Printable Version of Topic
Click here to view this topic in its original format
914World.com _ 914World Garage _ Signal Single Orange 74 EG33 Swap
Posted by: 914forme Sep 25 2013, 07:47 PM
Okay this is the car in all its glory ugly as heck, but hey its an auto-x car.  This one is from my first season of auto-x with this car.
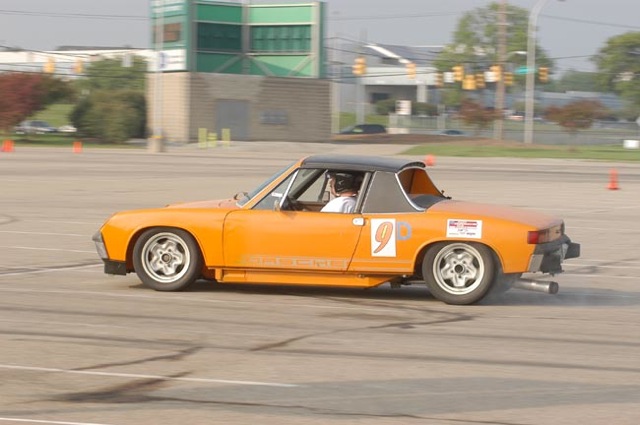
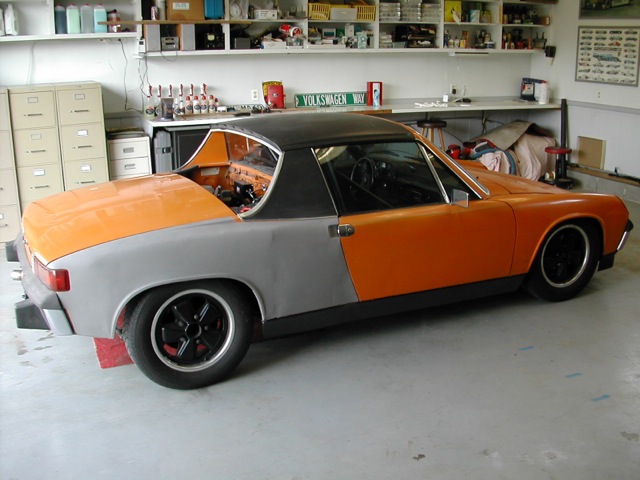
Heres what it looks like today. Made it even uglier 
Here is the goal, I can sketch ideas, but I can not draw at the level of others on this forum. Thank you http://www.eggscollective.org/914visualizer/914_visualizer.html and my black pen. Now if I could find a good front view. And the flares are not on the car since I'm not using GT Flares.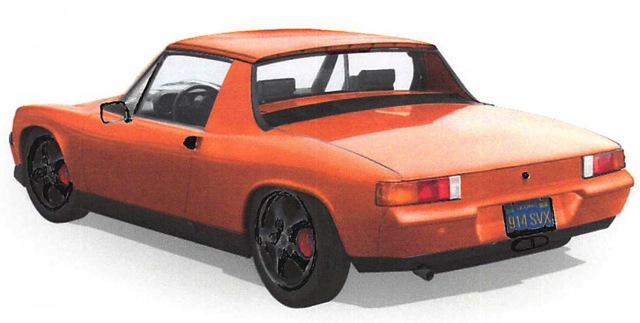
But you get the general idea.
Posted by: 914forme Sep 25 2013, 07:47 PM
History:
After looking for 6 months I found this 914 in Centerville Ohio. This was the same time Jon Lowe was looking for a tub for his 914-6GT Clone. He saw the ad, and did not even go and take a look, I did. Drug it home this is the summer of 1993. I worked on it a lot, it was in pretty good shape the hell hole was well, HELL. It looked good on initial inspection. I missed the nice 1/8 steel plate welded in for a battery tray. But thats all right it was a 74 2.0L, base model which was what I was looking for. Had sway bars from the factory, and a lot of nice parts that I would sell off over time.
Time goes by and the car changes configurations several times. I was running 2.0L in the car until I had to sell it. I had one from a parts car that did not work out so I gave up my engine. Needed the money more than a running 914. Car sat until I picked up a rusty but running 914 from Detroit for $800. I was told it was a 2.0L, it turned out to be a 74 with a 1.8L, bored out cylinders making it a short stroke 2.0L engine. That was a fun engine while it lasted.
Next change was a 2.0L I picked up off Van, as he swapped out to a -6. This engine ran me for 4 season of auto-x. Until one of the heads decided to go to the south. I then started the search for 2.0L heads, and found a set in Indy. And while I was doing that I found a 2.4L that was pulled from a car to swap a TDI engine in. I love TDIs as I drove them until just last month. But in a 914? Well We all can shut up as he finished the swap and he’s getting 60+ MPG out of the car.
Log story short. I had it in the car, and never got it fired up. I was out in the workshop one day all kinds of fired up. And my wife came out and asked what had me so torqued. And I started pointing at everything in the garage. Her response was sell it all. And I said okay. So I did, I sold every car I owned except my truck, and her Miata. And my 914.
Yet I sold everything I had for the 914 that I am not going to use in its new form.
Posted by: 914forme Sep 25 2013, 07:48 PM
The Plan:
Make this thing like Steve Austin. The Bionic 914.
Okay maybe not, yet who knows.
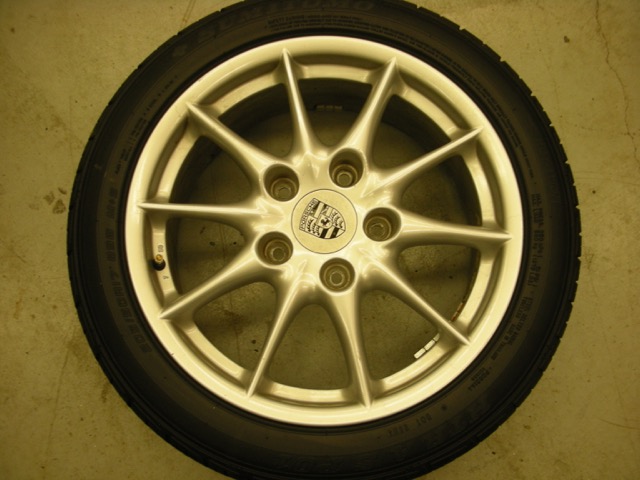
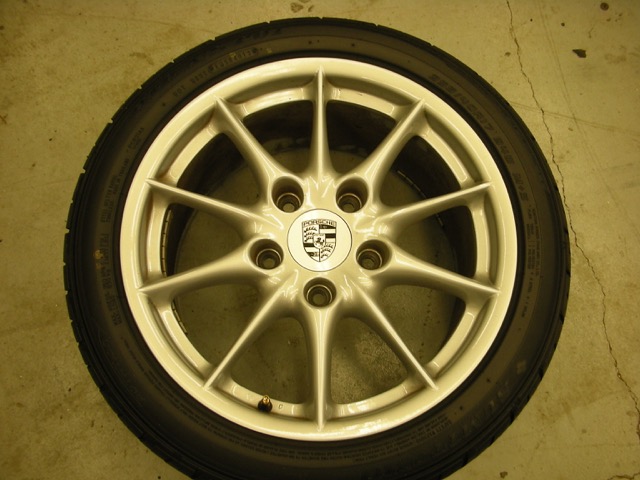
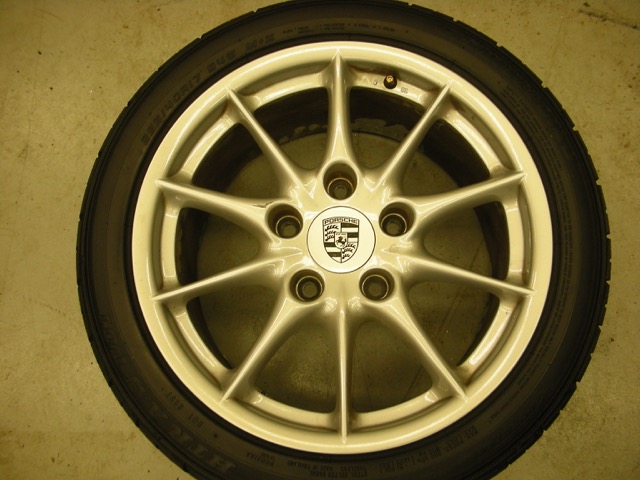
Body fix it so its a solid color and allows me to run these large meats an wheels. Wheels are off a Cayman S, 18” with 235/35 on the front and 255/40s on the rear. My car sits a little higher now that it did when it was a dedicated auto-xer. My front Tie downs have several encounters with various imperfections on its way to victory.
Flares will be added to the front fenders, and I will be raising the opening a little to clear tires at full suspension compression, and full lock.
I will be cleaning up the body lines and changing a few items to smooth it out, I have always liked a clean 914, mine will be a little cleaner with some slight tweaks to smooth it out even more. I will be using a metallic orange that is close to the current signal orange but will give it a little more pop. Trim will be blacked out as will the wheels. Badging removed. A third brake light will be added in the targa bar trim, from a Ford GT. I will be using a flashing circuit to get people to wake up. I will be adding a spoiler to the rear most likely out of clear.
Interior seats will be changed, It will be cleaned up, gauges replaced, a radio added, and maybe AC. Oh man I’m getting soft.
Motivation will be provided with by this:
Its an H33 from a Subaru SVX, that I have just picked up. Man these are great cars if they came in a 5-speed, I would be in love. The plan is drive the Subaru through the winter, and then swap the engine and other auxiliaries into the 914 once the body work is done. Power will go to the ground via a Subaru 5MT from a WRX. I have a OBX TB on order and the bolt and washer upgrades for it. MR2 Shifter and new cables and rod ends on order fro the shifter. Bunch of small items ordered.
Big decisions left to be made. Cooling I am thinking Boxster style rads on either side as I would like to ditch the pop up headlights. And I like my front trunk. Or just take the easy way out and put it in the trunk. And if I will be using a PEFI or the factory EFI. Right now, I am leaning towards PEFI, using SDS, and ITBs from a motor cycle to give it a more classic look to the engine compartment. Or I may use the stock intakes as thy do work rather well. And spend my money trying to get the exhaust ports and heads to flow better. Get more valve lift, and duration, and get the exhaust dog legs to flow better. I will be using a equal length header. That will be a challenge as I have never made one before. It will probably suck. But heres hoping I can pull that one off. I would like to get about 275 HP out of the motor in NA mode. No plans to turbo it, and I really want to maintain the torque for the auto-x corners.
Suspension: Most of that is done, I will be raising my front spindles to get more travel up front. And then getting rid of the bump steer and adding more camber up front.
Thats the plan now I need to get busy. First up figure out the front and rear flares before I pull the suspension and put this up onto a rotisserie I will be building to do this work, and then finally get to the 914-6.
Posted by: turk22 Sep 25 2013, 08:01 PM
I like the plan, the visualizer is nice, orange and black is a great combo on a teener.
Get to work!


Posted by: 914forme Sep 25 2013, 08:09 PM
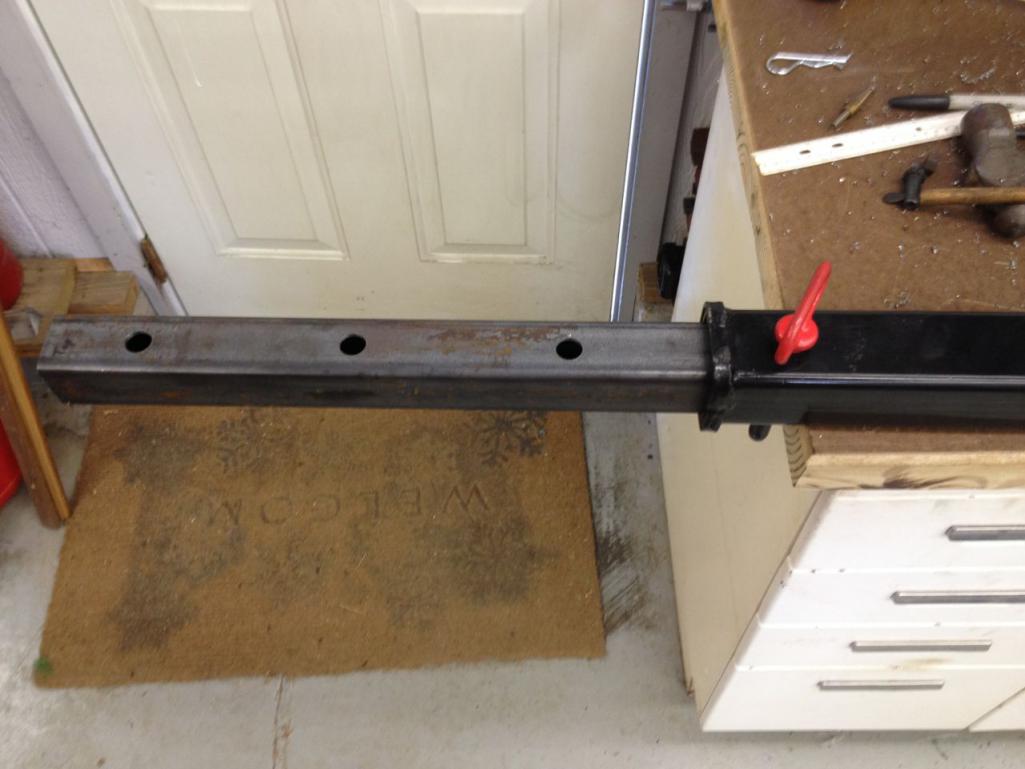
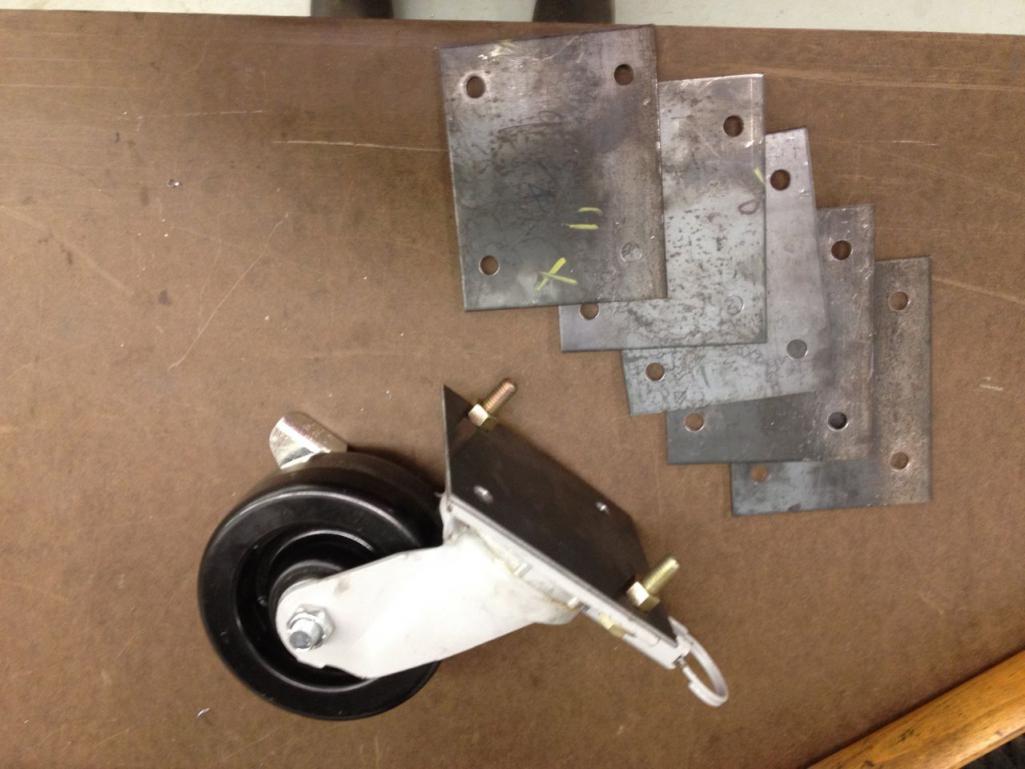
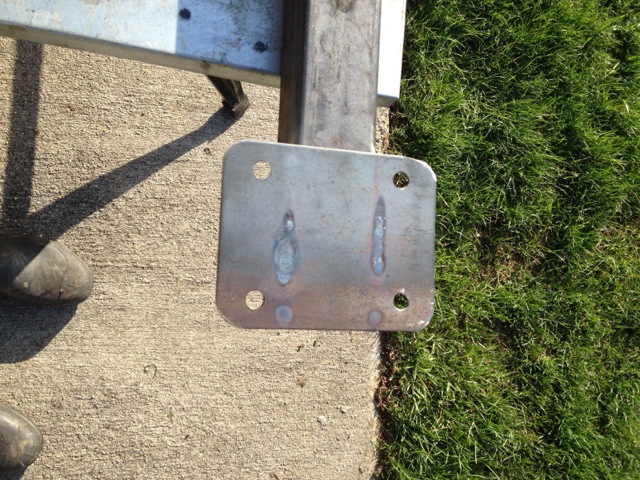
This weekend I pulled the torsion bar adjuster off the drivers side front. Added my hub centric spacer, and longer wheels studs.
I had to make this tool, I could not get the dust caps off. So a piece of DOM drilled and taped to accept these three bolts. Tighten them down, to get some grip on the indent of the dust cap. Tap and rotate the hub, and finally got the caps off with out damaging them.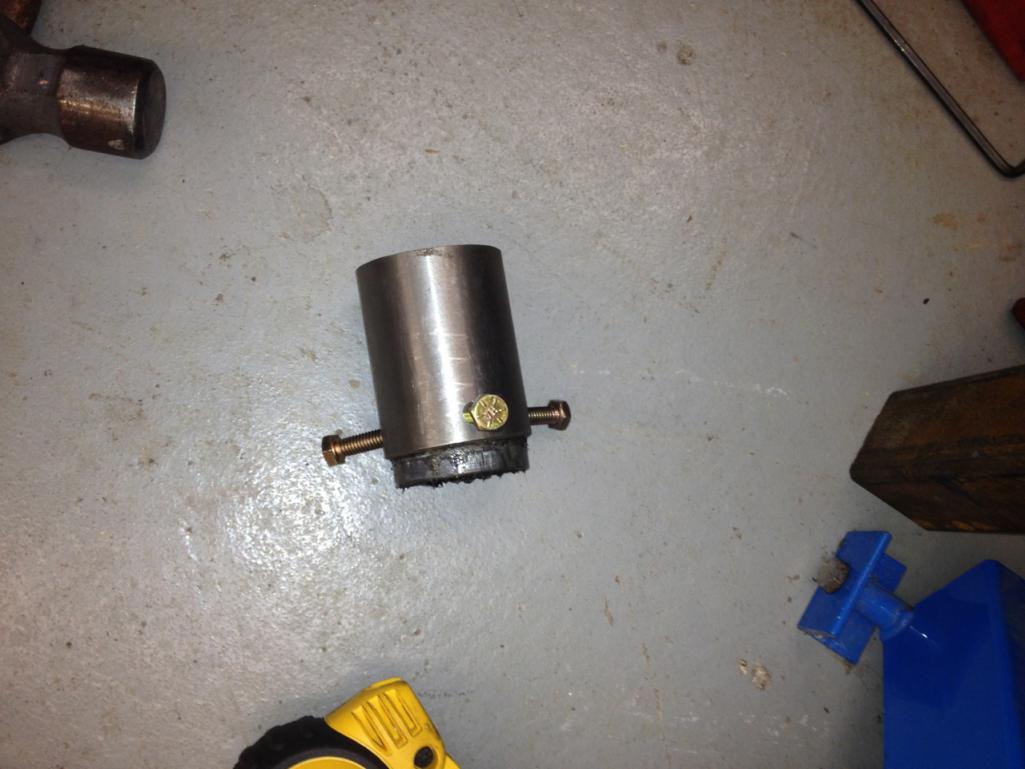
Here is the final result.
Full droop off the lift.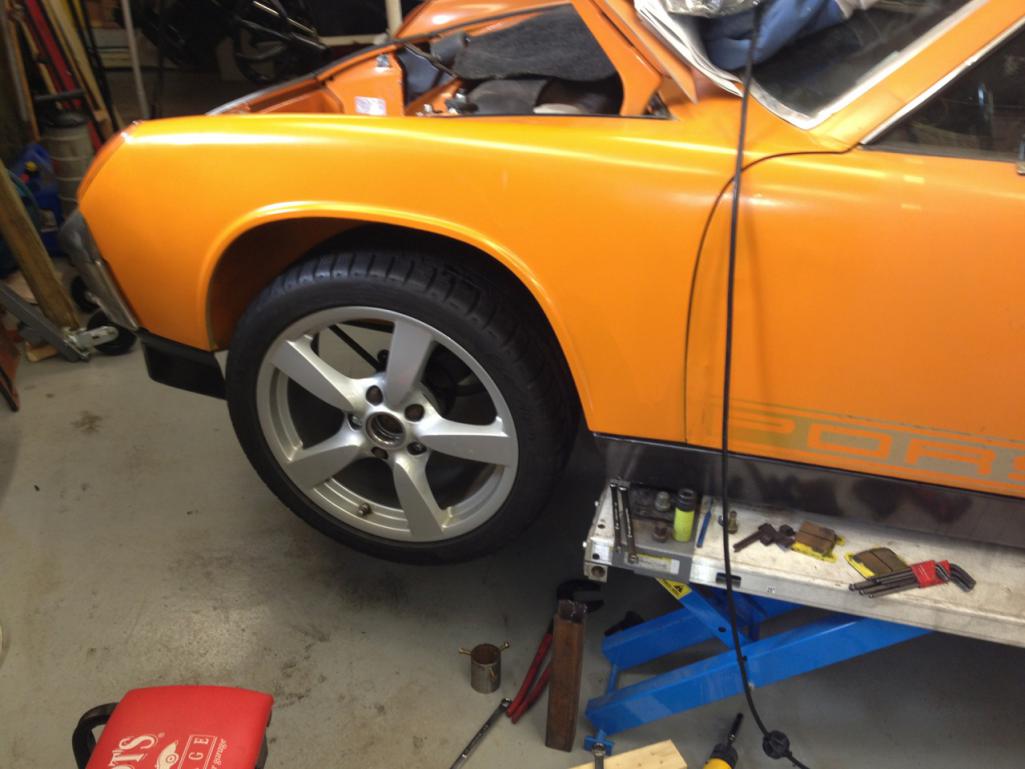
And Full Compression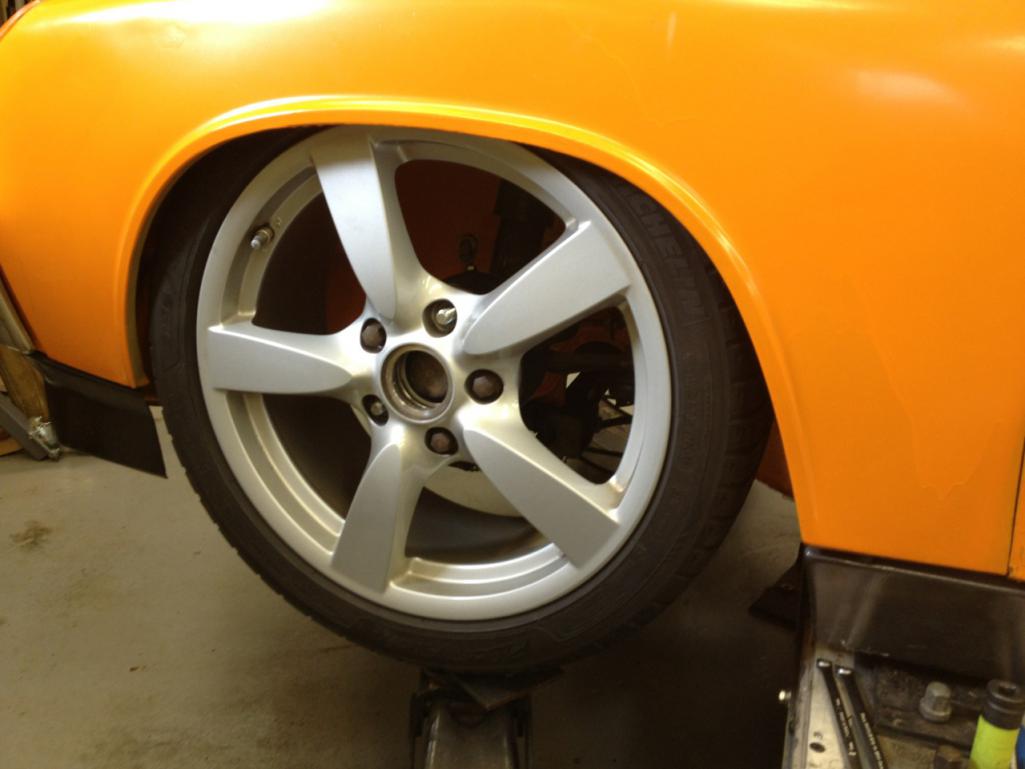
And yes I have issues.
Tires rub at full lock at the rears. It hits the LE spoiler on its way by, and at full compression I can only go in a straight line. I have ordered John Kelly's DVD on how to do flares.  This should be a good learning experience.
Posted by: 914forme Sep 25 2013, 08:21 PM
The rears fair much better. As I already did flares back there, you just don't think they should support this big of tire. 255/40R18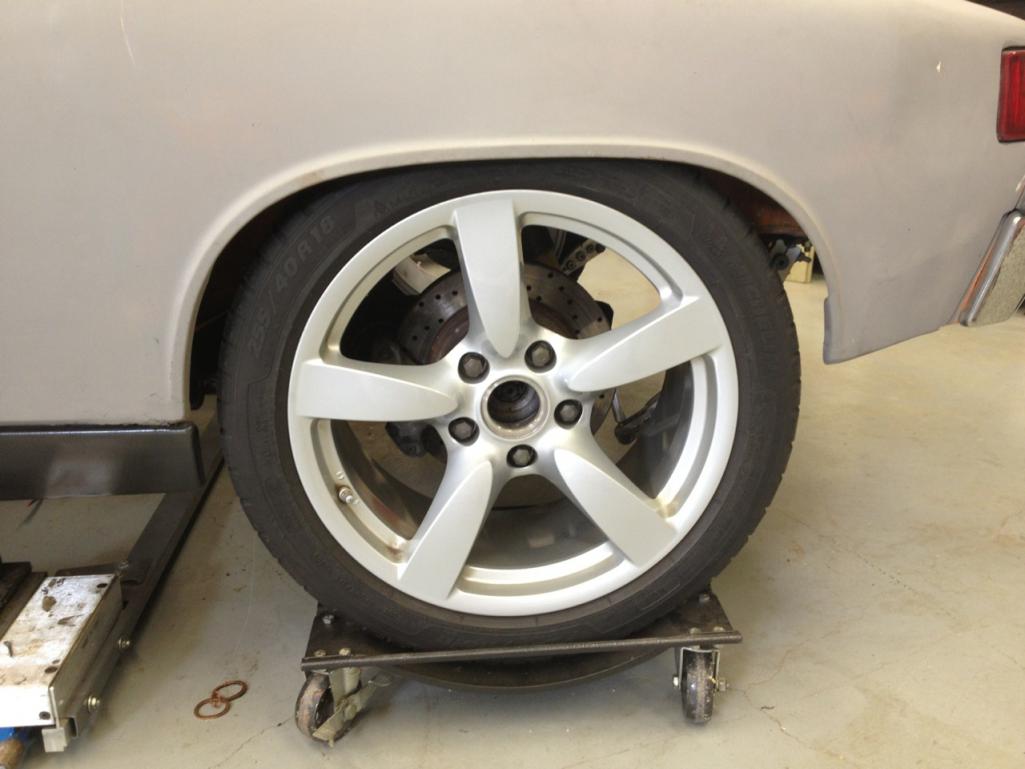
And heres the car on the ground.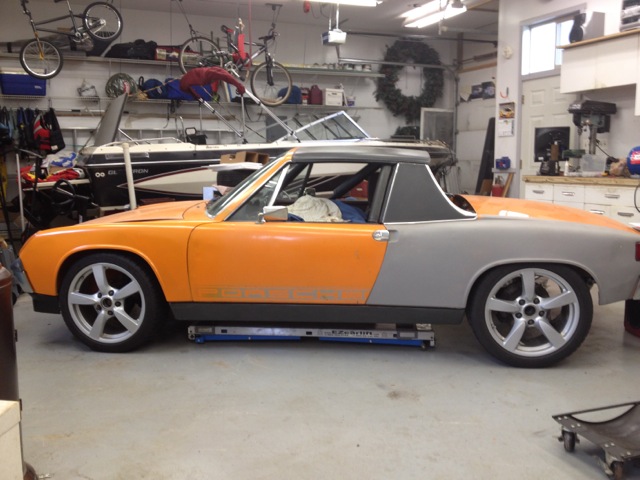
Much taller than it was, its still 2 inches short than my -6. But I can now get the lift under the car with out having to jack it up first or put it in the dollies.
Posted by: kg6dxn Sep 25 2013, 08:29 PM
You may want to get thinner front spacers to reduce scrub radius issues. Although it looks better with the wheel out at the lip, the handling will be dramatically changed due to the scrub radius change.
http://en.wikipedia.org/wiki/Scrub_radius
Posted by: 914forme Sep 25 2013, 08:38 PM

You may want to get thinner front spacers to reduce scrub radius issues. Although it looks better with the wheel out at the lip, the handling will be dramatically changed due to the scrub radius change.
http://en.wikipedia.org/wiki/Scrub_radius
LOL, they are not that big, they barely clear the struts. 1/4" in there from the strut, I can't move them in any closer. If I could I would have, its all compromises. Thats the nature of the game.
And now you also see my swaybar that needs to be modified, that hunk of Nascar metal is still heavy.
Attached thumbnail(s)
Posted by: mepstein Sep 25 2013, 08:42 PM
Its an H33 from a Subaru SVX, that I have just picked up. Man these are great cars if they came in a 5-speed, I would be in love. The plan is drive the Subaru through the winter, and then swap the engine and other auxiliaries into the 914 once the body work is done. Power will go to the ground via a Subaru 5MT from a WRX. I have a OBX TB on order and the bolt and washer upgrades for it. MR2 Shifter and new cables and rod ends on order fro the shifter. Bunch of small items ordered.
Please document everything - please.
Posted by: ConeDodger Sep 26 2013, 01:42 PM
You better have a whole bunch of power in that scooby motor cause it's going to take a week to accelerate out of corners with those 18" wheels! 
Posted by: Woody Sep 26 2013, 02:23 PM
You better have a whole bunch of power in that scooby motor cause it's going to take a week to accelerate out of corners with those 18" wheels!

Posted by: 914forme Sep 26 2013, 05:05 PM
I know y'alls hearts are in the right place, I appreciate it actually. Them wheels are HEAVY. So I know they won't spin up fast. I also know they will not be my track wheels, just not sure what will be. I'm looking for ubber light wheels in my price range, which is about 3 pennies and a dime that I found under the SVX's seat.  As for the power, yeah I have that covered.
  Just won't say exactly how yet. Got to keep some suspense in the build.
More junk yard / Ebay parts came in today. First off lets go back to Monday night. I picked up this engine for my mock up motor. 45K when somebody stuffed their SVX. Hopefully they where all right. Im going to use it to mock up my engine mounts and cradle. And all the body pan cutting I might need todo. And possibly the headers. ITs got more damage than it looks. If the cams and heads Survived on the drivers side, I may use it, we will see. Price was right for a mock up motor though.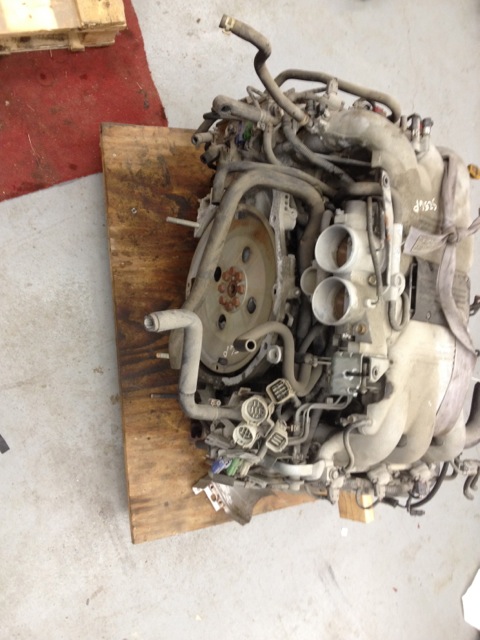
And my trans came in. Early Turbo Trans, out of a 00 WRX. Case is not quite as strong as I would like, and the gears are not the best for lots of power. Yet the price was right cheap, I could not pass it up. We will see if I destroy it.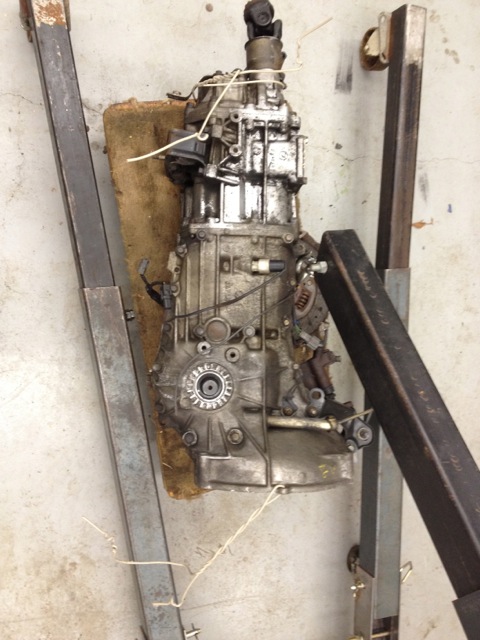
Posted by: 914forme Sep 26 2013, 05:15 PM
All the basic parts are in for the cable shifter. Though I ordered the wrong rod ends 
I thought I grabbed the 3/8" and I ordered 3/16" They might work, we will see.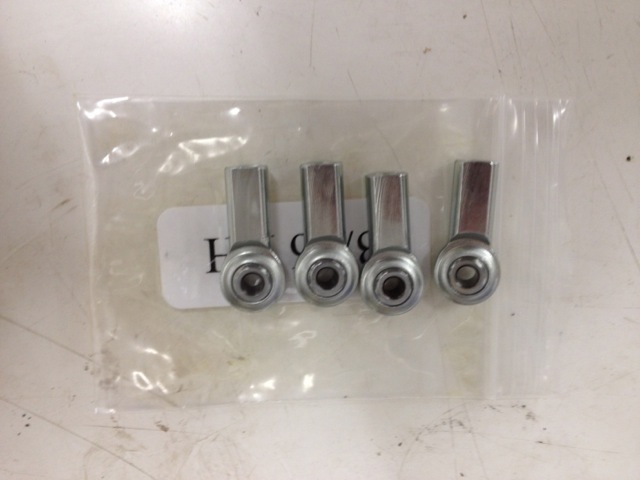
Teleflex control cables are in. 9' and 11' 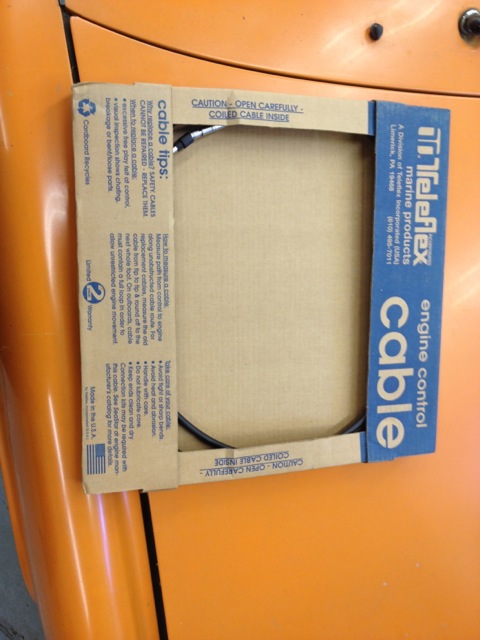
And a super clean MR2 Shifter.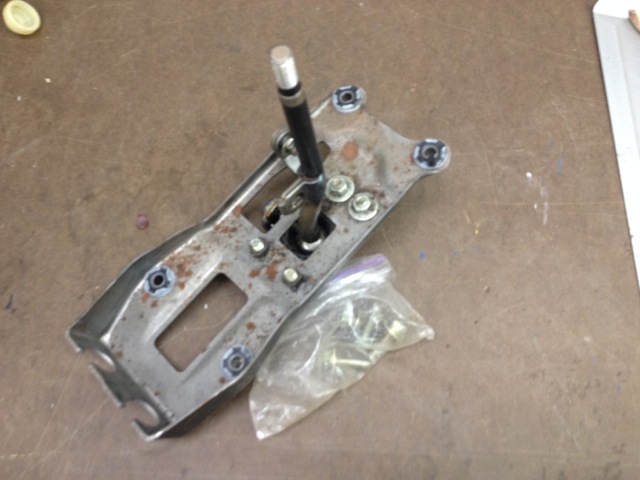
Thats the basics for the shifing system. Now comes the fun part fabrication.
Posted by: ConeDodger Sep 26 2013, 05:32 PM
Not just the heavy... It's the diameter. If you're building an autocross weapon, you want small diameter light wheels and tires. They look killer. But I am under the impression you're going to AX.
Posted by: 914forme Sep 26 2013, 05:38 PM
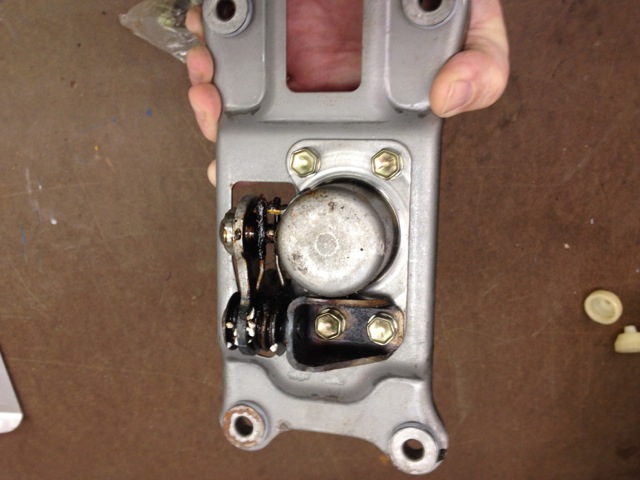
And now for the rest of the good bits. The OBX has landed.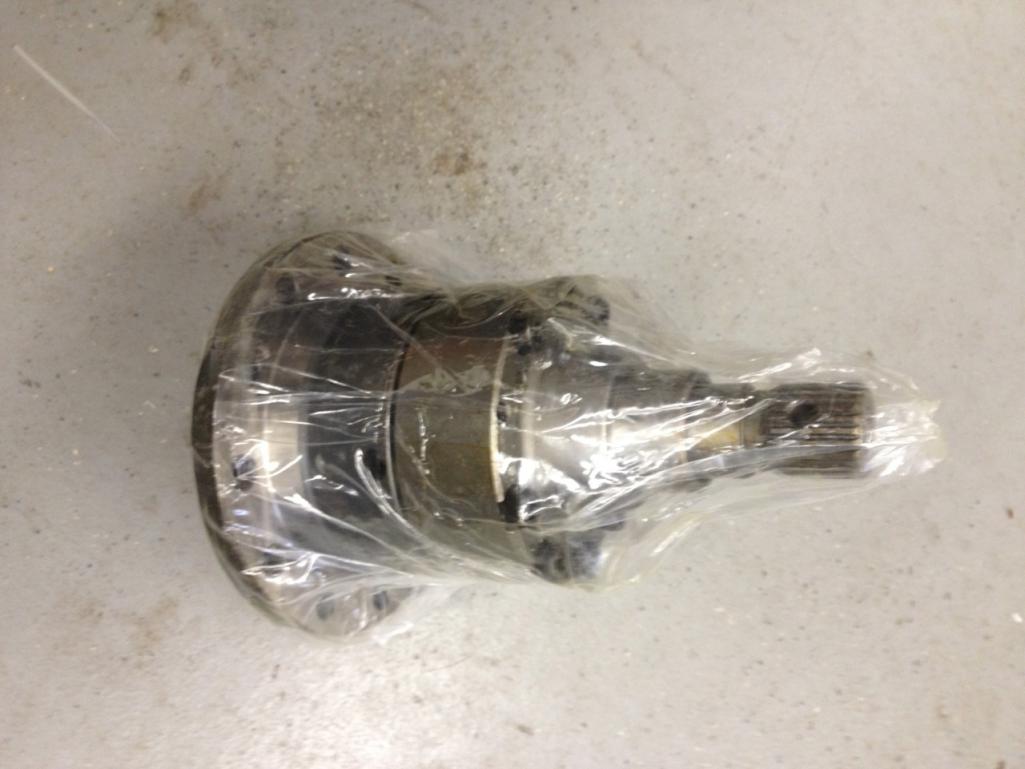
And I have the 12.9 replacement bolts and heat treated conical washers.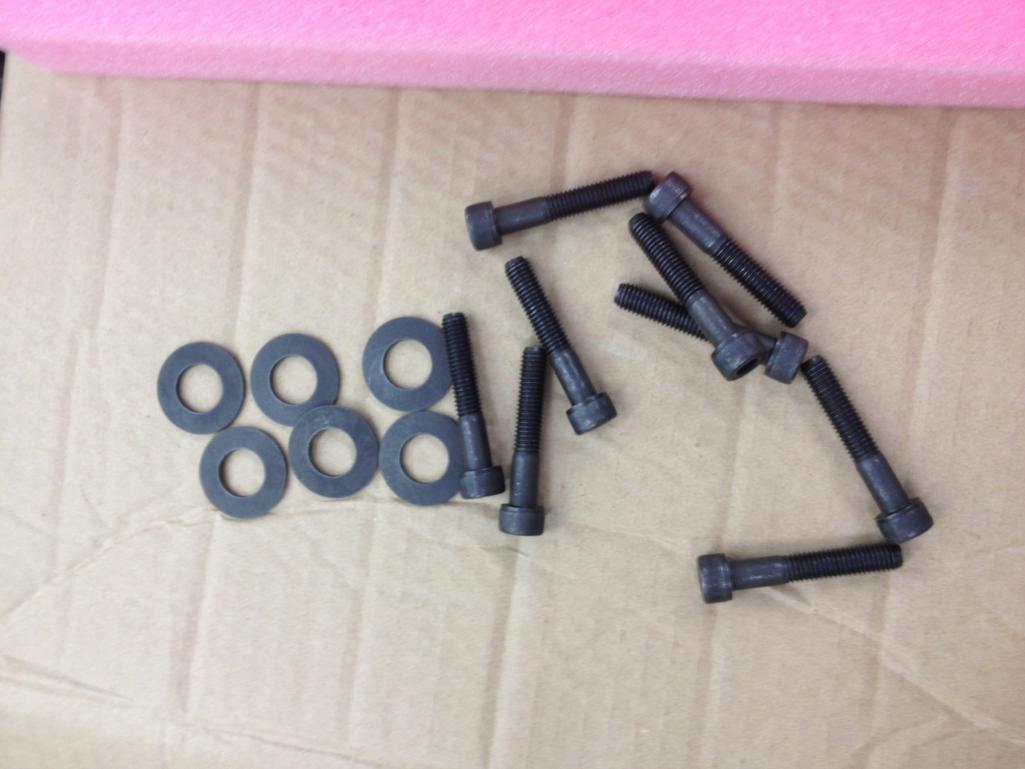
And the other two items I need to finish the trans conversion are in also from Australia. Subaru Gears got these to me fast.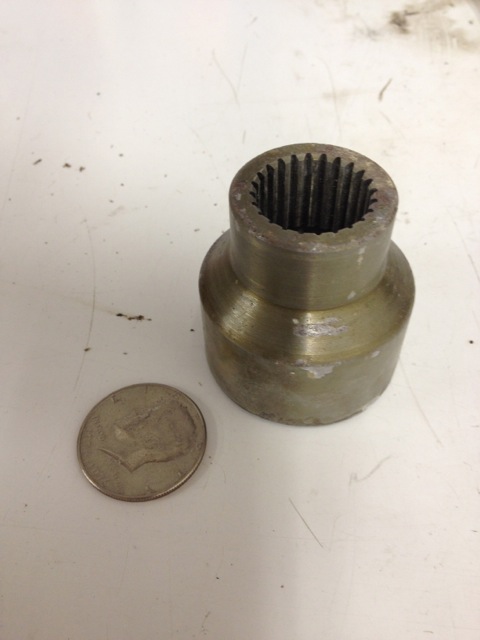
Yes thats a dollar I found under the seat of my 914  That coupler is smaller than I thought it would be.
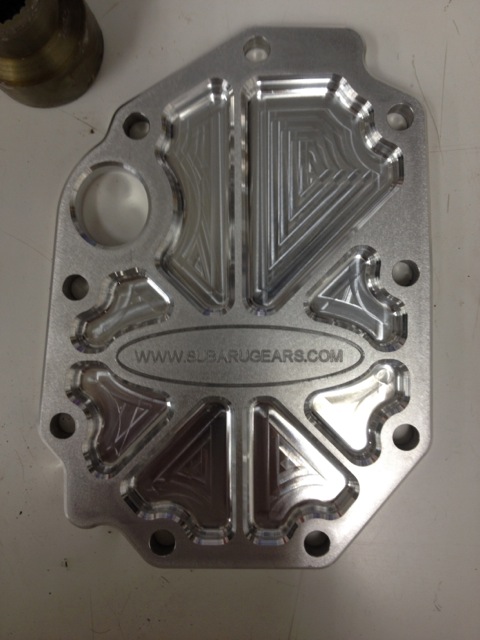
And here is the back plate, I hated paying money for it, but they did all the nice CNC work I could not resist 
Now I need to spend some time cleaning up the OBX. It requires a good going through, and inspection. Deburring and polishing will be required I am sure. Re-assemble it with the upgraded washers and bolts, and set the proper torque. Hopefully they did not strip out to many of the threads. And then I will need to spend some more time disassembling the transmission, cleaning the case halves inspecting the bearings swaping the ring and pinion over, checking the depth and mesh of the gears. Lots of work to be done to that transaxle. Thats for sure.
Hope to meet a few people  Sunday at the Cincinnati Event.
Posted by: 914forme Sep 26 2013, 08:25 PM
Not just the heavy... It's the diameter. If you're building an autocross weapon, you want small diameter light wheels and tires. They look killer. But I am under the impression you're going to AX.
I get it, just haven't found what Im looking for. The car originally ran 6.5x15s Minilites. I then went to 7x15 cookie cutters as seen in the pictures. I would like to find a set of light wheels like a Forgeline, or a centerline. Then run a set of Cnti's on them. I really need to figure this out as it could (probably will) effect my flares. Issue is the Forgelines would cost more than my entire build. And Centerlines are not made with the 5x130 bolt pattern.
Im open to suggestions, smallest diameter I can run is 15", if I could run 13s I would.
Posted by: ConeDodger Sep 26 2013, 08:47 PM
Not just the heavy... It's the diameter. If you're building an autocross weapon, you want small diameter light wheels and tires. They look killer. But I am under the impression you're going to AX.
I get it, just haven't found what Im looking for. The car originally ran 6.5x15s Minilites. I then went to 7x15 cookie cutters as seen in the pictures. I would like to find a set of light wheels like a Forgeline, or a centerline. Then run a set of Cnti's on them. I really need to figure this out as it could (probably will) effect my flares. Issue is the Forgelines would cost more than my entire build. And Centerlines are not made with the 5x130 bolt pattern.
Im open to suggestions, smallest diameter I can run is 15", if I could run 13s I would.
Bill Charron runs 13's and pretty much nothing touches him. Not sure what wheel they are. Minilites maybe. I like what you're thinking with the forgeline or centerline. Since you're doing so much to the transmission, maybe you could change the gearing to make up for the 'gear change' those wheels/tires give you...
Posted by: rick 918-S Sep 26 2013, 09:38 PM
Can you re-drill the centerlines? I did that to a set of Torque Thrust's back in the day. I had a machine shop countersink in off set washers. I drag raced on them with 500 hp.
Posted by: 914forme Sep 27 2013, 06:59 AM
Can you re-drill the centerlines? I did that to a set of Torque Thrust's back in the day. I had a machine shop countersink in off set washers. I drag raced on them with 500 hp.
Thats a great idea Rick.
Quick search found these http://www.kustom1warehouse.net/Made_in_USA_CMS_heat_treated_190_wheels_for_VW_p/cmsbolttogetherwheel.htmSince the centers are solid, should be able to have them indexed and drilled for 5x130. Like people do for rear hubs. I'm sure I would have to sign a liability waver. USA made custom back spacing, bolted or welded wheel halves your choice. for a 8" wide rim it came out to $231.
Or you can get Centerline drags from Summit for $237 in an 8.5" width, can't change the back spacing on these. Something to be said about a forged wheel though.
Why is it so hard to find wheel weights

Now to find a used set, as I have less in my tranny than these wheels would cost me.
Also I have to check my transcode, to get my ratios and final drive. If you want to say its a stock WRX US spec transaxle, you can use this http://www.teammfactory.com/gearcalculator.php?kmh=0&tirewidth=205&tireprofile=50&wheelsize=15&tirediameter1=23.07&maxrpm1=7000&finaldrive1=3.9&gearratio1=3.27&gearratio2=2.286&gearratio3=1.667&gearratio4=1.238&gearratio5=0.958&gearratio6=0&trannytype=11&tirewidth2=255&tireprofile2=40&wheelsize2=18&tirediameter2=26.03&maxrpm2=7000&finaldrive2=3.9&gearratioa=3.27&gearratiob=2.286&gearratioc=1.667&gearratiod=1.238&gearratioe=0.958&gearratiof=0&trannytype=11&tranny=Calculate+Transmission+1+%26+2 to see what different wheel and tire combinations will do for speed at a given RPM. What would be cool is to also have a system to project how long it would take you to get to a certain speed with rotational mass. I know a ton of variables to equate.
Posted by: FourBlades Sep 27 2013, 07:53 AM
Nice build!
Looking forward to seeing it unfold.
John
Posted by: 914forme Sep 27 2013, 10:33 AM
Ha found wheel weights for 8.5"x15" Centerlines. According to CarCraft they run in at 12.43 pounds the center caps would add 0.24 pounds. Who runs center caps at an auto-x. Thats almost as light as a magnesium Mahle Gas Burner. At the same width they are probably very close.
Now to see if I can get a decent set of tires to cover these, and that folks makes it a wrap.
Car Craft also say this change only equates to a performance gain of 0.111 of a sec on the quarter mile. Since Auto-x is like running a series of drag races, it should make a noticeable difference.
Posted by: 914forme Sep 29 2013, 08:22 PM
Only got a work a little Saterday, and maybe an hour today, my heart just wasn't in it, after the rainy Cincinnati Show.
I did get items pulled from my trans, and re-installed.
Tools needed.
12mm socket
14mm socket
27mm socket
Socket Wrench, or impact wrench for disassembly
Torque wrench for assembly
Punch
Big Hammer
Big Dead Blow Hammer with a Soft Face
Couple items to pry with
Cold Chisel
Small pick
Something to clean gasket material off with.
Two items to lock the drive shafts or flanges in place. I used to pipe wrenches.
Tube of Yamahabond or Hondabond
Oil dry see next item.
First make sure all the Tranny fluid is drained out of the trans. Or else you get a slick the size of the Exon Valdez spill.
Pull the bits and pieces not needed for the shifter. Its a roll pin, drive it out with a punch and a BFH. Watch pin fly across garage, you my want to save these pieces I'm going to modify them for the basis of my cable shifter.
It should look like this.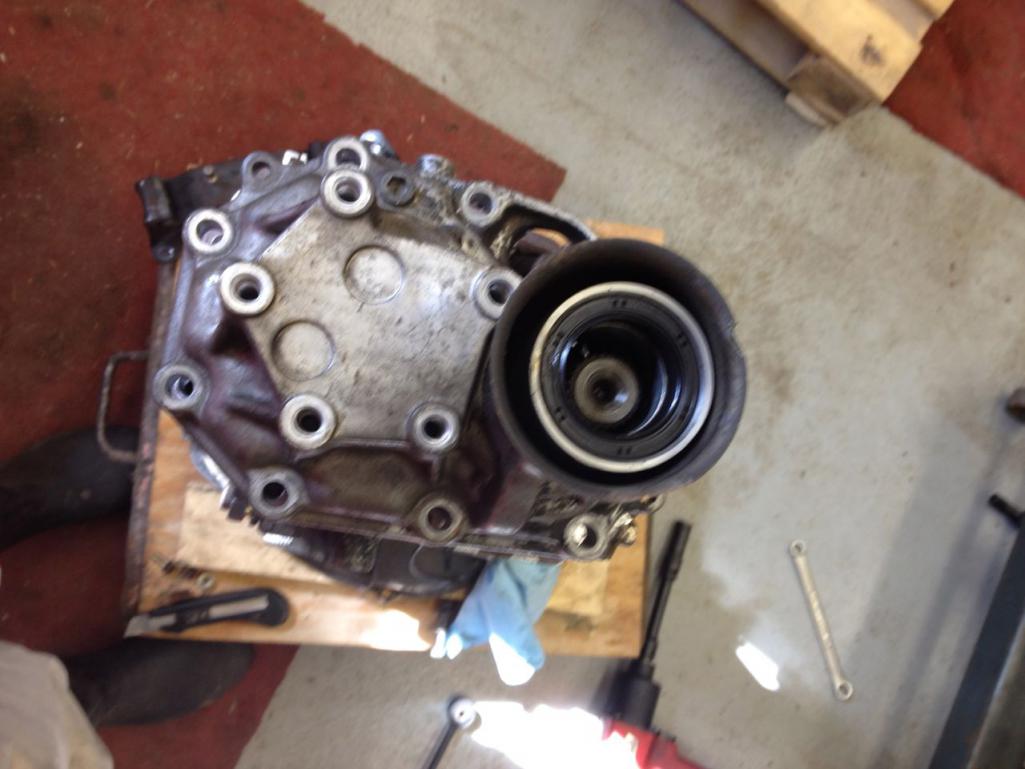
Remove all the bolts holding the nose onto the tranny. Put these aside for cleanup and re-use if your cover will allow, or measure them up for some new shinny ones.
Next pick up your Dead Blow or suitable alternative, and give it a few good whacks to loosen the adhesive, and hopefully open it up enough to get a nice wide pry in there with out damaging the mating surface. Once done heres the guts you get to pull out.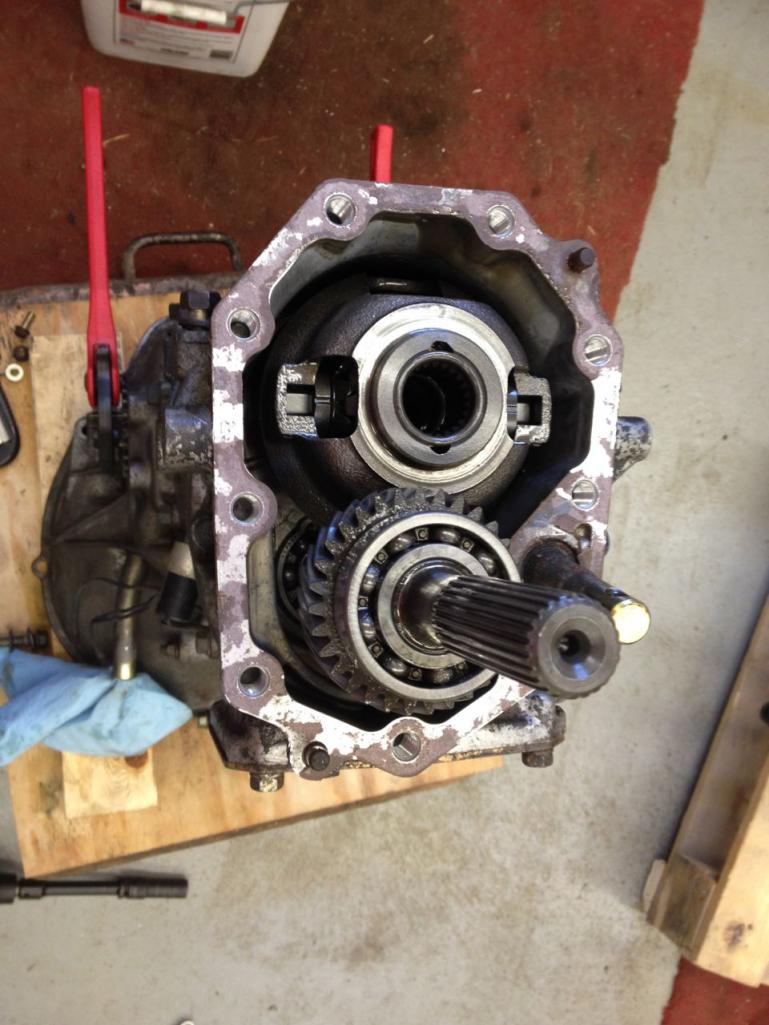
Next you pull these out. Grab ahold of both and lift they come out together. And you are left with this.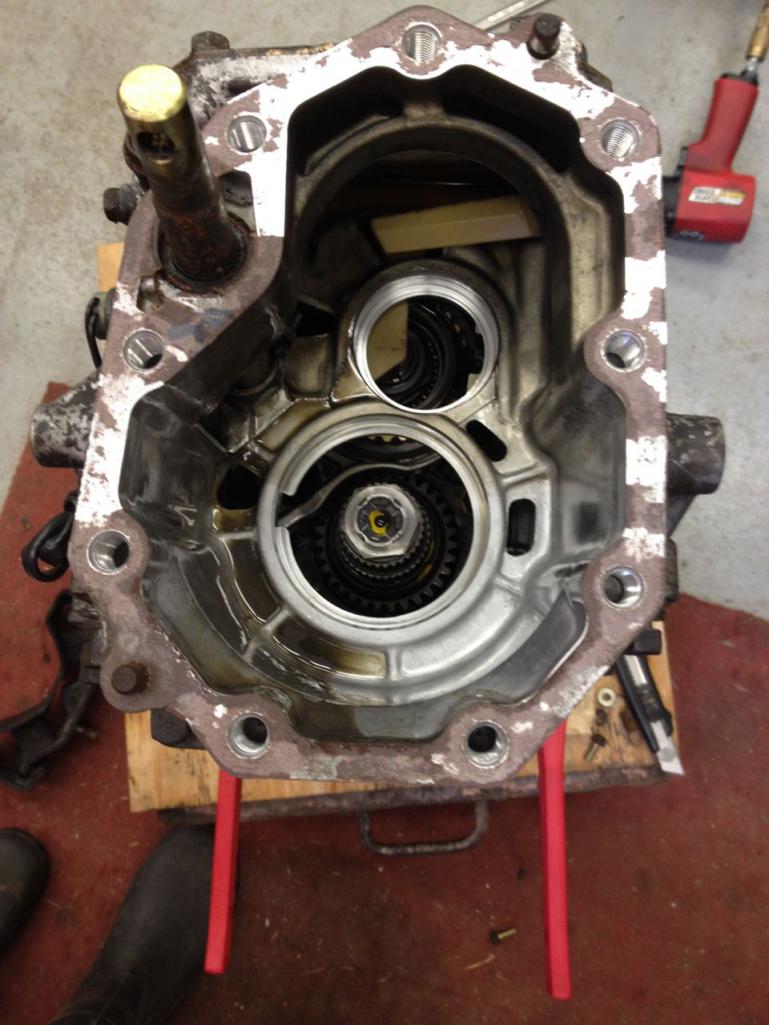
Pieces removed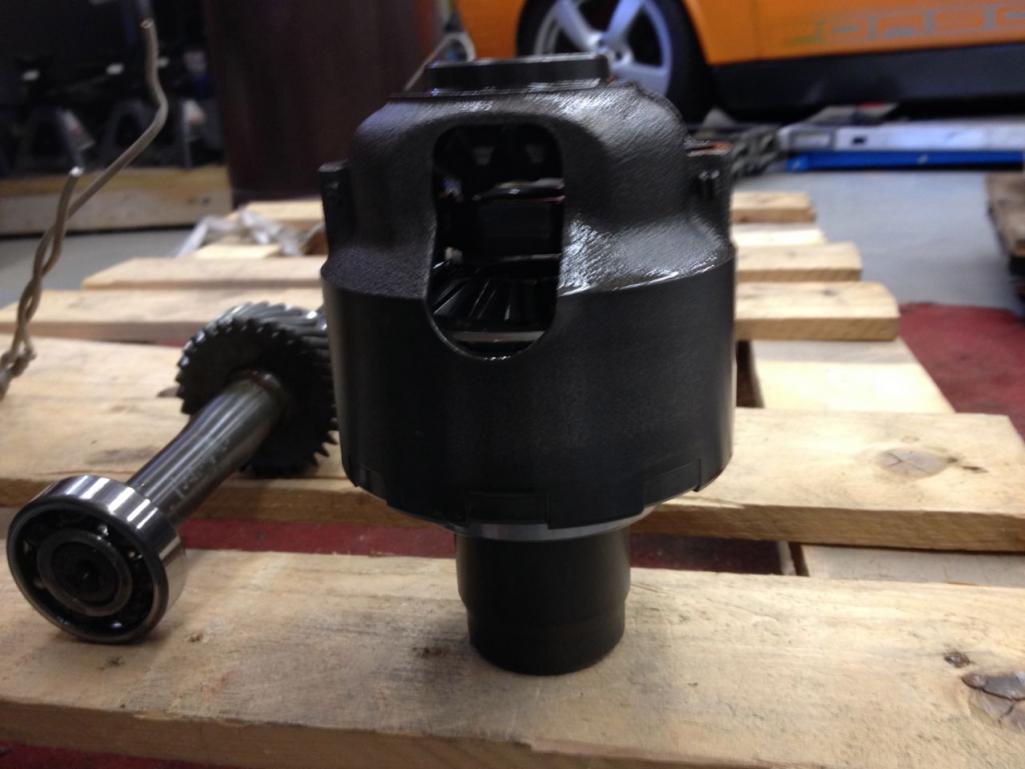
Next up you have to get this nut off the shaft. It is a 27mm and is peened over. Mine was done in 4 spots. Some assembly line worker in Japan, did his job with vigor.  Out comes the punch and BFH, and undo all his hard work. Next I took my impact wrench and locked the axles and zipped it off.
This is the first set of items you will pull, nut and 2 washers.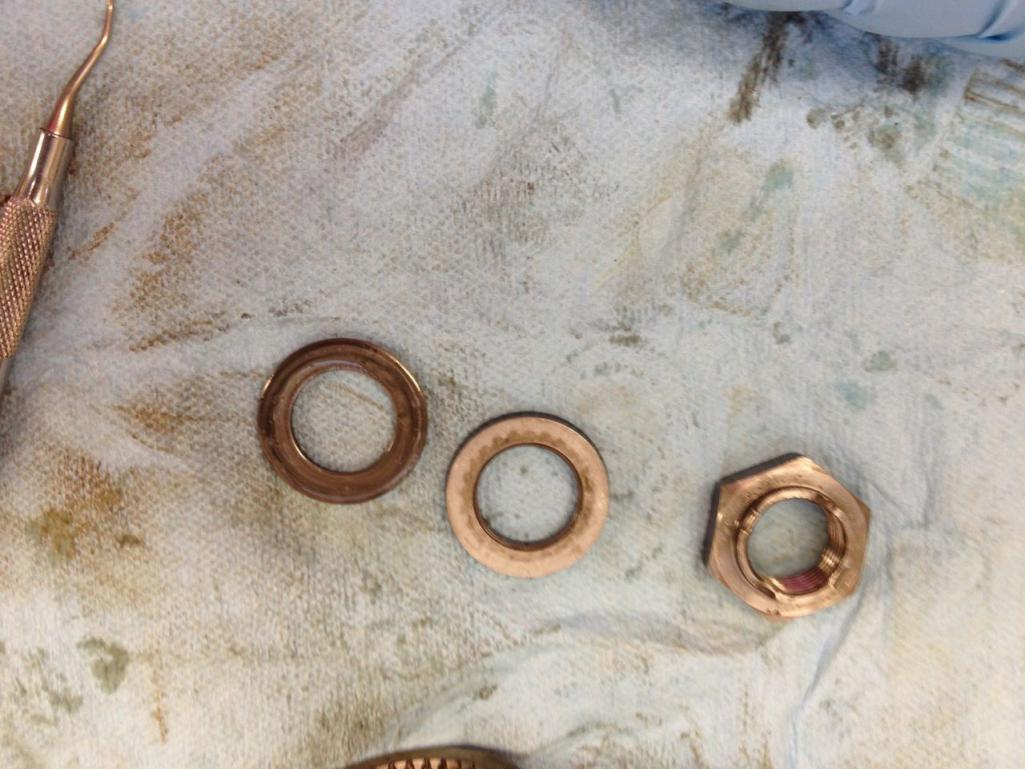
Next slip the shaft sleeve off the shaft. for lack of better terminology. There will also be a stack of washers, hardened bearing surfaces, and a roller bearing. A pick is helpful here to get these all off the shaft. 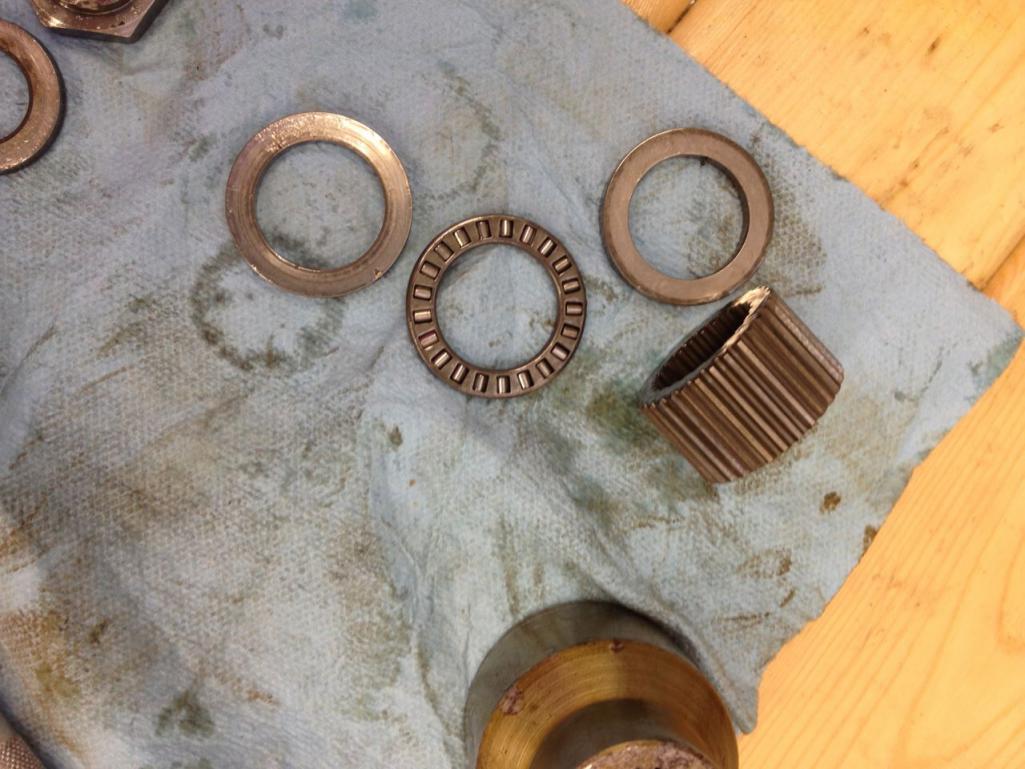
The last one gave me fits but it has to come out or else the spool will not fit correctly This picture shows its not fully seated.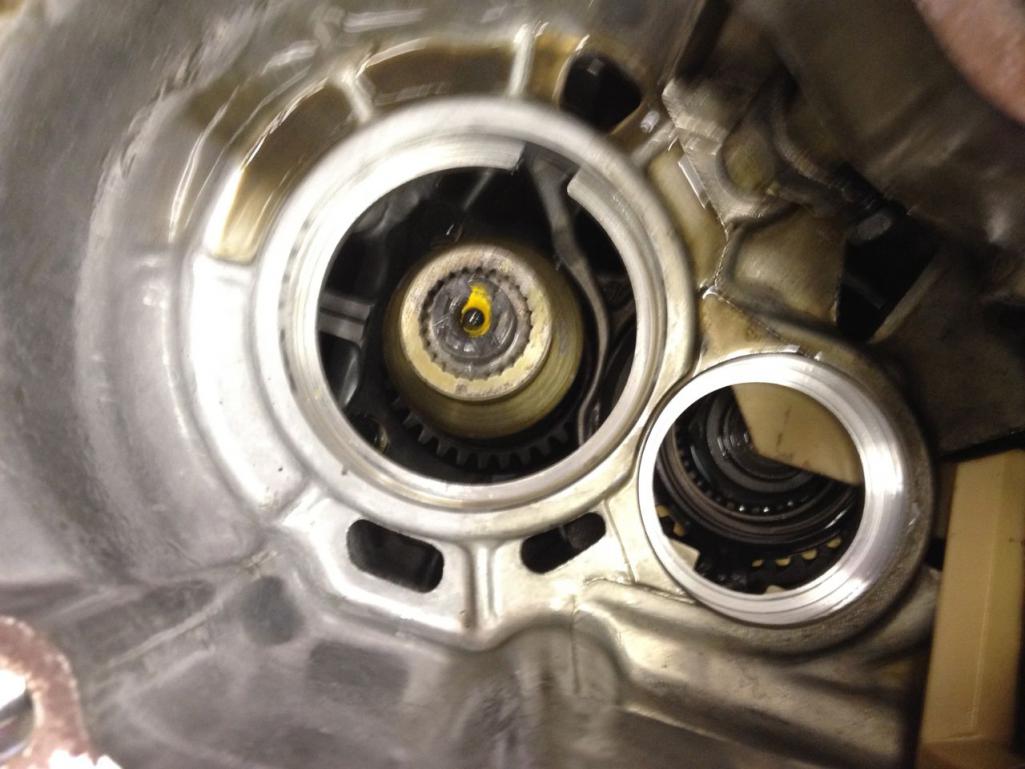
Next you will have to fiddle a little turning the shafts to get them lined up to get the spool to lock both inner and outer shafts together. And then with some luck it will drop into position.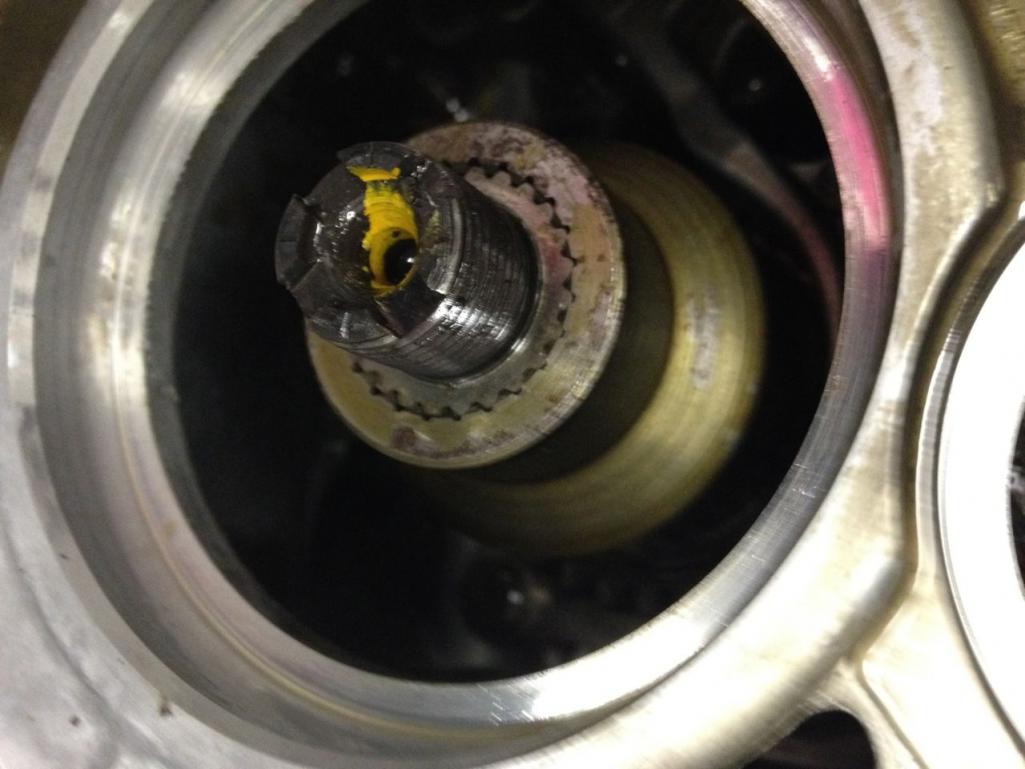
Next add the washer that was next to the nut on your gear stack. Thread it on, then torque it down, to ??? I forgot its in the FSM for the WRX sorry. Don't forget to lock the shafts again. Easy enough.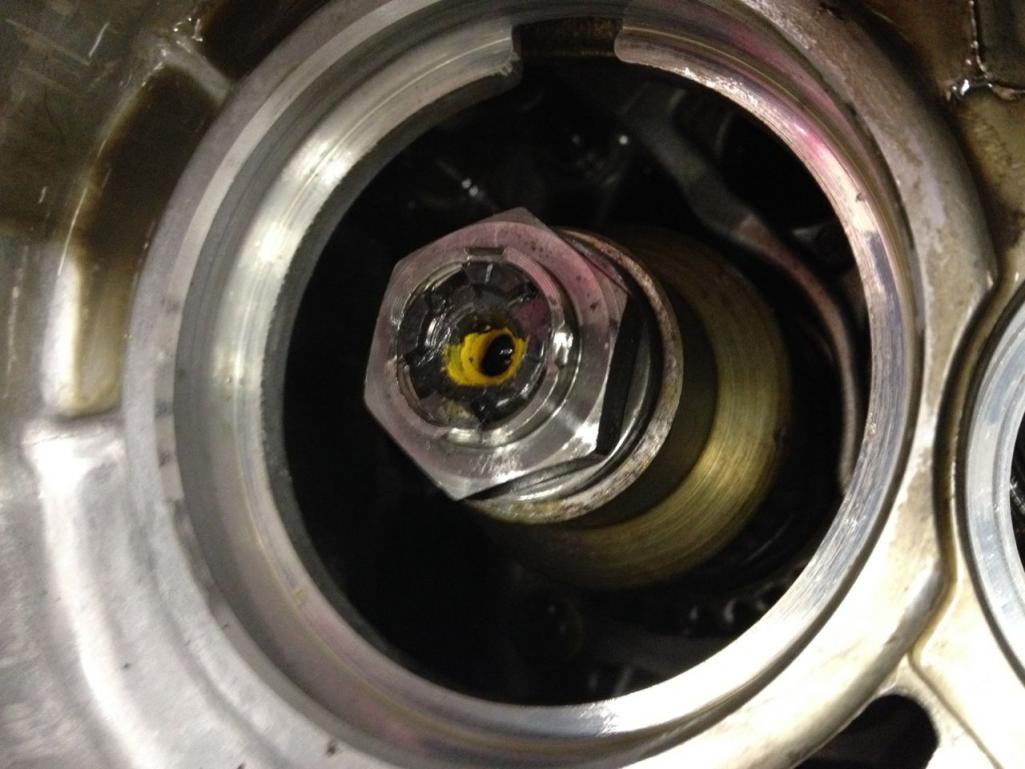
Peen over the nut to lock it into place. You can use a punch, I found a cold chisel did the job with one whack per indent. Yes I followed the original assemblers lead and and did it four times. 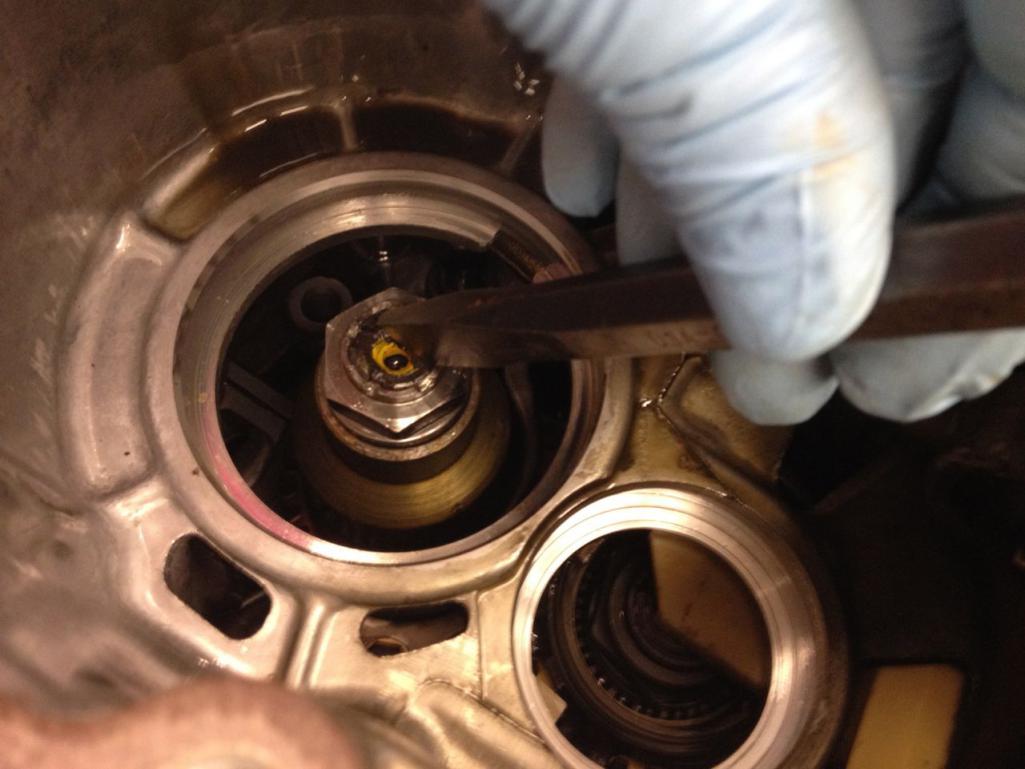
Next up get rid of the factory sealant left on the mating surface. I stuffed the inside with paper towels, and started to clean it up with a angled die grinder and a scotch brite pad. done. Clean up with what ever harsh chemicals you have around for that purpose. 
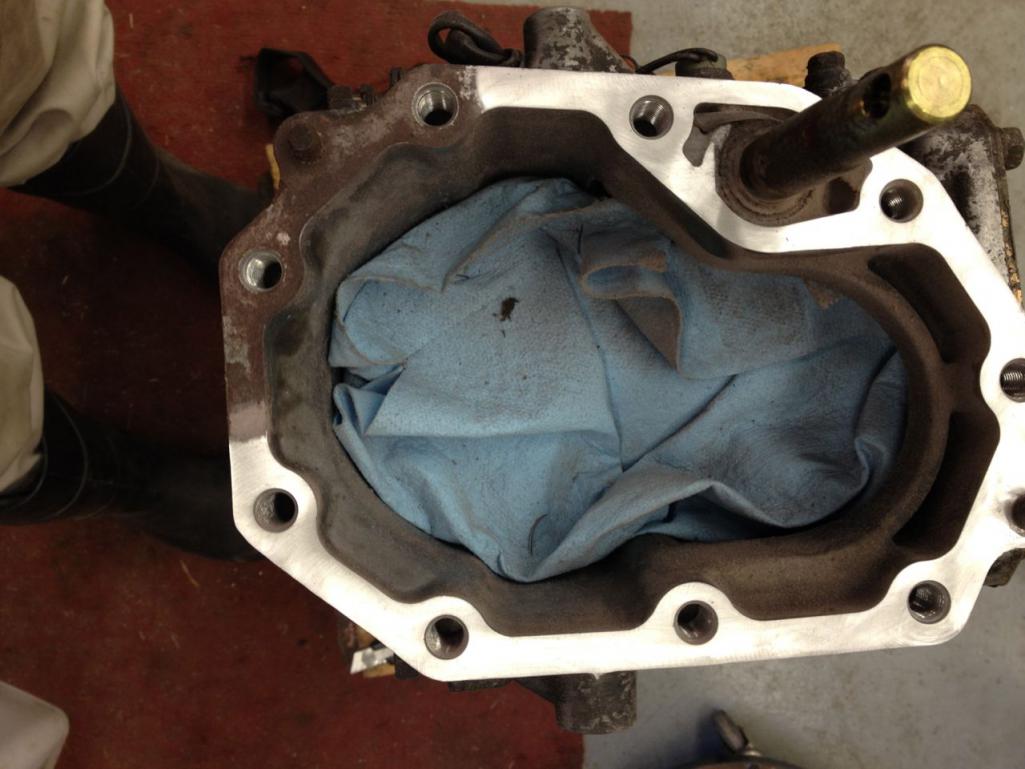
All that is left is seal the end with a thin bead of sealant, and place your cover on, torque down the cover. I have not gone there as I will be taking the trans apart further after cleaning up the outside.
This is the basics on how to convert to FWD transaxle for a 914 or other mid-engine car.
When you add it into the car, don't forget to add extra trans fluid to make up for the lack of central diff, and the other parts you removed.
Posted by: 914forme Sep 29 2013, 08:33 PM
Started working on the rotisserie. I should have bought one of the two that where for sale in the classified section. As usual I have gone overboard. The build is 99.9% of the fun.
Drilling the uprights, and the caster mounts, all part of the process.
Had to stop here as I did not have an essential item, 3/8" nuts to weld onto the caster plates. Off to Tractor Supply for supply.
Attached thumbnail(s)

Posted by: 914forme Oct 8 2013, 10:40 AM
Not much has happened over the last weekend. Life gets in the way. We did have a big cruise in on Friday night, shuts down the main drag of town, over 500 car came. Items of interest,
1 Lotus Exige
1 Fake Cobra
2 Nissian GTRs
1 Sunbeam Tiger
1 Sunbeam Alpine
Closest thing to a Porsche 914 a Cayman done up olive green plastidip 
I have been on a quest to complete my parts list and gather items needed for the conversion. And build out my just shy of 5000 line project plan. I'm a GTDer writing this post is a project un to itself. I have mapped a lot of sub systems out, and have copious notes, drawings, and tons of Evernote clippings.
As of today, I scored my Centerlinish. 8.5x15s and 11.5 x 15s. Those rears may get cut down a little They are three piece units so ,just have to find what I am looking for and build it out. Oh they weigh in at less than 12 pounds apiece. Ugly but light in weight. Next on the list a set of slicks, and it looks like I will need a trailer again. I may just make like a tire rack for them.
I have been quietly piecing together the parts to run 930 rear CVs to the subbie transaxle. Love it when a plan comes together. Still have a few parts to get, but the hardest ones are out of the way now.
Next up figure out how I am going to cool this car. Boxster style, standard front trunk rad, vent through the hood. Brant's street car has an oil cooler vent through the hood. As does this -6 rac car. 
Or something completely different. Since I'm flaring the rear more, maybe two rads mounted mid ship, and MKVII fans sucking serious air to back it up. Unfortunately I think that would look bad. Now if I was using the AIR 935 style kit, that could work with out issue.
Got to  the AIR Bond 934, wonder what ever happened to that car?
Posted by: Woody Oct 8 2013, 12:24 PM
You'll have a hard time finding a tire to run on a 15x11.5 rim unless you are going to run slicks. Im running 275/35/15 A6s on a 15x10 on the rear of my car. Street tires that wide don't exist.
Posted by: 914forme Oct 8 2013, 12:34 PM
You'll have a hard time finding a tire to run on a 15x11.5 rim unless you are going to run slicks. Im running 275/35/15 A6s on a 15x10 on the rear of my car. Street tires that wide don't exist.
Yes sir the plan is to run slicks, but thank you for the heads up.
Posted by: 914forme Oct 31 2013, 03:21 PM
Okay things change in the world.
Centerline-ish wheels are 8"x15s, they are light they have been welded a few times Not going to race them, just to many un-kows. Don't want to beat up the seller as he did not know, and I should have done more homework. Live and learn, no hard feelings what so ever. 
So I started down the long slippery sloop of wheels again. I grabbed a set off a member here, keep my money on the board when ever possible. They are boxster 16s both 6 and 7s. Okay they are light,  , and oh look at that I can get Hanooks for them cheap, thank you tire rack closeout. One set down.
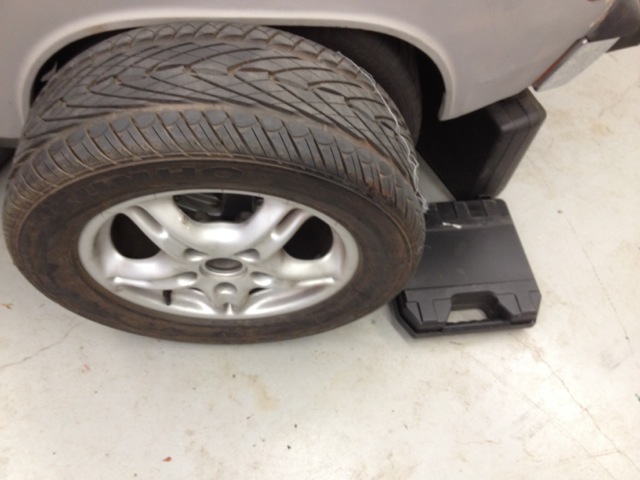
Dang it I really don't like these Kumho, had them on a Spec V once, terrible in the rain. Oh wait my 914 doesn't see rain.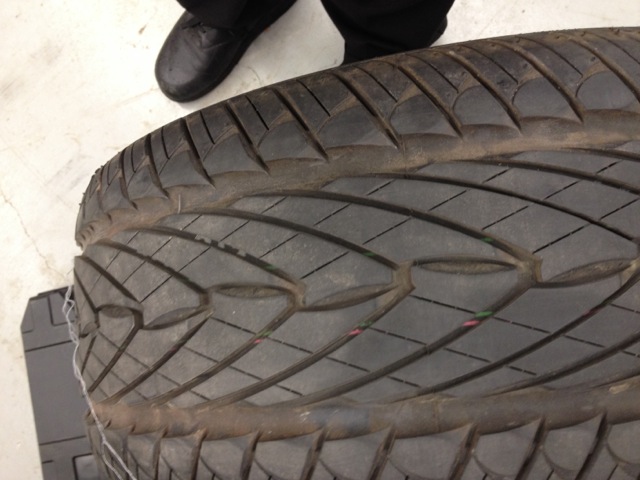
I'm too cheap to just toss these away. So off to find another set of wheels for the street. I found a set of 6 and 7x16s Fuchs. That would make a nice combo for the car also. But let me check around and see what else I can find. Craigslist, oh a set of Boxster 6 and 7x16s with caps - $250. that has got to be a miss print. Nope $250 cash, pickup. Okay done, these are super clean.
I was a little worried about the area I was in, somewhat shady. But it all worked out. Meet a great guy, old Rally, and hill climb guy, ran Pikes Peak. Runs a little shop on the north side of Columbus, had 3 Audi Quattro 2 coupes and an Audi 200 wagon, you know the one with the 20v turbo Great set of cars to build a awesome swap. Then I saw a car I wanted to grab. 83 GTI dude your killing me. How can you have 2 cars I love, always wanted to own sitting here as a when I get around to it thing. Then the shop door went up, and I saw the third car I wanted ever since I saw the article of MSDS' 911 swap into a VW Synchro double cab. Dude really, that is a super clean Syncro. Your killing me. Okay yes I just broke a commandment, but it was a good one to break. We shot the  for an hour and I headed home. There was a rusted out 914-4 chassis out front, sad really. Hate to see them rusting away.
Posted by: 914forme Oct 31 2013, 03:36 PM
Gathering the parts to do a 108mm rear CV swap into the 914.
Eric as usual came up with the parts I need, a set of early 911 rear 108s. Thanks man, not sure how you do it. 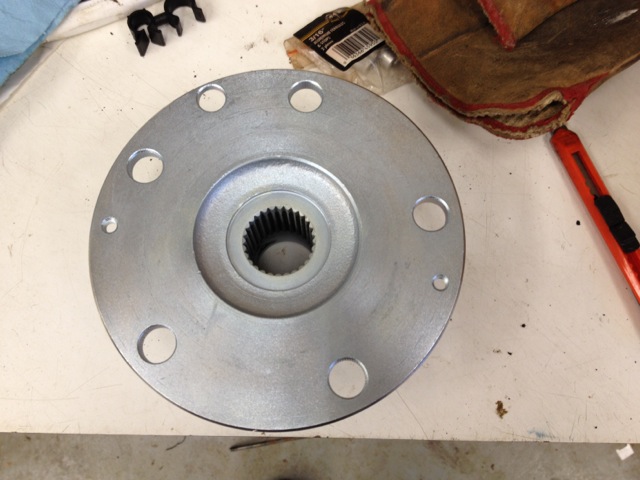
Grabbed a set of Stub axles off another board member.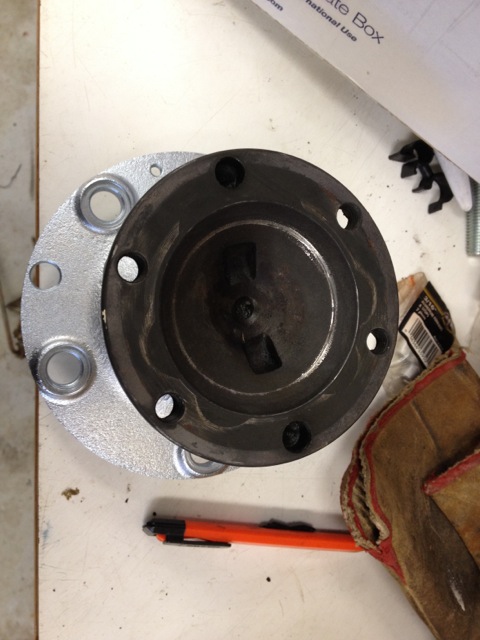
Now need to order the flanges for the subbie trans. That will give the pieces I need to get axle measurements done and find the proper length sway-a-way axle.
Hopefully I get a little time this weekend to work on the car. And build my rotisserie as I should have pulled the trigger on the one in Michigan.
Posted by: 914forme Apr 23 2014, 06:59 AM
My how time moves 
Decided to get some parts put back together: One OBX TB LSD rebuilt. So why is the price so good on these products? Because the machining sucks. So here we go
First up stock unit, as shipped. You need to remove all the bolts, they are 6mm and not held in by much force. I busted them loose in my hands, with a shorty 3/8 ratchet.
Once all the bolts are gone, you then remove the upper case half, you will need to pry being careful of the machined surfaces. 
This is what it looks like separated.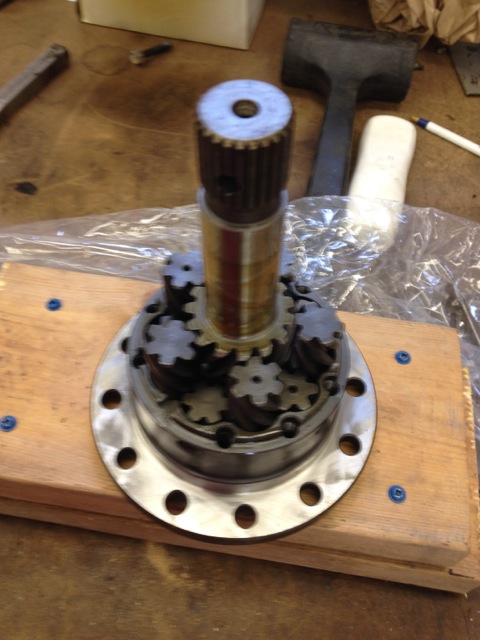
Next up pull the first set of bevel gears and the stub axle. Set them out in order, just for sanity.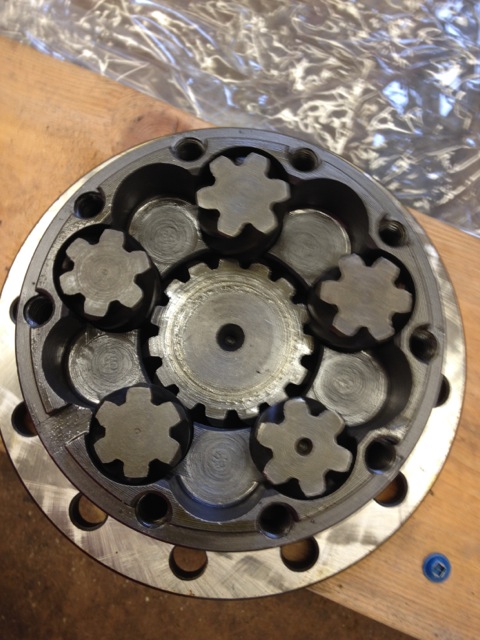
Next up, remove the inner pieces. The stack of washers in here are one thing to keep track of, I laid the out in order just to make sure I got them back in facing correctly. ITs not hard. It looks like this in the end }{}{}{. These washers are crap, they need to be replaced.
Next up remove the last set of gears and the other stub axle.
And well Im done eating my breakfast so Times a wasting I better getta wrenching! I'll give over the inspection photos and what I did to fix all the issues with this unit. And re-assembly latter. Oh it is so much fun. I'll give you a hint, hours spent with thick glass and sand paper.
Posted by: Chris H. Apr 23 2014, 09:36 AM
How did I miss this one? Did you get that donor car stripped? How do the engine seals look on the EG33?
Posted by: 914forme Apr 23 2014, 11:09 AM
How did I miss this one? Did you get that donor car stripped? How do the engine seals look on the EG33?
Nope have not stripped the donor yet, I have a spare engine, that I will be using for mockup.
The seals, well they are great shape, I repaired them all over the winter, while in the SVX, Oh what a sucky job that was.
Posted by: Chris H. Apr 23 2014, 12:29 PM
Wow. Yeah that would have been terrible. I'll take another look at the list of stuff that was of some value to sell and send it over. Mostly small stuff. You should break even.
Cool that you have a mockup engine. I learned from someone on the board (Andrew maybe?) that the 3.3 uses the stock 4 cylinder 2.2 P's and C's so you COULD stash that one away for later and collect the parts to do a turbo 3.3 with lower compression pistons, etc. That would be fun. There's also a guy in my thread supercharging one. Cut the intake right in half. Seems to know what he's doing too.
Posted by: 914forme Apr 23 2014, 02:03 PM
Yeah I saw the Super charger unit looked neat. Since it is for my enjoyment and auto-x enjoyment, I might do a super charger if I was to go that route. These engines are so under stressed that I think you could pull mild boast wit the current compression. You need better cams, and exhaust. The intakes are just heavy I don't think they are restrictive, though the IRIS system adds a little complexity to the system. It is just a TB plate mounted in the middle of the can.
But yes the 2.2 parts work, as far as pistons, and rods, which means you can build a pretty strong engine off older Subby Tried and true. Now if the tranny will hold together or CVs. Like my one buddy says, your building a rolling dyne, something will break.
Posted by: 914forme Apr 23 2014, 06:40 PM
Okay well now lets continue down the long path of making the OBX a quality unit.
First issue is when they machined the spool they drilled the last set of holes for gear oil to get to the gears from the outside. Thats okay, but they did not go back in and even de-flash the holes. 
As seen in the above, so you must take a die grinder or dremel with a diamond bit and debut and chafer the holes. Or mount it in a mill and counter sink the holes.
So they look like this, Ah much better now. 
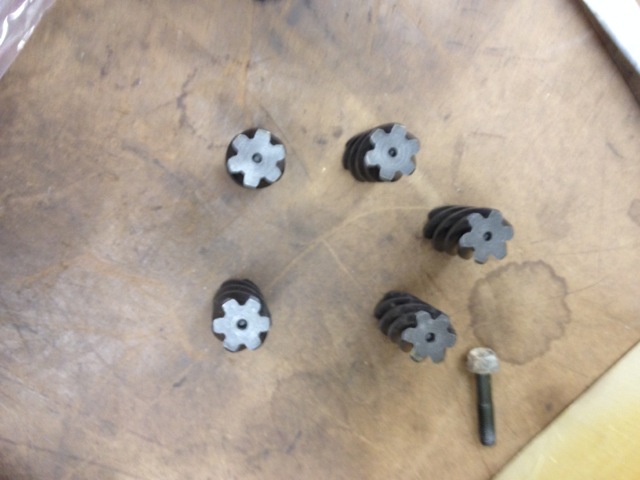
Next you need to clean up all the gears, the honda guys just let the diff do this, I chose to spend a lot of time with various grits of sand paper and a glass plate. I learned this in college from one of my room mates, he was a Clarinetist and made his own reeds.  Same technique works very well for polishing things to better than new. their are 20 tops and bottoms to do. Maybe I'm then one.
Still have a long way to go. Rinse and Repeat 40 times. Once done, they will be all nice and shiny on each end. Next is debarring the gear teeth. Oh come on guys really, I have to knock edges off all the helical gears. 
My Sir Andy picture taking skills come into focus again.
I did not take a picture of this because I noticed it when I as assembling. There is a hardened Pin on the upper section of the spool that aligns with a notch in the lower section. I had to know a bur off the pin to get the unit to seat correctly. For good measure mic the pin and make sure the notch matches or is just a hair bigger.
Reassemble in reverse order.
Torque the new bolts down to 23 Foot Pounds. Remove them one at a time and add a dab of blue lock tight to the threads and put back in. The factory morons can really screw up a set of threads, so it is always good practice to chase them before you put the new bolts in. Be forewarned these guys are not much of a machinist or assemblers, you get what you pay for I am guessing.
But I feel much better now running this in my car.
This guy sells a kit if you want to use it, http://rbryant.freeshell.org/obx_washers.htm His writeup on how to repair these is excellent also.
One item off the todo list.
Posted by: 914forme Apr 23 2014, 06:57 PM
And I started working on the rotisserie again.
Machined new up-rights, my old ones where to short. Yes I am cheap and used a Astro Van jack as my outrigger for my drill press. Hey it works!
I finished two of these up. And started working on machining the bumper stand offs.
Then I started working on the plate that goes into the hub, I am using as my pivot point. McMark, I stole your idea, I'll be making it my own shortly.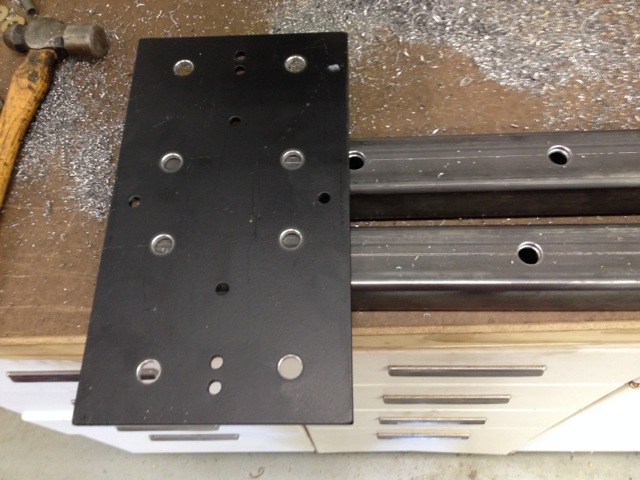
Test fit to the hub, Can't believe I pitched all the -4 lug bolts I had around. Luckly I have some extra studs. But I think i'll dig through my piles of junk and see if I can find some lug bolts. Or get the proper Metrics ordered in.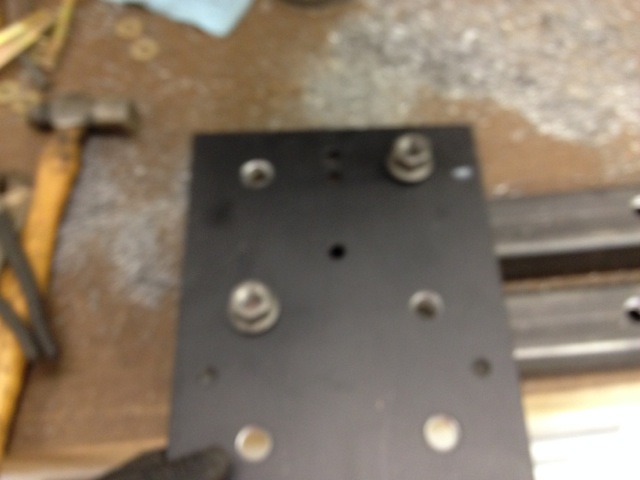
Thats it for now, I have CPADD, so I ran off to do something else when the Post Lady dropped off a couple of presents today.
Posted by: 914forme Apr 23 2014, 07:16 PM
Okay Post Lady brought me these today.
This is a piece of WWII goodness.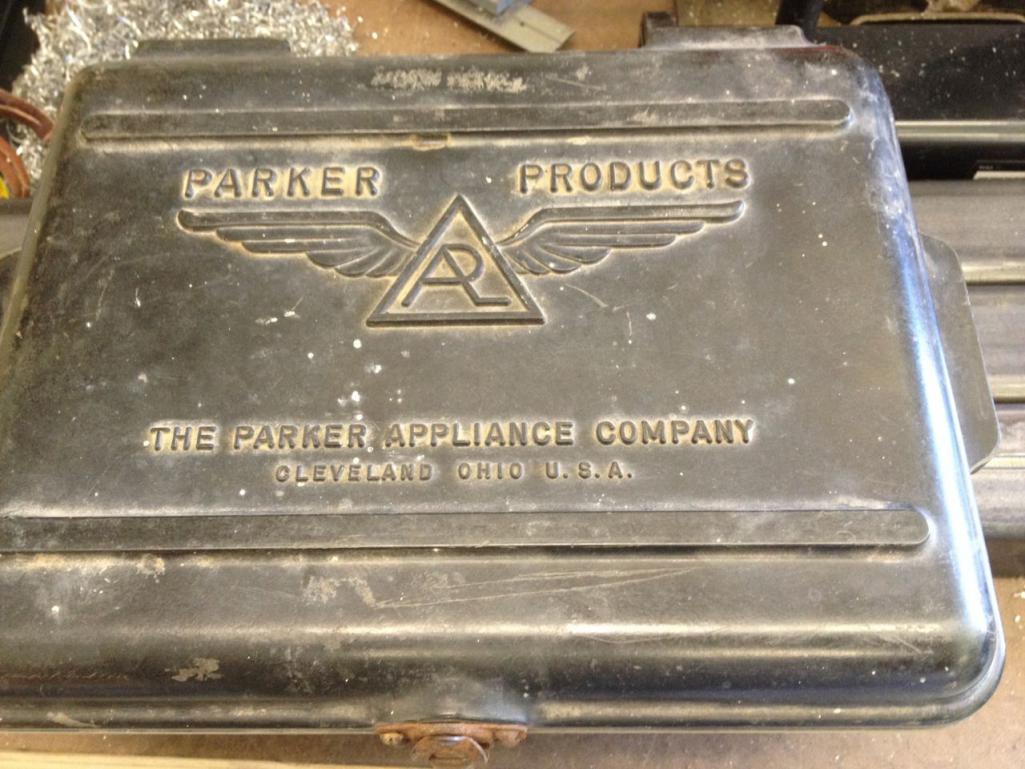
And this is a piece of VW-Porsche Incest that created these lovely gauges. Do not like the dome, looks like something Madonna would wear as a bra! 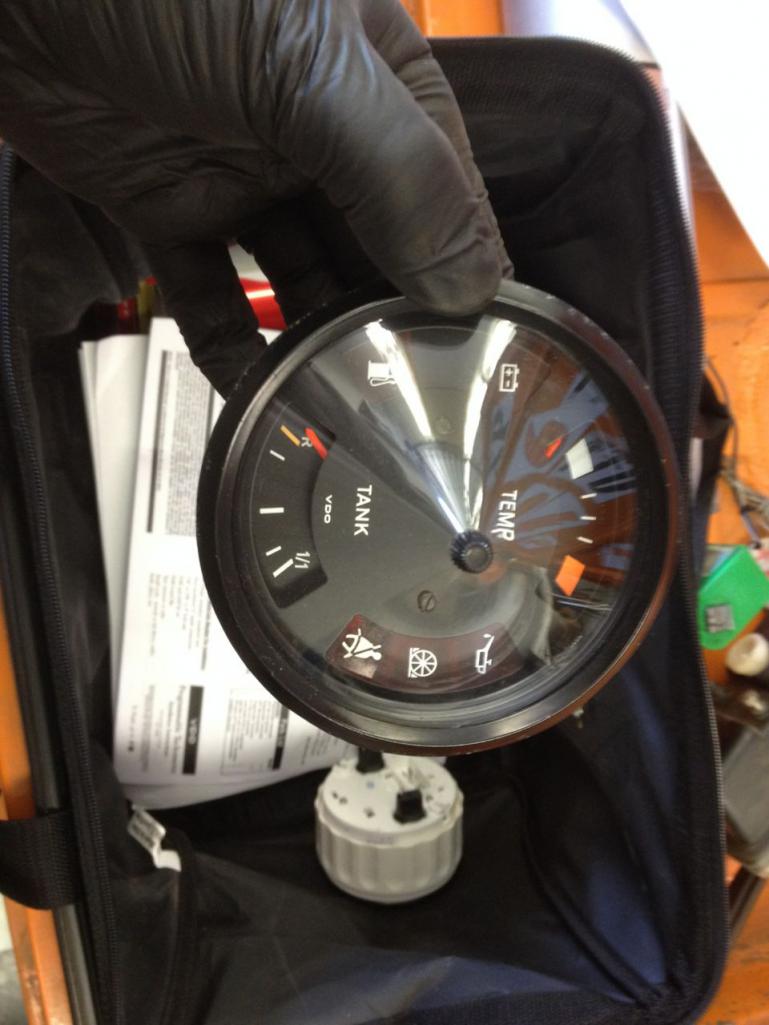
Its to form the basis for a future project.
And here is what is in my WWII Parker case.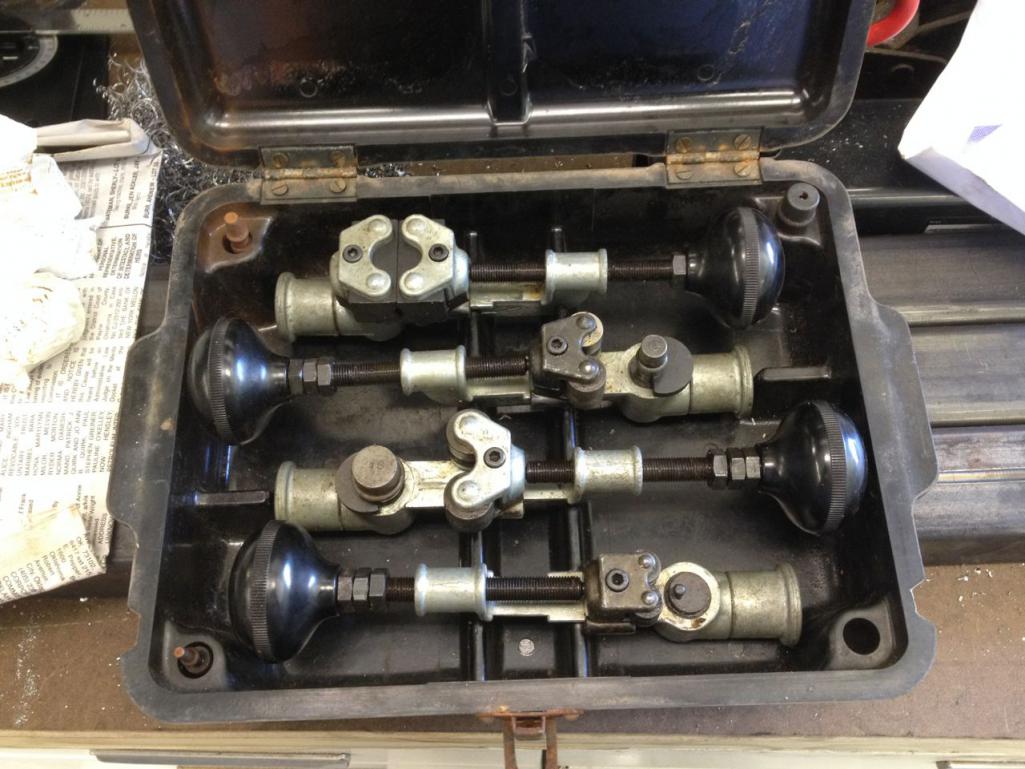
These are used to bead hard lines. That way your hoses don't slip off.
I will need to clean these up and lubricate them and they will be good to go. Now I can get my fuel lines done, and beaded. Then get a few test beads done.
Posted by: Amenson Apr 24 2014, 10:59 AM
Wow, of all of the great details in your build thread, the Parker Bead kit is the most awesome.
Where in the hell did you find those! 
Posted by: 914forme Apr 24 2014, 05:54 PM
Wow, of all of the great details in your build thread, the Parker Bead kit is the most awesome.
Where in the hell did you find those!
I have had a search setup on Ebay for a while now, finally got one at a price I could justify. I have been waiting on these for about 5 years now.
And thank you, just trying to help the next guy / gal that goes down this path. We get enough of these done, it might make the path wide enough, anyone will be willing to walk down it.
Posted by: Chris H. Apr 24 2014, 06:20 PM
When you put a flat piece of glass on the 924 gauge it looks so much better. I think it will be perfect for a conversion car if you like the stock-ish look. Still haven't checked calibration on the fuel gauge but you can swap that out with the 914 piece if you have to.
Posted by: 914forme Apr 24 2014, 06:37 PM
For todays update, I am tired of drilling holes for this rotisserie. I should have pulled the trigger ran to Cleveland and picked up the unit Doug has. Oh well, the build is most of the fun for me.
So here we go.
I got the welder out today, and my gas solenoid does not work I have plenty of gas in the tank, it traveled down the hose. Switched to Flux Core, I'm welding thick wall tubing and plate anyway.
Got the bottom frame done, welded up. I hate the splatter from Flux core.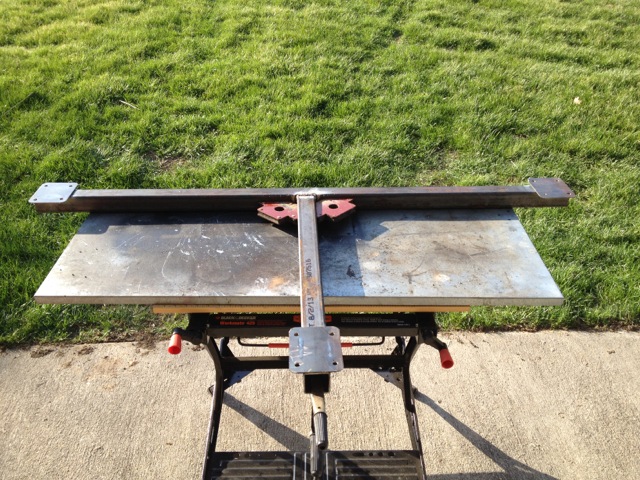
Got the front arms welded up, I might have to redo this one, I not sure how my math came out. 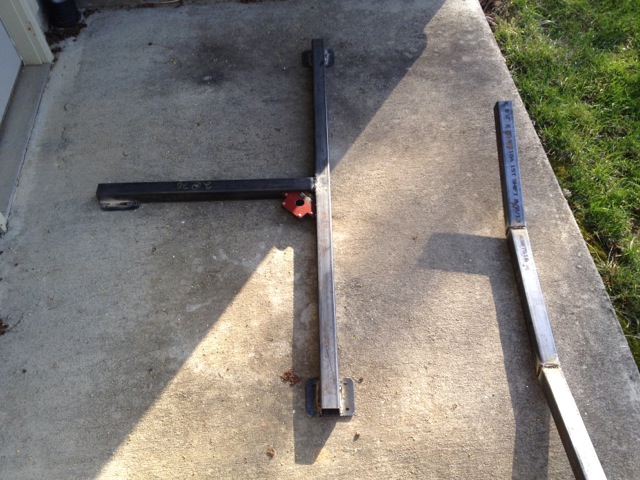
Welded my caster plates on, nice penetration on these welds. 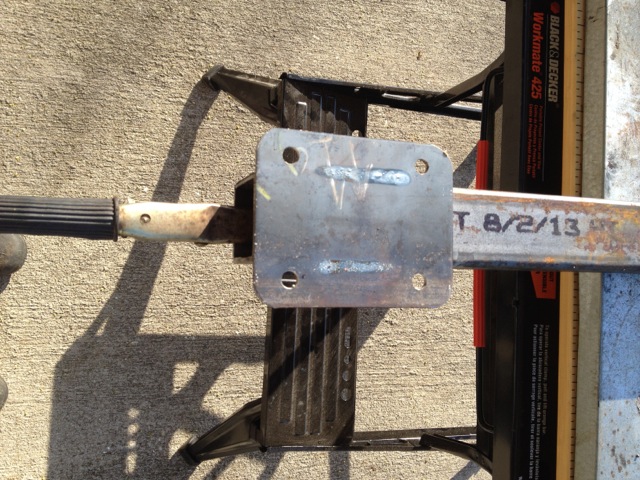
Started working on the stand offs for the bumper mounts, welded them up using 3/8" bolts. Test fitted them, and well the bolts are not big enough for the holes. So off to Tractor supply to buy 1/2 bolts.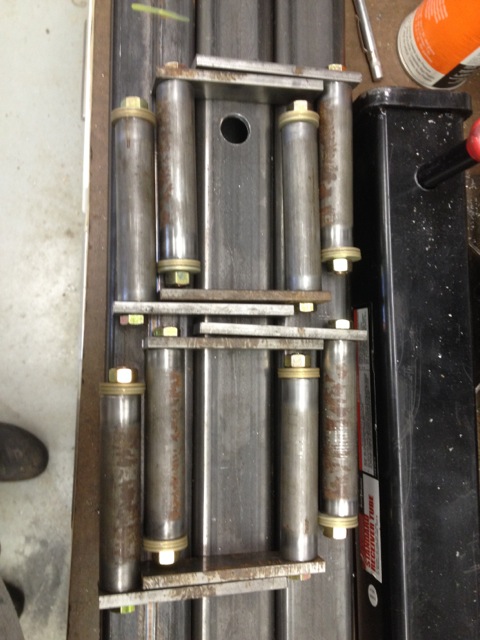
Welded on nuts to the top of the caster plates. Splatter 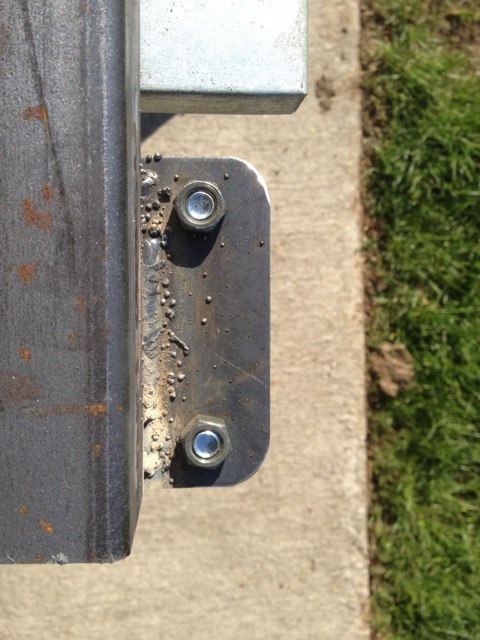
And one side is done, lol, hardly. Lots of work left todo on this side even.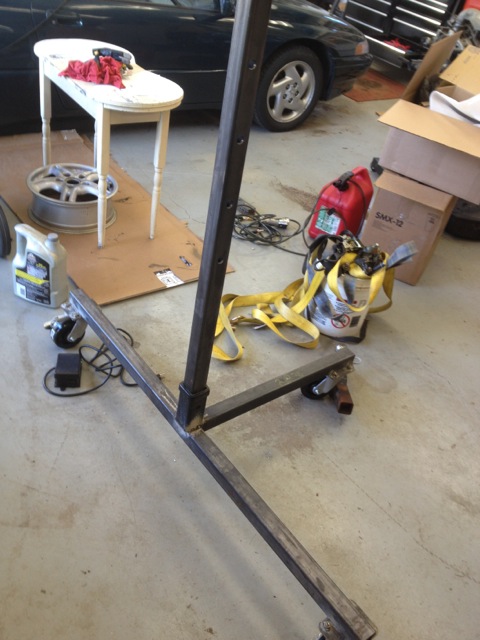
I need to invent the clean garage app. You take a picture, of your garage clean, an it becomes the background for all your other garage pictures, that way everyone thinks you work in a surgically clean environment. I really need to get the 5 gallon bucket of straps back in the truck. And that little white table is my wife's project. I have been moving it around for 3 years now. Not judging, just tired of it being here, there, everywhere.
Attached image(s)
Posted by: 914forme Apr 24 2014, 06:44 PM
When you put a flat piece of glass on the 924 gauge it looks so much better. I think it will be perfect for a conversion car if you like the stock-ish look. Still haven't checked calibration on the fuel gauge but you can swap that out with the 914 piece if you have to.
I was saving these for my gauge thread, but since you brought it up Chris.
924 quad, using VDO movements. There is even enough room for 5mm LEDs for warning lights, except the gen light, I need to figure out the load, as the bulb is part of the circuit. I'll have to

Only thing I don't like is the windows are not beveled like the 914 originals are. But then you figure the 924 was the next generation car, and that extra touch disappeared before the 914 was out of production. Most likely due to cost.
Posted by: 914forme Apr 24 2014, 06:50 PM
If I use this piece, I will need to redo the arches of the gauges so they look better, move all the identifiers to the 924 piece, and well figure out a way to hold it, as in the 924 it is screwed to a plastic piece that is used to separate all the warning lights. But it is something that looks good enough for me to move with it. I won't get back to gauges until, this winter. To many things I can do while the weather is nice, and its above 50 degrees.
Posted by: Chris H. Apr 24 2014, 06:54 PM
Hey that's cool Stephen....great idea. I'm using mine as-is. Didn't realize there were actually 4 windows... You can get those gauges for nothing too which is nice. I think mine was $18. Maybe I'll get another one to play with/mess up .
Posted by: 914forme Apr 24 2014, 07:00 PM
Yeah, now that the word is out Chris, you might want to grab a few more, I can see a run on them. 
Posted by: 914forme May 20 2014, 07:14 PM
Rotisseri has been complete
I used a set of 914 Trailing arms for the rotational bearings, and found that they worked a little to well. So I had to create an indexing wheel to keep the chassis from rotating. I have the suspension removed on one side, so it will go to that side with out issue, stupid gravity.
So how does a CSOB build an indexing wheel.
With a 914-4 rear brake rotor of course.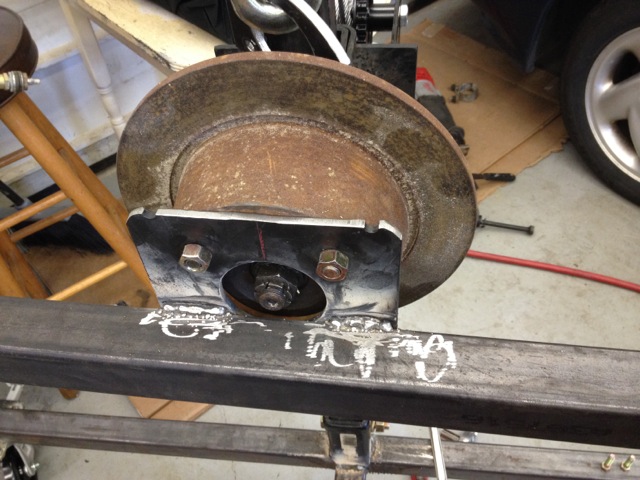
Next I figured I would have to find the level spot then figure out the angles do some math
Until I remembered I have this.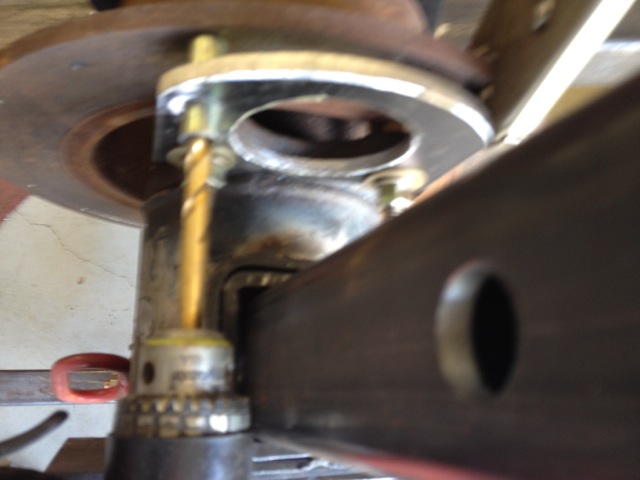
Then I drilled in a hole for a hardened guide. it is 5/16" ID, slight over 1/2" OD, and well a 15/32" hole, and a press and well I now have my fixture to hold the pin. After that grabbed my tight quarters drill and drilled my first hole with the bar level.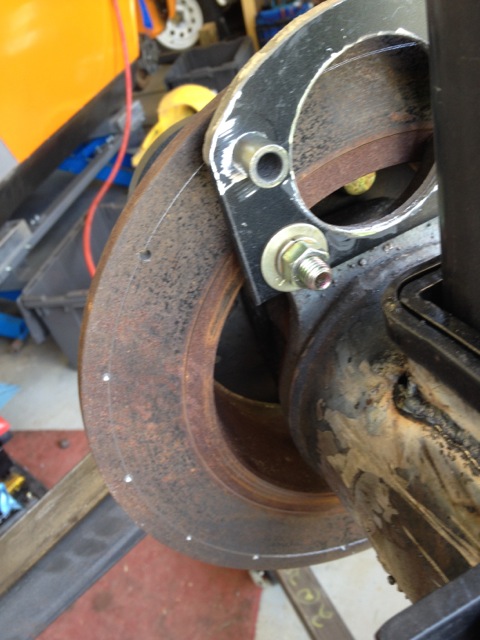

Drill a bunch of holes, using the angle finder, and adding 22.5 degrees to each rotation. In reality it was easier than that, the degree finder is marked at 45 and 90, I just had to find 22.5 and 67.5. I used a clamp to hold it in position whileI drilled. It can be off just a little bit, It won't matter.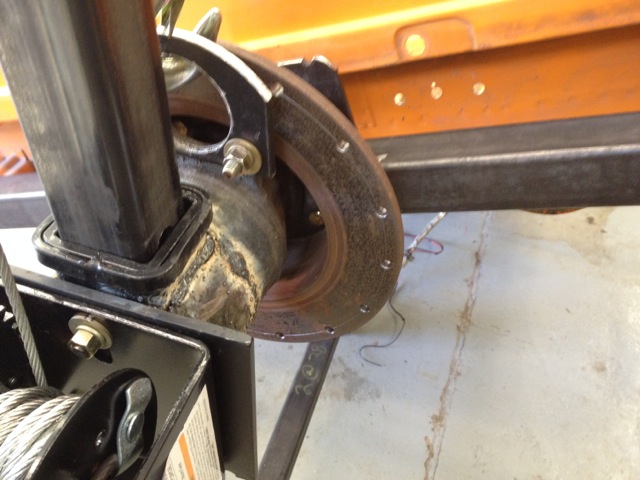
And the final result.
This was a huge step forward, allowed me to remove the chassis from my lift. I was then albe to get the SVX donor up on the lift, and start draining fluid prepping it for engine removal.
Yes forward progress!
Posted by: dan_the _body_guy May 20 2014, 07:34 PM
Rotisseri has been complete
I used a set of 914 Trailing arms for the rotational bearings, and found that they worked a little to well. So I had to create an indexing wheel to keep the chassis from rotating. I have the suspension removed on one side, so it will go to that side with out issue, stupid gravity.
So how does a CSOB build an indexing wheel.
With a 914-4 rear brake rotor of course.
Next I figured I would have to find the level spot then figure out the angles do some math
Until I remembered I have this.
Then I drilled in a hole for a hardened guide. it is 5/16" ID, slight over 1/2" OD, and well a 15/32" hole, and a press and well I now have my fixture to hold the pin. After that grabbed my tight quarters drill and drilled my first hole with the bar level.
Drill a bunch of holes, using the angle finder, and adding 22.5 degrees to each rotation. In reality it was easier than that, the degree finder is marked at 45 and 90, I just had to find 22.5 and 67.5. I used a clamp to hold it in position whileI drilled. It can be off just a little bit, It won't matter.
And the final result.
This was a huge step forward, allowed me to remove the chassis from my lift. I was then albe to get the SVX donor up on the lift, and start draining fluid prepping it for engine removal.
Yes forward progress!
thats a bit overkill but awesome at the same time
Posted by: 914forme Feb 7 2015, 07:36 PM
A lot has happened since I updated this thread. SVX is gone, and recouped most of my cost, figuring I drove the car for 9 months, and did not have to get my new TDI a salt bath it paid for itself.
So we will pickup now where I left off. I had gotten a Coldwater cradle. Great work there Ian. Issue I found was it would not work with the exhaust setup I wanted to run. So off to the drawing board. I sold off the Coldwater stuff, thank you.
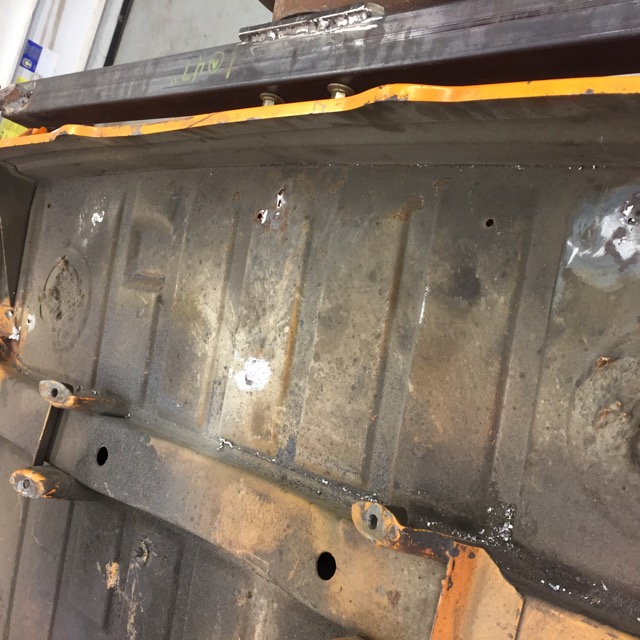
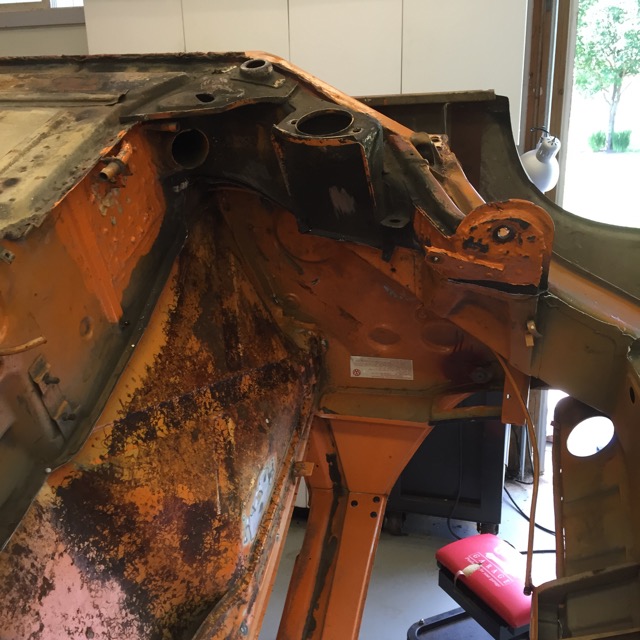
So now I started stripping the chassis. The plan is to go back in cut out al the un-needed stuff, fabricate everything that needs to go back in. Clean it up, section by section and get it into primer.
So let the fun begin.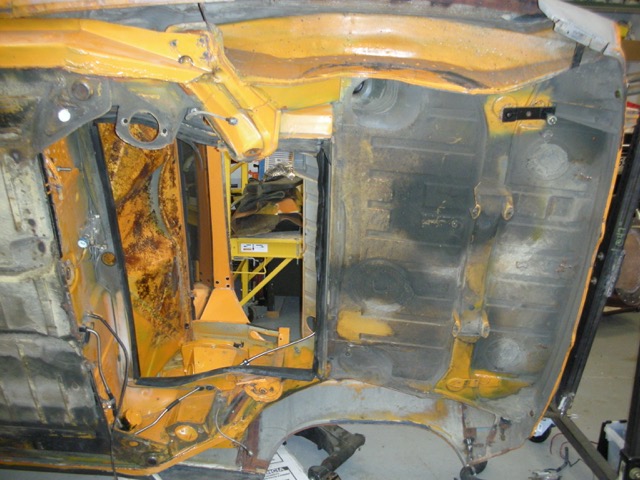
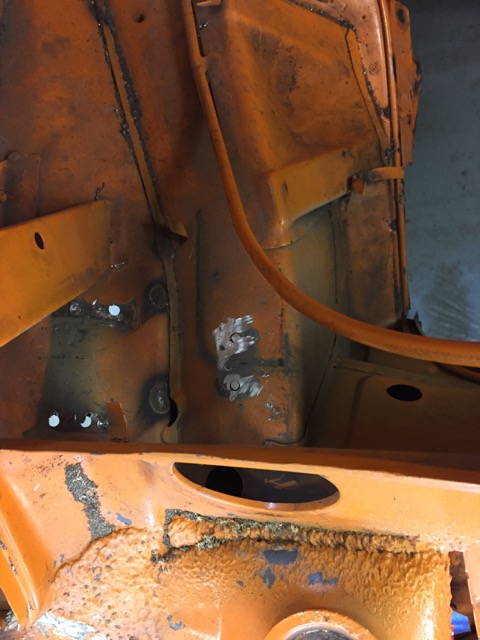
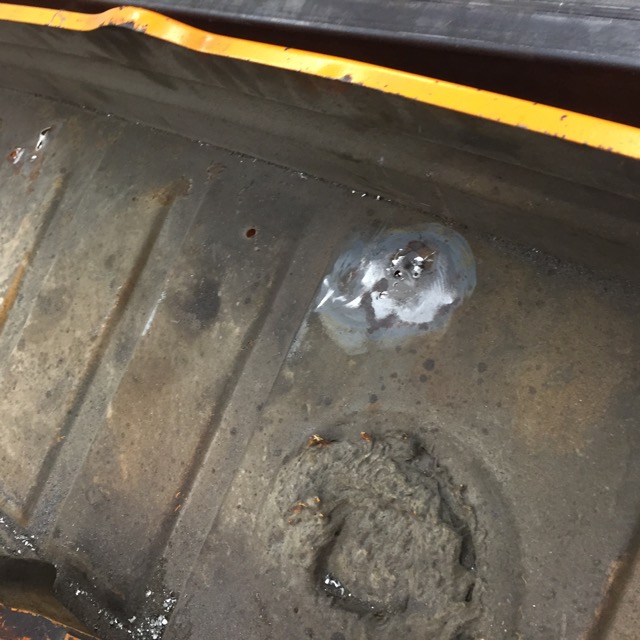
Wow that is one dirty rear trunk floor but it is solid.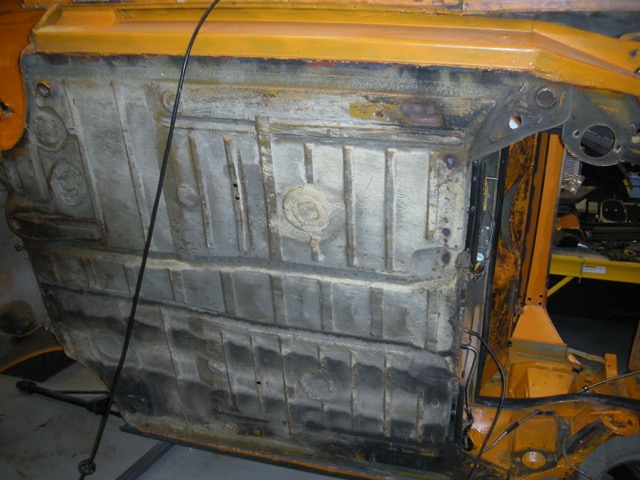
Passenger Cabin floors, solid little bit of surface rust under the brake pedal area.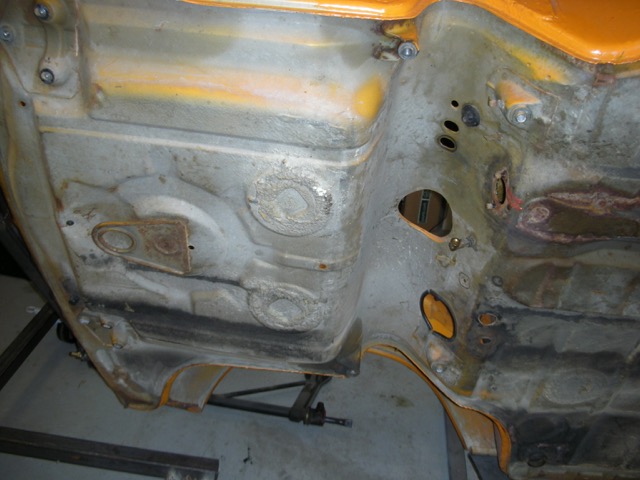
Front trunk, floor dented by the tow hook, and you can see the rust under the floor where the brake pedals reside.
It is really a pretty solid car. I will update it more as I progress.
Attached image(s)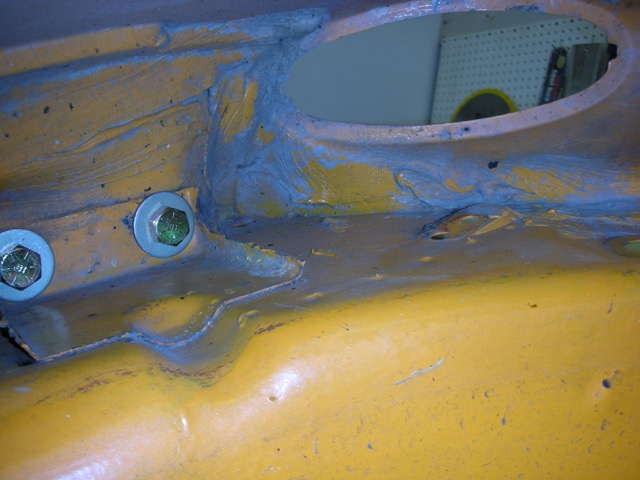
Posted by: mgp4591 Feb 8 2015, 07:05 AM
Oh yeah... ![popcorn[1].gif](style_emoticons/default/popcorn[1].gif)
Posted by: 914forme Feb 12 2015, 05:08 PM
I was told today I need to start posting more in my build thread 
So a few more of the car being stripped. Got the front out with ease, I have lots of practice, I have only removed about 20 of these things, and have broke 3 on my 914. 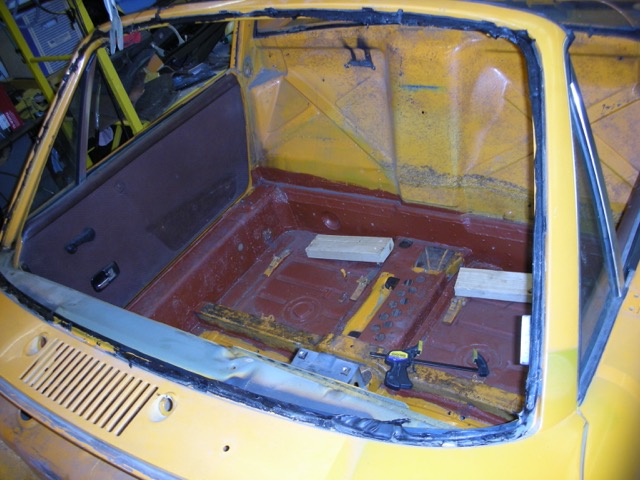
One Piece 
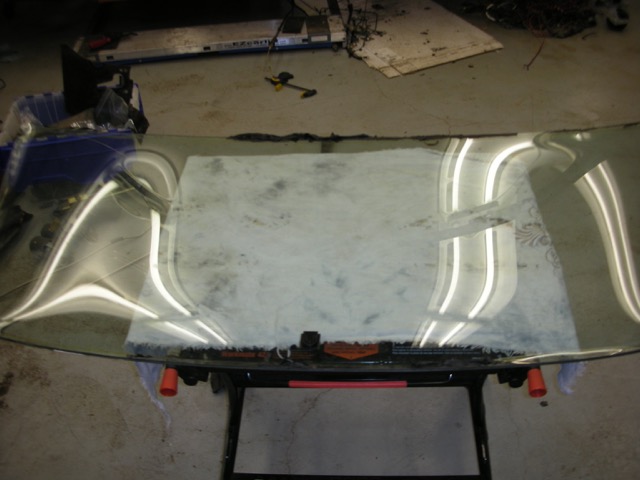
Love 3M windshield snot, nice big ole pile of
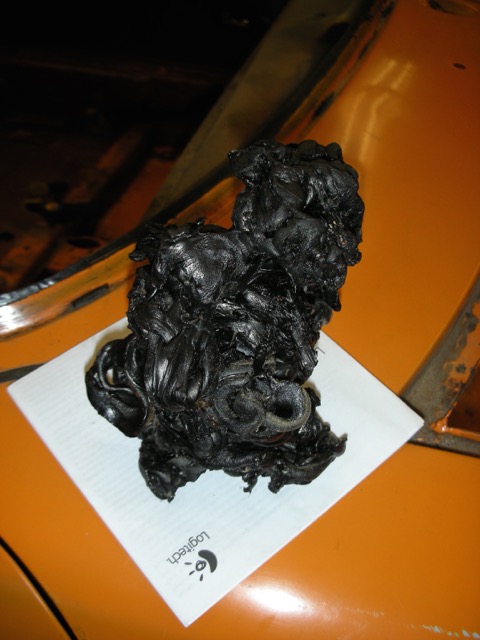
Rear window was much more of an issue. Somewhere along this 914's life some one filled the rear window with silicone. And trust me it was not an enhancement. So after trying for hours on end, I was about to give up. I went to google and found this!!!!!
Oh I have something that is like that in my tool collection. 
So out came this.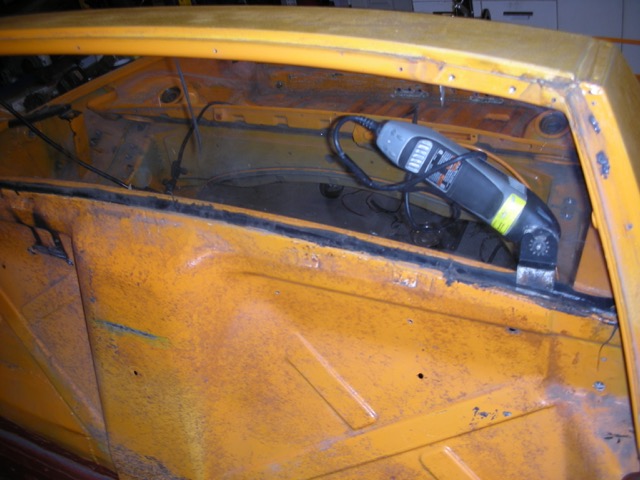
Dremel Multimax!
And it worked, I used a scraper blade. Most likely would have been better if the scraper blade was thinner, as it would get gummed up a bit. But after not making progress to 10 minutes and it was out. I will put up with having to clean the scraper blade a few times, and having to reclock the blade.
Car almost stripped.
Now how the heck do you remove these with out driving the pins into the chassis, and loosing them for ever?
Posted by: altitude411 Feb 12 2015, 05:55 PM
Just get new ones from 914rubber... http://shop.914rubber.com/914-Windshield-trim-retainer-clips-hold-chrome-on-914WSCRC.htm?categoryId=-1
Posted by: gryphon68 Feb 16 2015, 10:30 AM
Still have a long way to go. Rinse and Repeat 40 times. Once done, they will be all nice and shiny on each end. Next is debarring the gear teeth. Oh come on guys really, I have to knock edges off all the helical gears.
Would it be appropriate to just throw all the gears in a vibrator/tumbler with some abrasive media?
Is it critical the parts go back in original position?
Posted by: 914forme Feb 17 2015, 11:07 AM
Still have a long way to go. Rinse and Repeat 40 times. Once done, they will be all nice and shiny on each end. Next is debarring the gear teeth. Oh come on guys really, I have to knock edges off all the helical gears.
Would it be appropriate to just throw all the gears in a vibrator/tumbler with some abrasive media?
Is it critical the parts go back in original position?
I guess you could do that for demurring the gears, I don't have one, so..... And no the gears don't have to go in specific positions, I just like to do that, little OCD about that stuff. Tends to make things easier to assemble when I walk away from a project for a while.
If I was to do only two things to the OBX, it would be deburr the return holes at the bottom of the gears where they drilled from the other side. And changing the bolts and shim stacks. Oh three things, making sure the guide pin fits in the its receiver space on the other side, and oh......
Posted by: 914forme Feb 17 2015, 11:23 AM
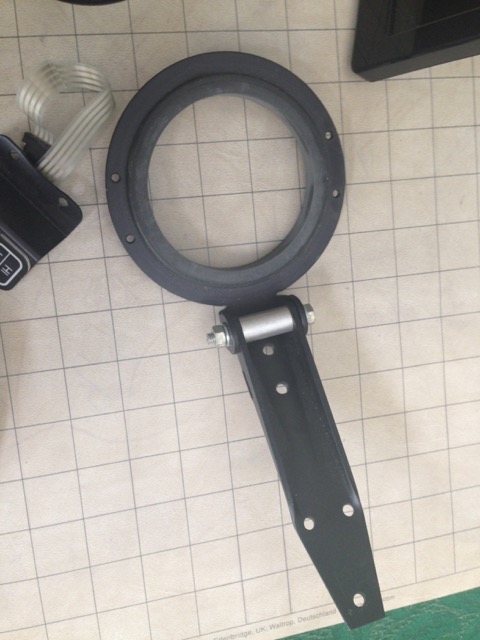
So this weekend I got busy on engine mount, and trans mounts.
Laying Out the brakes for the lower trans mount. I used the stock Sumaru Transmount for my guide.

Pile of scrap always makes me feel like I am getting something done.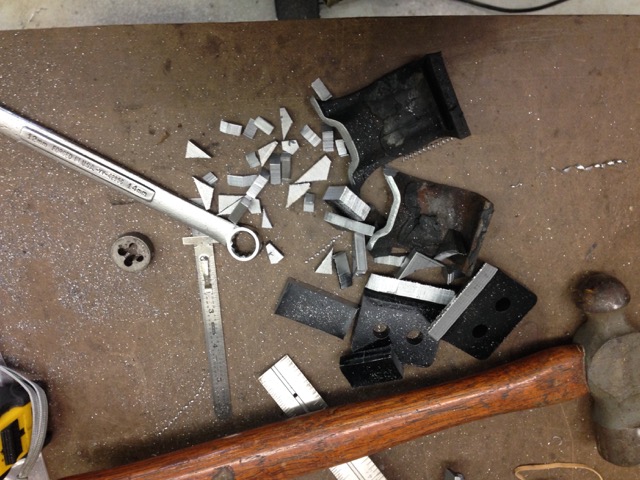
Upper Trans Mounts to the body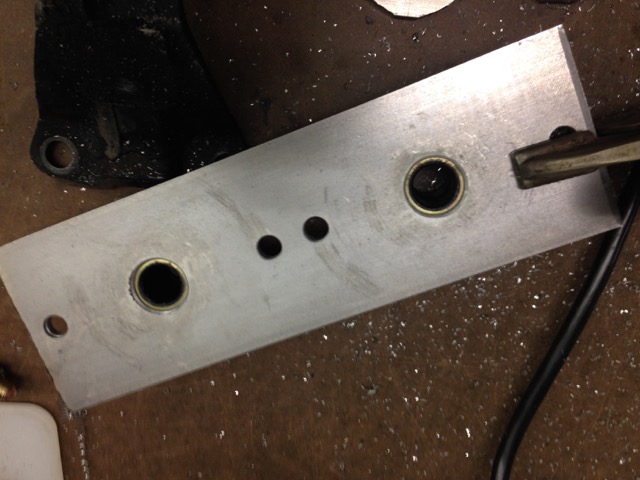
Energy Suspension Busing added, looks like I need to clearance the holes a little.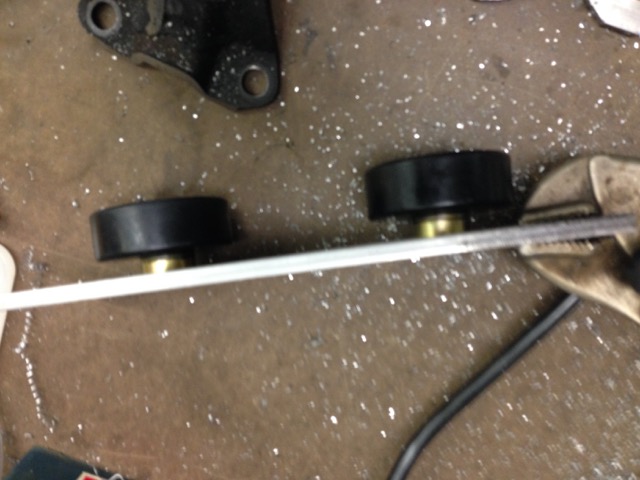
And Seated correctly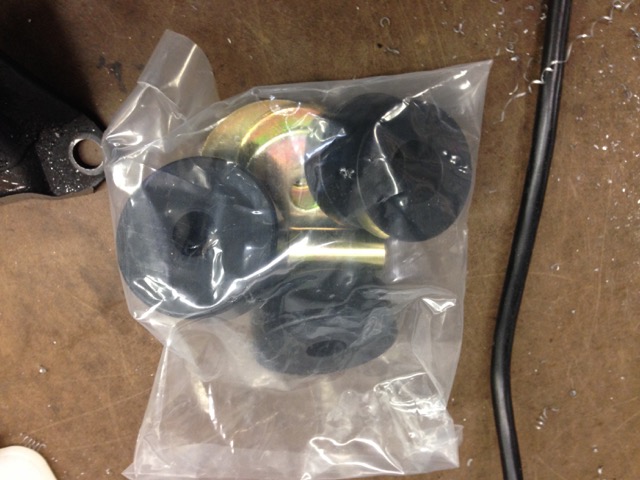
Upper part of the trans mount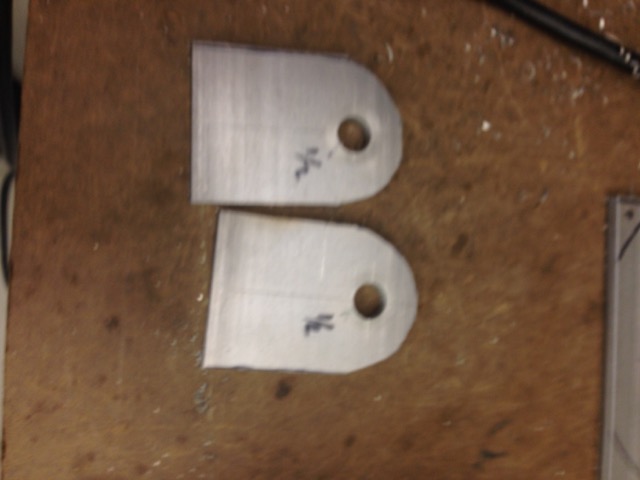
And well the bottoms of the trans mount bolted to the chassis.
Attached image(s)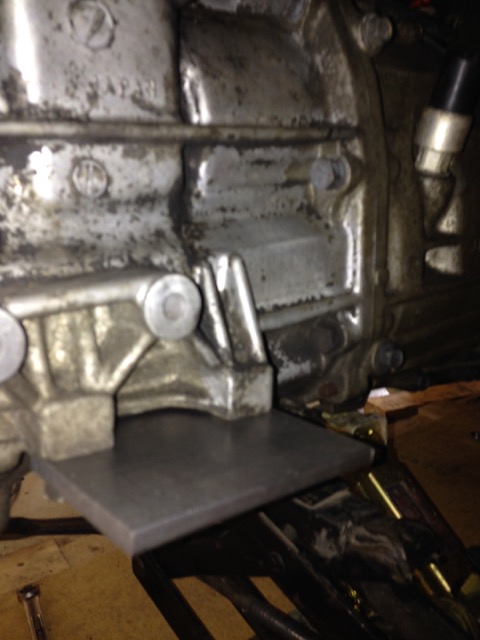
Posted by: 914forme Feb 17 2015, 11:48 AM
Now making my first bad design I wanted to use so DOM I had around. It did not go well.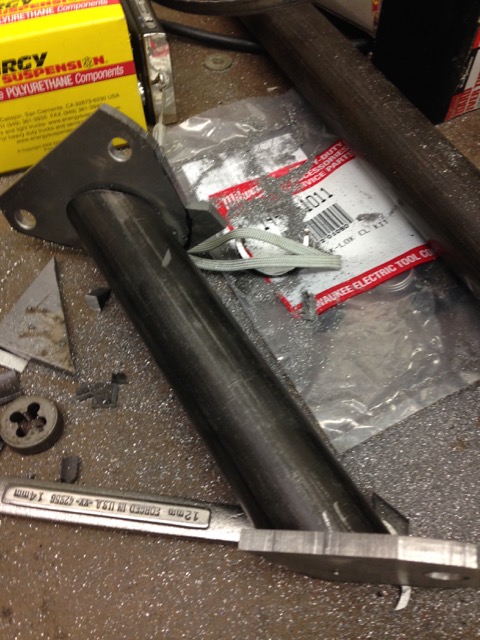
And more crap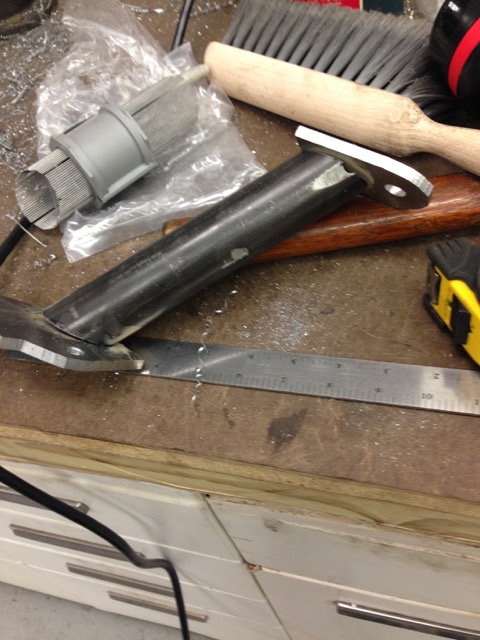
That tool requires more setup than what it is worth. And well, I had little less than 6" to play with in the car, so I was a bigger pain than it was worth.
So yesterday I cut them all apart and went at it again. This time I had some 1" Square with .125" wall. Back at it, and much easier. Sorry no pictures I got busy building
I drilled a small hole in the top bracket, and in the bottom where I wanted the center of my tube to hit. I took a long zip tie, and threaded it between the two points. Now I have my line and my angles. I then took a cereal box, and cut out pattrens and made them fit between the two mounts. I then took a sharpie and traced the zip tie. Removed the cardboard from the car, up on the bench I used a protractor, and figured out the angles. and cut my tubes. And well then fit, nice and tight welded them up.
Here they are in the car.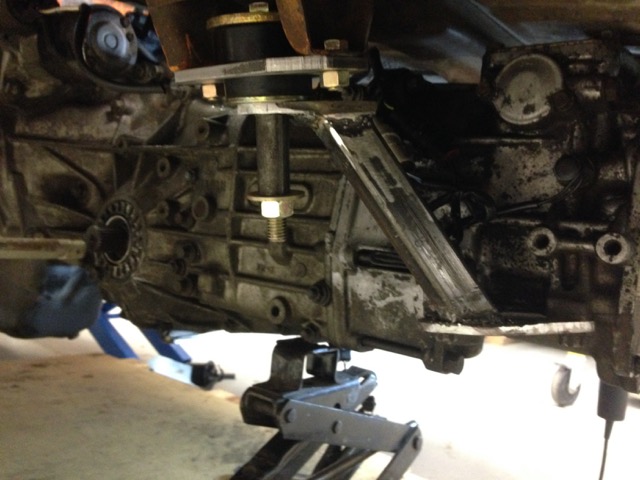
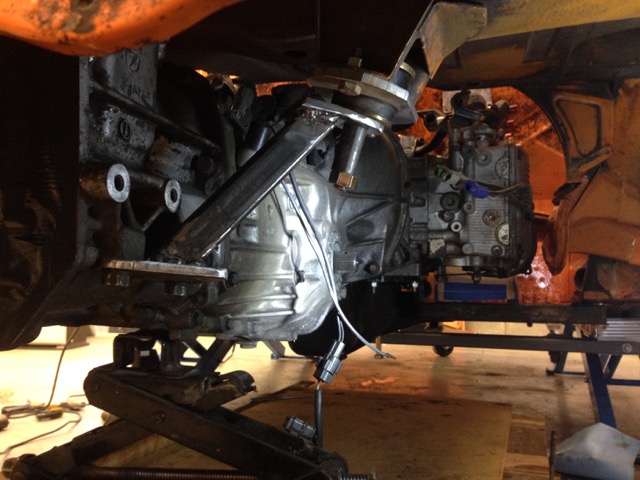
After much messing around I have the EG33 as far forward as I could get it. I used the engine front mounts forward by drilling the holes off center. That pushed me forward and extra 1.25"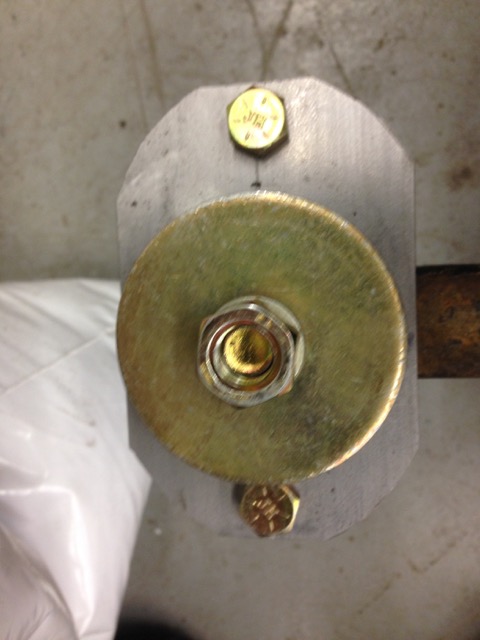
Which did this for my CV alignment.
And still allowed for this, just barely.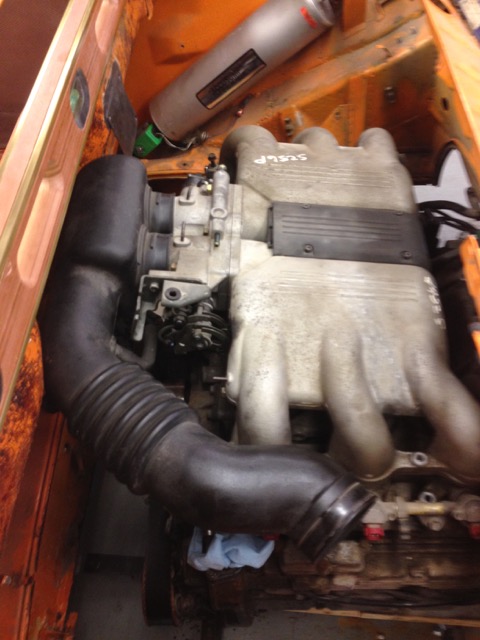
And if I was going to use the stock snorkel I would need to clearance the firewall just a little bit.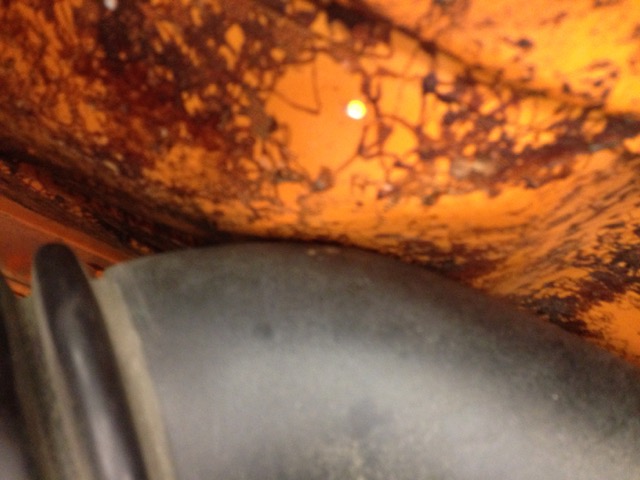
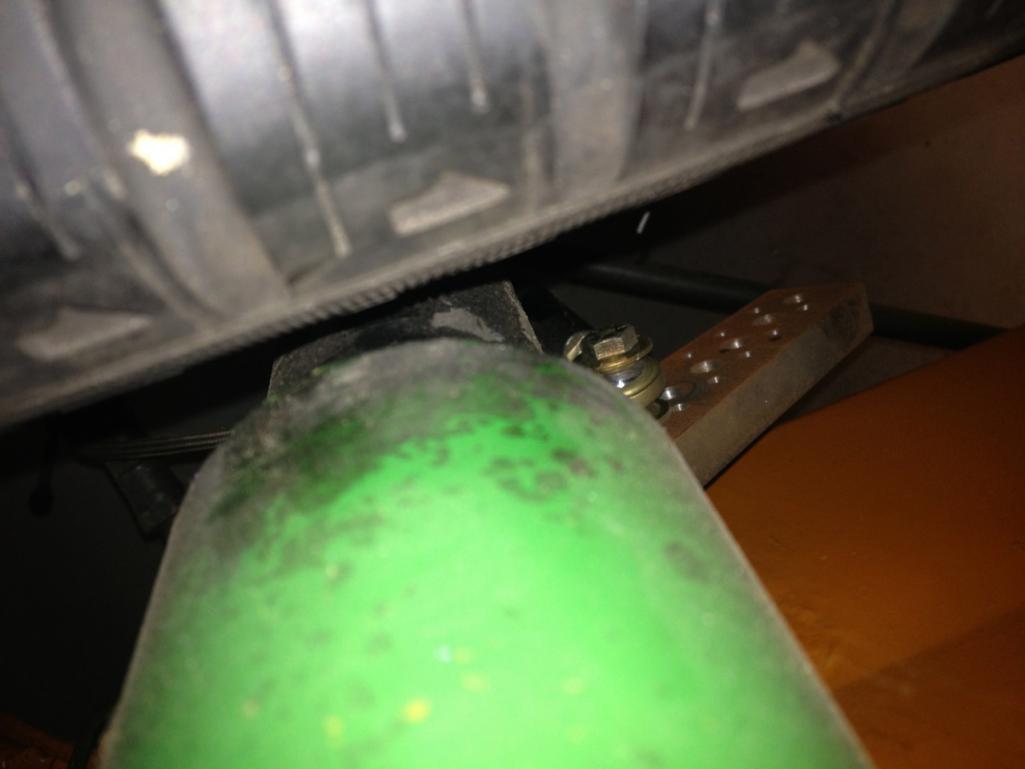
Only one hole in the car so far it got a little bigger due to this little issue right here,
And I'll make a nice plate to cover this 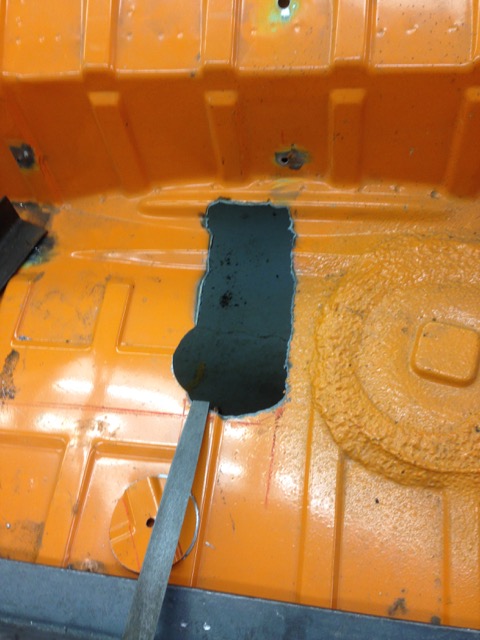
And my starter clears with plenty of room.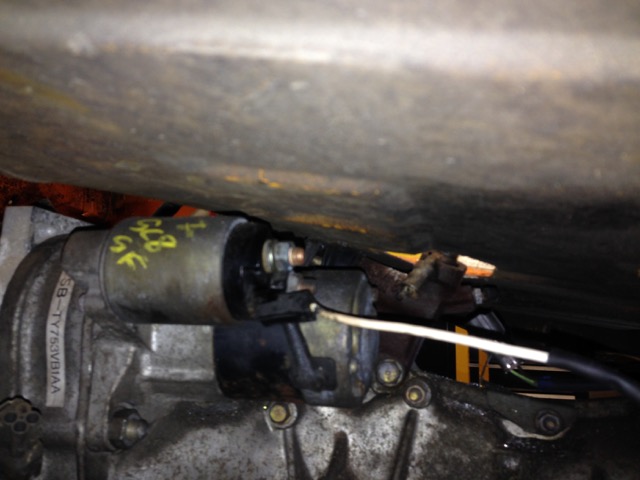
And this is the part number if you wish to duplicate it.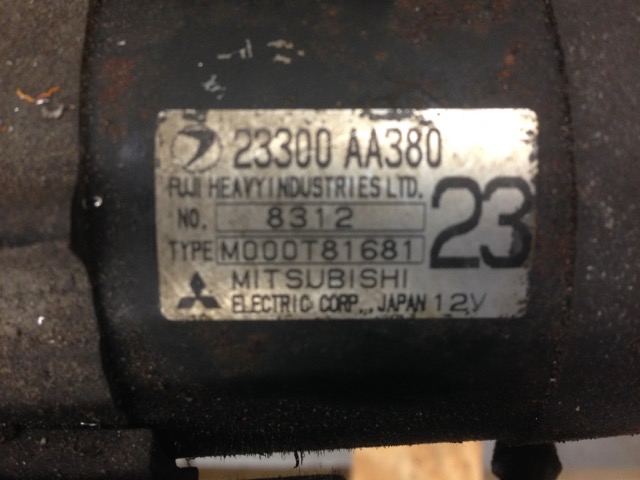
Posted by: 914forme Feb 19 2015, 11:36 AM
Yesterday I got a set of wheels I have been waiting to find for a very long time. Been on the list since the 80s. 
5 of them 
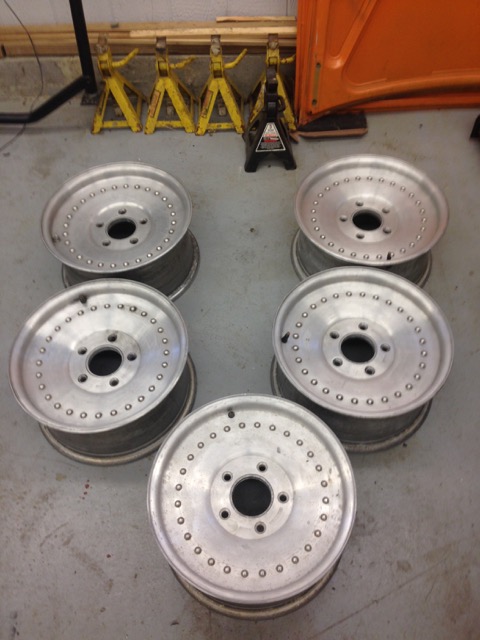
So why am I so excited?
Not produced any more, and they weigh nothing.
These are 15x8s, they weigh in at less than 13 pouds 2 ounces with valve stems and wheel weights. A 15x8 Fuch's is 15.4 lbs, My Mahle Gas Burners are in the 11_12 pound range for a 15 x 5.5" wheel.
And Hoosier makes an A7 in 225-15, forgot the aspect ratio. These where just announced, new tire, yes for auto-x only, but that will allow me to 
To round out my wheel dealing again. I also got these.
7x17, and 9x17s 10 spokes off a 996. Oh and these are pretty light with out the OZ or Forge line budget.
7s are 18 pounds 1 ounce, and 9s come in at 20 pounds, 7 ounces. With stems, wheel weights, and center caps. Plan is to black these out, as it will look nice off setting the Orange, these will be my street wheels.
For reference the OZs are $1300 it per wheel, way out of my budget.
So now I'll be getting back to the boring progress stuff. Up for this weekend, removing the doors, setting the door bars in place, flipping the shell on its side, and cleaning the bottom side
Posted by: 914forme Feb 21 2015, 06:41 PM
spent the day finishing stripping the car. Doors off, had to cut my parking brake handle pin that holds the cable out, as it was stuck. vacuumed everything up, and started cutting un-need brakes and studs out of the body shell. Lots of drilling of spot welds. And I only drilled all the way through one spot weld. Ventilated my floor board under the passenger seat. 
Nothing a can't fix.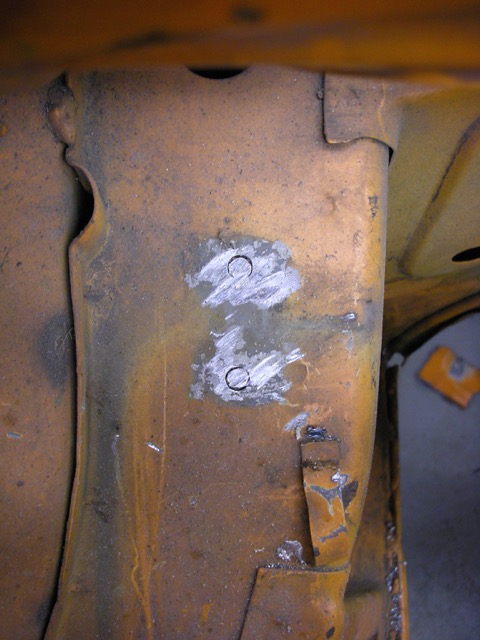
Also started working on the Alternator mount for the EG33, going to put it where the Power Steering pump was. And try and use the belt adjuster from the Power Steering bracket.
No pictures of that yet
After I removed the doors, I found this damage left over from a fender bender.
I'll need to take measurements and make sure Im good.
Posted by: Chris H. Feb 21 2015, 07:29 PM
Meant to post this...very pricey, but the Rocky Mountain Westy intake is nice. Smaller and provides more clearance.
http://www.rockymountainwesty.com/SVX_Intake_Manifold_kit_w_filter_p/rmw-svxintake01.htm
In case you want to attempt something similar yourself.... wonder what they would charge for just the box ...probably $397.99
Nice score on the wheels! A couple of my favorite styles.
Posted by: 914forme Feb 22 2015, 07:20 PM
Chris, Man them guys are expensive, and yes I have plans for something similar, larger MAF will be needed for my plans. yes I'll build my on, thats most of the fun for me.
Today I got the alternator bracket figured out, just need to add some triangulation. Unfortunately my SD card seems to have crapped out, and my pictures are gone. The bracket works great everything fits with the flipped manifold, and I can even use the stock adjuster and belt. Though the belt could be a little shorter to make it work better. Lots of adjustment in the stock belt tensioner. Now back to try and recover the pictures.
Posted by: mgp4591 Feb 22 2015, 10:57 PM
Failed SD card is no excuse... still needs pictures!! 
Posted by: Chris H. Feb 23 2015, 07:45 AM
Yeah re: the RMW intake...the part I don't get is how they attached the rubber tubes that connect to the throttle body to their metal intake piece and made it air tight....they must have a serious lip on them or something...or maybe they are a one-piece mold. I've searched on ebay and at home improvement stores for something similar, no dice. You could probably just go with PVC pieces and use a rubber piece to connect between them and the throttle bodies, or go with 90 degree silicone pieces that would bend downward and allow you more room (use 1.5" BTW NOT 1.75 as it measures or it's not tight enough). Then you could connect with PVC or a custom box of some kind. It would be nice if we could convert the throttle body to a single hole. How cool would that be???
BTW you really helped me out by telling me about that whole cruise control removal thing. I can cap that off and flip my manifold around. I was hating how my setup encroached on the whole trunk. I also think the way I had the cruise hose set up with my custom intake was incorrect, causing an intermittent stall issue. So .
Posted by: 914forme Feb 23 2015, 07:57 AM
Bad SD Card reader / cable.  I tossed something on the cable. and like magic it popped up, and I seized the opportunity to grab the files.
So here we go!!!!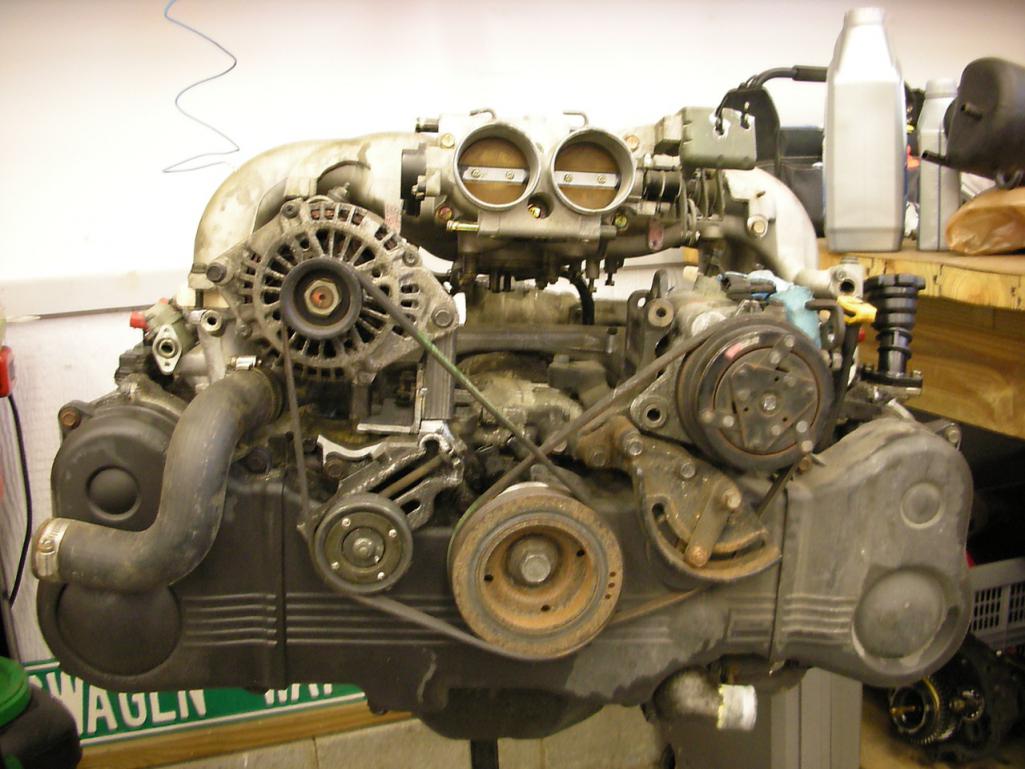
Overal Picture, plenty of clearance for cabling etc....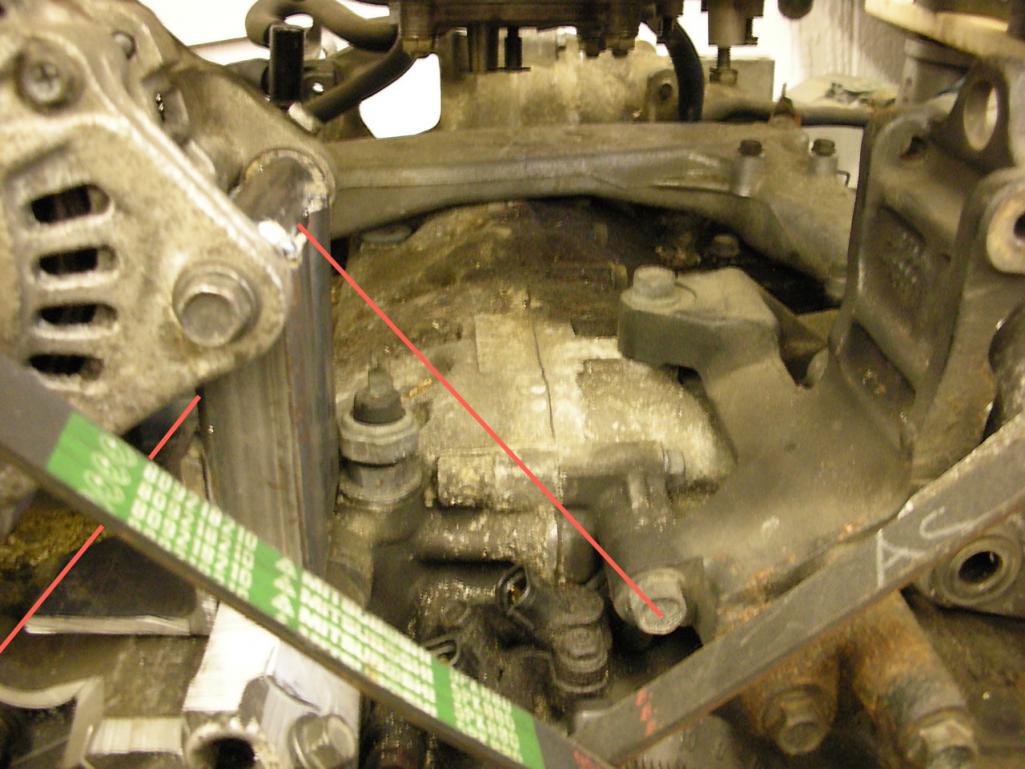
I will add triangulation in the plane the lines represent. This will tie the bracket in at three places. Even though its plenty strong , reduce metal fatigue do to vibration.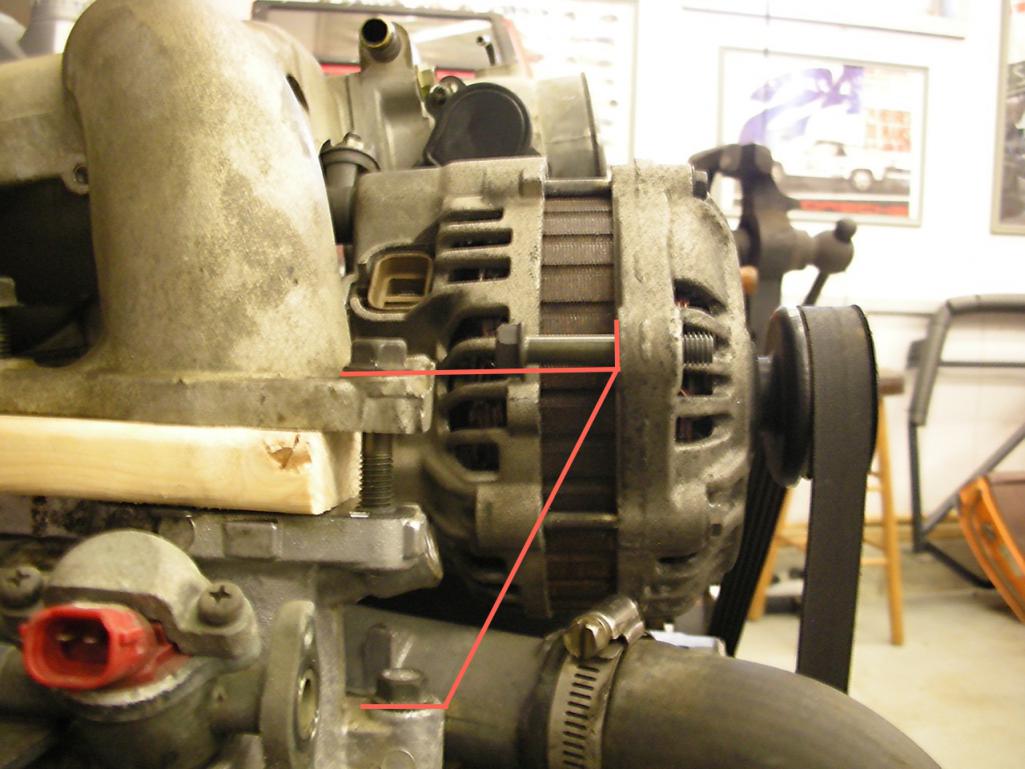
Will do the same on this side. Bracket will be made to catch the two points one down at the block and the other off the upper manifold. I will just need to finish welding, clean it up, and add it to the pile to get powder coated. The wood is my prototype spacer, it will not make it to the production vehicle. Though I have been thinking that maybe it should as a sheet of G10 Phenolic Material from USP is $1344.99  I can replace a bunch of them as the get gross, from Lowes for $1.49 in raw material. Not the correct Material for the job. I'll keep searching for a better price, and or sandwich the phenolic material between another piece of aluminum. Which is most likey the solution. As a 1/8" sheet is only $190.78 and I am sure I can sell off the extra material for other peoples projects. Or make up a bunch of EG33 phenolic spacers and sell them off, long return on my investment, lol.
Posted by: 914forme Feb 25 2015, 08:11 PM
Its been cold around here -15 the other day, and I am out of fuel for my heater
So I started working on things that I could do in the house. So back to gauges. I ordered two items, I have given up on redoing a bunch of gauges, yet I might still do one.
I need to have a speedo that works with Subaru trans.
I want a tach, with programable shift light.
I naed a fuel level gauge, I have run my 914 bone dry before
I would like a volt meter
I would like a water temperature gauge
I would like oil pressure
The speedo I solved by getting a new VDO 4" programable speedometer. It has an LED trip / ODO. Just a modern version of our old speedo. Different font, but easier to match.
The Tach, I went with a VDO Pro Eliminator tach, it has a shift light, programmable, and replayable, if I want to watch a tach needle bounce up and down. I will most likely redo the gauge face on the tach, as I don't like the huge Pro Elm lettering...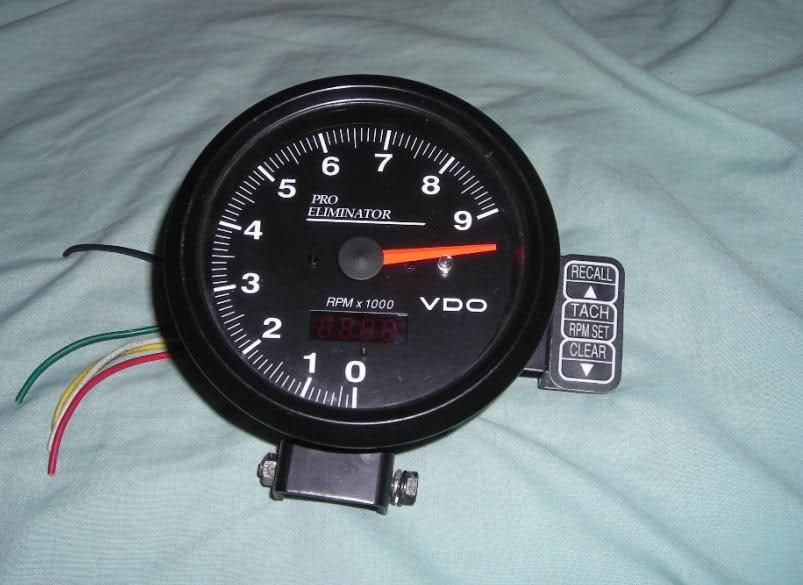
I will need to remove it from the pedestal mount. And move the function buttons some where else in the car.
I can thank DBCopper for these tips.
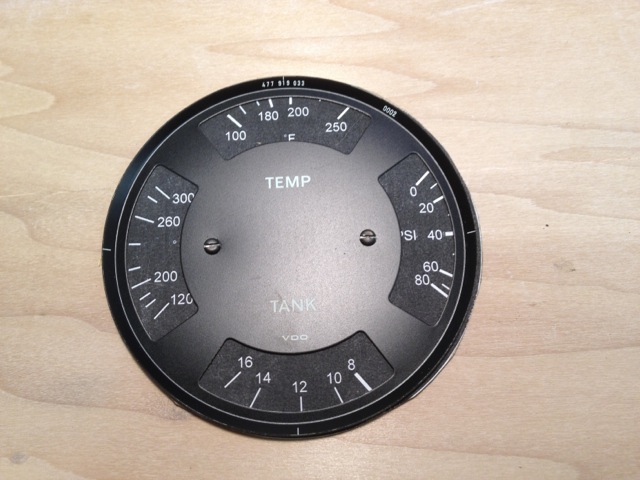
And well then I need to build a combo gauge, so here comes the 924 to the rescue. These are the basis for the build, I still need to design the plate that holds the gauge movements in. All needles will move clockwise, I know that bugs some people, but unless I use an amp meter or find other senders that cause the gauge to swing in the opposite direction. Heres the mockup of the gauge.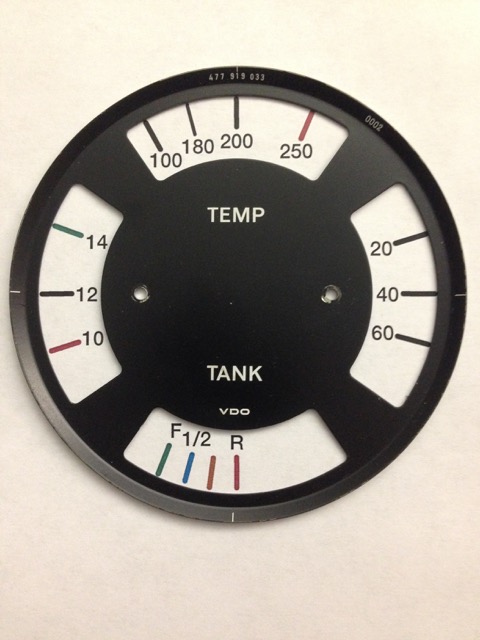
The VDO fuel gauge is setup that way, I don't like it. It's currently all digital so I can change it. Need to hook it up and see, where empty really is. I eliminated all the extra info I don't need to see.
Notification center for battery, brake, Oil Pressure, and C. E. (Check Engine) Though I could move that to the Fasten Seat Belt light in the center dash.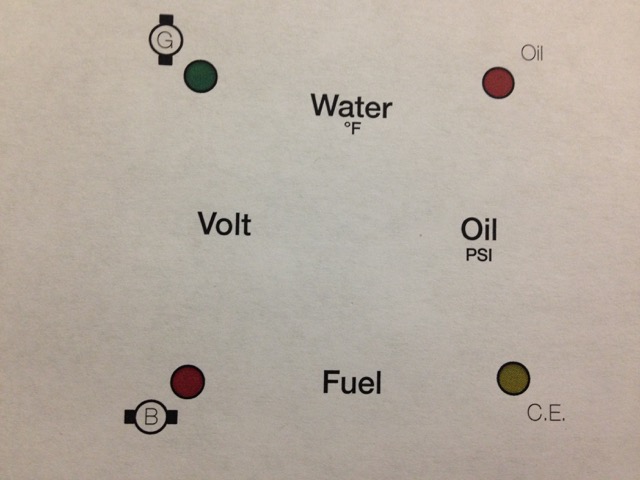
The system I am using to label the gauges, uses a foil that is activated by the toner on the page. So the design is done in reverse, so I can print it in white and other colors.
Posted by: 914forme Mar 1 2015, 01:27 PM
Old man winter did not keep me out of the shop yesterday, today he decided to pile on some snow to slow me down. Dug out 6" so far today, still more to come.
So yesterdays progress. project ADD kicks in, and I start looking at the sandblaster I have in the back of the shop. Well modified a bunch of items, and upgraded a bunch of crap. Project not done yet, still need to build a stand. I hate buying cheap tools never worth the effort to get them correct.
Sometimes I have the feeling that cheap swaps are the same way. Case in point, alternator amount. I changed my plan a little when I got an idea, very bad thing ideas are.
This was taken before I finessed the mount for the alternator and cleaned it up. so it has a little tilt to it. That has been fixed 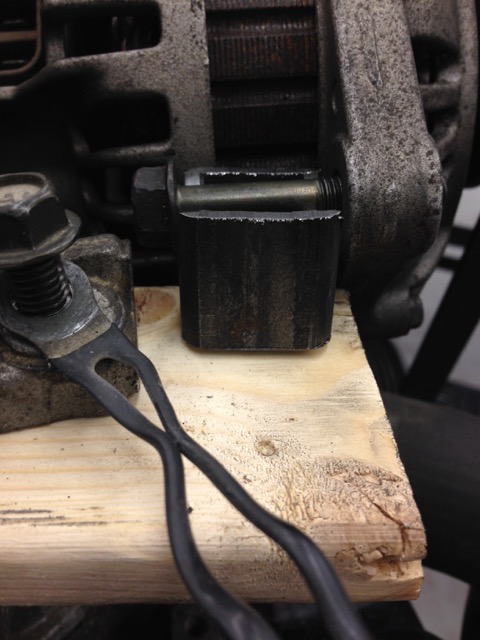
Since I am building a spacer between the lower section of the intake and the upper, why not extended it out, catch this bolt, and support it from this side.
So I finished up the bracket, triangulated it down the the left side bolt, and the rear and well it fits like it was supposed to. Welded it all up, cleaned up the welds, and now it is done until I prep it for finishing.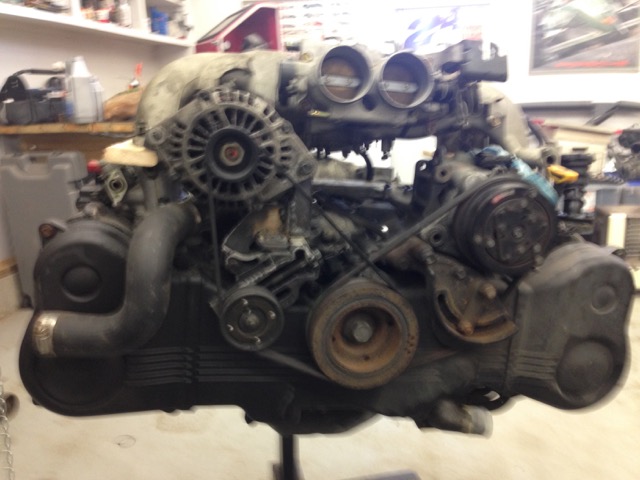
Closer shots, that is the stock SVX belt.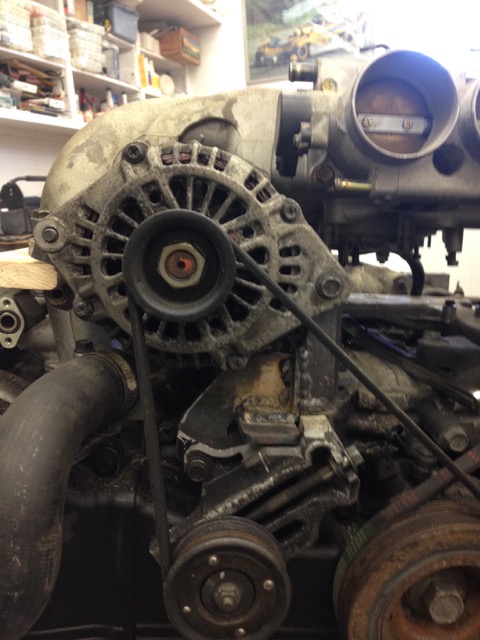
Like Fuji Engineers plan for that lug to be there.
And cross over pipe clearance, I think that will work.
So there you have it the last detail that will keep me from using the stock intake flipped forward so I don't have to cut up even more of the rear trunk.
But then bad ideas came into my head again, and I dug some TBs out I had been saving for a project.
They came from one of these.....
And this is what they look like on another H6
My plan is to get the car running with he stock intake, and mess around with these as I like the look, retro, yet modern.
And well these things are cheap, I have less than an uncle ben in 6 TBs. Each TB is 44mm at the throttle plate, and 50mm overall per each runner.
But there is a lot of fab work to b done, and well, it is a back burner project.
Project ADD get my focus back on, and keep moving forward.
I did try a mockup unit from Vintage Air, even their smallest unit, does not fit a 914 with out some modifications. Either to the unit, or the 914, I am thinking the 914! If I drop the shelf down a little this might just work!!!! Need to mark it up, and see whet might be required to be moved.
Some cutting I think it would work, but I also think other manufactures might have a better fitting system. Or I move the blower off the the side on the vintage air unit. I like there unit as its all electrical servers. That makes hooking up and breaking the system apart easier.
Then I have another idea, what if I used an under dash unit, and just built a setup around it. Heat, A/C, and then I could route over to defroster.
I know I know Renegade sells a unit, I just never liked the look of the under dash systems.
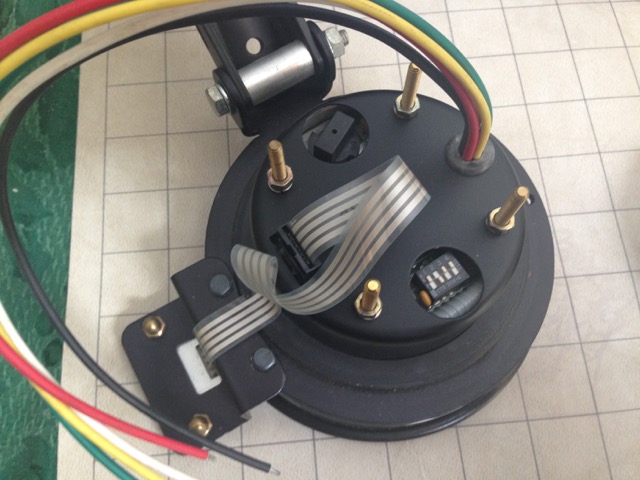
Posted by: 914forme Mar 7 2015, 05:23 PM
Works been hell this last week, so time for some 914 therapy!!!
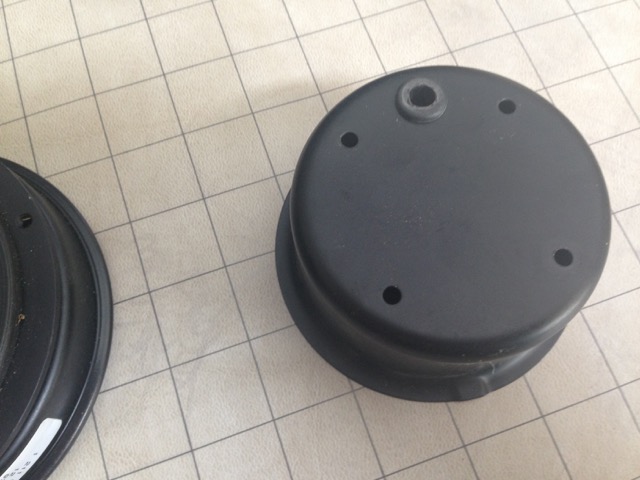
Got this in finally, and well I could not leave well enough alone, so I took it apart!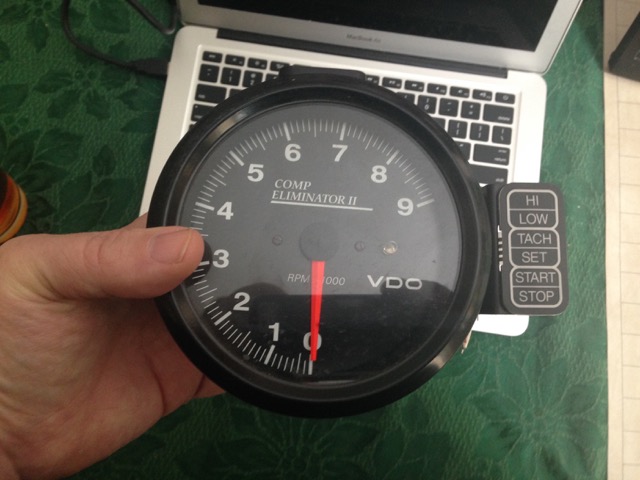
Popped the needle off, two spoons, pops right off!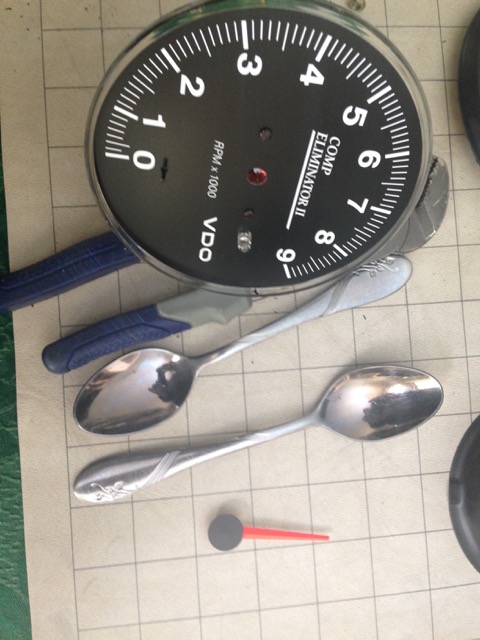
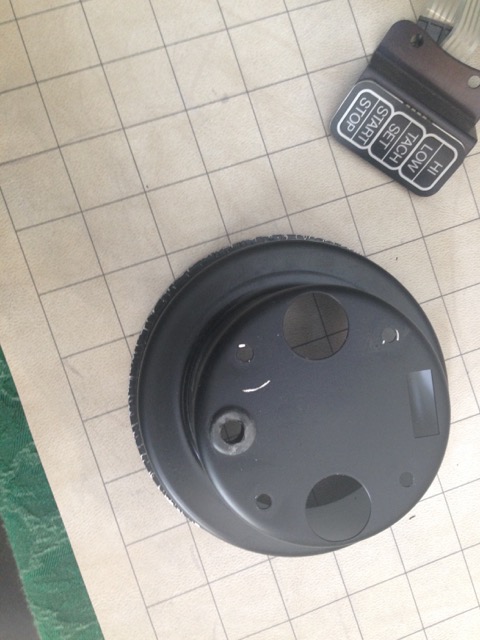
Pried the bezel off
All of this work to get to this.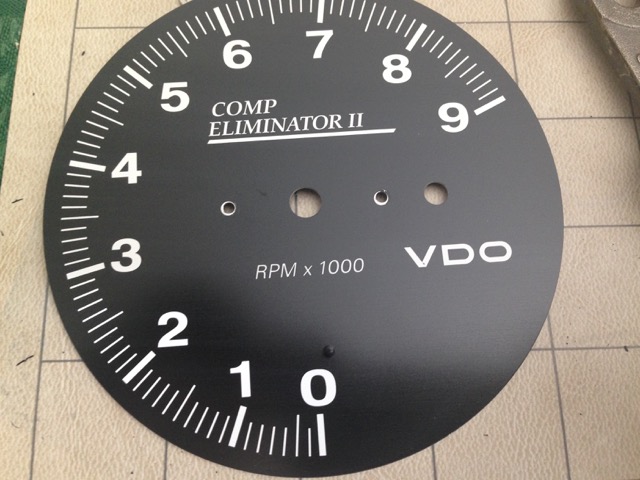
Plan is to make it look more like this.
Remove all the logos and the COMP Eliminator II
Add three LED spots for turn signals and high beam And maybe the check engine light, though Im not happy with it.
Posted by: Dave_Darling Mar 7 2015, 07:42 PM
I hope you marked the "rest" position of the needle.
--DD
Posted by: 914forme Mar 8 2015, 10:00 AM
I hope you marked the "rest" position of the needle.
--DD
Thank you Dave for bring this up, as I forgot to mention it. The easiest way to calibrate the tach again is one of three ways.
If you have access to a pulse generator, generate the pulse use a calibrated instrument to measure the pulse, hook up the tach, and gently put the needle on the running tach, in the proper position. Or you can mark it and the place the needle on once you disconnected it. Just have to turn the shaft back to the marked position. lots of original faces have these tick marks on the outs side edge where quality control hooked them up to a bench unit and did this, adjust the potentiometers, and glue them closed once it was done. Modren instruments are a little more refined than that. Older instruments have the look an feel of precision. Some have the precision of a watch maker. They can be art work with in them selves. Modren stuff is a servomotor,and a few chips, resistors, and diodes. And then the newest stuff, is a server driven, via a pulse from the computer.
On an engine test stand, hook it up with another tach, and well get it done. Not as accurate, but can be close enough
In the car, same thing. Harder to move around, stuff in the way.
Least favorite trail and error!!!
You can do this with any gauge. Just have to know its input needs and its scale, done. Even mechanical driven speedos can be calibrated by a controlled source.
BTW, if you don't know this about me, I have been working on gauges since I was 13 years old. First gauge restoration was on a 1967 CJ-5. After that I got into Karmann Ghias. I had a sleeper Ghia, used a 930 Tach, with 914-4 guts, and the Boost gauge as a fuel gauge. I had a 914 combo gauge Oil temp and oil pressure thank you 911 on the other side, and 914 speedo 150 MPH on the other. Even installed the trip reset function. 914-4 5.5 Inch steelies crammed in the fenders, with stock ghia hub caps, where the only external signs the car was not stock. But if you followed it through the twisties, you found out that its was no normal Ghia!!!! Stock 1600DP engine except a CB performance dry sump setup. My parents house was on a long up hill sweeper. Every morning, I knew where to turn off the engine and coast to the stop sign, where I would refire the engine. The dry sump solved that problem.
I miss that car, its the car I had when I dated my wife, its the second car my father and I rebuilt, this one was a rolling restoration. Family, and work got in the way, parts got sold, body had rusted away. Not many panels being made back then, and well being in the rust belt took it's toll.
After that I started doing the 904 triple gauge setups, machining the pieces was easy, laid them out in AutoCAD, sent them to a laser cutter, and bam, we had the kits. Got a local plater to do the back plates, same guy that also plated parts for the space shuttle. Silver Cadmium. Down fall was the powder coating process was still brand new, quality sucked, and then the screen printing sucked also. So I sold off what I had left to Pelican, they got the face work done, and sold the kits. I lost money on that deal.
John seems to do a great job with then now. Technology has progressed to the point now that custom work is much easier. Heck if I had heard of an ALPs printer back then, I might have a different career.
I now do this stuff for my cars, doubt I will reproduce these for anything but my own cars, as it is fun, for me. Lets me play, and engineer some one off stuff, and makes that car mine, all mine. And I enjoy the build more than the drive in reality.
But then I tend to like to hang out with the hot rod / old school racer crowd. Matter of fact, I also did this yesterday, though the gauges in this car where not impressive. The Buggati in person was
Detroit Autorama - must go to event for me!!!!
Posted by: 914forme Jun 27 2015, 11:31 AM
My wife had a 1990 Miata, I added a bunch of goodies, very clean car. 25th anniversary present for her. We where married in Dec. 1989, Miata was manufactured in Nov. 1989. It was the car we wanted back then but could not afford. Wife decided she wanted an EOS sold the Miata, picked up an EOS, son drives it more than my wife, he's home from college
Person I sold the Miata to wrecks it with in 2 months of car being sold. I buy it back for salvage costs. Lots of good parts for my parents car. Hard top, good soft top with glass window. 1994 Torsien LSD ( they don't need, they have a 1994 M editions sticks had LSD) Wheels etc.....
Start looking at it and thinking man that car can be brought back for less than my 914 project. Sell 914 and all its stuff, build Miata.
Nerd in me takes over and I do a spreadsheet over lunch.
Rebuild to stock = $3338.00
Swap in 1999-2000 engine 140HP NA in a 2000lbs car $4787.00
V6 Swap  $7138.00
Did not even price out the LS swap
Time, Stock 2 months
1.8L Swap 3 Months
V6 Swap 6 months - winter time , so 9 months before on the road
914 Swap in current state - 2 years, unless I hire out metal work and paint, then 1 year of around with bad body shop, 1 year to get it done right, and another for me to finish the swap.
Exercise talked me out of redoing the Miata. Post the tub onto a Miata forum see if someone grabs it up. I have way to much in parts for my 914 project. I have 15+ in the 914 right now, I should have never done that math. Most likely more than that if you count the number of iterations this car has been though.
Stock 2.0L
Built 1911
Built 2.0L
Built 2056
Built 2.5L never got done
Now EG33 most likely never gets done, if I don't start doing some build work on it.
Posted by: Amenson Jun 28 2015, 08:34 AM
Stephen,
I was reading your post and all I could think of was that I have a guy from Dayton coming to my house today to pick up some C10 parts and I could send a dope slap back with him to knock some sense into you.
Unless you are including the words, turbo, LS, and E85....step away from the Miata.
Focus on the glorious sounds and excellent torque that the EG33 will bring to your daily commute.
Cheers,
Scott
Posted by: Chris H. Jun 28 2015, 10:26 AM
Stephen...come back to the reservation...
DON'T worry about getting the bodywork perfect or the paint work before you get the car running and driving. Just get the drive train done and installed and do the mechanicals/rust/safety stuff.
You'll learn in the end that you like the process just as much or better than the end result. It will never be done. BTW I just learned this...
http://svxworldforums.com/view_topic.php?id=5131&forum_id=13&highlight=fuel+pressure+regulator+mod
Fuel pressure is a tad low with stock ECU settings. Adding an aftermarket FPR increases performance and solves the stall issue.
BTW we have another EG33 guy coming soon. TBA...our numbers are building! You can't leave the club now! Your insight is too valuable!
Posted by: 914forme Jun 28 2015, 05:40 PM
Scott, not to worry I talked with my wife this morning, and she promptly  me. Hey that guy could have been my neighbor, he has a few C10s littering his property. At least they are not up on blocks. BTW, how did you know the EG was going to be running E85, you reading my mind.
Chris, thanks for the tip, I hated that stumble, always thought it was part of the fuel, automatic, gear shifting program in the SVX.
I need to get the Miatas out of the shop, they are fun, but sometimes I get a little bit distracted from the goal.
And thank you both for bringing me back to reality, I need that at times.
Posted by: Amenson Jun 28 2015, 07:04 PM
Scott, not to worry I talked with my wife this morning, and she promptly
me. Hey that guy could have been my neighbor, he has a few C10s littering his property. ...
You have a good wife!
Ask your neighbor if he has a '67-'72 bed that he wants to get rid of. Preferably a short bed but a long bed at the right price would also work.
Cheers,
Scott
Posted by: 914forme Jul 20 2015, 04:18 PM
The none fun stuff..... And still more stuff to cut out.... 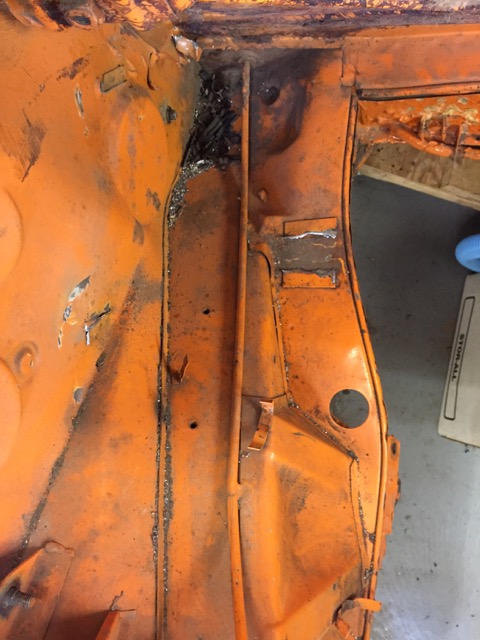
Rad opening cut out, will roll the opening over with lots of and a T bar.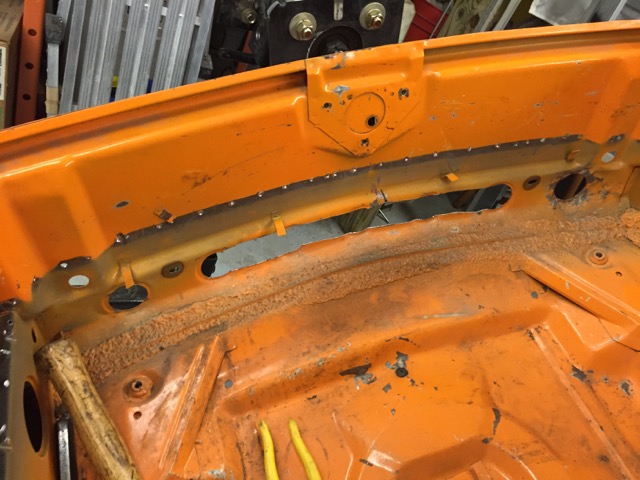
Oh and some bling came in 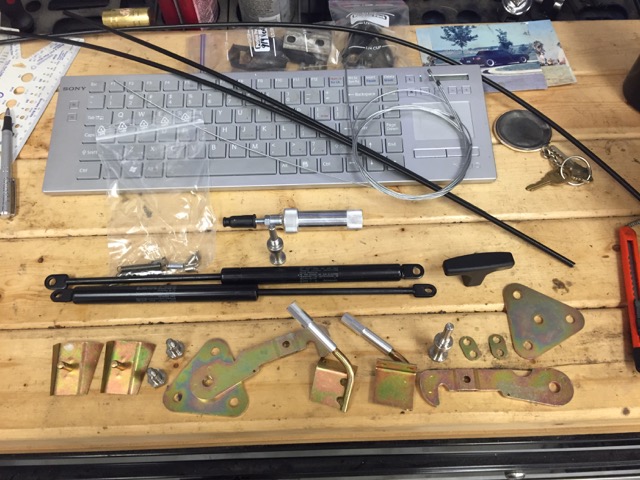
Always wanted a set of GT headlight lifts. Thanks to the Mike and his GB, I have a set
Spot weld cutter bits are getting a workout here. Removing everything I don't think I will need. I am sure I will have weld some stuff back in.
Next up engine shelf, still on how to take that one out. Right now I am thinking plasma cutter, but am open to suggestions.
Attached image(s)
Posted by: Amenson Jul 21 2015, 08:43 AM
The none fun stuff..... And still more stuff to cut out.... Next up engine shelf, still
on how to take that one out. Right now I am thinking plasma cutter, but am open to suggestions.Great progress, I really like the cable headlight parts!
As for the engine shelf, cut out big chunks the most efficient way possible and get back to spot weld cutting. I had a Blaire kit with a pack replacement cutters and burned through a few.
Cheers,
Scott
Posted by: 914forme Jul 28 2015, 05:42 PM
Hmm, so I was reading the ForSale ad for the RS, sad to see it go, I am sure Joe has is reasons. And he mentioned he was giving it a redo to make it less unique. All in hopes it will appeal to the crowds and sell quicker.
Well, I popped the question and ended up with these, love to have a couple other parts but I fear they will be gone before I save the coin to grab them.
Thank you Joe, should of had you sign them or something.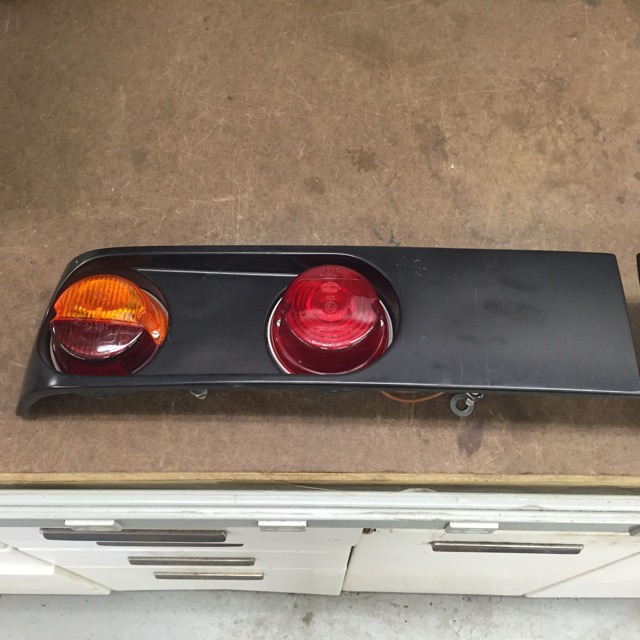
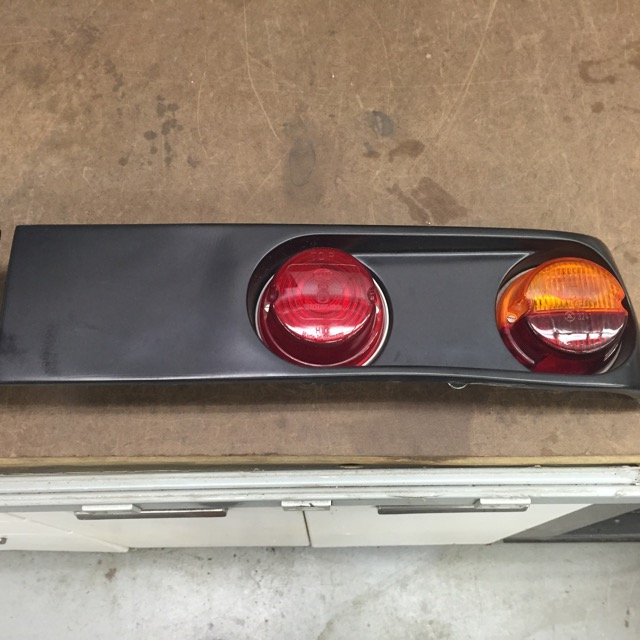
Oh real Hella Lamps 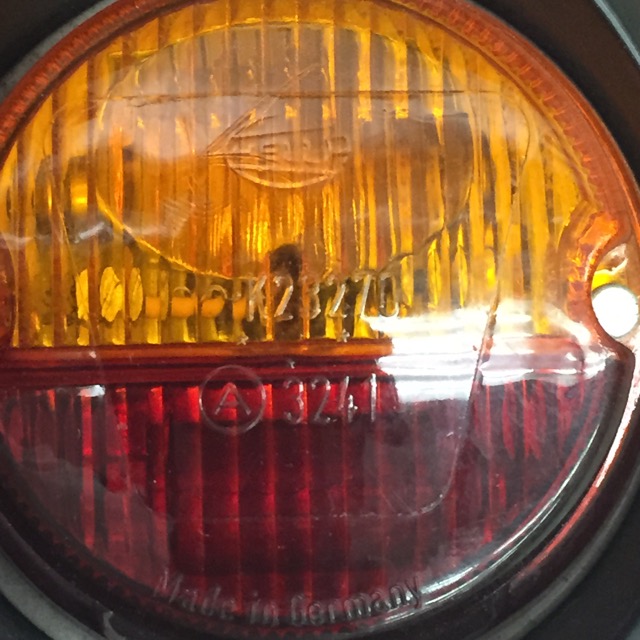
And test fit in the car: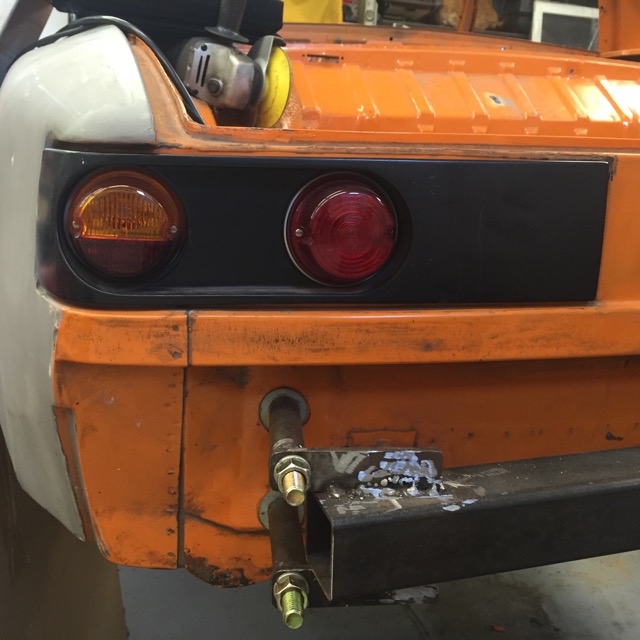
All boxed up now and on the shelf, need to get back to cutting up the car. Also spending way to much time reading http://forums.pelicanparts.com/porsche-914-914-6-technical-forum/632760-last-new-914-6-gt-project.html over on pelican.
Have not made it to the end, I stumbled into looking for an idea I remembered from Jon Lowe's old site. Now spent part of the night studying very page in detail, I am half way done..
I forgot I met him back in 199? at the Savannah HSR race, meet Jon and Nancy Lowe down there, hung out with the Brumos crew, drank Hurley Haywood Cola, thanks to Bob, and had a great time. And then this guy showed up and took pictures of every square inch of that car. Im guessing my foot is in at least one of his shots. Looking over his pbase site I see all the pictures and remember the car well. That was a great weekend at the races.
Posted by: 76-914 Jul 28 2015, 06:56 PM
About time that you got busy again.  I like those tail lights, as well. Who sells them? I looked at the same Vintage Air set up until I was blue in the face. I really wanted to use the existing face plate with their adapters, as a controller, but I ran into the same thing as you. About a 1/2" too tall to fit and I didn't want to start cutting that area out at this stage. Their "slim line under dash unit" with heat looks OK and can work with a console if you trim the top of the console down about 2". I also saw these Chinese AC/Heat units for $70 shipped. 12"x12.5"x4". Misery loves company and I could help but laugh as I read thru your ADD exercises. Jesus H Christ, ADD ADDs lots of hours to a project, doesn't it? Ask me how I know. I've got to go now. Something shiny just flashed before my eyes.
Posted by: 914forme Jul 28 2015, 07:37 PM
Not sure the guys name, I can't retrieve it currently. John I think, one of the Mulholland racers. Now that will drive me nuts. John Hall? Dang it, this drives me crazy, I can see his build thread like its in front of me. He owns the rights to the light buckets, when they came up, I had to grab a set. the other pieces I want to grab the carbon fiber deckled are gone I knew that deal would not last long!!!
Chris also has a set on the 914R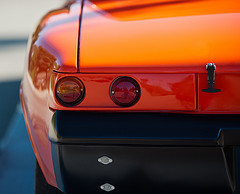
That under dash unit, gives me an idea, I might be willing to cut that one up, as it is pretty easy layout. Replace the vents with ducts for the dash vents and stick a couple in the dash, or center console and be done. Thanks for giving me another path to run down.
Posted by: mepstein Jul 28 2015, 08:31 PM
I thought craig at camp914 had done the RS tail light at one time. Jeff hail also used a set in his build but I think he made them from scratch.
Posted by: 914forme Jul 29 2015, 05:41 PM
Place called AR Concepts seems to have done them, thats what Chris has in his car.
http://www.914world.com/bbs2/index.php?showtopic=110845&hl=911R%20taillamps&st=0
So your guess is as good as mine, and thank for the name reminder.
Posted by: 914forme Jul 31 2015, 06:18 PM
Got the wrecked Miata out of the shop, hoping the guy coming down takes it home tomorrow, we will see.
After doing a few other things I started working on the 914
Started cleaning all the adhesive off the targa bar. And ran out of 3M adhesive remover Add that to the to order list.
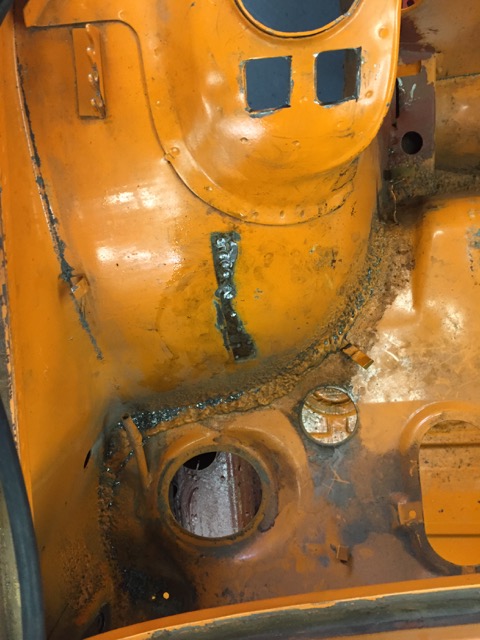
Worked on cleaning up the clutch slave cylinder hole.
Before, I scribed the line.
And After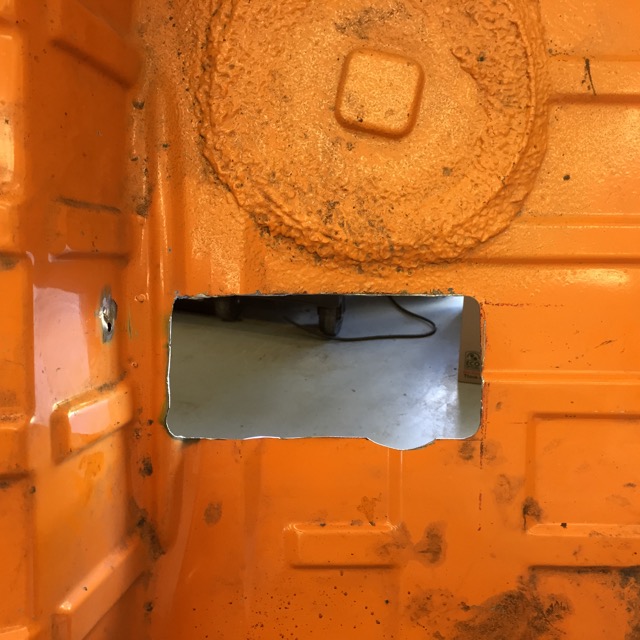
Flip the car over and started cleaning up old weds , and cutting out not needed stuff. I welded all this stuff, upside down, never cared about how it looked as long as I got on track.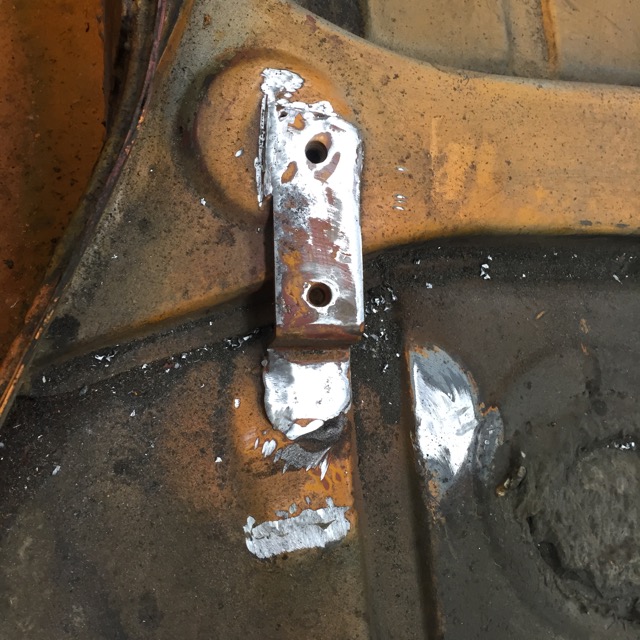
I have been trying to get this dirt oil, grease, tire rubber messed clean up. Anybody got ideas on how to clean this crap, so I can epoxy prime it?
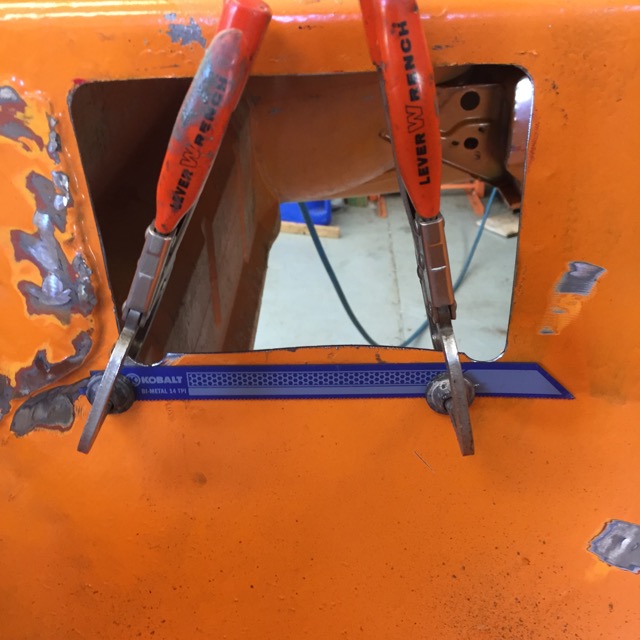
Started cutting out the engine shelf, my body saw, needs more power!!! I do like the control it gives you.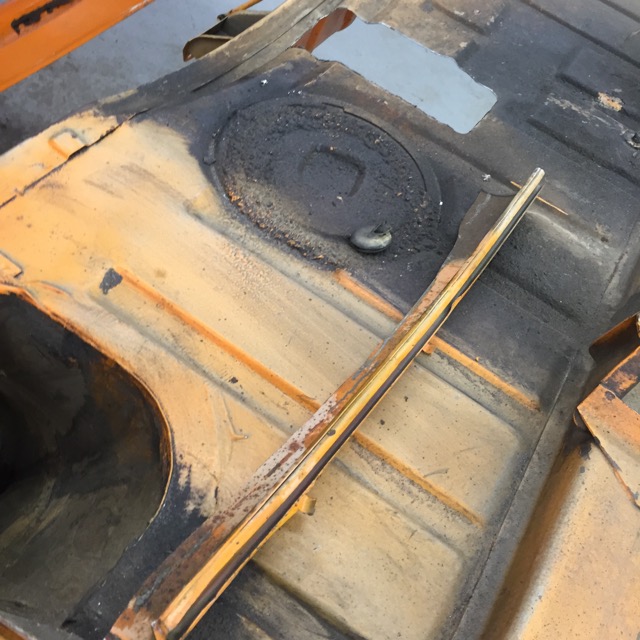
[attachmentid=510549]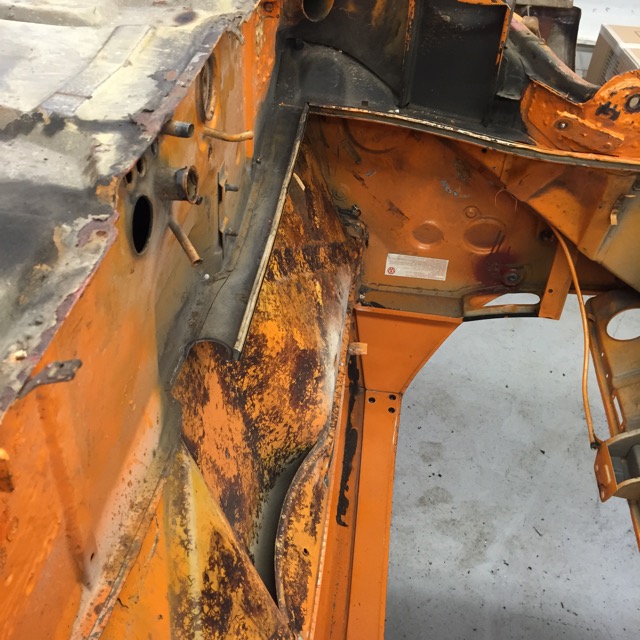
Thats it until tomorrow, can't wait to spend another day in the shop! Its like Im getting a vacation. Forgot all about work today, thats a very good thing, love my job, just need a break so I can go back refreshed.
Attached image(s)
Posted by: 76-914 Jul 31 2015, 06:42 PM
How close is your starter terminal to the chassis. I could never locate the starter that has the terminal at the 9 o'clock position and mine was too close to the chassis so I opened that hole up. I don't know if this will be your situation or not but it's something you might encounter.
Posted by: 914forme Aug 1 2015, 04:35 AM
Yes thank you, I think I tested that, but maybe I should just plan ahead, and raise that section also. Be easier to do it now rather than latter.
Posted by: 914forme Aug 1 2015, 05:34 PM
First of Miata sold, one less temptress in my life.
Got to work this after noon, started taking out the engine shelf pieces, just needs cleaned up not with a grinder. Need to order more disc for that too. 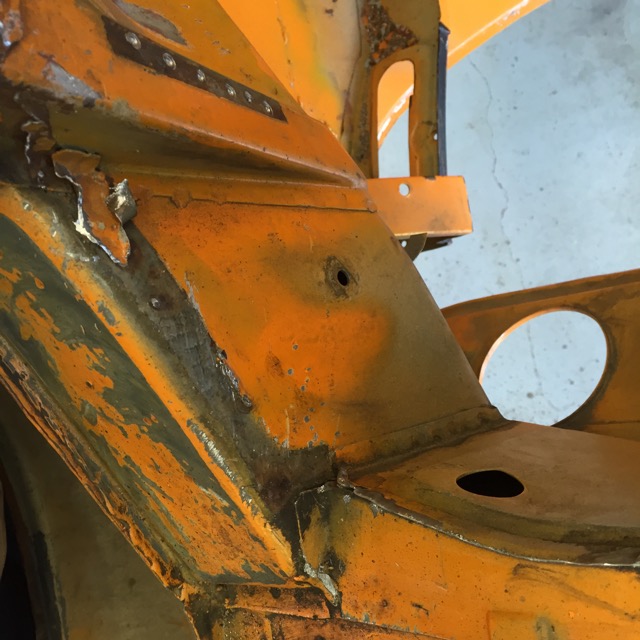
Oh no, I busted an old hell hole repair loose, investigate that latter. No reason to open that can of worms just yet.
Opened up the holes for the radiator exhaust exits.
My rad opening is 26.25 sq. in. These exits combined are 67.5 sq. in. Need to re-enforce the opening, add some mesh, and then I am thinking about Louvers just to keep crap from trying to come back in. Over kill I am sure.
Started with a template.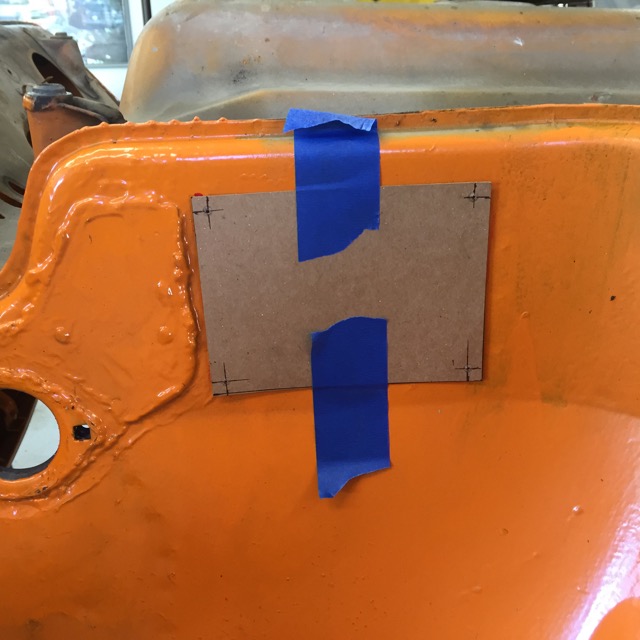
Drilled my pilot holes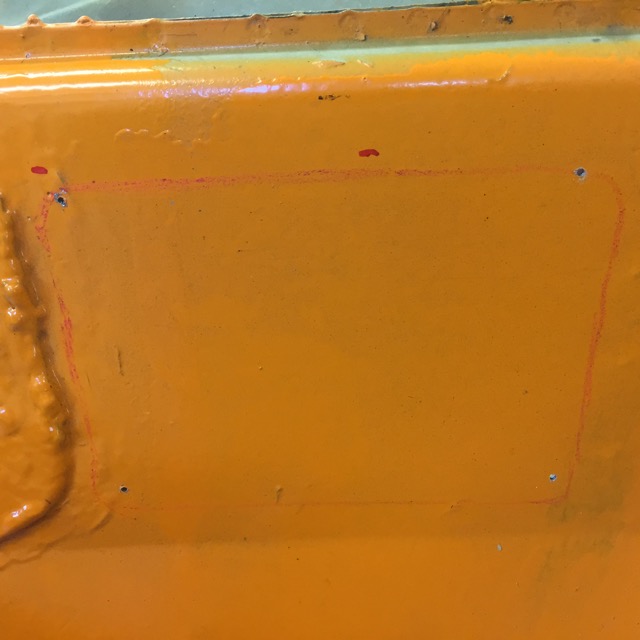
wanted a 3/4" radius on each of the holes, started to use my hole punch, but grabbed the uni-bit instead. 3/4" holes like butter.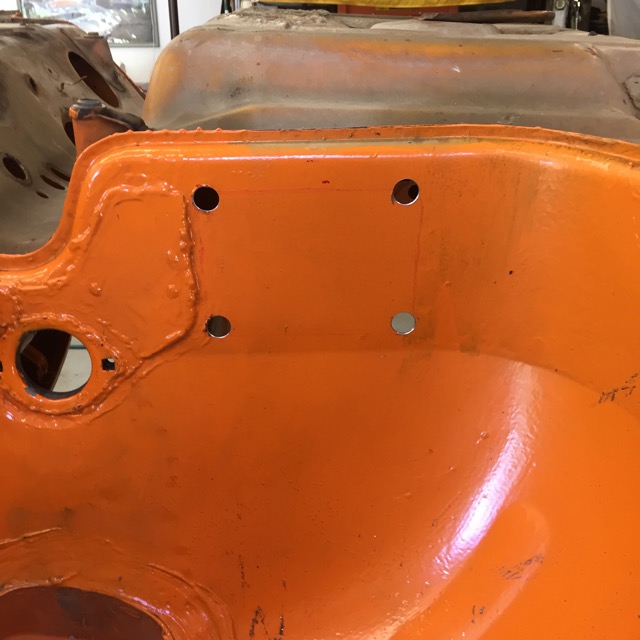
Now play connect the dots with the 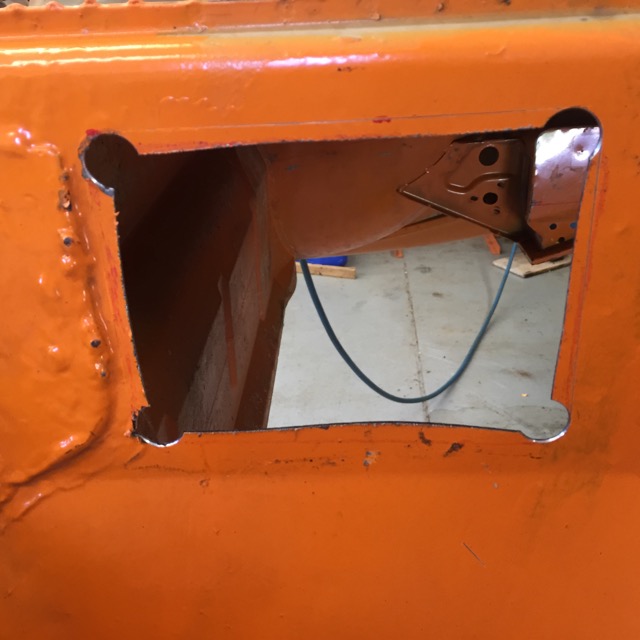
And this might be a helpful tip, after trying to get a 12" ruler in the hole to scribe the final trim line, I deceided that a sawmill blade will do the trick as a guid, and it is slightly flexible. 
cut all the lines then ground them down to the scribe line.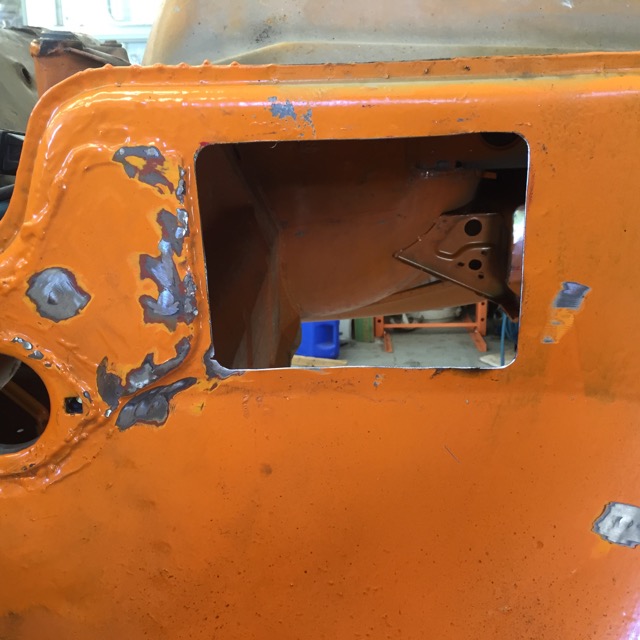
Rinse and repeat on the other side.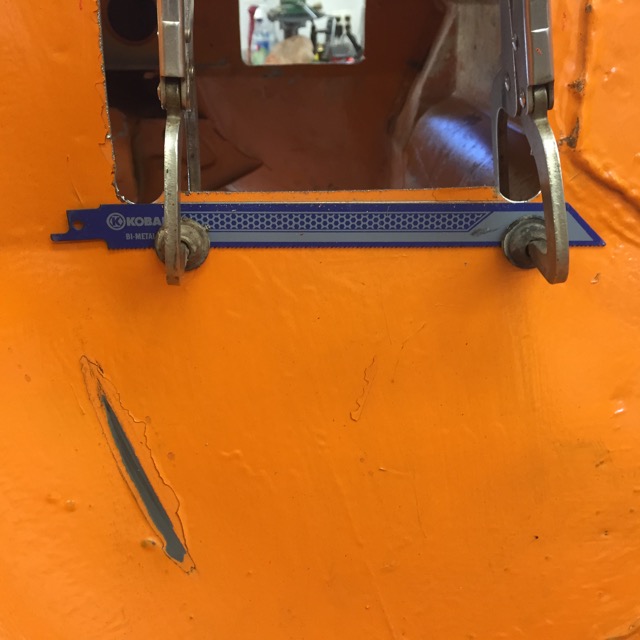
the sign of todays progress.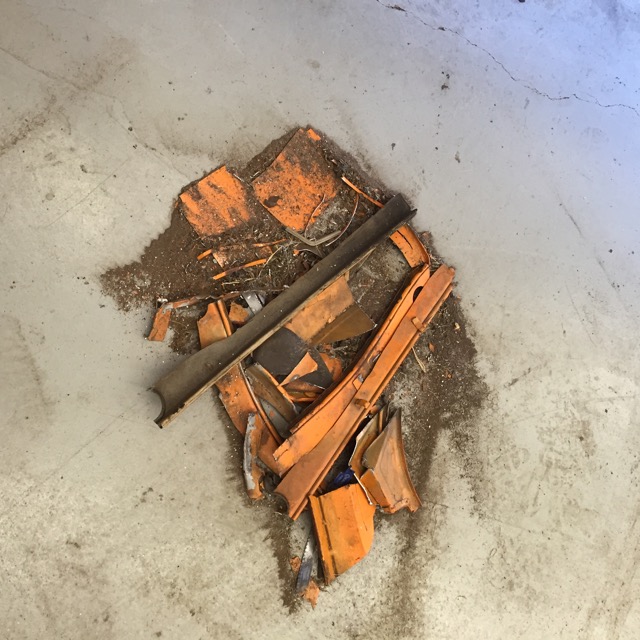
An now for an idea, well two really.
Pink idea:
Adding 14a of steel down the inner log to catch the inside box. I would llove to run it into the cabin, and tie into the egmann kit. Any benefit?
Blue Idea. Adding a semi jointed rod from the ear up to the seat belt retractor Nice stiff area of the firewall, maybe it will work.location. Thoughts, open to suggestions.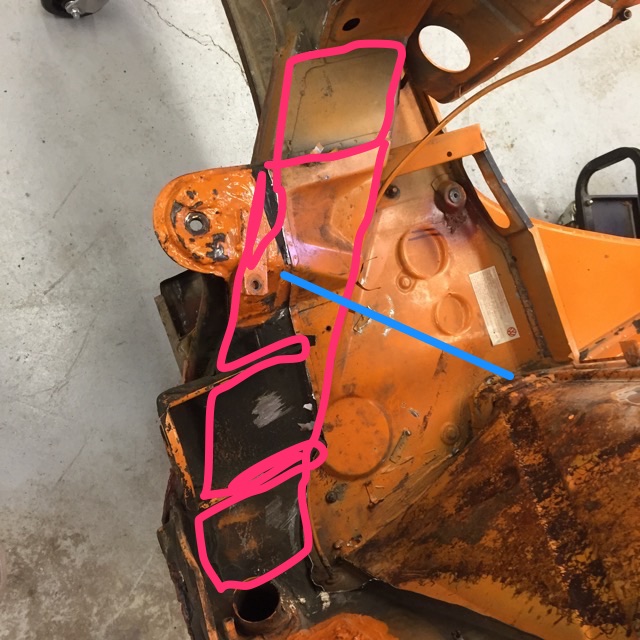
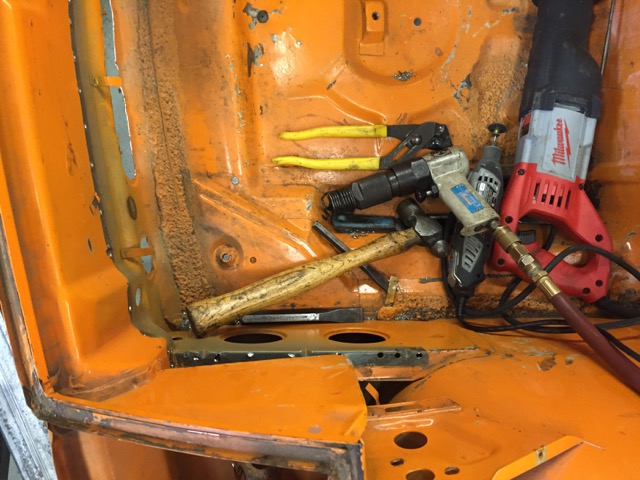
Posted by: 914forme Aug 2 2015, 05:50 PM
Finished cutting and grinding all the engine shelf bits out.
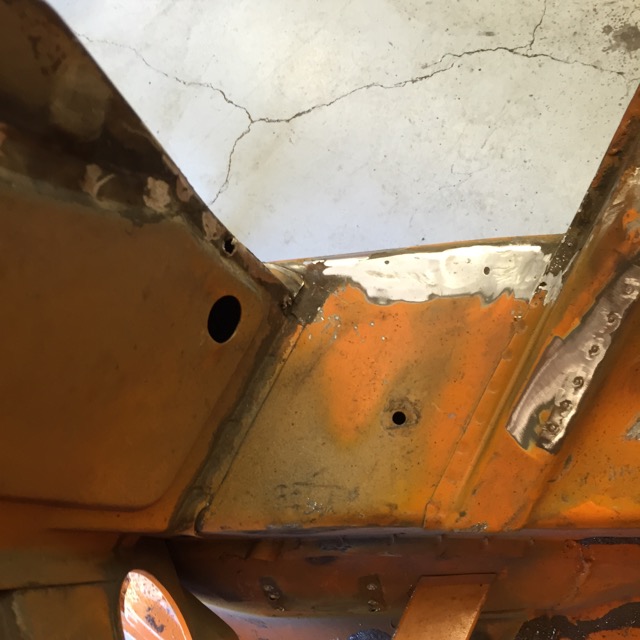
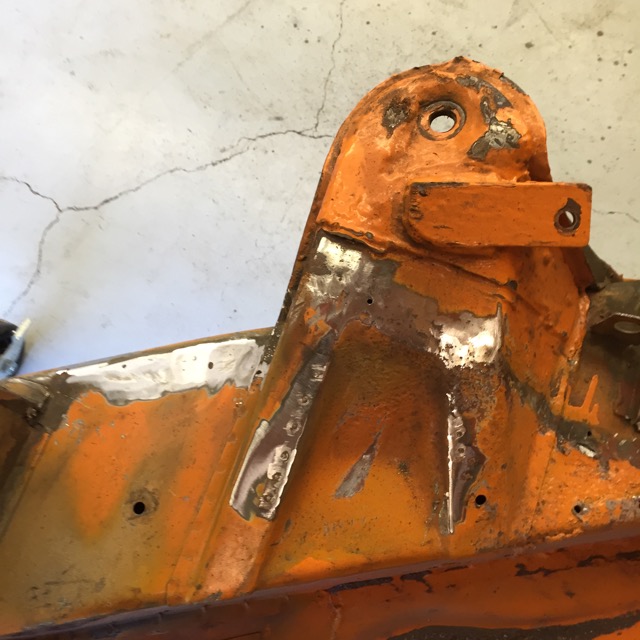
Trunk Pivots, have been fixed multiple times.
May Just order these and save myself a future frustration.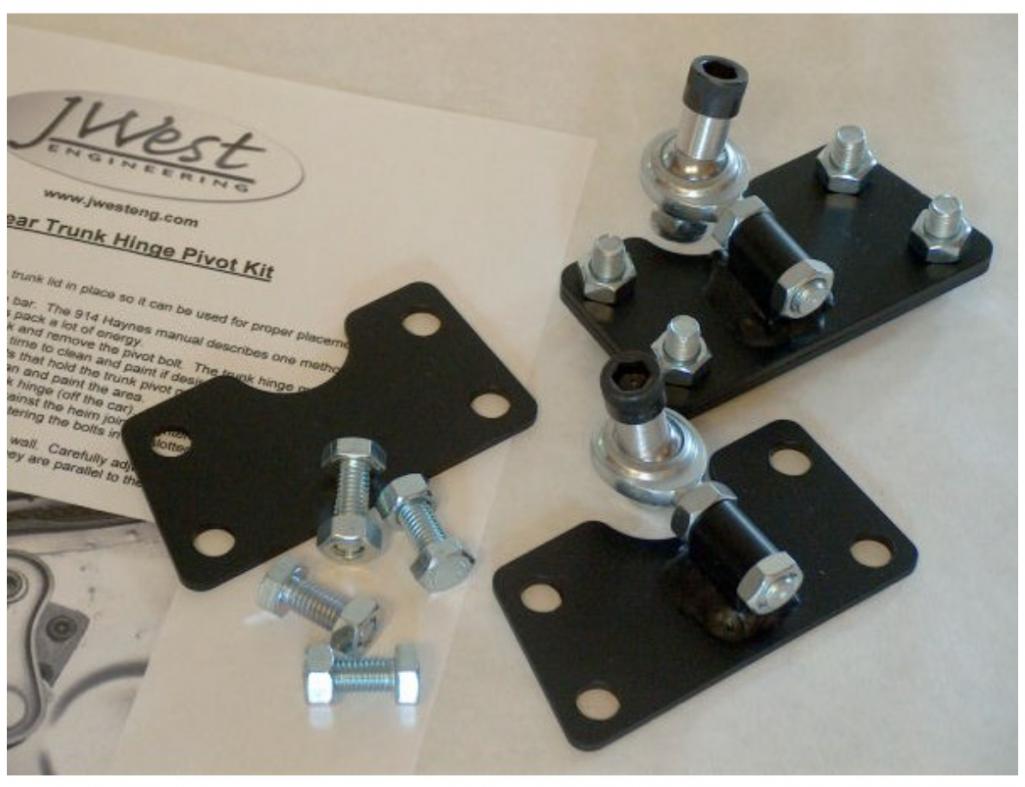
Next up Hell Hole repair, Chassis stiffening for the 3rd go around, and well lots of grinding on old race car additions. Never had to look pretty just had to be functional and strong.
BTW, Steam cleaner with a mixture of Zap Industrial De-greaser and distilled Water will do this.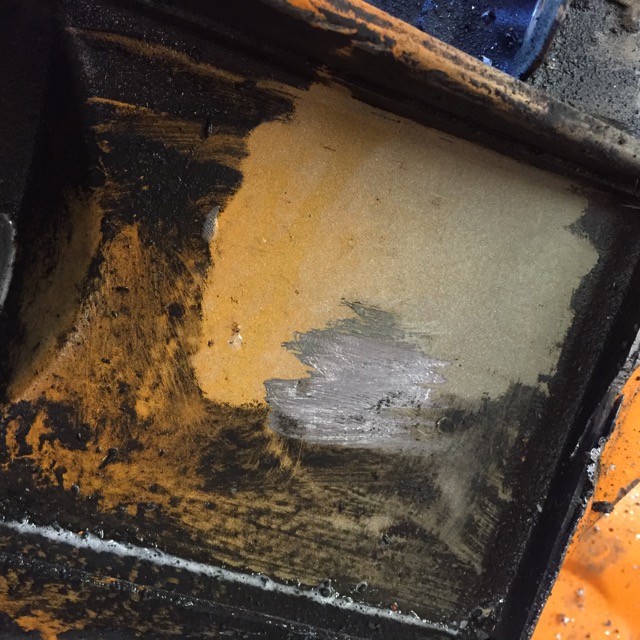
Now to do the rest of it, once I have all the metal dust cleaned up.
Attached image(s)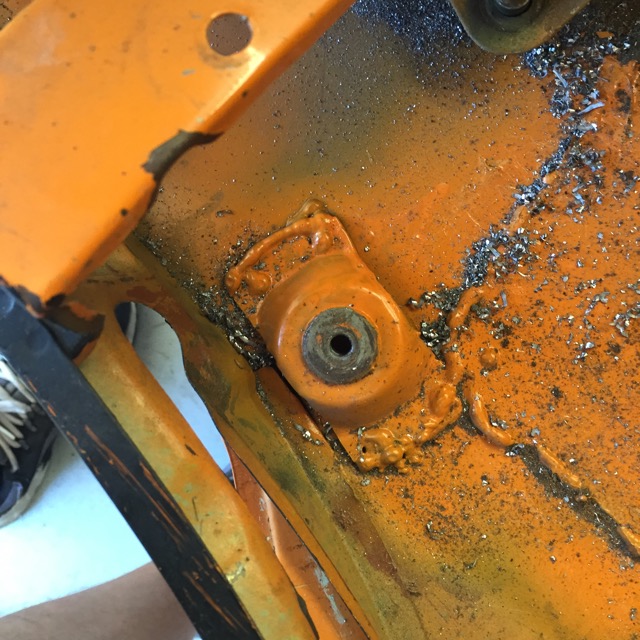
Posted by: Andyrew Aug 2 2015, 11:13 PM
An now for an idea, well two really.
Pink idea:
Adding 14a of steel down the inner log to catch the inside box. I would llove to run it into the cabin, and tie into the egmann kit. Any benefit?
Blue Idea. Adding a semi jointed rod from the ear up to the seat belt retractor Nice stiff area of the firewall, maybe it will work.location. Thoughts, open to suggestions.
Blue idea will give you more strength than the pink idea...

Posted by: Amenson Aug 3 2015, 07:54 AM
With all that cleared out of the way there is plenty of room for a turbo now!
Posted by: 914forme Aug 5 2015, 07:06 PM
I have my plans still trying to figure out what I want to do. In reality the turbo is easier than the supercharger I was thinking about. I could mock it up, and do one, a twin scroll might be the way to go Biggest issue is compression E85 helps with that, as would methanol injection. The intercooler gets to be an issue.
Air to Water
Air to Air in engine compartment, maybe even STI sprayer
Air to Air like Marty's car, in the rear trunk. I would like to have trunk space as I would like to drive the 914 all over the US and Canada.
Also would like to be able to ice it down, for auto-x and track events. Or if I feel like seeing if I can get into the 10s on the strip.
I think I could run the stock engine with a low boast level as long as I used tricks to keep the pistons from melting.
Okay back to progress.
Last night, I spent cleaning, and mocking up cuts, and
Steam cleaner did an excellent job
.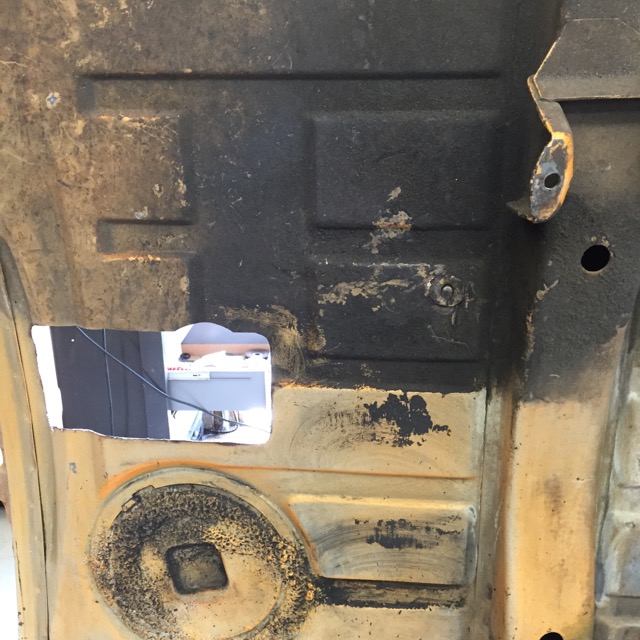
To use the GT head light cable setup, you have to cut an additional slit in the head light bucket.
So I marked up one side waiting on the water to come up to steam. Used the plate on one side to set my inner dimension.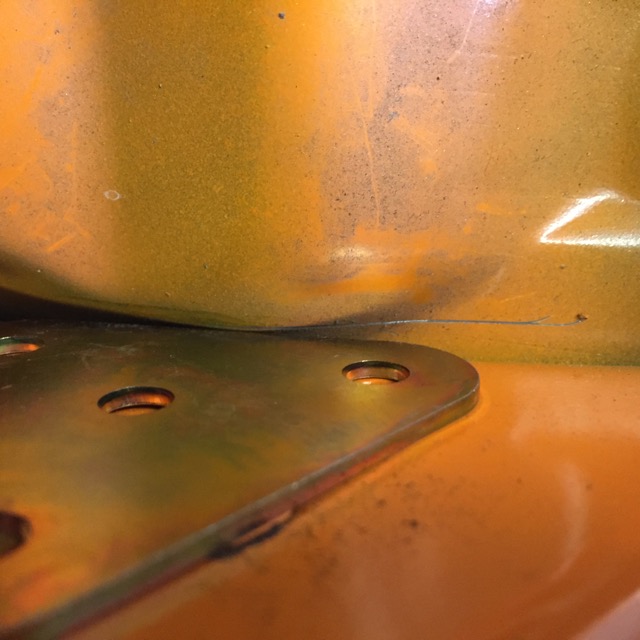
Used a Nut to set the other side, it just wider than the bolt that holds the latch mechanism.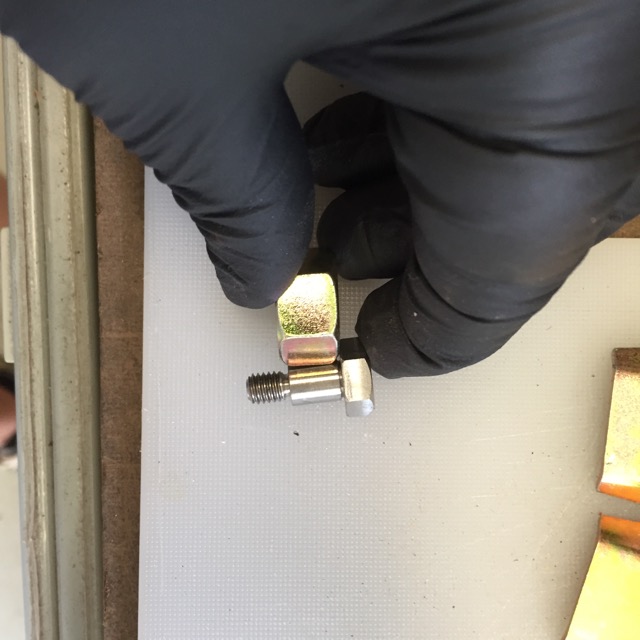
Scribed the final line, ~3/8" wide, make it easier to round the corners.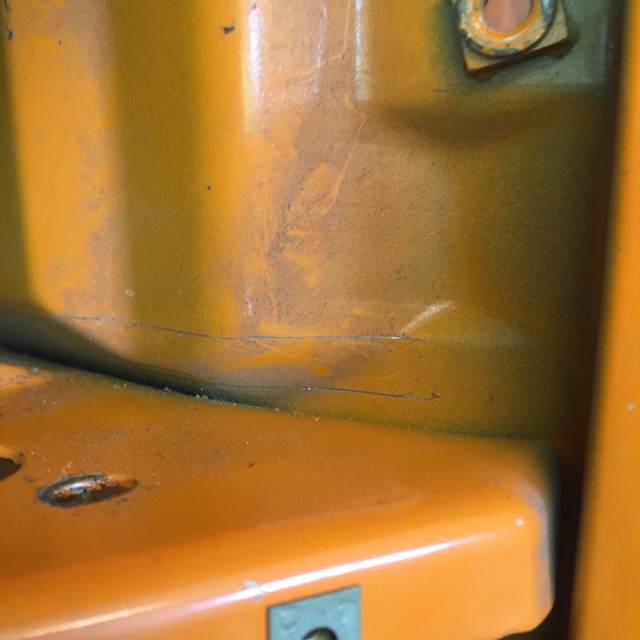
I then steamed some more.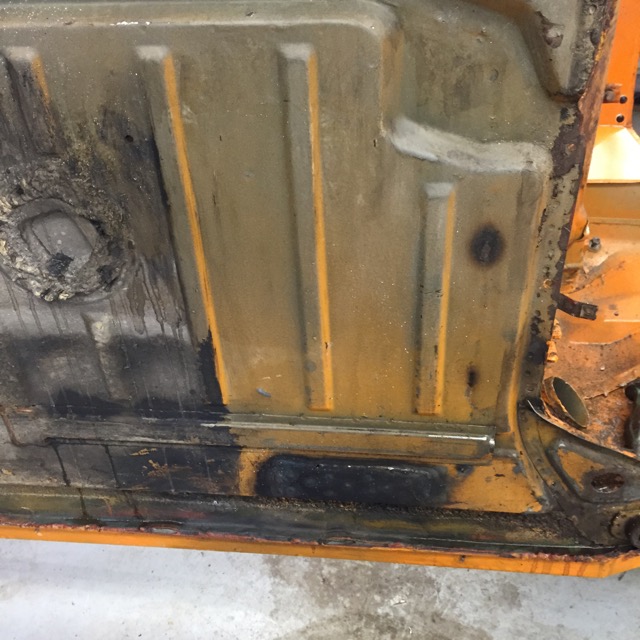
I then worked on the triangles getting them more in shape than they where.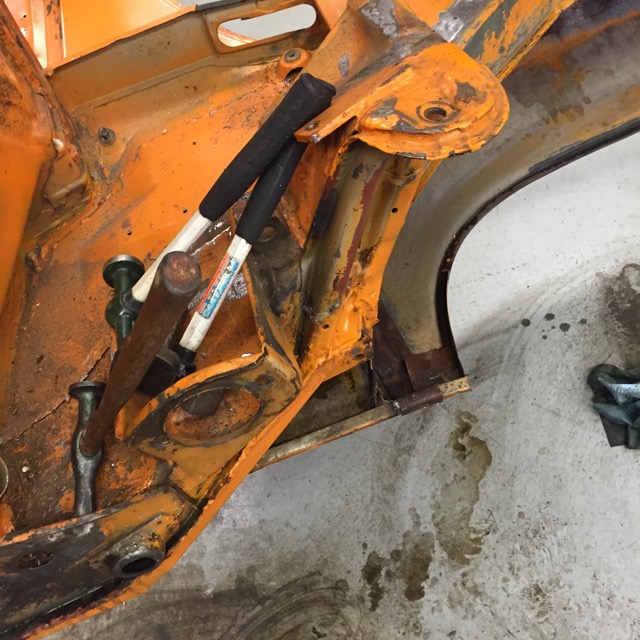
Thats it for now, off to read up on twin scroll turbos. :evil grin: Also thinking that maybe a pressure washer blast, would get me part of the quicker. The caked on stuff steam does a good job on, seems like a waste to wait for steam, when part of it is just years of dirt. I guess I could run it into the big city, and get it steamed that the Freightliner dealer.
Attached image(s)
Posted by: 914forme Aug 10 2015, 06:28 AM
Weekend and back into the shop, long slow process of cleaning the bottom is done, at least round one. Need to fix all the surface rust, scuff all the paint, clean it again, and shot some epoxy primer on it. Then Wurth, and then a color coat, 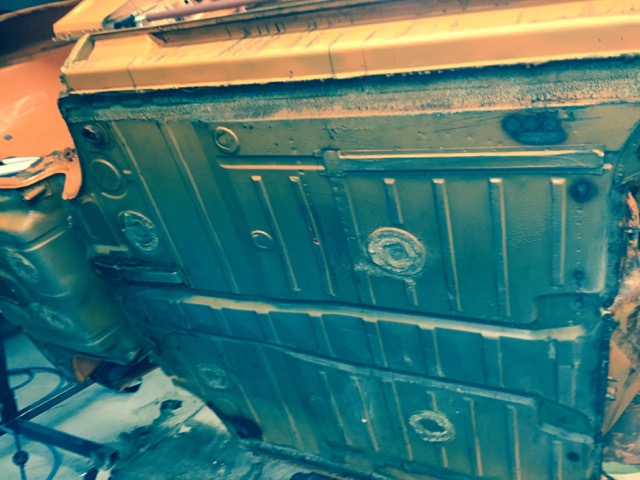
I also started work on the hell hole repair.
Templates are a good thing.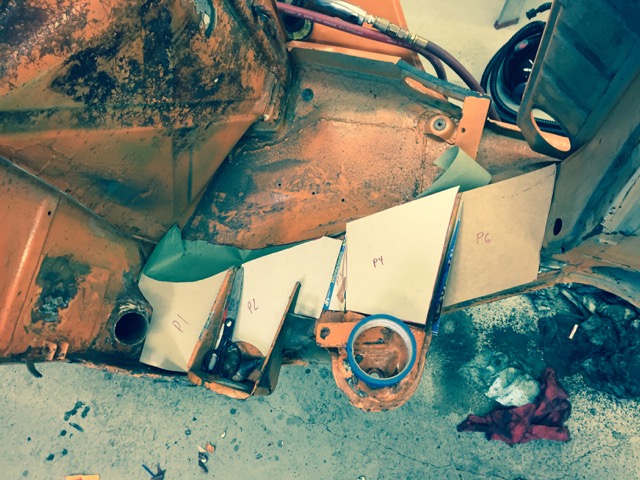
I will be doing something slightly different I am going with plan "a" above to fix the hell hole region. I will do hybrid plan "b" but move the pickup to shock tower area. More on that latter
Other items done, but no picture documentation.
GT headlight latch scribed on the other side.
Spent most of Saturday driving around swapping parts, meeting people, and having a good day of it. Thank you Eric , and thank you Mike for the sheetmetal! Now to see if I can put it to good use.
Posted by: mepstein Aug 10 2015, 06:57 AM
Are you removing the engine bar motor mounts.
Posted by: 914forme Aug 10 2015, 07:15 AM
Nope, using a Small Car Mount and an early -4 engine bar. With a few other tricks I have moved the engine forward. So the only cut I have currently is the trunk for the clutch slave.
I need to dimple the firewall if I want to run the stock air snorkel with the flipped stock manifold. That part is easy.
Now using the small car mount did give me a few other issues though. Mainly all the oil filters I had on hand did not fit. I'll get to that, a little latter. Not a huge deal as I will most likely add a remote filter, and have to figure out how to incorporate the Accusump anyway.
Posted by: Chris H. Aug 12 2015, 09:29 PM
With all that cleared out of the way there is plenty of room for a turbo now!
Speaking of turbo'd EG33's...anyone seen this nasty thing?
https://www.youtube.com/watch?v=9dBql7tSIts
Looks like it's pretty well done. He cut the middle of the intake and turned it 180 degrees so it would sit right. Rewelded it at the 6 "star" points.
Posted by: jd74914 Aug 13 2015, 01:10 PM
Speaking of turbo'd EG33's...anyone seen this nasty thing?
https://www.youtube.com/watch?v=9dBql7tSIts
Looks like it's pretty well done. He cut the middle of the intake and turned it 180 degrees so it would sit right. Rewelded it at the 6 "star" points.
It's quite the car; it runs a Syvecs ECU and as far as I know it was the first DBW EG33. The guy who built that car, Simon Roe (?) was a English tuner who died last year IIRC.
Look up Andy Forrest. He has a 1000hp 3.6L EG33 time attack car which is quite interesting as well.
Sorry for the hijack.
Posted by: 914forme Aug 13 2015, 07:13 PM
Speaking of turbo'd EG33's...anyone seen this nasty thing?
https://www.youtube.com/watch?v=9dBql7tSIts
Looks like it's pretty well done. He cut the middle of the intake and turned it 180 degrees so it would sit right. Rewelded it at the 6 "star" points.
It's quite the car; it runs a Syvecs ECU and as far as I know it was the first DBW EG33. The guy who built that car, Simon Roe (?) was a English tuner who died last year IIRC.
Look up Andy Forrest. He has a 1000hp 3.6L EG33 time attack car which is quite interesting as well.
Sorry for the hijack.
No problem on the

Andy Forrest's engine is most likely a EZ36. Nice engine, would love to have one, but will stick with the EGs for now, or until I blow them all up.
Subaru six turbos are all good to me. Andy's car is crazy fast and setup very well.
Posted by: mgp4591 Aug 13 2015, 08:52 PM
Speaking of turbo'd EG33's...anyone seen this nasty thing?
https://www.youtube.com/watch?v=9dBql7tSIts
Looks like it's pretty well done. He cut the middle of the intake and turned it 180 degrees so it would sit right. Rewelded it at the 6 "star" points.
It's quite the car; it runs a Syvecs ECU and as far as I know it was the first DBW EG33. The guy who built that car, Simon Roe (?) was a English tuner who died last year IIRC.
Look up Andy Forrest. He has a 1000hp 3.6L EG33 time attack car which is quite interesting as well.
Sorry for the hijack.
No problem on the
Andy Forrest's engine is most likely a EZ36. Nice engine, would love to have one, but will stick with the EGs for now, or until I blow them all up.
Subaru six turbos are all good to me. Andy's car is crazy fast and setup very well.
If you check out the engine, it's a poked and stroked EG33- I don't know if the EZ would handle that type of boost whereas the EG is fairly bulletproof for wild mods like that. All that stuff is fun to watch but the driveability goes right out the window- remember, the more boost you have the shorter your fuse is!

Posted by: mepstein Aug 13 2015, 08:59 PM
I'll be pretty happy with the stock eg33 - hp. 3X more than my stock '71.
Posted by: mgp4591 Aug 13 2015, 10:29 PM
I'll be pretty happy with the stock eg33 - hp. 3X more than my stock '71.
Even mild mods to your stock 3.3 will produce big results. A bigger TB along with larger injectors (I'm thinking 370cc) along with less restrictive exhaust and a tuned ECM will produce 300 hp fairly easily. All with the same reliability and mileage- if you can keep your foot out of it! That's a comfortable range for me...
Posted by: 914forme Aug 14 2015, 03:14 AM
Big injectors come fairly easy, I all ready have a set, forgot what car they came from. Nissan I think, well documented modification.
Bigger MAP is also an easy mod. Again a Nissan product.
Exhaust is the pain, and I contend it will only do you little good, because the cams are the limiting factor on this engine. You can spend the money for cams it will really bring this N/A engine up to mark. And yes the EG is built like a tank, 7 full Mains.
I read the write ups on the Green Car above. Not of Forrest's car. For me drivability is key. Low boast does put a bandaid on the cam issue. And as Scott says you got the room do something cool with it. A turbo also cuts down exhaust issues. Yes I have to build a custom header, that was already in the plans. That little spinning impeller helps knock out a lot of noise, which means I might be able to reduce muffler sizes and gain that all to critical item of space in the back of the 914. With the Subaru transmission space back their is still at a premium. And you loose the capability to use a larger Muffler like a 911 banana, or even sport style. at least on my car, even wit the engine being pushed forward as far as I could go.
Here is the key for me, I will do this in baby steps anyway. Stock EG3.3 with flipped manifold will go into the car. I will have all the lines ran for things like interceding, Larger Fuel, lines, and the like. Planning ahead. The basis for all the additions will be their, I can take my mockup engine and build it. Maybe as an N/A engine with Cams and all the tricks. 300HP N/A running on pump gas, or more on E85 would be a very nice 914 to drive around in, and especially on the auto-x. Do not want to get out of balance.
But you all know the power bug gets to people. And once you have 225HP, you get used to it. So 300Hp seems like a good step, you get used to that. Pretty soon, your thinking this car needs 350, 400, 500, 650, 800, 1000.
It is a slippery slope I have been down many times.
I drive TDIs as my daily driver cars. The one before this one was an insane built car. Still got 45 mpg as the day was long. But in the end I had a tune so wild, my wife was scared to drive it. I could light them up in the first 3 gears. If I got stuck in stupid traffic, the thing was a bitch to drive stop and go. As it would load up. So you would have to build enough space to let it rev a little. Which meant I was laying 11s every time traffic started to flow. Not to mention, the huge puff I would leave behind. Made me look like I was a total ass of a driver with road rage issues. I was not, just trying to keep the car running correctly. That last iteration of Jetta TDI ran a custom Malone Tune, huge hybrid turbo,DC auto front intercooler, only one they built for a 6-speed TDI. European PD 150 intake parts, cams, and injectors etc. And a full 3" exhaust that was a straight pipe. Dinky on the build was only 245HP, with a TDI its all about torque, I was at almost 550 FtP with boast pooping up, at 35PSI. We cranked the boast up to 45 for a while. Car was dysfunctional! Don't even know the kind of power I was making at that point. EG temps where alarming though, so took it back down to 35.
I had all the stuff to do it correctly, full GLI suspension and brakes, Large tires, hurt my fuel milage, and a Perloguin LSD. A very stiff South Bend Clutch, that gave my left leg a work out. Great car, the drivability and the fact that a highly tuned car takes a lot of maintenance for a daily drive caused me to sell it. It was fun to take people for rides in, it really need to be AWD, and if VW group would bring an AWD TDI over in a Golf or Jeta, or even A3, I would be buying the first used one I could find.
See it every now and again, usual passing me. And think man I wish I had that car again. So my current one, love the car, wish I had GLI suspension and brakes, and Seats, but I will keep it at a sane level of tune. Once factory warranty is out the door, I'll add a Molone tune to it. And drive it with the little extra that gives me and be happy.
Yeah right
Tonight back to the mundane part of the build, making templates and cutting metal to fix the hell hole area. Maybe I'll get into so more fun, as I have to make a few mods to tunnel exist in the engine bay. Mine is solid, but I need to close up a few exists and add a few more entrances.
The lines running front to back are getting crazy.
Fuel x2
Water x2
A/C x2
Clutch
Brake
Battery
Electrical Harness
Engine Harness
Throttle Cable
Heater?
Intercooler x2
Cable Shifter
Missing anything?
Posted by: Chris H. Aug 15 2015, 08:37 AM
Wow Steve, I should just copy this last post of yours and paste it into the thread asking about increasing the performance of the EG33....much better than my attempt .
Hey BTW I came across something in my searches on increasing the injector flow, changing the MAF to the Nissan Z32, etc. So it seems like unless you change to an aftermarket ECU you have to install the ECUTune chip. It's been called a few different things but I think this is the guy who makes it:
http://subiechips.com/modifiedSVX.htm
The page I linked is for the chip that compensates for the Z32/370-500cc injectors.
So the question/fyi...finally. See where it references "other options"? A couple of them mention using two MAFs. I kinda like that idea since the dual inlet throttle body is a pain to find an aftermarket substitute for. Wonder if it would work well though ... What do you think?
Posted by: 3d914 Aug 15 2015, 10:49 AM
Templates are a good thing.
I will be doing something slightly different I am going with plan "a" above to fix the hell hole region. I will do hybrid plan "b" but move the pickup to shock tower area. More on that latter
Stephen, nice build. I'd definitely like to do a build with the eg33 - nice motor.
Here's an example of how you could extend P4 to reinforce the dog ear. I includes pieces on sides also. More details in my project thread.
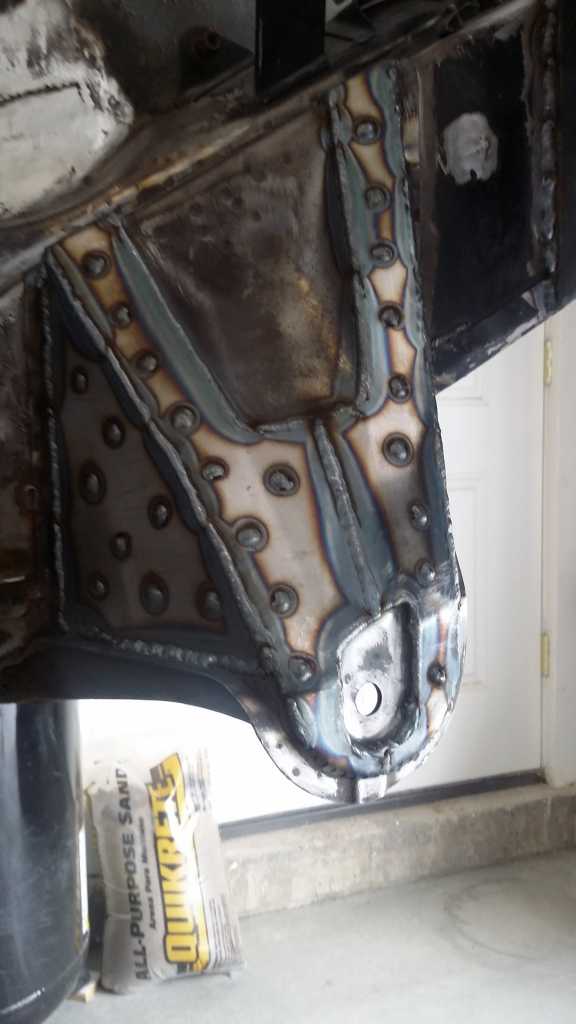
Enjoy!
Posted by: 914forme Aug 15 2015, 03:12 PM
Chris, not sure about the dual MAFs, unless you put a logic circuit in there to work out the details.
ECU tune is a great guy, also does CAMs BTW.
Gerald,
Nice reinforcement you have there. Need to go read your thread, with the welds you have there I'm sure I'll find some more tidbits in the thread.
I'm tying into one I did on the lower ear a long time ago. P4 butts up against it, I could add another layer to make sure like yours. I think it will be good enough. I was more worried about the bolt hole going out of round than, the ear. I have a drop link running to the front firewall, on Hemi Joints. Will be adding a few more for triangulation, and I have just finished mocking up the outer ear reinforcements.
I'll post what I got done today, a little latter, its Mom's Birthday so got cleaned up and taking her out to dinner.

Then read Geralds thread, as it looks like it will be a good one
Posted by: 914forme Aug 15 2015, 07:22 PM
Today's Progress:
Finished Hell Hole Template, need to transfer it over to pasteboard, I don't have any 
First Major Change 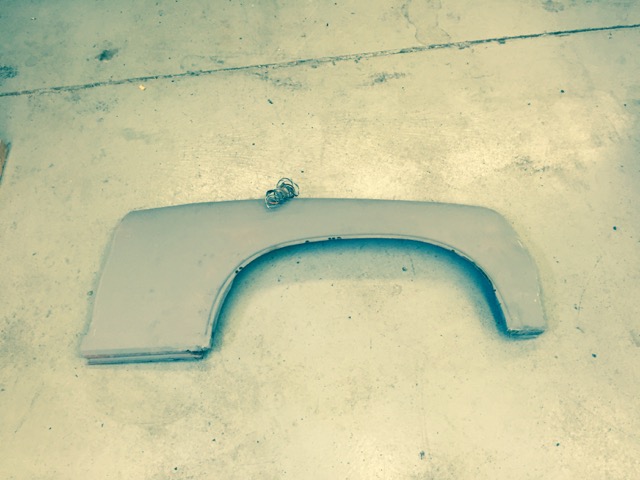
Drivers Side Fender is gone. That gives me access to clean a few old welds and build a few new items.
Grinding down welds, GT stiffening kit has seen some rubber in its time.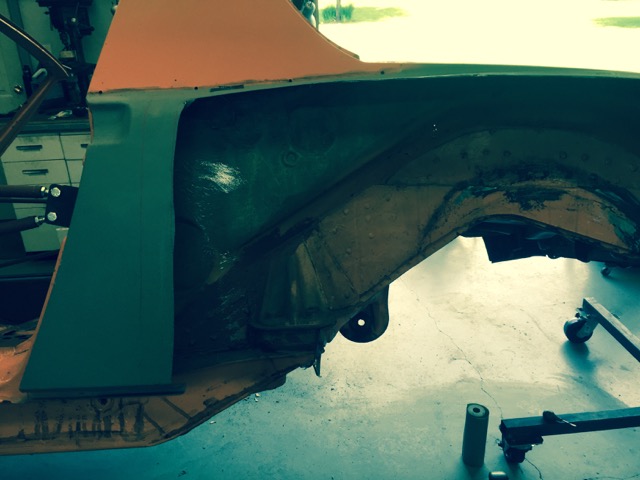
Started Mocking up the outer rear suspension arm pickup stiffening prices.
Two sides are done: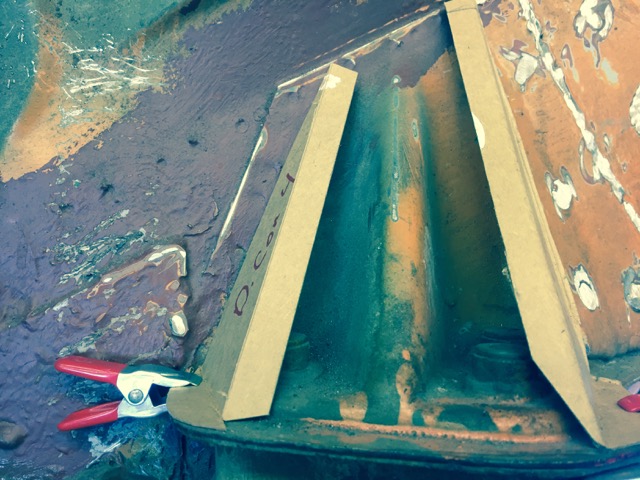
Front done: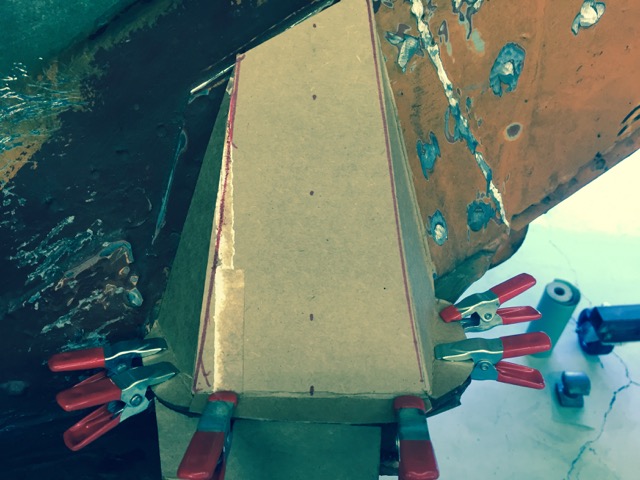
Now for the fun part, the Front Skin that triangulates the entire console into the Brad Mayer 914Ltd. Rocker pieces.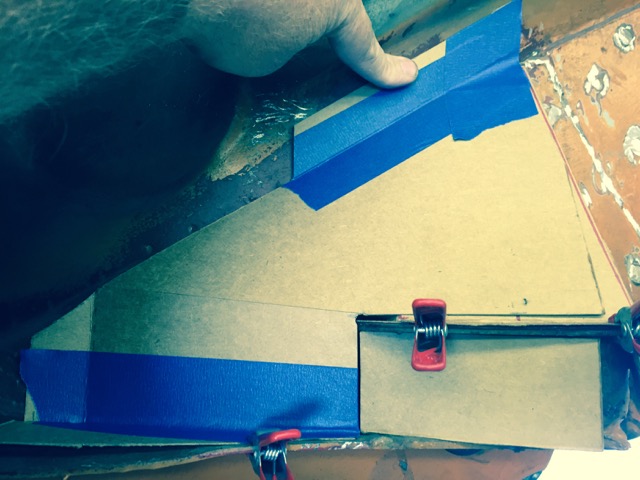
That along with the Hemi Rod off the lower suspension mount, makes a huge difference in stiffness of the outer ear. The Hemi Rod also allows for easy toe adjustments.
Now for more fun.
Plate in seat belt pocket.
Front Wrap around the rocker. Ties in to three planes for this piece. Cardboard does not hold its shape like Metal.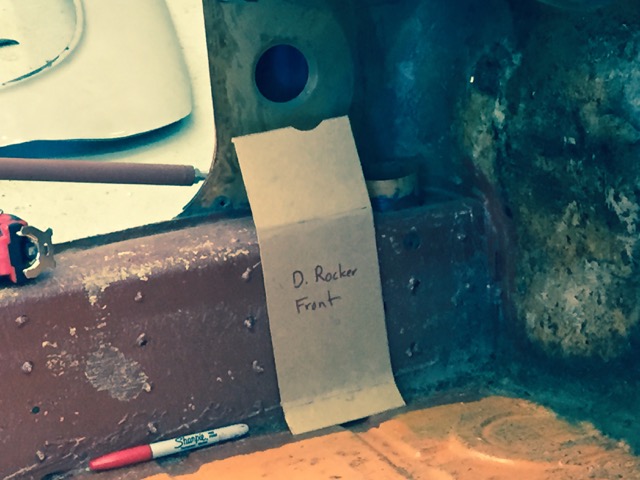
That will allow me to do a removable door bar looks like this. Blue Line.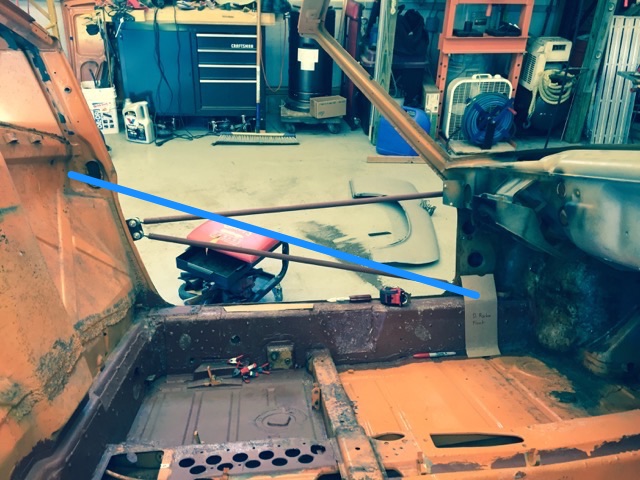
The Idea is that their will be another bar in the engine bay to the same location.
Also added these, need to finish it up.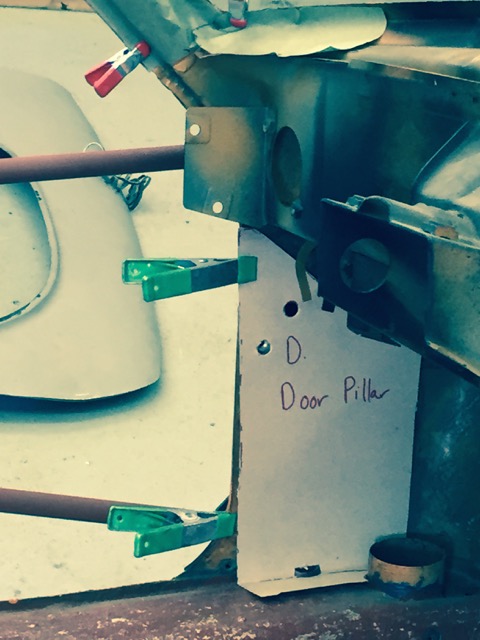
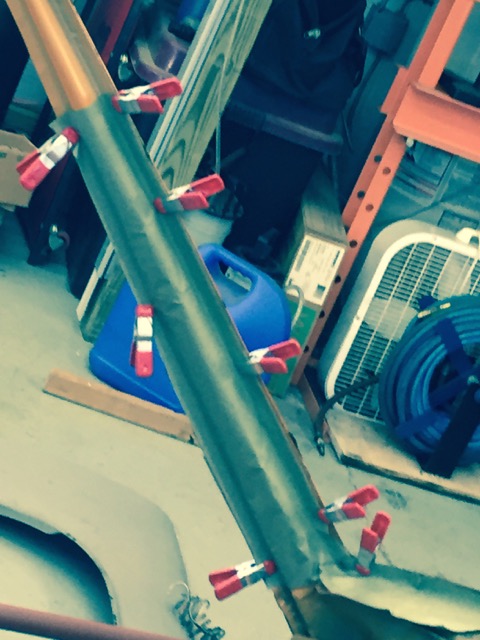
More tomorrow
Posted by: 914forme Aug 15 2015, 08:09 PM
Andy Forrest's Engine. 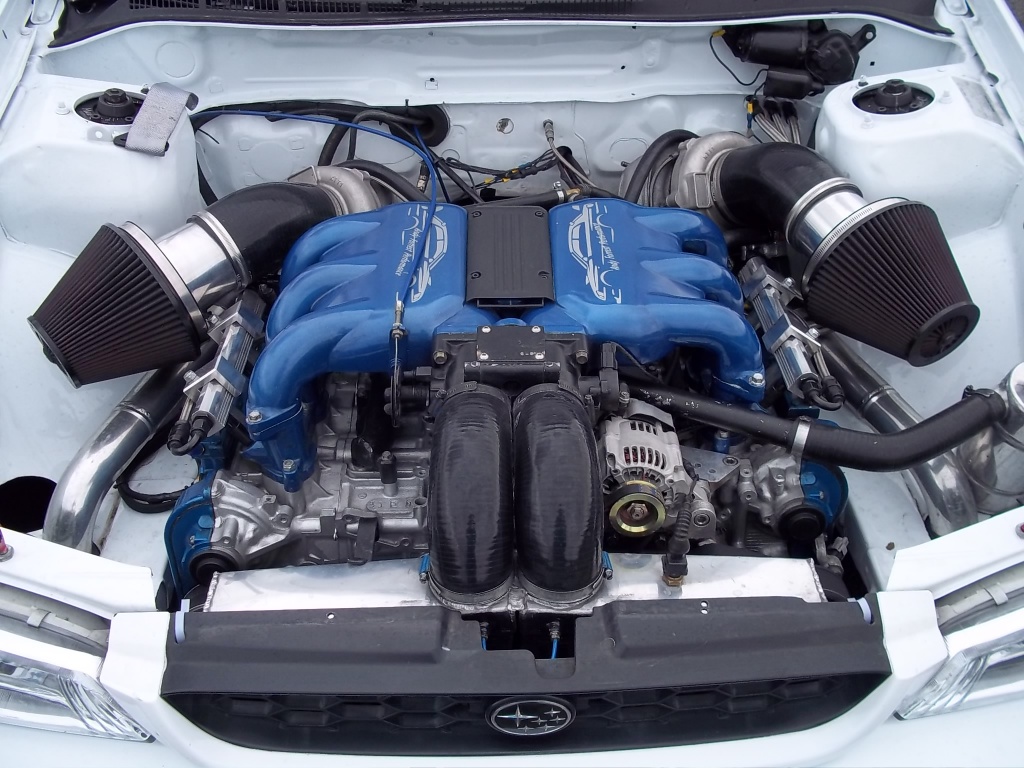
Posted by: Chris H. Aug 15 2015, 08:33 PM
That's a bruiser. Gotta look that one up.
Posted by: 914forme Aug 16 2015, 05:17 PM
Today's progress does not seem like a lot, but I spent a lot of time on this.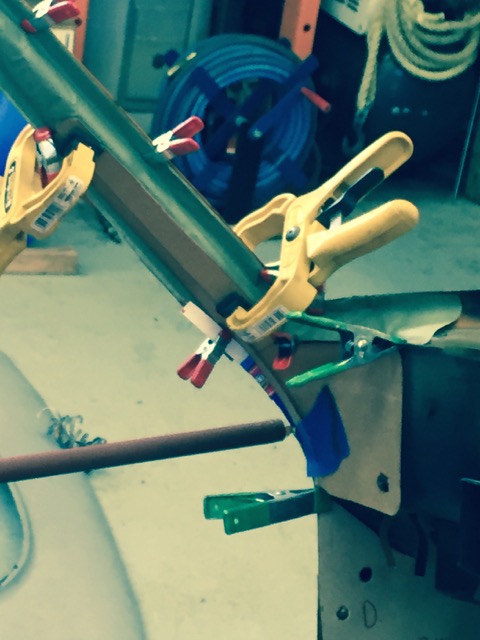
I then looked into Harness mounts for the upper shoulders. I made up the templates for the engine side to smooth that area out, and then reinforced the interior side. I will use forged bolts and backing plates, they are bot fully FIA certified, so Im not to worried about them.
Here are the templates. 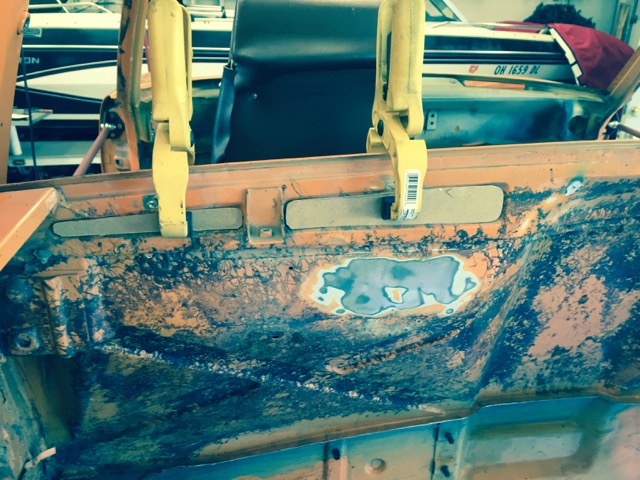
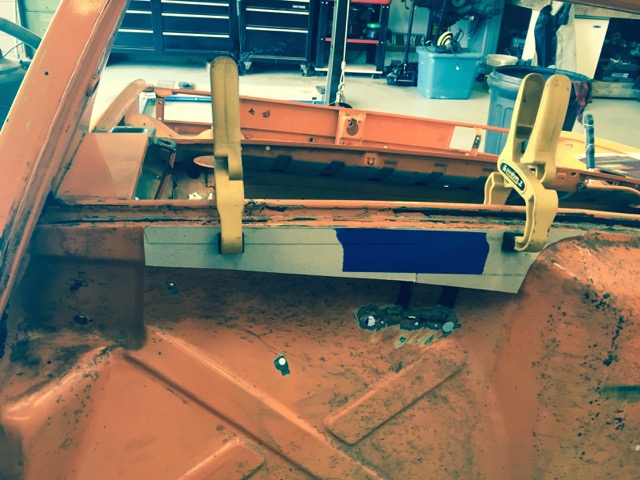
I know this is the boring stuff.
I did bolt in the drivers seat today also to get some bearing on shifter placement and position, figured out a bunch of stuff, and line placement.
So the plan as of right now, Is I will have a hot side and a cold side on the logs. Passenger gets the hot side, my wife is always cold, and she is used to burning her leg with me. My old Ghia the heater flap was stuck open, never knew, until a long trip.
And she still married me!
Posted by: 914forme Aug 30 2015, 03:17 PM
This weekends progress, not much, better than no progress.
Built a hammer form for the clutch cover. Need to go over to Dad's and run the clamping block through the table saw.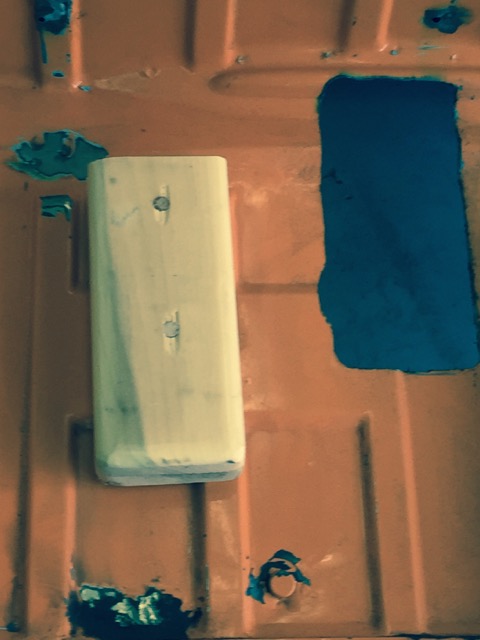
Then I spent what I thought was days surgically extracting this piece of 1/4 plate steel. It was used to secure my petty bar in that corner.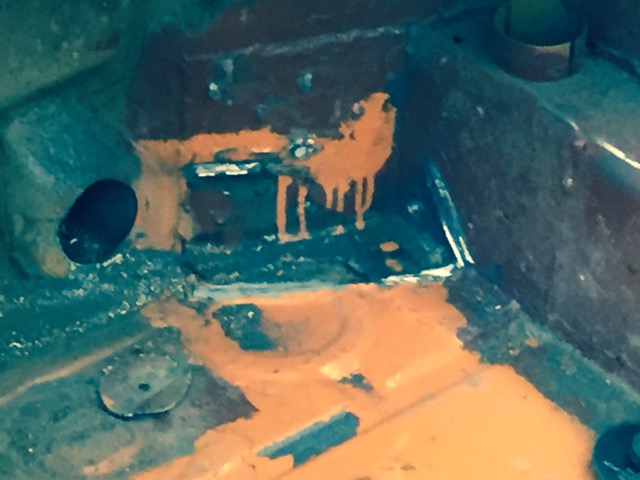
I finally used force, and the out of it, and got it out.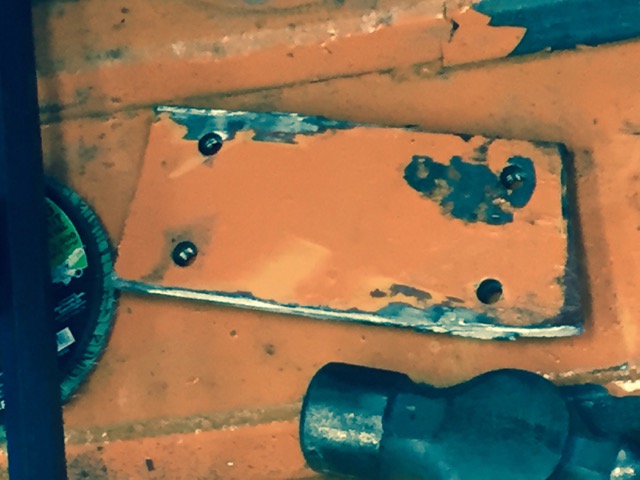
Drilled a few holes for lines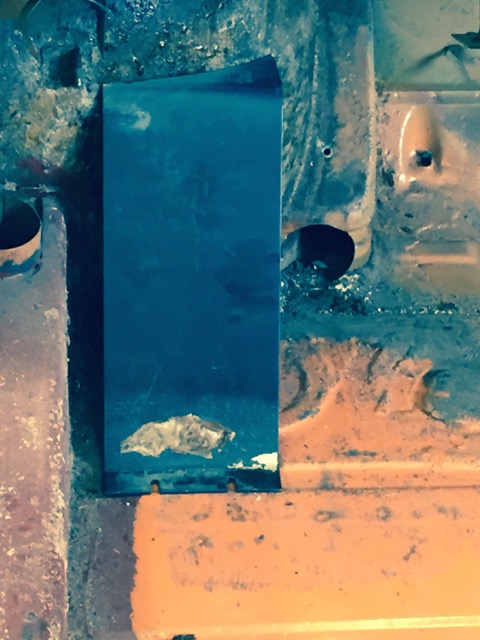
Unfortunately, My hole saw bit it going into the logs, Welds, Engmann Kit, and Roll bar reinforcements ripped the teeth right off the saw.
I then made that dead pedal you see above.
Posted by: 914forme Sep 20 2015, 03:38 PM
Back at it, spent a lot of time measuring and figuring, took a ton of parts in and out of the care, and finally came to the conclusion, a 914 is a tight place under the cowl. So Im thinking about talking the Southren Air Super Frost, and mounting it under the dash, feeding the tubes up to the vents and defrost, and adding a ver in the dash.
Even went as far as looking at fuel cells. I still have dreams of getting from front trunk space back.
I made more templates, need to get gas for my welder. Also some 1/8 chip board to build my final templates, and I can start plasma cutting all these piece out of various gauges of metal. Also need so 20a.
Next up on the order list is a RAD, Condenser, Oil Cooler, and the SuperFrost unit. After that, I will get everything built in place, and then figure out lines and wiring harness routing and duct work etc.....
I did move off the conceptual world and into the real world.
Added these to my rotisserie, so I don't lose the socket, and I can store my hitch pin.
Welded up the nut on the end.
Allows me to use this drill and move the car up and down the 4 feet in 17 seconds. Much better than cranking.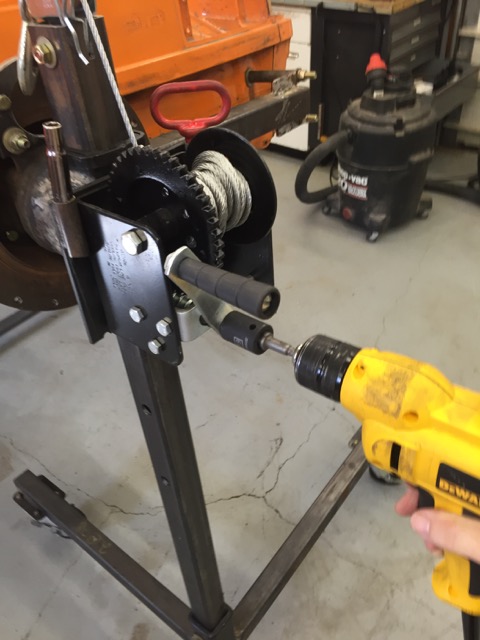
Just don't get your hand near the handle, it hurts like a 
I also took a 911 wiper motor and added it to the old rack, and reclocked it.
First off what I do on the weekends is my own thing. Old trick for aligning parts.
Mark the bolt holes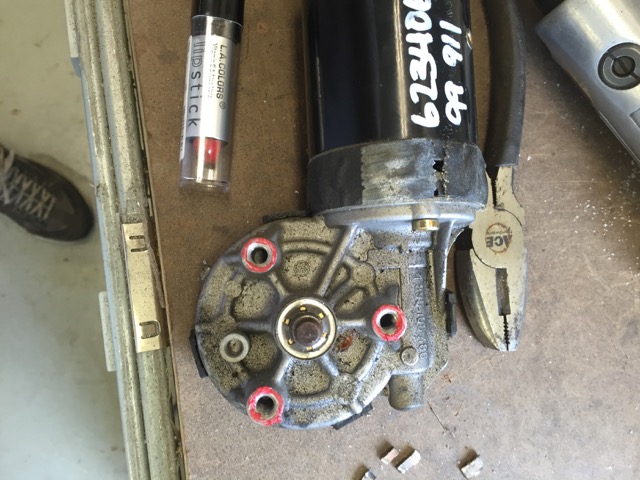
And transfer them over.
Bolted up.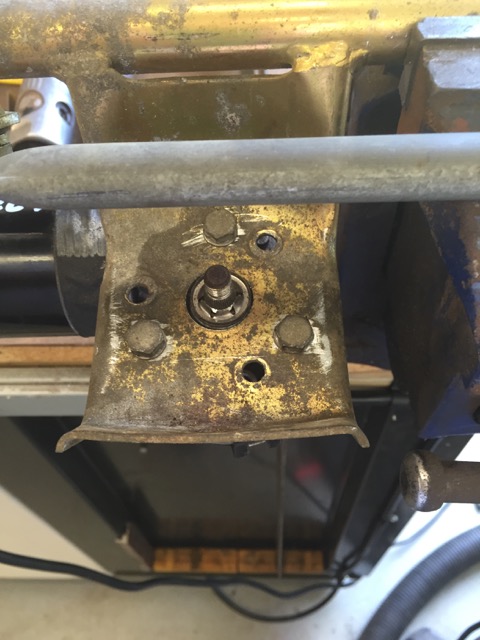
Oh, wow  that is close
I have 5/16ths of clearance. So why go through all of this. Maybe a little faster wiper, but mainly, It looses 2.3 lbs. Easier than me going on a diet.
Also looked at where I will put my Acusump. Need to mock up the bracket, but fits like it was built for that space.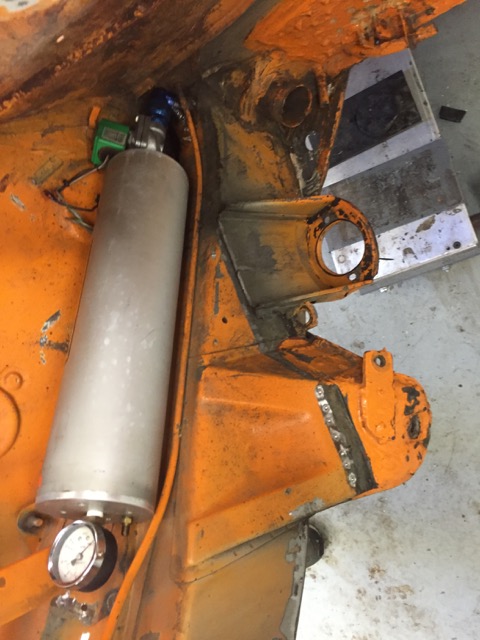
Posted by: 914forme Sep 26 2015, 04:43 PM
Waiting on the 914build to start I went out and looked at some parts and
Well I got my Radiator in, Condenser in, and started to mess around up front. And Civic Master Cylinder.
Radiator is a Griffen Scirocco Style unit.
Fans are from an Intrepid, and don't fit worth a dang. Guess what Scirocco Rads come in different sizes. I have a nice new set of intrepid fans I'll sell cheap.
I will have to modify the Rad some to do my plans. I'll get my son-in-law to lay the dimes on it. Need to remove the fill neck, and cap the upper inlet hose location, and move it to the side, bringing it down to be next to the Outlet at the bottom.
Condensor is a universal unit, fits well.
And the design I have come up with for the Rad ducting will allow me to store stuff under the front floor. Fuel Pump, Battery, water proof really for the fans, and a waterproof bag for tools, spare parts etc... It will only be waterproof for the off chance that water does get into that area.
I will then have a fake floor like the car has, just shorter. That combination will give me 6 cubic feet up top, and 1.8 cu.feet below. I will still have a front trunk
Now since I will be doing the build off, here is a shot of me sitting in my engine compartment.
And a shot of my engine Empty compartment.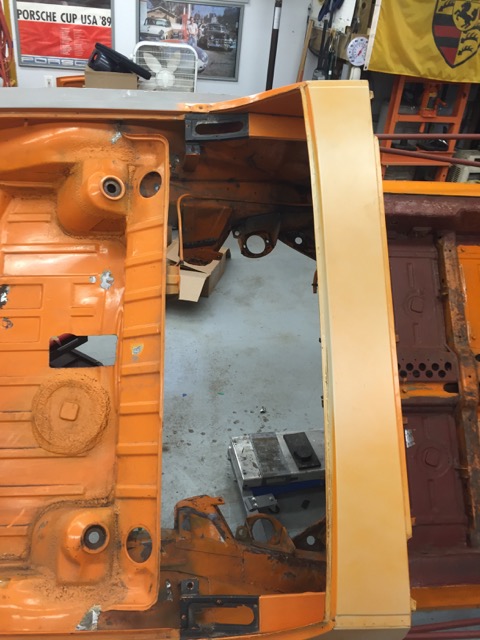
And no I am not this guy, resemble him though.
Posted by: 76-914 Sep 26 2015, 06:57 PM
Looking good Stephan. BTW, I haven't had any issues with unwanted heat from the longs.
Posted by: 914forme Sep 27 2015, 07:00 PM
Well I spent today messing around with my plasma cutter. And then I was working away, cutting some metal and bap bap bap, WTH, hey my compressor is not recharging.
So now on the list.
New compressor, trying to decide between this http://www.lowes.com/pd_54284-1126-VT6362_1z0vj77__?productId=3370356&pl=1&Ntt=air+compressors, (Campbell Housfeld) or http://www.ruralking.com/ingersoll-rand-air-compressor-3hp-60gal-single-stage-ss3l3.html.
The Kobalt I can get to the shop tomorrow, the IR will be a week out. The extra coin could go towards 914 parts, I need parts.
So if your keeping score:
My welder is down due to no gas, I need two tanks.
Compressor down
welding helmet is down, need a battery
Plasma Cutter down, due to no Air
Need more sheet metal, as 14ga is a little heavy for some of this stuff.
Need some Aluminum to mod the radiator, which will mean I will need to find a TIG and for the Rad air ducting.
And I am burning through cut off wheels like crazy.
Oh an I need dust masks, ran into some bondo today, man I kicked a lot of dust today.
Oh and my iPhone took a spill today at work, so no photos.
While I'm at Lowes I need to get some rigid Pink or blue foam, need to make a plug for my fiberglass Fan shroud on the back side, to keep some trunk.
And some fiber board, I need to make some plasma cutter templates, and modify a headliner that I will need to mod for some manual latches.
Good hard day, killing tools, and making progress.
Posted by: madmax914 Oct 2 2015, 10:51 AM
Good to see you're in the Build-off! I've followed your EG33 build from the beginning. I may be out in Lima OH in March to visit family, any chance we could get together? Would love to see this little monster in the flesh.
Posted by: Mueller Oct 2 2015, 11:02 AM
Cool build...impressive rotisserie..I like it.
Posted by: 914forme Oct 2 2015, 01:43 PM
Good to see you're in the Build-off! I've followed your EG33 build from the beginning. I may be out in Lima OH in March to visit family, any chance we could get together? Would love to see this little monster in the flesh.
Sure March sounds good it is the prefect time to visit Ohi, 80 degree days followed by a blizzard
Posted by: 914forme Oct 2 2015, 01:45 PM
Cool build...impressive rotisserie..I like it.
Thank you, One issue is it spins to good at times.
Posted by: injunmort Oct 2 2015, 03:32 PM
impressive, good luck with build. I grew up in kettering.
Posted by: 914forme Oct 27 2015, 06:42 PM
Long time no post, been busier than a one armed paper hanger!
So what I have been doing to the 914.
First up, made a pile of scrap metal.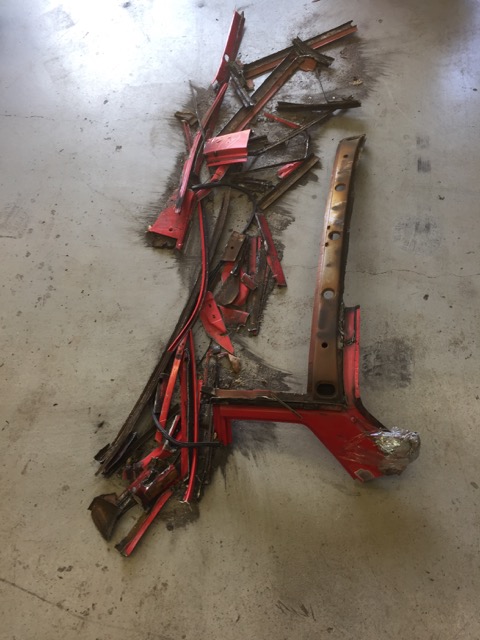
Poor 944 never stood a chance
I Got it fit basically to make sure I was on the right track, and I am.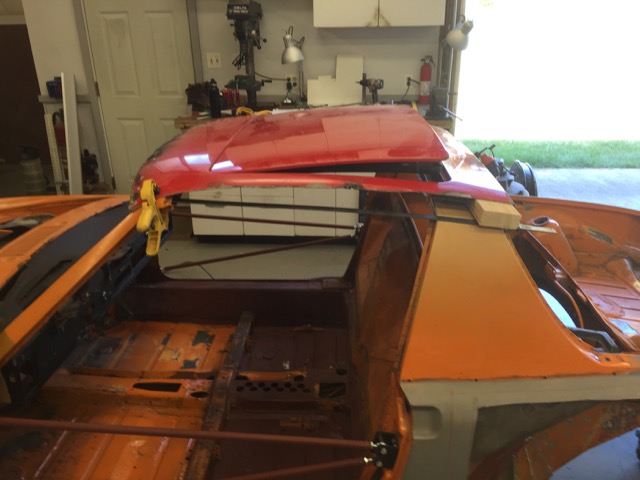
And it fits the curve of the windshield frame rather well.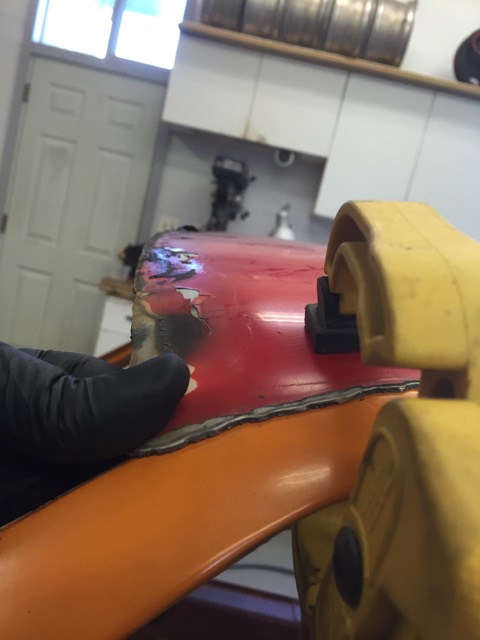
And this is one great reason to do a sunroofed coupe 914. 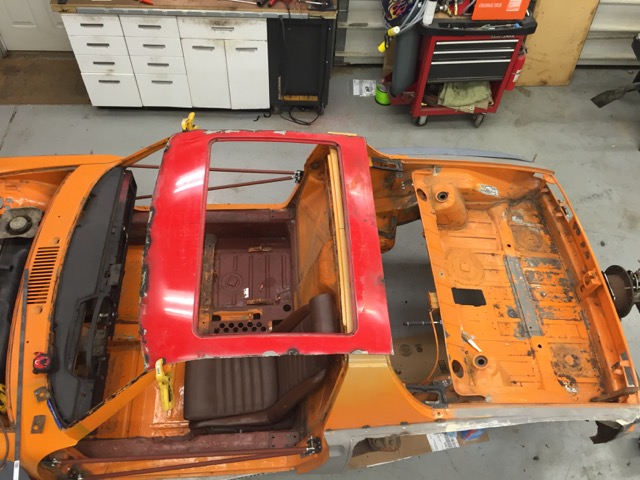
The other is stiffness with out running a roll cage. This is when I got scared. Oh crap will I fit with a helmet on. And the answer is just like the stock top, I fit with the seat cushion in place. I have to remove the cushion if I want to wear my brain bucket. That is a relief.
So Onward, I decided I would start cutting for my fender flares.
Drivers side rear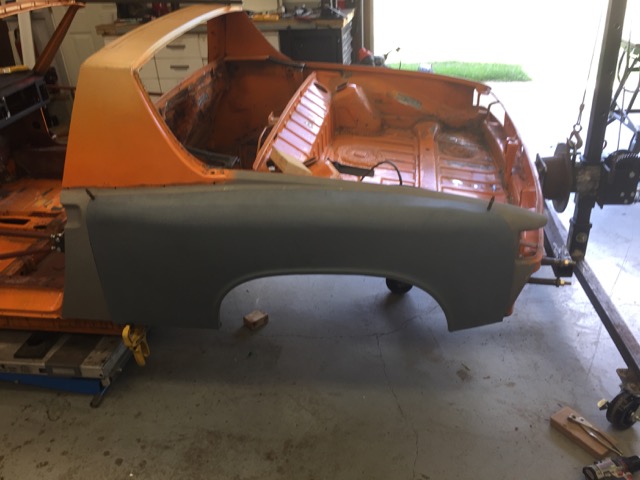
And I have 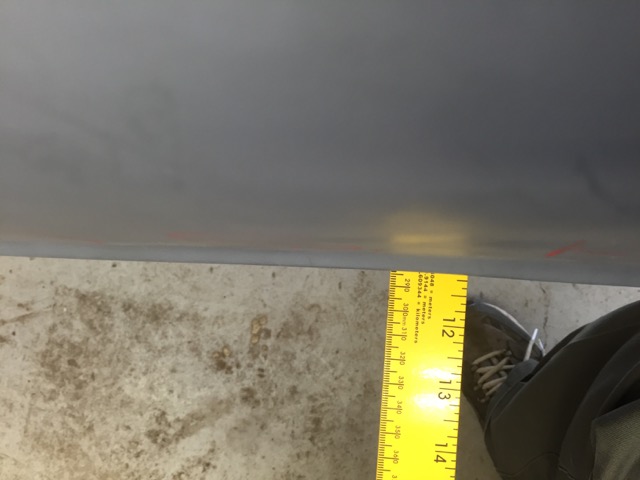
Oh crap will my tires fit Measured them up, and yes.
Drivers side front.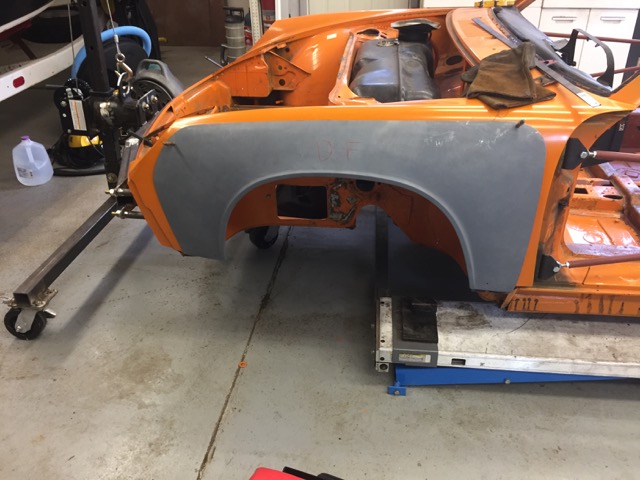
And the fronts are 2" wider than stock.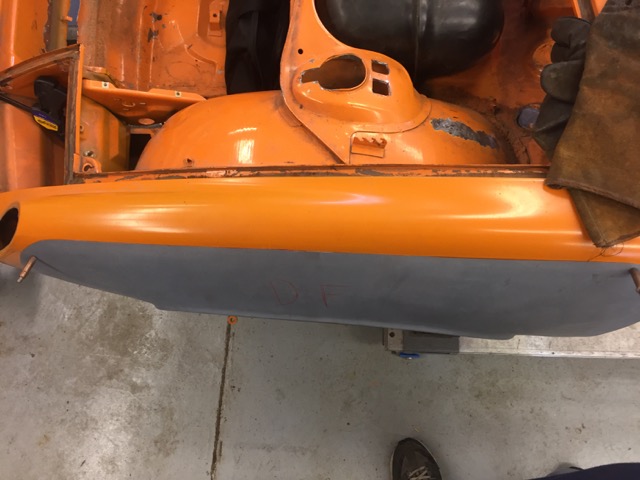
I then found that I was like a puppy chasing squirrels, never could concentrate enough to get anything done. So I took some advice, and decided to concentrate on one thing at a time. So I started working on the rear trunk.
Made a fill piece for the trunk light, and stripped the paint around all my weld spots. 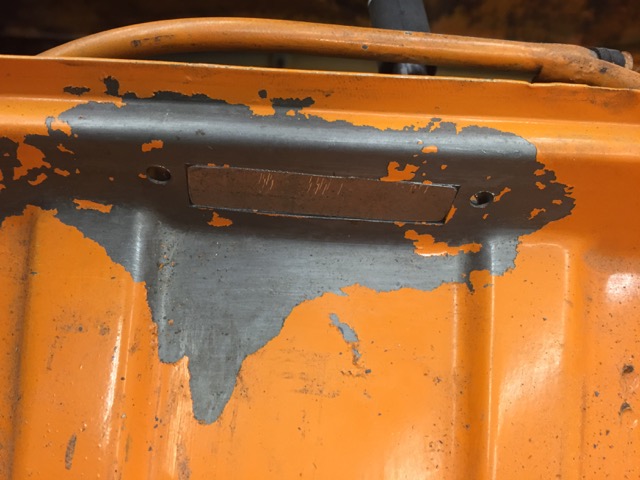
I then started working on the cover for the clutch slave.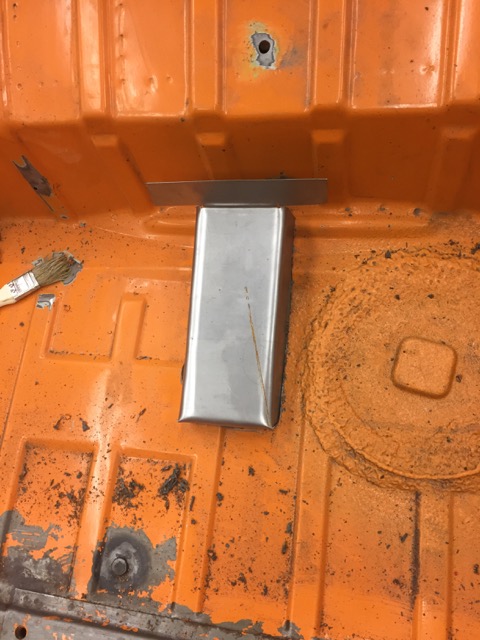
Hammer formed it, still lots of work to do on this piece but it is a good start.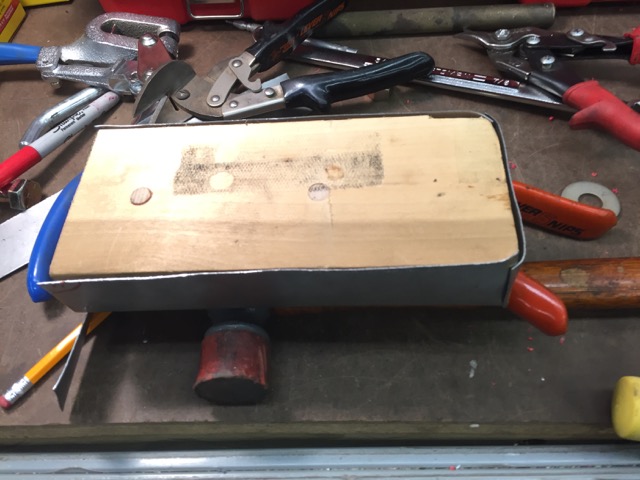
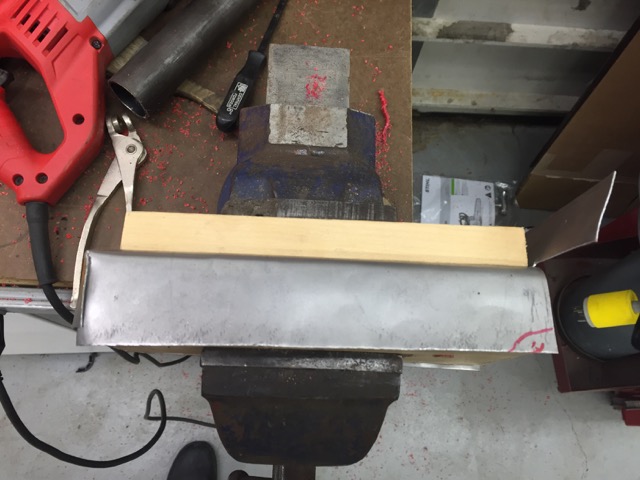
I then started working on the trailer hitch, still lots of work to do.
First up making it so I can get to the hitch. It will be hidden behind the license plate. The flip down is a Bully brand hidden plate.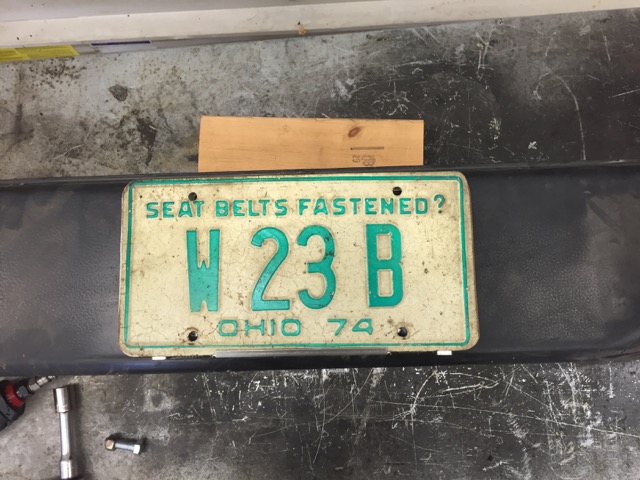
The plate is from my Grand Father, W 23 B from 1974.
Here is the plate mounts burnt some metal. 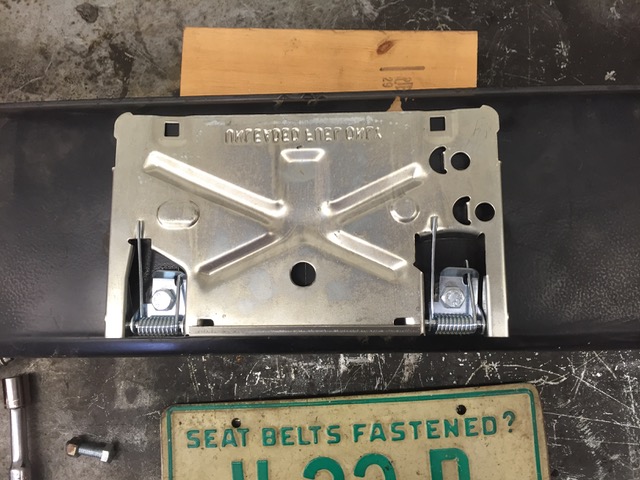

And that let me get it all measured up and mount the bumper on the car.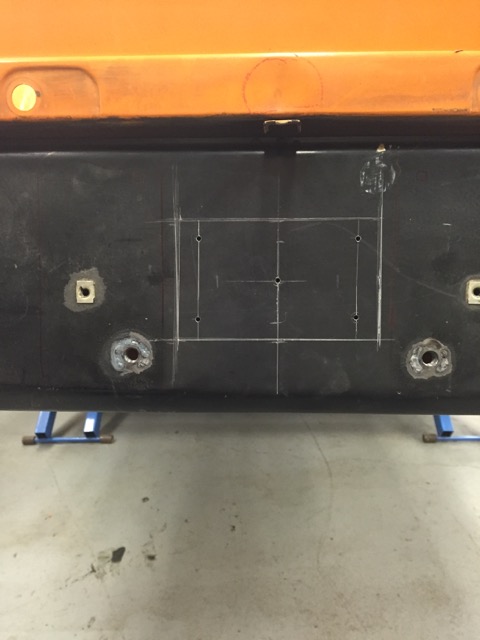
Drill the center into the car to see what I got.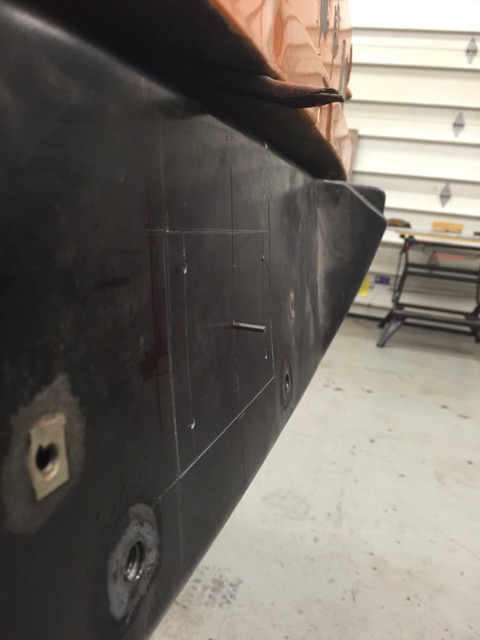
And this is where it comes out on the other side.
And lots of cutting I have it installed.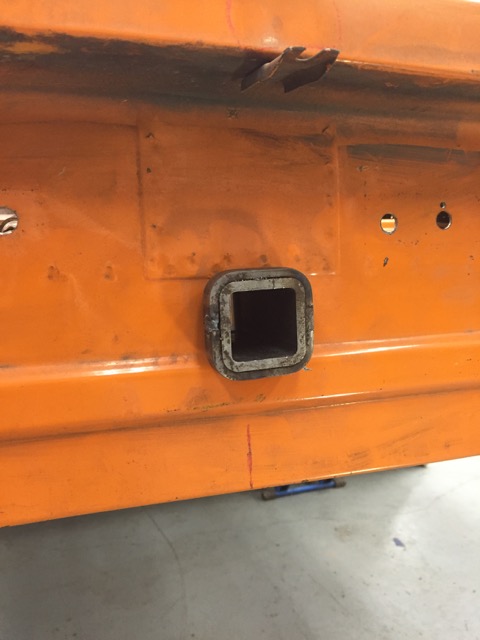
And the ball mounted, will have to see if this will work once the bumper is on, and the bumper top.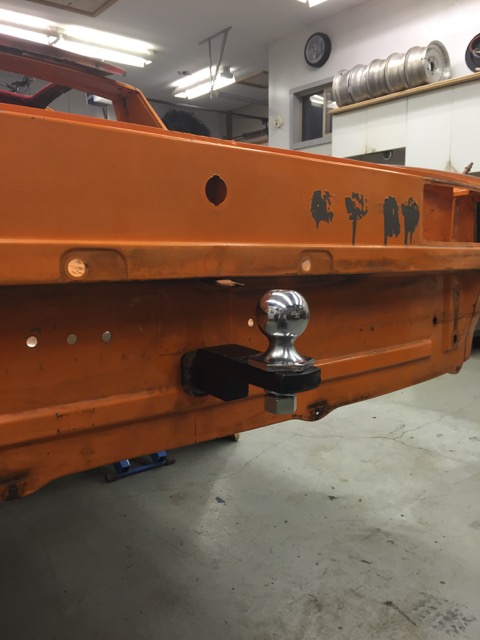
Next up, cut out the bumper, add re-enforcments for the hitch, and then figure out trailer chain attachments. I have an idea.
Parts needed to be ordered:
Trailer hitch wiring and flasher relay
J-West trunk hinges, mine are all buggered up.
License plate bolt kit, the Bully did not come with anything.
Posted by: Chris H. Oct 27 2015, 07:46 PM
Man you are really making progress Steve. Looking good! If you do that metal roof too well you'll have a line of people asking if you want to do theirs for them. Charge big bucks ! Where did those flares come from?
Posted by: Andyrew Oct 27 2015, 09:49 PM
Like the progress! That sunroof is a LOT of work!
Posted by: mgp4591 Oct 28 2015, 03:36 AM
You plan on putting a twin turbo setup on your EG33? I was thinking about just one running low boost to keep the heat down, just enough to eliminate the "suck" part of the whole suck, squish, bang, blow 4 stroke thing. Easier on the engine and a nice gentle jump in horsepower. These engines are quite flexible and I understand the whole idea with the EZ30 and all the EJ engines, but something about a turbo six with a flat plane crank and bulletproof internals just gets the blood going, ya know!
Posted by: 76-914 Oct 28 2015, 09:04 AM
Back at it, spent a lot of time measuring and figuring, took a ton of parts in and out of the care, and finally came to the conclusion, a 914 is a tight place under the cowl. So Im thinking about talking the Southren Air Super Frost, and mounting it under the dash, feeding the tubes up to the vents and defrost, and adding a ver in the dash.
Steven, did you do a test mock up fit with a cardboard box or something? In the end you'll find that yoou really have to want AC to go thru all this.
In retrospect I wish I had run the vent tube on the drivers side above (where the air box was) rather than below the dash. It really gets tight on the drivers side when you factor in big feet.
Posted by: 914forme Oct 28 2015, 08:27 PM
Man you are really making progress Steve. Looking good! If you do that metal roof too well you'll have a line of people asking if you want to do theirs for them. Charge big bucks
! Where did those flares come from?Yeah we will see, it will be a ton of work. Flares? Racer Chris
Like the progress! That sunroof is a LOT of work!
Hope so, I am a glutton for punishment
You plan on putting a twin turbo setup on your EG33? I was thinking about just one running low boost to keep the heat down, just enough to eliminate the "suck" part of the whole suck, squish, bang, blow 4 stroke thing. Easier on the engine and a nice gentle jump in horsepower. These engines are quite flexible and I understand the whole idea with the EZ30 and all the EJ engines, but something about a turbo six with a flat plane crank and bulletproof internals just gets the blood going, ya know!
Not yet, I have plans for several different version of the EGs, first will be stock with headers, and a flipped intake.
I would like to do a set of ITB on the engine next.
And then yes I have a plan for a single turbo with a water based intercooler.
But twin scrolls would be oh so nice.
Back at it, spent a lot of time measuring and figuring, took a ton of parts in and out of the care, and finally came to the conclusion, a 914 is a tight place under the cowl. So Im thinking about talking the Southren Air Super Frost, and mounting it under the dash, feeding the tubes up to the vents and defrost, and adding a ver in the dash.
Steven, did you do a test mock up fit with a cardboard box or something? In the end you'll find that yoou really have to want AC to go thru all this.
In retrospect I wish I had run the vent tube on the drivers side above (where the air box was) rather than below the dash. It really gets tight on the drivers side when you factor in big feet.Actually I have figured something out, but am disappointed with what I found. I will be using a Vintage Air Mini unit, and be cutting some metal, more of that to come.
But this is my controller for it, replaces the factory stuff.
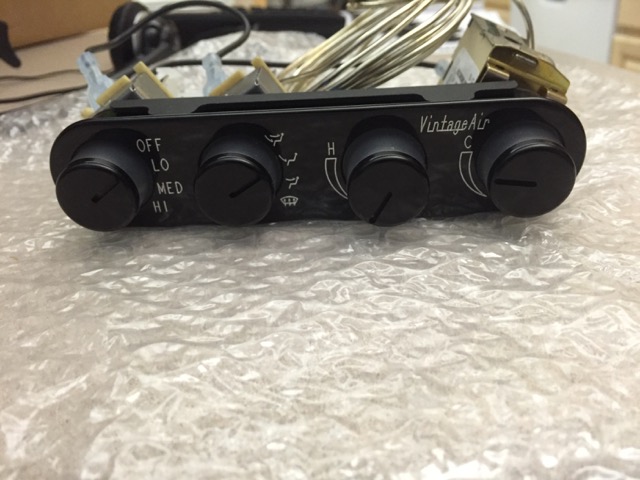
Thanks everyone, for keeping me going
Posted by: 76-914 Oct 29 2015, 08:42 AM
If your going with that VA unit why not go with their controllers adapted to the OEM factory heat/vent controller?
Posted by: 914forme Oct 30 2015, 09:07 AM
If your going with that VA unit why not go with their controllers adapted to the OEM factory heat/vent controller?
I don't like the factory controls, not sure I like the knobs either, but they are better than slide levers to me. I really like my 3 knobs setup I have in my TDI, simple easy to get a hold of.
That being said the 4th knob controls the electric heater water mixing valve, so it is sort of needed. I guess I could reverse engine the VW stuff, add it to the car, and move the mixing valve control some where else, or see if the VW part could do both
Posted by: 914forme Oct 31 2015, 04:30 PM
Todays Progress:
List of items I wanted to get do: I try to focus on three things, and go from there.
Fit Hitch
Fit Safety Chain Eyes
Cut and flange the bumper opening.
So First up Cut and flange the bumper:
No pictures of it being Takes a long tome to bump this heavy of metal with out heat.
Final Results, need a little touchup, but good enough for test fitting ,and working out bugs.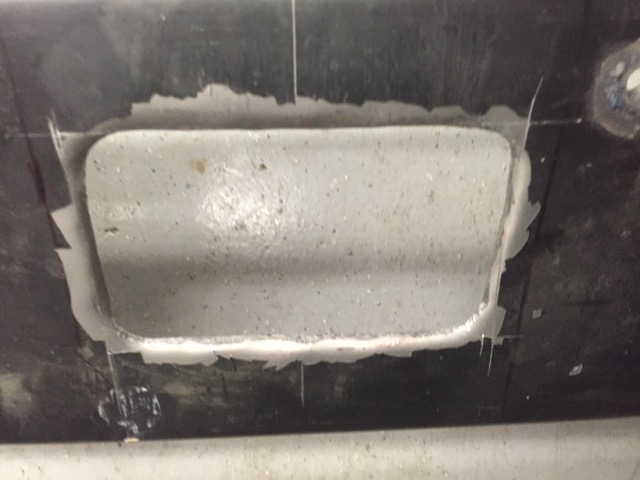
And a closer shot showing the flange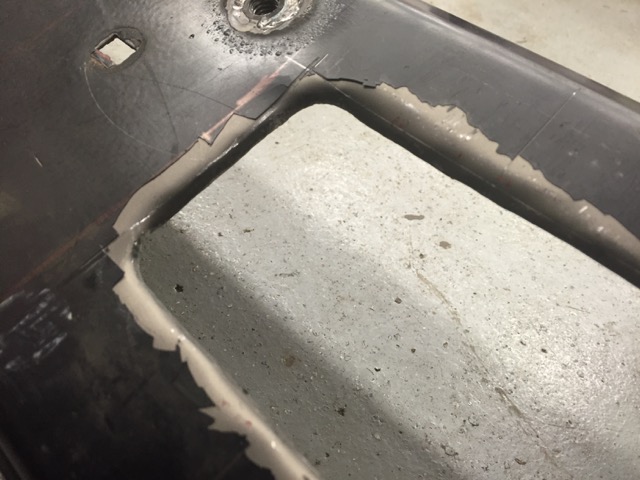
Now back to work on the hitch.
Test fit with the bumper.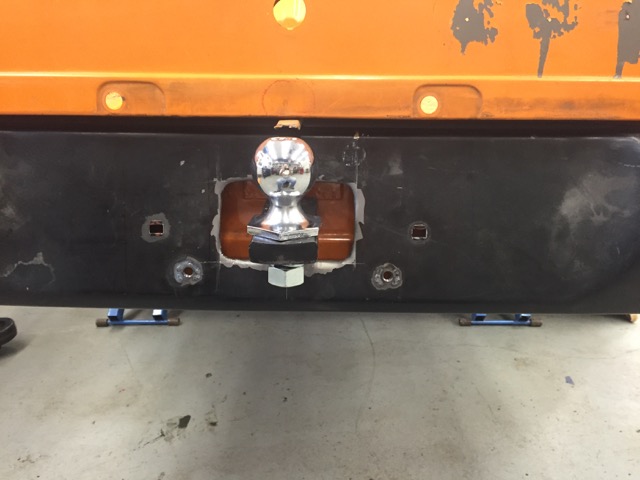
Install the flip down plate and test fit.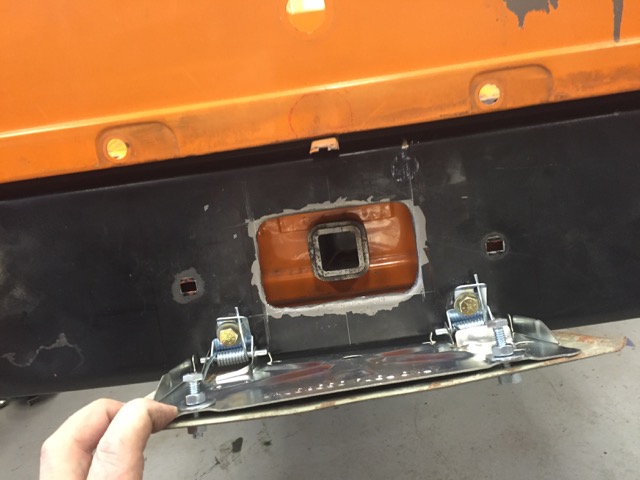
Plate flipped up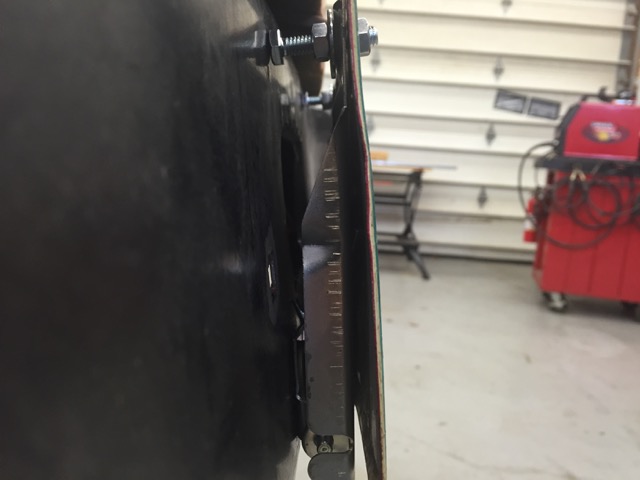
Couple of small details I'll need to figure out in the final version.
Need a rubber bumper between the hitch ball shank and the back of the flip down plate.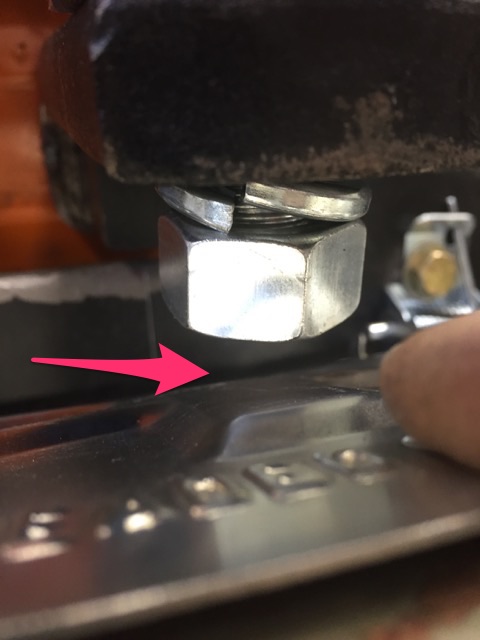
Need some spacers here also as I don't like the plate sloping back. Used these bolts to get the spacing correct.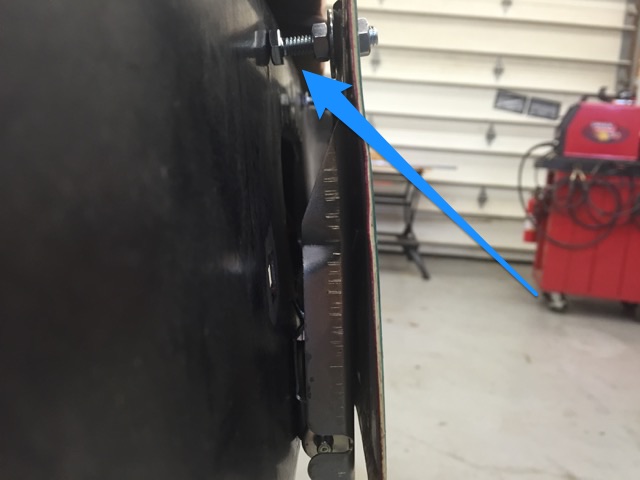
All together 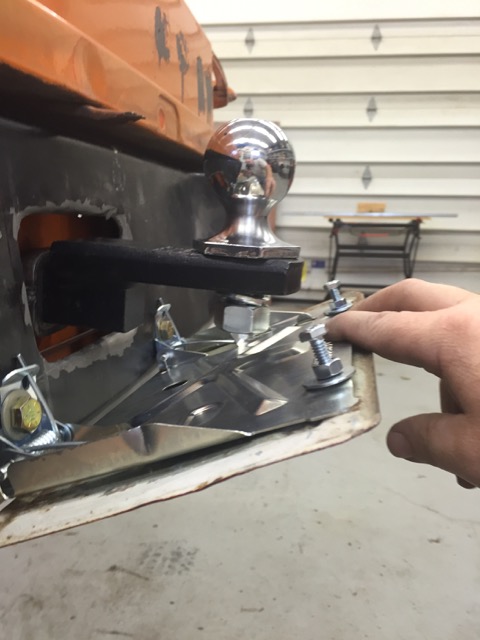
Next up get the safety chain eyelts mocked up. These forged eyelts are rated at 1200 lbs per eyelet. Not thinking a tire trailer or anything else I would want to to with the 914 would exceed that. I could pick the car up with these, and old a old school frontal collision test.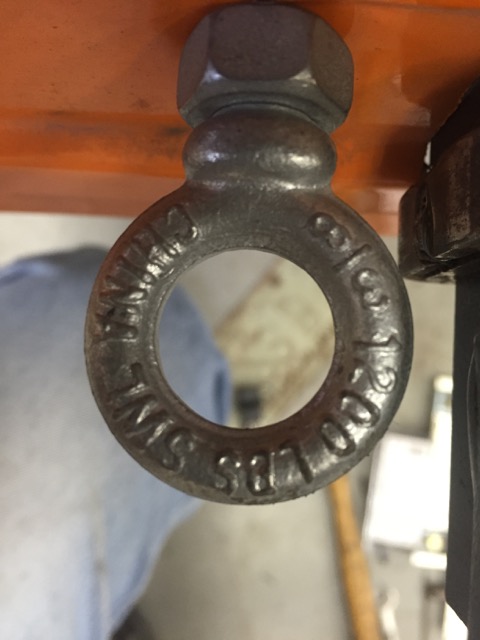
Installed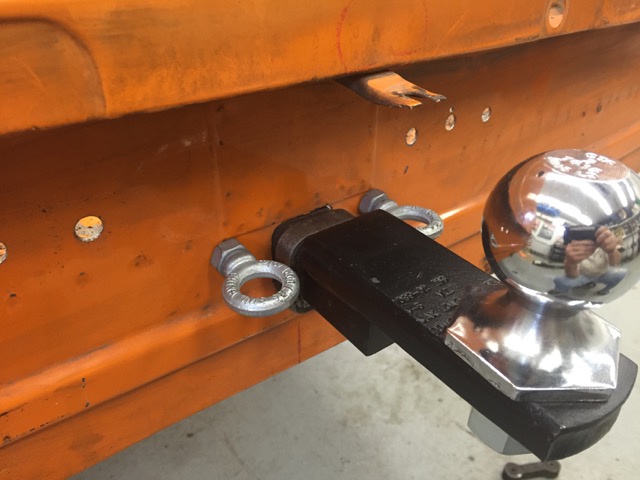
And crash test 
Metal Prep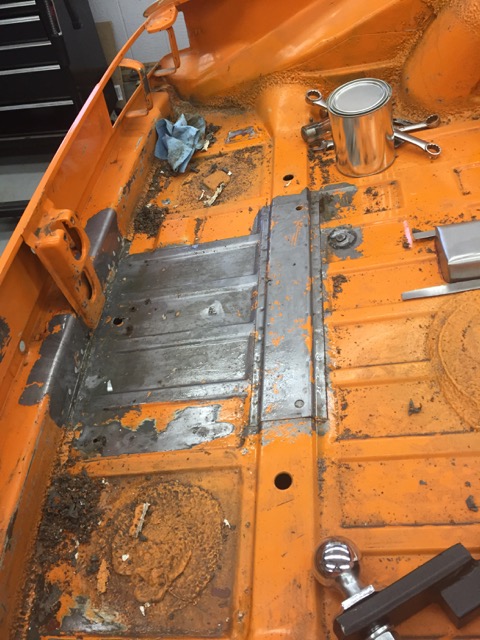
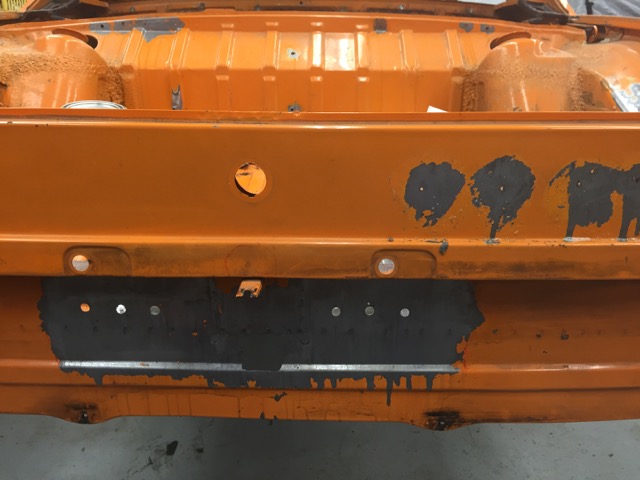
Tomorrow hopefully I'll get to spray some zinc primer on, and hopefully burn some metal.
Posted by: 914forme Nov 9 2015, 03:50 PM
SO I had a squirrel moment and started playing with LED lights. In reality I wanted to put a rear fog light in the bumper, trunk lighting that I can see whats in the trunks, and I needed reverse lights if I use the 914RS tail lights, still trying to decide on that.
So let the testing begin.
LED Rear light on running light setting.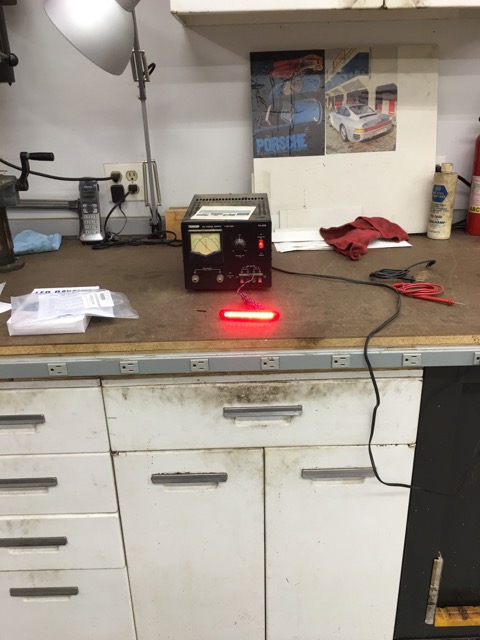
And what it illuminates in my darkened garage.
Don't think that will make a dent in fog.
Wire it up for brake and turn on the bench.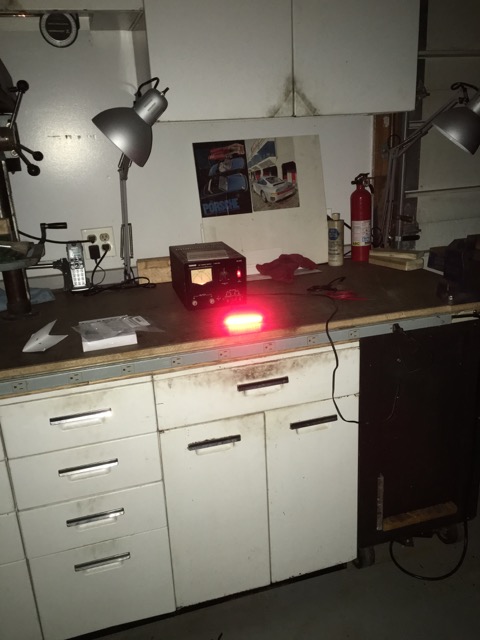
And it illuminates 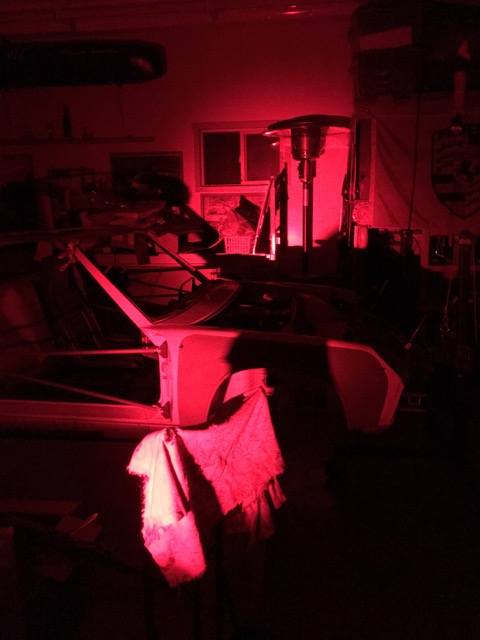
Oh that is getting a little better.
Would this work as a nice third brake light also So I got out this to see how it compared.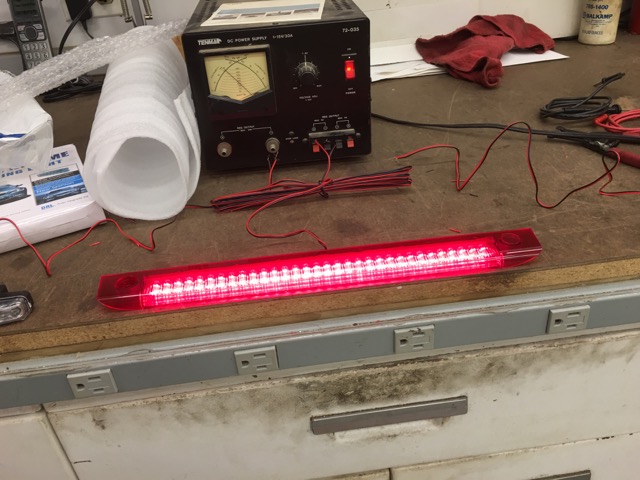
Third brake light from a Ford GT
And well it is a keeper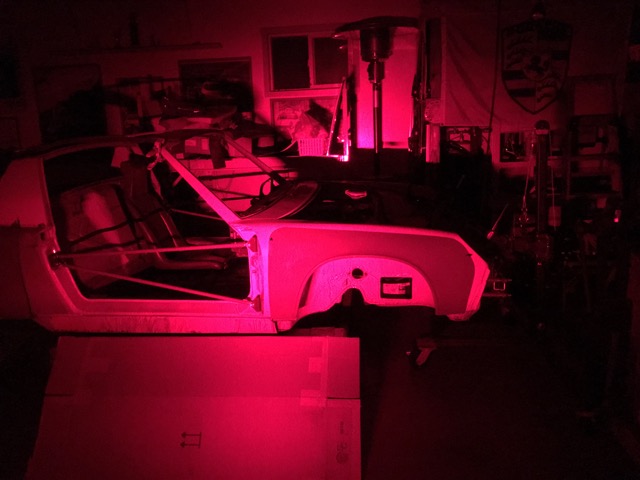
Hopefully that will get some ![yellowsleep[1].gif](style_emoticons/default/yellowsleep[1].gif) non observant driver a little
non observant driver a little  If not not much else I can do.
backup lights and trunk lights, not sure I like these 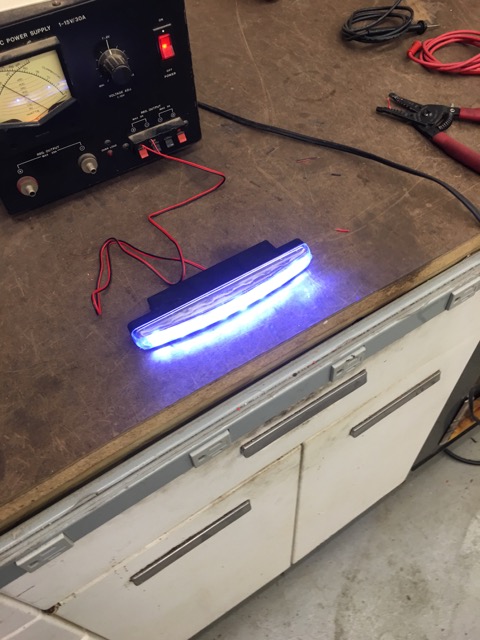
And how well they illuminate the room 1 light.
And 2x
I think it is the blueness of the light that bugs me.
Posted by: 914forme Nov 9 2015, 07:08 PM
Now for some progress:
Working on the rear trunk currently:
Task Items
___ Rear Deck Lid Shox - Mockup
___ Trailer Hitch - Mockup
___ Weld in all the holes
___ Cover for Clutch Slave
___ Seam Weld the shock towers
___ Add a bracket for Trailer wiring
___ Install new trunk hinge pivots
___ Mockup Trunk Lights
So J West's Kit is really nice, I like it a lot, yet, I can't leave well enough alone.
So I striped the paint, and will weld nuts on the backing plates. These will get welded into the inner fender wells. All cleaned up, nuts added, and bolts have Anti-Seize added to keep the threads from galling when they are welded.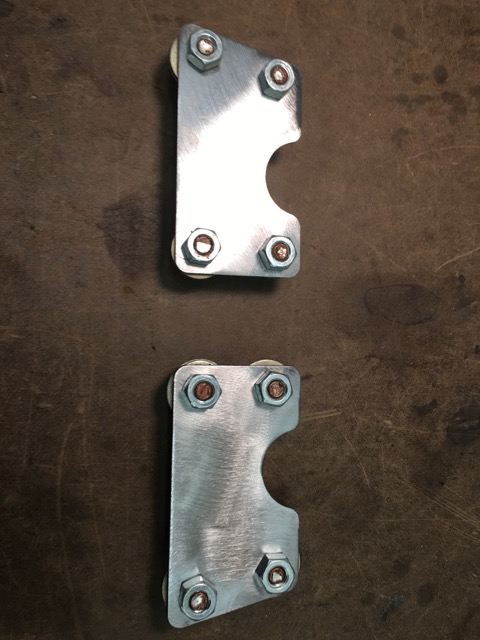
Posted by: 914forme Nov 9 2015, 07:19 PM
Worked on the trunk show kit even though I can't find page 5 of the instructions. So I had to wing it.
I mounted the rear hinges, and locked them in the full upright position. Mounted the Shox in the upper pivot. Took the lower brake, and put the shock thee, then moved it forward to keep the shock under tension. Theory is the trunk lid will add weight and I might need the extra pressure. Not sure it ill work 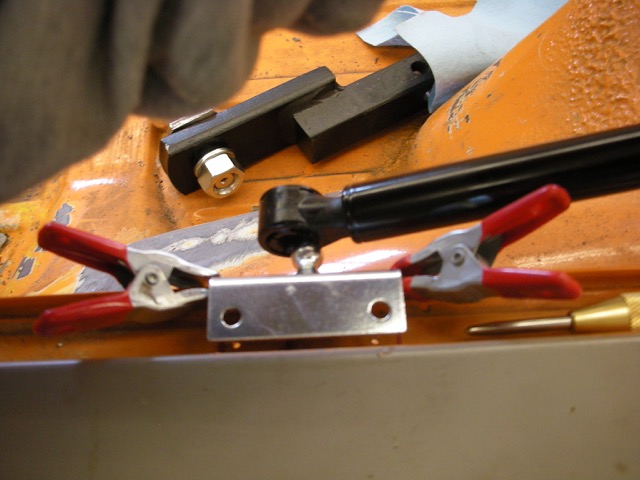
I then marked both sides. I used this trick, slip my transfer punch into a socket, and then it keeps it perpendicular to the bracket.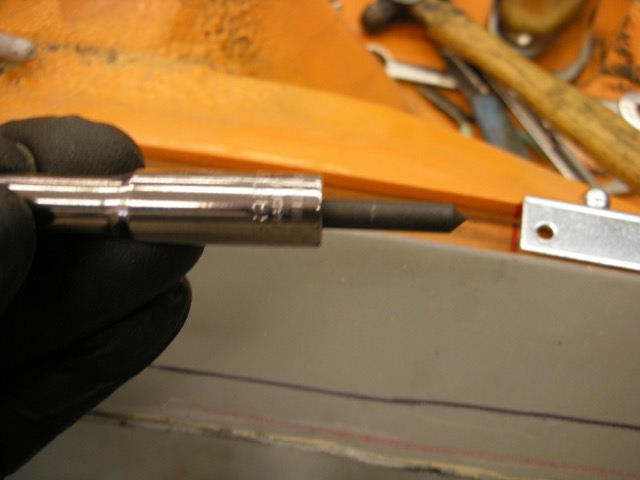
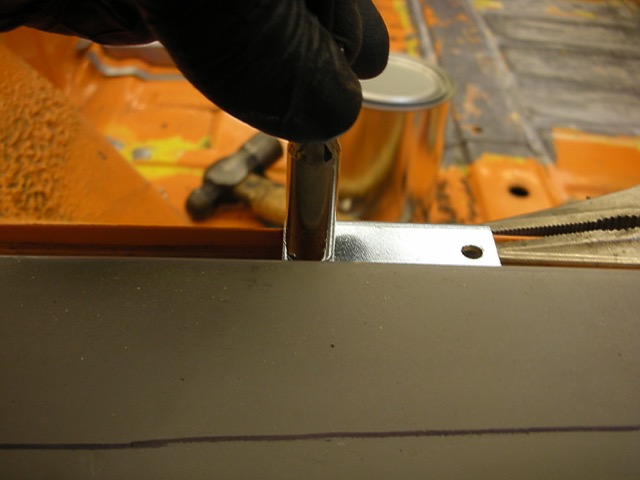
So that is one mocked up I forgot to take a picture
Posted by: 914forme Nov 9 2015, 07:36 PM
Now mocking up all the rear hitch stuff, don't mind the rust, it will be taken care of.
Cutting all the 16 ga to backup all the hitch parts. This tool is great, so glad I got it, or else my forearms might look like Popeye.
Laid it all out, and drilled hundreds of holes.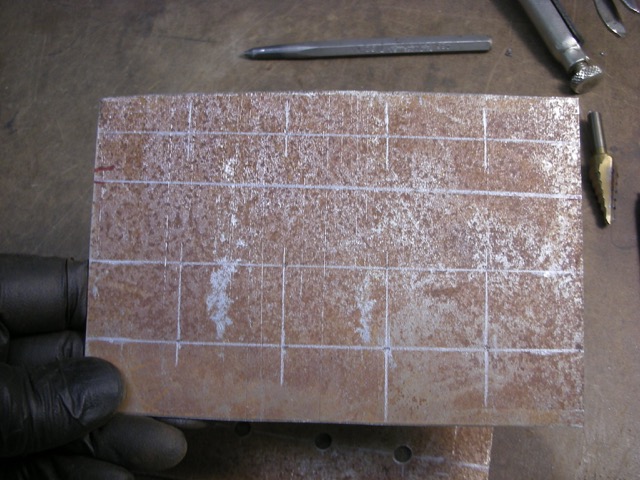
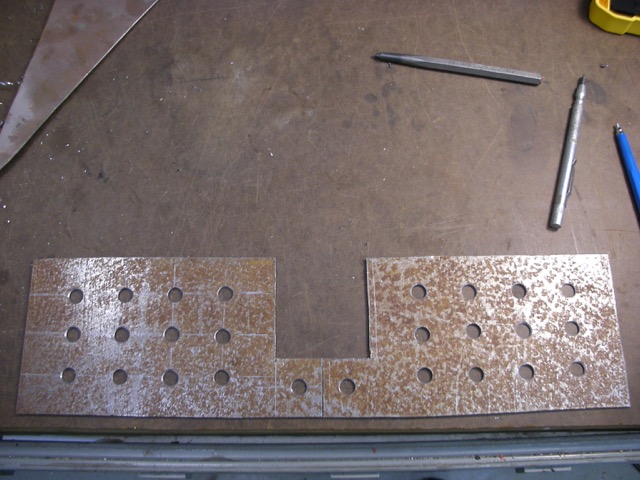
Started Fitting everything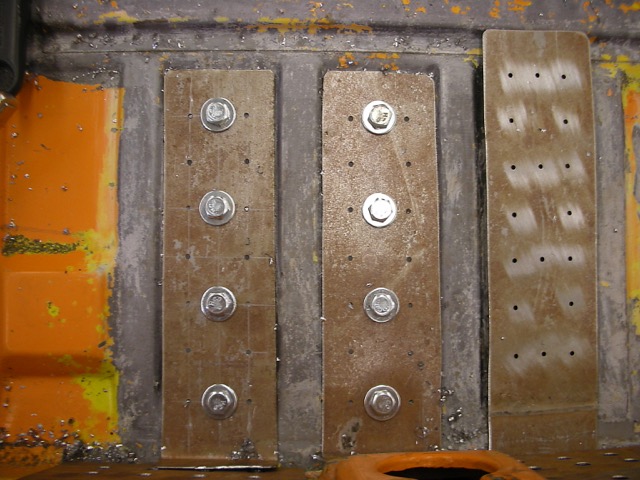
So I got my sandblaster working, added a dust depot to my harbor freight sand blaster and it works great.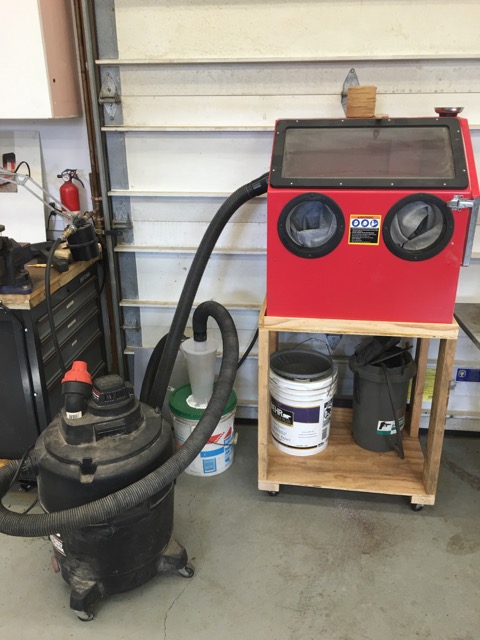
And I blasted all my pieces for the hitch, and a couple water boots that where de-coating.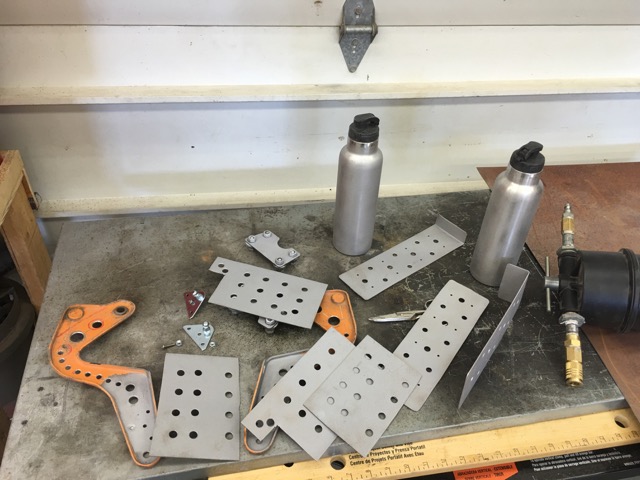
Then welded up a few items in this pile, don't have pictures, and started working on the slave cylinder cover.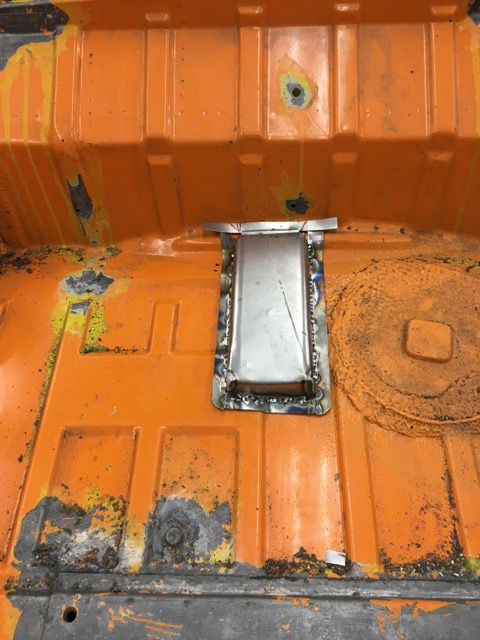
I still need to work on the flange more of that latter.
Posted by: 76-914 Nov 9 2015, 08:58 PM
Looking good Stephen. For the license plate, use plastic bolts. They don't scratch + they won't rust. The trunk shocks are fine if they're under a little load when fully extended. Glad you test hopped that HF electric shear. It's been winking at me last few times I was in there.  Let me know when you get shocked using that sand blaster. I've got the same one and similar vent set up. I thought I was going nuts till Jake chimed in and confirmed that I was indeed receiving little jolts of static electricity thru the gloves.
Posted by: 914forme Nov 10 2015, 07:19 PM
Nope no shocks, I hope not to have it happen.
Posted by: 914forme Dec 30 2015, 09:23 AM
Well long time no update. Lets see, a whole bunch of life got in the way.
Trip to Portland ended in a ride to the ER, but I caused our plane to get emergency clearance, and we arrived 30 minutes earlier than we should, way to turn up the wick.
Spent the next month trying to get clearance to drive again, that was no fun.
I am back to driving, all my doctor visits have found nothing, I am in prime condition except all the crap I all ready knew was an issue.
Thanksgiving, Christmas, Chanukah, Winter Solstice, etc.... Any excuse to not work on the car....
But the 914 got some progress despite all my efforts to keep me out of the work shop.
No outside services used yet, lots of parts and ideas being tossed around in my head. And yes I am still screwing around with the back bumper, rear trunk area.
But first things first some of the parts my 914 picked up.
These will replace my Cobie Z beams, and Cobie driving lights.
Yep Truck Lite 7" LEDs 
Nice Light pattern 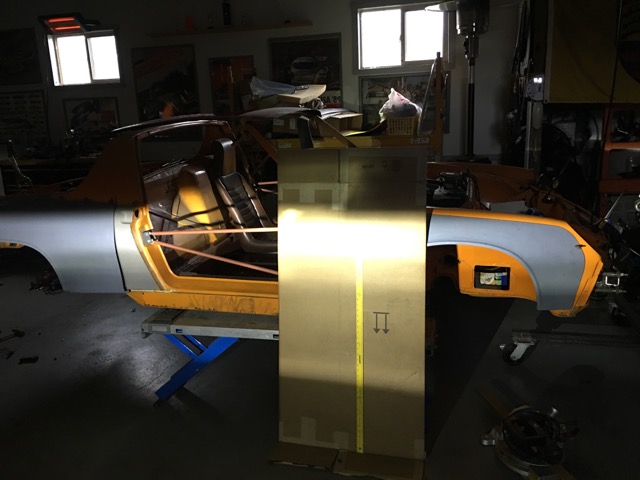
Then I also had an idea, so I ordered up one of these: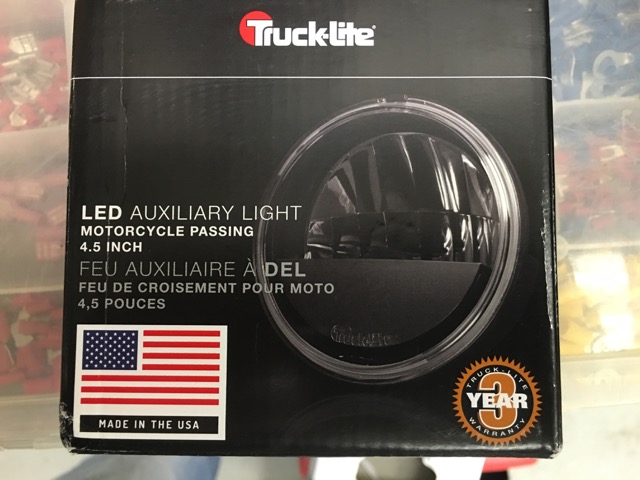
Harley LED passing light, also by Truck Light
Light pattern not as nice but still adds some to fill in the dark spots, I hope.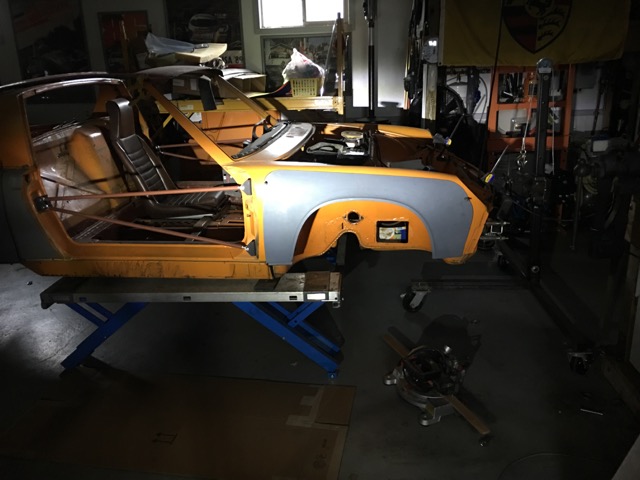
And here is my idea, stock location.
Stock fog light for comparison.
And now the Truck Lite unit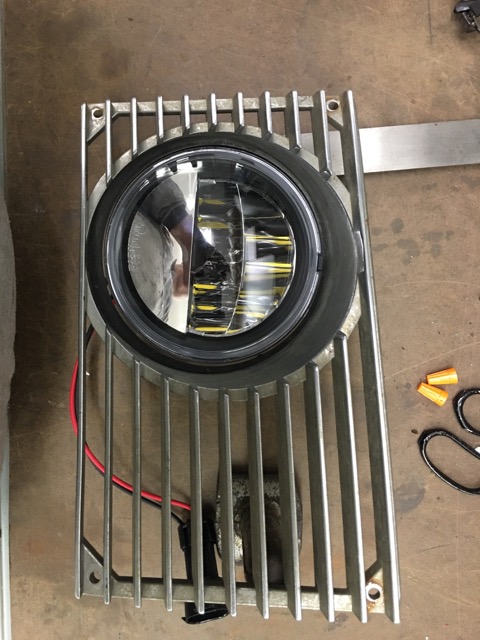
Now to figure out how to mount this things, nothing screams hey you can mount from here, and the instructions, are well nonexistent. 
You would think them little white plugs would work as a mount, but they don't seem to wanna come out.
Need to do some research on the Harley forums I also ordered a second one, so you all can go out and order to yours, as I have the stock I need for the build.
Fellow member asked about my 914-RS lights, and if I was going to use them in my build, and I said, I'm not sure. With adding backup lights, it is a road car, the extra weight might make it not worth the efforts.
So I decided to weigh them against stock.
Stock is 1 pound 14.4 ounces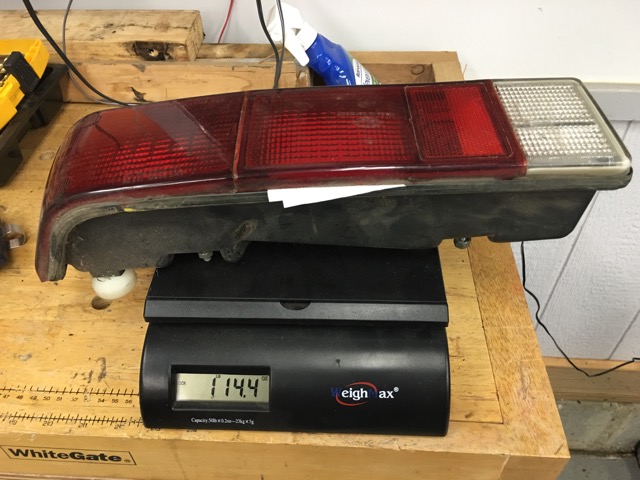
RS alone is 1 pound 0.4 ounces for a savings of 14 ounces. Or a total savings of 1 pound 12 ounces for the pair.
With backup lights I pickup an extra 2 ounces or 4 ounces total. Meaning I save 1 pound 4 ounces on the pair.
Yes every little bit helps so lets look at light output.
Running light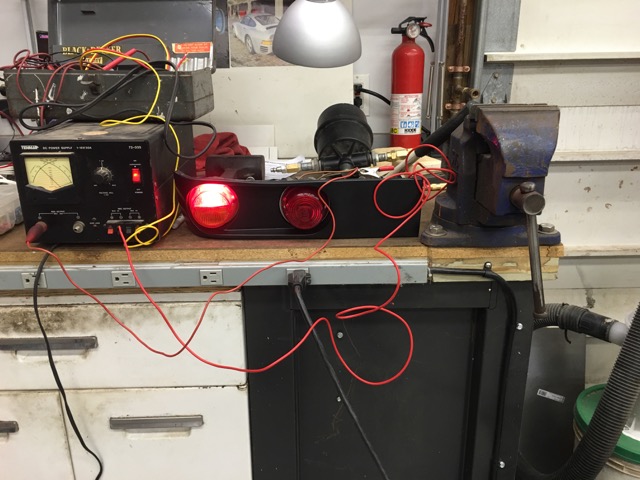
Turn signal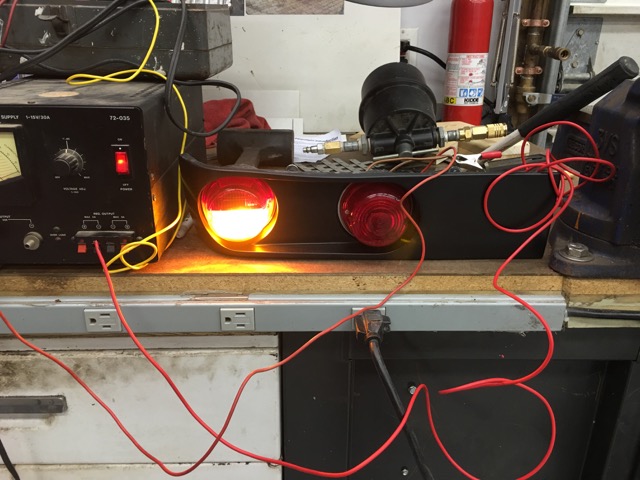
Brake Light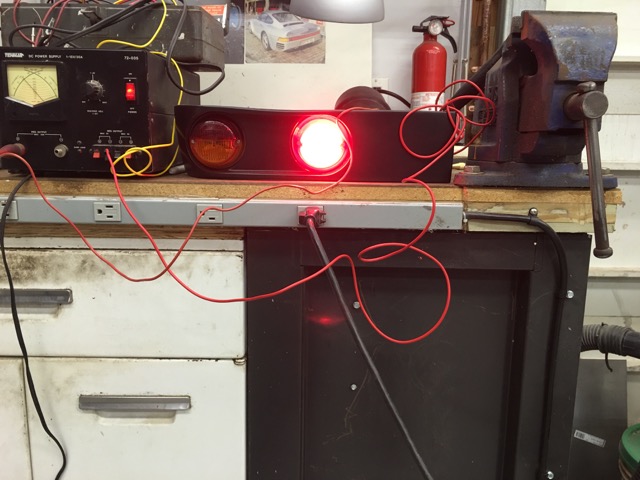
Long to the short, I have sold the RS lights, contacted Spoke about the Group Buy, waiting on the next round, and I ordered a set of euro rear lenses from AA. George out of stock I should have know, I am on the hunt for euro lenses now.
Done plying with lights, of crap I am not. Rear Fog, well now rear DLR / Fog. It forced me to make a decision, I will not be running the rear valance, I had been thinking about it, but now I won't have not run it since I owned the car. So where to put this, it needs to be low and on the drivers rear side. And I don't like the factory box.
So out cones this. Two modes DLR / and Fog/Brake A zener diode will allow both to function with out flashing the front fog lights when I hit the brakes. Or the other way around, in reality it will take two zeners.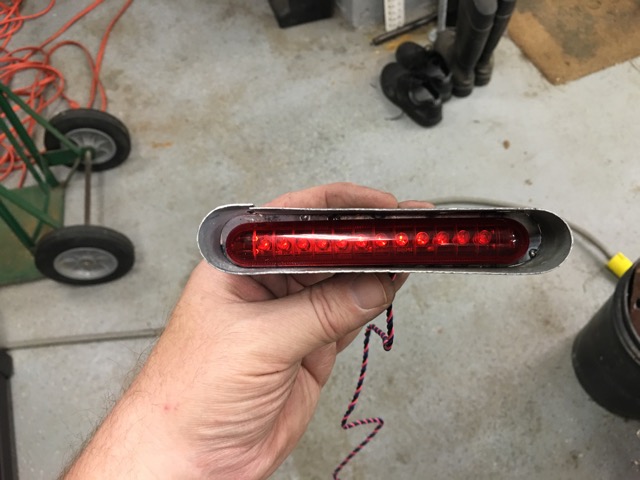
This is the bracket made to hold it.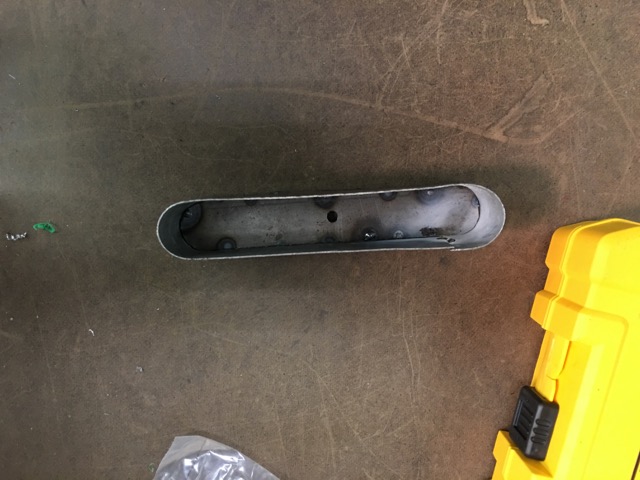
And this is it being fitted up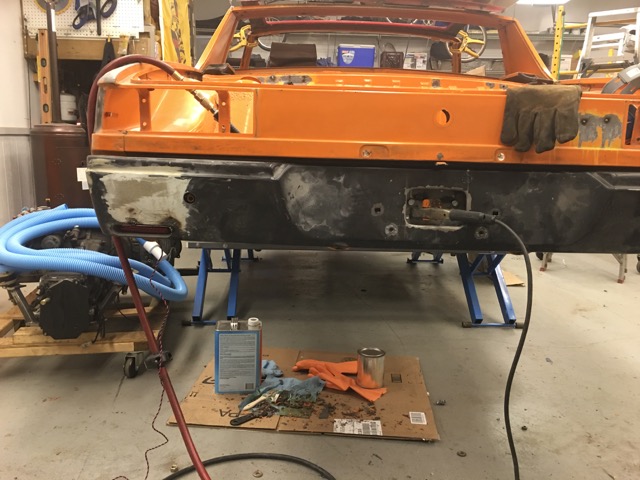
DLR mode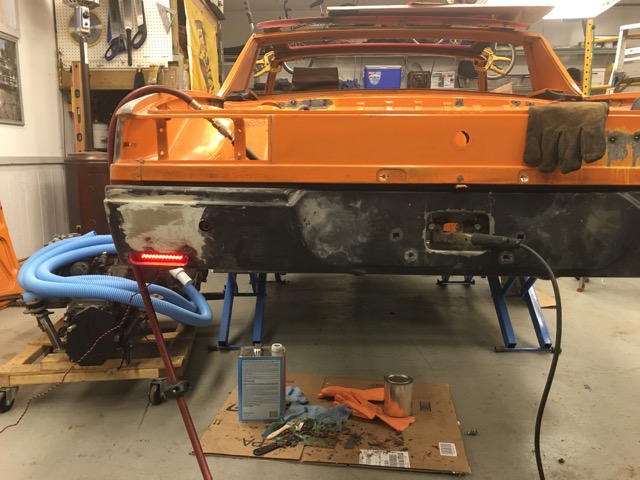
Fog / Brake Mode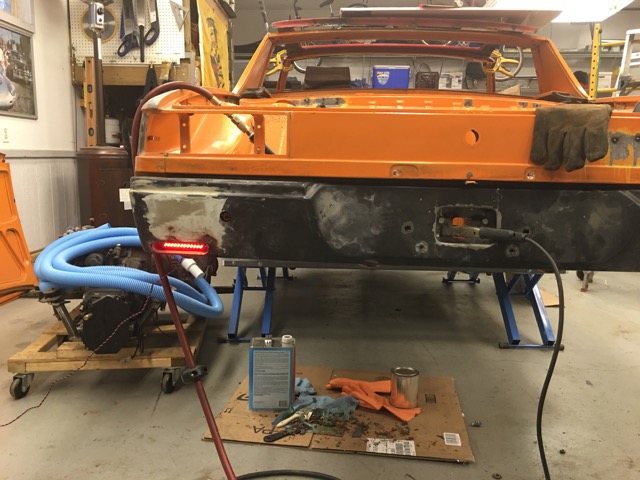
Wow camera does not show a difference in light output.
And after 2 days for it looks like this. We need a grinder emoji 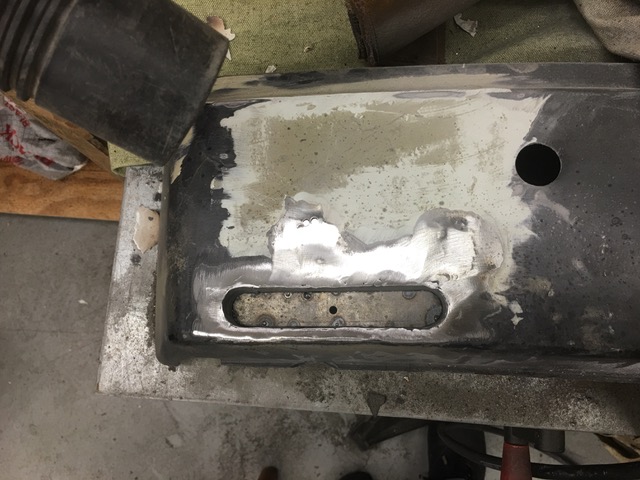
I will most likely have another few days worth of work cleaning up that bumper. Need to strip all the old filler, the dents out, and then epoxy prime, fill whats needs filled, epoxy prime/ seal, then primer, sand,primer, sand, on and on.
I am no Metal Surgeon thats for sure, but I am learning a lot, in the process.
What is next for the bumper
A plug for the trailer wiring, waiting on a step bit that goes to 1-3/8 of an inch.
Bumper tops, waiting on 914Rubber to get the kinks worked out on the fiberglass bumper tops, been waiting a long time for these.
And then into the trunk, and finish welding the trailer hitch, plug up all the holes I no longer need. Finish the shock mounts, waiting on my counter sink bit to show up for that. And building a mount for the trailer light conversion box. So back to the shop today, to makes some more progress, hope to get 3 more days out there this week.
Posted by: Mueller Dec 30 2015, 09:26 AM
Neat custom modifications...I like!
Posted by: 914forme Dec 30 2015, 12:03 PM
Thank you Mike:
Lunch Update:
Bracket made for trailer harness adapter.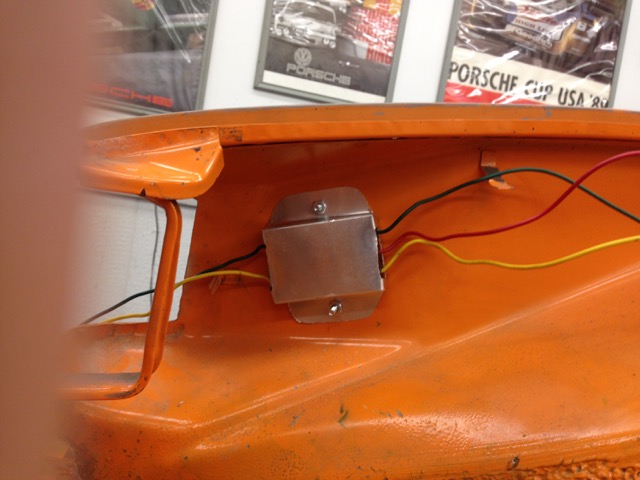
Made from Aluminum Flashing, nice and light. My AL skills need a little polishing, might redo it latter.
Drilled a hole for the harness. 
From the Bumper side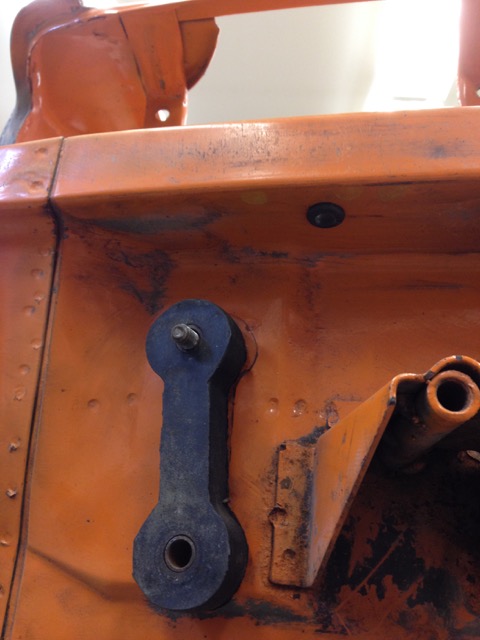
Will drop the harness down, and add a weather pack connector to it, for the trailer lights and DLR / Fog Brake. I might added these into the the setup also LED license plate lights. They hang down a little farther than I like. Might use a lighted frame, or lighted bolts instead.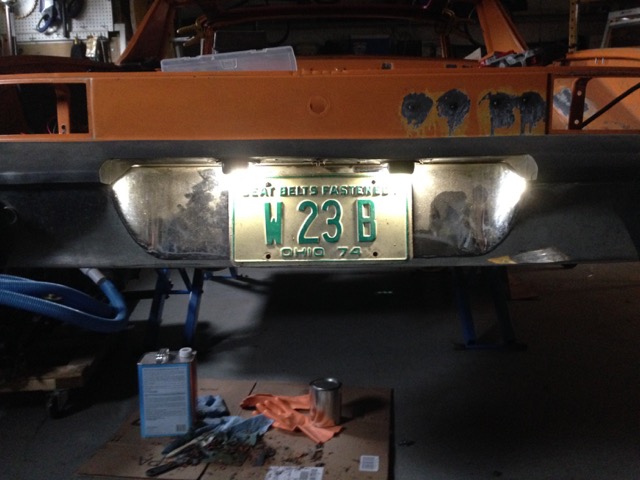
They look like an after thought, I hate that.
And no your not going crazy used my old chrome bumper to test the lights on as it has a bumper top.
Posted by: 914forme Jan 1 2016, 05:12 PM
Found 3 sets of European lens, sourced one set from Germany.
Here is what I completed yesterday, lots of
Welded in a ton of studs. figurative not 2000 pounds of steel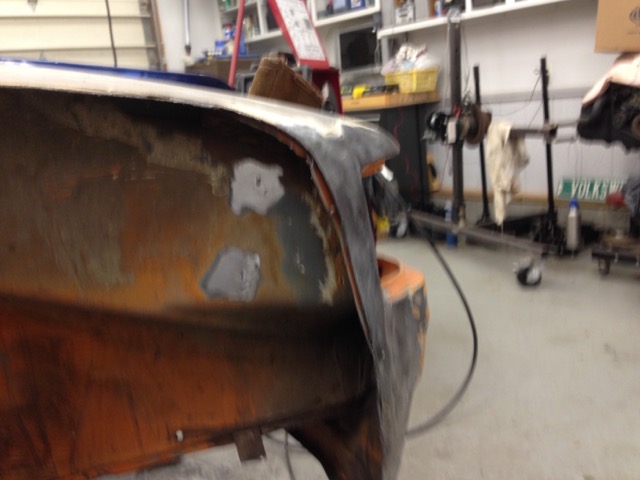
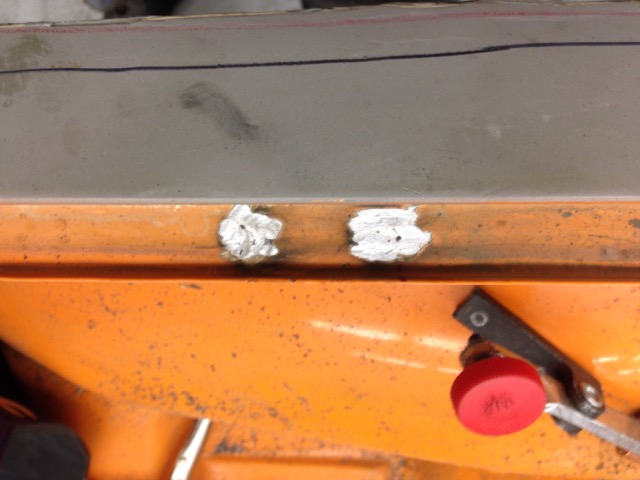
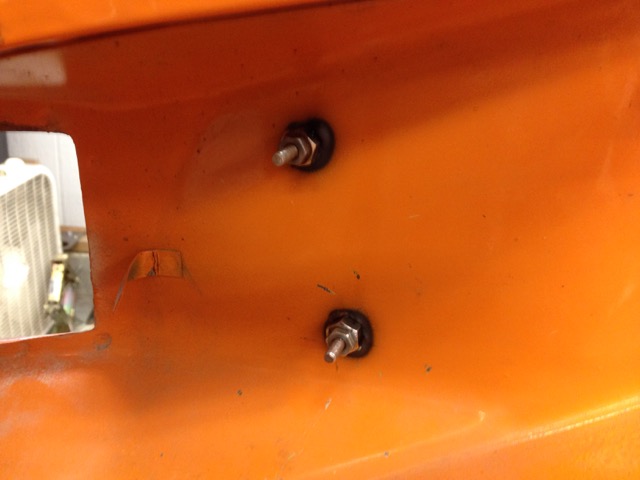
Filled holes no longer needed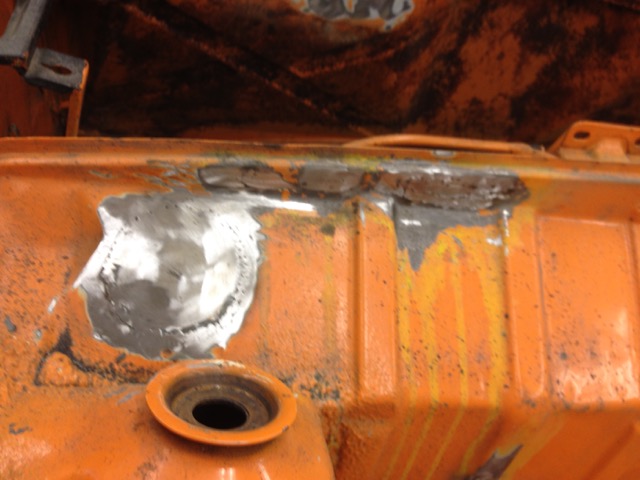
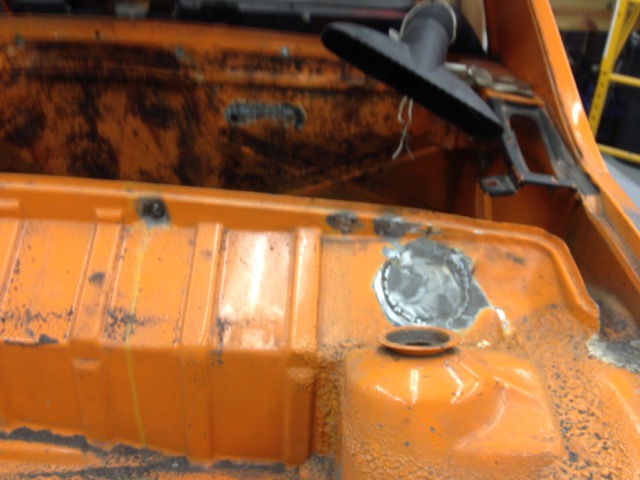
[attachmentid=534219]
Almost done with the hitch pieces until I get the chases back on the rotisserie.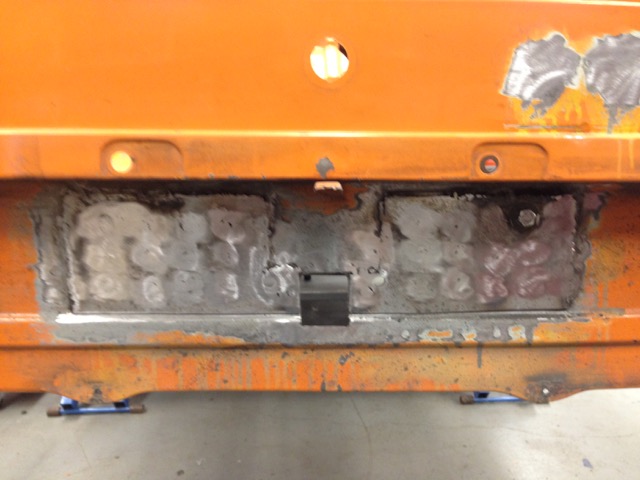

And mocked up the hitch wiring.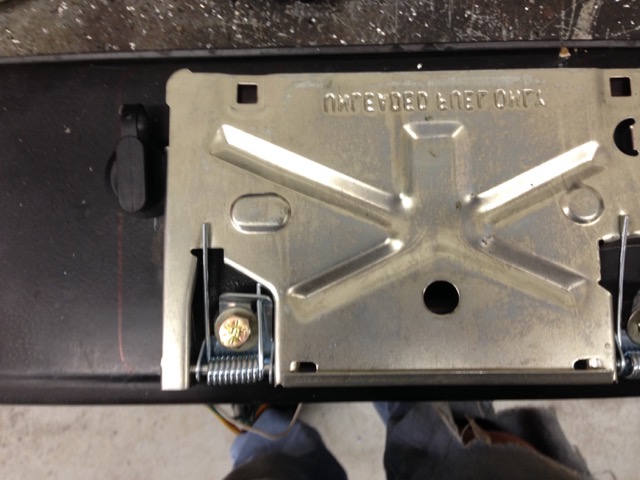
It will be hidden behind the license plate out of site out of mind, and protected from the elements.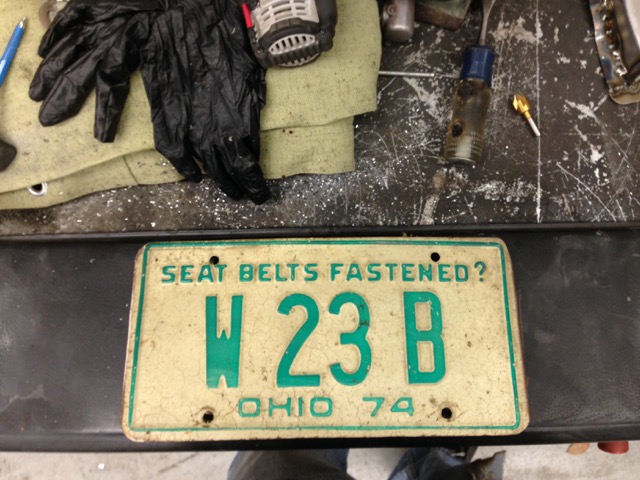
Progress made in baby steps.
Posted by: 914forme Jan 18 2016, 01:33 PM
Been a while, I have not been slacking just working on other items. A friend of the family died and left three young adults to fend for themselves. We finally got most of the items done, and cleared up. Probate papers are also done, some one took pity on them, got to love Christmas spirit.
I got drafted to do car repair work. Not sure if you have noticed but it is cold here in Ohio. And when heater fans go out, all sorts of things go wrong. So I fixed a Ford Escort fan system, corroded connectors, all rusted up. Little work and good as new. That car back on the road.
Then this got brought over: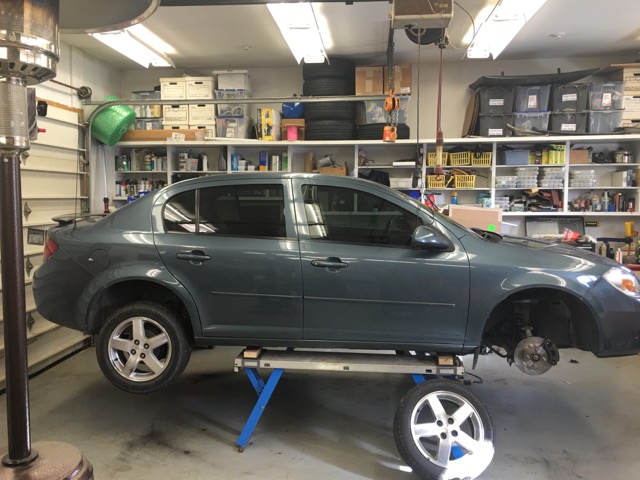
Long list of items needing fixed:
Battery Replaced
Wiper Blades ( who takes them off and does not replace them 
Front Brakes New Rotor, New Pads, lube pins, replaced all the fluid
Oil Change
Antifreeze flush
Trans Fluid Change
New Tires for the front
Radio does not work - Fuse
Front Right Turn Signal no work, burnt connector Fixed now.
Waiting on tires, and then mount them up, and torque the lug nuts, car will be done.
Oh and the worst item, car was parked with the windows down, and cats made it their litter box. So tore the entire interior out, pressure washed it, Steamed it, washed it and extracted it. Put it all back together, and running an ozone unit in the car. No smell yet, but we ill see if the urine smell comes back, once the car heats up.
So back to the 914, what happened to my pictures.
Finished mock up on the bumper, all studs fitted. Also made the pieces to fill the license plate bracket inserts.
Made pieces to fill the odd corner holes left in the slave cylinder cover.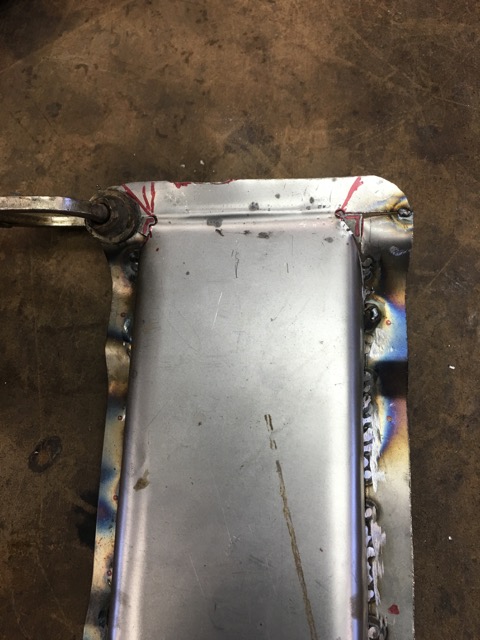
Worked on fitting up the last piece of the hitch re-enforcments on th trunk floor. Shh don't tell my wife, I took one of here purses to make a shot bag.
Got a decent fit once done.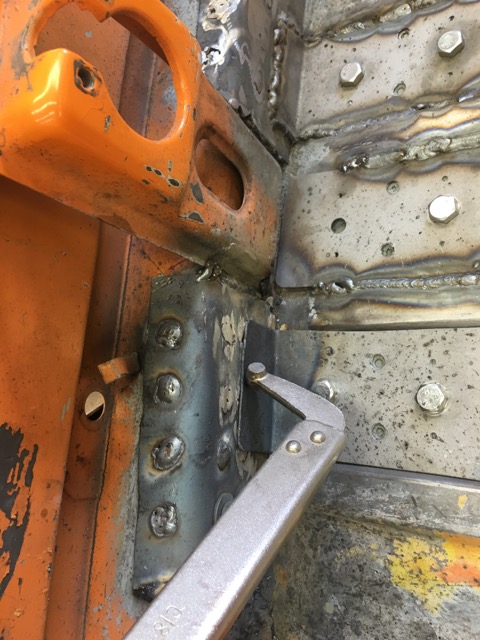
And started to work on the rad support in the front trunk!
Wish I had this stuff a long time ago 
Makes it so much easier for me to see Still does not help accuracy.
But now I can see how far off I really am
Posted by: 914forme Jan 24 2016, 09:31 AM
Yesterdays progress, life keeps getting in the way. Wife's EOS washer pump died, you have to disassemble the entire nose of the car to change it. 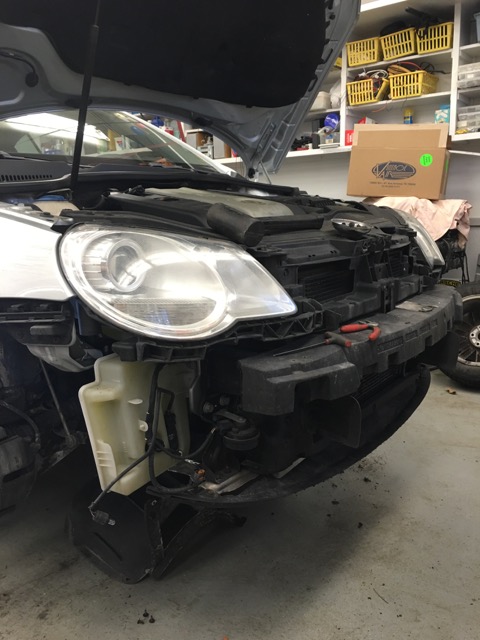
Car will be on the lift for a week or better now waiting on the pump to arrive.
Couple of items came in on the brown truck Friday.
Pedal Board thanks to G E O R G E 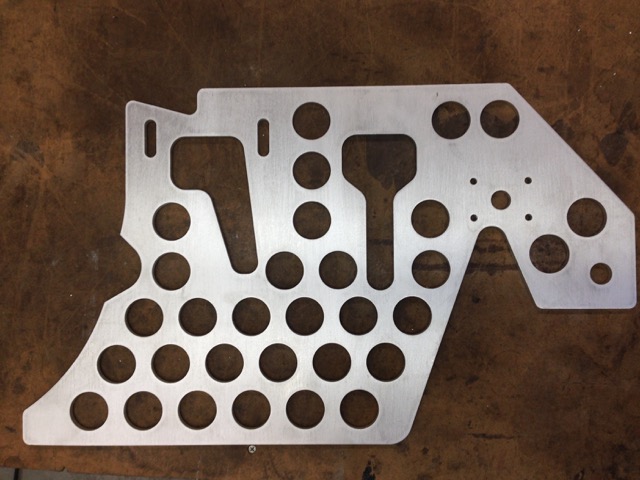
And yes I am back to working on the license plate holder will this ever been done.
Plastic Nut insert, round hole in a square peg 
Which allowed me to install these LED License plate lights.
And they look like this at night
Hoping today to get some welding done, and more fab work, seeing McMarks post of quick release engine lids got me thinking. Between his and Brant's racer, I might have to make my own design.
Looks like I will be starting fab work in the engine compartment next. Still have some things to eliminate. Decided I will keep my engine mount I built for the EG using the early -4 bar. Its ready to go, and does what it needs to do. I have a bunch of stuff to install in the engine bay, so this will be a long project also. If I can fab work done by April I'll be a thrilled, as it would be a good time to put it into paint. If I look at the days and obligations I have, that will be a hard target to hit.
Posted by: Garland Jan 24 2016, 12:23 PM
Appreciation for the time you have spent on the rear bumper and hitch, looks great.
Posted by: 76-914 Jan 24 2016, 08:44 PM
The piece that covers the slave cylinder does have a tricky bottom, doesn't it? Keep after it.
Posted by: rick 918-S Jan 31 2016, 11:58 PM
Nice attention to detail.
Posted by: 914forme Feb 13 2016, 07:36 PM
Thank you all for the nice commits
So today, shop is snowed in, what does that mean to me, I can work on the 914
So got right to it, fired up the welder and finished the welding on the rear bumper there was much rejoicing!!!!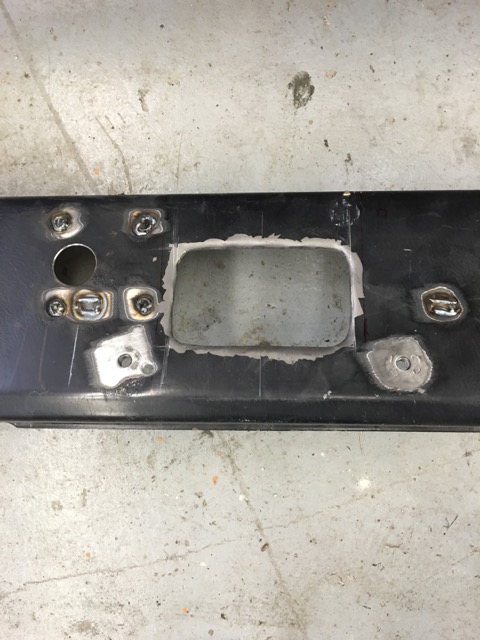
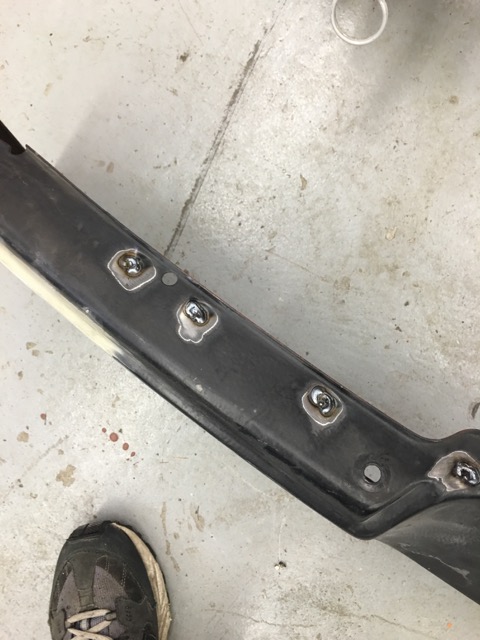
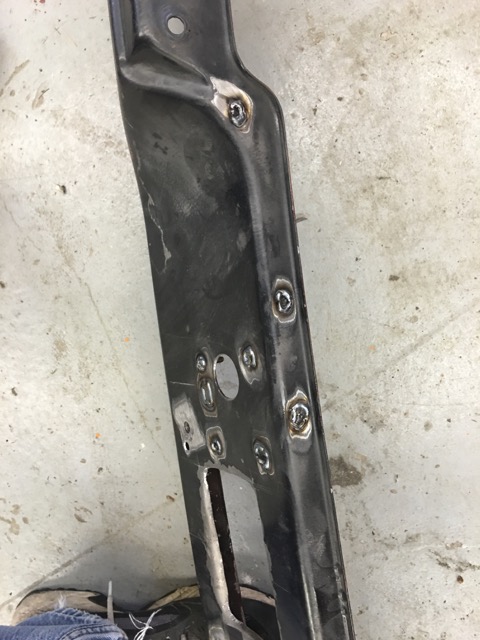
Finished the clutch slave cover.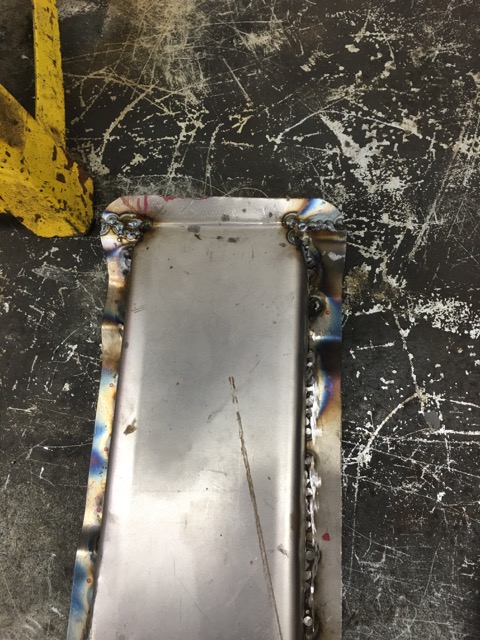
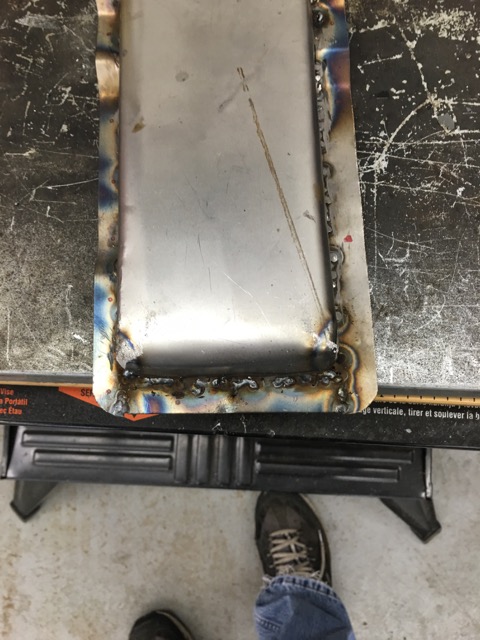

And thanks to another member here, I am going to run a rear valance now Hate the look of the mufflers.
So dug out a metal one, and well I can't leave well enough alone.
First fix a dent, and all the other damage.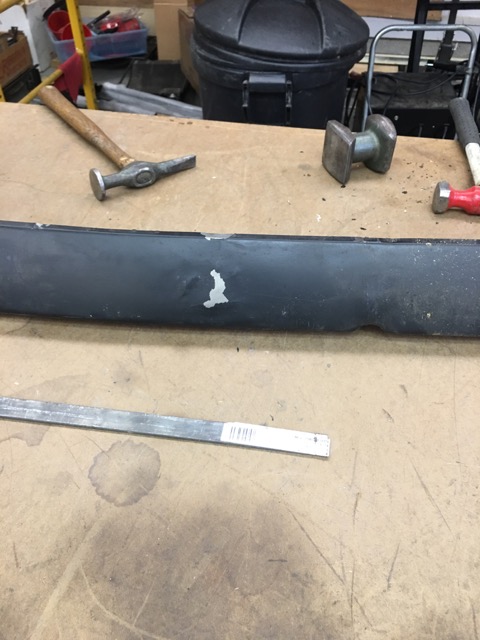
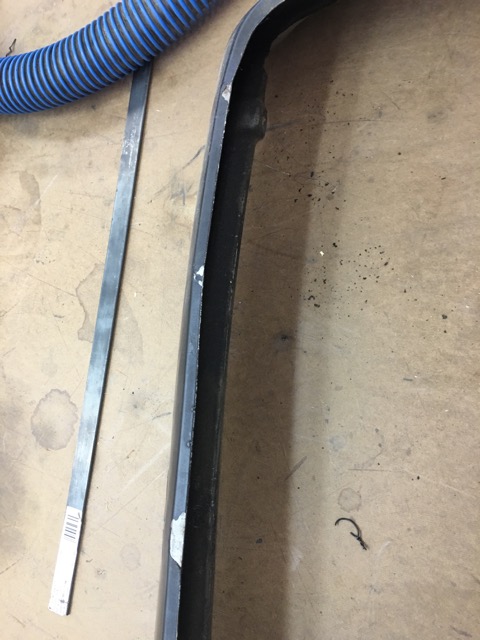
Next up file the side exhaust outlet. Man thats a compound curve 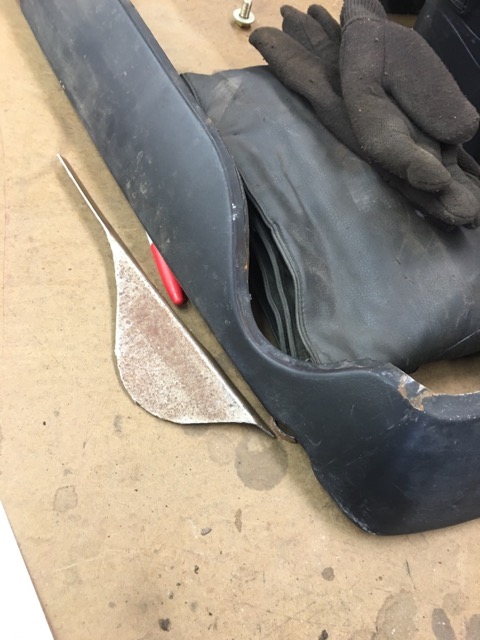
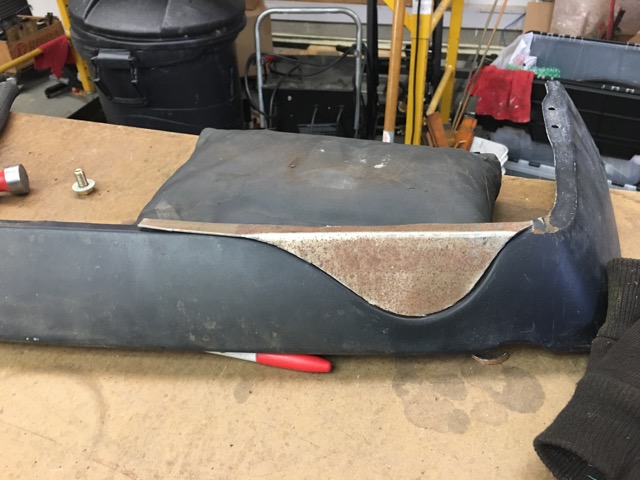
Lay out for center exhaust exit. Twin 2.5" outlets spaced an inch apart. I will most likely make it an oval pipe. Radius is 3" leaving 1/2" around the pipes to get pipes in the hole and lined up.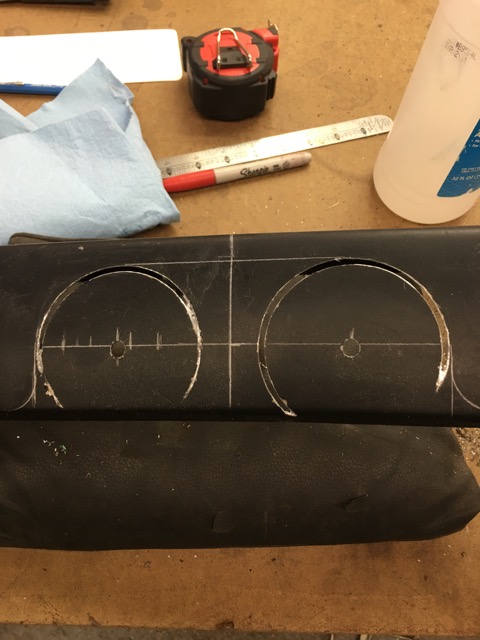
Cut Open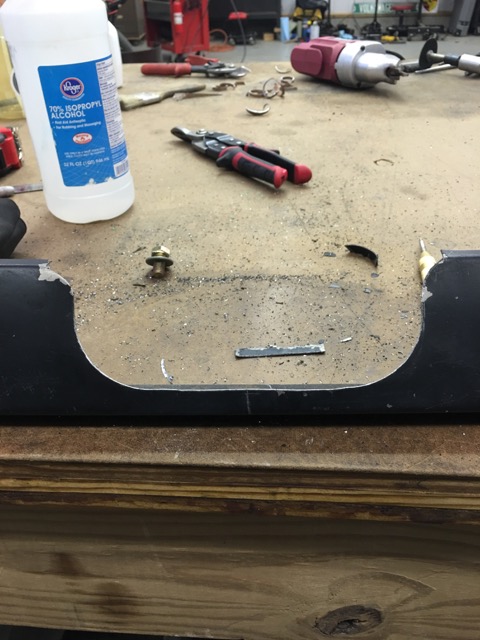
Add re-enforcmenet of the opening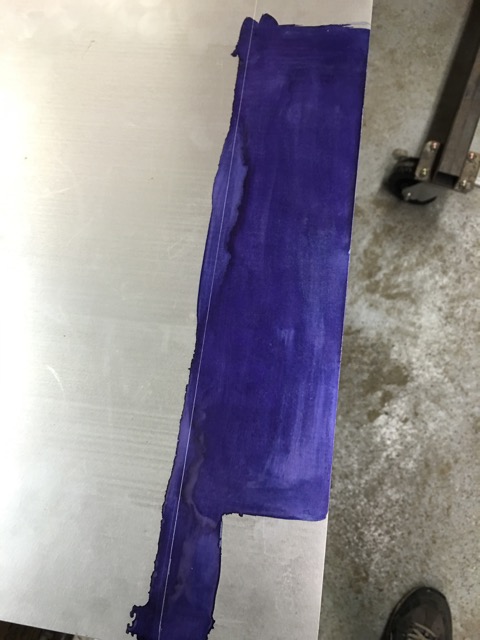
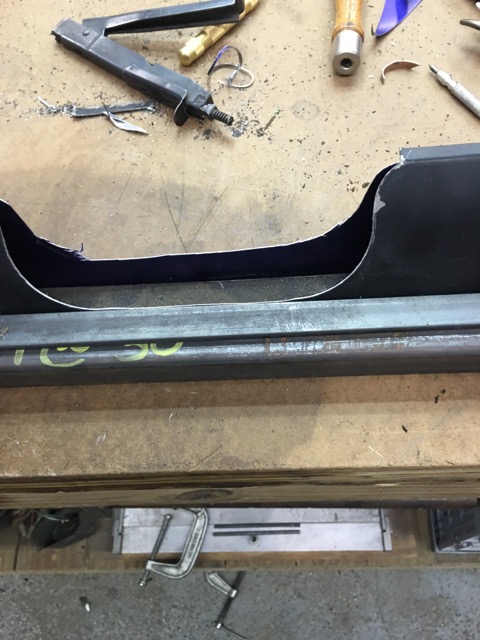
Pipes Mocked up these are 2.25" pipes so it will get better once done, did not have 2.5" in the shop, and did not want to leave to pick some up.
Sprayed some of this on the sealed up sides
And I finished welding the hitch re-enforcements in the trunk floor. Well at least until , I get it flipped over and start on the underside of the hitch.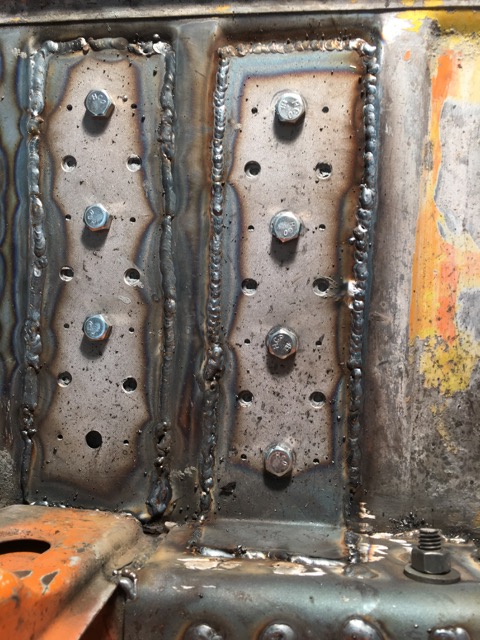
Once that is done, I'll need to come back and plug weld the bolt holes and the other holes you see. Make it nice and strong.
I just figured out, I need to radius the exhaust opening, so I will do that, then weld the back piece up, and start making the filler for in-between the valance and the new re-enforcement piece at the back.
Posted by: Andyrew Feb 14 2016, 08:29 AM
Looking good! I think the center exit exhaust will look fantastc!
Posted by: 914forme Feb 14 2016, 12:13 PM
The mornings work. Might get a couple more hours in today then I need to spend some time with my
Rounded over the opening. 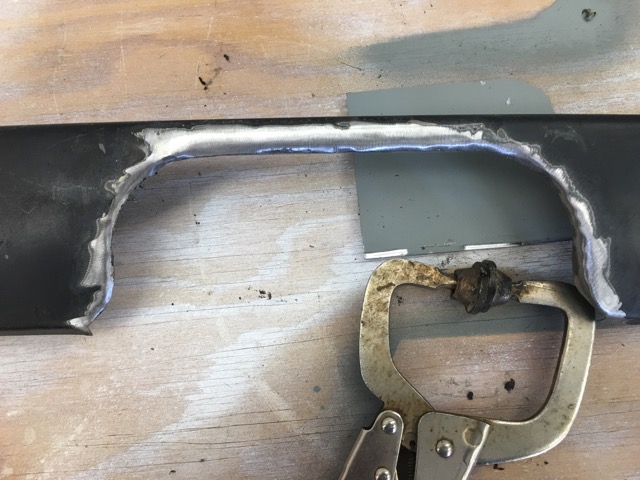
Using this home made dolly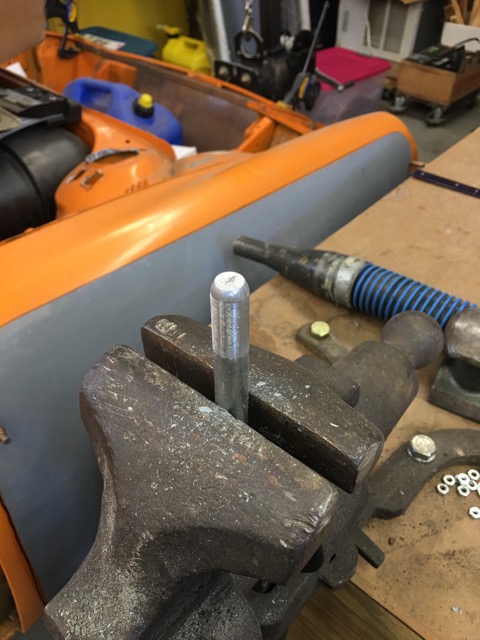
And this hammer made quick work out of it. It is only 20 gauge so it was pretty easy.
Final result of all the banging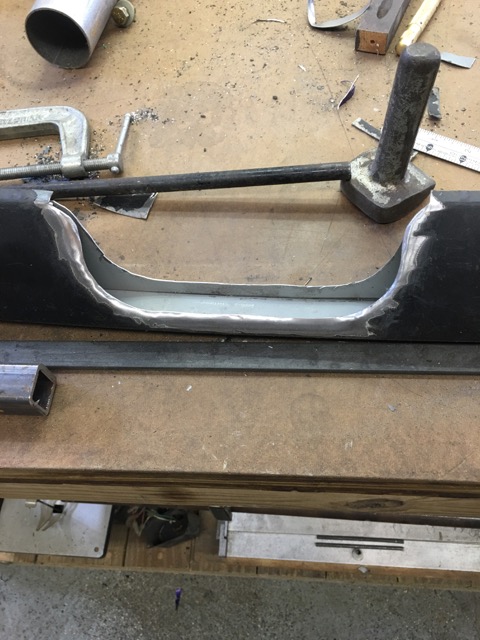
Layout the filler piece 1-1/4" strip will do the trick. Blue layout dye and a compass is all you need. Drag the point across the dye, accurate mark, cut.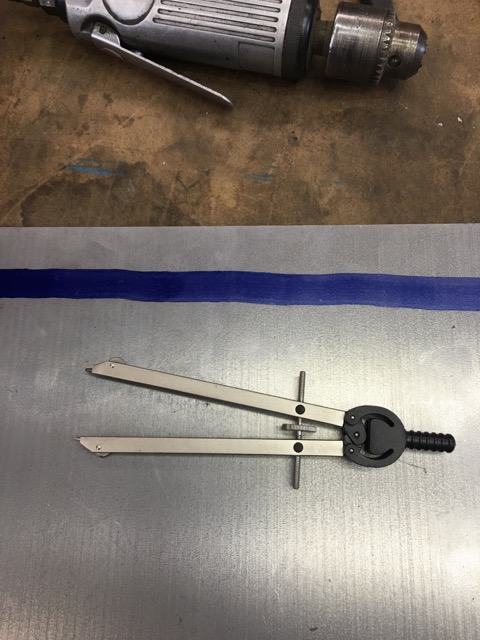
Lots of fitting, I found out I am not as good as a lot of people, so Im making it in two sections. More practice, but hey I am still learning this stuff.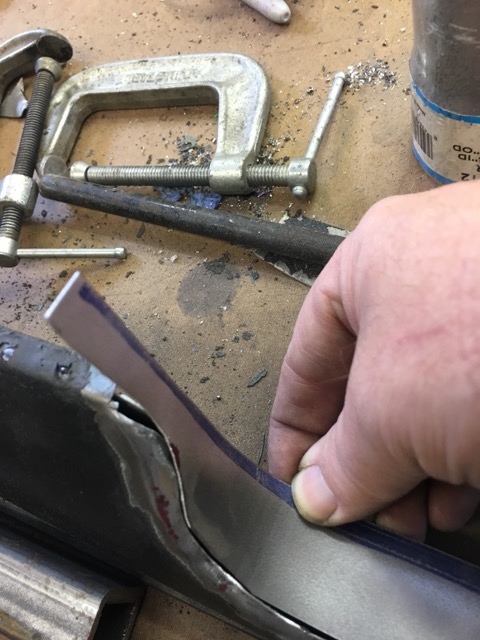
One side tacked up, get to rinse and repeat the other side finish the welding and spend lots of time with a cut off wheel. I use a cut off wheel to grind the welds down just shy of the surface. I'll finish up with sand paper, either a flapper disk, or small rolocs.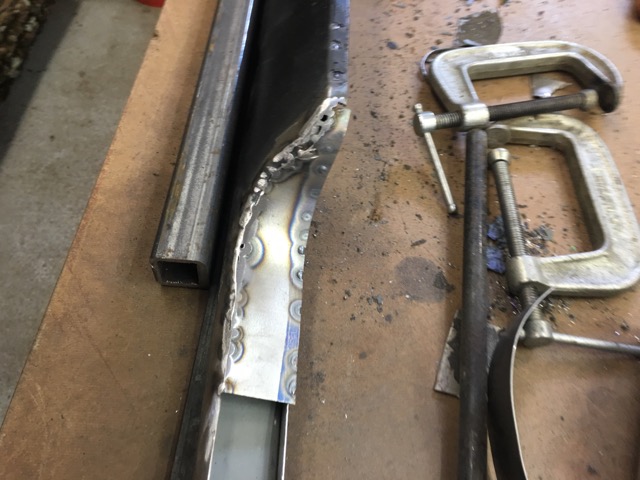
Times a wasting' better get back at it!
Posted by: Van914 Feb 14 2016, 01:50 PM
Stephen,
Great work! Spring is coming I hope
Van914
Posted by: 914forme Feb 14 2016, 03:11 PM
Stephen,
Great work! Spring is coming I hope
Van914
Thank you Van, and Andyrew
I certainly hope so, if not I might have to orchestrate a raid on a furry little creature in PA.
Who ever thought a ground hog could predict the future anyways After all he is only correct 39% of the time, and a cow pooping on a a field with 2 squares drawn in it could be that accurate.
So back to the build!
Valance all tacked up, needs to be final welded but hey that is the story of my life.
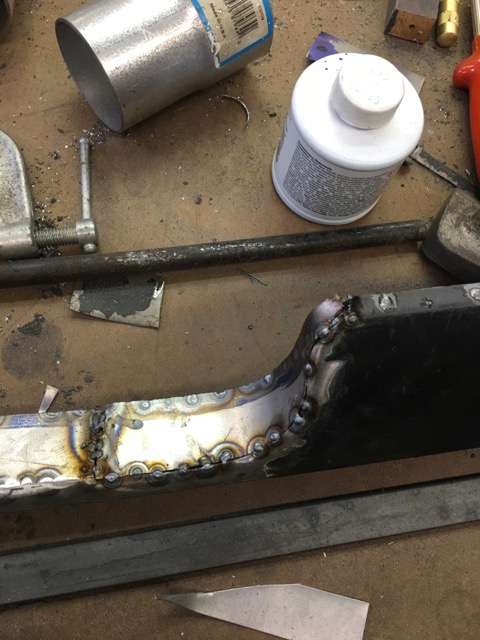
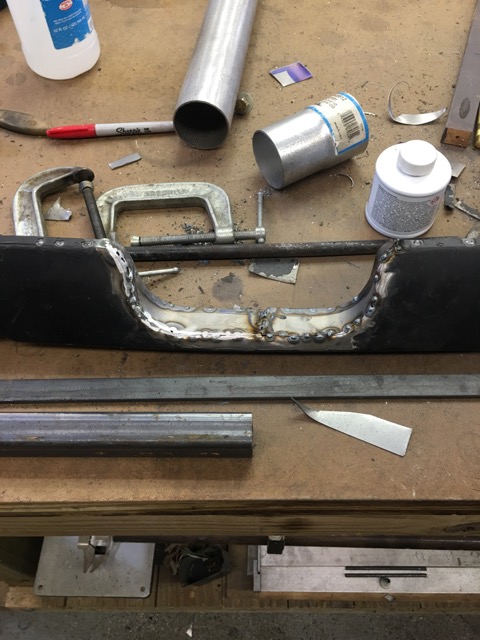
Welded up the trim holes on the drivers side sail panel.
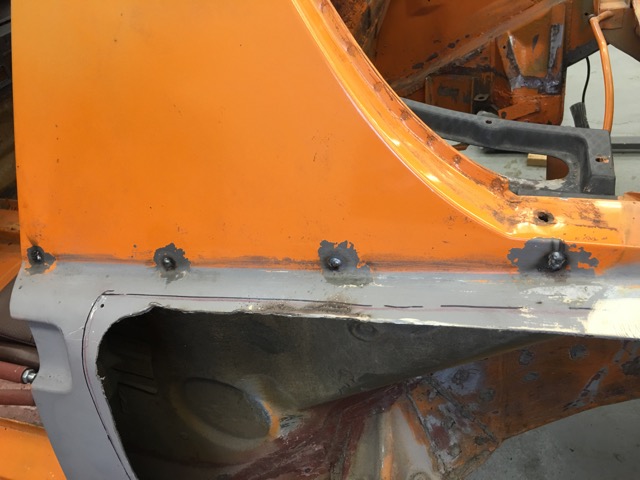
Moved into the engine compartment
Started mocking up the harness mounts.
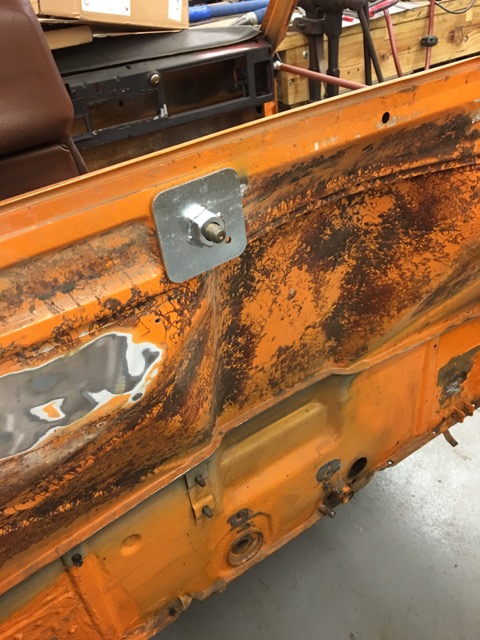
Have some work to do to make these safe as I would like. Big ole gap.
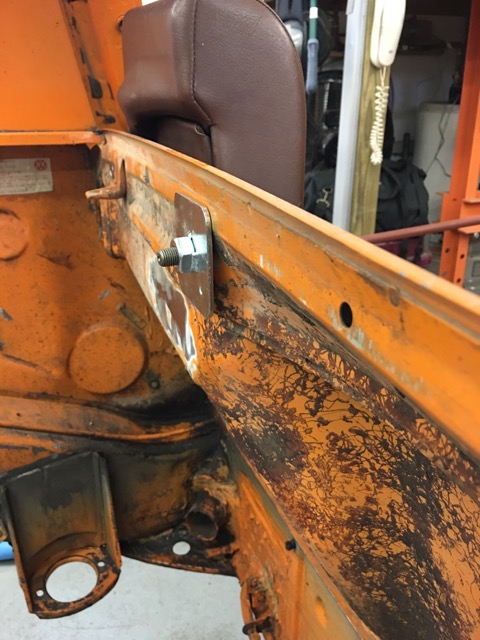
Have a tube running between the two sheet metal sections. Keep it from compressing the hallow section.
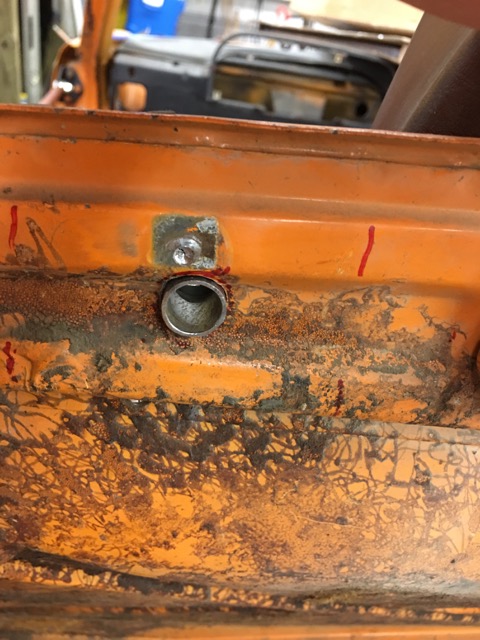
Will be adding re-enforcement to the from here.
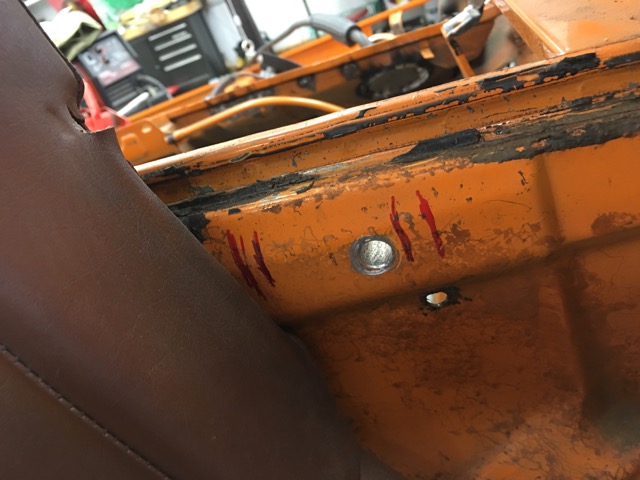
The Schroth Provi belts have these mounts they fit better than my square mounts on the outsides.

Test Belt clipped in,
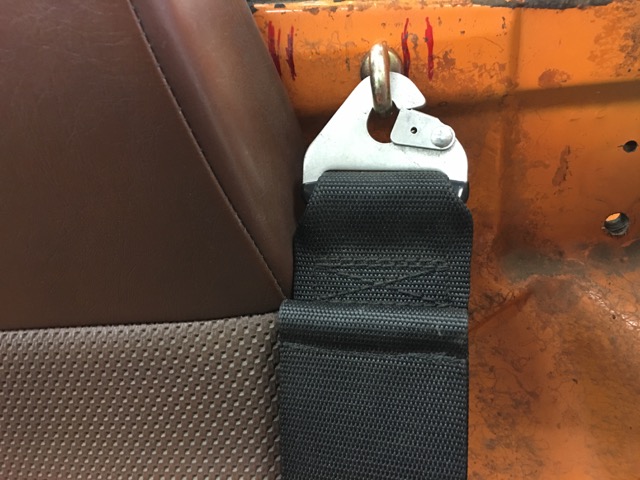
That is all for today.
Posted by: 914forme Feb 15 2016, 05:01 PM
Today's progress
Worked on the harnesses, and made a list of items I will need to finish up. Need 4 eyes, and 4 snap in endplates for 3" belts.
So Provi I have are 6 point harnesses. 2 anchors in the floor, issue is one ends up right next to the spot weld access hole in the floors under each seat. So I will cut them out, and back it up with some 16 gauge, then add the FIA certified backer plates.
No pictures of these, not very interesting yet.
Moved onto the drivers side rear fender well, this is one of those while I am here things.
Ground down all the plug welds on my old GT kit.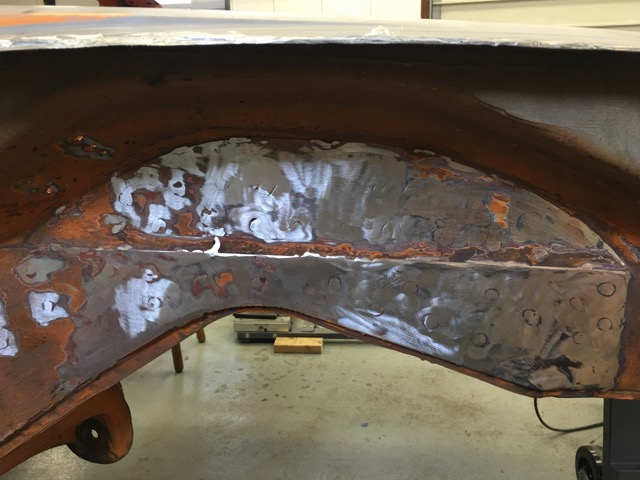
Next up worked on reinforcements of the outer suspension console, more than likely over kill, as I have 914LTD log stiffener in there all ready. But hey triangulation always makes things a little stronger.
So out comes the cereal boxes.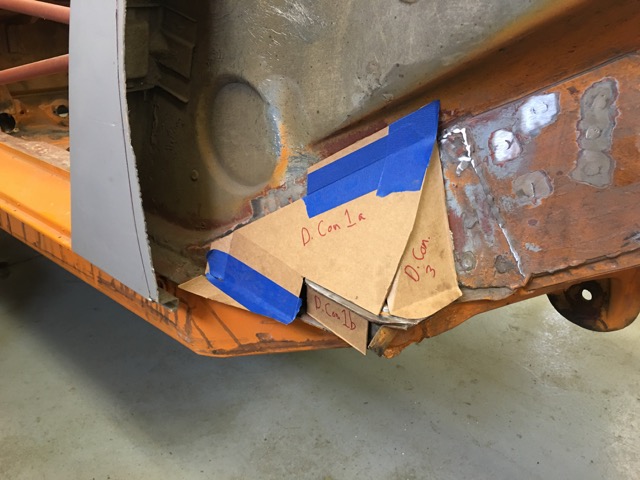
bending the first section up, love my high end sheet metal brake!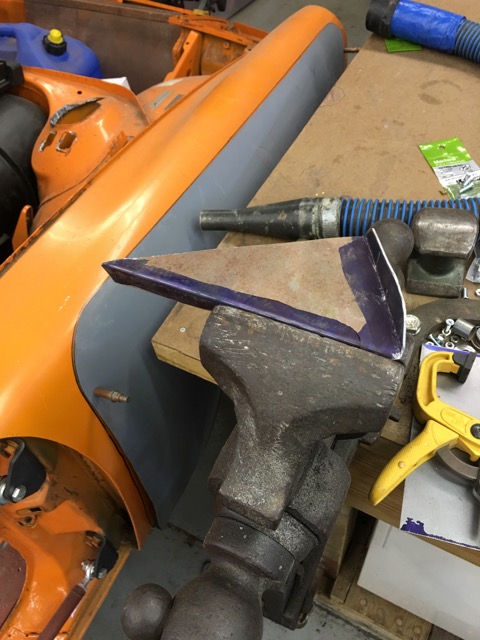
And fit to the chassis, not bad for a hack with a hammer, vice, and a harbor freight electric shears.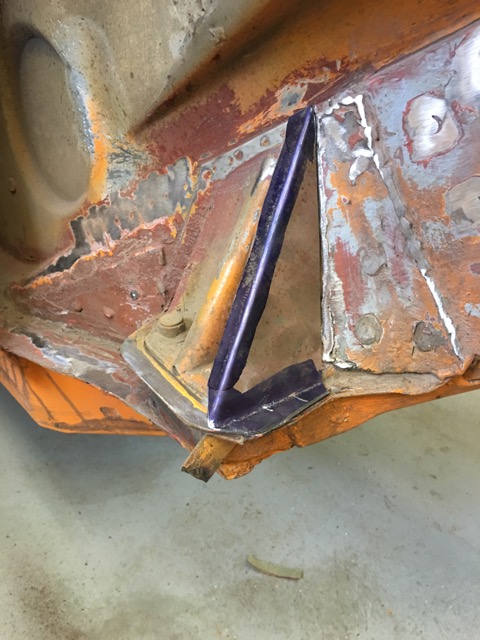
Laying out more piece, love my layout dye, you can see one of the anti-sub strap re-enforcements at the top of the picture.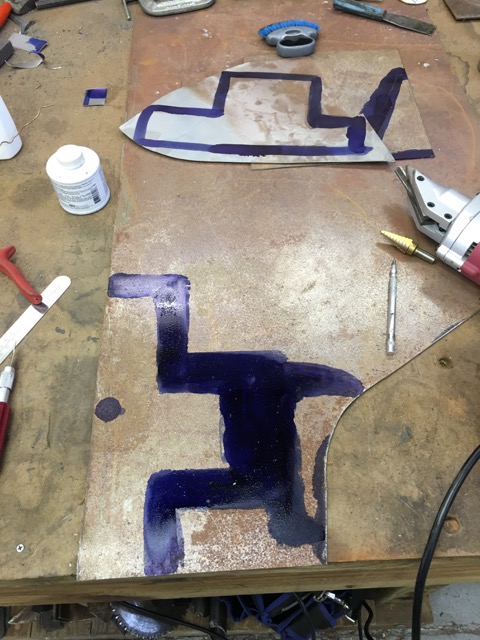
Second side all made up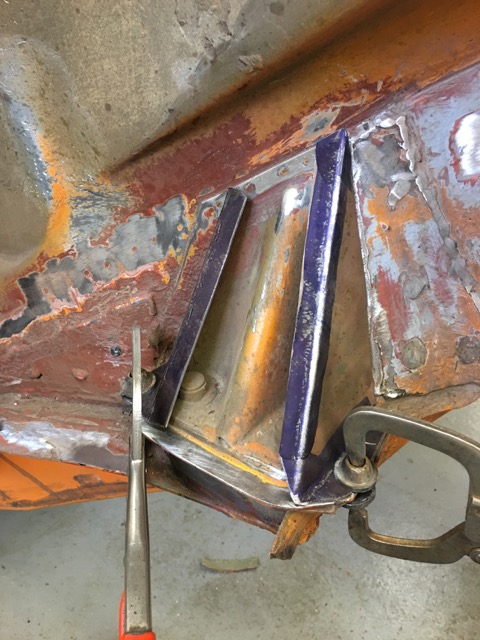
Add a front and a leg to cover all the seams in the GT kit.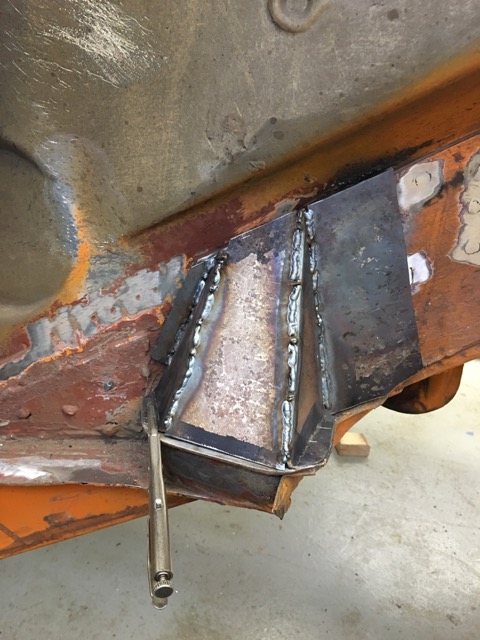
And now for the crazy part 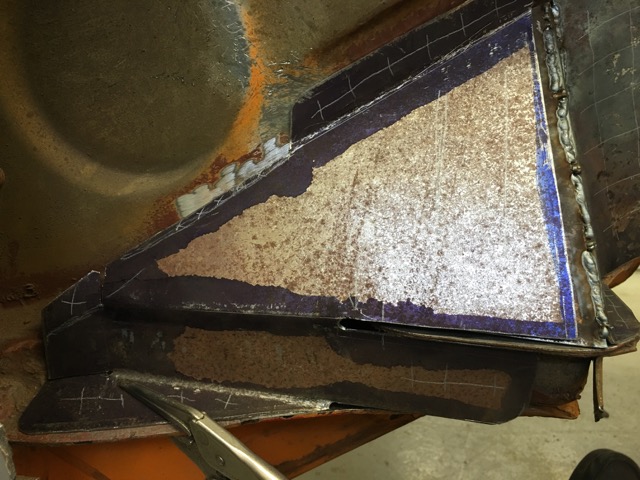
Ties it all together in several planes. 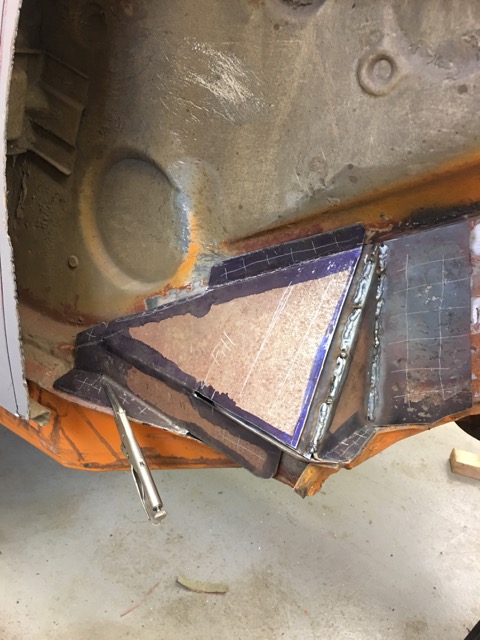
Sand blasted all the pieces fabricated up today, and sprayed the inner pieces with some zinc. Need to clean up the welding areas, and it will be ready to become a fixture to the 914.
Posted by: 914forme Feb 21 2016, 06:59 PM
So yesterday brake pedal parts started showing up. I got a killer deal on a Wildwood pedal set, so I needed a couple of M/C.
I choose the Tilton's over the Howe's why, well the Tilton come in 5/8" bore, as well as 3/4" bore which ~ 19mm.
And they are only about 1/4" longer than the Howe's, I can always build a pedal box if I need to.
All this cool accessories I will not be using lol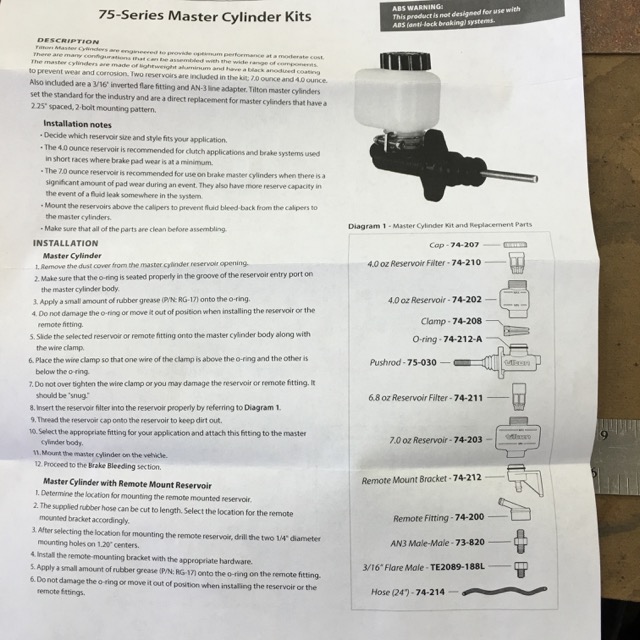
Next up, I made the decision that I was going to make it look like I was making progress,
So a little cut, and off came the three other fenders.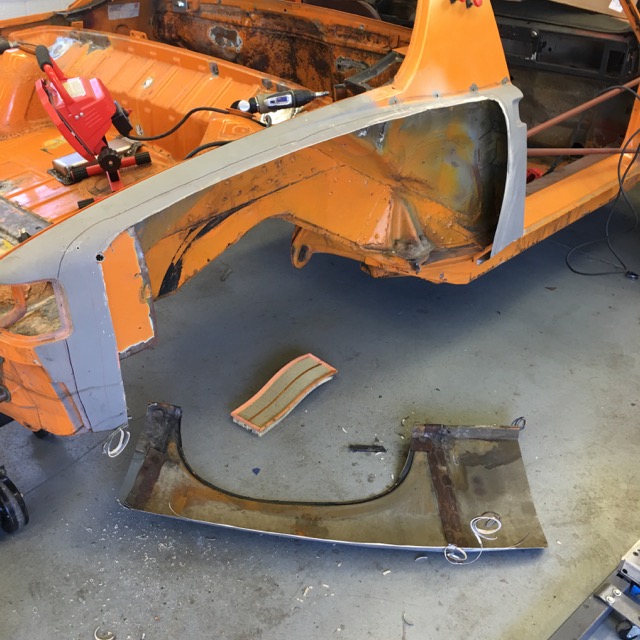
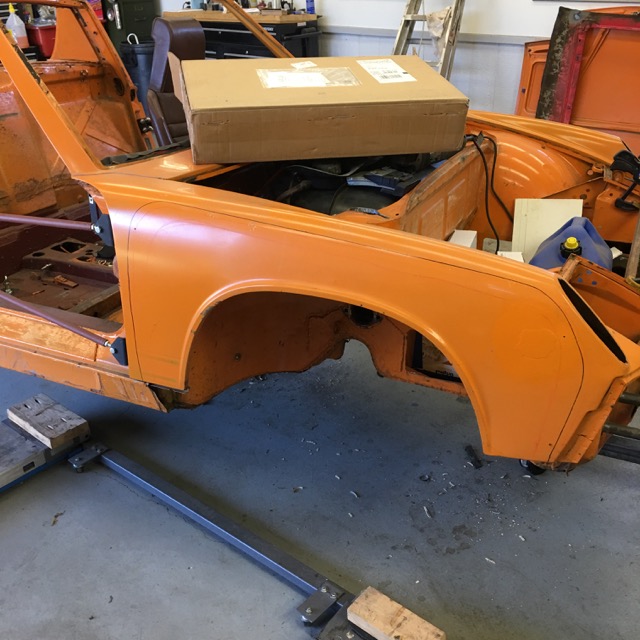
I forgot to take an after picture 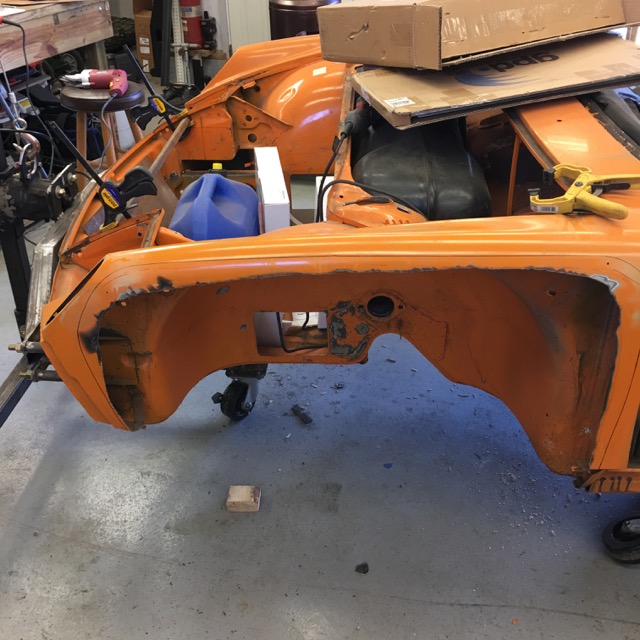
While the plasma cutter was out, I cut out the spot weld access hole under the seats.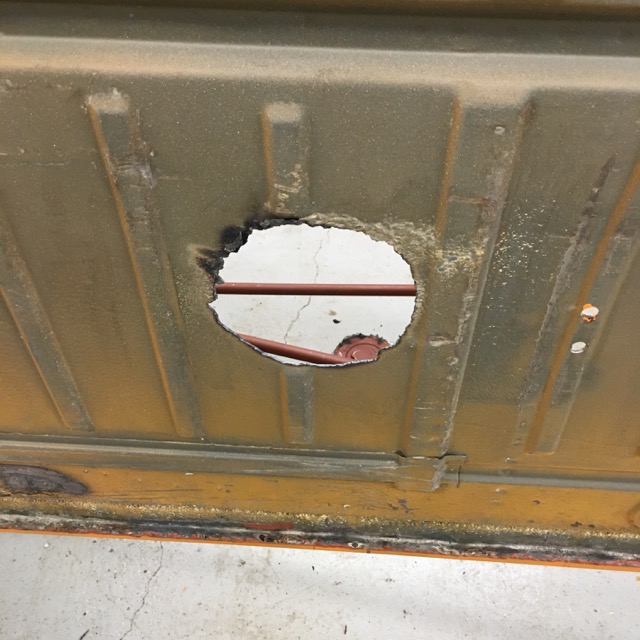
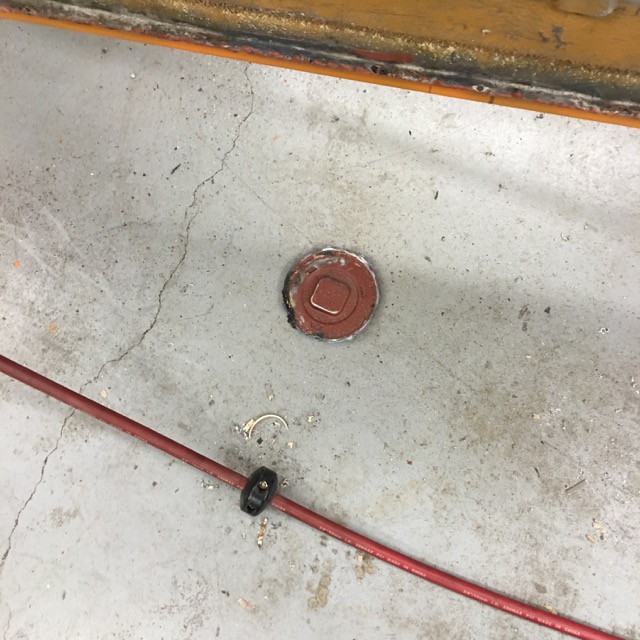
Stared welding in the floor re-enforcements for the anti-sub straps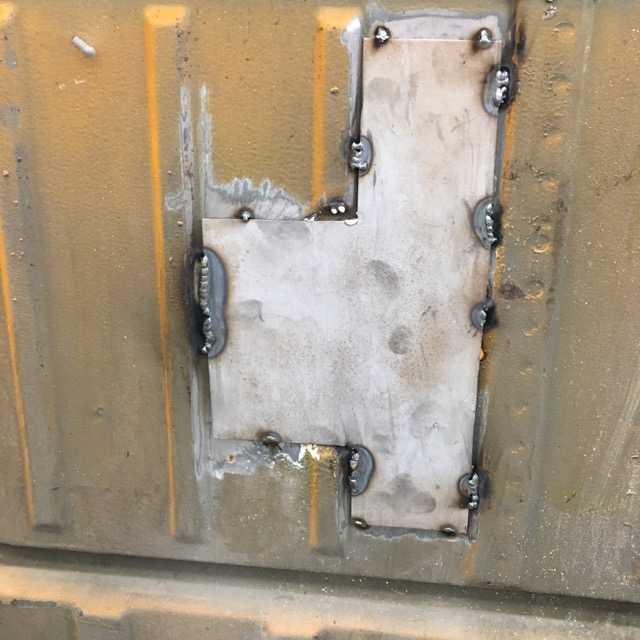
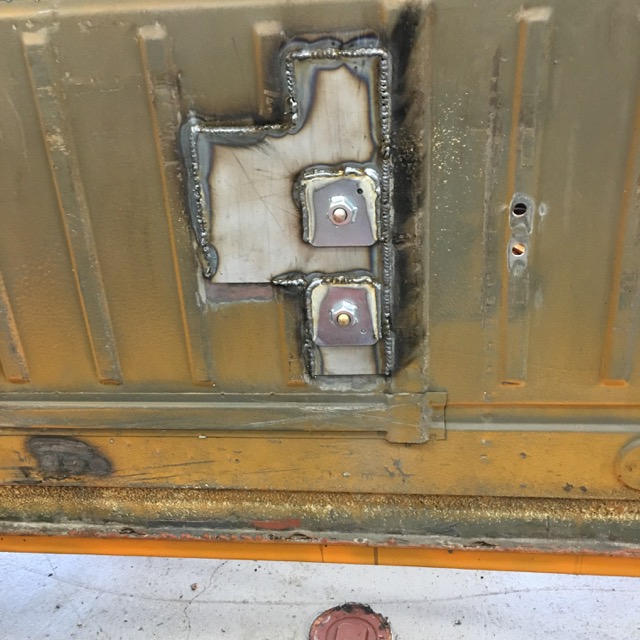
Still a little work to do on the interior side of these.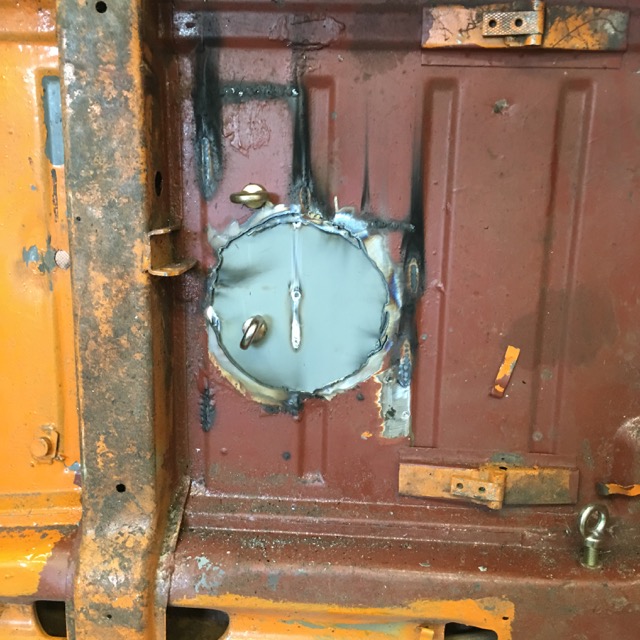
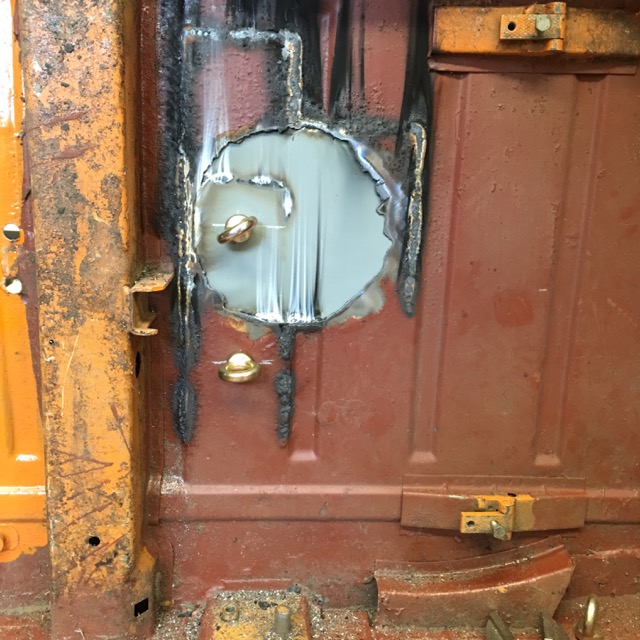
And now for something completely different
Started cutting out items in the engine compartment
Trunk hinge gone to make way for the JWest hinge.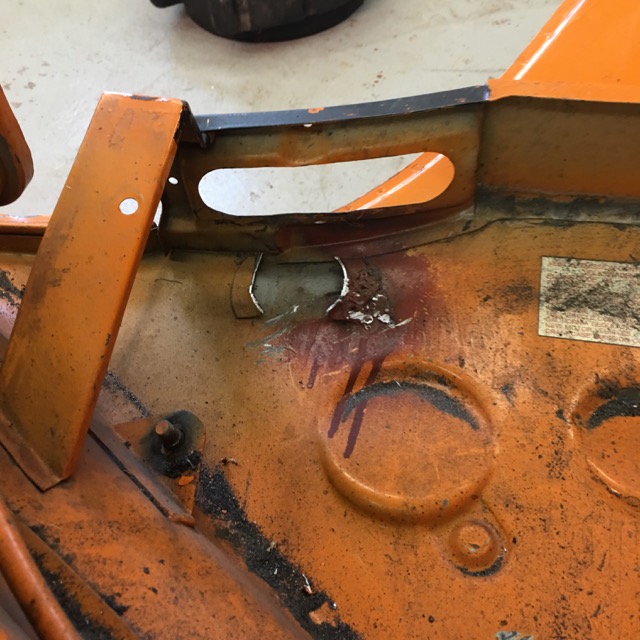
Since my new pedals have dual M/Cs and a balance bar, I cut out the prop valve bracket.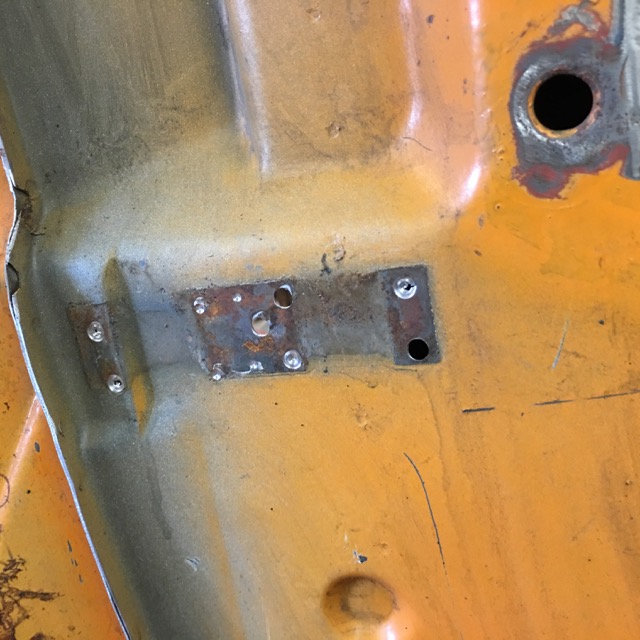
Eliminating Un needed tubes Don't need flapper valve cable, a clutch cable tube, and I don't need the Speedo Cable either, but will be reprising that one, I think.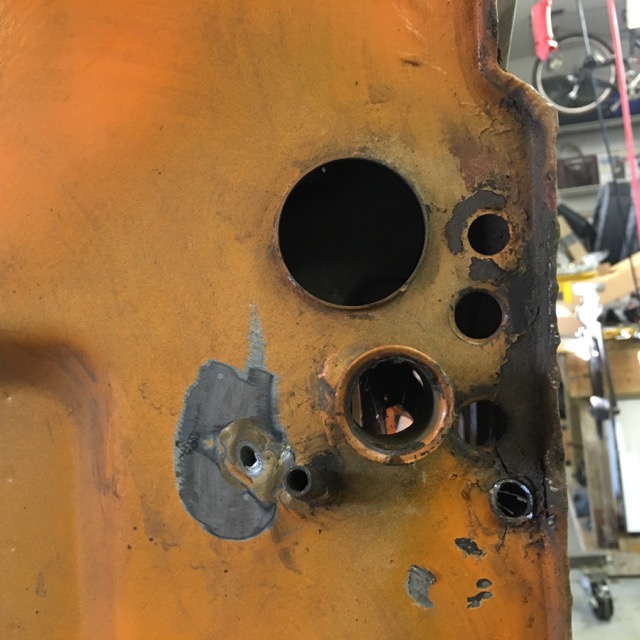
And I'll be moving the e-brake to the center tunnel, so these are not needed either.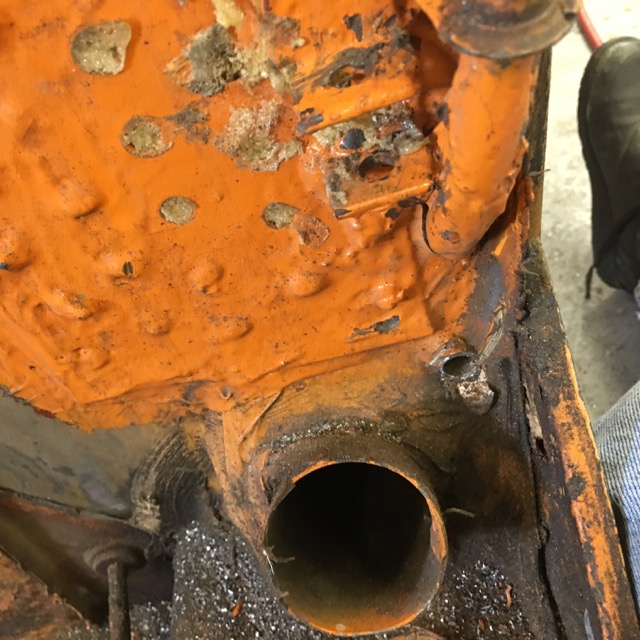
Started Working on the firewall engine mount. IT will allow me to route the exhaust easier. 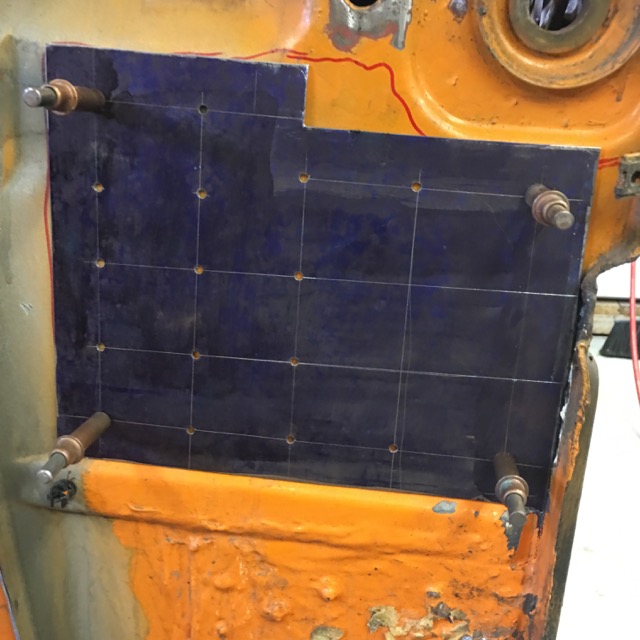
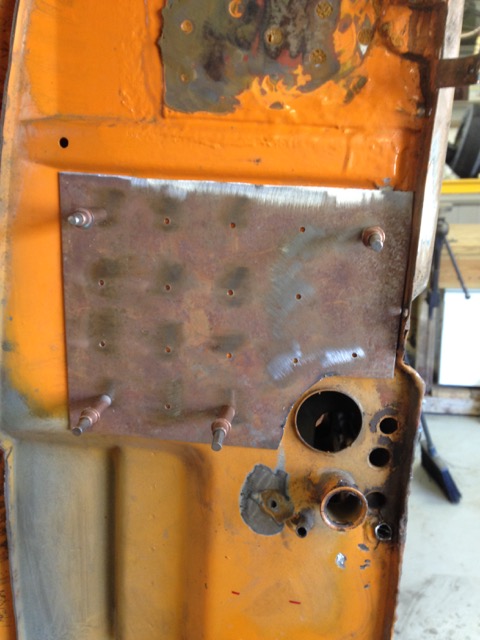
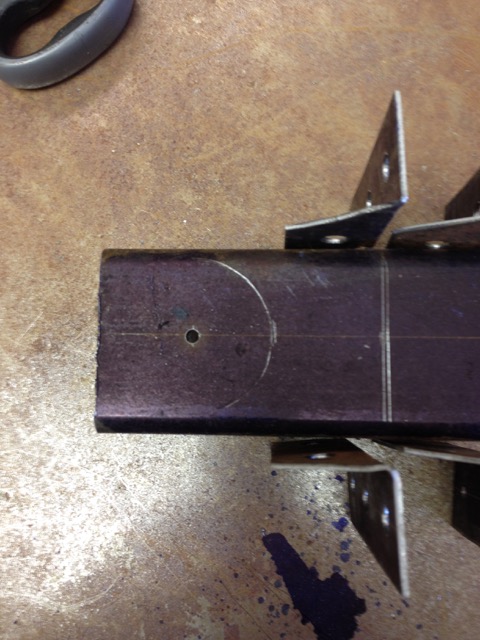
Using these bushing
Need to cut this tube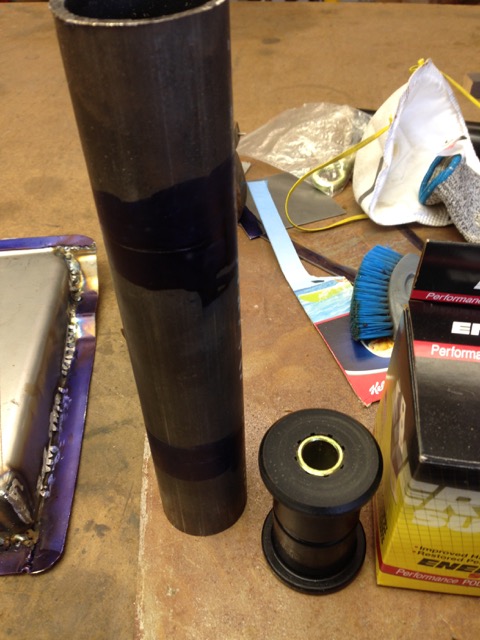
Oh look what's back.
Underside of the hitch plate.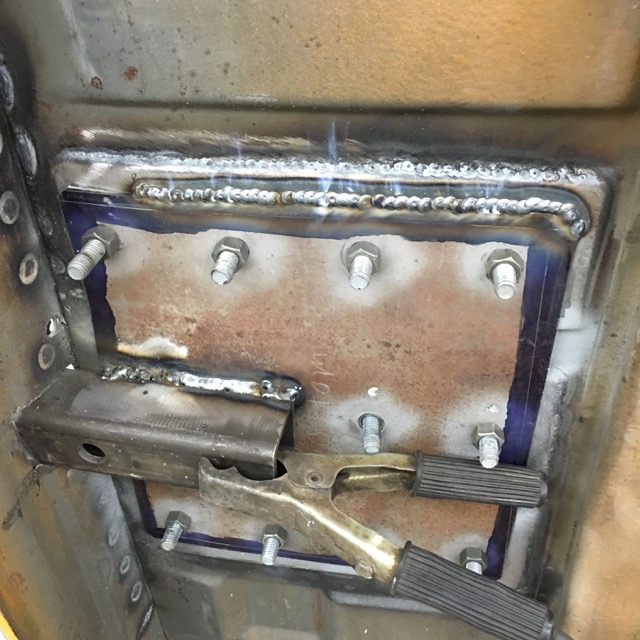
Starting to pull the bolts and plug weld the holes.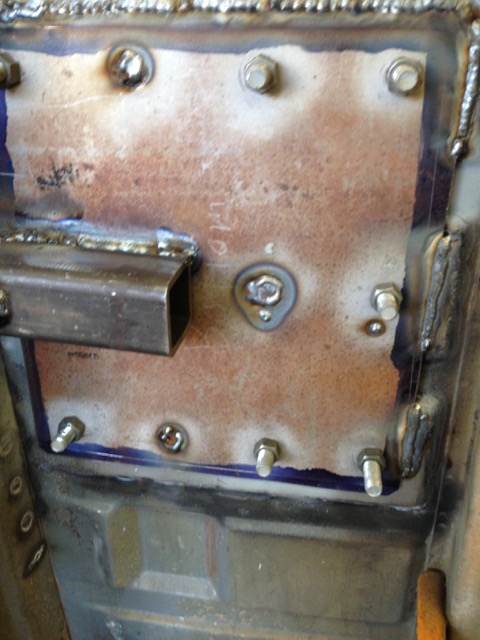
And the pile after the weekend.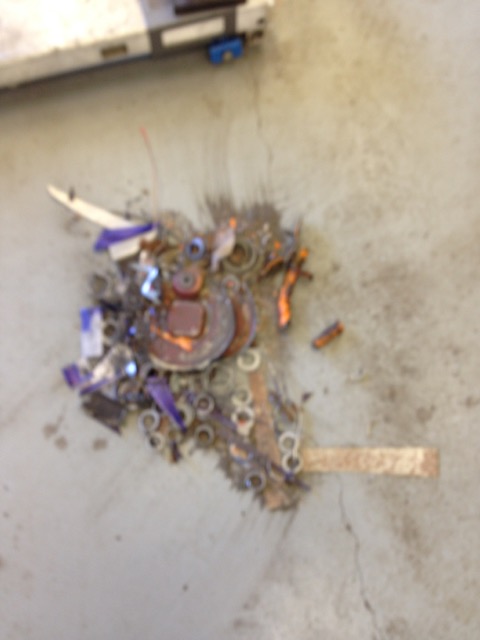
Feel like I got something done.
Posted by: 914forme Feb 23 2016, 05:49 PM
Parts have landed:
Wildwood pedal assembly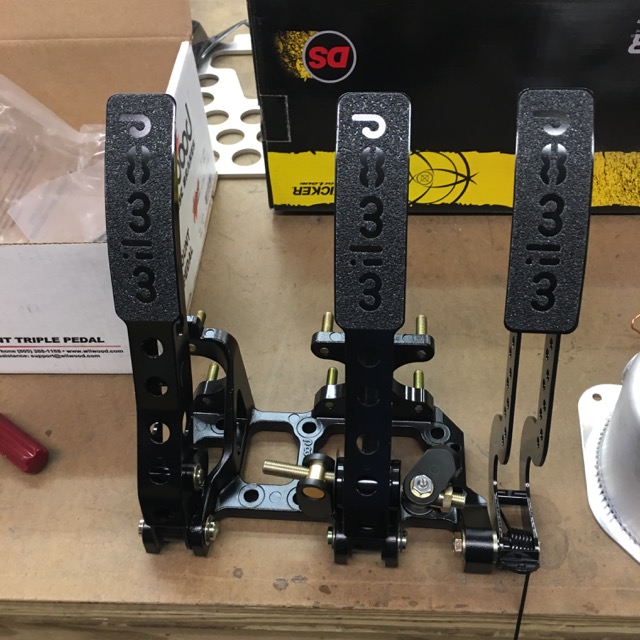
And expansion tank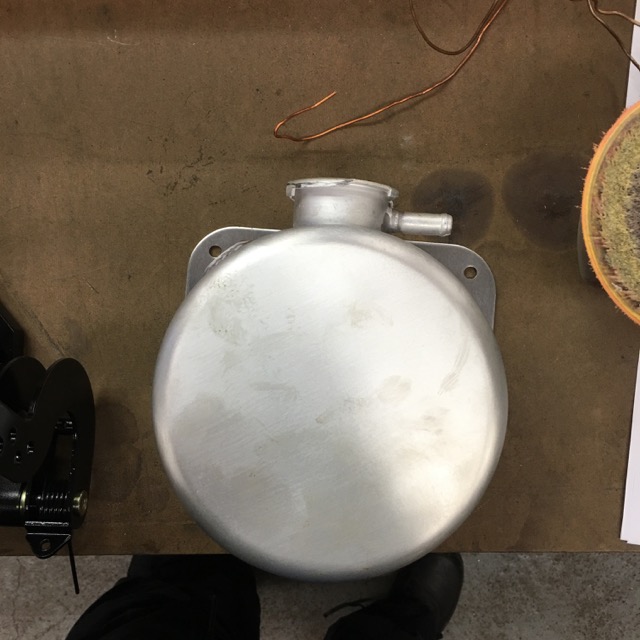
Posted by: Andyrew Feb 23 2016, 09:04 PM
What did you spend on the pedal assembly? Thats a nice looking piece of kit..
Posted by: 914forme Feb 24 2016, 04:17 AM
What did you spend on the pedal assembly? Thats a nice looking piece of kit..
For a song, I got it off a racer friend who was cleaning out a buds workshop. So I got a new part at a very good used price. I spent little over franklin on it with shipping. I have more in the Tilton M/Cs than I do on the pedal assembly. New these are right below $300 on the streets.
Now to see how well they fit.
Posted by: 914forme Feb 28 2016, 06:48 PM
Started working on mocking up the brake pedals.
Stock pedals up top, new ones below, they are actually shorter until you add the M/Cs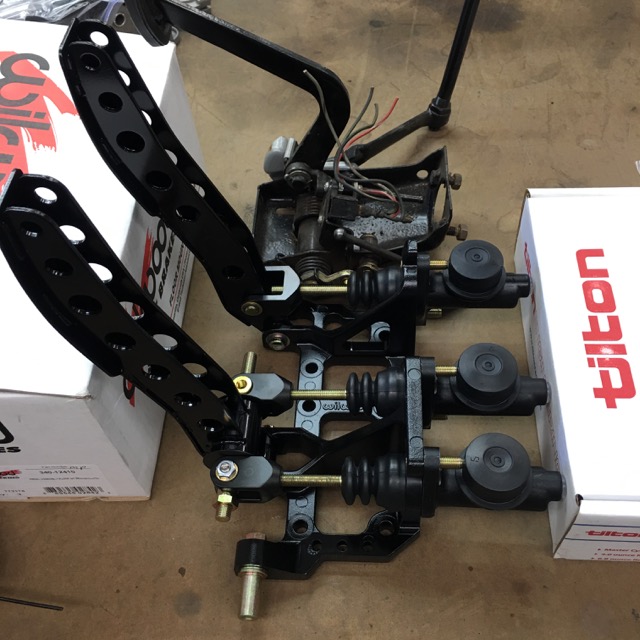
M/Cs add 2 - 1/4" to the overall length. 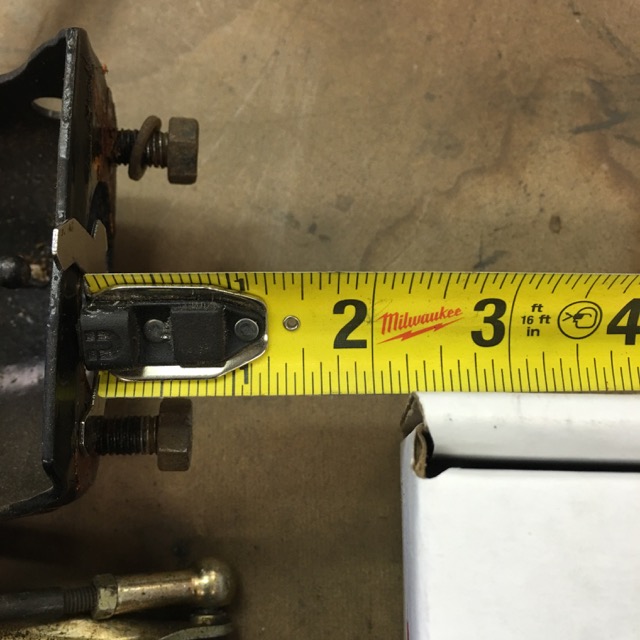
And here is what they look like in the car, with my Double Wide size 13s.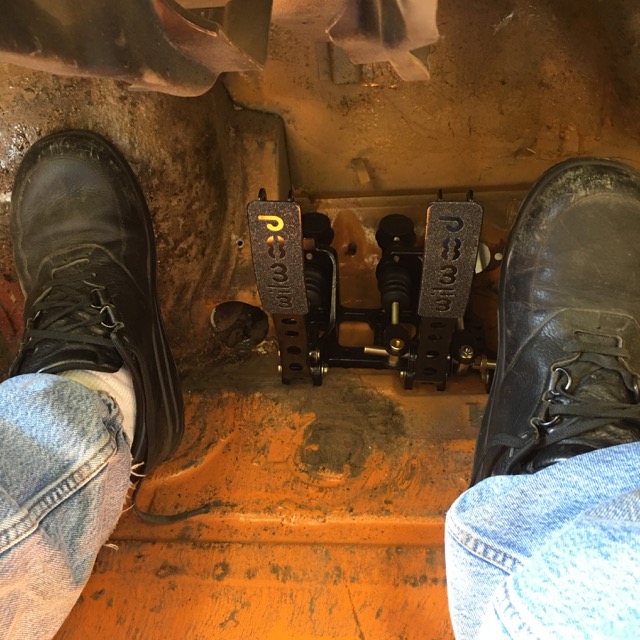
Now what that does to the leg geometry.
Stock pedals, my knee sits 13" off the floor.
Wilwood's My knee is slightly under 15" If my memory is correct, even with my small steering wheel that will be tight. Looks like I would need to build a pedal box.
Issue #2 the Clutch M/C comes out right in the back of the brace coming off the front cross over that holds the rack. Will have to think about that one, find a good solution.
Started working on the engine mount.
Cut apart with the bandsaw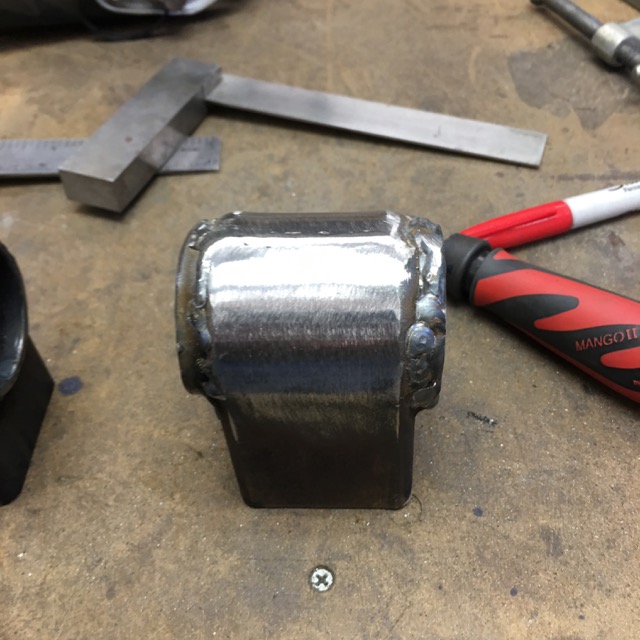
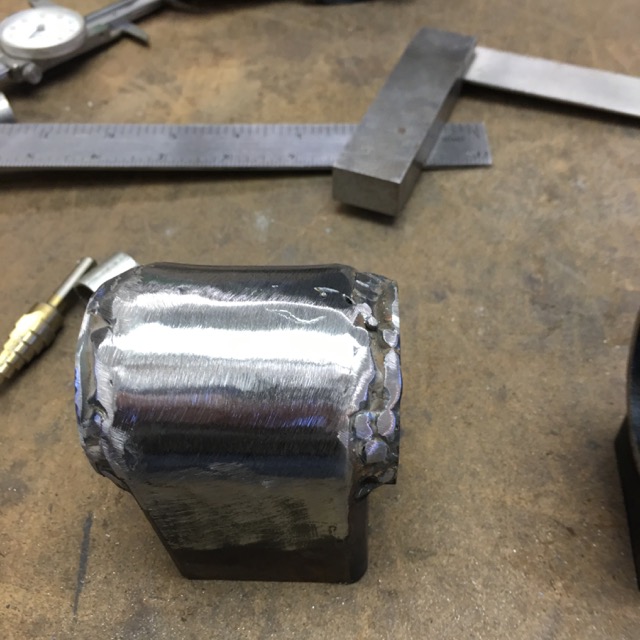
Welded to the chassis plate
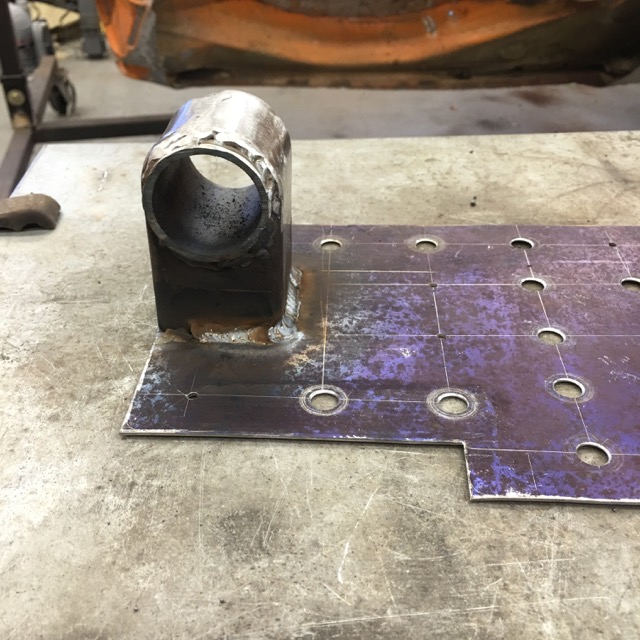
Both sides are welded up, and Zinc has bee applied to the back, ready to well in. Though I think I will add some try-angulation to the mount.
Made the pieces for the safety chains, and this will finish up the rear hitch At least until it gets off the rotisserie. 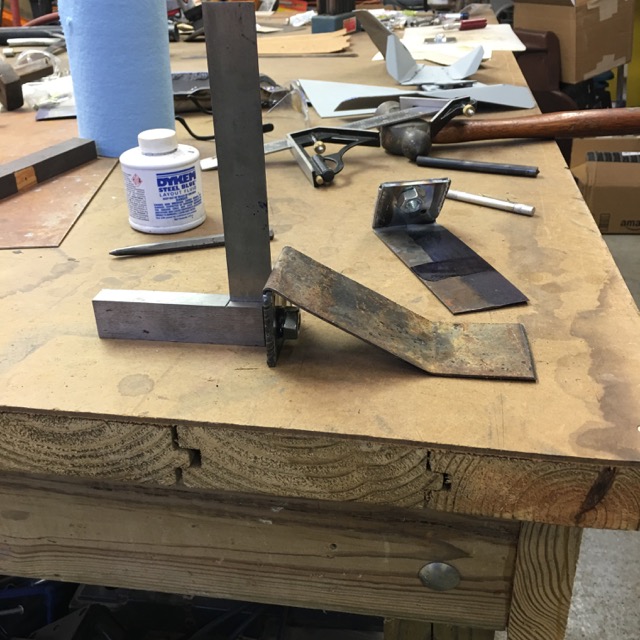
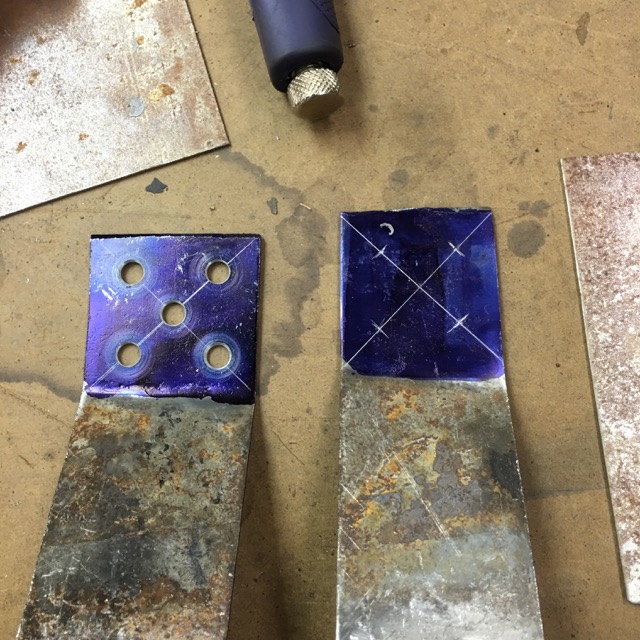
And Welded in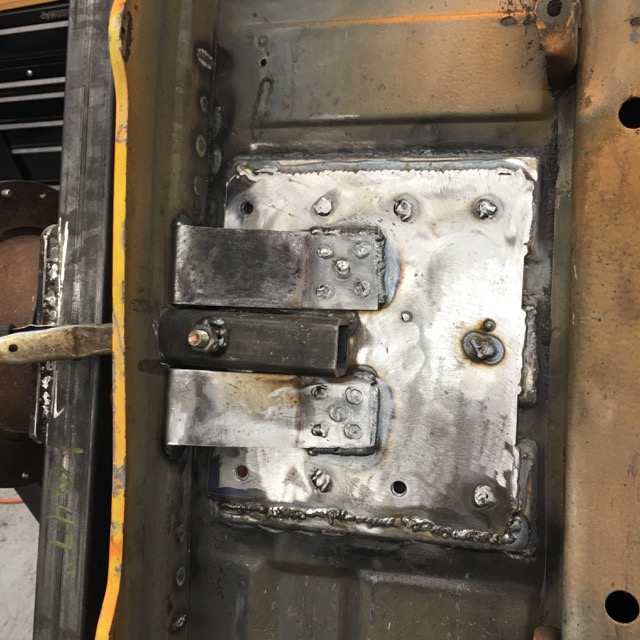
Finished laying down the welds on the sub straps, had to take a close up of this one!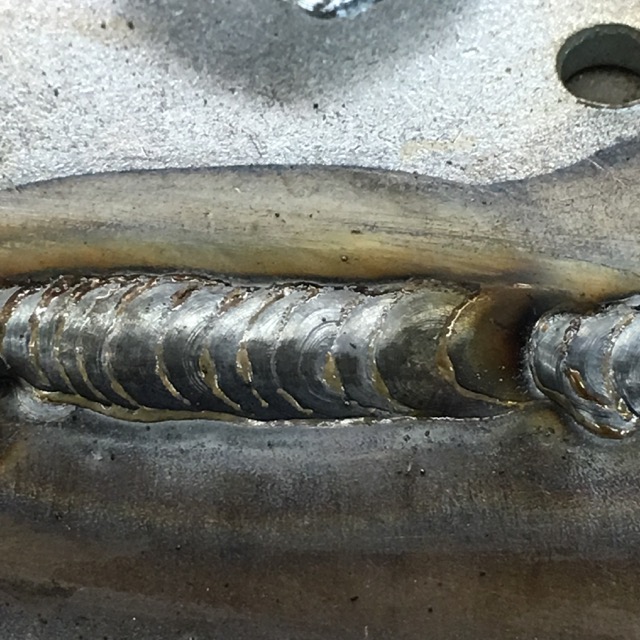
Then I got a brilliant idea since everything was going so well, I would add some beads into the clutch slave cover.
Made myself a small T-dolly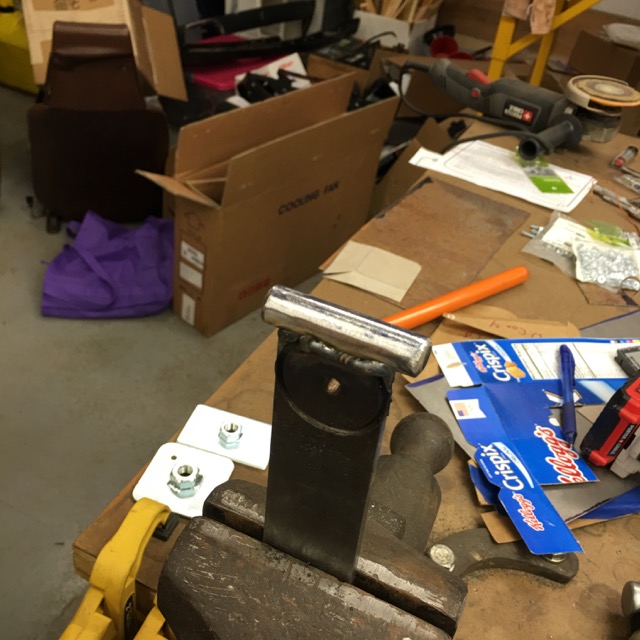
And started of
What did I do
So this is where I am at right now, after 3 hours of hammer and dolly work
But I got it so it fits again.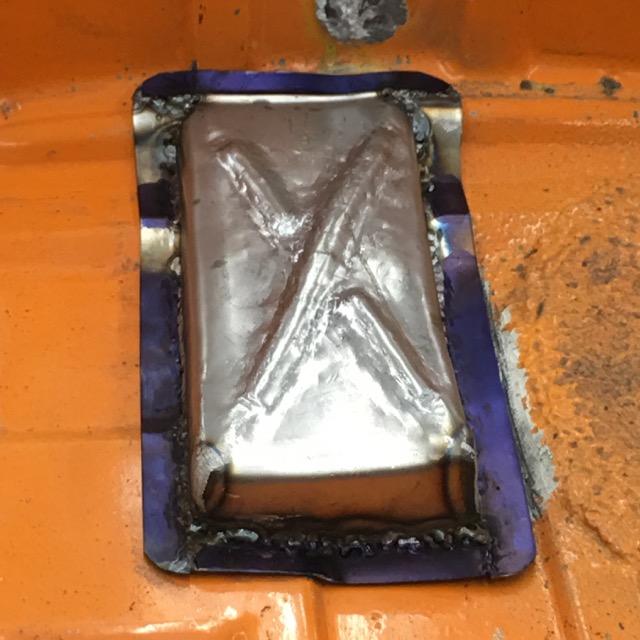
Sad thing is I have a bead roller that I should have used before I started harmer forming the cover.
Oh well, I keep learning this metal bumping stuff.
Attached image(s)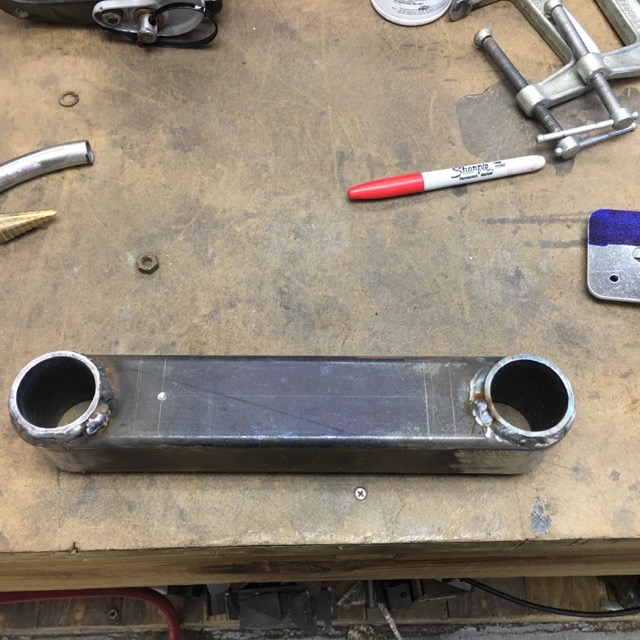
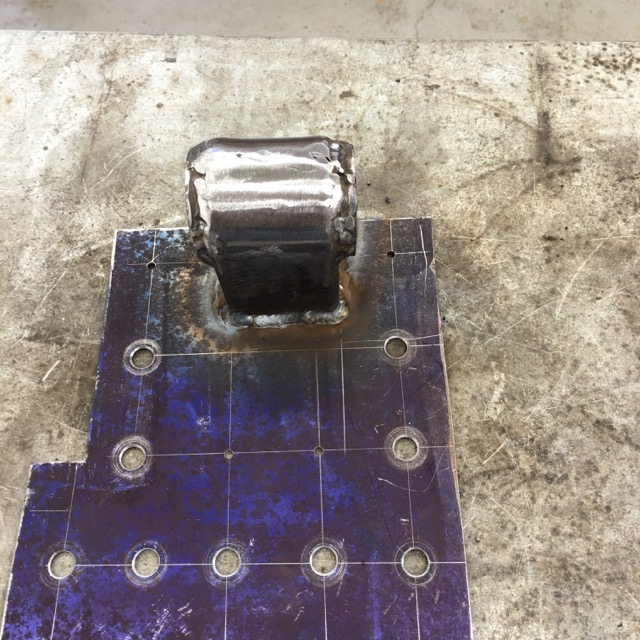
Posted by: 914forme Mar 5 2016, 07:49 AM
Got a couple hours in last night 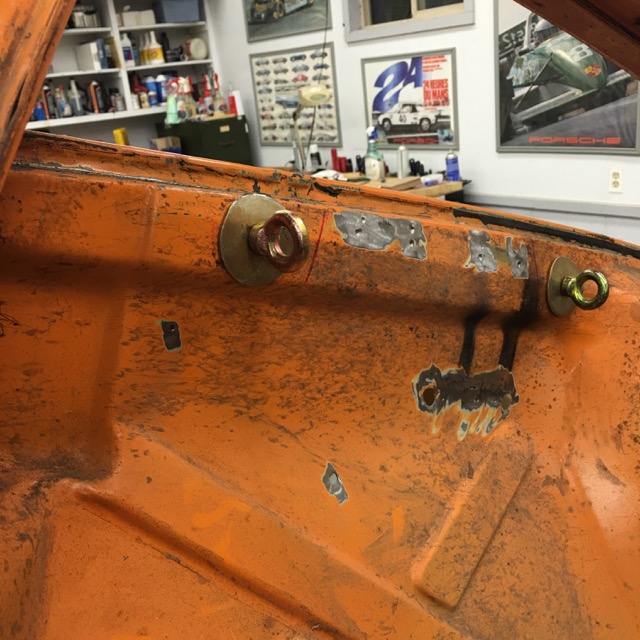
Inner reinforcements done for harness straps. These keep the spacer tube from going through the sheet metal. Hopefully I don't test this theory for function.
Topic going on in Chris H. thread about water inlet size. On the EG the larger the better! So how big can you go?
Now to find a place to run a 2" tube under a 914
Spent the rest of the night laying out the items in the engine compartment.
I have a large Oil filter, going in on the drivers side log.
A large Fuel filter going in on the Pass side log, not sure if I will be using it or not. Original idea was to build a fuel surge tank, feed it with a high volume low pressure pump, then have the High pressure pump in the engine bay. I have never had a fuel starvation problem in my 914 even while auto crossing, so why over engine this. Though the larger tires, more power, more aggressive suspension might make it a possibility.
Other issue could be heat soak with this design, vapor lock would be worse than a minor issue with fuel starvation.
Coolant Tank, upper pass side fire wall
Over flow bottle next to it, and a Engine Oil Overflow bottle Right next to it.
Don't forget that large Accusump, it goes down the drivers side log. It is almost a perfect fit.
Now the big question comes to air cleaner, and intake manifold.
3D print an intake manifold to run 2 sets of Triumph Triple Speed Throttle Bodies. And run filter stack air cleaners. Would it look good, brings up a mother of another set of issues, but oh man
Just finished eating breakfast, time to get out and get
Posted by: Andyrew Mar 5 2016, 08:32 AM
I really like the concept of the surge tank, especially with the fuel pump submergex in it. Constant flow of fuel over the pump will keep the pump cool and with the aid of a primer pump you shouldnt have fuel starvation issues. My current fuel setup might be a tad over engineered but its good enough to supply 700hp on e85... I simply wont get close to that but its nice knowing everything will be running efficiently and way before max limitations.
Your progress has been great as of late!
Posted by: 76-914 Mar 5 2016, 09:04 AM
Throw that engine in there so we can hear it run. Your getting close!
Posted by: 914forme Mar 5 2016, 12:03 PM
I really like the concept of the surge tank, especially with the fuel pump submergex in it. Constant flow of fuel over the pump will keep the pump cool and with the aid of a primer pump you shouldnt have fuel starvation issues. My current fuel setup might be a tad over engineered but its good enough to supply 700hp on e85... I simply wont get close to that but its nice knowing everything will be running efficiently and way before max limitations.
Your progress has been great as of late!
Thank you, thats nice to hear form you, as I feel like your kicking it also.
Fuel surge, I am using a rock crawler design. So Fuel pump is external of the surge tank. The surge tank is a huge fuel filter with the pickup extended to close to the bottom. Then return fuel form the engine then goes back into the surge tank, and if the surge tank overflowith, it will return to the main tank, to be pumped.
I'll add a diagram of it latter.
Thank you again for your kind words.
Posted by: 914forme Mar 5 2016, 12:18 PM
Throw that engine in there so we can hear it run.
Your getting close! Kent I so wish I so wish, right now I bolt a seat in when I am fitting things up and pretend, lol.
This car will not likely be a solid color this year, just got the estimate for my daughters wedding for food and bar. OMG, not bad, but still, cover a lot of the cost of the 914 conversion. But we will keep plugging away.
She is within budget right now, and knows Dad does not go for the excuses. They are all B.S. anyway! Still should be a wonderful May wedding, plan a few years ago was to have the 914 done for that day.
I am also supposed to be thiner and look like Hugh Jackman in X-Men shape
If I get one out of three, I will be extremely proud of my accomplishments. As I am sitting here eating lunch, a plate full of black beans, and vegetables.
I have until the end of May, I'll make the thinner target, I am already thinner, and in better shape, doubt I'll make 12% body fat, and not a big fan of oiled up, spray on tan.
I have an airbrush
Posted by: Andyrew Mar 5 2016, 01:14 PM
I really like the concept of the surge tank, especially with the fuel pump submergex in it. Constant flow of fuel over the pump will keep the pump cool and with the aid of a primer pump you shouldnt have fuel starvation issues. My current fuel setup might be a tad over engineered but its good enough to supply 700hp on e85... I simply wont get close to that but its nice knowing everything will be running efficiently and way before max limitations.
Your progress has been great as of late!
Thank you, thats nice to hear form you, as I feel like your kicking it also.
Fuel surge, I am using a rock crawler design. So Fuel pump is external of the surge tank. The surge tank is a huge fuel filter with the pickup extended to close to the bottom. Then return fuel form the engine then goes back into the surge tank, and if the surge tank overflowith, it will return to the main tank, to be pumped.
I'll add a diagram of it latter.
Thank you again for your kind words.
Awesome! From your initial post it sounded like you were not 100% sure if you were going to do it. With the lateral G's the 914 sustains I think its an awesome solution for those that dont want to spend $$$$ on a fuel cell.
I'd love to see your design when your done with it
Posted by: 914forme Mar 5 2016, 06:32 PM
I'd love to see your design when your done with it
Okay now for the description.
A: Stock Fuel Tank
B: Low Pressure Filter suction side to protect the pump
C: Low Pressure High Volume Fuel Pump
D: Fuel Filter / Sump
E: High Pressure EFI pump
F: engine and injectors, fuel rail, pressure regulator, etc...
G: Is a T One side comes from the pressure regulator outlet, the other side goes into D, and the last side goes onto the tank return. If for any reason the surge is full of fuel, the extra heads back to the main fuel tank, if not, the return will bring some back into the filter sump. At max the low pressure side will be 7 psi.]
Only issue I see is their is a filter and pump in the engine compartment and they could get heat soaked and vapor lock.
The EG should have a cooler engine compartment than the type-4 would have had. It is still a potential issue. Won't know until it is tried.
Posted by: 914forme Mar 5 2016, 06:52 PM
Just got back from a funeral for a team member's father who died at 53 Before I had to go, I was able to get some work done on the 914. Would much rather have gone to Scott's looked at his cars, ate good chill, and drank bear  But that is part of being a leader, sometimes you have to do things you would rather not do. It is all for the good of the cause.
Made a few brackets for the overflow bottles and the coolant tank.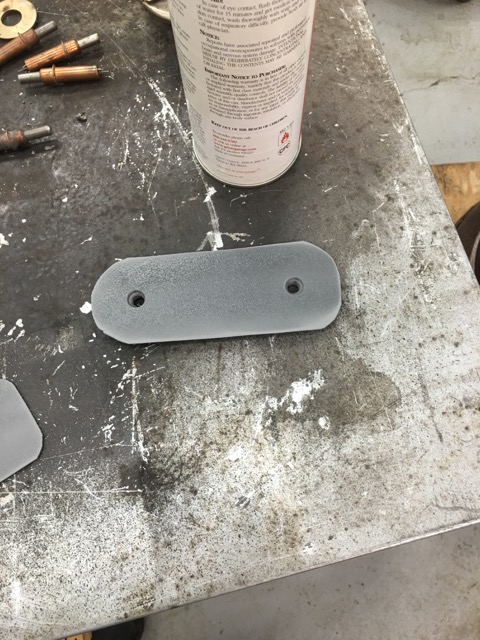
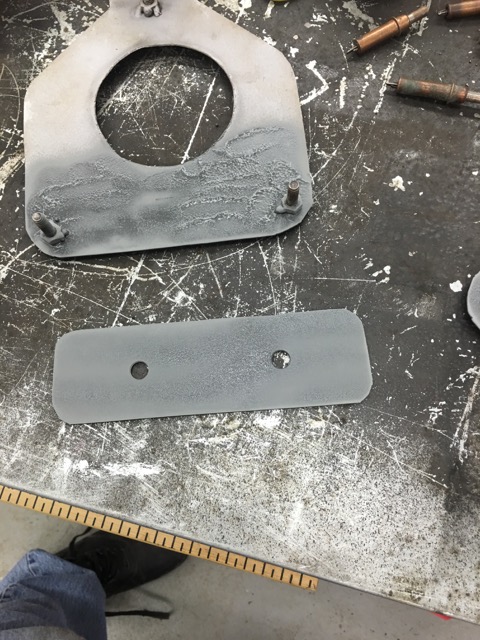
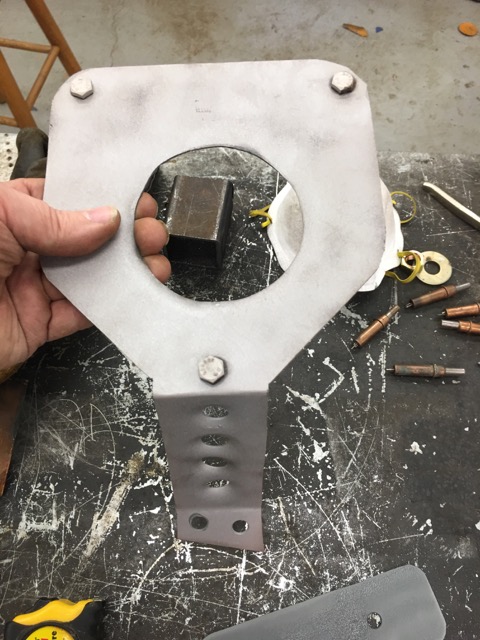
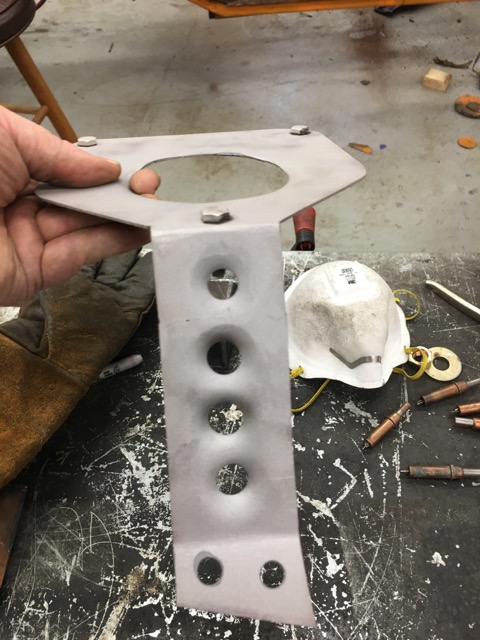
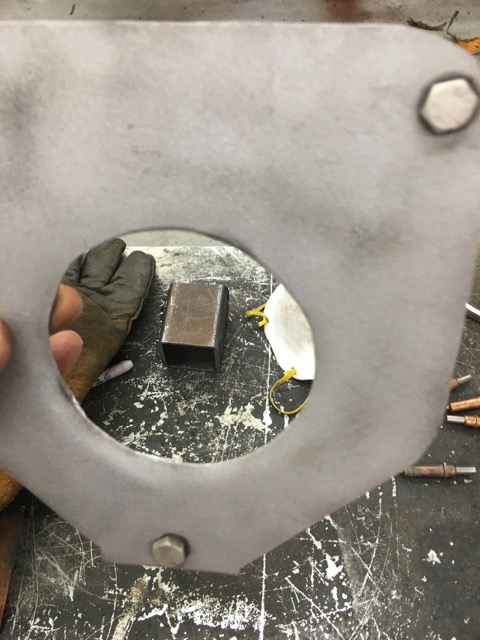
Zinc sprayed on the areas that will not be accessible.
Had a Squirrel moment and cut the pedal area out No going back now!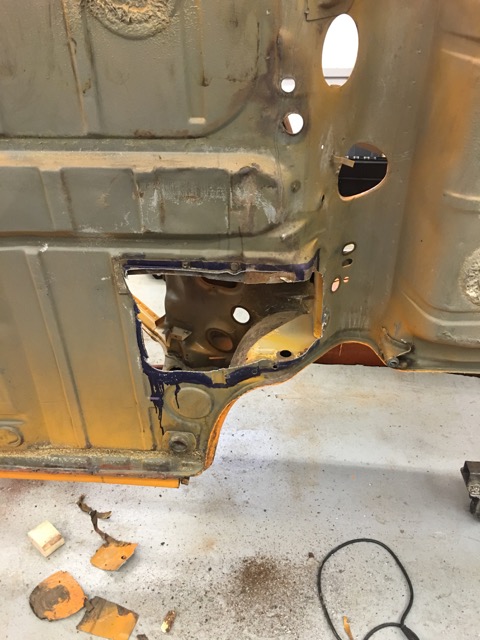
Cut out the drivers side -4 engine mount, and started mocking up the log reinforcements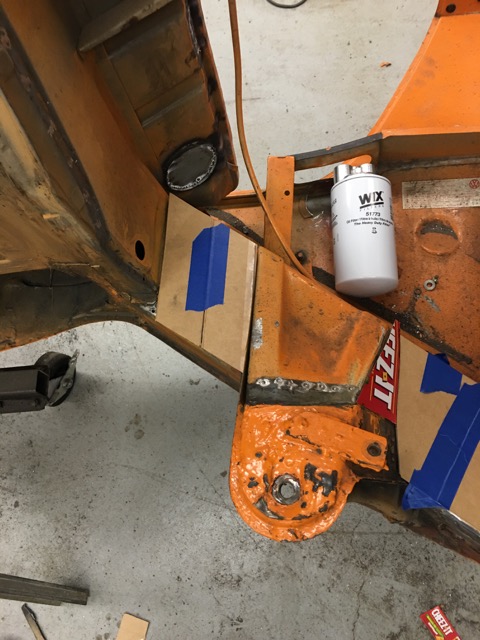
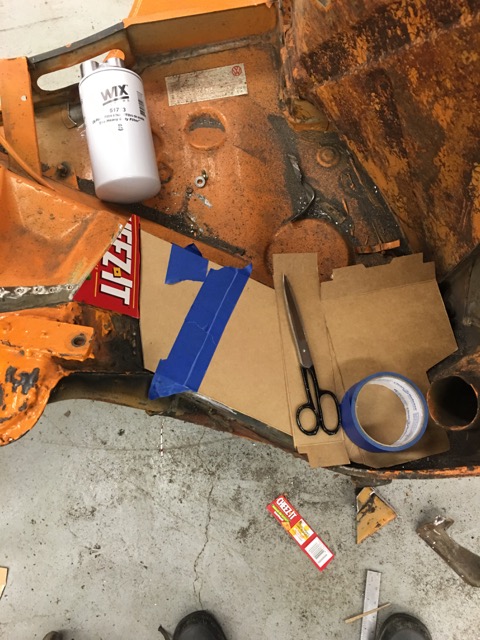
And this is where my big oil filter gets mounted. Plenty of clearance to the engine, and easy access.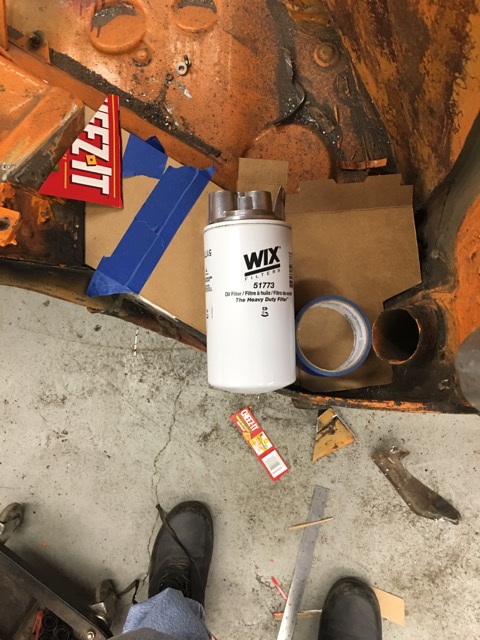
Started welding the engine mount in place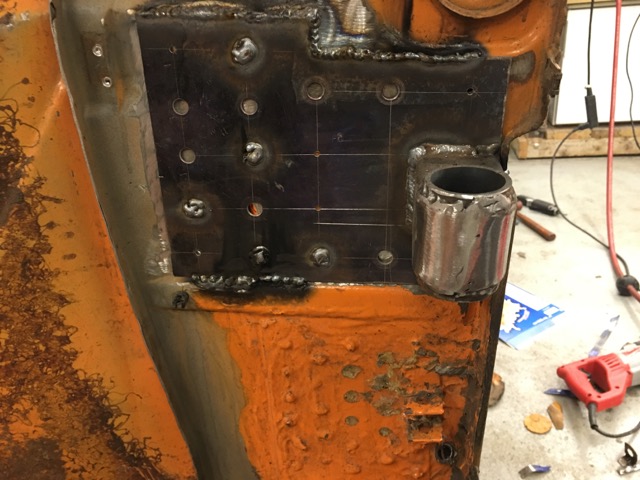
Shop is getting messy again, heading out to clean it up a bit, starting to loose small tools. I freaking hate that!!!!!
Posted by: 76-914 Mar 6 2016, 09:30 AM
God I know that feeling. I usually wait until it reaches that state before I clean up. Years ago, I built a plane and I had 3 pr of Cleco pliers. Whenever I could not locate any of them I would stop and clean shop. Hi-Jack over.
Posted by: 914forme Mar 7 2016, 11:29 AM
Got more stuff done yesterday, mainly layout, and drilling holes
The tools of the trade
Love layout dye, so much easier on my eyes Yes that is a rivet spacer, works great for marking plug weld holes. A Carbide scribe and a ruler.
Rinse and repeat, a continuous theme for this car.
Center Marked on another piece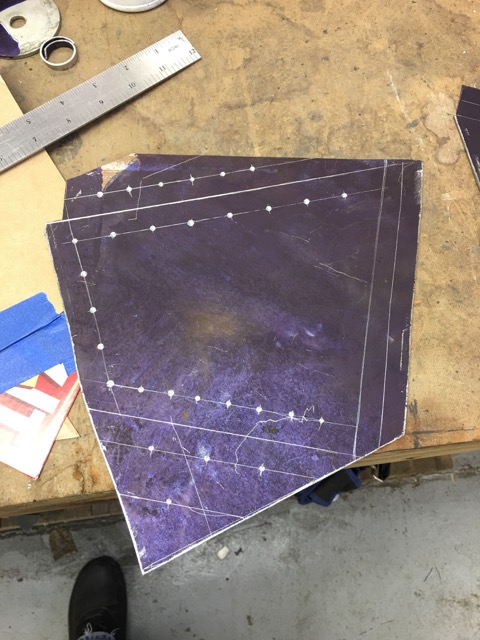
Holes Drilled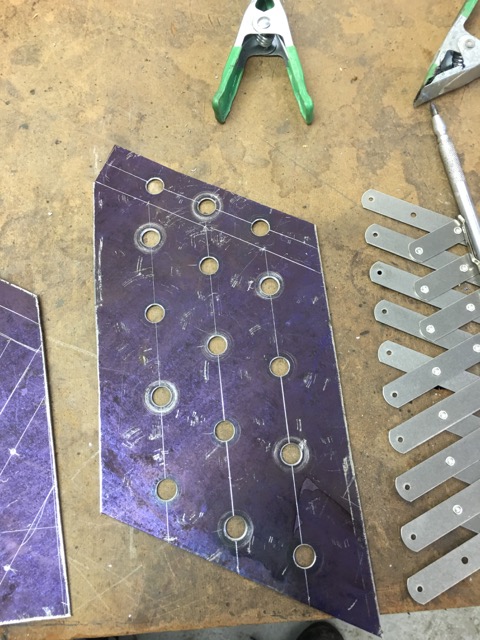
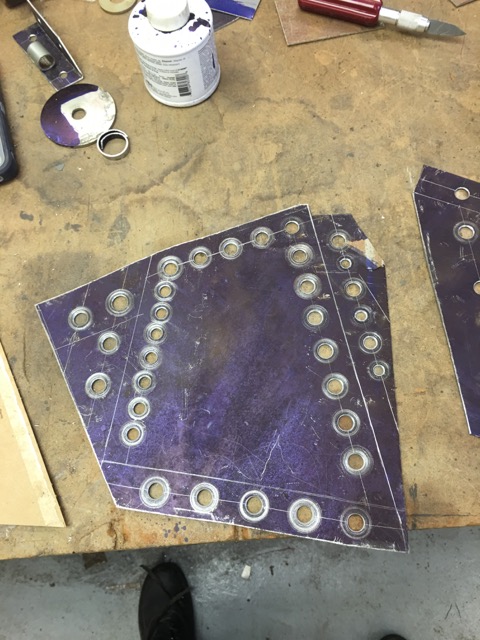
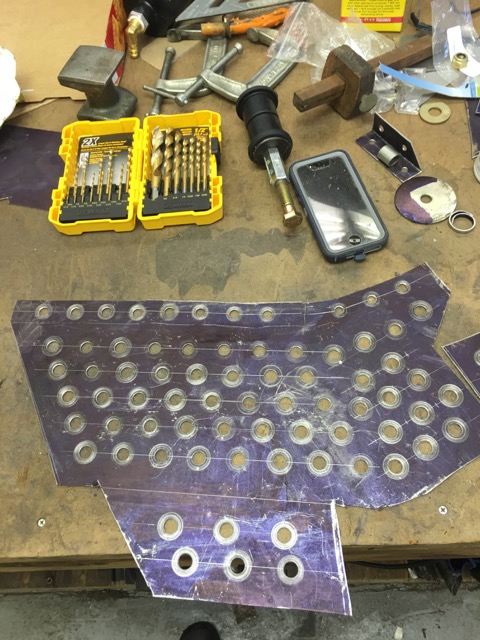
Left overs from all the cutting and drilling
And all the leftovers from the body cuts and pattern making.
Now we know how many holes it take to fill the driver log. Yes bad reference to the Beetles lyric. "Now they know how many holes it takes to fill the Albert Hall"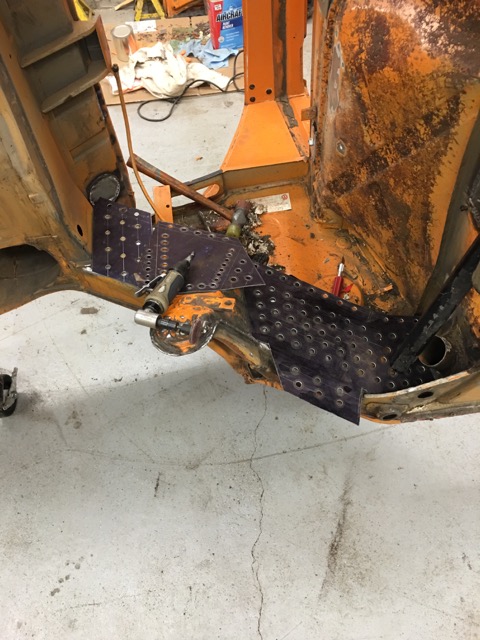
130
More Holes
Second Side of the engine mount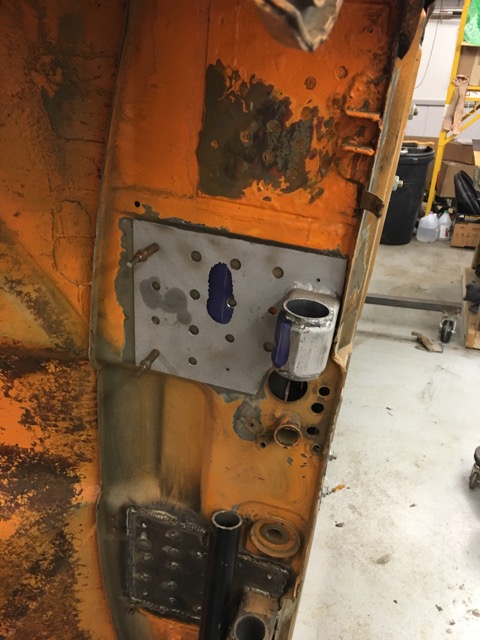
Collant Tank Bracket, need to clean the paint off. But it is test fitted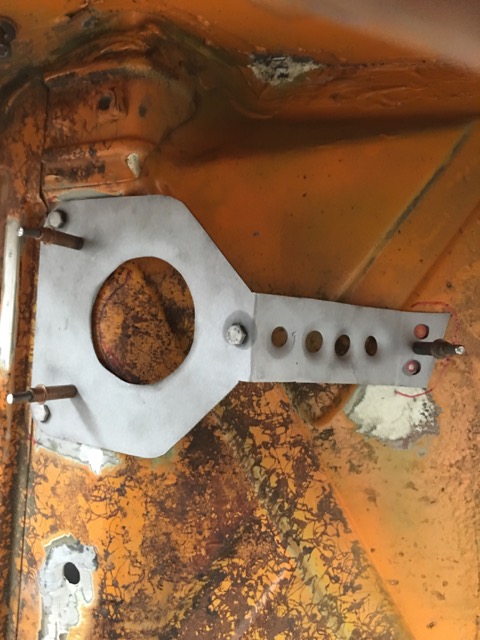
Final Hole for the brake pedals.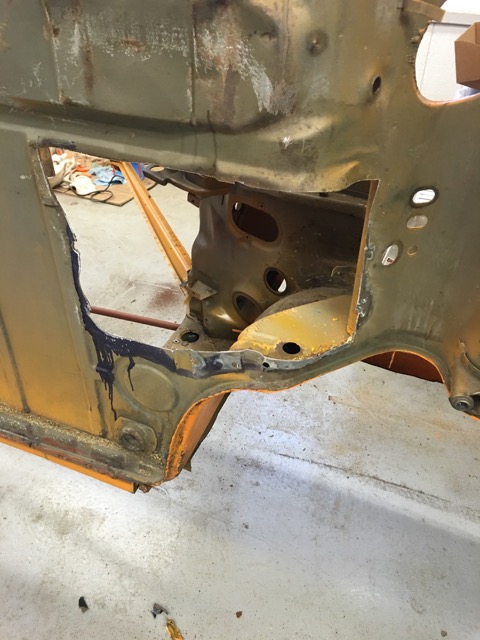
I then cleaned up the workshop, and lastly I started to mockup the pedal mount out of foam core.
Not as easy as I had hoped for, so I found the dimensional drawing and will give that a go. Wish it had the centers for the M/C openings. 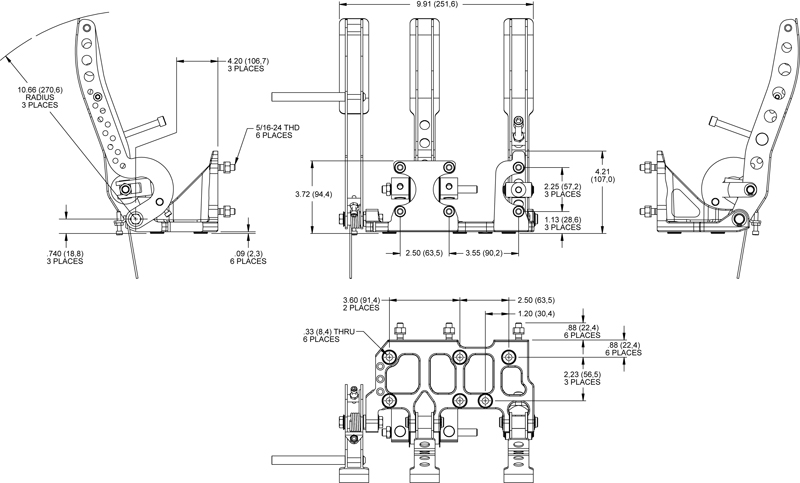
That was a wrap for this weekends work. I will try to get a little done each day, today it might be find a hole saw on the way home. I want to get a Metal Lathe!!!! That want list for tools is huge, and a Metal Lathe will be on the long side of that list. A good TIG welder should be up first. And a Horizontal bandsaw, to make nice square tubing cuts.
The cost of a Milwaukee Porta Band stand for that purpose is more than a decent used horizontal band saw.
Posted by: 914forme Mar 8 2016, 06:18 AM
Last night I was doing some work on my harness, adding snap eyes to the shoulder straps on my Profi IIs and discovered my dates all ended on 2015.
So it looks like before I start racing again, I will be buying a new set. Yes I can have them rewebbed. That being said I like the idea of the FIA 2" lap, and 2" shoulder hybrid, that way if I ever where a HANS, it fits better.
Now I wonder with the hybrid uppers if I could move the clips in closer to the seat head rest Time to put a seat back into the car and give that a try.
I don't wear the harnesses on the street, I have a new set of 3 points going back into the car.
Add that to the list with a new helmet for this year. I am sure local auto-x events would not look at the belt dates, but future plans hold that this car will be used for so other events.
Posted by: Philip W. Mar 8 2016, 09:00 AM
 WOW I think you are having too much fun! looks great.-
btw, what kind of flares are you putting on? are you going the GT, or fiberglass?
Posted by: 914forme Mar 8 2016, 09:05 AM
WOW I think you are having too much fun! looks great.-btw, what kind of flares are you putting on? are you going the GT, or fiberglass?
D. None of the above -
I have a nice set of Tangerine Racing Steel Flares. They match my older rear flares I cut out with out all the splices and filler. Chris' panel beater does a great job And thank you for the kind comments, I am having loads of fun!!!
Posted by: Philip W. Mar 8 2016, 09:30 AM
WOW I think you are having too much fun! looks great.-btw, what kind of flares are you putting on? are you going the GT, or fiberglass?
D. None of the above -
I have a nice set of Tangerine Racing Steel Flares. They match my older rear flares I cut out with out all the splices and filler. Chris' panel beater does a great job And thank you for the kind comments, I am having loads of fun!!!
I had considered having Chris do a set for me, my rear fenders are kind of a mess. After I put the 7's on the rubbed and blistered the paint and trying to stretch them to get an extra 1/2 inch creased the lip and bent it, so its going to need work anyway. how much does chris charge for a "mild" increase, I want stock look but need extra 1" max
Posted by: Chris H. Mar 8 2016, 04:34 PM
Those are great flares. Nice alternative to the GT flares.
Hey Steve did you find the engine harness? I have the wiring diagrams if you need them and can get you some pics of mine for reference when I pull the engine. Just about ready to lower it down. Drained the fluids, just waiting to be there are no stray antifreeze drips (not good for the dogs).
Posted by: 914forme Mar 8 2016, 07:59 PM
No Chris I did not. I might just go full MS3X so I can run sequential spark. Will be using GM LS coils. It will also do dual fuel, which I plan on running E-85, but will nee the ability to run high octane, if I can't find the corn fuel.
More progress I started laying out the various lines and systems. First up clutch as it was easy.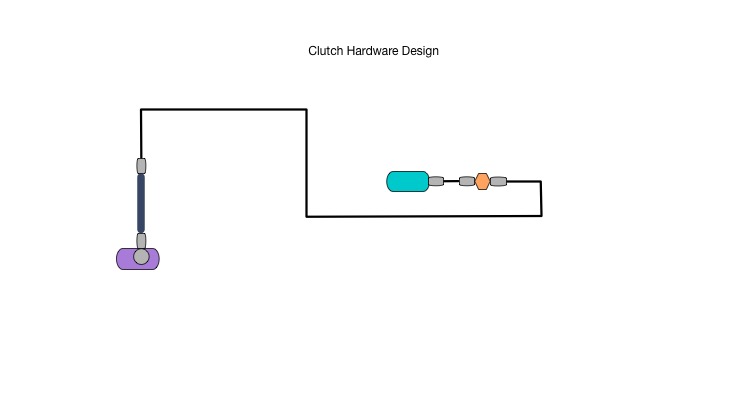
Brake Lines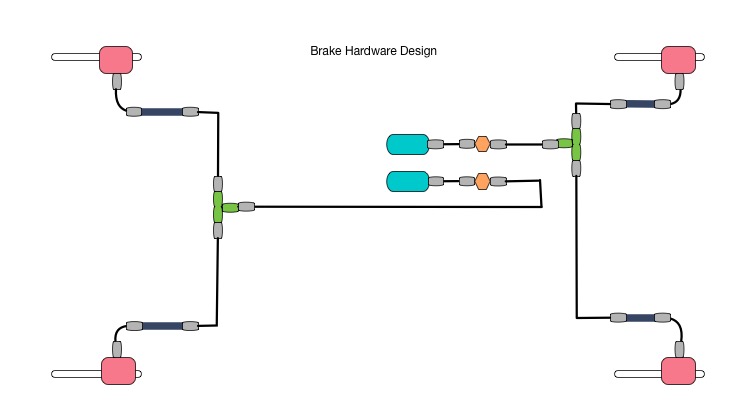
And now the key, and part numbers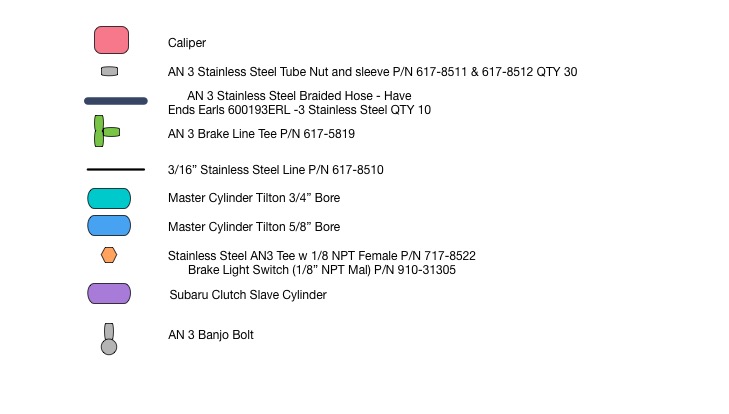
Yes I have 3 brake line switches. One for the lights, and two for the cruise control. I might need another one for the laugh control, have to think that one through.
Got home, beautiful night in Mid Western Ohio 70+ degrees. So out to the shop I went. Swaged winter tires of my Daily. Which means it will snow in a few weeks.
And started welding in the inner suspension console and logs on he driver side.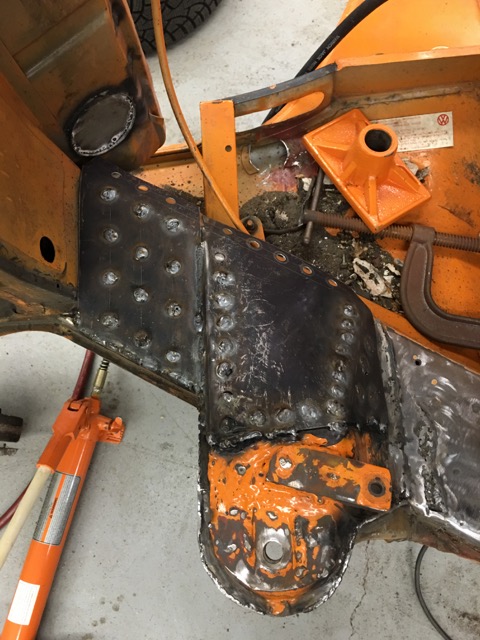
Posted by: 914forme Mar 11 2016, 01:26 PM
Grabbed a little welding time before work today.
Drivers side Logs almost done, the console was seam welded before I added all the extra to it.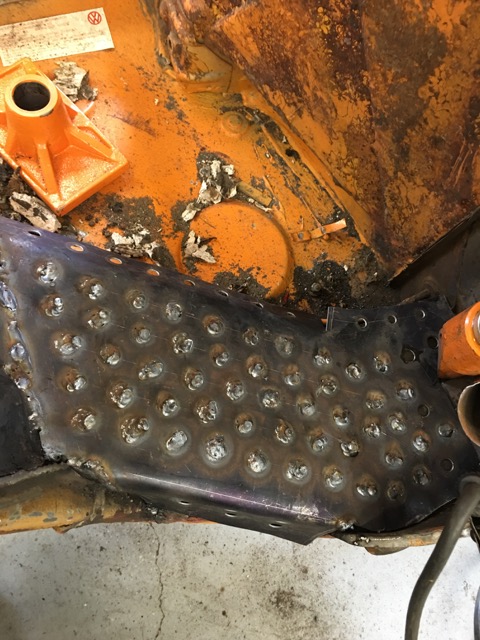
Started working on the plates to mount the oil and fuel filters.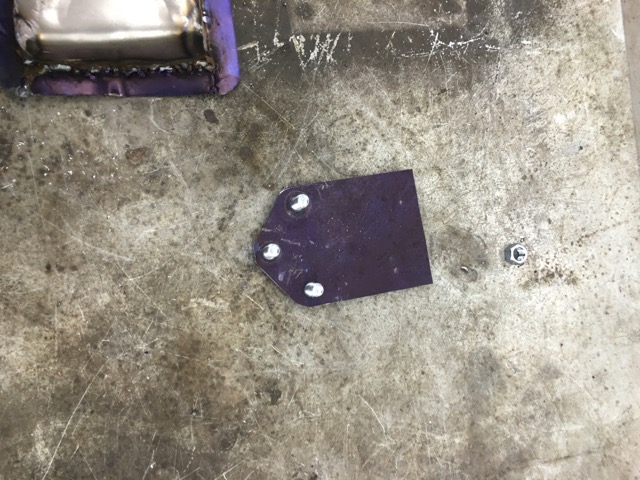
And this is the filter boss fits over the studs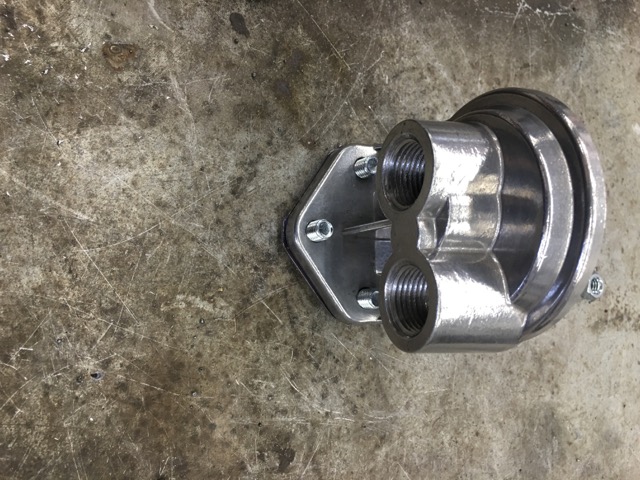
Hopefully get back to some welding tonight once I get home. Get the filter mount in place, roll over the upper sections, and then add the oil filter console, and the accusump mounts need to be fabricated.
And this just got delivered, it will help keep my uni-bits a little long-lasting.
Just in time, I need to drill a few hundred more holes. I am hoping to get out of the engine compartment this weekend.
Posted by: mgp4591 Mar 11 2016, 01:34 PM
Are you planning on running an adjustable proportioning valve for your dual circuit brake system? Looks pretty well planned out and great progress on the build!
Posted by: 914forme Mar 11 2016, 01:56 PM
Dual brake masters with a balance bar
Posted by: 914forme Mar 11 2016, 08:32 PM
Made some weld bolts, cut most of the head off a bole, mount it up on the weld table, and weld them. Grind them almost flush, and you have some nice studs.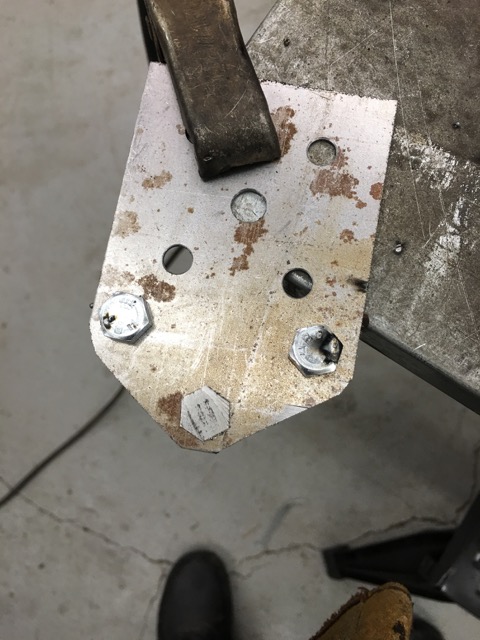
Oil filter mount welded onto the log.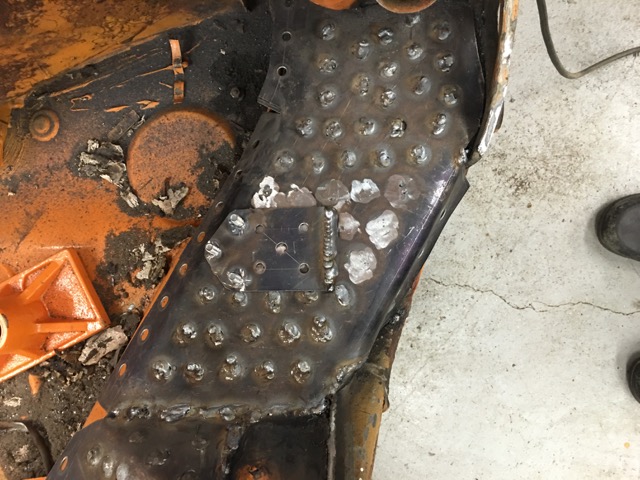
Oil filter mounted and then I needed to test to make sure my Suspension console reinforcement bar clears that big filter.
Plenty of room
Welded on the tank support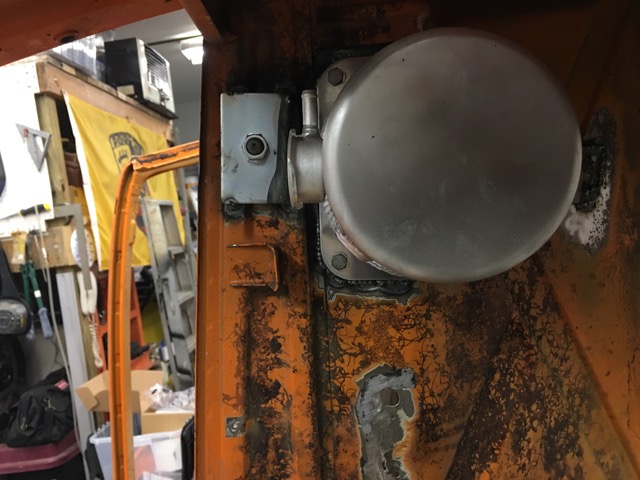
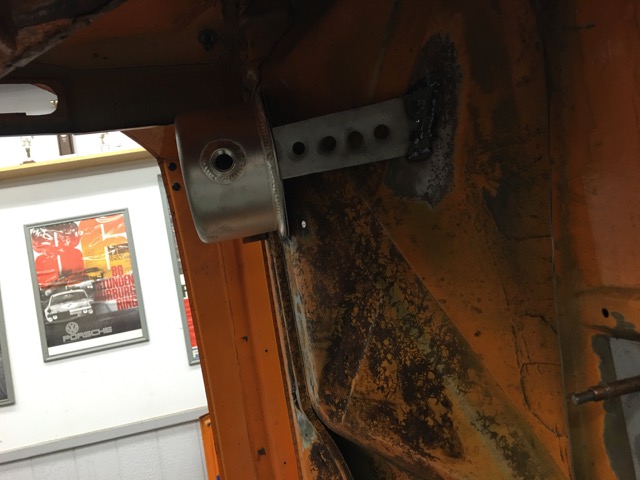
Welded in the front side washers on the harness mounts. This will help keep the tube from just running through the firewall.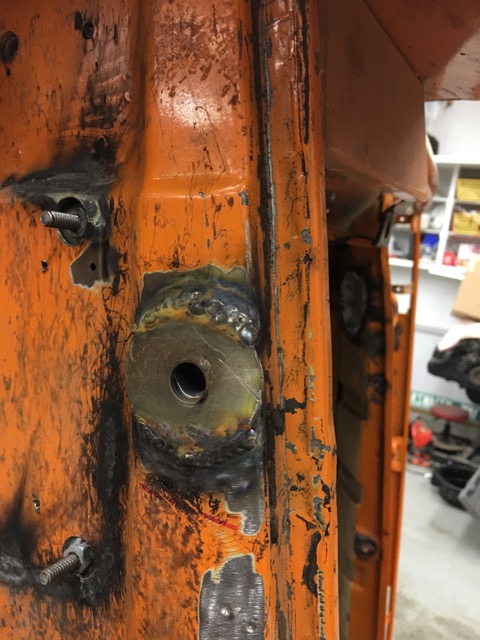
Spent the rest of the night with a dremel making a bracket fit a compound curve
No pictures of that, I'll snap one when I am done.
Posted by: Amenson Mar 11 2016, 08:58 PM
You need to start publishing lbs of welding wire per day. Getting time behind the torch before work...bad ass. Keep up the progress.
Posted by: 914forme Mar 12 2016, 12:11 PM
No I really don't want to know that number. I do weigh everything else, it will be interesting to see if I can keep the car at class weight of 2150 lbs. Still counted as a 4-Cyl 914.
I did go and get tanks refilled today so I can keep going!!!
Realized I have mis-placed my oil thermostat, I hate that!!! Knew right where it was went and opened the drawer, and it is gone
That being said, tested out the one of the new gas cylinders, yes it is working, I had one place give me an empty cylinder once. I now have manifolds that show tank and outlet pressure from the regulator so I know when I am getting into the critical zone. I spent a lot of time trying to figure out that the cylinder was empty as I could not wrap my head around some one giving me an empty cylinder. I also don't go back to that gas supplier anymore. I head over to Springfield. Great older guy there, we shoot the for a bit each time, and he takes me to the racks and points at the cylinders. I am way younger than him, so I'll do all the heavy lifting. He treats me right ever time  So they have won my business.
He also keeps poking me to buy a TIG, Lincoln is running a pretty good deal for a square wave AC unit, I might have to bite the bullet. I don't have a lot of Aluminum welding to do yet for they project. So little I can farm it out and still be way ahead cost wise.
I still want to do some TIG, and the fender flares might just be the place I use it, after some practice on something not quite as critical. Theory is it would be easier to keep the weld under control, and hammer weld with a softer filler.
Posted by: Andyrew Mar 12 2016, 12:40 PM
I find I go through gas more than wire. Granted my gas trigger sticks but its still quite a lot. I make it a habbit to turn off the gas between welds now.
Posted by: 914forme Mar 12 2016, 08:08 PM
Harness mounts completed, these little boxes took a lot longer than I would have liked.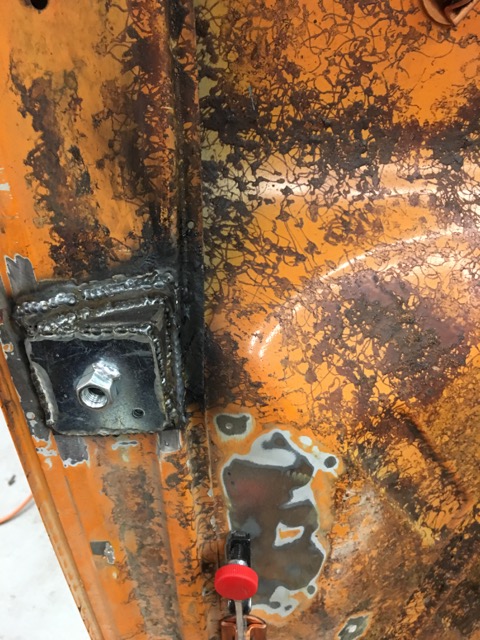
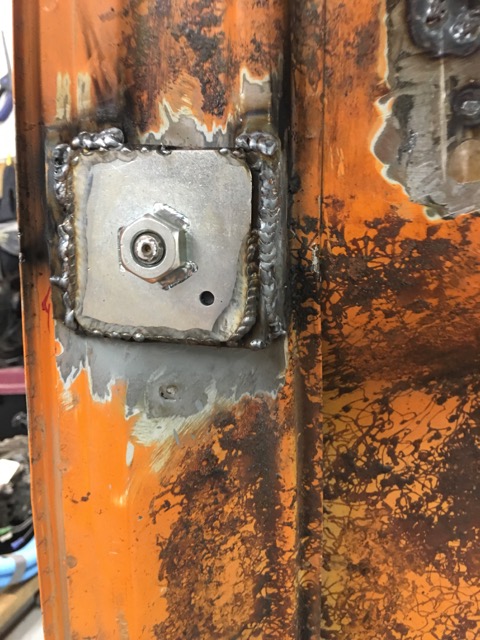
Need to do a little grinding and I'll be done with that part of the project.
Started on Engine mount number 2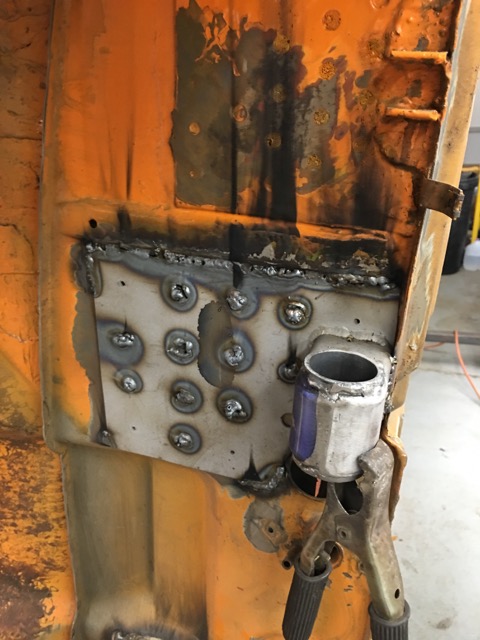
Back at it tomorrow
Posted by: 914forme Mar 13 2016, 08:05 PM
Spent the day going through boxes of parts, and selecting the items I want to keep, and what must go. Oh what fun it is then to clean up the workshop. But it must be done, other wise I get a little crabby.
I did find my accusump mounts
I also drilled more holes to fill the drivers log top, and well started working on passenger log items.
BTW, Boeing makes some great lube, you can really tell a difference in the drilling. Steel does not push through as much. And Aluminum cuts like butter, producing long slinky like chips.
Posted by: 76-914 Mar 14 2016, 09:07 AM
BoeLube is great Not sure it's for steel but anything is better than nothing. The main thing is to find the correct speed for the bit and to keep it cutting once you begin drilling. It's a distinctive feel and sound when the bit is "cutting". Much easier w/ AL than steel. Keep on having fun.
Posted by: 914forme Mar 19 2016, 08:43 PM
Well I had a Blau 80 mm cap, but I decided I would sell it, it was not going through the hood, but my hood will have a door, so I need something to grab ahold of.
So I knocked this out.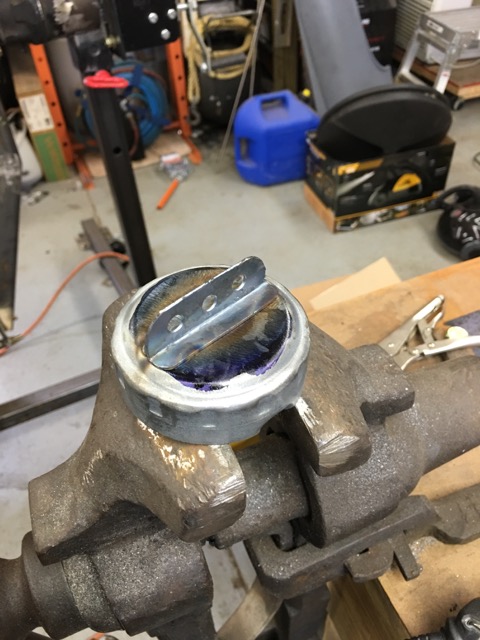
Installed on the tank, temporarily.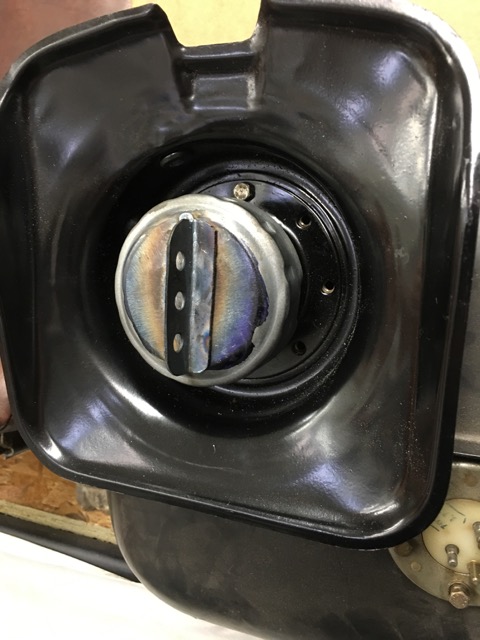
Then I started working on the oil thermostat, got a new one in. Never found my old one.
And I ran out of the proper length bolts to make my studs.
Then I started working on my new engine stand to get the mockup unit under the car while the car is still on the rotisserie.
So Like most things I over thought it. Started cutting metal to make a motor rotisserie. Then I figured out for what I needed todo in the near future, a drivetrain rotisserie is just over kill. Latter, it will make sense maybe, but I doubt it. So I put all the metal back in the bin, and built it out of wood.
So you can see it was a success!! The engine is in, to allow me to start working on the new engine mount.
Clearance to the front firewall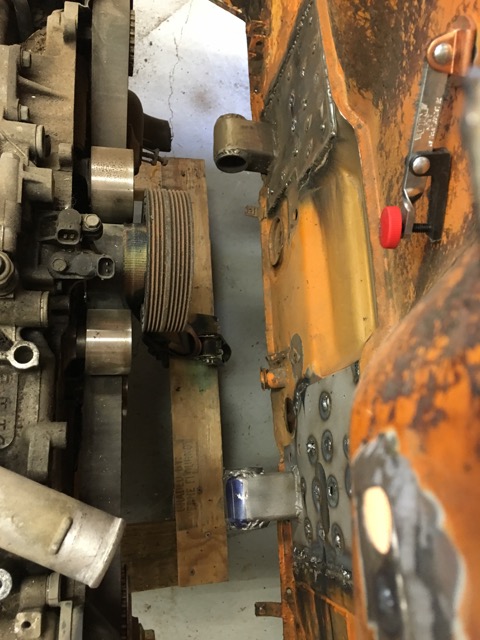
Clearance on the drivers side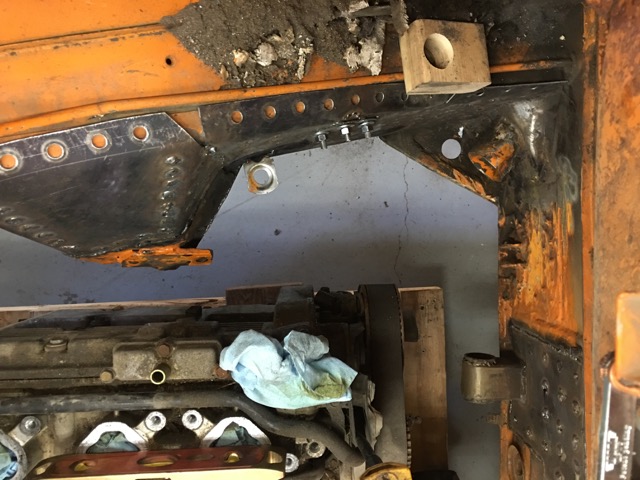
Clearance on the passenger side, -4 motor mount is still in there. need to get the and get that out of there.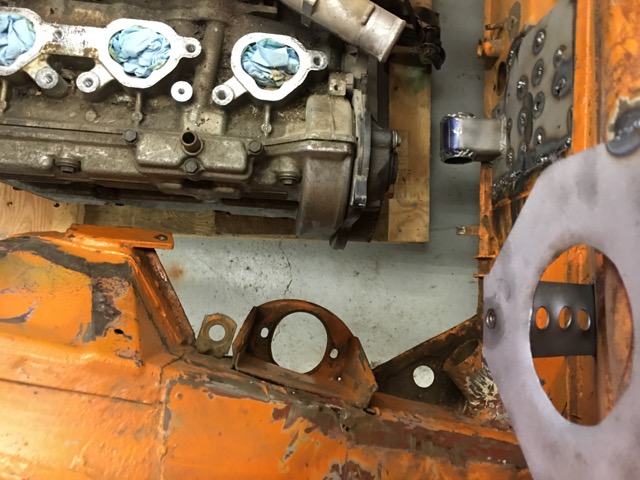
Here was the reason I needed to modify that cart. The leg on the rotisserie gets in the way. Engine is support the tranny makes it tip backward, so I have a ratchet strap on the front to keep things where they belong.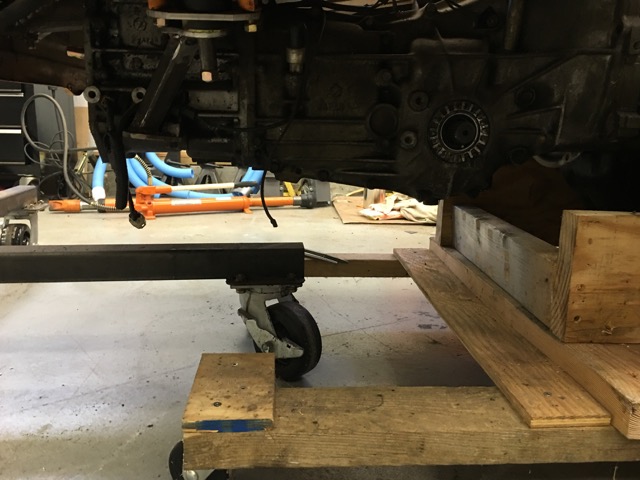
Down and dirty engine cart a few 2x4s a scrap 2x12 and a few screws.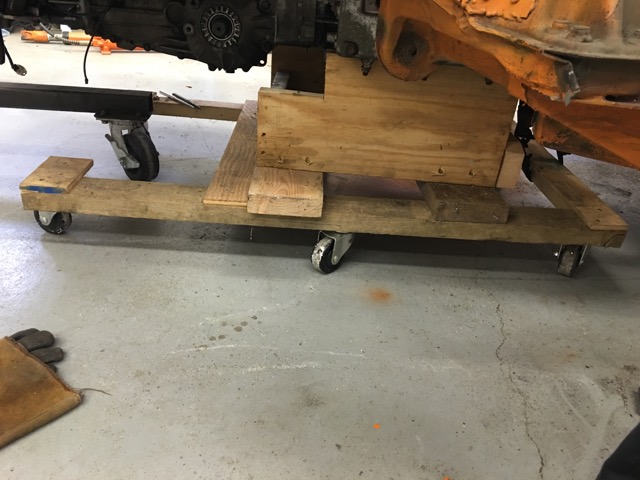
Today I ordered a few parts from the land down under, them Aussies have all the stuff.
And I calculated my fuel pump requirements, I need at minimum 190lph for E85. and looking at the 914 tank, I realized you knuckle head, it has a baffle in it. As long as I can get the fuel pump pickup in that part of the tank, I will be golden. So I will keep the fuel filter before the injectors, I just won't be running the complicated setup, I have drawn out several times.
Worse case I drop a Holly Hydrant in the 914 sump just to make sure I am good.
Any one know where I can get some 1-3/8" green stripe or equivalent, in a larger roll, not sure how much I need? Wonder if I can get 1-1/4" to slip over the 1-3/8" inlet, some serious lube and muscles maybe.
I am open to suggestions
Attached image(s)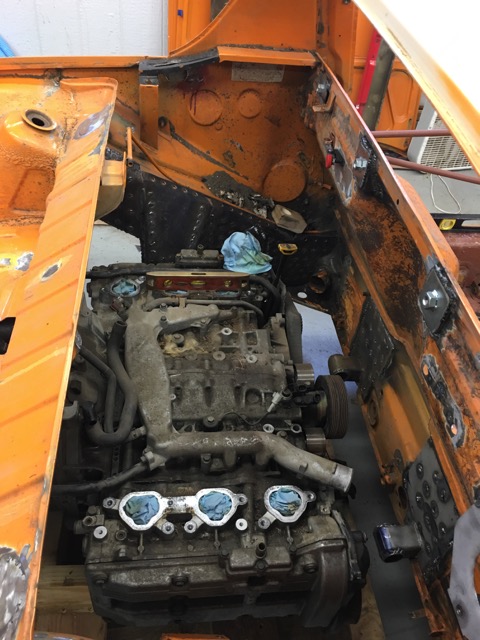
Posted by: Chris H. Mar 19 2016, 09:42 PM
Steve,
Seems like the 1.25 should stretch to 1 3/8. I was able to stretch gates 7/8 heater hose to 1" by soaking the end in hot water and then using a small amount of dish soap. You need less than 25 feet but it's nice to have some extra. A roll is 50 feet which is where the price break comes in. If you can find someone to split a roll this is a good deal:
http://www.amazon.com/Gates-28445-Heater-Hose/dp/B000CRHLF8/ref=sr_1_1?ie=UTF8&qid=1458444827&sr=8-1&keywords=gates+28445
Posted by: 914forme Mar 20 2016, 06:04 AM
Thank you Chris, and yes that is a great Deal I'll post the rest in the classified once I have completed my design.
Posted by: mepstein Mar 20 2016, 08:08 AM
Thank you Chris, and yes that is a great Deal
I'll post the rest in the classified once I have completed my design.If you want to split it, I'm in
Posted by: Andyrew Mar 20 2016, 09:46 AM
Any one know where I can get some 1-3/8" green stripe or equivalent, in a larger roll, not sure how much I need? Wonder if I can get 1-1/4" to slip over the 1-3/8" inlet, some serious lube and muscles maybe.
I am open to suggestions
The green stuff flexes really well. 1 1/4 should work well. A little oil helps a lot.
I would just keep spare lines just incase it splits.
Posted by: 914forme Mar 20 2016, 10:37 AM
Thank you Chris, and yes that is a great Deal
I'll post the rest in the classified once I have completed my design.If you want to split it, I'm in
Sounds good,
I'll bring the other half to Hersey with me,  , your going to make me drive my truck aren't you
 It is not a problem really, but if I avoid bringing the truck it makes so I am less likely to bring home a bunch of big items.
Posted by: 914forme Mar 20 2016, 10:39 AM
Any one know where I can get some 1-3/8" green stripe or equivalent, in a larger roll, not sure how much I need? Wonder if I can get 1-1/4" to slip over the 1-3/8" inlet, some serious lube and muscles maybe.
I am open to suggestions
The green stuff flexes really well. 1 1/4 should work well. A little oil helps a lot.
I would just keep spare lines just incase it splits.
Not a bad idea there Andrew, I will eventually need to place an order with Jags that work for some adapters. Still a long way out though.
Posted by: 914forme Mar 20 2016, 11:00 AM
Got the over flow bottle and catch can for the engine mounted.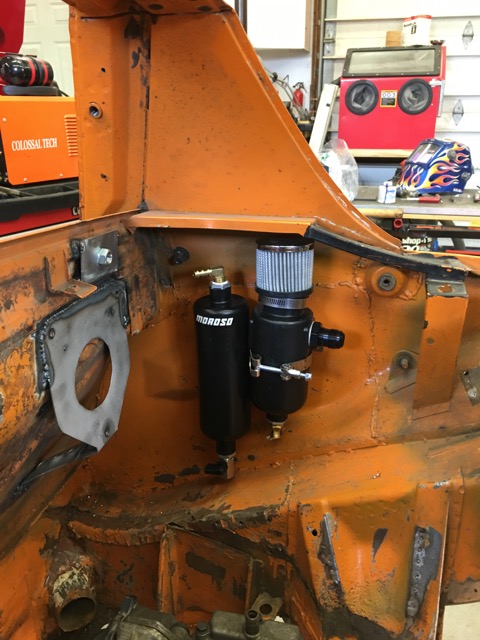
Started working on other brackets and mocking up the accusump mount.
Green Stripe ordered, as was the Accusump back flow preventer. No reason to fill the oil cooler if the engine needs the oil.
Cleaning up a little bit, workshop is a mess, then I will start up again.
Posted by: 914forme Mar 25 2016, 07:27 PM
Will I was out of ton for work a few more items showed up to keep this car moving forward.
Did not take a picture but I have a huge box of Green Stripe 1-1/4" in the garage 50 feet of it. Matches another 50' roll of 7/8" Green Stripe You would think I was collecting this stuff, I need some more but need to measure what inner diameter I need for the heater.
Got this in for the land down under.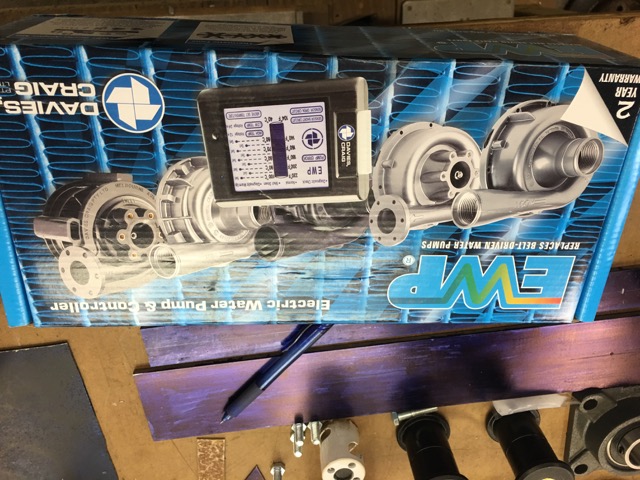
Man this thing is tiny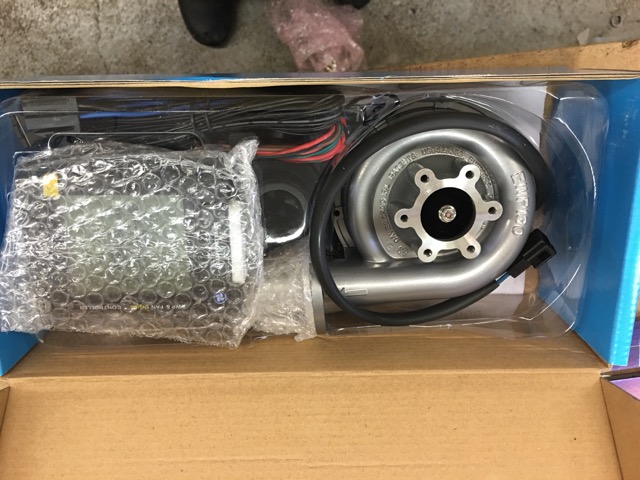
Nope not a turbo an electric water pump and controller.
Spoke LED Front Euro Turnsignals 
Canton Back flow valve. While working on the mount I dropped the accusump and shatter the gauge. Need to order one of them, love it off until it is going in the final time.
Garold sent me some A-pilars 
I will be using these to see how they where built, and how they compare to a 944 Coupe
Garold also sent me some axle nuts and washers I misplaced some where.
And they fit 
911 Hubs, proper depth so I did not need any spacers thanks to Eric and Bruce for these rare parts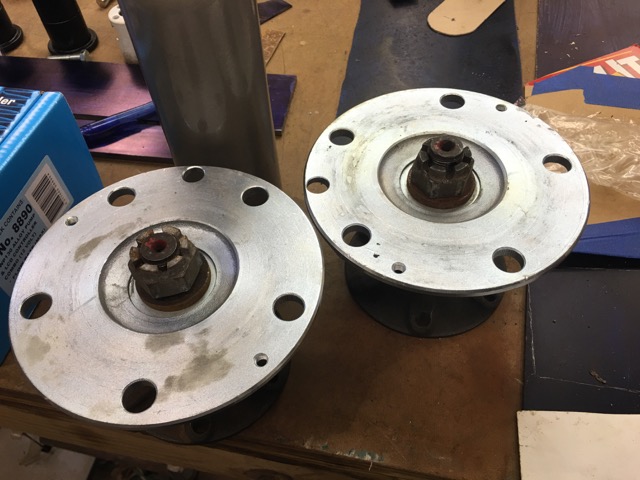
Yep they are 108mm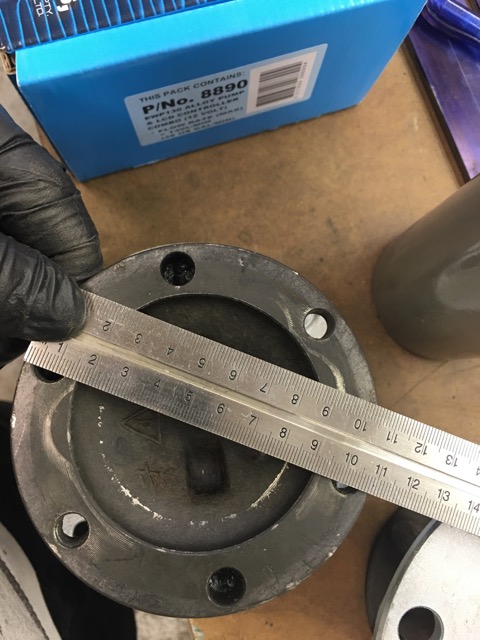
Yes I will be running 930 CVs
Stated working on the front engine mount. Did not take any pictures of the inner assembly. Since I don't have a lathe I took a 1-3/8" hole saw and cut a bunch of 1/4" disks. I then took an all tread nut, and put it in-between a double stack of the hole sawed disked. I then weed the entire assemble together. Ground down the welds, and added a larger one on the outside. Drill ed holes in the tub so I could plug weld the Insert I made into the 2" DOM tube.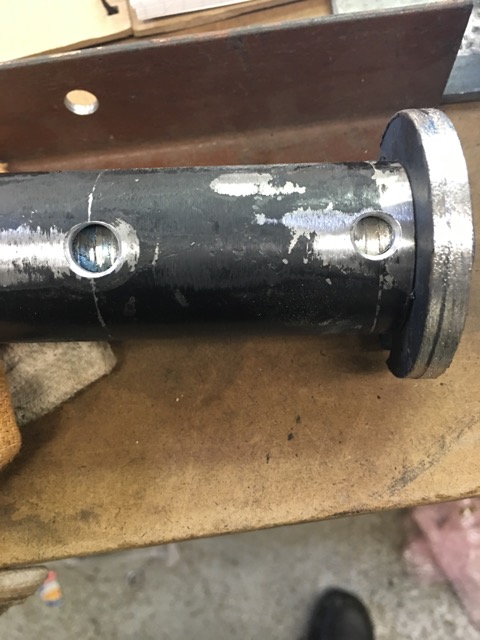
Plug welded up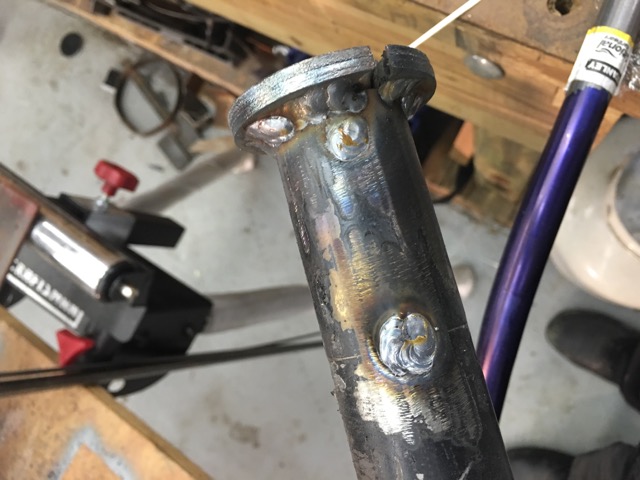
Mounted in the chassis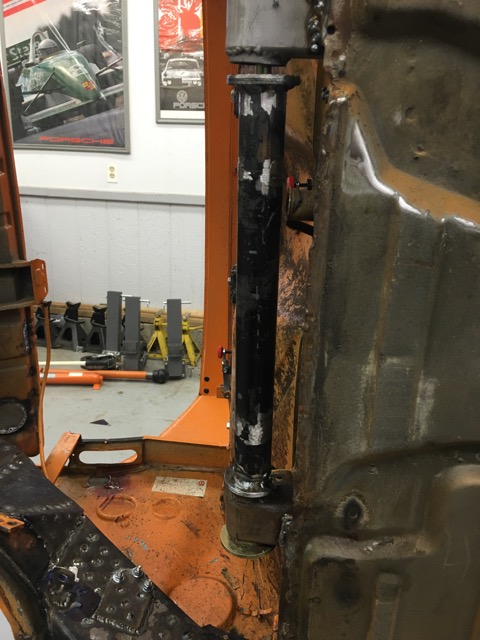
finished welding the modified small car mount.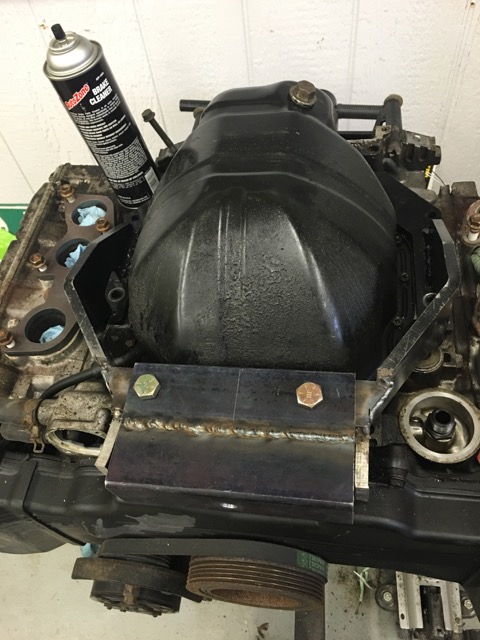
I need to go and pickup some bolts and a 1-3/4" dowel rod so I can finish mocking up the front engine mount.
Posted by: Andyrew Mar 25 2016, 09:59 PM
Great stuff! Love the water pump 
930cv's are a great choice!
Posted by: Chris H. Mar 25 2016, 11:46 PM
Looking good Steve. You'll be glad you did your mount that way. Leaves the exhaust options wide open.
Posted by: 914forme Mar 26 2016, 08:15 AM
Looking good Steve. You'll be glad you did your mount that way. Leaves the exhaust options wide open.
Yes, it leaves the exhaust open to a lot of options. Equal length headers snaking around. Proper length for the headers where 32.5" I have a set of pool hose to bend around and try to make fit. Wit the bar I could do it, but the collector was out the back of the 914. Or a very simple setup with a cross over going into one of them funny little snail shaped devices I love building things so It will be a simple NA build this go around. But you will seeI am planning for the future when I get used to the engine. Going from 100HP to 230HP will be a nice bump, and make the car completely different. But evil things happen to us humans and we make the new HP normal.
I sold my last TDI, it was all tricked out! It was plenty fast, got my new stock one, and forgot, I don't have that power anymore. So I downshift to pass and the first time I didn't it was like
where is the power! I have been a very good boy and have keep my new one all stock. Though I see that changing it its future. But if the turbo goes out, all hell will cut loose I am sure First up will be suspension and brakes, tires and wheels! I always start there with all my builds. Need to be able to stop and turn before you start making it move from point a to b quicker.
So if you know someone that has posed their MKVI Jetta GLI, or GTI, I would be interested in suspension and maybe the wheels some of them are
to me.
Posted by: 914forme Mar 26 2016, 08:22 AM
Great stuff! Love the water pump
930cv's are a great choice!
yeah you started that sickness In reality I like the concept as it solves a problem the EG33 has with high revs and pump cavitation. Or at least I hope it does.
Also just incase anyone needs to know what trans they are buying here is a PDF I liberated with information current to the date of publishing. I was looking for a generation 2 trans yesterday found a few, but this will help narrow down the choice.
Attached File(s)
 TransmissionIDChart_Public.pdf ( 151.84k )
Number of downloads: 86
TransmissionIDChart_Public.pdf ( 151.84k )
Number of downloads: 86Posted by: 914forme Mar 27 2016, 06:09 AM
Spent yesterday working on the engine mounts, took not one picture, sorry. I have pushed the EG forward another 2", that puts the AC unit just off the firewall. And still gives me some space for tubes. That forward movement adds some space around the rear shift rod, and allows for exist to center exit. It was a tight fit back there.
So now I get to step back and redo all the brackets I made on the trans mount also. Oh well it is a good learning experience.
I need to go and get a 1-1/2" holes saw, mine old one seemed to have seen better days 
Posted by: 76-914 Mar 27 2016, 06:42 AM
Oh God. What would it feel like to do something and get it right the first time, Steven? I believe that's is why so many peeps wash out before completion. Takes some mental prep for the disappointments that experimentation brings. BTW, that 1.25 will slip over the 1 3/8" easily. Glycerine is your friend. Keep on keeping on. Kent
Posted by: Andyrew Mar 27 2016, 10:20 AM
Just noticed what you did here
Nice orientation
Posted by: 914forme Mar 28 2016, 01:23 PM
Well the remanufacture of items I have done in the past continues. I got bot of the transmission hangers mocked up, one side is done. It was much easier the 2nd time around.
I used a shorter section of tube tack welded it in the location I wanted it to be in and covered it in layout dye. 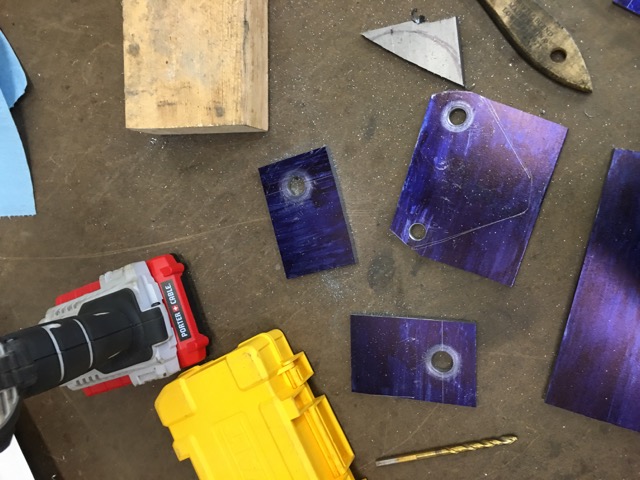
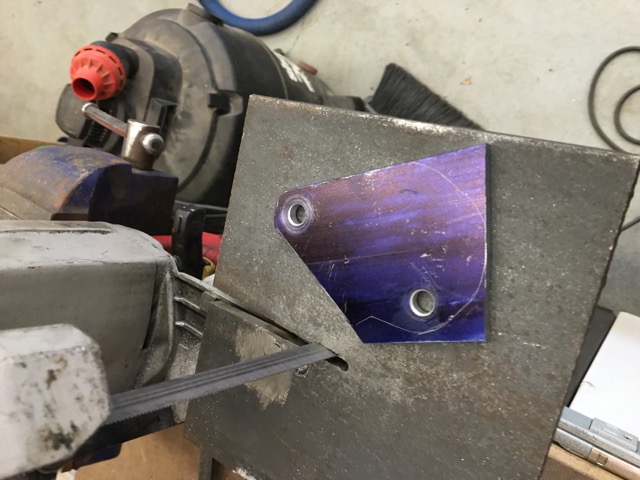
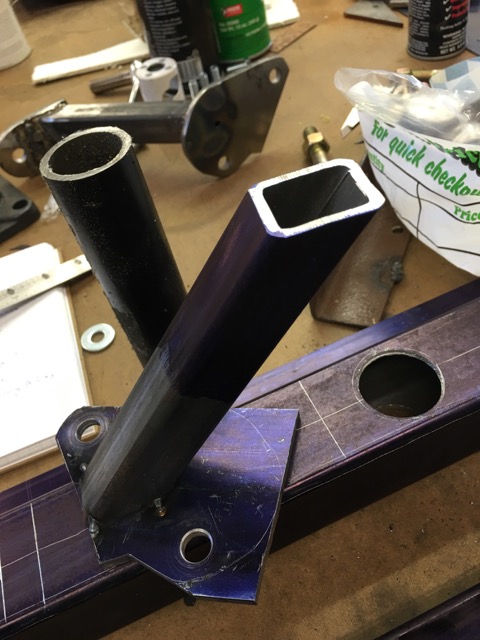
I then made this handy little scribe, point of the hardened nail is 1/2" from the surface being measured.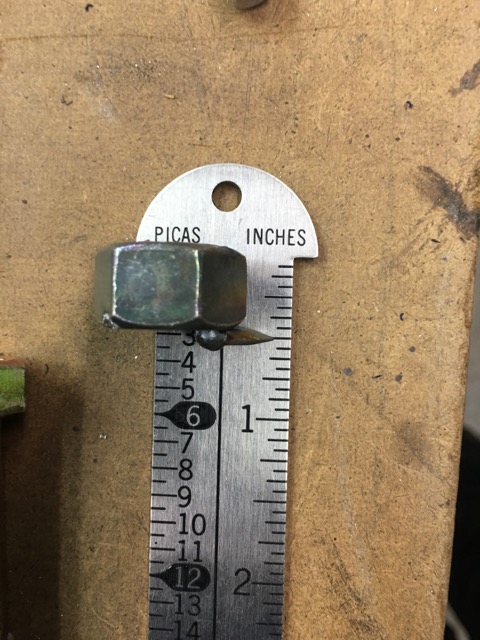
You just trace it around the surface your going the tube to and you have your exact measurements. Mark it on the final tube, add 1/2" and it fits really tight!!
I got into the flow of the project and took no more pictures. I love it when that happens, I just bang out stuff like it was no effort.
Started working on the front Mount from the engine to the bar
As I mentioned in a previous post I moved the engine forward forcing all these changes. Here it is in its final resting spot.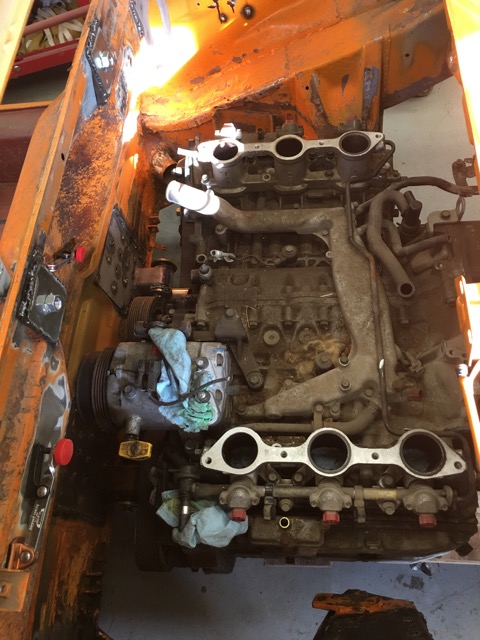
A/C compressor is tight but it fits.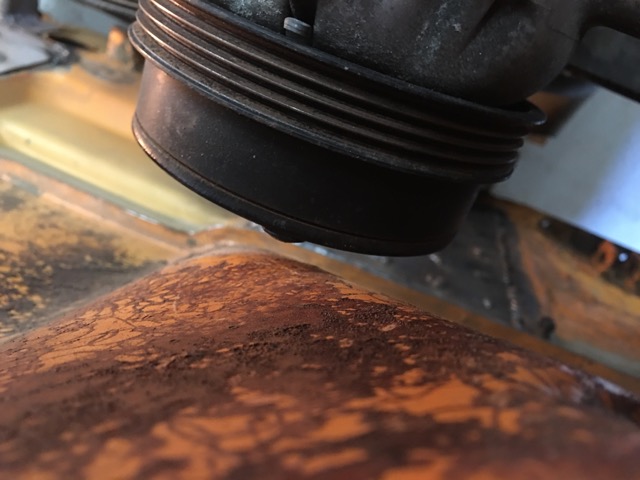
And the clutch slave is still in its hole 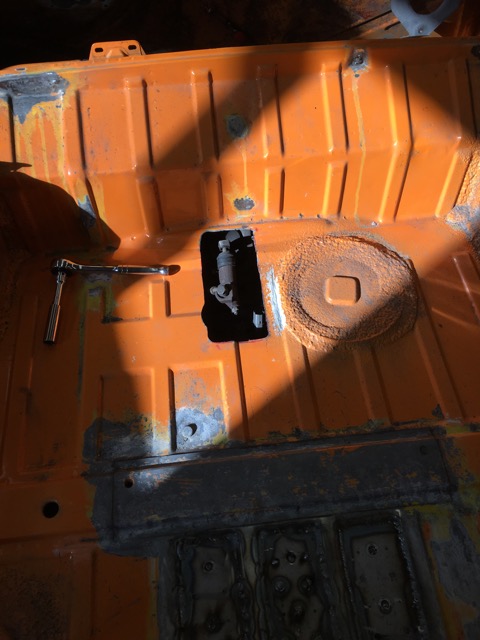
The last thing I did was lookup information on my Gen1 Trans.
So it is a 4.44 Final Drive with a 3.454 1st, 2.062 2nd, 1.448 3rd, 1.088 4th, and 0.825 5th gear.
At 70 in 5th I project turning just shy of 3000 RPM that will get old fast. So I started to wonder what combo I needed to get the best of all the worlds.
The WRX in 06 /07 has a 3.9 final drive. All the gear ratios are the same just the final drive changed. That translates into at 70 engine is turning at 2200 RPM.
Now to find a USDM WRX Trans TY754VW7AA from an 06/07
In reality the performance is not much different between the two final drives when I run it through the simulator.
Posted by: gryphon68 Mar 30 2016, 08:34 AM
The WRX in 06 /07 has a 3.9 final drive. All the gear ratios are the same just the final drive changed. That translates into at 70 engine is turning at 2200 RPM.
Now to find a USDM WRX Trans TY754VW7AA from an 06/07
I believe the 06/07 WRX is actually 3.7 final drive.
See bottom of page 4.
http://www.rallispec.com/downloads/Transmission%20ID%20Chart_Public.pdf
Also, they may have also relocated the clutch slave cylinder, that might allow you to patch the hole in the trunk floor.
Posted by: 914forme Mar 30 2016, 01:46 PM
I know it says 3.7 I am assuming it is a typo. Since the majority of them are 4.44, 4.11, and 3.9. I could not see this one tranny being the only 3.7. Patching the trunk hole would be nice. Though I have a nice solution. I worked hard on that cover then screwed it up.
Posted by: Chris H. Mar 30 2016, 05:45 PM
Hey so...before you buy an 06-07 WRX trans...straight from the 2006 5MT manual. I have the whole 2006 5MT (and 6MT) shop manual if you want it Steve. 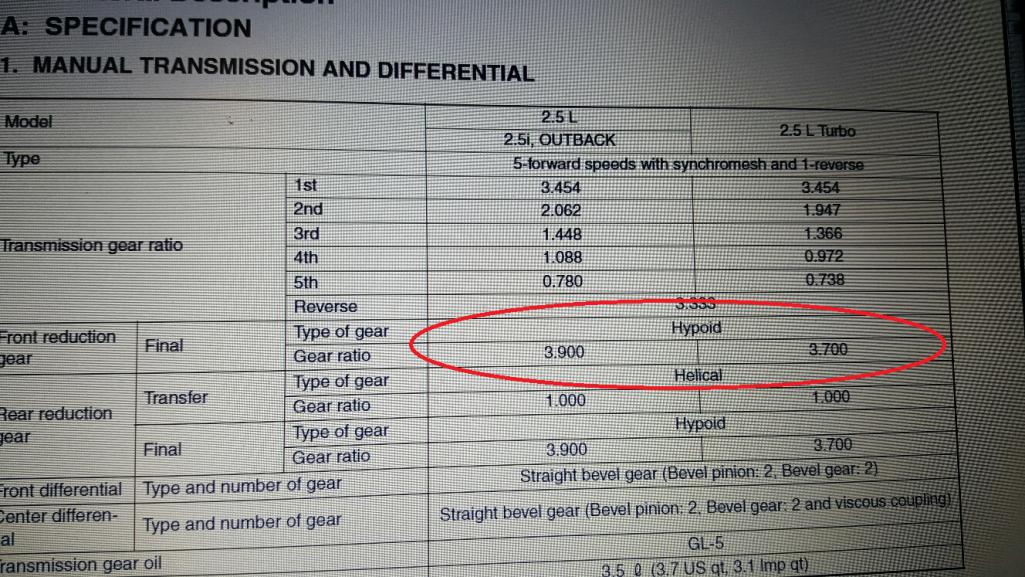
It APPEARS that the non-turbo cars are 3.90 and the turbo cars are 3.70. And it does seem like mine runs a little high RPM in 5th. Can't confirm the final drive...could be a typo but it seems right. I have a 2006 WRX (turbo car) trans.
Posted by: 914forme Mar 31 2016, 05:50 AM
Thanks for the confirmation Chris.
Also the gear ratios are different. The hunt is on, though I am a long way from deeding it officially.
Update on progress,
More parts are rolling in for the beast, I got my in tank fuel pump mount from Tanks, Inc. It is their Fuel Cell Pickup and return unit. Needs to be modified for fuel pump support. Once I get all these parts I will do a write up on my simple conversion to in tank fuel pump.
This setup also eliminates the need for an external sump setup, making my build easier, you got to love that
Nice night last night in the Ohio Valley so I finished welding my last trans hanger. And started working on the new front mount. Got my mock up done, and started cutting it to shape, to get the proper tight fit, this will take a bunch of cut off wheels.
Also I got a notice from AA last night that the Euro Taillights I order will finally be shipping next week. We will see how they compare to all the Hella units I have stock piled. Even the Hellas have various shade differences in the Amber section. So you have to mix and match them if you picked up multiple sets.
I am also getting ready to dive off the deep end with Tangerine racing parts. Before I go to far, I need to hold back , but Chris' stuff is so
Posted by: LowBridge Mar 31 2016, 08:20 AM
![]()
Posted by: 914forme Apr 1 2016, 06:52 PM
Well got to work a little bit tonight before my compressor bit it
No time to get to Harbor Freight tonight for a replacement pump. I would love to just buy a new compressor, but the 914 is more important. So instead of using my die grinders and other air tools, I had to use my dremel to get some tube fitting done.
That being said I got a decent fit for the first front engine mount let going to the firewall.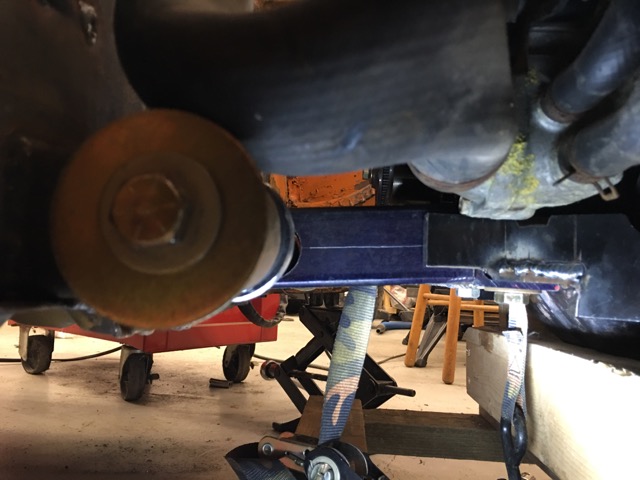
Took pictures of the rear brackets, much nicer than my first go around.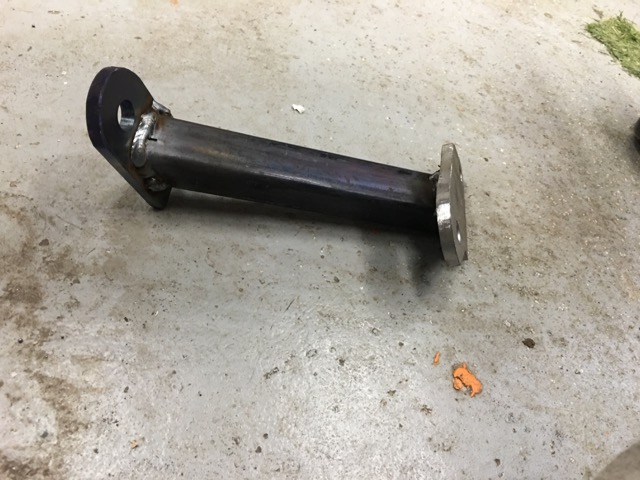
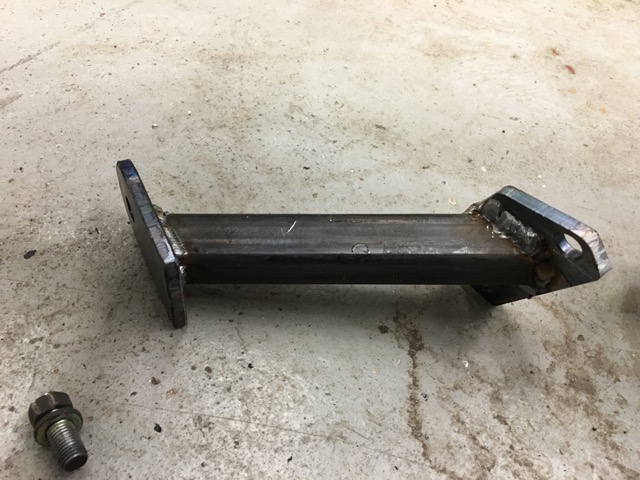
And Mounted in the car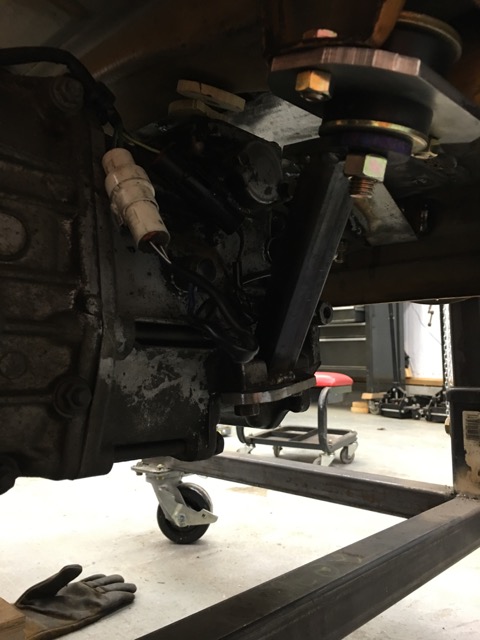
Fuel pickup came in from Tanks, Inc. 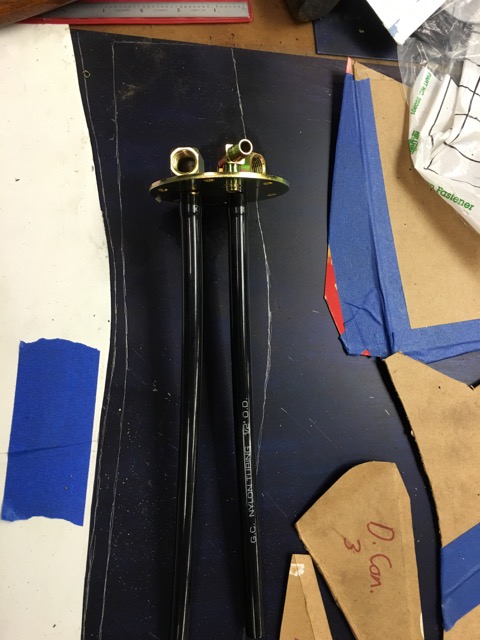
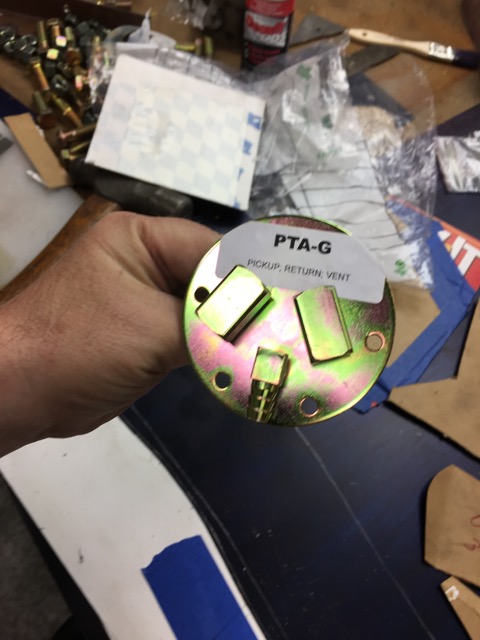
I have all the little pieces on order for the power lug to pas through this mount. The grounded side is much easier
And I got my Fuel Pump E85 compatible 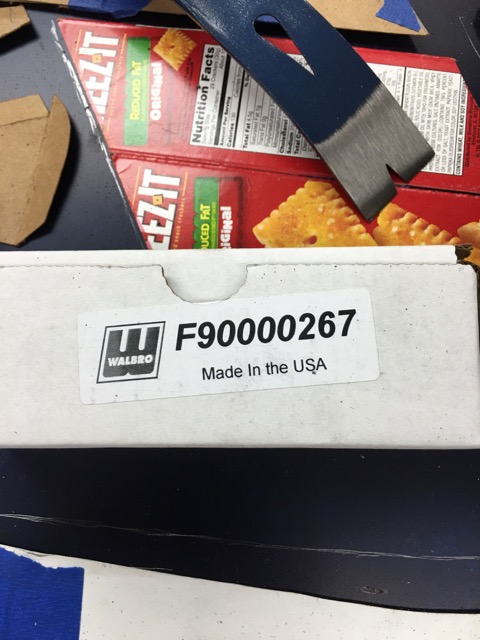
And install kit.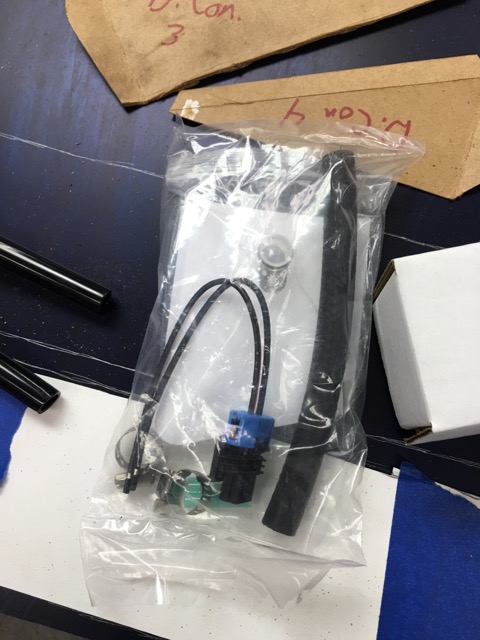
That is it for this update.
Be back at it tomorrow, and modifying my old Air Compressor to except an HF unit. Running it through its break in, reviews say need to do that until cleanish oil comes out of the drain, and then change it to some good purple stuff it will hum right along.
Posted by: 914forme Apr 2 2016, 07:10 PM
Today I got something done
engine mounts are done, well they need to be coated in something, paint, powder, gun blueing, etc....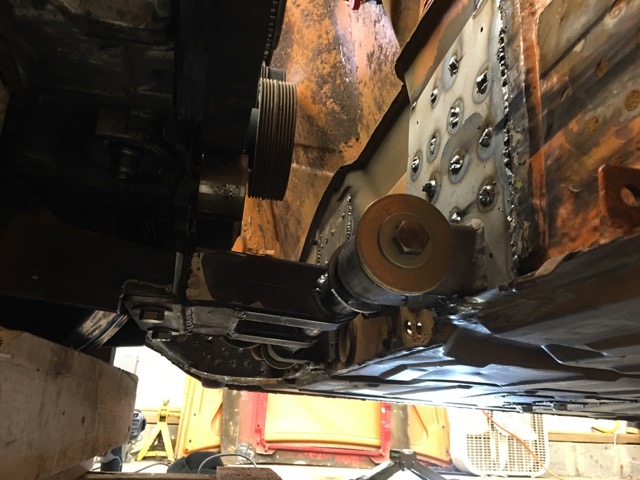
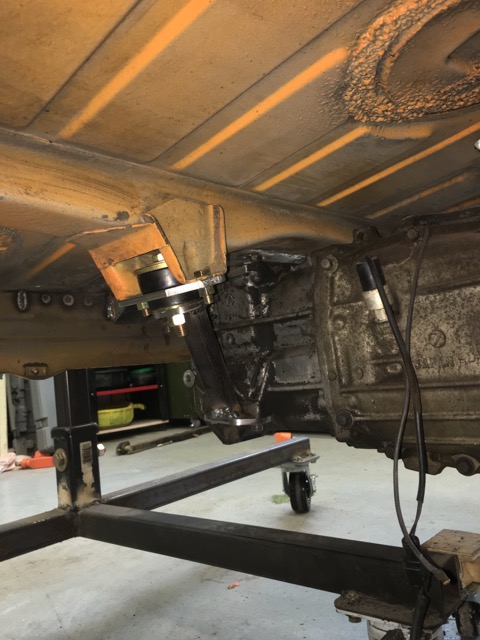
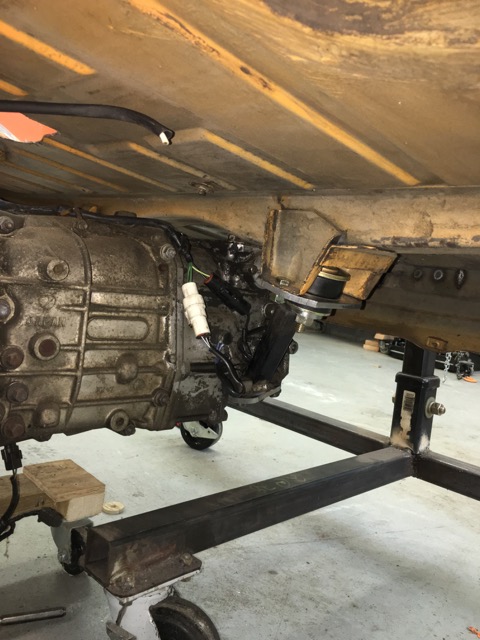
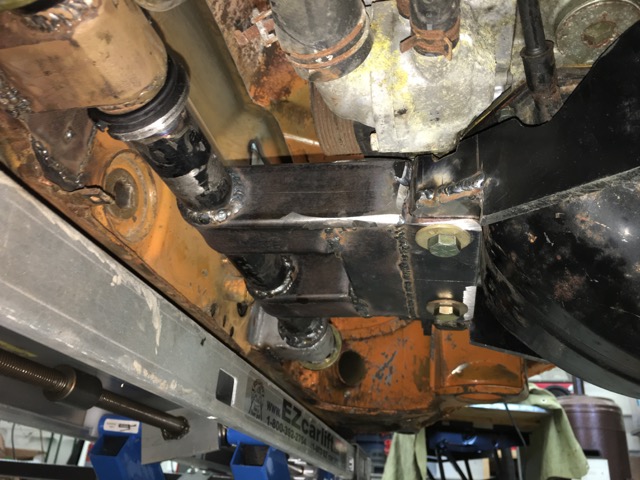
And the test, it works at least as a display piece.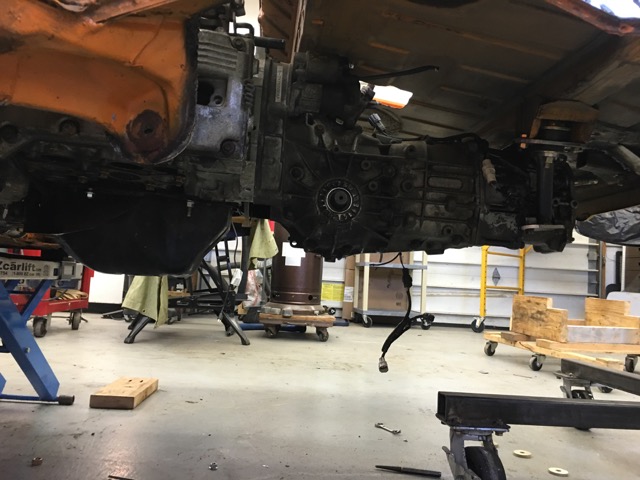
And I have started my new engine cart, my wood one was quick and dirty, and well All that wood gets in the way. Total pain in the....
So this is the start, this will sit under the cross bar at the front of the engine.
Now to find some good Casters
Repurposing scrap from my shop lights, I took them out of an open bay workshop and they where attached to these channels. I have used them for all sorts of stuff
Compressor update, well went to Harbor Freight got a pump, and ordered my new pulley for the engine. Got the old one torn apart and tossed it in the metal pile. I get to wait so todays work was done with a Dremel and a bunch of metal cutting discs. Them little things work, but dang they get eaten up quick.
But I did pickup a 12" disc sander at Harbor Freight to help me clean up metal work. And that is one solid disc sander. Oh and it eats metal like nothing else I have ever used. Sure beats my old belt sander stuck in a vice
Posted by: 914forme Apr 3 2016, 08:23 PM
Not much done on the car today.
I did make the lower part of the brackets for the engine dolly.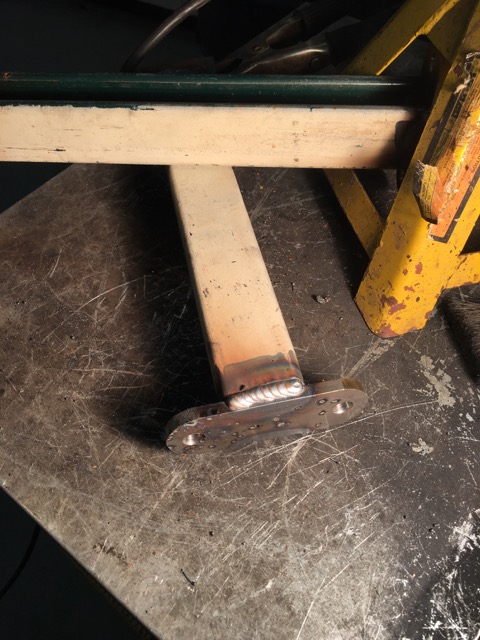
Baby steps
Posted by: 914forme Apr 7 2016, 05:34 PM
Well parts showed up today
More Parts from down under 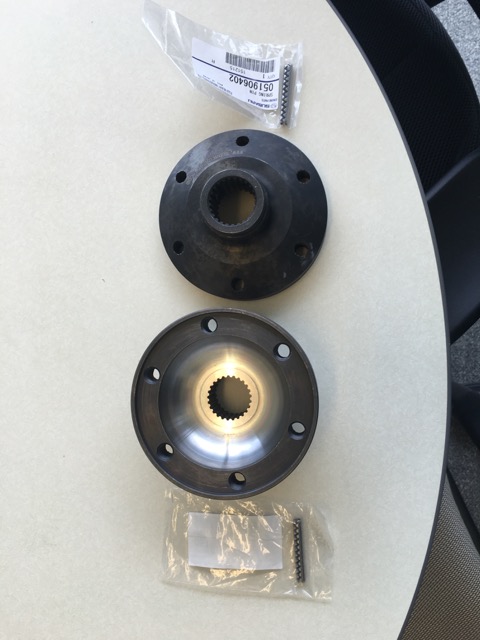
930 Hubs and roll pins for my Subaru Trans.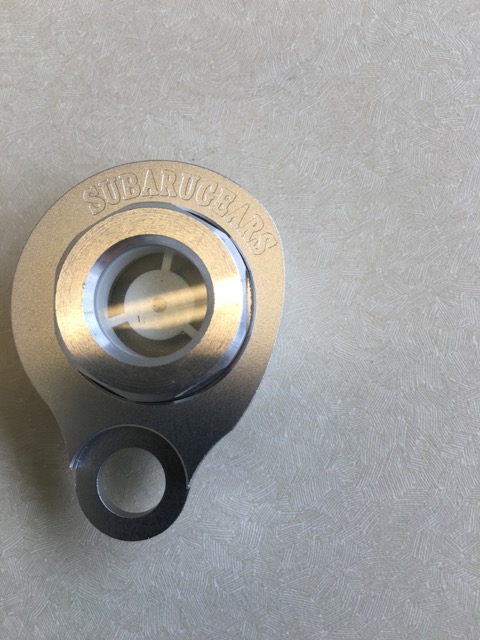
Subarugears Sight Glass for Transmission Oil level.
And after waiting 4 long years for this order it finally came I was not going to say anything until I got it in my hands.
Oh they look so pretty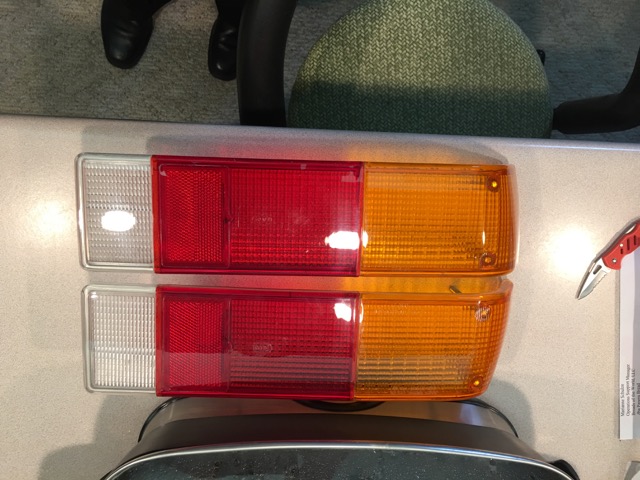
I was packing them back up in the box and 
Yes the reverse lens section was glued to the rest of the lens at an angle
So shot an e-mail off to customer service with a picture asking the same question. We will see if I get again
Posted by: jd74914 Apr 7 2016, 05:44 PM
Those engine mounts look good! I really like the front pivot! It's so clean without anything totally spanning the engine bay.
Eeek, how could anyone ship lenses out like that. No QC at all.
Just adding this because you have a picture of one of Andy Forrest's engine iterations posted above, but have you seen this recent interview with him? Lots of interesting stuff about the car, etc. https://www.facebook.com/HPAcademy/videos/990196814405772/
Posted by: 76-914 Apr 7 2016, 05:49 PM
Well parts showed up today
More Parts from down under
930 Hubs and roll pins for my Subaru Trans.
Subarugears Sight Glass for Transmission Oil level.
And after waiting 4 long years for this order it finally came I was not going to say anything until I got it in my hands.
Oh they look so pretty
I was packing them back up in the box and
Yes the reverse lens section was glued to the rest of the lens at an angle
So shot an e-mail off to customer service with a picture asking the same question. We will see if I get
again I'd like to placed a wager on that if it comes up!
Sorry Steven. How does someone stay in business with those practices AND reputation?
Posted by: 914forme Apr 8 2016, 04:25 AM
it was a gamble like anything, we will see if the house wins.
Also what a great find on the Forrester interview. Thank you JD74914 Lots of detail info on how the car was built and ran.
1200 HP in that form is super nice. And it sounds like he ha the potential to get to 1400-1500 if he wanted to stress it out a bit. As he says and has been my contention, you rarely use all the HP you have.
Do I need that kind of HP in my build, NO, would I want to experience it OH HELL YES
I have one GT350R sitting here and also have a GM 3.8L super charger with lots of bad ideas going through my head. The GMs are cheap bone yard items. The GT350R are a little more dollars, if you get the real thing. I have also been eyeing a Paxton unit.
I don't need to do any of these right now, the thoughts and pondering just keeps me from completing the build.
Countdown clock says I have 24 weeks left. Lots to get done in 24 weekends. And in reality I have less than that due to work, social plans, daughters marriage, etc... As they say Damn the Torpedoes Full Speed Ahead
Posted by: 914forme Apr 9 2016, 05:16 PM
After spending all day driving back and forth between my house and Home Depot only to have my wife change her mind again, I realize the 914 will not be completed for Okteenerfest! Realistically there is no way.
I still have the following long list to do:
Engine Bay
Fix the Passenger Log
Reinforce the passenger log
Install mount for oil filter
Install Mount for Oil Thermostat
Install Mount for Accusump
Finish Engine Mount
Install Hand Brake Tubes
Fill Firewall Holes
Install Coil Pack Mount
Install Engine lid Latch setup
Install J-West Trunk Lid Springs
Rear Trunk
Remove Seam Seller
Install Upper Shock Mounts
Fill in a couple holes I have found
Lines
Run Cooling System Lines
Run Brake Lines
Run Clutch Lines
Run Fuel Lines
Run Oil Cooler Lines
Run Heater Lines
Run A/C Lines
Run Intercooler Lines - for Future usage
Run Overflow / burp Line
Provision for engine harness
Revision for Chassis Harness
Interior
Sport Seats
Brake Pedal Box
Shifter Console
A/C system
Stereo
Seat Heaters
All the other interior bits
Carpet
Door Panels
Pack pad carpet
Headliner
Sun Visors
Fuel Tank area
Mount for brake and clutch fluid bottle
A/C system
Wiper System
Fuel Tank
In Tank Pump
Notched Corners
Camber Plates
Gas Strut Mounts
Holes not needed filled in
Fuse box
Front Trunk
Radiator Mount
Radiator
Oil Cooler
Water Cooler for Intercooler
A/C Condensor
A/C dryer
Reinforce exit vents
Cooling system Shroud
Front Air inlet finish body work
Storage
Head light motors - think Miata Pieces, smaller and several pounds lighter
Body Work
Fender Flares
Front Bumper - GT style in Steel
Front Valance
914 / 944 hard top with sunroof - already converted to manual
Door fixes
Hood fixes
Engine
EFI
Intake
Ignition
Shorten the oil pan
Electrical
Tear the car down
Paint
Reassemble
Suspension
Raise front Spindles
Reinforce rear arms
Re-assemble everything
I am sure I have forgotten lots of little details of things to do.
Just so you know I am not giving up, just realizing the long row I have to hoe.
Off to Home Depot again, Need some new duct work, I love my wife. This is getting ridiculous.
Posted by: 914forme Apr 9 2016, 08:46 PM
Got my parts to install the Fuel Pump in the tank, you need a way to drop power into the tank. The ground is easy as you just need a lug.
So I grabbed one of these, because I don't need 49 more of these.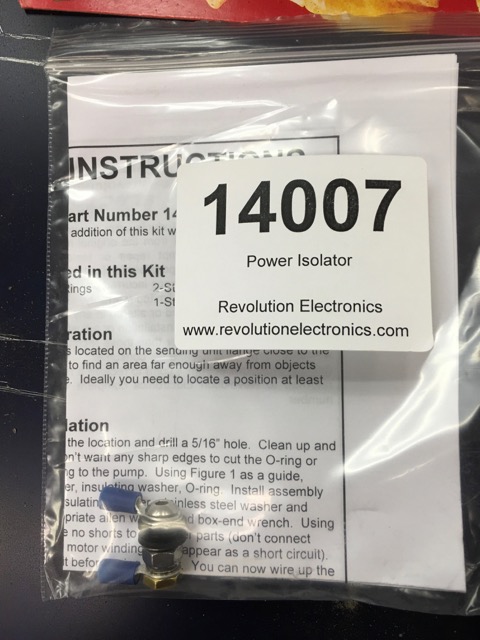
And this is what all the parts you get in the kit.
Not bad for $12 total with shipping. Thats all I got done on the car today. Still working on the new bathroom.
Posted by: 914forme Apr 22 2016, 03:11 PM
Not much done on the 914 in the last few weeks. I made the trip to Hersey, had a great time at the swap meet. Picked up a front painted bumper for GT bumper. Picked up a fe extra Centerline wheels, stupid things I can't resist them.
Before I left for Hersey I got a box from Chris at Tangerine Racing, I love Chris' work.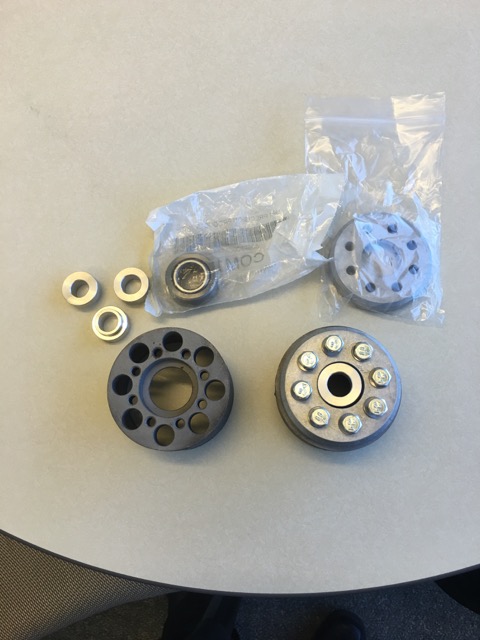
I picked up a wicked bug and have been sick since I came back from Hersey, totally wiped out. Hope to get something done this weekend, but the way I feel right now, I am thinking it might not happen.
BTW, who's car is this?
Yeah I know detail shots suck, but I feel this detail is a pretty unique item, so it should be enough for an identity.
Posted by: 914forme May 21 2016, 08:44 AM
Today is my daughters wedding and I can't seem to fall a sleep, wonder why? This was at 2 am when I started writing this post. As of now, I have butterflies in my stomach and mind is racing with speech ideas, food blessings, and hoping i don't screw something up!
So instead I went off and worked on an issue Chris Foley warned me about with his rear shock tower kit that raise the rear shock towers to increase shock travel on lowered cars.
The issue is this, if you are running an aftermarket upper spring hat, it might not allow the shock bolt to make it to the bearing, as it hits the housing. This will cause the shock to bind, and eventually cause it to fail. Since I run a Coleman Racing adjustable spring preaches. And it uses a different hat to allow me to run a 2.5" standard spring I might have the issue.
So lets see
Ah yes I have an issue. That is the Coleman hat in Chris's extension, everything is upside down on the bench to allow gravity to do its job.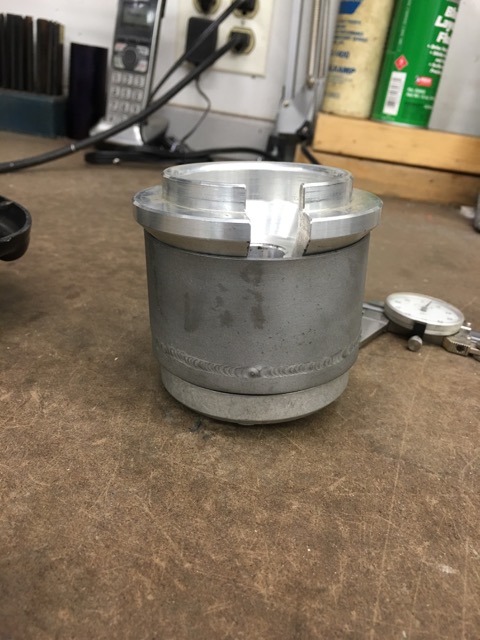
This is what Chris was talking about. The top of the hat does not meet the bearing extension. By just a so small amount.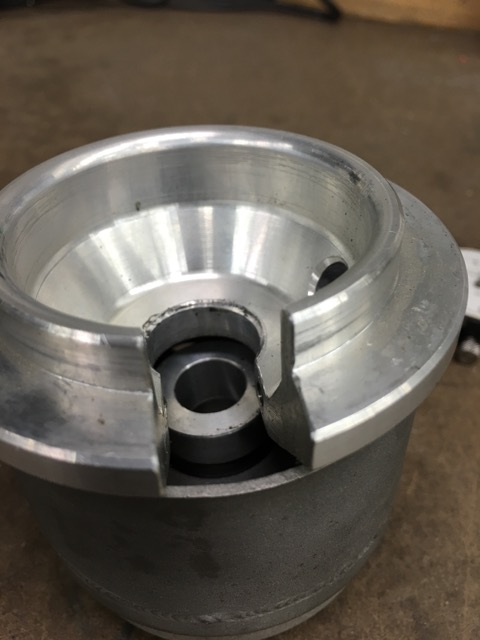
Chris's solution is use the stock spring hat.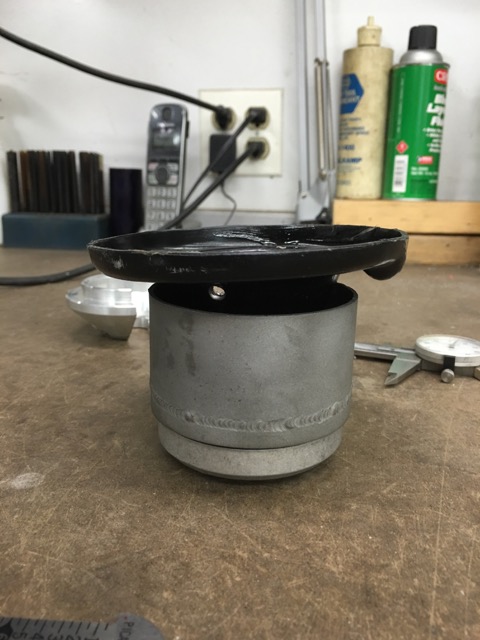
That does solve the problem, and creates and opportunity. I would have to make or modify the stock hat so the 2.5" spring would be secured and not move around in the hat.
Why not just fill in the gap between the bearing and the Coleman. So off to the parts drawers I go and I get me two extra of these, clean them up, and ad some dykem.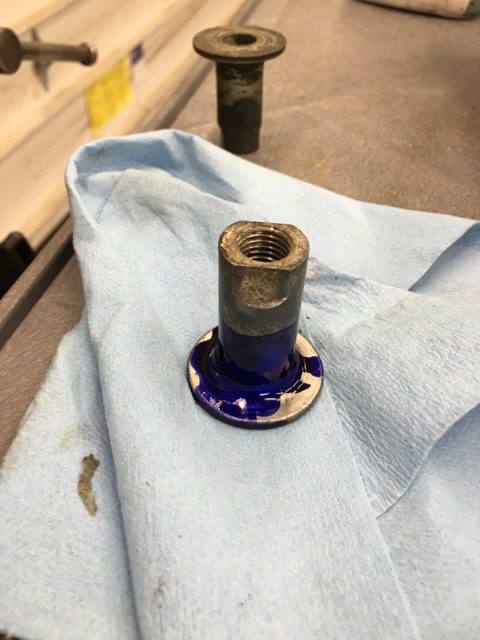
I then measure the difference in the two spring hats in height. And mark the difference on the that sleeve where I need to make the cut. So now how to make the cut. The obvious answer I need a metal lathe! So I run down the rabbit hole of small metal lathes.
I love the Sherline, always wanted one since I first saw one in a friends basement we where cleaning out. You can just see the quality in the product. Yes it would do what I need but not much over 2" I can live with that right. What is the next project you will be using it for. Modifying my crank pulleys on my EG for magnets for the hall pickup. That is a 6" Diameter . unit. Okay, a 7x10" would do that for me, cheap chines lathe. Reason being I will be on the face side of the piece an not the outside so I could spin it as I am over the bed, and don't have the cross slide in the way. No I would like more bed if I am getting into these. 7x16" Do lots of research, determine I am going down a really deep hole, and would be buying more tooling. So I look around the shop and decide enough dreaming, lets get back to doing. So I grabbed my Portaband. Chucked the sleeve in the vice. And cut it off just shy of the mark so I could true it up on my 12" sander.
That made short work off it, freeing up the funds I so quickly dedicated to a Metal Lathe, for other 914 parts.
Here is the spacers.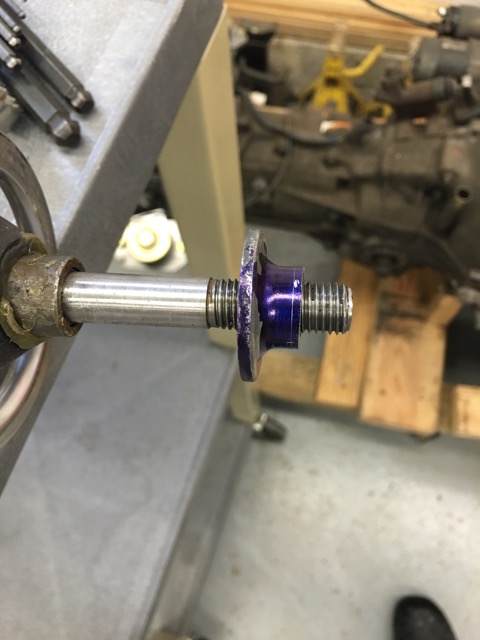
So here it is all bolted up, this was the first one. 
For Reference the stock hat.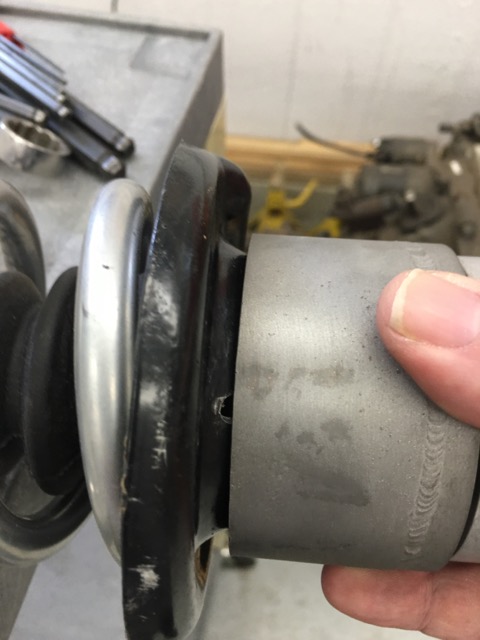
I might need to add a little length to my spacer, as the coleman hat does hit still. At least now it is not a dead stop, and good thing I have a drawer full of this upper shock bolts. Hat designs are that much different. I could modify the Coleman Hat, there is the pesky metal lathe again, or Milling machine could also do that for me.
And now I am looking some tools, which I could have made on a the lathe
Dimple Dies, Hello SWAG OFFROAD 
I moved on in the effort to increase shock travel, again, I need a Lathe 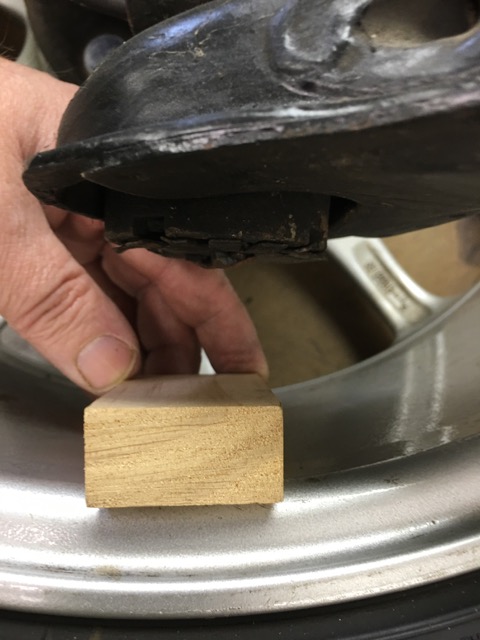
That gives me 20mm, I think I have some wiggle room there and 22mm should do the job.
What that means I would have to run 17" wheels. What that really means currently is a wider selection of performance tires. And yes weight goes up on the wheels from 13 pounds with the Centerlines to 18 and 20 for the Carrera 10 Spokes I am running.
BTW, Forgelines are not better than the Carreras.
Forgeline wheels
ZX3R
17x10 21.15 lbs
It is very hard to find Forgeline wheel weights
The 10 spoke Carrera wheel is manufactured by BBS, and is lite in its sizes.
If I keep the Centerlines , I can only drop the spindle by 10mm. While we are talking wheels weights 17 Center lines are not lite in themselves.
Current champ is Fiske, I can't afford them, so Carrera 10 spokes it is for me.
My high tech measuring device 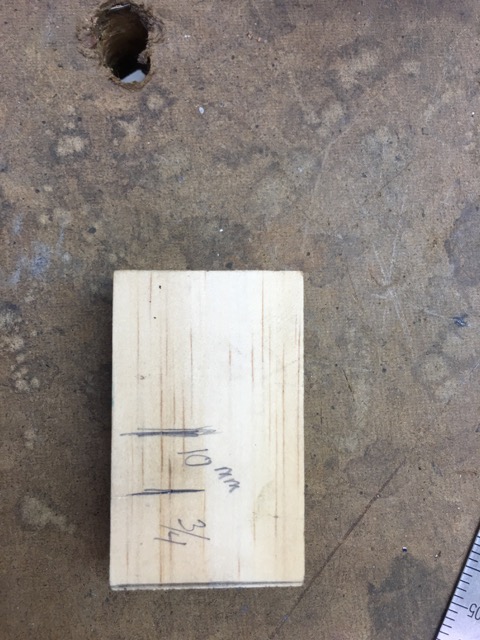
The odd thing is I had access to tons of Metal Lathes, Mills, etc... at work. And I never use them.
Posted by: 914forme May 25 2016, 05:24 PM
todays work, took the week off of work, Monday we where just to tired from all the partying to get up and play. Tuesday I had work todo, for work, darn Federalis won't wait for little ole me.
Today I go some time, and started working on the rear shock raise. As usual I will gladly plug Chris' stuff.
Chris says his hole saw fits around the shock cup no need for a centering ring. I am never that lucky. So I made a set of centering disc to keep my hole saw true.
Step one clean the cup so I can weld them in.
Drop in my centering disc
Hit it with the welder
Chuck up a 3" hole saw in a 1/2" drill, when it catches it will yank your arm off.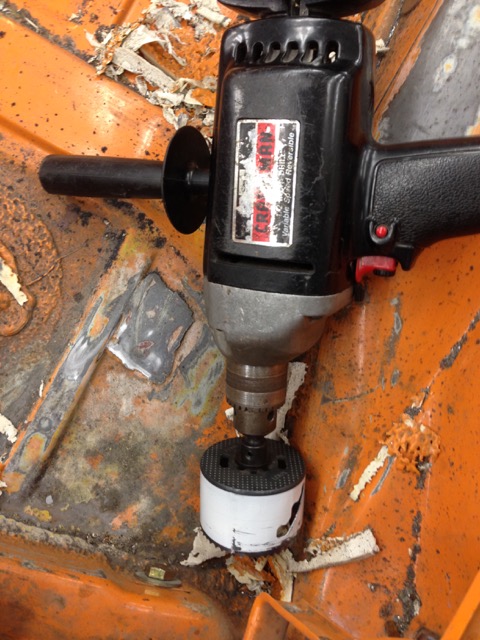
Drill a hole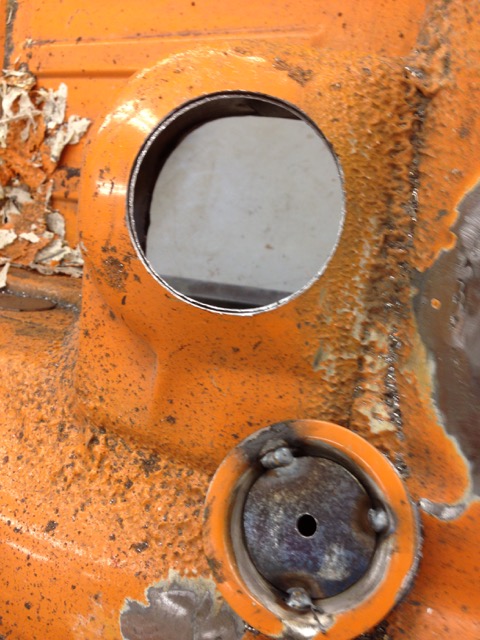
In reality it is two holes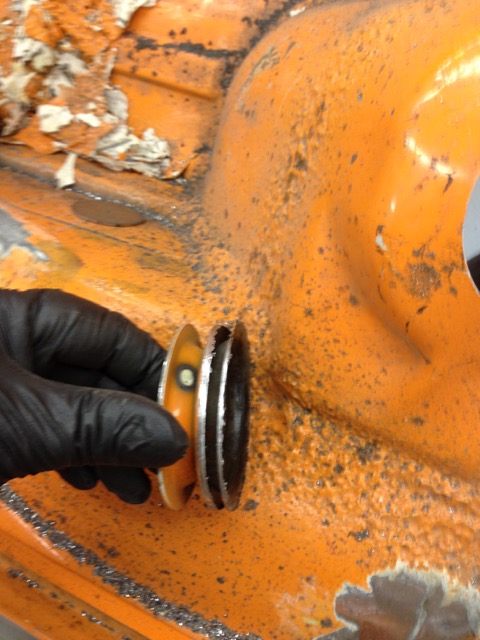
Set it in place, I scribed where I needed to file a little.
Clean all the paint around the unit, and get it ready, here it is before I started welding it in place.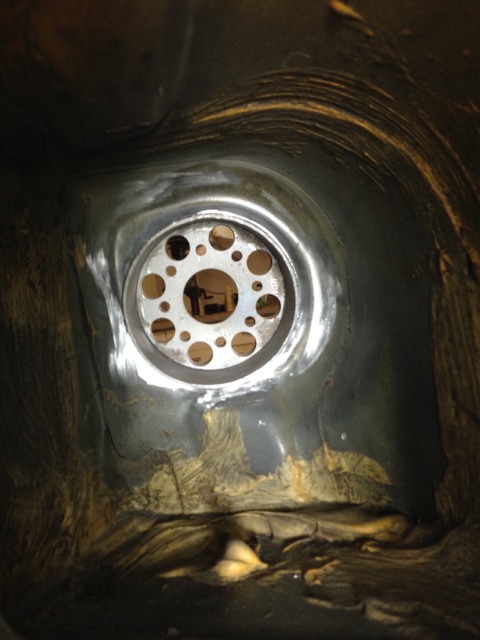
Used my calipers to get a 1/8" space off the bottom of the shock tower.
And burnt in on the topside, I forgot to take a picture of the bottom side it is all burnt in too. Mig wand is a little tight in there, glad I have it up on a rotisserie.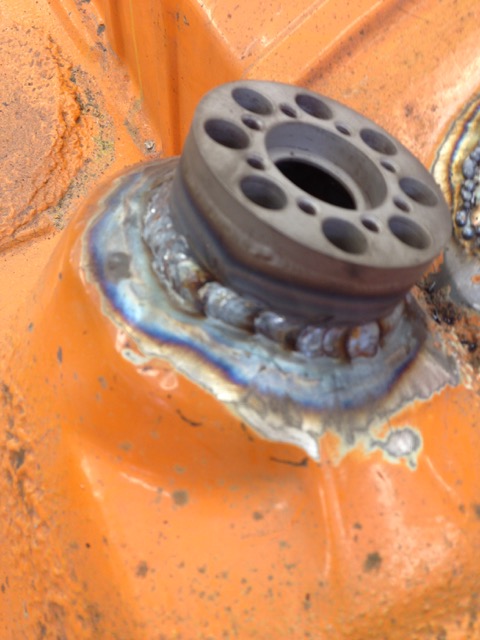
Little Idea I am toying with, I need a Lathe bad for this kind of stuff!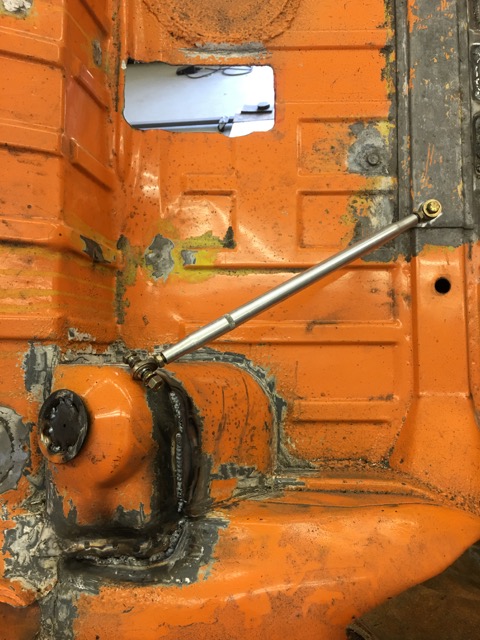
Can also see I started Seam welding the rear shock towers. That will be a much longer process.
Spent the rest of the day getting stuff ready to ship to Tangerine, and pressing studs. My 20 Ton press paid for itself today.
Posted by: 914forme May 26 2016, 08:39 PM
Todays Goals
1. Air Compressor Maintenance
Even added an hour meter to the unit. Fabbed it up while on hold with Time Warner.
Task one DONE
2. Finish my idea for the rear shock tower bolt in brace.
Needed to make the nuts longer and round to go through the hole. Welder and 12" sander to the rescue. Weld on a couple nuts onto my all thread couplers. Then turn them down on my fancy 12" abrasive lathe.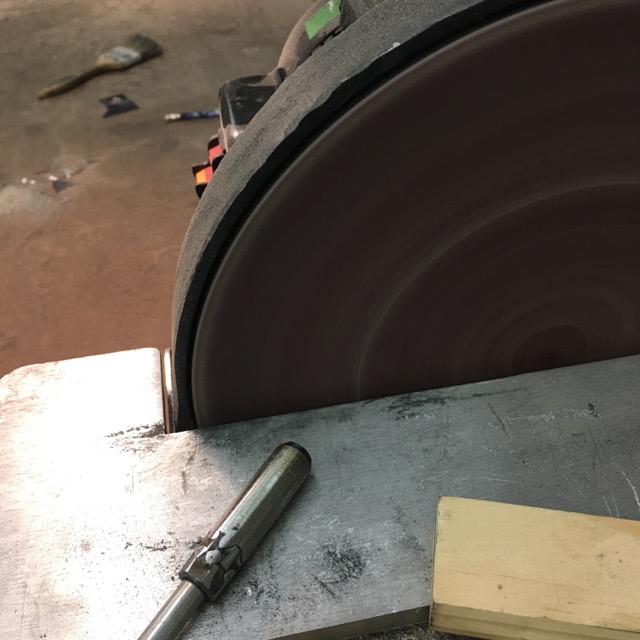
I really need a small metal lathe for this work. I even clearances the top of the mount to allow the rod end to move to its maximum angle.
Installed these, and did not take pictures of the finished product. Task number two Done!
Onto task three, finish the Drivers side Tangerine Racing shock tower extension.
Since it is a rinse and repeat of the steps in the last post I will not bore you.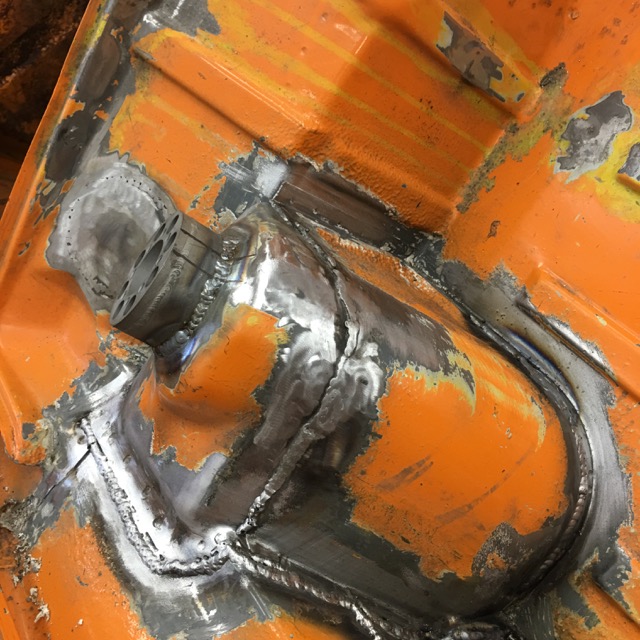
And it is done
So I started working on doing more seam welding of the rear drivers side shock tower.
More than half way there.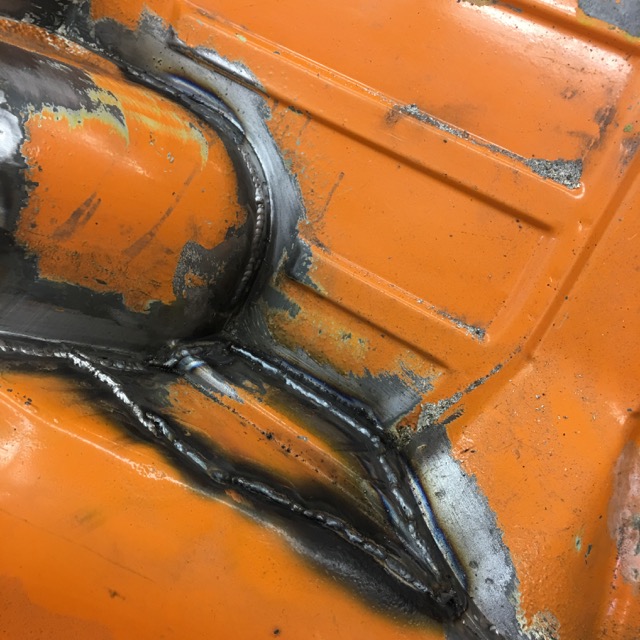
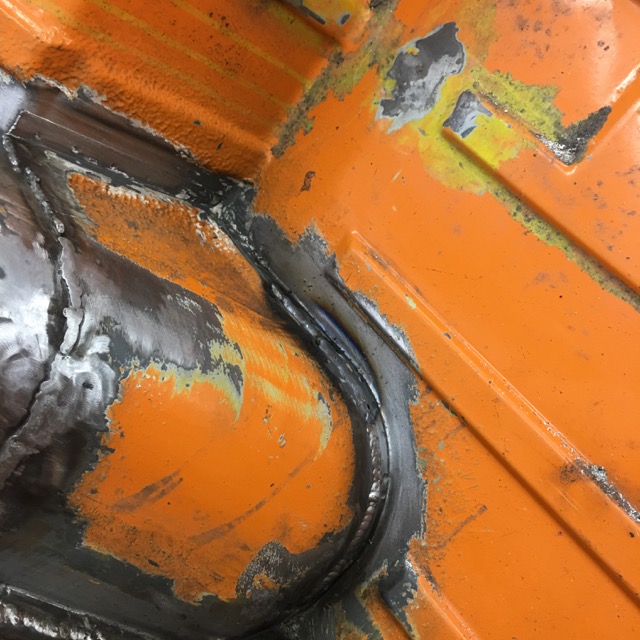
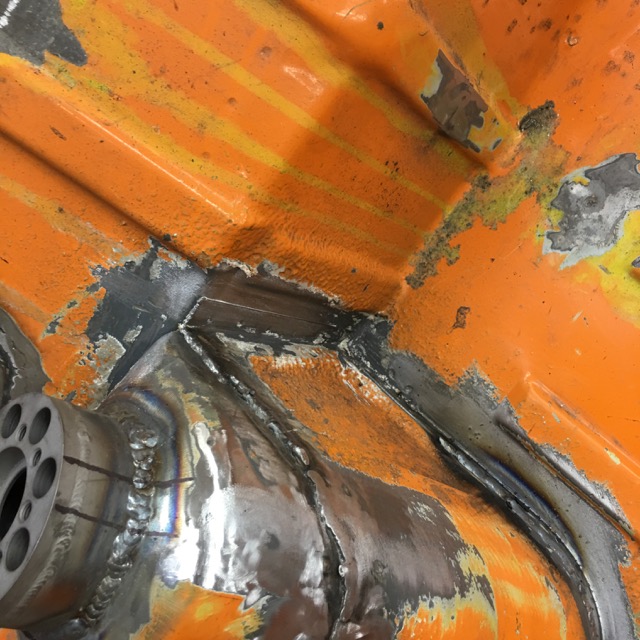
Whats left, man this is going to be a odd place to weld.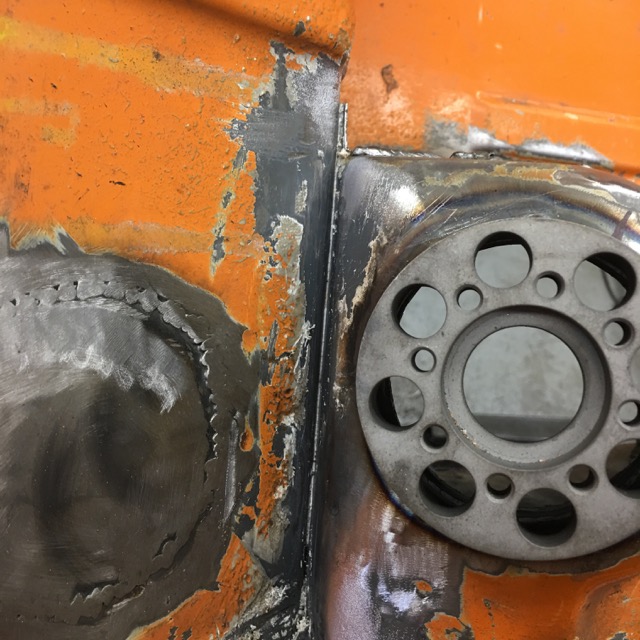
The fun is yet to come with all these welds comes lots of grinding, sanding, and cleaning.
I have a few more days to work on the 914 before I go back to work. Tomorrow is family day. Saturday, Sunday, and Monday, hopefully shop time. after that, May will come to an end, and so does my time in the shop.
Month of June, I am traveling for work 16 days, and crosses 3 out of the 4 weekends in June. The fourth is fathers day weekend, and family ha me booked both days. SO I might get one day or maybe two if I grab some comp time.
So how is it I am still in the rear trunk
Posted by: Alphaogre May 27 2016, 10:31 AM
Tell your family that the greatest fathers day gift they can give you is to come and grind off these welds and sand...
Posted by: 914forme May 29 2016, 07:17 PM
yesterdays progress I had three things I needed to get done in the shop and I forgot all of them
Service my ZTM, done, but then I decided to drop the deck bad idea, I am still cleaning it, and painting it with some slip coating. We use it on grain wagons to make the grain flow better.
Fix two holes in the trunk floor.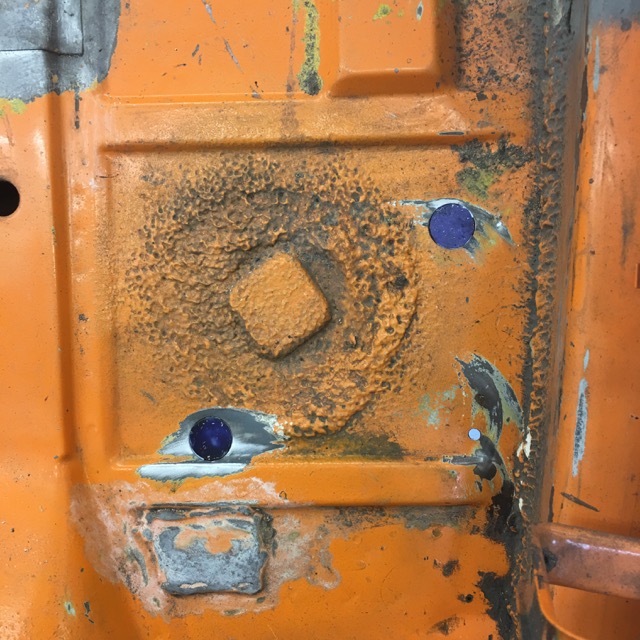
Welded in place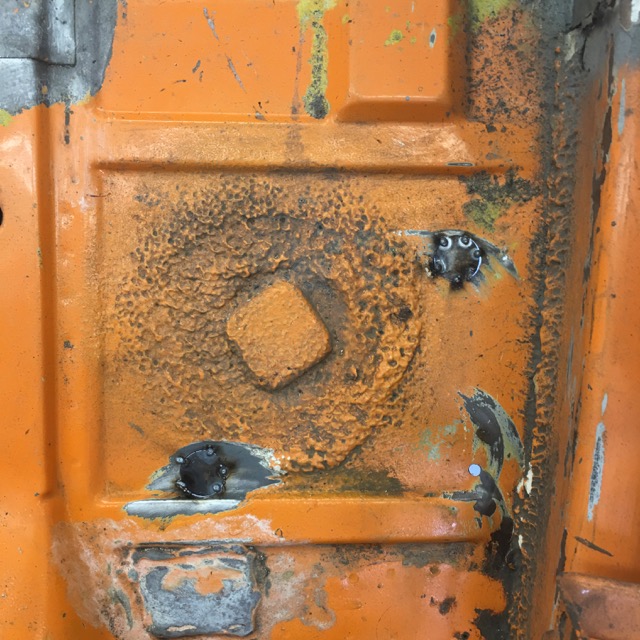
a squirrel came along and I started doing this, that was not planned, but this tool makes short work of undercoating.
The result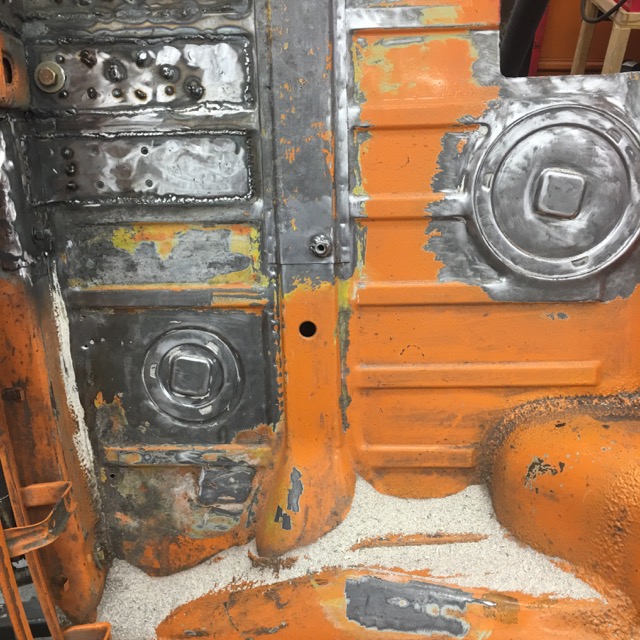
Finished seam welding Drivers side shock tower, shock towers make nice tool holds, my Mig welder goes into them a lot also.
Now for today
Pulled hubs out of my trailing arms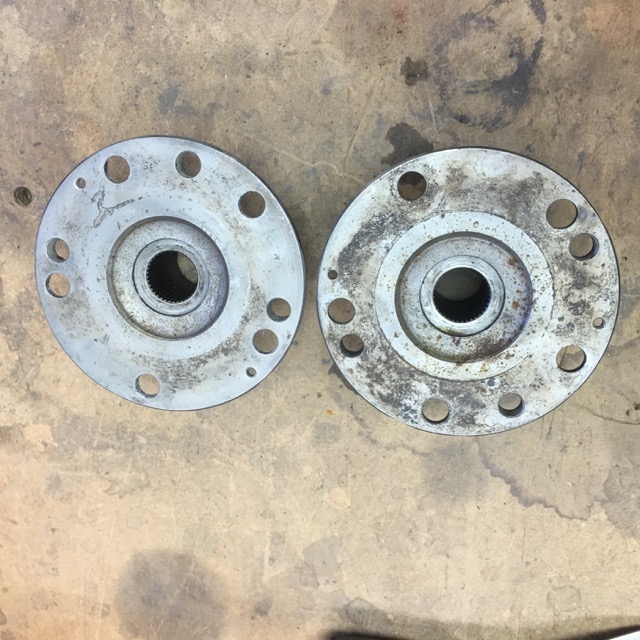
These are headed for the classified
Took my Dynabrade, and removed a bunch more seam sealer, and started seam welding the pass side shock tower.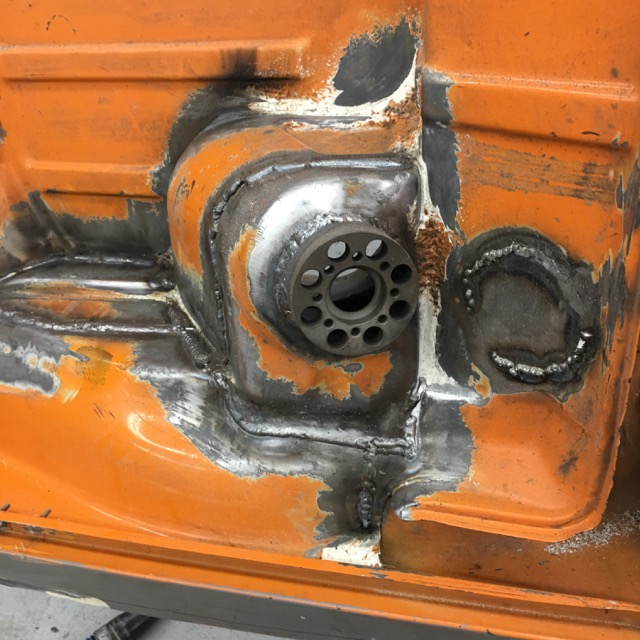
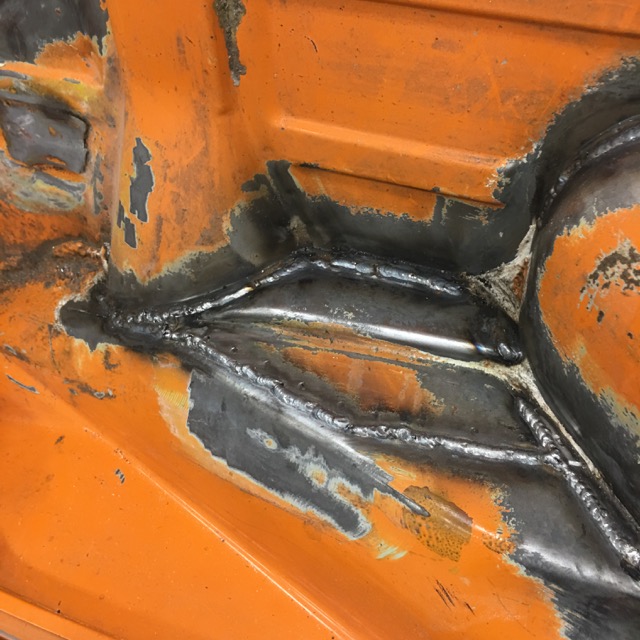
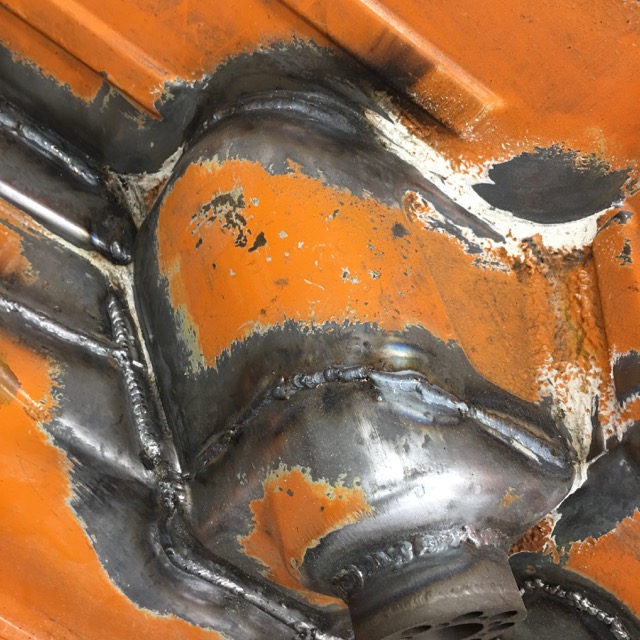
Still have some seam sealer to dig out, the Dynabrade does not quite get in there.
that darn squirrel stopped by again, and I keep welding.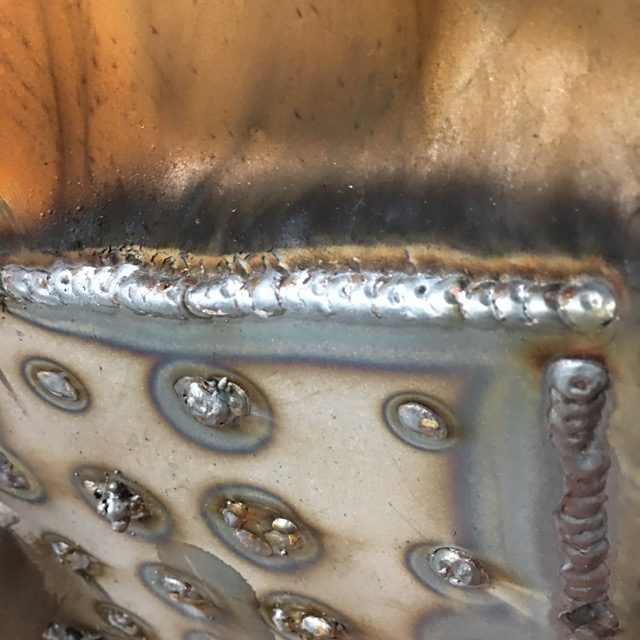
And I am getting good penetration 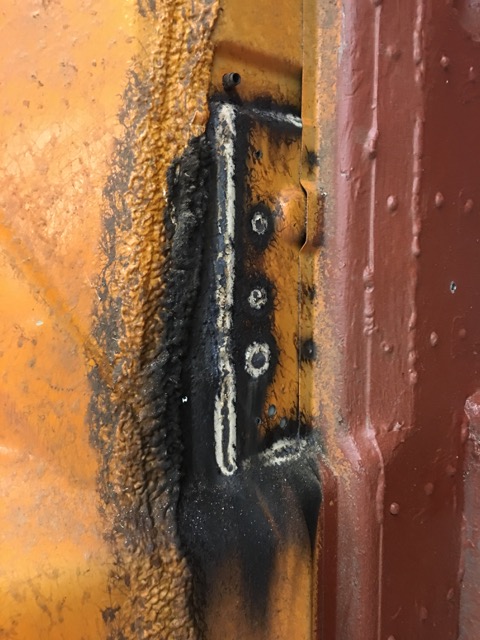
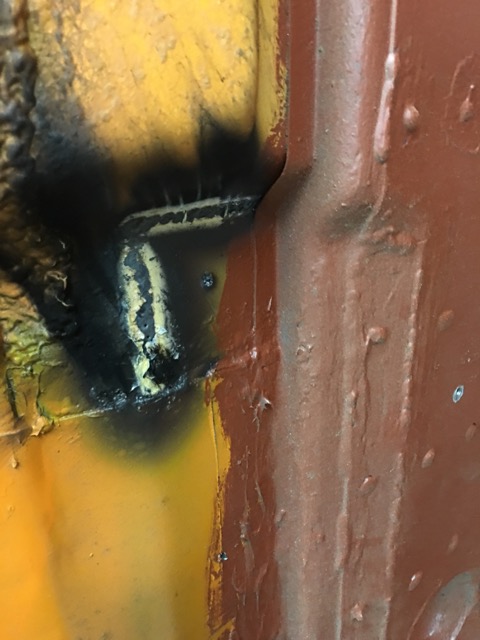
that was not all I did today, 1 step forward 2 steps back it seems. Rains came in, and washed my paint off my mower deck.
Also flash rusted my trailing arms.
Get to that tomorrow.
Posted by: 914forme Jun 19 2016, 08:18 AM
In my effort to do everything on the car at least twice I got a small shoreline lathe. I got it dirt cheap when I showed the guy the cross slide did not work.
Disassembled the entire lathe, lubed it up, found the cross slide thread boss which is brass had slide out of its mount. Put it all back together, tightened everything down. I had a working lathe, and a tool box full of lathe tooling, did not go through it to figure out what as what.
I did find a cut off tool.
Off to the parts drawer and grab a couple more shock top mounts. Chuck them in the lathe, and start my experiments.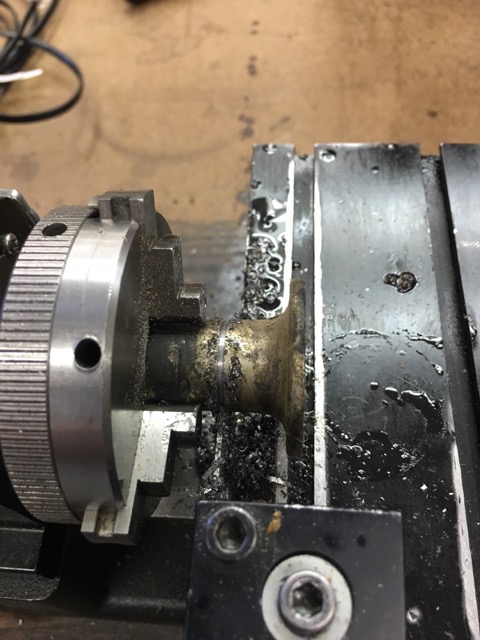
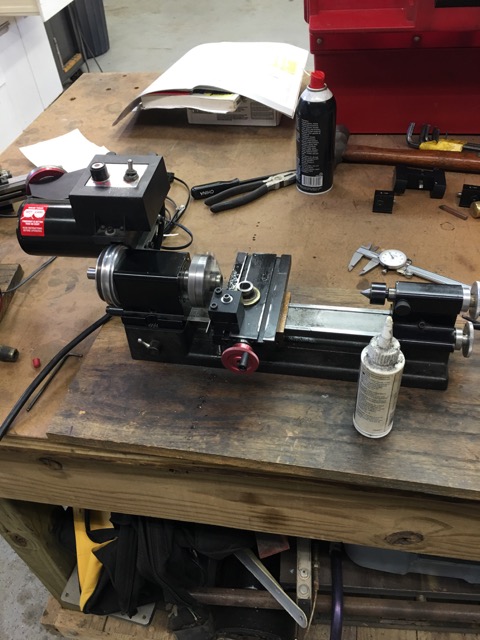
Got enough time to backup parts to send to Tangerine Racing for Chris to do his magic with them.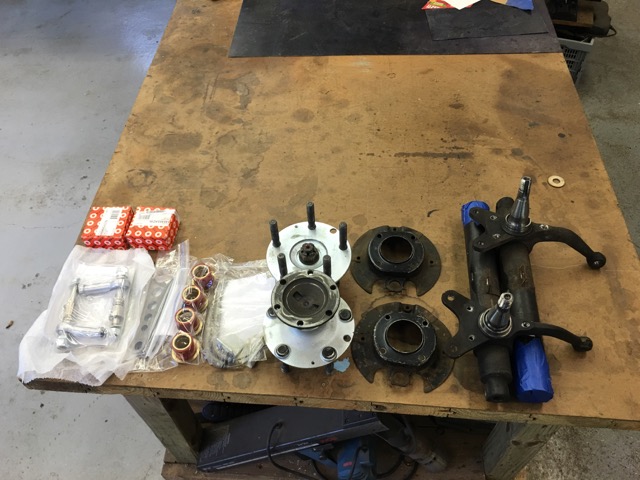
took the time to get accurate weights on the Carrera 10 spoke BBS rims.
7x17 with center cap lug nuts and balance weights still in place.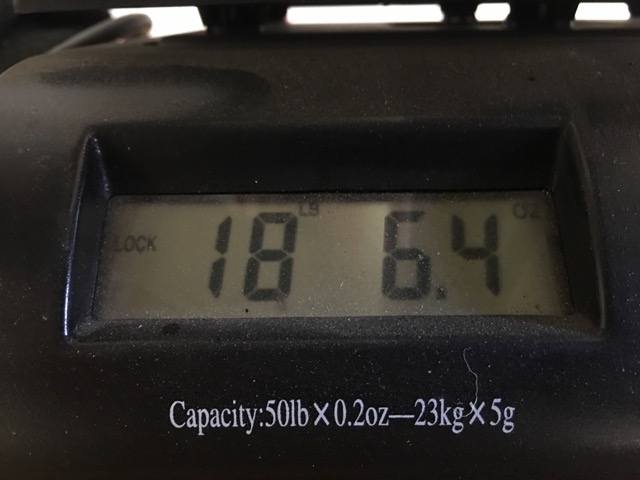
9.5x17 with center cap lug nuts and balance weights still in place.
I then took my old transmission out of the car. Removed the spool, disassembled my new trans, installed the spool. Bolted it up to the an engine, mounted it in the car.
I need to make a couple spacers for my transmission hanger, and everything clears the trunk floor with out cutting. So I can weld my trunk bak in and make it look like stock.
Now for the catch, lowering the trans means I might be running into ground clearance issues as the car is also being lowered. I am having Chris move the front spindles up 30mm little over 1" up from stock. The rear pickp points are being raised 2" from the stock location. Not sure what that is going to do to this, except make it closer to the tar.
Solution wold be to raise the engine and trans. Not liking that one.
Run skid strips . Titanium makes for so dramatic roaster tails, That makes that a win!
Or nothing happens at all and it is all good. guess we won't know until it is done.
Off to find some Aluminum I can chuck in the lathe and make my spacers with.
Posted by: 914forme Jun 21 2016, 05:11 PM
So I got a little time yesterday to look over the stuff I did a few days ago.
Placement of the clutch slave.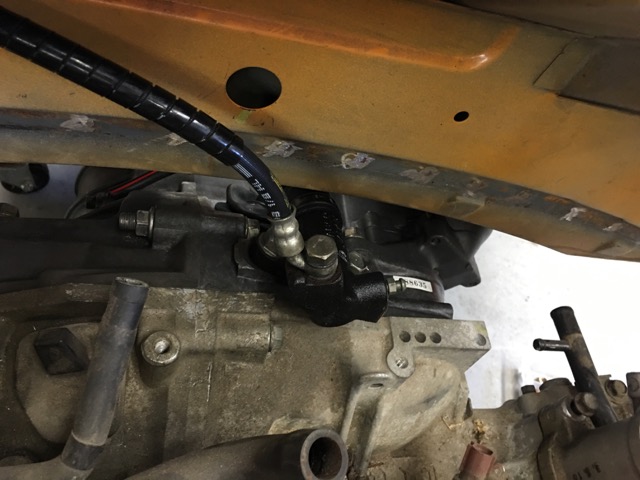
clearance of the start and clutch slave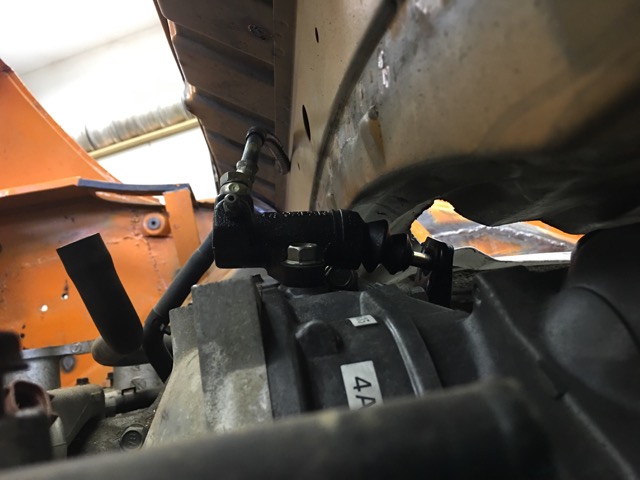
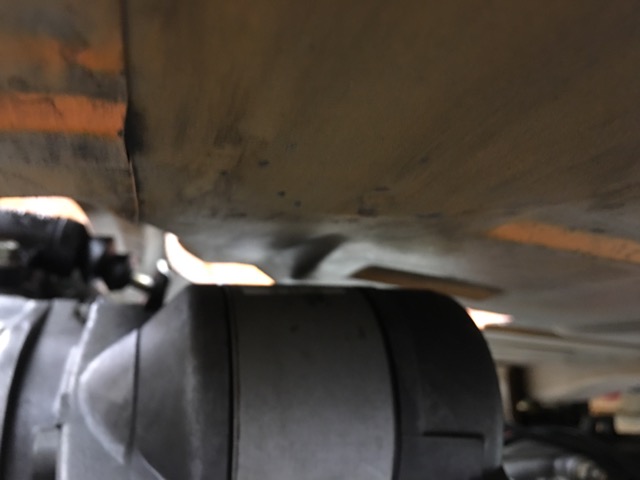
My spacer prototype system, stacks of washers 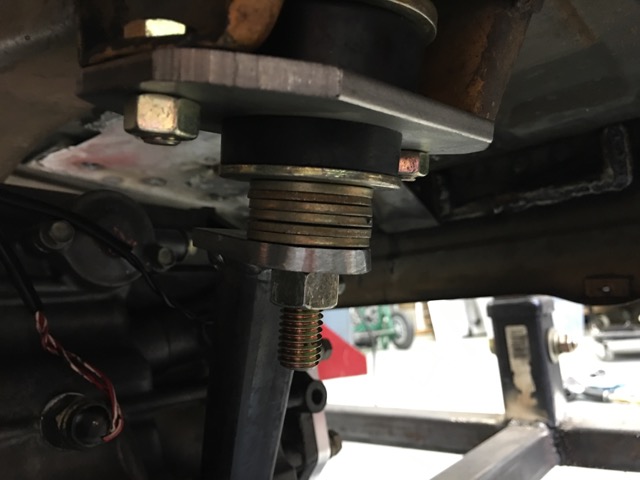
930 Flange on the trans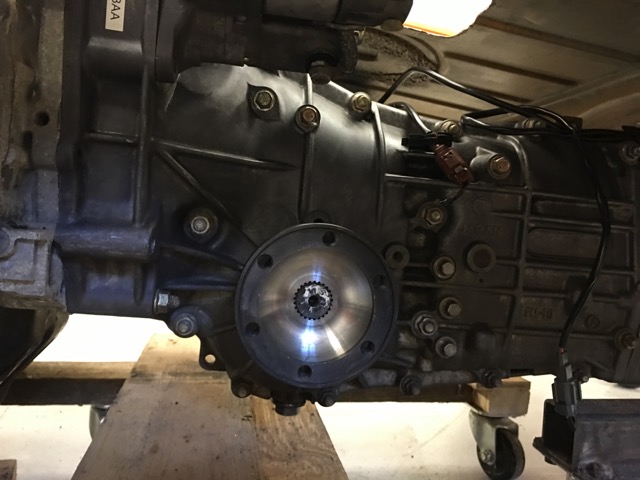
Howe Racing Master Cylinder compared to the Tilton 73 M/C not much difference, except on the Tilton the brake line exits out the back of the M/C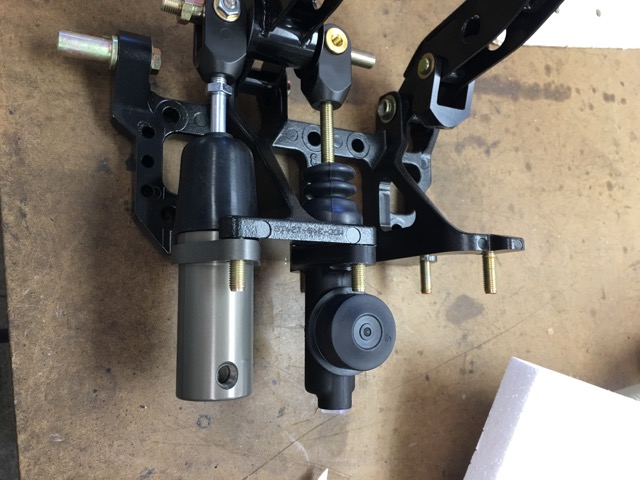
Like the Howes for the positive threaded brake line feeds, I think I could have done the same thing with the Tilton 74 series. I will have some Tilton 73s up for sale shortly 2 3/4" and 1 5/8" units, complete kits if anyone would like them, they will be 1/2 the price of new. And well they are new, you just have my on them
Posted by: 76-914 Jun 22 2016, 09:15 AM
Good progress. Question: Where are your output flanges in relation to the wheel centers?
Posted by: 914forme Jun 22 2016, 09:26 AM
Kent interesting question. At one point they where almost dead nuts on, with a slight bend maybe 5 degrees to make for a happy CV.
With the changes I am about to make they will be off by a little bit more, luckily by using 930 CVs I can get high degree angle CVs if I need to, and they can still take the torques. I will not know for sure until the rear pickup points get changed. This could all go to hell in a hand basket here shortly, and I redo the engine / trans mounts for a third time.
Posted by: 76-914 Jun 22 2016, 12:37 PM
I will not know for sure until the rear pickup points get changed. This could all go to hell in a hand basket here shortly, and I redo the engine / trans mounts for a third time.
Ain't that the
truth, Stephen! I want to tell every guy starting a conversion this same thing. If you can't admit defeat and doing things over and over till correct; don't even think about it! It took 4 iterations of the exhaust before I was satisfied. And a good thing too or I would have missed the water in the exhaust and possible some engine damage. Same deal with the cooling system, hydraulic clutch and yadi, yadi, yadi. Hopefully we can stub our toes enough that we settle upon a proven conversion system(s), be it Nissan, Audi or Subaru, for future guys and gals. Keep up the good work.
Posted by: 914forme Jun 30 2016, 10:58 AM
Between travels and family duties I got a bit more done of the car.
Removed the other -4 engine mount from the passenger side.
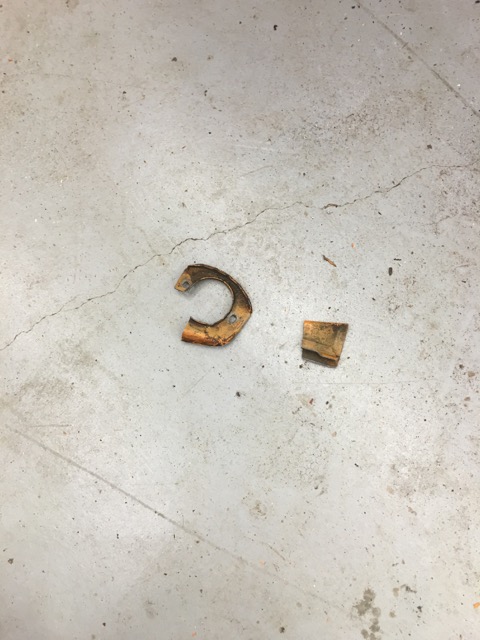
Never knew how much I would enjoy a cordless sawzall
Removed the triangle and the lift donut.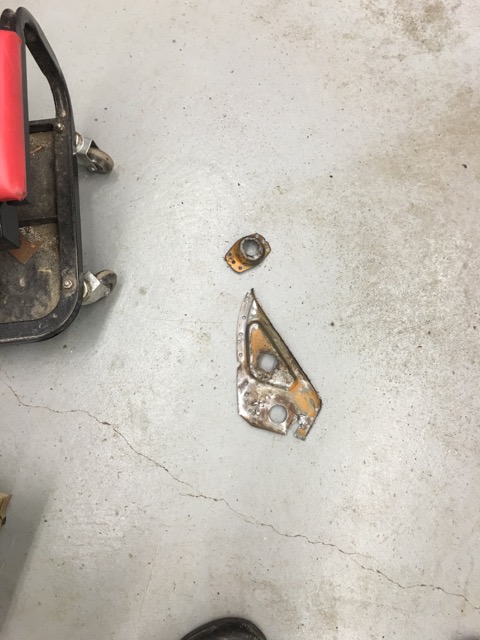
And well I am glad I did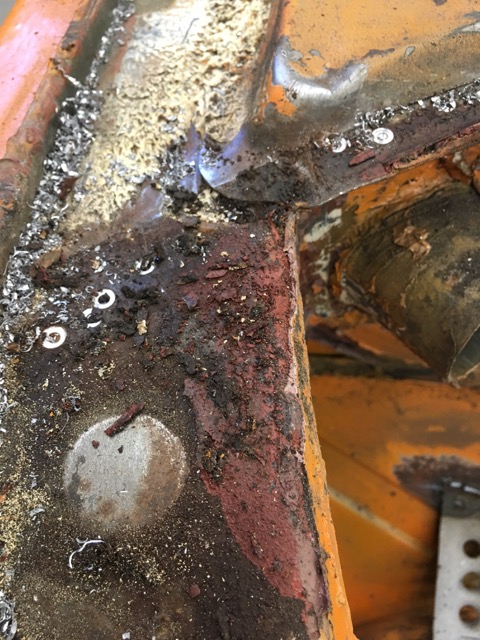
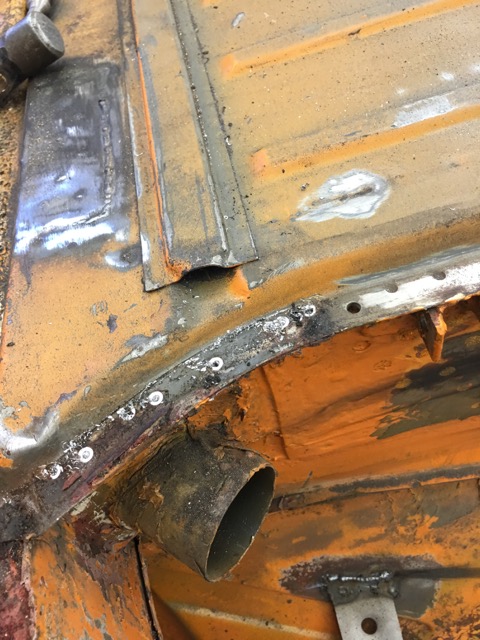
Work on getting that cleaned up and I might have to take off the driverside now.
Other items in the progress.
Chris now has my parts to work his magic with. I got some Picklex 20 in as the humid Ohio air has caused some flash rust on my shock towers. Give it a try as I can weld through it, stops rust, removes flash rust. It slices, dices and julians fries also.
LED backup lights came in from Jerry
Still looking for a piece of trunk sheetmetal to fill my hole, and maybe just maybe I will be done with the rear trunk. Never
Posted by: Amenson Jun 30 2016, 01:20 PM
No parts made with your new welder?
Posted by: Chris H. Jun 30 2016, 05:56 PM
He's probably welded up a whole new chassis by now .
Posted by: trojanhorsepower Jul 2 2016, 05:36 PM
June was a low productivity month for me as well. Still having trouble getting all the seams to line up. So far no matter what I do I can not get the trunk to line up right.
Unexpected surprises: The difficulty of lining all this stuff up at once.
Vendors: None... DougL help me some more, but I still have not started welding...
I would drive this car off a cliff...... if it could get to a cliff.
[attachmentid=562413] 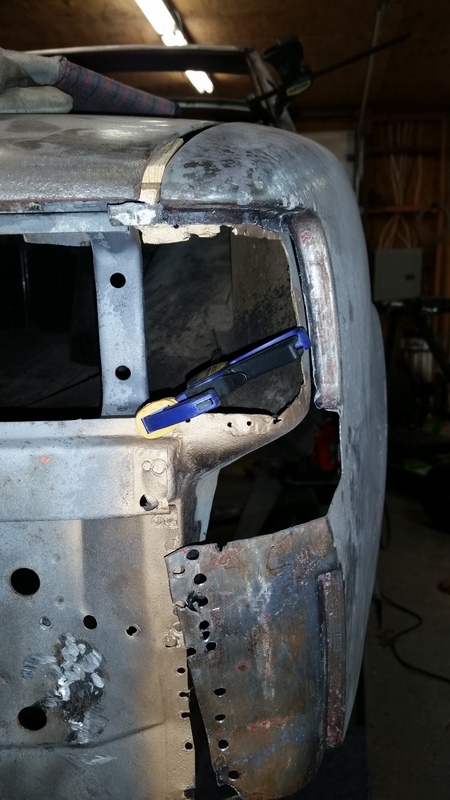
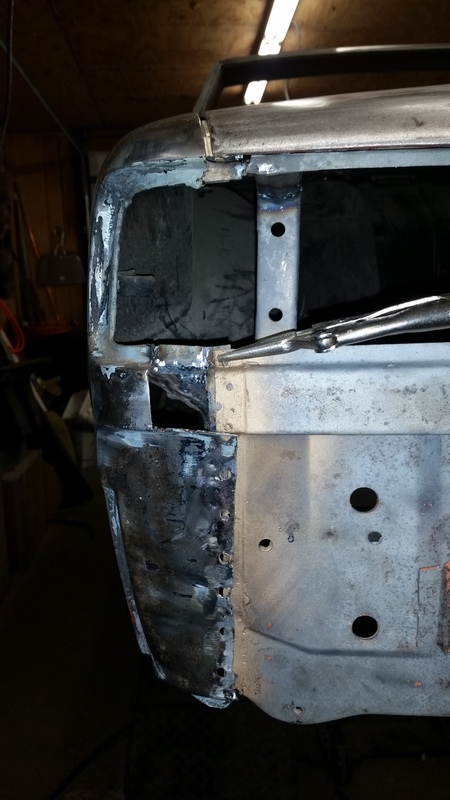
Posted by: 76-914 Jul 3 2016, 09:04 AM
You bought a "new" welder?
Posted by: 914forme Jul 4 2016, 08:31 PM
You bought a "new" welder?
Yes, a TIG. have not gotten it yet.
Well the update for today. Nothing done on the 914. I spent my day in the ER getting my figures reassembled. It seems that at 12" disc Sander and fingers down go together. The sander won! 12 stitches and two fake fingernails latter
So I am now sedated, and feeling very little pain. All I can think is "24 24 hours to go oh, I want to be sedated. Nothing to do, no where to go oh, I wanna be sedated. Put me in a wheel chair take me to the show. Hurry Hurry before I go explode. I can't control my fingers.
Posted by: white1975 Jul 4 2016, 09:06 PM
You bought a "new" welder?
Yes, a TIG. have not gotten it yet.
Well the update for today. Nothing done on the 914. I spent my day in the ER getting my figures reassembled. It seems that at 12" disc Sander and fingers down go together. The sander won! 12 stitches and two fake fingernails latter
So I am now sedated, and feeling very little pain. All I can think is "24 24 hours to go oh, I want to be sedated. Nothing to do, no where to go oh, I wanna be sedated. Put me in a wheel chair take me to the show. Hurry Hurry before I go explode. I can't control my fingers.
been there and didn't do it as bad as you did. that hurts that's what happens when you take the guard off but they just don't work with a guard i have dirt under the skin where i did my thumb you need anything just yell
Posted by: Andyrew Jul 4 2016, 09:40 PM
You bought a "new" welder?
Yes, a TIG. have not gotten it yet.
Well the update for today. Nothing done on the 914. I spent my day in the ER getting my figures reassembled. It seems that at 12" disc Sander and fingers down go together. The sander won! 12 stitches and two fake fingernails latter
So I am now sedated, and feeling very little pain. All I can think is "24 24 hours to go oh, I want to be sedated. Nothing to do, no where to go oh, I wanna be sedated. Put me in a wheel chair take me to the show. Hurry Hurry before I go explode. I can't control my fingers.
Hope you heal quickly, messed up fingers are No fun...
Posted by: Chris H. Jul 5 2016, 07:26 AM
You bought a "new" welder?
Yes, a TIG. have not gotten it yet.
Well the update for today. Nothing done on the 914. I spent my day in the ER getting my figures reassembled. It seems that at 12" disc Sander and fingers down go together. The sander won! 12 stitches and two fake fingernails latter
So I am now sedated, and feeling very little pain. All I can think is "24 24 hours to go oh, I want to be sedated. Nothing to do, no where to go oh, I wanna be sedated. Put me in a wheel chair take me to the show. Hurry Hurry before I go explode. I can't control my fingers.
Oh man sorry to hear that! 12 stitches?! That's a big gash.
Posted by: mbseto Jul 5 2016, 08:04 AM
Seems like everybody pays their dues at some point. Got mine with a cut-off wheel last year. Hope it heals fast, get some therapy and work it hard.
Posted by: 914forme Jul 5 2016, 08:52 AM
thank you everyone, I'll be back at it as soon as I can grip something. Going to have my son in law come over and finish my welding on the trailers. At least it will be forward progress towards getting things done. Use this time to continue to gather parts and get things ready, might sell a few things also.
Posted by: Chris H. Jul 5 2016, 10:51 AM
Just make sure you can grip a steering wheel in 6 weeks . I think I'm ready to start the old girl today or tomorrow. Found a couple of small wiring issues that will make a HUGE difference. Will update my thread with details but you know what probably happens when you don't ground the MAF sensor plug? I'm guessing NOTHING . It'll run but not very well.
Posted by: DirtyCossack Jul 5 2016, 08:39 PM
Crazy about the fingers, it seems every one of us in the challenge has visited the ER... The finger nail area may heal funny, I got mine with the grinder 6 months ago and still can't pinch.
Also, I absolutely love the Ramones reference, very pertinent to the situation.
Posted by: 914forme Jul 10 2016, 10:33 AM
It has been almost a week since my finger incident.
Scott took my mind off my fingers yesterday with a ride in PORSTI We went to Columbus cars and coffee event, some interesting stuff there. His car draws a crowd BTW. Then went over to the Godguys show, interesting stuff, I discovered something while I was there. I am a racer / fabricator, I like neat tech and cool ideas, I don't like 100% show cars. I as drawn to anything that hard a cool build feature, or was a race car.
Watched the Auto-x event, big american iron running around a 26 second course. Now for th odd thing when did good guys start letting VWs into their shows. My old recollection, been a while since I have been there, was it had to be pre 70s American Iron, or atlas be powered by American Iron.
Oh and I want a Ramp Truck
914 related, lots of time to think about stuff, keeping my right hand above my heart keeps the throbbing down in the fingers.
Scored some nice parts, and some great ideas.
Thank you Bruce for getting a rear trunk Panel cut out, and on its way
Thanks to Old914guy over on Pelican for a sweet deal on the Quaife steering rack quickener.
Spoke for the LED backup lights that makes all eternal lighting on the car LED
Speedhut for letting me know they can not put a boost gauge into their GPS speedo, oaks like I am back to building my own stuff, or adding one some where else. Maybe pass side so they have something to look at before they grab the Oh handle.
Eastwood for sending me two TIG welders working through that one with them.
Scott for taking my mind off the fingers, and introducing me to his wife Tara, who just so happens does consulting on safety accidents. The fingers are 100% my fault.
And for Scott reminding me that I need to get a few more tools in house, spending way to much time looking at dimple and other dies. I have even built a decision matrix spreadsheet to make my choice.
Still have not found the piece of metal I was deburring, thinking it might be in the disk sander body, along with my DNA, not sure I want to open it up just yet. Looking at my fingers every day is enough of a reminder.
But hey Doctor says I have a 99% chance of keeping them, and they look really good. To me they look like but they see this everyday, so I'll take their word for it. It could have been so much worse, grateful that it wasn't.
Off to take some pain-killers, and antibiotics. Enjoy your Sunday
Posted by: 914forme Jul 18 2016, 06:58 AM
Thank you Bruce for the rear trunk panel.
Chris H your box of parts showed up on Saturday, FedEx is for delivering on a Saturday unless Amazon was paying for the run.
Broke down after doing the math and ordered SpeedHut gauges. It would have cost me over a grand to finish out my build, with the tooling and items, not counting my labor.
SpeedHuts get me 90% there and the car on the road that much faster.
Taking it easy on the fingers, Dr. said I will have 100% success at keeping my fingers. That is because I now have the blood flow that he can fix anything that might go wrong with surgery Was not expecting that out of his mouth I was hoping I was in the clear, and be back in action in a week or two.
Posted by: Amenson Jul 18 2016, 08:47 AM
Taking it easy on the fingers, Dr. said I will have 100% success at keeping my fingers.
That is because I now have the blood flow that he can fix anything that might go wrong with surgery Was not expecting that out of his mouth I was hoping I was in the clear, and be back in action in a week or two. 
Posted by: 914forme Jul 18 2016, 09:32 AM
Scott you are a sick puppy
Finger number one.
I was successful in my attempt to make this finger shorter.
And this one I decided to unsuccessfully modify. 
I am off all pain killers now, only time it hurts is when I run it into something, or my wife helps me wrap my finger and squeezes the nail bed to keep the dressing in place.

Happened two weeks ago, they look remarkably well. I have full function, I can say all dressed up in white, it makes them stand out for non verbal communications.
Posted by: Amenson Jul 18 2016, 11:31 AM
Scott you are a sick puppy
Finger number one.
I was successful in my attempt to make this finger shorter.
And this one I decided to unsuccessfully modify.
I am off all pain killers now, only time it hurts is when I run it into something, or my wife helps me wrap my finger and squeezes the nail bed to keep the dressing in place.
Happened two weeks ago, they look remarkably well. I have full function, I can say all dressed up in white, it makes them stand out for non verbal communications.
I am actually quite squeamish about this kind of stuff but everybody needs a real life reminder every once in a while about the importance of workshop safety.
It does look like it it healing really well.
Posted by: Chris H. Jul 18 2016, 11:44 AM
OWWWWWW! (read this in your outside voice)
Dang Steve. You got those good. Amazing what a sanding/grinding tool will do to some soft flesh. I had a much smaller one TOUCH my thumb for a second over a month ago. I mean BARELY. Still don't have all the layers of skin back. Wearing gloves now .
Posted by: 914forme Jul 18 2016, 12:38 PM
I am actually quite squeamish about this kind of stuff but everybody needs a real life reminder every once in a while about the importance of workshop safety.
It does look like it it healing really well.
Yes it does, I had a bunch of older trade guys in doing electrical work the other day. And they asked what I did. All of them turned white as a ghost, and said its always use old guys that get hurt. The young ones seem to remember that this stuff can bite. And when it does it does very well.
I still have not cleaned the shop floor, or looked behind the shield of the sander for the piece of metal I'm missing. Not sure I am ready to relive this experience, and I am trying to avoid most things that remind me of what happened. It is bad enough to see every day.
So learn from me wear your safety gear.
Posted by: jmitro Jul 18 2016, 12:53 PM
nice job seam welding. In my attempts at seam welding (old BMW 320) I kept getting contamination from the seam sealer stuck underneath the seam. How did you get it clean enough to seam weld?
Posted by: 914forme Jul 18 2016, 01:32 PM
nice job seam welding. In my attempts at seam welding (old BMW 320) I kept getting contamination from the seam sealer stuck underneath the seam. How did you get it clean enough to seam weld?
Thank you
I used a combination of things.
A fail like this! it cuts out seam sealer like a dog eats brisket!
A vibrating scraper, these can be used for more than just cutting drywall.

Heat from a Mapp torch, do this in a well vented area, or with positive air flow mask.
And hand tools from a junked wood chisel to dental picks. I then go back with a hammer and dolly to seal the joint back up if I lifted it getting the sealer out. Luckily on the 914 the seam sealer sticks like crazy, but does not get into the joint unless the joint was lifted. Your 320 might had sealer with a more capillary action.
Also heat from the welder will burn stuff out of the joint, just need to do short seams, start in a clean section, and head towards the dirty part. The heat will burn out the crap. Hit it with a wire brush, and go again.
Posted by: mbseto Jul 19 2016, 09:48 AM
Wearing gloves now
.Choose your gloves carefully. Abrasive and cutting surfaces can grab cloth and yank your hand in. Gloves are not a free pass, it's just a different set of hazards.
Posted by: 914forme Jul 19 2016, 05:53 PM
Wearing gloves now
.Choose your gloves carefully. Abrasive and cutting surfaces can grab cloth and yank your hand in. Gloves are not a free pass, it's just a different set of hazards.
Been wondering about that, I really don't like gloves except nitrile gloves, keeps my hands clean. But have had wire wheels take the fingers of them off. I also have a set of kevlar I use when working with sheet metal. This happened with a piece of 1/4" steel, did not even have a set of gloves on.
I am open to suggestions though.
I joke with my wife I need steel plate gloves.
Posted by: Andyrew Jul 19 2016, 06:30 PM
I use welding gloves whenever welding, grinding or cutting. The cheap HF ones are really comphy...
Posted by: DirtyCossack Jul 19 2016, 06:36 PM
I was told after my grinder incident that gloves would have made mine worse, but I've since had incidents where gloves totally saved me. I guess it's all about luck...
Posted by: Chris H. Jul 19 2016, 06:55 PM
I've done the catch my shirt with the small round wire brush thing a couple dozen times. The one that looks like a vacuum attachment? You have like a half second to let go of the drill trigger or it gives you a sweet VERY TIGHT half shirt/mankini top .
Posted by: 914forme Jul 20 2016, 04:51 AM
I use welding gloves whenever welding, grinding or cutting. The cheap HF ones are really comphy...
Yes so do I,normally
slip in judgement trying to get some work done, and OCD kicking in. I was demurring a piece of steel that would have been demurred once I slapped a weld bead on it anyway. I have gone 40+ years with out a serious shop incident. Well if you don't count the eye thing with plywood shrapnel, Stuff happens, I just needed to slow down and think. Again in a rush to get things done, is when the bad stuff happens.For welding I have even ordered new gloves, sleeves for my TIG as I noticed I have a nice burn from where my short sleeve shirt ends, and my welding glove ends. TIG is a lot brighter than MIG. And you tend to get a lot closer to your subject while TIG welding.
I was told after my grinder incident that gloves would have made mine worse, but I've since had incidents where gloves totally saved me. I guess it's all about luck...
I can see that if you go through the glove you risk embedding even more foreign particles into or under your skin. Natural hide products can harbor some nasty stuff.
I've done the catch my shirt with the small round wire brush thing a couple dozen times. The one that looks like a vacuum attachment? You have like a half second to let go of the drill trigger or it gives you a sweet VERY TIGHT half shirt/mankini top
.No one needs to see me in a mankini that would assault everyones senses.
Posted by: jd74914 Jul 20 2016, 06:41 AM
Glad to hear your fingers are healing up nicely! Accidents like that are really scary.
For welding I have even ordered new gloves, sleeves for my TIG as I noticed I have a nice burn from where my short sleeve shirt ends, and my welding glove ends. TIG is a lot brighter than MIG. And you tend to get a lot closer to your subject while TIG welding.
You also tend to have the arc on for longer and unlike MIG there isn't crap hitting you to remind you. Definitely watch the TIG burn; it can be really bad and you don't know it until after you stop.
I've done the catch my shirt with the small round wire brush thing a couple dozen times. The one that looks like a vacuum attachment? You have like a half second to let go of the drill trigger or it gives you a sweet VERY TIGHT half shirt/mankini top
.I saw a buddy do that in about a tenth of a second; it scared the shit out of us.
Posted by: mbseto Jul 20 2016, 07:54 AM
I guess it's all about luck...
Man, you want to do what you can to stack the cards in your favor. After I nearly lost a finger last year, I read a ton on use of gloves. Many machinists recommend no gloves because you get a false sense of security, they can get caught in spinning machinery and pull your hand in, and many cutting tools will go through them like they are not even there. But there are just as many that say gloves are mandatory.
After thinking hard on it, I realize what I probably should have known from the start: you cannot put on a pair of gloves with the intent of reducing your vigilance. So these days, I concentrate on visualizing the task at hand before I do it: where's the tool going to be, where's the workpiece, where will my hands and body be. Cutting angles, direction of force and kickback, consequences. When all that gets mentally tiring, take a break.
I'm bad for getting casual over time. Working hard to start paying more attention. I REALLY want to be in one piece to be driving this car when it's done. (914forme, sorry for going off on a tangent in your build thread!)
Posted by: 914forme Jul 20 2016, 08:05 AM
(914forme, sorry for going off on a tangent in your build thread!)
Not off topic it is here the build is right now, almost ground to a halt.
Posted by: charliew Jul 25 2016, 08:22 PM
sorry about your accident Stephen. I am almost 72. I have been hotrodding and fabbing about 55 years. Kickback has gotten me once on the nose and once on the cheek. Both times working in a tight area. A face shield will always be on your mind after it is to late. I know we need our hands to do things but my left hand hasn't had any grip for 13 years and I still manage to work with my hands. To loose sight would be terrible for me. I guess wearing glasses probably has helped protect my eyes most times during cutting jobs with different tools. I did go to the er with aluminum in my eye before I wore glasses. Tigging or welding in a tee shirt has burned me more times than I remember but it is not good. I have mashed the meat out of my left thumb with a 5 lb hammer working on a 3spd jeep tranny in about 1970. I healed up and was good till the motorcycle accident that got my nerves 13 years ago. Once I was so happy to find a knock that sounded like a main bearing only to find the flywheel was loose, I stuck a long screwdriver in between the spinning flywheel and the pan lip on my chevy while it was idling to take the endplay out, the ring gear got my right thumb real good. I didn't stop to clean it up till I had pulled the three speed and clutch and pressure plate and got it all tightened back up. I nearly fainted while my grandmother scrubbed the dirt and grease out later that evening. I will never forget that was the day kennedy got shot. A bench grinder will really grind meat so fast you will not hurt for a minute or two, always use vicegrips too hold what you are grinding like when you need to shorten a bolt. Always put the piece of metal up against the drill press post to stop the bit from grabbing and jerking it out of your hand or spinning around and wacking you. If you could keep that 1/2 craftsmen drill from grabbing on that 3 inch hole you are pretty good though. You might know most of these things. You might think I am rambling but my fingers have had a lot of close calls. I've had two operations to tie tendons back together from cuts and two operations to put metal in my fingers to fix broken bones. Neither of my little fingers will straighten out fully but the right one still grips better than most 50 yr olds. I chainsaw with one hand.
One tool you might want at the top of your list is a long 4 inch air cutoff wheel tool. It looks like the wire wheel tool you have, once you use one you will wish it was one of your first tools. hf has them and I have bought two on sale but haven't tried them yet as the expensive one I have has not quit yet, it was about a 250.00 dollar one my friend gave me after he got one for fiberglass use. I use mine mostly for metal with a 1/32 thick wheel.
Hope you heal quickly and with out problems. Not having the nail will remind you to use gloves, believe me leather is tougher than flesh. No gloves with drill presses or mills or lathes though.
We got a heat wave going on anyway right now so you can spend this time studying and price shopping.
I enjoy your hotrodding skills. You do take great pictures.
Posted by: 914forme Jul 26 2016, 06:06 AM
Yes we all take our lumps through out life, it is your reaction to them that makes you who you are. Thank you for your kind words and taking your time to write these tips. They might help someone just getting started in this craft. Been doing this 40 years, and still learning everyday. Sometimes the lessons come the hard way Sometimes I am intelligent enough to learn from others.
Way to stay in there, and keep hot rodding.
Posted by: 914forme Jul 27 2016, 05:34 AM
Safety gear should be in tomorrow
Item number one Nitrel Finger Cots, keep the two open wound sites clean.
New Fabricator gloves, I ponied up the $$ for Mechanix brand fabricator glove, we will see. I also got a set of much cheaper ones for comparison.
Restocked my supply of cheater safety glasses
Bought two full face masks, and a tinted grinding shield for one of them. I got a lot of grinding to do
And got a new welding helmet, as my old one was starting to flake out. Maybe its the batteries, seems to have issues with welding in the sun, and picking up the flash from the welder. New mask darkens based on light wave length. So I can be outside welding facing the sun, not the best position, yet when I stick the arc, the helmet goes dark.
Up after this will be to build the TIG cart, finish the trailer work this weekend. Move the boat back to the farm for storage and move Dad's flat bed back to the farm. That clears out the shop to get back to work on the 914. I also have some standard vehicle maintenance items to do this weekend, oil changes, inspections, etc....
On a 914 project note:
Got information back from Chris everything is done waiting for him to ship. Well almost everything, one piece of the front camber boxes is not done. Will not hold up him shipping the items. Guy is seriously busy, and I am extremely happy. Can't wait to see the finished products. Hopefully in a week or so. Chris switch that hat I can wait on you Sir. Great workmanship is worth waiting on.
Got a three day weekend coming up, Safety gear will be here, wife has given me clearance to head to the shop. She knows I have been going stir crazy. And have a list of minor projects to complete. Have Son-in-law scheduled to do some welding for me. And hope the weather will be nice, Mid eighties with lows in the mid 60s. That is good enough for me!
Who knows maybe I will start doing things like restoring light housings, switch cleaning, prep trim and wheels for painting. You know the minor items that can hold you up, but never get done cause you always have the bigger items to complete.
Posted by: 914forme Jul 29 2016, 07:31 PM
Well got out to the shop today and got a little work done
First off Thank you Chris the for the plastics and coil packs. 
Next up all my safety gear is in also gloves and finger cots, they are really finger condoms.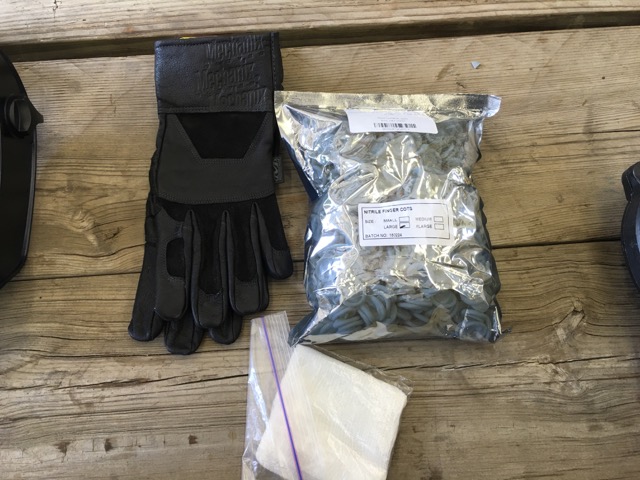
Face masks for grinding, cutting, sanding, and wire wheels.
New welding helmet on the left, one on the right flakes out everyone and then. And it is a Miller unit. 
New Gloves selves, and hat for my I also got a shirt, had leathers apron for a long time.
Found the piece of metal I was missing.
it went behind the the table, and into the shield on the sander, no body pieces found.
Son - in - law came over and welded a bunch of stuff for me, while I mocked up a bunch more to keep him busy.
So back to making progress in the shop it feels good. The Mechanix fabricators gloves are very nice, flexible, and seem to do well so far, been working with larger metal today, no sheet metal, that will come latter.
Posted by: Andyrew Jul 30 2016, 03:09 AM
I really like those face masks!!!
Posted by: 914forme Jul 30 2016, 04:22 AM
I forgot I had one on yesterday, was working away, and stopped said you idiot where are your glasses. It was then I realized I had the mask on, It was that clear and that comfortable.
https://www.amazon.com/gp/product/B001VXXUWK/ref=oh_aui_detailpage_o01_s00?ie=UTF8&psc=1
https://www.amazon.com/Uvex-S8550-Uncoated-Replacement-Polycarbonate/dp/B001VXVSZ6/ref=pd_sim_263_1?ie=UTF8&dpID=31vTWyCzSDL&dpSrc=sims&preST=_AC_UL480_SR465%2C480_&psc=1&refRID=7H0KWT490ZC6DN2XD32A
https://www.amazon.com/Uvex-S8560-Replacement-Polycarbonate-Uncoated/dp/B00209I0UG/ref=pd_bxgy_469_3?ie=UTF8&psc=1&refRID=8E70ZKRN4003AKQ5TRK8
https://www.amazon.com/Uvex-S8565-Replacement-Polycarbonate-Uncoated/dp/B00209JH1M/ref=pd_sim_469_3?ie=UTF8&dpID=317EbJPGZgL&dpSrc=sims&preST=_AC_UL480_SR450%2C480_&psc=1&refRID=7YFF2W791G1GH4G3W4HV
The Unex Shield fit this Spartan mask
The Jackson safety welding helmet is the best one I have ever had. My son-in-law grabbed it over my Miller after his Miller would not go dark. He said his Miler was not used that much, and he had replaced the lens in it 3 times since he got it. He is a pro welder though, so not long is like years on my helmets.
Finger cots work great, able to slip my hands in and out of the gloves with out issue. keeps the wounded areas clean which is a huge plus.
And I must say it was nice having Cory doing welding, freed me up to work out fabrication details while he was Need to check the welder as last night it shutdown do to over heating. Darn pros are used to welding for long periods of time, he might have killed my hobby Mig Pro. Wife accused us of sabotaging the build by killing the welder so i could get a bigger unit. Idea had not crossed my mind until she mentioned it. Wonder if I can find something with a much greater duty cycle. Maybe I should be hoping it is dead. NO!!!!!! That would take $$$$ away from my tool fund, I was getting ready to pickup a shrinker / stretcher set, and some flare and dimple dies. But if I have to pony up for a new to me Mig I will, I can't live with out a welder or two, or three....... Seems I might have an addiction.
Hi, Im Stephen, Im a weldoholic....
Posted by: Andyrew Jul 30 2016, 08:36 AM
Itll come back I am sure. The boards get hot and they sometimes shut down. Mine did that when a buddy recently borrowed it, was doing a bunch of thick walled welds and it shut off. Cooled it off, put it in the shade and it came right back. Ive done a few welds at my place with it since and it welds like normal. The 110 boxes are just not made for consistant use.
Posted by: 914forme Jul 31 2016, 02:33 PM
Well that last post for July
Fingers are healing nicely, been out working in the shop trying to get the trailer finished up.
Go see the hand doctor on Tuesday.
Posted by: jd74914 Aug 1 2016, 07:14 AM
I really like those face masks!!!
Definitely going to pick one of those up! Thanks for the links!
Posted by: mbseto Aug 1 2016, 08:53 AM
There's something weird going on this summer because I've been getting at least one text a week from buddies getting fingers lopped short. Oddly enough, they've been mainly cooking related. If you find it at all encouraging, I'll send you a pic of a 90-lb rock-climber girl with a finger that looks like yours doing 2-finger chin-ups... :-)
Posted by: Chris H. Aug 1 2016, 09:26 AM
THAT'S what you caught your fingers in??? SHHEEEESHH man. Keep those super clean! Take care of them like George Costanza the hand model:
https://www.youtube.com/watch?v=PZxX3-rJoNI
Hey did you see my post on the temp sender gauge? You can put the Speedhut gauge sender in place of the stock temp gauge sender. Makes it SO much easier. If you ordered that aluminum fitting you can use that as your air bleeder like this:
The upper coolant pipe will probably be your high point like mine, so you can connect it there, or just tap that pipe for a fitting. I just didn't trust my Harbor Freight tap set to make a fresh tap in the aluminum engine pipe.
Posted by: 914forme Aug 11 2016, 06:05 PM
Chris thank you for information. No hand model for me I like to work to much to worry about keeping my hands pretty.
Update on the fingers, they are getting better every day.
Looking great, actually it really is looking great.
I have not been doing much work on the 914, I have been working on Dad's trailer.
I have been gathering a few parts. Met white1975 at the Dayton British car day. Some very cool cars in attendance, we also did a trade for some parts.
Set of great Hella Euro turn signal lenses.
Also picked up a 20mm HH swaybar with some very interesting hardware in a coffee can.
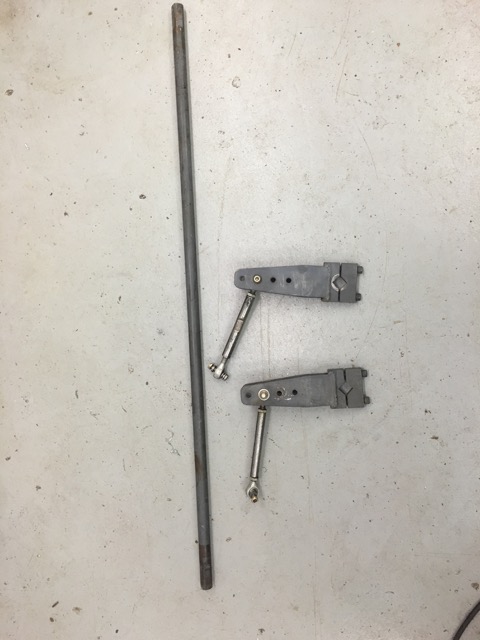
And now for a depressing and exciting item.
Yes I purchased a set of Speedhut gauges.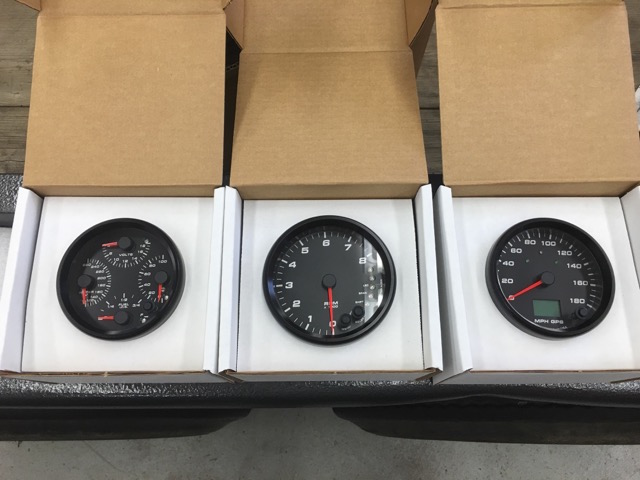
Yep quad gauge, oil pressure, water temp, fuel and volt.
8K Tach with lights and memory.
160MPH GPS speedo with high beam and turn signal indicators.
I need to get this car together a whole lot more to do on this one.
Posted by: 914forme Aug 29 2016, 05:01 PM
We this weekend came and went that is not such a bad thing.
My Shereline Mill has been getting a work out. 
I made this tool to release pressure on hydraulic lines. Sometimes the implements will move a bit, and pressurize the line, and you can't get the quick disconnect back together. Easy enough, Lathe, Mill, Welder, and Bandsaw all got a work out. As did the finger eating monster. 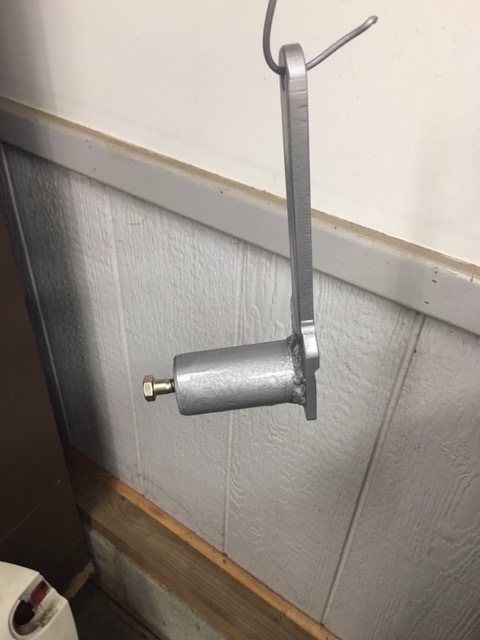
I went over to Scotts, to drop off a tool, and do a quick bushing install, and strut damper install. He got rid of the KYBs
Came back and did some work on my 914, its about time.
First I drilled out spot welds on the floor piece Bruce sent me. Thank you Bruce, very nice piece.
Then I started cleaning things up a bit. Cleared out the grease and removed a fuel pump mount off the 911 alloy cross bar.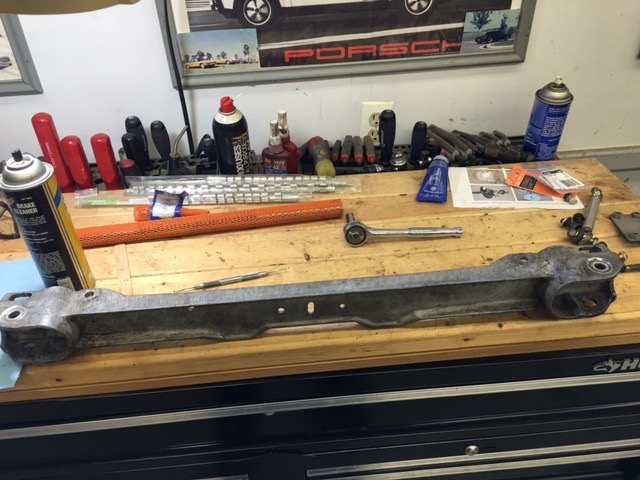
Then started taking the front rack apart for some R&R
32 mm wrench to big to fit on the turbo tie rods. So whats a guy to do
Make your own!!!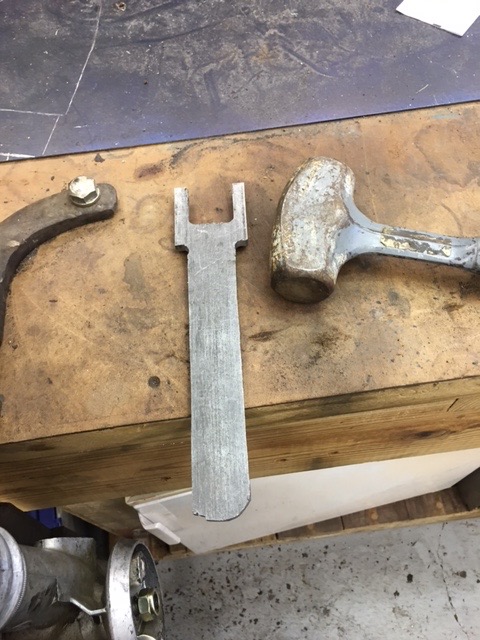
Works like a champ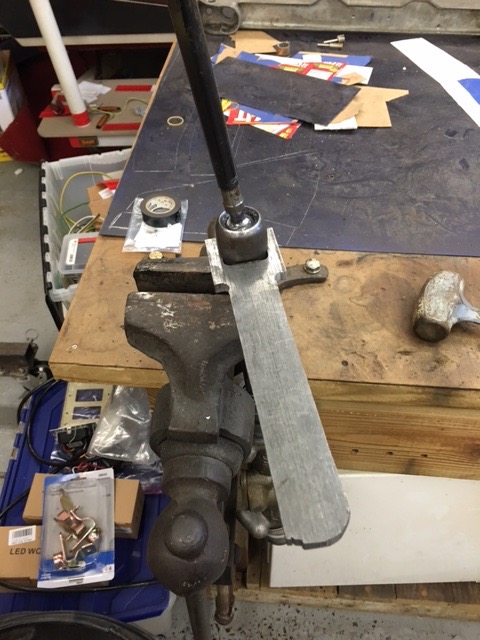
Disassembled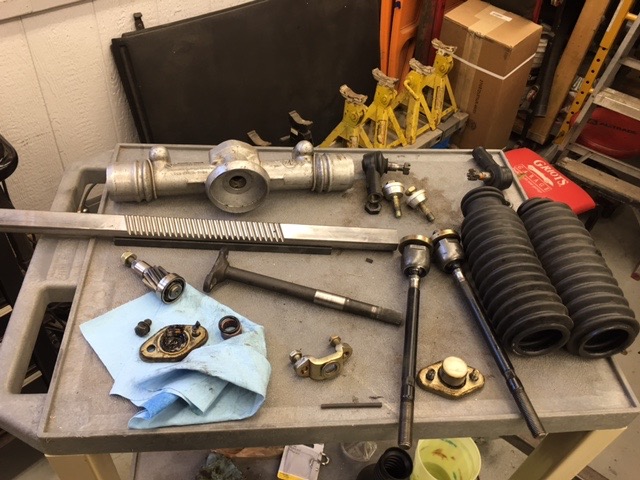
Note the difference, that bigger gear, makes a huge difference in lock to lock. Hopefully I don't need a ships wheel to turn this thing.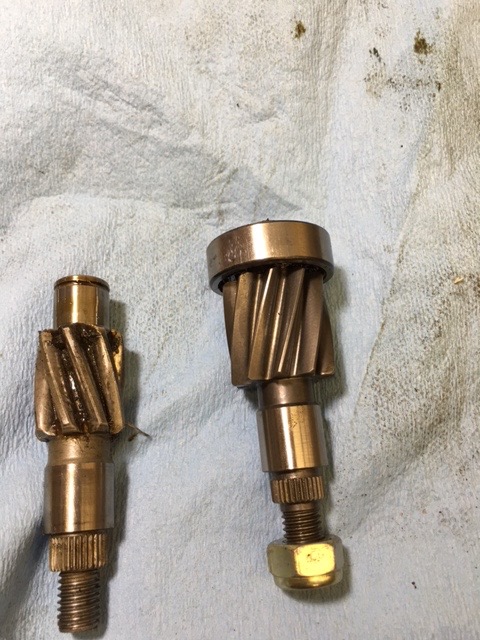
And did not get to re-assembly because I launched the clip on the end of the gear.
I need to invent high speed garage cameras to track all the little parts that fly around garage.
Oh almost forgot, I restored these body hammers and dollies that I got from a friend that died this year from a brain tumor. He was diagnosed on a Wednesday, and forgot who most of us where by the following week. Was dead two weeks after. Ken you made a huge impact around here, your deeply missed. So in honor, I cleaned up your hammers, I fell privileged to have them.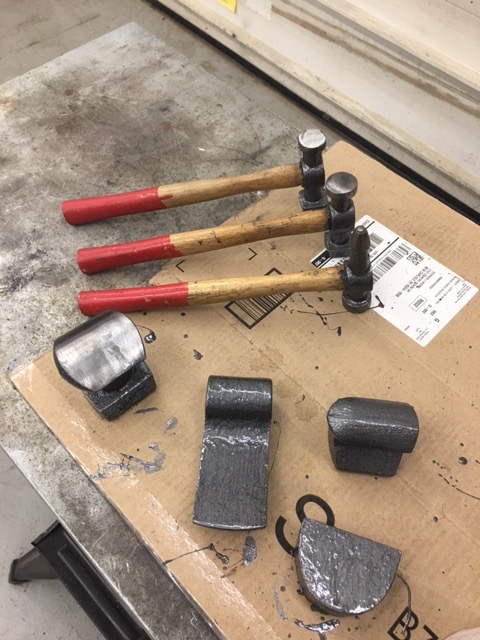
I also heard from Chris, some of my parts are in the post Weld on suspension bits should arrive tomorrow. Struts, and trailing arms should be in next week or so. I have a set of JRZ shocks showing up thanks to Bobby. Ordered a set of Koni front Sport inserts, and 22mm torsion bars from Paragon. Thank you Jason He also check to make sure I did not order the wrongs stuff. 914 Koni Sport inserts with 911 splined torsion bars. Top notch service as always from him. I would love to have a set of JRZ front strut inserts, they seem to rare as hens teeth.
My wife seems to be killing car batteries this week. Truck is dead, about to go out and pick one up, get a call, and she killed the one in her EOS. Man she is rough on batteries this week.
Posted by: mbseto Aug 29 2016, 09:46 PM
Good to see you back on the horse!
Posted by: 914forme Oct 15 2016, 08:22 PM
Well it has been a long time since I updated this thread. I have been doing many things 914 related except working on my 914
First off I made it to Okteenerfest - 914 less, but had a great time. Roads where great fun, even in a VW Jetta TDI!
I meet some great people and saw some great 914s. My wife was the lucky one and got some great stuff which she promptly handed over for good use.
I spent last weekend meeting Doug and helping to move his 914. it is now getting some work done, and I am glad I could help in a little ay to get the 914 running.
So that brings us to today:
First day of Build Off Challenge 2017 I am in the part Duex group. So if you don't wish to read the whole I'll get you up to speed.
Parts have come in from Chris.
Rear Trailing Arms are converted with 911 e-brakes, stiffened the Chris Foley way. Powder coated, and Elephant Racing Poly Bronze Bushings installed.
Front Spindles have been raised, thus lowering the front. Which then brings us to the top of the strut, where we will find new strut tops. We will have spherical bearings, and camber and caster adjustments.
The rear suspension pickup points will be raised by 2” using one of Chris’ kits installed. He does great work, and glad to have them on my car.
Brakes parts are here, and well they should stop the car.
Lots of work to do on this car to make go again.
GOALS:
Chassis Work and Welding Done. Yes I actually plan to finish welding the car. I calculate another 75 pounds of welding wire will be used. And most likely another 40 pounds of TIG filler.
Install the Engine
Get it running / driving
Finish body metal work
Make it one Color
Drive to Okteenerfest 2017
Posted by: 914forme Oct 16 2016, 06:02 AM
Here is how the 914 sits as of 7:30 am yesterday: Day One of Part Duex Challenge Build.
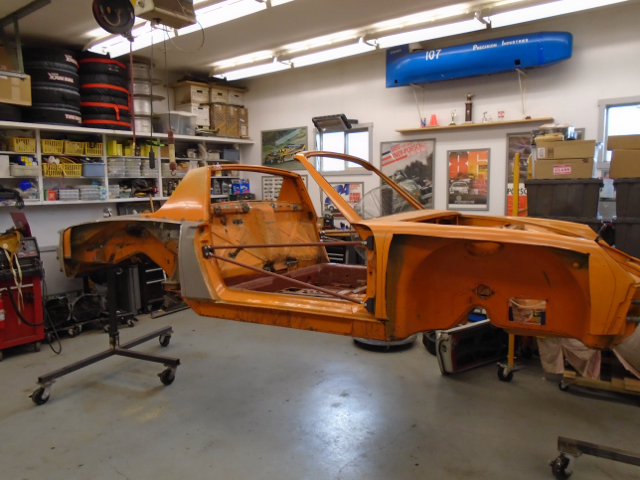
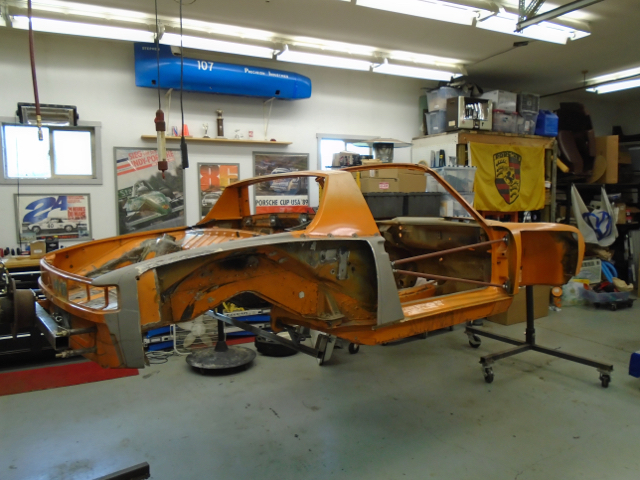
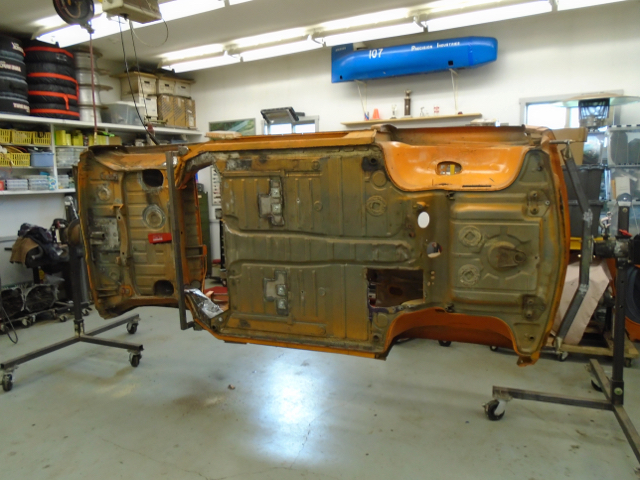
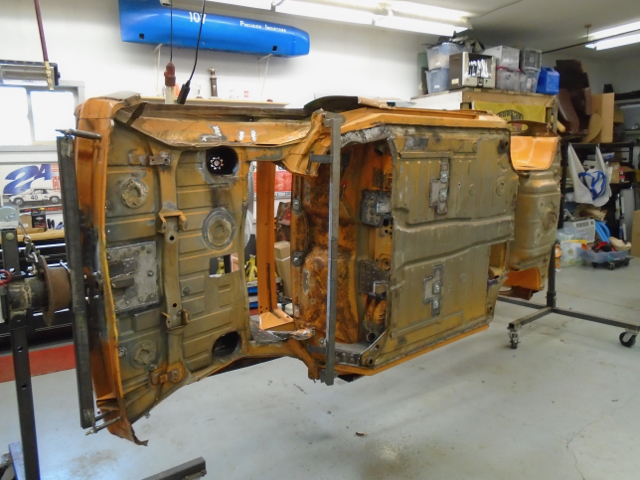
So that is where I begin the second round from.
Posted by: 914forme Oct 16 2016, 06:19 AM
Now for yesterdays progress October 15th, 2016 Day 1 of Build Off Challenge Part Duex.
First up finished my rebuild of the steering rack.
Had to mill the inside of the housing to accept the Quaife Gears, bolt in affair my .....
Not sure where all the pictures went of the rebuild and boring process
So you get to paint your own based off my description. I disassembled the rack, started the reassembly to find the a Quaife gear hit the housing. It was just to big to physically fit. So my limited arsenal of tools to the rescue. The steering rack housing was to big to go into my Sherline Mill. So I made a Guide on my Lathe. The guide fits into the opening of the housing and allowed me to use my Rotator and my drill press to bore the housing to allow the gear to fit. Times like these I need a Bridgeport! But hey it worked perfectly.
Here is the assembled rack 
And shaft bolts safety wired up. Don't want to loose a steering bolt. Over kill 100% YES 
You may bore I got ride of the steering donut and went direct drive, I did that 20 years ago, after a discussion with Jon Lowe. When you raise the rack with bolt on bump steer kits they can hit on some chassis. Mine was one of them. So return the geometry back closer to normal, I took the spacer out. Never looked back. Just don't put your fingers in the spokes of the wheel, it might hurt.
Rack is done, Quaife installed, Turbo Tie rods installed, standard tie rod ends removed.
Posted by: 914forme Oct 16 2016, 06:34 AM
Day 1 still, October 15th, 2016
Built the front struts: And my damn Sony camera lost the build shots So here are the finals.
Oh I did find one
This is almost how I got them back, I did a test fit of the Koni to see if I needed any parts.
Last year I sent these off to Chris at Tangerine to get the spindles raised, and have the arms reset, and the Rebel Racing Bump Steer Kit installed.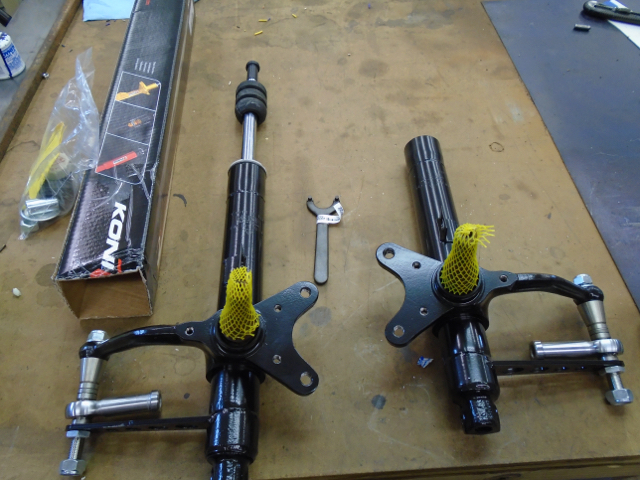
Chris' work is stunning
Thrashed on them and this is the final installation: Been a long time coming to get it here.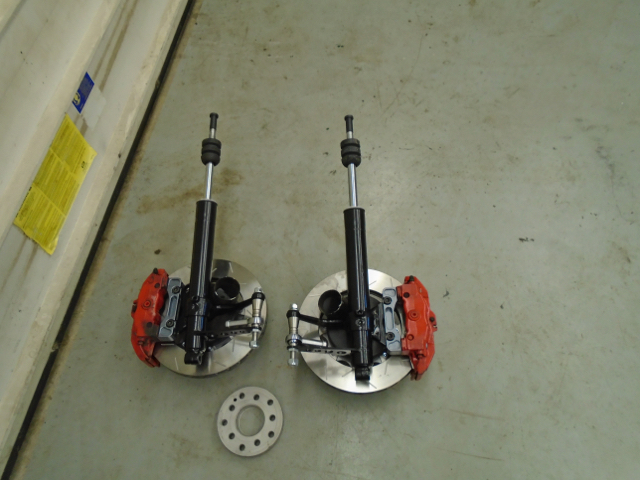
Detail shot of the back side.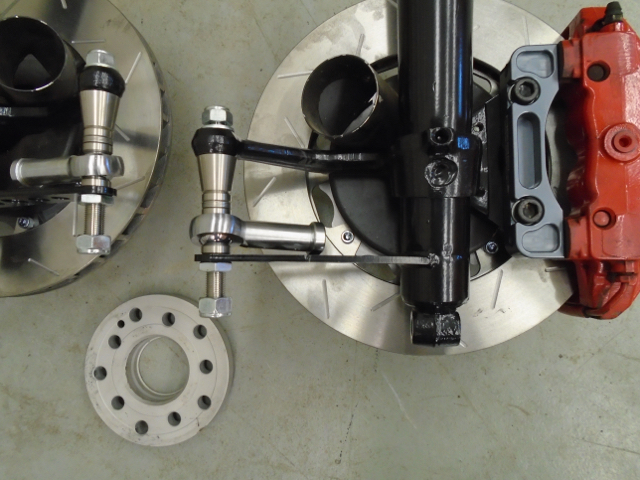
Front shot for you all addicted to brake porn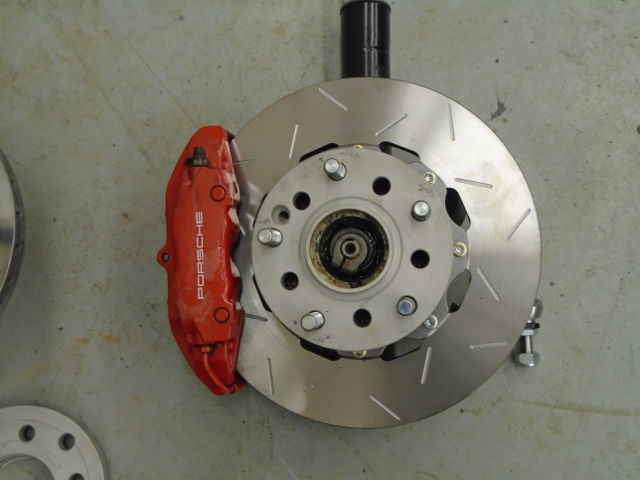
I would like to thank Chris at CFR and Tangerine Racing it was well worth the wait. And Also the guys at Rebel Racing for making the caliper adapters and the massive rotor.
Other parts not seen in the build.
Brake cooling ducts, with the hub seals to get more of that air down the rotor vanes. 996 calipers. Koni Yellows, custom valved, advantage of being in southern Ohio, I have two Koni rebuilders with 100 miles. These went to the factory. New bearings and seals. They will come back apart for touring and lubing before the final assembly. Need them for other work on the car. Should have done before I removed the old stuff. Hind sight is 20/20
Posted by: 914forme Oct 16 2016, 06:53 AM
More from October 15th, 2016 It was a pretty good day, but then assembling parts makes for great forward progress. It is the fabrication that slows you down.
So on with the show.
Got my Rear Trailing Arms back from _______________________.
And the answer is:
Looks like I am doing an ad for Chris, no I am not paid for these endorsements just a satisfied customer.
Installed the 911 brake parts, this is the picture I took to make sure I could get them re-assembled correctly.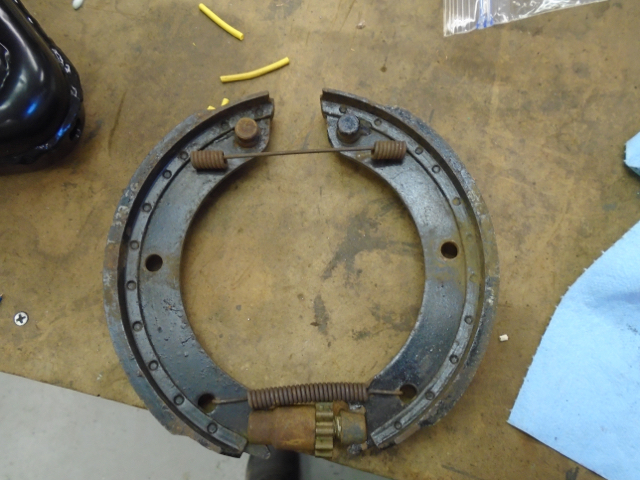
Notice a part missing.
The spreader bow and springs the one piece that makes the dang thing work. Replacements order, the ones I have will turn up, the minute the post drops the ordered parts onto the door step.
And final assembly: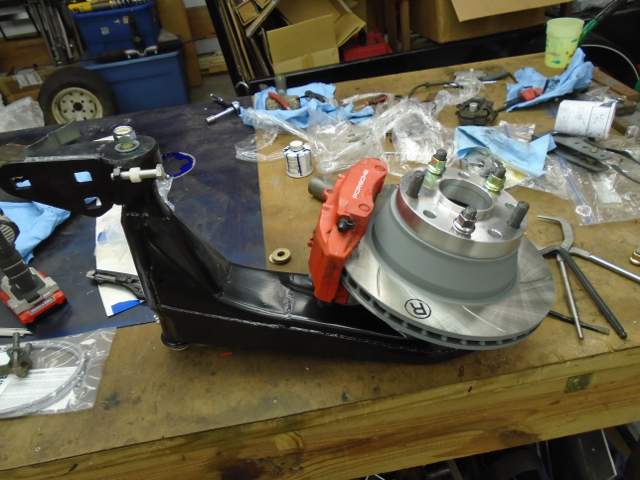
Item not seen
Elephant Racing Poly Bronze Bushings
Rebel Racing Caliper Bracket
All of Chris' hard work - yep his arm boxing trick is in there as are the re-enfocing plates, 911 rear brake adapter, bearing covers, etc....
FAG bearing
930 CV compatible stub axle is buried in the arm.
Not sure how I would do this build with out my machine tools. I needed to bore out the shaft hole on the outer arm mount. Mill and bore bar, took off just what I needed for a nice fit.
The Rear Brake mounts needed a spacer, just like 911 brake calipers do, so the Lathe made me a perfect set of four.
You could have gotten all this done with out machine tools. But as I am standing there fitting parts I wonder how I ever got this done with out them. More use than most other tools in my shop now.
That has a small snag going over the shaft on a shock. Lets take a .0001 off and call it a day. i know I am a little OK maybe a lot
Off to the shop for day 2, I would like to get the shell down on 4 wheels so I can make some measurements, and make sure things don't drag the ground, things fit under fenders, and well fenders actually line up with the centers of wheels. Just little details I forgot to check.
Posted by: Garland Oct 16 2016, 07:48 AM
Stephen,
Flying start, nice layout of where your at, and moving along well. Good luck on the 2017 Build.
Posted by: 914forme Oct 16 2016, 10:34 AM
Thank you sir, thank you, hopefully we will both be at Okteenrfest this year with a 914, I know that is my plan.
But then I have a backup plan just to make sure I get there in a 914 with 6 cylinders.
Posted by: 914forme Oct 16 2016, 06:04 PM
October 16th, 2016 Day 2
Well did not achieve all I wanted but I made great progress.
Finished the other rear trailing arm. 911 rear parking brake is a pain with the hub, but I have it down now.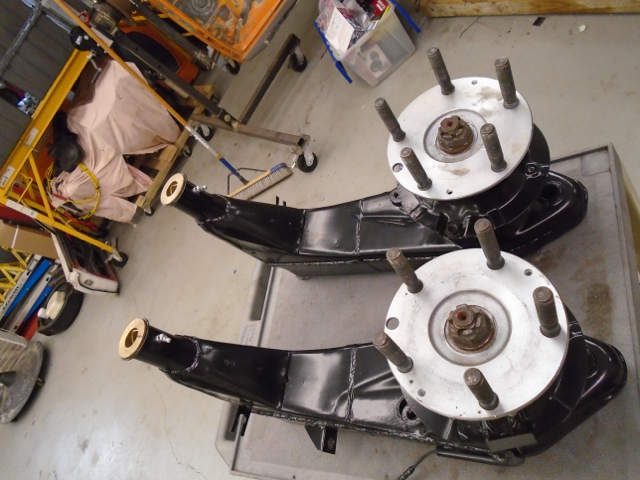
I then had a squirrel moment and pulled a Centerline out of storage. Wow it actually would work.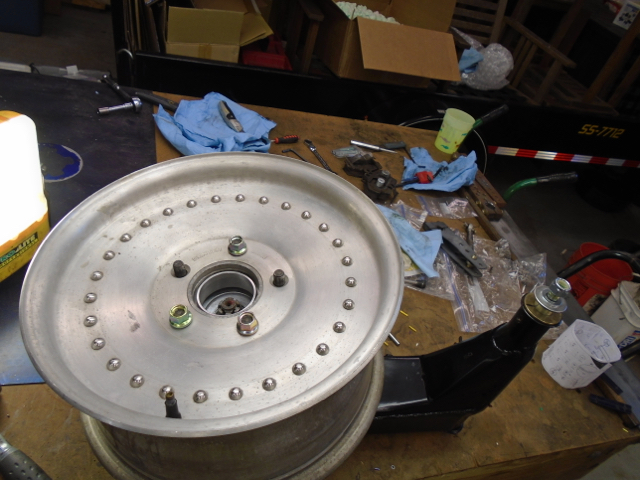
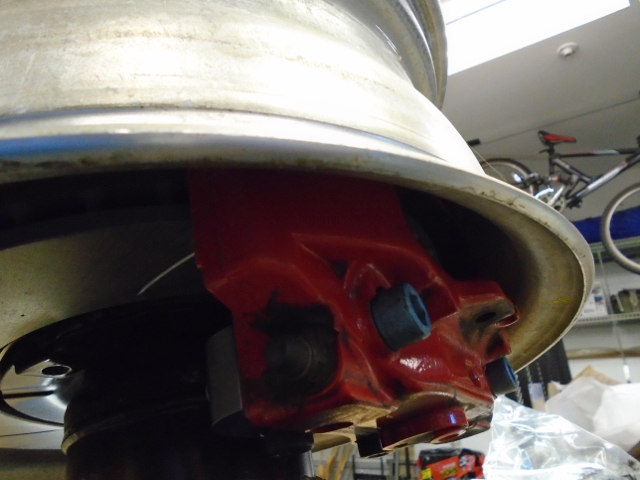
So now to the front struts, No Way Pal was my thought, and well it doesn't. But it is not far off.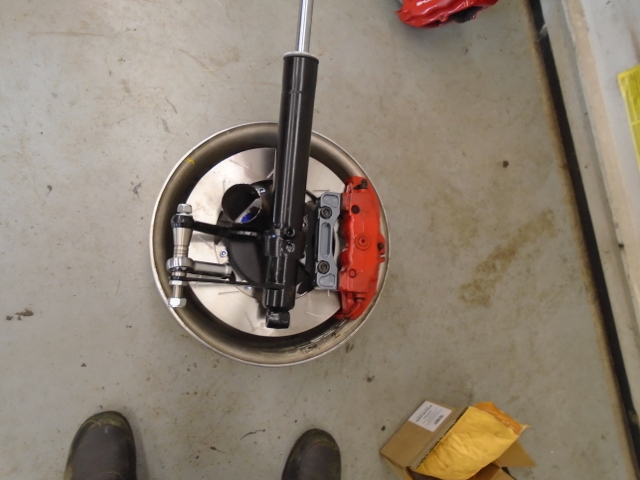
But this is where the buck stops. don't think you could fit a buck between the caliper and wheel.
So after the squirrels ran away, I got back to it.
Engine and trans back in for the 51st time, wish I could say it was the last time, but it is not.
Installed the trailing arms
Installed the rear tires and started working on getting the ride height set so I can figure out if I need to dry sump this thing.
Here is how it sits as of tonight.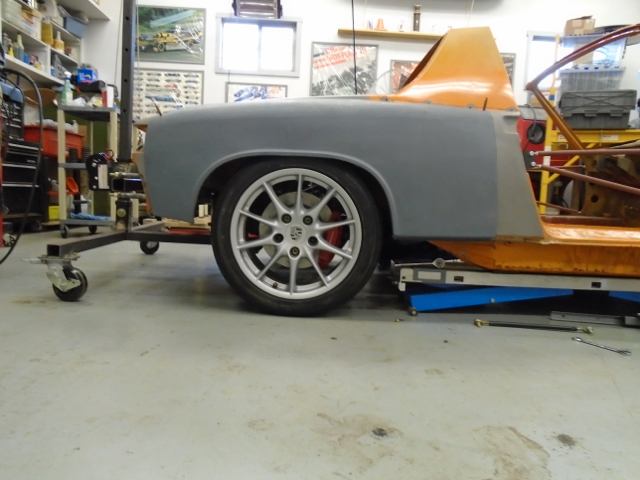
Posted by: Amenson Oct 16 2016, 08:43 PM
This build is way too epically awesome for such tiny pictures. More resolution please.
Did he cut and weld in material to raise the spindle on Boge struts.
Cheers,
Scott
Posted by: 914forme Oct 17 2016, 05:26 AM
Lets see if this does what you need. Two Birds theory.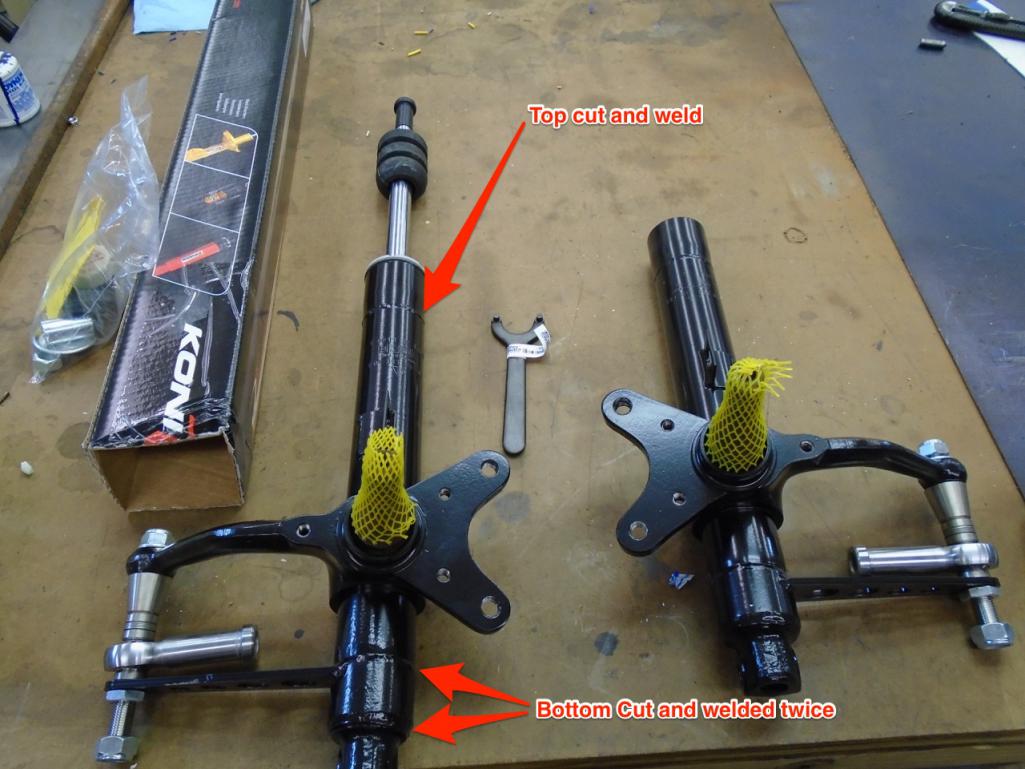
More than likely an over simplification of the idea. I do not have a band saw or a lathe that would cut this either accurately or fit on my lathe bed.
In reality the service price was a bargain for what I got. Once you calculate tooling costs, time, and if I screwed up.
The rear arms where the same way, calculate the one time costs, well worth paying to have them all boxed, welded, and parts installed.
Thank you for the measurements BTW, I will put them to good use
Posted by: 914forme Oct 17 2016, 05:34 AM
Bigger picture of the rear arms minus all the distracting hardware. Lots of welding and little details.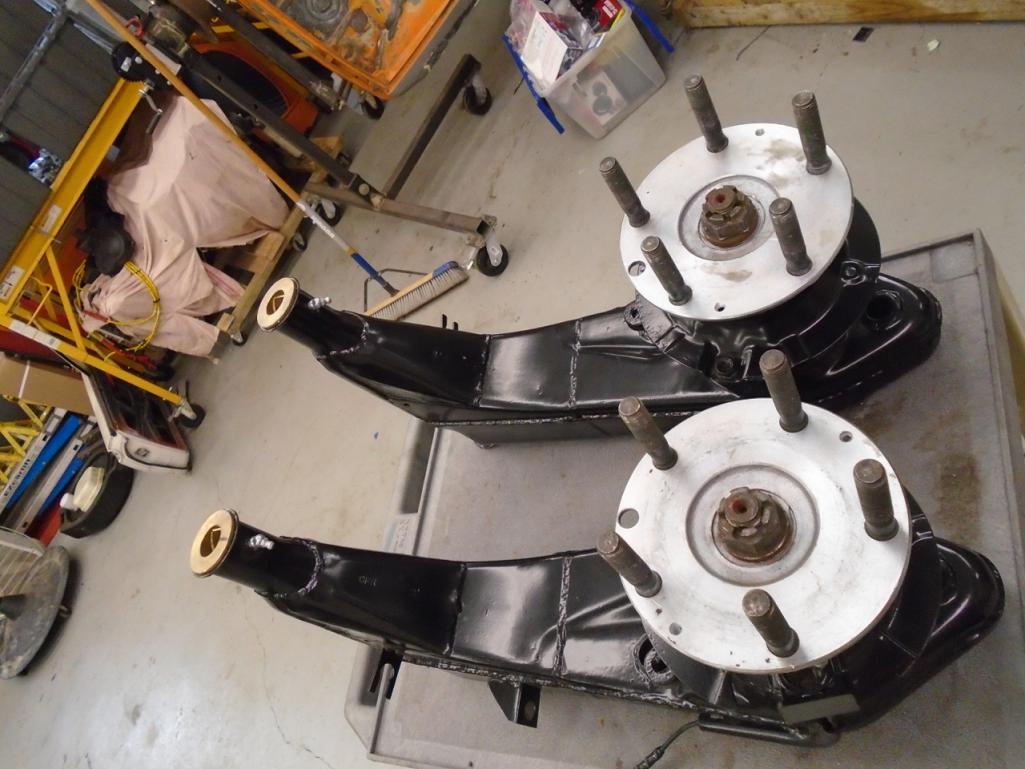
While I am capable of this work, I am sure I would have screwed up the arm, and then it would have been rattle caned if painted at all.
Posted by: white1975 Oct 17 2016, 05:42 AM
looks good you can come down and get mine ready too
Posted by: 914forme Oct 17 2016, 05:51 AM
looks good you can come down and get mine ready too
Two 914s in front of you, but after that I would ready to help in anyway I possible can.
Posted by: mbseto Oct 17 2016, 08:54 AM
Beautiful parts, this car is looking sweet.
Posted by: 914forme Oct 17 2016, 06:51 PM
Thank you
Day 3 October 17th, 2016
Nothing done expect finding parts needed that I have misplaced Or to replace parts that do not work with the other systems installed. That is what happens when your building a custom car. Some thing just don't fit with out and .
I have also started a second project. I don't want to let out of the bag until I know I have it nailed down. But lets just say it will guarantee I make it to Okteenerfest with a 914 in 2017.
I will start a build thread on that car also, I can't wait to reveal the car and the build.
Posted by: mepstein Oct 17 2016, 08:04 PM
Thank you
Day 3 October 17th, 2016
Nothing done expect finding parts needed that I have misplaced
Or to replace parts that do not work with the other systems installed. That is what happens when your building a custom car. Some thing just don't fit with out and .I have also started a second project.
I don't want to let out of the bag until I know I have it nailed down. But lets just say it will guarantee I make it to Okteenerfest with a 914 in 2017. I will start a build thread on that car also, I can't wait to reveal the car and the build.
I think you revealed it to me when you asked about an item I had for sale. I didn't realize you had the build waiting in the wings. Congrats.
Posted by: 914forme Oct 19 2016, 04:49 AM
Yes, I have a build in the wings. I am very excited about the build it has been a very long time coming. And can't wait to dig in to that 914, and bringing it back to life after a very long slumber,
Day 4 of build Oct 18th, 2016.
Struck a deal for a set of seats, like I needed them, but I was really bored in a meeting, and well I could finish a 914 detail.
Been talking to an engine builder outside of Columbus for my engine build for the other project. Looks like it will be a winter project for him also. That will also give me some time to research the shop and make sure it is a place I want to do the engine work. Really want to do it myself, but my wife has been on a kick lately of letting work on my project and outsourcing other items. She is a keeper, but somethings are so cool I hate giving other people the opportunity and the $$$. Ah well I should listen to her, she is wiser than my inner child is when it comes to my time. So that project will startup at the first of the year. I need to start a build thread for that one and thank all the people who have traded me parts to get this going. I also traded some green backs for parts to make it the car I want to drive.
My car nothing physical done yesterday, as I think I am getting sick, I crashed at 6pm last night. Forced myself to stay awake until 9:30 and was up at 2:30 this morning. Extra hour of sleep for me. At the office at 5 am, should get out of here early today and do some work I owe a few people.
And maybe get a few things done on the 914 tonight.
My new horizontal band saw landed yesterday so, I can cut some stock at square and at angles. Accurately , my Portland is great for detail cuts, but making a square cut was not at my skill level with that tool.
I have a couple projects for the new saw tonight. Need to make a couple of spacers for the trans mount. A second tier for my wheel rack, and an engine cart for my EG and trans combo. As the engine will come and go back in more than like a few hundred more times. I would like to build an eying rotisserie also as it would make it a lot easier to fit the exhaust headers.
Hopefully a couple items show up before the weekend so I can get the car down on all four wheels ,and get items measured and set.
Posted by: 914forme Oct 20 2016, 07:50 AM
Day 5
Good Day Eh!
October the 19th, 2016 if you are counting.
I did two things 914 related.
Paid Mike for some seats
Cleaned out all the trash out of the shop
Oh three, packed up some rear tail lights, and forgot to weigh them
Spent the rest of the night on Honey Dos
I started to lay out my new 914 front sway bar arms. I will snap some pictures as I proceed. My old mount was a NASCAR piece, for some reason them g'ol'boys don't seem to mind the weight of a solid steel arm. It was also a single sheer joint. I will make mine a double sheer in the RSR tradition. Bolt in a hole supporting a hemi joint. Pretty simple stuff.
More productive day than I thought.
Posted by: 914forme Oct 22 2016, 06:41 PM
Day number 8 October 22nd, 2016
Where has the time gone.
Got up today had about 4 hours to get something done on my 914.
So I unpacked my new small horizontal band saw. It cuts square so it is a keeper.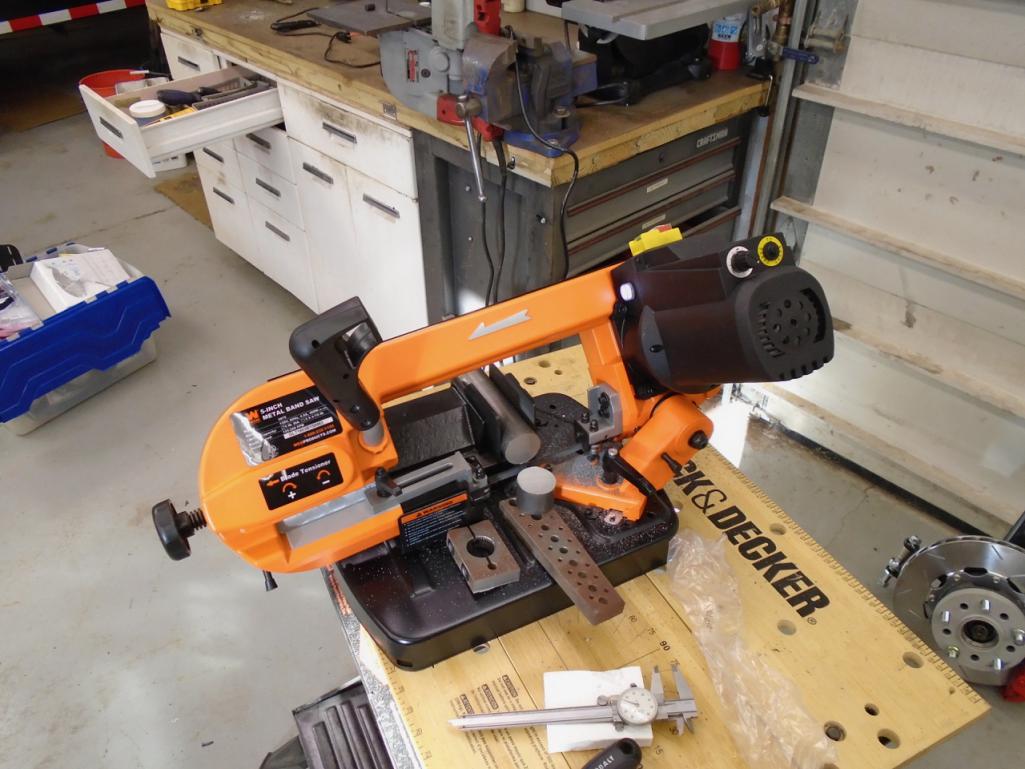
I did a bit of cutting, which I can say is much better than doing it on my vertical band saw and the truing it up on my lathe. 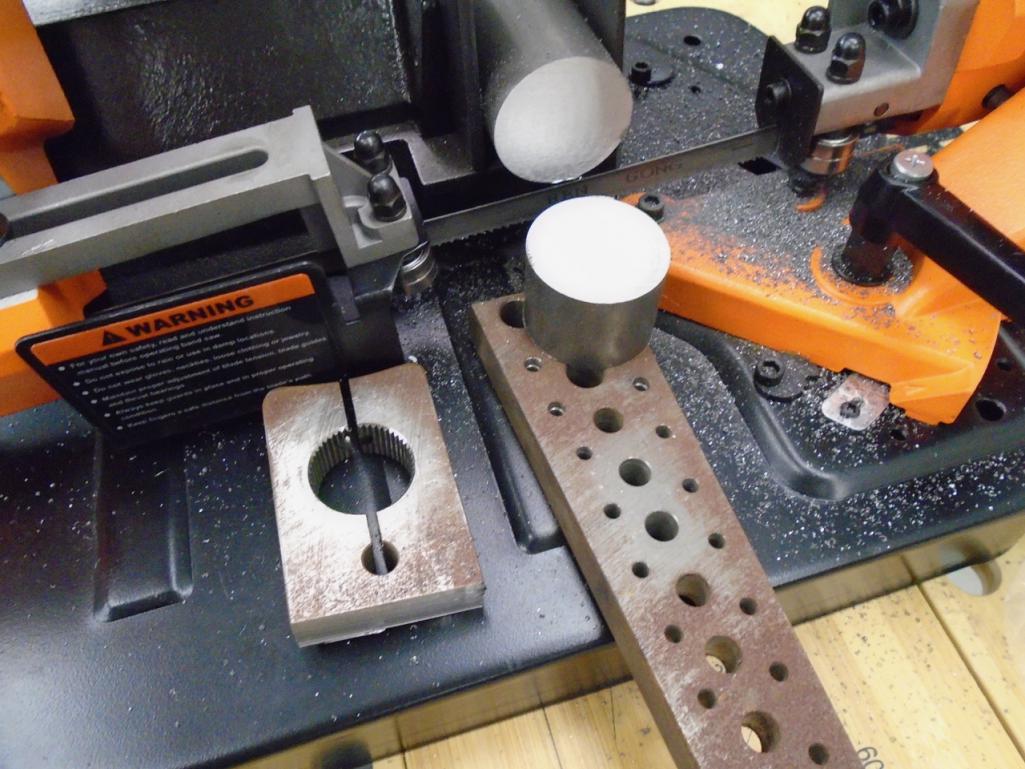
Posted by: 914forme Oct 22 2016, 06:50 PM
One was the blanks for my transmission mount spacers. I then chucked it in the lathe and trued up the end I had cut on my vertical band saw. Re mounted it into saw, and cut it in half to make the pieces I need. I then drilled them and added some lightening holes to the spacers.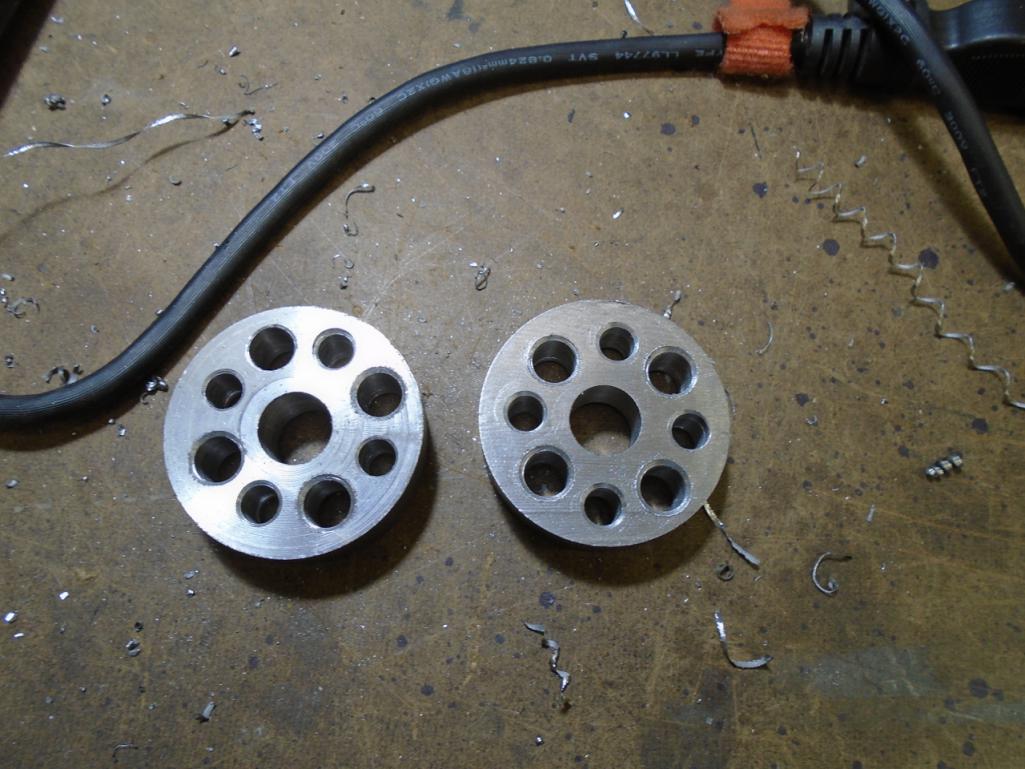
Parts came in over the past couple of days. Rear parking brake bows are very nice. I also got some spacers so I can get the rear wheels off the trailing arms. And a set of U tabs for moving mine on my arms, I could make them, some times its easier to just purchase the item, it will still need to be modded to work on my car.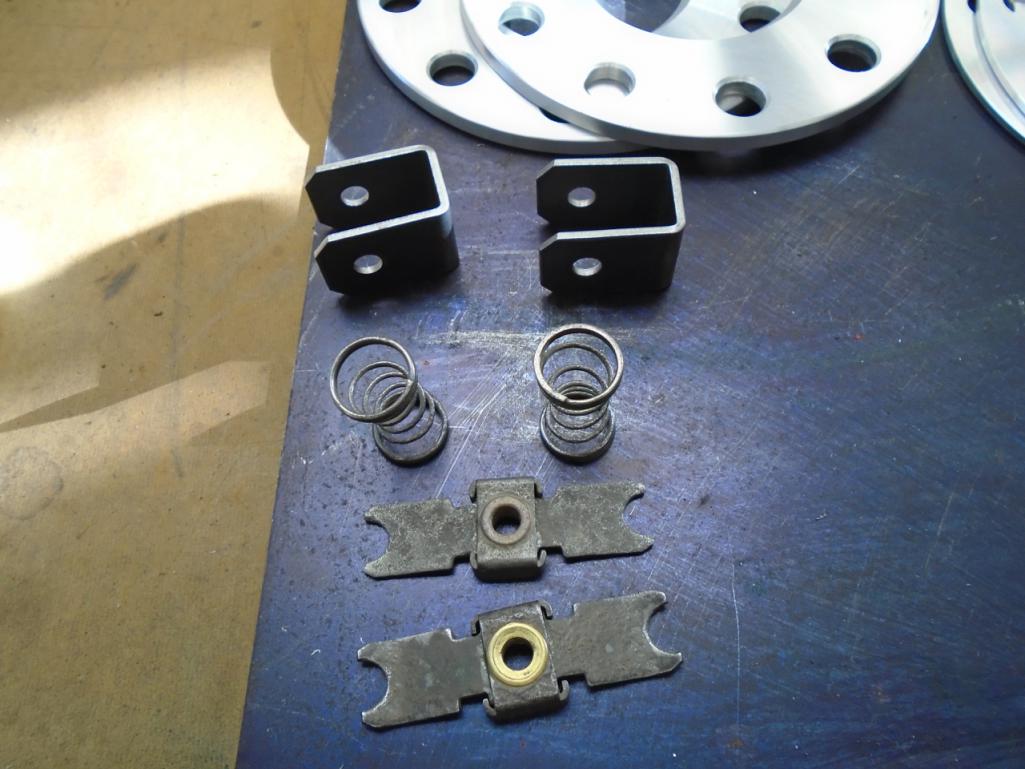
Posted by: 914forme Oct 22 2016, 06:59 PM
I started working on my front sway bar arms. I got these pieces off the circle track boys. They where heavy as hell. I trimmed them down and added lightening holes to get them down in weight.
This is how I ran it for years.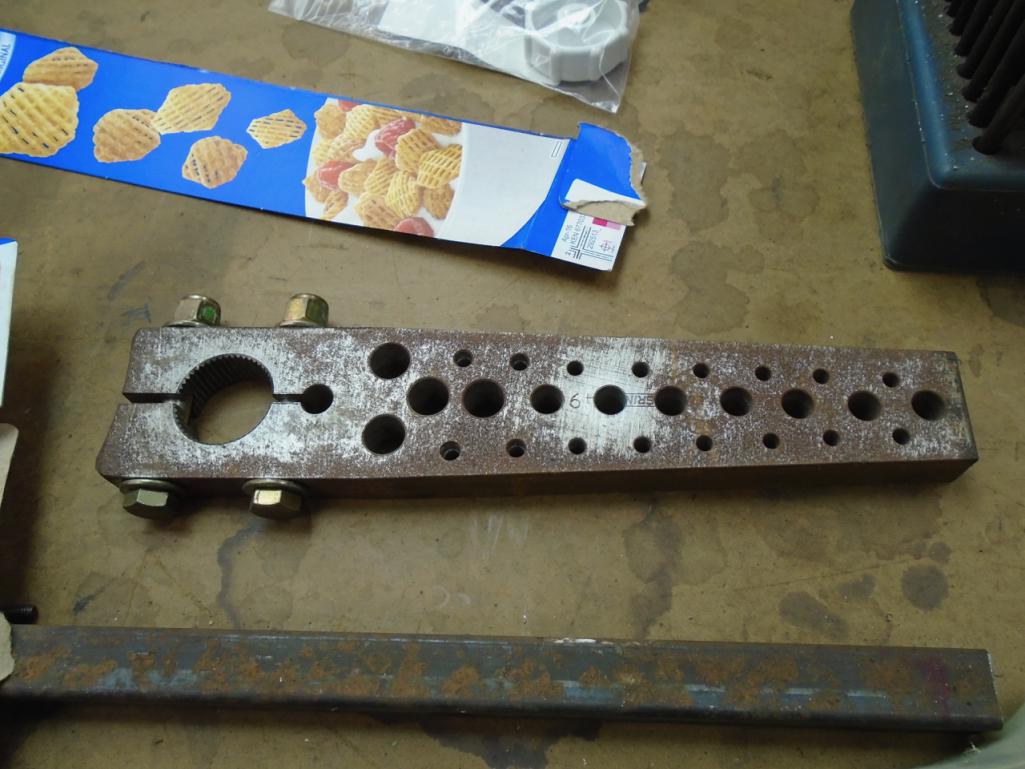
And this is what the weighed.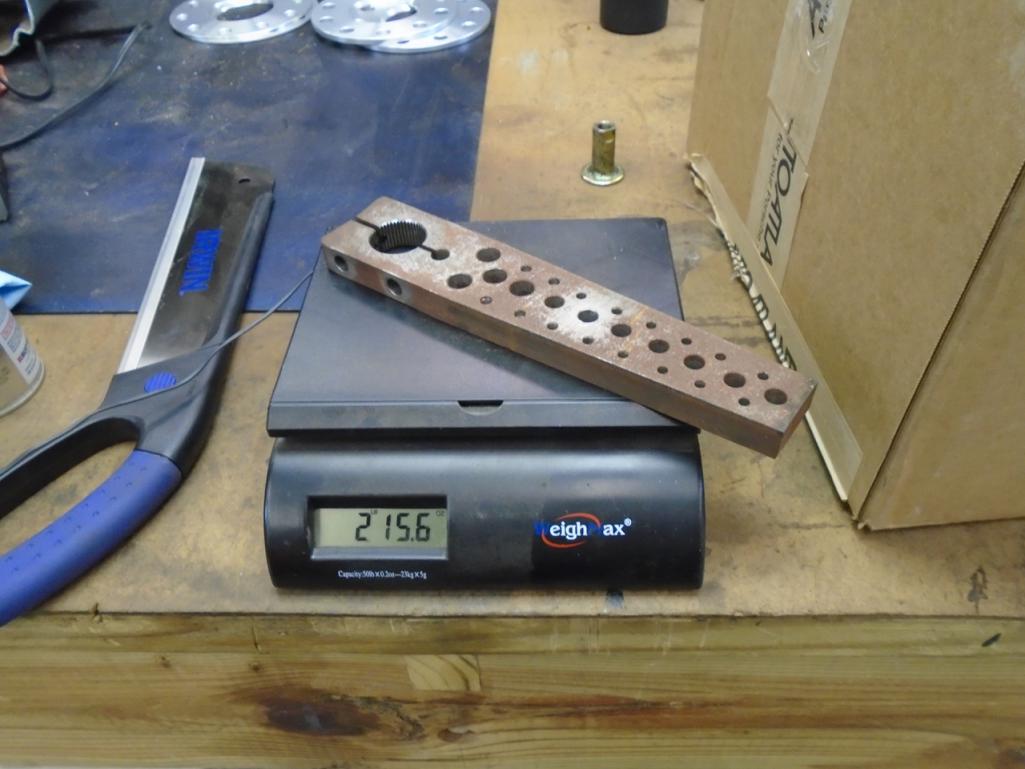
Remember you have two of these so almost 6 pounds worth of arms.
Posted by: 914forme Oct 22 2016, 07:09 PM
I am basing my design off the H&H swaybars. Which also is called the RSR style.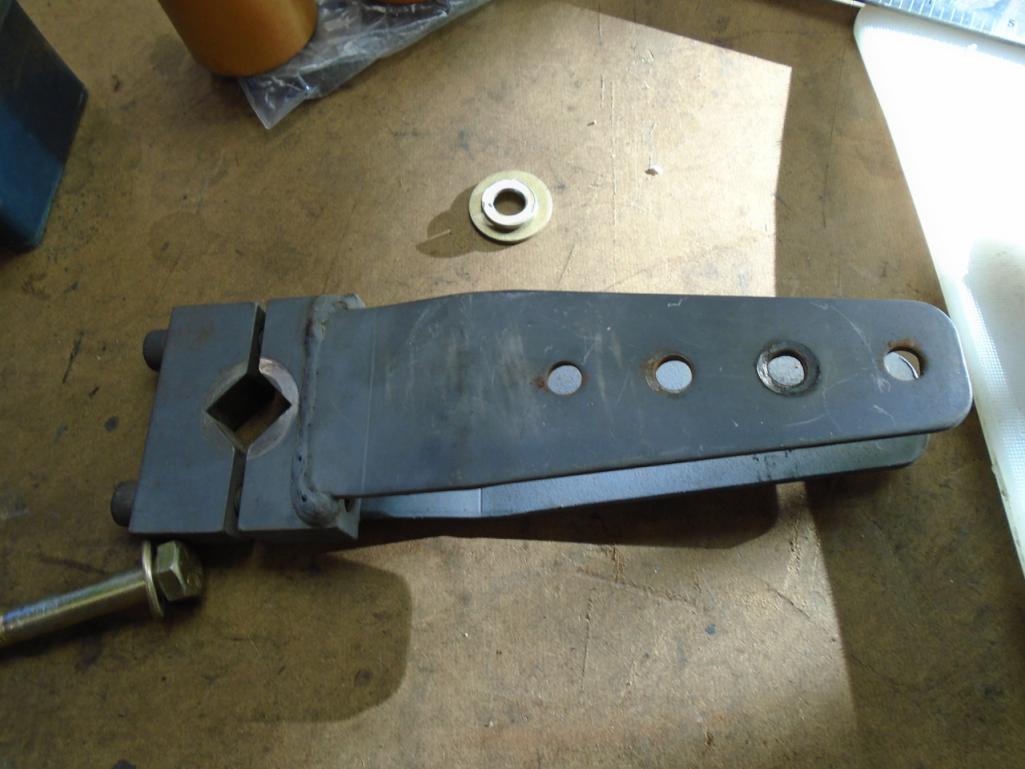
I lay everything out on this plate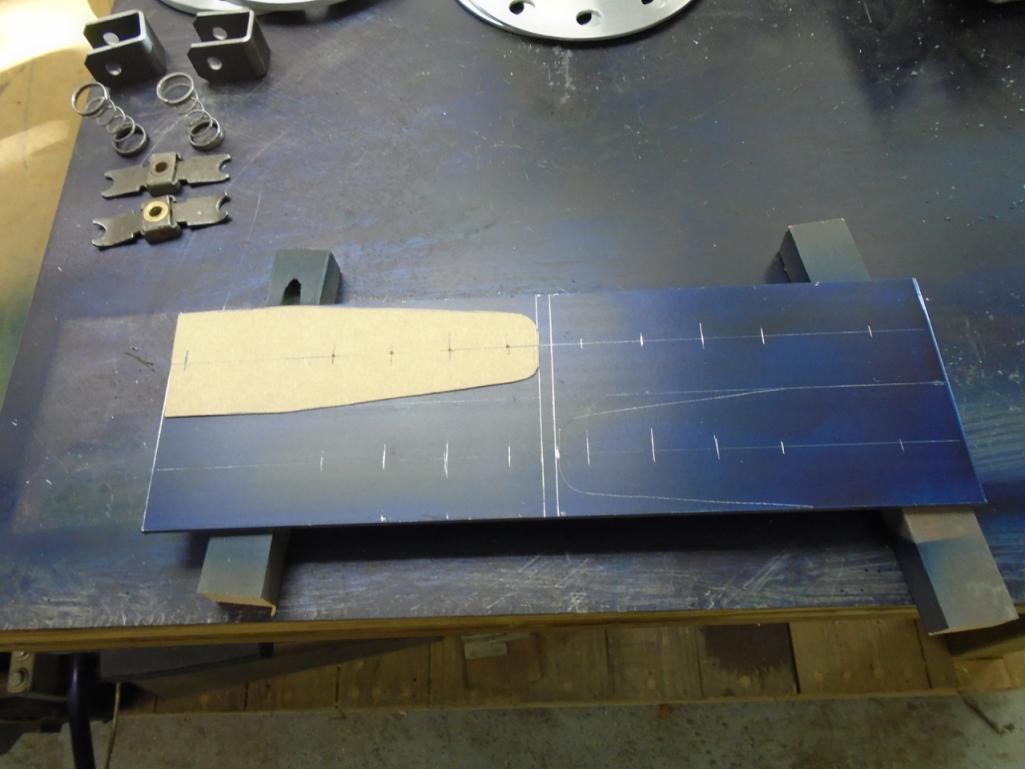
I then will cut them out, weld all 4 together, then drill the holes out, cut out all 4 together, and then run them all through the disc sander to clean them up. Stick a couple of bolts in them and add them weld them to the arm pieces I cut off earlier.
Posted by: 914forme Oct 22 2016, 07:14 PM
Last thing I did was figure out where to mount the coil pack at.
Attached thumbnail(s)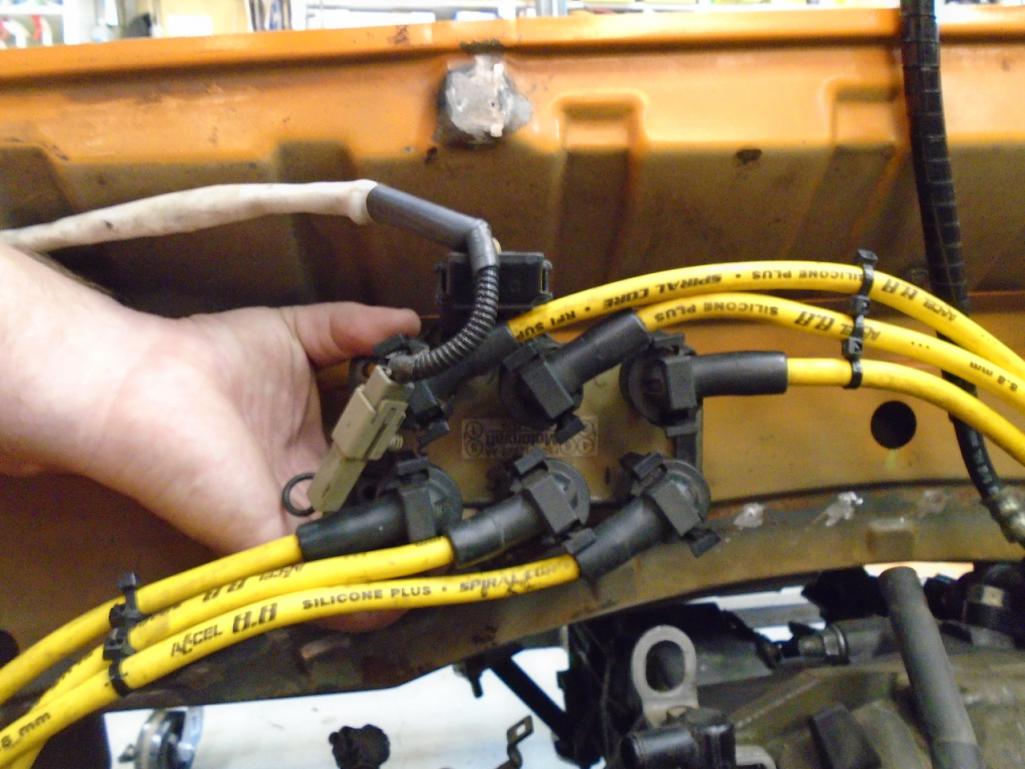
Posted by: tygaboy Oct 23 2016, 06:56 AM
Super awesome stuff! Love the CFR suspension and your other mods!
However:
I'm in this year's Build-Off, too, and less than 3 weeks in, I can see I'm already falling behind!
As a fellow "competitor", I insist you slow way down and constantly change your design plans so you have to redo everything at least three times.
Thanks in advance.
Posted by: BIGKAT_83 Oct 23 2016, 08:37 AM
Last thing I did was figure out where to mount the coil pack at.
Think I'd mount it here....,.
Attached image(s)
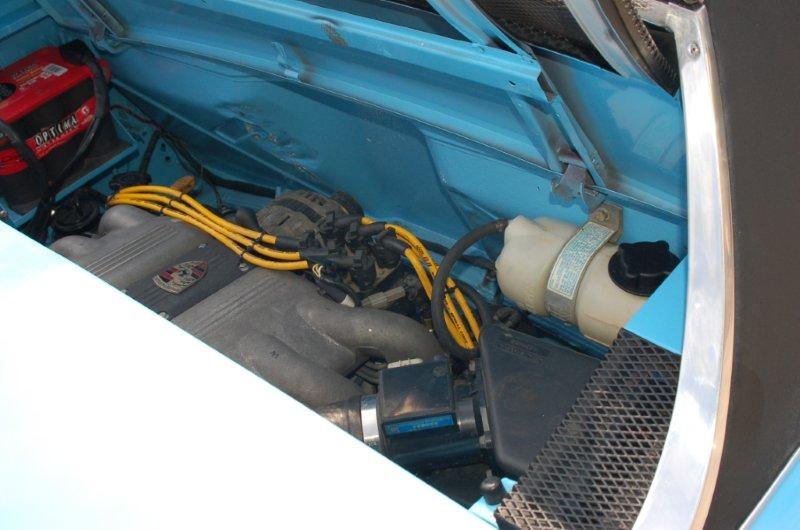
Posted by: 914forme Oct 23 2016, 09:22 AM
It is your so you would know best. Thanks Bob
That being said I have a plan that might occupy that space. That is unless Scott convinces me an exhaust feed snail is the way to go. I flip and flop like a fish, I need to be 
Tygaboy, yes I have been over on your thread also, nice stuff going on over there.
Trust me I will redo everything at least three times. That is part of the reason the spacers got made. Did not want to redo the trans mount for the third time.
Back to it, if you think those CFR suspension bits are cool, just wait
Posted by: Chris H. Oct 23 2016, 12:41 PM
Cool you're using that coil setup. I knew I wouldn't so it would just sit in a box. You should have the mount that Bob made if you want to mount it where he had it.
BTW I think my TPS was bad. Only the ugly looking spare didn't bounce around all over the place with the Ohm meter when I tested it. Should help with the idle. I'll let you know in a couple hours!
Posted by: 914forme Oct 23 2016, 02:54 PM
Now I need to find Bob's mount I hate misplacing stuff.
I did make a nice cardboard mockup of the coil mount back on the trunk wall.
I was going to build it out of 20ga, and be all artsy.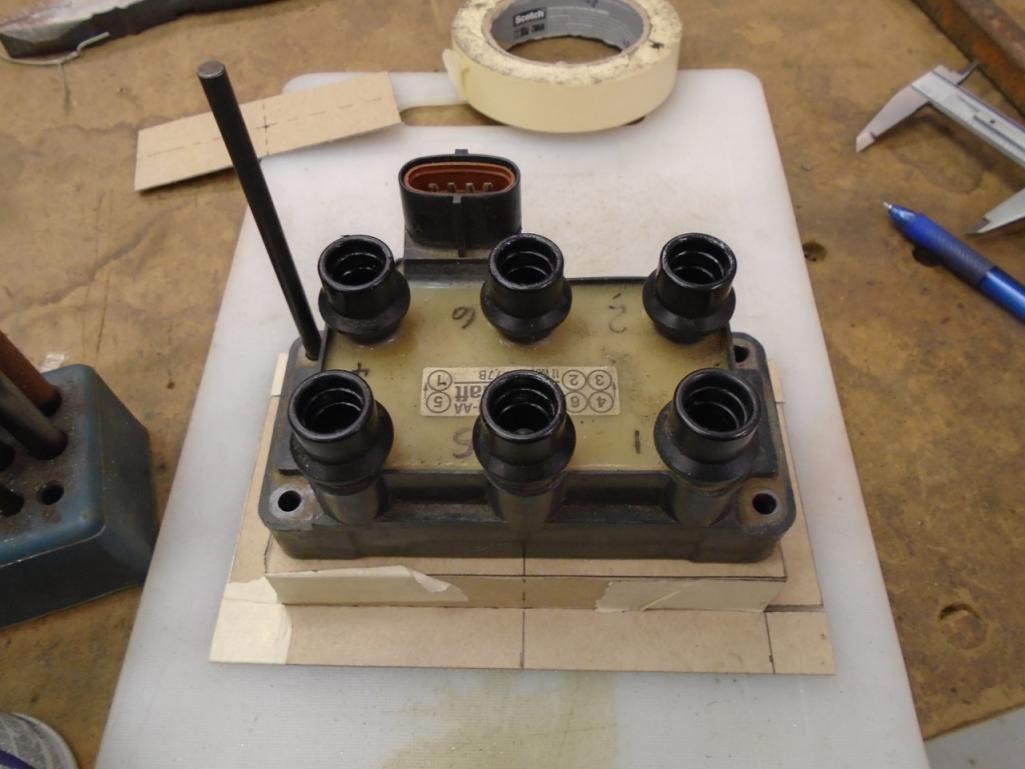
I transfer markings on cardboard via my trusty Dyekem - a little dab on the point and you can transfer the center of the hole my barely making contact.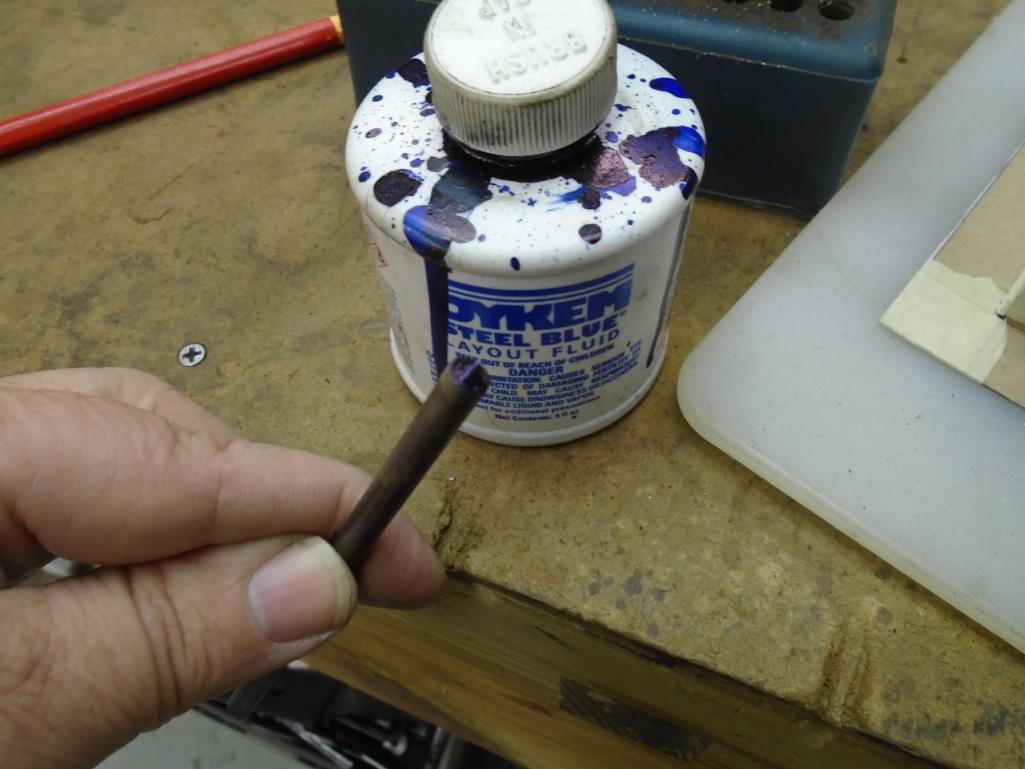
Squared corners mount is made up.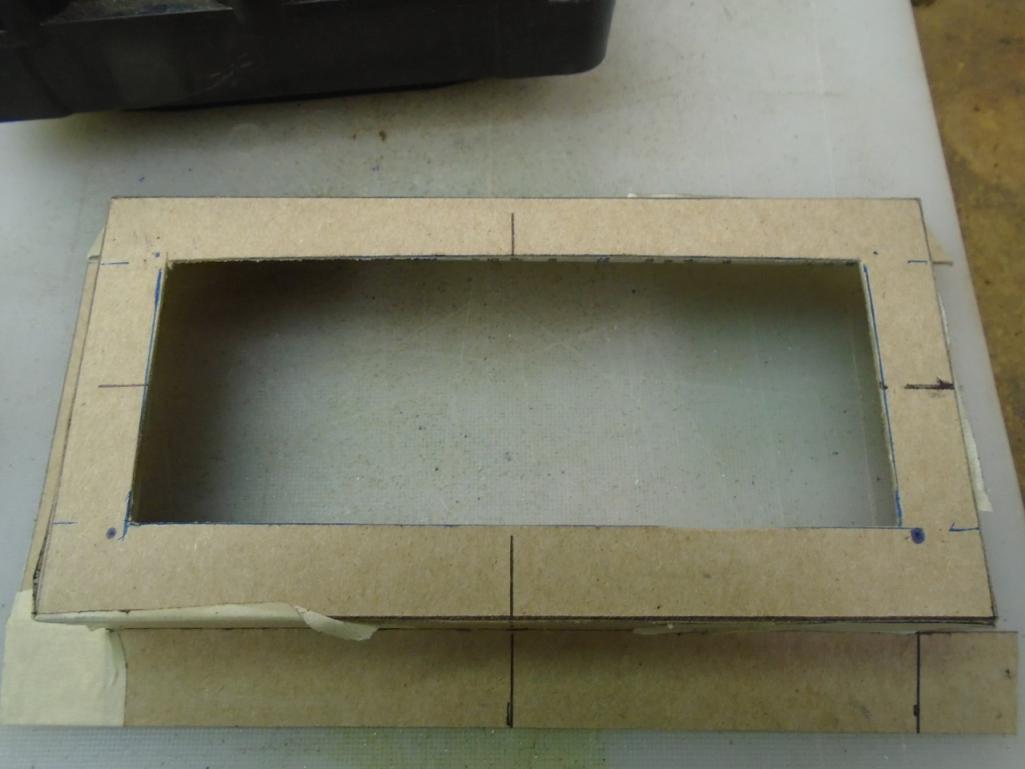
Now to get the it to fit nicer around the coil. Trick number 2, masking tape and a knife, stretch it across the corner and cut it out. I can careful transfer it to metal. Then file it to fit.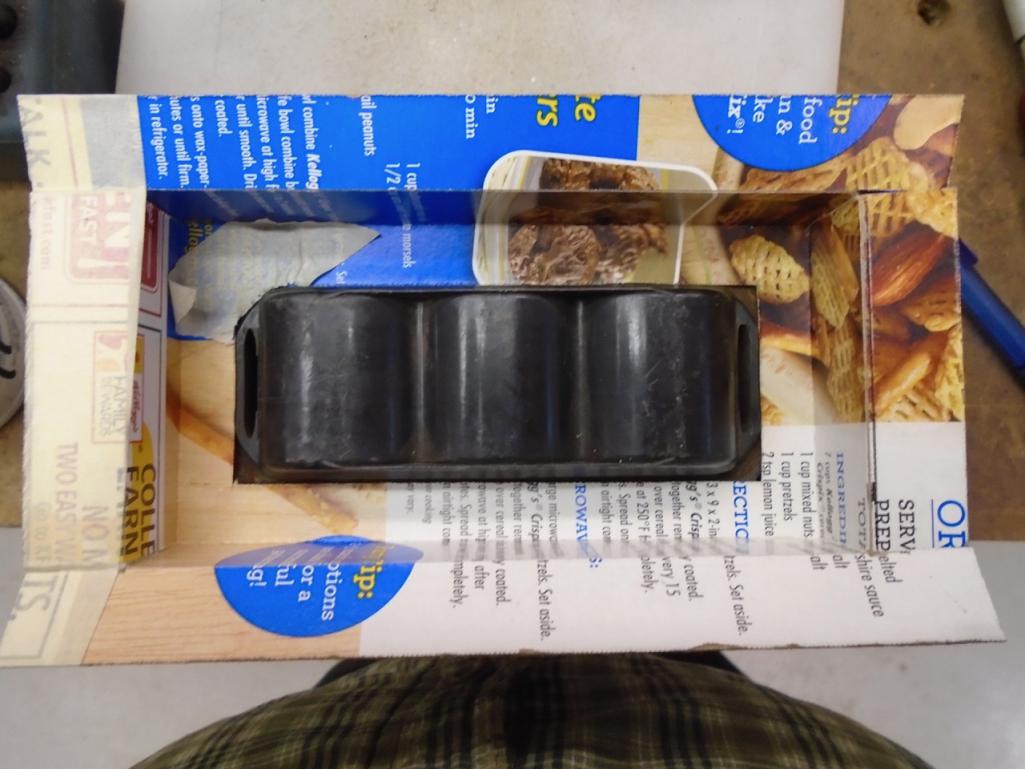
That is if to the coil mount as, I am not ready to transfer it to metal, it was a quick project while I waited for stuff to cool off.
More work to come, I will update latter tonight.
Posted by: 914forme Oct 23 2016, 05:24 PM
So I got busy today, you saw the coil mount above, needs a little tweaking and it will be good to go.
I worked on my swaybar arms.
First up drilling all of them. I welded them all together, and started making metal shavings.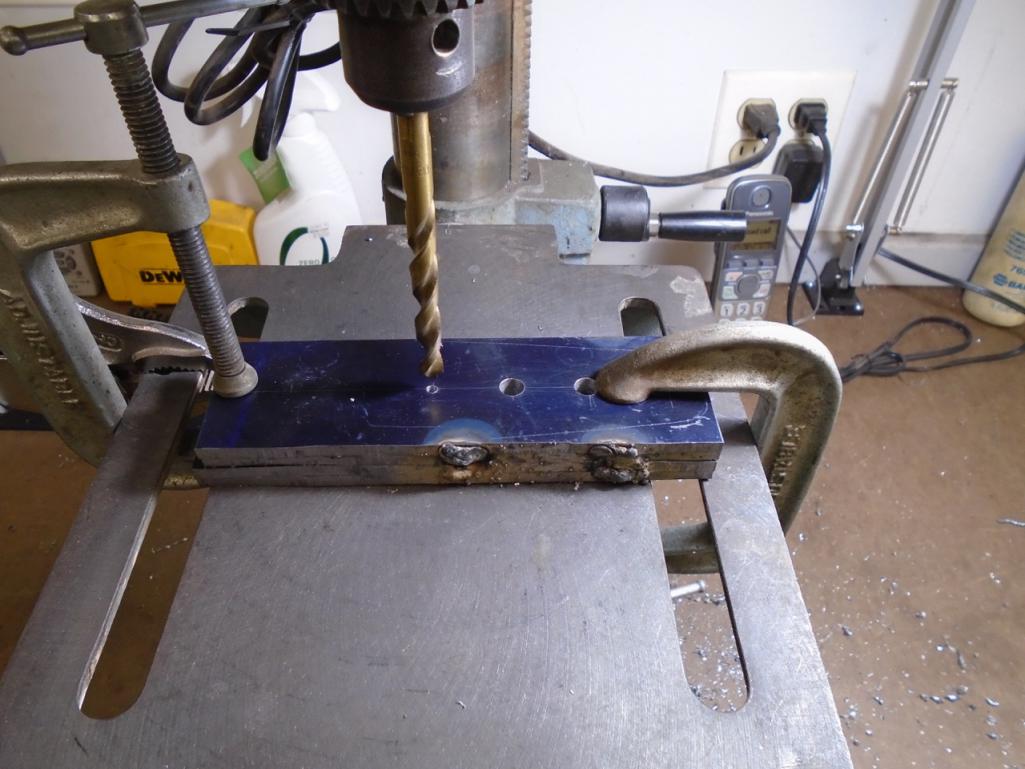
Got them all drilled spent some time working out the details. Here they are all welded up. Looks like I need to still slot one of the arms.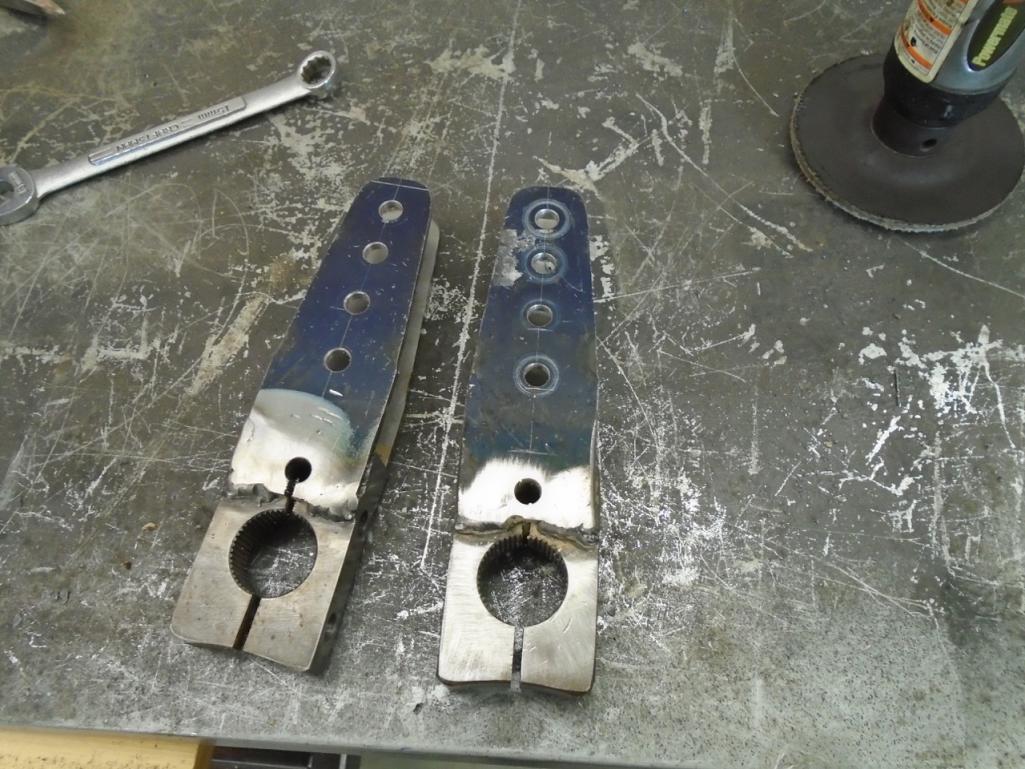
And I saved a little bit of weight once done.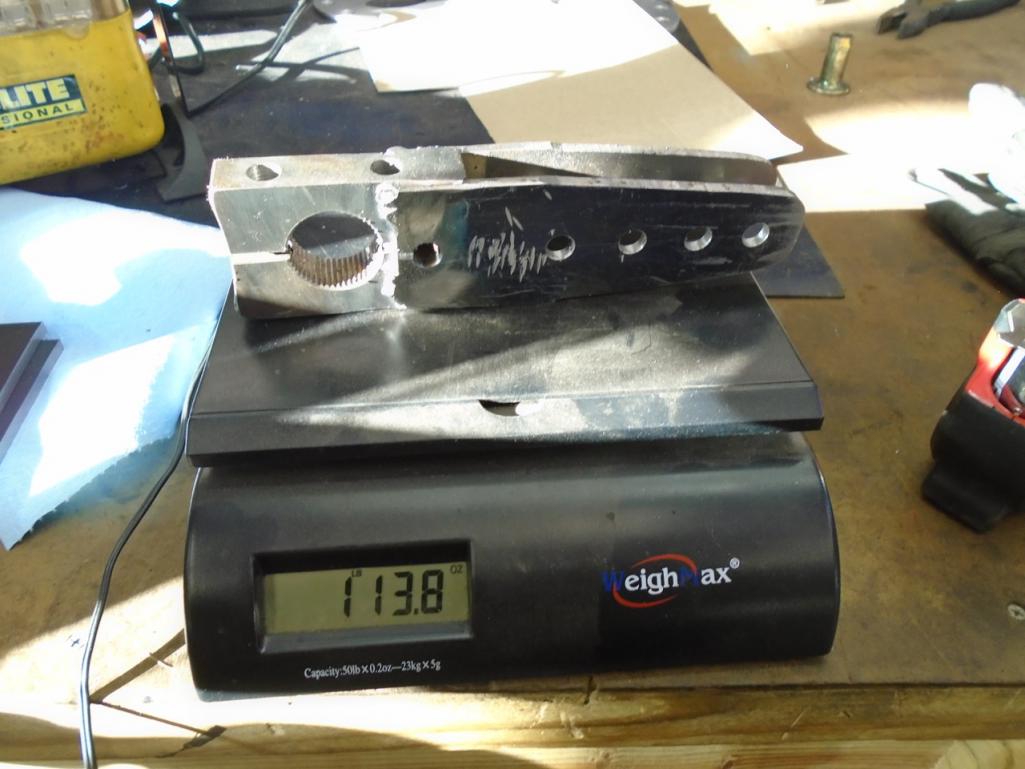
This is my swaybar, Nascar Items, with roller bearings that self align. Now binding what so ever.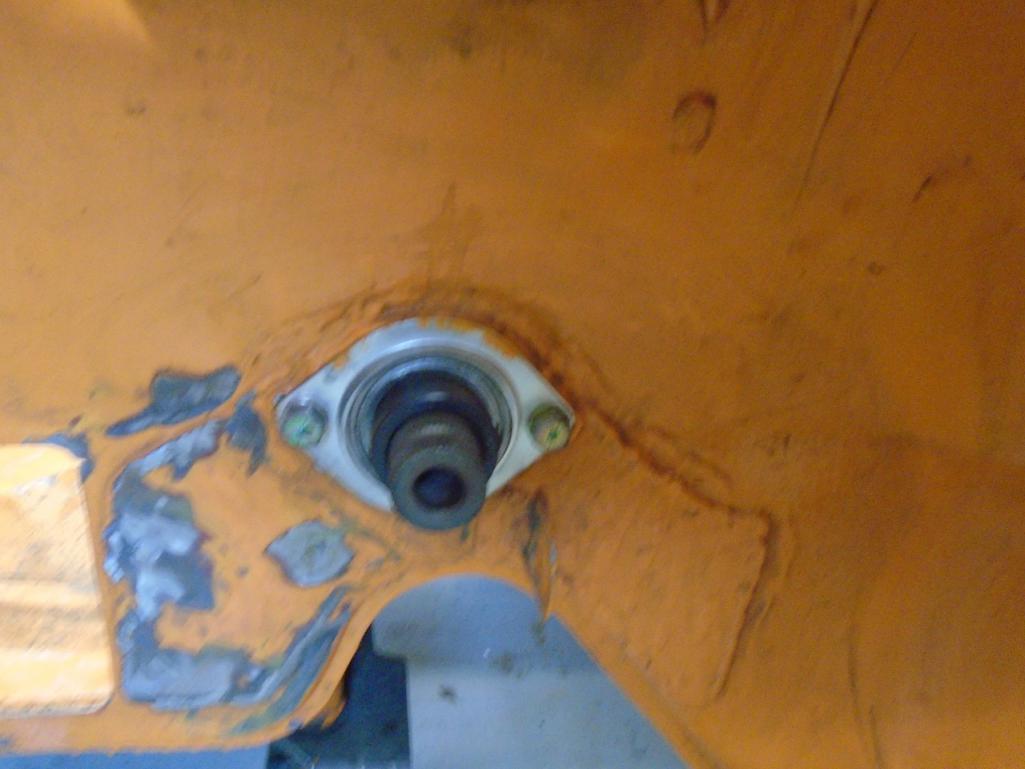
Yes it is a huge bar, 30mm to be exact. And nope I don't have an issue with understeer, we will see what the new setup does.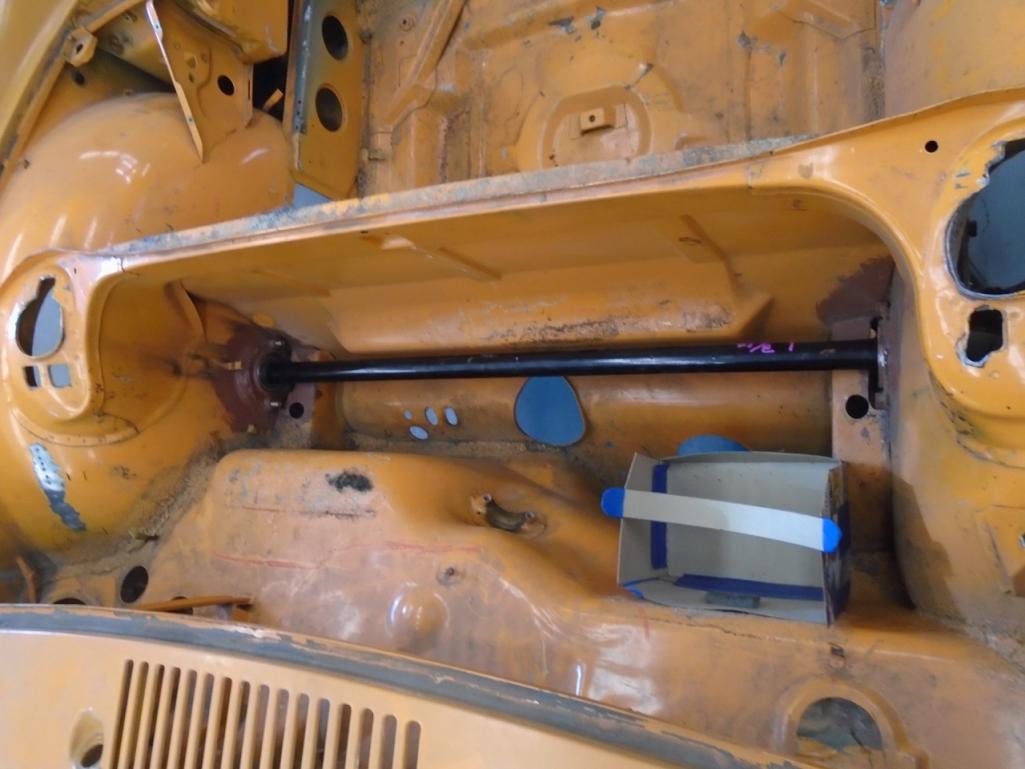
I installed it and one arm to make sure I could move it through all the locations, and not have the drop links bind. In-order to do this I had to move the U bracket back to the stock location. Yes the drop link is bent, thats what happens when you forget to remove the drop link and it got wedged, then bent.
All the way up arms hitting bottom of trunk floor.
Full droop
There was another post on 914world on how to install swaybars, so I grabbed my H&H bar and built a weld on nut plate for it. I did two of them in 20 minutes. Why spend $60+ for the factory parts Will go into the media blaster before installation on another 914.
Started working on a new engine cart, the wood one is pain. Always in the way. 
Cut off the old U tabs from the arm, and welded on the new ones. Will need to get these painted.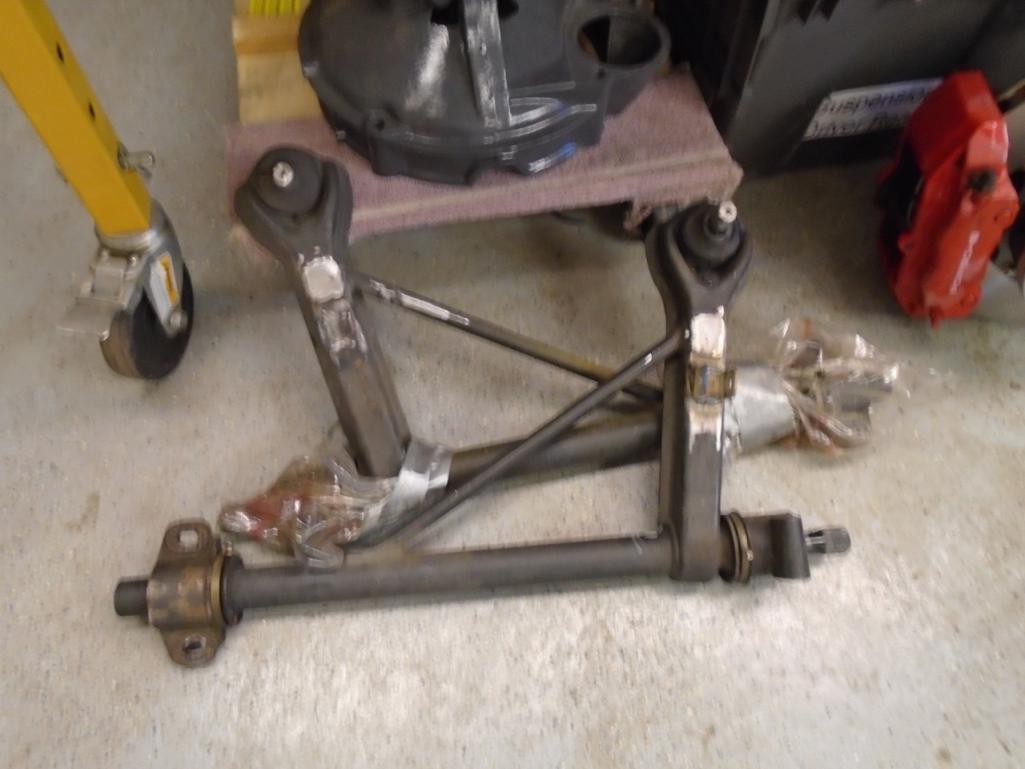
And it seemed only fitting to finish up the night of work back in the trunk. I cleaned the bottom of the cut Bruce sent me, dykemed it, and celcoed it to the car. Once I get the engine dropped again, I will take my scribe, mark it, and the then cut outside the lines to allow me to file it to a almost perfect fit.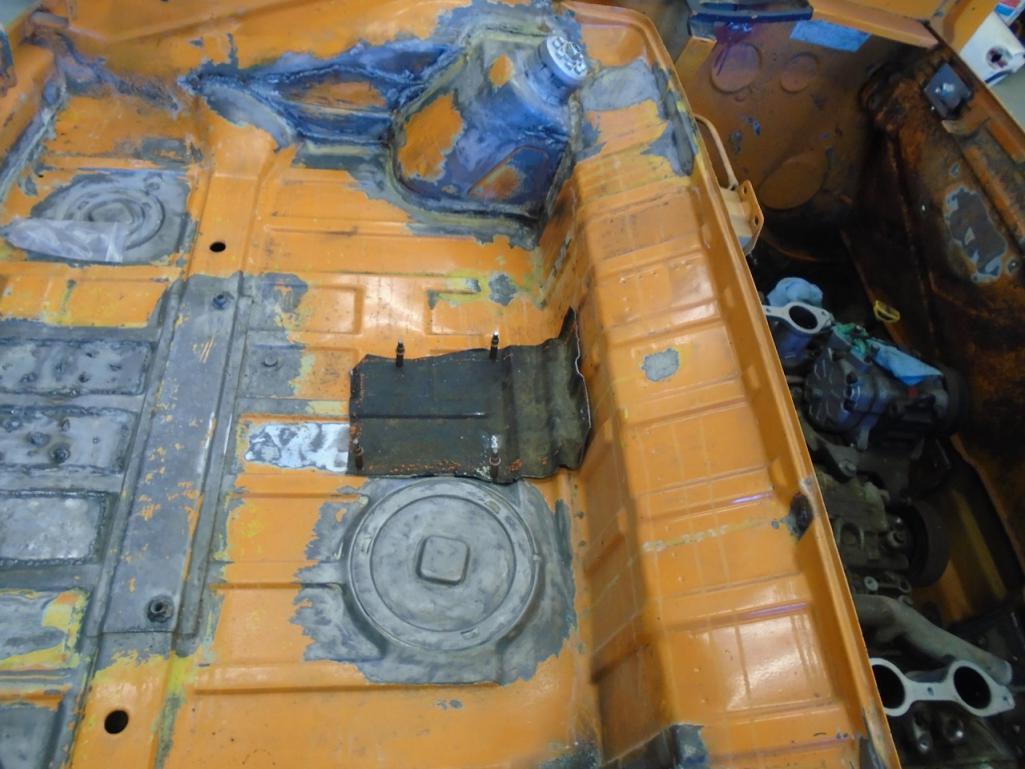
Oh and one last thing, we are coming up on November so I though I would grace you all with my finder. Not making some sort of commit here, just showing how it is healing.
Looks almost normal. Nail still growing out, it has come a long way from being gone.
This angle you can tell how well I screwed it up.
I am grateful everyday that it turned out as well as it has. Could have been so much worse, I am one lucky SOB. And so glad I went to an ER that was trained to do hand reconstruction. I have full feeling in that finger, matter of fact I can feel a bone spur in it. But then again, it could have just as easily been gone.
Posted by: 914forme Oct 29 2016, 05:28 PM
Family had other plans last night so that gave me some spare time in the garage. Whats a guy to do.
Well first things first finish a couple of other projects.
Engine stand finished welding up the last caster mount and mounted these casters.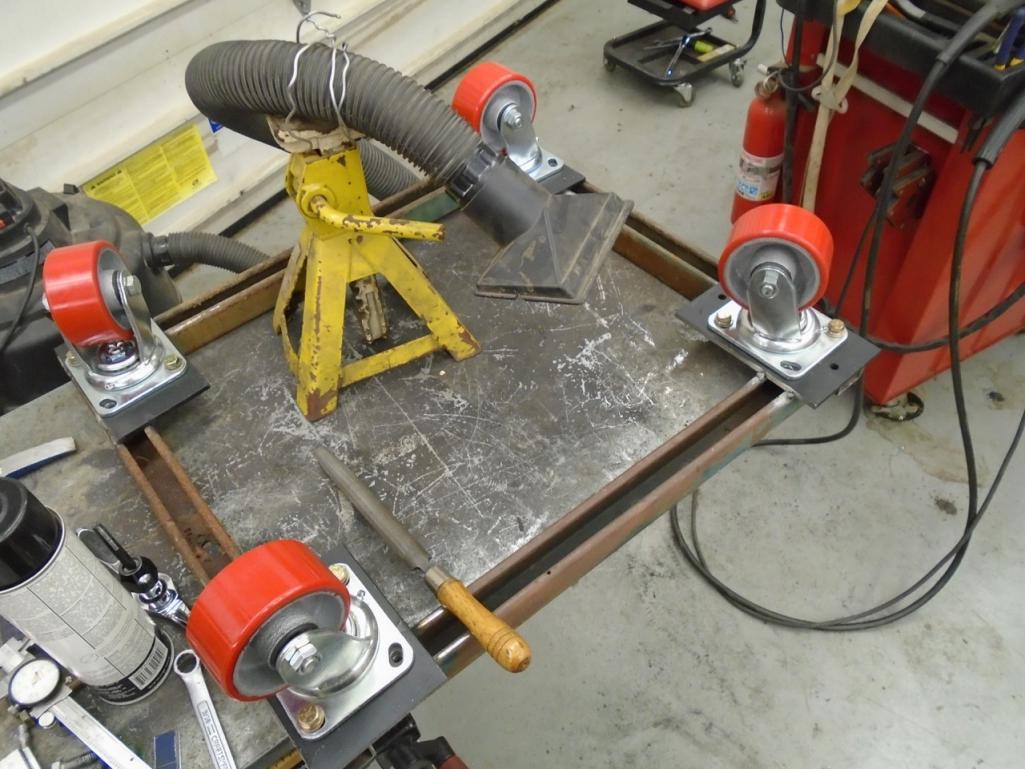
Next up cut the swaybar arm I did not finish last week.
Next I got to work on a new project. Needed to figure out where and how the cables are going to go, so I followed an epic build "Jeff Hail's Bring Out the Dead thread, and so kindly lifted this idea out of it.
So first up the frame: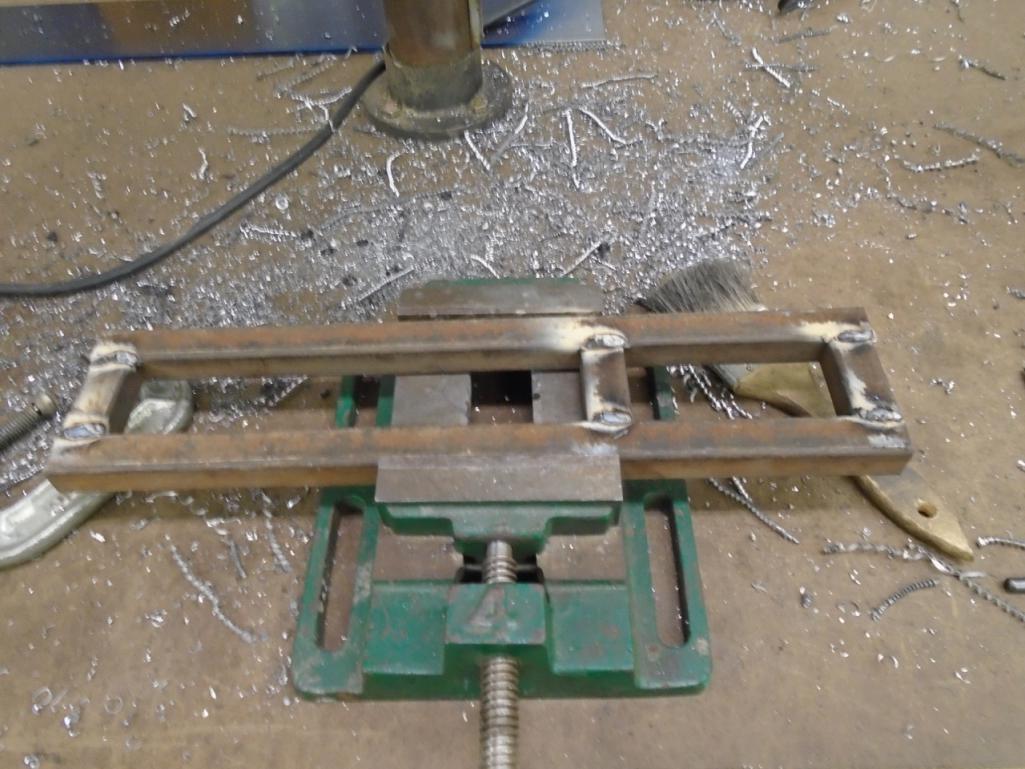
Next up these little beauties.
Made the with my two most used tools in the workshop now.
Horizontal band saw 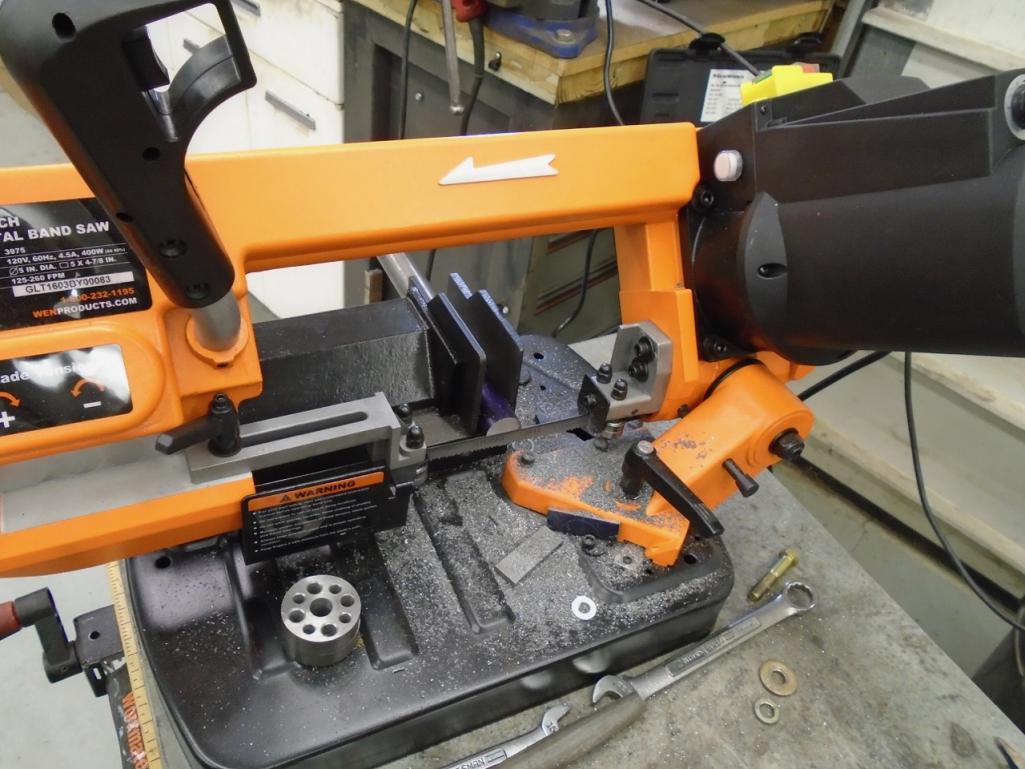
And my Sherline Metal Lathe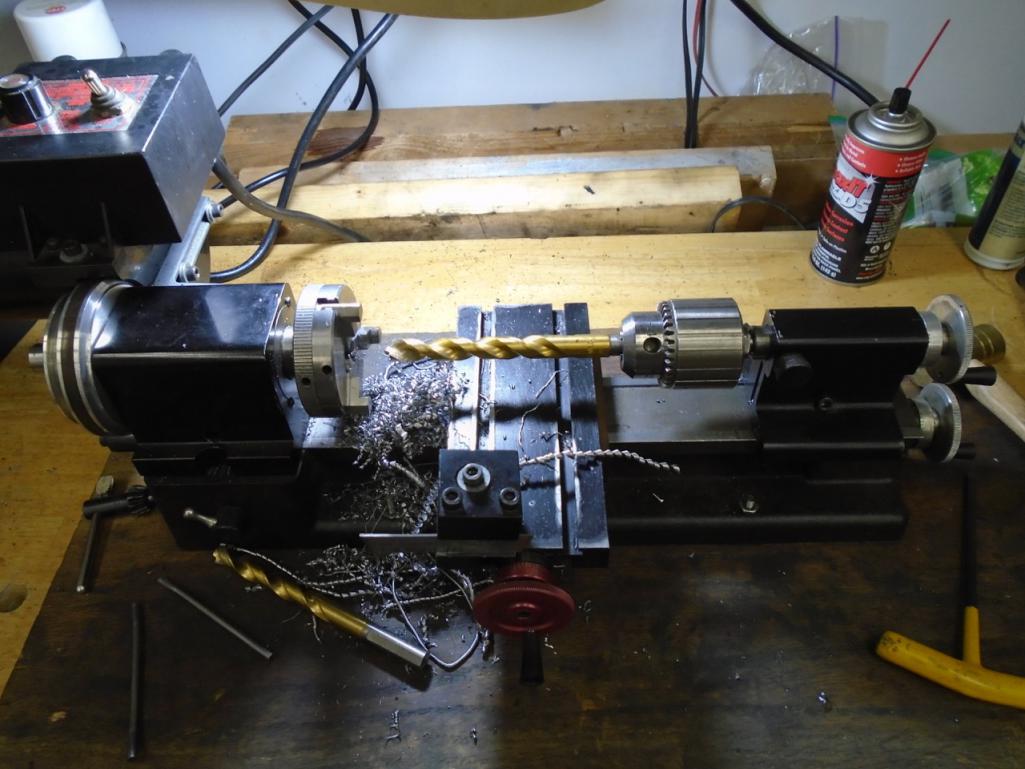
This is the parking brake handle I used out of an 90-98 964. Has a flat bottom. Early 911 will also work, and be more traditional. That later 911 and Boxster stuff will work, but requires a more complicated mount.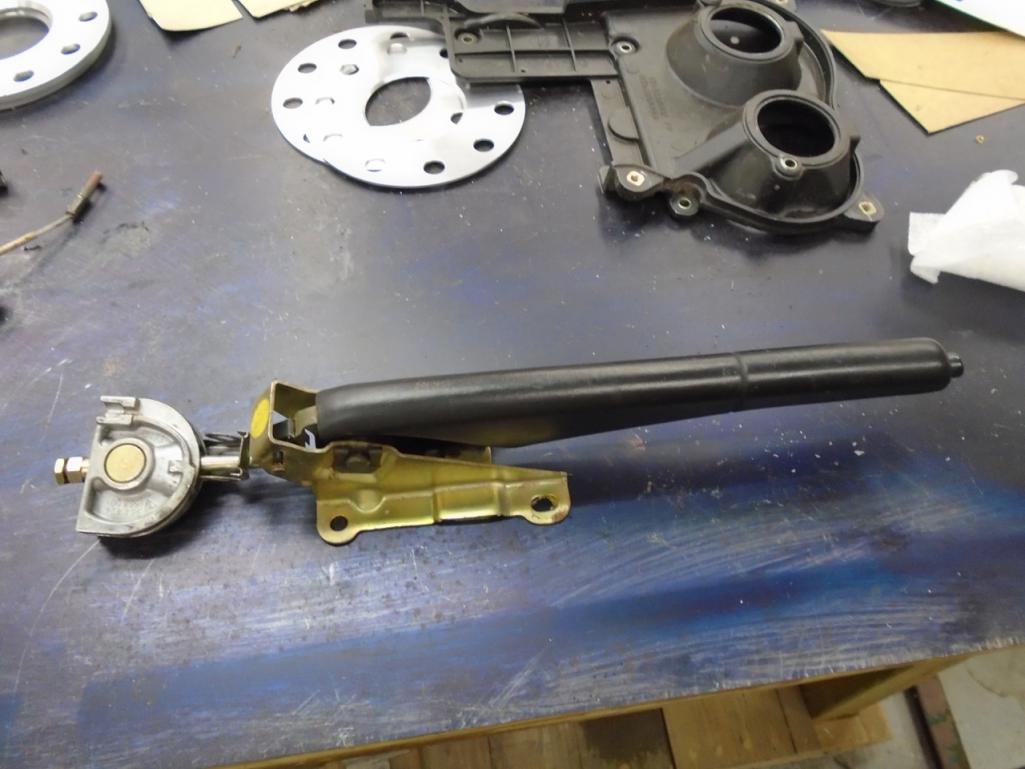
Today
I milled down one side of the cable stops, welded everything up, and it works, Here is where and how I am installing it in my 914. I will need to add some pieces to bolt it to the tunnel.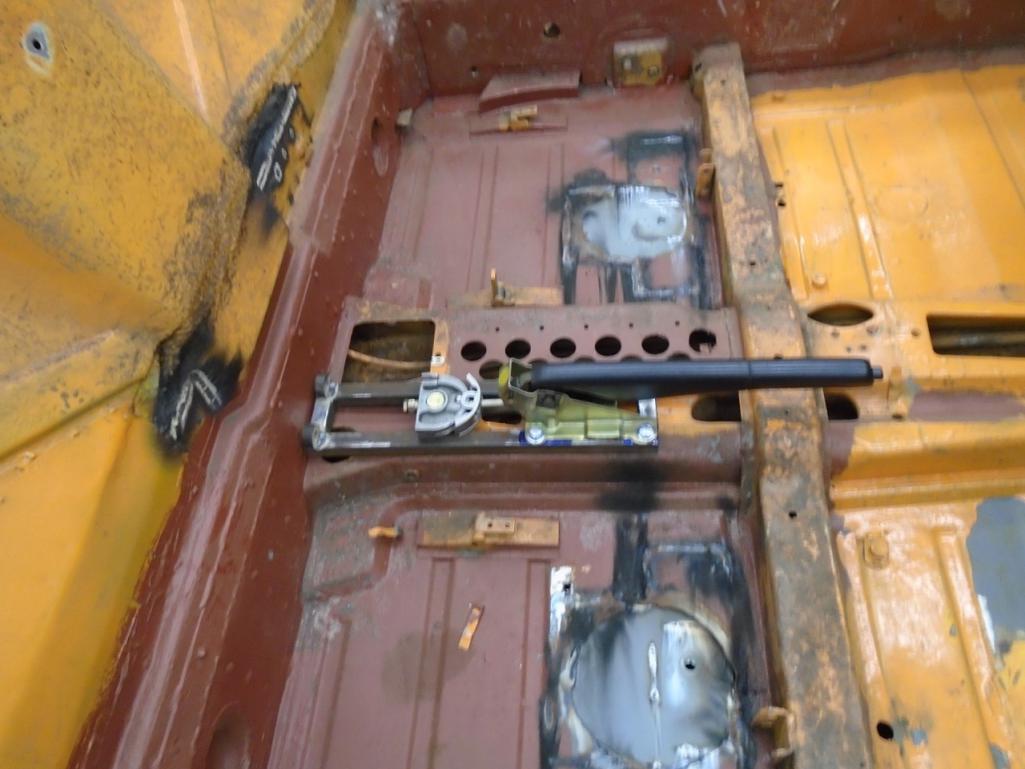
I then switched gears and un wrapped the unknown seats I purchased. They are Cobra RS's very nice.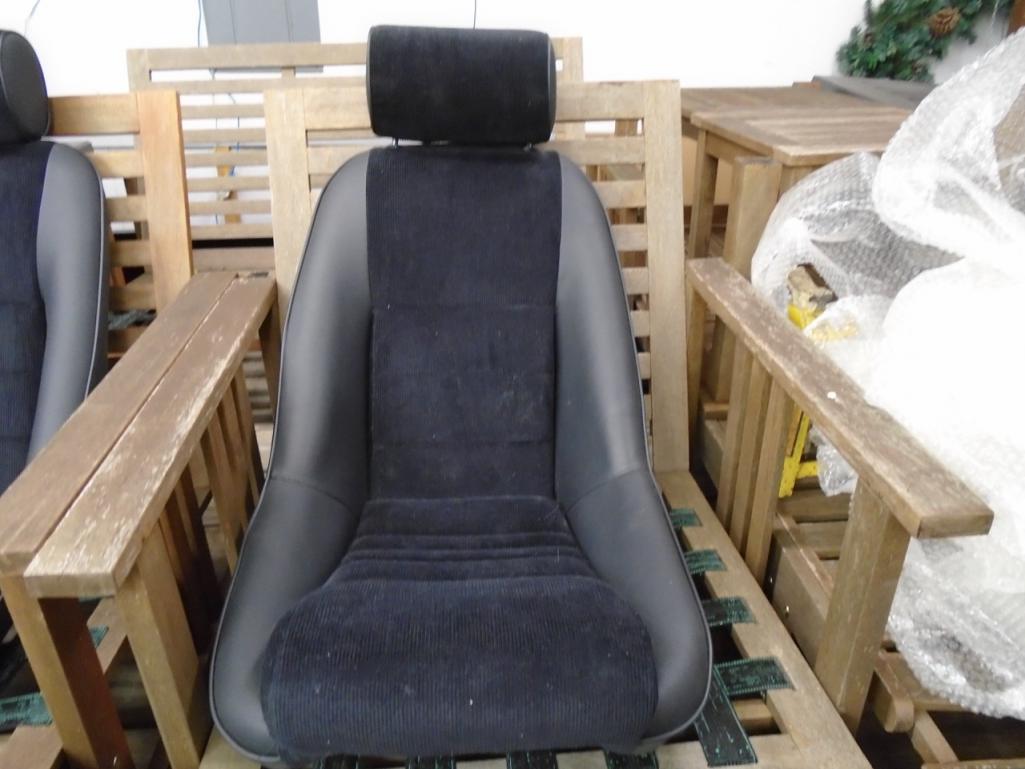
Had to toss one in the car and see how well they fit you know for testing purposes.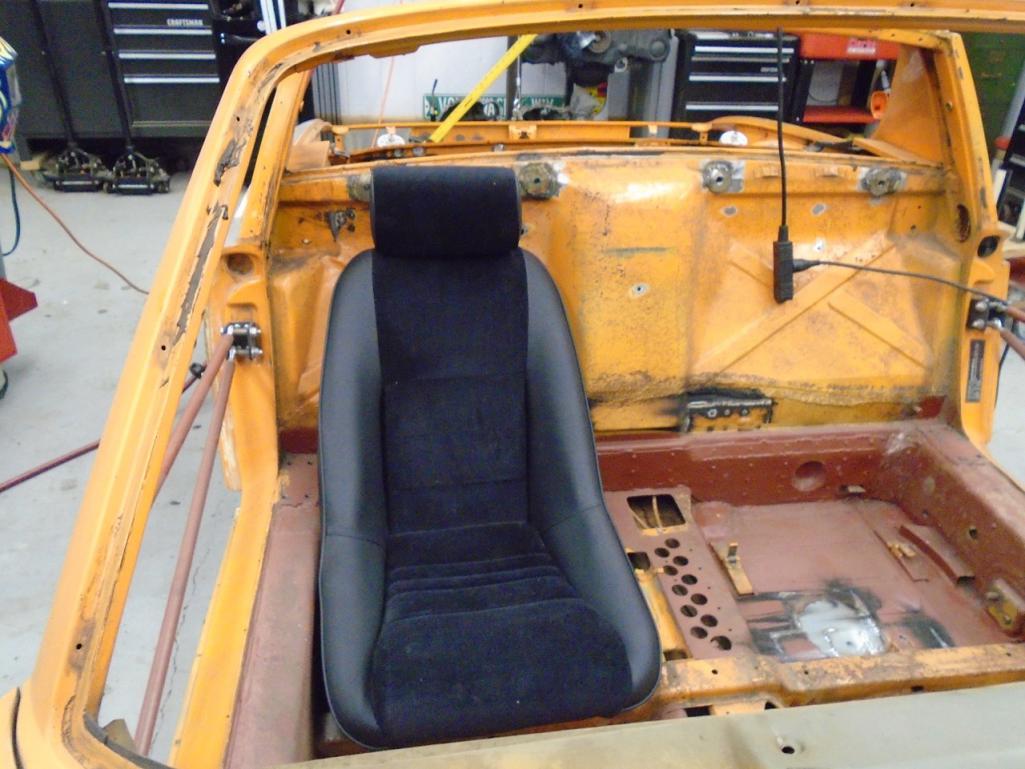
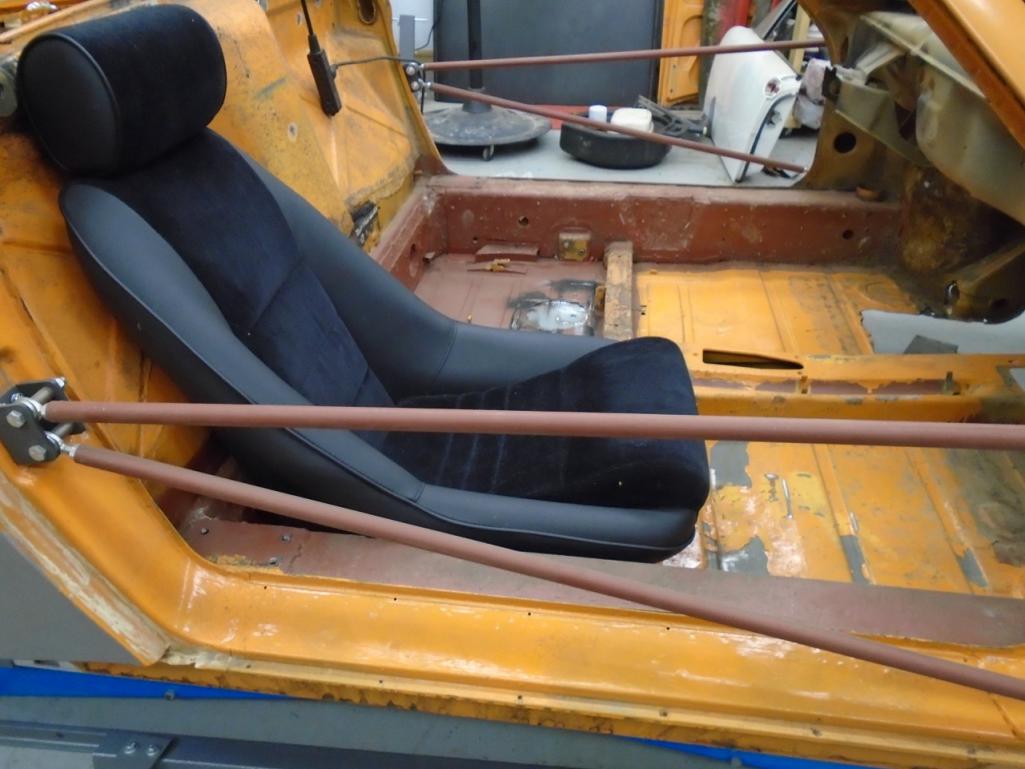
Not bad I think I can make these work. So I sat in it. My shoulders are way above the top of the seat. Matter of fact they are above the top of the head rest.
Well I guess I will be selling these cheap.
Onto more pressing things getting the car done.
When I bolted up the rear arms and mounted the tires, I had an issue with the new
CFR bracing that it rubbed the tire.
Okay I got a 3mm and 7mm spacers to try and see if I could make it work. At full droop. It works with the 7mm spacer added. Roll the arm up with weight on it, and the tire still rubs, just barely but rubs.
So looks like I will be modifying my new part.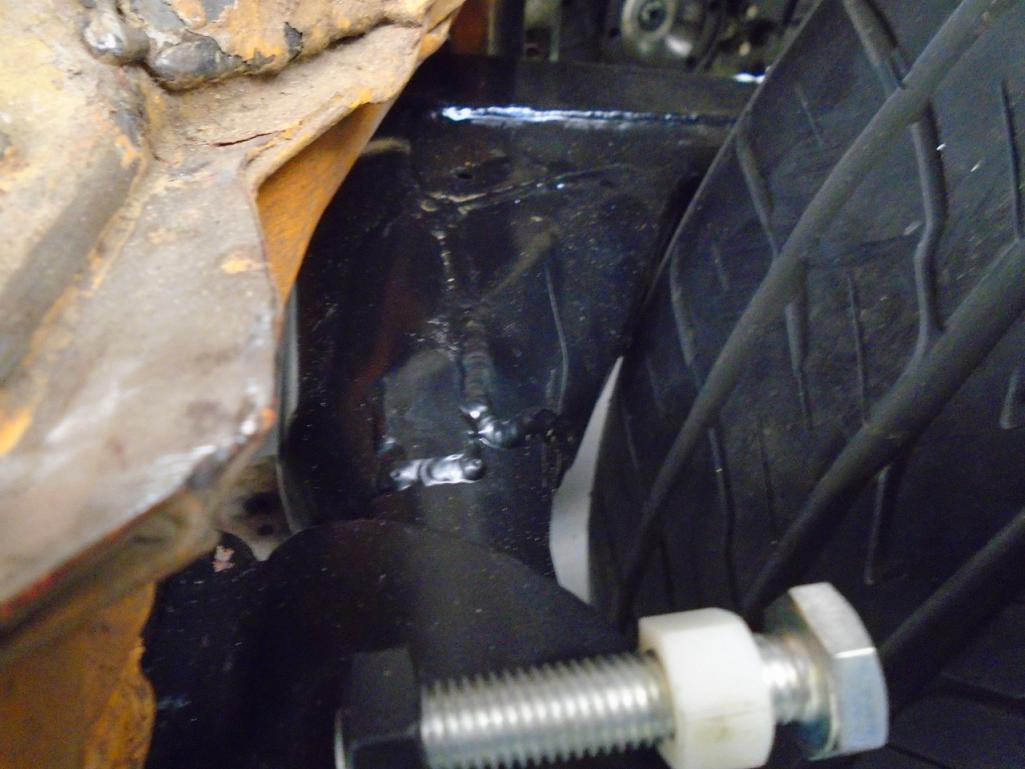
Speaking of modifying CFR parts, well I just had to Chris' stuff is so nice, but I just could not help myself.
Added a Toe Link to the outer pivots and cut Chris' off.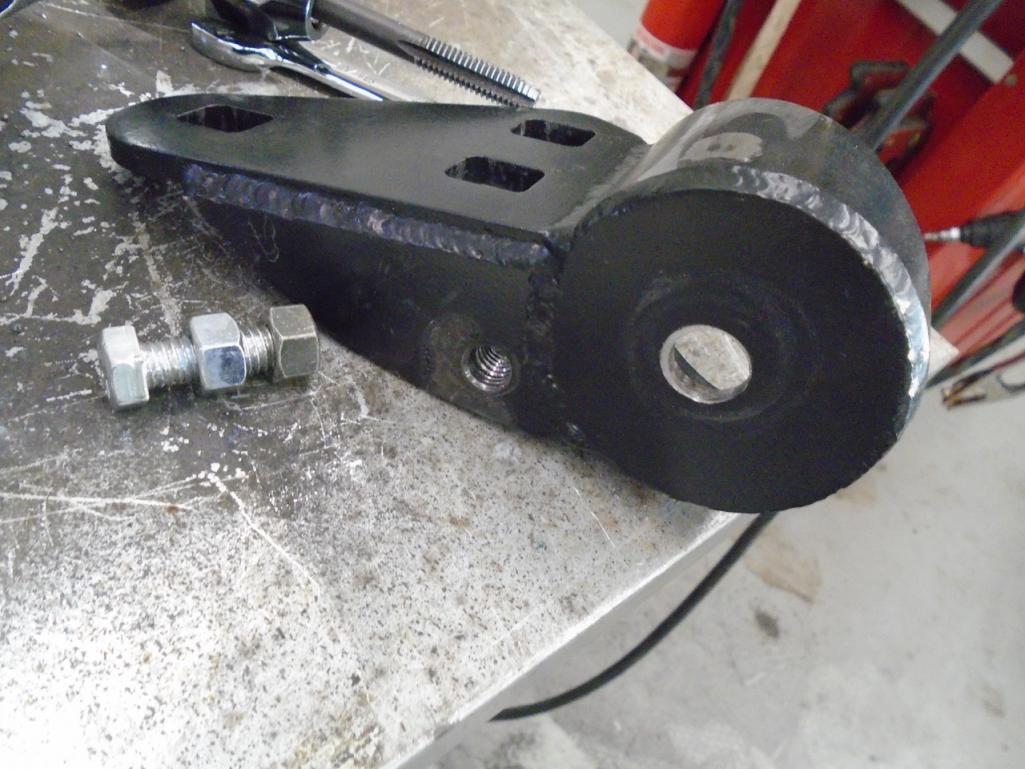
I also machined my rear brake caliper spacers.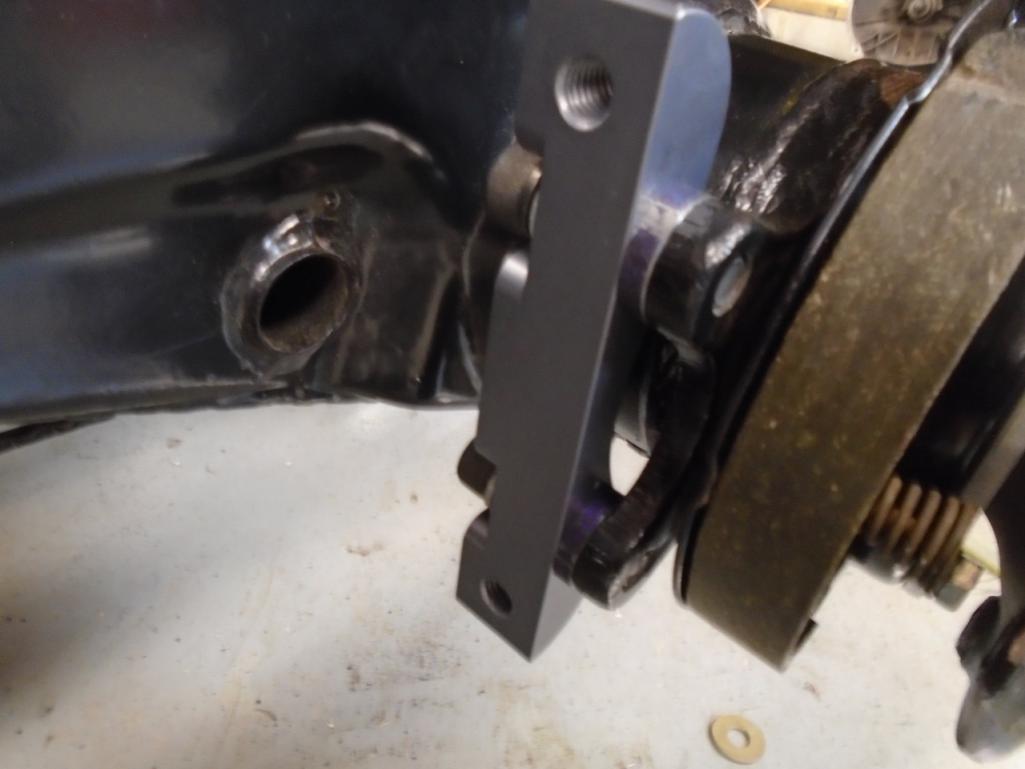
I then took the arms back off, and finished installing the 911 paring brake bows and springs.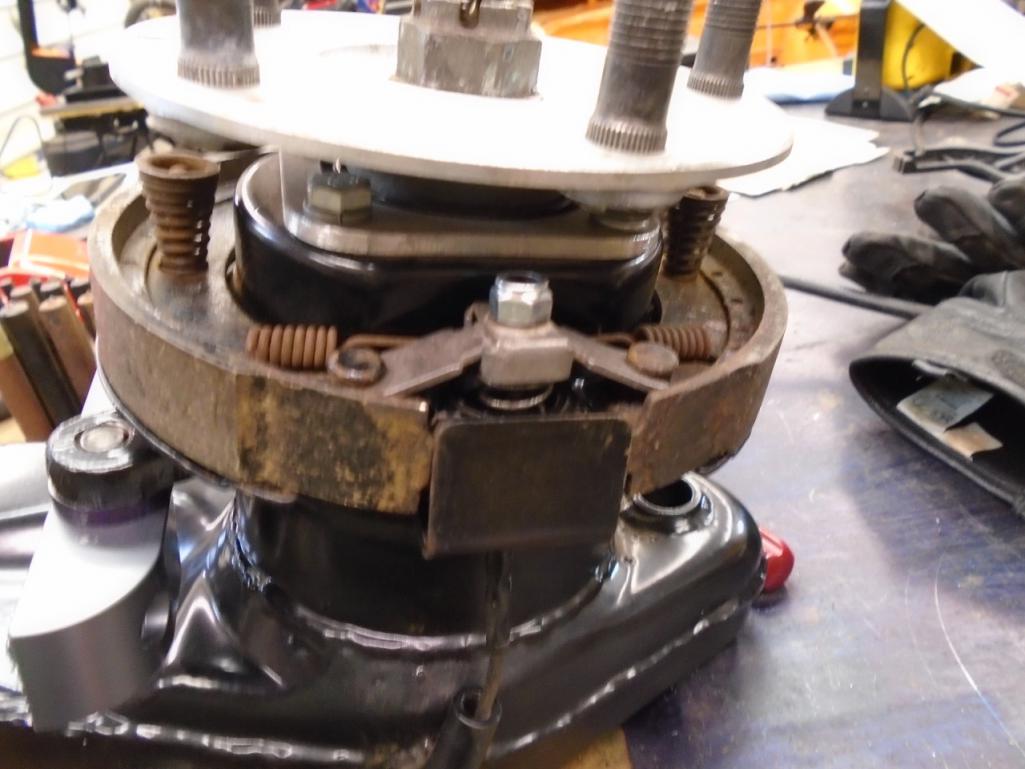
Posted by: 914forme Oct 29 2016, 05:43 PM
Next up tried to install the front struts so I could get some measurements done, and ran into a ton of problems. Looks like the powder coater did not seal the ball joint hole and added a few 1000thds of powder to the surface, making it not fit.
Scraped it out, and then wire brushed it.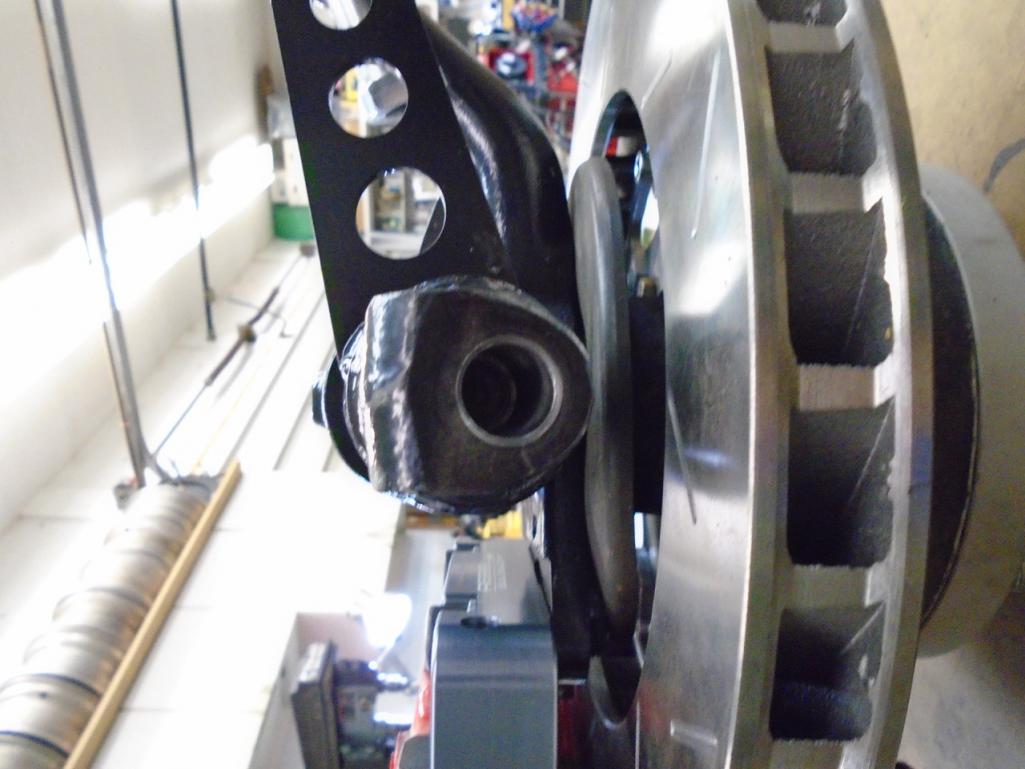
Plumbing tools to the rescue. 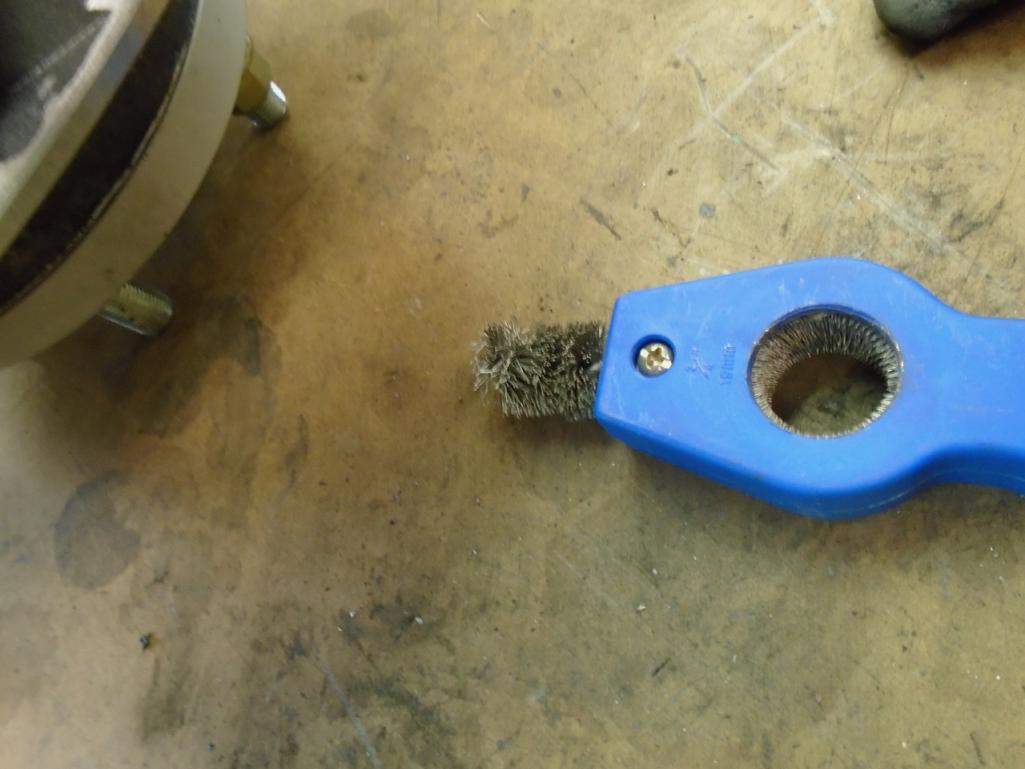
3/4" wire brush worked wonders.
This is the area I will need to modify on the CFR trailing arms. So nice an purdy but you can see the rubbing all ready.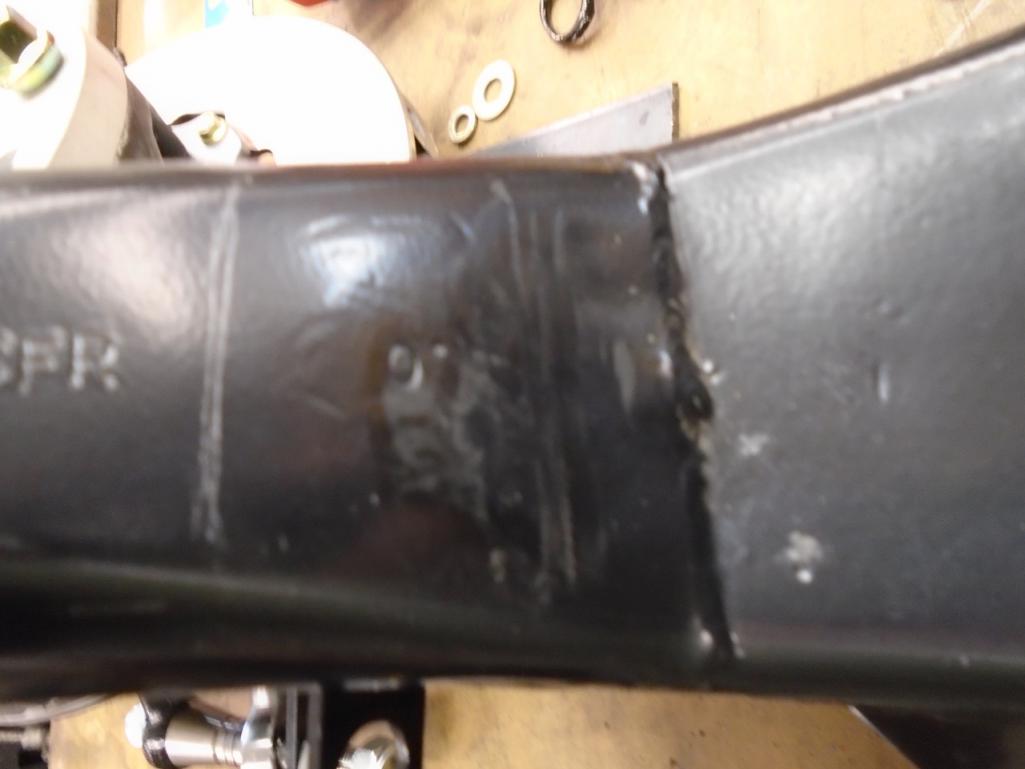
I then started measure up the rear suspension ears and getting ready to some stuff. And found that my ears are off Well I guess now there is no looking back, I need to finish measuring the chassis, make sure it is still square and I did not twist it at some point. I had one off track excursion a while back, and hit a drain culvert. No apparent damage, and the car always aligned just fine. One of the ears is off, not sure which one, but it is. At least according to my rear suspension fixture.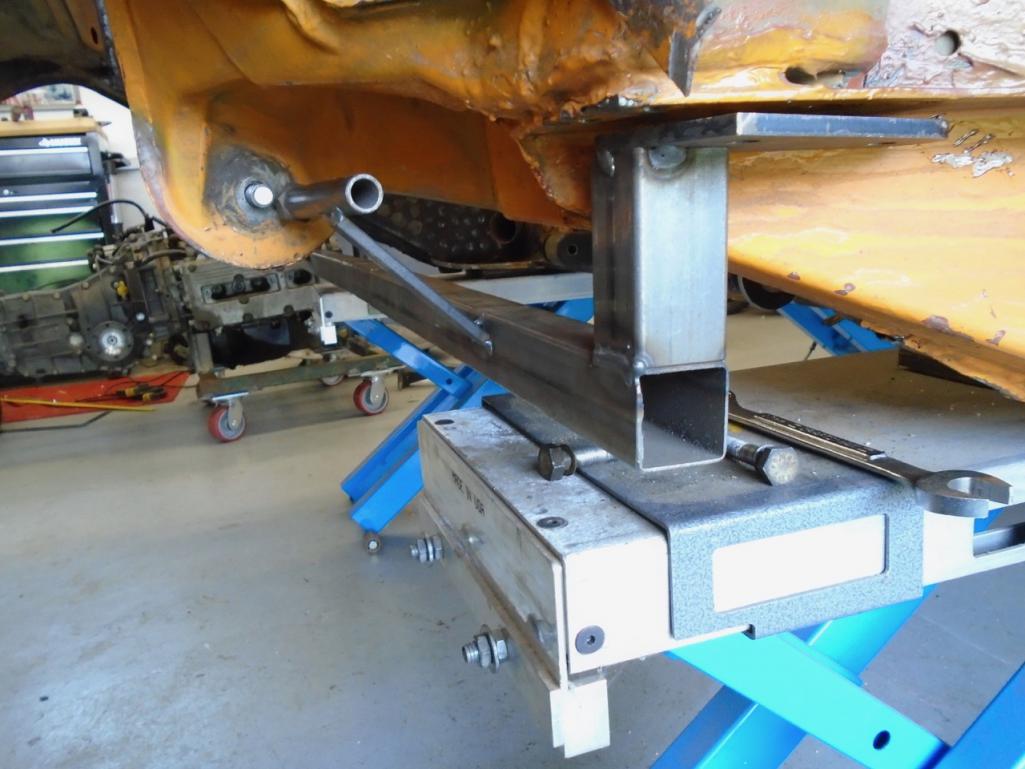
Finished off the day with some panel fitting in the rear trunk, and did not take a picture of it, but then it is not done.
Tomorrow I will check my measurements, and then grab the and see whats up. Seems like somebody really wants me to move the rear suspension points. Maybe it is Chris' way of hexing me for modifying his nice shine parts.
I also need to spend some time with some cardboard, tape, and a measuring tool. I have an more than likely it will not work. I m really hoping it does.
Posted by: tygaboy Oct 29 2016, 06:34 PM
CFR trailing arms, center mount ebrakes, changing suspension points... you and I share the same great ideas!
I am watching closely and plan to steal shamelessly! Keep up the great work!
Posted by: mbseto Oct 31 2016, 10:05 AM
Looks like you are making up for lost time!
Posted by: 914forme Oct 31 2016, 12:22 PM
Nope that time is lost, this is just my normal pace on anything I focus on.
Yesterday.
Where the heck did I put the scribe, which lead to me cleaning the shop, which lead to me finding the scribe and which lead to me thinking I need to purchase more scribes!!
All the metal lost from the work on Friday and Saturday. Always make you feel good to have a pan full of shavings.
I then got to work on the rear trunk fill section. I got part of it to level out, then tack, hammer, grind, tack, hammer, grind, tack, hammer, grind, etc.... Welder was running like crap. Would barely do anything, checked everything over and found a loose ground. Good I thought I found the issue, move on. Then I started back in, still welding like crap. I have gas, so that is not the issue. It is HTP easy grind wire, in a 0,23" diameter. More than likely become filler rod for my TIG, as the stuff just seems to suck. It does grind rather easily, and cleans up well. And to make it all worse when it does start to run correctly, it will break and the feed will ball it up in the machine.
This is how far I got, with it.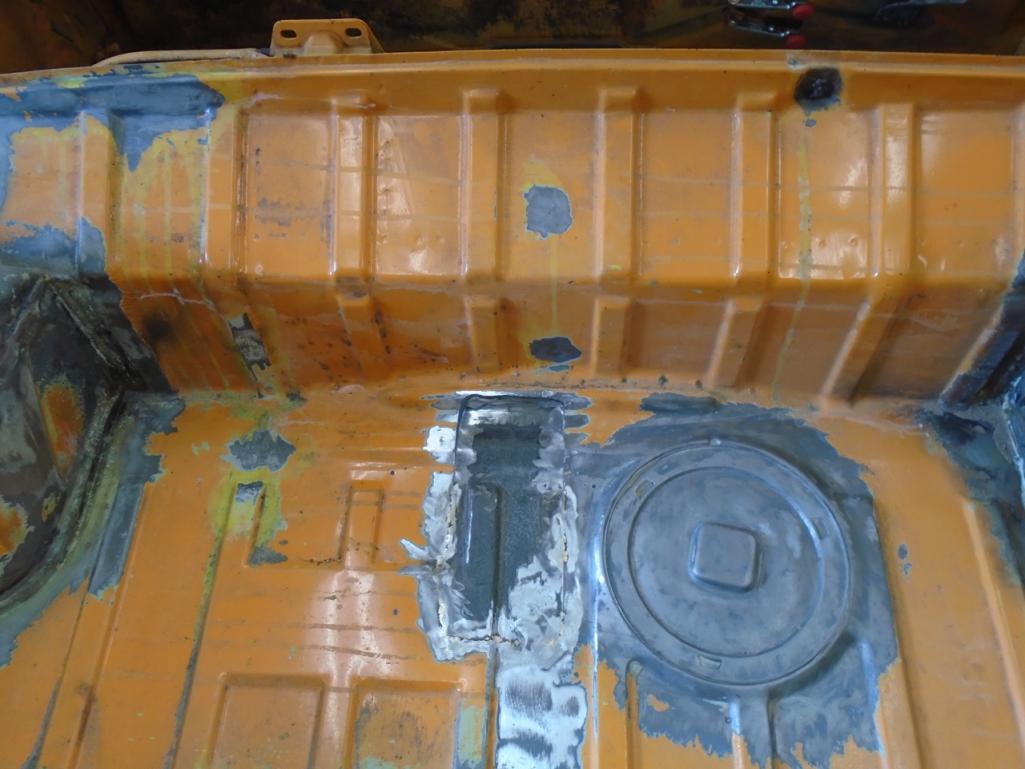
And then I ran out of CO2 /Argon I think I will switch to all Argon tanks, and keep 3 of them around, one on each welder one spare. At least until I finish this project.
Panel fits really tight , I just need to push the upper section into place. I just wedge a 2x2 under the one section, get it just right and
So I have been dreading working on the pedal. All sorts of variables going on, and I keep procrastinating the build. I started with a mockup, but then tossed it away, and just went to metal. Chemdyed it up, and started marking things. A cut here a whole there, a few more cuts and this is what I ended up with.
Need to make a reinforcement piece to reduce flex under the floor board, and also to accept the front suspension arm bolt at the rear location.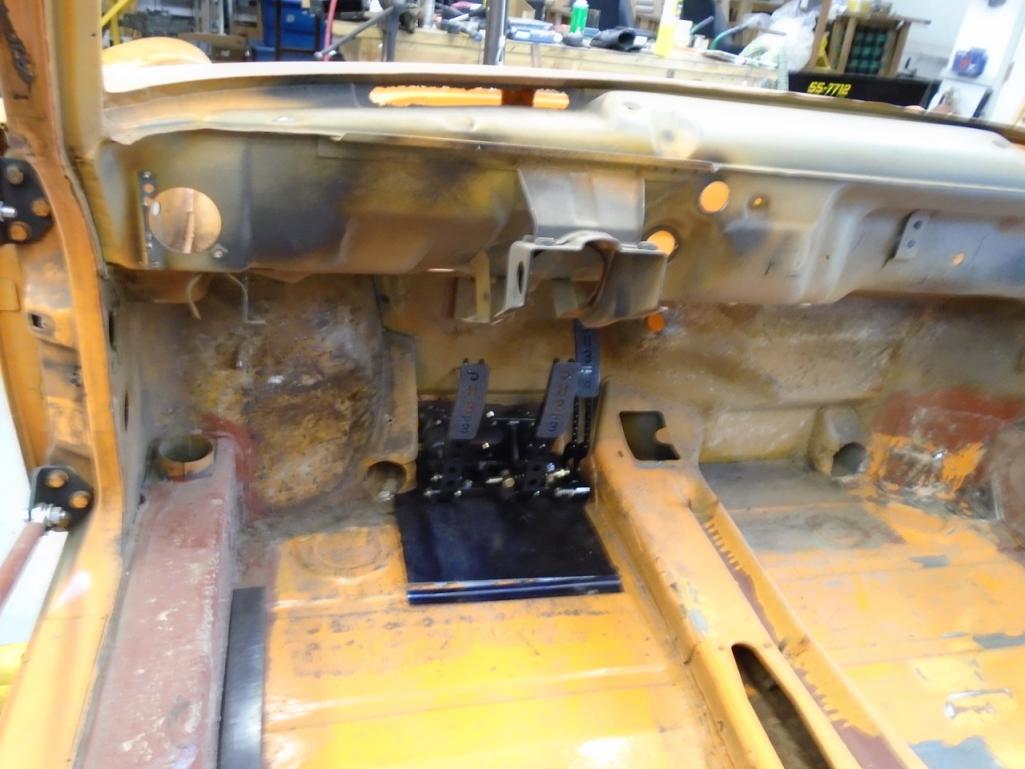
I then started woking the back side, and made a piece to cover the M/C and keep them tidy. I still need to make the two side pieces. This will unbolt to gain access the the MC's just incase you need to RR one of them.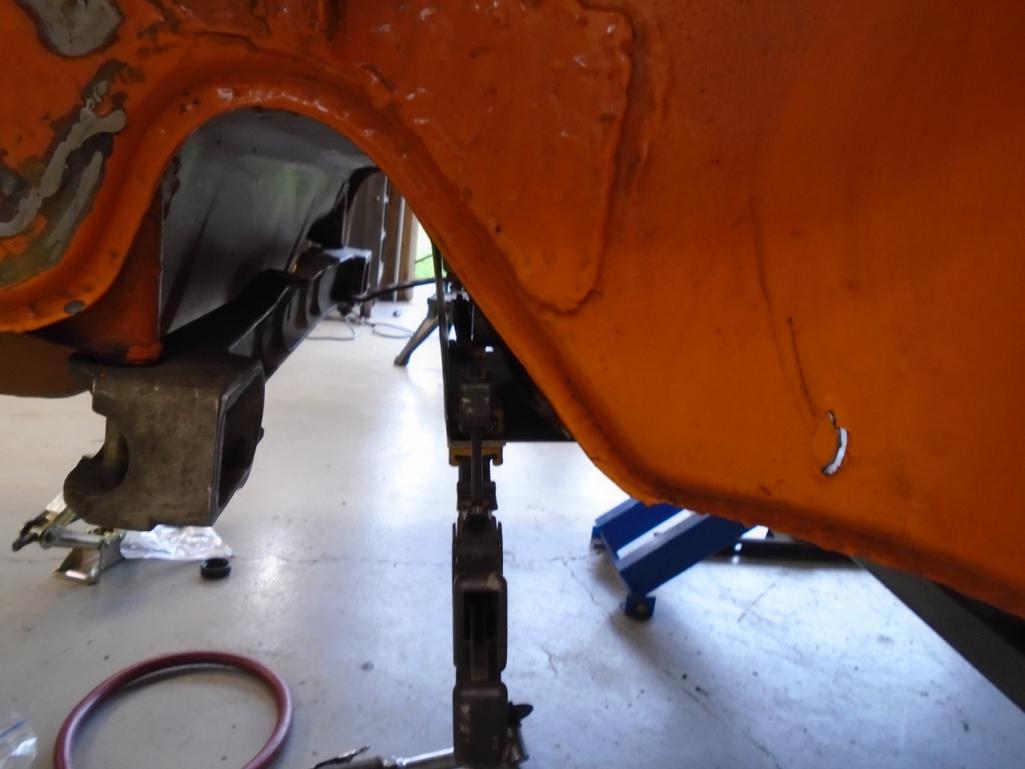
After that I worked on the cooling system placement of items.
I would love to see the front trunk, but can't figure out an easy way to do that. There is room for a 14x12 RAD behind the light buckets into the fender, if you made it 14 x 14 the tubes could be in the trunk area, making it easier to hook up Both sides would have a larger cooling capacity than my current griffen, so that is doable That leads you to no 14x14 rads unless you get the custom made. And that equals $$$$
So long of the short, I still have not quite decided how to mount the rad. I do know that it will most likely change several times before I get the final pieces done.
Posted by: Racer Chris Oct 31 2016, 01:01 PM
Stephen,
That tire rub spot on the trailing arm reinforcement can be mitigated by carefully "denting" the reinforcement with a hammer.
Posted by: Andyrew Oct 31 2016, 01:46 PM
Your sway bar setup looks familiar!
Yours however is finished while mine has been unfinished for 10 years...
http://www.914world.com/bbs2/index.php?showtopic=50483&hl
Your progress makes me jealous!!! 
Posted by: 914forme Oct 31 2016, 05:08 PM
Stephen,
That tire rub spot on the trailing arm reinforcement can be mitigated by carefully "denting" the reinforcement with a hammer.
Oh thank you Chris,
it isAndrew, I can't remember when I did the swaybar. I have run it for a long long time, and it works great, the bearings actually make it hard to setup the bar, as it rotates all the time. Once it is done, smooth as butter. But then great minds think alike
Posted by: 914forme Nov 3 2016, 06:43 PM
Tonight I messed around with the placement of items.
I followed Scott's lead with PORSTI and got a 15 gall tank for the front trunk. Also figured out my rad venting through the hood. Will be filling in the side discharges. Might add a tube to feed my brakes cool air.
I was then working on a way to get some front trunk space. Finally gave up on that idea, just to much stuff going back into the car, and the fuel tank area will be filled with fluid canisters, Heat and AC comments, and a battery. I might have enough room for a cooler up there, that would be nice. Or maybe a spot for a small tool box spare parts for road trips.
Lots of space in there, but just don't feel like building custom box sections and the like. Who knows, I might get there still, right now I have 6 months to get this thing on the road to make a goal I have.
I also put the Career seats back into the car, and a stock seat. there is 3/4" different. with the stock top I fit, with 3/4" head room. So my head scrapes with the Carrera seats.
But if I put the 944 roof, I have room And I even fit with my helmet on if I open the sun roof, which I planned on doing anyway to vent cabin pressure. So Woo Hoo!!!!!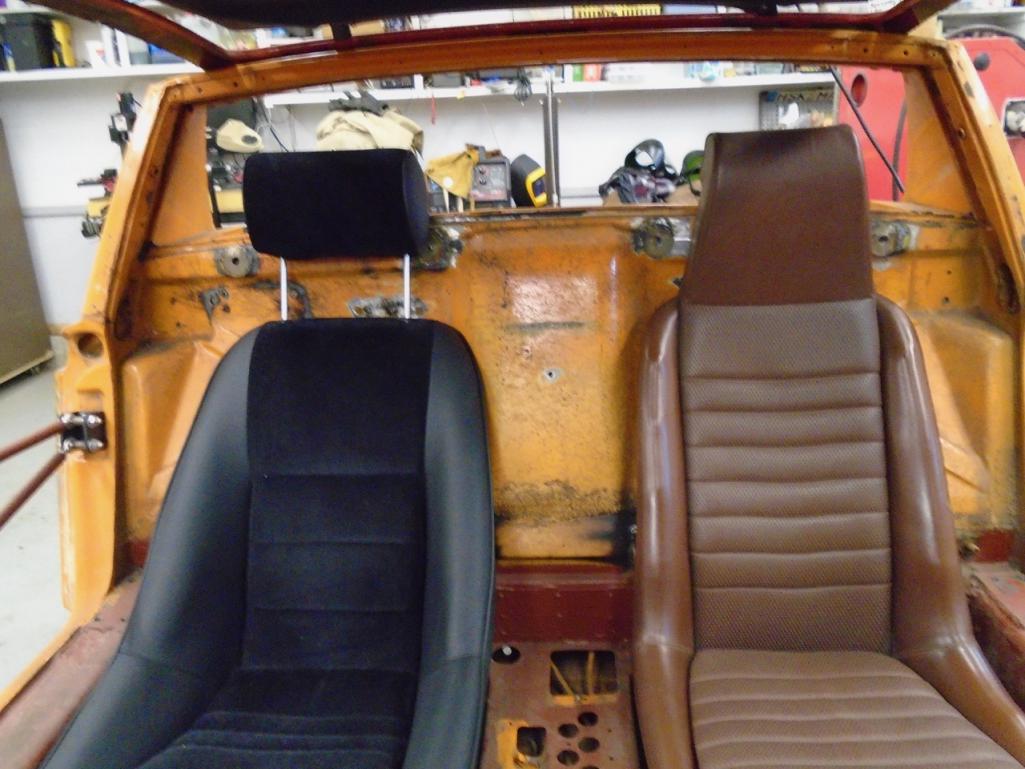
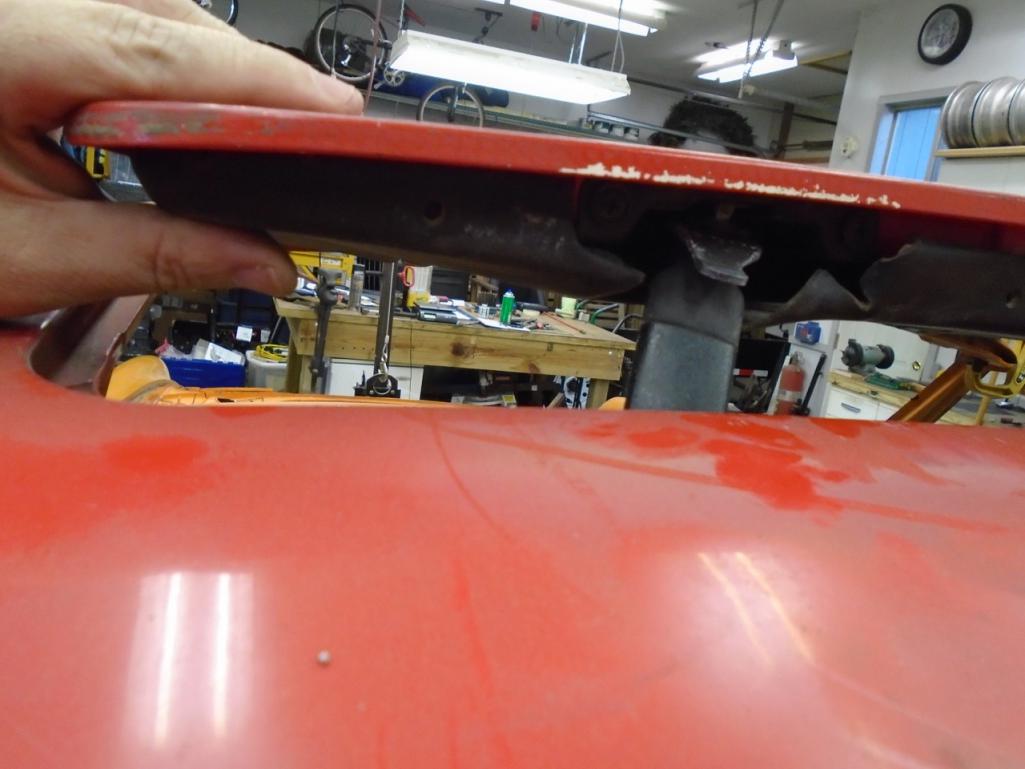
Now I have to do the 944, Also have to tell a buyer I changed my mind and eat crow.
Posted by: 914forme Nov 6 2016, 06:46 PM
Well another weekend come and gone.
I spent most of the weekend working on winterizing equipment, and doing some brake work on our work truck. 209,000+ miles the backers are toast, and had to order some new ones to get the truck back on the road.
But while I had down time, I got some stuff done on the 914.
Started working on the front, as well it is what was accessible. So I wanted to finalize the front rad opening and made more questions that I started with.
Prepped the front spoiler, man this thing does not fit well. But I got it close, will be opening up the front sheetmetal. I will make a transition piece to funnel air into the rad space. The spoiler lip will sit over the top of it.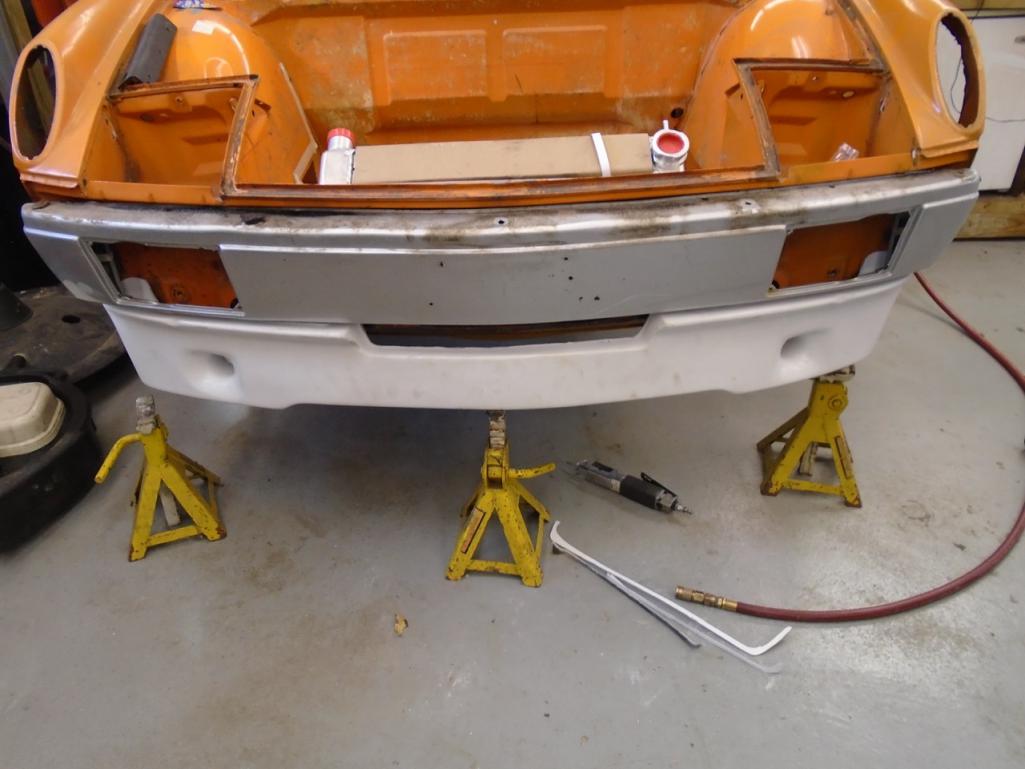
I am not trying to decide if I open up the bumper. It would only be up an inch, but would make an interesting transition. So I think it will happen.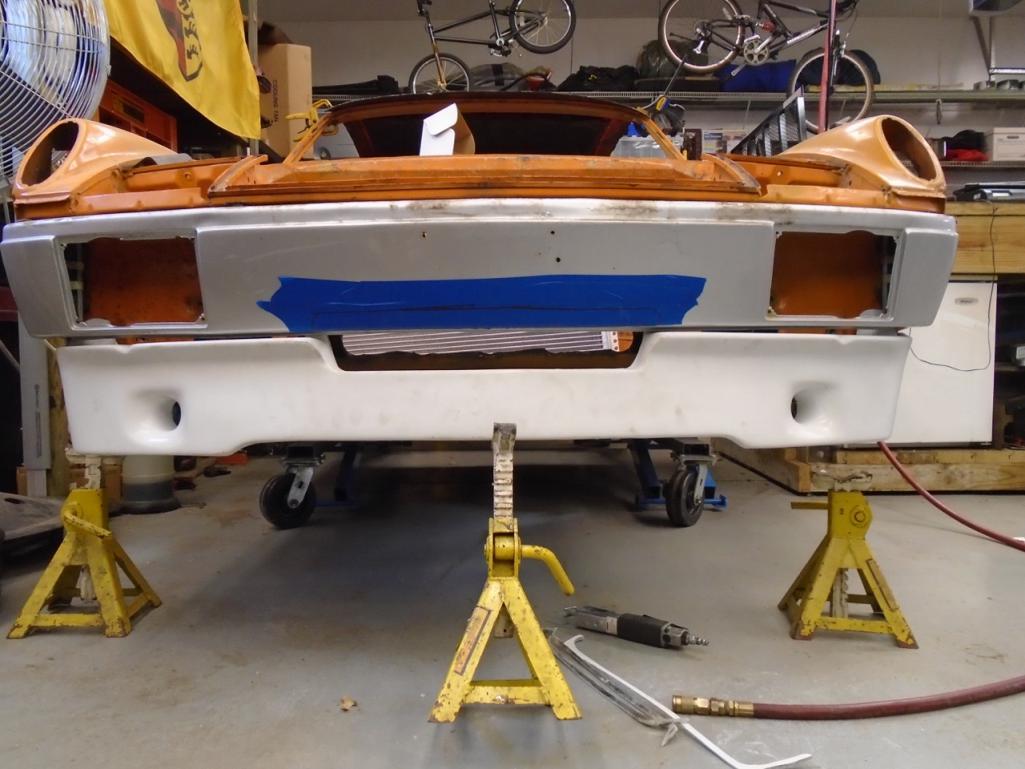
With that setup done and decision made, I moved onto the rad mount mockup and decisions on how I am going to mount all this stuff. I used the stock Subaru rad mounts. 
These will be threaded for the bolts and welded onto the chassis.
I then jumped in with both feet, and cut a shock tower out. Why the Hell Would you do that
To install these
Another item from Mr. Foley and Tangerine Racing. Camber boxes, it fixes my nice camber and caster enhancements. I used a big hammer, powered by air, and a cut off wheel.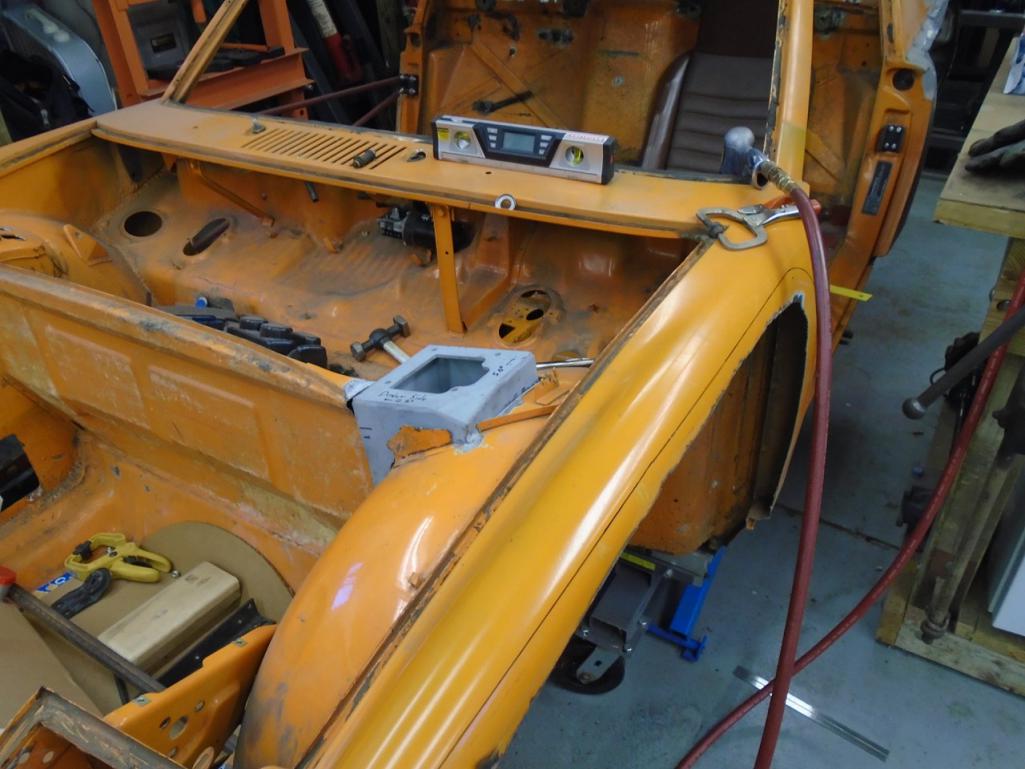
I don't have access to the other side, so I jumped to the last thing for the day.
I removed some of my swaybar re-enfoecments, so I could add a section around cut out to re-enforce that area. So lots of grinding and cutting to get a 1" strip out so I can just weld in another piece of 16 gauge.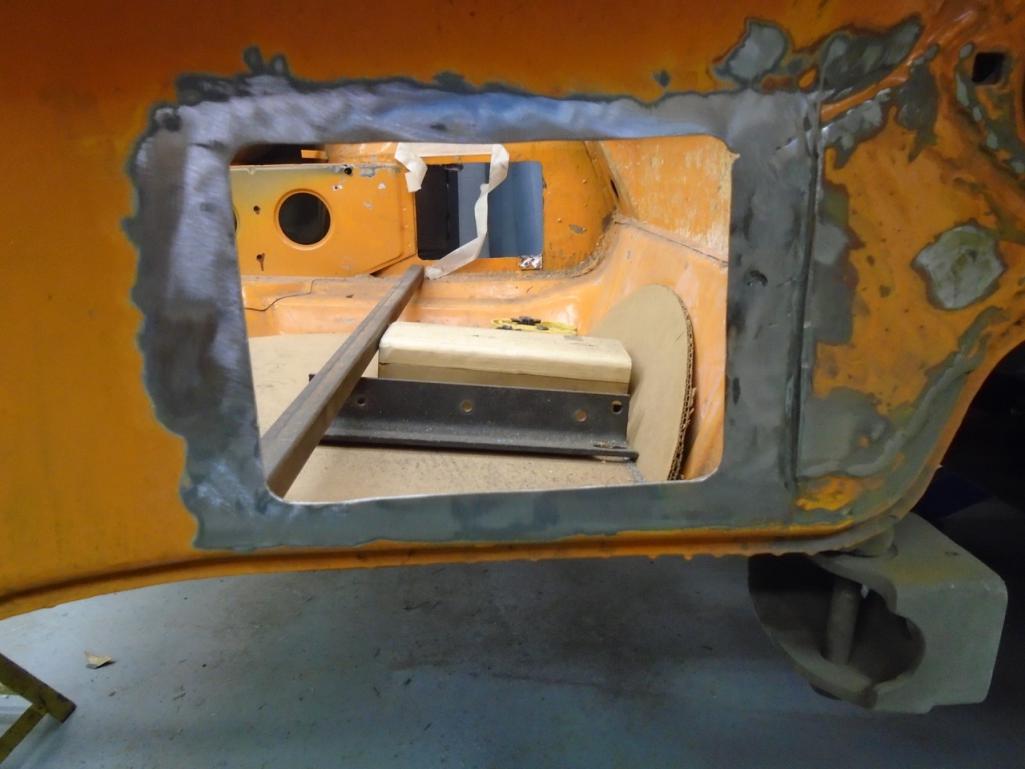
Posted by: Amenson Nov 7 2016, 09:04 AM
I removed some of my swaybar re-enfoecments, so I could add a section around cut out to re-enforce that area. So lots of grinding and cutting to get a 1" strip out so I can just weld in another piece of 16 gauge.
...and I am sure you will weld it back in using your fancy new TIG welder so that you don't have to grind welds when you are done
Posted by: mbseto Nov 7 2016, 11:16 AM
Looks like you are making up for lost time!
Nope that time is lost, this is just my normal pace on anything I focus on.
Well, heck, you should swing down to Cincy sometime!
BTW, for future reference, re: post #292:
...should you need to remove powder coat ... CRC gasket remover...
http://www.914world.com/bbs2/index.php?showtopic=275673&st=20&p=2304334&#entry2304334
Love all the ideas in this thread.
Posted by: 914forme Nov 7 2016, 12:44 PM
Im down here 5 times a week
Posted by: 914forme Nov 13 2016, 06:42 PM
Well long week traveling and nothing done on the 914 I have real good friends in Vegas though and made arrangements that when the car is done, and sorted, I can ship it out to their place and pick it up for a west coast run. And yes you two can drive it until I get there. make you remember what it was like to drive a real car.
Their current stable includes an M4, I am sure my little 914 will be able to scare the out of them.
One thing I did notice, no E85, living in corn country really spoils us. I can get E85 on almost ever street corner. With E85 in the tank, my little car can take positive pressure with out engine reconfiguration. With out it will have to stay NA
Oh other thing that sucked, coming back from very nice 70 degree 30% humidity to 28 degree and 60% humidity. I need to move desert.
Posted by: 914forme Nov 19 2016, 02:43 PM
Well yesterday UPS man showed up with some new goodies.
Rebel Racing adjustable spring perches.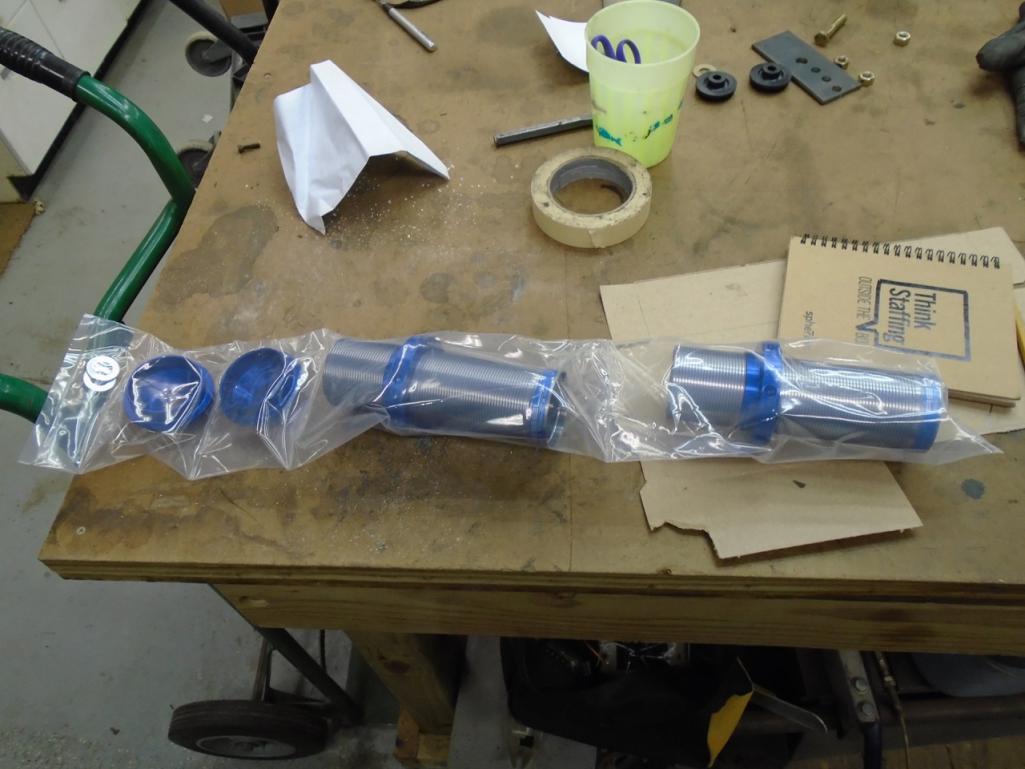
And installed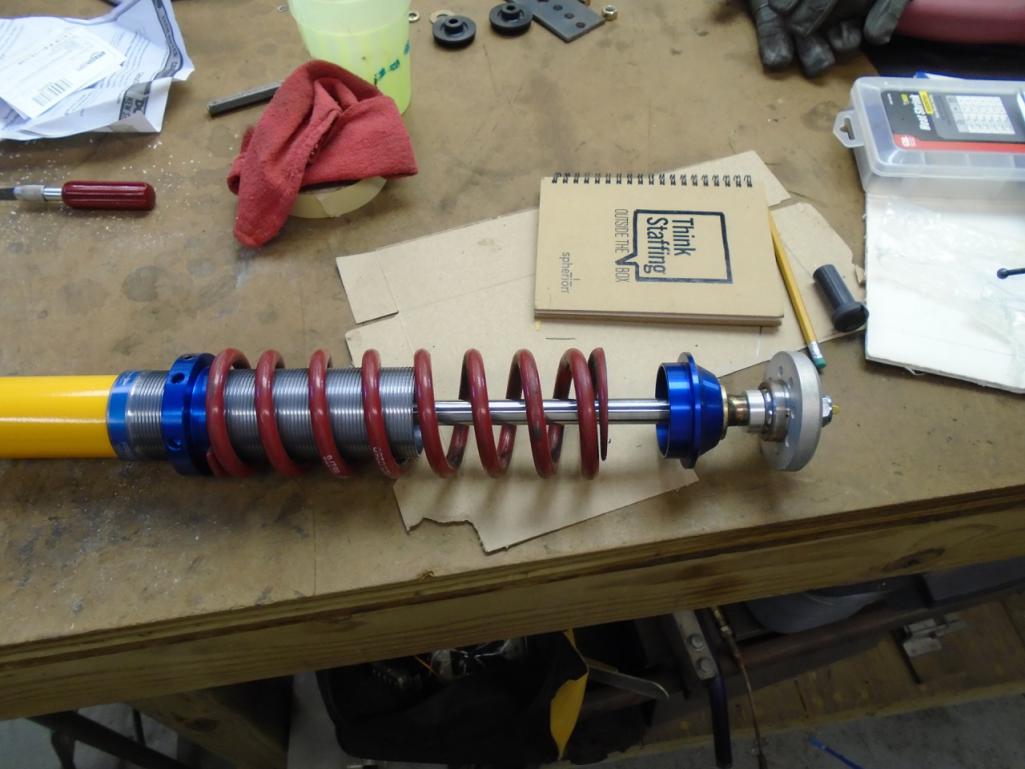
Need a set of helper springs and separator.
Also need to lathe down the spacer again for Tangerine's Rear shock mount. The nylox section is not on the threads.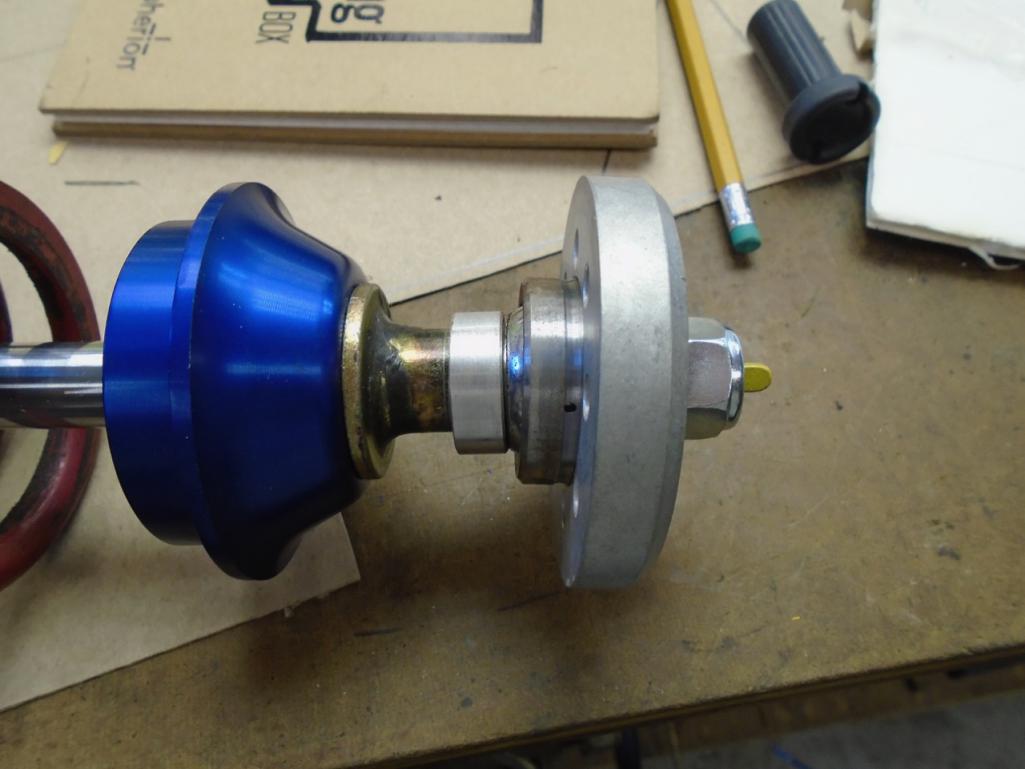
And then after that, I grabbed some sheet metal and :smashed: this out.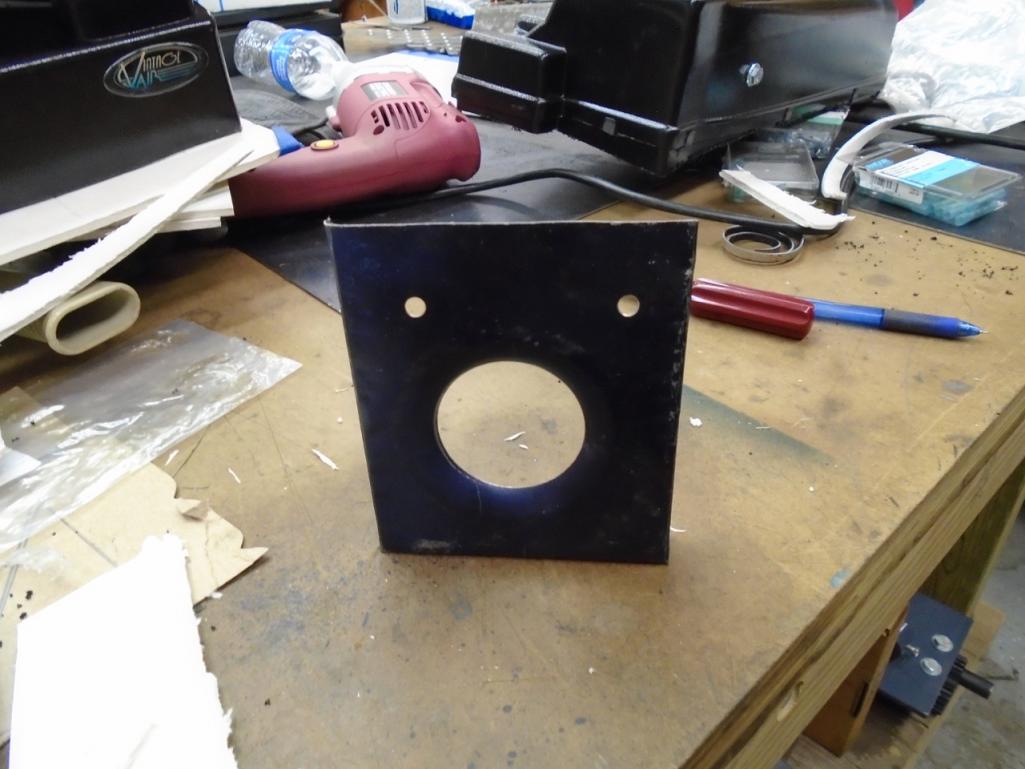
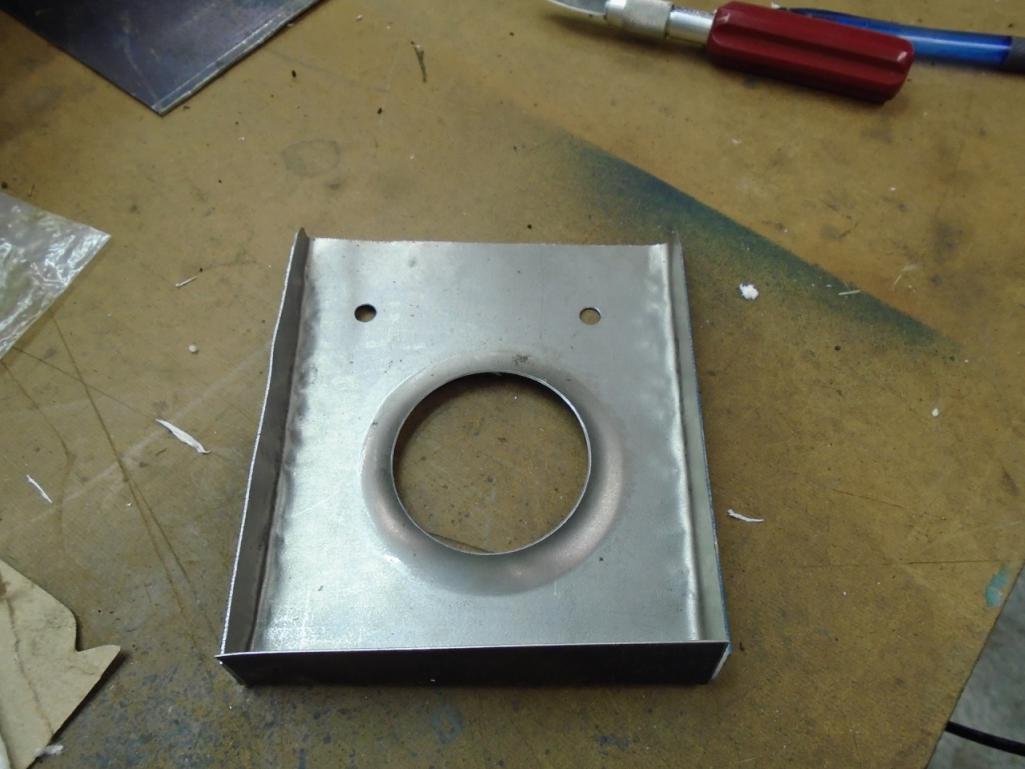
I really need to get myself a brake, but the vice does such a nice job. All the hammer marks
Oh it also shows the flare detail.
And this is what it is meant to hold.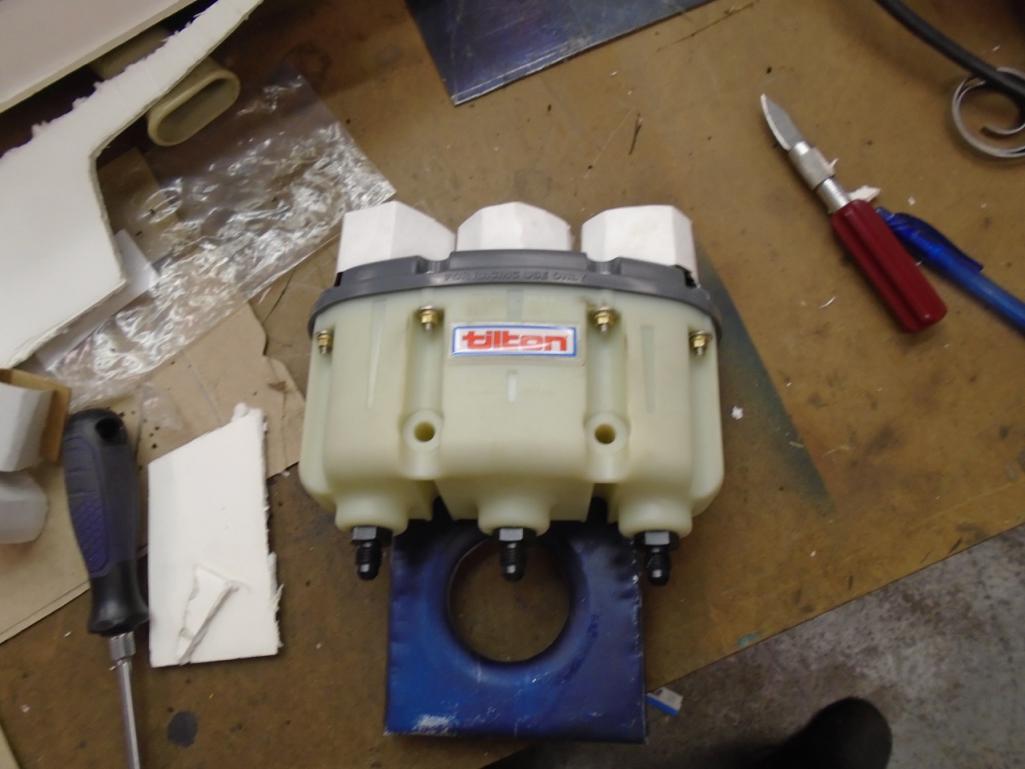
Then today I worked on my Truck, and then got a bit of time on the 914.
Started working on the fuel tank, it is related honestly
Drilled it for the in tank fuel pump.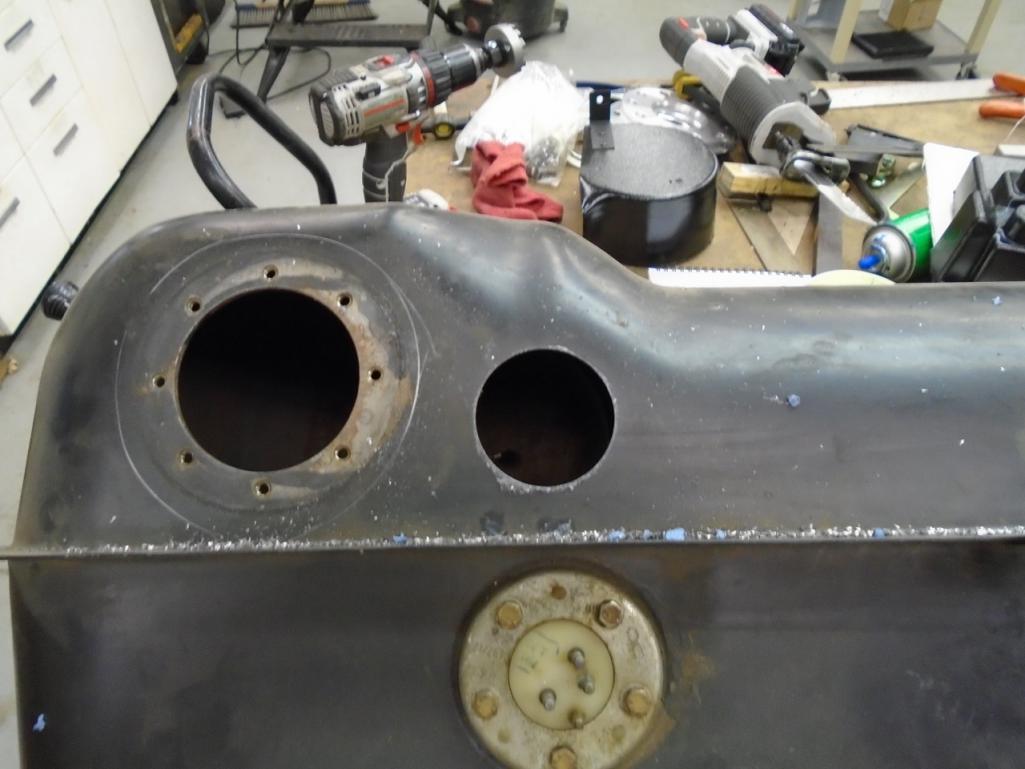
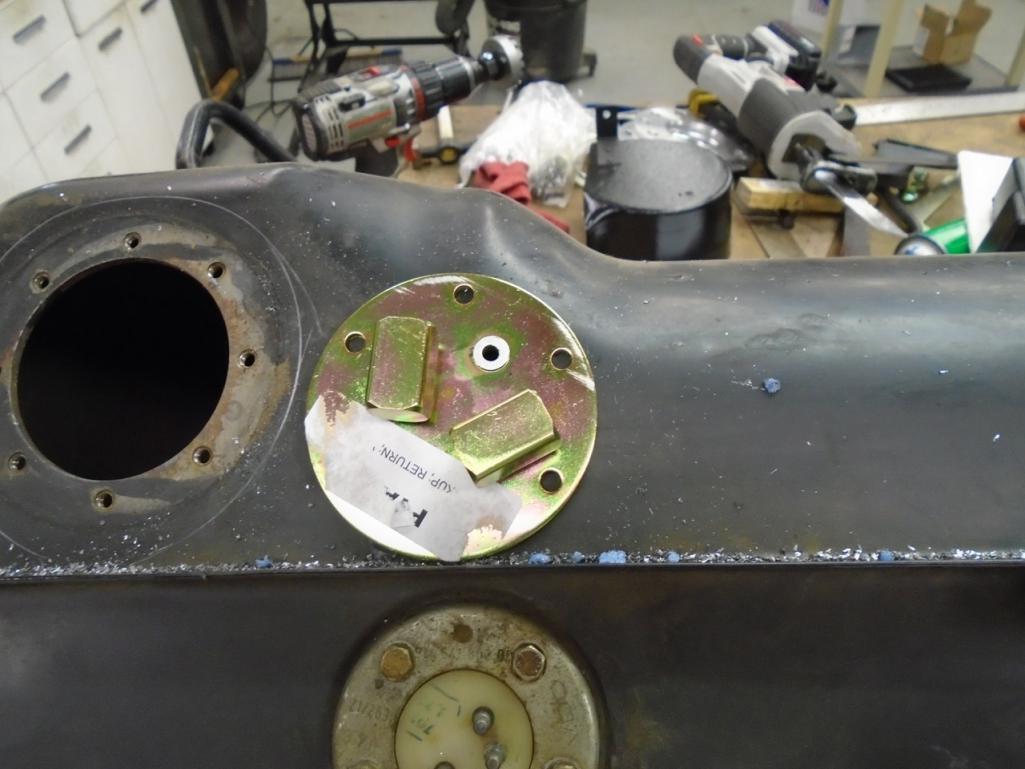
Making a backer to sandwich the mount to the tank, and give the studs something to bit into.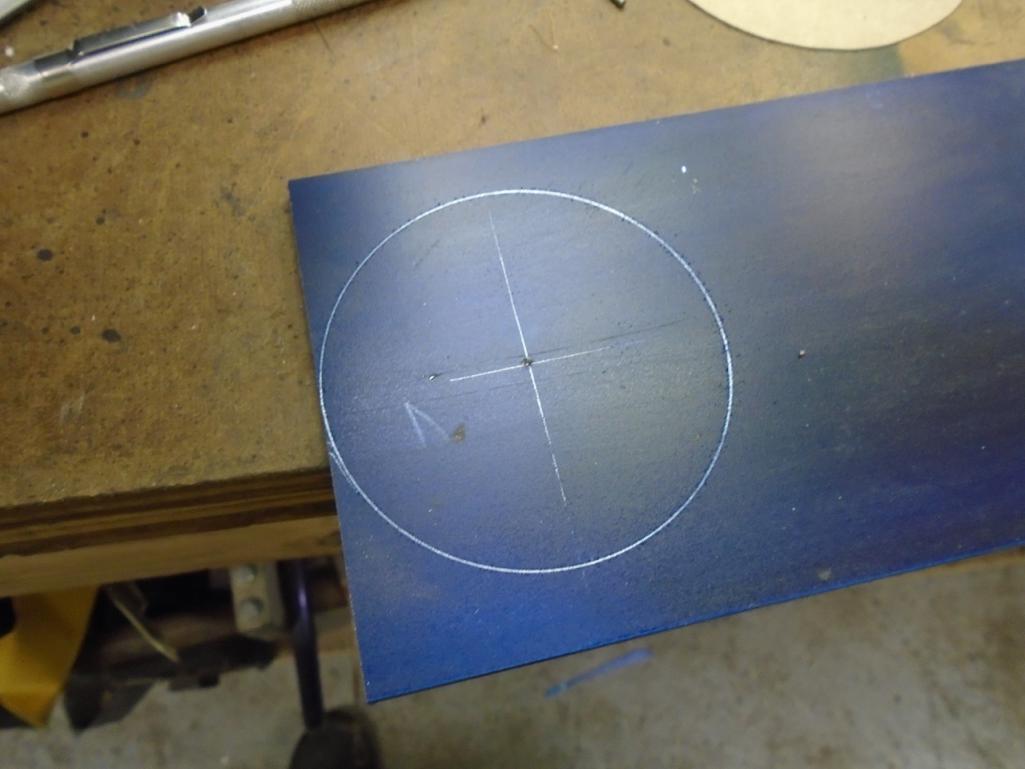
Got the power wire isolated and the ground lug installed also.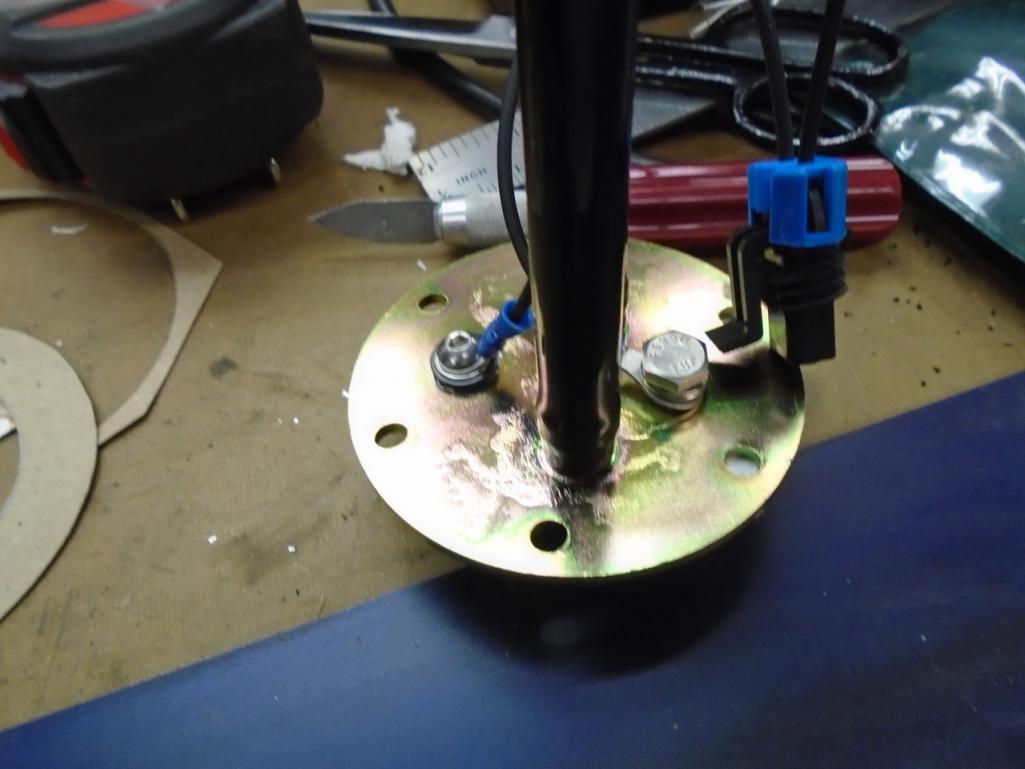
All this to put this in the car.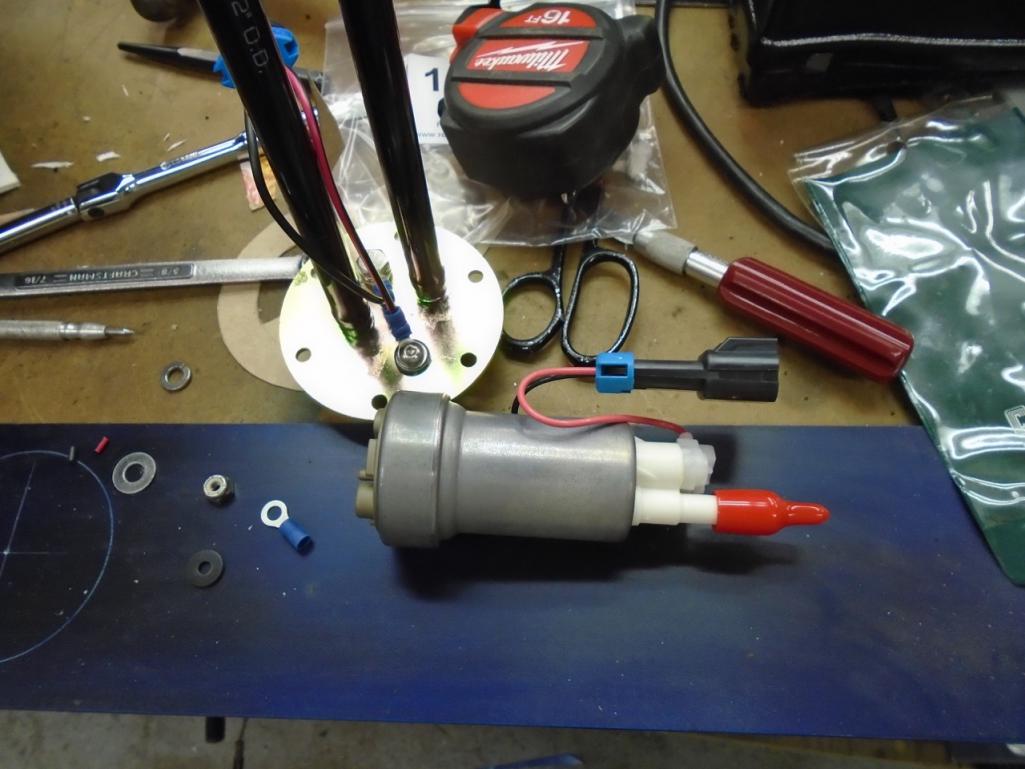
Walbro pump will support e85 and will push enough fuel to reach my goals
Here is the reason I chose the location I did.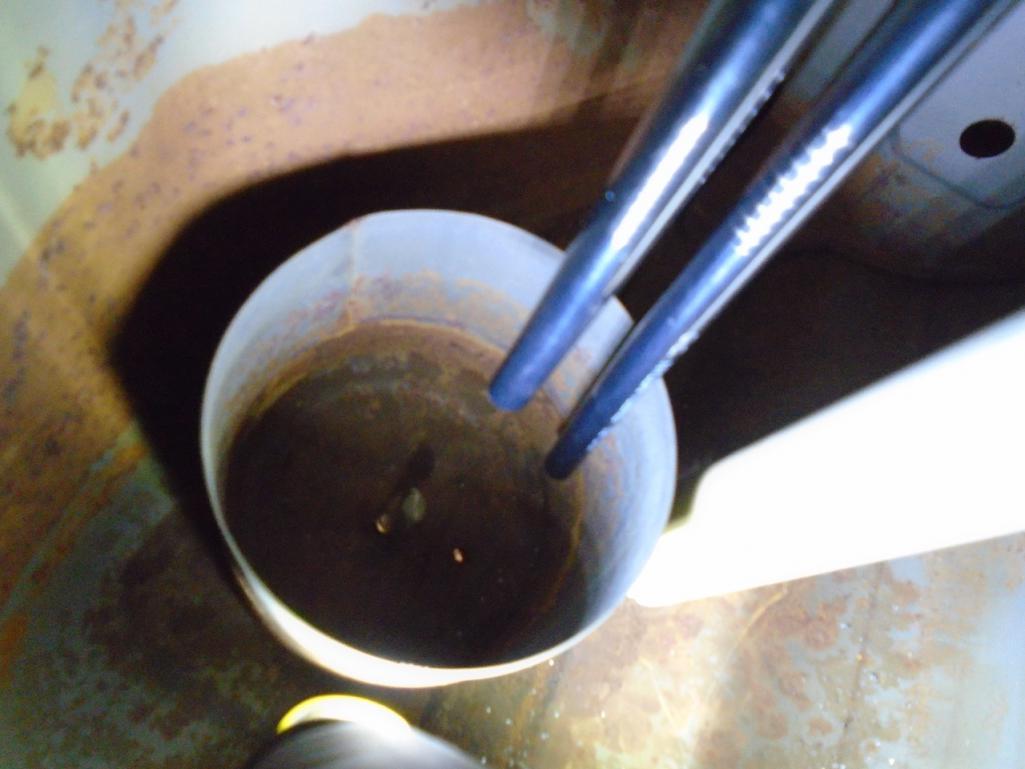
The Pump will be centered up, screen sits about 3/8" off the bottom. And the return dumps right into the baffle in the stock tank. Hopefully that will keep me from having to run a fuel sump. We will see, going lean can cause some serious damage,
Yes I know it is a rusty bottom tank, I need to get it cleaned and sealed. First I need to modify it to clear the camber plates.
Not sure if I should just it? Or take the time to cut it apart, and pieces back in then get it sealed. One thing for sure it does not fit the way it is right now.
I also need to get gas for the welders, but with the truck being down, hauling cylinders was not my top priority.
And snow , guess our mild fall is over
Attached thumbnail(s)
Posted by: Amenson Nov 20 2016, 09:50 AM
Back to using the stock tank? I thought that there was other stuff going in that space.
What fuel pump is that?
Posted by: 914forme Nov 20 2016, 11:51 AM
Well I keep flopping like a fish.
In reality you bring up a few good points.
Aftermarket tank = easier
Venting through the hood = easier
Camber boxes with out trunk tank separation = easier
Adding tie in across the camber boxes DOM
Building a area to store everything = easier
A/C I have found a place to tuck it, with some cutting and a remote fan. It will retain full defrost, heat, and cooling both floor and dash vents. And have circulation of cabin air, very important in Humid Ohio!
So Scott as usual you snap me back into reality.
Answer your question.
It is a https://walbrofuelpumps.com/catalogsearch/result/?q=f9000 - a 450 LPH E85 fuel pump
Posted by: 914forme Nov 20 2016, 06:30 PM
So thanks to Scott, I went out after running around with the wife and got a few hours in the shop.
First cleaned up, hate working in a jumbled mess.
So after that, I fixed this little hole for the antenna. Who needs a radio antenna anymore. 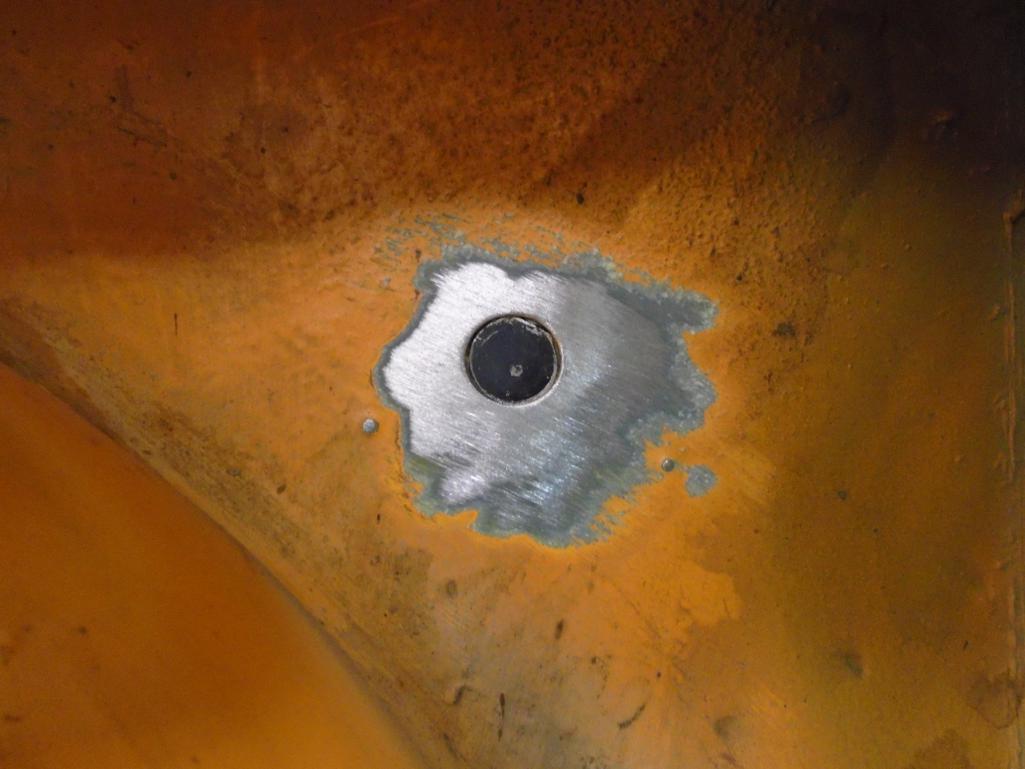
After that in an effort to do more things twice to five times on my car. I got out my fuel cell and sat it in the front trunk.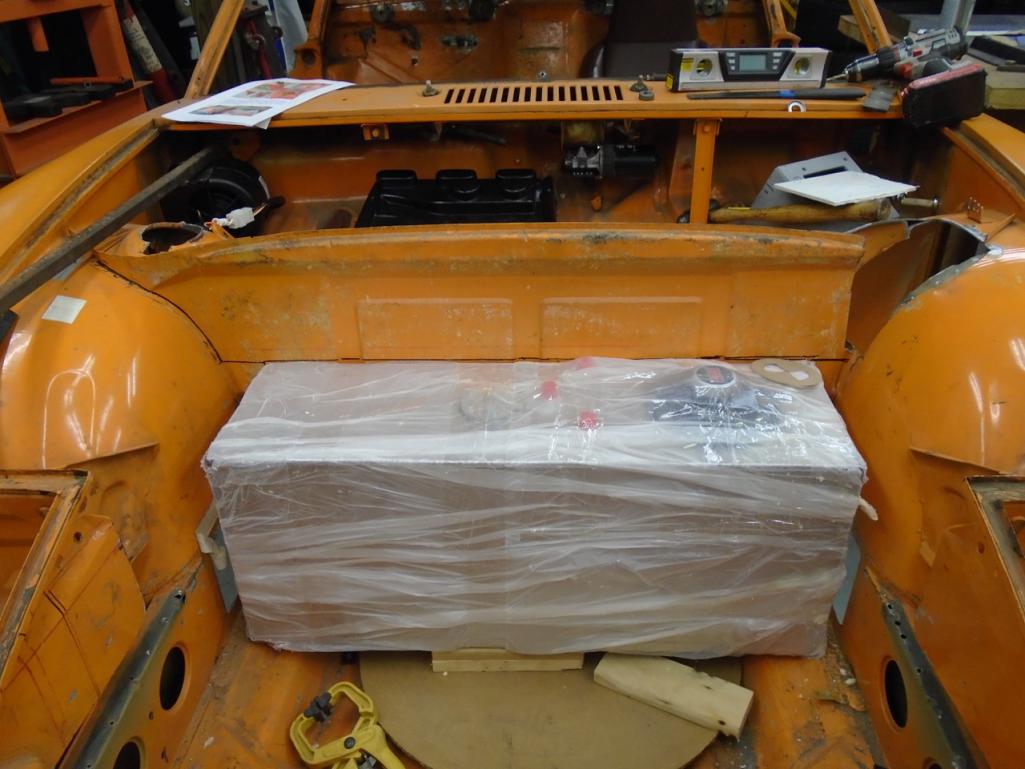
Look familiar Scott
This is where the A/C unit will go, just need to cut it out.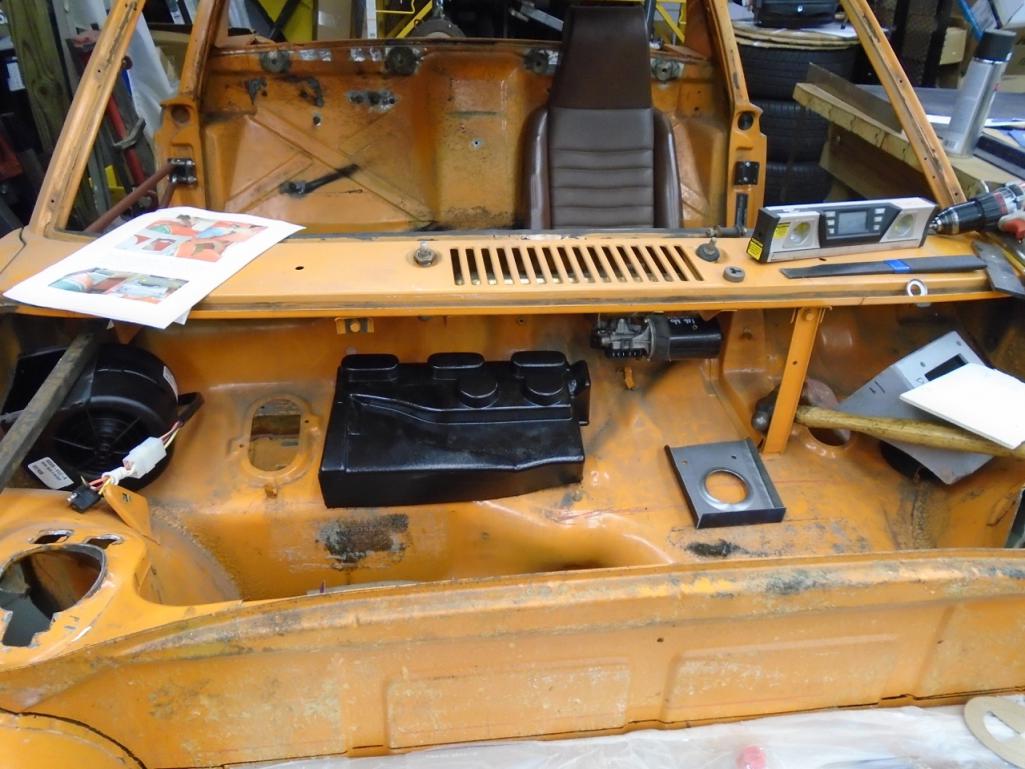
This will allow this area to have a battery down low, and the brake reservoirs.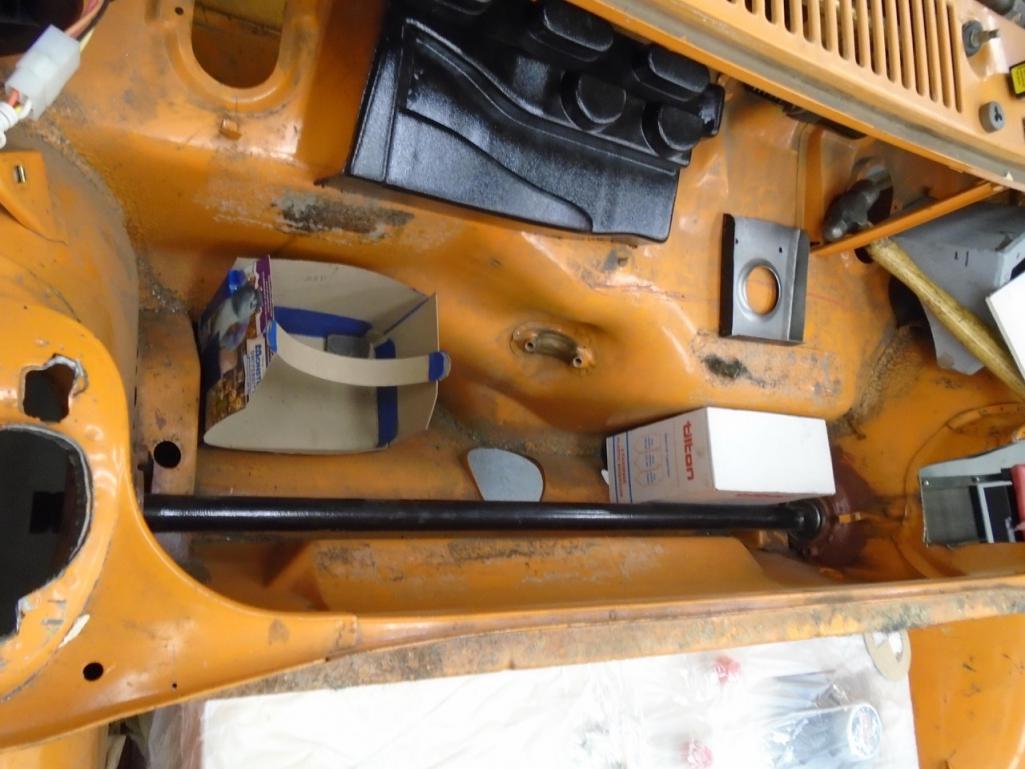
I then decided there is no time like the present. So I marked a line, and started cutting.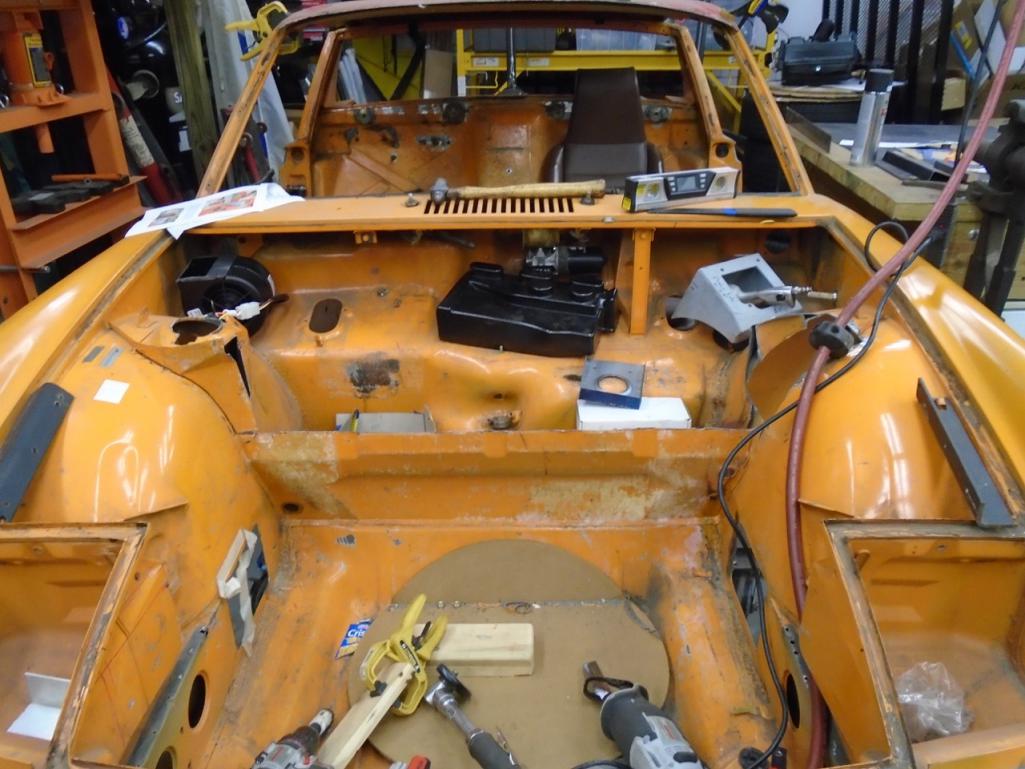
Which then allowed for this to sit in place.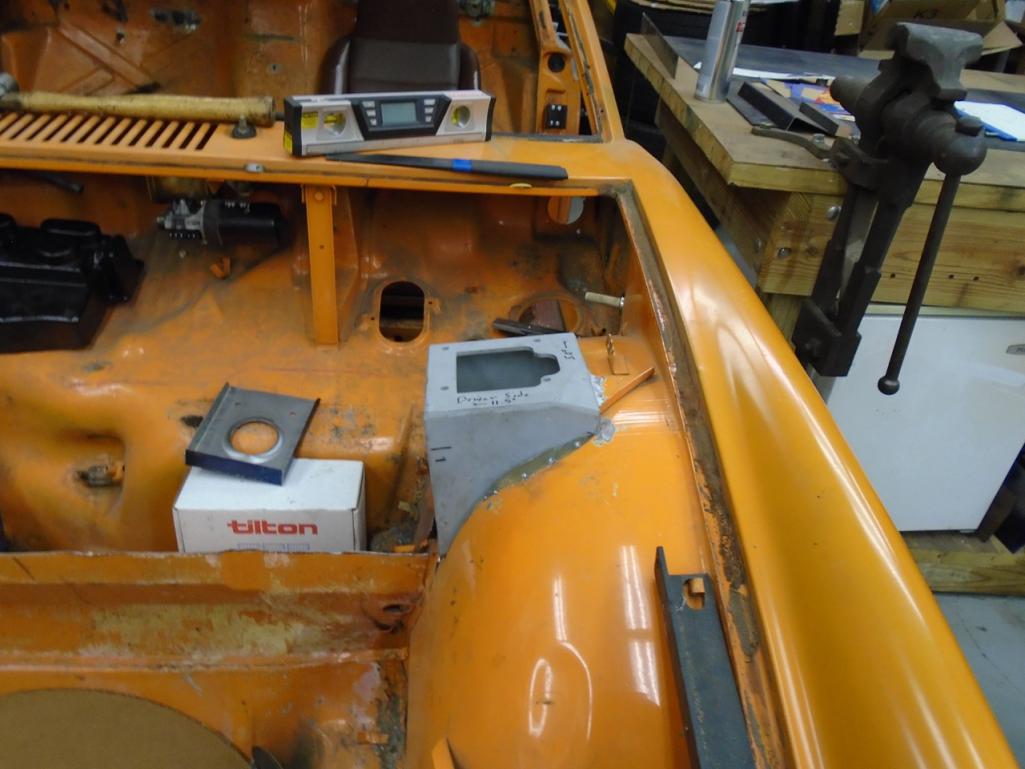
Well I am done for the night wife is back home time to spend some time with her
Posted by: Amenson Nov 22 2016, 08:12 AM
So thanks to Scott, I went out after running around with the wife and got a few hours in the shop.
Look familiar Scott
I was sort of hoping that you would continue the in tank pump setup on the stock tank so that I could copy it for Doug's car!
I forgot where you are planning to run your cooling lines but if you are thinking about doing it like I did mine, I highly recommend finding a way to run the lines straight out of the passages above the steering rack hump and alongside the fuel tank. Even if it requires cutting a chunk out of the sides tank.
That AC unit is going to fit great!
Cheers,
Scott
Posted by: Andyrew Nov 22 2016, 11:25 AM
Which AC unit is that? I see its a mock up. Looks like the unit I want to use..
Also your steering shaft is right there, you might want to move it over a couple inches.
Posted by: 914forme Nov 22 2016, 11:51 AM
Vintage Air Mini Space Saver with heat and defrost. All Electric servos, so controls can be mounted where ever.
I will be using the 4 rotary knob controls, and add a set of center vents right under the controls.
It just misses the steering shaft, and joints. Thank you for the reminder as it is easy to miss that stuff.
Posted by: Andyrew Nov 22 2016, 12:24 PM
Did you cut up the mock up? Mind if I buy the mock up off you when your done as thats the unit I was going to purchase.
(I figured thats what it was as it looked similar)
Posted by: Andyrew Nov 22 2016, 12:25 PM
PS that shock tower looks thick!
Posted by: Racer Chris Nov 22 2016, 01:28 PM
PS that shock tower looks thick!
Only the top plate.
Posted by: 914forme Feb 6 2017, 10:48 AM
Well as of Saturday it has been 6 months since I modified my fingers with a larger disc sander.
Here is the update, everything is looking really good. I am grateful everyday as this could have been much worse. I have feeling in all the fingers, they work they way they should. My nail is even growing out flat, and getting back to normal. Only issue I have right now, is stuff gets pushed under there, and it is a real bitch to clean out.
So 6 months ago. 
And now 
Also the last update for this car for a while, as I am putting it on hold to complete another project. I put the EG build back onto the rotisserie. 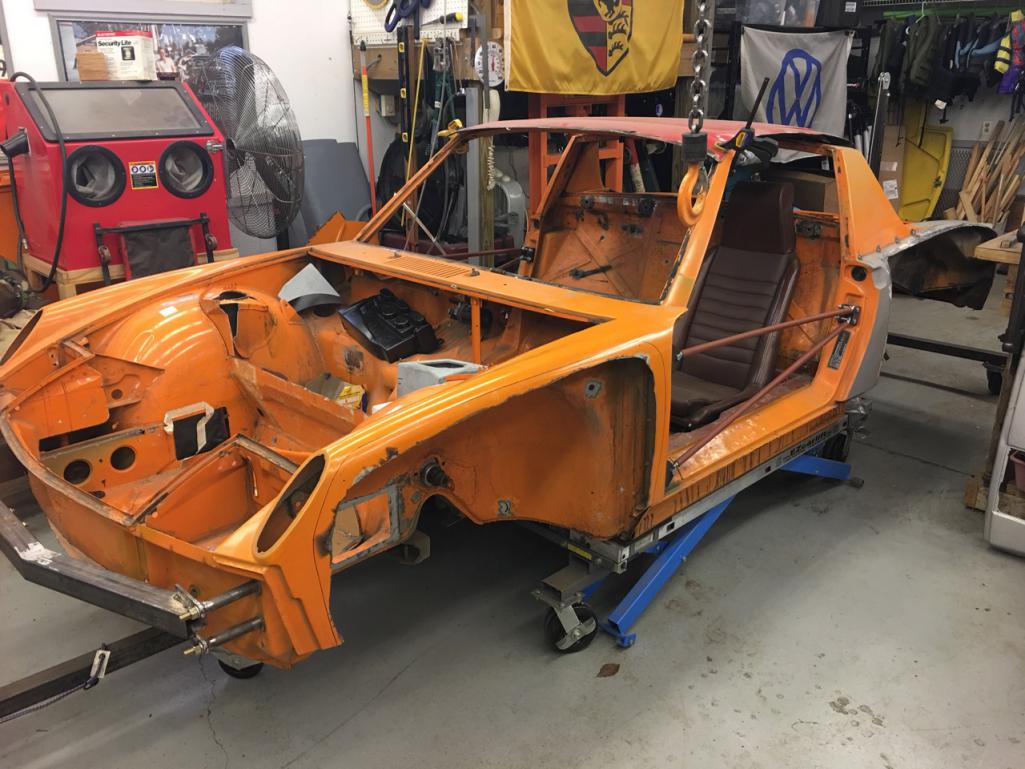
This frees up my easy car lift to go under the 914-6 allowing me to do suspension, brakes, and clean the underside, etc.... Eventually will allow for the engine to be installed.
I need to build a dolly for this one anyway.
I also pulled the EG33 off the engine stand in preparation for the 914-6 engine to go onto it for inspection and complete the rebuild.
Oh and Murphy decided to pay my house a visit and wrecked my furnace. So that was a serious hit to the budget. I guess heat is more important, than cars.
Posted by: 914forme Jul 21 2017, 08:05 PM
Well it has been awhile and Kent called me out.
So here you go Kent.

A year has passed since I ran my fingers into a 3400 RPM 12" disc sander. And this is how they turned out. Do not look bad at all. I am very grateful this was the outcome.
So this car, not much has gone on, I have purchased / upgraded a few parts, and will be selling off the items these replaced. My car funds are a bit short, as I sold my TDI to VW, who promptly sent me a check. To which I purchased a 2008 MB ML320 CDI. I can tow 7000 pounds, cruise in luxury, and still get 25-30MPG. Towing I get 18-20 MPG. I am quite pleased with it, and wished I got one sooner. That being said it has tapped me out on car funds as it required a lot of tools to service this bugger. I like tools but come on MB, then again I have a ton of VAG tools all ready so is it really any different And I have purchased a bunch of 911 engine tools I really should not complain about tools. And I have more that I would like to have
Oh and my son's have seem to find an affinity for taking out small animals at high rates of speeds. One took his STI and took out a ground hog not once twice. The other one took out an opossum with his Rabbit.
What started out is a simple repair ended up, being a complete front end tear down. Blew the entire lower rad mounts out, the rad support, the inner air guides, the bumper support, and a few other things Oh and I found the odd leak he had on this car. At some point some one put the screw on the right to hold the AC lines to the Radiator boss. It should be the size of the one on the left, not the right, they are used to hold door cards to the door.
Posted by: 76-914 Jul 21 2017, 09:26 PM
I understand the $$$ part but don't stay away from your project too long. There are some other 3.3 fans that need your support.
Posted by: 914forme Jul 22 2017, 08:52 PM
The 914-6 is the main focus right now, like to get it done and get dad out for a ride in it.
That rabbit just won't go back together, today I found out that new core support is from a Jetta, I would have to change the entire front end , lights grills, fenders, hood, and bumper to use it
And then to make matters worse, the new Radiator and the old A/C condenser did not fit well. A/C condenser was bowed in the middle, rad straight as an arrow. Put the AC condenser over my leg and bent it back semi flat. Hopefully I did not bust the system open I have to tools to fix it, just did not have a tank, otherwise I would just pulled vacuum and purged the system. Popped gauges on it, and it is still pressurized, check again in the morning to see, here to hoping something went right on that car.
Oh the Rabbit Core support NLA from VW So I might be getting the wielders, staplers and epoxy back out. Scott I might need to borrow my double barreled epoxy gun back.
Posted by: 76-914 Jul 23 2017, 07:48 AM
I missed the 914-6 part of this story! Is that in another thread?
Posted by: 914forme Jul 23 2017, 07:08 PM
I missed the 914-6 part of this story! Is that in another thread?
[url=1970 914-6 restoration project - longest know to man - 1976, back on track]Here you go[/url]
You can still call me a slacker though.
Posted by: 914forme Jul 24 2017, 08:33 PM
Got the core support all welded up.
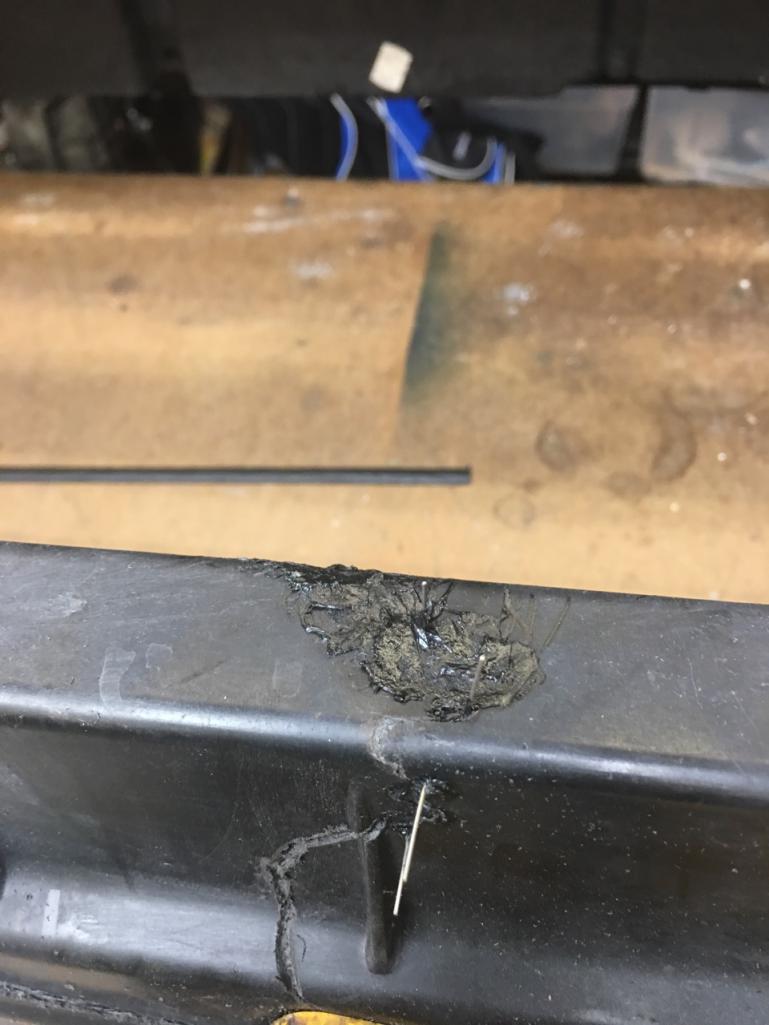
This stuff worked like a champ. Also used some hot staples to give it a bit more support.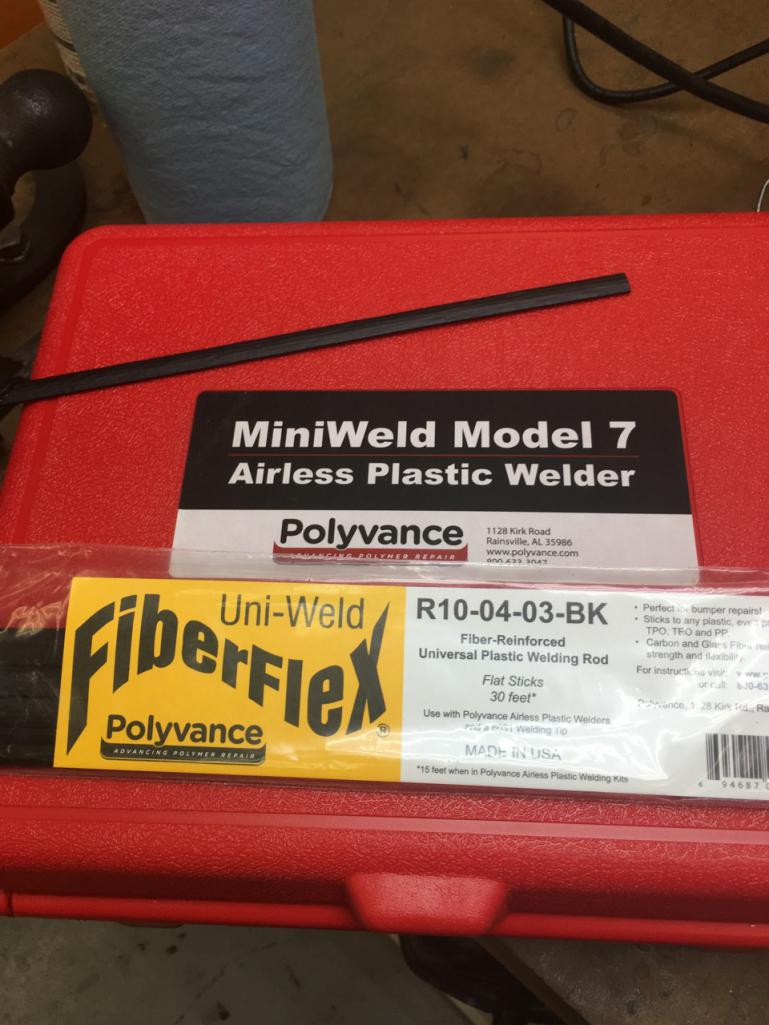
I also did one of these for the -6, need to look at them with the Momo wheel and see if I want to clear it or matte clear it.
Going after this look 
Posted by: 914forme Aug 2 2017, 07:29 PM
Well it is just a plug to free up some cash for the build.
http://www.914world.com/bbs2/index.php?showtopic=314220
Hope I don't regret it
Posted by: 76-914 Aug 3 2017, 09:02 AM
Whatcha doing instead?
Posted by: 914forme Aug 3 2017, 07:08 PM
Kent that is an easy one as I am a sucker for great design.
http://zerodecibelmotorsports.com/products/bell-crank-mechanism-5spd/
They manly market to the Factory Five guys for the 818s.
I really like it, nothing wrong with Ian's (Coldwater's) design, this one just struck my button.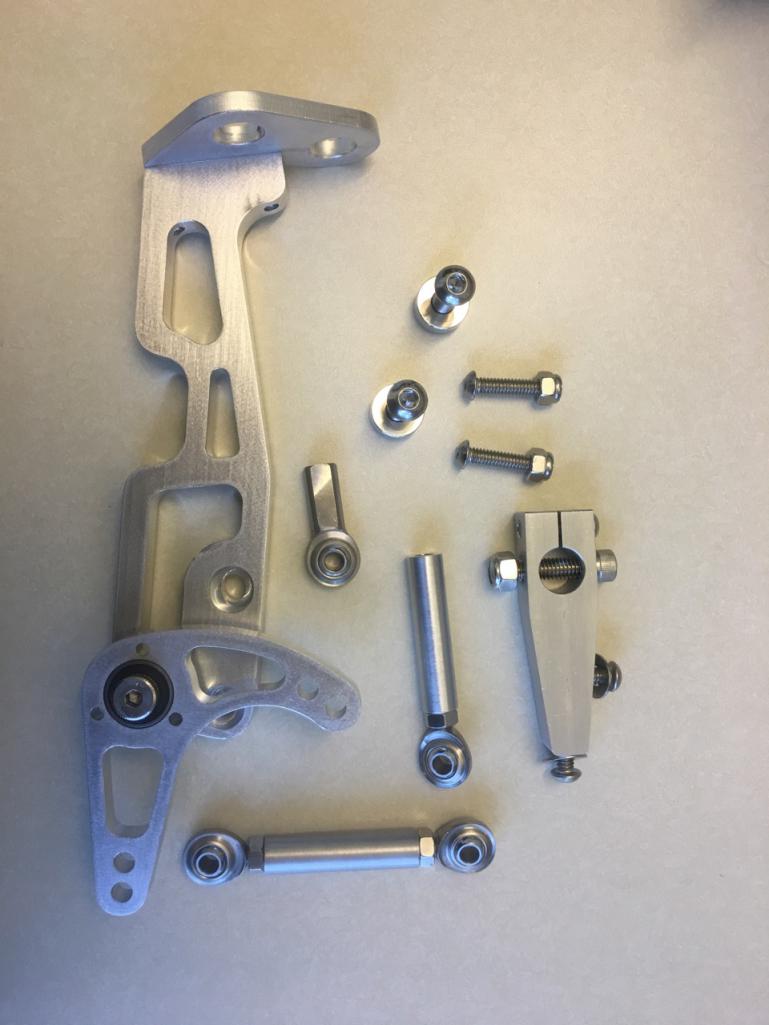
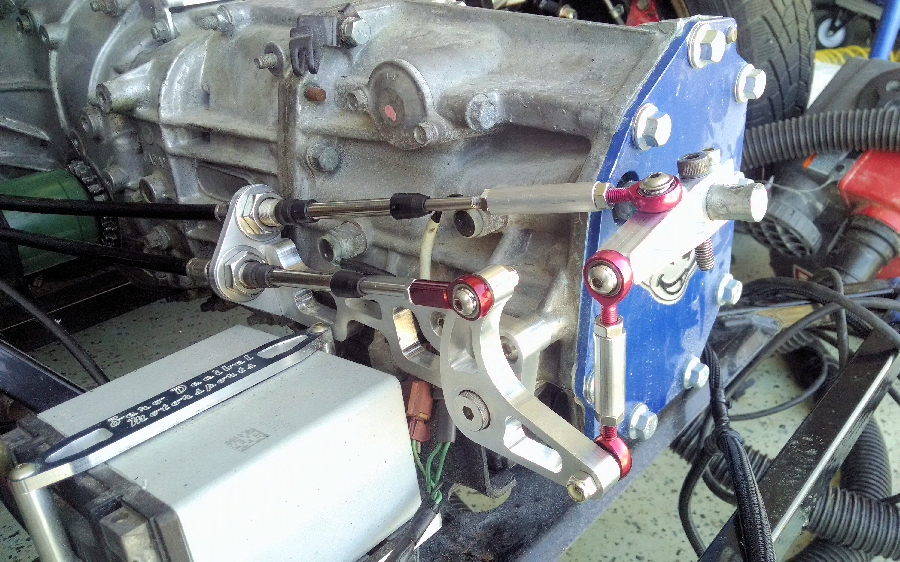
I am hoping to shorten the shifter rod in the trans as it does not give me much clearance back there.
It only comes as the bell crank and assembly, you have to provide the cables, and shifter. Ian's stuff comes with the cables. So they are pretty much a dead nuts same cost option.
I will say Craig was very easy to work with.
We will see how it works out.
Posted by: 76-914 Aug 7 2017, 10:35 AM
Looks sweet. I'm surprised you haven't sold Ian's model yet! The price is right.
Posted by: 914forme Aug 7 2017, 08:45 PM
Kent im :confused:also
Just ordered cables, and the thing of it is I'll have about and extra $125 in cables alone, of course they are top notch stuff built for off shore racing boats. I will most likely use the hemi joints that came with it, but might switch out to aircraft parts if I find they get worn from road grit.
Have to get it on the road first
Posted by: mepstein Aug 7 2017, 08:51 PM
Looks sweet. I'm surprised you haven't sold Ian's model yet! The price is right.
and saves you so many hours vs making your own.
Posted by: 914forme Aug 8 2017, 08:00 AM
Looks sweet. I'm surprised you haven't sold Ian's model yet! The price is right.
and saves you so many hours vs making your own.Time is money, but money does not equal time
So I did the run down.
Ian's kit was $375 new when I purchased it, plus shipping.
Zero Decible is $300 for the linkage and rod ends (in your choose of colors) and then you have to purchase the cables. plus shipping. Cables can be what ever quality you choose. I tend to go with higher end stuff I hate doing work twice, even though I do it a lot.
Least expensive set of marine helm control cables I could find for this application in the quality I liked was $116.00, plus shipping. So I have exceeded the cost of Ian's very fine kit. That leaves the items for the front. MR2 shifter is the one of choice, others work. MR2 shifter costs have started to climb, as the breakers have found out that they ae in demand from us 914 guys. We set the pulse of the economy You tend to pay for quality I get that. One advantage I see over Ian/s kit is you can pick the quality of cable, you also have a situation that looks like the geometry might be a tad bit better. We can compare Ian's to ZDM's by letting Scott try both. That would still be subjective to Scott's feelings and the amount of time he has invested in Ian's kit, but I think he actually has two cars in his shop with Ian's kit, I have the ZDM kit on mine. We will have to see.First I have to get mine running
Posted by: 914forme Jul 2 2018, 02:47 PM
Wow surprised I have not been hit by the slacker thread, maybe I have and just was a slacker and did not read it.
Watching Chris' great EG33 thread, I jumped off the deep end and went after a new radiator. Been looking at the Jeep Cherokee Rad, but this one seems to fit.
Well it came in on a fast boat from China or on a place with the latest shipment of Samsung Tablets.
Here is how if fits in the 914-6. Yeah I know wrong car but the 914 EG project is back in the shop somewhere buried I can't find it right now.
So this will have to do.
It don't fit 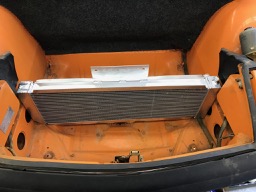
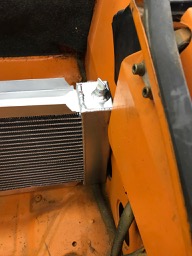
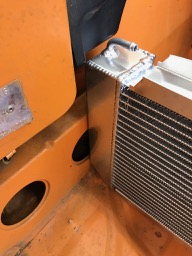
Nothing that a bit of can't fix. I'll just narrow down the top of the tanks to get past the head light buckets. It is only Aluminum
Posted by: Chris H. Jul 2 2018, 03:42 PM
Try it angled forward at a 45 degree angle under the light buckets.
Posted by: Andyrew Jul 2 2018, 04:22 PM
Wow surprised I have not been hit by the slacker thread, maybe I have and just was a slacker and did not read it.
Watching Chris' great EG33 thread, I jumped off the deep end and went after a new radiator. Been looking at the Jeep Cherokee Rad, but this one seems to fit.
Well it came in on a fast boat from China or on a place with the latest shipment of Samsung Tablets.
Here is how if fits in the 914-6. Yeah I know wrong car but the 914 EG project is back in the shop somewhere buried I can't find it right now.
So this will have to do.
It don't fit
Nothing that a bit of
can't fix. I'll just narrow down the top of the tanks to get past the head light buckets. It is only Aluminum I was always curious if that one would fit! Its too bad its not a couple inches shorter.. If you can weld that up then WOW. I'd love to see the details on how your going to accomplish that!
If you made it a couple rows shorter you might be able to completely fit it under the headlight buckets and then have a front trunk that could fit a spare tire and stuff!
Posted by: 914forme Jul 2 2018, 06:37 PM
I was always curious if that one would fit! Its too bad its not a couple inches shorter.. If you can weld that up then WOW. I'd love to see the details on how your going to accomplish that!
If you made it a couple rows shorter you might be able to completely fit it under the headlight buckets and then have a front trunk that could fit a spare tire and stuff!
It is just crappy Aluminum I have access to a certified welder that welded aluminum tanks for a living. If I can't make the puddle move, he can.
As far as fitting under the headlight buckets, that would be very nice idea. I have thought about doing like Brant did on his race car, and moving the head lights into the turn signal buckets. But then, I had a place that would do custom Rads for UTVs but lost it.
They where in Cincinnati. The calculations came up that you would have about the same area as the SVX RAD, with more rows. You just have to keep it back behind the back edge of the headlight bucket. You can also use a curved RAD to gain a bit of surface area. Really want to be able to show the people what I am thinking. In reality I could draw it up, and 3D print it, and just say make it. In reality I could also print it on the 3D printer out of Aluminum or Titanium. Neat idea, but man I would literally burn through a ton of powder to do it. But it would work
Back to buying a $55K 3D laser metal printer. Keep finding reason to purchase one of them for home shop.
Posted by: 914forme Jul 2 2018, 08:02 PM
So after Chris suggestion I ran out to the shop and flipped his idea, and I think this will work. 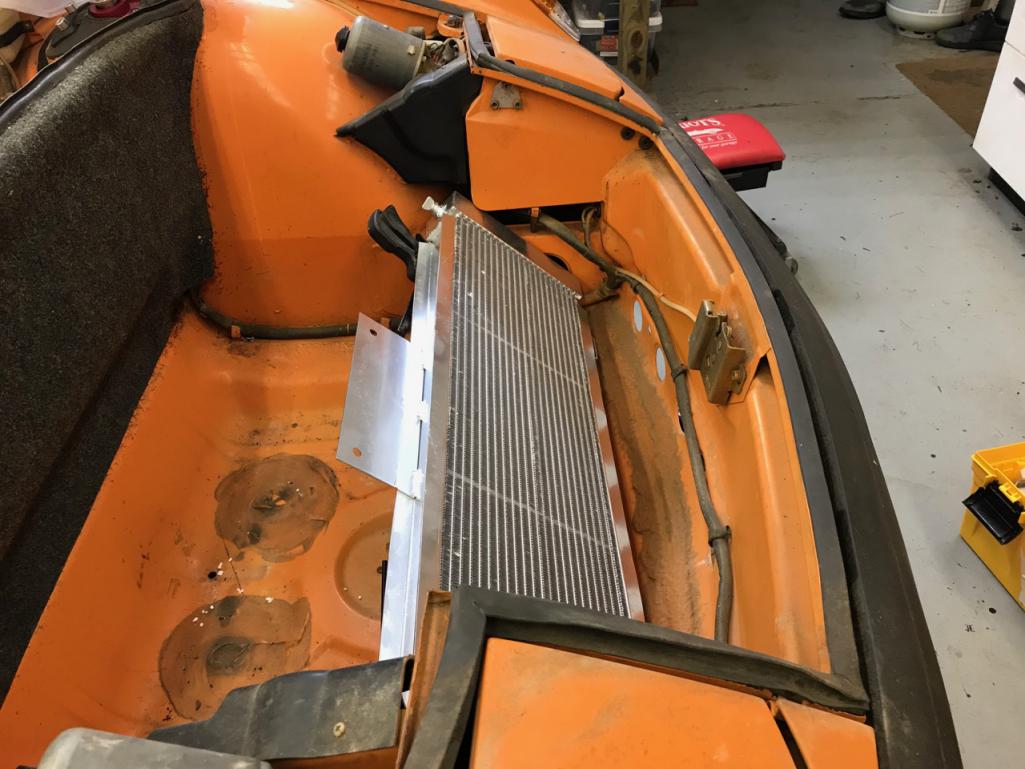
Then I did this nice color diagram.
Green is the front cover.
Blue is the transition over the top to the flat floor
Pink is the floor that opens above the spare tire well.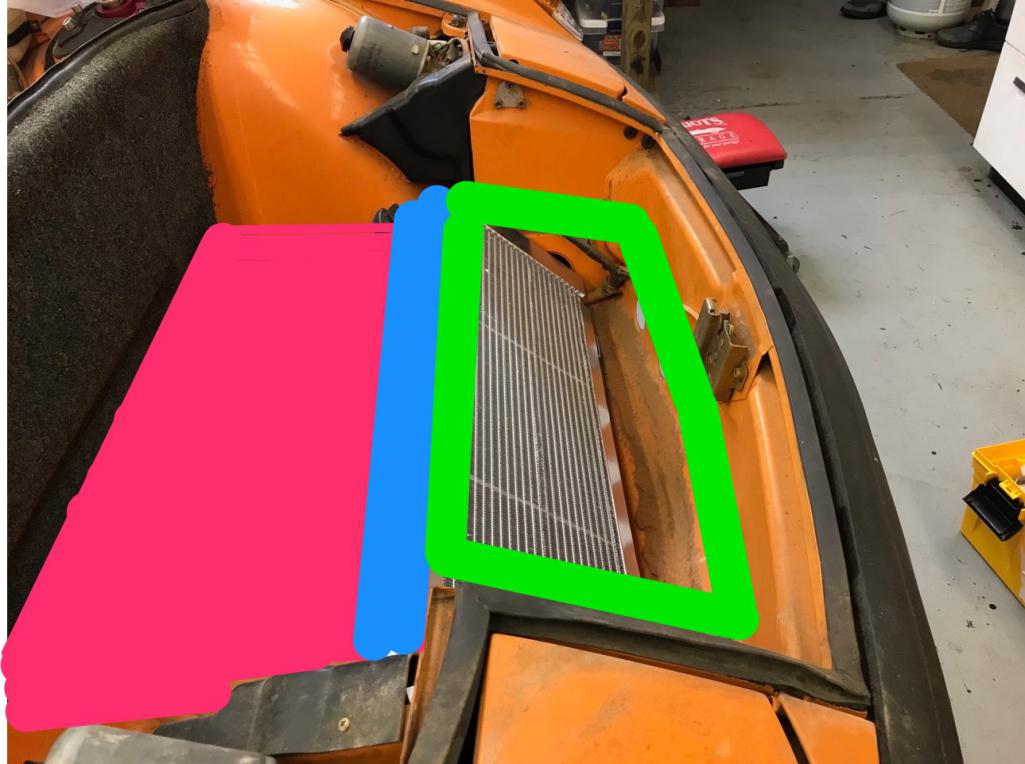
Nice artful picture there.
So since I could not get the idea very clear I did this quick not to scale line drawing.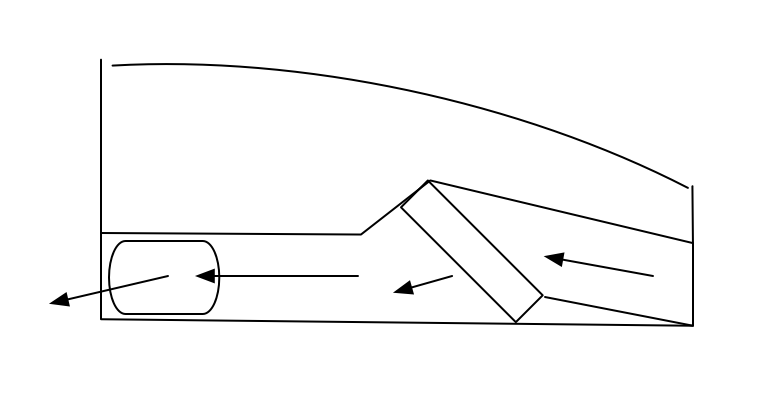
Air enters the front, goes through the radiator, down a small transition, and under the wheel board, and out the side exits I have made in the wheel wells.
All ideas are unproven at this point copy them at your own risk.
Posted by: worn Jul 2 2018, 08:09 PM
Gotta love the colors! Good to see things back on track.
Posted by: 76-914 Oct 31 2018, 11:29 AM
![]() to get any updates!
to get any updates!
Posted by: 914GTSTI Nov 4 2018, 09:30 AM
Need some help. What is the distance from the crank shaft center line to the bottom of the stock oil pan ?
Thanks
Posted by: 914forme Nov 4 2018, 07:26 PM
LOL, you think I just have these engines just sitting around.
I will have to dig one out to get you the measurement.
From some pictures I have of other builds it is around 6 2x4 high layer on the flat side. so 6' x 1.5" = 9" from crank center to bottom of the shipping skid.
I will have to check for you if you need a more accurate measurement.
Kent,
No progress on this car, working on my father's -6 still. Dad to a turn for the worse, so I have not been working on that car for the past few months.
Posted by: 914GTSTI Nov 4 2018, 10:45 PM
No,that's ok.
Thanks
Posted by: Amenson Jan 15 2019, 12:37 PM
Well yesterday UPS man showed up with some new goodies.
Rebel Racing adjustable spring perches.
And installed
Need a set of helper springs and separator.
Also need to lathe down the spacer again for Tangerine's Rear shock mount. The nylox section is not on the threads.
Why was this spacer needed in the first place?
Don't ask why I am wondering. Was in a less than engaging meeting and....squirrel.

Posted by: 914forme Jan 15 2019, 01:36 PM
[quote name='Amenson' date='Jan 15 2019, 01:37 PM' post='2681332']
[quote name='914forme' post='2424894' date='Nov 19 2016, 03:43 PM']
Well yesterday UPS man showed up with some new goodies.
Rebel Racing adjustable spring perches.
And installed
Need a set of helper springs and separator.
Also need to lathe down the spacer again for Tangerine's Rear shock mount. The nylox section is not on the threads.
[/quote
Why was this spacer needed in the first place?
Don't ask why I am wondering. Was in a less than engaging meeting and....squirrel.
[/quote]
We have all had the less than engaging meetings
The reason is the stock spring hat has a bell shape. Which allows the hat to move on the bearing properly where as the aftermarket one does not have that feature. The spacer allows for the hat not to bind in the raised pickup point. The spacers are just made from the stock strut topper. Easy fix, and eliminates the binding, eliminating the premature wear rate on the shock creating a failure situation. Tony “Kracker” was the first person I knew who had the issue. And Chris Foley mentioned the issue to me. You know me I love to solve problems. So this was my KISS solution. Will not be an issue unless your moving the upper rear shock location and are using a different spring hat.
Posted by: Amenson Jan 15 2019, 03:24 PM
Why was this spacer needed in the first place?
Don't ask why I am wondering. Was in a less than engaging meeting and....squirrel.
We have all had the less than engaging meetings
The reason is the stock spring hat has a bell shape. Which allows the hat to move on the bearing properly where as the aftermarket one does not have that feature. The spacer allows for the hat not to bind in the raised pickup point. The spacers are just made from the stock strut topper. Easy fix, and eliminates the binding, eliminating the premature wear rate on the shock creating a failure situation. Tony “Kracker” was the first person I knew who had the issue. And Chris Foley mentioned the issue to me. You know me I love to solve problems. So this was my KISS solution. Will not be an issue unless your moving the upper rear shock location and are using a different spring hat.
After raising and lowering Grey 100 times over the weekend without having to worry about the springs coming out of the hats I decided that I needed to do something about the rear coil overs on Porsti and could potentially fix the issue by raising the mounts (it would also get rid of the last bit of rubber in the suspension).
Now I have to consider the length of the spacer to see if I can keep the assembly under tension with the helper spring at full droop. Why can anything custom be simple?
What is the radiator from that you are using in the latest mockup? Might be good for Marks EG.
Edit: Found it going back to Chris' thread. Alpine A310!
Posted by: 914forme Jan 15 2019, 04:16 PM
In my days of racing when time on track was more important the design nirvana I just drilled a couple holes in the spring hat and zip tied the spring to the hat, and let it float on the bottom collar and shock body.
Simple never worried about them.
Now I want to use proper methods, though down and dirty has its appeal
Posted by: Amenson Jan 20 2019, 02:33 PM
In my days of racing when time on track was more important the design nirvana I just drilled a couple holes in the spring hat and zip tied the spring to the hat, and let it float on the bottom collar and shock body.
Simple never worried about them.
Now I want to use proper methods, though down and dirty has its appeal
I currently have zip ties and it bothers me.
If the spacer is not there, will the shock rod be constrained by the Tangerine spherical mount? Based on your comment that you need to shorten the spacer to get more threads exposed for the nut, the spacer is supporting the step at the top of the rod. If the spacer sat over the shock rod I could get the maximum extension of the shock even with the spacer in place. Make any sense?
Posted by: 914forme Jan 20 2019, 02:51 PM
Yes makes loads of sense. The spacer the first time I did them, made them a bit long. 2nd time I made them to be as close to the edge as the stock hat would be. If that makes sense. One thing I forgot to take into account is that the rubber crushes on the stock setup. Spherical bearings do not have a crush factor at least not a perceivable one. I am sure if I mounted them in a fixture and then compressed everything down and toss it into the fixture and recheck the measurements. I am sure I could measure a few .0001th of an inch once compressed and the oil film and small piece of dust gets compressed.
Are you raising the upper shock mounts on POR? Oh one other thing in the consideration. These are the tall mounts, so no top in the trunk for me. On this build it will not come off with out a anyway.
Chris' short unit might not have an issue at all.
Posted by: 914forme Jan 20 2019, 02:53 PM
If it becomes a huge issue and I am blowing shocks, I will lower the lower pickup point on the trailing arm. That will also allow the extension of the shock to allow full travel.
The spacer and Rebel Racing Hat are the same hight as the stock shock / spring hat. Hope that helps, pictures would help also, but it is too cold to hang in the shop today. I ran out of Propane late yesterday so no heat for me today.
I am working on gauges up in the house today.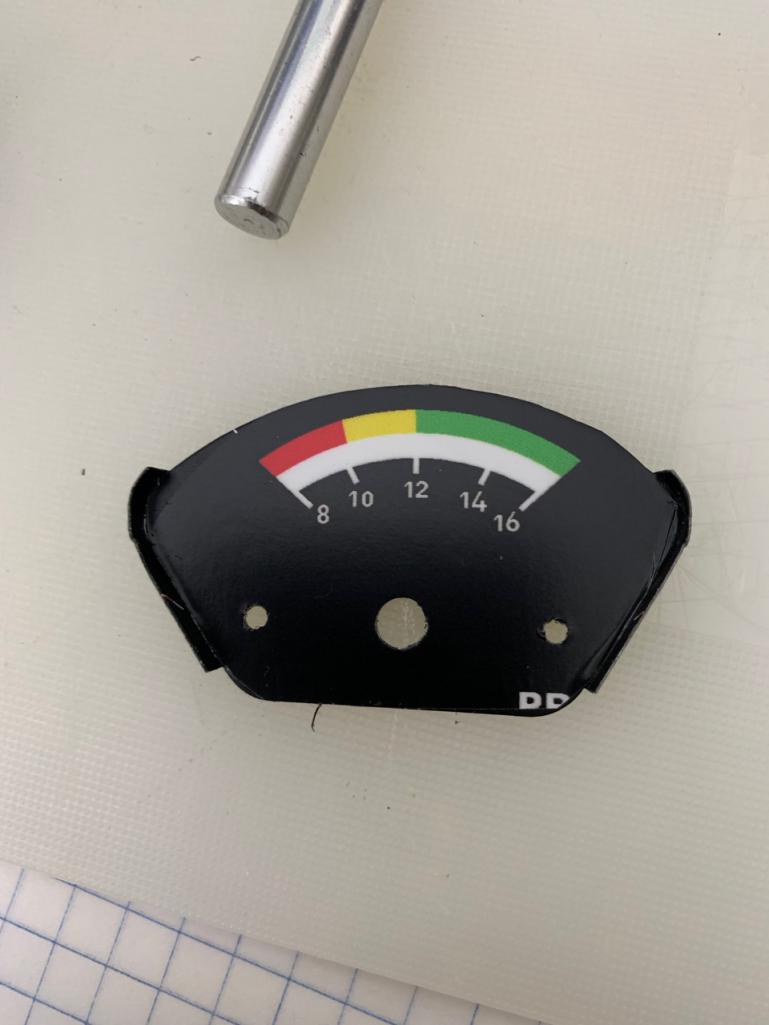
Also working on designing some new products I need a few new tools in the shop to make my designs a reality. Access too a Laser cutter would be a big plus. I am in the prototype stage right now so I can use the laser cutter in my 3D printer. But details are not quite as accurate, LOL, stuff can catch on fire when piercing holes, long lines are not an issue, as you have feed speed in your favor.
Could also do this stuff with a CNC and a turret head, I would only need 3 tools in the turret.
After the last few weeks, I am realizing I need a bigger garage or a way to stack cars, or both.
Posted by: 76-914 Jan 21 2019, 10:27 AM
Surely you need another welder by now.
Posted by: 914forme Jan 21 2019, 10:53 AM
Kent, funny you should mention that I get a call every month from my welding / gas supplier. I guess he is missing my business.
Since I upgraded tank sizes, I am still on the same tanks I have had. Also been lazy and have to swapped the MIG back over from flux core.
The TIG I am still dropping my Tungstens in to the pool, so that is not going as well as I hoped.
The Gas rig is sitting in the drawer, don't even have the bottles for it anymore. Plasma cutter and band saws have replaced it.
The AC / DC buzz box as not been used for 10 plus years, last thing I did was drag it out for a buddy to weld a cast iron manifold. Same weekend I used it to repair a Pig scale for the FFA group.
So do I really need a new welder, I guess if I tried hard enough I could justify one.
The 914-6 Project will be getting some of the welders attention. A few brackets too weld onto its chassis. Not much just a few small items, sway bar brackets, suspension console reinforcements, and a toe bracket I have designed that is sitting on a note pad next to the computer.
What I could use is a CNC plasma for big stuff and CNC laser that could do lets say 14ga and lighter.
Posted by: 76-914 Jan 22 2019, 10:14 AM
Kent, funny you should mention that I get a call every month from my welding / gas supplier. I guess he is missing my business.
Since I upgraded tank sizes, I am still on the same tanks I have had. Also been lazy and have to swapped the MIG back over from flux core.
The TIG I am still dropping my Tungstens in to the pool, so that is not going as well as I hoped.
The Gas rig is sitting in the drawer, don't even have the bottles for it anymore. Plasma cutter and band saws have replaced it.
The AC / DC buzz box as not been used for 10 plus years, last thing I did was drag it out for a buddy to weld a cast iron manifold. Same weekend I used it to repair a Pig scale for the FFA group.
So do I really need a new welder, I guess if I tried hard enough I could justify one.
The 914-6 Project will be getting some of the welders attention. A few brackets too weld onto its chassis. Not much just a few small items, sway bar brackets, suspension console reinforcements, and a toe bracket I have designed that is sitting on a note pad next to the computer.
What I could use is a CNC plasma for big stuff and CNC laser that could do lets say 14ga and lighter.
Miller has a sale going on.
I don't have a TIG so I still use my Oxy/Acy rig for thin metals if warpage isn't an item. I think you should throw you hat in the ring for some Suby mounts/cradles. Stay busy and hang in there.
Posted by: 914forme Jan 22 2019, 04:31 PM
My brother in-law is a welding rep for Airgas. His large company was bought out about a year ago now. But he can purchase at his costs, so if I upgrade, and believe me having a blue box, might be in my future, though I normally go with a red one.
As for making the Subaru mounts I would have done it, just ill timing on my part. I would over complicate things, getting the tubes laser cut, and blades all bent.
Posted by: 914forme Feb 19 2020, 08:12 AM
Project has moved on to help others hopefully finish their EG swaps.
I spent countless amounts of time thinking this over, looking at options, and finally came to this decision.
three things pushed me to this point.
One I have a real 914-6 that I need to focus on getting done.
Two, I was building a Cayman, so might as well go buy a Cayman, or Cayman S, or GT4. Trust me I was in GT4 territory, with dollars and time.
Three I happened upon a deal I could not pass that took care of a bunch of needs and wants. I picked up two BMW and replaced most of the fleet of cars I had at the time 9 total. I was setting money aside for the Cayman purchase, and got a txt from my brother-in-law who details cars as a side gig. A customer had a car he wanted to sell. 2006 BMW 7 Series, all the Alpina bits on it. 50K was the mileage. Half serious I drove the car, and fell in Handels great, has plenty of power, BMW CCA concours winner. While he was showing me parts in the garage, he had an M4 I put dibs on, LOL, and an X5M. We got to talking about cars, and he was going to sell the X5M but the dealership gave him a crappy number. I asked what he wanted for it, and he told me, and I bought two cars that day. Kinda of, it is a longer story but that is an over beer sort of thing.
I started selling off parts of this build, and still have a few items to go. I also got ahold of people I knew who could use certain items to get their builds that much ahead.
Meanwhile the chassis sat in the shop, and thoughts and tormented me. 914-8 tribute car, W12 swap, on , and on, LS???? N54 swap..... On and On.
Reminds me of a song " A terrible thought has moved into my mind
Like an unwanted room-mate drunk on wine
It feeds on my happiness won't pay the rent
I must take proper measures to evict it
A terrible thought has moved into my mind
A giant rat that's nibbling on my pride
It's tearing away my patience and my wit
I must take proper measures set a trap for it
What a terrible thought
What a terrible thought..."
Thank you Poe and Mark Z. Danielewski, BTW great Cello work in that song
Which brings us to here, I got the demon out of my head, it will be put to good use by its new owner to help resurrect a more significant 1974. But that is now part of his story, and I will let him reveal it when he wishes.
Sad day, as this is only the 2nd car I ever gave up on. I have restored about 30 cars over my years, and to drop 2 to this day bugs me. But I learned a lot from both, and who knows what this will allow to come into my life. Time to move on, finish a couple of projects in the shop, and off the honey do list, and get back on the 914-6.
Posted by: Andyrew Feb 19 2020, 08:49 AM
Pretty sad to see this project die....
Moving on is a part of life.at least you have cars you can enjoy!!
Posted by: Chris H. Feb 19 2020, 12:39 PM
I get it Stephen, 100%. There's just not enough time in life to do all the car stuff that we originally plan. And the 914 is almost too perfect of a starting point. You can literally do almost any swap you want. And when you commit to whatever drive train you pick, you think maybe you should have done something else. Time goes by, other options are available and (maybe) better...it's maddening. I also learned that most of the fun/torment of doing a conversion is the thinking about it, engineering, updating, problem solving, etc. You did plenty of that already.
Can't wait to see the 6 resto/refresh. That'll be time well invested for sure.
Powered by Invision Power Board (http://www.invisionboard.com)
© Invision Power Services (http://www.invisionpower.com)