Printable Version of Topic
Click here to view this topic in its original format
914World.com _ 914World Garage _ 1976 914 2.0
Posted by: colingreene Oct 31 2013, 12:23 PM
Thought I would introduce myself here, My name is Colin.
This is one of the first and most informitive 914 forums i found.
Having grown up with the automotive forum culture i figured i would show you all what i bought.
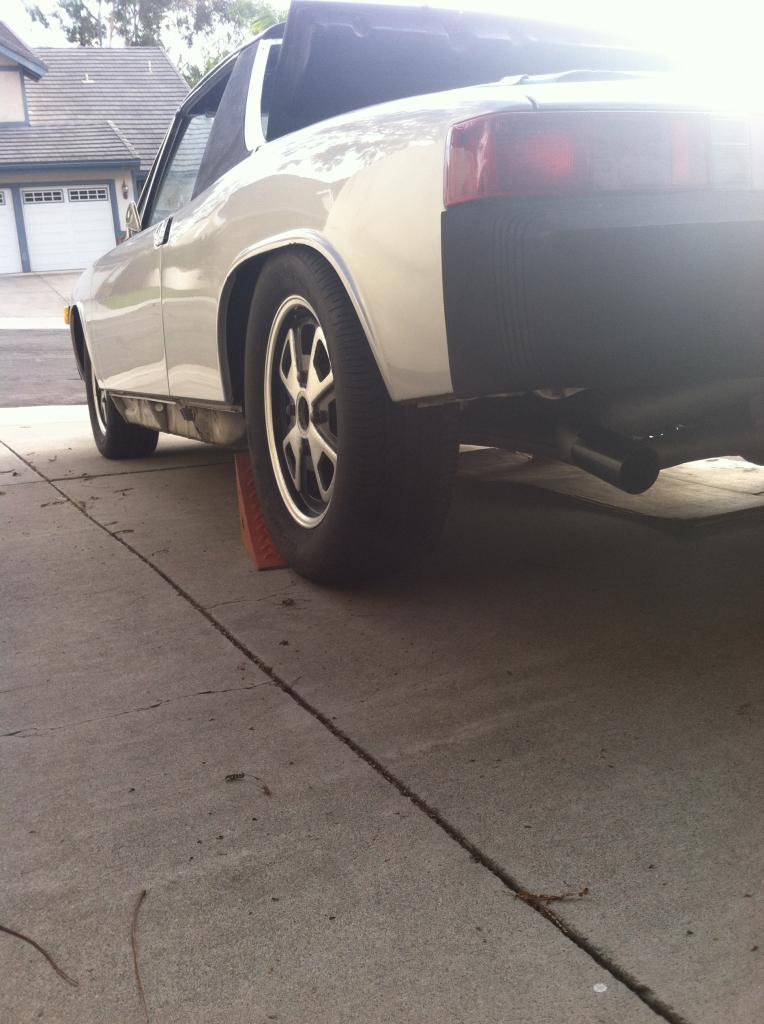
I just picked up a 1976 914 2.0
for
500$ seriously.
Problem is as you can see in this picture.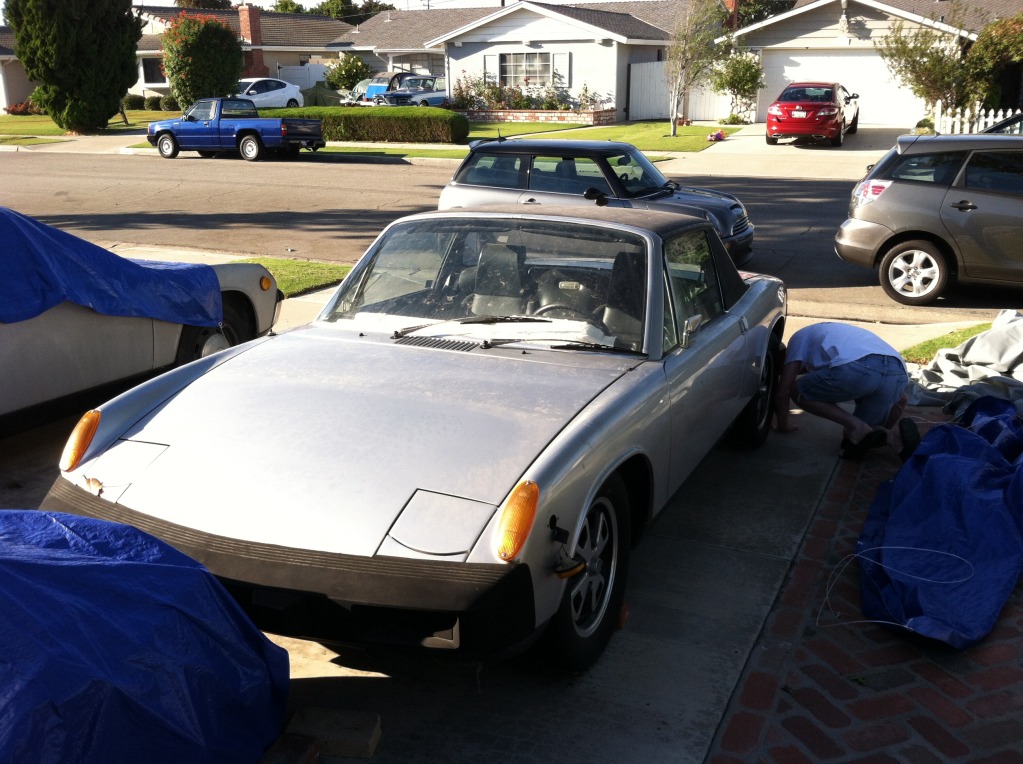
It needs a bit of work.
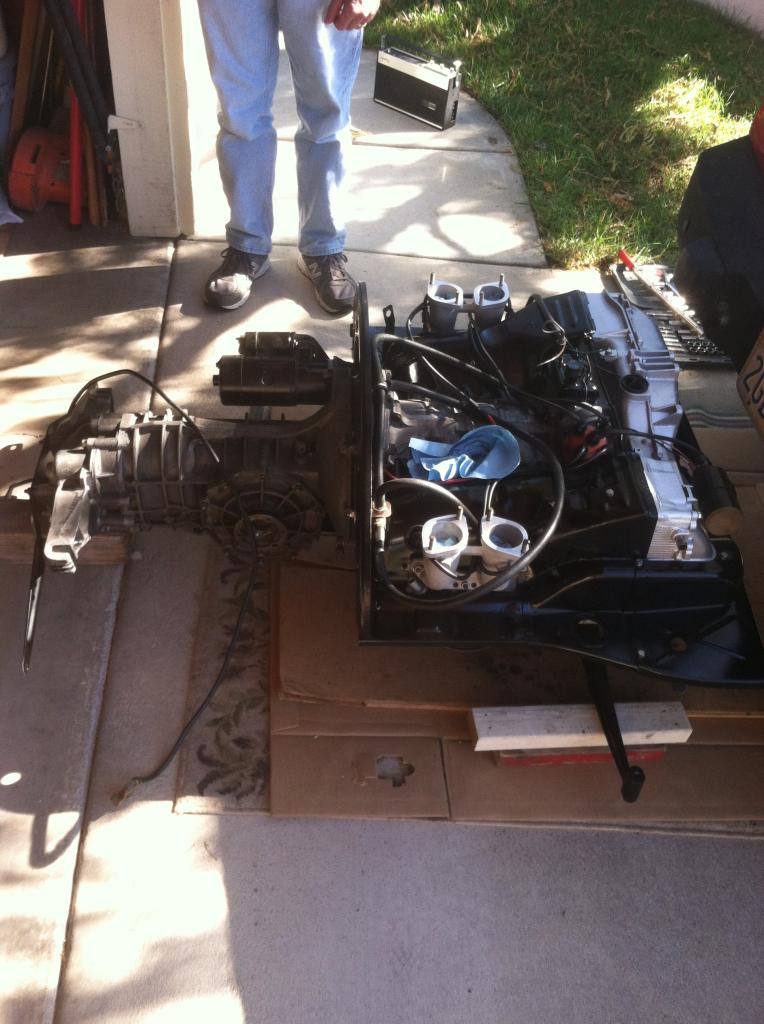
the previous owner used this car as a daily driver till the clutch delaminated. he then removed the motor took the trans appart and well, lost interest.
his mess is now my problem
However it could be worse, its a clean straight car and its got most if not all of its paint on it.
While the trans was apart i took it to my local and trusted trans shop but came back with a bill for 1725 to replace all the bearings and synchros. Ouch.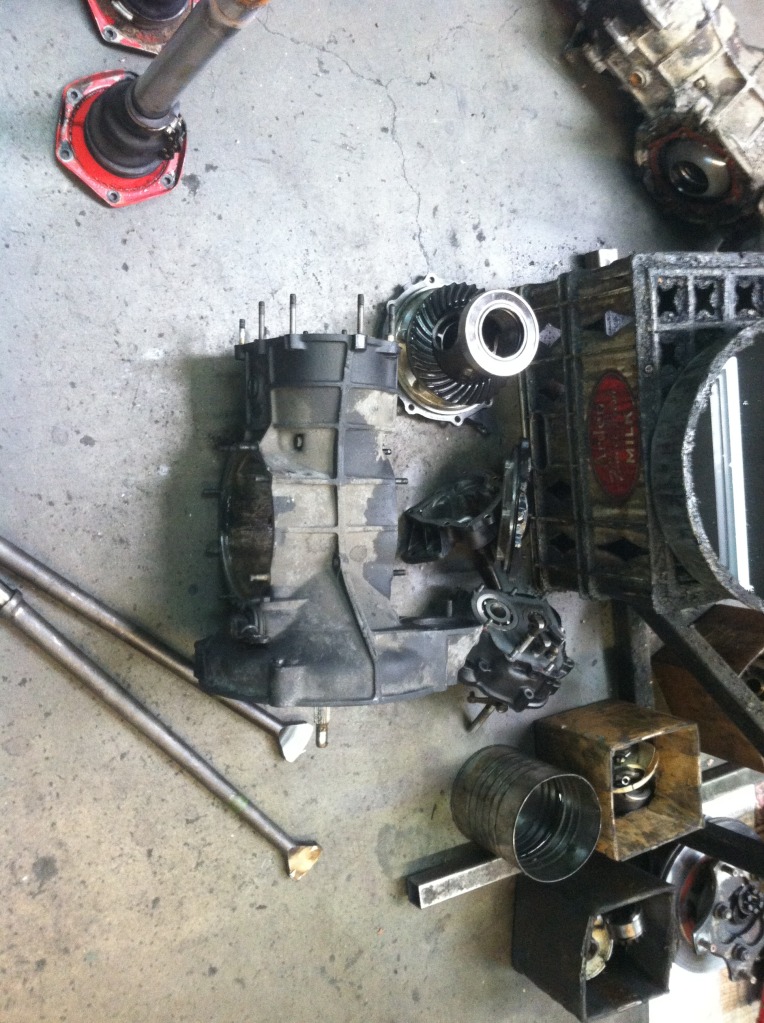
then started tearing the motor down to clean the tin and probably powder coat it.
this car will bankrupt me.
The previous owner said that it ran great and had no leaks.
Right.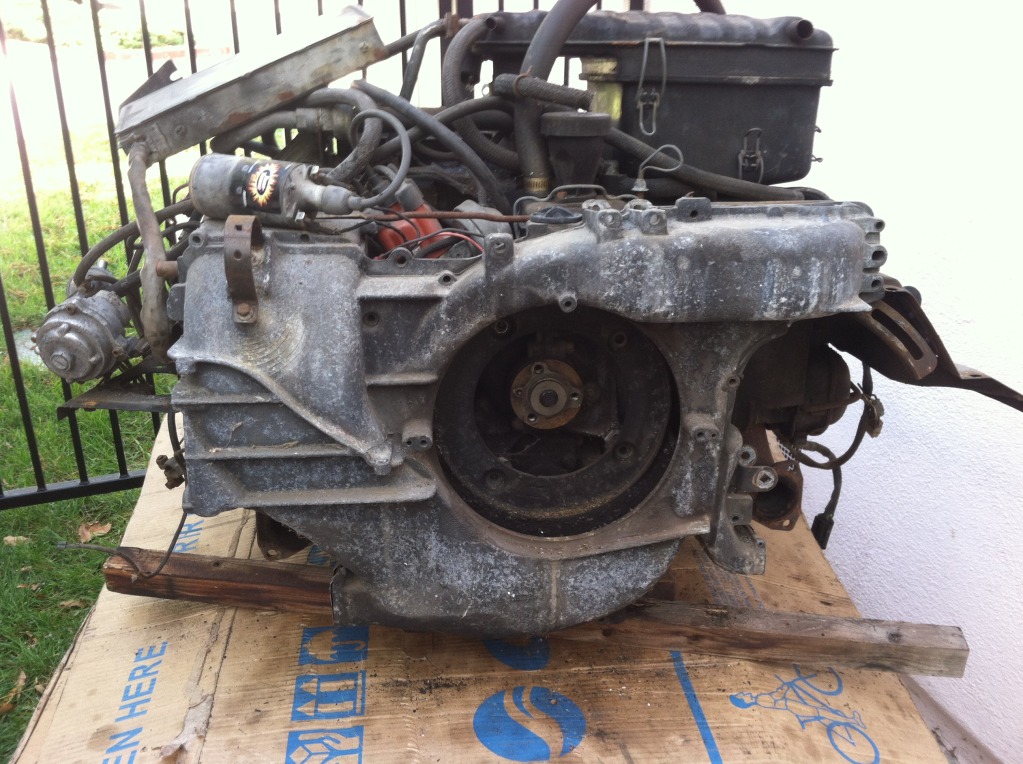
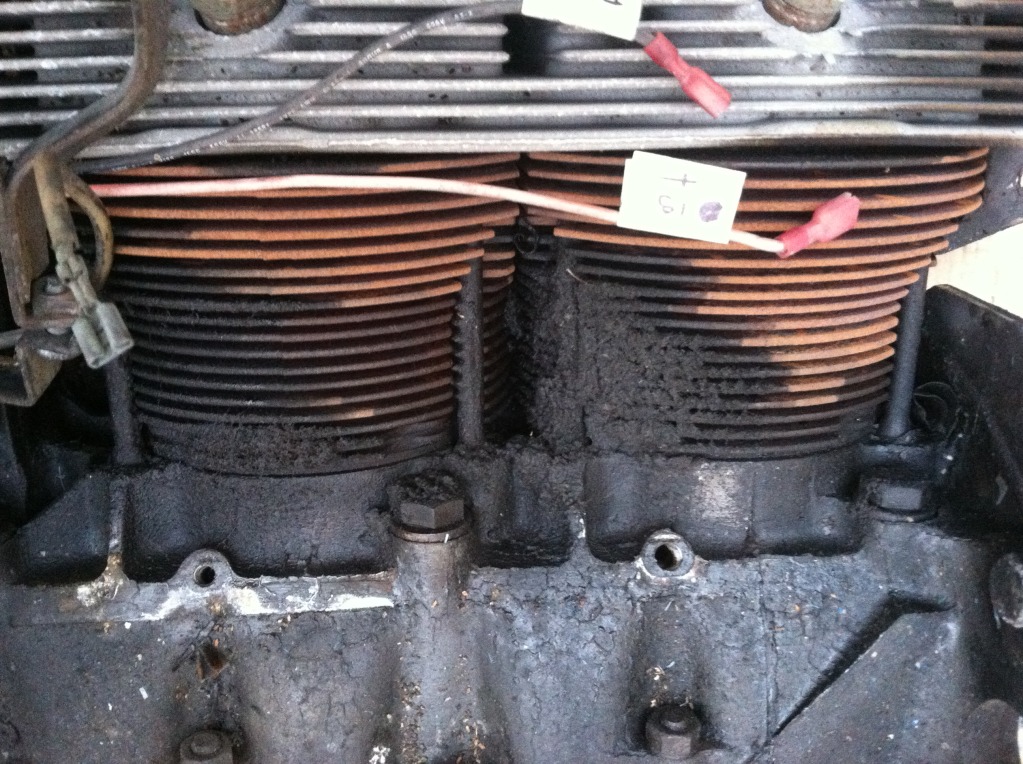
Also came with these wheels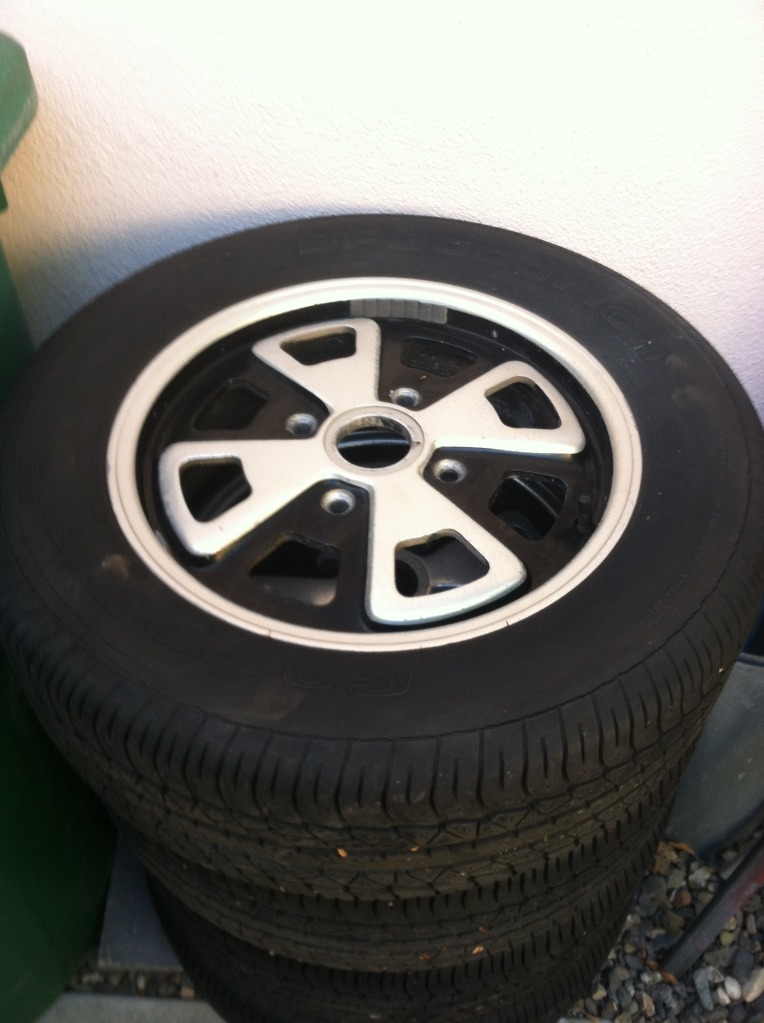
My friend bought one also (A 71) for 500$
heres the two of them together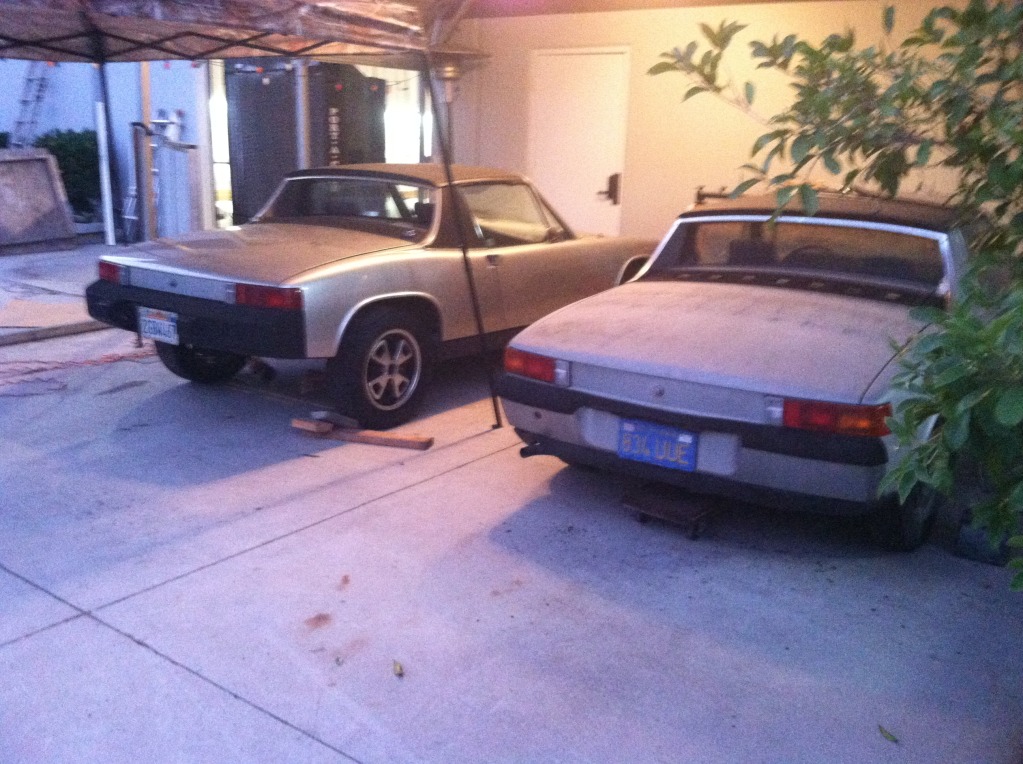
Ive read so many threads to inspire me to get off my ass and do something with my car so hopefully i can take the things i have learned here and really apply it.
I only have a few questions i cant find the answers to so ill just throw it out there.
Should i bother keeping the stock fuel injection if i want to have some sembalance of performance.
and will the stock fuel injection take to being modified say, headers maybe a mild cam?
How will the car perform stock ish,
while the motor is out is there any must do jobs?
Ive been looking at re enforcing the trailing arms and potentially the brackets for them.
as well as adding the J west shifter stuff.
the shocks and such will need to be replaced, any recommendations for a road car that id like to just handle well, I have one car on race suspension (Ast) and i don't know that i want another one.
And what material is the fan housing, is it aluminum or magnesium, can i get it anodized to protect it?
The car has been sitting for 10 years so the brakes are slightly borked, worth it to keep the stock calipers or do they need an upgrade.
other than that the car only has mild rust here and there ( the hell hole is good the battery tray is mediocre) and it appears that i might have wound up with a decent car.
Thanks for all the help in advance i look forward to getting this poor car back on the road.
Posted by: Brian Mifsud Oct 31 2013, 12:43 PM
Welcome to the site. Great people here. You will enjoy it.
If you are going to register the car in California, you will need to pass smog. 1975 model years and older are exempt. Dave Darling told me that for SOME 1976 models (they were ALL built in 1975 but sold as "1976"), people demonstrated to the state that their cars were old enough to be exempt from inspection.
If you don't have all the right smog gear, let me know. I've been accumulating it for spares and for people who need missing components.
Posted by: walterolin Oct 31 2013, 12:55 PM
Welcome, it is a great site.
Get in touch with Dr. Evil about your transmission. I went to his clinic in Canada in June and got my tailshifter 901 rebuilt with a lot of parts for $650.00. Might be easier to buy another one.
The consensus on this site is to keep the FI and learn how to keep it up. Carb changeover apparently is not as simple as it seems at first. There is a thread running right now styled "I Hate My Carbs".
Again, welcome, I've met a bunch of nice people here.
Walter Olin
Posted by: 7TPorsh Oct 31 2013, 12:59 PM
Welcome...what part of SoCal?
Posted by: 914itis Oct 31 2013, 01:12 PM

If you didn't let the mechanic do the job on the tranny yet, out great dr evil here will rebuilt it for maybe half of that. He used good used parts from salvaged transmissions but we don't have any complaints he will do a great job. Shipping it to him is about 80 bucks if you follow his instructions.
Posted by: pt_700 Oct 31 2013, 01:29 PM
welcome to the madness!
besides what's already said, ask here before spending more than $100!
let's revise... ask here before spending anything!
Posted by: dcheek Oct 31 2013, 01:42 PM
If you need specific pictures as to what goes where, or what you are missing, I can send pictures. My '76 is bone stock, and I've owned it since day one.
Let the "fun" (read work your ass off) begin.
Dave
Posted by: Cupomeat Oct 31 2013, 01:51 PM
And from what I've seen you got a steal (Given the fuchs wheels are worth more than the $500 you paid).
Take your time, ask LOTS of questions and here is my advice;
1. Go find a core transmission and rebuild it using the video (you have spare parts with the other trans)
2. Stick with the FI as it will make your car smoother and much better on gas mileage than carbs without lots of work.
3. Stick with the FI as it is likely you will legally have to to drive it on the road. A 76 2.0 is a fun car to drive!
4. Take pictures of the hell hole, the longs, the pedal area, the rear firewall (behind the seats) and post them. You should attack the rust first as all the rest is relatively easy comparatively. Plus if you have a solid chassis, the rest is SO much more fun.
5. Enjoy having a friend with another 914 that you can swap parts, and rebuild them together. I bought a 75 basket case (like yours) in 1987 and still own it. It will be part of you.
HAve fun, welcome and we are here to help (yes you'll take some abuse, but it is worth it!)
Posted by: 76-914 Oct 31 2013, 03:19 PM
Toluene is your friend come smog time.
Posted by: SLITS Oct 31 2013, 03:47 PM
He should come to the G&R and be insulted!
Posted by: Brian Mifsud Oct 31 2013, 04:11 PM

Toluene is your friend come smog time.
Toluene....Pray tell???
I've always passed just by adjusting the valves even though my converter was totally empty. Since then I've moved up in the world and have my "Sunday" catalytic converter installed with genuine Platinum inside.
Does the Toluene reduce NOx?
Or do you just pour some in the smog guys coffee when he's not lookin'
How much do you add?
Posted by: SLITS Oct 31 2013, 04:31 PM
How much do you add?
10% by volume .. alcohol works too!
Posted by: colingreene Oct 31 2013, 09:21 PM
what part of the longs do you want to see?
I can take pictures of the rest of it.
Also thank you for the offer but the Previous owner did include the apparently somewhat rare and hard to find working air pump.
I should have all the smog stuff to keep it legal. (kinda neat) Though i don't care that much.... I want to try to petition it to not be smogged.
its ridiculous that CA wants to emissions test a 37 year old Vehicle A Holes....
id prefer to have the factory injection working but
at the same time i want to know if its only ever going to run the car in a factory configuration.
thats my key question here.
Ive been around aircooled Vw/Porsche stuff my whole life.
(dads first car is a 70 beetle with a 1907 (92x74) with dual DCN14's)
So i know what it takes to run carbs.
Would prefer the fuel injection though.
For the person who asked I am in South Orange County.
My friends car has the carbs on a 2.0L bus motor. not sure if this is a good thing to have, its just what it came with. It might wind up with a new motor as the oil looked dubious when i drained it. its got Webber 44 IDF's on it.
I found a complete 1.7/1.8 motor for 300 the guy who has it says that it wont stay in second gear however.
My wheels I am unsure how to proceed in re finishing them. From what i read they are Anodized, I have a friend who can strip and re anodize them so i might do that if thats what we confirm here they are then re paint them.
As far as the trans goes, I am not real comfortable putting used parts into my trans, Id prefer to have all new parts. and thats where most of the cost has been generated.
He did my dads bug transmission and it came out fabulous so i could think of worse things than spending my money on something that will only need to be done once.
I know that Jim at Der Transaxle will stand behind it should it ever have any problems.
However Ill suggust the Dr.Evil route to my friend about his car as hes got less of a budget than I do.
After finding this website i dont feel so bad about my car not being a 911...
or a 914-6... though the guy i got my car from has one and apparently wants 15k for it, not sure how good of a price that is.
Posted by: euro911 Oct 31 2013, 10:25 PM
Your transaxle may not need all new parts, and some parts, like first gear, are almost unobtainable  - so don't discount rebuilding with some used parts.
There are several guys out here that can rebuild your trans for a reasonable price. $1700 is plain outrageous, and that price may include some 'used' parts as well.
I agree, keep the FI system intact, especially if you plan to keep the car in CA.
Remove the side rocker panels and check for rust where the longs swoop down from the engine compartment to the cockpit area, especially the passenger side, below the battery ('hell hole') area.
Stock brakes are adequate for low HP (stock) cars. Porterfield pads are good.
If you plan for 150+ HP, you might want to think about larger, vented rotors and 911 'M' calipers up front.
Posted by: rhodyguy Nov 1 2013, 08:22 AM
look on the rear of the wheels. if there is a fox head and/or the #914 361 011 01 they're the real deal. tread lightly on stripping the paint. the one pictured looks to be in nice shape. hate the stick on weights on the outer lip.
Posted by: colingreene Nov 1 2013, 11:37 AM
Ill get some pictures when i go up to see my car today.
Addtionally ill try to take pictures of the slight bits of rust i have found on the car.
As far as upgrading the brakes its a moot point if its a California car and I cant uprate the motor right....
the wheels i have a better picture of ill get that up here in a second.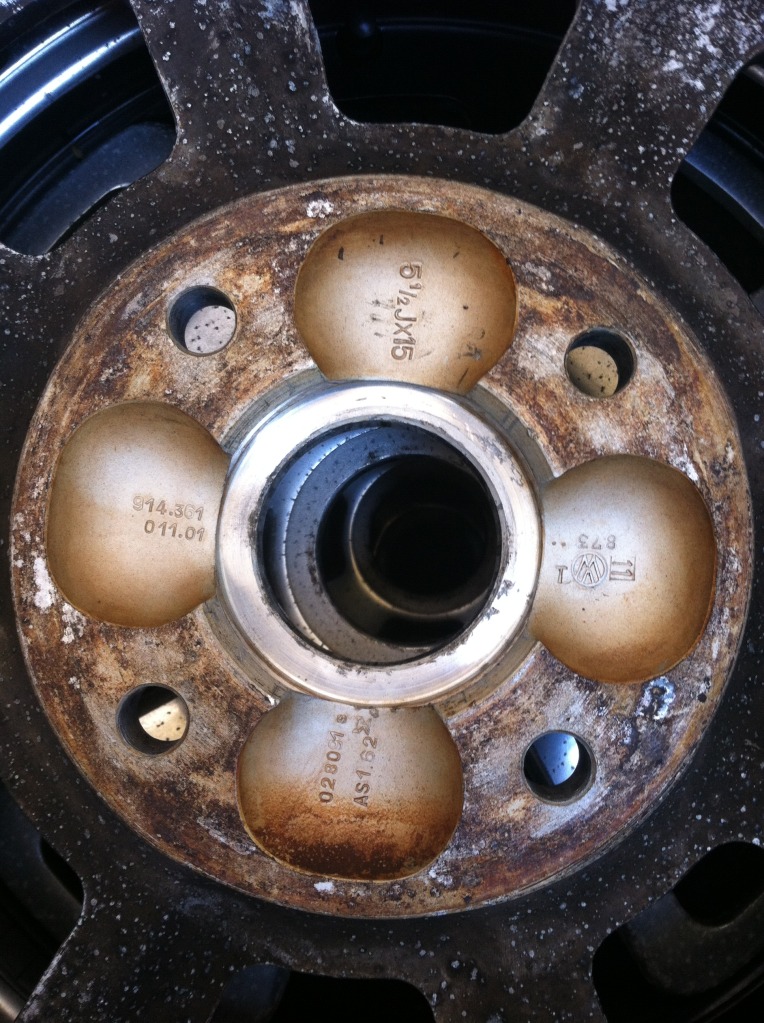
Posted by: Cupomeat Nov 1 2013, 11:59 AM
Ill get some pictures when i go up to see my car today.
Addtionally ill try to take pictures of the slight bits of rust i have found on the car.
As far as upgrading the brakes its a moot point if its a California car and I cant uprate the motor right....
the wheels i have a better picture of ill get that up here in a second.
That SIR, is the real deal wheel...
I love assonance... Yup, I'm a dork

For picks, I think Euro911 had it, but just look for rust and post pix of the worst areas. in the corner in front of the battery is a critical area.
Agree that used parts in a 901 trans rebuild are almost a given now. Plus, some parts, like synchros are the same 1st-5th and the upper gears barely wear on them so you may as well reuse them.
Don't buy new unless you have reason or it is an obvious end of life situation.
ANyway you slice it, you have lots of work and a GREAT time ahead of you with this car. Where are you on the motor? Given your tear down, you may as well pull the heads, check the condition and re-ring the pistons (If the motor has sat very long) and then put it back together and start working on the FI.
Replace ALL the fuel hoses with the latest ethanol friendly stuff.
Good luck and post questions, we are here to help (wish it was available when I was doing my first 914)
Posted by: Dave_Darling Nov 1 2013, 12:47 PM
They are indeed the real thing. But the real wheels were not painted at the factory. They were often painted at the dealer to imitate the five-bolt "windmill" Fuchs wheels, or by an owner who liked the painted look better.
The paint will have been applied over the stock anodization, unless someone removed that prior to painting. The black stuff itself is almost certainly not the anodizing.
--DD
Posted by: Brian Mifsud Nov 1 2013, 02:22 PM
I should have all the smog stuff to keep it legal. (kinda neat) Though i don't care that much.... I want to try to petition it to not be smogged.
its ridiculous that CA wants to emissions test a 37 year old Vehicle A Holes....
I have a question for you, do you know how to get through this requirement
 ?
?(This is from http://www.bar.ca.gov/80_BARResources/02_SmogCheck/Frequently_Asked_Questions_Part_1.html)
"Question: What vehicle model years are required to get a biennial smog check?
Answer: For gas-powered vehicles the 1976 model year is the earliest model year vehicle required to participate in the biennial Smog Check Program. Vehicles six years old and newer are not required to participate in the biennial Smog Check Program.
For diesel-powered vehicles 1998 model year and newer 14,000lbs and less are subject to the biennial Smog Check Pragram. The six year exemption does not apply to diesel vehicles.
Question: My 1976 model year vehicle was built in 1975. Why isn't it exempt from Smog Check?
Answer: Many 1976 model vehicles were built in 1975; however, the Smog Check exemption is based on model year, not date of manufacture, so these vehicles are not exempt."
Posted by: arcadeforever Nov 1 2013, 05:48 PM
Welcome Colin, your car looks to be in amazing condition. Great find!!!
Wayne
Posted by: colingreene Nov 2 2013, 02:28 AM
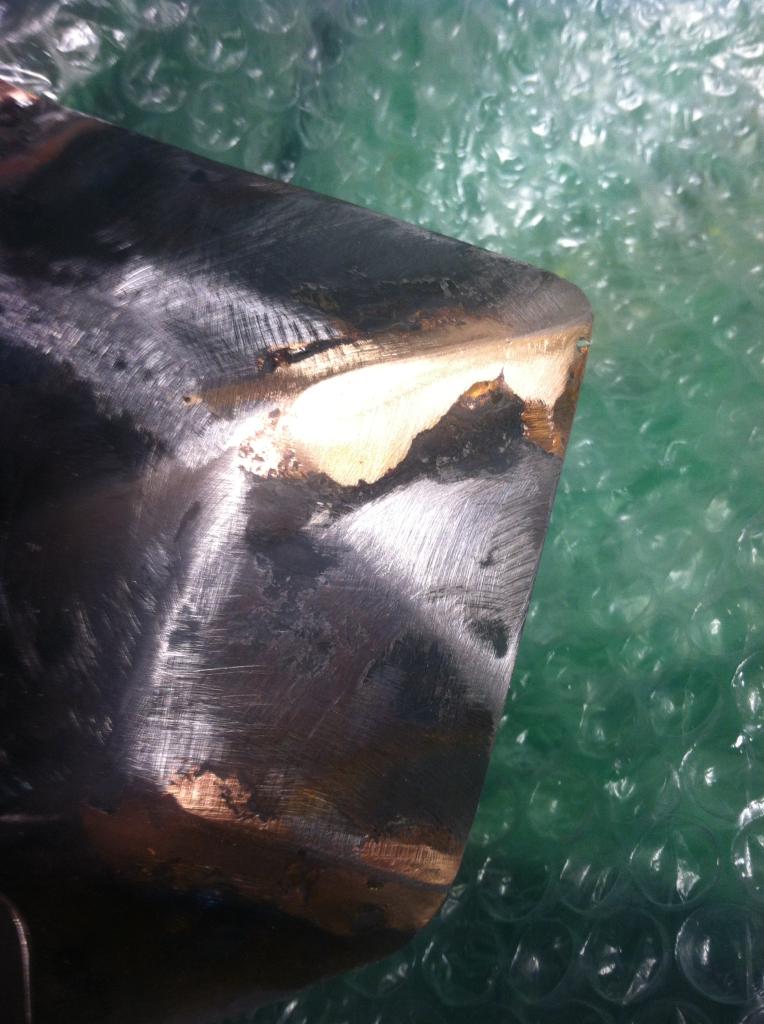
This is my current problem with my wheels.
I took some wheel polish to it but no dice.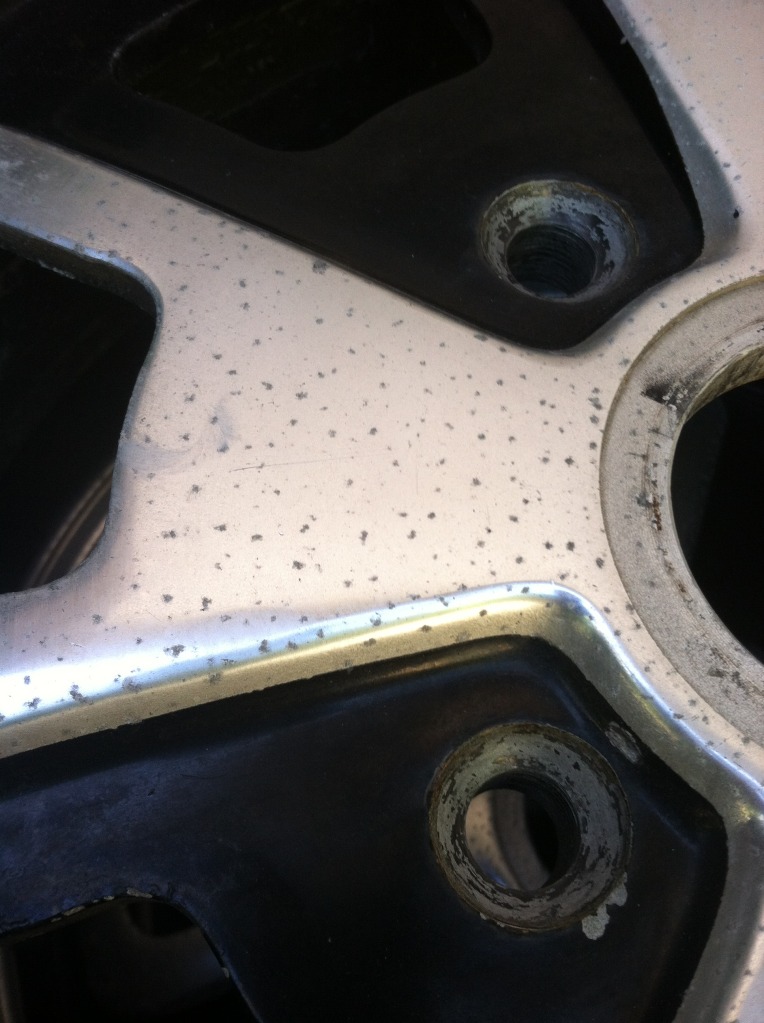
Heres some quick spots of rust i could find, however i did not get to investigate more fully.
I also pushed out one of my axels. the drivers side however will not budge.
Ill need to come up with a solution for that.....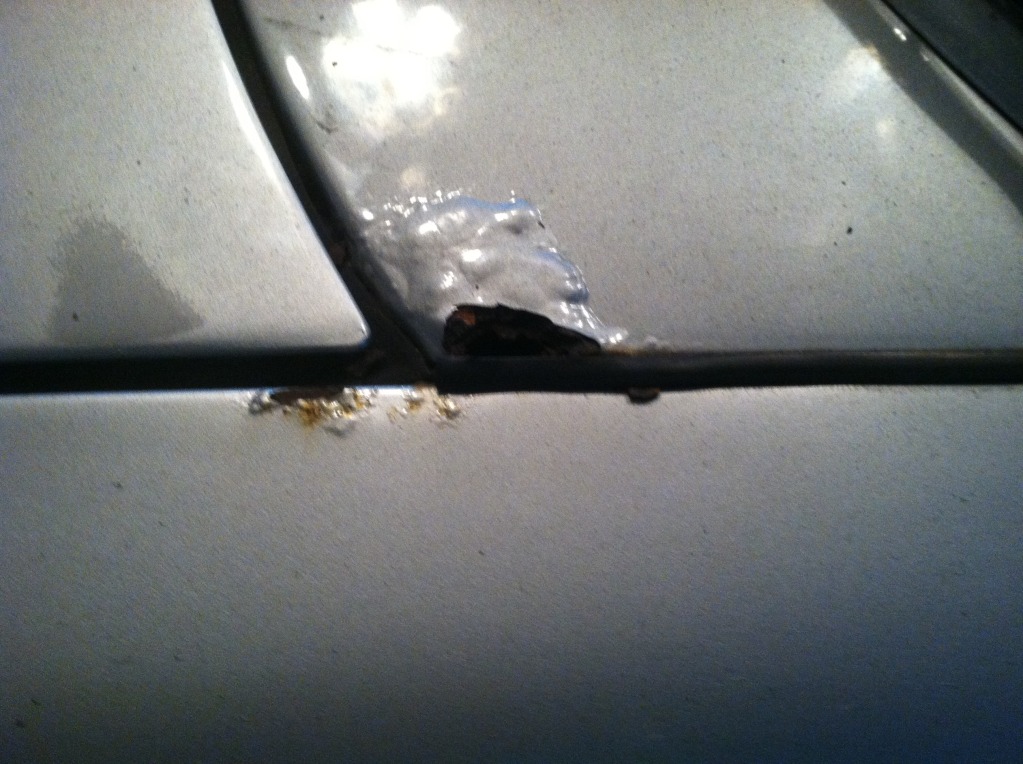
http://i821.photobucket.com/albums/zz135/Silversmoke06/null_zps7db2f31e.jpg
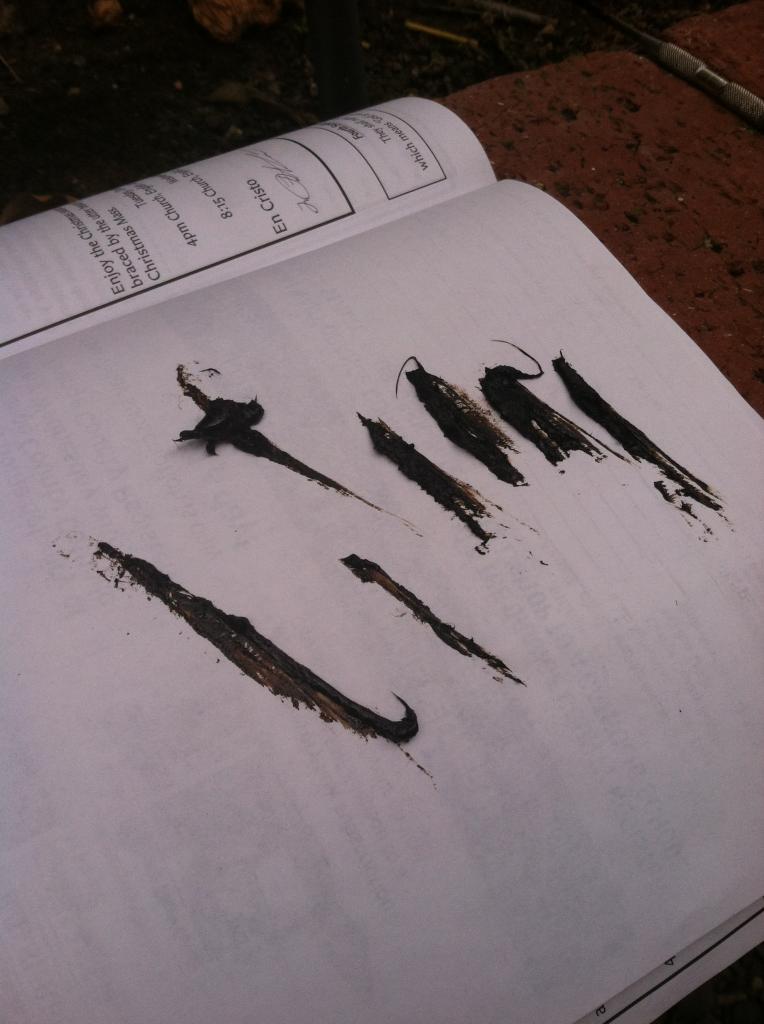
Also this might not be the best picture ever but this is the race set from one of my trans main bearings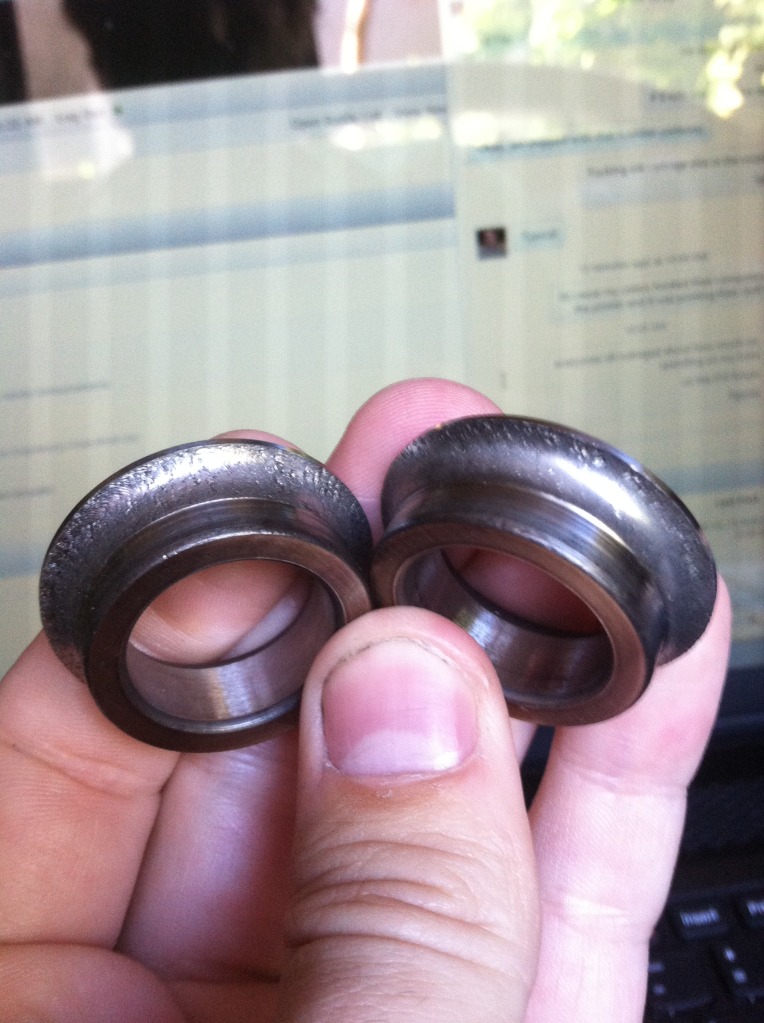
looks pretty borked to me.
Posted by: carr914 Nov 2 2013, 07:59 AM
Posted by: colingreene Nov 2 2013, 08:02 PM
Got a chance to work on the car some today, Took quite some doing to get the drivers side axel out. So much so that i need a new stub axle. If anyones got one let me know.
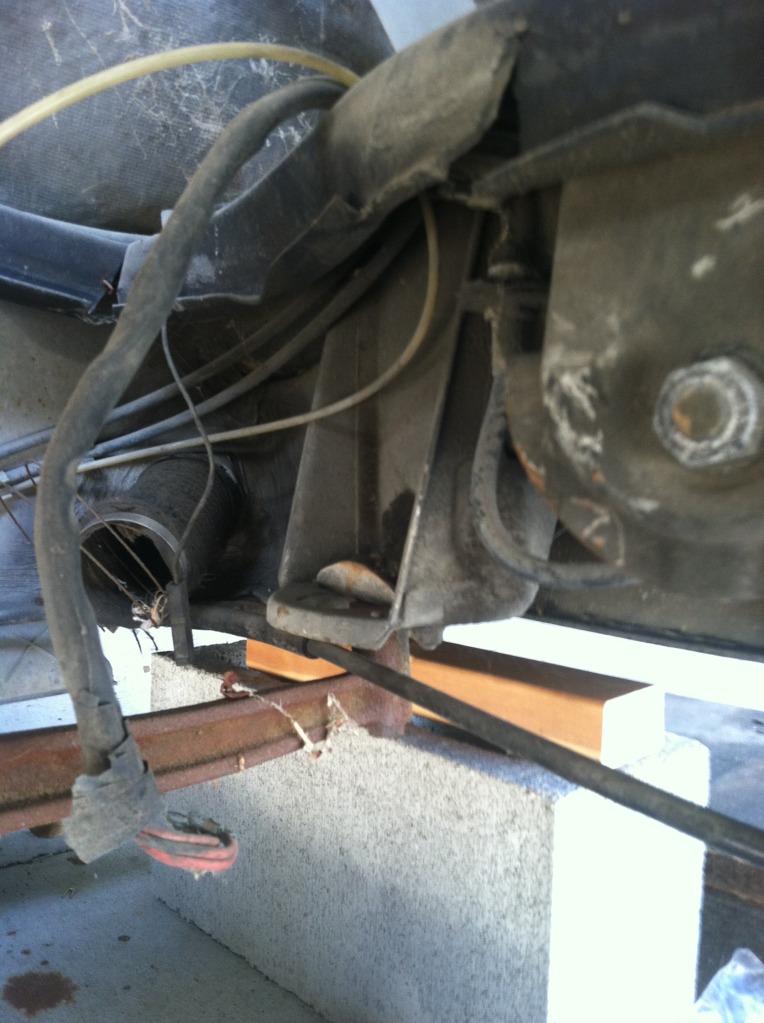
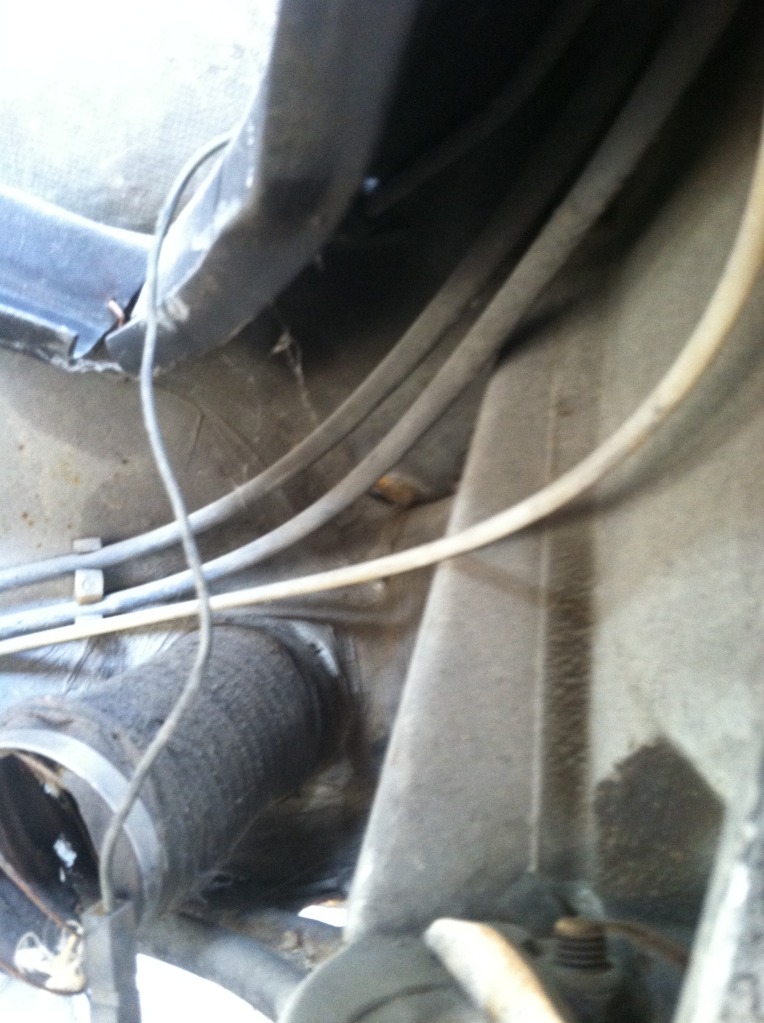
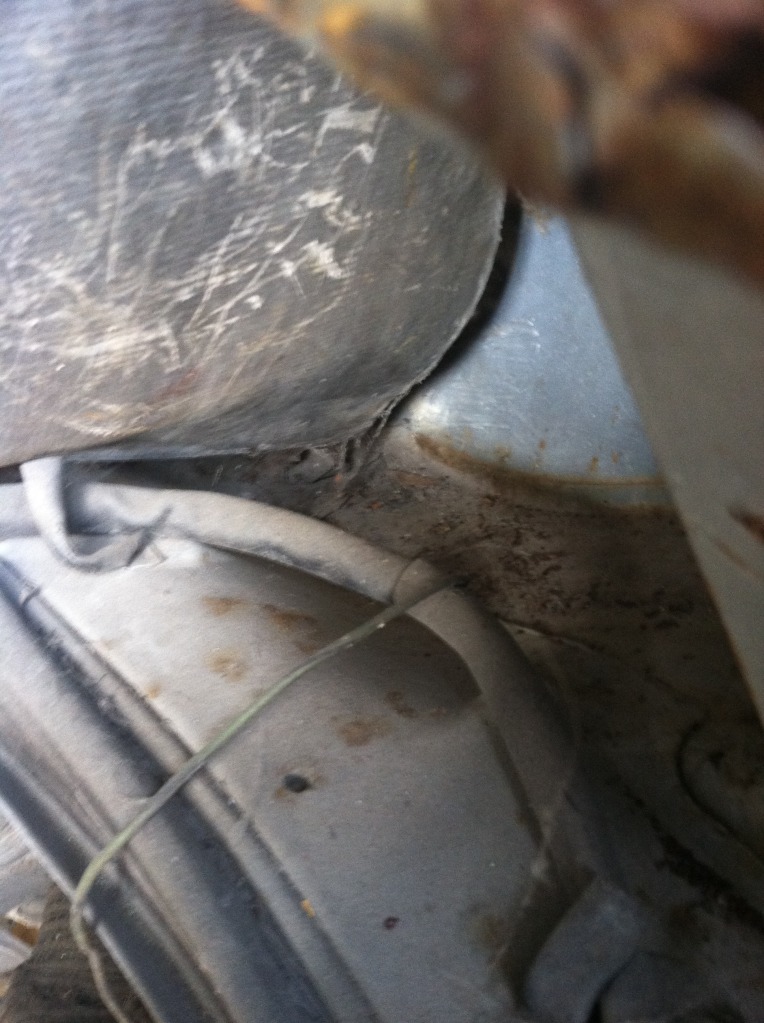
it was really stuck. anyway i got pictures of most of the stuff you all were asking about so ill throw those up now.
Drivers side rear suspension pick up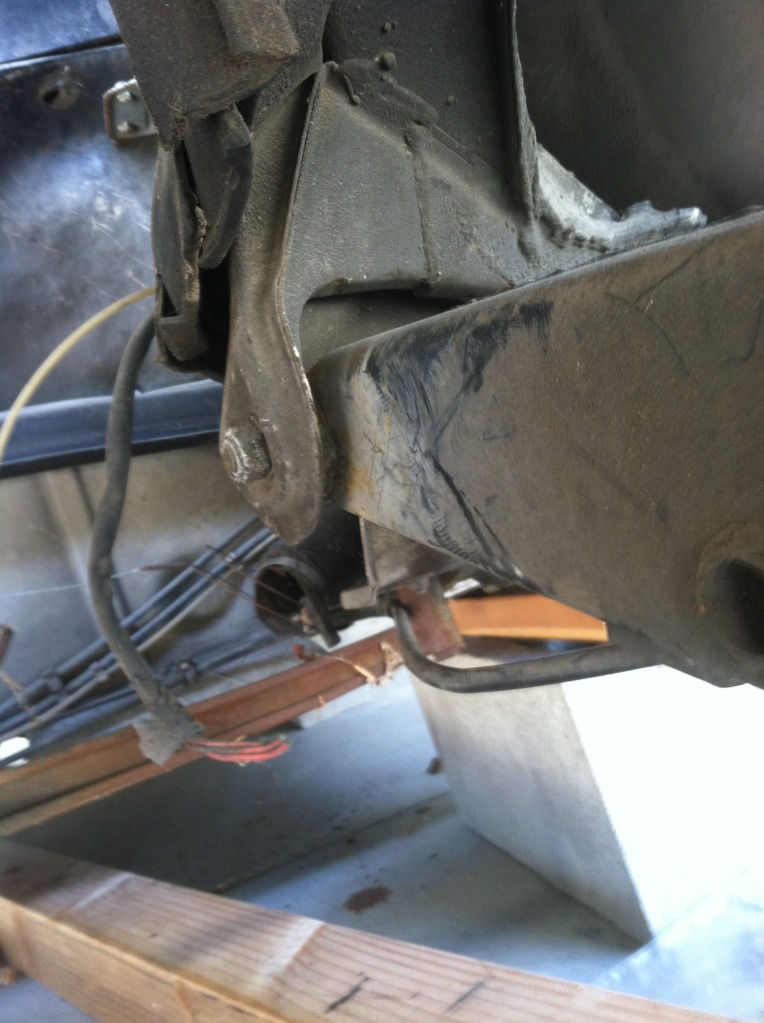
Passengers side rear suspension pick up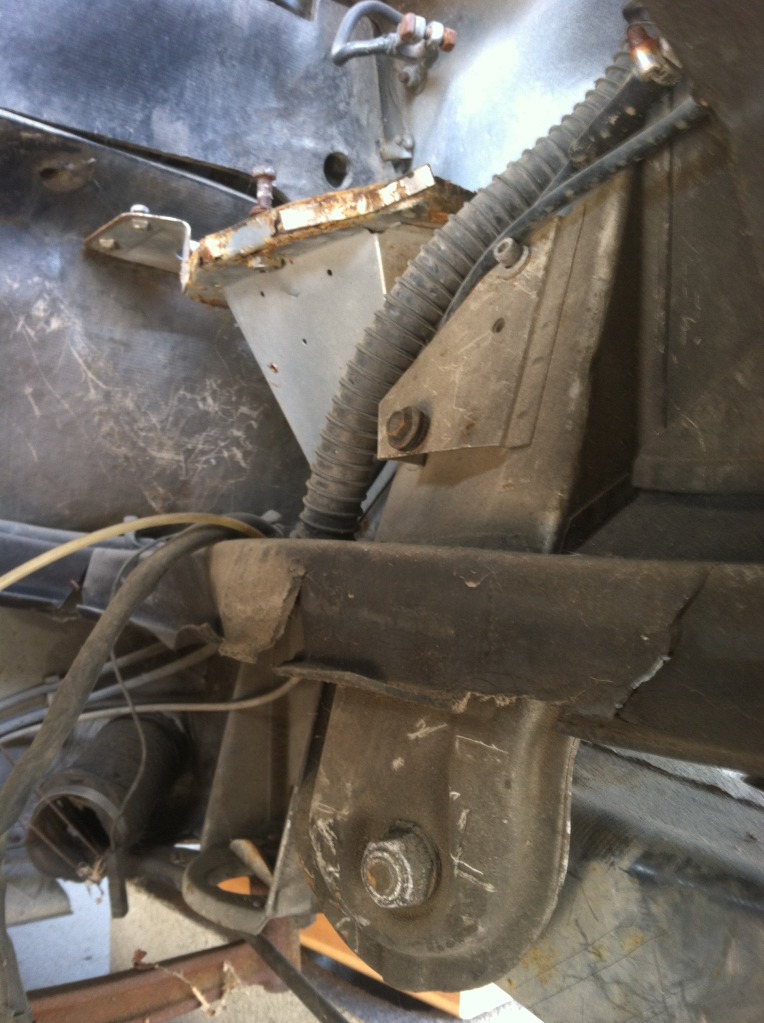
Posted by: euro911 Nov 2 2013, 09:28 PM
Hell hole looks pretty good, actually 
Remove the sound deadening pad from the firewall in the engine bay and check for rust behind it especially near the bottom.
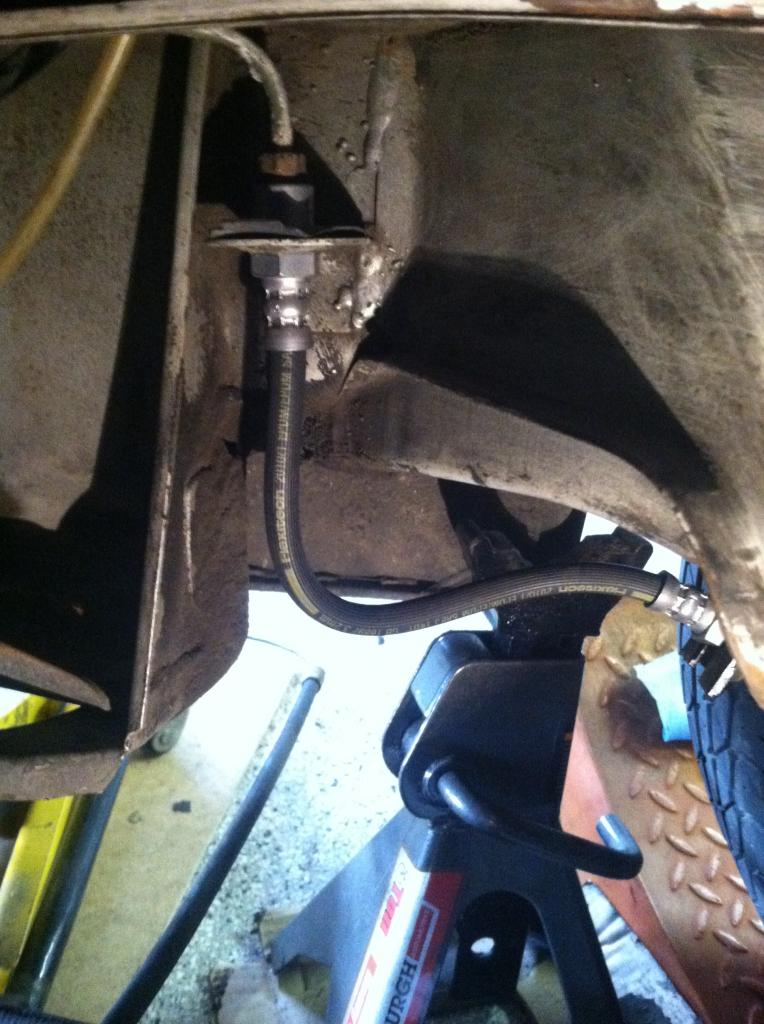
While the drive train is out, inspect and replace (as needed) the flexible brake hoses, e-brake cables and fuel lines (SS are highly recommended)*
* Two members here manufacture SS fuel lines: Robert (Rotary'14) is local in So Cal and will be at the G&R Swap Meet (you should try to attend this event if you can), and Chris (Racer Chris) of Tangerine Racing.
Posted by: rick 918-S Nov 2 2013, 11:36 PM
Posted by: Dr Evil Nov 2 2013, 11:45 PM
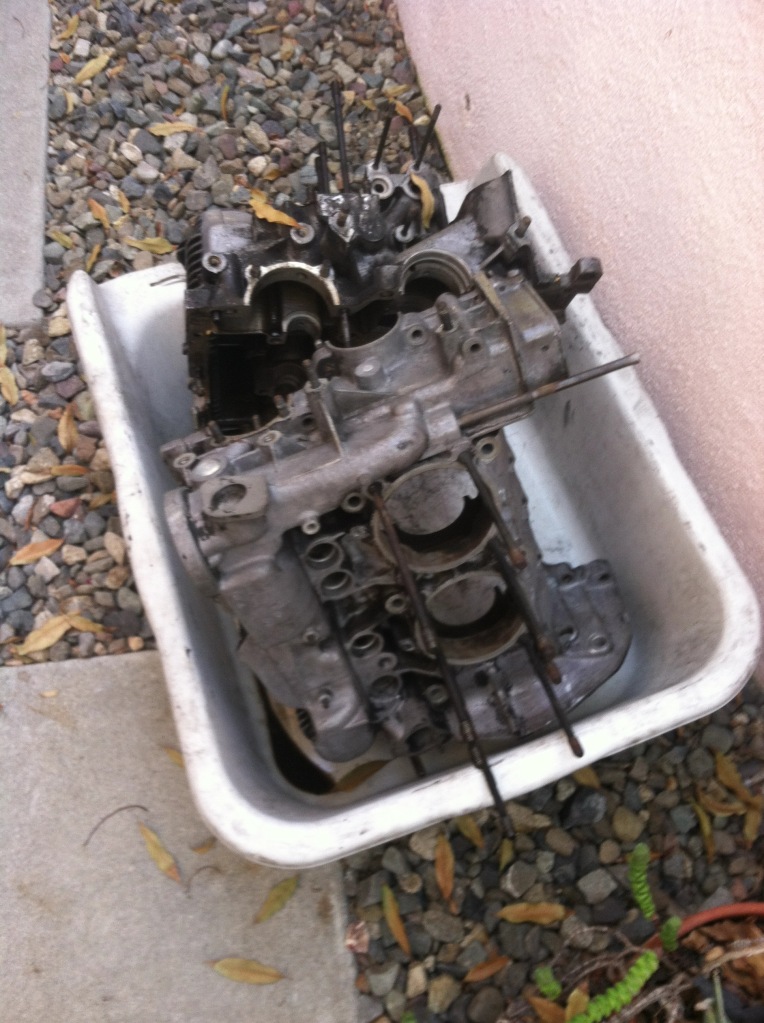
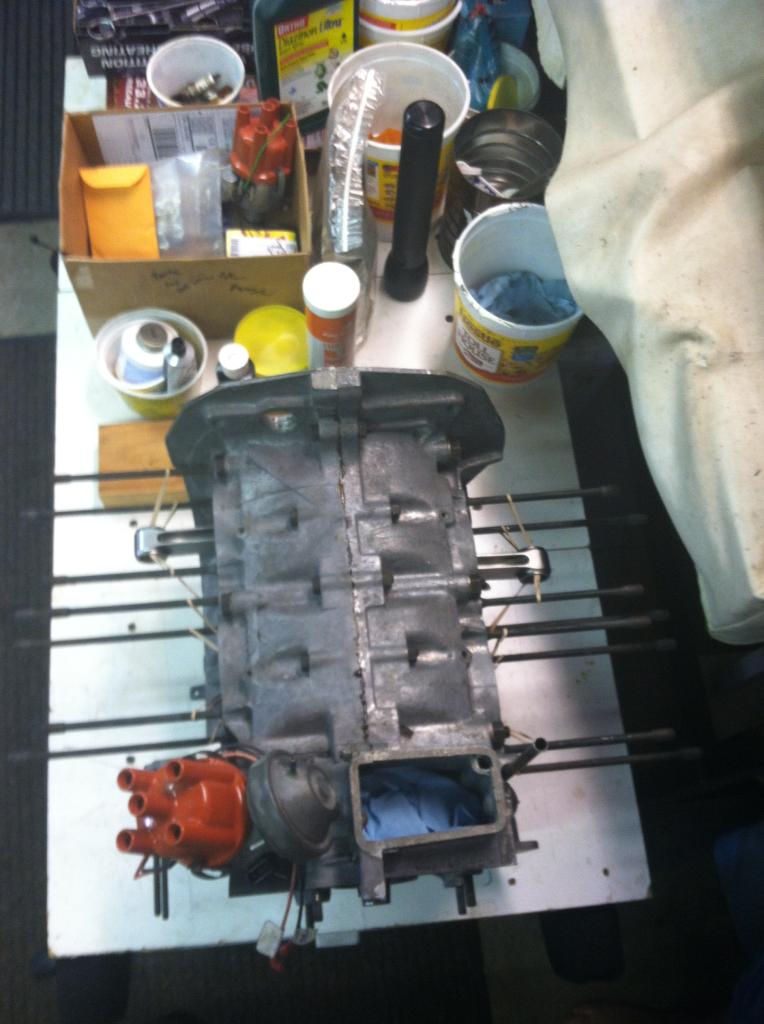
I am surprised that no one noticed.....those transmissions are for a bug. Not 901, not Porsche. You gonna need to buy a core and start there.
Posted by: Dr Evil Nov 2 2013, 11:53 PM
Did your shop note what type of tranz those are?
$1725 from a shop is not outrageous.
Latest parts costs and usual wear items:
1st slider - $500
1st teeth - $150
1st band - $88
2nd teeth - $140
2nd band - $88
2nd/3rd slider - $185
Small int plate bearing - $250
Large int plate bearing - $315
Without labor, for new parts, you are looking at a total of = $1716 before labor.
This is only one sites prices, and there is a little variation. Using inspected and verified good used parts saves you a butt load. This is how I keep build costs down.
Posted by: euro911 Nov 3 2013, 12:22 AM
Maybe I should have said, $1700 is outrageous to some of us. I'm sure some folks fork that kind of $ out, then again, some of us are spoiled by folks like you, Doc, or THOMAS, etc. who rebuild our trannys for pennies on the dollar 
Posted by: colingreene Nov 3 2013, 12:53 AM
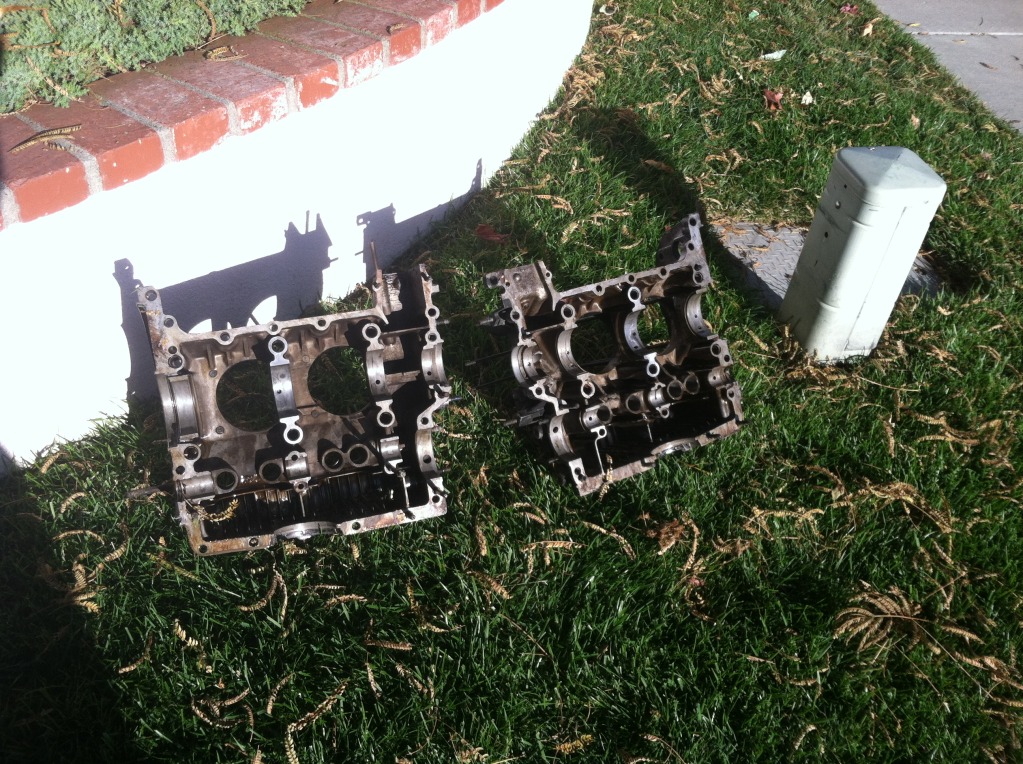
I know that they have Vw trans in that picture. That case is my 901 case though.
its a side shift as it should be.
Anyway when and where is the swap meet?
Ill pull the insulation when i get to it. I just wasent in any real hurry to pull it off then have to buy new ones.
I did plan on the brake lines and new wheel bearings after what i just had to do to get the stub axle out.
I know i need a new drivers side parking brake cable also, only two wires are holding it out of the whole cable.
The fuel lines.... is that a pain to change?
I can make them myself but id love to find a way to change them.
Posted by: euro911 Nov 3 2013, 04:05 AM
its a side shift as it should be.
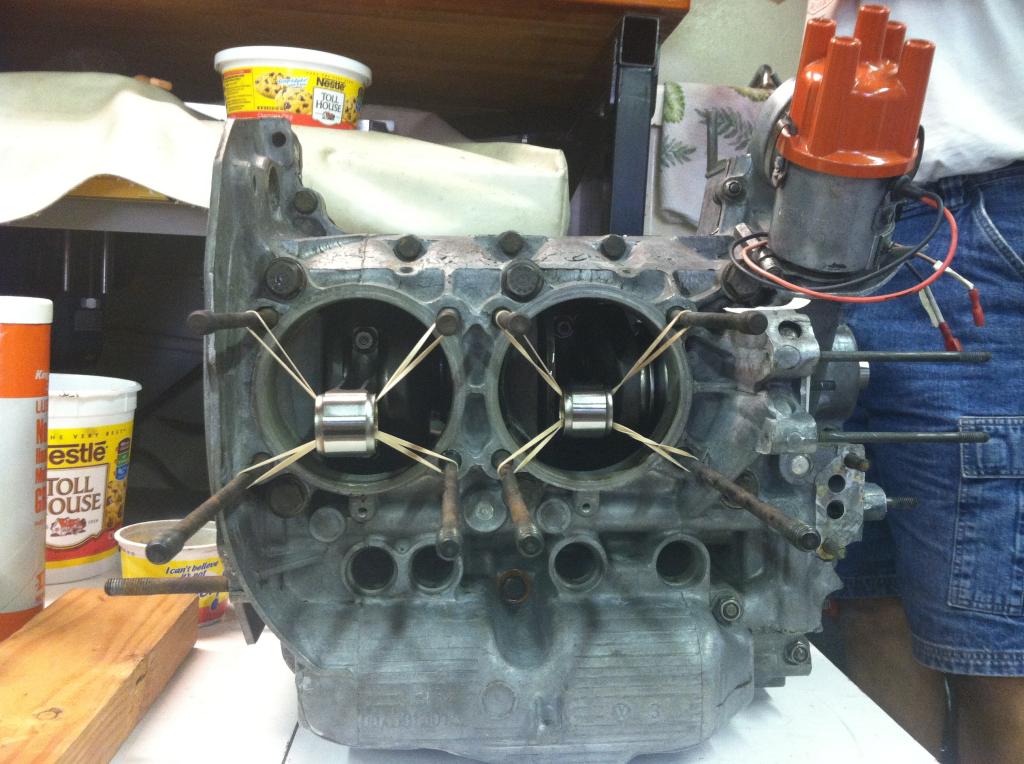
I didn't pay too much attention to the case at first, but I did notice the axles and swing-arm tubes weren't 914. The disassembled case in the pic IS definitely a bug/bus trans. A 901 case has a different throw-out bearing arm arrangement and a vent near the bell housing. Did you remove the drive train?, or was it already out the car when you got it?
Here's a 901 case (minus the nose cone)

Anyway when and where is the swap meet?
G&R thread, http://www.914world.com/bbs2/index.php?showtopic=221573
Ill pull the insulation when i get to it. I just wasent in any real hurry to pull it off then have to buy new ones.
If you use a wide putty knife (plastic is good) to remove the pad (slowly and carefully), you should be able to re-glue it in if it's still in good condition.
I did plan on the brake lines and new wheel bearings after what i just had to do to get the stub axle out.
Stub axles shouldn't be hard to pull out, but the hubs can be a pain. Have you tried PB Blaster?
Heat usually does the trick to get the hubs out of the rear wheel bearings. Be aware that the bearings get destroyed when you remove the hubs, so if the bearings are OK, rethink removing the hubs
(bearings are expensive too).I know i need a new drivers side parking brake cable also, only two wires are holding it out of the whole cable.
You might want to replace the engine bay seals 'while you're in there' ... they're critically important for air-cooled motors. Mark (Mikey914) of 914Rubber.com sells a replacement seal kit. You might want to check out all the products they make before placing an order.
The fuel lines.... is that a pain to change?
I can make them myself but id love to find a way to change them.
Here's a recent thread on that very subject http://www.914world.com/bbs2/index.php?showtopic=223670
Posted by: Dr Evil Nov 3 2013, 08:41 AM
Maybe I should have said, $1700 is outrageous to some of us. I'm sure some folks fork that kind of $ out, then again, some of us are spoiled by folks like you, Doc, or THOMAS, etc. who rebuild our trannys for pennies on the dollar
Ah, ya.

I have never made $1700 off of a non-modified rebuild, and that includes some really messed up ones that needed work, but were stock.
Cheaper without sacrificing quality, that is the way to go.
Posted by: colingreene Nov 4 2013, 12:38 PM
As I said in my first post the Previous owner had a clutch disk delaminate
so he took the motor out and the trans appart and then left it that way for 10 plus years.
I get to re assemble it now.
Posted by: colingreene Nov 9 2013, 07:05 PM
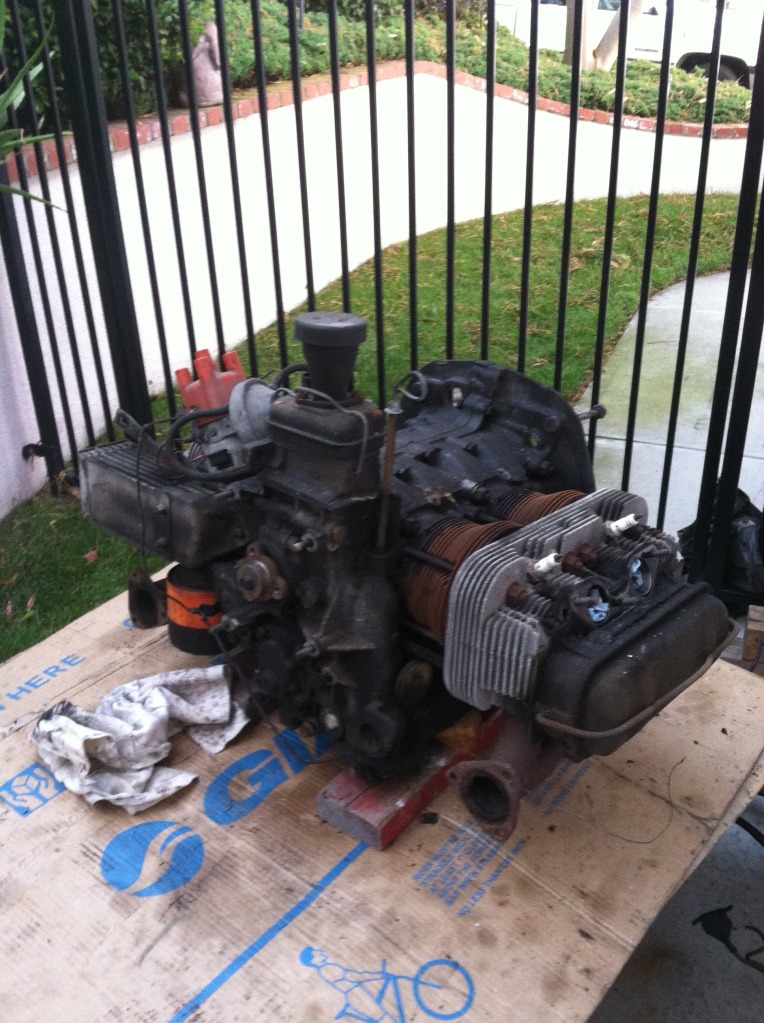
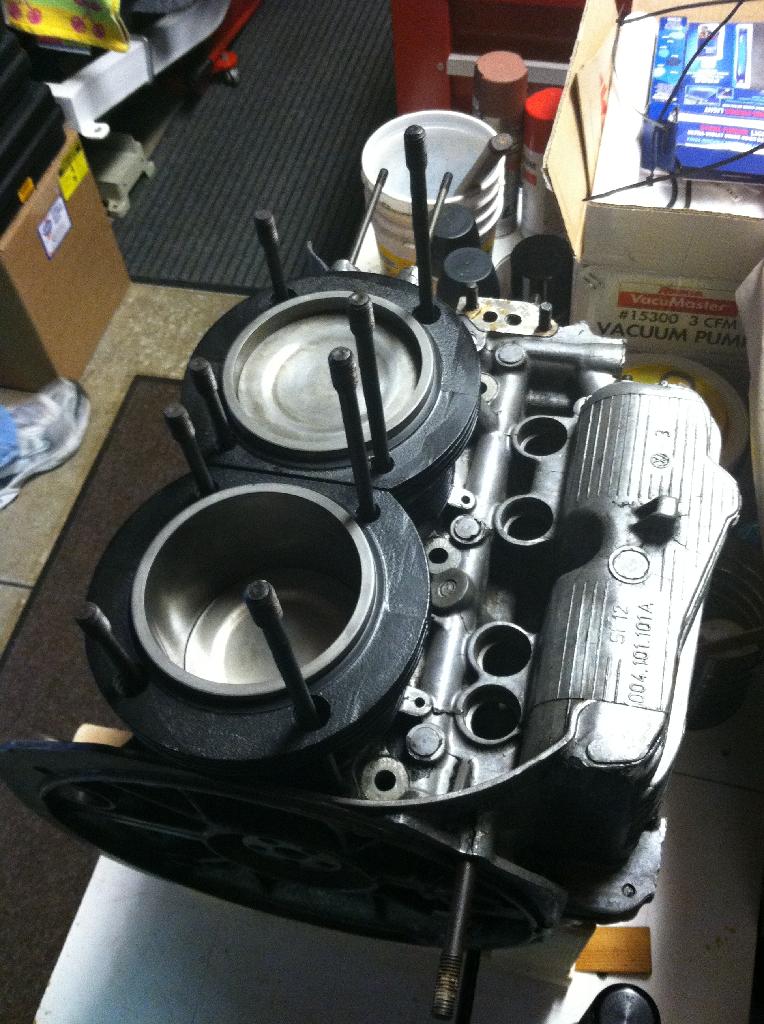
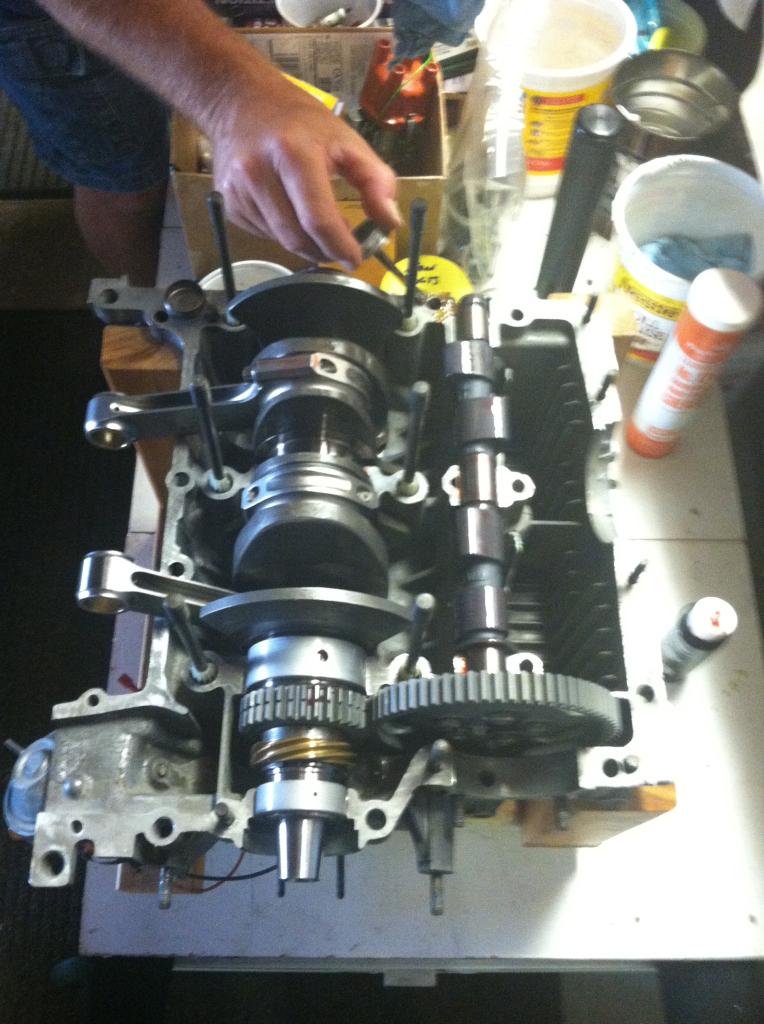
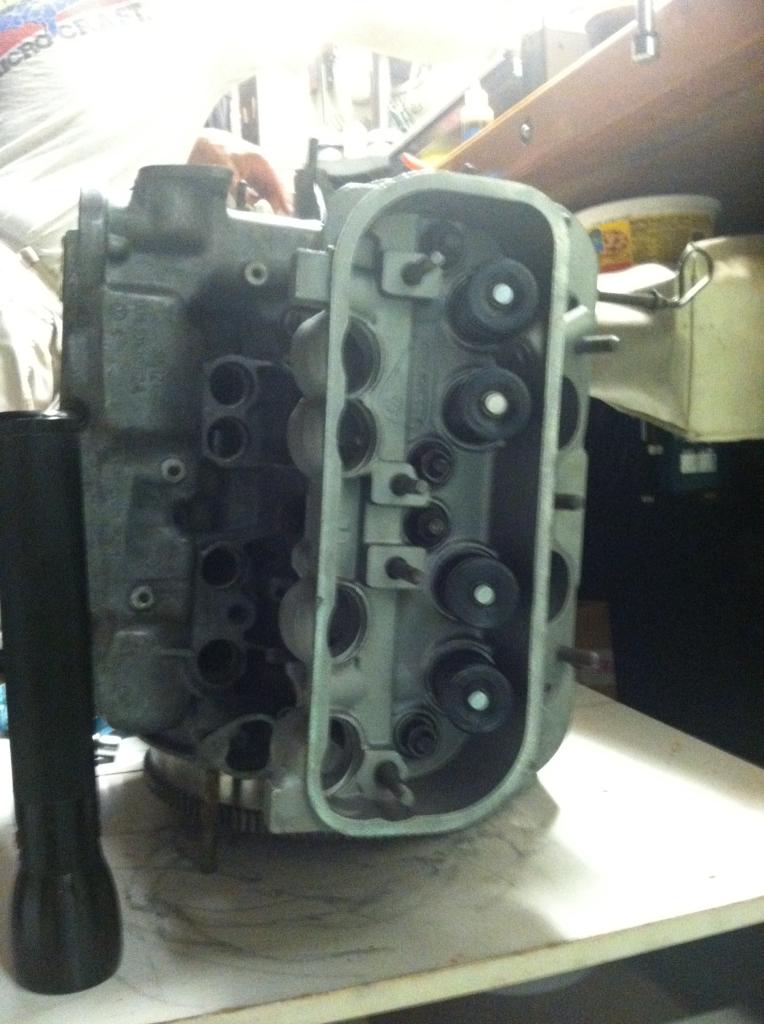
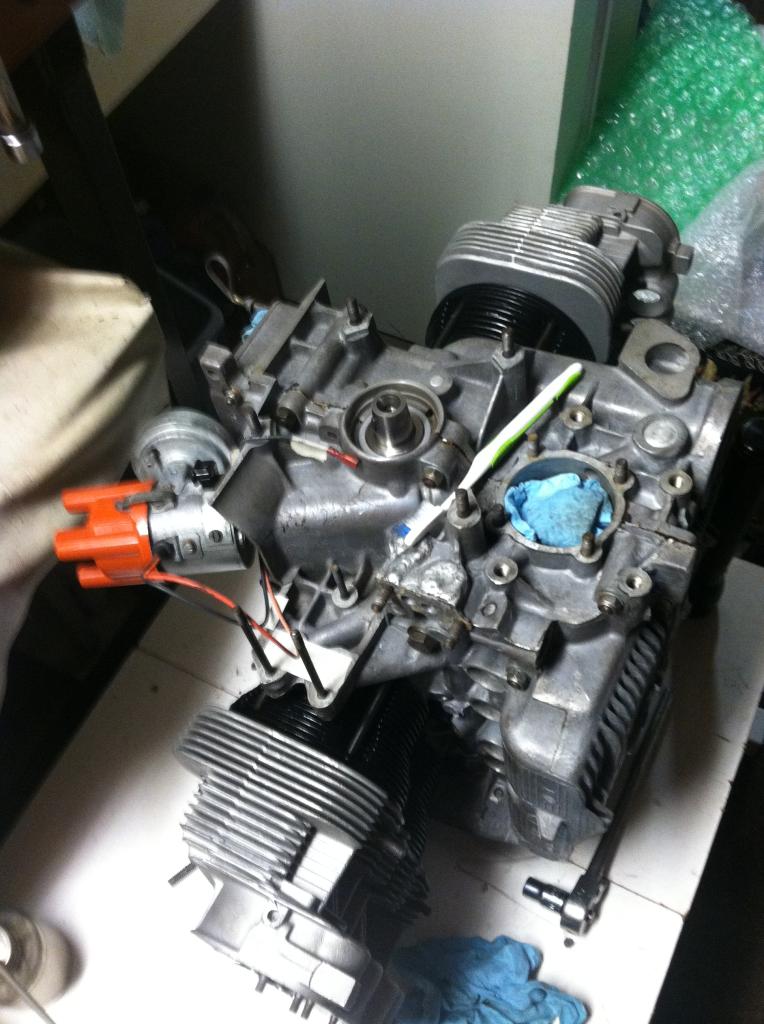
Took my motor apart.
Its bad news folks.
I found a few quarts of water in the case.
and that the lifters were showing signs of going away.
the rods even have rust on them.
I was considering going to a crank with counter weights and if im going to bother to do that why not add some stroke to it right?
anything i should know.
from what i have gathered i need to either do new pistons with a type 1 22mm piston and run those rods or
get arp rods for my 2.0L rods
My dad worked in a machine shop in college and says I cannot bore the stock cyls i have to 96mm i would need new cyls also.
and ill have to pick out a cam but ill probably just call engle and ask them what they think.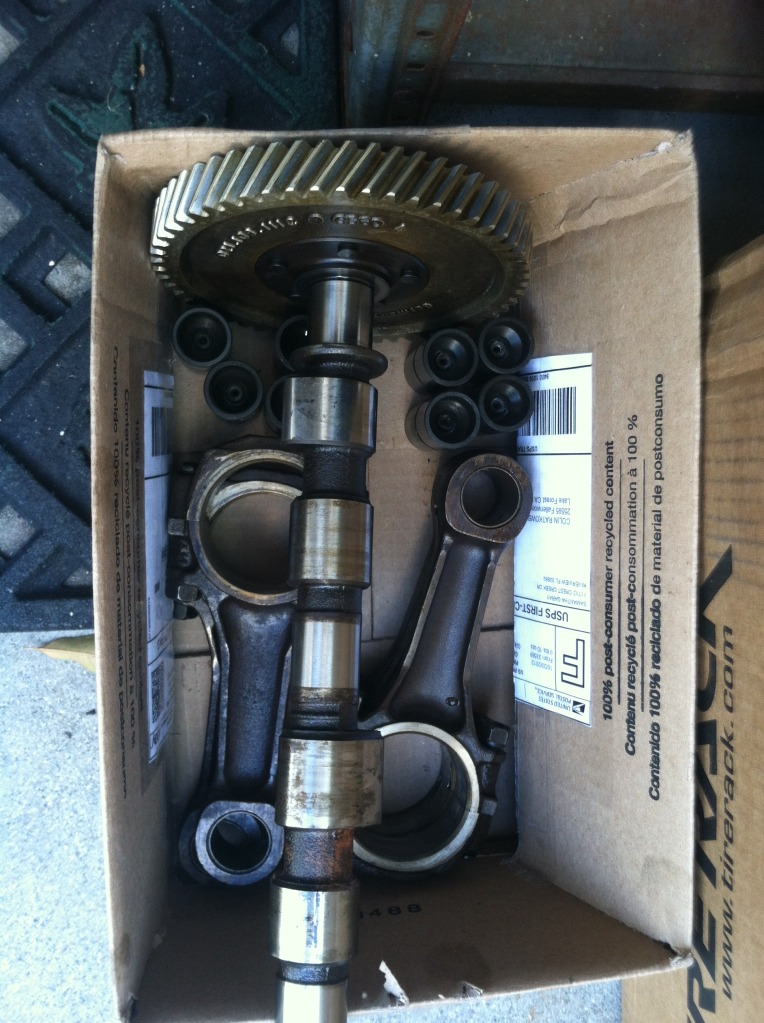

Posted by: euro911 Nov 9 2013, 08:28 PM
A good machine shop can bore stock 94mm (2.0L) Mahle cylinders out to 96mm, no problem.
IIRC, this is a '76, right? If you plan to build it larger than 2056, the stock FI may not work well at all. Also, you may not be able to smog it with an aftermarket FI system
I would stick with stock T-4 components, but others have built some awesome engines utilizing some exotic parts (for pre-'76 cars). Again, you might want to think about the smog test aspect before going down that road 
Posted by: colingreene Nov 10 2013, 02:04 AM
Lets just say, im not too worried about the emissions stand point.
my Cyls are marked KS on the inside of the pistons so they are not Mahles
Ive got one of the pistons fully cleaned up.
Im semi considering keeping the piston and barrels i have now if they look ok.
my dad seems really suspect of cutting the extra 2mm out of the existing ones citing problems with cooling, warping and head sealing surface.
I see his logic in that reliability should not be sacrificed.
What bore/stroke makes 2056 its 96x71 right?
Posted by: rhodyguy Nov 10 2013, 06:54 AM
fwiw, CMUs, also known as concrete blocks aren't the safest substitute for jacks stands. be careful.
Posted by: billh1963 Nov 10 2013, 07:07 AM
fwiw, CMUs, also known as concrete blocks aren't the safest substitute for jacks stands. be careful.
Good catch! Go buy some jack stands...they aren't expensive
Posted by: euro911 Nov 10 2013, 08:16 AM
Lets just say, im not too worried about the emissions stand point.
OK
my Cyls are marked KS on the inside of the pistons so they are not Mahles
Kolbenschmidt, another OEM part, good quality
Ive got one of the pistons fully cleaned up.
Im semi considering keeping the piston and barrels i have now if they look ok.
my dad seems really suspect of cutting the extra 2mm out of the existing ones citing problems with cooling, warping and head sealing surface.
I see his logic in that reliability should not be sacrificed.
The 2056 is quite reliable, no overheating, warping, etc., but it's your call. Stick with rebuilding it to 2.0L and drive it for now. Spend a little extra time and $ and have the rotating assembly balanced and you have a reliable peppy engine for a reasonable cost.
What bore/stroke makes 2056 its 96x71 right?
Yes
Posted by: colingreene Nov 10 2013, 04:39 PM
Third try now.
If the KS stock Cyls are good quality why swap to a larger piston?
I want a counter balanced crank so why not add stroke to it.
usually thats a bigger bang for the buck then a set of pistons.
im happy to do new push rods and re do the geometry to make it all work.
but if you guys think i need to do pistons ill give it a shot also.
its just my stock crank is pretty maingey looking.
and the 78mm crank is a staple in the Rat motors as well as with the type 4 guys.
I fully plan on balancing everything for the motor that turns.
Went to the swap meet today, saw some really nice cars
Nifty 912, really spotless silver 911 and the PMB car was nice.
I also liked the two 914-6s i saw a black one and a tangerine one.
thanks to Bruce for the stub axle i needed.
I may need a relay board cover also.
Is their anyway that i can fit a early bumper to a late car? I am just not a huge fan of the late bumpers.
Posted by: Kirmizi Nov 10 2013, 08:03 PM
Bumper back-dating instructions right here: 
http://www.914world.com/bbs2/index.php?showtopic=8404&st=0
Posted by: Dave_Darling Nov 10 2013, 08:40 PM
Going to a 78mm crank is a more complicated thing than you might realize at first. At least one of the cam lobes interferes with at least one of the rods at that size. So you have to use a reduced base-circle cam, which also has some complications.
It's all doable, but it's definitely not a bolt-in process.
--DD
Posted by: colingreene Nov 10 2013, 10:03 PM
Ah, so much for that.
If its dealing with a reduced cam then ill step down to the largest i can get away with before that becomes a problem
you dont know what size that might be do you?
76 or down to a 74?
Also thanks for the bumper info. I Appreciate it.
Posted by: euro911 Nov 10 2013, 10:51 PM
Tuna Can is another good T4 reference site. Here's their displacement chart: http://www.tunacan.net/t4/reference/displace.shtml
Posted by: rhodyguy Nov 11 2013, 08:30 AM
read this a few time and still not sure the route you want to take.
you're looking at a 2270? with a 78mm crank you'll encounter the issue(s) dave mentioned and i believe there are case clearance needs as well. plan on decking and prob align boring the case.
the rest are iirc,
you'll need some sort of aftermarket exhaust/header system. i don't think stock heat exchangers will get the job done. bring money. lots of it.
figure out NOW how you plan on feeding the engine. carbs? individual FI throttle bodies and aftermarket fi management(bring another big $ pile)? stockish djet wont get the job done. at a minimum a set of carbs will need to be redone and all components sized correctly for your engine's EXACT needs. that is going to run you $700 + after the dust settles.
perhaps additional oil cooling.
head requirements. more $$$$.
lots more tricks for sure. not for the faint of heart.
going BIG is going to require a substantial investment. more like the equivalent of the new suspension you're going to want, brake renew, rust repair and paint, tranny work and all that's required to get the power to the asphalt. things most if not all roller projects have in their future.
Posted by: colingreene Nov 11 2013, 10:14 AM
Thanks for raising those points.
I know I'll need more fuel. I have a set of 44 IDF carbs that I have all new gaskets and supply's on the way for.
I was hoping to use the stock distributor that should work ok.
However it may take some playing with the curve.
At any rate what I would prefer to do is drive some injectors off of a spare Vipec or mega squirt board I have around with the factory inlet hardware.
Plenum and runners. Hopefully that will flow we'll enough but if not ill figure something out.
As I posted earlier I do have a fully gone through trans ready to go.
I just might need to upgrade the clutch.
It's really nice to know you guys are looking out for me before I spend money.
However if theirs a combo with a stroker crank you reccomemd please let me know.
I just sort of want to stick to stock pistons for now.
The heads I have are being ported and I think I'll run stock valves for now.
They seem plenty big but I know I'll need springs.
Posted by: rhodyguy Nov 11 2013, 10:30 AM
a local guy (dave h) tried the stock plenum, a opened up throttle body route, and mega squirt with 0 success. i hope jake raby sees your post and will offer insight. the webers will need tweaking and the stock Djet distributor isn't going to work with carbs without a vacuum signal.
Posted by: colingreene Nov 11 2013, 05:12 PM
I emailed Raby, asking if he sold part, he just emailed back that he only does complete engines.
Im not sure how much he would want to share as its sort of his business to know how to do it and sell it rather than spred the word you know.
That said im grateful for any of the help i can get.
I knew mines vac but if the plenum wont work ill just run a different distributor.
not too hard to do.
I just want it right and I dont want to do it over.
Posted by: Bleyseng Nov 12 2013, 09:44 AM
The simplest engine upgrade is the 2056 using Djet or dual carbs. Plenty of hp depending on the cam 115 to 125hp which really wakes up a 914.
Forget the Counterweighted crank if you stay stock stroke as its just tons of weight you added that you don't need. CW a stock crank is what you do to type 1 motors and type 4's don't need it as the crank is big and super strong.
Going to 78mm stroke is a can of worms that costs lots of $$$$$ and if you have lots of $$$$$ its just better to install a 3.2L 911 motor with 200hp.
Posted by: colingreene Nov 12 2013, 09:56 AM
After the swap meet I had that thought. Just stick a 6 in it.
It would be more money.
Posted by: colingreene Dec 7 2013, 05:34 PM
PM me about the smog thing.
I took my motor appart and brought the heads to Fat performance.
Greg is a nice guy but as it turns out my heads are cracked and destroyed.
while he cut me a good price on them being refinished it still wound up being more money than i wanted to spend on getting a set of heads refinished.
Anyone know of a good set of heads for sale that i can buy and use?
In other news the trans guy still has my trans and has no finished it.
I guess hes too busy doing stuff for Gene Burg. Normally that would be frustrating but i dont have a motor to put in front of it so i guess its ok.
I also bought a sand blasting cabinet so now i can bead blast and sand blast my parts to make them like new again.
If theirs anyone in the area that needs to clean something up or would like me to do it for you, shoot me a message and ill be happy to lend the use of my tools!
Posted by: brant Dec 7 2013, 05:50 PM
all of these 2.0 heads (at least many) have cracks
you can buy brand new heads or fix the cracks
1k for rebuilding heads is common in my experience and it can go higher....
with such a significant investment, opening up the valves is common (more $$) with big displacement
we used to run 38/48 on a stock displacement 2.0 race motor.
Posted by: SirAndy Dec 7 2013, 05:55 PM
Posted by: euro911 Dec 7 2013, 07:10 PM
... Me too
I have a set of '75 2.0L heads. I'll check them out next week and let you know what condition they're in.
I also have a complete '75 2.0L long block that I got from Bruce Stone a few years ago I haven't tore into yet ...
Also, I see where you asked "If the KS stock Cyls are good quality why swap to a larger piston?"
Even this minimal increase in displacement (94~96mm), a little more compression and a more aggressive cam will really make it come alive. I haven't dyno'd my 2056 yet, but it should be doing close to 125 hp (KB pistons, Raby 9580 cam, 9:1 CR)
Posted by: colingreene Dec 8 2013, 10:30 AM
The quote to repair the heads was just over 2400
it was quite a bit more than i expected by about double.
Posted by: colingreene Dec 15 2013, 12:16 PM
Euro, Any word on those heads or should i Pm you?
Posted by: Java2570 Dec 15 2013, 12:48 PM
Call Len Hoffman - http://www.hamincgroup.com/type4.php -- about new heads, he sells through
Jake Raby's web store and honestly you'll be spending less than those rebuild heads cost.
You could certainly find a usable set of 2.0L heads for less than what it costs to buy new but you
may not find them quickly. And those used heads may be needing to be rebuilt sooner than later anyway.
My 2 cents, spend the money now on new heads and enjoy your engine for a long time!
Posted by: colingreene Dec 15 2013, 05:38 PM
It was a consideration.
I did look at the bill for 2400 and go yeah no.
just no.
Ultimately If i did not get stuck with a crank for a type4 id probably be putting the less ugly bumpers on it and a 3.0L Sc motor in it.
Oh well.
a good running type 4 should work ok.
Posted by: euro911 Dec 15 2013, 07:00 PM
IIRC, the heads only have about 4k on them.
Posted by: PancakePorsche Dec 21 2013, 03:02 AM
I live in So.Cal. and have a 76' I daily drive 90+ miles a day. You can PM me if you have any concerns. My car is stock engined and passes smog no problem. I also use a local shop in Chatsworth for all my gearbox needs.
Posted by: Bob L. Dec 21 2013, 04:56 PM
http://www.914world.com/bbs2/index.php?showtopic=203702&hl=
Heads for a big 4. Maybe too big?
I have no connection with seller.
Posted by: r_towle Dec 21 2013, 11:09 PM
Who wants to charge you 2400 in machine work on a pair of heads?
Have you asked other machine shops to look at the heads?
Posted by: colingreene Dec 22 2013, 03:38 AM
Local shop in california known well for its type 4 work.
They told me 3 out out of 4 spark plug holes were damaged and needed to be repaired so that was around 300
and all 4 exhaust ports were cracked so that was another 300 plus as well as replacing the exhaust studs was another 300. apparently they couldn't be removed conventionally and needed to be drilled and replaced. as well as 50$ each to replace the seats. one of the guide bosses was also trashed as well.
All of it adds up to me finding out as much as the previous owner said the car ran great it had numerous problems that were not addressed and he just drove it because it started.
Frustrating but too often is the case.
Understandable that its a old head and needed work but it was just more than what i was comfortable with paying as soon as i found out the heads were cracked.
ill have to pm the guy in the link for the heads but its highly likely ill work something out with euro 911 as i have bought stuff from him before and hes local so it works great for both parties. I know him to be a solid guy.
Some other stuff transpired where I now have a 78mm stroker crank so ill probably use that if i have it.
Id rather do a 6 but either way its going to cost a ton.
a 2270 should run ok.
And I am set on the transmission, I just got it back today. Finally.
its nice and tight and ready to go when ever i get my pile of parts together.
Posted by: colingreene Jan 15 2014, 06:00 PM
What do you guys think of a full carrera front end that bolts in with the brakes for 400
too much or good deal>?
The same guy also has a 914/6 hes looking for 15k if anyone is interested.
Posted by: euro911 Jan 15 2014, 06:12 PM
That's a good deal Colin
Posted by: colingreene Jan 16 2014, 08:41 PM
Thanks, I guess ill get on that.
I am starting to clearance my rods to the case, my dad is worried that Ill need new rods.
he thankfully is my engine builder. having done a few before.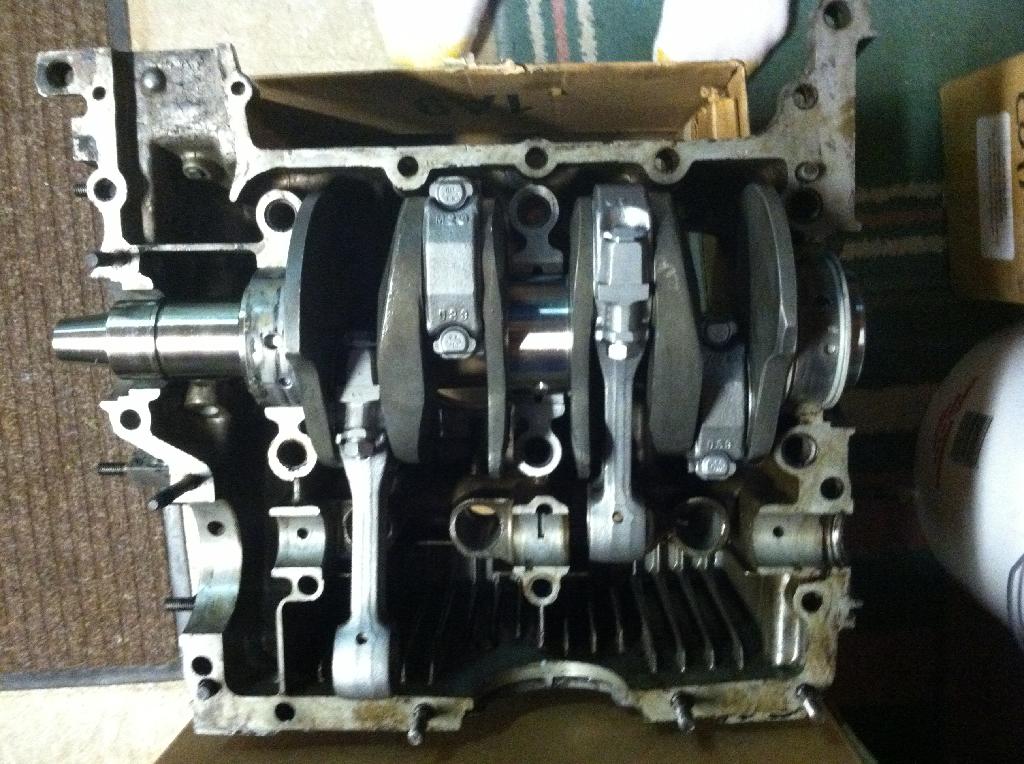
Posted by: Dave_Darling Jan 17 2014, 10:21 AM
IIRC, the rods to the case is not usually a problem.
One of the rods to one particular cam lobe is more often a problem...
--DD
Posted by: colingreene Jan 18 2014, 12:01 AM
Understood,
I am waiting on my cam to come from Web, so that way i can make sure everything is A ok.
Im sure it will be tight.
but i explained what i was doing and they seemed confident that it would all work.
Posted by: colingreene Feb 28 2014, 09:11 PM
its getting there!
been working next to this the past few days. I really like it.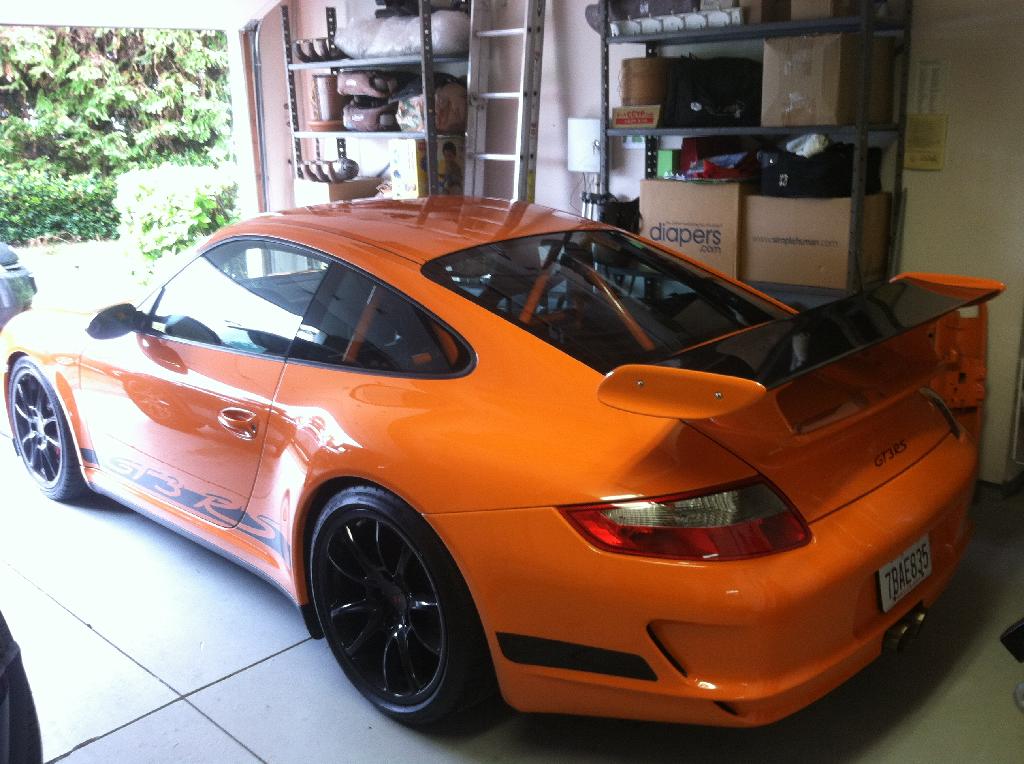
Posted by: colingreene Jun 18 2014, 09:31 PM
So since my last update i decided to ditch the stock rods because clearing the case with these and my +7mm of stroke was not happening.
Because of that I had to buy different pistons, as the pins are a different size.
Of course that means I bought bigger pistons, I bumped it 2mm Any larger and i felt like it would be getting out of hand.
Like the RMW stroker motors most of the power gain and drivable power comes from the additional stroke not the bore size increase,
While I could build this out to a even 3L i stuck with a 96mm x 78mm Stock bore was 94mm and stock stroke was a paltry 71.
Meaning my displacement went from 1971cc to 2258cc. I also added a much bigger and nasty Web Cam ( gotta be careful googling that)
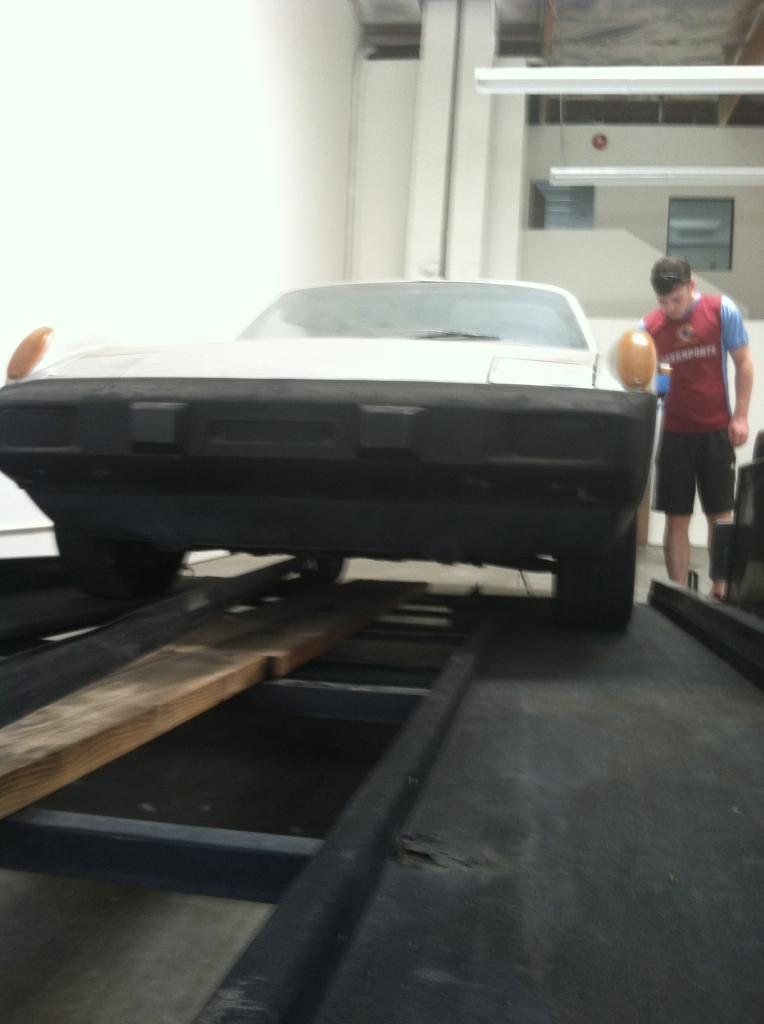
Since had to move the car from its first parking place to another because reasons.
And now the pictures. Re assembly has begun, got the case sealed together tonight so next up is Pistons and cyls then heads.
Sticking with stock heads for now, because of two reasons. Money and really they flow pretty damn good stock. my friend flowed my spare set....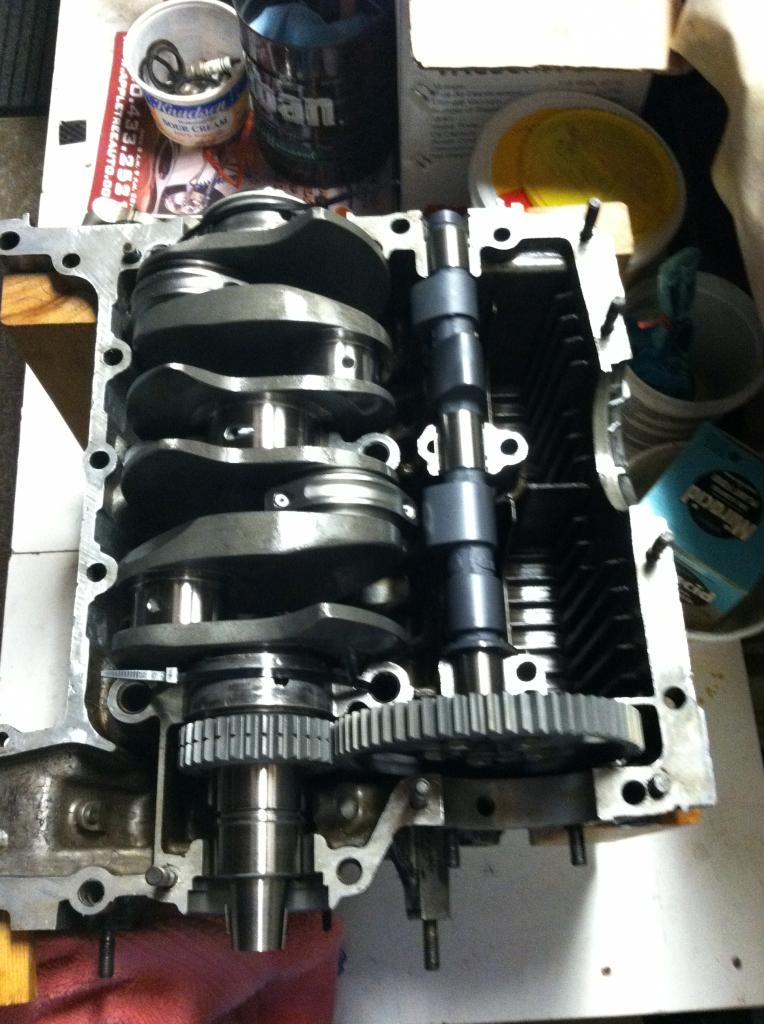
Posted by: Bleyseng Jun 19 2014, 10:09 AM
Straight cut cam gears?
Posted by: 914_teener Jun 19 2014, 11:56 AM

Posted by: colingreene Jun 19 2014, 05:00 PM
Yes its a straight cut cam gear, I also have dual thrust bearings for the cam because ive had problems with cam thrust in the past.
Hopefully it wont be horridly loud, if it is ill just add some dynamat.
Posted by: zambezi Jun 19 2014, 09:36 PM
It'll be loud. Straight cut gears whine.
Posted by: colingreene Jun 19 2014, 09:42 PM
Im aware, I am not super worried about it. I probably wont drive the car all that much.
I was only building this motor as a half measure I am working on someone to sell me a motor....
Though he needs to check his PM's
I need a 6 cyl.
Posted by: euro911 Jun 19 2014, 11:53 PM
I was only building this motor as a half measure I am working on someone to sell me a motor....
Though he needs to check his PM's
I need a 6 cyl.

I need to convince the 'Minister of Homeland Renovations' that I need a two-week break

We're getting ready to have our house fumigated (it's been 12 years since it was done last) ... problem is, one of Pepé Le Pew's cousins took up residence under the house sometime during the past couple of weeks

I set up some wireless cameras and finally spotted the critter leaving (just past midnight), so I secured the point of entry (unfortunately, AFTER it left a blast of what smelled like some potent skunkweed under the house). Being springtime, we're not sure if it has some youngin's living down there too
So, with time being of the essence, I got me an RC tank and outfitted it with some recon equipment today (LED lighting and a wireless camera)... I'll be deploying it under the house to asses the situation tomorrow.
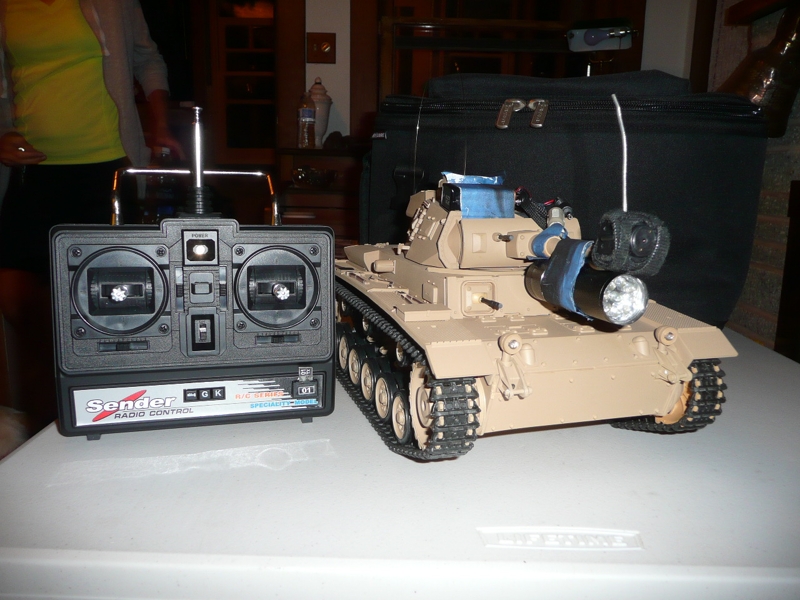
Yeah, it's not a 914 ... but it is a German Panzer

![popcorn[1].gif](style_emoticons/default/popcorn[1].gif)
Posted by: colingreene Jun 20 2014, 10:59 AM
Thats seriously bad ass.
Sorry about the skunk problem.
I had to "take care of" a rat in my yard the other day with my bow.
Posted by: colingreene Jul 26 2014, 11:43 PM
Got the heads on, Shimming the endplay is becoming a pain in the arse though.
I am going to need some serious help when it comes to putting the tin all together.
and doing the t stat.
Little by little im getting there.
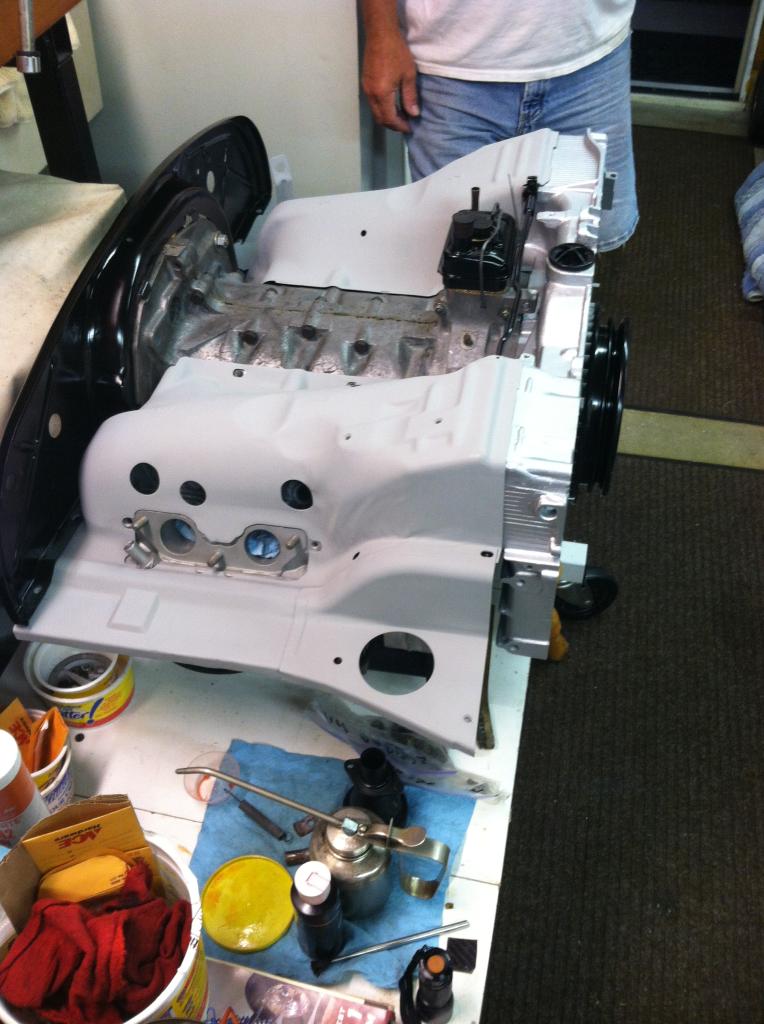
Posted by: colingreene Sep 2 2014, 05:44 PM
So some updates, Motor is nearly done and ready to go into the car.
Having trouble finding some odds and ends like intake gasket and clutch pressure plate bolts. If anyone knows where to find this stuff let me know. I cant find it anywhere. Im also having trouble with the nuts to fasten the exhaust manifolds. i ordered some from bmw but they are too small.
Also need to find the pins that hold the cable to the caliper for the parking brake and re attach that and change my bum parking brake cable.
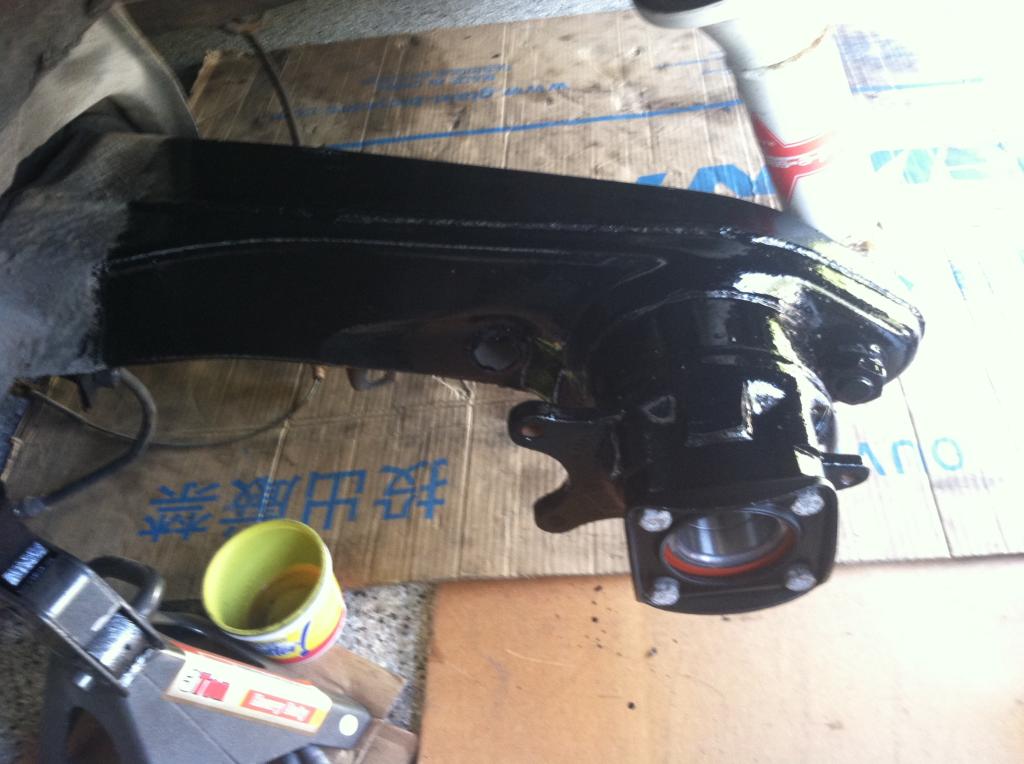
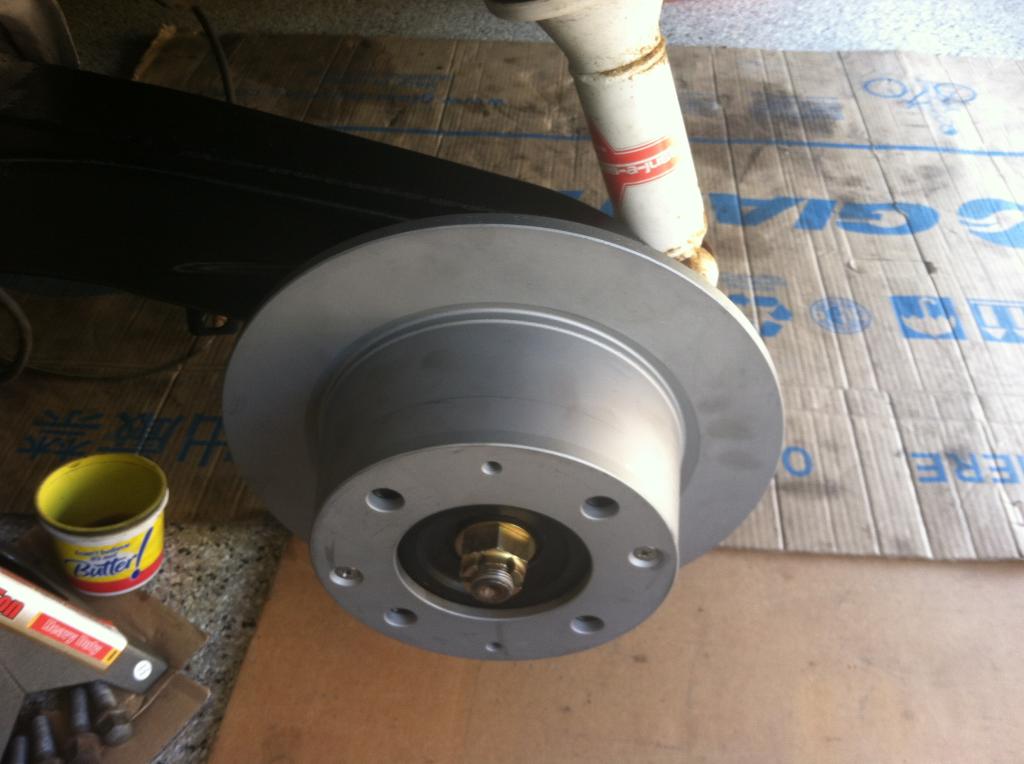
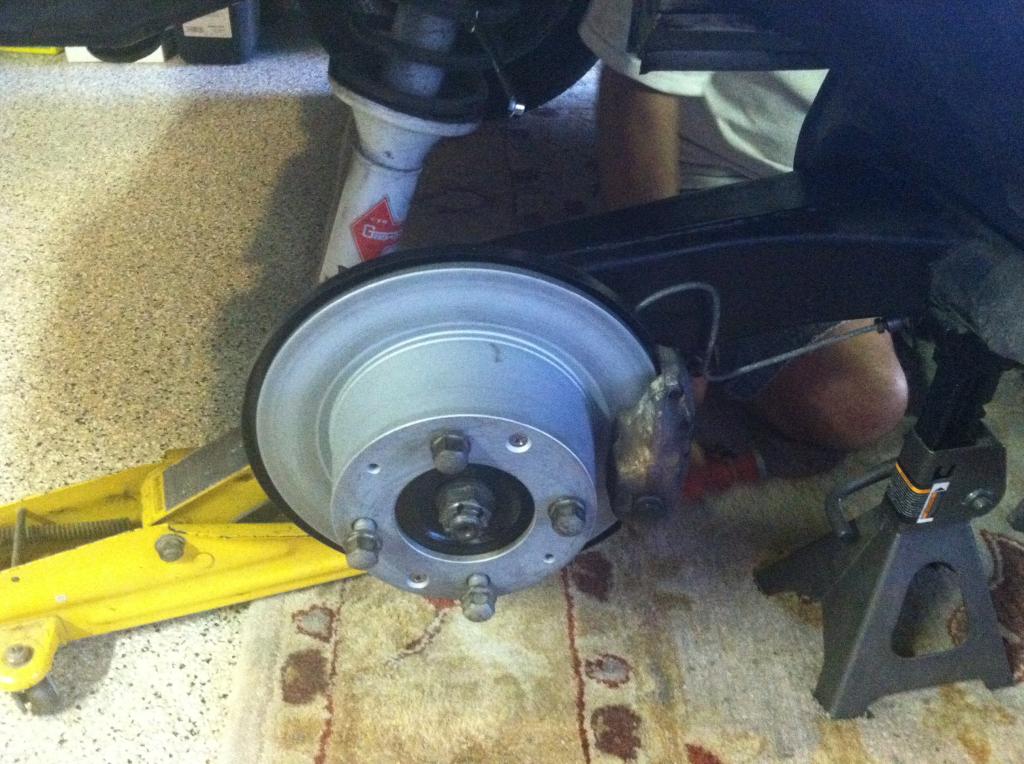
but i also had to address my failed rear wheel bearing so i did that today with some tools that had to be borrowed ( Thank you so much B Stone) however once the tools were correctly applied it was no sweat at all.
I am inherently super lazy, why work hard when you can make something else do the work for you.
this theory often also makes sure that you don't damage things.
Since i did not want to pull the trailing arm from the car i really did not want to damage anything.
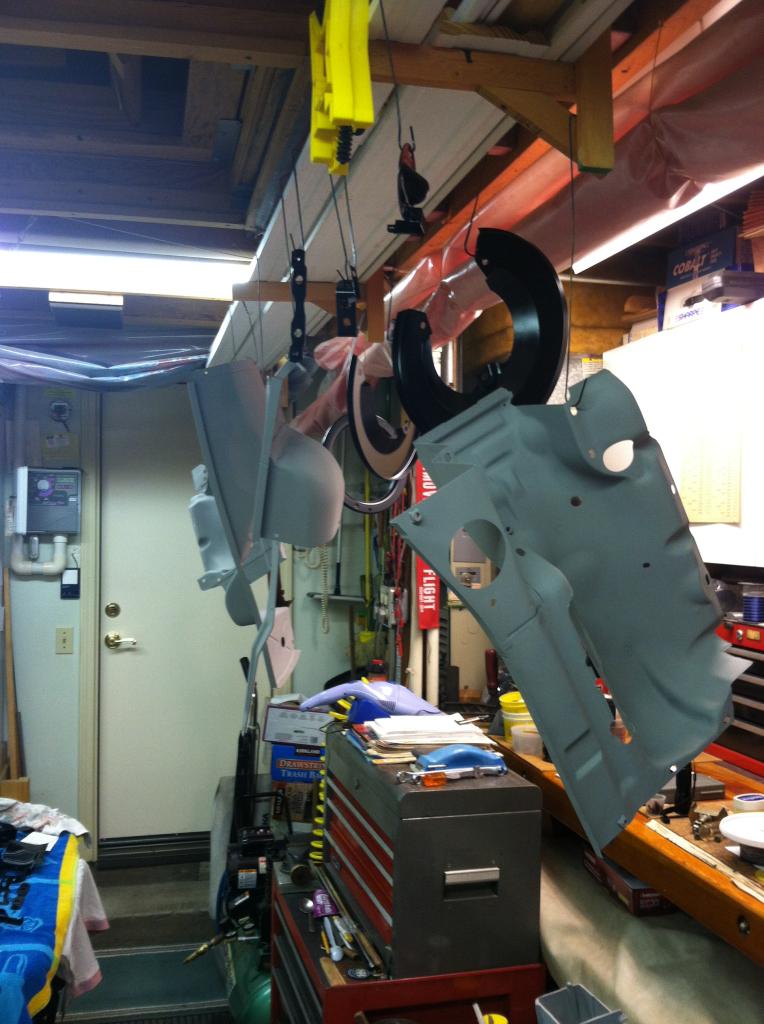
My garage has turned into a paint workshop painting engine tin and random other parts.
Thanks to the baseboard rack i have somewhere to hang all this excess shit.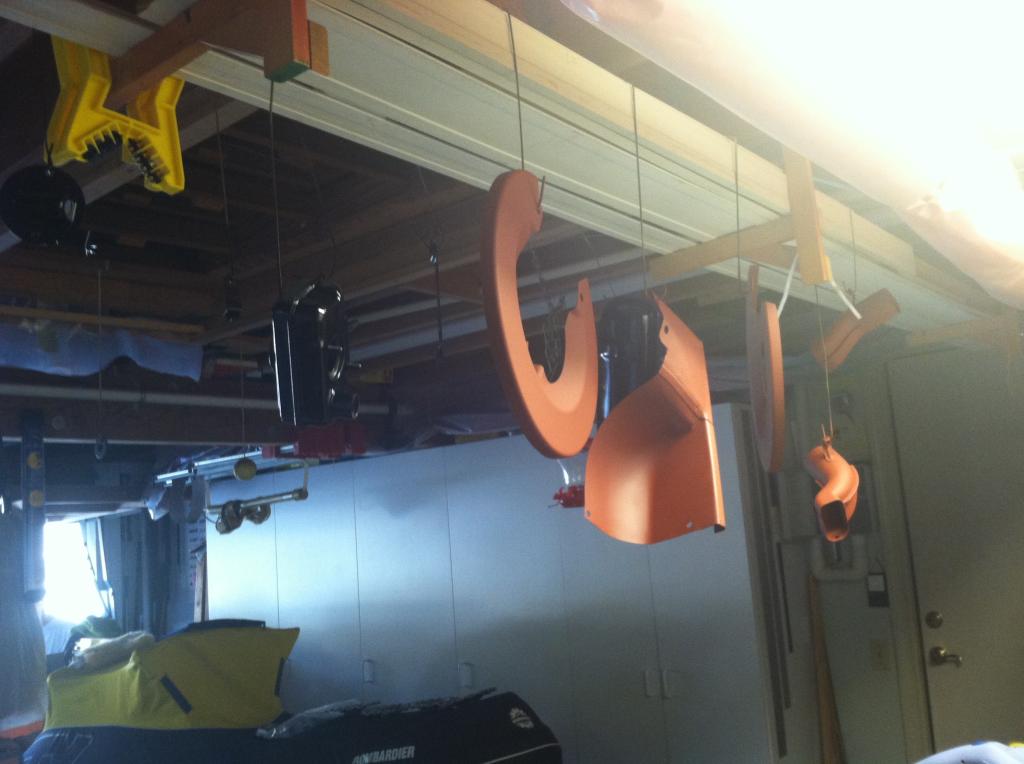
Arthur is always sending me motivation, as he spotted a 914 out on the street in the wild, Proof that they dont only exist on jack stands.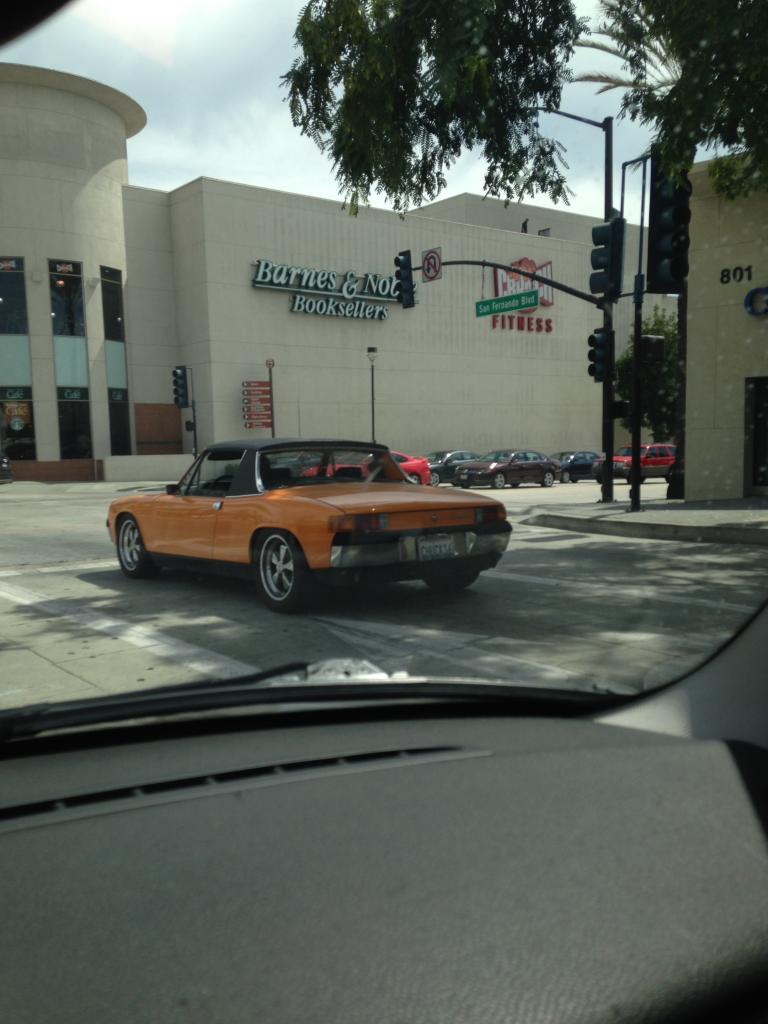
Motor closed up and ready to have the tin put on.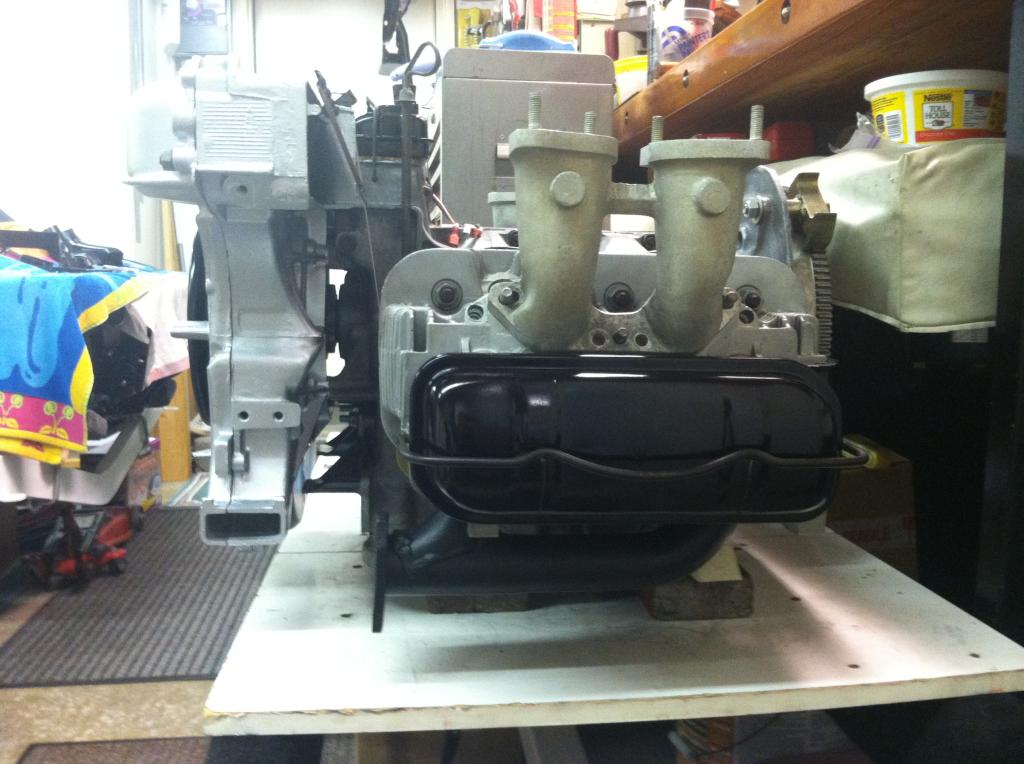
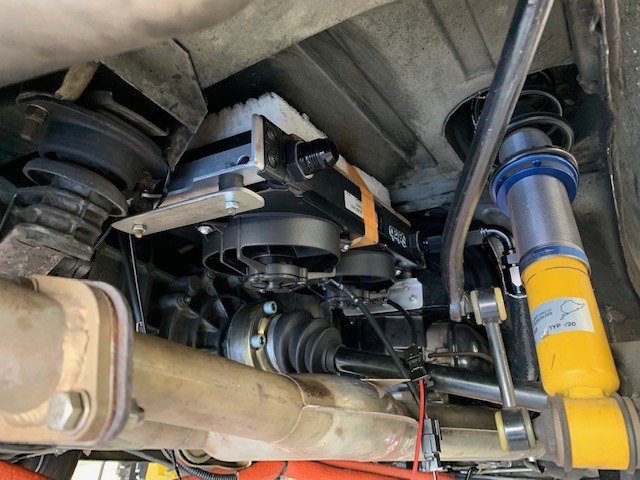
Close up of the thermostat cable and air flaps. Without this the motor wont regulate temp properly. Sucked to buy as it was 134$!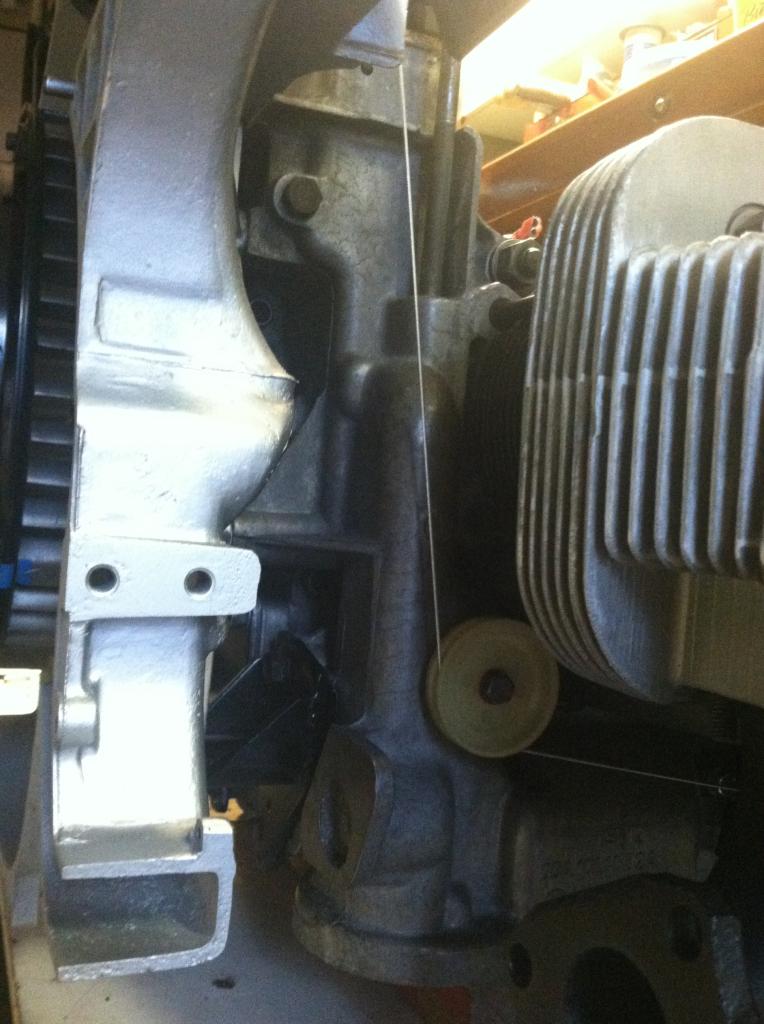
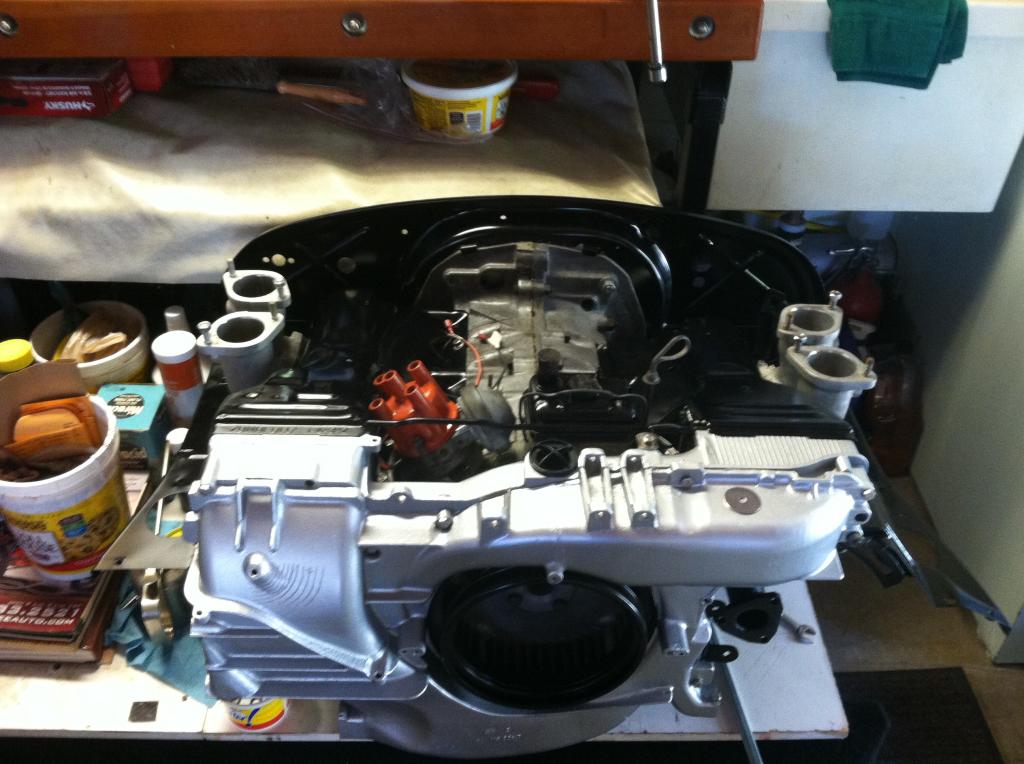
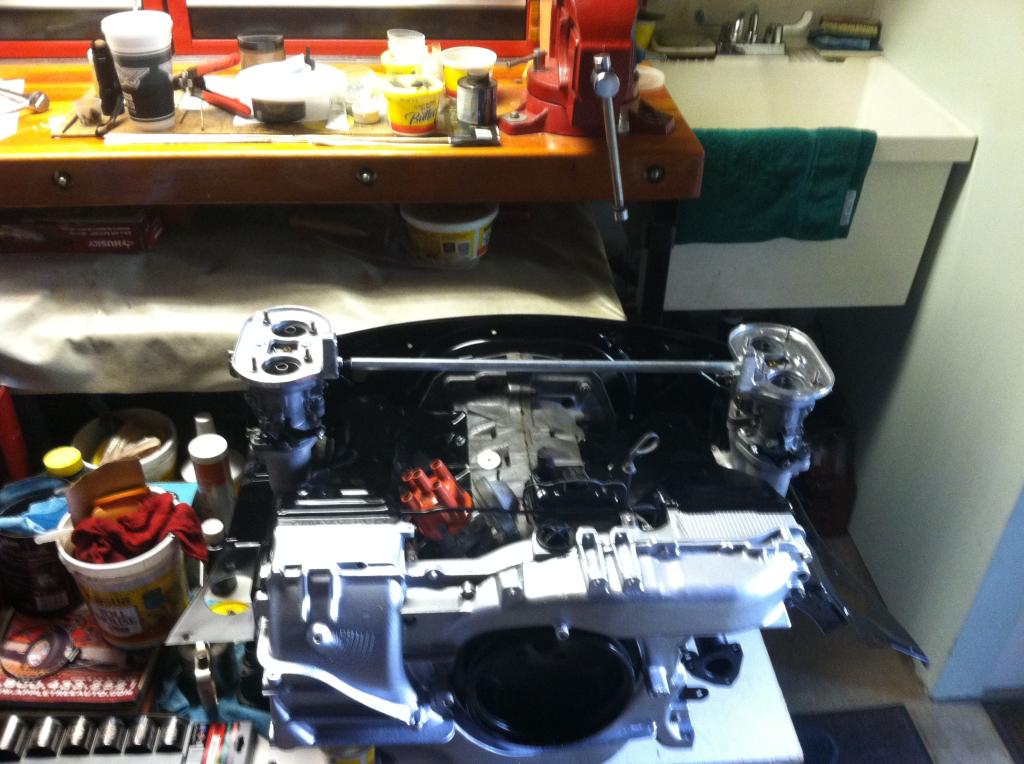
and a shot of how the fan and shroud work to deliver the cooling air to the motor and oil cooler.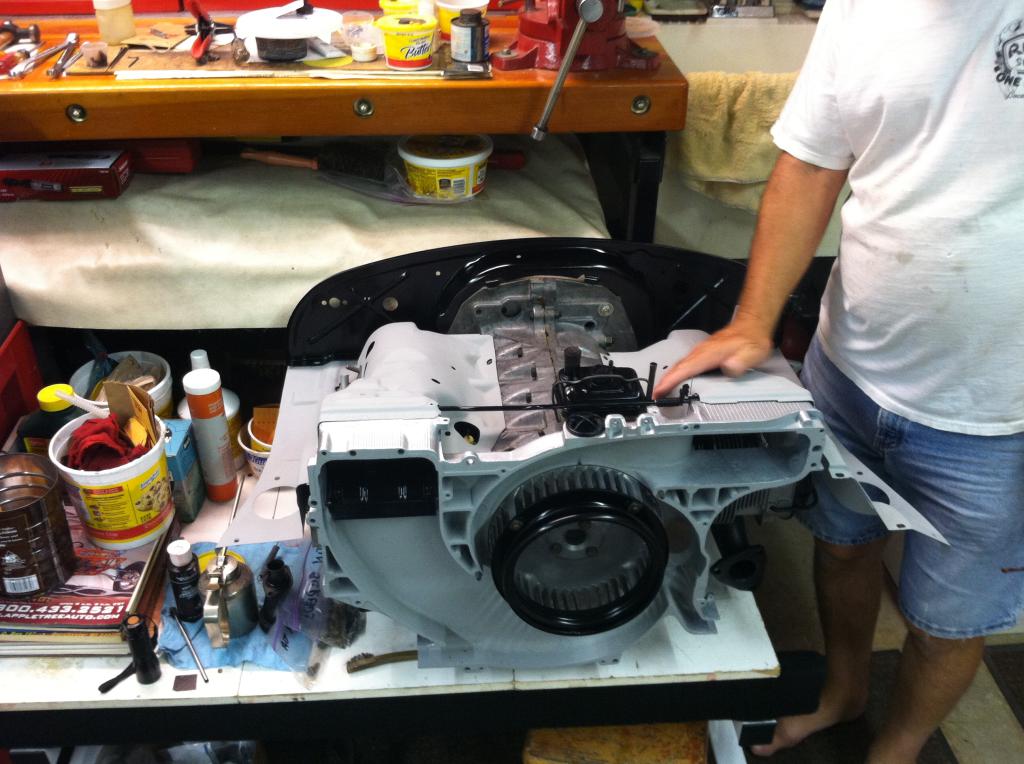
tin mostly on. Its all on right now i just dont have pictures of it yet. Still waiting for a damn alternator.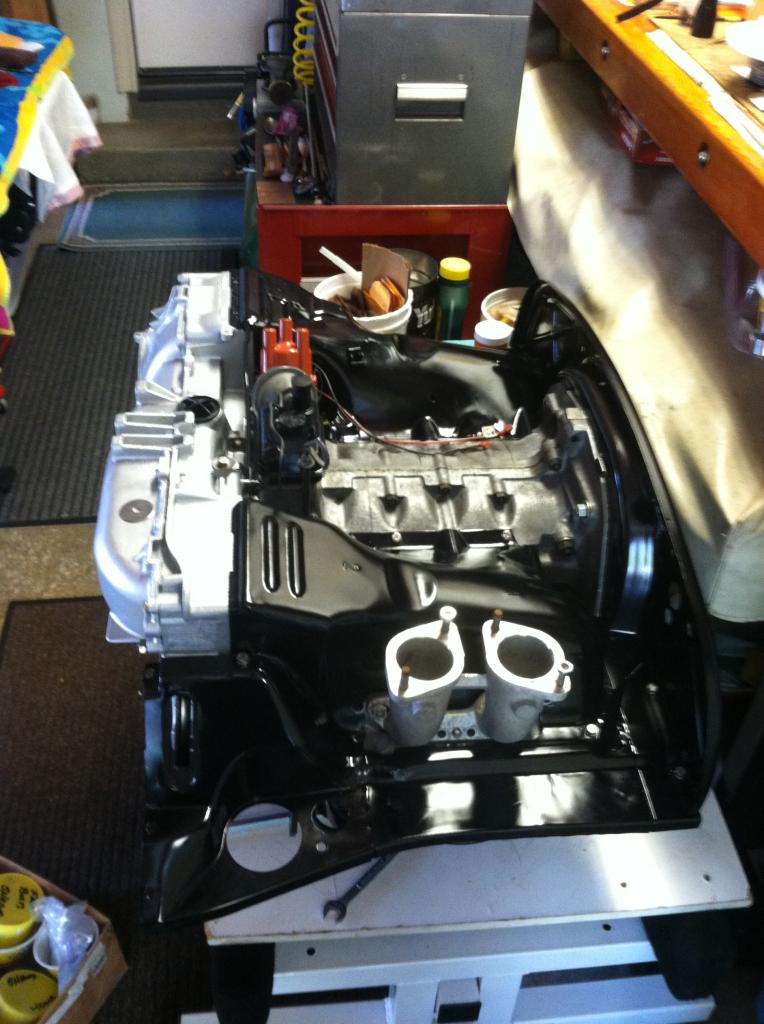
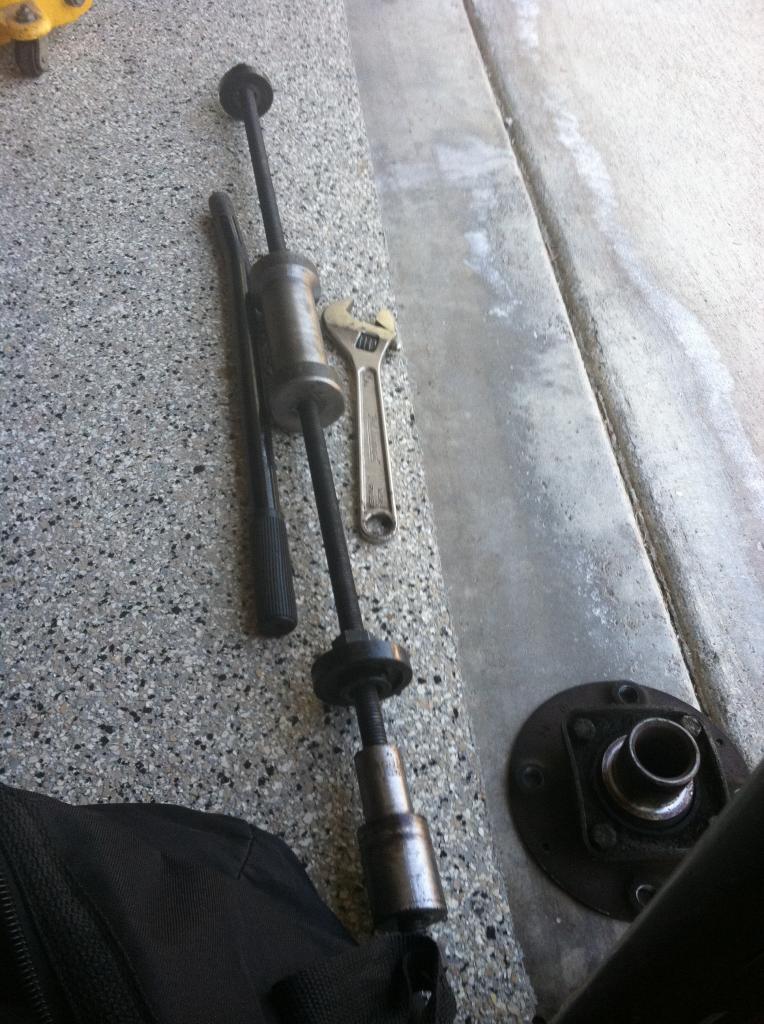
Special tools, Ill take pictures of me doing the next one i guess.
Posted by: 76-914 Sep 2 2014, 07:10 PM
Nice build but I must warn you that HP is highly addictive. I'll bet you a glass of wine that you're flirting with a 6 soon.
Posted by: colingreene Sep 2 2014, 10:15 PM
Its always been a thought but In order to do that Id want like 275 hp.
that means either a 993 motor or custom building something and thats just not a option right now.
Goal is to get it running asap so the car is no longer a storage concern and i can drive it.
Posted by: Larmo63 Sep 2 2014, 10:51 PM
Looking good, Colin. Maybe sell one of your thirty other cars to buy a six?
Just a thought.
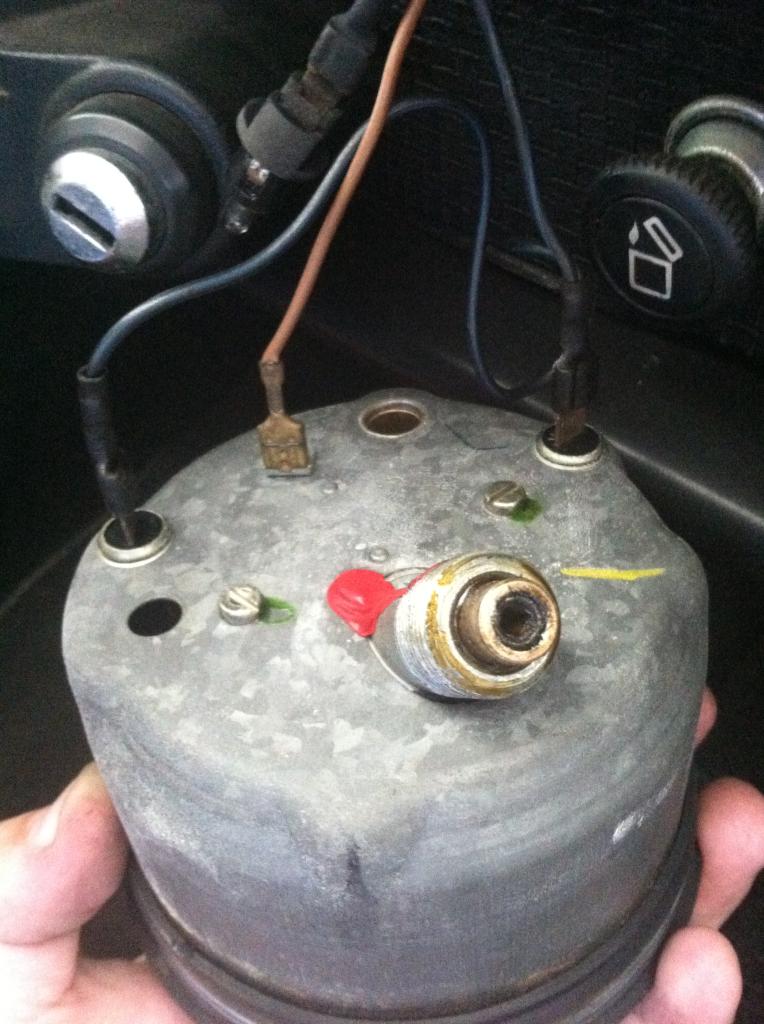
Posted by: colingreene Sep 8 2014, 04:08 PM
anyone recognize this master cyl though?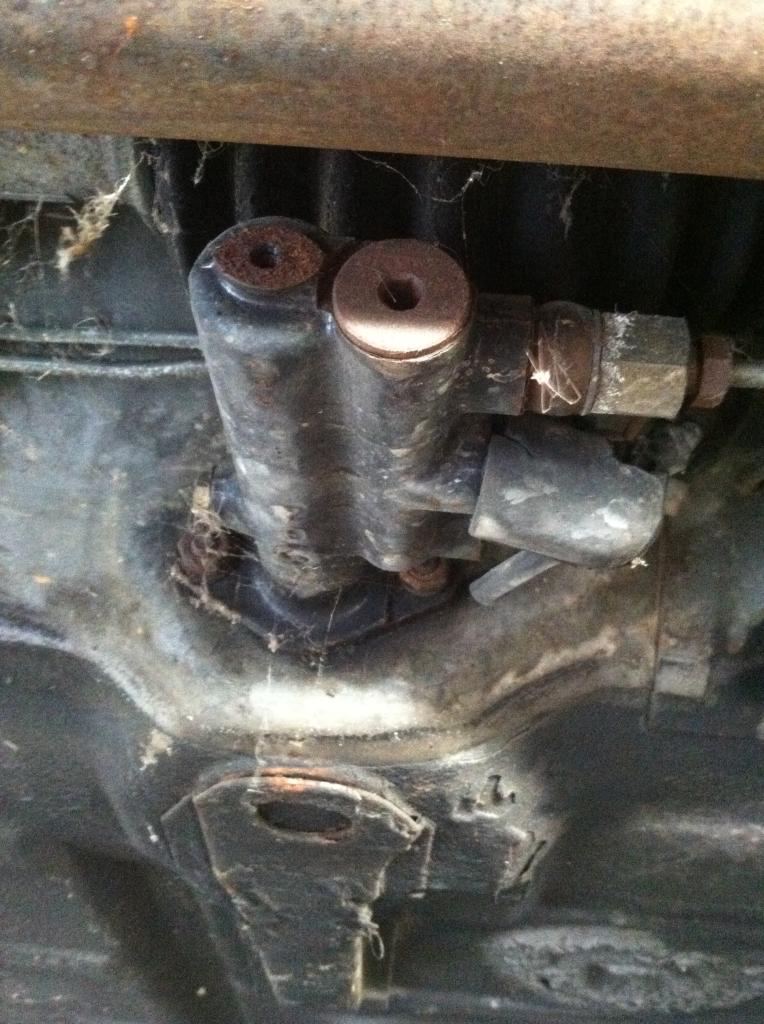
Posted by: euro911 Sep 11 2014, 09:32 AM
Original MCs were ATE with a 17mm bore. Getting a little harder to find a new 17mm for a good price these days, but 19mm are still plentiful.
Posted by: colingreene Sep 11 2014, 09:48 AM
I was told this was a 19? I dont know for sure though.
Posted by: Dave_Darling Sep 11 2014, 04:20 PM
Look around on it for numbers. There should be a "17" or a "19" on the top side, I believe. You'll need a mirror and a flashlight to see if the MC is still installed.
--DD
Posted by: colingreene Sep 11 2014, 10:21 PM
Ah neat thanks, ill have a look at it tomorrow.
Posted by: colingreene Oct 21 2014, 12:12 PM

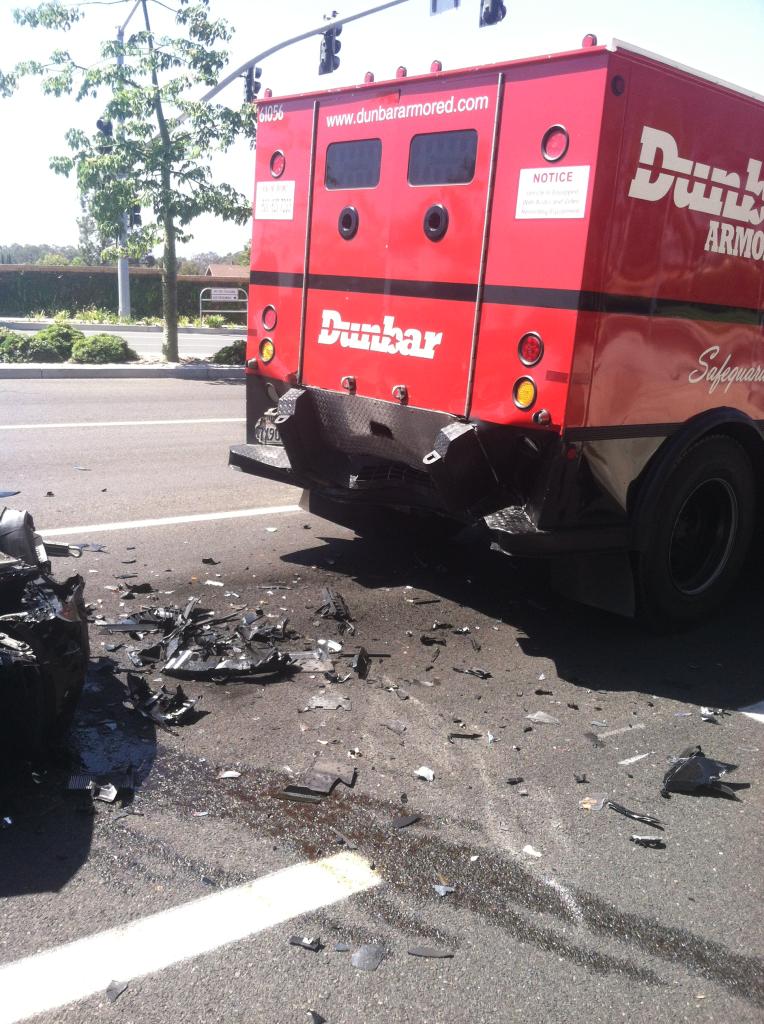
Whats left of the 14 year old gas that was in my old tank, thats also borked.
and while i went out to get parts and dispose of the fuel this happened right next to me.
This is not how you E92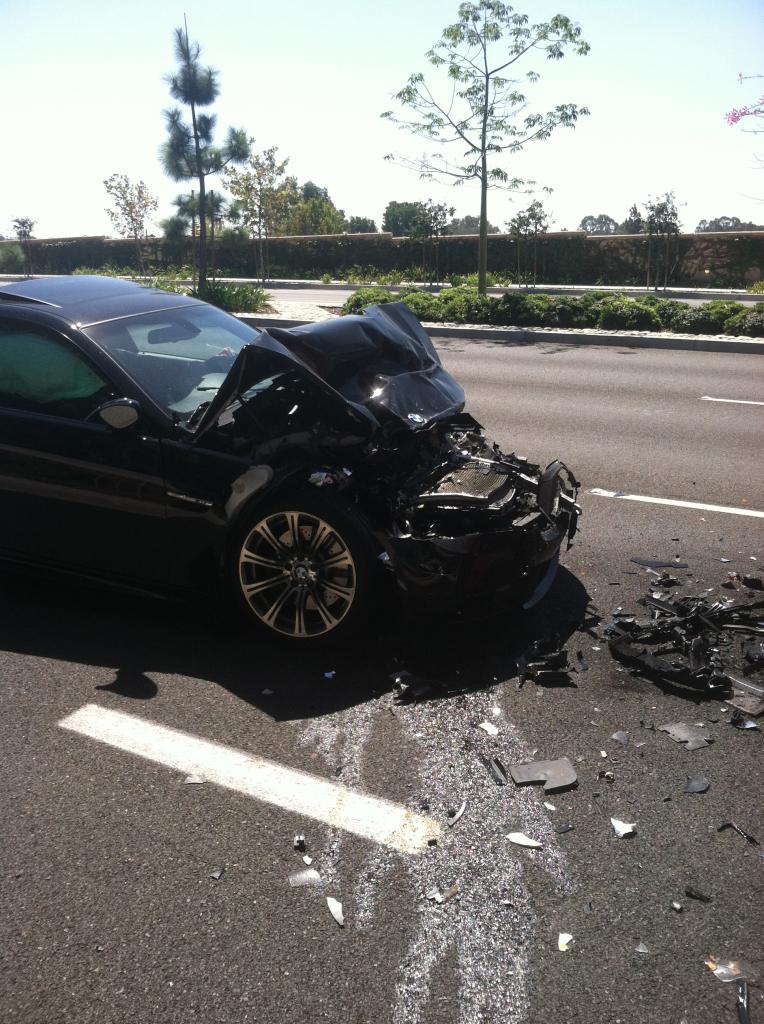
rear brakes needed to be rebuilt since they did not want to have a working hand brake, also one of the cables was freying, good thing i have a press at home, had to press the adjuster back into the piston.
Thanks to Eric for the parts to do that. hes honestly awesome for all the help he gave me ill always appreciate that.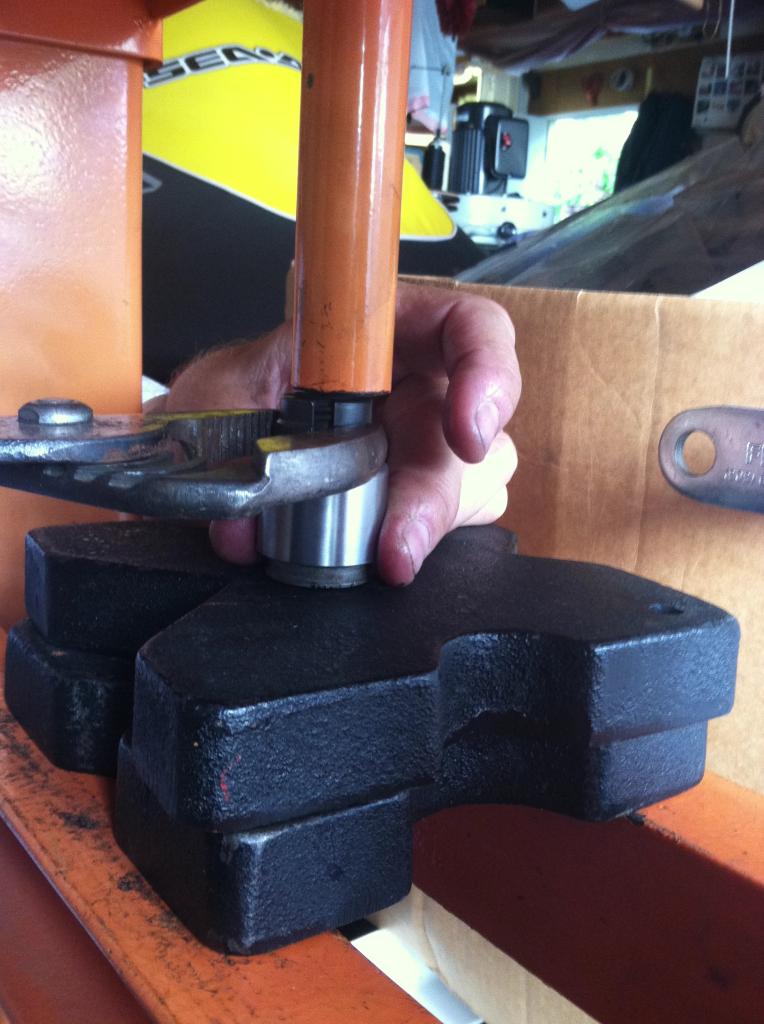
Got those on and bled.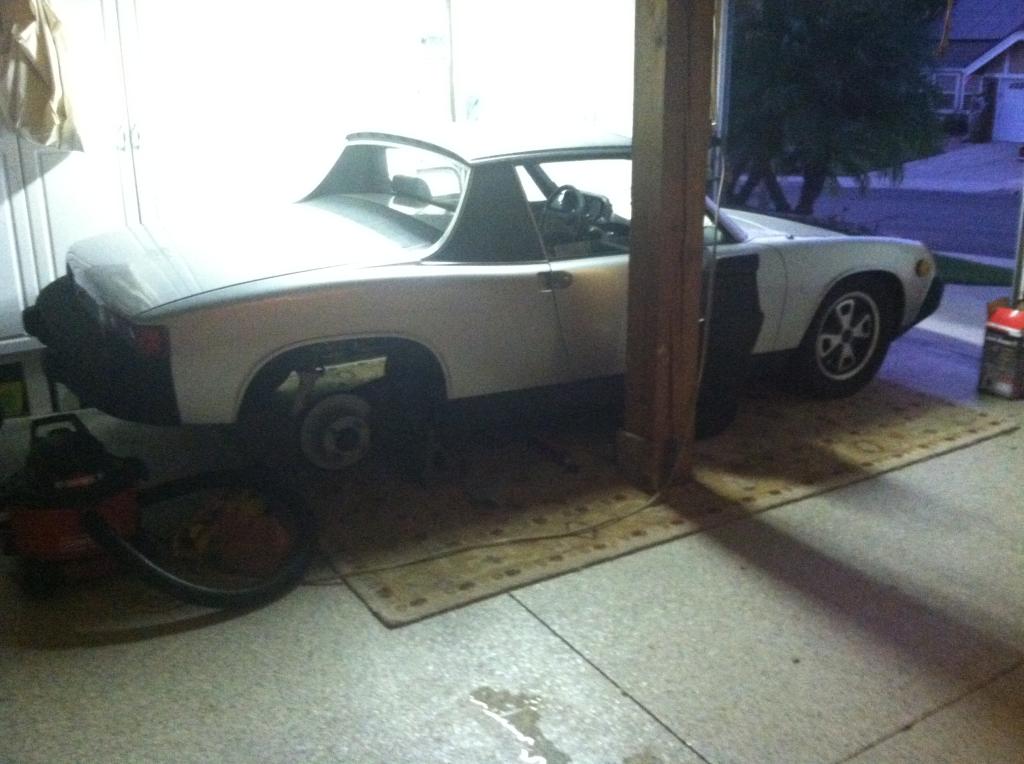
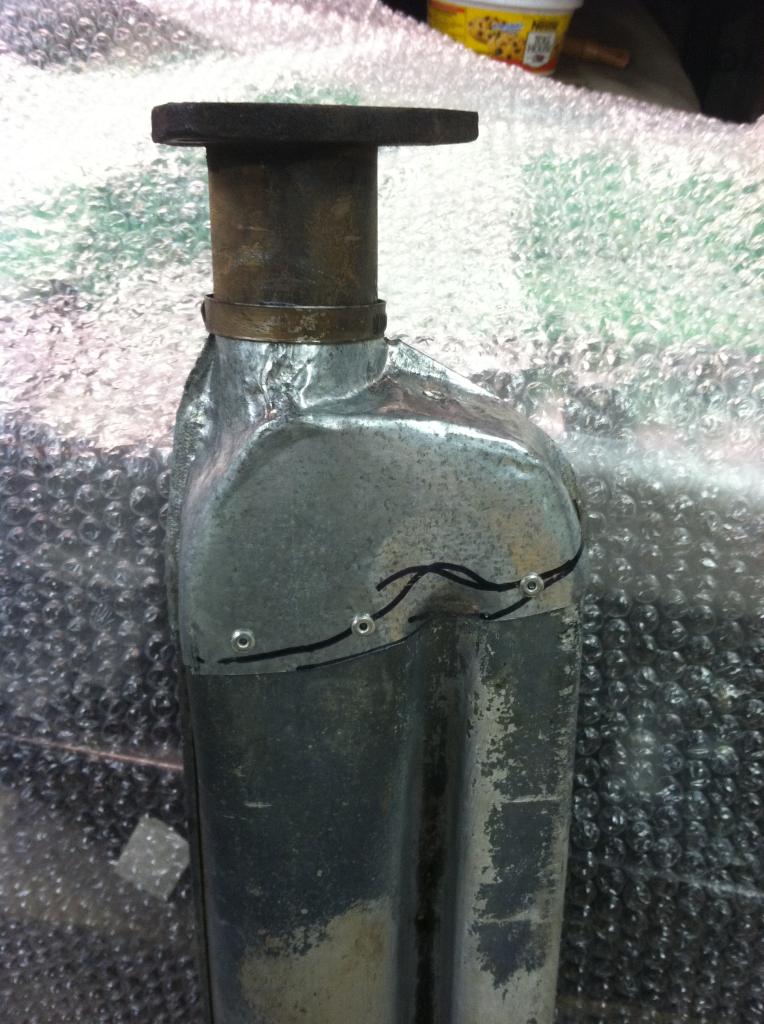
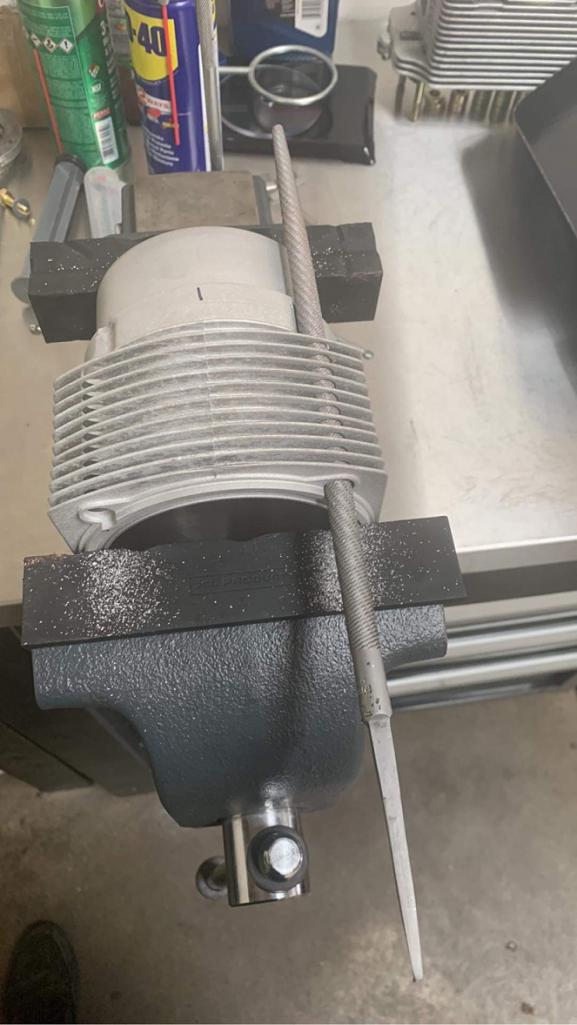
Heat exchangers, Mine of course were cracked and poorly repaired.
so cue the music and heres the next project.
all finished up, Had to beat some galvanized sheet metal to form to the end, and used some aluminum bar stock to pull the case halfs together and give it some rigidity.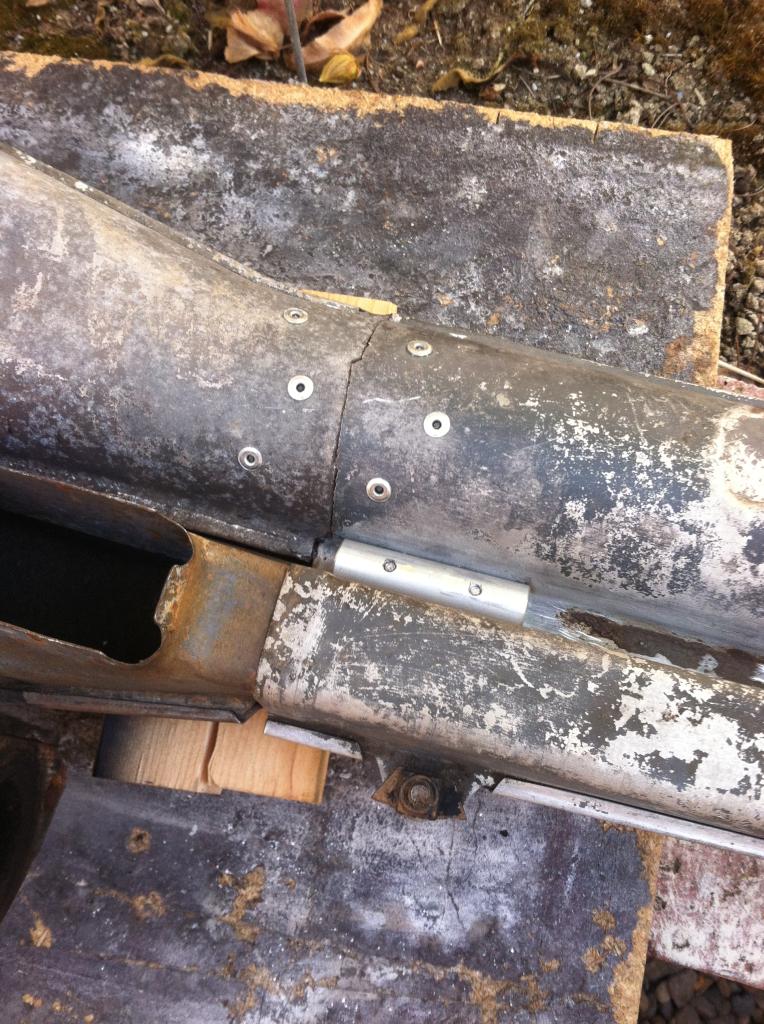
Now back to the battery tray issue.
Everyone knows I like to hit things with a hammer, so that skill ( If you want to call it that) worked out great for this next bit.
because I lack a welder at home and i did not want to cut the fender off the car and the side of the engine bay out i elected to put a patch in, obviously because someone hates me (i know who) the firewall where the battery tray is not flat. Means i had to make this.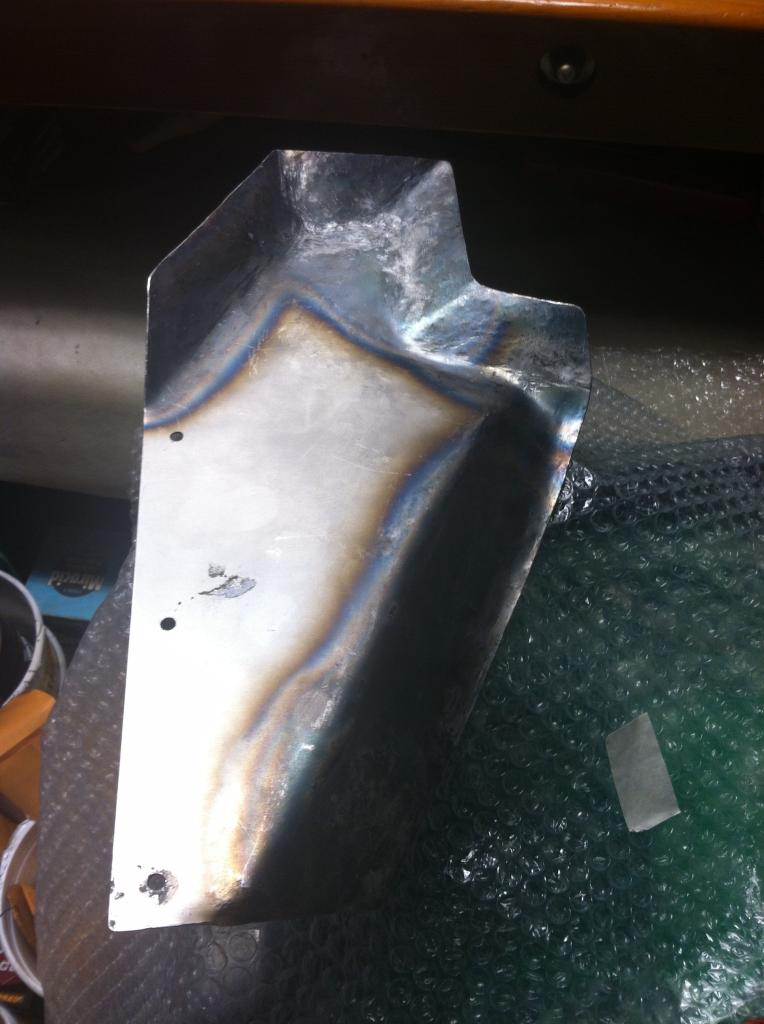
used this to braze the corners where the metal needed to be brought in.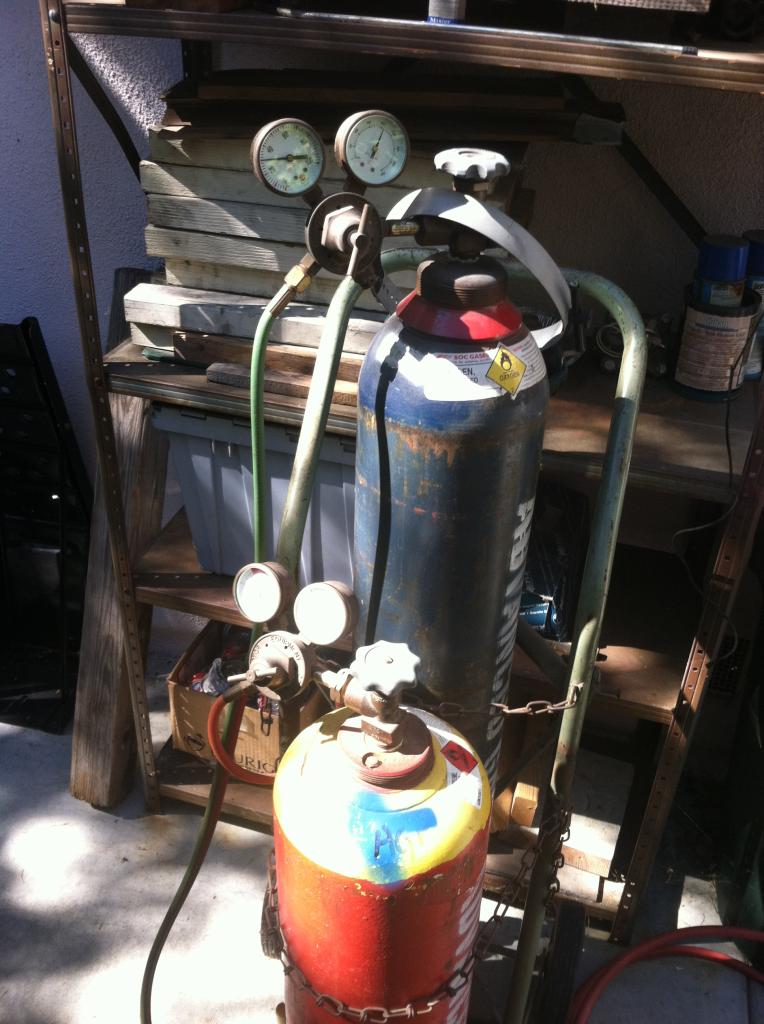
ill be honest, i just bought a new battery tray, re attached my original ECU bracket to it and blasted and re painted my battery stand and stuck that all sort of together.
the other spare part you see in this picture is the patch to go on the wheel well side of the firewall, and thats flat. who knows why.
i used a sealant and more rivets than i probably needed to hold it all together.
And finished off, before paint.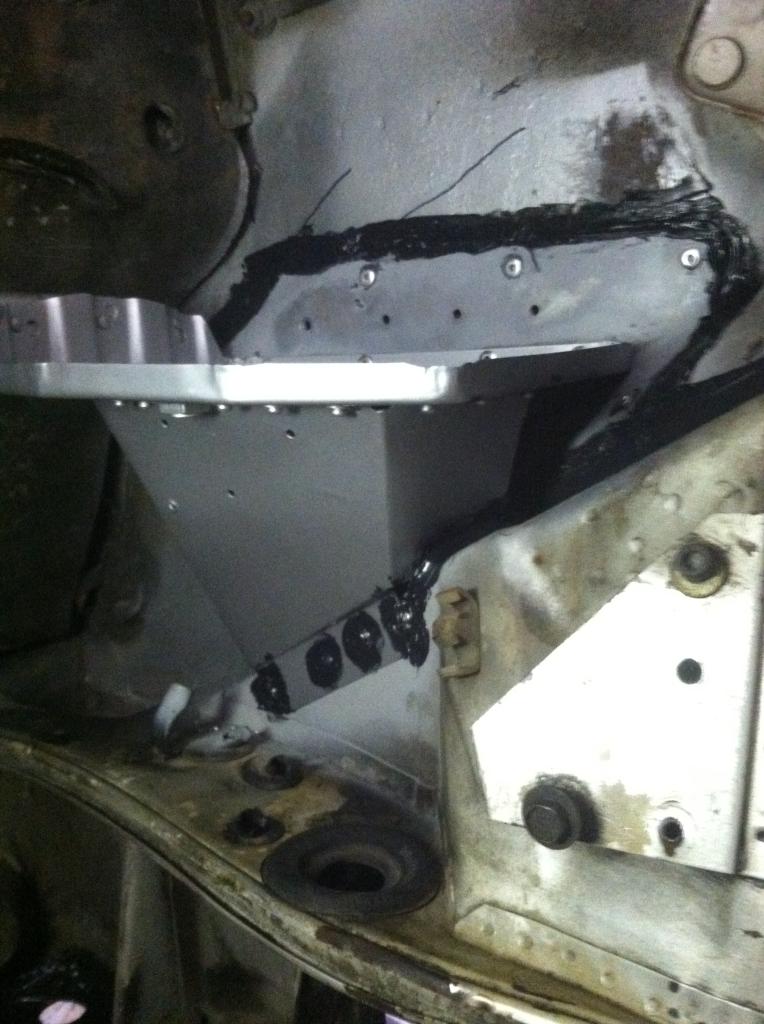
Of course all hell broke loose when i had to change the speedo cable.
Since my car is a 76 it means its subject to californias emissions standards of the time.
it had a cat and it had a oxygen sensor. Not anymore! but weirdly that means i have a retarded speedo cable set up. It feeds from the trans to a box in the passenger footwell then to the speedo.
Homie dont play dat.
I just bypassed it. however it required some interesting perspective to get the work done.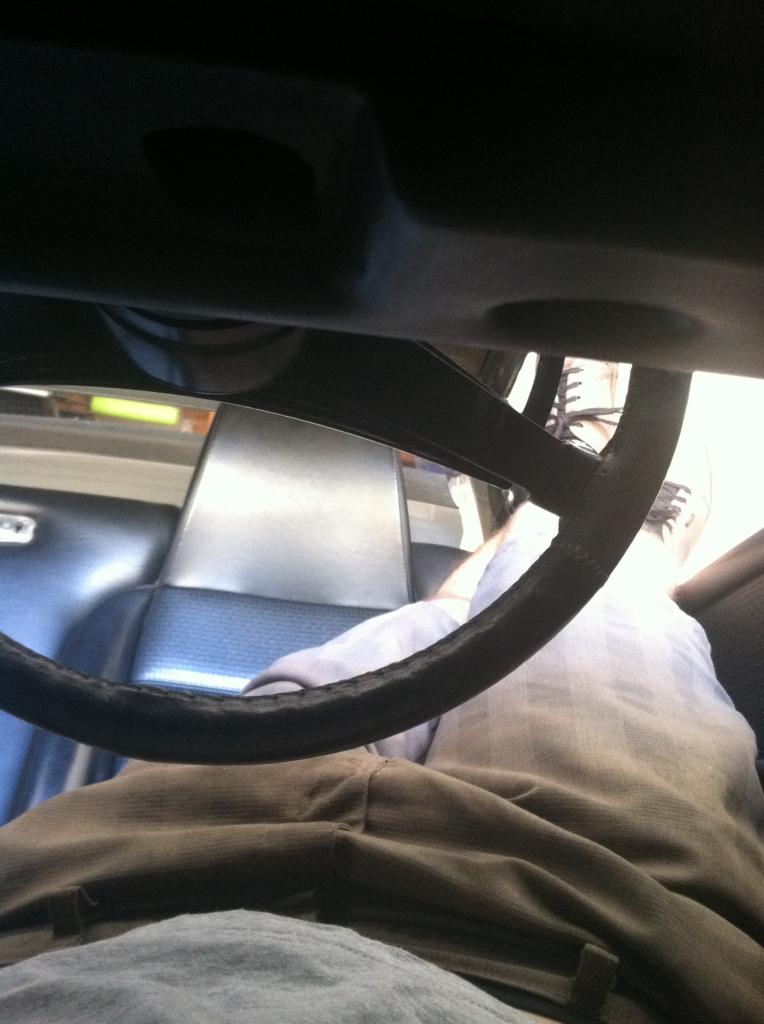
I cant say that was fun to stuff though the center tunnel.
and i re packed the front bearings since they sat for 12 years and who knows what kind of shape that grease was in.
And replaced the rubber hoses to the calipers.
Im not into flintstone mode.....
They were harder than a pedo at the local prep school so it was good to replace really.
Posted by: sb914 Oct 22 2014, 06:23 AM
Your just about one year in.looking good
Posted by: colingreene Oct 22 2014, 05:34 PM
Oh i know! I bought the car at the end of October to be honest. I only really started working hard on it in the last say 6 months. but unfortunately i wont make it to the swap meet in the car.
but I will be there.
Ill be wearing a Greene Performance T shirt if anyone wants to say Hi!
Posted by: ClayPerrine Oct 23 2014, 12:13 PM
FYI.. pop rivets won't hold the battery tray, because batteries are HEAVY. Been there, done that. Find a friend with a welder to attach it.
Posted by: colingreene Oct 23 2014, 12:22 PM
Did your friend use a .250 thou pop rivet? with 720 pounds of shear capacity?
I think it will be fine.
Posted by: colingreene Mar 31 2015, 12:28 AM
Took the Sills off the other day, Found the only real rust the car has on the jack point.
Easy enough to fix.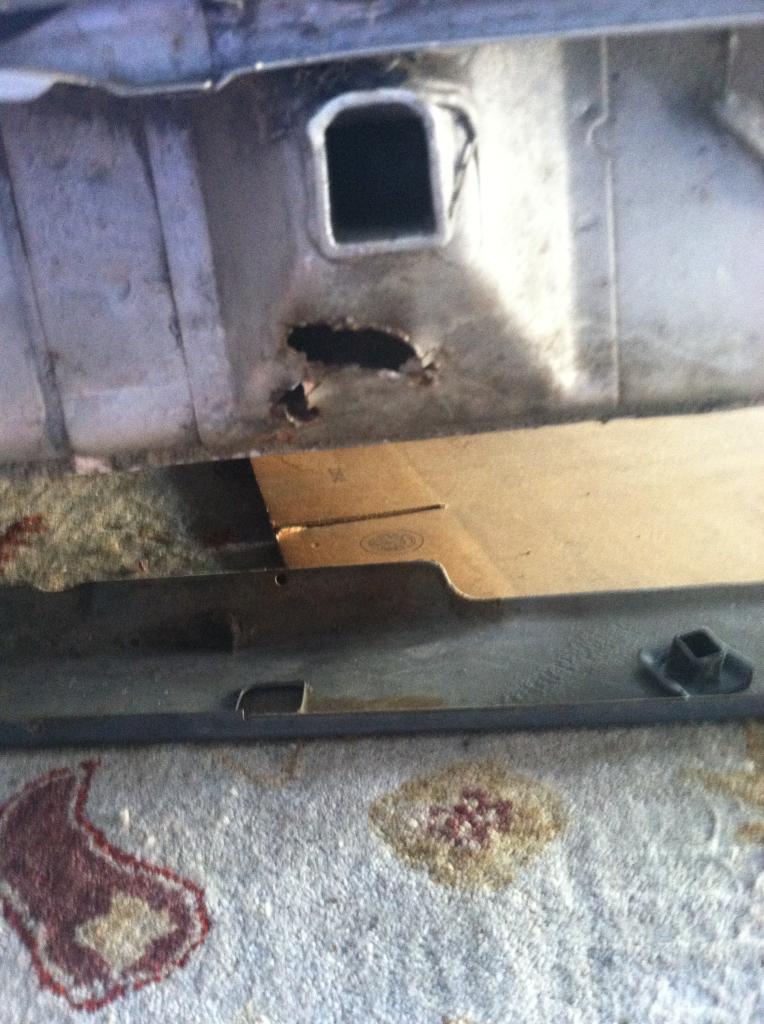
Cleaned up the engine bay and re did parts of the wiring harness in prep for putting the engine in.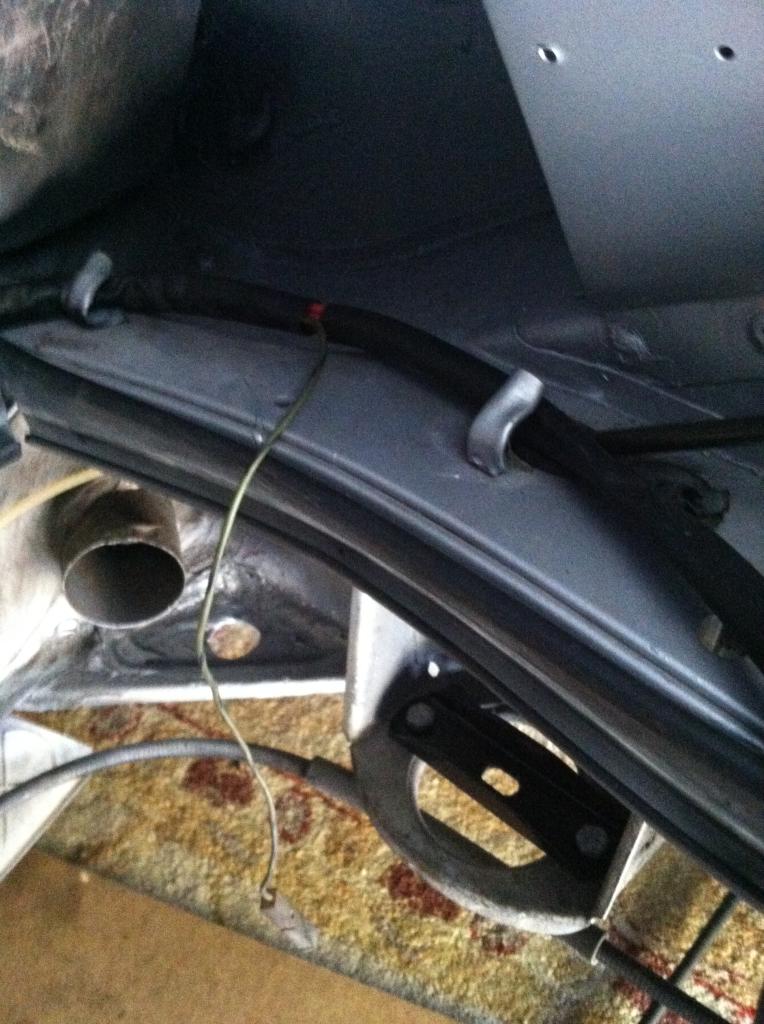
Time to put the engine in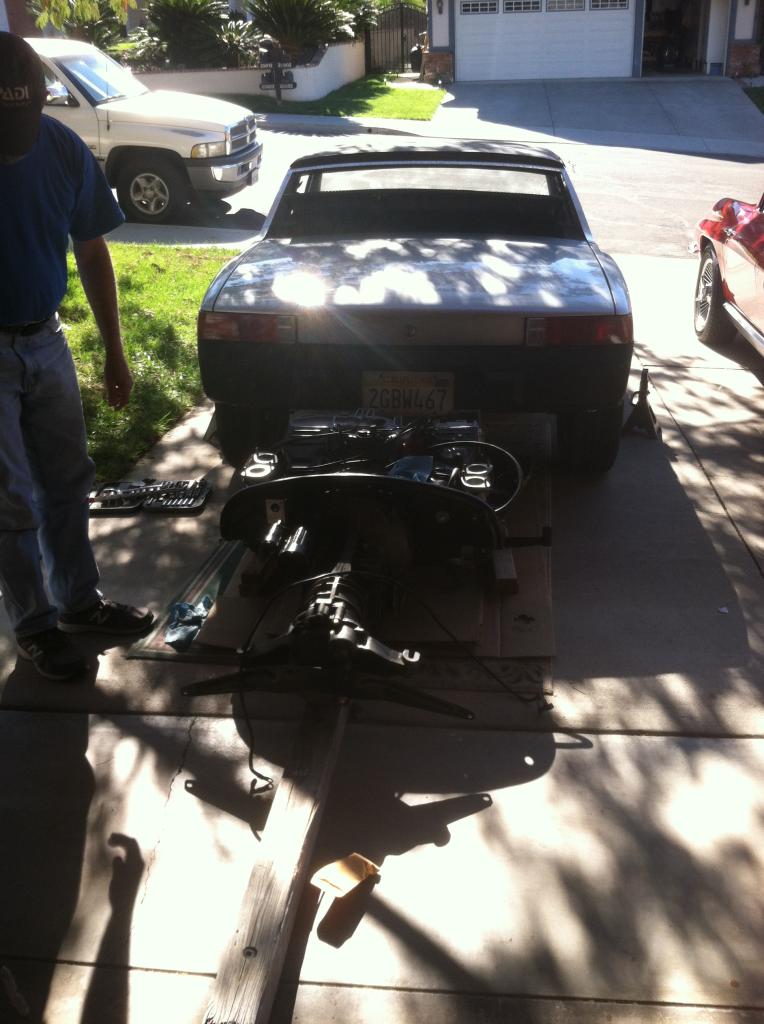
And its in.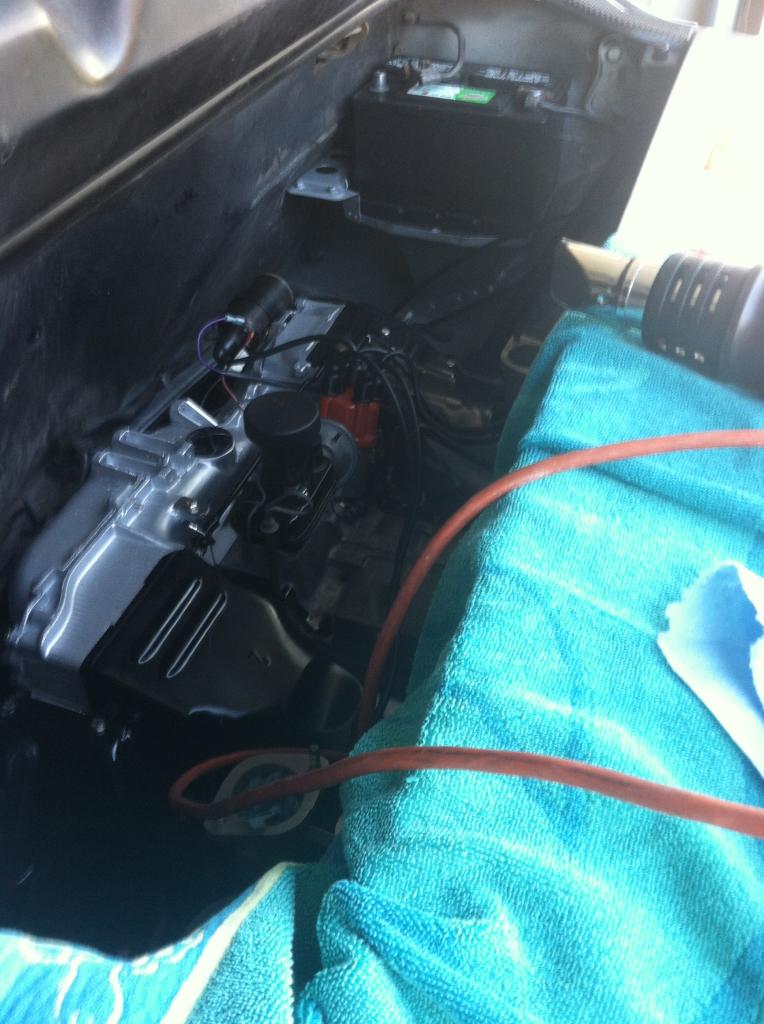
Time for axles 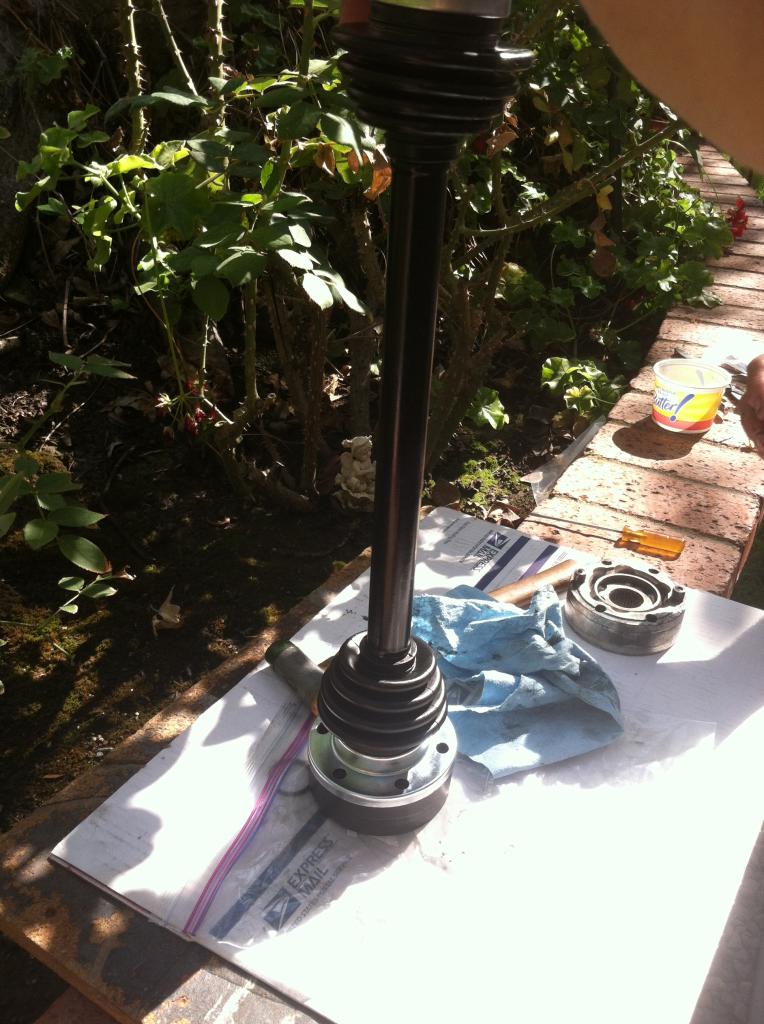
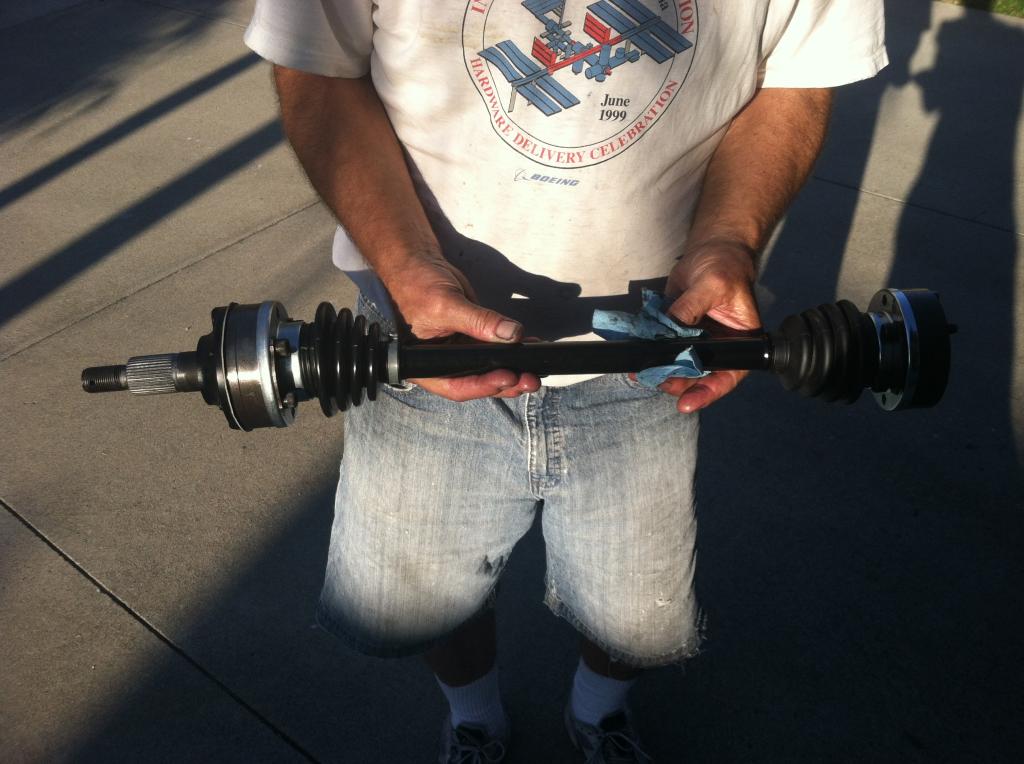
So the shafts and stubs were glass beaded then painted. got new boots and gaskets for them and fully anti siezed the splines.
What a pain they are to put in.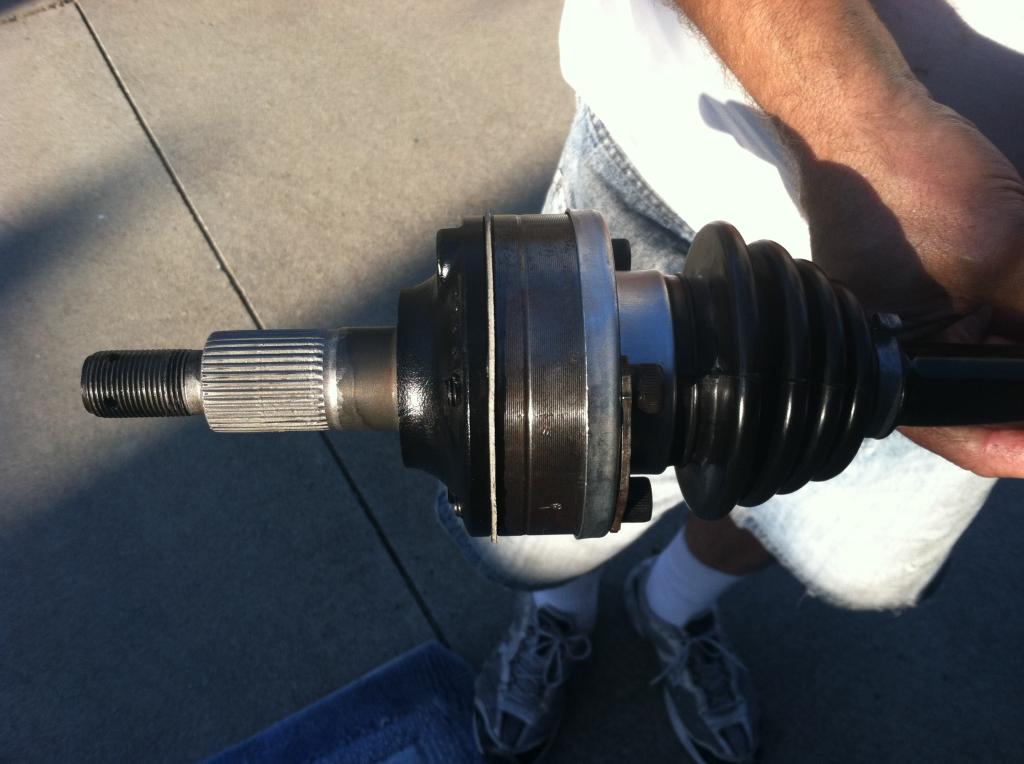
So afterwards I was all like.
Posted by: colingreene Mar 31 2015, 12:30 AM
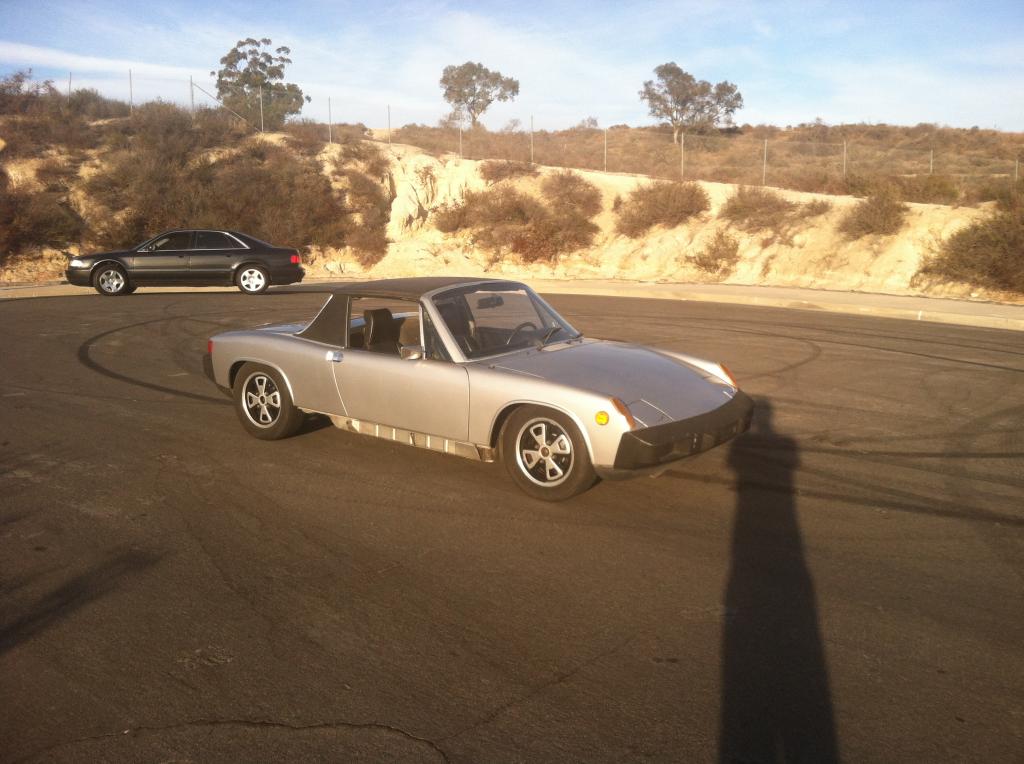
Out with a friend and his audi, Never ment to have that in the shot but its a great car even if it has the stance of a monster truck.
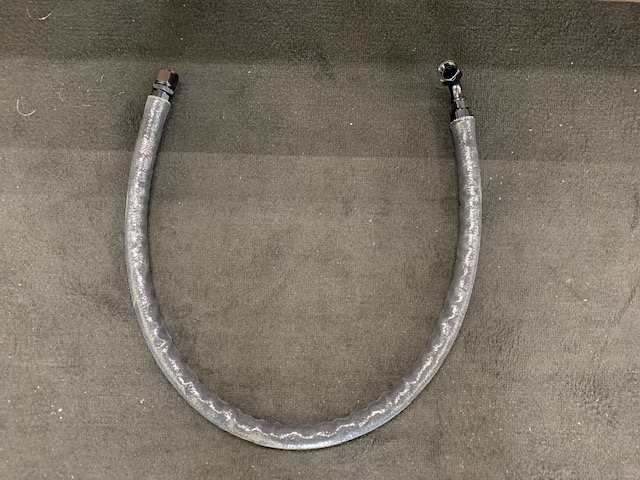
Also changed the Throttle cable(Thank fuck), and put fire sleeve on my clutch cable and speedo cable.
Pulled the wiper arms off to blast them as well as some other misc shit. I forget, I just stick it in the cabinet then blast the holy hell out of it.
Oh and hooked up a breather box. So my motor wont feel like the NYPD is arresting it.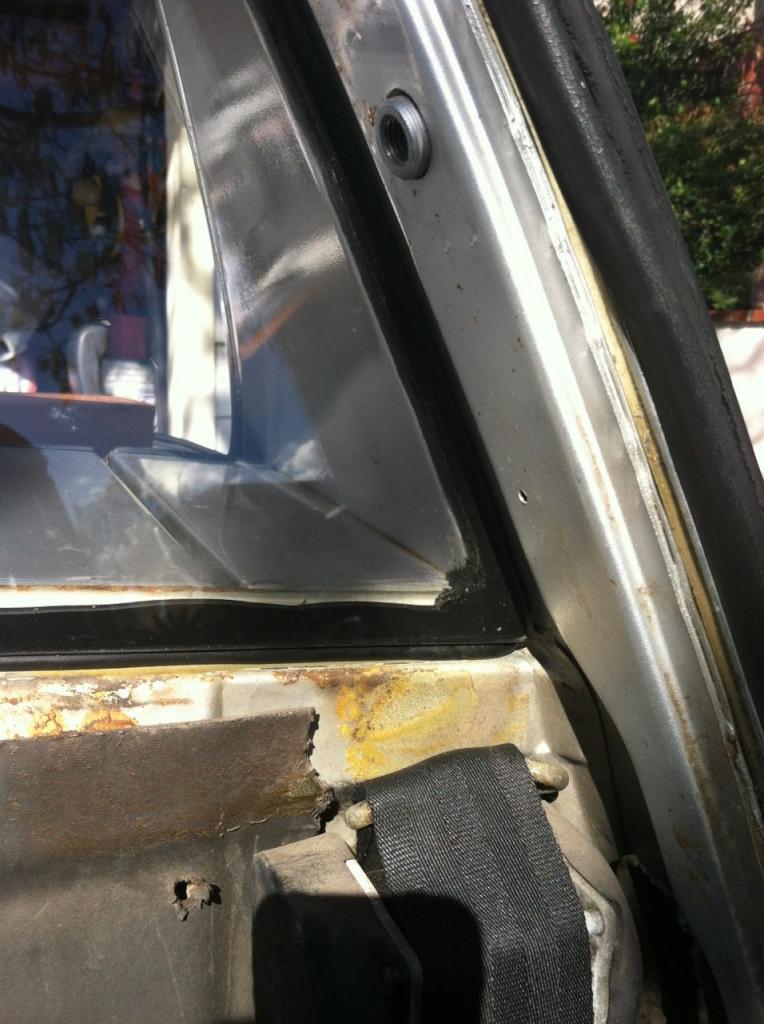
Had to re seal the rear window, it was the cause of my floor pan rust. Stupid owner had the car painted before me then they never put it back in properly.
Doing some carbs for another 914 friend. He said they only sat outside for a little bit.
Yeah right.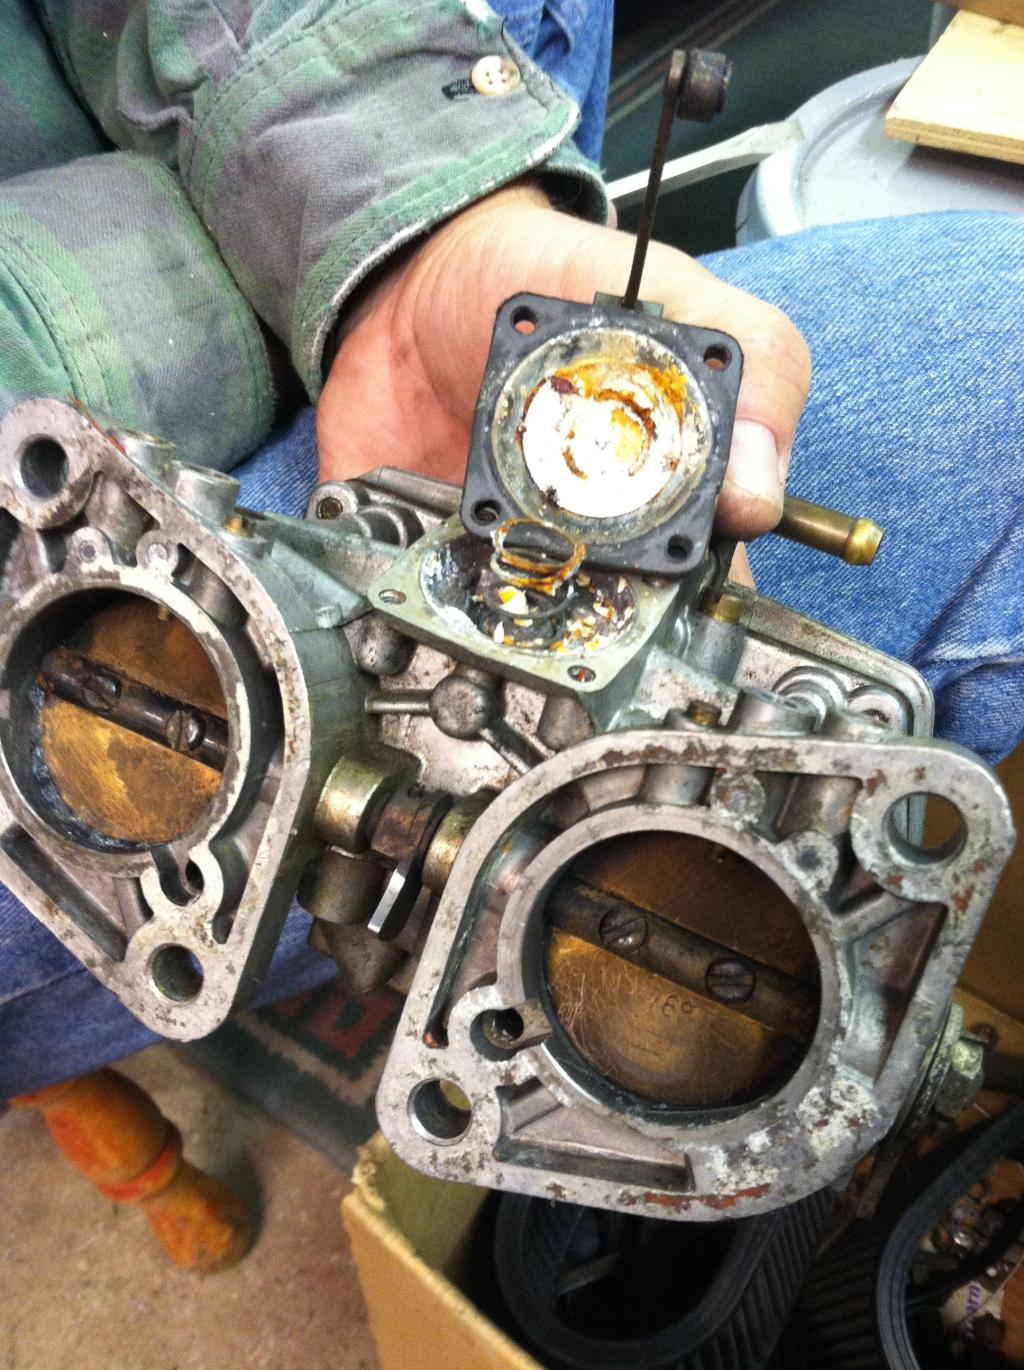
Drove my car to go see my good friend Arthur, Of course since i was 57 miles from home the car decided it did not want to shift at all. First second and occasionally 3rd was not going to get me home. Since i had no idea what the problem was i was hesitant to drive it lest their be loose something in the trans.
Onto the tow truck we go. (Thank you Arthur)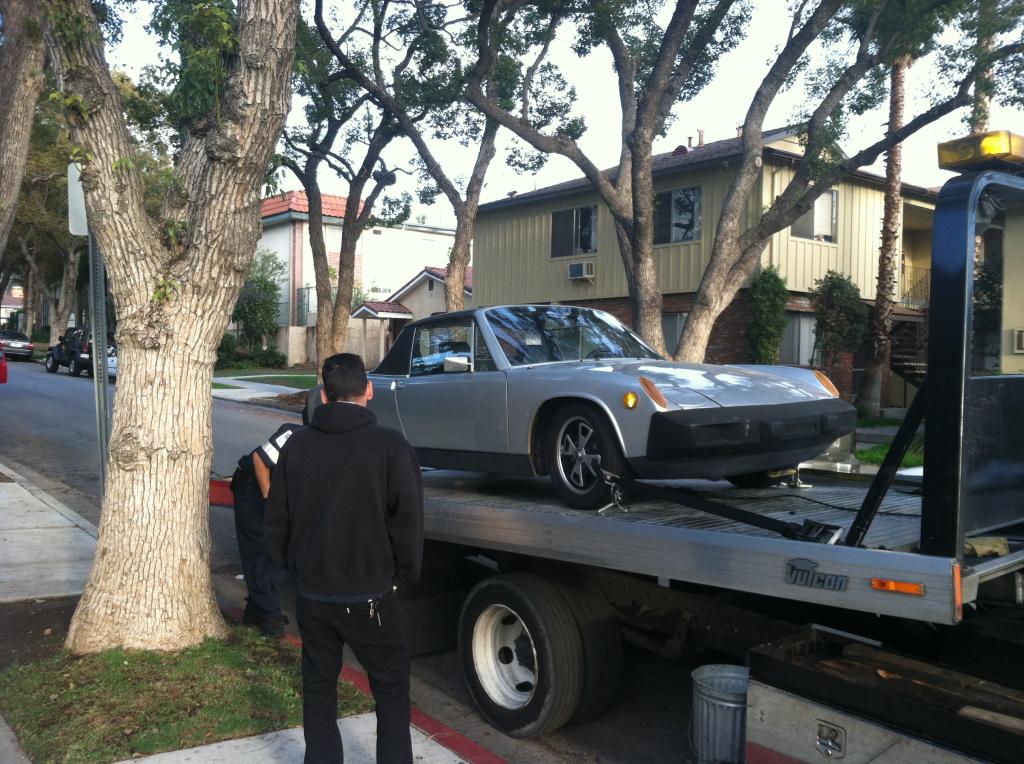
Two hours of LA traffic in a tow truck, what an adventure.
The cause, This is supposed to have bushings in it, They decided that right then was a good time to demand to be replaced. Easy enough to fix, gave me a excuse to re paint my shifter rod that was scratched up from the original install.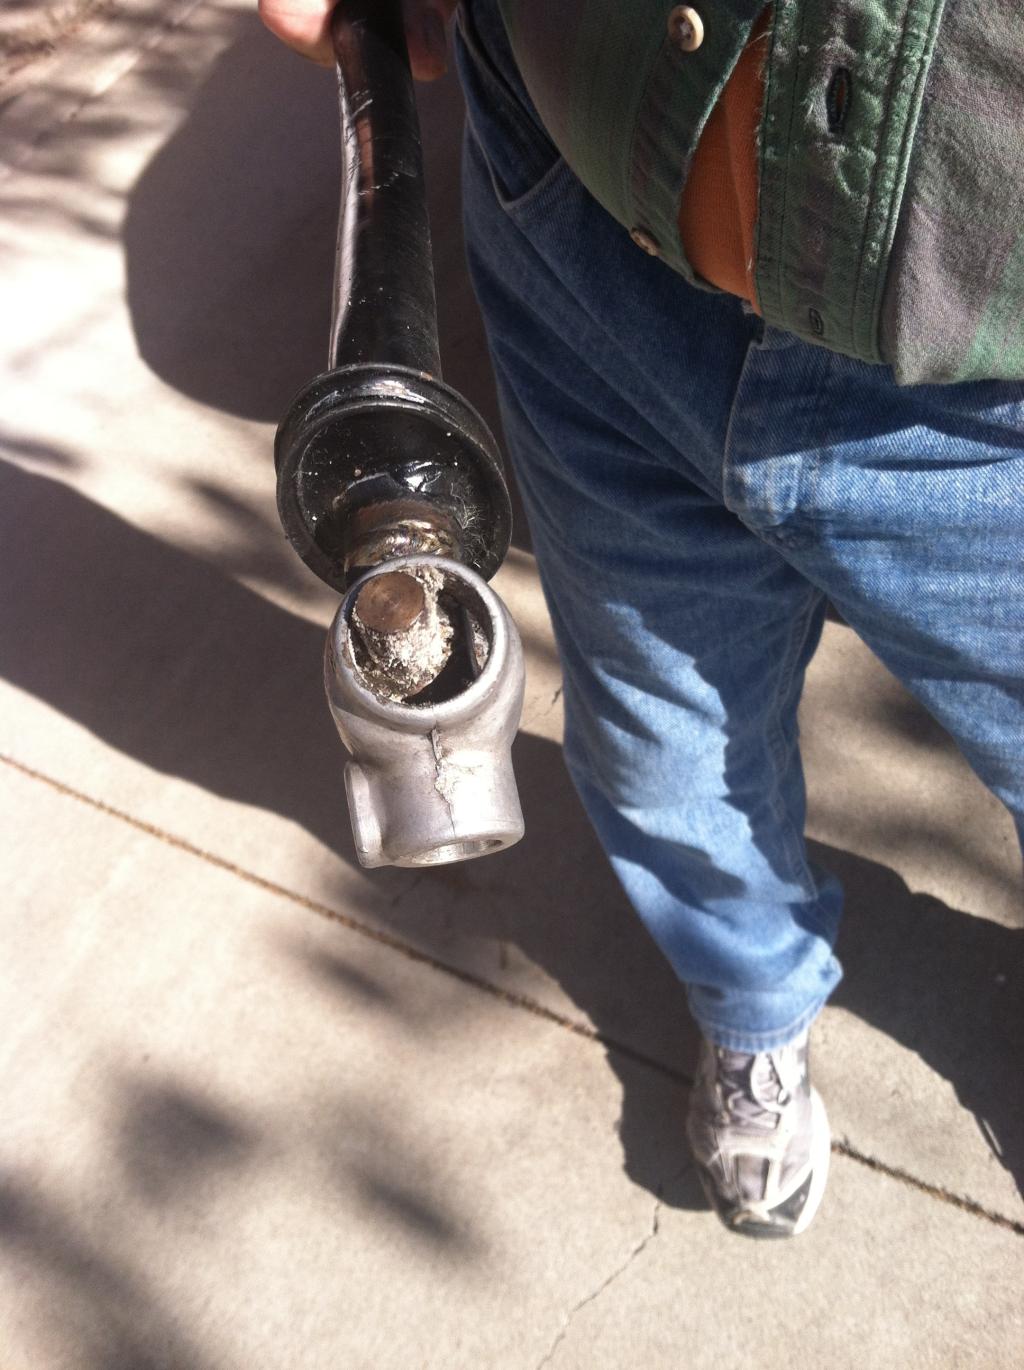
But not before i tore the shift console out of the trans to check the roll pin on the selector forks... UGH least it did not leak after i re installed them.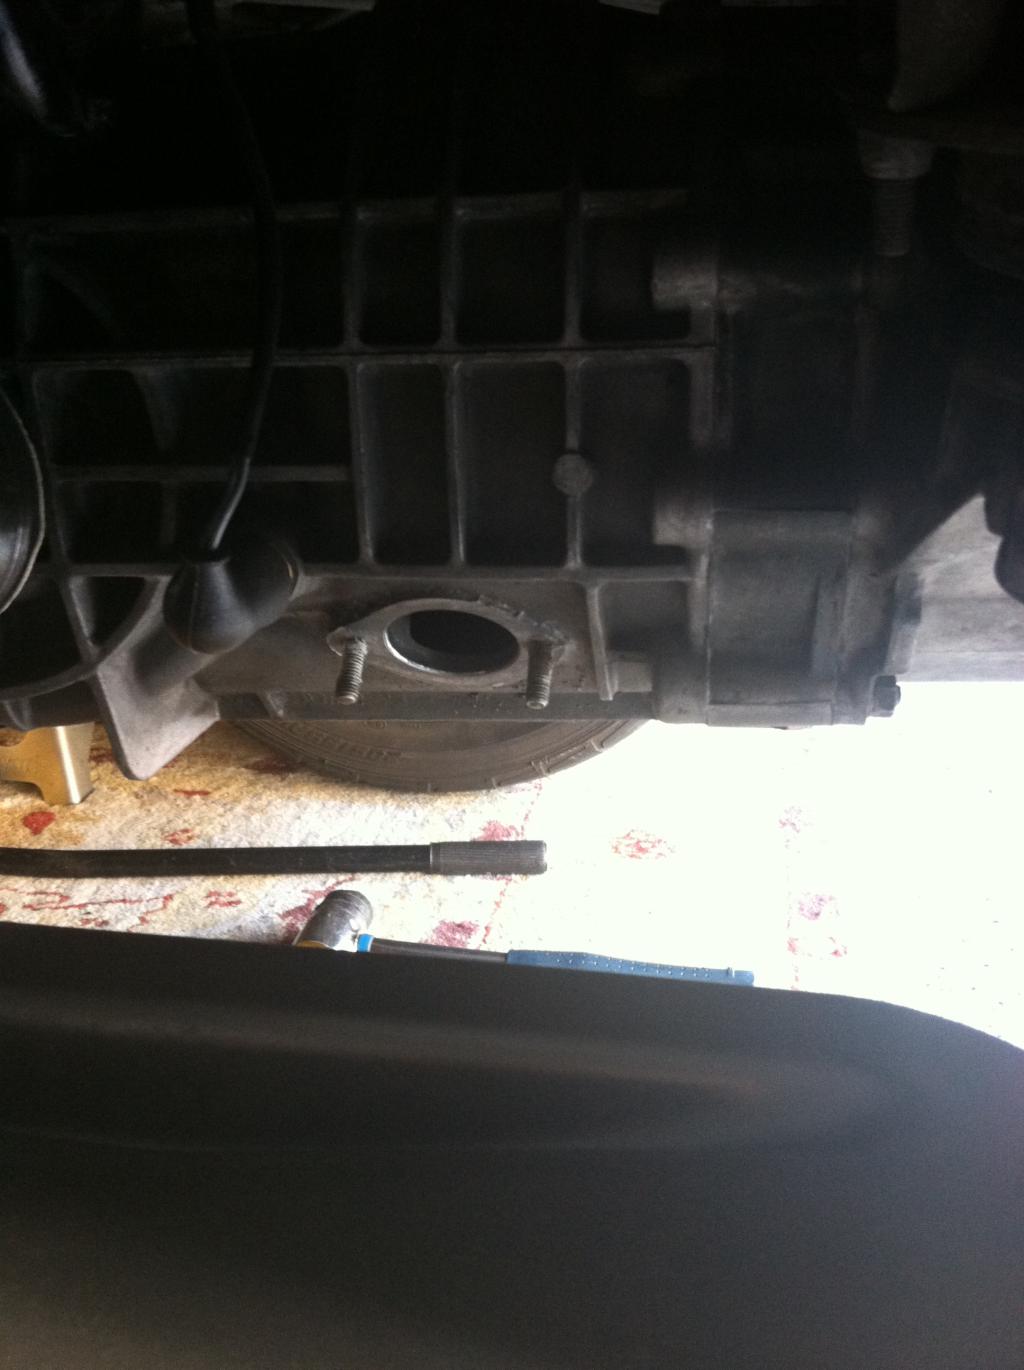
Nice day out in my bmw in Laguna Canyon chasing a Austin Healey 3000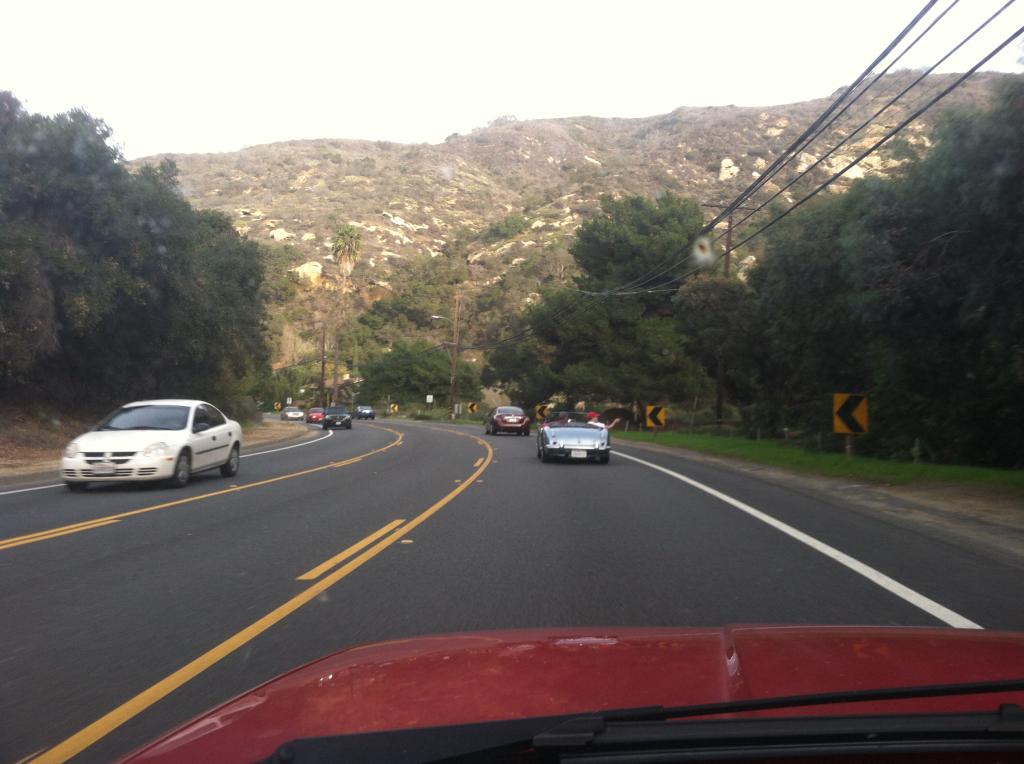
Of course since i fixed one thing, another problem had to crop up.
now the master cyl is leaking, so i have that on order.
UGH 280$ People buy my T shirts and Mounts! i have a herd of vintage cars and a mini to support!
Your part order could save this mechanical orphan!
Cant wait to see what this turns into. Rain sucks for working on cars.
Posted by: euro911 Mar 31 2015, 03:16 AM
Nice progress 
When you patch that jack support, leave a couple of good-sized drainage holes at the bottom corners on each side
If you can find a set of bronze bushings, you'll probably never have to perform this task again.
Posted by: maf914 Mar 31 2015, 06:57 AM
Pelican Parts had the bronze shift coupler bushings a couple of months ago, if you want to go that route. I bought a pair and will be giving them a try at some point.
Years ago the original black plastic shift coupler bushings in my car literally disintegrated and shifting became impossible. The replacements I got were a dark red delrin-type material. The difference was amazing and along with replacement of the other shift linkage bushings, the shifting was greatly improved. I guess the point is, whether you go bronze or plastic, you should see a big improvement.
Posted by: colingreene Mar 31 2015, 09:27 AM
Oh Bruce/Glen helped me find all new parts for the shifter so from the shifter to the trans is all new now.
They recommended a 911 part in that coupler i have pictured so thats fixed.
Posted by: euro911 Mar 31 2015, 11:04 AM

Posted by: colingreene Jul 28 2020, 02:37 PM
Over the last few years, I have done a few more things to the car. Ill have to add more pictures than this.
But due to the leaking window I had to repair the floor pan. I took the advice of a local metal guy who honestly could have been more helpful.
Really I would have been better off doing it my way and in the future I may revisit my repair. Only the passenger side was affected so that was nice.
I also have re carpeted the car, Need to do the seats and dash.
I also removed the back pad, put in two layers of sound insulation and a felt GT style firewall cover. I prefer it to the padded back pad, it seems no louder but the car feels more roomy.
Earlier I mentioned I had a opportunity to buy a full carrera Front end so i did.
I ultimately sold the brake calipers off of it and replaced them with some Early S calipers I had PMB restore for me with new shocks/bearings/ rotors/ball joints/ bushings and powder coat.
I am however thinking about going to a boxster set of brakes as Im not sure how I feel about these S calipers.
I also finished a full 5 lug conversion with a 911 parking brake because I was tired of the parking brake on the car just being not very modern feeling or modern functioning. this could be a load of things such as venting clearance or how the rear calipers were rebuilt (Did them at home) But i was over it and I wanted more brakes because I knew where this ultimately was going.
I now have the pmb recommended 108mm "System" with 911 parts everywhere.
Motor has been running great, I added a under deck rear cooler, Ill post pictures of that soon. Trans continues to shift perfectly.
And I have been running the wheels I bought from 0396, Gotta say I miss Peter.
I repainted the roof, and did the trailing arm reinforcement when i changed over to 5 lug.
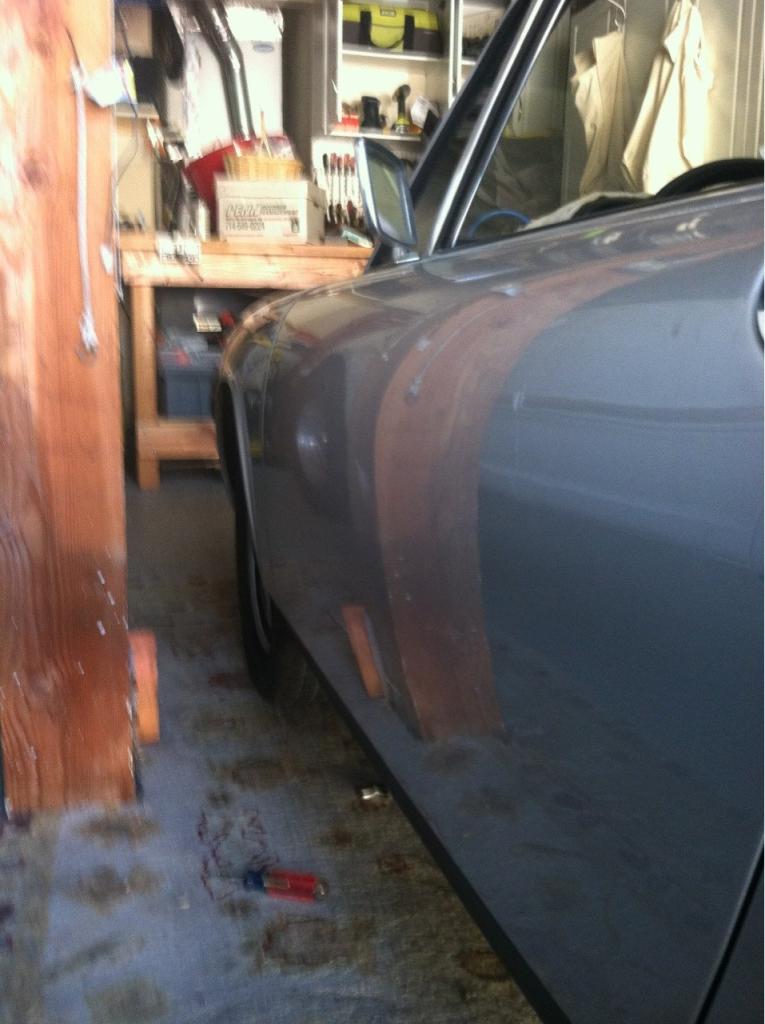
Also I back dated the bumpers, I absolutely hated those big ugly bumpers.
So the paint is failing its a little disheartening but ok. Here is how it sits as of right now.
Attached thumbnail(s)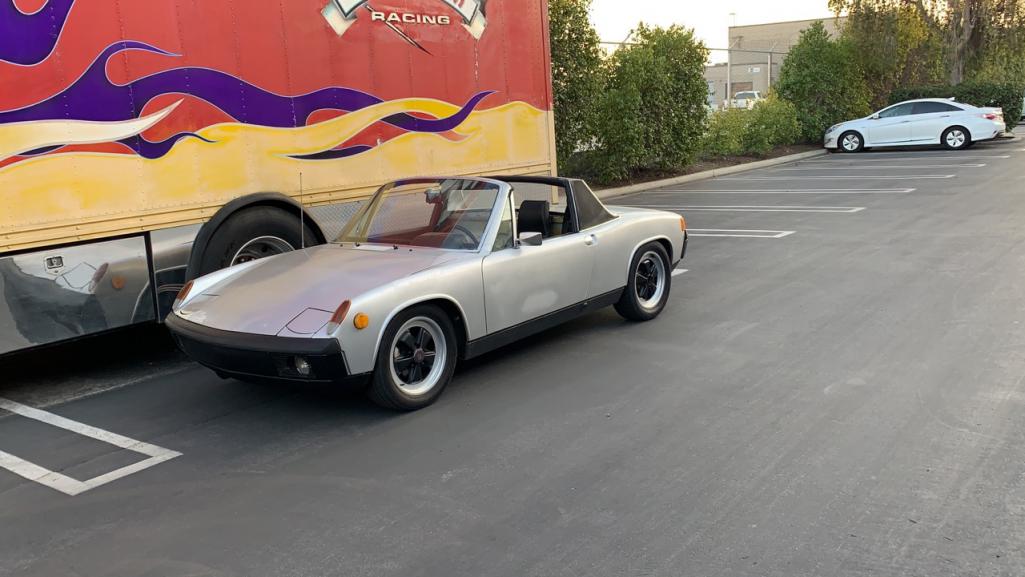
Posted by: Cairo94507 Jul 29 2020, 06:34 AM
Your car is looking good. That's a lot of work you have accomplished. 
Posted by: colingreene Jan 28 2021, 05:53 PM
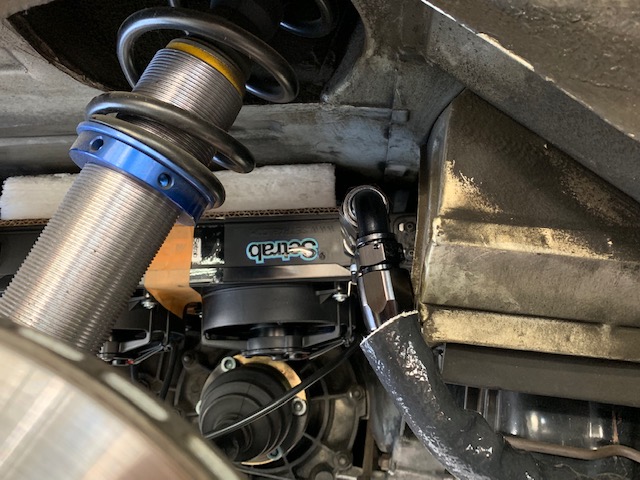
After running the car around a bunch and never being happy with the oil temps I added a thermostaticly controlled oil cooler with fans that are also controlled by a thermostat.
I am lazy and do not want to be bothered trying to remember to turn fans on and off.
Besides in my mind this is the correct way to do it.
I also added some 2.0L SSI exchangers. They are much better as everyone knows.
Attached image(s)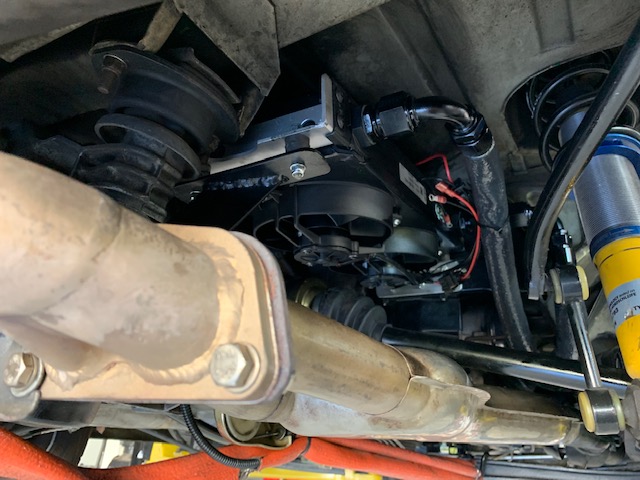

Posted by: colingreene May 9 2021, 08:18 PM
While trying to troubleshoot my ignition issues, I had a backfire and this happened.
Anyone have a distributor solution that's not a 123 you like, My Mallory seems to be my issue. Watching the ignition with a timing light it just dies off and comes back without anything being a determining factor.
I checked engine to battery ground, power to the coil with a test light while running.
Battery charge level. Plugs, cap, rotor, points are all new. Dwell is set correctly.
it just dies randomly. I cant trust the car at all.
Drove it a little today and like i said, had a back fire from the spark cutting in and out and this happened today.
So this should be a fun fix. popped a hole in my SSI.
Attached image(s)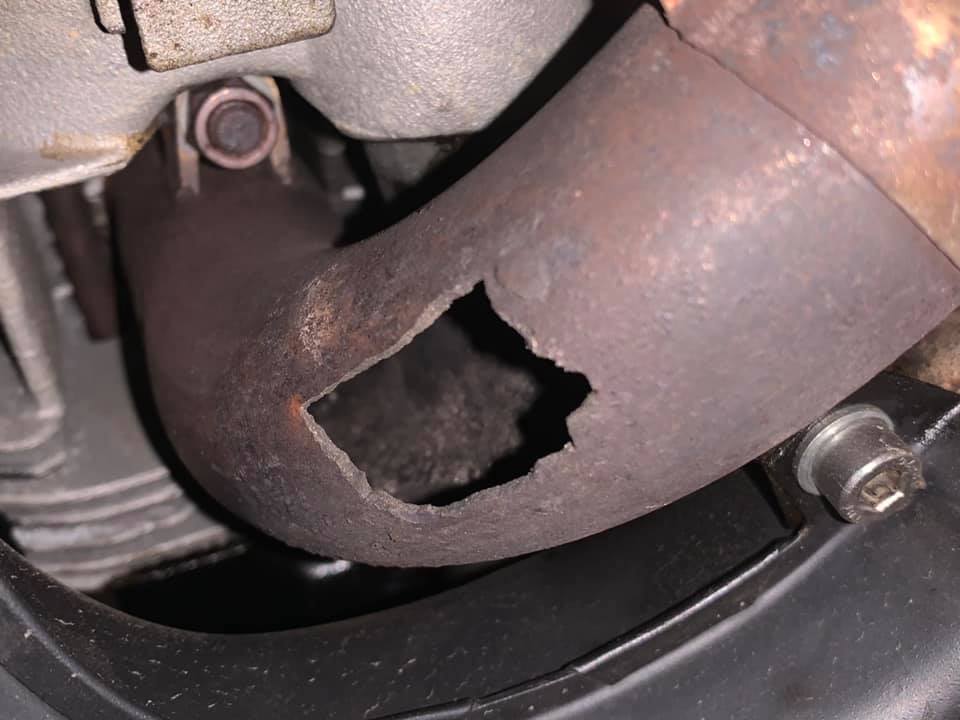
Posted by: jim_hoyland May 9 2021, 09:16 PM
The zmallory optical dizzy is notorious for intermittent performance when the module is weak. I went through this for a couple of months, all the time thinking the module was ok. Soon as I replaced it, problem solved…
Posted by: colingreene May 28 2021, 12:58 PM
The zmallory optical dizzy is notorious for intermittent performance when the module is weak. I went through this for a couple of months, all the time thinking the module was ok. Soon as I replaced it, problem solved…
It is a points distributor.
Posted by: colingreene Oct 31 2021, 08:27 PM
Bought a cheap distributor to put in the car to isolate the ignition issue.
Runs fine now, curve sucks but its drivable.
Since its a points distributor I guess ill change the condenser again and see how it goes.
This motor is due to be pulled and sold any day now. I have a 2.8L twin plug to be assembled and put int.
Just need more time thats all.
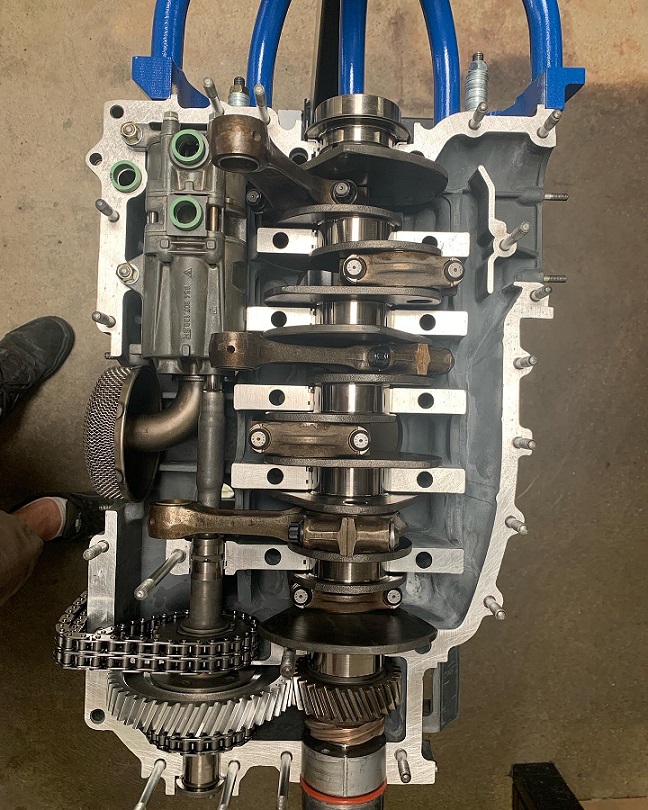
Posted by: colingreene Aug 17 2022, 04:15 PM
Somehow managed to get about 3 weeks of time to work on the motor that I planned on putting into this car so here are some pictures.
I am building a Mag case 2.8L meaning 92 bore 70.4 stroke.
Yes I know its probably a hand grenade but it is what it is.
Mark sold me the 2.7 core motor in I want to say 2015 or somewhere around there.
And Here and there little by little I have worked on it or bought parts.
Most of what put me off was I bought a 911 in the mean time and that needed a motor.
Since the 914 ran it was less of a priority to fix than the 911 that while it did run would knock on even 100 oct fuel.
I am using CP pistons with a coating DC60 or 65 Cams. All of my machine work has been done by Competition engineering.
That is not to say that this engine build has been without its bugs.
This is what the core motor looked like when I removed the heads.
The motor refused to turn over completely when i bought it. Turned out someone slightly bent the valves and that was the cause. No matter it turned clean now. however it was far from clean.
Attached image(s)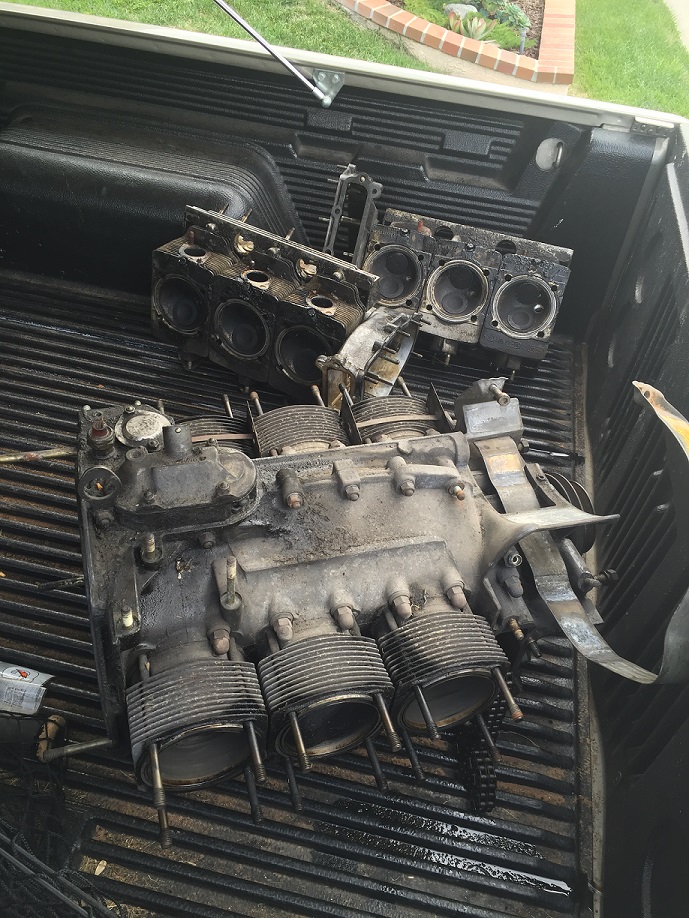

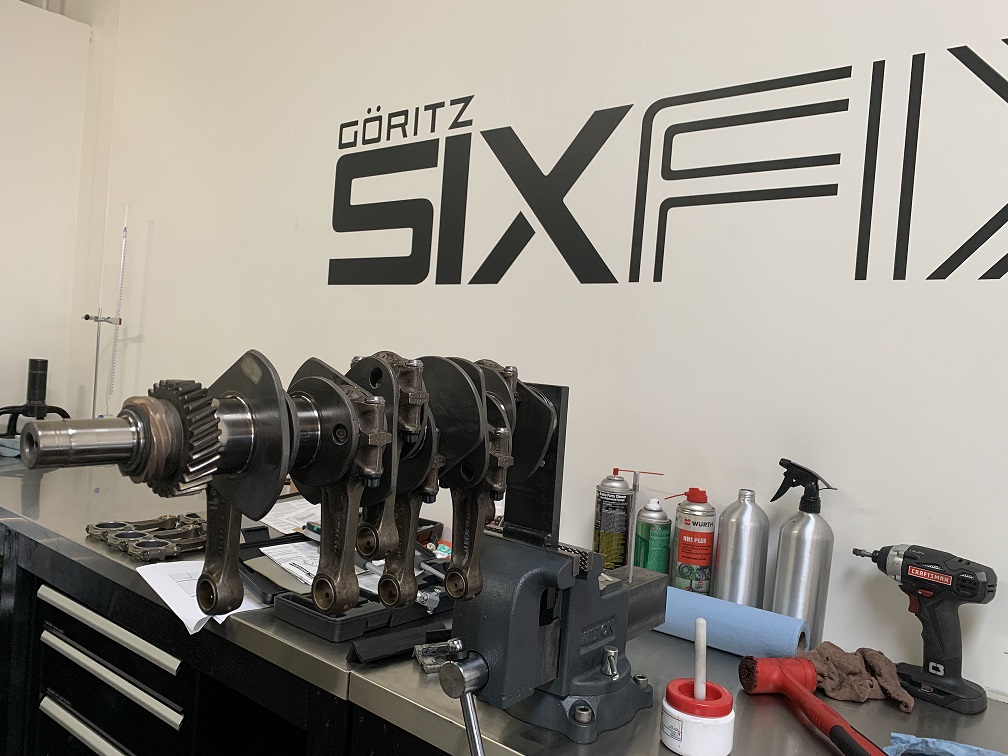
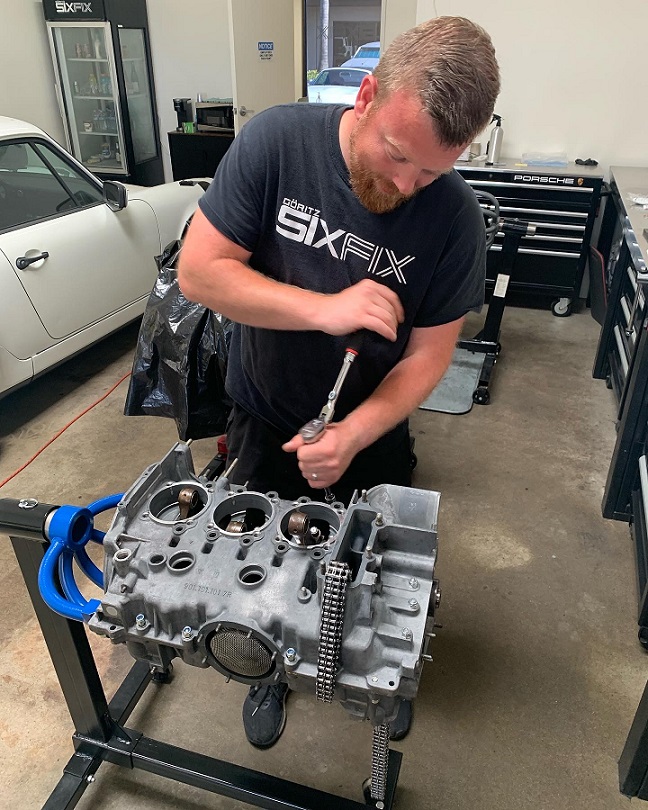
Posted by: colingreene Aug 17 2022, 04:45 PM
Luckily for me I was able to have a friend who now has his own engine building shop allow me to use some of his shop space.
he and I are both people who generally prefer to work in our own way but happily we get along fantastic.
While I assembled the motor under his guidance I ate all of his famous amos cookies.
Pretty soon it was starting to look like a motor. This lead us to our first problem
Originally I sent my case up to Competition engineering paid my bill and when it was returned no machine work had happened. Errors happen and luckily Walt is great.
I returned the case had it machined and it made its way back to me.
Ultimately we did find that the main bearing clearance was a bit on the big side however I chose to run a large oil pump and considered it to be safe. It was only a few tenths of a mm out.
Crank and rods mated up perfect. The crank measured out absolutely as new. A lucky score for me. Marine crank shaft had cleaned and polished it for me as well as balanced it.
I spent a ton of time mixing and matching pistons, wrist pins, rods together in order to get all of the rotating mass within .5 of a gram. Happy with that I began assembly.
Attached image(s)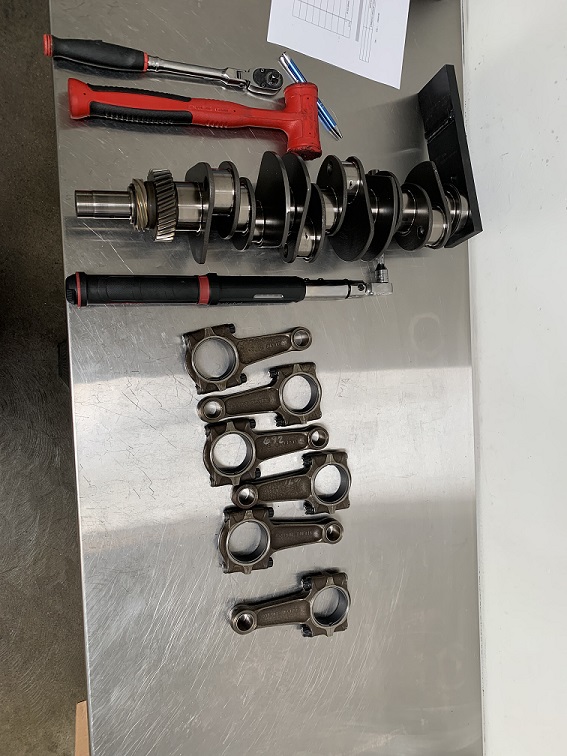
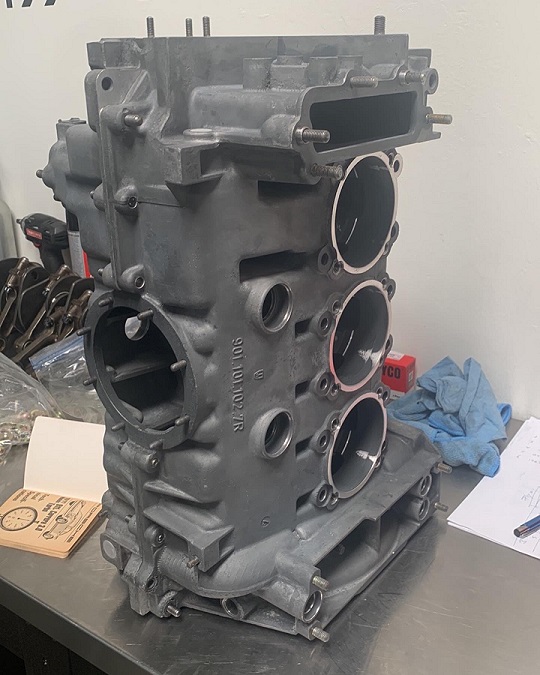
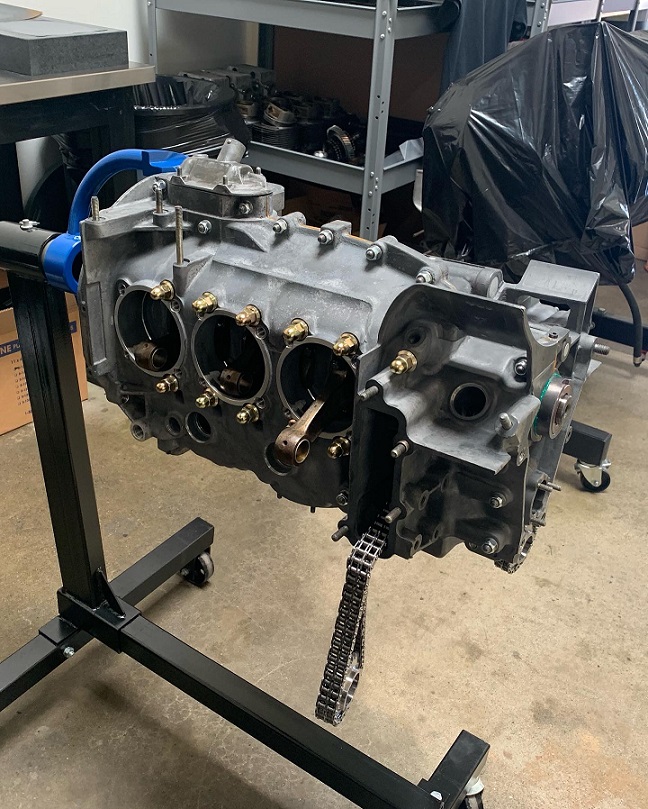
Posted by: colingreene Aug 17 2022, 05:20 PM
Next came laying out the case.
After I cleaned it years ago I had found a good deal on a 964 Oil pump.
This pump was never designed to go into this 2.7L case but uh, nothing a big ole grinder and some time cant fix.
We got it to clear and we were good to go.
However during this In my "replace all the wear items" phase I had bought some gears for the Intermediate shaft. Turns out they are garbage and would have grenaded the motor.
Thanks to Cornelius for this bit of info. I being the wise and annoying person that I am had kept all of the original parts so i simply swapped them back. they were not in the best of shape since someone had been in the motor before me and shimmed the cams and timing chain alignment poorly.
Once that was taken care of at a neighboring shop (They had a D type!)
we were on to lay out.
I am using the Iwiss racing chains the 964 pump and have ARP rod bolts for the rods.
That covers all the internals meaning I get to find my next set of problems.
Progress is often slow while we are doing this via its a working shop or I am plain screwing off. With that We had the case sealed up in no time. I was playing "we belong together" as we did the work. Hope that helps.
Attached image(s)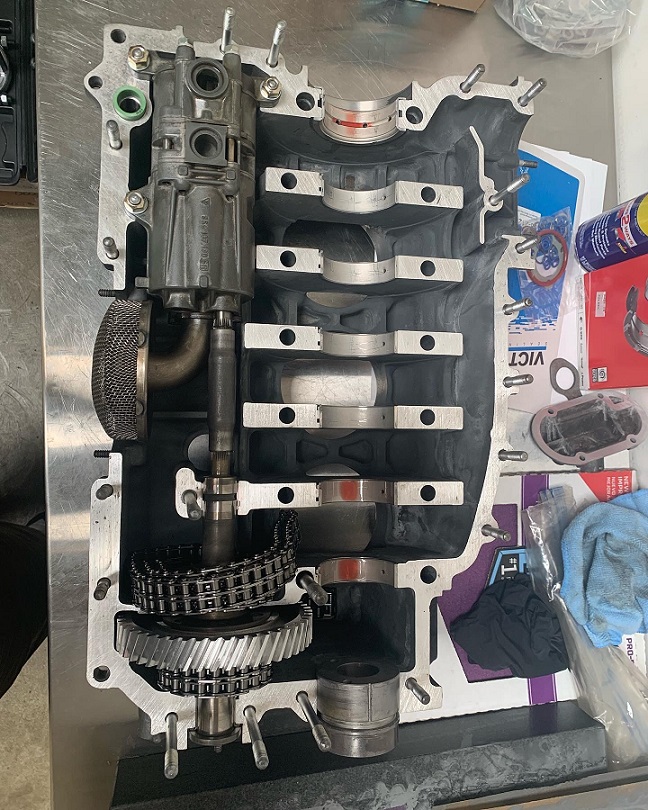
Posted by: 76-914 Aug 17 2022, 06:10 PM
Sweet looking motor. A clean and tidy shop speaks well of the builder. Will this throw a hitch in smogging the 76?
Posted by: colingreene Aug 17 2022, 07:40 PM
As I live in Minnesota the car has Minnesota plates.
Posted by: Optimusglen Aug 18 2022, 08:24 PM
And, for those who are unaware, there are no smog requirements in MN.
Looking forward to the 6 dude!
Posted by: Maltese Falcon Aug 19 2022, 05:14 PM
You're in the Greatest of hands with Cornelius overseeing your 2.8 project 

Posted by: colingreene Aug 23 2022, 08:03 PM
Once the case was assembled we moved onto checking the compression ratio and setting the deck height. 
While trying to set the deck height it became apparent that the cyls would not fit into the case, however this was not the fault of the cyls.
Turns out via some phone calls that the machine shop I used places the case savers .25mm further out. this in fact then adds up to a small but significant .5mm.
As with any problem its never just one thing, I following the advice of Cornelius and other notable names we like my last flat 6 build chose to use 993 studs.
Only plan of action became to open up the holes on the cyl for the larger studs
not fun.
The goal here was to meet or slightly exceed 10.5:1
Unfortunately either our measuring skills were not good or something was wrong. 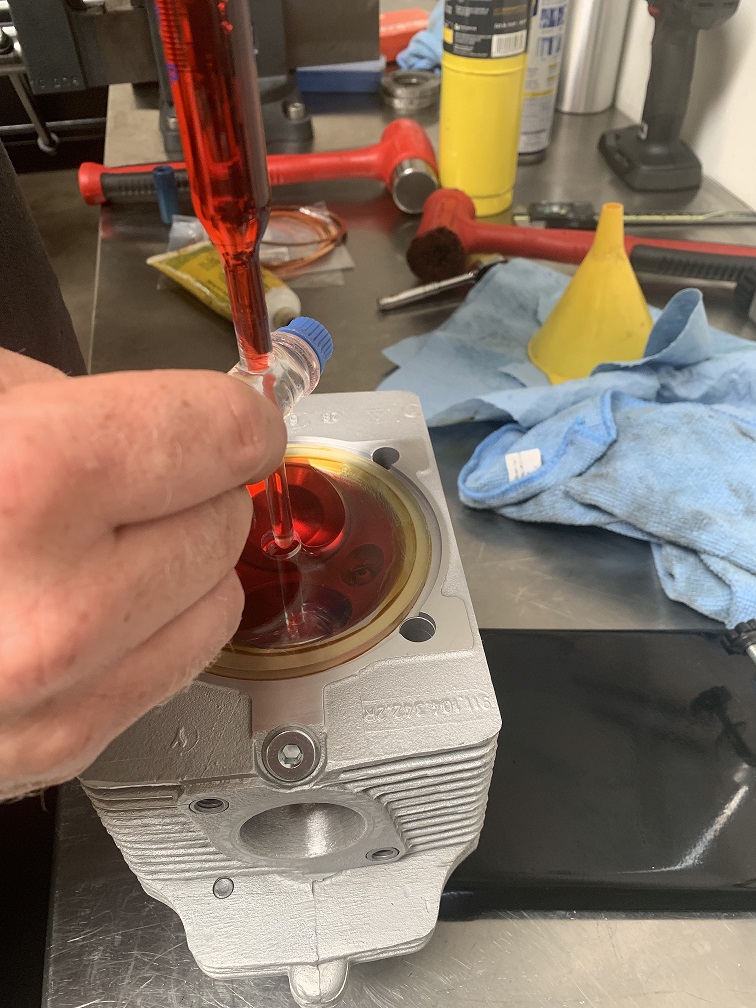
we kept coming up with somewhere around 9.5:1 not a bad number but not what I had asked for And not what the piston information card indicated.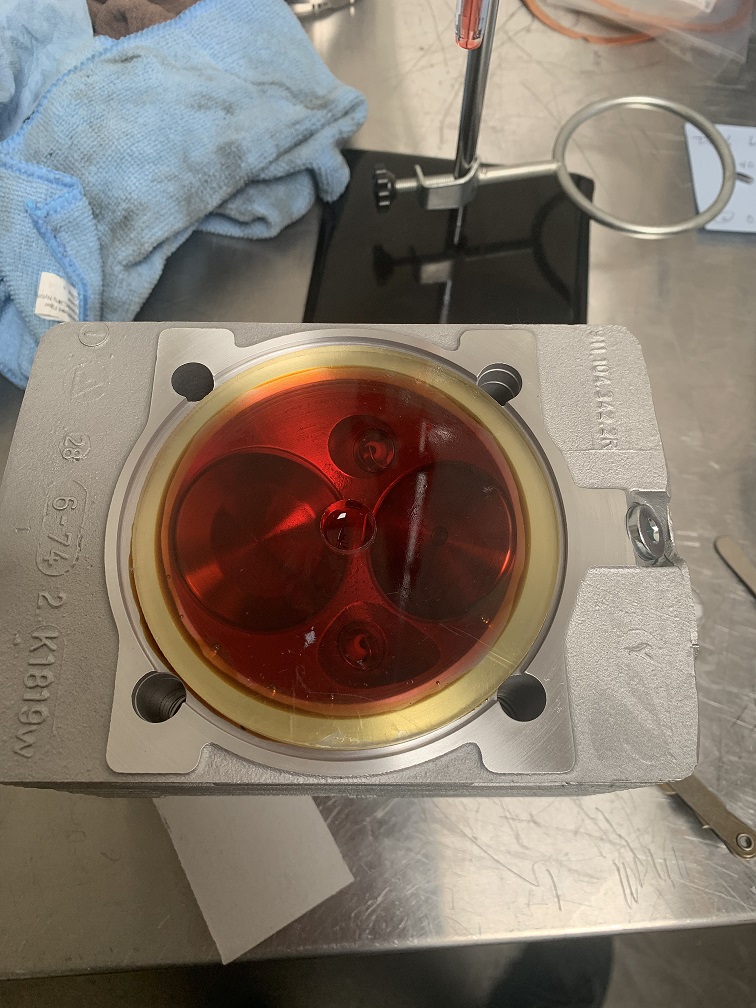
Luckily for us CP Carillo is right up the road. after some back and forth on the phone about the issue and how we measured I dropped off a piston to have them confirm what the piston exactly was.
Unfortunately it turned out they were made incorrectly. The base piston was in fact a 9.5 however the modified file never made it to the CNC machine that cut these.
They agreed to build me another set of pistons however it was going to take 3-6 weeks.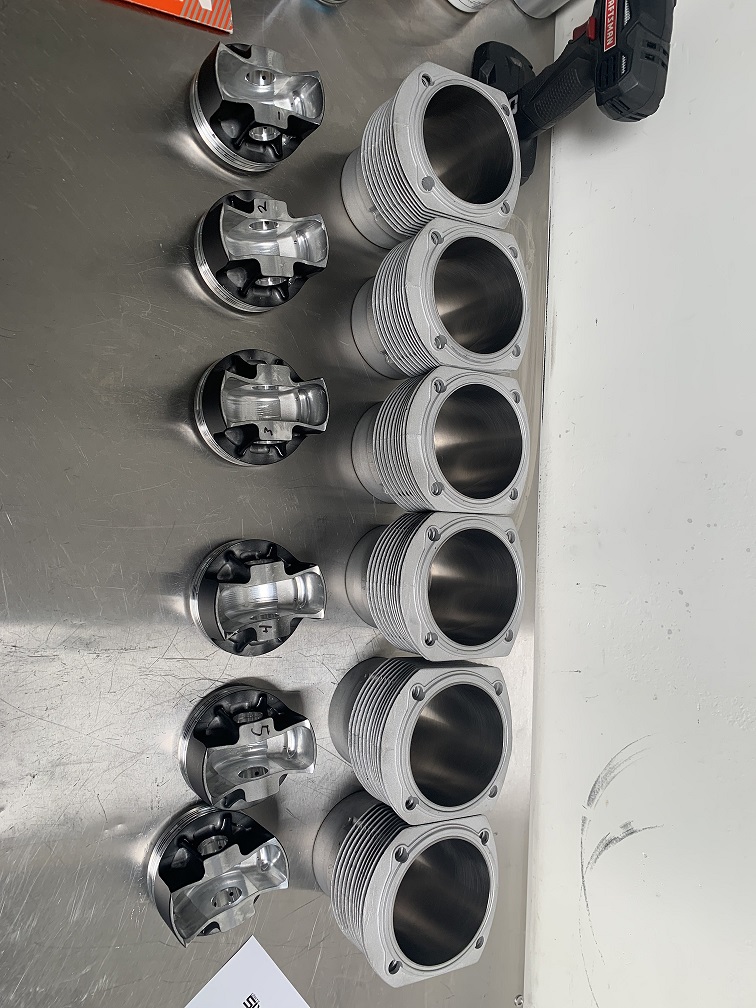
I Just have received them back but it will be a bit before I can get back onto this.
Of course this means my 4 cyl motor was being fussy after being parked on a incline. Unsure if that's a artifact of 44IDF carbs. If anyone knows let me know.
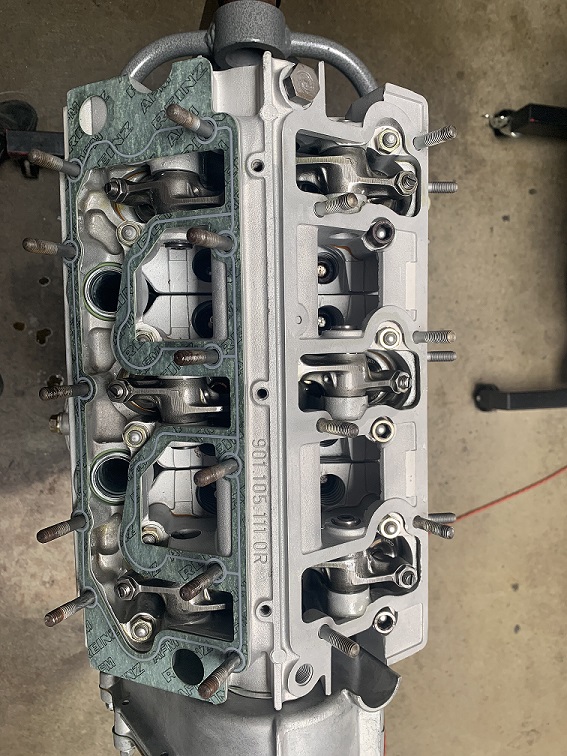
And a picture of the valve spring set up on the heads. 
Posted by: colingreene Aug 23 2022, 08:20 PM
Somehow I chopped this picture out of the last post.
This is a Semi current picture of what the car looks like as of right now.
Attached image(s)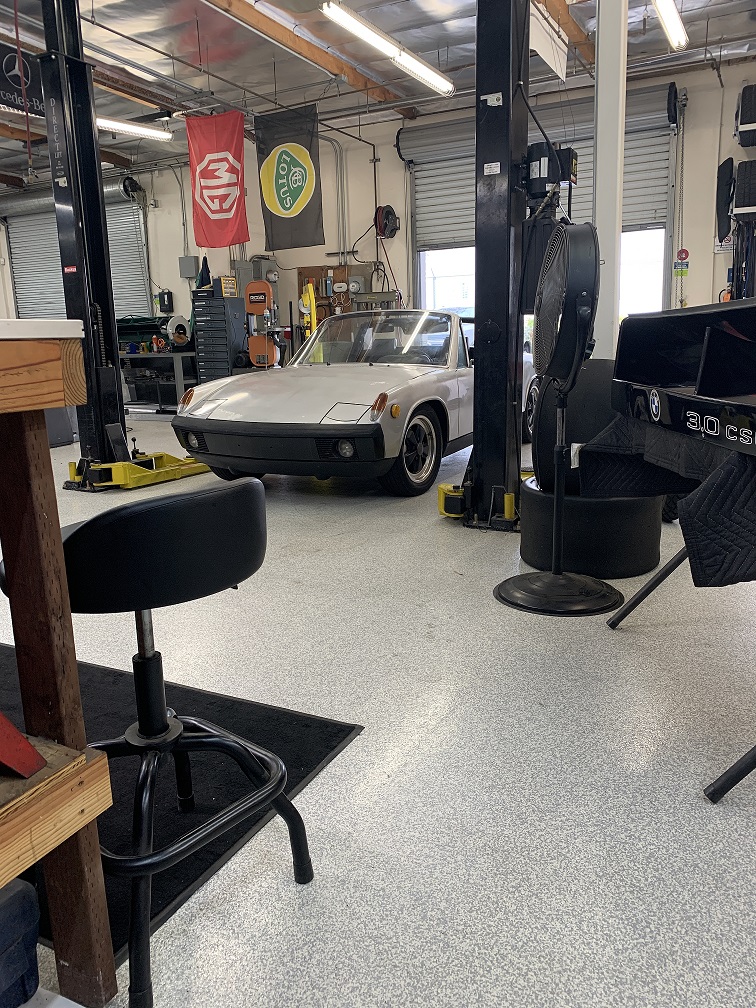
Posted by: tygaboy Aug 23 2022, 10:18 PM
Now hold on a minute... OT, but having just sold my E9, I have to ask about the 3.0 CS /Batmobile wing in that pic. Your car?
Posted by: colingreene Aug 27 2022, 02:18 PM
That is a real batmobile, not my car.
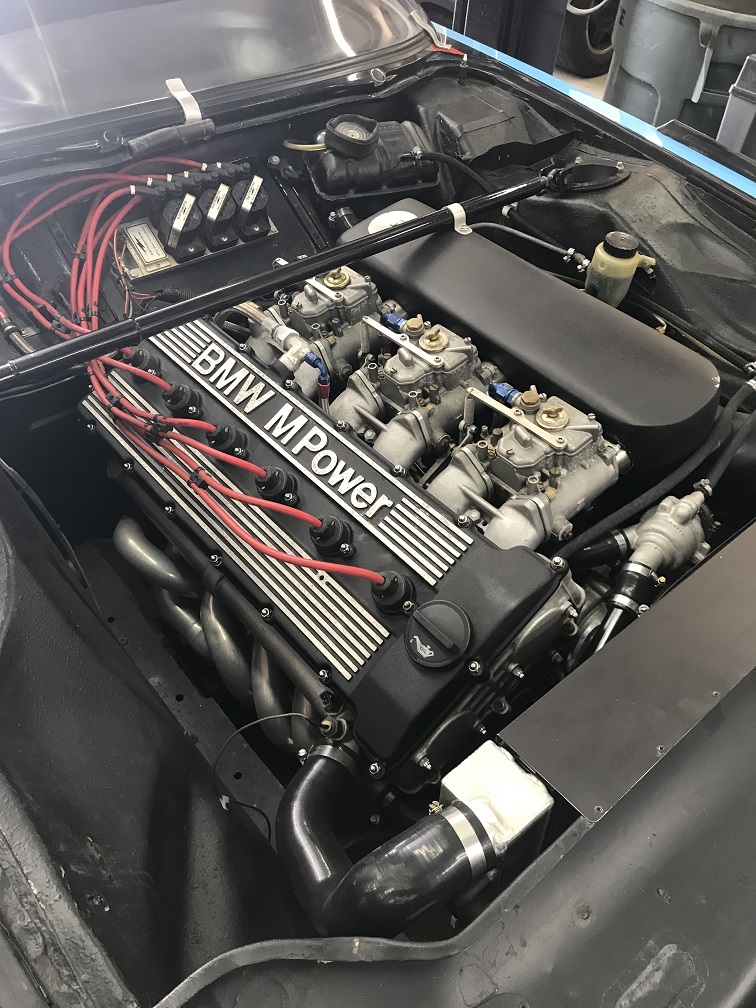
It does have a S38 3.8L on weber side drafts.
If you remember from a while ago about Adam Carolla selling one? this is that car.
I worked for the person who bought it and wound up doing a ton of work to it to get it race ready.
He also has a E9 street car with a S52 in it. its really beautiful and he uses it as his daily driver. Ive driven it a fair bit and its about the right amount of power for that car.
It was built for him by a friend (Jeff Tighe) who also built a white S54 powered car. That car was a monster.
Posted by: Optimusglen Aug 31 2022, 02:06 PM
That's a cool garage space, is that up here in MN or back in CA?
Those pistons look so nice, you have the new ones back now?
Posted by: colingreene Sep 5 2022, 08:28 PM
The picture of the car in the shop was back from when it was in California.
As far as the pistons go, I do have them back I just need to make time to go home and continue to put it together.
First the overcrest rally.
Posted by: Optimusglen Sep 6 2022, 07:37 AM
The picture of the car in the shop was back from when it was in California.
As far as the pistons go, I do have them back I just need to make time to go home and continue to put it together.
First the overcrest rally.
Posted by: colingreene Nov 8 2022, 11:51 PM
I'm just going to keep adding to this because why not.
After a while I made it back to California for like a month. Ultimately the motor is closed up and finished and that's what these next pictures will be detailing.
I was going to dump the motor into my 911 and see if i can break it in in that car while i do some work on my 911 motor but, things don't always go according to plan.
Oh well. ill be back at it in about a month.
Not having a job right now is both good and bad. Luckily a lot of the parts if not all of the parts have been bought for this over the years so its not costing me a ton of money. That makes all of this easier.
I found this picture I took when building my 911 motor and I found it a fun example of how different a flat 6 motor really is from the type 4.
CG-914 and his wife were in the middle of rebuilding a type 1 motor at the same time we were doing the 911 motor.
Im happy to say that motor is running pretty well and is a daily driver now.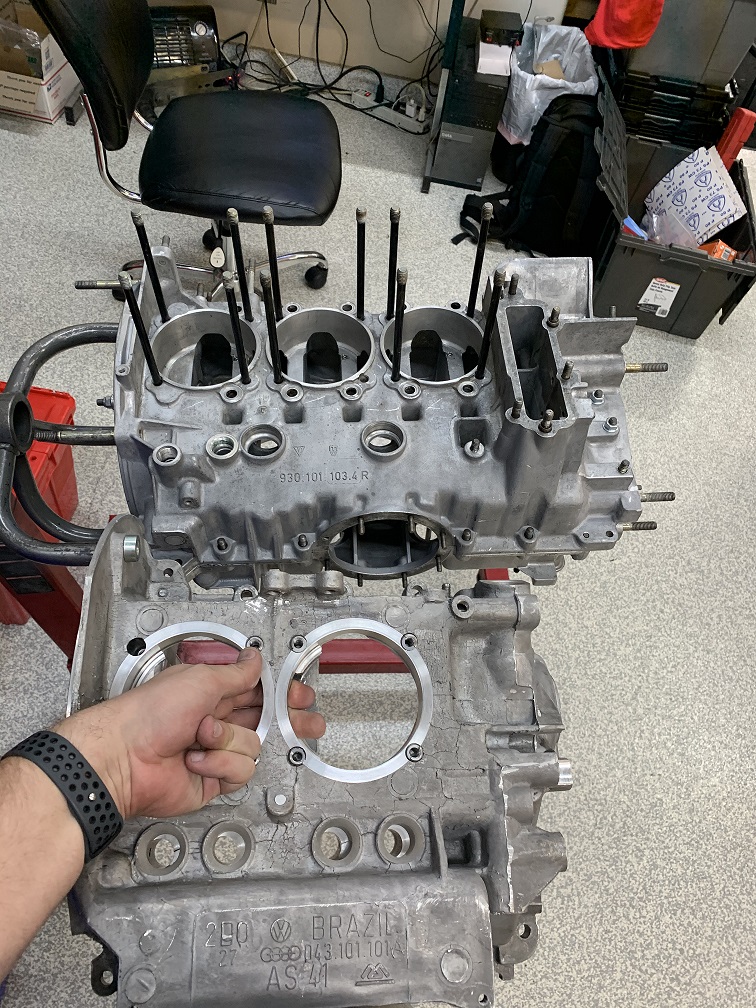
I have new pistons staged and ready for assembly and carried on opening up the stud holes on the cyls to make everything fit. 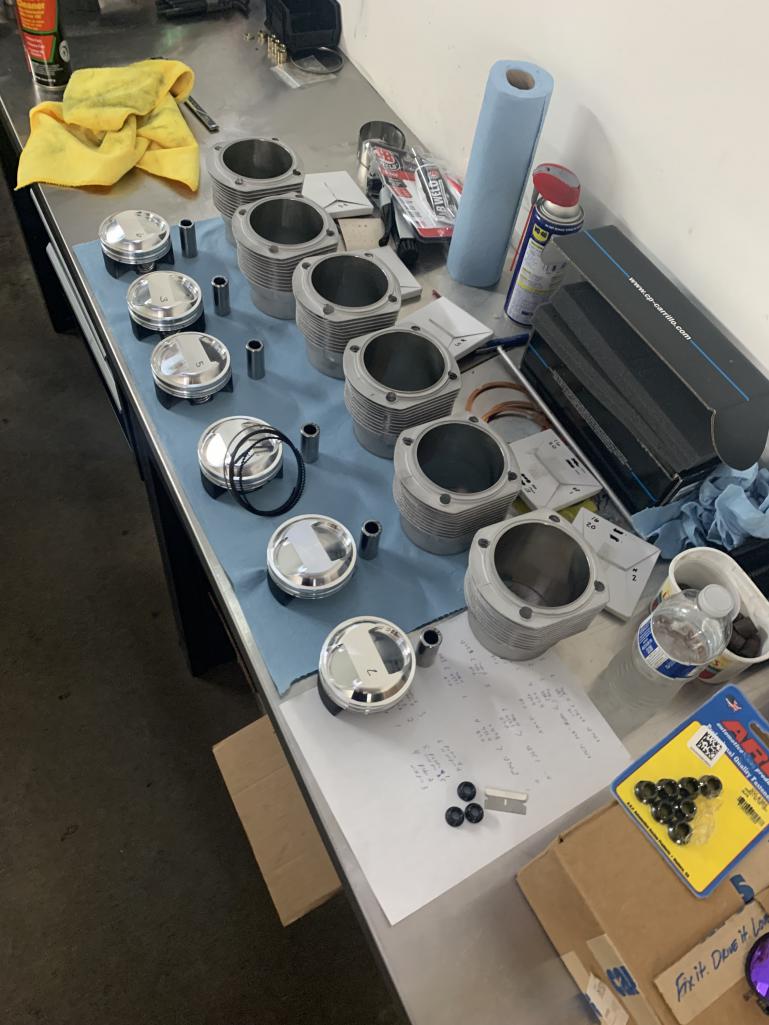
This included having to clearance the base gaskets as well.
We re shot the deck height and checked compression.
A single 1.0MM spacer was all I needed thankfully making it easy to clearance.
Final compression ratio came out at 10.60:1 Should have a ample amount of pop in a 914.
Once all the cyls were fit into the case, about two days of work I was ready to put pistons on and carry on. that will be the next post.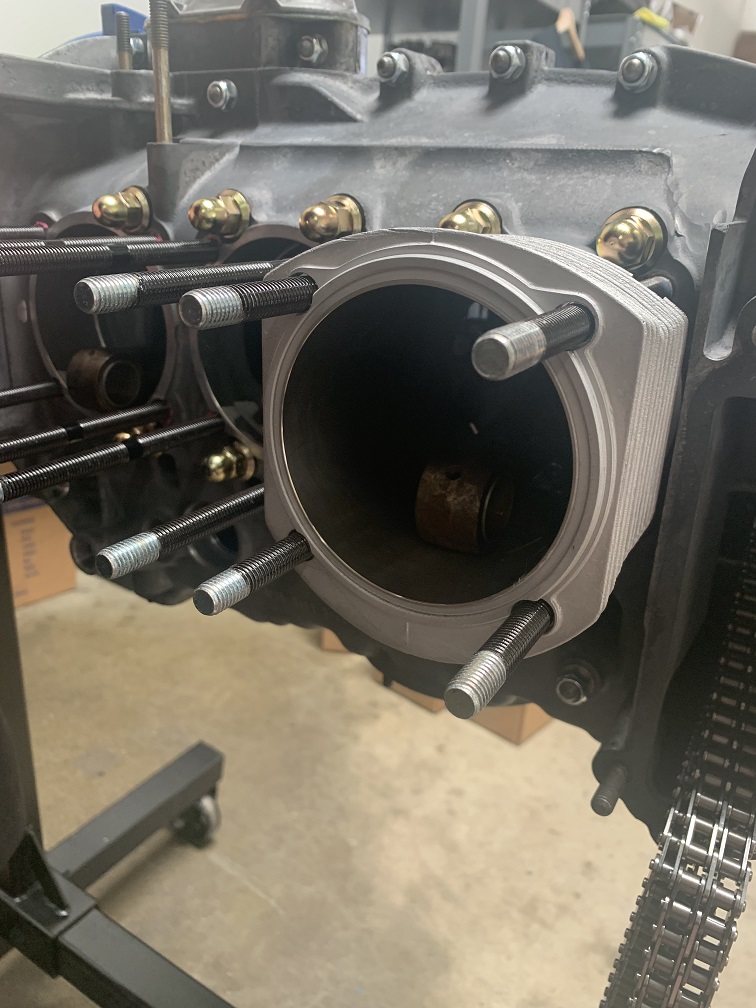
Posted by: colingreene Nov 9 2022, 12:26 AM
Oh and as far as the E9 stuff I am more than willing to take a slight detour,
Here are some pictures of the car you can see in the backround.
It as mentioned was Adam Carollas car. He bought it and promptly never did much of anything with it.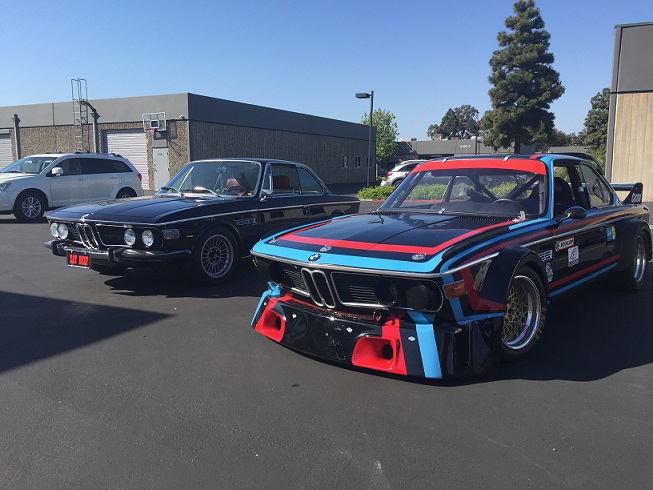
We found several problems with it the short list being way too much fuel pressure, shit exhaust quality, fuel cell foam dying, rear diff pulling the structure apart in the car.
I did manage to find the original engine builder, its a 3.8 with about 13:1 compression and should make right around 400 hp.
The current owner also had a Street driven E9, the black one seen here with a S52 put into it. car has bluetooth, AC and all the modern stuff you would hope for without being even remotely obvious about it
The guy doing these street cars also had built one of my fave street cars ever
A CSL look alike with real CSL interior and a S54 inside. To say the car is bonkers at full throttle is pretty fitting. but the owner put a ton of hard miles on it without ever really having any problems. We did suspect that it is a bit much on the chassis however since they are not known for being stiff..
Posted by: colingreene Nov 9 2022, 06:44 PM
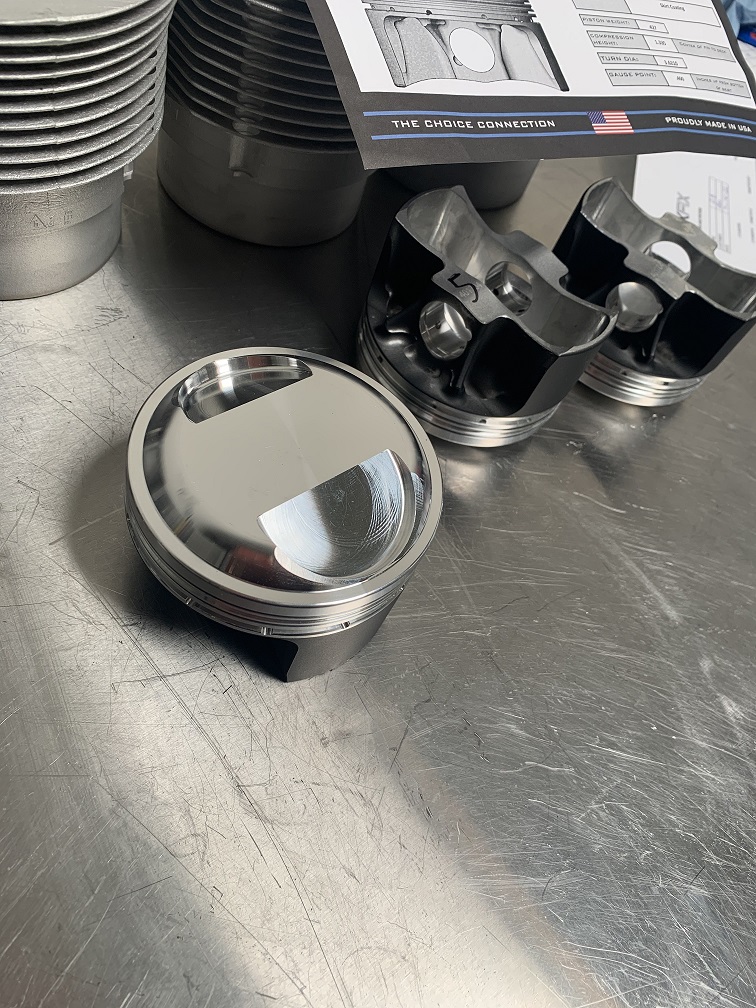
Gotta start somewhere right so here we go.
one on 5 to go. 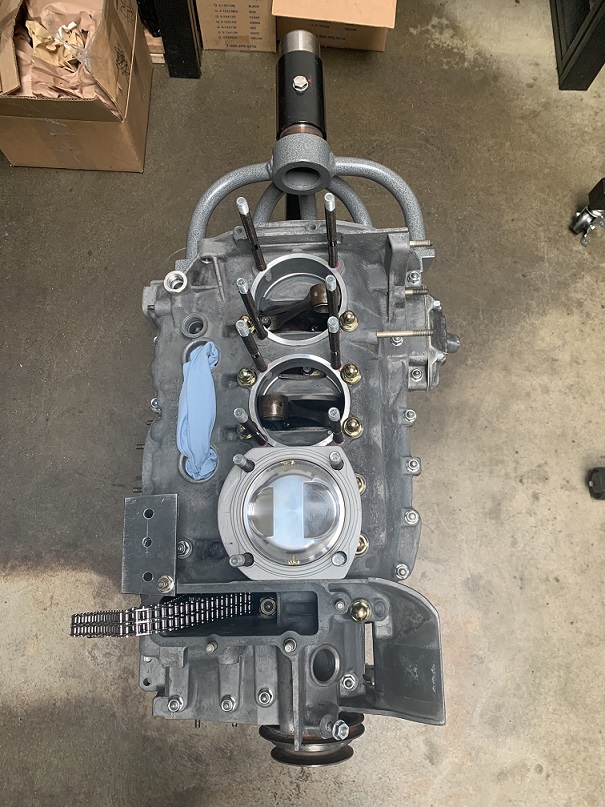
So, Do you remember having to have another set of pistons made?
It would seem that I came up short on a wrist pin clip because I left one of them in the pistons I bought back to CP, Leading to this picture. 5 cyls on. 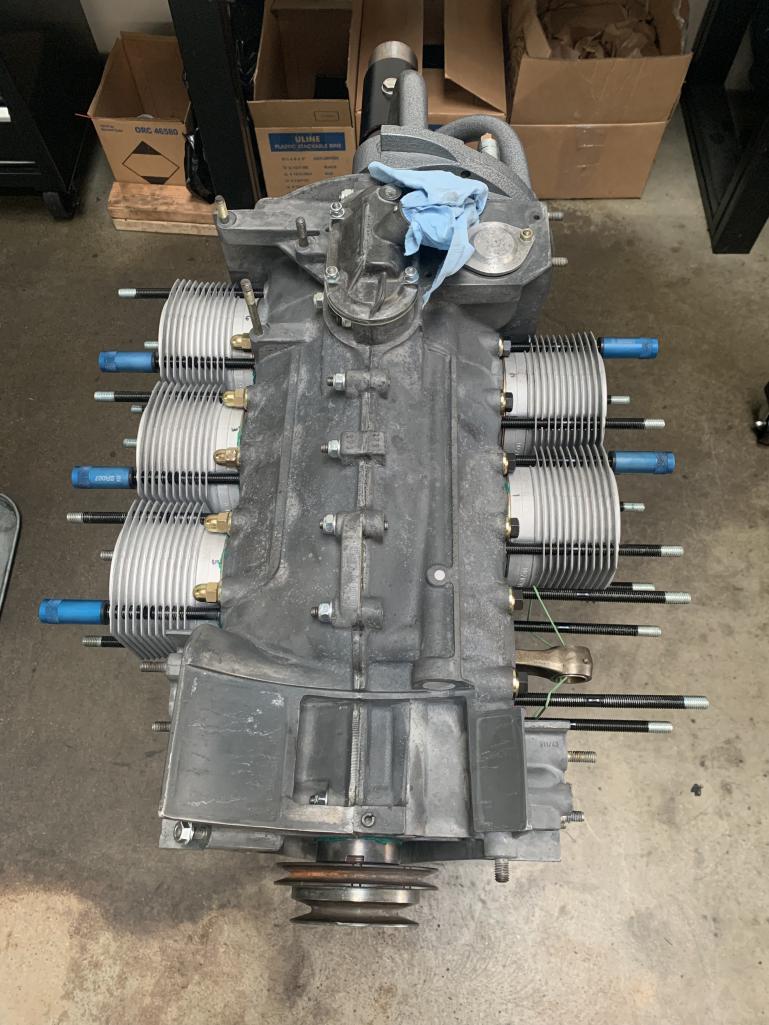
I had to run back to CP to go get another clip. Once We had all of those on i was ready to build the heads onto the cam towers.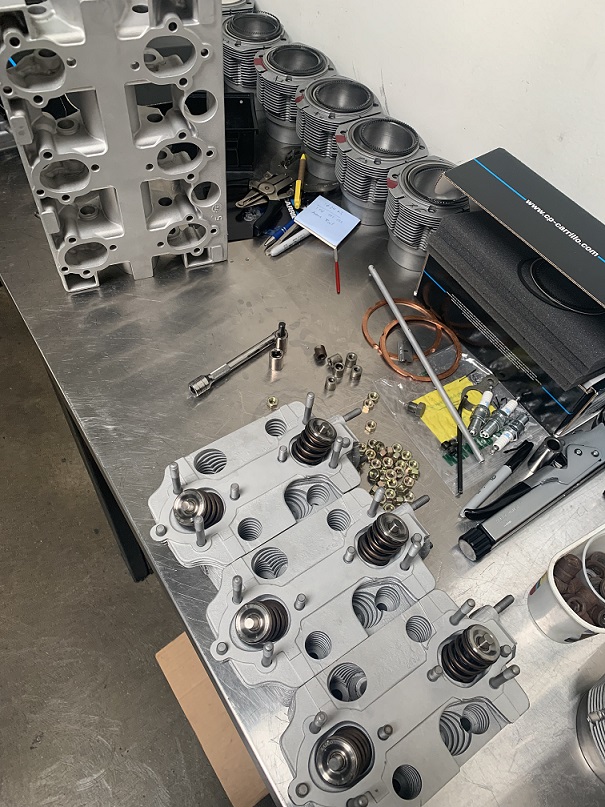
To do the cam towers i wound up pulling the tubes the plugs and everything i could get my hands on then vapor blasting and washing over and over and over and over to get it cleaned. I was really excited to see a nice looking orange squish once these were all torqued together. 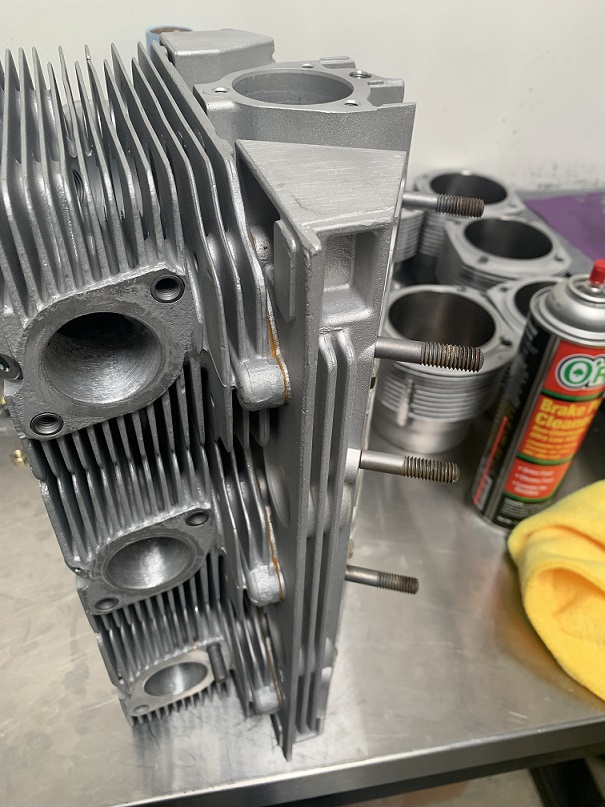
next I have to mount the heads and chain boxes. Hopefully with the tight fitting cyls it wont be a big problem getting it all to seat together.
Posted by: colingreene Nov 9 2022, 07:13 PM
Fortunately for me, with a good plastic hammer and some patience i was able to get the heads and cam towers down and seated. 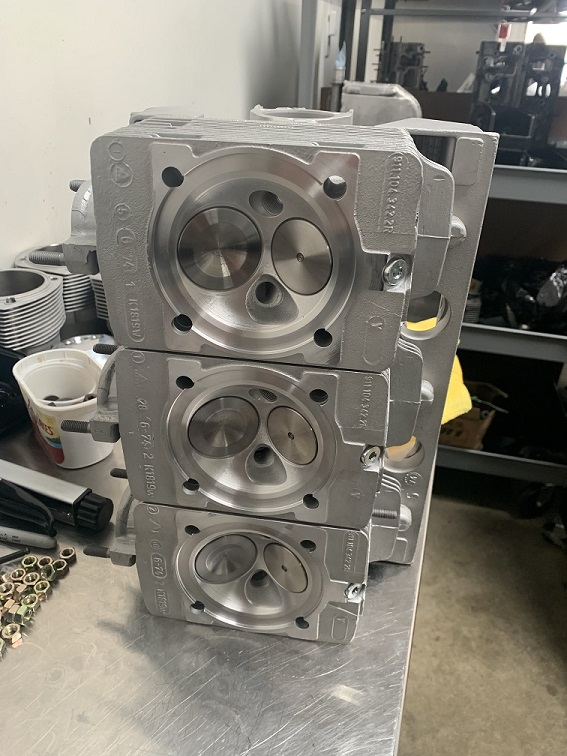
I don't think that I have a detail picture of it but when building these motors twin plugged
clearance around the plug can get tight due to the cylindrical profile of the factory headnut. I ran into this on my 911 engine.
On later motors that came from the factory twin plugged such as the 964 they had a different profile nut. I did buy a set of those only to find out the holes in the small motors 2.7 and down they do not fit into the cut pockets.
What should I do? I found out that ARP will sell loose nuts. (insert joke there)
They are crown shaped and smaller this allows really nice clearance around the spark plug to remove and install them. Going to do that on my other motor when I get the chance. If anyone needs a set of 6 let me know I have them hanging around. Ill sell them for whatever they cost me per nut when I bought 20 of them. 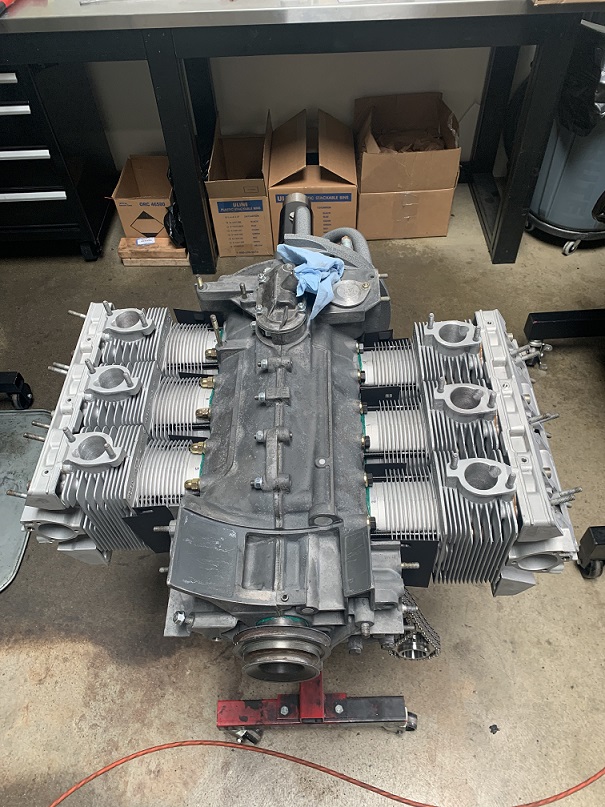
Next was to attach the chain boxes, note the routing of the chains around the post in the boxes. added the chain ramps and hoped for the best.
However once I did that I realized I forgot to put the plug into the end of the cam housing Off came the chain housing to re install the plug and seal it up with some 574.
Next up get the cams ready and cleaned up.
For this build I went with some Dougherty DC60s. Hopefully I wont hate it.
I have found limited information that talks about how these idle and run guess we will find out. 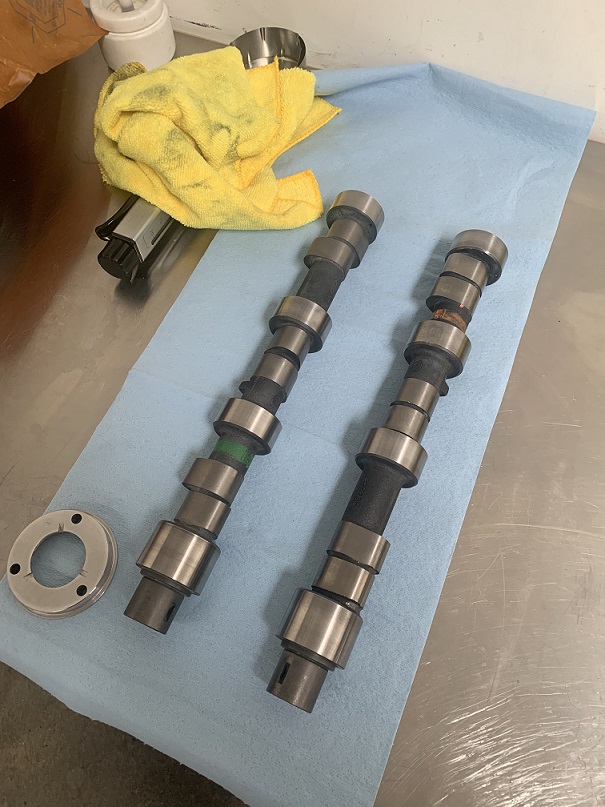
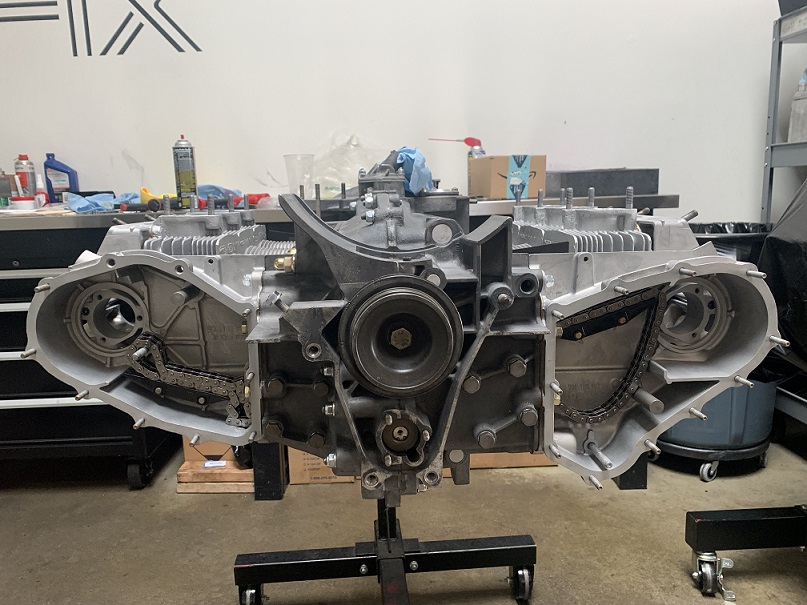
Next up is the important process of shimming the cam end play. If you go back and look before the case is closed up you will see that the chain runs on either side of the main shaft gear. The goal here is to get the measurements equal in order to not have any side load on the chain gears. When i originally disassembled this motor i could tell someone did not take the time and care to do this and the sprockets showed signs of wear due to being misaligned.
Attached thumbnail(s)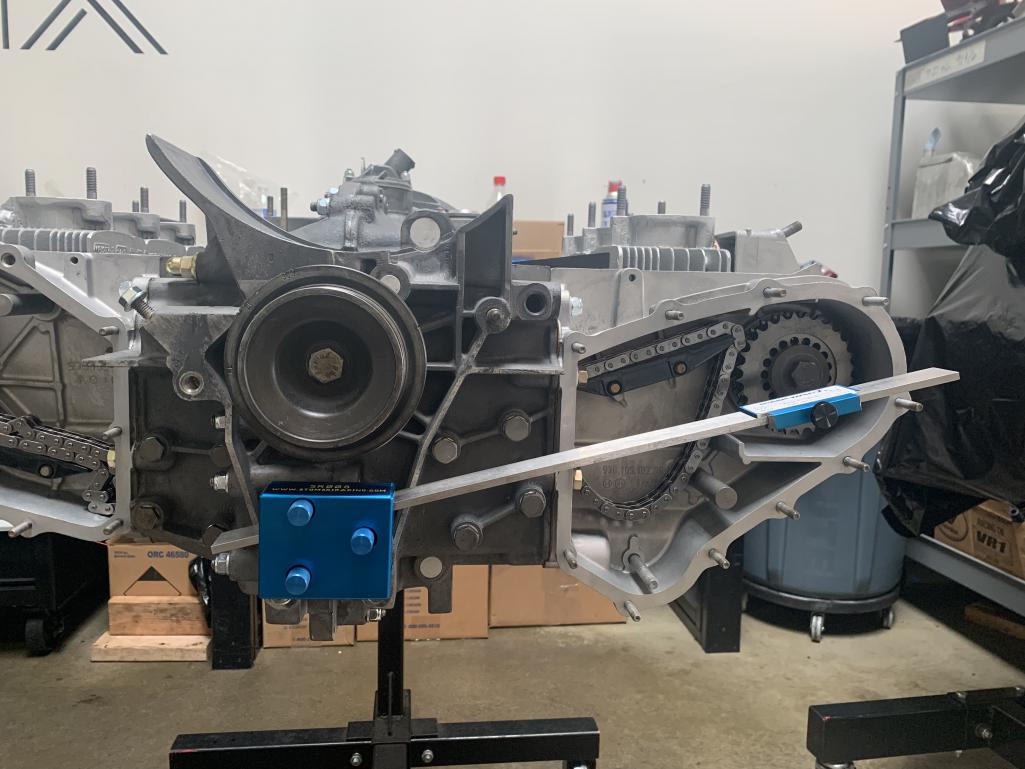
Posted by: colingreene Nov 9 2022, 10:52 PM
Once the cam endplay is determined we can move on to attempting to time the cams.
Its not hard, its just tedious.
Since my other motor has the "late" style cam bolts when i ordered these cams that is what I asked for. 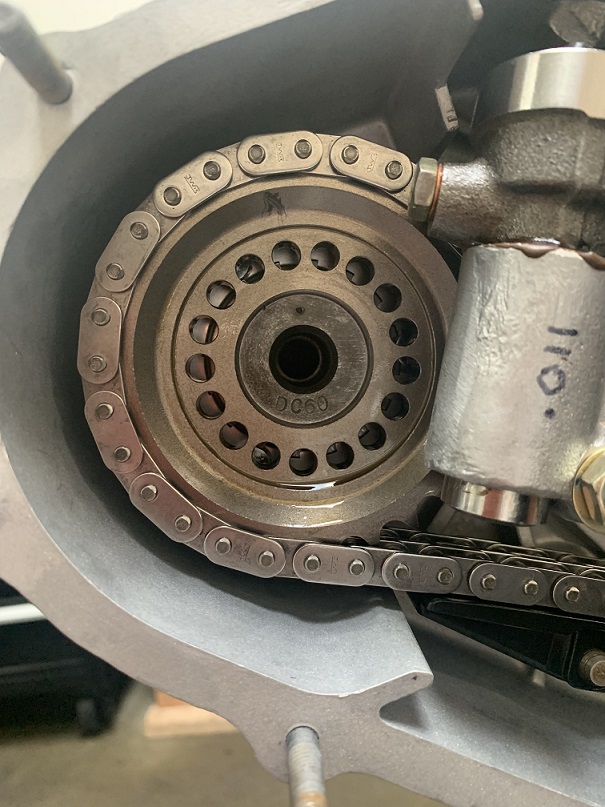
Obviously I tend to make some unconventional choices when doing this and I skipped the carrera tensioners so I had rebuilt the mechanicals and put them right in.
Ultimately we wound up with 4.99mm lift on one side and 4.95 on the other.
The cams say to set at 5.0 with a range up to 5.2 down to 4.7.
I figure its close enough for my purpose. 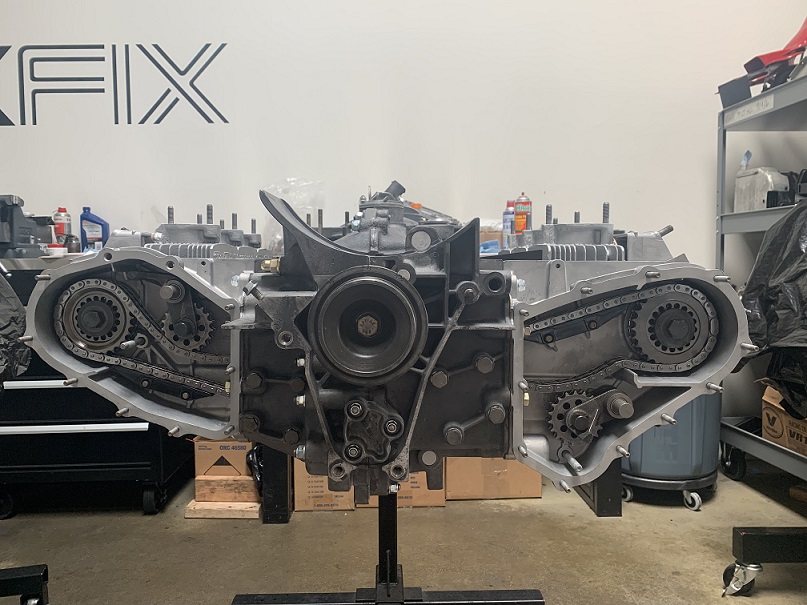
[attachmentid=857247]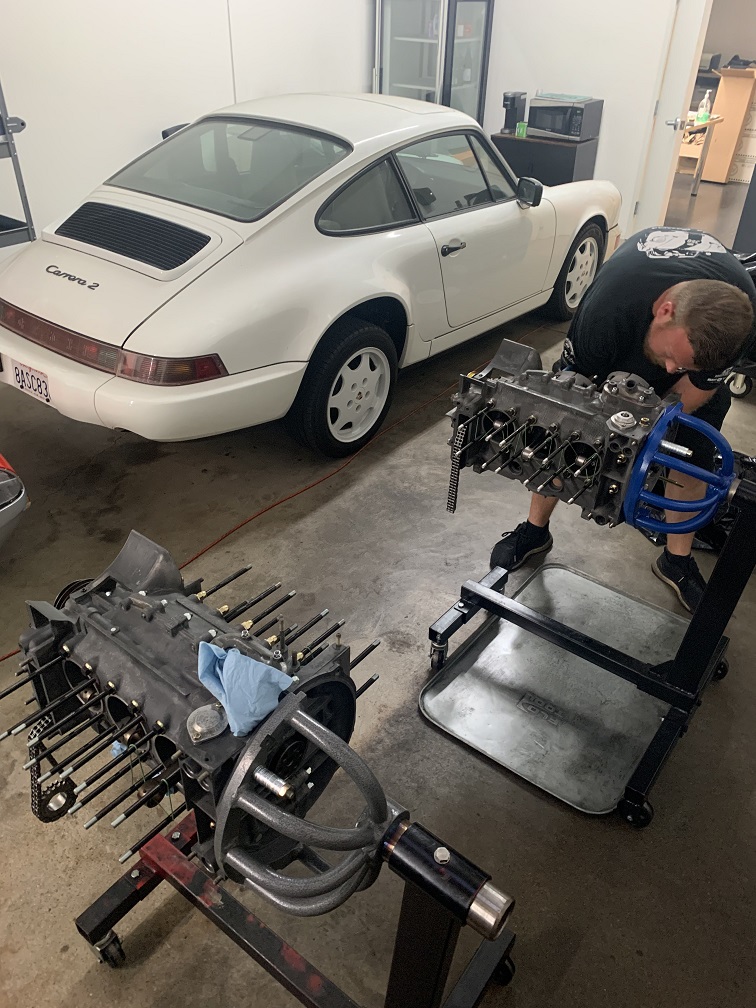
Here is a earlier picture of my motor going together along side a hot rod 2.4.
As per usual that was not the end of my problems. the machine shop that did the case had some issues with installing this thread insert on the oil bypass piston, I had to get in there and pack it with paper towels and hand finish the end of this. Of course I did not notice this till the motor was mostly together. way to go me.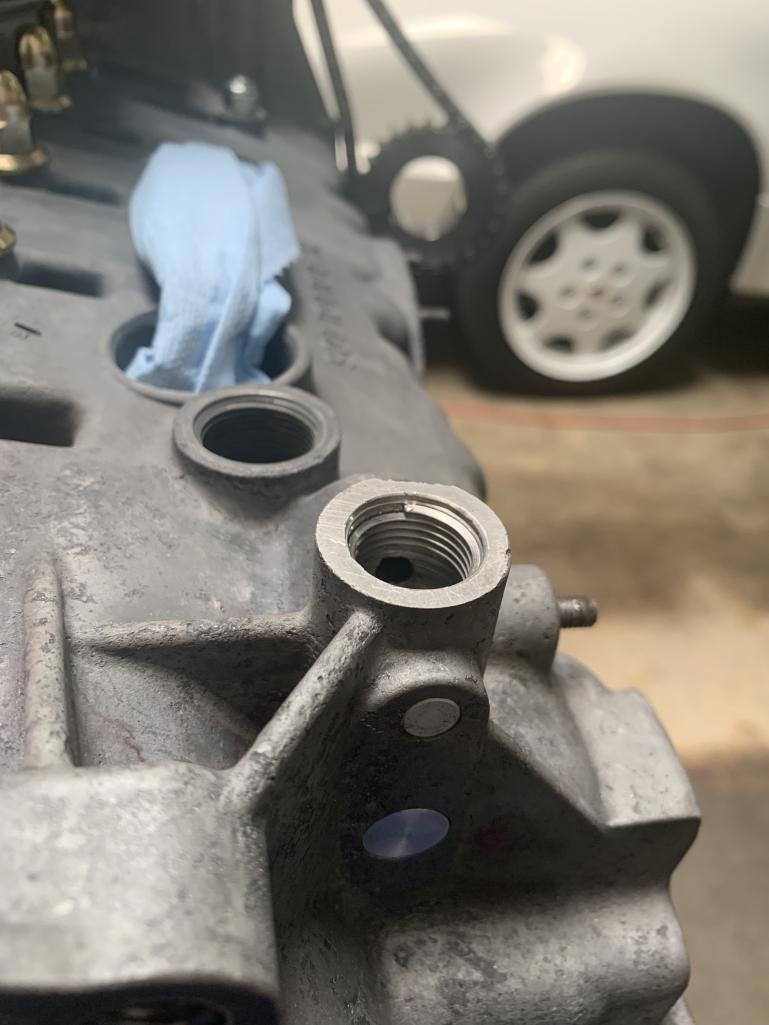
Posted by: colingreene Nov 28 2022, 09:47 PM
So with a bunch of clever filing and cleaning up of the oil pressure bypass plug I was able to get the plug to thread as you can see in the below picture.
Its irritating that after spending a ton of money on machine work that I had to remediate on several points.
I could just be salty or something but Its all fixed now. 
With this thread I think at this point I am mostly doing it for myself so Ill post whatever I have.
I did get the motor timed as mentioned and the cam boxes closed up.
That was a nice feeling being able to know that serious progress had been made.
We also stuck the distributor into the motor in order to be able to determine where top dead center is. 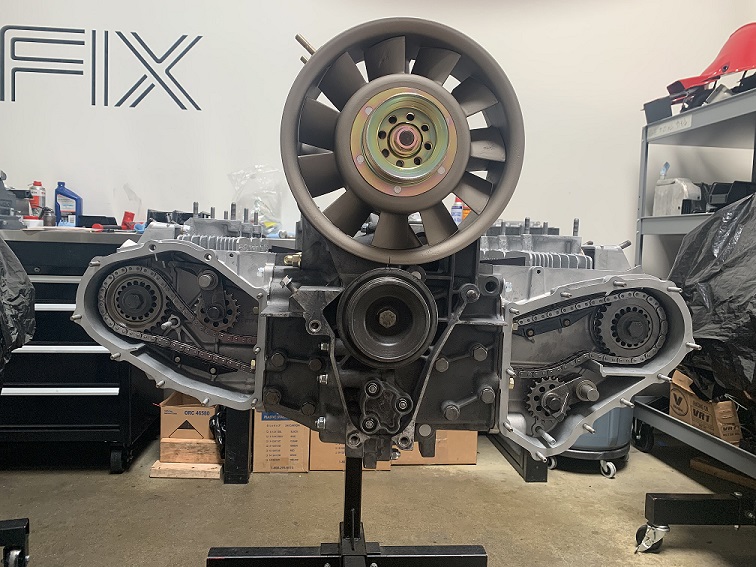
After this the only things really left to do would be to install rockers, set lash and turn it over a bunch.
So that's where we went. Installed the rockers, turned it over probably 20 times and then checked lash again. I expect that Ill have to re set it again in about 1000 miles as all the parts in that realm are new and need to wear together. No big deal.
I also chose to not put any form of sealant on the valve covers since I knew i would be in there pretty much immediately. 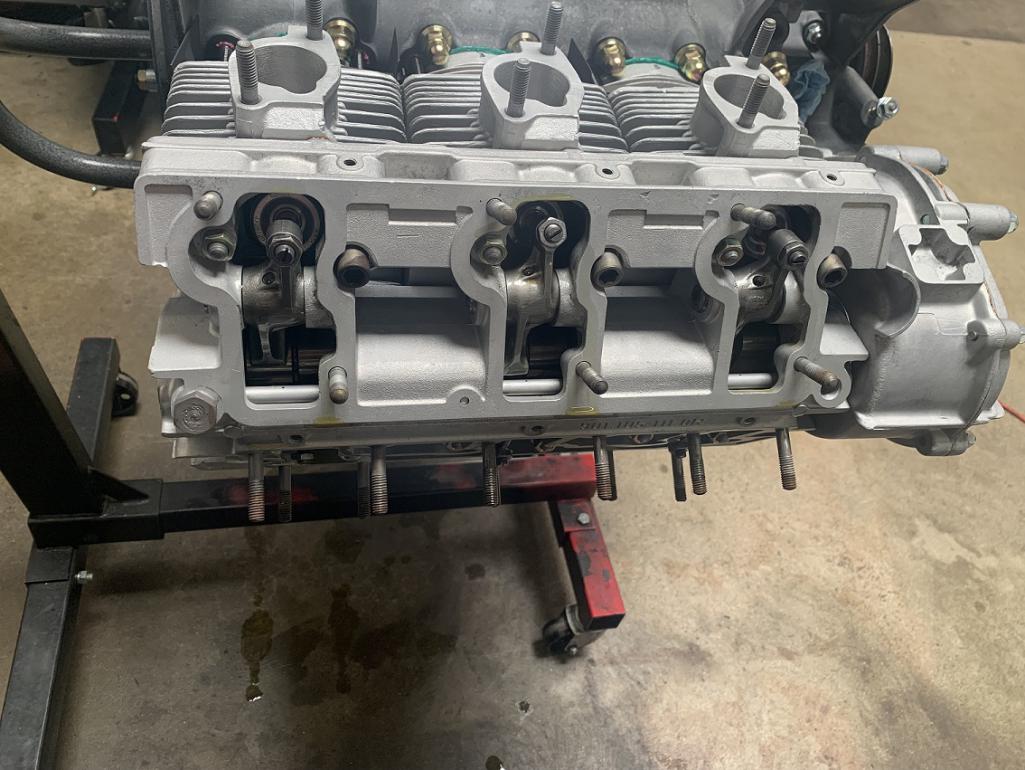
Once the motor was closed up I unfortunately had to leave again.
I bought a 951 that needed some attention and my friend Jake has some 911 and also 951 projects that he needed assistance with.
Oh and I was lucky enough to be able to spend a day going to South Dakota to get Glenn a new daily driver/tow vehicle. I'm always happy to help friends where I can. Plus like, its Glen, hes the best.
Posted by: colingreene Nov 28 2022, 10:21 PM
So here it is fully sealed up and ready to go into a car.
I think my tentative plan is to put it into my 911 and break it in.
It has the fuel and cooling system to manage it and more importantly the car is closer to the motor than my 914 is.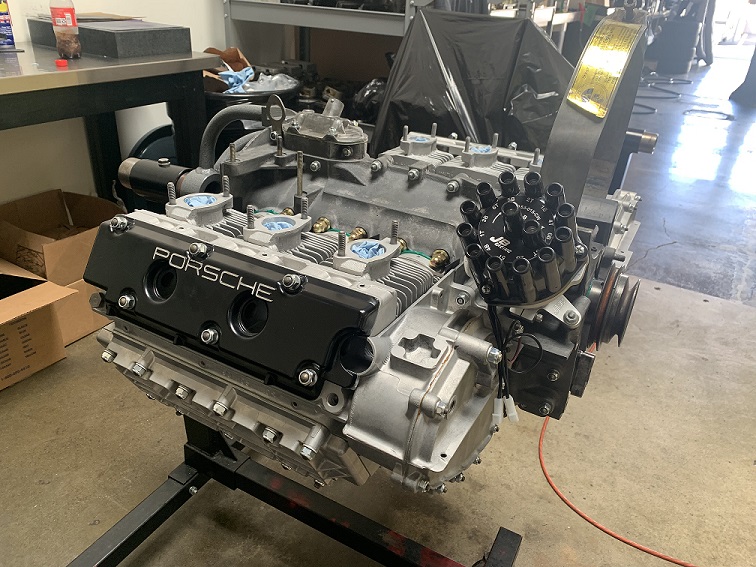
Ill have to create a new wiring harness for the 914 and buy a connector for it to the relay board. I think that ill keep it since I like the look of it. and I dont really want to re invent the wheel when it comes to that area of the car.
I do however need to find a place for the twin CDI boxes and coils that will need to be mounted for the ignition. I am actually opposed to mounting them in the trunk but I am sure I will think of something. if anyone has an idea I am always open to it. and pictures are helpful.
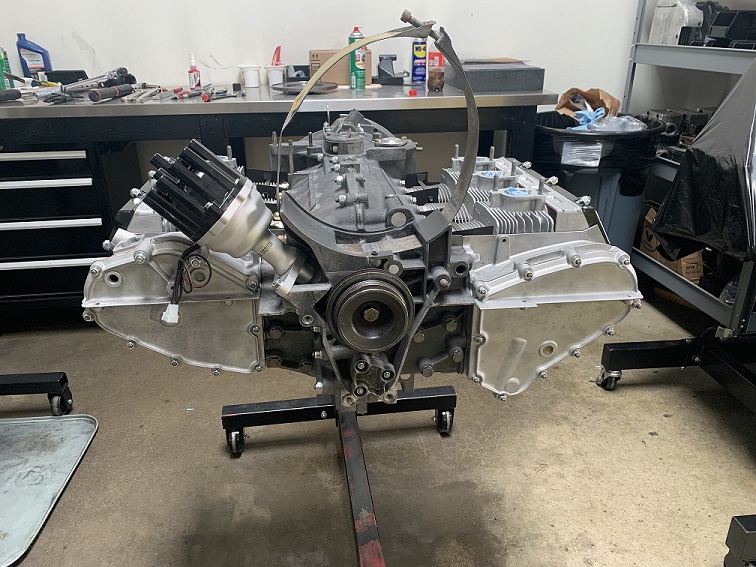
With that being said the fan shroud that came with the motor had some damage and it had a ton of holes I do not think ill need so a bunch of time repairing it was poured into it. Luckily for me my dad is talented with fiberglass and was able to repair the broken sections and get it cleaned up. Its being painted the factory green. Ultimately I may replace it with a amber shroud but its not high on the priority list. 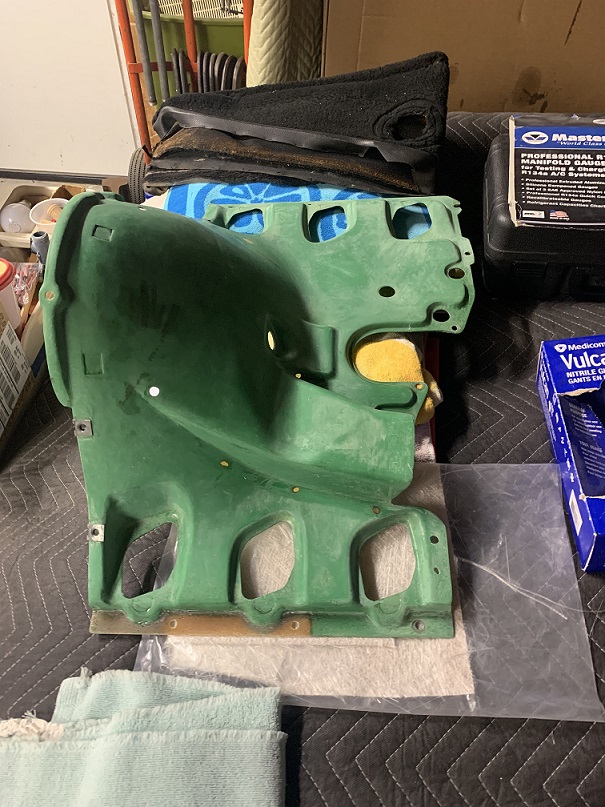
Posted by: colingreene Jan 17 2023, 10:07 PM
So like the old TV shows often had what we have here is a crossover episode.
Now this next move may not win me a lot of popularity but I also have a 911.
That being said this motor I am building for my 914 is in California as is my 911.
I want to put it into my 914 but i don't have a front oil cooler for it yet or the fuel system needed to feed the motor. I do own the fuel system but i have done an admirable job failing to install it.
The bad news is my 911 has been consuming a large quantity of oil after a rebuild.
If anyone has any interest in the story all of that information is in the build thread below. I feel like I somewhat outgrew the thread title fairly quickly but I am stuck with it now.
https://forums.pelicanparts.com/porsche-911-technical-forum/1001915-first-911-questions.html
My tentative plan was to remove my 911 motor and tear it down and put my 914 motor into the car in order to break it in, tune it and verify everything is good to go before I stuff it into the 914 chassis. 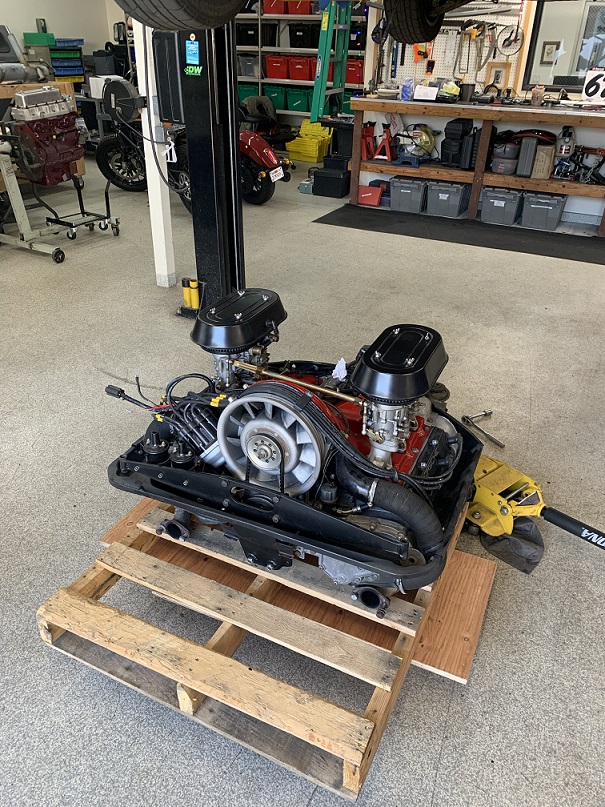
So that's what I did over this Christmas break. Clearly this motor started its life being placed into a 911 chassis so its not the end of the world that its going back into one. however I'm not sure I want it to be used to being backwards from the proper orientation. 
Things to note, I did refurbish the fan but I found out quickly that not all alternators and fan rings have the same offset or depth, so i have a mismatched fan in there in order to maintain the 911 alternator with the chassis. I did not want to rewire for a temporary (we will see how long that lasts) situation.
And I also decided to re use the spark plug wires but the orientation had made it somewhat messy due to the order being changed a bit. Thinking about this I probably could have solved it but I was in a hurry.
The motor now has only about 160 miles on it but its better than nothing.
I do have a 914-6 engine mount that welds in I bought from McMark years ago, however due to the spec of the motor I have some pause about if its the appropriate mount based on the power output of this 2.8.
with this motor in the 911 its certainly healthy and pushes the car along with authority.
I was considering buying a mad dog mount for its wider stance. I wanted to skip anything that was a solid mount or near solid since I do plan on driving the car frequently once its all together. I did when it was a 4 so i dont see any reason for that to change with a 6 cyl.
So, what I am saying is I would not mind hearing opinions about this situation I have gotten myself into. 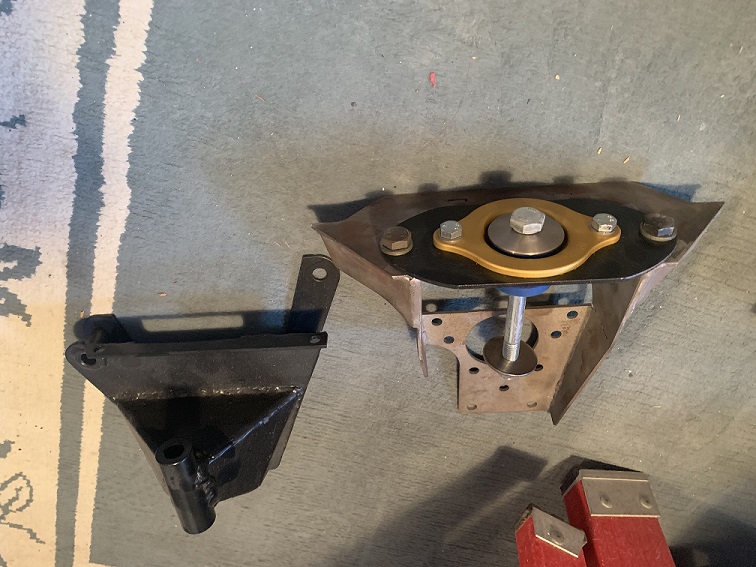
Posted by: colingreene Aug 9 2023, 03:06 PM
Bummer no one has any feed back about my engine mount question.
Just popping in to update that once again my car is having ignition problems on the 4 cyl.
Going to do some more trouble shooting but it eventually ate that cheap chineese 009 knock off distributor i put into it.
this lead me to take the "reliable" 951 shit box I bought to work. for the favor it decided to try to idle at 2k.
I'm wondering if i have a voltage regulator issue where its overcharging the battery and the extra current is destroying the points.
Any one ever experience a bad voltage regulator on the high side?
outside of that I don't have any ideas why its continuing to destroy ignition component's but nothing else.
I did recently replace the 5 year old interstate battery and I did check the current output at idle but unfortunately i was not smart enough to also rev the motor up.
however at idle it was making 13.5 volts so nothing crazy.
Symptoms are exactly the same. missing bucking backfiring all the usual suspects.
Posted by: DRPHIL914 Aug 10 2023, 10:57 AM
Good to see you getting close to completion and installation!.
No comment on the mounts, i have no experience with the /6 , none-the-less, a great write up its fun to follow along, ive got to re assemble my original /4 motor sometime soon so following other motor build threads is educational and motivational.
Phil
Powered by Invision Power Board (http://www.invisionboard.com)
© Invision Power Services (http://www.invisionpower.com)