Printable Version of Topic
Click here to view this topic in its original format
914World.com _ 914World Garage _ I figured on a triple gauge Take-2 see the end.
Posted by: worn Nov 5 2013, 08:55 AM
It seems that a lot of the triple gauge business involves making new holes in the back of the can. I figured I could do that. Especially after watching the threads here over and over. Thanks to all.
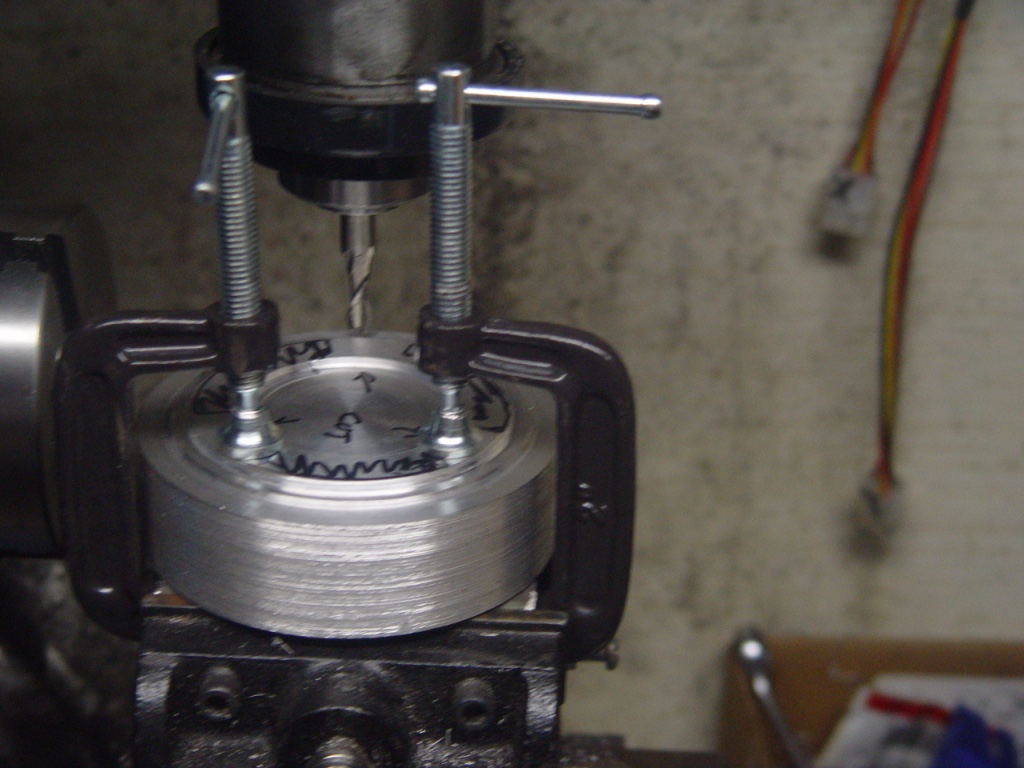
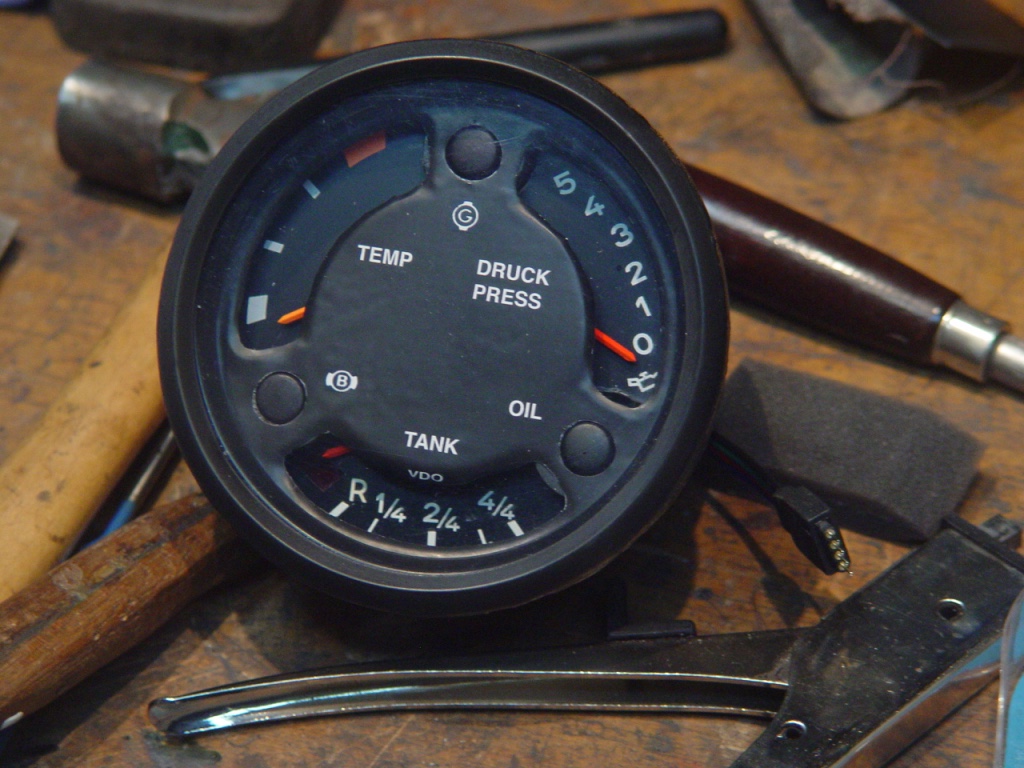
My problem was the gauge face. I di not want a simple cut out for the gauges. I wanted it embossed in like stock. So here is what I came up with.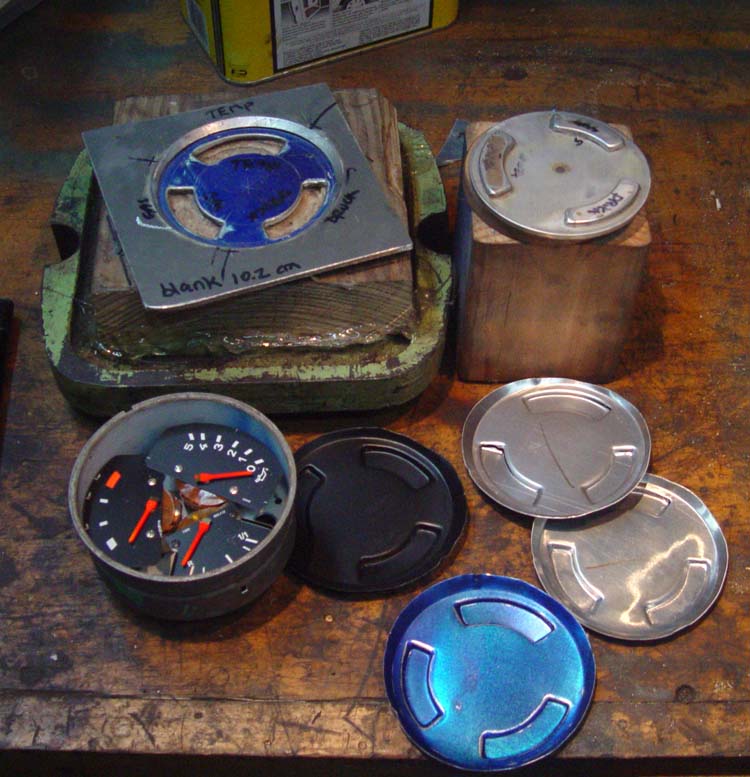
The dies fit in my old cast iron hydraulic press. You can see the bottom plate in the photo. I am having some tears, but generally they are about at the cut out line  so maybe they are OK. I found that even with some silversmithing under my belt, I cannot do this by hand. The press makes it flat and even. A coat of high build primer, sanding for flat and trimming and a coat of satin black and I am done I think. Then I need to do some wiring.
BTW, I am looking for some balled up otherwise useless harness wires so I can match the wire colors.
Posted by: timothy_nd28 Nov 5 2013, 09:03 AM
Awesome, this is the exact way these should be done
Posted by: timothy_nd28 Nov 5 2013, 09:09 AM
Is there enough material to fold some tabs over?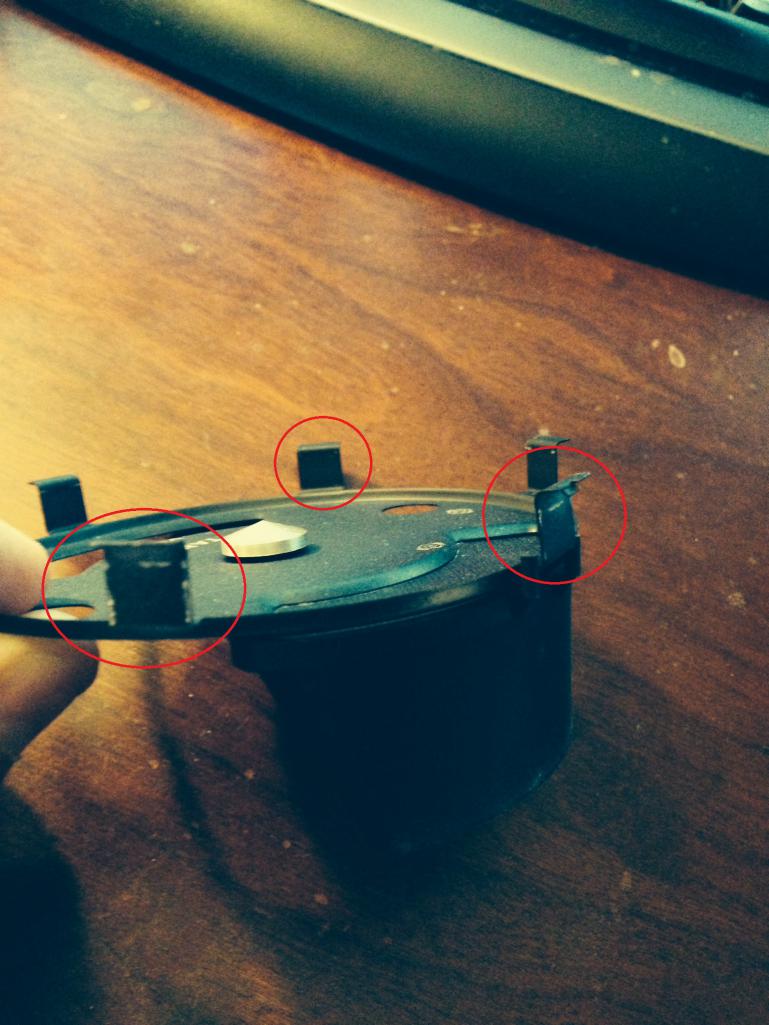
Posted by: worn Nov 5 2013, 09:58 AM

Is there enough material to fold some tabs over?
Not on those prototypes, but it can be tweaked. It takes about 10 minutes to make one, mostly cutting with snips. Fun to play with. Inspired by your efforts.
Posted by: billh1963 Nov 5 2013, 10:11 AM
Will these be available for purchase?
Posted by: Mark Henry Nov 5 2013, 10:33 AM
Will these be available for purchase?
Yes, I was thinking of doing this as well, I was considering a piece of aluminium.
But I would be interested in a blank if the price is right and it saves me all the work.
Posted by: worn Nov 5 2013, 11:09 AM
Will these be available for purchase?
I have to see if the quality is OK, etc. My initial idea was show and tell because this is within range for most of us with a little time provided you have a press.
Also I have been looking around for press-on letters. Once the staple of architecture and advertising, now very hard to find. I have a sort of OK font and size, but not a perfect match.
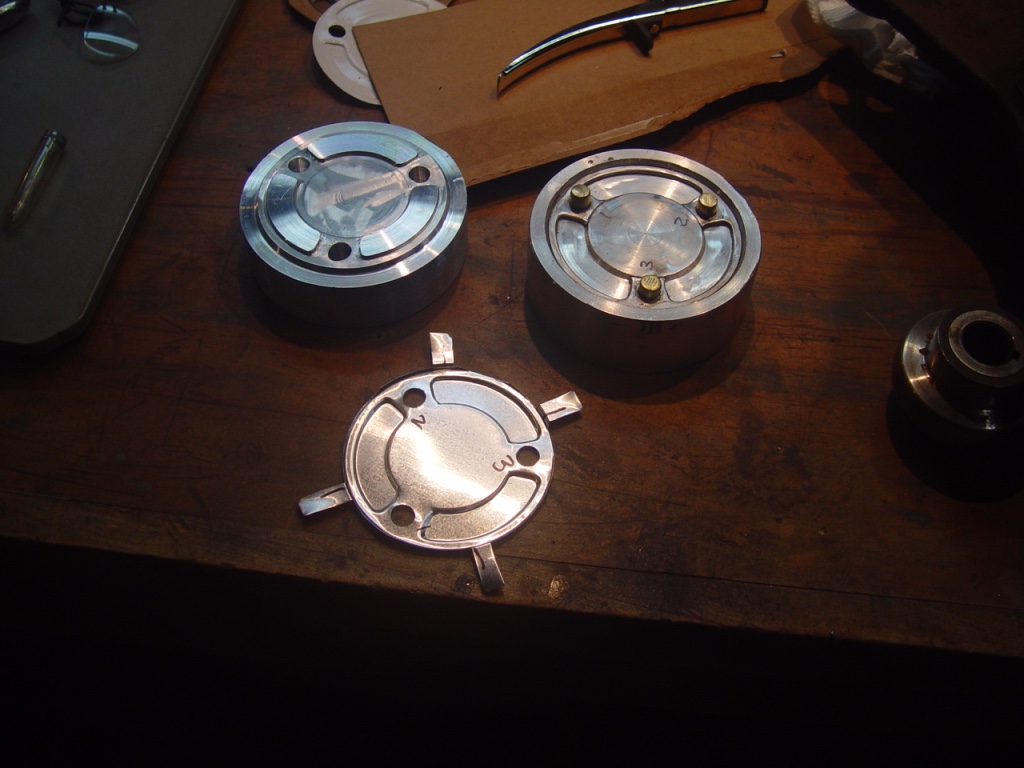
My design has larger holes for oil temp and pressure than fuel, but the largest spacing is actually at the top, where the oil gauges meet. The holes in the can are evenly spaced, but the sweeps are a bit different. E-bay donors.
Posted by: peteyd Nov 5 2013, 11:16 AM
have you tried annealing the aluminum first? It should get rid of your taring. What type of aluminum are you using? If you use a 3003 or even an 1100 grade these should work as well.
Pete
Posted by: 914forme Nov 5 2013, 11:18 AM
Way to improve on our original design. 

And yes its the way it should have been done. And I wish we did them.
Matter of fact, i'll take two, or three. Just need the face plate, I have all the backs I ever needed
Gladly pay for an improvement over an imitation any day. 
If I where to do them again, I wanted to press them out just like your doing, Gives the proper shape and feel to the gauges. The legs don't need to be pressed, you can reuse the originals with the center cut out, or build tabs and have them bent into place. I tried to do the original style on the first kit, the machine work and cost of the stamping die where way out of the ball park for the 175 production run we ran. I lost my ass on them even with out the die costs. The rears to be more complete, with tubes set, welded or pressed like originals, and then silver cad plated, like we did our original run for Pelican. I latter switched the backs to use three latter style gauges as I hated dealing with the early gauge posts.
So again, way to go, subscribed to this thread, you have my 100% backing and approval for your efforts. Like you needed that anyway. Information has always been free in the public domain.
If you need any advice on the production of these PM me, I'll gladly tell you how many ways to screw these up. LOL, still painful scares from the first production run of these.
Posted by: Mblizzard Nov 5 2013, 11:26 AM
Are you using any lubricant while pressing. That can reduce tears also.
Posted by: rdauenhauer Nov 5 2013, 09:19 PM
Ive got a big ole box of old hacked harnesses LMK if your after something specific.
Posted by: nsr-jamie Nov 5 2013, 09:50 PM
We use very thin vinly plastic in the presses here at work to help with tearing and give them a good greasing and lower the cushion presure as well...
Posted by: John Nov 5 2013, 10:13 PM
Those are interesting indeed. Once upon a time I had thought that would be the way to go, and it still might, but I found that the lettering was and is the real key to making these look nice.
I would think that they would almost need to be lettered while still in the flat, but how to keep the lettering nice?
The embossed look is nice.
Posted by: CptTripps Nov 6 2013, 08:02 AM
GREAT project. Bravo.
...I have nothing to add past that.
Posted by: arcadeforever Nov 6 2013, 08:42 AM
beautiful job!!
Posted by: r_towle Nov 6 2013, 04:14 PM
quad gauge please
temp
pressure
fuel
volts
Posted by: worn Nov 6 2013, 04:22 PM
quad gauge please
temp
pressure
fuel
volts
That is a combination I am interested in too. Actually I would like A/F on the dash too. I bought some cans from a 924 with a quad setup of two gauges flanked by lots of idiot lights, and have played with the quad idea. More later. The gauge cans need to spread out a bit, maybe a mm, to get all 4 in. Aftermarket voltage gauge OK? I am thinking of taking one apart.
My garage is getting colder every day. Also I am at the point where I am working underneath the tub. Pressing angle grinders like dumbbells, dirt in my face and dodging weld droplets, wrapped up like a mummy in fire-proof welding canvas (from HF, so how fireproof I am not sure) makes coming in to the basement shop appealing.
I will give it a shot.
Posted by: timothy_nd28 Nov 6 2013, 04:30 PM
I could order you a furnace, and then have you pick it up at your local Johnstone
Posted by: worn Jul 30 2015, 11:08 AM
OK, triple gauge: take two for Warren
I decided to be more serious. Boy was that a long haul. Started with making real dies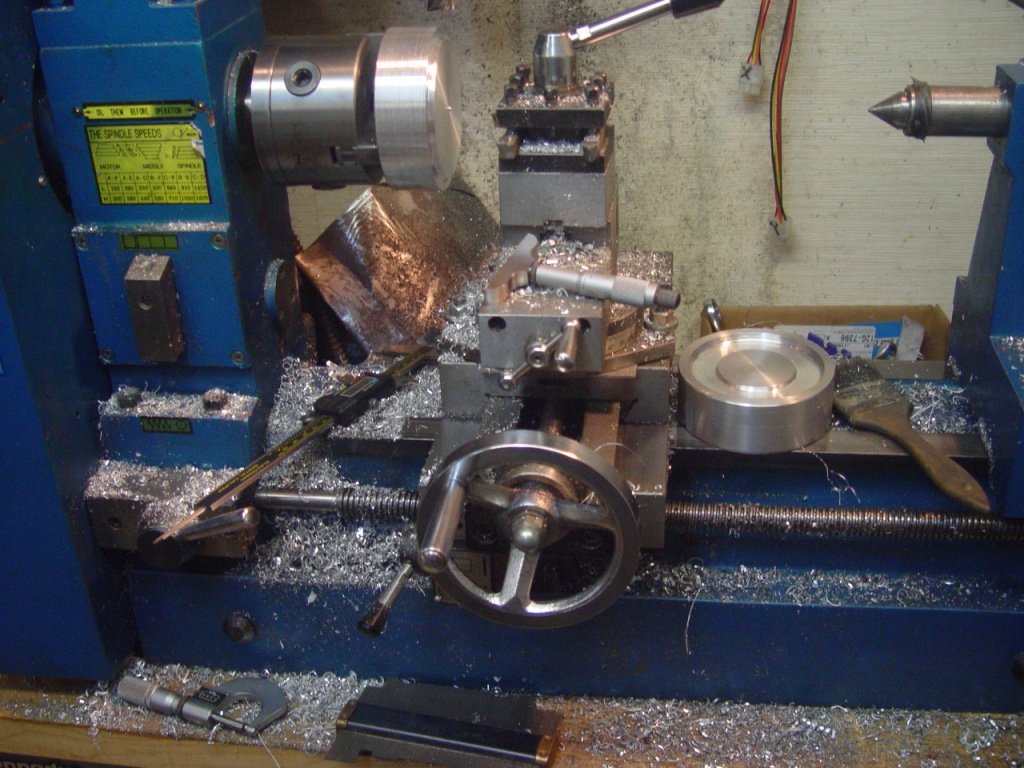
Then there was some milling and shaping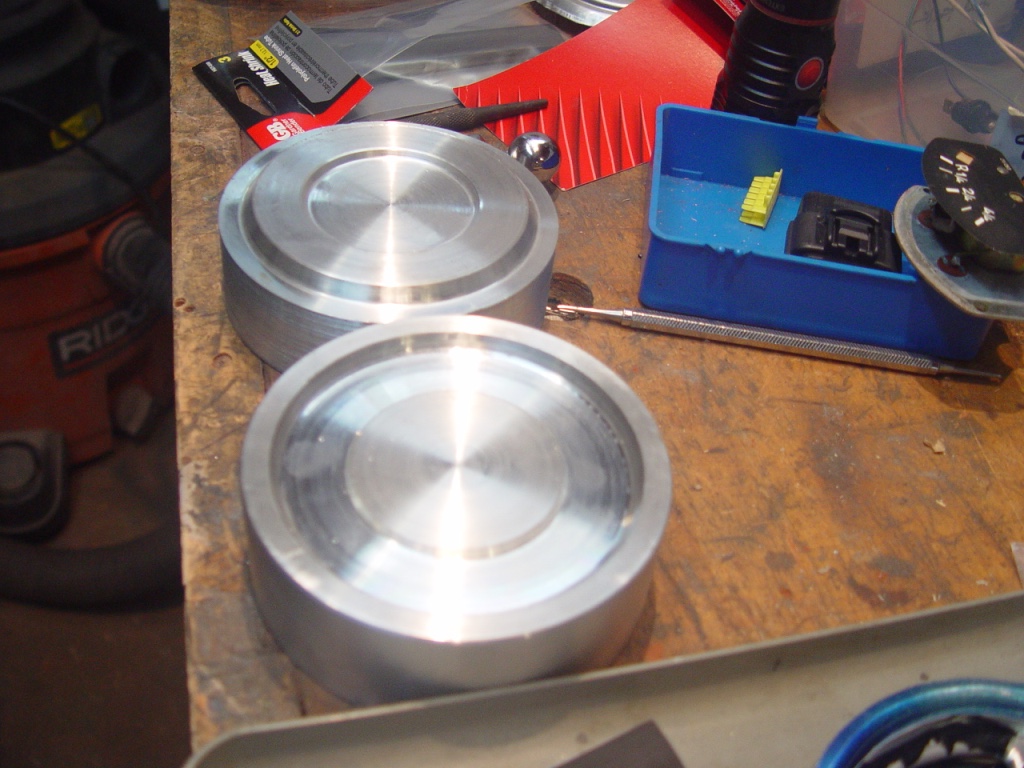
Then it was time to press - 016 aluminum sheet. Similar to original thickness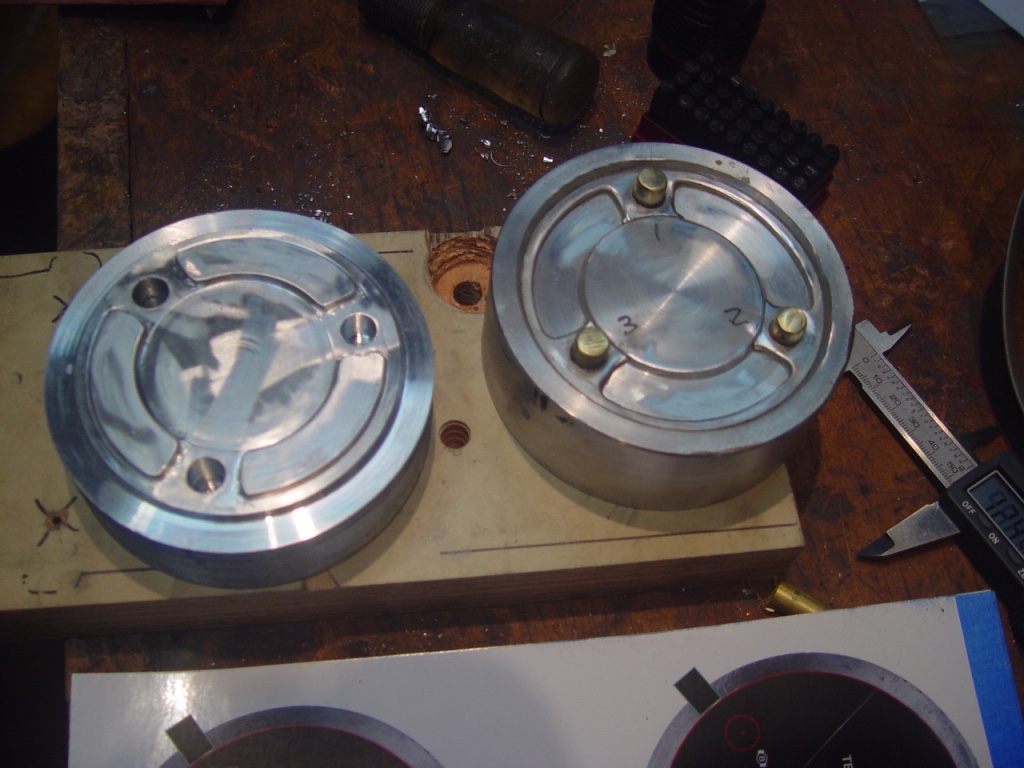
Then it suddenly got very very difficult. I had the blanks and I found that I could perfectly duplicate the letters with the laser printer. It went onto stick on vinyl.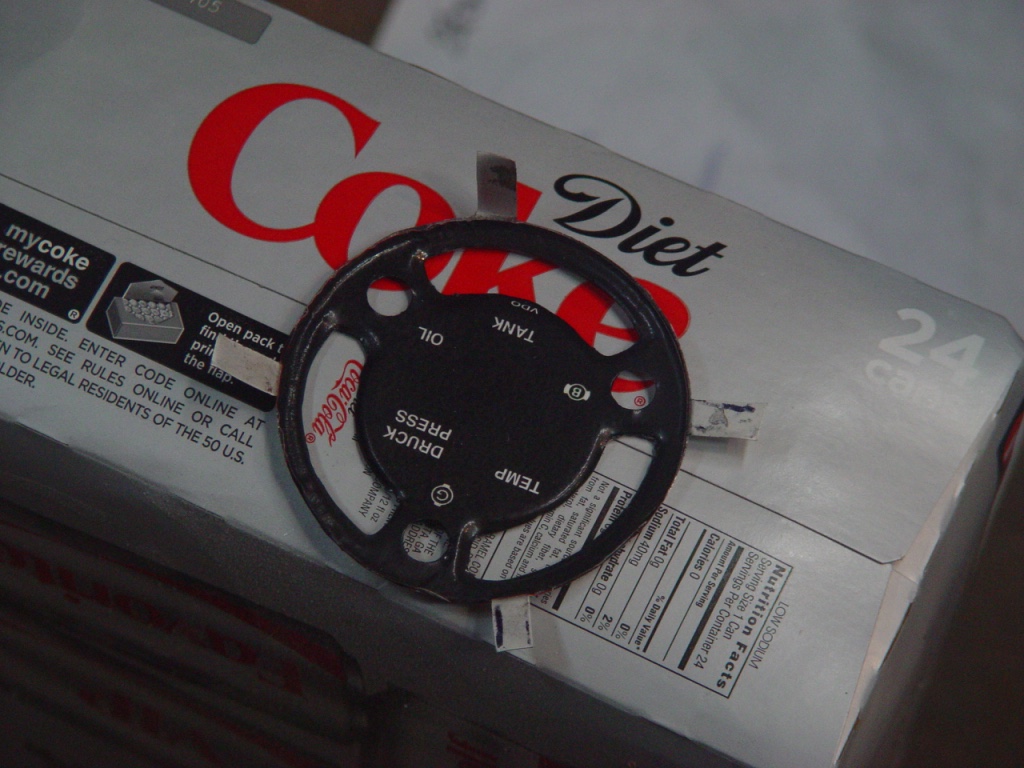
This was one of the better ones. Getting things to stick and align and not show shiny edges was a nightmare. I tried real paper too. Either wrinkles bubbles or the ink would scratch off. Still the VDO was right where I wanted it...
Onward anyhow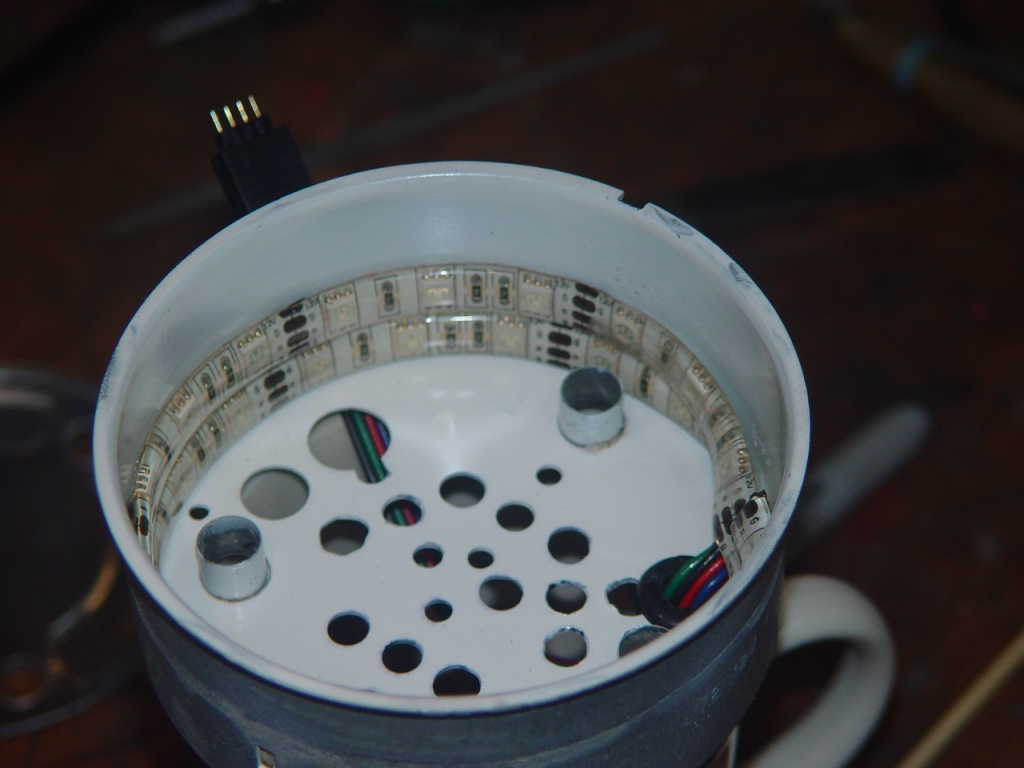
Lights with color anyway you like. I like plain blue-green white thank you. Sort of Stewart Warner look
Then the gauge cans and rubber lights.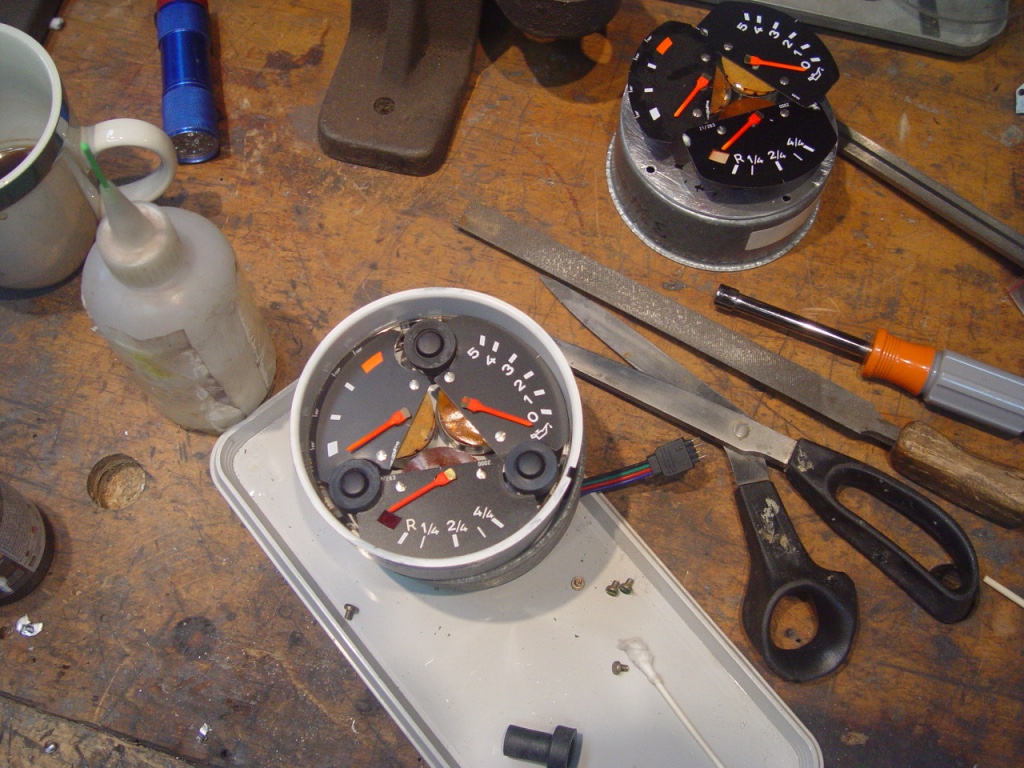
Wish it wasn't a plastic lens for these gauges, but I did polish it.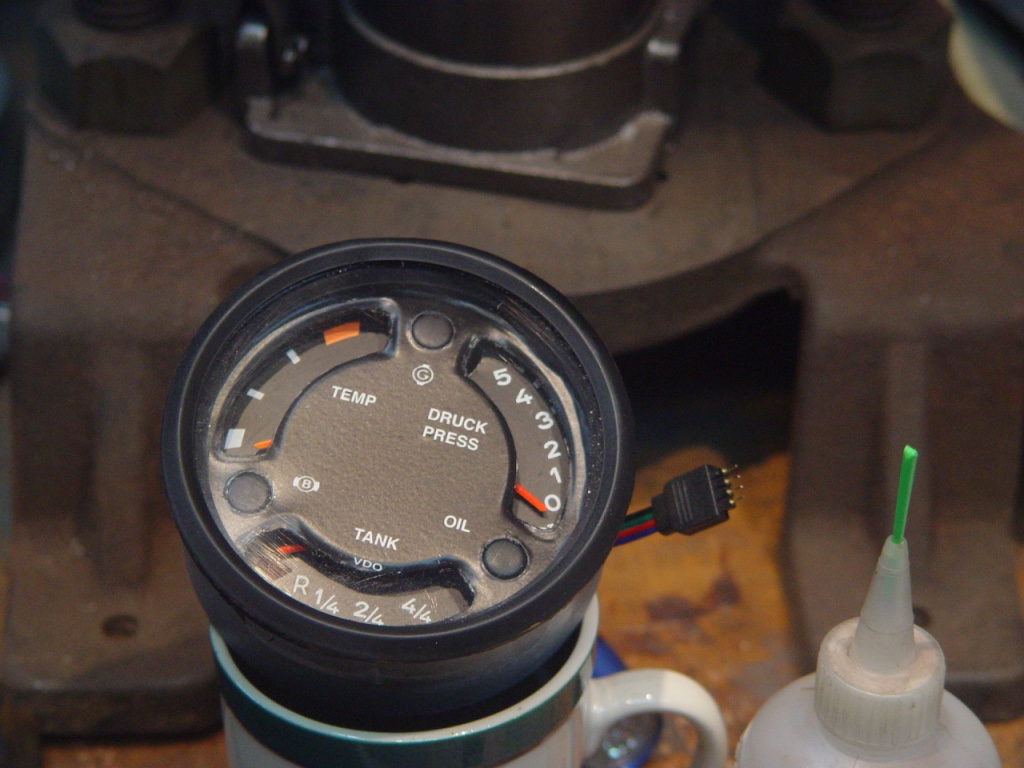
So there you have it: Take-2
I have a silk screen with the emulsion ready to expose, so maybe there will be a take 3. Two months of fiddling because this is the oil pressure gauge and I want to install the 3.2. Yes, it is an odd approach now that you mention it. Anyone with wisdom about lettering would be welcome to chime in. I know it isn't quite the thing.
Posted by: 914forme Jul 30 2015, 11:52 AM
Oh nice and great job  I'll take one, I need it for my 914-6 restoration.
Now onto lettering.
Silkscreening, is the way to go. But the http://www.pulsarprofx.com/DecalPRO/Vertical/3_LIBRARY/3f_Instructions/Instructions_2015.pdf New Vintage started their gauges.
Posted by: worn Jul 30 2015, 12:00 PM
Oh nice and great job
I'll take one, I need it for my 914-6 restoration.Now onto lettering.
Silkscreening, is the way to go. But the http://www.pulsarprofx.com/DecalPRO/Vertical/3_LIBRARY/3f_Instructions/Instructions_2015.pdf New Vintage started their gauges.
Well I have my positive and my lamp so I will let you know. Have to screen them flat and then press, cause I am real rusty on silk screening. In my day we cut stencils out of tracing paper and used the ink to hold them on the screen.
Do you think that other method is better?
Posted by: mepstein Jul 30 2015, 12:14 PM
I'd like one.
Posted by: billh1963 Jul 30 2015, 12:20 PM
Yep...if you decide to sell these put me on a list!
Posted by: Valy Jul 30 2015, 01:39 PM
Wow! Great job!
Posted by: '73-914kid Jul 30 2015, 01:50 PM
Please put me down for a piece as well. Been running around with a low fuel light rather than a gauge for the past year..
Posted by: worn Aug 5 2015, 02:04 PM
Oh nice and great job
I'll take one, I need it for my 914-6 restoration.Now onto lettering.
Silkscreening, is the way to go. But the http://www.pulsarprofx.com/DecalPRO/Vertical/3_LIBRARY/3f_Instructions/Instructions_2015.pdf New Vintage started their gauges.
Well I have my positive and my lamp so I will let you know. Have to screen them flat and then press, cause I am real rusty on silk screening. In my day we cut stencils out of tracing paper and used the ink to hold them on the screen.
Do you think that other method is better?
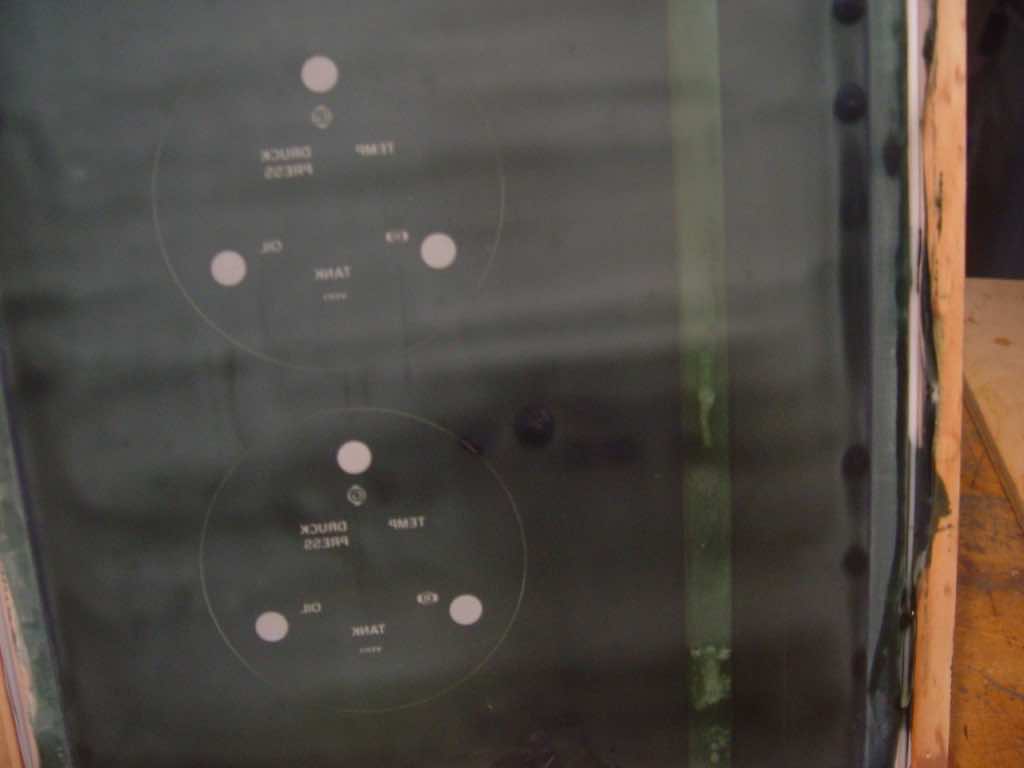
I tried two exposures with the inexpensive silk screen kit to make the stencils. Had I tried this first I would have stopped, cause they aren't horrible. But they are all a bit off. The high exposure leaves things out and the lower exposure of the emulsion made everything too blocky. I might in time get it, but it would be hard.
This is a screen emulsion after exposure and wash. I was psyched at this stage. If it was for a T-shirt it would be great.
I went back to the press-on vinyl with some mods in technique.
So what do you think about this:
If it doesn't fall apart on it's own, it is what will go into the car.
I also decided to follow Andy's method and simplify the wiring. Especially as the LED runs 4 wires for the colors.
Deutsch connectors from Jegs/ebay.
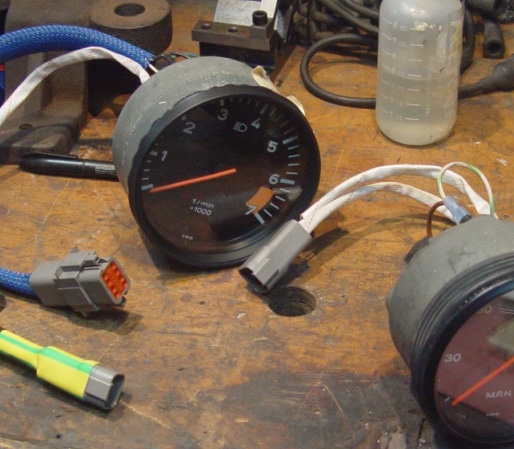
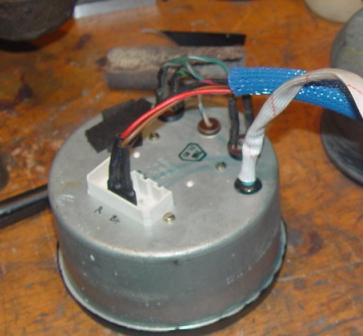
So the back looks like this. It says 11/85 and is from I think the donor car for the 3.2. However there are only 3 spade connectors for the tach part. I think that is all I need: power, ground, and signal.
If you have any insight into wiring the tach to the DME I would welcome it.
Also, I have had enough for awhile. I want to hear the motor crank more than have a cute gauge. Do you think it is good enough as a stopping point? I will be back at it as the snow closes us in, but for now.
As for distribution.
I have some ideas yet to try to make them easier to make and better in quality. A laser printable substrate with the right texture and enough stretch for the curves is what I am looking for. It need not be self stick. This vinyl may be good enough.
Or a quality screen print on the metal before forming.
A) They have to be good enough. Not sure they are yet.
B) This has taken so much time that I would only send them out for free to individuals who would use them.
C) I am sort of interested in making entire gauges ready to plug and play. To do that the quality would have to be there and we would need to decide how authentic they need be. My stash of gauge pots is limited, but one could make substitutes with air motors. If we go that way, I will let my son do the work, and he will ask for some compensation. Unfortunately he favors French and British marques,

Posted by: mepstein Aug 5 2015, 03:44 PM
Put me on your list. I have the 911 gauges ready to convert into the triple gauge.
Posted by: 914forme Aug 5 2015, 06:52 PM
Oh nice and great job
I'll take one, I need it for my 914-6 restoration.Now onto lettering.
Silkscreening, is the way to go. But the http://www.pulsarprofx.com/DecalPRO/Vertical/3_LIBRARY/3f_Instructions/Instructions_2015.pdf New Vintage started their gauges.
Well I have my positive and my lamp so I will let you know. Have to screen them flat and then press, cause I am real rusty on silk screening. In my day we cut stencils out of tracing paper and used the ink to hold them on the screen.
Do you think that other method is better?
Yes I prefer the other method actually. The best way was an Alps printer as it will print in white. You can find them all day long, but they are $$$$
Posted by: mepstein Aug 5 2015, 07:31 PM
Oh nice and great job
I'll take one, I need it for my 914-6 restoration.Now onto lettering.
Silkscreening, is the way to go. But the http://www.pulsarprofx.com/DecalPRO/Vertical/3_LIBRARY/3f_Instructions/Instructions_2015.pdf New Vintage started their gauges.
Well I have my positive and my lamp so I will let you know. Have to screen them flat and then press, cause I am real rusty on silk screening. In my day we cut stencils out of tracing paper and used the ink to hold them on the screen.
Do you think that other method is better?
Yes I prefer the other method actually. The best way was an Alps printer as it will print in white. You can find them all day long, but they are $$$$
Can you rent time on one?
Posted by: 914forme Aug 6 2015, 04:43 AM
Oh nice and great job
I'll take one, I need it for my 914-6 restoration.Now onto lettering.
Silkscreening, is the way to go. But the http://www.pulsarprofx.com/DecalPRO/Vertical/3_LIBRARY/3f_Instructions/Instructions_2015.pdf New Vintage started their gauges.
Well I have my positive and my lamp so I will let you know. Have to screen them flat and then press, cause I am real rusty on silk screening. In my day we cut stencils out of tracing paper and used the ink to hold them on the screen.
Do you think that other method is better?
Yes I prefer the other method actually. The best way was an Alps printer as it will print in white. You can find them all day long, but they are $$$$
Can you rent time on one?
excellent idea, never tried.Im a tool / gadget whore, so I always look at ROI on a tool. The rental / lease thing never grosses my mind.
Posted by: worn Aug 6 2015, 02:30 PM
Oh nice and great job
I'll take one, I need it for my 914-6 restoration.Now onto lettering.
Silkscreening, is the way to go. But the http://www.pulsarprofx.com/DecalPRO/Vertical/3_LIBRARY/3f_Instructions/Instructions_2015.pdf New Vintage started their gauges.
Well I have my positive and my lamp so I will let you know. Have to screen them flat and then press, cause I am real rusty on silk screening. In my day we cut stencils out of tracing paper and used the ink to hold them on the screen.
Do you think that other method is better?
Yes I prefer the other method actually. The best way was an Alps printer as it will print in white. You can find them all day long, but they are $$$$
The foil toner transfer looked interesting but very fiddle as well. But it works? I am about to check out the alps machine. How close do you think the last one is? The photo is accurate. Since it is generally a bit dim, I am probably going to use it, but I can take and welcome the critique.
Powered by Invision Power Board (http://www.invisionboard.com)
© Invision Power Services (http://www.invisionpower.com)