Printable Version of Topic
Click here to view this topic in its original format
914World.com _ 914World Garage _ Tarret Sway Bar install
Posted by: jrrhdmust Jan 15 2014, 11:09 AM
So I decided i would start drilling the holes for my Tarret front sway bar. I had downloaded the instructions from Pelican parts read through them a few times. I cut out the template and marked my holes. I drilled the bottom hole, and got the bright idea, that I would put bolts in the Tarret backing plate to verify and check my holes.
Much to my surprise my hole was wrong....then it dawned on me the Pelican parts instructions were for a stock sway bar...mine was Tarrett... 
So now my 2 minute hole is going to cost me about 4 hours of welding and grinding to build a tiny plate to weld the hole shut....
And all i had to do was match the template to the part and save me all of the trouble..... 
Posted by: Harpo Jan 15 2014, 06:32 PM
I also have the Tarret sway bar and I also used the instructions from pelican and mine went together just fine. My holes are located at 2:00, 6:00 & 10:00.
David
Posted by: jrrhdmust Jan 16 2014, 08:54 AM
The template from pelican is larger - like a 1/2 in per hole, than the tarret parts I received. I will post pics tomorrow.
Posted by: jpnovak Jan 16 2014, 01:46 PM
Bummer. Sounds like your template did not print to size. The Tarrett and stock factory mounts are the same dimension. The through body sway bars are all the same for 911, 912 and 914.
Posted by: Eric_Shea Jan 16 2014, 04:03 PM
I don't think I'd worry about it, when you weld in the backing plate you can cover the hole and weld the extra then.
P.S. Why didn't you just use the backing plate as the template?
Posted by: jrrhdmust Jan 17 2014, 12:11 PM
Ding ding ding we have a winner, the template didn't print to size. 
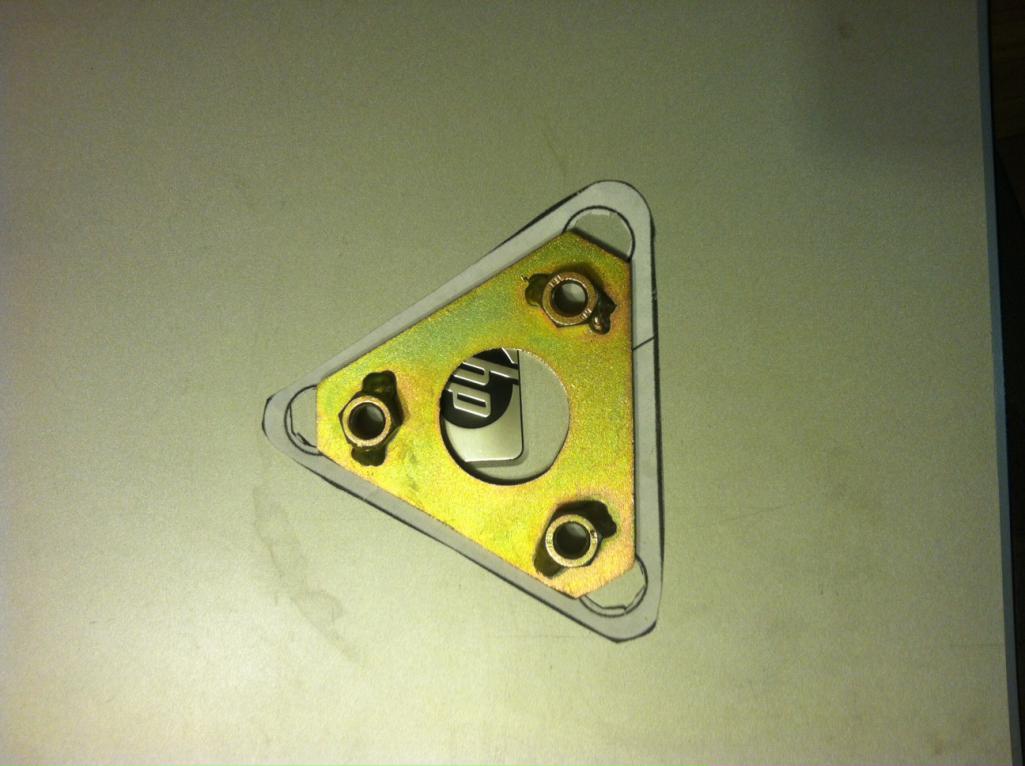
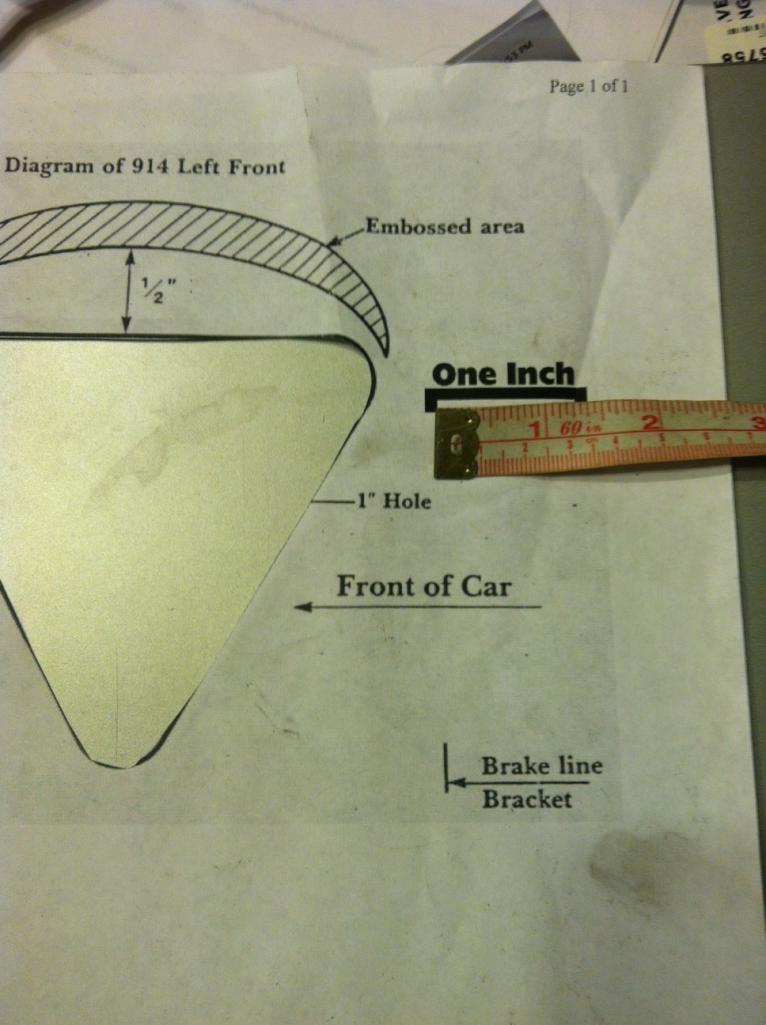
I am really gald I checked the template with the backing plate before I drilled all three holes. I did see the 1 inch call out and it didn't dawn on me to check it....
Posted by: SirAndy Jan 17 2014, 01:05 PM

More often than not, the default for printing mode is "Scale size to fit media" in which case who knows what size you'll end up with.
Been there, done that ...

Posted by: r_towle Jan 17 2014, 03:32 PM
where to start...
Your first mistake was reading the directions....
Did your Dad not teach you that part of manhood...
NEVER read the directions.
Second...
Well , nevermind, the first was enough.
rich
Posted by: Socalandy Jan 17 2014, 10:57 PM
So I decided i would start drilling the holes for my Tarret front sway bar. I had downloaded the instructions from Pelican parts read through them a few times. I cut out the template and marked my holes. I drilled the bottom hole, and got the bright idea, that I would put bolts in the Tarret backing plate to verify and check my holes.
Much to my surprise my hole was wrong....then it dawned on me the Pelican parts instructions were for a stock sway bar...mine was Tarrett...
So now my 2 minute hole is going to cost me about 4 hours of welding and grinding to build a tiny plate to weld the hole shut....
And all i had to do was match the template to the part and save me all of the trouble.....
As Master Rick would say, Flatten a section of copper pipe, Back up the hole and plug weld it. The weld wont stick to the copper
 you have to cut the slot on the inside for the backing plate anyways
Posted by: sixnotfour Jan 17 2014, 11:22 PM
drop it down another 1/4 to insure no rubbing on gas tank
Powered by Invision Power Board (http://www.invisionboard.com)
© Invision Power Services (http://www.invisionpower.com)