Printable Version of Topic
Click here to view this topic in its original format
914World.com _ 914World Garage _ Some progress at last!
Posted by: gaz914 Jan 2 2005, 06:38 AM
Well after looking at all the great pics of everyone else's project, I finally got myself a MIG welder and a cool auto-darkening welding helmet.
Practised on some scrap first then bit the bullet and moved to the real thing.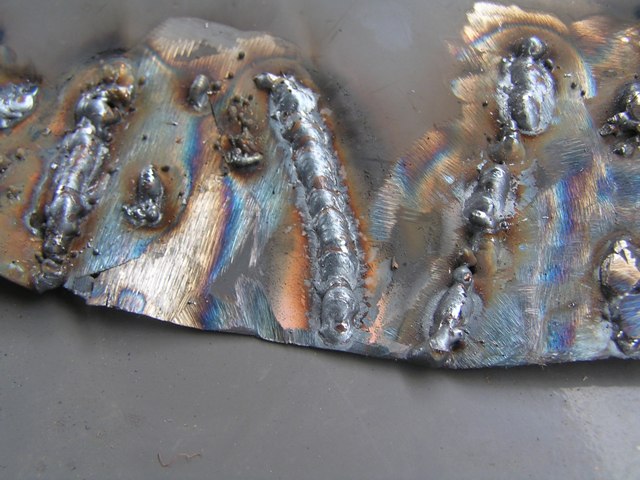
Only minor stuff first.
Weld up holes in sail panel.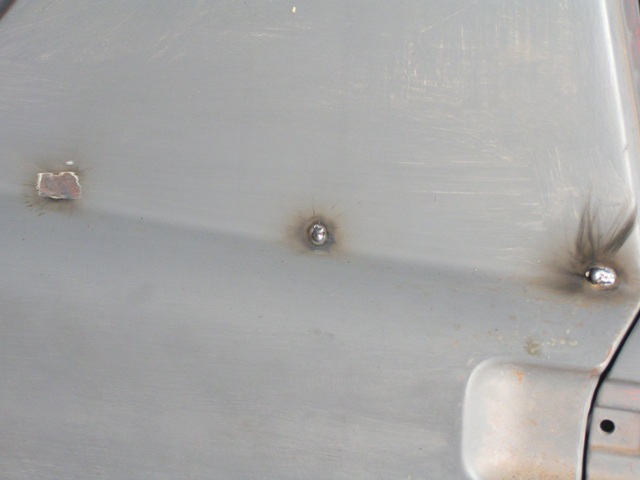
More Pics soon <!-- emo&:clap: --> <!-- endemo -->
2005 Year of the Tangerine <!-- emo&:trophy: --> <!-- endemo -->
Posted by: Rhodes71/914 Jan 2 2005, 10:32 AM
Cool, Looks like I need to get myself a welder, finally have an excuse now.
Posted by: RustyWa Jan 2 2005, 01:59 PM
I was in the garage last night practicing my welding as I've got to weld in the triangle reinforcement pads for the front swaybar. I did some real nice practice welds on the bench. I was feeling pretty good as they were some of my best.
Then I remembered that I'll need to do vertical welds. So I practiced doing vertical and boy was that humbling. My welds turned back to crap. I couldn't control the puddle as it would keep falling out.
I ran out of gas so I'll have to wait to practice some more. If anyone has tips for welding 16-18 ga. material vertical...I'm all ears.

Posted by: gaz914 Jan 2 2005, 11:29 PM
Welded up the hole for the lamp on the RHF fender.
Still needs some more smoothing.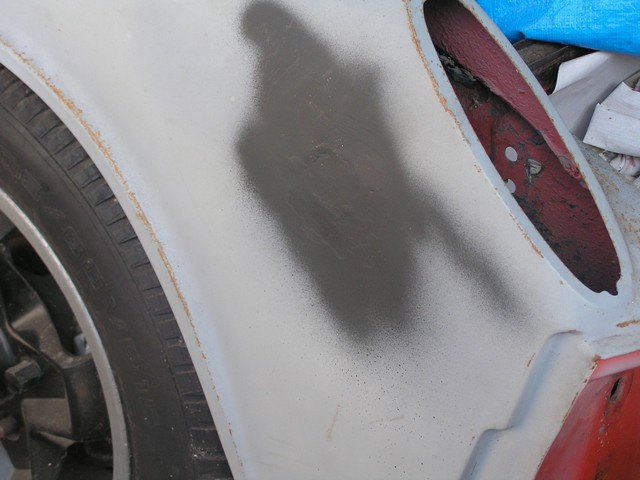
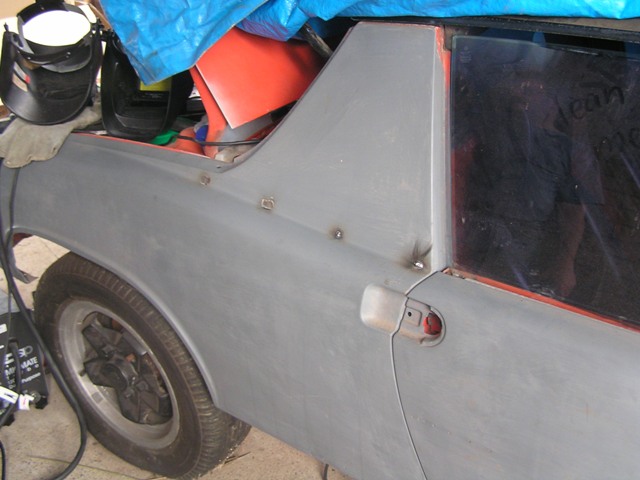
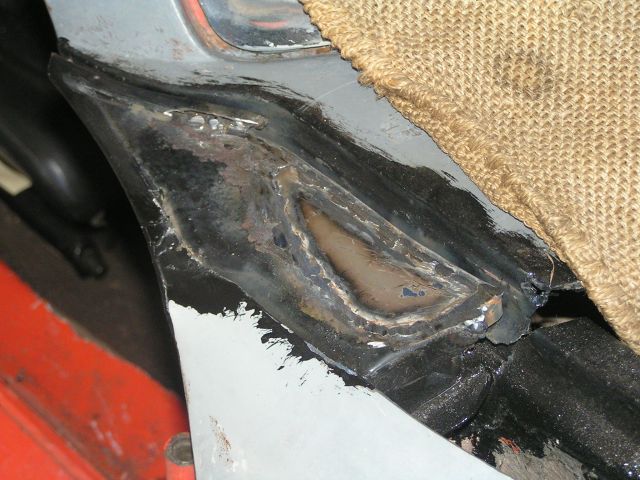
Started investigating the rust in the cowl area <!-- emo&:huh: --> <!-- endemo -->
It had rusted in the usual place where the fender meets the cowl.
The rest of the fender is pretty much perfect so I was not intending to remove it.
Good news is that the rust hasn't spread to the actual tub <!-- emo&:D --> <!-- endemo -->
Don't know if it's better or worse now though <!-- emo&:headbang: --> <!-- endemo -->
Any repair technique suggestions welcome.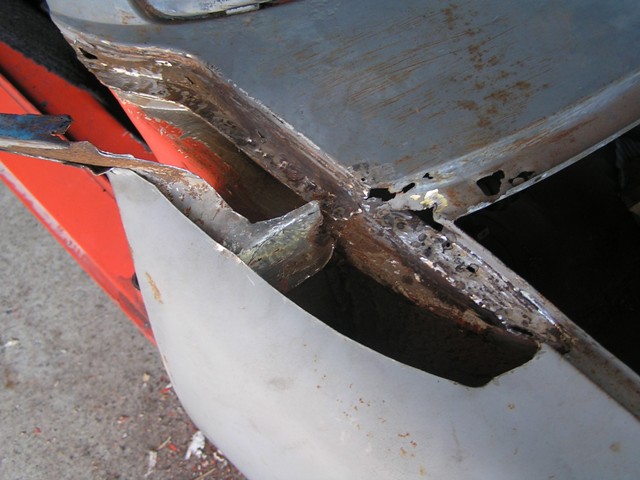
Posted by: Rhodes71/914 Jan 2 2005, 11:38 PM
Sorry I can't help you with any advice cause I'm new to rust repair as well. But I saw that you are an Aussie and I'm sitting here drinking a Coopers Brewery Best Extra Stout that my in-laws brought me and it ain't bad. This considered decent stuff there? 
Posted by: gaz914 Jan 3 2005, 02:36 AM
| QUOTE (Rhodes71/914 @ Jan 2 2005, 09:38 PM) |
| Sorry I can't help you with any advice cause I'm new to rust repair as well. But I saw that you are an Aussie and I'm sitting here drinking a Coopers Brewery Best Extra Stout that my in-laws brought me and it ain't bad. This considered decent stuff there? |
Coopers is" decent stuff" here

The "boys" have one or two on Christmas Day every year before we start on the red wine

Posted by: Jason914 Jan 3 2005, 05:43 AM
Looking good! I was planning to purchase a Lincoln Mig Pak 10 welder. But, I saw that Eastwood Company sells a Spot and Stitch Welding Set for Arc Welders (cheaper). It's at this link: http://www.eastwoodco.com/shopping/product/detailmain.jsp?itemID=1172&itemType=PRODUCT&RS=1&keyword=welding. What do you guys think about this setup?
Jason
Posted by: lapuwali Jan 3 2005, 12:09 PM
I bought one of those, primarily because the job I need to do will specifically require spot welding from one side of the panel, which this setup is ideal for. However, for general purpose use, a MIG welder is much easier to use, and you can "spot" weld with one by drilling a hole in one panel and rosette welding through the hole. Stick welders are cheap, but they're probably the most difficult of all of the welder types to use. I'll probably end up getting a MIG when I need to do something that requires much seam welding on panels. I'll probably give the stitch welder a try, but I'm not going to care much if I can't make it work well. The spot welder bit is worth the price by itself.
Posted by: gaz914 Jan 5 2005, 04:09 AM
I like staying home from work - lets me do some REAL work (on the teener) <!-- emo&:D --><!-- endemo -->
POR 15'd the cowl after cleaning up the rust and welding up some holes.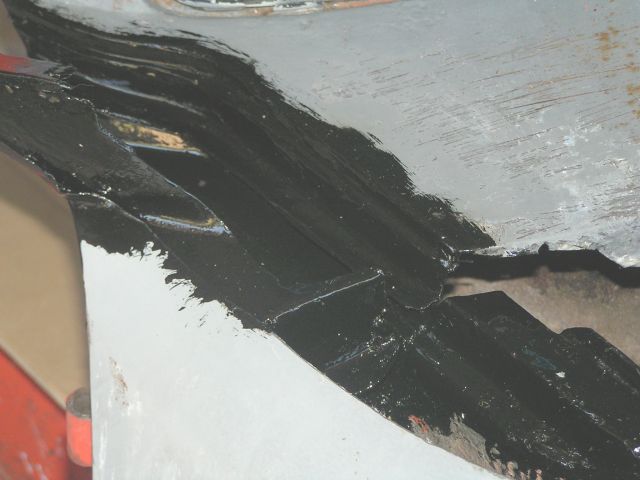
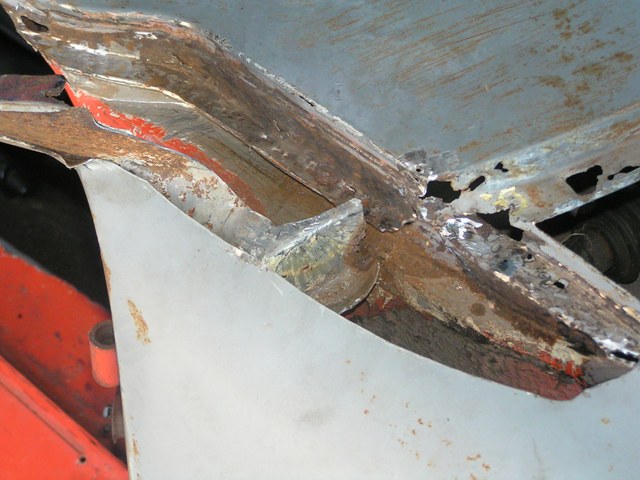
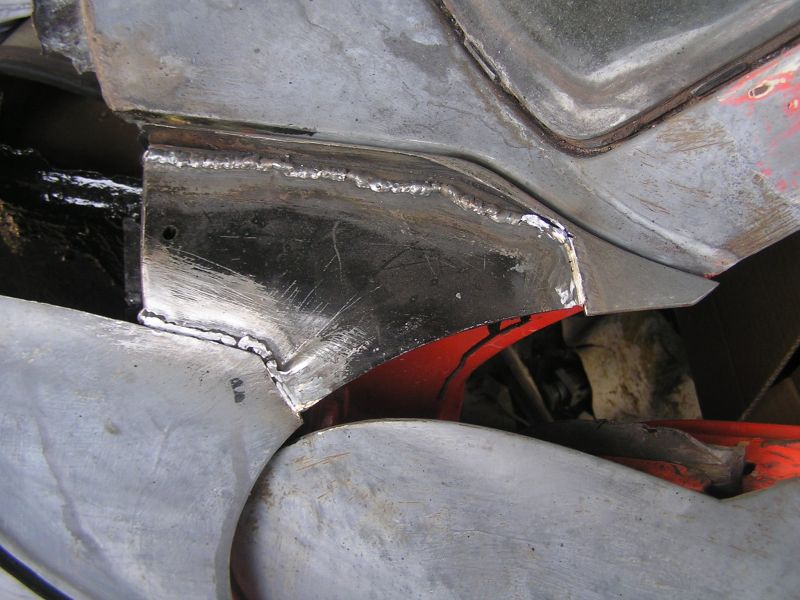
Made up some pieces to repair the inner fender and welded them in.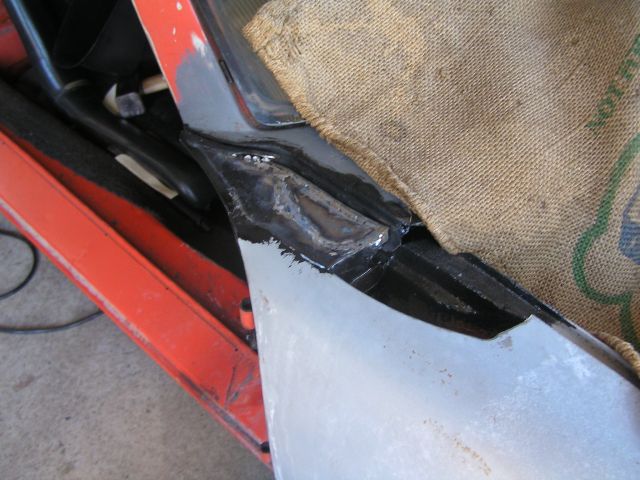
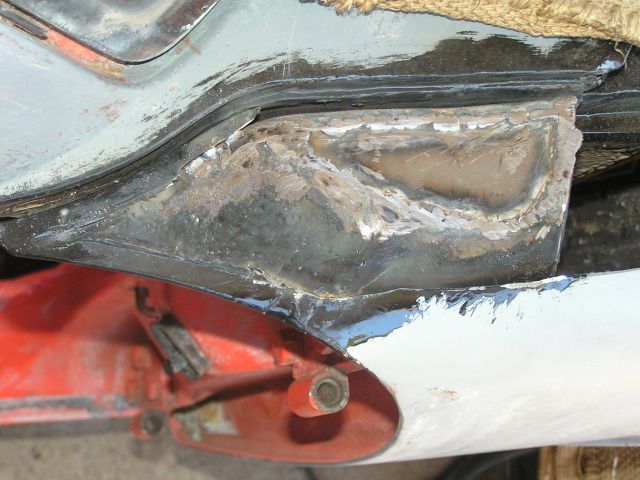
The only way I could think to do it was to use two pieces.
The first vertical piece (green highlight) was welded to the remains of the inner fender.
Then a patch was welded to fill up the hole (orange highlight).
Not the best job in the world but it won't be seen when the outer skin is repaired.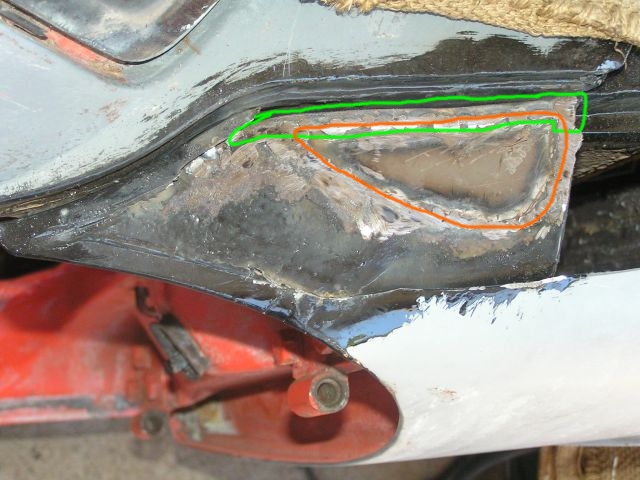
POR 15'd that as well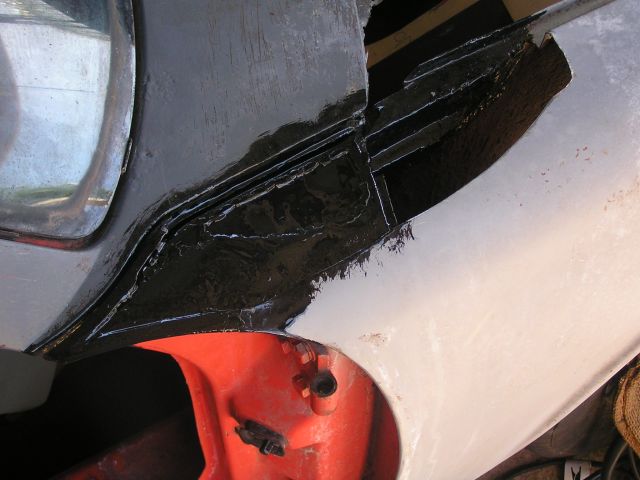
Now just have to make some pieces to fix the cowl and the outer skin of the fender.
Posted by: xsboost90 Jan 5 2005, 05:59 AM
wow, that looks just like what i did! Except here was my solution for making the last piece! 
Attached image(s)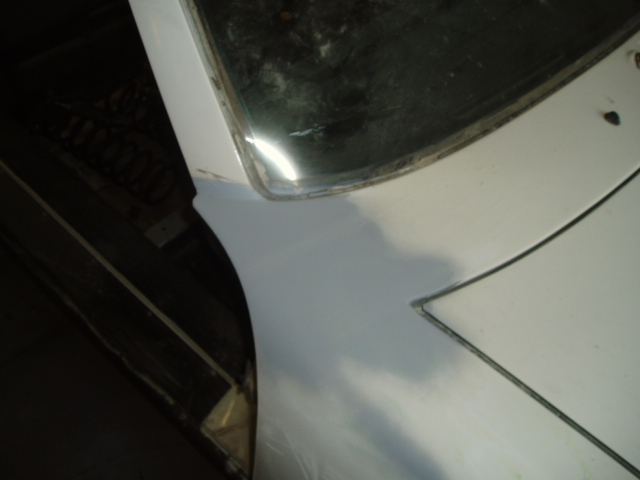
Posted by: xsboost90 Jan 5 2005, 06:01 AM
i did the same thing w/ the markers and the tops of the fenders, except i have still to weld up some small holes in the lower fender area, seems to be a PITA.
Attached image(s)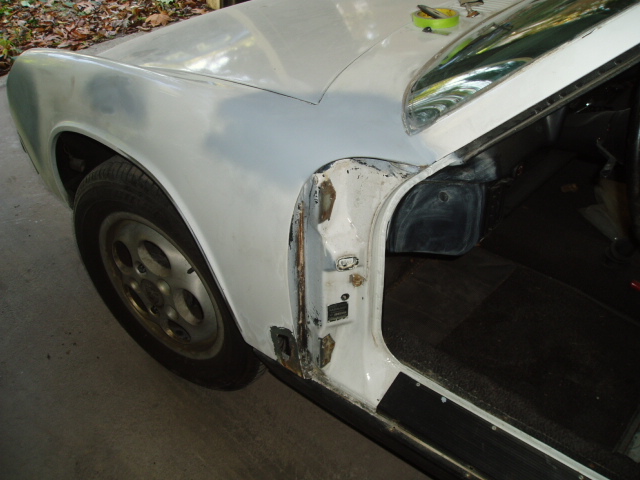
Posted by: Root_Werks Jan 5 2005, 10:03 AM
| QUOTE (RustyWa @ Jan 2 2005, 11:59 AM) |
| I was in the garage last night practicing my welding as I've got to weld in the triangle reinforcement pads for the front swaybar. I did some real nice practice welds on the bench. I was feeling pretty good as they were some of my best. Then I remembered that I'll need to do vertical welds. So I practiced doing vertical and boy was that humbling. My welds turned back to crap. I couldn't control the puddle as it would keep falling out. I ran out of gas so I'll have to wait to practice some more. If anyone has tips for welding 16-18 ga. material vertical...I'm all ears. |
Sounds like you are letting the metal "pool" a little too much. The easiest welding to do of course is like you are welding on the floor facing down. It gets harder as you turn to hot metal dripping as you weld above you.
Try shorter bursts. Give the metal a second to cool and stop flowing so much. Zap, zap, zap sort of thing. Not ZAaaaaaaaaaaaaaaaaaap.
Posted by: spunone Jan 5 2005, 11:57 AM
Heard there's a softer wire to use when doing body work so as much easier to sand is this true and where do we get it ???
Posted by: 914GT Jan 5 2005, 12:26 PM
I don't know the difference between mild steel and low alloy wire when it comes to ease of grinding welds. Your local welding supplier will have the wire and may know if one is easier to grind/sand than the other. You can buy wire online also. One thing I have noticed though - welds are easier to grind when using CO2 gas rather than the Argon/CO2 blends. Each gas has their benefits depending on your requirements.
Posted by: restore2seater Jan 5 2005, 01:10 PM
| QUOTE (spunone @ Jan 5 2005, 09:57 AM) |
| Heard there's a softer wire to use when doing body work so as much easier to sand is this true and where do we get it ??? |
Maybe talking about this wire.
http://www.jwharris.com/images/twentygauge.pdf
Posted by: J P Stein Jan 5 2005, 01:30 PM
I use a product called "Easy Grind"..... .024.....for auto sheet metal. It's just that, somewhat easier to grind.
Posted by: gaz914 Jan 7 2005, 12:23 AM
No progress on Thursday - Did this instead <!-- emo&:driving: --> <!-- endemo --> (I'm in the 2nd car in 1st pic)
Basically they throw the circuit open for the day and you get a number of 20 minute sessions (feels like about 5 minutes).
Through the little kink at about 140 km/h (80 mph).
Trail brake to get the back moving out a bit
This bloody Mustang wouldn't move over and let me past. I was much faster through the twisty bits and could even keep up down the straight, just wasn't fast enough to actually pass him.
Other cars have caught up now
Braking hard into turn 1 from about 80 mph
Posted by: gaz914 Jan 7 2005, 12:33 AM
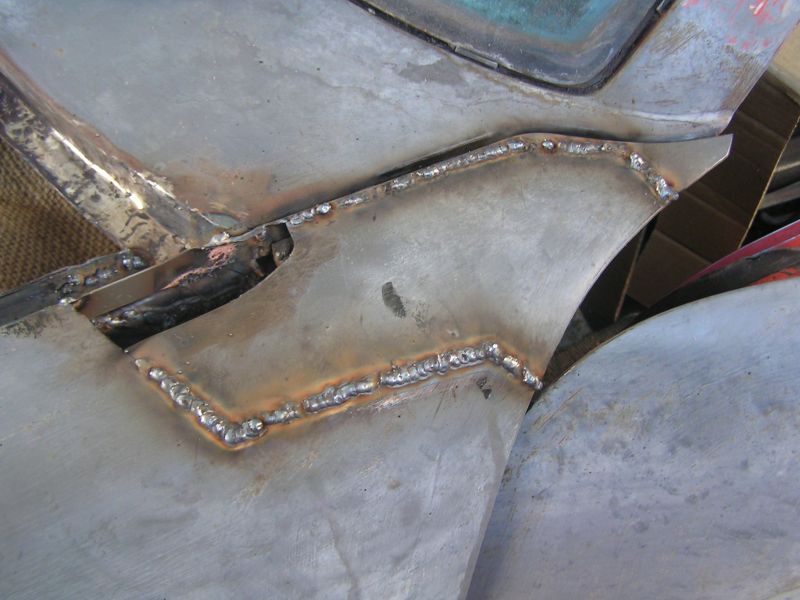
Today I made a new piece for the cowl area.
I am sure it isn't EXACTLY the shape that came from the factory but I am reasonably pleased with the result. And it took me most of the day to do <!-- emo&:headbang: --><!-- endemo --> 
This thread has been invaluable in getting the cowl back into shape.
http://www.914world.com/bbs2/index.php?act=ST&f=2&t=22105&hl=cowl
Hopefully I will have finished the RH fender before I go back to work on Monday <!-- emo&:( --> <!-- endemo -->
Posted by: SpecialK Jan 7 2005, 02:39 AM
Enough playin' gaz914 (if that is your real name  ), I want to see how this turns out!
I seriously like the one piece fender/cowl look xsboost90 has going there. Plus, it's one less rust trap.....considering that look myself (no concourse...previously molested, she's been around!
So what the hell )
Seriously...Great to see pics of progress!
Posted by: gaz914 Jan 7 2005, 07:05 AM
| QUOTE (Special_K @ Jan 7 2005, 12:39 AM) |
| I seriously like the one piece fender/cowl look xsboost90 has going there. Plus, it's one less rust trap.....considering that look myself (no concourse...previously molested, she's been around! |
Yeah it is tempting to just go to town and
and make the "clean" look like xsboost90 has done, but there is the "do it right" part as well... 
Just have to have a go and see how it turns out
Posted by: SteveSr Jan 7 2005, 11:58 AM
Holy Crap  everybody is driving from the right side of the car!!!!
SteveSr
Posted by: gaz914 Jan 9 2005, 06:47 AM
We drive on the "right" side here 

Posted by: gaz914 Jan 9 2005, 06:48 AM
RH fender repaired, not concourse yet but it's done <!-- emo&:trophy: --><!-- endemo --> 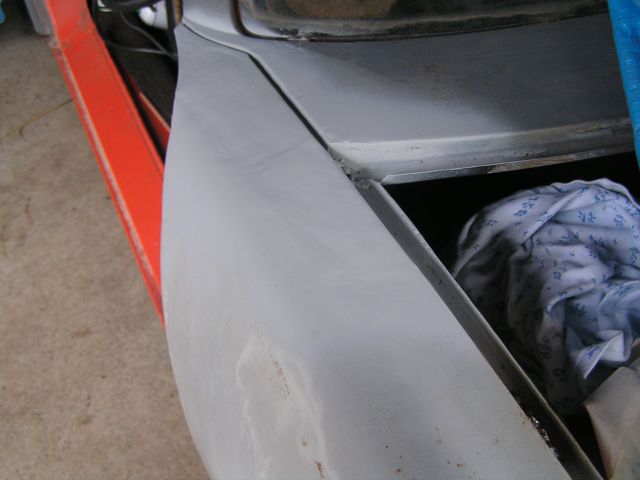
Posted by: gaz914 Jun 23 2005, 10:10 PM
Time for an update <!-- emo&:bump: -->![]() <!-- endemo -->
<!-- endemo -->
Front of the front trunk is done as seen in this thread
http://www.914world.com/bbs2/index.php?act=ST&f=2&t=27908&hl=a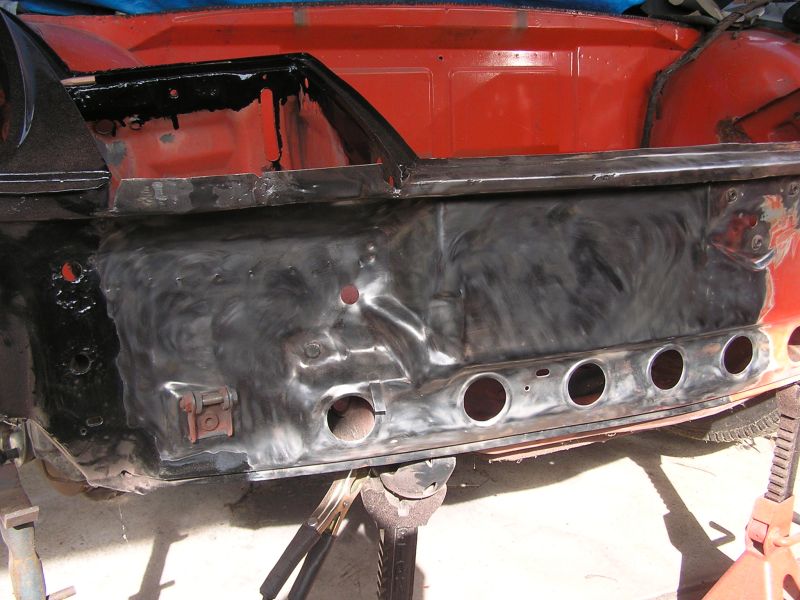
Posted by: gaz914 Jun 23 2005, 10:22 PM
Time to start on the LH Fender.
Sorry about the low quality pic <!-- emo&:( --><!-- endemo -->
Cut a bit more out to get a better look.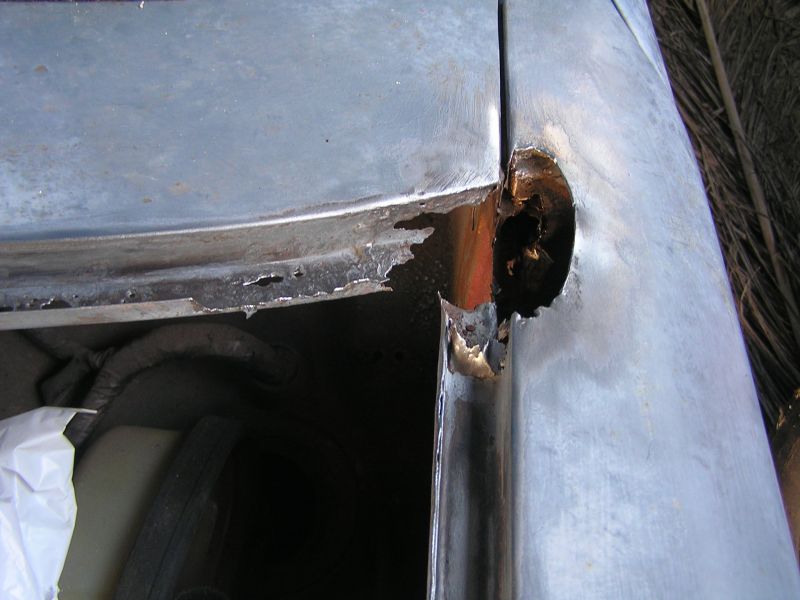
Unfortunately, there was some rusting at the top of the door post 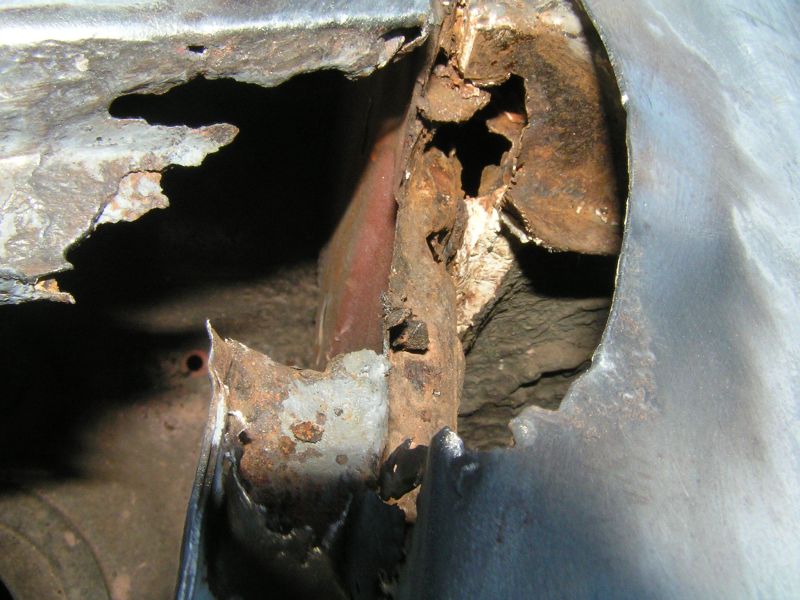
Posted by: gaz914 Jun 23 2005, 10:31 PM
Bought myself a Dremel kit <!-- emo&:headbanger: --> <!-- endemo --> and used the small cut-off wheels to cut out some of the fender.
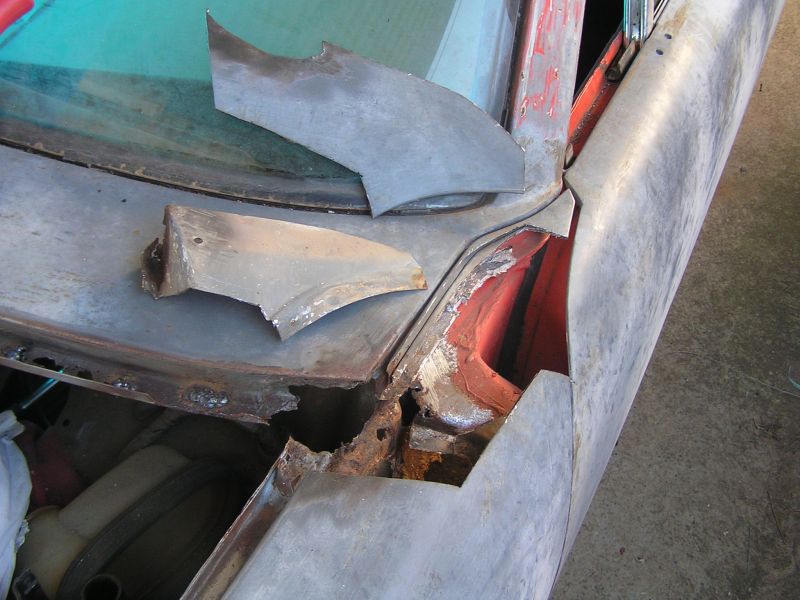
Here is a better pic of the rust on the door post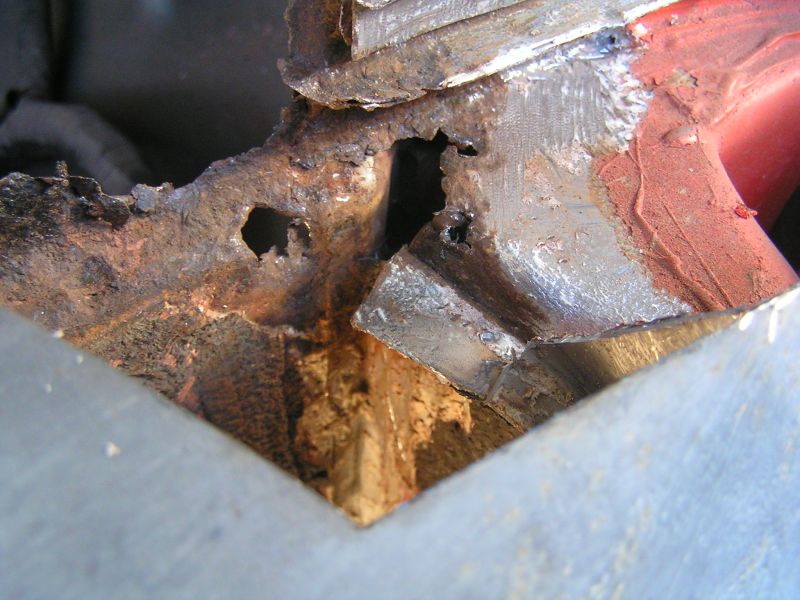
After some <!-- emo&:welder: --><!-- endemo --> it ended up like this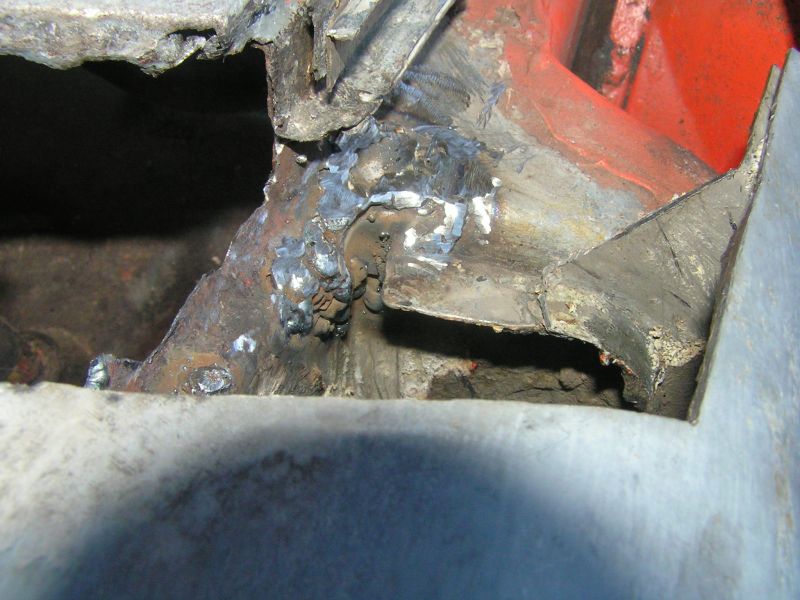
Posted by: gaz914 Jun 23 2005, 10:38 PM
Painted it with POR 15 before strating on the next bit of reconstruction.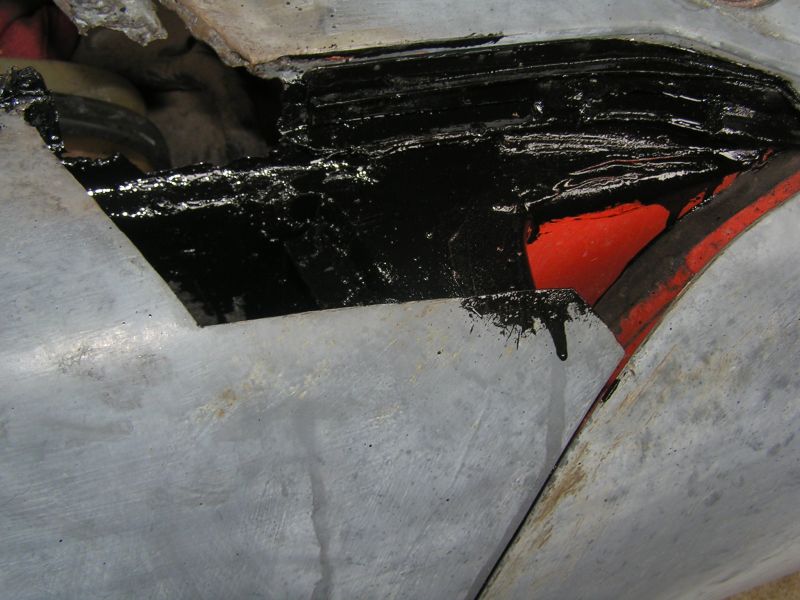
I think I am starting to get the hang of the <!-- emo&:welder: --><!-- endemo --> 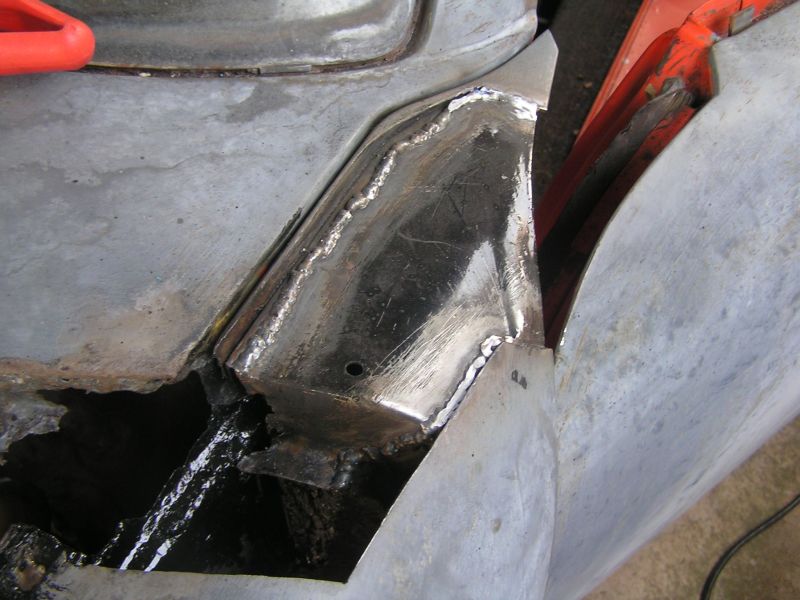
Posted by: gaz914 Jun 23 2005, 10:51 PM
More fabricating little filler pieces (cut out of an old filing cabinet actually!)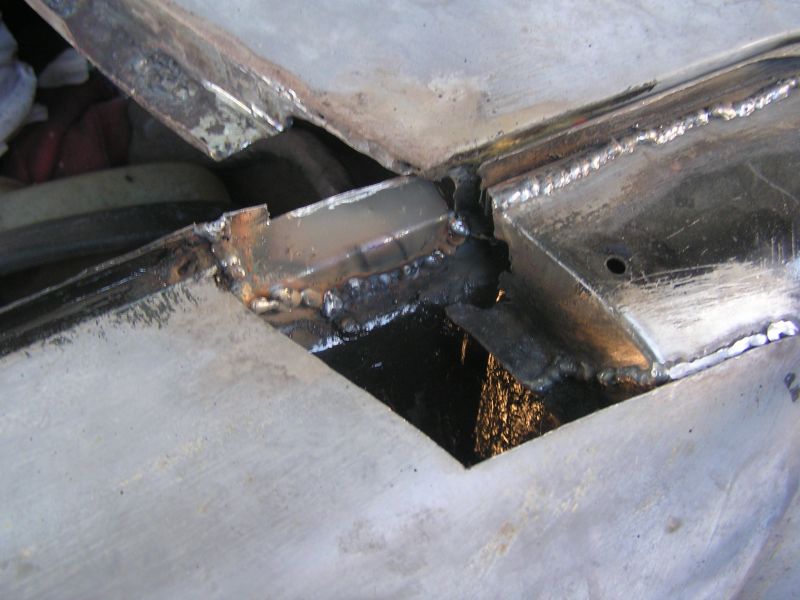
Then reweld the outer fender back on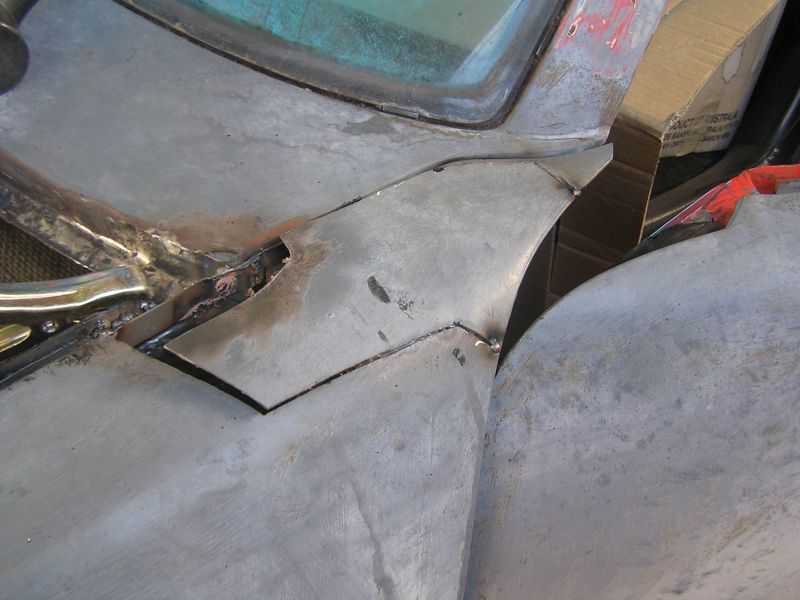
Posted by: gaz914 Jun 23 2005, 10:55 PM
Grinder gets a workout...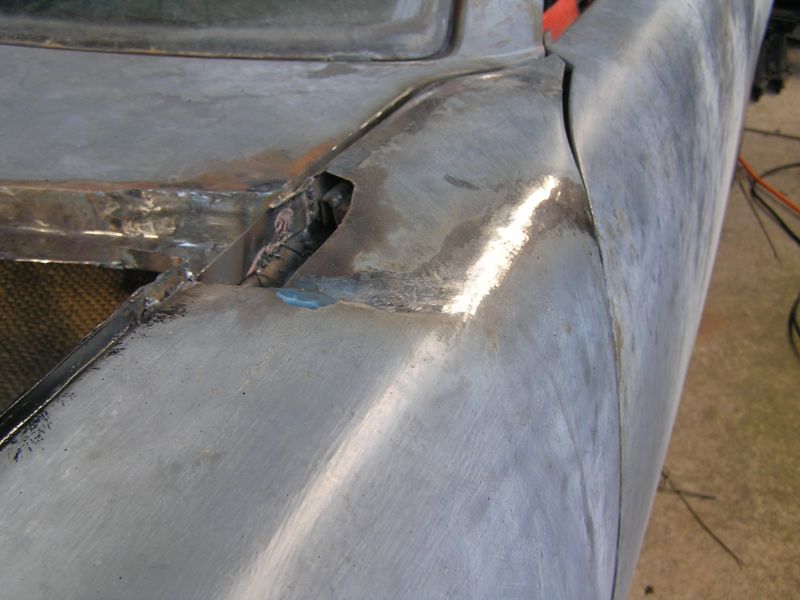
Then weld yet another filler piece to close up the fender.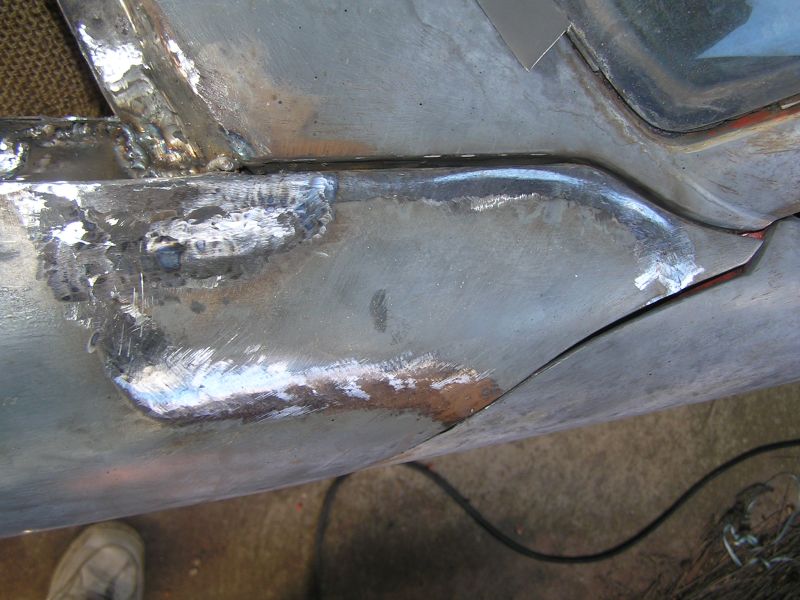
No more time for fixing now, work is sending me to Beijing for a week, so more progress pics when I get more time off!
cheers
GAZ
Posted by: michelko Jun 24 2005, 02:14 AM
very very nice work 
keep on posting pics, i love to follow those threads 
Posted by: banksyinoz Jun 24 2005, 02:28 AM
just checking out ur thread n was impressed with your attitude towards just getting into it ,good work and keep it up there is nothing better and satisfying than standing back and seeing the finished product GOOD WORK lets hope others follow your lead and give the 914 behind the shed a birthday and a new life
with the top of the a pillar where you did the plate work i couldnt see whether or not you took the surrounding areas back to bare metal normally this is desirable (just in case) sandblasting or grit is good as you can get almost everywhere clean and the paint will stick good and the rust (hopefully) wont return either way i know how frustrating this process is so keep up the good work
Posted by: gaz914 Jun 24 2005, 03:21 AM
Thanks for the kind words
Its a long slow road, but we will get there
Banksy,
I used one of the Dremel "die grinder" bits to get all the rust off "inside" the door post and around the weld area (no photos, too busy working!) and I used the POR-15 Metal Ready and POR-15 paint before I welded. The heat knocks the paint around, but I am intending to use some fish oil style rustproofing inside all the box sections once repairs are complete.
I'm hoping that it doesn't rust too much here in Aus - especially since it doesn't seem to rain anymore 
GAZ
Posted by: Dead Air Jun 24 2005, 06:56 AM
What type of car is your red one?
Ford? Peugot?
Posted by: Dead Air Jun 24 2005, 07:07 AM
| QUOTE (gaz914 @ Jan 9 2005, 04:47 AM) |
| We drive on the "right" side here |
I can see the headline:
American Tourist Kills Local
in Head-on Collision After Pub Tour!
Posted by: maf914 Jun 24 2005, 07:45 AM
| QUOTE (Dave Eddy @ Jun 24 2005, 05:07 AM) | ||
I can see the headline: American Tourist Kills Local in Head-on Collision After Pub Tour! |
When visiting England by car from the European mainland (where I worked for several years) I found that you really have to pay attention to driving on the left instead of the right. Driving a left hand drive car propably didn't help. Pulling onto roads from side roads and turning through intersections were prime opportunities for ending up on the wrong side of the road facing oncoming traffic. Yikes!
BTW, my transportation while pubbing was always either by foot or tube!
Posted by: gaz914 Jun 24 2005, 04:56 PM
| QUOTE (Dave Eddy @ Jun 24 2005, 04:56 AM) |
| What type of car is your red one? Ford? Peugot? |
Dave,
Its an Opel Corsa SRi, rebadged here as a Holden Barina SRi.
FWD, 1800 cc, 125 Bhp, 2500 Lbs, 4 wheel discs, ABS, Traction, Cruise, Stiff Suspension, plus all the normal late model stuff (A/C, stereo, airbags, etc).
Makes agreat daily as I travel 1.5 hrs to work every day (only 1 hr back though
).Here is a link to the Holden website for complete specs http://www.holden.com.au/www-holden/action/modeloverview?modelid=1002
cheers
GAZ
Powered by Invision Power Board (http://www.invisionboard.com)
© Invision Power Services (http://www.invisionpower.com)