Printable Version of Topic
Click here to view this topic in its original format
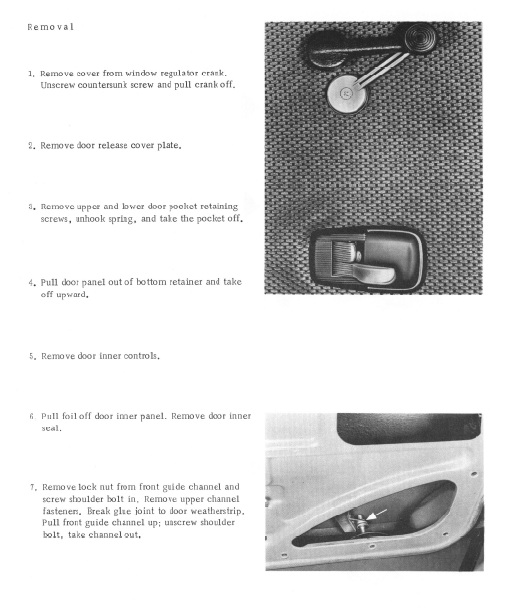
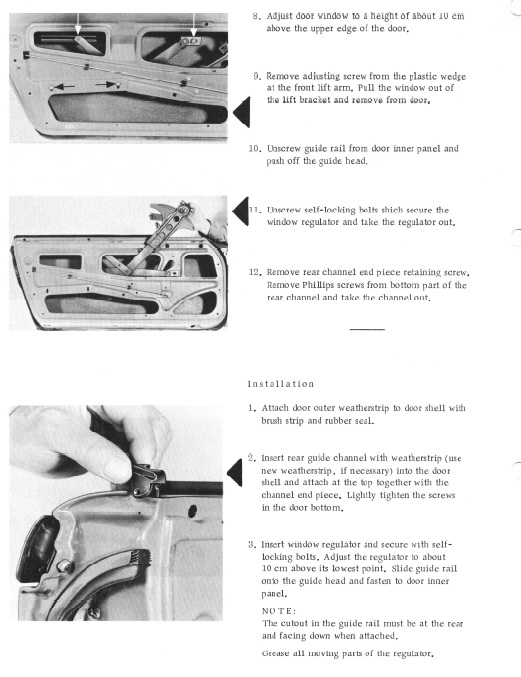
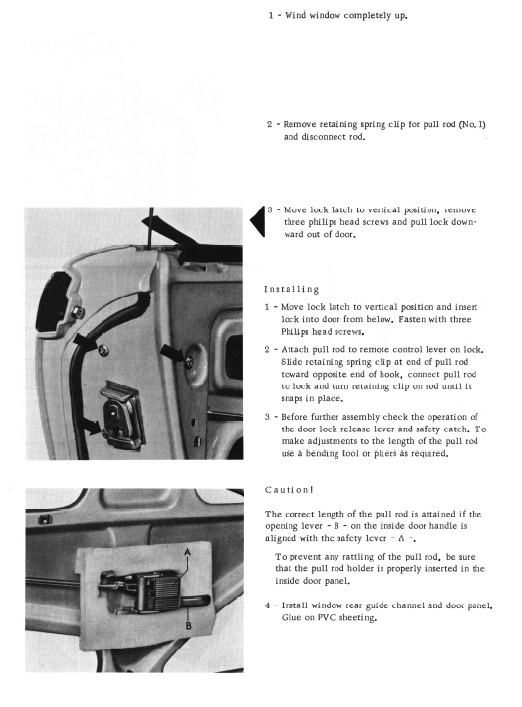
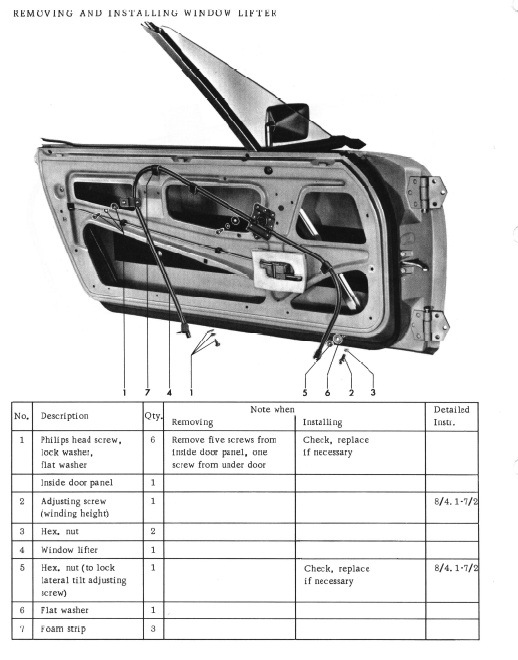
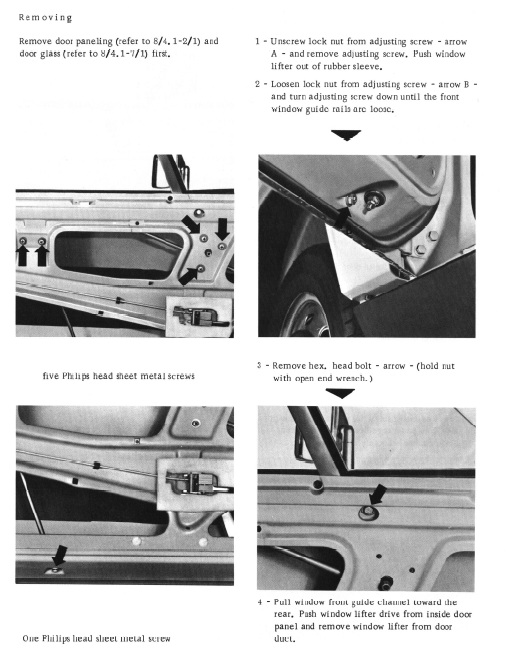
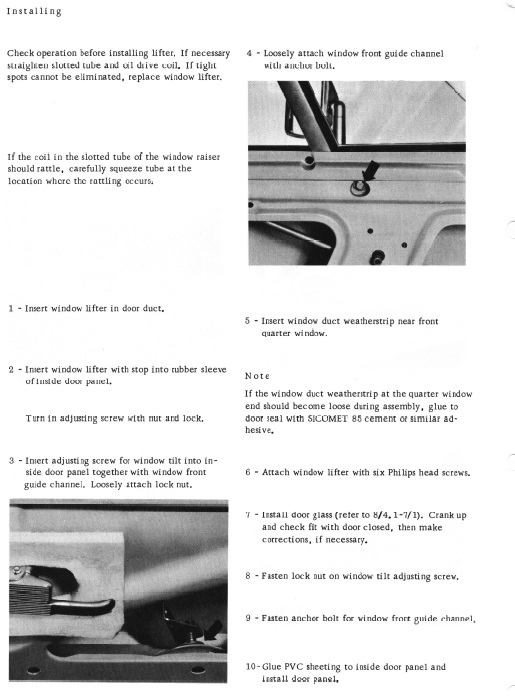
914World.com _ 914World Garage _ Triangle window seal installPic of late directions for both
Posted by: Mikey914 Feb 17 2014, 12:27 AM
First off I want to explain some of the photos. Pictures from my website have been showing up on other websites (9xauto), and I don't mind sharing info just not having what I've done show up on other commercial websites. I'm putting together an instructions for those that need it that by from my website, so it will be available on the site too.
Tool list -
#2 Phillips screwdriver
10mm socket
13mm socket
6" extender for ratchet
ratchet wrench 3/8?
13mm box wrench
#4 standard screwdriver
Wooden block and hammer
Optional items to look at "while you are there"
The Outer door fuzzy is difficult to access, you will be able to swap these out during this process.
I do make the aluminum strips for early and late doors as well as the rollers for both
Door handle isolators - If you need to swap out the seals on the door handles, this process will allow you to have more access. The door cam can be changed out at the same time. Locks can be rekeyed if needed and the door lock bushings replaced.
Window rollers, both the early and late have rollers that are replaceable.
The late doors have fuzzy strips that run vertical in the front and rear window guides, this is a good time to replace these too. The early door has rollers in the front track, the rear track has a plastic guide that runs up and down in the back track.
The door stay is easily reached with the door panel removed. You can replace the rollers, springs, and the strap easily. The unit has a pin that holds it to the body, and 2 -10mm bolts hold the unit in.
The fuzzy on the inside of the window can be replaced easily with the door panel off.
Lastly the door end caps can be replaced at this time also.
First off remove the door pockets, and plastic door handle cups. This will allow the door panel to be removed.
Attached thumbnail(s)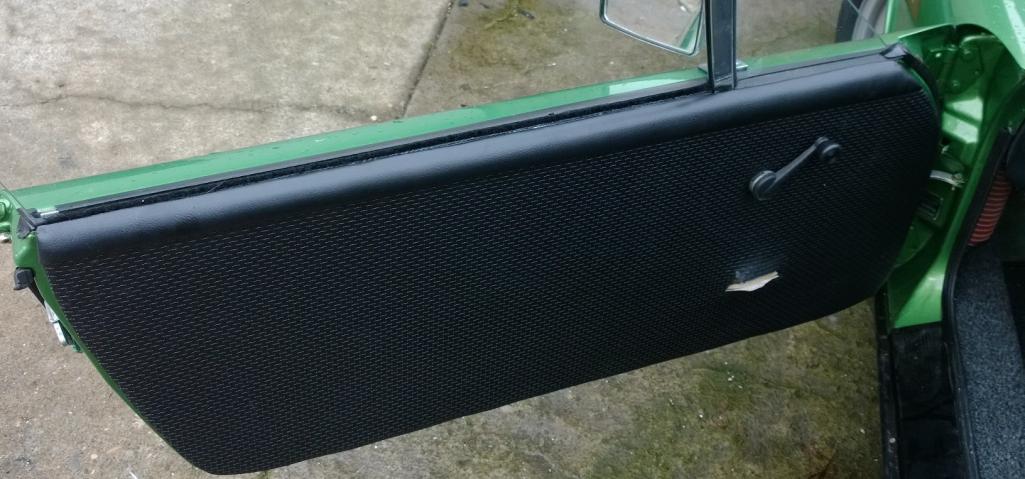
Posted by: Mikey914 Feb 17 2014, 12:36 AM
The door panel will remove easily by popping the door panel clips out of the door on the front rear and bottom. You can use a flat screwdriver and carefully pop them out one at a time. If you door panel is deteriorated you may want to use a clip removal tool, or a larger flat object. The panels will remove up as there are 3 clips on the top that hold the top of the panel in.
Attached thumbnail(s)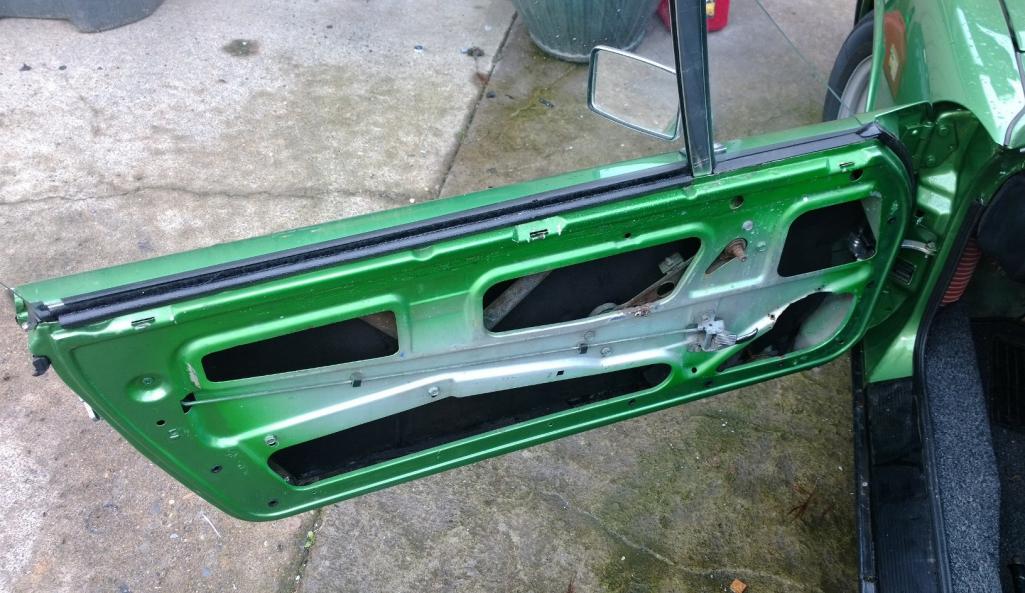
Posted by: Mikey914 Feb 17 2014, 12:39 AM
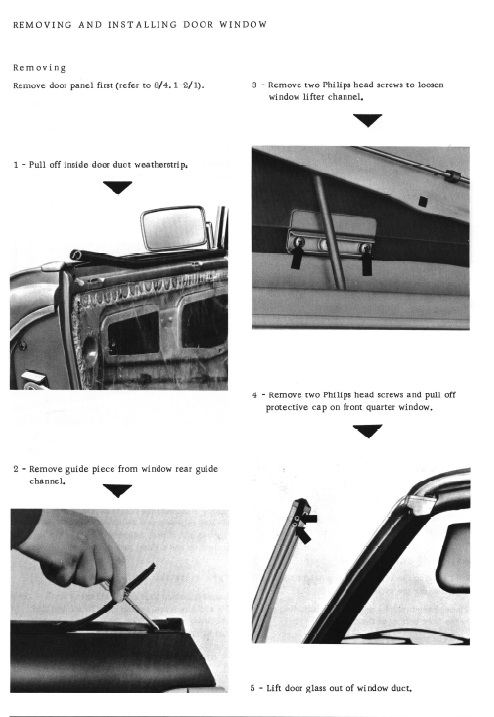
It's time to remove the window.
The 13mm socket with an extender will be what you need here.
Attached thumbnail(s)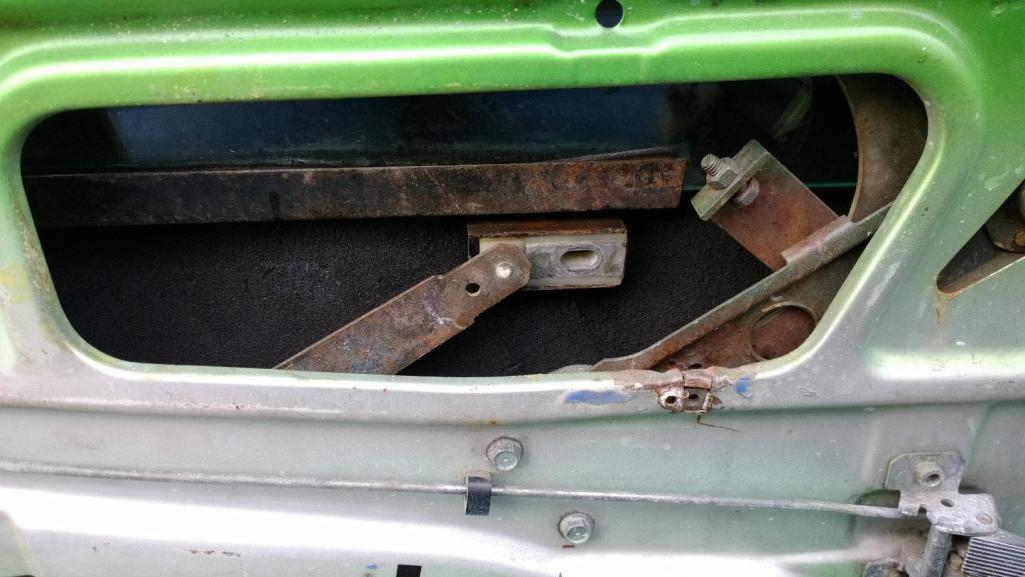
Posted by: Mikey914 Feb 17 2014, 12:44 AM
Remove the rear armature for the window scissor mechanism. Note that this is also used for adjustment.
Attached thumbnail(s)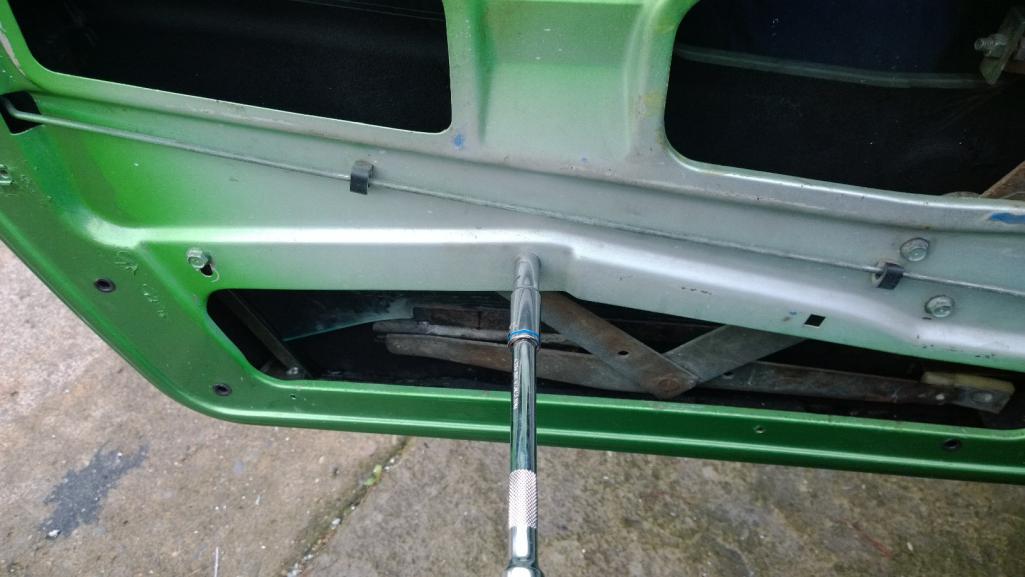
Posted by: Mikey914 Feb 17 2014, 12:49 AM
I found it easier to take the window mechanism loose. I did not remove it, but it allowed me to shift it around.
Attached thumbnail(s)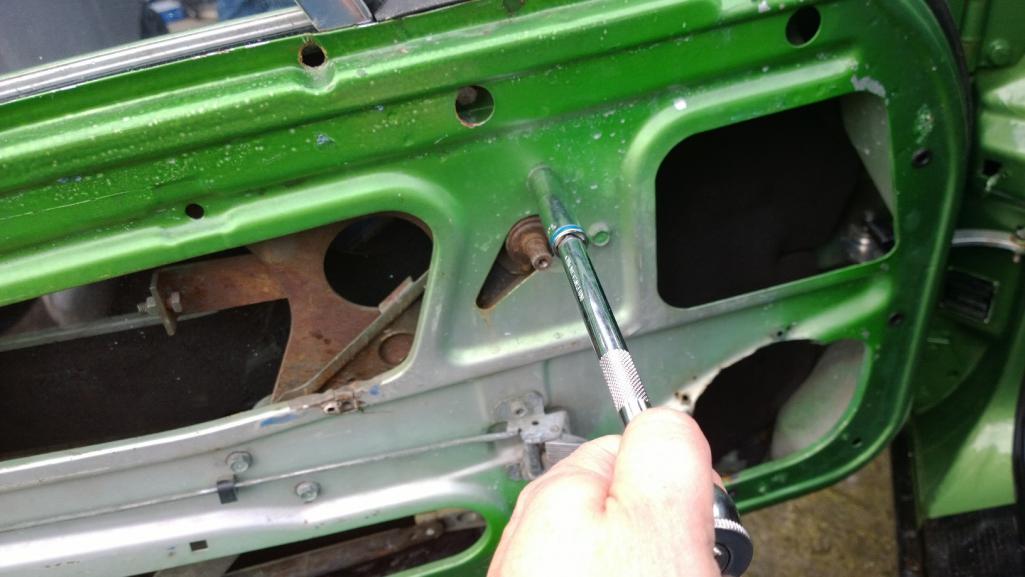
Posted by: Mikey914 Feb 17 2014, 12:53 AM
I then removed the rear track by taking the 2 screws out at the back rear part of the door.
Attached thumbnail(s)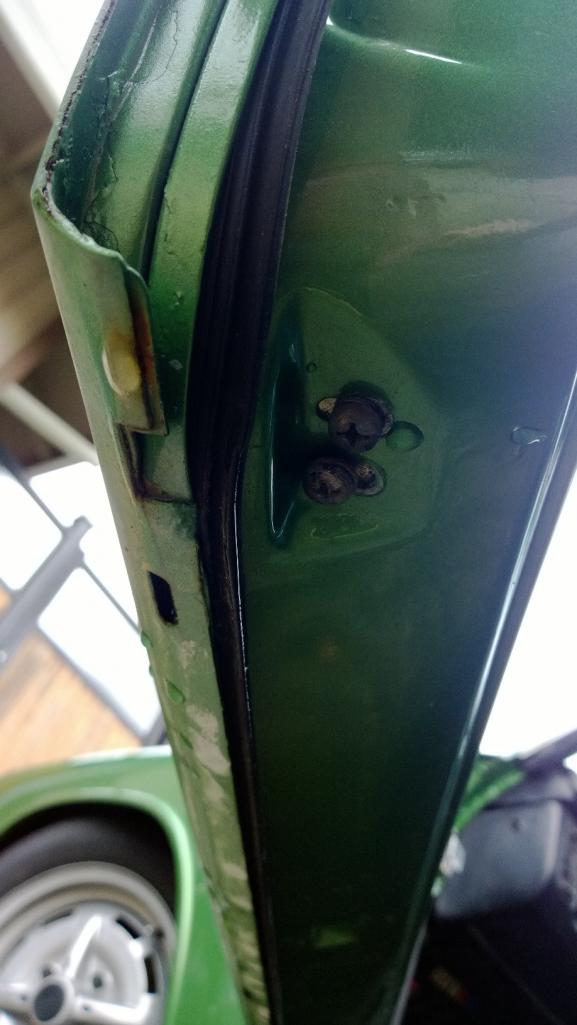
Posted by: Mikey914 Feb 17 2014, 12:58 AM
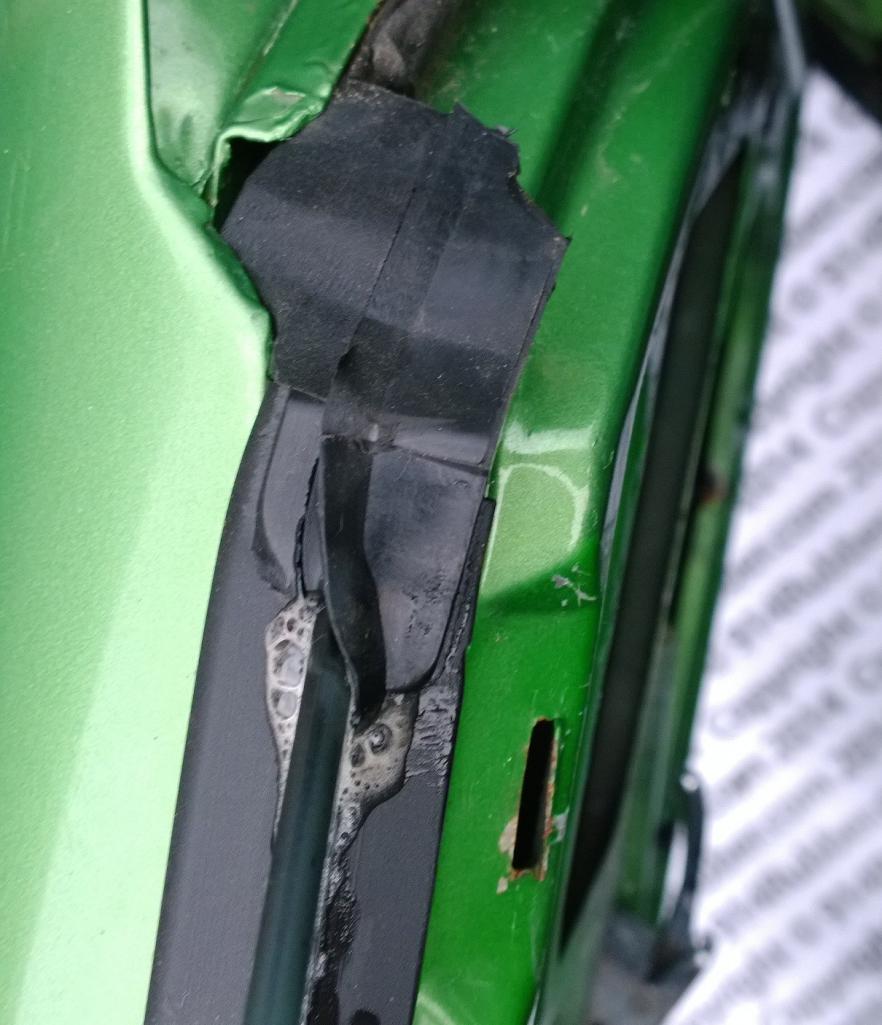
The rear door end cap will need to be removed. This also allows the rear track to be removed.
Shown below is the rear window track with the fuzzy installed.
Attached thumbnail(s)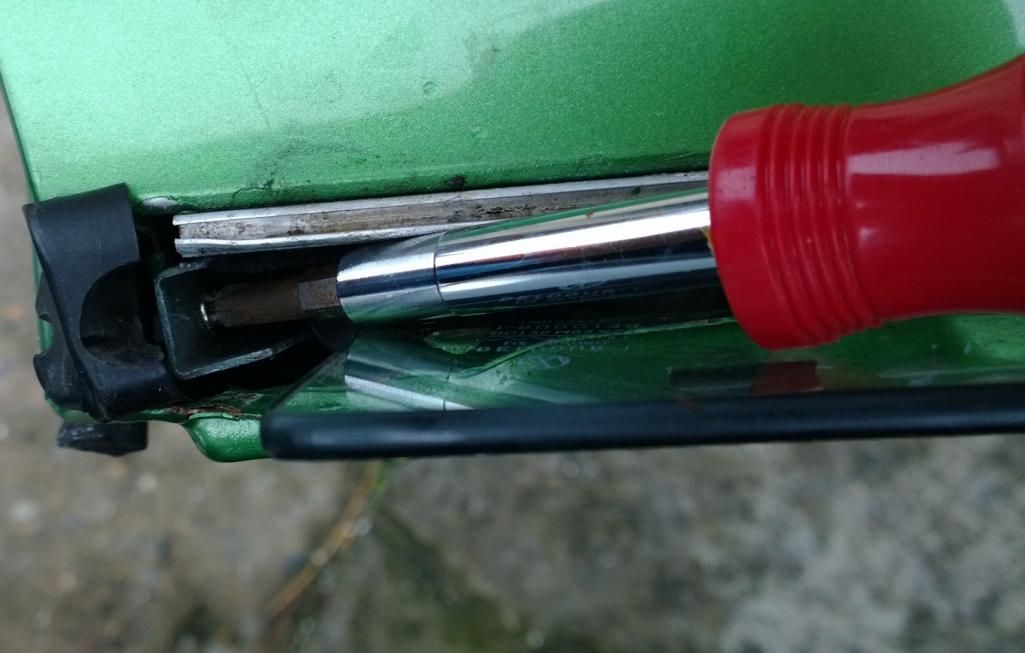
Posted by: Mikey914 Feb 17 2014, 01:05 AM
The window will remove by rotating the front down and pulling it out rear 1st.
You will find it helpful to remove the cap from the top of the window, the #2 Phillips will help.
Attached thumbnail(s)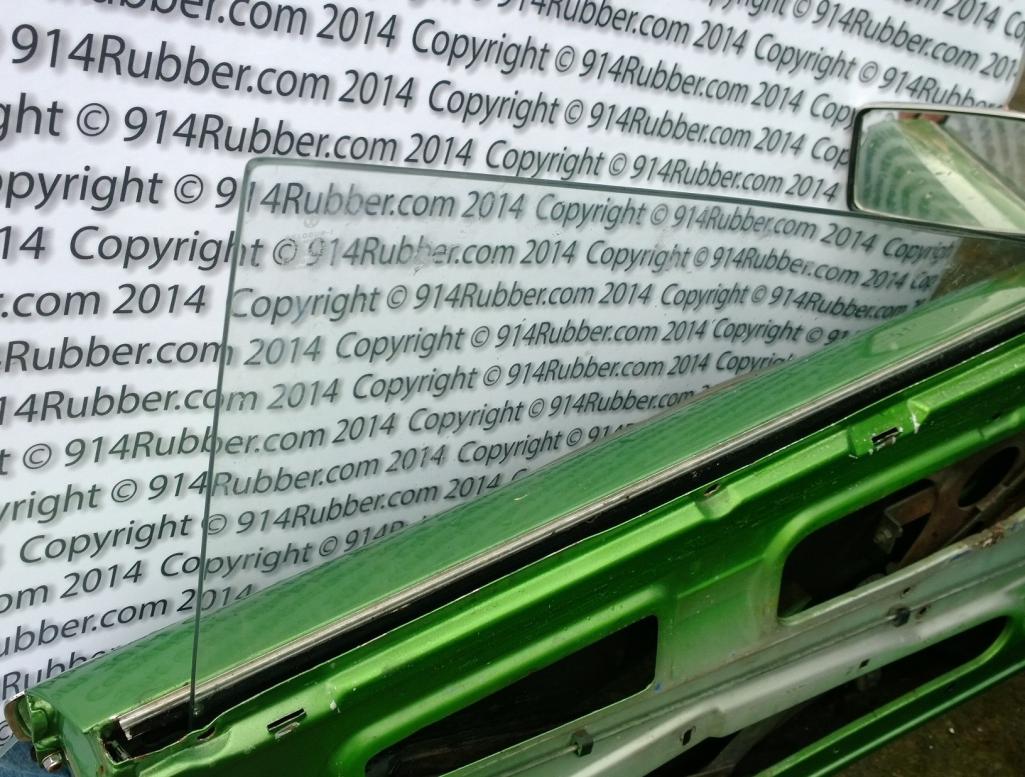
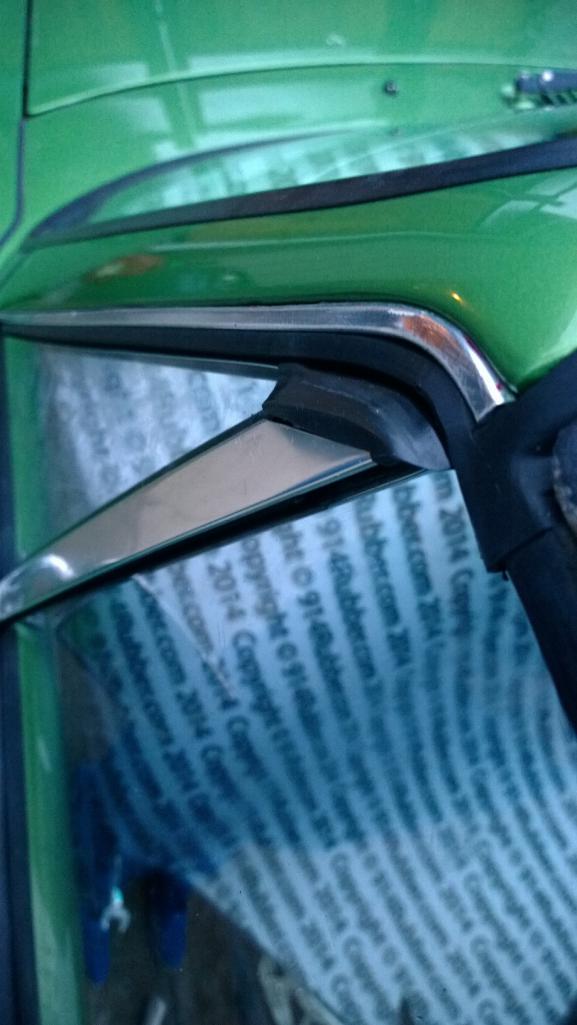
Posted by: Mikey914 Feb 17 2014, 01:18 AM
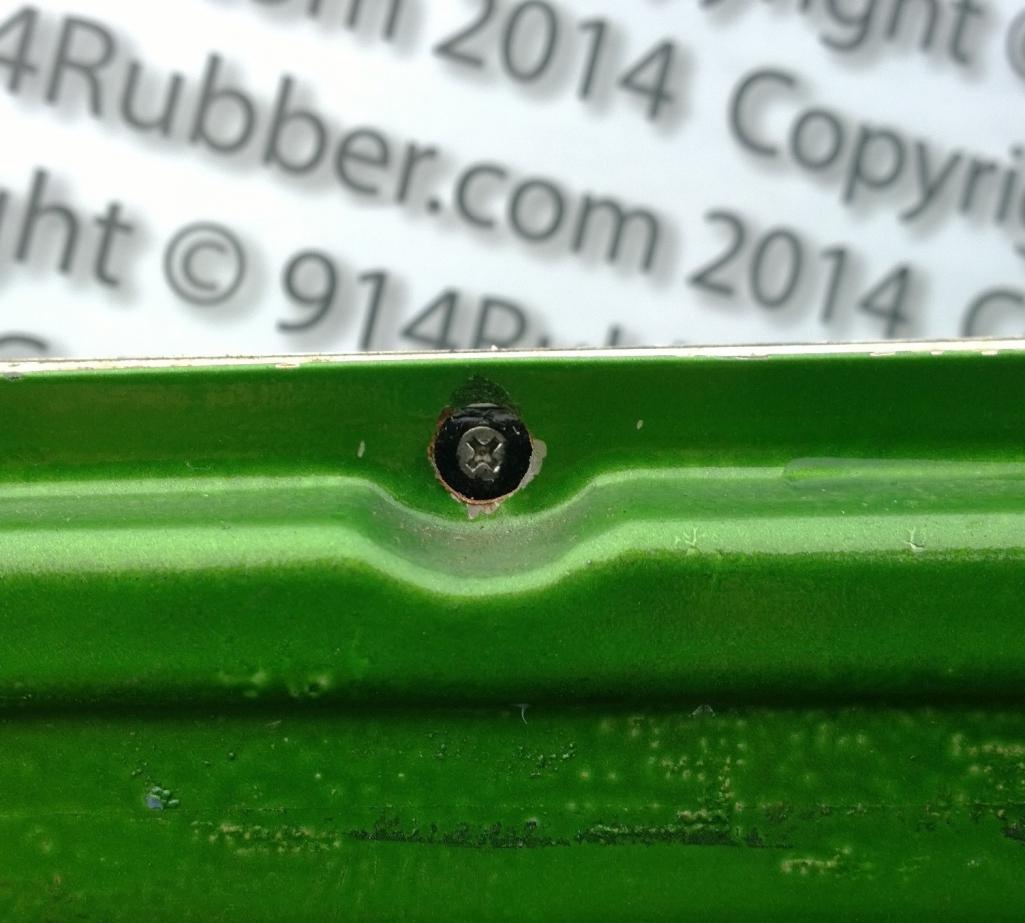
To remove the vertical bar you will need to remove the aluminum track that houses the outer door fuzzy. There are 3 screws with access holes to reach them. I provide stainless screws to replace these with my outer fuzzy set. They are a #6. You may need to drill out the old ones if they are rusted in. Go slowly you may be able to get all out without incident.
Aluminum track removed below
Attached thumbnail(s)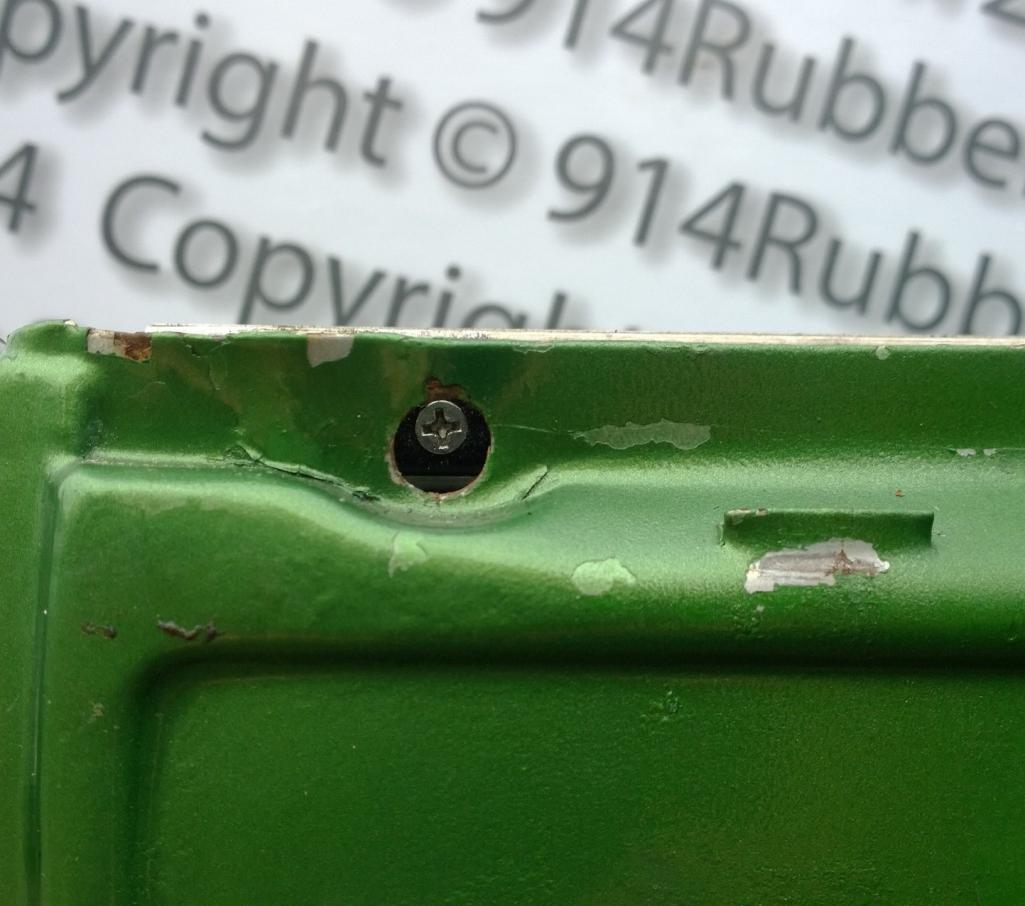
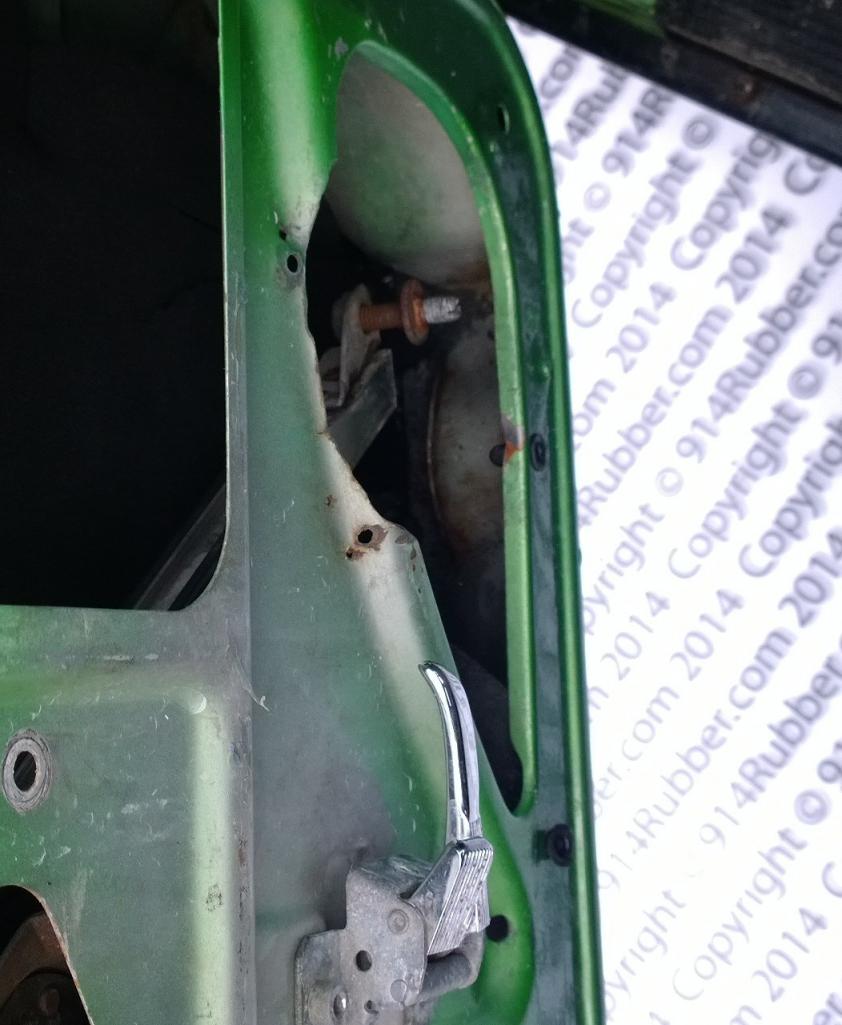
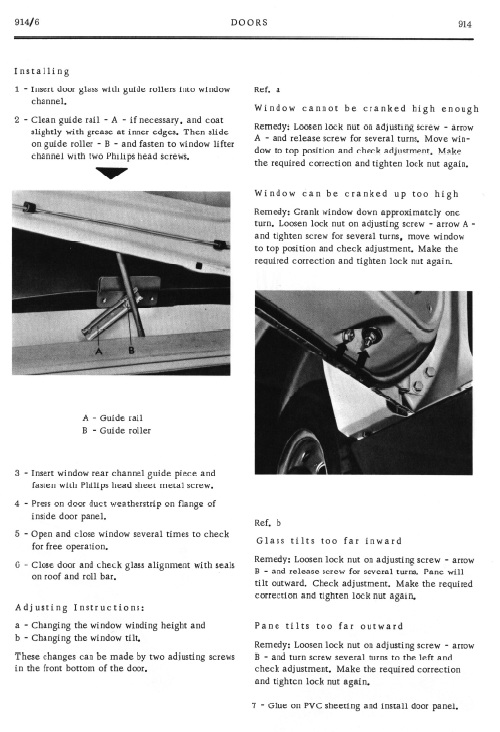
Posted by: Mikey914 Feb 17 2014, 01:33 AM
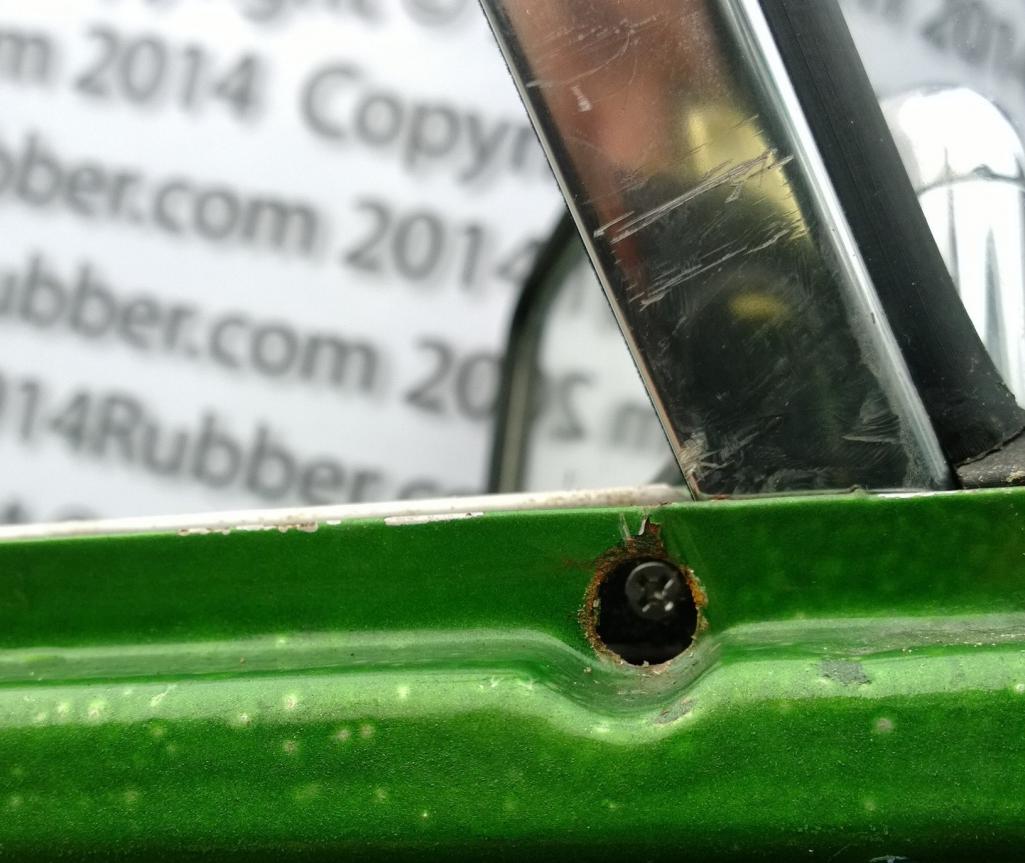
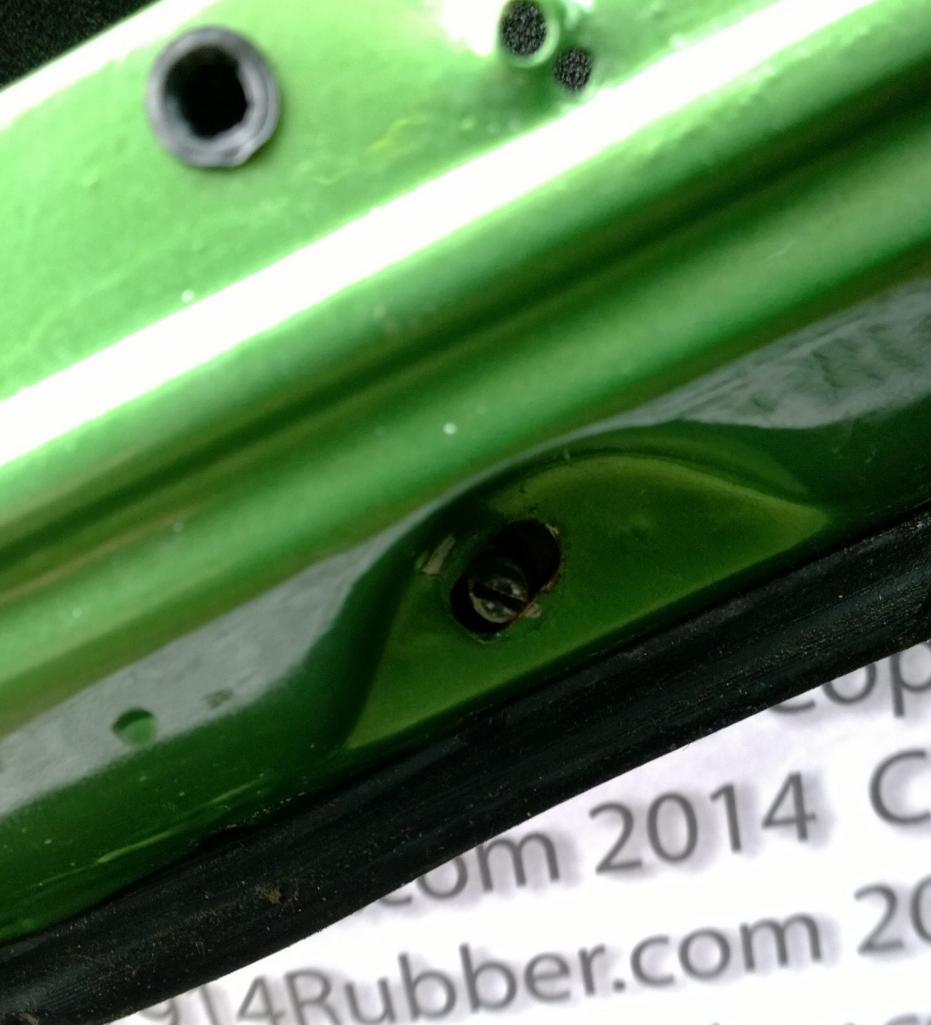
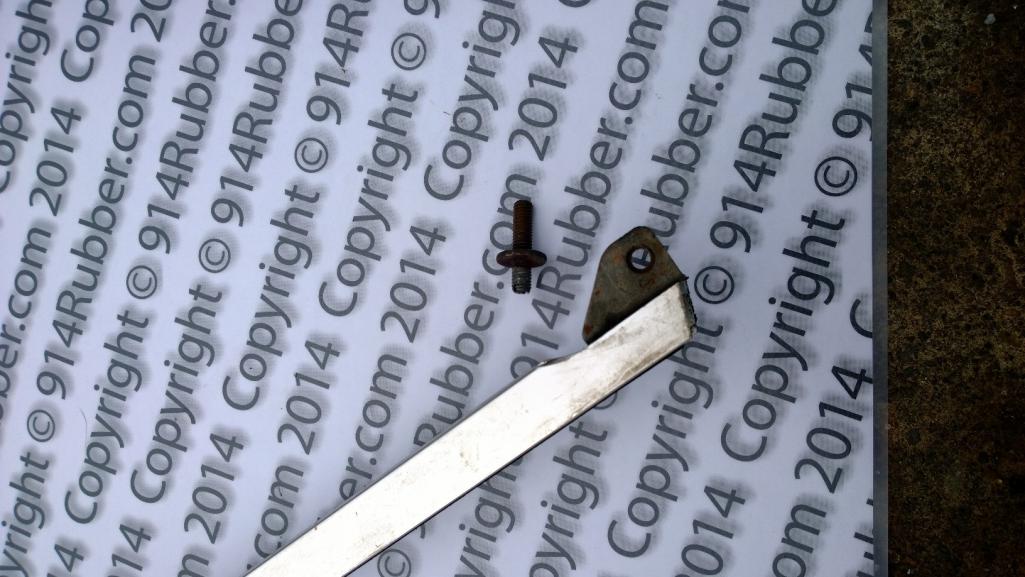
To remove the vertical bar you need to use a 10mm socket to take the bolt out from the center of the assembly. It is recessed in.
You will also need to use the 13mm box wrench to remove the nut on the bottom of the door. After the nut is removed screw the slotted bolt into the assembly. You will need to do this to get it out of the hole it's in. As soon as you get it out remove the screw completely to allow the entire assembly to come out.
Attached thumbnail(s)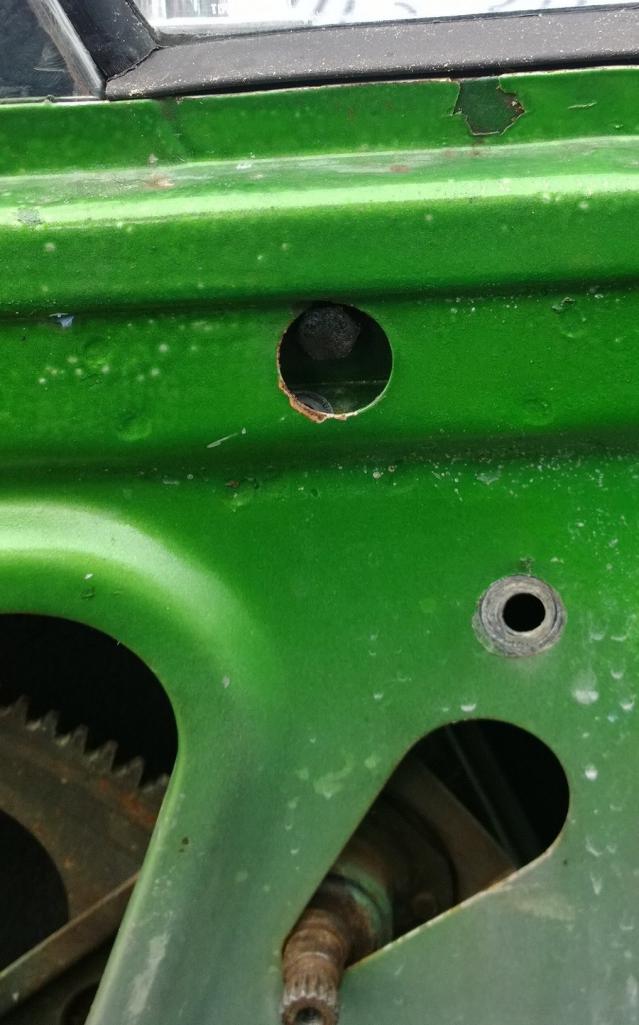
Posted by: Mikey914 Feb 17 2014, 01:44 AM
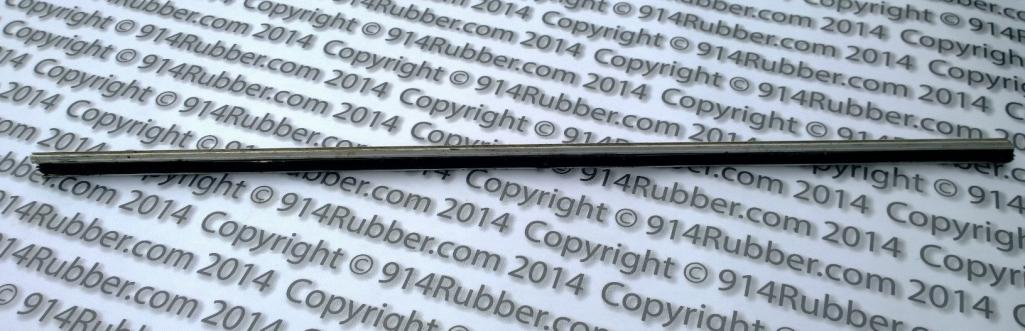
Get the new seal ready I use soapy water to slide the new seal into the track.
Shrink wrap it to hold in place. Be careful to only use where you will not have issues installing.
Attached thumbnail(s)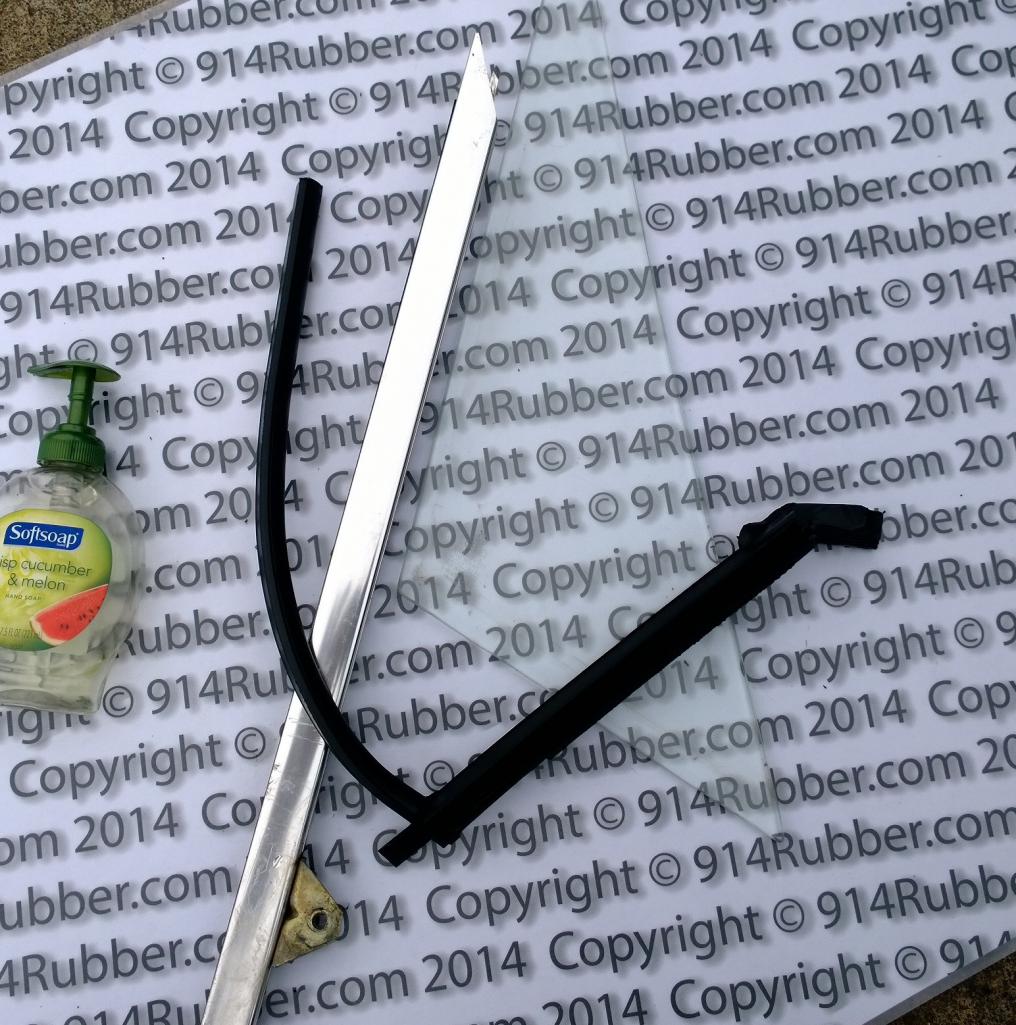

Posted by: Mikey914 Feb 17 2014, 01:49 AM
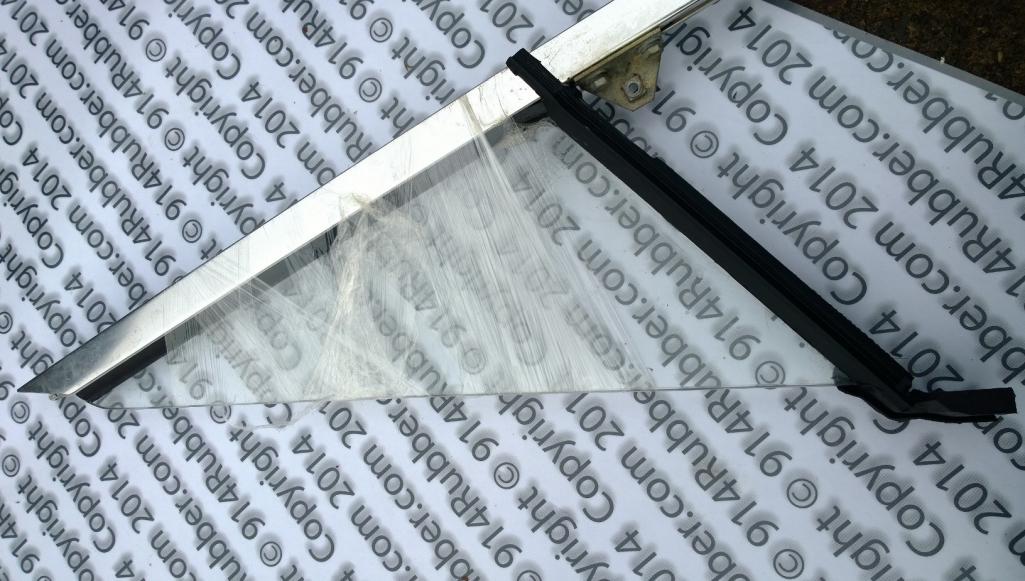
Install the base 1st. As soon as the bar is in, put the screw back in the base, just screw it all the way in to get adequate clearance.
Attached thumbnail(s)
Posted by: Mikey914 Feb 17 2014, 01:58 AM
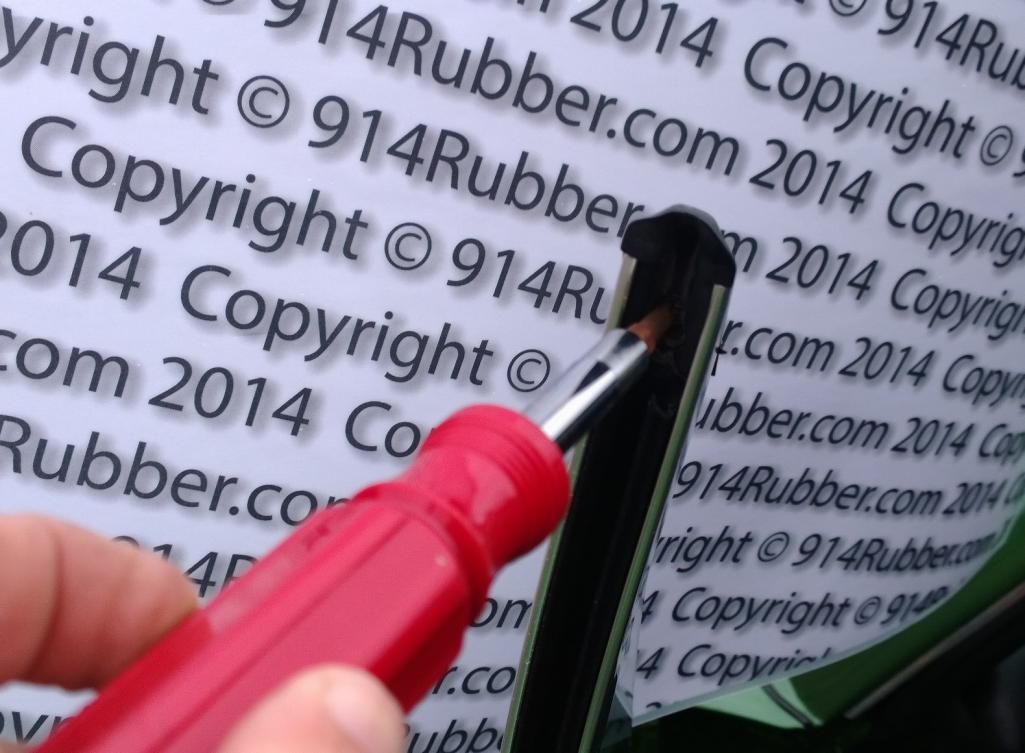
You will need to put the center bolt back in. Push it forward, and push the seal into place. I used a wood block to tap the seal into place.
The factory manual says you can glue the seal to the outer door seal, but mine popped into place after I played with it.
Attached thumbnail(s)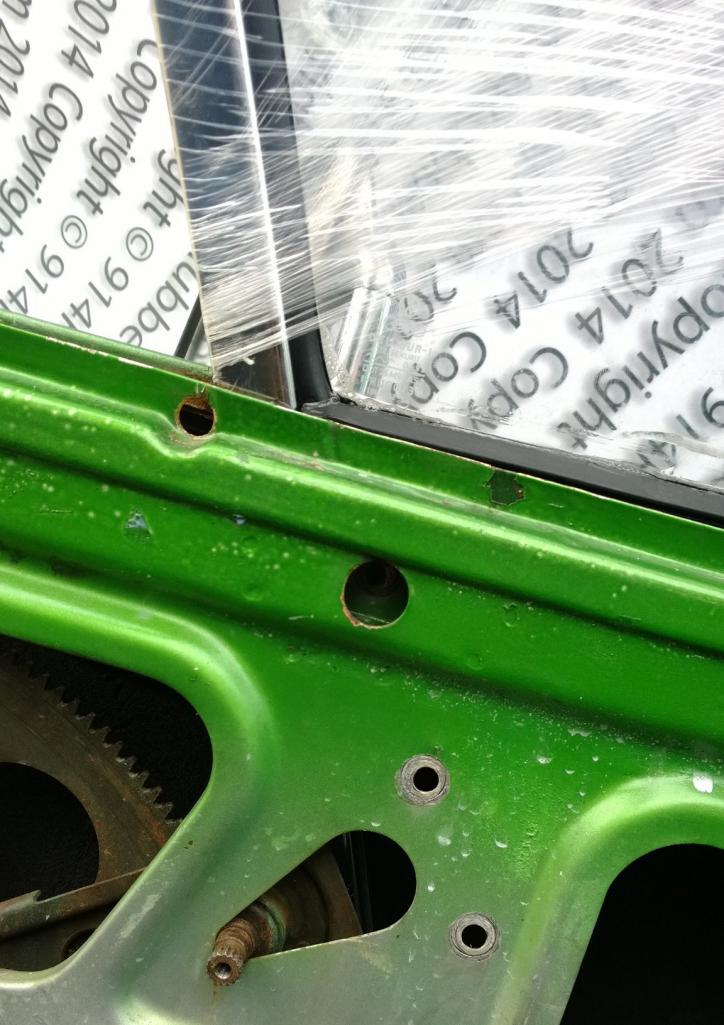
Posted by: Mikey914 Feb 17 2014, 02:05 AM
Re install the aluminum track with the outer fuzzy. It you are replacing the fuzzey you can drill through the holes in the track with 3/32" drill to allow the screws to go through and hold the track and fuzzy.
Attached thumbnail(s)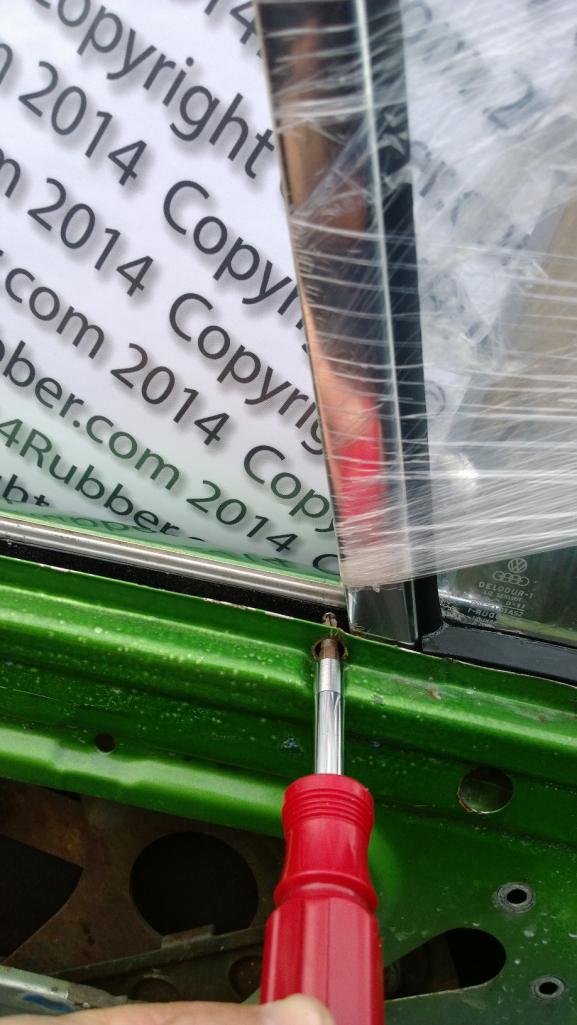
Posted by: Mikey914 Feb 17 2014, 02:16 AM
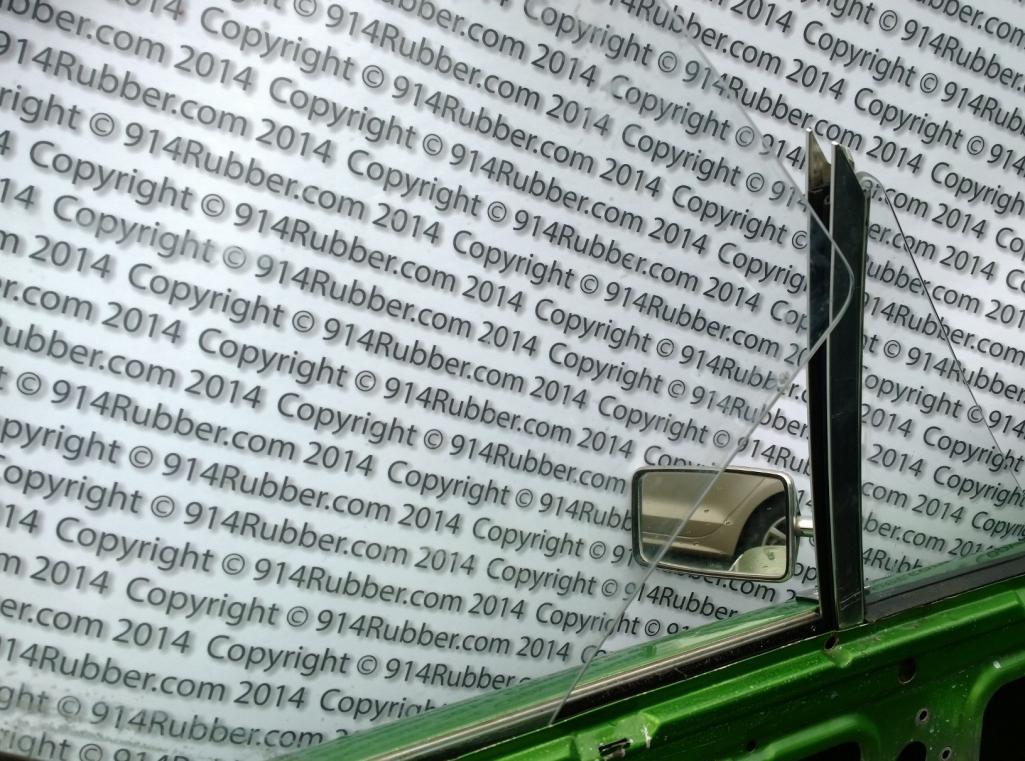
You can then install the glass the rear track is still out and the window mechanism is down so the window will be down when installed.
Attached thumbnail(s)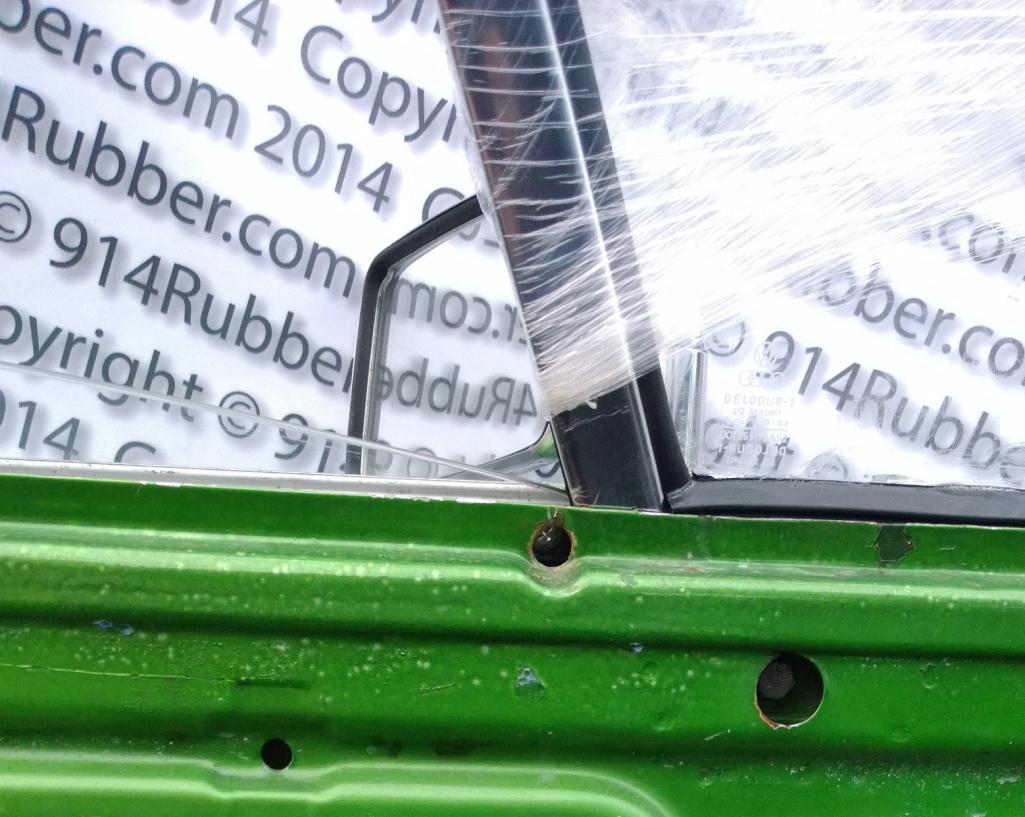
Posted by: Mikey914 Feb 17 2014, 02:25 AM
You will need to re install the 13mm bolt into the base of the window mechanism. This is the one you removed earlier.
Also reattach the mechanism to the door. You will have to move it around to make it fit.
Attached thumbnail(s)
Posted by: Mikey914 Feb 17 2014, 02:30 AM
Roll the window up so that you can get he rear track back in. You will be able to get the base in, and you will have to get the top edge in by pulling the glass forward and up. Attach the base screws loosely so you can easily adjust. I chose to replace the fuzzy.
Attached thumbnail(s)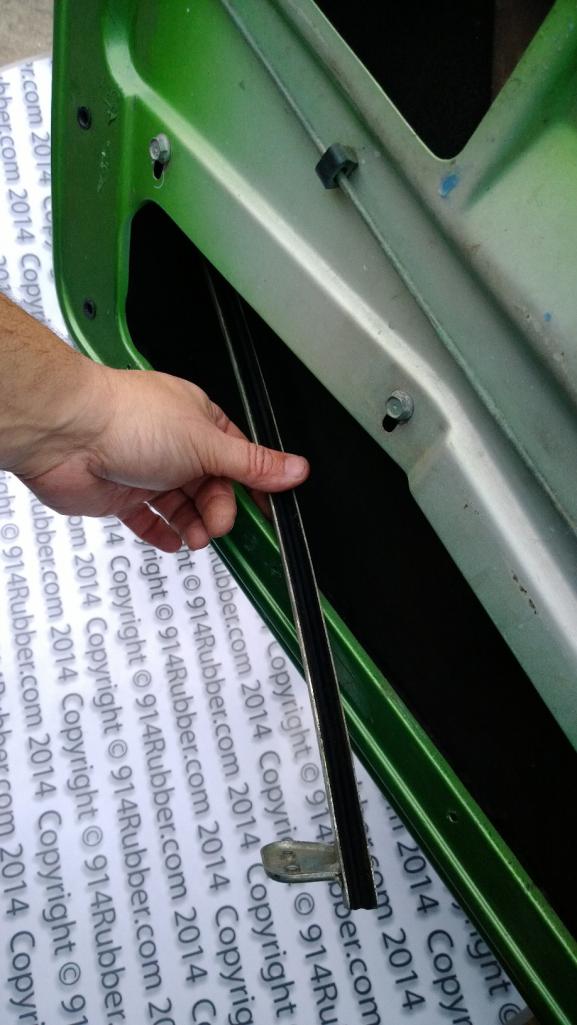
Posted by: Mikey914 Feb 17 2014, 02:35 AM
After this has been put in place you roll down the window, pull back the back of the seal and install the end cap between the track and the back of the door.
Attached thumbnail(s)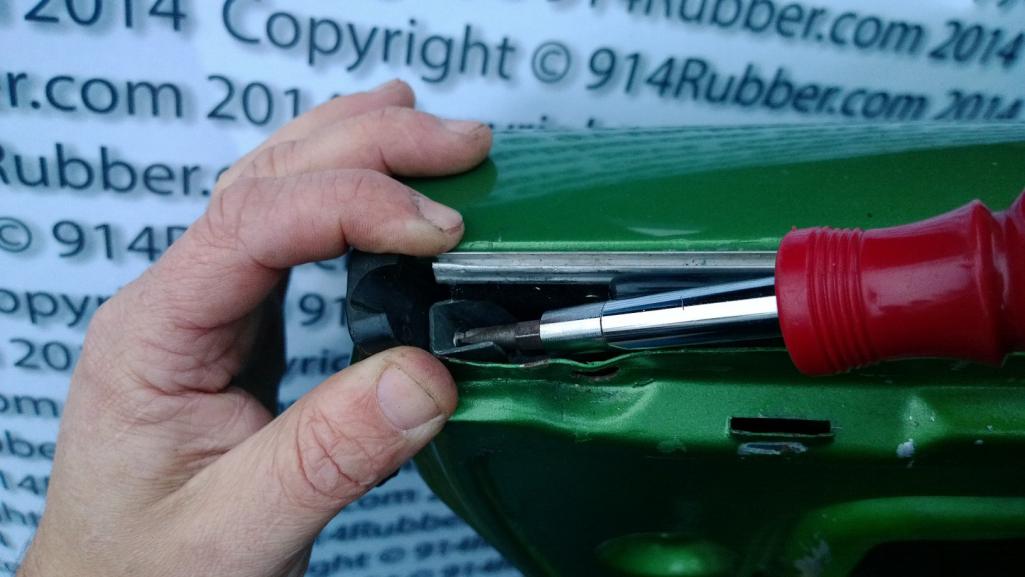
Posted by: Mikey914 Feb 17 2014, 02:41 AM
You can install the outer scraper, cut to fit. You will also need to adjust the top of the window using the base screw, and the slots for variation in the door screw areas.
Attached thumbnail(s)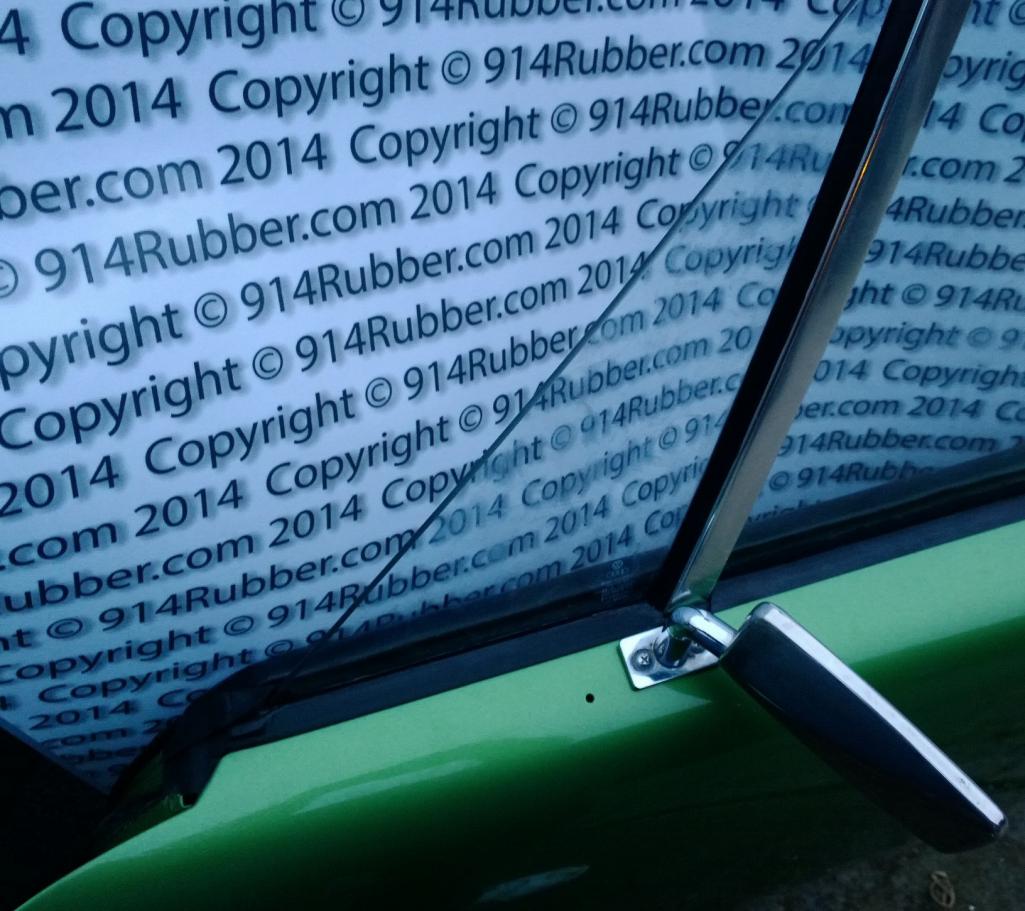
Posted by: Mikey914 Feb 17 2014, 02:43 AM
You can then install the inner door fuzzy and the door panel
Posted by: Mikey914 Feb 17 2014, 02:58 AM
The OEM version. I think my technique was easier, you can be the judge.
Attached image(s)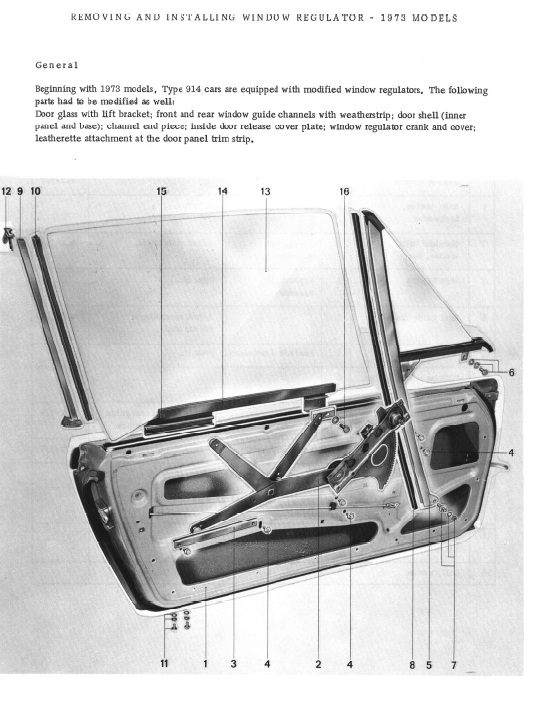
Posted by: Mikey914 Feb 17 2014, 03:01 AM
The early version door
Attached image(s)
Posted by: CptTripps Feb 17 2014, 08:18 AM
::: Can I comment yet? :::
Frickin' awesome.
Thanks for a great thread!
Posted by: Mikey914 Feb 17 2014, 08:36 AM

::: Can I comment yet? :::
Frickin' awesome.
Thanks for a great thread!
Yes, I just wanted to group it all together. This is not too difficult, just be patient and take your time. Fitting the seal in and the rear track take some playig with to get them right. Other than that it just takes time.
You more than likely will have to play with the adjustments to seat the window correctly.
Posted by: CptTripps Feb 17 2014, 11:08 AM
I def need the internal fuzzy track. I have the one for up-top, but the tracks would be a good idea for me to replace while I'm in there.
Posted by: t collins Feb 17 2014, 11:31 AM
I nominate for the classic thread 
Posted by: D1A3 Feb 17 2014, 02:28 PM

Ditto that. I've been meaning to dig around to get the window adjustment steps for a while, but now you have just put it all together in one place for us! AWESOME!!!
Posted by: abnrdo Feb 17 2014, 02:31 PM
I have to do this soon. Great post and I love the color of your car!! 
Posted by: larryg Feb 17 2014, 09:03 PM
Great stuff Mike and timing is perfect as I'm replacing fuzzies and vent windows right now. Larry
Posted by: Mblizzard Feb 17 2014, 09:40 PM
I did not follow that. Can you come install mine? Just kidding. Great instructions. But will have to order a few more parts.
Posted by: Mikey914 Feb 17 2014, 10:56 PM
Thanks guys, figured that if I sell the parts I should give you enough info to install them.
mark
Posted by: eyecolor Feb 18 2014, 08:45 PM
You can then install the inner door fuzzy and the door panel
Fantastic Mark
Thanks
How do you attach the rubber scraper after you have the rolling window re-inserted ?
I've been trying to get the window in afterwards since I couldn't get it to slide though the gap space in the aluminum top.
George O.
Posted by: Mikey914 Feb 19 2014, 12:35 AM
You can then install the inner door fuzzy and the door panel
Fantastic Mark
Thanks
How do you attach the rubber scraper after you have the rolling window re-inserted ?
I've been trying to get the window in afterwards since I couldn't get it to slide though the gap space in the aluminum top.
George O.
I can only speak for the late, but the key is getting the window regulator out of the way so you can maneuver the window. Also you can't get it in with the rear track in.
if its a late just follow the order above.
Posted by: rudedude Apr 16 2014, 05:28 PM
Mark,
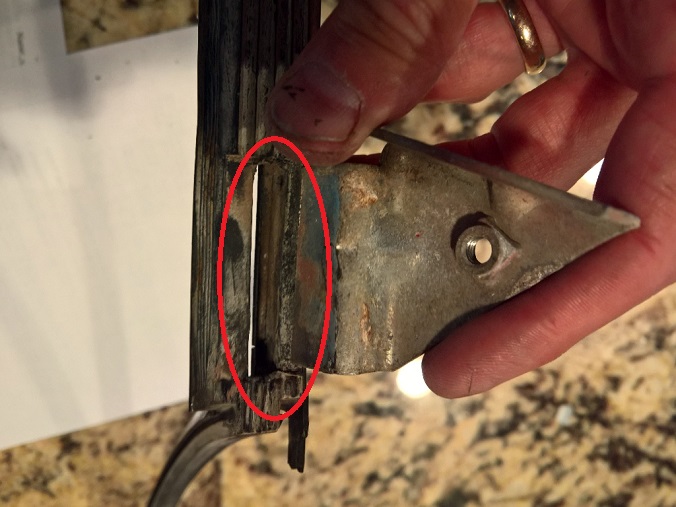
On the early style door the triangle seal has a piece that projects through the seal at the base of the triangle window. It appears the later style window doesn't have the same piece. Is it best to cut through the seal or remove the metal piece on the window frame to fit the seal?
Thanks,
Jule
Posted by: Mikey914 Apr 16 2014, 11:32 PM
I don't have an early car. The part number is the same for all years so that should indicate the seal can be used for both. I know there are differences in that area, but I'm thinking that modification of the seal would not be required.
Any early guys want to provide some input?
Posted by: 914werke Apr 17 2014, 07:47 AM
Ive found that support on later doors as well.
Ive tried to avoid the early door due to wonky regulator.
The 10mm bolt access hole seems to exist on all door frames but the nut plate/brkt. may or may not exist depending on dr.
I have a picture somewhere
Posted by: horizontally-opposed Sep 4 2015, 04:01 PM
Seconding the motion to make this thread a classic, if for no other reason than I'm in the middle of this and it's SUPER helpful—and it was harder than usual to dig up via search.
Thanks, Mikey!!
Posted by: Mikey914 Sep 4 2015, 07:56 PM
Thanks guys.
Posted by: BeatNavy Jun 11 2016, 04:24 PM
Mark,
On the early style door the triangle seal has a piece that projects through the seal at the base of the triangle window. It appears the later style window doesn't have the same piece. Is it best to cut through the seal or remove the metal piece on the window frame to fit the seal?
Thanks,
Jule
Sorry, bumping an old thread as I'm trying to install the triangle seal this weekend, and I just ran into the same basic issue Jule describes above. I have a '72 door, and the seal seems to have a slit at the front and back in the channel where the metal tabs that mount it to the door fit though (sorry, terribly worded sentence).
Before I cut into my beautiful, brand new, fairly expensive 914Rubber seal, to create those slits, has anyone done anything different? If I do that I guess I'd put some sort of adhesive in the channel to seal those slits back up after getting the metal tab in up front and at the base.
Posted by: Mikey914 Jun 11 2016, 07:23 PM
You can cut a relief in the back of the seal or remove the metal bracket. Mine are a replica of the ones currently available OEM.
Posted by: BeatNavy Jun 12 2016, 04:26 PM
You can cut a relief in the back of the seal or remove the metal bracket. Mine are a replica of the ones currently available OEM.
Thanks, Mark. Spent several frustrating hours today working on this. I initially tried to cut a relief and push the tab through the slit I made, but that didn't work particularly well. I managed to get the passenger side on, but I'm not happy with how it turned out.
On the driver's side I just removed the metal brackets and installed that way. It was easier to install and turned out better, I think. Time will tell if removing those tabs will cause any issues in terms of window stability. I think I'll go back and re-do the passenger side and just use adhesive to seal up the slit I cut in the seal. Anyone with an early car should probably just remove those tabs before installing the triangle seals. These seals are very well made, and I recommend them (like all 914Rubber solutions). But just know that you'll probably have to remove the two tabs when installing these.
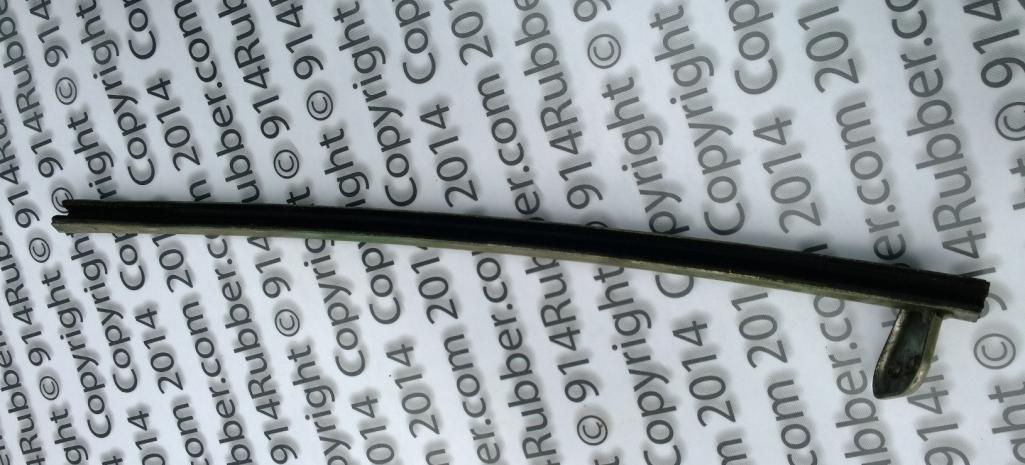
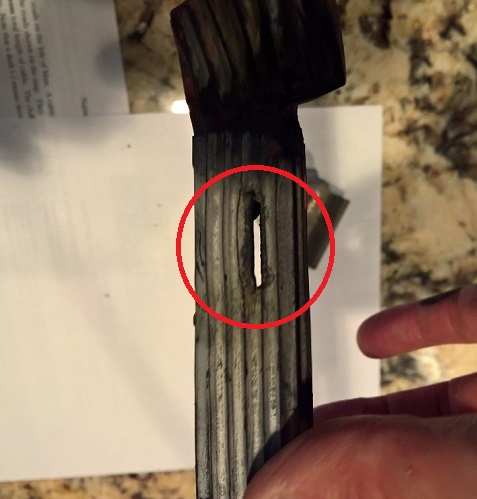
FWIW, here's a picture of the early seal with the tab that inserts into the seal. The bottom picture is the front seal relief. If you want these old seals for reference, Mark, I'll gladly send them to you, but I'm not sure you want more tooling costs

Posted by: roland914 Jul 13 2018, 12:32 AM
Thanks guys for your input, Was trying to do the vent window with the window regulator and glass in its proper location, will loosen them up and try the ways suggested. Appreciate the prompt response and help....THANKS so much!!
Posted by: Mikey914 Jul 13 2018, 09:37 AM
You can cut a relief in the back of the seal or remove the metal bracket. Mine are a replica of the ones currently available OEM.
Thanks, Mark. Spent several frustrating hours today working on this. I initially tried to cut a relief and push the tab through the slit I made, but that didn't work particularly well. I managed to get the passenger side on, but I'm not happy with how it turned out.
On the driver's side I just removed the metal brackets and installed that way. It was easier to install and turned out better, I think. Time will tell if removing those tabs will cause any issues in terms of window stability. I think I'll go back and re-do the passenger side and just use adhesive to seal up the slit I cut in the seal. Anyone with an early car should probably just remove those tabs before installing the triangle seals. These seals are very well made, and I recommend them (like all 914Rubber solutions). But just know that you'll probably have to remove the two tabs when installing these.
FWIW, here's a picture of the early seal with the tab that inserts into the seal. The bottom picture is the front seal relief. If you want these old seals for reference, Mark, I'll gladly send them to you, but I'm not sure you want more tooling costs
I do realize that the rubber that hold the window in can be quite frustrating to install. Matt is finishing up the video for the install on these and he speaks specifically about this area and how and why you should modify this area. Sorry we have not got that together yet but it will be very clear as you can see how it promotes rust. I think this may be why they eliminated it in the later years.
Mark
Posted by: roland914 Jul 17 2018, 01:00 AM
Up date Guys, took the window regulator, door glass and rear vertical track and worked with the vertical triangle bar and glass with the new rubber together as it was pictured in these posts and got the triangle glass in snug as a bug in the forward part of the door first. Then worked with the regulator, door glass, and rails, in wrapping it up. The Saran wrap trick in holding the glass to the vertical post with the rubber was a good idea, was using rubber bands and that did not work as the rubber bands kept sliding towards the shallow end of the triange. Got the drivers side done, passenger side next to tackle.
THANKS for all your help and input!!! When I get this together will post some picturs, as this is on my bucket list!
Powered by Invision Power Board (http://www.invisionboard.com)
© Invision Power Services (http://www.invisionpower.com)