Printable Version of Topic
Click here to view this topic in its original format
914World.com _ 914World Garage _ Qarl's NEW 914-6-GT Street Car Conversion Thread
Posted by: Qarl Mar 14 2014, 10:16 PM
A continuation of the original thread...
http://www.914world.com/bbs2/index.php?showtopic=3634&hl=
2014 Progress Thread...
Figure I'd post some pics...
In between I've been sorting out the body... basically marking up problems with a sharpie and noting all my issues for the new body guy.
I've been mock fitting some fiberglass rocker panels and valences. Drilling holes for oil lines in driver's rocker area. I also fitted the front oil cooler shroud.
Today I had to do some fitment of the Engman inner longs. I had to punch holes for the Rich Johnson Engine mount through-bolts that are inside the tub... and trim some areas that were a little tight, etc.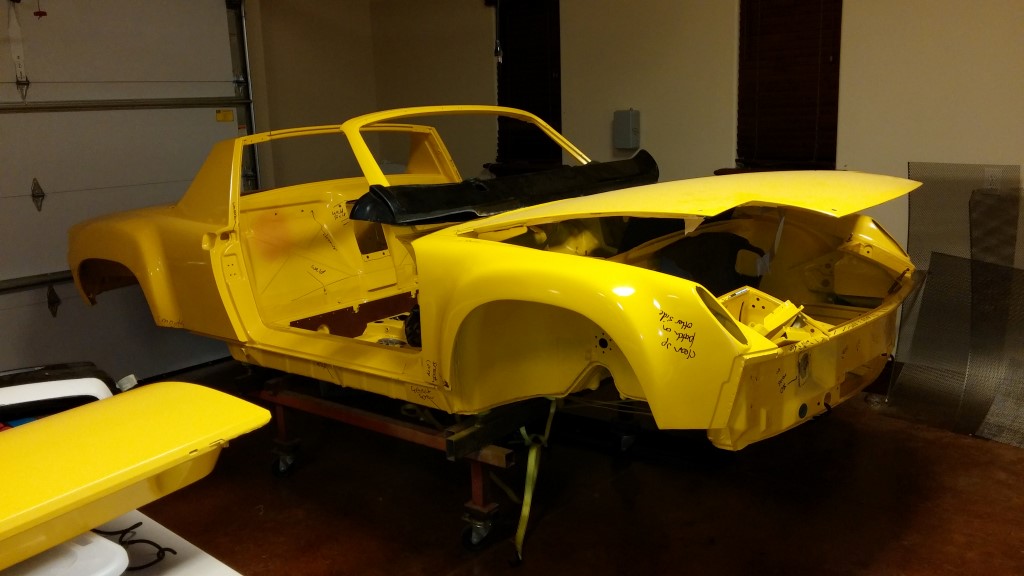
Here are doors, bumpers and Engman inner long stiffening kits. 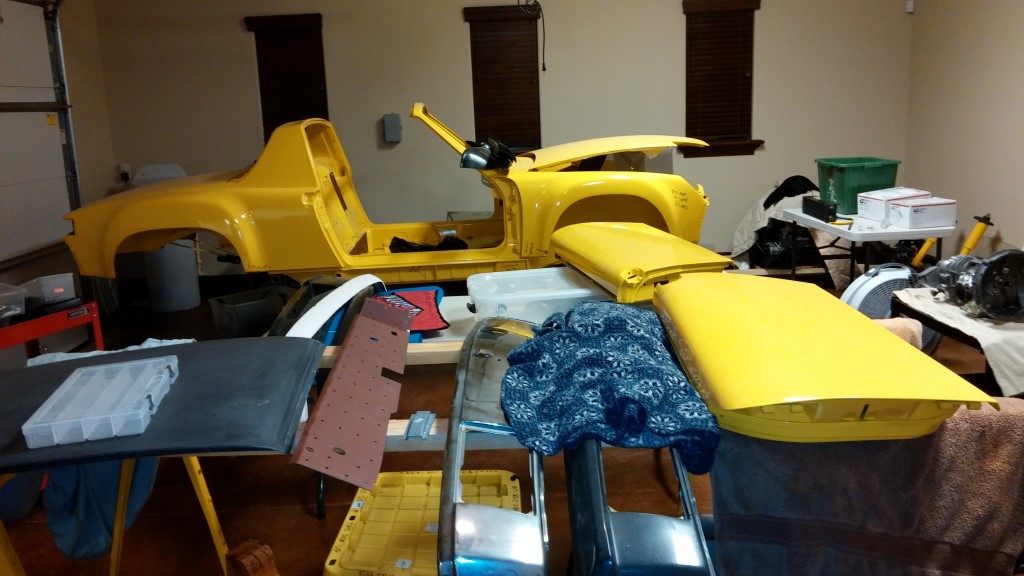
I admired Dr. Evil's Tranny work...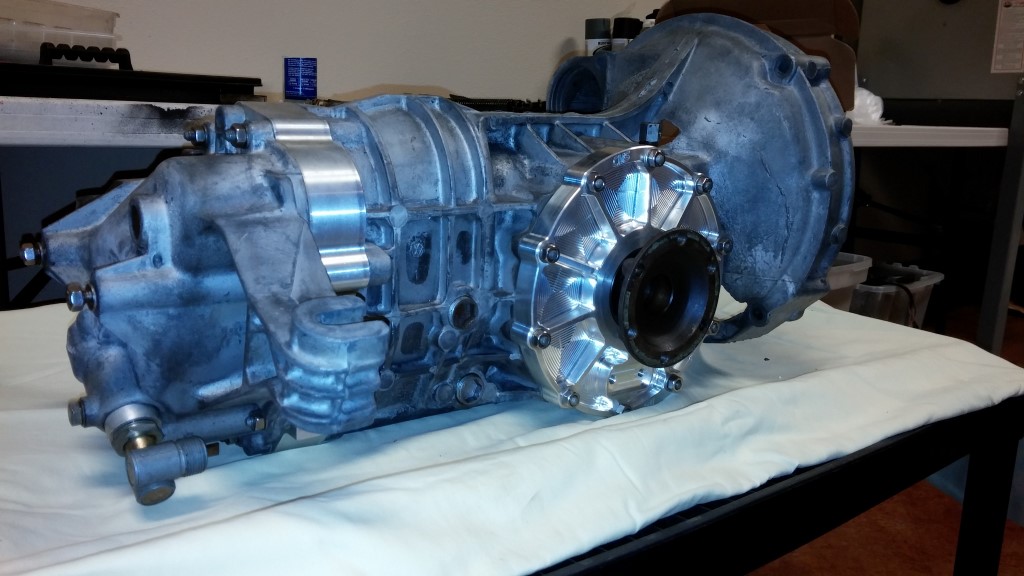
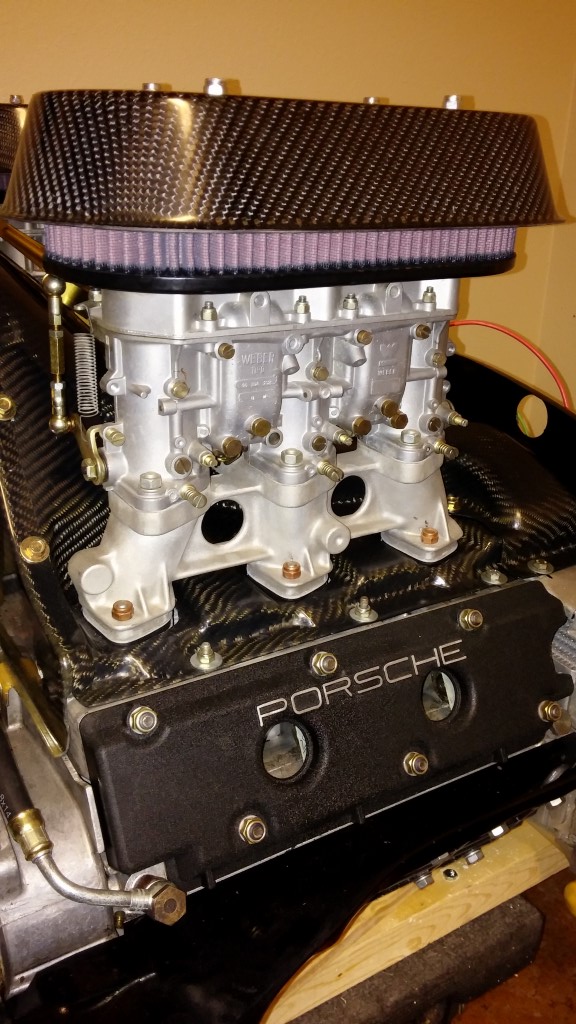
Dusted off the 3.2L Short Stroke, with 98mm P&Cs, modified S-cams, 46mm Webers, and a bunch of internal goodies...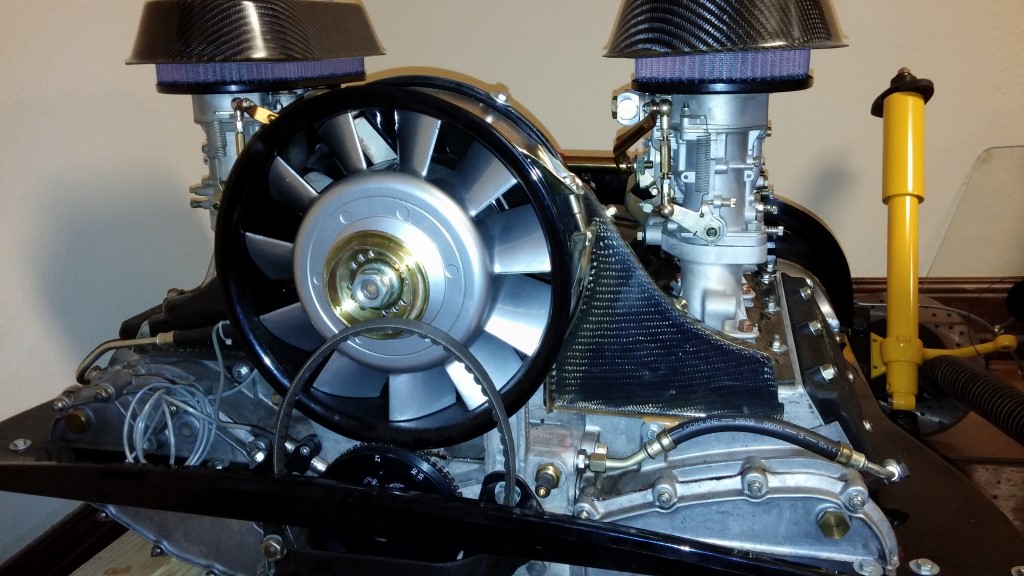
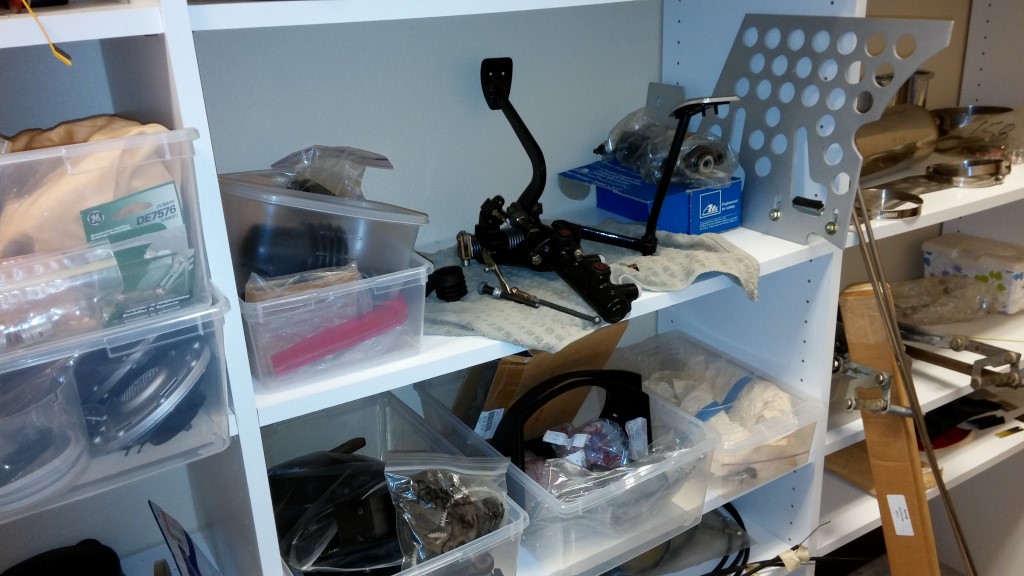
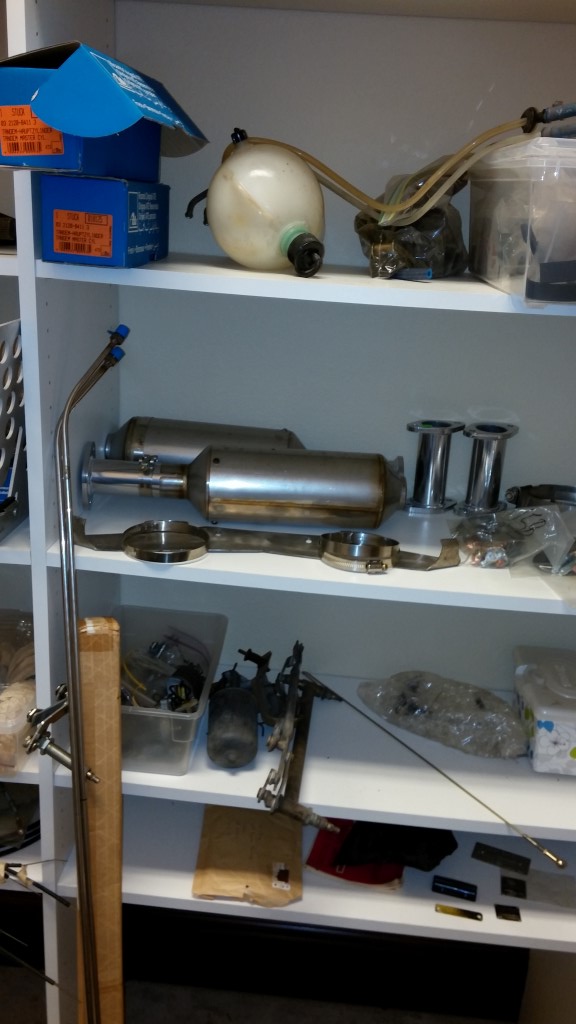
A new "Lost Warehouse" discovered... Almost everything refurbished or new.
I've spent 3-4 days sorting through ALL the parts. Placing things in bins by body area (brakes, transmission, electrical, trim, interior, oil, fuel, etc.)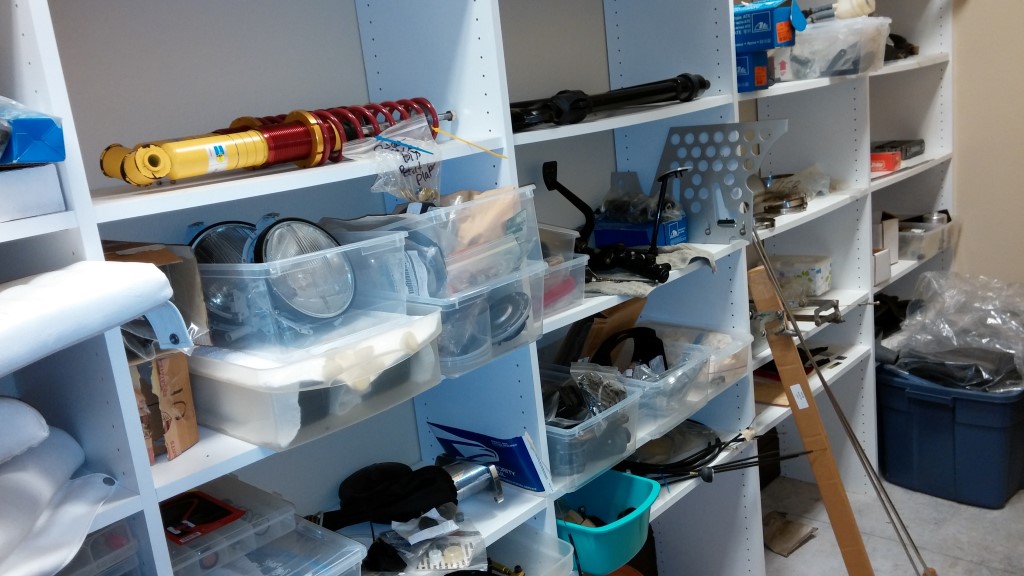
Posted by: biosurfer1 Mar 14 2014, 10:27 PM
You've had THAT engine sitting in your garage for years?!?! That thing is motivation enough!
Good luck Karl! 
Posted by: speed metal army Mar 14 2014, 10:40 PM
Nice stuff! I love new goodies. 
Posted by: Qarl Mar 14 2014, 10:55 PM
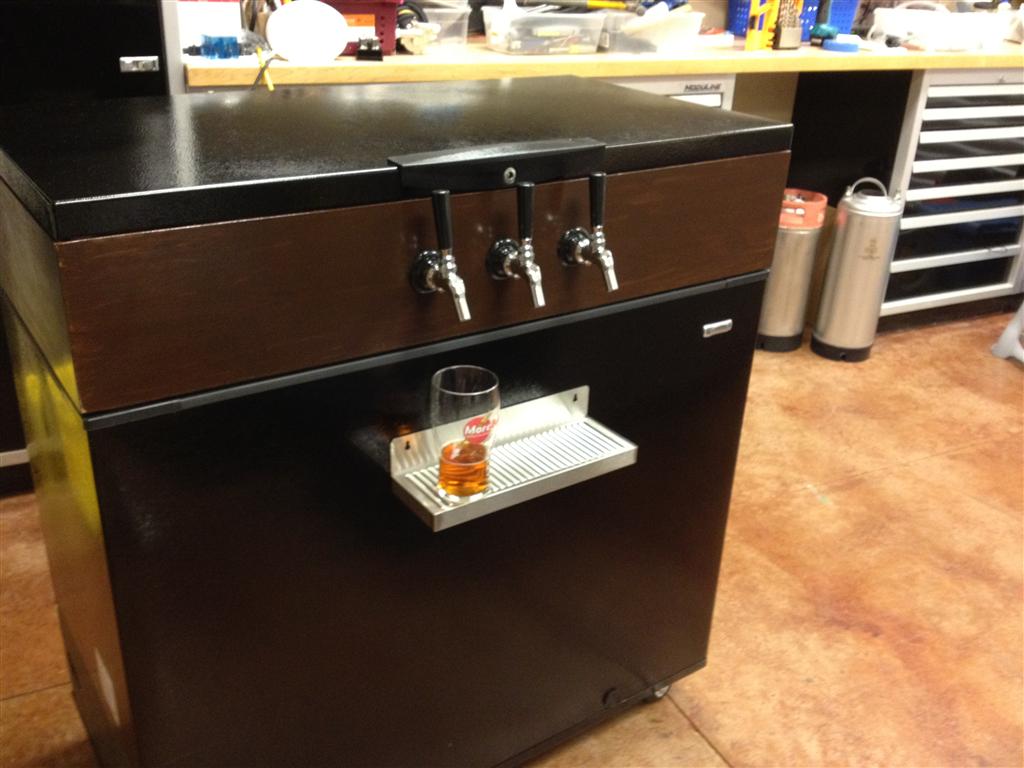
I almost forgot one of the added benefits of the new garage!
Free flowing BEER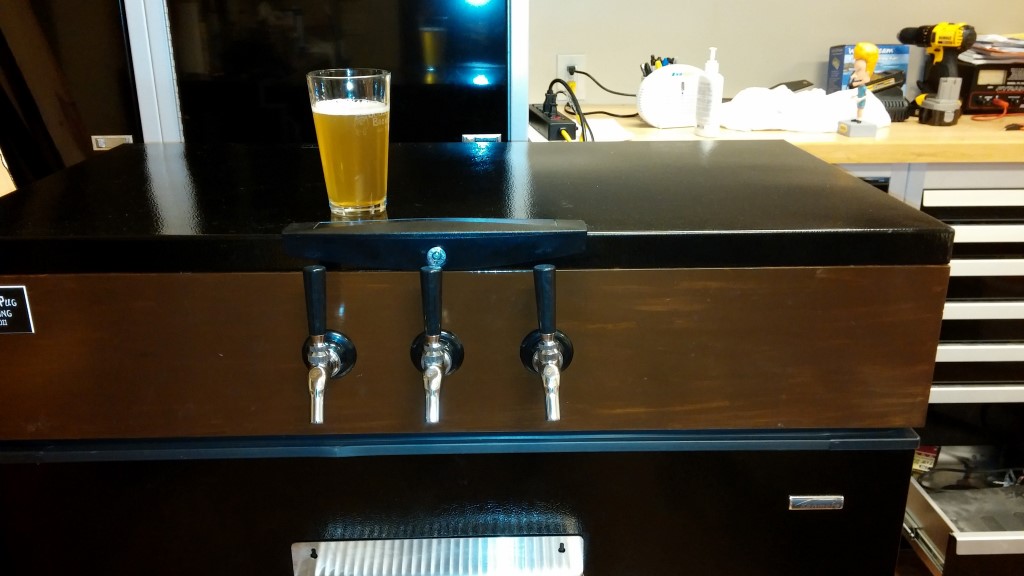
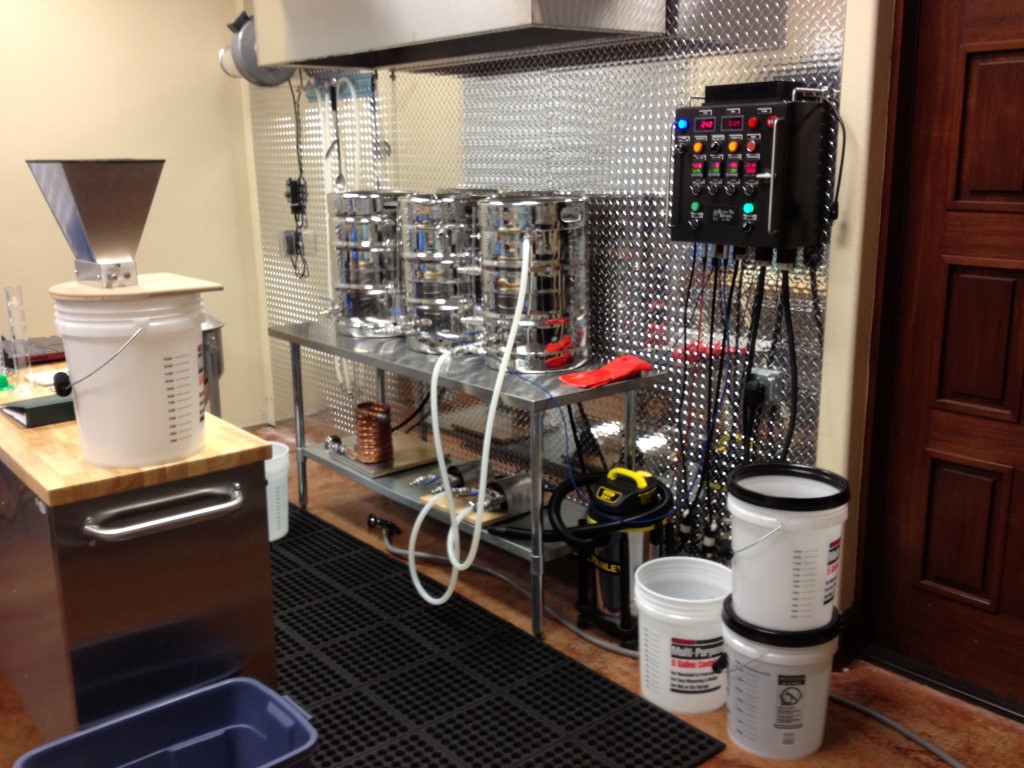
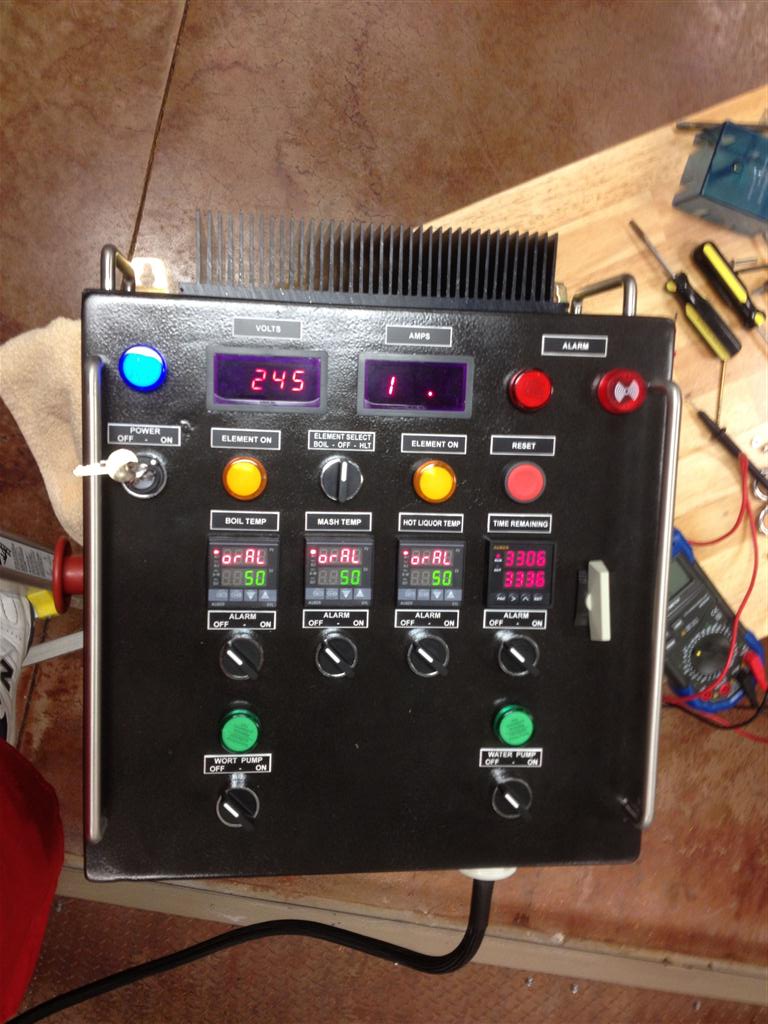
I built an electric brewery a couple of years ago!
Posted by: rick 918-S Mar 14 2014, 11:30 PM
Oh ya! You'll get a lot of volunteers when it comes time to assemble that bad boy! Free flowing beer.... 
Posted by: CptTripps Mar 15 2014, 02:25 AM
That's pretty great. I don't drink, but I'm great at buying/pouring, and can appreciate good engineering.
...the car stuff is nice too.
Posted by: GeorgeRud Mar 15 2014, 07:18 AM
Looks like you're ready for assembly. That car should be a rockets hip when it's done!
Enjoy the build in good health.
Posted by: The Cabinetmaker Mar 15 2014, 07:57 AM
I've followed this and your life with your son since the beginning. I think one of those parts on the shelf are from me. Great to see you back.
Posted by: Luke M Mar 15 2014, 10:10 AM
Welcome back to the world Qarl.
Posted by: Speedmster Mar 15 2014, 10:29 AM
Karl, I'm glad to see your project has re-ignited. I remember going to your website and reading about your build. Very nice. That new garage you've built with your house is awesome!
Posted by: Jeff Bowlsby Mar 15 2014, 10:36 AM
 Get 'er done!
Posted by: TJB/914 Mar 15 2014, 10:40 AM

I almost forgot one of the added benefits of the new garage!
Free flowing BEER
I built an electric brewery a couple of years ago!
Karl & I just shared emails about cars, family's, etc & it's wonderful to have Karl back!!
 Met Karl back in 2004 & he is still the same old Karl we love.
Welcome back Karl.
Tom
Attached image(s)
Posted by: wndsnd Mar 15 2014, 10:41 AM
![popcorn[1].gif](style_emoticons/default/popcorn[1].gif)
Posted by: Ferg Mar 15 2014, 11:21 AM
Wow, fun build. I had that exact motor that was supposed to go into my Carrera, then they became to valuable to modify. Never got to use it  . That's gonna SCREAM when done.

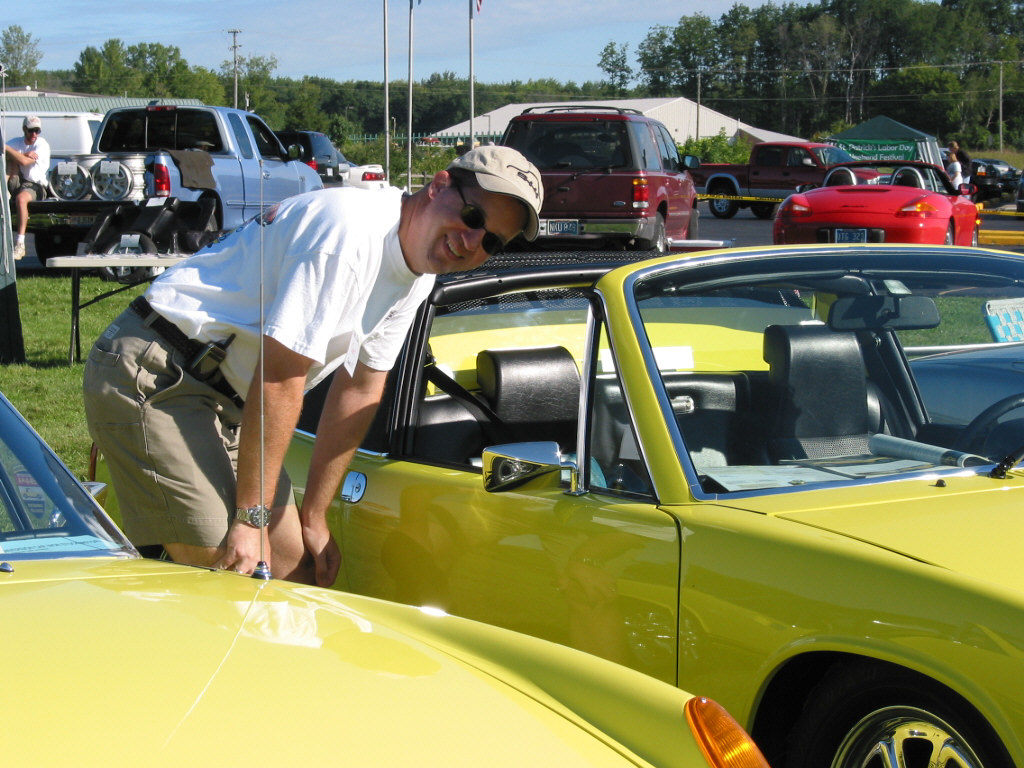
Posted by: mepstein Mar 15 2014, 11:47 AM
Always liked this pic
Attached image(s)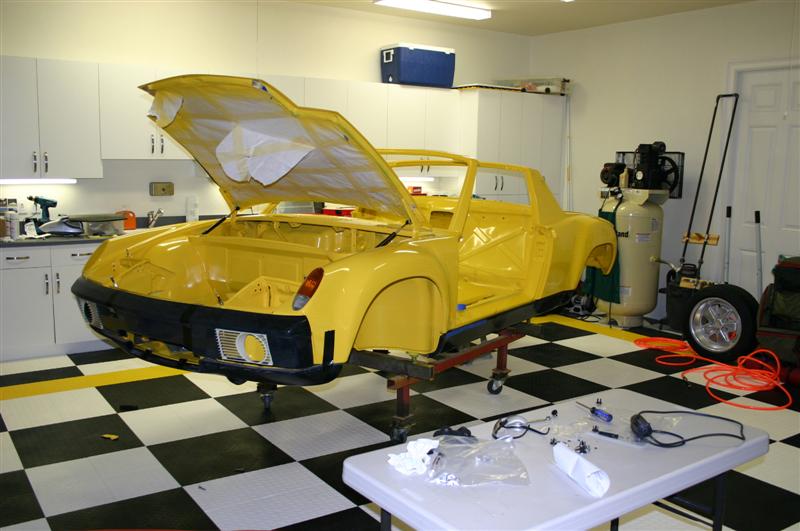
Posted by: spare time toys Mar 15 2014, 08:41 PM
As I was looking at the photos of parts all I could think is how smart it was to pre buy all those parts way back when because if you had to get them today $$$$$. Buy and sit its a good plan. lol. Once again welcome back.
Posted by: bcheney Mar 16 2014, 11:19 AM
As I was looking at the photos of parts all I could think is how smart it was to pre buy all those parts way back when because if you had to get them today $$$$$. Buy and sit its a good plan. lol. Once again welcome back.
Great looking stuff!
Posted by: Mark Henry Mar 16 2014, 11:44 AM
Nice!
Posted by: Montreal914 Mar 16 2014, 12:00 PM
Beautiful project and nice setup! 
Posted by: Qarl Mar 16 2014, 06:05 PM
Started cleaning up grinding the edges of the chassis reinforcements (a lot of slopping welds and splatter).
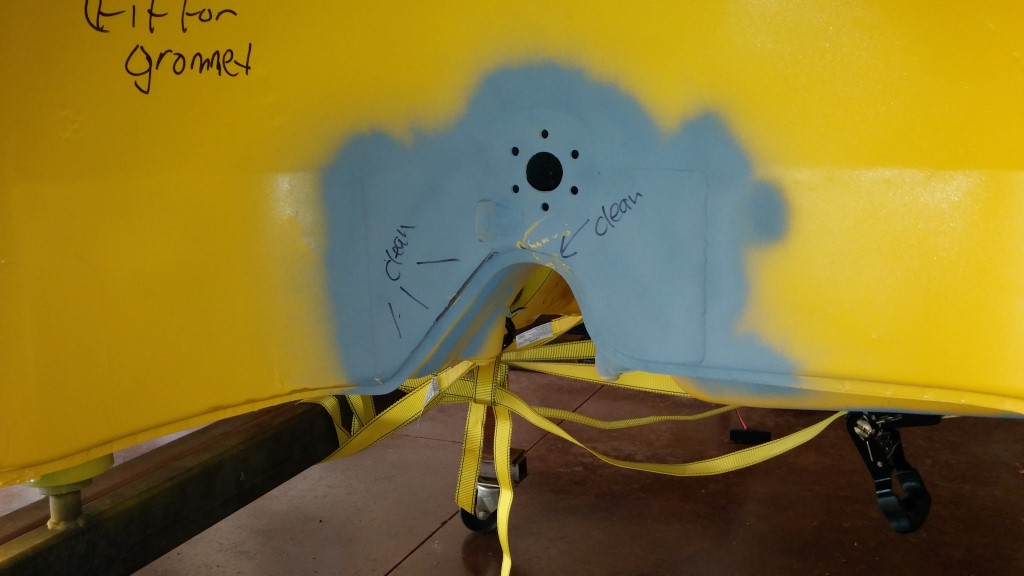
I located the oil cooler hose holes in the driver's longitudinal and the front wheel well. Have to still drill in the footwell.
I grafted two round grommets together into a figure-8 to fit in the center triangle. (no pics), but it will work out well
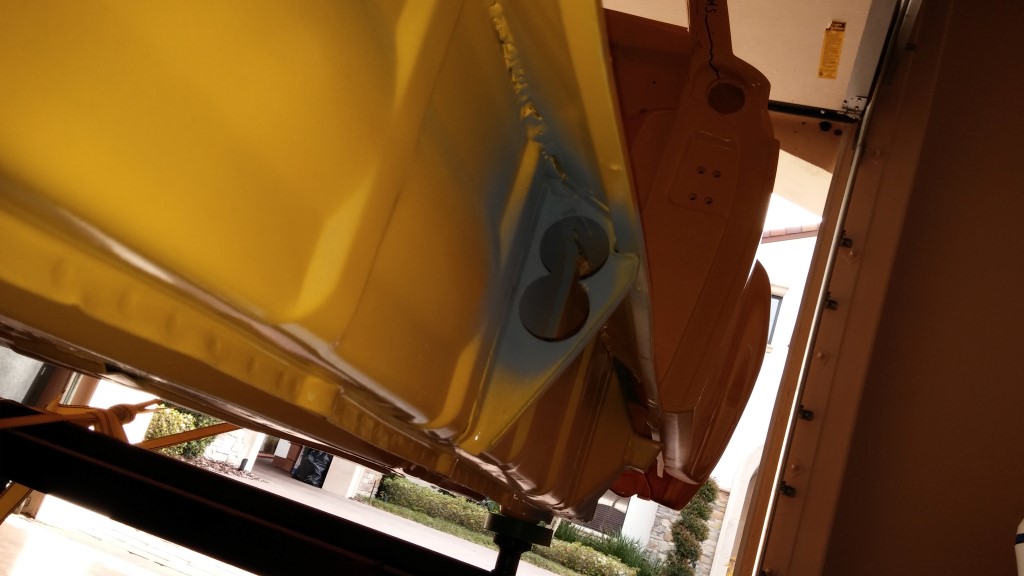
I also pulled out the grommet that the fuel lines go through in the front of the tunnel. Will clean it up and enlarge the holes in preparation of installing Tangerine's stainless fuel lines!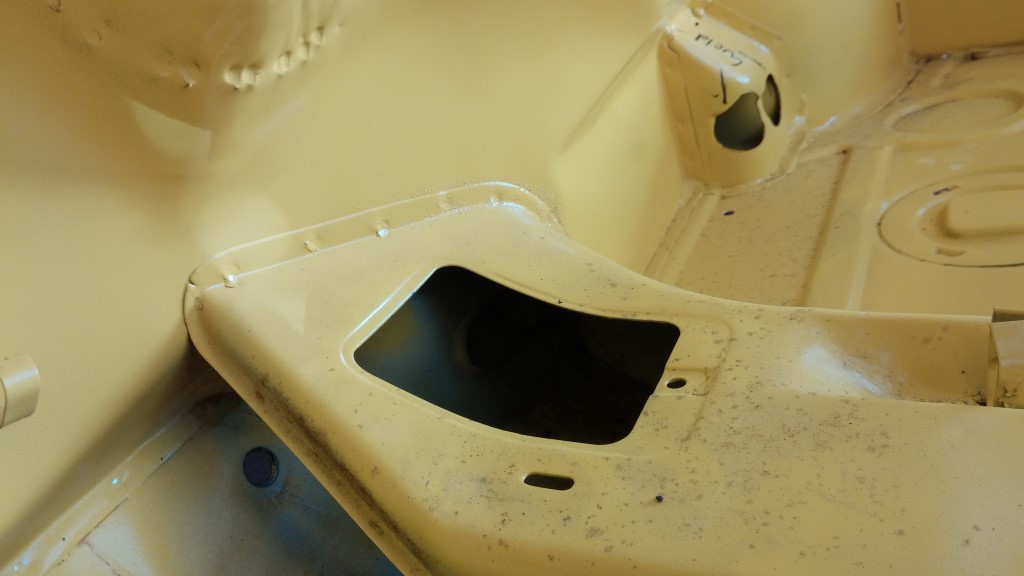
Posted by: Qarl Mar 16 2014, 06:10 PM
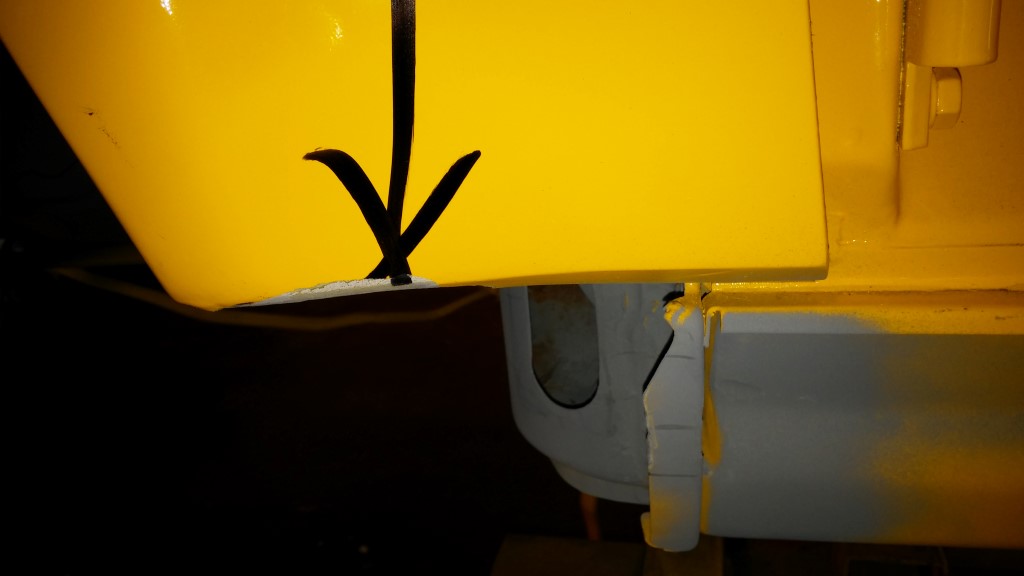
Little notches I had to cut in Engman's long for the RJ engine mount through bolts.
Next step... enlarge ALL the freaking weld holes in the kit! Ugh!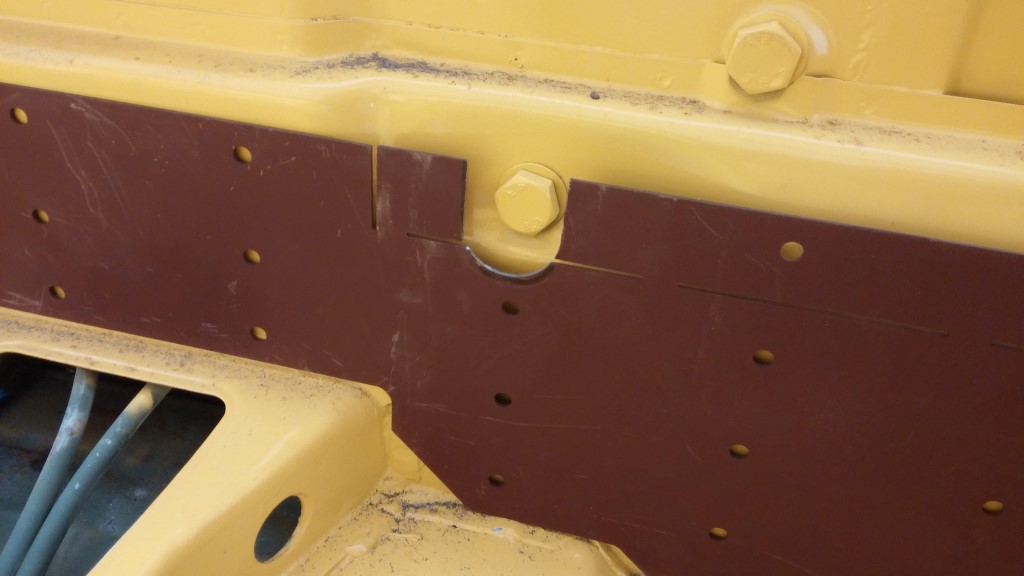
Posted by: Qarl Mar 16 2014, 06:14 PM
Always liked this pic
Yep... that house sold finally. Took 3 1/2 years. That was one of the reason the project was on hold Floating mortages and property taxes and upkeep on two houses for over 3 years. F-k me!
Posted by: Andyrew Mar 16 2014, 06:23 PM
Congrats on the renewed vigor and welcome back! A drill press would be great for those holes.
I welded mine without enlarging the holes, just set the welder really hot so It ate away the metal a bit to make the hole larger naturally.
Posted by: Qarl Mar 16 2014, 06:35 PM
Congrats on the renewed vigor and welcome back! A drill press would be great for those holes.
I welded mine without enlarging the holes, just set the welder really hot so It ate away the metal a bit to make the hole larger naturally.
Any idea how big to enlarge them to?
Posted by: Andyrew Mar 16 2014, 06:54 PM
If I remember correctly I've seen people make them as big as an inch. The thought is more surface contact between the reinforcement and the panel. I think the effects here are so negligible that no one could even feel it.
If it were me I'd make them about 3/4", there about 1/2" right now right? Whatever there at now, I'd say make them 1/4" larger.
When I did mine I filled in the welds completely, I've seen many people just do the outside connecting weld. Less heat to the long, sure but thats giving away some potential strength (I mean why even enlarge them at that point?)
Posted by: URY914 Mar 16 2014, 07:20 PM
See if you can find a sheetmetal shop that has a punch. That will take care of the holes quick.
Posted by: Maltese Falcon Mar 17 2014, 06:23 PM
Karl , I made your shipment today...track # on your pm.
The yellow gt is HOT !
Thank you for your order,
Marty
Posted by: bulitt Mar 17 2014, 06:39 PM
Little notches I had to cut in Engman's long for the RJ engine mount through bolts.
Next step... enlarge ALL the freaking weld holes in the kit! Ugh!
The bigger the holes the longer the heat in that area. If you go that route be mindful. I do recall that Engman enlarged the holes on the latter version.
Posted by: iamchappy Mar 17 2014, 06:50 PM
Qarl is going to have a hard time with this boys, that tap room is only a few steps away from that car, and there's things other than beer that he's been making in there......... Yum,Yum....
Posted by: Qarl Mar 28 2014, 04:18 PM
Qarl is going to have a hard time with this boys, that tap room is only a few steps away from that car, and there's things other than beer that he's been making in there......... Yum,Yum....
Started refitting the seat bases, supports and brackets (from Restoration Design).
Mine were removed, so I am re-installing them.
Posted by: Qarl Mar 28 2014, 09:29 PM
I drilled the weld holes in the bases for the seats brackets and started refitting the seat brackets.
Drilled 2 more oil line holes through the driver's footwell.
Made a weld-in patch for a fuck up I did a few weeks ago.
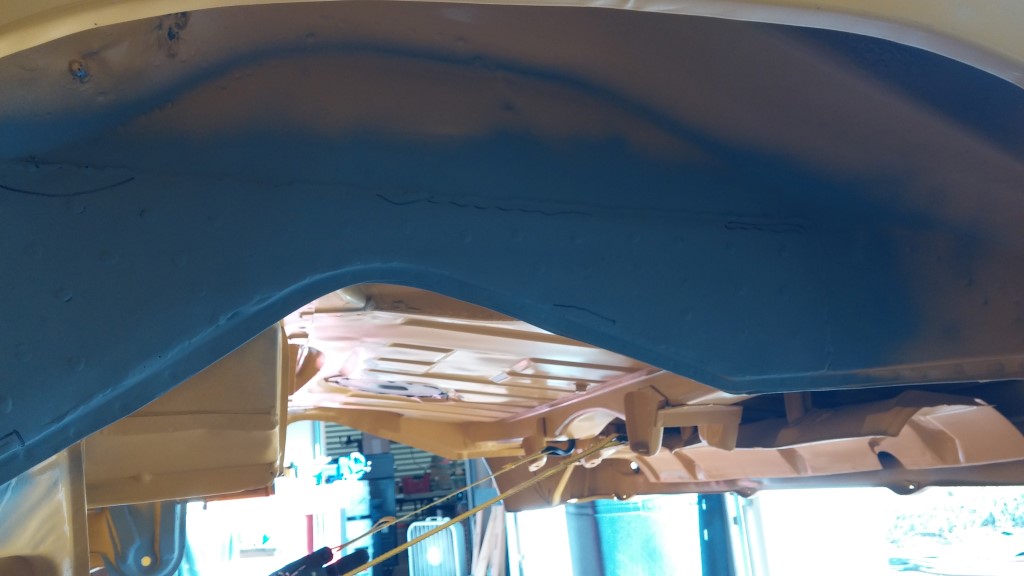
Removed the front hood and cleaned up the underside. Need to do some small fiberglass repair this weekend.
Started enlarging the weld holes in the Engman long kit.
Had a beer... or three!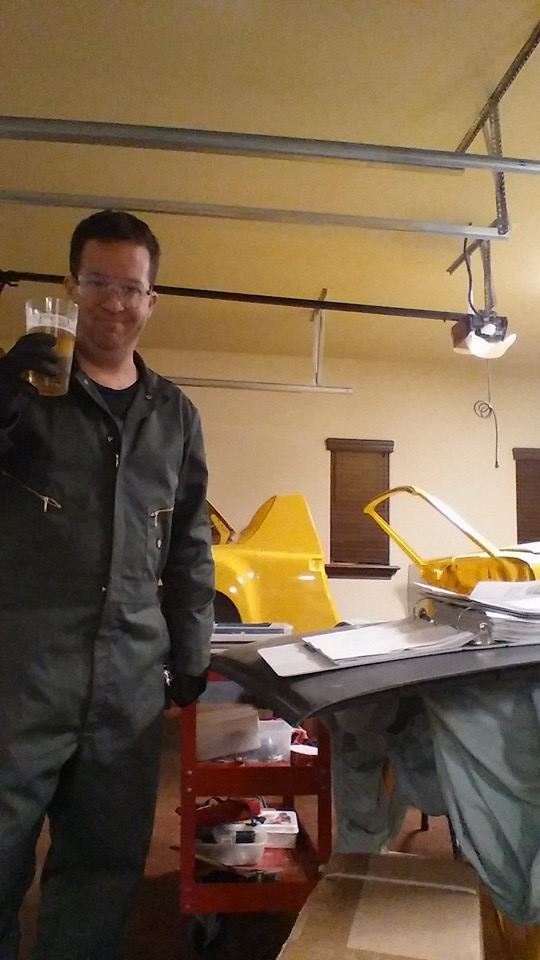
Posted by: URY914 Mar 29 2014, 06:00 AM
Good to have you back.
Posted by: rhodyguy Mar 29 2014, 09:28 AM
rock on!!! . for new folks that may not know, the dancing banana IS Qarl!! older times….
Posted by: Eric_Shea Mar 29 2014, 10:33 AM
Q. Can you come install a bar in the shop please?
Posted by: Qarl Mar 29 2014, 11:00 AM
Q. Can you come install a bar in the shop please?
I have a 3 tap keggerator and brewery in the garage... does that count?
And a still... shhhhhhh
Posted by: Downunderman Mar 29 2014, 12:25 PM
Step drill. You can make them as big as you like.
http://www.machineryhouse.com.au/D1071
Cheers,
Posted by: iamchappy Mar 29 2014, 12:35 PM
Qarl getting ready to consume some Signal Yellow and terrorize  the neighbors...
Attached image(s)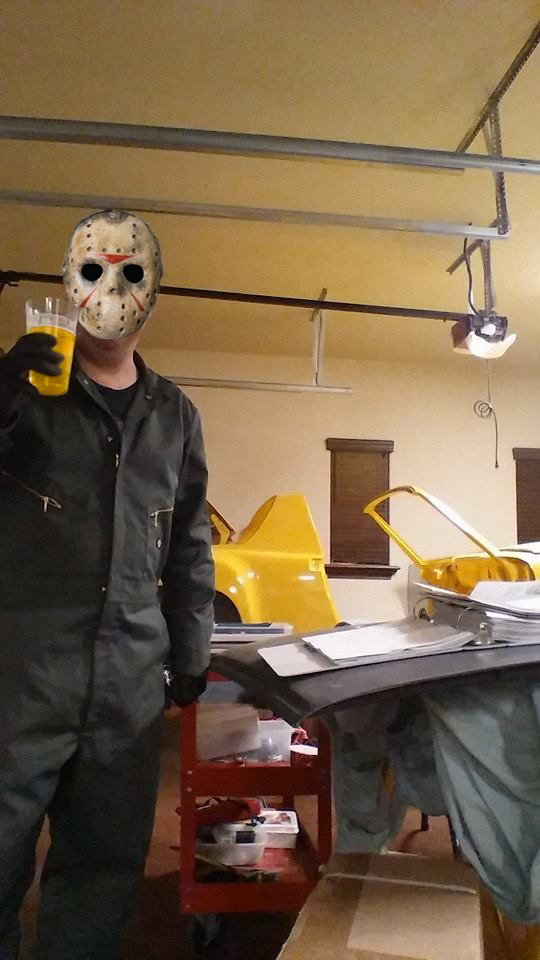
Posted by: Qarl Mar 29 2014, 02:31 PM
Step drill. You can make them as big as you like.
http://www.machineryhouse.com.au/D1071
Cheers,
Yep, started using the step drill last night and just made them one step larger. Not too big, though. Will be harder to fill.
Posted by: Qarl Mar 29 2014, 02:32 PM
Q. Can you come install a bar in the shop please?
Eric... does this count?
Posted by: Qarl Mar 29 2014, 02:36 PM
Q. Can you come install a bar in the shop please?
Eric... does this count?
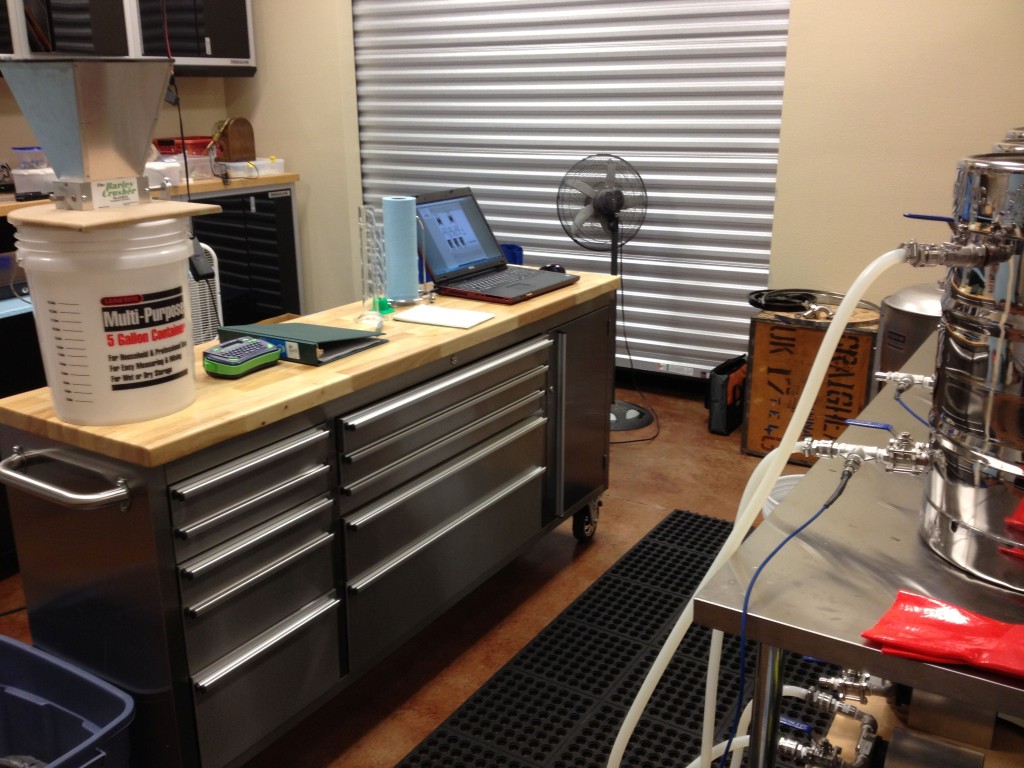
I built this brewery 2 years ago...
Posted by: SirAndy Mar 29 2014, 03:00 PM
I almost forgot one of the added benefits of the new garage!
Free flowing BEER
I built an electric brewery a couple of years ago!
Adopt me, please!

Posted by: Qarl Mar 30 2014, 04:42 PM
I almost forgot one of the added benefits of the new garage!
Free flowing BEER
I built an electric brewery a couple of years ago!
Adopt me, please!
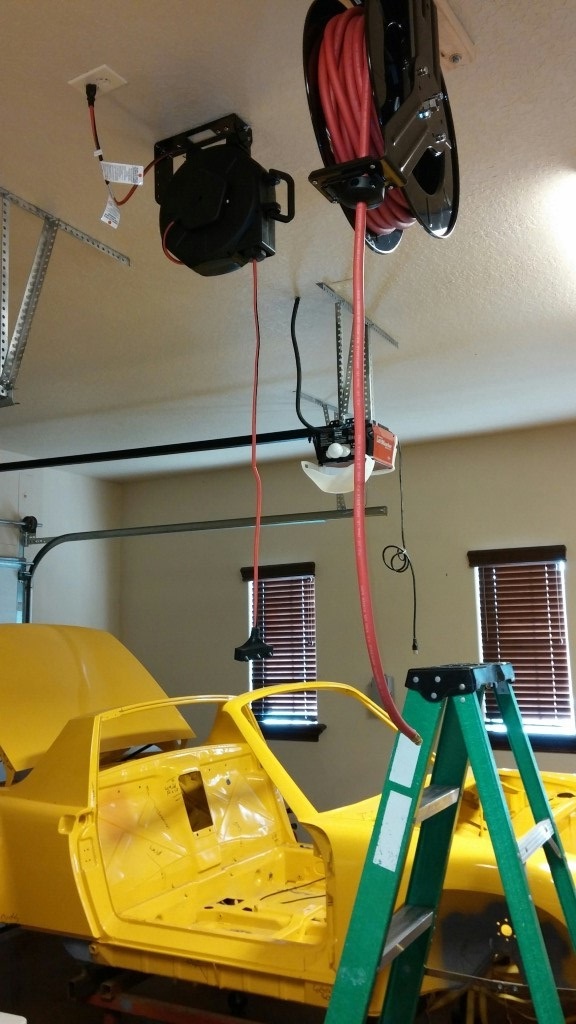
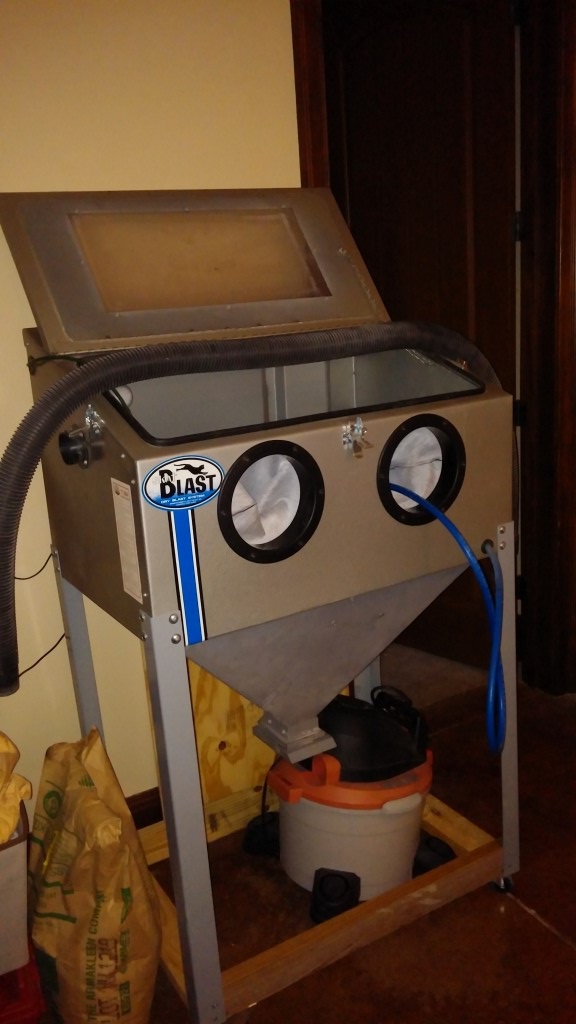
Shop day.
Hung ceiling power coil
Hung ceiling air coil (but still need to run a line to the other side of the garage whee the compressor is.
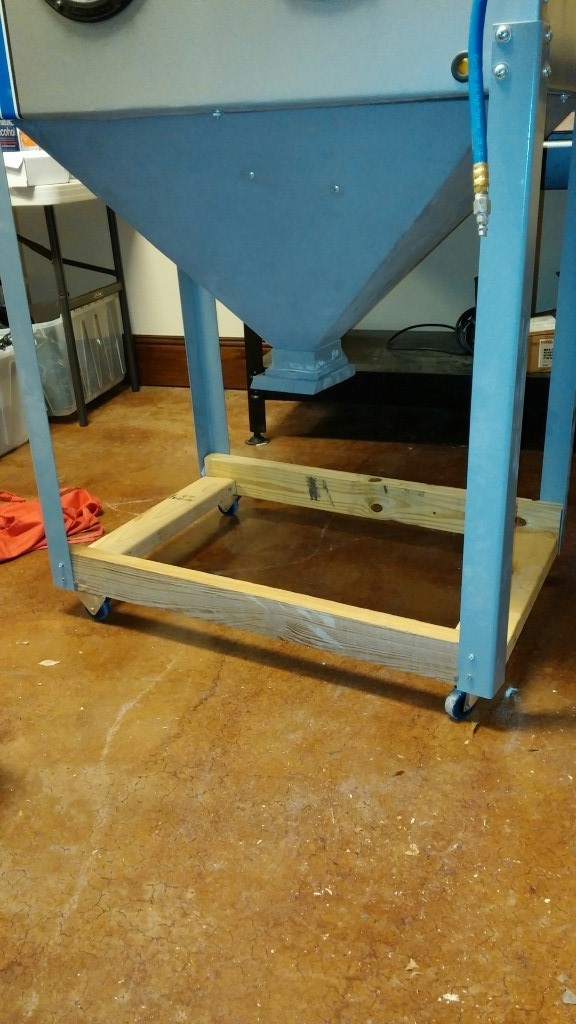
Redid the blast cabinet (cleaned out old glass, installed new work gloves, viewport protector, and added casters to the bottom
Posted by: CptTripps Mar 31 2014, 04:36 AM
I've bought a lot of that stuff and never installed it. My garage isn't worthy yet.
Rock on man. Those braces are headed your way this week.
Posted by: Qarl Apr 1 2014, 08:12 PM
Diversion today.
Had taken the Exige S out a few days ago and she started running rough. I had just changed out the Mass Air Flow sensor, so suspected something was amiss.
Reset the ECU and tried to let it recalibrate, and still ran poor... hmm...
Did some digging and fount out that the intake boot clamp had slipped off the coupling. Had the wifey apply some pressure to get it fully seated and reclamped the intake. (4 hands were better than 2)
Changed out the plugs and added some dielectric grease to the coil packs.
Added some Techron fuel cleaner and topped off with some fresh gas.
Reset the ECU and took her for a spin... all is well now.
This beast purrs like a kitten... (All 350 HP from the little 1.8L motor)!!!!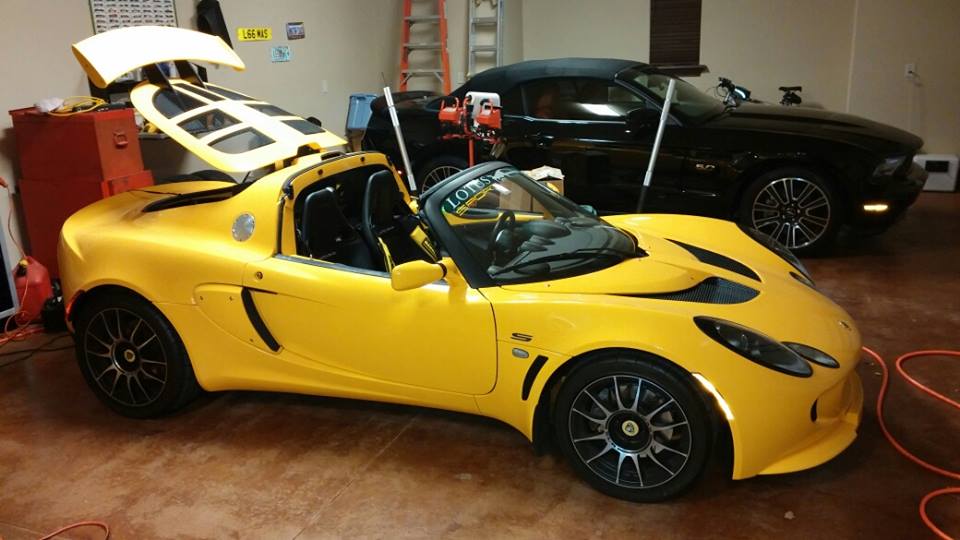
Posted by: Qarl Apr 13 2014, 02:55 PM
Media blasted some more parts before sending off to plating. (I think I have to gather just a few more parts.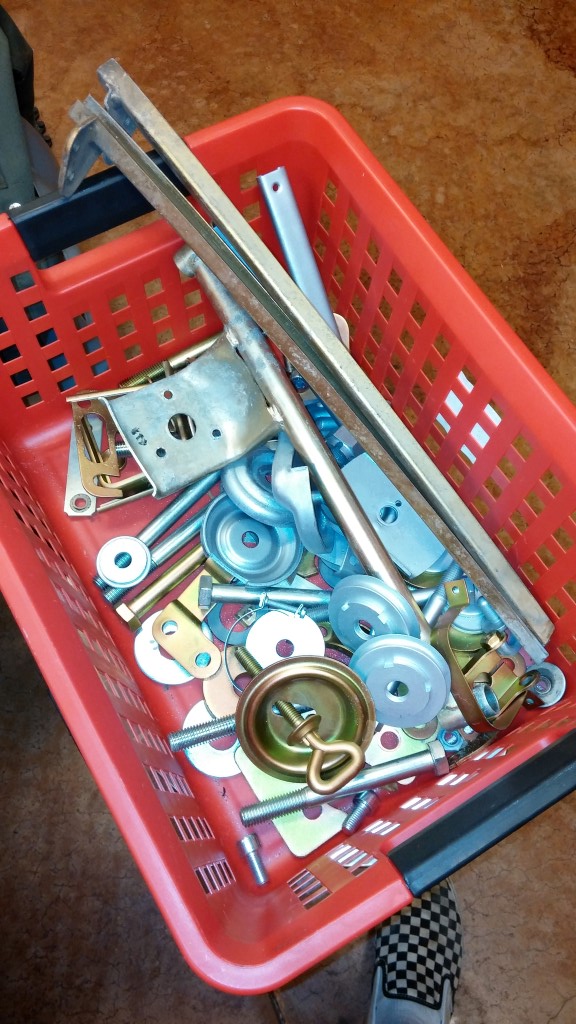
Posted by: 2mAn Apr 13 2014, 10:53 PM
nice vans! haha
Posted by: jfort Apr 14 2014, 02:37 PM
glad to see you are back at, Karl. git'r done!!
Posted by: Qarl Apr 14 2014, 04:03 PM
glad to see you are back at, Karl. git'r done!!
Met with the new body guy today to start creating a "plan".
Posted by: ConeDodger Apr 14 2014, 04:22 PM
Q, as your adviser on health issues, I find myself compelled to warn you that you dare not consume that much beer. 
You should really send a keg of it to WCR 2014 Teeners at Tahoe II...
Just sayin' 

Posted by: bcheney Apr 14 2014, 06:25 PM
glad to see you are back at, Karl. git'r done!!
Met with the new body guy today to start creating a "plan".
Way to go Qarl...great to see another custom 914 coming to life in Orlando!
Posted by: Qarl Apr 14 2014, 07:09 PM
glad to see you are back at, Karl. git'r done!!
Met with the new body guy today to start creating a "plan".
Way to go Qarl...great to see another custom 914 coming to life in Orlando!
We need to meet up. I need a little inspiration!!!
Posted by: Qarl Apr 14 2014, 07:47 PM
I fitted /prepped/trimmed the Engman kit.
1. Drilled out all the holes 1 step with a uni-bit and brushed over lightly with an angle grinder on the backside, since it leaves a little lip.
2. Trimmed the end and the seatbelt mounting bolt holes that weren't quite aligned right and drimmed hear and there to get it nice and flush all over.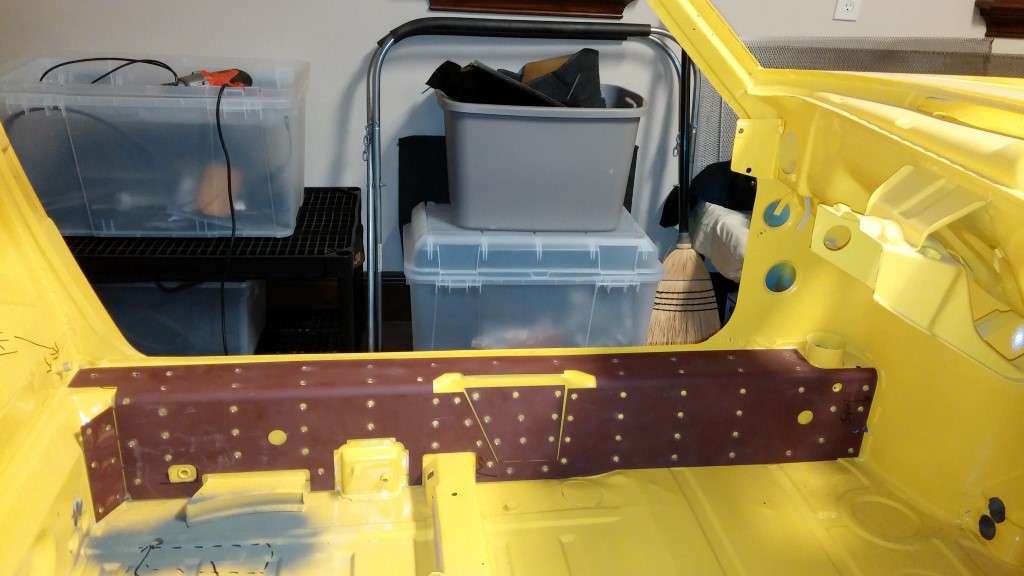
Posted by: Qarl Apr 14 2014, 08:34 PM
nice vans! haha
Yes, these are my garage shoes. My worn out pair.
I have Pandora set to 80s rock in the garage!

Posted by: puffinator Apr 15 2014, 06:03 AM
nice vans! haha
Yes, these are my garage shoes. My worn out pair.
I have Pandora set to 80s rock in the garage!
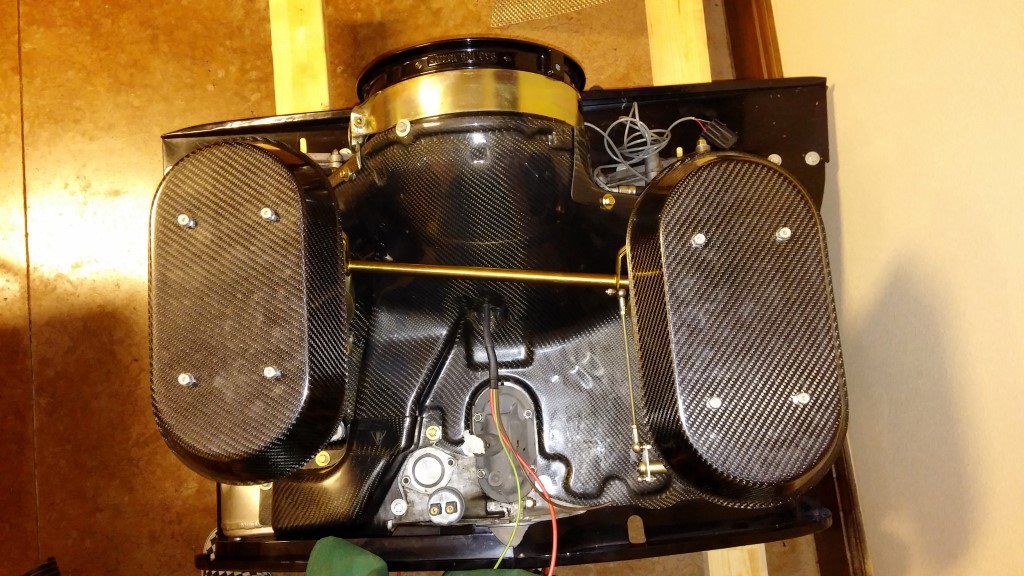
Where did you get the carbon fiber engine shroud?
Posted by: CptTripps Apr 15 2014, 06:56 AM
Yes, these are my garage shoes. My worn out pair.
I have Pandora set to 80s rock in the garage!
Great minds think alike! I rock Chuck Taylors and listen to the local 70's "Classic Rock" station. Mainly because it's the only radio station I get, but I like to think it's because I'm building a 70's car...
Posted by: tdgray Apr 15 2014, 07:11 AM
I almost forgot one of the added benefits of the new garage!
Free flowing BEER
I built an electric brewery a couple of years ago!
Adopt me, please!
No shit... me too.
Q is my hero
Posted by: tdgray Apr 15 2014, 07:13 AM
Nice to see you still have a Lotus as well.
I've been hunting Elise's for a while now but have not really stepped up to the plate yet.
I have space issues at the moment.
Posted by: Qarl Apr 15 2014, 07:17 AM
Where did you get the carbon fiber engine shroud?
Try A.I.R. or Getty Design
Posted by: CptTripps Apr 15 2014, 09:58 AM
I have space issues at the moment.
Oh come on Todd...they're tiny! Can't you just fit them in a mailbox or the trunk of another car?
Posted by: 2mAn Apr 15 2014, 11:33 AM
nice vans! haha
Yes, these are my garage shoes. My worn out pair.
I have Pandora set to 80s rock in the garage!
I also wear worn out vans for the garage
 mine are all black though, I love the checkerboard ones!
I still need to work on the garage music, but I leave my Ipod on random and have one tiny speaker hooked up to it. Gotta have music... and something to drink

Posted by: tdgray Apr 15 2014, 01:04 PM
nice vans! haha
Yes, these are my garage shoes. My worn out pair.
I have Pandora set to 80s rock in the garage!
I also wear worn out vans for the garage
mine are all black though, I love the checkerboard ones!I still need to work on the garage music, but I leave my Ipod on random and have one tiny speaker hooked up to it. Gotta have music... and something to drink
I reserve my checkerboard Vans for driving the little cars.
Posted by: tdgray Apr 15 2014, 01:06 PM
I have space issues at the moment.
Oh come on Todd...they're tiny! Can't you just fit them in a mailbox or the trunk of another car?
I've got five cars and a three car garage... already have to park outside during the summer and store one during the winter.
If I were to kick my wife out of the garage... all would not be well

I need to build another garage

Posted by: Qarl Apr 15 2014, 01:30 PM
I've got five cars and a three car garage... already have to park outside during the summer and store one during the winter.
If I were to kick my wife out of the garage... all would not be well
I need to build another garage
Double stack them with car lifts!!!!
Posted by: Qarl Apr 17 2014, 09:08 PM
Decided to "figure out" how to disassemble and reassemble the seat frames so I can get them powdercoated and the spring and arm plated.
Once this little roll pin comes out, it's all easy.
Getting it back in with the spring compressed is a bitch!
But I was able to figure out how to easily do it without damaging the rest of the frame.
Reassemble the parts with the spring clipped into the hole in the back of the crossmember.
The trick is to use a punch and get the pin in further than normal with about 3/16 exposed. Now take some electrical wire (about 20 inches), 18 gauge works, loop it around the bend of the spring. Tie it together and make a big loop you can pull. Place the frame on a secure surface (or on the floor with a rubber mat underneath) and pull the spring over the pin. Now take the punch and pop it out from the backside so the spring has more pin to grab.
Note: If you send of the seat frame to get painted or powdercoated, there is a plastic bushing that easily taps out with a socket.
There is also a black hard plastic bushing where the adjuster arm goes initially through the frame.
Pop those out, media blast everything, powdercoat, and you can have a new seat frame.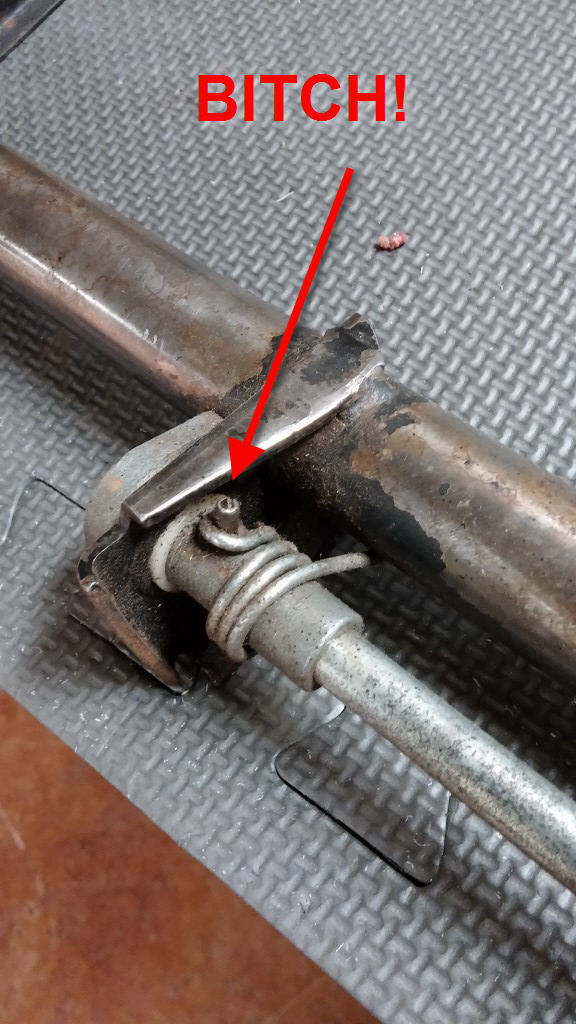
Posted by: JmuRiz Apr 18 2014, 09:53 AM
I've got five cars and a three car garage... already have to park outside during the summer and store one during the winter.
If I were to kick my wife out of the garage... all would not be well
I need to build another garage
Double stack them with car lifts!!!!
That's the way to do it...I have three cars and a motorcycle in my 22x24 garage
Posted by: tdgray Apr 18 2014, 10:35 AM
I've got five cars and a three car garage... already have to park outside during the summer and store one during the winter.
If I were to kick my wife out of the garage... all would not be well
I need to build another garage
Double stack them with car lifts!!!!
That's the way to do it...I have three cars and a motorcycle in my 22x24 garage
I do... sort of... I have the MGA and the TR6 sideways in the 3rd bay... the MGC-GT is coming out of storage in a week or so and it will take my winter parking place in the garage.
It stinks but my ceilings in the garage are not tall enough for a lift. I really need one... getting too old to crawl under cars anymore
Posted by: Socalandy Apr 18 2014, 07:48 PM
Decided to "figure out" how to disassemble and reassemble the seat frames so I can get them powdercoated and the spring and arm plated.
Once this little roll pin comes out, it's all easy.
Getting it back in with the spring compressed is a bitch!
But I was able to figure out how to easily do it without damaging the rest of the frame.
Reassemble the parts with the spring clipped into the hole in the back of the crossmember.
The trick is to use a punch and get the pin in further than normal with about 3/16 exposed. Now take some electrical wire (about 20 inches), 18 gauge works, loop it around the bend of the spring. Tie it together and make a big loop you can pull. Place the frame on a secure surface (or on the floor with a rubber mat underneath) and pull the spring over the pin. Now take the punch and pop it out from the backside so the spring has more pin to grab.
Note: If you send of the seat frame to get painted or powdercoated, there is a plastic bushing that easily taps out with a socket.
There is also a black hard plastic bushing where the adjuster arm goes initially through the frame.
Pop those out, media blast everything, powdercoat, and you can have a new seat frame.
Its is a bitch but worth it. comes apart easier that assembly and tell you coater to go light on the powder. Love your build!!!
Posted by: Qarl Apr 22 2014, 12:23 PM

Posted by: CptTripps Apr 22 2014, 06:42 PM
Cool! You got a urinal for the car!
Attached image(s)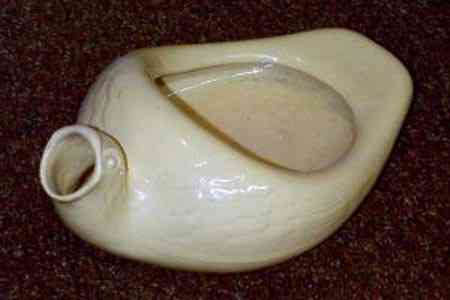
Posted by: Qarl May 3 2014, 09:17 PM
Met with a potential new body/paint guy today. Discussed the work I wanted done and repainting. Discussion went well, but he is 4 months out. No biggie.
Took some more photos to document what I want done to the body (welding, repair blemishes, etc.)
Dissasembled my 2 seat frames to get parts to the plater and powder coater.
Restripped my dash frame. (removed the new dash top pad, and bottom pad). Cleaned and treated the vinyl.
Spent 2 hours removing all the double-sided tape on the dash face.
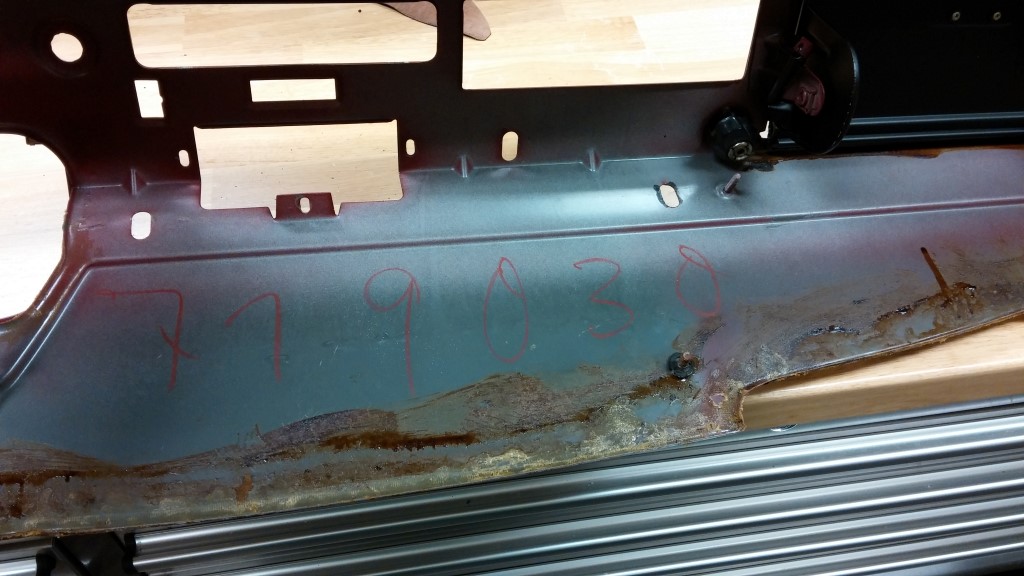
Did you know that your Chassis number is on the bottom inside of the dash frame?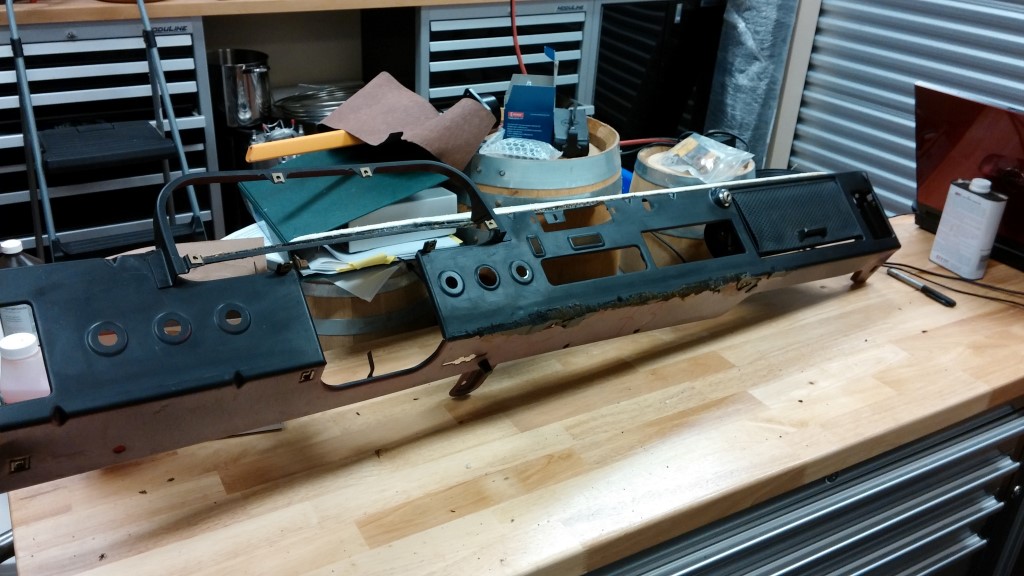
Posted by: bcheney May 3 2014, 09:20 PM
Met with a potential new body/paint guy today. Discussed the work I wanted done and repainting. Discussion went well, but he is 4 months out. No biggie.
Took some more photos to document what I want done to the body (welding, repair blemishes, etc.)
Dissasembled my 2 seat frames to get parts to the plater and powder coater.
Restripped my dash frame. (removed the new dash top pad, and bottom pad). Cleaned and treated the vinyl.
Spent 2 hours removing all the double-sided tape on the dash face.
Did you know that your Chassis number is on the bottom inside of the dash frame?
That is pretty cool! Keep up the momentum! You're doing great back on the saddle.
Posted by: Qarl May 9 2014, 09:58 PM
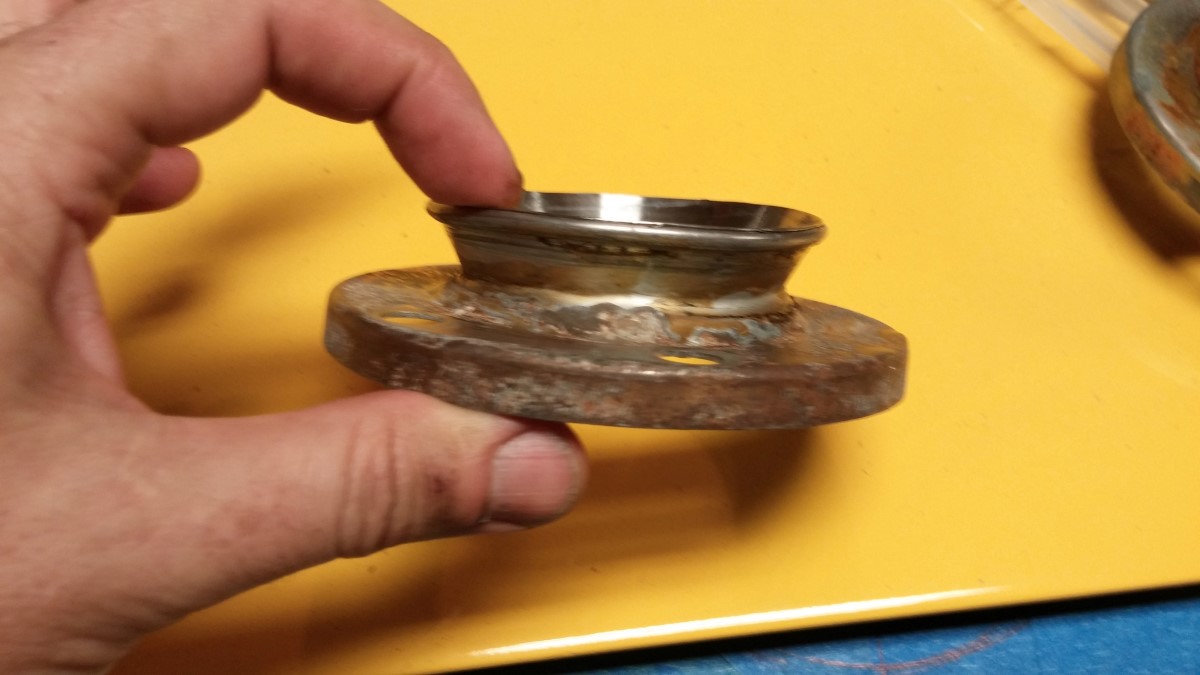
Stripped some 1970 911 axles, that I scored from a dismantler.
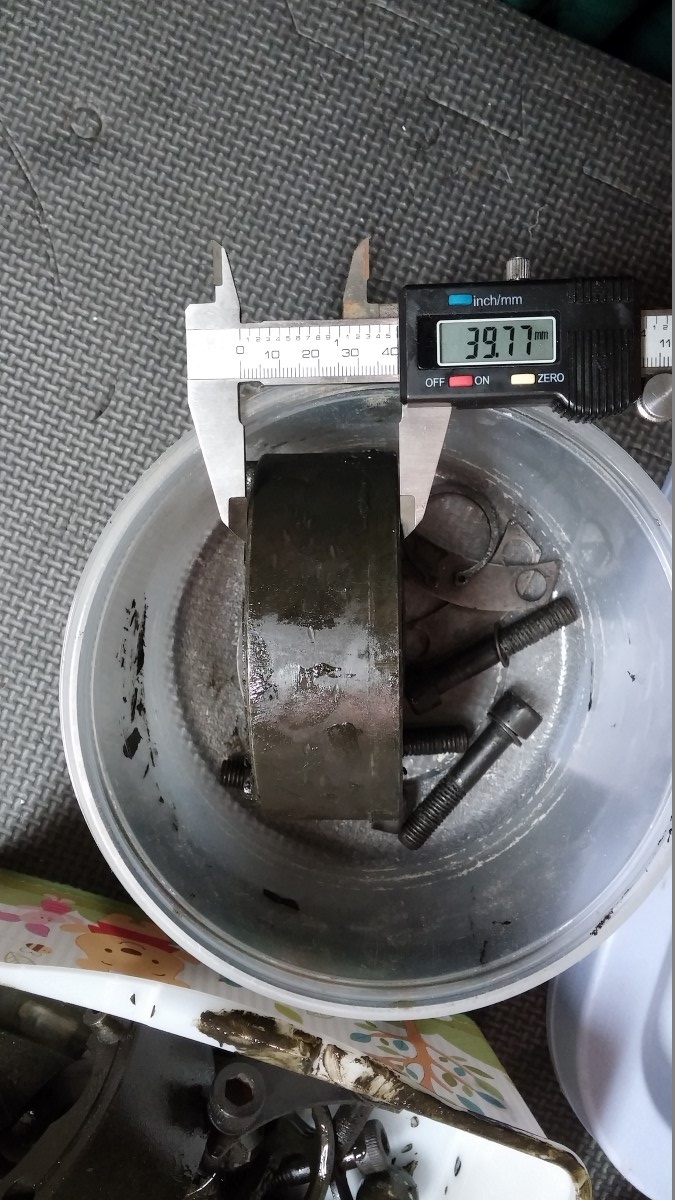
These have the rare 40mm thick CV joints (69-71 years only). Combine these with some Sway-aways axles and you have a REALLY strong axle.
Around October 71, they switched to "lighter" 32mm thick CVs. All replacement CVs are 32mm.
These are hard to find. I've cleaned up the races and balls on 2 so far, and they are clean (no pitting or scoring). Yippee!
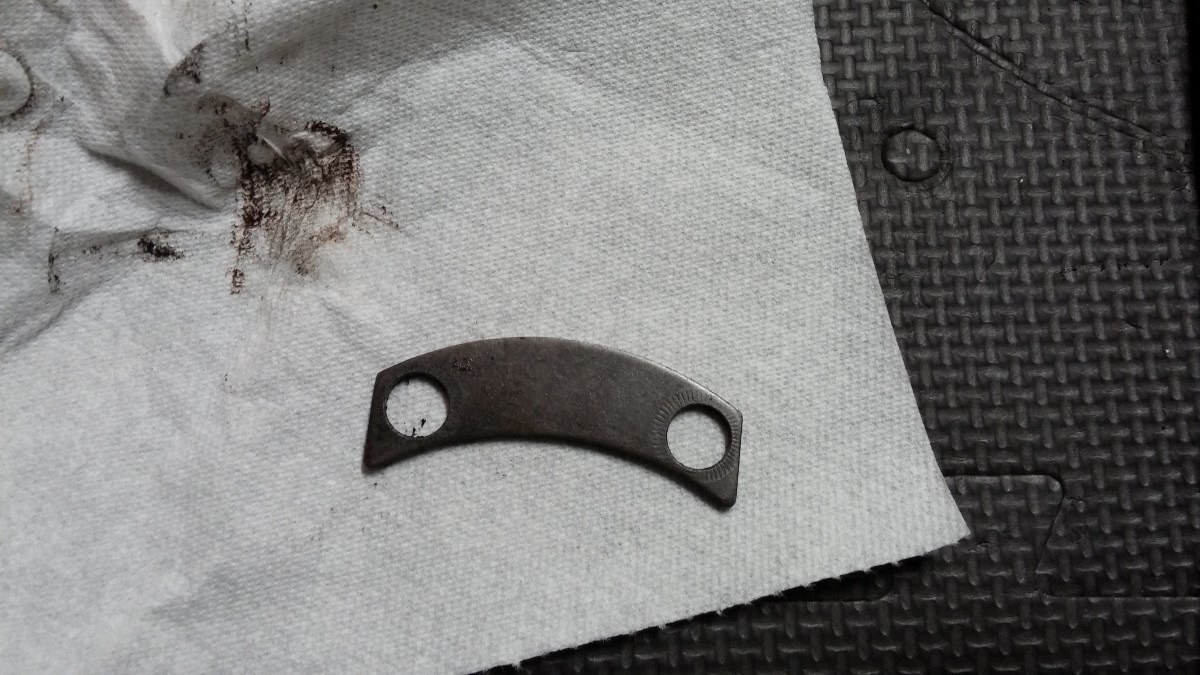
Bad news is that one of the Boot flanges is a mystery part? Looks like someone turned it or banged it with a hammer to make it fit the stock boot.
To complete this, I need 2 moon washers and a clean straight 108mm boot flange.
Can anyone help?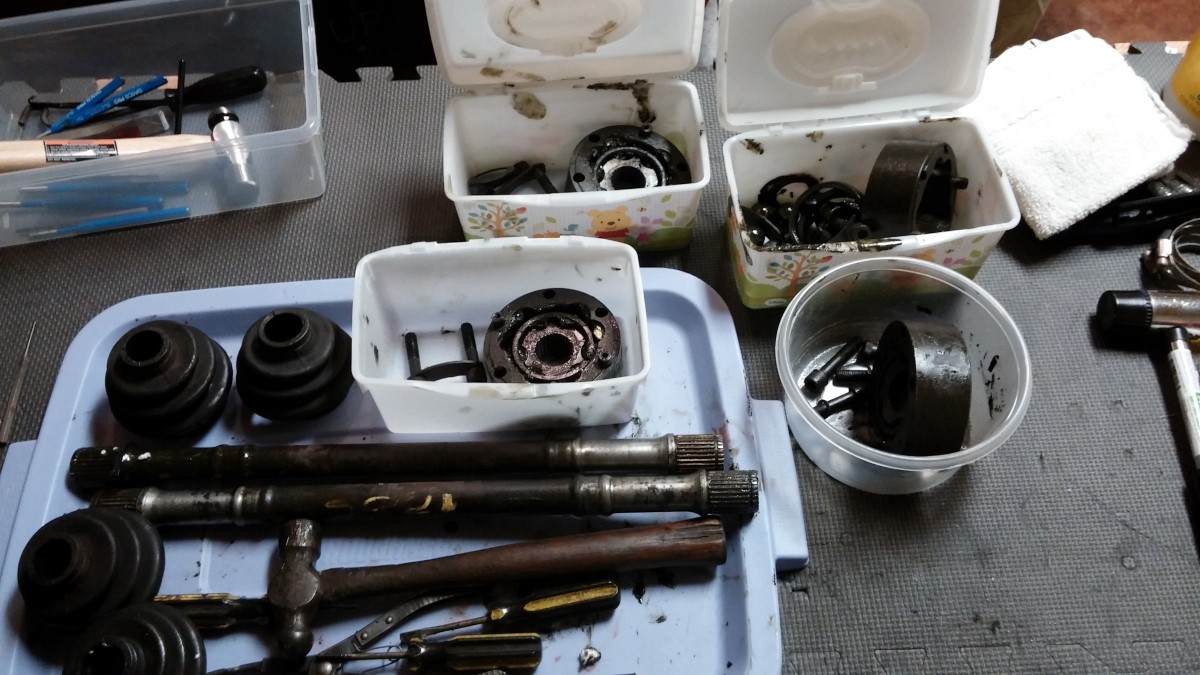

Posted by: Qarl May 9 2014, 09:59 PM
dupe
Posted by: Mike Bellis May 9 2014, 10:23 PM
40mm is not rare. It is 930 turbo. Easy to find.
Parts you need here at a good price.
http://www.pacificcustoms.com/porsche-930-chromoly-axles.html
http://www.pacificcustoms.com/cv-joints-and-axle-boots.html
Posted by: Qarl May 9 2014, 10:28 PM
40mm is not rare. It is 930 turbo. Easy to find.
Parts you need here at a good price.
http://www.pacificcustoms.com/porsche-930-chromoly-axles.html
http://www.pacificcustoms.com/cv-joints-and-axle-boots.html
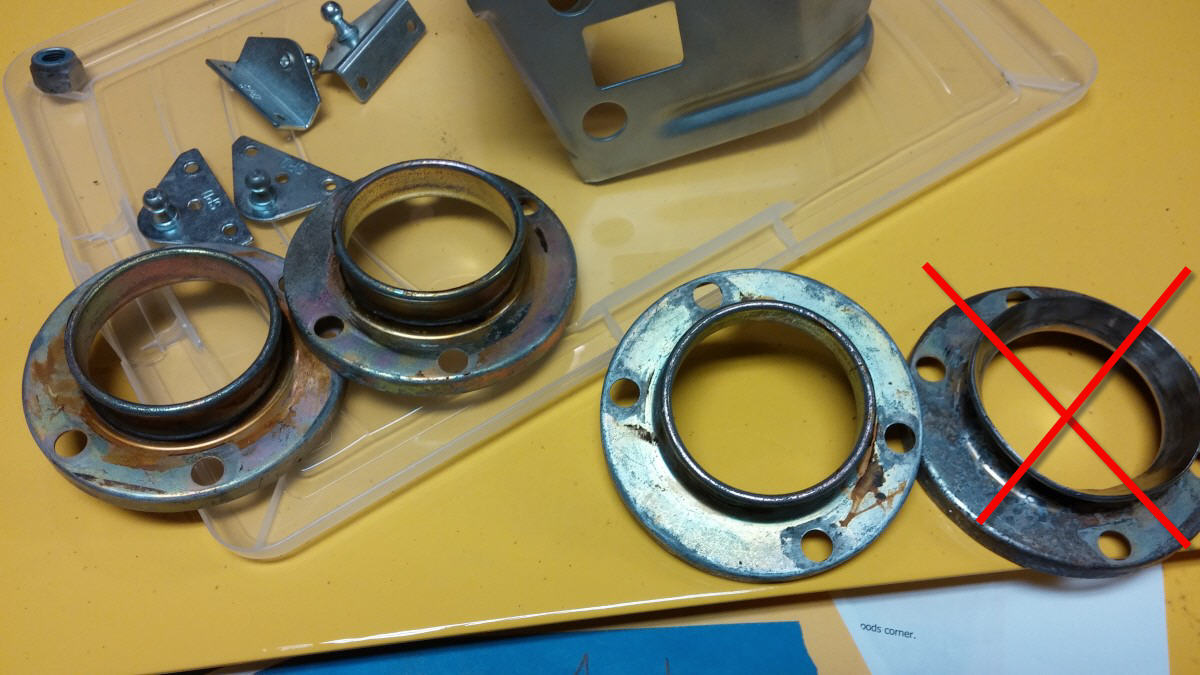
True... 930 CVs are 40mm, but are 6-bolt. The '69-71 CVs are 4 bolt with the 2 roll pins. (I realize the others can be adapted).
Posted by: Qarl May 9 2014, 10:35 PM
CV boot Flanges at Pacific Customs are also 6-bolt. I need 4 bolt. See the pics.
Posted by: Mike Bellis May 9 2014, 10:40 PM
CV boot Flanges at Pacific Customs are also 6-bolt. I need 4 bolt. See the pics.
4 bolt are NLA. I got a set of rebuilt 911 Lobro axles and they use 6 hole flanges and silicone the 2 extra holes. This seems to be the standard fix.
Posted by: Qarl May 9 2014, 10:42 PM
I realize that... or I'd just buy one.
But it's not impossible to find someone with a used one available that they aren't using...

Posted by: Mike Bellis May 9 2014, 10:53 PM
You could do one of these and weld up the unwanted holes...
http://www.ebay.com/itm/CNC-STEEL-930-CV-BOOT-FLANGE-FOR-VW-SAND-CAR-DUNE-BUGGY-OFF-ROAD-TRUCK-/290625474287?pt=Motors_Car_Truck_Parts_Accessories&hash=item43aaa0ceef&vxp=mtr
Posted by: Qarl May 9 2014, 10:55 PM
If I can't scrounge one up, I may have to. I've seen these and other 6-bolt loose flanges on evil bay.
Thx,
Q
Posted by: 914forme May 10 2014, 11:40 AM
Since your having everything replated, I would make up a couple of the aftermarket modified boots flanges. Weld the holes up, get them ground down smooth, and then have them plated in your run. Backup plan is always a great idea. Find someone to TIG them to keep the heat down and controlled, check them before plating to make sure they have not warped and then go for it.
Posted by: Qarl May 15 2014, 09:45 PM
Rebuilt 2 of my 4 CV joints...
Anyone know what the 3 red dots might mean?
These are from a 1970 911T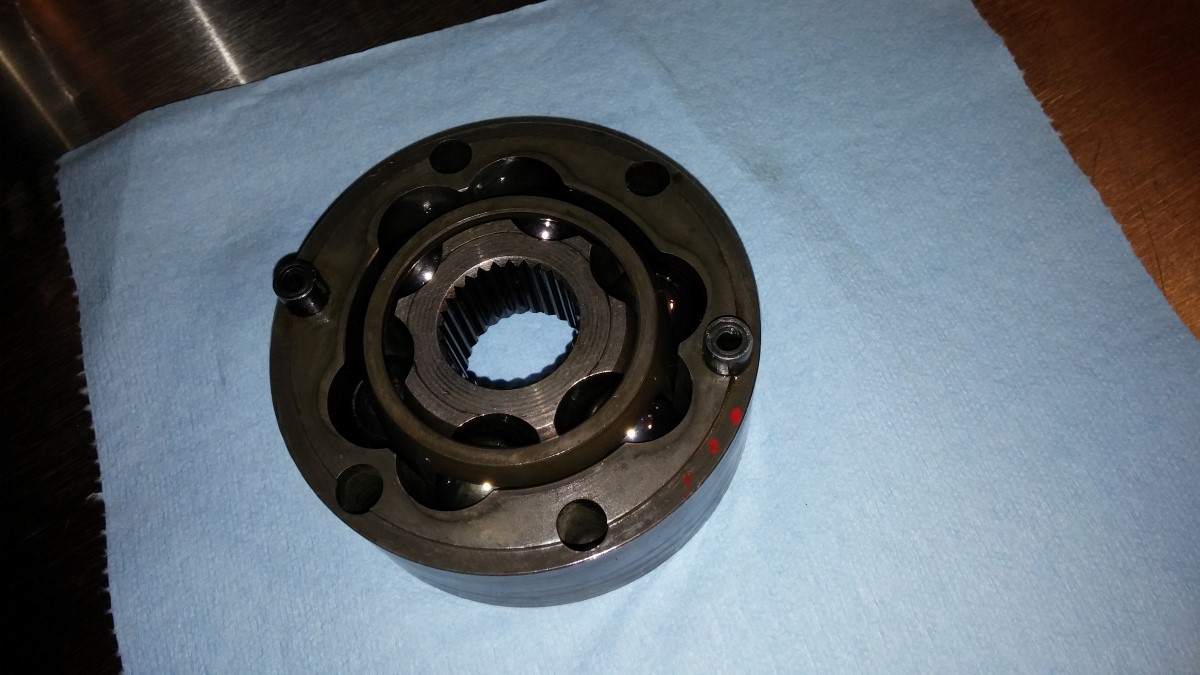
Posted by: Qarl May 16 2014, 07:37 AM
I just linked my original build thread at the beginning of this thread...
And here too...
http://www.914world.com/bbs2/index.php?showtopic=3634&hl=
Posted by: TJB/914 May 16 2014, 04:08 PM
I just linked my original build thread at the beginning of this thread...
And here too...
http://www.914world.com/bbs2/index.php?showtopic=3634&hl=
Whoooa, that was 11-years ago in 2003 so you get the trophy for the longest restoration in 914-World history
Beautiful project. Great job Anal Karl.


Tom
Posted by: CptTripps May 16 2014, 07:18 PM
Whoooa, that was 11-years ago in 2003 so you get the trophy for the longest restoration in 914-World history
Beautiful project. I think Gint has that honor.
http://www.914world.com/bbs2/index.php?act=ST&f=2&t=1191
Posted by: iamchappy May 16 2014, 07:53 PM
Qarls not done yet so no clear winner... plus Voltron has been welding up that lost soul of a car forever too, he's still in the race....
Posted by: Bleyseng May 17 2014, 05:01 AM
Qarl wins the trophy for longest project taken apart and parts in boxes perfectly restored.
Posted by: Qarl May 17 2014, 09:29 AM
Qarl wins the trophy for longest project taken apart and parts in boxes perfectly restored.
As a teenager, I was jealous of George's "lost warehouse." So I decided to create my own!
Posted by: mepstein Oct 8 2014, 06:37 AM
Progress?
Powered by Invision Power Board (http://www.invisionboard.com)
© Invision Power Services (http://www.invisionpower.com)