Printable Version of Topic
Click here to view this topic in its original format
914World.com _ 914World Garage _ PMB Performance - Project 914 ORV!
Posted by: Eric_Shea Mar 30 2014, 09:36 PM
We've been playing with this one in our spare time. I don't think I ever put an official thread up here on the site so, here goes!
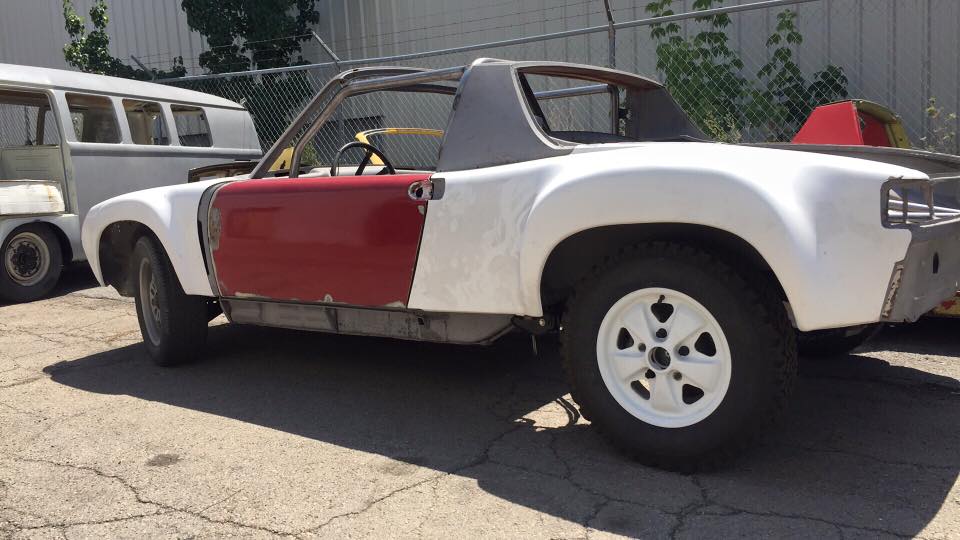
This piece of crap will soon become "Project 914 ORV". Actually what looks pretty bad on the surface; is pretty bad "on the surface".
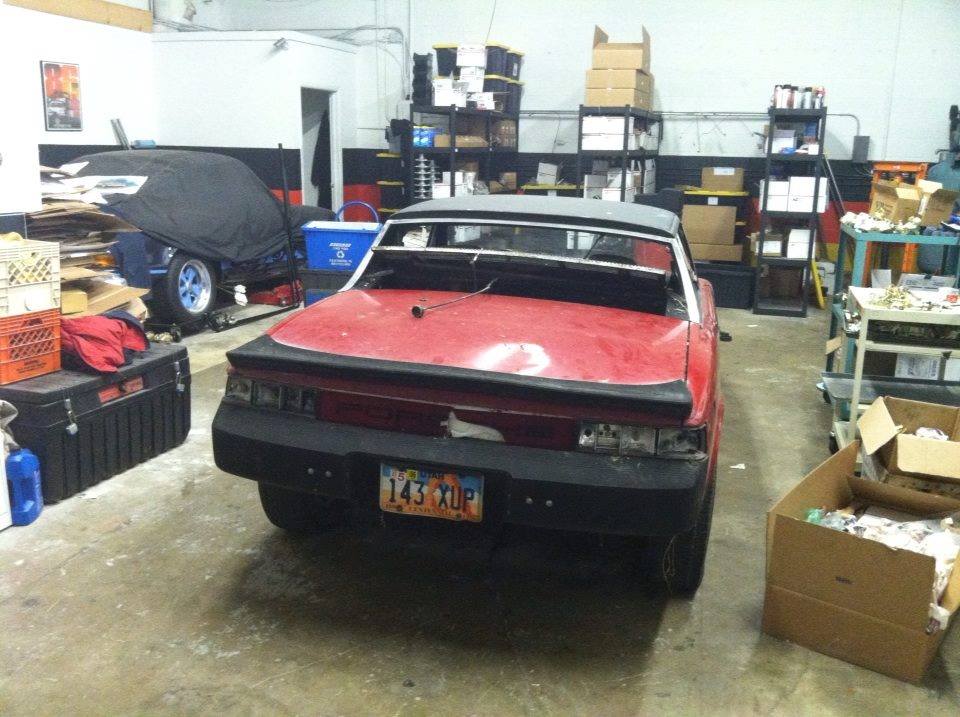
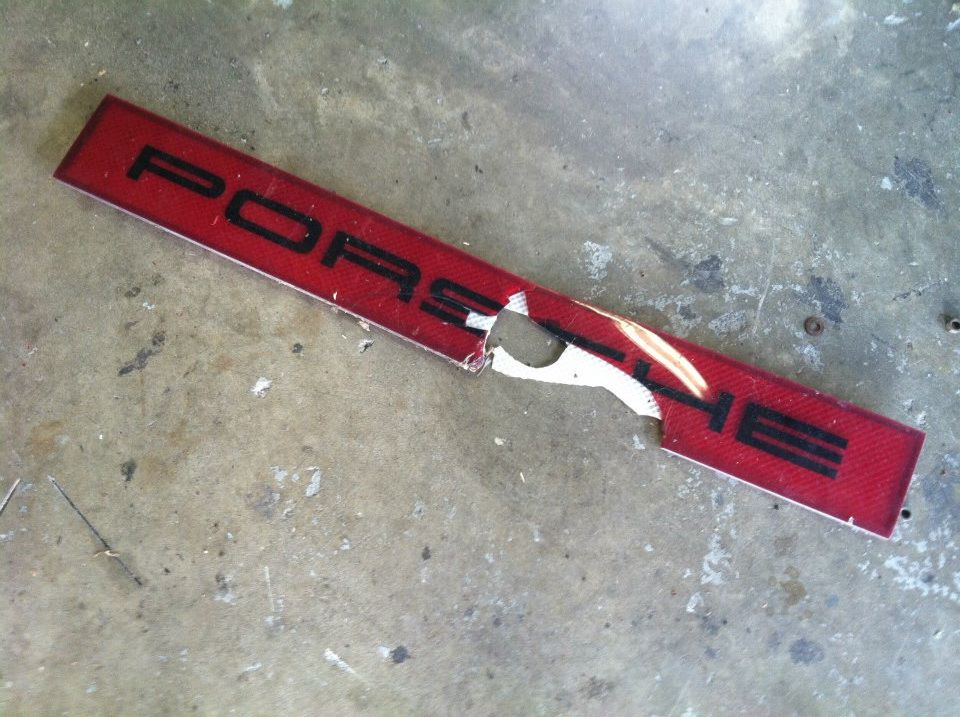
As many 914's go, someone tried to make this one something it isn't. It isn't a "slant nose" no matter what you do to the fenders. And, I don't care how many Miami Vice episodes you've watched, that rubber whale tail thingy and the rear reflector are just plain "wrong".
But wait... Speaking of "just plain wrong", were going to carve this late model, big bumpered version of of 80's lust into a high-rise, fiberglass skinned, tubed tub that's ready for Utah's backcountry. That's right; White Rim Trail here we come!
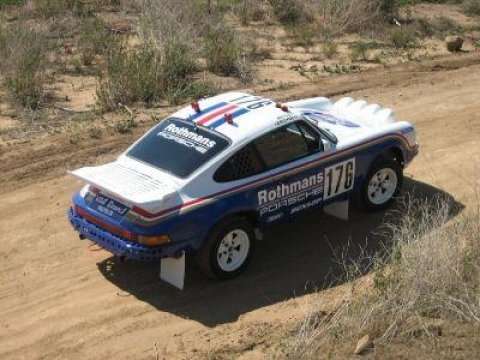
Fear not, we're still thinking "all things vintage" so, we'll be pouring over factory rally pictures and builds to make sure we can learn all we can from the engineers at Porsche who went before us.
Here it is as it arrived: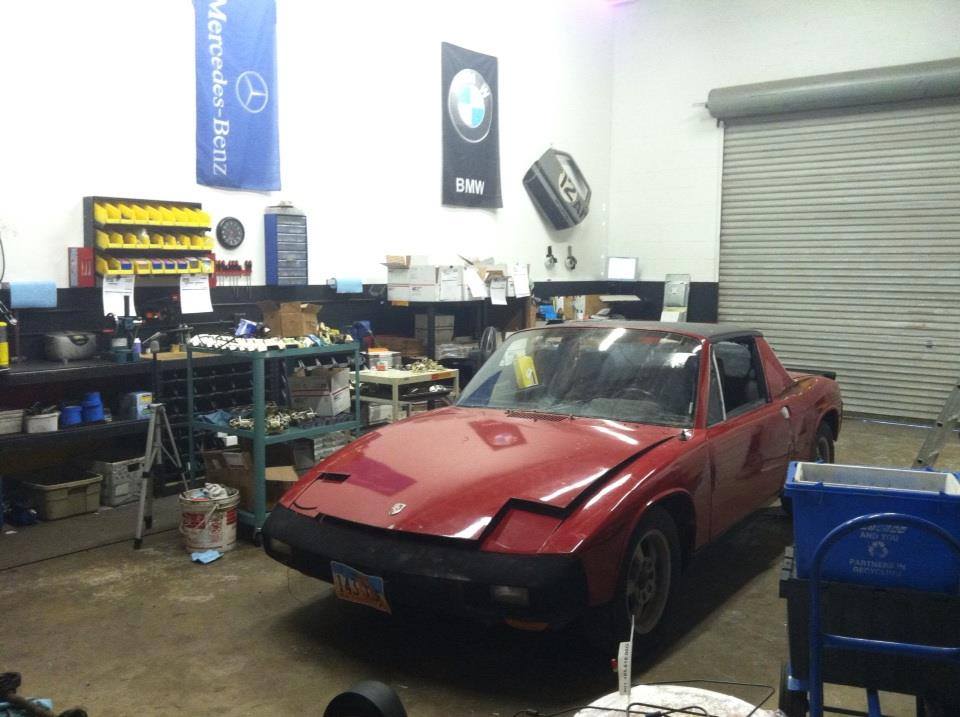
Mmmm purdy huh? 
Time to get busy. Shovel loads of crud came out of the trunks and interior: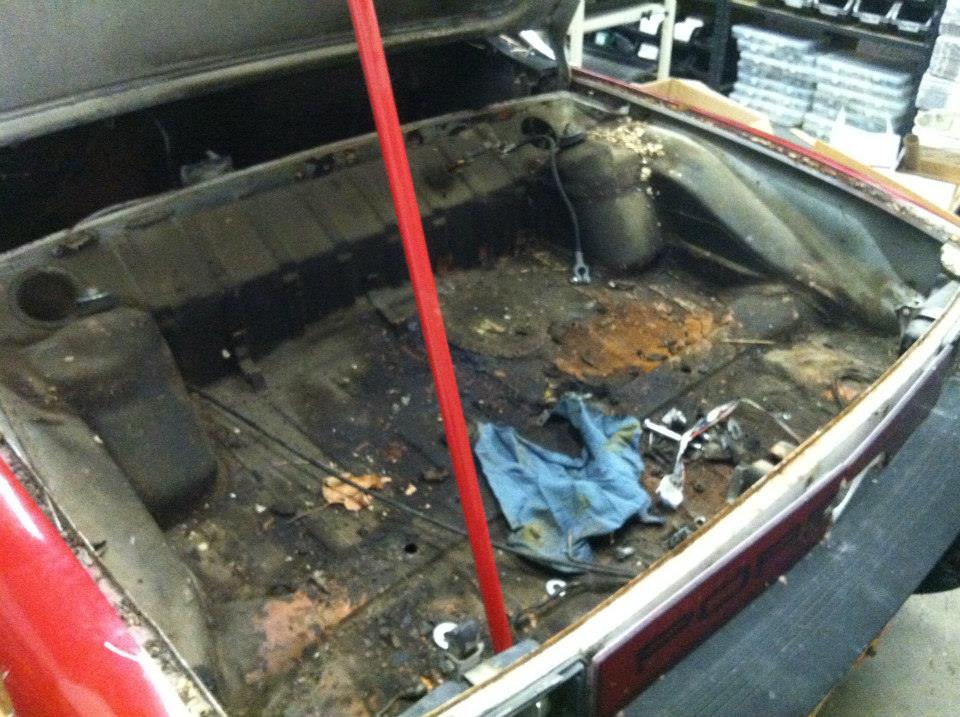
Bummer... 

Getting there: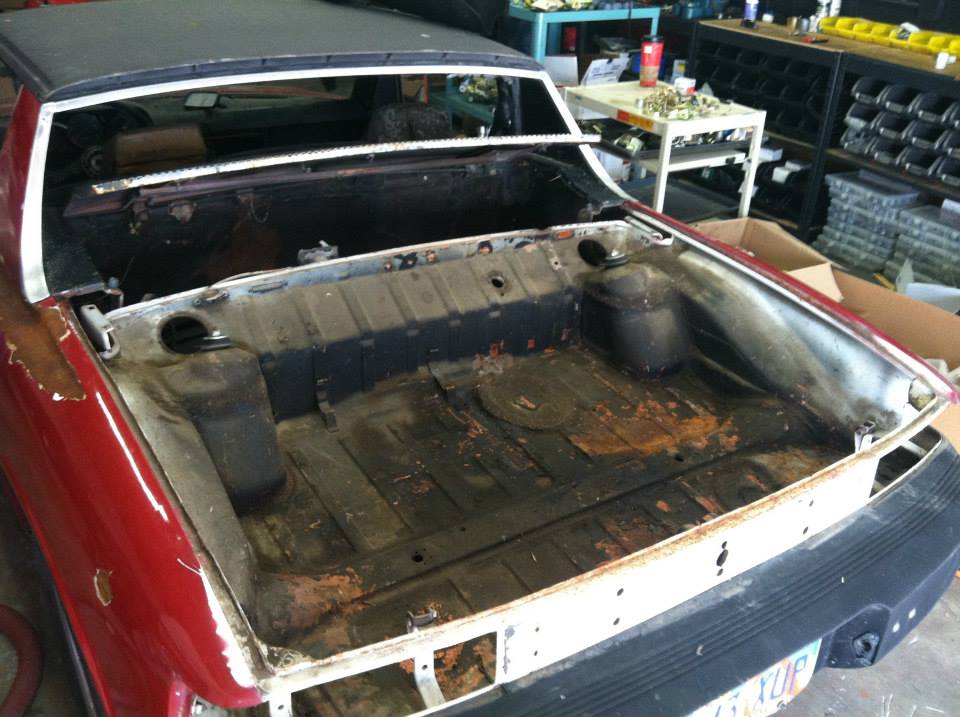
Buuuu-Bye: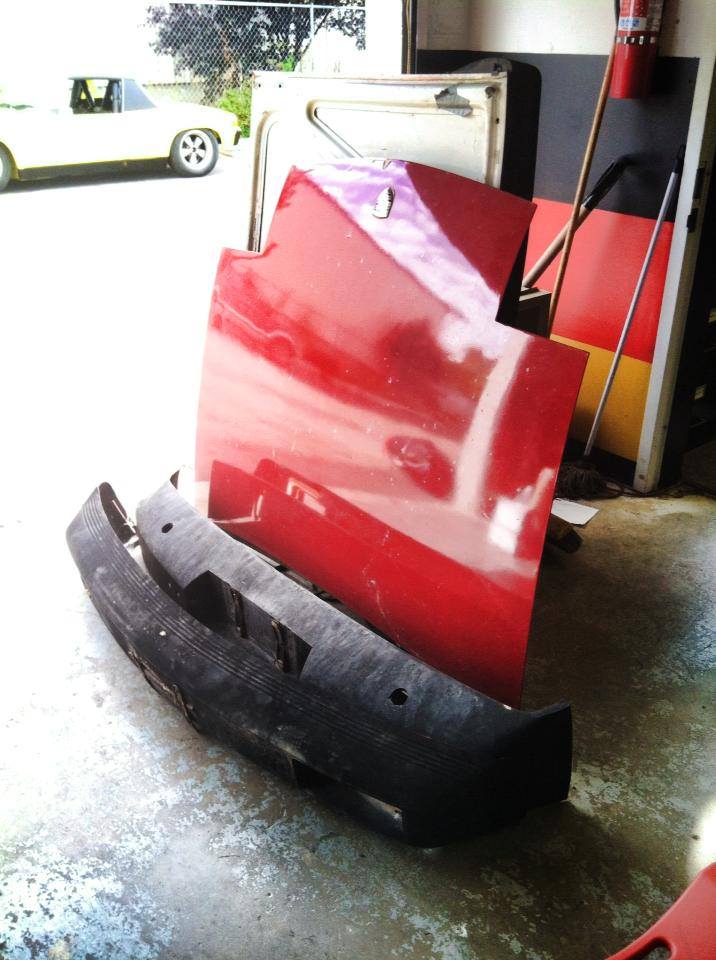
Ooooh, the comedy never stops when you're working on a 914. Farm and Fleet tractor implement lights silly-coned on for turn signals! Yee-Haw!!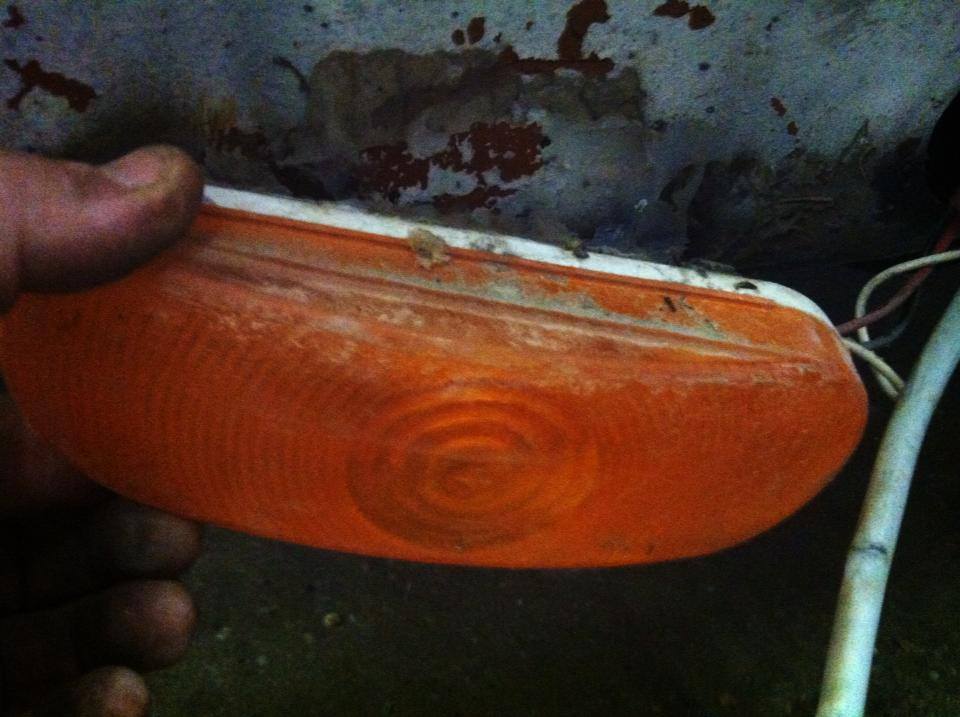
Rio inspecting the progress: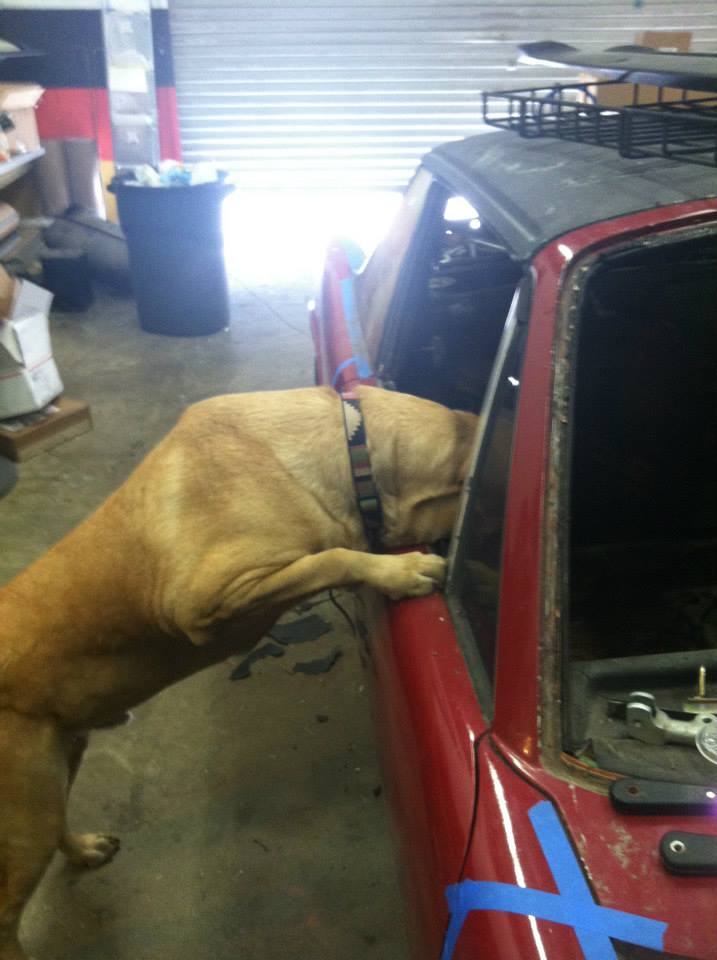
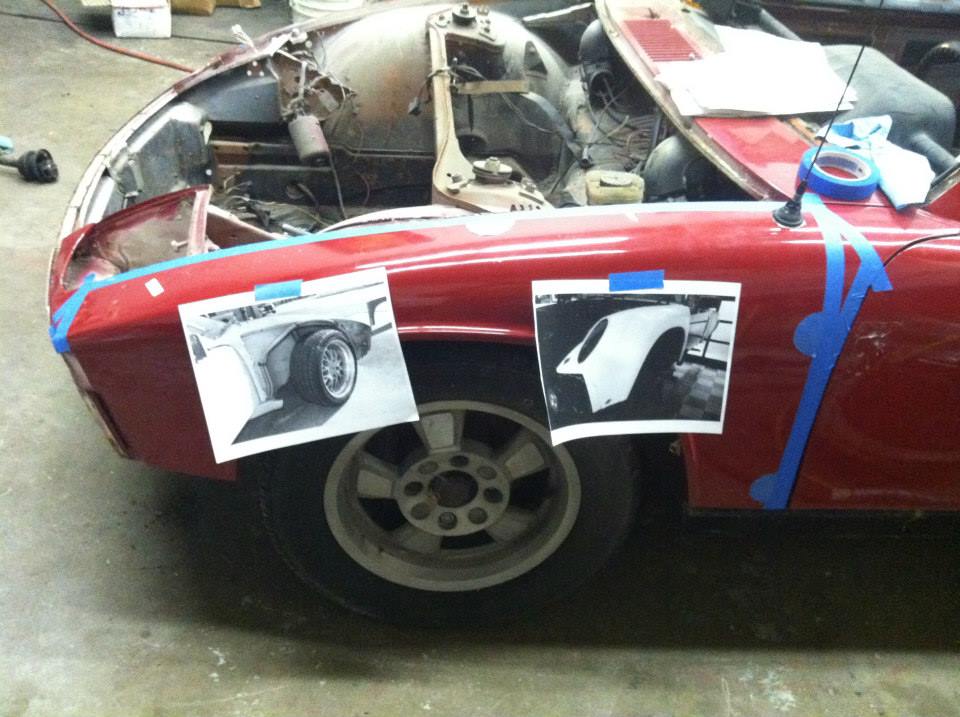
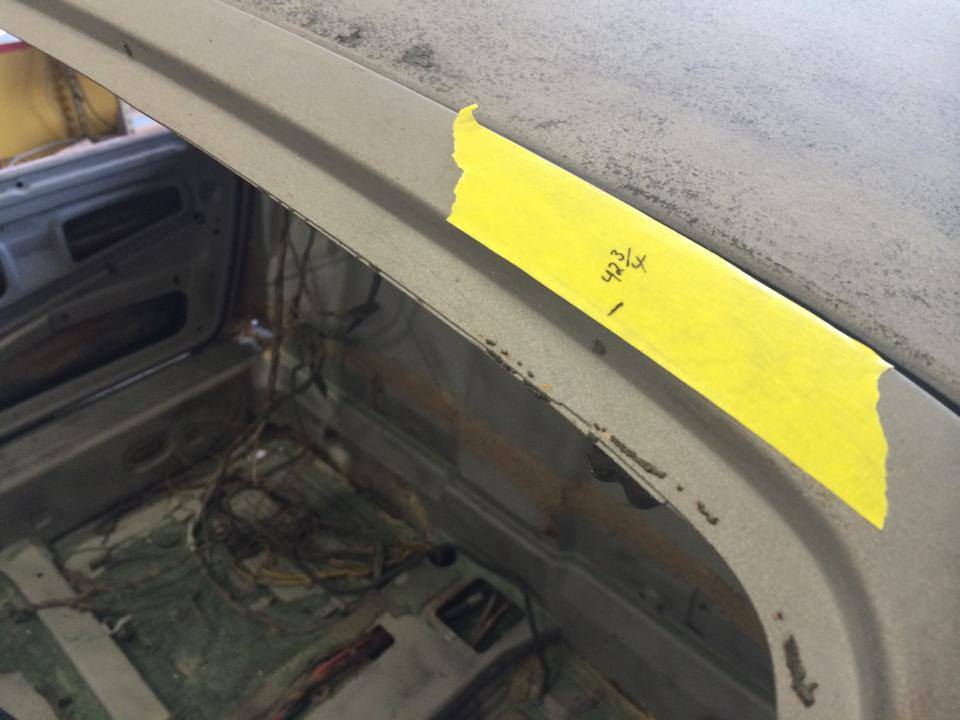
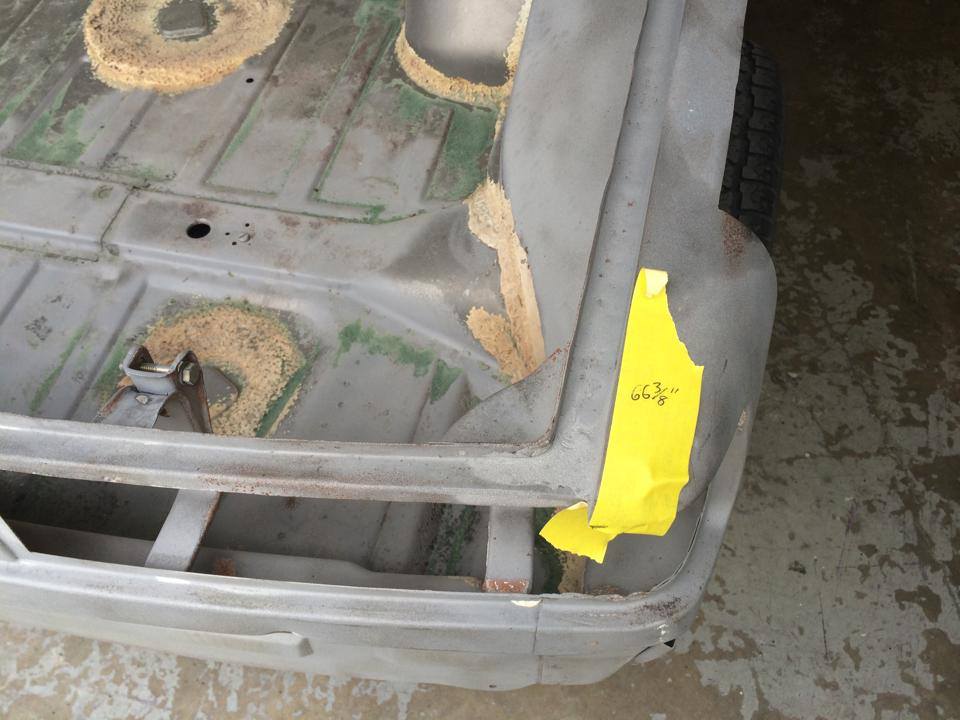
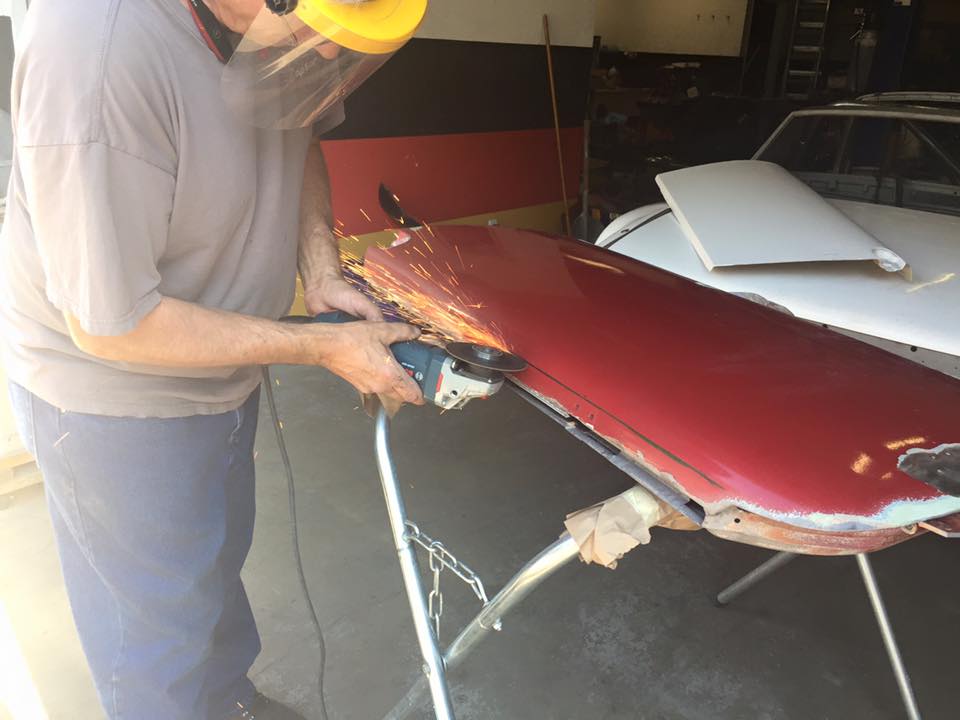
Off come the body panels. Special thanks to Elli-rot who went before us. He sent a bunch of pictures of his Dzuz fastener locations and offered advice on where to put them as we cut the panels off. Here you see pictures of his cars taped to the body as we taped and cut. 
That there's a good 1 1/2" of Bondo. 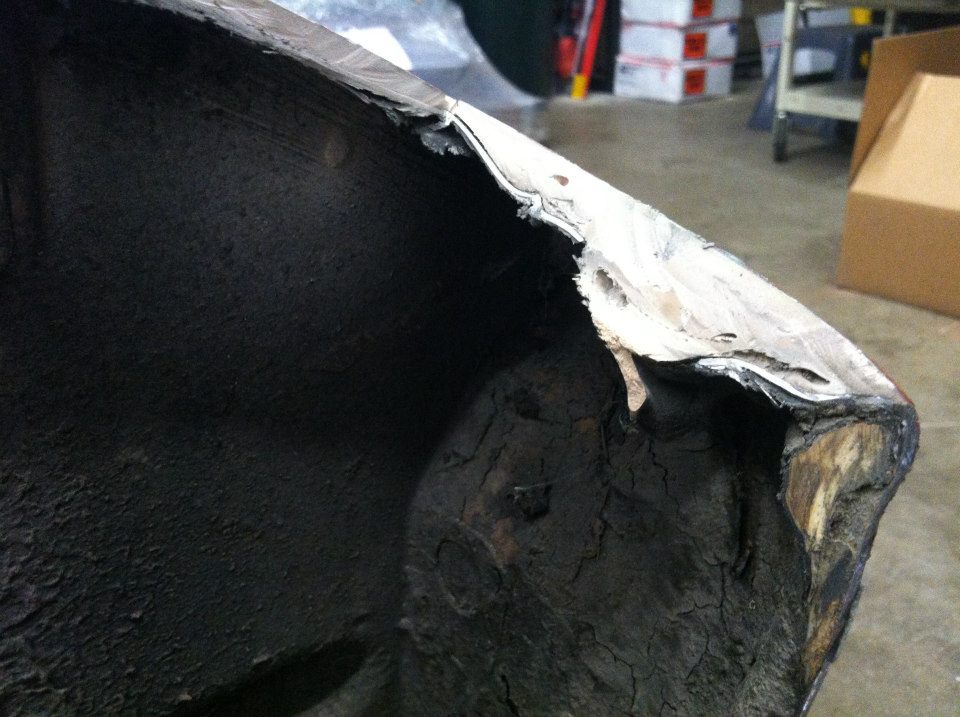
Done: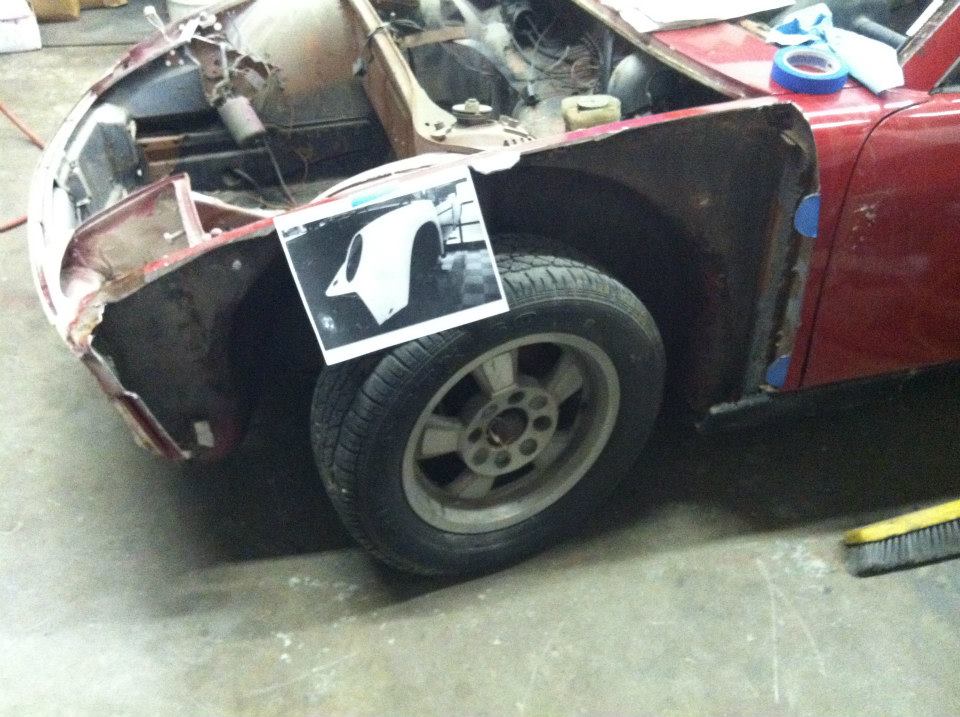
Nice solid tub is what we were looking for and it appears that's what we got.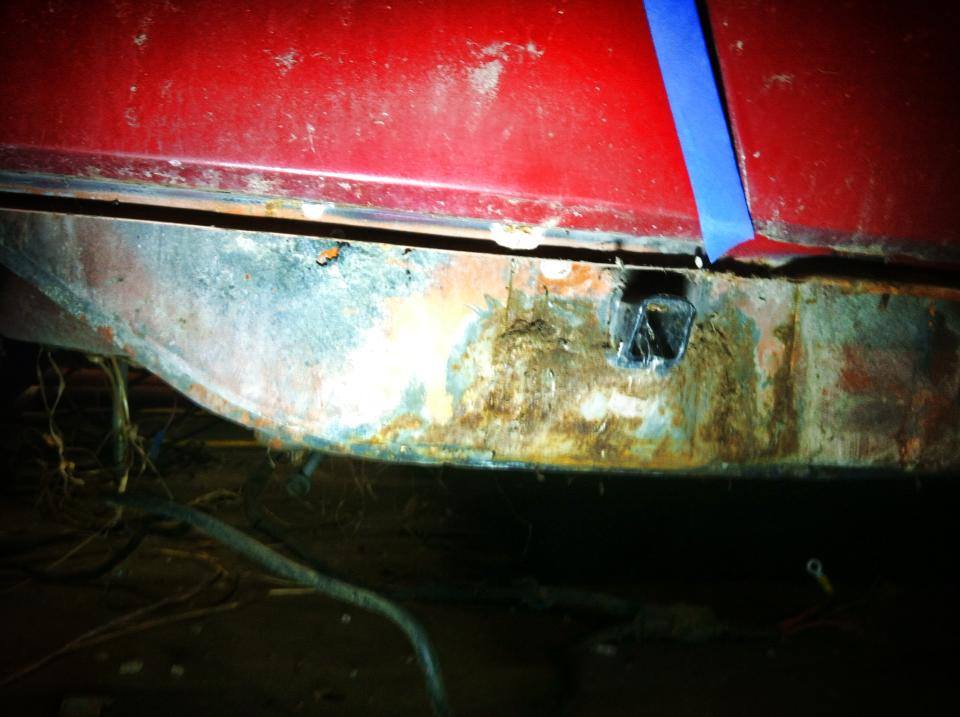
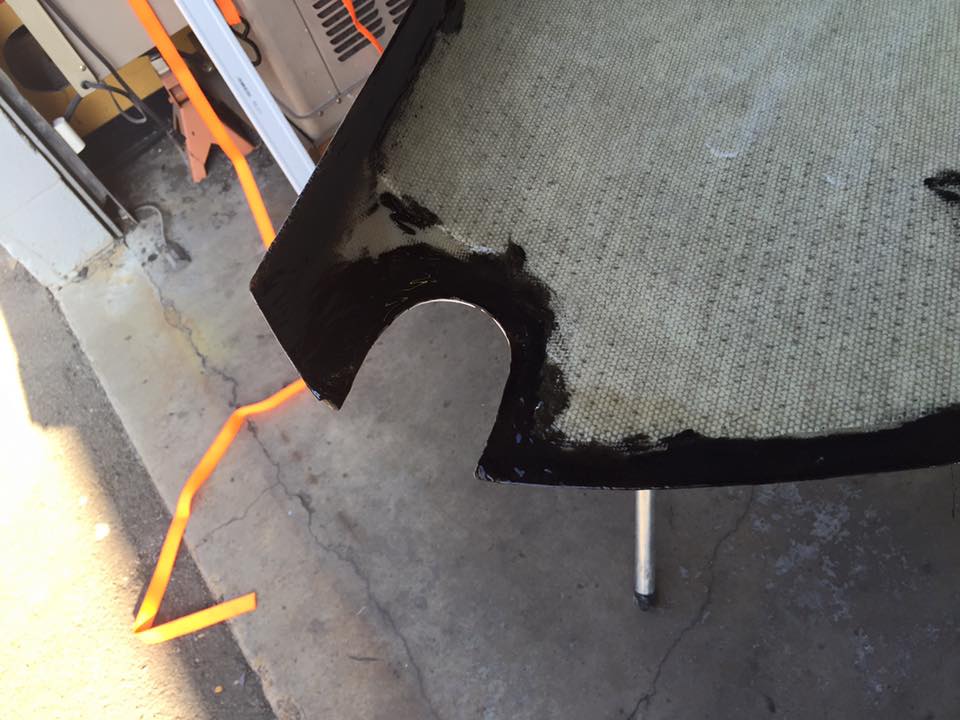
More panel cutting: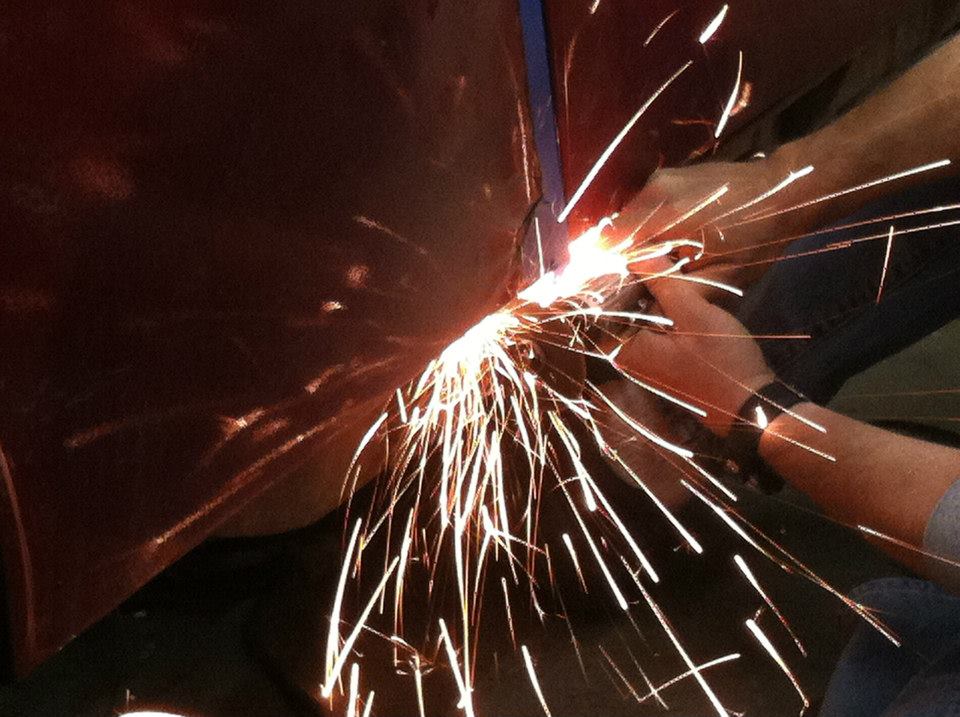
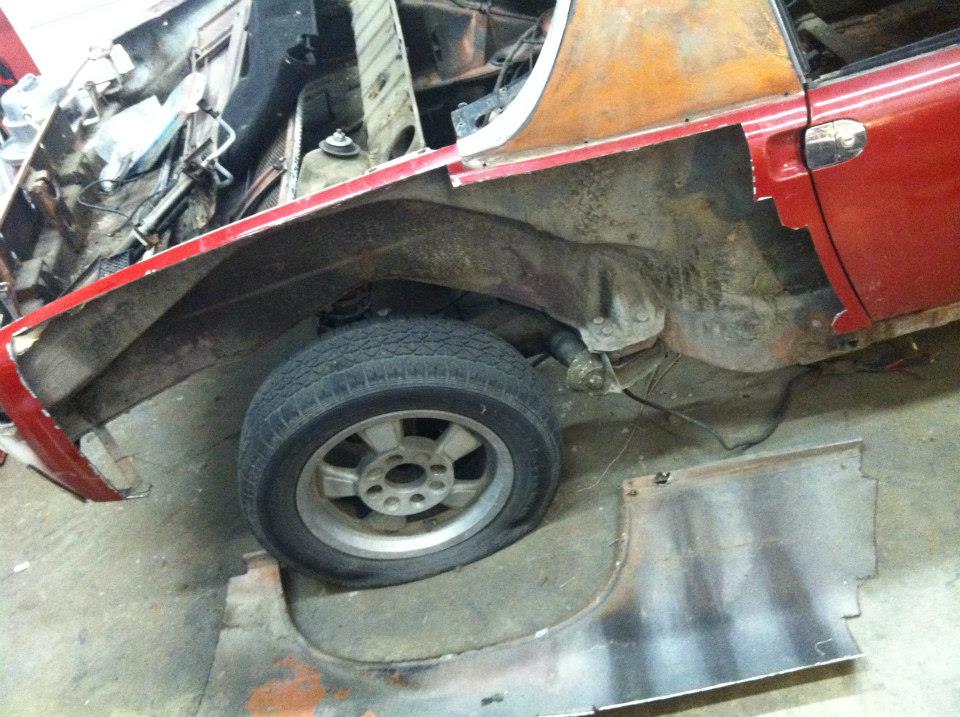
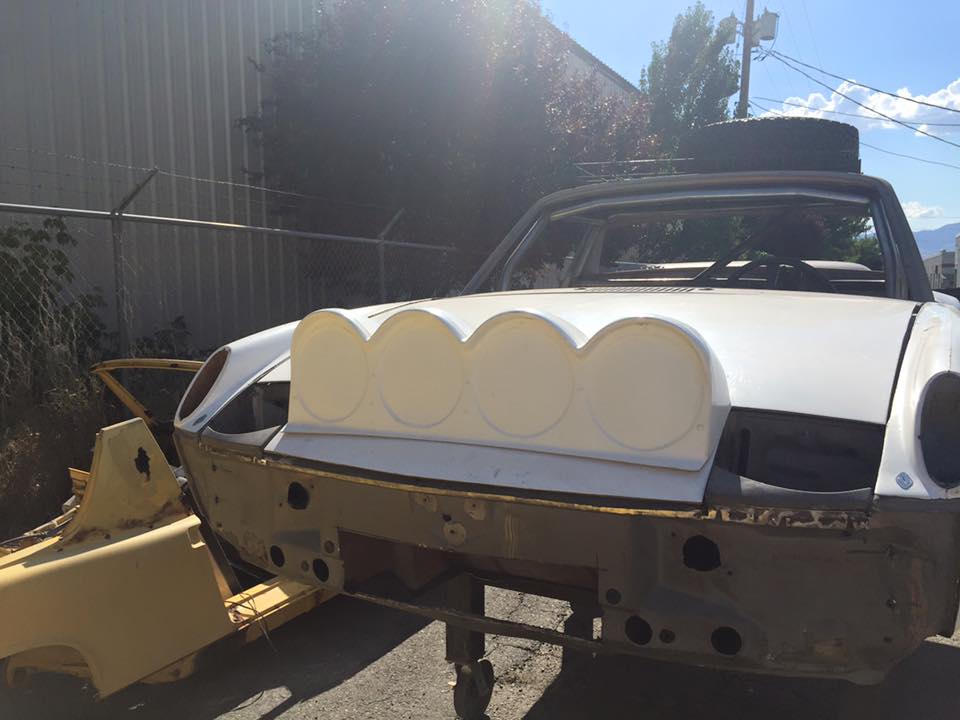
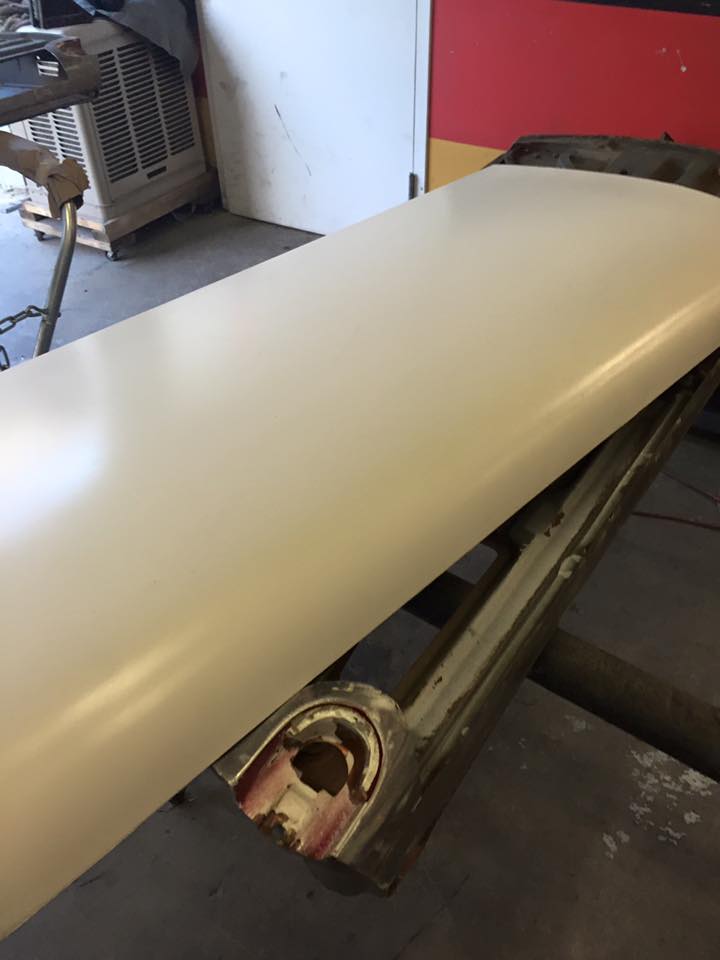
Here you can see what we're aiming for. All of the QRS panels from Jeff are laid on the car in a mock assembly. Already looking 100% better! Next it's off to sand and soda blasting.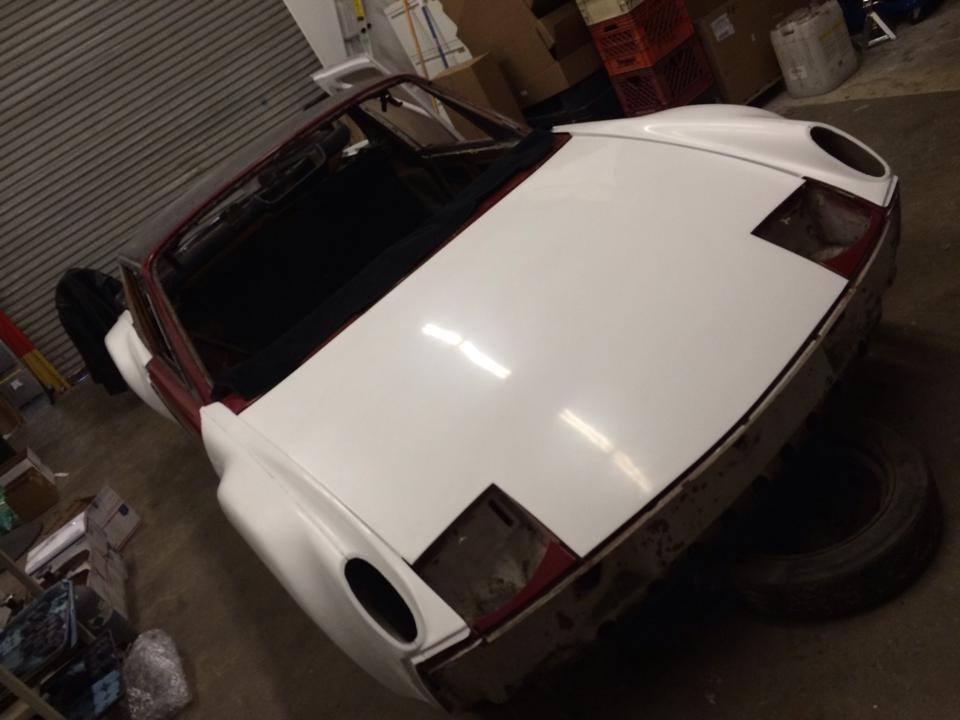
Posted by: ruby914 Mar 30 2014, 09:51 PM
This is going to be good 
![popcorn[1].gif](style_emoticons/default/popcorn[1].gif)
Posted by: Eric_Shea Mar 30 2014, 09:51 PM
Here's the tub at the media blasters shop. We actually did both sand and soda as there was a bunch of undercoating in the wheel wells that the sand would cut better. We wanted the trunks to be soda blasted as those areas have the finer detail that will be seen.
There will be no original body panels on this car (with the exception of the sail panels). The doors will be re-skinned and all of the panels on the car will be the complete QRS GT panels. Bumpers and all.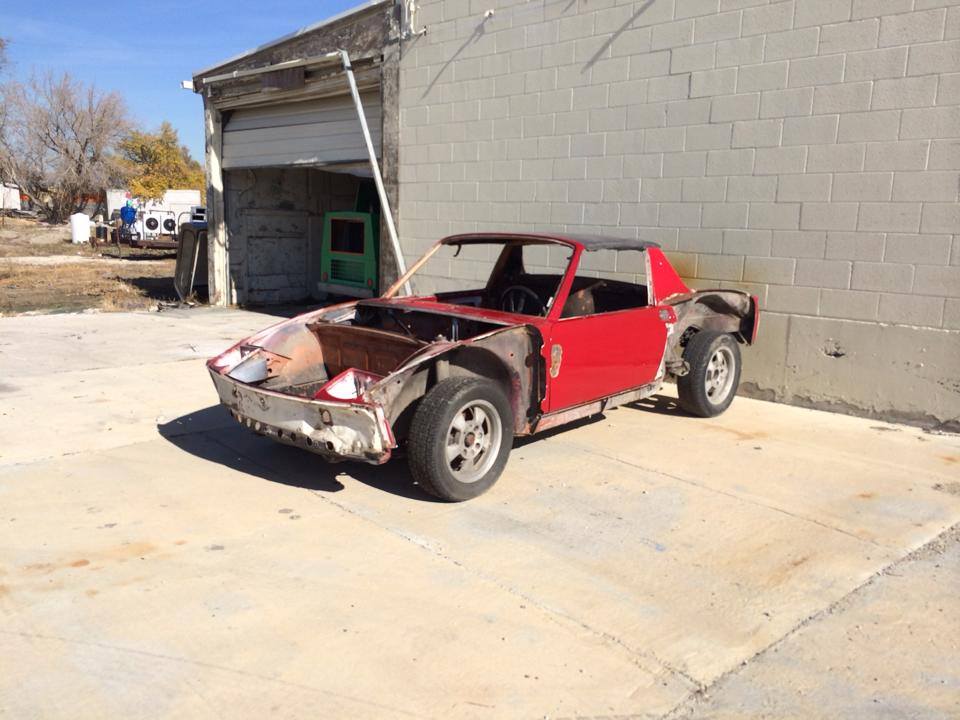
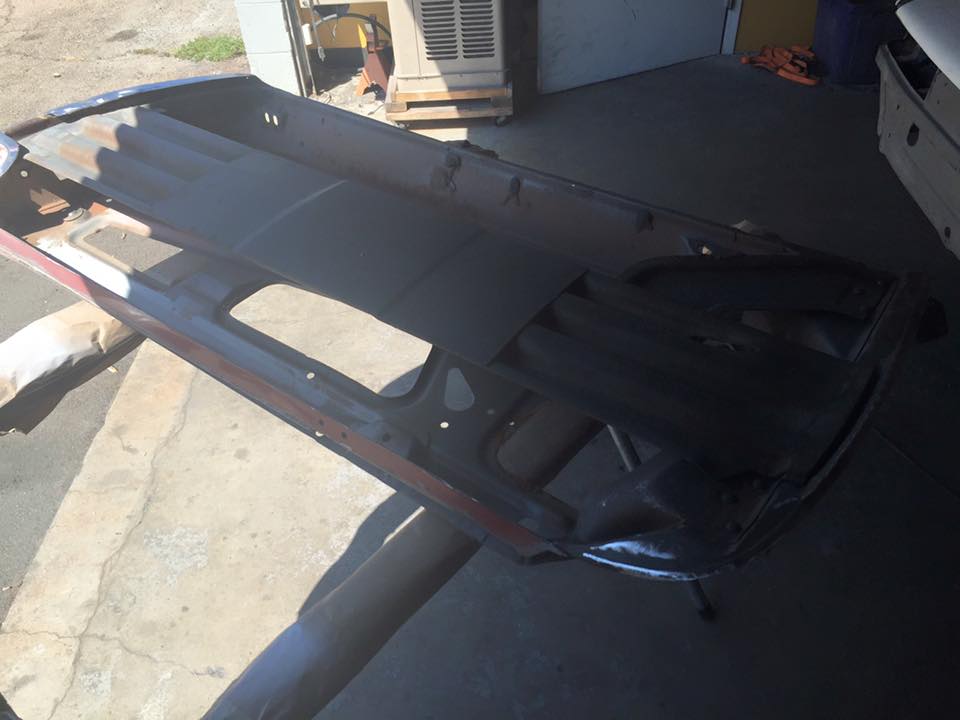
There was no light inside the shop when I got there so these pics are a little off but, you can see the tub is now stripped: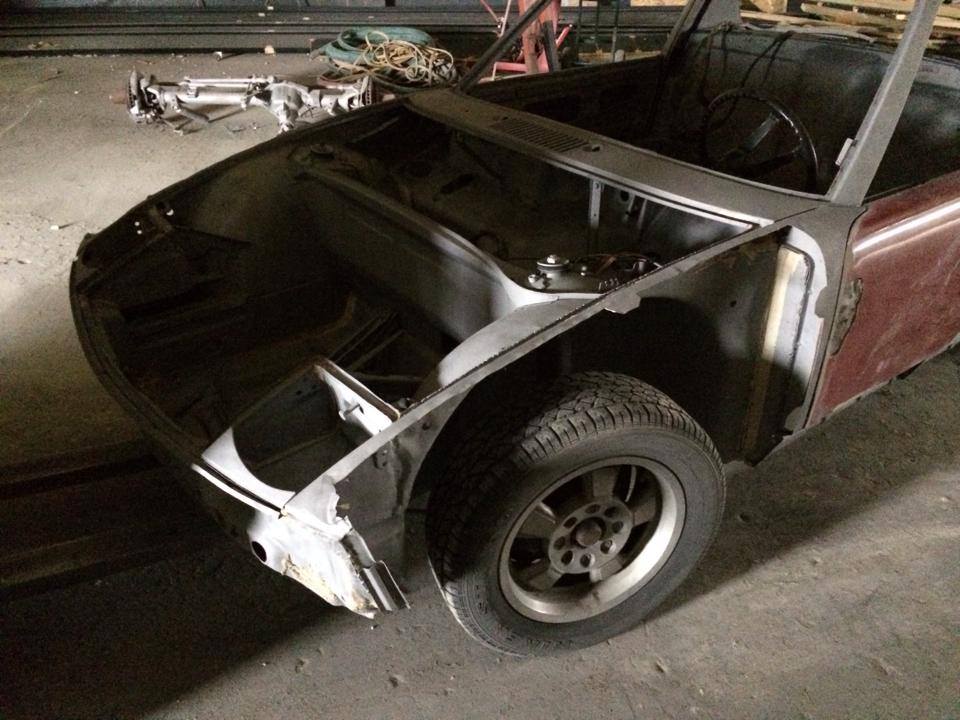
Here's how the soda looks inside the trunk. I just love the way it brings you back to factory metal: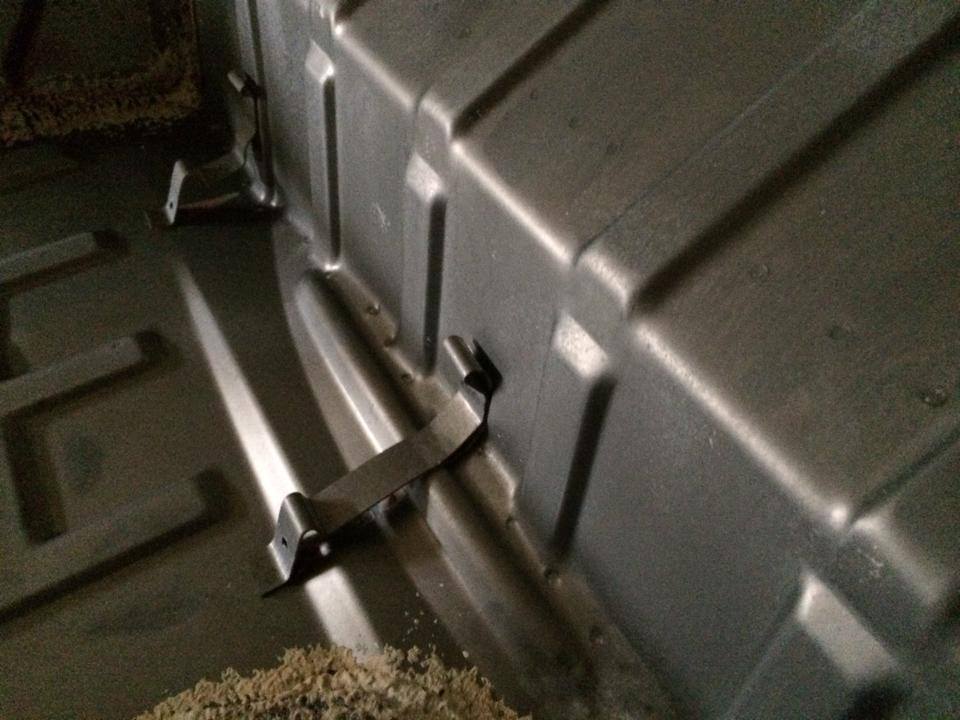
Here's a trunk full of goodies that we had blasted at the same time. These bits will be zinc plated in clear.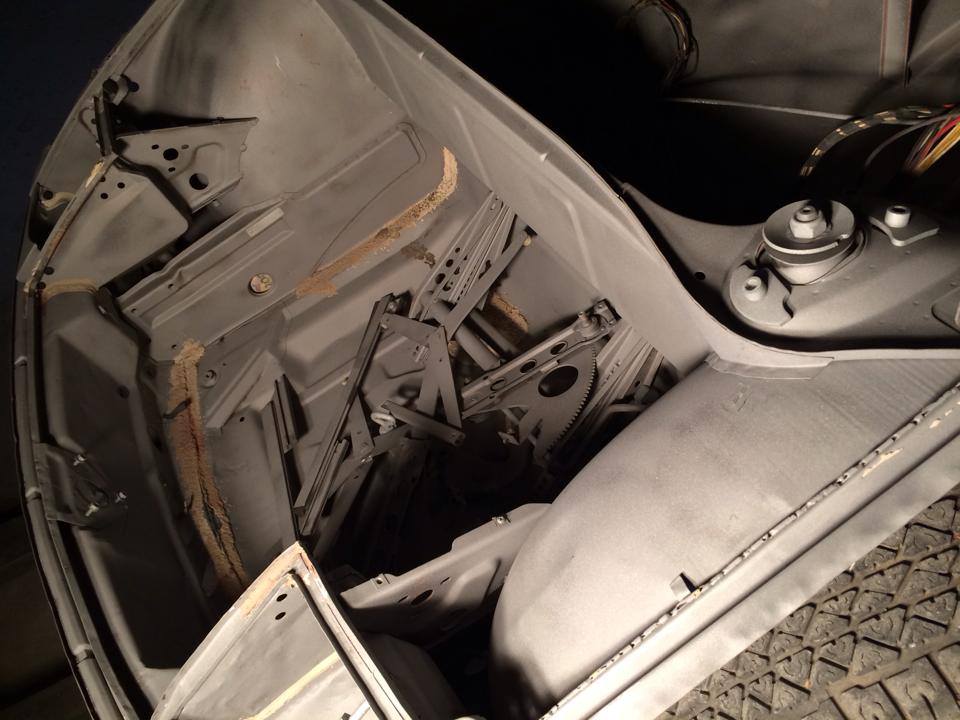
The dash and engine lid lay in wait inside the tub: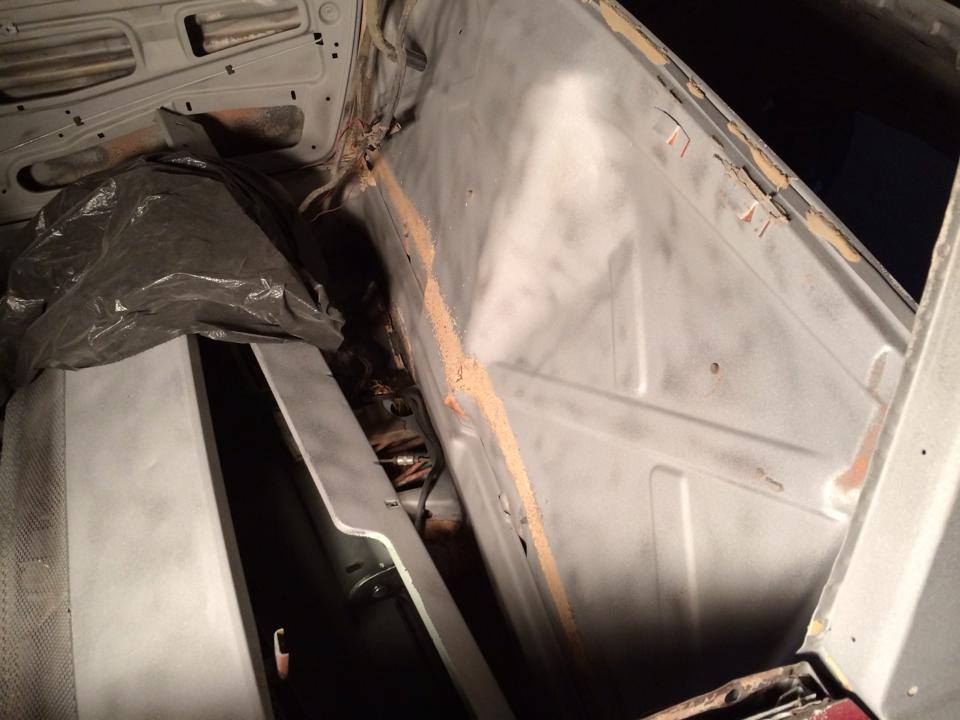
A small bit of hell hole work is about all that's needed here: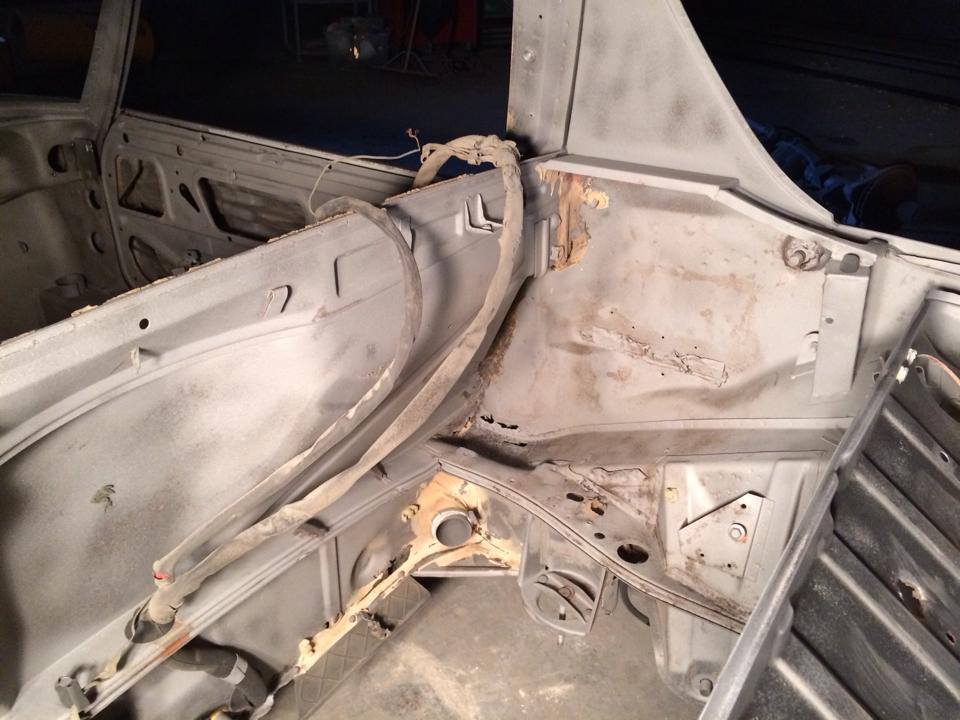
The rear trunk is fantastic. If your going to build a car, it really is a great idea to get the tub down to bare metal so you know what you're dealing with.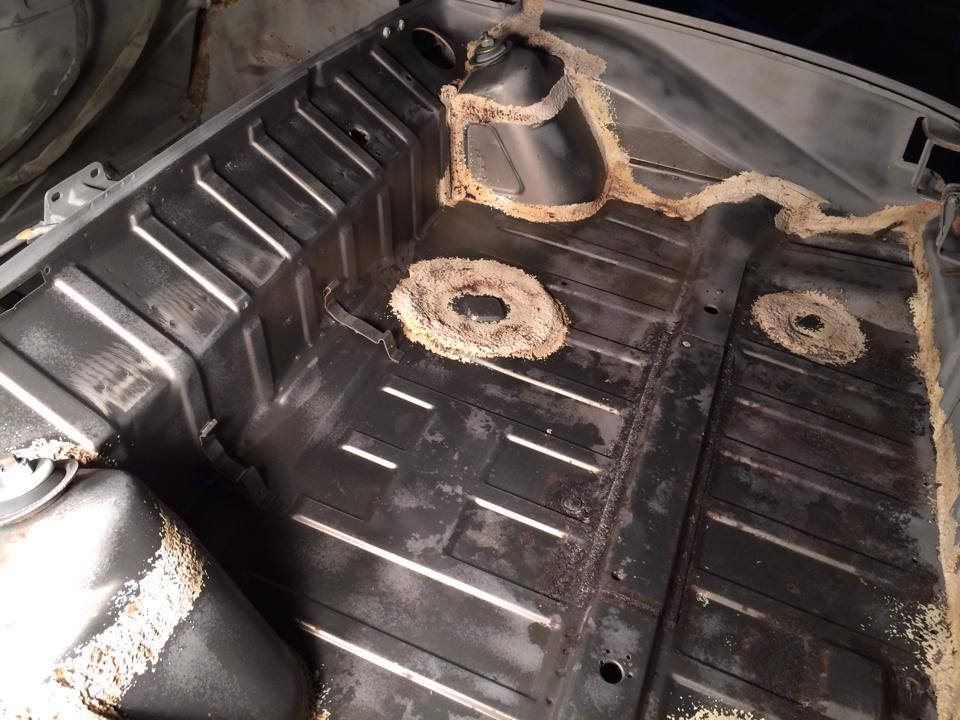
The next step was to have the car measured out top to bottom. This one is perfect on the suspension side and almost perfect up top. The front is only off by a few mm from a tap in the left front. We're currently deciding on how crazy we want to go with that as the car will be driven off-road and the entire skin will be new glass panels anyway...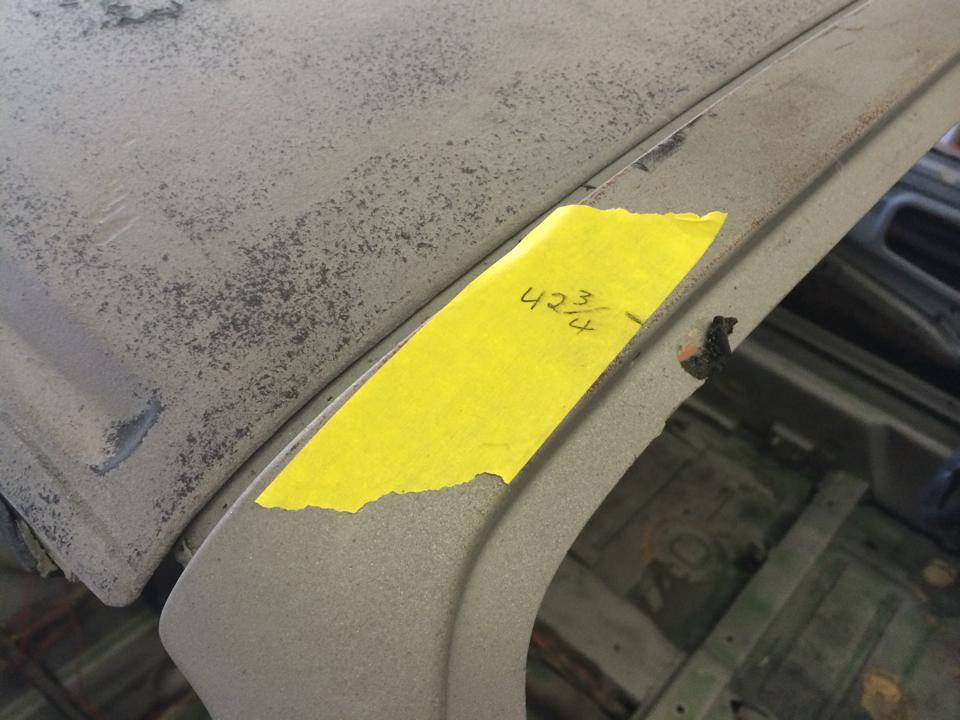
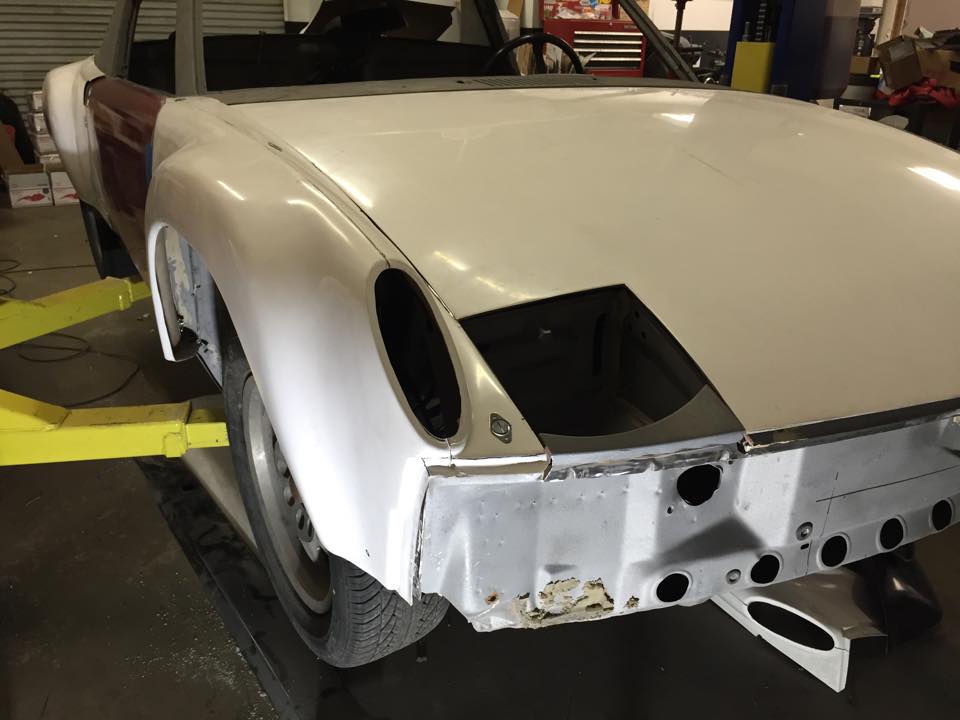
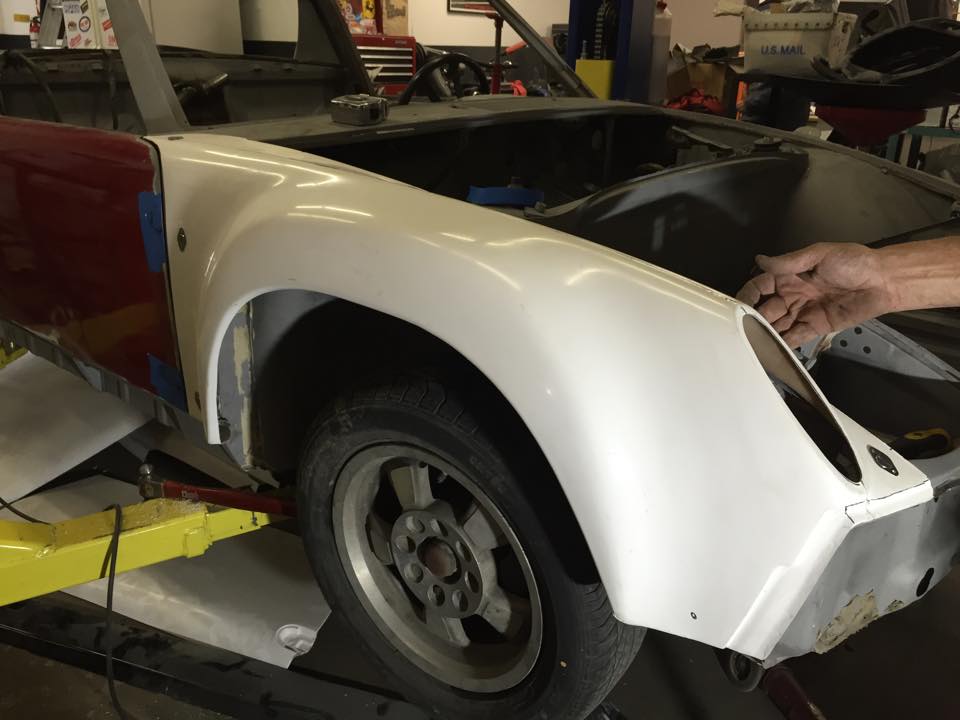
A little metal work will be needed here to get the left taillight housing right. Pretty simple stuff once you're at this stage in bare metal: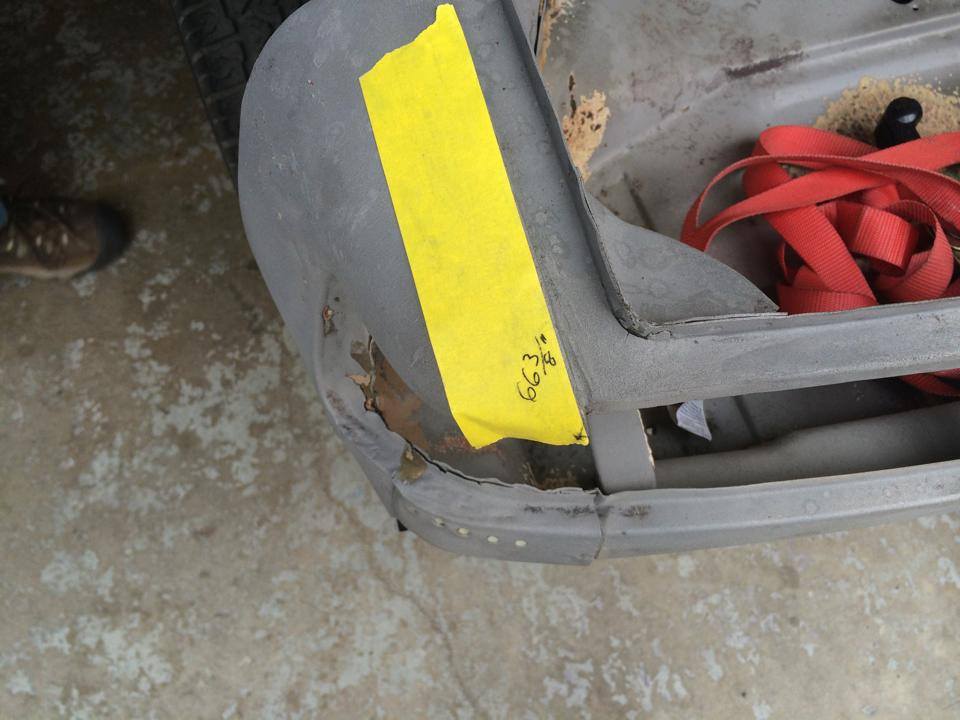
Next we'll dig into the suspension...
Posted by: Eric_Shea Mar 30 2014, 10:08 PM
We did a little something different with these control arms. We're still using our stiffening tubes but, this time with a little twist. People always asked "why not a lateral tube" so..., yeah; why not?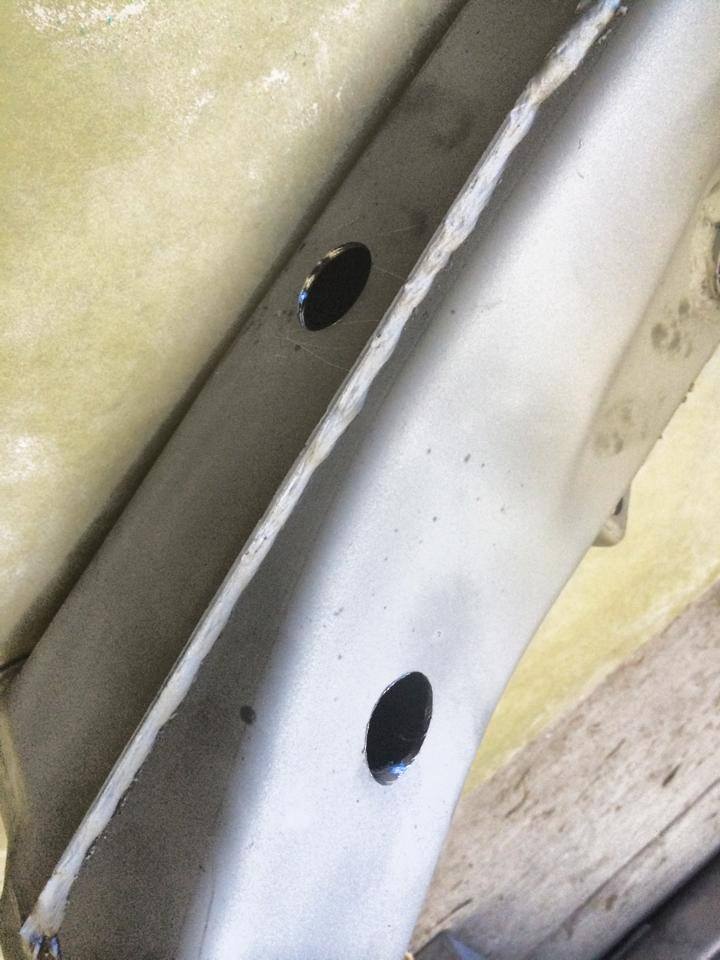
Here's the real twist. It turns out there's just enough room in there for a 1" tube so... that's where it went! 
The other side...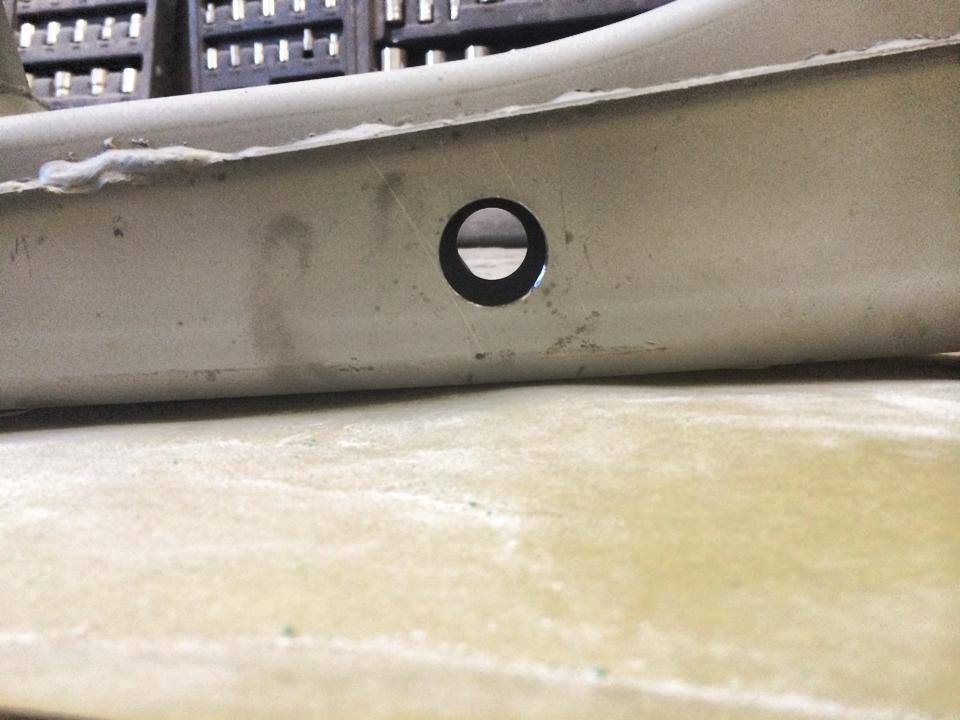
And another in the side evenly spaced from the lateral tube: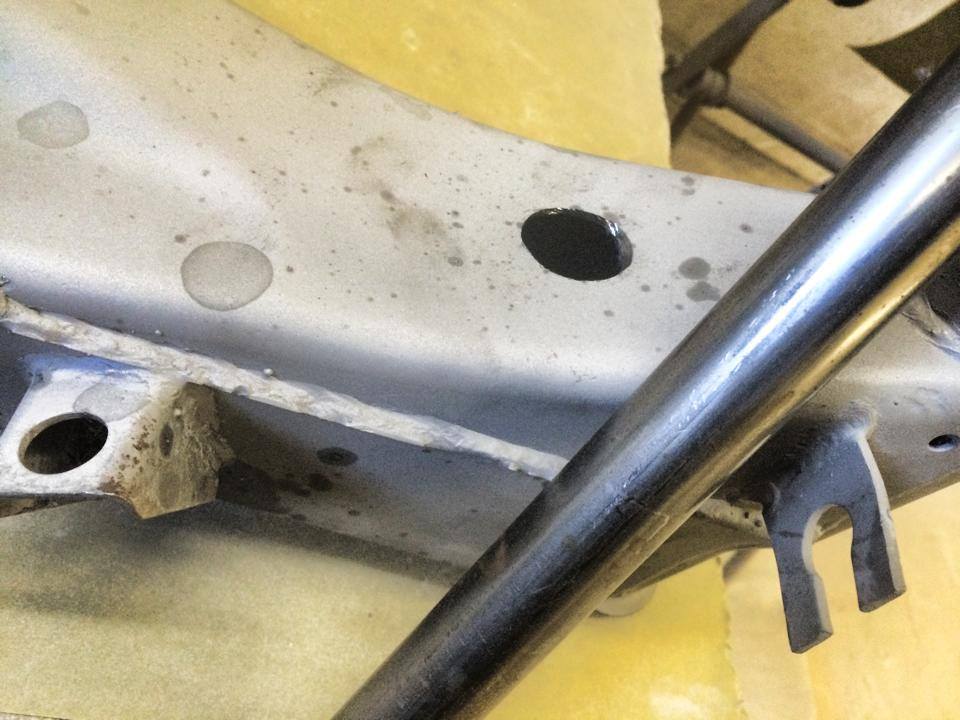
All welded up and ready to go!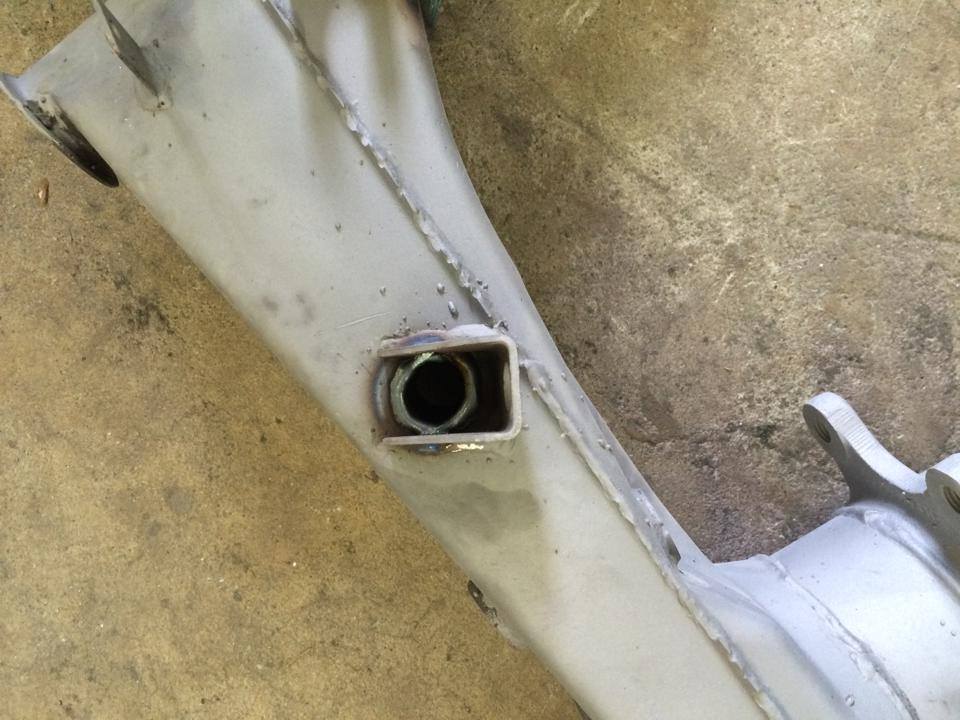
Gusset's too!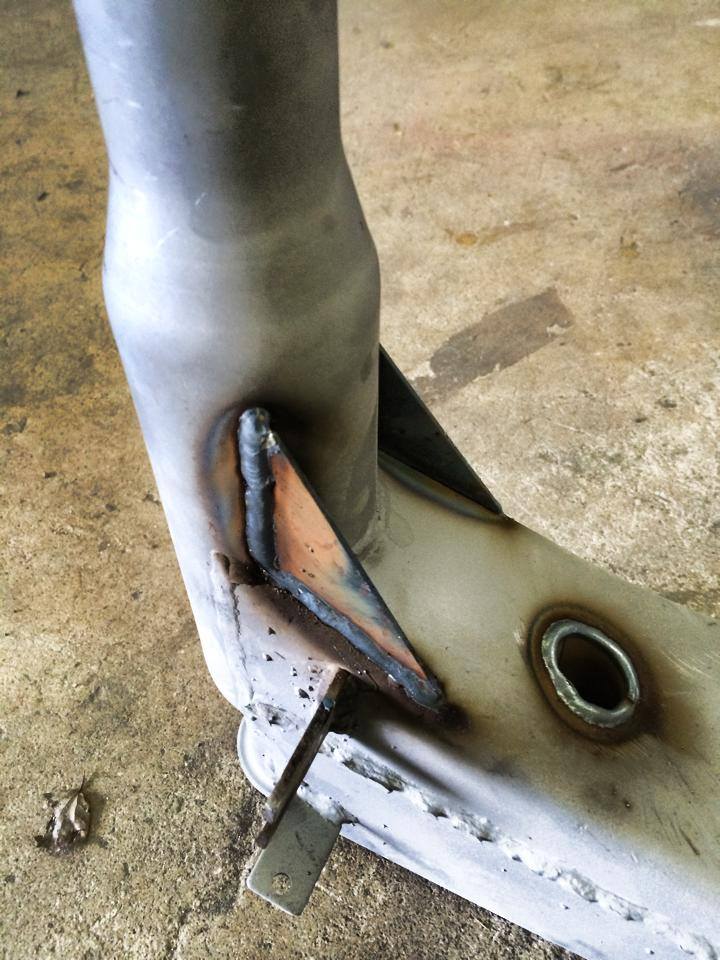
Then we turned our attention to the front end. While the whole world's gone plum-crazy over raised spindles, we decided to lower ours! 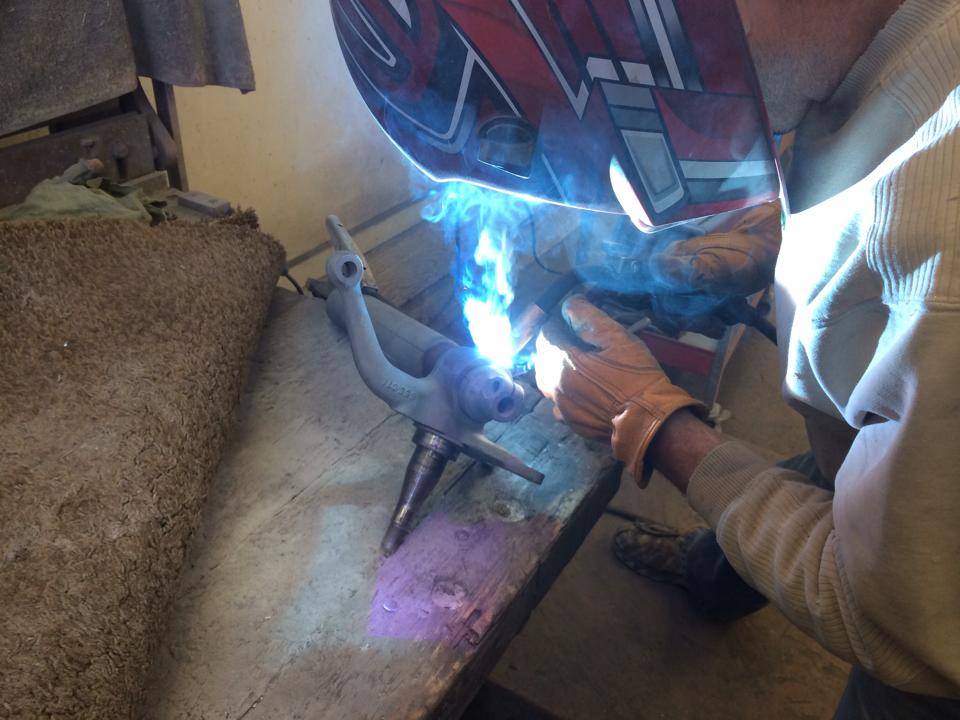
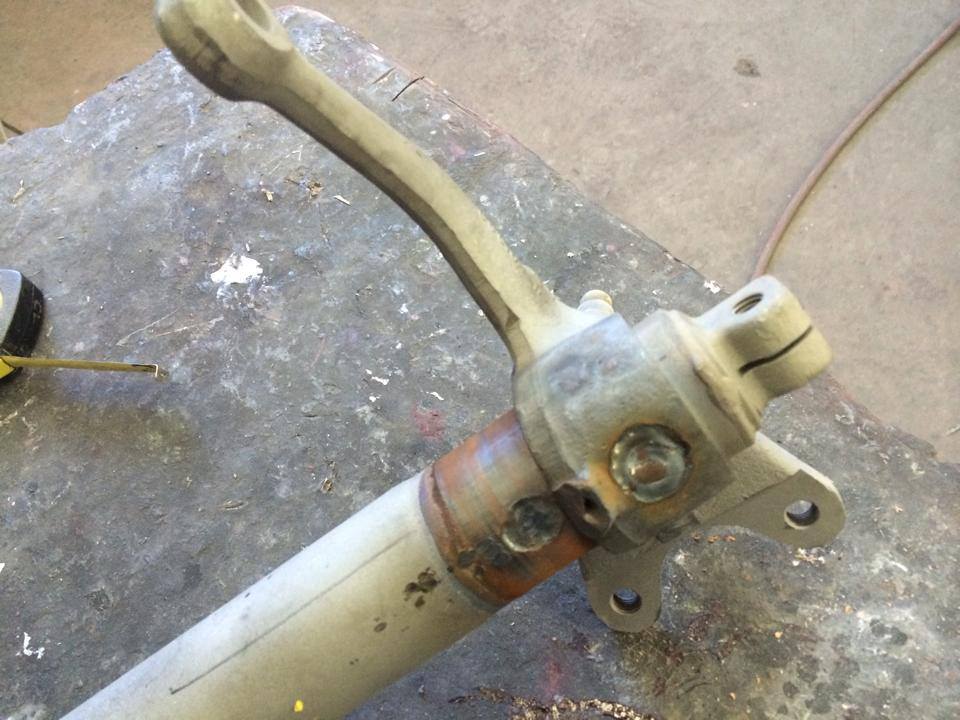
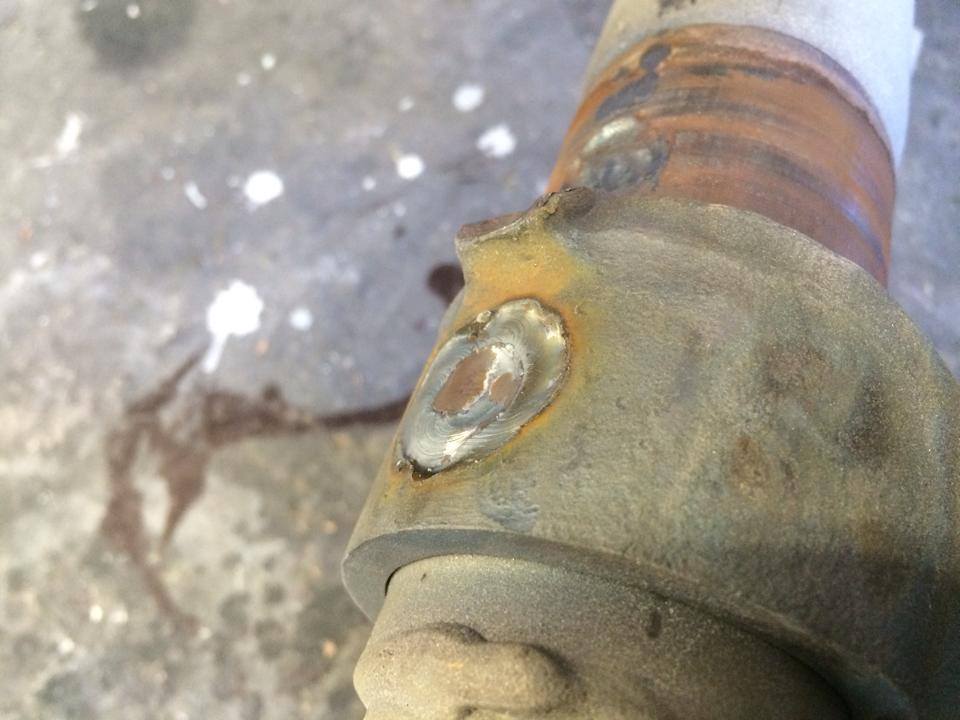
Gusset's too! 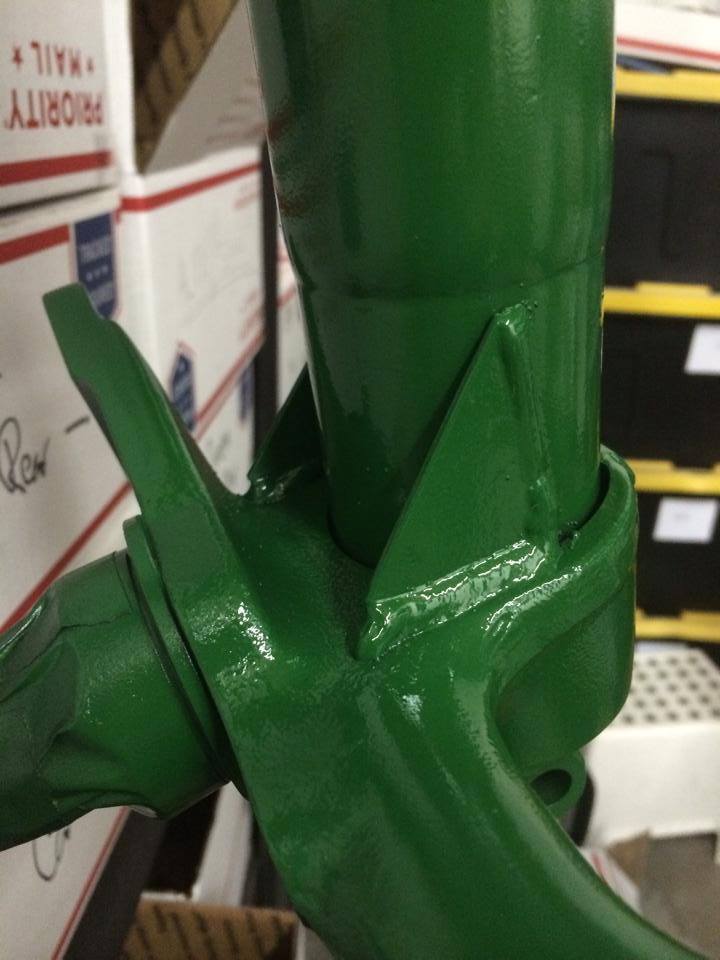
This car is getting Bilstein's all around so we went with the "Oliver" shade of vintage Bilstein green. The later Bilstein is more of a John Deere green with a more yellowish tint to it.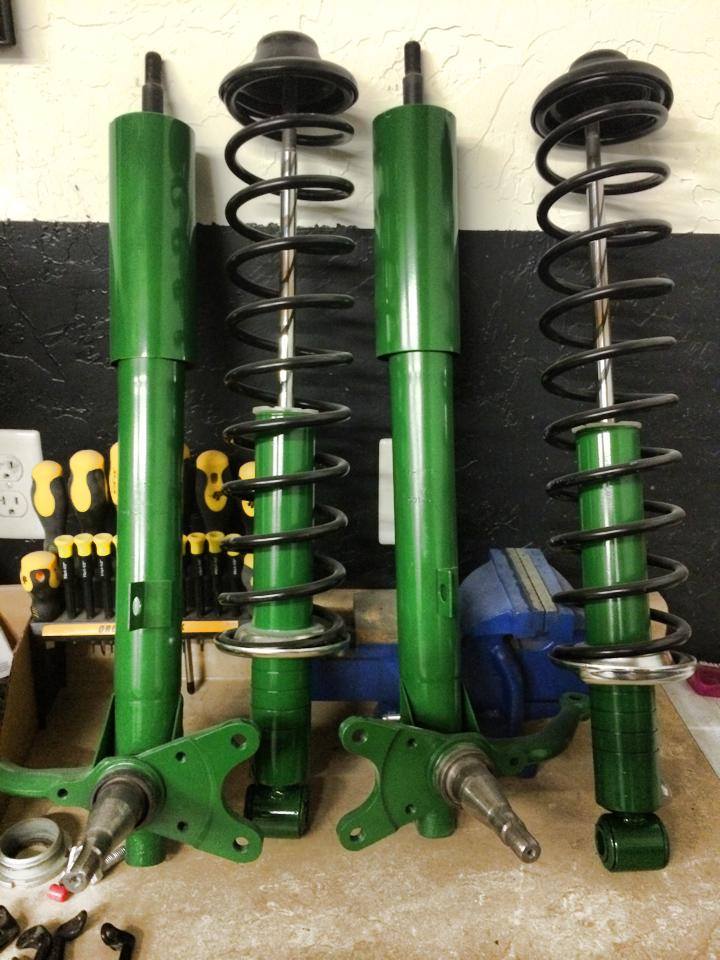
We're still playing around with some inner suspension ear designs for the rear but, suffice to say, we'll have an additional 4-6" of lift with basic stock settings (and these):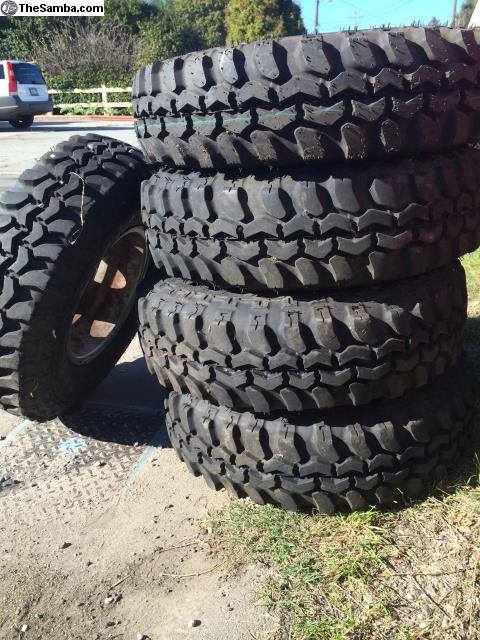
Still not sure if that will be our final tire choice but, they should give an additional 2" of lift off the stock ride height.
Stay tuned.
Posted by: porbmw Mar 30 2014, 10:13 PM
Can't wait to watch this thread....will be interesting, seeing this to fruition...and...see what it does. 
Amazed to see how well the soda blasting works...gonna see if I can talk someone into splitting cost and setup of that one...Hi Jake...
Posted by: Socalandy Mar 30 2014, 10:20 PM
This will be fun to watch, nice progress
Posted by: Mike Bellis Mar 30 2014, 10:23 PM
Subscribed!
Posted by: Eric_Shea Mar 30 2014, 10:26 PM
The tub is currently at Insane Buggy Werks getting a cage that will tie into the shock towers and into the suspension pickup points. One look at John Adderly's Northstar powered sand rail and you'll know why they call it Insane Buggy Werks! LOL They know how to bend tube and make strong off-road frames.
I also asked Jeff Zwart his thoughts on the cage after having his issues with his Pan-Alaska tub. He mentioned the areas to tie into which he thought would do the trick for what we're after. Thou shall be done...
...stay tuned.
Posted by: Eric_Shea Mar 30 2014, 10:34 PM
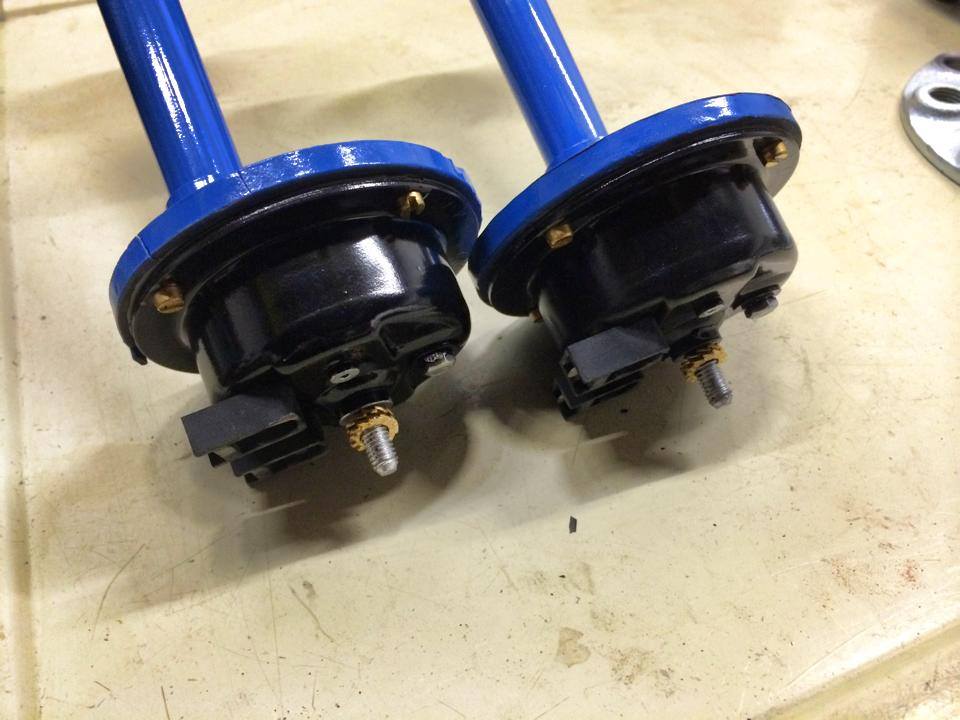
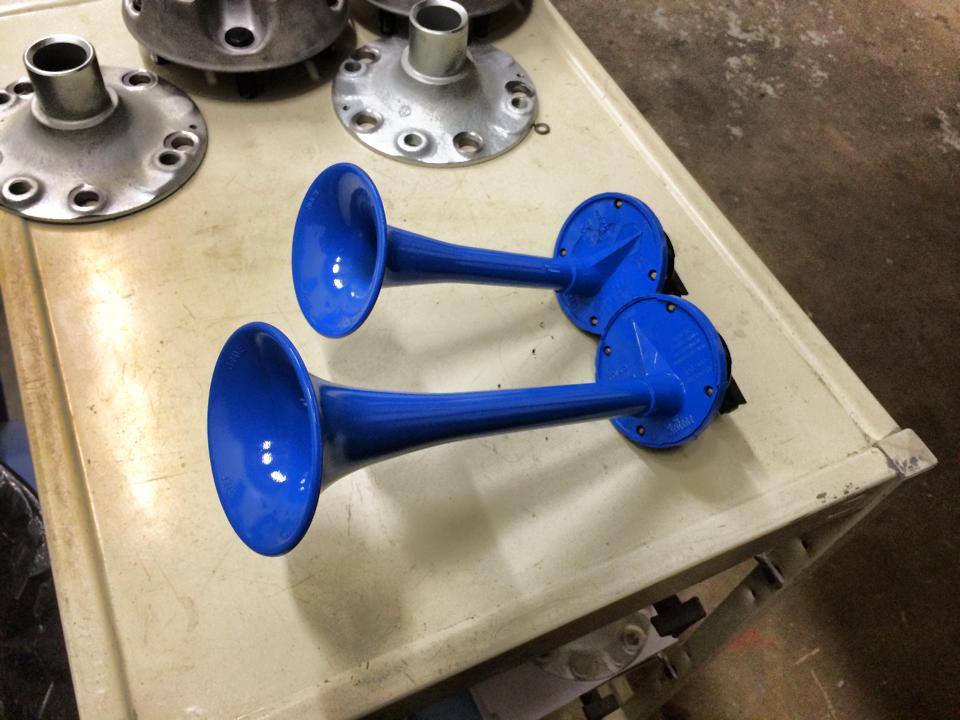
A few other tid-bits I left off.
Let there be light! And there was (or will be) light.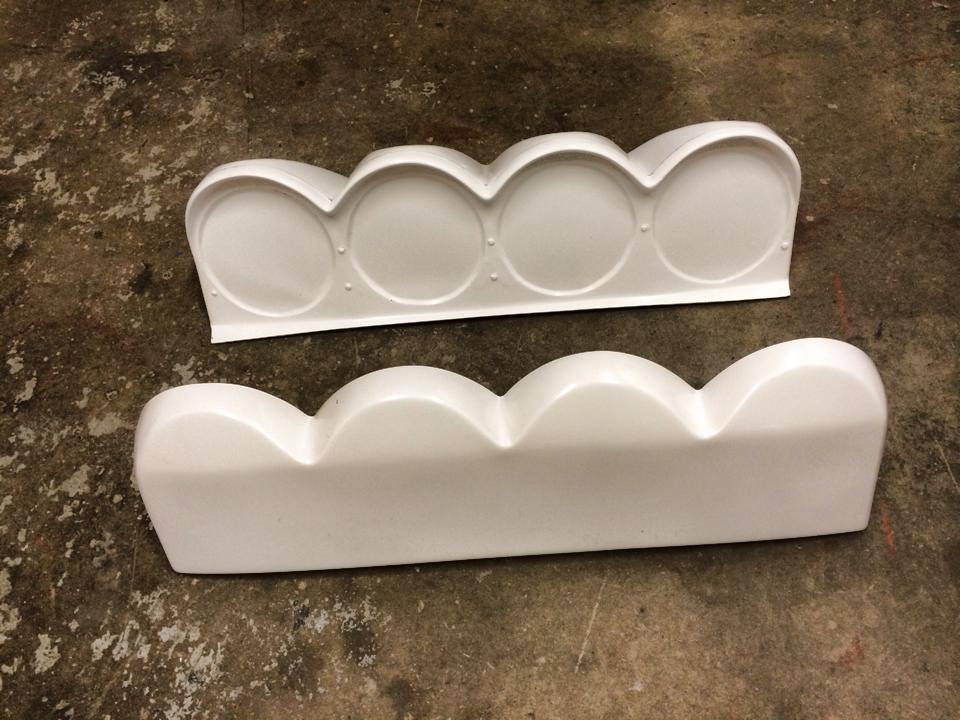
And of course we can't simply see no evil without hearing no evil... take a guess where these will go. 
Posted by: siverson Mar 30 2014, 11:40 PM
Neat!
Posted by: ruby914 Mar 31 2014, 12:05 AM
Have you considered extending your rear control arms 6" or 8" and moving the pivot points FWD the same. I don't think the stock shocks would work at that point. Same with the front end. If you flare the car you can extend the control arms and use narrow tires. I know it is a lot of work but...
Posted by: bulitt Mar 31 2014, 05:55 AM

Have you considered extending your rear control arms 6" or 8" and moving the pivot points FWD the same. I don't think the stock shocks would work at that point. Same with the front end. If you flare the car you can extend the control arms and use narrow tires. I know it is a lot of work but...
I agree Erc. You should extend your rear arms. On the front you may want to put some Aluminum blocks between the body and the control arms, crossmember to keep the geometry when you raise your spindles. You will need to lengthen your steering rod also.
Posted by: CptTripps Mar 31 2014, 06:53 AM
That's pretty bad-ass. Ask me about my next project when we're on the phone.
Posted by: rick 918-S Mar 31 2014, 07:39 AM
Cool! 
Posted by: 76-914 Mar 31 2014, 08:12 AM
Pat Garvey is looking for you Erc and he ain't too happy, either.
Posted by: Eric_Shea Mar 31 2014, 08:37 AM
Pat Garvey is looking for you Erc and he ain't too happy, either.
Tell him it's an improvement upon this:
Now... time to order that new rear fog light.
If you look close... maybe "two" rear fog lights!
Posted by: r_towle Mar 31 2014, 11:21 AM
its the FOUR lights on the roof that make the car....
Posted by: IanS Mar 31 2014, 11:43 AM
Way cool! Saw a lot of these pics on your facebook site but great to see it on here. That car with the slantnose front bumper treatment makes it look like a TR7 (not really a compliment).
Posted by: scotty b Mar 31 2014, 11:54 AM
Attached image(s)
Posted by: 2mAn Mar 31 2014, 01:42 PM
Awesome!
Posted by: MDG Mar 31 2014, 02:07 PM


Posted by: Eric_Shea Mar 31 2014, 02:10 PM
Dave... can you reel him in please?
Posted by: balljoint Mar 31 2014, 05:31 PM
Yes.
Posted by: balljoint Mar 31 2014, 05:31 PM
And no.
Which one were you talking about?
Posted by: worn Mar 31 2014, 07:40 PM
its the FOUR lights on the roof that make the car....
Aucontraire. Cest les mudde flappes!
Posted by: Eric_Shea Apr 30 2014, 07:15 AM
Not too much to report here as this is our little side project.
The tires arrived and the wheels are off being powder coated in white. We'll try to update that around the end of the week here. Hoping to get them mounted up so we can throw the suspension on the car while the chassis is still in metal stage.
The chassis is off getting the cage welded in. We'll be going to all of the shock towers and then down to the suspension points and the tranny mounts in the rear.
Speaking of suspension; the rear arms are back and the bearings are in: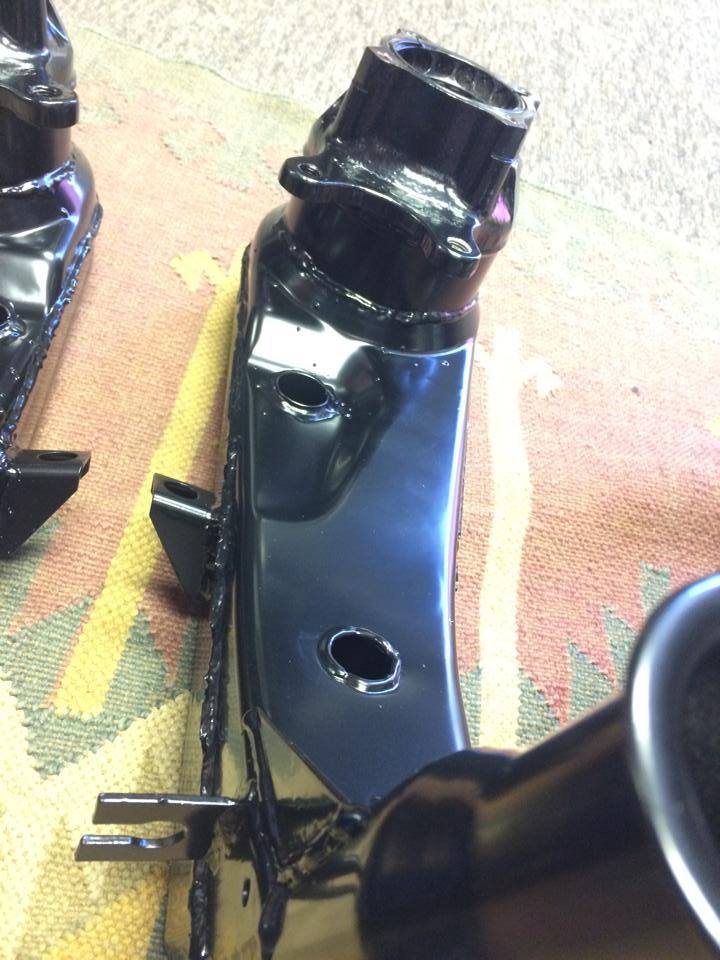
Posted by: mepstein Oct 8 2014, 06:43 AM
Posted by: Eric_Shea Nov 29 2014, 08:36 PM
Ooopsie... I've been so swamped. Business went gangbusters this summer and I have an Elderly father in Michigan to look after. Stimulating times to be sure. I've been doing a few things here and there on the beast but haven't had much time to update the thread. Here's a few:
Fuch's have all been powdercoated: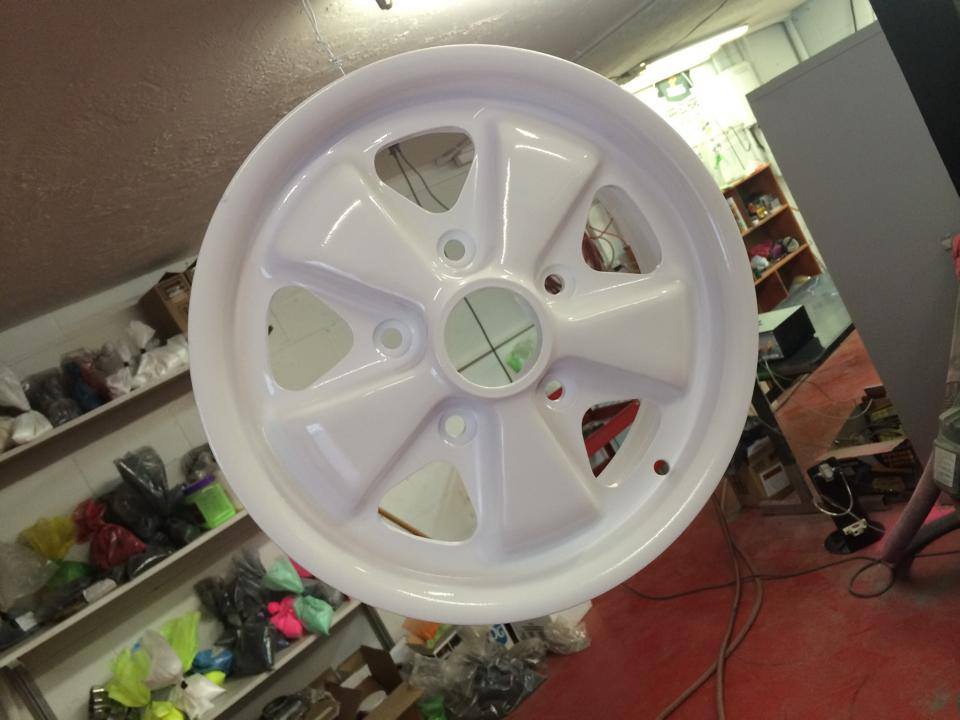
The tires were toned down a bit but, now they're absolutely perfect for the chassis: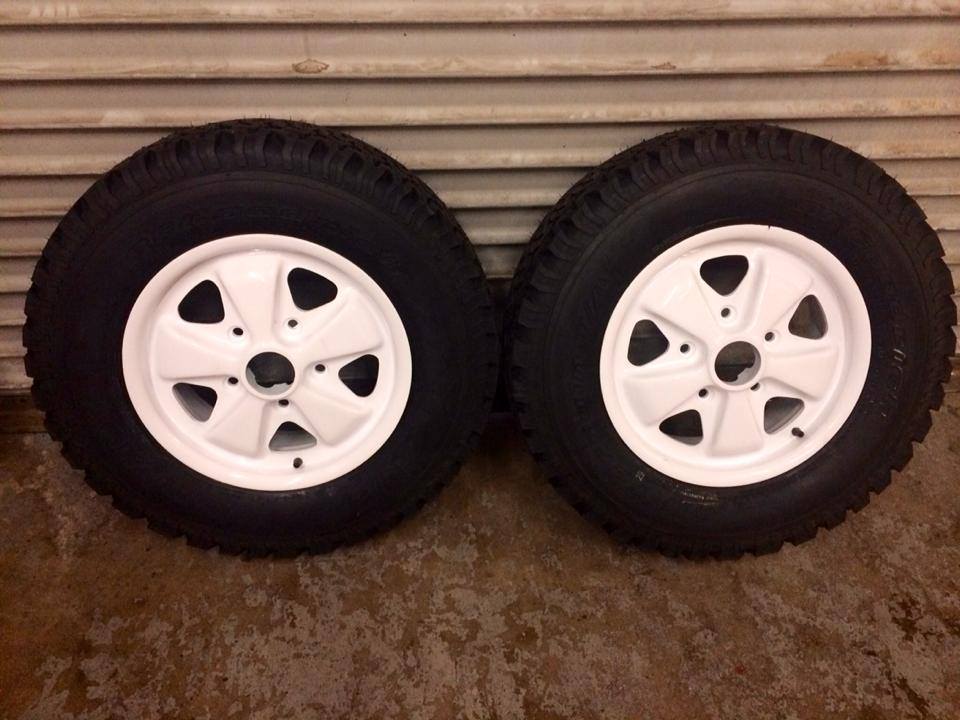
Plenty of meat here but, believe it or not, they're basically a stock diameter: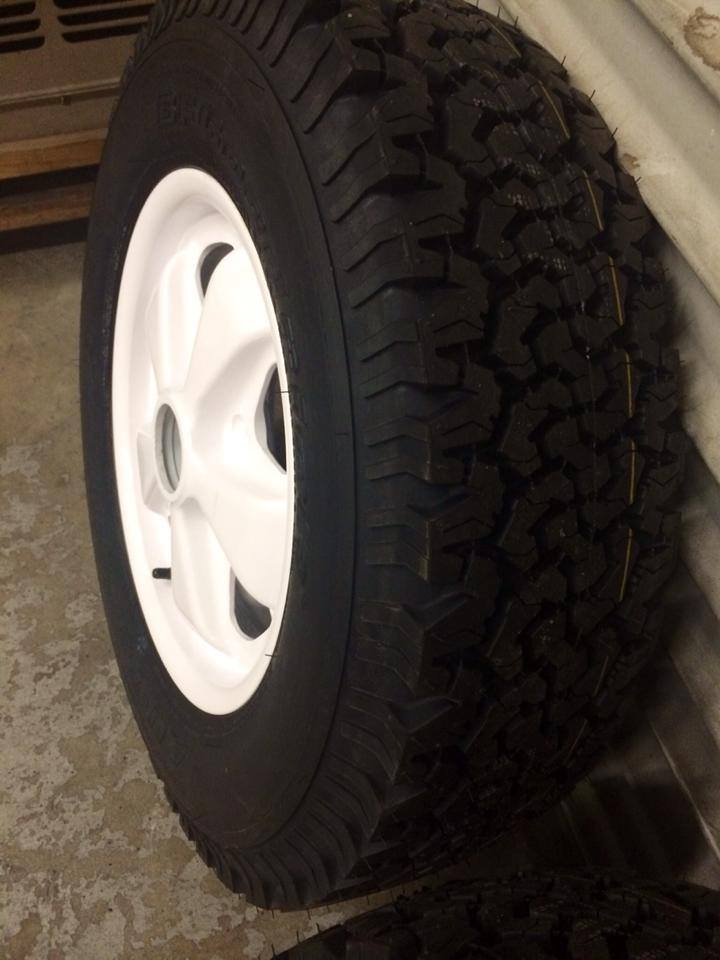
Mr. Zarbo provided us with some amazing luminage for the front. NOS Cibie Bi-Oscars will probably be mounted in the shell of a bumper. I plan to literally build the bumper opening around the lights: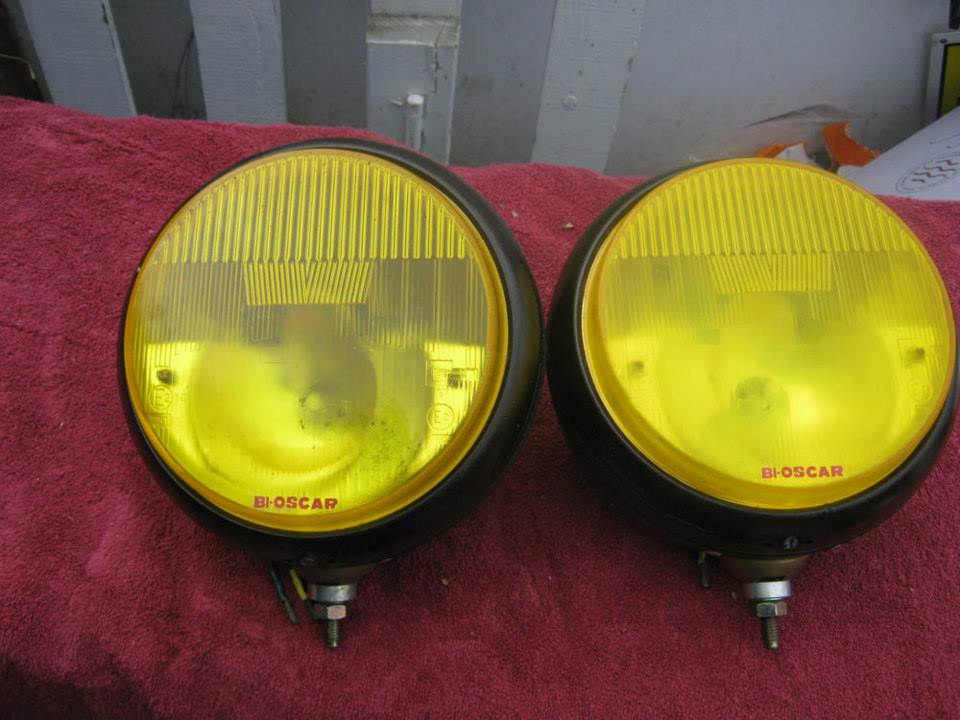
These are massive! Like dinner plates. It will be hard to get them in the bumper spot but, if all goes as planned, that's exactly where they'll be: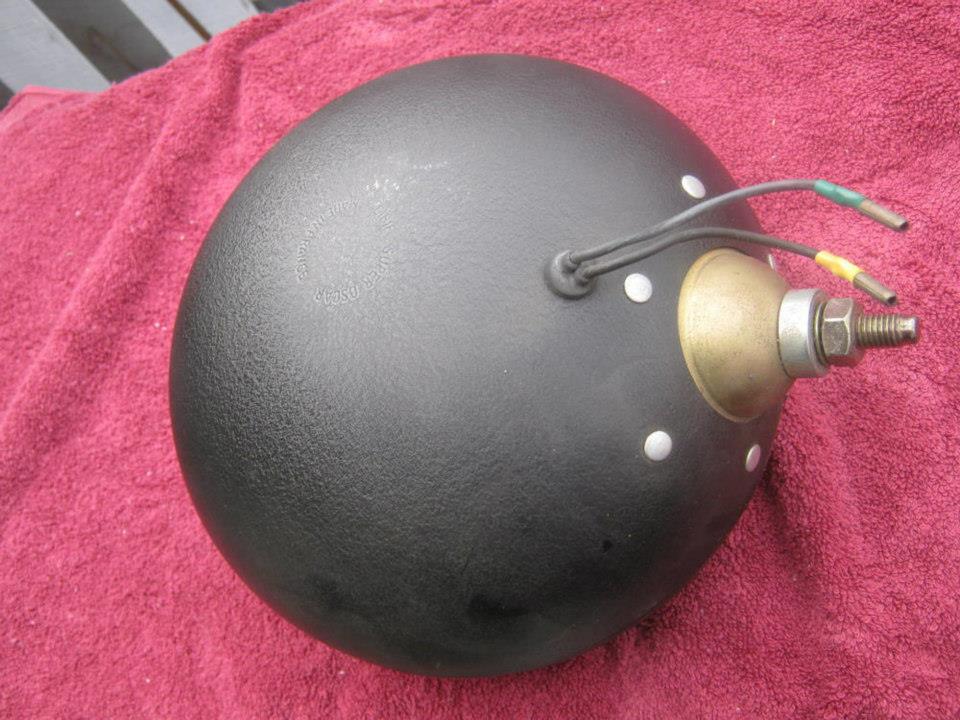
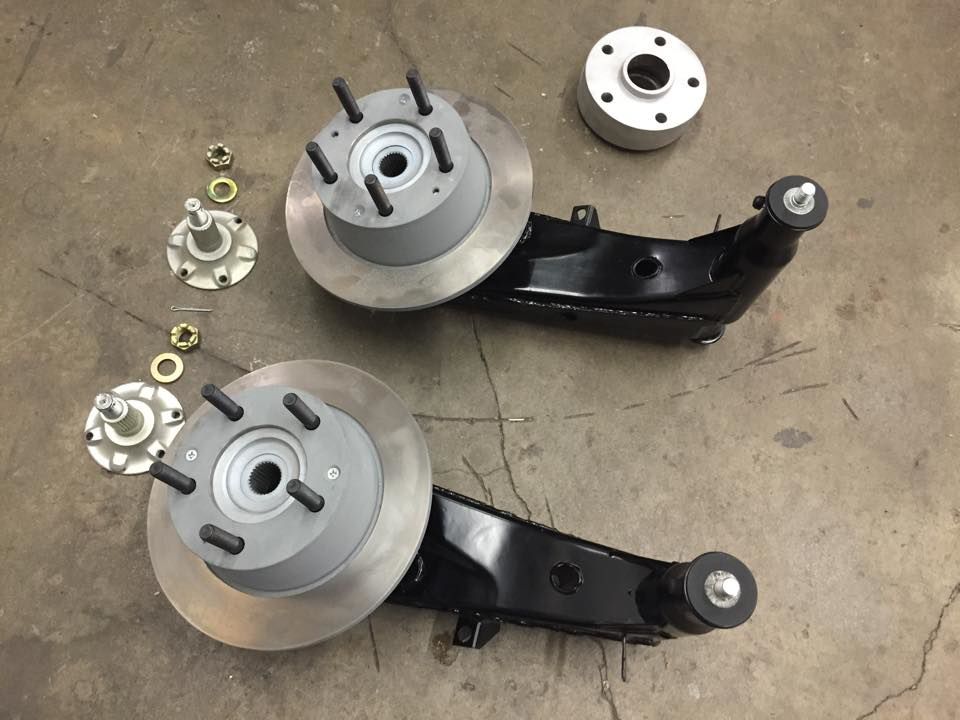
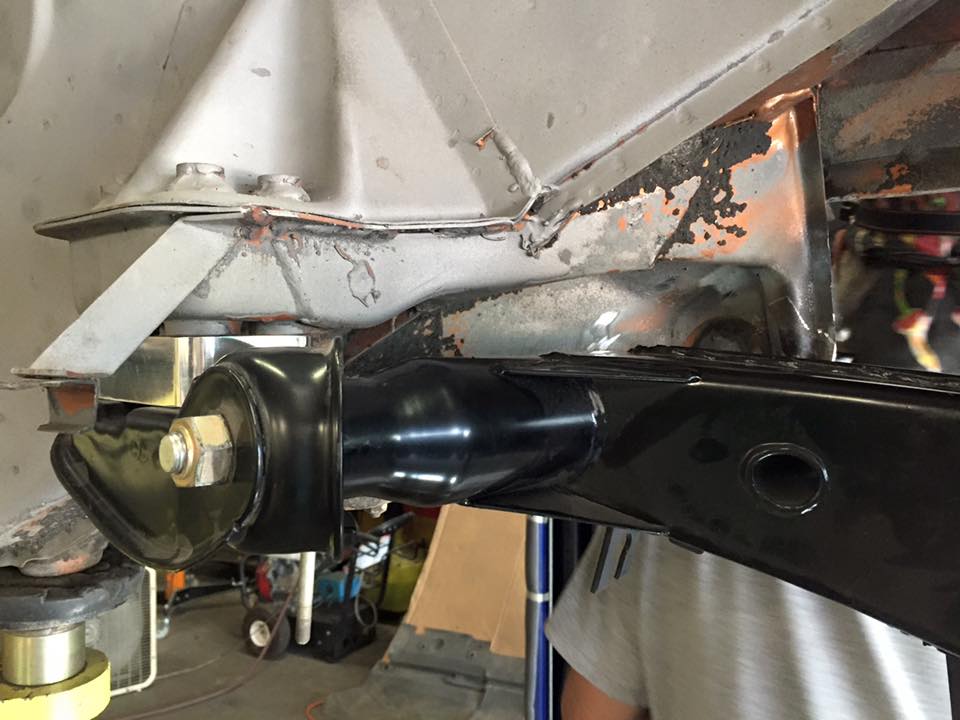
We've all seen this before but, it's basically ready to bolt on. We'll be using our PerformancePoly bushings throughout. We'll be using alignment washers for a low-friction mount and decambered ball joints to deal with the raised ride height suspension geometry. (more on that as we mount everything up)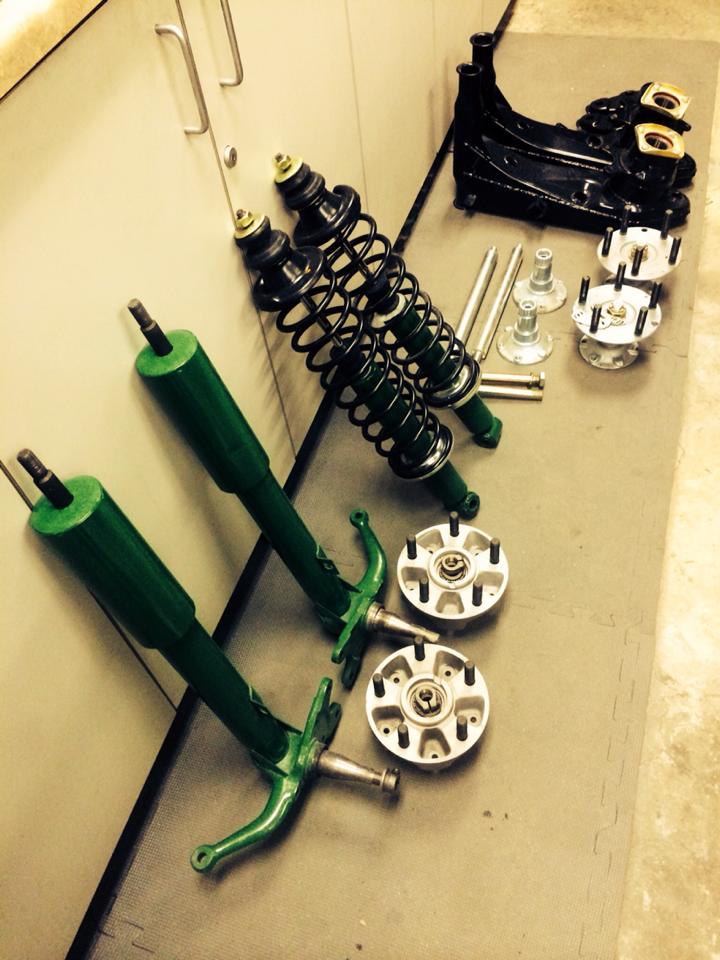
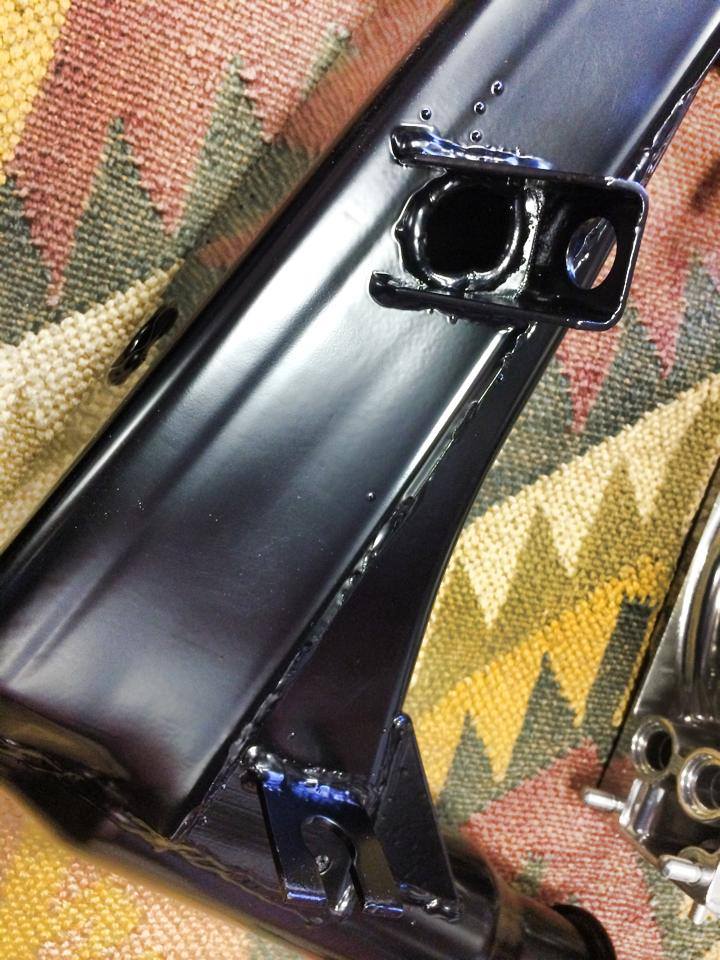
Bilsteins on the tallest setting with stock springs. The top body-mount with be lowered and strengthened and the ears will be lowered and strengthened as well: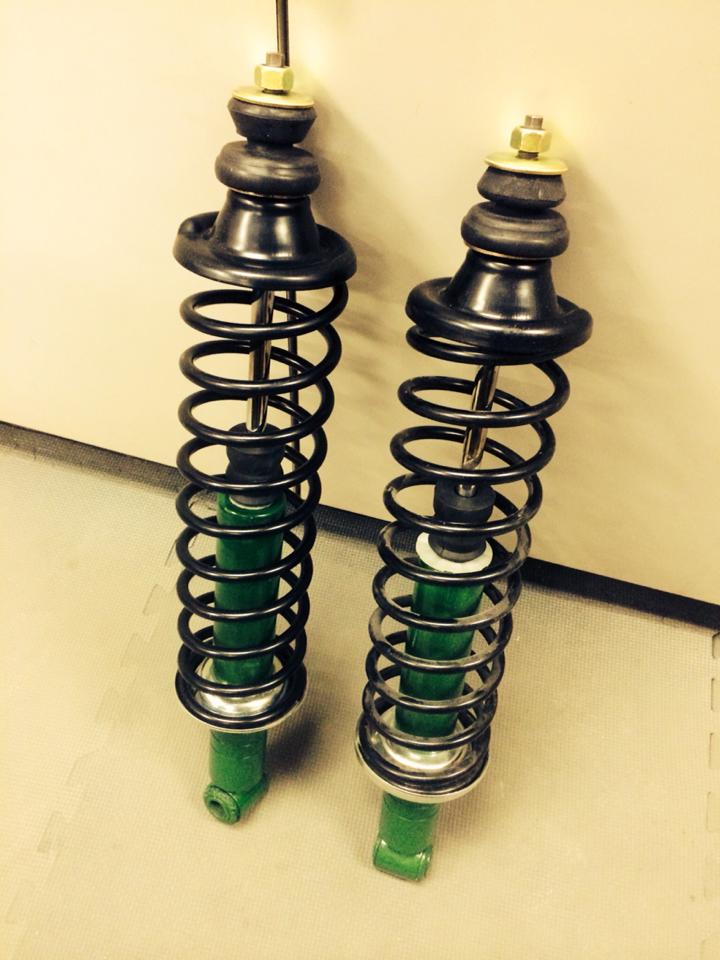
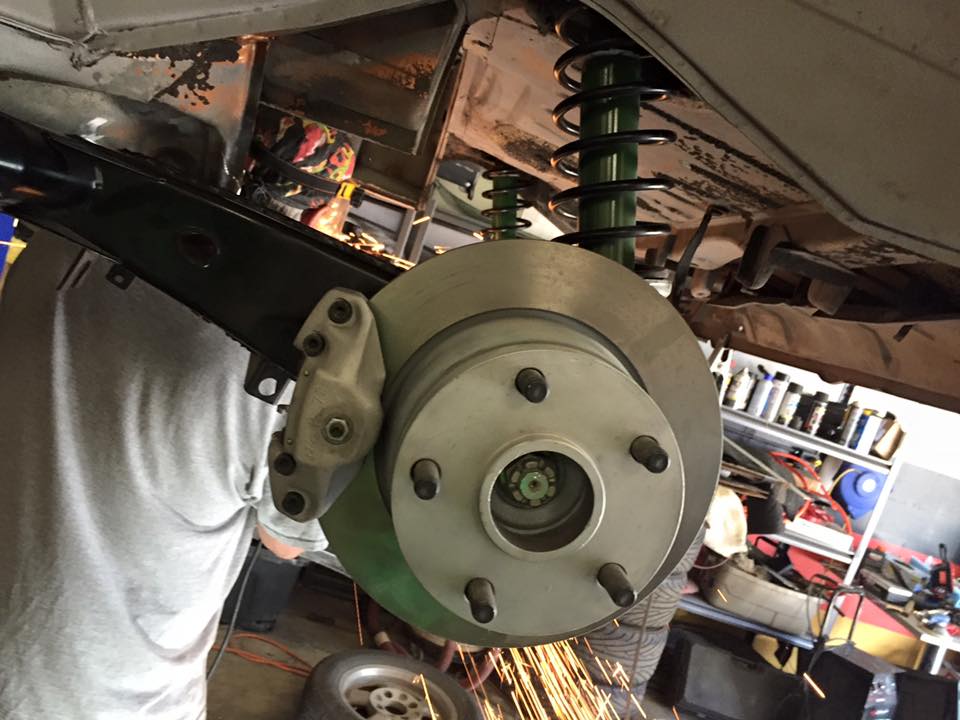
Artsy hub shot: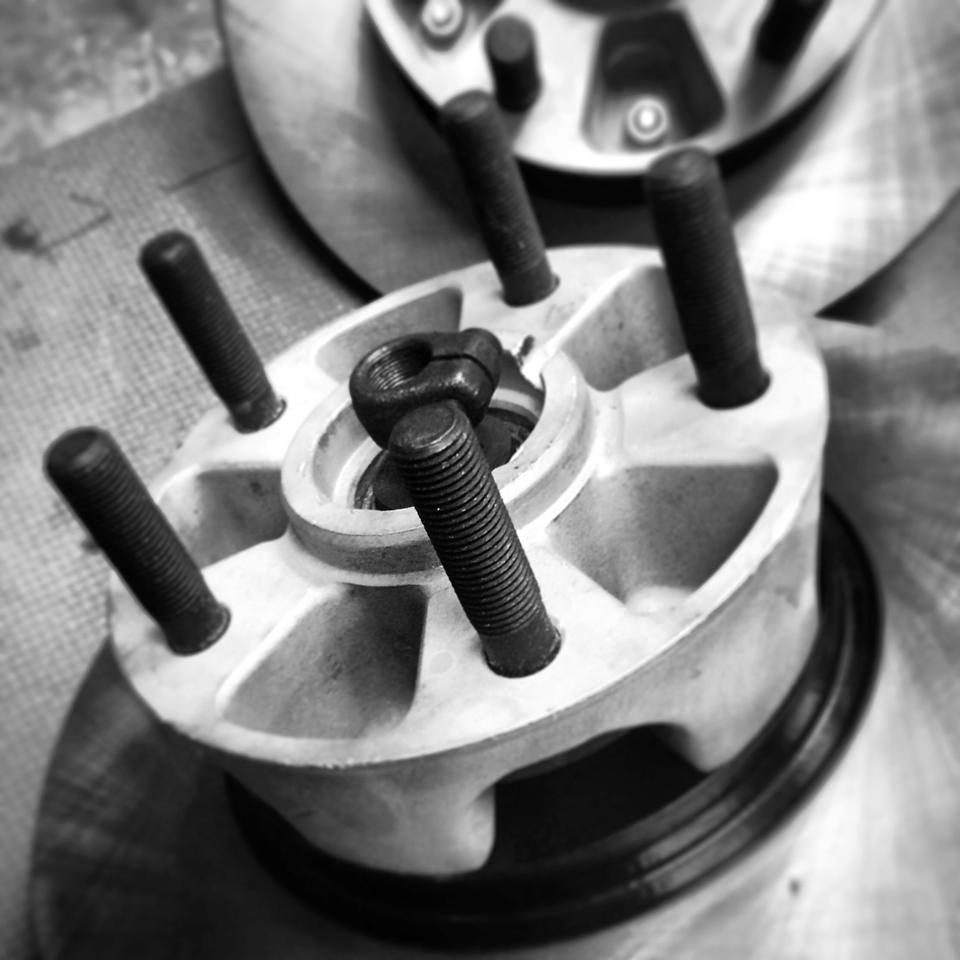
These will get 930 spacers and Brembo calipers: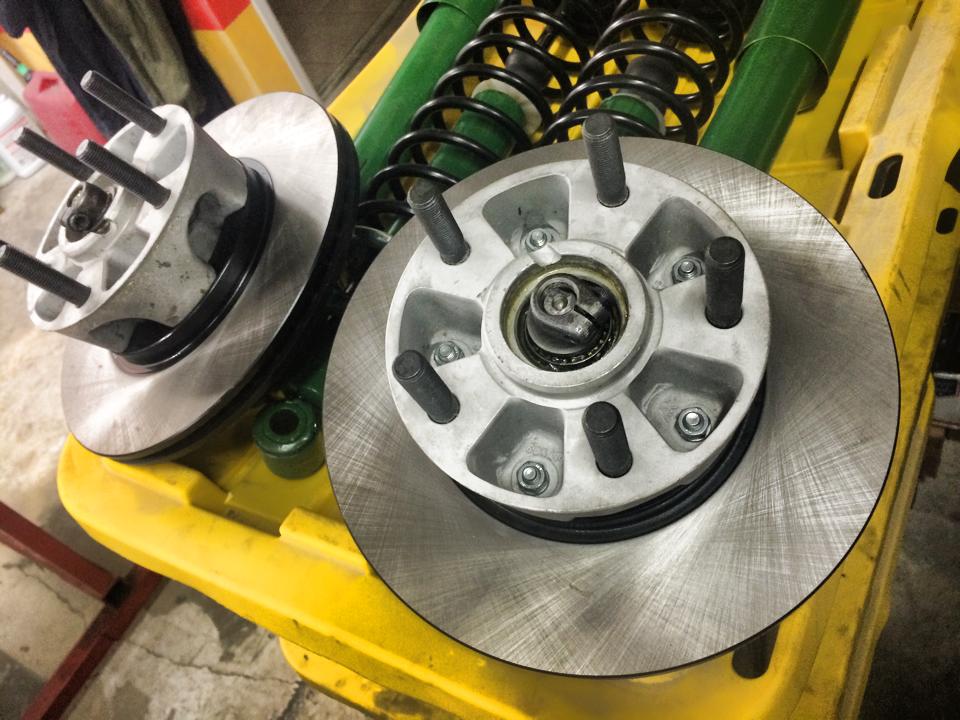
These get 930 spacers and our rear VB914-6 calipers:
Yes, I actually bought one of those old style Dymo label makers to make the factory style dash labels... it's the "details".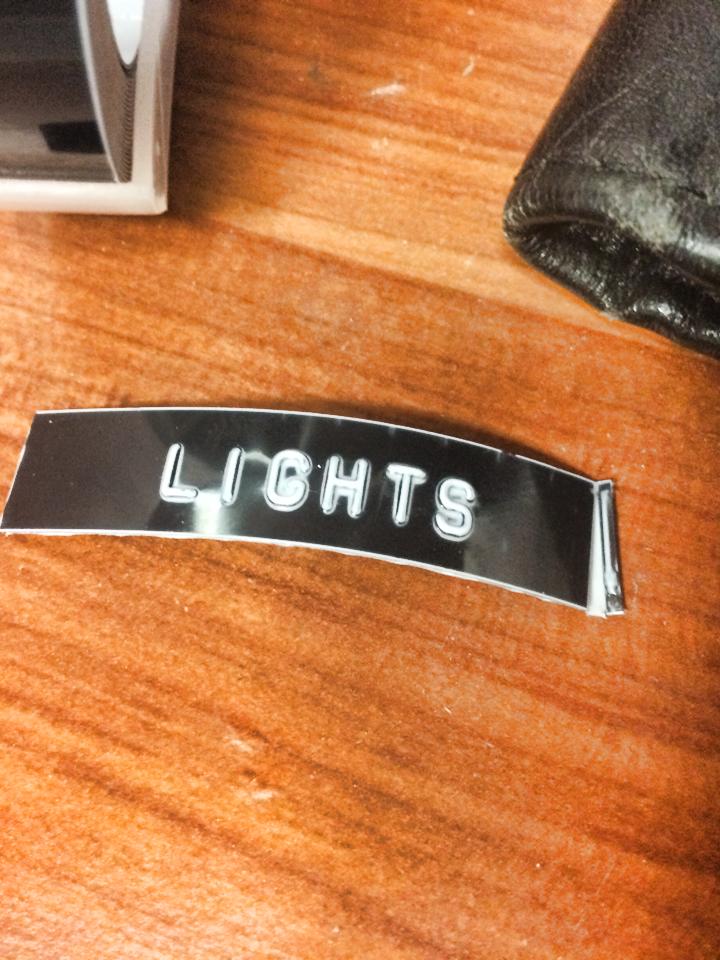
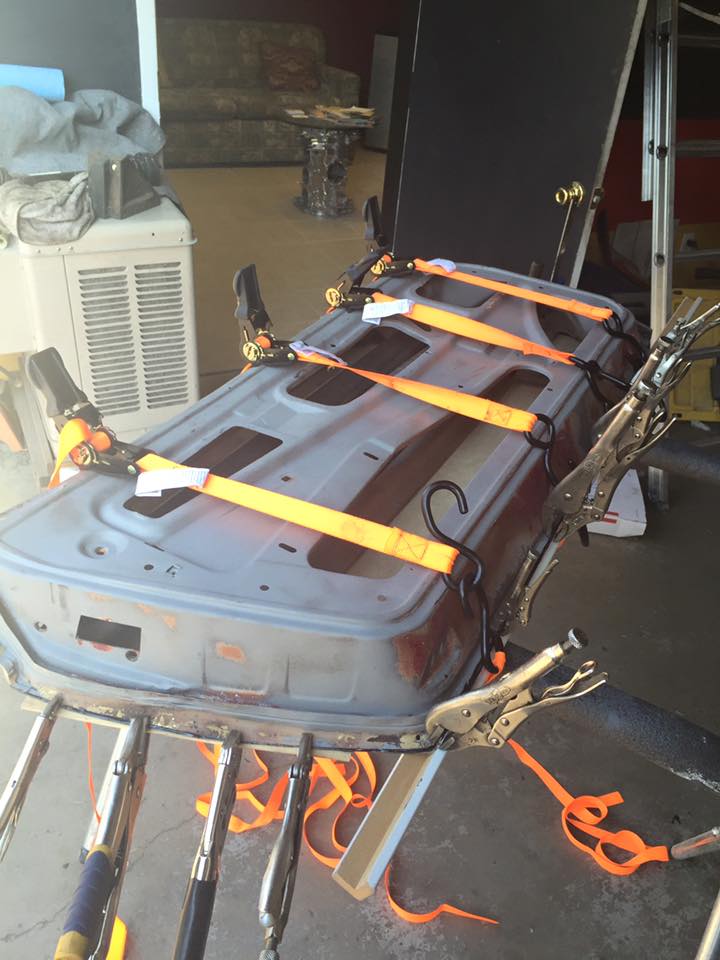
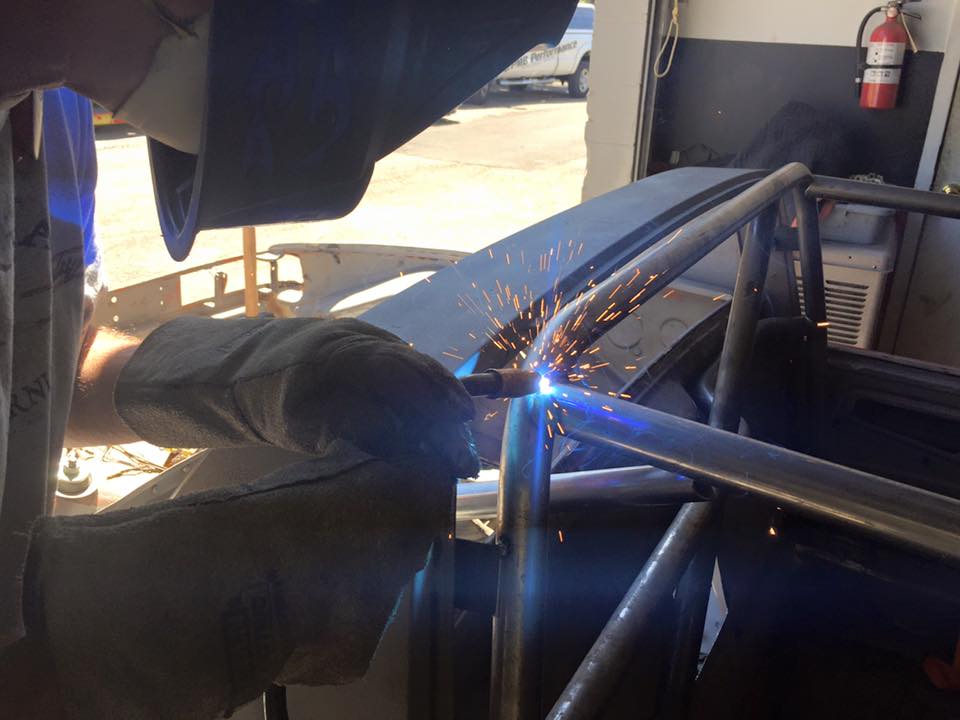
And finally, here's a sneak-peek at the cage going in.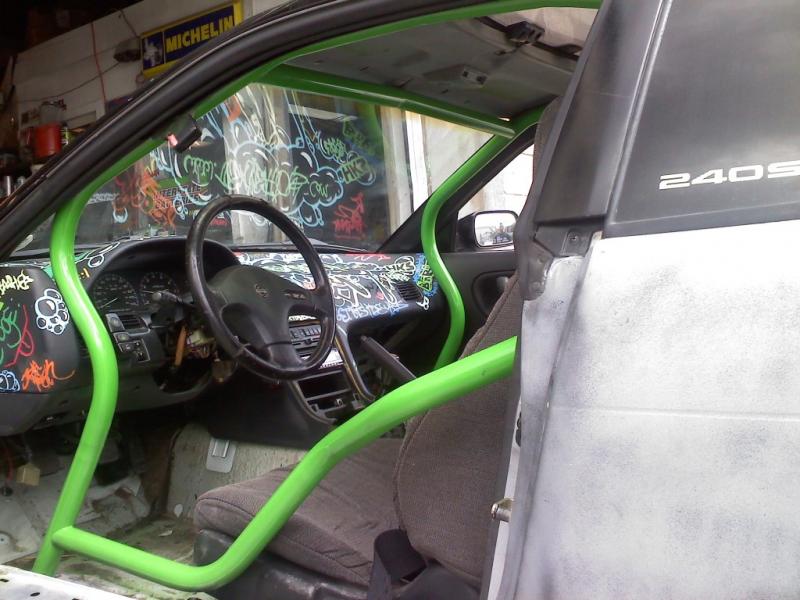
This will be more of a cruiser/rock crawler cage with ties to all of the suspension points to make a fairly rigid chassis.
Engine and drive train plans are coming together as well. Initial plans are looking like a basic 3.0 with the newer CIS cams and maintaining the stock CIS induction. We're looking to mate this to a side-shift, short-geared box via a solid linkage kit and updated bushings. All tucked under a nose-to-tail aluminum skid plate.
This should give us turn-key performance in a reliable package that's capable of operating at various altitude settings. This is very important as we can be at or below sea level a few hours south of us or, 12,000 ft. above in the mountains behind the shop.
Posted by: Mike Bellis Nov 29 2014, 08:54 PM
Awesome progress!
The roll bar hoop looks awfully low. Might be a head knocker...
Posted by: rick 918-S Nov 29 2014, 09:06 PM
Ooopsie... I've been so swamped. Business went gangbusters this summer and I have an Elderly father in Michigan to look after. Stimulating times to be sure. I've been doing a few things here and there on the beast but haven't had much time to update the thread. Here's a few:
Fuch's have all been powdercoated:
The tires were toned down a bit but, now they're absolutely perfect for the chassis:
Plenty of meat here but, believe it or not, they're basically a stock diameter:
Mr. Zarbo provided us with some amazing luminage for the front. NOS Cibie Bi-Oscars will probably be mounted in the shell of a bumper. I plan to literally build the bumper opening around the lights:
These are massive! Like dinner plates. It will be hard to get them in the bumper spot but, if all goes as planned, that's exactly where they'll be:
We've all seen this before but, it's basically ready to bolt on. We'll be using our PerformancePoly bushings throughout. We'll be using alignment washers for a low-friction mount and decambered ball joints to deal with the raised ride height suspension geometry. (more on that as we mount everything up)
Bilsteins on the tallest setting with stock springs. The top body-mount with be lowered and strengthened and the ears will be lowered and strengthened as well:
Artsy hub shot:
These will get 930 spacers and Brembo calipers:
These get 930 spacers and our rear VB914-6 calipers:
Yes, I actually bought one of those old style Dymo label makers to make the factory style dash labels... it's the "details".
And finally, here's a sneak-peek at the cage going in.
This will be more of a cruiser/rock crawler cage with ties to all of the suspension points to make a fairly rigid chassis.
Engine and drive train plans are coming together as well. Initial plans are looking like a basic 3.0 with the newer CIS cams and maintaining the stock CIS induction. We're looking to mate this to a side-shift, short-geared box via a solid linkage kit and updated bushings. All tucked under a nose-to-tail aluminum skid plate.
This should give us turn-key performance in a reliable package that's capable of operating at various altitude settings. This is very important as we can be at or below sea level a few hours south of us or, 12,000 ft. above in the mountains behind the shop.
Short geared 901? Call me

Posted by: Chris Pincetich Nov 29 2014, 09:22 PM
Fuchin cool
14" rims?
This 914 will rock 
Posted by: Krieger Nov 29 2014, 09:43 PM
Awesome work Eric. This will be too nice to get dirty...
Posted by: SirAndy Nov 29 2014, 10:04 PM

Mine goes a good 2" over the stock targa bar and i still only have little head clearance.
Unless your name is Clay, that bar will be too low ...
PS: And yes, the top still fits!
Posted by: Eric_Shea Nov 30 2014, 08:38 AM
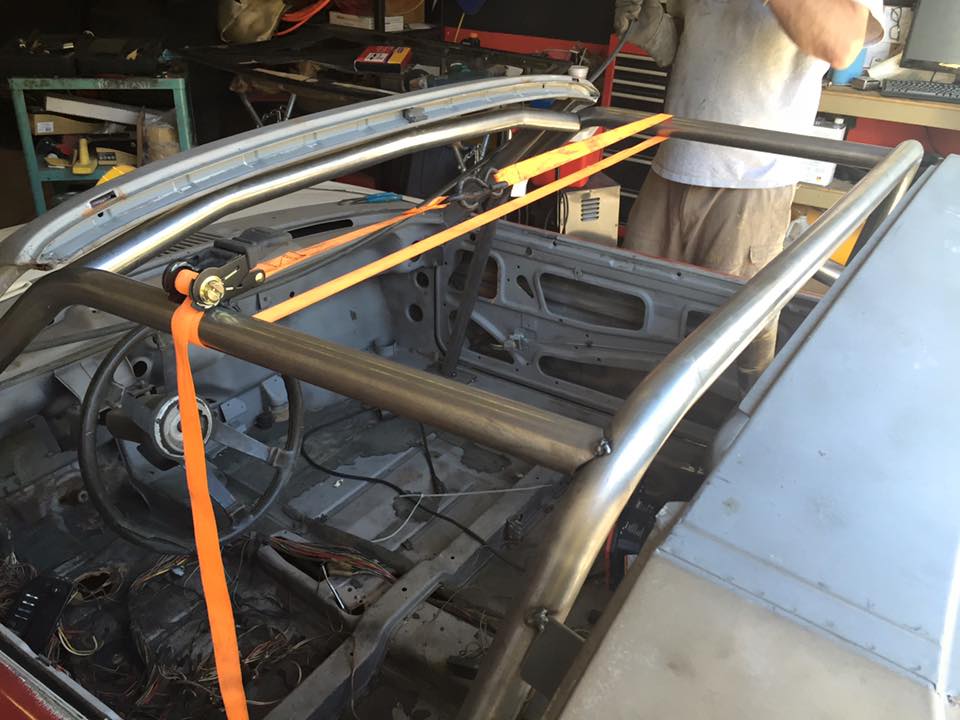
We may yank the bar. That section was done without me seeing it. I'd "like" the potential to be in SCCA rally cross events and a one piece hoop is manditory.
Posted by: r_towle Nov 30 2014, 09:29 AM
We may yank the bar. That section was done without me seeing it. I'd "like" the potential to be in SCCA rally cross events and a one piece hoop is manditory.
I would suggest you pull all of it out.
The welds would concern me, especially the passenger side angle bar and how it meets the long at the bottom.
Not going to pass a tech inspection.
You might want to consider getting Foley to ship you out his precut bar and base setup to start with, then you have at least that bar, the base plates and the rear cross bars all fitting correctly.
He sells it like that, a shipped, you weld it in , roll bar, or semi cage.
You can add tubes from there, but the stuff from Foley would be a great place to start.
I think it might be worth giving him a call to talk about what he can fabricate for you that could be pre done , just for ease of putting it all in place and having it all fit.
Rich
Posted by: sixnotfour Nov 30 2014, 11:09 AM

Posted by: Larmo63 Nov 30 2014, 02:10 PM
Have you read the article on cracked Fuchs wheels in the last Panorama? (October 2014 - Wheeling & Dealing -with your life) They talk about problems with stress cracks on the wheels and especially powder coating issues in the lug nut seats. I realize that he is talking about race cars and wheels, but something to keep in mind. A good read and fair warning.
Very cool build and can't wait to see more…..
Posted by: RobW Nov 30 2014, 06:59 PM
Looks like you're going to have the only zombie apocolypse 914 on the planet... I want to drive it.
Posted by: Mueller Nov 30 2014, 07:29 PM
Way cool build...plans for nerf type bars up front and in the back?
Posted by: Eric_Shea Nov 30 2014, 07:54 PM
Everyone can breath... the bar is coming out. I poured over the SCCA bar rules yesterday and handed them to John. He agrees. He thought it was just an off-road car and, it may be but, I'd like the chance to play "Rally-Cross" with the local kids.
Posted by: jd74914 Dec 1 2014, 07:33 AM
Not to keep beating on your cage guy but...Independent of the roll hoop not being a single piece, those braces don't go to nodes which is really poor practice. It's not that hard to cope a tube to fit into a node, rather than just cut it on a mill to fit onto the vertical tube. I've built a few tube frames and cages and would never, ever, let anything like that leave my shop. That's all.
I really can't wait to see more progress! This should be a really cool car when it's done. 
Posted by: Eric_Shea Dec 1 2014, 02:09 PM
Oh pa-leeeeze... 
Posted by: eric9144 Dec 1 2014, 03:07 PM
Posted by: Jeffs9146 Dec 1 2014, 05:16 PM
FYI
When you attach the calipers you will probably need to remove the powder coat on the trailing arms and front struts where the calipers sit. The powder coat is thicker and will space the caliper off center of the rotors.
Posted by: Elliot Cannon Dec 1 2014, 06:16 PM
FYI
When you attach the calipers you will probably need to remove the powder coat on the trailing arms and front struts where the calipers sit. The powder coat is thicker and will space the caliper off center of the rotors.
Good advice since this guy don't know shit about brakes.

Posted by: Larmo63 Dec 1 2014, 06:37 PM
I actually wondered about that because I powder coated my trailing arms too. I hope Eric shows us what his solution is.
This is one of those threads that you wish was 15 pages long and you want to peek to see the end result!
Posted by: colingreene Dec 1 2014, 06:50 PM
Id just file the powder coat off but thats me.
To be fair, id have asked them to not powdercoat it in the first place.
Posted by: JRust Dec 1 2014, 07:59 PM
Good advice since this guy don't know shit about brakes.

Although I do have his brake rebuilds on all 4 corners

Posted by: bdstone914 Dec 1 2014, 10:16 PM
I actually wondered about that because I powder coated my trailing arms too. I hope Eric shows us what his solution is.
This is one of those threads that you wish was 15 pages long and you want to peek to see the end result!
You would have to go pretty heavy on the powder coat to make any difference. You can mask them by installing a short bolt and washer in the caliper hole. I haven't in the past and never had a problem.
Posted by: Elliot Cannon Dec 1 2014, 11:07 PM
Good advice since this guy don't know shit about brakes.
Although I do have his brake rebuilds on all 4 corners
So do I. What does that say about us?
Posted by: Eric_Shea Dec 2 2014, 11:20 AM
I was going to make a list of everything that's wrong ahead of time but, I thought it would cut the post count down dramatically.
Posted by: balljoint Dec 2 2014, 11:38 AM
Hey Ricky, very cool project, I think it's going to be awesome. 
Posted by: bulitt Dec 2 2014, 11:48 AM
Bought these same wheels for my utility trailer at Tractor Supply.
And they gave me a free hat, unlike some vendors........ 
Posted by: blackmoon Dec 2 2014, 05:13 PM
Very cool, great project 
Posted by: Eric_Shea Dec 8 2014, 08:08 PM
What's wrong here? 
Posted by: r_towle Dec 8 2014, 08:12 PM
Shield missing?
I would not put one on an ORV anyways.
Posted by: bigkensteele Dec 8 2014, 09:33 PM
Metallic green Bilsteins?
Posted by: Eric_Shea Dec 8 2014, 09:49 PM
Ummm no... guess again. Oliver Green which is correct for the vintage. John Deere is correct for the later stuff. Just funny iFone filters making it look weird.
Posted by: altitude411 Dec 8 2014, 09:52 PM
* edit
Posted by: Larmo63 Dec 8 2014, 10:15 PM
Raised spindles. (or lowered)
Posted by: eric9144 Dec 8 2014, 10:23 PM
Spindles lowered on them to give some lift and a little extra up travel
Posted by: bigkensteele Dec 8 2014, 10:26 PM
Powder coating in the dust shield holes? No brake pads installed? No unicorn decal on the strut? Grasping at straws here.
Posted by: r_towle Dec 8 2014, 11:08 PM
They are not on the car slacker.
Posted by: euro911 Dec 8 2014, 11:17 PM
How the fuch did I miss seeing this until now?
COOL
Posted by: veekry9 Dec 8 2014, 11:34 PM

Sniff,is that mouse or weed?
Rio find it.
Posted by: eric9144 Dec 9 2014, 08:43 AM

Posted by: bozo914 Dec 9 2014, 10:21 AM
The struts were welded back together backwards? Upside down? Inside out? Come on, I'm dying here. What's wrong with them? 
Posted by: 914Timo Dec 9 2014, 11:02 AM
What's wrong here?
Not sure if it is "wrong", but usually I have seen the brake disk bolts are the other way round. The head of bolts outside and the nuts inside.
Right or wrong, looks very nice

Posted by: Jeffs9146 Dec 9 2014, 11:05 AM
You forgot the brake pads!
Posted by: tomeric914 Dec 9 2014, 08:39 PM
Wedge bolt struts with a regular bolt and vinyl cap holding the ball joint in place for the photo?
Nope, I see an earlier photo where these are the pinch bolt type.
Posted by: altitude411 Dec 9 2014, 09:51 PM
I'm gonna jump thru this window..... Please, someone answer this damn question. 
Posted by: oldschool Dec 9 2014, 11:31 PM
How the fuch did I miss seeing this until now?
COOL
Dude cause you hang out on the "What did I do to my 914 tread"
Posted by: euro911 Dec 10 2014, 02:10 AM
Can't contest that, can I
I've just got too many irons in the fire anymore, can't keep up with all of it
Posted by: Eric_Shea Dec 10 2014, 06:38 AM
That would be wrong. Check the factory manual.
I'm not sure what is wrong in the picture but, I figured I'd post it here first before I put it on the car. If anyone can find something wrong with what you're doing it would be this crew!
Posted by: r_towle Dec 10 2014, 08:02 AM
Db
Posted by: majkos Dec 10 2014, 08:53 AM
Bleeder valve?
Posted by: bulitt Dec 10 2014, 08:57 AM
Db
Well said.Posted by: 914Timo Dec 10 2014, 09:59 AM
I'm not sure what is wrong in the picture but, I figured I'd post it here first before I put it on the car. If anyone can find something wrong with what you're doing it would be this crew!
So, the question was wrong.
![yellowsleep[1].gif](style_emoticons/default/yellowsleep[1].gif)
Posted by: Eric_Shea Dec 10 2014, 10:45 PM
I've decided to use our "PerformancePoly™" brand of bushings on this project. These are the hardest durometer poly bushings available and can withstand over 10,000 PSI.
I can think of nothing more brutal than Utah's back country for a full on acid test. This should silence a few. Poly bushings get a bad rap because most units sold are the softer durometer versions and, yes, those do compress and fail, and squeak over time.
These have been honed on our lathe with an adjustable reamer set to the perfect size of our freshly plated shafts. Here we're taking the face down so the knurled end of the shaft protrudes beyond the bushing just enough to grab the inner ear and outer mount.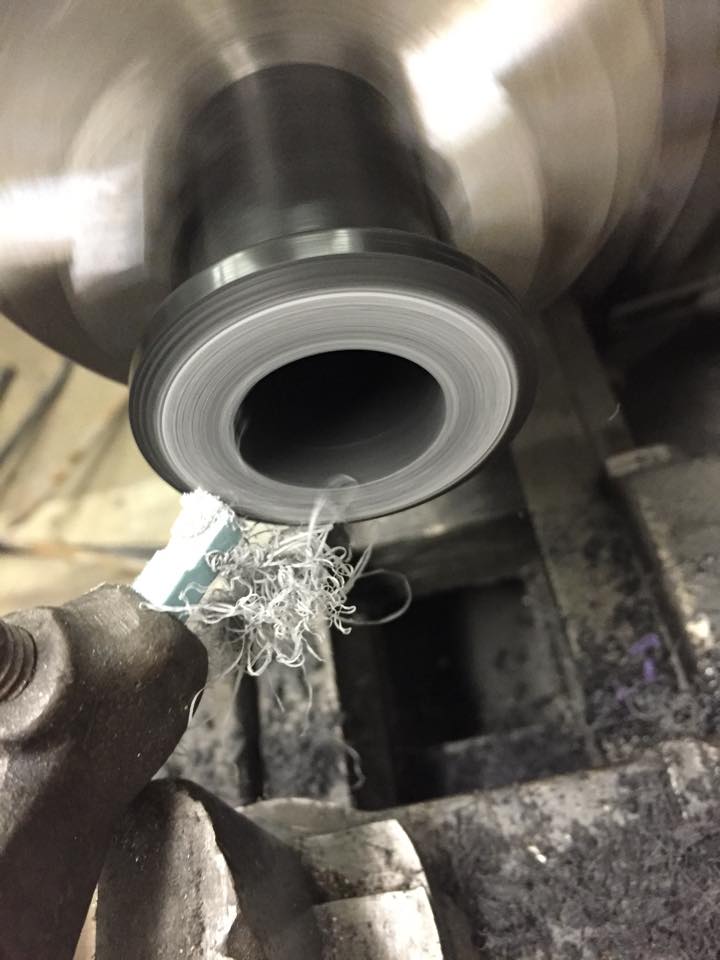
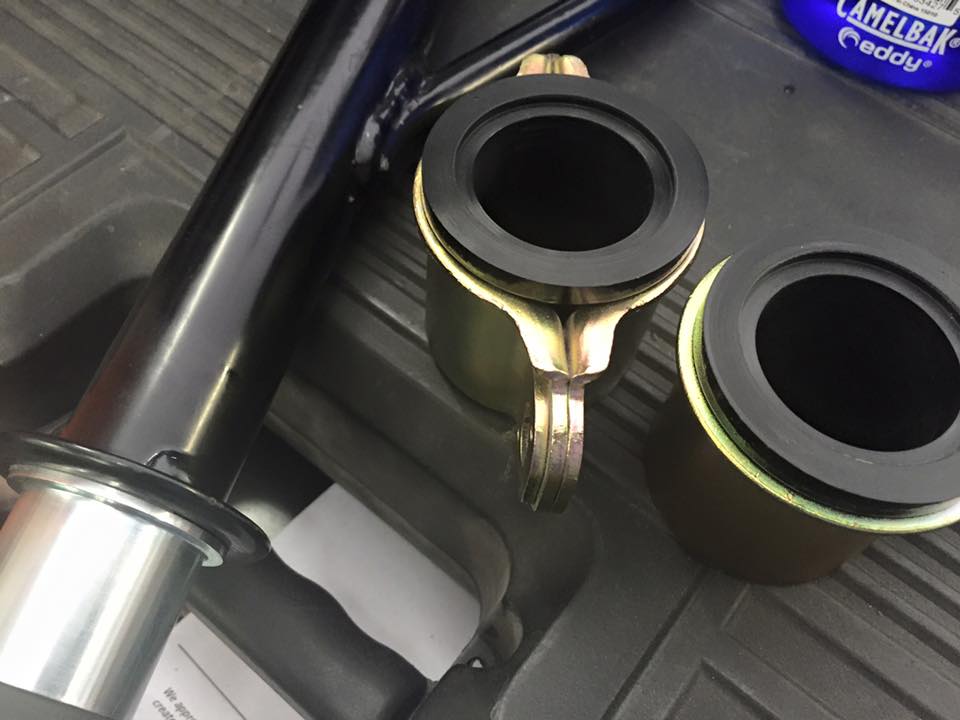
Here's a test fit on the shaft and, you can see the knurled section "just" protruding from the bushing. This is the look we'll be after once they're mounted.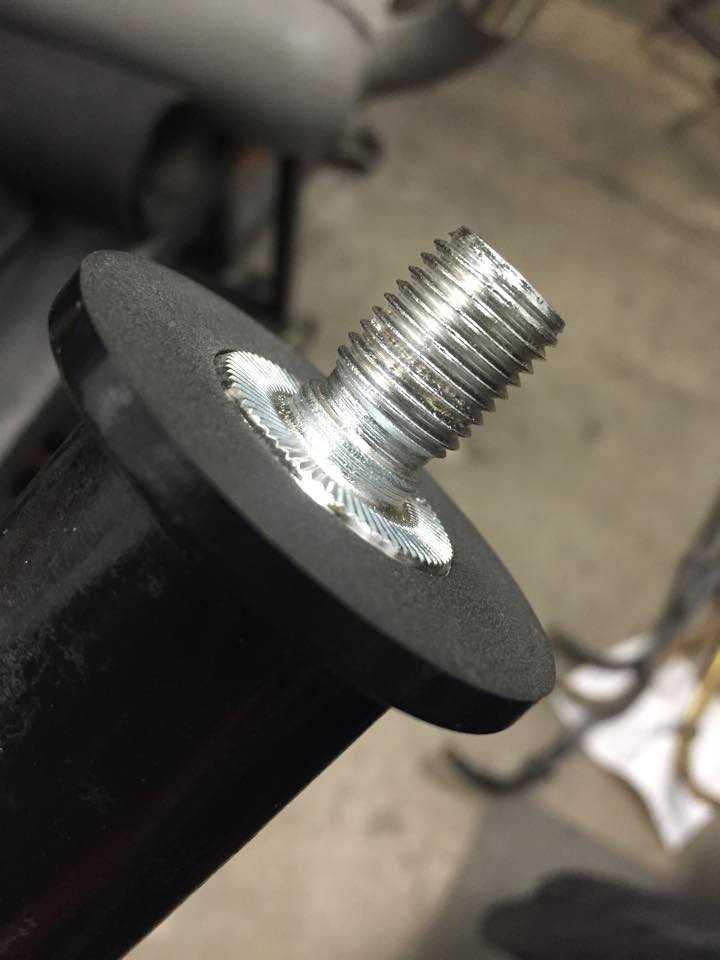
This bushing is being test fit into the arm. Notice the grease ring cut inside. We'll measure this and mark the arm off for a grease zerk here.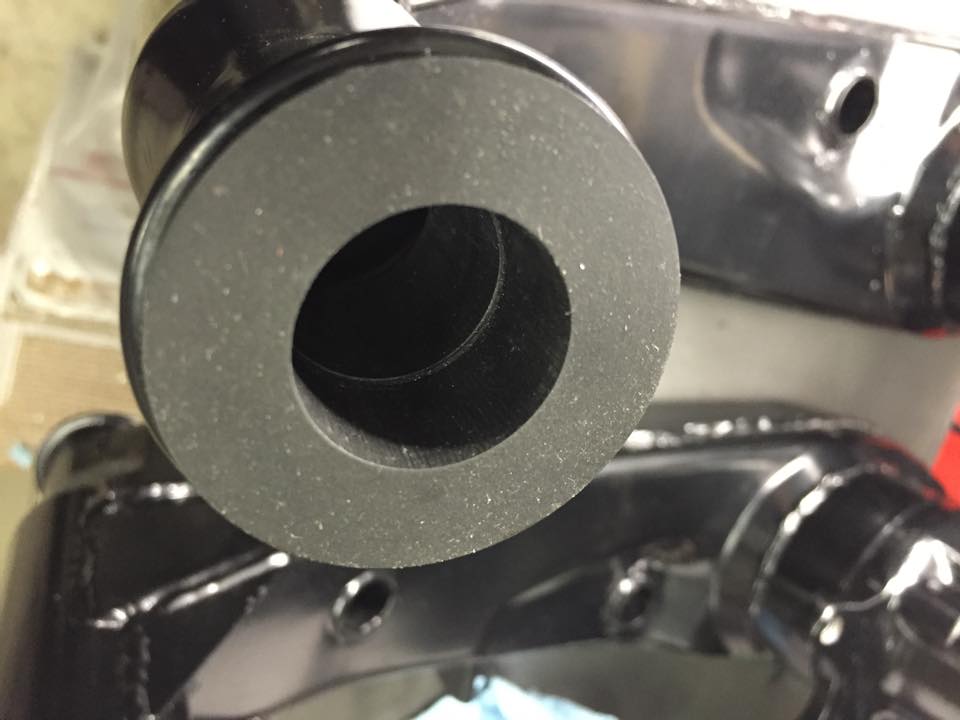
Here, both bushings are test fit onto the shaft. It's a perfect fit. No slop, in fact, it's a bit tight because, once the grease is added, the nuts are torqued to spec. (over 100lbs.) and a 1900lb car is riding on top of them, they will spin easily and be totally noise free.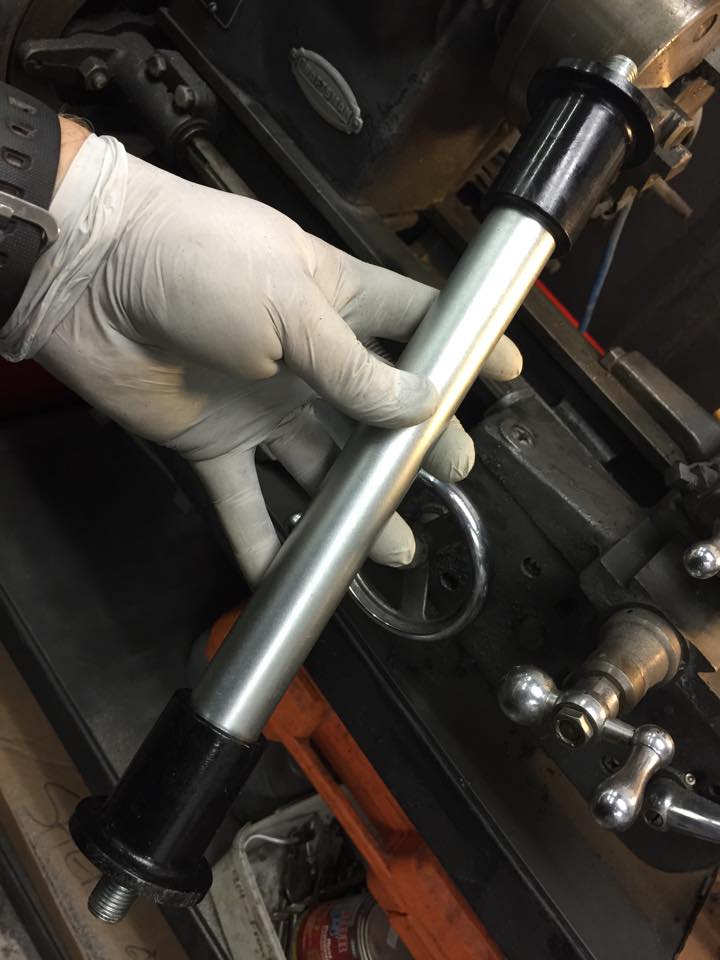
What's a 914 without a little "Wonder Glue"? Better known as JB Weld...
These bushings were twisted in and stayed over the weekend allowing the epoxy to set-up properly.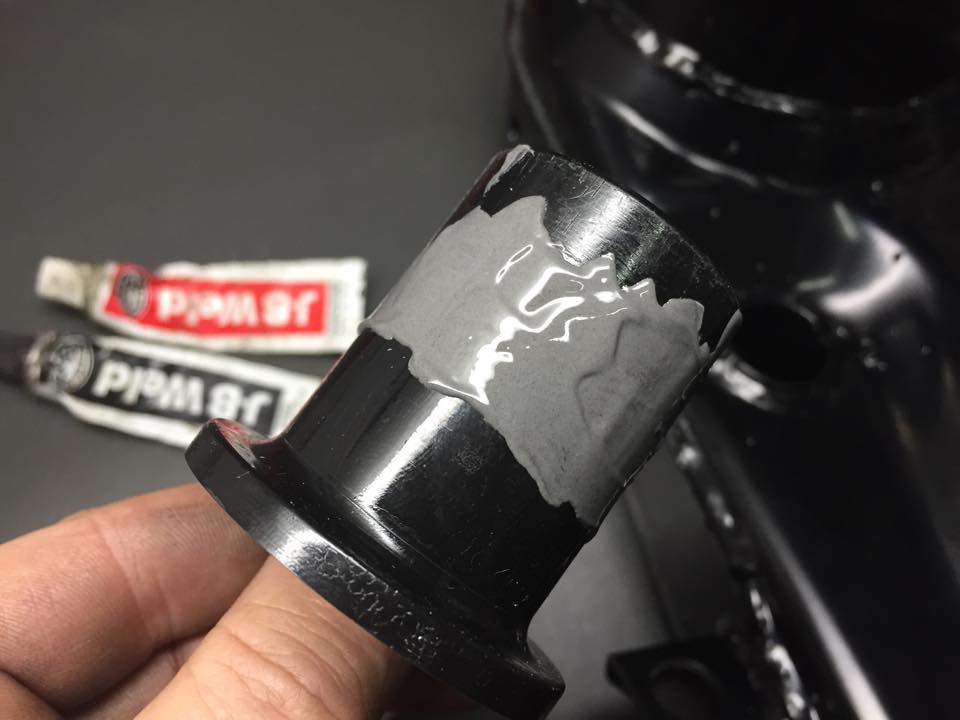
Using the drill press, a perfect 5mm hole is punched through right in the middle of the grease groove we cut in earlier.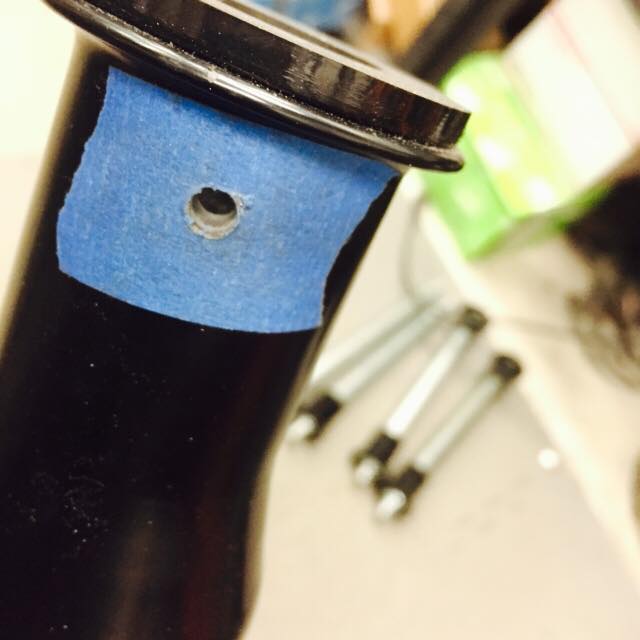
A 6x1 tap finishes things off nicely here...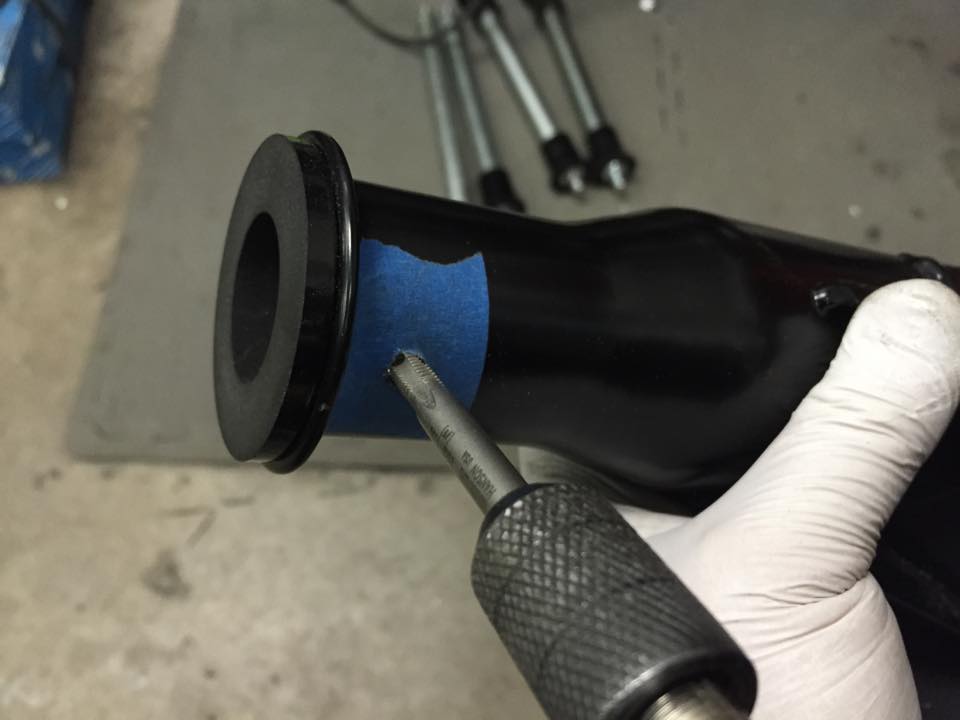
Here you can see how it lands in the grease journal.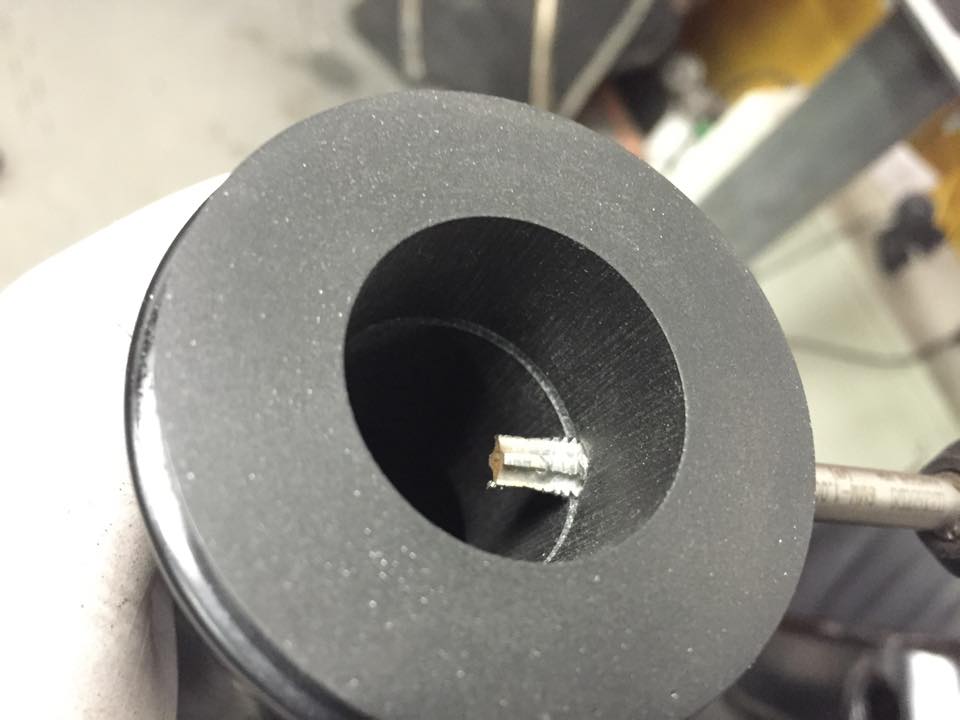
..and, the zerk.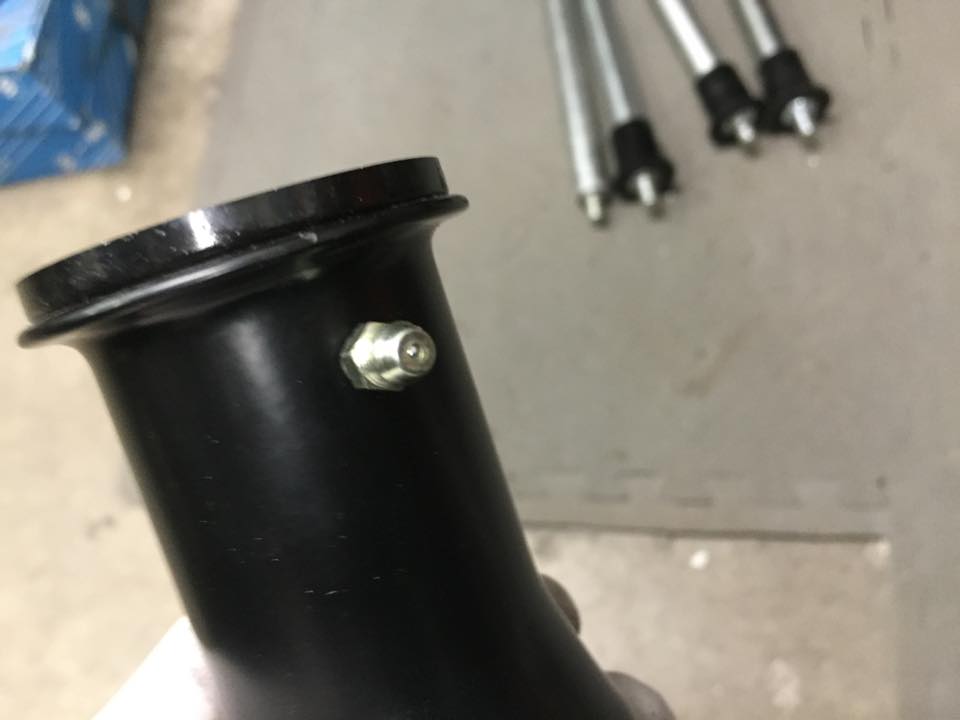
And here's the end result. Notice the knurled end of the shaft standing just proud of the bushing face. Too much and the arm would slap around with lateral movement. Too little and the bushing would bind on the body after the shaft was torqued to spec. I like how the beehive bleeder caps snap over the zerks!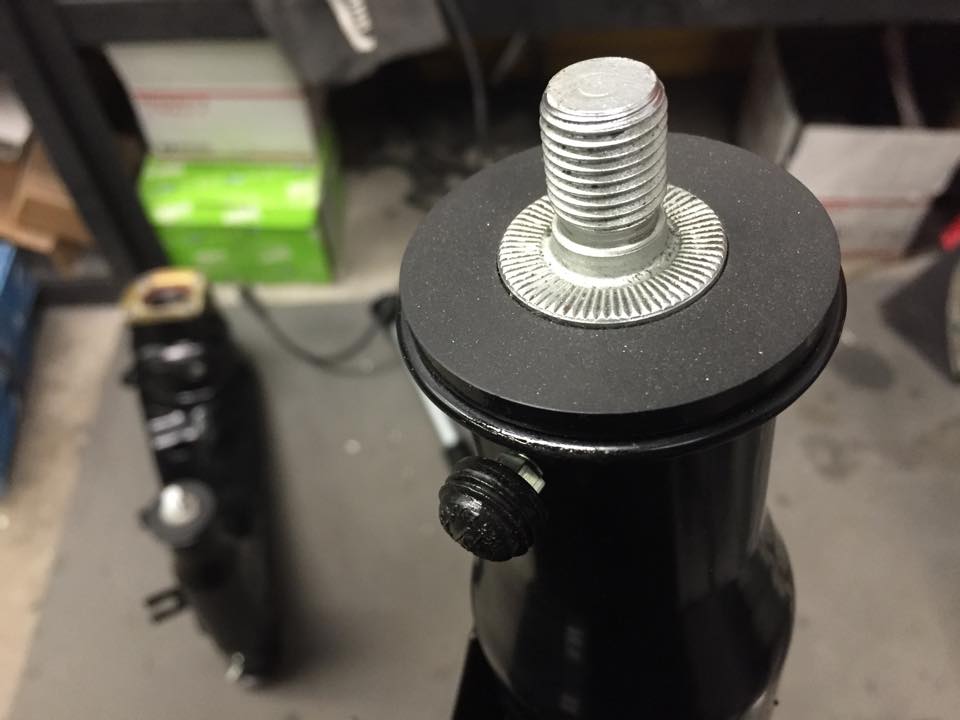
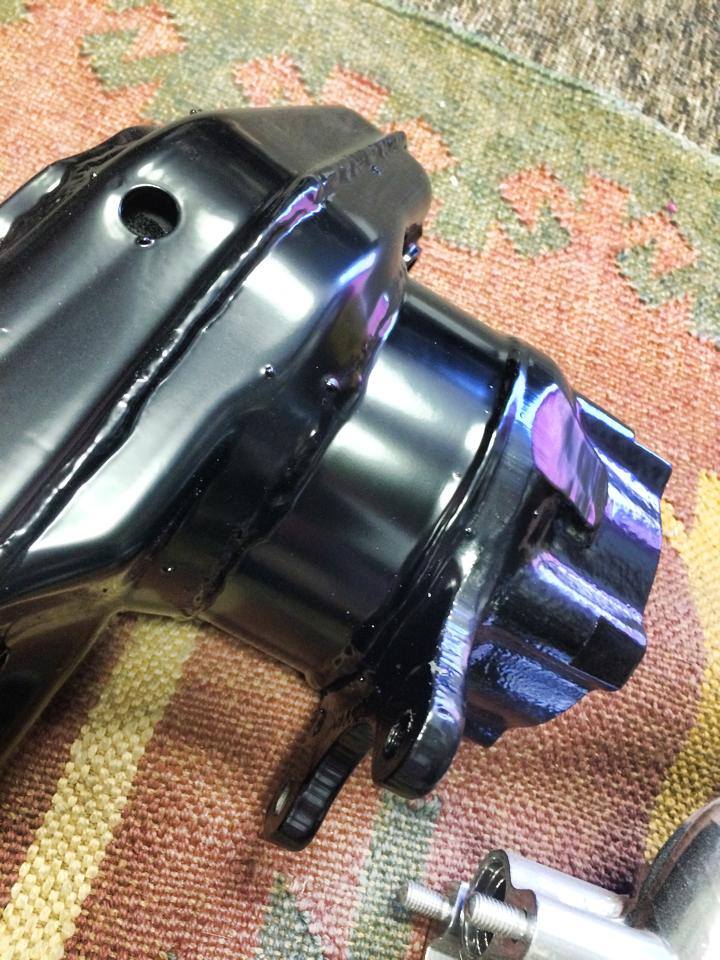
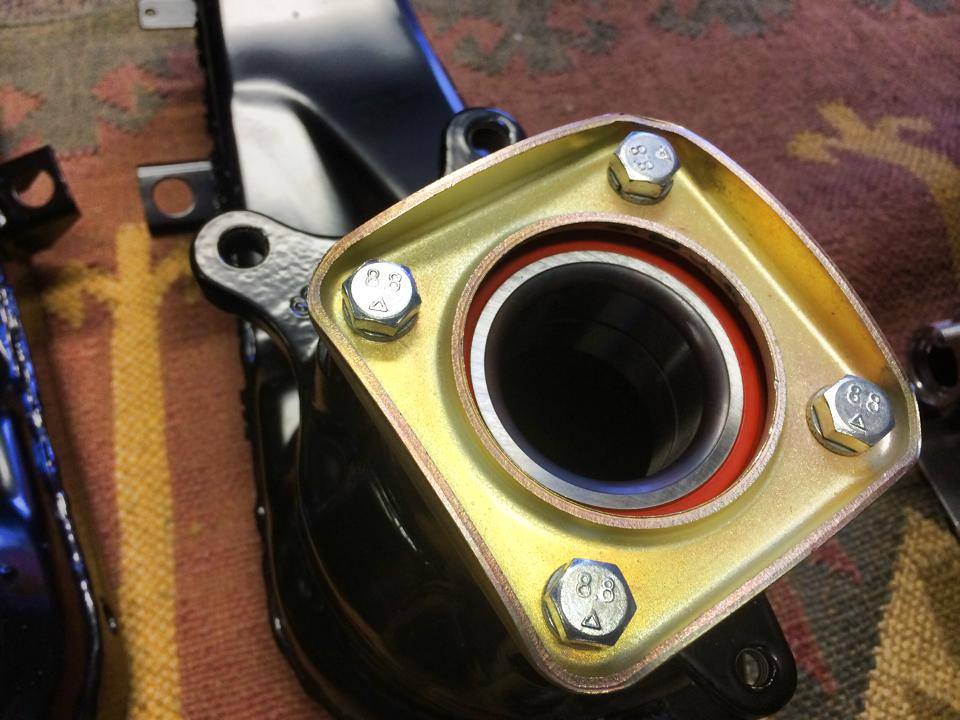
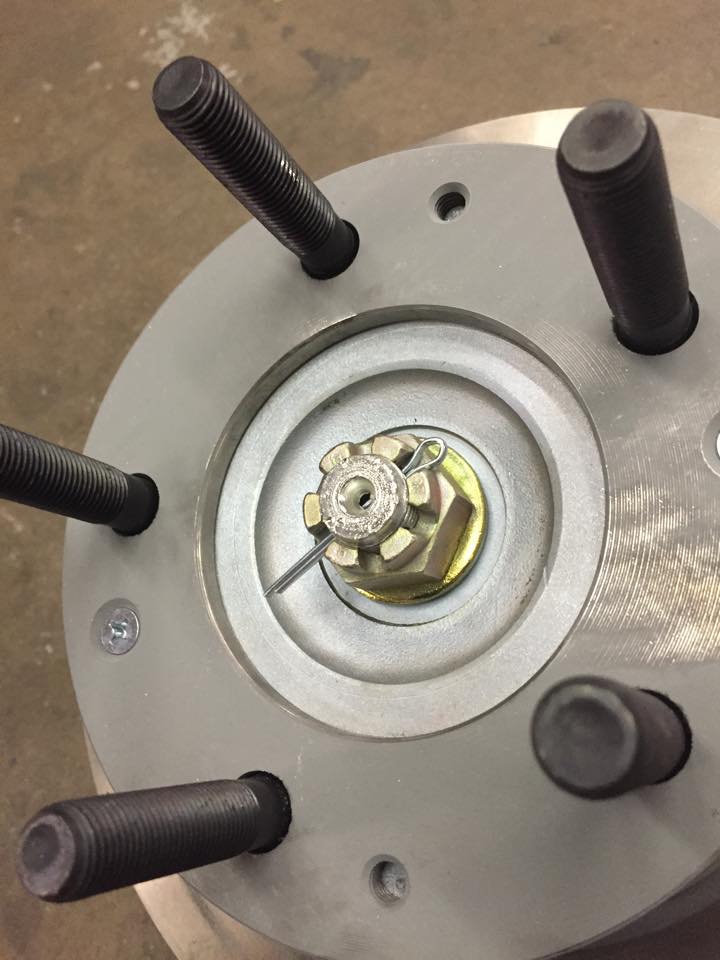
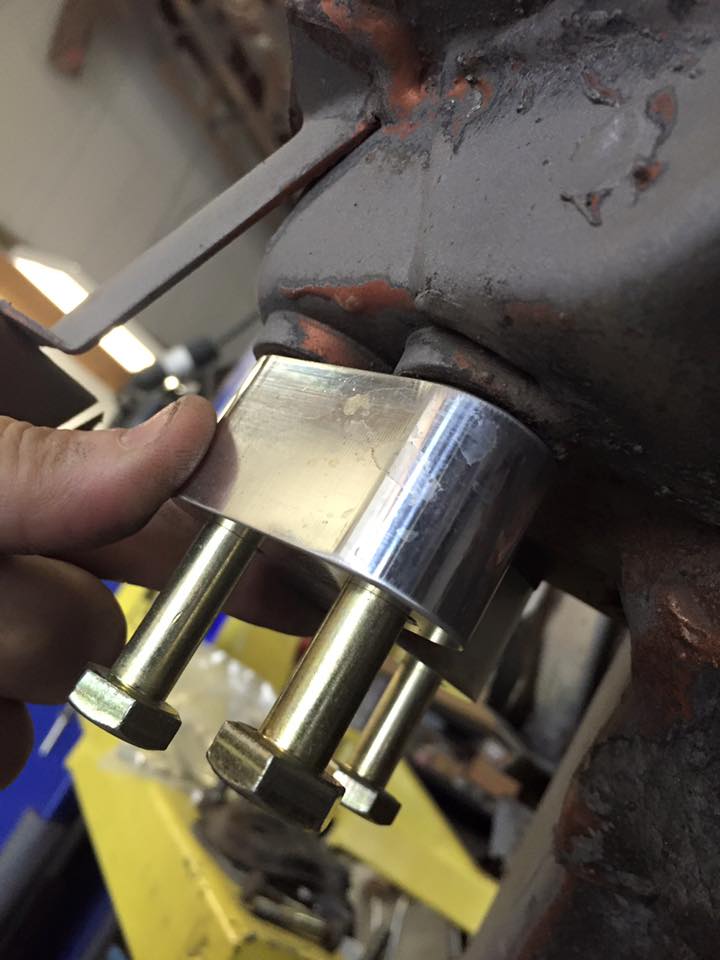
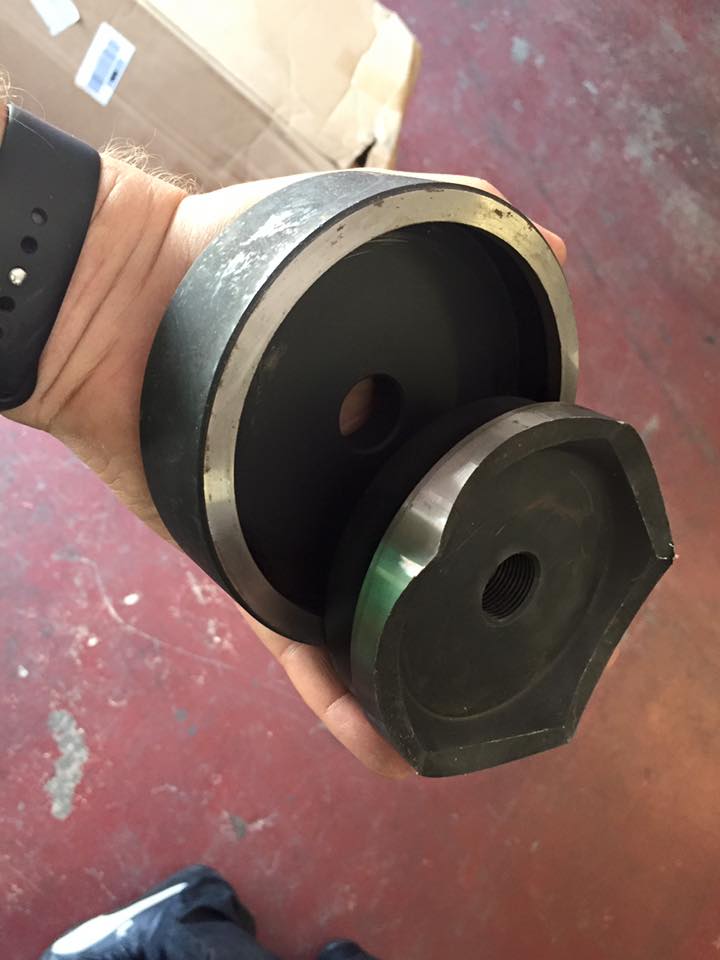
Longer studs were pressed in the rear hubs to allow for the 930 spacers.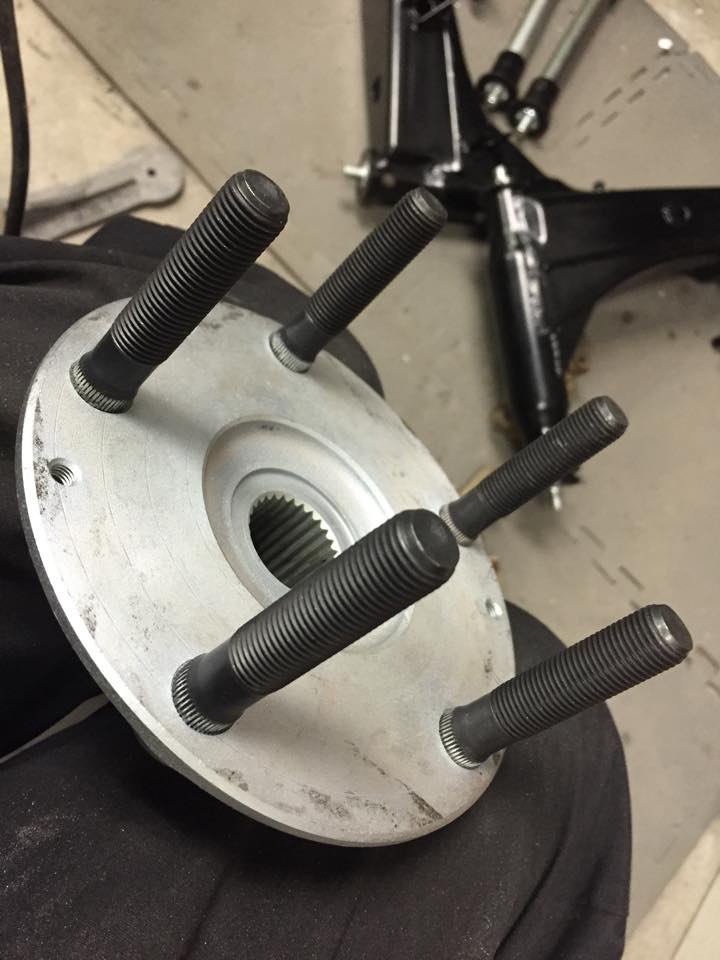
The hubs were pulled into the arms and topped off with new 914-6 rotors which match up with the mounting holes on the 911 hubs.
This project should never require a vented rotor in the rear so... why bother. Special calipers are on the way. Stay tuned.
The Stub Axle and castellated nut are in place and ready to go on.
Posted by: r_towle Dec 10 2014, 11:04 PM
Eric,
You are starting to remind me of a great guy who works at Paul Russel Restorations here in Mass, it's a super high end restoration shop.
I went over his house and in the garage was a ready to assemble 32 ford.
Everything was restored, powder coated, just gorgeous, and a fun looking kit to build.
This was a real car, lovingly taken apart and restored in his spare time...not at work.
When I asked him WTf, when are you gonna build it?
He stated that he was scared he would scratch all his nice new parts, so he could not get started.
Nice work, now bolt it on and show us the new stance already...
Posted by: Eric_Shea Dec 10 2014, 11:14 PM
Gotz ta get all the parts before ya can start bolt'n them on! 
Posted by: DavidSweden Dec 11 2014, 05:40 AM
The work your doing looks very nice.
I have a question regarding the rear bushings; in your opinion would it be workable to use a metal bushing instead of the poly?
Posted by: Eric_Shea Dec 11 2014, 09:02 AM
Thank you!
Regarding the bushings - You bet. The Elephant PolyBronze units are some of the finest metal bushings on the market. We sell quite a few varieties:
http://www.pmbperformance.com/914suspension.html
They're actually more of a journal bearing with a inner spiral grease journal. VERY good quality stuff.
I'm using our PerformancePoly front and rear (yes, we now have fronts here at the shop) to validate their durabillty. Again, the softer durometer bushings have tainted the market so, this is something I wanted to do for many reasons.
I think the off-road platform is a perfect place to prove these out. The company that molds these for us does all of the hard bushings for the Jeep and 4x4 off-road market.
Posted by: tomeric914 Dec 11 2014, 01:09 PM
Don't confuse what Eric sells with the Weltmeister crap, it's not the same! Eric's Delrin bushings are far better. They do require machining to set up right as he has shown. If you don't have access to a machine shop, then spend a little extra coin for the Elephant bushing kit which are pretty close to plug and play.
Years ago I made the mistake of buying the Weltmeister bushings. They lasted about 6 months.  The Elephants have been in my track car for 4 years now with no problems.
Posted by: Eric_Shea Dec 11 2014, 10:51 PM
We can machine them for our customers as well:
https://www.youtube.com/watch?v=pkIUODfyNkY
Posted by: euro911 Dec 12 2014, 01:17 AM
Hey Eric, if going with the delrin/poly type, do you need the customer's pivot shafts to accurately machine the bushings?
Posted by: DavidSweden Dec 12 2014, 05:21 AM
Regarding the bushings - You bet. The Elephant PolyBronze units are some of the finest metal bushings on the market. We sell quite a few varieties:
Yes Elephant have good products.
I was thinking it would be fun to turn some bronze bushings myself, if I were to go this route what would be a reasonable clearance between the bushing and the axle and is bronze the best material?
Posted by: Eric_Shea Dec 12 2014, 06:54 AM
We used a micrometer to measure the shaft(s) at their thickest points (in the middle where there is no wear). You'd have to play around with the bronze to check your final fit. The arms themselves are not always a perfect fit so, what may look good on the shaft itself can change once inside the arms.
This goes to Marks question as well. When measuring 4 separate shafts, we found them to be consistent. That said; they do tighten up considerably when installed in the arms. I found that to be perfect. That's exactly what I wanted. Once in place, I could not turn them by hand. Once I torqued the outer mount on and greased them, I could turn them with the leverage of the outer mount. Now... once a car is riding on them, I expect that to be perfect. I'll be doing the same thing with the fronts along with conical washers all around for a bind free fit.
I'm not sure turning my own bronze bushings would peg my "fun-o-meter" but if I were to do it I would try some of the oil impregnated bronze as a starting point. The "Poly" surround on the Elephants relieves a lot of frustration you'll have with the arm fit and they come with new shafts etc. If you take the six major pieces in the Elephant kit and divide out the cost, for a little over $50.00 each piece, time, labor and materials can easily exceed the cost of two (or three) Elephant kits.
Posted by: ThePaintedMan Dec 12 2014, 07:39 AM
I used PMB's bushings and installed everything just like Eric outlined. Though my measurements and fitting weren't quite as precise as his, I am thrilled with them. We did 10 hours of track time on them at Sebring and at the end had a little squeaking. A couple of shots of grease in the fittings and they went right back to being dead silent. Great product!
Eric - glad you've done the fronts now too. Any chance those will be available for us to purchase?
Posted by: euro911 Dec 13 2014, 12:30 AM
I musta missed something ... why was the JB needed?
Posted by: Eric_Shea Dec 13 2014, 08:33 AM
Hey George, Thanks.
Yes, I'm going to get a set of arms and run through a few "Best Practices" scenarios before I launch them onto the market. I need to get ID measurements correct and LOA with both bushings loaded in their respective end caps and on the car. I have all of the conical washers as mentioned earlier as well. I want to perform a full non-binding install and get pictures and make notes.
Mark, these are very hard bushings with little give so, they can't be made to "force" into the arm like the softer ones. Some fit very tight and some are snug. You want the bushing to remain stationary in the arm while the arm itself rotates on the shaft. The shaft has to remain proud of the bushing end because it gets torqued to 85-87 ft lbs. on the outer side with the mount and 108 ft. lbs. on the inner suspension ear. Those knurled ends dig into the body mounts and figuratively make the shaft one with the body while the arm rotates on the shaft. Any excess side-to-side movement and you'll get slop, noise and odd handling. Any looseness on the shafts and you get rattles and squeaks.
"Most" bushing installs require JB Weld to either install their precise races (Elephant) or their bushings in general. It's those variances you mentioned in your previous post that need to be overcome and with these rear arms, I've found the arms themselves to have the largest variance.
Elephant has a nice method of supplying a sleeve that is a looser fit to the arm (like these) and then makes the arm precise to their bushing ID. That sleeve needs to be JB Welded on though. I may utilize sleeves for my fronts. Still thinking my way through it. The variance, again, will be the arm itself. Some may be rusty stock old paint "get'er on the road" fixes. Some may be powder coat. Some may be paint. That's where the sleeve can come in handy. "Do what you want but, put this on before you put the bushing on..."
Posted by: r_towle Dec 13 2014, 08:34 AM
I musta missed something ... why was the JB needed?
Venture a guess that it is there to hold the bushing in place while you drill, tap and fit the zerk grease fitting.
You don't want the bushing to move inside the trailing arm, you want the bushing, and trailing arm, to move around the shaft.
Rich
Posted by: euro911 Dec 13 2014, 02:12 PM
OK, got it.
Posted by: ThePaintedMan Jan 30 2015, 02:53 PM
I'm ready for a set of those front bushings. Just sayin. 
Hope you do end up doing the cross-country trek Eric. It would be fun to meet you at Amelia!
Posted by: Eric_Shea Jan 31 2015, 11:01 AM
I think the trip is in pen.
I have the fronts and a reamer coming for the lathe.
Posted by: tomeric914 Feb 1 2015, 05:11 PM
Any ORV update pics?
Posted by: OU8AVW Feb 2 2015, 08:07 AM
Yeah, seriously Eric, starting a great thread, putting it on the classic builds page then leaving us hanging with no exciting pictures.....
LAME!
Get back to work!
Posted by: siverson Feb 2 2015, 07:26 PM
I beat you to it!
-Steve
Attached thumbnail(s)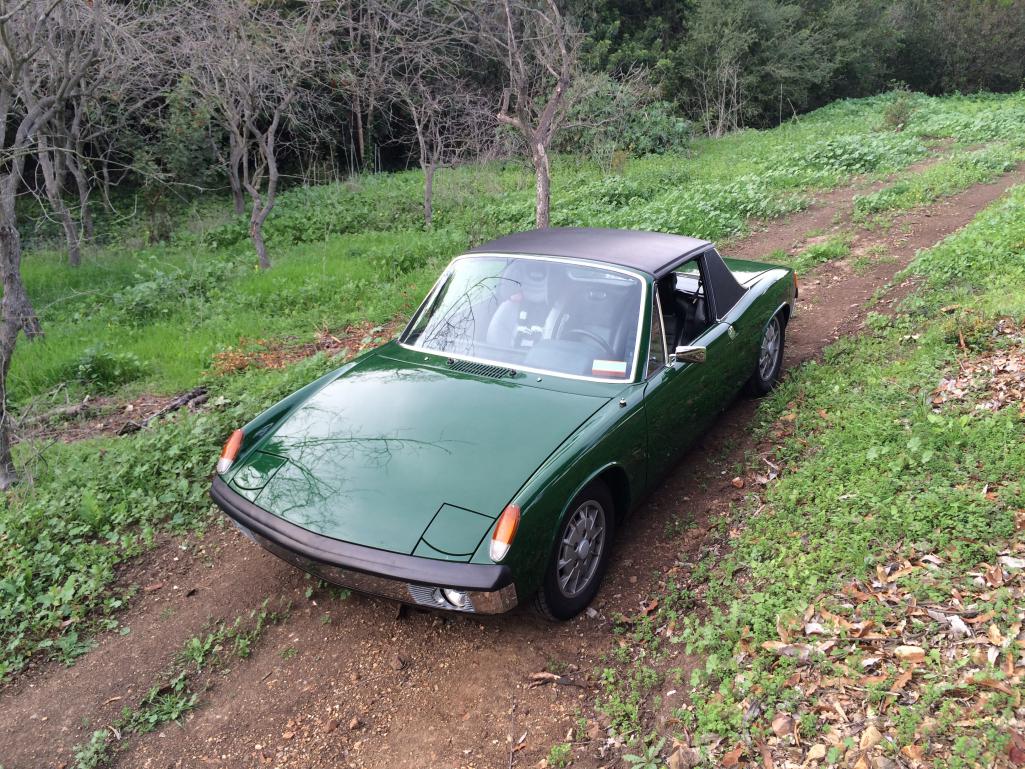
Posted by: JmuRiz Feb 2 2015, 07:41 PM
...with the kid seat = bonus points!
Posted by: sixnotfour Feb 2 2015, 07:43 PM
I beat you to it!
-Steve
Love the Irish Green and Mahle's
Posted by: Kaeferfreund Mar 13 2015, 01:15 PM
...with the kid seat = bonus points!
But driving without windscreen wiper...
Bonus points deducted!
Posted by: madmax914 Jul 31 2015, 10:20 AM
Any updates Eric? Love this build!
Posted by: Eric_Shea Sep 2 2016, 10:46 AM
I realized this hasn't been updated in a while so here's a batch of new pictures to keep you all entertained.
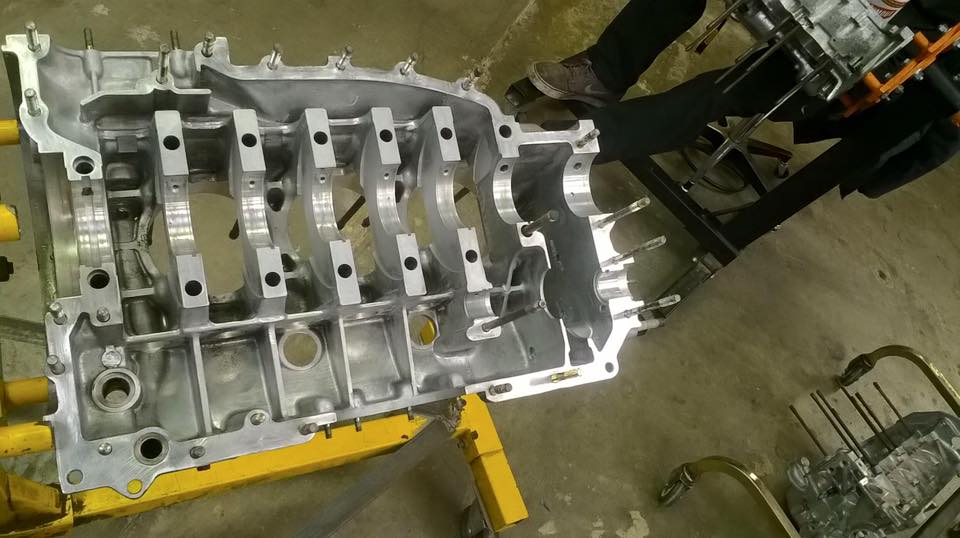
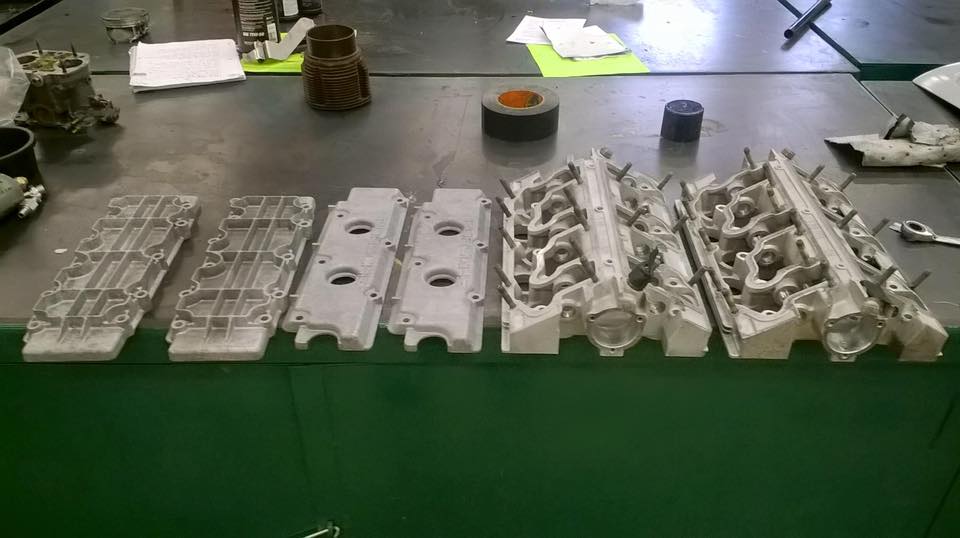
Matt has been busy making the engine look new. He finally got an edict from the goofy owner as to what he wants it to become. This 3.0 will remain CIS and get Euro HC pistons and Elgin Mod CIS cams. I think the FI will help with the multitude of elevation changes here on Planet Utah and should prove itself to be "set it and forget it" reliable. Others have reported stock 3.2 figures from this configuration. What we're looking for here is "torque":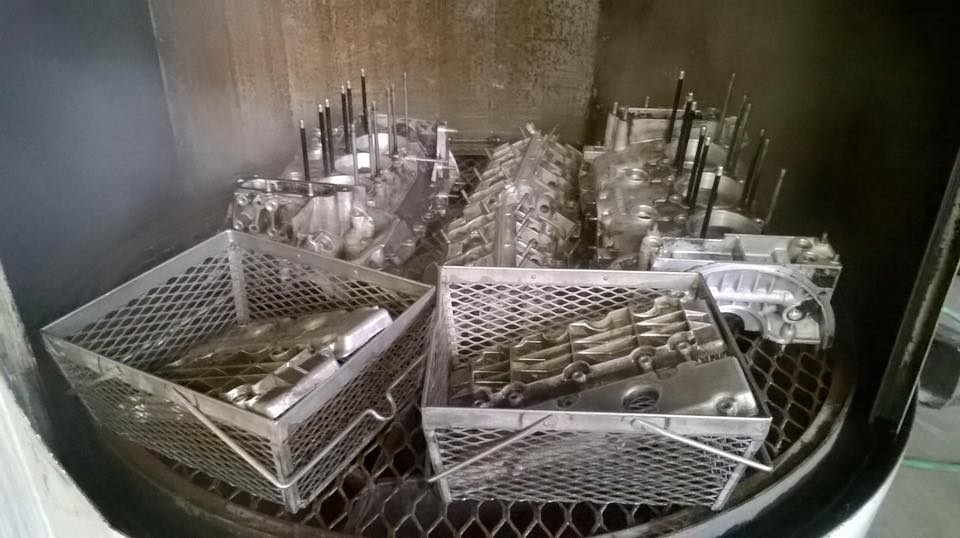
The transmission is getting ready for the 3.0 power with 108mm CV flanges to accommodate off road CV and axle combinations.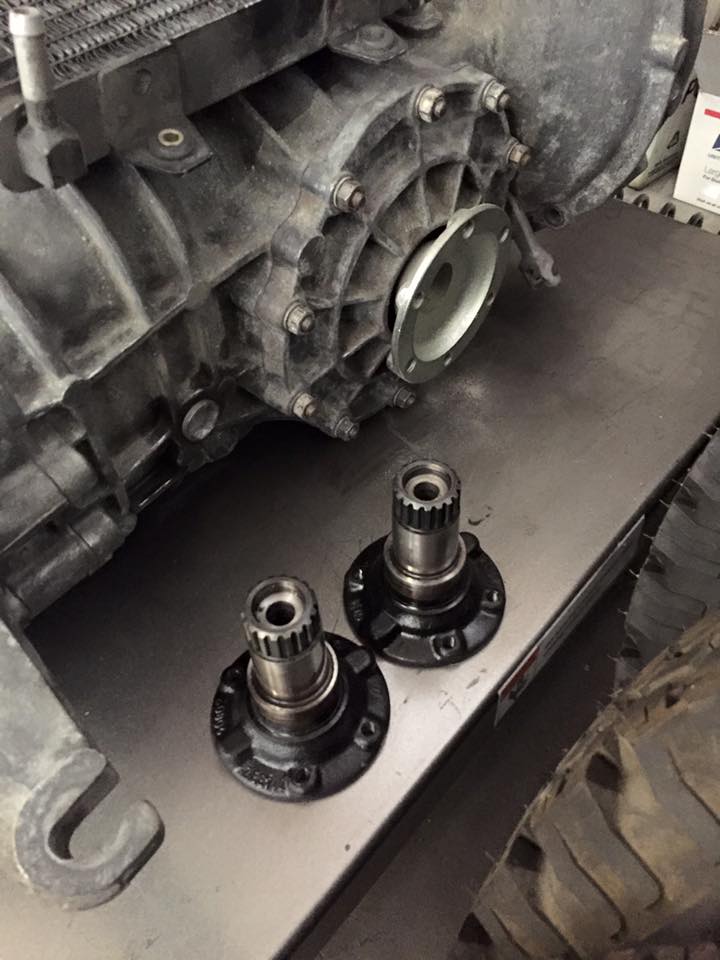
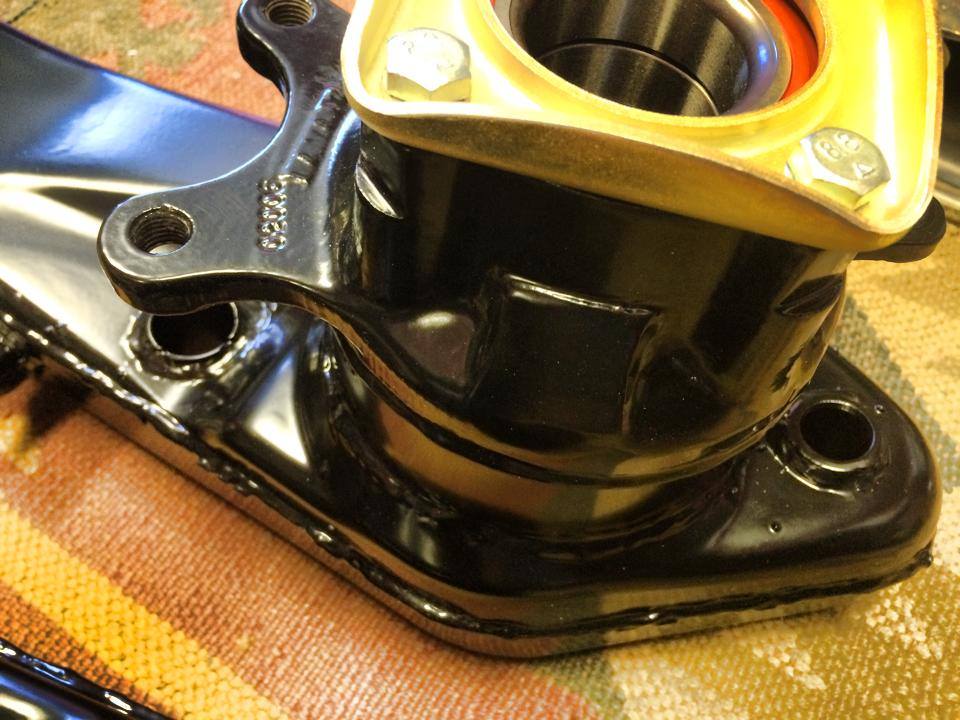
The rear hubs are early 911 with longer studs and, again 108mm stub axles installed:
As seen earlier in the thread, we're using our own PerformancePoly bushings (hardest durometer) to test their worthiness in the off road environment. These were again, glued into the mounts after being machined for the arm races. 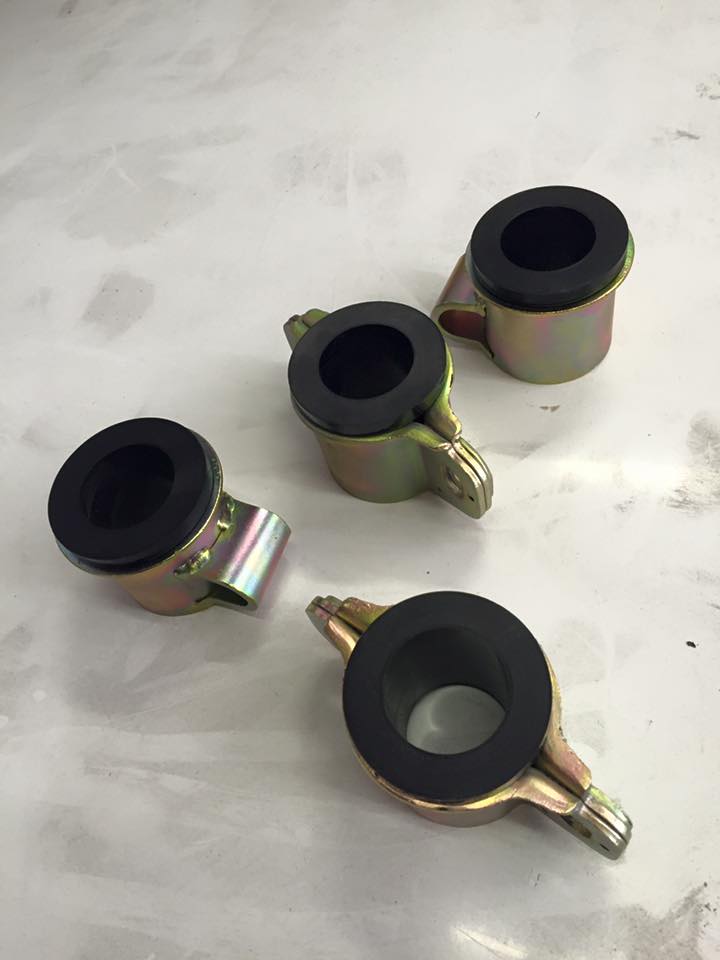
After a bit of welding, we were finally able to test mount the rear suspension. The factory ears were extended by 28mm by utilizing a good set of ears off a donor car. Chris Foley at Tangerine Racing made a custom pair of inner control arm mount stiffening plates that tied everything together. We then had a pair of custom 28mm spacers machined for the outside mount.: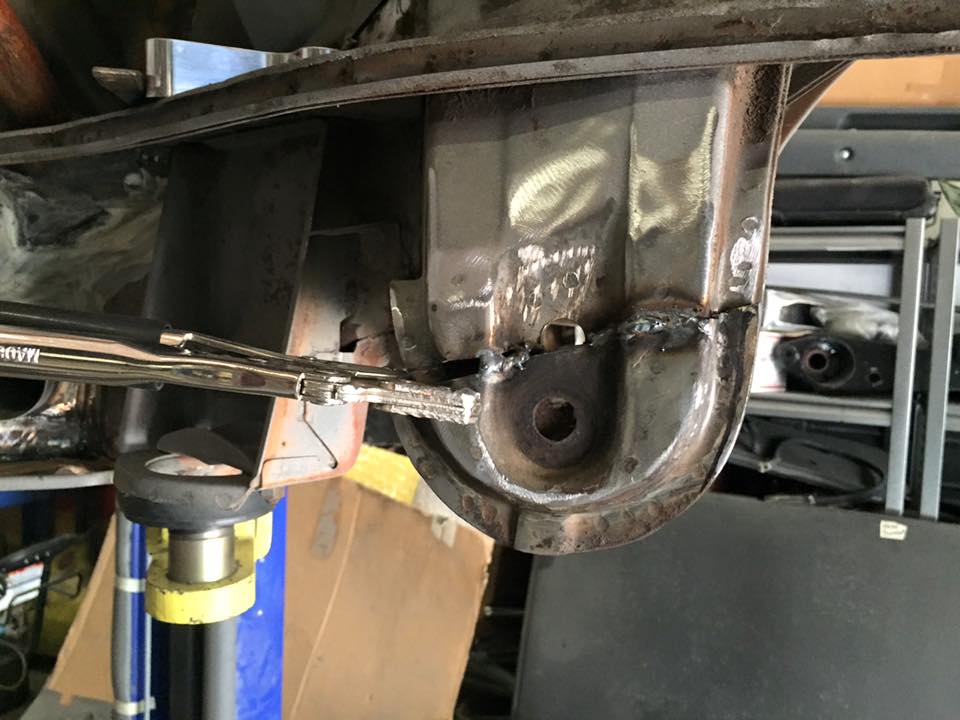
Posted by: Eric_Shea Sep 2 2016, 10:52 AM
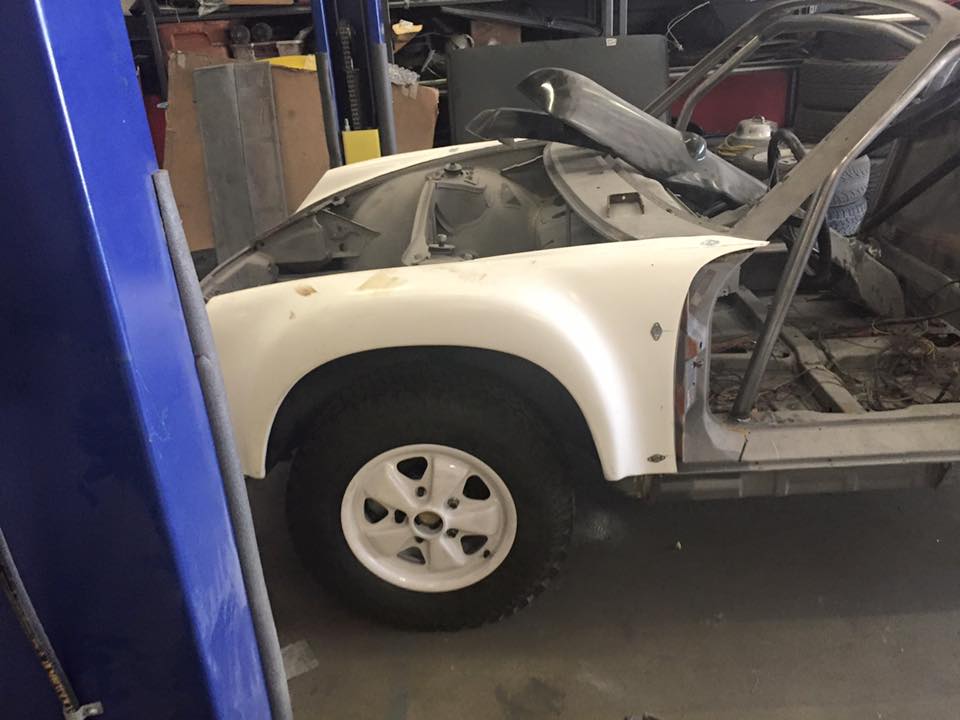
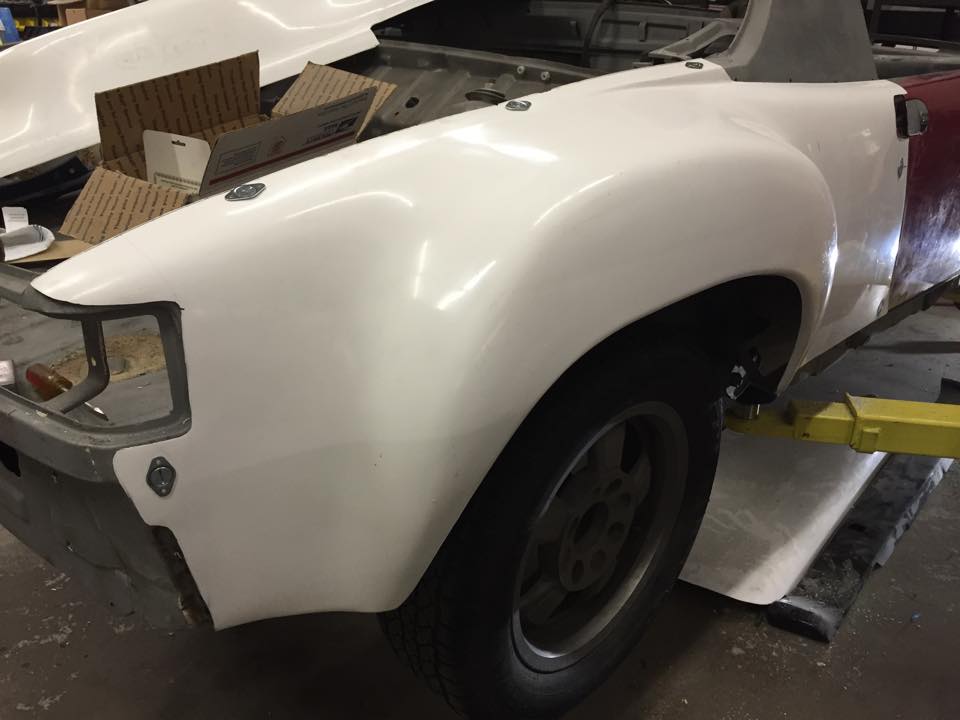
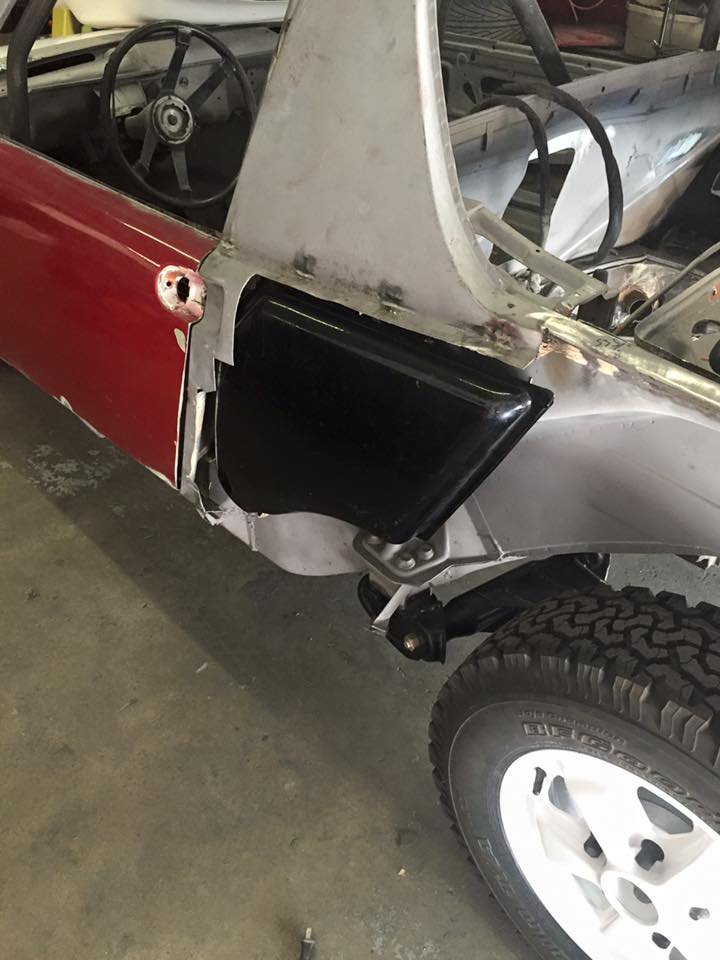
Panels were fitted all around. We've chosen Dzus fasteners for easy access and, to allow for a quick change if we have a rock accident etc.
Trunk Monkeys in place to emulate the weight of the motor in the chassis: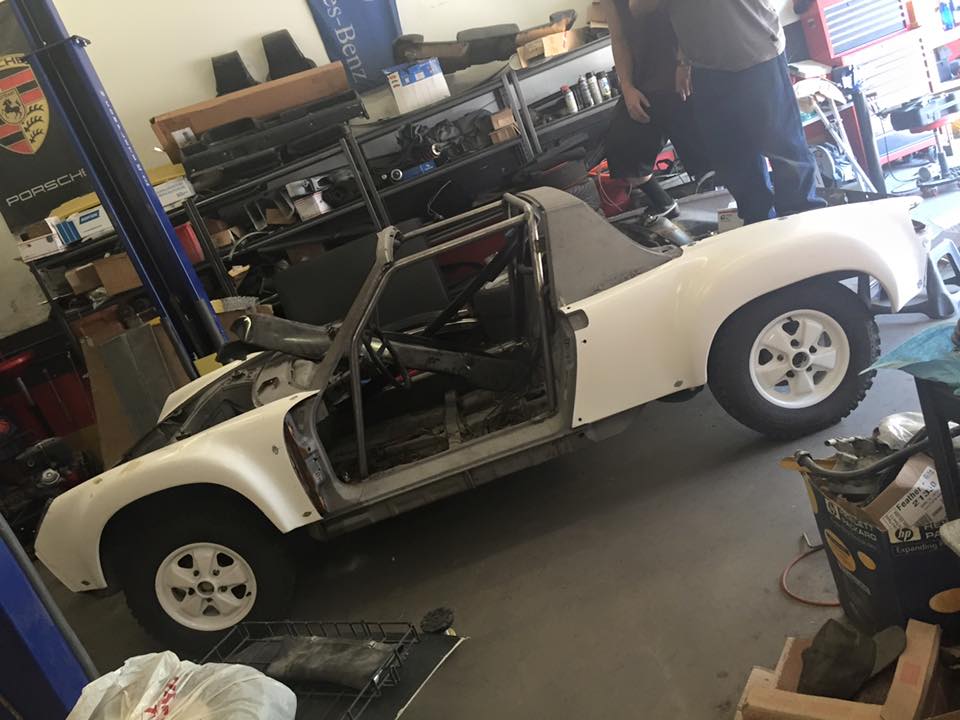
Posted by: Eric_Shea Sep 2 2016, 11:01 AM
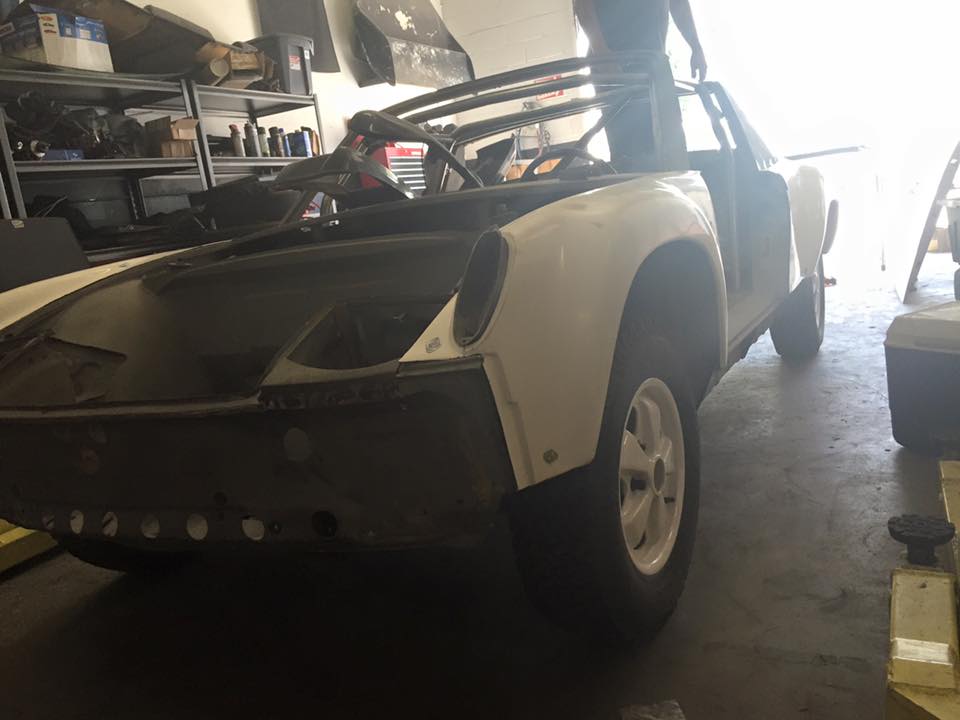
The front suspension was (obviously) fitted and checked for ride height: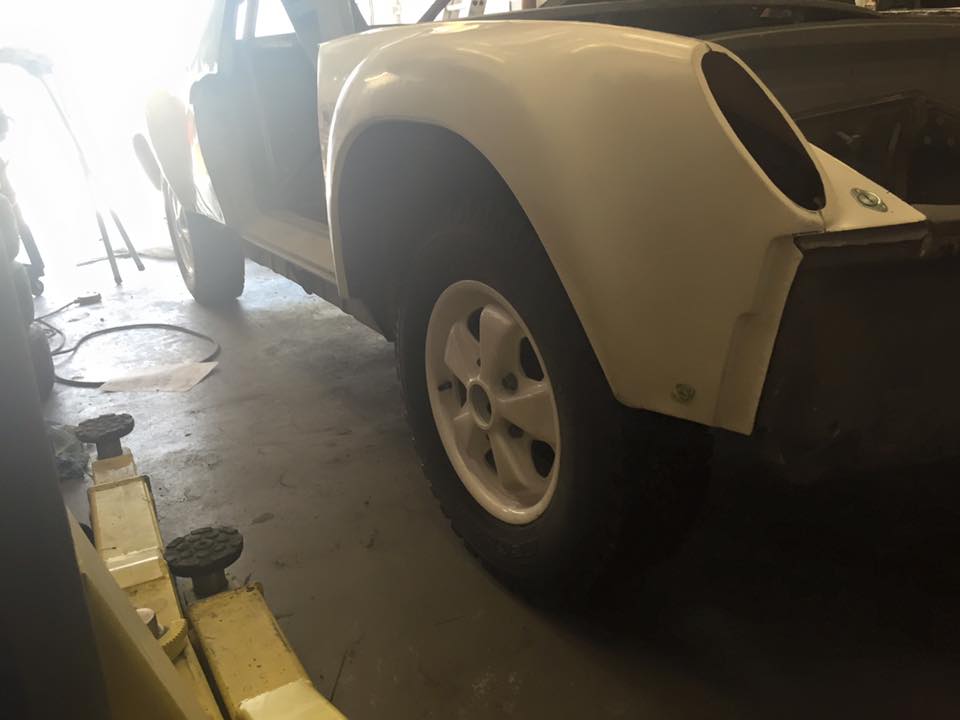

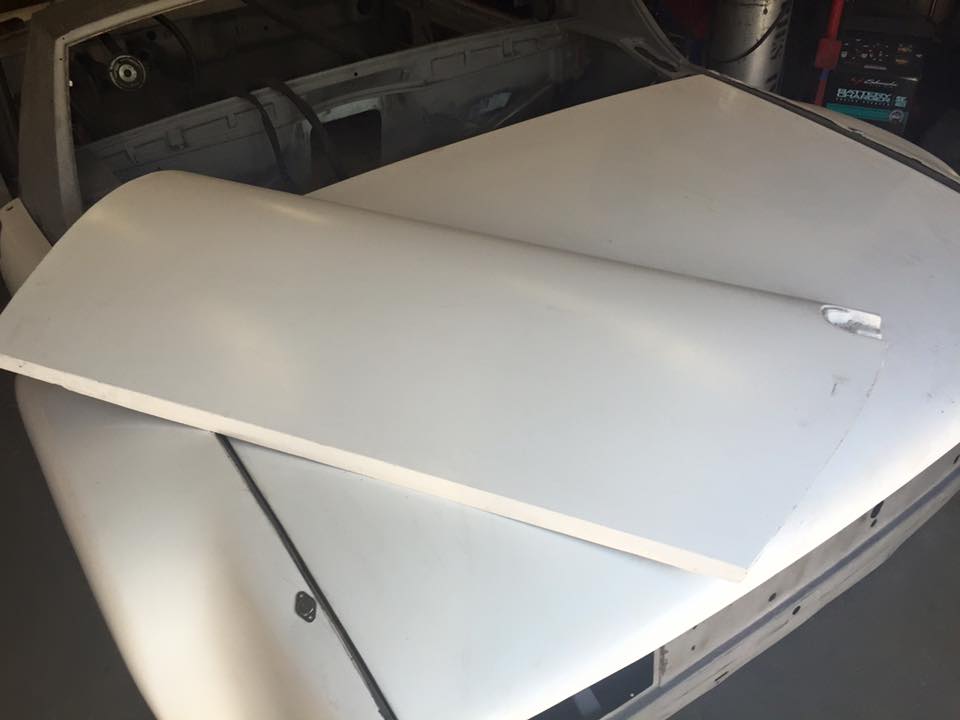
We also mocked up the location for the front light panel: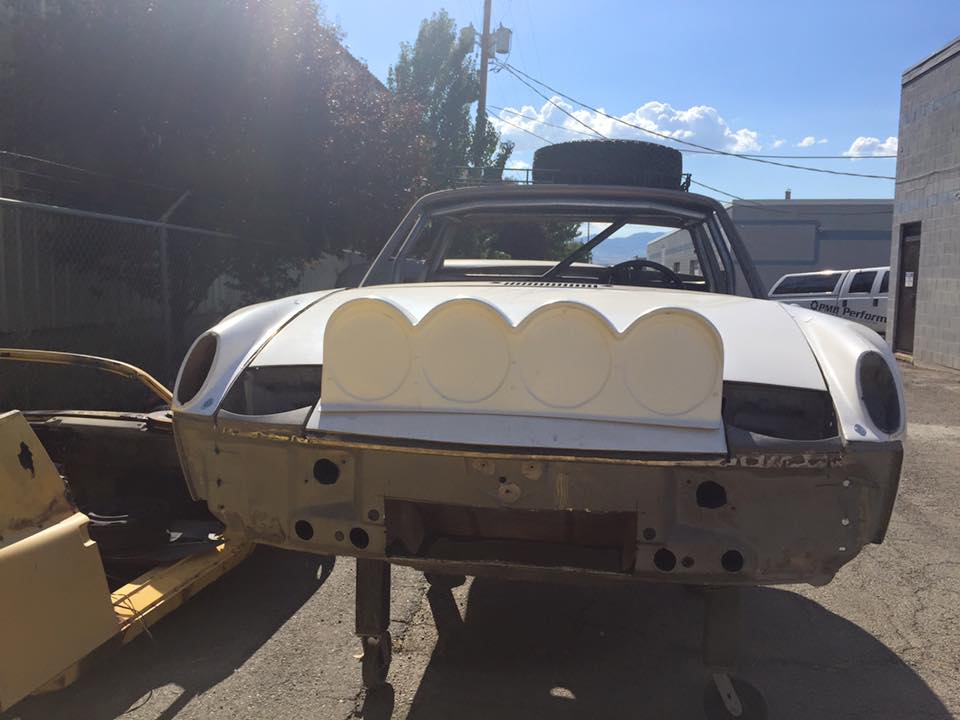
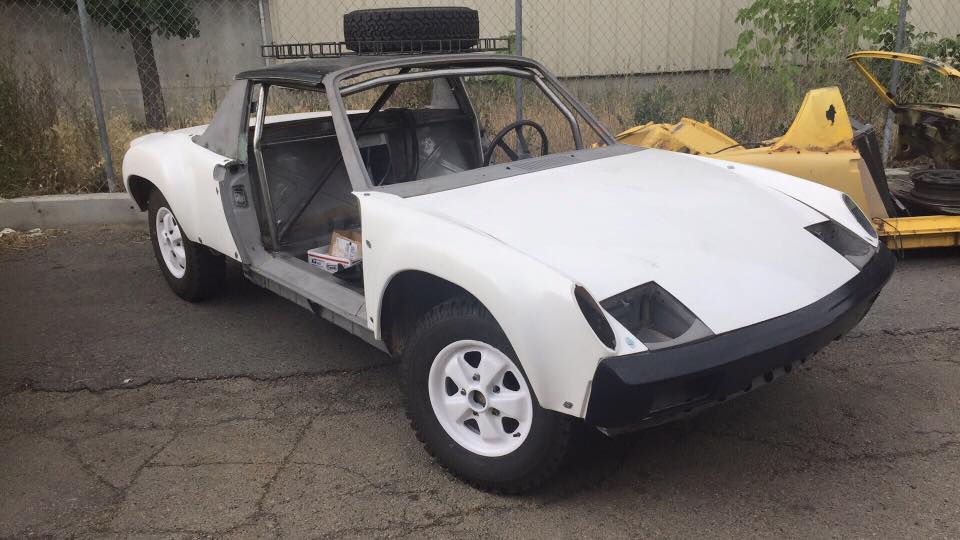
Lovin' the roof rack! The spare fits perfectly: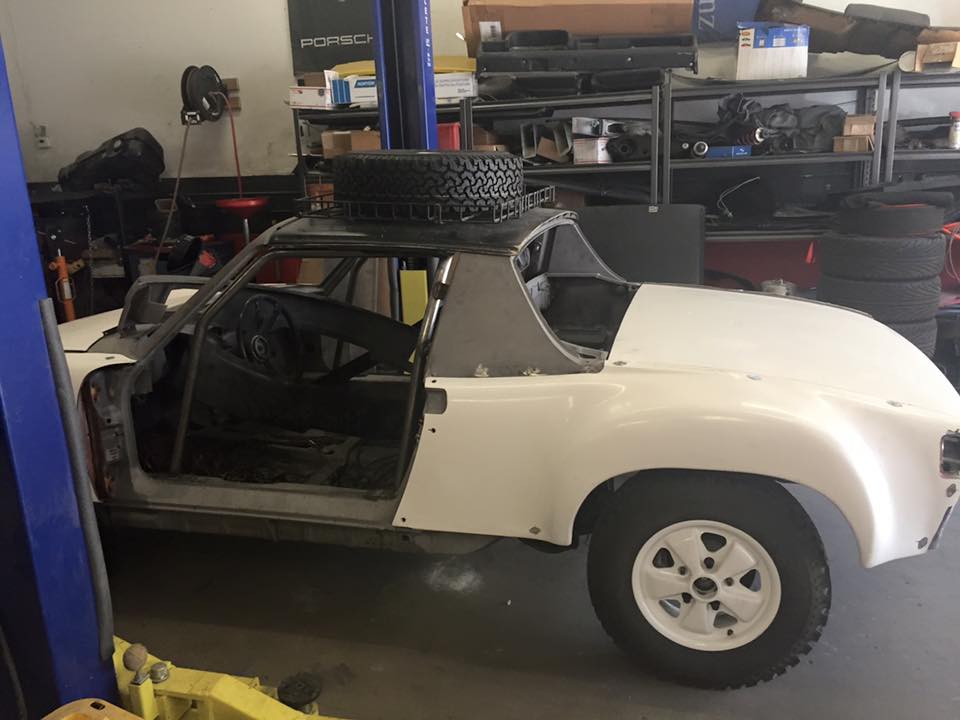
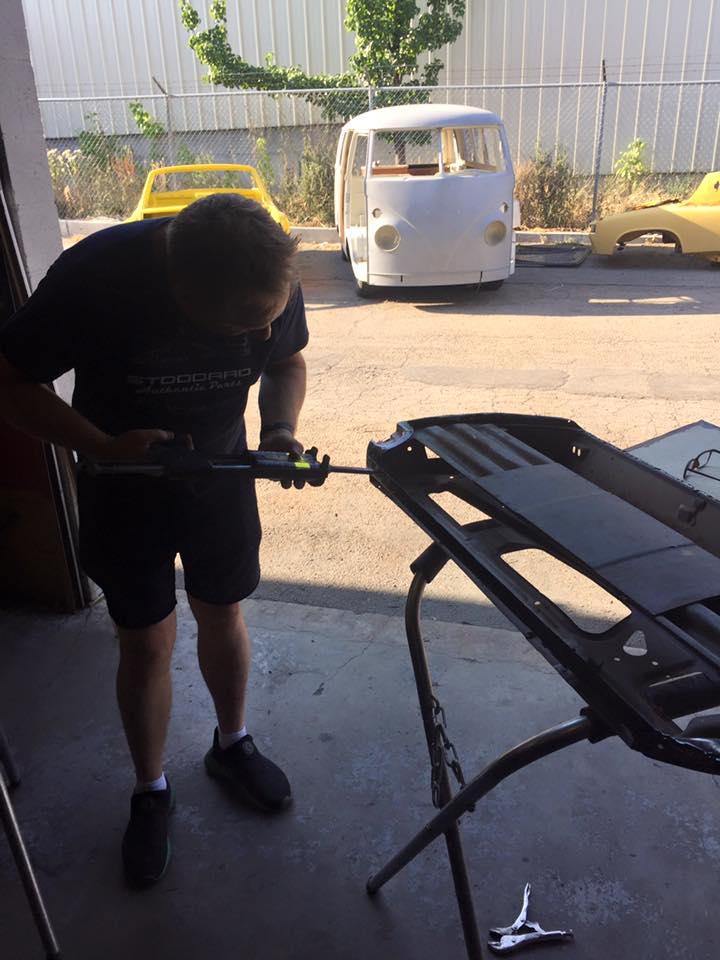
And... we spent a little time on the doors and getting the fiberglass skin put on them. The metal skin is just wrapped anound the frame and welded at the top and bottom so, grind off the edges, make a few cuts, test fit the skin, apply the adhesive and let it dry. We used every clamp in the house:
Posted by: Eric_Shea Sep 2 2016, 11:11 AM
As you can see from some of the above pictures, the cage is in. Chris Foley and the Tangerine crew to the rescue again. Tangerine makes one of the best roll cages in the business for a 914. Every piece was there and, it just fit. 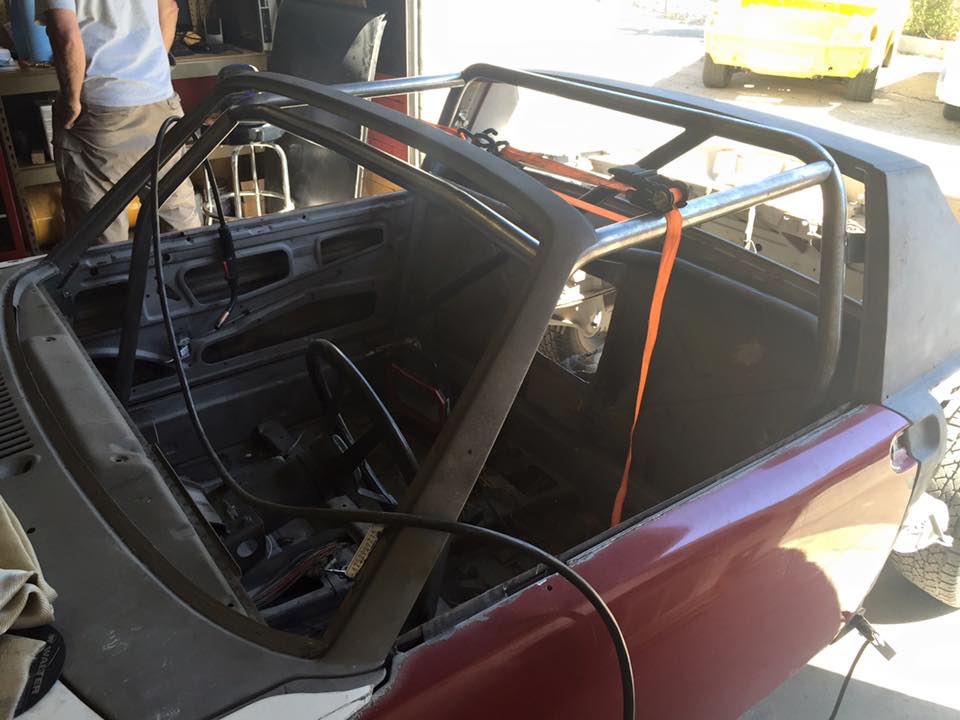
More welding was done in the form of motor mounts and a basic front to back approach to holes and any rust issues. 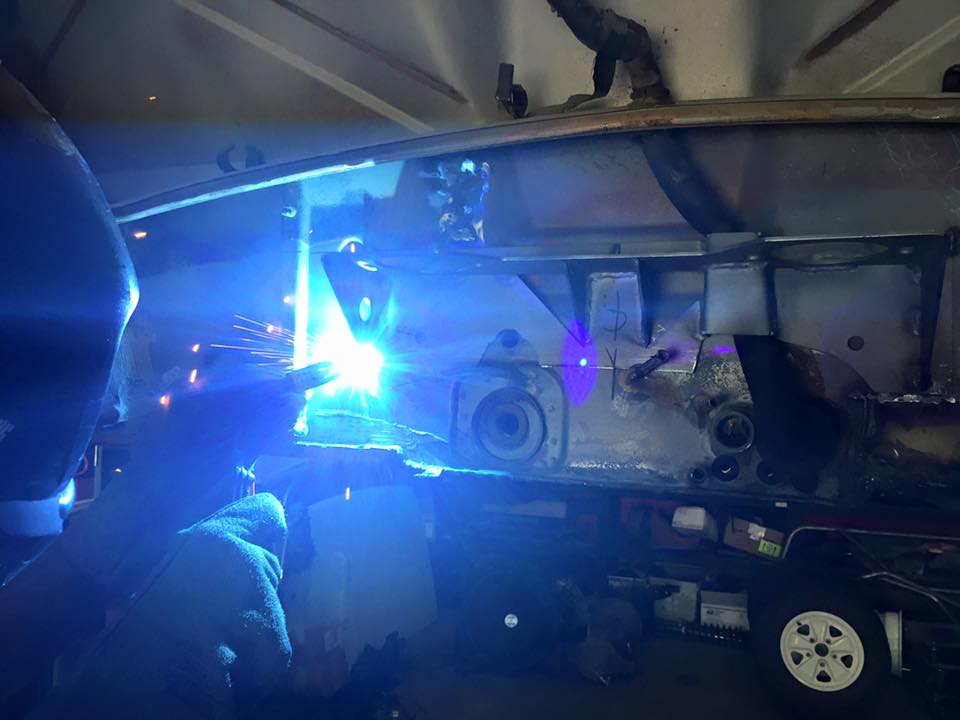
We also made some holes and fitted the oil tank. We used a factory tank for fittment but, we'll be using one of Ben's new tanks for the updated oil filter and more capacity. We special ordered a custom 111mm hole punch for the filter console: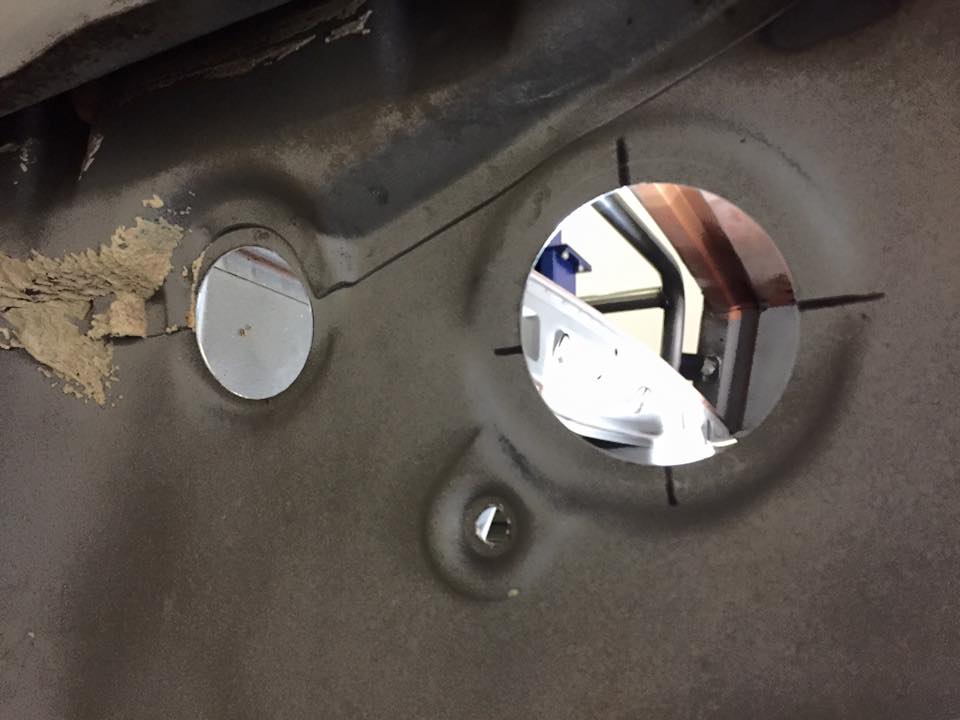
The suspension is back off and the body is now on our body dolly. This means we're wrapping up the rough body work and it should go off for final prep and paint next! Starting to look more and more like a 914 every day!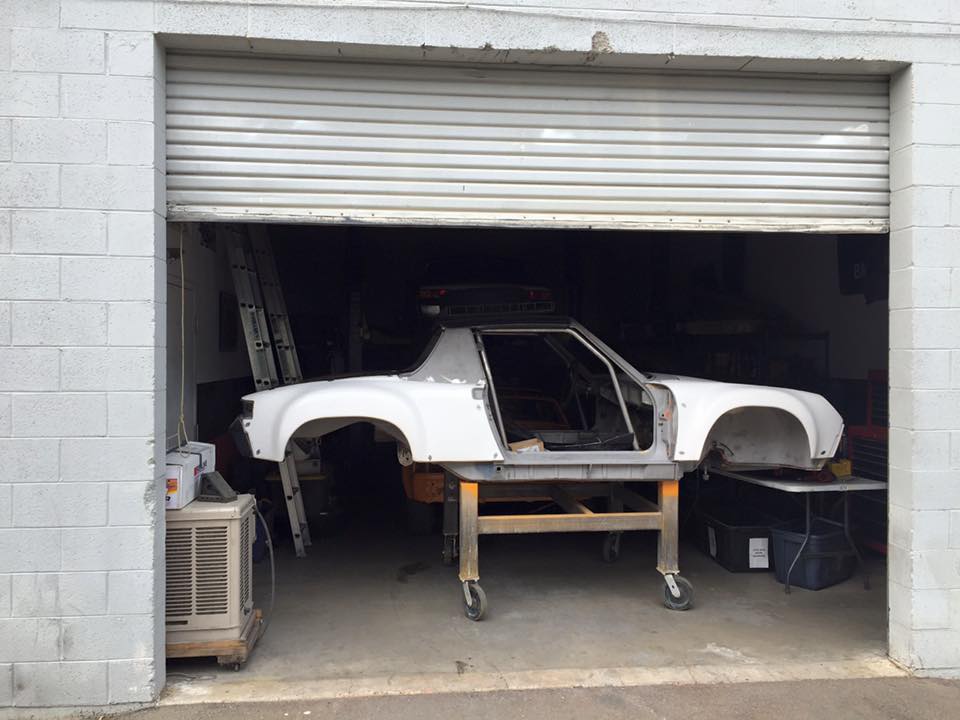
Posted by: SirAndy Sep 2 2016, 11:27 AM

Posted by: Mike Bellis Sep 2 2016, 11:33 AM
This is an awesome build!
Posted by: rhodyguy Sep 2 2016, 01:19 PM
I think your recip saw blade is long enough.
Posted by: Eric_Shea Sep 2 2016, 01:34 PM
I think your recip saw blade is long enough.
Epoxy Panel Bond Glue Gun.
Posted by: siverson Sep 2 2016, 03:03 PM
Very cool!
Posted by: Cory M Sep 2 2016, 03:21 PM
Love this project. You should put some fender liners or foam in the wheel wells so the paint won't get thrashed from rock/debris impact.
Posted by: restore2seater Sep 2 2016, 03:37 PM
Hard to tell from the MIG flash, what type of engine mount is that being welded on?
Posted by: pete000 Sep 2 2016, 07:39 PM
How much weight savings with the fiberglass door skins over stock doors?
Posted by: Eric_Shea Sep 2 2016, 08:55 PM
How much weight savings with the fiberglass door skins over stock doors?
None because I opted to keep the guard rails in the late doors for the off road protection.
We did a set for another car and it was "substantial".
Mount is a Maddog copy of a Vellious mount from back in the day. I tend to like those mounts the best for six installs.
Posted by: Elliot Cannon Sep 2 2016, 10:14 PM
Not sure I like the idea of the Dzus fasteners. I mean, who does that really? 

Posted by: Krieger Sep 2 2016, 11:17 PM
Looks great Eric! It's very interesting to see how you raised the back end. Is that a cooler on top the tranny?
Posted by: Sleepin Sep 3 2016, 06:47 PM
Looking for torque? No Rally Car is complete without a turbo....
Posted by: sixnotfour Sep 3 2016, 08:01 PM
SubArooo
Posted by: gms Sep 5 2016, 11:50 AM
Making great progress!
Posted by: SixerJ Sep 5 2016, 03:29 PM
Loving it Eric, presumably your going to put in some heavy duty rock protection for the oil tank?
BTW which DIY store did you steal the trolley from to make the roof rack?

Posted by: r_towle Sep 5 2016, 05:07 PM
Looks like great progress on a fun project!
Posted by: Ferg Dec 11 2017, 12:45 PM
![]()

Posted by: Eric_Shea Dec 11 2017, 04:14 PM
Currently residing on a back burner as we have over 4 years worth of customer builds to work on before my off-Road play toys.
Posted by: burton73 Dec 11 2017, 04:27 PM
PMB Performance, “Build it and they will come”
Bob B
Posted by: Mueller Dec 11 2017, 04:29 PM
Currently residing on a back burner as we have over 4 years worth of customer builds to work on before my off-Road play toys.
Gee, I wish I could work only 20 hours a week
Posted by: t collins Dec 12 2017, 09:30 PM
I think I see another Leno show in your near future 
Posted by: Edward Blume Dec 13 2017, 07:33 AM
Wow. 4 years. Someone needs a "914 World intervention...."
Posted by: JmuRiz Dec 13 2017, 08:34 AM
4 years....that's nothin' I'm working on 10 years of my 'project'.
More important stuff gets in the way
Posted by: flippa Dec 13 2017, 07:25 PM
There are more than a few of us in the same boat.
Posted by: Matty900 Dec 13 2017, 10:47 PM
You should get it ready for the mexican 1000 and race it. These one already entered for next year. https://www.norra.com/vehicle-entries.php
Attached image(s)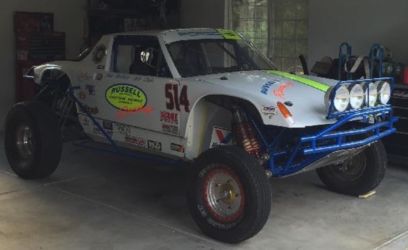
Posted by: stownsen914 Dec 14 2017, 12:46 PM
Not much 914 in that, but pretty cool!
Posted by: JamesM Feb 2 2018, 01:53 PM
Need to tell all those pesky customers to stop giving you so much work so you can get this project done. It seems you have some stiff competition mounting in the "offroad mid-engine Porsche" realm.
https://www.highsnobiety.com/2017/02/02/porsche-918-spyder-off-road/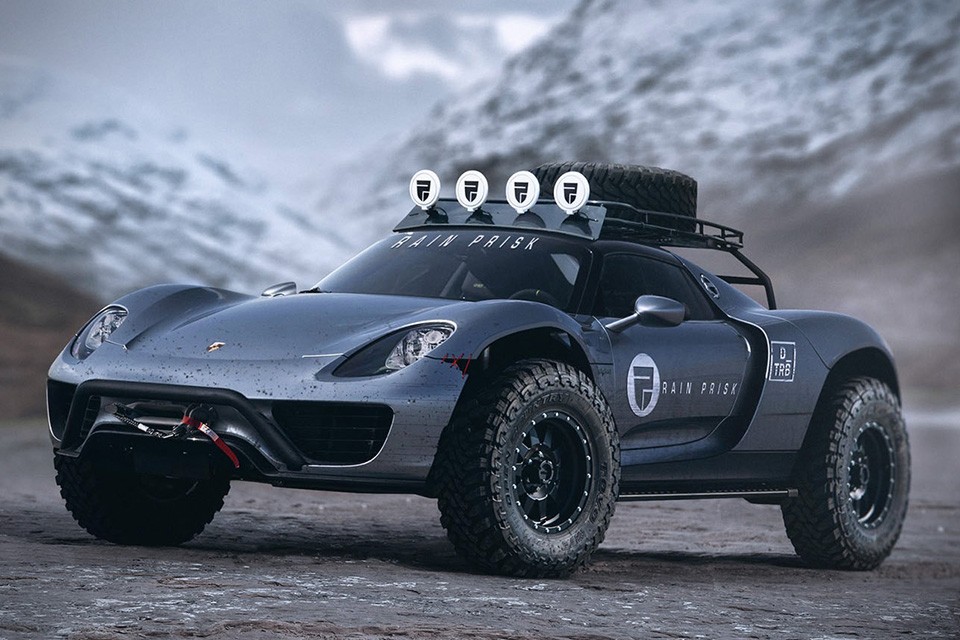
Posted by: JmuRiz Feb 2 2018, 02:27 PM
"...Sadly, the Porsche is just a pet project and won’t be rolled out formally anytime soon. "
Reference to the post above: Understatement of the year, someone is just writing an article based on a computer rendering, haha.
Posted by: worn Feb 2 2018, 06:24 PM
Need to tell all those pesky customers to stop giving you so much work so you can get this project done. It seems you have some stiff competition mounting in the "offroad mid-engine Porsche"
What caught my eye was the mountain range in the background. Where is that?
Posted by: Optimusglen May 25 2018, 11:02 PM
BUMP. I did a bit of my own model/render work to try and get this project moving again. Mostly so you can work out all the bugs and then I can build one similar.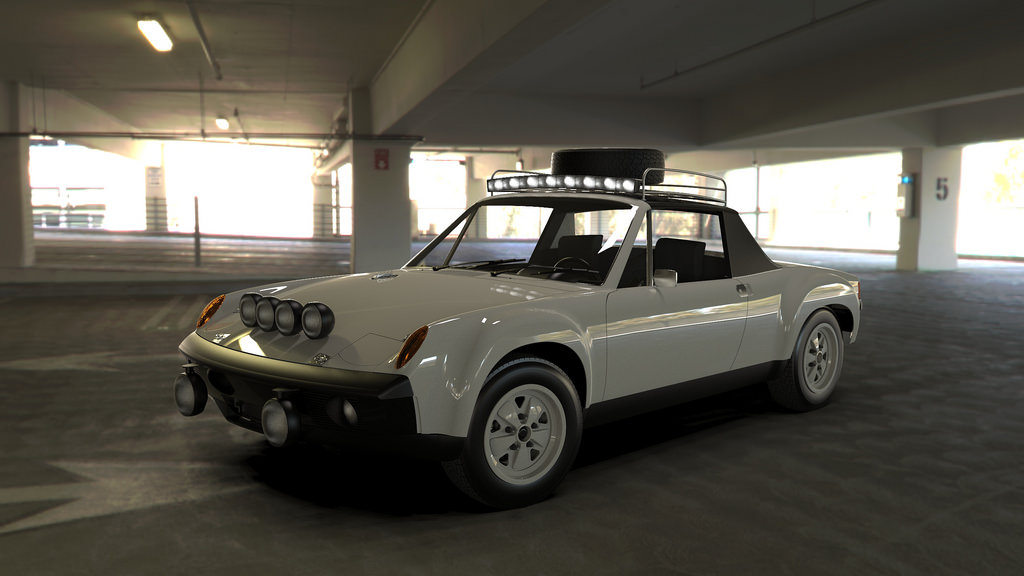
Posted by: rhodyguy May 26 2018, 09:17 AM
Needs more aux lights.
Posted by: Optimusglen Sep 16 2022, 06:29 PM
Bump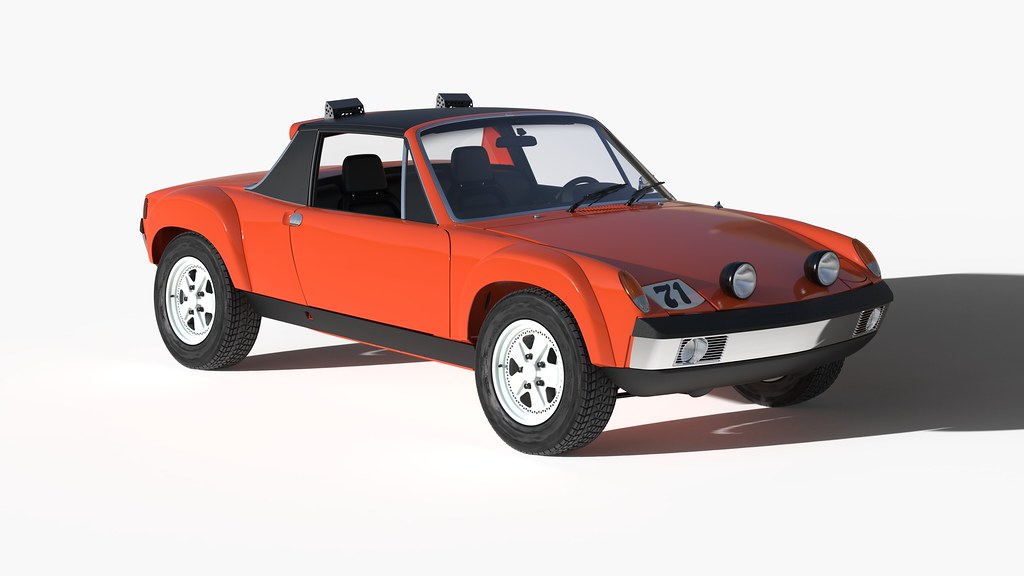
Posted by: bkrantz Sep 16 2022, 07:54 PM
Actually, that looks close to stock ride height.
Posted by: waltonsm Sep 16 2022, 10:11 PM
Bump
Getting closer on the colors!
Posted by: rick 918-S Sep 17 2022, 08:11 AM
Always wanted to do this. Glad to see the progress.
Posted by: 6er Dec 12 2022, 01:39 AM
It'll be worth it when your done
Powered by Invision Power Board (http://www.invisionboard.com)
© Invision Power Services (http://www.invisionpower.com)