Printable Version of Topic
Click here to view this topic in its original format
914World.com _ 914World Garage _ RevWife's 914
Posted by: Mikedrevguy May 19 2014, 09:34 AM
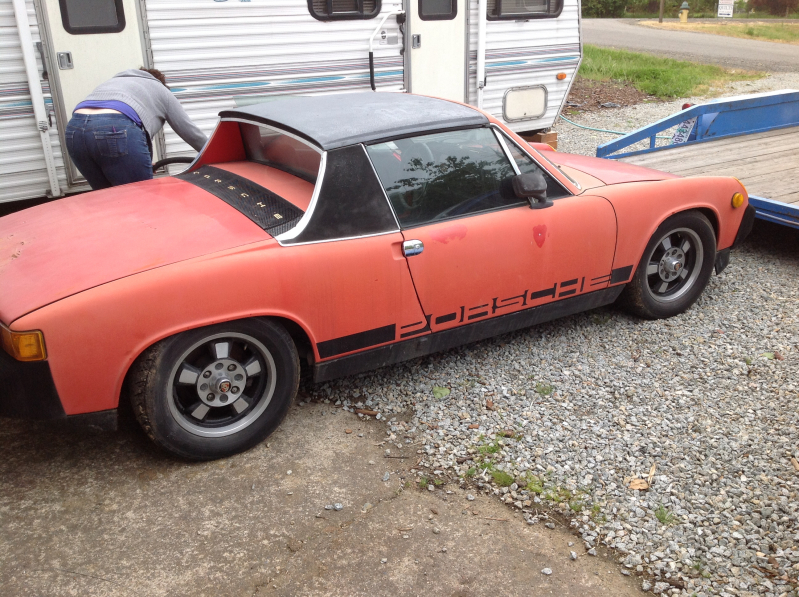
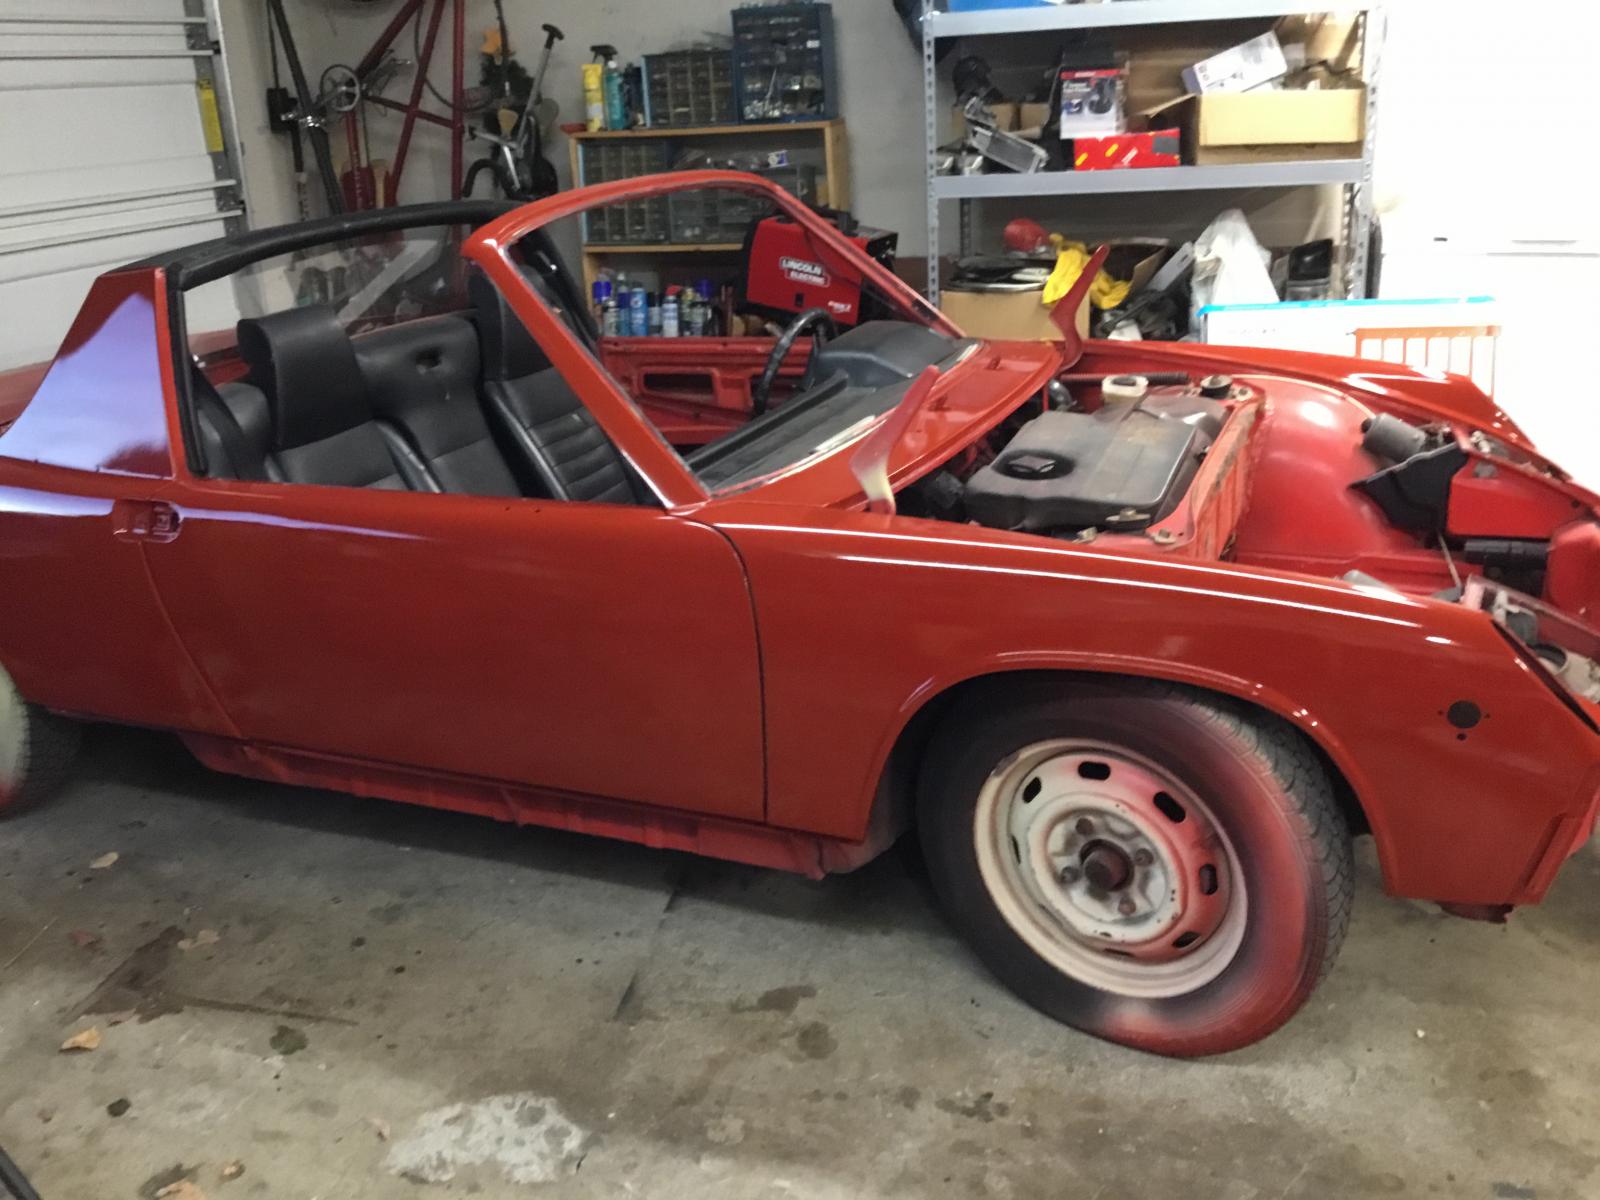
Picked up a 76 2.0 for my better 1/2.
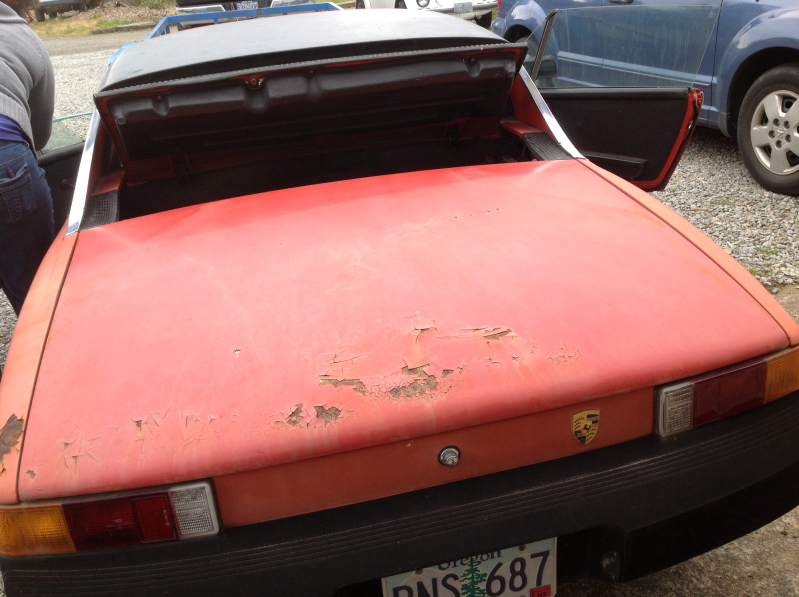
It's been off the road for the past -10 years. Motor spins freely and, reportedly, was rebuilt shortly before it was parked (which was due to physical limitations). Paint is heavily oxidized. Brakes were locked up, rotors rust covered. Car had been hit previously, and the resulting bondo has cracked pretty badly.
Interior is nice, seats have no tears or holes. Dash has a couple cracks, but nothing overly grotesque.
As I begin getting this back roadworthy,
Am pulling fuel tank to be cleaned out thoroughly. Replacing all fuel and vacuum lines. Changing oil and trans fluid.
Will go through brake system. See what's good. What's in need of replace or [email]repair.
My question: where can I go for a list of what pieces parts are compatible from year to year in the 914.
Interested in front and rear hoods, top, brake calipers -
Or more specifically, I've a line on a 71 running complete parts car- what will cross over between a 71 and a 76?
Thanks. I look forward to posting pics (when I get them and figure out how they work on this forum.
Rev.
Posted by: Philip W. May 19 2014, 10:00 AM

there are a few things that are not the same for early vs late cars. - you fron and rear hood should be able to be used. there are differences in the brakes and suspension bits, look to Eric at PMB performance for the specifics. he is an expert and will tell you all you need to know. if you hve original motor with F>I> the wiring for the motors has some variation as well - again i have a 75, and have not had an early car, but most of what you wand or need will be interchange with 74-76, although even the MPS for the FI will be different,. i am not aware of any one document that would list out the different years/parts and their compatability but hat would be really cool if someone put one together.
Posted by: green914 May 19 2014, 11:03 AM

there are a few things that are not the same for early vs late cars. - you fron and rear hood should be able to be used. there are differences in the brakes and suspension bits, look to Eric at PMB performance for the specifics. he is an expert and will tell you all you need to know. if you hve original motor with F>I> the wiring for the motors has some variation as well - again i have a 75, and have not had an early car, but most of what you wand or need will be interchange with 74-76, although even the MPS for the FI will be different,. i am not aware of any one document that would list out the different years/parts and their compatability but hat would be really cool if someone put one together.
 Would be a nice addition to my 914 library.
Posted by: rick 918-S May 19 2014, 12:26 PM
Posted by: Mikedrevguy May 19 2014, 01:06 PM
Thanks for the welcome, and for the direction.
What I founds PMB Performance is that 70-72 rotors/calipers do differ from the 73-76. The offset is the factor.
However,if swapped together, they should work.
http://www.pmbperformance.com/914brake.html
Also, the later rotor/caliper set up is compatible with the VW Type 3.
And here's another sheet listing parts and comps
https://bowlsby.net/914/Classic/zTN_Gen_914-4_PartsInterchange.xls
Thanks again.
Rev.
Posted by: jmill May 19 2014, 01:07 PM

Posted by: Mikedrevguy May 19 2014, 01:34 PM
Considering the offset- will changing the offset affect what wheels I can run?
Posted by: Jeff Bowlsby May 19 2014, 01:45 PM
First off...its incorrect to think of 914s as 'early' and 'late'. 914s are at least broadly categorized as early / mid / late and the line between those categories can be fuzzy. In reality each year has significant differences.
Some parts can easily swap onto all model years, but some others are 1 year only.
Please leave the running 'complete' 71 alone...let someone else bring it back, don't take one down for a couple of parts. You can find whatever parts you need individually elsewhere.
Posted by: Dave_Darling May 19 2014, 04:18 PM
The tops are different, though if you swap over the seals from your later top to the earlier one, it should work. (A knowledgeable person could probably tell from looking at the underside of the top that it wasn't right, but...)
The brakes are different. Rears are interchangeable. Fronts are not, nor are the front struts and ball joints. (Unless you replace struts, ball joints, brakes as a unit--not recommended, as the later bits are slightly better.)
If you hunt through the Porsche website for a while, you can find "Porsche Classic" and then a PDF of the parts catalog. It isn't perfect, as some parts have been superceded to stuff from later cars that isn't the same, but it does have some information on running changes in part numbers.
--DD
Posted by: Mikedrevguy May 19 2014, 07:19 PM
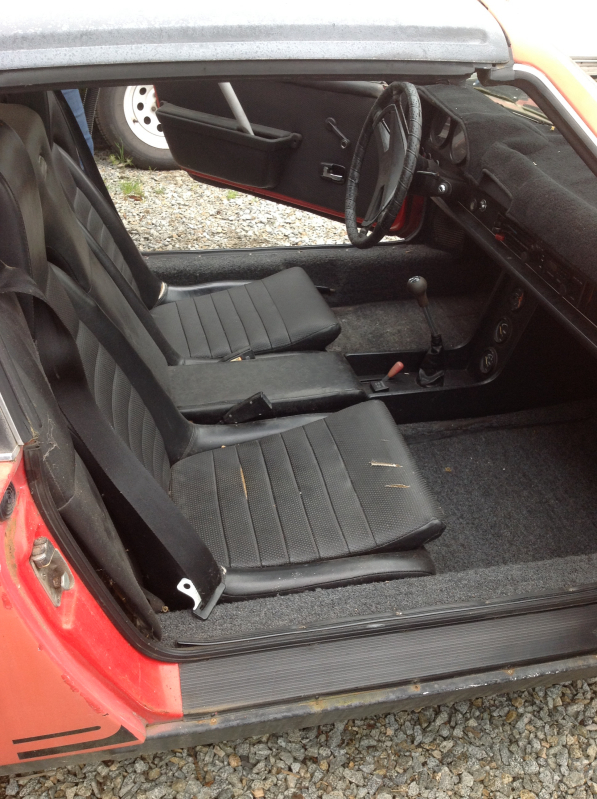 okay, there are a couple tears. But I'm not shedding any tears.
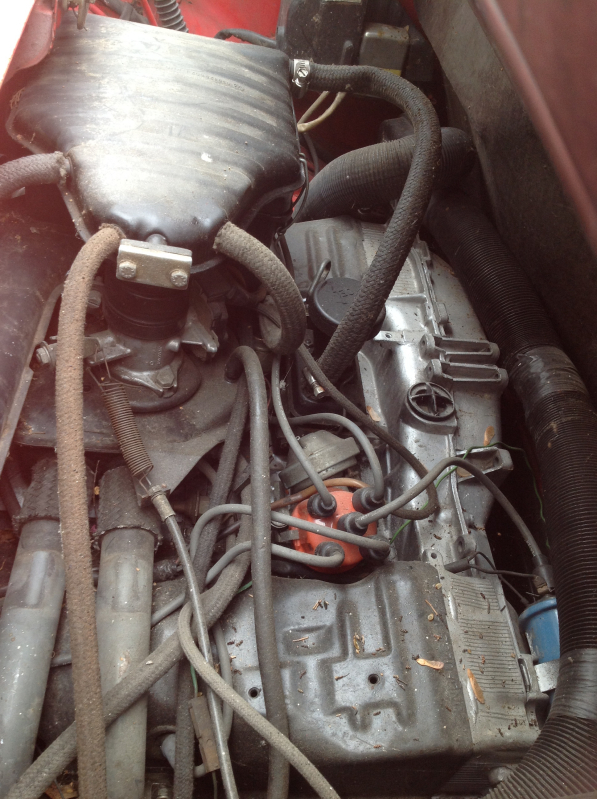

Posted by: hndyhrr May 19 2014, 08:33 PM
welcome, i'm in central point.
Posted by: Mikedrevguy May 20 2014, 09:08 AM
welcome, i'm in central point.
Thanks. Small valley that it is, I'm sure we'll run into each other as some point.
Posted by: Mikedrevguy May 22 2014, 09:00 AM
In effort to avoid the procrastinator's thread, yesterday, I pulled the wheels off and sprayed wd40 in the ebrake cables/mechanisms.
Next up,
A)pulling the rotors to have the rust removed
B) getting new battery and assessing the electrical system
C)pulling fuel tank
Or
D) other?
Posted by: Mikedrevguy May 22 2014, 10:26 AM
And rear rotors mic out at - 9.75mm
Fronts - 10.4 & 10.2
That's before being turned.
Posted by: bulitt May 22 2014, 10:47 AM
Some late cars equipped with smog stuff may have to pass emissions in some states.
Wiring harnesses are different.
Steering columns are different.
Dashes have different sizes for glove box. And late has side vents.
Kneepads different
Window regulators and side glass different.
Front and rear- side window glass brackets different.
Bumpers different
Brake hose clips different
Transmissions may be side or rear shift.
Posted by: relentless May 22 2014, 01:39 PM
Welcome! I'm in Cave Junction. 
Posted by: Mikedrevguy May 24 2014, 08:02 PM
Found the fuel pump. What's the white box?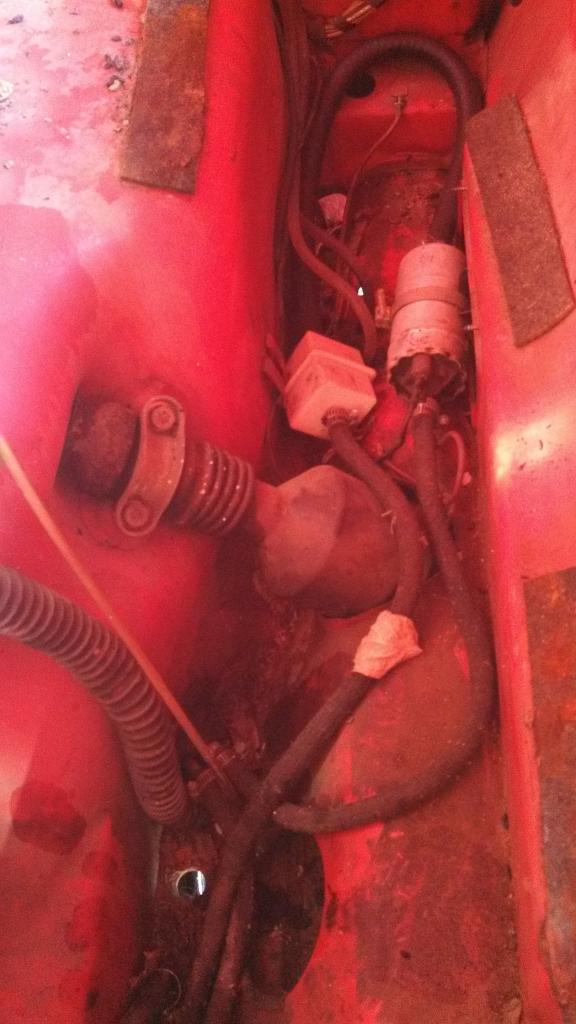
Tank is t and ll be going to radiator shop for cleaning and sealing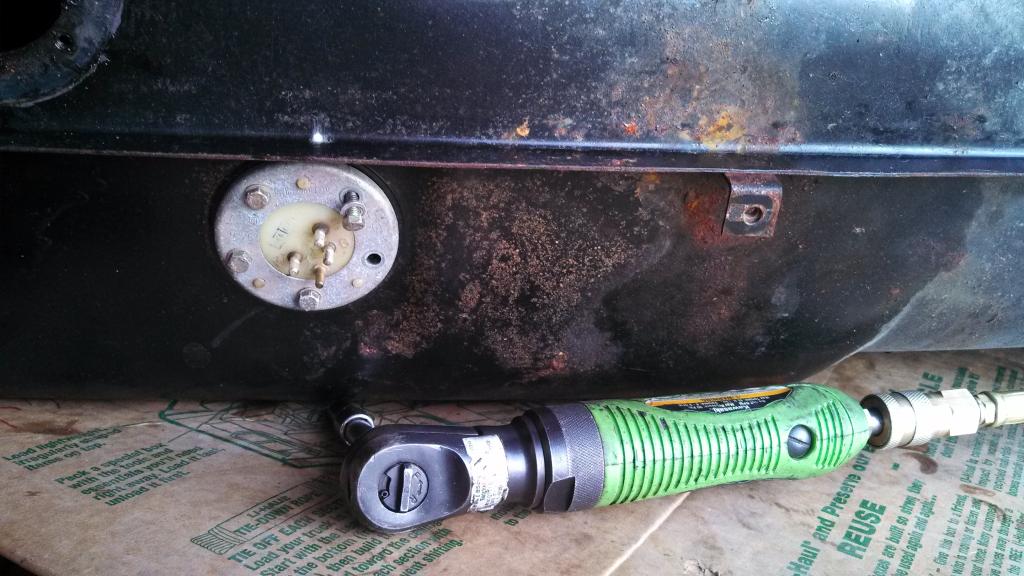
Any thoughts on cleaning the fuel sending unit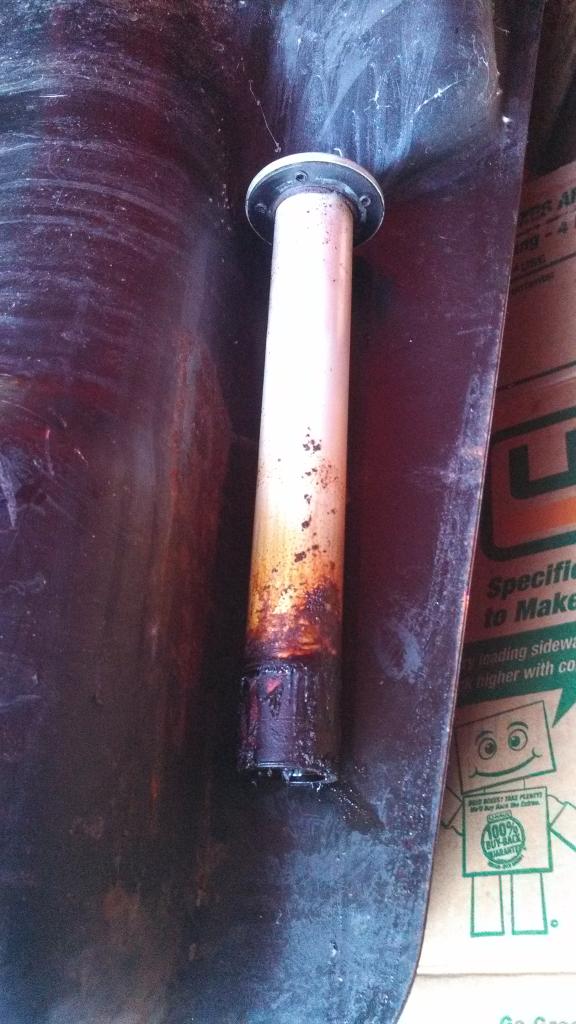
Is there a list of hose sizes and types I'll need to replace the entirety of the fuel system?
Verified that the brakes to work. Each rotor locks up; at lest there aren't any frozen cylinders.
Posted by: Mikedrevguy May 24 2014, 08:03 PM
Welcome! I'm in Cave Junction.
Should be a fun drive out there one of these days.
Posted by: bdstone914 May 24 2014, 08:11 PM
The white box is the fuel filter. That fuel sender might be trashed. I have never seen one with that much varnish. There is probably as much inside which has a sliding float. You can try soaking it a closed container of lacquer thinner. If you are carefully you ca open them up from the bottom. After soaking it turn it upside down and you should hear the float slide to the other end. New ones are pricy at about $160. Sometimes you can find good used ones.
Posted by: Mikedrevguy May 24 2014, 08:47 PM
Thought it might be the filter, but, gosh, you think it could have been placed in a MORE inconvenient place? Hw often should they be changed?
How concerned should I be with the fuel pump, there being THAT much varnish in the tank- will that have gummed up the pump?
Posted by: bdstone914 May 24 2014, 08:59 PM
They do not get change often. You should be able to access it through the access hole for the fuel pump.
Posted by: Mikedrevguy May 26 2014, 05:28 AM
And rear rotors mic out at - 9.75mm
Fronts - 10.4 & 10.2
That's before being turned.
So it pays to read, completely, all the parts, charts, graphs, and the check to make sure there isn't anything that's been missed.
http://www.pelicanparts.com/techarticles/914_brake_pads/914_brake_pads.htm
Looked up info on wear limits for rotors. Wanted to see if they were within tolerances not. Followed the link, read the chart and simply presumed that front and rear rotors had same dimensions. Foolish naive, whatever.
Armed with this misinformation. I set ant pricing out rear rotors, believing they were out of spec.
Yestereve, I read further and discovered the chart for the rear rotor specs which puts these certainly within tolerances.
Again- read. Reread. And read some more.
Posted by: Mikedrevguy May 26 2014, 07:35 PM
Got fuel line from tank to tunnel out. No real big accomplishment there.
The filter and pump both had turpentine with residual goo. I believe it was in process of turning back into a dinosaur.
Filter will be replaced- no question.
Re the pump- can it be cleaned, soaked in thinner, brake clean? What will ruin the innards? Or rather what WON'T ruin the innards. Or is this sol and I should just source a new pump?
Posted by: jim_hoyland May 26 2014, 08:28 PM
Fuel Tank: there is a copper filter under inside the tank outlet. It's shaped like a sock and designed to keep particles from reaching the fuel pump. You may need a pointed tool to loosen and remove it for cleaning. I just did this and found a fair amount of sediment in the screen; from the look of your fuel gauge sender, there could be a buildup. BTW, the screen are available new if it's really bad
Good luck with the project
Posted by: Mikedrevguy May 27 2014, 09:45 PM
$200 to boil, acid wash, and line the tank. In line? Out of line?
Oh, and I got the fuel fittings off the tank, but there was little chance of getting the sock out. Pretty corroded in there. One more to add into the purchase pile.
Posted by: Mikedrevguy May 29 2014, 06:16 AM
Report from radiators shop: inside had some rust spots with pin holes. He'll solder those and then line the tank, paint it and it'll be ready for prime time. Pick it up Monday.
Posted by: jim_hoyland May 29 2014, 06:30 PM
AA carries two socks (strainers); one for 70-74, another for 75-76.
111209147A and 113269147
Posted by: Mikedrevguy May 30 2014, 06:17 AM
Thanks for the lead and the heads up.
As far as placement- is the sock fitted into the opening that's closest to the midline of the tank?
Posted by: hndyhrr May 30 2014, 06:50 AM
that would be the correct one.
Posted by: jim_hoyland May 30 2014, 08:43 AM
Thanks for the lead and the heads up.
As far as placement- is the sock fitted into the opening that's closest to the midline of the tank?
Sock will be in the outlet that goes to fuel pump...

Posted by: Mikedrevguy Jun 2 2014, 03:52 PM
Picked Up the tank today. Looks good. Clean and sealed on the inside. Repainted on the outside.
Ready to get the rest of fuel line cleaned out- let's do it.
Posted by: Mikedrevguy Jun 2 2014, 06:01 PM
The fuel lines running through the tunnel, back into the engine bay.
What are they made of?
The return line seems brittle at the end. What is the longevity of these? Would one go about replacing them should they be compromised?
Posted by: Bob L. Jun 2 2014, 06:43 PM
The fuel lines running through the tunnel, back into the engine bay.
What are they made of?
The return line seems brittle at the end. What is the longevity of these? Would one go about replacing them should they be compromised?
They are plastic and probably should be replaced. 40 year old plastic under pressure can leak = fire. Most folks here use stainless steel lines from Chris Foley(tangerine racing) or Rotary914(in the vendor section where I got mine) There's also a shorter set in the engine bay going through the engine shelf underneath the battery. Those are replaced as well.
Posted by: Mikedrevguy Jun 2 2014, 07:26 PM
Thanks, Bob.
What would be the best way of replacing them?
Are they as tic the whole run through tunnel, from the barb fitting to braided hose in the engine bay? Is there a metal section in middle of tunnel?
Posted by: hndyhrr Jun 2 2014, 07:45 PM
Thanks, Bob.
What would be the best way of replacing them?
Are they as tic the whole run through tunnel, from the barb fitting to braided hose in the engine bay? Is there a metal section in middle of tunnel?
plastic all the way thru.
did mine with engine in not so hard. need two people . one under car to push tube thru and one in car to help guide so it doesn't get hung up on other stuff in there.
Posted by: Mikedrevguy Jun 2 2014, 08:37 PM
Thanks,
Reading up on the process from Pelican.
Whelp- I guess this means we've got a clean fuel system, front to back.
What stuff is running down the tunnel that needs to be avoided?
And I just fed the 914world write up on same.
Posted by: Mikedrevguy Jun 2 2014, 09:34 PM
Diameter of lines:
I've read of running both supply and return lines in 7/16 ss tubing.
I've also read of doing the return line in 3/8 ss tubing.
And then using 3/8 on supply and 5/16 on return.
What's the difference between the various options.?
Posted by: Mikedrevguy Jun 9 2014, 07:48 AM
Has the door latch mechanisms changed? Or are they same part across the years?
Posted by: malcolm2 Jun 9 2014, 09:16 AM
Thought it might be the filter, but, gosh, you think it could have been placed in a MORE inconvenient place? Hw often should they be changed?
How concerned should I be with the fuel pump, there being THAT much varnish in the tank- will that have gummed up the pump?
If you look in the front trunk the carpet is cut in a small rectangle. behind that is a plate that the pump attaches to. You can work the pump out from under the tank thru that hole. The filter will come out too. It is not very easy, but it can be done.
They moved the pump up front in 74 i believe, maybe 75. Something to do with fires, or fuel smell in the cockpit.
Looks like you have a good car there. Check the pelican parts site, I think they have a long list in their tech articles on getting everything up to snuff.
just the basics.... fuel, brakes, lubrication and electric. Sounds easy.

Posted by: Mikedrevguy Jun 9 2014, 09:58 AM
Thanks, Malcolm. That's on my list to wrk on today.
Just full of ??? Today-
The top seal that (targa top to se windows): the seal is 23" long while the track is 24". It matches toward the rear, while leaving a 1" gap between the front seal and this one.
Is the problem in the front seal? Or the side seal? It shoes not appear as though the seal has been trimmed- will they shrink? Or symptomatic of bd aftermarket? Or other?
Posted by: Dave_Darling Jun 9 2014, 10:32 AM
They moved the pump up front in 74 i believe, maybe 75. Something to do with fires, or fuel smell in the cockpit.
In 75. To cure vapor lock issues. (Which I have experienced a grand total of ONCE in my 74 in the past two decades.)
--DD
Posted by: Mikedrevguy Jun 9 2014, 04:13 PM
Well then. Maybe I misunderstood- plastic lines run the length of the tunnel? Apparently, in its history, someone replaced the lines IN the tunnel with steel but joined them to the plastic via 7/16 fuel hose and hose clamps, inside the tunnel, under the rear access panel.
I inclined to leave them as is.
Posted by: Mikedrevguy Jun 9 2014, 07:45 PM
Well, I put the project of replacing the fuel lines through the tunnel on hold while I ponder this.
Turned to the fuel lines in the engine bay. Picked up the line, trusting what the proprietor said I'd need. Nope, 18" short. Oh well.
In pulling it all apart, pulled fuel rails and injectors, learned that the injectors don't like brake clean. But also discovered the seals were mostly good- except for the last one which had seated cock-eyed- so back to import parts- fuel line and injector seals- but alas, they are closed.
Also, dropped battery off at Les'- they tested, charged for several hours. Never would hold anything. So, I, pick g up new battery tomorrow, and sizing tires too.
Running rivieras, any suggestions/recommendations on fitting in stock height wheel wells?
Posted by: hndyhrr Jun 9 2014, 08:03 PM
Well, I put the project of replacing the fuel lines through the tunnel on hold while I ponder this.
Turned to the fuel lines in the engine bay. Picked up the line, trusting what the proprietor said I'd need. Nope, 18" short. Oh well.
In pulling it all apart, pulled fuel rails and injectors, learned that the injectors don't like brake clean. But also discovered the seals were mostly good- except for the last one which had seated cock-eyed- so back to import parts- fuel line and injector seals- but alas, they are closed.
Also, dropped battery off at Les'- they tested, charged for several hours. Never would hold anything. So, I, pick g up new battery tomorrow, and sizing tires too.
Running rivieras, any suggestions/recommendations on fitting in stock height wheel wells?
this is off topic but.... on Weds the 11th part of the medford cruise is the park and shine for imports out at the porsche dealer on hwy 62. Thinking i will take the pumpkin out. stop by if you got time.
ok now back to your regularly scheduled programing
Posted by: Dave_Darling Jun 9 2014, 08:40 PM
Well then. Maybe I misunderstood- plastic lines run the length of the tunnel?
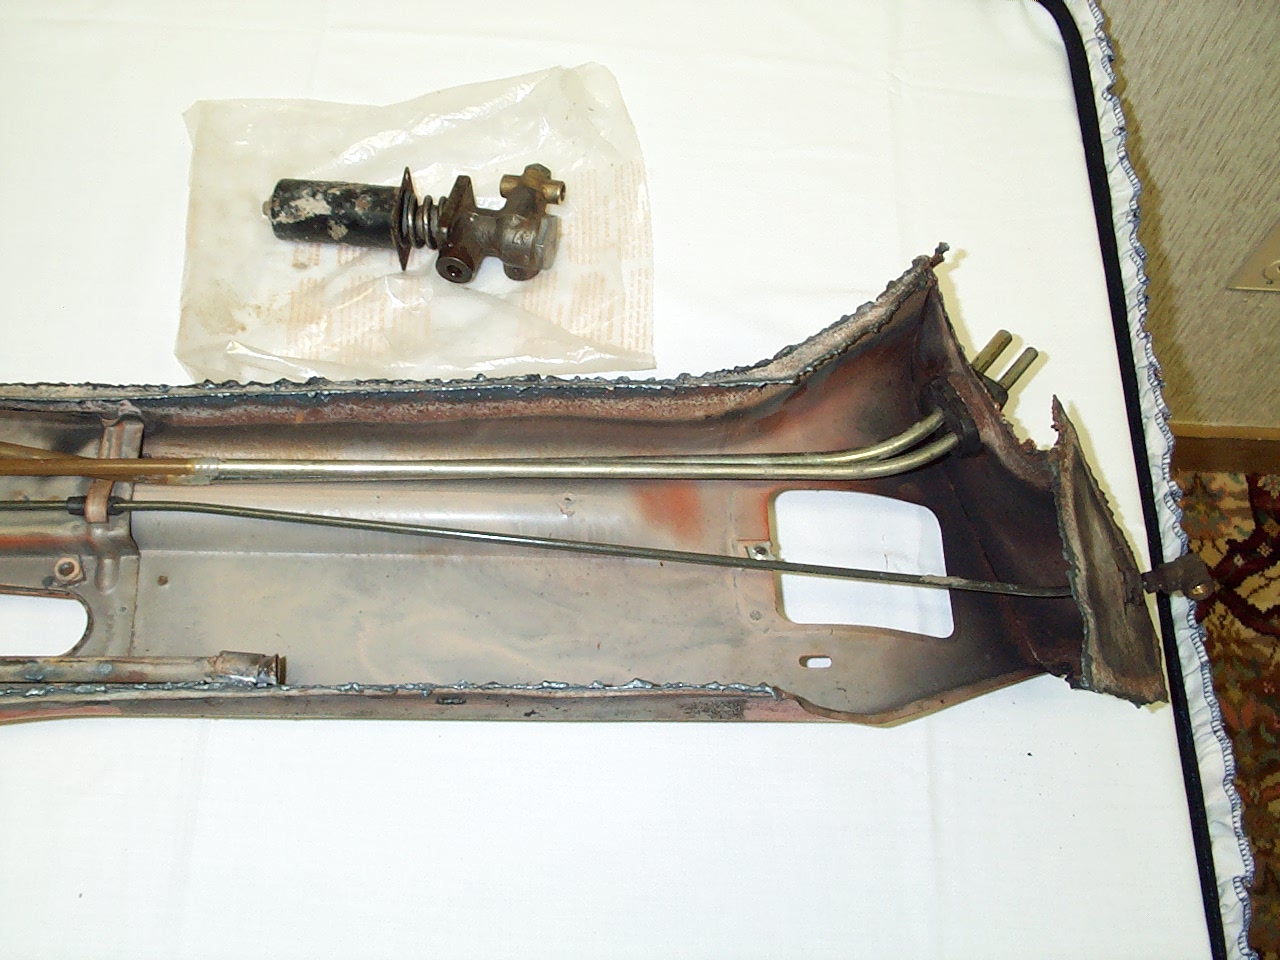
Not quite the length. Below, you can see a photo of a cut-away center tunnel. (Literally cut, I think with a plasma cutter.) Note that the front of the lines are metal, but most of the length of the line is plastic. No clamps, just flanges for a strong friction fit.
--DD
Posted by: Mikedrevguy Jun 9 2014, 09:27 PM
Dave, thanks for the Mage. That helps.
Thanks for the heads up, hndyhrr. May have to find my self out there.
Posted by: Mikedrevguy Jun 18 2014, 03:19 PM
got new battery, checked turn signals, flashers, headlights.
one motor works, the other not. (pass side works)
tried test on the headlight motor - spun the black disc on motor to cause activation:
pass side works,
driver side not.
is this indicative of a bad motor, or no power, or??
thanks,
M
btw - engine bay is redone with new fuel hose.
front fuel lines will be redone when acquire new pieces parts, which are in the mail as we speak.
Posted by: Mikedrevguy Jun 29 2014, 10:26 PM
Getting closer to firing the motor.
Drained oil- about 5 quarts worth 

There was a bunch of fuel.
Potential culprit?
Bad rings?
Bad/stuck injectors?
IF we're talking about a bad injector, what are the options for replacement ?
Are type IV injectors compatible?
How to test to determine which injector it might be?
On another note: replaced the broken door latch on driver's door.- closes solidly now.
Posted by: Mikedrevguy Jun 30 2014, 03:02 PM
compression check this am revealed I've got 130-140 psi on each of the 4 cylinders.
Other good news, the car turned over - - however was unable to get oil pressure to build, presuming that the Oil Light should go out after cranking sufficiently to test the compression. I do have the gages in the center console tore apart; might this have something to do with the oil light staying lit?
realized I should have painted the hell hole and the battery tray last night, as now I'm in a holding pattern until the POR 15 dries.
verified that the fuel pump does in fact pump fuel. that's another good thing. so just awaiting a little bit more drying time before assembling and giving a test fire.
Posted by: Mikedrevguy Jun 30 2014, 06:54 PM
and we've got ignition!!!! 
however 
there's a crack in one of the fuel lines in the engine bay - gonna do hardlines from tunnel into the engine bay - and go from there.
answered one of my questions:
yes, after cranking enough, with starting fluid, the oil system did charge and build pressure: the light went out.
sooo,
on to the next step.
thanks,
Rev/
Posted by: Mikedrevguy Jul 5 2014, 03:49 PM
may be a shot in dark, but someone may be able to address these questions:
fuel lines are intact - motor turns over and, with assistance of starting fluid, will start.
however there is no fuel squiring through the jets.
pulled distributor out and cleaned the trigger points
thoughts? guidance?
also, looking at the fuse panel, the fuse supposedly for the license place light - someone put a 26 amp fuse in there. any speculation on why or what they might have been thinking?
?
thanks much.
Posted by: Mikedrevguy Jul 5 2014, 04:12 PM
verified that there is fuel getting through system:
pulled off cold-start fuel line, cranked and plenty of fuel came through.
have fire: verified with starting fluid.
have fuel: as verified above.
fuel simply not making it through the injectors.
thanks in advance for you assistance.
Mike
Posted by: Mikedrevguy Jul 6 2014, 05:28 PM
relay question:
found the relay box in the engine compartment.
with three slots filled with the the 911.615 109.01 relays. the slot farthest front is empty.
what do these control.
where might I go to find out what these control?
any help would be most appreciated.
thanks.
Mike
Posted by: Mikedrevguy Jul 6 2014, 07:35 PM
never mind; found it.
http://www.rennlist.com/techarticles/djetronicfuel.htm
had a 1/2 hour heart attack.
somewhere in the course of connecting, reconnecting, disconnecting - motor stopped turning over. key fine. power to fuel pump fine - turn to attempt to start - and just more fuel pump.
and then just as mysteriously, it began turning over again. not sure what to make of THAT. those arent good mysteries.
in course of checking grounds to the injectors, discovered that the injectors on both 3/4 share a common ground. as do 1/2 injectors. is this an issue?
diagram that Blowsby indicate they are not so paired. dont think this is of issue, but just wondering.
thanks again.
Posted by: PlantMan Jul 6 2014, 11:44 PM
never mind; found it.
http://www.rennlist.com/techarticles/djetronicfuel.htm
had a 1/2 hour heart attack.
somewhere in the course of connecting, reconnecting, disconnecting - motor stopped turning over. key fine. power to fuel pump fine - turn to attempt to start - and just more fuel pump.
and then just as mysteriously, it began turning over again.
not sure what to make of THAT. those arent good mysteries. in course of checking grounds to the injectors, discovered that the injectors on both 3/4 share a common ground. as do 1/2 injectors. is this an issue?
diagram that Blowsby indicate they are not so paired. dont think this is of issue, but just wondering.
thanks again.
Make sure you check your point gap and it is set to the proper dwell/gap. I went through this recently when I started my car for the first time.
My car would not turnover at all until I was close on the dwell/gap.
I used the Pelican Parts article as a guide to setting it for my first start.
Sorry if this has already been discussed, I skimmed the thread quickly.
Good Luck!
Posted by: Mikedrevguy Jul 7 2014, 06:05 PM
Thanks, PlantMan. I've had it running on starter fluid sprayed down the throttle body.
but will certainly be keeping an eye on the points to make sure they're properly adjusted.
right now, just cant seem to get the injection to function; no spray, no electircal impulse at the injectors. nada.
so, have the injectors soaking in diesel.
I removed all the relays (the universal round) tested for continuity and operation- opened them all up and cleaned/filed the points. only fubared one, but it's still operational, just ugly.
what's a good way to seal the relays back up? I'm thinking super glue may not be the right approach (I believe that was what held the one I buggered up together).
Got the interior put back together again.
installed the window/roof seals. not all together happy with how they turned out. maybe the next one I do will be better.
thanks again,
Mike
Posted by: Mikedrevguy Sep 23 2014, 07:41 AM
So, after a summer of other priorities got a fuel pressure gage on to determin I'm only getting 14psi.
Headed into the market for a new fuel pump, it would seem.
Posted by: malcolm2 Sep 24 2014, 07:56 AM
So, after a summer of other priorities got a fuel pressure gage on to determin I'm only getting 14psi.
Headed into the market for a new fuel pump, it would seem.
Did you re-furb the injectors? That is a good thing to do. It might take me a while, but I could find the vendor that did mine, or someone will chime in. I got lots of data back with mine. They change out all the tubes and o-rings, etc.... Probably to e10 gas standards, can't remember.
Then, I let them sit for several months before I put them on.... The cleaning fluid gums up. Had to send the injectors back and they cleaned them once more. Just paid 3rd and 4th shipping to and from Michigan as a stupid tax...

My pump worked fine after sitting for 10 years, but it made an awful sound, so I replaced it too. I added a permanent fuel pressure gauge to the engine bay so I could quickly verify pressure when needed.
Keep working at it.
Clark
Posted by: Mikedrevguy Sep 24 2014, 04:36 PM
Thanks for the reply, Clark.
have not had injectors referbished. soaked them in diesel for starters and will go from there.
tracking down a fuel pump - will verify that I've got sufficient pressure - evidently 14lbs is not enough to even open the injectors. so, no they are not squiring.
however, we did procure a tester to verify electrical pulse to the injector. pulse is positive.
so, relays are good, pump will be good. injectors unknown.
wi'll just keep plugging away.
thanks,
Peace,
Rev.
Posted by: 76-914 Sep 24 2014, 06:00 PM
They moved the pump up front in 74 i believe, maybe 75. Something to do with fires, or fuel smell in the cockpit.
In 75. To cure vapor lock issues. (Which I have experienced a grand total of ONCE in my 74 in the past two decades.)
--DD
FWIW, One of our members vapor locked on our run after the BBQ last month. It was 95F and we pulled over after ascending appx 1500' up the mountain. I knew it would fire if would could get some gas thru it so we pushed him around and he headed back down, allowing it to get some cold gas thru the overheated FP.
Posted by: Elliot Cannon Sep 24 2014, 06:03 PM
It's too bad you can't run the fuel pump with the engine stopped. Then you could circulate cool fuel through the system with the engine shut down.
Posted by: Dave_Darling Sep 24 2014, 10:50 PM
You can--either put a jumper wire where the pump relay would go, or get a trick relay with a loose top you can pull off. Push down on the metal part on top of the relay, and the pump will run.
--DD
Posted by: Tbrown4x4 Sep 25 2014, 04:24 AM
There are timer relays from companies such as Grainger but they are expensive. You would need a 12v "Delay Off" relay. It could probably be wired in place of the original FP relay. The time the relay stays on after powering down is adjustable. Not sure it would be worth the expense unless you have a real problem with vapor lock.
Posted by: Mikedrevguy Oct 6 2014, 03:30 PM
okay, got new fuel pump - bosch.
confused on the wires going back on -
one is red - that one terminates on a spade connector to the body.
other is black - that appears to do back into the harness.
which one should connect to the positive + pole on the fuel pump.
which to connect to the negative - pole.
thanks.
Posted by: Dave_Darling Oct 6 2014, 06:22 PM
Stock wires would be black with a red wire (power), and brown (ground). Sounds like someone has done some re-wiring? Or the red stripe isn't very visible and the brown has faded to kind of reddish.
Check the wires for a good ground. One of them should have basically zero resistance to ground, the other should have quite a bit when the key is off.
--DD
Posted by: Mikedrevguy Oct 6 2014, 06:34 PM
Thanks. Confirmed the same independently.. Appreciate the reply.
Wiring is an excersise in futility for the color blind.
On another note: I did get 1/2 injectors to spray. However, the 3/4 seem AWOL.
I got 3 to spray, and it kept spraying til the pressure cut out. But now nada.
4 simply oozed.
Posted by: Dave_Darling Oct 7 2014, 09:13 AM
The 3/4 problems sound like mechanical ones with the injectors themselves. There could also be electrical ones, but there's something mechanical there. Get them cleaned up--possibly send them to Witchhunter or another good place.
You can use a "noid light" from your FLAPS to check that the injector plug is getting a signal; the injector should be grounded full-time and be getting +12V when it is supposed to be open. That can at least verify that the signal is going. But it won't help mechanically plugged injectors to squirt.
--DD
Posted by: Mikedrevguy Oct 20 2014, 02:52 PM
Firing on all cylinders. Turns out, the fuel pump was no good (or not very good)
That and discovered that the MPS does have to be plugged in to the harness for the injectors to fire. When I went to test the 3/4 side, all was attached and worked. Then to access the 1/2 injectors, I disconnected the MPS and the injectors would not squirt.
Then, today, went back to the 3/4 side and they would not squirt. Process of elimination and best guesstimate, led me to plug in the MPS and low and behold, they squirt on all 4. Re-installed all 4 injectors and it fired on first tme.
Now, with all hoses air cleaner, reattached and connected, it's got a huge stumble when depressing the throttle.
Thoughts? Hints? Direction to look? Thanks in advance.
Rev.
Posted by: Mikedrevguy Oct 20 2014, 04:35 PM
Replaced all vacuum and air lines.
The vacuum line to the distributor- that one should actuate the advance should it not? It won't hold a vacuum, nor will it move the rotor.
Could this be the cause of the major stumble off of idle?
Posted by: Mikedrevguy Nov 8 2017, 10:21 AM
Wow. Has it been so long??
Lots changed. HPMX 44 installed and she hasn’t looked back. It’s been her daily driver for the past 3 years. And she’s been loving every minute of it.
Daily news nail the past month. Pics to follow.
Posted by: Mikedrevguy Nov 8 2017, 10:29 AM

Some assembly required.
Posted by: Mikedrevguy Nov 15 2017, 09:22 AM
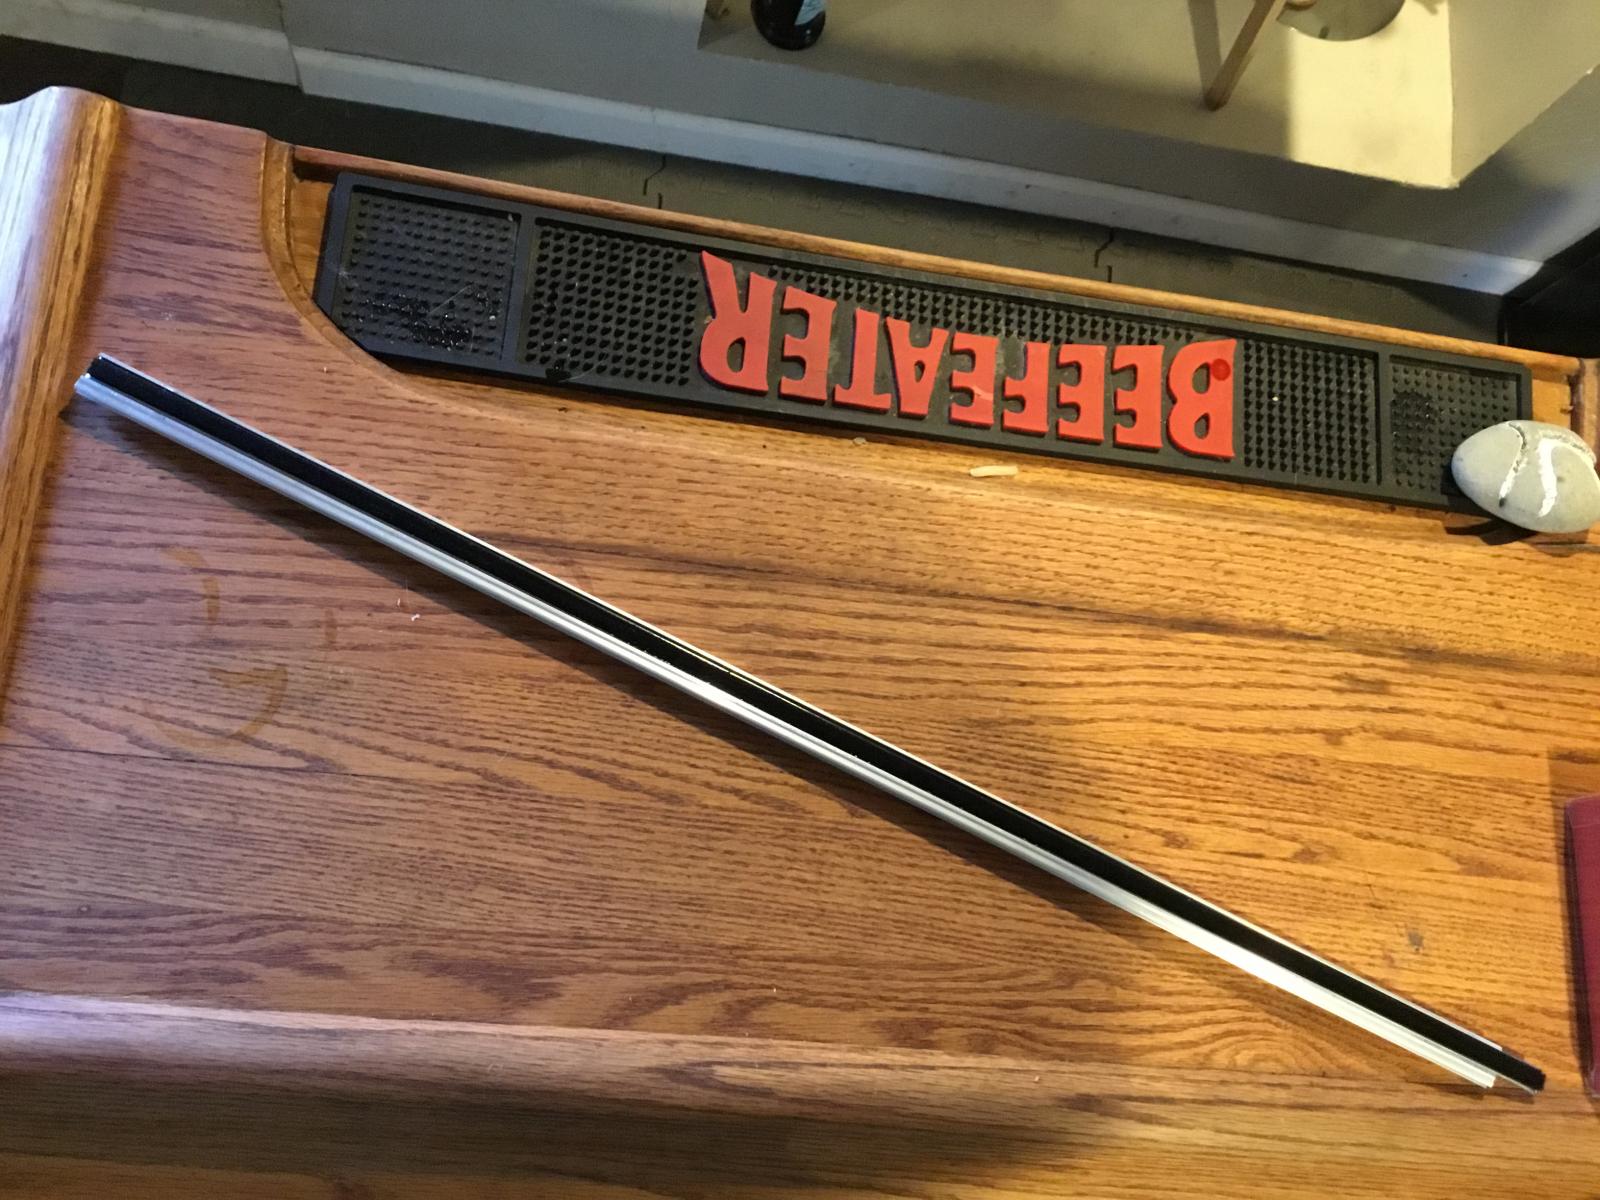
Should the fuzzy window scrapers be cut even with rails.
Same question for the rubber scrapers, too.
Thanks.
Posted by: Mueller Nov 15 2017, 09:58 AM
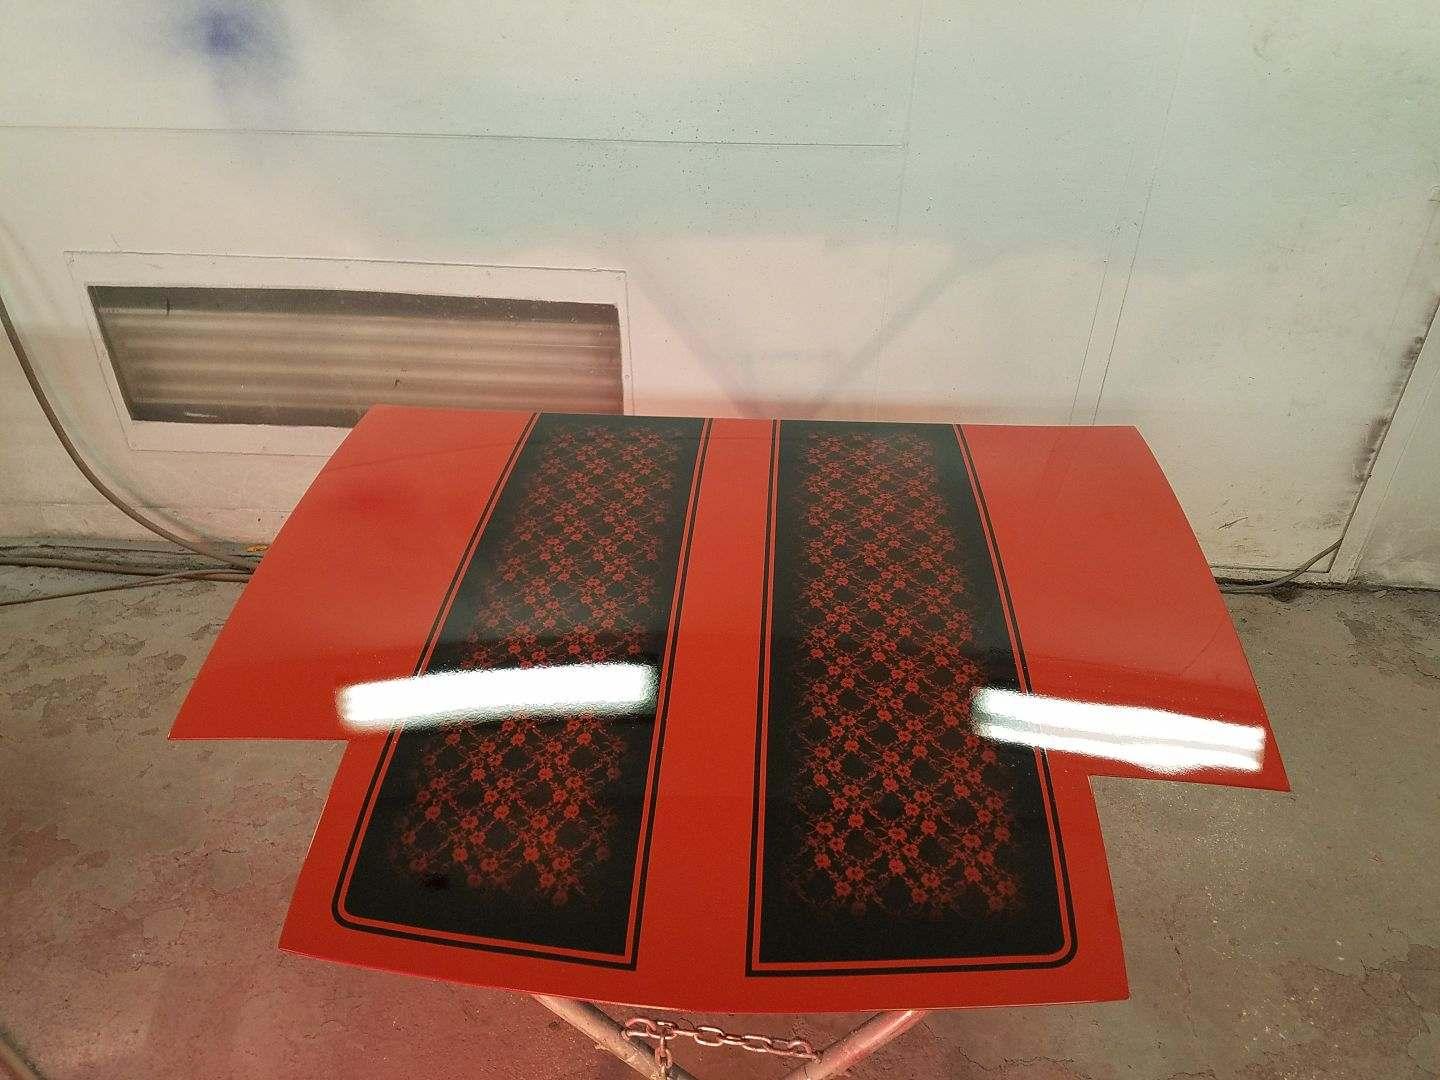
I dig the stripes...
Posted by: Mikedrevguy Nov 15 2017, 03:45 PM
Thanks. A product of KingHat Pinstriping
Posted by: erwan914 Nov 23 2017, 03:20 AM
or can buy the aluminum rod ?
Erwan
Posted by: Mikedrevguy Dec 18 2017, 08:34 PM
We had engine lid installed. Still have tape on, as it will come out one more time for the seal to go in,
Trunk goes in tomorrow, 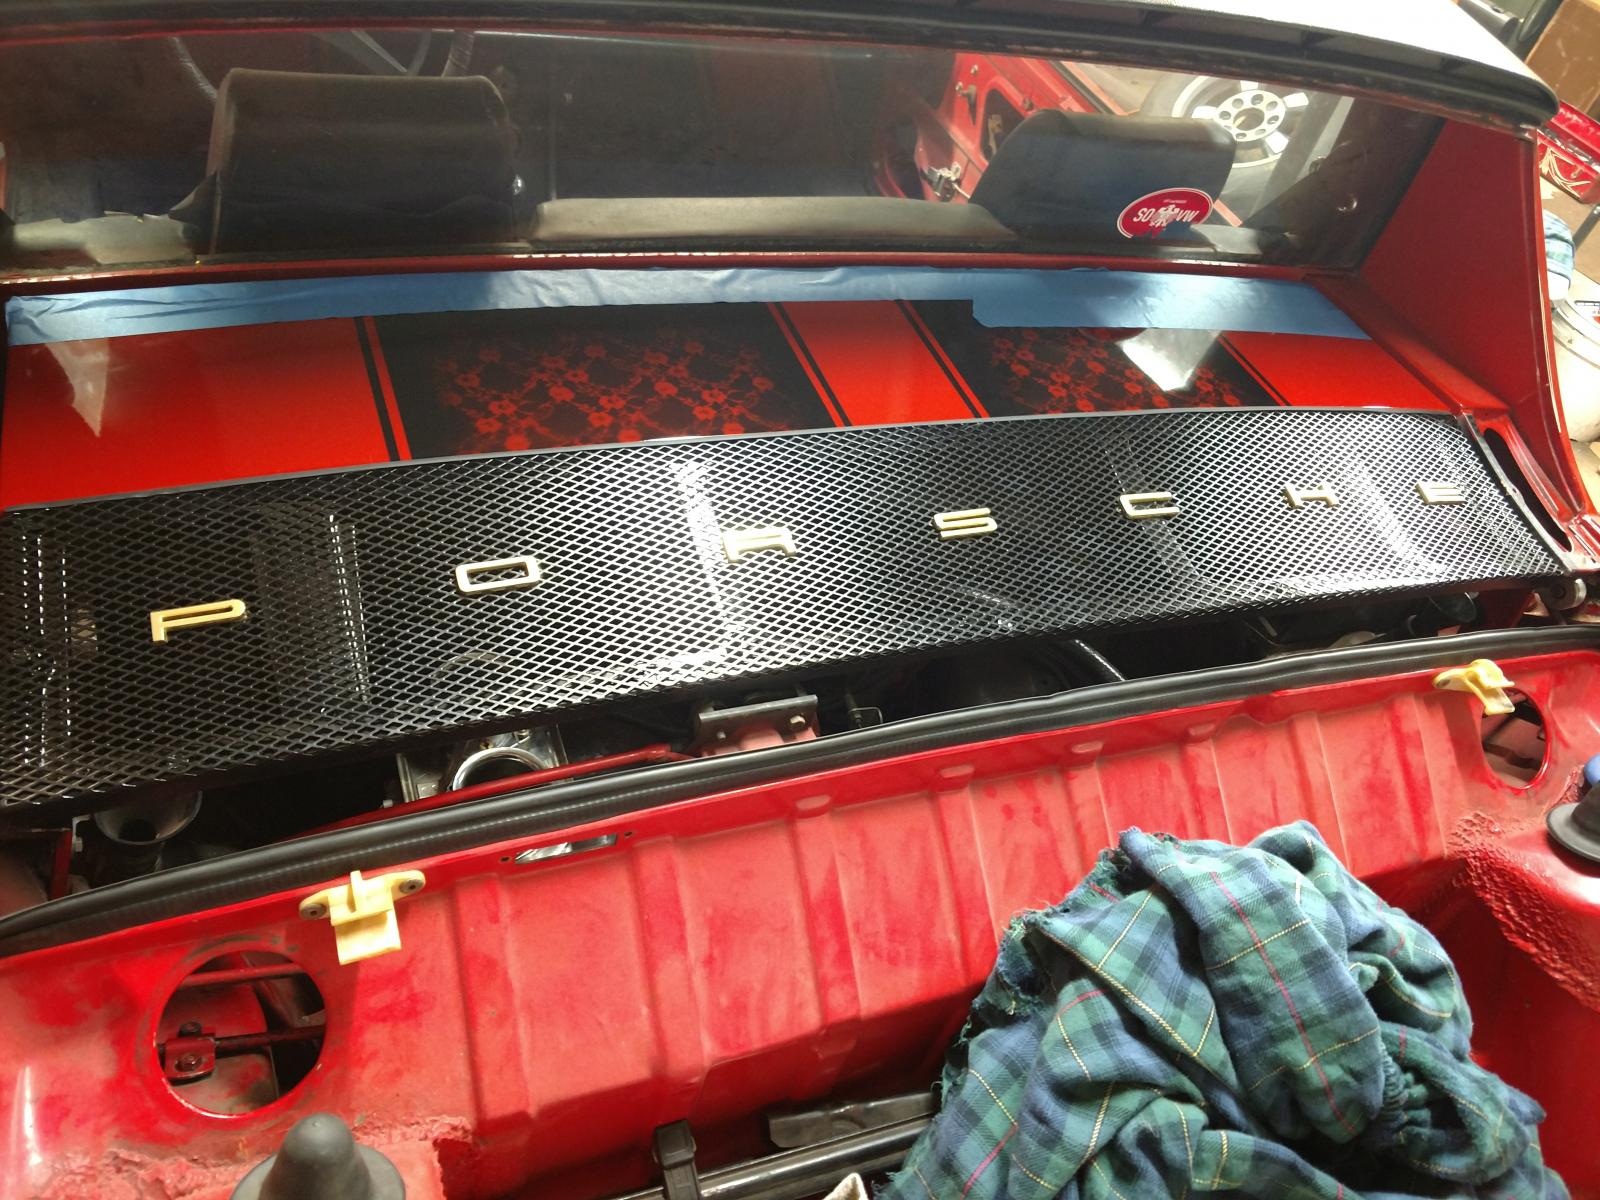
Pics of me getting the rear trunk tensioner rods leverazged back into place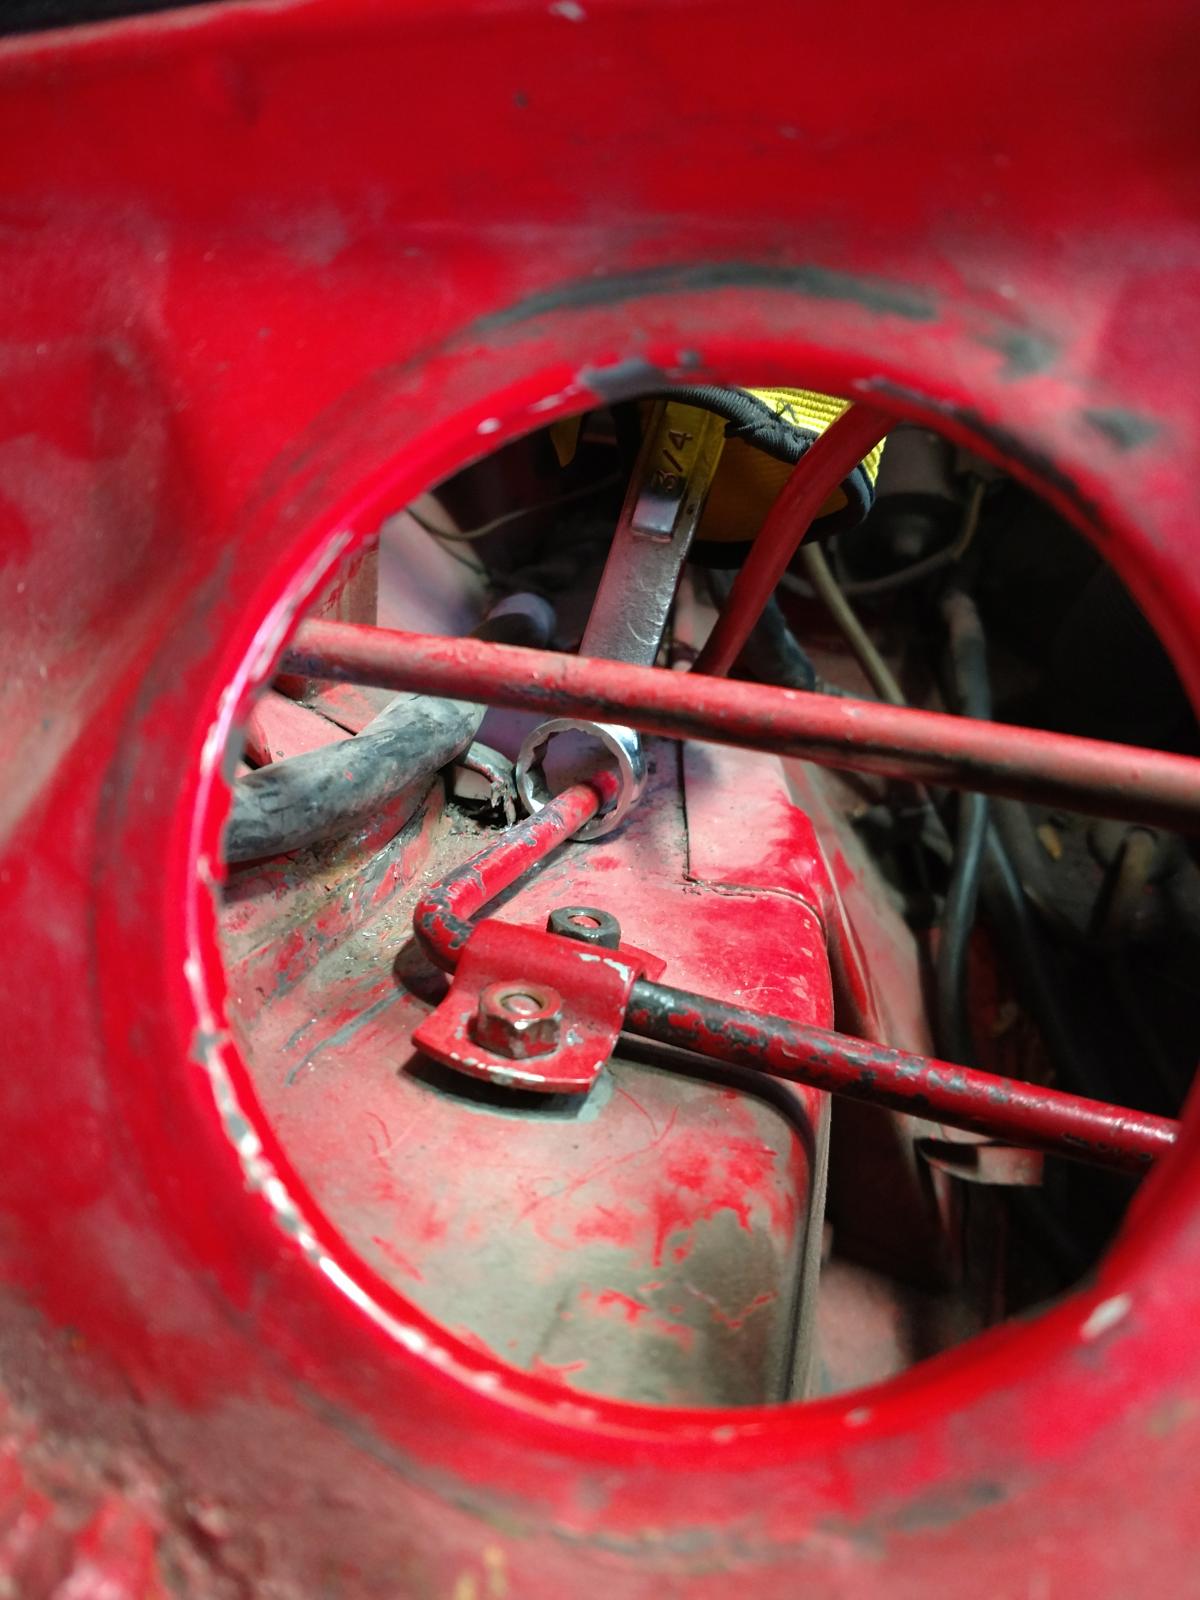
And engine bay is by no means pretty, but will be done when I get to point of installing new motor. 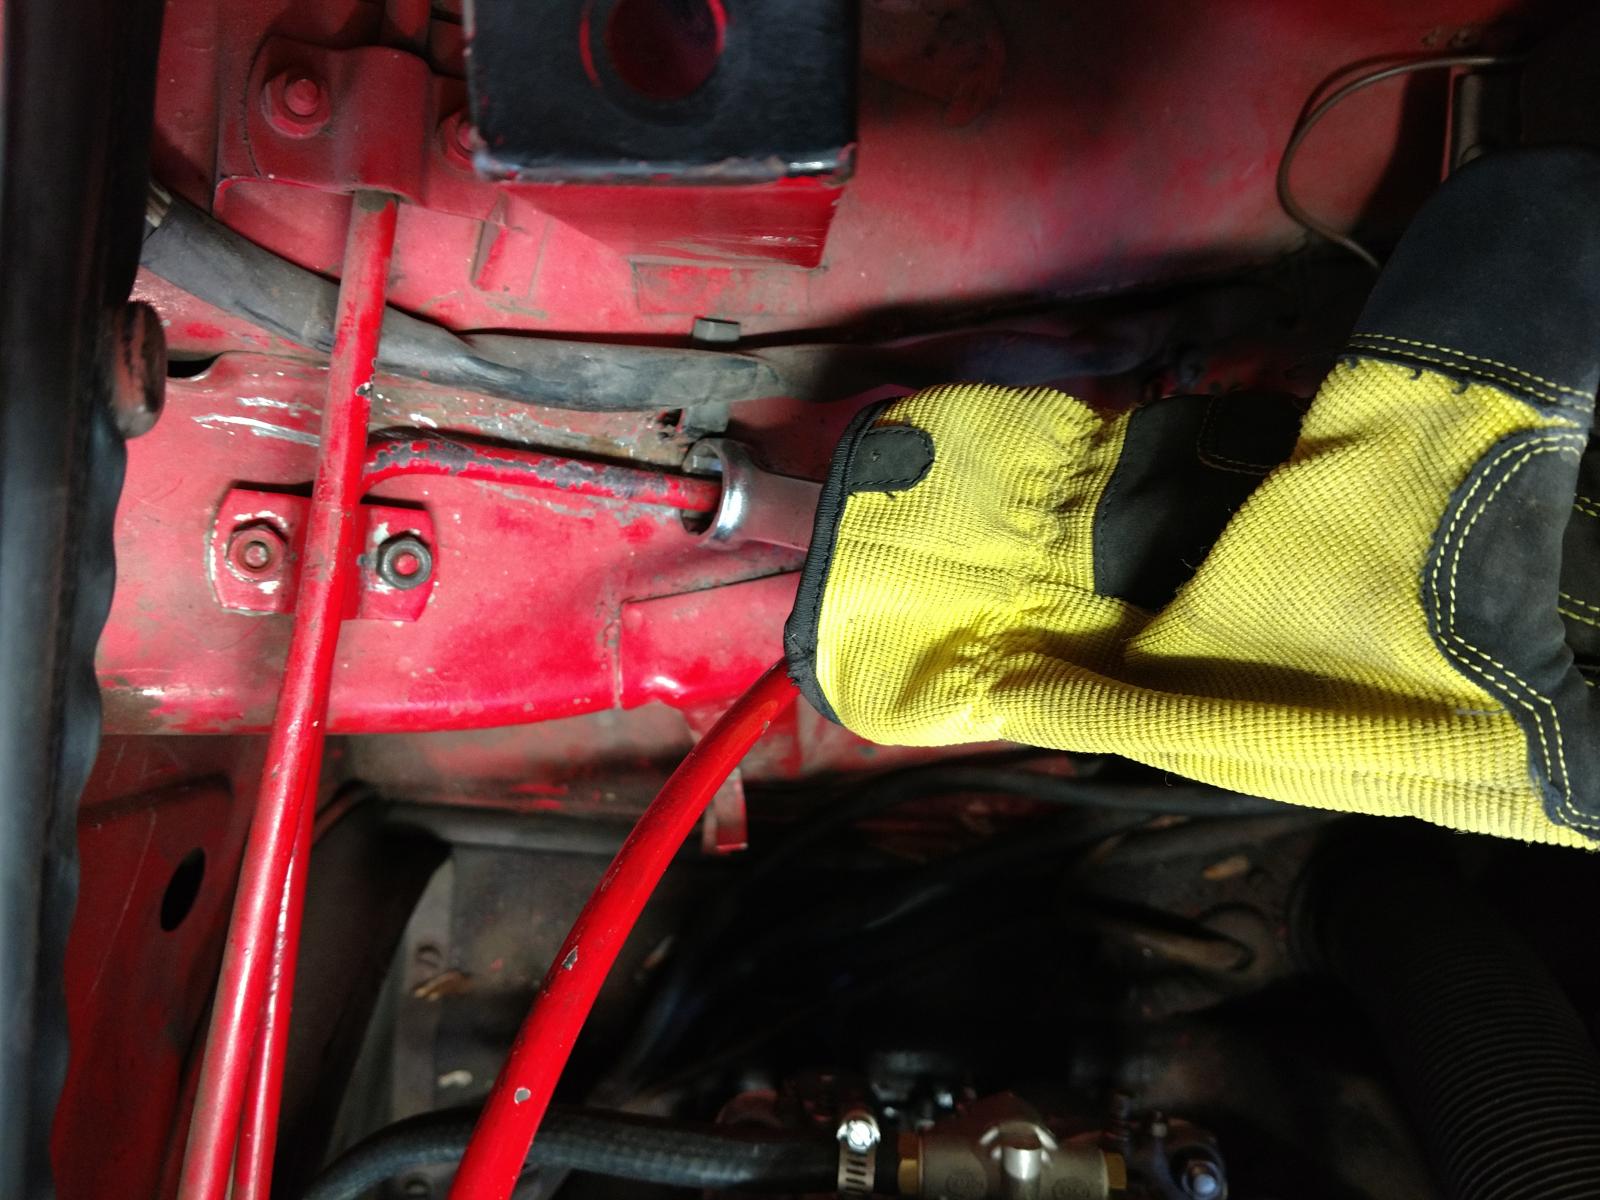
In the absence of any replacement rollers for the rear trunk roller, a little massaging with a lathe, and voila, function. (In final product, it is cradled in the groove.)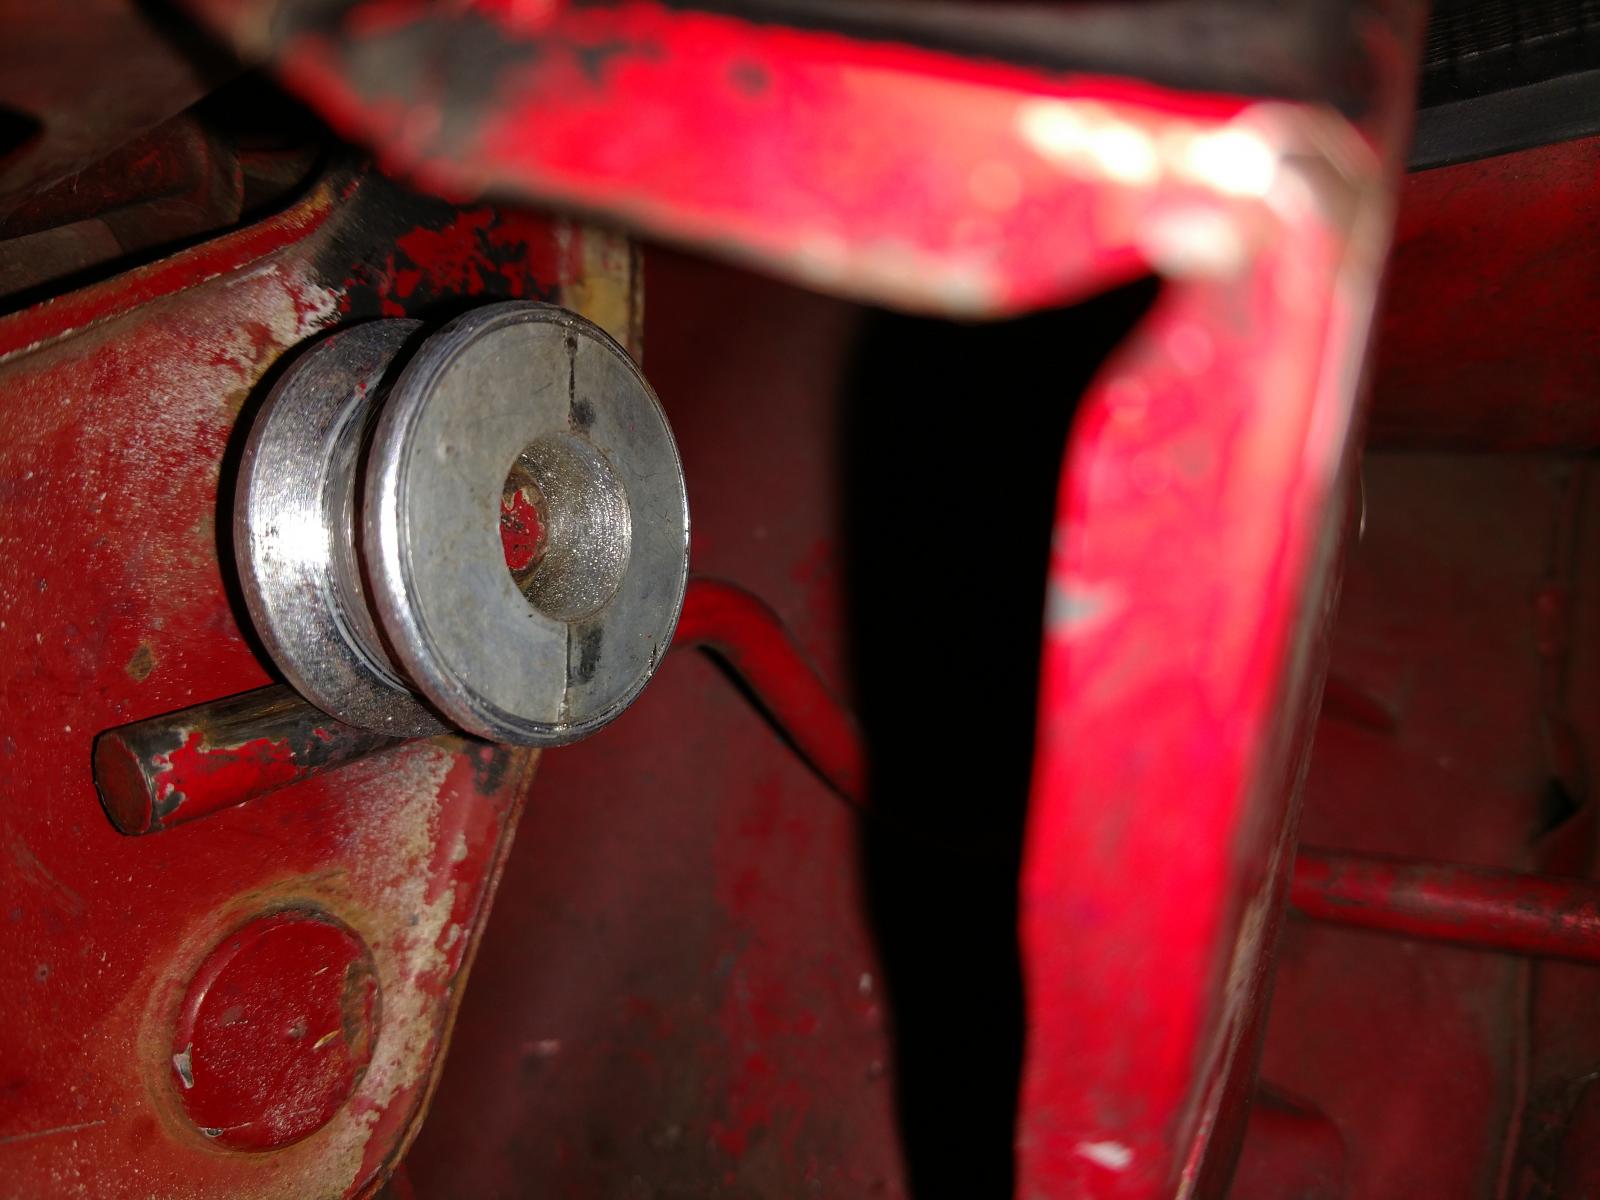
And lastly tonight, the Fuchs with 205/60/15. A little tight up front, but they do clear the shock. 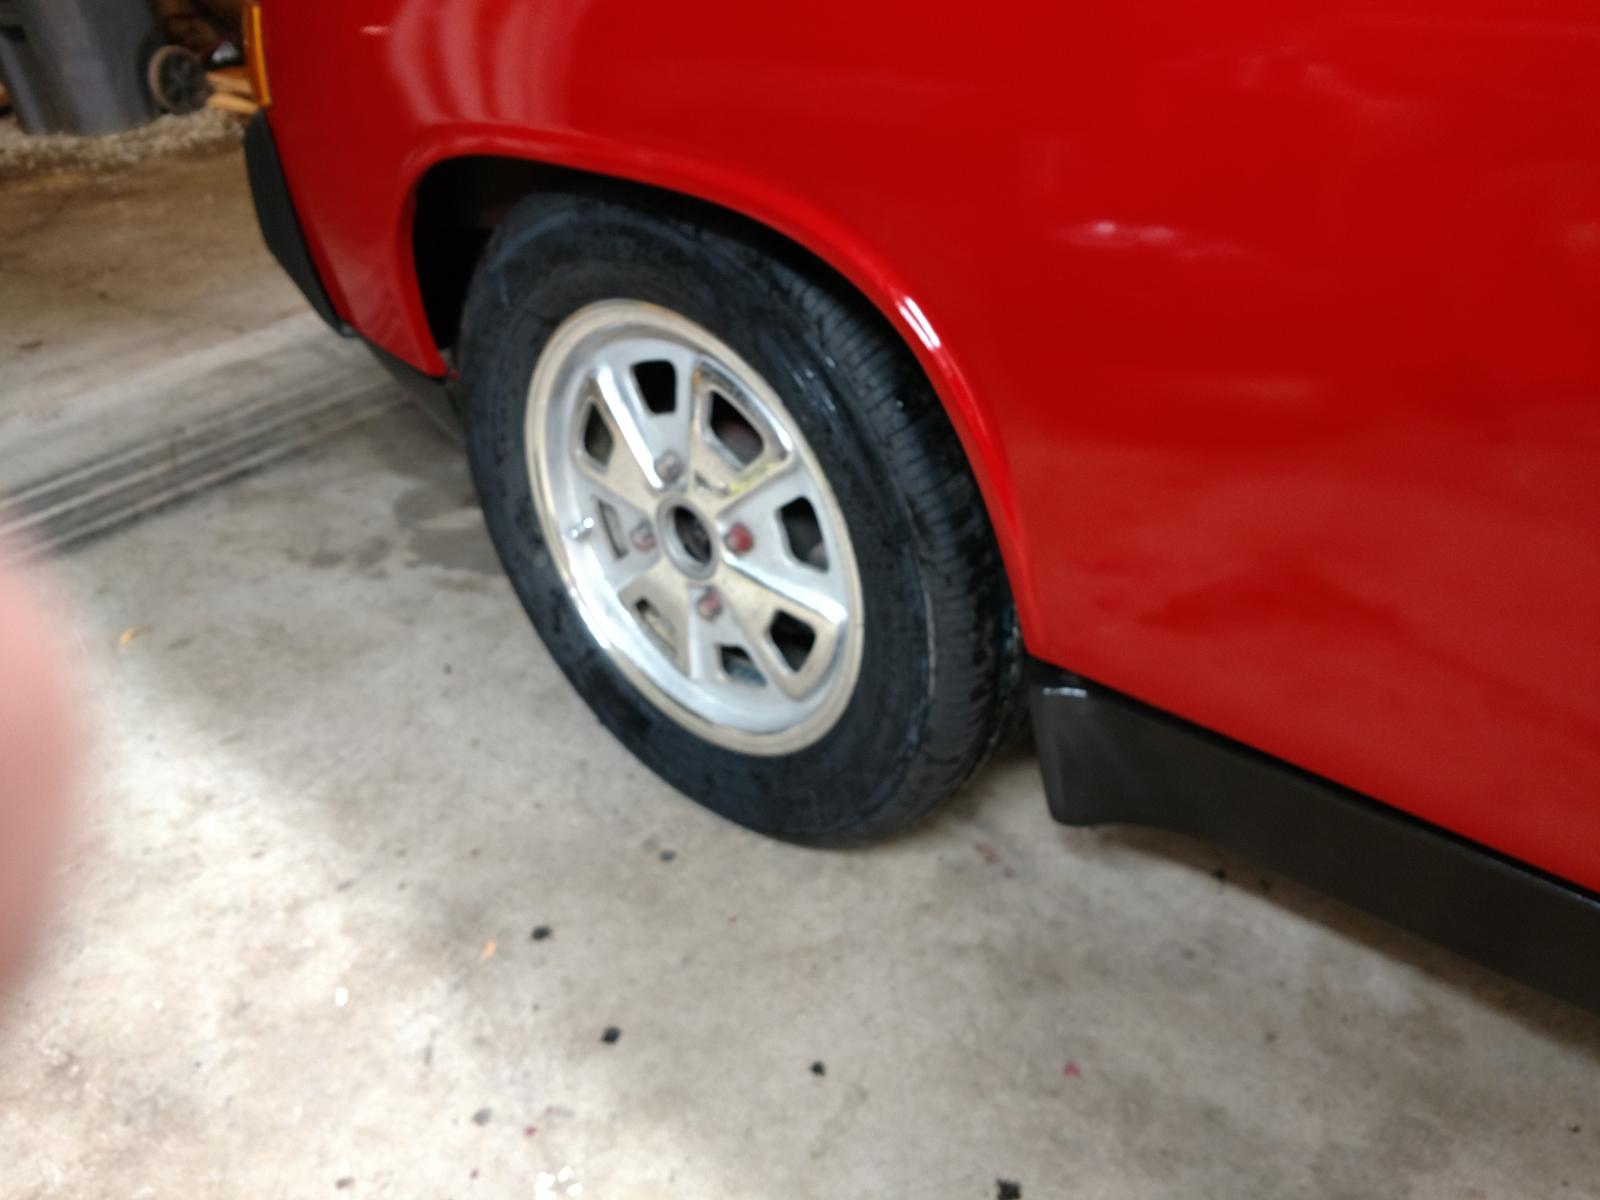
Posted by: Mikedrevguy Dec 22 2017, 06:48 PM
Yeasterday wos the mirrors.
Today, the door panels, and maybe the sail trim.
Got two runs at installing the doo cards. First time, after nearly all complete, realized that the fuzzy inner window scraper needs to be installed before the door cards. U install, install and reinstall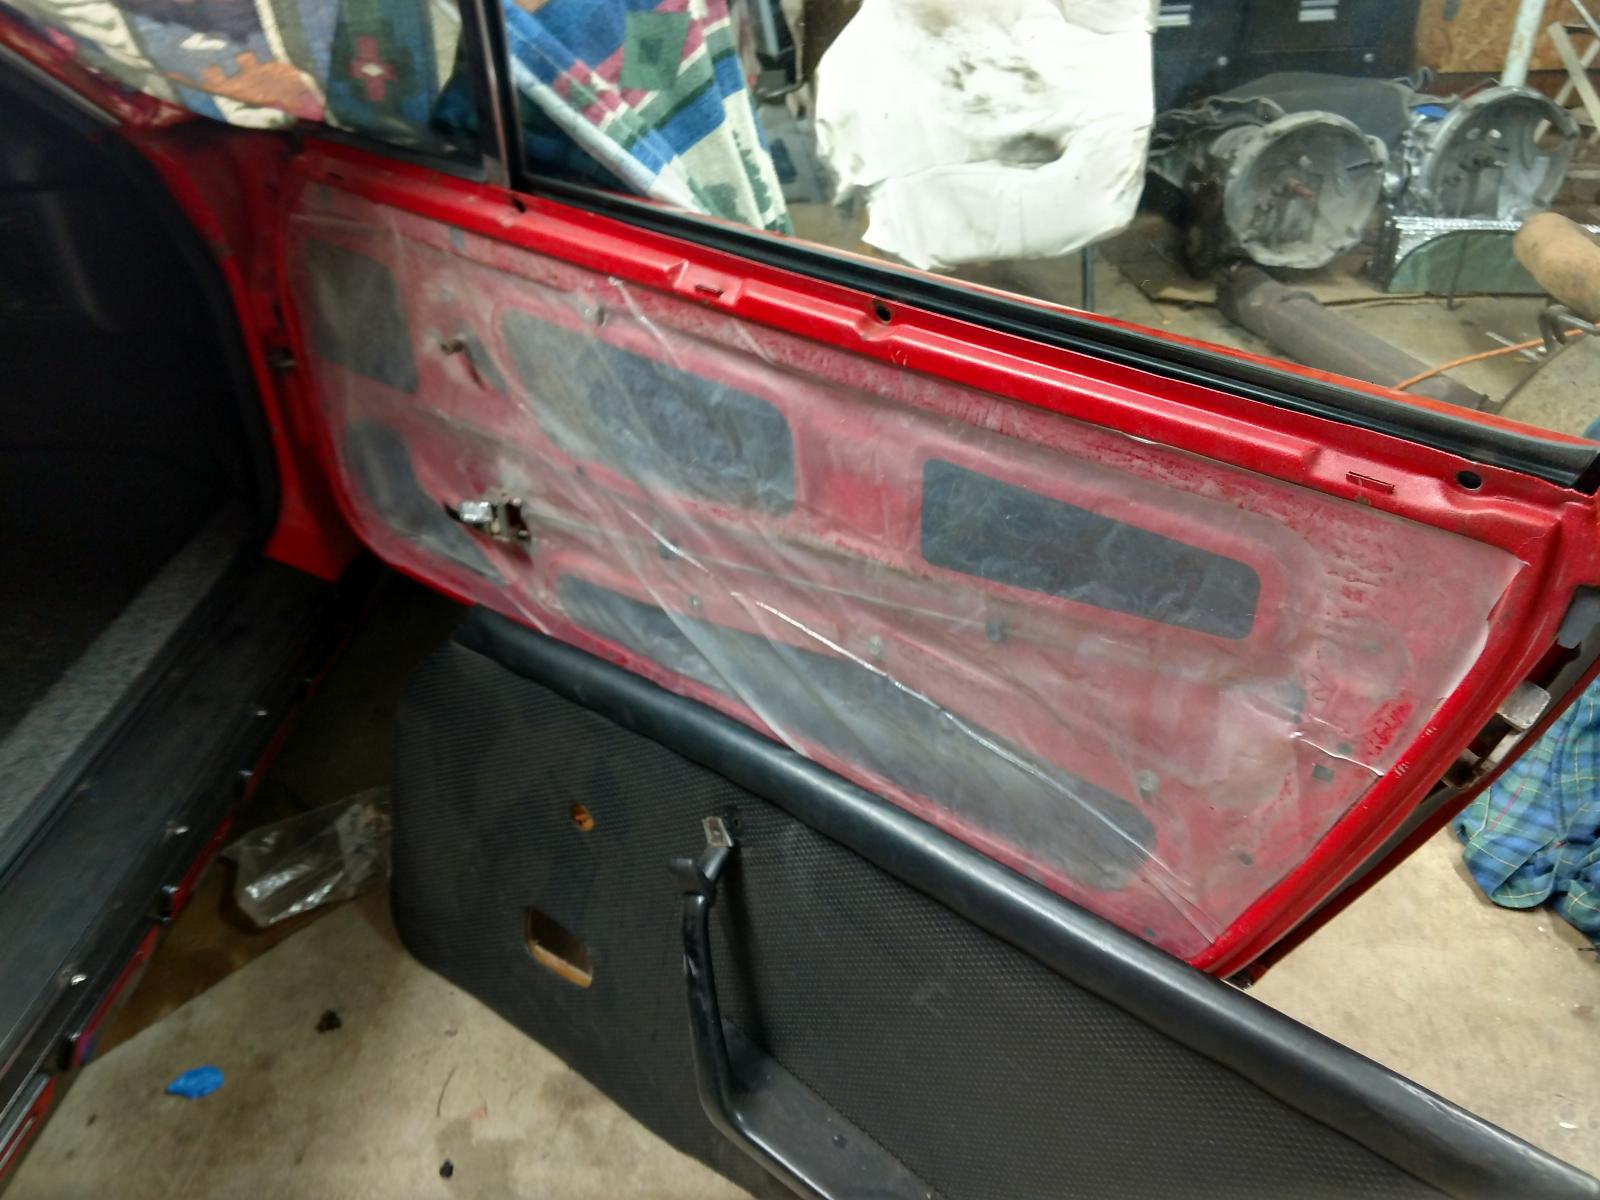
After some construction projects, had leftover visqueen (sp) so, with some 3M adhesive, I’ve got a moistur barrier
And the completed passenger side. 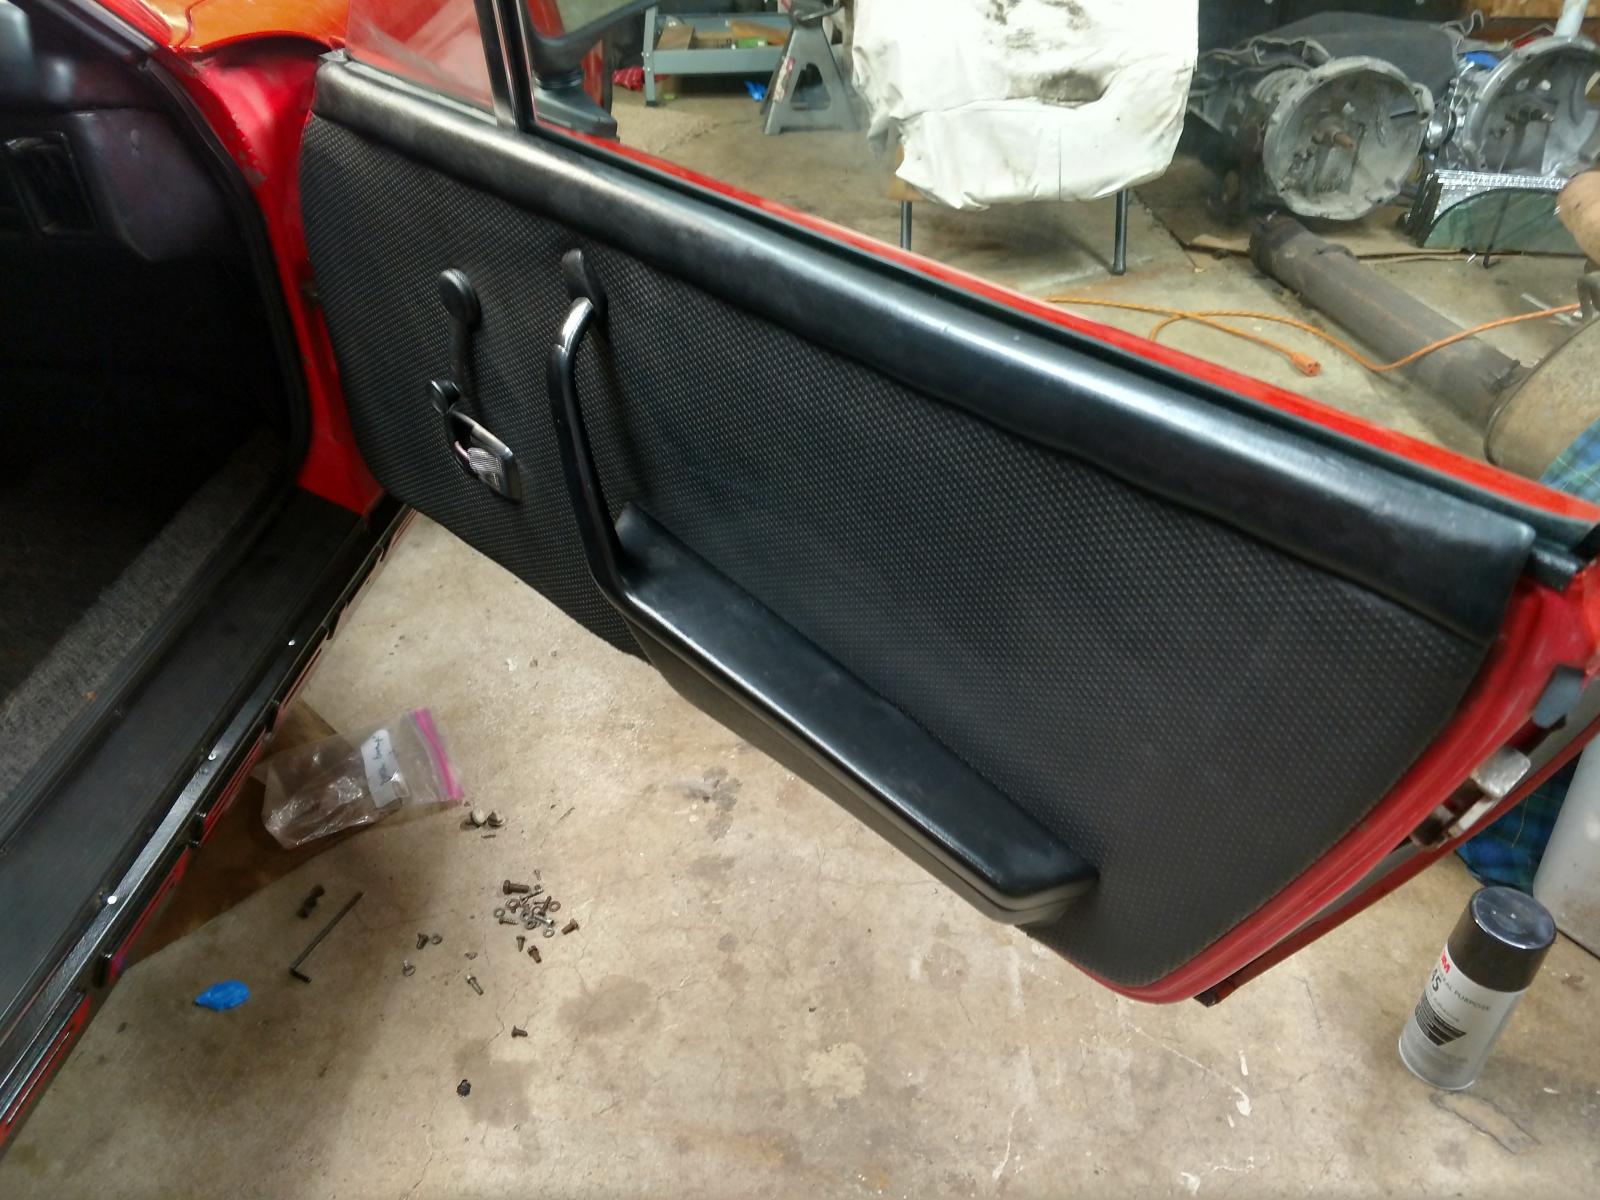
Pics of the sail if that gets trimmed for the holidays.
Posted by: Mikedrevguy Dec 22 2017, 09:10 PM
Sail trim on.
Rain tray installed. Only thing left on the rear is the spoiler. That should be done/painted after Xmas. 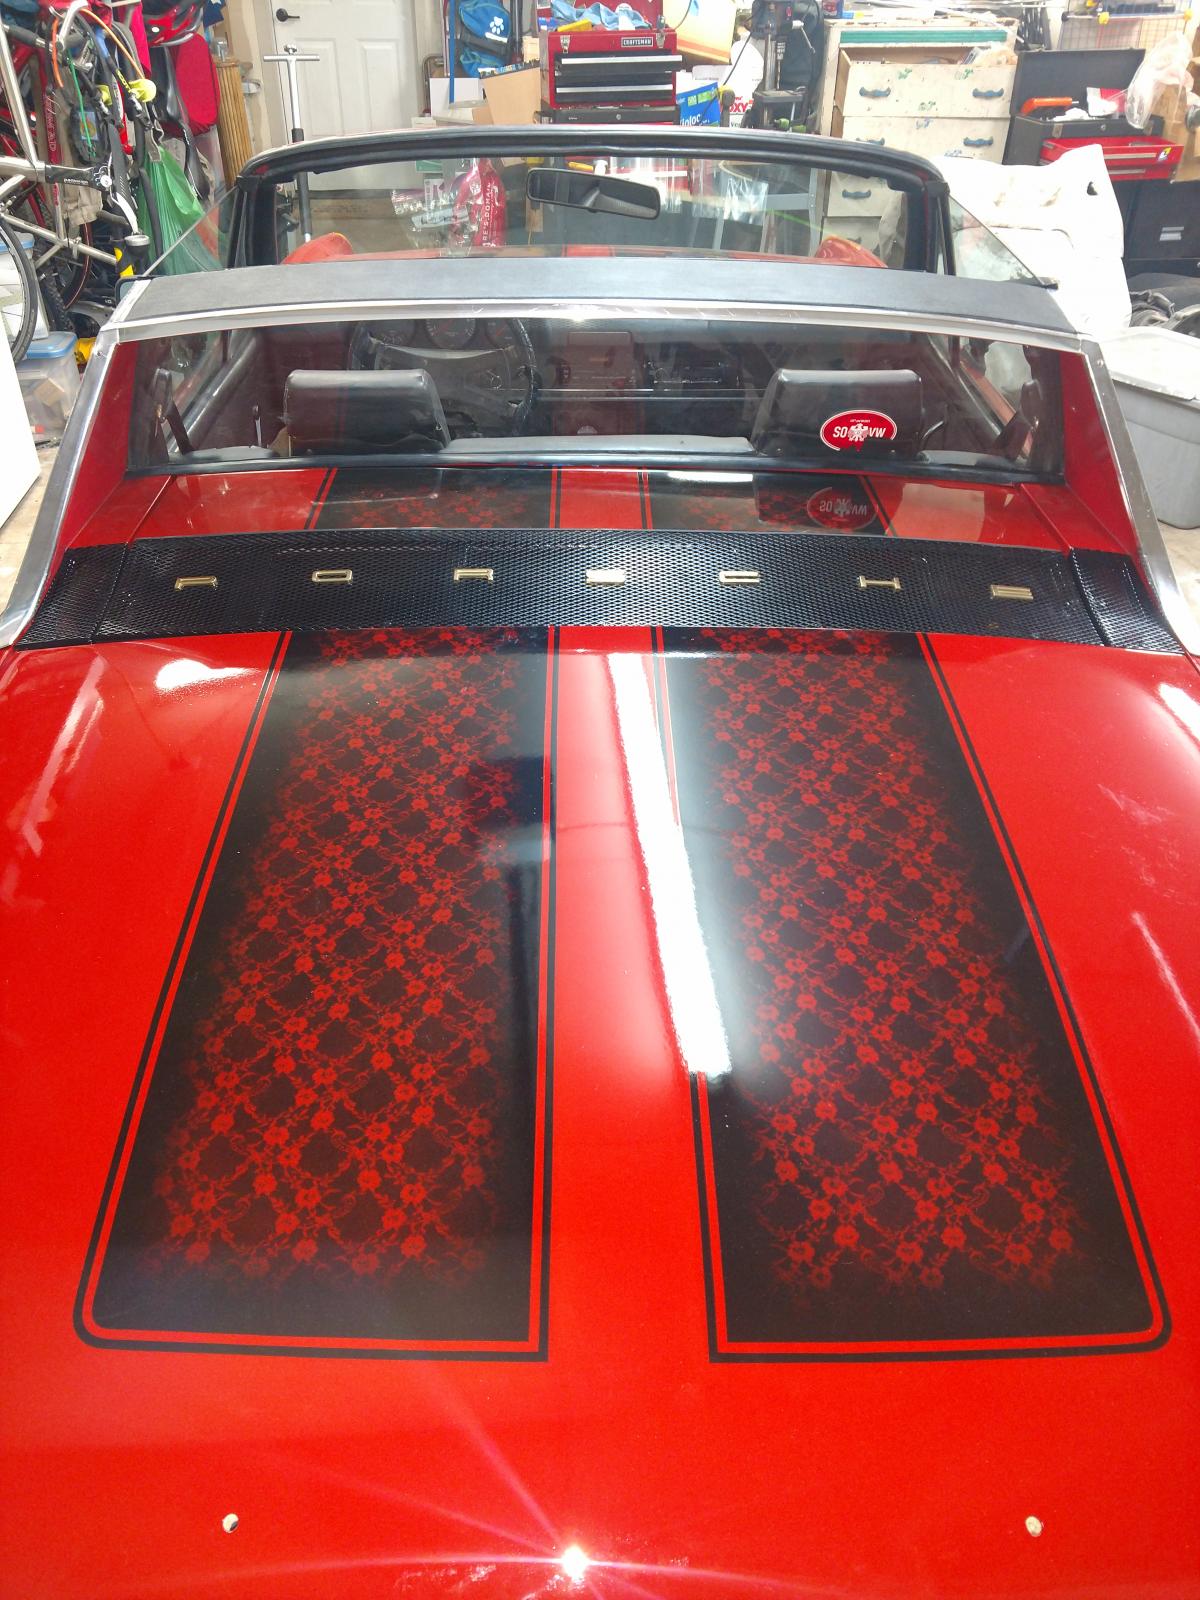
Minor things up front: antenna and wipers.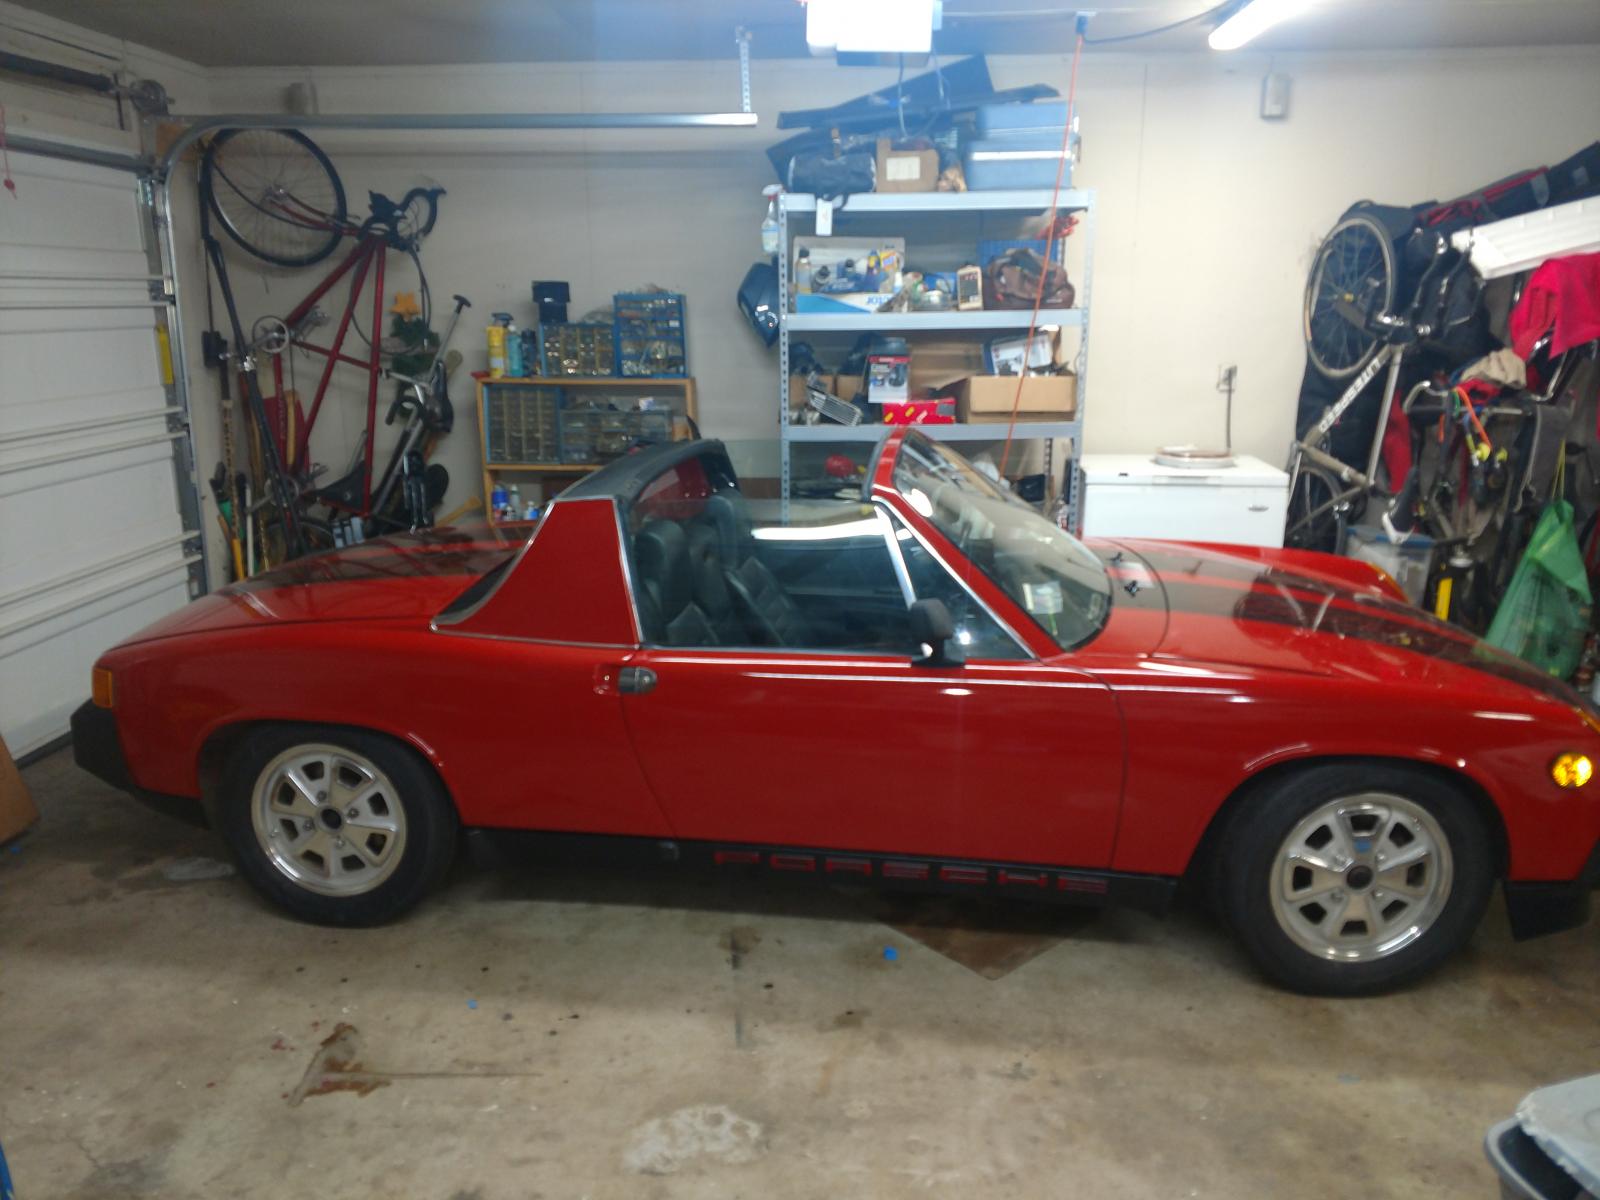
And one major thing.
Cracked while installing the trim. Old trim wouldn’t click in. Pushed a bit too briskly?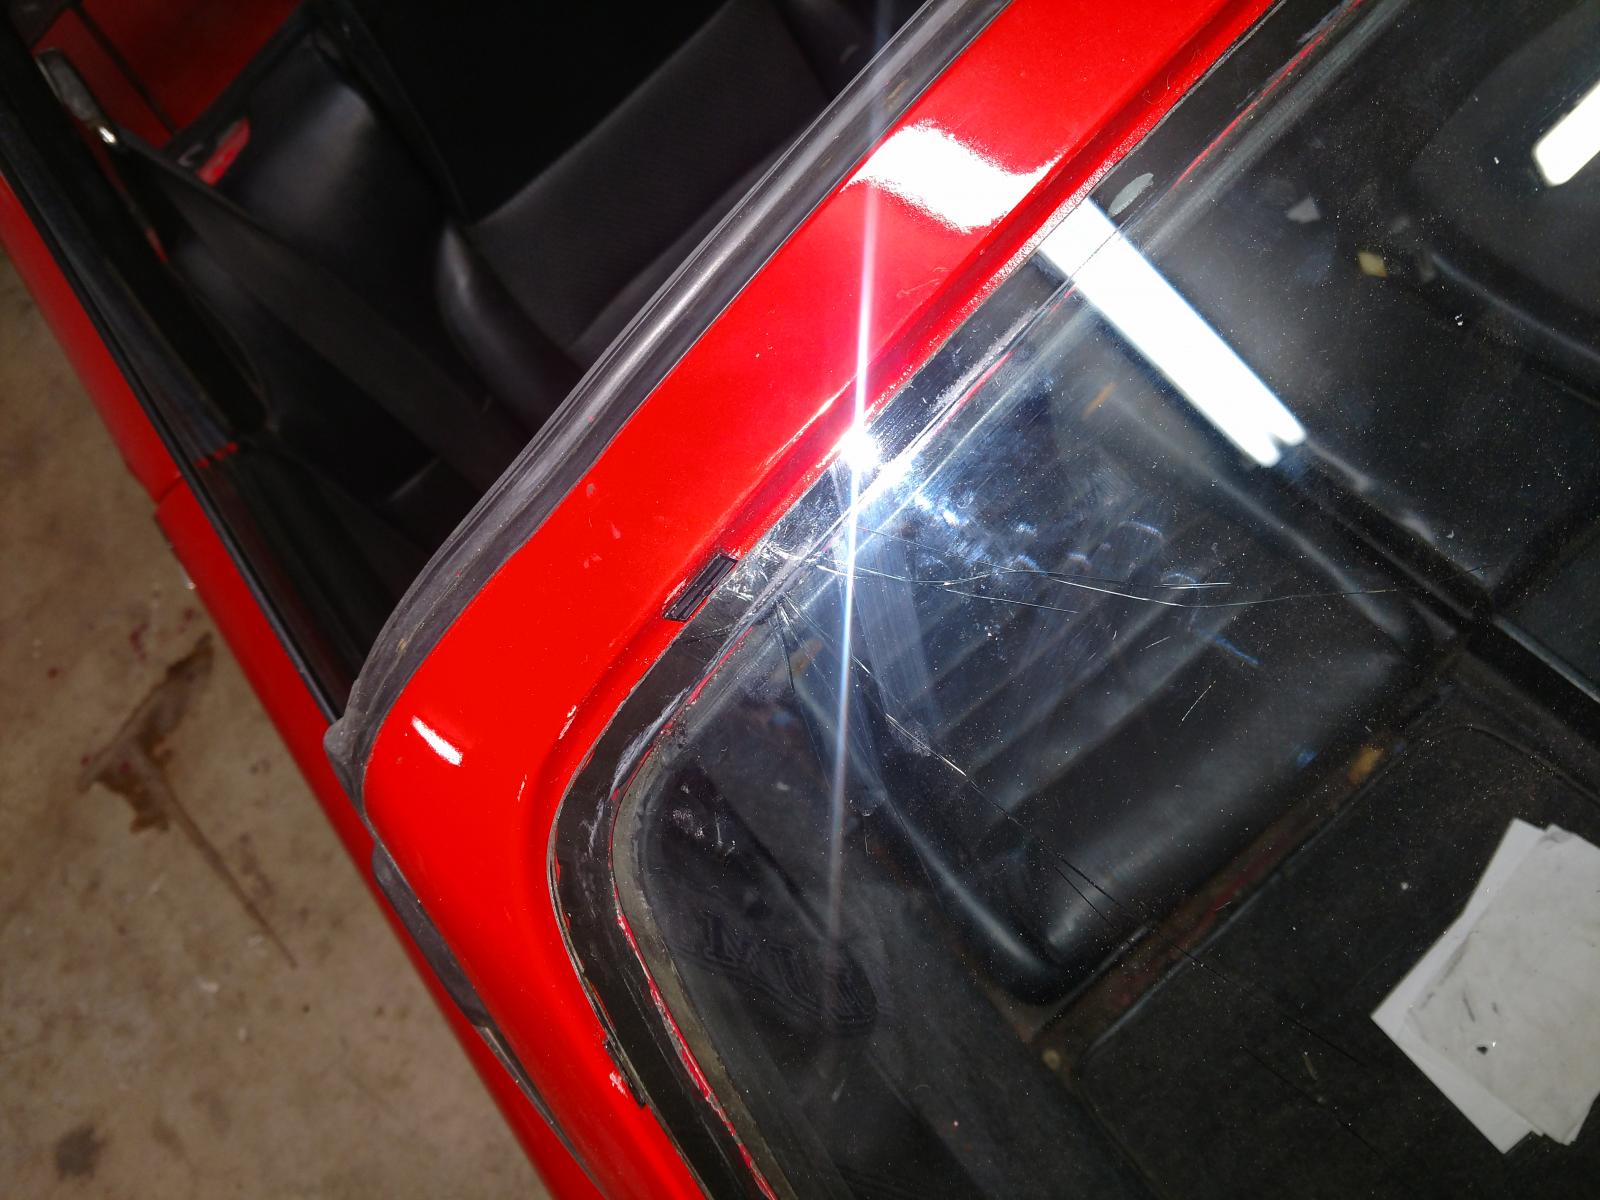
Posted by: Mikedrevguy Dec 23 2017, 12:25 PM
Also, mounted 205/60/15 all around. Preliminary investigation shows they do not rub on the strut or wheel well, it it that’s an issue, should be able to use 1/2” spacers to get the clearance needed.
Happy holidays, all.
Posted by: ConeDodger Dec 24 2017, 01:37 PM
So, let me get this straight? Your wife daily drives a 914? I can barely get mine to ride in mine and she says she loves it! We need to meet this Revwife of whom you speak. Such is the stuff of legends! 
Posted by: Mikedrevguy Dec 24 2017, 02:04 PM
Yup, I think RevWfe is pretty special, too. Thanks.
she’s missed driving these past couple months while it’s been down for paint/reassembly.
She’s contacting an upholsterer to redo the seats and the backsplash.
I’ve got a 2260 on the engine stand being mocked up, that, now that THIS has been completed, can proceed.
Yep, she loves her car and loves driving it.
She may even take it for some passes down the drag strip.
Merry Holidays to all.
Mike.
Powered by Invision Power Board (http://www.invisionboard.com)
© Invision Power Services (http://www.invisionpower.com)