Printable Version of Topic
Click here to view this topic in its original format
914World.com _ 914World Garage _ BUILD-OFF CHALLENGE: Finn's '75 2.0l FI 914 build
Posted by: dudzy's914 Jun 10 2014, 05:19 PM
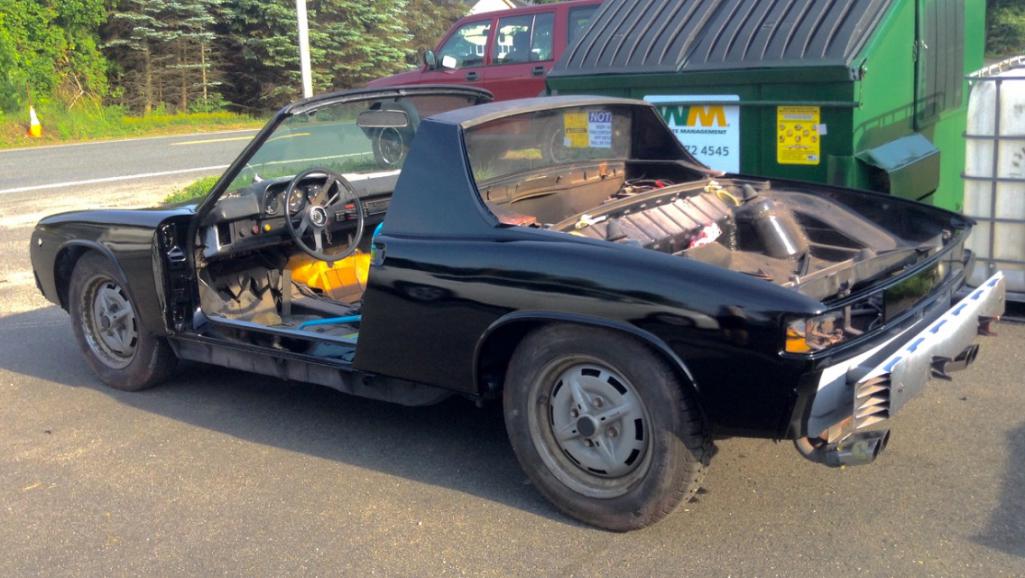
Hey, gang! So here's the deal; my name is Finn, and I'm 14 years old (that doesn't really matter), I have been reading 914World and learning all sorts of skills for about 3 years now. I bought my first 914 in mid 2012, a '74 1.8l. It wasn't running, I knew there was an engine rebuild in the future. But as I was disassembling, I found some unwanted rust issues out of my budget at the time 

 . So this spring I came across a Black '75 2.0l FI. All body work was already done, brand new interior...
So, this (by the way, a very nice guy) started this project about 8 years ago, he had all the body work done, reupulstered interior, he bought everything you would need to build a new 914. All I needed was a battery and this car purred so smoothly it is unbelievable. My dad, has owned busses, Beetles, Ghias, 914s, a lot of air cooled wonders, so he knows a lot about them. He has/is helping me learn, he already taught me a ton, enough to feel confident to go out to the barn and make progress by myself. Thanks a lot, your the BEST DAD!
My plan is to fix the small remaining little bits of work; welding e-brake pivot plate, seat belt attachment bolt, center console wiring, recover dash. then I will shoot it with gloss black Plasti-Dip(to preserve until I can afford a quality paint job) and reassemble.
Since I got a lot of extra parts, I will be selling some. I will post a link in the classifieds to ebay, where I will be selling them.
(as for the '74, that will be a father-son race car project.)
By the way, I am paying for everything. Including the gas to pick it up.
I will keep you all updated as the build progresses. And ask a few questions:)
I'll post better pictures later
Posted by: hndyhrr Jun 10 2014, 05:35 PM

pictures please. it is awesome that you are very young and learning from your dad and all the great folks here on the world
Posted by: Johny Blackstain Jun 10 2014, 05:41 PM
I was 11 when I started working on teeners & now 40 years later I still have that car & could not imagine ever parting with her. Have fun with yours 
Posted by: dudzy's914 Jun 10 2014, 06:18 PM
Pictures.
Attached thumbnail(s)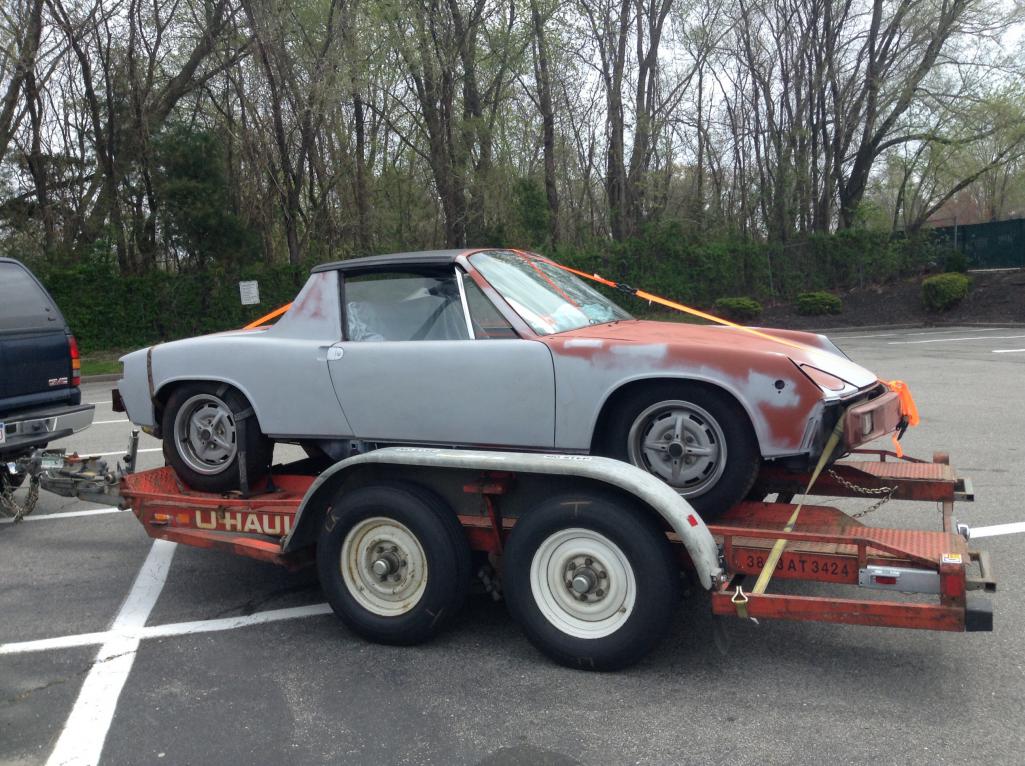
Posted by: dudzy's914 Jun 10 2014, 06:20 PM
Pictures
Attached thumbnail(s)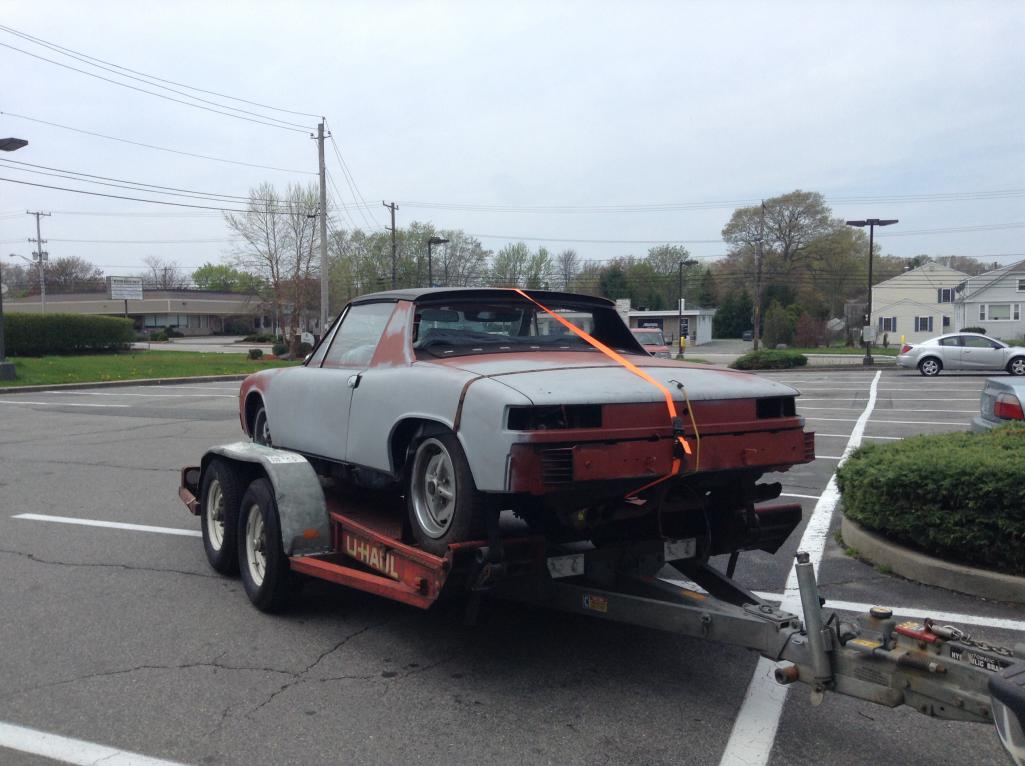
Posted by: KELTY360 Jun 10 2014, 07:04 PM
So cool! Yes it does matter that you're 'only' 14...it gives you a head start on a sickness that appears to be happily incurable.
Posted by: Bob L. Jun 10 2014, 07:06 PM
Only 14 and you already have 2? I'd say your off to a good start.
I'm jealous.
Posted by: dudzy's914 Jun 10 2014, 07:09 PM

So cool! Yes it does matter that you're 'only' 14...it gives you a head start on a sickness that appears to be happily incurable.
Lots of people don't take me serious. I'm hoping the teener community takes me in.
Posted by: dudzy's914 Jun 10 2014, 07:11 PM
Only 14 and you already have 2? I'd say your off to a good start.
I'm jealous.
I have found what hard work earns.- something that is labeled "PORSCHE"
Posted by: Maltese Falcon Jun 10 2014, 08:52 PM
Great start at 14  !
!
I worked with along with my son on his 914 when he turned 15.
My automotive interest started at age 14...in the GM Fisher Body Craftsman Guild.
Here is a block of sugar pine that I shaped into this black mid-engine, gull wing door, sports car scale model. I finally got to work on real iron in High School auto shop a couple years later !
Keep us posted with lots of pics...
Marty 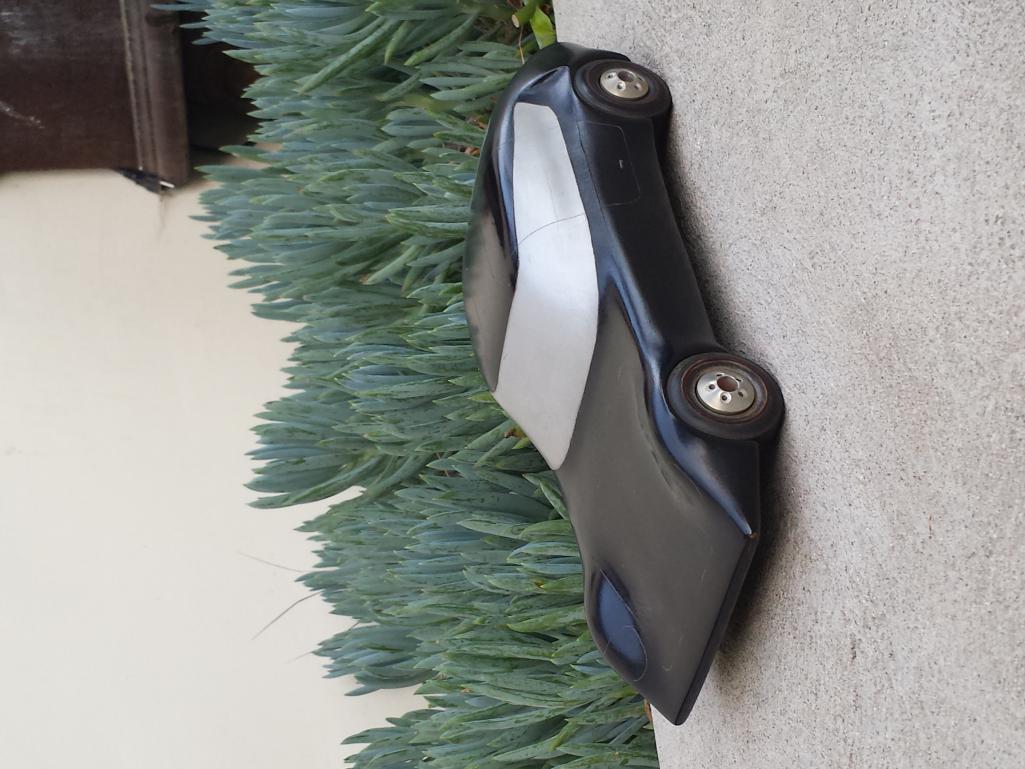
Posted by: poorsche914 Jun 10 2014, 08:59 PM
Hey, Finn...
You and your dad should come to the Smokies for Okteenerfest this fall. "Only" around 900 miles 
Keep track of the mileage... maybe it will be 914 

Posted by: PanelBilly Jun 10 2014, 09:55 PM
Great project. I wish I had started on cars a few years earlier. I was building RC cars at your age.
Posted by: ruby914 Jun 10 2014, 10:04 PM
So cool! Yes it does matter that you're 'only' 14...it gives you a head start on a sickness that appears to be happily incurable.
Lots of people don't take me serious. I'm hoping the teener community takes me in.
Your in
![popcorn[1].gif](style_emoticons/default/popcorn[1].gif)
Posted by: dudzy's914 Jun 11 2014, 07:58 AM
[quote name='Maltese Falcon' post='2048700' date='Jun 10 2014, 10:52 PM']
Great start at 14 !
I worked with along with my son on his 914 when he turned 15.
My automotive interest started at age 14...in the GM Fisher Body Craftsman Guild.
Here is a block of sugar pine that I shaped into this black mid-engine, gull wing door, sports car scale model. I finally got to work on real iron in High School auto shop a couple years later !
Keep us posted with lots of pics...
Posted by: dudzy's914 Jun 11 2014, 08:00 AM
Hey, Finn...
You and your dad should come to the Smokies for Okteenerfest this fall. "Only" around 900 miles
Keep track of the mileage... maybe it will be 914
I'll try to talk him into it

Posted by: brant Jun 11 2014, 08:10 AM
Awesome. I started on the same path when I was 15 with my dad.
Still at it and racing too
Great story and great start.
My first car was too rust also and we got a second one a year later that I still own.
Posted by: Racer Chris Jun 11 2014, 09:01 AM
Finn,
Its great that you found something better so quickly!
Posted by: JawjaPorsche Jun 11 2014, 09:15 AM
Welcome to the Madness. Anyone who loves 914's is a friend of mine regardless of age! (Was going to use the touching of beer glasses icon but you are too young!)
Attached image(s)
Posted by: rnellums Jun 11 2014, 09:18 AM
I was just like you at 14! bought my first not knowing much about the cars and lucked out on a 73' 2.0L! Good luck and have fun!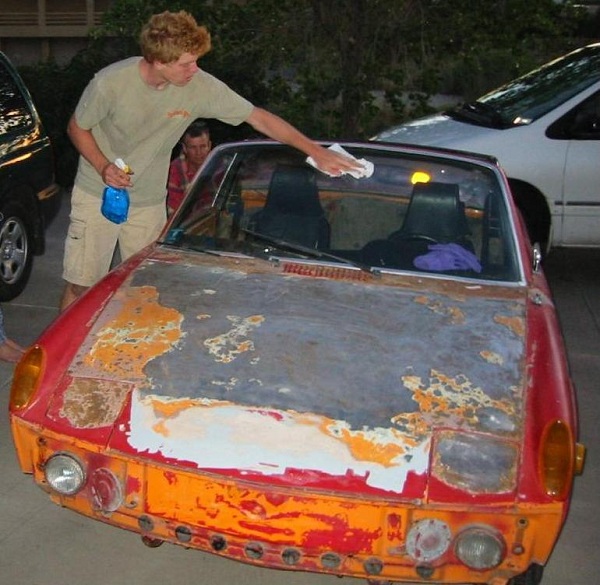
Posted by: gms Jun 11 2014, 10:17 AM
Always great to have another among us, you can carry the 914 banner for another generation.
Posted by: Cairo94507 Jun 11 2014, 10:45 AM
Finn- I think it is great that you are into these terrific cars. Have fun and remember to post a lot of pictures.
Posted by: ChrisNPDrider Jun 11 2014, 11:27 AM
So Finn here has a reason to act like he's 14 years old, what about the rest of the 914world clowns?? 

Have fun wrenching! This cheers is root beer 
Posted by: PlantMan Jun 11 2014, 11:32 AM
Cool Beans!
Good luck with the car!!!
Posted by: dudzy's914 Jun 11 2014, 12:48 PM
So Finn here has a reason to act like he's 14 years old, what about the rest of the 914world clowns??
Have fun wrenching! This cheers is root beer
Chris has a point here; Ya, come on guys, shape up!


Posted by: jbyron Jun 11 2014, 01:01 PM
Finn! You rock dude!
Posted by: dudzy's914 Jun 11 2014, 03:13 PM
Welcome to the Madness. Anyone who loves 914's is a friend of mine regardless of age! (Was going to use the touching of beer glasses icon but you are too young!)
THE MADNESS!!
Posted by: dudzy's914 Jun 11 2014, 04:30 PM
Had to work inside today, rain. The PO had smeared this rubbery coating wherever he could-this stuff is a pain. When the metal work was done, they ripped the e-brake and seat belts right out. Got the hunks of metal off them. They just put hoaky patch panels over the holes from the mounts. I need your opinions for the seat belt mounts; So I'm going to cut out the patch, (drill a hole) weld a nut to the back and weld it back in, or, make another patch (drill a hole) and weld the nut to the back, drill a hole for the nut in the existing patch and weld that panel onto the existing patch.
Attached thumbnail(s)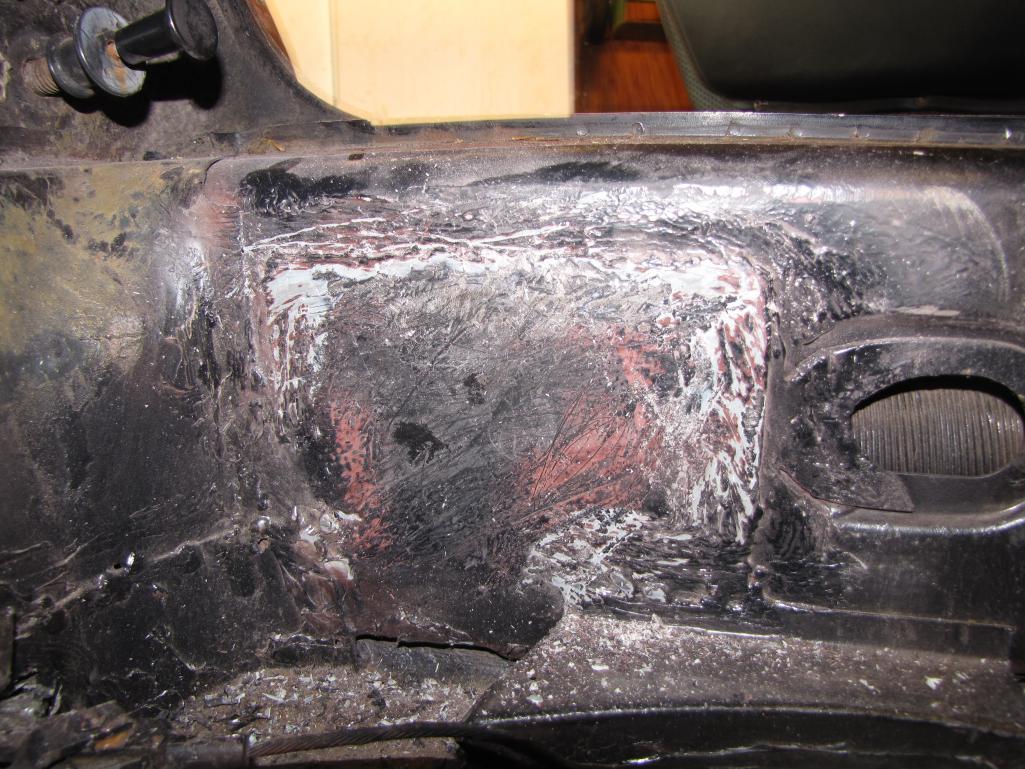
Posted by: Socalandy Jun 11 2014, 04:37 PM
I worked on cars with my Dad as well. Great project!!!
Posted by: dudzy's914 Jun 11 2014, 04:37 PM
The hoaky seat belt attachment patch.
Attached image(s)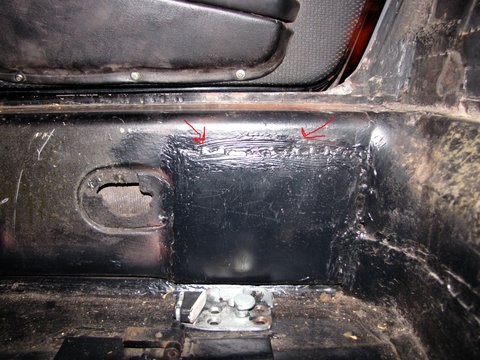
Posted by: dudzy's914 Jun 11 2014, 04:39 PM
Pain in the butt rubbery stuff.
Attached image(s)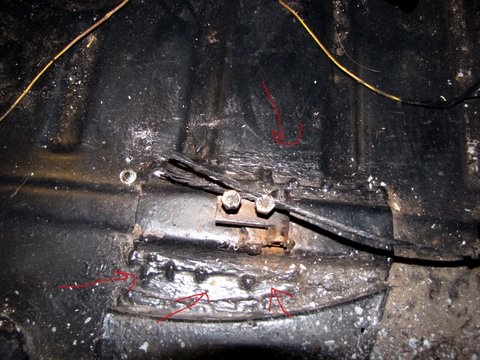
Posted by: dudzy's914 Jun 11 2014, 04:40 PM
Rain. Everything's inside.
Attached image(s)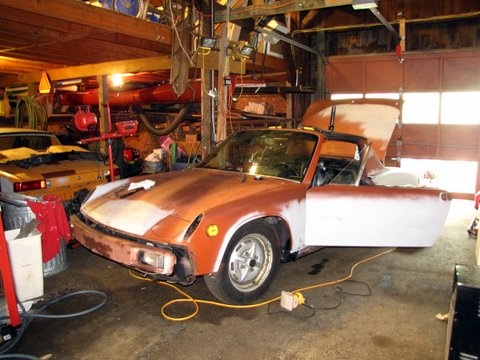

Posted by: dudzy's914 Jun 11 2014, 09:09 PM
I need your advise.
Posted by: r_towle Jun 11 2014, 09:21 PM
Finn,
Keep it up, get a grinder and wire wheels and get to work stripping it all down.
Here is a link to Rockets thread how he restored a car...
He was only a bit older than you, took his time and lots of nights, and all his spare cash....but he did this car with some help from me....
http://www.914world.com/bbs2/index.php?showtopic=38369
Rich
Posted by: rnellums Jun 12 2014, 10:12 AM
I would suggest getting the seatbelt mounting metal off an old car out of the classifieds and welding that it. that way the threads will match and you can use the original style hardware without worry.
Posted by: Racer Chris Jun 12 2014, 10:31 AM
The correct threads for seatbelt mounting is 7/16-20. (7/16-20 and M11 x 1.25 are virtually identical btw)
Just buy some nuts at the hardware store, weld them onto small plates with a 1/2" hole, and weld the plates onto the surface after cutting a hole big enough for the nut to go inside.
That's easier than other methods and just as effective, as long as the added thickness doesn't create interference with something else.
Posted by: dudzy's914 Jun 12 2014, 10:56 AM
The correct threads for seatbelt mounting is 7/16-20. (7/16-20 and M11 x 1.25 are virtually identical btw)
Just buy some nuts at the hardware store, weld them onto small plates with a 1/2" hole, and weld the plates onto the surface after cutting a hole big enough for the nut to go inside.
That's easier than other methods and just as effective, as long as the added thickness doesn't create interference with something else.
I have been searching for the specs since the were no nuts or bolt for the bottom attachment.
Thanks a lot Chris!
Posted by: dudzy's914 Jun 12 2014, 03:54 PM
I would suggest getting the seatbelt mounting metal off an old car out of the classifieds and welding that it. that way the threads will match and you can use the original style hardware without worry.
the original style hardware did not come with the car.
Posted by: dudzy's914 Jun 12 2014, 06:52 PM
I have a black back pad for sale-$150 in the classifieds, and a 911 style rear reflector for a 914 on ebay- buy it now $200 but has a low reserve.
Posted by: Racer Chris Jun 12 2014, 07:06 PM
I would suggest getting the seatbelt mounting metal off an old car out of the classifieds and welding that it. that way the threads will match and you can use the original style hardware without worry.
the original style hardware did not come with the car.
What about your parts car?
BTW, the shoulder harness bolts have the same threads, so do the tunnel belt mounts.
There's also a nylon "L" shaped washer so the belt ends swivel freely without being loose.
Posted by: dudzy's914 Jun 12 2014, 07:24 PM
I would suggest getting the seatbelt mounting metal off an old car out of the classifieds and welding that it. that way the threads will match and you can use the original style hardware without worry.
the original style hardware did not come with the car.
What about your parts car?
BTW, the shoulder harness bolts have the same threads, so do the tunnel belt mounts.
There's also a nylon "L" shaped washer so the belt ends swivel freely without being loose.
The bolts on the tunnel are frozen on the '74 but I may be able to snatch the top bolts and find matching nuts.
Posted by: dudzy's914 Jul 3 2014, 06:01 PM
Mini Christmas in July! My door catch screws, e-brake handle pin, and e-brake pivot plat arrived today. This weekend I will weld in the pivot plate and the seat belt mounting points.
Also starting to think about wheel options. I want polished 2.0L Fuchs. Trying to maybe sell or trade(with cash too) my original sport wheels with the chrome trim ring. So if you have 4 lug alloys your willing to possibly part with, tell me.
Attached thumbnail(s)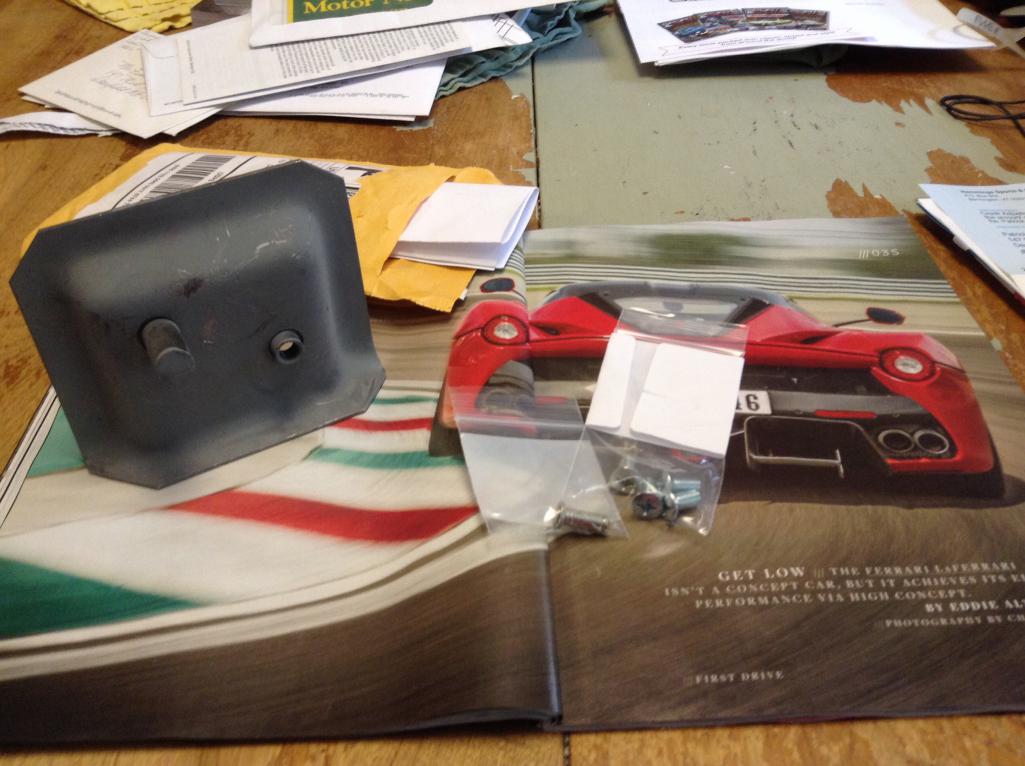
Posted by: dudzy's914 Jul 4 2014, 06:22 PM
Question here,
is this foam thing supposed to be here? If so, what is it?
Attached thumbnail(s)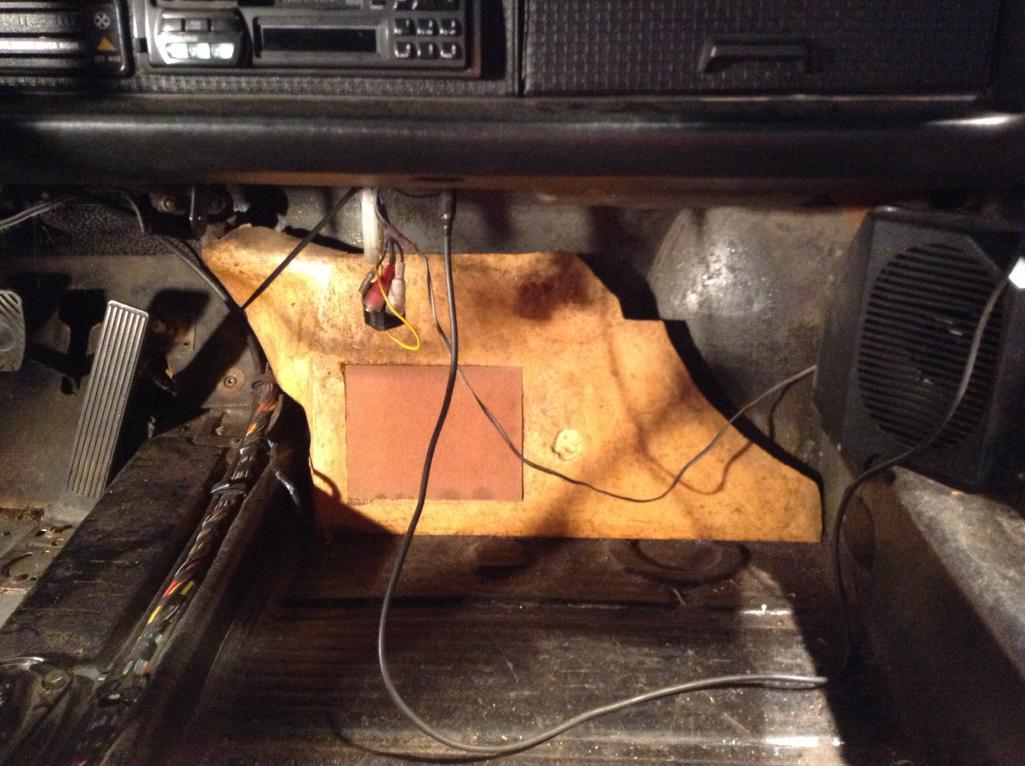
Posted by: mobymutt Jul 4 2014, 06:44 PM
It's the footrest. I took mine off when I removed all the rotten carpeting, and I've been wondering if people keep them or not.
Posted by: dudzy's914 Jul 13 2014, 12:20 PM
Finally sucked it up and ordered my plasti dip. I went for the cheapest gallons I could buy, for this is only to protect the car. It should come in sometime this week. This is the color I'm aiming for;
Attached image(s)
Posted by: dudzy's914 Jul 20 2014, 05:17 PM
The plasti dip arrived Friday! I'm in the process of building a booth(pics to come this week). I've been prepping the body for a while and it's about time to dip it.
Attached thumbnail(s)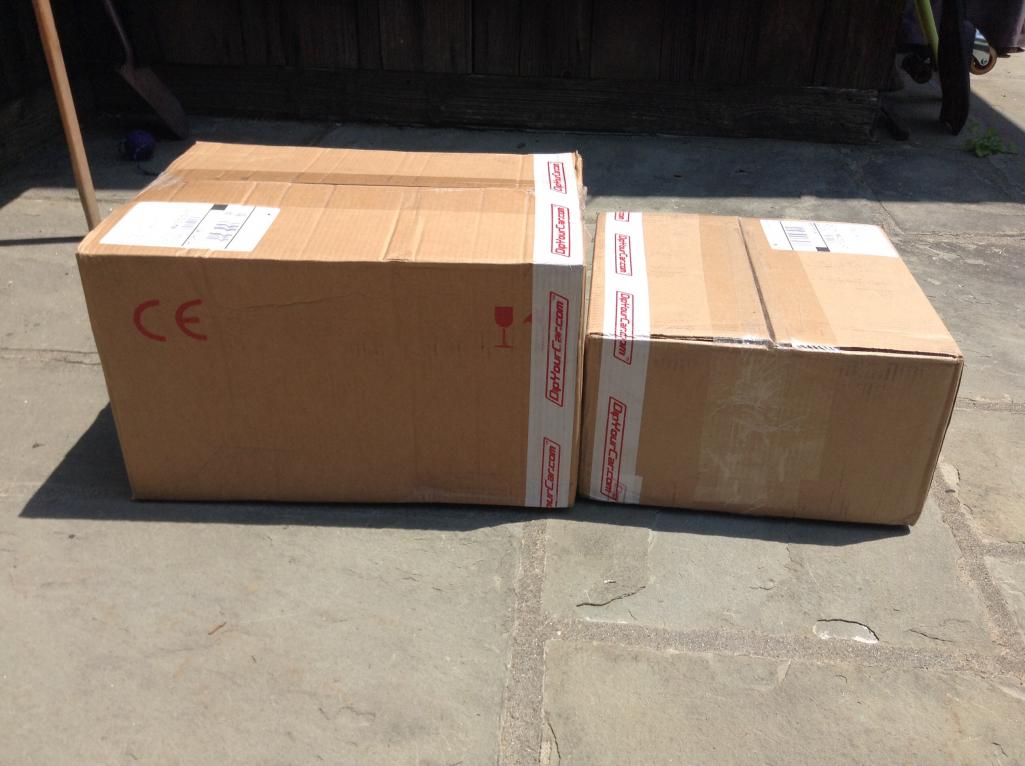
Posted by: rnellums Jul 21 2014, 07:30 AM
I'm interested in seeing how your dipping comes out! I'm thinking about doing a plastidip paint scheme myself...
Posted by: 76-914 Jul 21 2014, 08:16 AM
Similar path here. My Dad bought a 56 Ford (292 V8) that needed a rebuild and gave it to me along with a "hard backed" Chilton Repair manual. Then said if you can get it running it's yours. I was 13 and determined so I had it running in < a year. He thought it would keep me busy until I was old enough to drive. He spent the next 2 years chalking the tires every time he left. It's a great skill set to have in your "chest" and can become a hobby that you work on at home. And those are the best kind.
Posted by: dudzy's914 Jul 21 2014, 06:26 PM
I'm interested in seeing how your dipping comes out! I'm thinking about doing a plastidip paint scheme myself...
Can't wait to see how it turns out myself
Posted by: dudzy's914 Sep 30 2014, 09:50 AM
Alright. It's been a long time since I posted. The guy who will do a little metal work was going to do it at the beginning if the summer but got caught up in work(he owns a farm). Since I was in no rush I was fine with that. That held up the process a bit. I focused on making some cabbage so I can finish this thing up this winter.
Decided to go ahead and dip it before it got cold. It is far from perfect but not bad for protection until I can afford a real paint job.
It is black, but is drying like a dark charcoal. I think it is the gloss.
Attached thumbnail(s)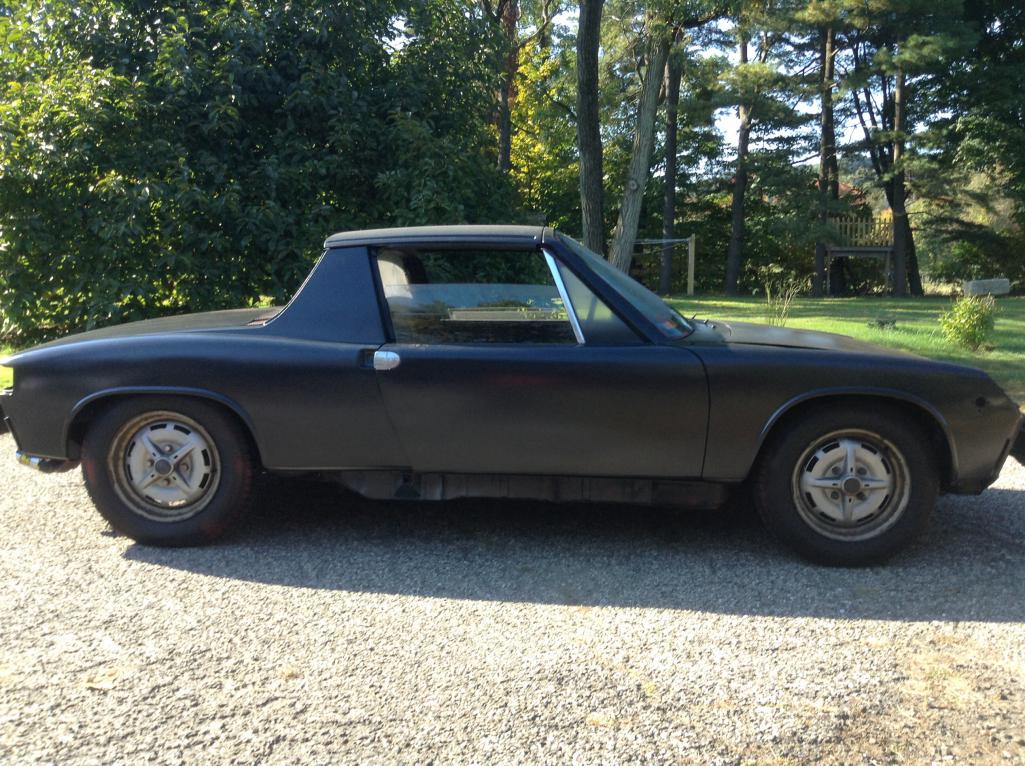

Posted by: dudzy's914 May 23 2015, 06:59 PM
Update: she survived the long hard winter in her coat of Plastidip. Today I peeled it off and sent it out to paint. I have accumulated most of the part I needed to finish. We have to be out of our house by the end of the summer, so I need a buyer by then, the car will be done in the next month or two.
Thanks,
Finn
Posted by: dudzy's914 May 23 2015, 07:02 PM
Loaded and ready!
Attached thumbnail(s)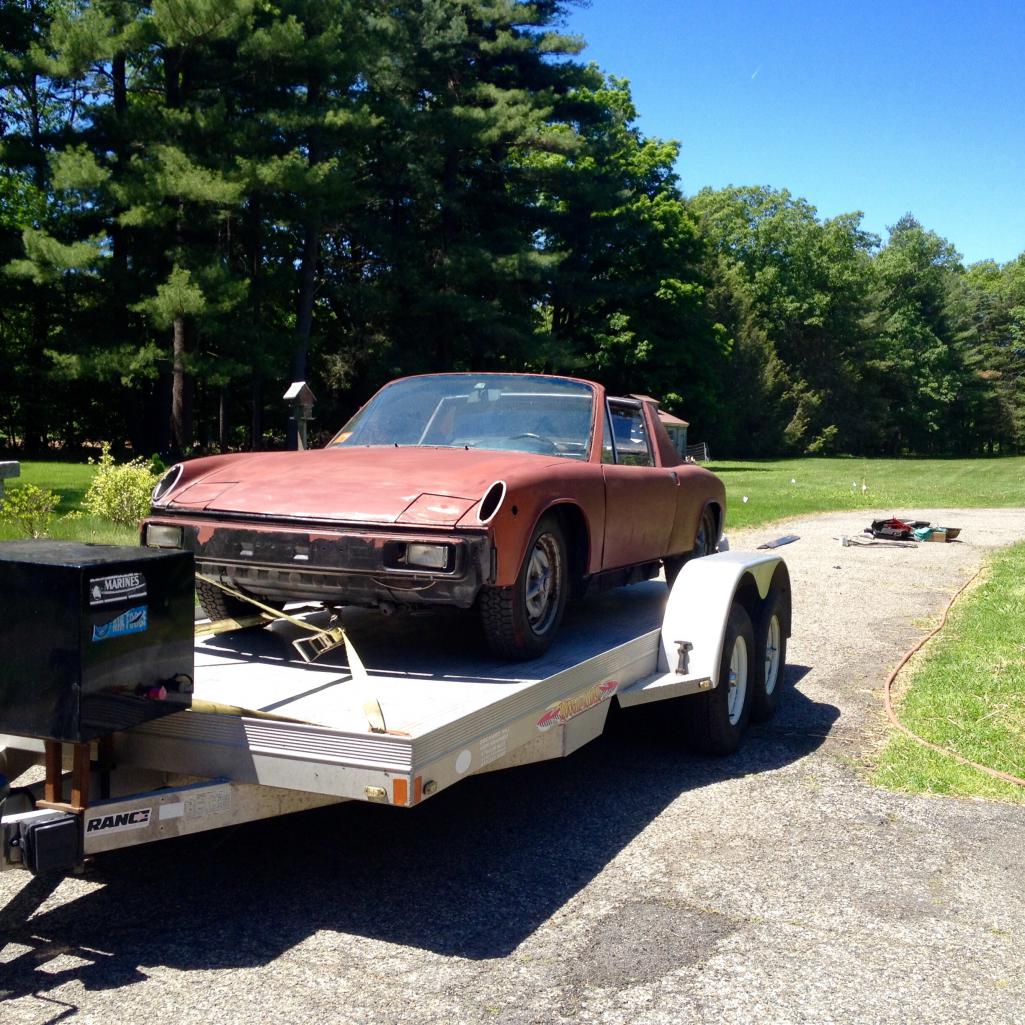
Posted by: Bleyseng May 24 2015, 06:58 PM
Question here,
is this foam thing supposed to be here? If so, what is it?
Yes, it's the foot rest so the passenger has a flat place to put their feet. The piece of wood in it is a access panel to the EGR counter.
Posted by: dudzy's914 Jun 10 2015, 04:16 PM
Update: the car was sanded this week, and everything aligned.
Attached thumbnail(s)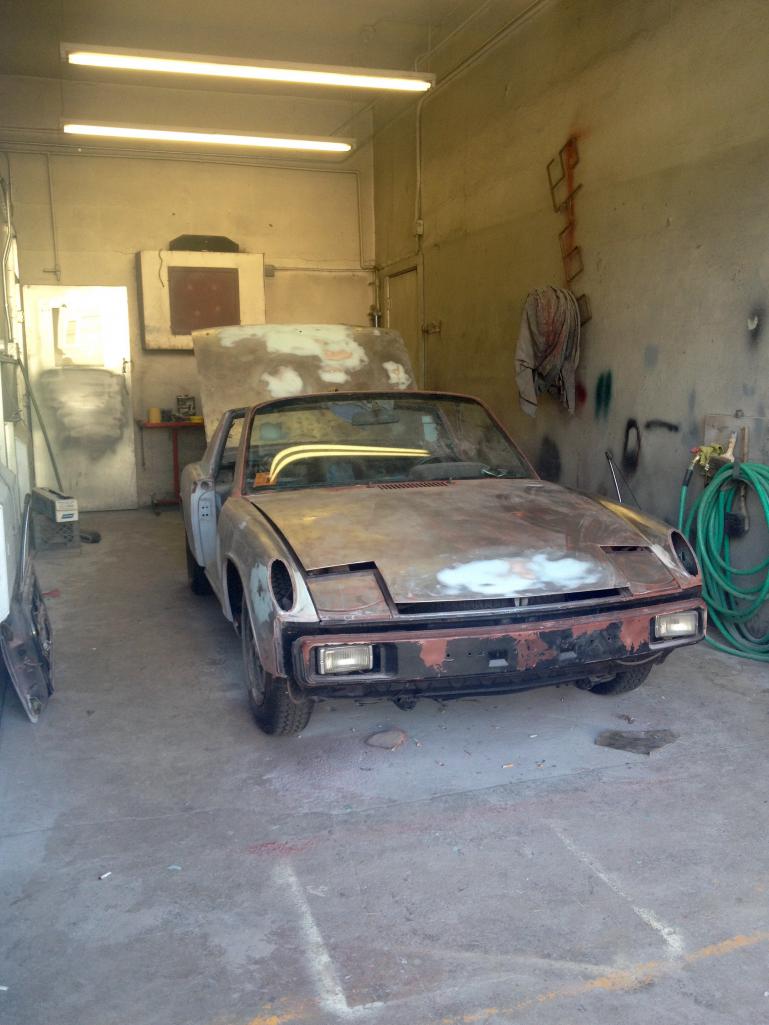
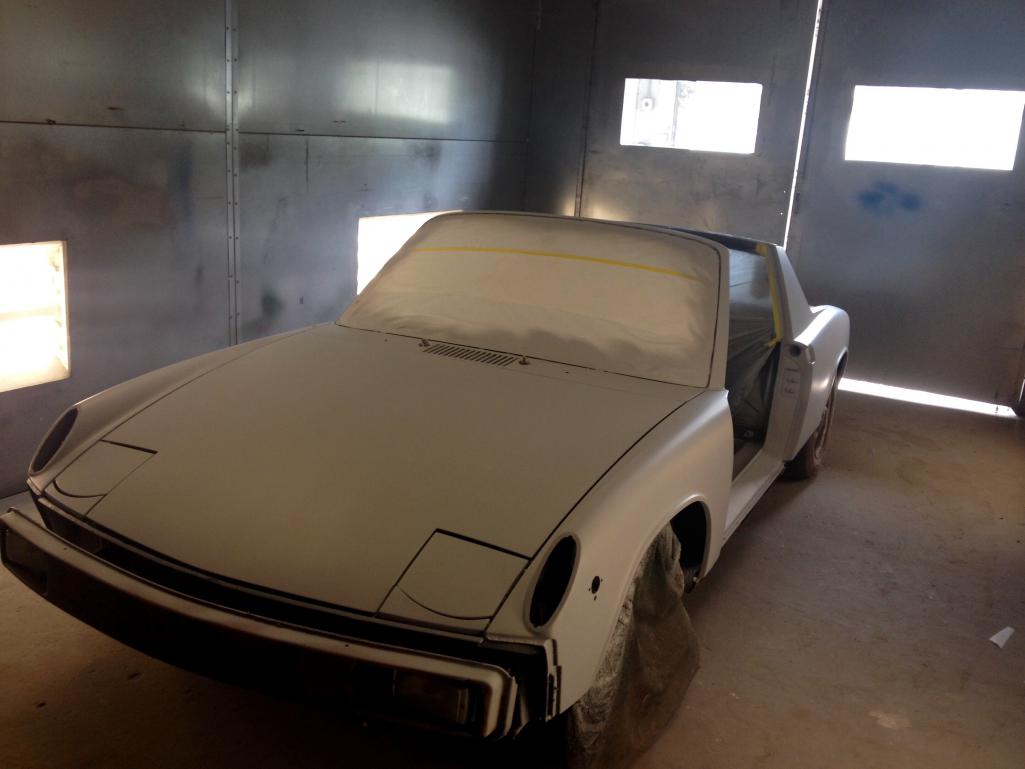
Posted by: dudzy's914 Jun 10 2015, 04:17 PM
Blocked out and sharp!
Attached thumbnail(s)
Posted by: dudzy's914 Jun 12 2015, 07:40 AM
Here she is in all of her L041 beauty!
Attached thumbnail(s)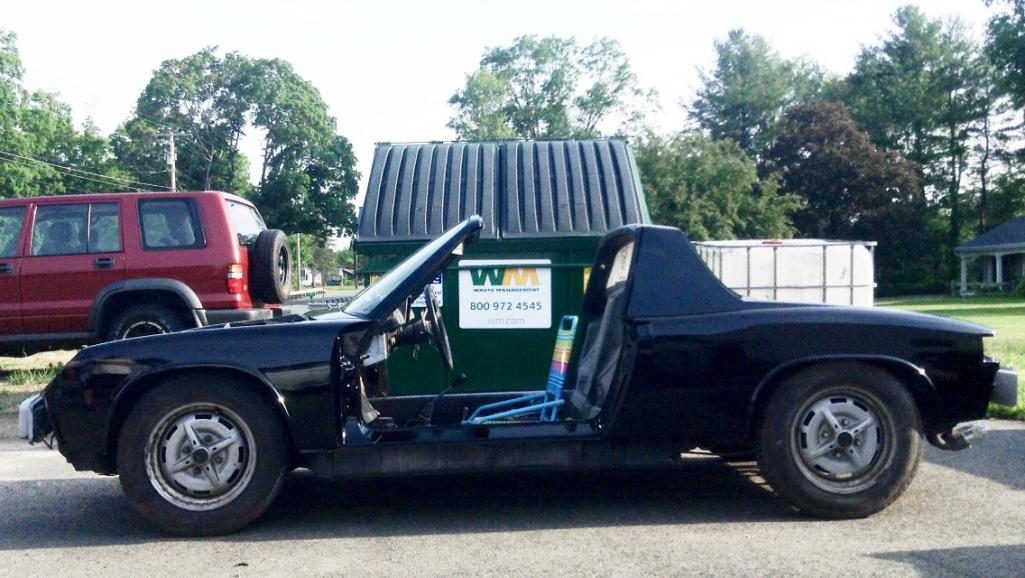
Posted by: billh1963 Jun 12 2015, 07:43 AM
Great progress!
Posted by: Sleepin Jun 12 2015, 01:42 PM
Great Job Finn! Keep up the good work! Your story gives me hope for the next generation of car drivers!
Posted by: dudzy's914 Oct 4 2015, 06:28 PM
Alright, time for some excuses for not working on the car: We have been in the moving for the past year and are finally settled. Now I have a nice place to work on it and being part of this wonderful Build-Off hopefully will get me going again. Exited to share the process!! Let the fun begin!!
Posted by: dudzy's914 Oct 31 2015, 01:16 PM
October update! Alright so haven't been on the world posting a whole lot, working on the car-right? No school and sports. I have made good progress though. Started on an small engine tune up (point, plugs, wires, condenser...) part way through I stated the r and had gas poring out all over I'm lucky nothing caught fire because it was running right down the exhaust. Found that it was the rubber hoses that go from the rail to the injector, they looked like crap, dug a little further, pulled out the injectors, going to clean those up. I considered getting new injectors because the seal rings looked like this and who knows how old they are, I figured I'd try new seals first-good decision? The injector didn't look to bad though. Bought new rubber line to go from the fuel rail to the injector also. That's about it I think, I'll try to post at least once a week.
Posted by: dudzy's914 Nov 1 2015, 06:12 AM
The old seals!
Attached thumbnail(s)
Posted by: dudzy's914 Nov 1 2015, 06:13 AM
New seals I just put on last night, I'll get a picture tomorrow
Attached thumbnail(s)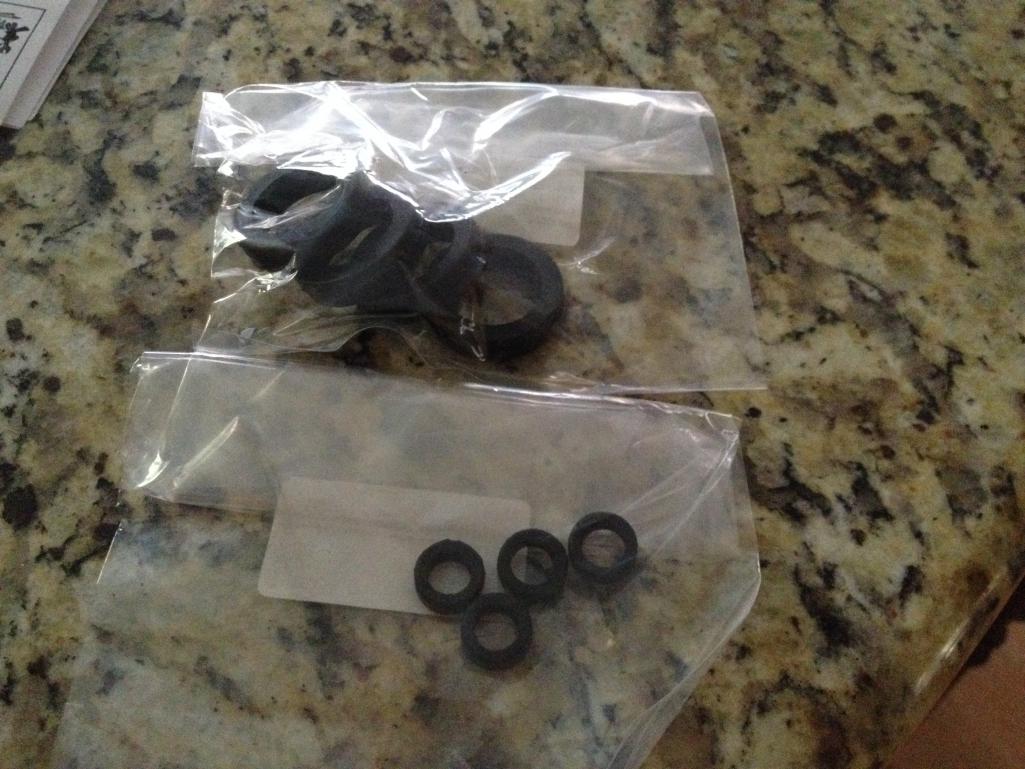
Posted by: dudzy's914 Nov 1 2015, 06:15 AM
Old hoses I pulled out
Attached thumbnail(s)
Posted by: mepstein Nov 1 2015, 08:32 AM
So the car got a quick respray and needs a tuneup. Why is it part of the build off challenge?
Powered by Invision Power Board (http://www.invisionboard.com)
© Invision Power Services (http://www.invisionpower.com)