Printable Version of Topic
Click here to view this topic in its original format
914World.com _ 914World Garage _ Easiest and most accurate way to adjust Side Shift linkage
Posted by: ClayPerrine Jul 20 2014, 08:39 AM
Here is the easiest, most accurate way to adjust your side shift linkage. I tried this on Betty's car, and she raves about the shifting. So, on to step 1. Please excuse the crappy cell phone pictures.
1. Remove the cover over the shift console.
2. Remove the carpet around the shifter.
3. Put the shifter in neutral, and loosen the pinch bolt on the shift rod. This is accessible behind the shifter.
4. Completely disconnect the shift rod by pulling the shifter back into the third gear position. You should see the coupler laying against the floorboard (like in the picture below).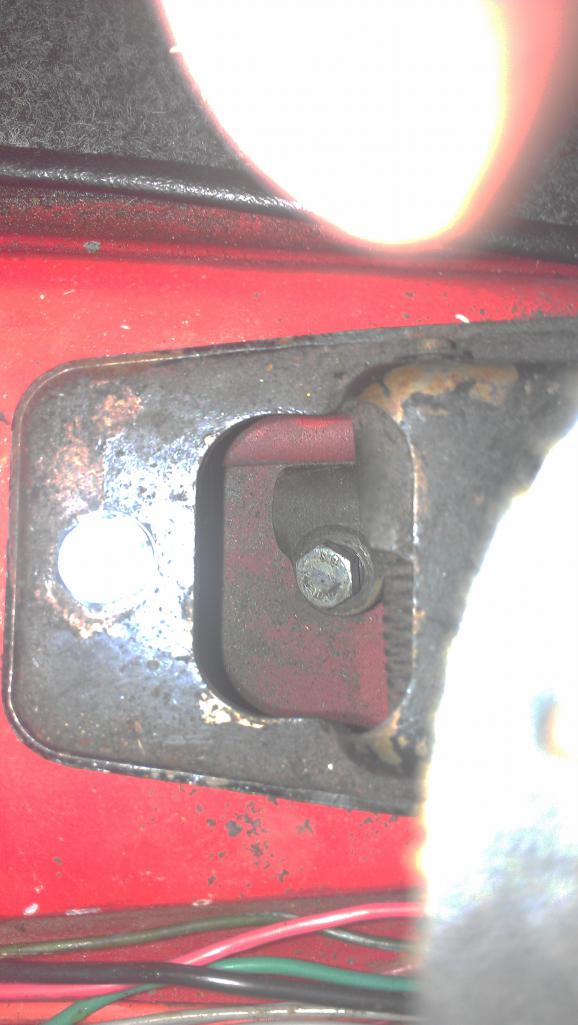
5. From under the car, put the side shift console on the transmission into 4th gear. This is done by pulling down on the shift rod and pulling it rearward. 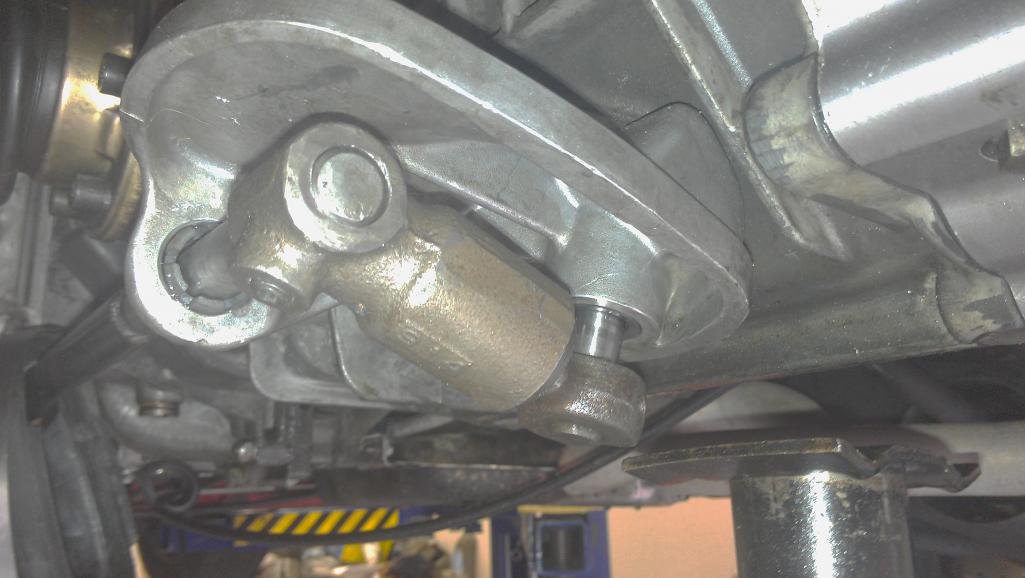
6. Back inside the car, put a rubber bungee cord around the base of the shifter, and loop the other end over the right hand door handle. 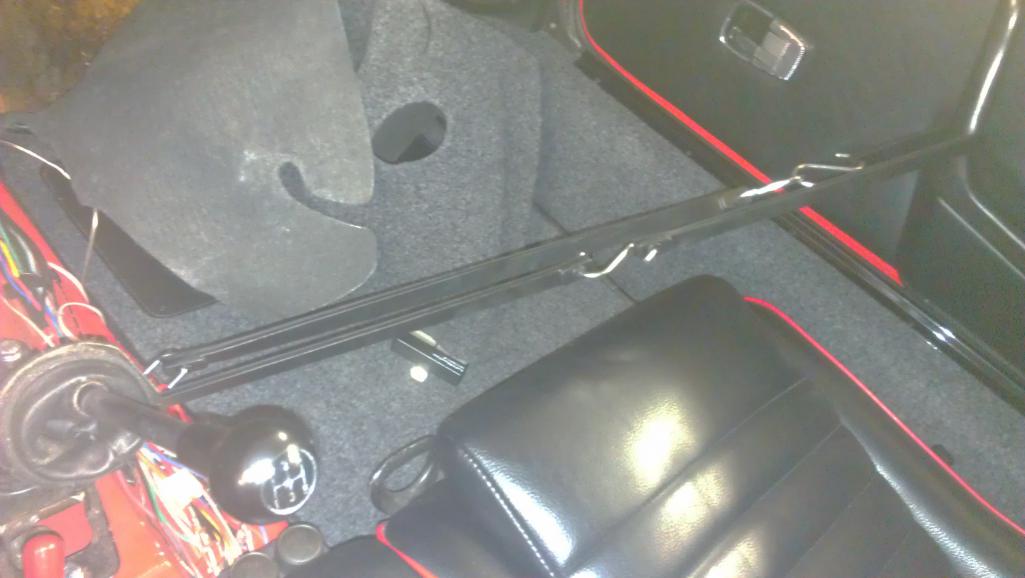
7. Make sure that the bungee stays at the base of the shifter.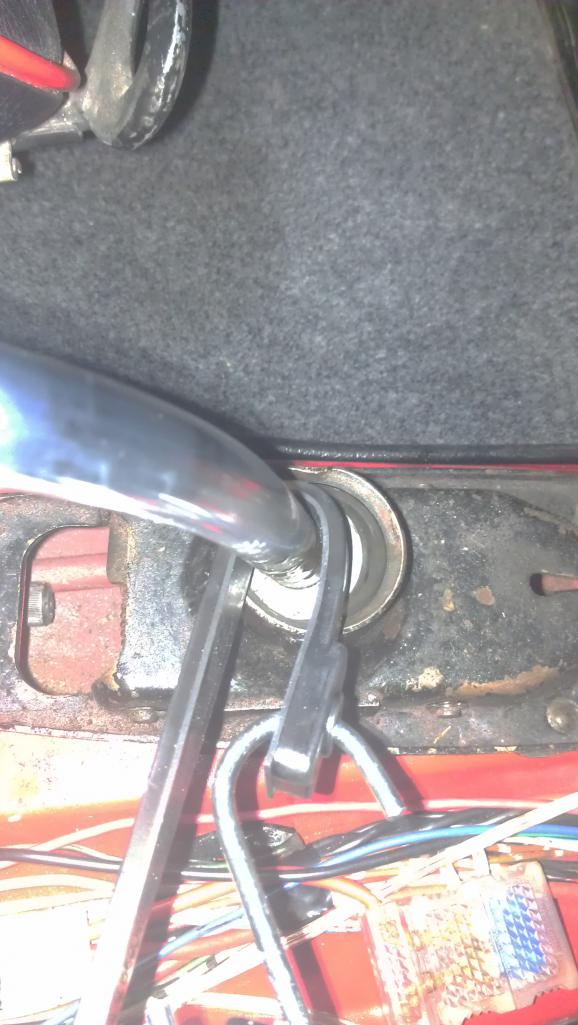
8. Lift the shift rod inside the tunnel up, and slide it into the coupler on the bottom of the shifter. This is the hardest part of the job. The hole is small and both parts sag downward. You may have to use needle nose pliers or something like them to hold them up.
9. Once you have the coupling done, move the shifter as far forward as it will go.
10. From under the car, move the shift console into the neutral position.
11. Remove the bungee cord from the shifter, then move the shifter until the part below the curve is vertical. Tighten the pinch bolt.
12. Reinstall the carpet and the cover over the shift console.
You are done, go drive it. 
Why does this work, you ask?
There are 3 fore and aft "shift planes" in a 914 transmission. Reverse/First, Second/Third, and Fourth/Fifth. When you place the transmission into Fourth, you are providing enough clearance to hook up the shift coupler, and you are insuring that the transmission end of the shift linkage is in the fourth/fifth shift plane. The bungee cord around the shift lever pulls the shifter into the fourth/fifth shift plane and holds it there while you slide the rod into the coupler. Then putting the trans back into neutral allows you to set the proper location of the neutral gate for each shift plane by making sure that the lower portion of the shifter is vertical.
Give it a try and see if it works for you.
Posted by: Cap'n Krusty Jul 20 2014, 09:30 AM
Having done this an untold number of times over the years, your method seems sound. I'd probably fix that loose shift bushing in the console first, though. "Loose", you ask? There are clear signs it's moving around, and that's not good for the shifting precision we're all looking for.
The Cap'n
Posted by: Hank914 Jul 20 2014, 09:54 AM

Having done this an untold number of times over the years, your method seems sound. I'd probably fix that loose shift bushing in the console first, though. "Loose", you ask? There are clear signs it's moving around, and that's not good for the shifting precision we're all looking for.
The Cap'n
This sounds like it'd be good for us tail shifters as well, correct?
Posted by: jim_hoyland Jul 20 2014, 12:11 PM
Clay,
Good write up  Is this going to work for a Rennshifter as well ?
Posted by: Dr Evil Jul 20 2014, 12:33 PM
I find my method simpler, and easier for Rennshifter adjustment, too.
1-Put in 2 or 3
2- Undo pinch bolt and remove shaft from coupler
3 - Put selector in 2 or 3 depending on gear you chose, but make sure they rest against the spring plate
4- Insert rod back into coupler and tighten bolt.
5- drink beer
No under the car, one spot to operate, I do this on all the cars I work on. Only for side shifter. The reason I to chose 2 or 3 is dependent on how far forward or aft you want/need your shift pattern to be.
Posted by: stugray Jul 20 2014, 12:49 PM
I just adjusted my new renshifter a few days ago.
It seems that the adjustment hole is not as big as stock, so you are limited in where in the pattern you are and still be able to tighten the bolt.
It seems I needed to be close to neutral between 2 & 3 to tighten.
Posted by: Dr Evil Jul 20 2014, 12:57 PM
I just adjusted my new renshifter a few days ago.
It seems that the adjustment hole is not as big as stock, so you are limited in where in the pattern you are and still be able to tighten the bolt.
It seems I needed to be close to neutral between 2 & 3 to tighten.
 yup. Man that was difficult the first time I did it.
Posted by: 914itis Jul 20 2014, 01:18 PM
Slight hijack.
I have used both method with good results.
One thing we often missed especially if you have not driven one well adjusted before attempting to adjust, is that when shifting from 1st to second, we attempt to move the shifter straight up .
This is not the case.
The diagram on the knob shows up-right-up, and that's the way it should be shifted.
Posted by: Dr Evil Jul 20 2014, 02:11 PM
When adjusted correctly with all components in good condition, you can shift by using one finger and pushing forward. The spring plate will guide the lever right Like magic.
Posted by: 914itis Jul 20 2014, 02:27 PM
Thanks Doc,
Great to know.
Posted by: ClayPerrine Jul 20 2014, 06:09 PM
When adjusted correctly with all components in good condition, you can shift by using one finger and pushing forward. The spring plate will guide the lever right
Like magic. Once I got the shifting right on both cars, I go from first to second just by pushing the shifter with the heel of my hand. Second to third I pull with my two middle fingers. Third to fourth is push forward with the heel of my hand and add a little pressure to the right. Fifth is pull rearward with a little pressure to the right.
Frankly, I was able to adjust the shifter right in the past, using the same method as Dr. Evil. But it usually took two or three tries to get it correct. This method may take more steps and have you in and out of the car a couple of times, but it only takes once to get it right.
Posted by: Harpo Jul 20 2014, 06:35 PM
Awesome thanks. This is next on my list of things to do
David
Posted by: Mblizzard Jul 21 2014, 07:54 PM
So I have a question. Why is it necessary to remove the rod from the shifter at the pinch bolt? I have not been entirely happy with the adjustment on mine but I have never removed the shit rod at the pinch bolt during the process.
Will try this tomorrow.
Posted by: SirAndy Jul 21 2014, 08:29 PM
The Rennshifter is easier to adjust because of the better springs. They keep the lever firmly in the 2/3 plane.
It's as easy as the Doc described it above ...

Posted by: ClayPerrine Jul 21 2014, 09:21 PM
So I have a question. Why is it necessary to remove the rod from the shifter at the pinch bolt? I have not been entirely happy with the adjustment on mine but I have never removed the shit rod at the pinch bolt during the process.
Will try this tomorrow.
The shaft is splined, as is the inside of the coupler. If you don't remove the shaft completely, you cant rotate the shifter to the correct position.
Posted by: Mblizzard Jul 22 2014, 10:52 AM
Did not work well for me. Had all gears but hit 4th instead of 2nd every time. Could cautiously shift into 2nd but it was not a natural shift coking off the spring plate. Adjusted it the Dr Evil way and had good shifting to 2nd and all other gears but first. First is a battle.
Posted by: Racer Chris Jul 22 2014, 11:20 AM
... as is the inside of the coupler.
...
Not true.
The inside is smooth, but takes on a splined visual appearance over time.
A less than half spline adjustment is often necessary, particularly when the linkage assembly is upgraded to be more precise.
Powered by Invision Power Board (http://www.invisionboard.com)
© Invision Power Services (http://www.invisionpower.com)