Printable Version of Topic
Click here to view this topic in its original format
914World.com _ 914World Garage _ getting under the heat shield...
Posted by: barebrad Sep 21 2014, 05:05 PM
Alright folks, I've been cleaning, grinding and sand blasting all day. I'm trying trying to figure out how to get under the heat shield? Do you cut it out? Just leave it alone? (I'm to OCD to do that!) I'm thinking about cutting it out and weld in some studs and I can bolt it in after paint. What do most do?
Thanks
Posted by: Mike Bellis Sep 21 2014, 05:13 PM
You would have to cut it out. A tab on each side and a spot weld in the middle.
Posted by: barefoot Sep 21 2014, 06:58 PM
there are 6 tabs with 2 spot welds each if you can pinpoint them and drill them out.
I had to replace the rear trunk panel, so cut around the 6 tabs and liberated the heat shield, then attached to the new trunk panel with SS pop rivets.
Posted by: worn Sep 21 2014, 06:58 PM

Alright folks, I've been cleaning, grinding and sand blasting all day. I'm trying trying to figure out how to get under the heat shield? Do you cut it out? Just leave it alone? (I'm to OCD to do that!) I'm thinking about cutting it out and weld in some studs and I can bolt it in after paint. What do most do?
Thanks
Mine came off when the trunk floor fell out. OK I cut some. I figure on putting it back with screws or bolts to match the eventual six muffler. Then you have a smooth surface to work on. My car is 3 feet off the ground and I keep hitting my head on it. Good luck!
Posted by: SirAndy Sep 22 2014, 09:56 AM

Early cars used screws which makes for much easier removal. Later cars have them spot welded.

Posted by: RobW Sep 22 2014, 11:08 AM
Out of sight... Out of mind?
Posted by: barebrad Sep 22 2014, 12:41 PM
Are the spot welds in the bottom of the trunk? If they are between the floor panel and the heat shield, I don't see how get a drill in there...
I saw no screws, but based on the amount of crud, there could be human remains in there and I couldn't tell! Nice to be doing this with the car on a rotisserie.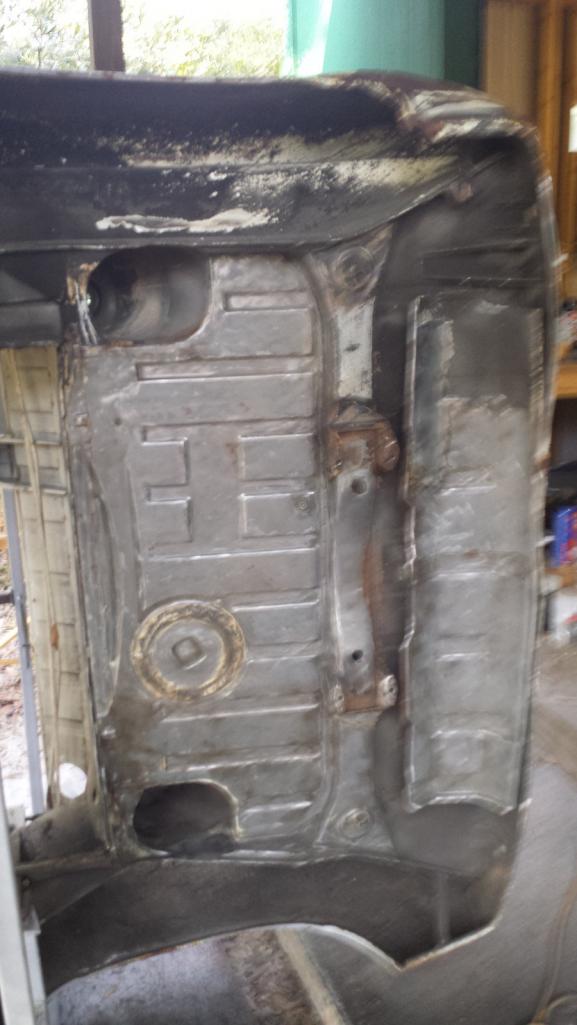
Early cars used screws which makes for much easier removal. Later cars have them spot welded.
Posted by: malcolm2 Sep 22 2014, 12:56 PM
there are 6 tabs with 2 spot welds each if you can pinpoint them and drill them out.
I had to replace the rear trunk panel, so cut around the 6 tabs and liberated the heat shield, then attached to the new trunk panel with SS pop rivets.
Rivets sound good. If you ever had to take it out, just drill them out. I took the "out of site" road. Stuck my wire brush in as far as I could reach, hit it with some primer and paint and called it DONE. On this piece there is nowhere for the water to sit and rust it out. The rust comes from the trunk acting like a dog bowl with water in it.
I am a fan of the spot weld cutter mounted in a drill. All the metal is still there. When you go to put it back, just tack the old spot to the old hole, grind and paint.
Clark
Posted by: SirAndy Sep 22 2014, 01:09 PM
Only the factory /6 cars and very early /4 cars had screws which were screwed in from inside the trunk.
Not sure if you can see the spotwelds and drill from the trunk side on the later cars ...

Posted by: scotty b Sep 22 2014, 01:13 PM
Only the factory /6 cars and very early /4 cars had screws which were screwed in from inside the trunk.
Not sure if you can see the spotwelds and drill from the trunk side on the later cars ...
Yes you can see them form the trunk side. you may have to dig the seam sealer out( should be done anyways) Run a piece of 80 grit over the top of the areas to highlight the centers of the spot welds, or just strip all the paint off the welded spots to find them
Posted by: Johny Blackstain Sep 22 2014, 01:13 PM
Only the factory /6 cars and very early /4 cars had screws which were screwed in from inside the trunk.
I didn't know that. Going to have to check my six. I'd like to replace that & the steering rack pan w/ stainless. Hell, I'd like to replace all the sheet metal with stainless

Posted by: barefoot Sep 22 2014, 05:30 PM
[quote name='malcolm2' date='Sep 22 2014, 02:56 PM' post='2089046']
[quote name='barefoot' post='2088826' date='Sep 21 2014, 07:58 PM']
there are 6 tabs with 2 spot welds each if you can pinpoint them and drill them out.
I had to replace the rear trunk panel, so cut around the 6 tabs and liberated the heat shield, then attached to the new trunk panel with SS pop rivets.
[/quote]
Rivets sound good. If you ever had to take it out, just drill them out. I took the "out of site" road. Stuck my wire brush in as far as I could reach, hit it with some primer and paint and called it DONE. On this piece there is nowhere for the water to sit and rust it out. The rust comes from the trunk acting like a dog bowl with water in it.
I am a fan of the spot weld cutter mounted in a drill. All the metal is still there. When you go to put it back, just tack the old spot to the old hole.
Here is photo of old trunk panel. you can see where i cut around the 6 tabs, this should get you close.
Barefoot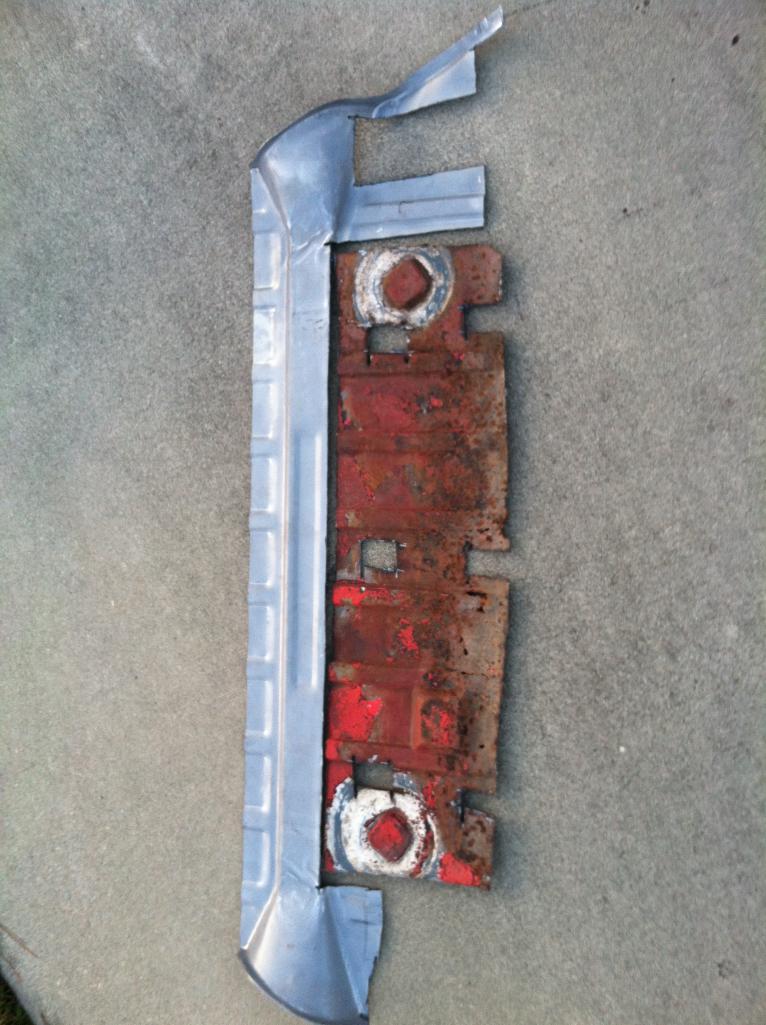
Posted by: Spoke Sep 25 2014, 05:00 PM
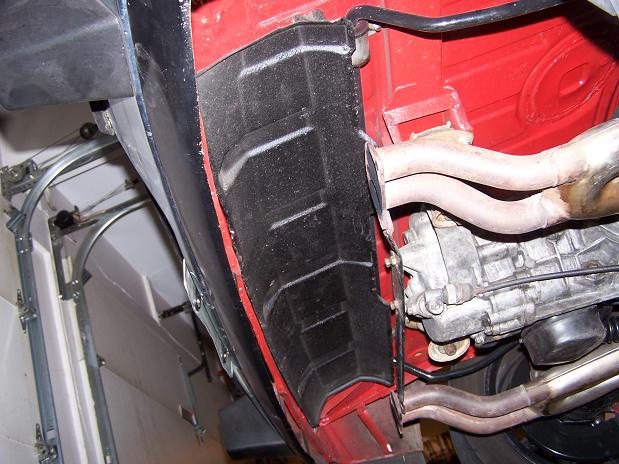
I removed the heat shield initially to do some trunk floor rust repairs. Instead of attaching it permanently, I welded bolts on the hangers and drilled holes in the floor for the mounting bolts.
I've now had the shield off 2 times after that to do maintenance under the car.
Attached image(s)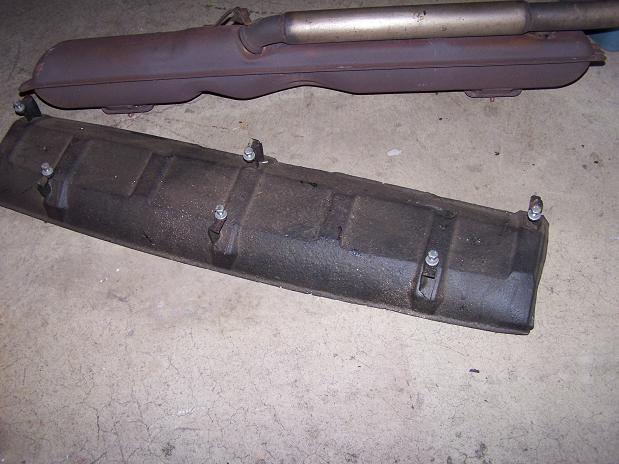
Powered by Invision Power Board (http://www.invisionboard.com)
© Invision Power Services (http://www.invisionpower.com)