Printable Version of Topic
Click here to view this topic in its original format
914World.com _ 914World Garage _ Engine start up
Posted by: OU8AVW Dec 17 2014, 11:44 AM
I'm working through starting my freshly rebuilt 2056. It has the original D-Jet and is a 1975 motor. At first I had no fuel pump, I fixed that.
Now there is no spark from the coil. I traced the lead from #8 on the fuse box to the relay board then out the relay board. I have 12.4v at the coil positive but no spark. I'm testing it with a light-type tester. No bueno.... It is a Bosch coil, i believe it is a "blue" coil.
I read here that there should be 1.5 ohms resistance between the two poles on the coil with everything dissconnected. This one tests at 7.4 ohms. A spare coil I had had similar results with no spark at crank and 4.6 ohms resistance.
I assume i need a new coil......
Right?
Posted by: stugray Dec 17 2014, 12:08 PM
Here is a quick test:
Unhook the lead from the coil output terminal (the BIG one) to the dist.
Hook a sparkplug wire with a spare plug into the coil output terminal.
Lay the plug on the top of the engine.
Turn on the ignition.
Crank the engine.
Is there a spark?
If no, then it is the points OR the coil.
If Yes, then the points & coil are at least working (doesnt mean they are great).
To elimiate the coil as the problem.
Leave everything hooked up as above, but unhook the wire that goes from the coil to the distributor (points).
Turn on the ignition.
If you have a Voltage meter, check the ignition input terminal on the coil - it should have battery Voltage (~12.5 Volts).
Check the terminal that you just pulled the wire off of.
It should have the same voltage as the ignition input.
Now briefly SHORT that terminal (the one the wire to the points was connected to ) to the engine case.
There should be a spark when you touch the wire to the case.
When you UN-short that wire from the case, you should have a spark from the plug.
The above tests take the distributor out of the picture to simplify the tests.
HTH
Posted by: Cap'n Krusty Dec 17 2014, 12:36 PM
"New coil"? Hardly EVER. Look at the wiring to the negative side of the coil, look at the points and the points plate ground strap. If you have a points replacement unit, such as a Pertronix, it may have gone bad (generally from operator error, but they also just quit). You can easily test the coil by removing the points wire and the tach wire off the (-) side of the coil and momentarily ground, then unground, the terminal, which will cause the coil to fire. (See the above post.)
The Cap'n
Posted by: OU8AVW Dec 17 2014, 03:06 PM
I will test tonight and report back to the collective.
Thanks guys.....
Posted by: OU8AVW Dec 18 2014, 08:51 AM
Installed new points. Now I have spark. Thanks for the help.
Moving on to the next problem. Fuel
Pump turns on the 1.5 seconds but I'm not seeing gas at the motor yet. I'll try again tomorrow. Could just be that it hasn't picked up or sent enough fuel through the system yet. I have only cranked it a few times.
Posted by: Cap'n Krusty Dec 18 2014, 09:22 AM
First, make ABSOLUTELY sure you have the fuel ring set up properly. Fuel enters the ring on the right side injector rail, move across the top of the engine, pass through the left rail and into the fuel pressure regulator. From there it exits the engine via a long hose above the bell housing area and joins the return line at the "Y" next to the pump. If you mix up the lines near the battery, you'll never get fuel pressure. Next, cycle the key for 2 seconds about 10-15 times. That'll fill the lines and build up pressure to specs.
The Cap'n
Posted by: Dave_Darling Dec 18 2014, 11:02 AM
If you don't want to muck with the key on/off a zillion times, you can jumper the fuel pump relay. Just bridge terminals 30 and 87; the pump will run even with the key off.
--DD
Posted by: Jon H. Dec 19 2014, 05:40 AM
Doesn't the fuel pump also need to be lower than the tank  ? Just in case it's been moved from the stock location.
Jon H.
Posted by: OU8AVW Dec 19 2014, 01:26 PM
Got spark. It was the points
Fuel pump seems to be working.
I'm thinking that my starter isn't giving me enough umph.
I used my old ground strap because I couldn't find the new one I had purchased. That's my first step to try. A new new one is on the way. Anyone have a diagram of how this starter should be wired? I have a solenoid installed. The starter turns the motor but not very fast. Looks like a rebuilt unit. Nice and clean.
You guys are awesome.
Note: my fuel pump has been relocated under the tank, above the steering rack.
Posted by: stugray Dec 19 2014, 01:51 PM
I didnt catch the new rebuild part.
So you havent precharged the oil system yet?
You should charge the system before trying to start it.
Then you need to follow the cam break in steps
Posted by: OU8AVW Dec 19 2014, 03:01 PM

I didnt catch the new rebuild part.
So you havent precharged the oil system yet?
You should charge the system before trying to start it.
Then you need to follow the cam break in steps
By pre-charge the oil system you mean spin it up with the starter until it gets oil pressure right?
Cam break in will be done according to Jake's instructions as it is his cam.....
Posted by: stugray Dec 19 2014, 03:27 PM
Here a cut & paste from my other posts regarding this step:
Here is some help:
1- Dont install the pushrods (cranking to prime with pushrods installed will wipe away the cam lube you put on the cam & lifters)
2 - remove the sparkplugs
3 - install a mechanical oil pressure gauge if you have one.
4 - do NOT fill the oil filter with oil before installation
5 - crank the engine until oil pressure peaks then keep cranking for as long as you are comfortable to get oil through the whole system. (Dont overheat the starter - ~10 seconds at a time, then cool off)
6 - check oil and top off if required
7 - reinstall pushrods & set valve lash (with Jakes pushrods, cold lash is zero)
8 - reinstall spark plugs
9 - proceed with engine first startup & follow Jakes cam break-in instructions
"Jake's instructions as it is his cam....."
Just out of curiosity, which cam did you get?
Did you measure the cam lobes before you installed it?
Did you set the valve train geometry?
I would be interested in hearing what measurements you got.
Posted by: OU8AVW Dec 19 2014, 05:43 PM
Here you go stu....
http://www.914world.com/bbs2/index.php?showtopic=229571&hl=
Posted by: OU8AVW Dec 19 2014, 05:48 PM
I realized that last thread didn't have my final lift numbers.
I got within .001 on all valves with shims and custom cut push rods.
Attached image(s)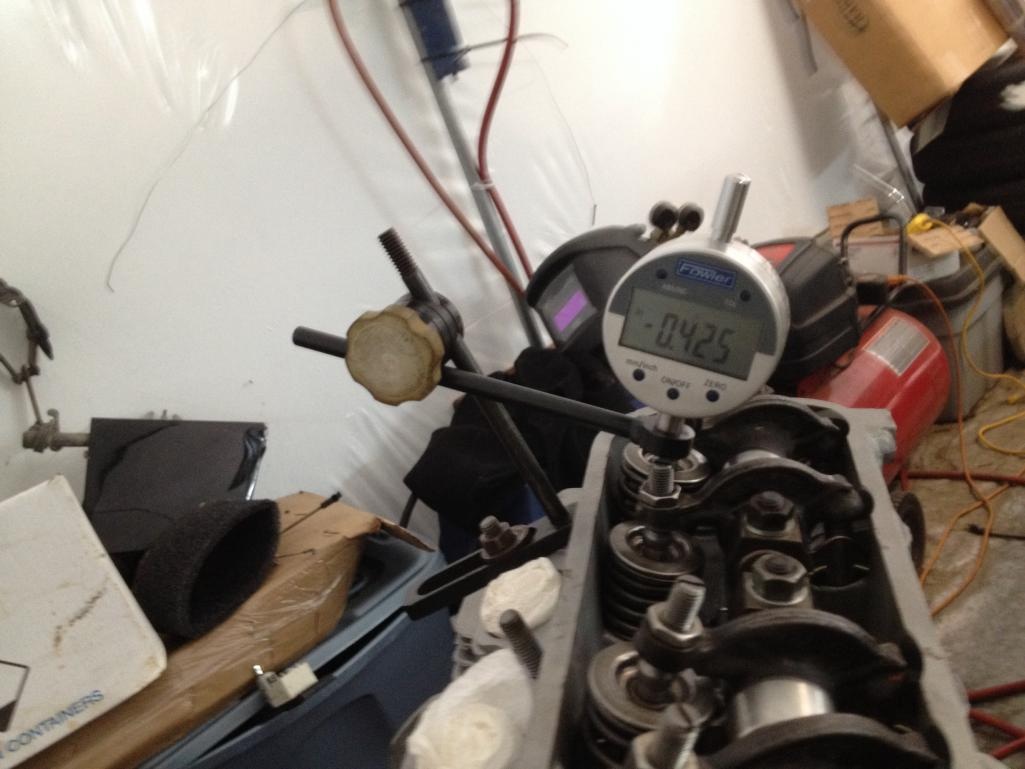
Powered by Invision Power Board (http://www.invisionboard.com)
© Invision Power Services (http://www.invisionpower.com)