Printable Version of Topic
Click here to view this topic in its original format
914World.com _ 914World Garage _ Steve's Silver '72 (Not so) Quick Build Thread
Posted by: stevegm Dec 18 2014, 05:16 PM
As some of you might recall, I have a Gemini Blue '71 that I am hoping to do a complete restoration on, eventually. Build thread - http://www.914world.com/bbs2/index.php?showtopic=242895&hl=
However, right after I began that restoration, I came across a nice buy on a '72 and couldn't resist the idea of having a good driver while I do the restoration on the blue car. So, here we go again.
I bought the car from the previous owner (in South Florida), who has been incredibly helpful. When I saw the condition of the car, and what he had put into it, I got in my truck that weekend and drove to South Miami from Charlotte (by myself) to get the car. It turned out to be a great trip.
The car had been sitting inside for over 10 years, following his driving it from California to the east coast. During that time he tinkered with fixing various things, had it painted, and completely rebuilt the engine. He kept the most meticulous records I have ever seen. Unfortunately, he worked out of the country for much of the time and just never really got a chance to finish it. After the engine was rebuilt, he got it running for a short time, and then couldn't get it running again.
The seller was nice enough to let me do a thorough inspection of the car, and even let me remove the screws that hold the lower part of the rocker covers on, to take a look at the longs. The car is very clean. Anyhow, I got it home, got the new engine running - a newly built 1911 with all of the bells and whistles - The engine not running turned out to be a simple electrical issue (rotor was not clicked in correctly). I then took the engine out. I want to take the car back to 100% original (or close), and also wanted the engine out while I inspected it for rust, etc. I am getting ready to sell the brand new 1911 engine, if your looking for a good one.
I took the car to Scotty's for two weeks and he fixed a very small amount of rust around the jack posts, and treated the inside of the longs. Scotty does amazing work, and I couldn't be happier with it. Now it is completely rust free. I have a '72 1.7L engine with injection for the car. We recently disassembled the engine at Black Forest Racing, and John, my son, and I are going to rebuild it to original specs.
Anyhow, as I have gone over the car, I have come to realize that it is probably a better car than my blue one. No accidents, no rust, and very clean in nearly every detail.
My plan is to rebuild the engine and repaint the car (it has some nicks, scratches, etc. and was painted over twice) this winter, and drive it to the Hershey Swap Meet in April. Wish me luck.
I will post the progress here.
Attached image(s)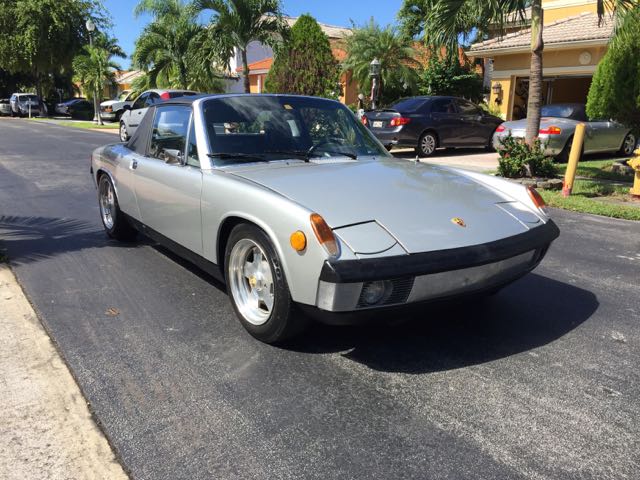
Posted by: mepstein Dec 18 2014, 05:28 PM
I think that's a great plan. You can always dig into the blue one later but having a car that can be back up and ruining in 6 month is very attractive.
Posted by: stevegm Dec 18 2014, 07:01 PM
Here's my to do list to give myself some accountability to get her back on the road quickly:
DONE:
1. Minor rust repair - Done - Scotty (Kahiko Customs and Restoration) - http://kahikocustoms.com/
2. New wheels - Pedrinnis - Brad at 914 Limited - http://914ltd.com/
3. New seat upholstery - Burgundy-red (#47) Plaid - 914rubber's Group Buy - http://www.914world.com/bbs2/index.php?showtopic=244388
TO DO:
4. Restore wheels - considering painting the Pedrinnis red to match the plaid seats. Or maybe not.
5. New tires - still figuring out what size/brand
6. New Windshield chrome - always collecting/looking for clean chrome
7. New sail panel chrome - dealer has these I think
8. Rebuild '72 engine for car - working - Black Forest Racing - http://blackforestracing.com/
9. Original muffler - still looking
10. Sand car down and have it painted - procrastinating
11. New rocker covers - need to order
12. New carpet - need to determine what type/color it had originally
13. Play with the hood - the PO ran very large speaker wires from the interior, by the gas tank, and over the bulk head in the front trunk. This pushed the right side of the hood up a bit when it was closed, and caused it to go wop a little. Still playing with it to get it to lay down correctly.
14. Have seats done with new plaid upholstery
15. Sell newly rebuilt 1911 engine to keep wife happy.
COA - need to order
Posted by: bcheney Dec 18 2014, 08:01 PM
What a cool story and plan. Maintain momentum and have a blast with it!
Posted by: stevegm Dec 25 2014, 05:34 PM
I removed the windshield chrome today. We will start sanding the car down for paint tomorrow.
Posted by: type47 Dec 27 2014, 07:43 AM
'splain you engine plans again ... you took out a bells and whistles 1911 engine out to rebuild it?
Posted by: stevegm Dec 27 2014, 08:49 AM

'splain you engine plans again ... you took out a bells and whistles 1911 engine out to rebuild it?
No. We took the engine out for two reasons:
1. To do a full inspection for rust, etc. you really need to take the engine out. For example, sometimes the suspension consoles literally crack. To fully inspect for that you really need the engine removed.
2. The PO had cleaned out the hell hole (which is in great condition). But, he used POR-15 when he was done. I am learning that POR-15 isn't what it is cracked up to be. In fact, in the trunk, there was surface rust under the POR-15 he applied. Fortunately, it wasn't bad. Anyhow, to remove the POR-15 from the hell hole and do it right, we needed the engine out.
The engine that came with the car is a newly rebuilt 1911, all of the bells and whistles. But, I want to take the car back to original. I happen to have a '72 engine that was complete with injection. So, I am rebuilding that engine to factory specs (just got the NOS pistons last week). It also gives me a nice project to do with my son who wants to rebuild an engine for the first time. I am going to list the 1911 engine for sale on 914world in a couple weeks.
Posted by: type47 Dec 27 2014, 01:24 PM
... It also gives me a nice project to do with my son who wants to rebuild an engine...
good enough reason right there.

Posted by: stevegm Dec 27 2014, 02:03 PM
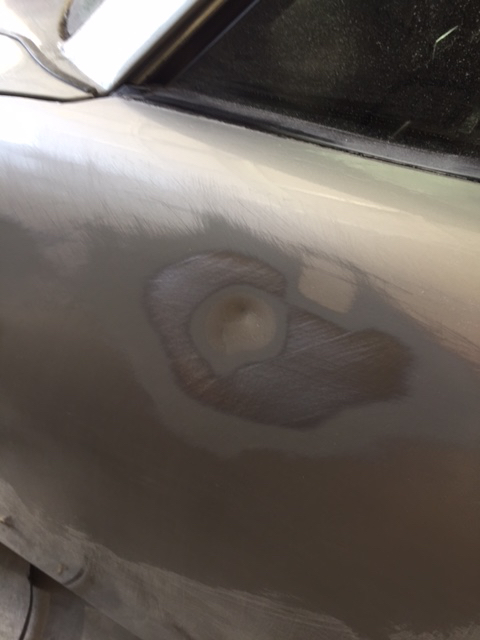
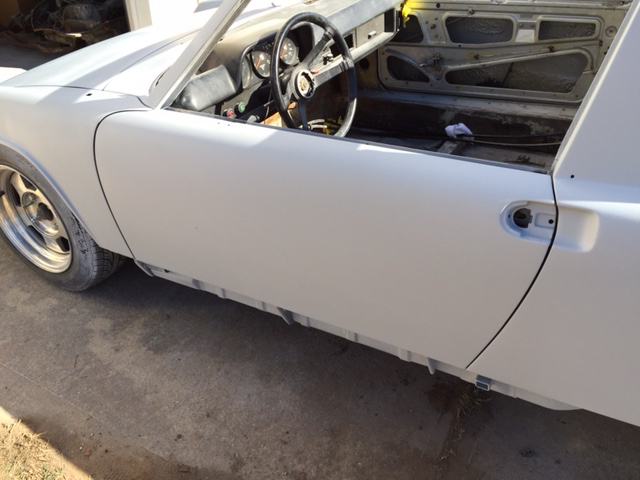
Interesting development. Isn't that a single layer of paint, then primer, then bare metal?
The PO had this car painted to a custom silver color (he spent $5,000). Then it got nicked up and a small motorcycle fell on the door, etc. Since the PO didn't have the paint code, we need to paint the whole car (and we want to go original color). And when we worked on it at Scotty's we concluded they had painted over the original paint. But, it doesn't look like it here. This looks like bare metal, primer, and then paint, right? What do you think?
Attached image(s)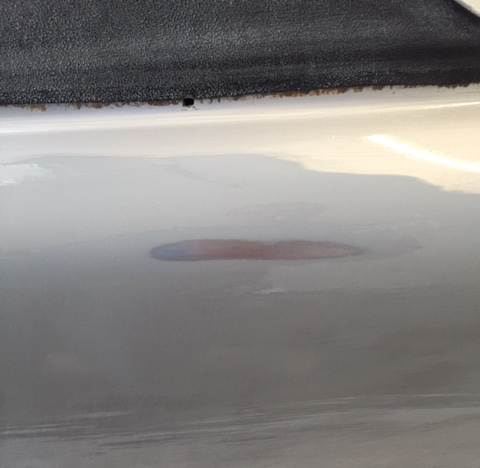
Posted by: stevegm Dec 27 2014, 06:30 PM
Although there were no signs of rust, I wanted to remove the sail panel vinyl anyway. Just to be sure. Did the driver's side today. The glue under there was a PITA to get off. But, it was nice to see the original color under there. I think there was a debate in another thread as to whether the factory painted the sail panel under the vinyl, or left it primed. Mine was painted. Or, maybe this vinyl was added by a PO. I will have to check and see if the sail vinyl was available in '72.
Posted by: stevegm Dec 27 2014, 06:44 PM
I guess the appearance group option was available in '72, which included vinyl sail panels. I wonder if a COA would show whether the car was ordered with the appearance group option.
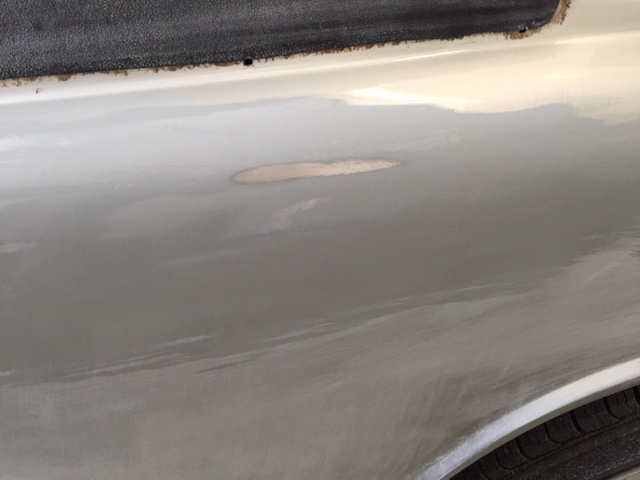
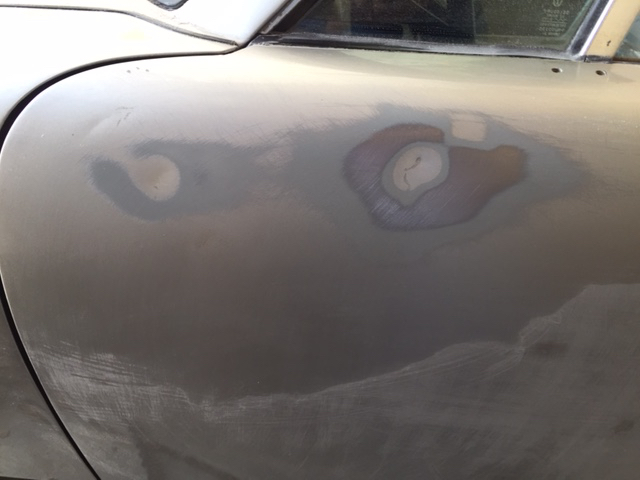
Posted by: stevegm Dec 28 2014, 01:59 PM
Removed the targa trim. The piece of chrome that goes across the back of the targa bar (horizontal) is a PITA to get off. Also removed the passenger sail panel vinyl, and sanded the glue off. And then block sanded the trunk lid. It was pretty straight. No surprises.
A panel a day will have it on the road in May. Wait, I mean April. Anyone else building a car to take to the Hershey Swap Meet?
Attached image(s)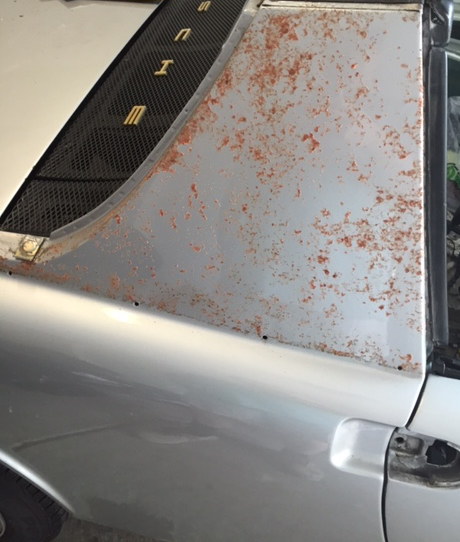
Posted by: mepstein Dec 28 2014, 02:27 PM
Removed the targa trim. The piece of chrome that goes across the back of the targa bar (horizontal) is a PITA to get off. Also removed the passenger sail panel vinyl. And then block sanded the trunk lid. It was pretty straight. No surprises.
A panel a day will have it on the road in May. Wait, I mean April. Anyone else building a car to take to the Hershey Swap Meet?
Yes. The year is still tbd.
Posted by: stevegm Dec 29 2014, 02:11 PM
Got the passenger door and quarter panel block sanded, and went back and finished the driver's door and quarter panel. Started the hood. I haven't sanded on a car since I repainted my 912 the summer before I went to law school. I can report that it hasn't gotten any easier.
Posted by: barebrad Dec 29 2014, 02:45 PM
Got the passenger door and quarter panel block sanded, and went back and finished the driver's door and quarter panel. Started the hood. I haven't sanded on a car since I repainted my 912 the summer before I went to law school. I can report that it hasn't gotten any easier.
Since then, they have invented these air operated tools that make sanding a little easier!

Posted by: stevegm Dec 29 2014, 05:05 PM
Got the passenger door and quarter panel block sanded, and went back and finished the driver's door and quarter panel. Started the hood. I haven't sanded on a car since I repainted my 912 the summer before I went to law school. I can report that it hasn't gotten any easier.
Since then, they have invented these air operated tools that make sanding a little easier!
I can hardly spell air sander. Much less operate one like a pro. It has been a long time since I did any body work. This car seems to have been stripped and painted very well by the PO. It is very straight. We are only painting it to take it back to original color and to address a few minor dents, etc. I don't want to mess it up with an air sander. I am block sanding it by hand. Then sending it to be primed, sanded some more, and painted by someone that actually knows what they are doing.
Posted by: stevegm Jan 1 2015, 09:00 AM
I took the driver's side window and vent window out. I also got the fuzzy strip channel out. I still need to do the passenger side. I hate to have to put these doors back together. I know it will be a pain. But, it will make for a cleaner paint job not to have to tape off the vent window lower rubber strip and the fuzzy strip channel.
Posted by: stevegm Jan 3 2015, 03:10 PM
In prepping the cowl area for primer we found a little surface rust in the windshield channel. So, today we took the windshield out to make sure that it is removed. Rust in that channel can wreak havoc on a car. Luckily we caught it in time. It is all surface rust.
We are going to Ospho, prime, and paint the inside floor pans this coming week, before it goes to the painter for the exterior. Fortunately, the pans are in great shape. We want to keep them that way.
Posted by: stevegm Jan 3 2015, 03:42 PM
What a difference it is today from working on these cars in the 1980s, when all we had was the Porsche shop manuals and a Haynes manual. 914world is awesome.
After we pulled the windshield today we noticed that the rubber seal between the windshield and the dash was cracked. I started to pull it off a little and it cracked more. I got worried that I might have to pull the dash to get it out (it seems that when you start taking a few things apart on these cars, it never stops :-). I searched it and quickly found this - http://www.914world.com/bbs2/index.php?showtopic=219761
Thanks 914world.
Posted by: stevegm Jan 5 2015, 02:43 PM
I pulled the taillight housings out today. Note to newbies - please don't silicon the light housings in. It makes it very difficult to get them out without breaking them. I also pulled the cracked seal between the windshield and the dash, as well as the engine lid grill. For the rest of the week we are going to work on the pans (inside) and clean up the front truck rubber channel - Ospho, prime, paint. Then the car should be pretty much ready for the painter.
Here is our planned schedule:
January - Finish paint - car, rocker covers, engine grills, and two dash vents.
February - Reassemble interior, rubber, lights, etc.
March - Build/install new engine.
April - Hershey Spring Fling & Swap Meet
Posted by: stevegm Jan 9 2015, 08:46 AM
Cold weather. Ugg. We missed the weather window. Now it looks like it will be below 50 degrees for weeks (well below 50 most of the time). Can't really put the 2k primer on in this weather (I am told below 55 degrees is a no no). So everything is on hold for a while.
Anyone have any experience priming and painting in cold weather? Bad idea I assume? Do professional painters just keep their shops warm so the metal doesn't get cold?
Posted by: KELTY360 Jan 9 2015, 04:58 PM
Cold weather. Ugg. We missed the weather window. Now it looks like it will be below 50 degrees for weeks (well below 50 most of the time). Can't really put the 2k primer on in this weather (I am told below 55 degrees is a no no). So everything is on hold for a while.
Anyone have any experience priming and painting in cold weather? Bad idea I assume? Do professional painters just keep their shops warm so the metal doesn't get cold?
I think most professional painters spend these months on a beach in the tropics living off the $$$$ made painting 914s the rest of the year.

Just kidding.....

Posted by: stevegm Jan 9 2015, 05:21 PM
I think we are back in business. A friend of a friend has a climate-controlled booth.
Posted by: barebrad Jan 10 2015, 10:34 AM
Better ask what your friend charges before you put the car in the both. Price always goes up if you ask after it goes in. 
But I'm just jealous you can keep working...
Posted by: stevegm Jan 14 2015, 02:44 PM
Better ask what your friend charges before you put the car in the both. Price always goes up if you ask after it goes in.
But I'm just jealous you can keep working...
I know, right. Still working out the details.
Posted by: stevegm Jan 14 2015, 02:48 PM
We are still plugging away. Still lining up the final paint. It looks like the weather will be nice enough this weekend to spray the 2k primer. Then back to block sanding.
Pulled the rear window out. A PO had glued it in. Got the two small dings in the door removed by a paintless dent repair guy. He did a great job. All of the glass, rubber, trim, etc., is off the car. So we are ready for final prep.
Still hoping to take her to the Hershey Spring Fling - http://www.914world.com/bbs2/index.php?showtopic=248115
Posted by: stevegm Jan 25 2015, 08:37 PM
We got the 2k primer on the car last weekend. I just let it sit this past week to make sure it fully cured. I started long blocking the hood out today. It looks great. I'll move on to the doors, quarters, and trunk lid this week.
Posted by: stevegm Jan 27 2015, 12:23 PM
I got the rear trunk lid block sanded out. It looks pretty good. Come to think of it, I think long block sanding was the step I skipped when I did my 912 in the early 90s. I didn't know any better. And there was no internet. It really makes a difference. I am happy with how it is coming out so far.
Posted by: CptTripps Jan 27 2015, 02:07 PM
Keep cranking!
We need to see some pics though!!!
Posted by: stevegm Jan 31 2015, 06:48 PM
I spent the afternoon block sanding. It is getting close to ready for the paint booth. I'll post some pictures soon.
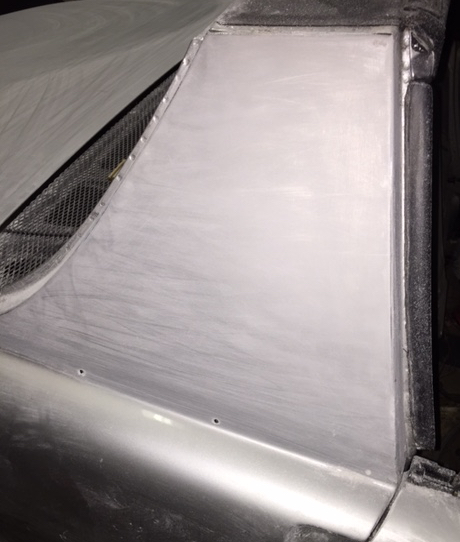
Posted by: stevegm Feb 8 2015, 10:55 AM
It's ready for paint. Primed, block sanded, primed, sanded. A lot of work. But it looks great. I will post some pictures later.
PS: I'm tempted to paint it tangerine. But we'll stick to the original silver.
Posted by: stevegm Feb 8 2015, 06:33 PM
Some pictures.
Attached image(s)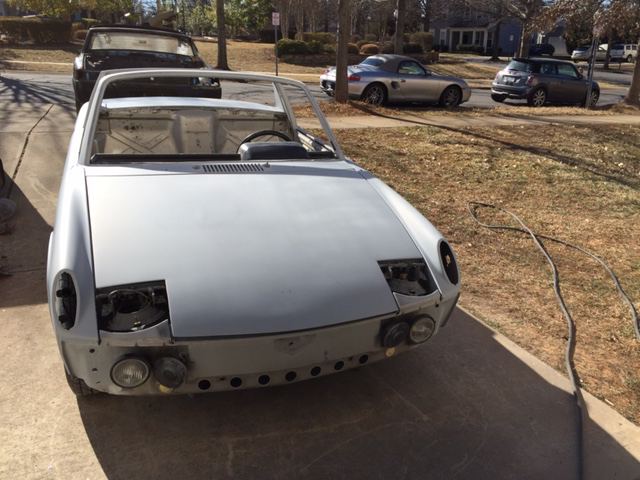

Posted by: stevegm Feb 27 2015, 03:09 PM
We delivered her to the painter today. Now we just wait (and order parts). We are having the Pedrinis painted and the plaid seats done in the next couple of weeks.
Attached image(s)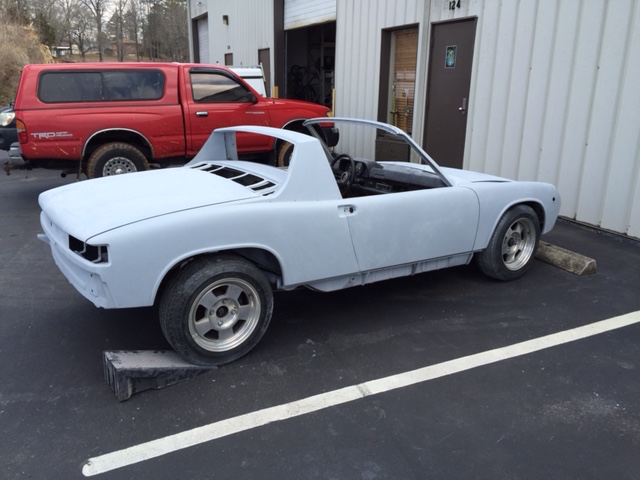
Posted by: stevegm Mar 2 2015, 12:01 PM
I stopped in to check on the painter today. With all the salt/mag on the roads (whihc creates clouds of corrosive stuff in the air) he washed the car yesterday to get it ready to start today. Sounds like a good idea.
But, since the car has no rubber, glass, etc. there was a 1/2 to 1" of water in the back of the front floor pans, and 1 1/2 to 2" inches in the rear trunk. Been sitting there since yesterday afternoon. I about had a kanipchen fit. I got it all sprayed and dried out. Then I got to thinking - back in the day we wet sanded the cars to death before painting them. I am sure we got water in them.
It isn't ideal. But, normal? Anything I should do special to get it more dried out? Or am I just being unnecessarily obsessive? The car has original pans, and original rear trunk pan.
Posted by: JRust Mar 2 2015, 01:12 PM
Just dried out should be fine. I'd be a little worried in the center tunnel & make sure that was all dried out. I would have been pissed to find standing water in my car to. Unless he literally did it a few minutes before you arrived  . If it sat for a day I would lay into him some
  . Are you spraying the inside (floorpans/firewall)? How about the trunks?
Posted by: 914Next Mar 2 2015, 01:12 PM
I would have been beyond irate!!! What did he say?
Posted by: stevegm Mar 2 2015, 02:15 PM
Just dried out should be fine. I'd be a little worried in the center tunnel & make sure that was all dried out. I would have been pissed to find standing water in my car to. Unless he literally did it a few minutes before you arrived
. If it sat for a day I would lay into him some . Are you spraying the inside (floorpans/firewall)? How about the trunks?None in the center tunnel. Just about 1/2 to 1" in the back of the front pan (right in front of the brace running from side to side in the center of the floor), and about 2" in the back of the rear trunk. Ugg. I'm not spraying pans or trunks right now. We'll come back to those. I think he got the message. My wife was actually more pissed than me, which is cool. When I told her she said - "We just spent all this time making sure it was rust-free, and he did what?"
Posted by: Larmo63 Mar 2 2015, 02:37 PM
Nice project and plan, Steve. Can't wait to see all of the red pop with the silver.
BTW, on another note, has the first issue been published of "Fourteener?"
Posted by: stevegm Mar 2 2015, 02:40 PM
Nice project and plan, Steve. Can't wait to see all of the red pop with the silver.
BTW, on another note, has the first issue been published of "Fourteener?"
We are working on it now. I had something come up that pushed all of my projects behind about 2 weeks. And we want to get this first issue right. The website will be up this week, and the magazine out in a couple weeks. We will email everyone when it is ready to launch.
Posted by: Larmo63 Mar 2 2015, 02:42 PM

I need another Porsche magazine, I only get Panorama, Excellence, and the local OC region PCA magazine…..!
Posted by: stevegm Mar 2 2015, 03:00 PM
I need another Porsche magazine, I only get Panorama, Excellence, and the local OC region PCA magazine…..!
I think you will like what we have put together. We just want to get that first issue right. It sets the tone, so to speak.
Posted by: stevegm Mar 4 2015, 03:06 PM
She is silver now. Just waiting to have a little of the details done, and then it will be time to bring her home. Photos soon.
Posted by: stevegm Mar 7 2015, 09:07 AM
Picking her up this morning.
Posted by: stevegm Apr 26 2015, 06:27 PM
Back on the silver car. I decided I have to finish one before before I can start on another. Finishing up the floors. We should be ready to paint them next weekend.
Scratched the fender. Very minor. Just an abrasion scratch with sandpaper too close. Tell me it will buff out (it is basecoat/clear coat, after all). Please. Tell me it was bound to happen eventually. Tell me it is just a daily driver.
Posted by: stevegm Apr 28 2015, 04:08 PM
Wow. I like base/clear. A little 2000 grit and a little buffing and the tiny scratch can't be found. Very nice.
Posted by: stevegm May 8 2015, 05:06 PM
I got the hood, trunk lid and engine lid back from wet sanding and buffing, got them installed, and adjusted. Time to paint the inside pans, build the engine, and put it back together. We may make Parade.
Attached image(s)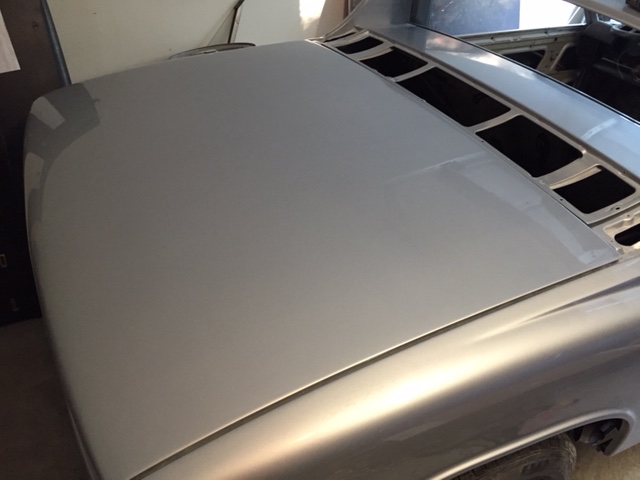
Posted by: stevegm Jun 8 2015, 04:53 PM
I decided to go with a Web cam and gear (stock grind), and oil pump from European Motorworks. The cam arrived today. When John (BFR) gets back from the Indianapolis Vintage invitational races, we will build the engine.
Posted by: Andyrew Jun 8 2015, 05:03 PM
Paint looks great! Congrats!
Posted by: Big Len Jun 8 2015, 05:07 PM
Looks great.
Posted by: stevegm Jun 9 2015, 06:16 AM
Paint looks great! Congrats!
Thanks. I think it turned out pretty good.
Posted by: stevegm Jun 9 2015, 01:57 PM
I finally finished stripping the floors. Osphoed them yesterday. Painting them tomorrow, along with the trunks. Then, finally, I can begin putting the car back together.
Posted by: stevegm Jun 11 2015, 08:07 AM
We painted the trunks and floors. I think they came out pretty good. I can finally start putting it back together. Oil pump should be here today. Web cam arrived a few days ago (lifters on the way), but, I forgot to order a new cam gear. So that is on the way now. I think we can be driving it by August 11th. Whoopee.
Attached image(s)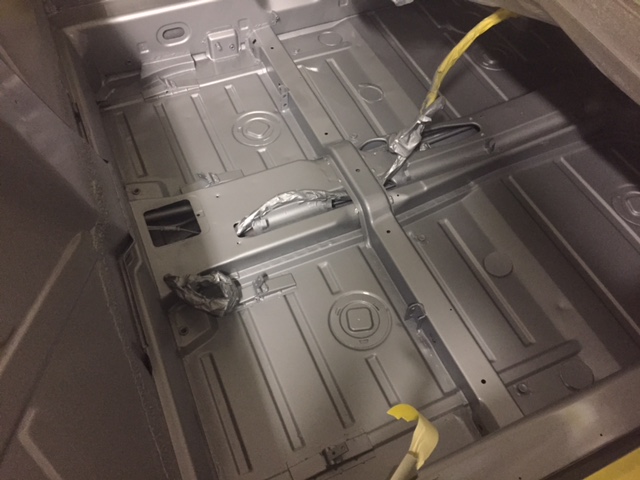
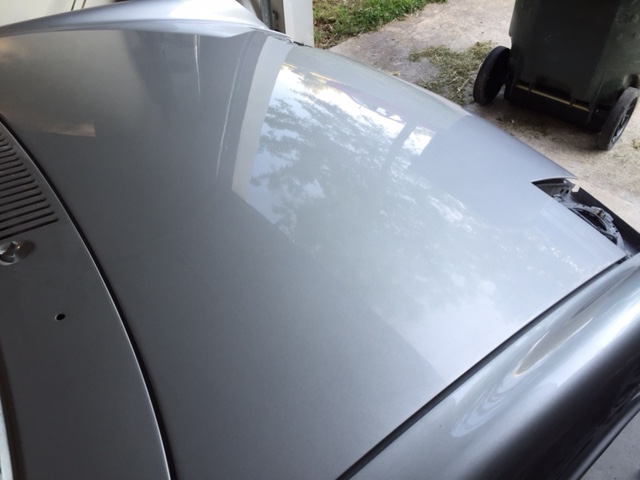
Posted by: stevegm Jun 12 2015, 03:05 PM
Some more pictures.
Attached image(s)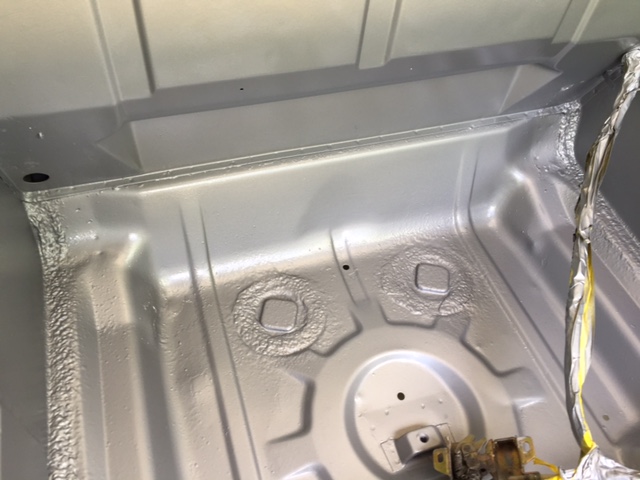
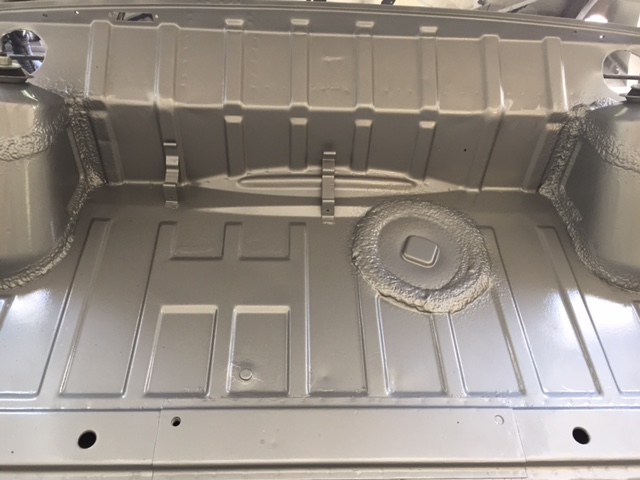
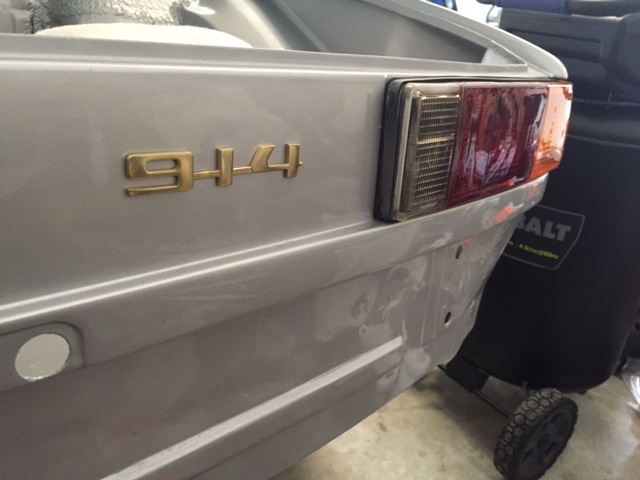
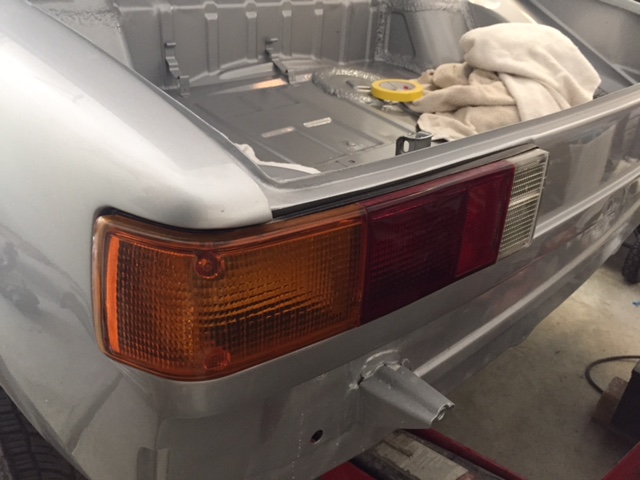
Posted by: stevegm Jun 12 2015, 03:07 PM
I am so glad to finally start to put this thing back together. Today I put the rear taillights in, and 94 emblem and hood crest on. That was the fun stuff. Now it is time to do the rest.
Attached image(s)
Posted by: Cairo94507 Jun 12 2015, 03:20 PM
Silver always look nice. 
Powered by Invision Power Board (http://www.invisionboard.com)
© Invision Power Services (http://www.invisionpower.com)