Printable Version of Topic
Click here to view this topic in its original format
914World.com _ 914World Garage _ here we go!
Posted by: BK911 Mar 28 2015, 04:21 PM
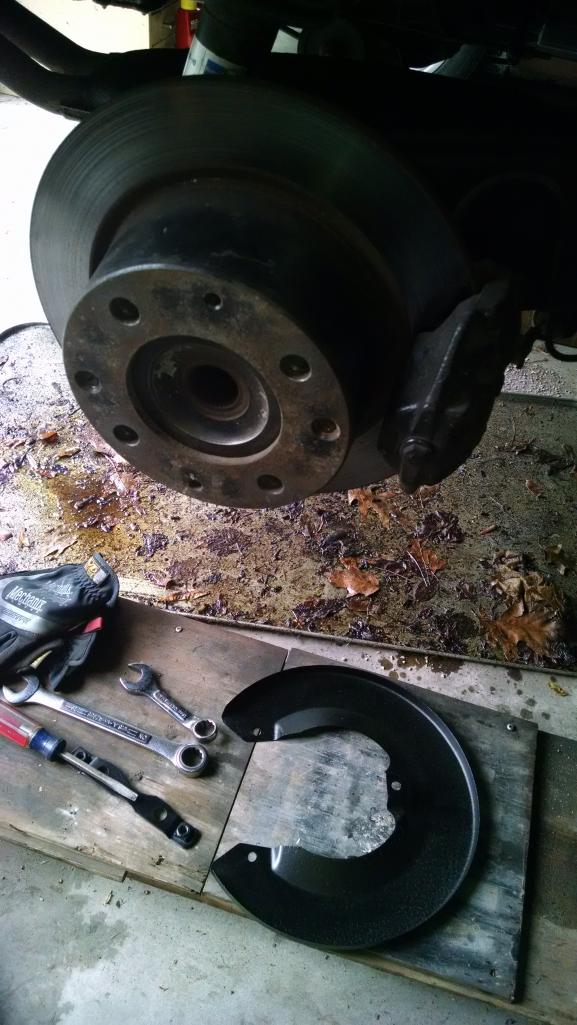
Got the drivers side torn down with help from my beautiful assistant.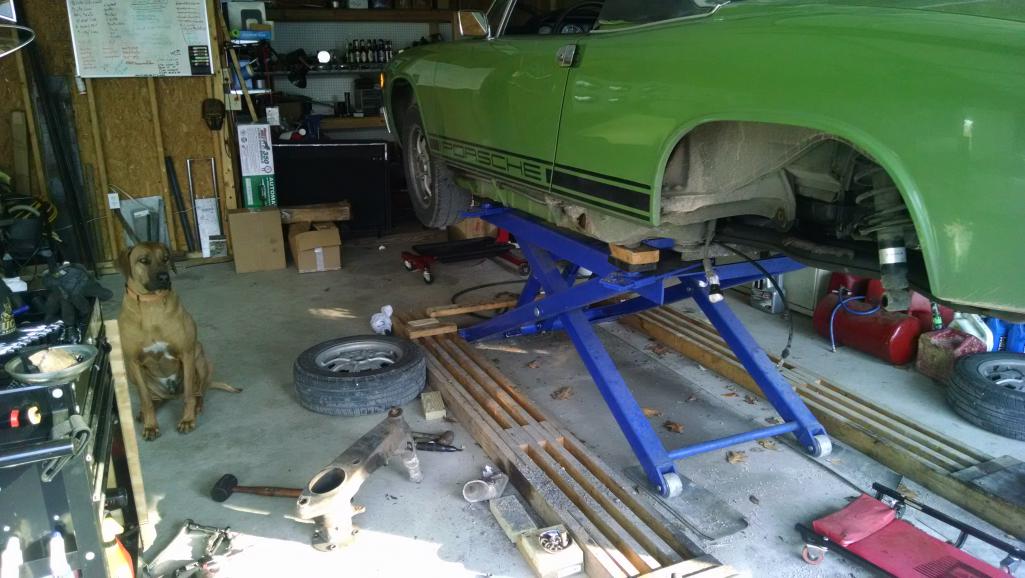
Posted by: BK911 Mar 28 2015, 04:24 PM
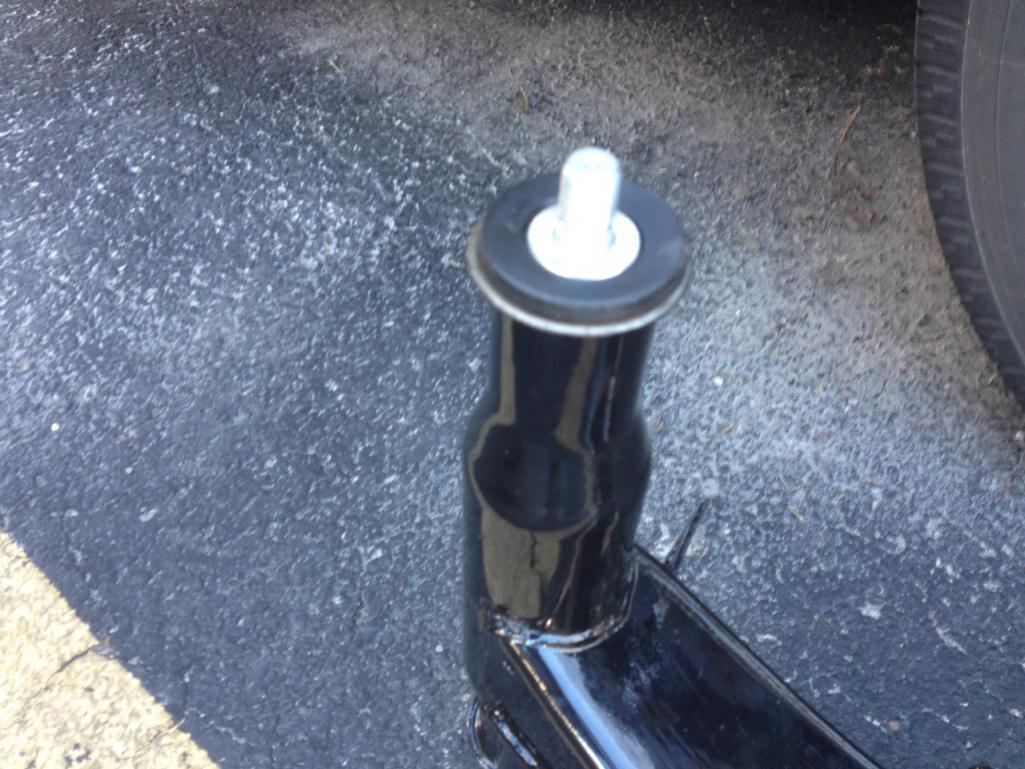
Had a cluck on the drivers side. Could this be it?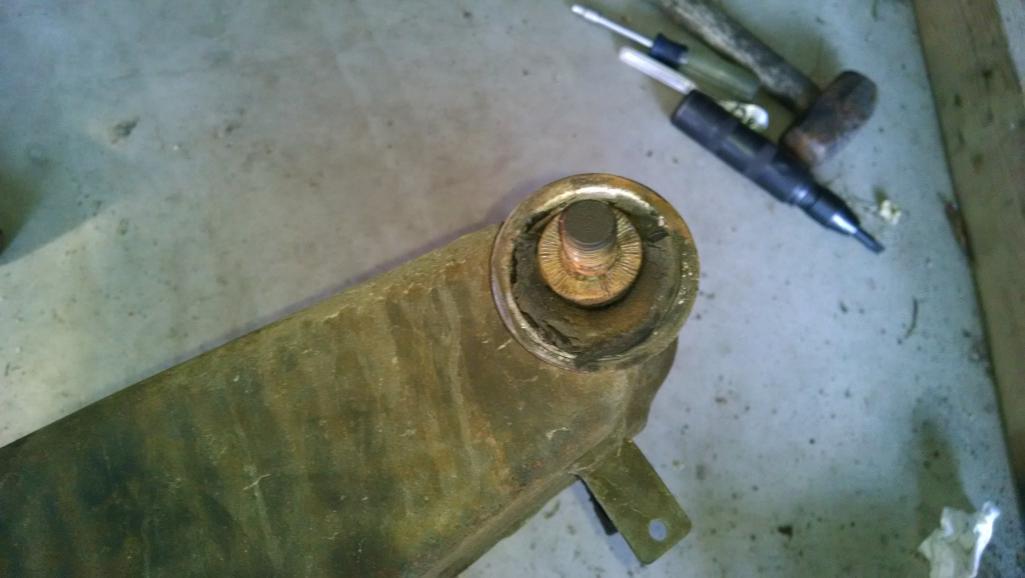
The trailing arm looks OK. I will replace wheel bearing while I am this close. Should I blast and paint the arm? Or wire brush and paint?
Posted by: BK911 Mar 28 2015, 04:27 PM
Also found this under the rocker: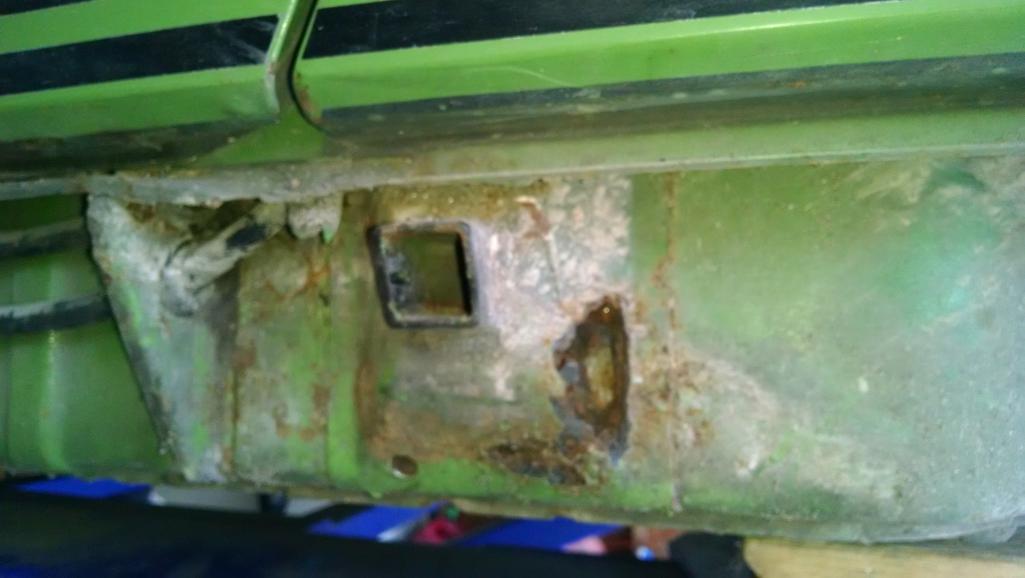
Just on the jack post, not underneath. Thinking of just blasting and por 15 ing. No welding. Whatchu think?
Posted by: SirAndy Mar 28 2015, 10:43 PM

POR15 does not work as advertised ...

I'd replace it with good metal.

Posted by: Larmo63 Mar 28 2015, 11:23 PM
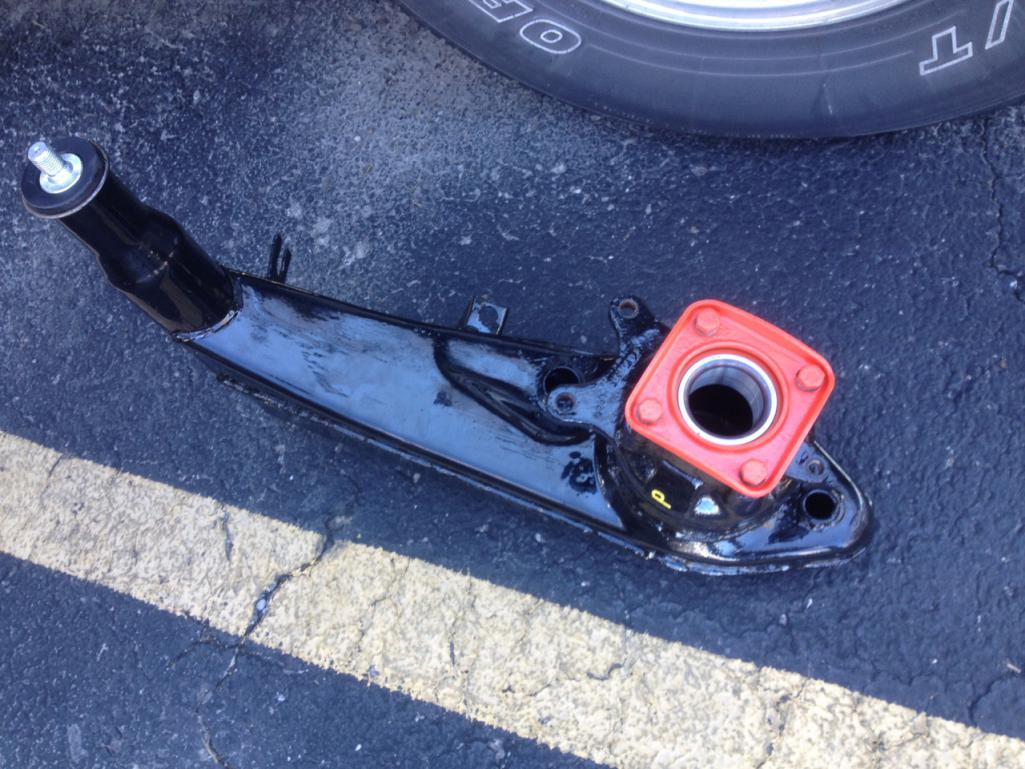
Blast and powder coat the trailing arms. Make sure no PC gets into bearing areas.
My $.02
Posted by: BK911 Mar 29 2015, 02:53 PM
What do you guys think about leaving the old bearings in while blasting and powder coating? I removed the stub axles and bearing retainer plate. Bushings were AFU and metal to metal with the rod and trailing arm!! Glad I decided to do this.
Posted by: Larmo63 Mar 29 2015, 02:55 PM
I didn't leave mine in, but it might work.
Posted by: BK911 Mar 30 2015, 07:08 AM
Tore down the front yesterday.
All ready to blast and powder coat.
One local shop quoted ~$500 to blast and powder coat front and rear pieces.
$80 per hour for blasting!!
This seems high to me.
Any opinions?
Posted by: bdstone914 Mar 30 2015, 08:12 AM
What do you guys think about leaving the old bearings in while blasting and powder coating? I removed the stub axles and bearing retainer plate. Bushings were AFU and metal to metal with the rod and trailing arm!! Glad I decided to do this.
Remove the old rubber bushings before powder coating. The heat will turn them into a bubbly mess. I have powder coated the inside bearing area when using poly graphite bushings as some fit too loose. They holes get distorted from cornering.
Posted by: Larmo63 Mar 30 2015, 08:17 AM
My powder coating was $65 for the front A arms.
$500 is crazy. Powdercaot guys are getting greedy with their prices lately, I'd look around. My guy even does ceramic coatings really inexpensively.
Posted by: bdstone914 Mar 30 2015, 08:18 AM
Tore down the front yesterday.
All ready to blast and powder coat.
One local shop quoted ~$500 to blast and powder coat front and rear pieces.
$80 per hour for blasting!!
This seems high to me.
Any opinions?
Prices seem to vary greatly on blasting and powder coating costs. I get large parts done for about $50 each. Plug the ends of the A arms before blasting then remove the plugs at the front end to clean inside before powder coating. You don't want grease dripping out when they get baked. The dirt and rust accumulates around splined front.
Posted by: Harpo Mar 30 2015, 08:34 AM
$500 is ridiculous. I paid about $150
David
Posted by: mepstein Mar 30 2015, 10:14 AM
$500 is ridiculous. I paid about $150
David
Mine charges $100-150 for that amount of parts. Shop around for a commercial please in an industrial center that does a lot of work. Not a small specialty place.
Posted by: BK911 Mar 31 2015, 09:35 AM
Front and rear, 23 pieces total, found a place for $100. 
Just dropped them off, should have them Friday.
Posted by: malcolm2 Mar 31 2015, 09:54 AM
POR15 does not work as advertised ...
Oh contraire.... What you might have thought you said was, "people don't follow the directions when using POR-15." Which is absolutely true.
3 or 4 steps: 1a. if needed wire brush the hell out of it. 1b. use marine clean, several times at your favorite strength mixture. 2. use metal ready 'til it stops bubbling, rinse thoroughly, dry thoroughly then finally you 3. paint. if 2 coats then hit #2 while #1 is tacky. If #1 drys you have to ruff it up. If the part is going to see sunshine, then you must top coat POR. It does not like UV, gets ashy, but still works.
Todays society is MICROWAVE. Everyone wants it NOW. Think CROCK-POT and the world will be a better place. and 90% of painting is the prep. My 2 cents and I don't work for POR.
Posted by: SirAndy Mar 31 2015, 09:58 AM
3 or 4 steps: 1a. if needed wire brush the hell out of it. 1b. use marine clean, several times at your favorite strength mixture. 2. use metal ready 'til it stops bubbling, rinse thoroughly, dry thoroughly then finally you 3. paint. if 2 coats then hit #2 while #1 is tacky. If #1 drys you have to ruff it up. If the part is going to see sunshine, then you must top coat POR. It does not like UV, gets ashy, but still works.
Todays society is MICROWAVE. Everyone wants it NOW. Think CROCK-POT and the world will be a better place. and 90% of painting is the prep. My 2 cents and I don't work for POR.
Nice ass-sumption you're making there

Still didn't work as advertised ...

Posted by: BK911 Apr 13 2015, 09:07 AM
That looks nice Malcom.
I ended up powder coating mainly because it only cost $100 for the blasting and PC, and zero prep work from me!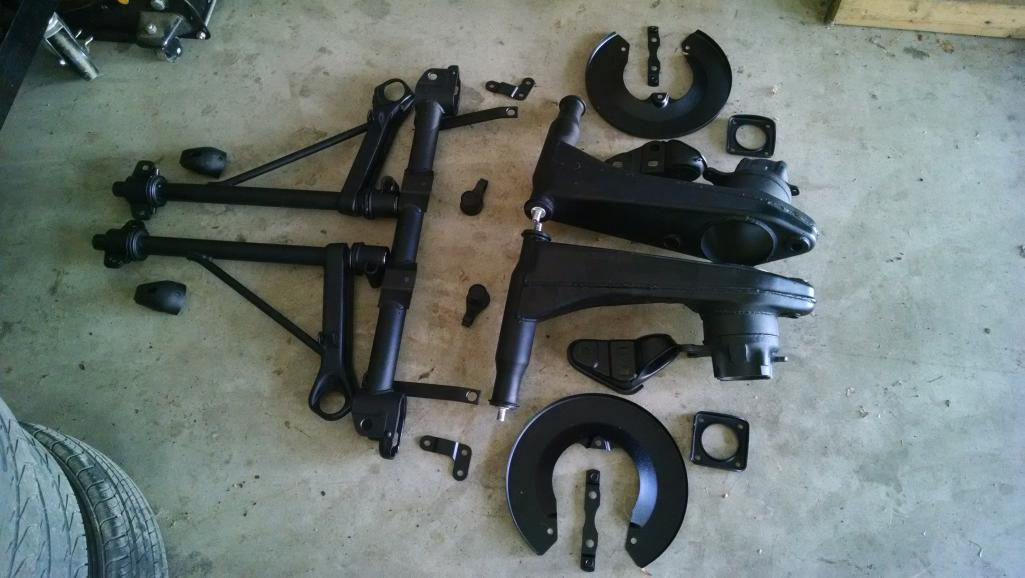
The nuts that hold on the rear trailing arms (#7), I think they are called locking pivot nuts or something? Pet calls them hex nuts, how helpful!
They have a little lip along the outer face.
Is this lip supposed to fit inside the bore of the link bearing? (#5)
One nut fit that way, the other three did not.
Also, the Haynes says replace them. Should I?
I cant find them yet.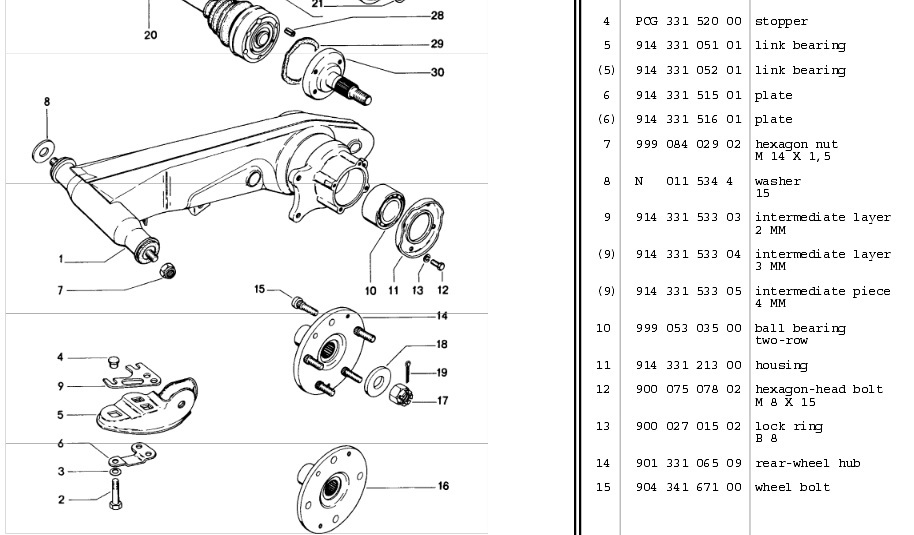
Edit: The PET shows a washer. Mine did not have one. That is why I was wondering if the lip is supposed to fit inside the bore.
Posted by: 76-914 Apr 13 2015, 09:14 AM
yes
I didn't replace them, either.
Posted by: Andyrew Apr 13 2015, 09:15 AM
That looks nice Malcom.
I ended up powder coating mainly because it only cost $100 for the blasting and PC, and zero prep work from me!
The nuts that hold on the rear trailing arms (#7), I think they are called locking pivot nuts or something? Pet calls them hex nuts, how helpful!
They have a little lip along the outer face.
Is this lip supposed to fit inside the bore of the link bearing? (#5)
One nut fit that way, the other three did not.
Also, the Haynes says replace them. Should I?
I cant find them yet.
Edit: The PET shows a washer. Mine did not have one. That is why I was wondering if the lip is supposed to fit inside the bore.
Be sure that the rubber part of the bushings do not touch the mounting points. You might need to shave off some rubber. The mounting points need to be attached only by the tube, so the rubber trailing arm is free to move without being hindered by the rubber. If you notice your trailing arm bolts are constantly loose, there's your answer...
Posted by: Mblizzard Apr 13 2015, 07:26 PM
Front and rear, 23 pieces total, found a place for $100.
Just dropped them off, should have them Friday.
Where was that! I need a few things done.
Posted by: BK911 Apr 14 2015, 05:53 AM
Where was that! I need a few things done.
Tennessee Metallizing just west of Oliver Springs.
I am dropping off more stuff maybe this weekend.
Anybody guess what this is? Not the dog!!!
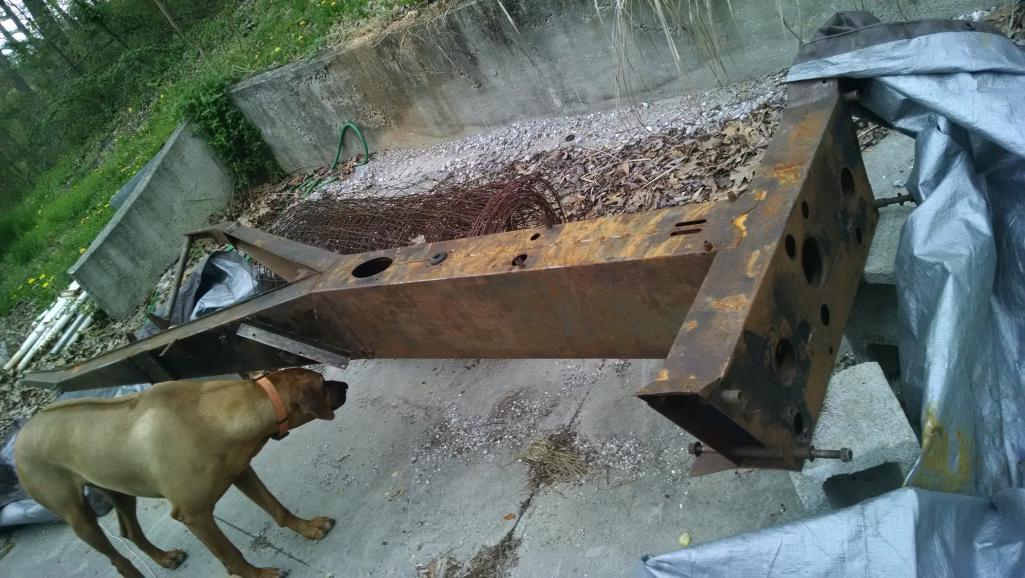
That frame is getting blasted and primered (PC oven not big enough), and all the suspension pieces are getting blasted and powder coated.
Posted by: mgp4591 Apr 14 2015, 05:59 AM
A really BIG Lotus frame? 
Posted by: BK911 Apr 14 2015, 06:20 AM
That was quick!
'69 Lotus Europa frame
Camera angle is deceptive.
The car is tiny, only ~1500#.
Posted by: BK911 Apr 18 2015, 04:18 PM
Fuch. 
Oh well, only 2 bolts per side.
Was getting ready to attach brake line and bleed brakes.
Coulda been worse! 
Powered by Invision Power Board (http://www.invisionboard.com)
© Invision Power Services (http://www.invisionpower.com)