Printable Version of Topic
Click here to view this topic in its original format
914World.com _ 914World Garage _ Taming this baby down
Posted by: Blue6 Apr 16 2015, 10:03 PM
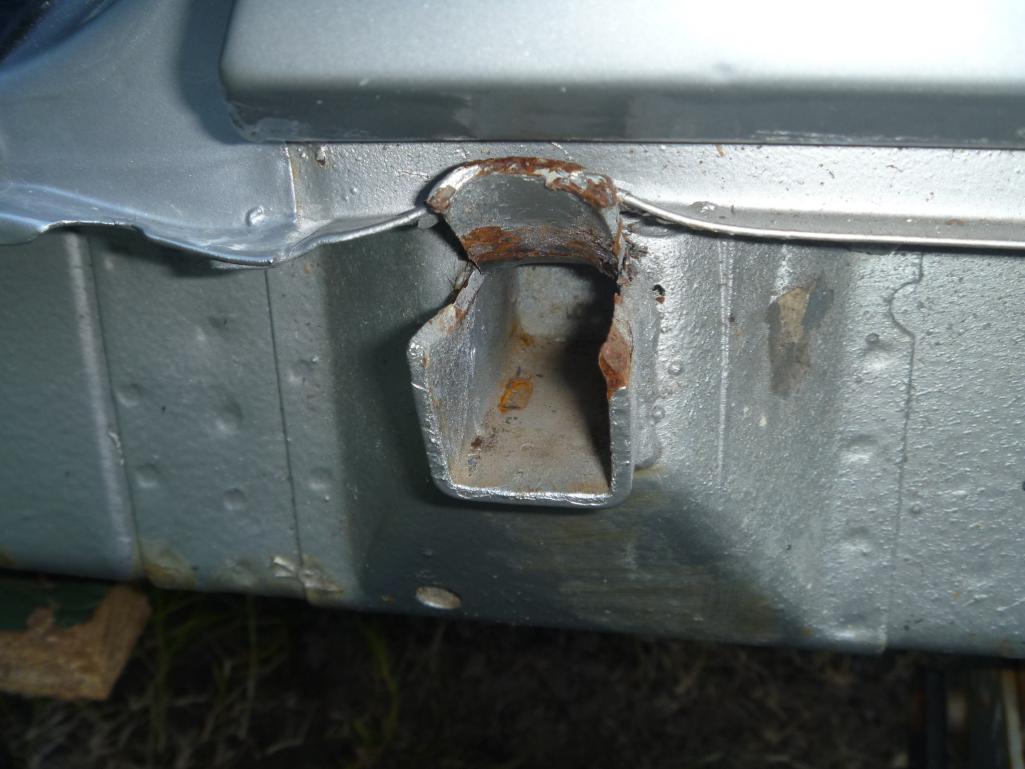
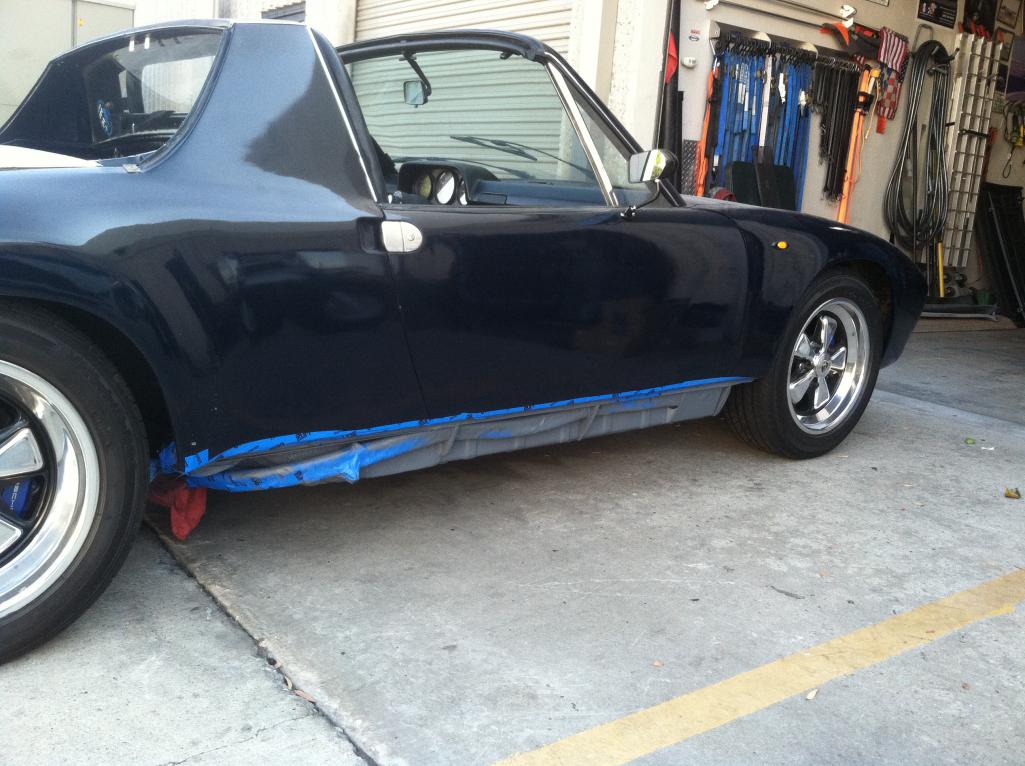
Finally got time to remove the rockers and inspect. Amazing, nothing but a little surface rust on an unpainted portion of the longs. Car was from San Fran area so I thought maybe, but another rust free Ca car. 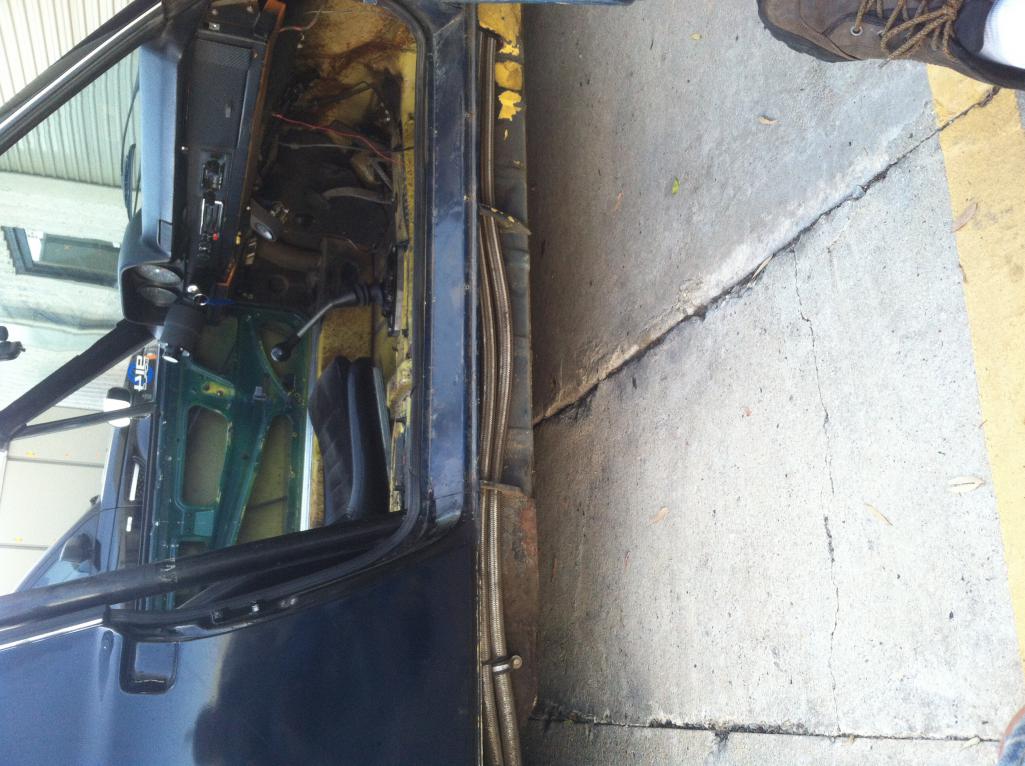
Posted by: mepstein Apr 17 2015, 05:11 AM
No jack point either so someone has been there before. Looks like there is a piece of welded metal under the clamp.
Posted by: rick 918-S Apr 17 2015, 06:40 AM
It should look like this.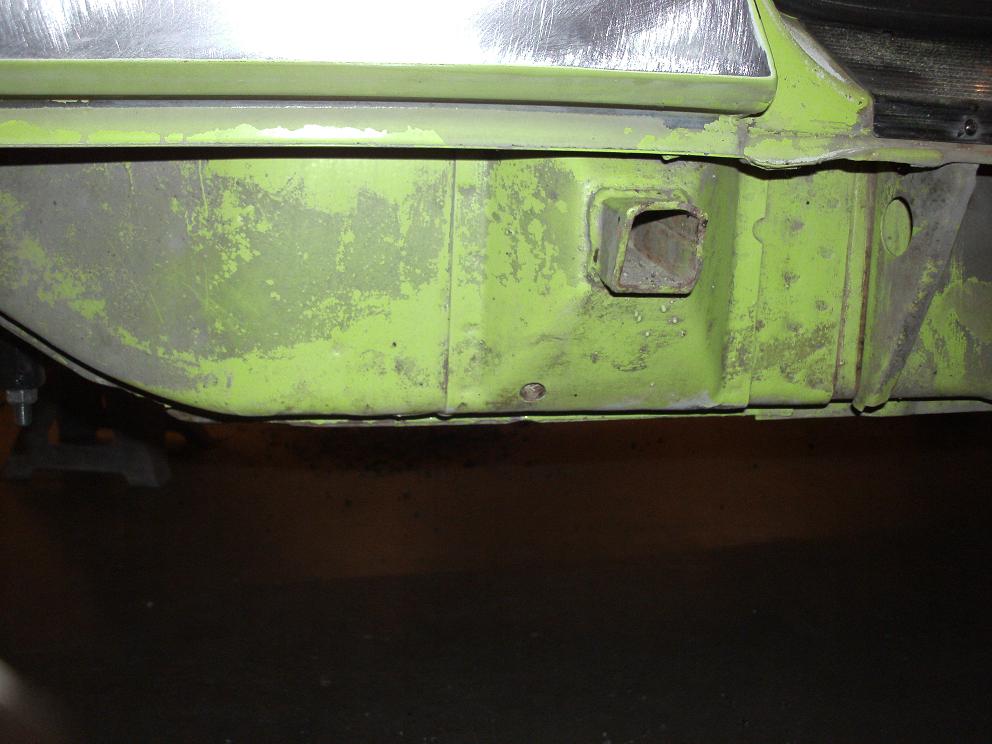
Posted by: Blue6 Apr 17 2015, 07:58 AM
Yep, the PO got rid of the jack points, and enlarged the holes through the braces in order to run the oil lines forward.
Posted by: boxsterfan Apr 17 2015, 03:51 PM
When I take my car down to bare metal, I plan on NOT having jackpoints. Never use them anyway and just an area for dirt and junk to get stuck up under the rockers.
Posted by: damesandhotrods Apr 17 2015, 04:33 PM
You’re forgetting that Frisco is physically a very small city, surrounded on three sides by salt water…
Posted by: Blue6 Apr 17 2015, 11:55 PM
No, that's why I was expecting rust ( at least coastal rust), but to be more accurate, the car was from Santa Cruz. All the same to us SoCal people. 
Posted by: Blue6 Dec 3 2016, 10:40 PM
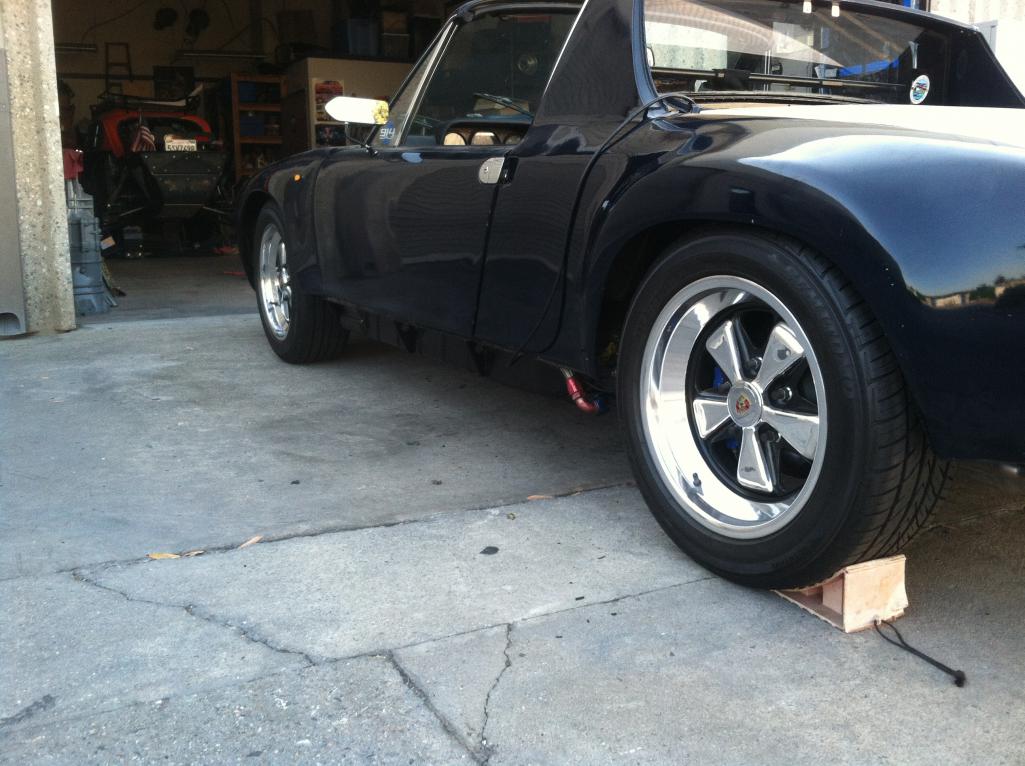
It has been a really long time, but finally got to installing the inner long kit. With the help of Rob (914_Teener), were getting it done. Truth be told, it's really Rob with the expertise and doing the work. But I am assisting(handing him tools etc)  ... Figured after cutting out the cage, this could restore some strength
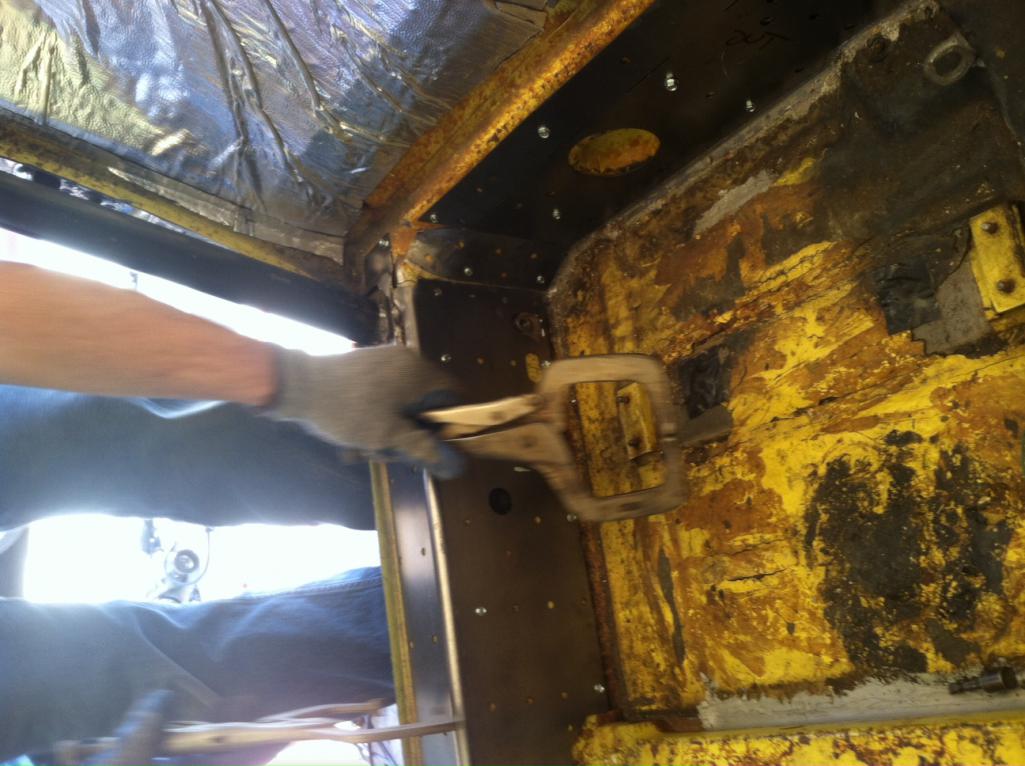
Posted by: speed metal army Dec 3 2016, 11:08 PM
I remember feeling like I was maybe wrecking my car while installing the long kit..
When the stinky smoke cleared, I had a much stiffer 914. Worth it! Much stiffer chassis.
Posted by: porschetub Dec 4 2016, 12:16 AM

When I take my car down to bare metal, I plan on NOT having jackpoints. Never use them anyway and just an area for dirt and junk to get stuck up under the rockers.
and you get a flat tyre........
Posted by: Rand Dec 4 2016, 12:19 AM
When I take my car down to bare metal, I plan on NOT having jackpoints. Never use them anyway and just an area for dirt and junk to get stuck up under the rockers.
and you get a flat tyre........
...and then you use a scissor jack at one of many appropriate jacking points like any other car.

Posted by: 76-914 Dec 4 2016, 08:54 AM
 I use the scissor jack that came with my Subaru donor car. It has a small gap in the middle that spans the flange on the bottom of the longs.
Posted by: boxsterfan Dec 4 2016, 11:44 PM
A small-ish hydraulic jack can be stored in the car easily. There's easy room in the rear trunk or can be stored behind passenger seat.
It's also cheaper to pay for AAA then it is for body work to repair the jack plate areas.
Attached image(s)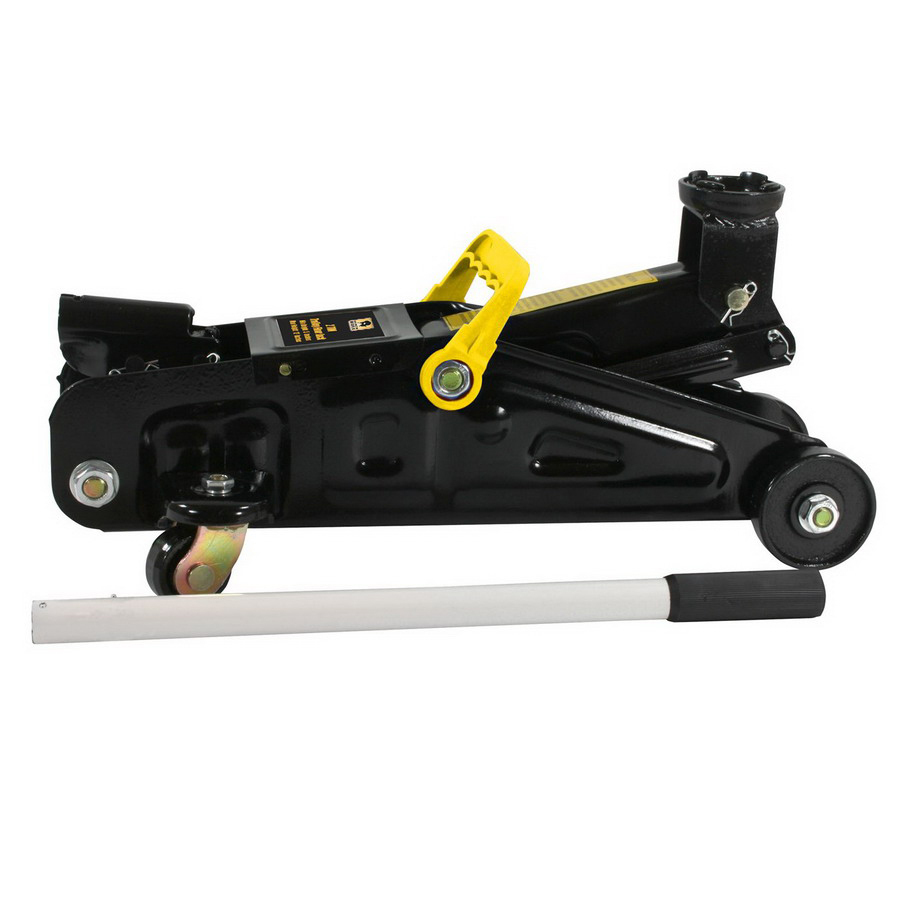
Posted by: Blue6 Feb 4 2017, 10:16 PM
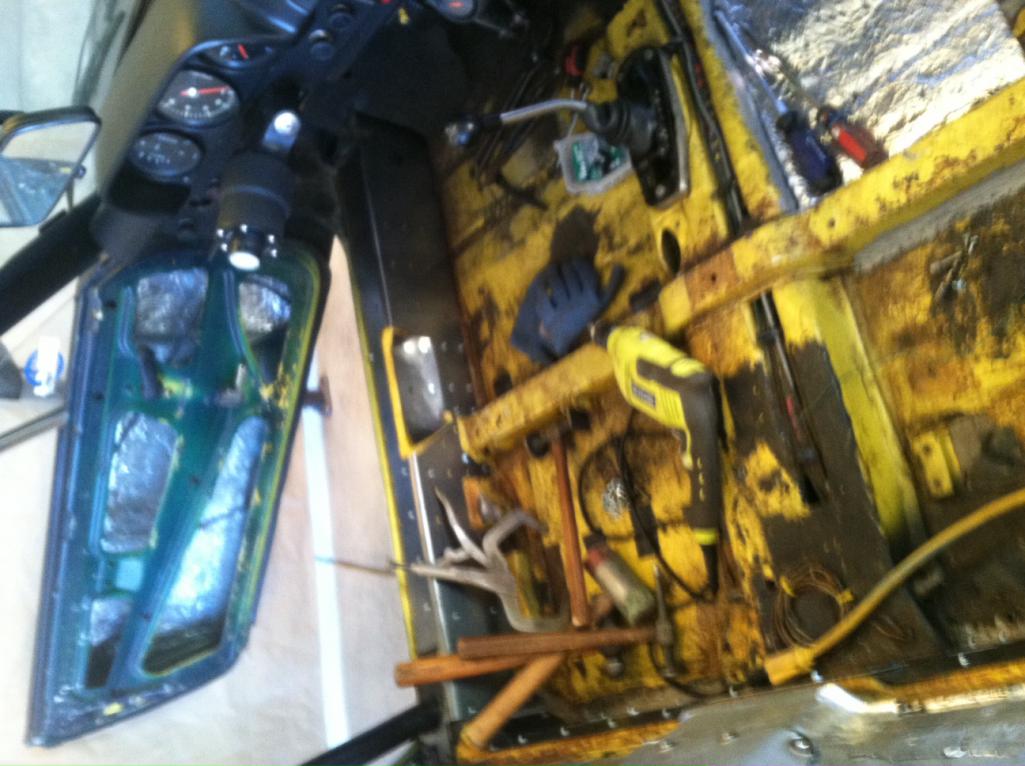
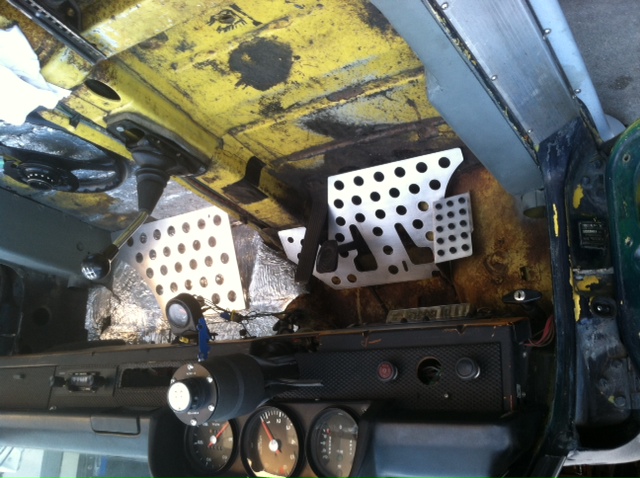
Well, Rob (914 Teener) finished the inner long kit, and did a great job. Today, attempting to fit the eye candy ( pedal boards /dead pedal). Noticed my car doesn't have a clutch pedal. Must be one of them there automatics 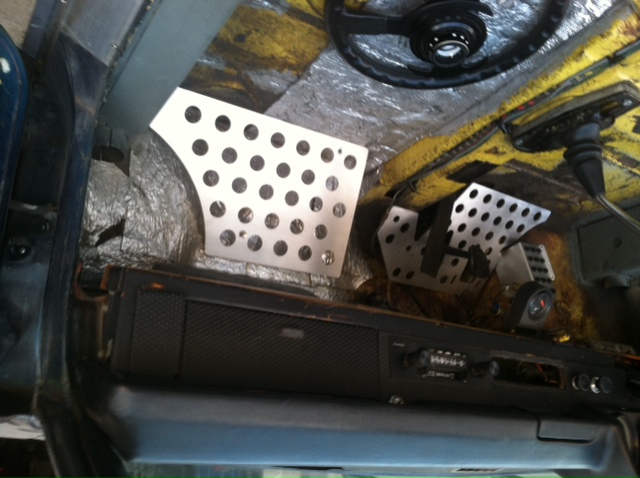
Posted by: horizontally-opposed Feb 4 2017, 10:28 PM
When I take my car down to bare metal, I plan on NOT having jackpoints. Never use them anyway and just an area for dirt and junk to get stuck up under the rockers.
and you get a flat tyre........
...and then you use a scissor jack at one of many appropriate jacking points like any other car.
Got rid of my jack points last time. Every time I took the rocker panels off, I watched all of the dirt and rocks and sand pour out. And this was quite often, making the amount of stuff that got up there depressing.
Aluminum 944-style scissors jack now in front trunk.
Posted by: bdstone914 Feb 4 2017, 10:52 PM
When I take my car down to bare metal, I plan on NOT having jackpoints. Never use them anyway and just an area for dirt and junk to get stuck up under the rockers.
and you get a flat tyre........
...and then you use a scissor jack at one of many appropriate jacking points like any other car.
Got rid of my jack points last time. Every time I took the rocker panels off, I watched all of the dirt and rocks and sand pour out. And this was quite often, making the amount of stuff that got up there depressing.
Aluminum 944-style scissors jack now in front trunk.
Jack recievers strenghten the long at a flex point. Not good to remove them.
Posted by: StratPlayer Feb 5 2017, 04:00 PM
If you get rid of the jack points, are you going to fill in the holes on the rocker panels as well?
Posted by: Blue6 Apr 14 2017, 09:25 PM
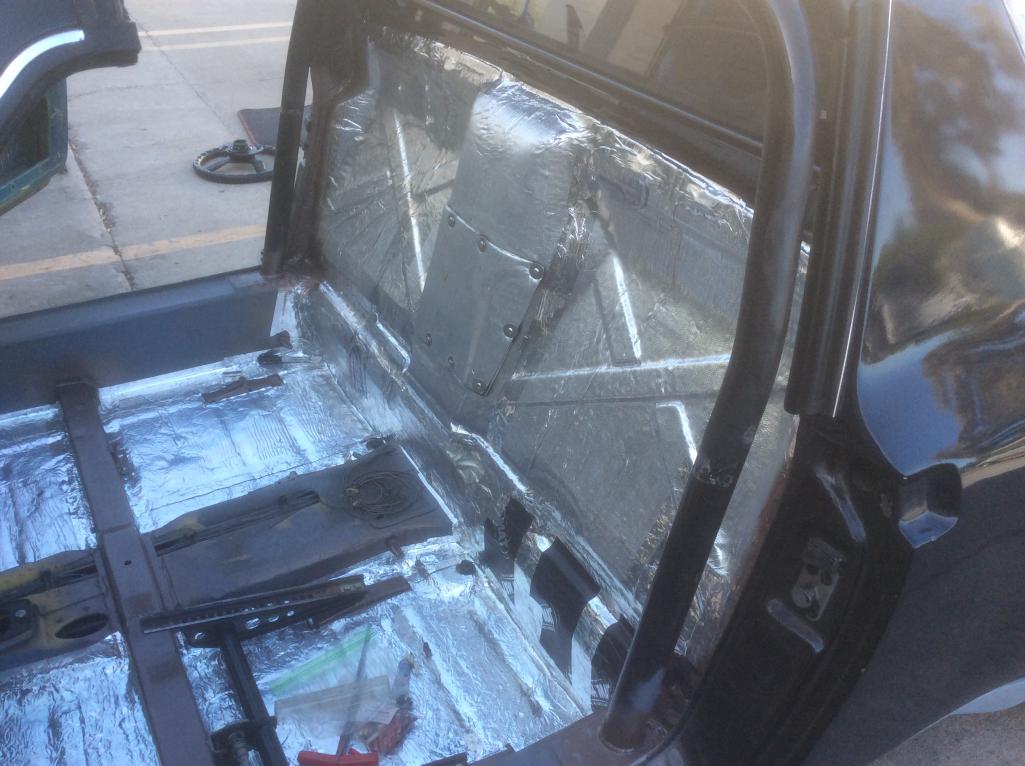
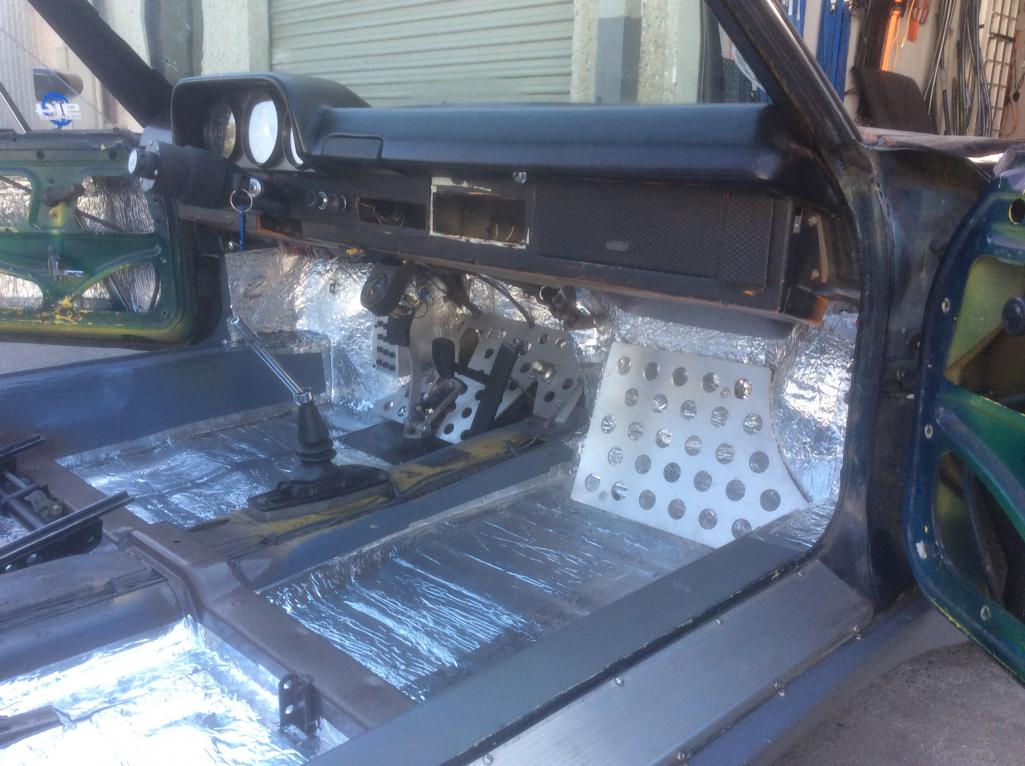
Thank god for these rallies, it makes me move the 914 to the front burner and get things done. Finished the hydraulic clutch install, finished the interior sound / heat proofing with seem sealer and insulation. I know several members are firmly opposed to permanent insulation, but he's a SoCal car now and won't see any wet weather.
Maddog's pedal board are very nice but needed a lot of massaging due to the new clutch pedal and lines.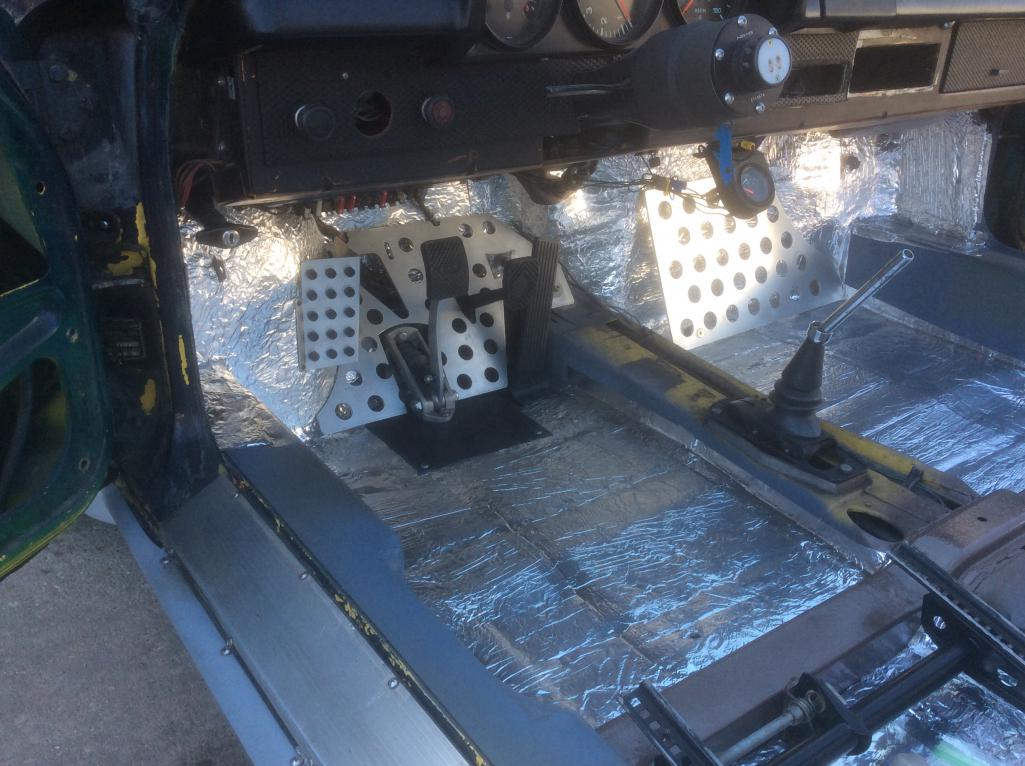
Posted by: Blue6 Apr 14 2017, 09:28 PM
Posted by: Blue6 Apr 14 2017, 09:39 PM
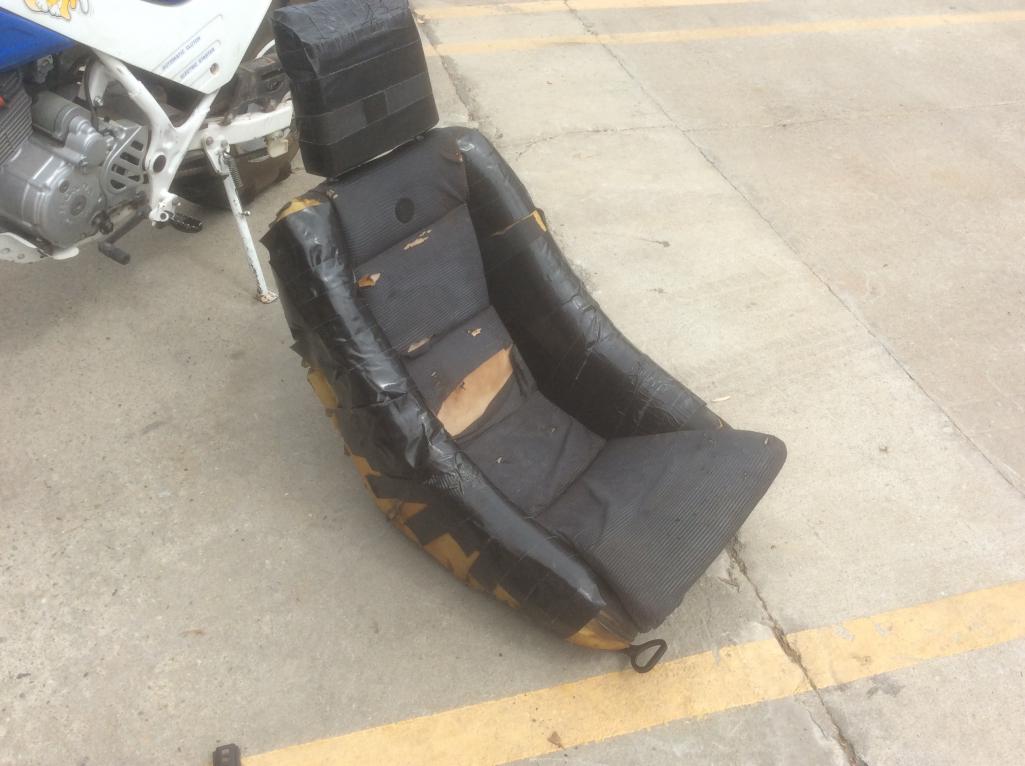
While apart, cleaned and lubed the seat brackets. They were in great shape. Still no rust found. Also had my Scheel seats upholstered. Found a guy in SoCal, Duc Tape unlimited. Friends and family say they look like $hit. I think they look period correct.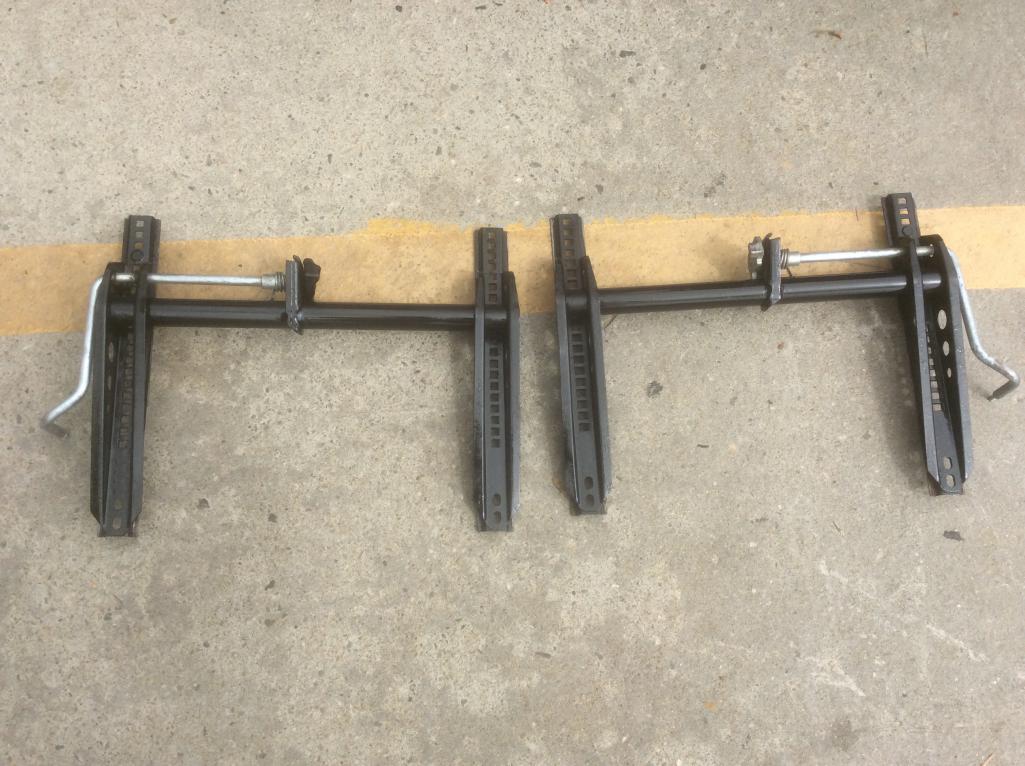
Posted by: Blue6 Apr 14 2017, 09:42 PM
Now working on customizing the drivers side mat. Doesn't fit with the new clutch and pedal board.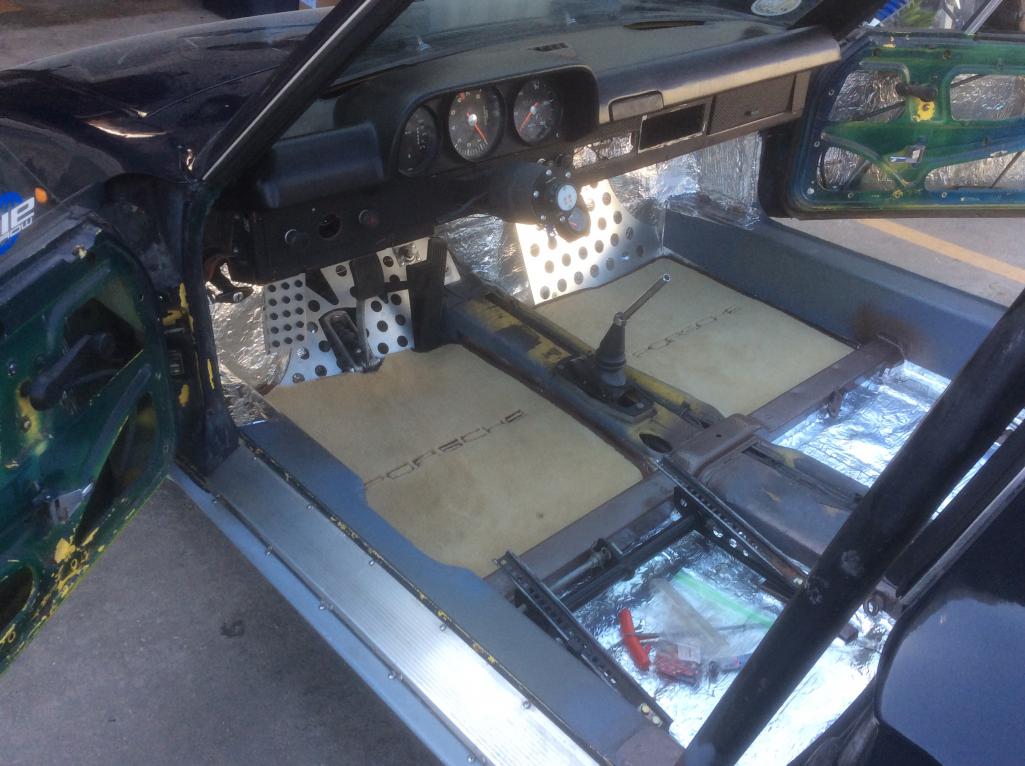
Posted by: Blue6 May 12 2017, 12:20 AM
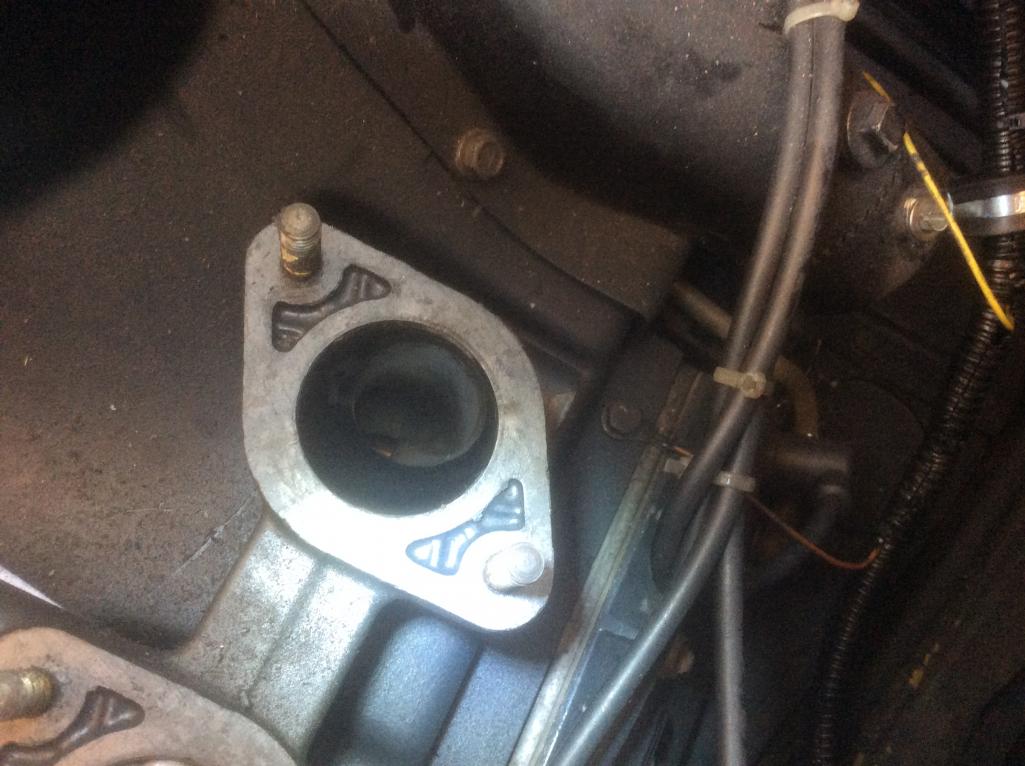
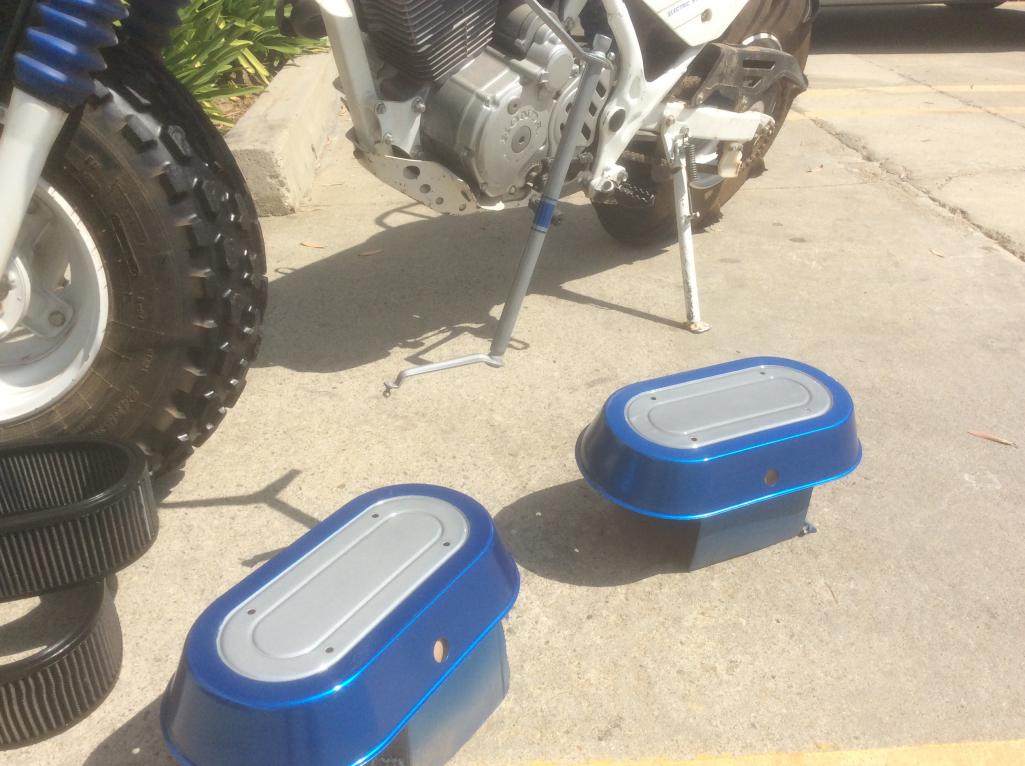
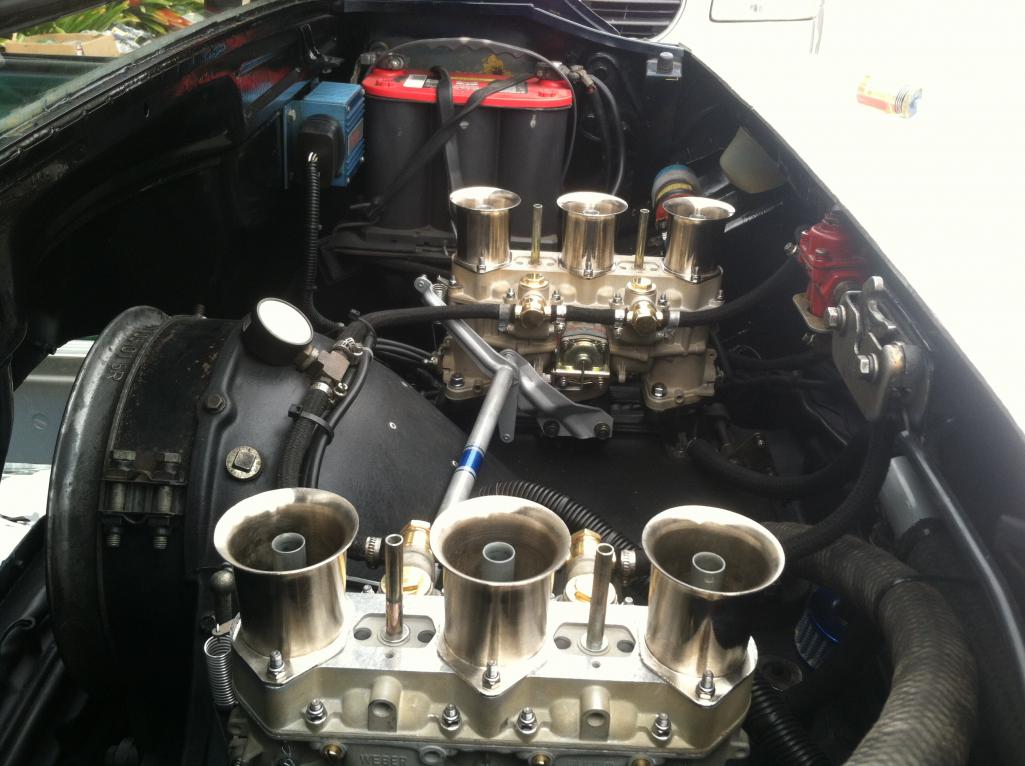
After returning from Rt66, pulled the carbs for a badly needed rebuild. Found a local guy that says it will take only about three weeks, including replacing badly worn throttle shafts .... While carbs are off, looked into the intake manifolds. Pleasantly surprised to see the engine had been ported, and the intake valves and guides appeared clean and low mileage. While waiting for the carbs, had time to clean and paint the rain hats and linkage. Had to paint a competition stripe in the middle of the linkage..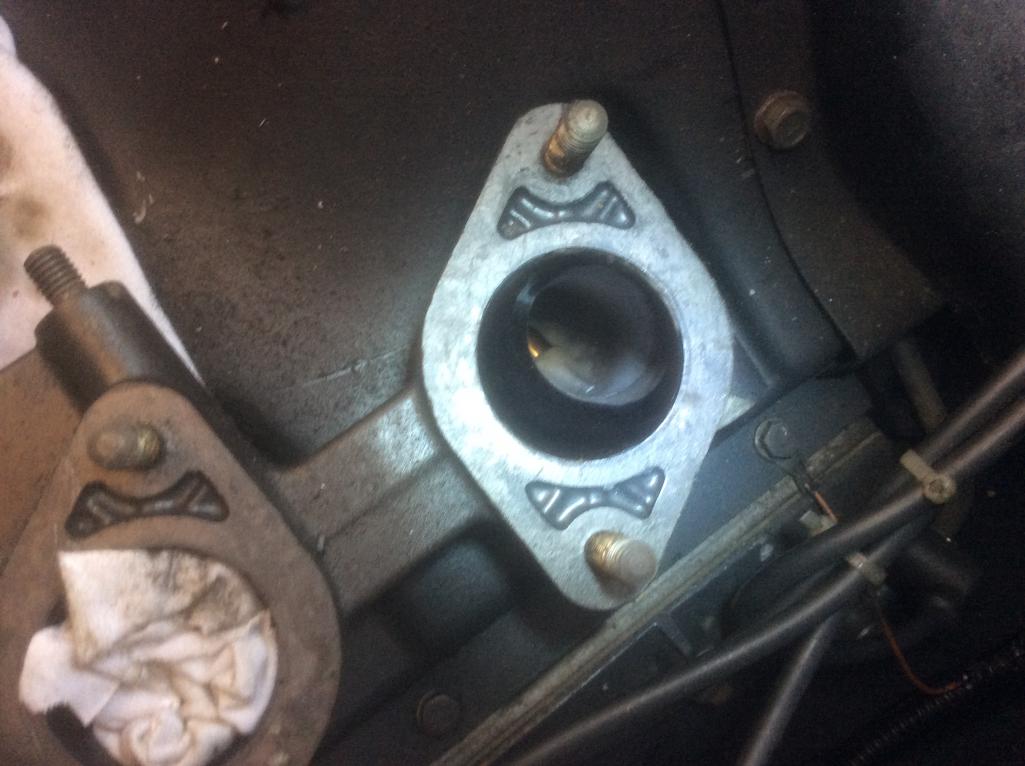
Posted by: Blue6 May 12 2017, 12:23 AM
Pics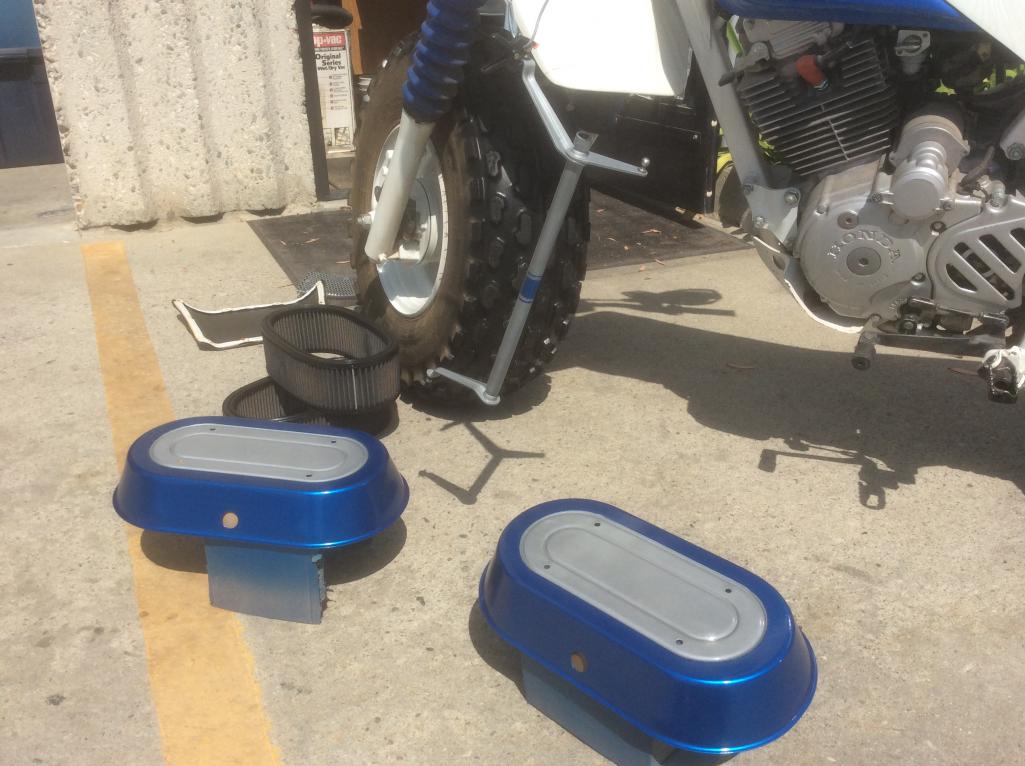
Posted by: Larmo63 May 12 2017, 11:32 PM
I use the scissor jack that came with my Subaru donor car. It has a small gap in the middle that spans the flange on the bottom of the longs. Who would use Japanese parts on a fine German car like a 914 Porsche?
Posted by: Blue6 Jun 27 2017, 08:41 PM
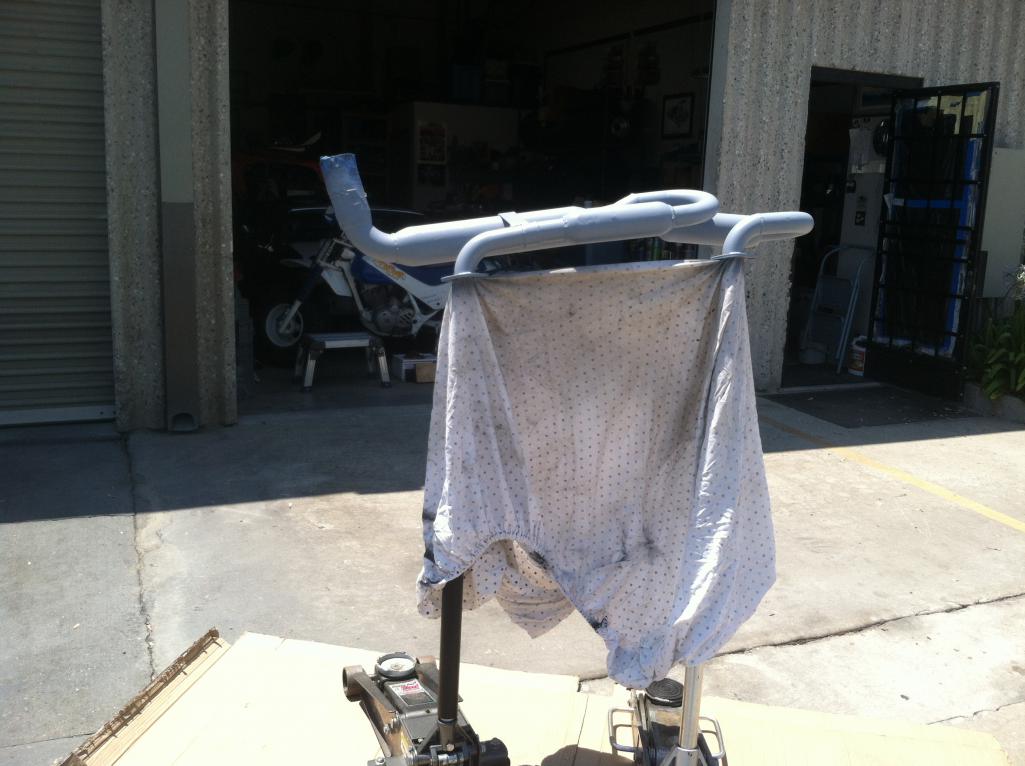
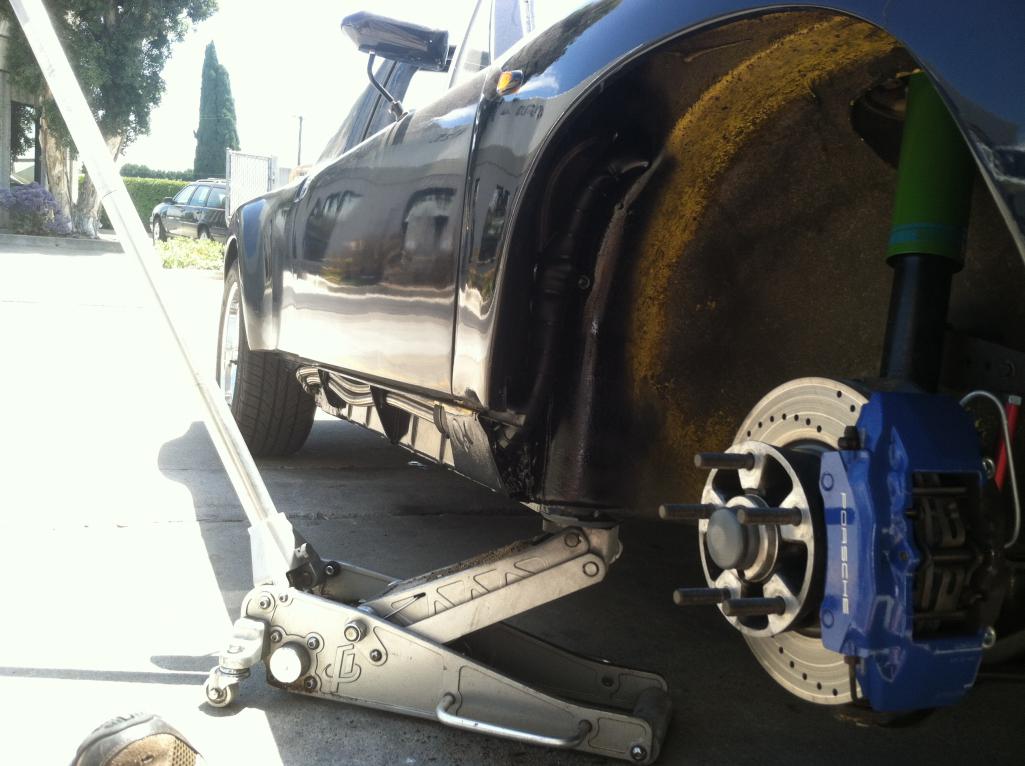
Carb guy said it would help if I had an O2 sensor in the car. Pulled the Triad I scored from Bdstone awhile back. Had my son weld in the bung for the sensor. While it was out I figured I would clean, prime, and paint it. Look at pic #2 for another use of two floor jacks.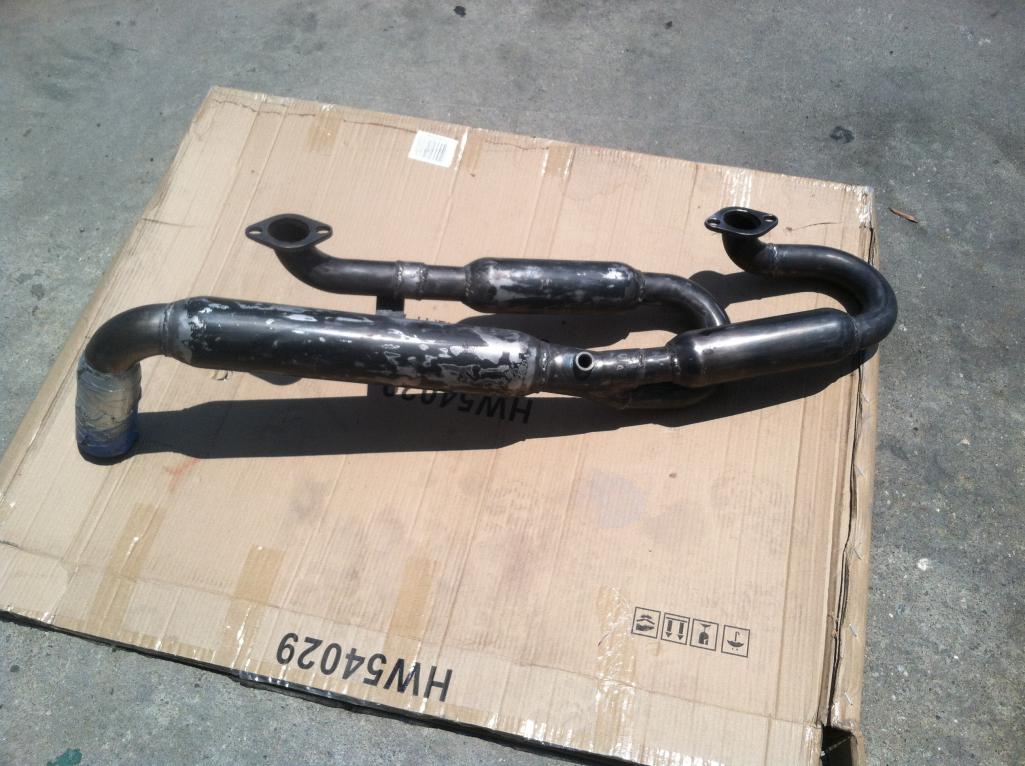
Posted by: Blue6 Jun 27 2017, 08:45 PM
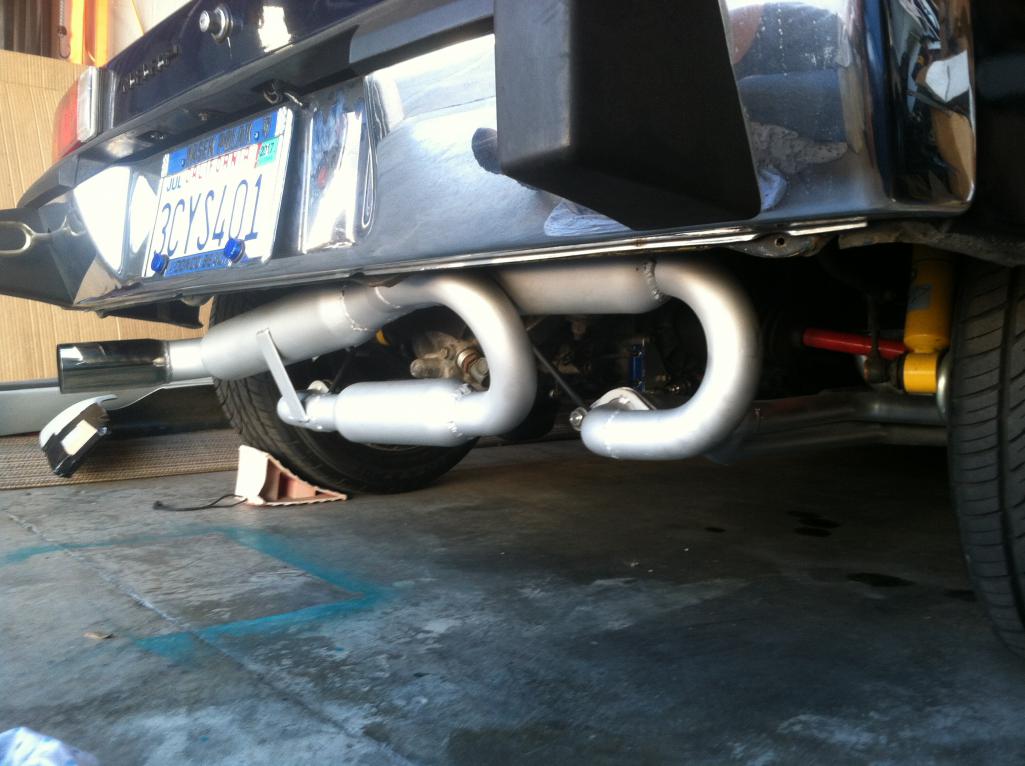
And back where it belongs. Almost looks as nice as Marty's (MSDS) headers now. 
Posted by: porschetub Jun 27 2017, 10:55 PM
A small-ish hydraulic jack can be stored in the car easily. There's easy room in the rear trunk or can be stored behind passenger seat.
It's also cheaper to pay for AAA then it is for body work to repair the jack plate areas.
Rubbish reply,without thought
 ,you can remove stuff on these cars but you need to think a bit that it has another function .
I have busted one my drivers side and I will be fixing it cause it is part of the structure in that area....been mentioned so far
Bit of a weight freak have peeled of heaps of useless stuff but in the end some stuff stays.
Posted by: Blue6 Jun 29 2017, 09:15 AM
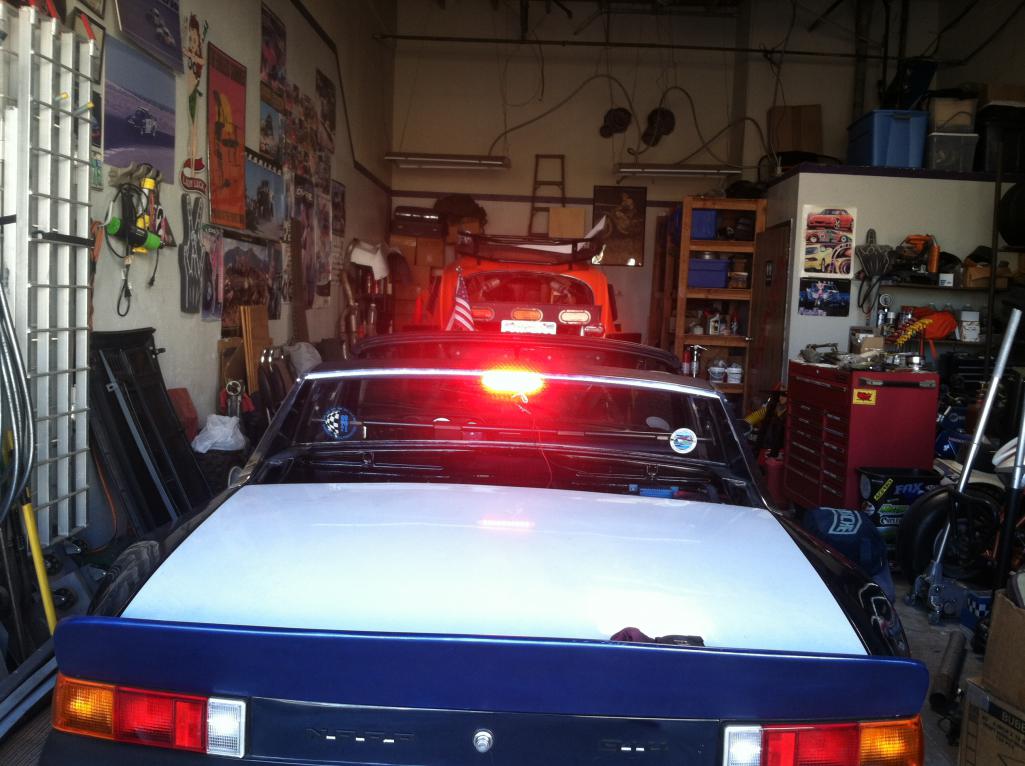
Added an LED third tall/brake light. Just jumped it to the battery to see how bright. It's bright! Should be safer..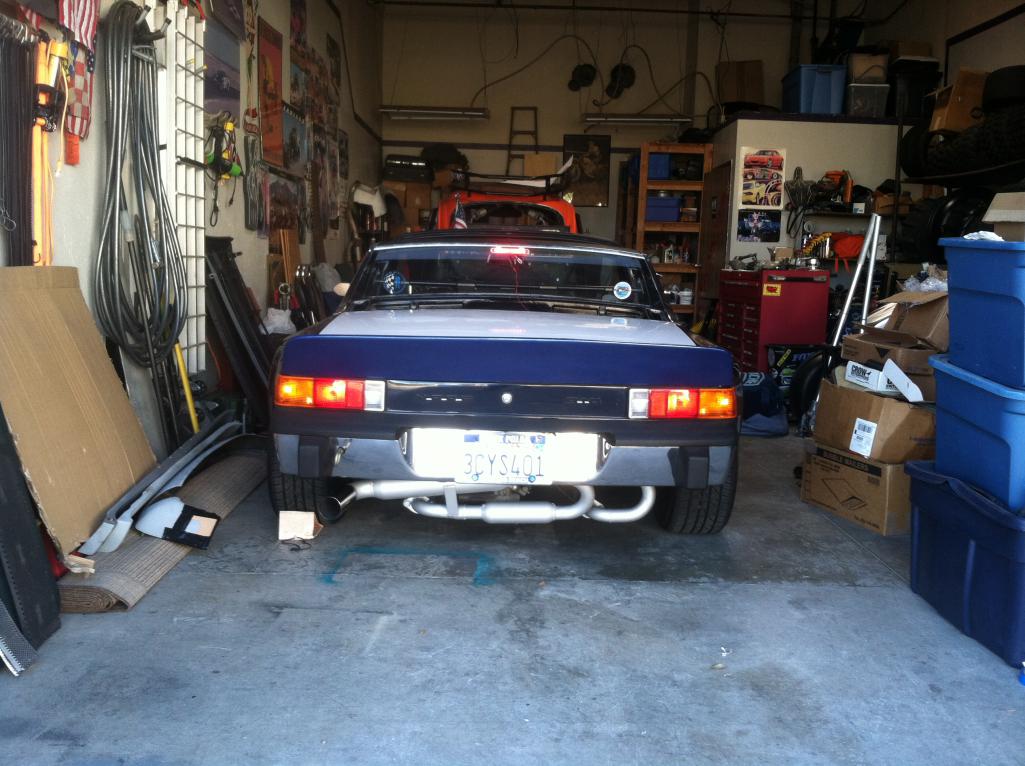
Posted by: Blue6 Aug 1 2017, 11:59 PM
Got to spend some time with her. The longs still had a bunch of the original Canary Ylw. I wire brushed them, primed, and painted. As you can see passenger side has the oil cooler lines. They were wrapped in rubber anywhere they came close to metal. In the drivers side, I ran the wires for the O2 sensor, and the 4 gauge welding cable. I ran them into the fronk through the old antenna hole. The 4 gauge cable will be used for the battery, which is being moved to the fronk.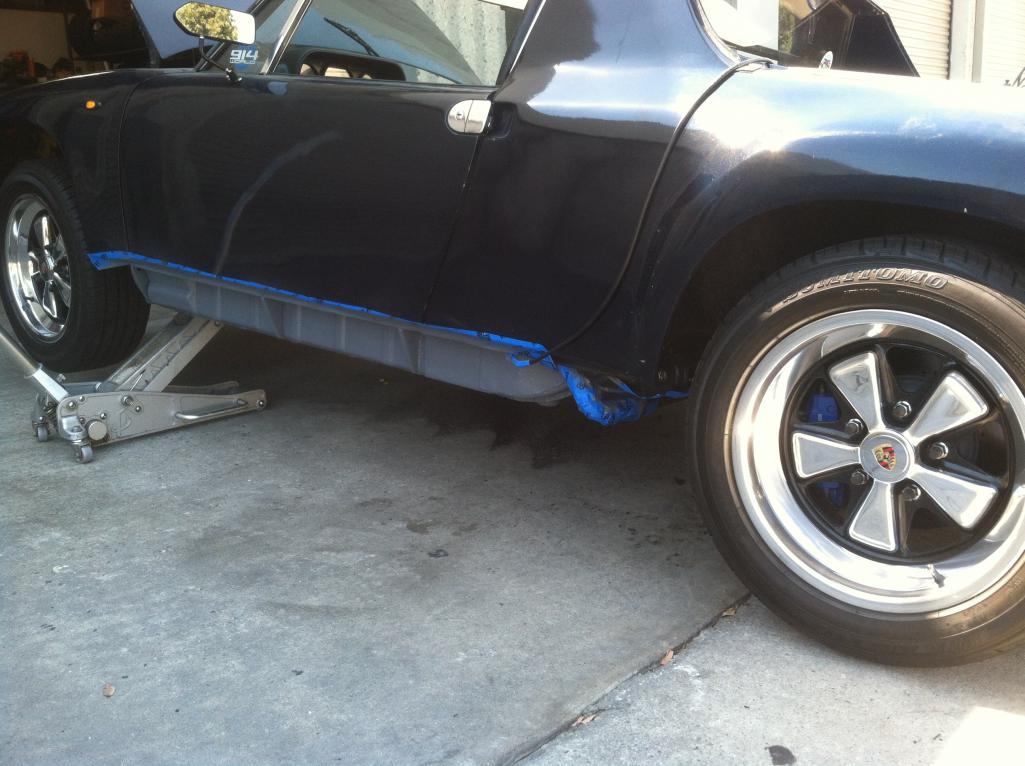
Posted by: Blue6 Aug 2 2017, 12:03 AM
Posted by: rhodyguy Aug 2 2017, 09:57 AM
I have that triad version built for 2.0 heat exchangers. The second one I have seen. Early triad days wheN David Said owned the co. I like the exhaust note. No droning. You'll get comments and questions about it after installation. If you look closely there is prob a serial # on it. Mine is 004.
Posted by: Blue6 Aug 2 2017, 11:28 PM
I have that triad version built for 2.0 heat exchangers. The second one I have seen. Early triad days wheN David Said owned the co. I like the exhaust note. No droning. You'll get comments and questions about it after installation. If you look closely there is prob a serial # on it. Mine is 004.
Thanks Kevin, I've had it on already, just removed it for the O2 bung. Love the sound. I'll look for the serial number.
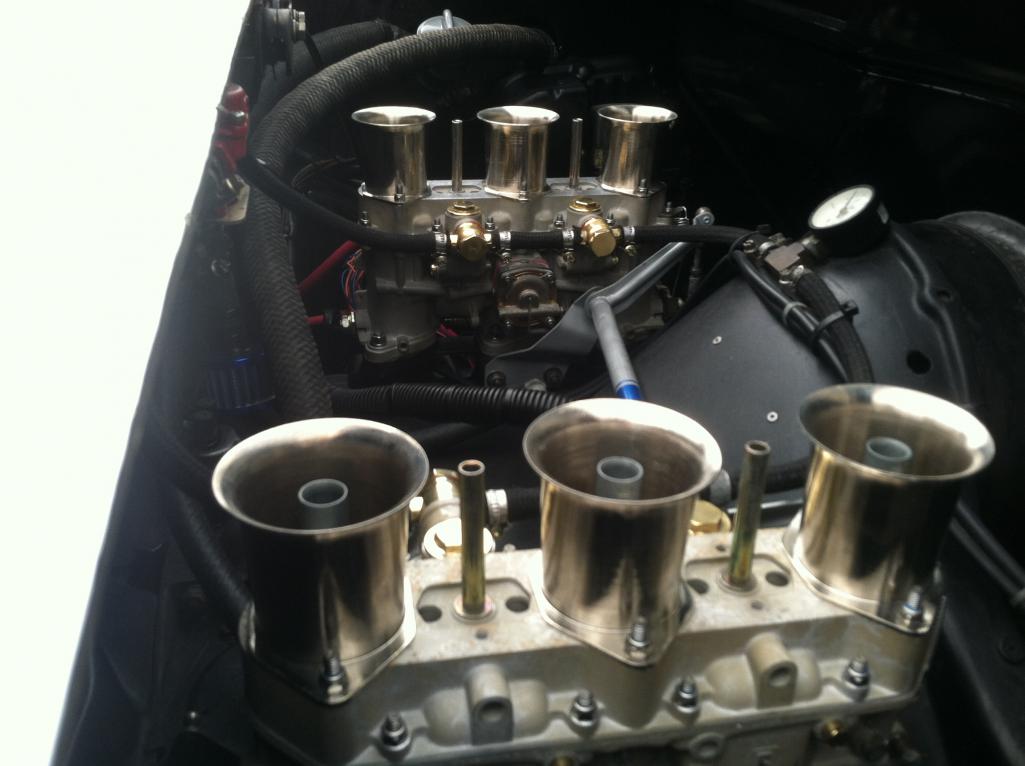
Posted by: Blue6 Sep 16 2017, 11:09 PM
It's been awhile, but I finally got the engine compartment painted and organized. Our local carb guru got the carbs rebuilt and had time today to install and tweak them. The vacuum leaks from worn throttle shafts were bad, but he corrected everything in the rebuild. It was amazing how close he had dialed it in off of the car. A couple of seconds running the fuel pump, then fired it, and ran great. He's a perfectionist, so he spent a couple of hours dialing it in just perfect. It's runs and sounds sweet. 
The last pic is of my self customized rain hats. I know it's not for everybody, but I like them and it's my car 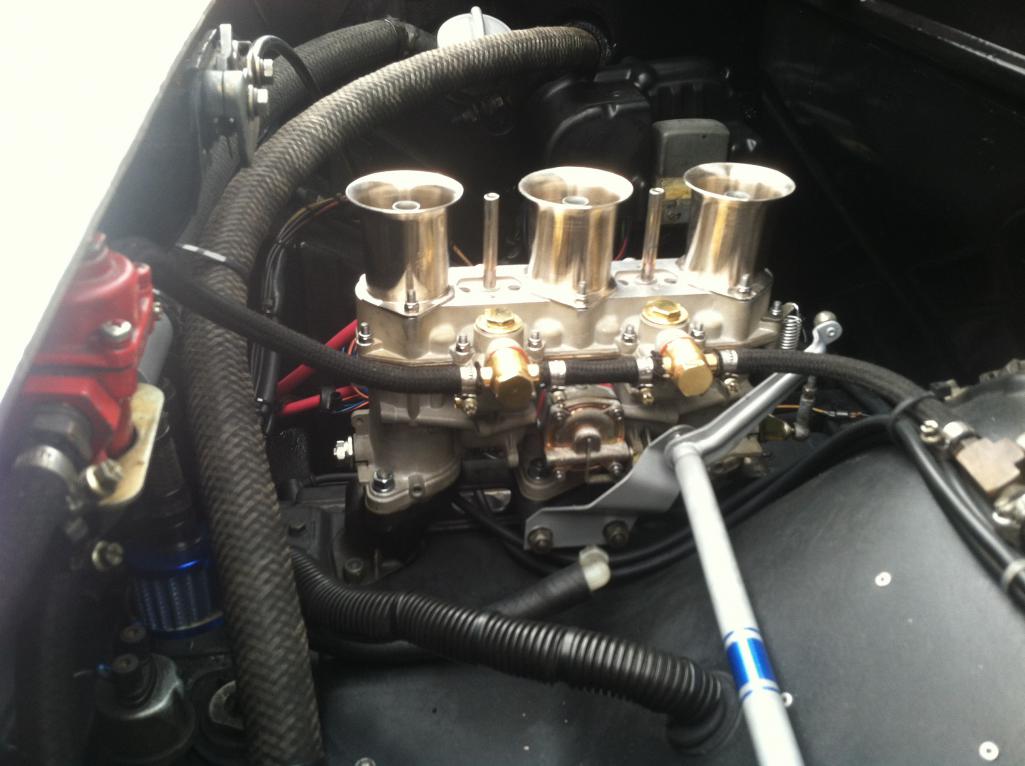
Posted by: Blue6 Sep 16 2017, 11:11 PM
Posted by: Larmo63 Sep 17 2017, 12:57 PM
Wow!!!
That was a LOONNNNNNNNNNNNGGGGGGGGGG three weeks!!

Posted by: Blue6 Sep 17 2017, 06:09 PM
Agreed.. 
Posted by: 914_teener Sep 17 2017, 06:30 PM
Missed you at the fun day Dave.
Glad to see ya working on the car again.
Drove mine the whole way after trailer madness...just said f it and took the car.
Carbs look great.
Posted by: Blue6 Sep 18 2017, 09:21 AM
Thank Rob. l really wanted to make the 914 Fun day, but I was tired of having people push me around in the teener while I made engine sounds. No matter how much I yelled at them, they couldn't push me fast enough.
Posted by: ConeDodger Sep 18 2017, 11:00 AM
OMG those carbs are so sexy!

Posted by: 76-914 Sep 18 2017, 02:20 PM
Looking good, Dave. Say, I just noticed your front end is a little different! Is that the circumsised model?
Posted by: Blue6 Sep 18 2017, 11:35 PM
Rob, they run as good as they look.
Kent, the circumcision was done by the PO. He called it a slantnose, and thought it was faster.
Posted by: 76-914 Sep 19 2017, 07:28 PM
Rob, they run as good as they look.
Kent,
the circumcision was done by the PO. He called it a slantnose, and thought it was faster.Couldn't resist it.
Powered by Invision Power Board (http://www.invisionboard.com)
© Invision Power Services (http://www.invisionpower.com)