Printable Version of Topic
Click here to view this topic in its original format
914World.com _ 914World Garage _ The story of a silver -6
Posted by: db9146 Apr 26 2015, 07:50 PM
The first 914 I had was a white '76 2.0L. I didn't know a lot about 914s back then (mid 80's) but I came to love that car, despite our ups and downs. Eventually I had to sell it and buy something more practical (I was buying a house and could only afford one car) but I remember reading an article in VW & Porsche magazine about a 914 conversion to a -6. That one was white as well and I started dreaming about one day having a -6.
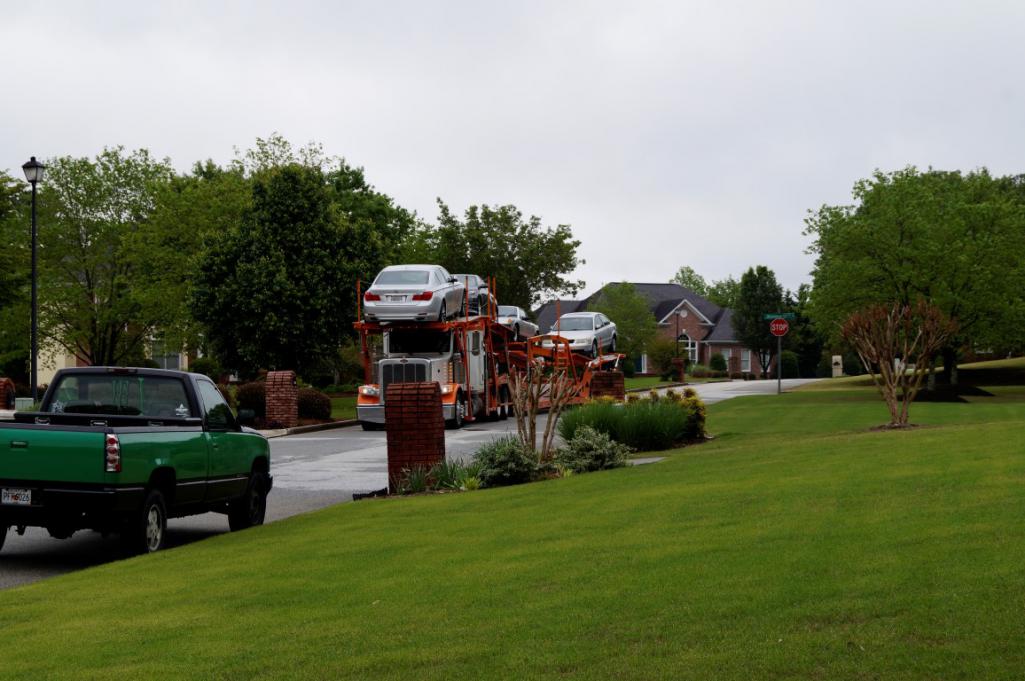
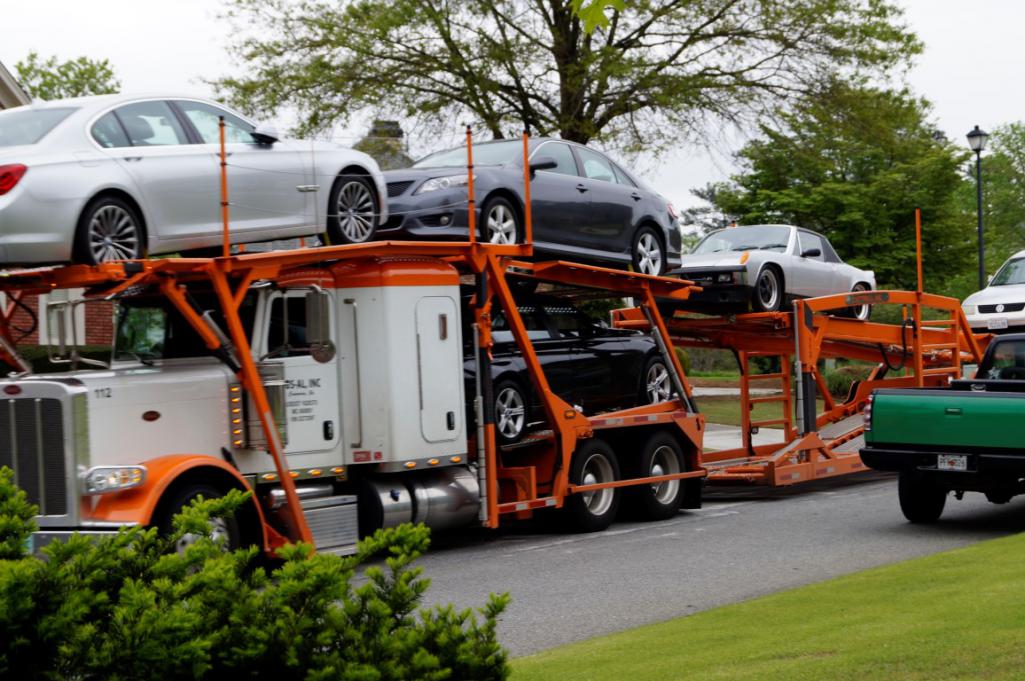
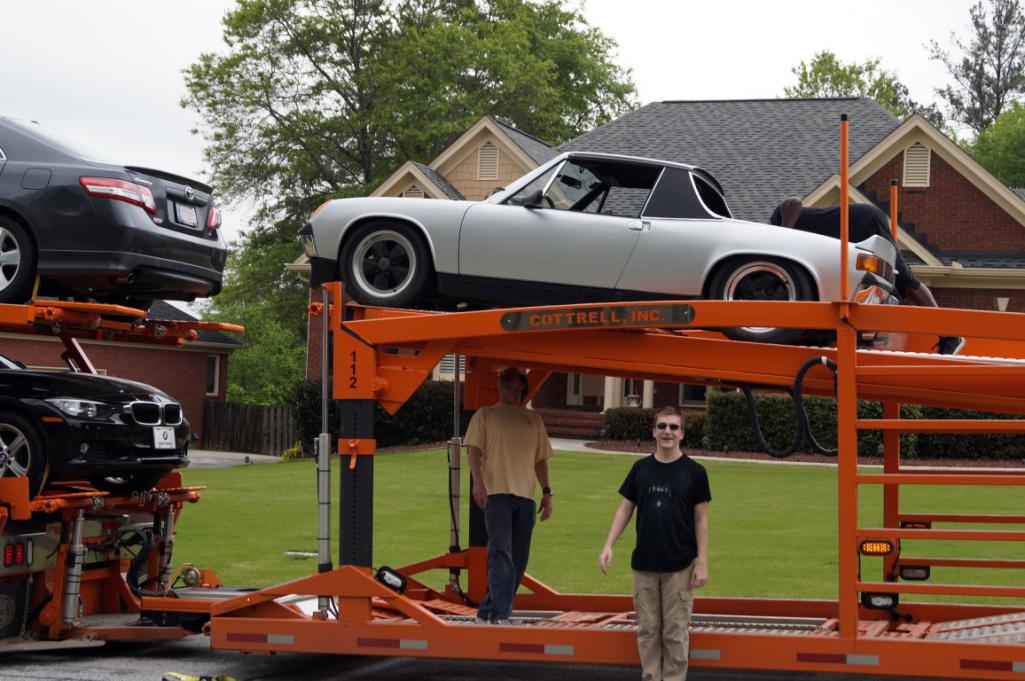
Well, about a month ago, I was surfing another Porsche site that I don't visit much at all and just on a lark, typed in 914-6 just to see what would come up. To my surprise, I found a silver 1970 for sale near San Francisco. I finally reached the seller and started a conversation. I then reached out to the board here for a PPI and Matthepcat responded and very graciously offered to take a look for me. Well, things progressed with the seller and not wanting to let it get away, I made arrangement to skip the step 1 visual PPI that Matt offered to do and jump straight to step 2, a professional PPI with a compression check and the whole bit. A few more conversations and it was mine. There was money to wire and forms to FedEx back and forth but on my drive up to the Hershey swap meet a little over a week ago, it all came together. My wonderful wife was working out the transfer at the bank while I was driving up through Virginia. To cut to the chase, it got delivered yesterday.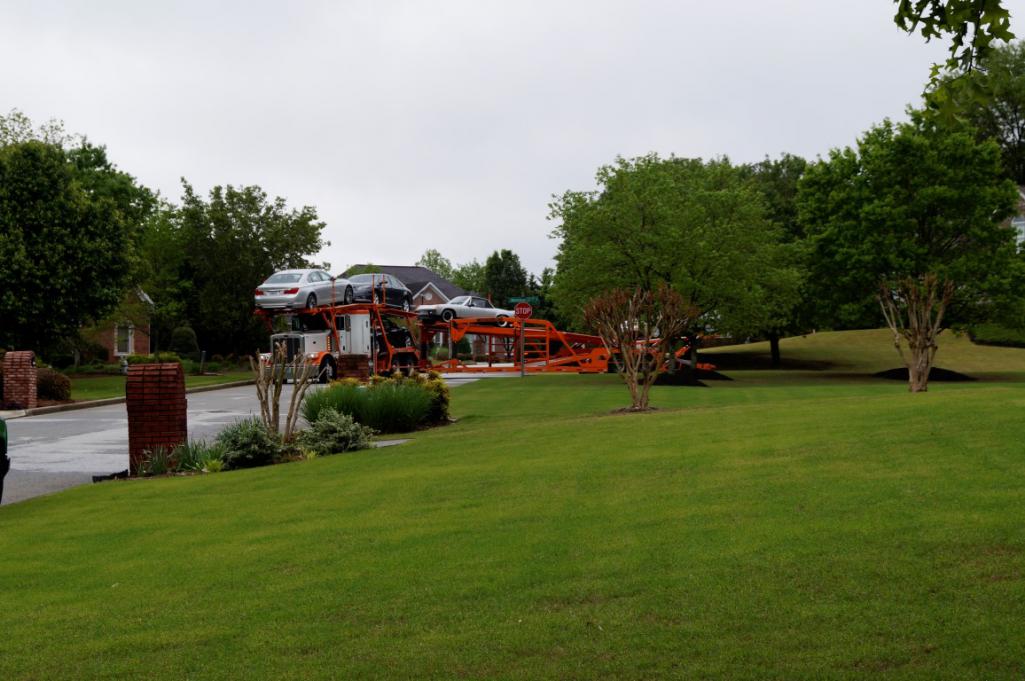
 [attachmentid=498
632]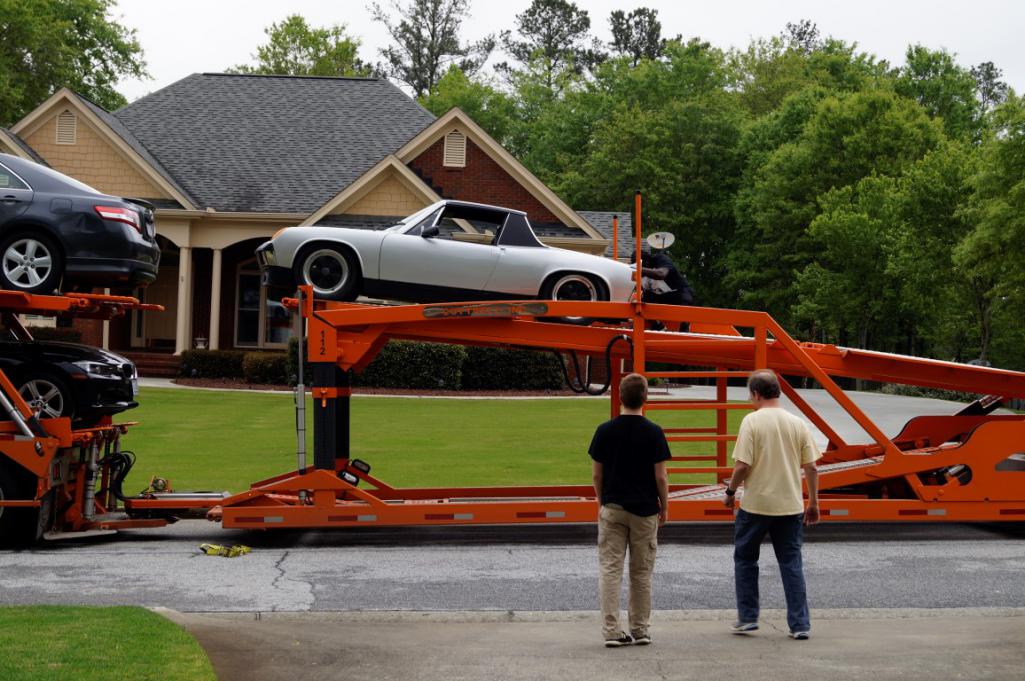
 [attachmentid
=498636]
I know you guys especially can understand the excitement about this....I'm not bragging at all just very thankful that it has all worked out this way after dreaming about this for 30 years.
Attached thumbnail(s)
Posted by: Philip W. Apr 26 2015, 07:54 PM
Congratulations! !

More pictures, please!
Posted by: stevegm Apr 26 2015, 07:57 PM
Very nice, indeed. Congrats. Enjoy.
Posted by: db9146 Apr 26 2015, 07:58 PM
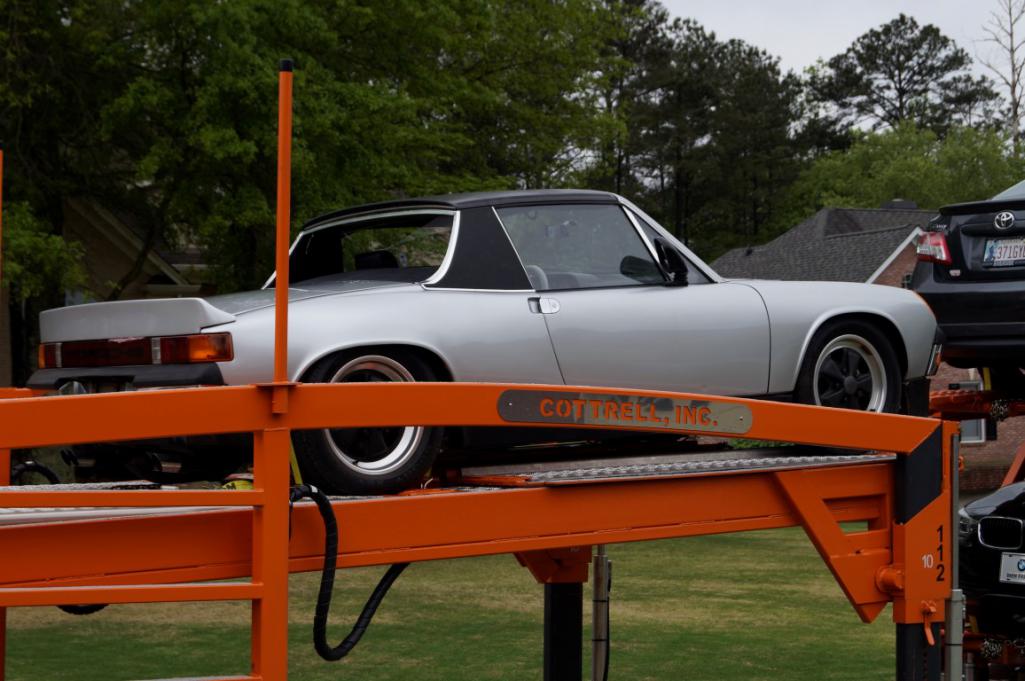
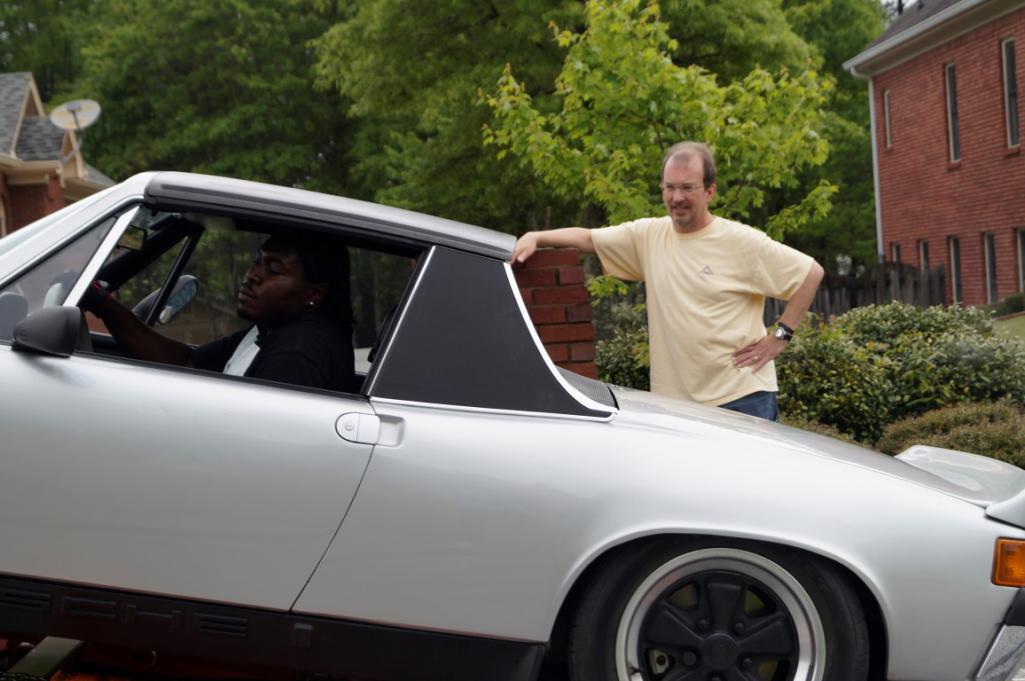
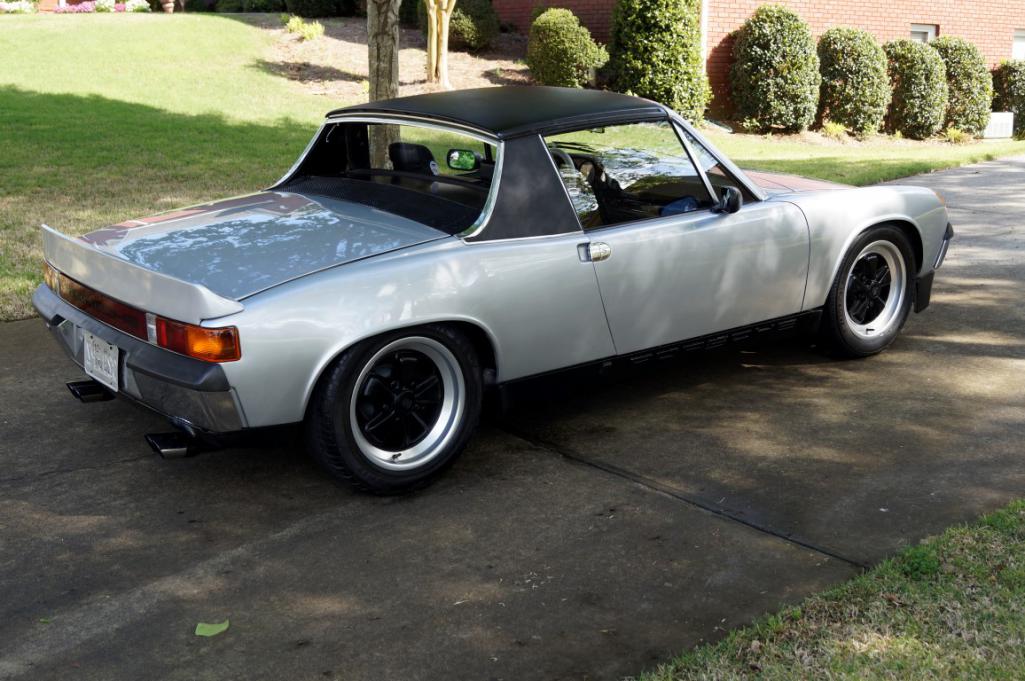
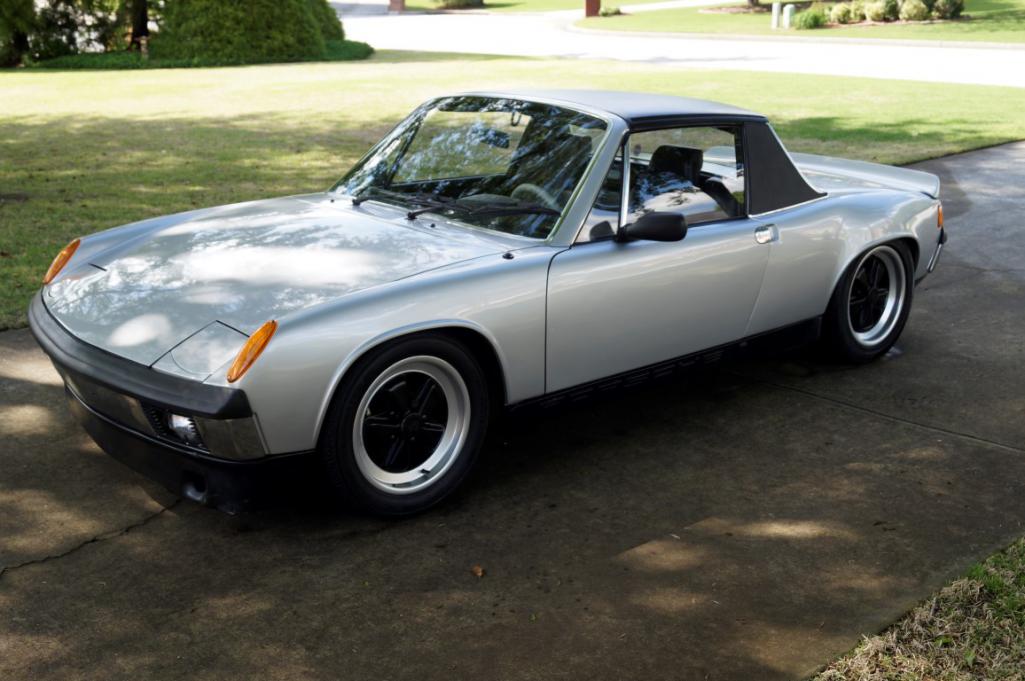
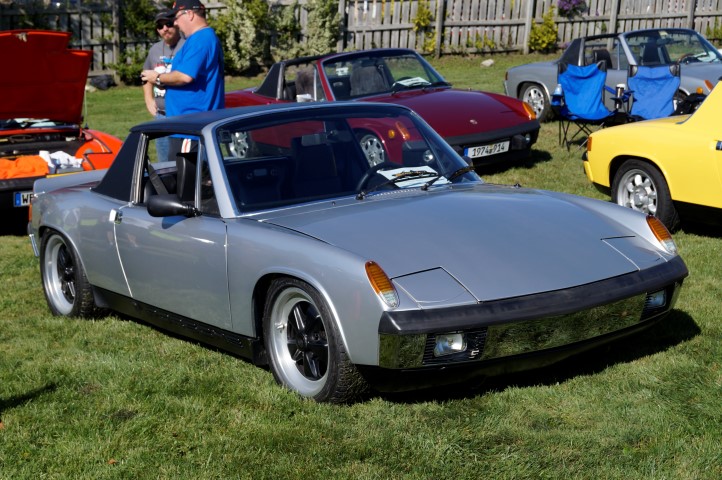
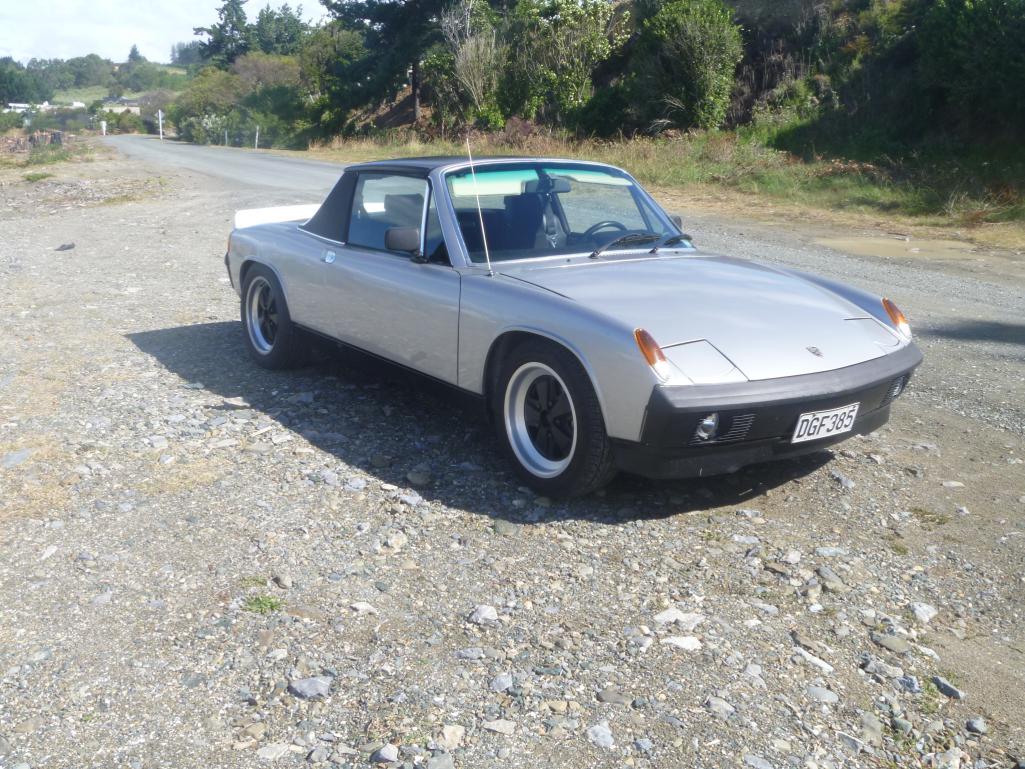
So here she is, my silver surfer. A numbers matching 1970 -6.
She lived with the previous owner for 32 years. Hope she'll be with me that long.
 [attachmentid=498
642]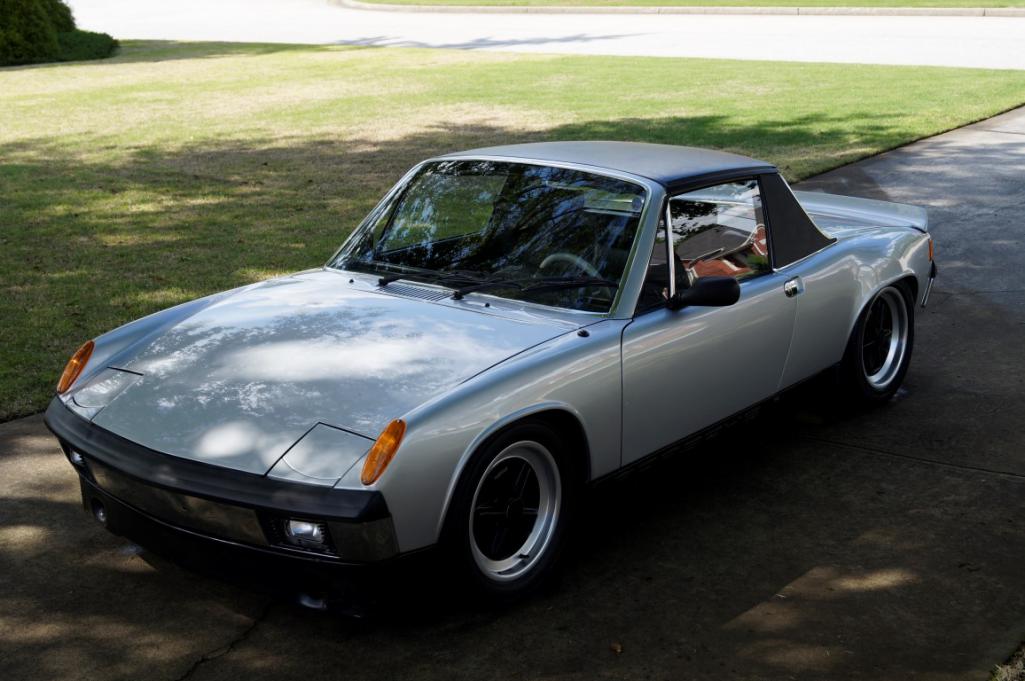
 [attachmentid
=498648]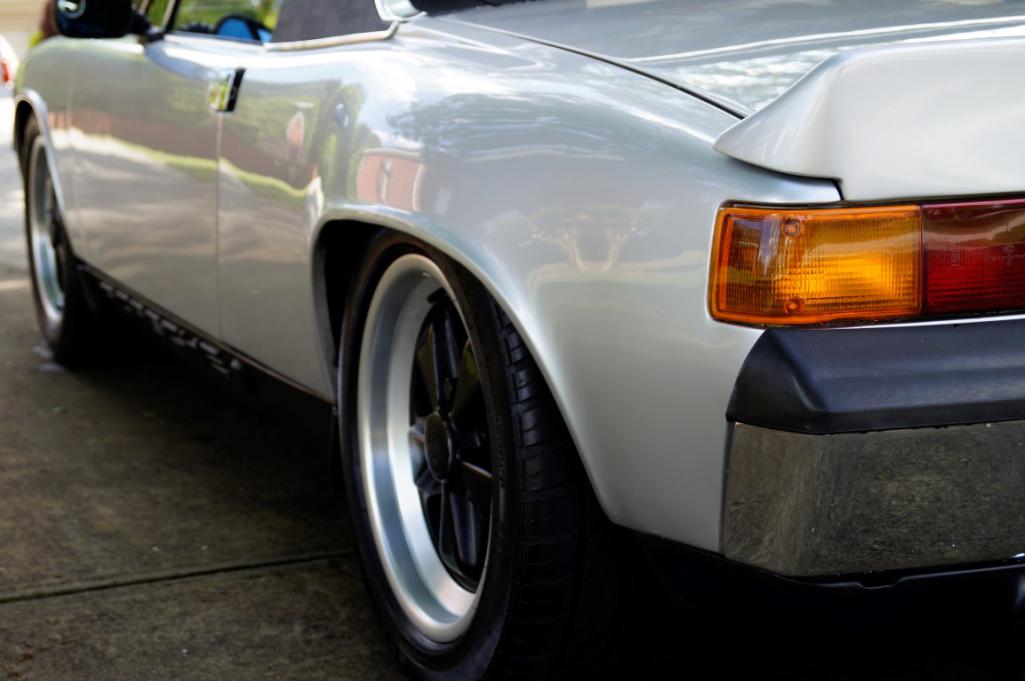
Matt, (Matthepcat), thanks again for the offer of the PPI help.
Attached thumbnail(s)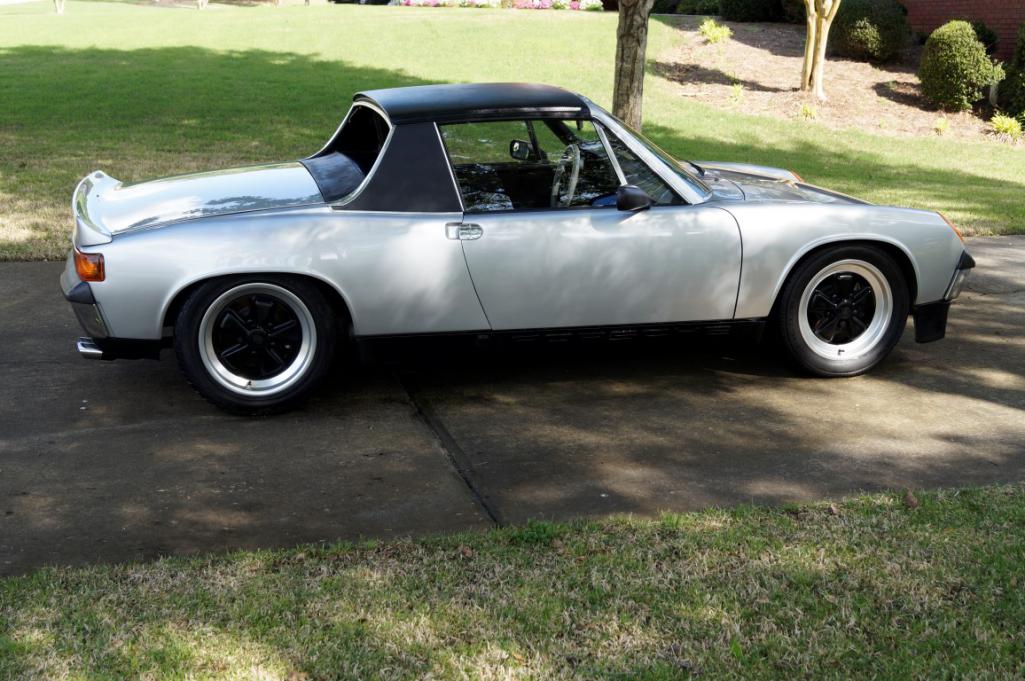
Posted by: db9146 Apr 26 2015, 08:23 PM
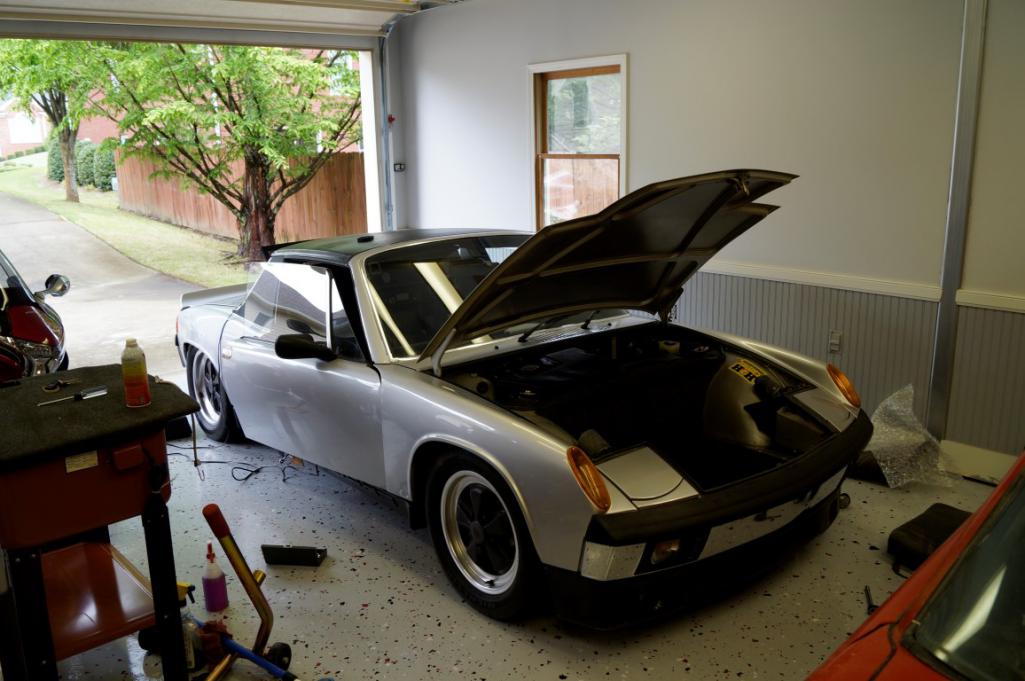
I took the day off Friday and spent it cleaning up the garage and moving the '72 parts car around. Saturday, the driver delivered it during a break in the showers that were supposed to go on all day. When I got it in the shop, I removed this from the passenger side, 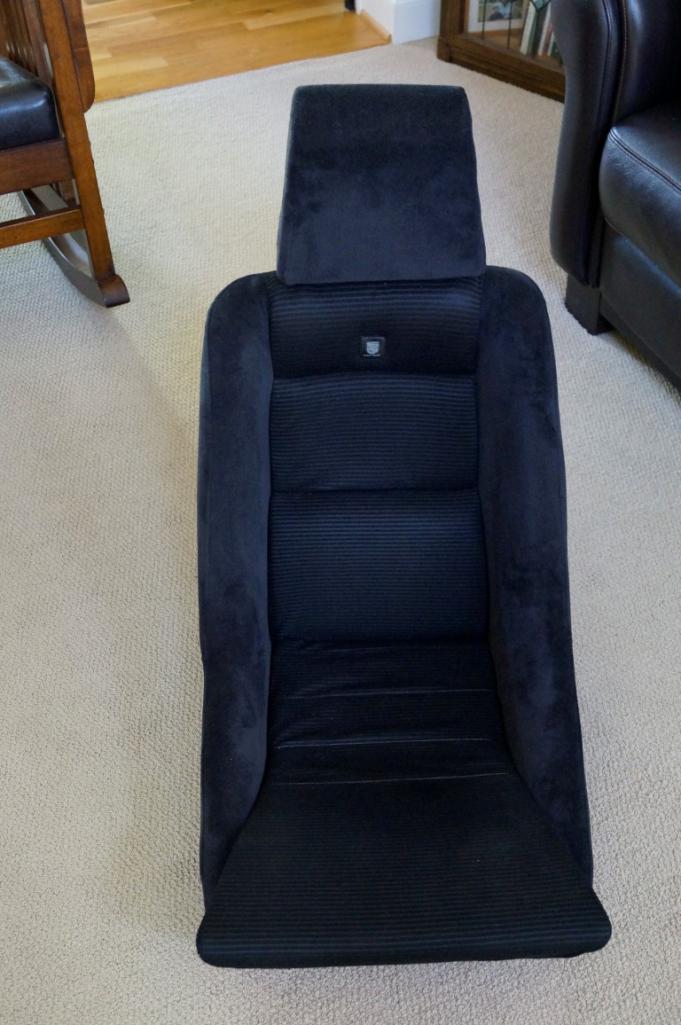
removed the 5 point harnesses, and pulled some retractable belts from the '72. Going to clean them up this week. I then spent several hours buffing and polishing the paint. It was repainted the original color about 15 years ago but there are some scratches I was trying to address.
I'm going to run it with the existing latter model seats for a while but while I was headed to Hershey a couple of weeks ago, I spoke with Garold and he hooked me up with a nice '70 backpad and pass. seat bottom that I've cleaned up and am going to store, until I decide to put it back 100%.
Posted by: db9146 Apr 26 2015, 08:29 PM
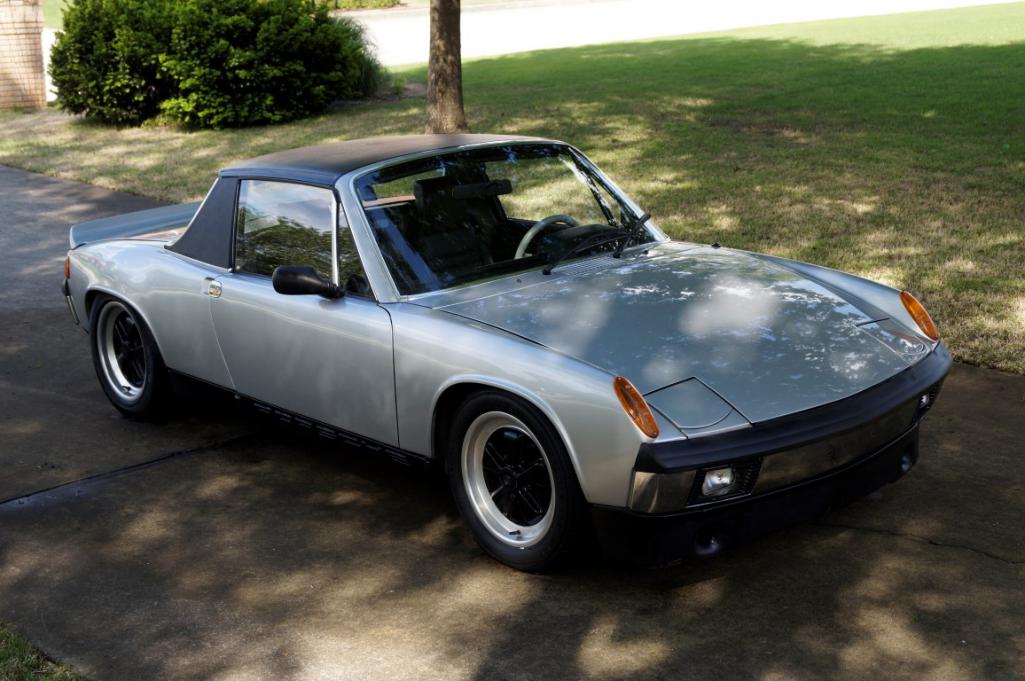
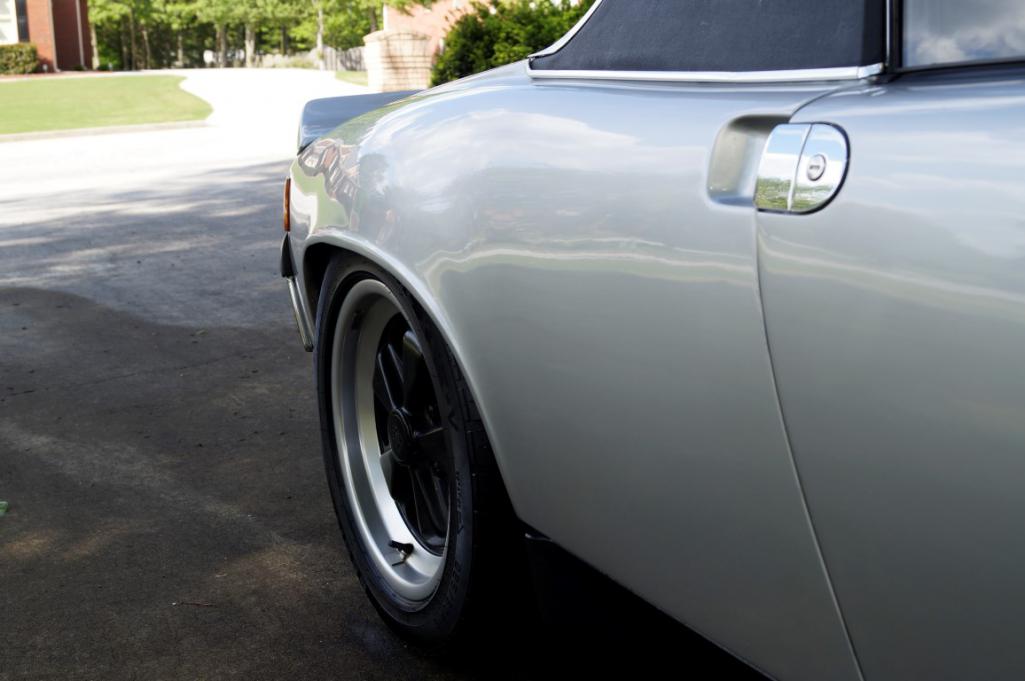
The car came with 205/55/16s on the front on 6" Fuchs and 225/50/16s on 7" Fuchs on the rear. The rear tires looked a little ballooned so this afternoon, I pulled out a set of 7s and 8s with the same size tires and swapped them on. The 8's in the rears flatten out the sidewalls and move the tires out a little to fill out the flares better. The 7s on the front look better than the 6s and move the tires out enough that they don't rub on the back inside of the passenger fender well.
Also adjusted the clutch a little. I'll tell you, the tailshifter has GOT to go. It is awful. I've got to figure out if there is anything I can do to adjust the linkage because the 2-3 and 4-3 shifts are hard to get right.
Posted by: campbellcj Apr 26 2015, 09:10 PM
Congrats! Looks like a nice solid car. I'd probably change the muffler and side skirts back to stock-ish. My car had the same skirts, spoiler and rear reflector when I first bought it, and I found them a bit over the top and borderline cheesy. Obviously that's subjective and to each his own. Enjoy her in good health!
Posted by: PanelBilly Apr 26 2015, 09:51 PM
Very nice
Posted by: JRust Apr 26 2015, 10:07 PM
Congratulations! That is a sweet ride 
Posted by: rick 918-S Apr 26 2015, 10:12 PM
Nice!
Posted by: Cairo94507 Apr 26 2015, 10:26 PM
 Congratulations! Looks like you found a nice car. How exciting to finally have your dream in your garage. Please post tons of pictures to make us all jealous - we love it.
Michael
Posted by: matthepcat Apr 26 2015, 10:41 PM

Wow! She is a beauty!
Congrats Dee! Glad to hear all worked out smoothly.
Never let this one go.
Matt
Posted by: Maltese Falcon Apr 26 2015, 10:51 PM
Stunning find...love the rear quarters pulled out !
Marty
Posted by: db9146 Apr 27 2015, 05:37 AM

Stunning find...love the rear quarters pulled out !
Marty
"Honey, do you think these flares make my butt look too big?"
Nah......just right!!

Posted by: Big Len Apr 27 2015, 05:43 AM
Really gorgeous. Best of luck !
Posted by: 914Next Apr 27 2015, 06:05 AM
Very nice Dee! Will be great to see it in person.
Steve
Posted by: r_towle Apr 27 2015, 07:26 AM
Congrats.
Posted by: RobW Apr 27 2015, 07:44 AM
Super cool!
Posted by: Johny Blackstain Apr 27 2015, 08:43 AM
Schweet! Congrats 
Posted by: francar Apr 27 2015, 04:31 PM
great car  . Have fun with
Posted by: JawjaPorsche Apr 27 2015, 04:53 PM
Awesome Score!
Silver looks so awesome on a 914.
I live up here in Clayton. If you drive up here one weekend, one love to see it in person. What part of Atlanta do you live?
I bought my 914 new and I still have it. Here is link to my 914:
http://www.terrytuck.com/914.htm
Glad your dreams came true!
Terry
Posted by: Cuda911 Apr 27 2015, 04:54 PM
Great-looking car.... congrats!!
Posted by: mgp4591 Apr 27 2015, 05:06 PM
Looks great! Any pics with the newer wheels and tires on? It's always nice to have perspective when eyeballing these things to see which setup will look "just right" when it comes to our own 
Posted by: db9146 Apr 27 2015, 07:24 PM
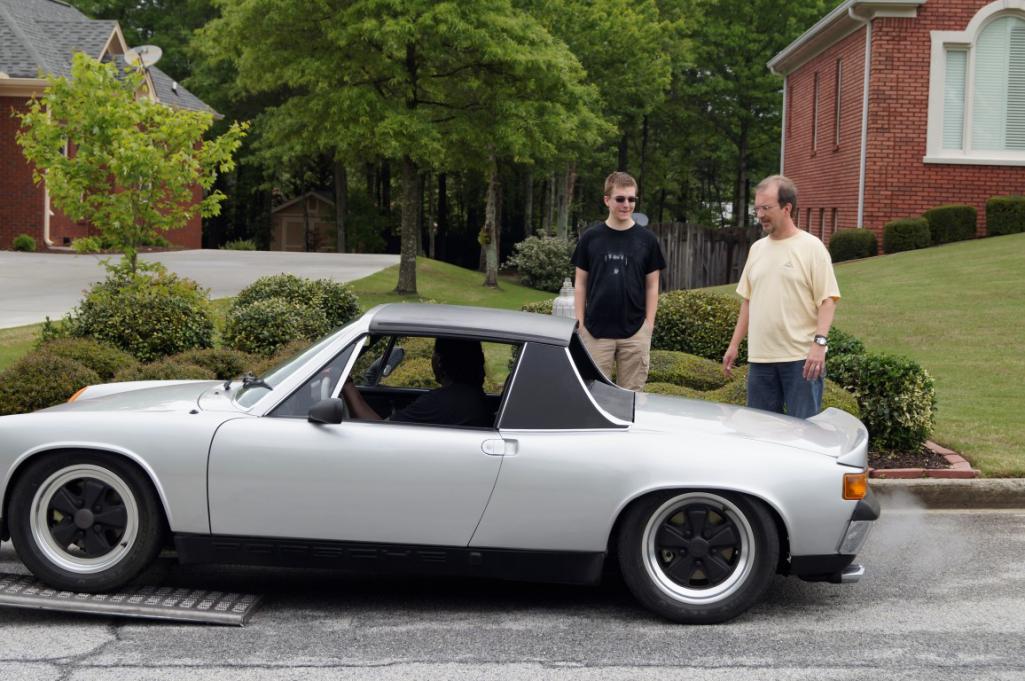
Here is a pic of it before it was delivered. 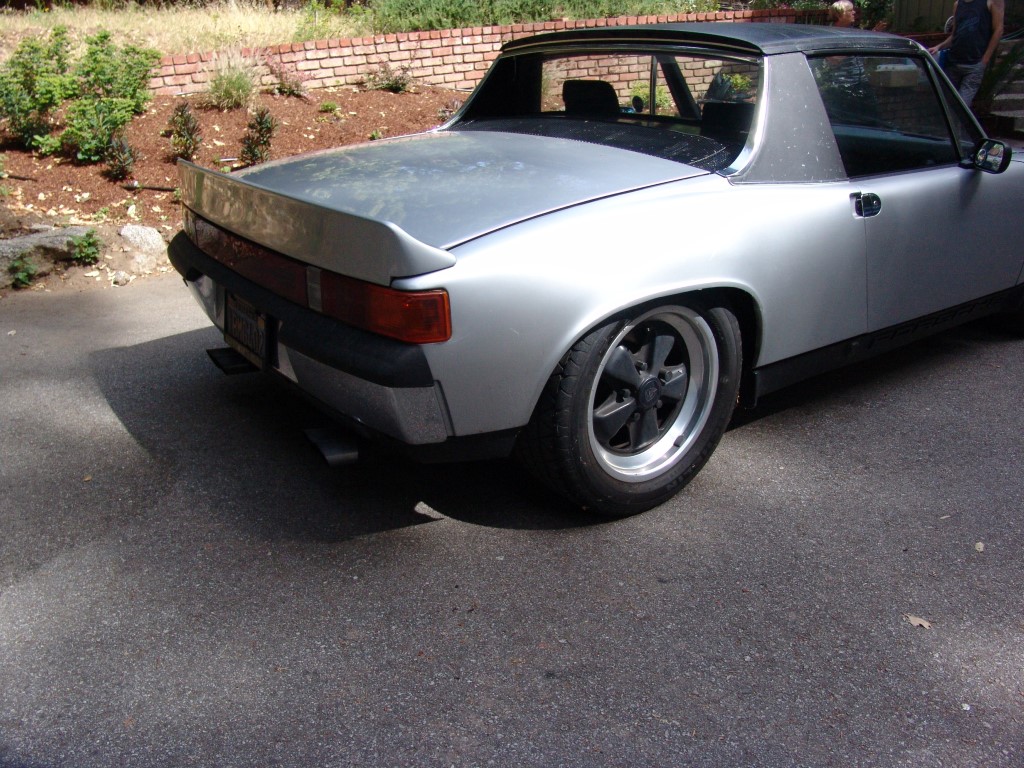
Its hard to tell but this is a 225 on a 7x16, the sidewalls are ballooned out pretty good.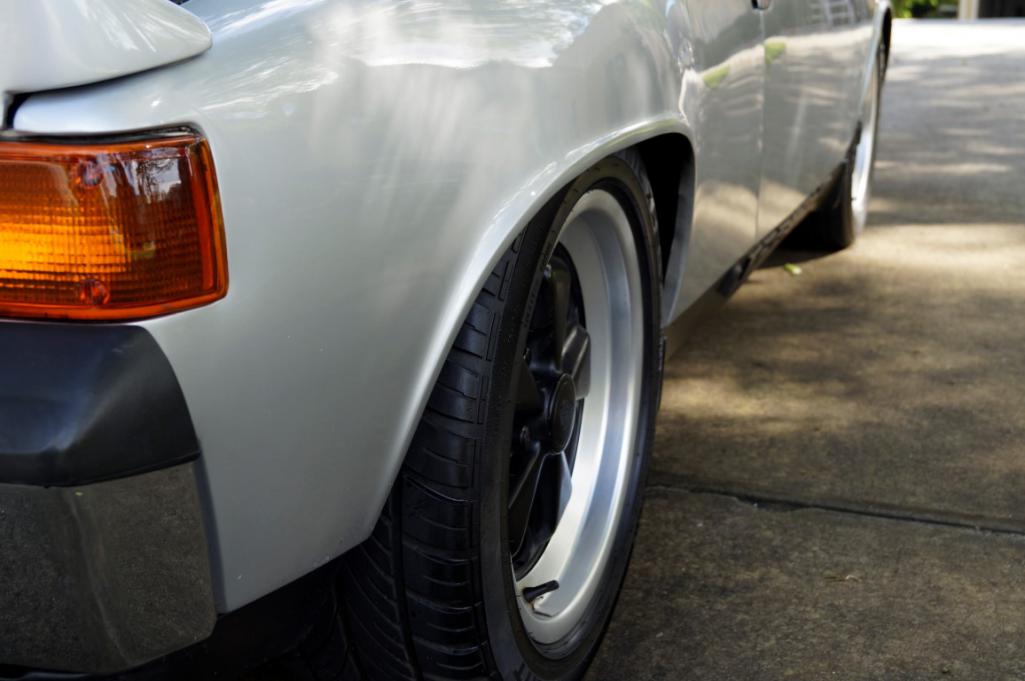
Here the same size tire on an 8" - the sidewalls are straighter and the offset pushing them a little further out (about 1/2 inch front and rear).
The tires are the same size (205s front, 225s rear) and the wheels are the same (all 16" Fuchs) but it came with 6s and 7s and I pulled from storage a set of 7s and 8s I had with tires the same size.
Sorry I don't have better pictures for comparison.
Its the first 914 I've had with a tailshifter transmission and I hate the shifting. I've got to figure out how to adjust it.
Posted by: bcheney Apr 27 2015, 08:05 PM
Fantastic story and great car! Congrats on a VERY nice purchase. I love the rear flares!
Posted by: db9146 Jul 24 2015, 09:33 PM
I been working on a number of projects on it since I got it....trying to get it ready now for Okteenerfest. Some things I've done:
- detailed wash, polish, and wax,
- cleaned the underside of the engine and transmission
- replaced rubber fuel lines, filter and electric fuel pump (old one was really noisy)
- replaced ss braided brake lines that had frayed on both side in the front with stock rubber lines and completely bleed the brakes (much better now, found out it has mid-'80s Carrera calipers on the front, all calipers recently rebuilt by PMB, and a 19MM Master)
- moved up from 6s and 7s x 16 to 7s and 8s x 16 and installed new Continental ExtremeContact DWs
- replaced the rear KYBs and springs with Koni yellow sport coil overs with 10" QA1 140-250lb progressive springs (really helped the ride)
- removed the rear swaybar (it was really binding up - bent one of the mounting bolts)
- backed off one adjustment on the front swaybar
- replaced all of the shifter and shifter rod bushings and adjusted the linkage
- rebuilt the pedals with new bronze bushings
- replaced some bushings in the throttle linkage
- balanced the carbs and adjusted the idle
- installed a new Momo steering wheel and shift knob
- replaced the front spoiler
- replaced the exhaust with a 2 in / 2 out sport muffler
- installed front and rear euro LED turn and brake lights.
I still want to rebuild the front suspension and replace the trailing arm bushings before the trip along with a few other items.
Posted by: MoveQik Jul 24 2015, 10:54 PM
Nice! I am a sucker for the subtle fender pull with 8's hiding under them! :-)
Posted by: mgp4591 Jul 24 2015, 11:32 PM
Nice! I am a sucker for the subtle fender pull with 8's hiding under them! :-)


Posted by: HaraldD Jul 25 2015, 07:08 AM
Hi,
I think your new wheels are also 7"..
Could it be?
My Best
Harald
Posted by: PanelBilly Jul 25 2015, 07:15 AM
Too much fun. Owning a piece of history and getting to drive it too
Posted by: Annapolis914 Jul 25 2015, 08:06 AM
Nice work......how is the linkage and shifting since your adjustment?
If it is improved, what did you do?
Enjoy!
Posted by: db9146 Jul 25 2015, 09:27 AM
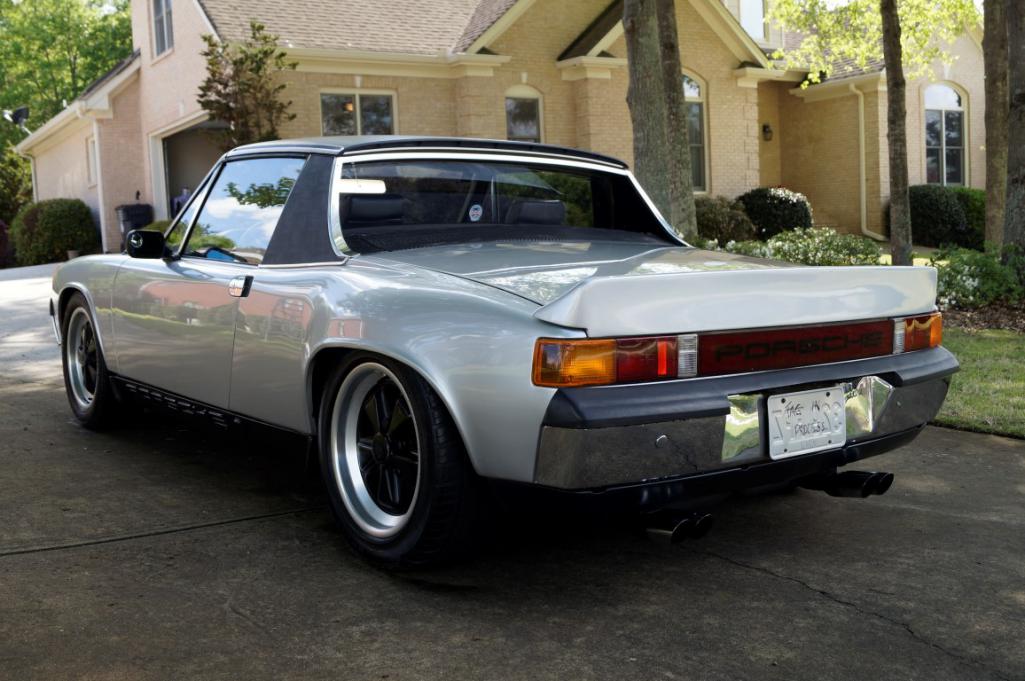
Thanks for the positive comments on the flares. There was a little metal added to make them "right", so more than just pulling them. The rears do give it a more muscular look.
Hi,
I think your new wheels are also 7"..
Could it be?
My Best
Harald
When I got it, the PO had 6x16s on the front with 205s and 7x16s on the rear with 225s but the tires needed to be replaced and they looked a little like donuts with the sidewalls ballooned out a little too much for my tastes so I pulled another set of wheels I had and put 7x16s on the front with new 205s and 8x16s on the rear with new 225s. If I had 10MM longer studs, I'd put some 7MM spacers on the rear to move them out a touch more with the flares.
As far as the shifting, I replaced all of the bushings and springs in the shifter console and the firewall and linkage housing bushings, then spent a good bit of time adjusting, driving, adjusting, driving - until I could get it into 1st consistently w/o nicking anything and make a gentle shift into 2nd so I don't nick reverse. 3rd, 4th, and 5th are okay. I think its as good as its going to get for now until I either rebuild the trans or swap to a sideshifter. My plan is to rebuild a sideshifter I have and install it with a JWest shifter that has the baseplate modified for the hand throttle of the -6. But this will be after Okteenerfest.
Posted by: cconcepcion Jul 25 2015, 12:27 PM
Ditto post #27! Nice lookin 6. Jealous. ...
Posted by: db9146 Aug 26 2015, 09:12 PM
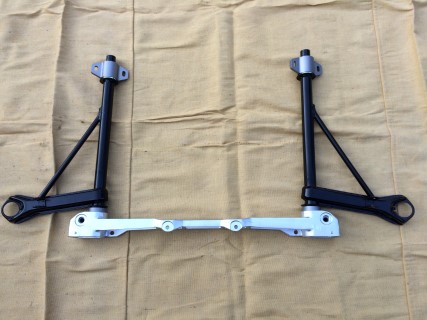
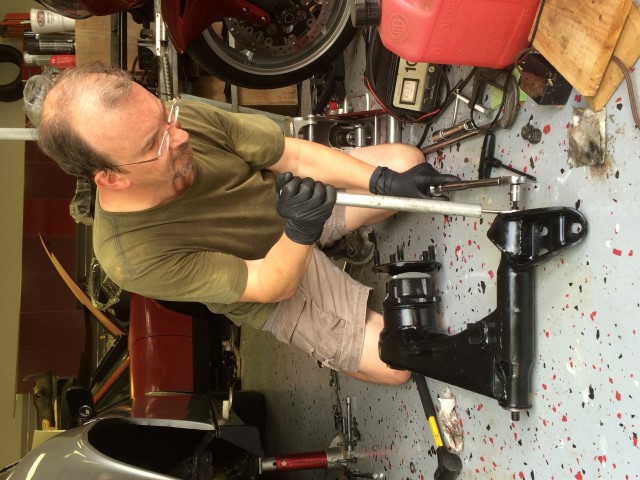
So with the Okteenerfest coming up, it has prompted me to get it in gear and refresh the suspension under the -6. The last time that the previous owner paid it much attention is probably back in the '80s when teflon bushings were added along with a 21mm H&H swaybar.
I started with the front looking like this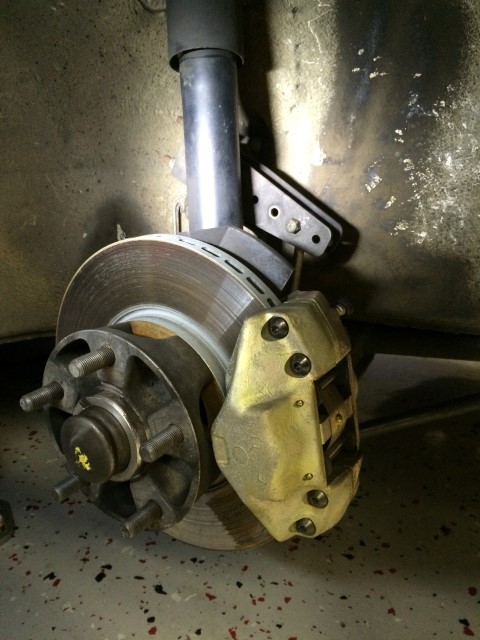
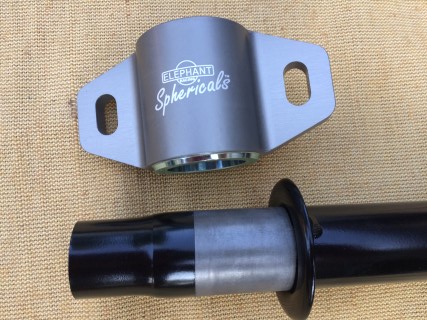
After a lot of cleaning, bead blasting, powder-coating, more cleaning, and basically a lot of work, its looking like this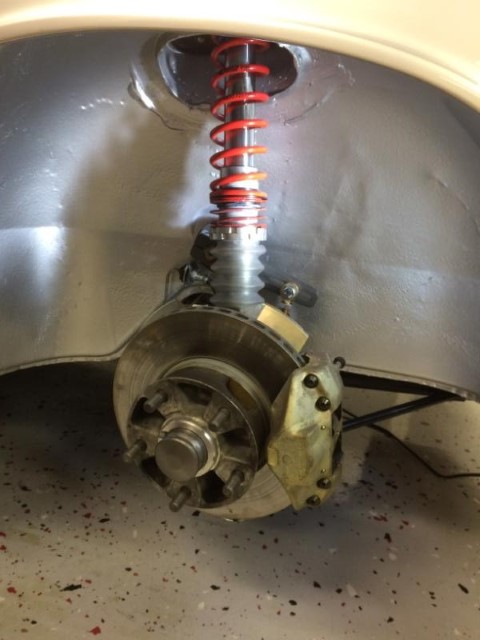
- cleaned and powder-coated the 911 A-Arms
- installed Elephant Racing Sphericals
- replaced the steel crossmember support with an aluminum one
- installed a set of NOS RSR front struts I squirreled away more than 25 years ago
- added new Bilstein sport inserts
- Eibach springs
- turbo tie rod ends
- new 19.4mm hollow GPR/Tarett swaybar
- new ball joints and hardware
- new wheel seals, inner and outer wheel bearings
- new brake lines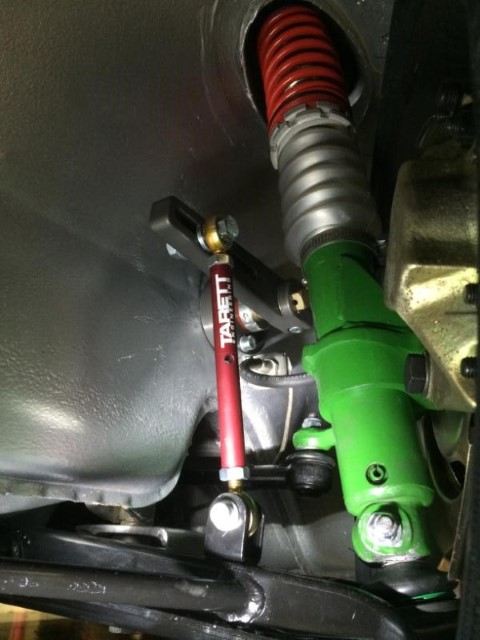
The brake calipers where restored in December by our good friend and resident brake expert, Eric.
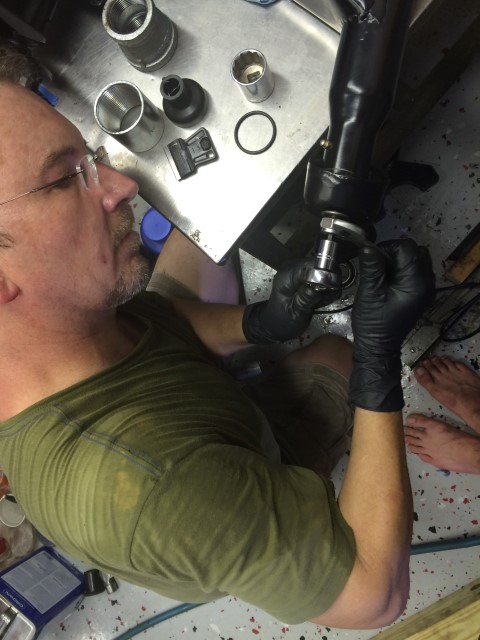
And a little help from my shop mutt.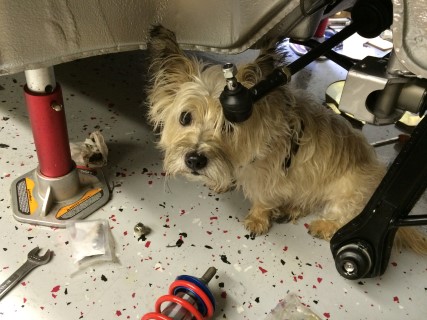
Posted by: 914Sixer Aug 26 2015, 09:24 PM
Looking good !!!
Posted by: db9146 Aug 26 2015, 09:29 PM
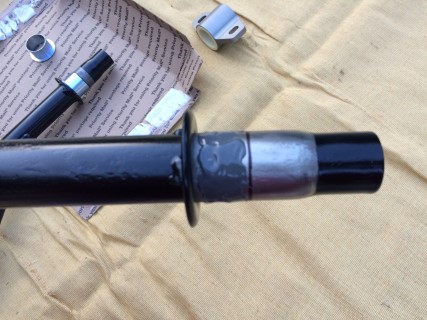
I found a new friend when it came to stripping the paint on the a-arms before powder-coating.....HD Easy Off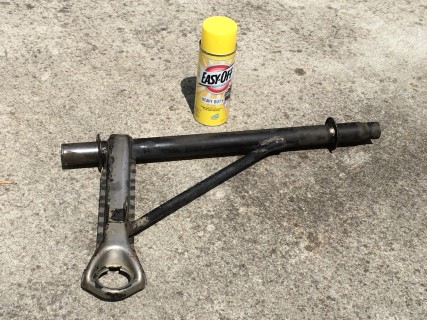
Then measured and taped off the bearing area on each end of the a-arms during powder-coating, roughed up the bare metal surface, epoxied the races in place, and after letting them cure, the installation was very easy.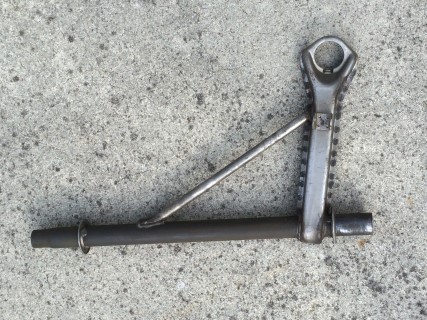
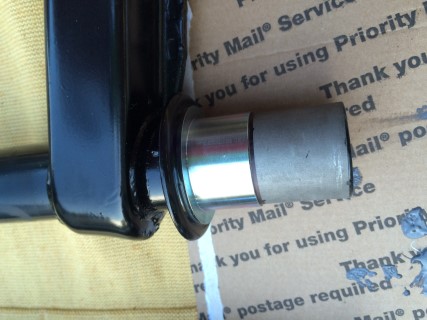
Posted by: db9146 Aug 26 2015, 09:32 PM
And speaking of "easy", the arms now move smooth as glass.
[attachmentid=514188]
Posted by: db9146 Aug 26 2015, 09:36 PM
Now for the rear!
I removed the trailing arms and stripped them - I found two different types of delrin bushings on the pivot shafts, white on one side and black on the other. 
Literally, I stripped them using EasyOff and then ground the welds where the swingarm stiffening pieces had been added.
Before: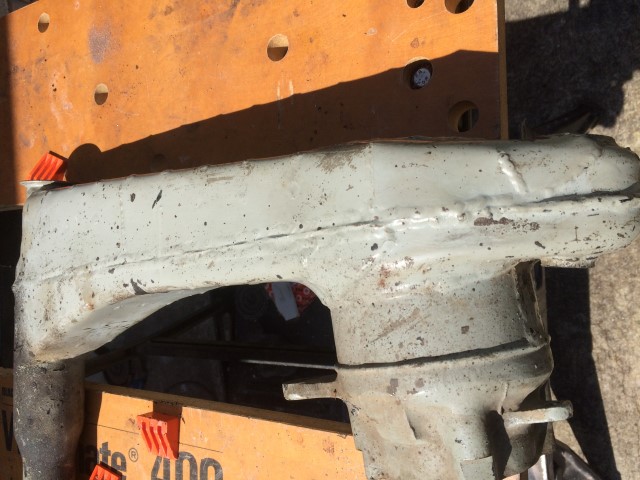
After: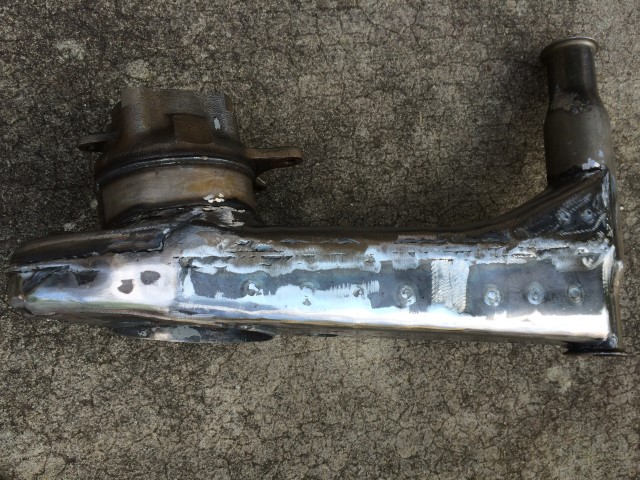
Then bead blasted them to get them clean, wiped them down, and powder coated them. Then installed a Mueller needle-roller bearing kit, zerk fittings, fresh hub bearings and cleaned up the wheelwells and the mounting points.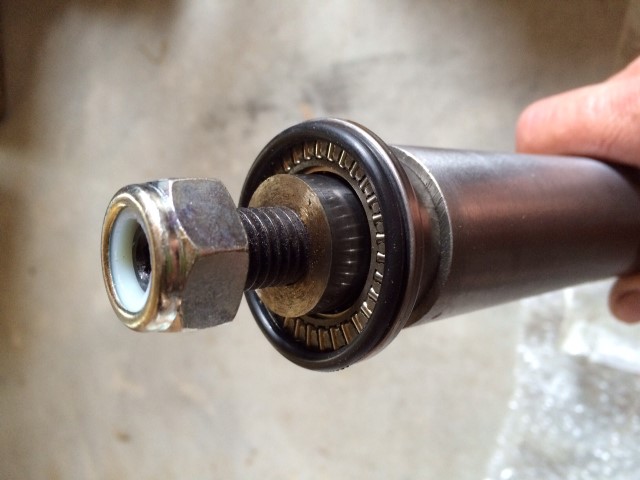
And now:
And the ride is SO MUCH BETTER!!!
Posted by: r_towle Aug 26 2015, 09:37 PM
You promised you would not modify it.....hahahahaha
Posted by: db9146 Aug 26 2015, 09:49 PM
What? I'm "improving" it.

Posted by: 396 Aug 27 2015, 02:50 AM
So with the Okteenerfest coming up, it has prompted me to get it in gear and refresh the suspension under the -6. The last time that the previous owner paid it much attention is probably back in the '80s when teflon bushings were added along with a 21mm H&H swaybar.
I started with the front looking like this
After a lot of cleaning, bead blasting, powder-coating, more cleaning, and basically a lot of work, its looking like this
- cleaned and powder-coated the 911 A-Arms
- installed Elephant Racing Sphericals
- replaced the steel crossmember support with an aluminum one
- installed a set of NOS RSR front struts I squirreled away more than 25 years ago
- added new Bilstein sport inserts
- Eibach springs
- turbo tie rod ends
- new GPR/Tarett swaybar
- new ball joints and hardware
- new wheel seals, inner and outer wheel bearings
- new brake lines
The brake calipers where restored in December by our good friend and resident brake expert, Eric.
And a little help from my shop mutt.
Very nice!
What spring rate and tender are you using?
Congrats on a fantastic build
Posted by: db9146 Aug 27 2015, 09:33 AM
Actually, I'm starting off softer than when I bought it and working my way from there if needed. It had 21MM torsion bars, a worn out 21MM sway bar, and Boges with teflon bushings on the a-arms. In the rear, it had teflon bushings, KYBs, and unmarked stick springs. It rode like a buck board.....with a couple of square wagon wheels.
FRONT
200 in/lbs main spring (the helper spring is just to keep it seated properly, no effective rate)
Bilstein Sport inserts
19.4mm hollow GPR/Tarett sway bar (set about 30% off full soft to start)
REAR
140-250 progressive springs
Koni Sport 1050 shocks (a couple of clicks off full soft)
New Michelin Pilot Sport AS3 tires
I'm looking for good handling on the street and if I get a chance to autocross it, I'll have enough adjustibility to make some changes. Switching springs, adjusting ride height, stiffening the sway bar are all pretty easy. Just got to find a good set of specs for the alignment.
Anybody got a recommendation?
Posted by: db9146 Dec 12 2015, 10:04 AM
Time for a few more updates.....
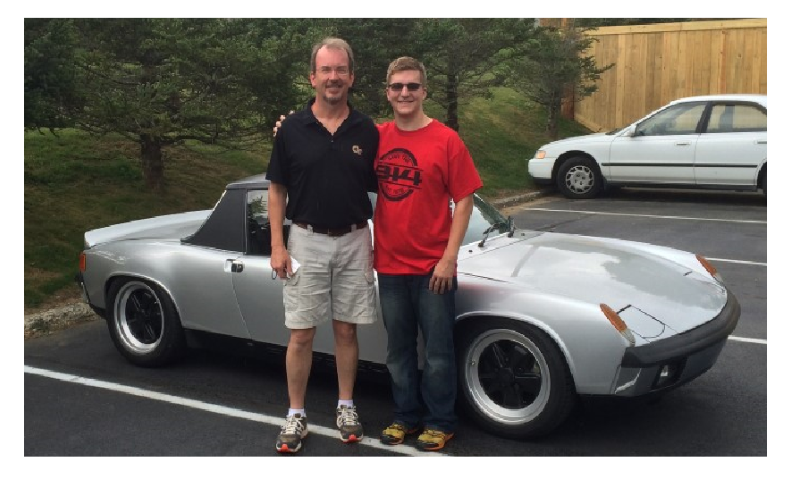
My 18y.o. son and I took it to Okteenerfest ... it ran great and handled really well in the corners. It was a really good trip and my son and I had some wonderful time together.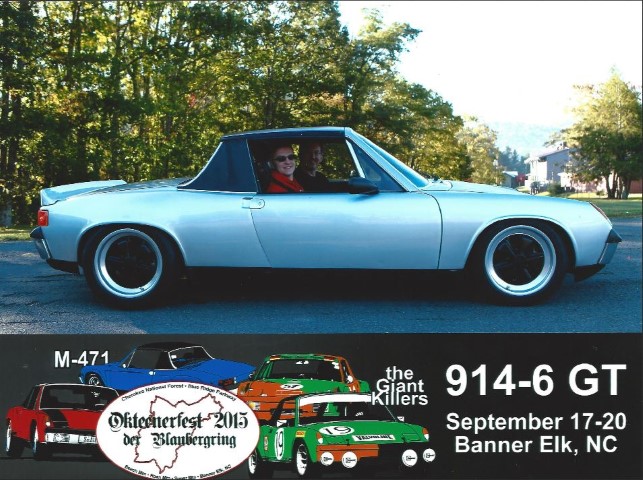

Posted by: db9146 Dec 12 2015, 10:35 AM
Since getting back from Okteenerfest, I've turned my attention to the interior of the car and have sorted out a number of issues.
The PO had installed power windows back in the late '80s I think. Over the years, they had gotten slower and slower. While it is convenient to have power for the passenger side at times, I decided that its really not worth it so I pulled the motors out and converted back to the stock winders.
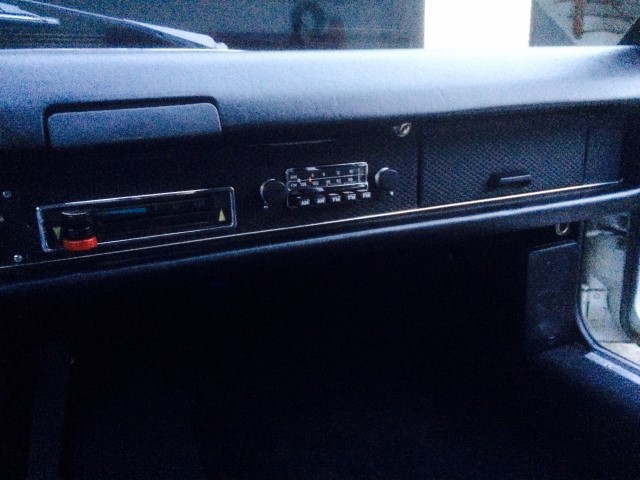
Then I started in on the wiring mess, removing the 30y.o. alarm system, the awful aftermarket stereo, amp, graphic eq, and speakers, the dash-mounted voltage meter (mounted in the stock radio location with a 2-hole meter pod - and one hole left open!) and the associated rats nest of wiring. (separate post http://www.914world.com/bbs2/index.php?showtopic=265903&hl=)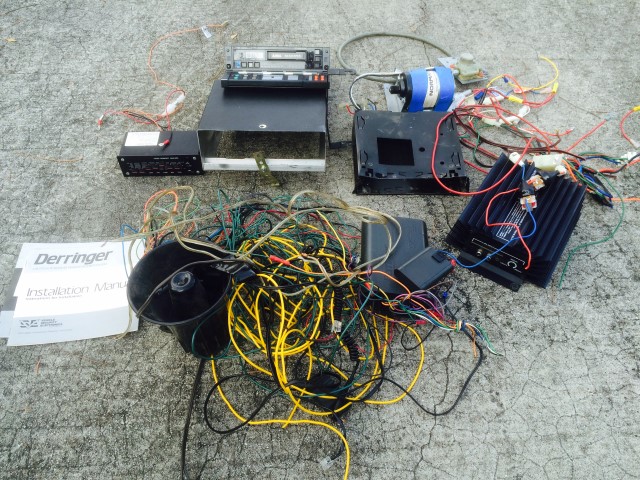
And lastly installed the proper Blaupunkt AM/FM stereo (refurbished and some new knobs) with some vintage ADS 200i speakers in some repurposed and refinished metal enclosures and a 3.5mm jack for iPhone (Pandora) input.
Posted by: r_towle Dec 12 2015, 05:19 PM
You claimed you would not touch this one......but it's liked a drug that cannot be resisted.
Hope you can drive it up to Hershey this year.
Rich
Posted by: db9146 Dec 12 2015, 06:58 PM
But Rich, you don't understand....I'm fixing it!

Seriously, I am putting the interior back closer to stock.

Posted by: r_towle Dec 12 2015, 07:08 PM
"Fixing" is another word you can use.....
Posted by: db9146 Dec 12 2015, 07:21 PM
Hey Rich, here's some proof. When I got it, the interior looked like this: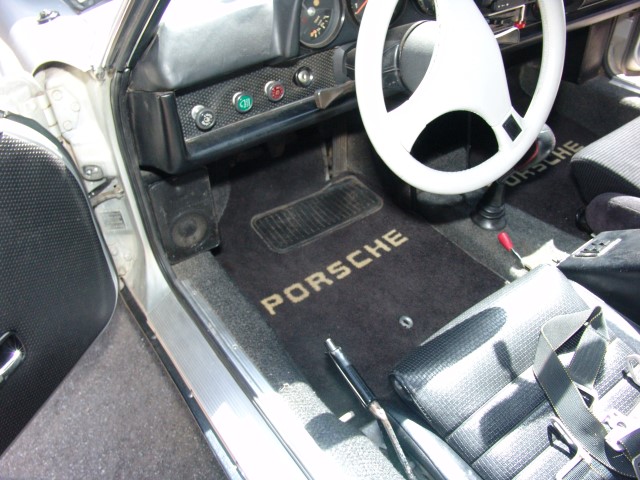
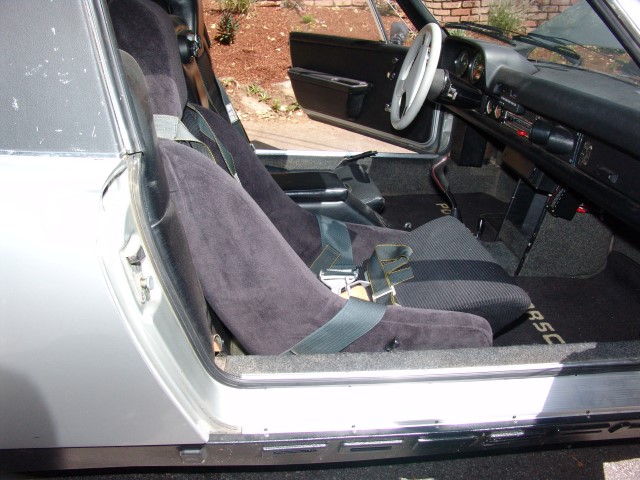
It was pretty ugly and really looked like a top notch hack job! A white steering wheel, a butchered center deposit, gauges where the radio is supposed to be, and a Sheel Mann seat in the passenger location!
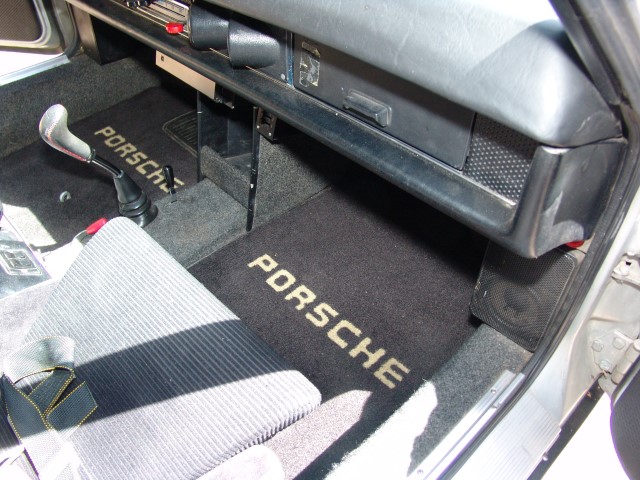
After some time and elbow grease, the interior now looks like this: 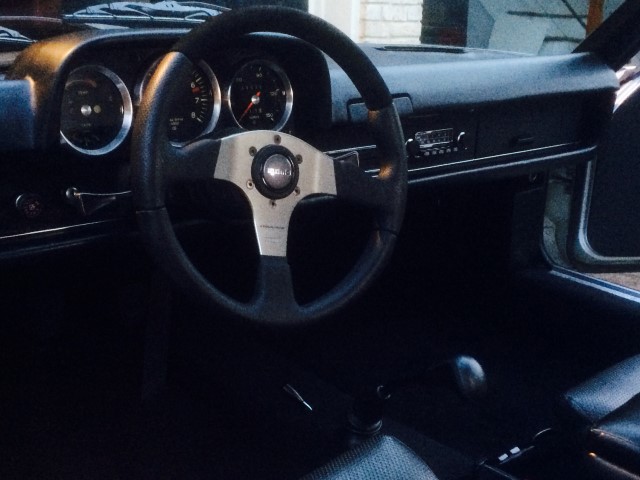

with one small 944-esque modification. As I was putting in the new black carpet and new black Lloyds mats, I reworked the emergency brake handle like so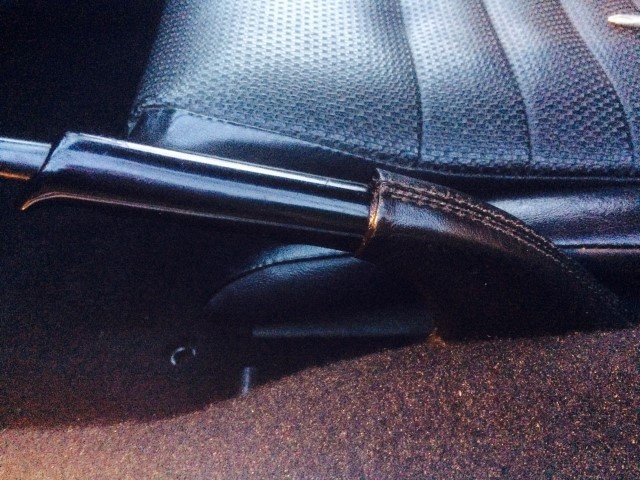
I'm much happier with the interior now......still have some things on the list.
Posted by: db9146 Dec 12 2015, 07:52 PM
Today it was a beautiful 70 degree day so I got out all the toys (almost, Ravenna green 2.0 is non-op at present) and washed them all and took each one out for a ride.....great way to enjoy the day.
Attached image(s)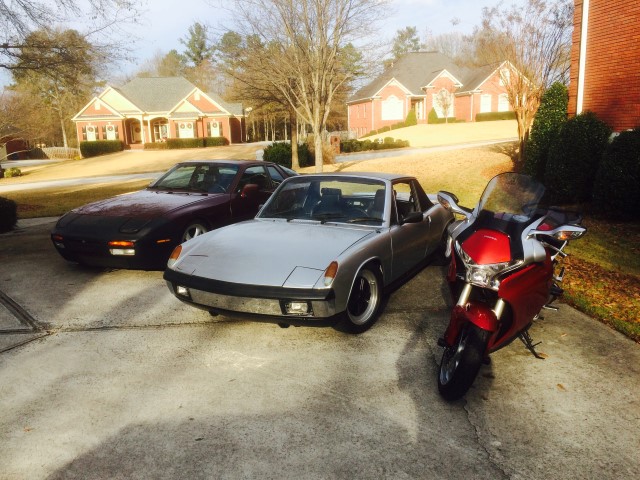
Posted by: db9146 Jun 14 2016, 12:22 PM
2016 Okteenerfest coming up.....thinking up options for this year's "improvements". 
Posted by: r_towle Jun 14 2016, 01:23 PM
A 3.6
Posted by: db9146 Jan 27 2017, 01:17 PM
When I bought my -6, it had 130K miles and as far as I could tell in the documentation and from talking with the PO who had owned the car for the last 33 years, the engine had never been rebuilt. I have taken the car to a couple of local experts for a more thorough analysis than I have the knowledge to perform and came away with a number of pretty expensive items that would need to be addressed: carb rebuilds ($3K +), new heat exchangers, rebuild engine, etc.......and still wind up with a 2.0 gutless wonder (sounds great but no grunt).
So I know my approach might run against the grain with some but since it's my car...
I have started the process of dropping in:
- a rebuilt 2.7S with 9.5:1 forged pistons,
- individual throttle body F.I.,
- distributorless electronic ignition,
- a pair of Ben's 1 5/8" SS HEs,
- a Kennedy Engineering 228mm Stage 1 clutch package,
- a side-shifter trans, and
- Tangerine Racing's complete shift linkage kit with a JWest shifter
I've never taken on a project anywhere close to this magnitude so I'm sure that I will take more time than most to get it all done. I started pulling together the pieces of the project back in August, starting with the engine. Just for my own sake, I'm going to document the steps here because I'm sure that there will be suggestions of how to do things or other items to check that I will not think of and need you guys watching over my shoulder. Unfortunately, there are few teeners around these parts.
My adage just for those wondering, is to do no harm (make no modifications to the car that can't easily be addressed or returned to stock), make it look stock (and/or as period correct as possible), and clean and correct any issues I find as I move along through the project.
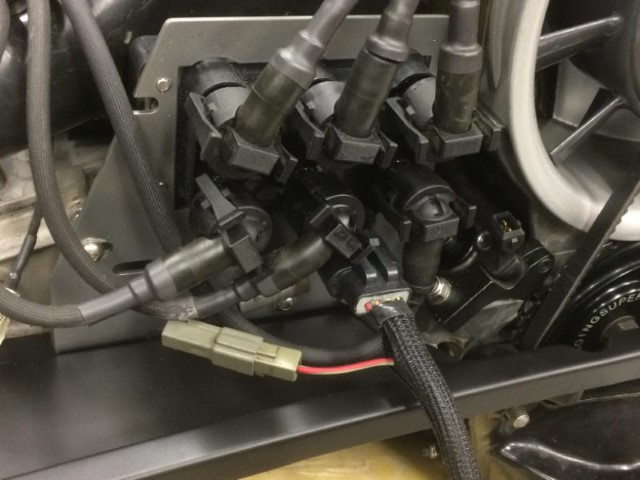
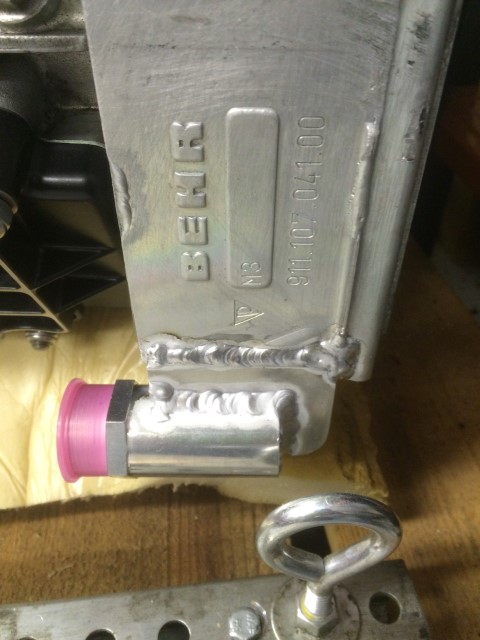
Starting with the engine....its a '74 911S that was completely gone through by someone who has done many of these with the correct machining, upgrading to 9.5:1 JE forged pistons and changing the S cams for E cams to make it a better engine for my tastes. I had the builder replace the CIS with ITBs and EFI, managed by a Megasquirt MS3 box with the expansion card. Next, we removed the distributor and replaced the ignition with an EDIS system tied into the trigger wheel and the MS3 ECU for control. He did enough wiring to get it running on his stand but I redid all of the wiring to clean it up and tie it into the factory -6 circuit board, per my adage. I'm going to be using some rainhats to top of the ITBs for now although I may move to a stock air cleaner assembly with a velocity stack on the front. I got a set of Ben's new 1 5/8" SS HE just this last week and have a surprise in the works for the rest of the exhaust. 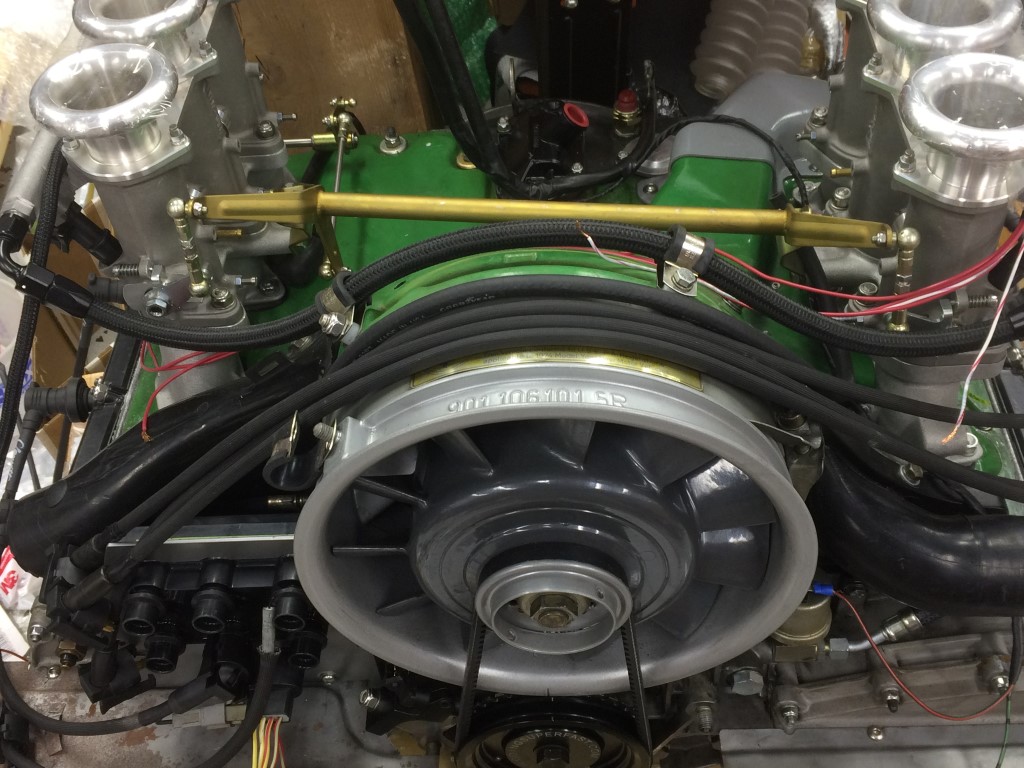
Posted by: db9146 Jan 27 2017, 02:24 PM
Wiring the engine has come in stages as I have tried to compartmentalize it.
First, was the actual wiring of the FI and sensors on the engine. I followed the MS3X diagrams and tied in one of the oil (coolant) temperature sensors along with oil pressure and air intake temp. All of the ECU connections from the engine will be in one harness that terminate into a single connector for easy engine removal in the future. throttle position sensor
 intake air temp sensor
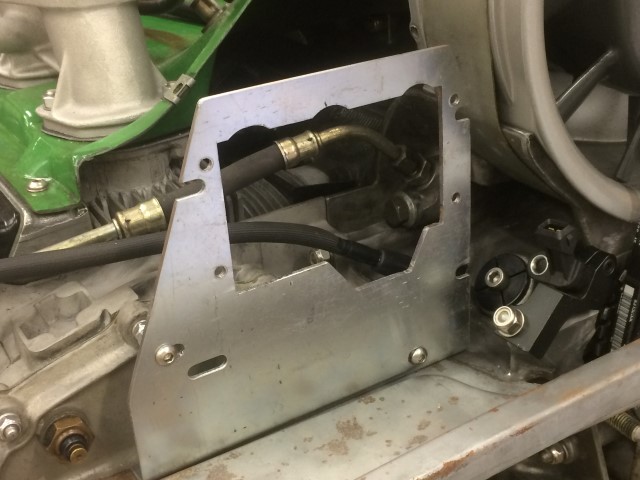
I plan on mounting the bulkhead portion in this aluminum housing since it will mount neatly using an existing stock hole on the passenger side of the engine shelf near the right "hell hole". I looked at other housings and couldn't find anything else that mounted as easily or used existing holes....other than just letting a bare connector rattle around unsupported (not doing that).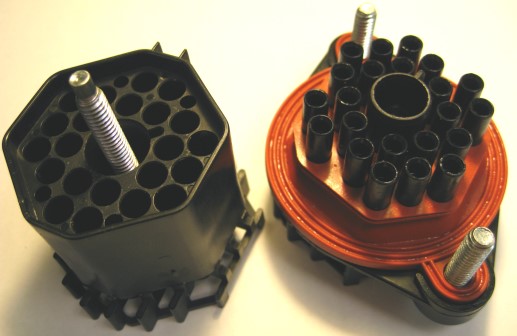
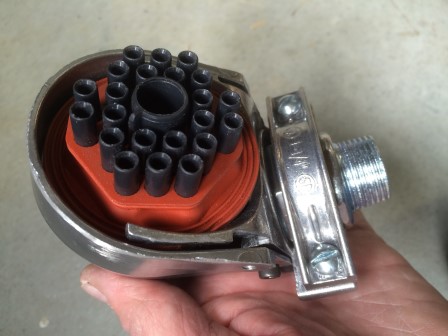
This connector will handle everything back to the ECU under the dash.
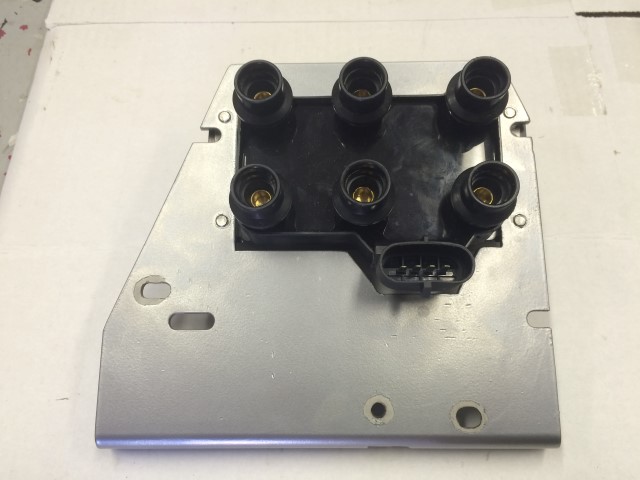
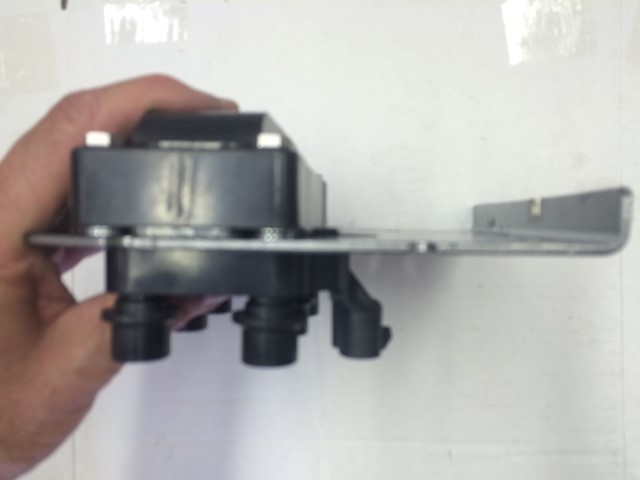
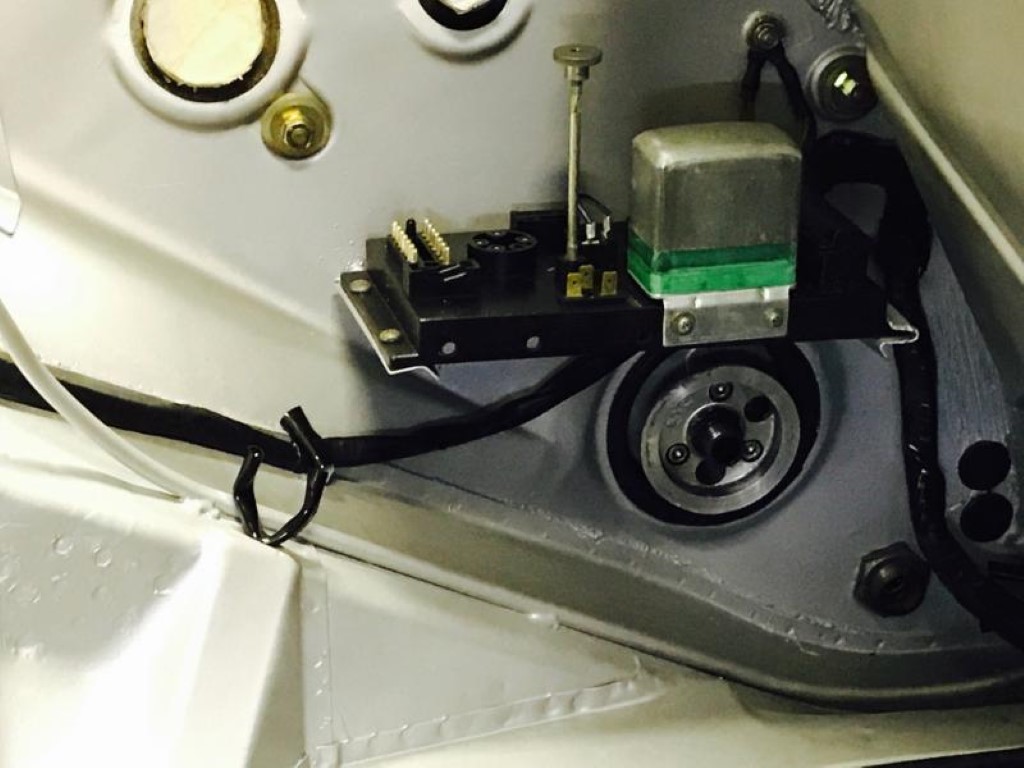
Posted by: db9146 Jan 27 2017, 02:38 PM
The next item I started working on was the ignition. I'm using a 6 cyl. EDIS set-up with Clewett wires. I made a bracket for the coil module to mount it in the same location as the distributor. The mount is supported by the engine tin screws and some threaded stand-offs back to the cam cover studs but only for vertical stability as the mount has an "L" shape to it to support the weight of the coil and spread it across the shelf along that side of the engine. It came out pretty well, I think...the mount is nice and solid.
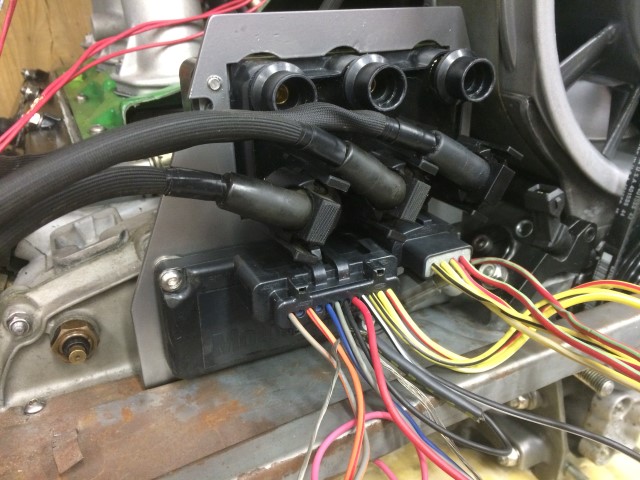
I thought long and hard about mounting the ICM (ignition control module) on the same mounting plate just under the coil pack (like the pic below) but after some research, I decided to move it off the engine altogether for EMI and heat reasons.
I reworked all of the Clewett plug wires to clean them up and adjust the length as well.
Attached image(s)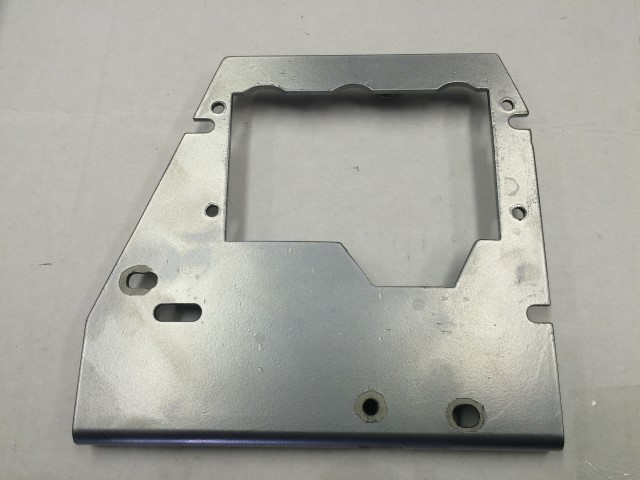
Posted by: db9146 Jan 27 2017, 03:02 PM
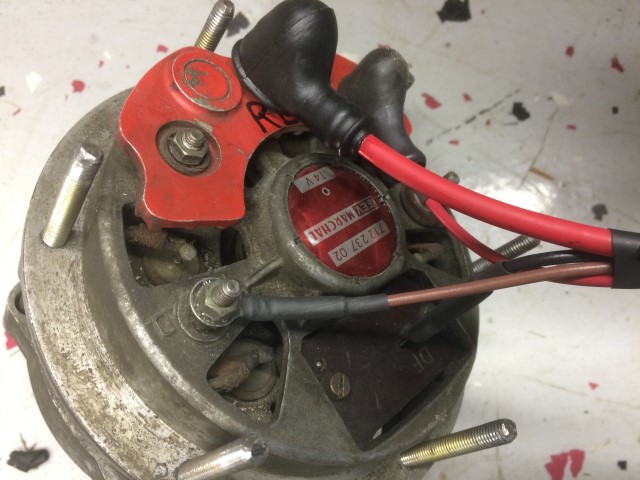
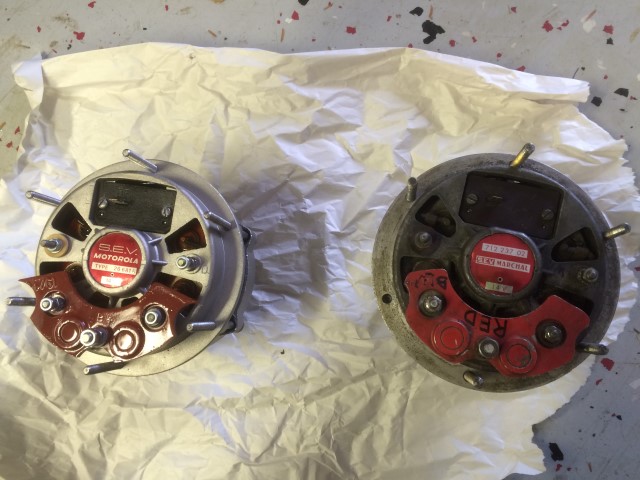
Next, I pulled the alternator to inspect it and decided to replace it with a remanufactured original (with the external voltage reg) from a company in California and an engine wiring kit from Perry Kiehl (thanks again for the kit and the advice Perry!!). I waited to terminate the connections for the 14-pin plug to the stock -6 circuit board and the starter and reverse lights until I have the transmission mounted on the engine. I've been researching a lot to find the right terminals, harness materials, connectors, etc. to make all of the harnesses as bullet-proof reliable as possible....I hate chasing wiring/electrical gremlins.
The old alternator looked like the original unit (dirty and tired).
 [attachmentid=590
989]
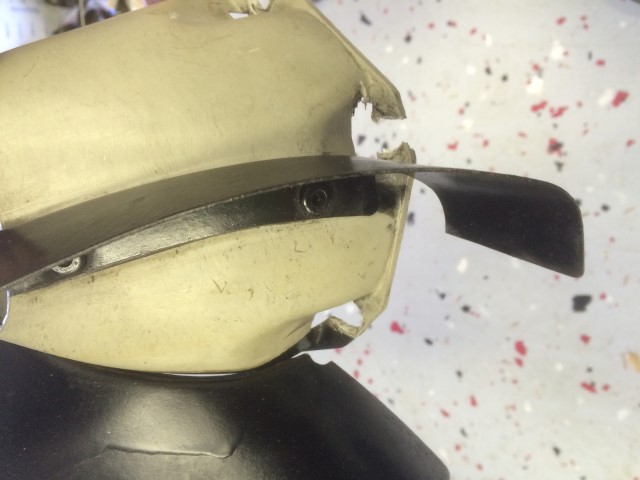
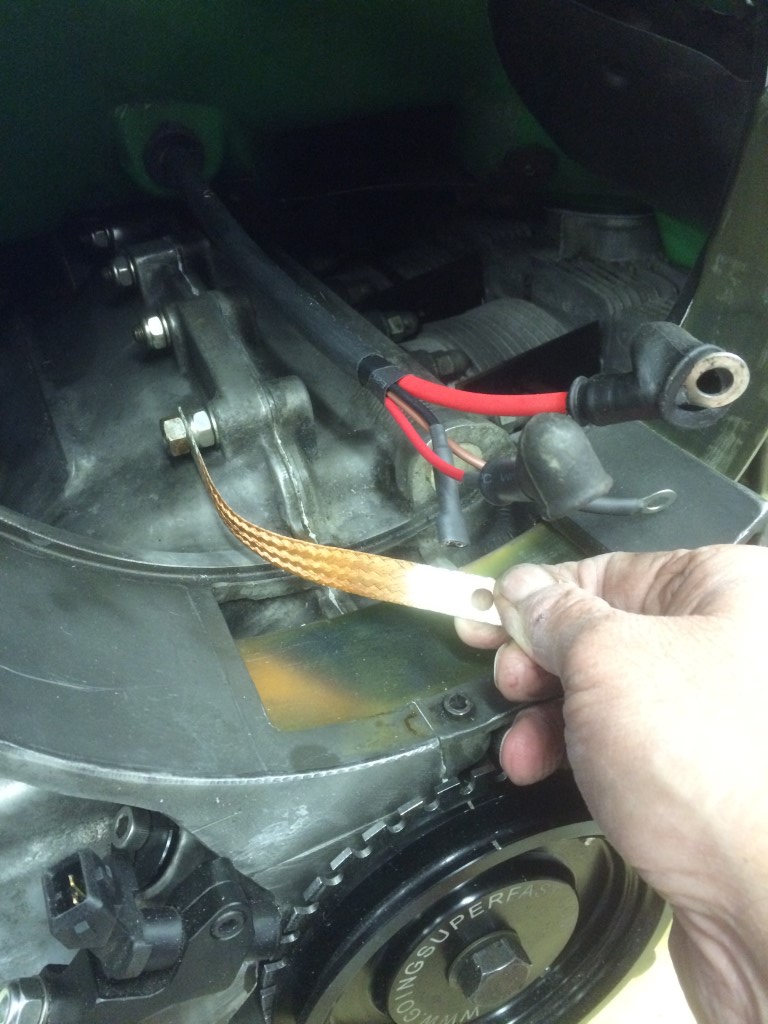
"While I was in there", I sourced the correct air guide (that was in much better condition) for the back of the alternator and installed a new braided ground strap per a Porsche service bulletin of the day (you can just see the new copper strap).
Attached image(s)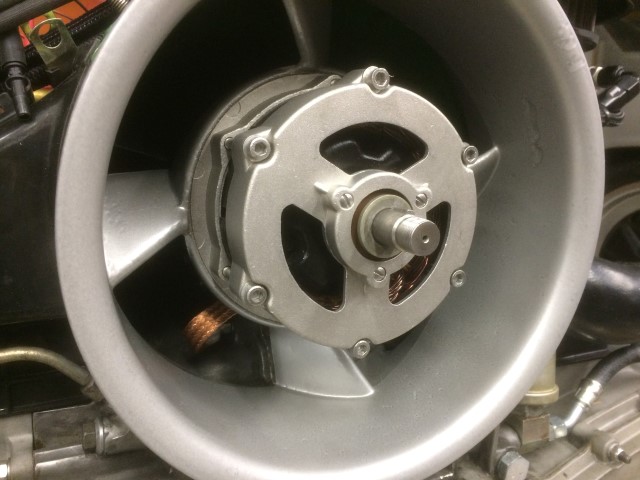
Posted by: 6freak Jan 27 2017, 04:09 PM
dont forget the extra oil cooler  have fun
Posted by: jmill Jan 27 2017, 04:29 PM
I can't believe I missed this thread. This car looks exactly like the 914 that gave me the desire 30+ years ago. When you say near San Francisco, did it happen to come from Daly City? If so, it might be one in the same.
Posted by: db9146 Jan 27 2017, 04:37 PM
John,
Could be. The gentleman I bought it from lives in Woodland Hills. I believe he had owned it since '83, IIRC.
Posted by: Larmo63 Jan 27 2017, 04:41 PM
Wow, that looks great!!! Thanks for all of the pics, keep 'em coming!! Maybe you don't know it, but you are inspiring me by moving forward so swiftly.
Posted by: ThePaintedMan Jan 27 2017, 04:47 PM
Nice work! Pretty car. Can I make one small request? With all the mechanical work you're going through, can we get those fog lights replaced with the correct ones along with the grills?
Posted by: db9146 Jan 27 2017, 04:50 PM
Working on the harness for the EDIS and trying to figure out how best to tie it in for the long haul was fun and yet challenging. I drove over to my nearest Pick-a-Part on two different Saturdays to get sections of wiring harness and then stripped the old tape wrap and cleaned everything. I was able to find a source for the factory ICM 12-pin connector so that I could create my own harnesses to the coil pack, the crank sensor, and to the ECU, that way I got good connections with no splices. I also incorporated the factory radio suppression cap at the coil pack and a grounding diode in the ground path.
Started with this:
and got to this: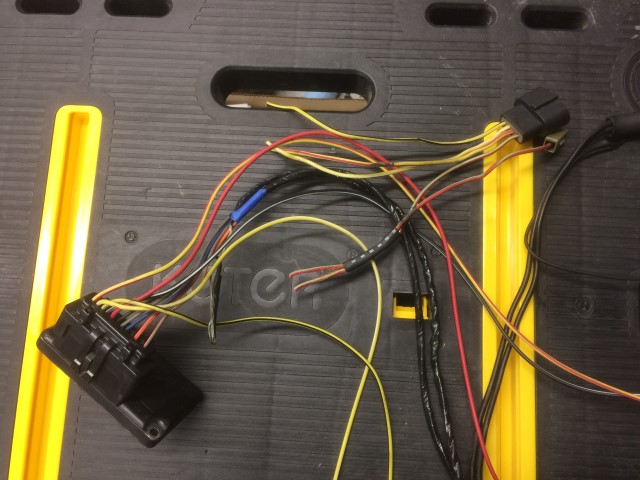
and finally to this: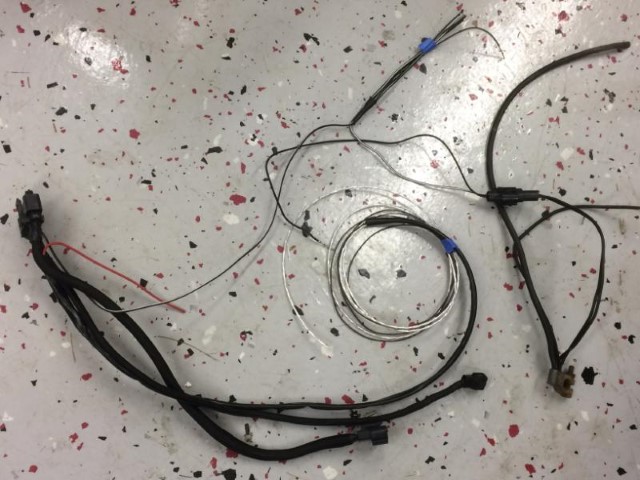
Just have to cut to length and terminate with everything mounted in the car.
Posted by: db9146 Jan 27 2017, 04:52 PM
I started work on this a few months ago and its amazing how much time it takes to figure stuff out, find the right parts, get the right items in hand, and then put them together....all in the course of a regular life as well.
Posted by: db9146 Jan 27 2017, 06:11 PM
dont forget the extra oil cooler
have funActually, that was one of the considerations for choosing the engine I did. I didn't want to have to cut the front trunk for a cooler or other areas for oil lines so I tried to pick an engine that would make it more fun to drive w/o adding an aux. cooler.
The other reason I had for going with the 2.7S is because for me, it seemed a better fit for the kind of experience I am looking for.
When I got the engine (which had just been rebuilt), there was a tremendous amount of crud in between the fins of the cooler which I'm sure would have affected cooling. So since I needed to modify the 911 oil cooler to work in the 914, I cleaned it really well by plugging the inlet and outlet and soaking it in carb cleaner as the first step. Once it was really clean, I sent it out to Rich Johnson to have him do the -6 oil cooler mod and then pressure test it. Now its like new.
Attached image(s)
Posted by: db9146 Jan 27 2017, 06:26 PM
Nice work! Pretty car. Can I make one small request? With all the mechanical work you're going through, can we get those fog lights replaced with the correct ones along with the grills?
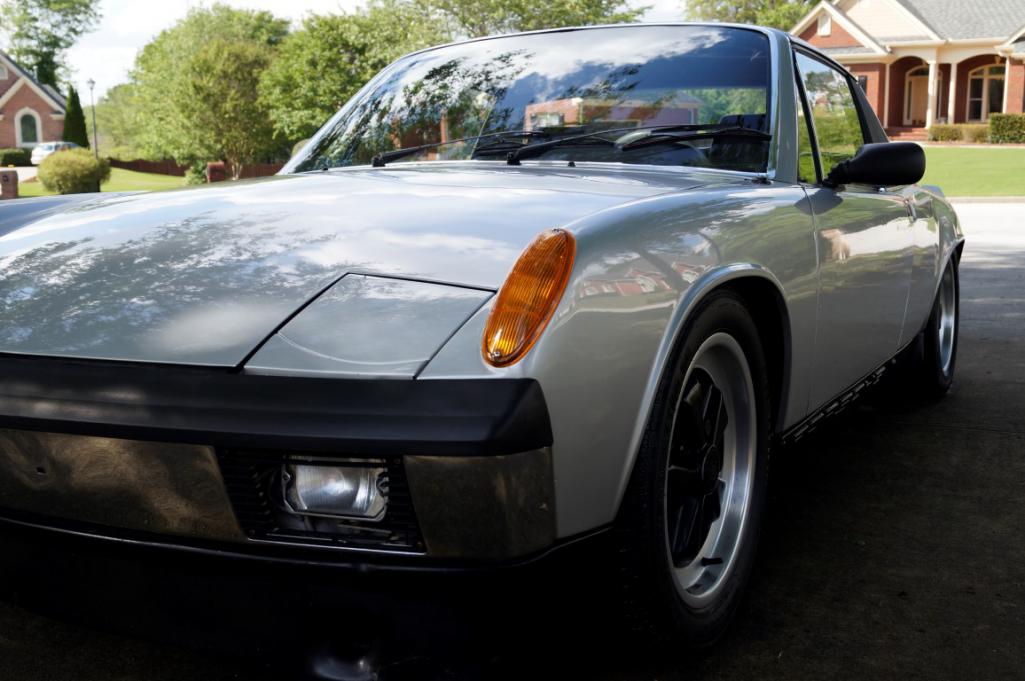
Thanks for the compliment but I kinda like the square fog lights in the bumper. They're different and fit with the "squareness" of the bumper. I'm looking for some square LED foglights to match the rest of the exterior lights that have all been converted to LED. I'm going to pay close attention when mounting them to make sure their centered and the modify the grills to fit.
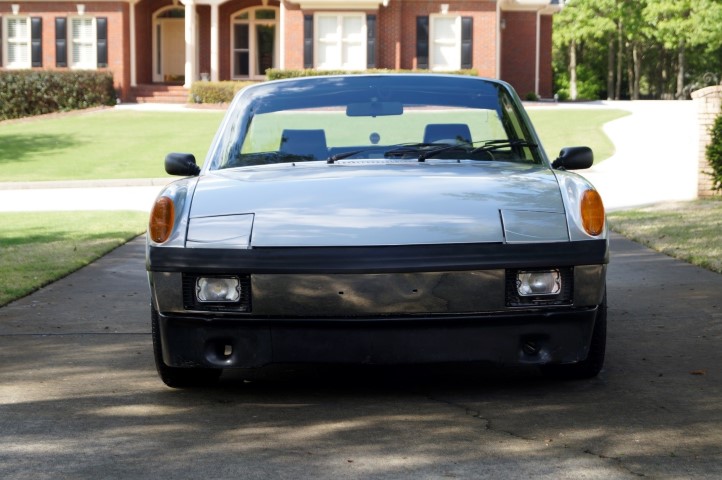 (with old spoiler)
But don't worry, I have a set of NOS grills and a set of 914Rubber's latest for when my son converts it all back to stock when I'm long gone!
Posted by: db9146 Jan 27 2017, 09:59 PM
For the trans, I decided to pull the stock tailshifter trans and store it off to the side with the engine. I had spent some time shortly after I got the car replacing all of the bushings and wear items in the shift linkage (rebuilt the shifter itself, replaced the firewall bushing, and the bushings at the back) and then adjusting the shifting until there just wasn't a way to make it better. I still had to shift it very slowly between 1st and 2nd....nearly got rear-ended a time or two when I would take off with some hotrod close behind me and then have to shift to 2nd!!
I had decided to reach out to someone here in Altanta for some help in rebuilding a sideshifter but since I have no experience with it (pulled it from a parts car I bought), he recommended that I put it in the car and drive it to understand what it needs. So, I guess I'll be pulling it later and rebuilding it then.
In the meantime, I cleaned up the sideshifter really well and then used some Gibbs to protect the magnesium from oxidation. I looked at a number of different options from some toxic near-military grade stuff to spray-on waxy compounds that sound like cosmoline. I have a nice billet intermediate plate that I'm going to install during the rebuild which will help with the strength of the trans under the added load and provide a proper mount for the bellcrank shaft for the throttle but until then, I've made up a bolt-on bracket for the bellcrank.
For the clutch/flywheel package, I called up Kennedy Engineering and asked for a recommendation. The engine builder estimated the HP output of the engine at around 210-220 based on his past builds so I went with a Stage 1 228mm package that's supposed to hold 250+ HP (IIRC) but still have a smooth, light feel....we'll see. Over the Christmas break, I tried bolting the flywheel on the engine to verify clearances so I could order the new starter. When I got the flywheel snugged down a little, the engine wouldn't turn over any longer with a wrench. Hmmmm...something's not right. I backed off the flywheel bolts and voila, the engine could then turned over again but then I heard something dragging. So I spun the engine over a time or two more and then pulled it off, applied some tape to mark the areas of concern, snapped a few pics of the back of the engine and gave Kennedy a call.
They wound up having me ship the flywheel back for some additional machining. After a week, the received it, machined it and sent it on its way back to me only to realize the next day that they had left the ring gear off. They contacted UPS and had them turn it around. After 2 weeks, I get a notice that the flywheel got lost and Kennedy is going to have to machine a new one....then another week of shipping back to me. Today, one month later almost to the day, I finally get it back. I'm going to try bolting it on again tomorrow to see if it fits properly now. Crossing my fingers!
Posted by: db9146 Jan 27 2017, 10:42 PM
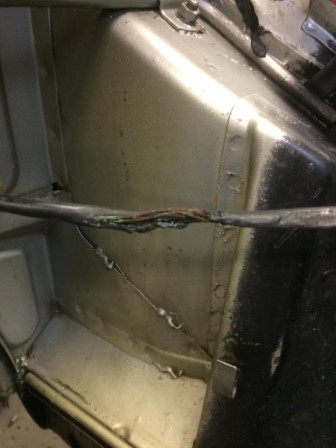
A couple of weeks ago while my son was home from college, he and I pulled the stock 2.0 -6 and tailshifter trans. Once I got the disconnected everything from the top, we moved underneath and pulled the shifter linkage, oil lines, and stock heat exchangers. I thought they were in pretty good shape until we got them off and I found out that the metal tab near the #1 exhaust port had torn a hole in the top of the HE about the size of a quarter.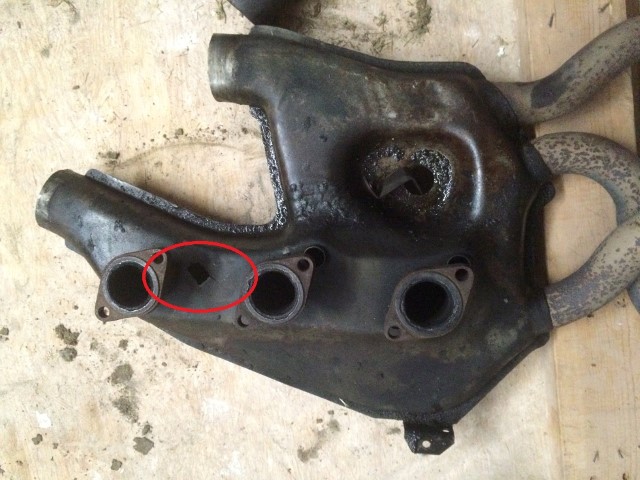
With a pallet placed on top of a furniture dolly, we positioned it under the engine/trans and used an assortment of wood and 1.5" styrofoam blocks to support both equally well. I then lowered the car the last 1" until it touched down, pulled the three bolts, and lifted the car off the engine with the Atlas 6000 lift. Wow, worked like a charm!
Here's a pic of the engine as it came out: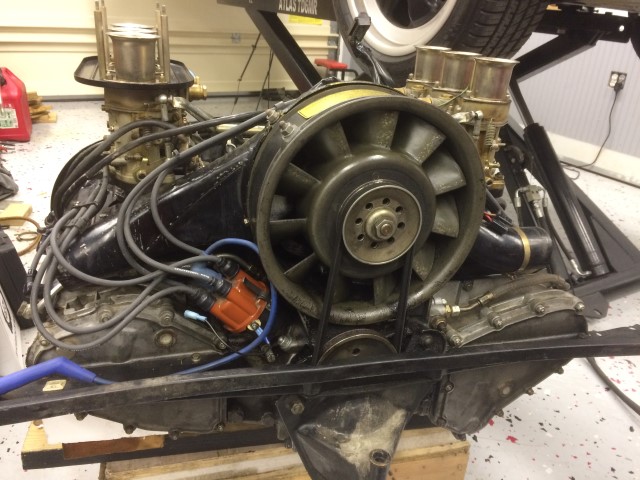
You can tell it's tired, huh?
Posted by: Larmo63 Jan 27 2017, 11:11 PM
Love the car, hate the fog lights. 
It's your car.
Did I say I love what you're doing, love the car?
Posted by: 914forme Jan 28 2017, 12:18 PM
Love this car, would like to follow in your steps
Posted by: mb911 Jan 28 2017, 02:39 PM
A couple of weeks ago while my son was home from college, he and I pulled the stock 2.0 -6 and tailshifter trans. Once I got the disconnected everything from the top, we moved underneath and pulled the shifter linkage, oil lines, and stock heat exchangers. I thought they were in pretty good shape until we got them off and I found out that the metal tab near the #1 exhaust port had torn a hole in the top of the HE about the size of a quarter.
With a pallet placed on top of a furniture dolly, we positioned it under the engine/trans and used an assortment of wood and 1.5" styrofoam blocks to support both equally well. I then lowered the car the last 1" until it touched down, pulled the three bolts, and lifted the car off the engine with the Atlas 6000 lift. Wow, worked like a charm!
Here's a pic of the engine as it came out:
You can tell it's tired, huh?
Didn't I just send you a replacement for those worn out heat exchangers?
Posted by: db9146 Jan 28 2017, 04:01 PM
Hi Ben,
Yes you did and they are beautiful. I have an Innovate Motorsports LC-2 WB O2 sensor I'm going to be plugging into one of the bungs and feeding the MS3X.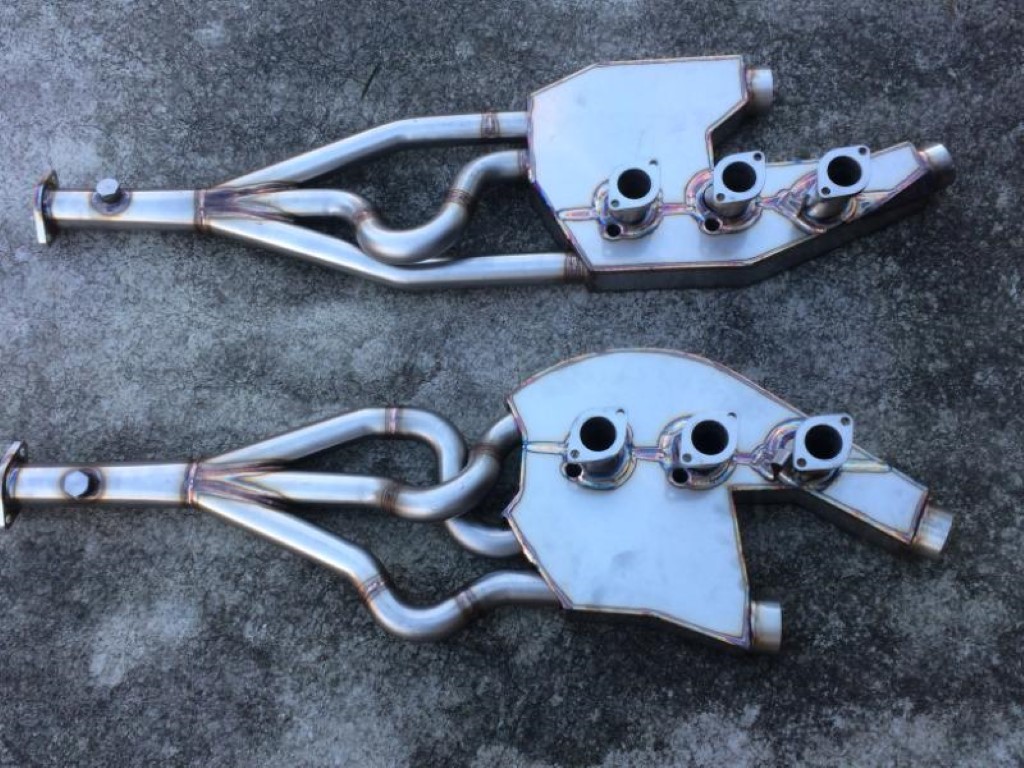
The rest of the exhaust is going to be surprise!!
Posted by: db9146 Jan 29 2017, 08:29 PM
Once I got the engine out, I started working in the engine compartment to clean everything up and look for any issues that I need to address. I've found a few on the original engine when I pulled it our as well.
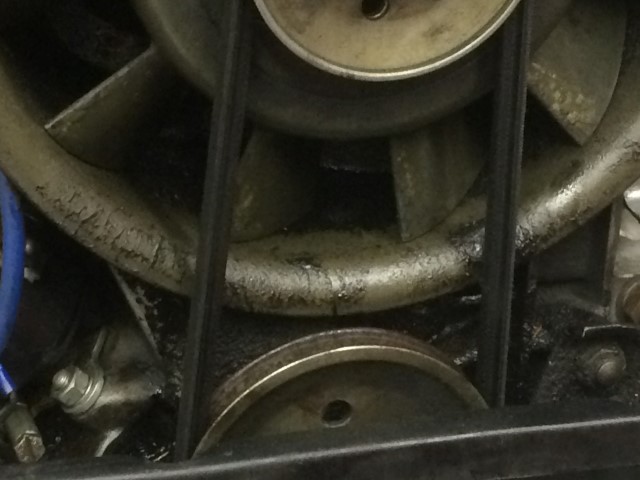
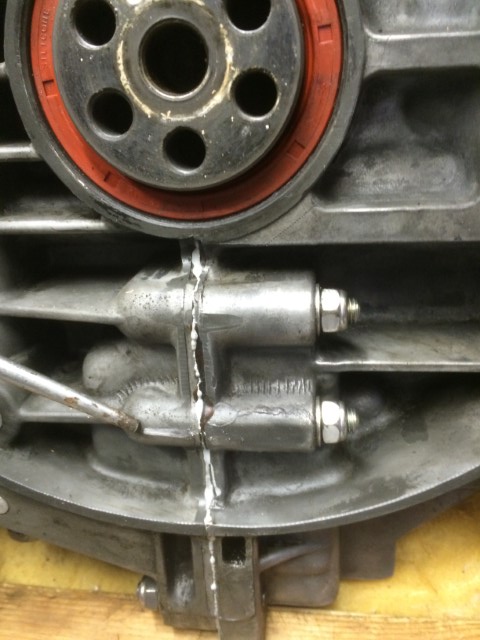
For one, there was a separate, heavy duty ground cable from one of the starter mounting bolts all the way back to the negative battery terminal in addition to the stock ground strap on the back of the trans up to the stud on the underside of the trunk floor. Another "interesting" issue I found on the original 2.0 once I had it out and was checking it over was this splice in the alternator output lead back to the starter.
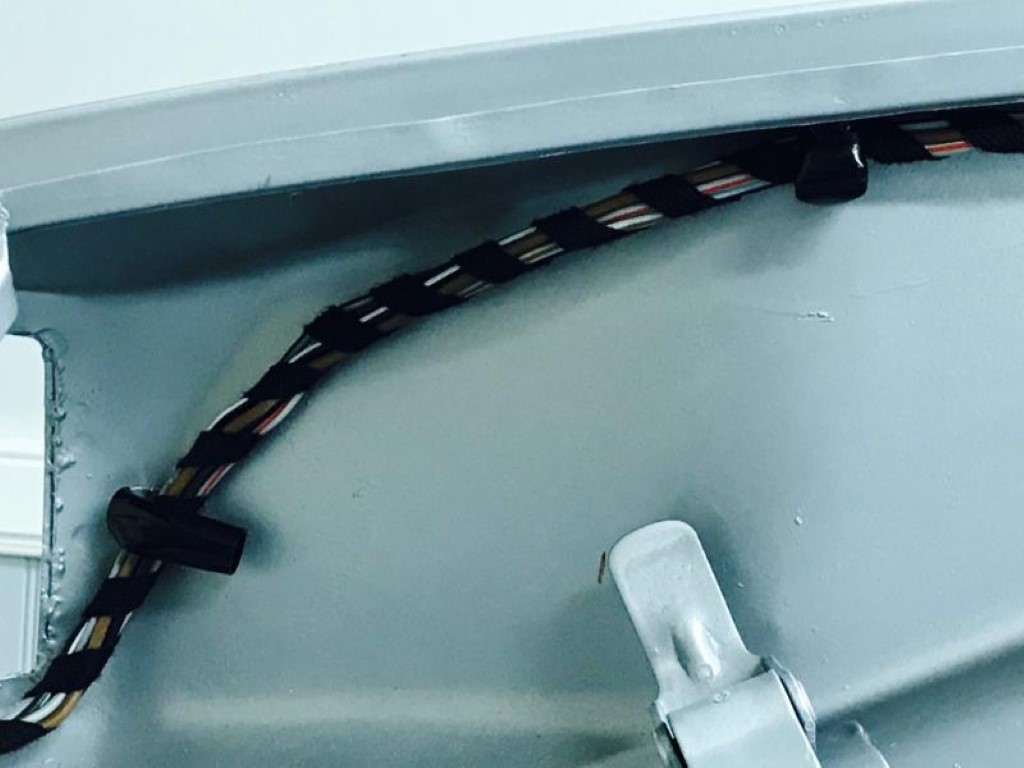
When I was looking over the wiring harness through the engine compartment back to the light in the trunk and the tail lights, I found an area on the PVC sleeve covering that was a bit "crunchy". I continued on up towards the trunk light and found more of the same.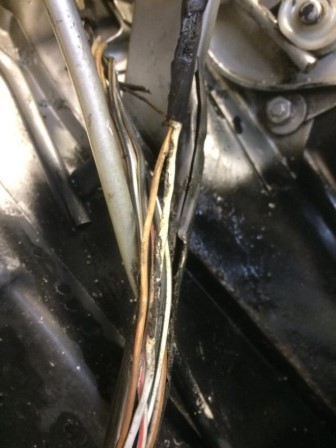
So I went back to a spare wiring harness I have and cut out the wiring for the rear trunk light, cleaned it up, and spliced it back into the harness and then wrapped the harness again.
Posted by: 6freak Jan 30 2017, 08:25 AM
dont forget the extra oil cooler
have funActually, that was one of the considerations for choosing the engine I did. I didn't want to have to cut the front trunk for a cooler or other areas for oil lines so I tried to pick an engine that would make it more fun to drive w/o adding an aux. cooler.
The other reason I had for going with the 2.7S is because for me, it seemed a better fit for the kind of experience I am looking for.
When I got the engine, I cleaned it really well and then sent it out to Rich Johnson to have him do the -6 oil cooler mod and then pressure test it. Although the engine was rebuilt, the oil cooler still had a lot of crud in the fins that I'm sure would have affected the cooling.
good deal and yes all that grim really afects cooling.. look into the bruce anderson cooling fins mod and how to cut them for better affect good luck nice hot rod
MikeC
Posted by: Larmo63 Jan 30 2017, 10:56 PM
I'm definitely installing a front cooler in my 2.7 conversion. You may need one in the future.
Posted by: Mike Fitton Jan 31 2017, 07:46 AM
I am running a 2.7S engine in my 6 right now it is from a '76 911S. Drove it to Okteenerfest from Chicago 11hrs each way with no engine temp problems and stock 6 cooler. Having my original matching engine rebuilt right now and will go back in the car. 
Dee guess you are not interested in a stock steering wheel anymore? I think the stock fog lights with the yellow lenses would look killer on your car!
Posted by: db9146 Jan 31 2017, 09:52 PM
Hi Mike,
I'm still trying to find the right wheel for my car. I have an early leather one from a -4 that I can start with but its from a '72. The car will likely never be 100% stock again but I was trying to find one to put aside for the future. I like the Momo wheel I have on it now.
I've got a pair of NOS clear and yellow lenses....you may be right there. Whenever I get to that point.
Posted by: porschetub Feb 1 2017, 01:46 AM
So here she is, my silver surfer. A numbers matching 1970 -6.
She lived with the previous owner for 32 years. Hope she'll be with me that long.
[attachmentid=498642]
[attachmentid=498648]
Matt, (Matthepcat), thanks again for the offer of the PPI help.
Kinda twins (a bit) mines a mongrel but similar to a point.
Plan on pulling rear body for 16 x 8's as I don't really fancy a flared car,wow you have done some nice stuff with your car ,nice keep up the good work.
Posted by: db9146 Feb 1 2017, 01:15 PM
Porschetub, nice car....looks great. Did you import it yourself?
I asked the PO how they were done as he didn't have any record with pics from the day but he said that there was some metal added and then the inside of the fenders reworked (as well as the outside obviously) to finish out the job. It does seem as if they did a nice job on them. I'm running 951 8x16 Fuchs now with some thin spacers and 225/50 tires with room left. I have a set of 930 9x16s and with the right tire, those would fit as well. Find the wheel then fit the flare if you're doing it.
Posted by: db9146 Mar 9 2019, 10:38 PM
Sorry for the long gap.....got pretty busy working on the car and didn't stop to update the thread.
Back to the engine…..
So I completed the wiring for the engine sensors, the EDIS, and the injectors. MS3x can handle sequential injection management but for now, I’m going to go with batch fueling for each bank. I can always come back and modify it later if it seems I need to. 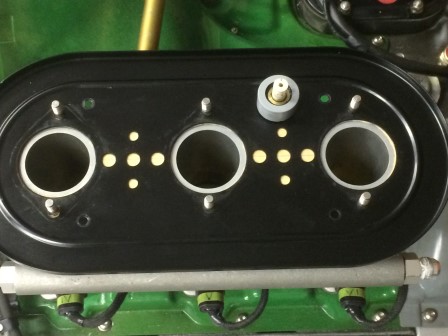 Here's the air temp sensor on the bottom plate of the rain hat,
 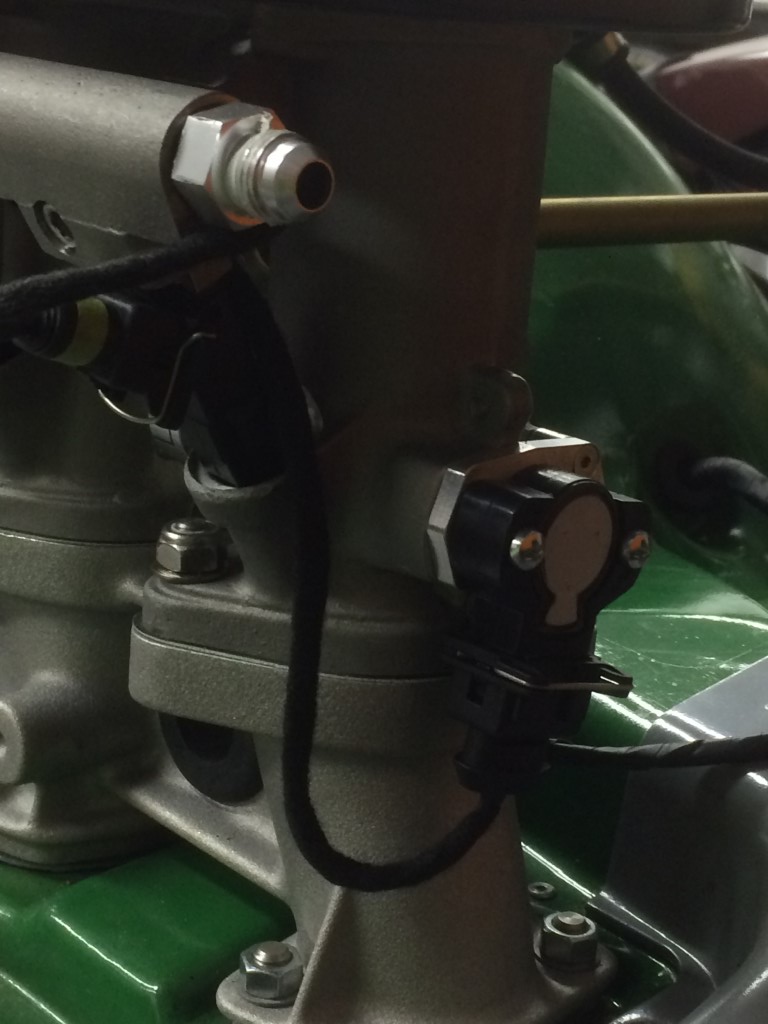 The throttle position sensor,
 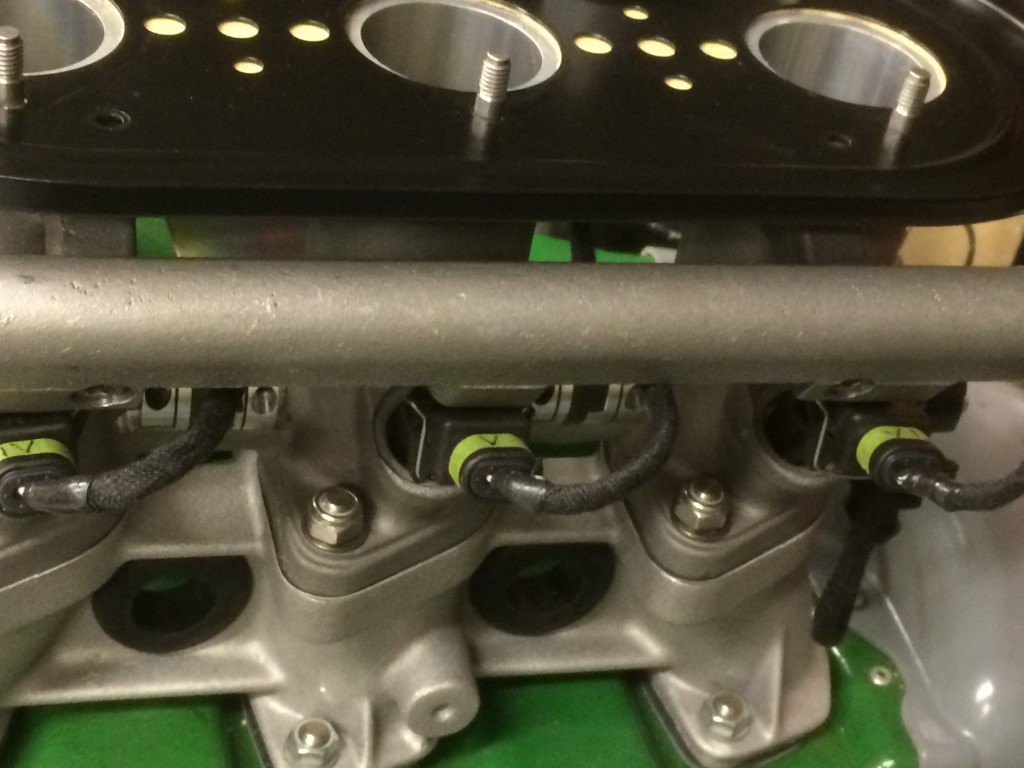 The fuel injectors at the base of the 40mm throttle bodies,
 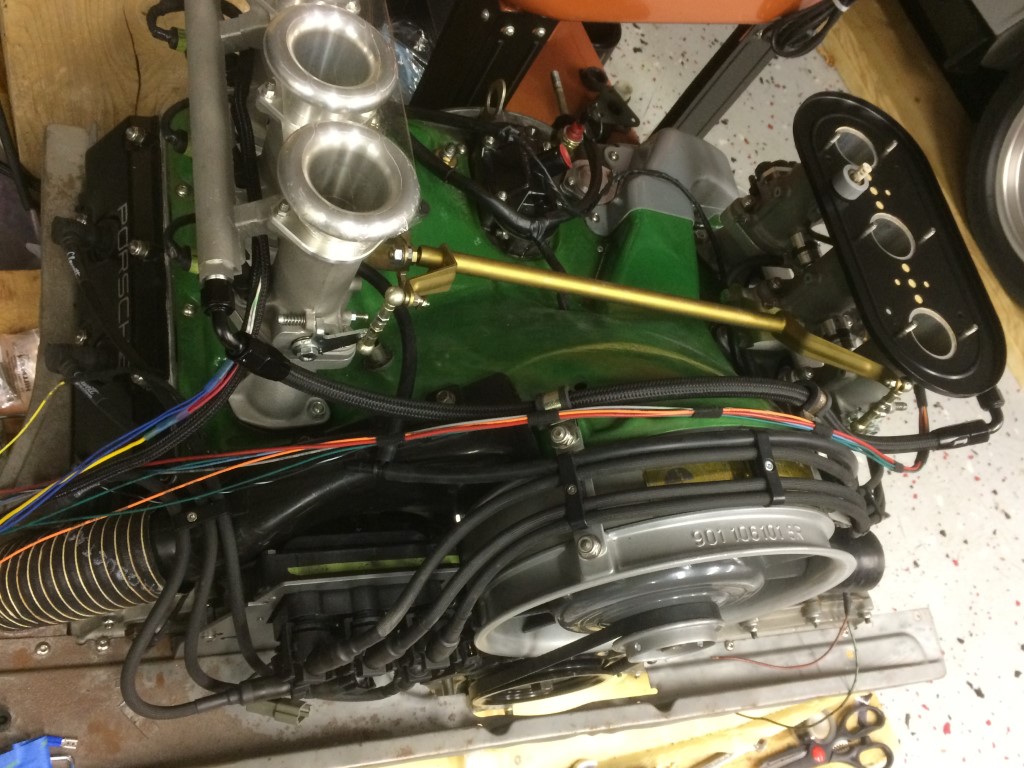 The roughed in wiring, and
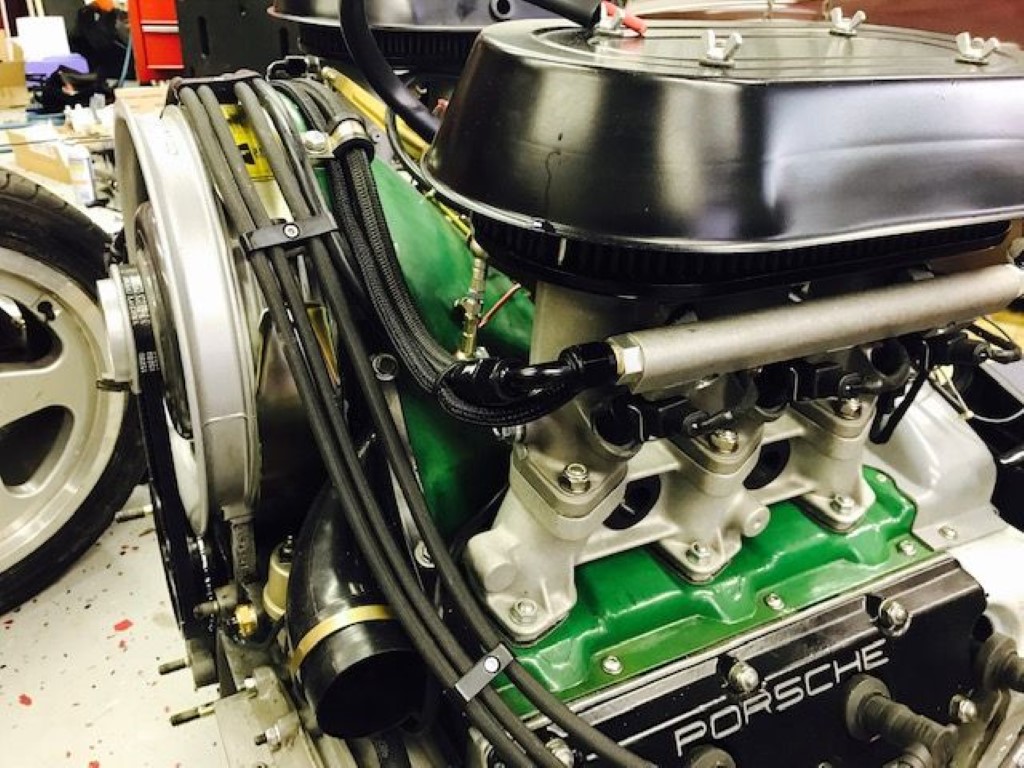
 The final wiring.
 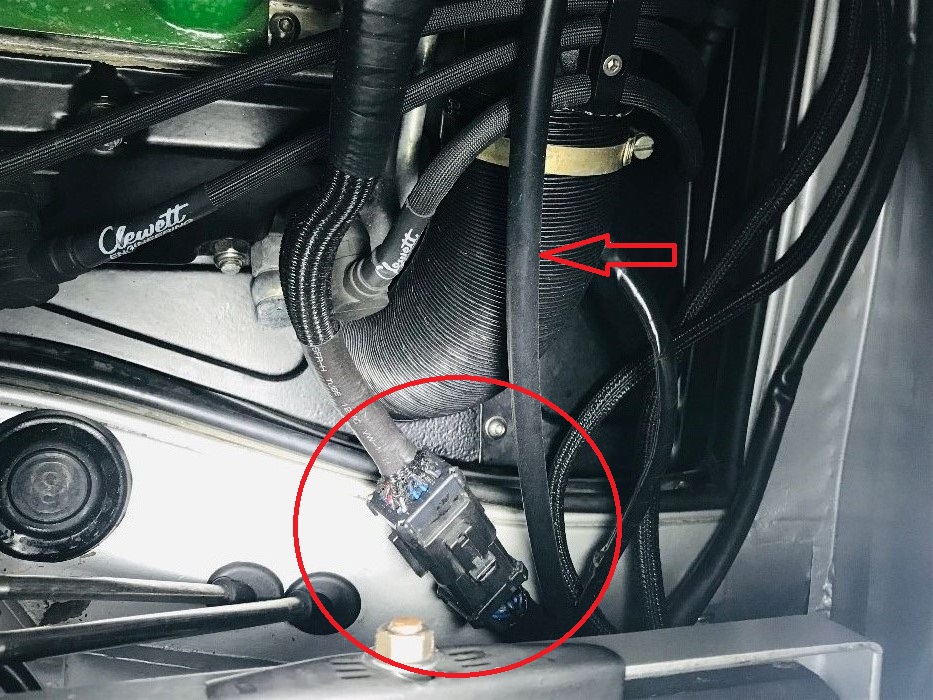 The FI engine connector and the manifold vacuum line.
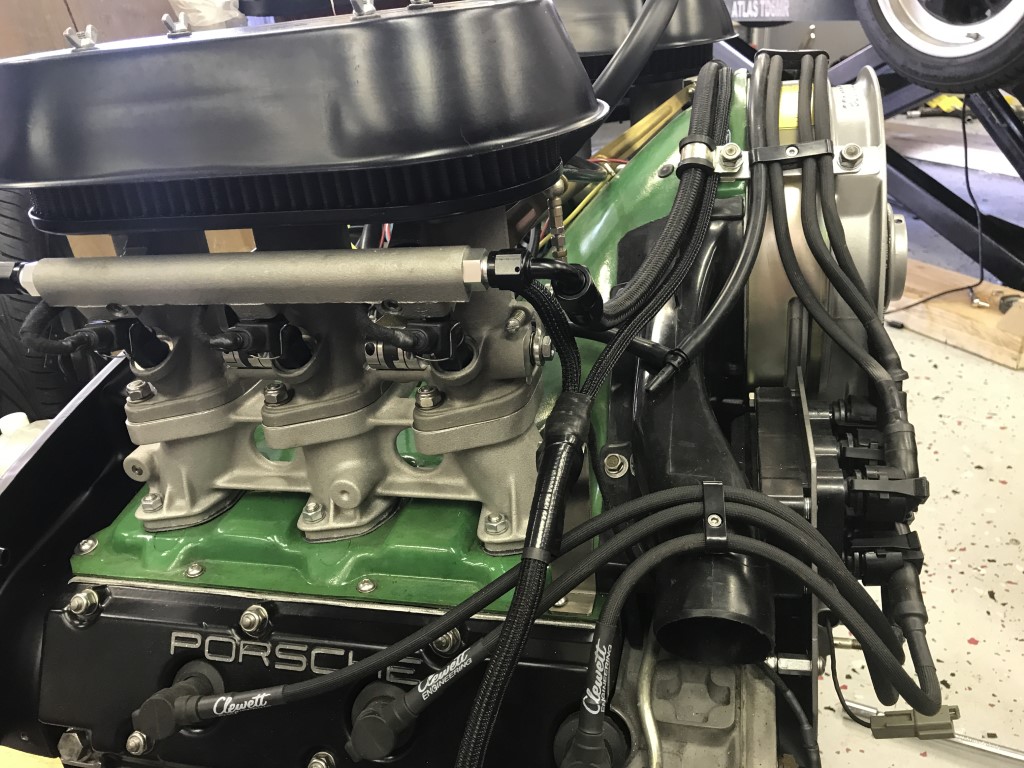
After getting the engine to this point, I re-evaluated the connector for the engine electronics and decided that I could go with a smaller connector. This is for the engine to ECU harness and again, not wanting to cut/drill any holes, this was a good decision. The braided harness coming off the engine between the 1st and 2nd pugs in the pic above goes to a 16-pin connector so that when I need to drop the engine, I'll only have 3 connectors, the battery cable, and a fuel line to disconnect, keeping it pretty simple and straightforward.
Posted by: Cairo94507 Mar 10 2019, 07:52 AM
Very nicely done.
Posted by: db9146 Mar 10 2019, 04:24 PM
The next issue was to add the new clutch, pressure plate, starter, and a side-shifter trans in place of the stock tail-shifter as another step to make the car a little more fun to drive.
I reached out to Kennedy Engineering and got one of their 228mm Stage 1 bus kits (flywheel, disc, pressure plate) and a new throw-out bearing and transmission input shaft seal while I was in there. This package is supposed to be able to handle up to 300HP with a pedal pressure similar to that of the stock. When I first bolted up the flywheel, I noticed that I couldn't turn the engine over with a wrench so I then backed off the torque on the bolts to hand tight, and I could turn the engine again but heard something dragging....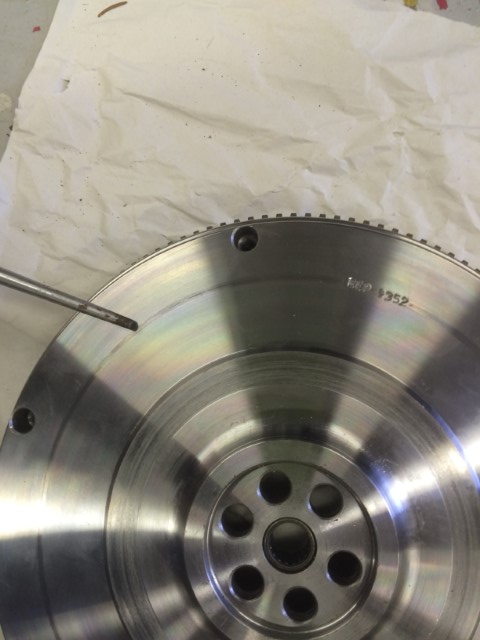
Just so you know, there is a spacer that goes in between the flywheel and crankshaft (if you look at the manual, you'll see it there but I didn't want to cause questions/concerns here by not showing it).
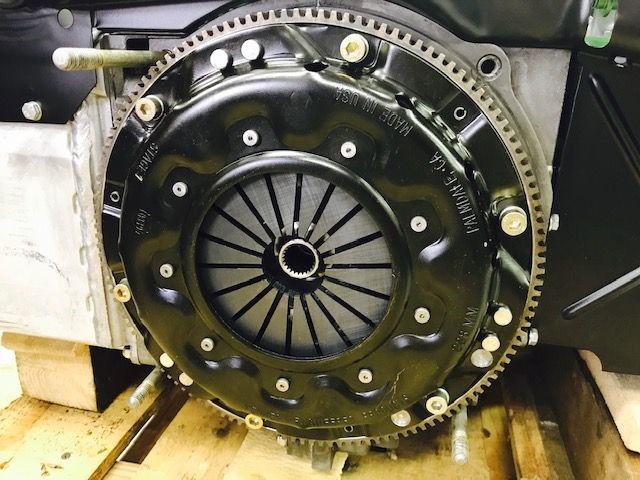
So I called Kennedy and shipped it back out for "a little bit more machining". While it was out, I got a second set of factory -6 engine sheet metal powder coated. I have the gun and oven to do smaller pieces but the longest piece across the front of the engine is too long to fit in my shop oven so I found someone locally. It looked nice pulling it all together for the first time.
When I got it back, it went on without a hitch so I was then able to bolt up the side-shifter trans that I had cleaned up some and the new starter so that I could finish the engine wiring harness.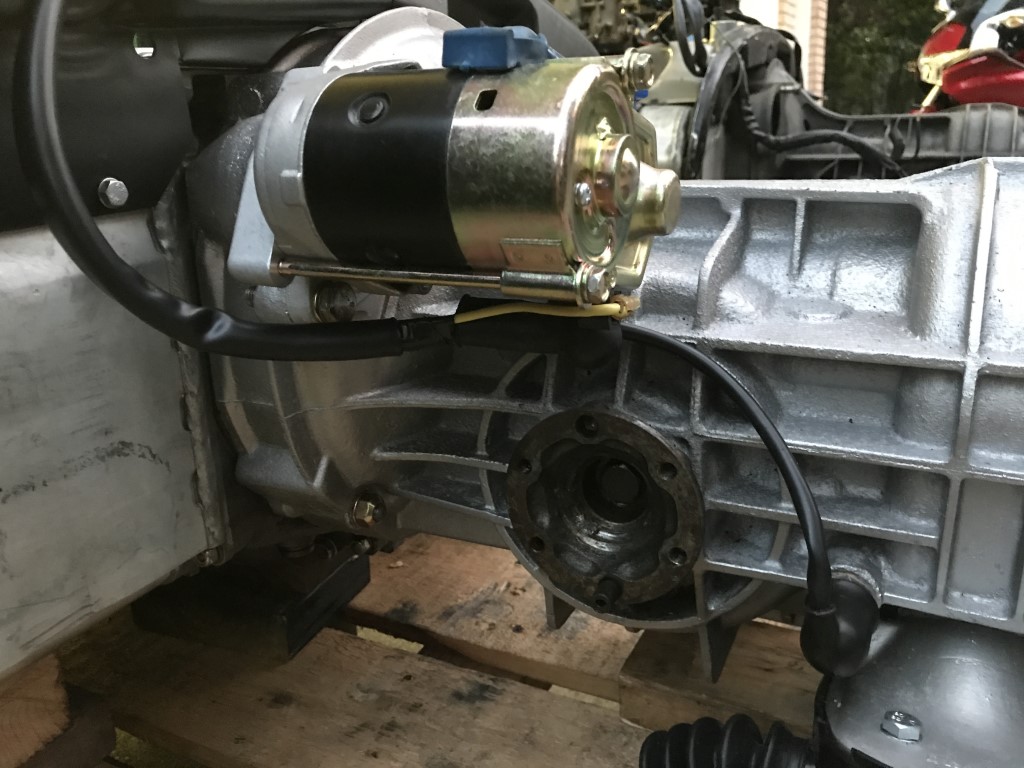
It took me a long time to get all of this pulled together, having never done this before. I learned A LOT reading through the threads here and that really helped, along with bolstering my confidence just enough to try this. As with documenting any project like this in hind-sight, there is a lot I'm skipping over....too many little details to bore you with.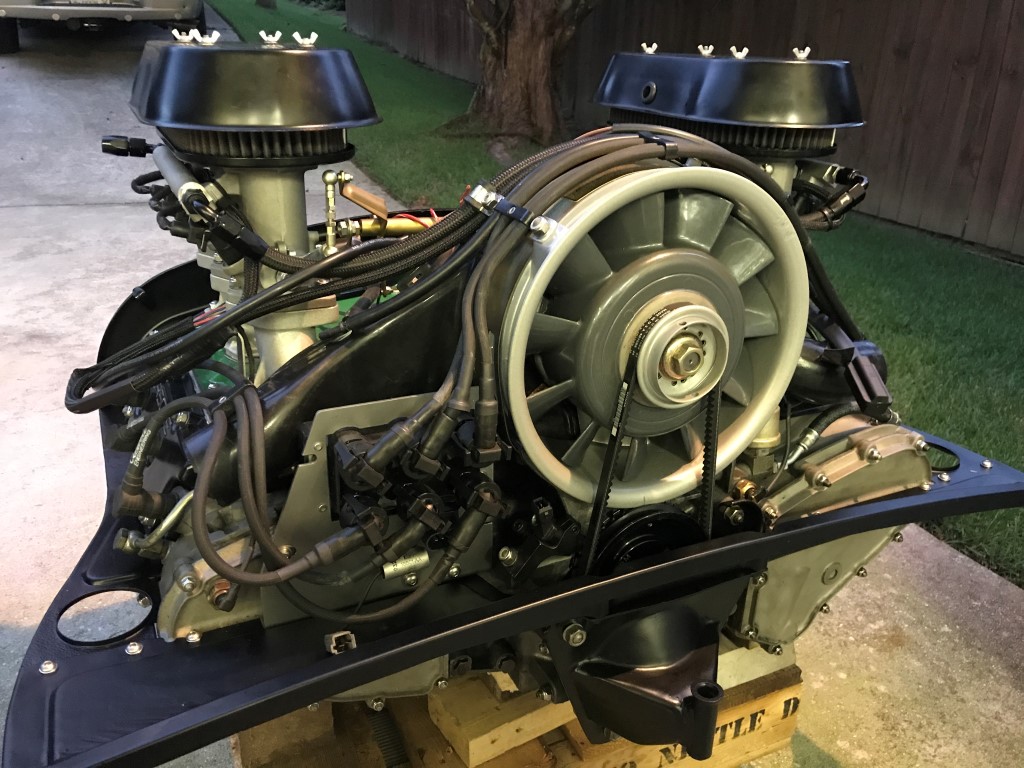
If you look just behind the rain hat on the left, you'll see the 45degree elbow for the fuel line. The fuel circulates from the tank, through the fuel rail on the #1 bank from the rear (see 90 degree elbow behind the rain hat on the right in the pic), across the top of the fan housing to the driver's side bank, past those injections, through the elbow you see on the left in the pic, and then into the PMO regulator mounted at the back of the engine compartment above the engine/trans mating surface, and finally to the return line to the tank. The regulator is set at 43-44 PSI.
Attached image(s)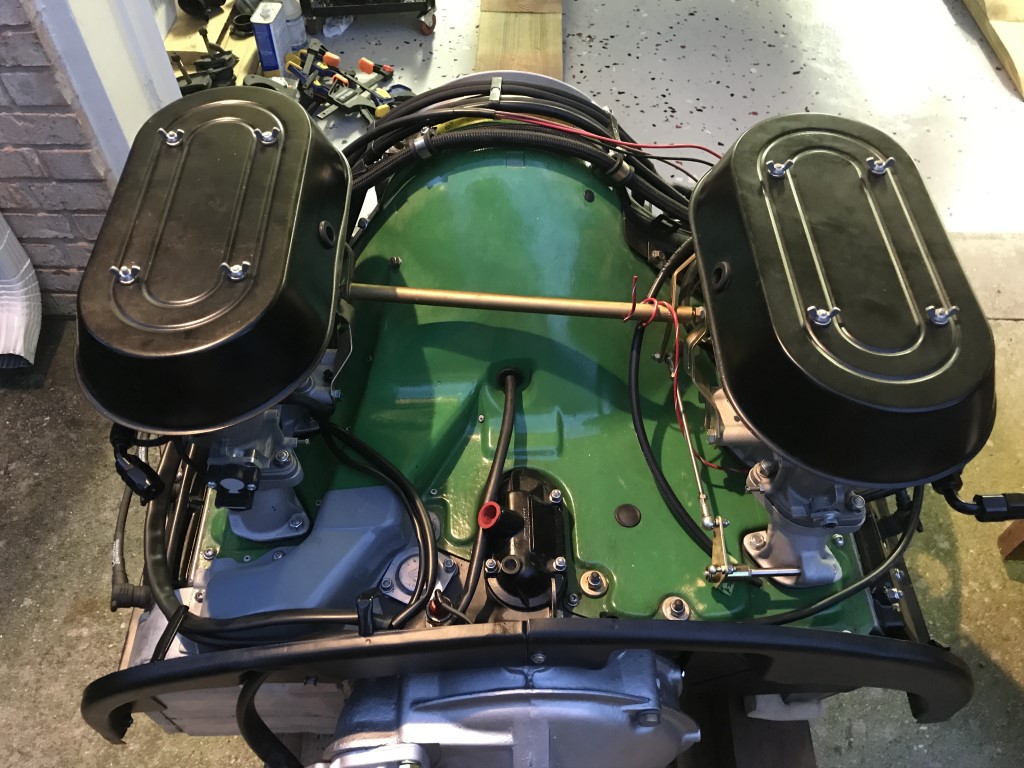
Posted by: db9146 Mar 10 2019, 06:05 PM
Once I had the stock engine out, there were a number of "while I'm in there" things to take care of. I had been making a list since I got the car.
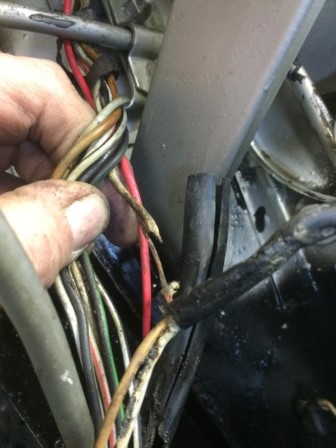
As I continued chasing the crunchy wires in the engine compartment to the light, I decided to continue working on back through the harness in the trunk to check that wiring. I pulled it loose and find some issues here and there so I got some of the fabric harness tape from 914Rubber and dug in. I pulled it all loose and examined the wires and decided to make some repairs using part of another trunk wiring harness I had from a parts car. I carefully cleaned the wires and then carefully started to wrap it back up. When I finished, I was pretty happy with the results but then looking at the trunk, I really couldn't see putting the fresh harness back into that trunk.
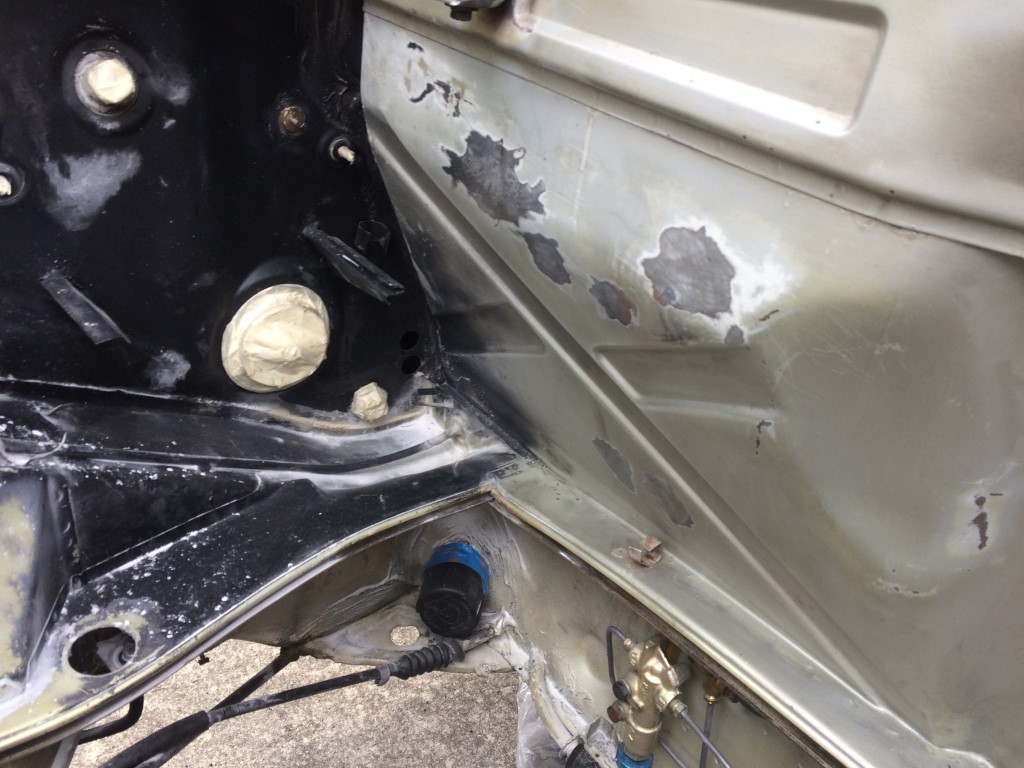
Here's some of what I saw from the PO: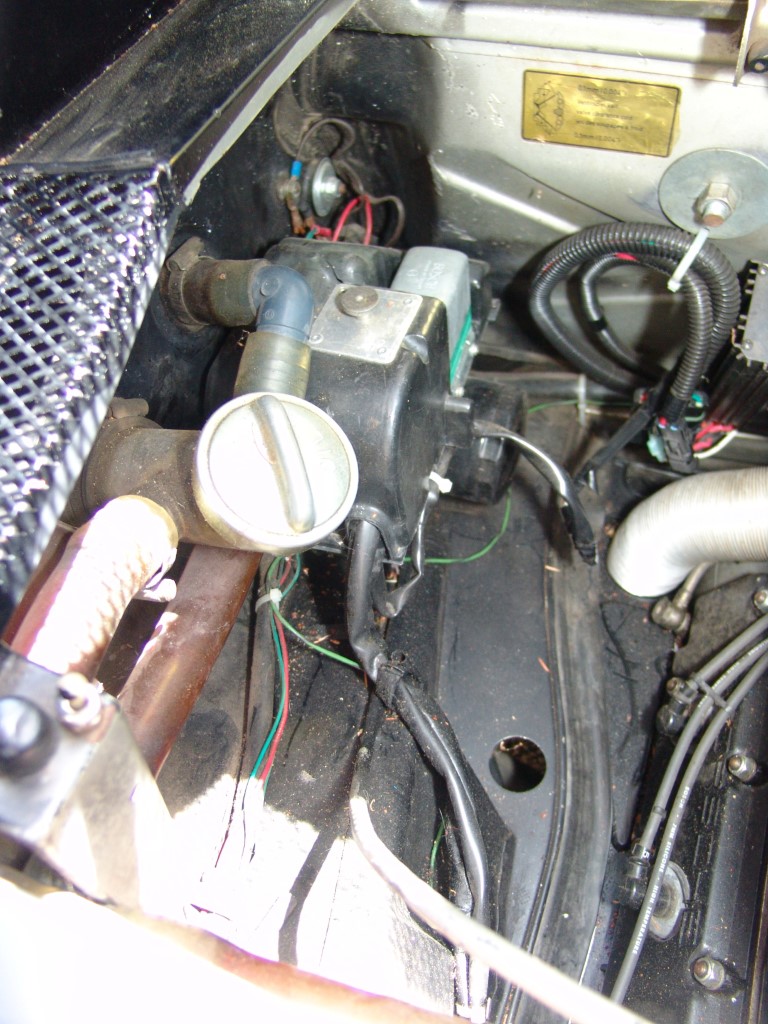
At some point, the PO decided to spray part of the engine compartment with black spray paint.....oh yea, and the 2" washer and bolt in the firewall, there were four of them, hardware-store grade, mounted in the firewall for a 5 pt. harness system. And the bolt holes weren't even in a straight line horizontally across the firewall.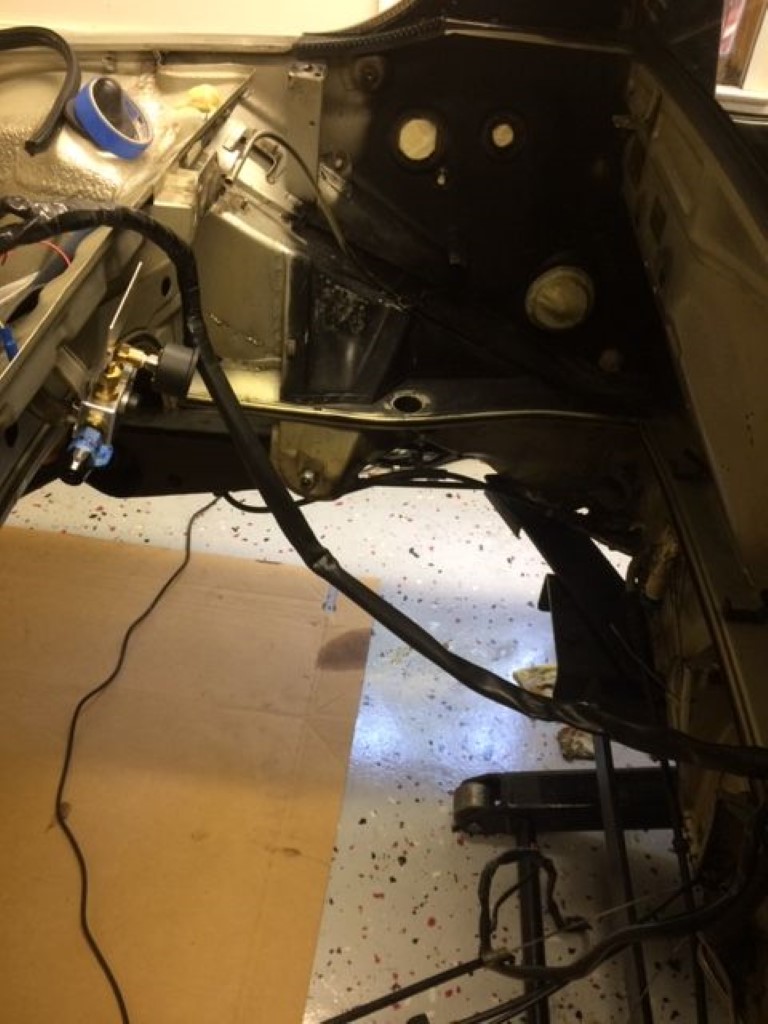

He had also added some Crane High Energy/Mallory ignition system and had wires and components mounted on both sides of the fan on the firewall...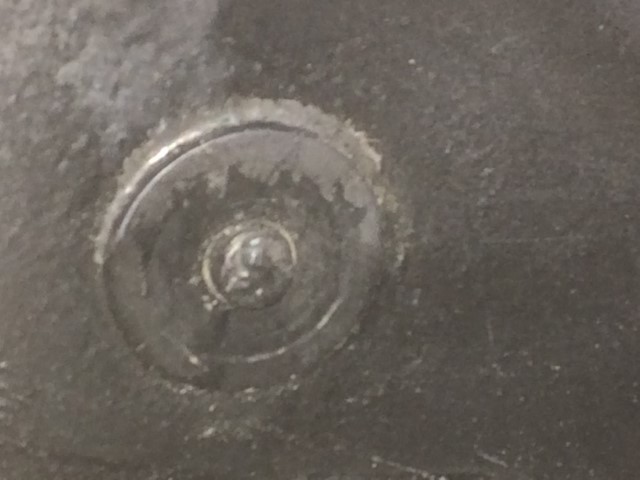
Over on the battery side, the stock ground stud had been wrung off and so another 3/8" hole had been drilled so that the ground cable could be bolted to the firewall.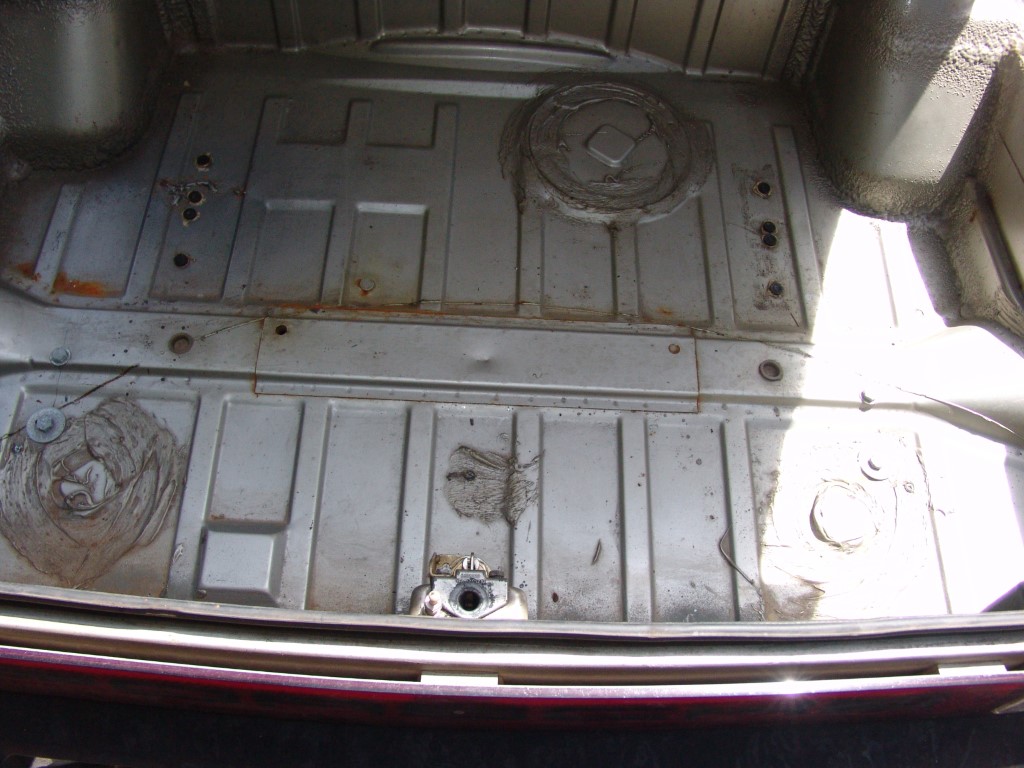
And then there's the trunk....lots of holes from various mounting of a rear sway bar and the holes in the rear panel for the "Porsche" reflector.
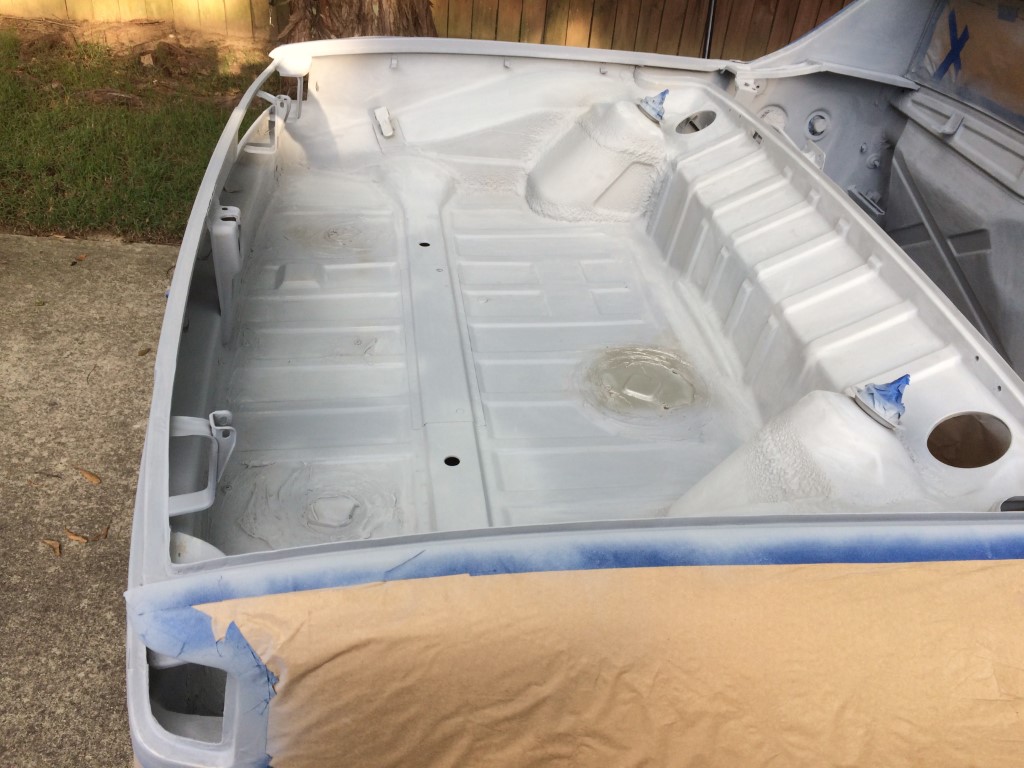
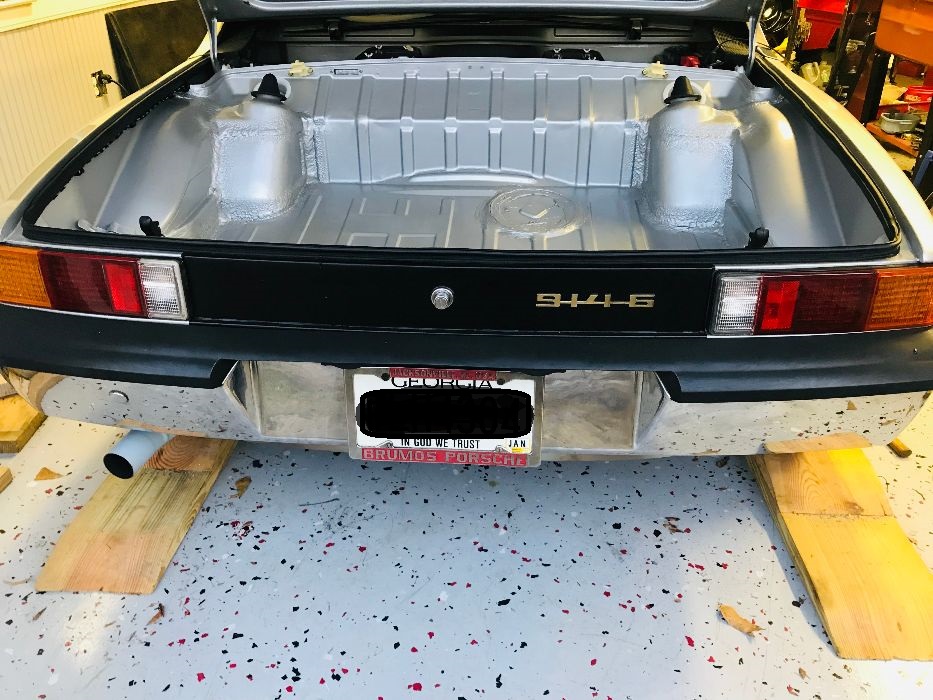
Posted by: db9146 Mar 10 2019, 06:54 PM
So I did what any 914 owner would do, tore into it further!
With the engine out and all of the wiring pulled from the engine compartment and trunk, I just blasted everything....and I mean everything. The tail light housings came out, the rear bumper and valance came off, the trunk lid and hinges, and the torsion rods for the engine lid and deck lid. Then I took the car over to a friend's shop to weld up some of the holes. All said and done, I think he welded up 26. 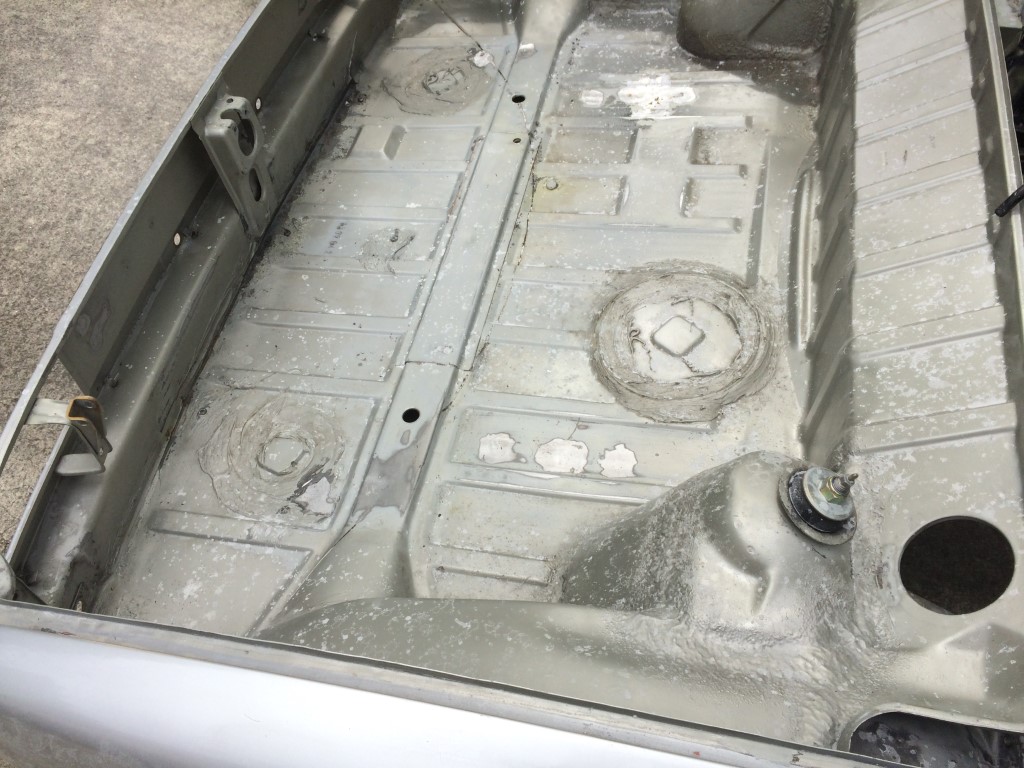
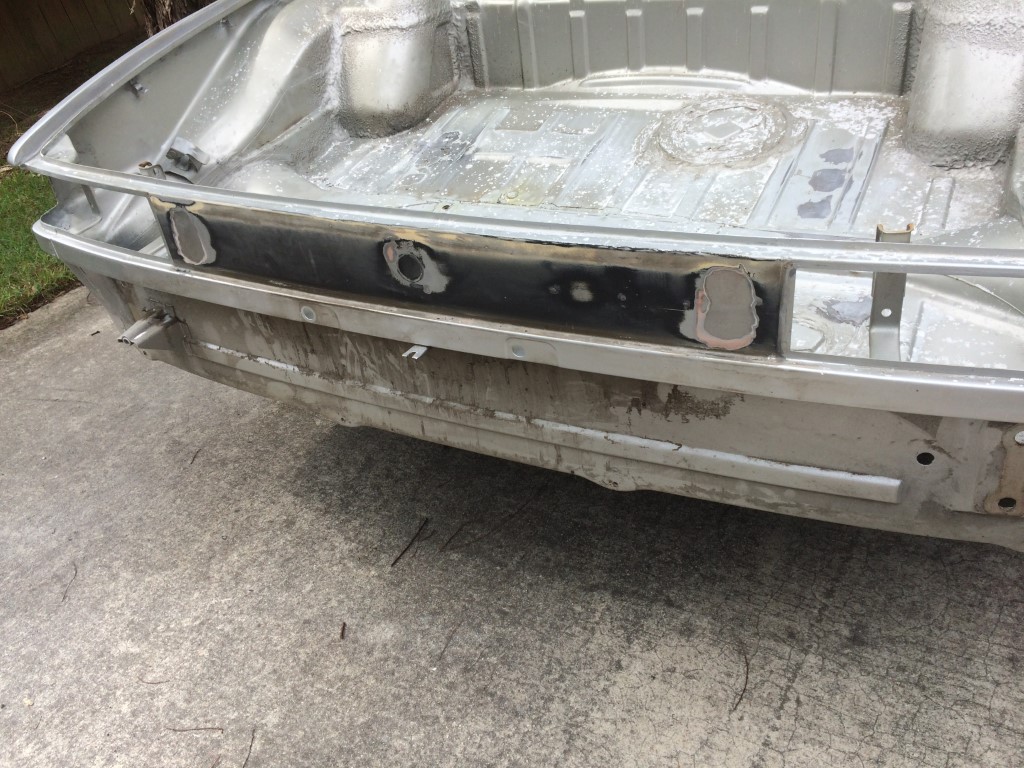
If you look on the left, you can see that I had already drilled out the broken ground stud, tapped some fresh threads, and installed a new ground stud.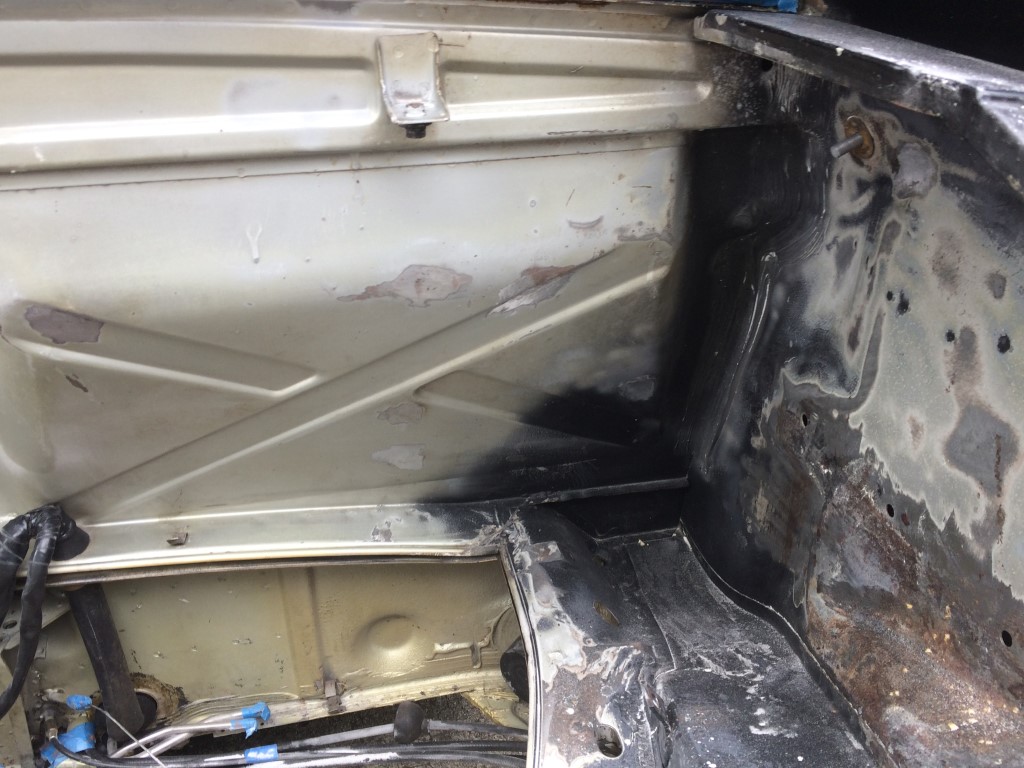
Then I bought a cheap soda blaster from Harbor Freight and got to work.

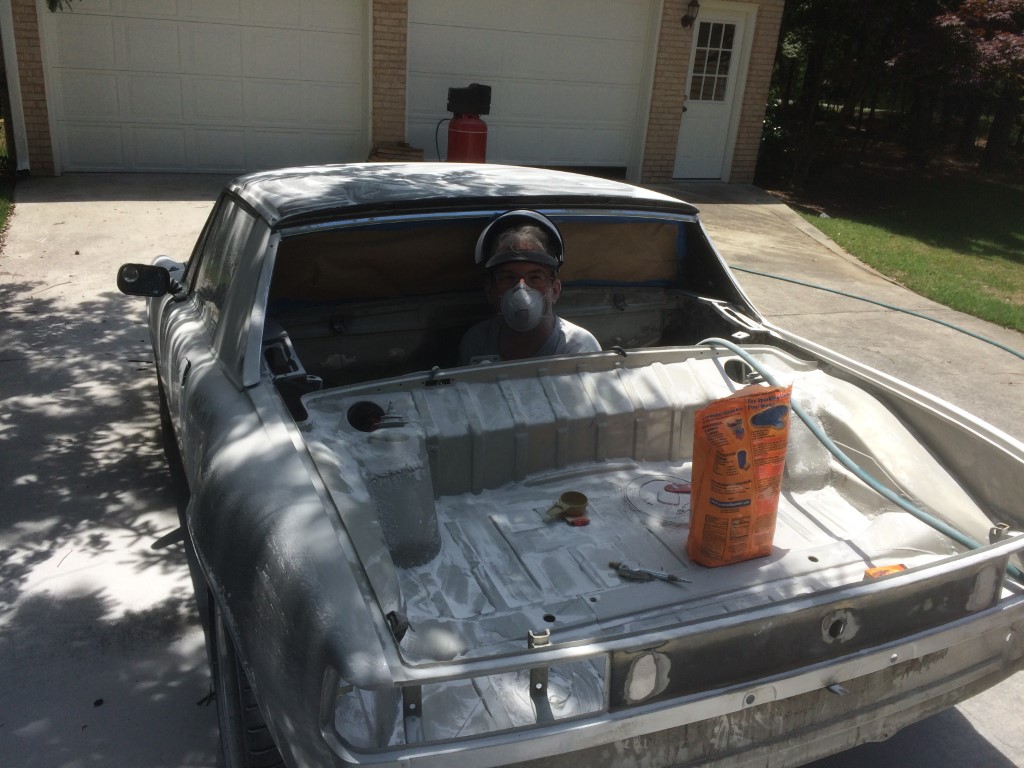
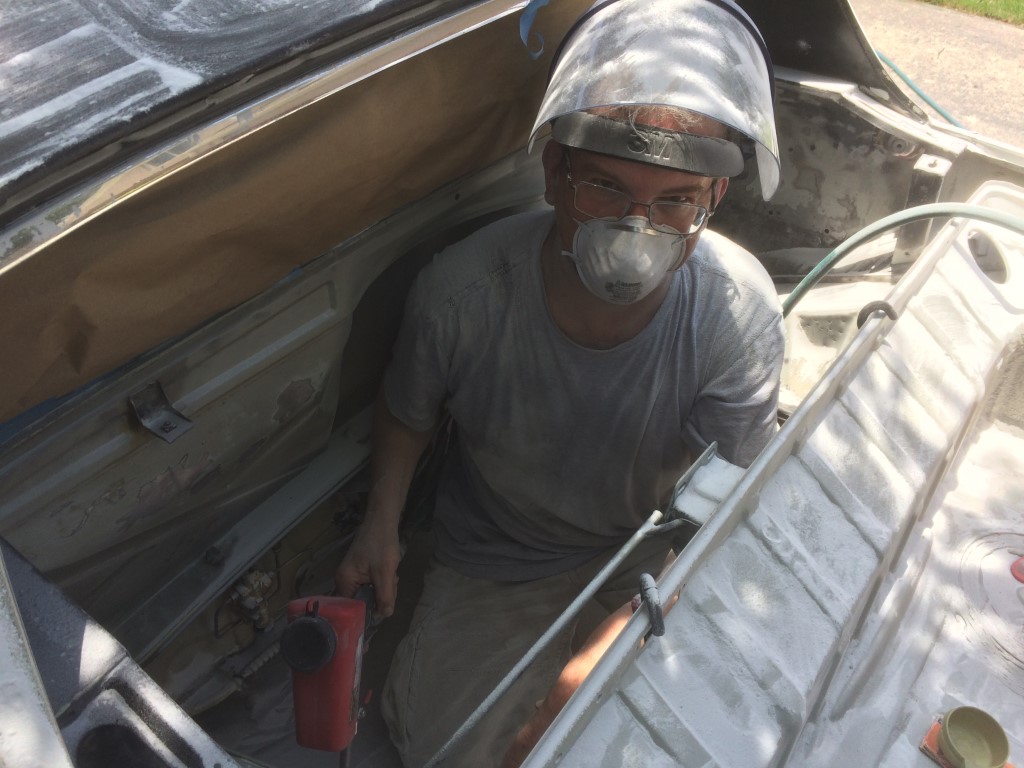
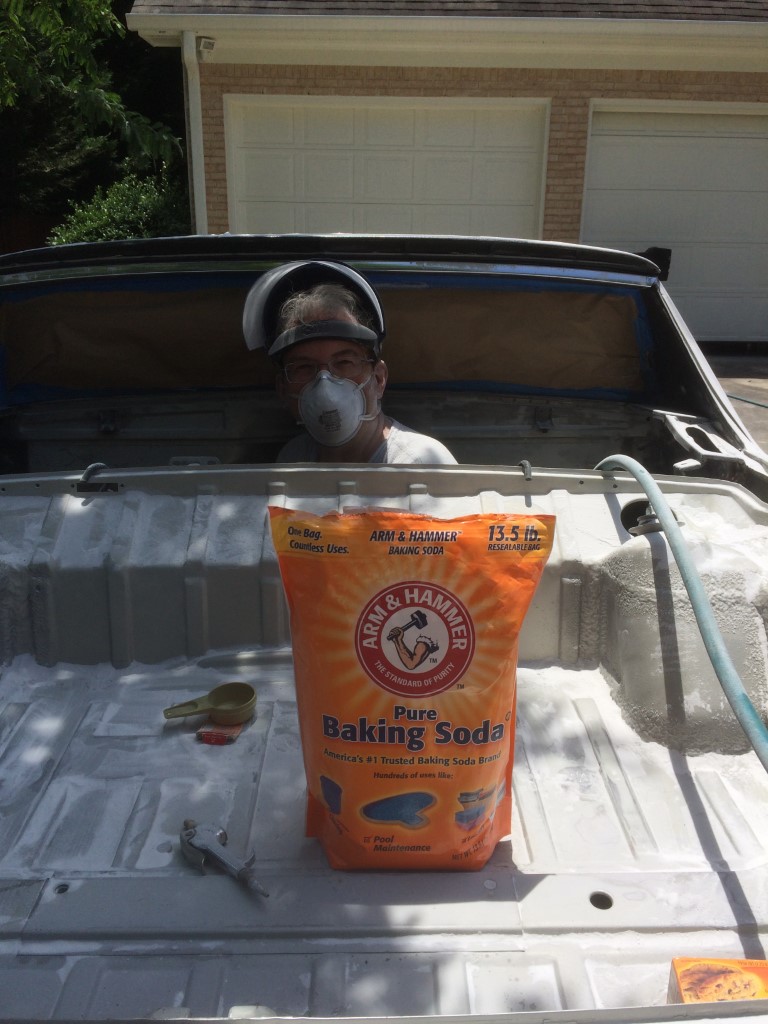
I was smiling in this pic but I'll tell you, I had spent a few gut-wrenching half-hours over the previous few weeks trying to decide that I really did want to "jump into the deep end of the pooling" doing all of this for the first time, in my driveway, over a couple of days, having never done this before and only having the guy at the paint shop to talk with about this. Luckily, it came out very good.
Attached image(s)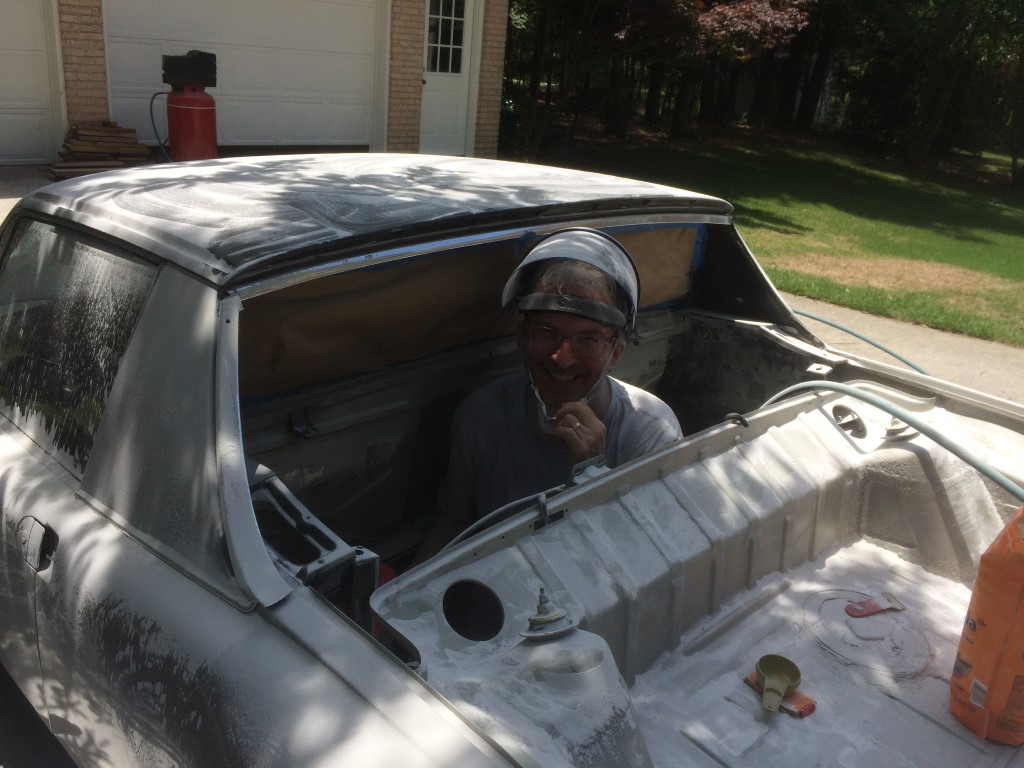
Posted by: db9146 Mar 10 2019, 07:17 PM
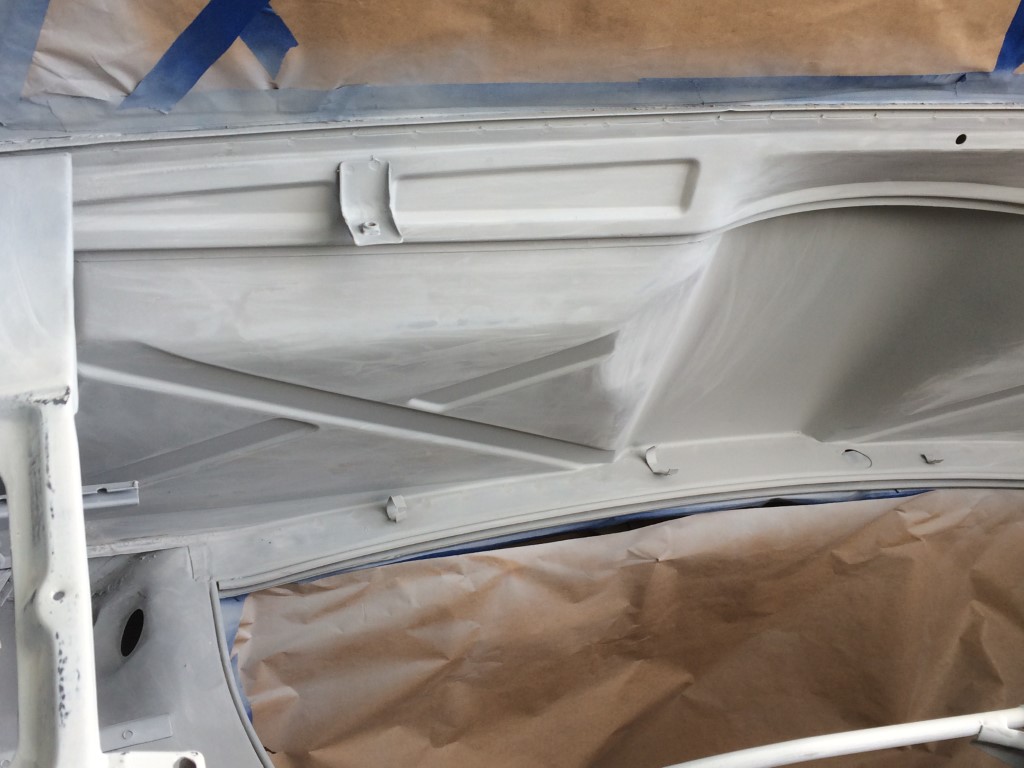
When I got done with the blasting (and I went through a lot of soda), I washed it all down good and then prepped the metal. Understand that I didn't blast all the way down to metal all over, I just blasted through the last repaint. If you look closely above, you'll see that the trunk was a little different color, more champagne in tint. Only where my friend had welded the holes was there any bare metal and after blasting and rinsing, it didn't take long for a little rust to appear. I knew that was likely so I used a little metal prep to neutralize the rust and then after wiping it all down with solvent and prep, I sprayed the engine compartment, trunk, and rear panel with some etching primer, sanded a little, building primer, then more sanding.
 [attachmentid=689
204]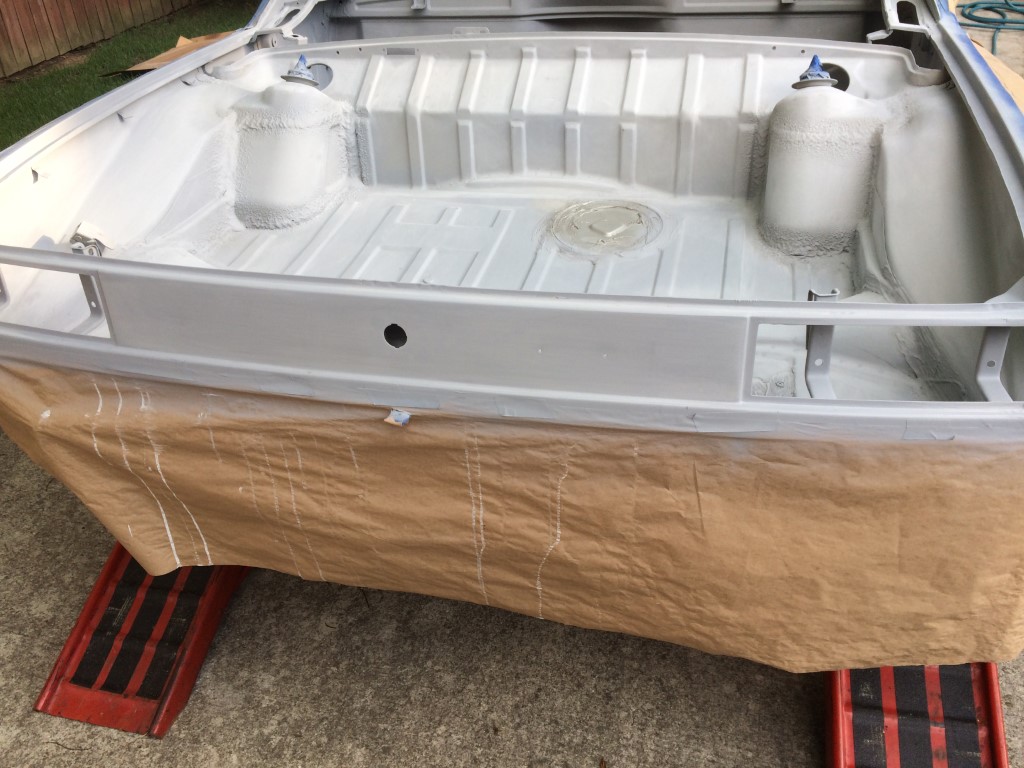
Attached image(s)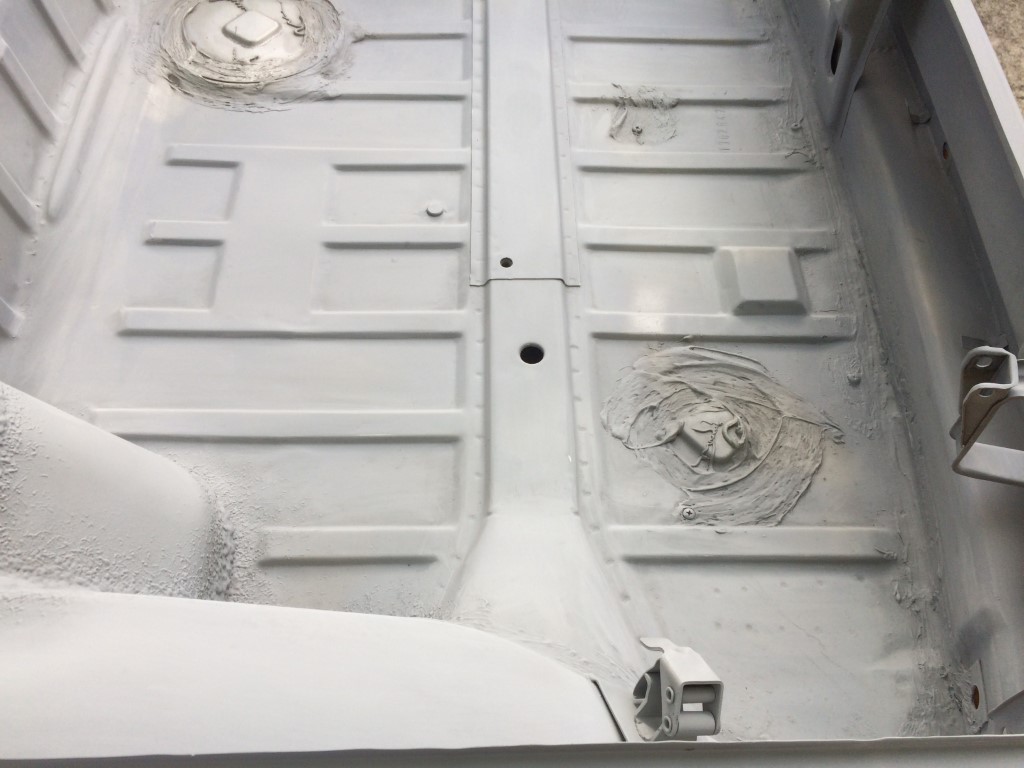
Posted by: db9146 Mar 10 2019, 07:38 PM
After finishing the prep, I sprayed the engine compartment and trunk with a single stage enamel. At some point, I'll paint the entire car but for this effort, it was just to get the areas cleaned up so I could install the new engine. I also resprayed the black on either side of the engine grill and the engine lid/grill as well.
Here's the fabric tape I got from 914Rubber.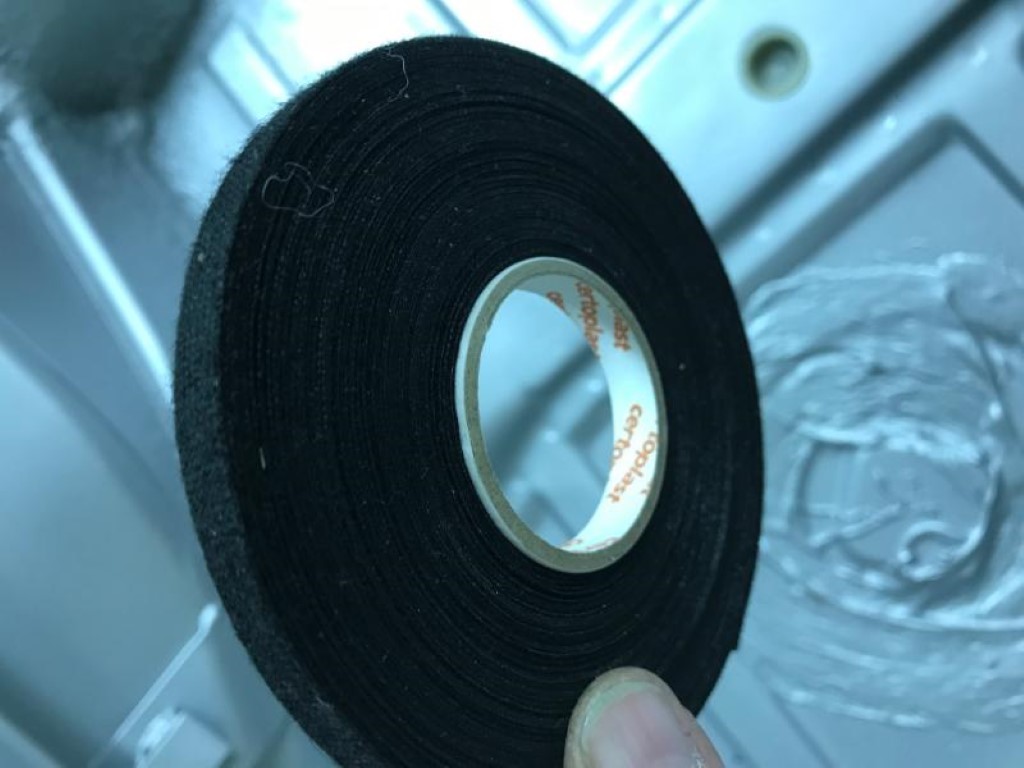
And went from this: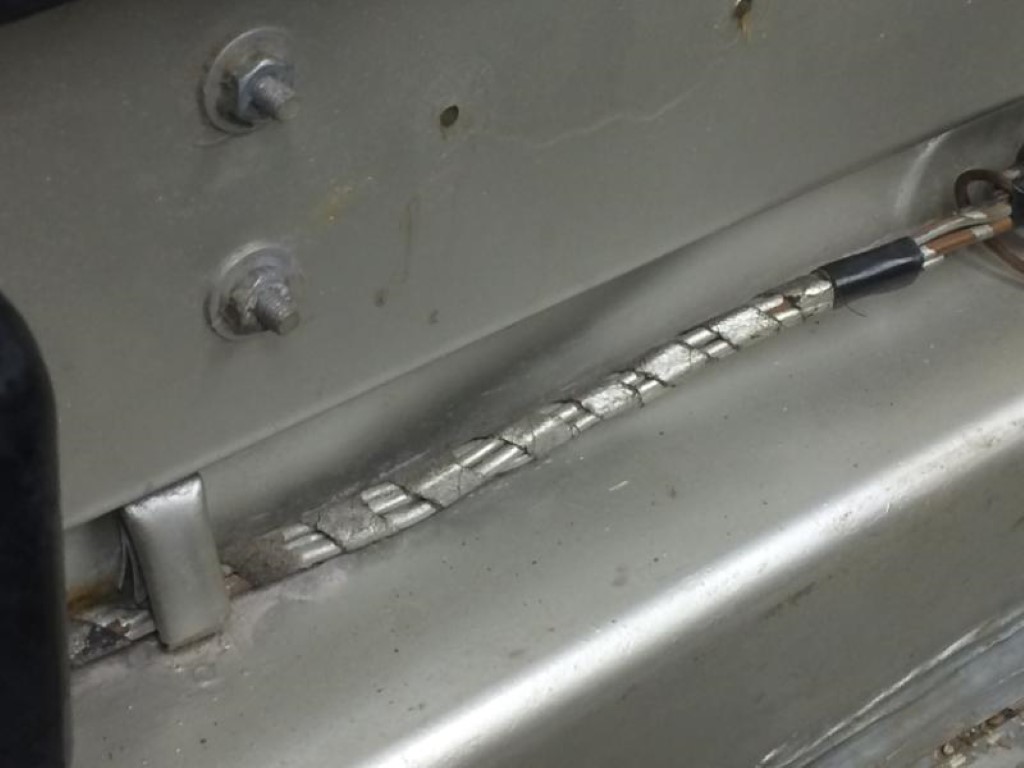
to this after a lot of work and the new paint.....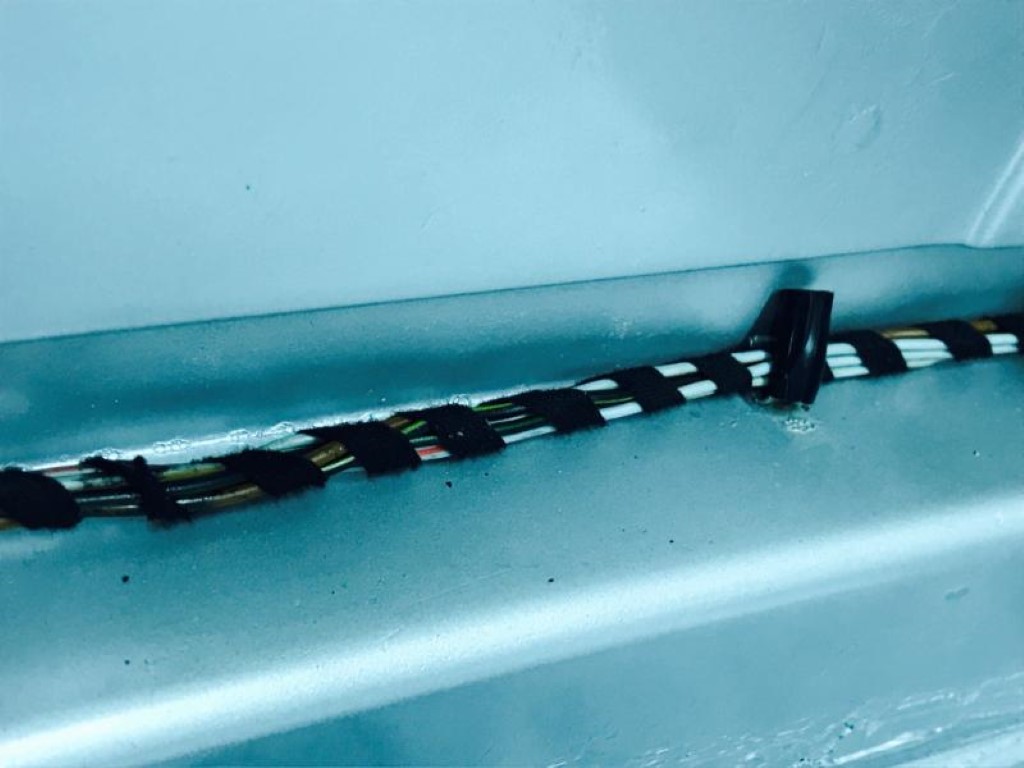
 ]
]
Posted by: db9146 Mar 10 2019, 09:05 PM
In preparation for installing the engine, I then started working on the fuel system and the chassis wiring.
For the fuel system, I purchased new stainless steel supply and return lines from Tangerine Racing and had then add the right flared ends on the lines for the high pressure connectors for the FI which will run at about 44PSI. I then started under the tank and added a small filter before the Walbro pump and then another 10 micron filter under the engine shelf.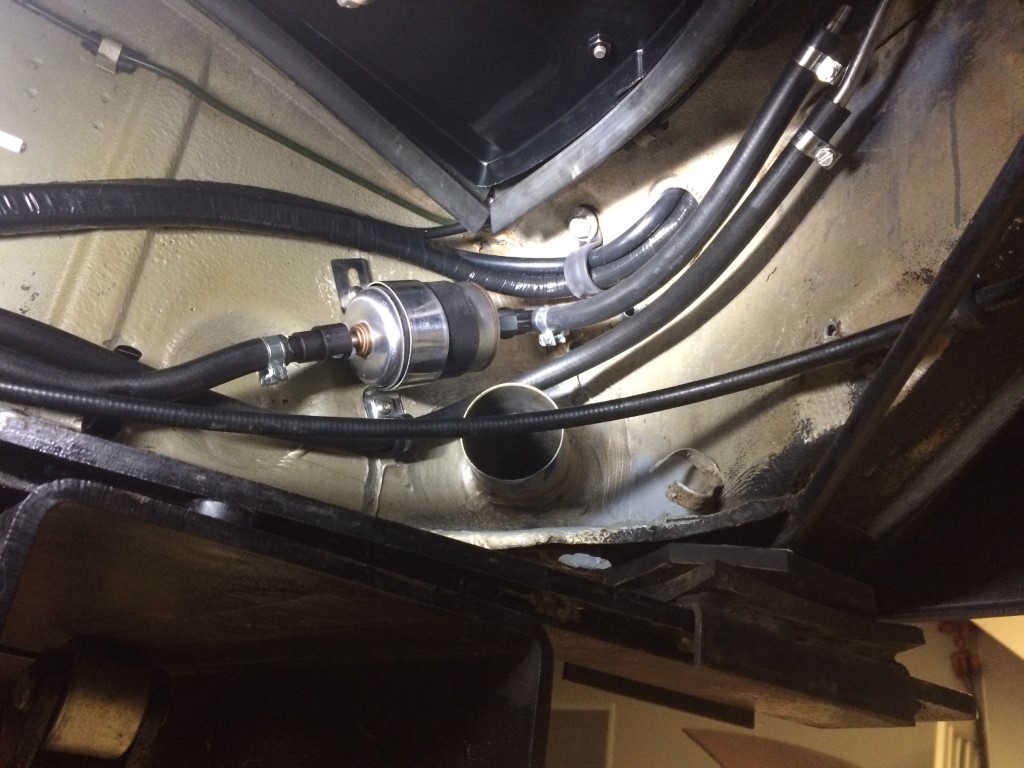
For the ECU wiring (the ECU is mounted under the dash), there is the harness itself and a vacuum line for reading manifold pressure. I routed the harness and vacuum line down the center console and brought it out where the snorkel exits the firewall and routed them up through a factory opening in the engine shelf under the battery tray. 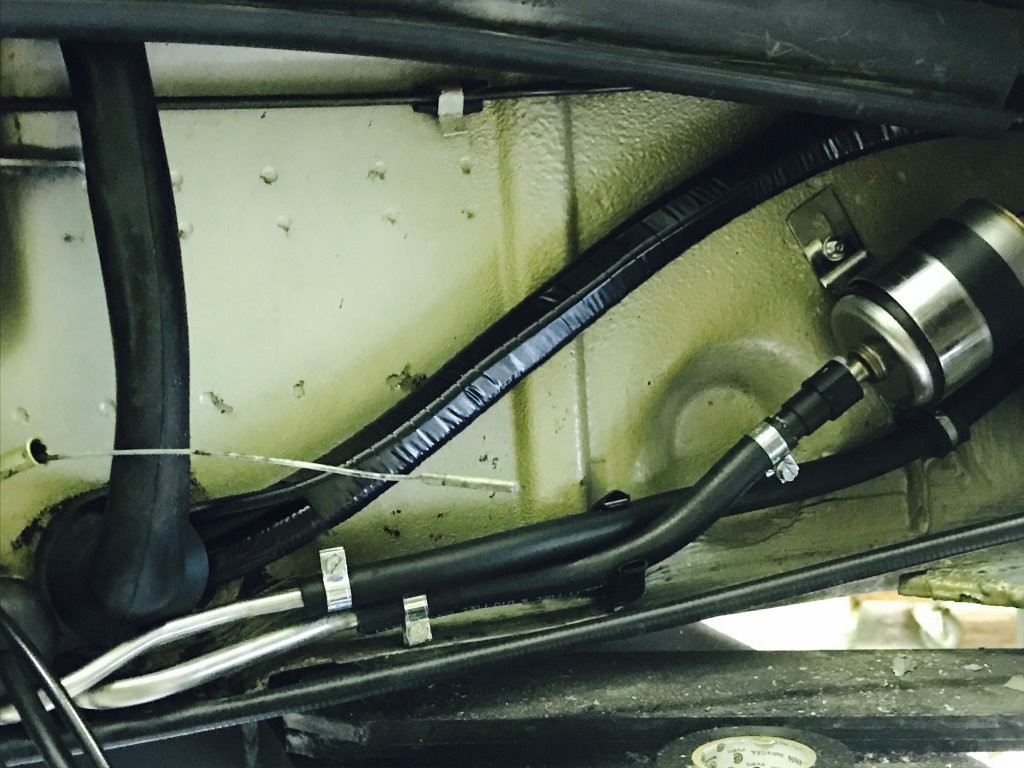
Since I couldn't route the ECU harness and vacuum line through the snorkel and I didn't want to damage the stock snorkel, I took a piece of 1 1/2 PVC, cut about a 1/2 long piece (just enough length to let the ECU wiring harness out from under the snorkel", and then cut a small section of the PVC to create a "C" shape. I slipped it over the harness and behind the snorkel to space it out from the firewall, and sealed it all with clear silicone. So its now watertight but also easily reverse-able.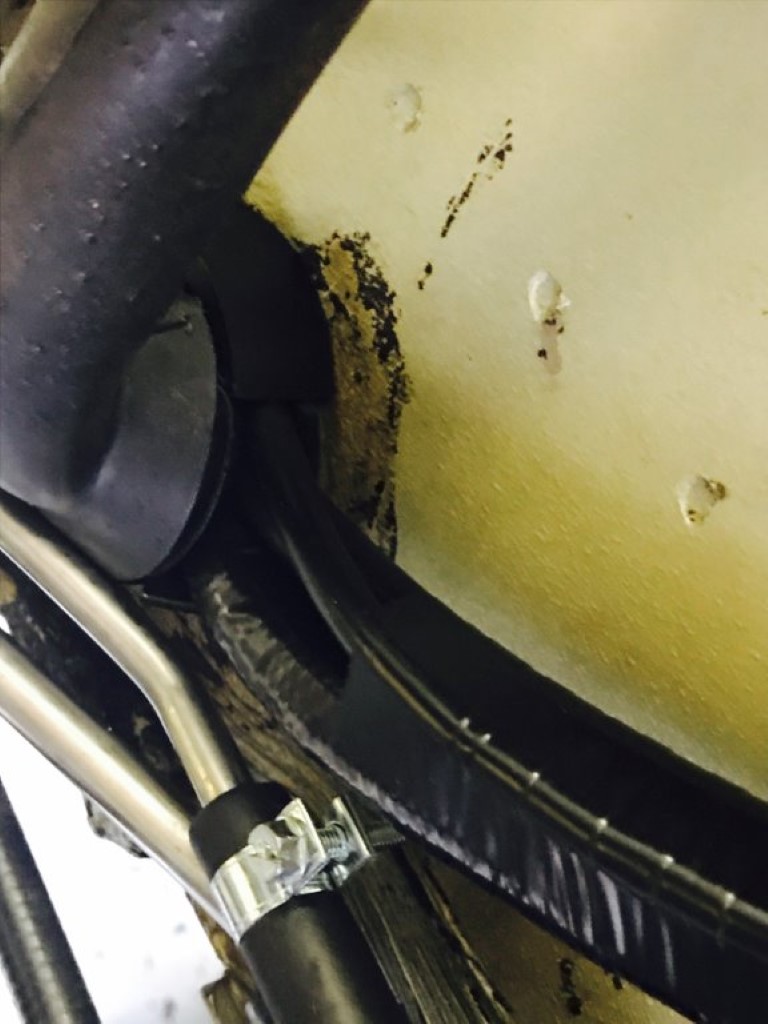
Posted by: AHudson Mar 11 2019, 06:36 AM
Okay, well I was supposed to be going through my emails after a nice Amelia Island weekend, trying to be responsible. Yet I see this thread and read it completely, marveling at the work and details.
Though I'm now 20 minutes older, I am a little bit more educated and a lot more impressed. Excellent work and you CANNOT bore us 'with tiny details', though I realize its also work to take pics and do the wonderful write-ups.
No matter, whatever steps you're posting are great to see, not just for your progress but for those of who are curious or in the same situation. (<-me). It also adds to future searchers and lost souls trying to navigate a similar path. (<me)
Thanks for all. I'm not too far from you and would love to get my own -6 to the point of high fivving you in person with the cars. Keep up the great work.
Posted by: Dion Mar 11 2019, 07:59 AM
Very beautiful car. Your efforts show. Keep up the great work.
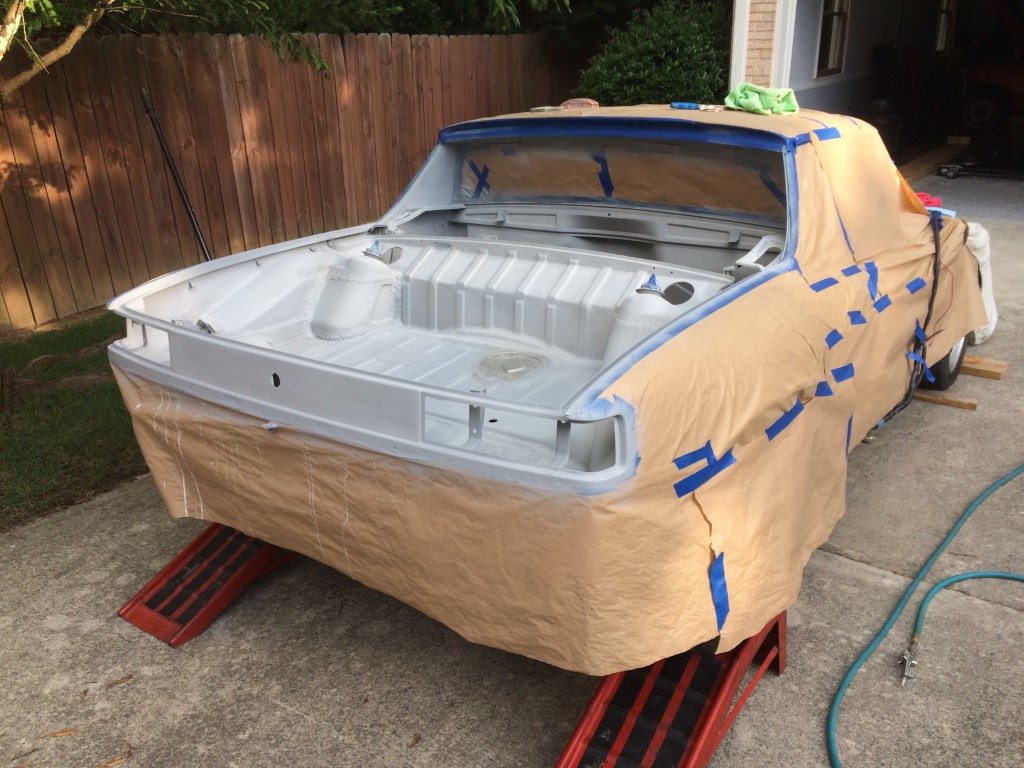
Posted by: db9146 Mar 11 2019, 09:33 PM
Here are a couple of shots of the trunk and rear after the blasting and paint.
Posted by: db9146 Mar 13 2019, 10:41 AM
After I got the engine compartment and trunk painted, I worked to finish up all of the other items that I needed to do before the engine went back in. I ordered new stainless steel fuel lines from Tangerine Racing and installed those including the lines up through the side engine shelf with new grommets. I also replaced the rubber fuel lines with new FI rated ethanol-compatible line and FI clamps. I was also careful to support the lines with line clamps and a standoff to support the lines above the engine shelf in the engine compartment.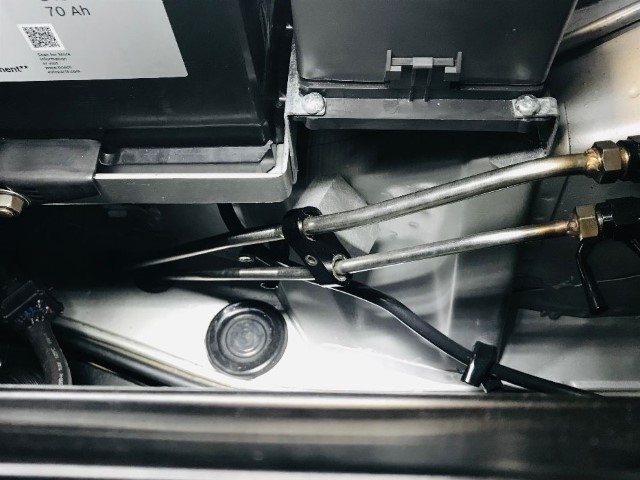
Posted by: jkb944t Mar 13 2019, 11:11 AM
Here are a couple of shots of the trunk and rear after the blasting and paint.
Wow, this is really nice workmanship! Enjoying the progress.
Jeff B
Powered by Invision Power Board (http://www.invisionboard.com)
© Invision Power Services (http://www.invisionpower.com)