Printable Version of Topic
Click here to view this topic in its original format
914World.com _ 914World Garage _ Bringing Back The Dead
Posted by: LeftCoastErik May 14 2015, 09:35 AM
OK, so I was the *lucky* bastard who ended up with GandolfTheGrey's (previously MichaelT55's) 1972 V8 Car. Specs were as follows.
Engine:
-1962 Buick 215 Aluminum V8
-STD bore, 10.5-1 (stock) comp ratio
-Cyl heads-ported exhaust ports, 3 angle valve grind with hi-retainers-shaft rocker stands shortened .060"-pushrods shortened .125" for geometry correction.
-Camshaft-M-488 custom ground by Shadbolt engineering(Vancouver B.C.) C/W hydraulic lifters
-Spheroidal graphite iron crankshaft, 5 main journal center, thrust mains, .010" under -Rods ground .001"
-New rings
-Hi volume oil pump, Buick V8 filter housing
-Facet electric fuel pump-GM canister filter
-Offenhauser alum intake
-500 cfm Edelbrock carb C/W electric choke
-Buick distributor with Unilite conversion
-Kennedy engineered product #1000 Buick to Porsche adapter
-KEP 9" Flywheel, clutch and throw-out bearing
-Custon h.d. radiator w/ twin Spals
-Toyota Corolla heater
TRANSMISSION:
Custom built V8 side shift trans by Dr. Evil.
Custom ratios
1st gear lock out
Fresh rebuild, newly installed
BODY:
-Rayco FRP front fenders
-Mitcom 916 rear quarter panels
-P.B. Tweeks FRP flared rocker panels
ELECTRICAL:
-Hella H-4 Q.I. headlites
-Eurolens rear tail lites
-Tach converted to 8cyl
-Mechanical oil pressure and water temp
-Alpine CD
-Electric windows
-Updated blade style fuse blocks
SUSPENSION:
-H & H Carrera 19mm adj front sway bar
-Addco 16mm rear sway bar
-140# rear springs (100 stock)
-Stock front torsion bar
-Koni adj front and Koni H.D. rear shock absorbers
-BMW 320i front brake conversion
-Stock Porsche rear calipers
-All four calipers have stainless steel liners and completely rebuilt.
-Adj proportioning valve
-19mm 911 master cylinder
-All rotors have been crossdrilled
-All flex lines are braided stainless steel
-Pagio performance brake pads, all four wheels
-Carrol Shelby Mini-Europa wheels 7/15 front 8.5/15 rear
-Custom roll bar with rear chassis supports
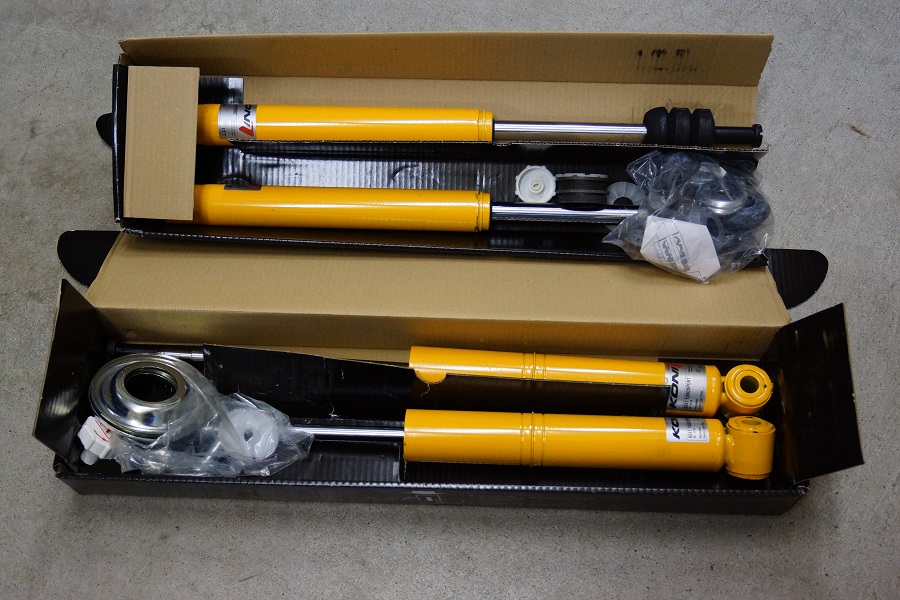
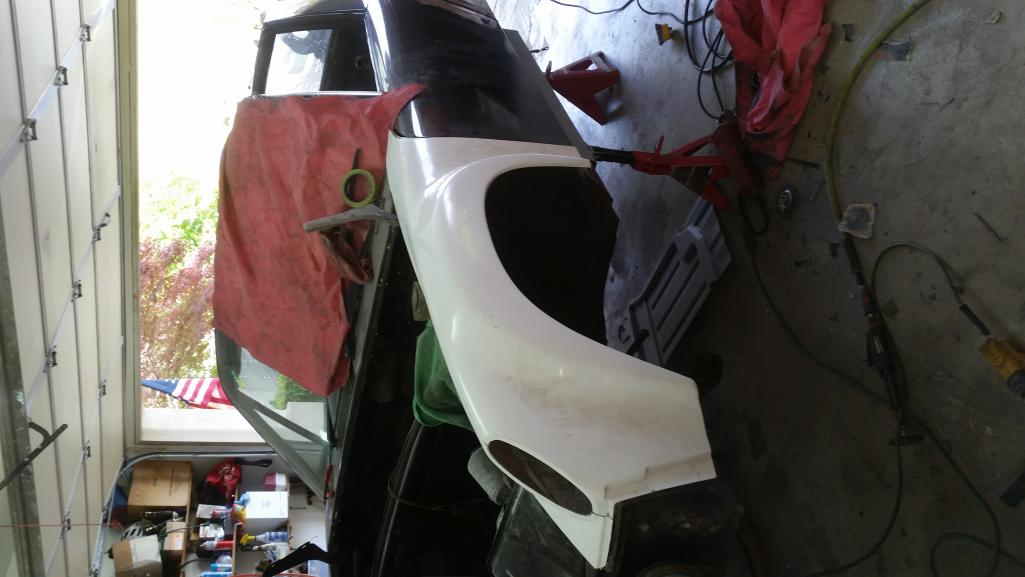
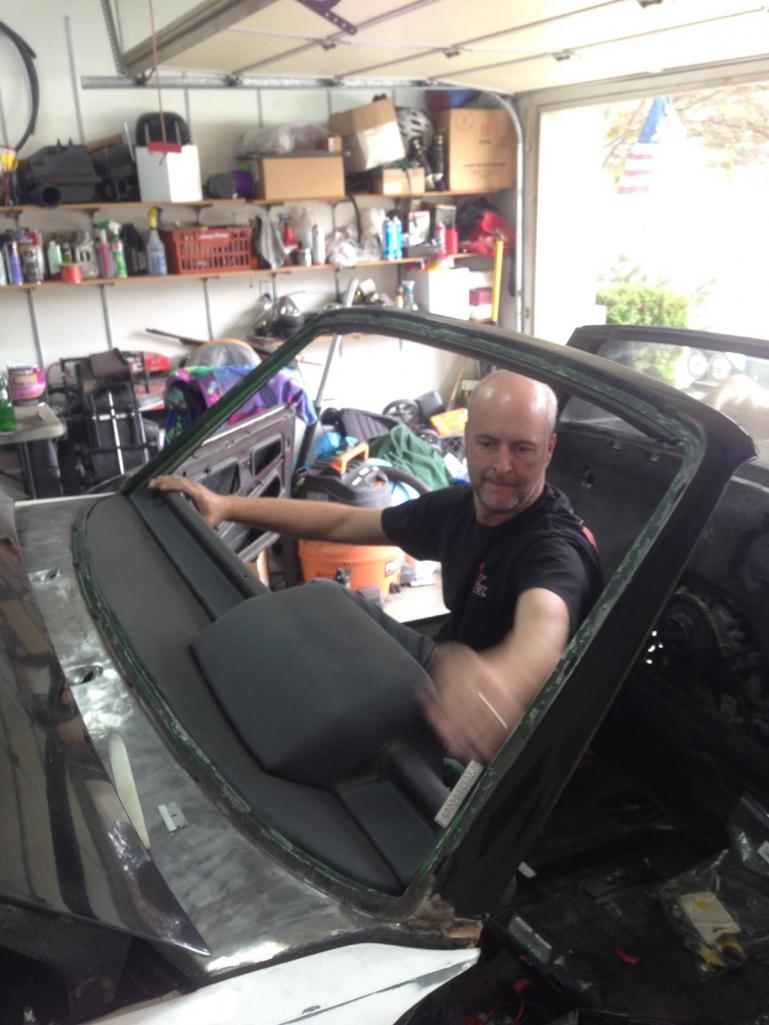
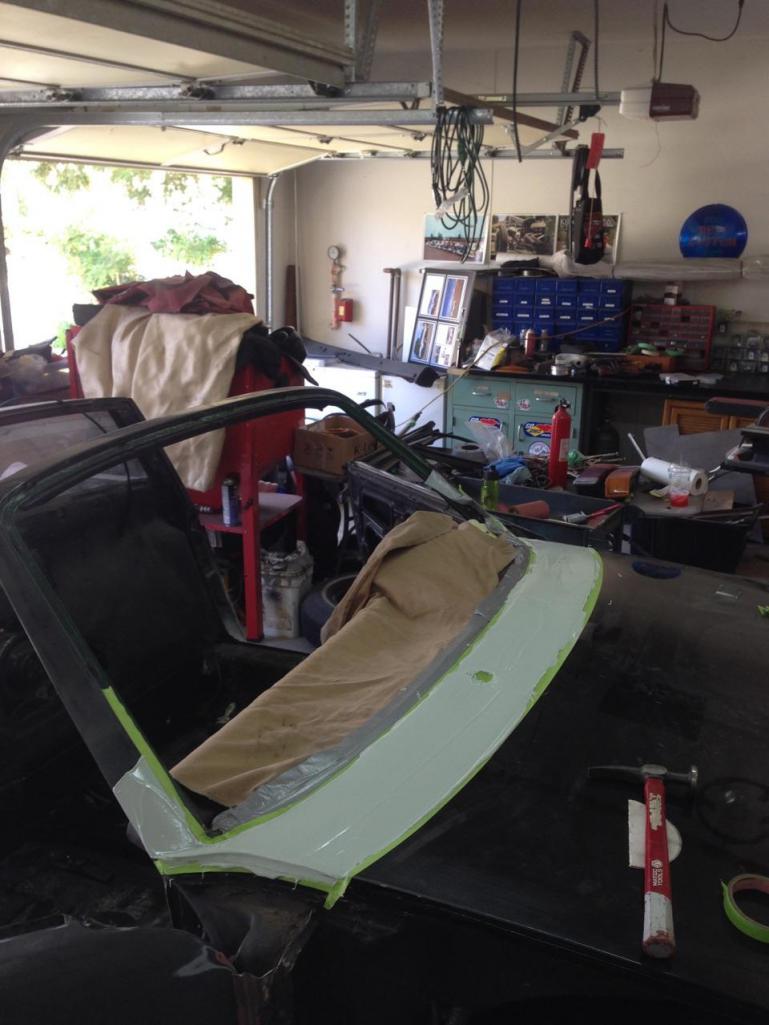
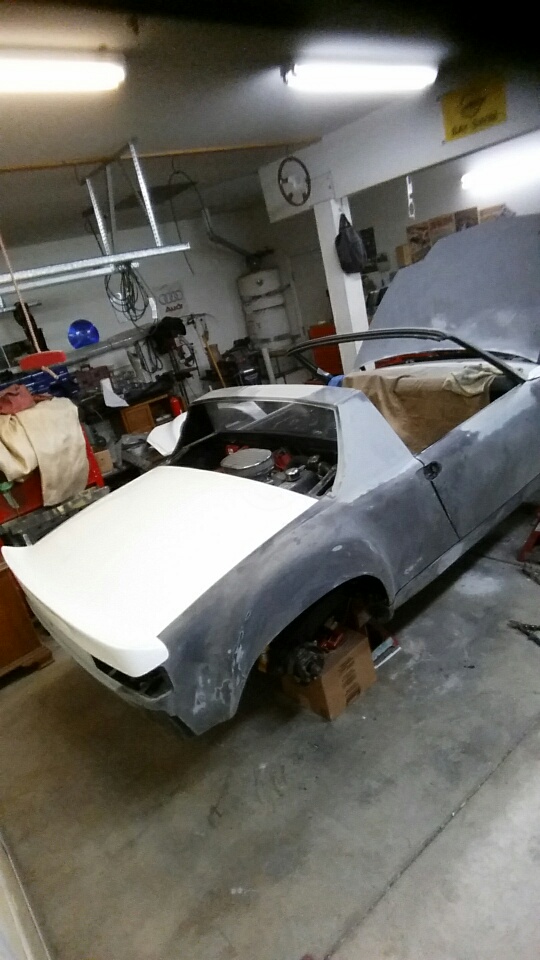
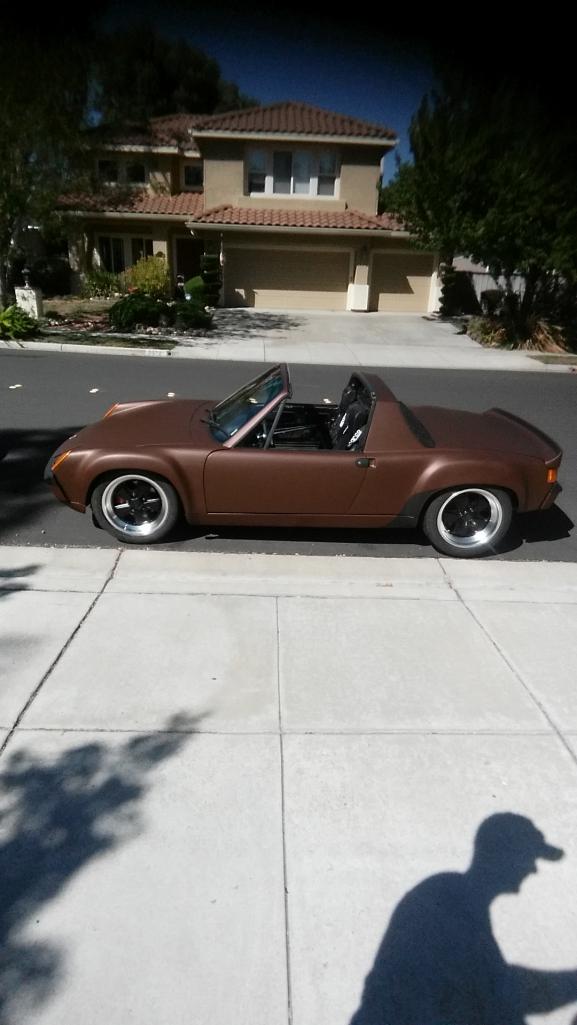
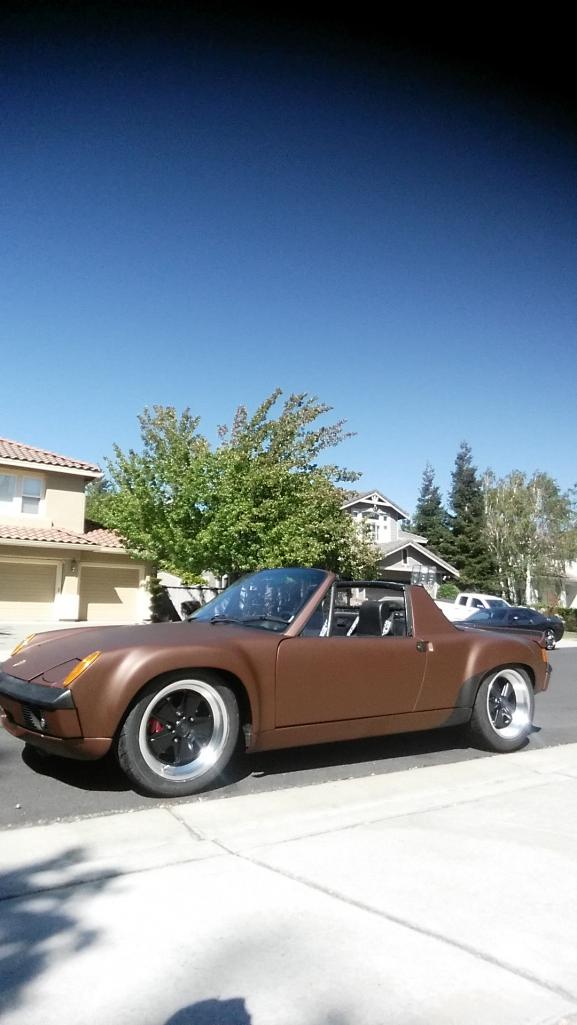
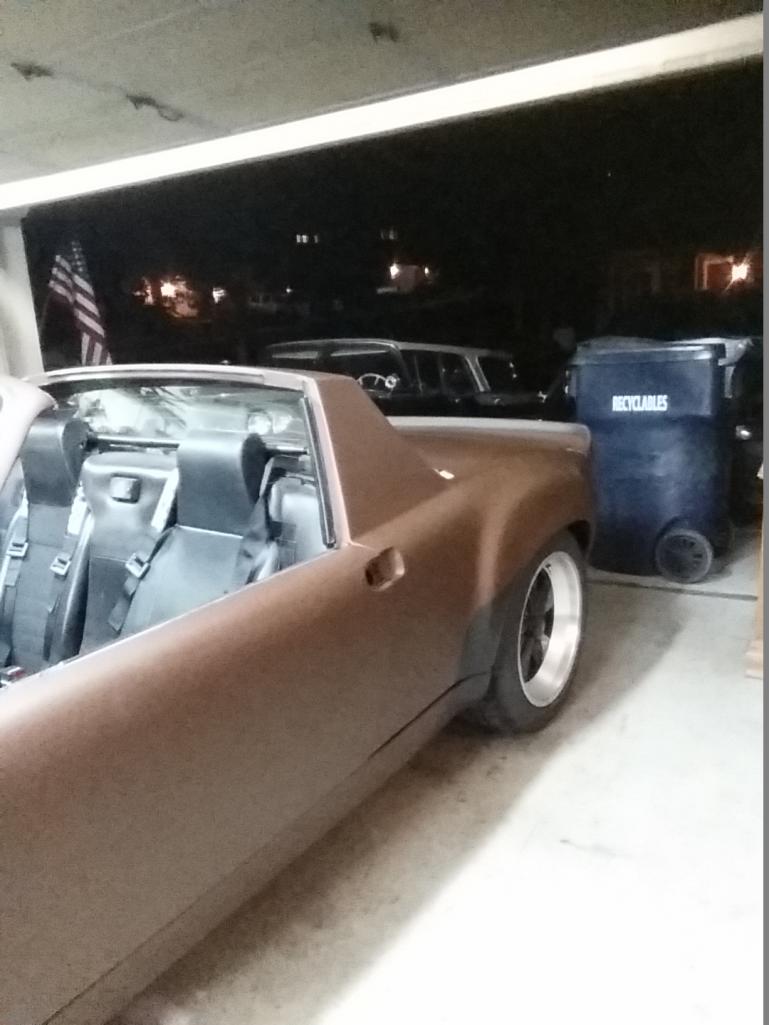
Posted by: LeftCoastErik May 14 2015, 09:41 AM
Looks like a good car, right? Gandolf had recently redone the engine and trans and shift linkage and, in fact, it runs and drive really nicely. The trans works well also. After it took 3 weeks to get the car from MN, I was pretty excited, and I already had a full 5-lug conversion ,sway away axles, 17" Fuchs, new tires, konis, Boxter brakes from Rich Johnson, etc sitting in piles waiting for the car.
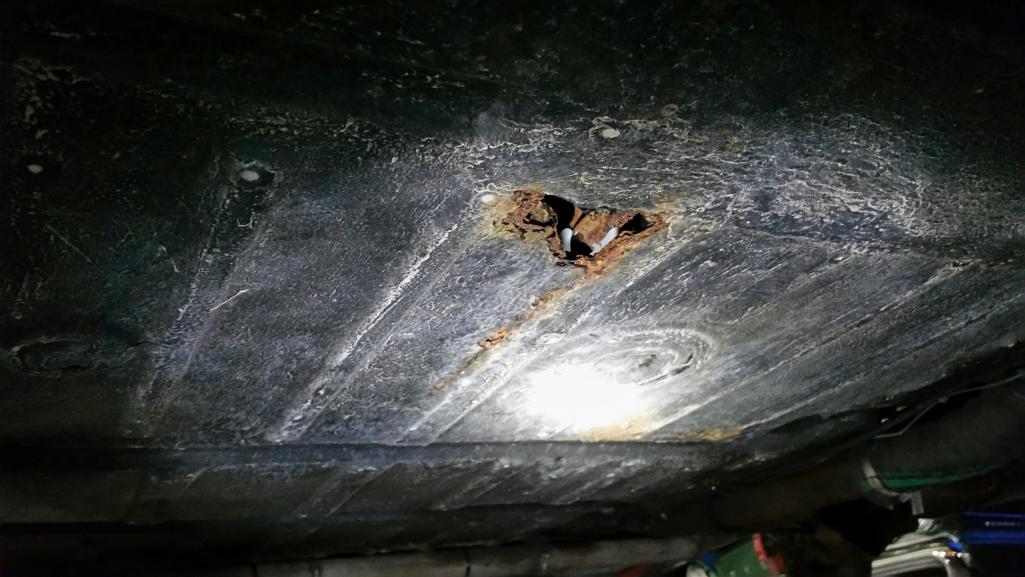
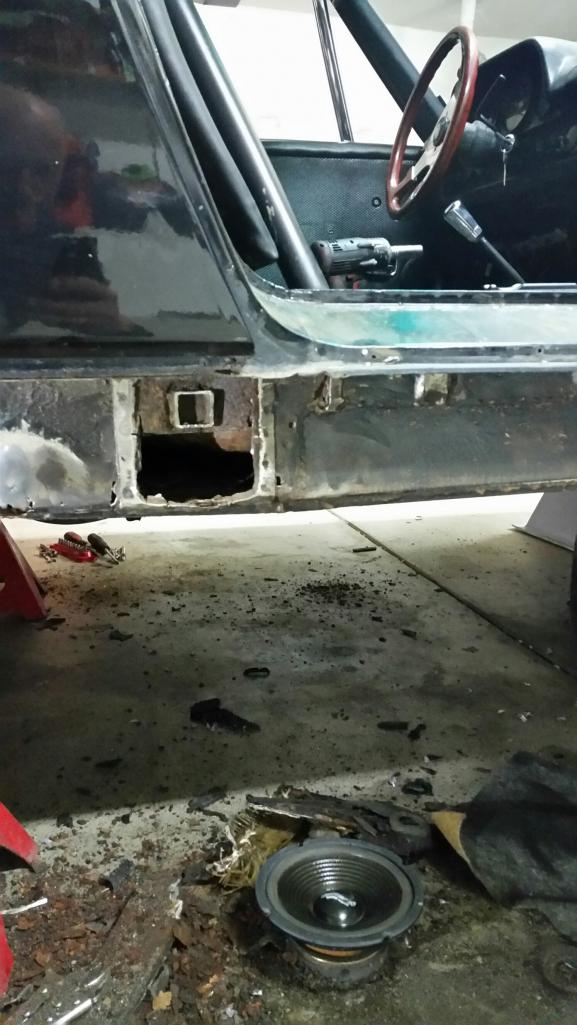
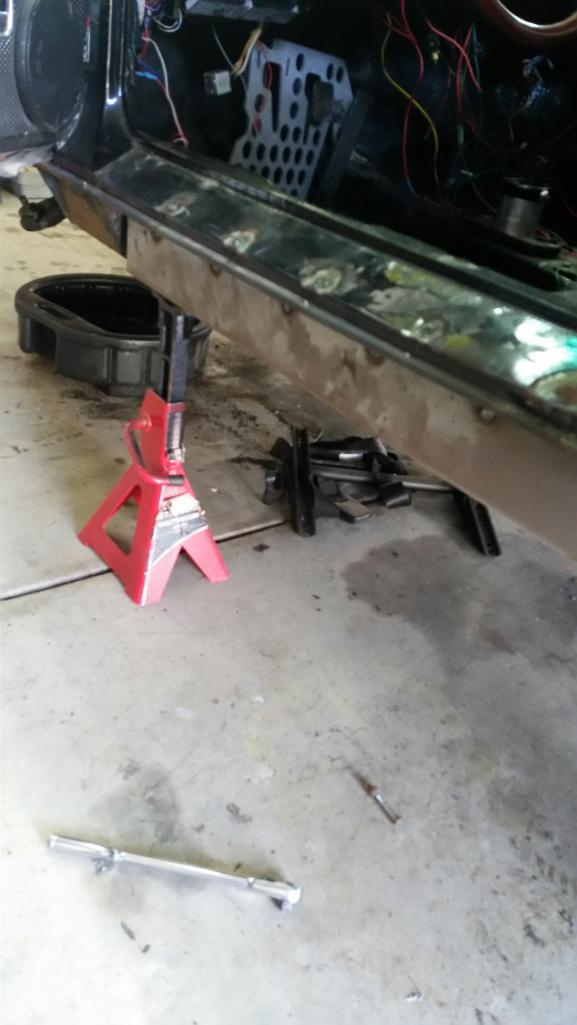
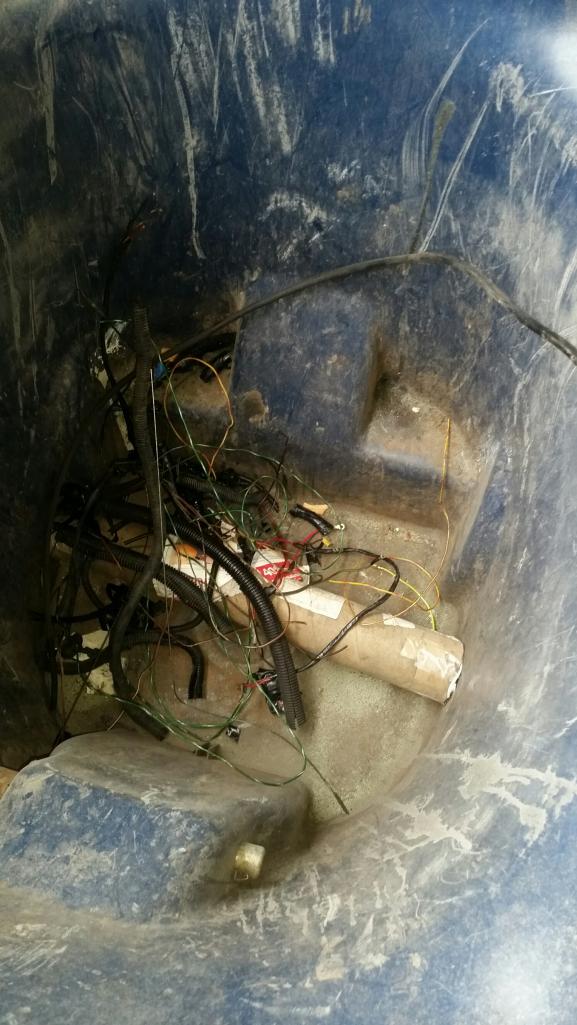
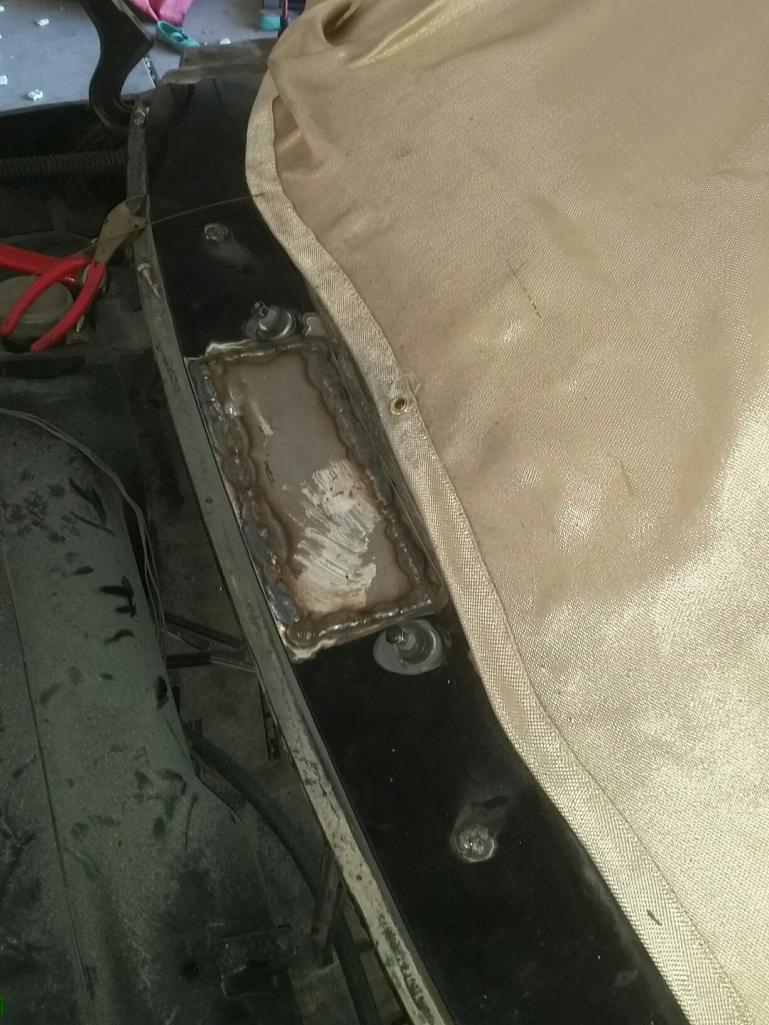
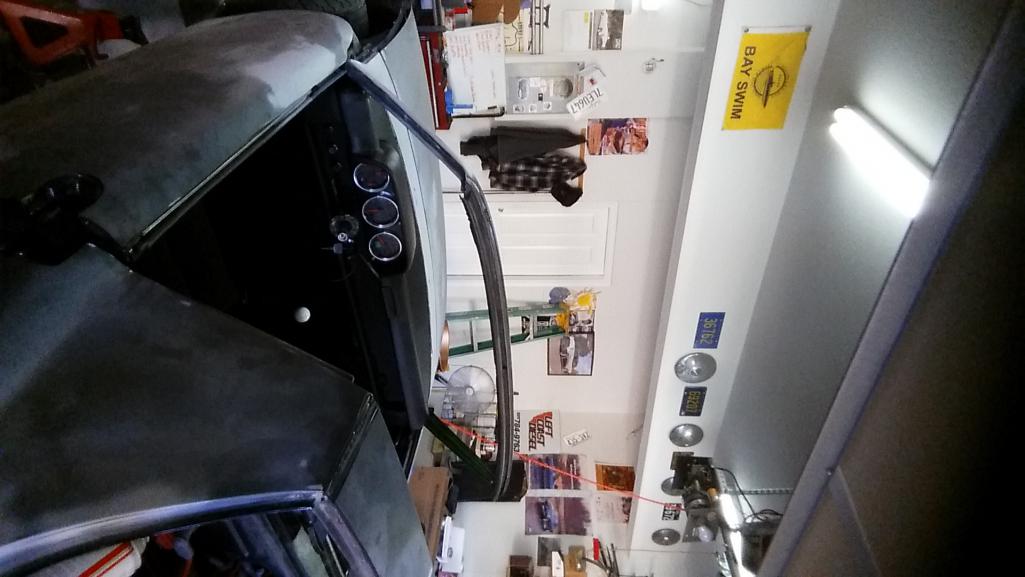
Car arrived late Wednesday and I drove it, cleaned it up and parked it in the garage. Yesterday afternoon, this happened:
Attached thumbnail(s)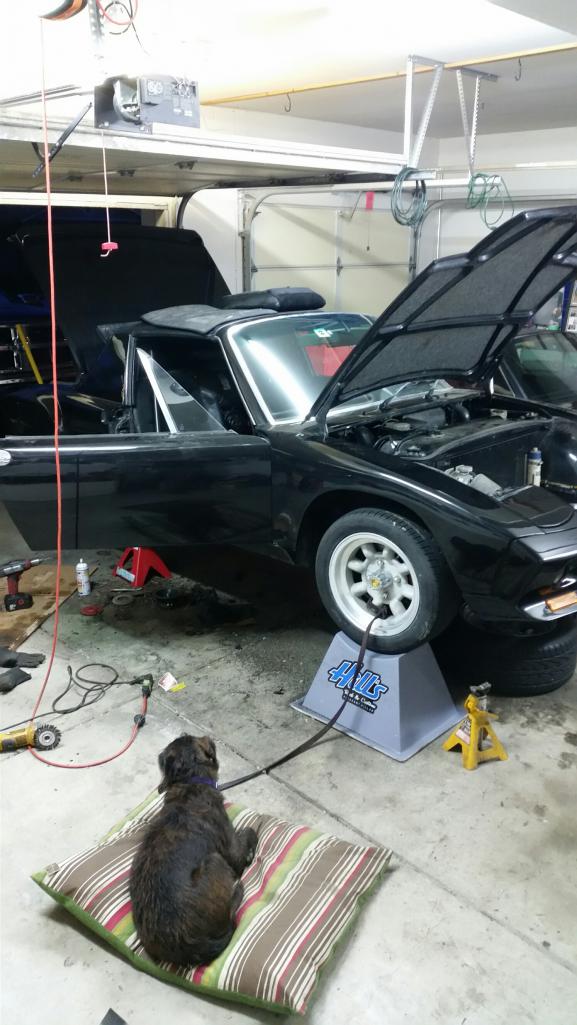
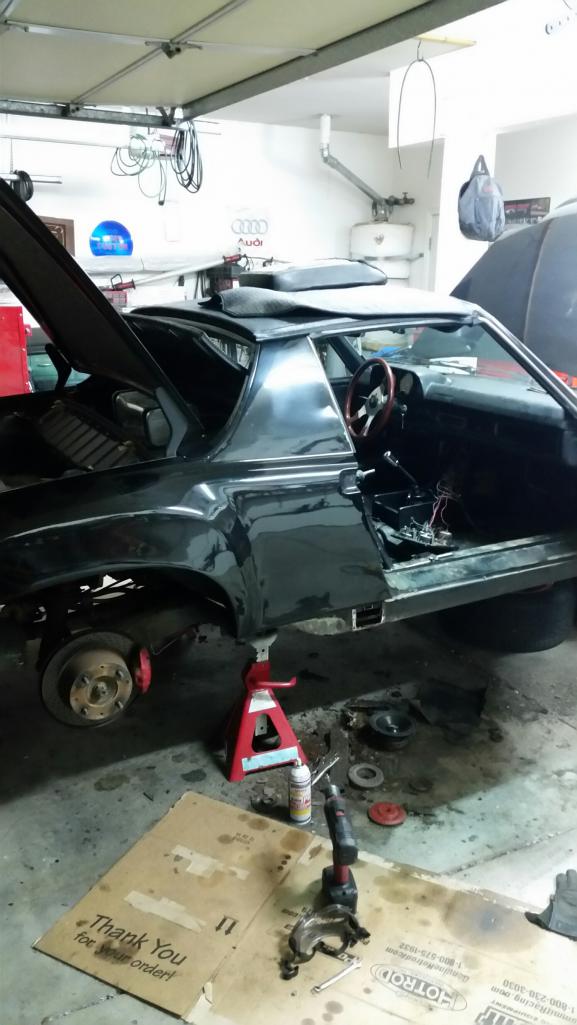
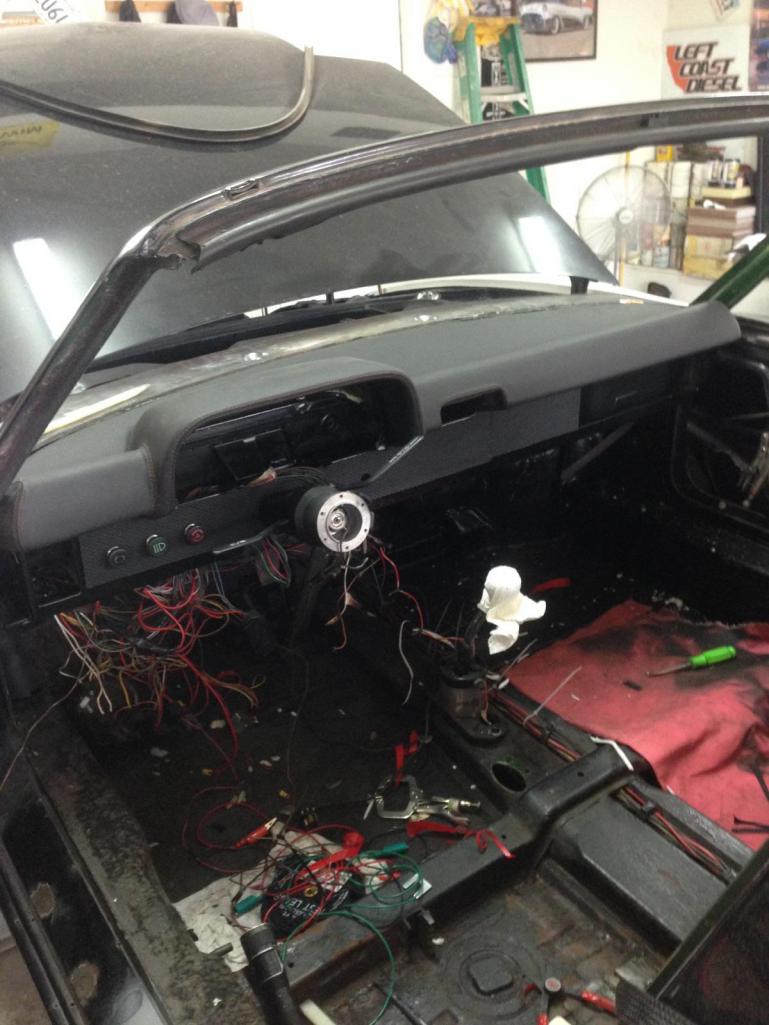
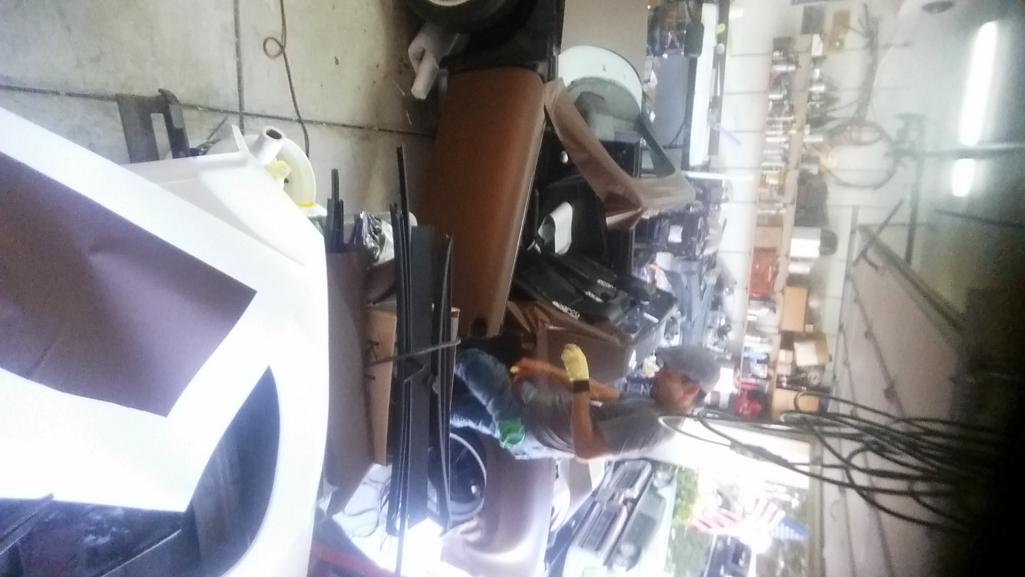
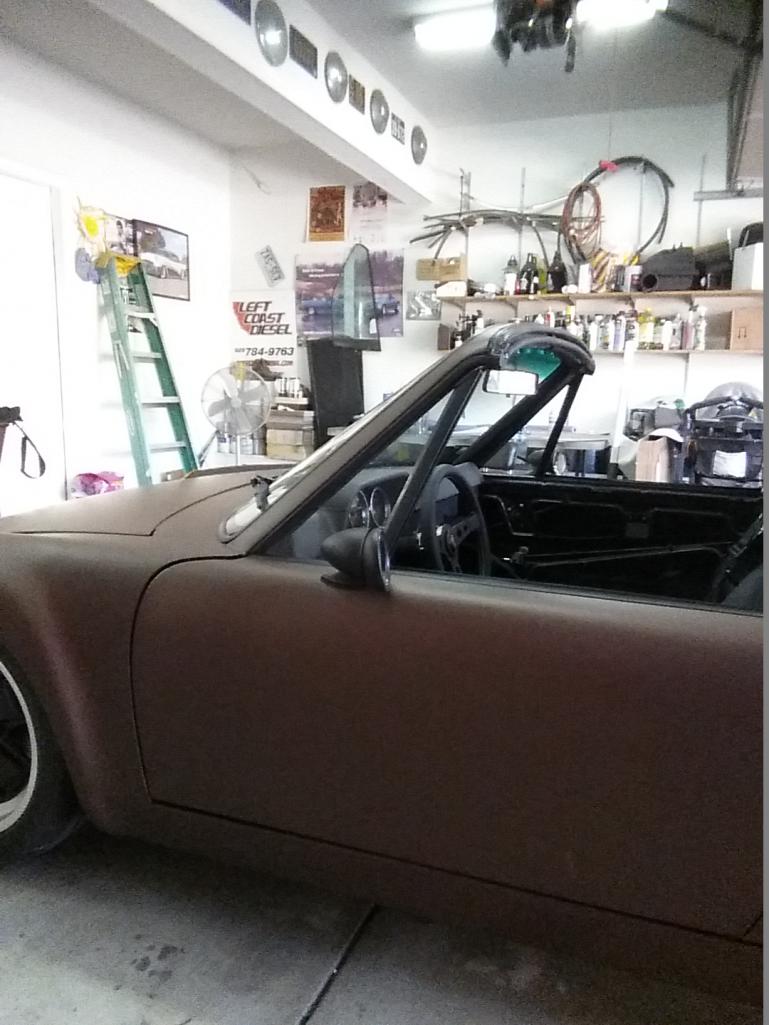
Posted by: LeftCoastErik May 14 2015, 09:59 AM
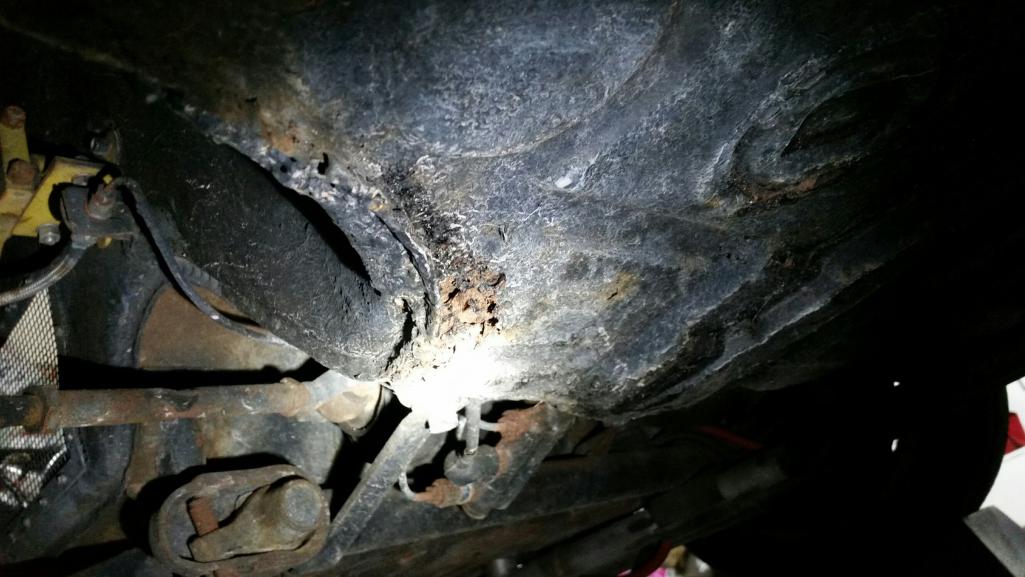
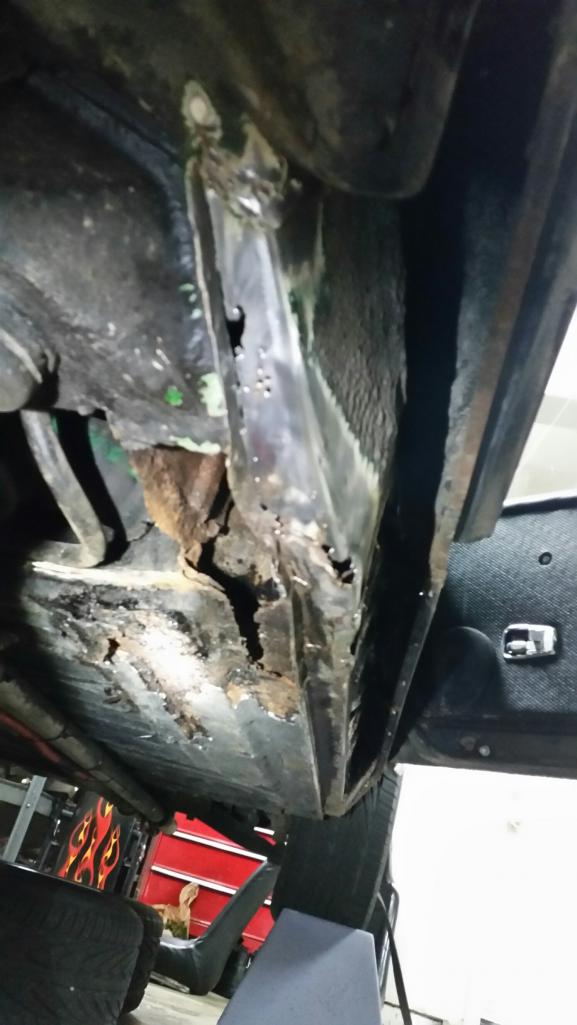
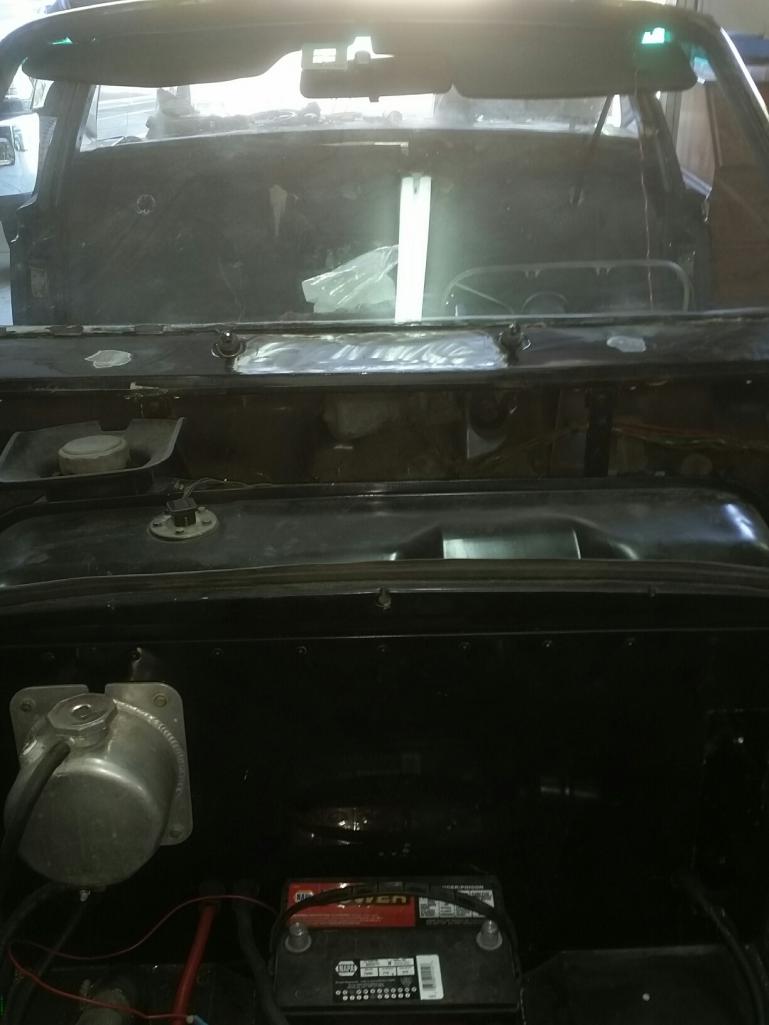
I yanked the rockers and my heart started to sink a little. I NEVER buy old cars without looking at them first...I made an exception in this case and it bit me in the ass. In Gandolf (steven)s defense, he did nothing except the mechanicals on the car when he had it and barely drove it. BUT, the rust is pretty ugly.
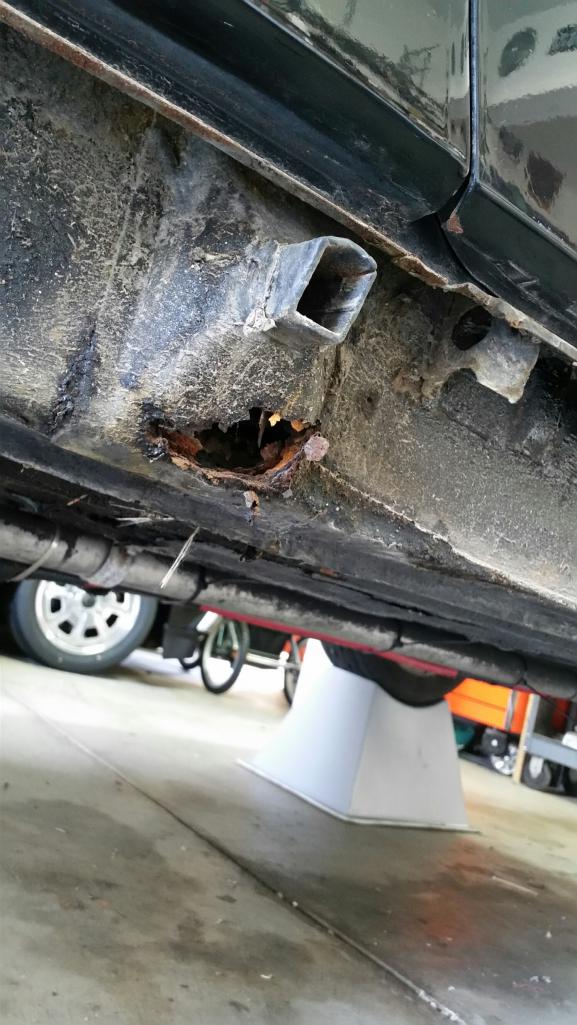
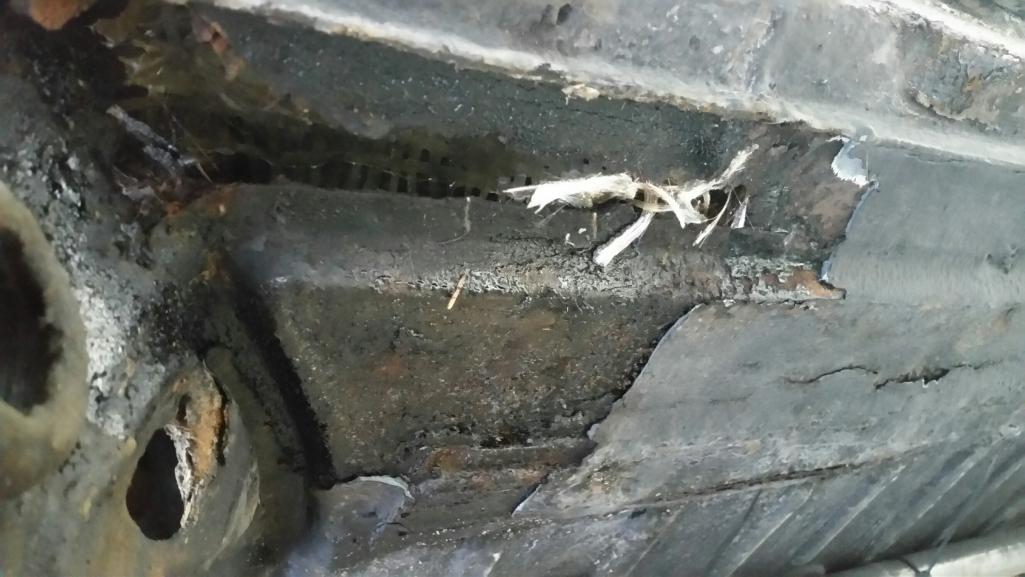
Hell hole is good (probably because the car was converted in 1984 and the battery moved to the front trunk). BUT the long is hammered, as is the passenger jack point. The inner long is surprisingly OK. Front of passenger footwell is separating. Pedal box has some rust, drivers inner fender and master area have been repaired from an accident, I imagine. Drivers tub is pushed up some, but not wrinkled. Passenger rocker area was poorly repaired with fiberglass and was holding water. I found standing water under the floor mats and seats. Passenger quarter is separating from the sail panel (fixable)
Also, the front fenders are molded into the cowl, so they have to be cut out. I have QRS GT flares and front end to install in the car, so that is on the list also.
Its a good running car with some nice parts, but its kind of a mess compared to the 73 I just restored.
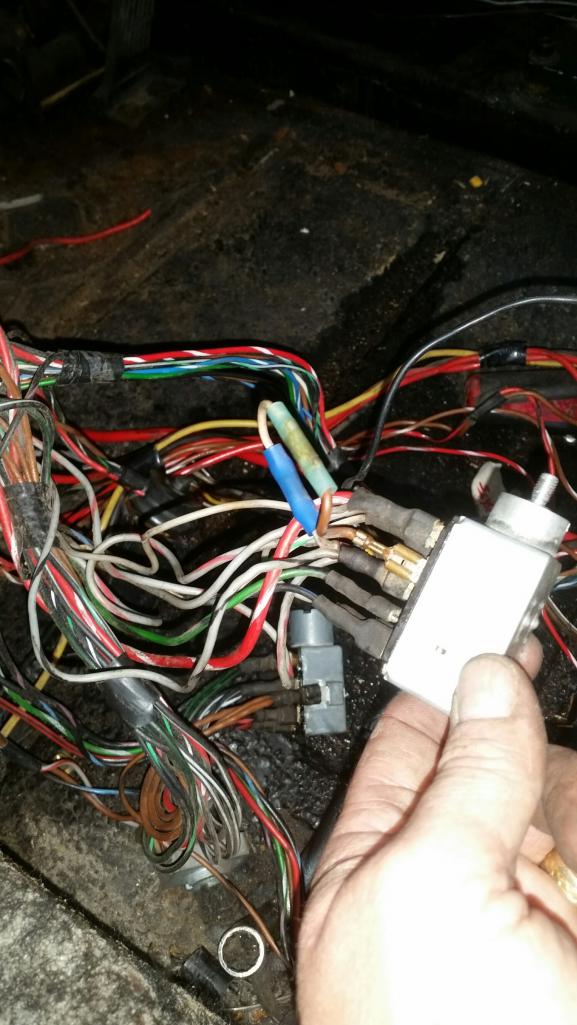
Wiring was a mess, power windows only sort of worked. Extra gauges were old school and one of them was arcing on the subwoofer installation..Arggg...
Anyway, teardown happened in one night, so today I get started on installing Brad's Long kit, the gt chassis reinforcement and a bunch of patch panels.
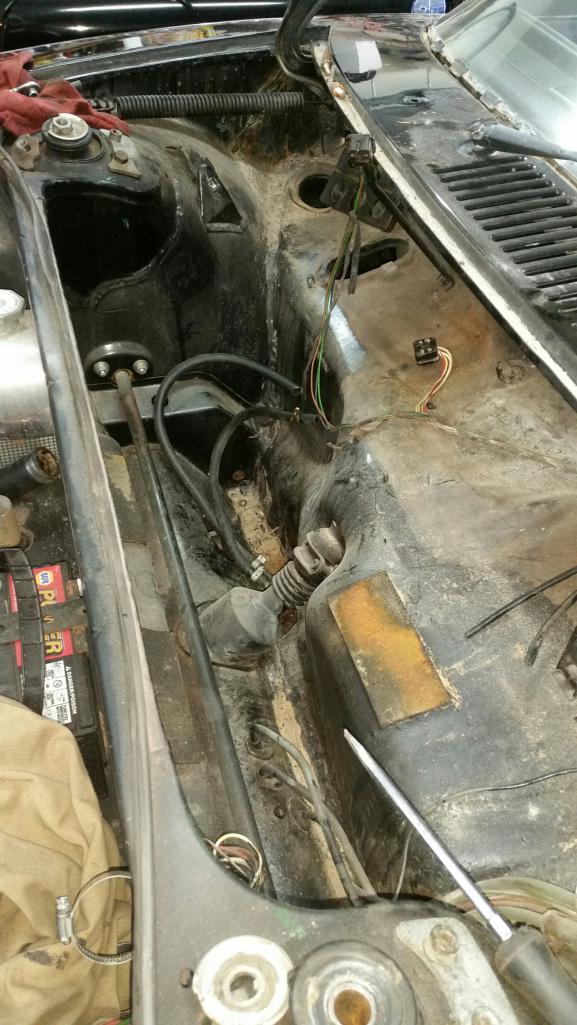
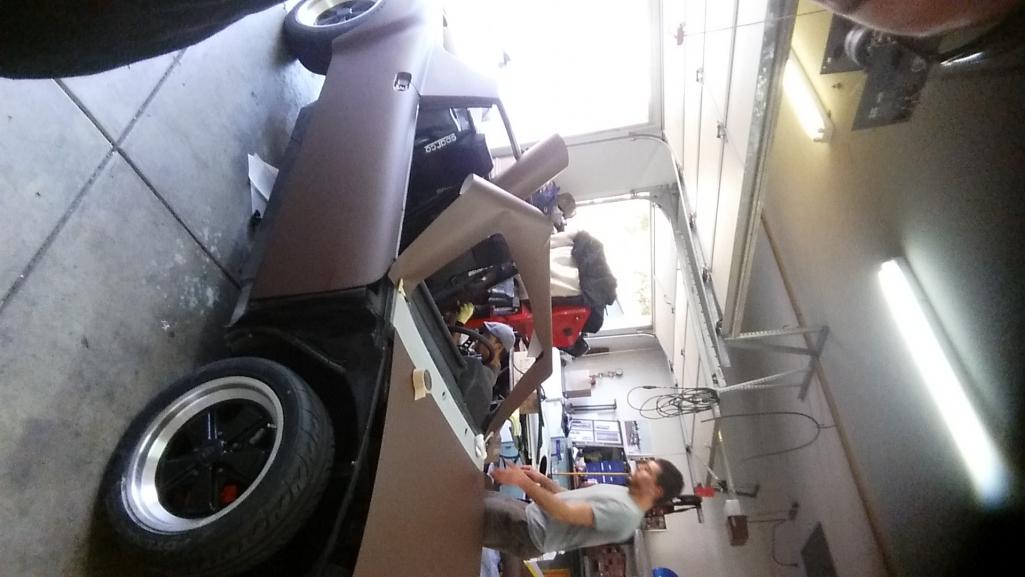
Posted by: LeftCoastErik May 14 2015, 10:03 AM
More pics
Posted by: LeftCoastErik May 14 2015, 10:05 AM
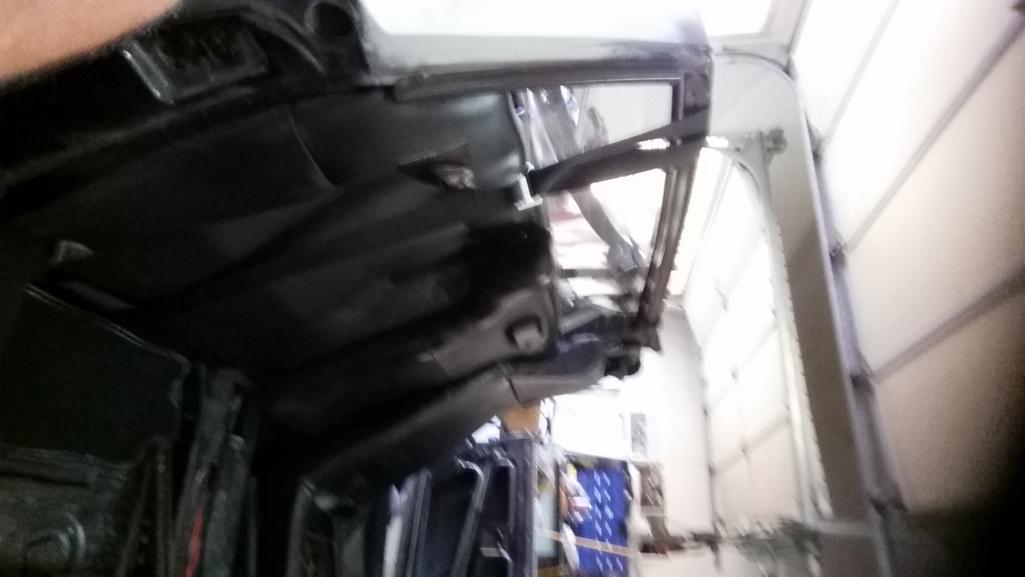
and some more
No problem zip tying the battery cables to the rear swaybar, right?? It should be ok.. 
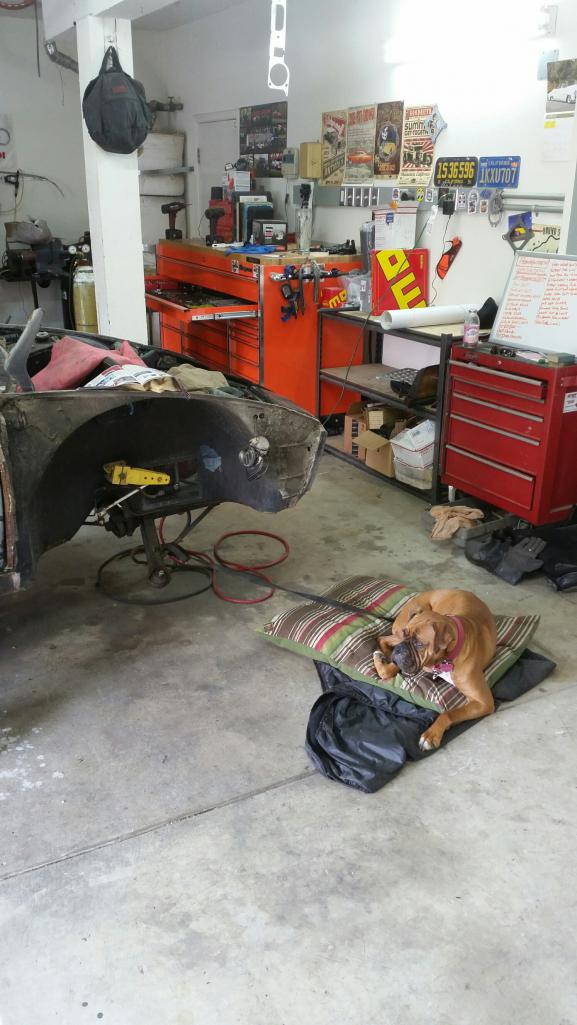
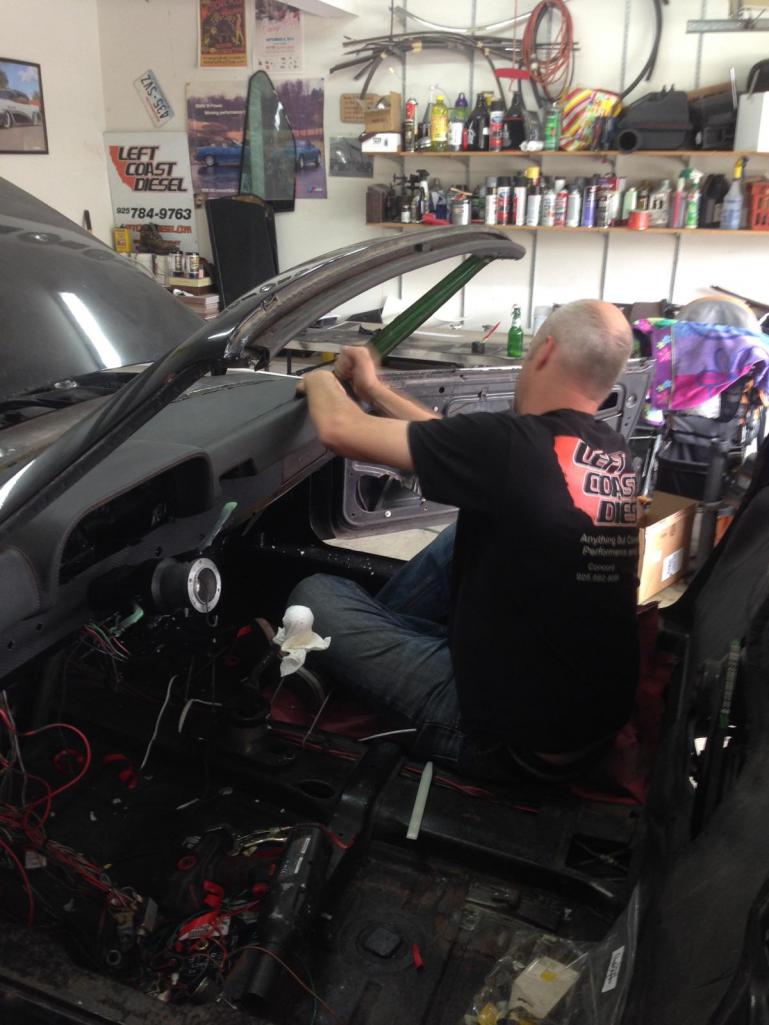
Posted by: LeftCoastErik May 14 2015, 10:08 AM
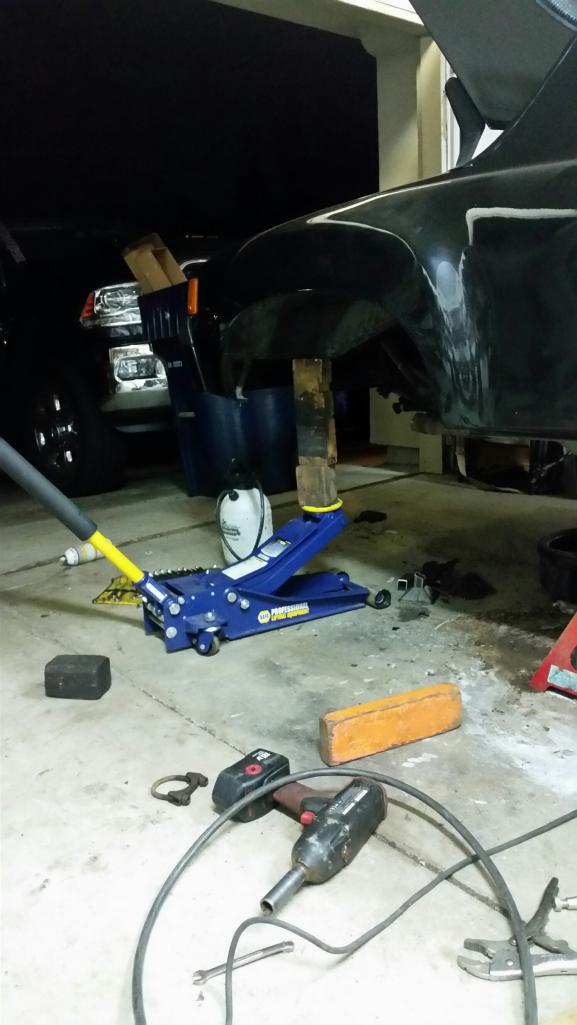
So, yeah...going to be doing a lot of this  for the next few days. I hope to get the longs in by tomorrow so that I can support it there and yank the front and rear suspension to bring down to the 914 swap meet in san jose on sunday
Wish me luck

Posted by: rhodyguy May 14 2015, 10:15 AM
Bummer
Posted by: rjames May 14 2015, 10:44 AM
Bummer indeed.
At least it looks like you have the skills to make it right again.
Posted by: Mueller May 14 2015, 10:55 AM
Ouch....using the speaker to pick up the metal scraps?
Posted by: matthepcat May 14 2015, 11:50 AM
Bummer about the rust.
The car is going to look so much better when you swap out the front fenders and those wheels. At least you can drive it and enjoy it during the process.
Matt
Posted by: LeftCoastErik May 14 2015, 12:03 PM
Yeah, definitely a bummer, but stuff happens.
My wife (who is less than thrilled with the multiplying teeners) was like "so can you fix it?"
Me: "of course honey, no problem...I just didn't WANT to fix it..."
I just have to keep telling myself that its nothing compared to chopping the top on a 50 chevy or half of the other work I have done on custom 50's cars...Everything is small and easy..yeah...that's the ticket..
Posted by: whitetwinturbo May 14 2015, 08:51 PM
.........and I had this one on the "watch" list on Ebay. MI seemed like a long way from CA so I did not bid...even though the price seemed right.....right? WRONG! Looking forward to the "fix"!
Posted by: r_towle May 14 2015, 09:01 PM
Dude, don't lose the magic speaker that goes behind the jacking point to keep everything in tune.
Posted by: LeftCoastErik May 15 2015, 10:13 AM
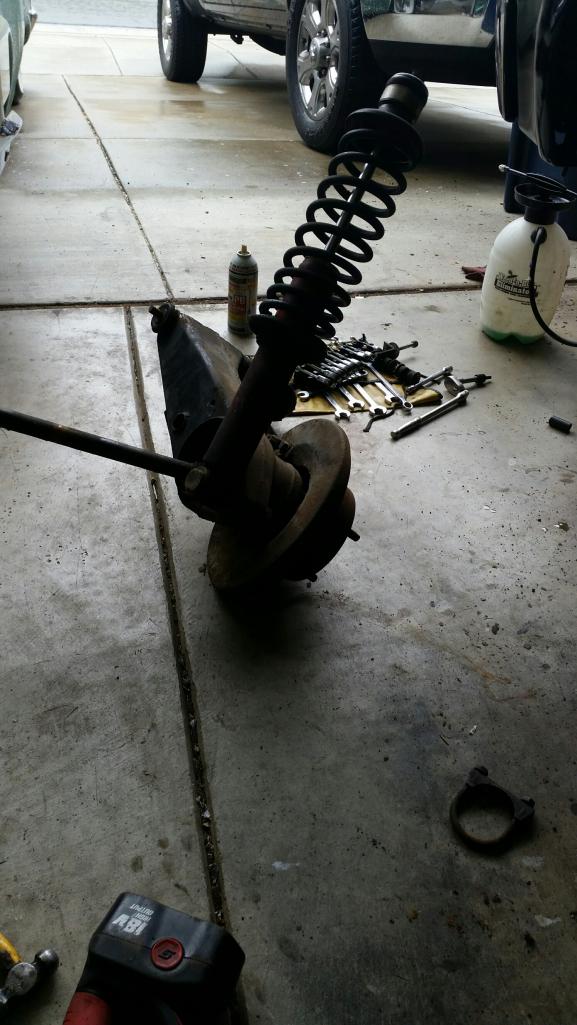
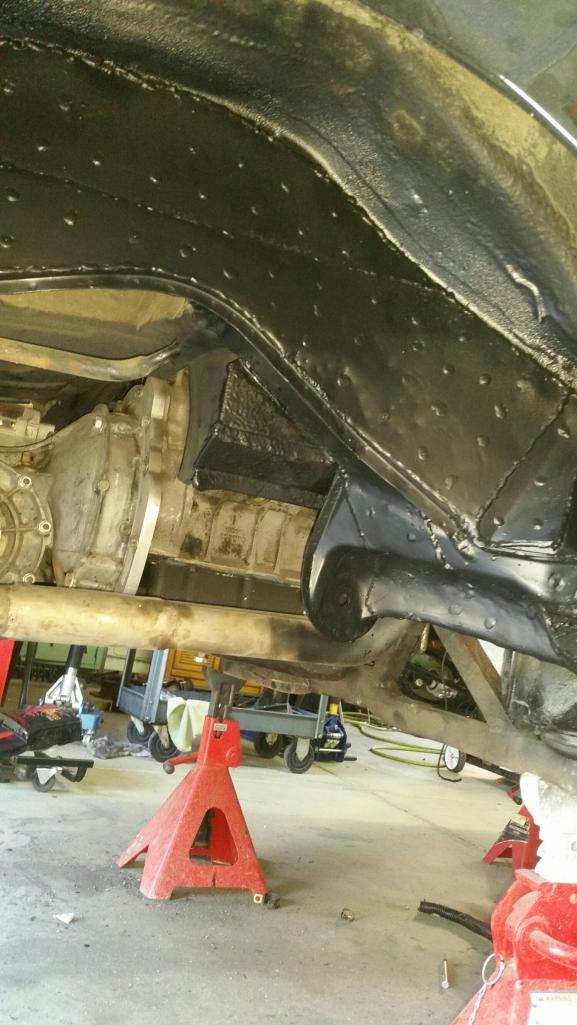
Day 2 saw the removal of the rear right suspension, complete with a broke off trailing arm console bolt...HOORAY! I soaked them for 2 days. 2 came out like butter. One rotated half a turn and snapped...Should be fun to remove.
It also appears that the long has been patched full length at some point in its history. Metal is good, and its gas welded with a goldish metal that is hard as hell. Not sure what it is, but I am guessing the welds aren't factory. The longs look nothing like the ones on my 73. I had to make spacer pieces to weld to the long to get the Mayeur kit to but up to and be able to plug weld. No biggie, but one more thing to deal with..
Hoping to get out today around 10am and put some more hours into it.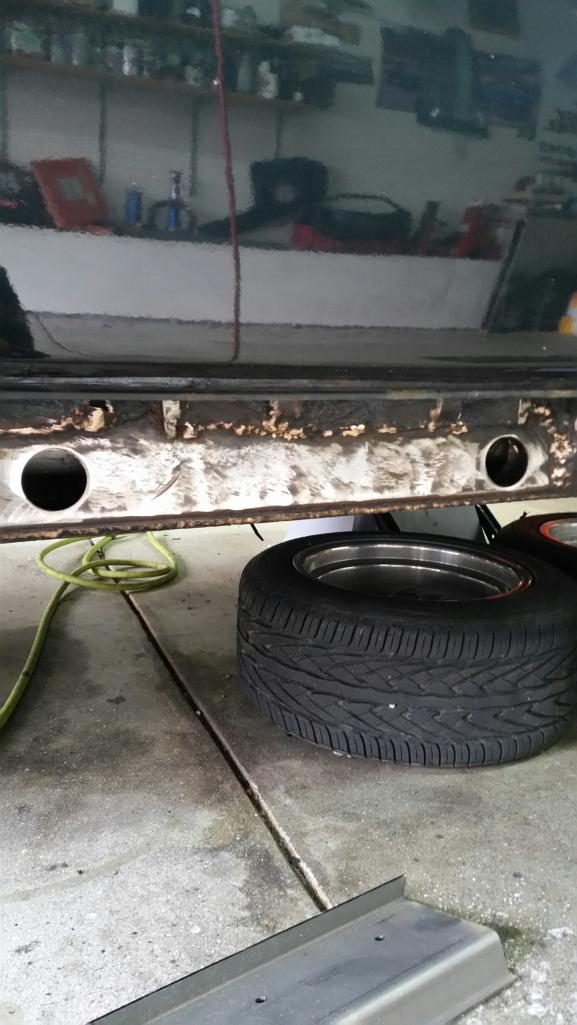

Posted by: LeftCoastErik May 15 2015, 10:15 AM
Holes were added so I could spray Ospho in there all over...

Posted by: RobW May 15 2015, 11:05 AM
Super cool. Dig the pup too! Let me know if you need any spare parts. I think I have an extra pair of CFR dog ear plates.
Posted by: LeftCoastErik May 15 2015, 11:31 AM
Rob, I may just take those off your hands. Bring them if you are heading to Harrys on Sunday. I definitely want to check your rides out also.
Posted by: tomrev May 15 2015, 02:48 PM
I too was following the car on ebay; not to buy, as I have my 914 fix, but because I thought it was a smoking deal with the mechanicals, and couldn't believe the low selling price! Given all the metal work, i feel better about the price now. I also had the same thought about having to R&R the front fenders for a stock look. It will be a cool ride when you are finished!
Posted by: LeftCoastErik May 19 2015, 02:26 PM
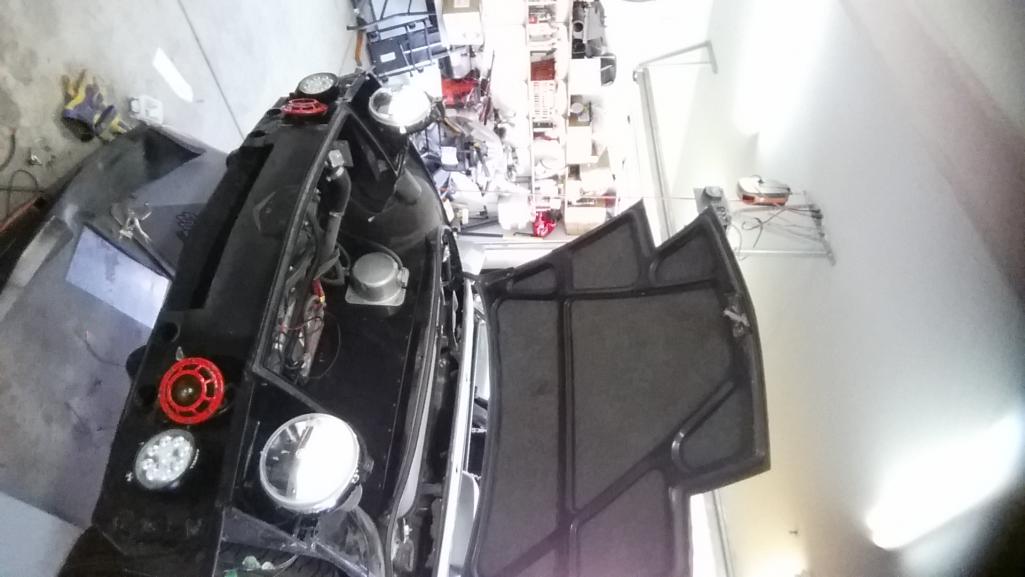
Days 3-5 were pretty exciting also.. Got the longs done on both sides, the front and rest of the rear suspension torn out. Found a bunch more rusty stuff 
Also removed the toyota heater box and plumbing, pulled the battery cables so I can route them in (rather than under) the car, yanked a bunch of crap wiring and started to pull the fenders.
Damned fenders were molded to part of the original fender (very odd stuff) so they are going to be a beeeyatch to remove.
Got all my 911 CVs and Flanges thanks to some folks on here and got my Sway Away axles as well.
Turbo tie-rod kit is here.
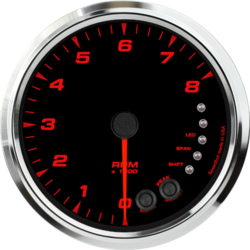
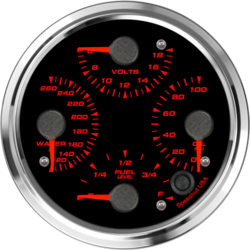
Custom SpeedHut gauges ordered up as well (since I have to rewire stuff anyway..why not?)
Attached thumbnail(s)


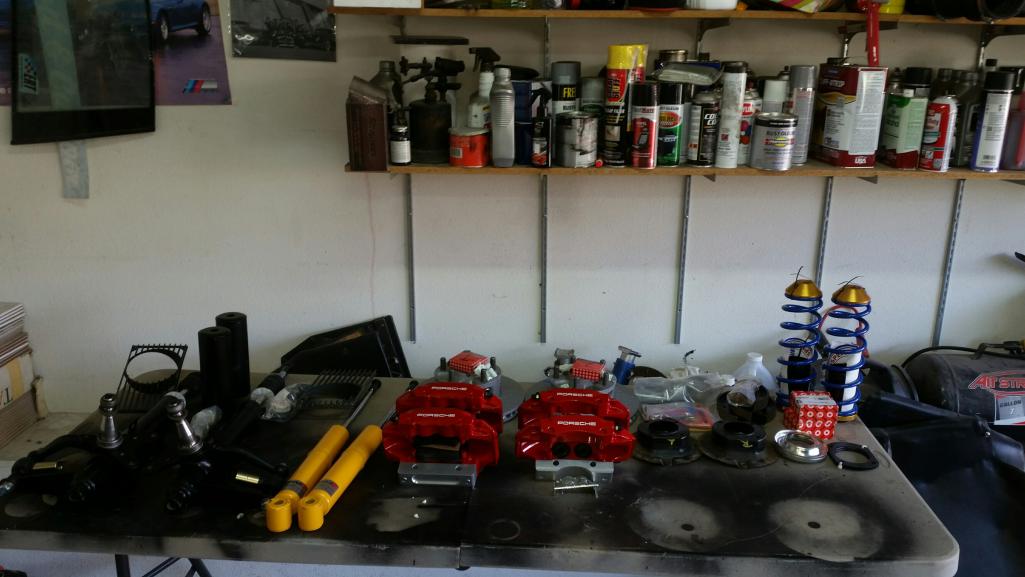
Posted by: LeftCoastErik May 19 2015, 02:29 PM
More pics. New 17" Fachs and RE71R tires waiting to go on!
The BMW 320i calipers, struts and drilled rotors are for sale also. Make me an offer

Posted by: Mueller May 19 2015, 05:03 PM
Those 17" Fuchs are nice!
Nice meeting you last week!
Posted by: LeftCoastErik May 19 2015, 05:26 PM
Thanks! You too man!
Posted by: Chris H. May 19 2015, 05:50 PM
Nice work! The Brad Mayeur kit should stiffen it up quite a bit, especially if the longs were weak. Should feel great when you get it back on the road. You'll love the Speedhut gauges. Very easy to set up and use. What style did you get?
Posted by: LeftCoastErik May 19 2015, 05:55 PM
These right here. I know the Brad kit made a night and day difference on the 73, and that car wasnt as flimsy as this car was. I am doing the GT Reinforcement and trailing arm reinforcement also
Attached image(s)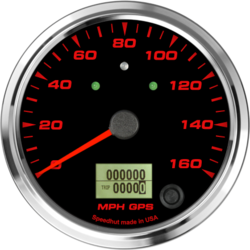
Posted by: Chris H. May 19 2015, 06:45 PM
Nice! Mine are very similar. White during the day, blue at night, black surrounds but the same font and layouts.
Posted by: LeftCoastErik May 19 2015, 07:01 PM
Cool. They have great reviews and the gps speedo makes life easy
Posted by: BillC May 19 2015, 07:34 PM

What breed/kind of dog is that? He (she?) looks just like our dog, whom we got through a rescue league, so there was no history on our pooch.
Posted by: LeftCoastErik May 19 2015, 08:06 PM
Probably related! He came from big dog rescue and was expected to be 65+lbs of deer hound mix. .he's 42lbs of wire haired asshole. Loves us and great with my 3yr old but is hit or mostly miss with strangers and other dogs
Posted by: a914guy May 19 2015, 09:06 PM
Keep up the pace Erik. Nice work and ditto on the Fuchs wheels. I love 'em on GTs.
Posted by: LeftCoastErik May 27 2015, 10:34 AM
No updates for a while, sorry. I did get the interior torn down, hood off, fuel tank off and started tearing down the trailing arms for reinforcement and powdercoating.
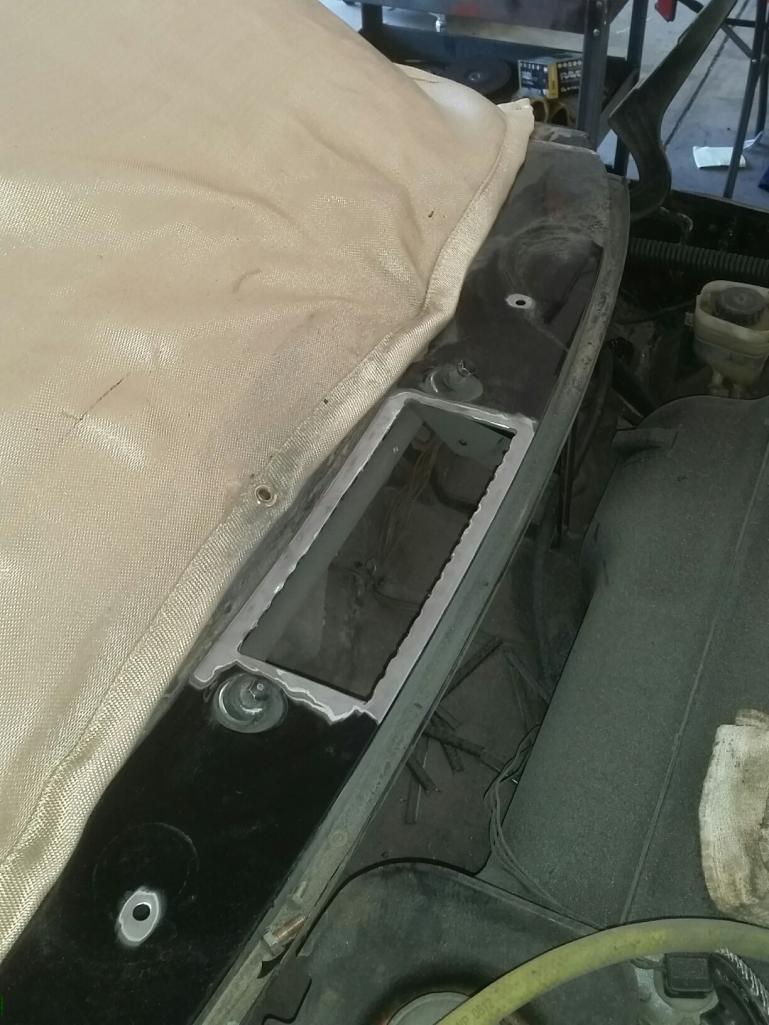
Rich Johnson has been working away at the suspension and brake components and they are being shipped. I managed to sell the 73, so I can order up the fuel injection for the motor, so that will be fun. I pulled out all the HVAC components and will be filling the fresh air vent slots in the cowl as well as the washer nozzle holes.
Attached image(s)
Posted by: arkitect May 28 2015, 06:13 AM
Erik,
Cool work bringing the longs back in shape, you are quick with the repairs. Nice looking weld, that shows years of practice.
Dave
Posted by: LeftCoastErik May 28 2015, 11:13 AM
Thanks Dave. I am actually disappointed in those welds. My welder gas solenoid was getting funky and there wasn't much shielding gas getting to the weld, so they are a little porous. That's being fixed now before I continue with the welding. I did get some other little stuff blown apart though!
Attached thumbnail(s)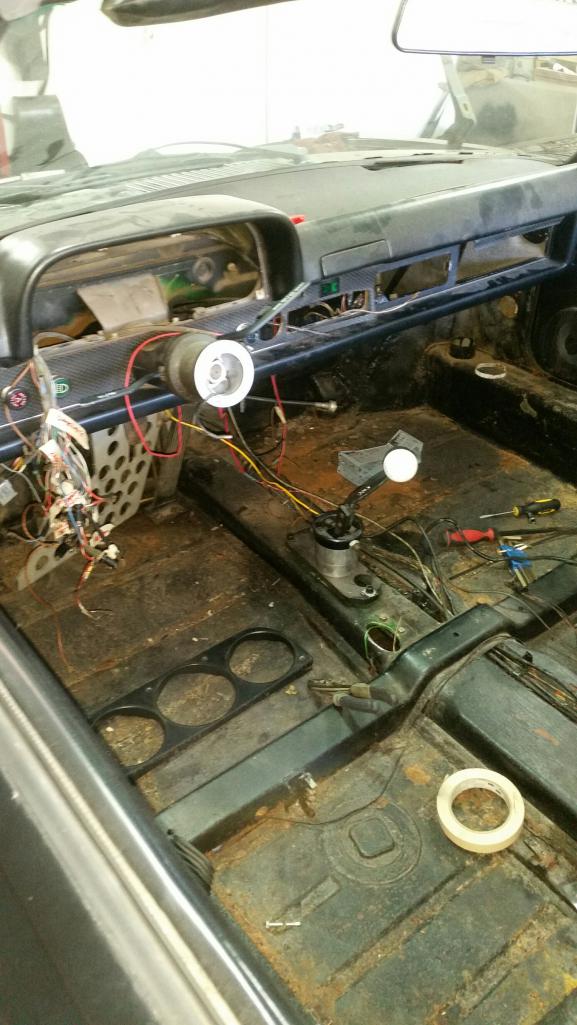
Posted by: LeftCoastErik May 29 2015, 10:37 AM
I think I am going to rename the car the FML914..Every time I take something apart I find another marginal repair. The bottom of the fuel tank hold was rusty at some point and poorly fiberglassed over. I can fix it, of course, but geez.
The car was originally irish green. but the front portion of the car looks like it may have once been light blue before being painted irish green and then black. I just have to keep going and reweld/reinforce everything..arggg...
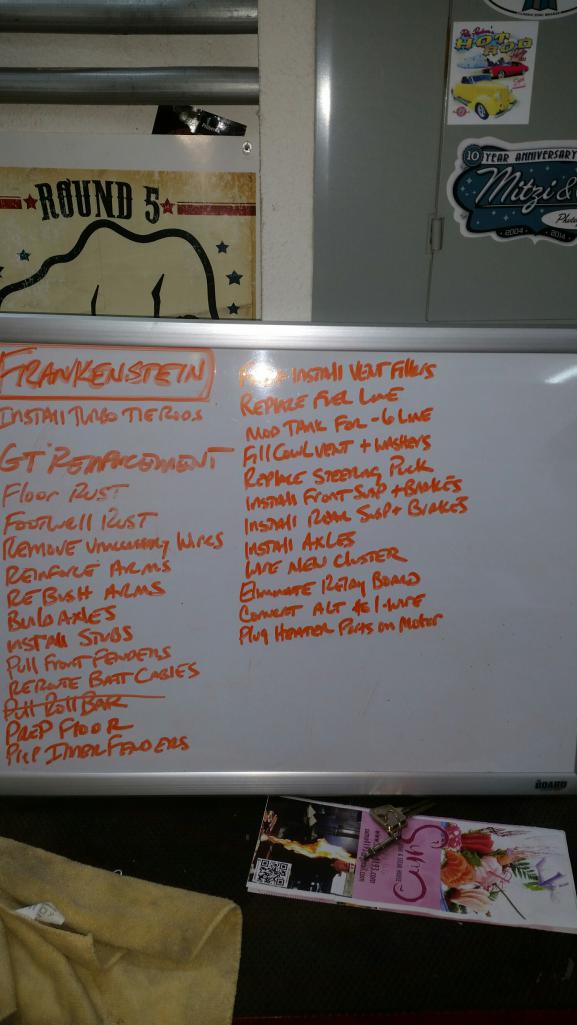
Got fuel lines out so I can run a fresh -6 to the back to support the EFI thats on order. Going to relocate the battery cables through the center tunnel also (instead of strapped to the coolant pipes under the car) Started thinning out the wiring harness of extraneous wires. Decided to eliminate the relay board entirely. Going to a one-wire alternator as well.
My project board was fairly well crossed off, so it got wiped and re-written with a new list of excitement...
Attached thumbnail(s)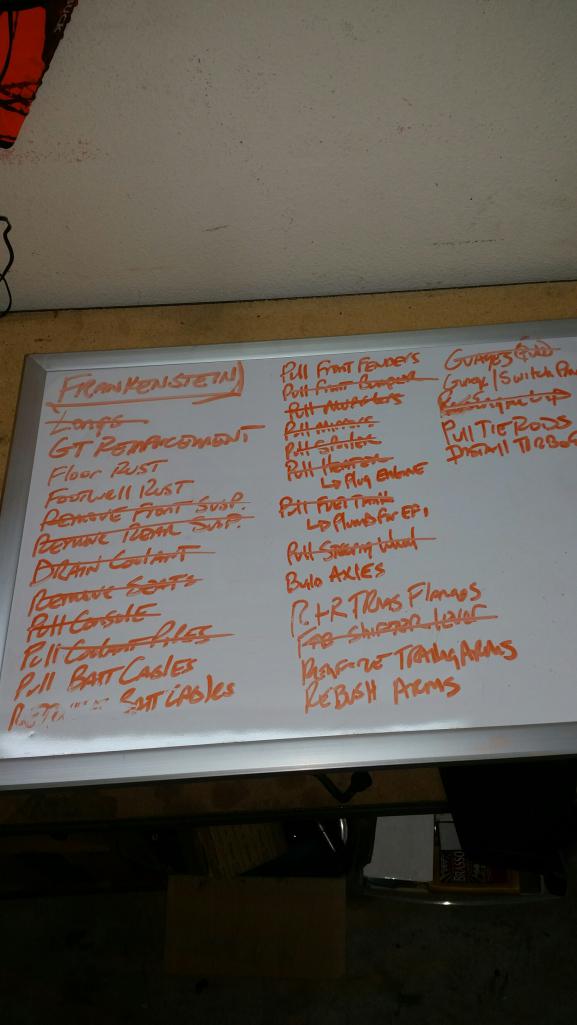
Posted by: Chris H. May 29 2015, 11:04 AM
Going to relocate the battery cables through the center tunnel also (instead of strapped to the coolant pipes under the car)
YIKES! Imagine if the insulation rubbed through those...probably nothing but could be...

You're doing it right Erik. When you find a few weird things you have to go all the way down to square one and start fresh. There might have been a repair done if only one section was blue. It happens. As long as the tub is straight it's all good.
Posted by: LeftCoastErik May 29 2015, 11:24 AM
Yeah, when I got the truck of the transport and parked it in front of the house I looked at it and was like "what??" the cables were dragging on the ground because the zip tie broke! That's pretty much why it got immediately torn apart.
Posted by: matthepcat May 29 2015, 06:47 PM
While your at it, you should just drop the 901 and go with a modern trans with a cable shift. Then you will actually have low enough engine rev's to travel 75MPH and get good gas mileage.
What's one more thing?
Posted by: LeftCoastErik May 30 2015, 08:20 AM
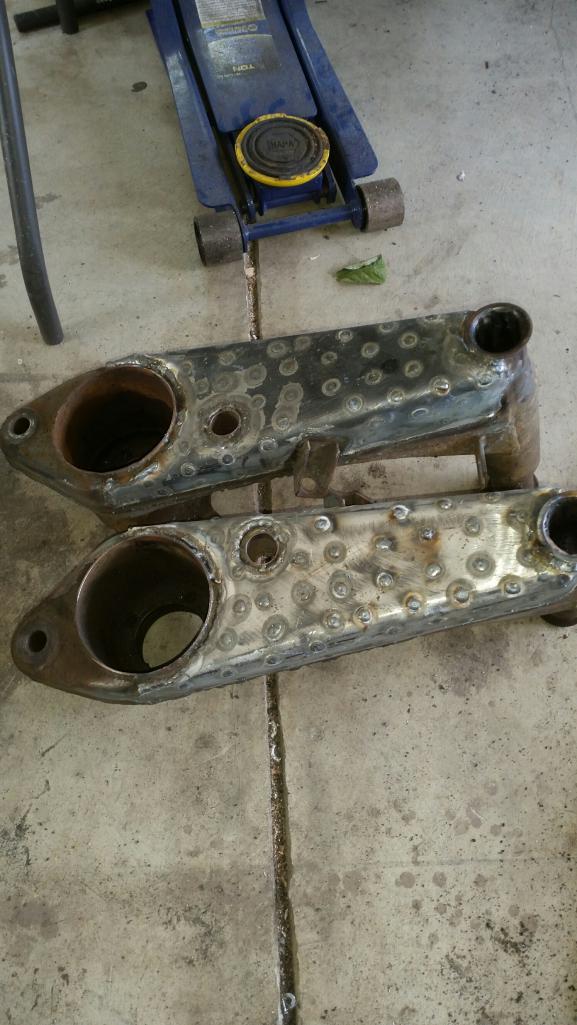
Yesterday I got the rear inner fenders cleaned and tacked in the gt kit. Also cut the front fenders off because I couldn't stand looking at them any more. I also got one trailing arm reinforcement pretty much done. Trying to finish the other one today so they can go to powder coat Monday.
Attached thumbnail(s)
Posted by: LeftCoastErik May 30 2015, 08:20 AM
More
Attached thumbnail(s)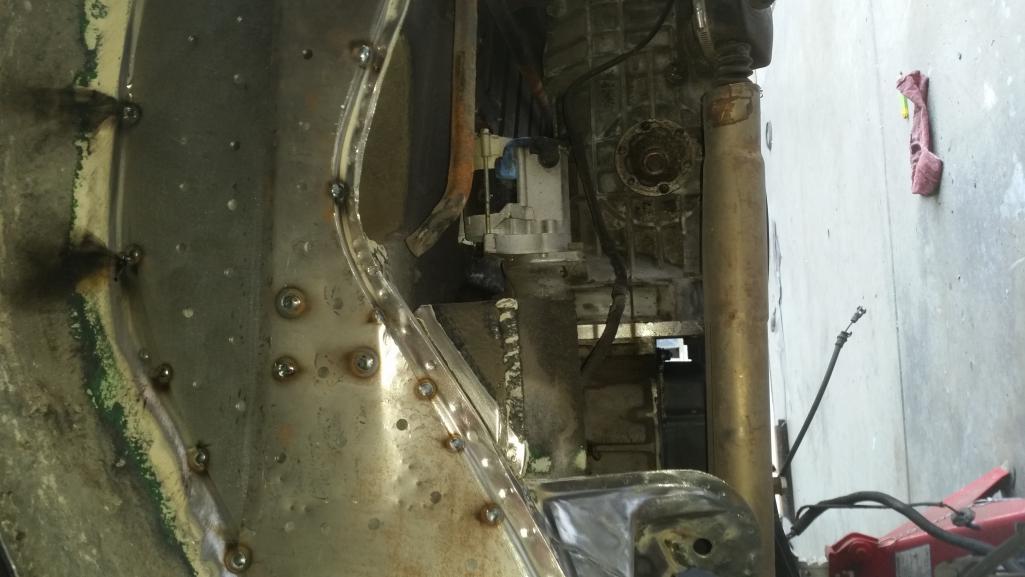
Posted by: LeftCoastErik May 30 2015, 08:21 AM
Trailing arm
Attached thumbnail(s)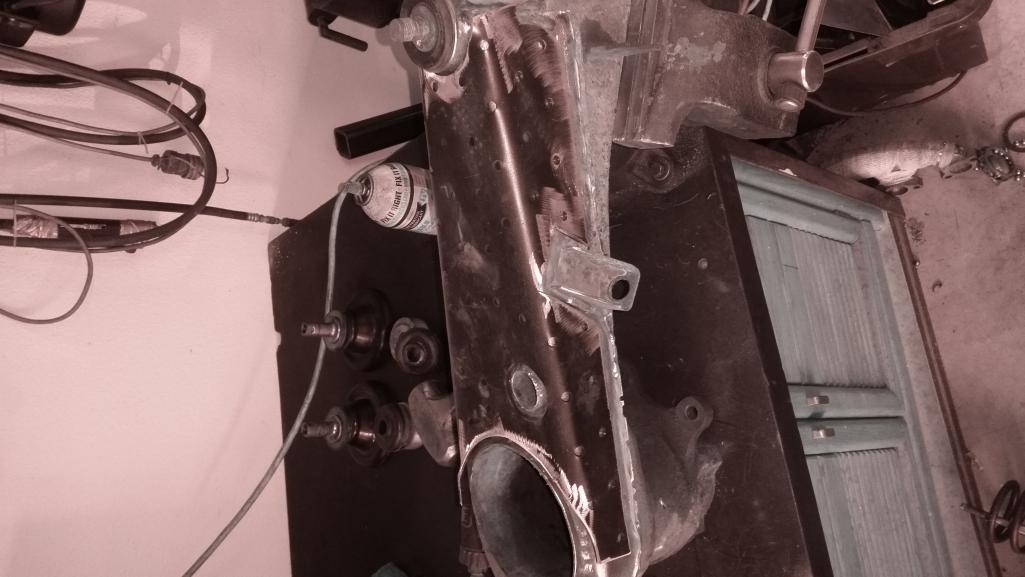
Posted by: LeftCoastErik Jun 1 2015, 10:33 AM
More pics from the weekend. Got the entire GT reinforcement kit welded in. Got the trailing arms boxed and ready to go to powder coat.
Attached thumbnail(s)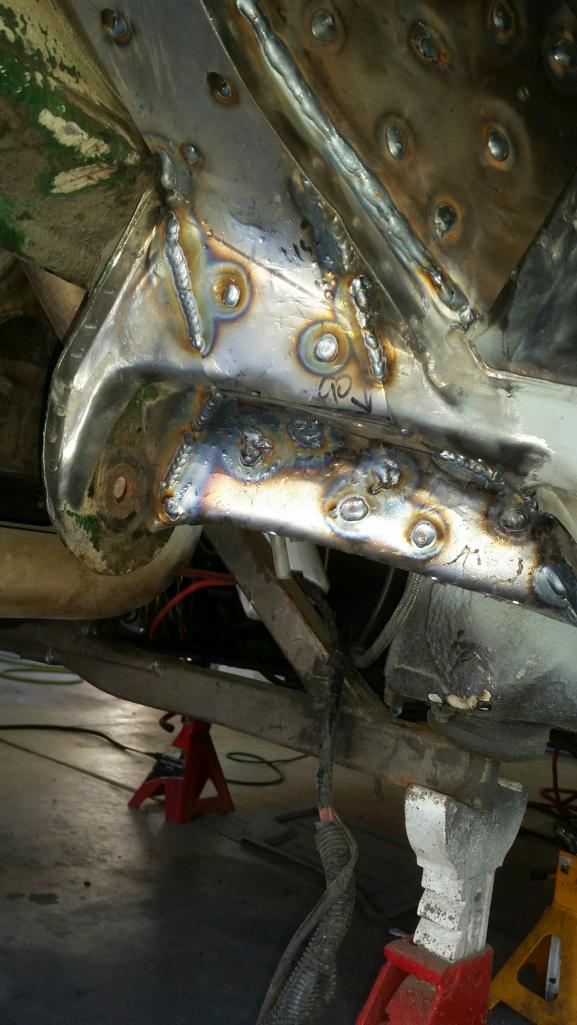
Posted by: whitetwinturbo Jun 1 2015, 10:25 PM
Had this on "watch" too..........and I'm happy you got it since you've got MAD motivation to get it right....WOW......keep going!
Posted by: whitetwinturbo Jun 1 2015, 10:34 PM
Is the white GT front fender replacement fiberglass?
Posted by: LeftCoastErik Jun 1 2015, 10:36 PM
Yes. From QRS
Posted by: Andyrew Jun 1 2015, 10:48 PM
My my my thats a lot of welding!!
Posted by: LeftCoastErik Jun 1 2015, 11:05 PM
Yeah. They seem like small parts..but it adds up. Took probably 12 hours all told of actual trigger pulling and tapping around. My neck is gonna be sore for a while!
Posted by: whitetwinturbo Jun 2 2015, 10:44 AM
Final color stays black?
Posted by: LeftCoastErik Jun 2 2015, 11:36 AM
Probably. It was originally irish green, which I dig. But I like the blacked out look, so I am gong to do all the trim black as well. I may change my mind, but who knows.
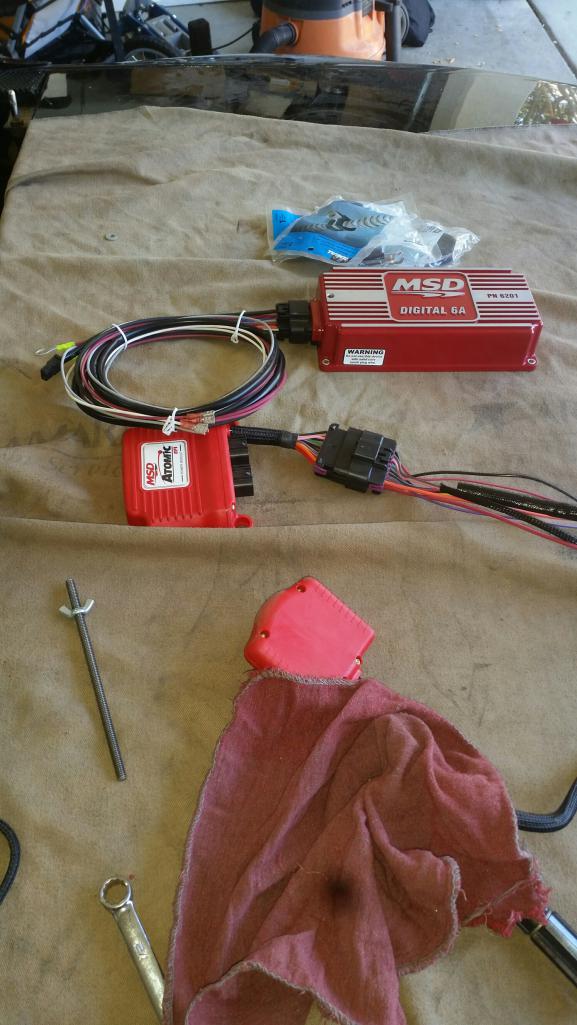
I just ordered up the MSD Atomic EFI, ProBillet Dizzy and 6A controller for full EFI excitement. Pricey stuff, but it works really well and should be flawless at altitude and at the track. Should pick up some good low end torque also
Posted by: matthepcat Jun 2 2015, 06:52 PM
Sweet about the EFI. I want to hear how it goes, as I was looking at that for my previous V8 conversion.
Posted by: LeftCoastErik Jun 4 2015, 01:12 PM
I decided that the old, hammered relay board and associated wiring had to go. The Buick actually had a Porsche alternator on it (anybody need one?) so I am going to a custom case, lightweight, 1-wire alternator that Dean's Electric is building for me. Since most of the relay board that I would have been using is pass through wiring anyway, I will solder everything up. Fuel pump will be right by the fuel tank and I can use the Atomic EFI to manage power to it. I found 3 broken wires in the main harness, two of which were for rear lights, so I am glad I took the time to do this.
Attached thumbnail(s)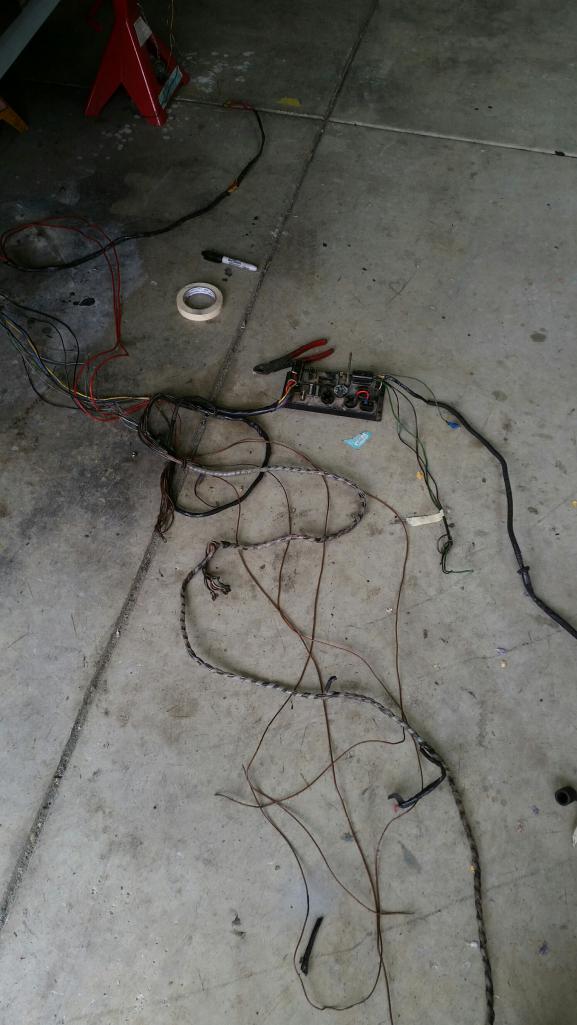
Posted by: whitetwinturbo Jun 4 2015, 04:26 PM
I decided that the old, hammered relay board and associated wiring had to go. The Buick actually had a Porsche alternator on it (anybody need one?) so I am going to a custom case, lightweight, 1-wire alternator that Dean's Electric is building for me. Since most of the relay board that I would have been using is pass through wiring anyway, I will solder everything up. Fuel pump will be right by the fuel tank and I can use the Atomic EFI to manage power to it. I found 3 broken wires in the main harness, two of which were for rear lights, so I am glad I took the time to do this.
Now that takes patience!
Posted by: Chris H. Jun 4 2015, 06:08 PM
Wow, the right guy got this car for sure... it's a lot of work but it'll be really nice when done.
Hey it looks great in black but you're Irish Green comment made me remember another V8 conversion from years ago. Rich Brennick's car (a 283). 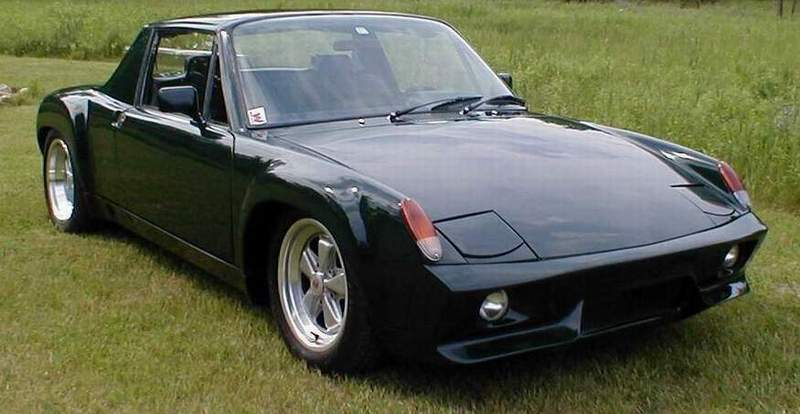
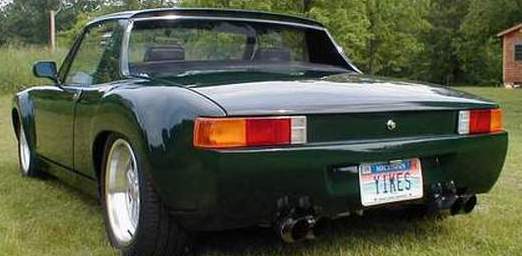
Just thought I'd show you since yours would look pretty similar. Hard to beat the look of a black flared 914 though....
Posted by: arkitect Jun 5 2015, 04:53 AM
Yesterday I got the rear inner fenders cleaned and tacked in the gt kit. Also cut the front fenders off because I couldn't stand looking at them any more. I also got one trailing arm reinforcement pretty much done. Trying to finish the other one today so they can go to powder coat Monday.
That's the way to do the fiberglass flares, the whole fender, not just the flare.

Dave
Posted by: LeftCoastErik Jun 5 2015, 10:25 AM
I got the dash top pulled to have Tri Valley Auto Glass and Upholstery re-cover it in black ultra leather with double stitched silver thread. I made some fillers for the dash vents too, so those will be covered when they do the bottom half.
I got the relay board out of the harness entirely and fixed a bunch of other little wiring issues.
Got the GT reinforcement kit final welded and painted so re-assembly can resume.
Rich Johnson sent me a bunch of packages with some serious awesomeness in them! If you have never dealt with Rich, he is awesome! He even hooked me up with some foglight grilles from his personal collection.
Hoping to have the powder coat stuff back today so I can start on the trailing arm reassembly this weekend
Attached thumbnail(s)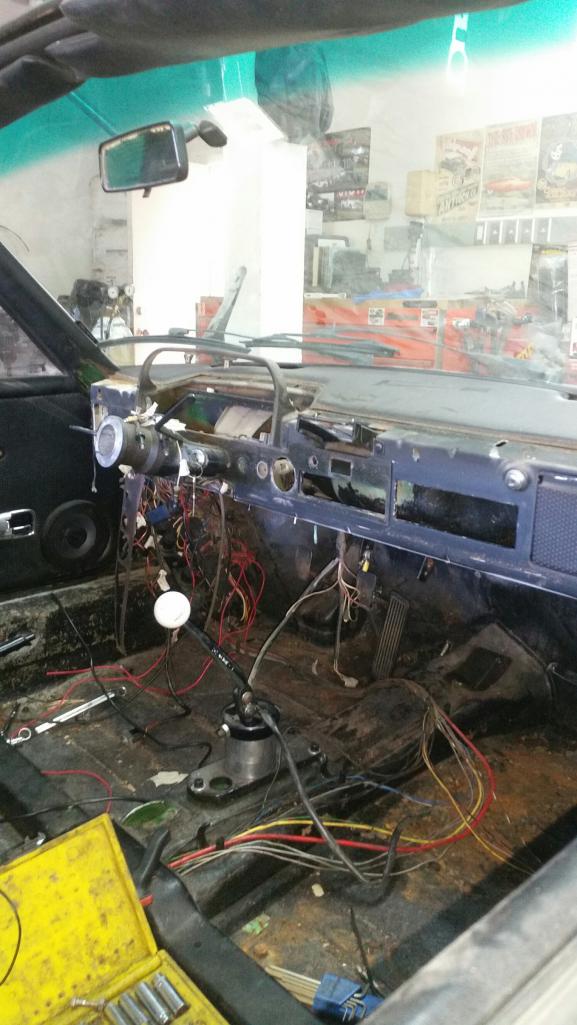
Posted by: LeftCoastErik Jun 5 2015, 10:28 AM
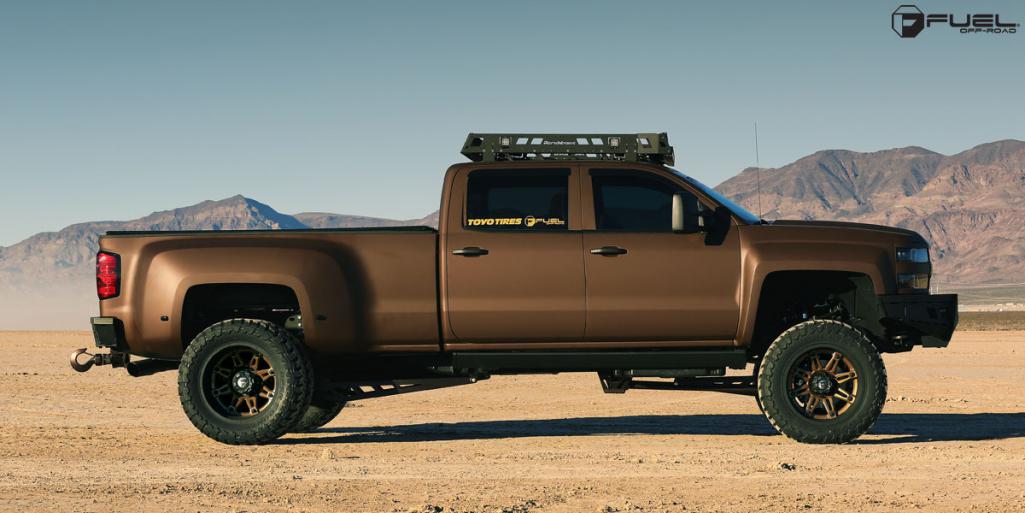
As for color...its either black or maaayyyybeeee......the color on this truck. Its actually a wrap and the color is called chocolate mocha. I like the way the color works with the black accents. I may have to get someone to photoshop a GT with the copper color. Anyone here have those skills?
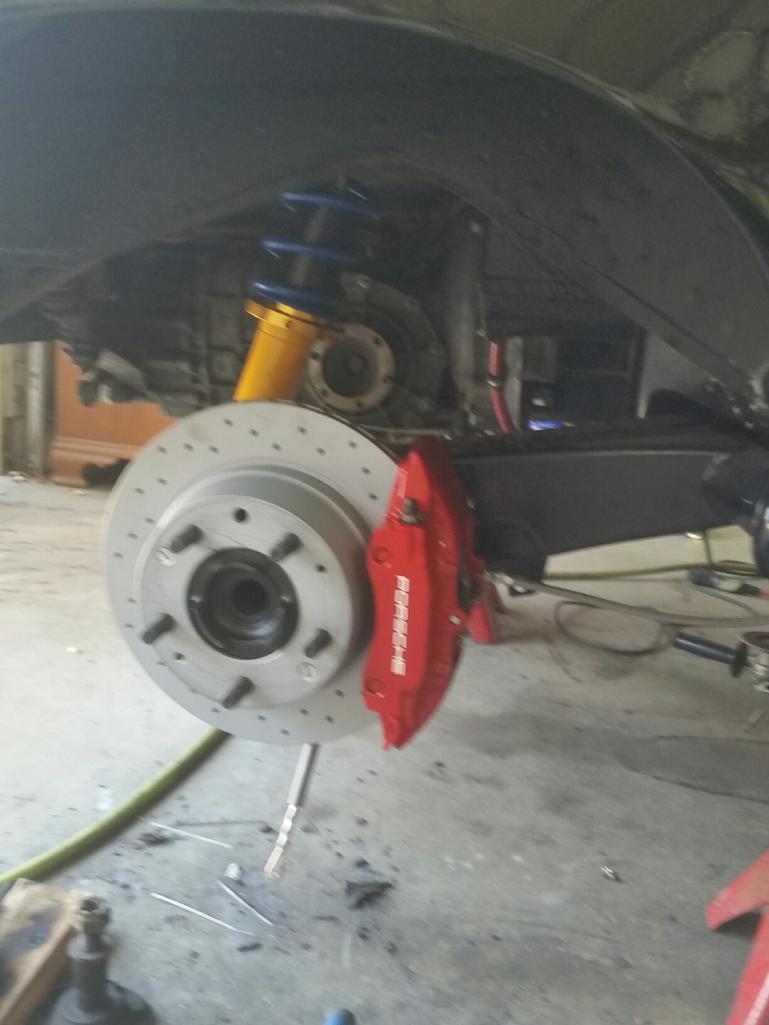
Also a close up of the Boxter Brakes....
Attached thumbnail(s)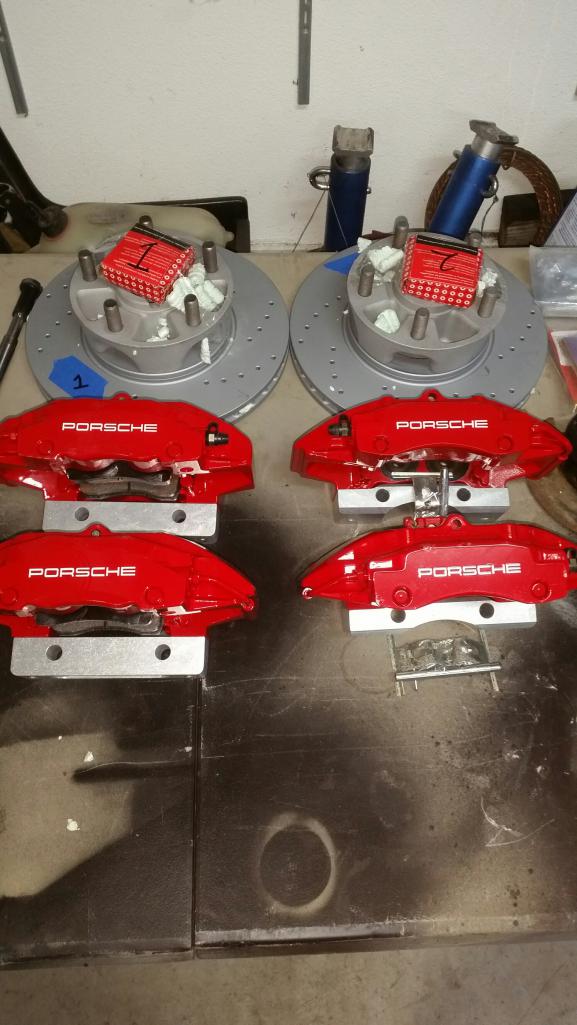
Posted by: whitetwinturbo Jun 5 2015, 11:03 AM
Eric,
How is the WHOLE fiberglass front fender attached?
Posted by: whitetwinturbo Jun 5 2015, 11:05 AM
As for color...its either black or maaayyyybeeee......the color on this truck. Its actually a wrap and the color is called chocolate mocha. I like the way the color works with the black accents. I may have to get someone to photoshop a GT with the copper color. Anyone here have those skills?
Also a close up of the Boxter Brakes....
Here's a link to "Coppertone" 914:
http://www.dublerfamily.com/914.html
Posted by: LeftCoastErik Jun 5 2015, 11:06 AM
Good question...I haven't gotten that far yet.. I am assuming I will either bond it and mold it in to the cowl or find a way to use small dzus fasteners to attach it at the corners. Thats why I haven't cut off all of the metal yet, I want to leave my options open....
Posted by: LeftCoastErik Jun 5 2015, 11:08 AM
That coppertone is cool! I think the flat clear look might work with the copper color...but I'm pretty sure it will end up shiny black..
Posted by: howlndog Jun 5 2015, 11:41 AM
Regarding colour... have you ever played around with this online tool?
http://eggscollective.org/914visualizer/914_visualizer.html
Posted by: LeftCoastErik Jun 5 2015, 12:12 PM
Holy crap!! That is awesome! ! Thanks...I have some playing to do. Your version looks pretty good..hmmm
Posted by: LeftCoastErik Jun 5 2015, 12:12 PM
Holy crap!! That is awesome! ! Thanks...I have some playing to do. Your version looks pretty good..hmmm
Posted by: whitetwinturbo Jun 5 2015, 12:14 PM
That coppertone is cool! I think the flat clear look might work with the copper color...but I'm pretty sure it will end up shiny black..
Black is the new orange.....
Posted by: LeftCoastErik Jun 5 2015, 04:03 PM
I took a stab at it...
I will be making a custom muffler with similar outlets to the GT one shown, but I am thinking of running the lower valance with the pipes coming through it.
Trim will be blacked out
No jack holes
Bullet style mirrors in Satin Black
Can't decide on the 911 style reflector or not...
Attached thumbnail(s)
Posted by: craig downs Jun 5 2015, 04:39 PM
I love the color on that truck. That would look great on your car.
Posted by: whitetwinturbo Jun 5 2015, 04:39 PM
WOW..........Yes on that color! It will be 1 of 1 and a few others already have black. Looks like the "frozen" BMW treatment.
Posted by: matthepcat Jun 5 2015, 06:08 PM
I say no to 911 reflector, but he'll yes to that muffler.
Make sure to air on the side of quiet and restrictive mufflers...the V8 is a drone machine.
Posted by: whitetwinturbo Jun 5 2015, 09:00 PM
I say no to 911 reflector, but he'll yes to that muffler.
Make sure to air on the side of quiet and restrictive mufflers...the V8 is a drone machine.
 ..........or wear a mouth guard to stop protect your teeth from harmonic drone overload.
Posted by: LeftCoastErik Jun 8 2015, 02:59 PM
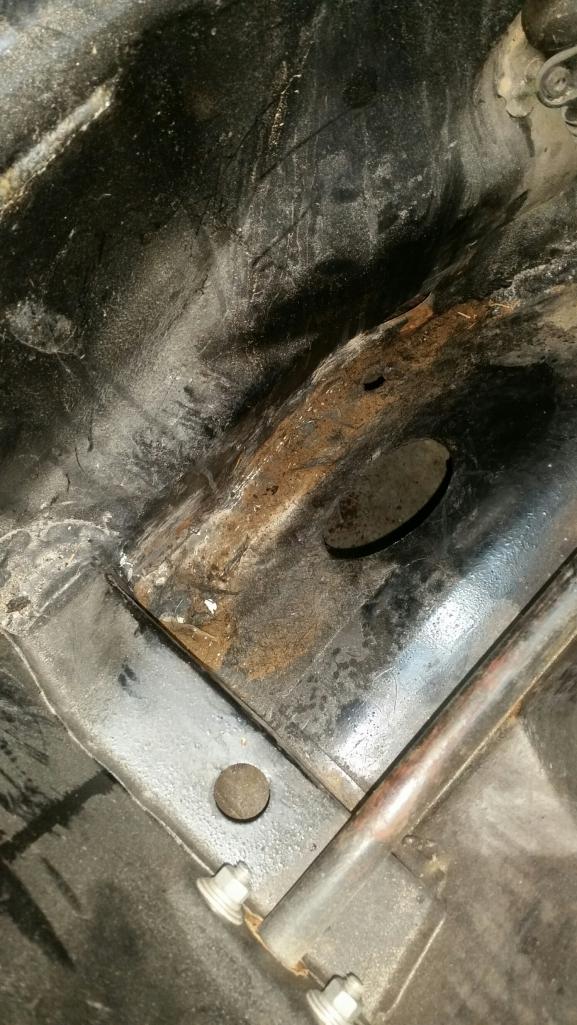
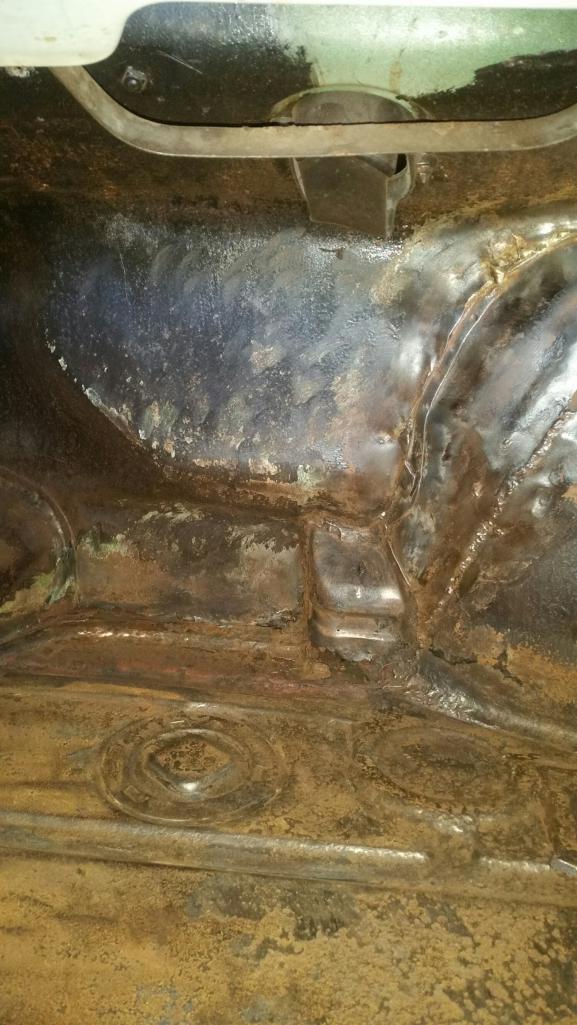
I got a lot done this weekend. I also cursed a lot, especially at the previous owner..
"No Significant Rust Issues" from the ad...See for yourself..
In addition to the rusty hole that was patched with fiberglass under the gas tank, the passenger floorboard at the firewall was goneski.
ANDDDD, I determined that the whole front of the car was actually grafted on from another car. Probably in 1984 when the they did the slant nose conversion. I am guessing it was an insurance wreck. Hooray..Oh well, I am too deep now. I am just reinforcing and strengthening everything I can and then I will put on my buddy's frame rack to make sure its straight
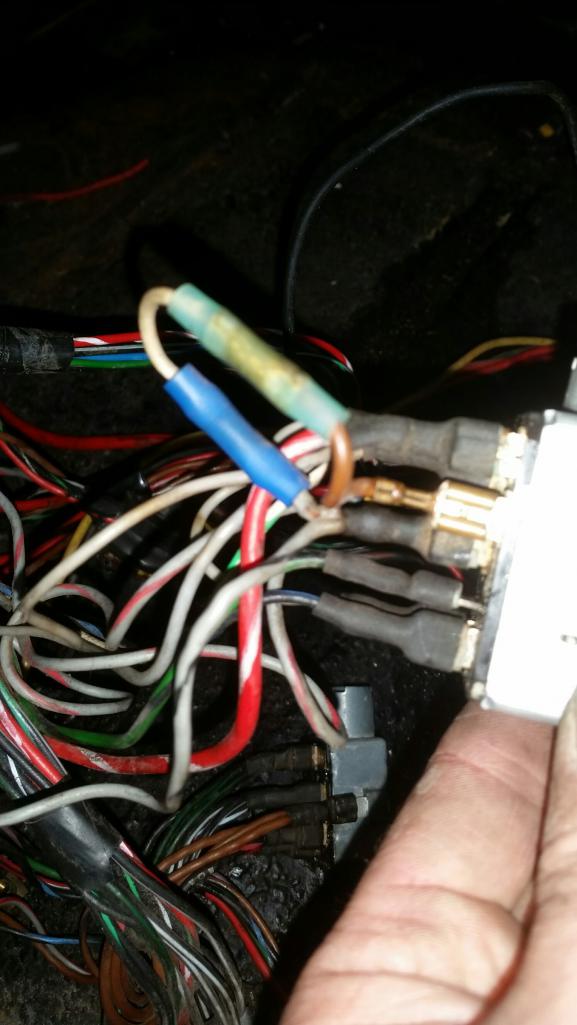
Arrgg Anyway, this first series of pics is the wiring completion. I found 4 wires melted together, the headlight switch wired incorrectly, and 3 broken wires that I actually need...
Attached thumbnail(s)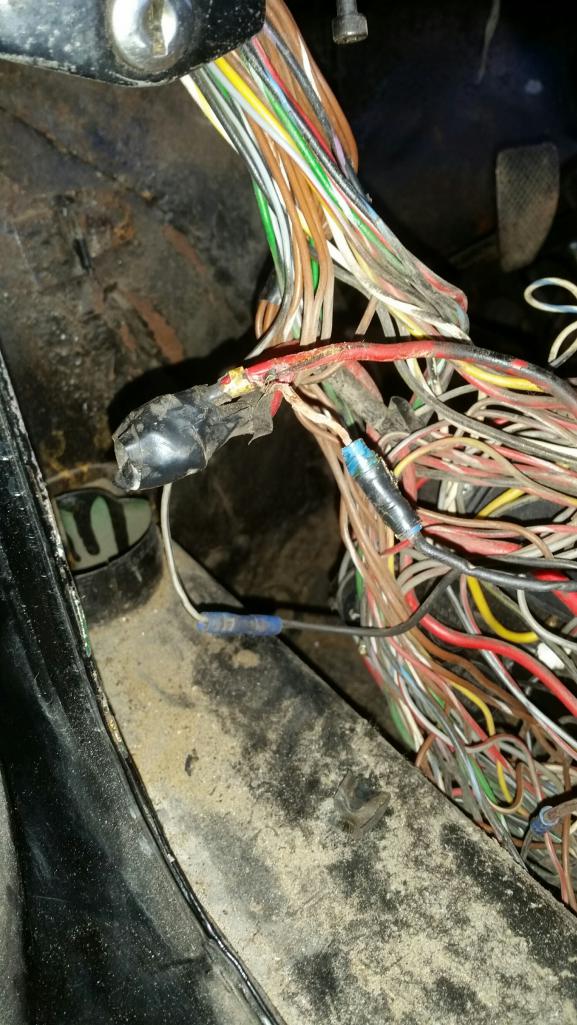
Posted by: LeftCoastErik Jun 8 2015, 03:02 PM
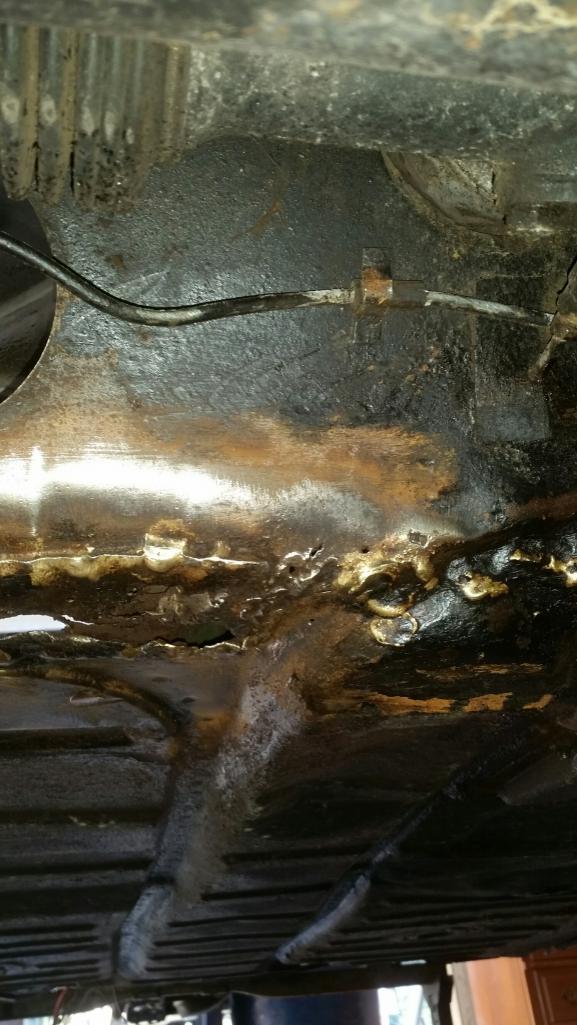
Here are some pics of the "Not-so-significant" rust and where the car was seamed together.
Attached thumbnail(s)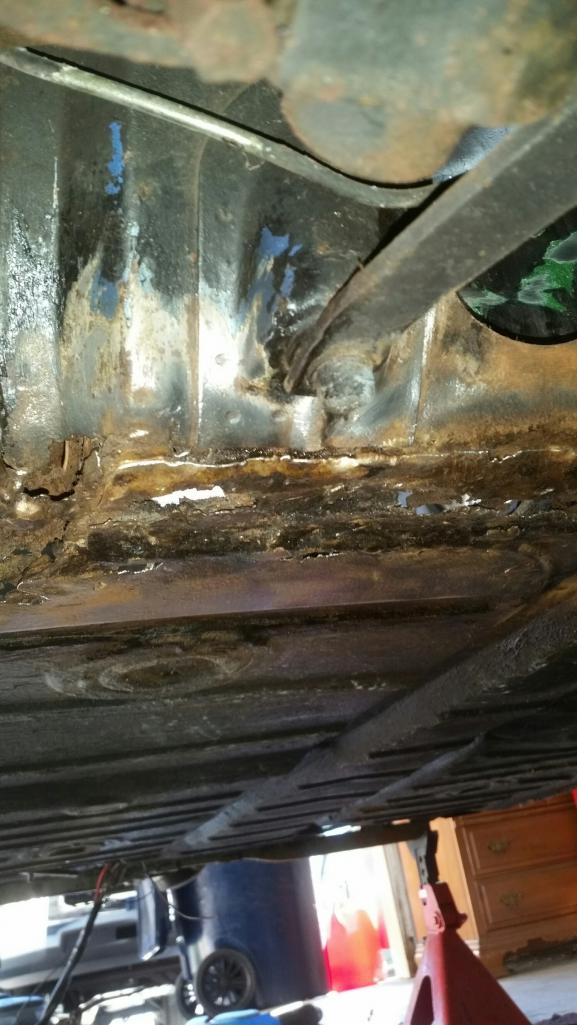
Posted by: LeftCoastErik Jun 8 2015, 03:04 PM
and the fixing..
Attached thumbnail(s)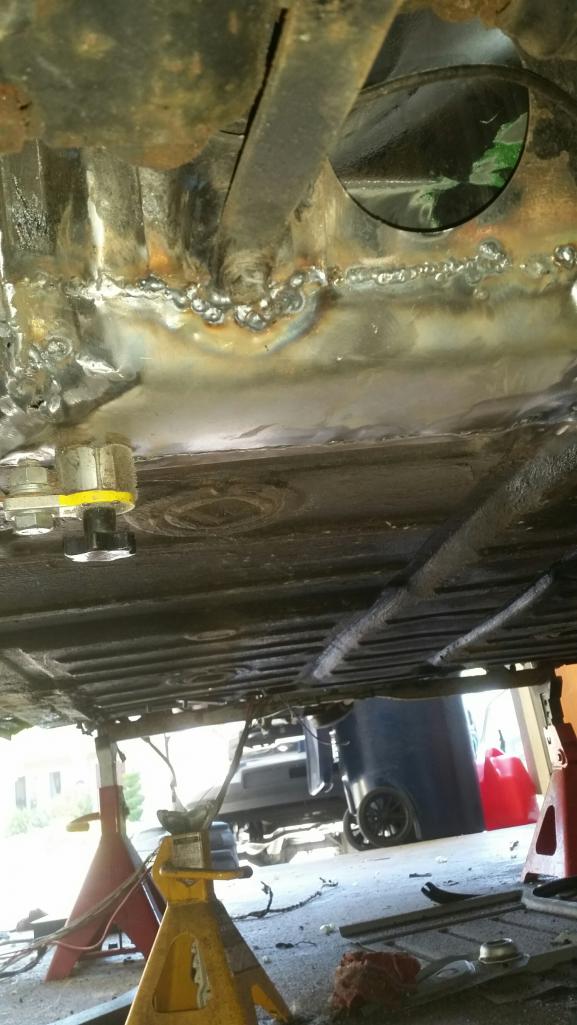
Posted by: LeftCoastErik Jun 8 2015, 03:05 PM
last pic for now...More to follow after I get the passenger pan fixed up..
Attached thumbnail(s)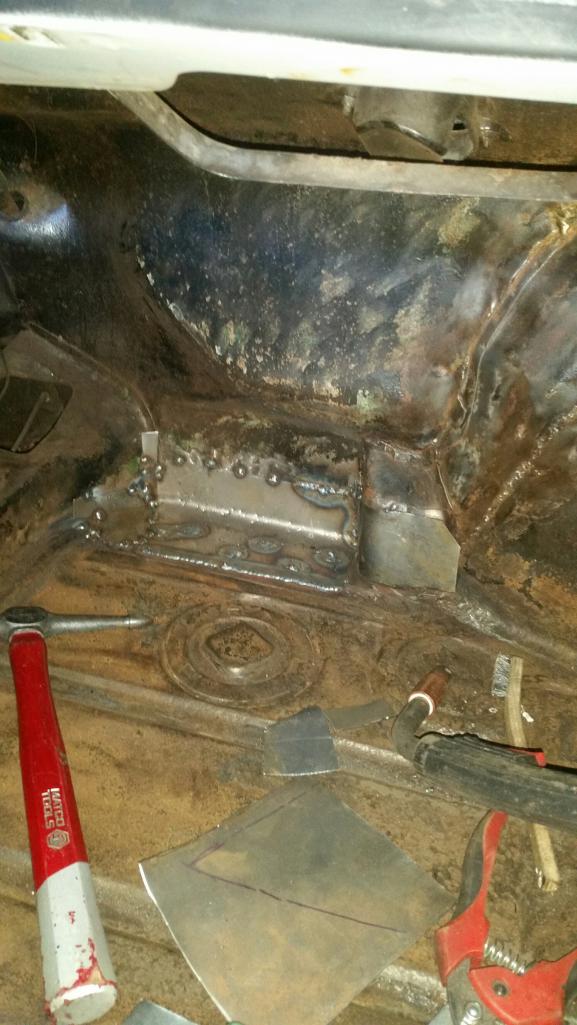
Posted by: whitetwinturbo Jun 8 2015, 04:07 PM
Like Pres Bill Clinton said: ....what's you definition of "significant"........?
Posted by: matthepcat Jun 8 2015, 05:10 PM

I guess the next one will be a west coast car.
Posted by: LeftCoastErik Jun 8 2015, 05:19 PM
Hence the #fml914
Posted by: LeftCoastErik Jun 8 2015, 05:38 PM
On a positive note..I just came home to these beauties
Attached thumbnail(s)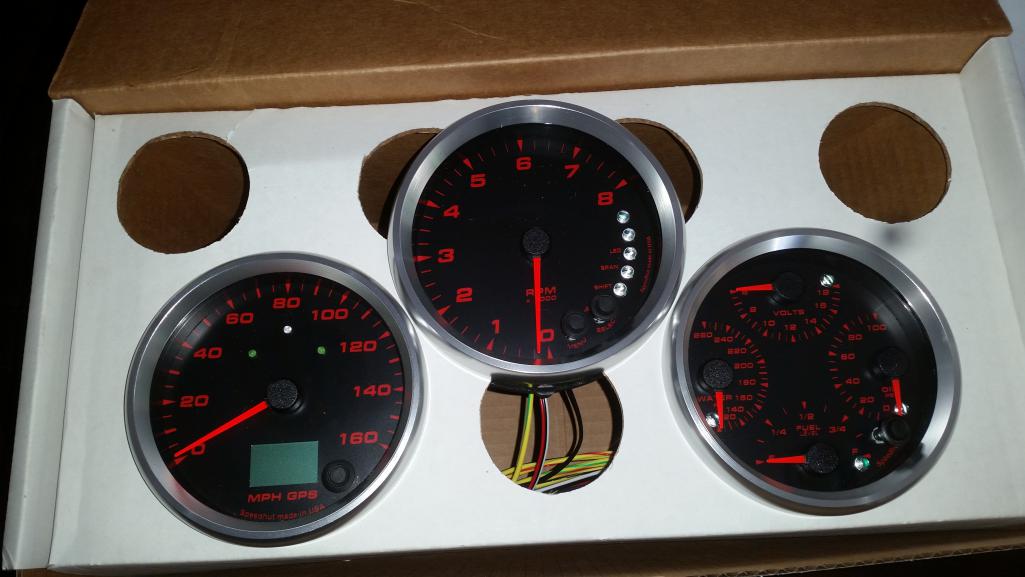
Posted by: matthepcat Jun 8 2015, 05:48 PM
Nice! My GPS speed hut gauge took like 3 weeks to ship...but it's nice.
What size gauges are those? 4.5"?
Posted by: LeftCoastErik Jun 8 2015, 06:06 PM
Iirc they are 4" and the tach is 4.5
Posted by: Andyrew Jun 8 2015, 06:20 PM
Those are nice!
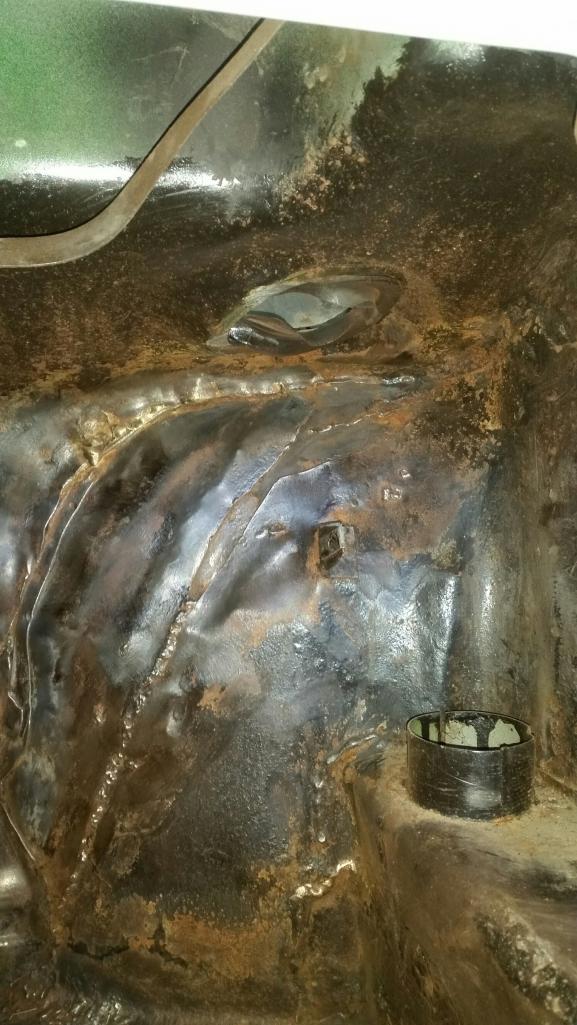
Posted by: LeftCoastErik Jun 10 2015, 11:12 AM
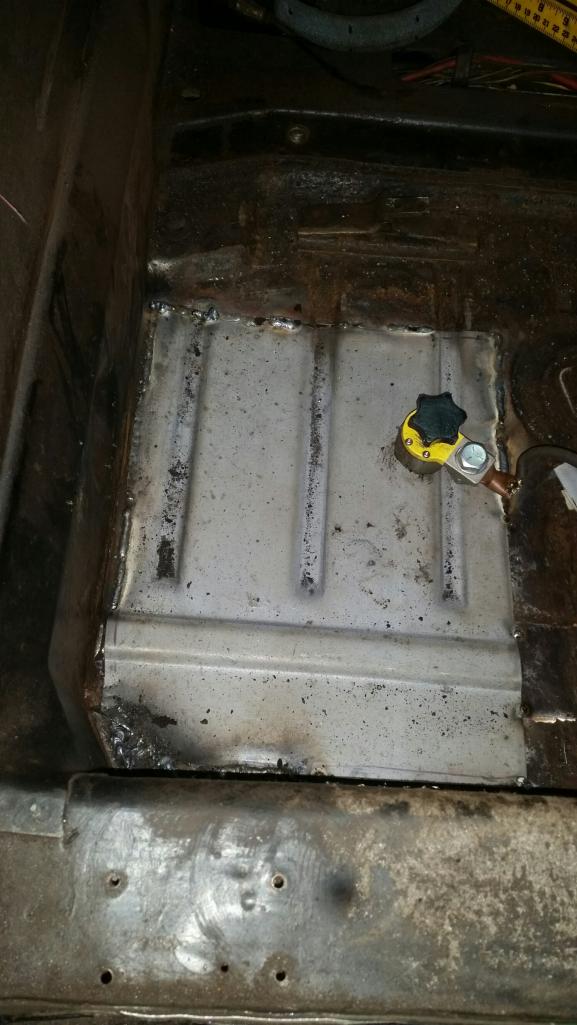
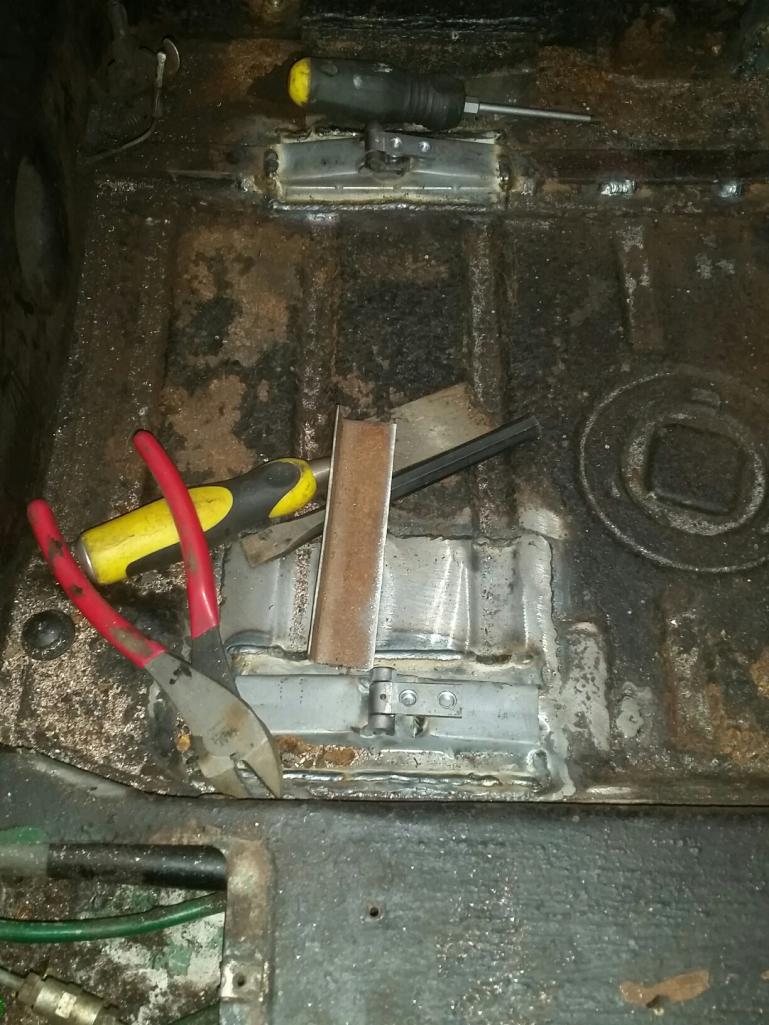
The #FML914 continues to live up to its name..I finished the passenger floor/footwell area and also made a bridge patch over the area where the car had been seamed together. Got that in, galvanized, and seam sealed.
Moved on to the rear pan on the passenger side. Had rust/fiberglass repair that I already knew about and had an RD half pan sitting on the shelf..The seat hinge pedestal on that side was hammered as was the area under the cross brace. I opened it up and Ospho'd the hell out of it. Ordering the new hinge and reinforcements from RD now.
Found a bunch of perforation on the driver's side also...I will get to that eventually...
Attached thumbnail(s)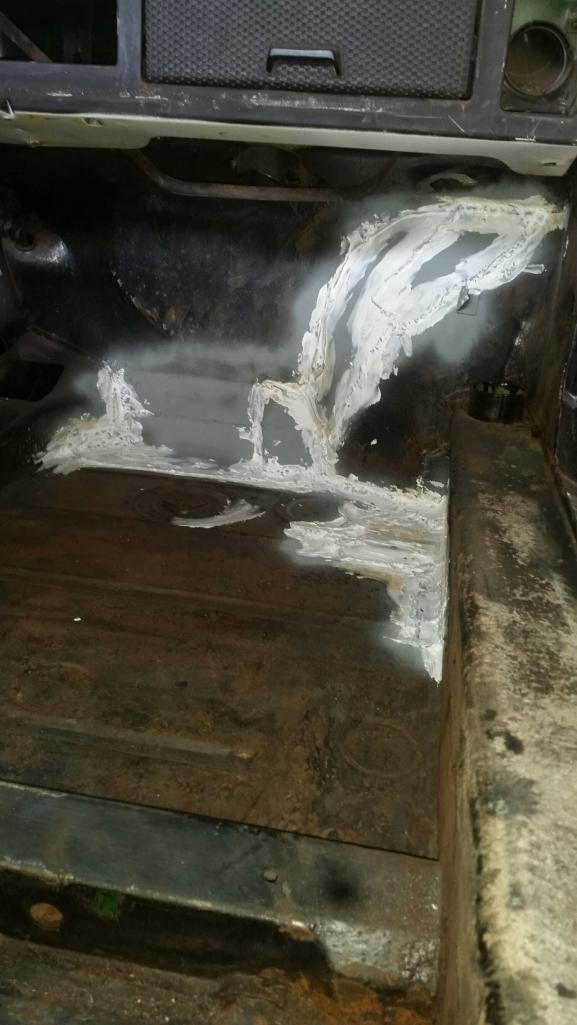

Posted by: whitetwinturbo Jun 10 2015, 03:17 PM
When will the PO "insignificant" rust end?
Posted by: TargaToy Jun 10 2015, 04:00 PM
Looking good, Erik!
Do you like your magnetic ground clamp?
Posted by: LeftCoastErik Jun 10 2015, 04:06 PM
Thanks!. Yeah I swear by it
Posted by: whitetwinturbo Jun 12 2015, 10:13 AM
Erik,
Here's more another shade of "coppertone":
http://www.ebay.com/itm/Ferrari-Testarossa-/181753422810?forcerrptr=true&hash=item2a515923da&item=181753422810
Posted by: LeftCoastErik Jun 12 2015, 11:17 AM
Looks like the candy brown on my 55 buick kustom. It's for sale if anyone is interested.
Attached thumbnail(s)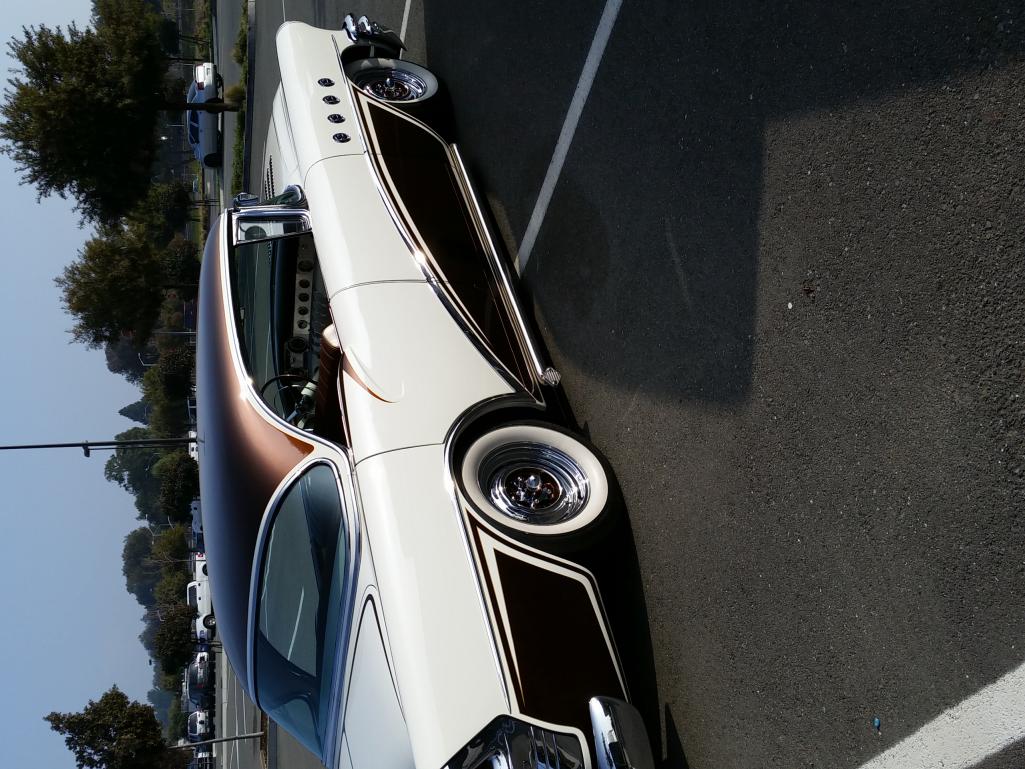
Posted by: whitetwinturbo Jun 12 2015, 11:41 AM
Nice paint job!
Posted by: LeftCoastErik Jun 12 2015, 11:48 AM
Thanks! It'd be nice if pics would post correctly from the phone. ..
Posted by: LeftCoastErik Jun 15 2015, 10:36 AM
I had a busy weekend of exciting rust bucket work... I got the rear rust work done and painted up, so I decided to take a brake for a couple of minutes and start assembling some of the pretty bits. First step was installing the new Elephant trailing arm bushing kit and some fresh FAG bearings (I still laugh at "FAG" every time..) into the freshly powder coated arms. Then I hung them with the rear Koni coilovers and 175# progressive springs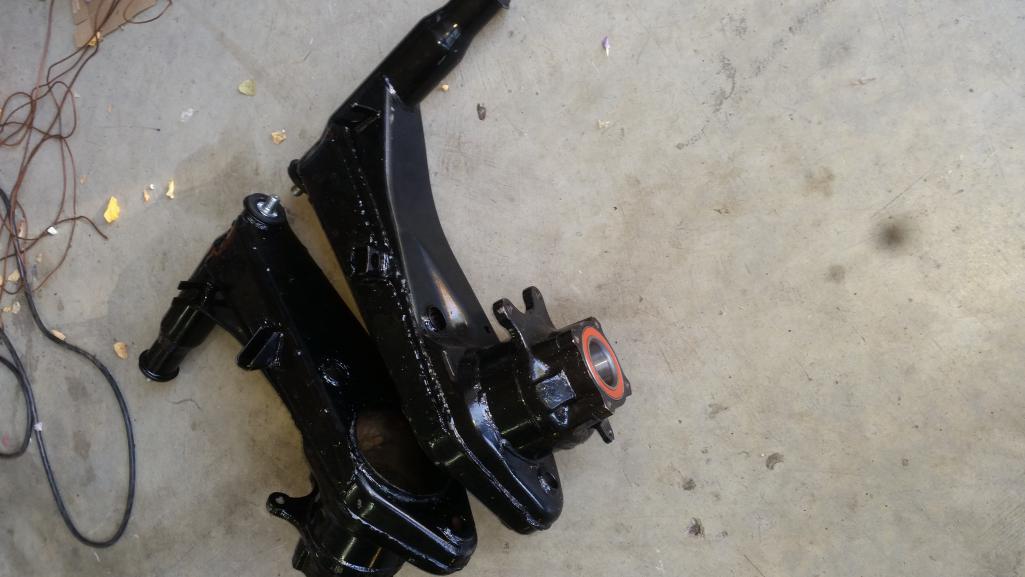
Posted by: LeftCoastErik Jun 15 2015, 10:38 AM
more
Attached thumbnail(s)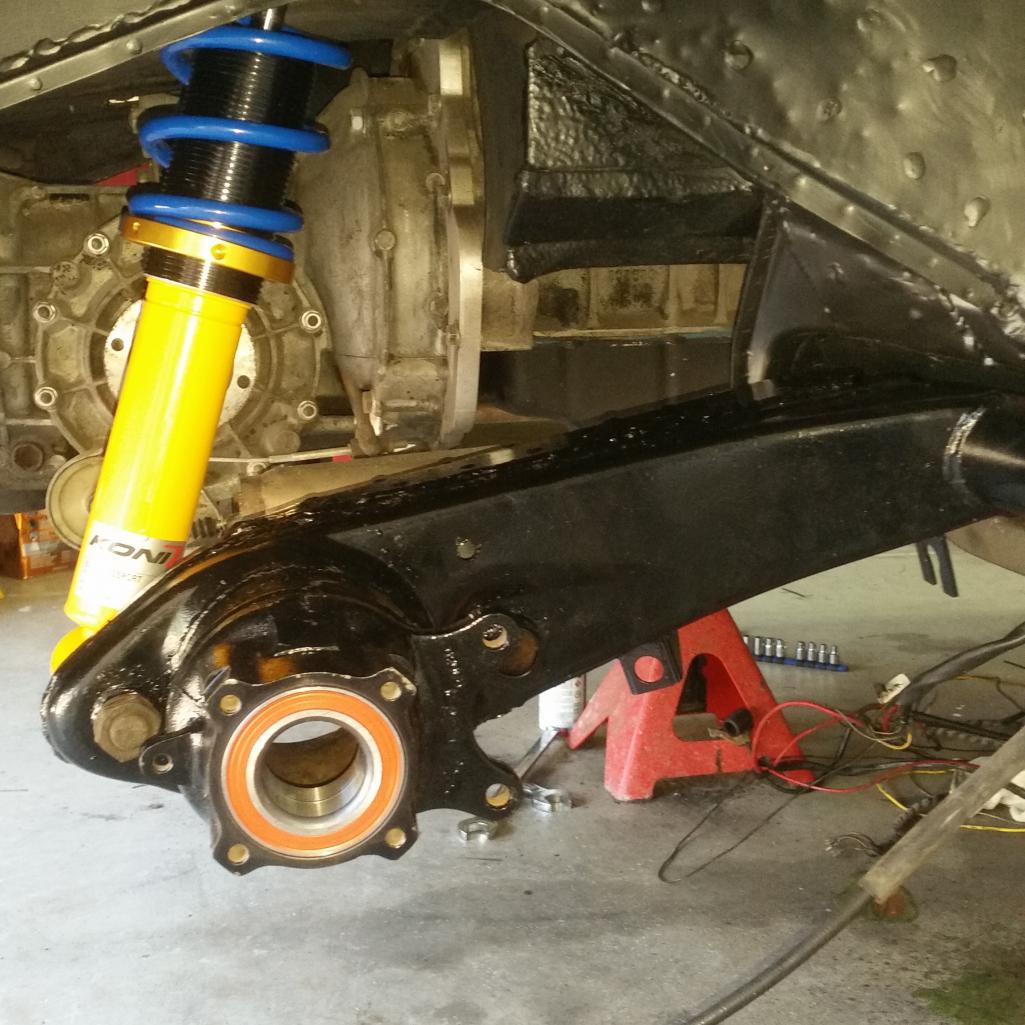
Posted by: LeftCoastErik Jun 15 2015, 10:47 AM
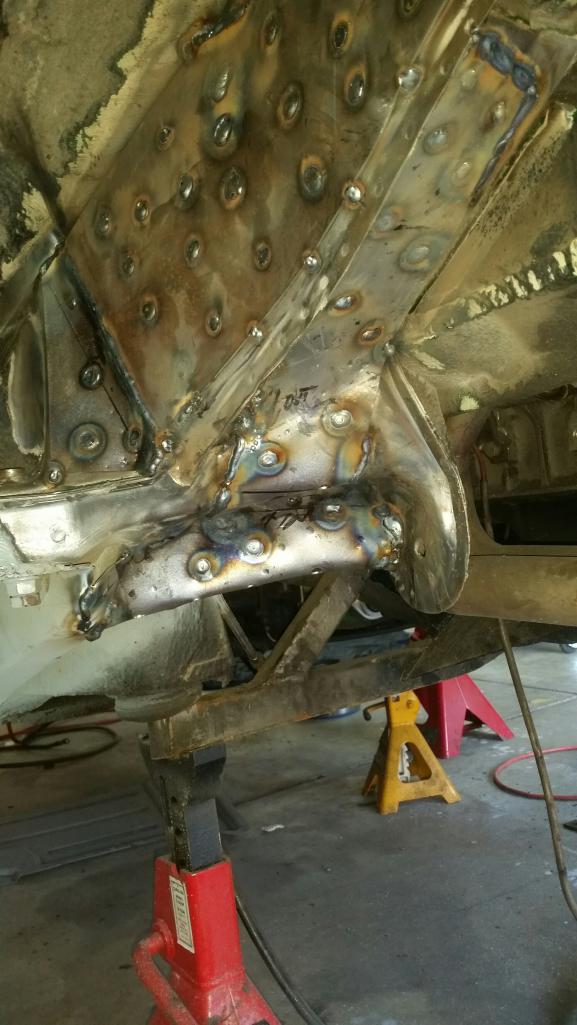
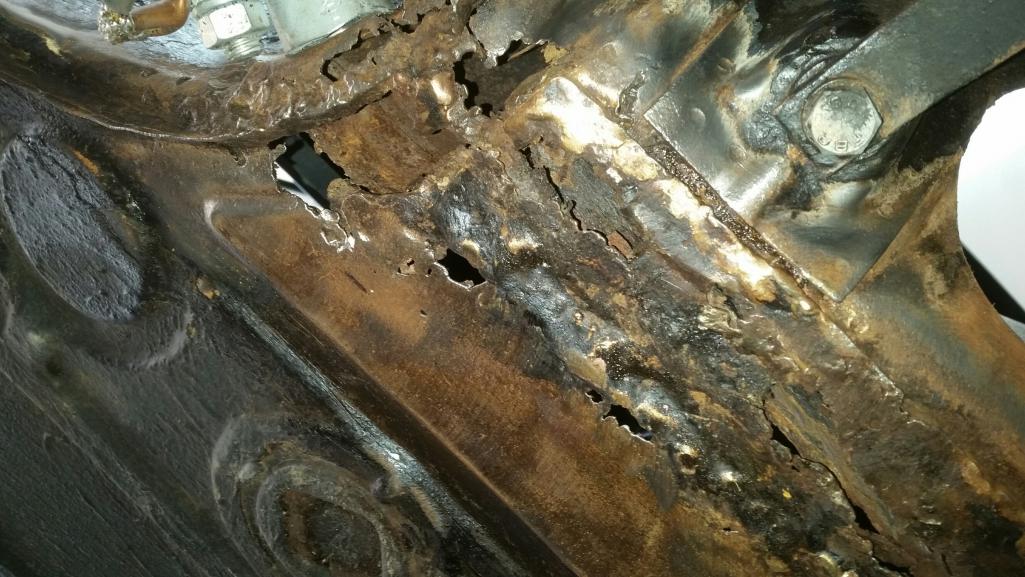
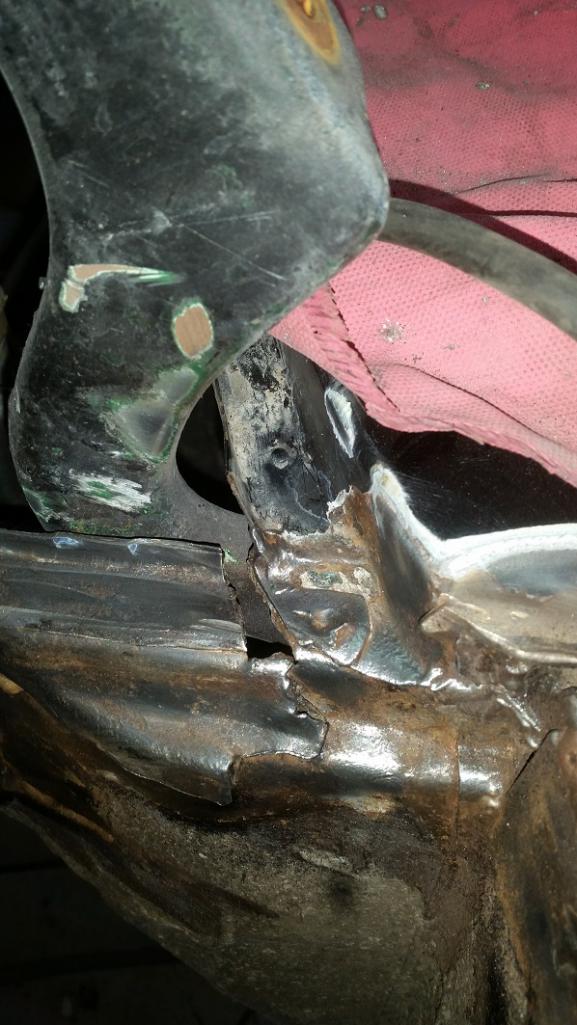
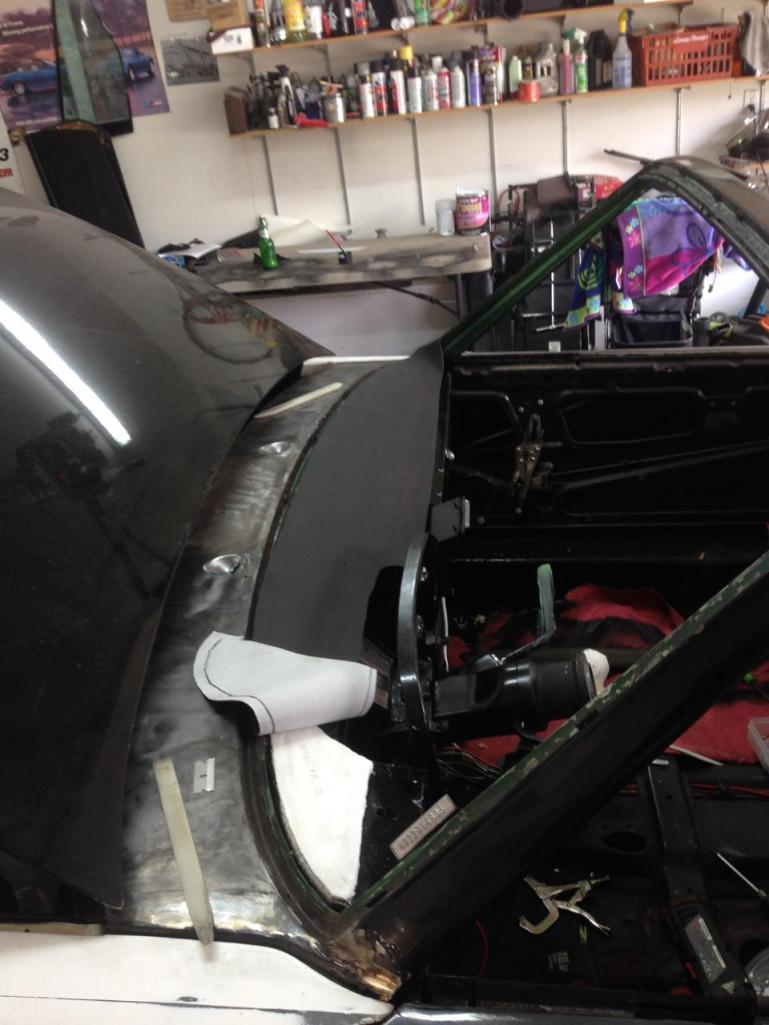
I then moved on to the front of the car and discovered some more exciting BS...I suppose that its totally OK to graft on a new (used) front end and then stop welding when you can't see or reach an area, right? I mean, I know its a unibody car, but I am sure some fiberglass resin will be strong enough to maintain integrity, right?
So, yes, I started yelling and throwing myself around for a minute...then I got back to work.
Attached thumbnail(s)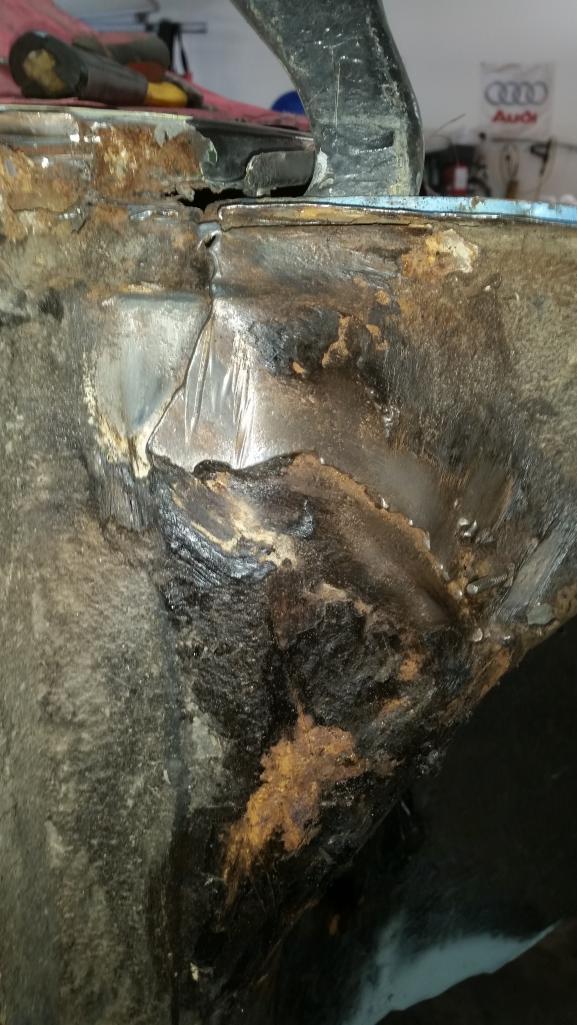
Posted by: LeftCoastErik Jun 15 2015, 10:49 AM
Here's the drivers side...some of the spot welds were still intact...hooray
Attached thumbnail(s)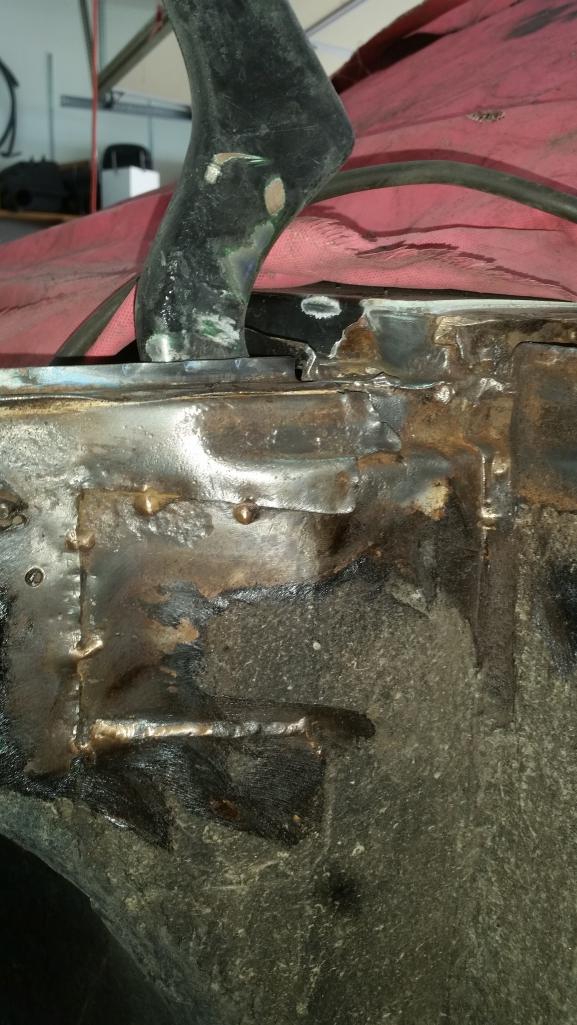
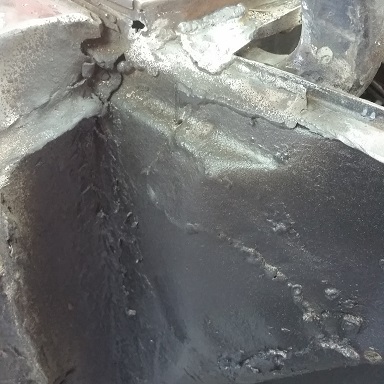
Posted by: LeftCoastErik Jun 15 2015, 11:27 AM
I got everything seam welded up and then made new patch pieces to actually connect the cowl to the inner fender
Attached thumbnail(s)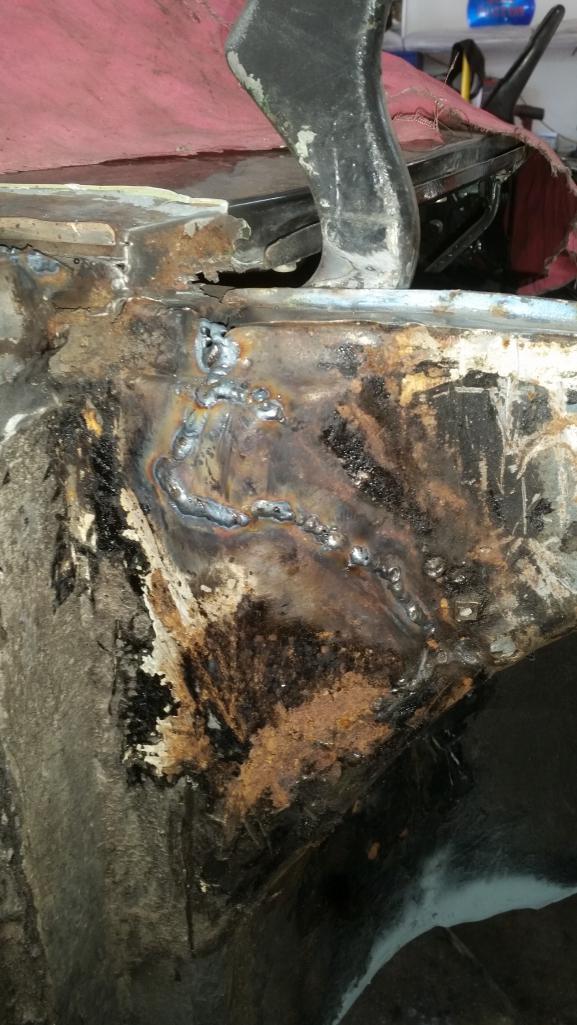
Posted by: LeftCoastErik Jun 15 2015, 11:36 AM
I still have some work to do in the exposed corners, but I wanted to wait until I could test fit the fenders and figure out how they are going to fit before I added more material there.
Attached thumbnail(s)
Attached image(s)

Posted by: whitetwinturbo Jun 15 2015, 11:36 AM
Eric, you are the "welding MAN"! 
BTW, if you hook phone to your computer and paste to your desktop the software display the desktop icon once open will probably allow you to rotate picture and then 'save' which over-writes the origina....then you can post the picture here. Seems like a hassle but once you do it a few times it becomes routine and easy.
Keep the photos coming!
Posted by: LeftCoastErik Jun 15 2015, 11:37 AM
I am on my second big bottle of gas, and this spool was new when I started on the 72...
Attached image(s)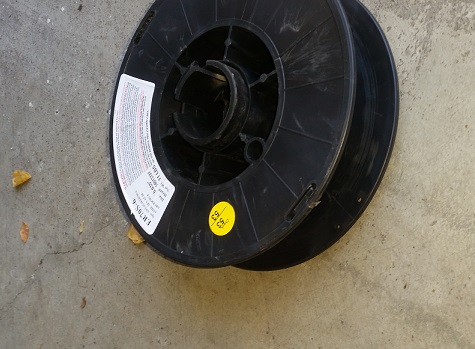
Posted by: LeftCoastErik Jun 15 2015, 11:39 AM
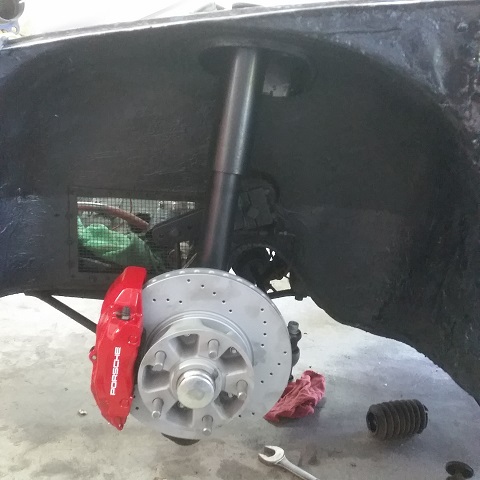
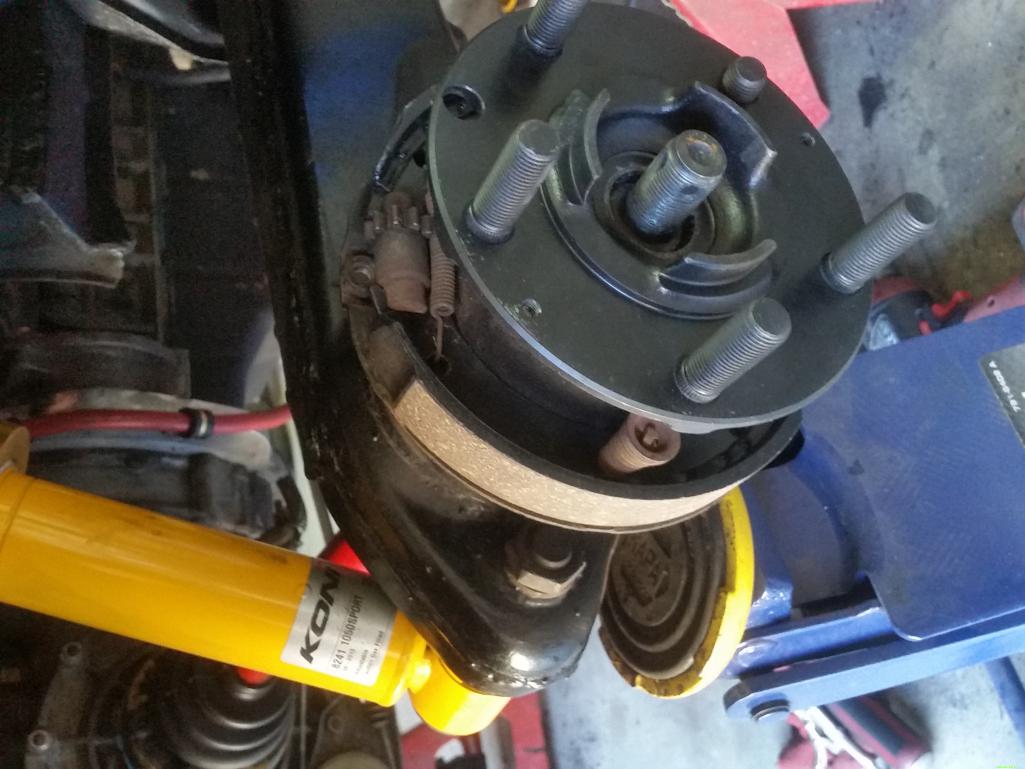
I decided to take another welding brake Saturday afternoon and got the front Koni struts, turbo tie-rods and brakes installed up front. Looking at that stuff almost makes all the BS worth it...Almost...
Attached thumbnail(s)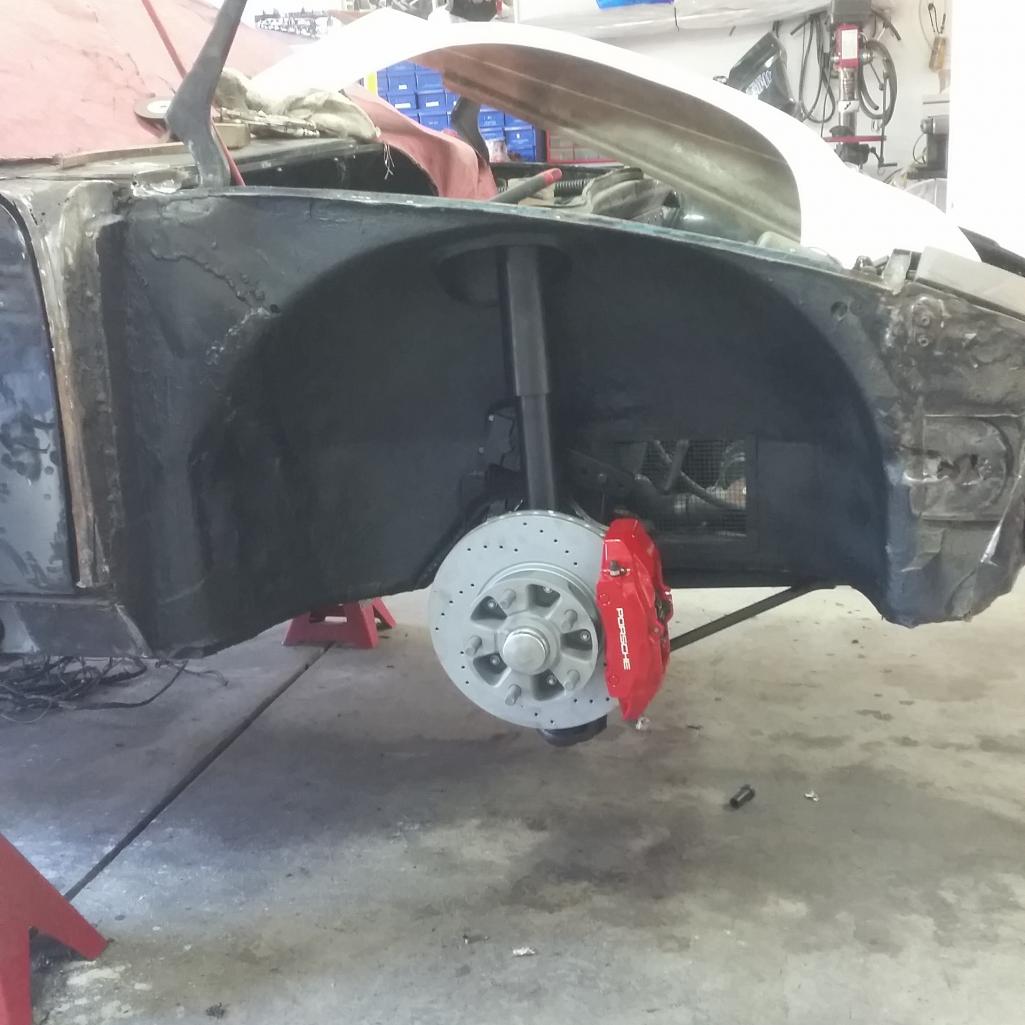
Attached image(s)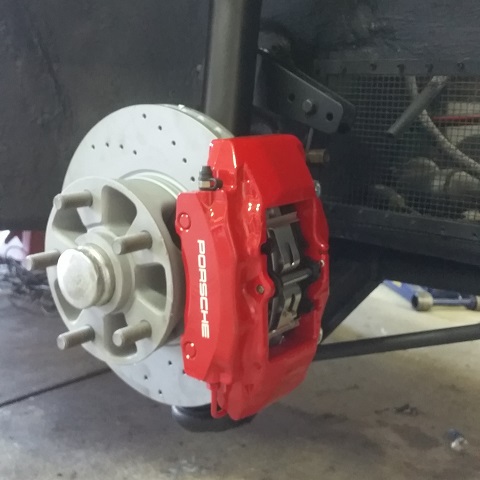
Posted by: whitetwinturbo Jun 15 2015, 11:42 AM

Posted by: LeftCoastErik Jun 15 2015, 11:42 AM
Thanks, I figured that out, but its a pain in the ass since I like to take and post as I go from the phone. I try not to drag my laptop home with me if I can help it...
Posted by: LeftCoastErik Jun 18 2015, 12:27 PM
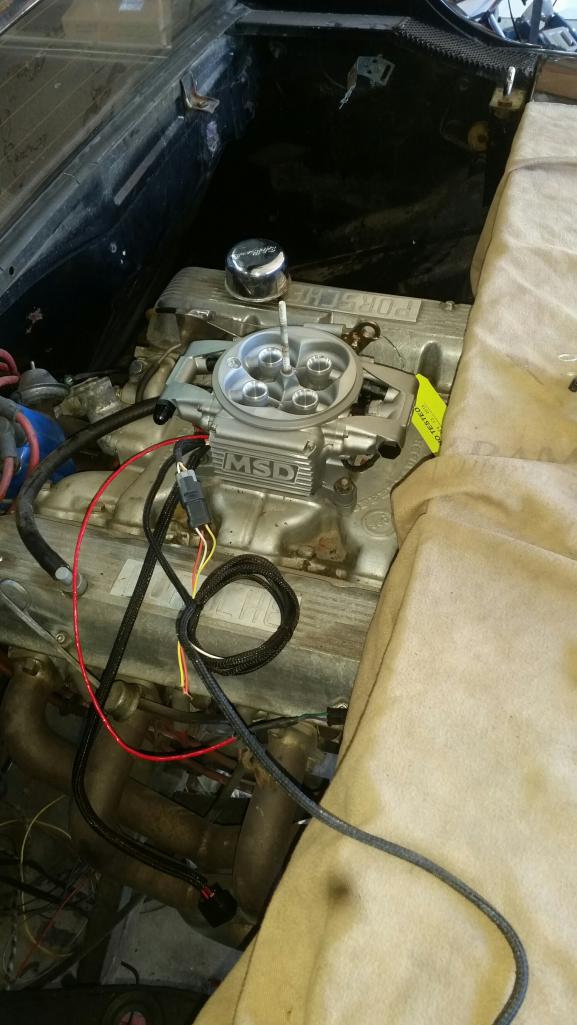
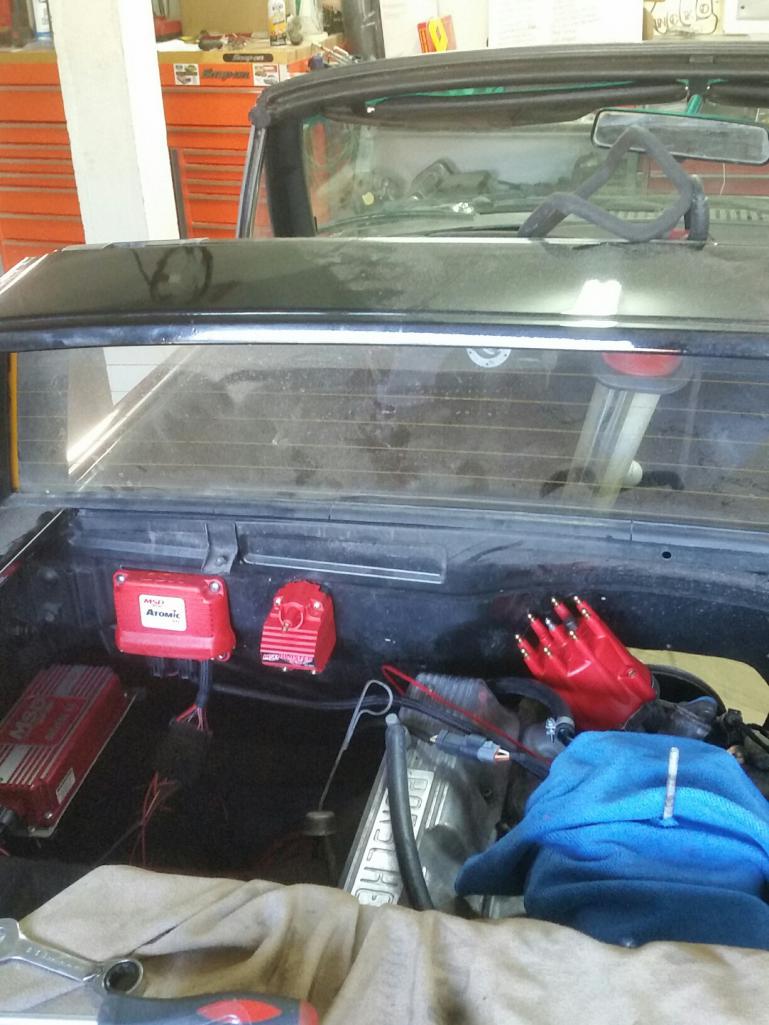
The past few days have been eventful. Got the fuel system installed, got the fuel tank back in the car. Got the Atomic EFI ECU, Coil, MSD 6a, Return Regulator and throttle body installed. Had to modify the firewall to clear the MSD Male-style cap (hooray).
I ran the feed and return lines through the driver's heater tube, along with the fan control wires and the fuel pump wiring. I actually used a measuring tape as a fish line and it worked pretty awesome.
I am off for a quick vacation with the wife and kid, so next tuesday I will be back at it. I received all the seat pedestals, hinges and reinforcements yesterday, so I want to get the welding finished for GOOD soon.
Brake lines are being made and Rich has the last of the rear brake parts coming this week too.
My Vinyl guy came by and took measurements for the wrap and that is scheduled for July 21
Attached thumbnail(s)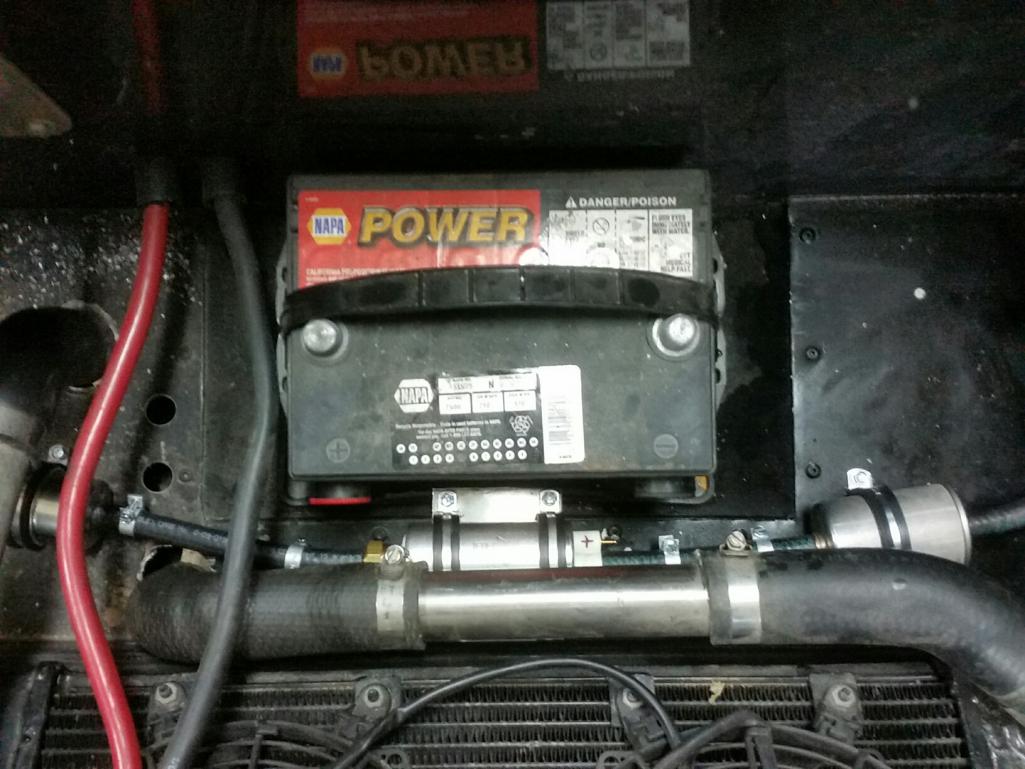
Posted by: whitetwinturbo Jun 18 2015, 02:22 PM
 Love all the new "jewerly"......have a good vacation!
Posted by: howlndog Jun 18 2015, 02:26 PM
yes, have a good vacation.... but more importantly how long will we have to wait for an update? 
Posted by: LeftCoastErik Jun 18 2015, 02:32 PM
Haha thanks. I get back Monday, so I'll probably be on it again Tuesday
Posted by: matthepcat Jun 18 2015, 05:04 PM
What is your brake set up? Boxster?
Posted by: LeftCoastErik Jun 18 2015, 05:52 PM
Yessir. Standard boxer
Posted by: LeftCoastErik Jun 29 2015, 10:24 AM
OK, I have been slacking on updates. But work has been happening for sure.I got the battery cables all secured and terminated at the battery. Brake lines are made. Rear brakes and hubs are now installed (PITA).
The FML914 did strike again, however...the 911CVs I got were supposed to have everything needed to build my custom axles...well, they were missing the top plates that the boots secure to...guess what? they are NLA and nobody has a set.. So I had to buy a complete set of axles. Hooray..I have some nice, clean 108mm CVs if someone needs them...
The MSD is all installed, new wires are made and installed, distributor is indexed, she is ready to fire. Headers are out to get lengthened. I also got the cowl and washer holes filled.
Got the drivers side floor rust repaired and new seat pedestals and hinges welded in. Doing the passenger side pedestals today as well as the under-car seat rail reinforcements.
Modified the cluster to make the speedhut gauges work. Need to send it off for powdercoat along with some other small stuff this week.
Phew..more to come as things go together this week.
Attached thumbnail(s)
Posted by: whitetwinturbo Jun 29 2015, 11:18 AM
There's a busy guy  .....
.....
Posted by: matthepcat Jun 29 2015, 12:58 PM
Great work....Yes the rear swing arm bearing/brake assembly is a big PITA.
I would like to hear about what adapter kit you used for the 4 wheel boxster brake set-up.
Posted by: LeftCoastErik Jun 29 2015, 01:20 PM
Great work....Yes the rear swing arm bearing/brake assembly is a big PITA.
I would like to hear about what adapter kit you used for the 4 wheel boxster brake set-up.
Rich Johnson (a914guy) sells a package. I opted to go that way rather than reinventing the wheel. He does a killer job. Everything came perfect and powdercoated. Great tech support too.
Posted by: whitetwinturbo Jun 29 2015, 01:57 PM
those brakes.....
Posted by: sixnotfour Jun 29 2015, 03:31 PM
Well since you got that 914 all fuch'd up..go the extra mile..MonoWiper.. 
Attached image(s)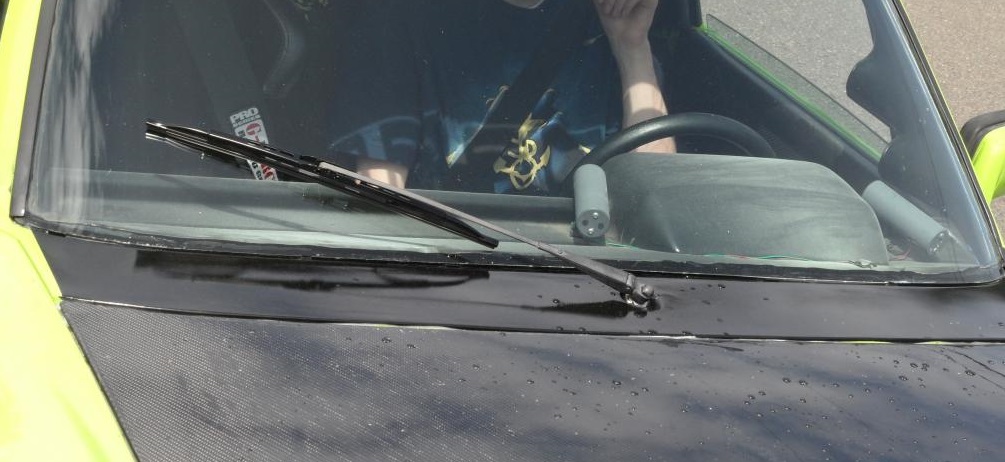
Posted by: whitetwinturbo Jun 29 2015, 03:42 PM
 where on he internet do you get that kit?
Posted by: sixnotfour Jun 29 2015, 03:45 PM
I have done two...modified stock wiper assembly..arm is two cut and welded..all 914
If I did another , I would use a marine wiper motor adjustable sweep and no work..
Its Fun having it straight up for speed... 
Attached image(s)
Posted by: matthepcat Jun 29 2015, 04:05 PM
What do you plan to do for an ebrake?
Posted by: LeftCoastErik Jun 29 2015, 04:28 PM
What do you plan to do for an ebrake?
Boxster ebrake
Posted by: LeftCoastErik Jun 29 2015, 04:48 PM
What do you plan to do for an ebrake?
Boxster ebrake
Like this
Attached thumbnail(s)
Posted by: whitetwinturbo Jun 29 2015, 09:22 PM
Nice
Posted by: LeftCoastErik Jul 2 2015, 05:39 PM
Porsche 914 with 215 buick and MSD Atomic fuel inj: https://youtu.be/JaSQza537a8
It's alive! Fired on the first keystroke. Set the timing then unlocked and let the MSD Atomic take over. I used some magna flow mufflers I had sitting here. Sounds mean
Posted by: Chris H. Jul 2 2015, 05:41 PM
Congrats Erik. Great job. That thing is really shaping up. Magnaflows are awesome. I plan to use one big one on my EG33 phase 2 setup width wise 2 in 2 out.
Posted by: whitetwinturbo Jul 2 2015, 08:35 PM
Way to go
Time to add a video with sound 
Posted by: LeftCoastErik Jul 2 2015, 08:58 PM
Way to go
Time to add a video with sound
Has sound for me?
Posted by: Mueller Jul 2 2015, 09:23 PM
Dang....that sounds sweet!
Great job!
Posted by: mgp4591 Jul 2 2015, 10:07 PM
Congrats Erik. Great job. That thing is really shaping up. Magnaflows are awesome. I plan to use one big one on my EG33 phase 2 setup width wise 2 in 2 out.
Chris, I was originally going to go transverse also but with my trans there's really not enough room out back to do it. Do you have enough room back there because I'd really like to see it- I think it's the cool setup! My overall system is gonna be pretty wild when it's done tho. Now I just gotta get back on my feet... and I'm working on it!
Posted by: Chris H. Jul 3 2015, 07:57 AM
I haven't started that project yet, still working on Phase 1. I do know of a nice setup I'd like to do mine similar to (smaller pipes for me).
This is speed_metal_army's car: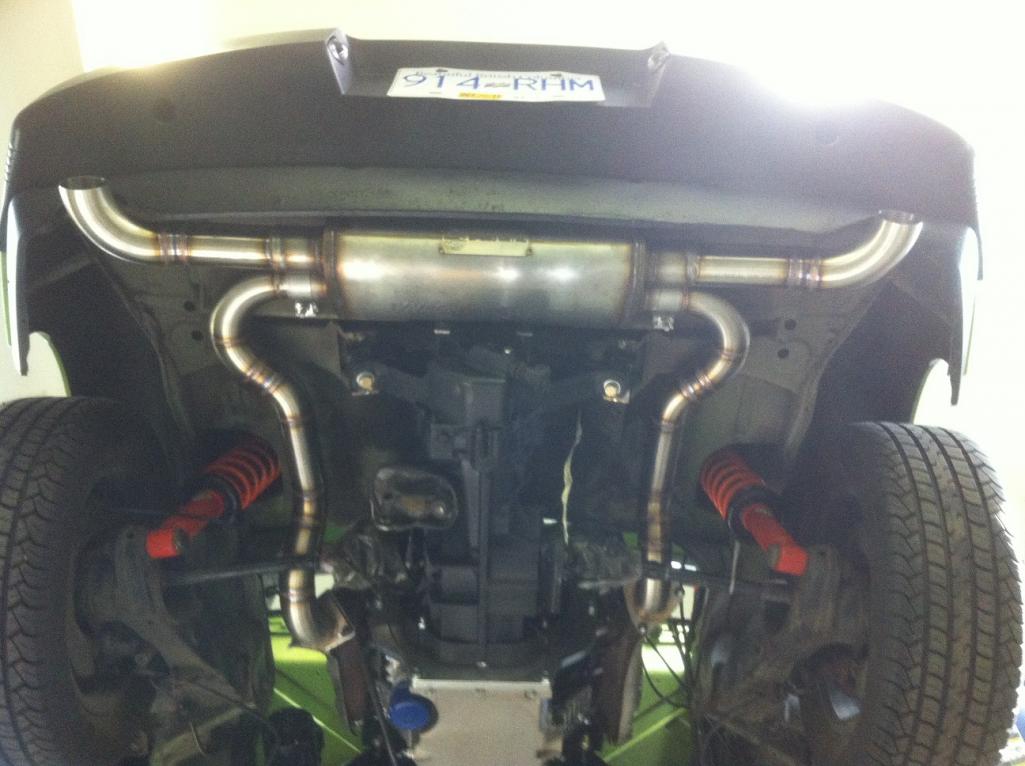
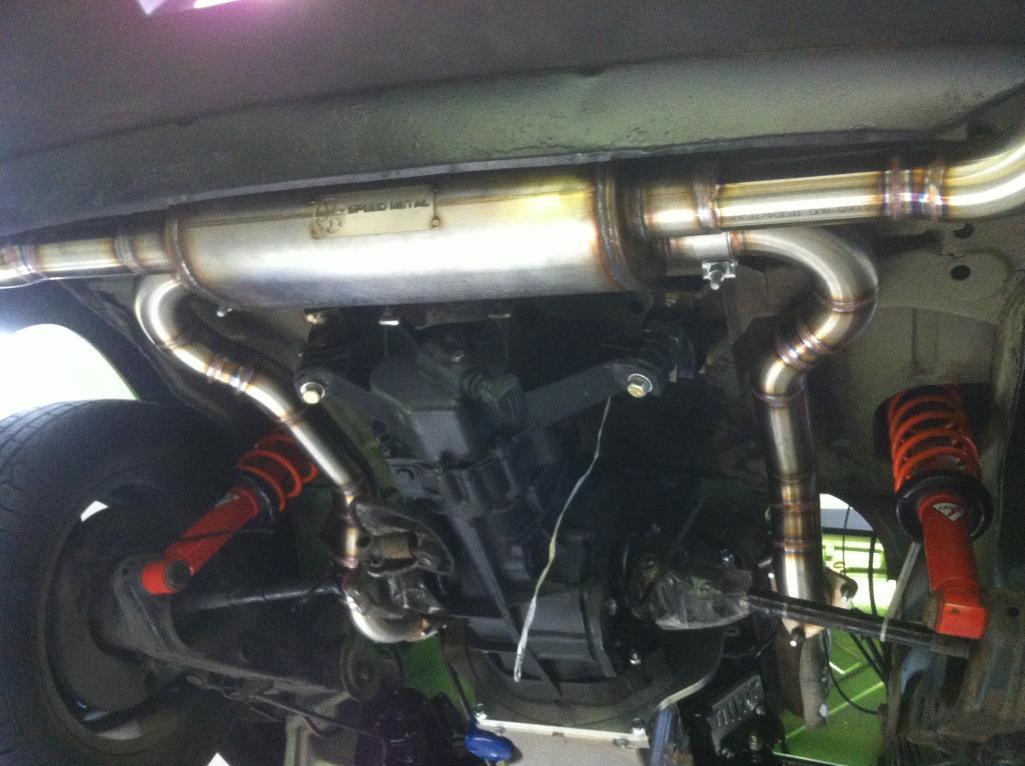
You have to remove the heat shield at the back of the car if yours is still in place, and then it's a tight fit turned sideways. I've also seen some where the muffler hangs down just a bit below the valance but painted black it would be almost invisible.
Posted by: JRust Jul 3 2015, 08:55 AM
Sounds great bud! Get to drive it yet?
Posted by: LeftCoastErik Jul 3 2015, 08:59 AM
Sounds great bud! Get to drive it yet?
Minor issue with the rear hubs. Should be on the ground again sometime next week. Need to assemble the dash, wire gauges and prep for the wrap. It gets wrapped on the 22nd.
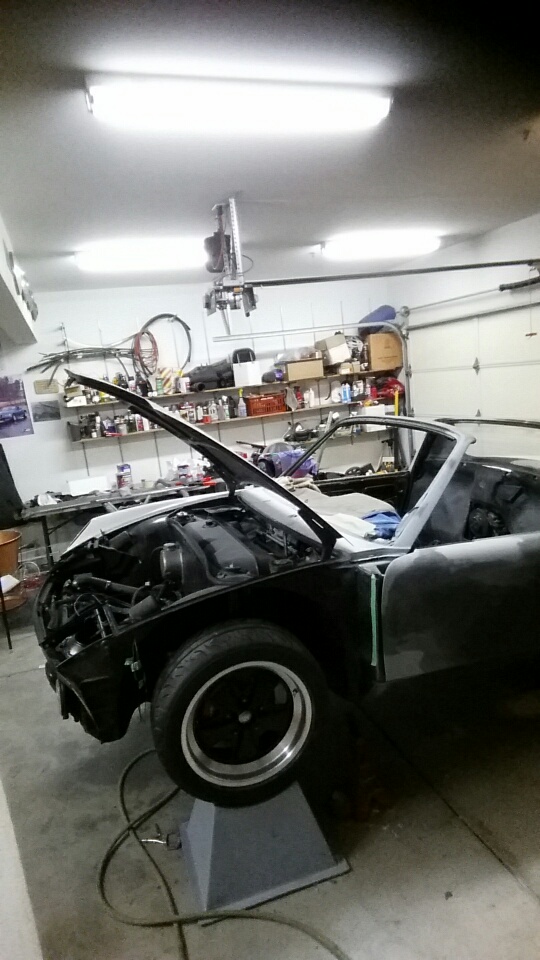
Posted by: LeftCoastErik Jul 3 2015, 10:36 AM
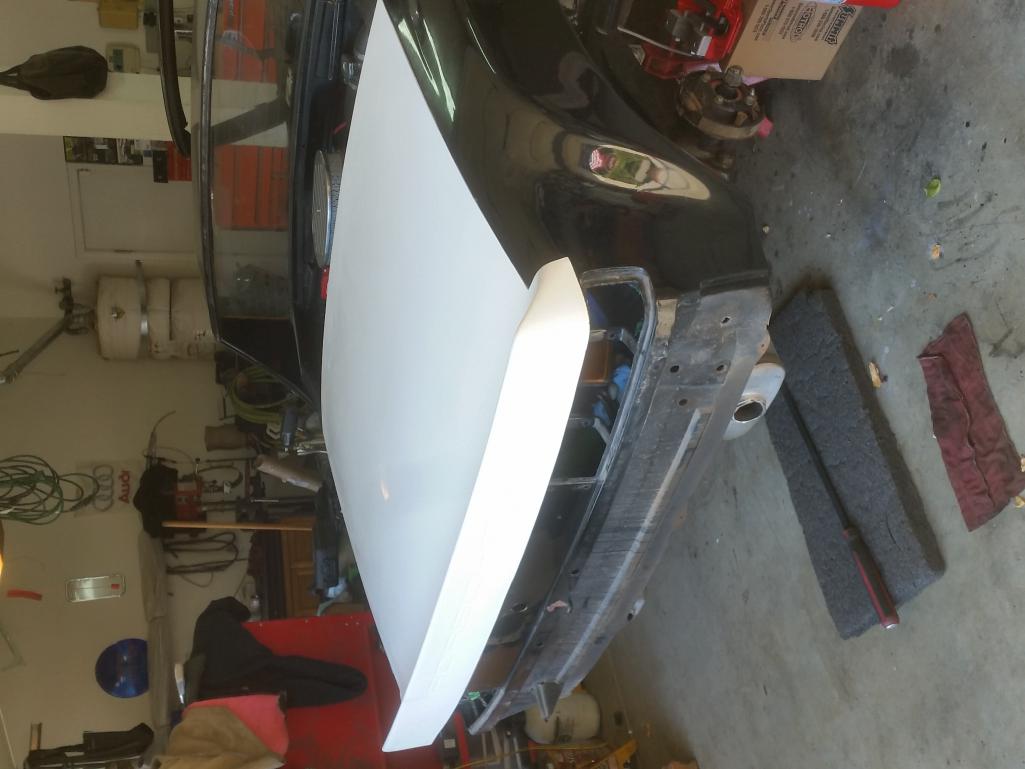
Got my decklid from QRS. Fits pretty well out of the box
Attached thumbnail(s)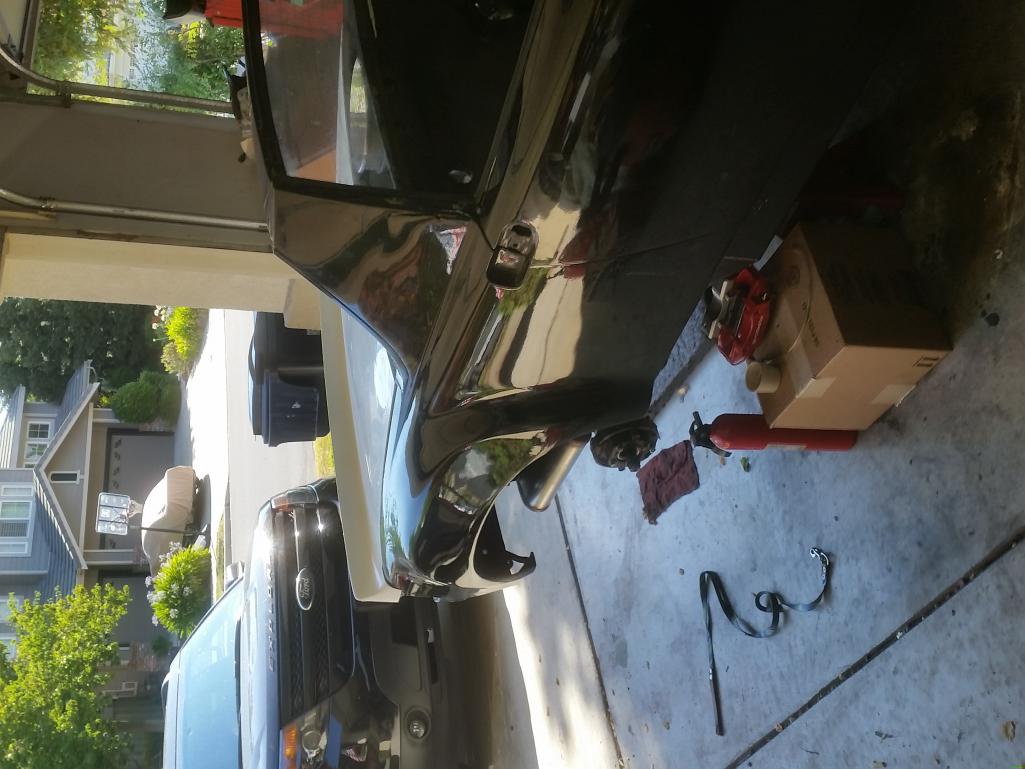
Posted by: LeftCoastErik Jul 3 2015, 10:37 AM
And Tony finished my double stitched dash pad
Attached thumbnail(s)
Posted by: whitetwinturbo Jul 3 2015, 10:43 AM
Dash looks great!
Posted by: LeftCoastErik Jul 3 2015, 10:56 AM
Upside down but cool..damn posting from the phone!
Posted by: Shadowfax Jul 3 2015, 11:20 AM
Engine sounds great. Dash looks good too. You are making terrific progress. 
Posted by: howlndog Jul 3 2015, 12:40 PM
What you have accomplished in a few weeks is seriously impressive. I can't wait to see it rolling again.
Posted by: LeftCoastErik Jul 6 2015, 08:17 PM
https://instagram.com/p/4z8KEPj-2k/
Did this among other stuff today. Previous repair, prob 20 years ago, had the car folded the wrong way. I thought I could live with it but that 5/8" gap at the top of the drivers door was killing me. So we cut the car in half..it's awesome now!
Posted by: whitetwinturbo Jul 6 2015, 09:00 PM
Eric is getting jiggy with the 
Posted by: itchybro Jul 7 2015, 02:06 PM
Would the Shelby "Mini Europa" rims fit stock 914 hubs and where on earth would one find some if they did?
Posted by: LeftCoastErik Jul 7 2015, 04:34 PM
Would the Shelby "Mini Europa" rims fit stock 914 hubs and where on earth would one find some if they did?
They were on the car with the 4 bolt setup.
Posted by: itchybro Jul 8 2015, 02:04 PM
https://instagram.com/p/4z8KEPj-2k/
Did this among other stuff today. Previous repair, prob 20 years ago, had the car folded the wrong way. I thought I could live with it but that 5/8" gap at the top of the drivers door was killing me. So we cut the car in half..it's awesome now!
You're my "Great American of the week" sir!
Posted by: Mueller Jul 8 2015, 02:22 PM
The progress on this car is amazing....I think I will be visiting you again in the near future for a ride!
Posted by: LeftCoastErik Jul 8 2015, 02:24 PM
The progress on this car is amazing....I think I will be visiting you again in the near future for a ride!
Anytime!
Posted by: LeftCoastErik Jul 9 2015, 08:21 PM
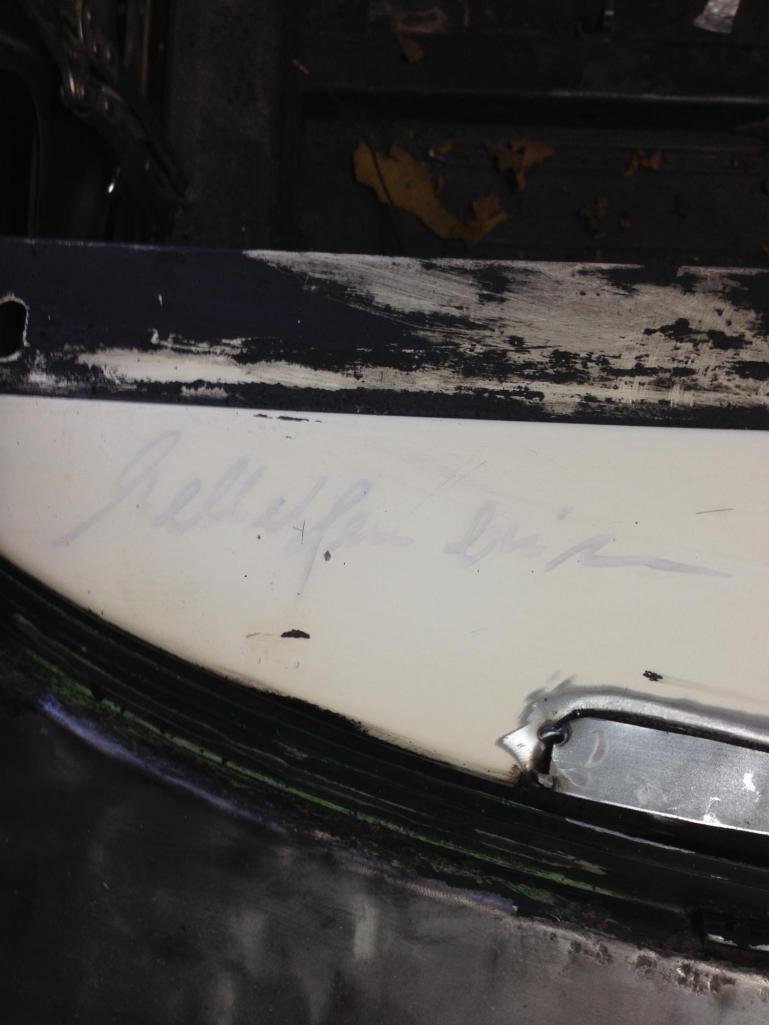
Got a lot done so far this week. My body guy, Brian is coming over tomorrow to smooth everything out. I made a new dash top piece on the same material as the dash top and bottom and installed that with new foam. Found what appears to be an original signature on the dash.
Had to make extensions for the front fenders as they were too short..
Attached thumbnail(s)
Posted by: whitetwinturbo Jul 9 2015, 09:55 PM
So nice!
Posted by: LeftCoastErik Jul 10 2015, 02:56 PM
Mud work and other exciting stuff going down today!
Attached thumbnail(s)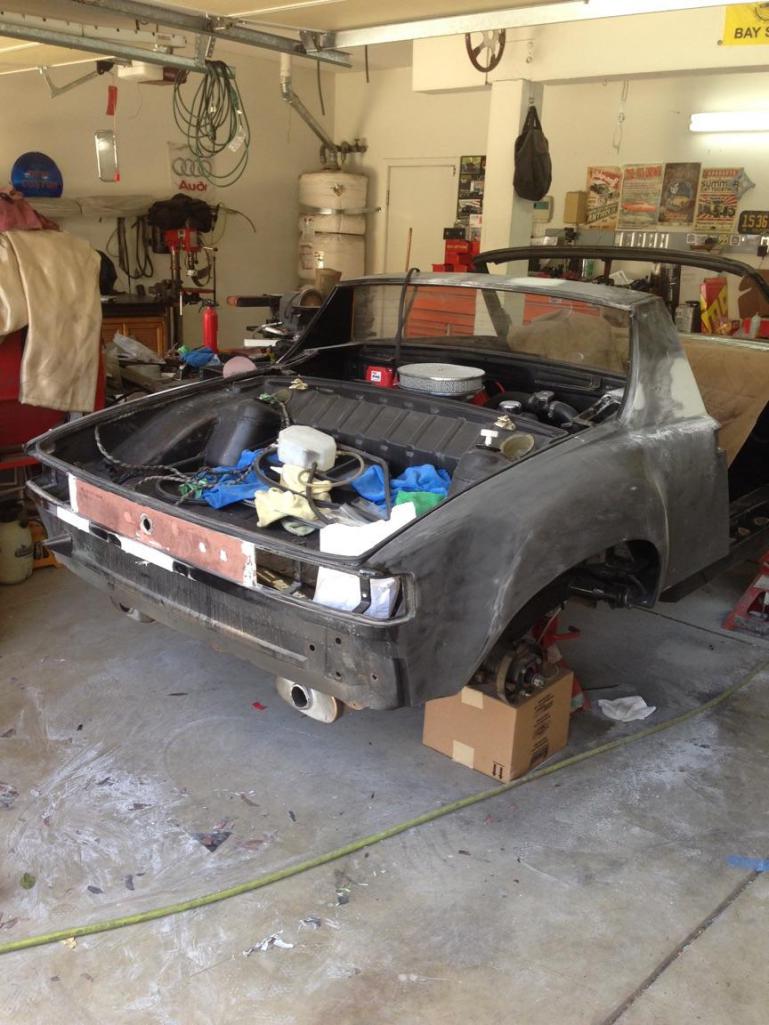
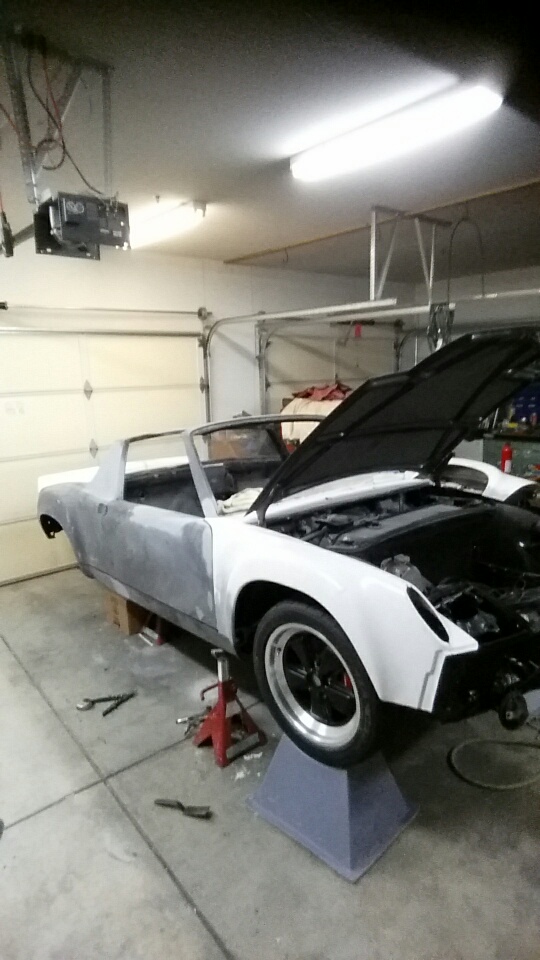
Posted by: LeftCoastErik Jul 13 2015, 10:06 AM
Man, things are happening quickly! Brian was by on Friday and we basically trimmed all the fiberglass panels and gapped the car, molded the bottoms of the extended fenders to fit the rockers, bodyworked the whole car and knocked it down to 220 grit. I'm doing some small cleanup work and then 320 so its nice and smooth for the wrap.
Got the gauges installed and verified they work. They look awesome in the car! This week I have Bret helping again, so we can get the dash buttoned up and the bottom pad on. Well do the carpet and thresholds, figure out a mounting solution for the rockers and fenders and get the rear hubs and brakes installed (assuming I get the darned hubs) It gets wrapped next tuesday and we should be test driving by wednesday!
Attached thumbnail(s)
Attached image(s)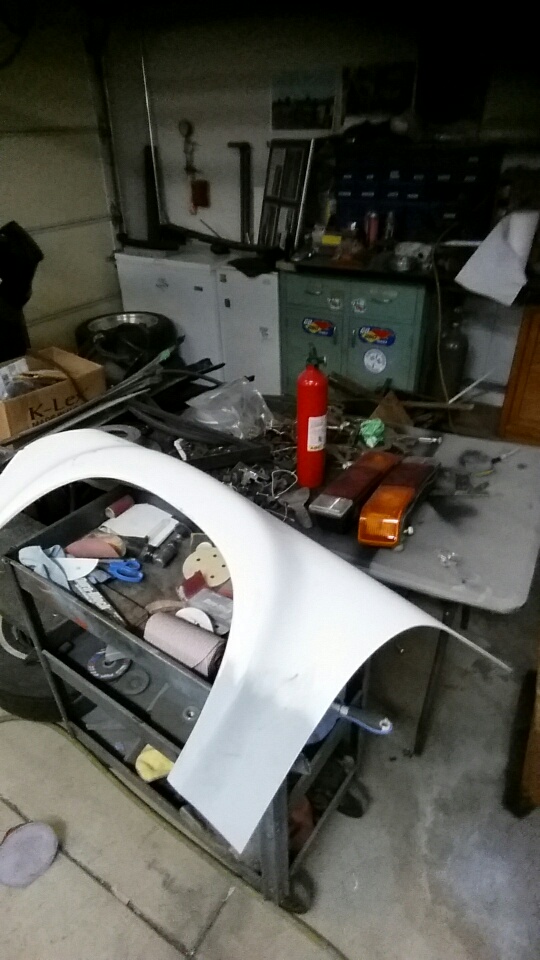
Posted by: whitetwinturbo Jul 13 2015, 01:58 PM
Down and dirty
Posted by: LeftCoastErik Jul 16 2015, 05:56 PM
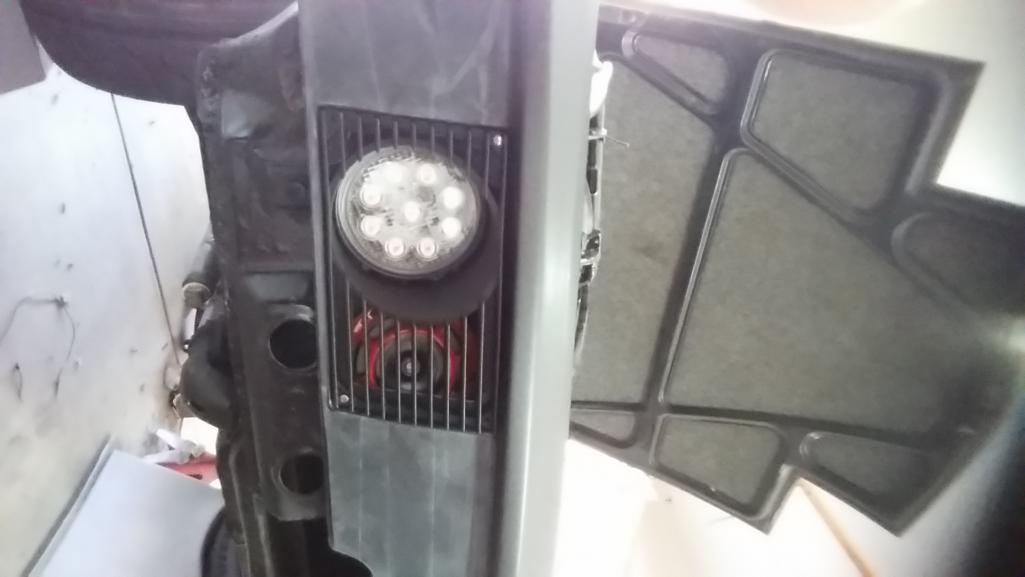
Got a bunch done this week. Unfortunately fedex decided that my hubs needed to get delayed so it still isn't driving. But we got the led headlights and led fogs installed and working. Lowered the front. Got all the trim pieces painted flat black. Painted the thresholds with black bedliner. Replaced the hazard switch. Fixed the wiring for the headlights and fogs. Etc. I'm heading out for the weekend so Tuesday well be installing hubs and bleeding brakes while the car is getting wrapped.
Attached thumbnail(s)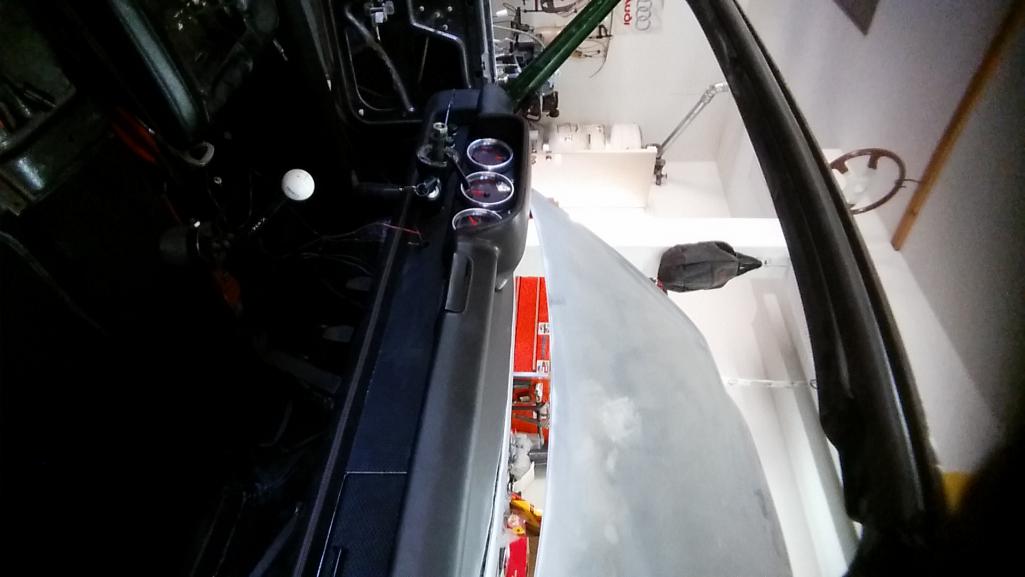
Posted by: whitetwinturbo Jul 16 2015, 11:08 PM
OOOOOOOOOOOh that lighting  ...like that white shift knob too.
Posted by: Andyrew Jul 16 2015, 11:09 PM
Your progress makes us look bad!!
Posted by: LeftCoastErik Jul 17 2015, 08:35 AM
Thanks guys. The light seems pretty impressive I can't wait to see it at night. The white knob is probably temporary but it does have the Ford Toploader pattern on it which matches this modified trans
Posted by: Chris H. Jul 17 2015, 09:03 AM
Your progress makes us look bad!!
It's like fast forward!
Posted by: LeftCoastErik Jul 17 2015, 09:18 AM
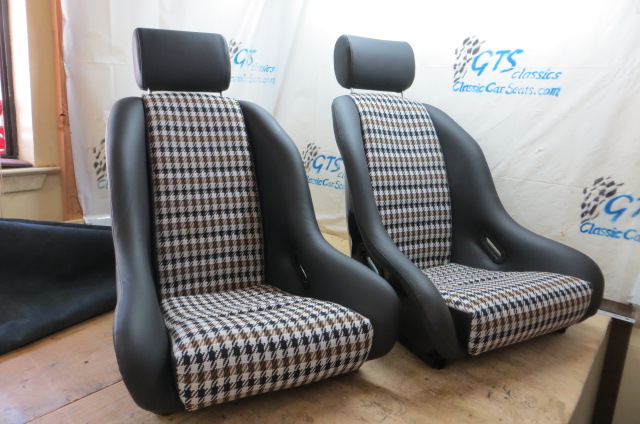
I am talking with Stepan at gts seats. Debating on the Lemans or the Watkins Glen seats. He sent me a bitchin pic of a matching plaid and a copper colored houndstooth for the seat centers. Any opinions on one seat or the other?
Posted by: LeftCoastErik Jul 17 2015, 09:34 AM
I am leaning toward the lower left plaid or that copper houndstooth. Thoughts? The seats are close to these ST seats but they have an integrated headrest
Attached thumbnail(s)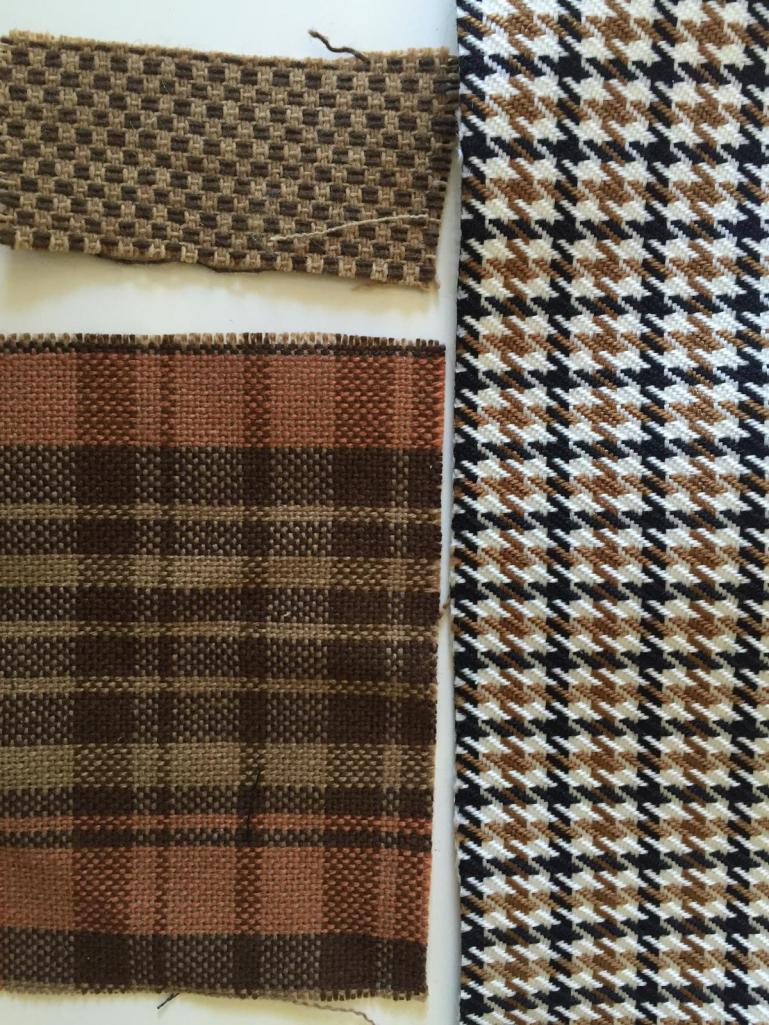
Attached image(s)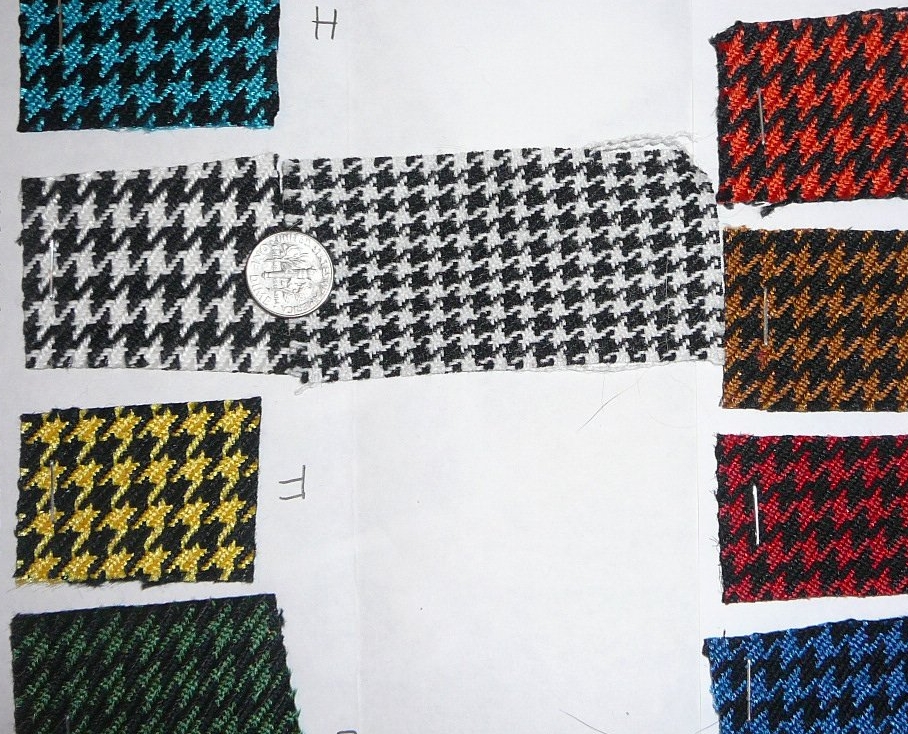
Posted by: whitetwinturbo Jul 17 2015, 10:31 AM
I am leaning toward the lower left plaid or that copper houndstooth. Thoughts? The seats are close to these ST seats but they have an integrated headrest
All way too cool for school....
 ......... reminds me of 928 "Pasha"
Posted by: matthepcat Jul 17 2015, 02:15 PM
Houndstooth all the way.
Posted by: LeftCoastErik Jul 20 2015, 06:30 PM
Got back from vacation at noon. At 3 I drove it.it's still learning but it's pretty crisp. Rich's boxster brakes are killer. Stay tuned. Alot happenING this week
Attached image(s)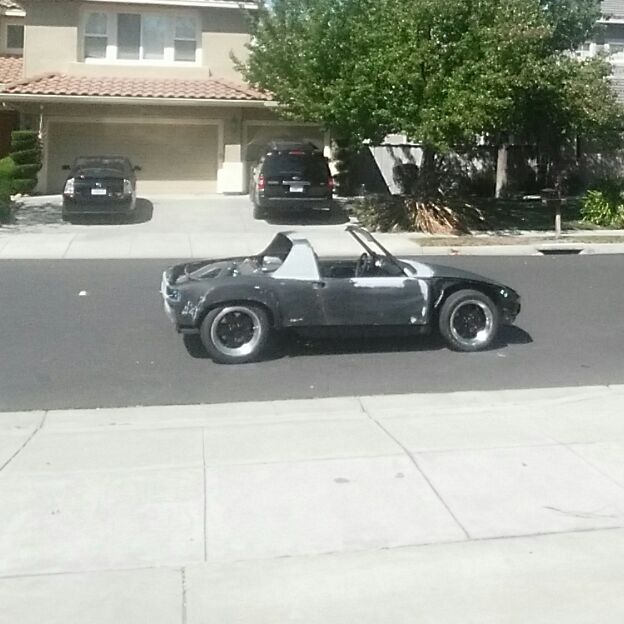
Posted by: Cairo94507 Jul 20 2015, 10:08 PM
Those houndstooth seats are perfect. Like the lights too. Sent you a PM.
Posted by: LeftCoastErik Jul 21 2015, 05:56 PM
Wrapping is happenin! It's really starting to look good. Got the wheel and quick connect hub installed and my shifter boot. Should be finished up tomorrow so I can start putting it back together
Attached thumbnail(s)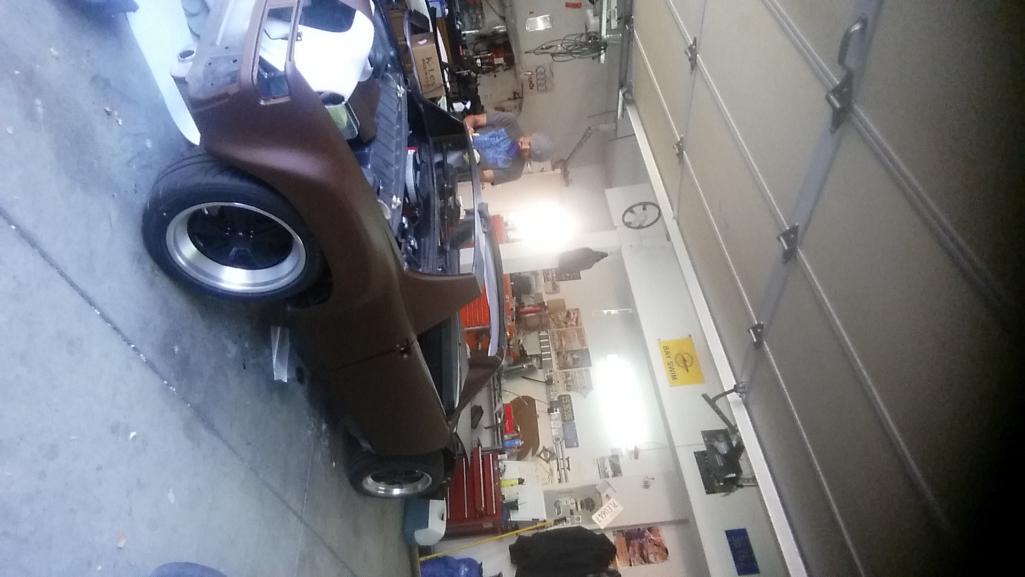

Posted by: Chris H. Jul 21 2015, 08:20 PM
Fastest...build....ever.....
And it's pretty much a full-on resto. Nice work Erik .
Posted by: whitetwinturbo Jul 21 2015, 10:23 PM
LOVE the "wrap"
Posted by: Andyrew Jul 21 2015, 10:44 PM
Awesome!
Posted by: mgp4591 Jul 21 2015, 11:00 PM
Great work, fast and looking good! Only one complaint- my neck is getting sore from the sideways angles of your pictures!
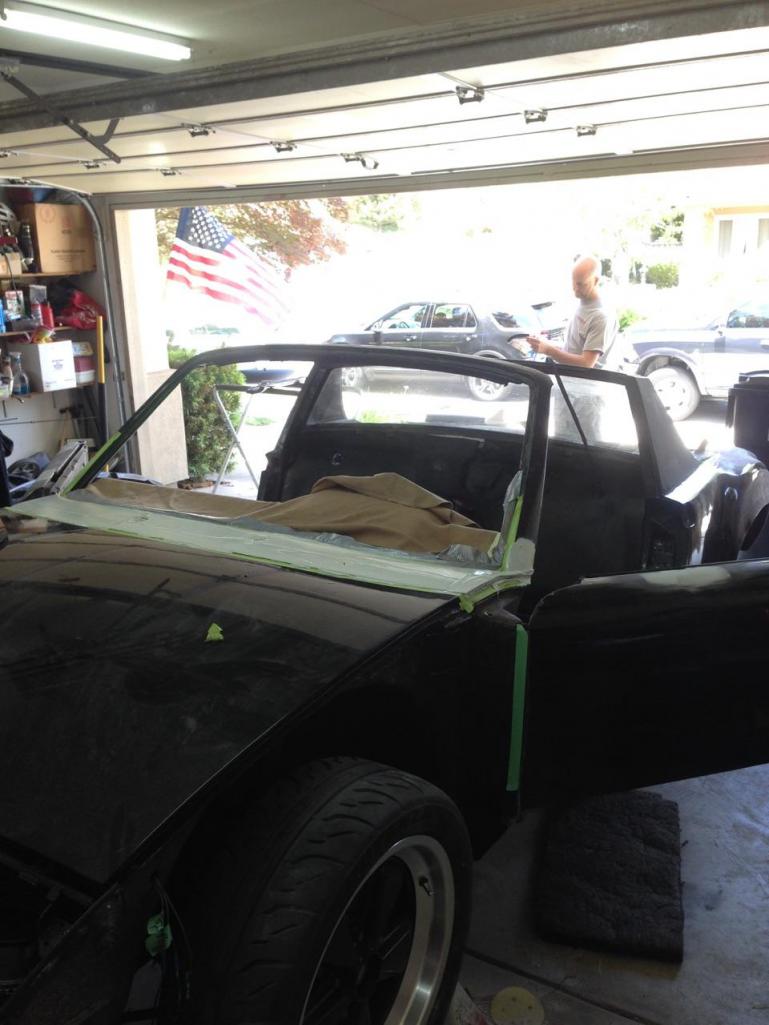
Posted by: LeftCoastErik Jul 27 2015, 04:10 PM
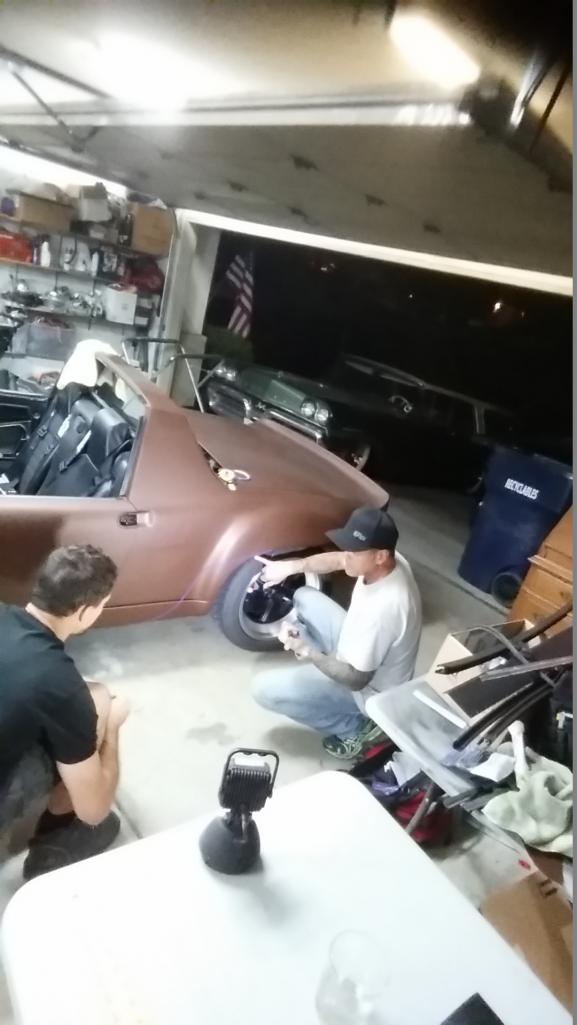
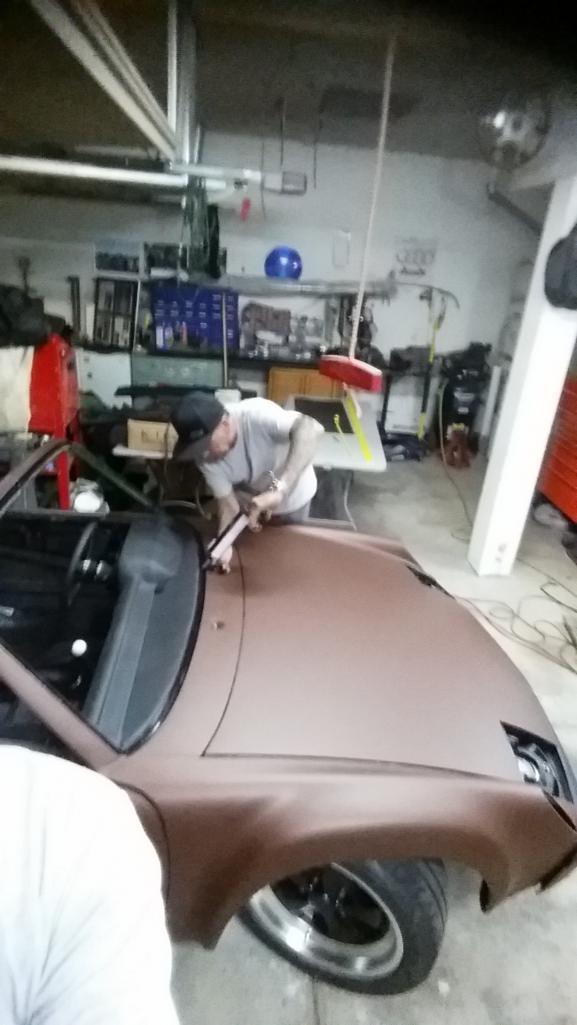
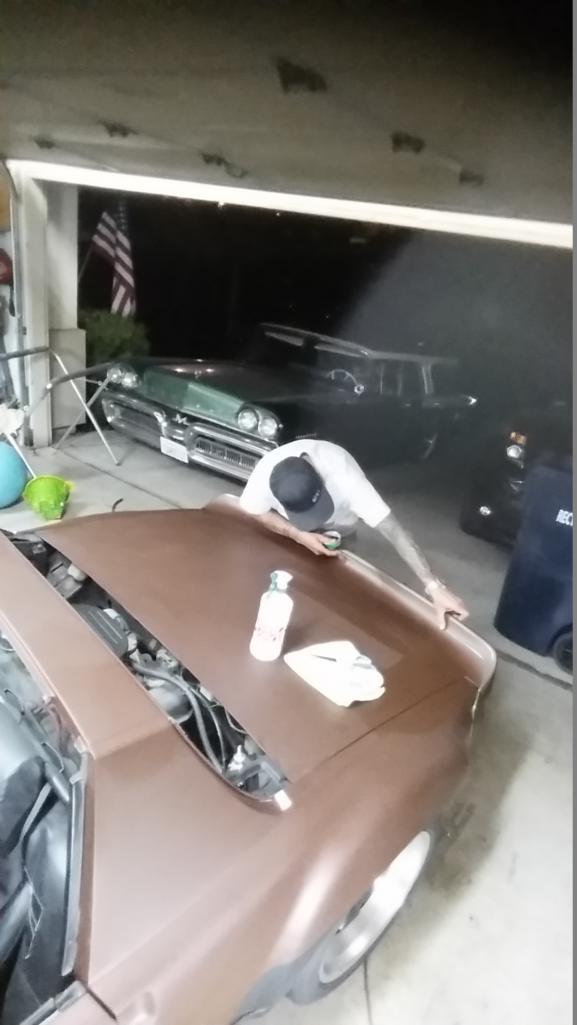
Well, its a WRAP! Here are some pics of John and his helper from Wolf Vinyl doing their thing as well as my buddy Tony Gomes fro Tri-Valley Auto Glass and Upholstery stabbing the windshield. Finally some color shots out in the sun too!
Attached thumbnail(s)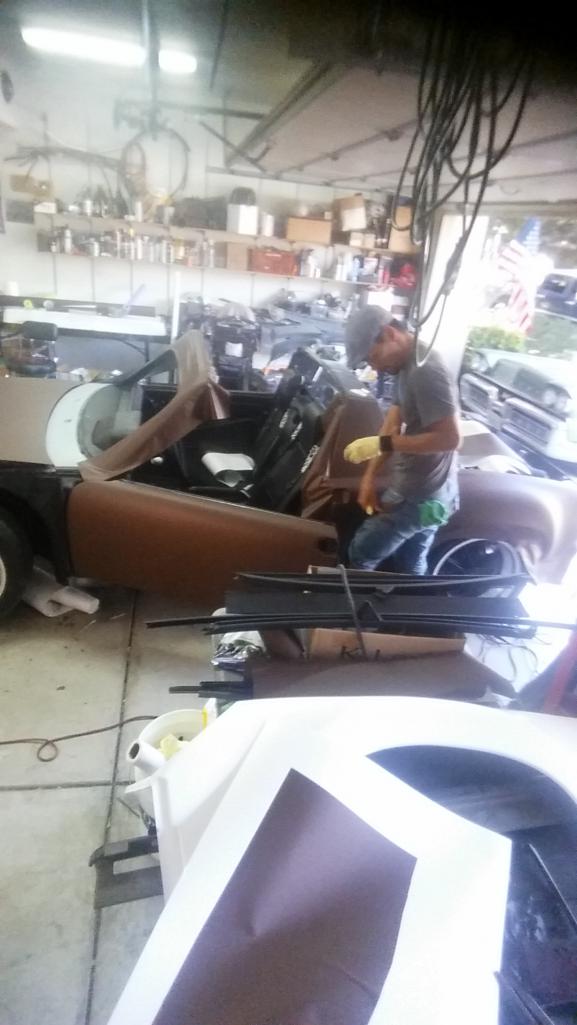
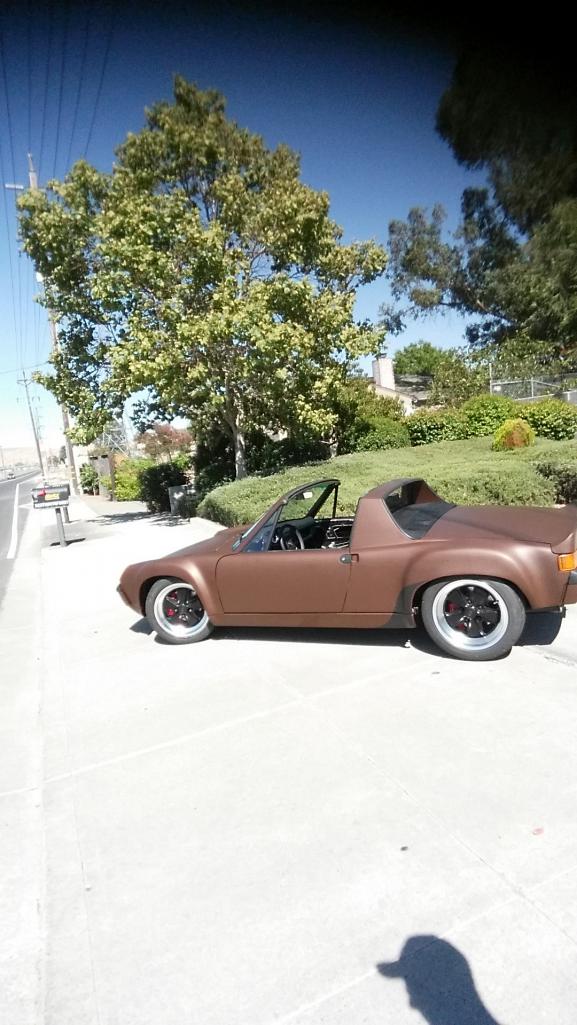
Posted by: LeftCoastErik Jul 27 2015, 04:12 PM
Here are a few more! Now with black bullet-style mirrors
Attached thumbnail(s)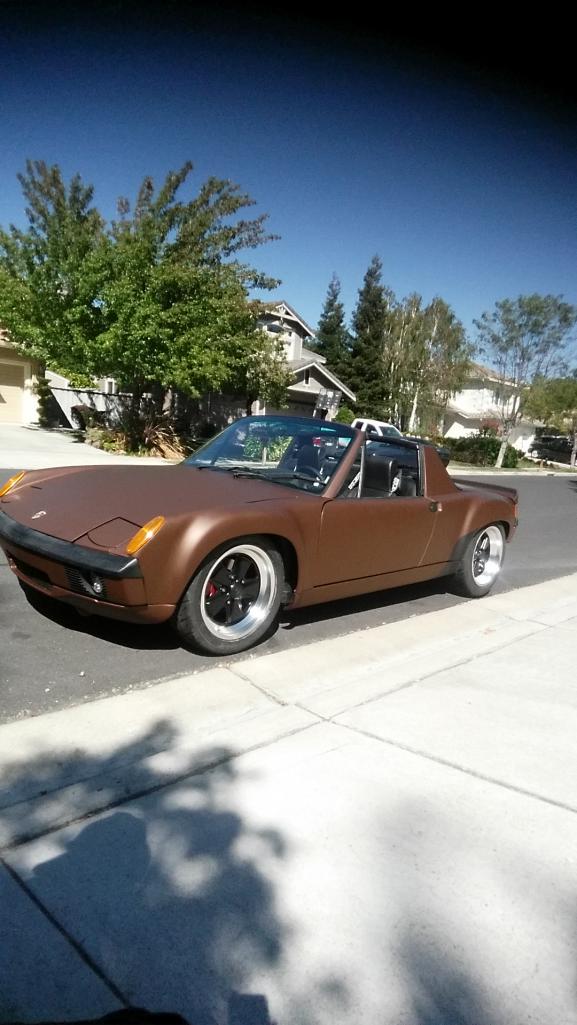
Posted by: matthepcat Jul 27 2015, 04:51 PM
Fantastic. Can't wait to see it out at a local event soon.
Posted by: Cairo94507 Jul 27 2015, 05:19 PM
Wow, that looks really nice. If you don't mind can you give us an idea what it cost to wrap a tiny little 914?
Posted by: Chris H. Jul 27 2015, 06:23 PM
Nailed it !
Posted by: LeftCoastErik Jul 27 2015, 06:37 PM
Thanks guys! The wrap depends alot on material choice. The vinyl for mine was like $600. Figure on $1500-$2000 in labor. It took John and a helper two 8 hour days and then John another 12hour day to finish it.
Posted by: whitetwinturbo Jul 28 2015, 10:13 AM
Those mirrors are WAY cool too ![popcorn[1].gif](style_emoticons/default/popcorn[1].gif)
Posted by: LeftCoastErik Jul 28 2015, 10:17 AM
The mirrors work on the car and look awesome. You can't see shit out of them though...I am going to add some convex stick on mirrors in hopes that that gives me some visibility, especially for the track.
Posted by: JRust Jul 28 2015, 10:54 AM
You make me 
How in the hell did you get this all done so fast  . We really have rules here about how long this stuff takes. That looks like at least 18 months to me. Damned if I can remember ever even seeing it on jackstands
Really amazed at the amount you accomplished in such a short time. Nice job doesn't do it justice. Great work & speedy too 
Posted by: whitetwinturbo Jul 28 2015, 11:15 AM
The mirrors work on the car and look awesome. You can't see shit out of them though...I am going to add some convex stick on mirrors in hopes that that gives me some visibility, especially for the track.
If you are always in front you don't need no stinkin mirrors
Posted by: LeftCoastErik Jul 28 2015, 11:16 AM
Thanks man! I took delivery in May, so a couple of months of thrashing every day/night, plus I had one of my guys come work at the house for about 3 weeks, so that helped. I still have a bunch to do to it, but at least it looks like a car again and its damned fun to drive.
I get a little OCD when I get a project rolling, and patience is not one of my virtues.
Posted by: LeftCoastErik Jul 28 2015, 11:58 AM
Its Official....
Posted by: LeftCoastErik Jul 28 2015, 10:46 PM
Well it was 100degrees here today so I stress tested the car in stop and go traffic. EFI read 207 gauges read 190 max on the cool side. I couldn't be happier!
A I got a new iPhone 6+. So my pics should be better.
Posted by: whitetwinturbo Jul 29 2015, 11:31 AM
Well it was 100degrees here today so I stress tested the car in stop and go traffic. EFI read 207 gauges read 190 max on the cool side. I couldn't be happier!
A I got a new iPhone 6+. So my pics should be better.
:toke:WAYYYYYYYYYYYYYYYYYYYYY COOOOOOOOOOOOOOOL
Posted by: whitetwinturbo Jul 29 2015, 06:22 PM
Here's a wanna be ..........
http://www.ebay.com/itm/281761070453
Posted by: LeftCoastErik Jul 30 2015, 07:19 PM
Got the altitude adjusted today after I got some shorter rear springs. Now I have adjustment! Set up the elephant racing bump steer kit and she's ready for alignment
This is also a test of the iPhone photo upload. Hopefully the pic is correctly oriented
Attached thumbnail(s)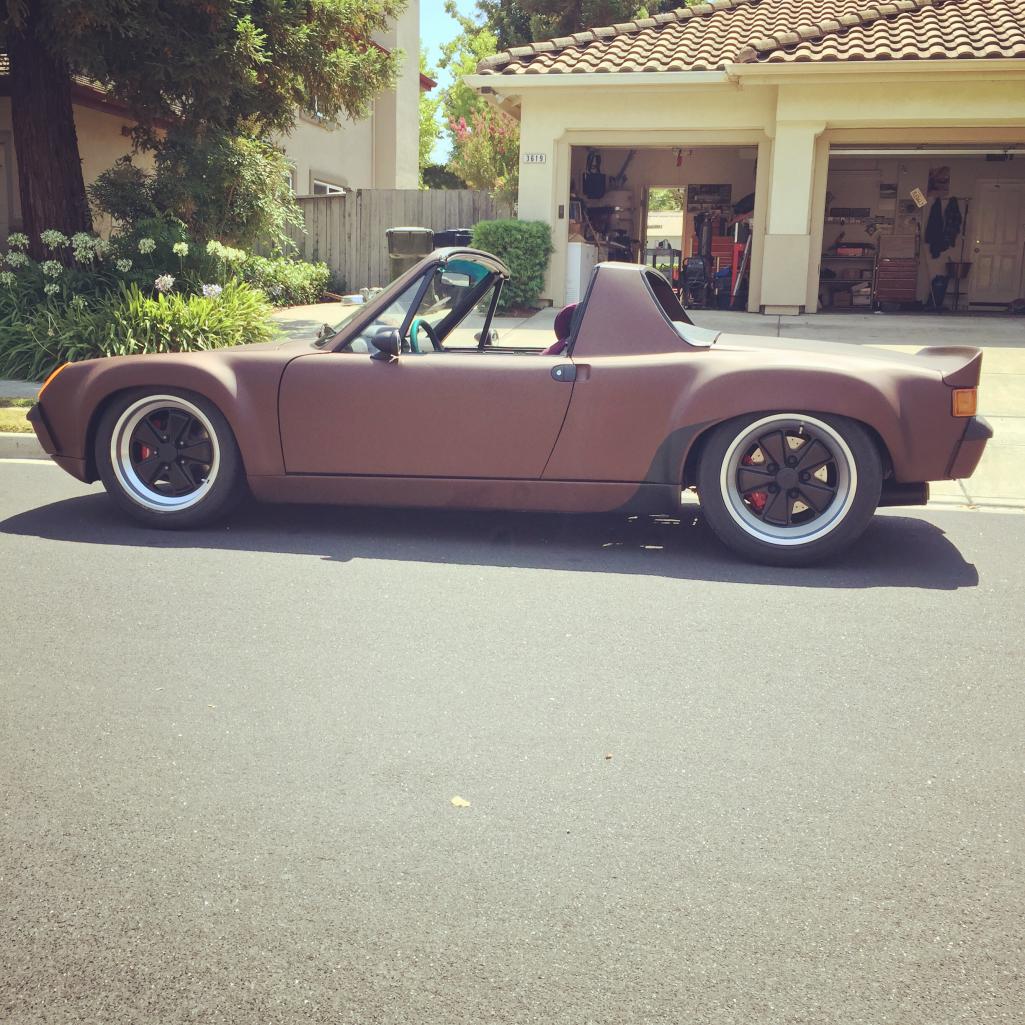
Posted by: KELTY360 Jul 30 2015, 07:27 PM

Posted by: mepstein Jul 30 2015, 07:28 PM
Great job on the build!
Posted by: LeftCoastErik Jul 30 2015, 07:47 PM
Thanks! Mepstein you are in my old hood. Born and raised in Newark. Went toUofD
Posted by: whitetwinturbo Jul 30 2015, 11:47 PM
you are so the man.
That wrap is a wrap .
Posted by: eric9144 Jul 31 2015, 11:30 AM
Damn, that was fast indeed, congratulations!
Now you're going to have to take it all apart and put it up on jack stands if you're going to fit in around here 
Posted by: ndfrigi Jul 31 2015, 11:42 AM
Wow less than 3mos! Congratulation and Good Job! Beautiful Beast!
Posted by: LeftCoastErik Jul 31 2015, 12:13 PM
Thanks guys, still lots of work to do, but its turning out pretty nice. I have to keep reminding myself that many of the body parts are race fiberglass, so stuff just doesn't fit as well as I would like. But I am getting used to it.
I did wake up in the middle of the night with a an idea for a better personalized plate..and it was available...
BADPNNY
Posted by: LeftCoastErik Jul 31 2015, 04:07 PM
Super cute!!! And a 40lb savings on the nose of the car!!
Attached thumbnail(s)
Posted by: LeftCoastErik Jul 31 2015, 04:15 PM
Ok I give up. The first pic from the iPhone posted with the correct orientation. This one is sideways again
Posted by: LeftCoastErik Jul 31 2015, 04:58 PM
Got my door panels back from Tony today. I used the 914rubber.com fiberglass kit but used the vinyl that we put on the dash for the top and threw in the double stitch to pull it all together
Attached thumbnail(s)

Posted by: LeftCoastErik Jul 31 2015, 05:00 PM
Trying something else. 
Posted by: dlkawashima Jul 31 2015, 05:31 PM
Looks great. I have to check out these new fangled batteries.
Regarding your pics, if you have the images on your computer, rotate them in Preview if on a Mac or in a free editor like Gimp or Irfanview if on a PC.
If your images are still on your iphone, try this:
1. bring up the image
2. click Edit on the upper right
3. click the crop/rotate symbol on the bottom left (next to Cancel)
4. click the rotate button above Cancel to turn the image to the proper orientation
5. click Done

Posted by: LeftCoastErik Jul 31 2015, 05:41 PM
I know how to rotate images. And I don't take pics with the phone rotated. They are correctly oriented on my phone and when I post to Instagram or Facebook. Also when emailed. That's why it's so frustrating only seems to happen on this site
Posted by: LeftCoastErik Jul 31 2015, 05:42 PM
Also if you click on my sideways image it opens correctly oriented
Posted by: LeftCoastErik Aug 4 2015, 10:11 AM
Well I put about 100 miles on the car this weekend, mostly with my 3-year old daughter in the car seat next to me, so that was cool. The car did, of course, break on me, about 1/4 mile from the house. After 2 hours of messing with it, I discovered that the set screw for the adjustable rotor (that you have to run with the MSD/Timing Control) had vibrated loose. I guess 15 degrees ATDC is no bueno for starting...Got that fixed and to the house, disassemble and re-assembled with loctite and now I just need to retime it. I also got my Patrick Motorsports rear valence panel so I need to fit that, cut some holes for the exhaust and wrap it before install. It really finishes the rear of the car.
Posted by: LeftCoastErik Aug 4 2015, 05:27 PM
Working on the Patrick Motorsports rear valence and exhaust tips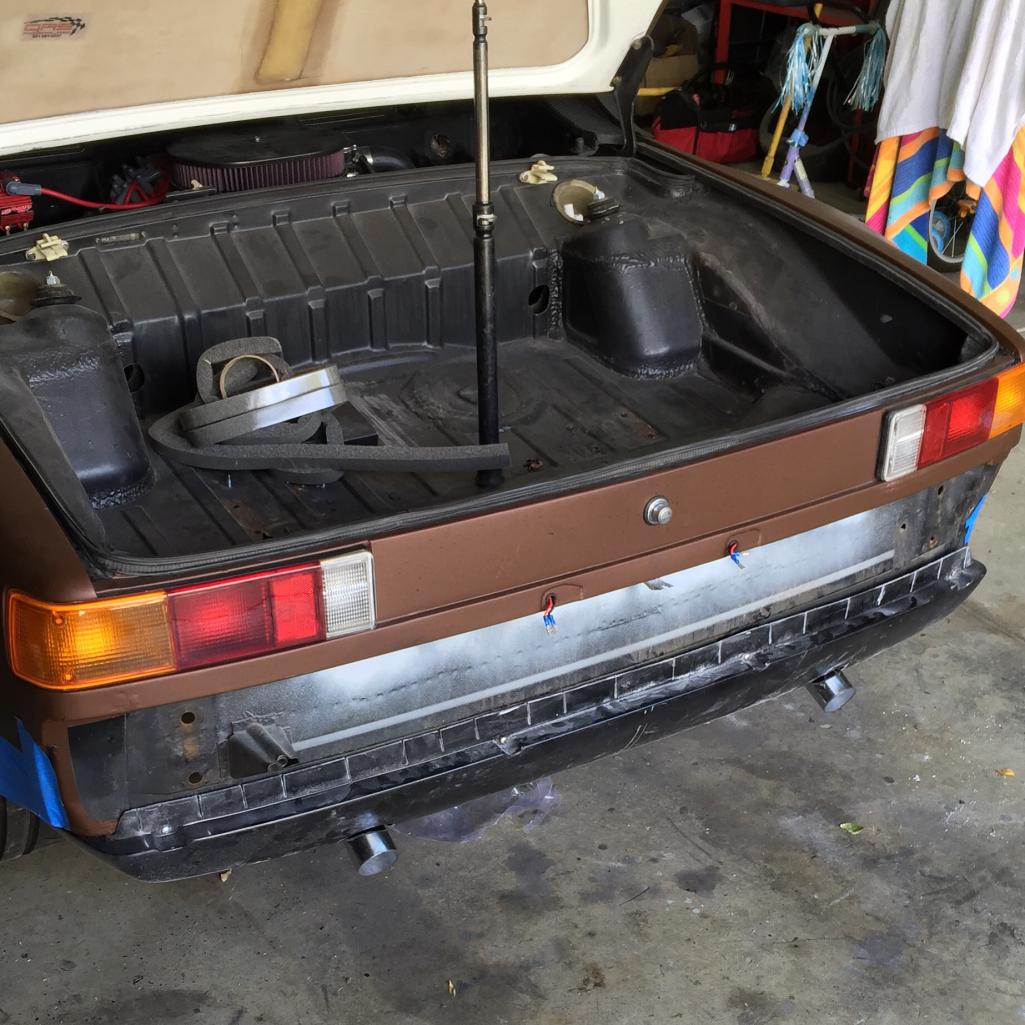
Posted by: mepstein Aug 4 2015, 05:48 PM
Thanks! Mepstein you are in my old hood. Born and raised in Newark. Went toUofD
My wife and I lived in Newark for about 10 years and both went to UD. We still work in Newark but live just over the border in PA.
914's are a rare sight around here.
Posted by: whitetwinturbo Aug 4 2015, 10:06 PM
Wow..............that coppertone stitching on the door panels
Posted by: dlkawashima Aug 5 2015, 05:25 PM
I know how to rotate images. And I don't take pics with the phone rotated. They are correctly oriented on my phone and when I post to Instagram or Facebook. Also when emailed. That's why it's so frustrating only seems to happen on this site
Just trying to help you sort out the problem ... you won't be frustrated if you follow the simple guide below. Or don't, no skin off my nose.

Posted by: LeftCoastErik Aug 5 2015, 05:42 PM
Thanks Dave. I typically shoot with the phone as shown in example 3. Which is apparently incorrect. And yet it works sometimes, and still only has an issue on this forum. I am no less confused about the issue but I'll try it as shown in example 1 and see if it's consistently cool
Posted by: Stacks914 Aug 6 2015, 03:46 AM
WOW nice!!
Posted by: LeftCoastErik Aug 6 2015, 04:32 PM
Got the rear valence on and wrapped last night. Did the exhaust tips too. Trying the correct photo method per dave
Attached thumbnail(s)

Posted by: LeftCoastErik Aug 7 2015, 06:52 PM
Heading here tomorrow. Ronnie is a buddy and he gets around 100 cars there. It's a good time. Come on out!
Posted by: matthepcat Aug 7 2015, 07:12 PM
Looks cool, I will make it out.
Any euro cars show up?
Posted by: LeftCoastErik Aug 7 2015, 07:27 PM
Some. But now that I have one I hope to get more there
Posted by: LeftCoastErik Aug 8 2015, 12:01 PM
Thanks Matt, Dave(hope I got that right) and Pam for coming out. Hope you had fun!
Attached thumbnail(s)
Posted by: mepstein Aug 8 2015, 01:34 PM
Got the rear valence on and wrapped last night. Did the exhaust tips too. Trying the correct photo method per dave
My daughter would like this car. Looks like it was carved from a big Hershey bar.
Posted by: whitetwinturbo Aug 9 2015, 06:46 PM
so nice..........drive it to Hersey, PA at your own risk 
Posted by: LeftCoastErik Sep 8 2015, 01:13 PM
Got about 500 miles on the car now. Getting the suspension dialed in and loving every minute of it. 50 miles of Mines road this weekend after a jaunt to Blackhawk Cars and Coffee. Good times
Attached thumbnail(s)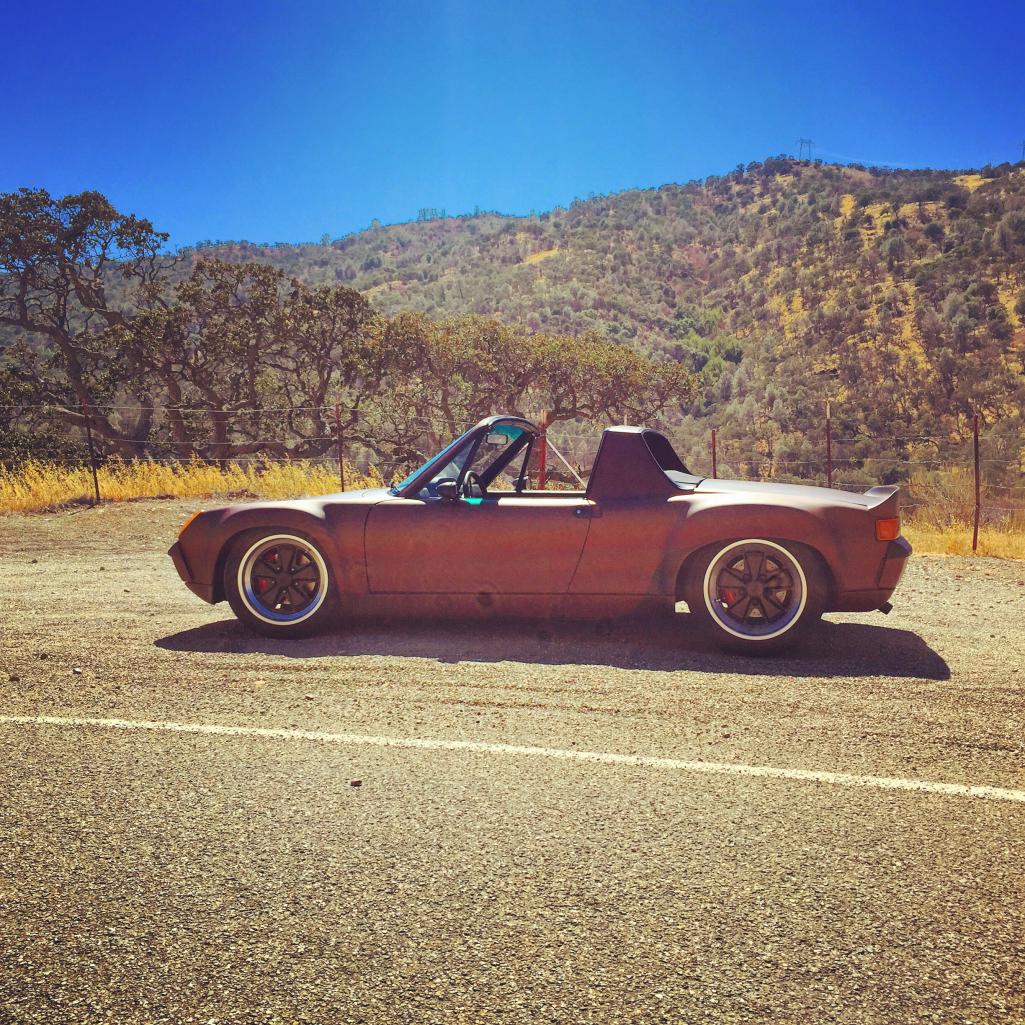
Posted by: LeftCoastErik Sep 8 2015, 01:15 PM
Another
Attached thumbnail(s)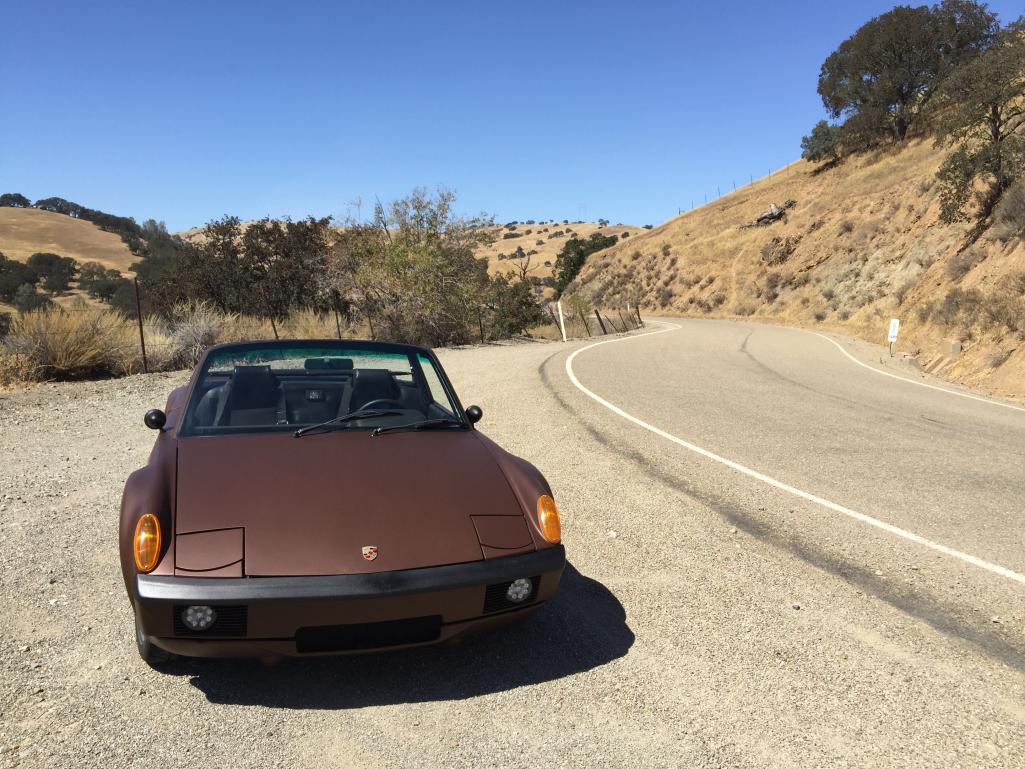
Posted by: LeftCoastErik Sep 8 2015, 01:16 PM
And den.
Attached thumbnail(s)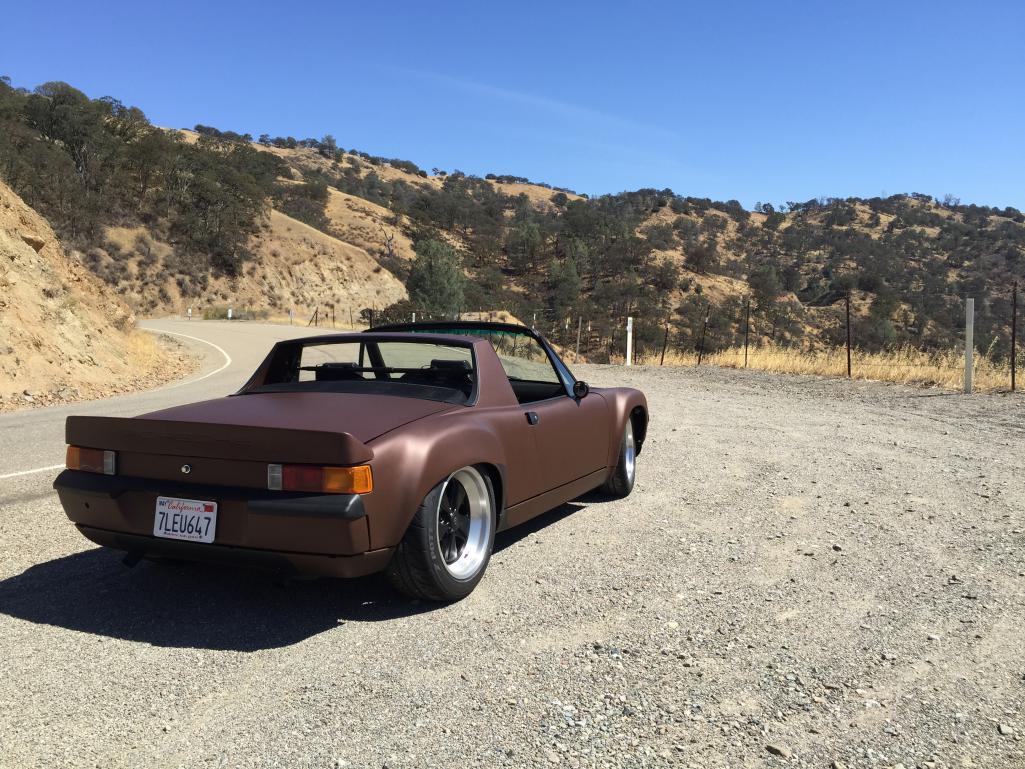
Posted by: whitetwinturbo Sep 8 2015, 01:23 PM
 ...looks like a Imperial Oatmeal Stout
Posted by: rhodyguy Sep 8 2015, 03:36 PM
Kind of a record for the turn around time. Nice work.
Posted by: JmuRiz Sep 18 2015, 01:15 PM
Your contact Tony looks like he does great work. Is he interested in doing other dashes/door panels?
Mind sharing the approx costs (via PM if you wish)
Posted by: LeftCoastErik Sep 18 2015, 01:20 PM
Tony at TriValley Auto Glass and Acme Upholstery in Pleasanton. +1 (925) 462-6459
Posted by: Andyrew Sep 18 2015, 05:27 PM
And den.
Love Mines road
Posted by: LeftCoastErik Oct 22 2015, 11:45 AM
FOR SALE!
Taking offers as I am working on a deal for a dream 911 and don't really need two sports cars in the garage. Not in a hurry to sell, not even sure I really want to, but if someone appreciates this car and the build, I would definitely let it go.
Here is the updated build list, I am sure I am missing a bunch, but this is the big stuff:
ENGINE:
-1962 Buick 215 Aluminum V8
-STD bore, 10.5-1 (stock) comp ratio
-Cyl heads-ported exhaust ports, 3 angle valve grind with hi-retainers-shaft rocker stands shortened .060"-pushrods shortened .125" for geometry correction.
-Camshaft-M-488 custom ground by Shadbolt engineering(Vancouver B.C.) C/W hydraulic lifters
-Spheroidal graphite iron crankshaft, 5 main journal center, thrust mains, .010" under -Rods ground .001"
-New rings and bearings (approx 1200mi ago. Previous Owner)
-Hi volume oil pump, Buick V8 filter housing
-Offenhauser alum intake
-Kennedy engineered product #1000 Buick to Porsche adapter
-KEP 9" Flywheel, clutch and throw-out bearing
-Custom radiator w/ twin Spals (Haven’t gotten it above 200 on a 105 degree day, beating on it. Runs 180 most of the time)
-MSD Atomic Self-Tuning EFI with full Return-Style Fuel System and Timing Control ($3k in parts)
-MSD 6A Spark Box
-MSD Pro-Billet Distributor with locked timing (controlled by Atomic)
-Mid-Length Stainless headers with Magnaflow mufflers
TRANSMISSION:
-Custom built V8 side shift trans by Dr. Evil.
-Custom ratios (Previous owner, no documentation on ratios)
-1st gear lock out
-Fresh rebuild, newly installed (approx 1200mi ago. Previous Owner)
-JWest Shifter with Hurst Lever and Knob, Fresh 911 Boot
BODY:
-Mitcom Rear Quarters
-QRS Fiberglass Front GT Fenders (4lbs apiece!)
-QRS Fiberglass Front GT Bumper and Valance
-Mitcom Fiberglass GT Rockers
-Patrick Motorsports Fiberglass Rear Valance
-QRS Fiberglass Ducktail Decklid
-Brad Mayeur Longitudinal Reinforcement Kit
-GT Chassis Reinforcement Kit
-GT Trailing Arm Reinforcement Kit with Elephant Bushings
-Body is wrapped with Matte Chocolate Metallic Vinyl ($2200)
-Fresh air vent/grille on cowl is filled
-Windshield Aluminum Trim deleted and new correct Gasket installed
-Door handles blacked out
-Mad Dog Racing HVAC hole blockoff plates installed
-All trim Blacked Out (Satin)
-GE Night Hawk LED Headlights ($500/set)
-LED Fogs
-Hella Horns
-Wiring harness was thinned of everything unnecessary
-Updated blade style fuse blocks
-Passenger rear floor pan replaced, new jack pad from Restoration Design
-All other small rust areas repaired, rustproofed
-New seat pedestals on both sides, with new hinges from Restoration Design
INTERIOR
-Heater/Vent Controls Filled on Dash
-Dash End Vents Filled
-Dash wrapped in vinyl with chocolate double stitching
-Radio delete
-Fiberglass door panels, fresh basketweave and matching vinyl with double-stitching
-New loop carpet
-Momo Prototipo wheel with quick release hub
-Custom SpeedHut gauges in a factory panel ($650)
-GPS Speedo with peak recall, performance test ability, etc
-Tach with programmable, sequential shift lights, peak recall, etc
-Combo gauge with oil pressure, water temp, fuel level, volts. All have programmable
high/low warning lights
-Brand new GTS Classics “Watkins Glen” seats. Vinyl with alcantara centers, lap belt holes, matching stitching ($2500)
-Harness Bar
-Sparco Street (DOT Approved) harnesses with the Spaco Patch removed (it just looks better)
SUSPENSION:
-H & H Carrera 19mm adj front sway bar
-Stock front torsion bar
-23mm master cylinder (100 miles)
-911 Front Struts, Boxter Brakes, 5-lug Conversion and Rear Coilovers from Rich Johnson ($6500)
-Raised Spindles
-Koni Sport Inserts
-Elephant Racing Bumpsteer Kit
-Turbo Tie Rods
-5-Lug Conversion
-Powdercoated Calipers
-Drilled, Vented Rotors
-Hawk HPS Pads
-Fully Functional E-Brake
-Braided Lines
-250# springs installed
-175#springs included
-17x9 and 17x7 Euromeister Wheels (600 miles, $1000)
-Bridgestone RE71R Tires (245/225) (600 miles, $1000)
Asking $27k with the EFI installed, $24.5k with a Carburetor installed (I can run the EFI on my Hotrod, so...)
Posted by: LeftCoastErik Dec 7 2015, 10:48 AM
Here is the updated build sheet (note some changes!) and the updated price of $19.5k
ENGINE:
-1962 Buick 215 Aluminum V8
-STD bore, 10.5-1 (stock) comp ratio
-Cyl heads-ported exhaust ports, 3 angle valve grind with hi-retainers-shaft rocker stands shortened .060"-pushrods shortened .125" for geometry correction.
-Camshaft-M-488 custom ground by Shadbolt engineering(Vancouver B.C.) C/W hydraulic lifters
-Spheroidal graphite iron crankshaft, 5 main journal center, thrust mains, .010" under -Rods ground .001"
-New rings and bearings (approx 1200mi ago. Previous Owner)
-Hi volume oil pump, Buick V8 filter housing
-Offenhauser alum intake
-Kennedy engineered product #1000 Buick to Porsche adapter
-KEP 9" Flywheel, clutch and throw-out bearing
-Custom radiator w/ twin Spals (Haven’t gotten it above 200 on a 105 degree day, beating on it. Runs 180 most of the time)
-MSD Atomic Self-Tuning EFI with full Return-Style Fuel System and Timing Control ($3k in parts)
-MSD 6A Spark Box
-MSD Pro-Billet Distributor with locked timing (controlled by Atomic)
-Mid-Length Stainless headers with Magnaflow mufflers
TRANSMISSION:
-Custom built V8 side shift trans by Dr. Evil.
-Custom ratios (Previous owner, no documentation on ratios)
-1st gear lock out
-Fresh rebuild, newly installed (approx 1200mi ago. Previous Owner)
-JWest Shifter with Hurst Lever and Knob, Fresh 911 Boot
BODY:
-Mitcom Rear Quarters
-QRS Fiberglass Front GT Fenders (4lbs apiece!)
-QRS Fiberglass Front GT Bumper and Valance
-Mitcom Fiberglass GT Rockers
-Patrick Motorsports Fiberglass Rear Valance
-QRS Fiberglass Ducktail Decklid
-Brad Mayeur Longitudinal Reinforcement Kit
-GT Chassis Reinforcement Kit
-GT Trailing Arm Reinforcement Kit with Elephant Bushings
-Body is wrapped with Matte Chocolate Metallic Vinyl ($2200)
-Fresh air vent/grille on cowl is filled
-Windshield Aluminum Trim deleted and new correct Gasket installed
-Door handles blacked out
-Mad Dog Racing HVAC hole blockoff plates installed
-All trim Blacked Out (Satin)
-LED Fogs
-Hella Horns
-Wiring harness was thinned of everything unnecessary
-Updated blade style fuse blocks
-Passenger rear floor pan replaced, new jack pad from Restoration Design
-All other small rust areas repaired, rustproofed
-New seat pedestals on both sides, with new hinges from Restoration Design
INTERIOR
-Heater/Vent Controls Filled on Dash
-Dash End Vents Filled
-Dash wrapped in vinyl with chocolate double stitching
-Radio delete
-Fiberglass door panels, fresh basketweave and matching vinyl with double-stitching
-New loop carpet
-Momo Prototipo wheel with quick release hub
-Custom SpeedHut gauges in a factory panel ($650)
-GPS Speedo with peak recall, performance test ability, etc
-Tach with programmable, sequential shift lights, peak recall, etc
-Combo gauge with oil pressure, water temp, fuel level, volts. All have programmable
high/low warning lights
-Brand new GTS Classics “Watkins Glen” seats. Vinyl with alcantara centers, lap belt holes, matching stitching ($2500)
-Harness Bar
-Sparco Street (DOT Approved) harnesses with the Sparco Patch removed (it just looks better)
SUSPENSION:
-H & H Carrera 19mm adj front sway bar
-Stock front torsion bar
-23mm master cylinder (100 miles)
-911sc Bilstein Front Struts and brakes, Rear Koni Sport Coilovers from Rich Johnson
-Turbo Tie Rods
-5-Lug Conversion
-250# springs installed
-175#springs included
-17x9 and 17x7 Euromeister Wheels (600 miles, $1000)
-Bridgestone RE71R Tires (245/225) (600 miles, $1000)
Posted by: Andyrew Dec 7 2015, 11:09 AM
Good choice of tires... How do they feel? I havent seen them ran on anything in our weight class..
Posted by: LeftCoastErik Dec 7 2015, 11:22 AM
They like lower pressures, like 30 for autocross. They are very sticky, very predictable and definitely considered one of the faster street tire class tires. The Fiesta/Focus guys like them, but FWD, so?? They feel as good as the unscrubbed R888s on my 911. I dig them
Posted by: Andyrew Dec 7 2015, 12:28 PM
Glad to hear, they are the hot ticket for the Fiesta ST guys. Good to hear they respond well in the 914 chassis as well.
Posted by: tygaboy Dec 7 2015, 02:35 PM
Congrats - turned out nice! Question for you: I'm looking at an LS3 conversion and using the Mayeur long kit. Wondered how hard it was to get to the needed welding around the jack support and up behind the rear quarters? Any pics and/or suggestions?
Did you consider the Restoration Design outer stiffener kit?
And I'll pm you re: the 108 cv joints.
Posted by: LeftCoastErik Dec 7 2015, 04:24 PM
well, if your longs are shot, brads is the only way to fly in my opinion. I have done two cars, both were pretty straightforward. For an LS3, you will want to do the GT reinforcement and the trailing arm reinforcements also. Especially the rear trailing arm ears.
Posted by: Sparkysounddog Feb 16 2016, 11:15 AM
No mention of the targa top. Is there one and is it wrapped too or is it standard issue black?
Posted by: LeftCoastErik Feb 16 2016, 12:02 PM
No mention of the targa top. Is there one and is it wrapped too or is it standard issue black?
It does have a top. Standard issue. I have never used it
Posted by: LowBridge Apr 25 2016, 04:54 AM
just thought I post up about spotting your old car.. ran into it at a NER AutoX this weekend at Devens. Looks even better in person
Posted by: veekry9 Apr 25 2016, 05:18 AM
I am spellbound by her beauty,have you posted a YTub movie about her?
Do you have a name for her,those pix I'm sure,have been copied worldwide by many.
/
Posted by: Darren C Apr 25 2016, 05:36 AM
Erik,
This is the PAINT COLOR NAME
"Helleifenbein"
Light Ivory.
Karmann painters used to write the paint colour name on the dashboards before they went to the trimmers.
Unfortunately when the dashes got fitted to the cars, they often took the first dash to hand and it may not match the color of the body it was painted with.
Check out my Build-off Challenge thread. My Alaska blue car has Zambezi Green written in German on my dash in the exact same position as your Light Ivory.
Regards
Darren
PS car looks great.
Powered by Invision Power Board (http://www.invisionboard.com)
© Invision Power Services (http://www.invisionpower.com)