Printable Version of Topic
Click here to view this topic in its original format
914World.com _ 914World Garage _ temp gauge
Posted by: arsprod May 17 2015, 04:26 PM
The temp gauge above my fuel gauge isn't working. For the life of me I cannot find any mention of it in the Haynes manual I have or even in the owners manual. Where's the sending unit for this thing? 74 2.0
Posted by: type47 May 17 2015, 05:28 PM
Where's the sending unit for this thing?
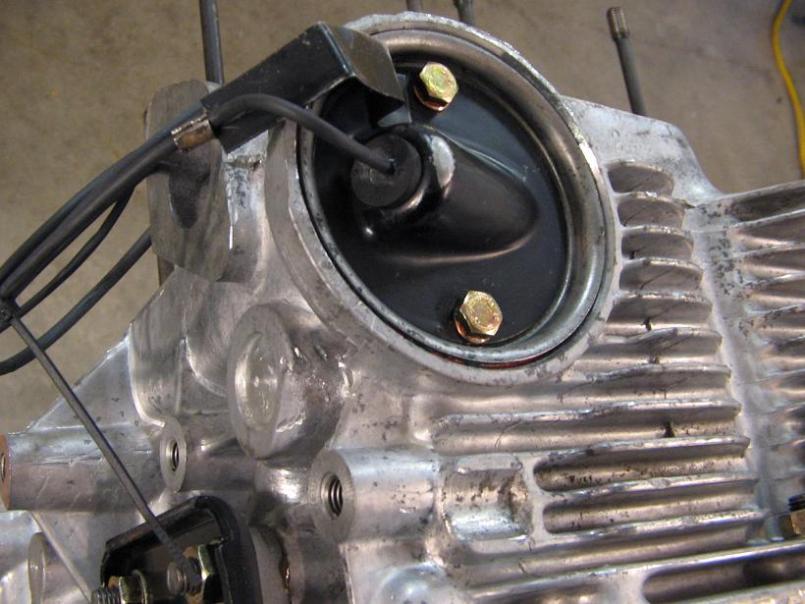
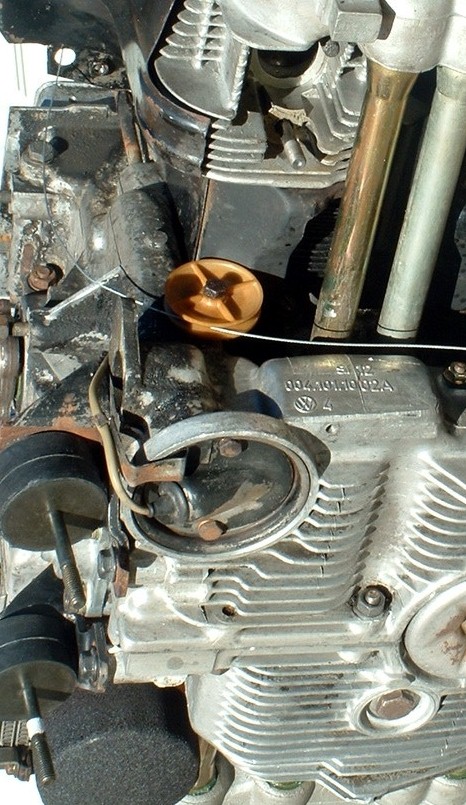
Located in the engine sump. Also called the "taco plate" so if you need to buy the temp sender, that's what you can search for and ask for. Same temp sender would be for the console temp gauge. Your combo gauge with oil temp was installed by the factory to those cars not equipped with the center console. Here's a pic of the taco plate:


Maybe you just need to verify the wire from the sender to the harness connector just below the battery tray.
Posted by: arsprod May 17 2015, 05:33 PM
Thank you! I was looking at that yesterday though mine's not nearly so clean.
Posted by: 914Sixer May 17 2015, 07:30 PM
Wire is green with red stripe. Heat and time have caused most of the wires to get brittle and break under the sheath giving you no reading at the gauge.
Posted by: arsprod May 23 2015, 11:28 AM
Wire is green with red stripe. Heat and time have caused most of the wires to get brittle and break under the sheath giving you no reading at the gauge.
Could it be green/black on 74? There's 1 wire under battery box that's not going to the fuel pump and it's green/black. From my reading in Haynes manual that's correct
Posted by: type47 May 23 2015, 03:48 PM
Could it be green/black on 74?
http://www.pelicanparts.com/914/parts/Electrical/914_electric_74D.jpg
G8 and G9 are temp sender and temp indicator and the wire is indeed green/blk (track 53 and 54)
Legend: http://www.pelicanparts.com/914/parts/Electrical/914_electric_74F.jpg
Posted by: arsprod May 23 2015, 06:13 PM
Could it be green/black on 74?
http://www.pelicanparts.com/914/parts/Electrical/914_electric_74D.jpg
G8 and G9 are temp sender and temp indicator and the wire is indeed green/blk (track 53 and 54)
Legend: http://www.pelicanparts.com/914/parts/Electrical/914_electric_74F.jpg
Great thanks. So, I'm assuming if I either ground or put power to the wire going to the gauge it should give a reading or move? I get continuity to the taco but nothing back to the gauge.
Posted by: SKL1 May 23 2015, 09:25 PM
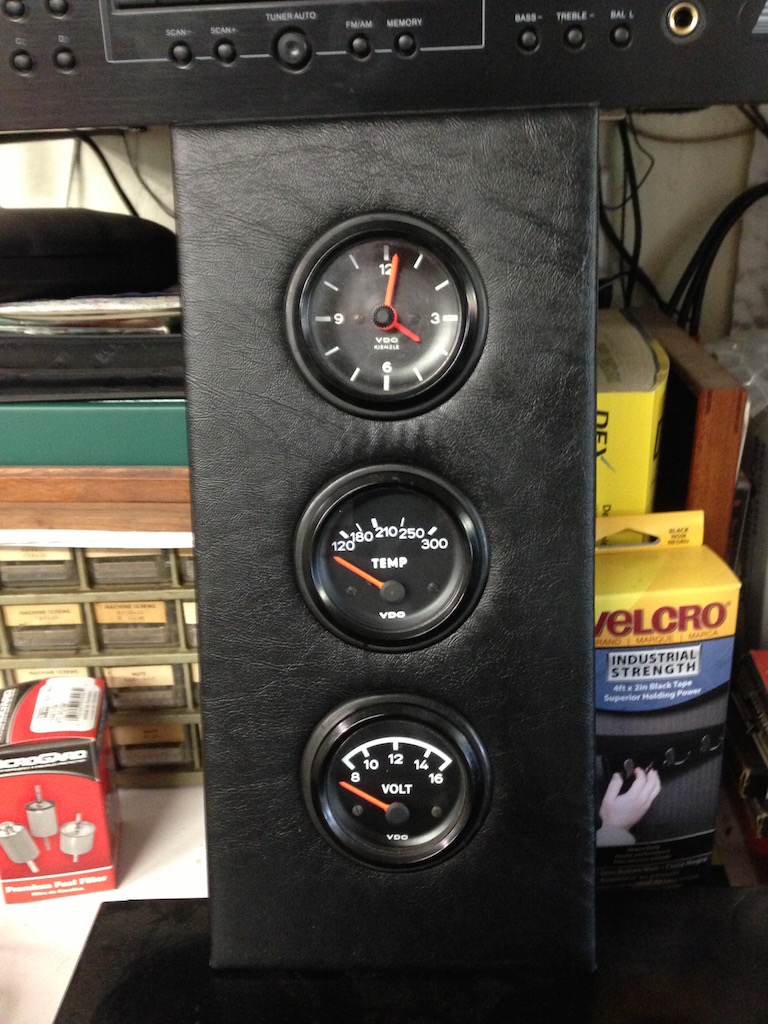
Get a new sending unit for the taco plate and put a new wire back to the gauge. I sent my gauge to North Hollywood Speedometer and had them put numerials on it and with a new sending unit works great! Now I actually know the temp!
Posted by: steuspeed May 24 2015, 01:08 AM
... I sent my gauge to North Hollywood Speedometer and had them put numerials on it and with a new sending unit works great! Now I actually know the temp!
Good idea right there. Photo?
Posted by: arsprod May 24 2015, 06:57 AM
Get a new sending unit for the taco plate and put a new wire back to the gauge. I sent my gauge to North Hollywood Speedometer and had them put numerials on it and with a new sending unit works great! Now I actually know the temp!
I like that idea - spend time making it work rather then tracking what's broken!
Posted by: arsprod May 24 2015, 07:44 AM
This the correct part? http://www.egauges.com/ProductDetails.asp?ProductCode=323-055
Posted by: arkitect May 24 2015, 08:24 AM
Get a new sending unit for the taco plate and put a new wire back to the gauge. I sent my gauge to North Hollywood Speedometer and had them put numerials on it and with a new sending unit works great! Now I actually know the temp!
Any pictures of this? Great idea.
Dave
Posted by: Java2570 May 24 2015, 08:43 AM
This the correct part? http://www.egauges.com/ProductDetails.asp?ProductCode=323-055
That sender won't match the temp gauge in the combo gauge in your dash. The combo temp gauge needs a 200C sender and the VDO 323-055 is a 150C. I don't think a sender is available anymore for the combo gauge. If you place a WTB ad in classifieds, someone may have a good used one for you. You can also put in a VDO Cockpit gauge in your console or other location that can utilize the 323-055 sender.
Posted by: brant May 24 2015, 10:07 AM
I am facing the same problem
is there anyway to test the sender without removing it?
maybe cold, then after the motor is warmed up?
haven't gotten under there yet to examine the wire
Posted by: bdstone914 May 24 2015, 12:03 PM
Measure the resistance from the center terminal to ground. It should change with temperature. It is very sensitive. Heat it or cool it. Usually not the sender that goes bad.
Open curcuit or 0 resistance it is bad. I tested one recently. I think it was about 200 ohms at room temp
Posted by: bdstone914 May 24 2015, 12:08 PM
This the correct part? http://www.egauges.com/ProductDetails.asp?ProductCode=323-055
That sender won't match the temp gauge in the combo gauge in your dash. The combo temp gauge needs a 200C sender and the VDO 323-055 is a 150C. I don't think a sender is available anymore for the combo gauge. If you place a WTB ad in classifieds, someone may have a good used one for you. You can also put in a VDO Cockpit gauge in your console or other location that can utilize the 323-055 sender.
Yes 150 C is the correct sender. 200 C will not work. That sender has a shorter probe but is the correct thread. The original has straight terminal but you should be able to make that work.
Posted by: Java2570 May 24 2015, 02:56 PM
This thread has a ton of good oil temp info: http://www.914world.com/bbs2/index.php?showtopic=97987
Sorry, didn't see the post about redoing the calibration of the combo gauge before I posted my previous, that would be a great idea.
Posted by: arsprod May 24 2015, 05:55 PM
Hmm... maybe just replacing wire is the answer
Posted by: SKL1 May 24 2015, 06:36 PM
Here's a picture of the gauge panel before I put it back in the car, with temp gauge in the middle.
Posted by: arsprod May 31 2015, 07:56 AM
So I've confirmed a connection from sender to gauge and no luck. I assumed it was the sender but based on bdstone914's comment I checked resistance and it looks OK. So, now I'm thinking it's the gauge (argh). Is there a test for the gauge?
Posted by: forrestkhaag May 31 2015, 08:54 AM
I recently went thru this issue with my newly reworked early temp gauge. After installing the incorrect sender (200) - then the correct one / Bruce Stone confirmed that the correct sender was the 150 degree version, I realized that my engine was simply not running hot enough to push the gauge past 1/8" off of the cold start position.... even after a good hour of freeway speeds.
Then, going back to the beach from bstone's treasure trove of goodies, I got stuck in a Riverside traffic jamb mid day and sat idling for about a half hour..... The gauge woke up and tweaked over to the middle range of the scale...... case solved. ![]()
Posted by: arsprod May 31 2015, 09:00 AM
I recently went thru this issue with my newly reworked early temp gauge. After installing the incorrect sender (200) - then the correct one / Bruce Stone confirmed that the correct sender was the 150 degree version, I realized that my engine was simply not running hot enough to push the gauge past 1/8" off of the cold start position.... even after a good hour of freeway speeds.
Then, going back to the beach from bstone's treasure trove of goodies, I got stuck in a Riverside traffic jamb mid day and sat idling for about a half hour..... The gauge woke up and tweaked over to the middle range of the scale...... case solved.
Now that would be brilliant! I'm seriously thinking about getting a dipstick gauge - call me paranoid
Posted by: arsprod Jun 14 2015, 03:21 PM
Back at this - I've ordered a sender finally but pulled the gauge out to check it (and it's fine). I noticed the gauge has 3 tabs marked +, GND, and an up arrow with lines. The schematic only shows 2 connections and I'm assuming one needs to be the up arrow one. Does the other lead go to + or GND?
Posted by: stugray Jun 14 2015, 04:00 PM
+ to +12VDC (dash power)
GND to chassis ground
The third wire would lead to the temp sensor.
To test the gauge, with ignition on disconnect the wire from the temp sensor and ground it to the engine bar.
The gauge should read the Highest temp it is capable of.
This case represents the Hot case where the temp sensor resistance drops and approaches zero Ohms (short) at the sensor's highest rated temp.
The VDO unit that can be purchased through PP has the following cal curve.
From VDO:
125F (51C) = 340 ohms
160F (71C) = 135 ohms
300F (146C) = 20 ohms
This unit reads 1211 Ohms at ~20degC (68F)
Posted by: arsprod Jun 14 2015, 05:40 PM
+ to +12VDC (dash power)
GND to chassis ground
The third wire would lead to the temp sensor.
To test the gauge, with ignition on disconnect the wire from the temp sensor and ground it to the engine bar.
The gauge should read the Highest temp it is capable of.
This case represents the Hot case where the temp sensor resistance drops and approaches zero Ohms (short) at the sensor's highest rated temp.
The VDO unit that can be purchased through PP has the following cal curve.
From VDO:
125F (51C) = 340 ohms
160F (71C) = 135 ohms
300F (146C) = 20 ohms
This unit reads 1211 Ohms at ~20degC (68F)
Thank you - appears mine is missing a lead to ground
Posted by: stugray Jun 14 2015, 06:57 PM
Thank you - appears mine is missing a lead to ground
It might work fine that way though.
So there is a chance grounding the gauge "can" might not help.
Posted by: arsprod Jun 15 2015, 08:17 AM
Thank you - appears mine is missing a lead to ground
It might work fine that way though.
So there is a chance grounding the gauge "can" might not help.
Discovered that - adding ground pegs the needle
Posted by: arsprod Jun 22 2015, 10:15 AM
Follow up with some potentially helpful info for future readers - I got my temp gauge working (yay). The VDO sender I referenced earlier does work and Pelican stocks them, part #323055-M82. Another discovery - there's a bundle of connectors below the stickshift, underneath the heater indicator and carpet. I wished someone would have mentioned that earlier - the wire from the sender to my gauge was disconnected for some unknown reason. I discovered this after I'd already replaced the sender... oh well!
Posted by: stugray Jun 22 2015, 12:48 PM
- the wire from the sender to my gauge was disconnected for some unknown reason. I discovered this after I'd already replaced the sender... oh well!
To test the gauge, with ignition on disconnect the wire from the temp sensor and ground it to the engine bar.
The gauge should read the Highest temp it is capable of.
Glad you got it working!
Posted by: arsprod Jun 22 2015, 01:15 PM
- the wire from the sender to my gauge was disconnected for some unknown reason. I discovered this after I'd already replaced the sender... oh well!
To test the gauge, with ignition on disconnect the wire from the temp sensor and ground it to the engine bar.
The gauge should read the Highest temp it is capable of.
Glad you got it working!
Thanks, me too! Just noticed your signature - I was going to name mine Marvin too (after my dad).
Posted by: stugray Jun 22 2015, 04:04 PM
Thanks, me too! Just noticed your signature - I was going to name mine Marvin too (after my dad).
I named mine Marvin because it is green, and my favorite Looney Tunes char was Marvin the martian.
And the mascot for a number of my missions has been Marvin:

Stu
Posted by: arsprod Jun 22 2015, 05:51 PM
Thanks, me too! Just noticed your signature - I was going to name mine Marvin too (after my dad).
I named mine Marvin because it is green, and my favorite Looney Tunes char was Marvin the martian.
And the mascot for a number of my missions has been Marvin:

Stu
Well, mine's green as well and the car was owned by my dad's best friend. But you win - I have nothing to compare to Mars rover mission!
Powered by Invision Power Board (http://www.invisionboard.com)
© Invision Power Services (http://www.invisionpower.com)
