Printable Version of Topic
Click here to view this topic in its original format
914World.com _ 914World Garage _ oil cooler leaking--!&#*(#()!
Posted by: synthesisdv Feb 27 2005, 07:45 AM
damn cooler has a pretty good leak. Most of my tin is cut away, so can i change out the seals with the motor in the car?
I just got her back together so dropping the motor again so soon does not seem appealing.
Posted by: Mark Henry Feb 27 2005, 07:56 AM
No can do bud...
I haven't tried it but you may be able to just drop the front of the engine, get the fan off and change the seals. Still a bit of work, shift linkage out, some cables...anything in the way.
BTW did you have it off? seals not sitting proper, tweeked it, overtightened it etc.?
Posted by: Van914 Feb 27 2005, 08:02 AM
I changed mine with the motor in the car. You can too. AA used to have a write up on the How to.
VAn914
Posted by: synthesisdv Feb 27 2005, 08:05 AM
| QUOTE (Mark Henry @ Feb 27 2005, 08:56 AM) |
| BTW did you have it off? seals not sitting proper, tweeked it, overtightened it etc.? |
I think it may have been tweaked while it was in the garage, moving the motor around and such before installing..

Posted by: Mark Henry Feb 27 2005, 08:17 AM
Doh...been working on too many buses lately.
Yeh, you should be able to do it in the car. You got to remove the fan shroud.
If you did tweek it you might want to get it pressure tested....
Posted by: mack914 Feb 27 2005, 09:02 AM
I did mine with the engine in the car. Just removed the part of the air shroud that diverts the air to the cooler. It's the piece that is pop riveted to the main shroud. Drill out the pop rivets, remove the engine tin on left side and and rear and you are ready for removal.
Posted by: ClayPerrine Feb 27 2005, 09:09 AM
ON a type 4, you can remove the oil cooler WITHOUT removing the motor from the car, or removing the fan shroud. Changing the seals is a breeze...
Step 1.
Jack the car up so you can get under it easily....
Step 2.
Remove all the tin that blocks access to the lower side of the oil cooler.
Step 3.
Remove the bolts in the end of the fan housing that hold the support bracket for the oil cooler.
Step 4.
With a 10 mm socket, remove the nut that holds the inboard end of the oil cooler. This is the one on the short stud.
Step 5.
With a 10mm wrench, remove both the nuts that hold the cooler in place. These are the ones on the long studs.
Step 6.
Push the cooler forward up against the fan housing. You wil have about 2 inches between the cooler and it's mounting surface.
Step 7.
Knock the old seals down with a screwdriver.
Step 8.
Install the new seals by putting plain (not molygraph) wheel bearing grease on the mating surface. Then put a large dab of grease on the screwdriver blade and stick the seal to it. Using the screwdriver, push the seal into its mount point and then pull the screwdriver straight down. THis will scrape the seal from the end of the screwdriver, and leave the seal stuck to the case with the grease. Make sure that you do the upper seal first.
Reverse the disassembly directions for reassembly.
If you need to actually remove the oil cooler, after sliding it forward, use a pair of needle nose vice grips to unscrew the studs from the case. Then the cooler will come out when you remove the second long stud.
Posted by: synthesisdv Feb 27 2005, 09:13 AM
so I only have to take off the left top shroud? NOT the blower housing??
most of my tin is cut anyway?
Attached image(s)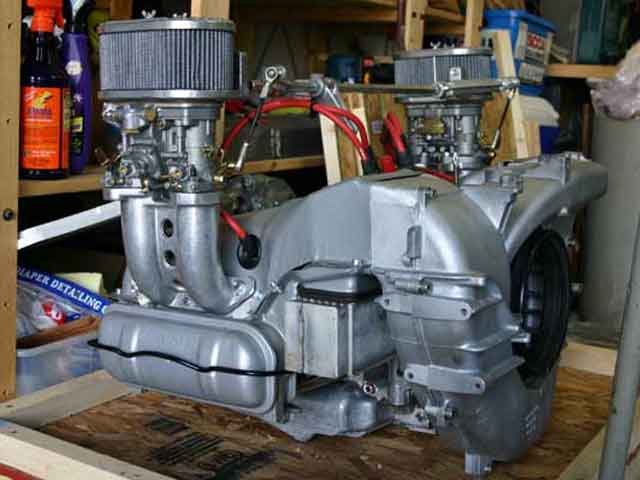
Posted by: ClayPerrine Feb 27 2005, 09:18 AM
| QUOTE (synthesisdv @ Feb 27 2005, 09:13 AM) |
| so I only have to take off the left top shroud? NOT the blower housing?? most of my tin is cut anyway? |
Seeing the pict of your engine, you don't have to take ANYTHING Off in the way of tin. This procedure is done from the bottom of the engine. Just start with step 4.
BTW.. you need the bracket that supports the end of the cooler. If you don't have it, you will be doing this again in a few months. The weight of the cooler will make it move up and down with vibration, wearing out the seals real fast.
Posted by: RonD Feb 27 2005, 09:24 AM
I did my seals about 3 weeks ago exactly as described above and in the Pelican Parts Article. The tip of using a long open end wrench to slide the new seals in place worked perfectly.
No tin is removed from the top. Everything is done from under the car.
Unless you have an air conditioning pump, like me. Then that also must be totally removed to do the job.
Really not all that difficult.
Posted by: ClayPerrine Feb 27 2005, 09:26 AM
AC just adds another 2 steps.
Step 1.
Remove the battery. Then unbolt the AC compressor, lift it up and place it in the battery tray.
Step 2.
Remove the bolts holding the AC compressor mount to the fan housing and set the AC compressor mount aside.
Posted by: Garland May 28 2005, 01:33 AM
| QUOTE (ClayPerrine @ Feb 27 2005, 10:09 AM) |
| ON a type 4, you can remove the oil cooler WITHOUT removing the motor from the car, or removing the fan shroud. Changing the seals is a breeze... Step 8. |
Step 9.
Don't put the thick washer behind the cooler when installing the cooler on the engine.
Then, don't build up the engine complete w/FI and install it, start it up ,and a
.......MASSIVE OIL LEAK......
The seals where loose.
Read all instructions before starting.
THANKS, this post saved me, almost pulled the engine right back out.
Powered by Invision Power Board (http://www.invisionboard.com)
© Invision Power Services (http://www.invisionpower.com)