Printable Version of Topic
Click here to view this topic in its original format
914World.com _ 914World Garage _ Finishing A 914-6 GT Conversion Project
Posted by: Lucky9146 Aug 3 2015, 10:29 PM
Bought This car in Nov 2013 and unfortunately it had to sit in my trailer until May of this year to get started on it. The picture is how the car looked the way I got it and how it came out of the trailer. Factory P/N steel flares, nice paint job, a not installed 3.0 close to ready to install, Oh, and an in process conversion. Just some cleaning and put it together and yes a lot of learning/ research. Because (a) I have never owned a 914. (b) never done an engine conversion (built a few). © never picked up where someone left off (you know how its easier to put something back together when you take it apart).
I got the "bug" from a friend who took me up the Ortega Hwy in his 6 conversion and I was hooked.
I decided to share my experiences with the "world" and hopefully along the way gain some insight. I have met some great 914 folks so far at swap meets and parts houses and everyone has been quite helpful. I will tell more of the story of what came with the car and what I have done so far as the days go by. Check in once in a while.
Attached thumbnail(s)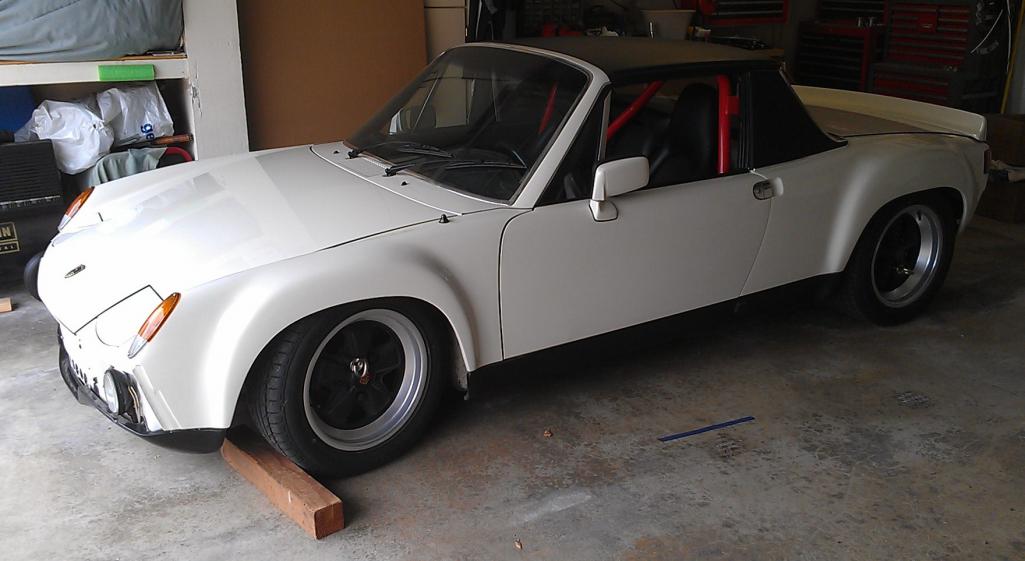
Posted by: mgp4591 Aug 3 2015, 10:34 PM
Welcome to the money pit! Lots of good advice and great people here with almost all the info you'd need to succeed with you project but it looks like you've got it handled. Great looking car! Keep us up on your project and hope to see you at a function sometime! 
Posted by: jmitro Aug 3 2015, 10:55 PM
looks great so far; look forward to see more of this car!
Posted by: whitetwinturbo Aug 3 2015, 11:04 PM
 the "great" white ....... I'm sorting out the "great" pink:
Attached thumbnail(s)
Posted by: Lucky9146 Aug 3 2015, 11:05 PM
Welcome to the money pit! Lots of good advice and great people here with almost all the info you'd need to succeed with you project but it looks like you've got it handled. Great looking car! Keep us up on your project and hope to see you at a function sometime!
Thanks, I forgot to mention there are the evil "electrical issues" and I am mechanical so you see the problem there.
Posted by: whitetwinturbo Aug 3 2015, 11:12 PM
............ I started a build thread "There goes the neighborhood" last month 
Posted by: Lucky9146 Aug 3 2015, 11:17 PM
So as I have found so typical is the jack stand stage. This is the current state. Note the previous picture there were 993 seats and a red roll bar from the PO. Going to be looking for some racing seats and probably will not use the roll bar.
Attached thumbnail(s)
Posted by: Lucky9146 Aug 3 2015, 11:20 PM
the "great" white ....... I'm sorting out the "great" pink:
Thanks I will check it out. Good luck on your project!
Posted by: Maltese Falcon Aug 3 2015, 11:50 PM
Good purchase of MoparRob's white 6/conversion project...it has the right stuff !
I met Rob at a Peterson cruise-in, he told me that my hot rod 6/conversion was an inspiration to build his white car. Better check that light ivory car, it might be an LE 914 
Marty
Posted by: Lucky9146 Aug 4 2015, 12:07 AM
So where does one begin when you have never owned a 914 and the conversion in progress is a car that has not been on the road in 17 years. Yes that's right 17 years. With the car in the trailer I started research on which tires to get. Since the Car has Fuchs 16" 7's and 8's I chose Bridgestone 205/55/16 fronts and 225/50/16 rears. I had heard they may be discontinued so I got them and put them away. When I got access to the car the wheels came off and I debated reannodize and they just looked tired but they cleaned up! 17 years of oxodation on the paint came back to life with a lot of elbo grease. Check out the rims before and after.
Attached thumbnail(s)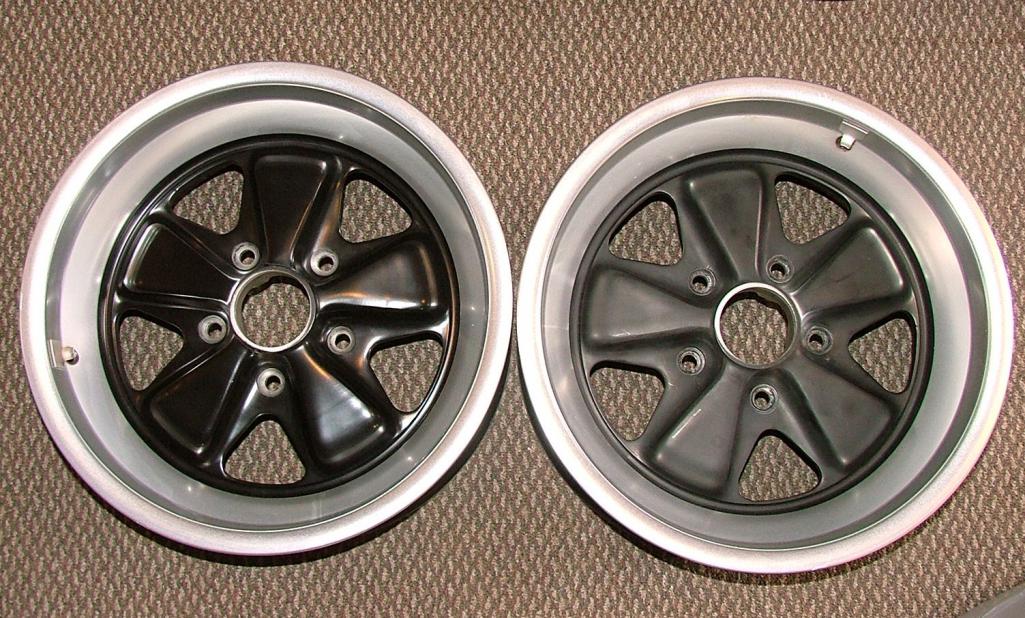
Posted by: Cairo94507 Aug 4 2015, 06:22 AM
Terrific - Keep up the good work so you can get that bad boy on the road soon. 
Posted by: RobW Aug 4 2015, 07:23 AM
Everybody was wondering where that one went. Looking forward to seeing you on the road with it..... 
Posted by: Lucky9146 Aug 4 2015, 09:38 AM
[quote name='Maltese Falcon' date='Aug 3 2015, 10:50 PM' post='2218484']
Good purchase of MoparRob's white 6/conversion project...it has the right stuff !
I met Rob at a Peterson cruise-in, he told me that my hot rod 6/conversion was an inspiration to build his white car. Better check that light ivory car, it might be an LE 914
Love to see your car since it was the inspiration. Yes it was Robs and has lots of the right stuff!
So I started to get to know the car and with all of its years of sitting. But apparently it had been on the road for a time after the fenders and complete paint job (wish there were pictures!) back in 1995. So I started in on the wheel wells which actually cleaned up pretty well. Here is the Rt Front.
Attached thumbnail(s)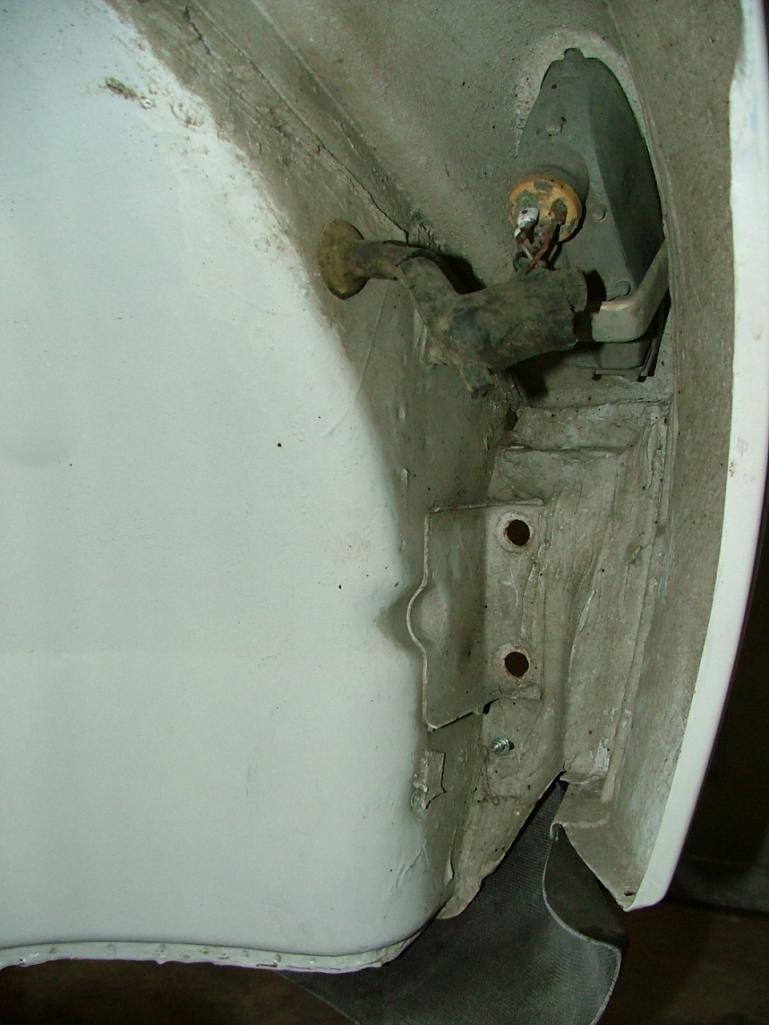
Posted by: eric9144 Aug 4 2015, 09:49 AM
Hey I'm right up the hill from you, hit me up if you need a hand or just want to admire the raw power of my /4 
Congratulations on the purchase, I was getting ready to pull the trigger on that car when it was up for sale but just couldn't part with my current 914 after so many years
Posted by: Lucky9146 Aug 4 2015, 10:15 AM

Everybody was wondering where that one went. Looking forward to seeing you on the road with it.....
Yes a lot of people have recognized the car and I am going to try to do it right take my time and although it will never be concours it will be a nice car. Thanks
Posted by: Lucky9146 Aug 4 2015, 10:22 AM
[quote name='Maltese Falcon' date='Aug 3 2015, 10:50 PM' post='2218484']
Good purchase of MoparRob's white 6/conversion project...it has the right stuff !
I met Rob at a Peterson cruise-in, he told me that my hot rod 6/conversion was an inspiration to build his white car. Better check that light ivory car, it might be an LE 914
So now I learned from Maltese Falcon that since my car is a 74 and white it could possibly be a limited edition so I will have to check that out! Thanks Marty! Like to see your "hot rod 6/ conversion and meet you some time. Thanks!
Posted by: Lucky9146 Aug 4 2015, 10:26 AM
Hey I'm right up the hill from you, hit me up if you need a hand or just want to admire the raw power of my /4
Congratulations on the purchase, I was getting ready to pull the trigger on that car when it was up for sale but just couldn't part with my current 914 after so many years
Like to see your car and I appreciate the offer. Being so close is great! I will PM you.
Funny you were looking at this car too! Thanks!!
Posted by: mepstein Aug 4 2015, 10:27 AM
It belonged to a guy named Rolland who had it running with a big 4. I almost bought that car.
Posted by: Lucky9146 Aug 4 2015, 10:33 AM
On with cleaning and lerrning here is the left rear fender before and after pics of tedious nooks and crannies. The paint job was thorough and welll done with good prep. When this car was done in 1995 it had to be stunning! Because the paint for the most part is still really great! Even the wheel wells which I found impressive.
Attached thumbnail(s)
Posted by: Lucky9146 Aug 4 2015, 10:54 AM
It belonged to a guy named Rolland who had it running with a big 4. I almost bought that car.
Have yet to talk with him he is not on world that I know of. I do know about him from the PO. So, you let it get away too! Thanks. Do you have any pictures of it from then? Thanks for looking!
Posted by: mepstein Aug 4 2015, 11:09 AM
It belonged to a guy named Rolland who had it running with a big 4. I almost bought that car.
Have yet to talk with him he is not on world that I know of. I do know about him from the PO. So, you let it get away too! Thanks. Do you have any pictures of it from then? Thanks for looking!
I have a pdf of the build/for sale ad somewhere. He was asking around 18k for the roller. I don't know the actual sale price. I remember it was very nice but distance from me made the sale more difficult. It sat in his garage for a couple years before the sale so it's been quite some time now. Glad to see its getting built. I don't think Rolland has been on world for years
Posted by: Lucky9146 Aug 4 2015, 11:35 AM
It belonged to a guy named Rolland who had it running with a big 4. I almost bought that car.
Have yet to talk with him he is not on world that I know of. I do know about him from the PO. So, you let it get away too! Thanks. Do you have any pictures of it from then? Thanks for looking!
I have a pdf of the build/for sale ad somewhere. He was asking around 18k for the roller. I don't know the actual sale price. I remember it was very nice but distance from me made the sale more difficult. It sat in his garage for a couple years before the sale so it's been quite some time now. Glad to see its getting built. I don't think Rolland has been on world for years
That would be amazing if you could come up with any info from back then. Appreciate it that when you get a chance you could find it. History is always good. Thanks for the response!
Posted by: rhodyguy Aug 4 2015, 11:44 AM
here is a shot of the cushions/wire protectors i pm'ed you about.
Attached thumbnail(s)
Posted by: Maltese Falcon Aug 4 2015, 01:16 PM
Lucky9146,
Here is one angle of my '74.
Photo credit; Marco Gerace "Excellence" mag.
Is that white car running yet ? 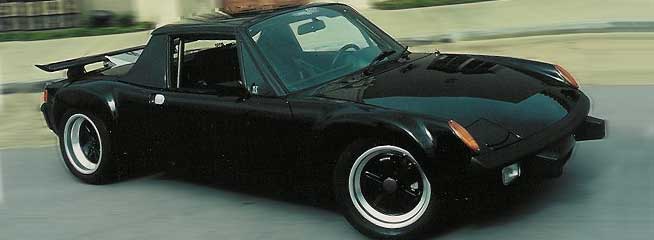
Posted by: Lucky9146 Aug 4 2015, 01:21 PM
Lucky9146,
Here is one angle of my '74.
Photo credit; Marco Gerace "Excellence" mag.
Is that white car running yet ?
Nice car! Sinister looking. No not quite yet! Thanks for the pic take care
Posted by: lonewolfe Aug 4 2015, 01:23 PM
I'm going to enjoy following this thread! What an awesome car to begin your project with! Your starting point is light years ahead of mine!
Posted by: pete000 Aug 4 2015, 04:00 PM
I don't know what it is, but I think there is a certain beauty in seeing the 914 up on stands without wheels, just seems like a natural state...Ha ha !
Here is mine right now...
Attached image(s)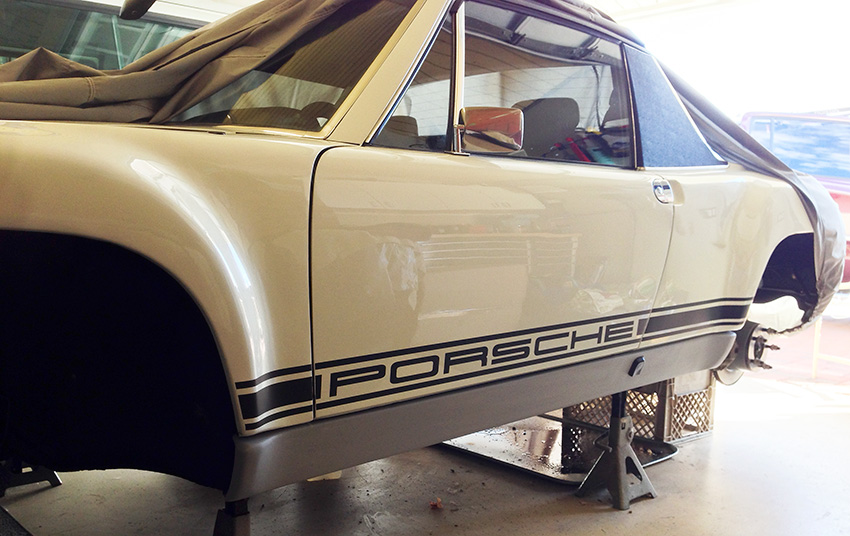
Posted by: KELTY360 Aug 4 2015, 04:26 PM
Unlike a lot of guys here, I wasn't in line to buy the car, but I certainly understand the inspiration. I had a new '73 1.7 and the Ortega Hwy was one of the roads I'd go work out on. Lived in Fullerton so it was nice to make a big loop over the top and into Lk. Elsinore. But, most of the time, once I got down there I'd make at least a couple of runs over the top and back. That road is a blast in either direction; or at least it was back in the day. I think it was made for 914s.
Congratulations on the car, now, get that thing off jack stands before it gets used to it. 
Posted by: Cairo94507 Aug 4 2015, 04:43 PM
Hi Pete - I generally do not like the Porsche graphic down the side of the car, but on your car it looks perfect. Love the car.
Posted by: Lucky9146 Aug 4 2015, 04:52 PM
This car came with some really nice parts! Some it already had. Some purchased by the PO for the conversion. The PO did his homeowrk and it is going to take some time but I will show you a lot of what came with the car.
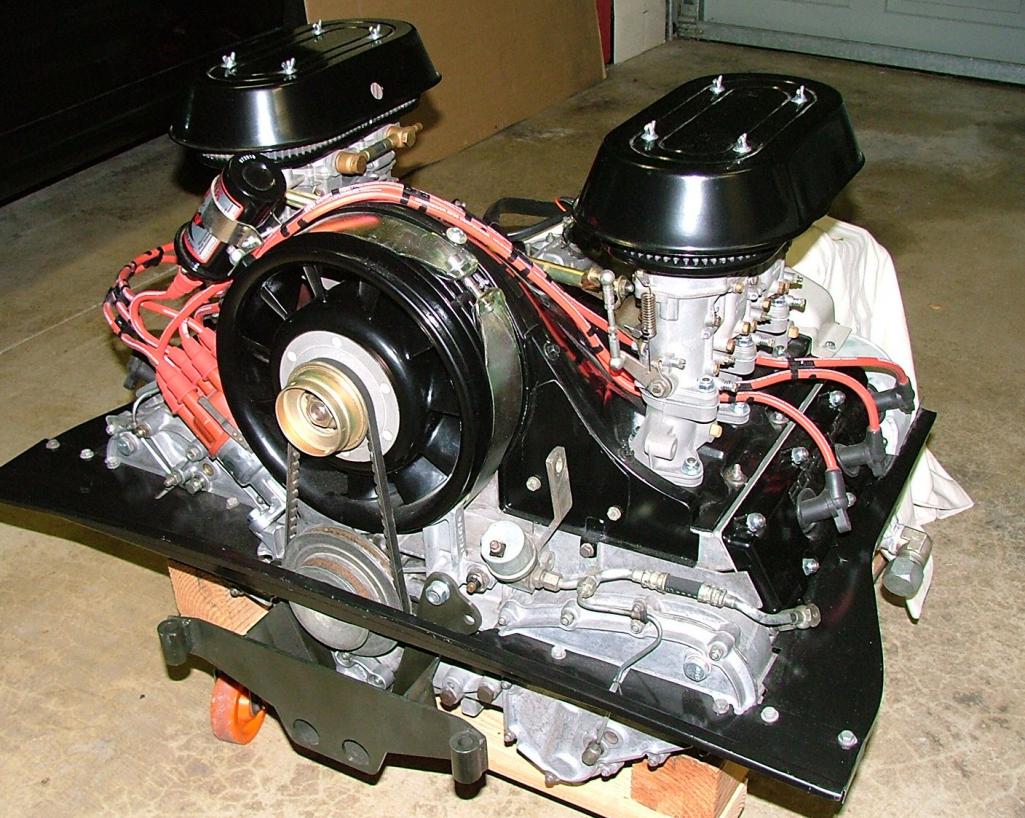
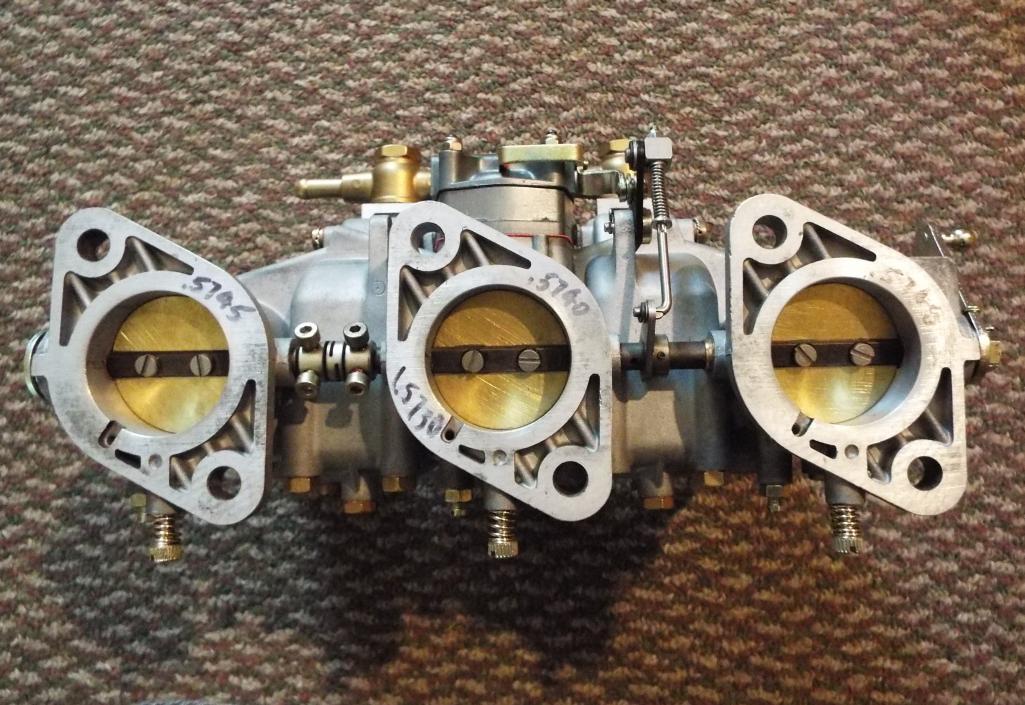
First pictured is the engine which is a 1979 3.0 with 39mm port heads, chain tensioners, turbo valve covers with fins trimmed to clear trailing arms then powder coated. A Jerry Woods complete distributor rebuild/ re-curve, MSD Blaster high vibration coil, Magnecor Spark Plug wires, new plugs. Valve clearances set. Dual Weber 40 IDA 3C carbs/manifolds/linkage, completely rebuilt and bench tested by Paul at Performance Oriented. Intake manifolds are glass beaded, port matched to the heads, new gaskets and phenolic spacers. New K&N Filters and powder coated rain hats. Note the cad plating and front mount installed. Yes this is how I got the engine!!!!!
Next is the PO installed Rich Johnson engine conversion mount pictured and it is both bolted and welded.
Attached thumbnail(s)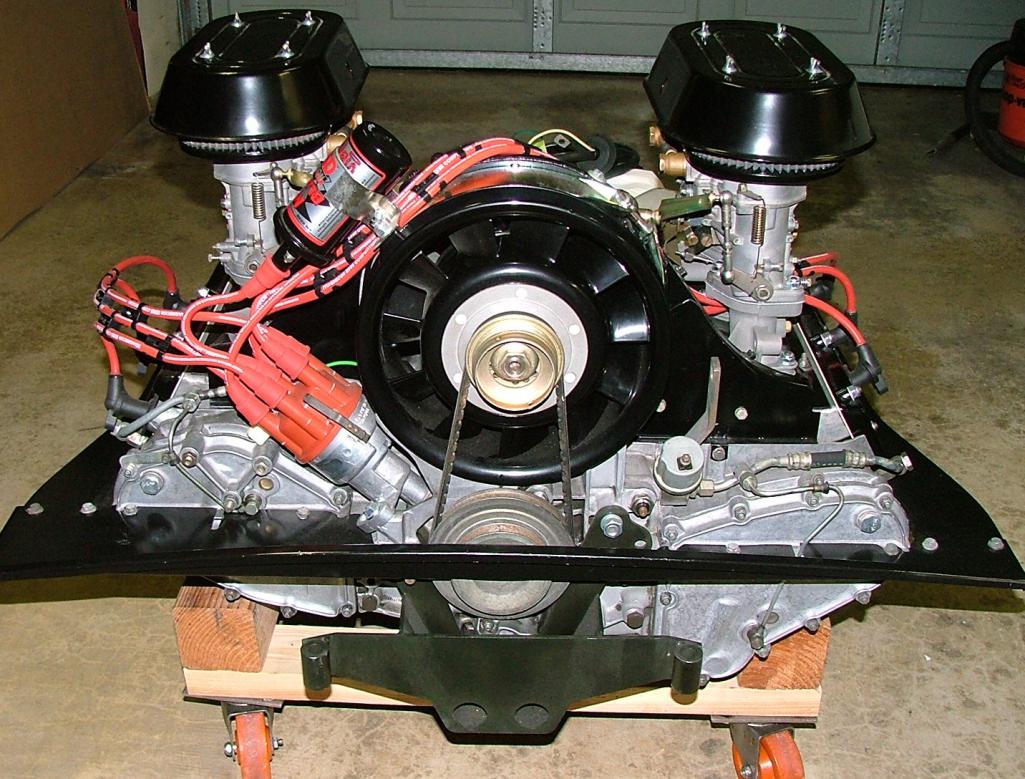
Posted by: Lucky9146 Aug 4 2015, 04:55 PM
[quote name='pete000' date='Aug 4 2015, 03:00 PM' post='2218769']
I don't know what it is, but I think there is a certain beauty in seeing the 914 up on stands without wheels, just seems like a natural state...Ha ha !
Here is mine right now...
Nice! I like the paint! and the stripe! Thanks for looking
Posted by: rhodyguy Aug 5 2015, 07:25 AM
the shift rod bushing looks a little spent.
Posted by: Lucky9146 Aug 5 2015, 09:12 AM
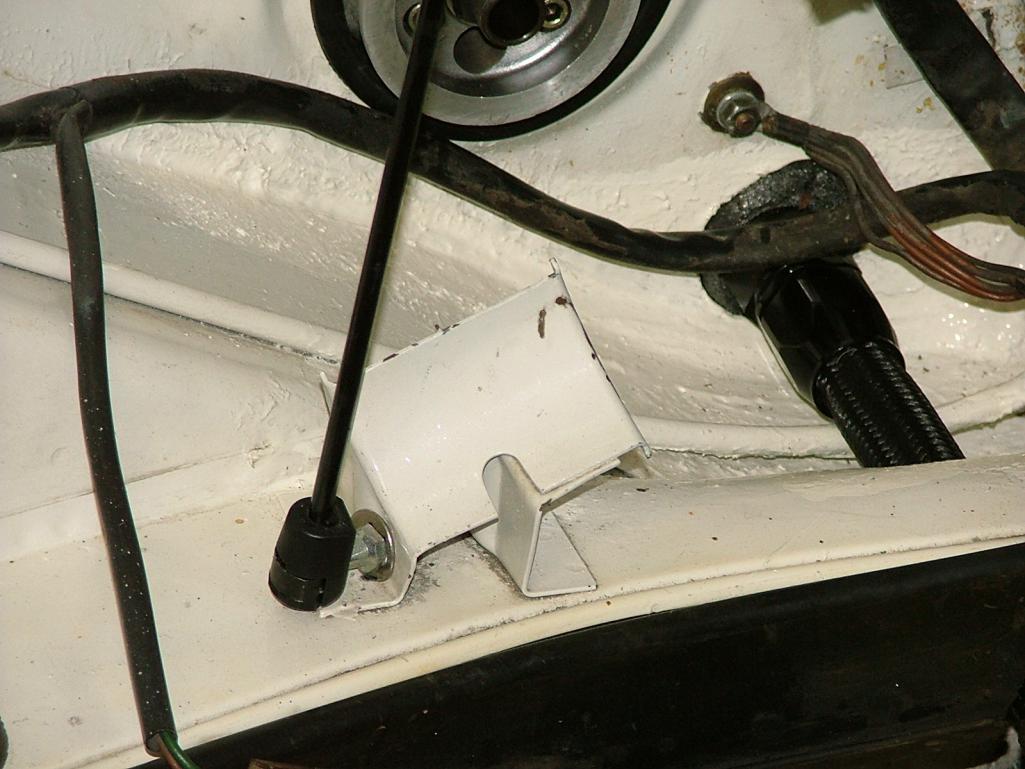
So I decided to run the oil hoses from the front trunk oil cooler back to the engine compartment through the passenger heater tube. A slick idea from the PO but I have to admit I was concerned they would actually fit as the hoses came made up with AN 12 fittings already on. The short story is it worked! I made numerous attempts trying different approaches wanting to avoid removing the fittings. Pictures will show that I filed the the sharp edges of the B nuts, purist will shudder, but they were actually cutting the duct tape as they came through the long tube being pulled by garden hose. In the heat of the moment and the sweat of the fun I neglected to take in process pictures (just imagine duct tape around the two hoses). The final approach was one at a time and you HAVE to have a another person to push as you pull. It really does look cool though! The upsides are; no cutting of holes in fenders, no external lines, very clean look when done. Downsides are; no heater, filing the B nut edges, modifying the heater tube just inside the engine compartment, and worst of all modifying the gas tank because the hose does not fit past the flange on the side of the tank! It is a nicely powder coated tank too. Have started modifying the tank by dimpling the side but the flange will need to be removed. More on that to follow.....
Attached thumbnail(s)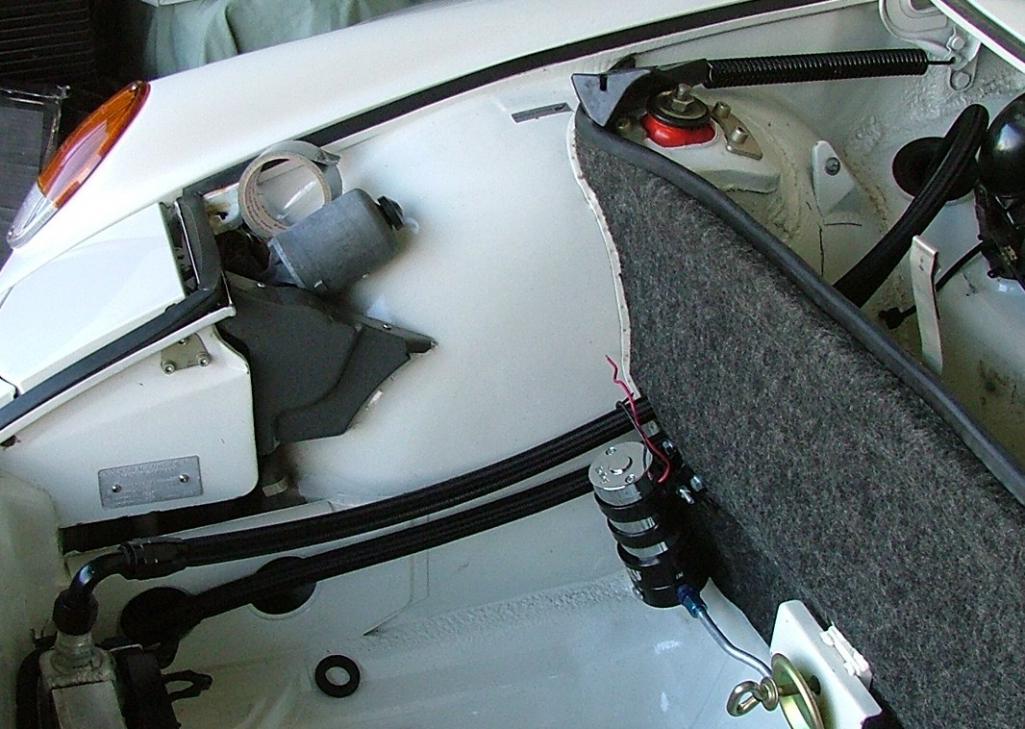

Posted by: Lucky9146 Aug 5 2015, 09:51 AM
the shift rod bushing looks a little spent.
Like your keen eye, keep 'em coming, I am always looking for one more little part. I'll add this to the list! Thanks.
Posted by: rhodyguy Aug 5 2015, 10:00 AM
do em all. the complete 'kit' from pelican is swell.
Posted by: rhodyguy Aug 5 2015, 10:41 AM
in this picture the top is the throttle cable. the bottom is the clutch. the large one to the right of them is the speedo. you seem to be missing something.
Attached thumbnail(s)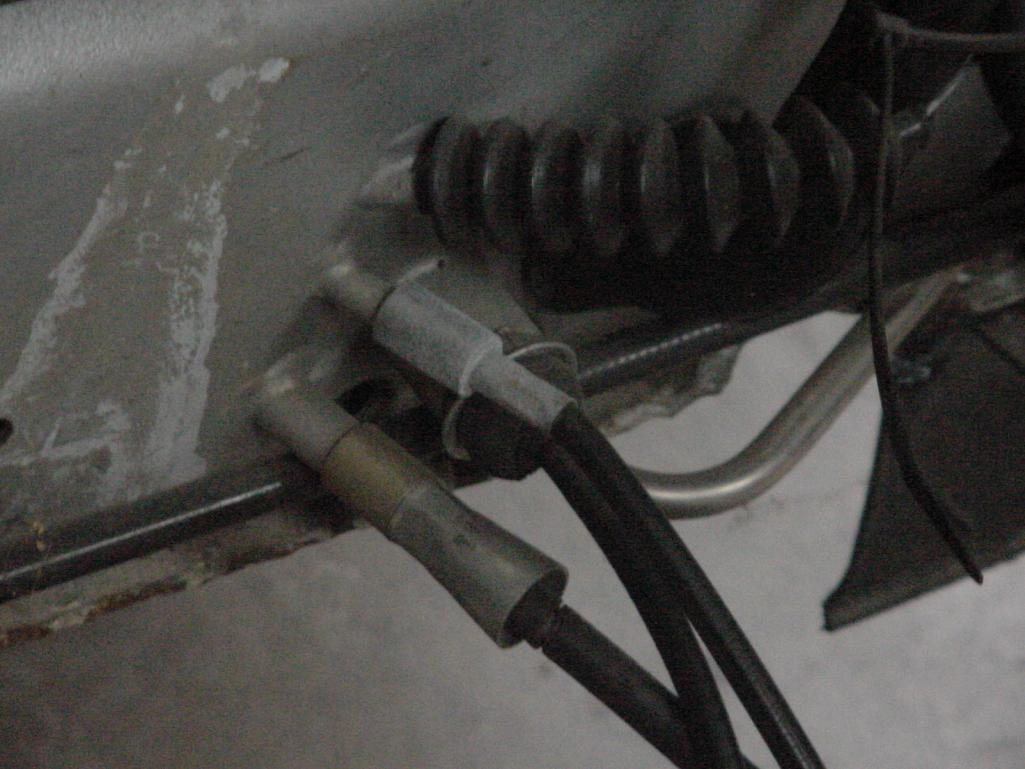
Posted by: Lucky9146 Aug 5 2015, 11:09 AM
in this picture the top is the throttle cable. the bottom is the clutch. the large one to the right of them is the speedo. you seem to be missing something.
Thanks rhodyguy for responding to my PM with the picture of your cables. I was trying to figure out which tube the accelerator cable went through since the car came with out the cable. In my picture the PO welded flat washers as back stops for the center e-brake just left of the cables, and I like the idea. So on mine the clutch is on the left, the speedo goes through the larger opening up to the right and the speedo tube must be where I have the safety wire hanging out of. Note PO ran fuel line next to Clutch hole. Mine is a 74 what year is yours? Thanks again
Attached thumbnail(s)
Posted by: rhodyguy Aug 5 2015, 11:41 AM
73'
Posted by: Larmo63 Aug 5 2015, 12:19 PM
Great looking engine!!! 
I think we could almost have a separate thread area here on World just for /6 conversions and talk….
Andy? 
Posted by: Lucky9146 Aug 6 2015, 12:22 AM
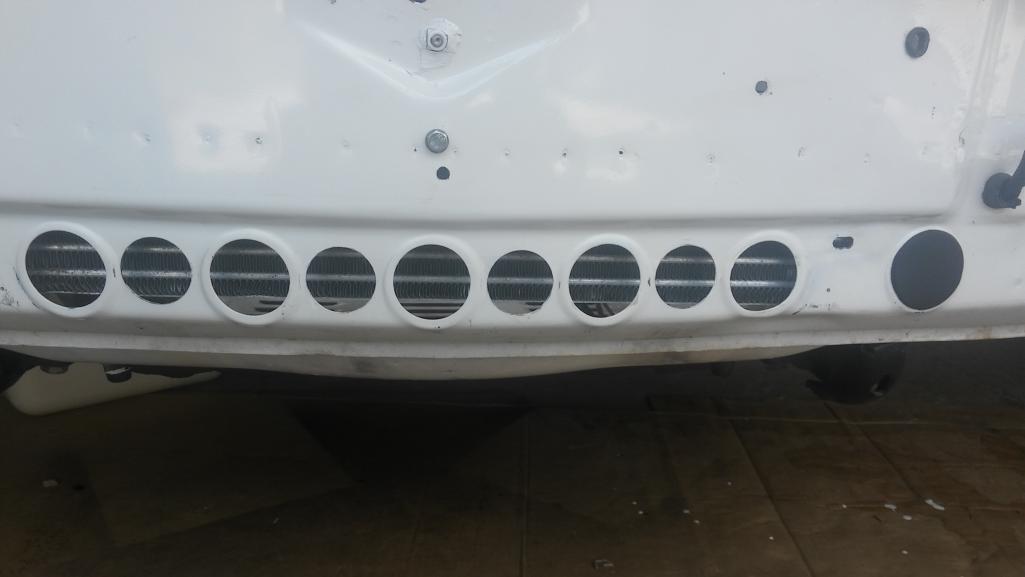
One of the things I have completed is the rear bumper. The car came with a nicely pianted (black) later style rear bumper. The PO was going down the path of black bumpers front and rear. So the car also came wih a fiberglass GT front bumper and matching lower fiberglass valance with the cut out for the cooler.
I really wanted chrome bumpers front and back so I proceded to find a nice early rear and get it chromed. Finding good local chrome shop in San Diego is the challange. I found Escondido Plating and Don does triple chrome great quality for a reasonable price. Also note I bought the new gold 914-6 script and new bumper top.
The front bumper is in work now and another story but it will be steel and chrome.
Attached thumbnail(s)
Posted by: lonewolfe Aug 6 2015, 12:50 AM
One of the things I have completed is the rear bumper. The car came with a nicely pianted (black) later style rear bumper. The PO was going down the path of black bumpers front and rear. So the car also came wih a fiberglass GT front bumper and matching lower fiberglass valance with the cut out for the cooler.
I really wanted chrome bumpers front and back so I proceded to find a nice early rear and get it chromed. Finding good local chrome shop in San Diego is the challange. I found Escondido Plating and Don does triple chrome great quality for a reasonable price. Also note I bought the new gold 914-6 script and new bumper top.
The front bumper is in work now and another story but it will be steel and chrome.
Did the bumper have any dent repairs? What did they charge for the work?
Posted by: Lucky9146 Aug 6 2015, 09:10 AM
One of the things I have completed is the rear bumper. The car came with a nicely pianted (black) later style rear bumper. The PO was going down the path of black bumpers front and rear. So the car also came wih a fiberglass GT front bumper and matching lower fiberglass valance with the cut out for the cooler.
I really wanted chrome bumpers front and back so I proceded to find a nice early rear and get it chromed. Finding good local chrome shop in San Diego is the challange. I found Escondido Plating and Don does triple chrome great quality for a reasonable price. Also note I bought the new gold 914-6 script and new bumper top.
The front bumper is in work now and another story but it will be steel and chrome.
Did the bumper have any dent repairs? What did they charge for the work?
The bumper did have one small dent and the total was $350 which I thought was reasonable for a local So Cal shop.
Posted by: Lucky9146 Aug 6 2015, 09:33 AM
So now I learned from Maltese Falcon that since my car is a 74 and white it could possibly be a limited edition so I will have to check that out! Thanks Marty! Like to see your "hot rod 6/ conversion and meet you some time. Thanks!
[/quote]
On Monday I learned the car could be an LE = Limited Edition. I learned that Jeff Bowlsby has a website with an enormous amount of info in case any of you have never seen it.
It was worth the learning experience but unfortunately my car it is not an LE although it was manufactured within the time frame they were made.
http://bowlsby.net/914/CanAm/
Posted by: rhodyguy Aug 6 2015, 09:47 AM
in your favor it's not an LE. then you would have to undo everything to make it 'correct' for any real collectibility $.
Posted by: mepstein Aug 6 2015, 09:49 AM
[quote name='Lucky9146' date='Aug 6 2015, 11:33 AM' post='2219620']
So now I learned from Maltese Falcon that since my car is a 74 and white it could possibly be a limited edition so I will have to check that out! Thanks Marty! Like to see your "hot rod 6/ conversion and meet you some time. Thanks!
[/quote]
On Monday I learned the car could be an LE = Limited Edition. I learned that Jeff Bowlsby has a website with an enormous amount of info in case any of you have never seen it.
It was worth the learning experience but unfortunately my car it is not an LE although it was manufactured within the time frame they were made.
http://bowlsby.net/914/CanAm/
[/quote]
Would it really matter? It's been highly modified from stock - in a good way 
Posted by: Lucky9146 Aug 6 2015, 11:02 AM
Thought I would share some history of the car at least what I know. I only have history back to 1990. Prior to that it was to my understanding a CA car. In Aug 1990 it was purchased and went to WA where he owned it until 2010. So in 1990 there began a complete restoration through Jan 1995. No Pictures Darn! As I understand it when the car was completed in Jan 1995 with a super built 4 cyl., it was driven a short time, then something happened, and the car sat until being sold in 2010. During that time the engine was removed and apparently sold. So the main things done to the car by that earlier owner in a complete restoration, besides the previously mentioned paint job and top notch addition of factory P/N flares is:
Koni adjustables, Sport spring kit, Turbo tie rod kit, Cross drilled rotors
911 SC struts. 5 lug conversion, SC brakes, 914-6 half shaft adapters
Boxed trailing arms, Automotion chassis siffening kit, batt tray,
Weltmeister 22m front and rear sway bar, Weltmeister short shift kit
GT rockers, Gt spoiler, GT engine lid
Tweeks rubber kit, 944 mirrors, custom door panels
Fuchs 16" 7 and 8's, MOMO steering wheel & shift knob
And thousands in powder coat, Cad, bushings, misc, and hunderds upon hundreds of new parts, many of which were dealer bought. I actually have a list of all done. It has been off the road to my undersatanding from sometime between 1995 and 1998.
In 2010 my PO bought the car and had it until Nov 2103 when I got it.
Posted by: Lucky9146 Aug 6 2015, 05:13 PM
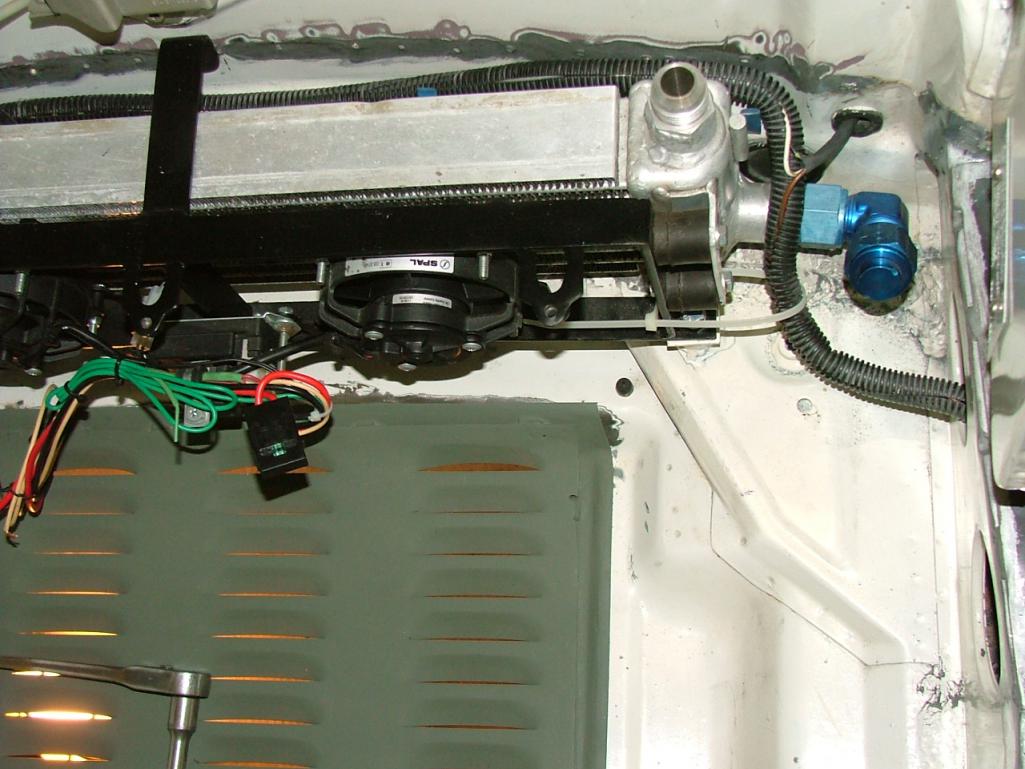
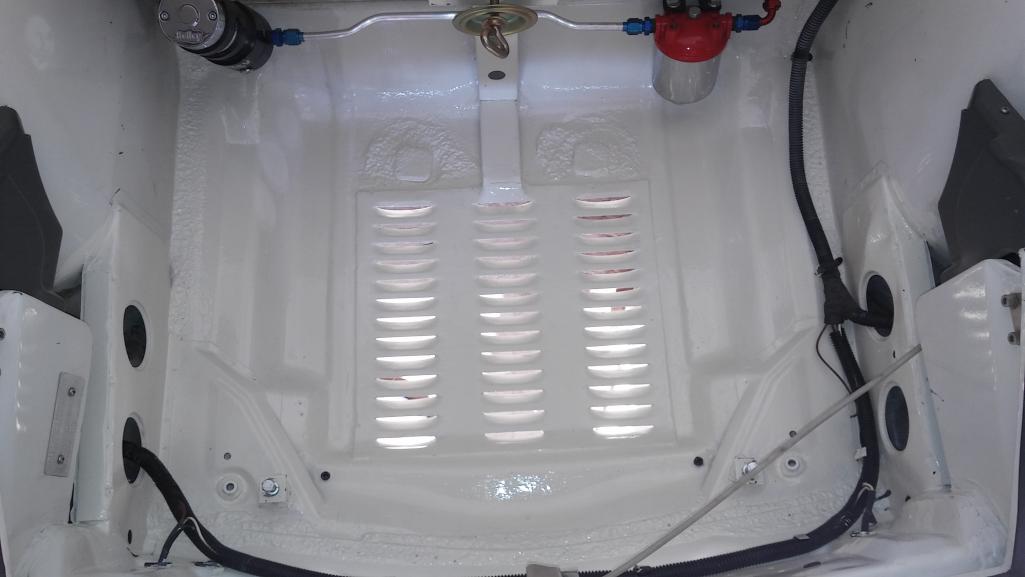
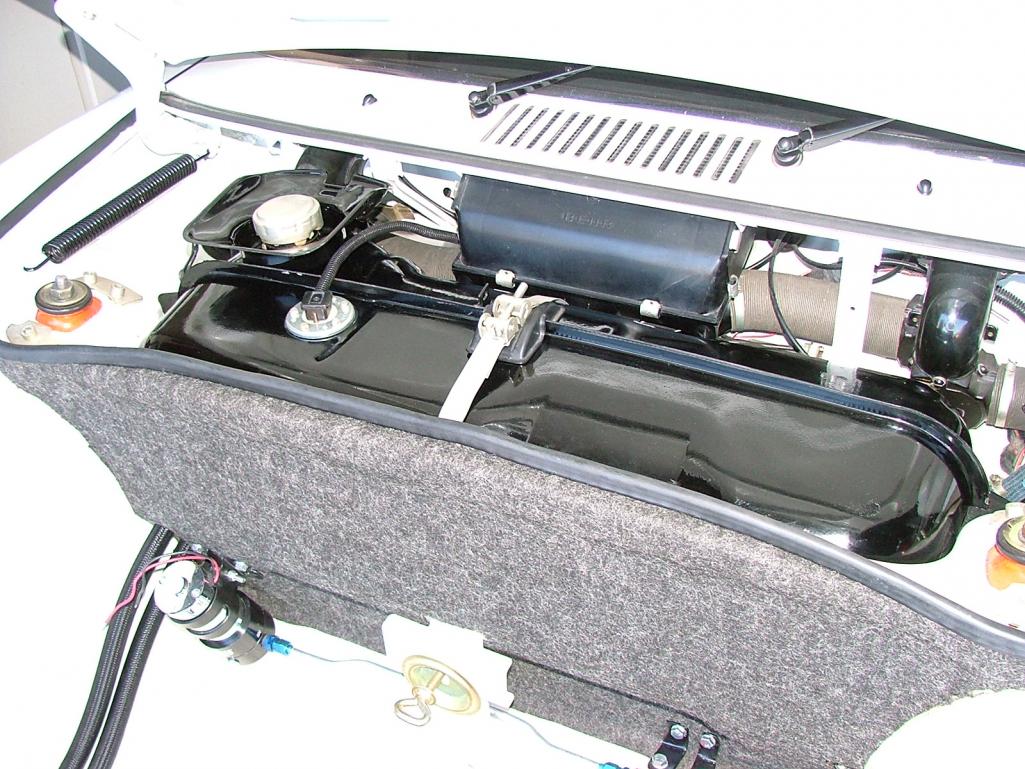
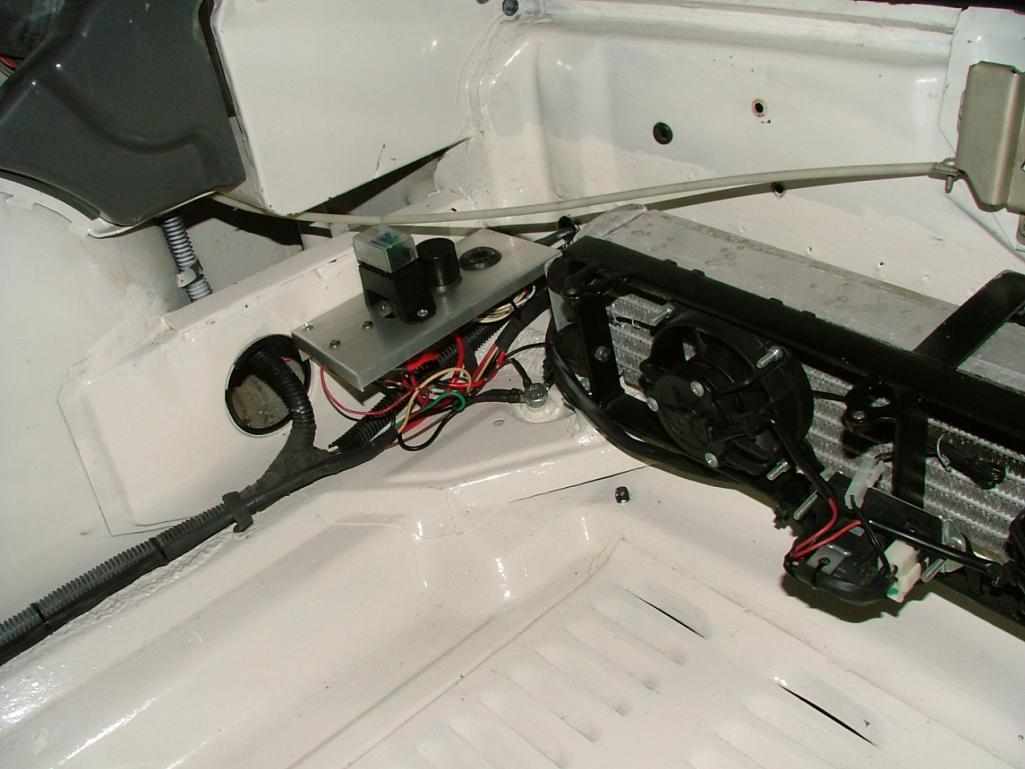
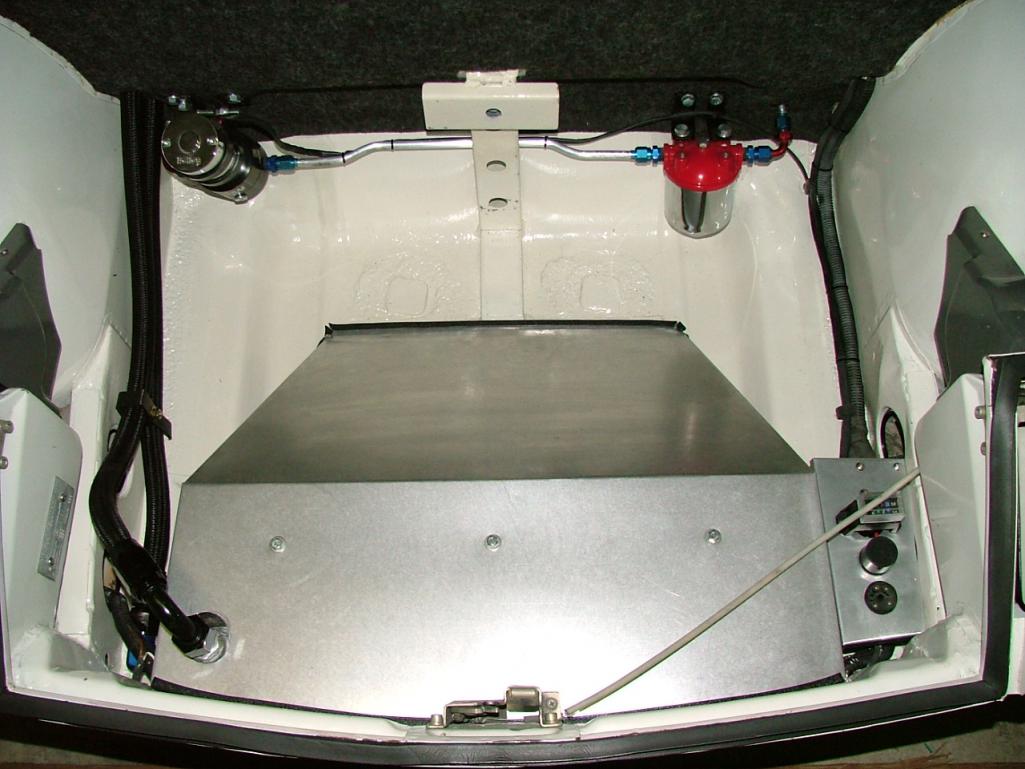
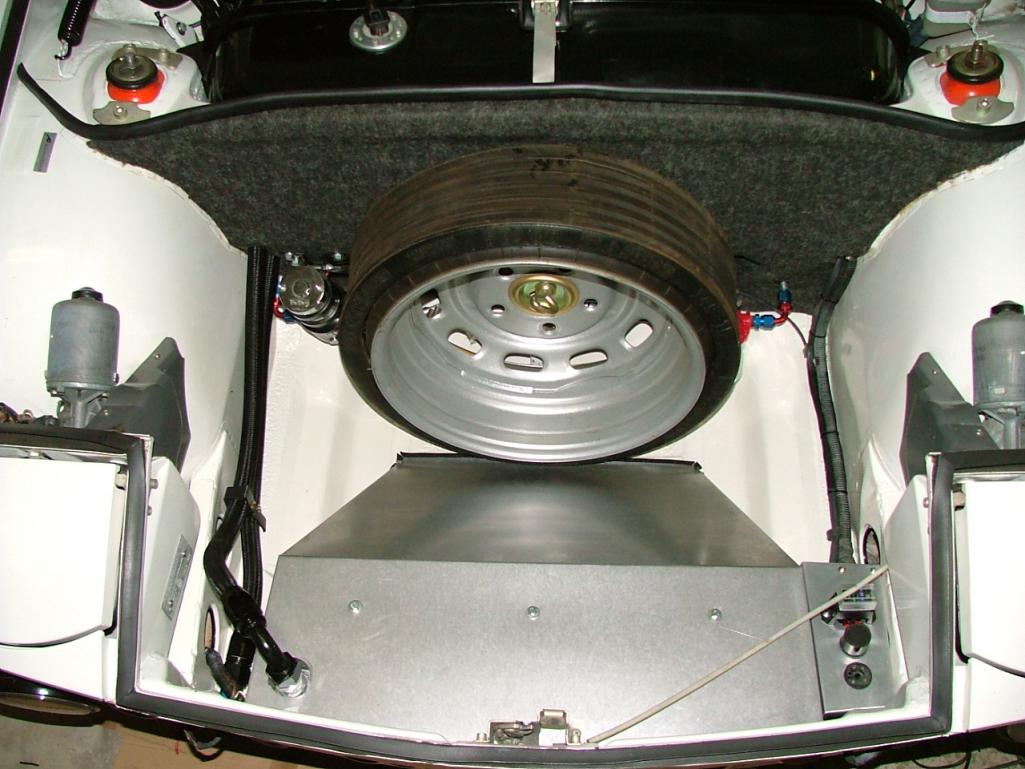
Pictures of front trunk as received. Louver was installed. Bracket had been added for compact spare tire mount. The oil cooler was mounted and I will cover that and the oil cooler shroud in more detail shortly. Note the PO added same size holes matching and between the original holes on the front for the oil cooler intake.
Attached thumbnail(s)
Posted by: Lucky9146 Aug 6 2015, 05:19 PM
Minimal rust was treated with Pour 15, louver was sealed from top and bottom, and trunk painted.
Attached thumbnail(s)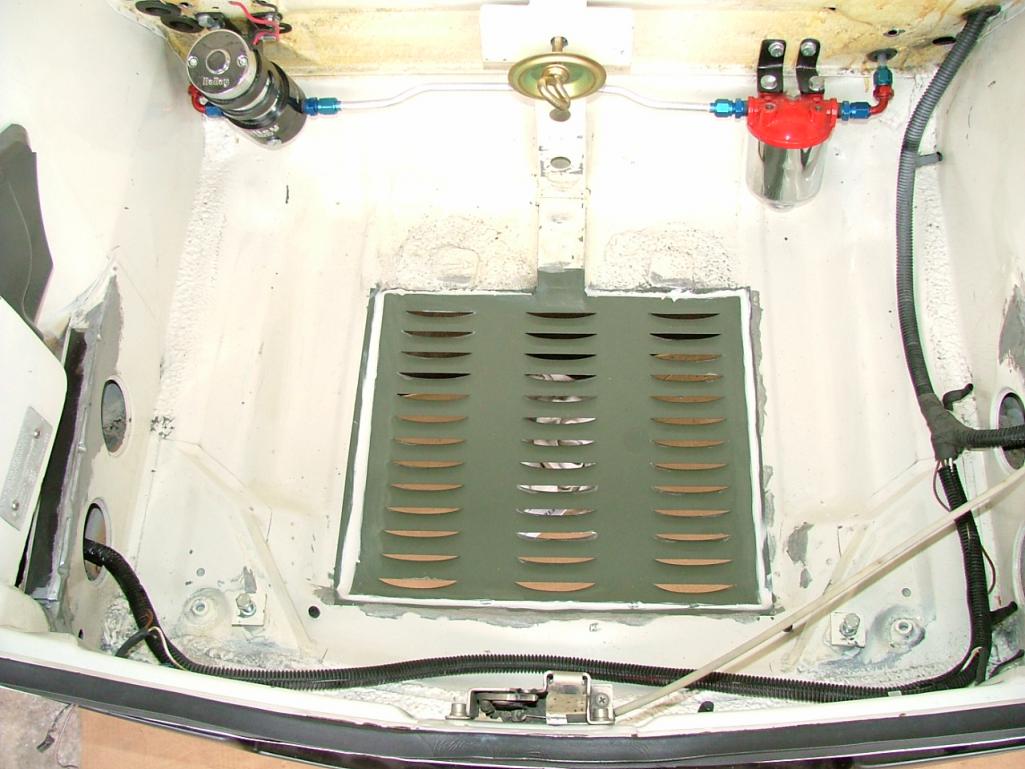
Posted by: lonewolfe Aug 6 2015, 05:22 PM
I like how the spare tire mount was added for a space saver spare. Is that the fuel pump mounted on that same firewall? I'm pretty sure it is but what is the other device? Is that a giant fuel filter? I've not seen one like that before if that's what that is. Did you weld in that louvered panel?
Posted by: Lucky9146 Aug 6 2015, 05:32 PM
Front carpet reinstalled. Under front louver sealed and undercoated.
Attached thumbnail(s)
Posted by: Lucky9146 Aug 6 2015, 05:53 PM
I like how the spare tire mount was added for a space saver spare. Is that the fuel pump mounted on that same firewall? I'm pretty sure it is but what is the other device? Is that a giant fuel filter? I've not seen one like that before if that's what that is. Did you weld in that louvered panel?
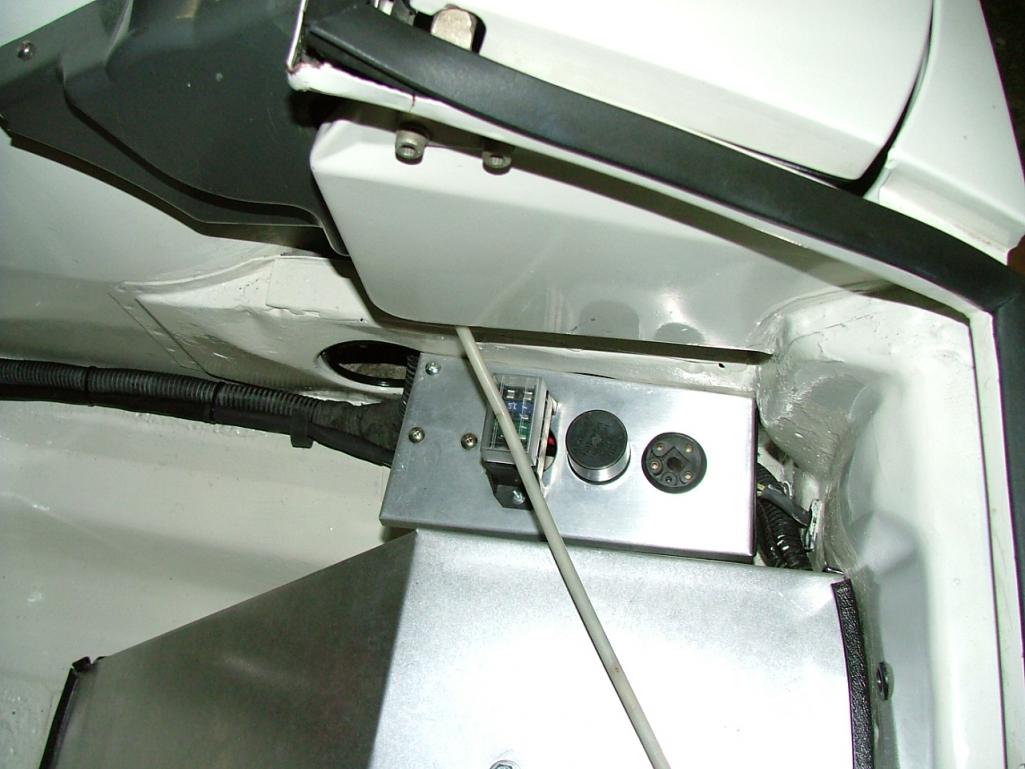
PO gets credit for the compact spare tire mount and it is nicely done. Yes that is a Holly 120 fuel pump on left and unfortunately I have no info on the fuel filter on the right but I believe it is a Holly as well, both done with AN 6 tube and fittings to engine compartment by PO. Yes the louver panel was spot welded in hence the sealing by me. I tried to find the filter on line but could not find it, there are no markings on it.
Posted by: Lucky9146 Aug 6 2015, 06:14 PM
Have been looking for months for the cir-clip that hold the rear roof latch on the shaft that it rides on. Found it at Marshalls Hardware, huge selection of parts. San Diego Off Miramar Rd. Like I always say the devil is in the details.
Attached thumbnail(s)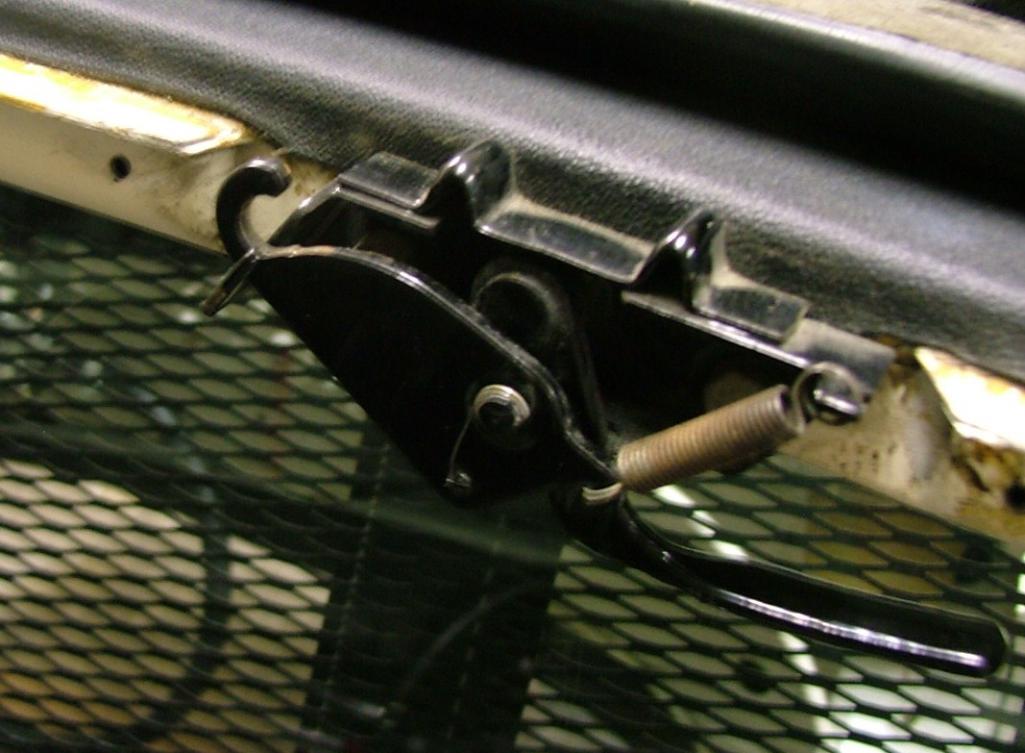
Attached image(s)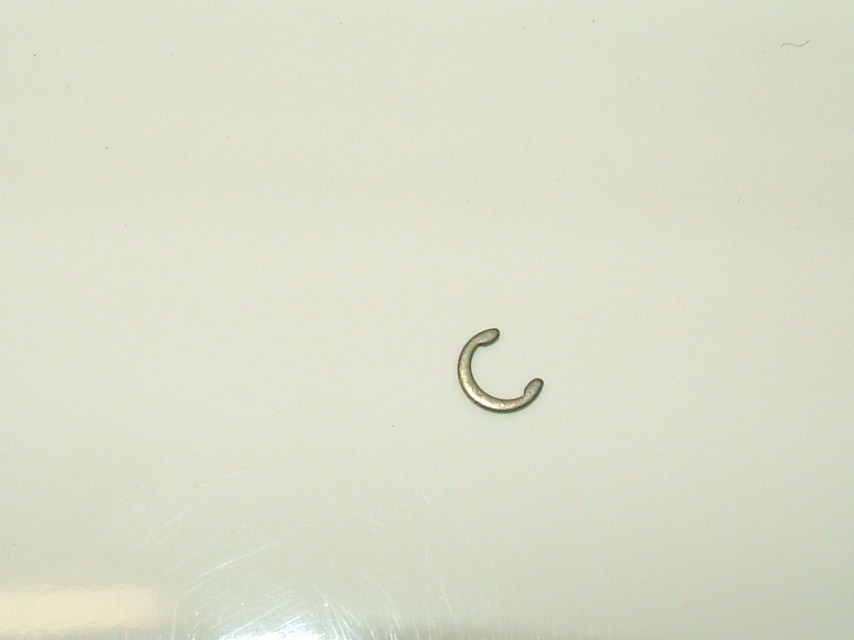
Posted by: Lucky9146 Aug 6 2015, 10:47 PM
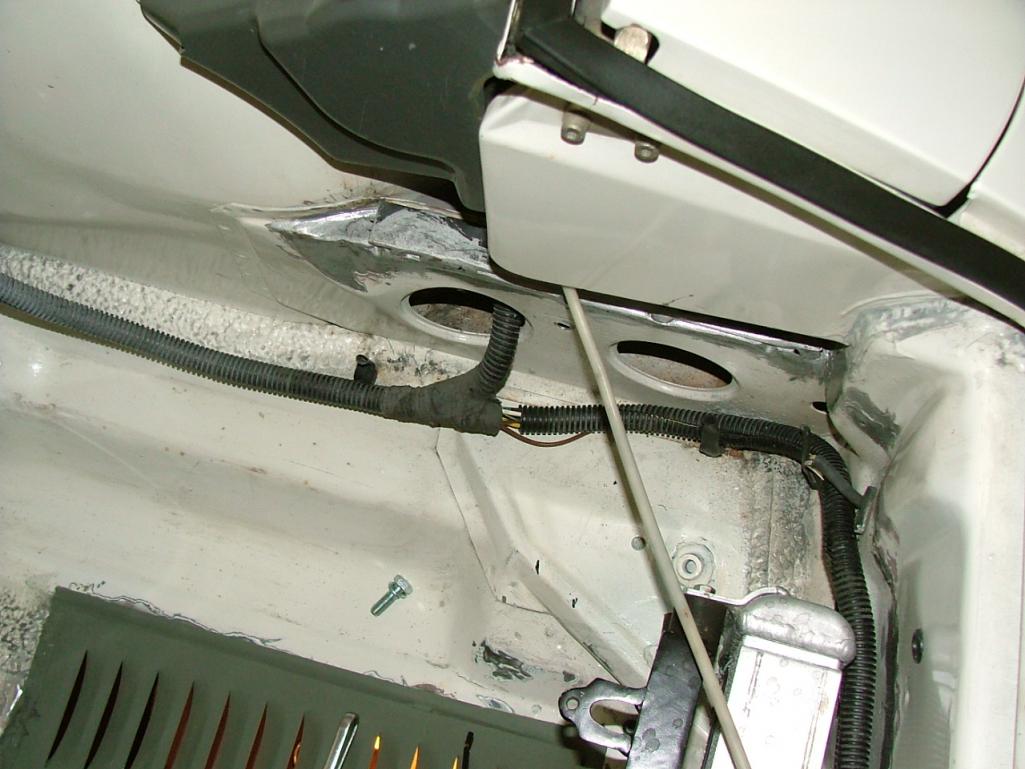
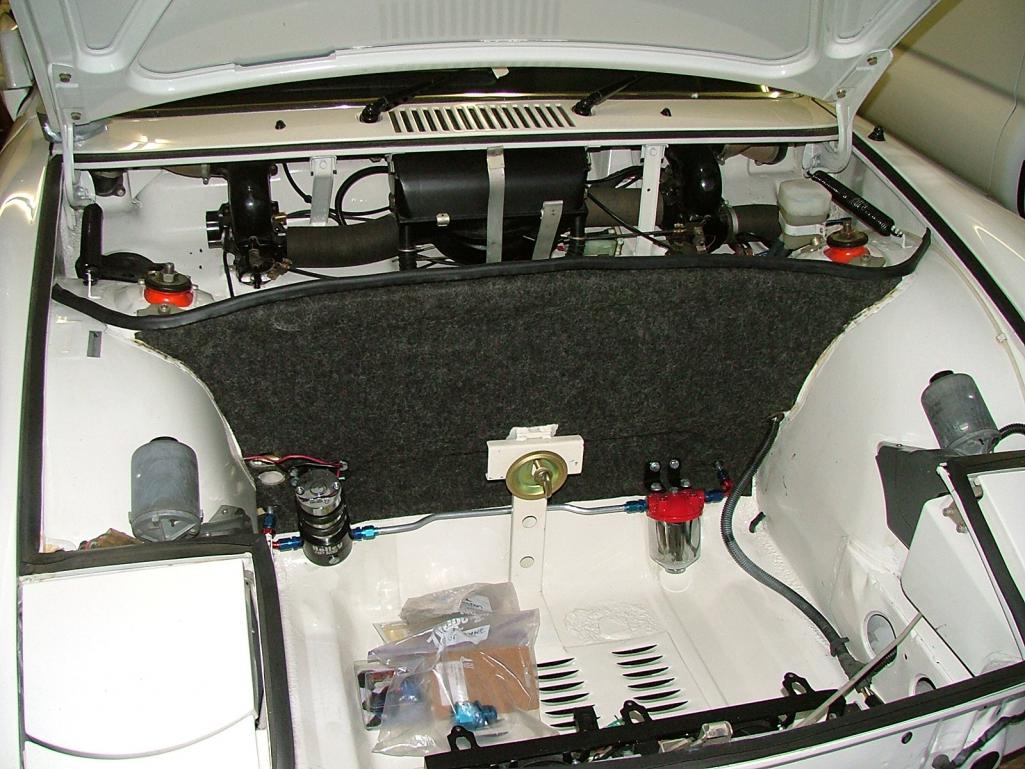
Engine compartment insulation was not installed when I got the car but the original insulation did come loose with the car but it was very tired. Also, it had a lot of extraneous holes in it so I used it for a template. Found some foil backed heat shield at ORW = Off Road Warehouse made by Competition Specialities (about $50). It worked well fitting it and glueing it in, mostly scissor work. Still need to do the back side of the access panel from the passenger compartment.
Attached thumbnail(s)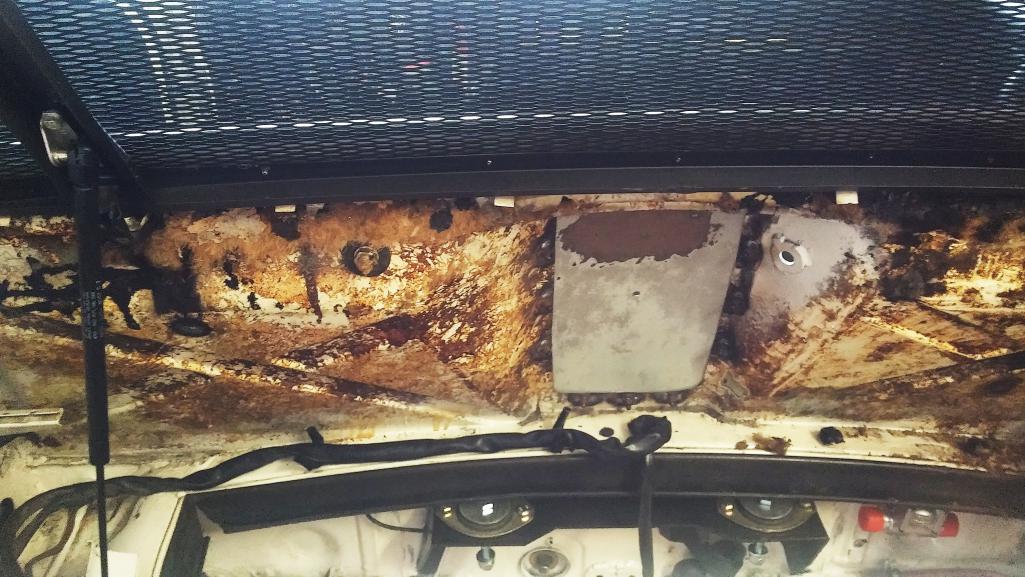
Posted by: Lucky9146 Aug 6 2015, 10:50 PM
Insulation Installed
Attached thumbnail(s)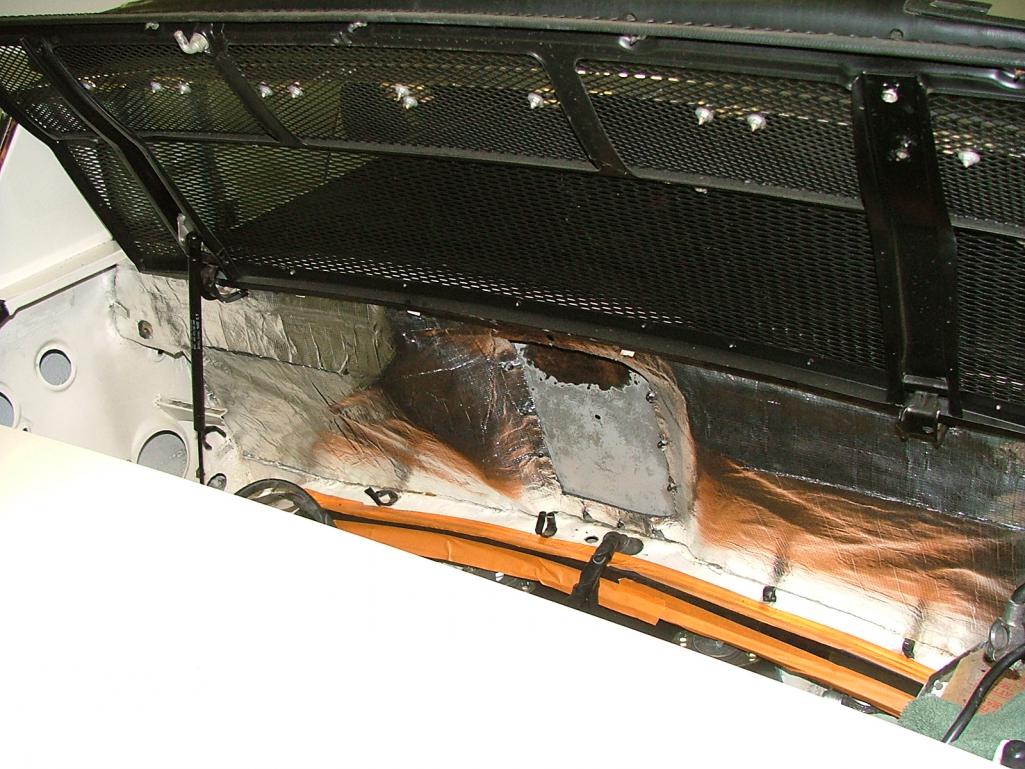
Posted by: Lucky9146 Aug 8 2015, 12:29 AM
To continue on with the front trunk, oil cooler, and shroud. It should be noted that I started a thread "Mazda RX7 Oil Cooler Flow" to try to figure out in fact which way the oil should flow or if it really mattered. That thread has taken on a life of is own and I will try not to duplicate here. In fact that post preceded this thread because through that thread I decided I would share my experience of taking over a project started by someone else to complete it. The PO fabricated a bracket for the oil cooler and fans and it is the support for the shroud. Pictured
Attached thumbnail(s)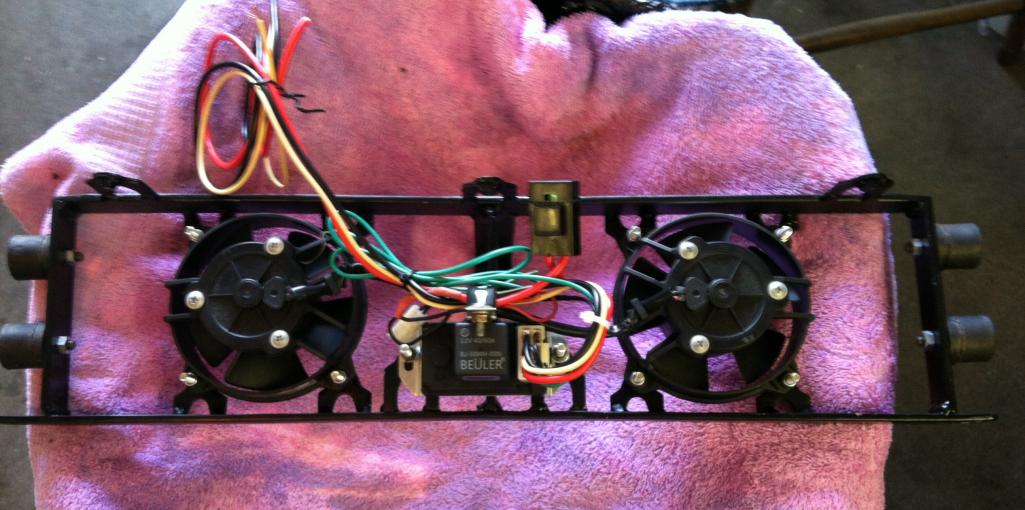
Posted by: Lucky9146 Aug 8 2015, 12:41 AM
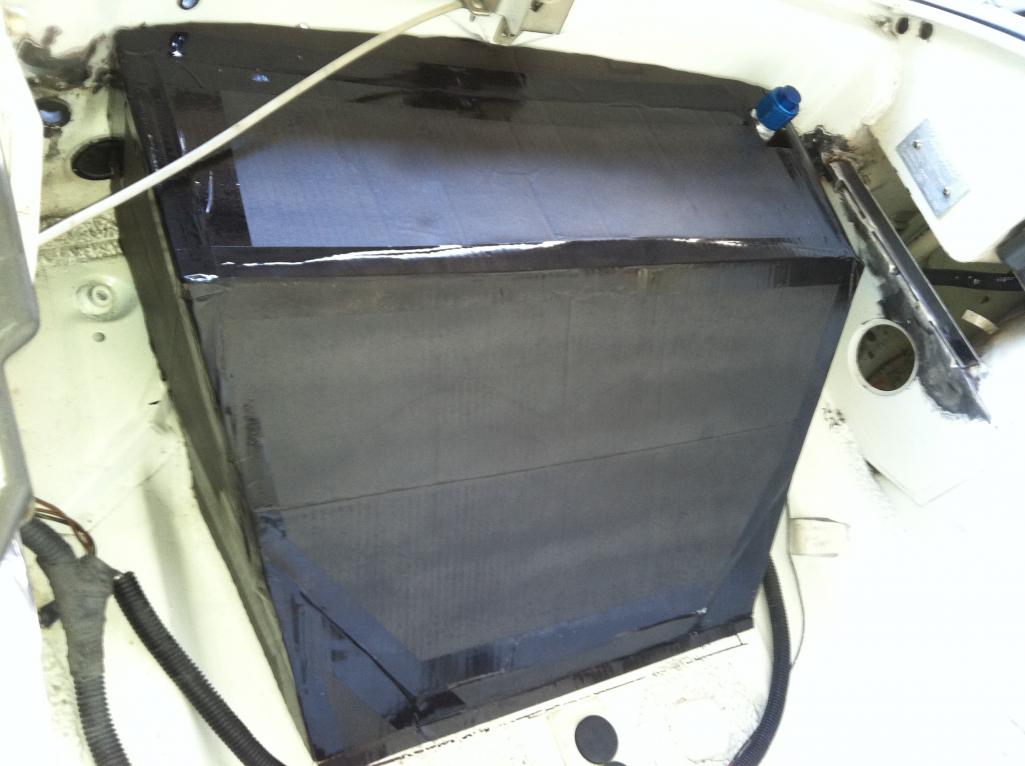
The PO installed oil cooler and card board mock up shroud. It is my understanding the Mazda cooler is wider making it harder to just buy a shroud.
Attached thumbnail(s)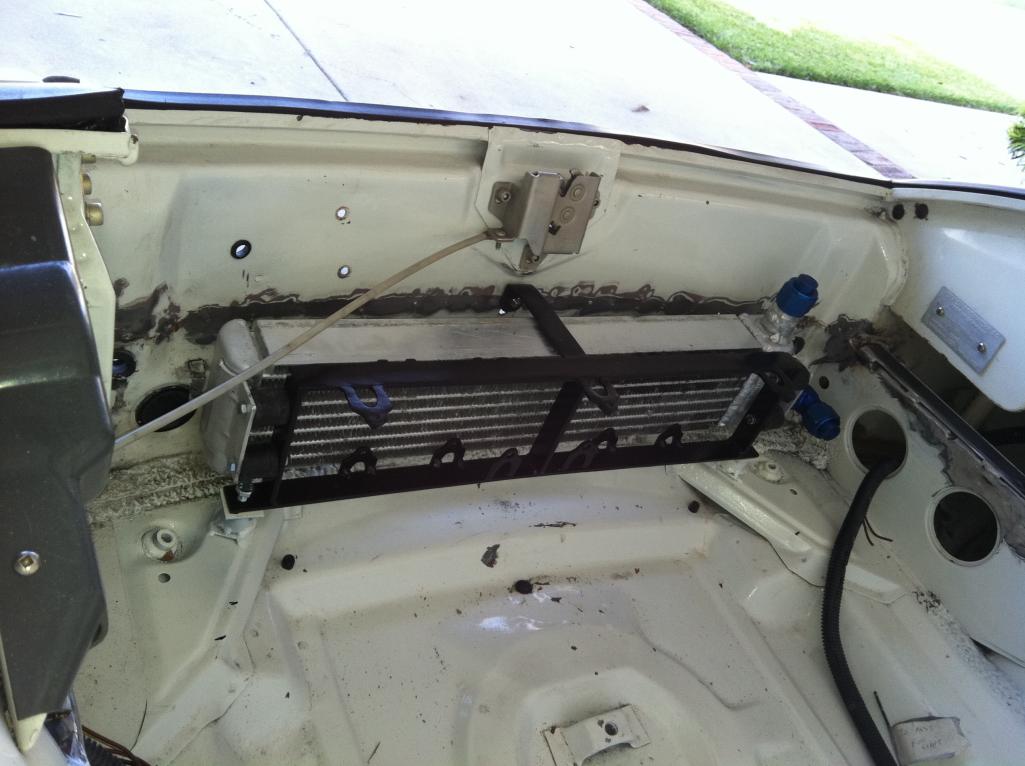
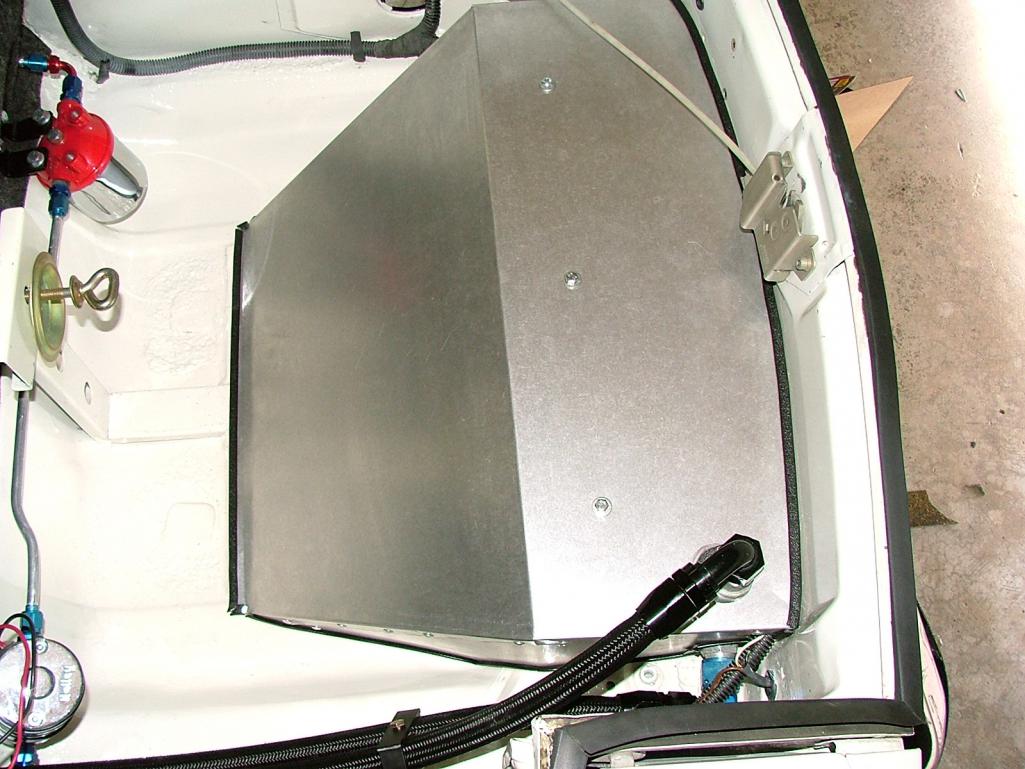
Posted by: Lucky9146 Aug 8 2015, 01:09 AM
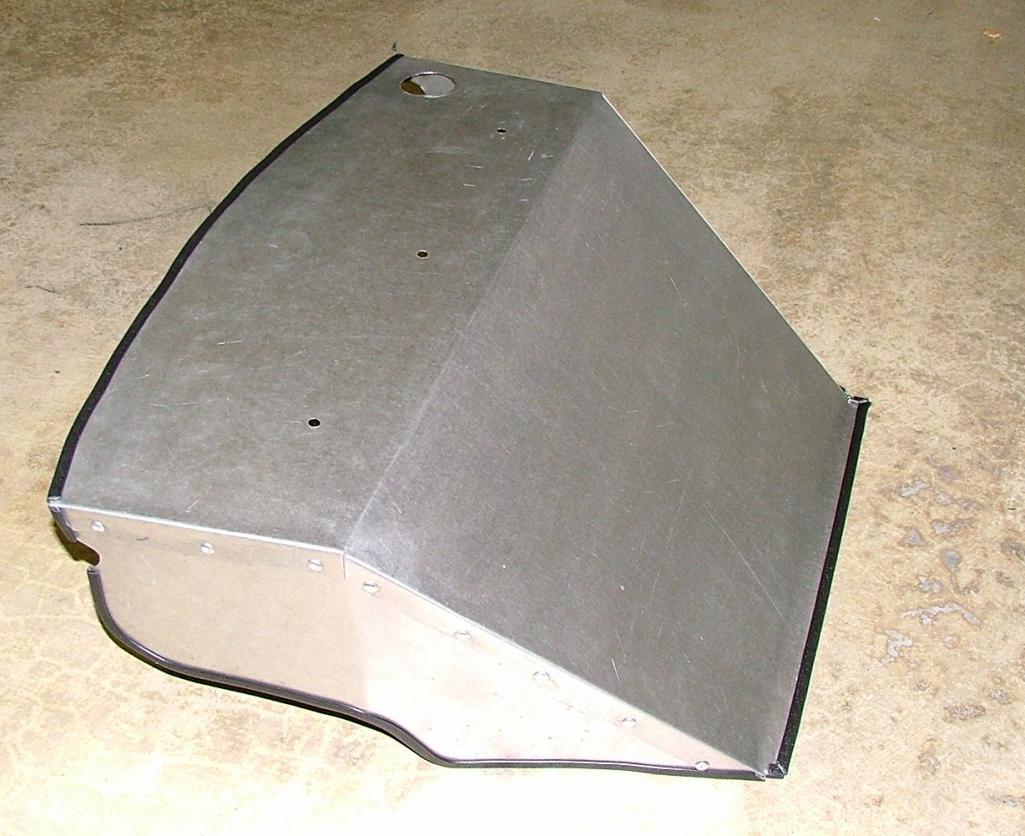
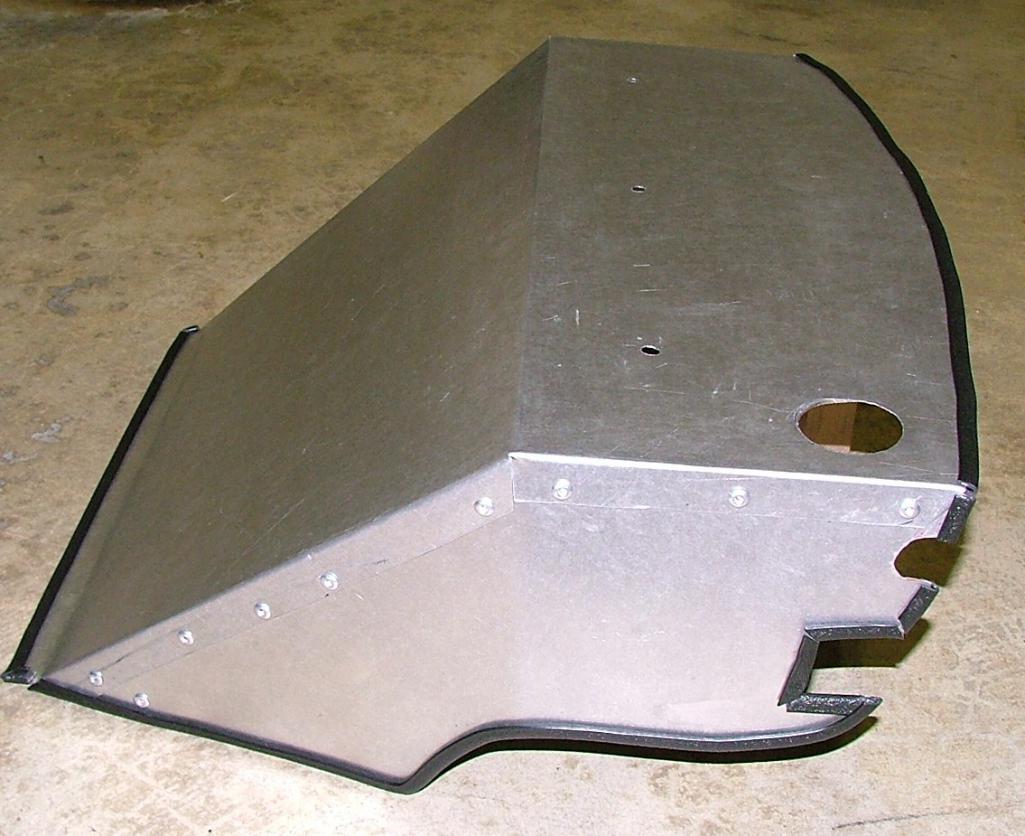
So I started with the mock up and some spare galvanized sheet metal. It would take a total 5 brake bends to shape the top piece and then cut to fit the two sides. Note it is much more difficult to cut the metal to contour the trunk than cardboard but with careful trial fits it works. I located a local metal fabricator for the first 5 bends which are the one main bend across the top and then the 4 flaps which would attach to the sides. Fabricator charged $20.00 which seemed fair as a walk in customer. Rivits $6.50 Depot. Finally, 9 feet of Trim Lok edge protector $11.50 which also serves as additonal contour to the floor. Total cost $38.00 One last bend was done at the back to allow a clamping flange. Three bolts through the top to the cooler bracket bold it firmly in place and camps have yet to be completed.
Attached thumbnail(s)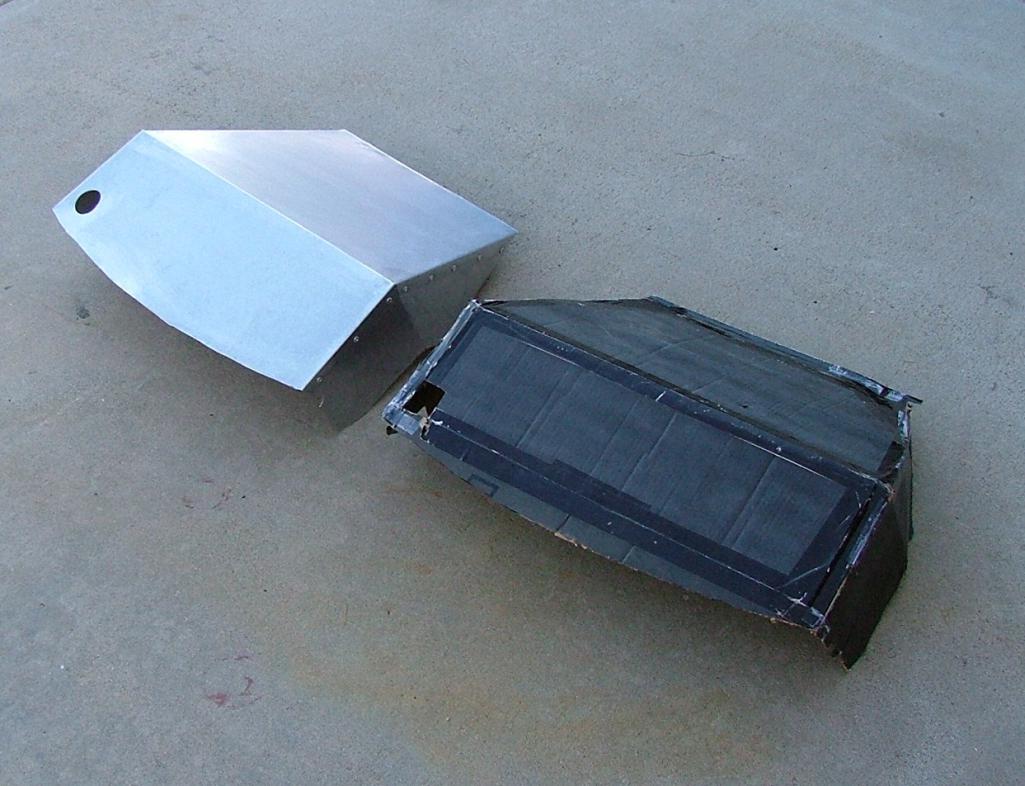

Posted by: mepstein Aug 8 2015, 06:57 AM
Very nicely done!
Posted by: RobW Aug 8 2015, 07:08 AM
Very nicely done!

Very nice!
Posted by: SLITS Aug 8 2015, 07:31 AM
unfortunately I have no info on the fuel filter on the right but I believe it is a Holly as well
The fuel filter is a Fram HPG1. We used their remote filter bases for both oil and fuel on the race cars. You can find them at JEGS and Amazon.
Posted by: earossi Aug 8 2015, 08:26 AM
One of the things I have completed is the rear bumper. The car came with a nicely pianted (black) later style rear bumper. The PO was going down the path of black bumpers front and rear. So the car also came wih a fiberglass GT front bumper and matching lower fiberglass valance with the cut out for the cooler.
I really wanted chrome bumpers front and back so I proceded to find a nice early rear and get it chromed. Finding good local chrome shop in San Diego is the challange. I found Escondido Plating and Don does triple chrome great quality for a reasonable price. Also note I bought the new gold 914-6 script and new bumper top.
The front bumper is in work now and another story but it will be steel and chrome.
Did the bumper have any dent repairs? What did they charge for the work?
The bumper did have one small dent and the total was $350 which I thought was reasonable for a local So Cal shop.
I got my bumpers triple plate chromed out in Salt Lake City. Both bumpers came in at a little over $700 in total. Sourcing the old bumpers was another $800; so, it's about a $1500+ mod to do it right. But, mine came out great and I would gladly spend the money on another set if I were doing another car. But, you do need to get them triple plated, meaning that a copper strike is first plated onto the bumpers. The copper will fill minor imperfections (such as corrosion pitting) and can then be sanded smooth by the plater before moving on to the nickle and chrome strikes.
Most shops just do a coat of nickle followed by chrome, which allows any pitting to show through the plating.
Posted by: Lucky9146 Aug 9 2015, 11:49 AM
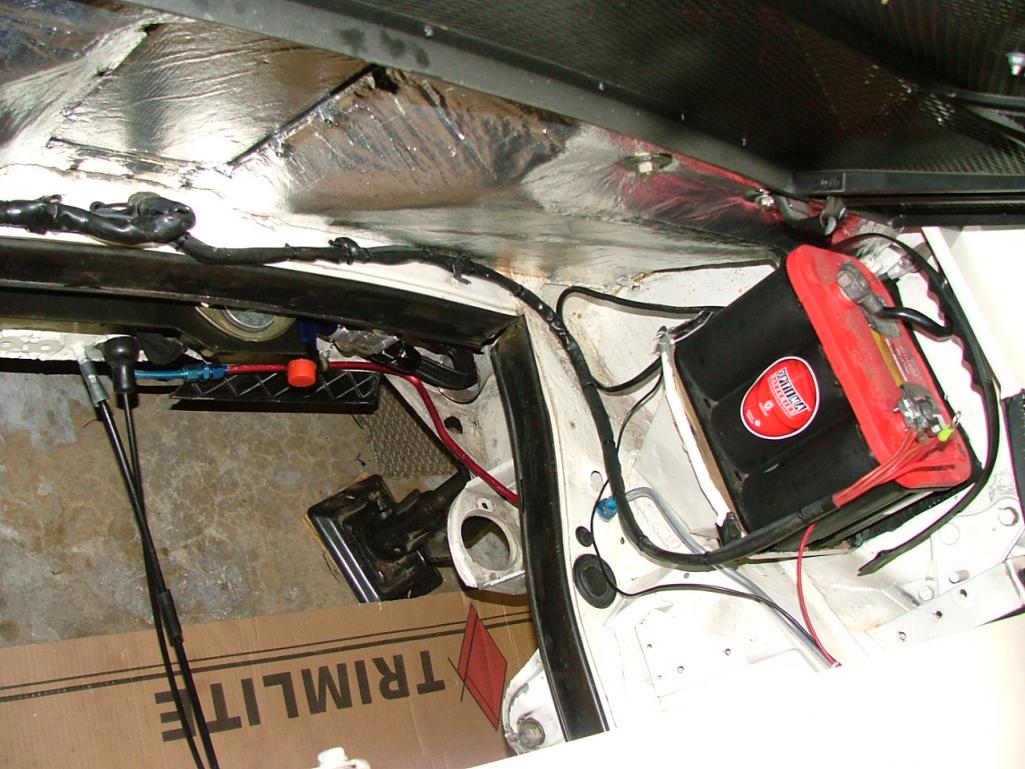
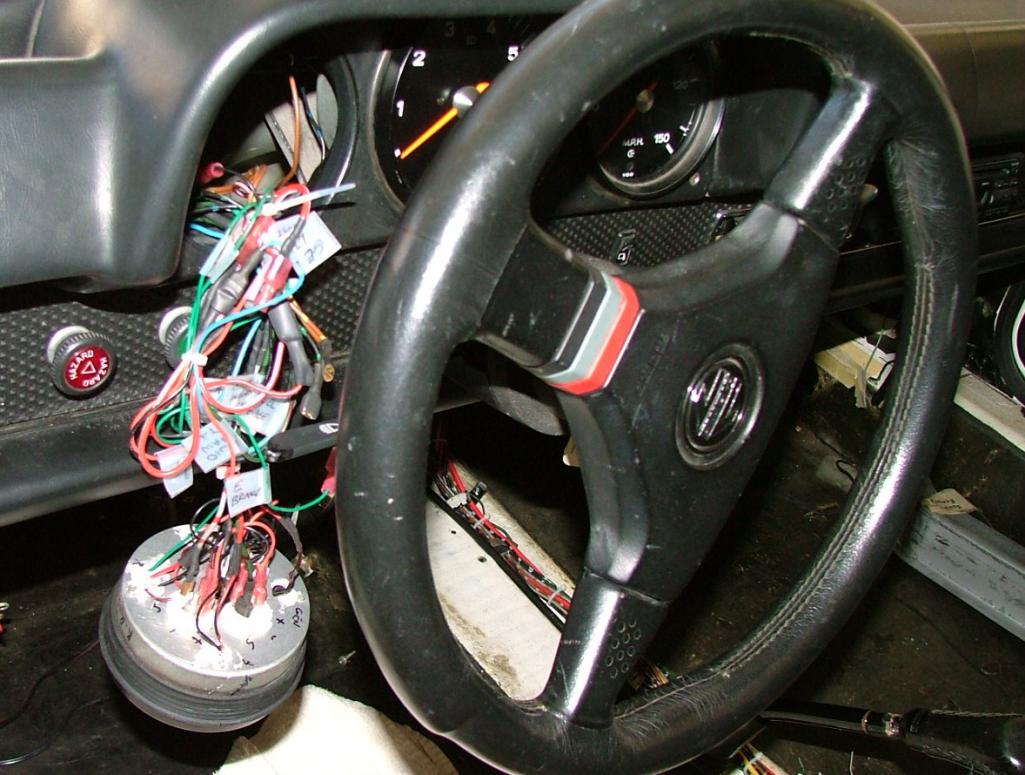
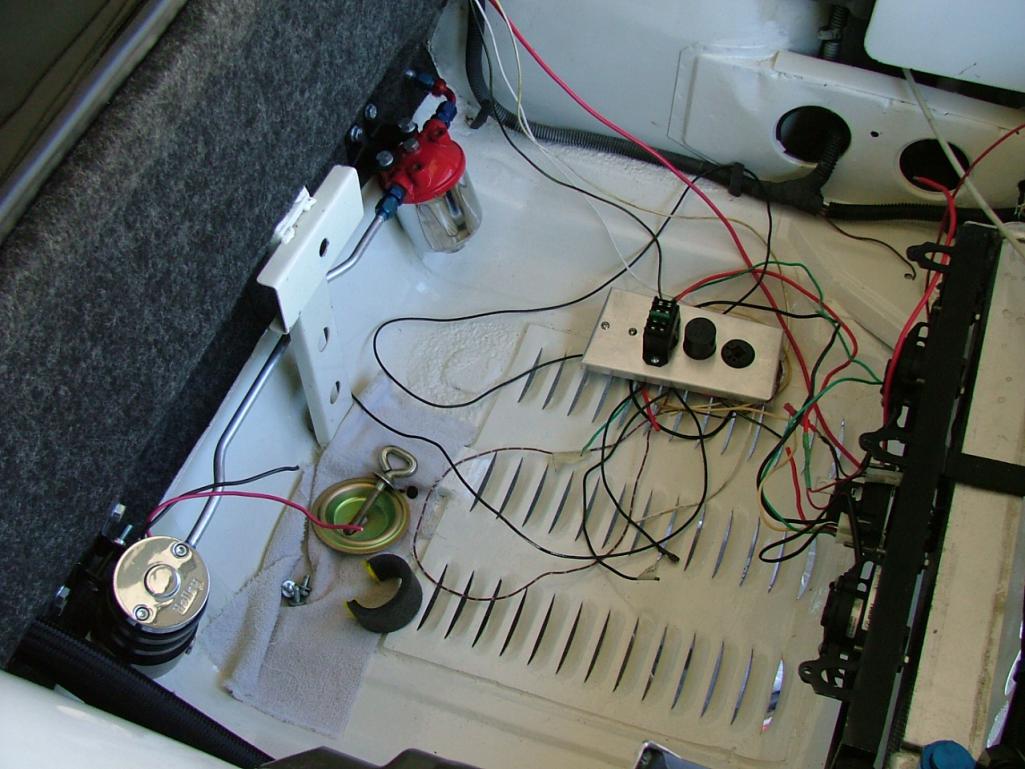
The real elephant in the room for me is the wiring for and under the dash. As I mentioned earlier in the thread, mechanically I am ok but electrical not so much. I have spent countless hours under the dash so far tracking and identifying wires from the fuse panel making some headway. Bought diagram's from Prosperos Garage and if you haven't seen them they are done very well and reasonably priced about $20. There is a lot of extraneous wires from a major bundle that were cut cut to the gone console, wires for a stereo, wires from some sort of long gone alarm system, wires to the electric and heated mirrors, and wires that used to go to the 4 cylinder engine for something(?). Add to that the PO found a 6 cyl tach (no year identified) and a really cool quad guage made both yet to be installed and challenges for both. PO bought and included small aux fuse box intended for the oil cooler fans, electric fuel pump, and whatever else. PO also included and intended to change the old main fuse panel to the modern fuses. Don;t get me wrong I think the harness is OK I think it worked but after reading a post the other day from a guy who fried his wires TWICE! I am just a bit skiddish. First the dash current state.
Attached thumbnail(s)
Posted by: Lucky9146 Aug 9 2015, 12:04 PM
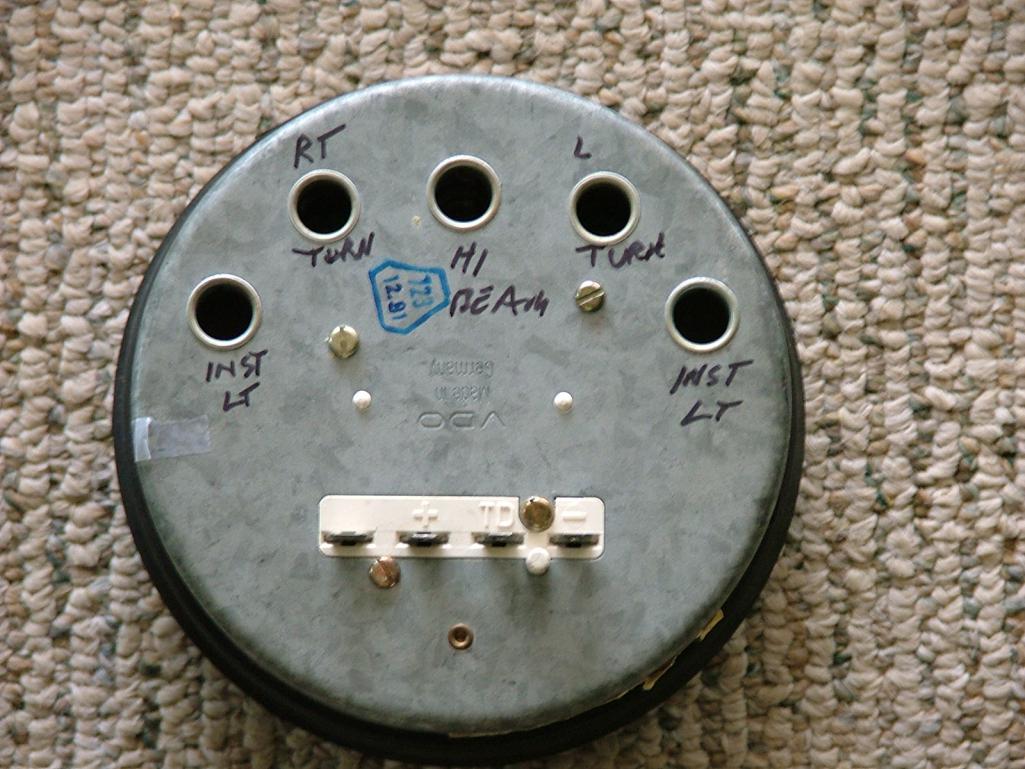
The Tach is a 911 641 303 03 which is for a 78-83 so appears appropriate for my 79 engine. It was rebuilt by North Hollywood Speedometer. One difference on the Tach from the 4 cyl (that I do not have to actually look at) is that the 4 cyl had a single turn signal light that blinked whether you turn left or right (just like an old VW) and now the the 6 cyl tach has two seperate bulb locations for left and right so of course the wiring does not support that. Delima #one just hook up two bulbs and let them both blink when turing or figure out where to bring wires up for true left and right blinking? Dunno.
Attached thumbnail(s)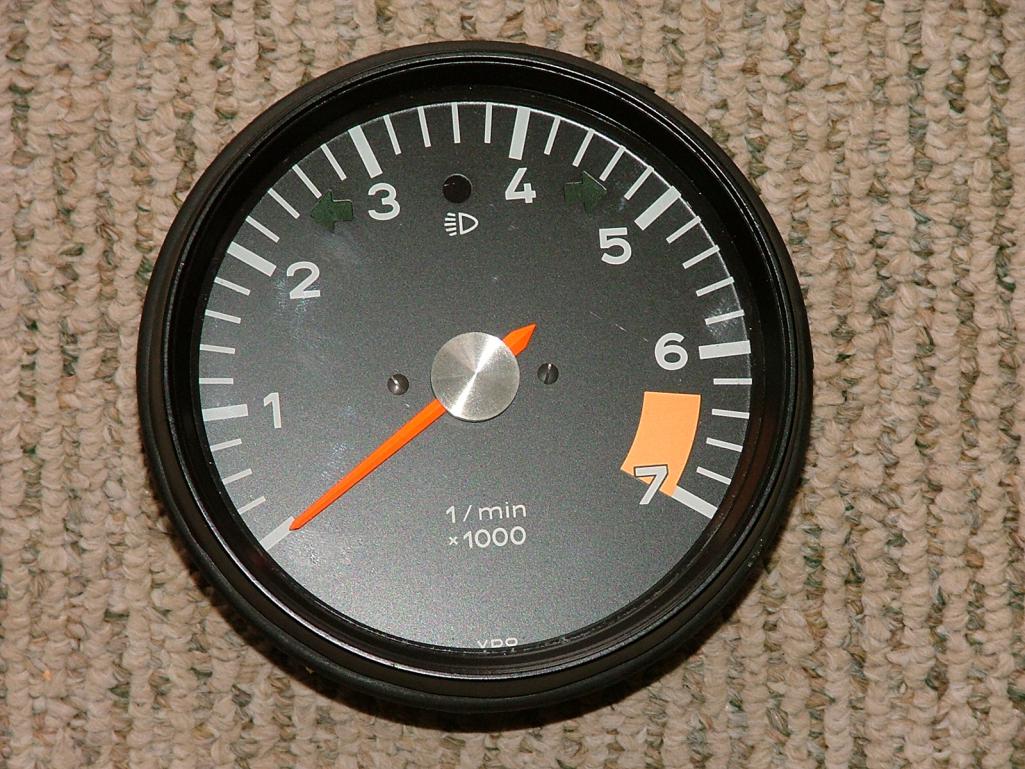
Posted by: Lucky9146 Aug 9 2015, 12:23 PM
Next up is the very cool quad guage custom built for PO by New Vintage Guages in Detroit MI. It has Oil Press, Temp, Fuel, Volts. Actually it also has 4 warning lights as well. I have a buddy with a 914-6 clone who wants to kill me for it and get rid of his console, so I get why the console is gone. Much better to look at the quad guage than down at the console. As mentioned in the recent "elephant in the room post" this car had a console with gages (all gone) and a wad of cut wires that went to it. So I have figured out some from the console for the quad guage but now with the 6 conversion and different sending units it is a stretch to figure out what goes to what and this is where the wiring diagram falls apart.
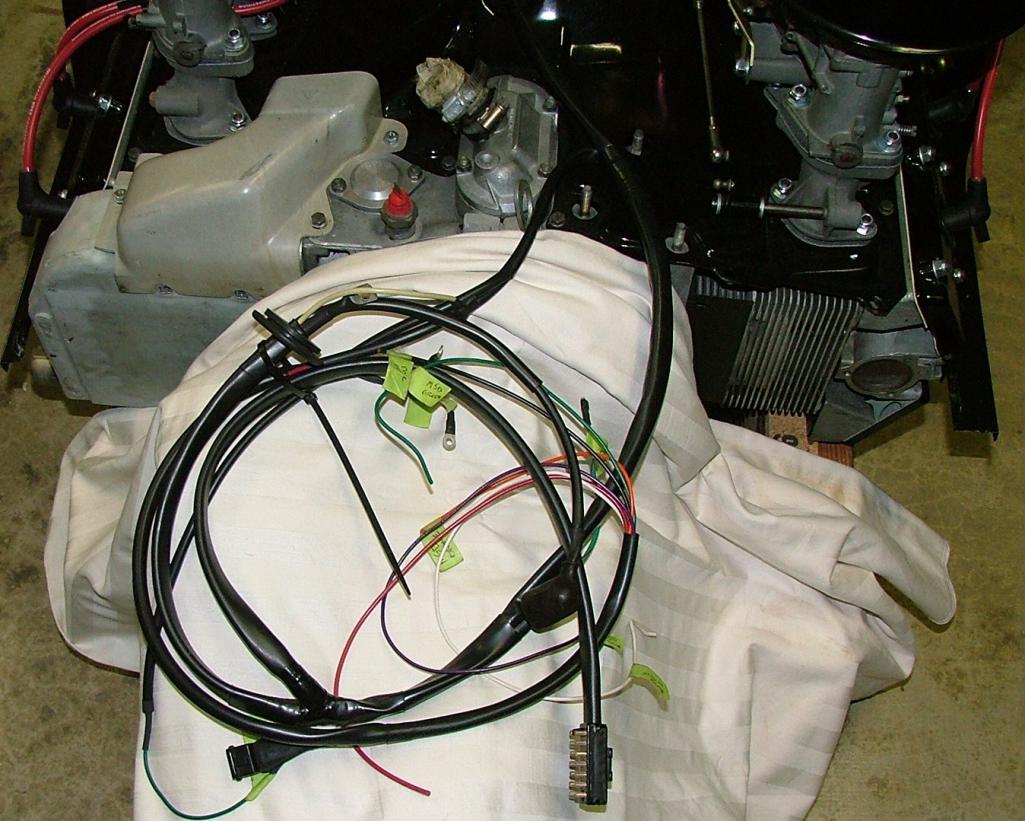
Oh, and forgot to mention engine came with PO installed Perry Kiel 914-6 engine conversion wiring harness which is very nice and clean and marked.
Attached thumbnail(s)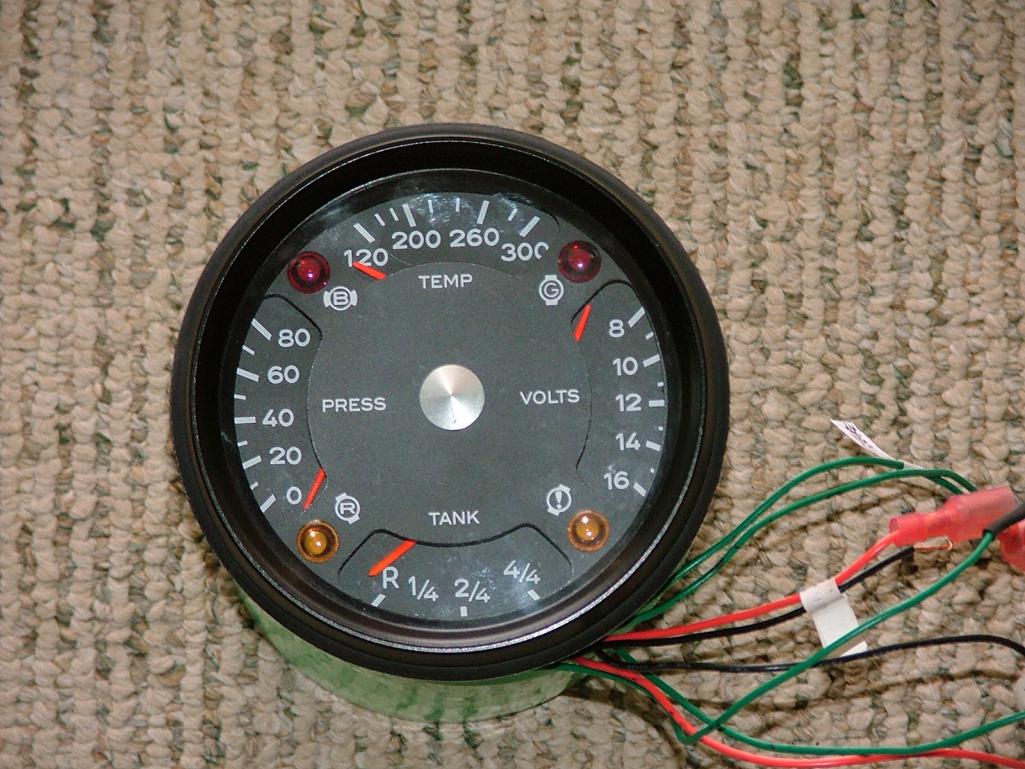

Posted by: porschetub Aug 9 2015, 12:46 PM
The real elephant in the room for me is the wiring for and under the dash. As I mentioned earlier in the thread, mechanically I am ok but electrical not so much. I have spent countless hours under the dash so far tracking and identifying wires from the fuse panel making some headway. Bought diagram's from Prosperos Garage and if you haven't seen them they are done very well and reasonably priced about $20. There is a lot of extraneous wires from a major bundle that were cut cut to the gone console, wires for a stereo, wires from some sort of long gone alarm system, wires to the electric and heated mirrors, and wires that used to go to the 4 cylinder engine for something(?). Add to that the PO found a 6 cyl tach (no year identified) and a really cool quad guage made both yet to be installed and challenges for both. PO bought and included small aux fuse box intended for the oil cooler fans, electric fuel pump, and whatever else. PO also included and intended to change the old main fuse panel to the modern fuses. Don;t get me wrong I think the harness is OK I think it worked but after reading a post the other day from a guy who fried his wires TWICE! I am just a bit skiddish. First the dash current state.
I can't help but laugh @ your comments ,I'am doing the exact same job as you right now,PO had just popped the gauges in the dash on my car the only thing hooked up was the speedo cable
 .
.My combo gauge is a 77 911 one and I have standalone fuel gauge already wired in the dash,its certainly a lot of wires to play with,I spent an hour and marked them all from the Bowlby diagram,like me you will have to run extra wires for earths and backlighting etc for the combo gauge.
I will watch and maybe learnt from your mistakes/success
,as it sounds like we both share the same electrical skills,cheers.
Posted by: Lucky9146 Aug 9 2015, 01:13 PM
I can't help but laugh @ your comments ,I'am doing the exact same job as you right now,PO had just popped the gauges in the dash on my car the only thing hooked up was the speedo cable .
My combo gauge is a 77 911 one and I have standalone fuel gauge already wired in the dash,its certainly a lot of wires to play with,I spent an hour and marked them all from the Bowlby diagram,like me you will have to run extra wires for earths and backlighting etc for the combo gauge.
I will watch and maybe learnt from your mistakes/success ,as it sounds like we both share the same electrical skills,cheers.
[/quote]
Response above shows misery loves company and I wish you luck too! BTW my speedo was the only guage hooked up too. Ha ha. But your comment promted me to go back and look at my stuff I found a note from boxster fan back in June, early when I was trying to sort things out and still am! He provided the following tip which some may find helpful on Bowlsby he referred to.
boxsterfan
914 relays, Jun 14 2015, 09:28 PM
914's are kewl
Group: Members
Posts: 1,282
Member No.: 791
Joined: 6-June 03
Here is info in the wiring for under the passenger seat.
http://bowlsby.net/914/Classic/zTN_Elect_R...ltInterlock.jpg
Other stuff on Bowlsby's site also:
http://bowlsby.net/914/Classic/TechNotebook.htm
boxsterfan
1974 2.0L
Posted by: Lucky9146 Aug 9 2015, 01:37 PM
The "elephant in the room" continues by adding to the wiring "opportunity" with the concept of an aux fuse box furnished by the PO to handle the new electric fuel pump, and oil cooler fans as well as whatever else. PO had some great concepts which I agree with but looking for ideas on best location to put it aux fuse box and how to wire it in for my application. Kit form with all the afore mentioned is a lot!
Along with that is the the PO idea of converting to modern day fuses with a furnished brand new fuse panel. Thinking I need to just get it running first with old fuse panel and not add any more complexity to the issue. This is JWest clone made by Engman I believe.
Pro's Con's suggestions are welcome.
Attached thumbnail(s)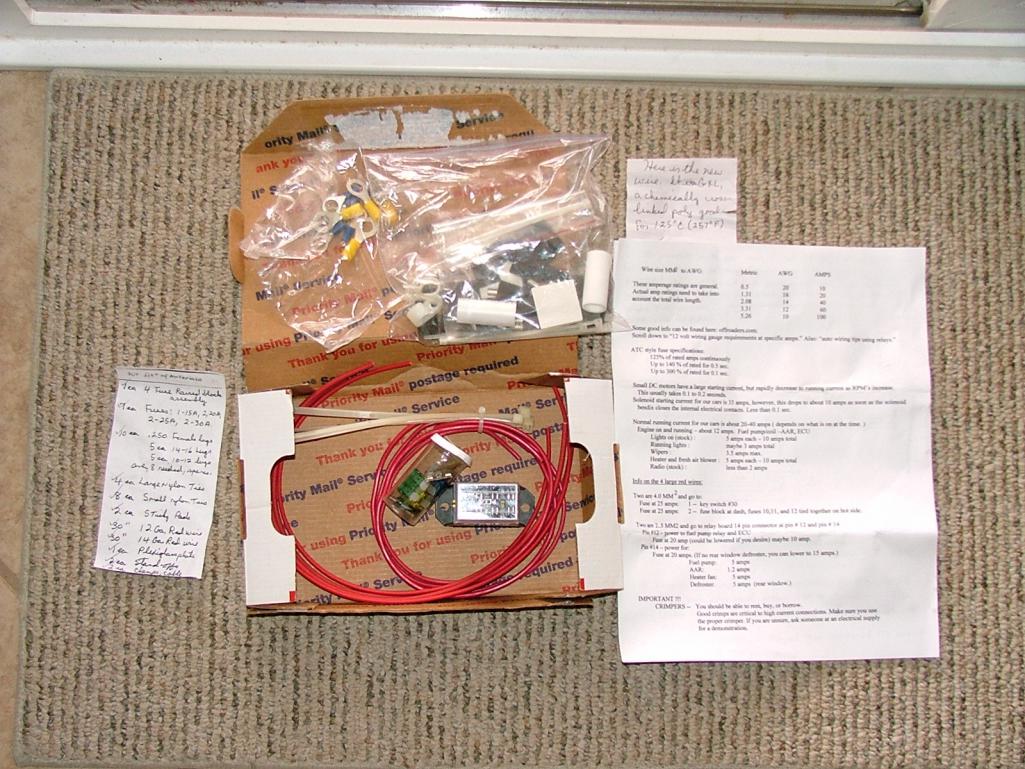

Posted by: Mike Bellis Aug 9 2015, 10:03 PM
Your other thread sent me here... There should be a link in the other thread... 
I just did this work today For RobW. I can't really help over the internet but if you were closer, I could have it sorted out in a few days...
I speak wires...
Posted by: porschetub Aug 12 2015, 02:05 AM
The "elephant in the room" continues by adding to the wiring "opportunity" with the concept of an aux fuse box furnished by the PO to handle the new electric fuel pump, and oil cooler fans as well as whatever else. PO had some great concepts which I agree with but looking for ideas on best location to put it aux fuse box and how to wire it in for my application. Kit form with all the afore mentioned is a lot!
Along with that is the the PO idea of converting to modern day fuses with a furnished brand new fuse panel. Thinking I need to just get it running first with old fuse panel and not add any more complexity to the issue. This is JWest clone made by Engman I believe.
Pro's Con's suggestions are welcome.
Since you have the fuseboard put it in ,they seem to get good press,however I would leave it till later as you suggested.
Did you find your other indicator switch lamp wire?my missing one was tucked down the far left hand side near the headlight switch wiring,I think it was a black/green or similar this one is for the RH side.
Have you a wire for your oil pressure gauge? I foolishly run new wiring into the engine space and forgot this one....bugger.
In regards to your aux fuse box,i think they are a good idea,I ran a new 30amp rated cable for future amp and others devices and have a nice little 4 fuse block I intent to tuck up under the dash.
Posted by: Lucky9146 Aug 17 2015, 11:27 AM
The "elephant in the room" continues by adding to the wiring "opportunity" with the concept of an aux fuse box furnished by the PO to handle the new electric fuel pump, and oil cooler fans as well as whatever else. PO had some great concepts which I agree with but looking for ideas on best location to put it aux fuse box and how to wire it in for my application. Kit form with all the afore mentioned is a lot!
Along with that is the the PO idea of converting to modern day fuses with a furnished brand new fuse panel. Thinking I need to just get it running first with old fuse panel and not add any more complexity to the issue. This is JWest clone made by Engman I believe.
Pro's Con's suggestions are welcome.
Since you have the fuseboard put it in ,they seem to get good press,however I would leave it till later as you suggested.
Did you find your other indicator switch lamp wire?my missing one was tucked down the far left hand side near the headlight switch wiring,I think it was a black/green or similar this one is for the RH side.
Have you a wire for your oil pressure gauge? I foolishly run new wiring into the engine space and forgot this one....bugger.
In regards to your aux fuse box,i think they are a good idea,I ran a new 30amp rated cable for future amp and others devices and have a nice little 4 fuse block I intent to tuck up under the dash.
Thanks porschetub for the reply I was out of town with no access to computer. I will look for the other turn wire that would be cool if there. No have not tried running new wiring at all yet. Still hoping for more input. Just returned from Laguna Seca Races and the Works Reunion amazing time I highly recommend it. Monterey Penunisula is beautiful.
Posted by: Lucky9146 Aug 22 2015, 10:07 AM
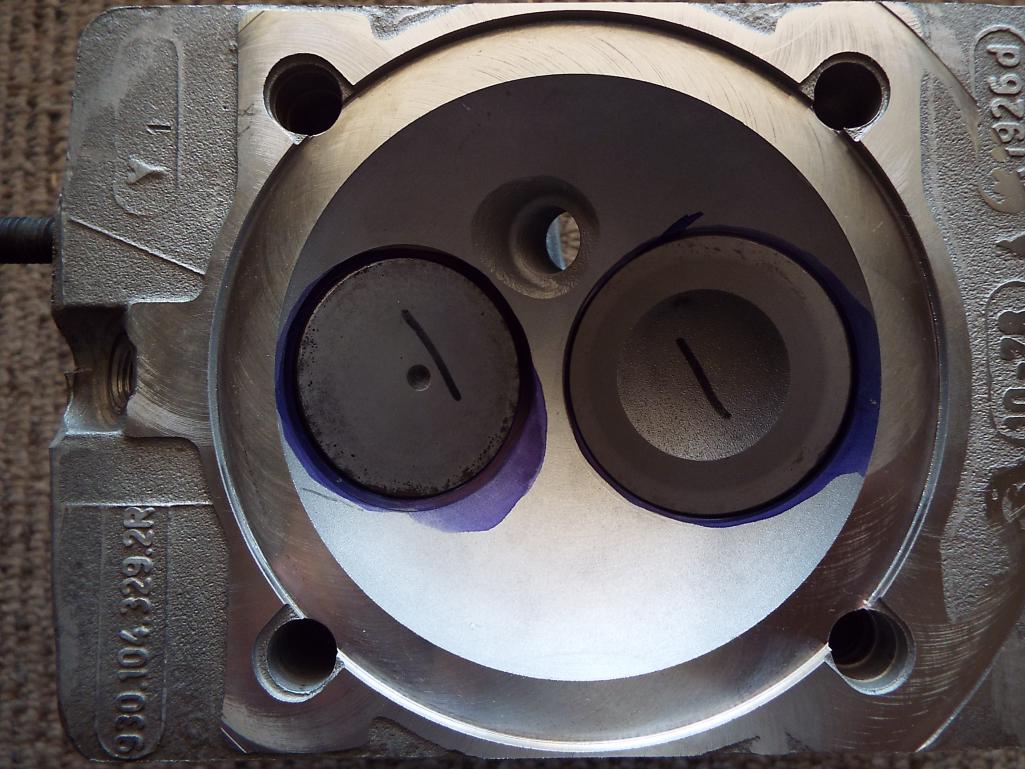
It is my understanding that from '73 up the vehicles had the wiring harness for the center console regardless of whether the console was installed or not. There was connector just forward of the shifter in the main loom that runs in the center tunnel. It not only provided for the wires from the sender, but power to the gauge lighting and grounds. I this picture shows the connector but it is behind the shifter? The wiring for the PO removed console in my car did not come from here but came from elsewhere.
Attached thumbnail(s)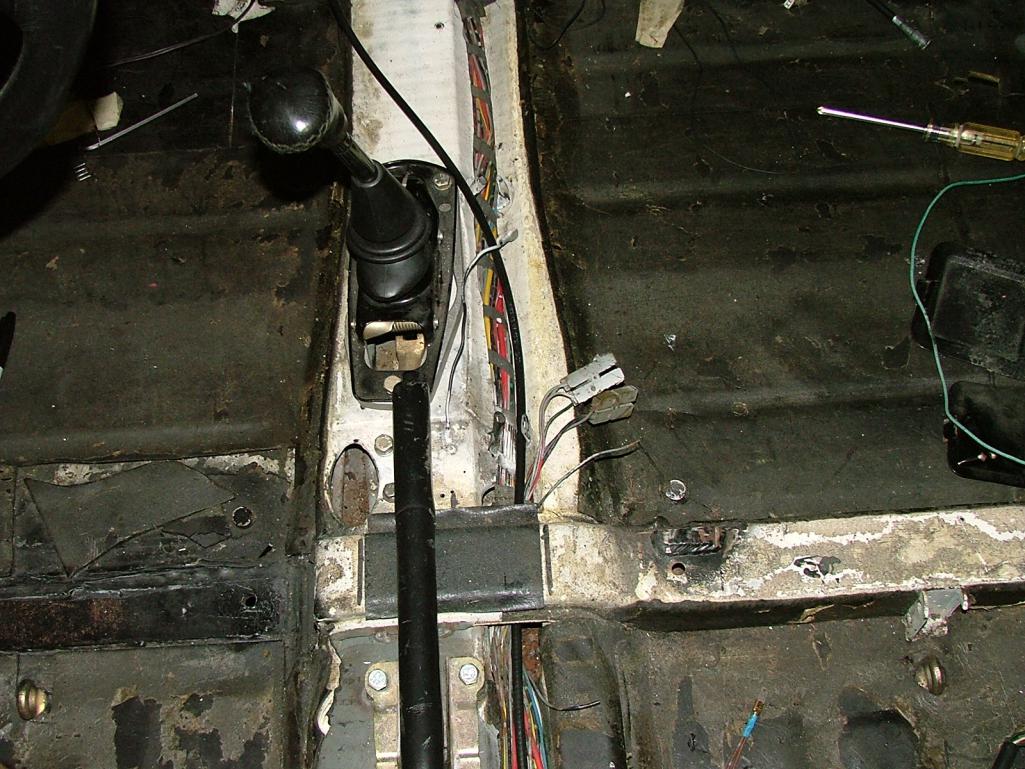
Posted by: mepstein Aug 22 2015, 10:38 AM
99% sure those connectors plug into a seperate (small) wire loom in the center console.
and yes, the mid and late year cars came with the connections reguardless if it had a console or not.
Posted by: tp_reading Aug 22 2015, 01:36 PM
It is my understanding that from '73 up the vehicles had the wiring harness for the center console regardless of whether the console was installed or not. There was connector just forward of the shifter in the main loom that runs in the center tunnel. It not only provided for the wires from the sender, but power to the gauge lighting and grounds. I this picture shows the connector but it is behind the shifter? The wiring for the PO removed console in my car did not come from here but came from elsewhere.
Hi, interested to see from this pic that you have a parking brake lever situated centrally. I have 930 discs on the back, and hence no parking brake. Any info on your set up would be much appreciated.
Cheers,
Tony
Posted by: Lucky9146 Aug 22 2015, 09:14 PM
It is my understanding that from '73 up the vehicles had the wiring harness for the center console regardless of whether the console was installed or not. There was connector just forward of the shifter in the main loom that runs in the center tunnel. It not only provided for the wires from the sender, but power to the gauge lighting and grounds. I this picture shows the connector but it is behind the shifter? The wiring for the PO removed console in my car did not come from here but came from elsewhere.
Hi, interested to see from this pic that you have a parking brake lever situated centrally. I have 930 discs on the back, and hence no parking brake. Any info on your set up would be much appreciated.
Cheers,
Tony
Tony,
Good eye! Afraid its a good news bads news scenario. I picked up on this car where someone else left off and that PO= Previous Owner installed the console e-brake. I love the idea btw. It has yet to be hooked up and he had custom cables made to boot. He later found a post of a much nicer setup that someone else had done using standard cables that when he saw it he liked it better and wished he had done it, but he felt pretty comitted with welded in nuts and all already. And so I went looking and found the link for you of the better set up. Hope this helps! Let me know if link does not work and I will try again. I can show more pictures if you like of mine but it is not yet proven. So if I had it to do from scratch I would probaby go with the better set up.
http://www.914world.com/bbs2/index.php?sho...6791&st=380
Take care
Update I can't get the link to work sorry but the guy who posted it was Jeff Hail search him out and the post was Feb 2011
Posted by: SLITS Aug 23 2015, 07:18 AM
You found the center console connectors. Sent a PM with info.
Posted by: tp_reading Aug 23 2015, 07:23 AM
It is my understanding that from '73 up the vehicles had the wiring harness for the center console regardless of whether the console was installed or not. There was connector just forward of the shifter in the main loom that runs in the center tunnel. It not only provided for the wires from the sender, but power to the gauge lighting and grounds. I this picture shows the connector but it is behind the shifter? The wiring for the PO removed console in my car did not come from here but came from elsewhere.
Hi, interested to see from this pic that you have a parking brake lever situated centrally. I have 930 discs on the back, and hence no parking brake. Any info on your set up would be much appreciated.
Cheers,
Tony
Tony,
Good eye! Afraid its a good news bads news scenario. I picked up on this car where someone else left off and that PO= Previous Owner installed the console e-brake. I love the idea btw. It has yet to be hooked up and he had custom cables made to boot. He later found a post of a much nicer setup that someone else had done using standard cables that when he saw it he liked it better and wished he had done it, but he felt pretty comitted with welded in nuts and all already. And so I went looking and found the link for you of the better set up. Hope this helps! Let me know if link does not work and I will try again. I can show more pictures if you like of mine but it is not yet proven. So if I had it to do from scratch I would probaby go with the better set up.
http://www.914world.com/bbs2/index.php?sho...6791&st=380
Take care
Update I can't get the link to work sorry but the guy who posted it was Jeff Hail search him out and the post was Feb 2011
Thanks for the info. I am off to gather the bits that I need !
Posted by: Lucky9146 Aug 24 2015, 01:19 PM
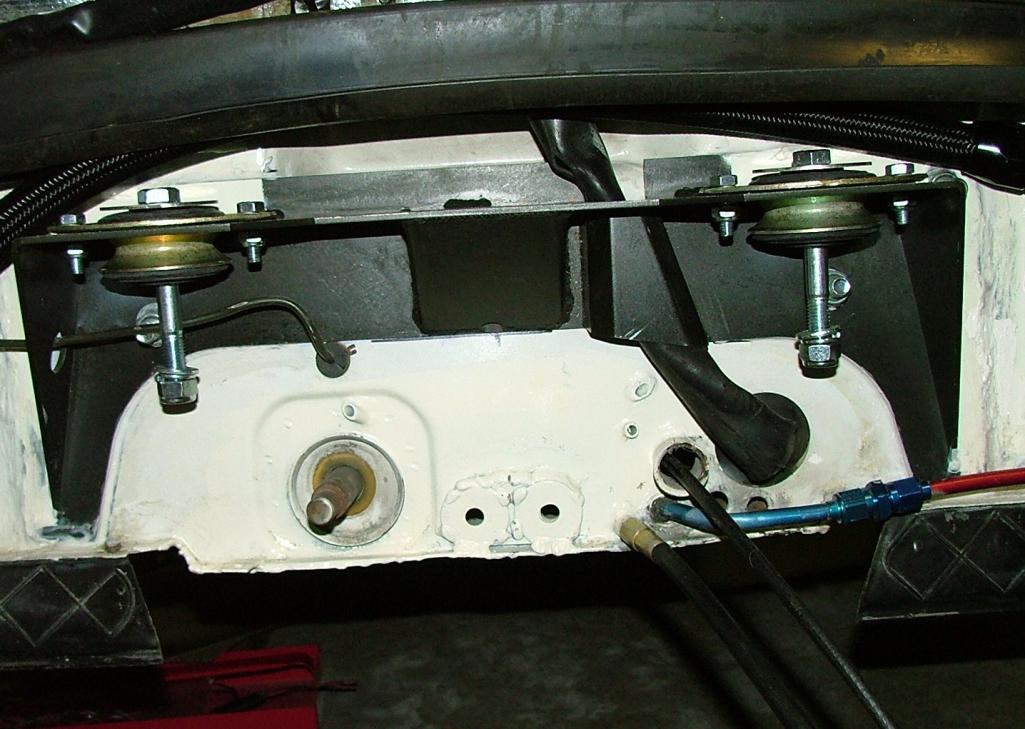
Anybody with a 74 take a look at my newly installed oil tank area. What a pain but the tank is in. A lot of "trial fits" but done. There is a strut on my car for the engine lid but it looks like the strut mount/ bracket is suppose to do a lot more by the looks of it. I don't know. Anyway the upper most corner of the bracket is in the way of installing the oil filter. The strut itself will clear it is just the upper corner of the bracket is in the way. Did you have to cut or modify this mount/ bracket thing to get the oil filter to fit?
Attached thumbnail(s)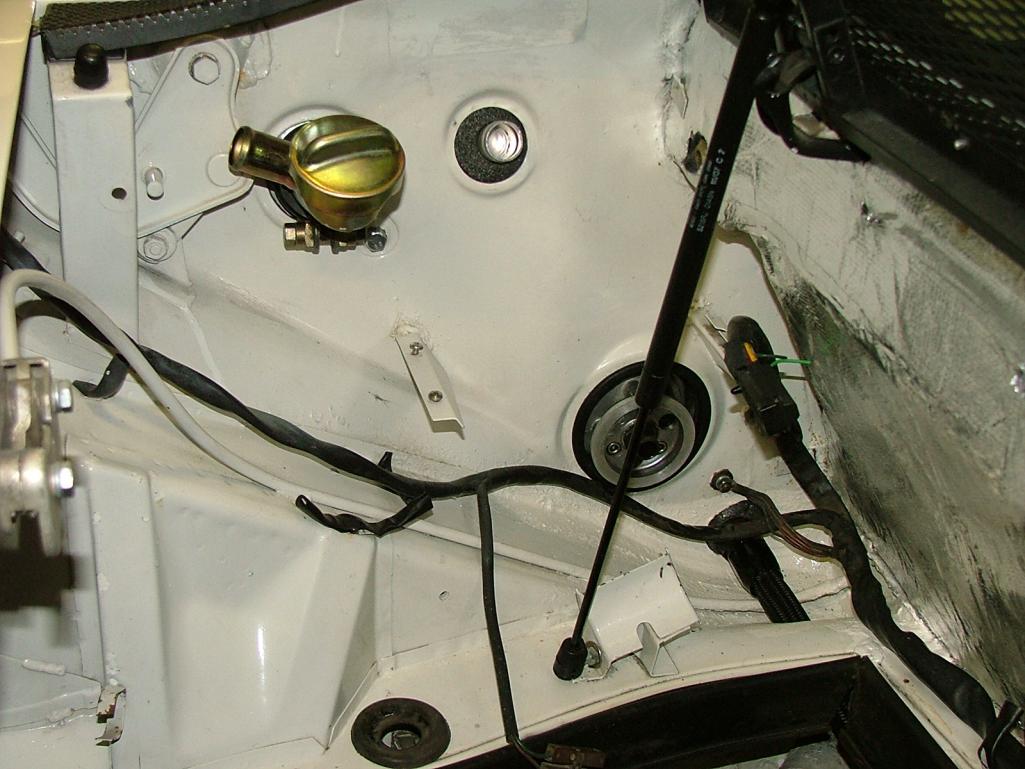
Posted by: rhodyguy Aug 24 2015, 01:21 PM
Pm sent.
Posted by: Lucky9146 Aug 24 2015, 02:10 PM
So learn as you go. Seems the lower bracket for my GT lid strut is affixed to an aux fan mount. Interesting. Strut works ok! Modified said bracket thanks Rhodyguy for the info.
Posted by: OllieG Aug 28 2015, 03:10 AM
I wasn't sure what that bracket on mine was for either - I figured it was something a six wouldn't need and I hadn't seen it on other conversions so I just lopped it off!…so it was an aux fan mount, hmm.
Nice job with the oil tank btw..
Posted by: R8CERX Aug 28 2015, 08:53 PM
Jim
Link to the seats you were looking for...
anyone here has had experience with these type of seats? (914 type)
here is the link:
http://www.exoticcarseats.com/
Posted by: Lucky9146 Oct 29 2015, 10:25 PM
My last post was mid August so it has been very slow with mostly wiring. And lots of it.
But before I get to that, I did carpet the back interior wall and access cover.
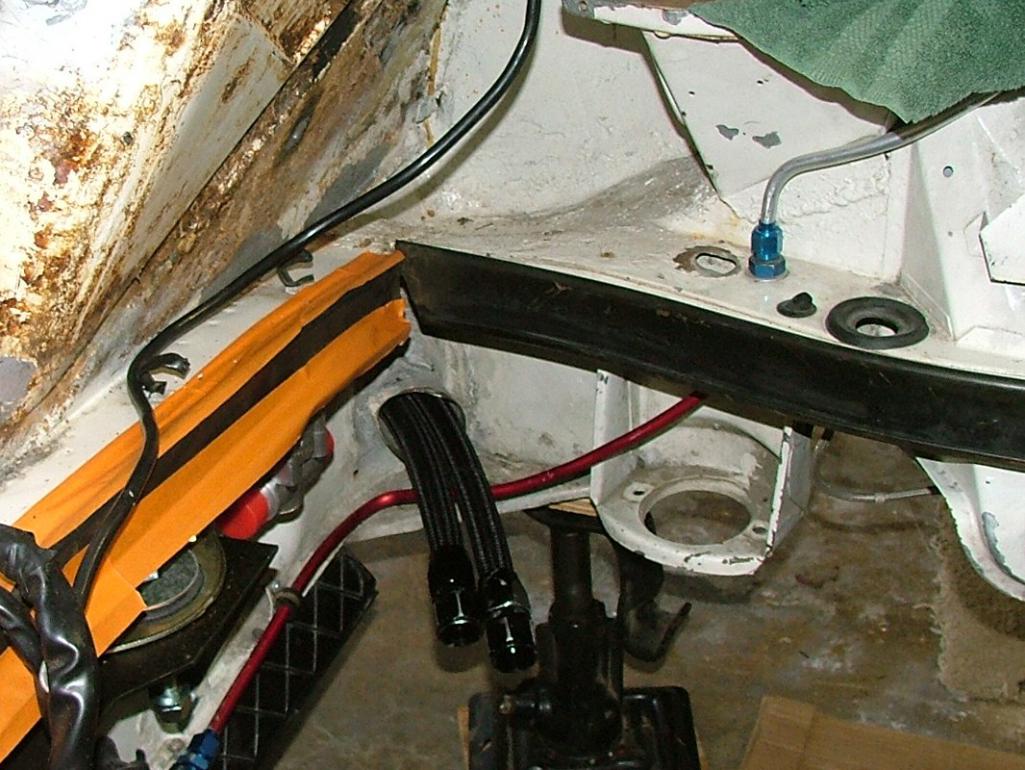
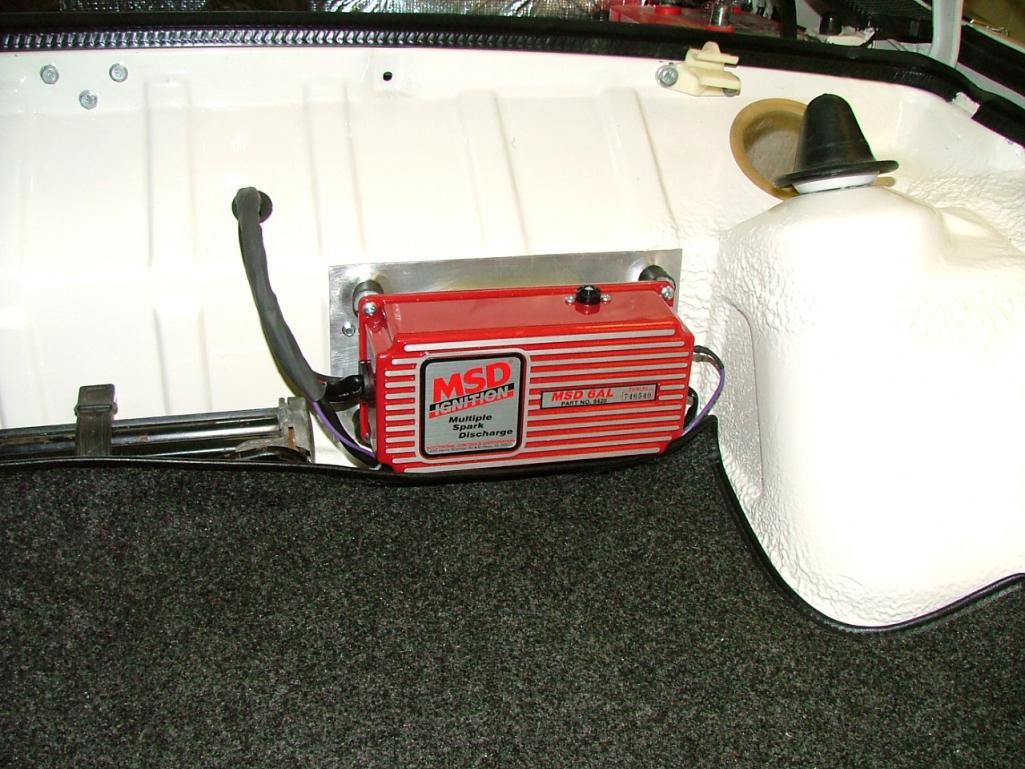
The first of the wiring challenge was locating and installing the MSD in the trunk. Wiring the MSD in, coupled with the engine conversion wiring Harness from Perry Kiehl, proved to be quite the challenge. For me anyway. Have to say that Perry Kiehl was extremely helpful in getting through it. Especially so, since I did not buy it from him directly, the PO did and Perry really came through to help out. I made a aluminum mounting plate as seen in the picture to adapt to the trunk forward wall.
Had to modify the Gas tank to make room for the oil cooler lines heading to the longitudinal as mentioned earlier. Local radiator shop did excellent work and resealed the tank as well. Thought it was going to take more modification than it did mostly cutting the flange off and a small indentation provided enough room.
Also carpeted the wall in the front trunk.
Much more wiring in the next post.
Attached thumbnail(s)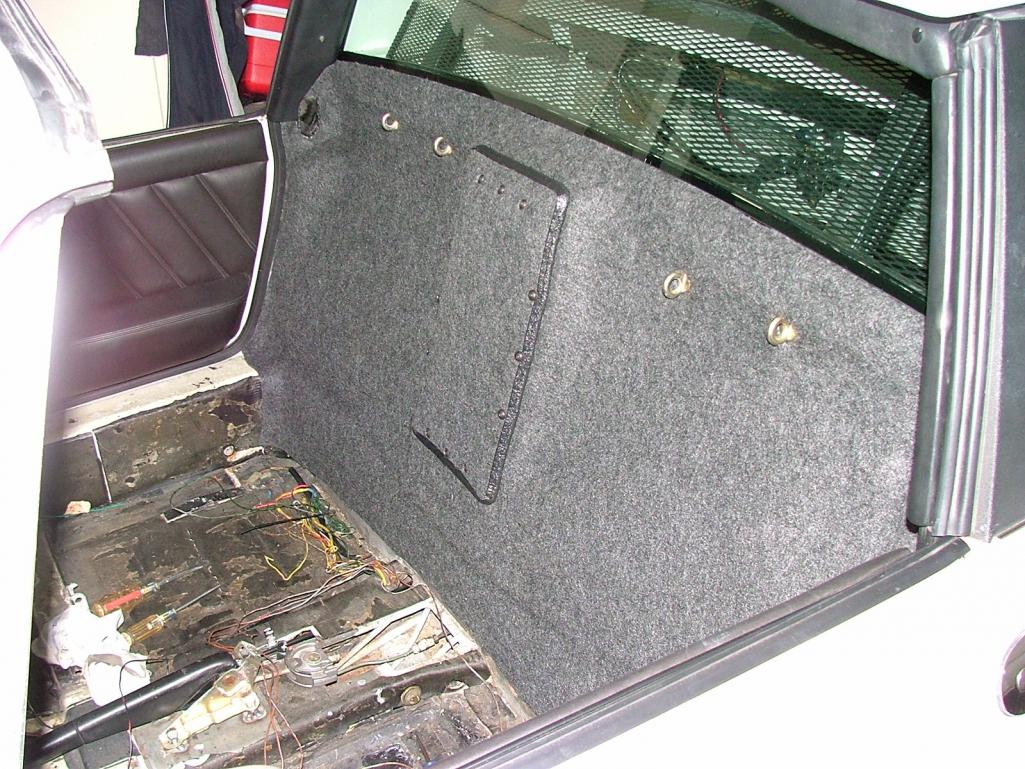
Posted by: bcheney Oct 29 2015, 10:41 PM
You're doing some nice work. Keep up the momentum and you'll be done before you know it. I remember seeing this car for sale...it is a nice project with many great parts. All the best to ya and I will continue to watch your progress 
Posted by: whitetwinturbo Oct 30 2015, 10:24 AM
Gas tank looks REALLY nice 
Posted by: jkb944t Nov 4 2015, 06:39 AM
This is some awesome work!
Jeff B
Posted by: Lucky9146 Nov 4 2015, 10:47 AM
Thanks to those who responded to my last post with encouraging feedback.
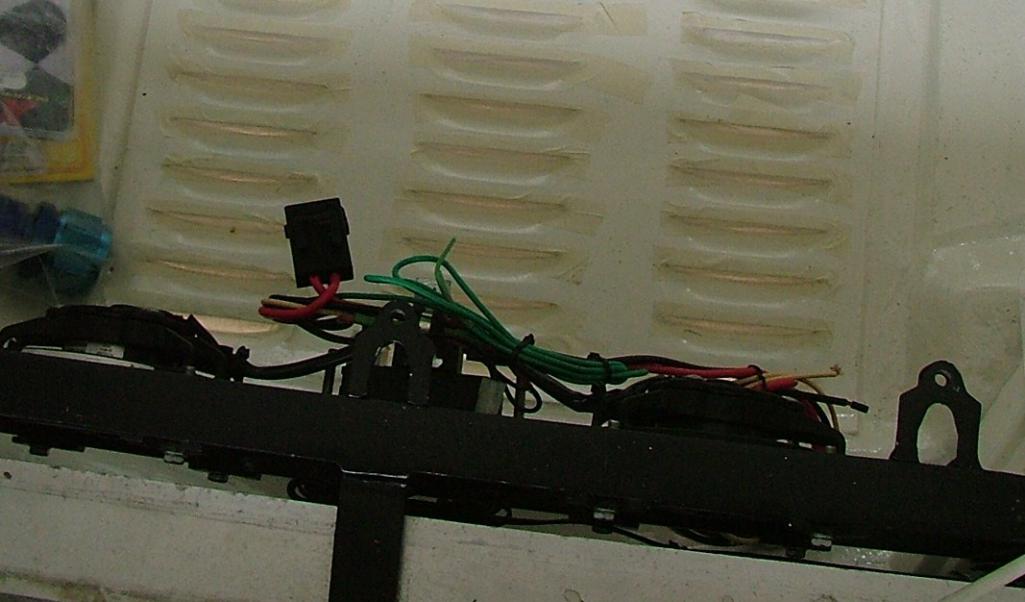
The engine compartment is all wired now and very cleaned up looking. I like how it came out. Hid the wires to the original fuel pump and also hid the wires to the blower, ran the new wire for the oil temp in eng compartment too. Still want to keep my options open as far as putting the engine in, so holding off for now. Looking to still add a starter relay.
Quad gage wiring completed recently. What a challenge that was! It is actually a quad gage with 4 warning lights, pretty slick. 4 days invested here on this alone. Lots of calls to New Vintage Gage in Detroit. Ben was very helpful. Again, the gage was not purchased by me directly, it was puchased by the PO. So Ben went above and beyond to help sort out a gage they sold about 4 years ago. Pretty cool. Had to run several new wires replacing wires and additional wires. Also thanks to Matt at CPR and Dave Walker toolguy.
Attached thumbnail(s)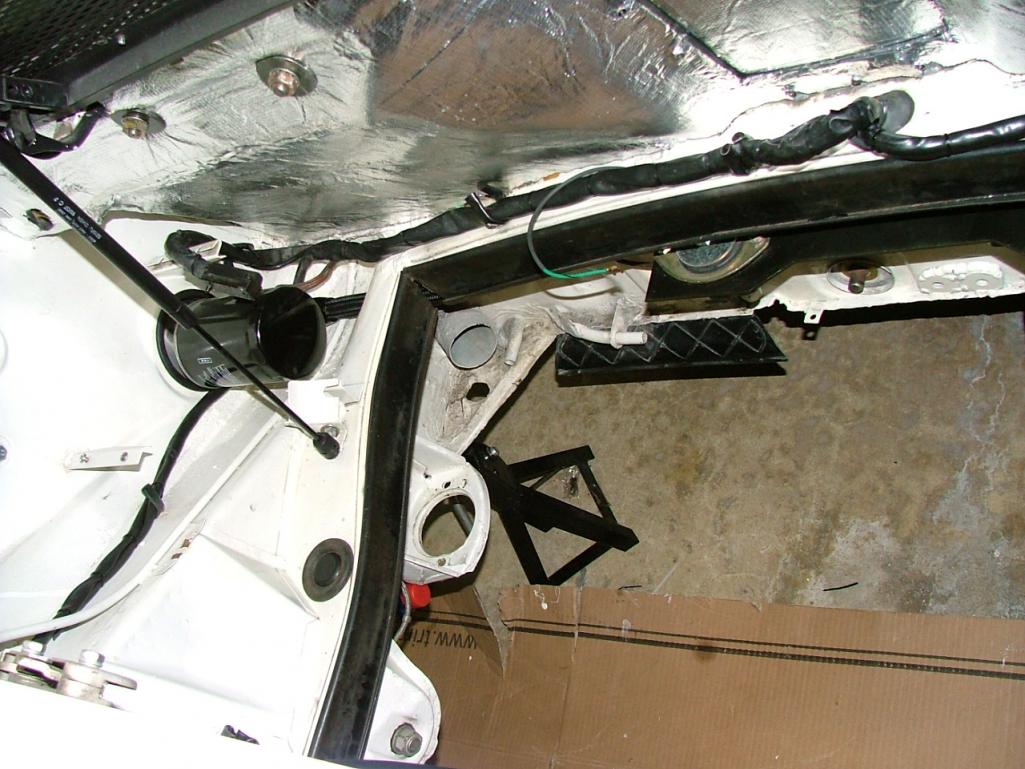


Posted by: whitetwinturbo Nov 4 2015, 11:22 AM
Cool gauge! 
Posted by: Lucky9146 Nov 4 2015, 11:43 AM
Put power to the chassis recently for the first time since I have owned the car! This car has not seen power in 18 years!!! Matt at CPR suggested a good systematic approach to applying power for the first time. No fuses blew, no melted wires and a lot worked, some not so much. Had some burned out bulbs, bad ground, and normal stuff. The reason I had not put power to the chassis is there were a bunch of extraneous wires to figure out, sort out, and rip out. Plus there were a couple of previously burned/ blistered wires to replace. (picture) Thanks dlewis for the box of 914 wires to use. Also read here on world from a guy who burned his harness not once but twice, freaked me out. It is nice to see head lights, running lights, gage lights, flashers, horn, wipers, fog lights, and turn signals. Still bugs to work out like parking brake light, and interior light. I even got the radio and power antenna working!
This car originally being a 4 cyl had the single bulb blinker in the tach. With the 6 cyl tach it actually has a left and right. I needed to run wires from the flasher area the grn/blk right turn and grey/ blk left turn. Now the white/blue original wire for single turn signal is now not used!?? oh well. I have correct turn signals now on the 6 cyl tach!!! Blink normal and everything!!! There is hope for me yet. (Disclaimer: It didn’t work first time). Wiring diagrams from Dave Walker toolguy sure helped.
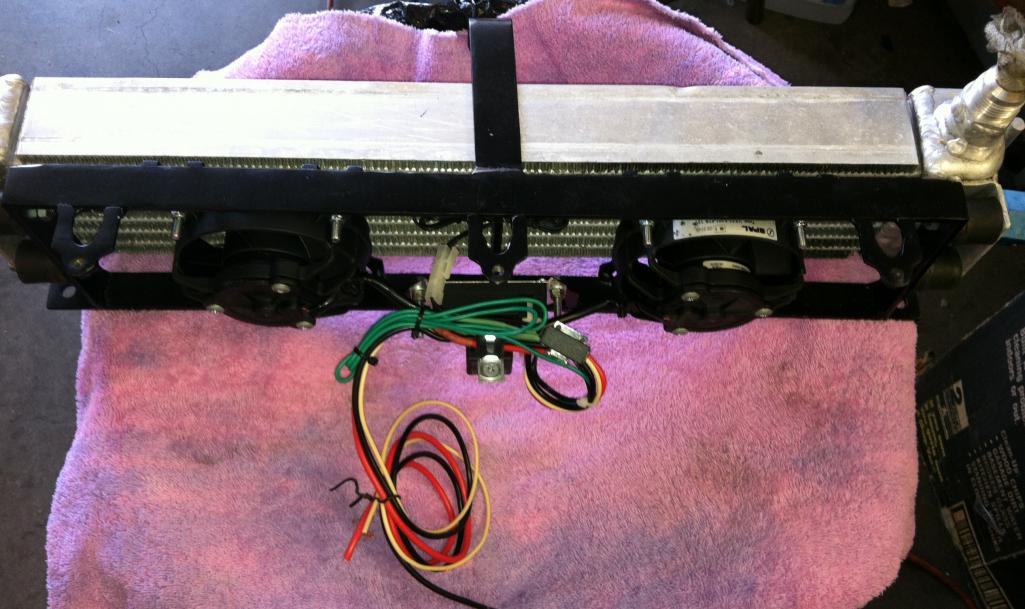
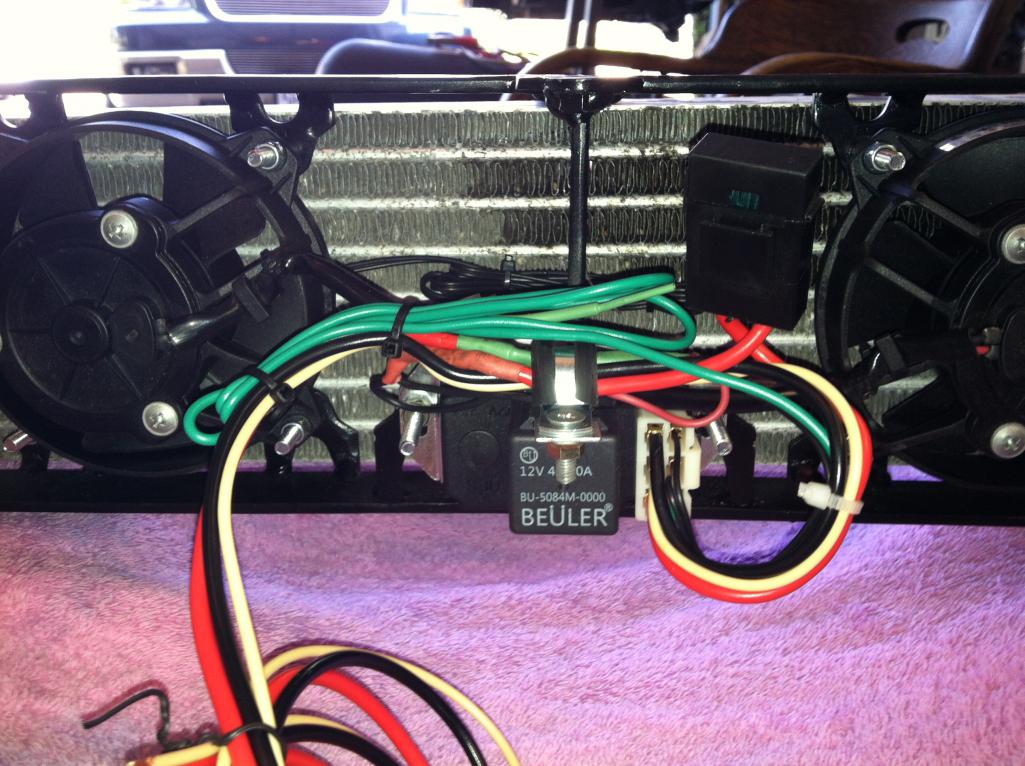
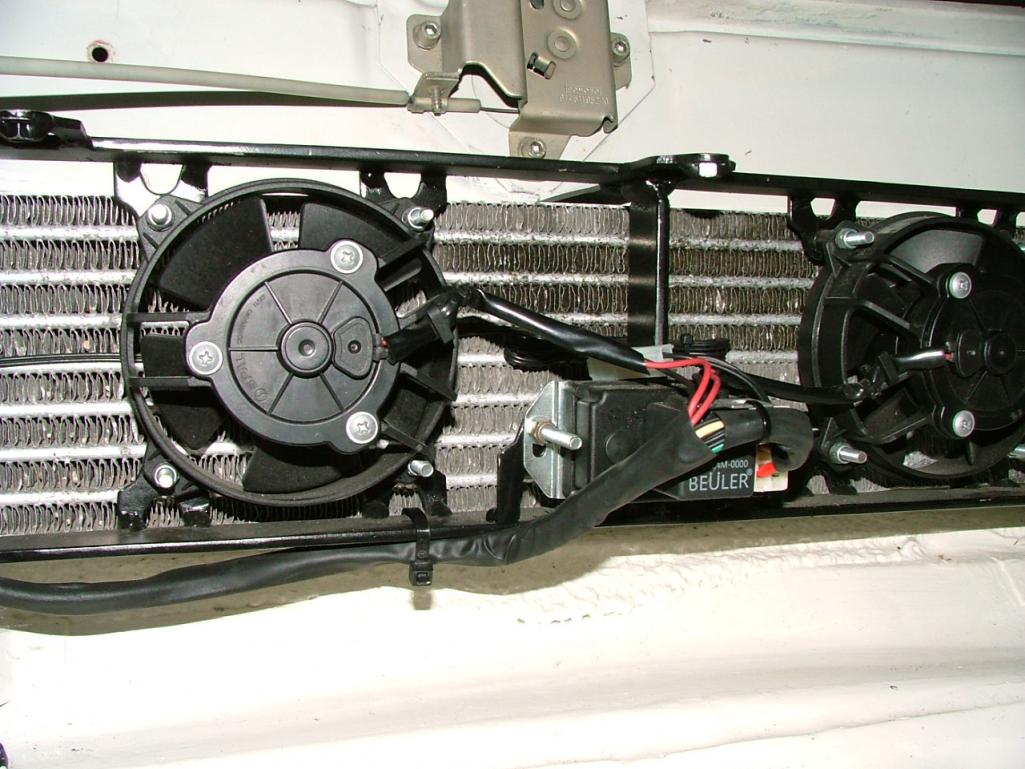
Next focus was wiring on the oil cooler fans and fuel pump. I finally get it! Thanks to Dave Walker toolguy I finally do get it how the wiring is suppose to work with a relay. So re-did the wiring to the fans because I thought it could look way better (before and after pictures) Want to use the small 4 fuse block and took the in line fuse previously installed for the fans and moved it to a small fuse / relay panel. It will be so much easier to see on that little fuse block than bundled up in a wiring harness under the oil cooler shroud.
Used Porsche relays on the panel since I had the bases (thanks dlewis) and relays so made a fuse box/ relay tray out of aluminum, toolguy helped me out with his slick machine shop in punching and bending the alum panel. The 4 fuse panel has a fuse for the fans and fuse for the fuel pump with 2 empty fuse positions for anything future. Note that the fan had its own relay so that is still located on the fan frame. Also I left myself a spare relay base on the panel to potentially run a relay for the headlights or anything else.
Attached thumbnail(s)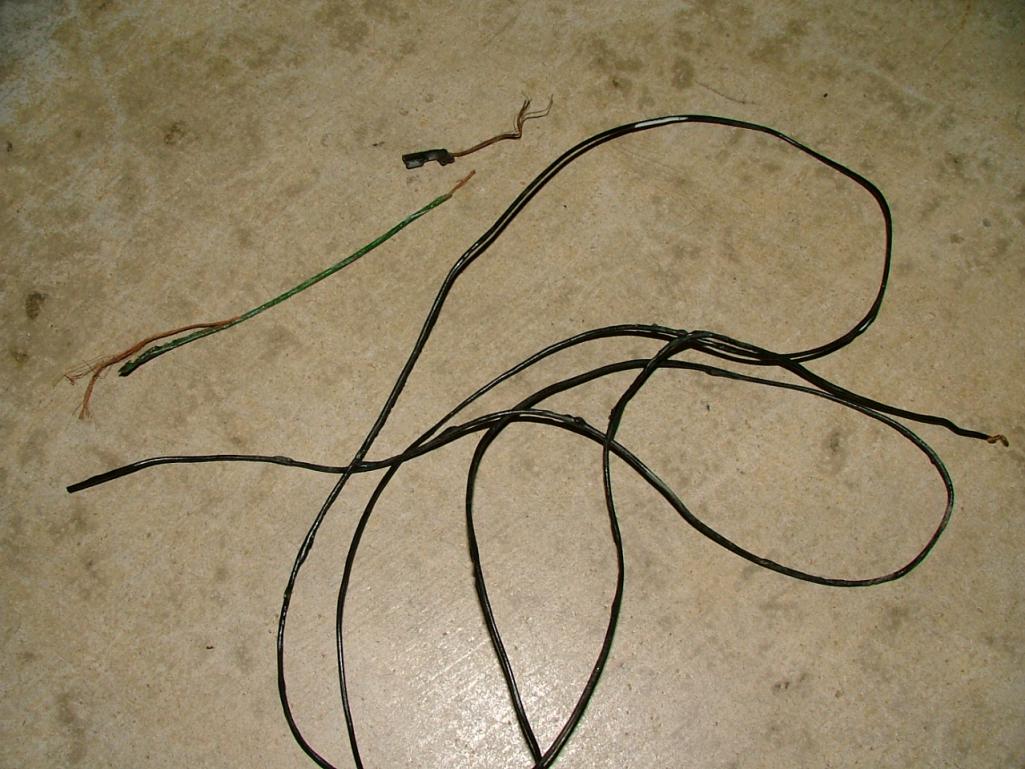
Posted by: rhodyguy Nov 5 2015, 10:40 AM
Wow! Clean. Nice work.
Posted by: Lucky9146 Dec 4 2015, 11:45 AM
Unfortunately I have not been able to devote much time to the project over the last month but I was able to complete the installation of the front bumper. This was actually no small feat and a culmination of a several month process but dammit I really wanted a chrome front bumper!
The car as I bought it had a fiberglass bumper and lower valance. First of course was finding a decent front bumper that would be able to be chromed. The bumper I found was just ok and it did have a good bumper top. Second was having the bumper modified to accommodate the intake for the front oil cooler PLUS match up to the fiberglass lower valance. Thanks Chris! Then there was the chrome shop and almost 4 months later. Next was finding some sort of mesh screen to go in the intake. Lastly was fitting it all to the car. Trial fit, trail fit, trial fit, and trial fit.
For those looking for an inexpensive solution for the mesh screen I found at the Home Depot that gutter guard worked great and was already painted black, was close to the right size, fairly easy to work with, and like $3.00. How many parts can you buy for $3.00?
Note the PO cut extra holes for the oil cooler intake in the front panel, I just blacked out around it. Attaching the mesh to the fiberglass valance was accomplished with strategically placed tie wraps.
Attached thumbnail(s)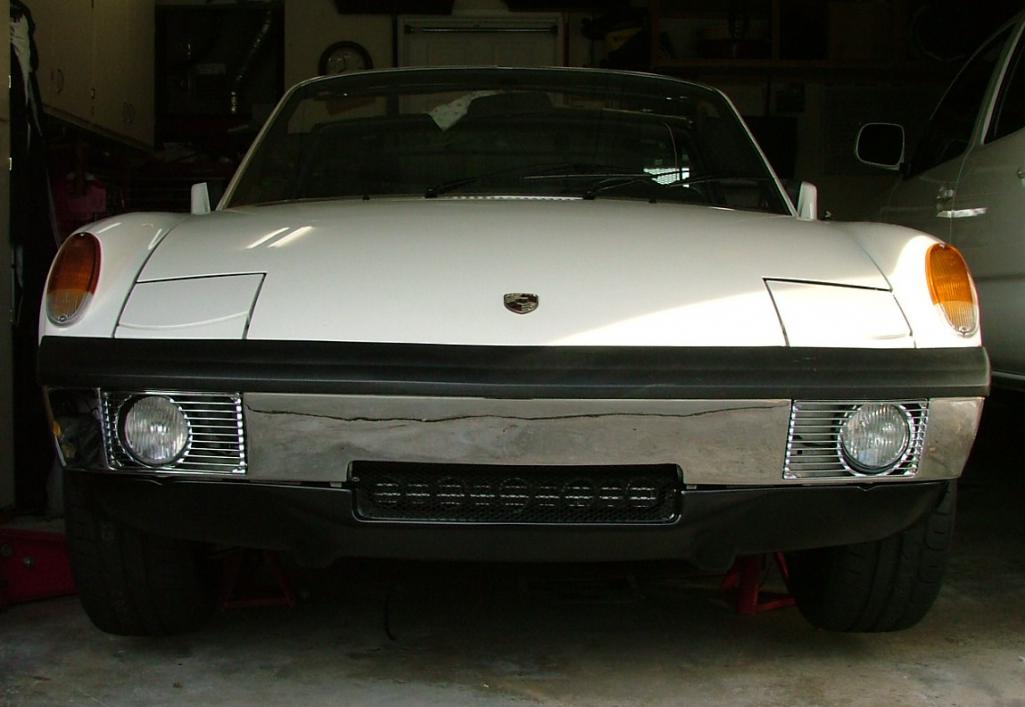
Posted by: Justinp71 Dec 4 2015, 12:10 PM
![popcorn[1].gif](style_emoticons/default/popcorn[1].gif) Looking Good!
Looking Good!
I hope to redo my front bumper soon as well. Did you modify the bumper yourself?
Posted by: MJHanna Dec 4 2015, 12:13 PM
Nice work on the bumper It's one of those details that "make' your car. No one that looks at it will have any idea how much effort went into it. But you will always look at it with eyes that show and remind you that it was all worth the effort. 

Posted by: siverson Dec 4 2015, 12:35 PM
Nice work! Makes me want to get my orange car back on the road. Our builds are very similar.
-Steve
Posted by: Lucky9146 Dec 4 2015, 01:22 PM
Looking Good! I hope to redo my front bumper soon as well. Did you modify the bumper yourself?
No, did not modify myself wish I could say I did. A guy I know here in San Diego who is a metal wizard did it for me. He has done some amazing stuff so this was like a minor thing for him but I sure appreciated it.
Posted by: Lucky9146 Dec 4 2015, 01:27 PM
Nice work! Makes me want to get my orange car back on the road. Our builds are very similar.
-Steve
Thanks, I know what you mean about getting it on the road. Yes yours does look similar. Unfortunately mine is getting too used to the jack stands. The way things are going it looks like 2016 for me. Still lots to do.
Posted by: Mueller Dec 4 2015, 02:24 PM
Very nice....yep, attention to detail makes a huge difference, great job.
Posted by: Cairo94507 Dec 4 2015, 03:10 PM
Wow! Excellent attention to detail. Your car is looking beautiful. Full speed ahead.
Posted by: moparrob Dec 3 2016, 10:39 PM
I was the prior owner of this car and must say that I am very impressed with the work Jim has done since he has had it. I also realize that i would not have had the skills to complete the car to this level and I applaud his patience and perseverance in picking up the pieces and bringing this project ever so close to completion.
I can't wait to see it running when he is able to devote more time to the project. Needless to say - SUBSCRIBED!
Posted by: forrestkhaag Dec 4 2016, 12:07 PM
At your convenience, can you post a picture of the access port open to see the engine front / and loosely describe your cover's dimensions? I have built a cover from doner firewall but want to confirm that I will be able to get at everything necessary in the engine bay with my dimensions. Thanks and nice work.
Posted by: mb911 Dec 4 2016, 12:45 PM
I am just so impressed with the build. The bumper rechrome seams really cheap.. Do you have some contact info?
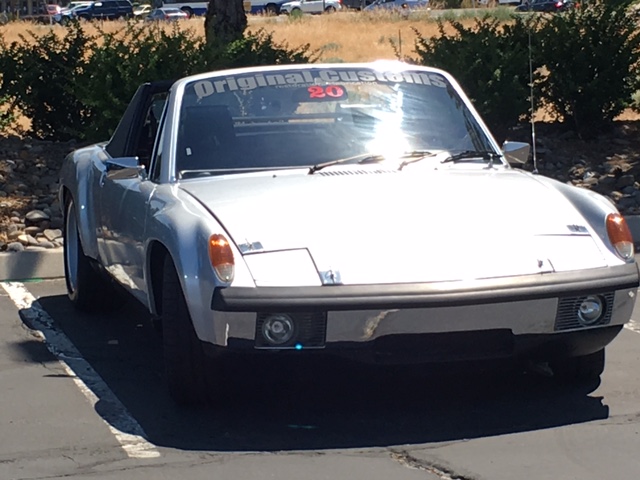
Posted by: ConeDodger Dec 4 2016, 05:21 PM
I am just so impressed with the build. The bumper rechrome seams really cheap.. Do you have some contact info?
Ben,
I didn't see what he paid for the rechrome. Mine was $1000 by Ogden Chrome in Utah. Most I've ever paid for a rechrome but it's perfect, as in perfect! Original Customs modified the bumper. Mark has done 3-4 now so he has perfected his technique on that.
Attached image(s)
Posted by: mb911 Dec 4 2016, 05:29 PM
I am just so impressed with the build. The bumper rechrome seams really cheap.. Do you have some contact info?
Ben,
I didn't see what he paid for the rechrome. Mine was $1000 by Ogden Chrome in Utah. Most I've ever paid for a rechrome but it's perfect, as in perfect! Original Customs modified the bumper. Mark has done 3-4 now so he has perfected his technique on that.
I am not sure if I am willing to pay that much for the rechrome.. I know that 350 I am very interested.. There is a local shop that told me they would do it for 250 but I need to have it polished in between the removal of chrome and then the replating.
Posted by: 914dave Dec 4 2016, 05:31 PM
Your build is awesome! Who made your quad gauge? New Vintage did mine a few years back. I know what you mean about the wiring. I've been working on mine for a week. My whole harness is out of the car so it's a little easier to work on.
Posted by: Lucky9146 Dec 4 2016, 06:24 PM
At your convenience, can you post a picture of the access port open to see the engine front / and loosely describe your cover's dimensions? I have built a cover from doner firewall but want to confirm that I will be able to get at everything necessary in the engine bay with my dimensions. Thanks and nice work.
Forestkhaag,
I was recently in touch with the previous owner (Moparrob)and let him know about the thread and progress on World. If you look closely you will see my last post was actually a year ago almost to the day. By responding, Moparrob resurrected the thread with his kind words on the work I have completed. Unfortunately life got in the way a year ago and I had to sideline the project and put it in my trailer. In the trailer I cannot actually get to anything so I am sorry I cannot furnish picture or dimensions at this time. When I get it back out, and I am thinking in just a couple of months, I will provide the picture and info you have requested. Hopefully that will still suit your time frame needs. All the best on you project!
Posted by: Lucky9146 Dec 4 2016, 06:46 PM
I am just so impressed with the build. The bumper rechrome seams really cheap.. Do you have some contact info?
Ben,
I didn't see what he paid for the rechrome. Mine was $1000 by Ogden Chrome in Utah. Most I've ever paid for a rechrome but it's perfect, as in perfect! Original Customs modified the bumper. Mark has done 3-4 now so he has perfected his technique on that.
I am not sure if I am willing to pay that much for the rechrome.. I know that 350 I am very interested.. There is a local shop that told me they would do it for 250 but I neetehd to have it polished in between the removal of chrome and then the replating.
Ben,
Thanks for the complement on the car. You will see in my post just above the project has been idle for a year.
On the bumper...Well unfortunately the chrome job did not come out as good as hoped and I would not recommend the shop I used for that reason. There was a slew of delays and poor communications and in the end it was just one of those deals where I took the best he could do. I think I ended paying about $300 but it was to have been much more if he could have delivered what he said he could do.
But to be fair there were some "issues" with my bumper to begin with from a repair, so much so, that the first place I took it to would not touch it. That place I wanted to take it to was Escondido Plating he advertises show quality chrome and I have used him before. Don Prestage is a great guy and does good work. Check him out.
860 Metcalf St. Escondido, CA 92025
760-743-4148
cell 760-505-4148
escondidoplating@att.net
autochromeplating.com
Good luck!
Posted by: Lucky9146 Dec 4 2016, 07:02 PM
I am just so impressed with the build. The bumper rechrome seams really cheap.. Do you have some contact info?
Ben,
I didn't see what he paid for the rechrome. Mine was $1000 by Ogden Chrome in Utah. Most I've ever paid for a rechrome but it's perfect, as in perfect! Original Customs modified the bumper. Mark has done 3-4 now so he has perfected his technique on that.
ConeDodger,
Gotta love your bumper! Sometimes you just have to throw down to get it done and yours looks great and I am sure it was worth it for perfect. Obviously that was the same look I wanted too and I also had to find someone who could do the modification, and then a chromer, so in all it took about 6 months. Take care!
Posted by: Lucky9146 Dec 4 2016, 07:12 PM
Your build is awesome! Who made your quad gauge? New Vintage did mine a few years back. I know what you mean about the wiring. I've been working on mine for a week. My whole harness is out of the car so it's a little easier to work on.
914dave,
Thanks on my build and as I said a couple of replies up it has been on hold for a year. Looking forward to getting back to it!
The quad gauge was also from New Vintage but the PO I got the car from had bought it but had not installed it. In my thread I talk about how helpful Ben at New Vintage was when I was trying to sort it out even though they had made it years ago he went the extra mile. Unfortunately they don't make them anymore or at least when I was last in touch with them about a year ago. Good luck on your car!
Posted by: Lucky9146 Aug 15 2017, 06:59 PM
My last real post to this thread was Dec 2015 ouch! Although there were minor comments in Dec 2016 nothing was posted on progress. Because there was none!!! Lots of life got in the way!
Revised 7-11-18 to add that I had posted a separate threat asking for help on the torsion bars 3-30-17 that received a few responses but no real solution was reached.
http://www.914world.com/bbs2/index.php?showtopic=307499
I actually have been “back at it” since April of 2017 but the progress has been so darn slow that I could not see posting. The short story is that I am now focused on the engine and I didn’t plan to be…… Lots of “issues” came up
Recap, I bought this “work in progress project” with some good stuff already completed and a lot of brand new parts to work with. To top that off this 1974 is an amazingly solid GT conversion with genuine Porsche PN metal flares on a car that did NOT need paint when I got it!! Yes that is correct and this paint job is over 20 years old! It also came with a ’79 3.0 big port six, that to my understanding, “was ready to go”. Hence my handle Lucky9146 for this amazing find after a very long search. This is how it looks today but still not complete. 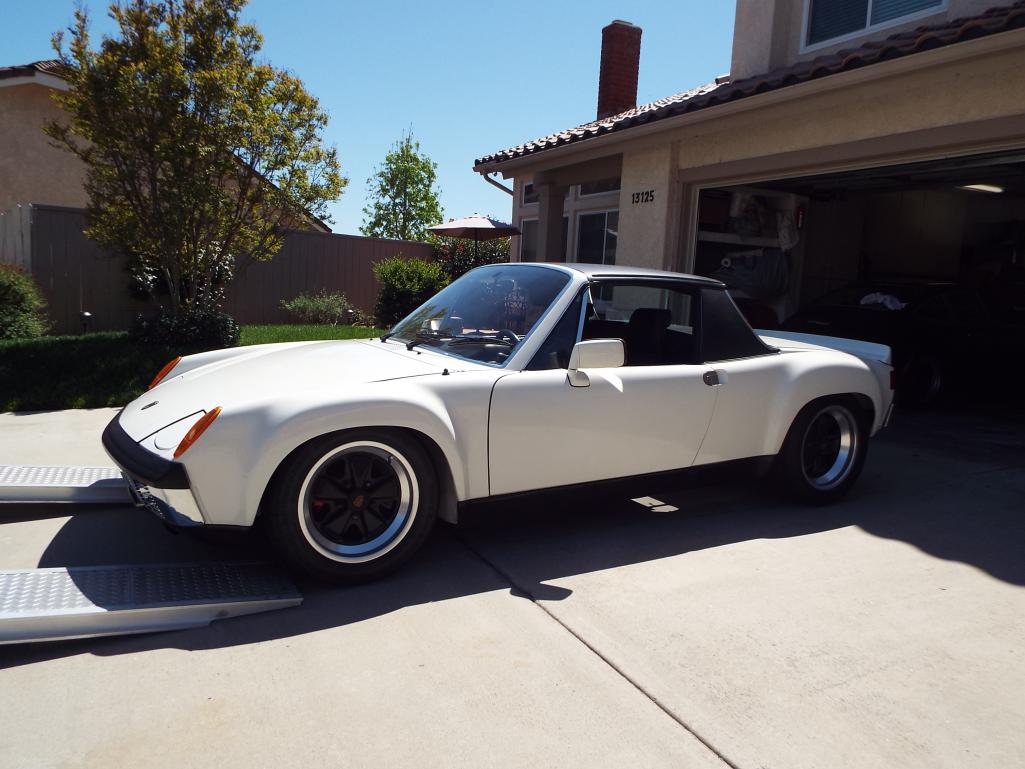
I had mated the trans to the engine a while back and really had planned to install it as basically the next major phase. However I had a chance to chat with the PO moparrob earlier this year about the car, and although he had dressed the engine with a pair of Weber 40’s, 914-6 powder coated sheet metal, turbo valve covers etc. to where it looked fantastic, he expressed some reservations about the engine itself. Dang. Turns out we really did not know the history.
And…. In addition I also learned that CIS pistons and CIS cams were NOT that great of a setup with Webers. Soooo….. what next took me quite a bit of time was contemplating and researching what to do.
All this all led to my decision to tear down the engine and go through it. My second 3.0 build, so at least I had done one.. It sure looked ready to go!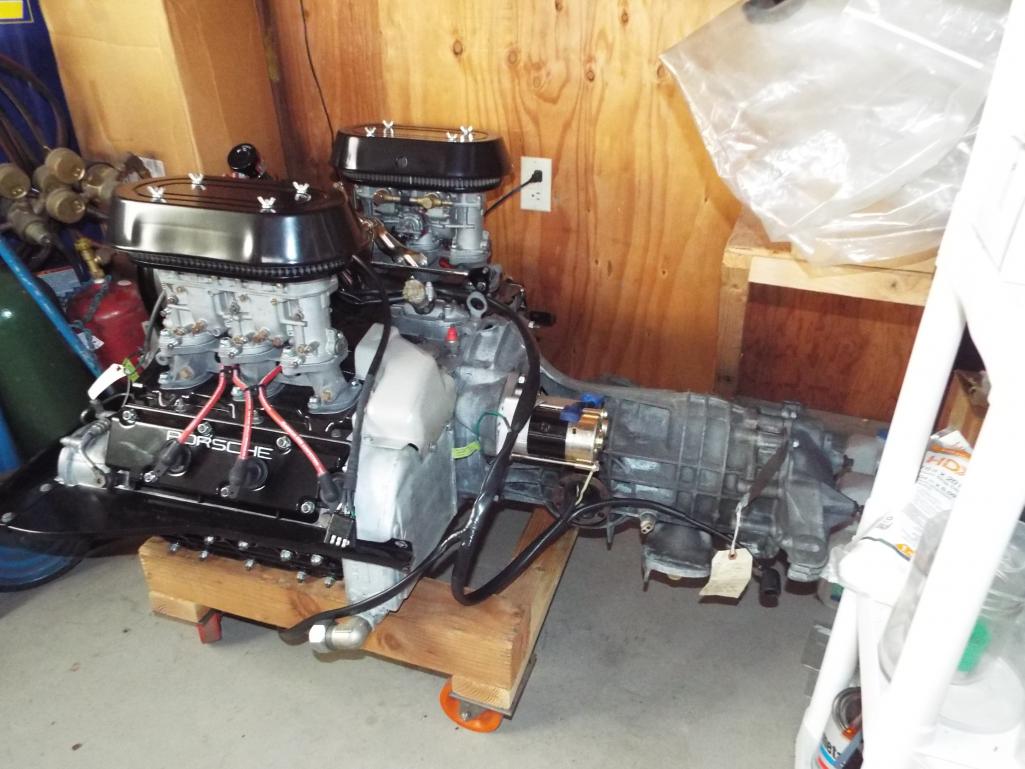
Posted by: Lucky9146 Aug 15 2017, 07:13 PM
I had recently (like May – Aug 2016) rebuilt the 3.0 CIS for my then newly acquired ‘78 SC and that really is a good part of the reason my 914 project got “back burnered”.
Save all the tail dragger comments it is a blast to drive! And I got a smoking deal.
This is the 3.0 CIS going in. 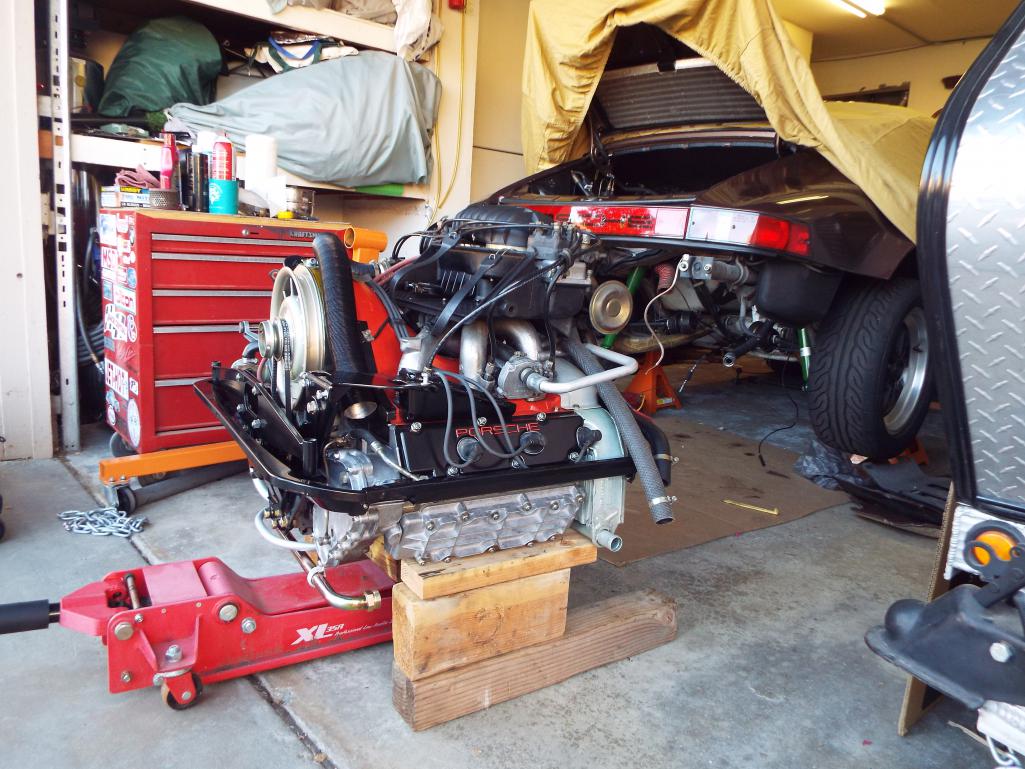
Posted by: Lucky9146 Aug 15 2017, 07:19 PM
And Installed. Such a sweet running motor! 
Posted by: Lucky9146 Aug 15 2017, 07:25 PM
So up on the engine stand the tear down begins and the discovery process.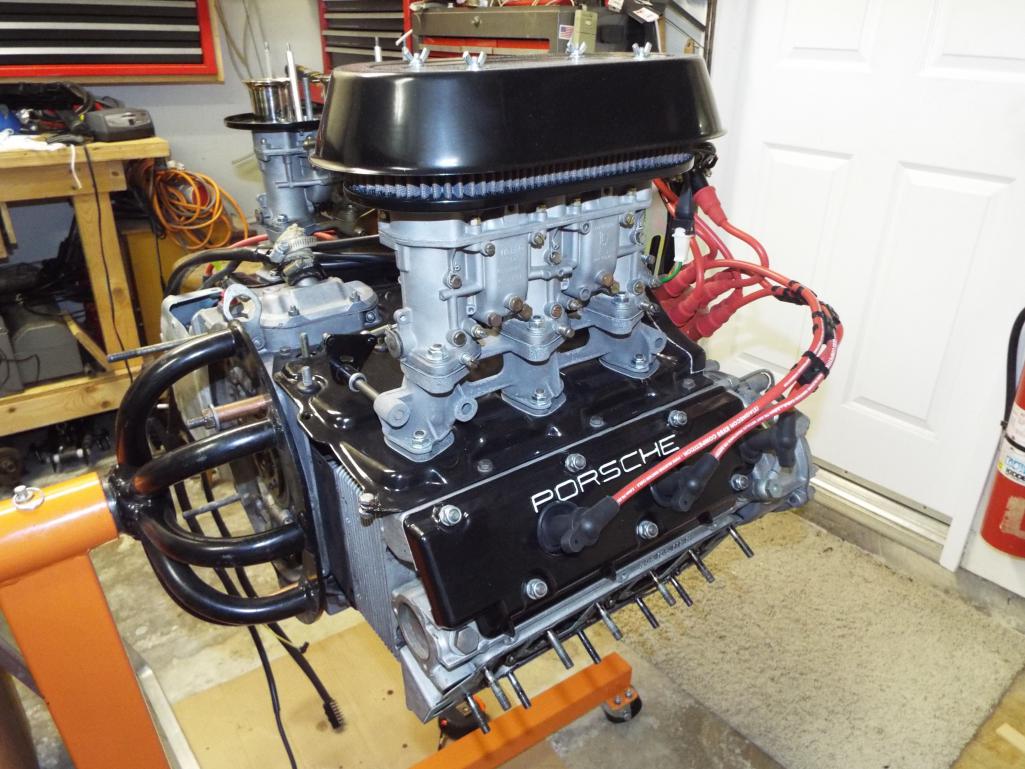
Posted by: Lucky9146 Aug 15 2017, 07:42 PM
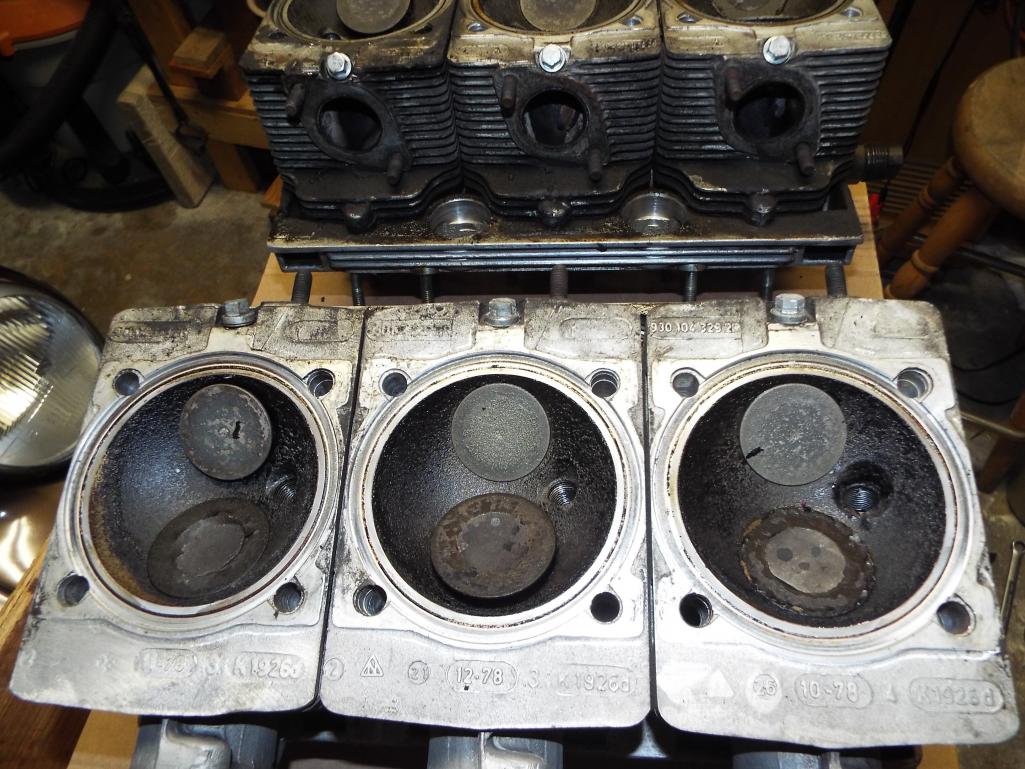
Turns out it was a good decision to get into this engine because there was major carbon that went down the piston skirts and clogging the rings. The Cylinders and heads were not the greatest looking either. Appears not to have been all that well maintained and it apparently had sat for several years and at least the 6 years I know of causing other problems.
Inside seemed to be a caramel color, like the pistons shown, from maybe burnt oil?
Can’t blame the PO too much he got it from a guy who bought it from a reputable source but ya how that goes………….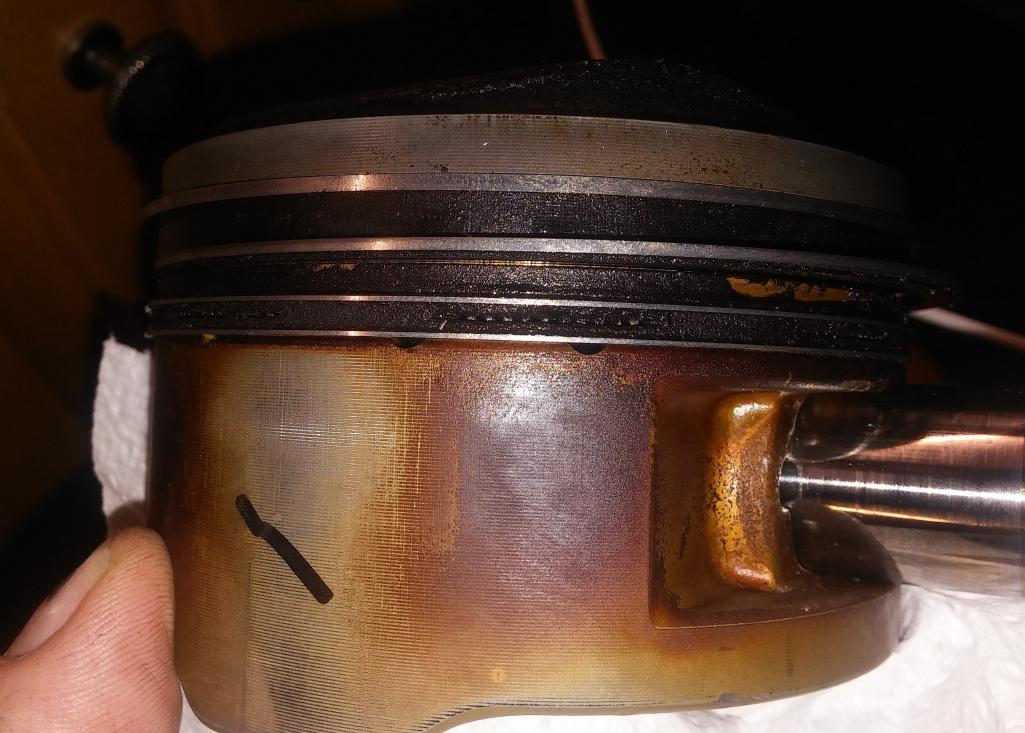
Posted by: moparrob Aug 15 2017, 07:45 PM
Hey Jim, the progress looks great. Glad to see you're taking this the next step forward.
Posted by: Lucky9146 Aug 15 2017, 07:56 PM
Thanks Rob!
More of the caramel color inside like the pistons...
Posted by: porschetub Aug 16 2017, 12:06 AM
Good move,oil burning indicated on the pistons and lack of oil changes has caused the caramel colour in the chain cases .
Great to see you back on the job .
Posted by: defianty Aug 16 2017, 01:32 AM
Nice to see this project moving along again. It's one that inspired me to convert my car with a 3.0L. Good luck.
Posted by: Lucky9146 Aug 16 2017, 09:50 AM
Good move,oil burning indicated on the pistons and lack of oil changes has caused the caramel colour in the chain cases .
Great to see you back on the job
.Thanks for the reply and all the way from New Zealand too!
Looked to see if you had a thread and found yours on your car from May 2016 through June 2017.
Especially liked the comment on Apr 2 "just when you think the list is getting smaller something new always crops up" How true! How true!
Good lookin car you have and I will refer back to your thread now for inspiration and ideas.
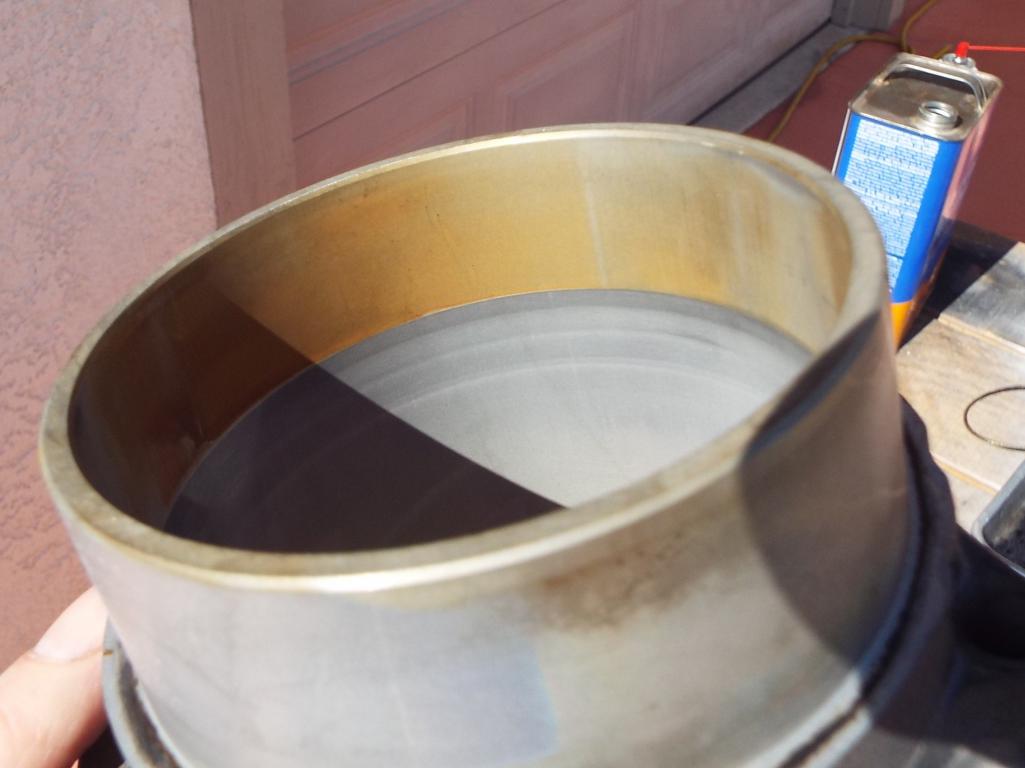
Continuing with the tear down process here is a cylinder....
Comparing these cylnders with the SC (mentioned earlier) that I rebuilt, this cylinder looked much worse. On my SC I could still see the hone marks and it had 100k miles on it! Not so here.
These did not look like good candidates for a hone job as I was considering new pistons to get away from SC pistons.
And here are the heads....
Posted by: Lucky9146 Aug 16 2017, 10:35 AM
Nice to see this project moving along again. It's one that inspired me to convert my car with a 3.0L. Good luck.
Defianty- I appreciate your checking in too. Yes it is good to be at it again and like I said I started in April this year and I wish I'd have just posted as I went along but trying to catch up now.
Hearing that mine helped inspire you is pretty cool because I have seen your thread "914 2.0>3.0 GT conversion" and you are doing some amazing work! I mean the detail is really something. Wow! Now who is inspiring who? I will continue to follow your thread as well. Good luck to you too.
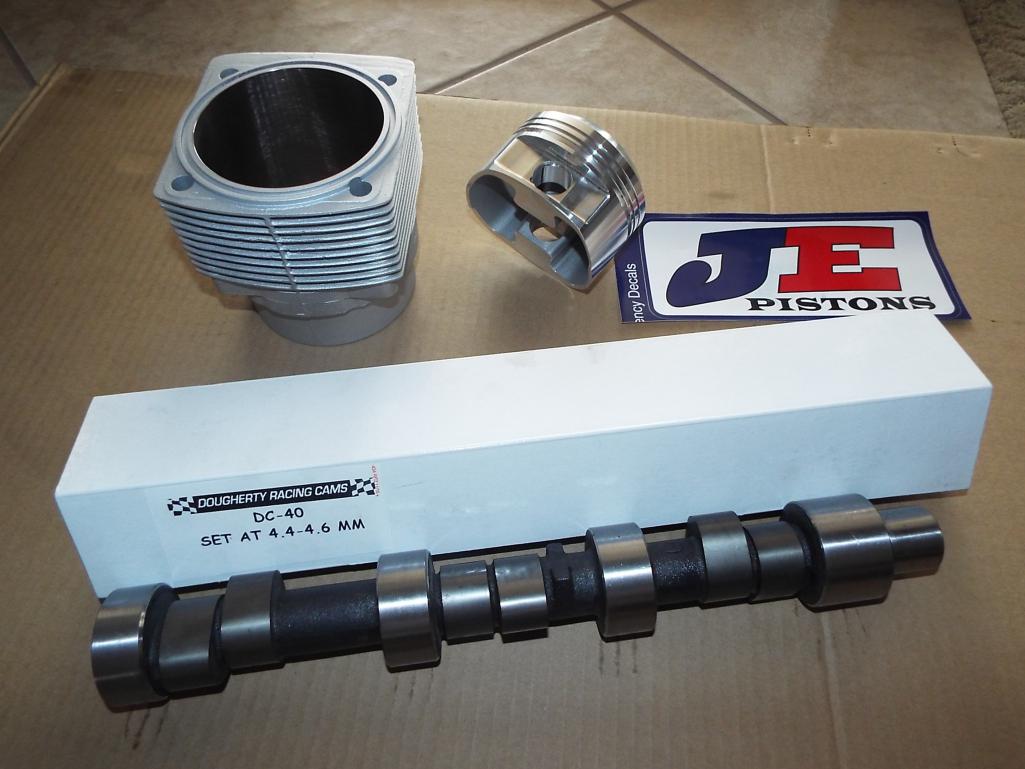
So all my research led to the following decisions. Cams and pistons is what really took me the time figure out. then of course lead times for valve job and cylinder work.
Dougherty DE40 Cams
Re-Nikosil the cylinders
JE 9.5-1 Pistons almost too nice to hide in an engine!
Top notch valve job from one of the best in San Diego
Posted by: Lucky9146 Aug 16 2017, 06:33 PM
So here we are down to the bottom end which by all accounts think will be ok. Almost ready for assembly. All lower Delvar head studs were replaced with steel ones.
Mean while the sheet metal got some attention.
Before: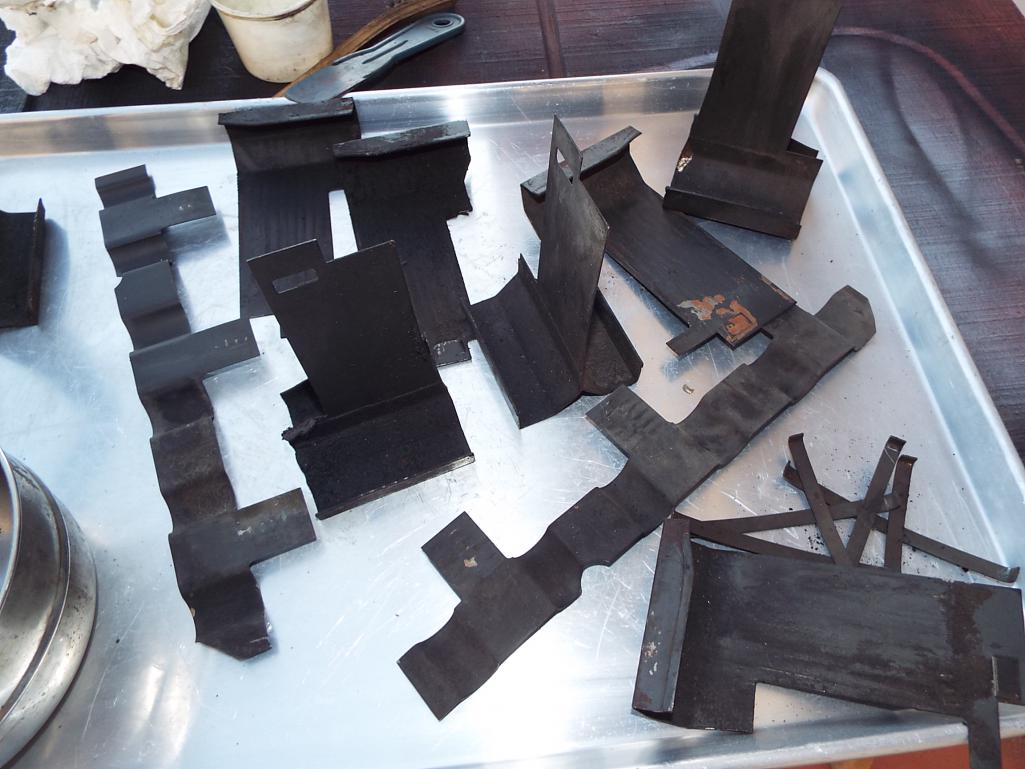
And After.......
Posted by: Lucky9146 Aug 16 2017, 10:37 PM
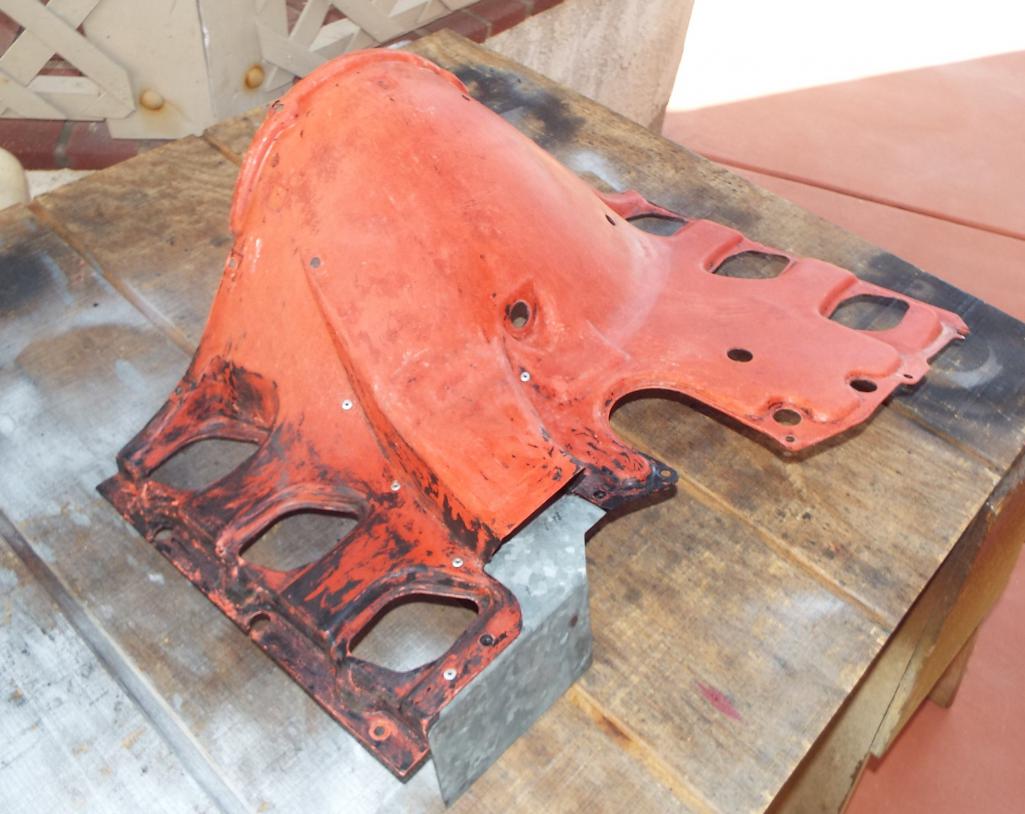
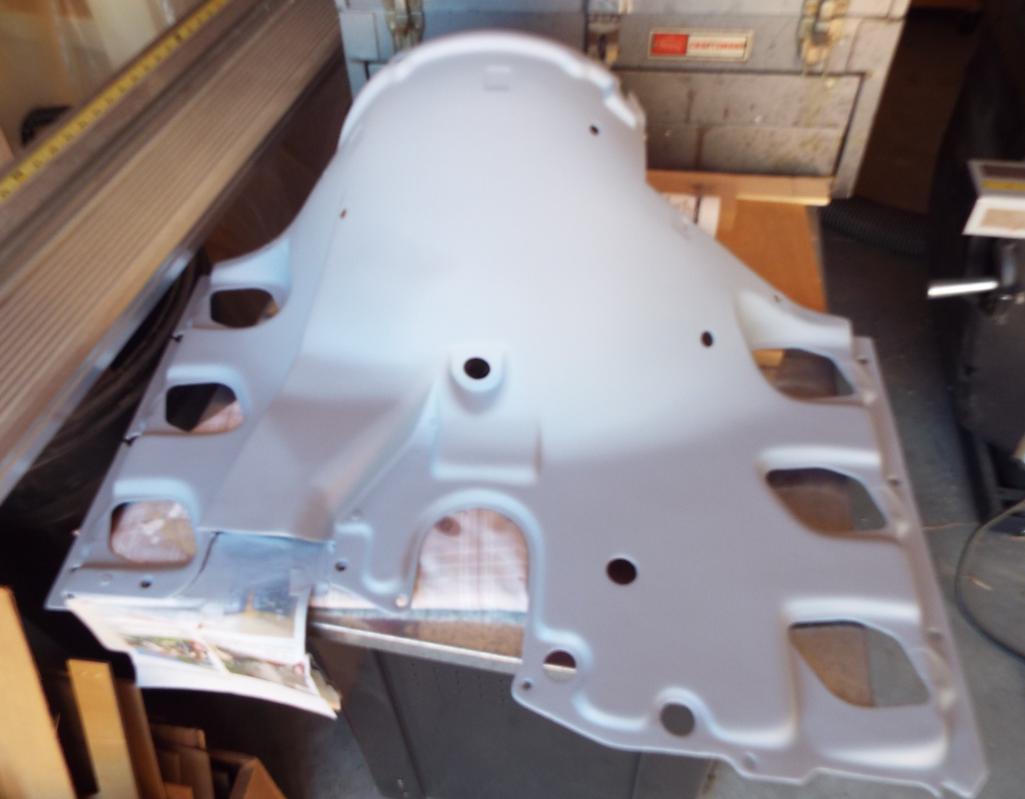
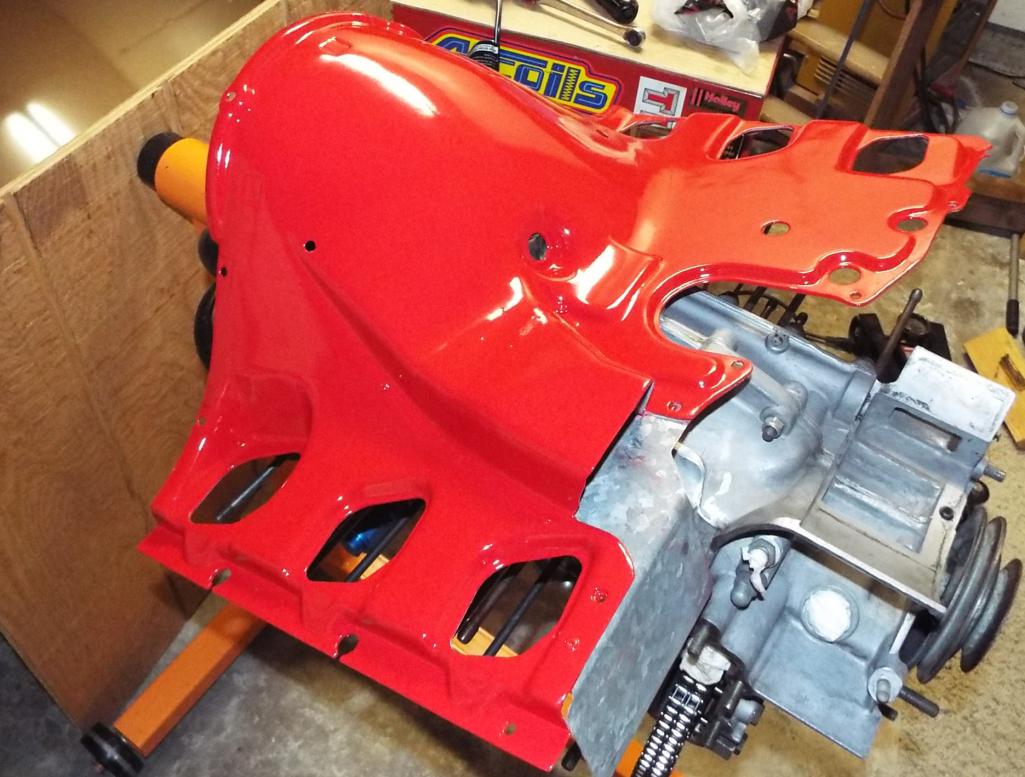
One fun project that I thought I could knock out of the way fairly quickly was the engine cooling shroud. PO had painted the original red one black and it was a nice shiny paint job and all but I just thought the engine being all black with black rain hats, black valve covers, and black shroud would be lost in the hell hole and I wanted it red.
I first wrongly thought that I could just strip the shroud down to the fiberglass original red and that would be good. Big! Big! mistake because not thinking, I used paint stripper, and it got into the fibers and I just couldn't get all the black off! What a mess!
Now I HAVE to paint it again and so I contacted moparrob to find out what he painted it with because the black was pretty nice and amazingly he he still had the can of black Rustoleum For Plastic that he used and shot me a pic. Try to find red Rustoleum For Plastic locally in CA. Nope! Ended up buying from Summit Racing. I must have sprayed and sanded and then primed and sprayed and wet sanded #600 at least 8 times because the paint just kept krinkling up.
So after I had tried several things with no luck I finally ended up calling Rustoleum and amazingly enough they are actually quite helpful. Suggested Rustoleum Professional Primer which can be found locally but the Rustoleum Automotive Line Acrylic Enamel Gloss red #248642 they recommended as their top of the line was another tough one and had to order. I highly recommend this paint. A couple of good coats of this and you're good.
At one point I almost started to look for another shroud but ended up saving this one and it came out great just took a lot of extra work. And sanding.......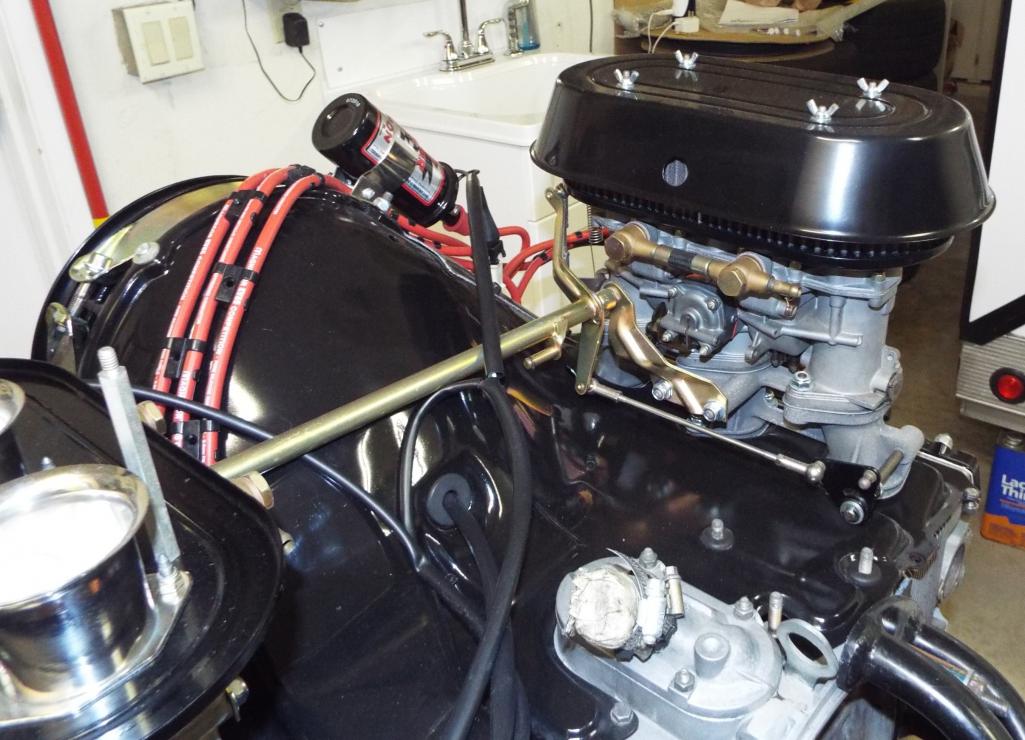
Posted by: Larmo63 Aug 16 2017, 10:47 PM
Wow, looks great. Fun thread to read and a nice car to look at!
Posted by: Lucky9146 Aug 18 2017, 11:23 AM
Thanks Larmo63! I have been following your thread as well and can relate to your ups and downs. I see your engine is going in soon. Best of luck!!
As mentioned earlier my engine sat for years and that is not good it appears for rockers and cam shafts.
No pic of cams (very very minor on cams but going to DC 40's anyway) and here is my worst case rockers.... 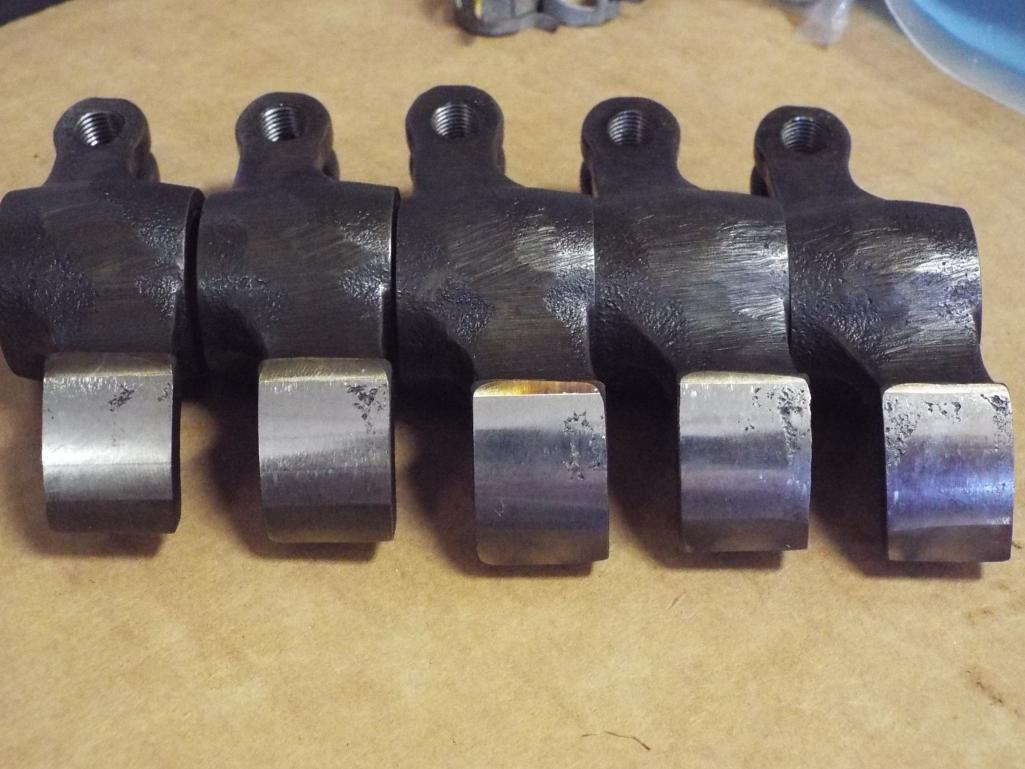
Reconditioned rockers from Henry Schmidt via Ken @ 911 Vintage in Fallbrook CA.
Apparently Henry is doing rockers for Nascar and has developed a great process.
And if you have not met Ken he is a great guy and I always enjoy the drive up for the in person experience and a poke around his shop.
Ugh! Another unplanned expense!
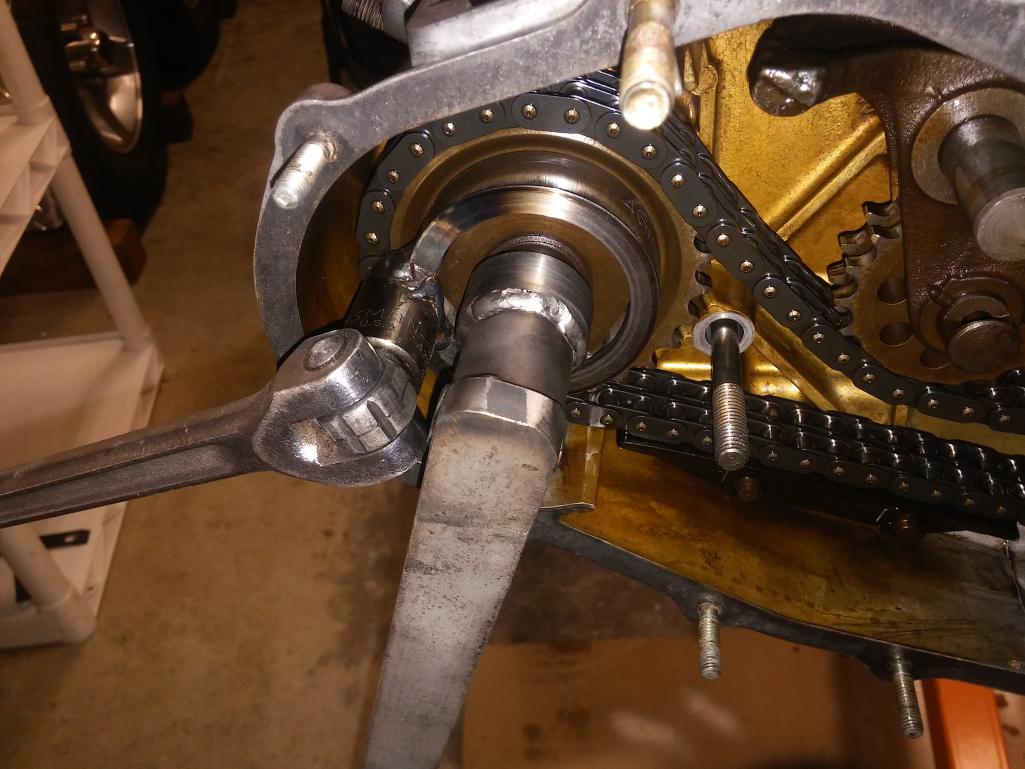
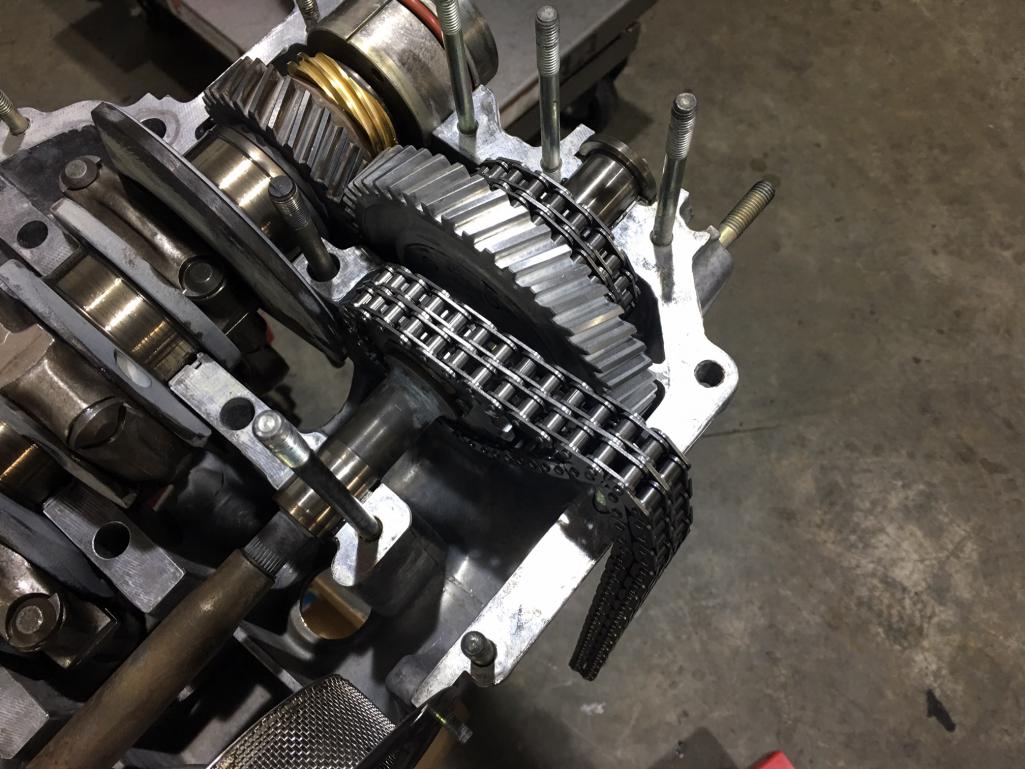
Decided to do new timing chains. why not?
Seems like everything else is being changed out! Simple operation and worth every penny of insurance. Basic stuff I know but there may be those out there that have not done some of it. In fact this was my first timing chain change out on a 3.0.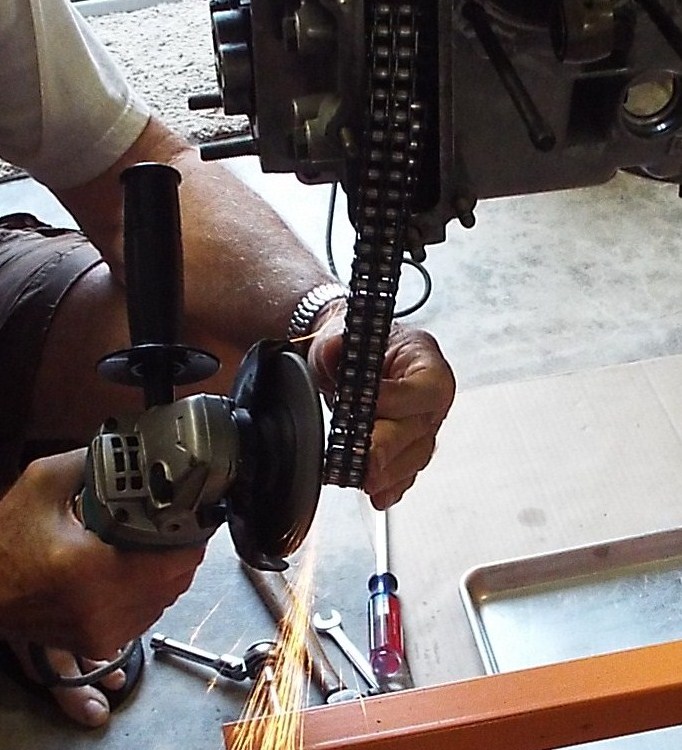
Just feed the new chains through following the old chains out using the new master links and good to go!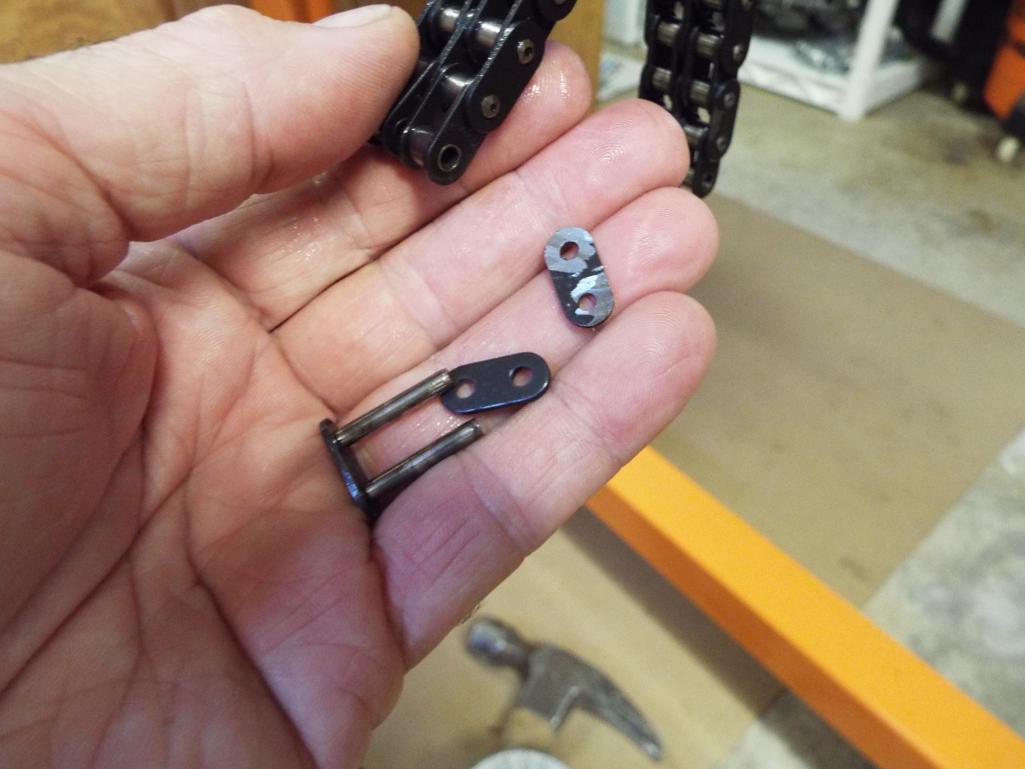
Posted by: Lucky9146 Aug 18 2017, 09:26 PM
The cam housings had cracked and peeling sealant on the thru pins on the back sides so the recommendation is JB Weld as a similar material used by the factory originally.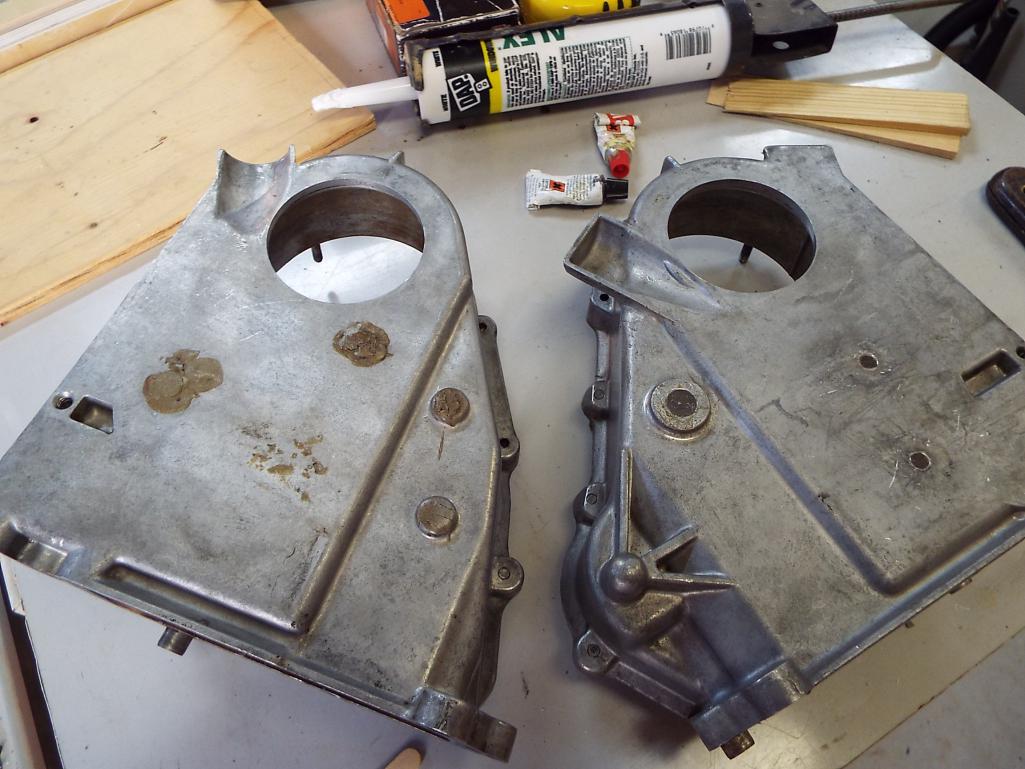
Unfortunately I put it on a bit thick and then had to file it down as there was not enough clearance with the cylinders/ heads.
Posted by: Lucky9146 Aug 18 2017, 09:42 PM
Cam tower cleaning and prep was a very tedious process. There is no laquer thinner, carb cleaner, gas, paint thinner or whatever else I tried that I know of that will take that Locktite 472 crap off. 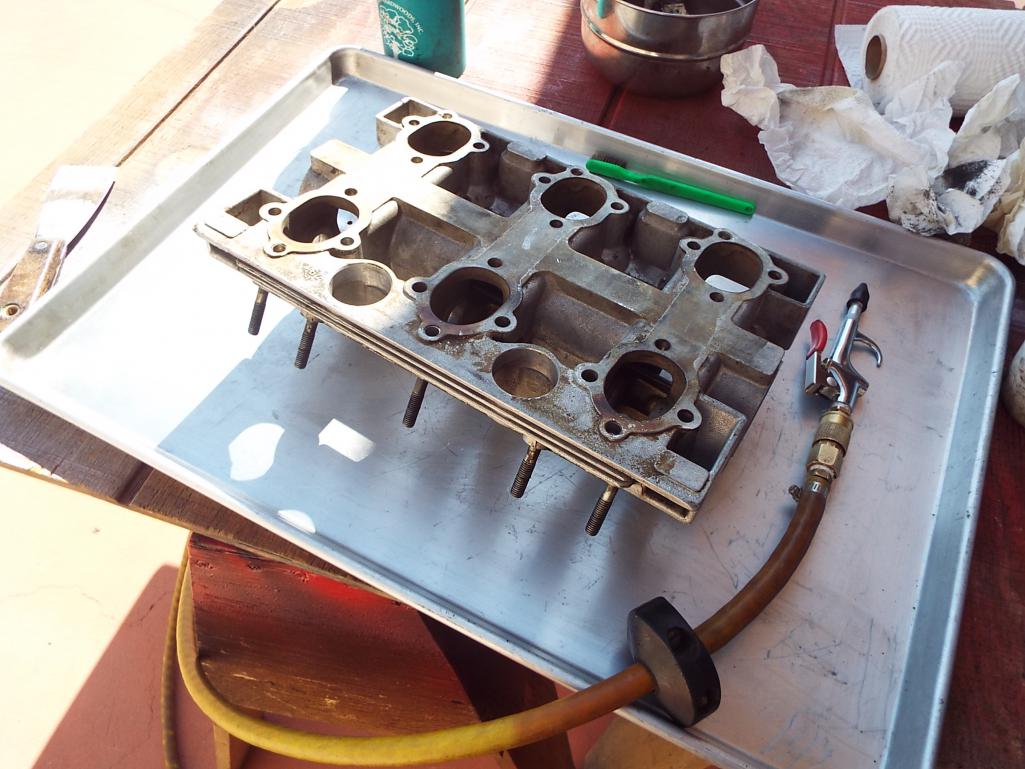
A buddy of mine has a surface plate so I used 320 sand paper to clean the Locktite 472 off of them and of course this also helped ensure flatness too.
There were many more cleanings after the sanding operation. Ugh!
Before and after pics: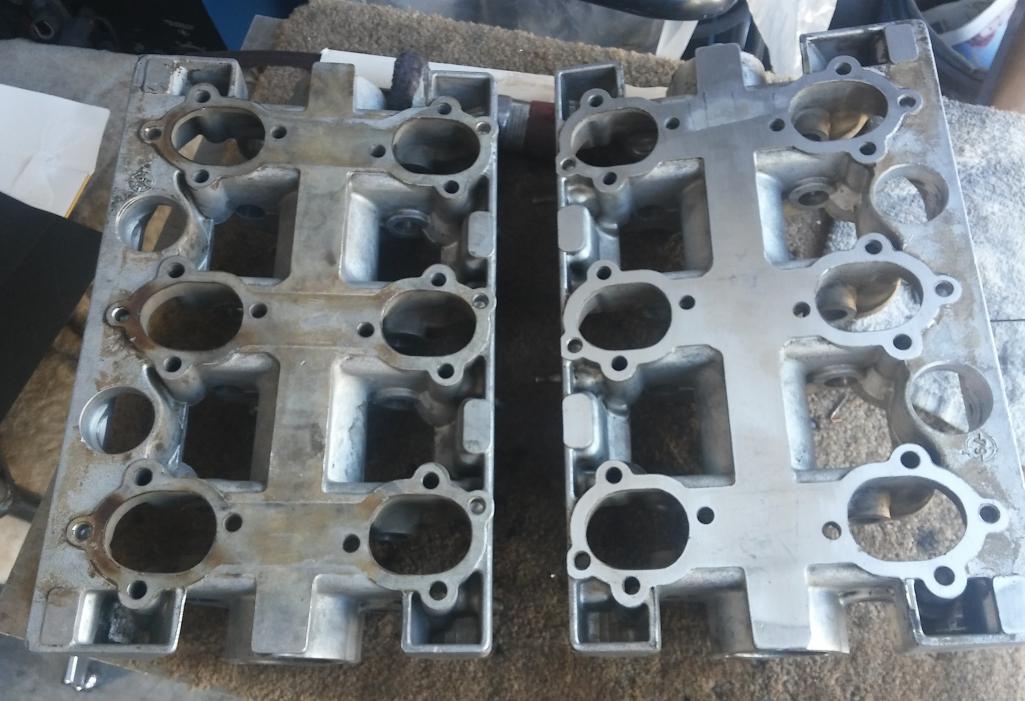
Posted by: 914forme Aug 19 2017, 06:43 AM
Keep it up, answering a lot of questions I will more than likely have myself.
BTW, seeing you grind the chain with an un protected hand, brings back painful memories.
Posted by: Lucky9146 Aug 19 2017, 02:58 PM
Keep it up, answering a lot of questions I will more than likely have myself.
BTW, seeing you grind the chain with an un protected hand, brings back painful memories.
Stephen thanks for the encouragement and good point on the grinding!
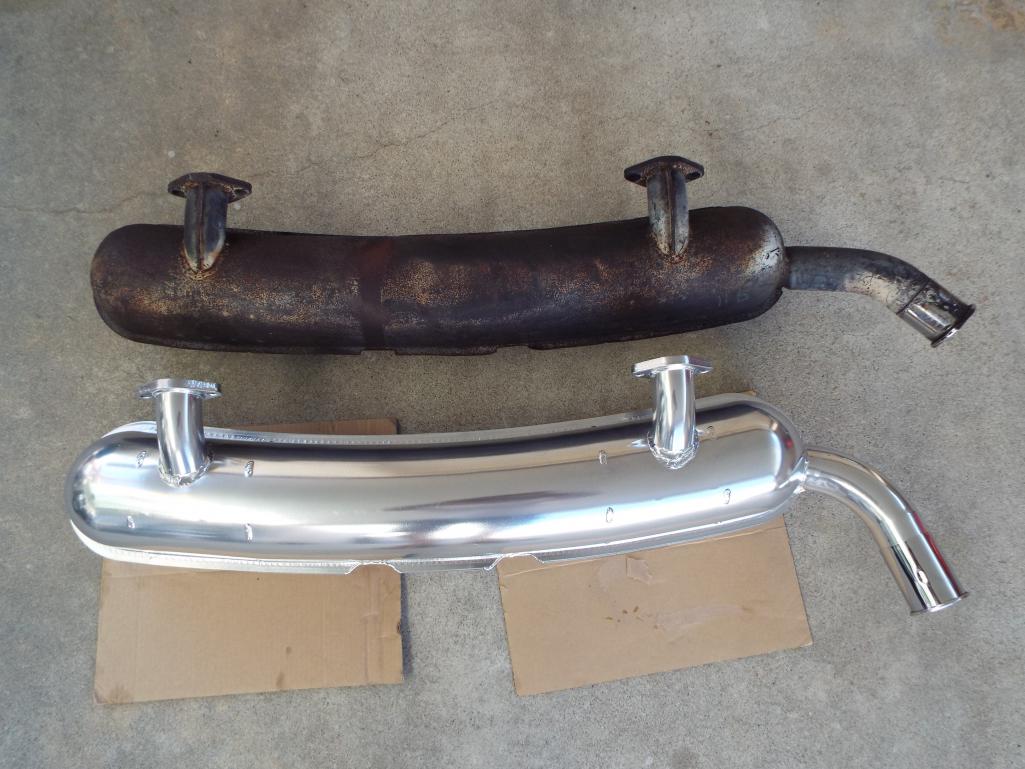
My original muffler plan was to rework this older 911 muffler 2 in 1 out by re-positioning the tail pipe for 914-6. I was also considering hollowing it out as well but never got that far. Decided that since I am in this deep that I would just treat myself to a new Dansk. Got a decent deal on Ebay.
Then since I had ceramic coated the one for my SC I did this one too. I know it is not stock looking but neither is the rest of the car and I like the look. Matches the ceramic coated headers but muffler has a better finish.
Posted by: Lucky9146 Aug 19 2017, 03:48 PM
I learned that the carbs, although they had been serviced by one of the best, Performance Oriented, that the throttle shafts “might be OK to run”.
How this all came about is one day I decided to contact Performance Oriented via e-mail explain my situation and how I had acquired the carbs to see if he had any records since I had the SN’s and because I knew the PO had sent them there years ago. I wanted to know jetting and just general info if available.
Shocking, Paul got back to me in like 45 minutes with a complete written rundown on the carbs. from July 2011 with venturis, jetting, emulsion tubes, main air correction jest and idle jets. And it was that very last sentence in his email where he said “they were very worn & I performed a ‘best effort’ to tune them” that really hit me. I called Paul we talked at length, very knowledgeable engineer type and very thorough. Paul explained that basically the “throttle shafts were at the end of their serviceable life” and they would be ok for a while but I might have trouble keeping them tuned.
Once again something seemingly so ready to go had a problem. I didn’t feel comfortable with this information and felt it needed addressing.
Back story here was that I had years ago a 69 912 with Solex’s that had worn throttle shafts and I fought those damn air leaks for way too long so I decided to nip this one in the bud.
Here is what they looked like before sending off. They looked great! Well they had oxidized some.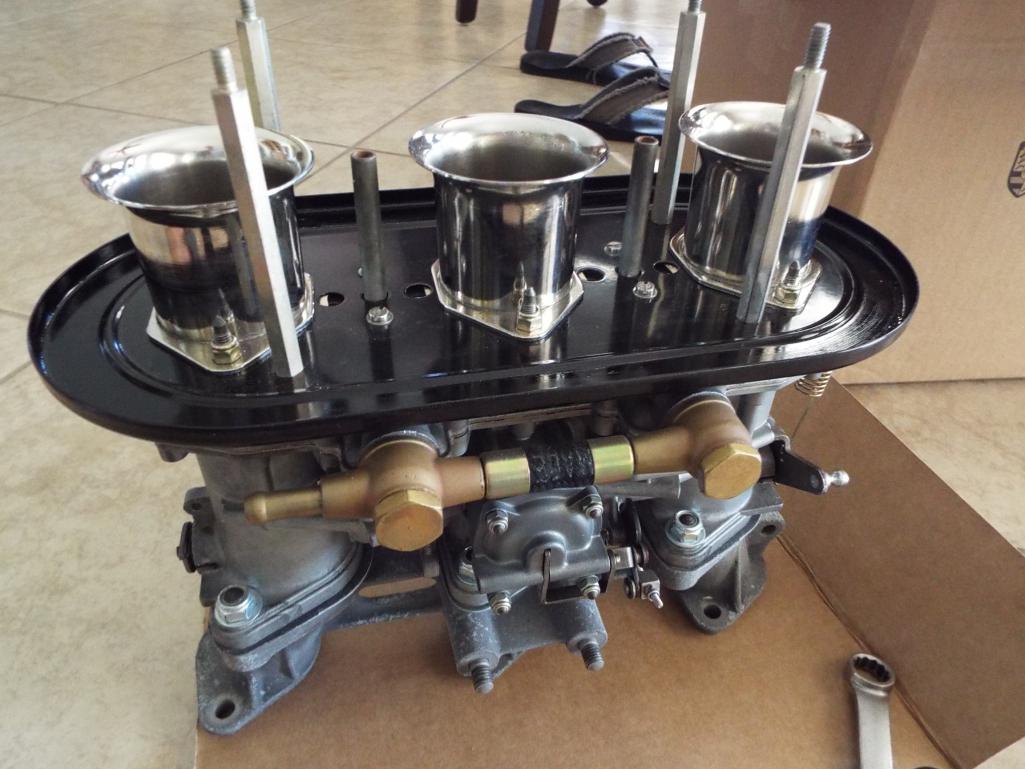
Here they are back all done. Completely re-jetted, oxidation gone, new long shafts, OEM throttle valves, and shaft couplings.
Resealed and tested!
Hopefully this will make for less sorting out. 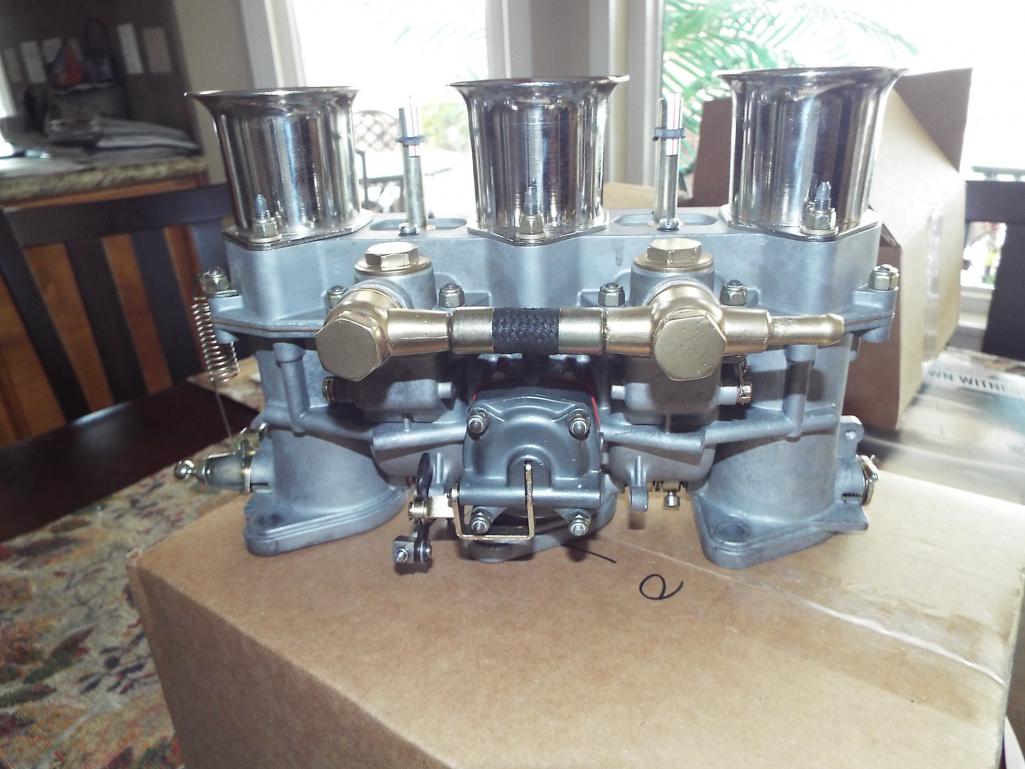
Posted by: porschetub Aug 19 2017, 04:22 PM
[quote name='Lucky9146' date='Aug 19 2017, 05:23 AM' post='2518353']
Thanks Larmo63! I have been following your thread as well and can relate to your ups and downs. I see your engine is going in soon. Best of luck!!
As mentioned earlier my engine sat for years and that is not good it appears for rockers and cam shafts.
No pic of cams (very very minor on cams but going to DC 40's anyway) and here is my worst case rockers....
Reconditioned rockers from Henry Schmidt via Ken @ 911 Vintage in Fallbrook CA.
Apparently Henry is doing rockers for Nascar and has developed a great process.
Quote
Great build going well,did you find what caused the galling on the rocker arms? blocked oil spray rail or wrong oil maybe ?,would be interested to know,cheers.
Posted by: mepstein Aug 19 2017, 04:48 PM
Posted by: Lucky9146 Aug 19 2017, 05:33 PM
[quote name='porschetub' date='Aug 19 2017, 03:22 PM' post='2518781']
[quote name='Lucky9146' date='Aug 19 2017, 05:23 AM' post='2518353']
Thanks Larmo63! I have been following your thread as well and can relate to your ups and downs. I see your engine is going in soon. Best of luck!!
As mentioned earlier my engine sat for years and that is not good it appears for rockers and cam shafts.
No pic of cams (very very minor on cams but going to DC 40's anyway) and here is my worst case rockers....
Reconditioned rockers from Henry Schmidt via Ken @ 911 Vintage in Fallbrook CA.
Apparently Henry is doing rockers for Nascar and has developed a great process.
Quote
Great build going well,did you find what caused the galling on the rocker arms? blocked oil spray rail or wrong oil maybe ?,would be interested to know,cheers.
[/quote]
____________________________________________________
porschetub
Thank you on the build comment.
Unfortunately that is not galling. That my friend is pitting. Best I can tell from research I did is that it was caused by:
A. Mostly sitting
B. Lack of oil changes (contaminates in the oil eating the metal)
Best I got hope it helps. Thanks for looking
Posted by: forrestkhaag Aug 19 2017, 06:20 PM
Great to see brain damage similar to mine on the way to a screaming 3.0 Weber driven 914.
Do what you have to do and build to the highest bar your budget will allow.
Once you crack open the case halves, replace everything and sleep like a baby.
Attached thumbnail(s)
Posted by: forrestkhaag Aug 19 2017, 06:22 PM
and finishing?..........  Never finished......
Posted by: porschetub Aug 19 2017, 07:51 PM
Exactly ,all that final stuff ....takes for ever,then the oil leaks come later  .
.
Posted by: Lucky9146 Aug 20 2017, 12:14 PM
Great to see brain damage similar to mine on the way to a screaming 3.0 Weber driven 914.
Do what you have to do and build to the highest bar your budget will allow.
Once you crack open the case halves, replace everything and sleep like a baby.
Yes forrestkhaag misery loves company and there may well be brain damage involved! Thanks for the post and I like the looks of your engine.
To reinterate the point here I started the engine late April and did not start posting again to my thread till about Aug 15th so most of the work on engine build is done now, case splittting ship has sailed. I had not posted during the April to Aug time frame cuz progress just seemed so darn slow with so many set backs and I didn't really have the time or inclinaton to post so I am trying, with still limited time, to bring the thead up to date. In some ways it is a better perspective with before and after pics. And I happen to be waiting on parts again!
I based my decision not to split the case on the health of the cam bearings and rod bearings and group think that the bottom ends are pretty stout and good for several thousand miles. Glad you did tho and hope like hell I made the right decision. Might not be sleeping like a baby.
____________________________________________________________
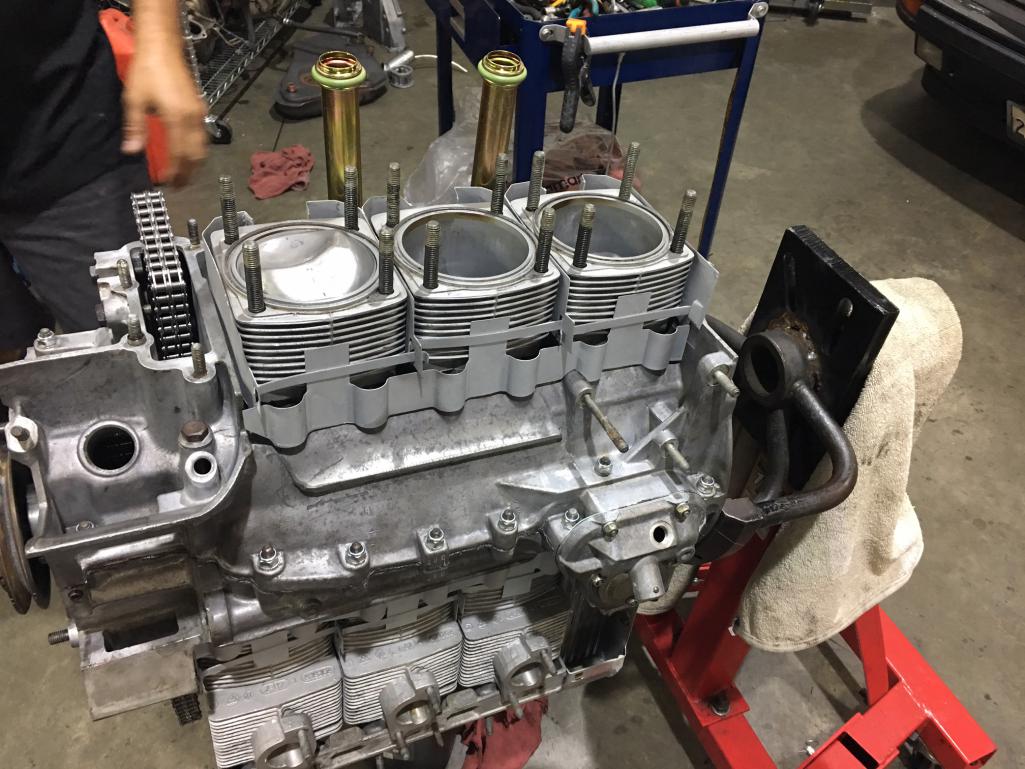
After an enormous amount of research, cleaning and prep, and parts gathering, the reassembly finally begins July 5. But there was one final delay to get to this point of actually putting the cylinders on. I opened up the Victor Reinz gasket kit and found the cylinder base gaskets were black! I decided to go with some expert advice and order the copper cylinder base gaskets, as opposed to the black. Once more thought I was ready to go only to have to wait for more new parts to arrive. Ugh! Long time Porsche engine builder friend says he does not like the black ones and relies only on the copper. I am not going to argue!
First piston and cylinder here we go….
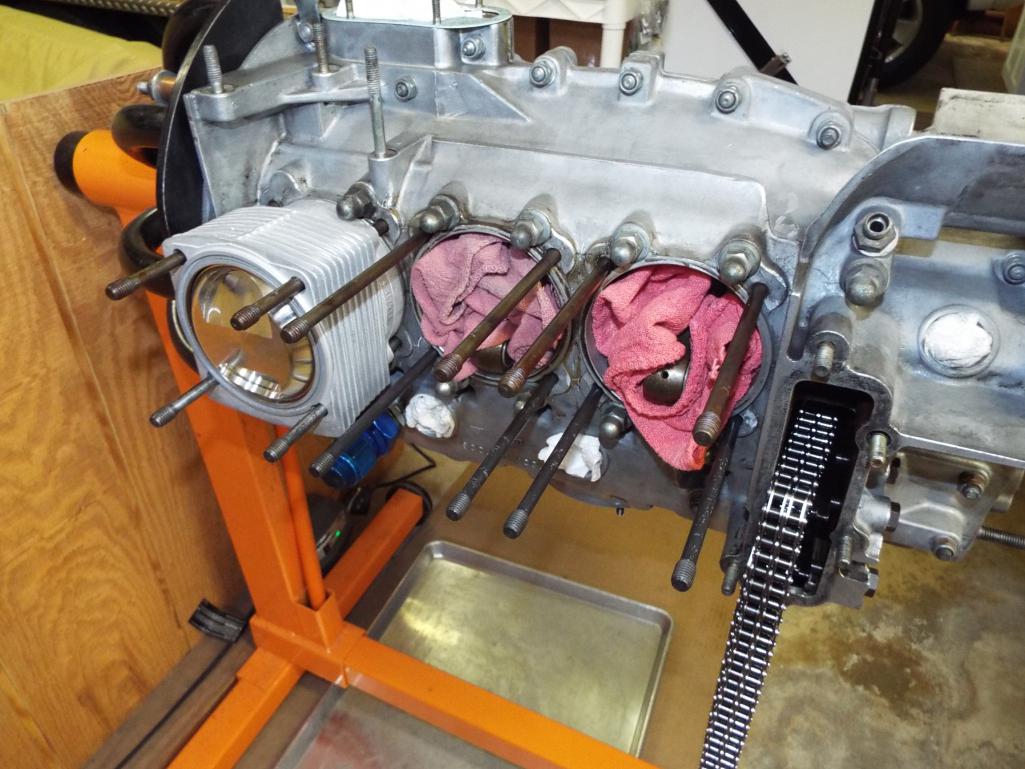
Pistons and cylinders on and secure. This is a good point to mention the cooling shrouds being installed correctly. They say if installed upside down it can lead to over heating and the that design change that was made to remove material about 1977 supposedly lowers engine temp 15 degrees. And, it is easy to put them in upside down! Oh and you really can’t get them off to fix it later as the drain tubes are in the way. Word to the wise.
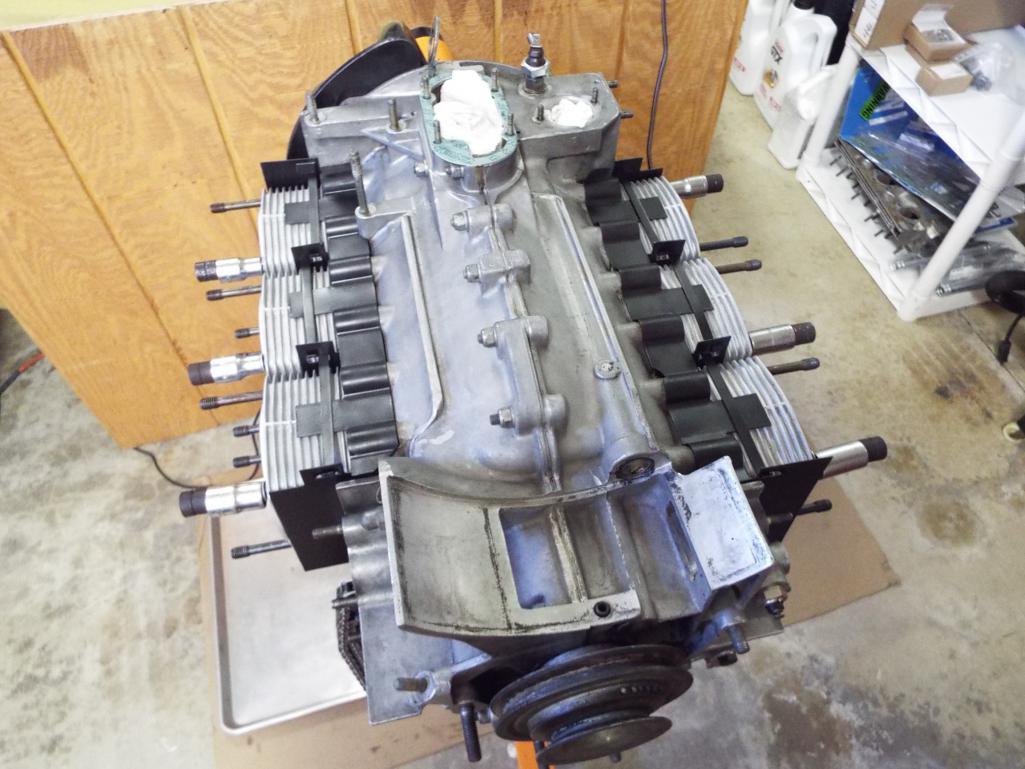
Posted by: earossi Aug 20 2017, 02:23 PM
Thanks Larmo63! I have been following your thread as well and can relate to your ups and downs. I see your engine is going in soon. Best of luck!!
As mentioned earlier my engine sat for years and that is not good it appears for rockers and cam shafts.
No pic of cams (very very minor on cams but going to DC 40's anyway) and here is my worst case rockers....
Reconditioned rockers from Henry Schmidt via Ken @ 911 Vintage in Fallbrook CA.
Apparently Henry is doing rockers for Nascar and has developed a great process.
And if you have not met Ken he is a great guy and I always enjoy the drive up for the in person experience and a poke around his shop.
Ugh! Another unplanned expense!
Decided to do new timing chains. why not?
Seems like everything else is being changed out! Simple operation and worth every penny of insurance. Basic stuff I know but there may be those out there that have not done some of it. In fact this was my first timing chain change out on a 3.0.
Just feed the new chains through following the old chains out using the new master links and good to go!
First off, you are doing a great job on this rebuild. I'm loving the attention to cleanliness which is key to a great build. Having spent hours cleaning parts on my 3.6 build for my 993, I really appreciate what you are doing.
Second, comments on the pitted rockers. As you noted, this was probably due to leaving the engine with old oil inn it for a long period of time. Since one of the products of combustion is sulfurous acid, it's imperative that oil be changed on a regular basis......not necessarily mileage. As I've seen many places, oil needs to be changed annually or every xxxx miles; whichever comes first. So, the pitting is corrosion and the only way to prevent it is to keep the oil clean. That's why it is best to change out oil just before putting your car away for the winter months or for any extended storage period.
Galling is another thing and is usually due to the poor formulations of today's oils. It's been explained ad nausium the cause of galling; but, the thing to remember is to run an oil that higher levels of ZDDP. You need at least 1300 ppm of that additive to prevent galling of the rockers. To get those levels, you need to run oils meant for off road or racing use. You can also get the correct level of ZDDP by running Mobil 1 V-Twin, which is their oil formulation for motorcycles. Since motorcycles do not need catalytic mufflers, the higher additive levels are permitted.
On my teardown of a 3.6 motor from my 993, there was significant evidence of galling on a number of lobes of one of the cams. That was at 107k miles. All the bearings in that motor were perfect which is an indication that oil changes were proper. Research showed that galling failures are beginning to be seen in the air cooled motors.
One question: Since you elected to split the case of your motor, why did you opt for split cam chains? There is nothing wrong with the chains that have a removable link, but the continuous chain eliminates the potential for the link coming loose.
Posted by: Lucky9146 Aug 20 2017, 03:26 PM
First off, you are doing a great job on this rebuild. I'm loving the attention to cleanliness which is key to a great build. Having spent hours cleaning parts on my 3.6 build for my 993, I really appreciate what you are doing.
Second, comments on the pitted rockers. As you noted, this was probably due to leaving the engine with old oil inn it for a long period of time. Since one of the products of combustion is sulfurous acid, it's imperative that oil be changed on a regular basis......not necessarily mileage. As I've seen many places, oil needs to be changed annually or every xxxx miles; whichever comes first. So, the pitting is corrosion and the only way to prevent it is to keep the oil clean. That's why it is best to change out oil just before putting your car away for the winter months or for any extended storage period.
Galling is another thing and is usually due to the poor formulations of today's oils. It's been explained ad nausium the cause of galling; but, the thing to remember is to run an oil that higher levels of ZDDP. You need at least 1300 ppm of that additive to prevent galling of the rockers. To get those levels, you need to run oils meant for off road or racing use. You can also get the correct level of ZDDP by running Mobil 1 V-Twin, which is their oil formulation for motorcycles. Since motorcycles do not need catalytic mufflers, the higher additive levels are permitted.
On my teardown of a 3.6 motor from my 993, there was significant evidence of galling on a number of lobes of one of the cams. That was at 107k miles. All the bearings in that motor were perfect which is an indication that oil changes were proper. Research showed that galling failures are beginning to be seen in the air cooled motors.
One question: Since you elected to split the case of your motor, why did you opt for split cam chains? There is nothing wrong with the chains that have a removable link, but the continuous chain eliminates the potential for the link coming loose.
Thanks for the encouragement and for all your input on oil and all. That is what so great about this site is you can learn something every day.
To your question, Um, my last post earlier today talks about my decision NOT to split the case and why and so, you are correct, I could have just done solid chains had I split the case. Hope I made the right choice in not splitting. Had some expert guidance in my decision.
Thanks again for looking!
Posted by: earossi Aug 20 2017, 06:39 PM
First off, you are doing a great job on this rebuild. I'm loving the attention to cleanliness which is key to a great build. Having spent hours cleaning parts on my 3.6 build for my 993, I really appreciate what you are doing.
Second, comments on the pitted rockers. As you noted, this was probably due to leaving the engine with old oil inn it for a long period of time. Since one of the products of combustion is sulfurous acid, it's imperative that oil be changed on a regular basis......not necessarily mileage. As I've seen many places, oil needs to be changed annually or every xxxx miles; whichever comes first. So, the pitting is corrosion and the only way to prevent it is to keep the oil clean. That's why it is best to change out oil just before putting your car away for the winter months or for any extended storage period.
Galling is another thing and is usually due to the poor formulations of today's oils. It's been explained ad nausium the cause of galling; but, the thing to remember is to run an oil that higher levels of ZDDP. You need at least 1300 ppm of that additive to prevent galling of the rockers. To get those levels, you need to run oils meant for off road or racing use. You can also get the correct level of ZDDP by running Mobil 1 V-Twin, which is their oil formulation for motorcycles. Since motorcycles do not need catalytic mufflers, the higher additive levels are permitted.
On my teardown of a 3.6 motor from my 993, there was significant evidence of galling on a number of lobes of one of the cams. That was at 107k miles. All the bearings in that motor were perfect which is an indication that oil changes were proper. Research showed that galling failures are beginning to be seen in the air cooled motors.
One question: Since you elected to split the case of your motor, why did you opt for split cam chains? There is nothing wrong with the chains that have a removable link, but the continuous chain eliminates the potential for the link coming loose.
Thanks for the encouragement and for all your input on oil and all. That is what so great about this site is you can learn something every day.
To your question, Um, my last post earlier today talks about my decision NOT to split the case and why and so, you are correct, I could have just done solid chains had I split the case. Hope I made the right choice in not splitting. Had some expert guidance in my decision.
Thanks again for looking!
I guess I missed seeing your decision to NOT split the case. Normally, splitting the case is only called for on very high mileage engines, or engines that have sustained any internal damage.
Personally, given the corrosion found on your rockers, what assurance do you have that the same pitting is not on the crank main journals? One thing that you can do is to pull the rods to see if there is evidence of pitting on the rod journals.
Normally, the bottom end of these engines are good for over 200k miles if normal oil changes occur.. The only thing that does get more wear are the intermediate shaft bearings.
Posted by: porschetub Aug 20 2017, 06:42 PM
I learned that the carbs, although they had been serviced by one of the best, Performance Oriented, that the throttle shafts “might be OK to run”.
How this all came about is one day I decided to contact Performance Oriented via e-mail explain my situation and how I had acquired the carbs to see if he had any records since I had the SN’s and because I knew the PO had sent them there years ago. I wanted to know jetting and just general info if available.
Shocking, Paul got back to me in like 45 minutes with a complete written rundown on the carbs. from July 2011 with venturis, jetting, emulsion tubes, main air correction jest and idle jets. And it was that very last sentence in his email where he said “they were very worn & I performed a ‘best effort’ to tune them” that really hit me. I called Paul we talked at length, very knowledgeable engineer type and very thorough. Paul explained that basically the “throttle shafts were at the end of their serviceable life” and they would be ok for a while but I might have trouble keeping them tuned.
Once again something seemingly so ready to go had a problem. I didn’t feel comfortable with this information and felt it needed addressing.
Back story here was that I had years ago a 69 912 with Solex’s that had worn throttle shafts and I fought those damn air leaks for way too long so I decided to nip this one in the bud.
Here is what they looked like before sending off. They looked great! Well they had oxidized some.
Here they are back all done. Completely re-jetted, oxidation gone, new long shafts, OEM throttle valves, and shaft couplings.
Resealed and tested!
Hopefully this will make for less sorting out.
Strange how someone would shortcut that but really that's were the money is rebuilding them,the rest is rather basic,interesting how the throttle shafts wear more than the bushes....steel on bronze afterall ,did see the same thing was I was engineering on large fishing trawlers.
My Zeniths had wear on the spindles but not the bushes,not a lot but I do have a slight wet spot at those points ,however they have tuned well so happy for the moment,those carbs of yours are jewels ,Paul has a great rep on Pelican well done.
Posted by: earossi Aug 20 2017, 06:48 PM
OK, my error. I went back and reviewed the pictures of what I thought was your build, and found that they were pictures from another build.
So, given the corrosion related damage to the cams and the rockers, did you pull the rods and inspect the rod journals? If you did, and you found no indication of the same failure mechanism, then you are probably alright to have not split the case.
How many miles are on the bottom end of the engine?
Posted by: Lucky9146 Aug 21 2017, 10:21 AM
OK, my error. I went back and reviewed the pictures of what I thought was your build, and found that they were pictures from another build.
So, given the corrosion related damage to the cams and the rockers, did you pull the rods and inspect the rod journals? If you did, and you found no indication of the same failure mechanism, then you are probably alright to have not split the case.
How many miles are on the bottom end of the engine?
No did not pull the bearing caps and as I said in an earlier post I based my decision NOT to split the case on the health of the cam bearings which looked very good as did rod bearings and group think that the bottom ends are pretty stout and good for several thousand miles. The pitting on the cam lobes was very minor it was the rockers that had the most. Hope it was the right decision.
Thanks for your input.
Posted by: Lucky9146 Aug 21 2017, 10:21 PM
Heads on and temporary install of the oil cooler for the cam tower install. This allows you to make sure the heads are lined up on that side for head to oil cooler clearance when assembling the cam towers. There is just the slightest bit of play in the heads, so why not? Another tip from Porsche engine builder friend of mine.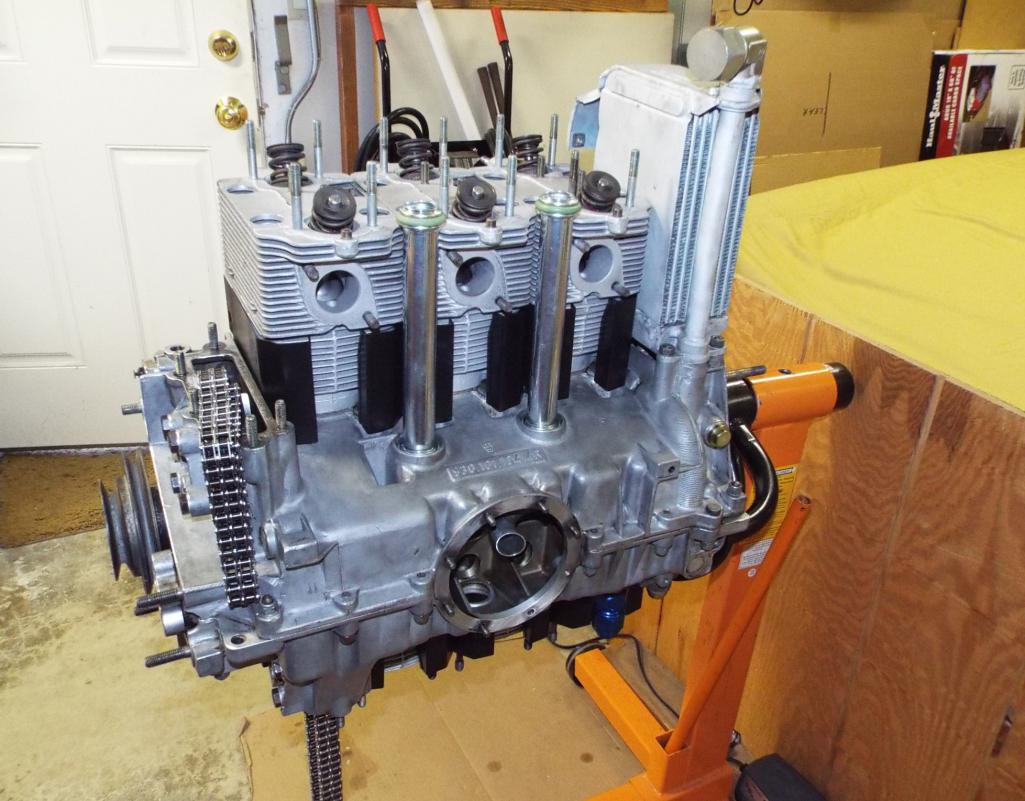
Cam tower on, and I wish I had thought to take a pic of how much (really how little) Locktite 472 to be put on. Missed pic on both sides!! UGH! There is a lot going on at this point though with the Locktite 574, 2 lubricated oil drain tubes, and 6 pins in the three heads to line up, and a host of studs, it is easy to forget the camera even moving at the snail pace I am.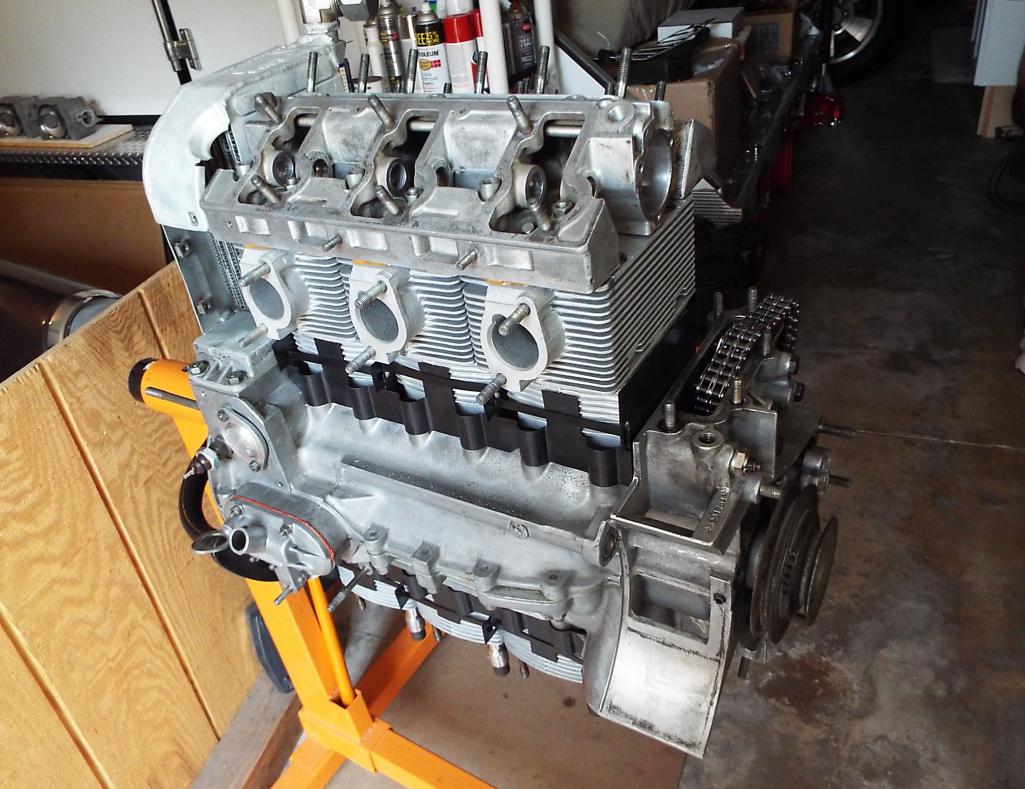
Funny, the build book says the way to check proper installation of the cam towers is to try the cam and see if it turns freely.
Yikes!... and re-torque if necessary. Really?
Well good news on mine, both sides!! Good to go!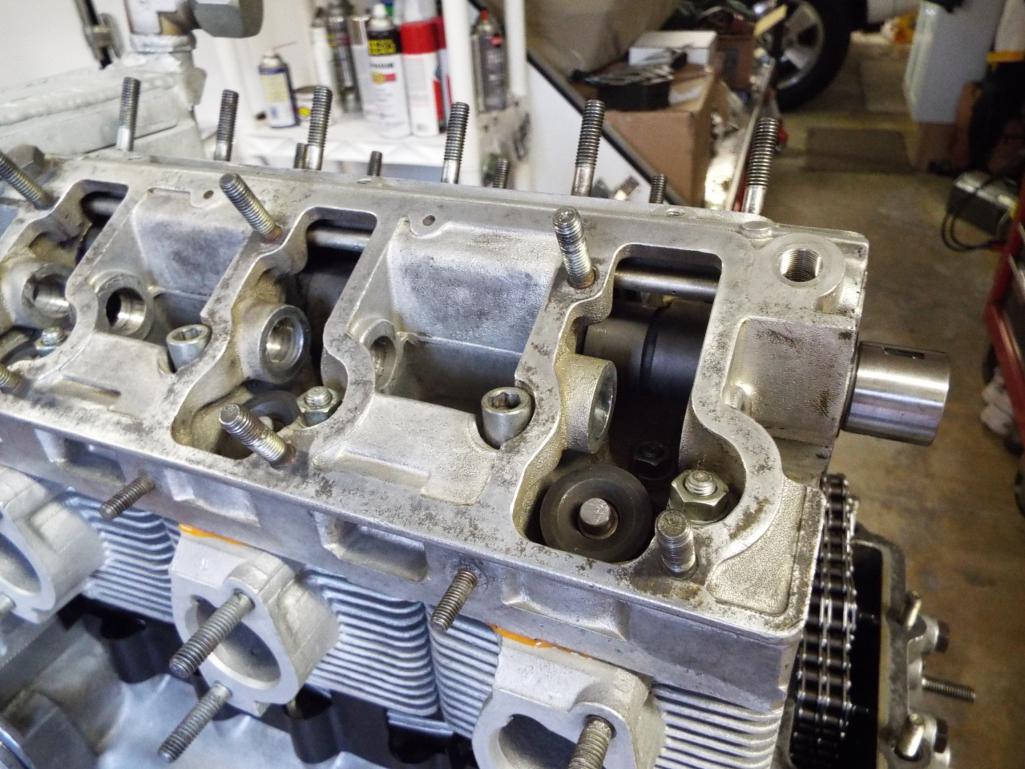
Starting to look like an engine again....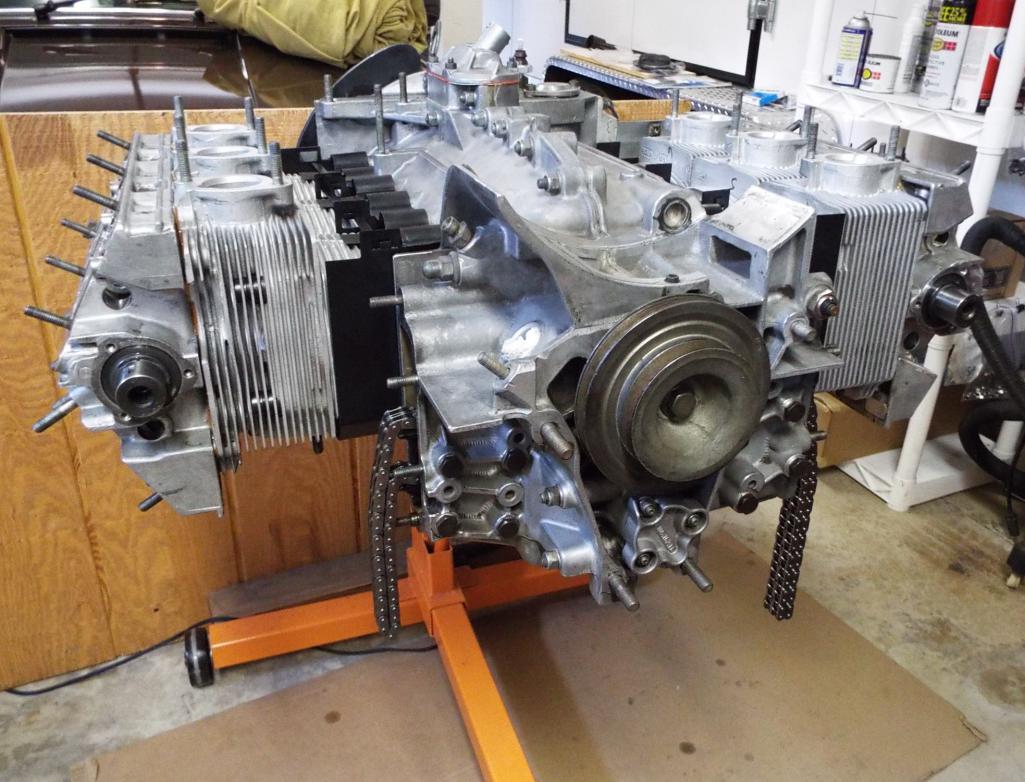
Posted by: Lucky9146 Aug 24 2017, 07:59 AM
Had a lot of problems with the Dougherty DC40 cams as they punched the front end to mark the key way DC40 right in the end of the front of the cam.
That punch marks, which took me quite a while to figure out, deformed material on the front of the shaft that would not allow the timing gear to go on or the sprocket for that matter. It was as though the ends of the cams were mushroomed. After dickin with the cams for hours I alerted John Dougherty they were putting the punch too close to the O.D. and raising material. He was surprised and was going to make a change to his process. So I either had to return (more lost time) or hand dress them myself, which I chose to do.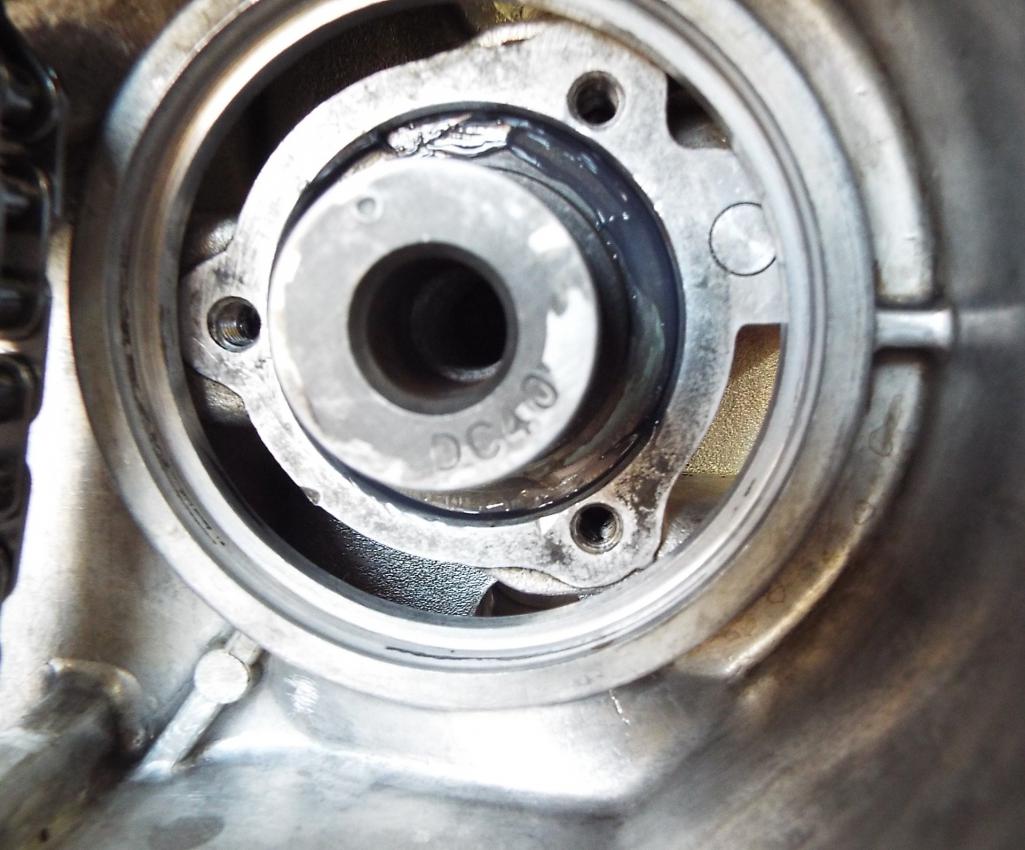
Reconditioned chain tensioner arms with the upgraded integral spacer makes for a much wider bearing surface. Old and new shown here. Pricey improvement but the original arms were galled and had no brass bushing. Really had no choice but now I have a much improved nice wide bronze bushing and spacer! Again these were exchange from Supertec through Ken at 911 Vintage in Fallbrook. 
Ready to set the chain timing!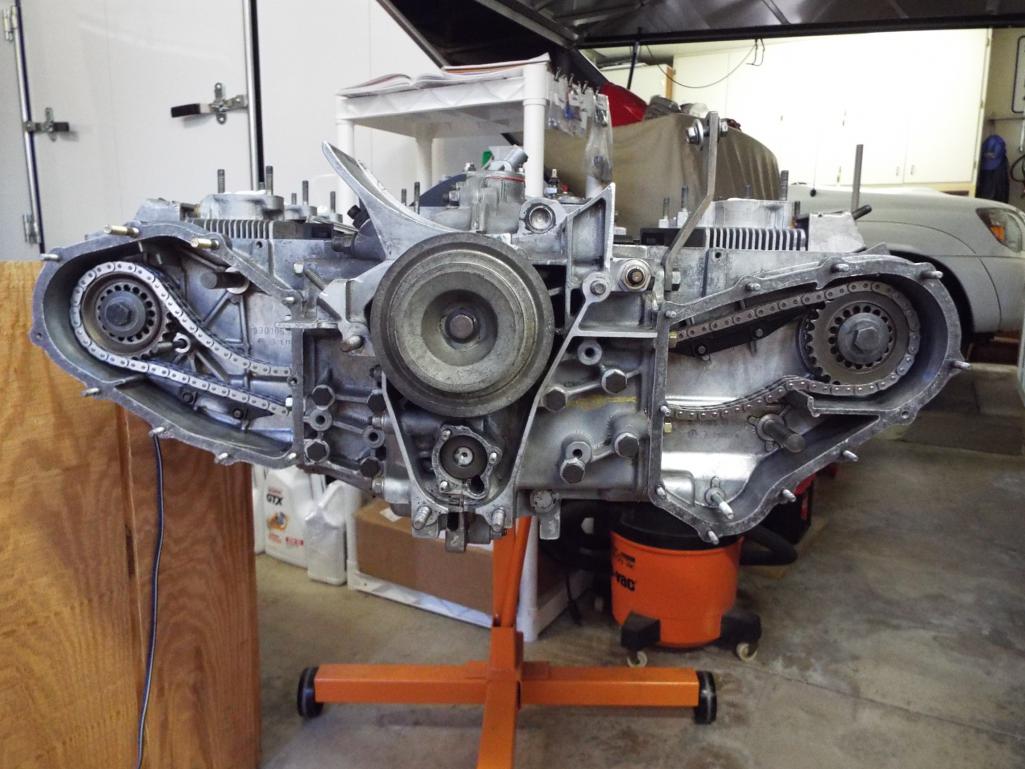
Posted by: Lucky9146 Aug 24 2017, 12:05 PM
So now with the timing set, and lucky for me that I happen to know one of the best Porsche engine guys in San Diego, I am ready to finish build this puppy. I feel comfortable building the engine alright but the cam timing with the Dougherty Cams is another story. There was a trick to setting it and we figured it out because it behaved differently than a regular Porsche cam due to the lift. This guru also helped me with the cam timing on my SC motor as well and that sucker runs like a watch. There are little nuances you can do with setting cam timing and you don’t read that in a book!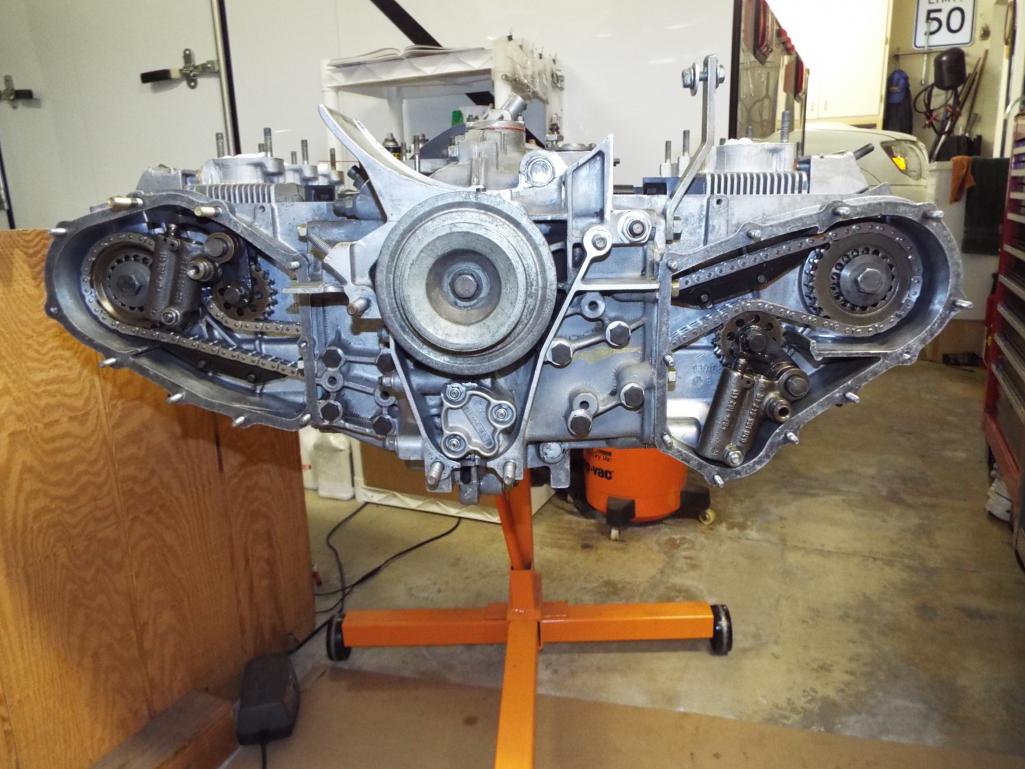
Chain housing covers installed after sanding them for flatness. Buttoning it up!
Then the chain tensioner oil lines were the next order of business. Might seem like a simple thing but cleaning up all the fittings, flushing, and then having to re-bend both the larger and the smaller feed lines on both sides took the day! You see a small bend in the larger line relocates the fitting for the intersecting smaller line and so a bend in the one results is needing to bend the other. Fun.
Looked like the metal line segments, having been installed at angles as shown in the before picture, was putting stress on the rubber hose part of the larger line.
Before
After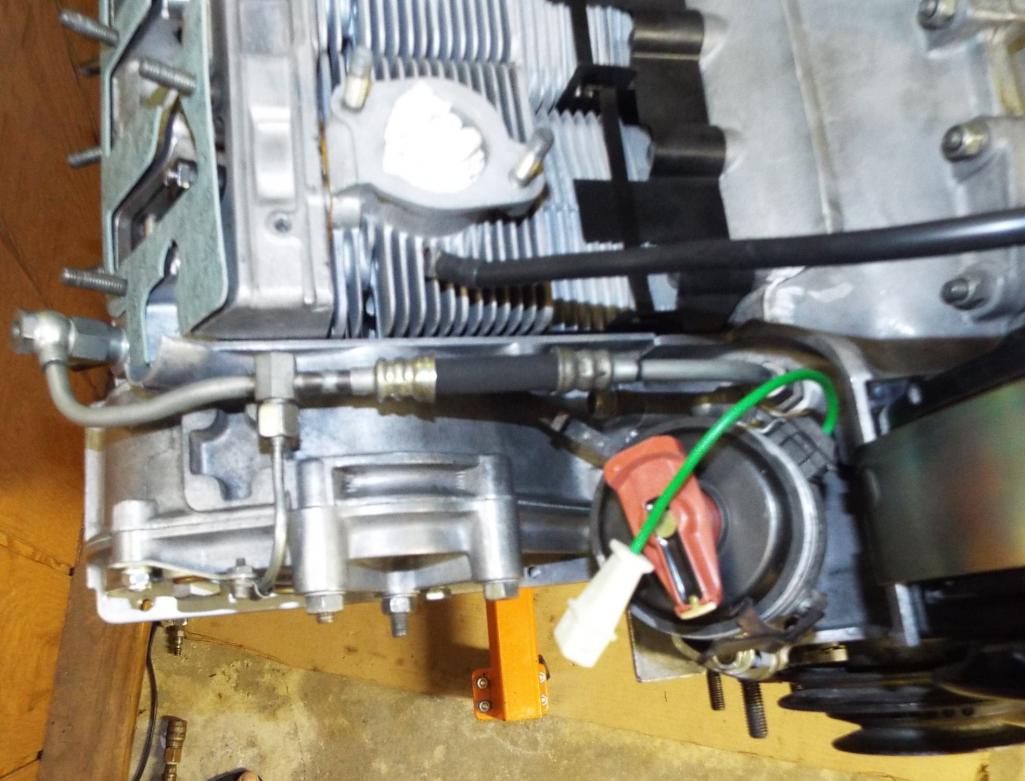
Posted by: moparrob Aug 24 2017, 12:22 PM
Your spectacular attention to detail and thorough explanation of problems and solutions is greatly appreciated. These are the things you don't learn in a book. Thanks for sharing.
Posted by: Lucky9146 Aug 24 2017, 12:23 PM
Additionally I filed a relief in the front of the timing chain cover for the small oil line on the right side for clearance and added plastic tube for insulator to prevent line chafing.
Before 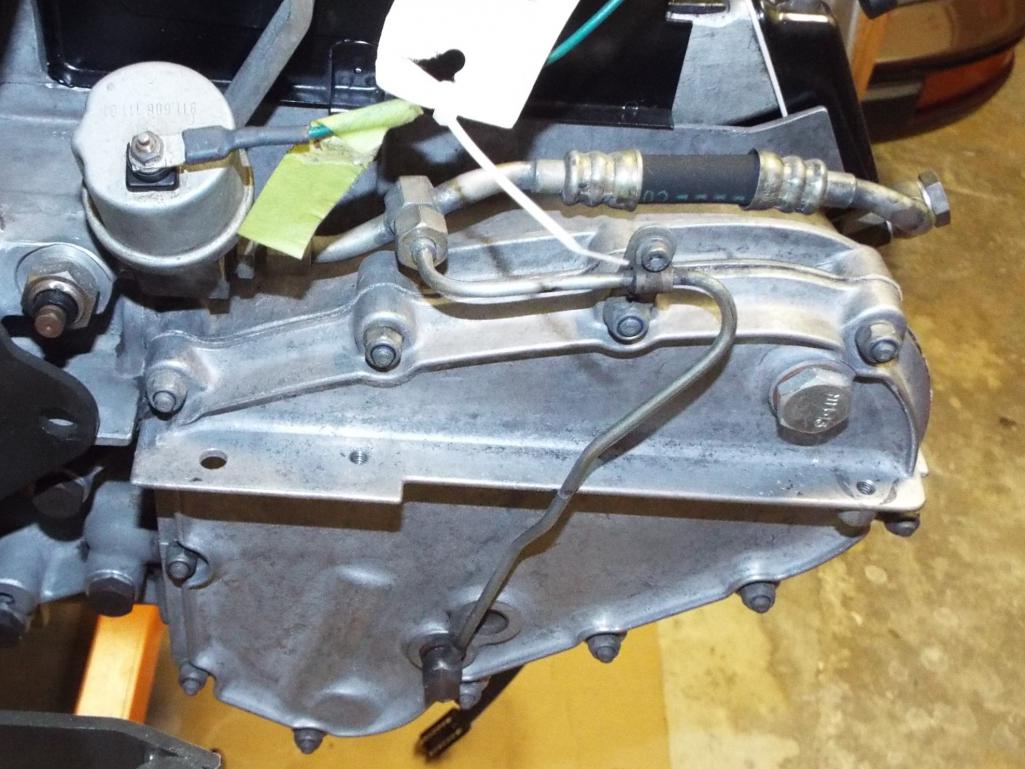
After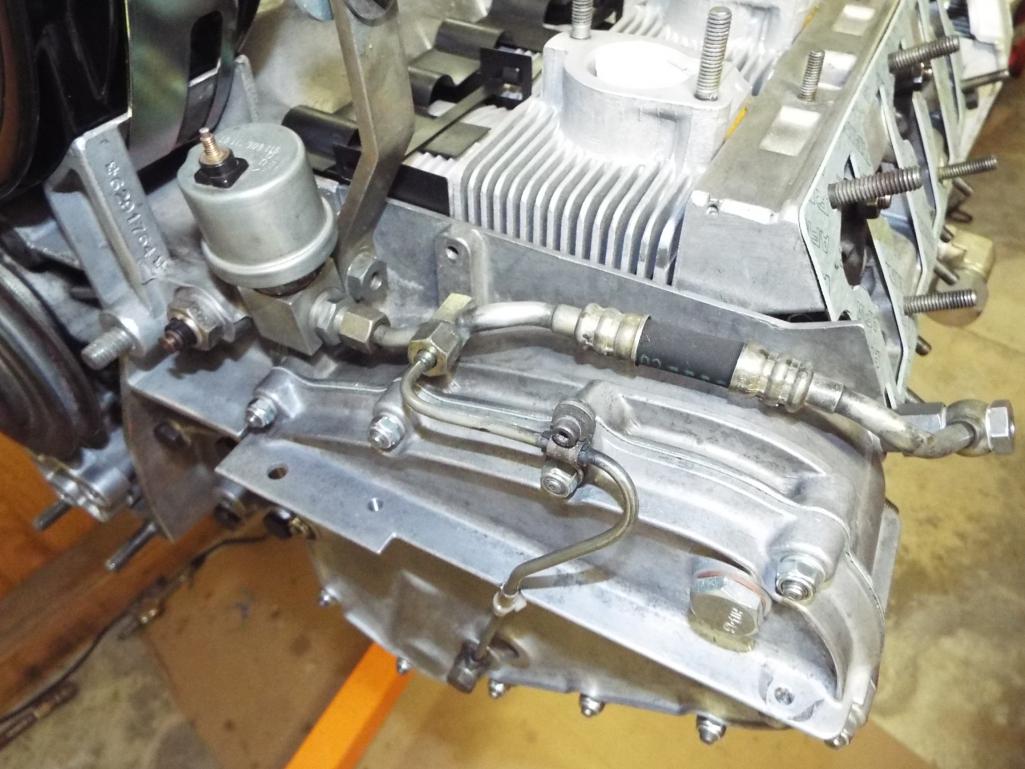
And I decided to install the fan and clamp now because I know you can’t get the clamp in after the dizzy goes in. 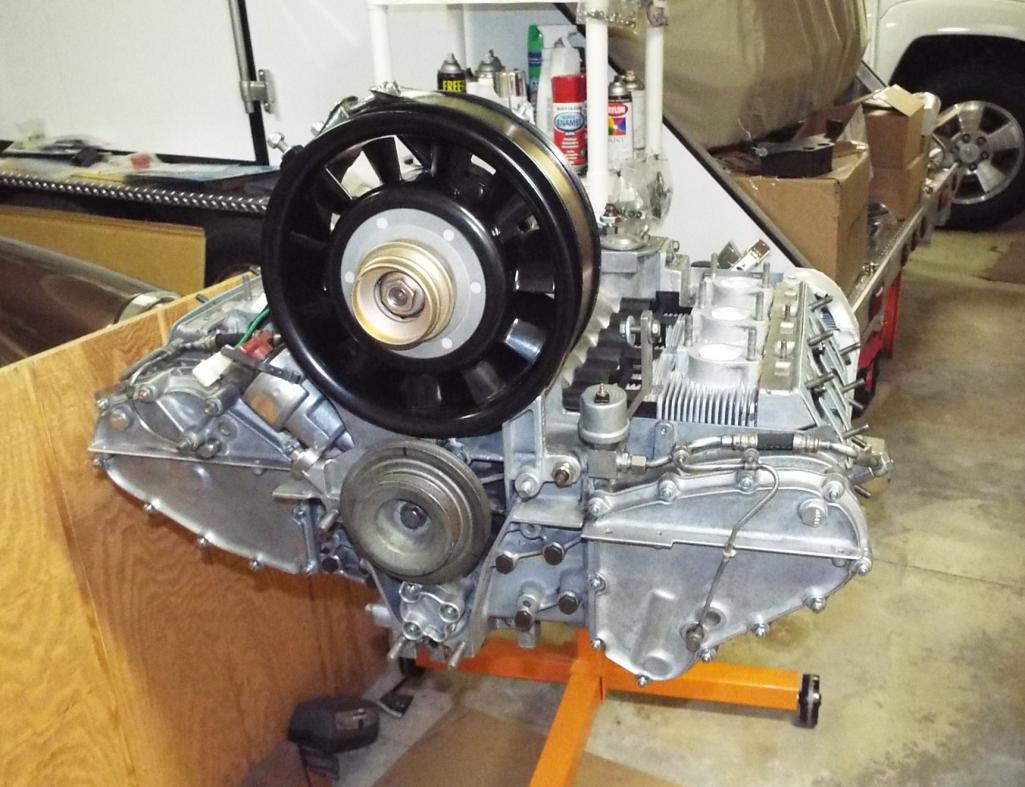
Posted by: mb911 Aug 24 2017, 01:02 PM
In all the 911 engines I have built over the years I have always put the heads and cam towers on as 1 assembly.. I know others do it just like you but just don't know if one way is better then the other..
Posted by: Lucky9146 Aug 25 2017, 08:56 AM
In all the 911 engines I have built over the years I have always put the heads and cam towers on as 1 assembly.. I know others do it just like you but just don't know if one way is better then the other..
mb911 with only 2 of these particular engines under my belt I am always willing to learn and it sounds like you have more experience than me. My thought is that the joint between the cam towers to heads assembly is said to be one of the most critical, that using the head studs to line up the heads would be beneficial to mating the cam tower to them. Additionally it makes the application of RTV574 one operation when putting the cam tower to the heads instead of three when assembling each head to the cam tower. Just my 2 cents. I would say if you are having good success with your method to continue on. Thanks for looking at the thread.
Posted by: Lucky9146 Aug 25 2017, 09:16 AM
Valve covers were the next opportunity for flatness. More sanding…….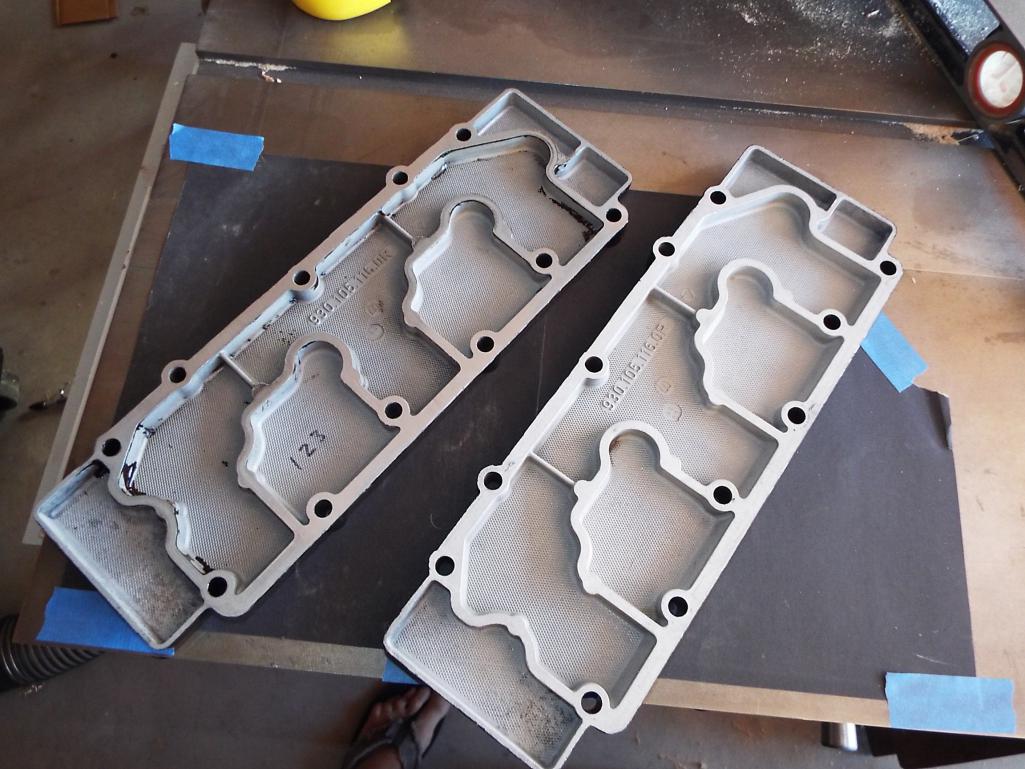
Just had to try a header on for fit to see. Sure looks cool. MSDS 1 5/8 with Ceramic coating, beautiful! These came to me done and with the project I bought. Nice work moparrob!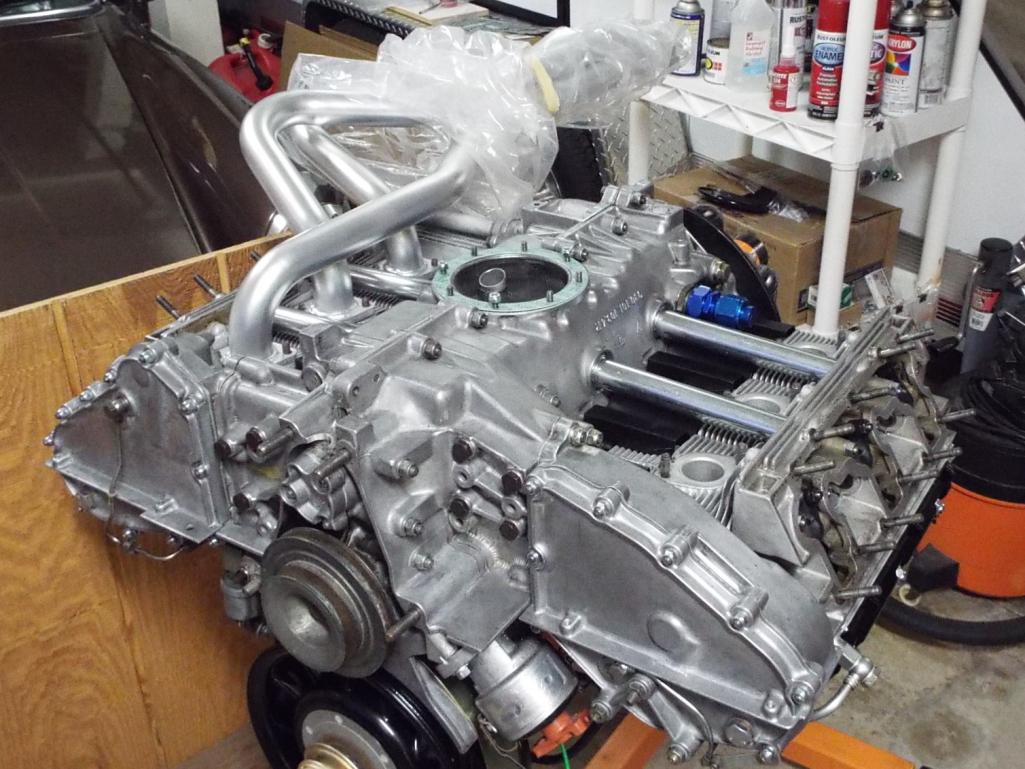
Posted by: ValcoOscar Aug 25 2017, 09:36 AM
You D'man....
Truly a work of art. Great skills and patience indeed.
Oscar
Posted by: worn Aug 25 2017, 09:42 AM
Valve covers were the next opportunity for flatness. More sanding…….
Doesn't it look grand at that point? Good flattening. Wish I had done that with my chain covers

Posted by: mb911 Aug 25 2017, 03:21 PM
In all the 911 engines I have built over the years I have always put the heads and cam towers on as 1 assembly.. I know others do it just like you but just don't know if one way is better then the other..
mb911 with only 2 of these particular engines under my belt I am always willing to learn and it sounds like you have more experience than me. My thought is that the joint between the cam towers to heads assembly is said to be one of the most critical, that using the head studs to line up the heads would be beneficial to mating the cam tower to them. Additionally it makes the application of RTV574 one operation when putting the cam tower to the heads instead of three when assembling each head to the cam tower. Just my 2 cents. I would say if you are having good success with your method to continue on. Thanks for looking at the thread.
Oh completely understand but I always approached it from the dowl pins in the heads made it easy to locate into the cam towers and put it on as a completed unit though a bit harder to torque the heads ..
Its all good.. Keep up the good work.
Posted by: moparrob Aug 25 2017, 09:55 PM
Marty Schneider (MSDS) makes some awesome headers here in So Cal. He is also a really nice guy who owns a bad ass turbo 914 (6 cyl).
I know, I know... you can't turbo a 914...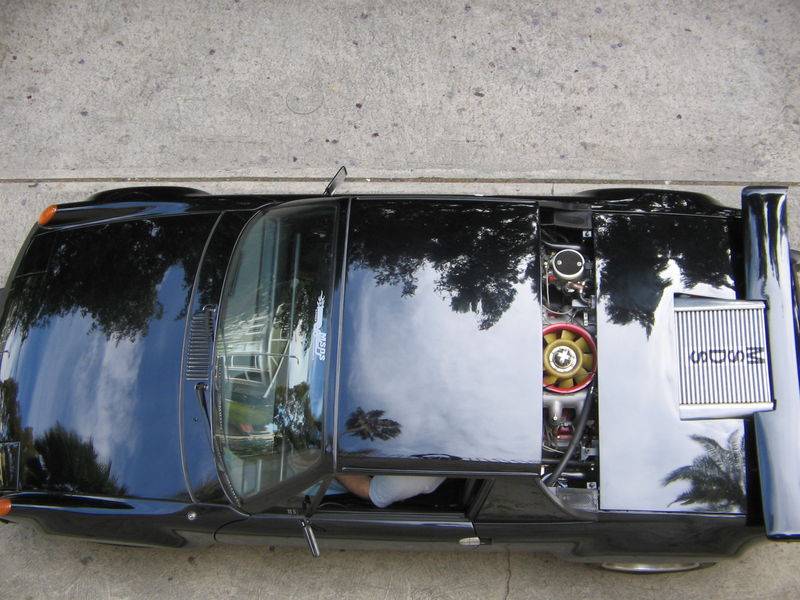
Posted by: Lucky9146 Aug 26 2017, 02:16 PM
Your spectacular attention to detail and thorough explanation of problems and solutions is greatly appreciated. These are the things you don't learn in a book. Thanks for sharing.
Thanks man.
It truly is a learning experience and if I can help one person with anything I've come across then all this posting is worth it. I have to say that I sure have learned a lot from this site and it is one of the things that keeps me inspired it is my way of contributing. I appreciate the others who have done or are doing 6 conversions like forrestkhaag and larmo63 and I am sure there are many others.
Starting with a car this far along was perfect for me at this point in my life. My hats off to those doing the heavy lifting of major rust reapir and GT conversions. These truly are cool cars worth the effort.
Posted by: Lucky9146 Aug 26 2017, 02:23 PM
You D'man....
Truly a work of art. Great skills and patience indeed.
Oscar
Thanks for weighing in and the complement. I am fortunate that I am not in a hurry and can take the time. Rushing was never one of my strong points and I can see that In a lot of folks cars. Look at what defianty is doing with detail in the UK amazing!
Look forward to meeting you in Temecula.
Posted by: Lucky9146 Aug 26 2017, 02:38 PM
Perry Kiehl Wiring harness going back in.
He sure was a major help to me when I was wiring to the chassis with MSD a while back. I have heard others also say that he what a big help he is and that is really true!
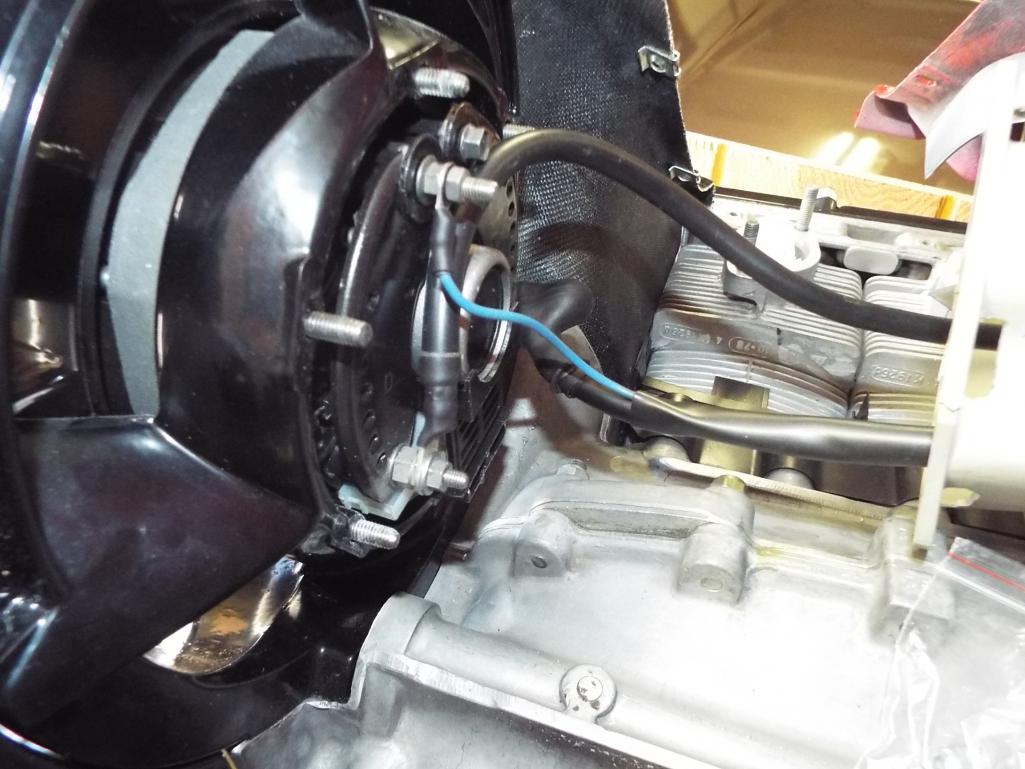
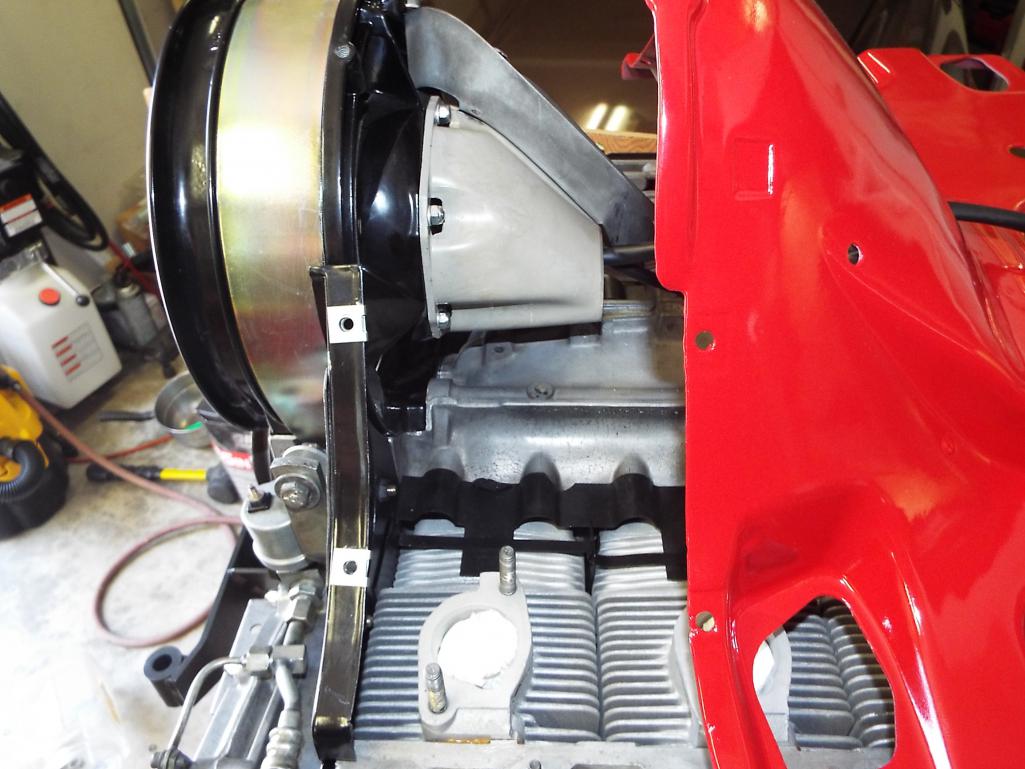
Posted by: mepstein Aug 26 2017, 03:40 PM
Marty Schneider (MSDS) makes some awesome headers here in So Cal. He is also a really nice guy who owns a bad ass turbo 914 (6 cyl).
I know, I know... you can't turbo a 914...
Dropping a 935 engine in a 914 is just a whole 'nother level.

Posted by: Lucky9146 Aug 27 2017, 01:20 PM
Almost ready to come off the stand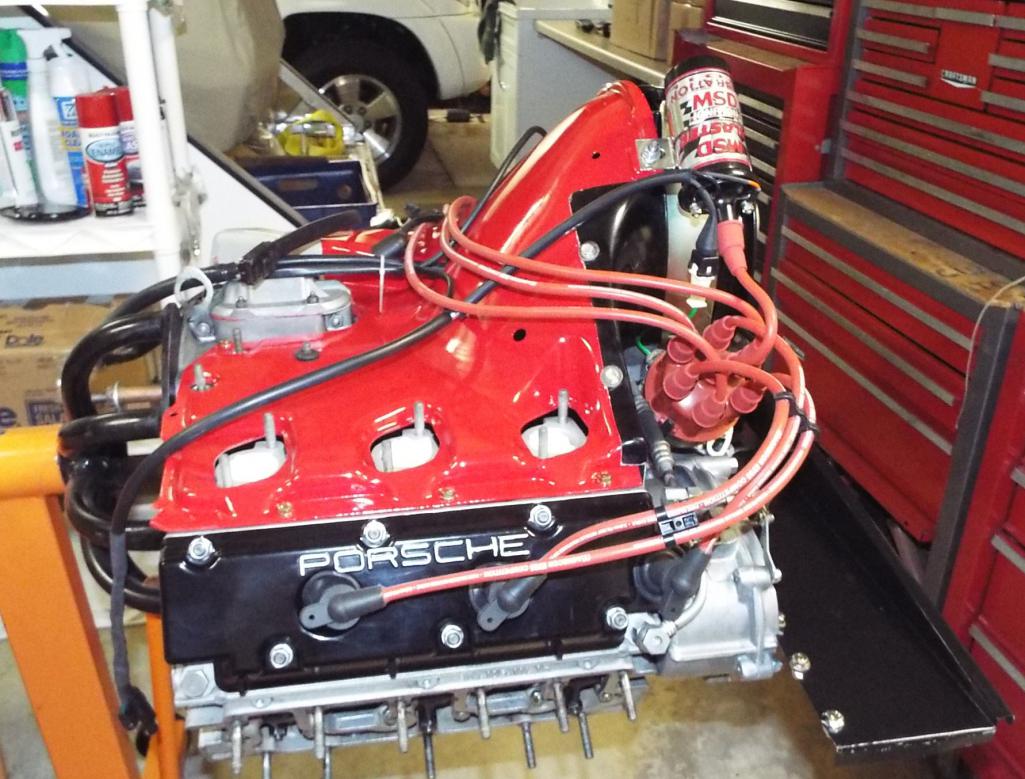
Kind a like giving birth! I took it off the stand because I was again waiting parts and top side work from here on out. 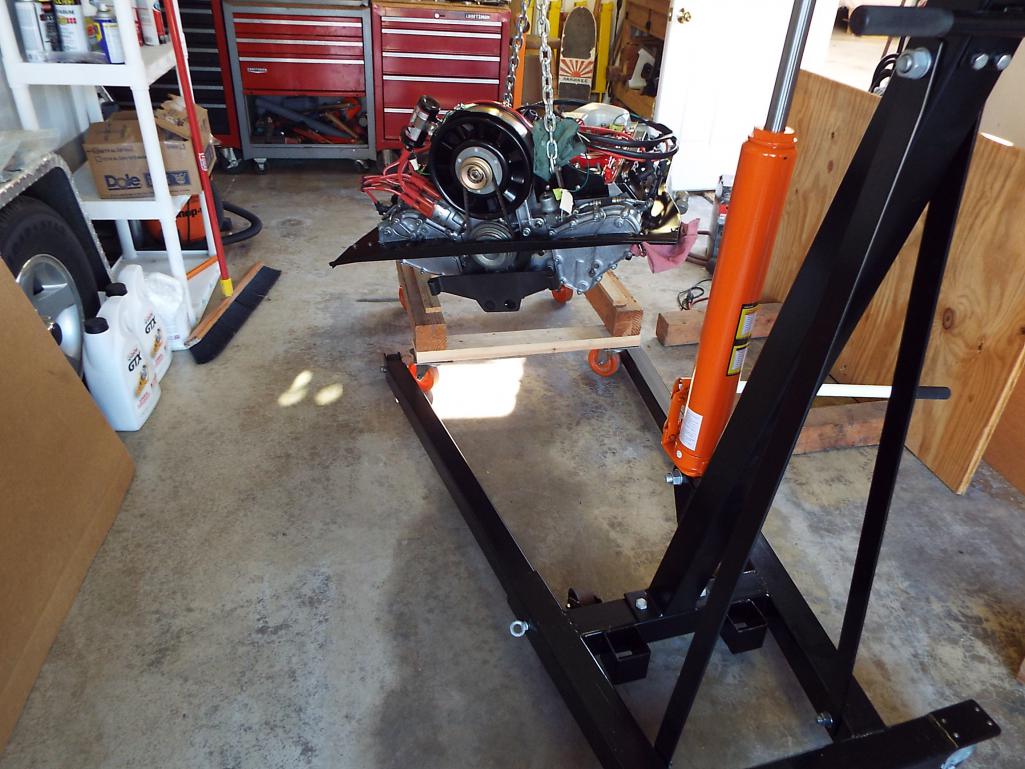
But I was not quite as ready as I thought because when I went to order new intake manifold gaskets and insulators so I could mount my manifolds and Weber 40’s, I began yet another fun educational experience. I'm hearing the intake manifolds that I have which are actual Porsche intake manifolds, that have been lightly ported and came with my project purchase, won’t work well. These great looking Porsche PN manifolds are for an early 2.0 engine and now present major complications especially when trying to use them on a 3.0 CIS to Weber conversion application. Hmmmm…….. Really? 

Took me a while to buy into the concept that my recently bead blasted, beautiful ready to go manifolds, were really not a good idea to use. Made a couple calls to Richard at PMO and Paul at Performance Oriented (he did the carbs), plus contacting a few guys here on the World who have also done 3.0 conversions, and I finally came to realize that another investment was necessary. That being new PMO CIS manifolds had to be ordered.
Just when I thought all the large purchases were behind me. Man, I can’t wait to see the difference of these PMO’s, this better be worth it.
Here is another shot of the original Porsche Manifolds flange that mates to heads.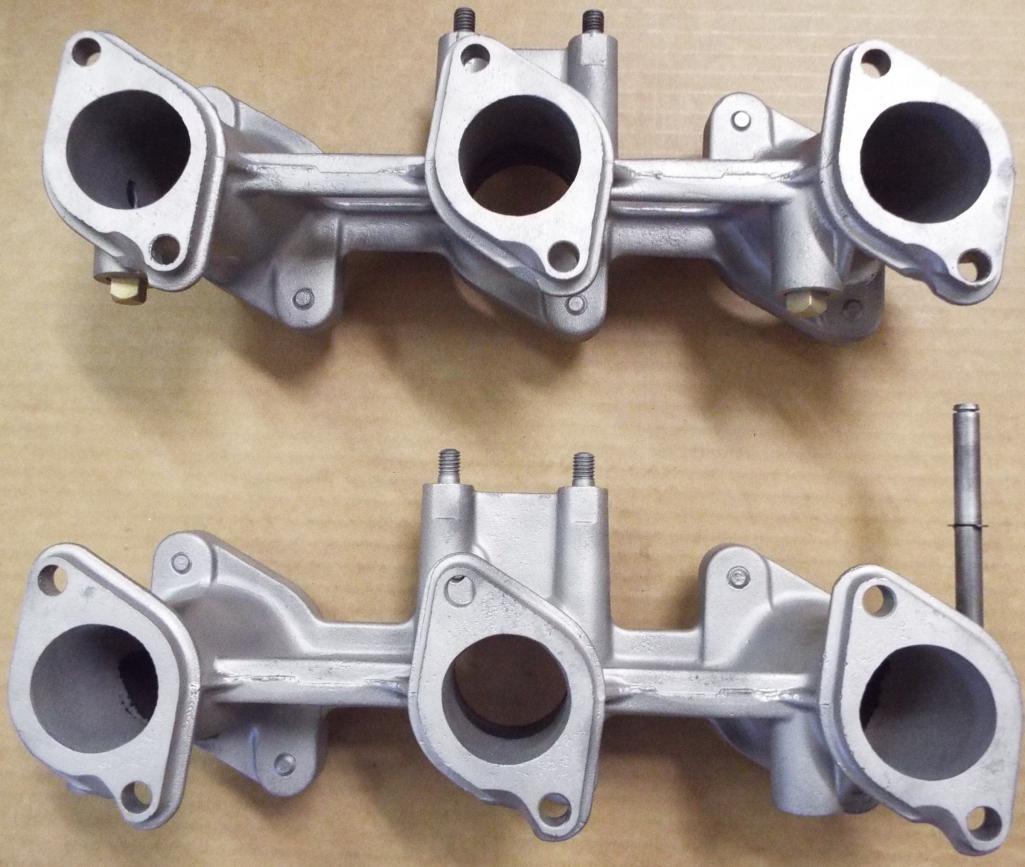
Posted by: gms Aug 27 2017, 02:10 PM
Yup those manifold will leak air because they don't cover the CIS injector cut out on the intake of the head.
Head
Recommended intake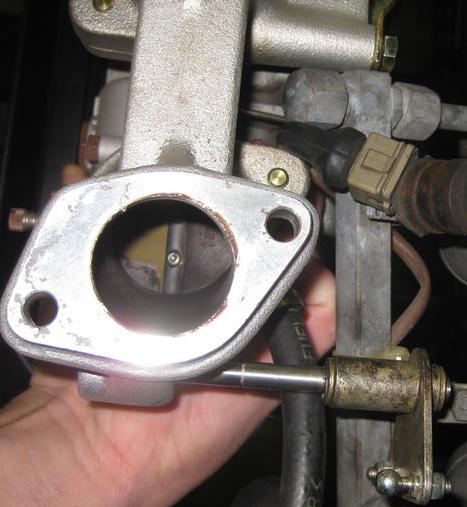
Posted by: mepstein Aug 27 2017, 02:18 PM
Yup those manifold will leak air because they don't cover the CIS injector cut out on the intake of the head.
Ant you buy some spacers that will seel up the gap.
Posted by: sixnotfour Aug 27 2017, 02:20 PM
rick 918-S, made some plates he was selling to solve that coverage, or PMO has plastic spacers that would work also..
http://www.914world.com/bbs2/index.php?showtopic=263516&hl=
Posted by: Lucky9146 Aug 27 2017, 02:46 PM
rick 918-S, made some plates he was selling to solve that coverage, or PMO has plastic spacers that would work also..
http://www.914world.com/bbs2/index.php?showtopic=263516&hl=
Thanks for the info on the Alien plates. Sent him a PM but that post was from 2015 and I already ordered manifolds.
Guess I should have done more checking around.
Posted by: rick 918-S Aug 27 2017, 07:20 PM
Yup. And i think the PMO's are too tall for our cars. Maybe not but i thought i read that in one of our threads here.
Looks like you have the 36mm ports. My Alien adapters only raise the intakes 1/8" and clear the shroud. Send me your address. I will send you a set to try. If you like them you can send me a pay pal or something. 
Nothing like a high cost solution to a low cost problem.
Posted by: Lucky9146 Aug 27 2017, 08:30 PM
Yup. And i think the PMO's are too tall for our cars. Maybe not but i thought i read that in one of our threads here.
Looks like you have the 36mm ports. My Alien adapters only raise the intakes 1/8" and clear the shroud. Send me your address. I will send you a set to try. If you like them you can send me a pay pal or something.
Nothing like a high cost solution to a low cost problem.
Rick
That's for sure on the high cost solution! Well actually I have the 39mm ports in the heads. Not sure why the venturi's are 36 but that Weber stuff is beyond me, I have skills and limitations. I will double check on the PMO's "too high" part. PMO actually sells 2 CIS solutions 40/38 at 3.9 in. high and 40/36/ which are 3.25 in. high and I went with the shorter one which was suppose to work with stock air cleaner
I'll PM you
Posted by: Lucky9146 Aug 29 2017, 09:31 AM
[quote name='gms' post='2521345' date='Aug 27 2017, 01:10 PM']
Yup those manifold will leak air because they don't cover the CIS injector cut out on the intake of the head.
Head
Recommended intake
PMO Manifolds received!
The original Porsche manifolds will not just bolt on CIS heads as there just isn’t the sealing surface on the manifold flange because they do not have the bump out on the flange to cover the CIS intake port scallop in the heads as gms pointed out. And they will likely crack, I’m told.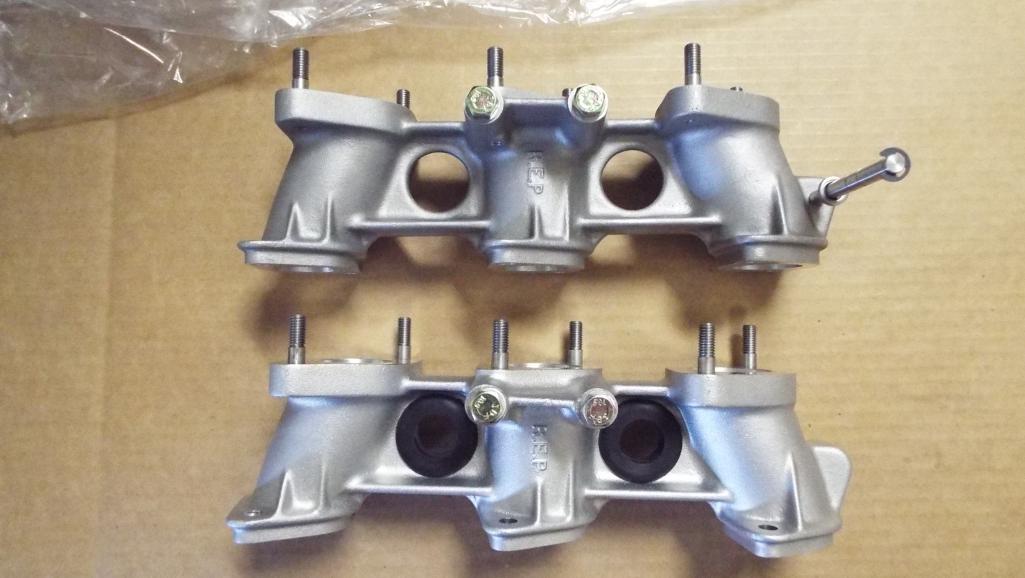
Posted by: Lucky9146 Aug 29 2017, 09:40 AM
rick 918-S, made some plates he was selling to solve that coverage, or PMO has plastic spacers that would work also..
http://www.914world.com/bbs2/index.php?showtopic=263516&hl=
Thanks for the info on the Alien plates. Sent him a PM but that post was from 2015 and I already ordered manifolds.
Guess I should have done more checking around.However Rick 918-S is sending some of his Alien Plates for me to check out and they will look like this. So the jury is out for now awaiting their arrival. Thanks again sixnotfour for the tip on the Alien plates!
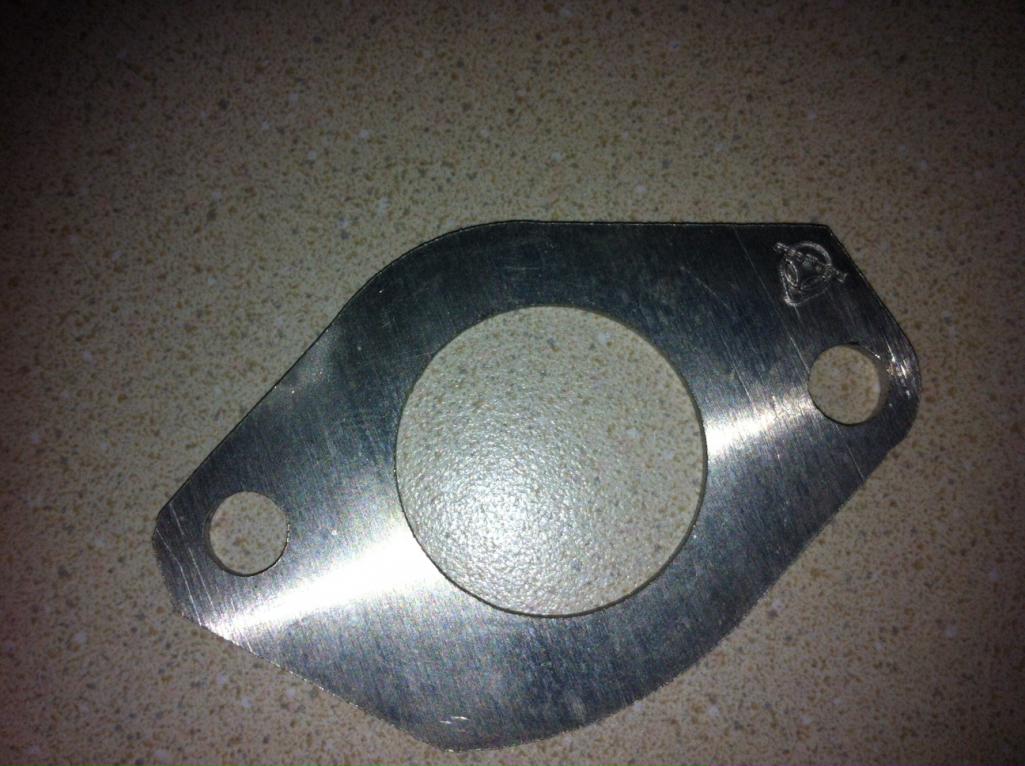
Posted by: Lucky9146 Aug 29 2017, 10:14 AM
Richard at PMO recommended the 40/38 “tall” manifolds. But the height concerned me at 3.9 inches as I wanted to leave myself the option to use a 914-6 air cleaner should I want to. I have heard from many that you just might get tired of the sound right behind your head or for longer drives and maybe to get my wife to ride in the car. So I elected to go with the 40/36 “short” manifolds at 3.25 inches. Sounds like I am necking it down I know, but Paul at Performance Oriented said that with the 36mm venturi’s in the carbs it should be fine.
The pictures are distorted a bit, because I was so close taking them, but you can see the height differences. Note the original manifolds are about 2.75 inches high.
Nice how the PMO have the rubber grommets in the manifold that the spark plug wires go through.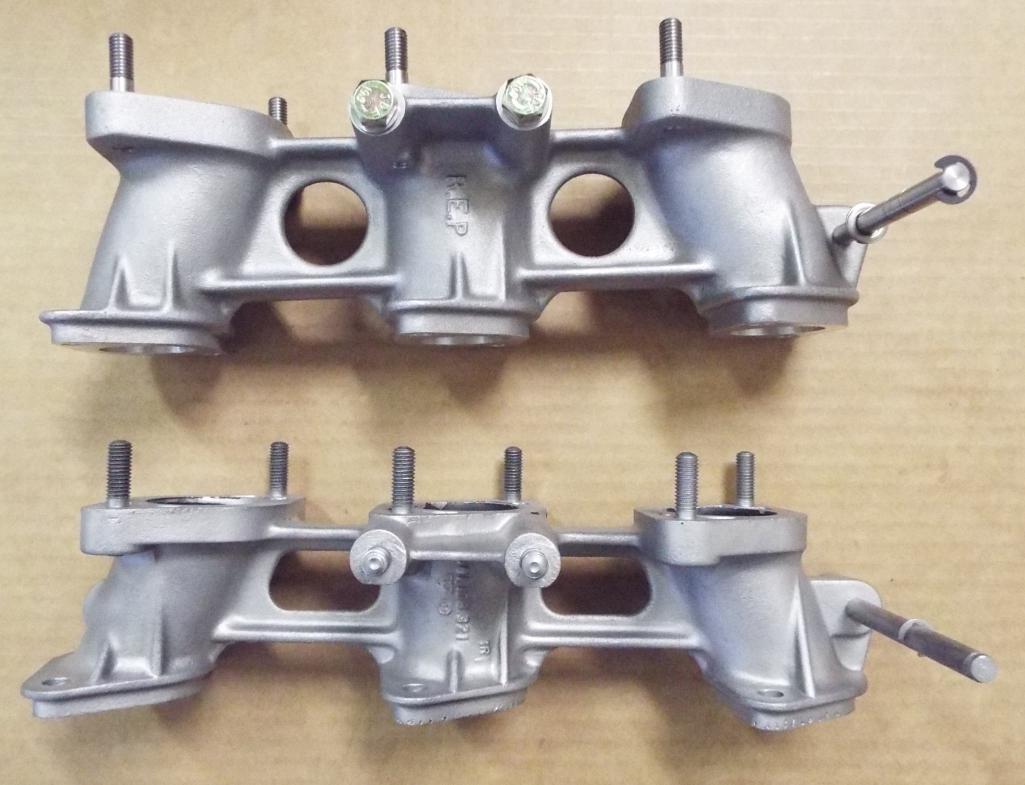
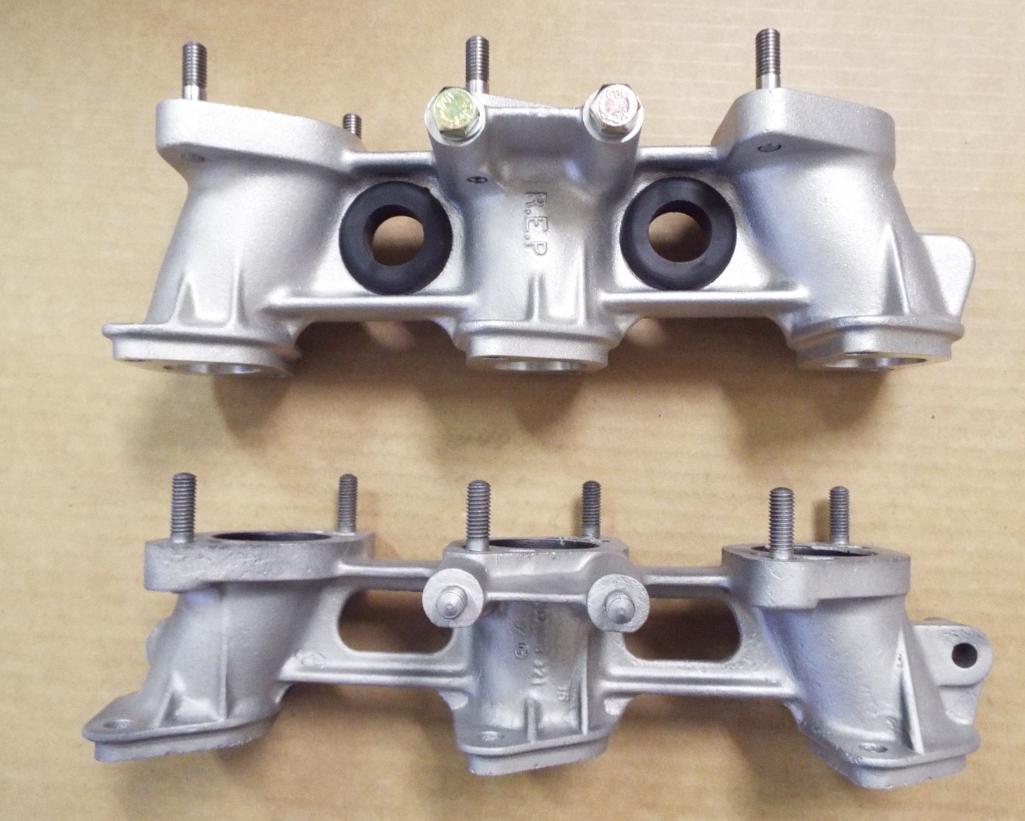
And you can clearly see the differences in flanges.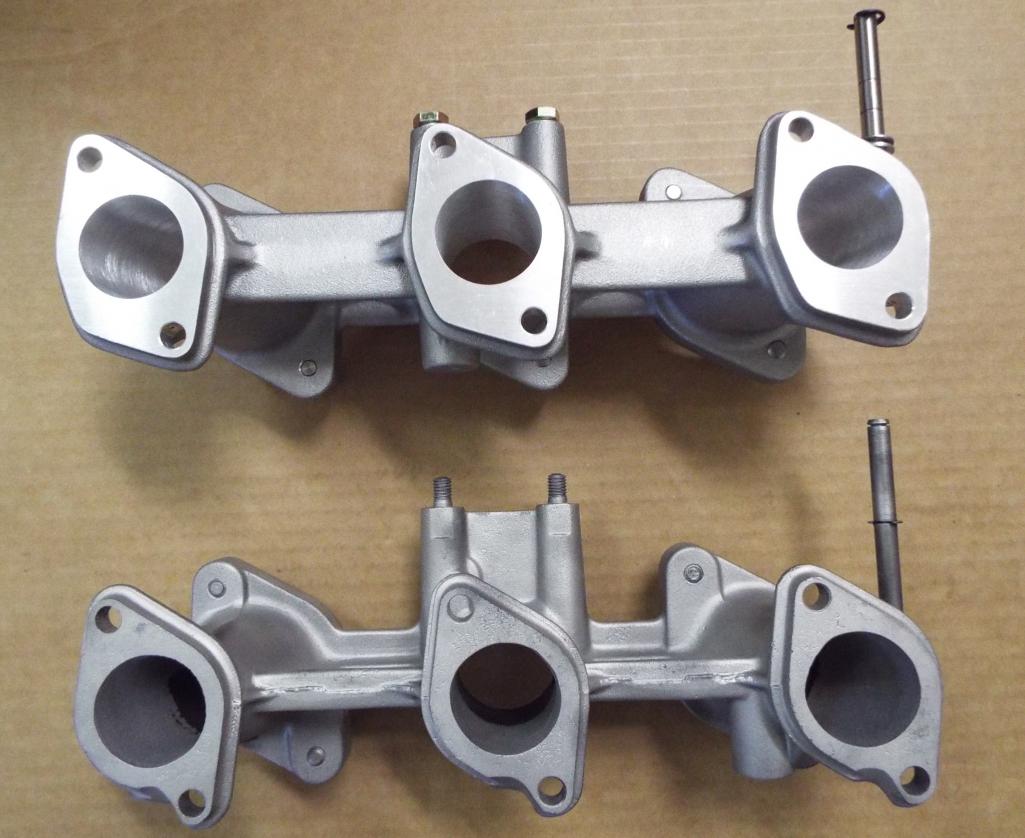
Posted by: defianty Aug 29 2017, 11:14 AM
I'm in a similar position at the moment Lucky 9146.
I think I have the 'tall' manifolds and am concerned they're too tall to fit correctly with the rain hats I have.
http://www.914world.com/bbs2/index.php?showtopic=315580
Posted by: Lucky9146 Aug 31 2017, 02:24 PM
Heard from Rick 918-S that he does not have any 39mm Alien Plates at this time and he would have to make them. Plates are shown above and made for adapting original intake manifolds to cover the CIS scallops in the heads. Rick had offered to let me try them. Don’t want Rick to spend the time to make up something that I may not ultimately use, so I am going to proceed with the PMO CIS Standard Manifolds (often referred to as short, see previous postings) since I already have them. “Nothing like a high cost solution for a low cost problem” as Rick puts it.
It’s not like I can’t wait for the plates, because my progress is so darn slow, but I really was leaning toward the PMO manifolds anyway and it didn’t seem fair to Rick. Thanks again Rick for the offer!
________________________________________________________________
Now on to another time gobbler (at least in my case) is the gaskets supplied by PMO with the insulators for the intake manifolds. The good news is for the most part the insulators fit down through the engine shroud with only minor exceptions but the gaskets are far larger and require trimming.
And I thought I was just going to slap them on there! Ha! 
This may seem like such a minor thing to bring up and cover but luckily for me my engine is not installed yet for performing this operation and right now I can easily see how to trim the gaskets with the engine right in front of me. I did this with a nice sharp pair of scissors.
But for someone doing this after the engine is in, man I feel for ya.
Additionally, these gaskets seem to have a lot (and I mean a lot) of loose flaky material in the bore of the gasket that unless removed and cleaned up could easily fall into the head. I also recommend running something like an old stud through the gasket stud holes prior to installing it as there is also a lot of flaky crap in those holes that goes everywhere when you slide the gasket down the intake studs. PIA
Does Not fit through the shroud at all, and this is my original shroud.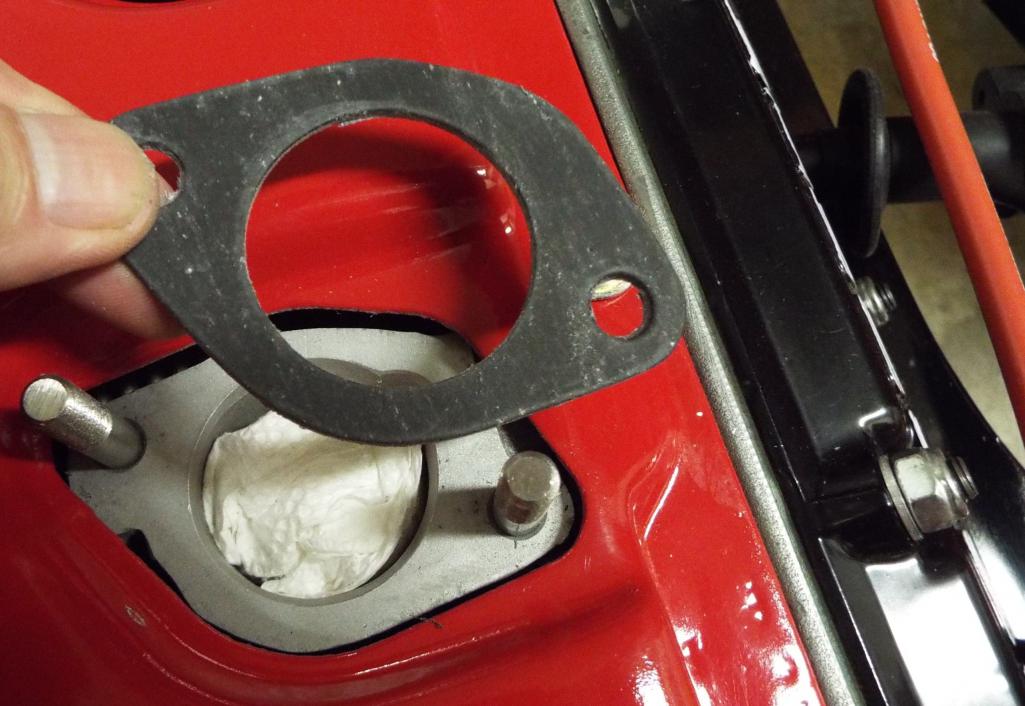
Trimmed about this much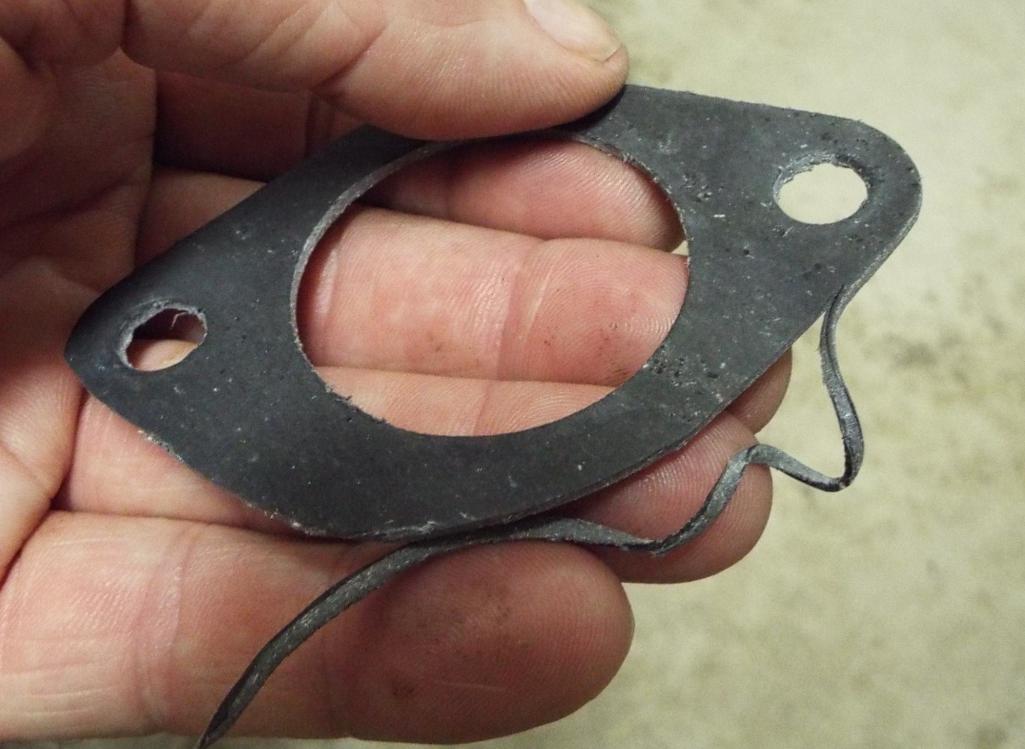
Comparison and all the flaky loose crap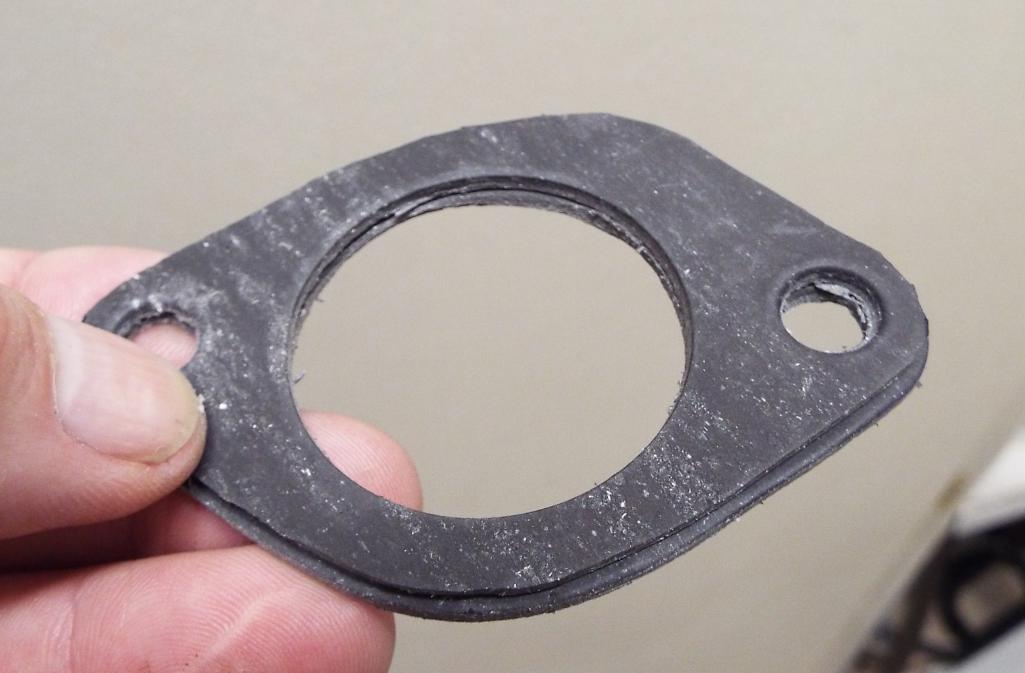
Just the gasket in place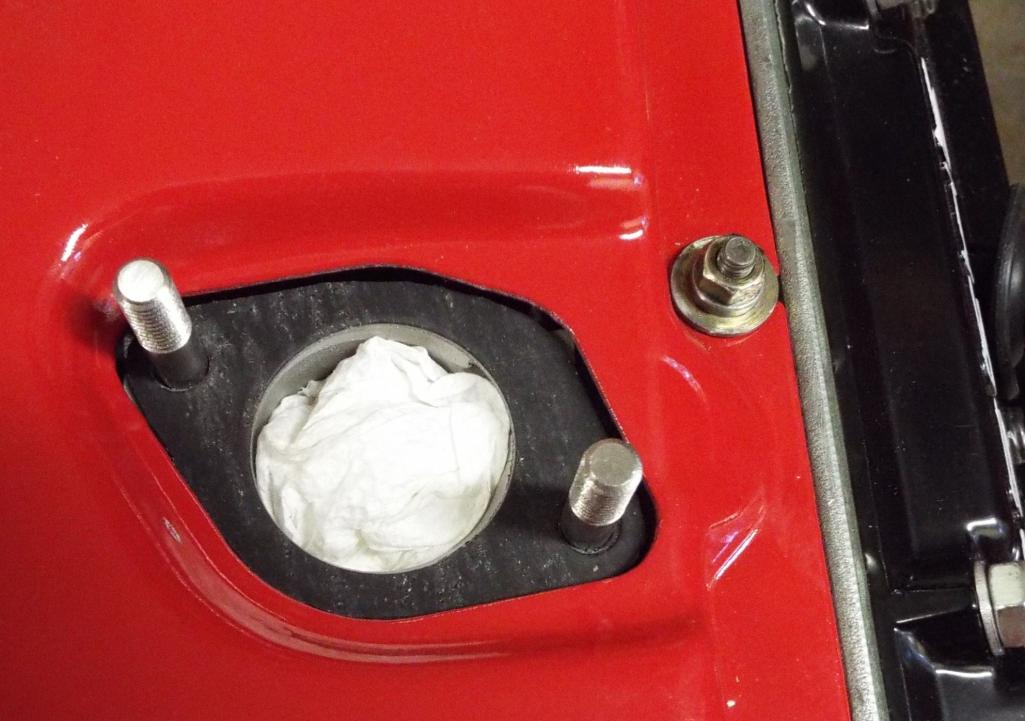
Insulators fit pretty well and yes that's another damn flake in the hole..... I'll get it...
Another gasket goes on top the insulator and really does not need to be trimmed but might as well as it looks kinda stupid if you don't with a big ole gasket hanging over the insulator. 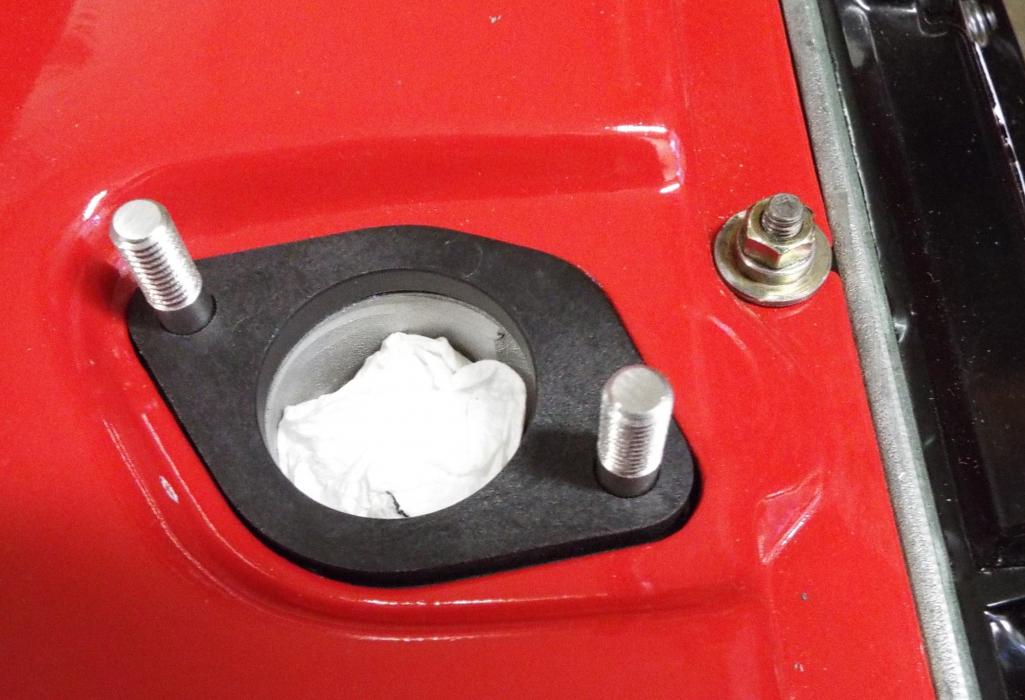
Posted by: porschetub Aug 31 2017, 02:58 PM
[quote name='Lucky9146' date='Aug 30 2017, 04:14 AM' post='2522011']
Richard at PMO recommended the 40/38 “tall” manifolds. But the height concerned me at 3.9 inches as I wanted to leave myself the option to use a 914-6 air cleaner should I want to. I have heard from many that you just might get tired of the sound right behind your head or for longer drives and maybe to get my wife to ride in the car. So I elected to go with the 40/36 “short” manifolds at 3.25 inches. Sounds like I am necking it down I know, but Paul at Performance Oriented said that with the 36mm venturi’s in the carbs it should be fine.
quote
Read your comment about the engine noise,I went back to stock over the K&N's I had,yes I know these engines sound great but I found it kinda got a bit much for me.
Difference in sound is rather noticeable,like the idea of better air filtration due to my road condition also.
Just measured clearance @ rear bulkhead and I have around 10mm with the stock plastic one,it also appears there is plenty of room to go upwards as in your case with taller manifolds ,really can't see rain hats clearing however.
Someone mentioned it depends on what conversion engine mount you have,fair point.
Keep up the good work
Posted by: Lucky9146 Aug 31 2017, 08:39 PM
[quote name='porschetub' date='Aug 31 2017, 01:58 PM' post='2522800']
[quote name='Lucky9146' date='Aug 30 2017, 04:14 AM' post='2522011']
Richard at PMO recommended the 40/38 “tall” manifolds. But the height concerned me at 3.9 inches as I wanted to leave myself the option to use a 914-6 air cleaner should I want to. I have heard from many that you just might get tired of the sound right behind your head or for longer drives and maybe to get my wife to ride in the car. So I elected to go with the 40/36 “short” manifolds at 3.25 inches. Sounds like I am necking it down I know, but Paul at Performance Oriented said that with the 36mm venturi’s in the carbs it should be fine.
quote
Read your comment about the engine noise,I went back to stock over the K&N's I had,yes I know these engines sound great but I found it kinda got a bit much for me.
Difference in sound is rather noticeable,like the idea of better air filtration due to my road condition also.
Just measured clearance @ rear bulkhead and I have around 10mm with the stock plastic one,it also appears there is plenty of room to go upwards as in your case with taller manifolds ,really can't see rain hats clearing however.
Someone mentioned it depends on what conversion engine mount you have,fair point.
Keep up the good work
[/quote]
Porschetub, that you have stock air cleaners is yet another example and I also have a good friend who has a 6 conversion and he is done with the sound. I have driven it a couple of times and it sounds great to me but I guess it could wear on you after a while.
Like I said, I want to keep my options open. It never hurts.
As best I can tell the mount is set for stock engine height and was not done by me.
Good luck on yours as well!
Posted by: Larmo63 Aug 31 2017, 09:07 PM
I kinda want my car to sound raspy so my wife "won't" want to ride in it. She drives an Escalade, so she's already freaked out about a 914.
I usually drive in the car by myself, so I only have to please myself.
Posted by: Lucky9146 Aug 31 2017, 09:20 PM
I kinda want my car to sound raspy so my wife "won't" want to ride in it. She drives an Escalade, so she's already freaked out about a 914.
I usually drive in the car by myself, so I only have to please myself.
That's cool I get it. Who knows mine might not want to ride in it either.
Hey your car is coming right along I just was on your thread looking at your install day pics. I am hopefully not that far behind.
I may have a question or 2 for ya.
Won't have my car ready but I'll see you in Temecula.
All the best in sorting yours out.
Posted by: Lucky9146 Sep 3 2017, 11:13 AM
Yesterday…….Off subject of the engine for a minute.
If you have not yet met Marty Schneider of MSDS you are missing out! What a great guy! I had heard a long time ago from mepstein that Marty had fabricated a fiberglass GT rear valance for 914-6 GT flared cars.
I was heading up to the LA area early Saturday morning for a different reason and decided on a Friday night to contact Marty and see, on a long shot, if he would meet me and sell me one of these GT flare valances. To my pleasant surprise he said he would! So I present myself to his shop at the prescribed time and there he was. Great to talk with, easy going with a wealth of information and experience, and lots of good stories. Not hurried to beet feet out of there on a very warm Saturday morning plus holiday weekend, he took the time to educate me on the nuances of the valance and make sure I understood what needed to be done for fit and finish. He even offered a 100% refund. How can you beat that! Maybe I shouldn’t have said that but I get the feeling the he treats everyone well. Sorry if I spilled the beans there Marty!
I learned from Marty that he had one of these valances molded for his own car, which had factory PN GT metal flares, and then he had some valances made to sell. Keep in mind this is NOT a tall valance but rather deals with the flared fenders instead and looks to be about the same height as a regular valance.
I know, I know, a “real GT’ has no rear valance but I kind of like the idea of a clean look and it could be removed so no harm done. So, why not?
Oh, and one last thing I got the last one he had but he said he will be making another batch of 25 sometime in the future. What a great experience (well except for LA traffic). Picture below of the valance taped in place this morning. Another future project to paint and fit. Looks like a winner! Thanks Marty
P.S. It was cool to see where my headers were made.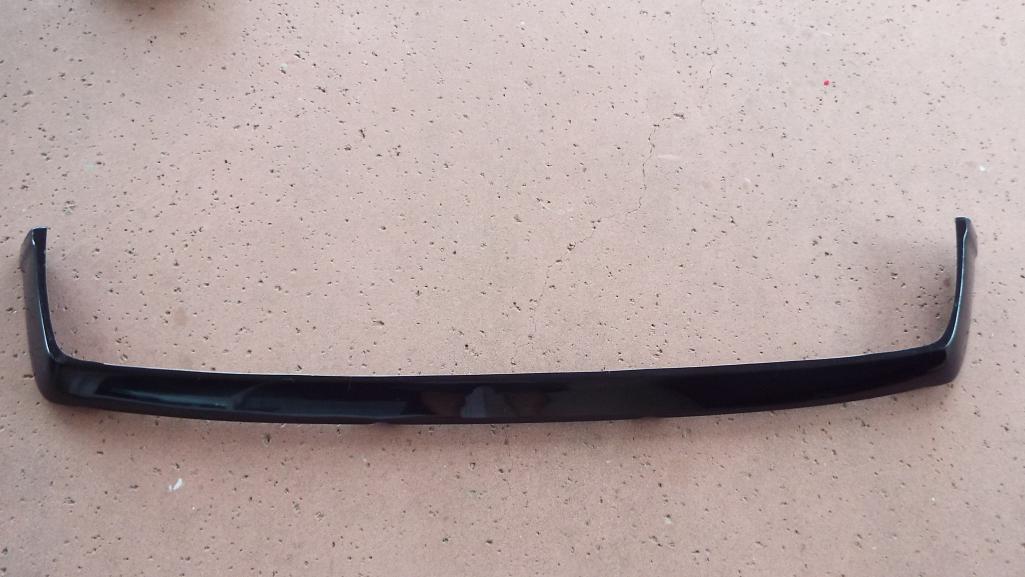
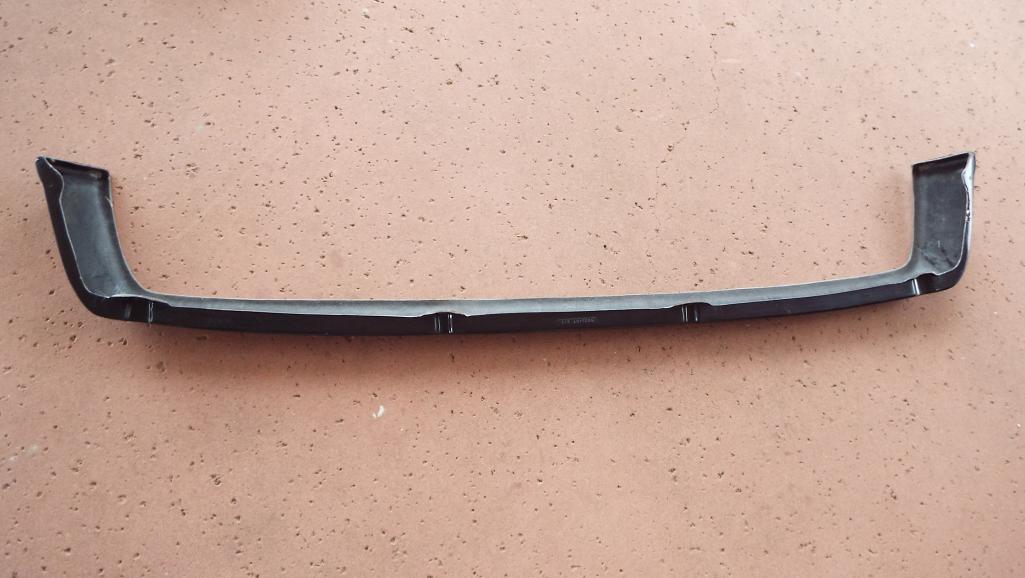

Posted by: moparrob Sep 3 2017, 01:32 PM
That's awesome Jim. I had the same experience when I met him at his shop and picked up the headers. He is truly an ambassador of these cars and a great guy to know and converse with. Will you need to clearance the lower edge for the exhaust tip?
Posted by: defianty Sep 3 2017, 02:09 PM
I like the rear valance. I have a similar one made by a guy in Germany to go on my GT. For a road car I personally think they look better with the valance than the raw GT look.
Posted by: mb911 Sep 3 2017, 02:27 PM
I like the rear valance. I have a similar one made by a guy in Germany to go on my GT. For a road car I personally think they look better with the valance than the raw GT look.
Once get to it I will be making weld flares for the stock steel valance just like I do for the rockers.
Posted by: mepstein Sep 3 2017, 02:34 PM
I like the rear valance. I have a similar one made by a guy in Germany to go on my GT. For a road car I personally think they look better with the valance than the raw GT look.
Once get to it I will be making weld flares for the stock steel valance just like I do for the rockers.
Ben - I'm just going to send you my car - and a bunch of cash. It will be easier in the long run.
Lucky - great job getting the parts together. MSDS makes awesome stuff for our cars.
Posted by: Lucky9146 Sep 3 2017, 03:15 PM
That's awesome Jim. I had the same experience when I met him at his shop and picked up the headers. He is truly an ambassador of these cars and a great guy to know and converse with. Will you need to clearance the lower edge for the exhaust tip?
Hey Rob, thanks, yes it is "some assembly required"
and you have to make the cut out for the exhaust but I don't think it will be a big deal. I hope.
Posted by: Lucky9146 Sep 3 2017, 03:16 PM
I like the rear valance. I have a similar one made by a guy in Germany to go on my GT. For a road car I personally think they look better with the valance than the raw GT look.
Posted by: Lucky9146 Sep 3 2017, 03:26 PM
I like the rear valance. I have a similar one made by a guy in Germany to go on my GT. For a road car I personally think they look better with the valance than the raw GT look.
Once get to it I will be making weld flares for the stock steel valance just like I do for the rockers.
Ben - I'm just going to send you my car - and a bunch of cash. It will be easier in the long run.
Lucky - great job getting the parts together. MSDS makes awesome stuff for our cars.
Thanks Mark for the tip and your other help along the way. Great community and support.
Posted by: Lucky9146 Sep 4 2017, 01:39 PM
Dust off the trans.
Note that the trans had been gone through and intermediate plate added for 914-6, a new gear, bearing, and gaskets while under PO moparrobs ownership. Should be ready to go!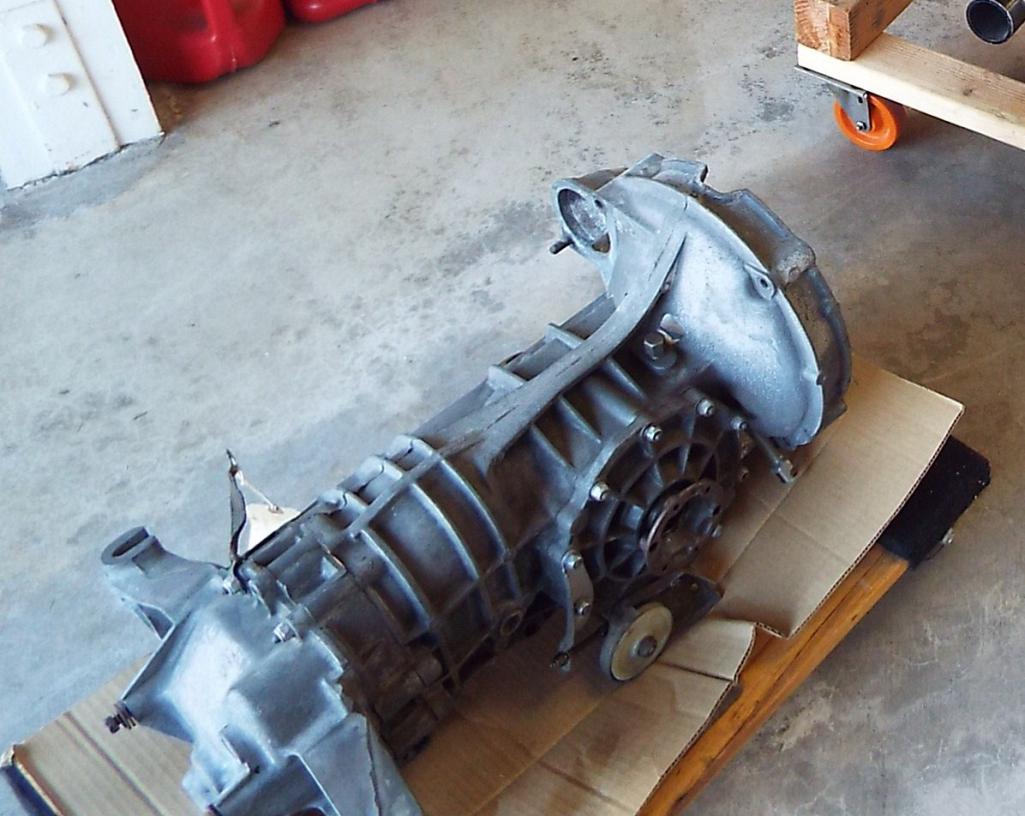
Next is the trans shift arm fix recommendation that comes by way of Forrestkhaag.
It’s a 10 cent fix!
He called it "the shaved head dime". Yes it takes a bit to file it down to fit in the cup hole.
Do yourself a favor and do a search and check out forrestkhaag’s posts regarding trying to resolve shifting issues on his 914-6 conversion. He truly has been through the wringer. Best of all his tip came to me via a PM from him on another subject, he just offered it. I definitely took his advise even though I already had the new bushing installed, yup I dug out a brand new never used bushing and ordered another. They do not like to come out nicely either! Scraped the arm all up trying to get the dang bushing out.
The story is that after fighting gear “nash” issues Leamon gave forrestkhaaag the same advise and it fixed it!
This is a great site!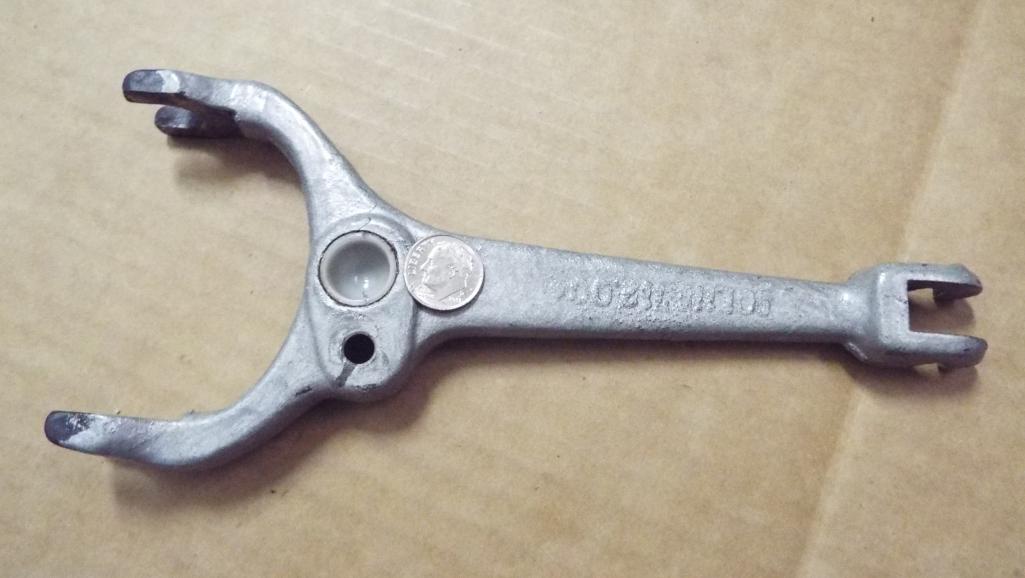

Posted by: lonewolfe Sep 4 2017, 02:22 PM
Replace the bushing with a dime?
Posted by: Lucky9146 Sep 4 2017, 03:23 PM
Replace the bushing with a dime?
Oooops sorry wasn't clear no insert the dime then install the new bushing. It is working to space the bushing up a bit is all. Changes the arm position closer to the clutch.
Posted by: lonewolfe Sep 4 2017, 03:32 PM
Replace the bushing with a dime?
Oooops sorry wasn't clear no insert the dime then install the new bushing. It is working to space the bushing up a bit is all. Changes the arm position closer to the clutch.
That makes more sense to me. Is this mod only for the 914-6 or for 914-4's as well?
Posted by: Lucky9146 Sep 4 2017, 05:02 PM
Replace the bushing with a dime?
Oooops sorry wasn't clear no insert the dime then install the new bushing. It is working to space the bushing up a bit is all. Changes the arm position closer to the clutch.
That makes more sense to me. Is this mod only for the 914-6 or for 914-4's as well?
May have to defer to someone with a lot more experience on that possibly Leamon who I do not know but advised forrestkhaag. I will see what else I can learn. Fair question though.
Posted by: gms Sep 4 2017, 05:19 PM
Replace the bushing with a dime?
Oooops sorry wasn't clear no insert the dime then install the new bushing. It is working to space the bushing up a bit is all. Changes the arm position closer to the clutch.
That makes more sense to me. Is this mod only for the 914-6 or for 914-4's as well?
the lever arm is the same on both 914/4 and /6
Posted by: Larmo63 Sep 4 2017, 07:59 PM
I didn't do the dime bag trick and my clutch is fine.
Just saying.
Posted by: Lucky9146 Sep 4 2017, 08:45 PM
I didn't do the dime bag trick and my clutch is fine.
Just saying.
Glad you got yours running yesterday!
Nice work!Oh well maybe it will help mine.
Posted by: porschetub Sep 5 2017, 01:03 AM
I didn't do the dime bag trick and my clutch is fine.
Just saying.
I think this modification would suit those who have machined flywheels
,I would say that a shim washer under the pivot ball would do the same thing,I don't really know if there is enough thread to support that,surely would do the same job.Reason I mentioned as I believe I have the same issue as forrest had but to a lesser extent,just feel like the lever isn't moving enough.......
At the moment I live in hope my trans isn't
 .
.Posted by: Maltese Falcon Sep 5 2017, 10:29 AM
I didn't do the dime bag trick and my clutch is fine.
Just saying.
Lawrence...I think the 914World has the best nicknames around any of the car forums; Dime Bag (too funny / as in Ceech + Chong), taco plate, hell hole, narp...Not Hijacking this thread; back to your scheduled program
Marty
Posted by: Lucky9146 Sep 6 2017, 10:56 AM
Kennedy Conversion Flywheel and Kennedy Stage II Clutch back in place.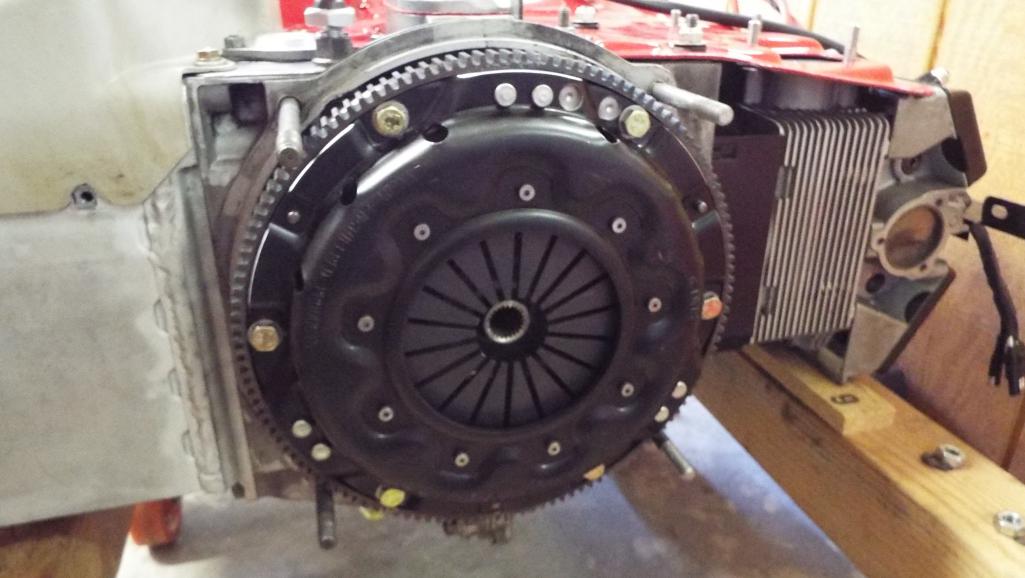
Trans and starter back on, the last 2 pieces of sheet metal, and finish the Perry Kiehl wiring harness hook up.
Now on to addressing the intake manifolds.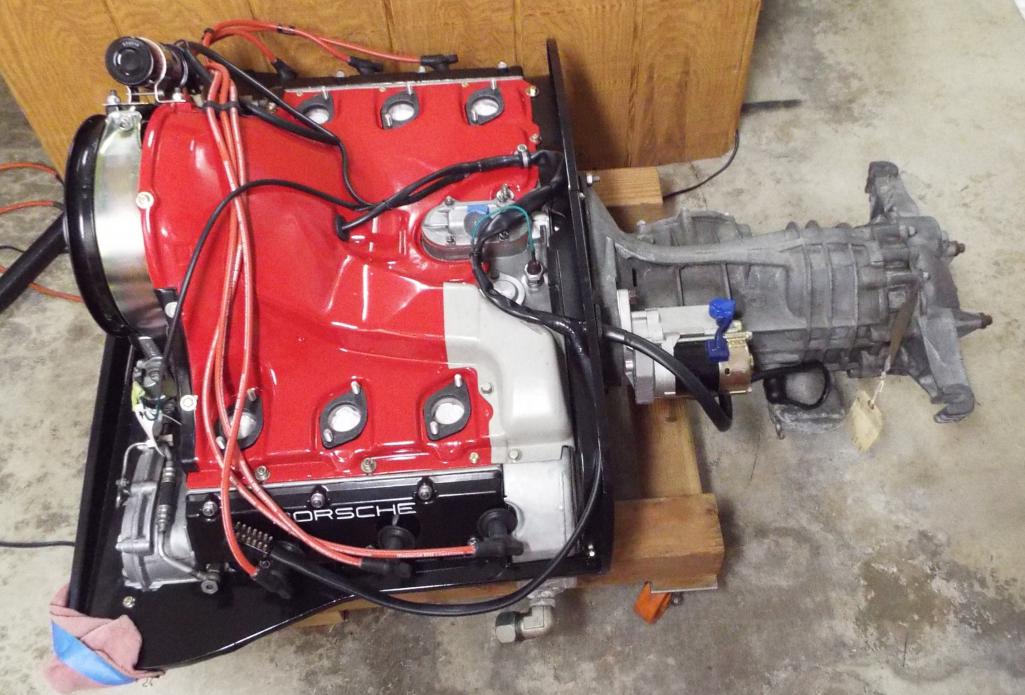
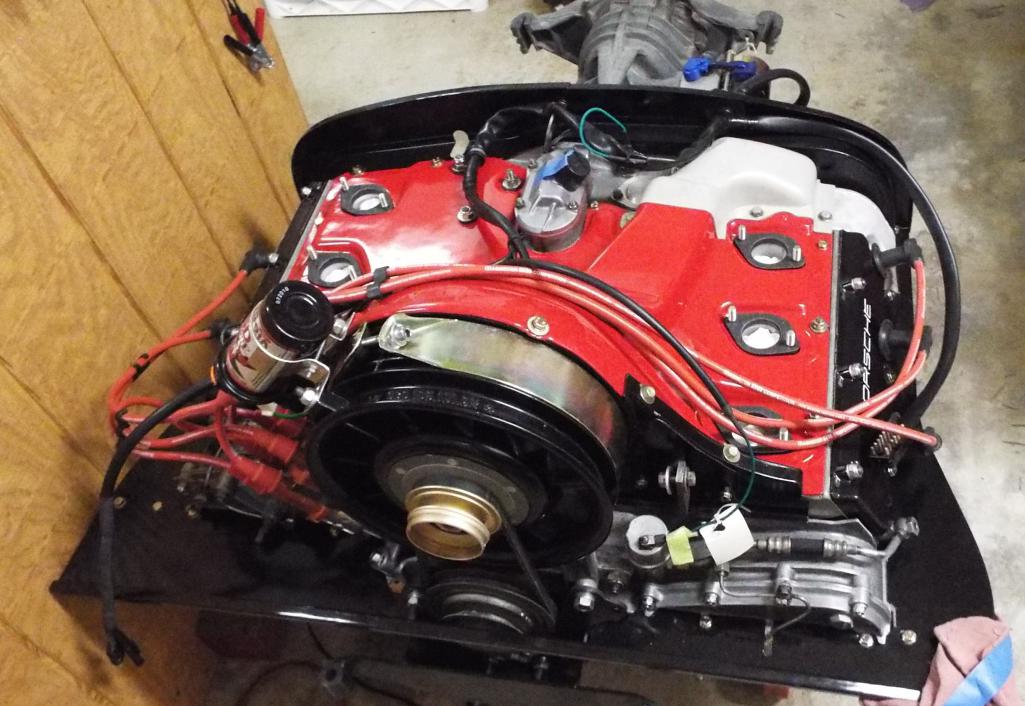
Posted by: Lucky9146 Sep 7 2017, 09:59 AM
Porting my brand new intake manifolds.
Wow, these new manifolds sure look nice! And I’m going to grind on them?
This operation does not sound like fun. Porting is a new one to me and one problem I have is that while I like doing most things once so doing anything 6 times is pure torture.  Ugh!
Ugh! 
PO was generous enough to mail me his “porting kit”. How’s that for support! Thanks moparrob!! No more excuses now I have to do it!
To start with, I just have to say that I was concerned about tackling this project with brand new manifolds as they were quite an investment and not something to screw up!
I am sure there are many out there that have done this and it would be no biggie to them.
So here goes……………..
I was looking for something around the house to use to model the ported hole size to and it turns out that a ping pong ball is almost exactly the correct size I need. Who knew? Disclaimer: I didn't realize that I had only 3 China ping pong balls to choose from.
That's the insulator and the diameter I am going to be working to.
Transfer insulator diameter to manifold, and you can see the difference in size and how much material has to come out with no gouges or scarfing up the flange surface! No Pressure!!!!
More to come................................
Posted by: mepstein Sep 7 2017, 11:01 AM
Get a scap piece of aluminum, cut a hole in it. Them work on "porting" it. Always practice a new procedure on scrap before you do the real thing. Pretty universal.
Posted by: Lucky9146 Sep 7 2017, 11:36 AM
Tried starting with grinding wheels, first the one from the kit. Yup loads right up just like I thought it would with aluminum. I think it was meant to grind on a Chevy manifold. I even resurrected a coarse stone that I had from eons ago. And that one loaded right up too!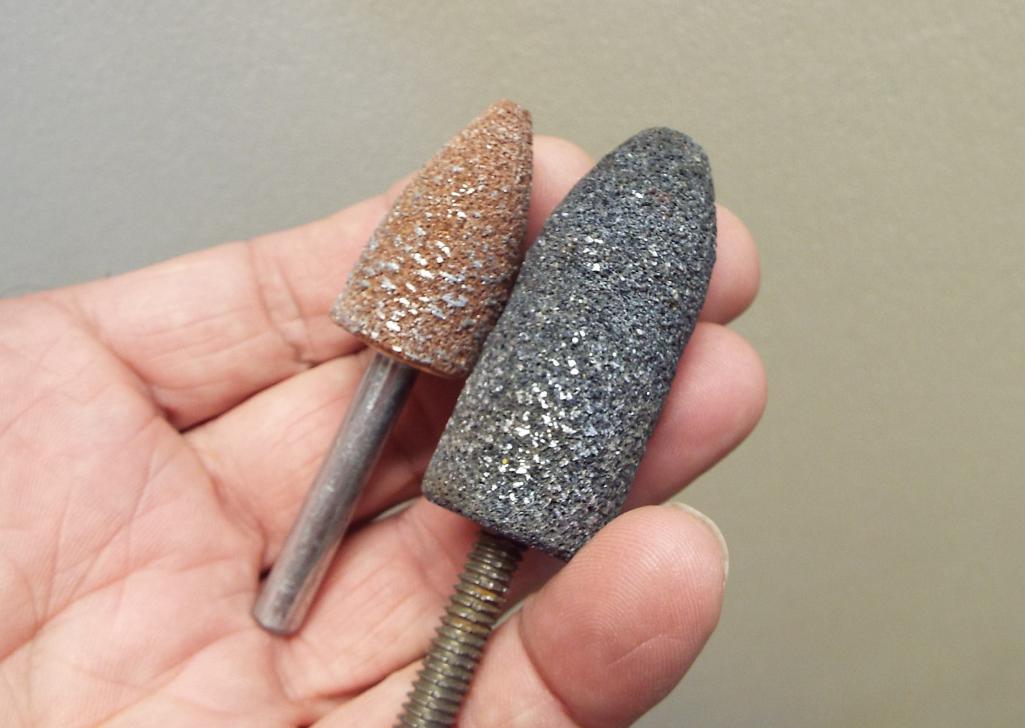
Well this ain’t working. So off to the hardware store and search for a solution. Came up with this jewel of a carbide rotary file burr tool FOR ALUMINUM. What a great find! The girl at the hardware store even remarked “isn’t it pretty?” and I had to agree. $33.00 pretty. Didn’t even need that grinding wheel in the picture it was only for back up.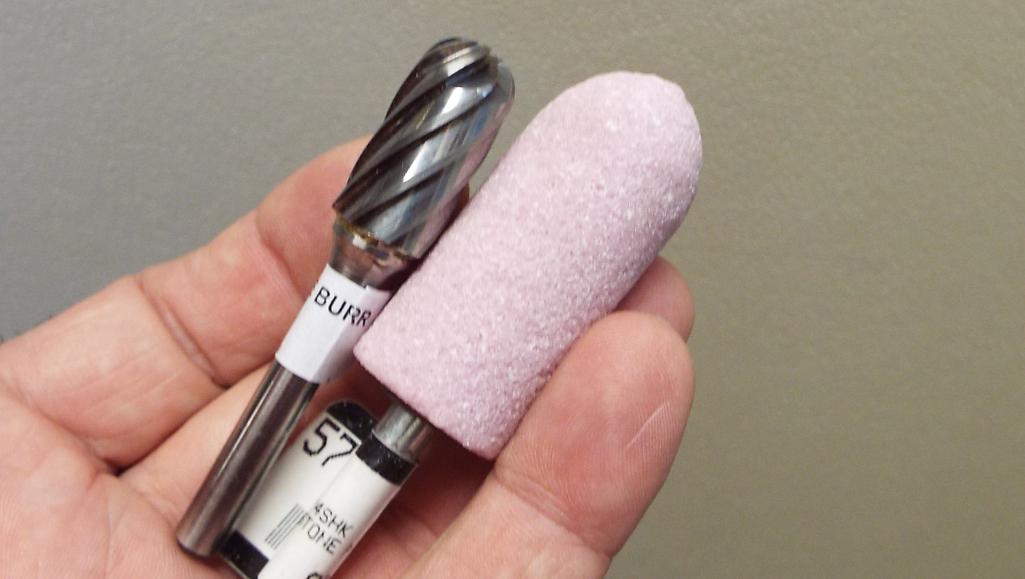
Man that burr tool is amazing but I can see how you can get in big trouble real fast though. Slow and easy but it cuts like butter. Runner finish is a close match to as new, actually got it even closer after this pic.
Enlarged runner in process left and original runner right.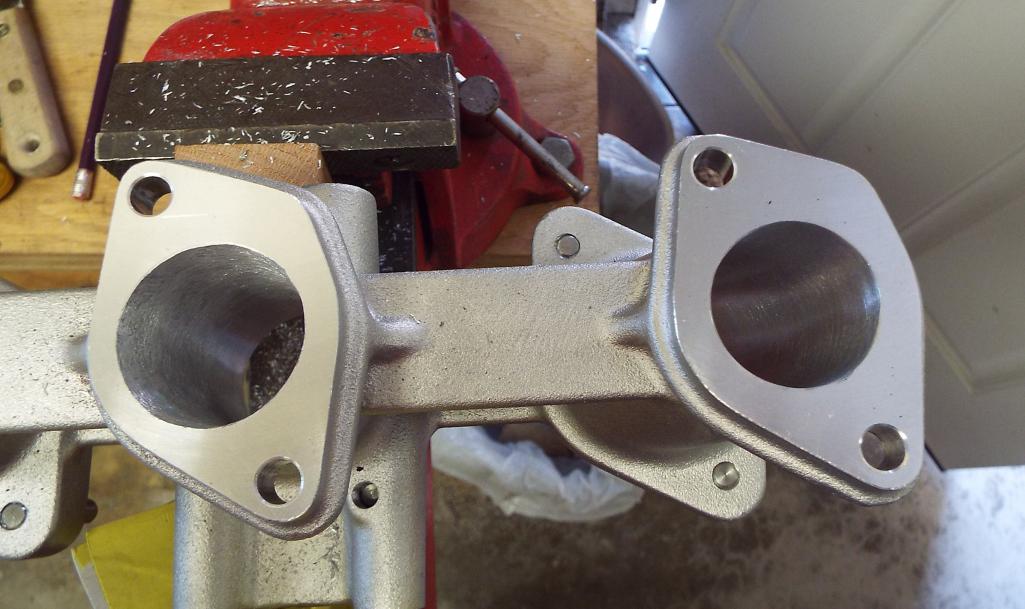
Developed a process which yielded a good runner finish very close to what the manifolds came with by using these tools in this order left to right.
Carbide burr, 60 grit roll, 80 grit roll, coarse scotch brite and fine scotch brite. 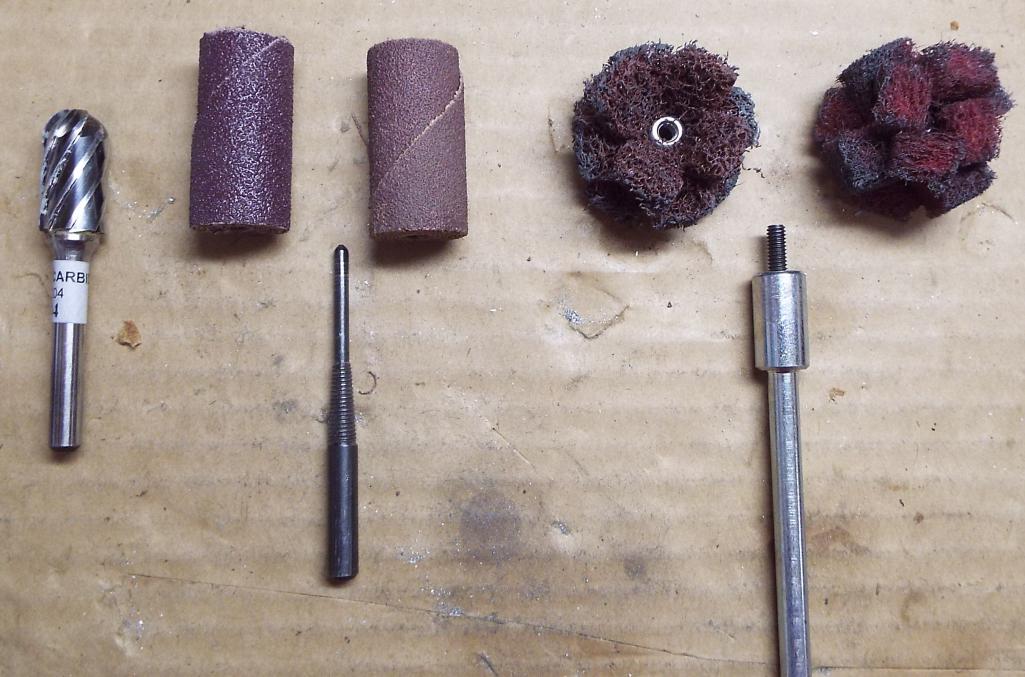
Not so bad just tedious and time consuming plus knowing there are 6 total to do.
Posted by: Lucky9146 Sep 7 2017, 11:49 AM
Get a scap piece of aluminum, cut a hole in it. Them work on "porting" it. Always practice a new procedure on scrap before you do the real thing. Pretty universal.
Thanks for the tip Mark but I had so much material to remove that there was plenty of practice right in front of me. Start off slow is all. Have plenty of wood working experience in shaping just different tools and material is all.
Going well more to post and that is time consuming too but I wanted to share this experience.
Thanks for weighing in.
Posted by: mepstein Sep 7 2017, 11:57 AM
Get a scap piece of aluminum, cut a hole in it. Them work on "porting" it. Always practice a new procedure on scrap before you do the real thing. Pretty universal.
Thanks for the tip Mark but I had so much material to remove that there was plenty of practice right in front of me. Start off slow is all. Have plenty of wood working experience in shaping just different tools and material is all.
Going well more to post and that is time consuming too but I wanted to share this experience.
Thanks for weighing in.
If you have wood experience then you are ahead of the game. You already know it's easier to remove than put it back. Good luck.
Posted by: moparrob Sep 7 2017, 01:11 PM
Looking awesome. I'm glad someone is putting those porting tools to good use.
Posted by: Lucky9146 Sep 8 2017, 11:04 AM
[quote name='moparrob' date='Sep 7 2017, 12:11 PM' post='2525302']
Looking awesome. I'm glad someone is putting those porting tools to good use.
[/quote
Thanks Rob!
These are billed as 40/36 manifolds but they actually measured 35mm so I am really going from 35 to 38mm.
It is a lot of alum to remove and that carbide burr works perfect for this job!.
In process on right side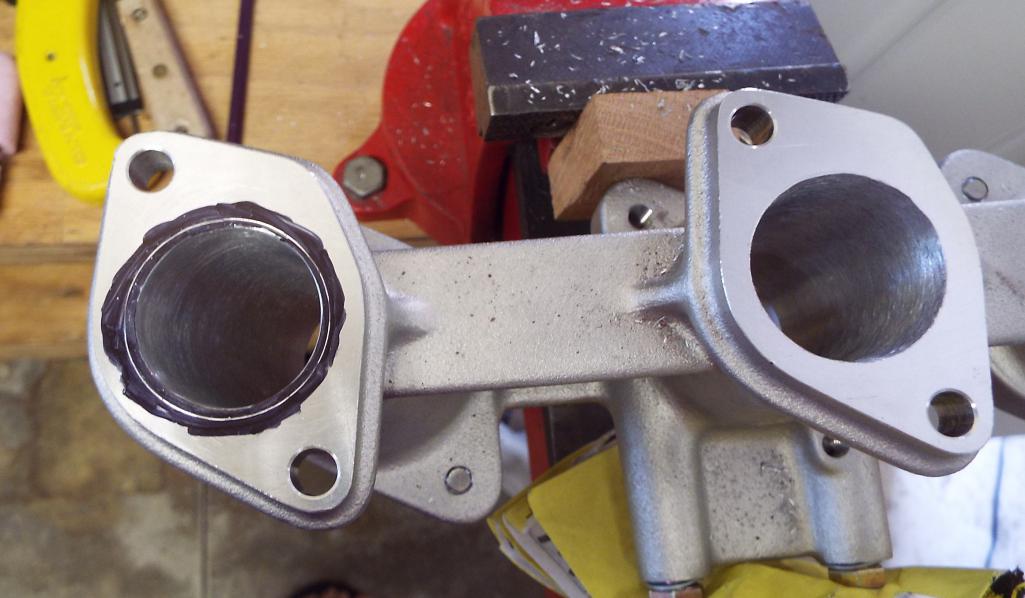
Metal removed from just one runner
The ping pong ball fit check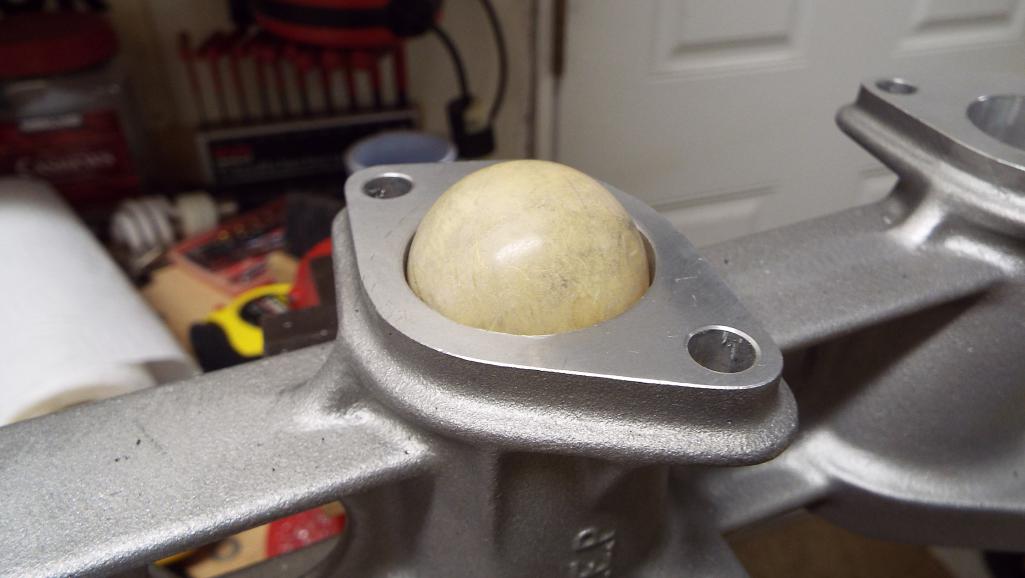
Posted by: Lucky9146 Sep 8 2017, 11:40 AM
First hole done!
That would be the obviously larger one in the center.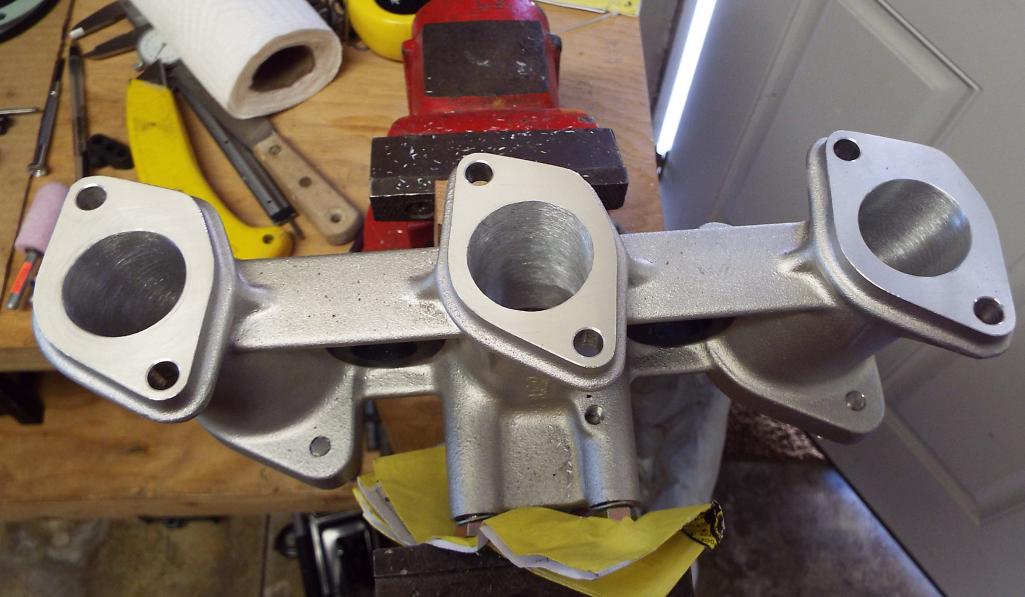
How it matches up to the insulator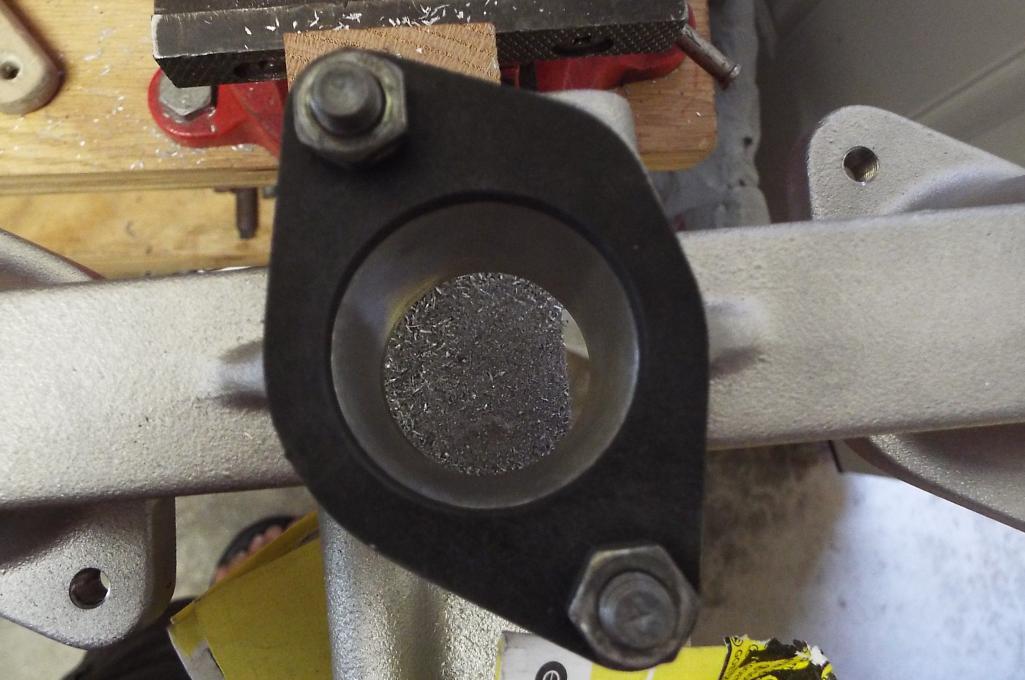
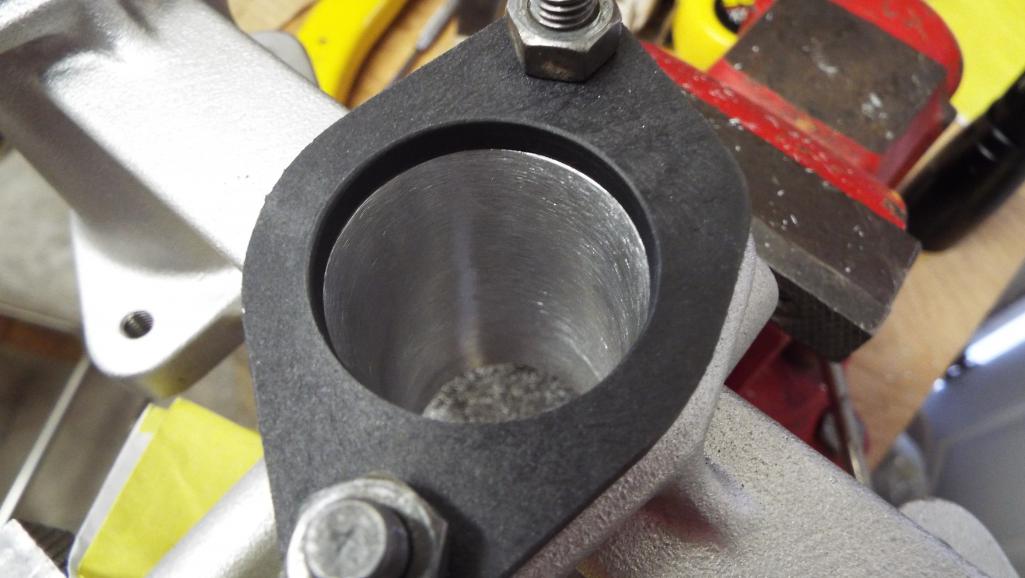
And before and after with the ping pong ball really gives sense of the size. Yes that is the same ball.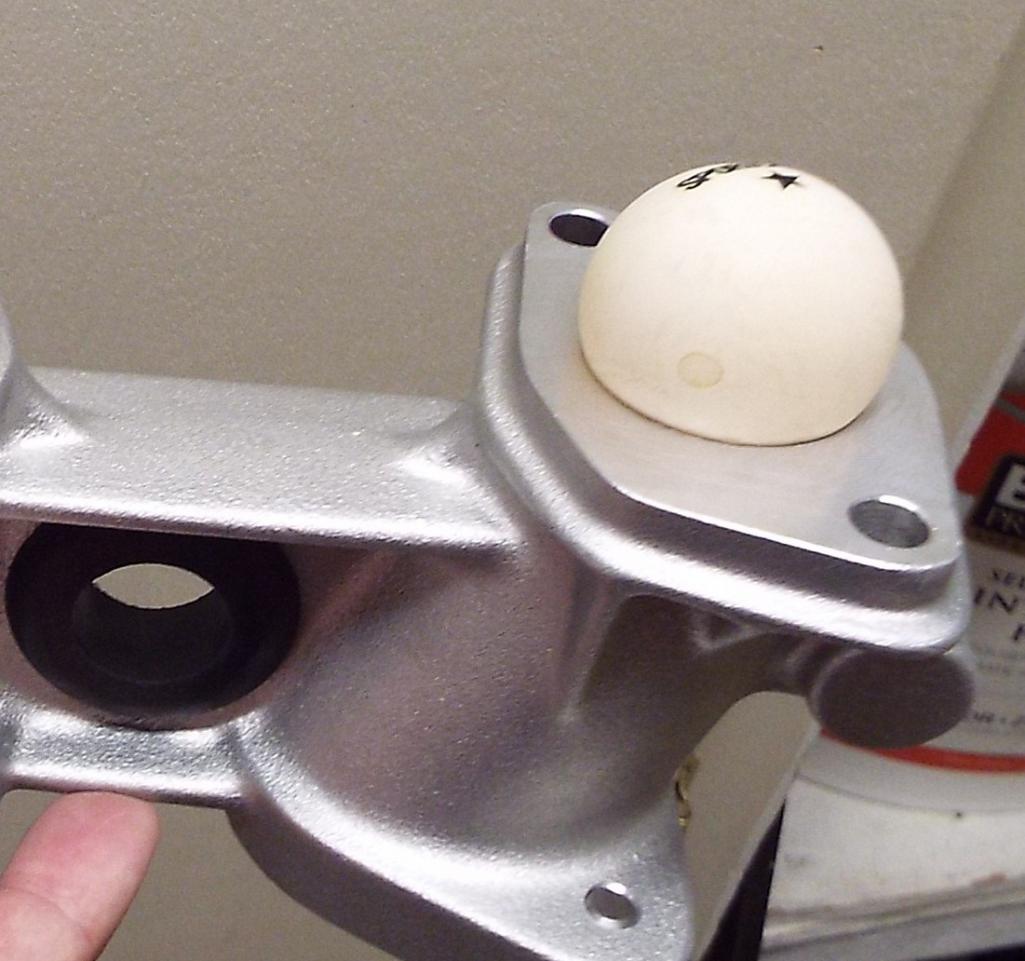
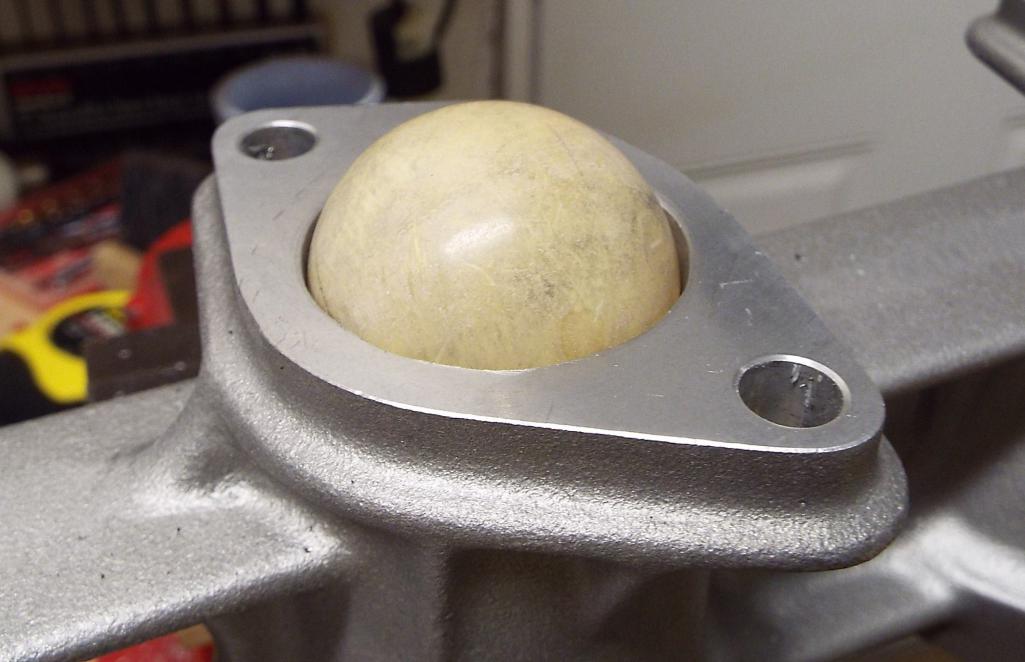
OK now just 2 more runners on this manifold with no mistakes!
Working good so far........
Posted by: mepstein Sep 8 2017, 11:55 AM
Liar ! You've done this before.
Or it least it looks that way
Posted by: moparrob Sep 8 2017, 02:38 PM
Liar ! You've done this before.
Or it least it looks that way
No, all of Jim's work is that way. I have been to his house and between his amazing woodworking skills in his kitchen, as well as the several other cars he has already restored, it is clear he has good skills and patience. Don't let his modesty fool you.
Posted by: Maltese Falcon Sep 8 2017, 03:12 PM
First hole done!
That would be the obviously larger one in the center.
How it matches up to the insulator
And before and after with the ping pong ball really gives sense of the size. Yes that is the same ball.
OK now just 2 more runners on this manifold with no mistakes!
Working good so far........
Mil-Spec...just paint it OD green
Posted by: whitetwinturbo Sep 8 2017, 09:18 PM
Posted by: Lucky9146 Sep 8 2017, 09:36 PM
Liar ! You've done this before.
Or it least it looks that way
No, all of Jim's work is that way. I have been to his house and between his amazing woodworking skills in his kitchen, as well as the several other cars he has already restored, it is clear he has good skills and patience. Don't let his modesty fool you.
Thanks guys I need all the moral support I can get.
We have all ground on metal at one time or another but I have to say expensive new aluminum manifolds was a first for me.
One manifold done! It sure does dress up that engine! Next one close behind now.
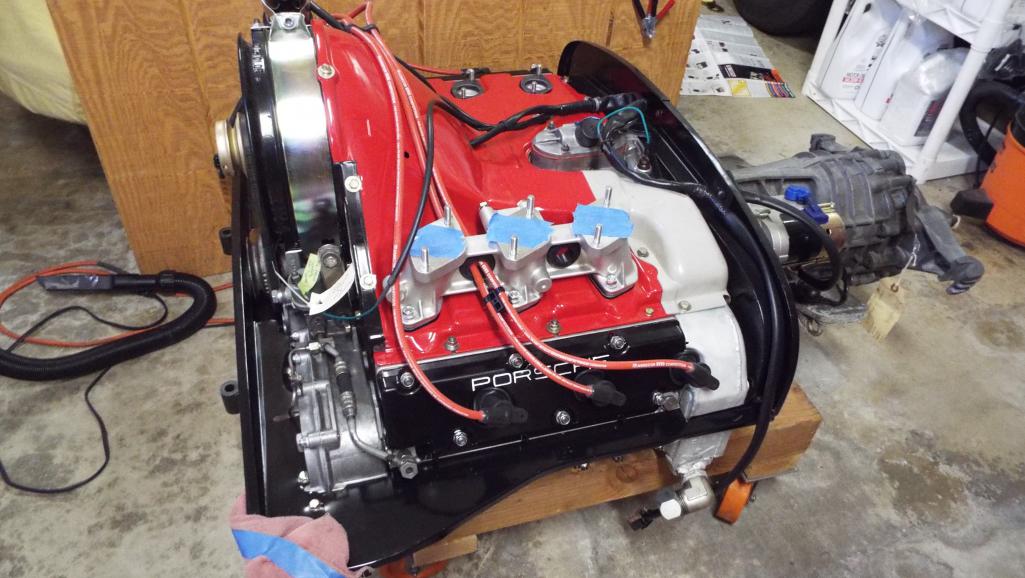
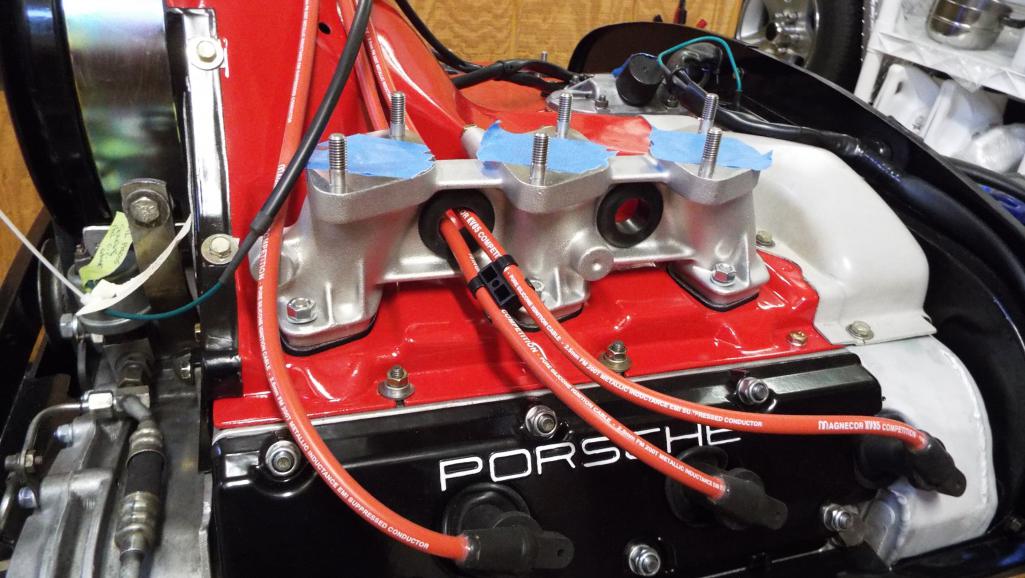
Thanks for checking in

Posted by: defianty Sep 9 2017, 11:01 AM
Fantastic job on the porting. What size are the inlet ports? Have they been ported too?
Posted by: Lucky9146 Sep 9 2017, 11:26 AM
Fantastic job on the porting. What size are the inlet ports? Have they been ported too?
Great to hear from the UK again! Thanks man!
The inlet ports are billed as 40 but actually measure 41mm, so no they are not ported further than received. Thanks for checking in.
Posted by: defianty Sep 9 2017, 11:37 AM
Fantastic job on the porting. What size are the inlet ports? Have they been ported too?
Great to hear from the UK again! Thanks man!
The inlet ports are billed as 40 but actually measure 41mm, so no they are not ported further than received. Thanks for checking in.
41mm that's the same as mine then. I'm trying to ascertain as to whether my 3.0L 930/10 engine is standard as I thought 41mm was rather big. I think I've got a lot to learn!

Posted by: Lucky9146 Sep 10 2017, 10:29 AM
Both manifolds on......... Sure glad that is done!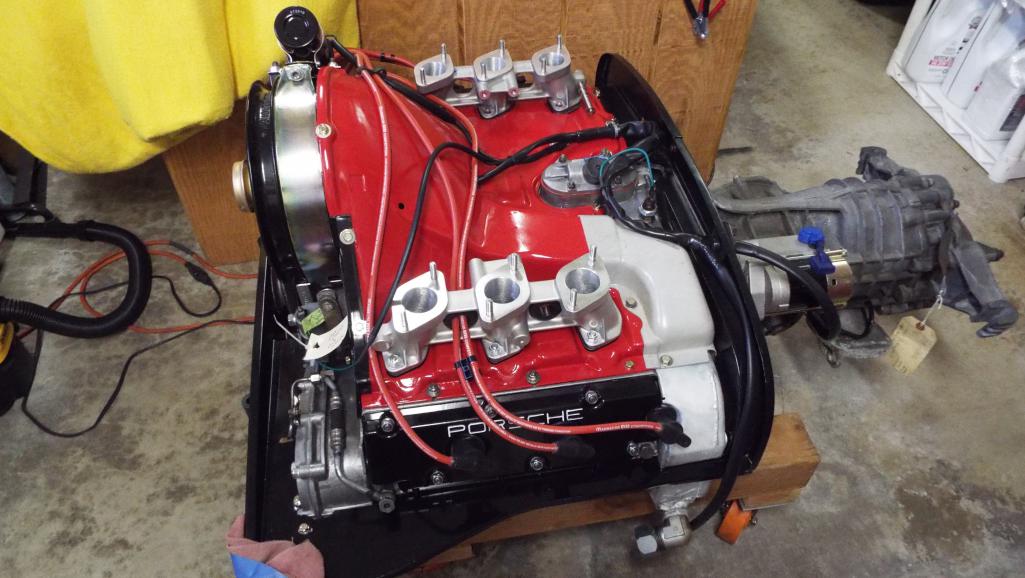
Love this shot!
Big hole clear down to the valve!
Well, that ought to work!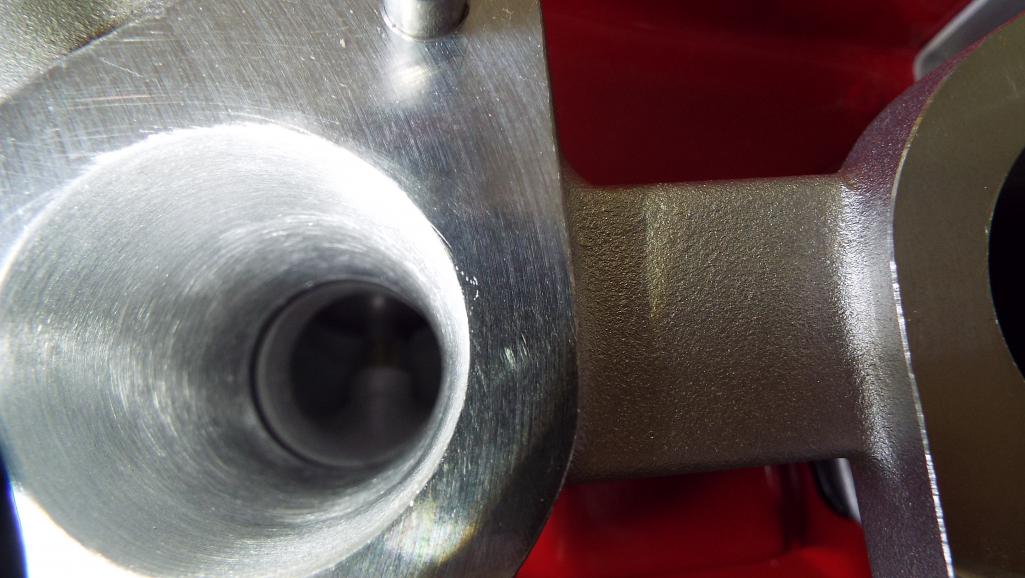
Posted by: Lucky9146 Sep 10 2017, 10:58 AM
Did I think I would spend an entire afternoon yesterday on my accelerator linkage? Nooooooooooo
Disclaimer on the following posts “my linkage may be different than your linkage”.
Thought it might be a good idea to check out my carb linkage while the engine still easily accessible.
Turned out to be one of the best decisions I could possibly make!
As I got into it I thought I would document my Weber carb linkage set up.
Maybe someone has posted it on the site already but I couldn’t find it.
I am a lousy searcher.
I learned so much in the process and if I had waited to do this after the engine was installed I would have been up and down and a half million times and needed a second person to help and it would have been a real pain in the ass! I can see that now.
To Start:
Tried to put my linkage on. Didn’t get far. Unfortunately my linkage has been sitting for several years now and that sitting had taken its toll. The linkage arm ends that go on the pivot balls were dried out inside, and they were corroded plus that little cir-clip inside the linkage arm end that captures the ball was non functional. Stuck in its groove.
OK so stop right there and clean up every linkage end and polish up the little pivot balls. Unfortunately, I neglected to take pics of all that ugliness.
Key is cleaning all linkage attachment points and applying a good grease to every moving part.
While you are at it, make sure the rod ends work freely in the threaded part of the linkage arm end as well. Mine did not, some only screwed in half way. Make sure they actually screw in all the way because you just may just need that last bit of thread as I later discovered. WD40 is your friend here.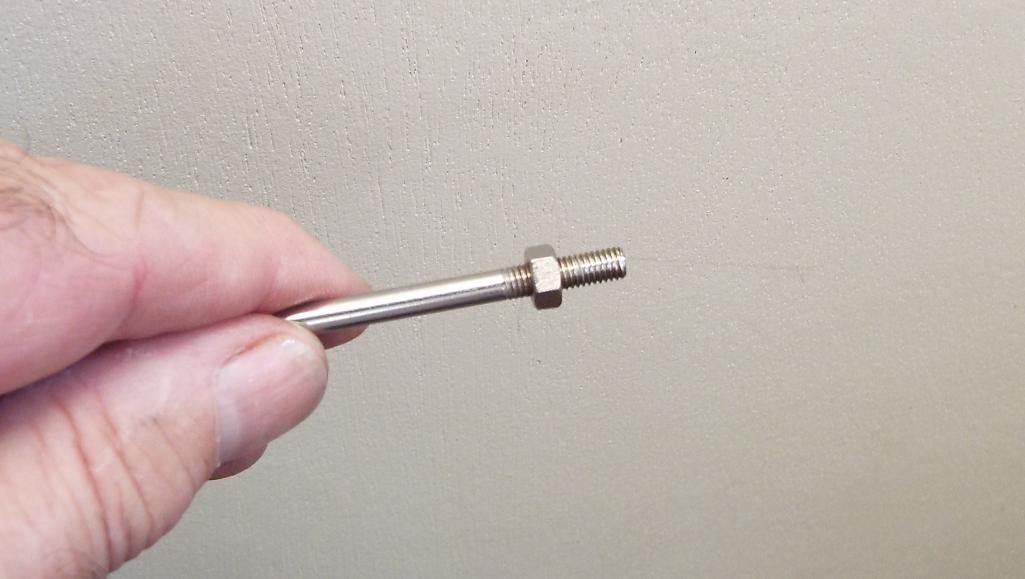
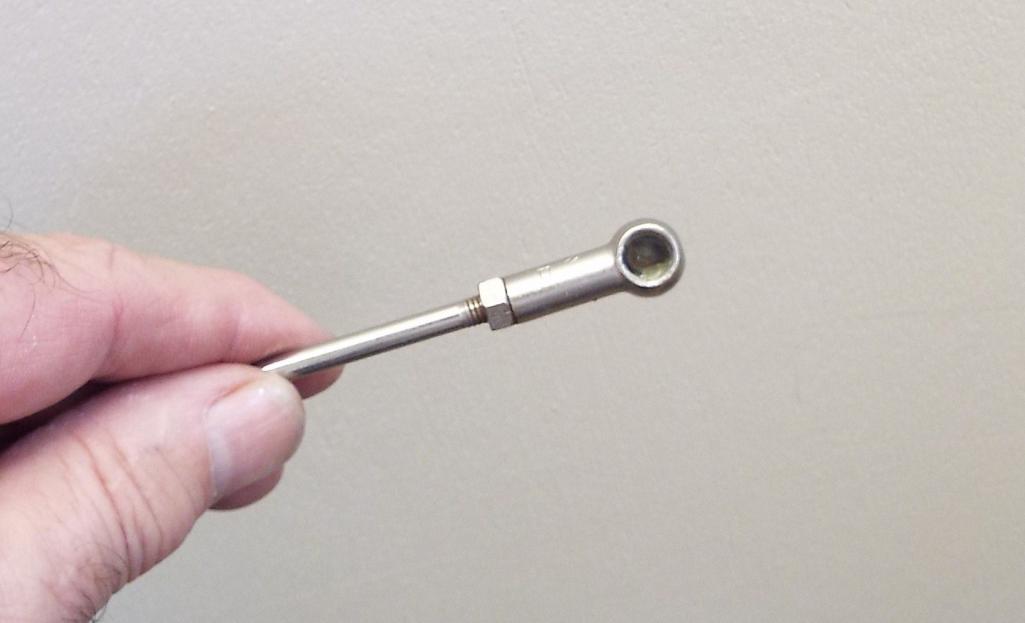
I needed to turn a difficult/ stuck rod ends and a 10 mm open end wrench works great for that. Protect that rod in a vise.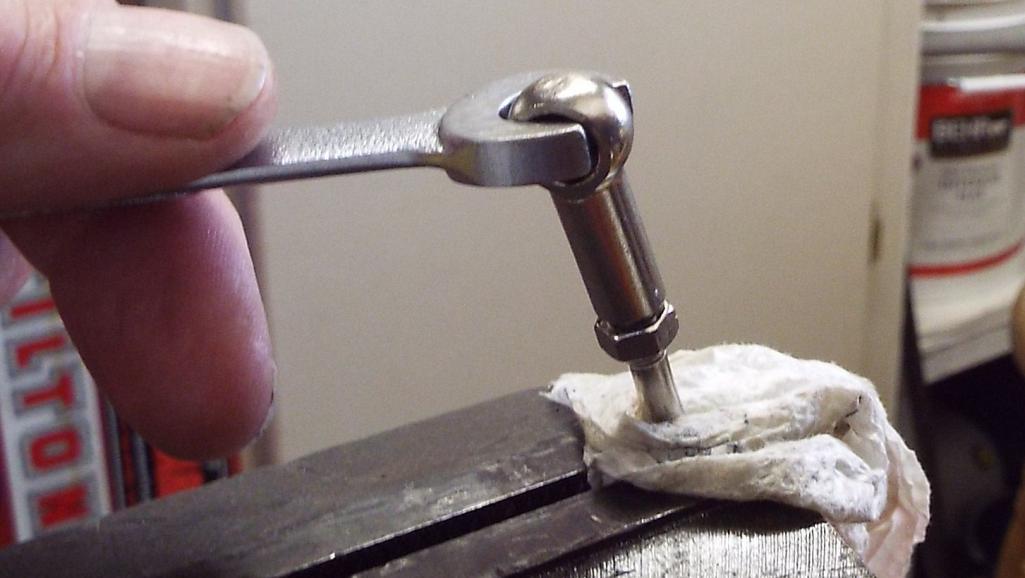
Next step, install the brackets for the cross bar to the intake manifolds followed by the cross bar.
As you know these are new intake manifolds in my case so who knows how this will go? I mean this was all together once but with different manifolds. Should still work though, right?
Now with the uprights loosely installed and grease in the sockets and also on the cross bar ball ends, tighten the bolts to the manifolds.
Nope, not even close to rotating freely.
Bit of tweaking on the uprights to release the inward pressure on the bar to free it up but still just enough tension to keep it well contained. 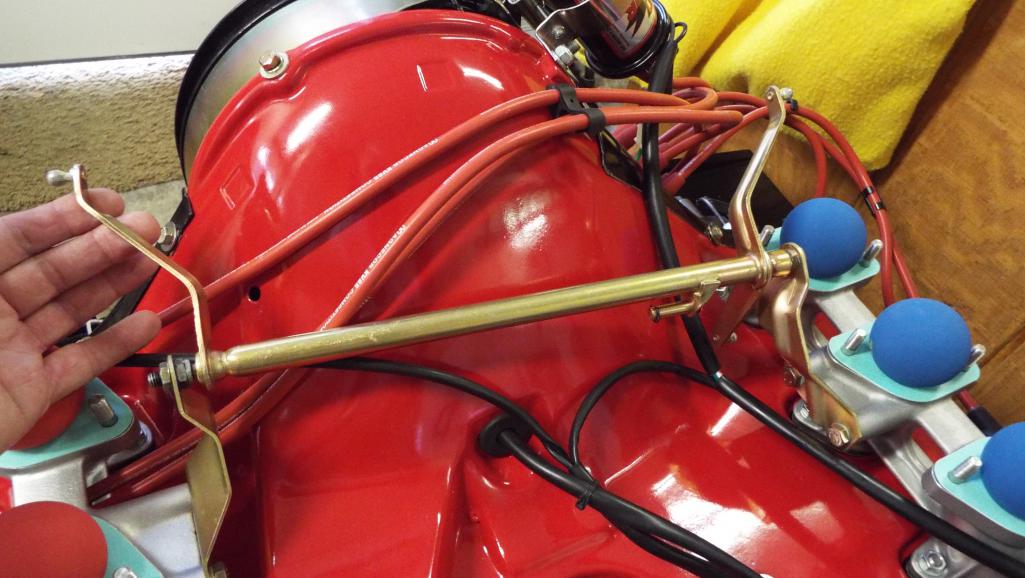
Posted by: Lucky9146 Sep 10 2017, 11:11 AM
Reverse lever positioning.
I found this to be about the right position as shown. Note inboard arm just a little past 12 o’clock and outboard arm a little past 3 o’clock. It is important that the outer arm not be much higher than shown as the arm should be beginning the downward movement. Your arm may be different.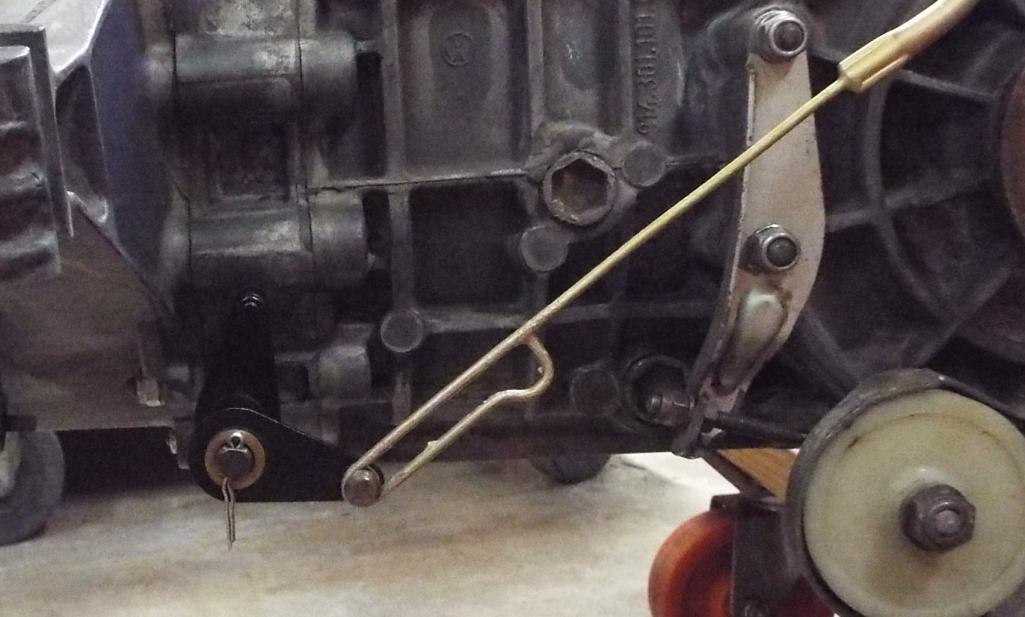
While at the same time the top triangular reverse lever almost horizontal across the top.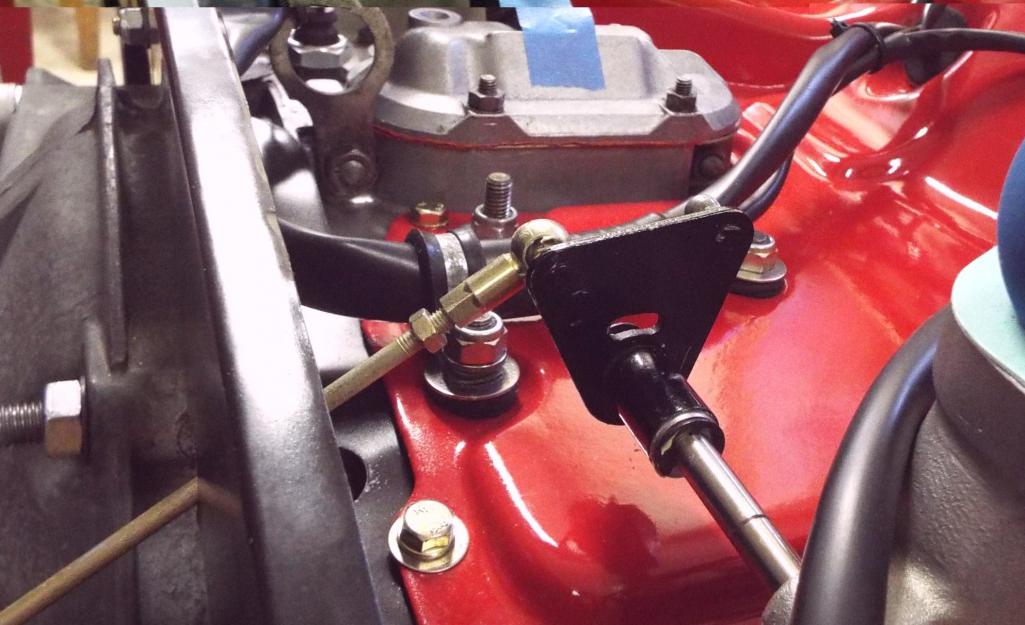
So, you have a hand on the trans end and the other hand on the upper pivot and you can feel when the linkage if is over extended and there actually is kind of a sweet spot and of course checking for binding. Adjust the long link as necessary to achieve.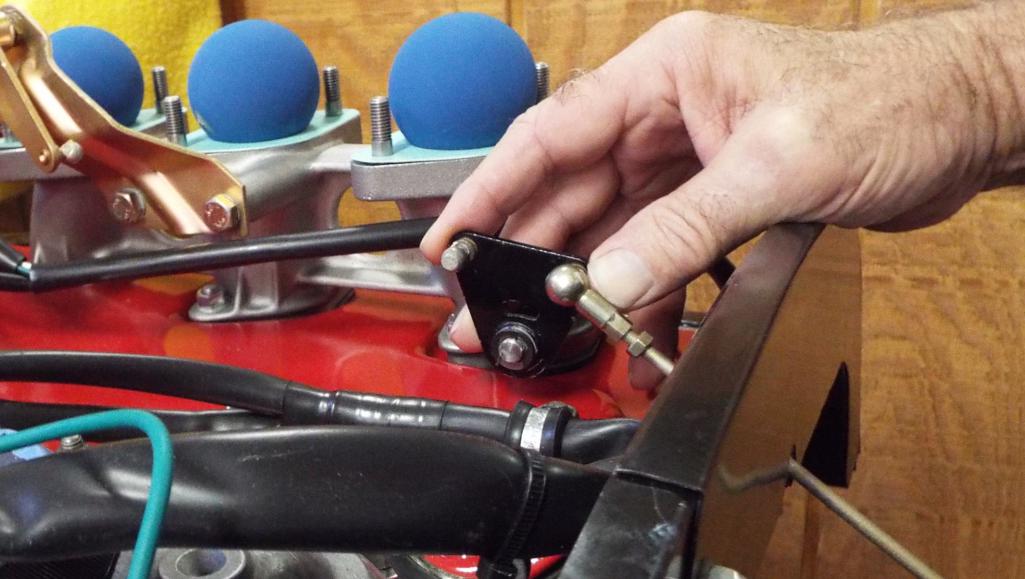
Now remove the long accelerator linkage going to the trans and install the piece of linkage running from the cross bar to the reverse lever and check that for free movement. Note the linkage is set to have the triangle reverse lever flat across the top and the attachment arm on the cross bar is vertical.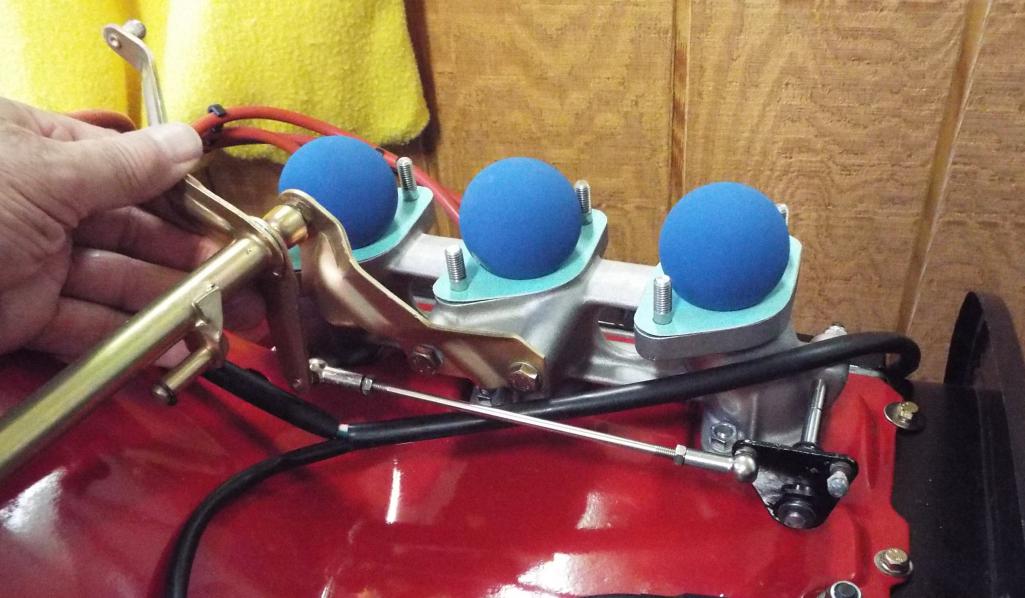
This link is critical to the set up. You may have to play with this linkage arm, because it is a very fine line between too long and too short, as it really affects the arms that go to the carbs from the cross bar. I actually think this arm on mine could be longer because I only had about 6 tread engagement at both ends. A little longer makes for longer arms at the carbs and my carb arms ended up very short.
Posted by: Lucky9146 Sep 10 2017, 11:22 AM
Reattach the lower long linkage that goes over the rear axel to the trans and check free of movement.
All linkage has now been checked for free movement and is together.
Now try to hook up ONE carb link to ONE carb and I started with the right carb.
I chose this carb as it is the furthest away from the linkage on the other side of the engine/ trans actuator. Adjust the carb lever arm to maintain the locations of triangle reverse lever and trans pivot noted earlier.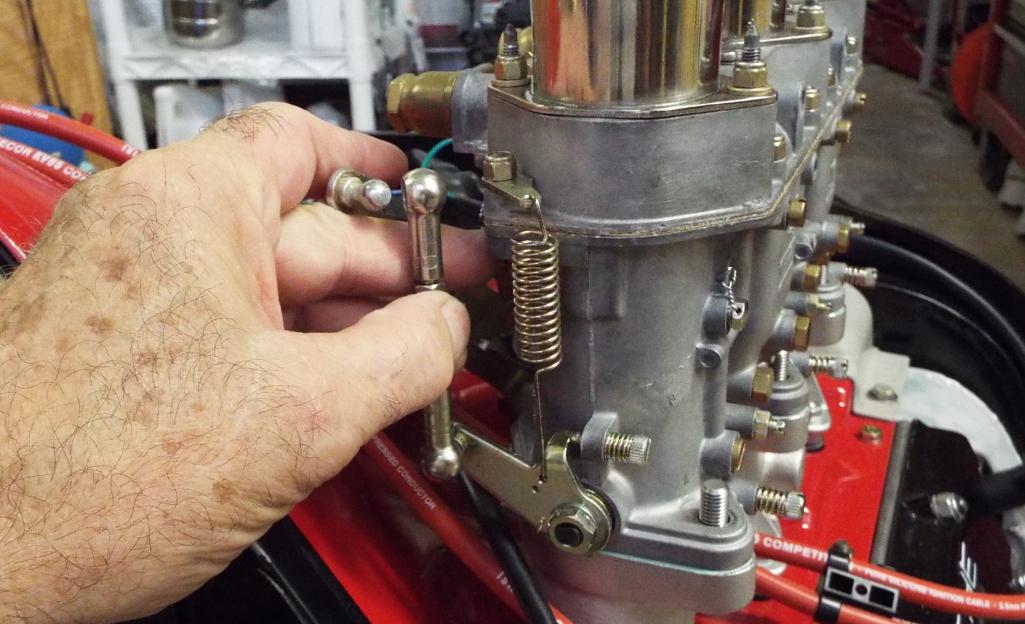
Note how the top of the triangle reverse lever is level across the top making sure it ended up where I wanted it when all assembled.
While making adjustments, disconnect the carb arm when doing so, and re-set the carb link length when done. My 2 cents.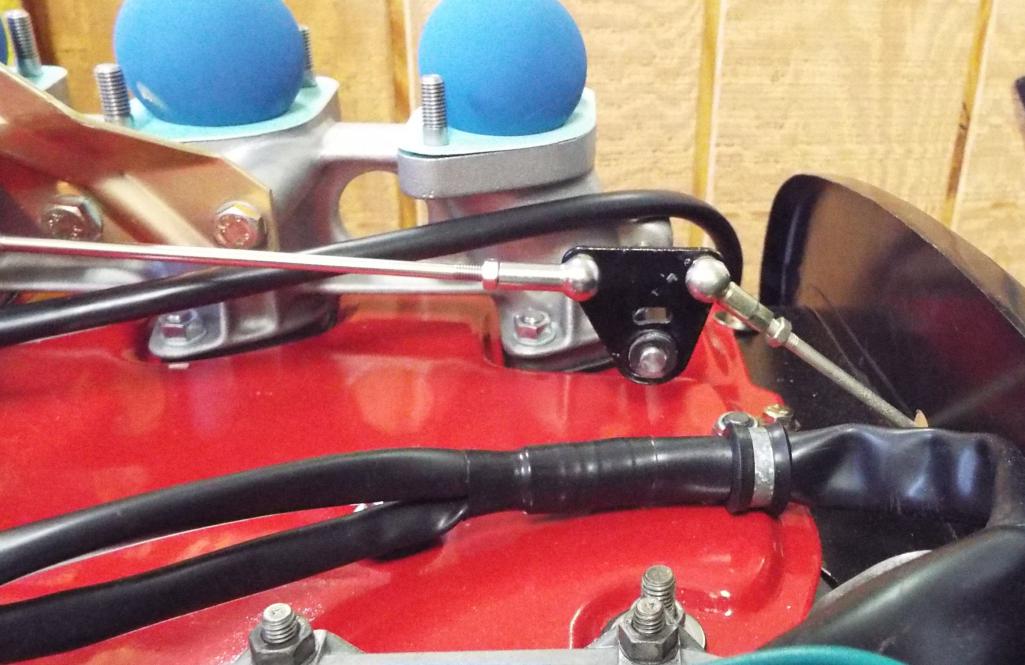
Posted by: Lucky9146 Sep 10 2017, 11:34 AM
From the trans reverse lever pivot
Get ready to actuate the mechanism by hand. Looking at the carb. note the closed position shown in the middle of this pic. Look at the bottom of the spring.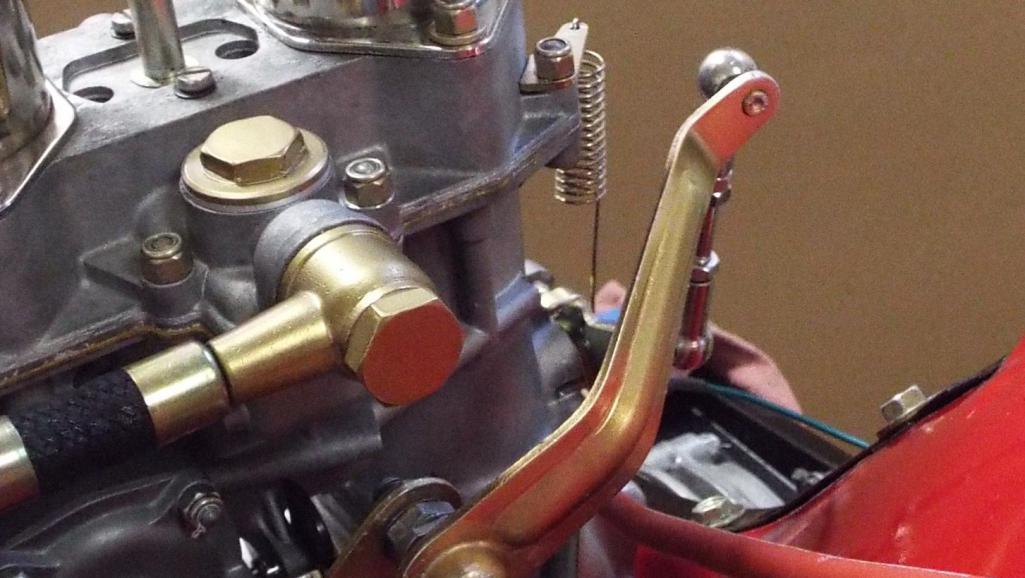
Now actuate the mechanism and make sure it rotates/ opens all the way down to the stop shown (this is the carb. main shaft rotation stop as it comes in contact with the carb housing).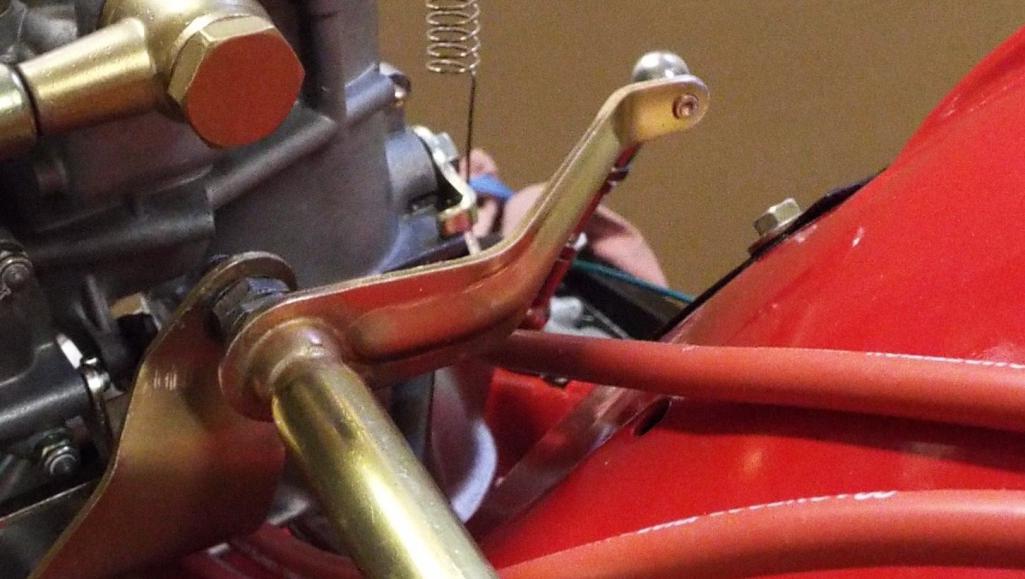
Should adjustment be necessary start here 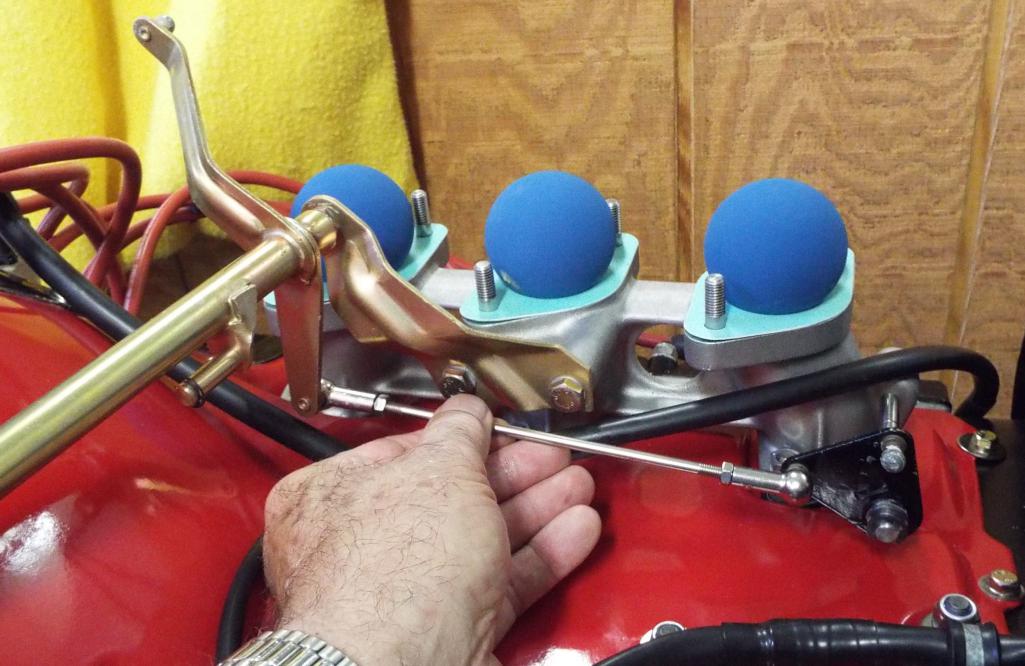
But disconnect the carb linkage first and then re –adjust the carb link to match. In my opinion this is very important.
I still did not even have the left carb on at this point. 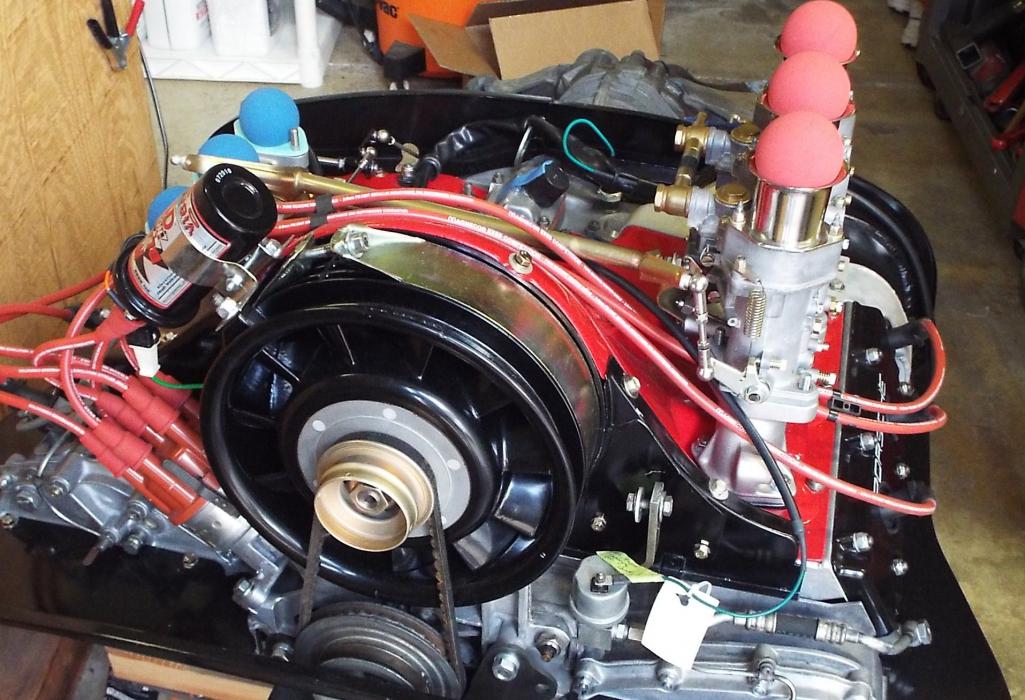
Now install and hook up the second carb and link.
Adjust this carb. link to fit the already fully adjusted linkage and make sure it matches the ball height exactly before attaching.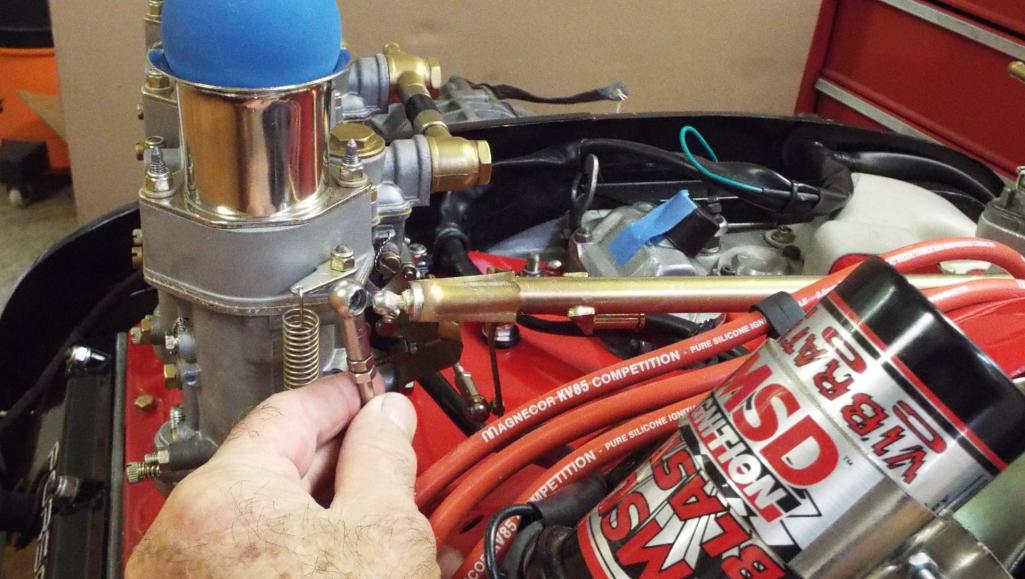
Actuate linkage from the trans again to make sure you have full travel on both carbs. to the full open stops. I would expect some minor adjustment to the carb arms but it should be set very close at this point.
Done. Hope this helps someone.
Posted by: bigkensteele Sep 10 2017, 07:29 PM
Done. Hope this helps someone.
This helps me a great deal! I am pulling together a Weber setup, and the carbs I bought only came with the manifolds, the side plates and the rear pivot. Your latest posts have helped me identify what I still need as well as how to set it all up. Thanks!!!
Posted by: gereed75 Sep 10 2017, 08:07 PM
There is a ton of info on the Performance Oriented web site about setting up Webers, including info on "blue printing" the linkages.
Posted by: Lucky9146 Sep 10 2017, 09:06 PM
Done. Hope this helps someone.
This helps me a great deal! I am pulling together a Weber setup, and the carbs I bought only came with the manifolds, the side plates and the rear pivot. Your latest posts have helped me identify what I still need as well as how to set it all up. Thanks!!!
Glad I could help!
I see the post right behind yours says Performance Oriented has a lot of info too so now we both learned something. I knew there was a lot of Carb info on the Performance Oriented site but not regarding the linkage on the engine itself.
Thanks for checking in and good luck on your project!
Posted by: Lucky9146 Sep 10 2017, 09:11 PM
There is a ton of info on the Performance Oriented web site about setting up Webers, including info on "blue printing" the linkages.
Thanks gereed75 I should have known, that Paul is such a thorough guy. He did my carbs and I remember looking at a lot on his site on the time but obviously it didn't stick that he had linkage info.
Appreciate the input and I will check it out.
Thanks for weighing in.
Posted by: Larmo63 Sep 10 2017, 10:00 PM
I'm having issues with my linkage. We worked it a bit yesterday, but I'm not really happy with it. I like your set up better than mine. Mine is the Rich Johnson set, and, well, I like yours better.
Posted by: Lucky9146 Sep 11 2017, 10:42 AM
I'm having issues with my linkage. We worked it a bit yesterday, but I'm not really happy with it. I like your set up better than mine. Mine is the Rich Johnson set, and, well, I like yours better.
Larmo63, Sorry to hear you are having linkage issues, that's a bummer!
Thanks on my linkage set up! It came with the project and works, but I have no idea whose it is and can't recommend.
My only complaint is that there is no flats on the rod ends like on my long linkage from the trans and that makes tightening each rod end a bit more difficult. I had to remove each segment to tighten each rod end stop nut because otherwise the rod end socket would turn as I tightened the stop nut and the rod end would end up twisted tight against the ball potentially causing binding. Hard to explain I guess.
My long linkage is Porsche over the trans (right in picture) has the flats on the rod end making it much easier to tighten the stop nut. And on the left in picture has rod end with no flats and the stop nut.
All the best in getting it sorted out!
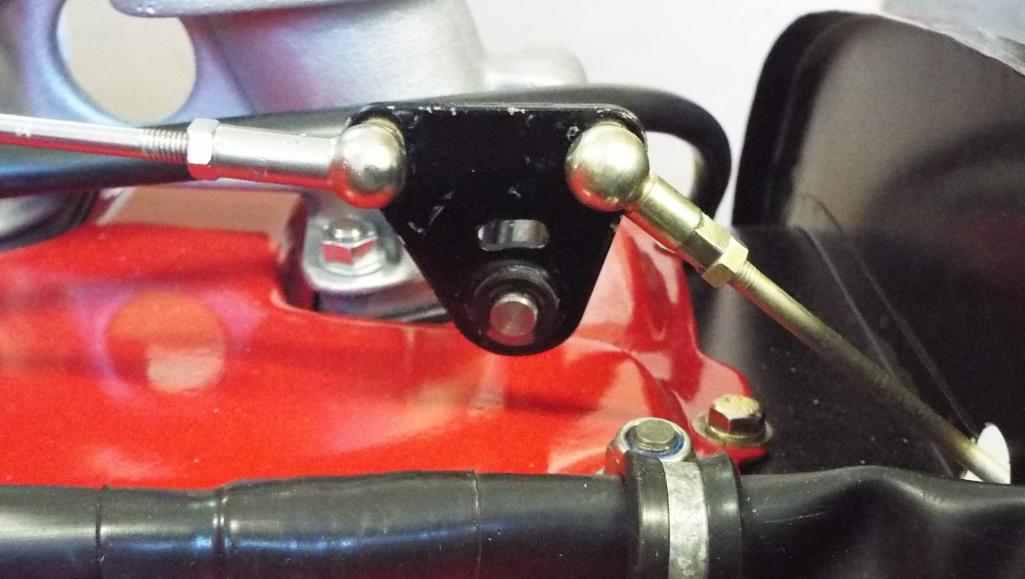
Posted by: Lucky9146 Sep 11 2017, 11:09 PM
Well almost to that point……………………
Rearranged the garage and cars today and got these two sweethearts closer together. They are just winking at each other right now and getting acquainted because this is probably the closest they have come yet!
Should go in this week!
My "install, hook up, and get it running" will not go as fast as Larmo63, who I have been following pretty close, because I think I have a few more “details” in front of me. At least I think I do because he had a running car, which I didn't, when he started his conversion. Got some install insight from him just tonight.
Still will have to get one more braided line made from the tank to the engine and I have some extenuating circumstances with my emergency brake to figure out that I will cover on the thread. Plus there still are some dreaded electrical issues to deal with and that is certainly my least ability. On the electrical, I will have to do like a total refresh/re-learn because I had to side line this project from Dec 2015 to April 2017, and I have been only focused on the engine since April. Well I did order cool visors from Mikey. I also have a pretty good list with several other fun challenges.
Plus I need to get with forrestkhaag and find out where he put all these fuel filters he keeps taking about.
Someone recently said they were 90% done with 90% to go. Yup kind of feels like that.
My plan is to get the whole car up on stands once again when I get the engine in the mounts and then go from there.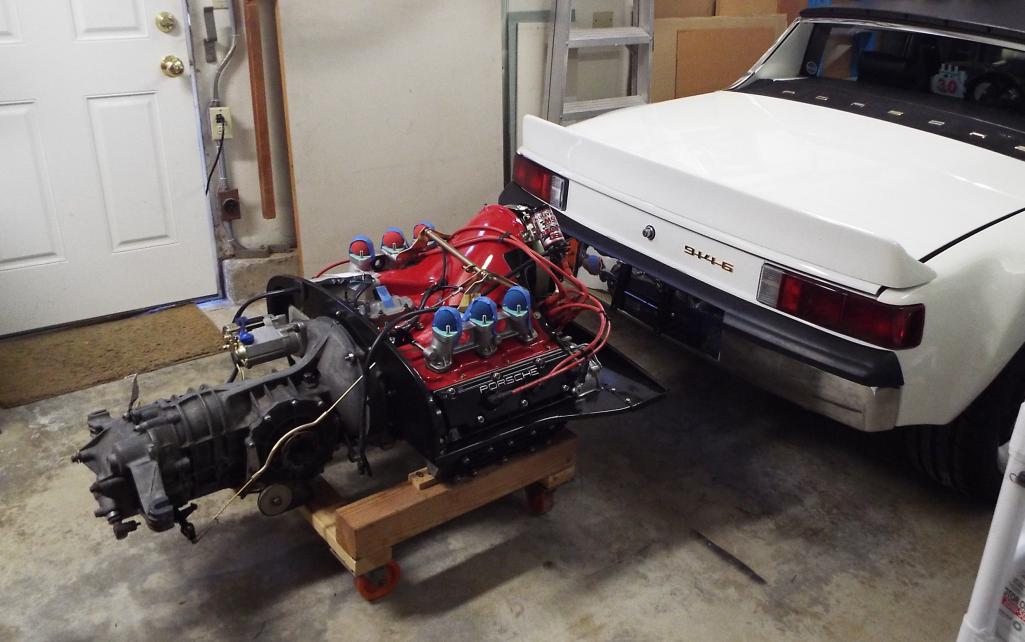
Posted by: Retroracer Sep 12 2017, 04:53 AM
This is all great info for someone looking at a 6 conversion. One other point to watch out for - as I recently noticed this issue on my car, post-install - is to make sure the plug wires clear the throttle linkage on the left carb. Some of your pictures highlight the issue on the #4 wire. If you have super long wires then this is not an issue, but routing options can be limited on some sets.
Much easier to see if you're doing this with the engine out, also guiding / nailing down the plug wires is easier too.
Posted by: Larmo63 Sep 12 2017, 09:48 AM
I'm not sure why all of your spark plug wires aren't going through the holes in the manifolds?
Just wondered.
Posted by: Lucky9146 Sep 12 2017, 10:55 AM
I'm not sure why all of your spark plug wires aren't going through the holes in the manifolds?
Just wondered.
Good point! I never was real happy with the way that looked but it just seemed the #4 wire was too short to go through the manifold and look "right".
So one would think that the wire lengths would necessarily coincide with the locations by length but it turns out not so in my case with these wires.
The #6 seemed a bit too long so ended up shooting it through the same hole I had the #5 and it looked ok and was a good way to use up some of that wire length. But the that left no room for the #4 to fit through the same grommet in the manifold. Three wires would not fit through the forward grommet. In addition when I had tried the #4 through the grommet initially it was pretty much taught because of its location on the dist being near the bottom, it had a long way to go. So I left the #4 to go around the end of the manifold and was not real happy with it but it worked.
The fix: I reversed the wires on the #4 and #5 both on the dist. and the plugs.
By moving the longer $5 wire to #4 plug and #4 position near the bottom on the dist. it fits great and looks right.
The shorter now fits well on the #5 because of the higher position on the dist. and the more direct shot to the #5.
Yup looks better.
Thanks!
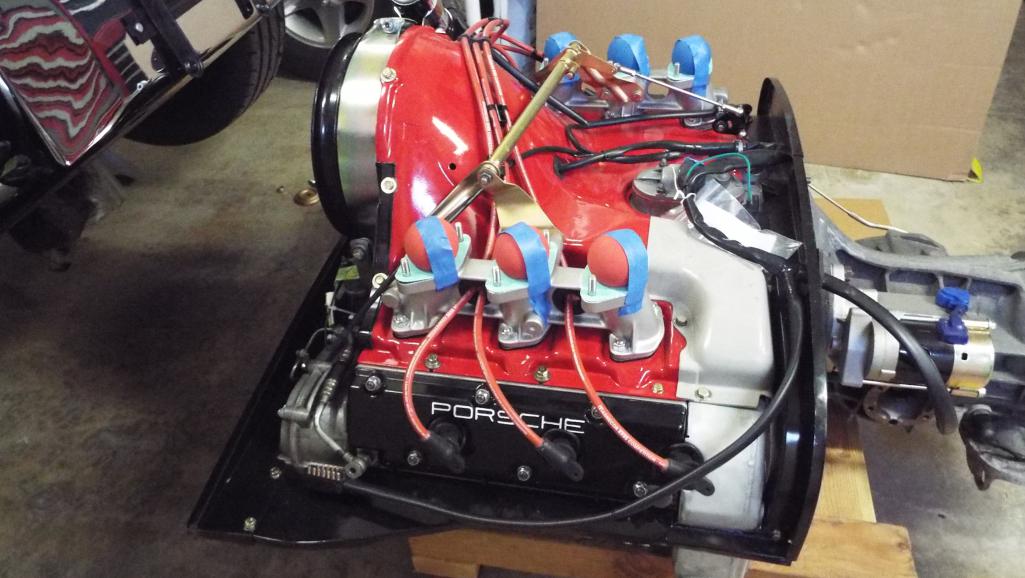
Posted by: Lucky9146 Sep 13 2017, 11:57 AM
Little project I’d been putting off was the engine sump plate. Mine was not in that great a shape so I ordered a new one from EBS Racing, where I get a lot of my new stuff, and had it sitting on the shelf ready to go. It was reasonably priced at about $11.00. I specifically wanted one with the drain plug. When I got to the point of assembly I discovered the original magnetic plug would not work in the new plate. The new plate was made so that the plug went in more like a pipe plug and so there was no sealing ring flat for the old plug to seal against. I returned the new plate and figured I’d somehow make do or get another plate. You see Porsche does not make the original type plate anymore. Maybe they should.
It seemed to me that the best solution would be to have a clamp ring that fit the bolt circle on the plate because those tiny 6mm washers and nuts had been over tightened so many times they had deformed the plate. 
Did some hammer reshaping of the bolt circle where it had been pulled by the 6mm nuts and then ground the plate flat. 
This project then went to the back burner in hopes a solution would emerge until now.
I couldn’t really think of a way to make a clamp ring myself as it would need some precision to fit within the inner and outer diameter of the bolt circle and would need the holes drilled pretty accurately. So I looked for slightly larger diameter washers but had no luck, because again, there is not a whole lot of real estate for larger washers.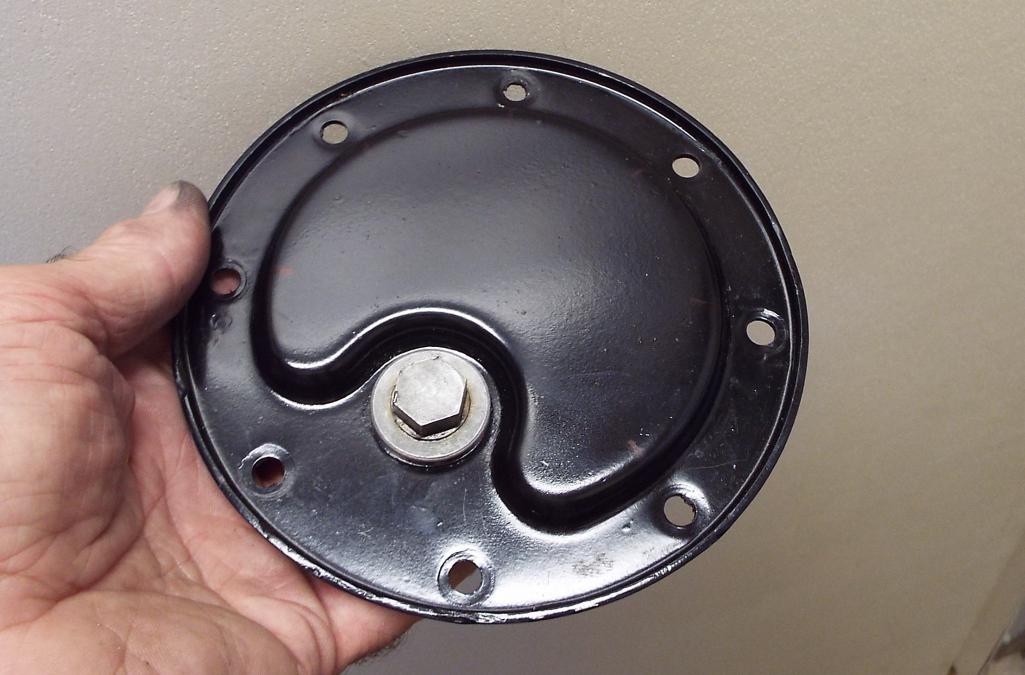
Posted by: Lucky9146 Sep 13 2017, 12:07 PM
Having come up with no solution and now needing to install the plate, and wanting some sort of fix, I contemplated making my own elongated clamp washers. But before I went down that path I searched on line with no luck and then contacted Pelican Parts, Patrick Motor Sports, Summit Racing, and EBS Racing in search of a better idea. I was surprised PMS just used the new plate like what I had returned, no magnetic drain plug. Hmmmm. EBS had what is called a billet plate machined out of aluminum. Nice piece but a bit too pricey for me at $87. a pop. 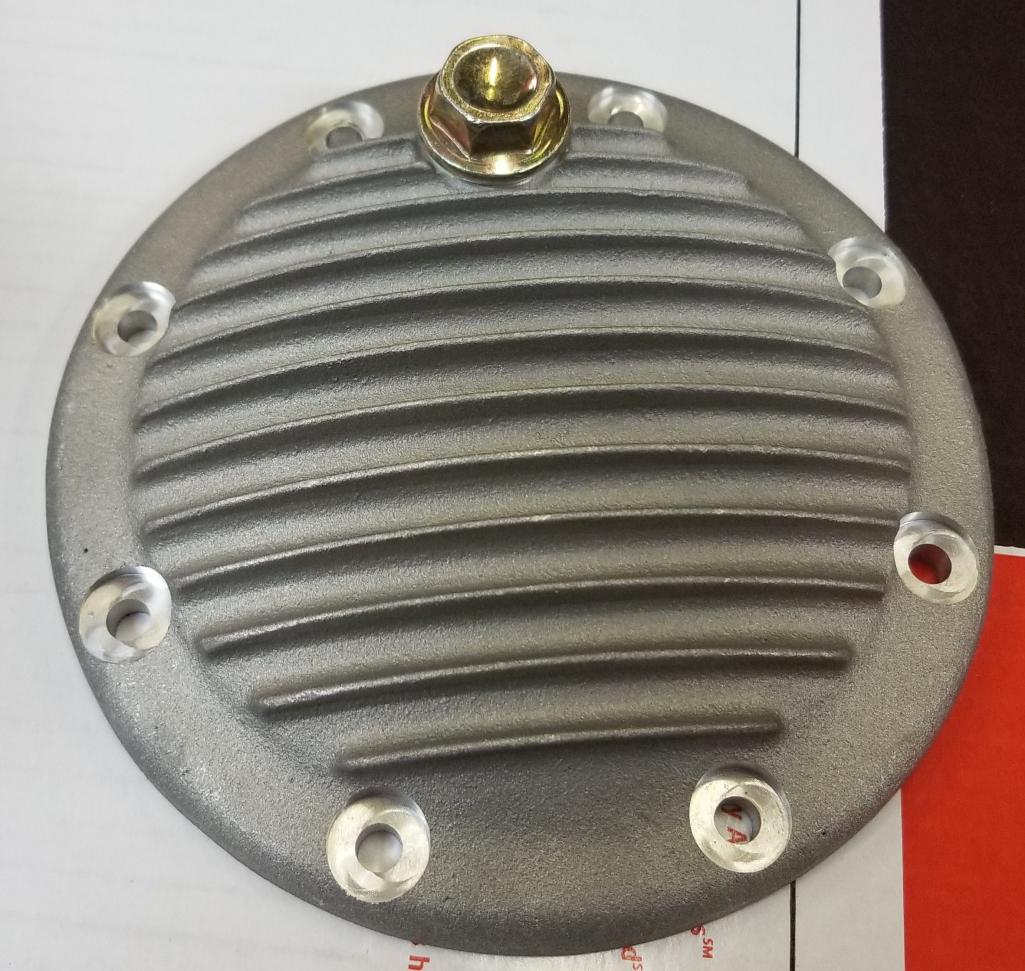
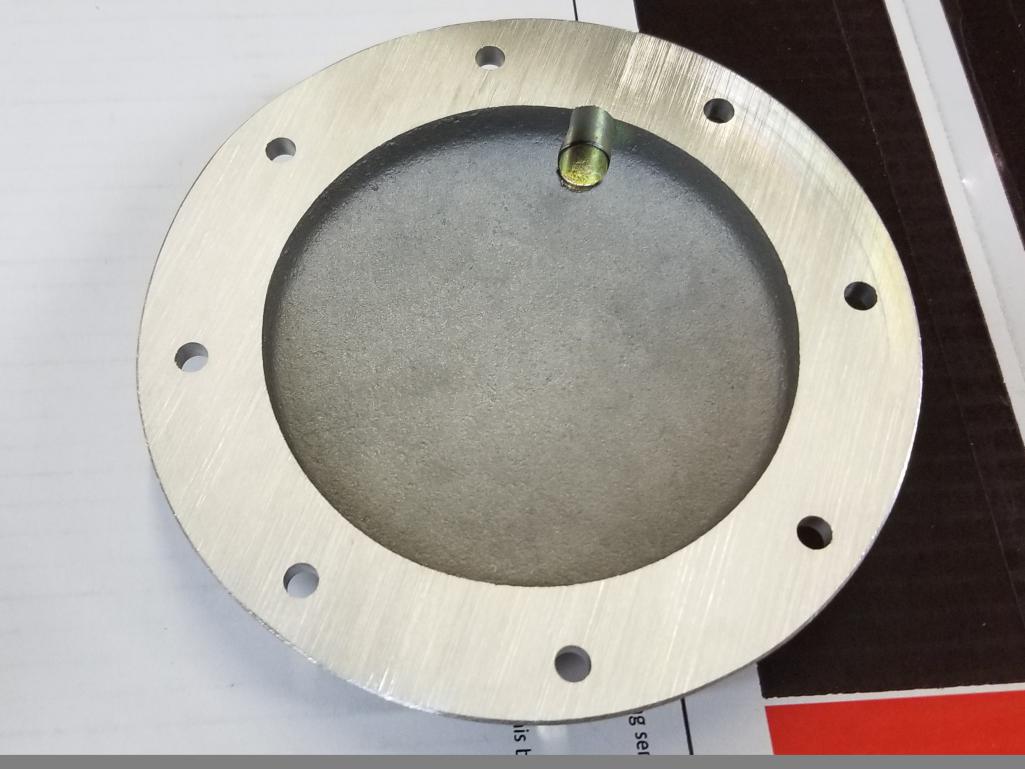
Made 8 clamp washers out of large flat washers from Home Depot. They are right at 1/8” thick so they should more evenly provide clamping.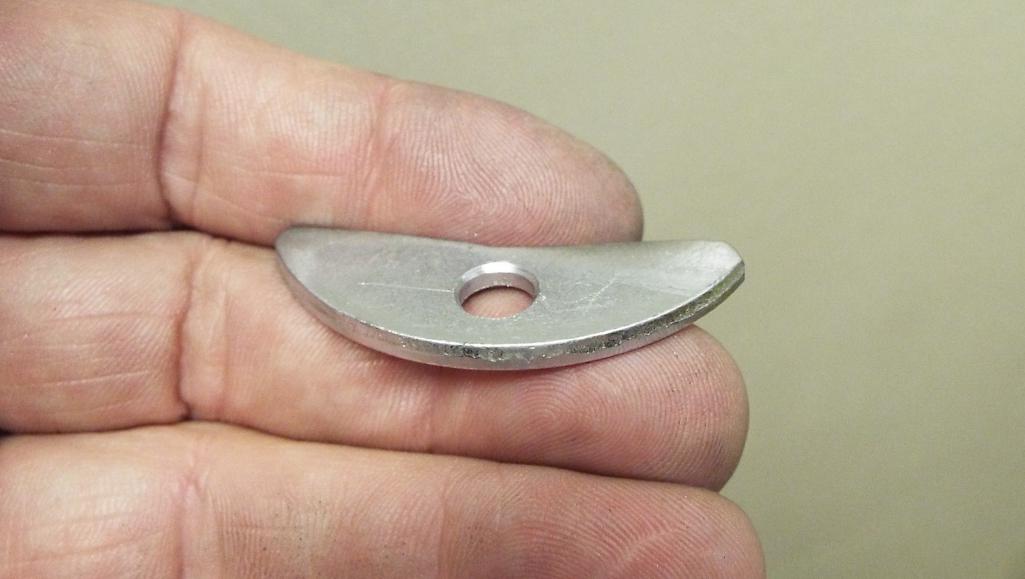
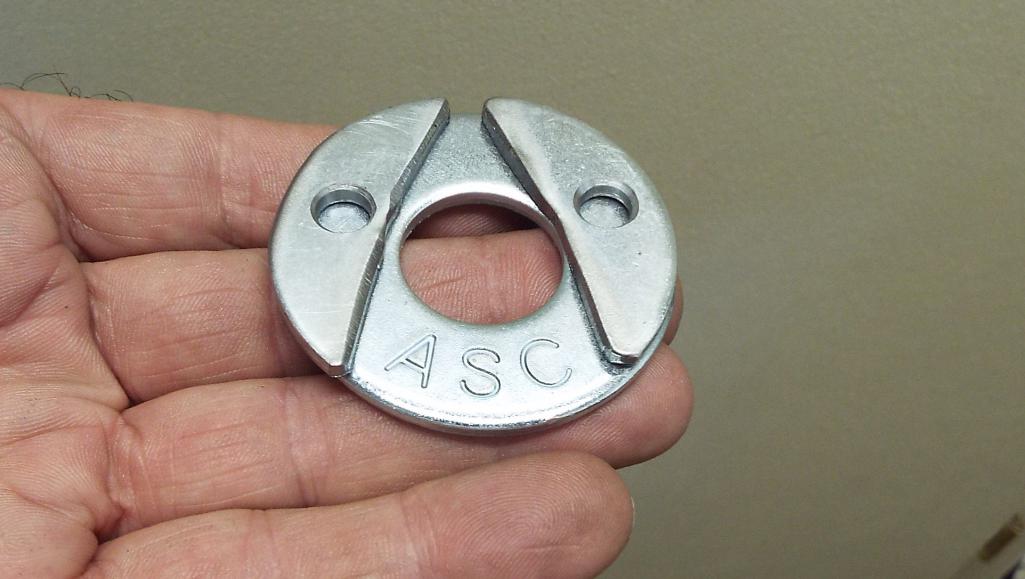
Here they are with only 4 complete. I like it and yes there is still room for that damn little nut. 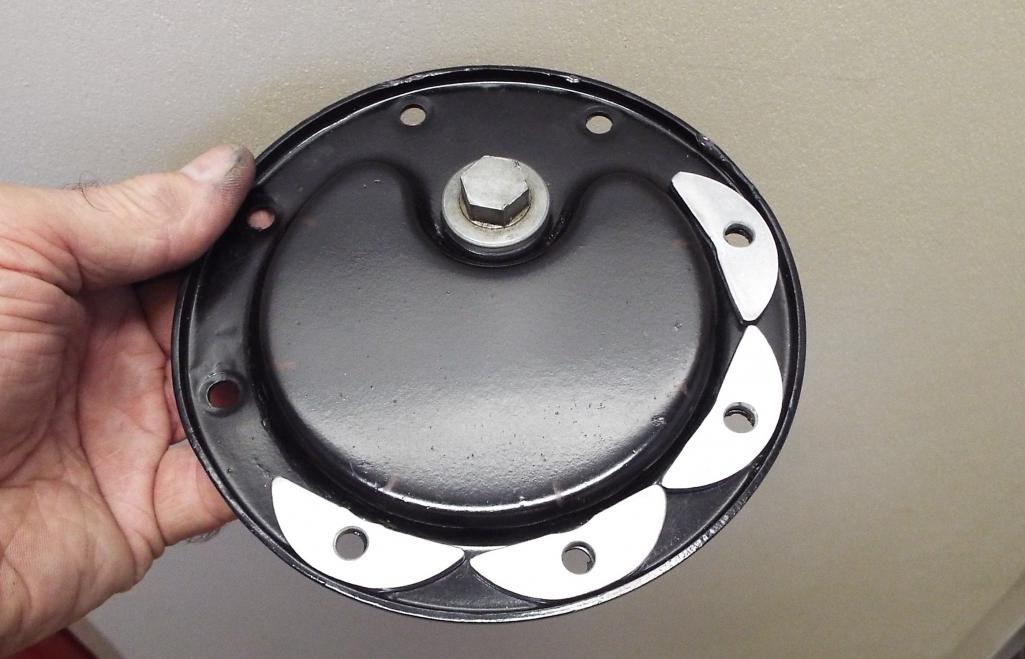
Posted by: Lucky9146 Sep 13 2017, 06:13 PM
Getting the rear axles out of the way to get ready to install the engine.
My good friend toolguy suggested using a piece of 1/2” metal conduit as a support to hold up the rear axles and get them way up out of the way. I had PM’d Larma63 the other night looking for insight, since he had just gone through all this, only to recall right after hitting send I actually did have a tiny bit of experience on installing a 6. Larmo63 got back to me fairly quickly with some good pointers so thanks Larmo63 for that.
Recall my car came to me with no engine installed. So although I have installed engines in 911’s, I had not actually done it myself on a 914, either in or out.
I had lent toolguy a hand on an install a couple years ago and totally forgot. Well actually not much of a hand, I functioned as a spotter, mostly. When I arrived he was completely ready install a 6 in a real 6 car. Car up in the air, axles tied up, engine on jack, blocks of wood at the ready, engine all lined up. It went so fast it was over in a minute, of course this was not his first rodeo. So I really didn’t help a whole lot, I did take pictures only to loose them off my phone, another sad story.
The conduit shown is 42” long and tied off to the shock springs, providing the opportunity to tie the axles up more toward the center of the conduit. This positions the wire from the axle to the conduit right at the end of the axle and also away from the boot.
Of course I realized while under there tying up I had some unfinished business back there that I also forgot about. Gonna be a bit longer! 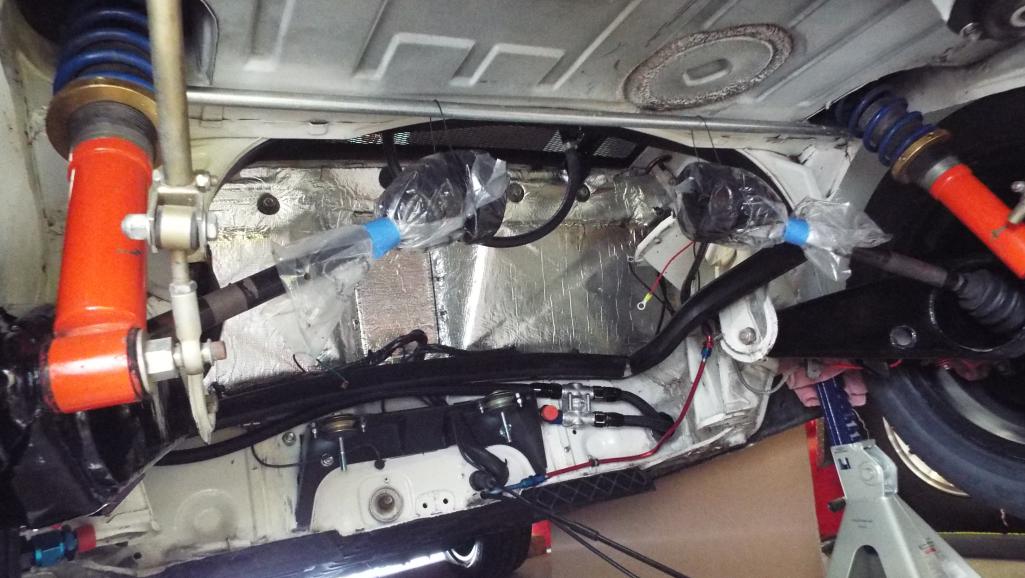
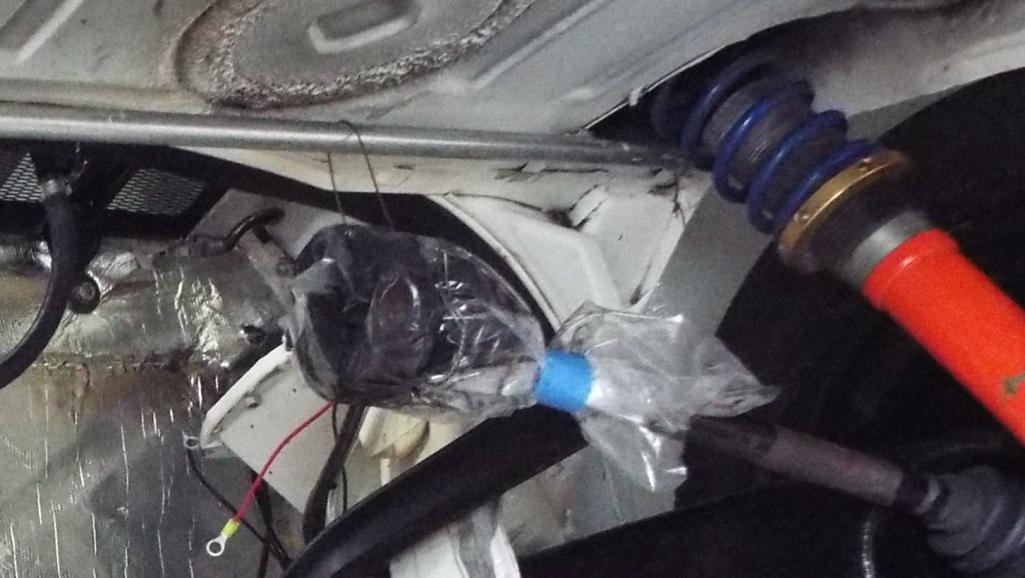
Posted by: Lucky9146 Sep 14 2017, 10:22 AM
Toolguy suggested marking my flywheel with timing marks before stuffing the engine. Only real 6 engines came with the flywheels marked and he's got one!
I already have the access hole cut through the cabin firewall but you never know you just might want to throw a timing light on it when you are right there with the distributor. Good point!
And especially with the 914-6 sheet metal having the cut out and the fly wheel staring right at me. I am going the share the good the bad and the ugly in my postings. As you will see in the pictures that Kennedy flywheel is damn hard and the punch wants to jump and trying to correct is futile. I look like such a hack in these shots, mission accomplished, but not real pretty. Lesson here is probably should have removed the rear sheet metal it might have made it better. Good luck if you try something similar! You really only get one chance to do it.
Shot of cut out and flywheel with no marking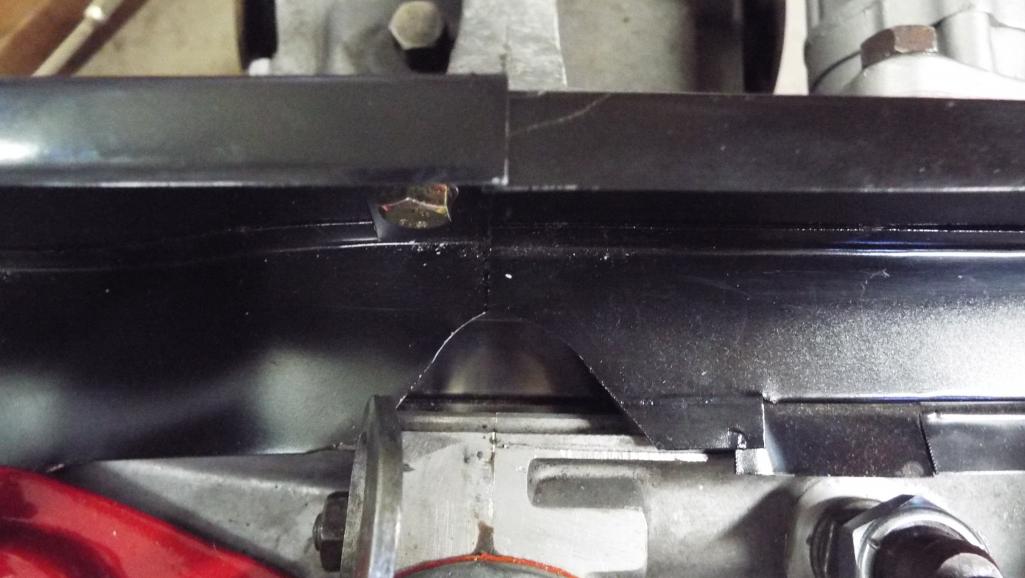
Here is the Z1 mark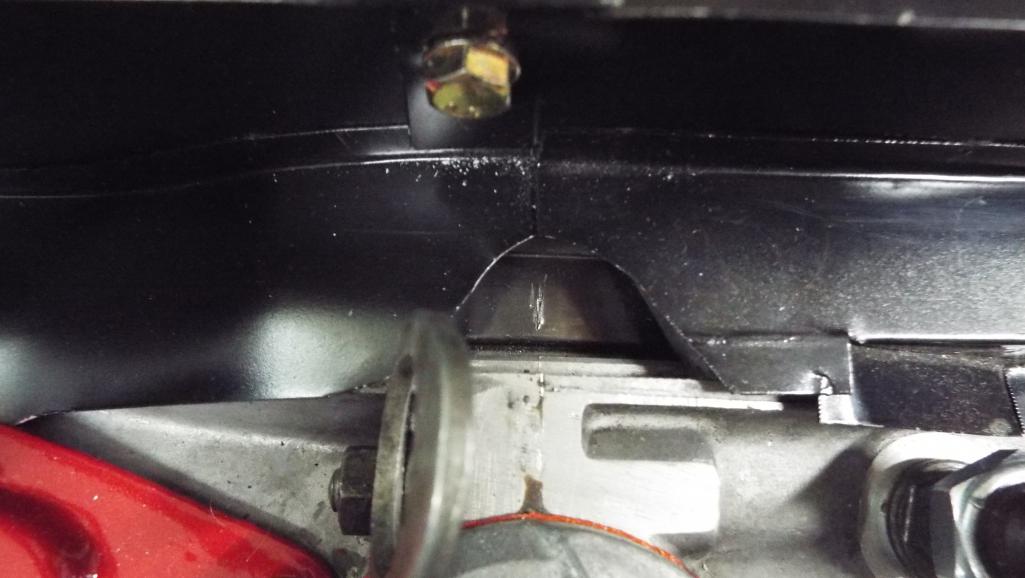
And a faint 5 degrees mark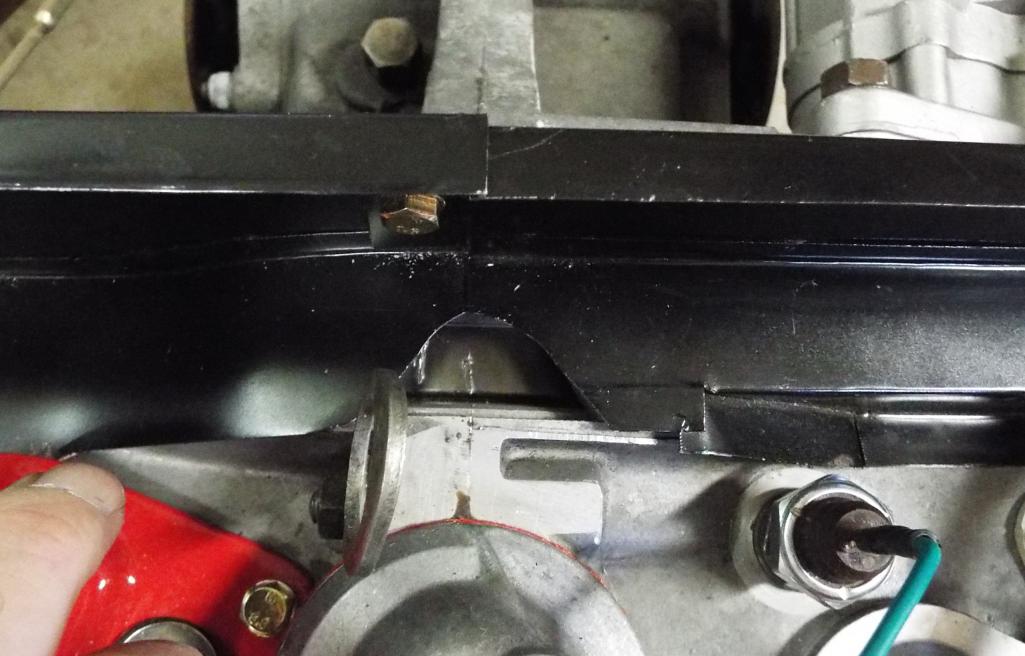
Posted by: Larmo63 Sep 14 2017, 12:13 PM
My KEP 228mm flywheel was marked already. Strange.
Posted by: porschetub Sep 14 2017, 01:49 PM
Nice solution for the sump plate ,mine was had it because someone had added extra gaskets and overtightened it,replaced it with the one Pelican sell.
I found the axles were a pain so I removed the RH side before my engine went in,but what I forgot to do was mark my flywheel .
Your builds going great.....not long to fire up time
Posted by: Lucky9146 Sep 15 2017, 09:56 AM
My KEP 228mm flywheel was marked already. Strange.
After reading your comment I went and double checked my flywheel last night to make sure I had not missed any marks. Nothing there but my marks.
This morning I called Kennedy Engineering and spoke to Brett. Here is the skinny.
6 bolt crank they mark (yours I believe) and you have a 2.7 right?
9 bolt crank they do not (mine) my engine is a 3.0
Mystery solved!
Posted by: Lucky9146 Sep 15 2017, 09:33 PM
Today was a big day for me. Engine goes in today!
I possibly have the best wife in the world because not only does she support me with all my cars and car craziness, she helps where she can, and today this was waiting on my work bench this morning! Yes that is a cheesy fried egg, my favorite and YES I am one lucky guy! 
I made this wooden cart a couple years ago for storage and mobility because I knew it would be a while before the engine went in. It was designed at such a height that a floor jack would fit under it with my “special tool” (details later). It was also designed so that when the time came the rear 2X4 cross brace would literally be cut out with a saw. That would then allow the jack to go underneath and the engine, even without the rear cross brace, would still be completely supported.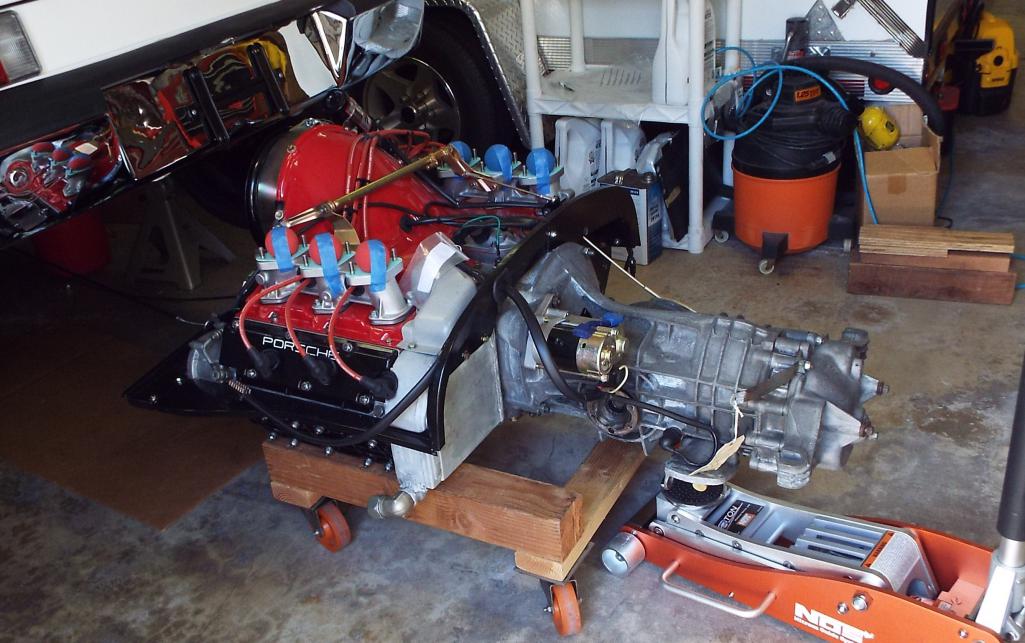
Here is the cross brace cut out and I had safety blocks on each side but I actually did not need them. Additionally, I had the jack positioned under the aft of the tranny for support as well, but did not need that either. Cart was way sturdier than I thought!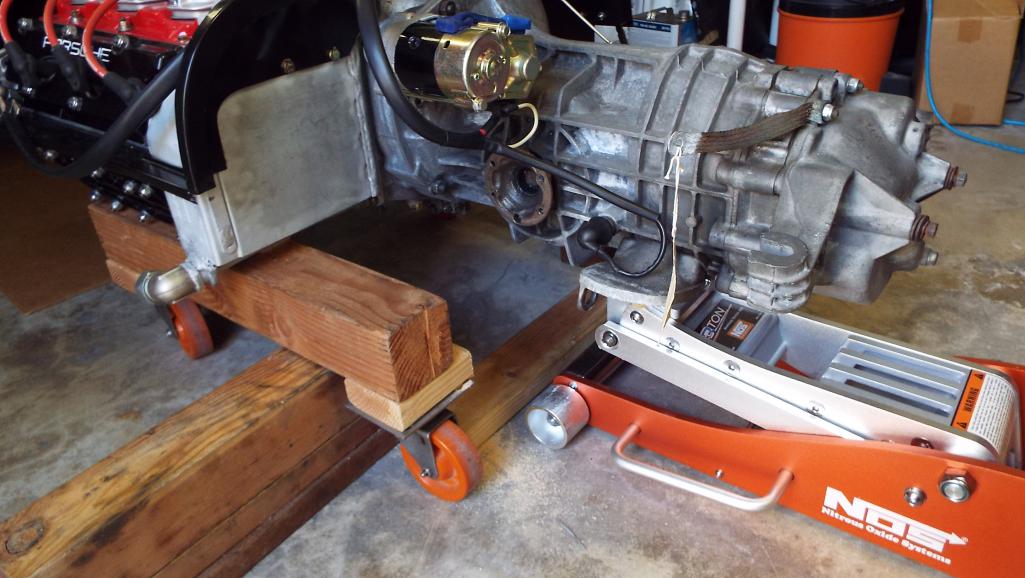
Posted by: Lucky9146 Sep 15 2017, 09:38 PM
Jack slides right under and there is the “special tool” I referred to earlier on the jack pad. 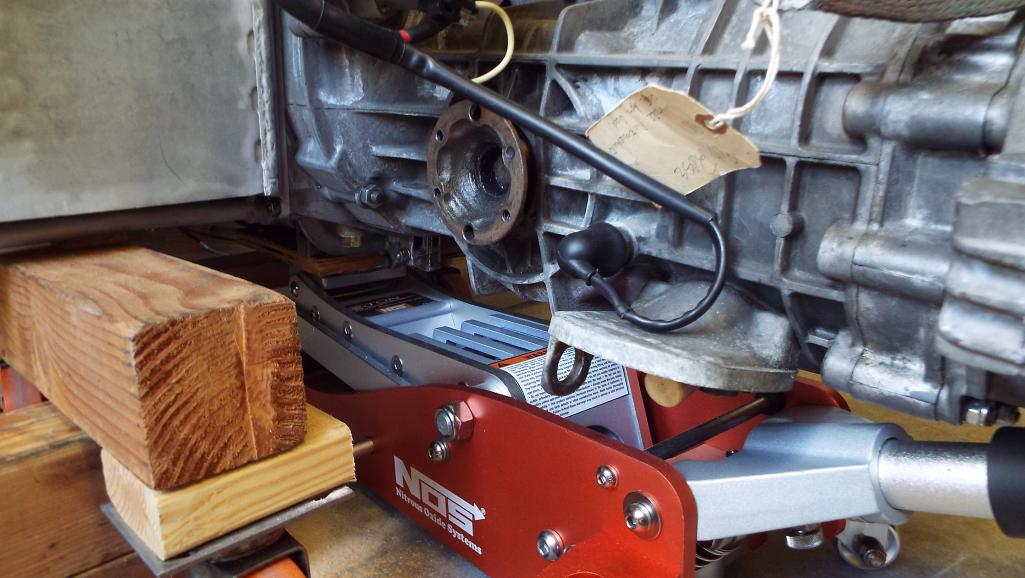
Engine is now completely on the jack only with tranny slightly resting on the jack by the handle, almost balanced fore to aft.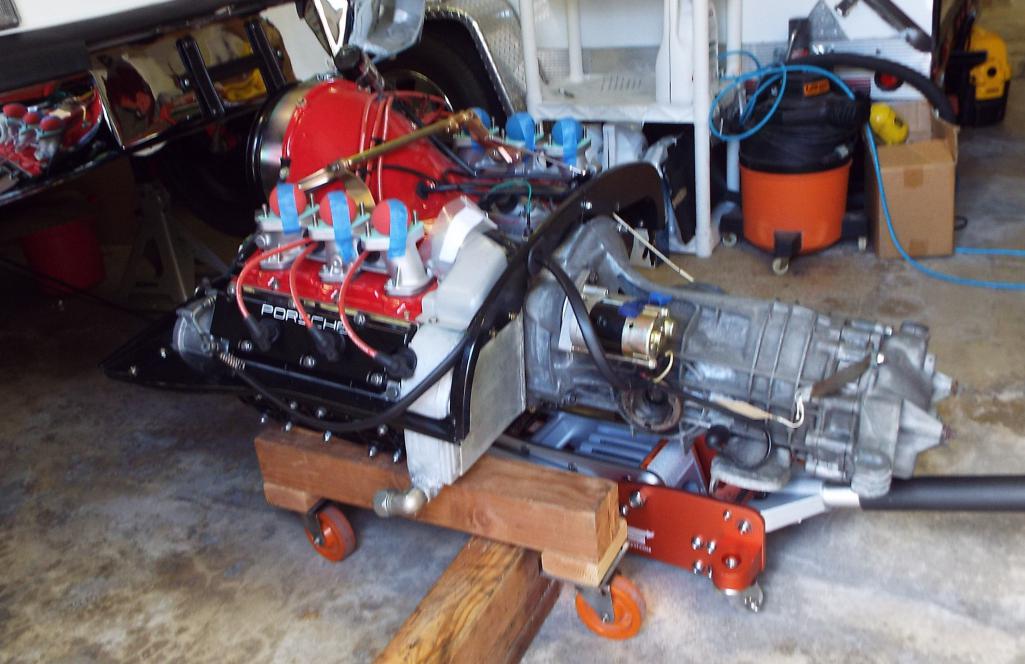
Posted by: Lucky9146 Sep 15 2017, 09:44 PM
Remove the cart and the engine was actually very stable on the jack. I credit the special tool. The special tool is located on the sump plate mostly and the engine case just before the hump.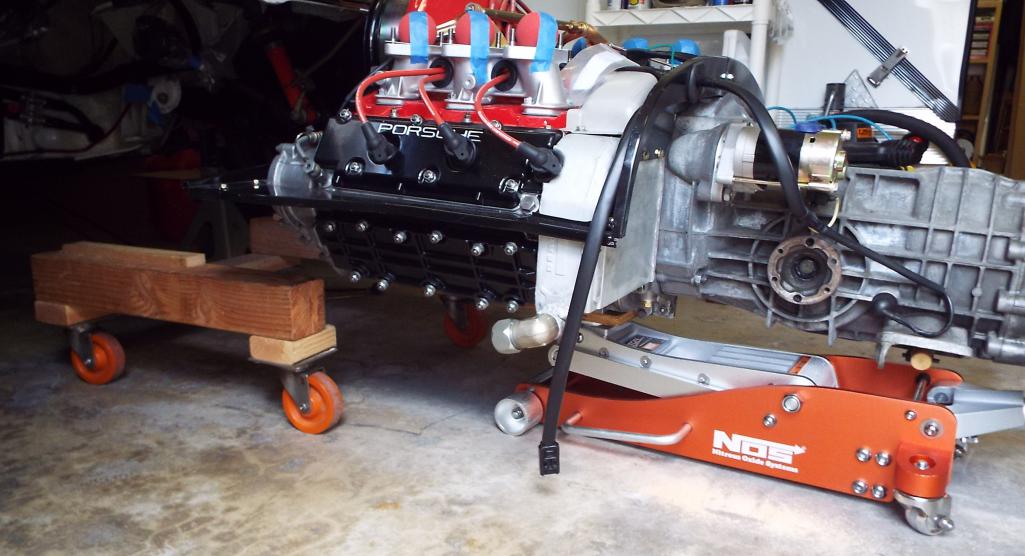
I don’t know how, luck I guess, but the car was exactly at the right height to roll the engine under the bumper, coil and all.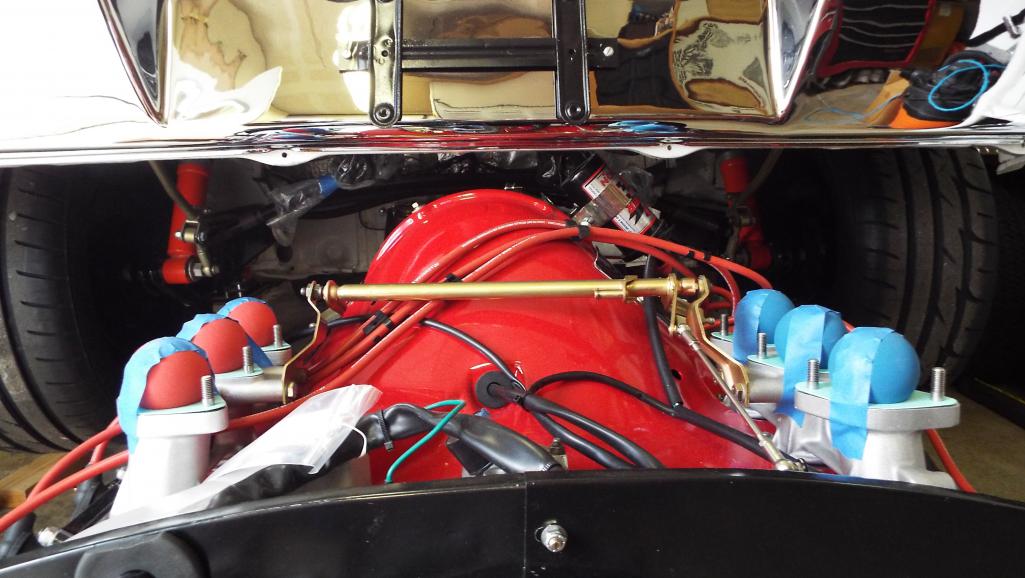
And it just rolls right forward. Opps you're not suppose to see that cable hanging down on the floor. 
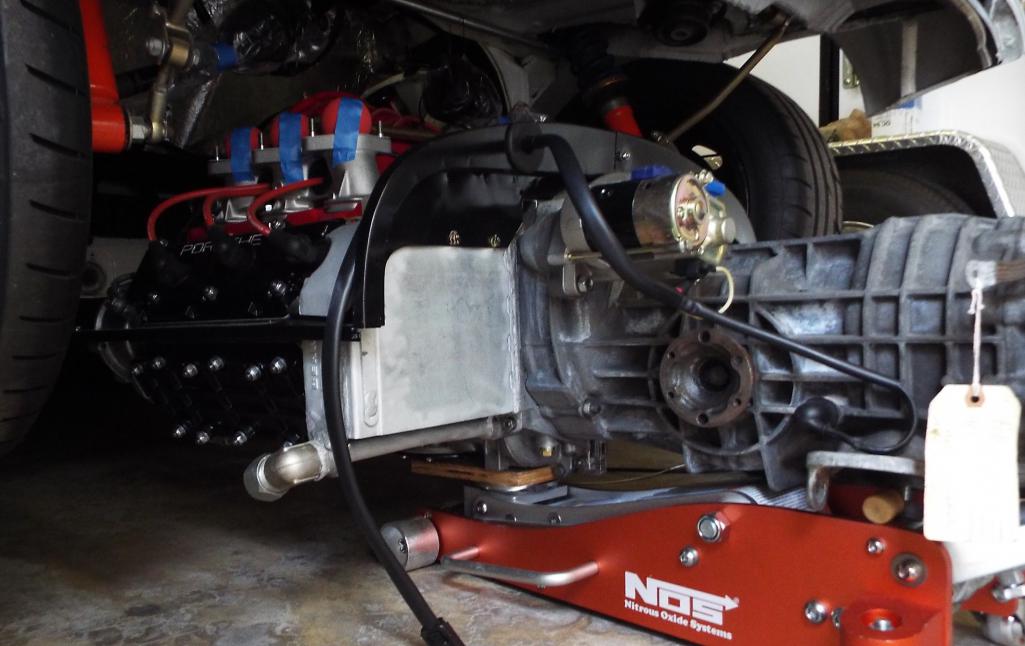
Posted by: Lucky9146 Sep 15 2017, 09:50 PM
Here we come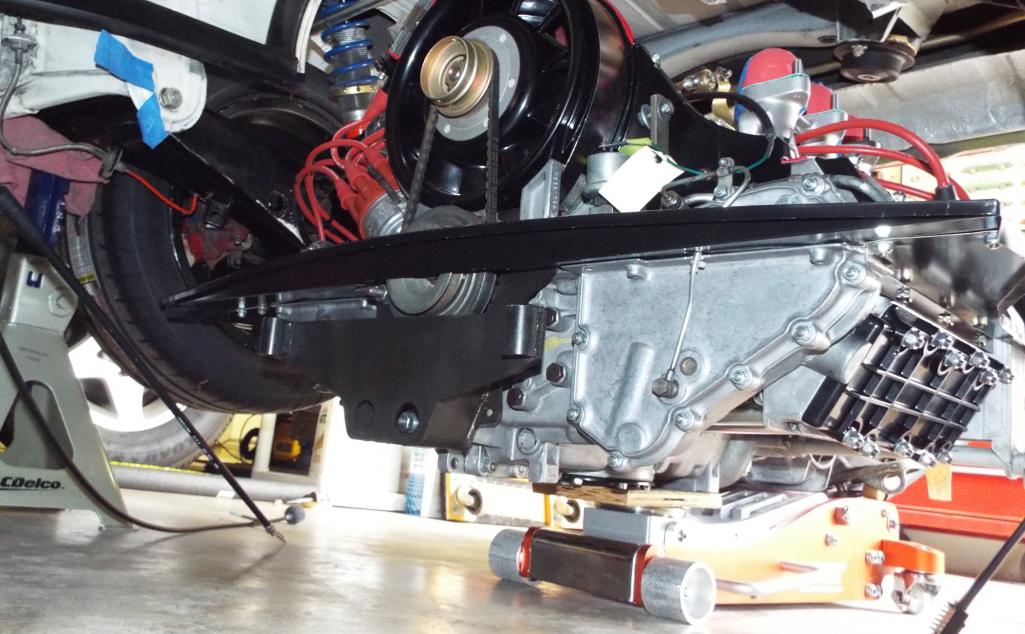
Bring me on home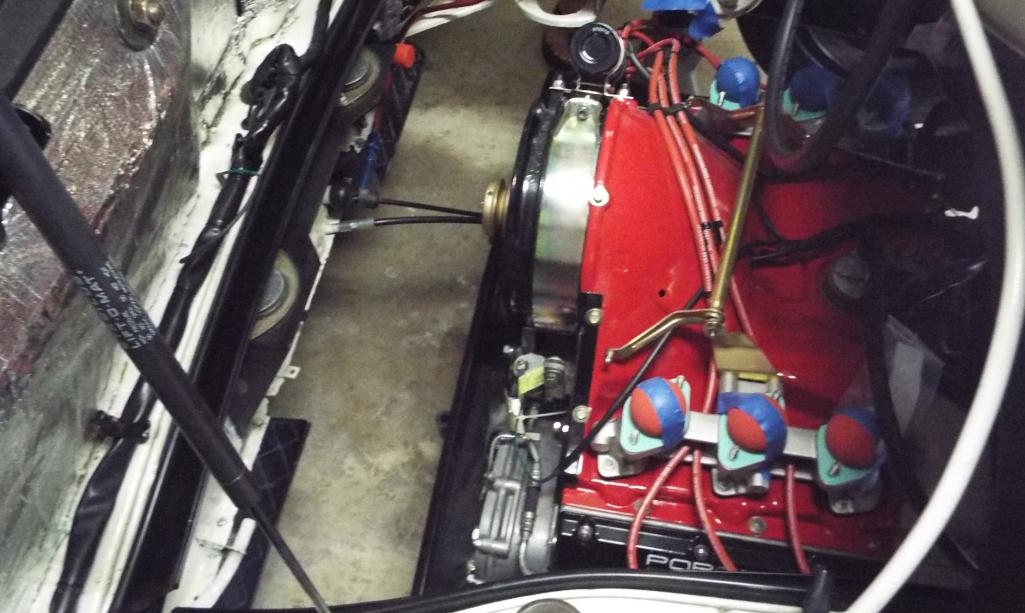
Even though the engine felt and was very balanced I‘m not an idiot, I still used support blocks under each side while jacking it up. 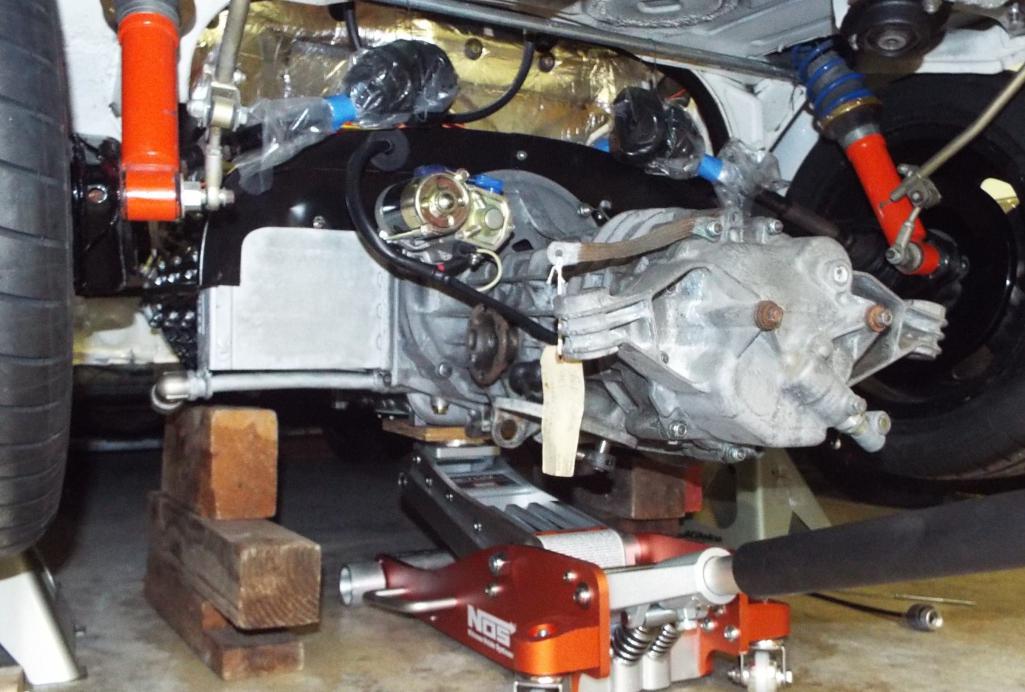
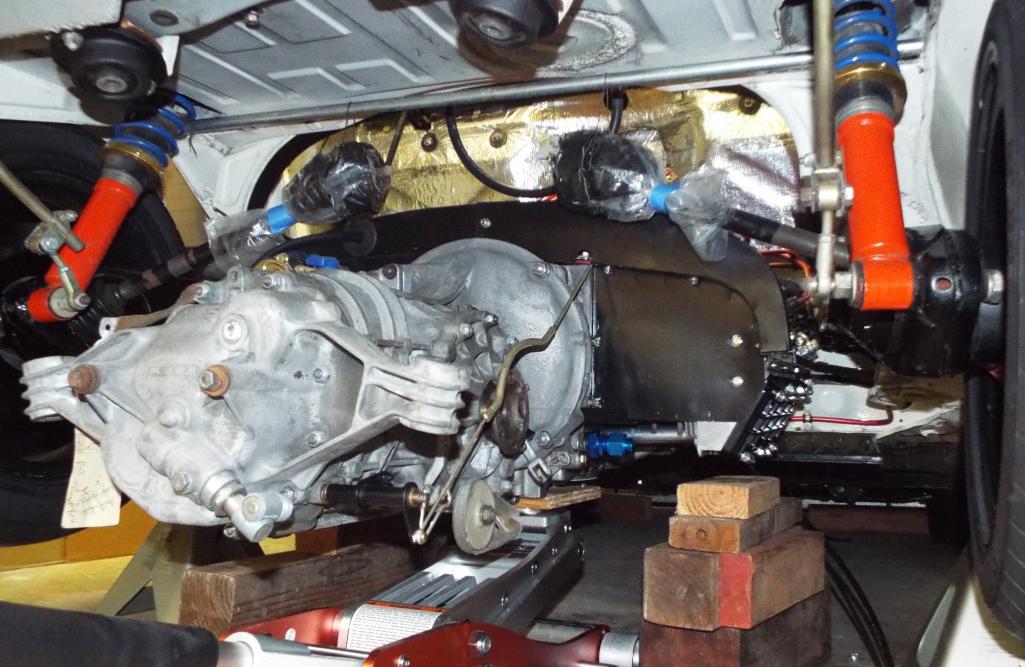
Posted by: Lucky9146 Sep 15 2017, 10:04 PM
That forward engine mount shown here was installed by PO morarrob and it appears to be an excellent job.
Good thing because it is welded in and I know he took a lot of time figuring it out and installing it.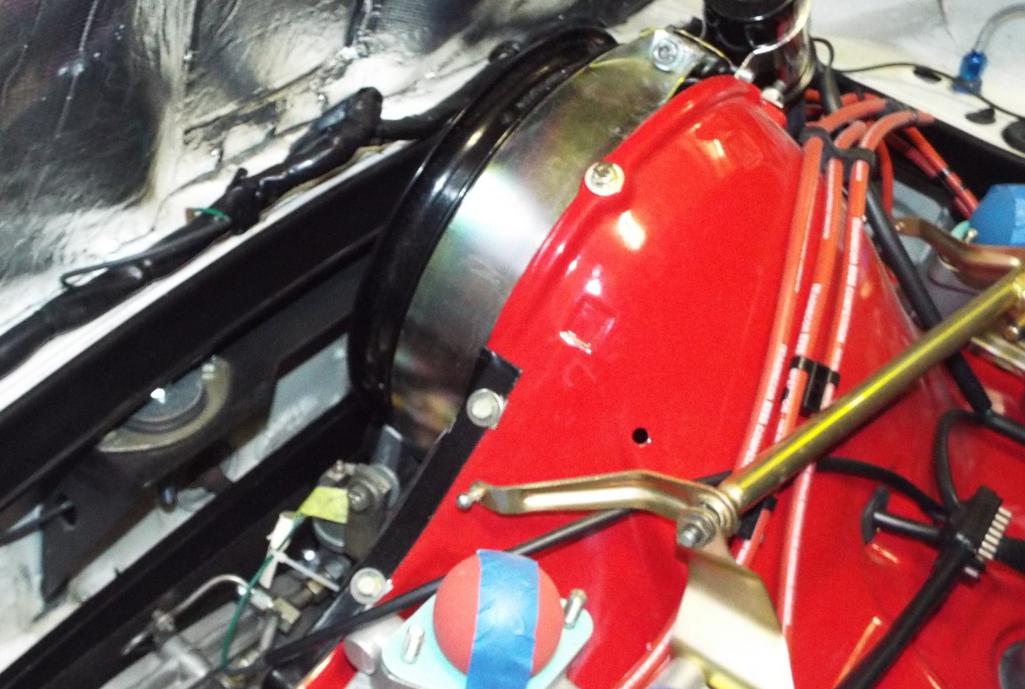
Up and past the axles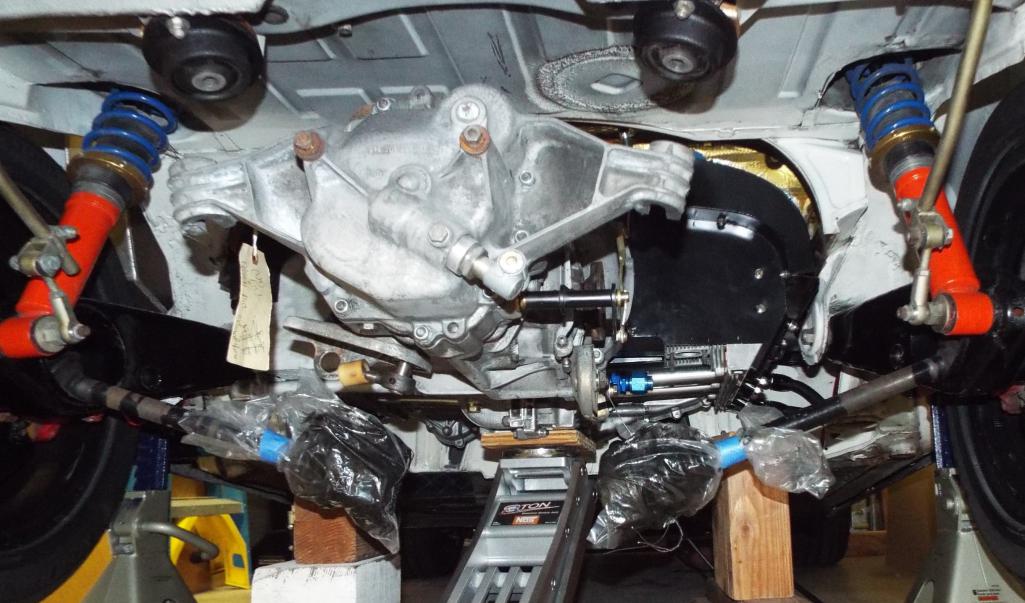
And there we are home at last it sure looks good in there!
My goal was to install this week and I made it.
Have to say it went very well, did it all myself, with my lovely wife as the spotter. 

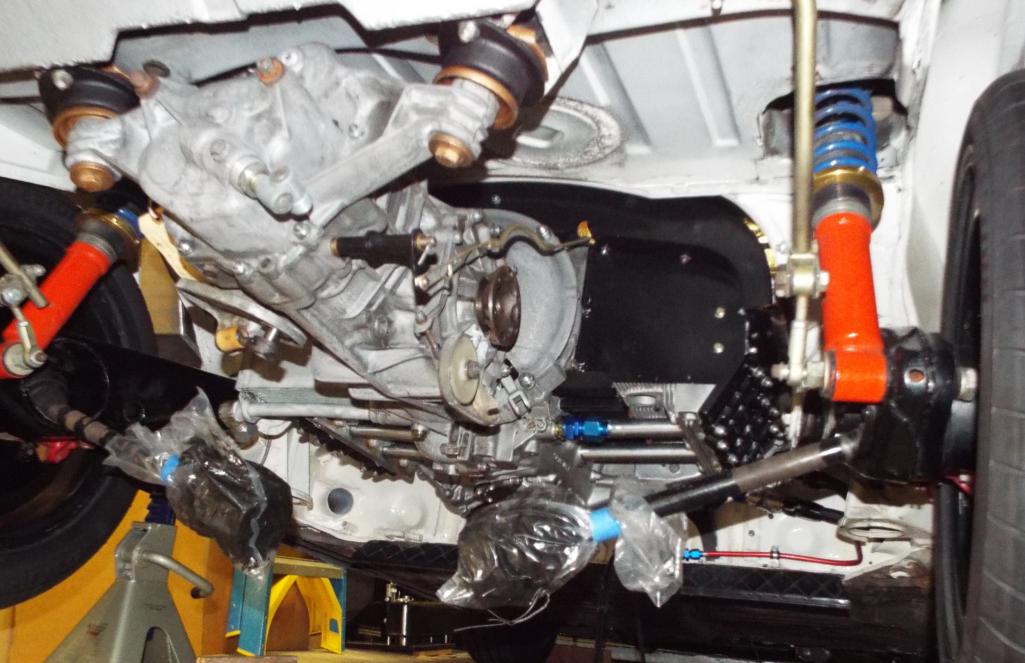
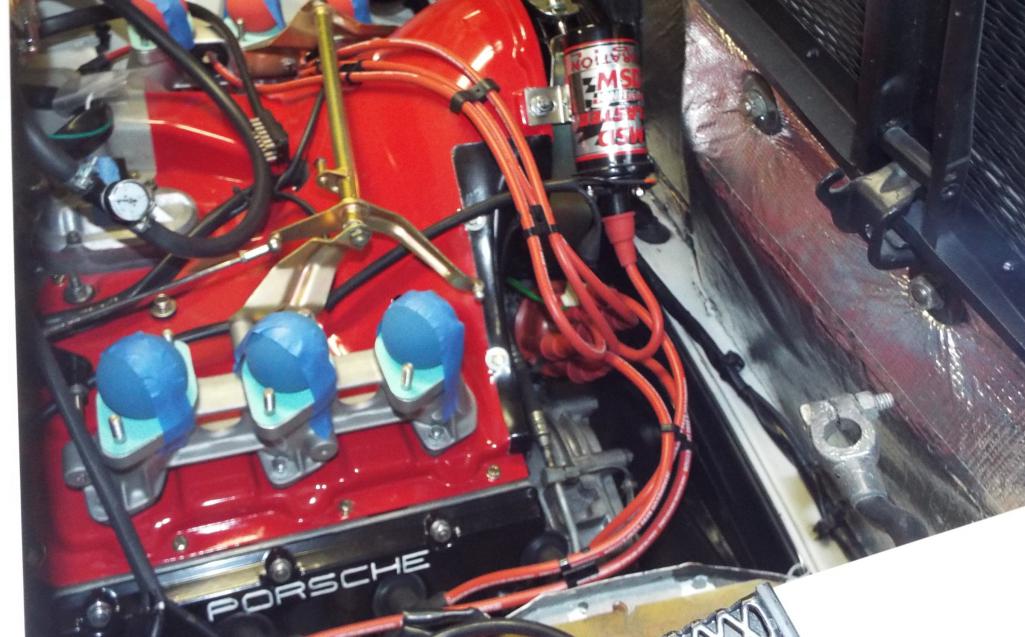
And the “special tool” is 3/4” ply 5 ½ X 7 3/4 Worked great! 
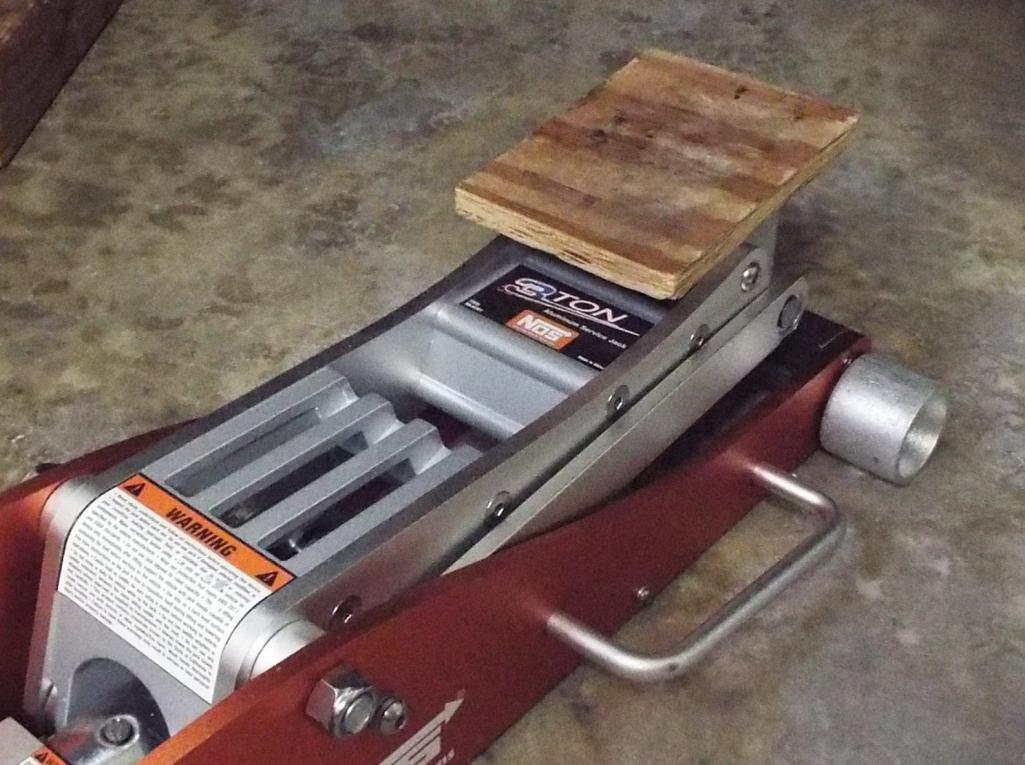
Hope to see some of you at 914 Day in Temecula! Wish the was done to bring.
Posted by: Larmo63 Sep 15 2017, 10:36 PM
You might want to get a patent on the "special tool" before someone else does.

Posted by: defianty Sep 16 2017, 12:55 AM
Nicely done. Getting close to that finishing line now.
Posted by: Lucky9146 Sep 19 2017, 11:53 AM
A little progress and a little humor.
Since the wonderful 914 Fun Day in Temecula last Saturday hosted by ValcoOscar with the help of many others , where I learned a great deal from other 916-6 conversion owners Forrestkhaag and Larmo63, as well as a beginning insight into the Weber world from Keith914, I got back to it yesterday. Having installed the engine in on the mounts last Friday everyone wants to know when I’m going to “fire it up”? I say probably 2 months and based on the entire afternoon spent below I’m probably right.
As I am sure many of you know by now and from the title of this thread I have taken up where another left off. Obviously I did not take it apart so mostly I am working to pictures and looking at other peoples cars. The best part for me though is that the PO sourced a lot of very fine parts with which to continue and now I am actually installing some of those parts I have been looking at for almost 4 years now. Ugh!
Yesterday was shifter linkage day! 
This is a 74 car with side shifter, so in my treasure trove of parts was a brand new shift rod (body to trans) which is modified for headers. A beautiful piece still in its packaging that moparrob found as well as a brass trans bushing with 914 PN in its original bag dated 11/4/2010. I actually had everything needed boots and all. Took a bit of figuring out which way to install the bushing (shoulder in or out) and I understand the bushing was originally nylon like the other shifter bushings. Got that done and now time to button it up with the big plastic cover and secure it with the retaining strap. I think I got one of those. 
Here is the funny part.
I actually had that “strap” that goes around the plastic housing and identified by PN for the application, and of all things, in an actual Porsche part bag.
It’s a Ty-wrap! 
Now I can’t say for sure if I bought it or it came with the parts I got but I thought it was a little cool to have an “actual” P part. Even though it is just a Ty-wrap.
Turned out to be too short! 
I ended up using .041 safety wire and it holds it just fine. On to the braided oil hoses.
Posted by: porschetub Sep 19 2017, 04:53 PM
A little progress and a little humor.
Since the wonderful 914 Fun Day in Temecula last Saturday hosted by ValcoOscar with the help of many others
, where I learned a great deal from other 916-6 conversion owners Forrestkhaag and Larmo63, as well as a beginning insight into the Weber world from Keith914, I got back to it yesterday. Having installed the engine in on the mounts last Friday everyone wants to know when I’m going to “fire it up”? I say probably 2 months and based on the entire afternoon spent below I’m probably right. As I am sure many of you know by now and from the title of this thread I have taken up where another left off. Obviously I did not take it apart so mostly I am working to pictures and looking at other peoples cars. The best part for me though is that the PO sourced a lot of very fine parts with which to continue and now I am actually installing some of those parts I have been looking at for almost 4 years now. Ugh!
Yesterday was shifter linkage day!
This is a 74 car with side shifter, so in my treasure trove of parts was a brand new shift rod (body to trans) which is modified for headers. A beautiful piece still in its packaging that moparrob found as well as a brass trans bushing with 914 PN in its original bag dated 11/4/2010. I actually had everything needed boots and all. Took a bit of figuring out which way to install the bushing (shoulder in or out) and I understand the bushing was originally nylon like the other shifter bushings. Got that done and now time to button it up with the big plastic cover and secure it with the retaining strap. I think I got one of those.
Here is the funny part.
I actually had that “strap” that goes around the plastic housing and identified by PN for the application, and of all things, in an actual Porsche part bag.
It’s a Ty-wrap!
Now I can’t say for sure if I bought it or it came with the parts I got but I thought it was a little cool to have an “actual” P part. Even though it is just a Ty-wrap.
Turned out to be too short!
I ended up using .041 safety wire and it holds it just fine. On to the braided oil hoses.
Well done ,looking really nice ,even if you aren't due start it for a while it's still a really good feeling to have the engine in there,least it was for me.
I used those console bushes and found they were a little sloppy so I had a machinist make me up and oversize rod and did this;
Posted by: Larmo63 Sep 19 2017, 06:38 PM
You can source a large, narrow hose clamp at Home Depot or Lowe's that is used for Dryer exhaust hose. It works and fits perfect.
Posted by: Lucky9146 Sep 20 2017, 09:53 AM
A little progress and a little humor.
Yesterday was shifter linkage day!
This is a 74 car with side shifter, so in my treasure trove of parts was a brand new shift rod (body to trans) which is modified for headers. A beautiful piece still in its packaging that moparrob found as well as a brass trans bushing with 914 PN in its original bag dated 11/4/2010. I actually had everything needed boots and all. Took a bit of figuring out which way to install the bushing (shoulder in or out) and I understand the bushing was originally nylon like the other shifter bushings. Got that done and now time to button it up with the big plastic cover and secure it with the retaining strap. I think I got one of those.
Well done ,looking really nice ,even if you aren't due start it for a while it's still a really good feeling to have the engine in there,least it was for me.
I used those console bushes and found they were a little sloppy so I had a machinist make me up and oversize rod and did this;
Thanks for the idea that is a very robust design and I can see it is a major improvement because to your point it is a bit "sloppy".
Posted by: Lucky9146 Sep 20 2017, 07:49 PM
You can source a large, narrow hose clamp at Home Depot or Lowe's that is used for Dryer exhaust hose. It works and fits perfect.
Larmo63 is right a dryer hose clamp fits perfect and is installed. No Picture just imagine a hose clamp.
Spent a fair amount of time laying out my last 2 oil hoses today. Oil tank to engine oil cooler (on the left) was not bad because I had already developed hoses from the tank to near the original engine mount. Getting made tomorrow.
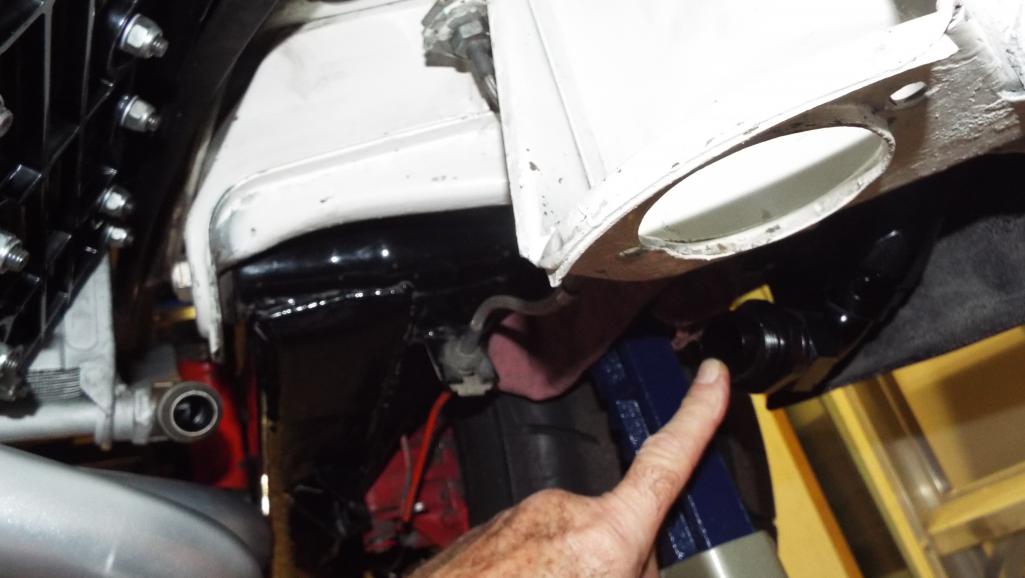
Thermostat on firewall to engine is going to be a bit of a cluster because of the close proximity to the engine mount.

Many of my hoses were already made by the PO with considerable investment and thought. The front oil cooler hose routing through the air passages in the longs was the intended design, as well as the thermostat location, which I followed through on and installed because I though it was a good plan and I liked the idea. Getting from that 90 on the thermostat to the engine will be fun. I may not post pictures of the completed solution if you know what I mean.
Learned the other day that Larmo 63 made his own hoses and I saw them at least the ones by the front oil cooler and they looked great! I was impressed.
Posted by: Larmo63 Sep 20 2017, 08:19 PM
You should be okay with that hose there, just mock it up and have your guy make it. The less unions in the hose, the better.
Looks good!!
Posted by: Lucky9146 Sep 23 2017, 11:27 AM
You should be okay with that hose there, just mock it up and have your guy make it. The less unions in the hose, the better.
Looks good!!
Thanks!
Last couple of days have been dedicated mostly to oil lines, the last 2 braided oil lines that is.
Mocked up and then made by my “guy”, well actually it's a she and she has made several really accurate AN hoses for this car in the past. Next post has the details. and yes less unions is the goal!
Posted by: Lucky9146 Sep 23 2017, 11:44 AM
First up was the AN16 with straight end and 30 deg end. Decided a bit of 800 degree shield would be good next to the header too.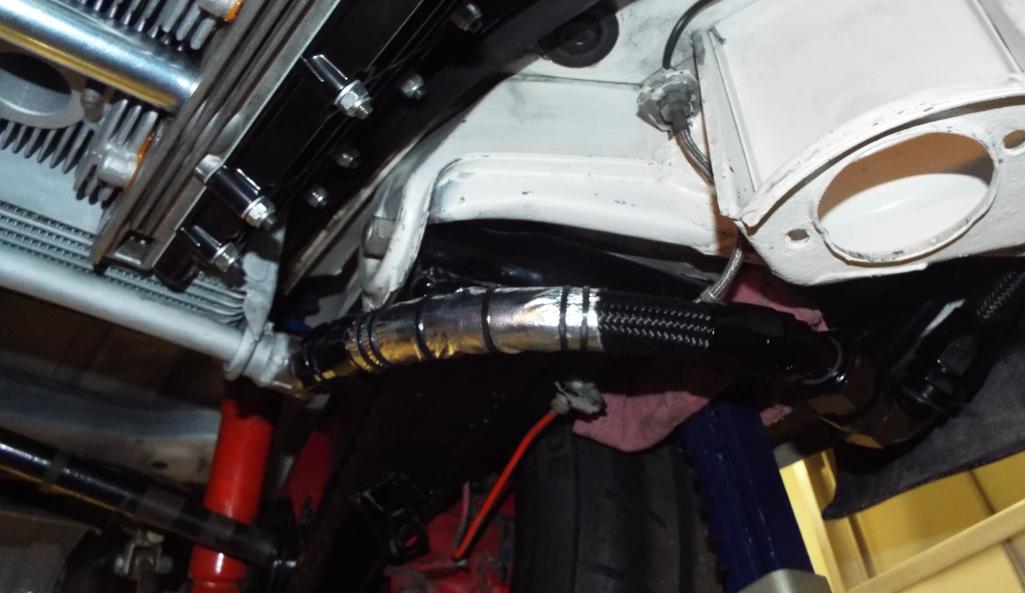
A couple years ago when I ran the AN12 front oil cooler lines through the heater tubes to the engine bay it all made sense and I liked it. Having an elbow coming out of the thermostat right next to engine mount seemed tight but ok.
Now, with the engine in place that hose is a bit of a challenge, and like Learmo63 says, the fewer the elbows the better.
My last post said jokingly that I may not post pictures but I am now happy with what I ended up with. So pictures there will be!
I always liked an original 911 hard line concept; tight bend out of the block, close to the engine and drain tubes plus away from headers. So I shortened a 911 hard line, bent, and had a fitting tig welded to the end. This hard line is similar to the PMS line they sell for $160 and I did it for $42. I had the line cut 2 years ago just waiting for the engine install.
Have to say the first hose approach was a bunch of close proximity elbows and it was nuts.
The big spiral approach is going to be it! Just a bit of clamping and I’m done with oil system.
Seems like baby steps but progress none the same. And many thanks to my hose"guy"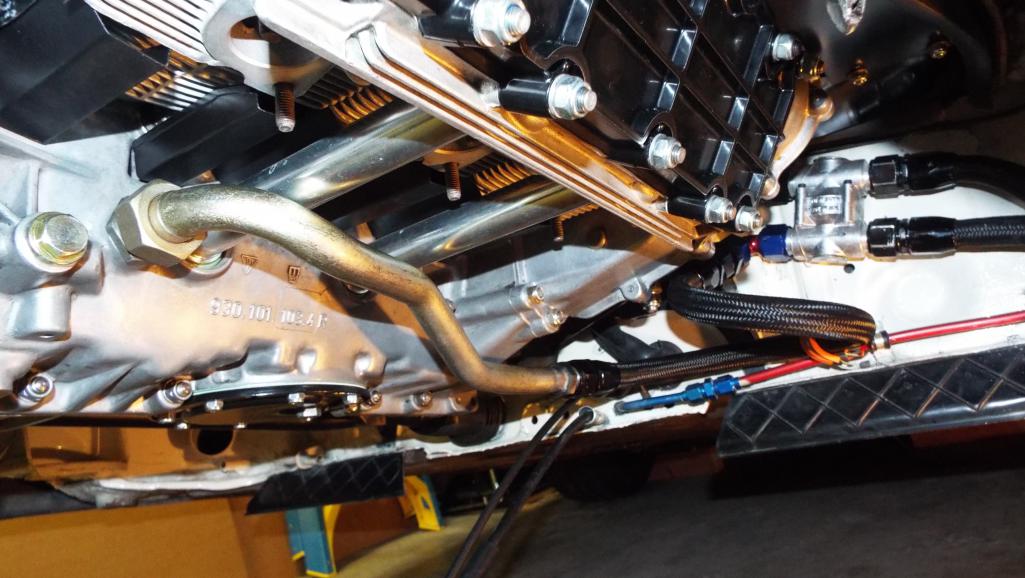
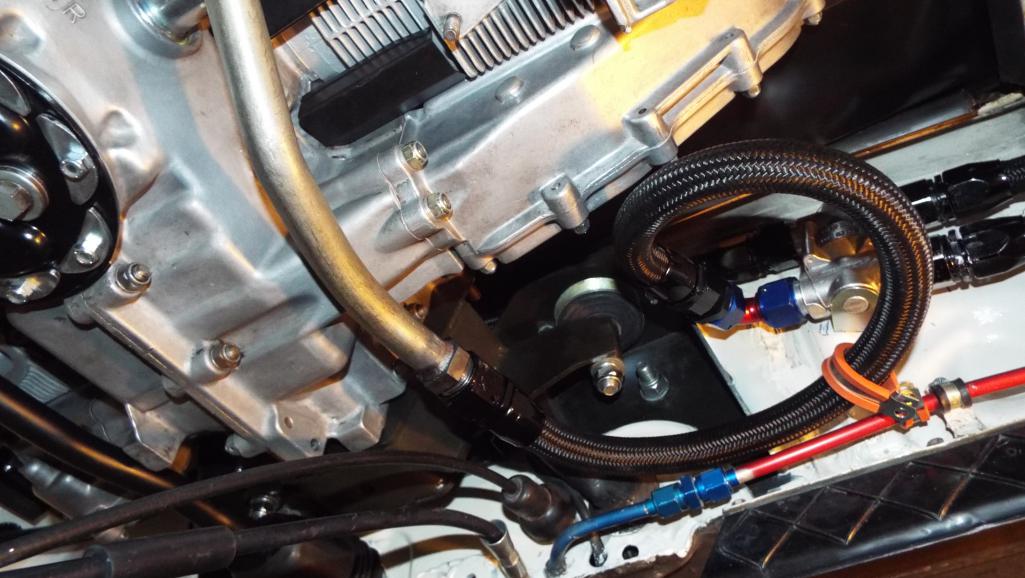
Posted by: 914forme Sep 23 2017, 05:32 PM
are your zip ties also 800 degrees resistant
They make ss zip ties, or you can use ss safety wire, and just twist it on the end.
Everything else is looking great, making much more progress than I am, keep it up.
Posted by: Lucky9146 Sep 23 2017, 08:03 PM
are your zip ties also 800 degrees resistant They make ss zip ties, or you can use ss safety wire, and just twist it on the end.
Everything else is looking great, making much more progress than I am, keep it up.
Thanks!
Good point they are not! I was looking at that when I got done.
Safety wire it is!
Thanks for looking in! Hope you're making progress on your project.
Posted by: maf914 Sep 24 2017, 06:04 AM
Porschetub, How did you fabricate and attach the second bracket/boss to support the second bronze bushing on the shift linkage console?
Attached image(s)
Posted by: Lucky9146 Sep 25 2017, 01:32 PM
2015
Seat Rail Cross Member Repair Sept / Oct 2015
Not sure why I didn’t post before but a host of reasons as things came to a screeching halt the end of 2015.
Disclaimer:
You have to cut me some slack here as I had not owned a 914 prior to this and it came with giant 911 seats just sitting in it not bolted in at all. When I originally took the seats out I noticed there was no seat bracket anything, so I knew I had a problem right there. But you don’t know what you don’t know.
By Sept 2015 I had spent countless hours IN the car with wiring and the rear firewall insulation and never, and I mean never, noticed until one day I was looking at pictures of an interior on 914 World (and that just might be Andy’s) and I saw this beauty.
Look at this perfect yellow floor, mine is ugly one below 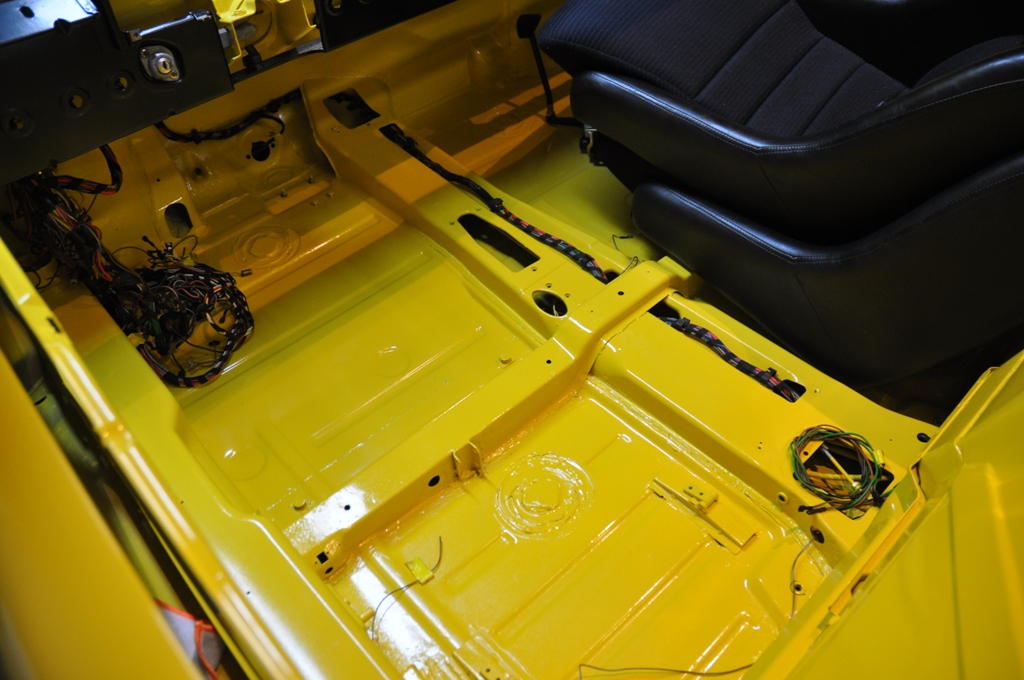
Do you see what I saw? The damn cross rail did not go all the way across the drivers side on mine, I mean WTF? Now I realized I was really was missing something! It was cut completely off! Welds ground like it was never there!! All the hinge brackets and hinges gone! Flat floor! Covered with a patchwork of sound deadening. I do know the owner before moparrob had Sparco seat but not much more than that. Passenger side seat hinges ground off.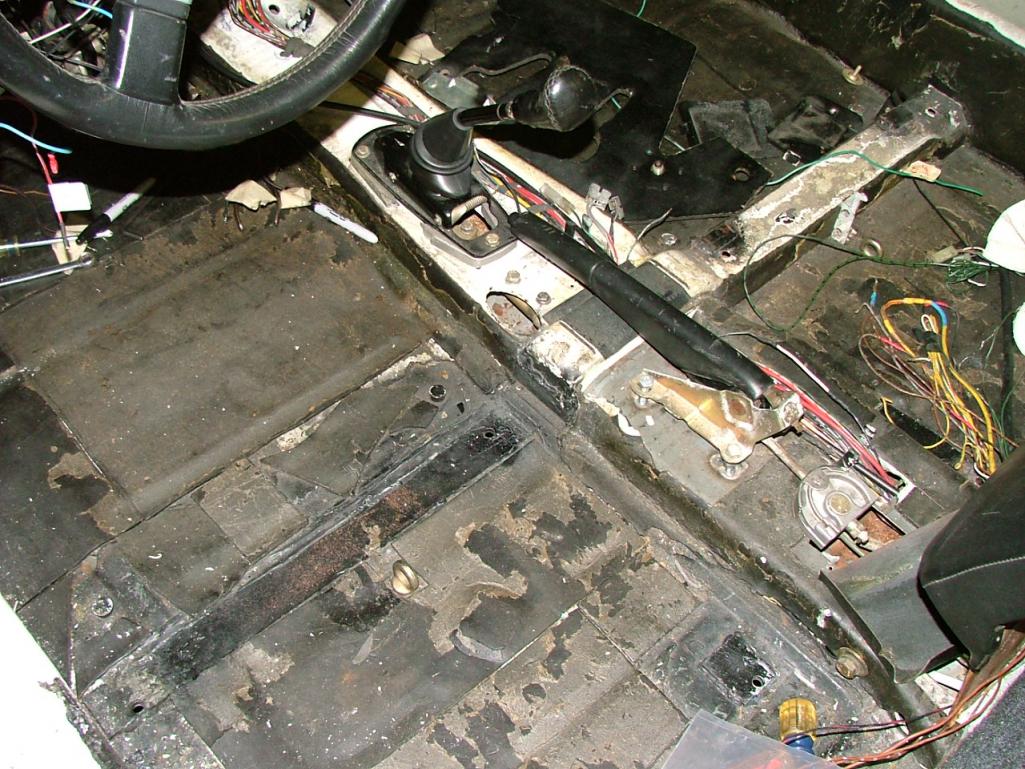
Well shit I got to fix this at least for structural integrity anyway and I wanted to be able to run stock seats and who knows maybe someday Scheels ( I mean I saw Larmo63’s Scheels at 914 Fun Day and I’m Jealous and that is what actually refreshed my memory of this wonderful mess). 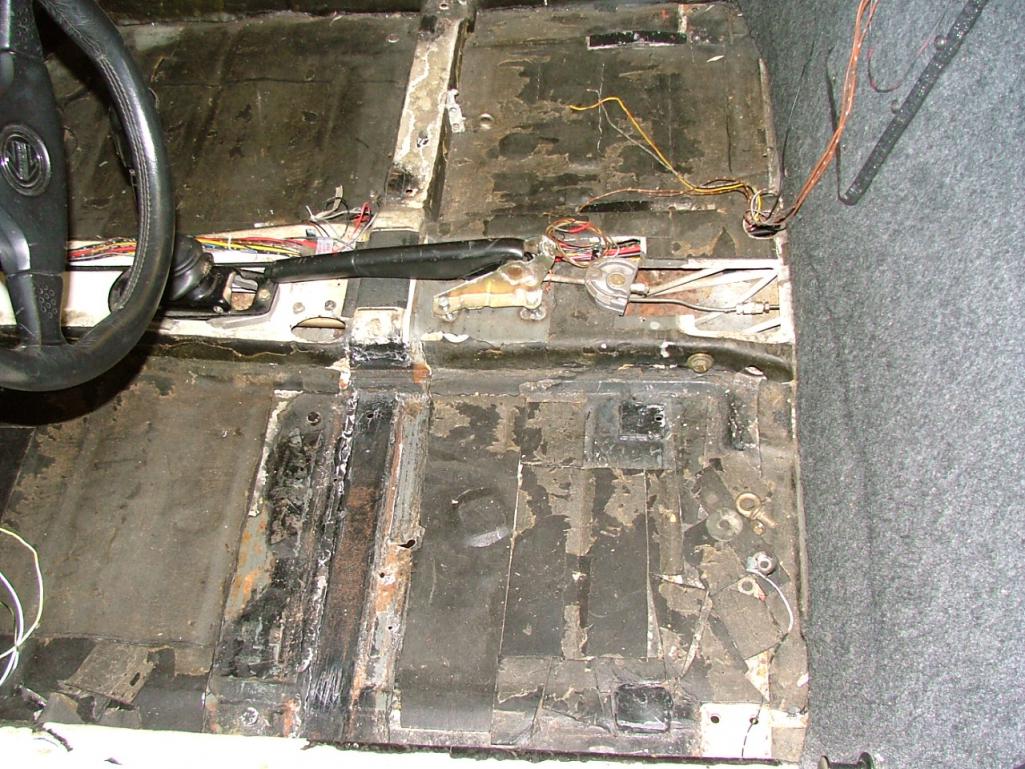
I had by this time new German glass front and non German rear installed (another story for another day that I would just as soon forget) so I fashioned some partitions out of hard board for sparks.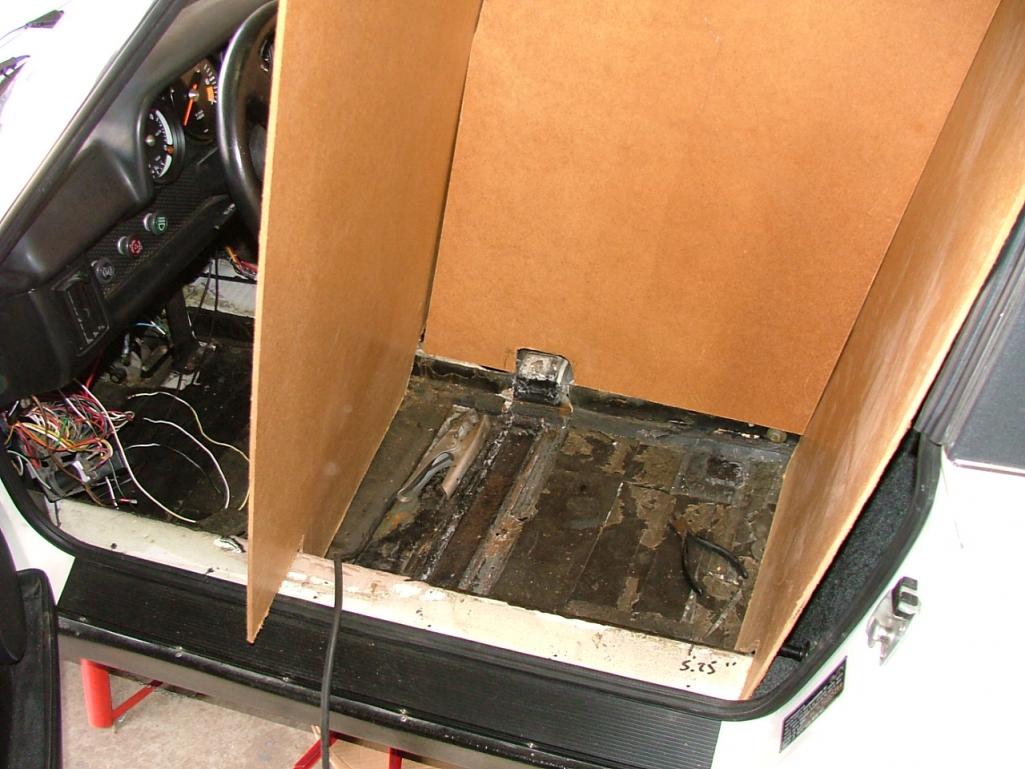
The only place I could find the half cross rail was AA but I was happy to be able to find just a half. And it actually was a pretty nicely made piece and did not require a lot of customization to fit it in. Not the welding expertise of mb911 but I got it done! Kind of a tight area too. 
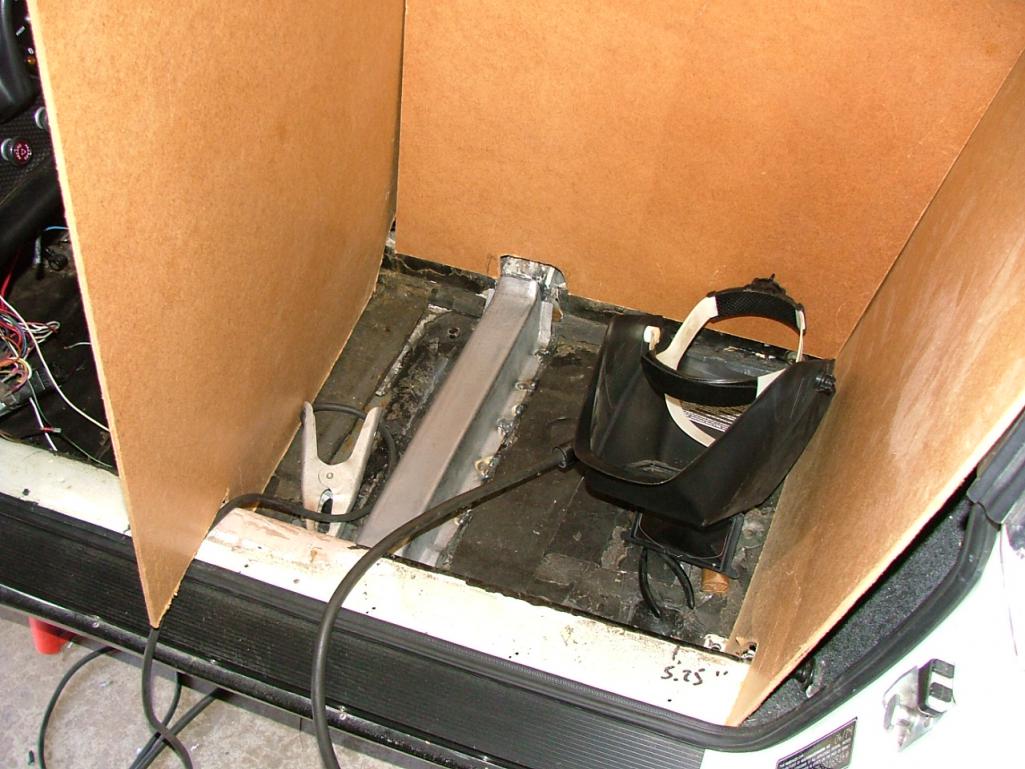
Installation of seat brackets was a royal pain but they are even and level. Picture of completed to follow.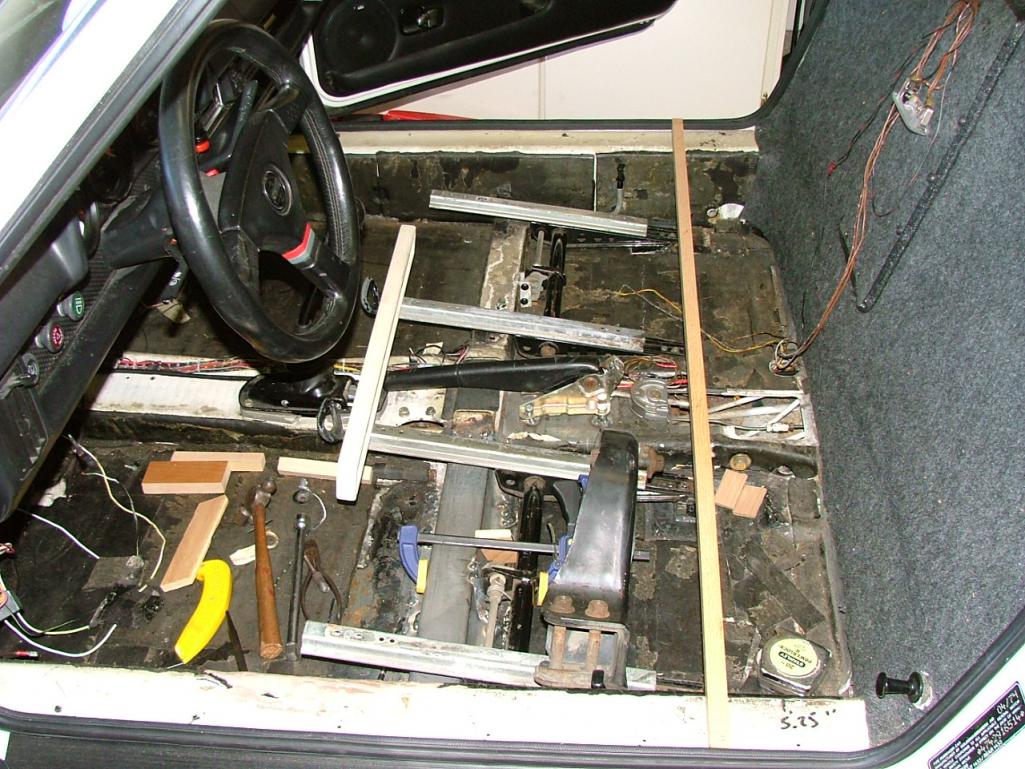
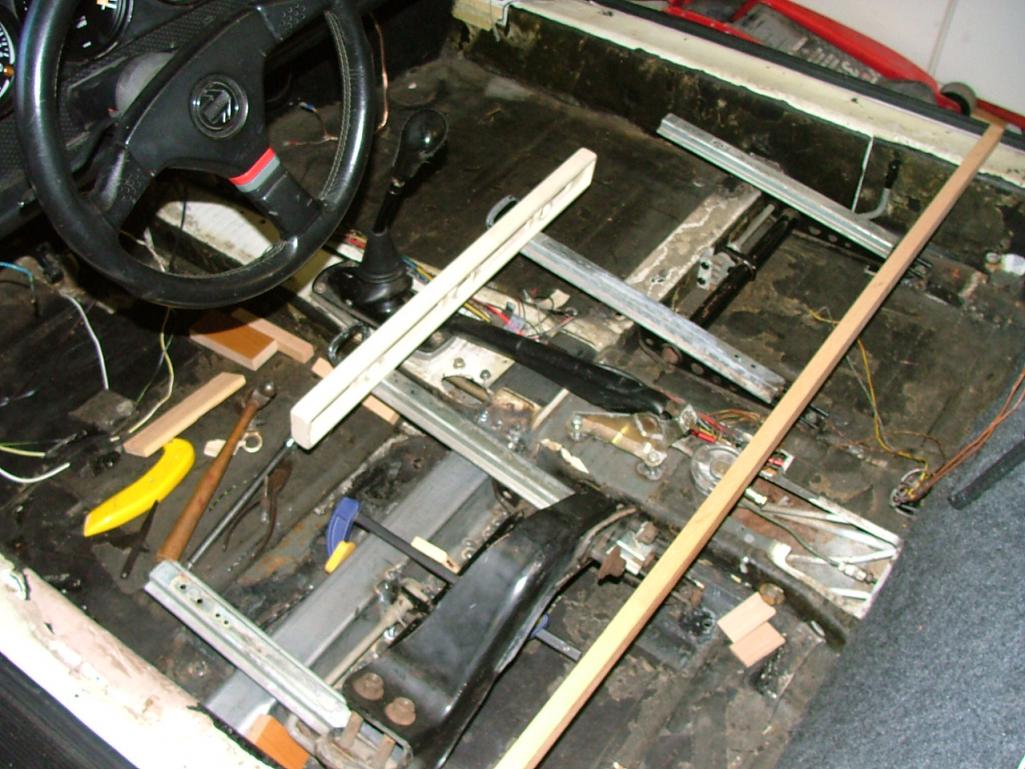
Posted by: Lucky9146 Sep 25 2017, 01:59 PM
Completed job 2015 cross member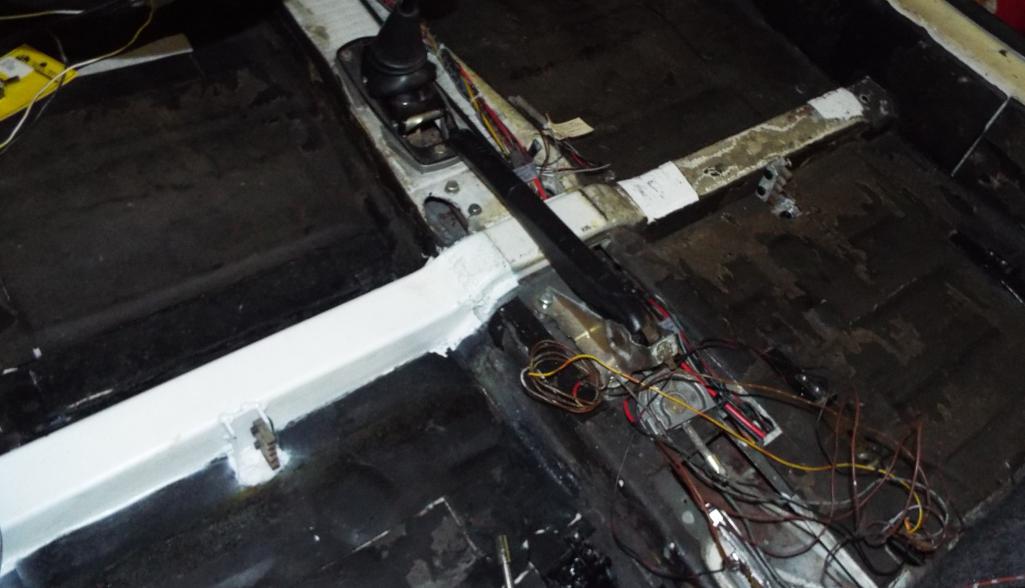
And with stock seats installed
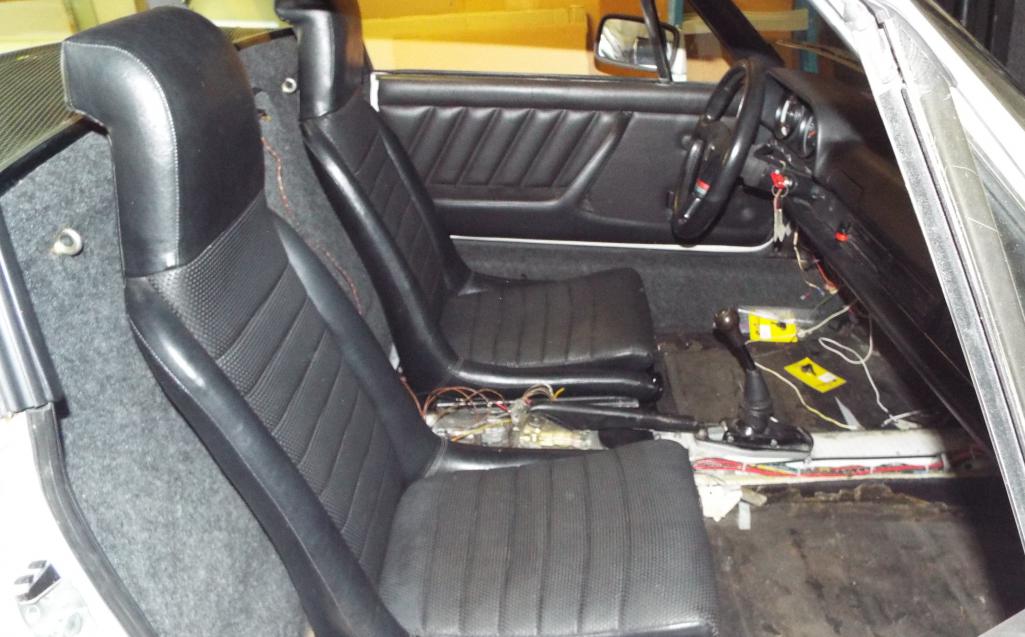
But in doing the post above about 2015 I decided to remove the seats and see what all I still have left to do in there. My day was ruined when this handle broke off moving the seat forward. This all gets really frustrating sometimes and it just doesn’t pay to get out of bed. Killer is I sold my extras for cheap at a swap meet hoping somebody could use them.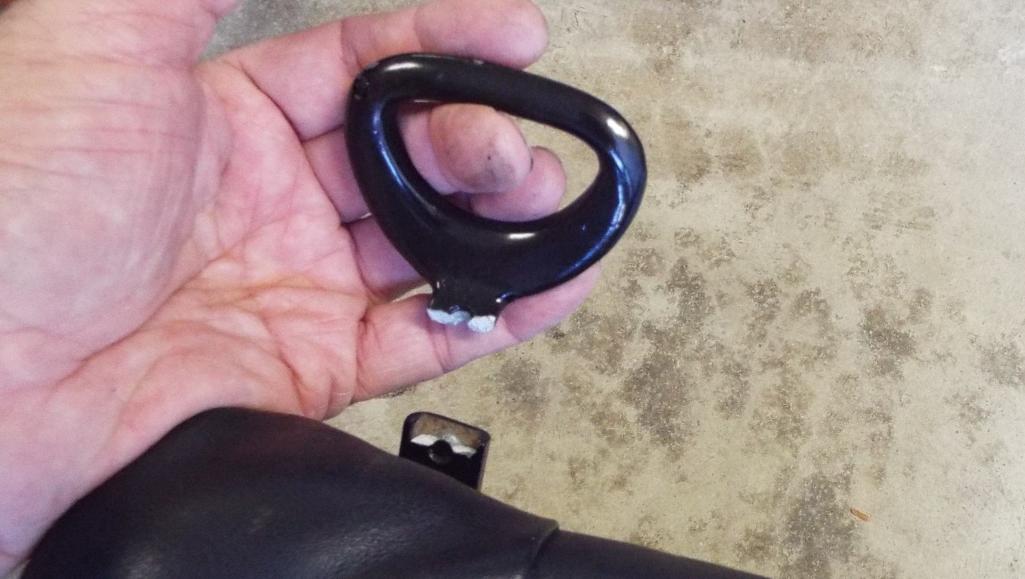
Posted by: porschetub Sep 25 2017, 02:01 PM
Interesting handbrake setup,that would work well surely,good progress going on here .
Posted by: porschetub Sep 25 2017, 02:27 PM
Porschetub, How did you fabricate and attach the second bracket/boss to support the second bronze bushing on the shift linkage console?
maf914,I used a scrap of 50x50x5 box section (RHS) cut and sectioned to make an angle,the reason I choose this was because the 5mm thinkness is basically correct to support the bush,I may have added an extra snap ring as a spacer but can't remember offhand.
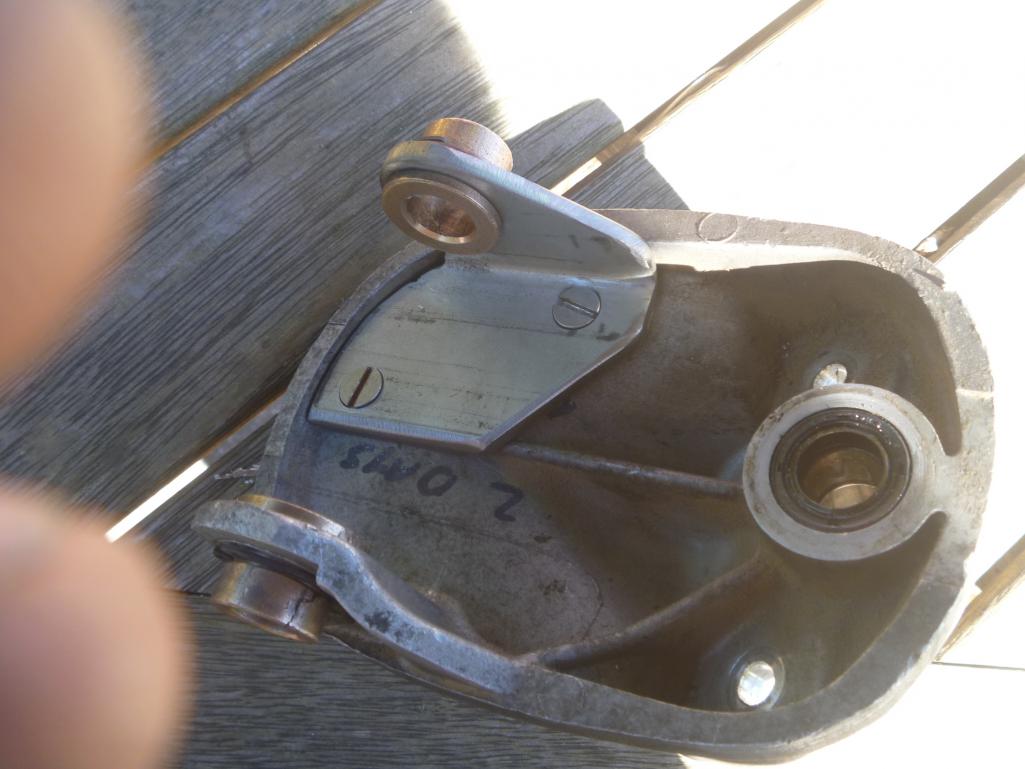
It takes a bit of setup time but wasn't too hard,as I had a longer rod made up I decided to add another uni-joint to further help rod alignment ,you need to cut a hole in the rear of the plastic cover for obvious reasons.
I got the oil impregnated bushes from a seller on ebay.
Hope that helps.
Posted by: moparrob Sep 25 2017, 04:20 PM
Porschetub, How did you fabricate and attach the second bracket/boss to support the second bronze bushing on the shift linkage console?
maf914,I used a scrap of 50x50x5 box section (RHS) cut and sectioned to make an angle,the reason I choose this was because the 5mm thinkness is basically correct to support the bush,I may have added an extra snap ring as a spacer but can't remember offhand.
It takes a bit of setup time but wasn't too hard,as I had a longer rod made up I decided to add another uni-joint to further help rod alignment ,you need to cut a hole in the rear of the plastic cover for obvious reasons.
I got the oil impregnated bushes from a seller on ebay.
Hope that helps.
Very creative on that bracket. It would be nice if someone did a three axis scan on that and created the part in billet.
Posted by: moparrob Sep 25 2017, 04:20 PM
Double post
Posted by: mepstein Sep 25 2017, 04:32 PM
First up was the AN16 with straight end and 30 deg end. Decided a bit of 800 degree shield would be good next to the header too.
A couple years ago when I ran the AN12 front oil cooler lines through the heater tubes to the engine bay it all made sense and I liked it. Having an elbow coming out of the thermostat right next to engine mount seemed tight but ok.
Now, with the engine in place that hose is a bit of a challenge, and like Learmo63 says, the fewer the elbows the better.
My last post said jokingly that I may not post pictures but I am now happy with what I ended up with. So pictures there will be!
I always liked an original 911 hard line concept; tight bend out of the block, close to the engine and drain tubes plus away from headers. So I shortened a 911 hard line, bent, and had a fitting tig welded to the end. This hard line is similar to the PMS line they sell for $160 and I did it for $42. I had the line cut 2 years ago just waiting for the engine install.
Have to say the first hose approach was a bunch of close proximity elbows and it was nuts.
The big spiral approach is going to be it! Just a bit of clamping and I’m done with oil system.
Seems like baby steps but progress none the same. And many thanks to my hose"guy"
I’m not there to see this in 3D but I wonder if a 45 degree fitting on each end of a short piece of line would connect without the loop.
Or keeping the 90 on the thermostat and adding a 45 on the oil pipe.
Posted by: Larmo63 Sep 25 2017, 04:36 PM
I like the GT center hand brake idea, but when it is up does the shifter interfere with it. They look close, maybe too close?
It's much better to drive a 914 with seats in it.
Order two steel seat adjuster handles from 914 Rubber and be done with it. Those old alloy ones break regularly.
Posted by: Lucky9146 Sep 25 2017, 05:15 PM
Porschetub, How did you fabricate and attach the second bracket/boss to support the second bronze bushing on the shift linkage console?
maf914,I used a scrap of 50x50x5 box section (RHS) cut and sectioned to make an angle,the reason I choose this was because the 5mm thinkness is basically correct to support the bush,I may have added an extra snap ring as a spacer but can't remember offhand.
It takes a bit of setup time but wasn't too hard,as I had a longer rod made up I decided to add another uni-joint to further help rod alignment ,you need to cut a hole in the rear of the plastic cover for obvious reasons.
I got the oil impregnated bushes from a seller on ebay.
Hope that helps.
Porschetub thanks for all the info I was wondering too how it was made and was glad maf914 asked. I am not sure who I know could make this but the piece is a really good idea.
Posted by: Lucky9146 Sep 25 2017, 05:37 PM
A couple years ago when I ran the AN12 front oil cooler lines through the heater tubes to the engine bay it all made sense and I liked it. Having an elbow coming out of the thermostat right next to engine mount seemed tight but ok.
Now, with the engine in place that hose is a bit of a challenge, and like Learmo63 says, the fewer the elbows the better.
I always liked an original 911 hard line concept; tight bend out of the block, close to the engine and drain tubes plus away from headers. So I shortened a 911 hard line, bent, and had a fitting tig welded to the end. This hard line is similar to the PMS line they sell for $160 and I did it for $42. I had the line cut 2 years ago just waiting for the engine install.
Have to say the first hose approach was a bunch of close proximity elbows and it was nuts.
The big spiral approach is going to be it! Just a bit of clamping and I’m done with oil system.
Seems like baby steps but progress none the same. And many thanks to my hose"guy"
I’m not there to see this in 3D but I wonder if a 45 degree fitting on each end of a short piece of line would connect without the loop.
Or keeping the 90 on the thermostat and adding a 45 on the oil pipe.
Yeah it looks like it would work with 45 deg from the pic I know what you mean. The end coming out of the 90 at the thermostat and the end of the hard line were only 7 inches from each other and with 90's on them they were in the same plane. Not a lot of real estate to work with. I really don't think there was room for 45's and then more 90's just didn't make sense and even that wouldn't really work either. Thanks for looking in.
Edit to add picture to show how tight it is against the engine mount right now I have a piece of rubber in there for cushion. if anything the elbow coming out of the thermostat could bave been like 75 degrees. The mount is coming down at an angle. Hope this helps.
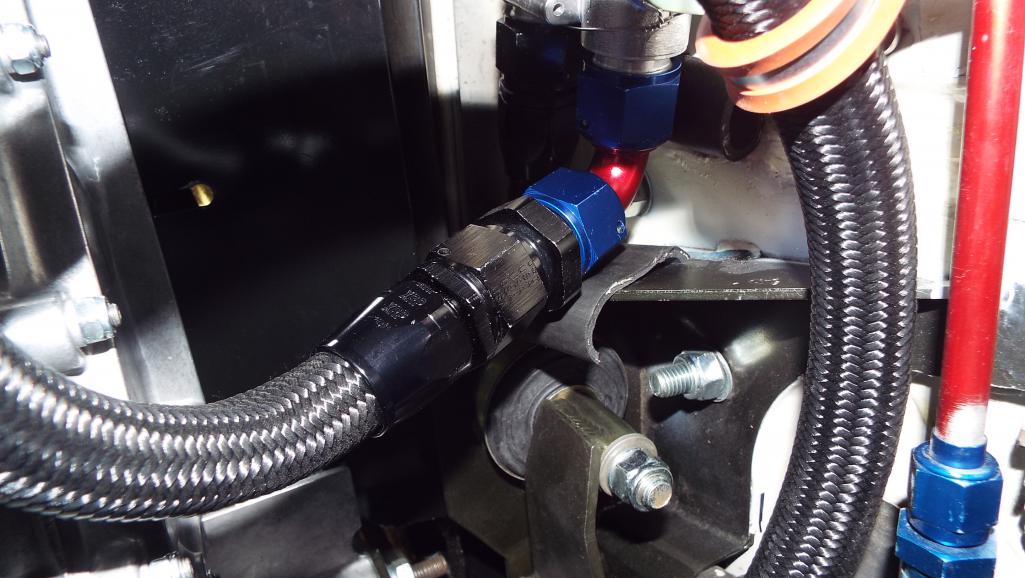
Posted by: Lucky9146 Sep 25 2017, 06:26 PM
I like the GT center hand brake idea, but when it is up does the shifter interfere with it. They look close, maybe too close?
It's much better to drive a 914 with seats in it.
Order two steel seat adjuster handles fro 914 Rubber and be done with it. Those old alloy ones break regularly.
Yes center hand brake should be cool.
Since I just installed the shifter linkage the other day I can now check it so thanks for asking. Shifter fully back and brake up to match. Picture shows got about an inch, but I doubt the brake is that high when pulled up, have to see and that's another whole project.

I will get right on the 914 Rubber seat handles thanks for that too!
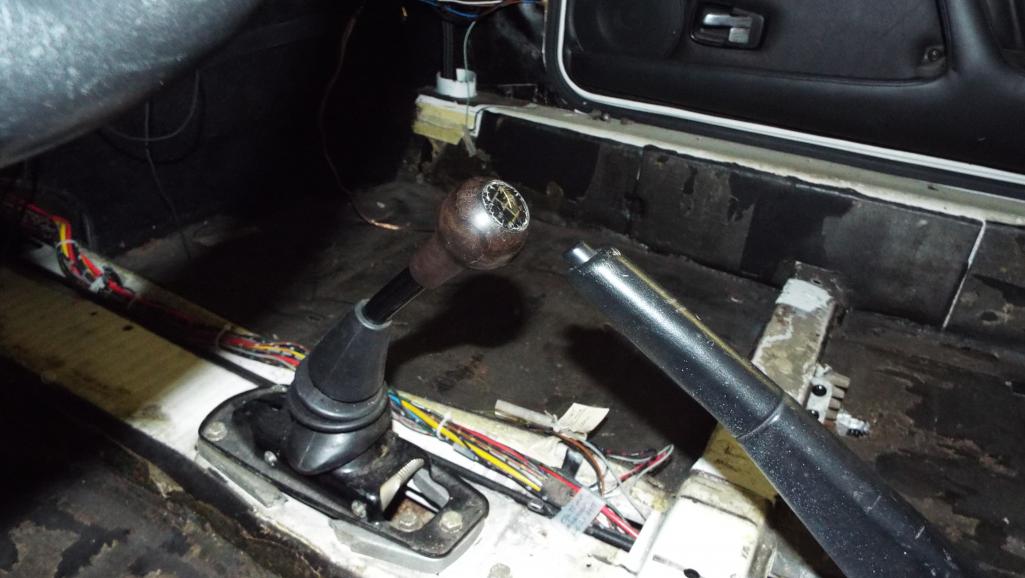
Posted by: Larmo63 Sep 25 2017, 09:37 PM
I thought the same exact thing that Mark said in his comment about the oil line loop. I doubt the loop hurts anything, but a direct connection does look possible.
Posted by: maf914 Sep 26 2017, 06:50 AM
Porschetub, How did you fabricate and attach the second bracket/boss to support the second bronze bushing on the shift linkage console?
maf914,I used a scrap of 50x50x5 box section (RHS) cut and sectioned to make an angle,the reason I choose this was because the 5mm thinkness is basically correct to support the bush,I may have added an extra snap ring as a spacer but can't remember offhand.
It takes a bit of setup time but wasn't too hard,as I had a longer rod made up I decided to add another uni-joint to further help rod alignment ,you need to cut a hole in the rear of the plastic cover for obvious reasons.
I got the oil impregnated bushes from a seller on ebay.
Hope that helps.
Porschetub thanks for all the info I was wondering too how it was made and was glad maf914 asked. I am not sure who I know could make this but the piece is a really good idea.
Yes, thank you Porschetub for the explanation. Chris at Tangerine Racing offers a kit that adds double bushings at the shift console, and Mark Henry and Brant have posted threads and photos of their custom double bushing installations. All good information.
Posted by: Lucky9146 Sep 26 2017, 12:07 PM
Porschetub, How did you fabricate and attach the second bracket/boss to support the second bronze bushing on the shift linkage console?
maf914,I used a scrap of 50x50x5 box section (RHS) cut and sectioned to make an angle,the reason I choose this was because the 5mm thinkness is basically correct to support the bush,I may have added an extra snap ring as a spacer but can't remember offhand.
It takes a bit of setup time but wasn't too hard,as I had a longer rod made up I decided to add another uni-joint to further help rod alignment ,you need to cut a hole in the rear of the plastic cover for obvious reasons.
I got the oil impregnated bushes from a seller on ebay.
Hope that helps.
Porschetub thanks for all the info I was wondering too how it was made and was glad maf914 asked. I am not sure who I know could make this but the piece is a really good idea.
Yes, thank you Porschetub for the explanation. Chris at Tangerine Racing offers a kit that adds double bushings at the shift console, and Mark Henry and Brant have posted threads and photos of their custom double bushing installations. All good information.
That's what I like about this site is you can learn something new almost every day. Never heard of Tangerine Racing. Went and looked at the kit. Wonder if you could buy just pieces? Also did not know that Mark and Brant had made them too. Thanks maf914
Posted by: porschetub Sep 26 2017, 01:21 PM
Porschetub, How did you fabricate and attach the second bracket/boss to support the second bronze bushing on the shift linkage console?
maf914,I used a scrap of 50x50x5 box section (RHS) cut and sectioned to make an angle,the reason I choose this was because the 5mm thinkness is basically correct to support the bush,I may have added an extra snap ring as a spacer but can't remember offhand.
It takes a bit of setup time but wasn't too hard,as I had a longer rod made up I decided to add another uni-joint to further help rod alignment ,you need to cut a hole in the rear of the plastic cover for obvious reasons.
I got the oil impregnated bushes from a seller on ebay.
Hope that helps.
Porschetub thanks for all the info I was wondering too how it was made and was glad maf914 asked. I am not sure who I know could make this but the piece is a really good idea.
Yes, thank you Porschetub for the explanation. Chris at Tangerine Racing offers a kit that adds double bushings at the shift console, and Mark Henry and Brant have posted threads and photos of their custom double bushing installations. All good information.
That's what I like about this site is you can learn something new almost every day. Never heard of Tangerine Racing. Went and looked at the kit. Wonder if you could buy just pieces? Also did not know that Mark and Brant had made them too. Thanks maf914
I did ask Chris if he would sell me the dual bush console casting ,he replied promply and politely saying the part wasn't sold on its own.
I have his firewall bush and already had a converted shift shaft reason for not needing the whole kit.
Posted by: ACP911 Sep 26 2017, 01:46 PM
Hello 914/6 Gurus and LUCKY...
Well this thread is very impressive and for most of you but couple of individuals, you are experiencing this through this thread, for the very very lucky few, the original owner from time to time and also ME, we have the opportunity to see his amazing work in person and let me tell you, WOW is an understatement. Very meticulous, methodical, well planned and must admit, excessively planned at times, but that is what makes him who he is......
Well done my friend... All I can say is, I am thankful to have met you and get to experience your work first hand. Can't wait for the ride in this beauty....
GG w/85 M491 
Posted by: porschetub Sep 26 2017, 07:40 PM
Porschetub, How did you fabricate and attach the second bracket/boss to support the second bronze bushing on the shift linkage console?
maf914,I used a scrap of 50x50x5 box section (RHS) cut and sectioned to make an angle,the reason I choose this was because the 5mm thinkness is basically correct to support the bush,I may have added an extra snap ring as a spacer but can't remember offhand.
It takes a bit of setup time but wasn't too hard,as I had a longer rod made up I decided to add another uni-joint to further help rod alignment ,you need to cut a hole in the rear of the plastic cover for obvious reasons.
I got the oil impregnated bushes from a seller on ebay.
Hope that helps.
Porschetub thanks for all the info I was wondering too how it was made and was glad maf914 asked. I am not sure who I know could make this but the piece is a really good idea.
Oh come on Jim what you have done and achieved with this conversion you would ''knock it over" easy,it seems to really tighten things up and and provide a better reference to the shift gate if all is adjusted properly....key point.
Go for it
.Posted by: maf914 Sep 27 2017, 07:47 AM
Here is a link to the thread where Porschetub, Mark and Brant provided photos of their double bushing linkage installations:
http://www.914world.com/bbs2/index.php?showtopic=303921&hl=linkage
And here is a photo of the linkage kit that J-West offered in the past:
Attached thumbnail(s)
Posted by: Lucky9146 Sep 27 2017, 08:14 AM
Here is a link to the thread where Porschetub, Mark and Brant provided photos of their double bushing linkage installations:
http://www.914world.com/bbs2/index.php?showtopic=303921&hl=linkage
And here is a photo of the linkage kit that J-West offered in the past:
Very helpful and thanks for posting in my thread much appreciated!
I will look further into double bushing sure looks much more robust and thanks to Porschetub for raising the issue.
Lots of good help here.
Posted by: Lucky9146 Sep 27 2017, 08:27 AM
Have been close to installing my rear axle shafts to the tranny and was awaiting the gaskets when this timely thread appeared and proved quite helpful to me and I am sure the thread originator! Perry Keihl specifically addressed some of my questions. Thanks!
Who knew? "Schnoor washers" learning all the time 
Thought it would be good to link in here.
http://www.914world.com/bbs2/index.php?showtopic=316867
Posted by: Lucky9146 Sep 27 2017, 11:31 PM
Hello 914/6 Gurus and LUCKY...
Well this thread is very impressive and for most of you but couple of individuals, you are experiencing this through this thread, for the very very lucky few, the original owner from time to time and also ME, we have the opportunity to see his amazing work in person and let me tell you, WOW is an understatement. Very meticulous, methodical, well planned and must admit, excessively planned at times, but that is what makes him who he is......
Well done my friend... All I can say is, I am thankful to have met you and get to experience your work first hand. Can't wait for the ride in this beauty....
GG w/85 M491
Thanks ACP911 for looking in and you will get the first ride and then YOU will want a 914-6 guaranteed.
Also since you signed up on World you will learn what a great site this is because of the people and support

Posted by: Lucky9146 Sep 28 2017, 04:10 PM
One last point on the work I had done back in Oct 2015 in the interior post #248 above.
Did you notice the long next to the driver seat?
Since I will have a center pull E-brake I went ahead and took that scallop out of the long next to the driver seat where the E-brake lever originally was. Now nice and straight and clean just like the passenger side.
But upon finally looking at the interior again I found that I have lots yet to do in there. I also found vinyl that I had installed on that cross rail hadn’t stuck well and was curling up and peeling off so will have to re-do that too, as well as finish installing all the rest of the vinyl, and carpet, and trim, and, and, and……………………………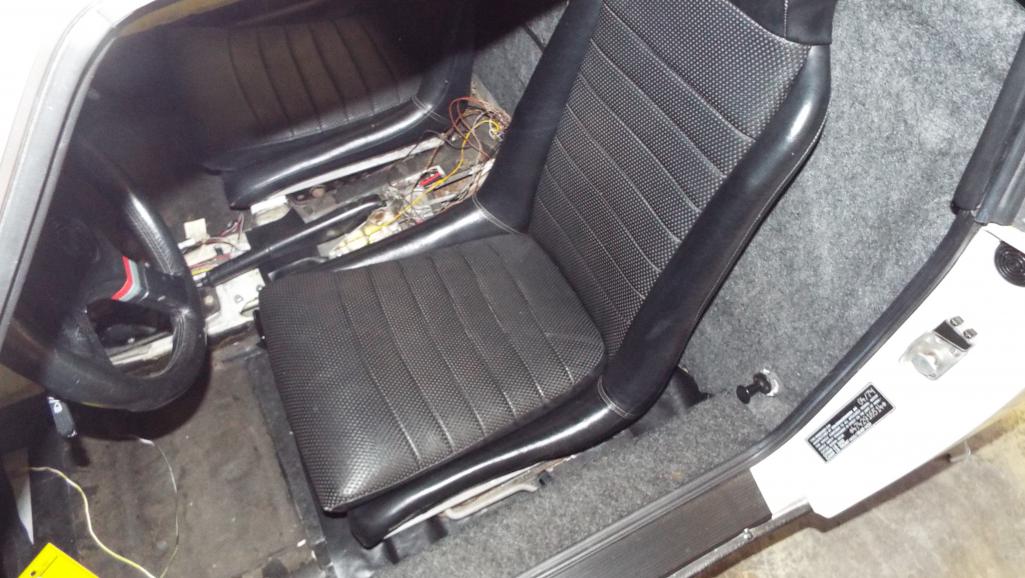
Back to the engine, got some parts!
Posted by: Lucky9146 Sep 29 2017, 09:37 AM
Hooked up my engine wiring the other night, took like 2 minutes.
That’s because when I did the Perry Keihl wiring harness with his super cool 14 pin connector for the chassis wiring I got the idea to make things easier when I did install the engine so I spent the time to add my own quick connectors.
Yes, those are indeed trailer type pin connectors for my MSD ignition wires. Took a bit of extra planning but should engine removal be required in the future it’s a snap to disconnect. Could not find a 6 pin so used a 4 pin and 2 pin. 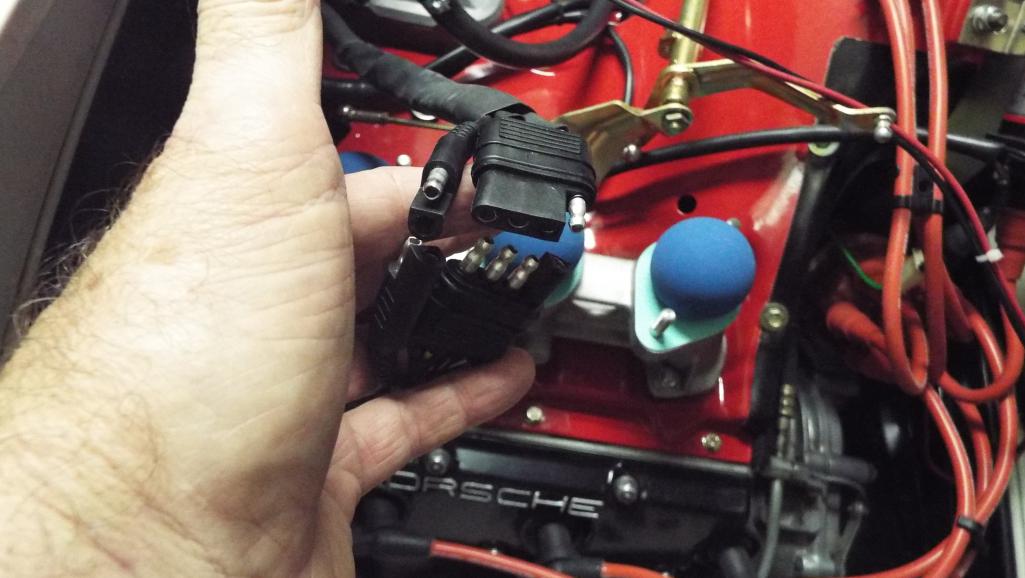
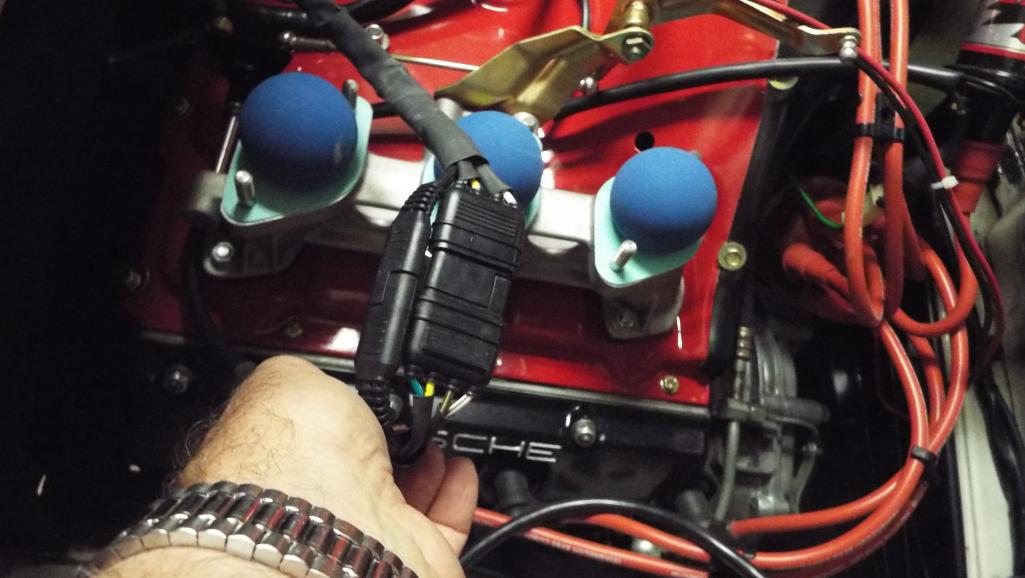
Posted by: whitetwinturbo Sep 29 2017, 11:08 AM
...........way cool connector
Posted by: jd74914 Sep 29 2017, 11:14 AM
Quick disconnects are always nice.
I don't mean to rain on your parade, but I've never had any positive experiences with flat trailer connectors and it seems like a shame to use them on a build of this quality. They don't really positively lock and are pretty easy to damage. The might work OK for you, but if they don't consider switching to something like a 6 pin Delphi Weatherpack connector. They're inexpensive (~$5-10 for both sides, the terminals, and seals), don't require a super special crimper (very important if you're doing just one), and have a nice positive locking catch so the can't come loose with vibration.
http://www.ebay.com/itm/Delphi-GM-6-Pin-Weatherpack-Connector-Kit-16-14-AWG-Made-In-USA-/230864494085
Posted by: mepstein Sep 29 2017, 11:20 AM
Lucky - I like the idea, a lot.
Tony/cracker’s setup throughout his car. Awesome
Attached thumbnail(s)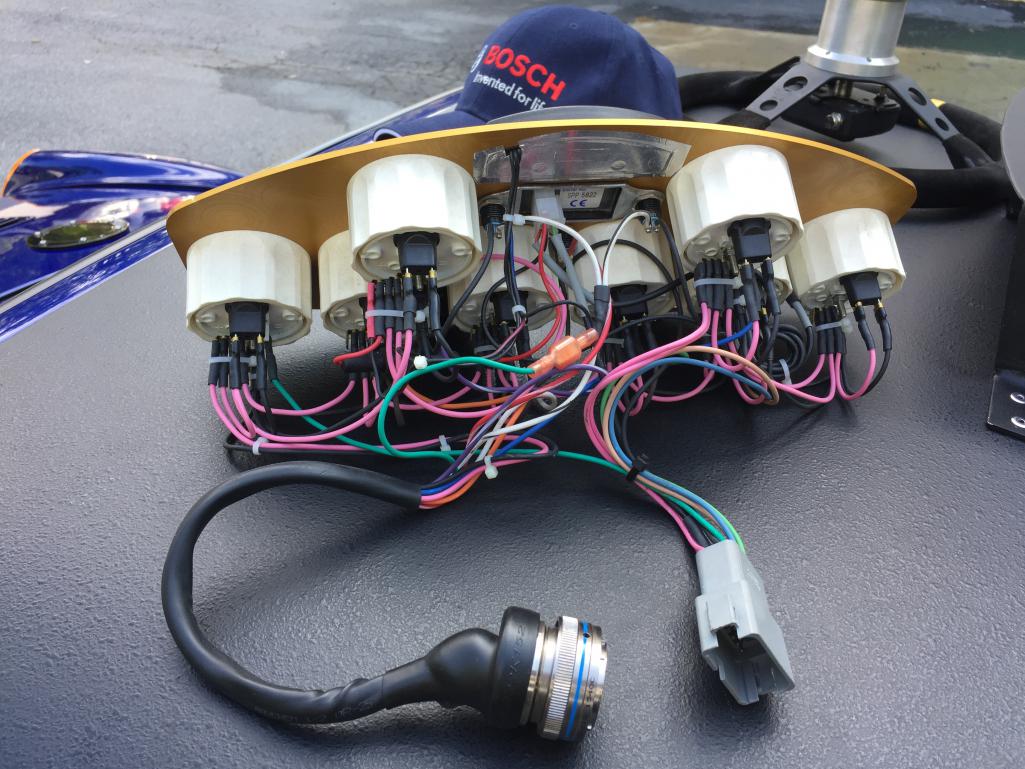
Posted by: Lucky9146 Sep 29 2017, 12:43 PM
Quick disconnects are always nice.
I don't mean to rain on your parade, but I've never had any positive experiences with flat trailer connectors and it seems like a shame to use them on a build of this quality. They don't really positively lock and are pretty easy to damage. The might work OK for you, but if they don't consider switching to something like a 6 pin Delphi Weatherpack connector. They're inexpensive (~$5-10 for both sides, the terminals, and seals), don't require a super special crimper (very important if you're doing just one), and have a nice positive locking catch so the can't come loose with vibration.
http://www.ebay.com/itm/Delphi-GM-6-Pin-Weatherpack-Connector-Kit-16-14-AWG-Made-In-USA-/230864494085
jd74914 Thanks for the link and suggestion
My parade is fine just a sprinkle here. Thanks also for the comment on my build! Much appreciated.
2 years ago when I set that all up I have to admit I did not look real hard for a 6 pin mostly because I was looking at trailer connectors and went for it. Spent hours in the engine bay soldering it all in, when it was easy, with no engine installed. And a lot of time on the harness soldering that end on when it was right in front of me.
,
It is always good to find out there are perfect products out there even though a little late for me
Maybe someone else coming along can use the information you provided and who knows down the road if my engine comes back out a Delphi would go in. My connector will live tucked up under the lip aft of the engine lid opening where they should be out of sight unless you lean over to look.
Posted by: moparrob Sep 29 2017, 05:10 PM
Jim, just think of all the amazing information you have learned during the process of this build – which you can hopefully apply when I send you my next car for you to build for me.
Posted by: Larmo63 Sep 29 2017, 05:18 PM
You could use a little safety wire on the trailer plug....?
Suspenders AND a belt?
Posted by: Lucky9146 Sep 29 2017, 06:54 PM
Jim, just think of all the amazing information you have learned during the process of this build – which you can hopefully apply when I send you my next car for you to build for me.
Cool I was hoping for a turbo next!

Posted by: Lucky9146 Sep 29 2017, 06:58 PM
You could use a little safety wire on the trailer plug....?
Suspenders AND a belt?
Done! and thanks for the call the other nite good info

Posted by: Lucky9146 Sep 30 2017, 02:21 PM
Who knew? 
Have been stopped now on right hand carb install now for a few days. Need to fashion a new fuel line in the engine compartment and have been looking at options and rounding up materials. PO ran an AN Alum hard line from the gas tank all the way back to the engine with good bends and connections, it looked great! He couldn’t have known it would interfere with the rain hat which sucks because it looked like such a clean direct install!
Then when I was doing MY work in the engine compartment I never even gave it a second thought, and on top of that I even ty-wrapped wires to the line, as it certainly looked as though it was out of the way.
Have to admit I do like the look of hard lines but Larmo63 makes a good point about the flexibility of his blue fuel lines.
Will post the follow on solution hopefully soon.
All looked good till the engine went in. 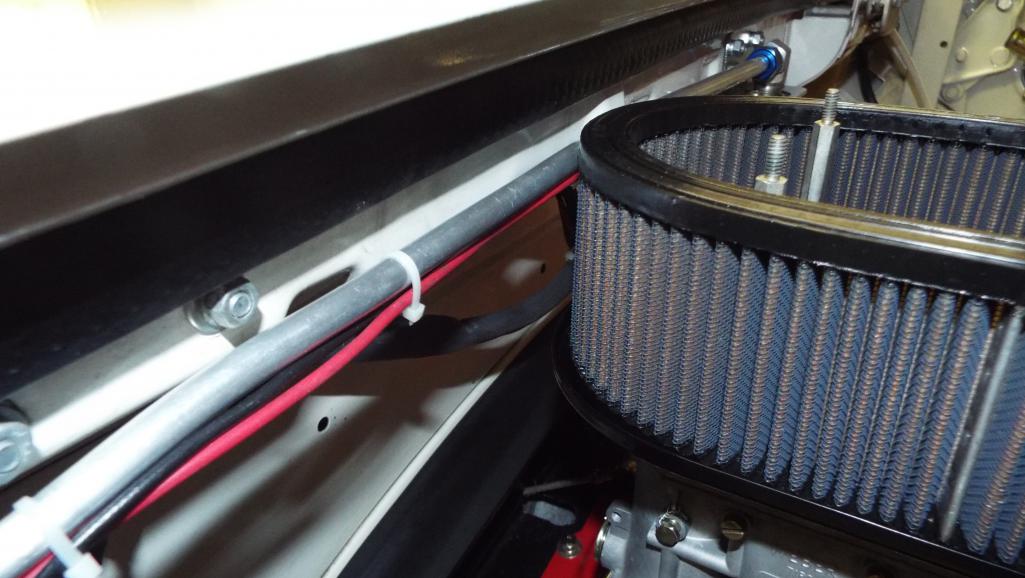
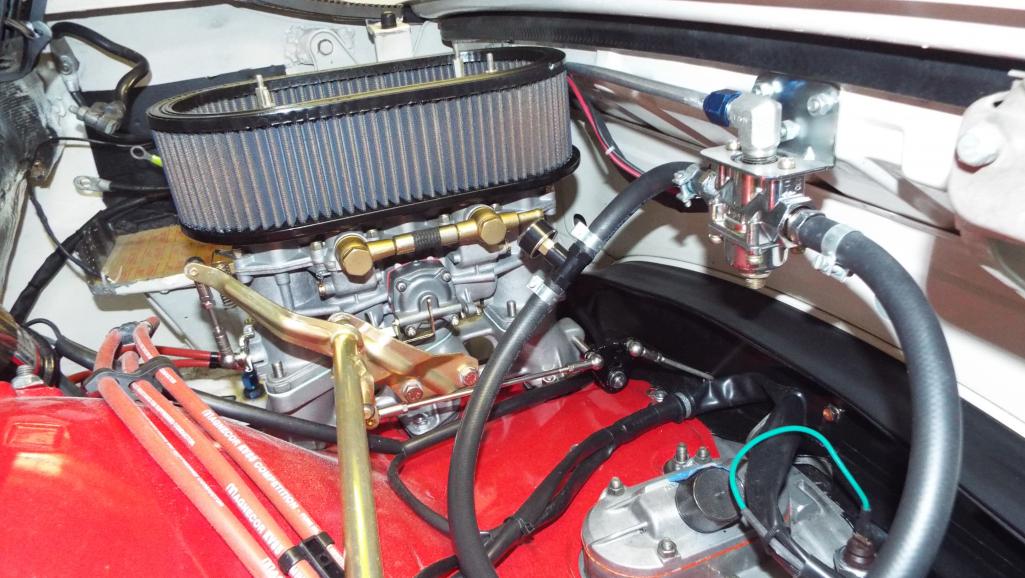
Posted by: Larmo63 Sep 30 2017, 02:38 PM
It seems as if you could bend it to go under the rain hat pretty easily???
Posted by: Lucky9146 Sep 30 2017, 03:40 PM
It seems as if you could bend it to go under the rain hat pretty easily???
It sure does.......but Um No.
Unbending 90's? Tried. But thanks.
Posted by: Keith914 Sep 30 2017, 03:42 PM
Just catching up on your progress. You may have put the shift rod brass bushing that is in the front of the tranny bracket backwards. This can prevent the rods moving to the rear for 2nd and fourth so that you can't quite complete these shifts.
Posted by: Keith914 Sep 30 2017, 03:45 PM
Just looked at your post 247 again - your shift rod is different from mine (Tangerine), so you may not have a problem as I did.
Posted by: Lucky9146 Sep 30 2017, 03:55 PM
Just catching up on your progress. You may have put the shift rod brass bushing that is in the front of the tranny bracket backwards. This can prevent the rods moving to the rear for 2nd and fourth so that you can't quite complete these shifts.
Made me look
Post #237 shows placement of my brass bushing. The arm on the trans would not move in the direction of the bushing if installed reversed from what is shown. Seems to go OK through all the gears as installed just re-checked!
Thanks for weighing in.
Posted by: Lucky9146 Sep 30 2017, 03:58 PM
Just looked at your post 247 again - your shift rod is different from mine (Tangerine), so you may not have a problem as I did.
Post #247 is Porschetub 's set up showing what he did with double bushings. Wish I had that! Mine is post #237
Posted by: Lucky9146 Oct 1 2017, 12:26 PM
Received my rear axle gaskets and found some Schnorr washers (which was a new word for me and makes me chuckle). Good news is the rear axles are together after a lot of cleaning, it was a greasy mess to do, as I am sure many here know. I was not planning to show any pictures because everyone has seen rear axles.
However I did address what the axles looked like. They were powder coated black many years ago and had been hung on coat hangers over time which ended up removing the powder coating in several areas. Was not looking forward to trying to remove the remaining powder coating thinking it would be a real challenge. To my surprise, moisture had apparently worked under all the powder coating and they were rusty underneath, making coating removal fairly simple. Maybe they were not prepped well first? Cleaned up the rust and coated with silver Por 15 always intending to paint them black again, but I think I like the silver!
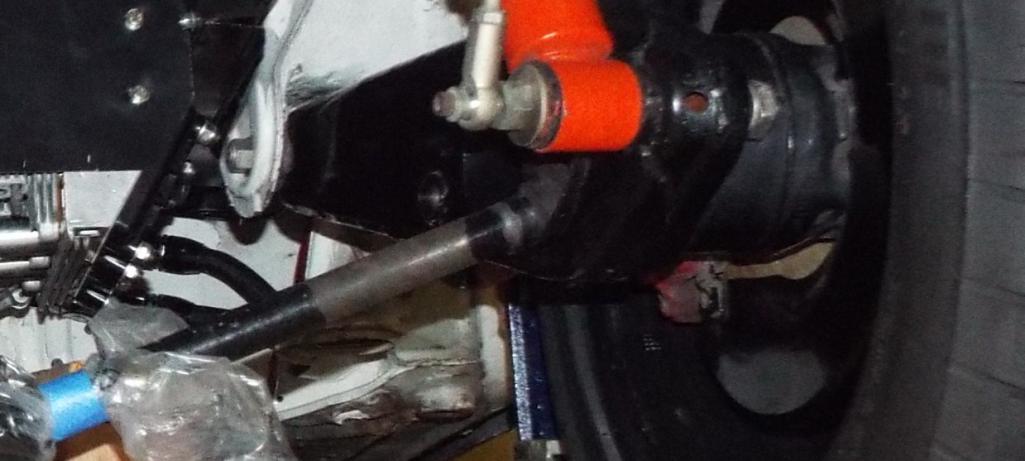
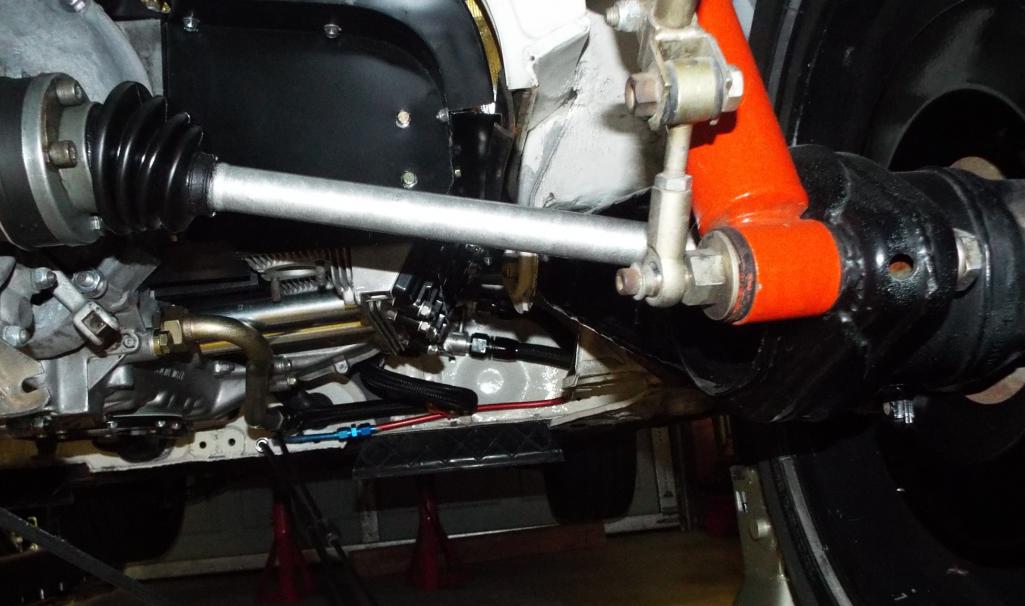
Posted by: raynekat Oct 1 2017, 01:18 PM
Yes, the previous powder coating on your axles must have been a very poor quality as usually it's very difficult to remove powder coating. It just doesn't slough off easily likes yours seemed to do.
Posted by: Lucky9146 Oct 2 2017, 10:13 PM
Small steps!
Got the left MSDS header installed today. I need some parts that are on order before I can install the right header.
Unfortunately that right header will be in the way for what I have to do.
So this gave me a an opportunity to explore the much anticipated PO’s idea for a center pull hand brake. As an aside I have a good buddy with a 6 conversion who is jealous as hell about the center pull hand brake AND the quad gage (hope he sees this).
PO had the cables made and all the new attaching hardware! Nice.
The concern of course was the hand brake cable routing past the header with the cable now coming out of the center of the rear bulk head
The cable is just to the right of the shifter rod and ends up upper left below the red spring.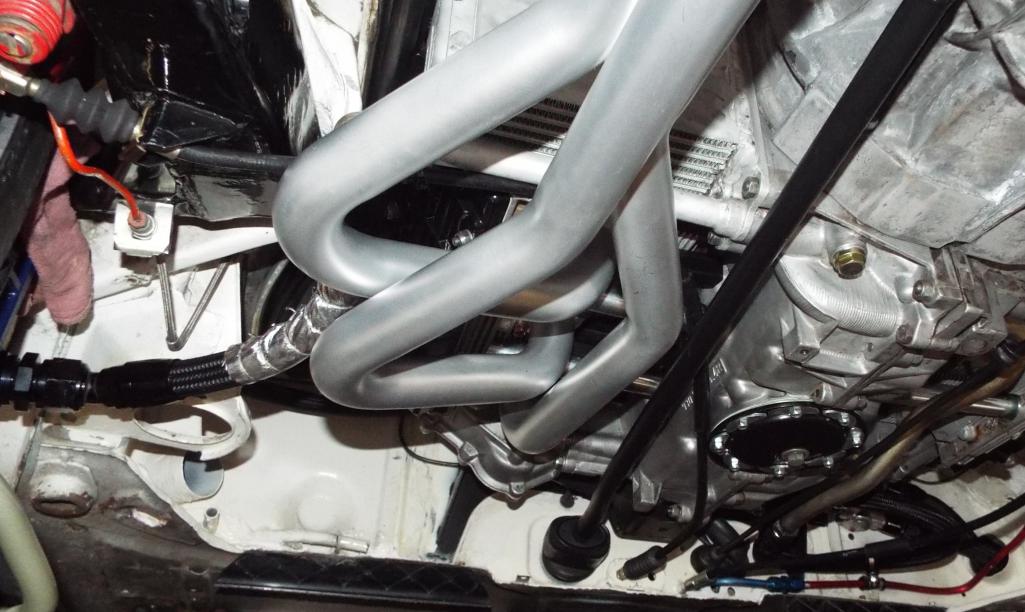
Cable routing went pretty well with the exception of being a tad close to the header in only one location. Routes up over shifter rod and header and over to brake.
I’ll figure something out to shield it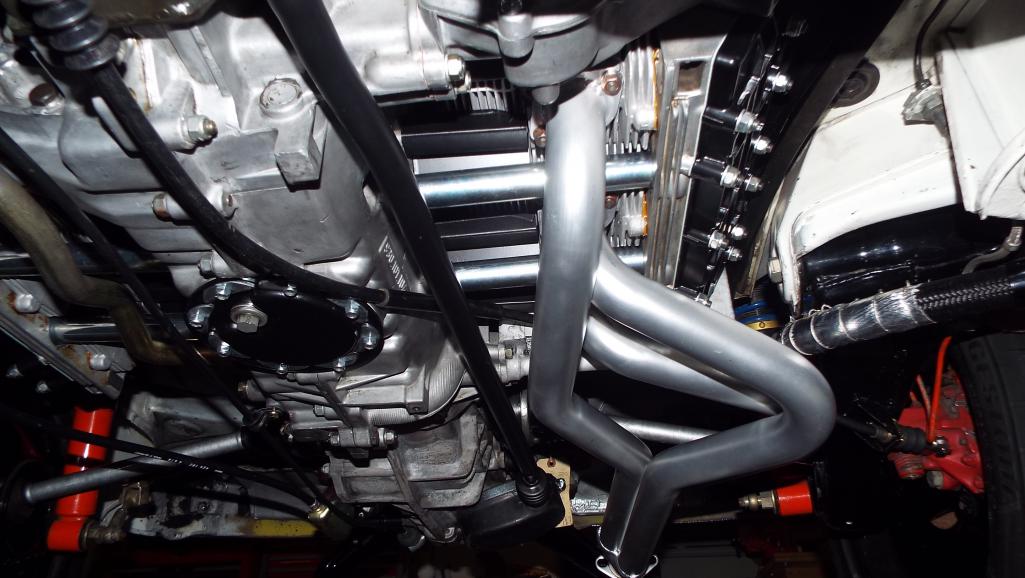
It actually looks closer than it is in the 3rd picture.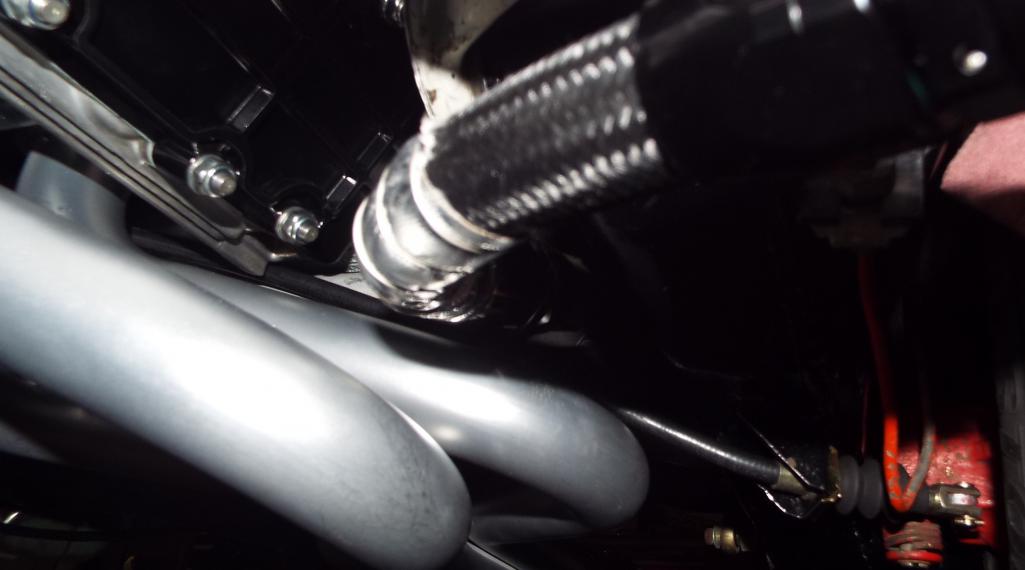
Length seems good too. Got ‘er all hooked up and it should work as imagined! Can’t do the full handle pull test without both cables installed. Dang
Livin’ The Dream! Thanks moparrob It Worked.
Posted by: Larmo63 Oct 3 2017, 10:29 PM
I have two 911 E-brake cables for a center pull brake set up, but I don't think I will explore the idea.
Not that it's a bad idea, but the 914 set up works fine.
Posted by: Lucky9146 Oct 4 2017, 07:30 PM
I have two 911 E-brake cables for a center pull brake set up, but I don't think I will explore the idea.
Not that it's a bad idea, but the 914 set up works fine.
I believe the concept was for making an e-brake turn in rally driving. Then you are able to use your right hand for e- brake and shift with left hand on the steering wheel.
According to my rally driving friend. Very awkward to make an e-brake turn with left hand e-brake. This is why he is jealous.
Never done this myself and really have no plans for it, but the option is now there and it seems much more instinctive to utilize a center pull hand brake.
Posted by: moparrob Oct 4 2017, 08:06 PM
Actually, the reason for this mounting was because this wide seats I had chosen, from a 964 Porsche, would not allow access to the handbrake on the left side. Also, uphill starts using the handbrake are much more intuitive with a center handbrake.
Posted by: 914forme Oct 5 2017, 06:08 AM
The reference was based off the original Rallye Prepped 914-6GTs that had center tunnel mount for just this reason. Easier to find the dang thing when it is out in the open. Also the original early hand brake folded, so it would be even more of a pain to use.
Now modern Rallye cars us cutter brakes that actuate the brakes on that side our rear. In reality it could now be done via electronics, via the stability control system. In this case you would have to change the acronym and make it IICS (Intentional Instability Control System) As your making the car unstable to induce the intend rotation.
Carry on neat layout. I would add some heat sleeves on the cables and SS safety wire to keep them from burning. Might increase the life span You never know until you get it running and start using the cables.
Jeff Hail has the best setup I have seen for this. He used to 914 Pass side cables, that allowed for plenty of cable to route along the firewall, and out to the caliper down the trailing arm for a factory look and routed installation.
If you have not read his thread it is a http://www.914world.com/bbs2/index.php?act=ST&f=2&t=76791. Great Read and full of very useful information.
Posted by: mepstein Oct 5 2017, 06:11 AM
The reference was based off the original Rallye Prepped 914-6GTs that had center tunnel mount for just this reason. Easier to find the dang thing when it is out in the open. Also the original early hand brake folded, so it would be even more of a pain to use.
Now modern Rallye cars us cutter brakes that actuate the brakes on that side our rear. In reality it could now be done via electronics, via the stability control system. In this case you would have to change the acronym and make it IICS (Intentional Instability Control System) As your making the car unstable to induce the intend rotation.
Carry on neat layout. I would add some heat sleeves on the cables and SS safety wire to keep them from burning. Might
increase the life span You never know until you get it running and start using the cables.Jeff Hail has the best setup I have seen for this. He used to 914 Pass side cables, that allowed for plenty of cable to route along the firewall, and out to the caliper down the trailing arm for a factory look and routed installation.
If you have not read his thread it is a http://www.914world.com/bbs2/index.php?act=ST&f=2&t=76791. Great Read and full of very useful information.
I am copying his setup.
Posted by: 914forme Oct 5 2017, 10:47 AM
Jeff Hail has the best setup I have seen for this. He used to 914 Pass side cables, that allowed for plenty of cable to route along the firewall, and out to the caliper down the trailing arm for a factory look and routed installation.
If you have not read his thread it is a http://www.914world.com/bbs2/index.php?act=ST&f=2&t=76791. Great Read and full of very useful information.
I am copying his setup. Already liberated Jeff's idea on the EG build even used the same seals the firewall. In my normal way of making things to complicated I started mocking up the tubes to go through the firewall like the factory would have done it. Saw Jeff's setup and keep it simple. Posted by: Lucky9146 Oct 5 2017, 07:05 PM
The reference was based off the original Rallye Prepped 914-6GTs that had center tunnel mount for just this reason. Easier to find the dang thing when it is out in the open. Also the original early hand brake folded, so it would be even more of a pain to use.
Now modern Rallye cars us cutter brakes that actuate the brakes on that side our rear. In reality it could now be done via electronics, via the stability control system. In this case you would have to change the acronym and make it IICS (Intentional Instability Control System) As your making the car unstable to induce the intend rotation.
Carry on neat layout. I would add some heat sleeves on the cables and SS safety wire to keep them from burning. Might
increase the life span You never know until you get it running and start using the cables.Jeff Hail has the best setup I have seen for this. He used to 914 Pass side cables, that allowed for plenty of cable to route along the firewall, and out to the caliper down the trailing arm for a factory look and routed installation.
If you have not read his thread it is a http://www.914world.com/bbs2/index.php?act=ST&f=2&t=76791. Great Read and full of very useful information.
Thanks for all the info including the Jeff Hail link! Like you said great read.
Yes I will be adding the heat sleeves soon.
Posted by: Lucky9146 Oct 10 2017, 07:58 PM
Nits and Nats
Just returned from a trip but before leaving I spent some time getting a bunch of small parts ordered from several suppliers. Little crap that was holding me up on several fronts.
As my thread title says “Finishing A 914-6 GT Conversion Project” I am now (hopefully) down to just the small stuff for finishing it up as you can see.
Waiting for me to open were 4 packages! So it was like a 914 Christmas. 
PMS clutch pulley buy was encouraged by Larma63, so why not. I had looked at it a couple years back trying to justify it and had input saying the stock one would work but I am right there now, so new pulley it is!
Timing decal, which I always wanted but could not figure out where to get it from, was a lead from Defianty all the way over in the UK. He first suggested a Polish company and that wasn’t working out so well for me and then he suggested of all places Sierra Madre right up the road. How cool is that! Have to add I have not gone to Sierra Madre in the past but will scrutinize their site in the future.
Then there is often offered GB from 914 Rubber which of course leads to additional “stuff”.
My usual “go to” site is EBS Racing where I have spent the majority of my dollars and a great company to deal with.
It’s the help and suggestions from others that make this site so great.
On we go 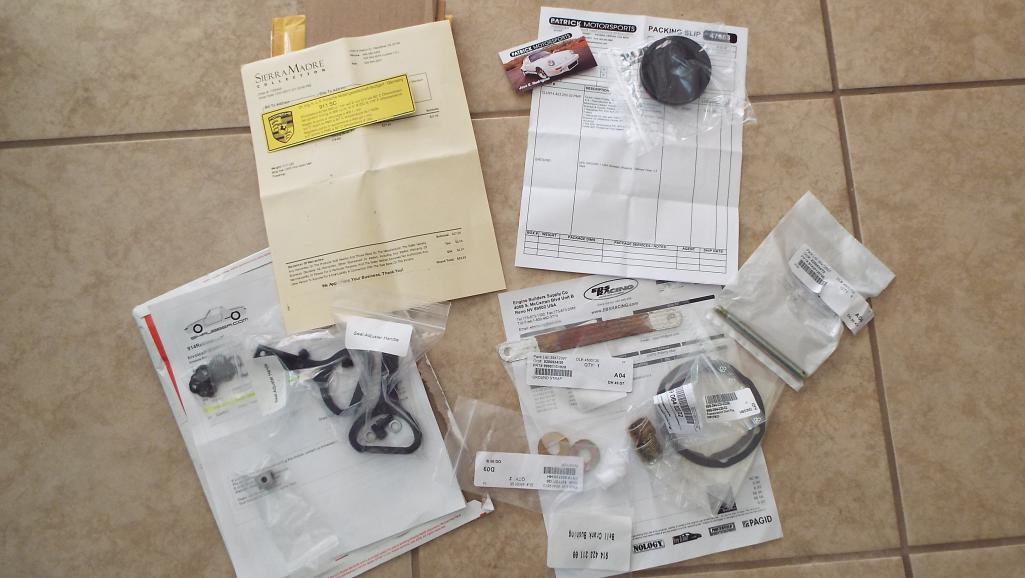
Posted by: defianty Oct 11 2017, 01:51 AM
Always nice getting 914 bits in the mail!
Glad you found the fan sticker. It's a nice finishing piece. It almost felt like a stamp of approval when I fitted mine
Posted by: Mark Henry Oct 11 2017, 05:16 AM
Small steps!
Got the left MSDS header installed today. I need some parts that are on order before I can install the right header.
Unfortunately that right header will be in the way for what I have to do.
So this gave me a an opportunity to explore the much anticipated PO’s idea for a center pull hand brake. As an aside I have a good buddy with a 6 conversion who is jealous as hell about the center pull hand brake AND the quad gage (hope he sees this).
PO had the cables made and all the new attaching hardware! Nice.
The concern of course was the hand brake cable routing past the header with the cable now coming out of the center of the rear bulk head
The cable is just to the right of the shifter rod and ends up upper left below the red spring.
Cable routing went pretty well with the exception of being a tad close to the header in only one location. Routes up over shifter rod and header and over to brake.
I’ll figure something out to shield it
It actually looks closer than it is in the 3rd picture.
Length seems good too. Got ‘er all hooked up and it should work as imagined! Can’t do the full handle pull test without both cables installed. Dang
Livin’ The Dream! Thanks moparrob It Worked.
That ebrake cable is nowhere near as close to the header once the car is on the ground and there's a load on the suspension.
Posted by: Lucky9146 Oct 11 2017, 10:55 AM
Small steps!
Got the left MSDS header installed today. I need some parts that are on order before I can install the right header.
Unfortunately that right header will be in the way for what I have to do.
So this gave me a an opportunity to explore the much anticipated PO’s idea for a center pull hand brake. As an aside I have a good buddy with a 6 conversion who is jealous as hell about the center pull hand brake AND the quad gage (hope he sees this).
PO had the cables made and all the new attaching hardware! Nice.
The concern of course was the hand brake cable routing past the header with the cable now coming out of the center of the rear bulk head
The cable is just to the right of the shifter rod and ends up upper left below the red spring.
Cable routing went pretty well with the exception of being a tad close to the header in only one location. Routes up over shifter rod and header and over to brake.
I’ll figure something out to shield it
It actually looks closer than it is in the 3rd picture.
Length seems good too. Got ‘er all hooked up and it should work as imagined! Can’t do the full handle pull test without both cables installed. Dang
Livin’ The Dream! Thanks moparrob It Worked.
That ebrake cable is nowhere near as close to the header once the car is on the ground and there's a load on the suspension.
Thanks Mark! Good catch and now I have some inappropriately placed ty-wraps that will be removed today. I have to admit I totally did not catch that! Duh
Not sure what I was thinking.Seriously, thank you for weighing in.
Posted by: Lucky9146 Oct 13 2017, 08:44 PM
Frustration the last couple days.
We all experience frustration at one time or another going through this process of 6 conversion. With my last purchases of bits and pieces I can’t believe I already have another list going. Does it ever stop?
Some of the small parts I recently got worked ok. PMS clutch pulley is on, so the clutch is complete, and somewhat adjusted. Trans ground strap was good too and now with new fill drain plugs installed the trans is full of Swepco 201.
One thing bugging me is the accelerator cable. Can’t figure out where the hell I got the darn thing and I am not sure it is the right one, it just doesn't look right to me. Going to continue to install but may need another one of those.
Timing decal I bought from Sierra Madre turned out to be the wrong one. It was SC all right, but ROW SC, so now have found where I can get the correct one, or closer to it, and have to order that one now. Sierra Madre did not have the correct one.
My hats off to those of you who have successfully installed the washer and nut on the right side carb under the accelerator pump. I know it can be done but really? I'll get it.
Definitely needed some positive progress today after fighting the right header on last night. I was pretty stoked about the idea of installing my ceramic coated new Dansk muffler so I want to share that. The install went ok, I wouldn’t go so far as problem free, but it is on there! I know silver ceramic is not "correct" but I love the look and kind of goes wit the headers. Will be eventually hidden by MSDS flare rear valance anyway.
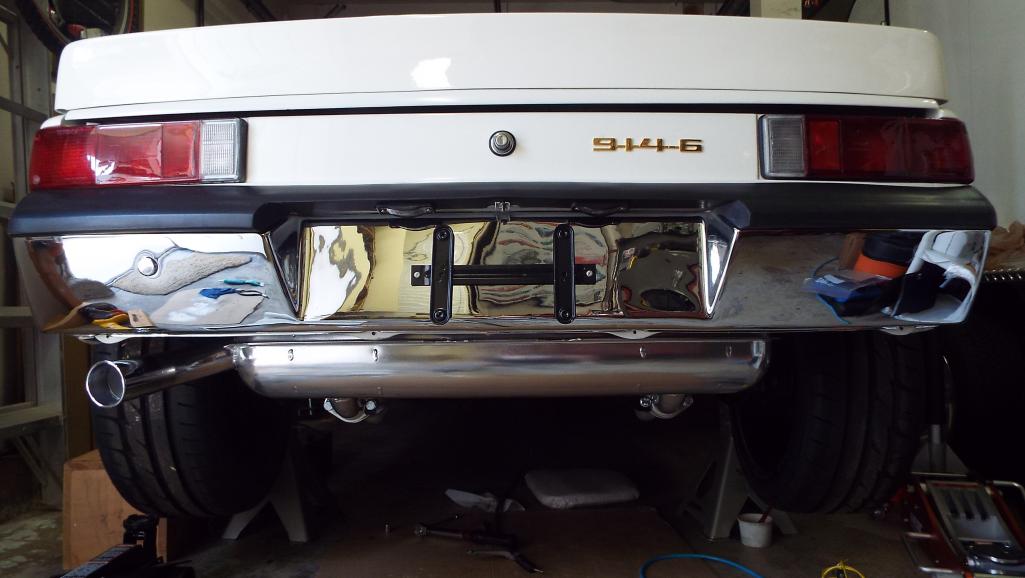
6568
6579
Posted by: Keith914 Oct 13 2017, 10:04 PM
Loosen the other 5 nuts to nearly off the studs. Lift the carb up the unthreaded stud height - put a screw driver handle or similar spacer under the carb to hold it up - should now be easier to put that remaining carb nut on the stud. Then screw all the nuts backdown following the difficult to access nut.
Posted by: Lucky9146 Oct 15 2017, 12:58 PM
Surprise!
Came out yesterday morning and found this.  Yes, that is my Swepco 201 leaking out of the left rear axle seal.
The trans had been gone through under PO direction to add the 6 intermediate plate, change a gear, a needle bearing, and gaskets. Right seal is holding up just fine, go figure, but apparently the trans sitting for 4-6 years is not a good plan. Got some back tracking to do.
Posted by: Larmo63 Oct 15 2017, 07:55 PM

Posted by: Lucky9146 Oct 15 2017, 08:36 PM
Love it! Exactly!!!!
Posted by: porschetub Oct 15 2017, 08:54 PM
Don't sweat it Jim,had an input shaft seal go real early,managed to save my new clutch just in time,you are still lucky9146 .
Replace both sides you will be good, .
Posted by: Lucky9146 Oct 15 2017, 09:29 PM
Don't sweat it Jim,had an input shaft seal go real early,managed to save my new clutch just in time,you are still lucky9146
.Replace both sides you will be good,
. Thanks! Yes you are right I truly am still lucky (to have this car). If you did your own trans work were there any nuances removing the stub shafts? Both sides RH thread? Tips? etc?
Posted by: porschetub Oct 15 2017, 10:28 PM
Don't sweat it Jim,had an input shaft seal go real early,managed to save my new clutch just in time,you are still lucky9146
.Replace both sides you will be good,
. Thanks! Yes you are right I truly am still lucky (to have this car). If you did your own trans work were there any nuances removing the stub shafts? Both sides RH thread? Tips? etc?
No never touched mine and its not great,others have done this seal repair but not me ...no big deal as far as I have seen.
Your handthrottle lever is this one BTW;

The straighter one of the two (rh side pic ),fairly simply thing to build .
Posted by: Lucky9146 Oct 16 2017, 08:32 PM
Should I be really worried? Or just worried?
Leaking Transmission stub shaft is out and am going to post a separate tread appealing specifically to "Transmission Experts" for advise on where to go from here.
http://www.914world.com/bbs2/index.php?showtopic=317991
Posted by: Lucky9146 Oct 17 2017, 09:36 PM
Looks like things will be OK on the stub shafts and the seals. Seemed to be touch and go for a bit with the seal removal. I was actually looking at all that I would have to do to drop it all back out again. Here is the seal that put up quite a fight! 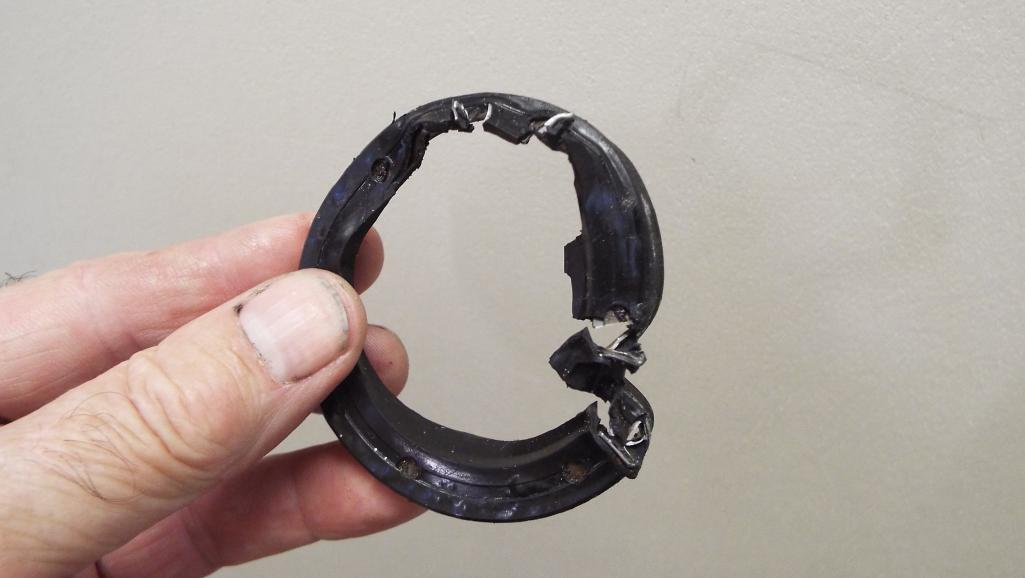
And the other stub shaft did not look quite as bad.
Then in answer to the thread I posted asking for “Expert Advice” Dr. Evil came to the rescue to offer me a good deal on some shafts and answer some questions. Awesome! Love this site!
I should be back to making progress again on the tranny soon. Still lots of other areas to address.
Posted by: 914forme Oct 18 2017, 06:07 AM
Not as bad as you say, but still has rust in the path of the seal. The seal was riding on that bright shiny area of the shaft, that "better" one is still
Glad you got a good deal from Dr. Evil, I had a couple I would toss in for an offer to keep you moving forward. I know what it is like to get stalled on a project.
Posted by: Lucky9146 Oct 18 2017, 08:33 AM
Loosen the other 5 nuts to nearly off the studs. Lift the carb up the unthreaded stud height - put a screw driver handle or similar spacer under the carb to hold it up - should now be easier to put that remaining carb nut on the stud. Then screw all the nuts backdown following the difficult to access nut.
I had tried lifting the carb when I first posted, but it worked way better by lifting AND standing on my head.
The car is up on jack stands so that might make it a bit tougher I think. Thanks for the tip! On and tight now!
Posted by: Lucky9146 Oct 18 2017, 08:50 AM
Not as bad as you say, but still has rust in the path of the seal. The seal was riding on that bright shiny area of the shaft, that "better" one is still
Glad you got a good deal from Dr. Evil, I had a couple I would toss in for an offer to keep you moving forward. I know what it is like to get stalled on a project.
Thanks for weighing in. Yeah that second shaft sucked too! I meant relatively speaking
and thanks for offering to keep me moving had Dr. Evil not come to the rescue. Great bunch of people here!
Posted by: Lucky9146 Oct 19 2017, 08:58 PM
Waiting for my smokin deal axle stub shafts from Dr. Evil Thanks!
What’s Up With My Headliner? 
Not ever having a 914 before leads to not knowing what is correct and what isn’t so I actually had not paid a lot of attention to the headliner and saw nothing major wrong with it other than I noticed it looked like it had come unglued.
I did learn from Toolguy that it really should be perlon. Hmmm.... check the picture, there is perlon under there all right, just this crap was glued right over the top of it.
Ok need some new perlon so 914 Rubber order placed for this and the 914-6 replica hand throttle lever I was looking for.
Posted by: Lucky9146 Oct 24 2017, 05:19 PM
Don't know much about short shift kits so I posted a separate thread.
http://www.914world.com/bbs2/index.php?showtopic=318569
I believe the spacer looking thing under my shifter base plate is a Weltmeister Short Shift adapter/ spacer. Looking for anyone with experience with a Weltmeister? Trying to decide if I should leave it or remove it.
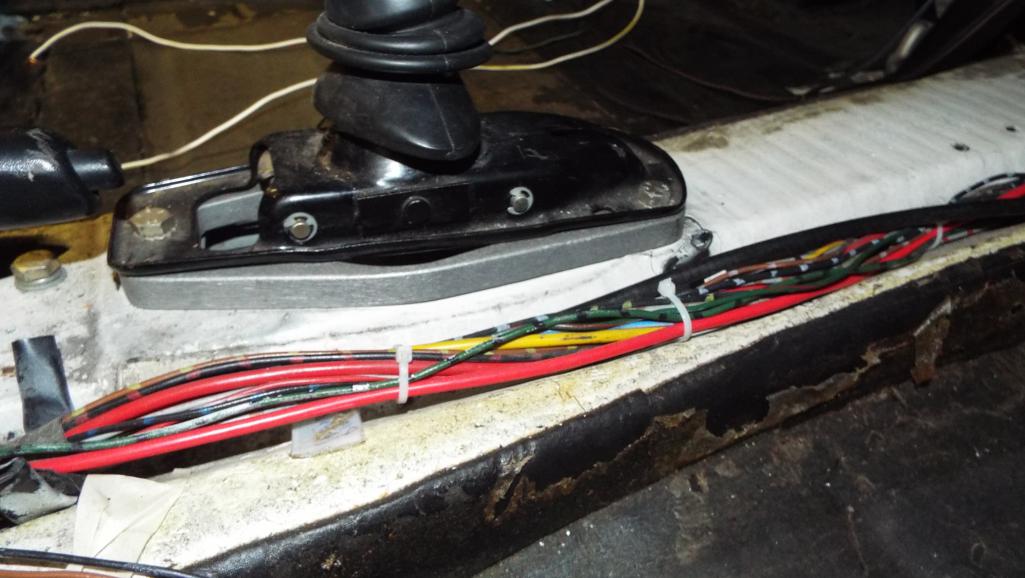
Posted by: eric9144 Oct 25 2017, 03:34 PM
I have one of those in my car, has been in for well over a decade, was way better than stock, I know there are better options out there now but at the time that was it.
Posted by: 914forme Oct 25 2017, 04:07 PM
I had on of those once, only once.
For me http://www.jwesteng.com/shop/transmission-911/12-rennshift-performance-shifter.html or https://www.wevo.com/Products/ShifterProducts/WevoShifterProducts_Shifter-901All.htm all the way. I have had 2 Rennshifters so much better of a
Also http://www.tangerineracing.com/transmission.htmwill make a huge difference.
And it will be as good as it can be, don't forget the firewall bushing.
Posted by: horizontally-opposed Oct 27 2017, 11:10 AM
Looking for anyone with experience with a Weltmeister? Trying to decide if I should leave it or remove it.
Have had one in my '73 since 1991, and it's been quite good (new linkage bushings twice in that time). Probably put 80,000-100,000 miles on it. I sometimes think about a Rennshifter or Tangerine linkage, but my car shifts just fine—and got even better when I converted to a six with a straight shift rod.
Posted by: Larmo63 Oct 27 2017, 11:18 AM
My car shifts "okay," but now that I'm used to it, I don't really think about it.
The stock shifter is a bit balky even with all new bushings, PMS rod, Tangerine firewall bushing, etc.
Posted by: Lucky9146 Oct 29 2017, 01:08 PM
Today is a really BIG DAY! No, I’m not ready to fire up that 6 yet, that will be another big day hopefully in the not too distant future.
It’s the 4th birthday of actually purchasing my project car. 
Seems like this “finishing” is taking forever, but I know there are others out there that are that long and longer, so maybe I shouldn’t be too concerned since it’s mostly just me. We refer to our cars usually as “she” and I got her a present for her birthday that I have been waiting to give her and she hasn’t seen it yet so it will be a big surprise. More on that present (and pictures) in another post later today.
Made what seems to be a lot of progress lately with getting the axle shafts reinstalled in the tranny and fluid back it, oh wait that is all redoing, well I guess it still counts as progress. Right? That was a project in itself but part of the two steps forward one step back routine as sometimes happens. Thanks to all again for weighing in on that thread.
Pretty much finished up underneath the engine now though. Clutch seems to be adjusted ok, shifter shifts, gas pedal will open the carbs fully, the center pull parking brake works great, heat shields on cables and hoses complete, cables are all tied up.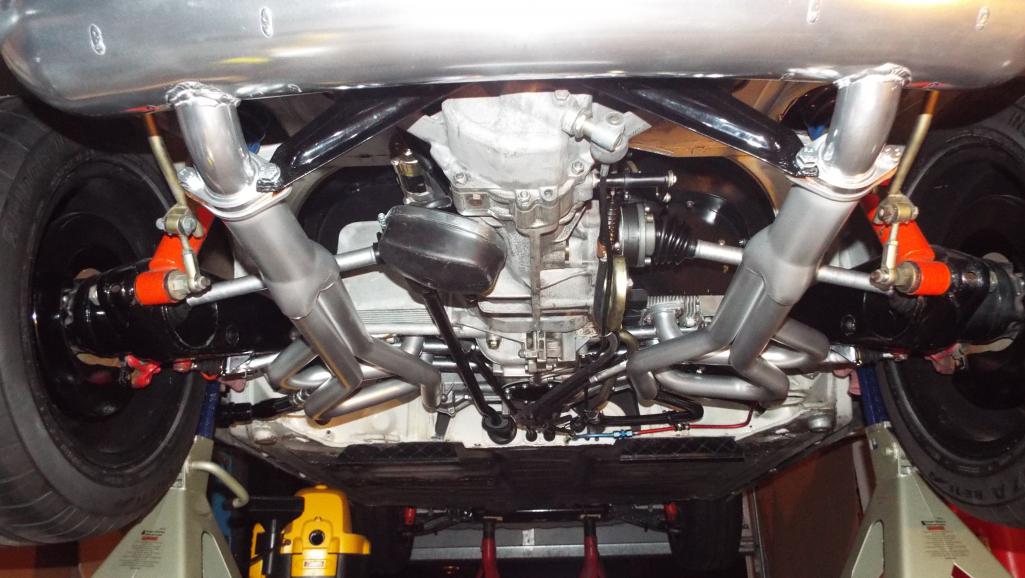
Up top in the engine compartment there are still just a few things to do but it’s almost there! Breather hose from oil tank, need to figure out and add an oil breather tank, fuel line flush (after the gas goes in), and just a couple more small details to finish in there.
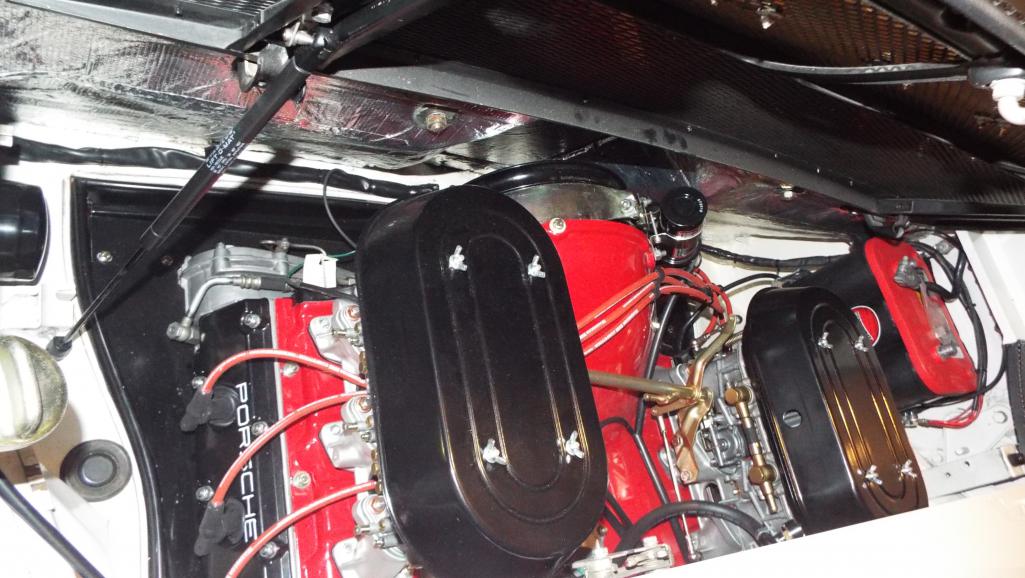
Posted by: Lucky9146 Oct 29 2017, 02:11 PM
Found this Noiko insulation material for the floors of the interior and have been slowly installing that in my spare time, sure cleans up the area!
Great stuff to work with too! Sticks like crazy! They recommend a special roller for installation which I didn’t buy. Still have a bit more of the install to do.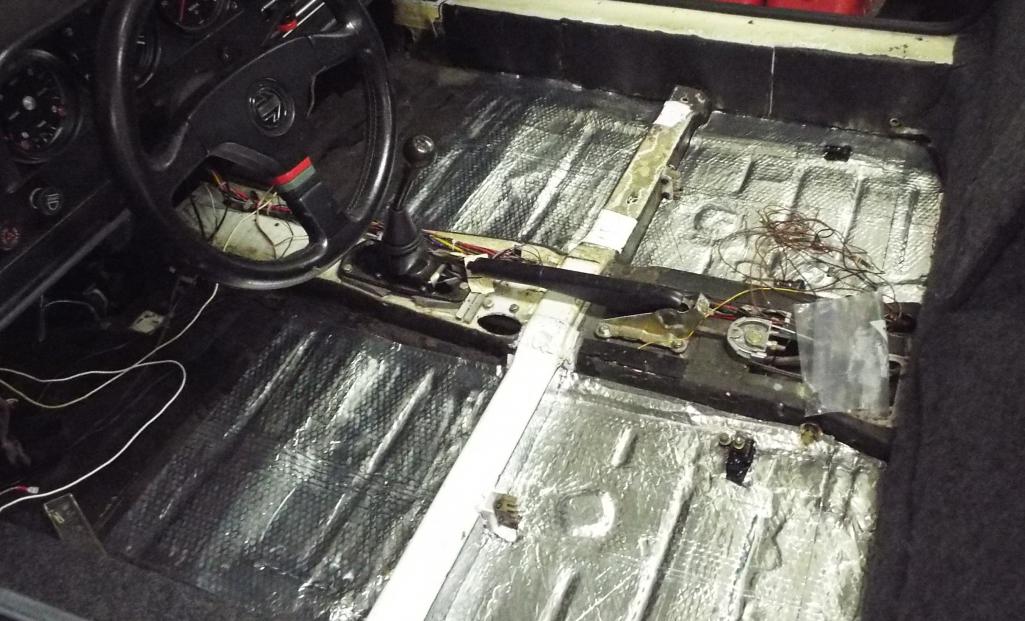
The idea is to press the quilting of the foil top until it is smooth. I found a tool which I think actually does a better job than a roller and really gets into all the nooks and crannies. You may already have one.
Mine is old and smooth and does not have any sharp edges what so ever so I could just press and slide it all over the insulation, plus the small end works great in the corners and valleys. 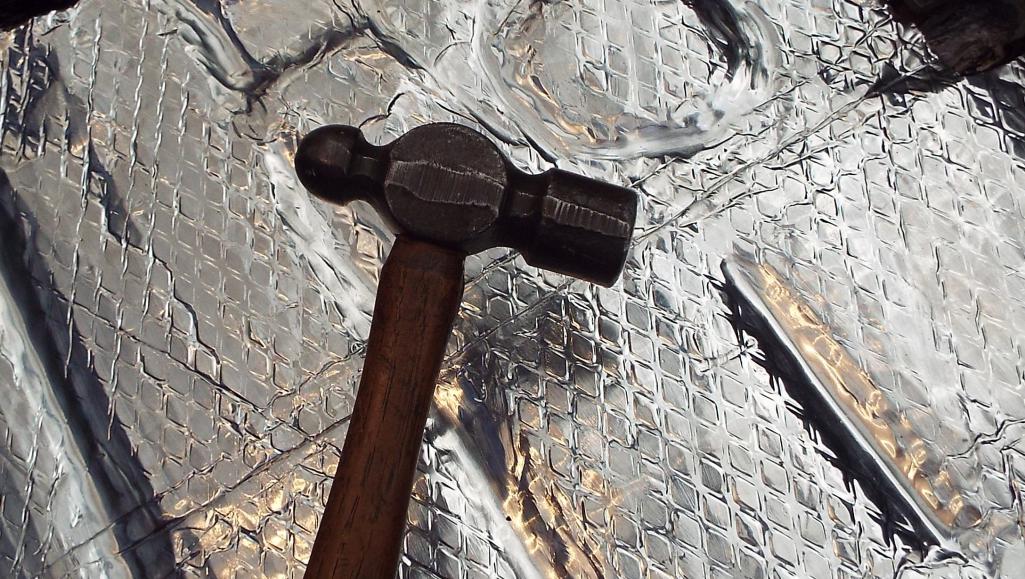
Getting into the corners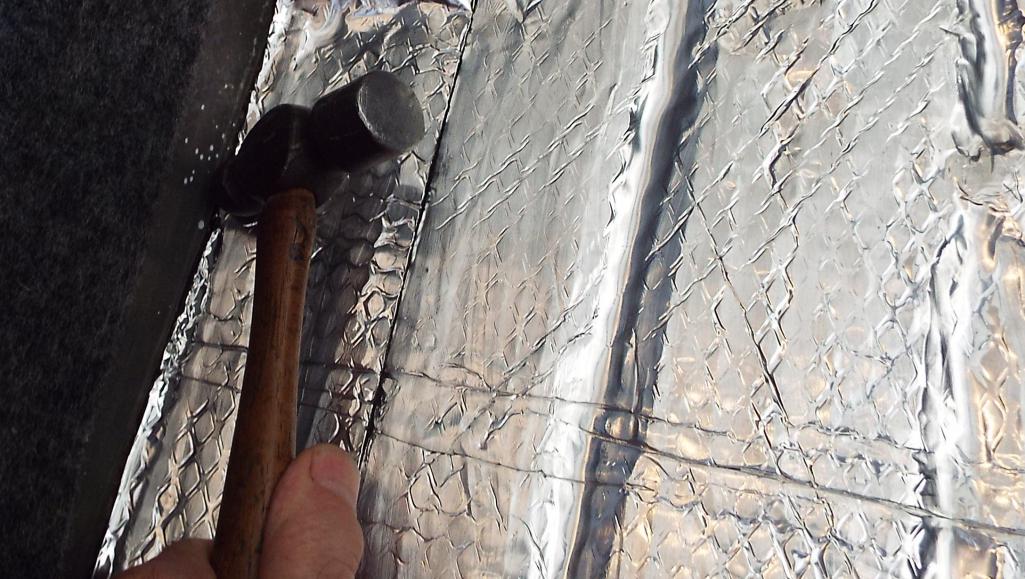
Flattening it out/ sticking it down just pressing down hard and sliding around.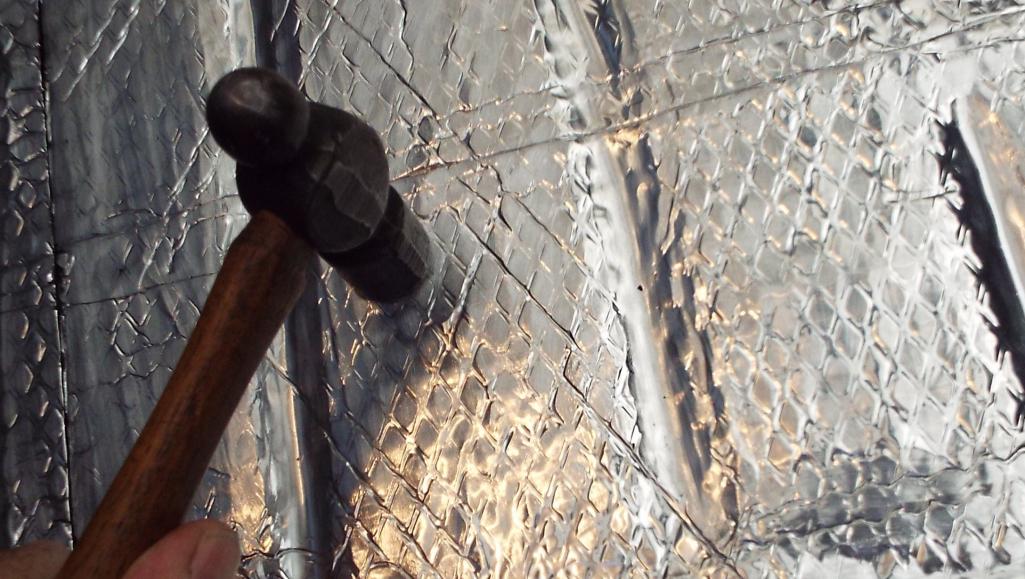
Plus here is a shot of the hand brake fully pulled showing there is no interference with the gear shift (someone raised this issue earlier).
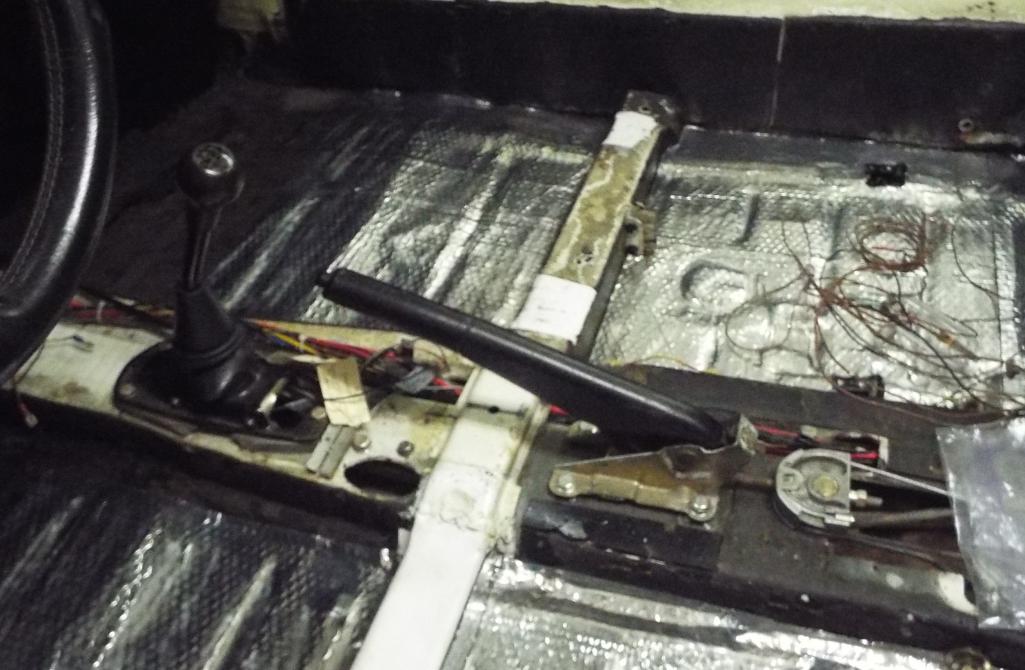
Posted by: moparrob Oct 29 2017, 04:34 PM
I'm glad those cables I made 5 years ago actually were the correct length.
Now I can't wait to see what kind of custom center console you come up with to house the handle (and possibly the shifter).
Posted by: Lucky9146 Oct 29 2017, 05:22 PM
I'm glad those cables I made 5 years ago actually were the correct length.
Now I can't wait to see what kind of custom center console you come up with to house the handle (and possibly the shifter).
Me too on both comments!
Posted by: Lucky9146 Oct 29 2017, 07:16 PM
Ok, so here is the Birthday Present for my car. 

It’s really a “Good News” (and sorta kinda but not really) “Bad News” scenario.
The good news is two fold, I do have a new German windshield installed!
AND I scored a deal on a brand new 914 Rubber repro dash!
The bad news is the order things occurred. That’s it.
I bought the windshield and installed it over 2 years ago, June 2015. 
I scored what I consider a smokin’ deal on the dash earlier this year in March 2017 that I got from a guy who gave up on his project here locally in my town.
My original dash is cracked but I had just planned to live with it and save the money for other things.
Sure would have been nice to have gotten the dash while the windshield was out as I have heard it is much easier.
But can’t complain too much, I mean it is a brand new, still in the box, dash from 914 Rubber!
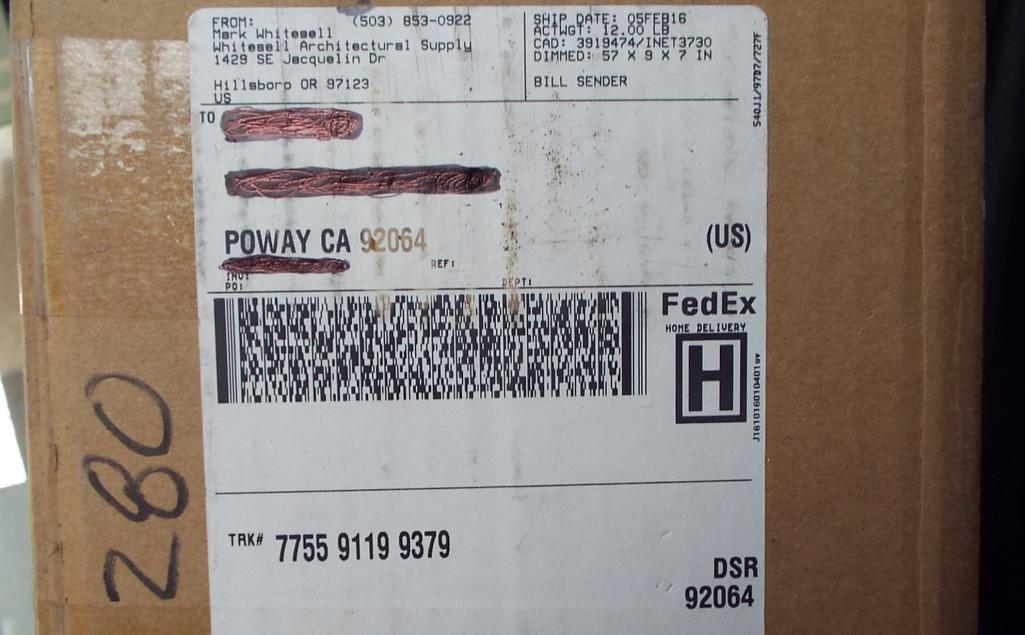
Posted by: whitetwinturbo Nov 1 2017, 08:03 PM
Posted by: mepstein Nov 1 2017, 08:09 PM
Unless you are removing the entire metal sub dash or installing new vinyl and seal in front of the window, having the windshield already installed won't make a difference.
The most important thing when you install the dash is patience. Almost every nut is a challenge so take it one at a time and don't have a time goal to finish. If you get frustrated, take a break.
Posted by: Lucky9146 Nov 1 2017, 09:37 PM
Hey whitewinturbo I am ramping up to install my hand throttle from 914 Rubber. In getting ready to do so I sought help through another thread.
http://www.914world.com/bbs2/index.php?showtopic=319072
What a ton of very helpful information I got! So helpful are the folks here on the site. Actually just your prod is pretty darn cool. Thanks!
Also I have been working on the interior sound deadening, vinyl and carpets. This car had a few interesting things in it one of which was the carpet. Not complete and huge heavy black double layer front floor mats.
I was at a swap meet a couple years ago and a guy had a bunch of random charcoal perlon original pieces of carpet I picked up for $20, some nice some not so nice. My goal was to have all all charcoal carpet. I had not spent much time really looking at the pieces I bought back then until this week and I discovered I have the majority of it. So I removed this nasty black piece that was in the front passenger bulk head and my charcoal swap meet piece below.
This is where I am right now on the interior. You'll notice I am using alum thresholds and had been keeping an eye out for those. Stumbled on some for free recently, not perfect but useable and I prefer the alum to the black plastic.
It's coming along slowly.
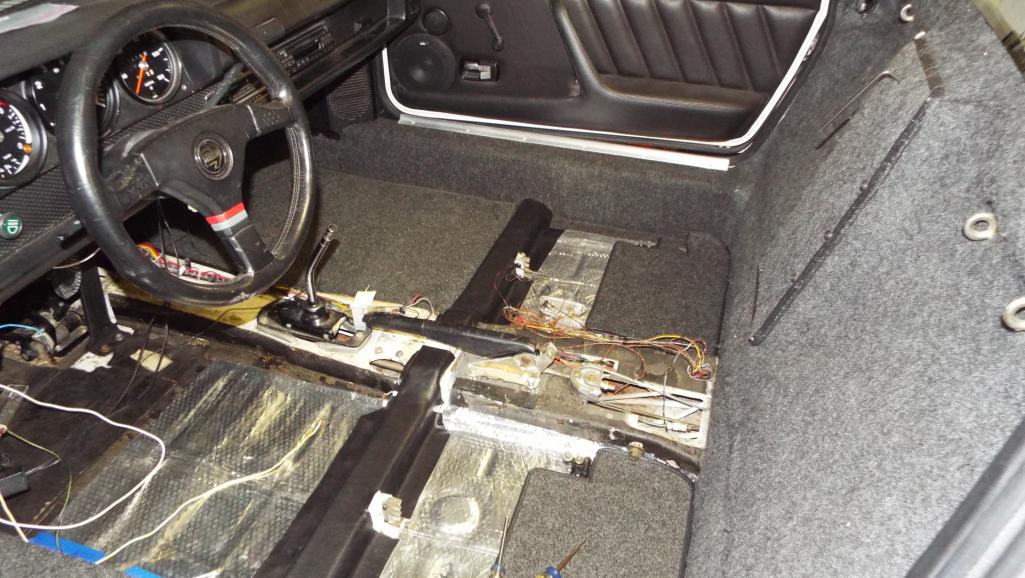
Posted by: Lucky9146 Nov 3 2017, 03:41 PM
My 6 Hand Throttle Journey.
I posted a separate thread to gain a wider audience and more input which proved to be very helpful and provided the detail I was looking for. Here is the thread which will have more information than I have here.
http://www.914world.com/bbs2/index.php?showtopic=319072
I want to document in my build thread some of the more pertinent information I found most helpful and my final result.
The lever assembly came from 914 Rubber and I thank them for replicating the factory lever assembly. 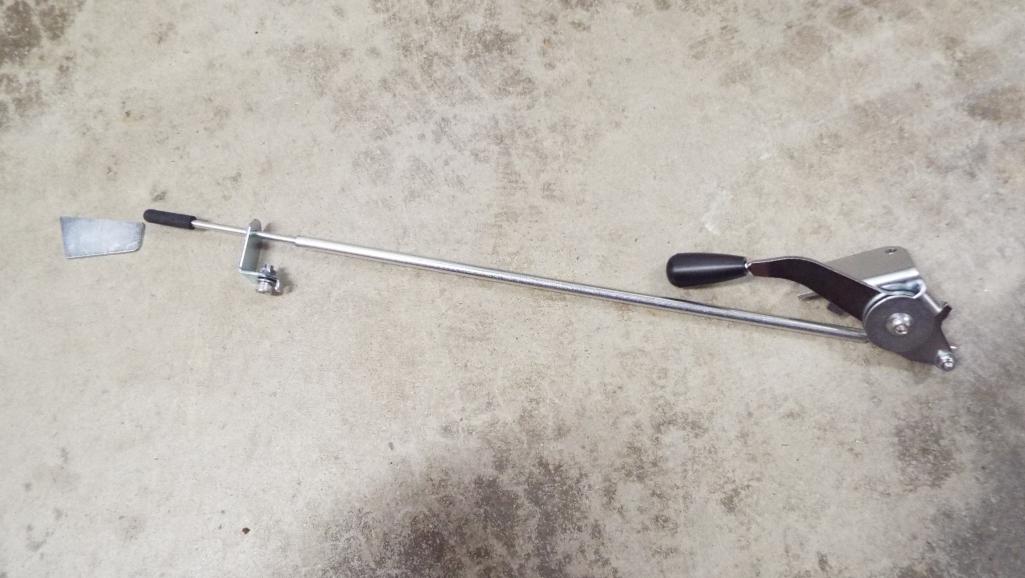
Pertinent to my install is that I wanted to install this hand throttle AND keep my short shift this of course mad it just a bit more complicated.
A few posts back I also sought help with a separate thread asking for short shift experience, where with a lot of very good input pro and con, I decided to try it (being as I have never actually driven this car) as one suggested, because it could always be taken out later.
The short shift adapter alum casting is about ½” thick needed two modifications. One was to notch the forward end where there was plenty of meat to make room for the hand throttle but I neglected to get a pic of that. The other modification was to drill and tap a hole for the aft hole of the hand throttle assembly base. Then I countersunk the aft hole of the throttle assembly base and put the only metric flat head screw I had into it. Interesting there is a hole in the shifter plate that does not match the hole for the hand throttle?
In process picture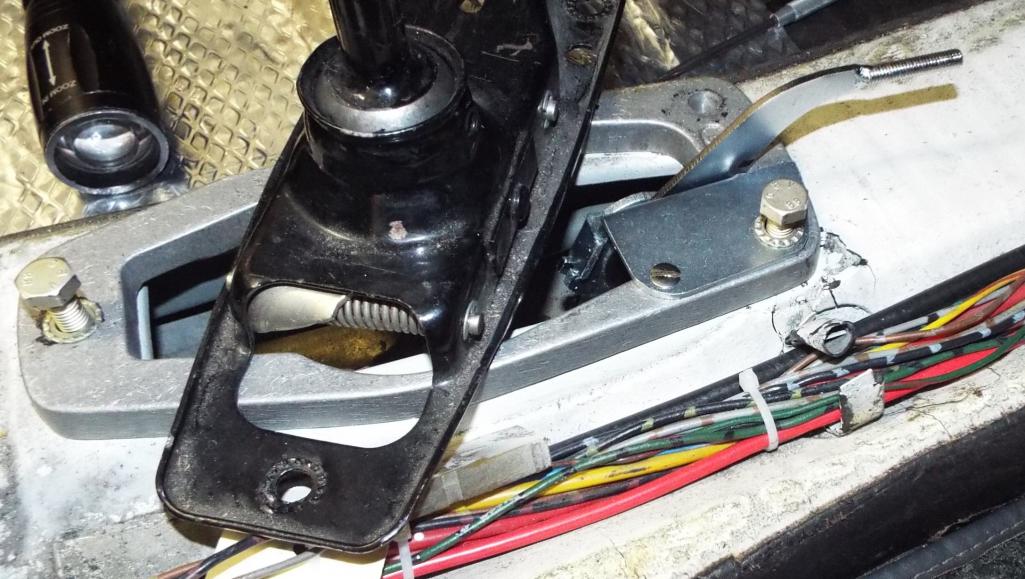
Here is all the stuff that really helped.
The colored sketch from 914 Rubber gives a good overview but not the detail for the “Shark Fin” install.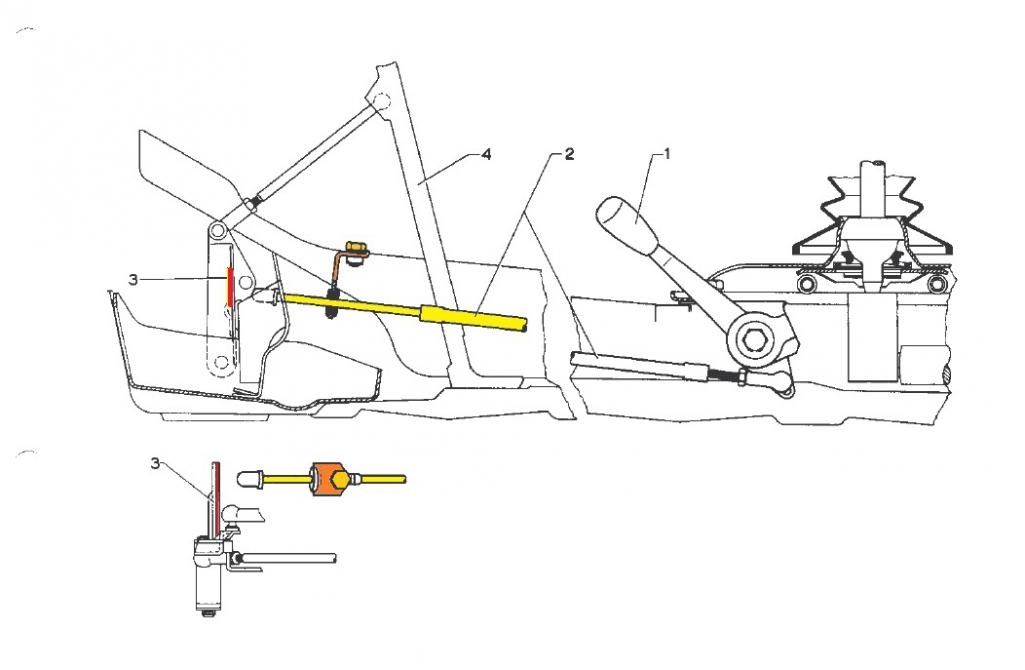
I found these pics from SixerJ to be most helpful to installing the “some assembly required” “Shark Fin” to the accelerator lever. 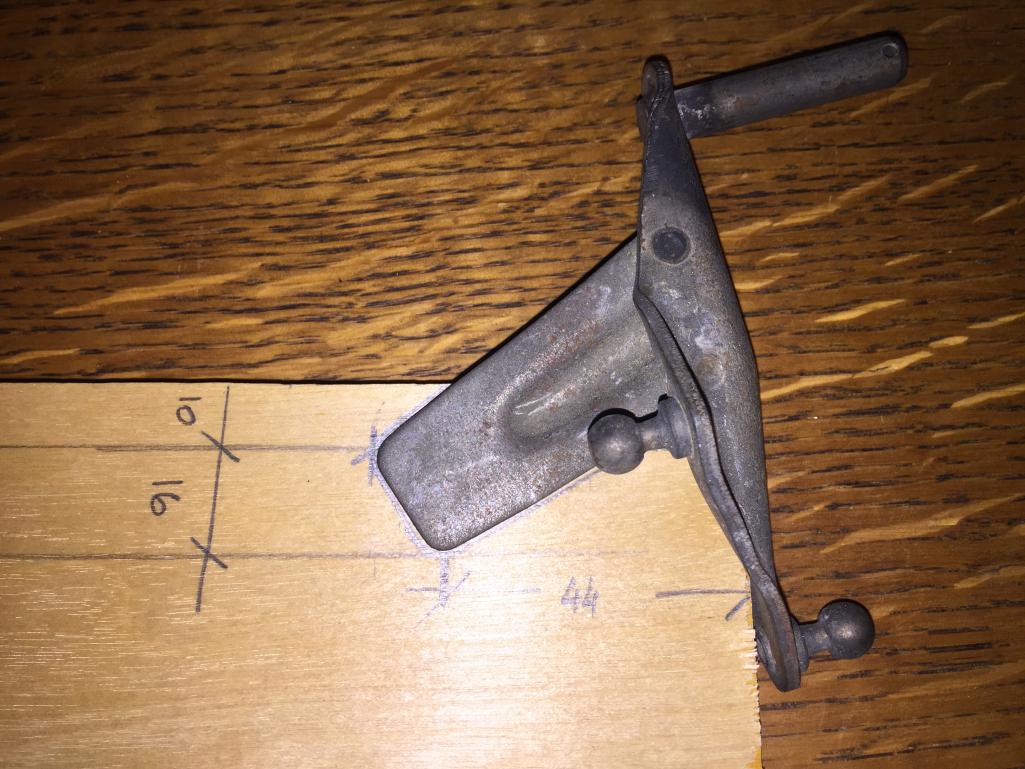
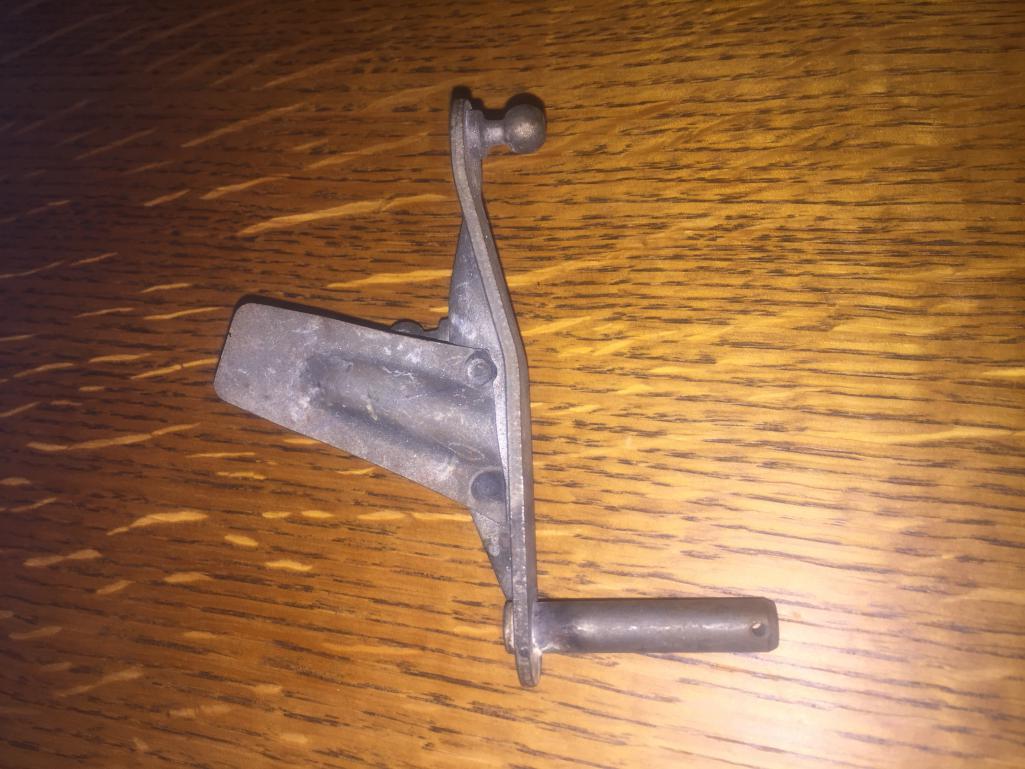
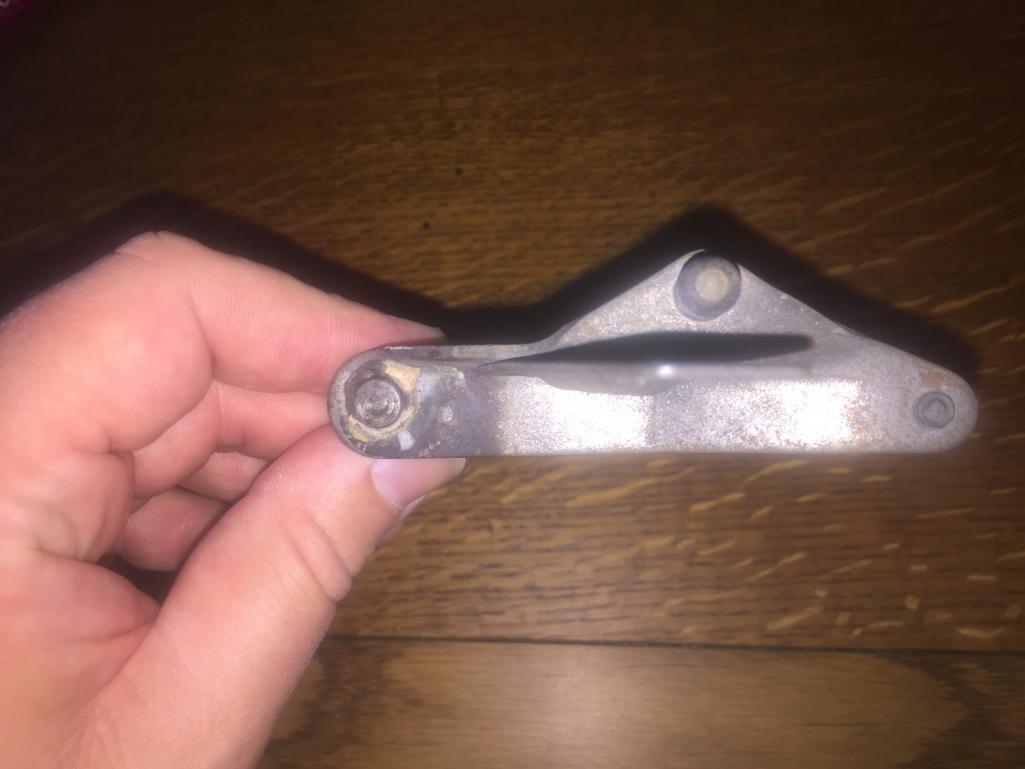
I also found this one from raynekat helpful of a 914 Rubber fin installed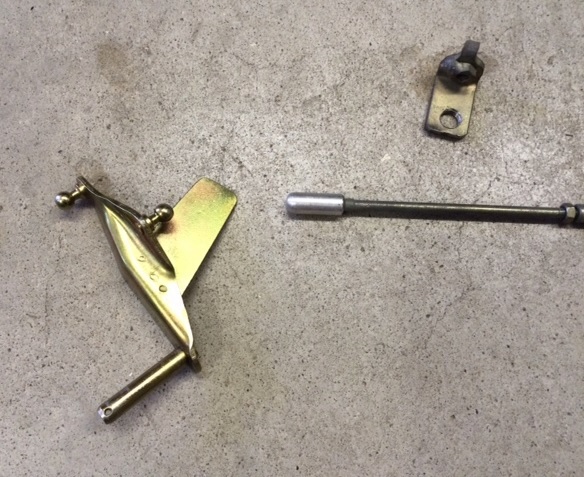
So here is what I ended up with.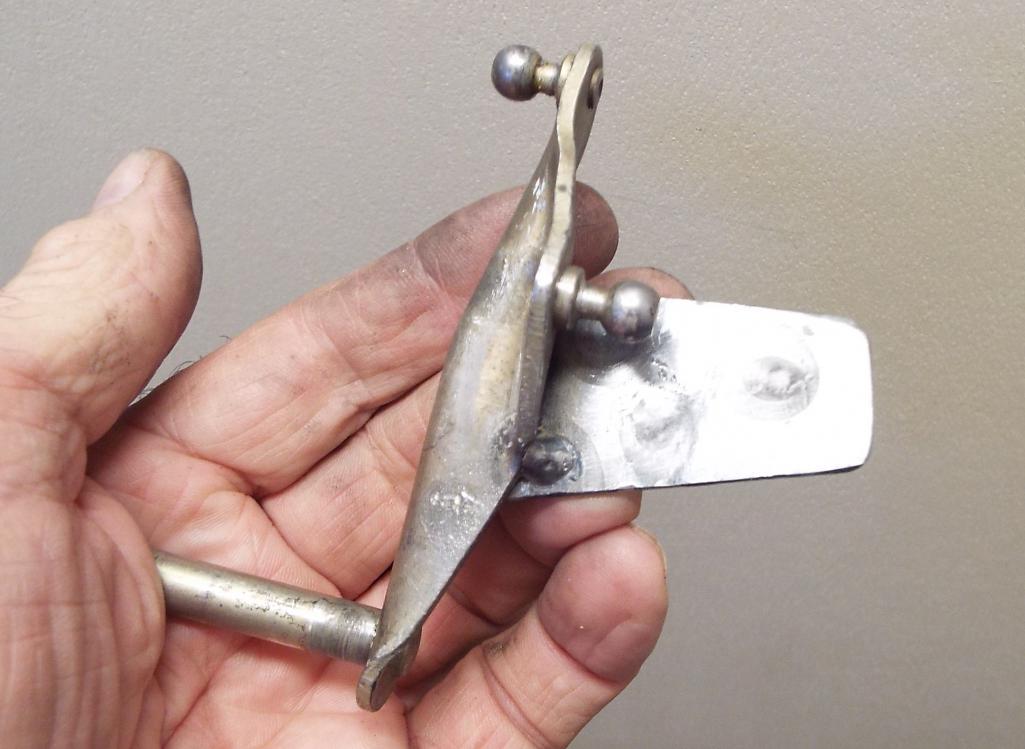
On the back I tacked an extra brace. Probably looks like over kill but I don’t think too many people will be looking and it will never bend. 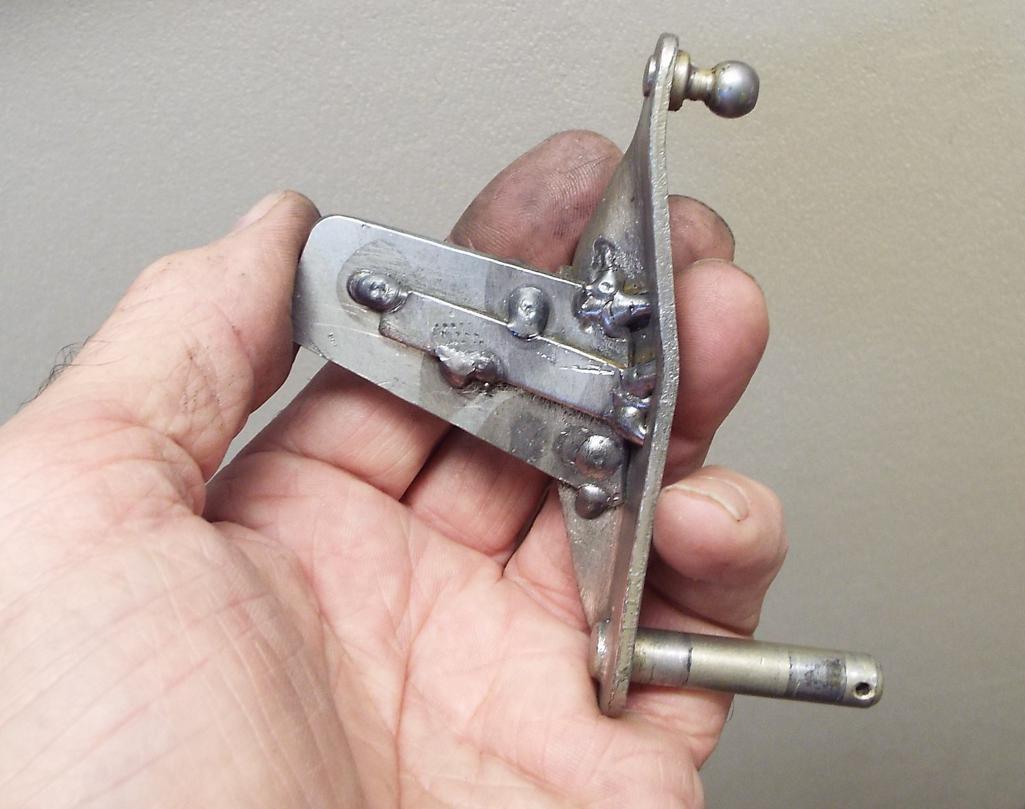
Re-installing the lever with fin was not too bad. But for those of us with transition lenses (trifocals) it is sometimes hard to actually see where you want to.
There you have it with the throttle rod smack in the middle of the “Shark Fin”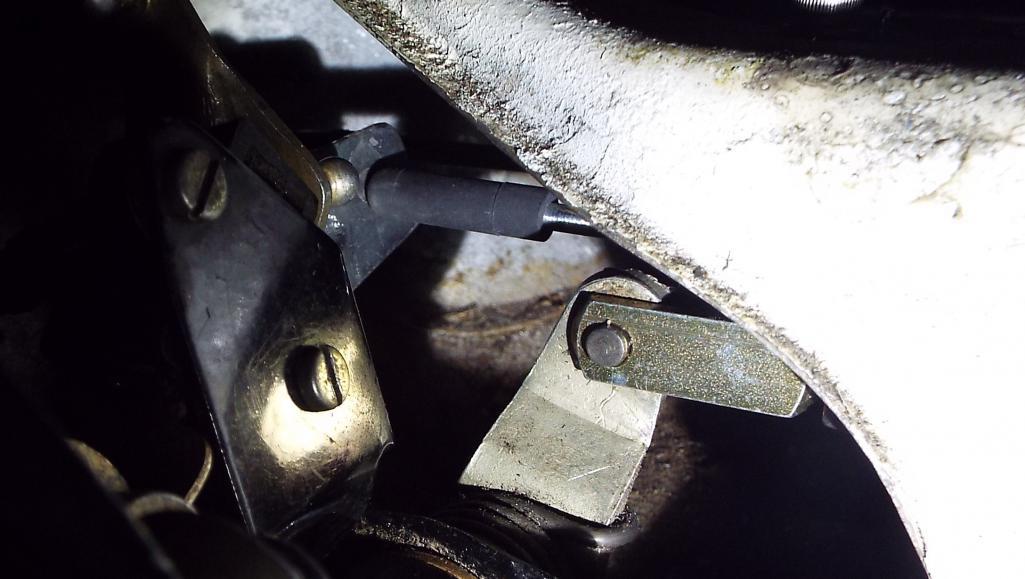
And the finished product that I am quite happy with.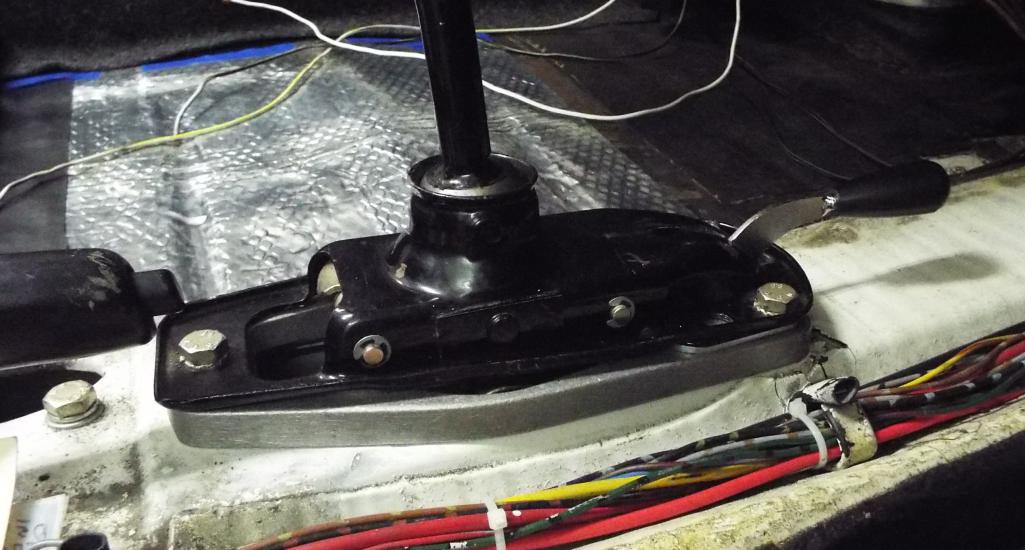
On to the next thing! Thanks everybody!
Posted by: 914wrenchin Nov 3 2017, 04:11 PM
VERY NICE
Posted by: raynekat Nov 3 2017, 04:33 PM
Was the front support (locating) bracket for the hand throttle hard to place in the correct place?
Looks like you got the rod end right in the middle of the shark fin.
Does the rod end slide up the shark fin when you engage the hand throttle?
Posted by: Lucky9146 Nov 3 2017, 06:16 PM
Was the front support (locating) bracket for the hand throttle hard to place in the correct place?
Looks like you got the rod end right in the middle of the shark fin.
Does the rod end slide up the shark fin when you engage the hand throttle?
Thanks for asking and I forgot to mention the hole/slot already exists on the tunnel for the front rod support bracket so you do not need to make one. Bonus! It was easy to place the front rod support bracket.
Install the the mechanism in the shifter area first without the front support bracket and rubber end cap. Then place the rod support bracket in from the top opening in the tunnel onto the end of the rod and bring it back and line it up with the slotted hole and secure it with the bolt provided. The support bracket has a locator on it to keep it from tuning and correctly positions the rod vertically as well aiming at the "shark Fin". Just make sure you have the clutch linkage attached because it will block access from the passenger side.
The rod does NOT slide up the shark fin it just pushes the pedal forward as intended. Note there is a rubber tip on the end of the rod.
The cool thing for me is having the short shift plate on there did not really affect the outcome.
Best of luck!
Posted by: defianty Nov 5 2017, 04:05 AM
Thanks for the info regarding the hand throttle. I plan to add one to my car and wasn't aware of the 'shark fin'. Guess I'll just have to rebuild my pedal cluster again.
Posted by: Lucky9146 Nov 10 2017, 06:50 PM
Not much progress lately. Or really it amounts to “little things” are getting done.
I finished the sound deadener on the floor and the majority of the carpet.
Reworked one seat track to install my 914 Rubber seat adjuster handle.
Posted a thread looking for pictures and ideas on tank breathers from 6 owners and have been getting some good input.
Love the utter simplicity of some of them.
Here is the thread http://www.914world.com/bbs2/index.php?showtopic=319486
Started sorting through my seat belt situation, with the help of Larmo63, and learned I am a couple of pieces short for full sets of standard 914 seat belts. I believe Dlewis donated them a couple years back and it’s a good start!
Time to post a WTB.
Hooked the battery up to the chassis yesterday (it’s been about 2 years) and it was motivating to see some lights and stuff actually work. Of course this generated the proverbial electrical “to do” list.
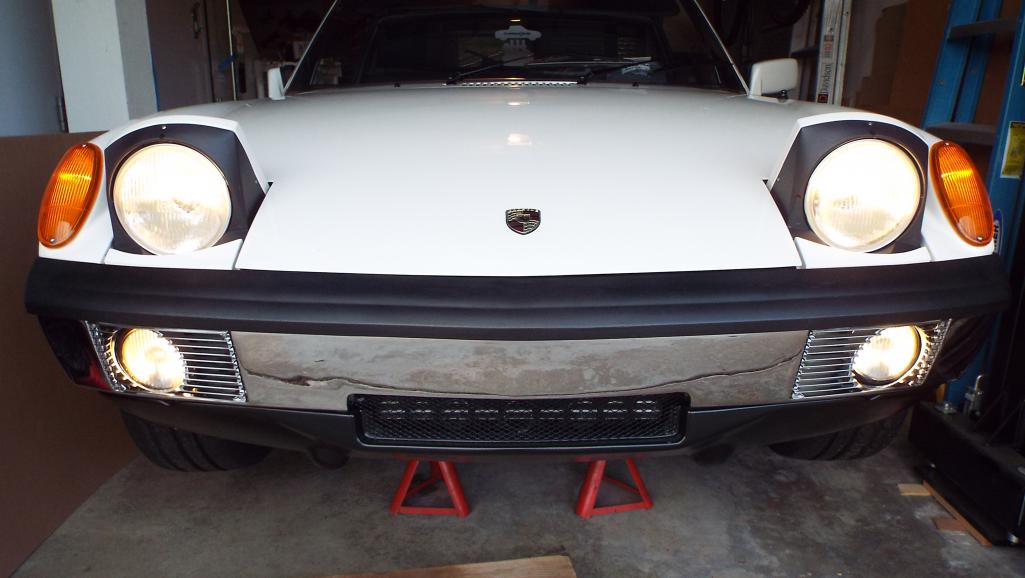
Posted by: Larmo63 Nov 10 2017, 08:03 PM
Your front lower snout looks "business."
I like that look.
Posted by: Cairo94507 Nov 11 2017, 06:36 AM
Yup, looks very nice.
Posted by: flmont Nov 11 2017, 11:49 AM
where did you find the front lower valence,..was it pre cut like that,.?? TIA Frank
Posted by: 914forme Nov 11 2017, 12:07 PM
It is a standard 914-6 GT front valance all the usual suspects carry them.
http://www.gt-racing.com/914-6-gt-front-valance-part-89/
Posted by: Lucky9146 Nov 11 2017, 01:55 PM
where did you find the front lower valence,..was it pre cut like that,.?? TIA Frank
The valance actually came with the project car I bought so I really don't know who made it.
The trick was mating up the fiberglass lower valance to my customized front bumper because the valance was designed to mate up with the corresponding fiberglass bumper that it came with (since sold).
Know a metal magician who performed the work on the bumper, and it wasn't the greatest to start with. He actually matched the steel bumper to the valance perfectly.
I see 914forme has a suggestion and I am sure there are others who make them.
Best of luck to you!
Posted by: porschetub Nov 11 2017, 02:07 PM
Was the front support (locating) bracket for the hand throttle hard to place in the correct place?
Looks like you got the rod end right in the middle of the shark fin.
Does the rod end slide up the shark fin when you engage the hand throttle?
Its not too hard ,I think I only drilled one hole and bolted it on ,you can then move it up and down a little to suit,my guide bracket would appear to be a little shorter than Jims one as I had to turn the "fin " a bit further upwards to centre the rod.
Certainly easier if you have a unit ready to go but I enjoyed making mine.
that front view is the business,looks really sharp,love the comment about the electrics Jim made SO true in my situation also,I don't run my car that often and there's always something ,I feel for guys with crappy/butchered looms lucky for me mines unmolested.Posted by: Lucky9146 Nov 11 2017, 04:29 PM
that front view is the business,looks really sharp,love the comment about the electrics Jim made SO true in my situation also,I don't run my car that often and there's always something ,I feel for guys with crappy/butchered looms lucky for me mines unmolested.Thanks porschetub and also to Larmo63 and Cairo94507 for comments on "business" snout. Spending most of my time at the other end for months and recently moving to the interior I haven't really had much of a chance to see it with the front butted right up to the garage door. I love the look.
As for the wiring mine has been a bit more than molested I'm afraid. porscehtub you are lucky!
Here is one I am fixing today. Picture does not do it justice though as you cannot see to the right of that primo splice there were only 2 strands left hidden under crappy old electrical tape.
 Going to be fun to fix up by the hood release handle!
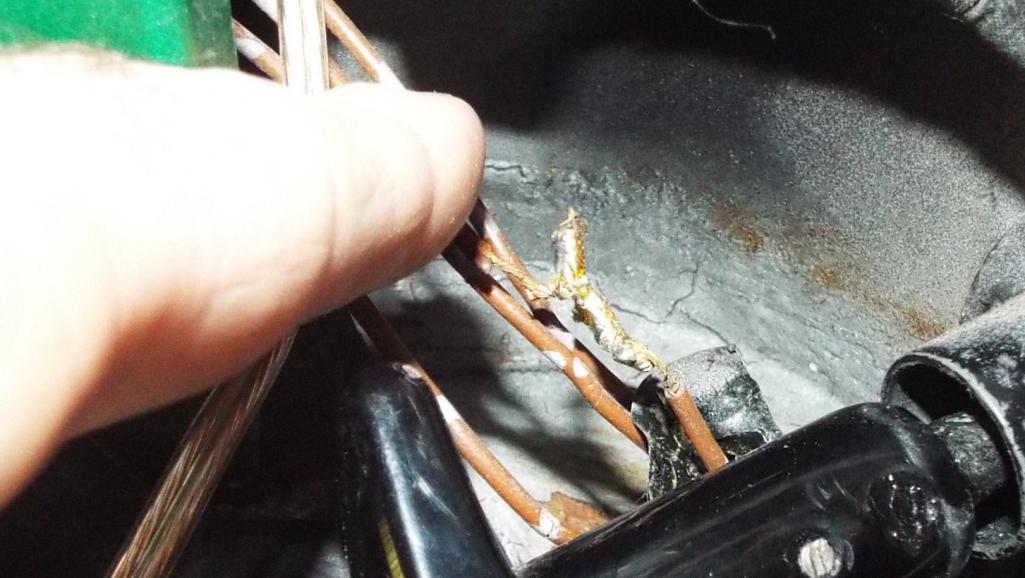
Posted by: porschetub Nov 11 2017, 05:35 PM
Oh dear,I'am into solder and heatshrink not much more permanent....if you can get in there ? otherwise use duraseal heatshink connectors,they are a total sealed connection and there is no oxidization of the wire.
Good luck...when are you going to fire the beast ? .
Posted by: moparrob Nov 11 2017, 06:01 PM
Thanks porschetub and also to Larmo63 and Cairo94507 for comments on "business" snout. Spending most of my time at the other end for months and recently moving to the interior I haven't really had much of a chance to see it with the front butted right up to the garage door. I love the look.
As for the wiring mine has been a bit more than molested I'm afraid. porscehtub you are lucky!
Here is one I am fixing today. Picture does not do it justice though as you cannot see to the right of that primo splice there were only 2 strands left hidden under crappy old electrical tape.
Going to be fun to fix up by the hood release handle! That splice job was definitely not my work. Need to have a chat with Roland...

Posted by: Lucky9146 Nov 11 2017, 06:39 PM
Thanks porschetub and also to Larmo63 and Cairo94507 for comments on "business" snout. Spending most of my time at the other end for months and recently moving to the interior I haven't really had much of a chance to see it with the front butted right up to the garage door. I love the look.
As for the wiring mine has been a bit more than molested I'm afraid. porscehtub you are lucky!
Here is one I am fixing today. Picture does not do it justice though as you cannot see to the right of that primo splice there were only 2 strands left hidden under crappy old electrical tape.
Going to be fun to fix up by the hood release handle! That splice job was definitely not my work. Need to have a chat with Roland...
No it was not your work, too old, I should have specified PPO = Previous Previous Owner
That electrical tape screamed the 90's! Good luck on that Roland thing he is MIA for a while. Should you raise him remind him he said he would get me some pictures from back in the day
Posted by: Lucky9146 Nov 12 2017, 03:20 PM
Oh dear,I'am into solder and heatshrink not much more permanent....if you can get in there ? otherwise use duraseal heatshink connectors,they are a total sealed connection and there is no oxidization of the wire.
Good luck...when are you going to fire the beast ?
.I only do solder and heat shrink too, and did get it done, but your tip on duraseal may come in handy one day, so duly noted.
When am I going to fire the beast? good question! Thanks for asking.
I get similar questions like “when you gunna fire it up?” or “when do think you’ll be done?” My usual answer is “when it’s done” And I’m not saying that to be a wise ass. Hell really I don’t know.
It literally all depends on what I run into next! There have been far too many unplanned time consuming events that pop up to commit to anything. The list is getting shorter and there are no more parts in the dining room. There is a pretty good list of things on the interior yet to do besides the vinyl, carpet, and trim I’ve been working on. The hand throttle is now complete and that turned into more of a project than expected but I learned a lot. Got that new 914 Rubber dash I mentioned at the 4th
to install which is really cool but I know it could be a bitch.There is the center pull hand brake aesthetics where I need to fashion something to make it look “right” in there with a console or something and I’ve been looking at that.
And then there’s whole a bunch of other interior odds and ends in there to finish and sort out. Seat belts for instance, piecing that together now.I would like to completely strip off whatever undercoating/ dirt/ crud from the bottom of the car, but not the paint, and really just clean it up. Defianty was doing it with his special tool
on his and so it inspired me. I mean the car is up in the air now. Right? Might as well do it right.And I am not going to even mention the wiring issues I have.

Couple months? Maybe……………
Posted by: defianty Nov 12 2017, 03:38 PM
You mocking my tool Jim?
Good luck with the scraping. It's an awful job and one I'm so glad I've now completed. I must get around to updating my thread but it's just been boring rust welding repairs of late. All was going well until my finger had an argument with the angle grinder! No prizes for guessing who won. Fortunately it could have been worse and I'll be back out working on the car in just a few days with all ten digits intact.
Keep up the good work Jim.
Posted by: 914forme Nov 12 2017, 03:43 PM
Oh dear,I'am into solder and heatshrink not much more permanent....if you can get in there ? otherwise use duraseal heatshink connectors,they are a total sealed connection and there is no oxidization of the wire.
Good luck...when are you going to fire the beast ?
.https://www.youtube.com/watch?v=O-ymw7d_nYoDo use adhesive heat shrink after that,'
Posted by: Lucky9146 Nov 12 2017, 10:14 PM
Posted a thread looking for wider audience on the specific topic of oil tank breathers on 6 cylinder cars and found some very inventive ideas, so I thought I would tie it in here.
http://www.914world.com/bbs2/index.php?showtopic=319486
Have a look if you have not seen it as you will not be disappointed! No two a like. I haven't decided which way to go just yet but another "thing" I would like to have behind me. I appreciate the input and I will post my contraption.
Posted by: Larmo63 Nov 12 2017, 10:25 PM
I'm going to use one of these on the firewall and just run the breather hose right down into it.
Posted by: Lucky9146 Nov 12 2017, 10:38 PM
I'm going to use one of these on the firewall and just run the breather hose right down into it.
Cool but I kinda liked the other one you posted on the thread, this is a real improvement tho
Posted by: Lucky9146 Nov 14 2017, 10:10 AM
In addition to my partial list of things yet to be done in my last big post, my Targa top needs the headliner changed and maybe, an exterior repaint. Made a little progress on the headliner replacement the other day. Perlon from 914 Rubber. Another plug
Here is a prime example of chain of events leading to extra time and therefore not really knowing when the car will be done. That forward cover piece between the latches has 4 screws under those little plastic caps. Three screws came out perfectly but the 4th well, not so much. I won't say how long it took.
Then I discovered a lot of glue where it wasn’t supposed to be, so I have got to get that off of course! Then I realized the latches looked pretty shabby and probably should be stripped and repainted, so now I’m disassembling latches and on we go!
Could this have all waited? I suppose, but it’s hard for me to do things half assed I guess.

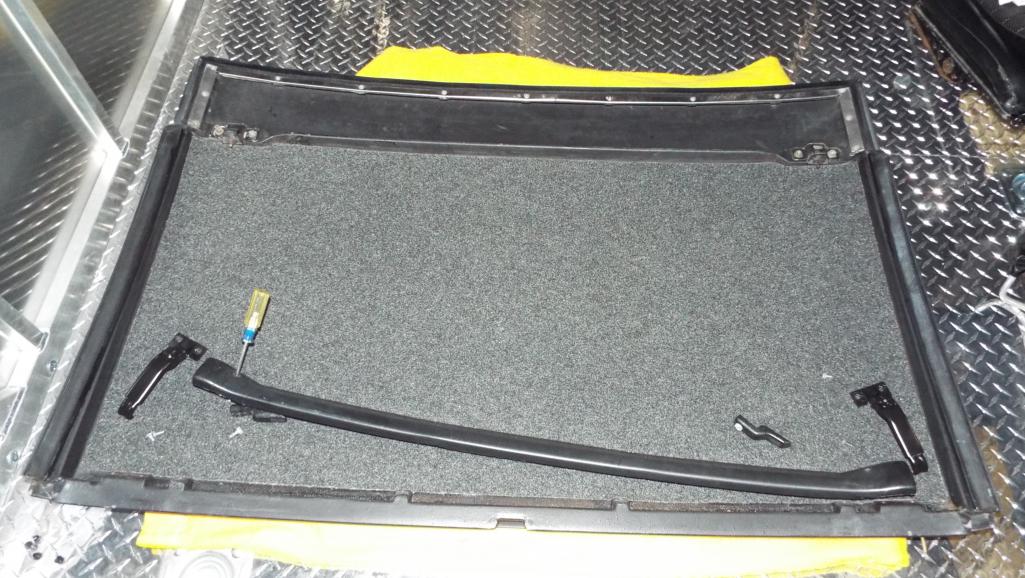
I started on the dash replacement! 
Posted by: mepstein Nov 14 2017, 11:03 AM
Looks great!
It’s all those little details that seperate a great build from a nice one.
Just this morning I pulled out these seats to clean them off. Then things got away from me.
Attached image(s)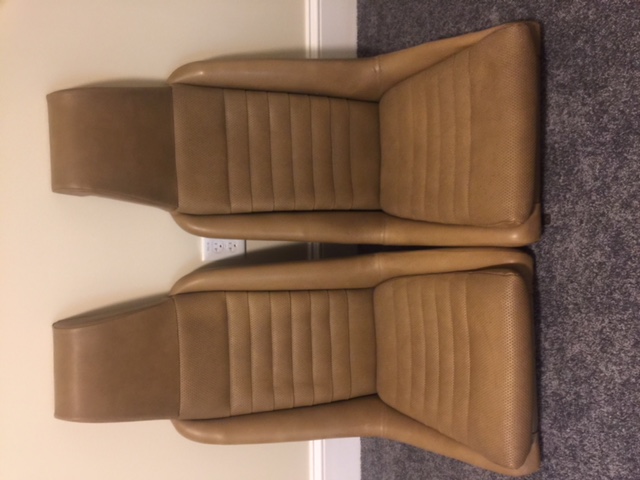
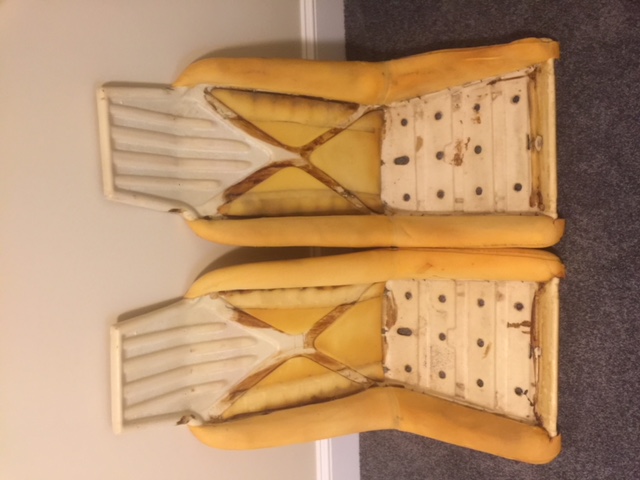
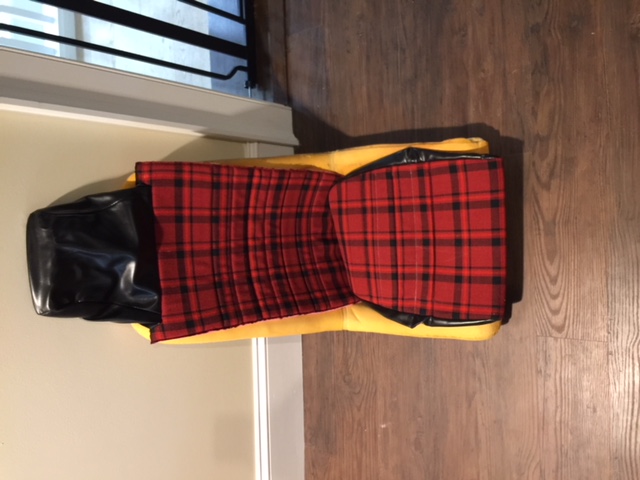
Posted by: Lucky9146 Nov 16 2017, 10:12 PM
Looks great!
It’s all those little details that seperate a great build from a nice one.
Just this morning I pulled out these seats to clean them off. Then things got away from me.
Thanks!
It Happens! Things are always getting away from me. I know I'm not alone and sure like when folks like you weigh in. Good luck on them seats!
Posted by: Lucky9146 Nov 16 2017, 10:29 PM
Finished the Dash Pad Install
I would have to say it was not as bad as I expected but perhaps more involved than I thought it would be. There is a You Tube video out there where Brad Mayeur from 914 Ltd. installs a 914 Rubber dash. Watch it. One of the key things out of the video is you really don’t have to remove your gages by unplugging all the wires.
There IS another couple of good tips in there and that stubby wrench he uses. Get one. I happened to have a stubby set so that was a good thing. But you do not have to use the stubby as much as he does, I found you can access 6 of the 9 nuts with this set up or a combination of it, all ¼ inch drive with 13mm socket. This really is your best friend!
Before, obviously a big crack but there were several smaller ones I had not noticed as much until removed.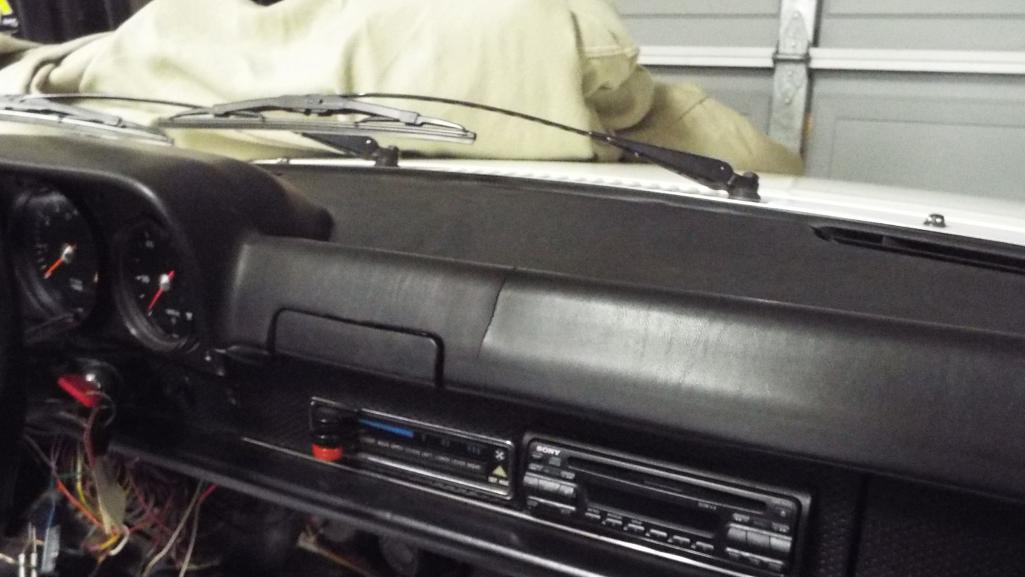
Go ahead and remove the visors it just makes removing the interior windshield side trim easier. The hardest nut I found to remove was the left one over the gage panel, just real tight space.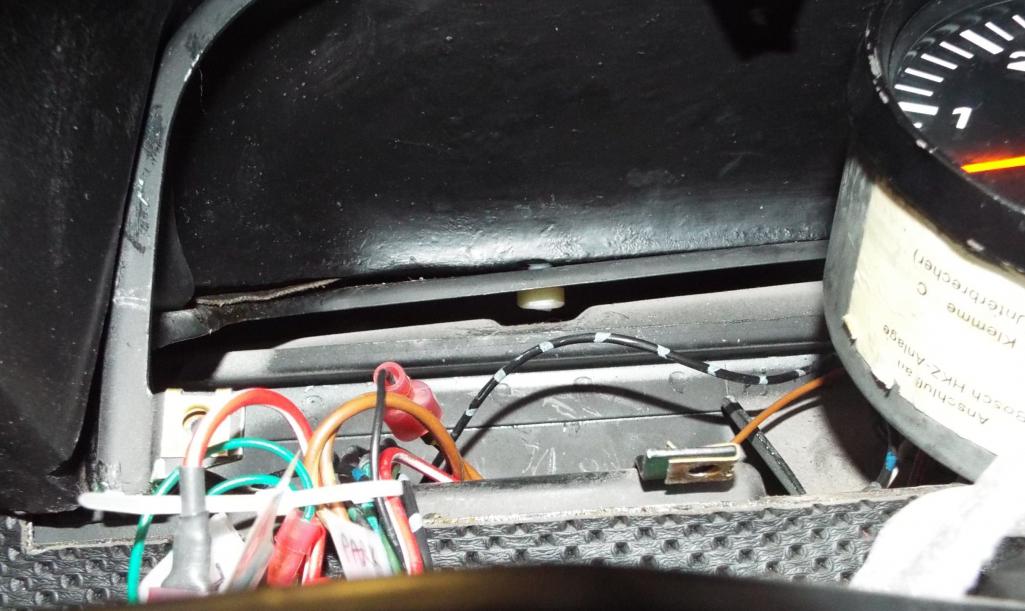
Disassembly. You HAVE TO remove the radio. Further complicating my remeoval was the PPO had installed a amp under the radio.
You DO NOT have to remove the glove box. I didn’t realize that until after I had removed the glove box door. 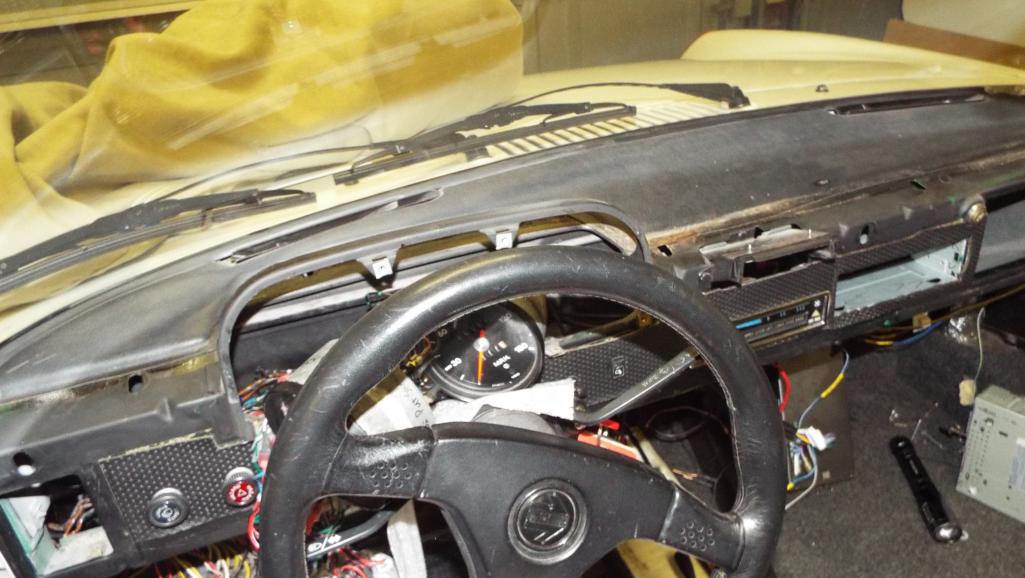
Posted by: Lucky9146 Nov 16 2017, 10:39 PM
My disassembly looks worse because I still have my fuse panel dropped and don’t ask I don’t want to talk about. 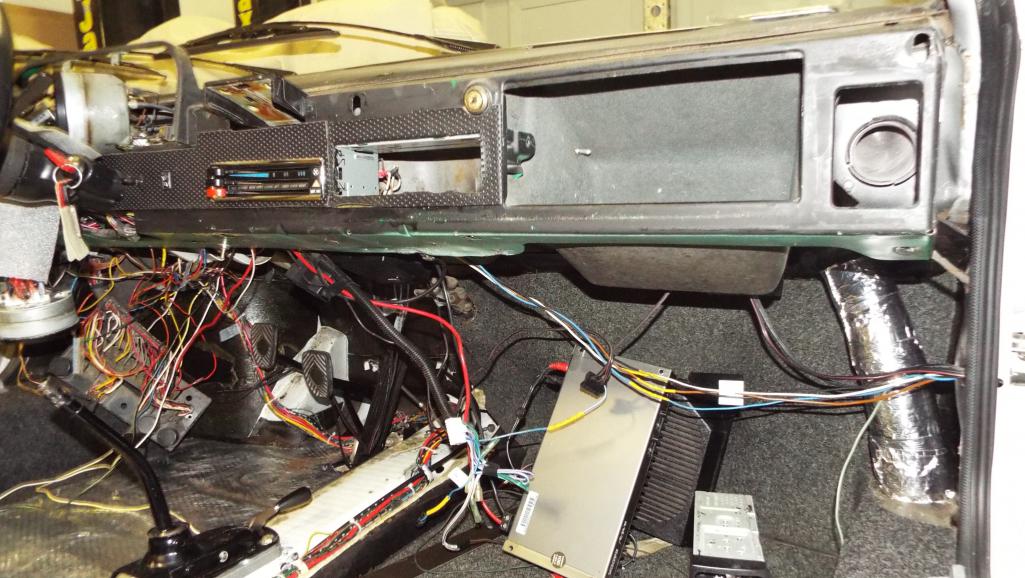
Picture has blue tape roughly marking the location of the 9 nuts. Radio out Yes, glove box out No.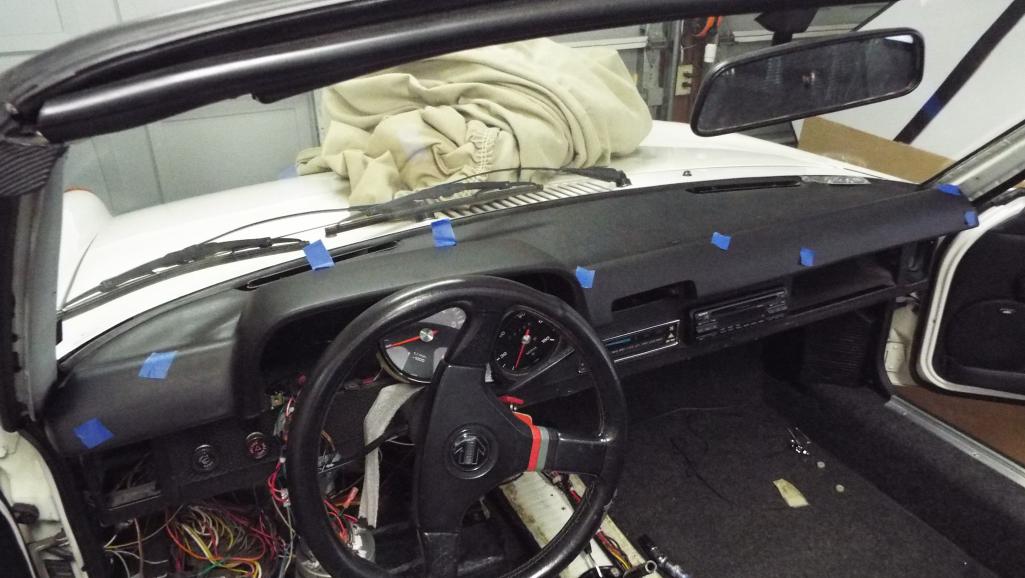
Done. Love it! Glad that one is now behind me! On to the next. Started on my frunk board thanks to Defianty inspiration.
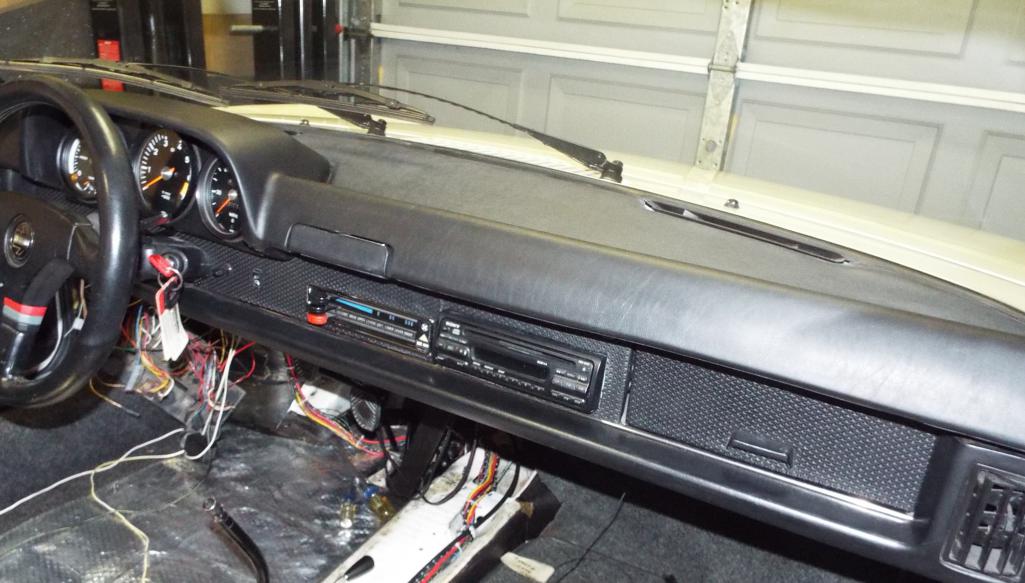
Posted by: defianty Nov 17 2017, 02:35 AM
Perfect!
Posted by: whitetwinturbo Nov 17 2017, 11:08 AM
Posted by: ValcoOscar Nov 17 2017, 11:12 AM
Great job Jim....getting close!!!!
Posted by: Cairo94507 Nov 17 2017, 11:41 AM
Dash looks very nice. Good work.
Posted by: Lucky9146 Nov 19 2017, 12:42 PM
Dash looks very nice. Good work.
Well thank you!
Thanks for weighing in!Your post caused me to spend most of last night reading both your part one AND part 2 in their entirety! Yes, I have read parts of them before, but only parts, and I decided I wanted to take the time on your thread and start from the beginning and get the entire picture. Wow you my friend have been through a lot! And I was sorry to see some of your set backs, hell I'm sorry to see all your set backs
and it makes mine seem rather simple in comparison. When it came time in part 2 for the entire front end to come back off I thought I had dozed off and somehow clicked back on part 1. Holy Sure looks like it is now in the right hands and making good progress with NOS parts. I see that you have had tremendous support through the whole ordeal and that is fantastic. I will now follow closely your thread and wish you all the best in getting it completed!
Posted by: Lucky9146 Nov 19 2017, 12:46 PM
Great job Jim....getting close!!!!
Thanks Oscar!
Yes it is. Like I said a couple posts back, you know you are making progress when there are no more parts in the dining room!
Posted by: Lucky9146 Nov 19 2017, 12:59 PM
Appreciate the support! Thanks
Posted by: Lucky9146 Nov 19 2017, 01:01 PM
Perfect!
Happy with the results! (new dash pad) Kind of a pain but worth it!
I follow your thread and you are doing great fab work keep it up!
Anybody that hasn't seen it is missing out.
Posted by: Lucky9146 Nov 19 2017, 09:08 PM
Frunk!
Well Defianty showed off his new frunk board (below) so that got me going on mine. Thanks! Something I had thought about several times but just hadn't got to yet.
So now is a good time!
Here is Defianty’s inspiration board in his Frunk. 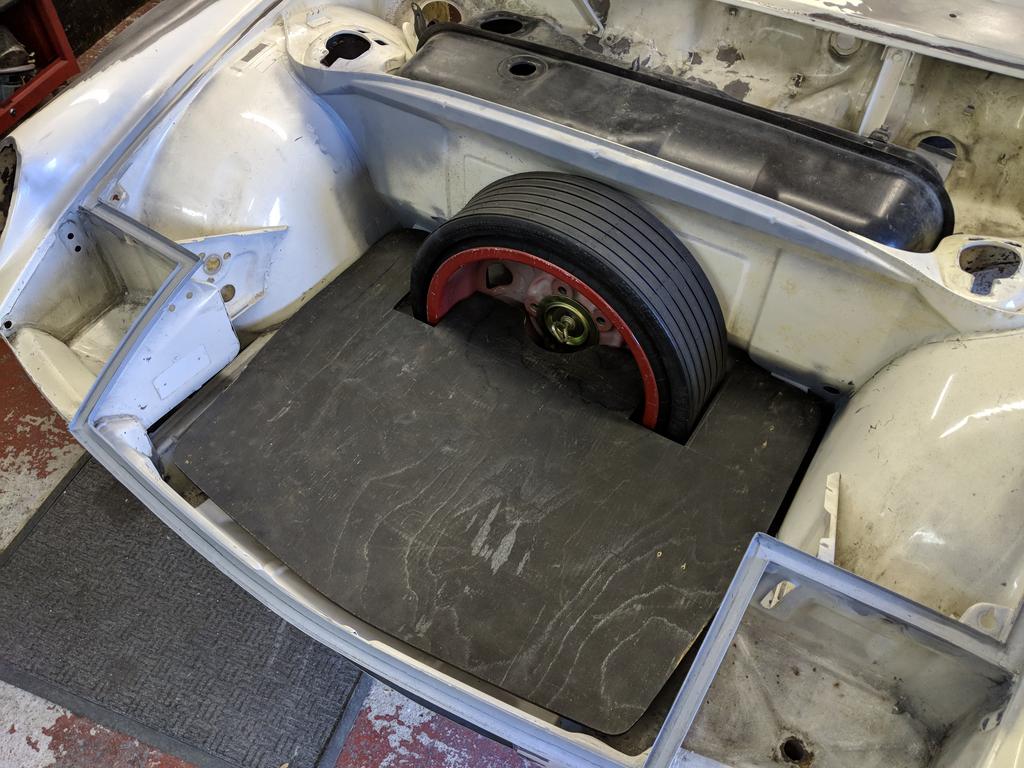
This is mine without: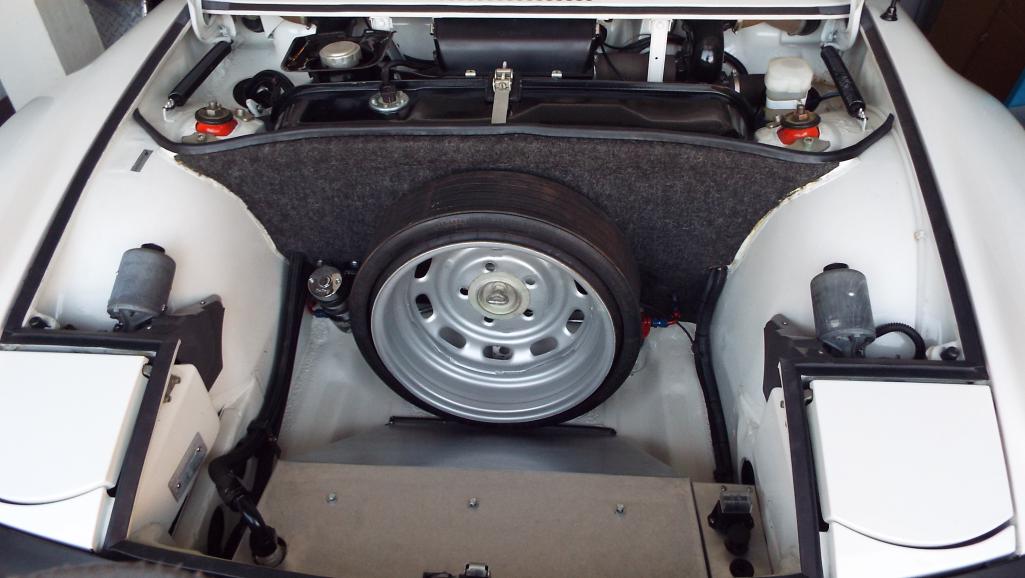
I was actually able to somewhat re-use the one that came with the car which I learned on disassembly was actually a home built thing anyway. I started by using that board (well actually it was a 1/8” piece of flimsy melamine) as a template by removing the carpeting and modifying (sorry I forgot a before pic). Then when I had it to where it would fit with my oil cooler shroud (completed eons ago). I cut up piece of ¼” cabinet grade panel for the final product. 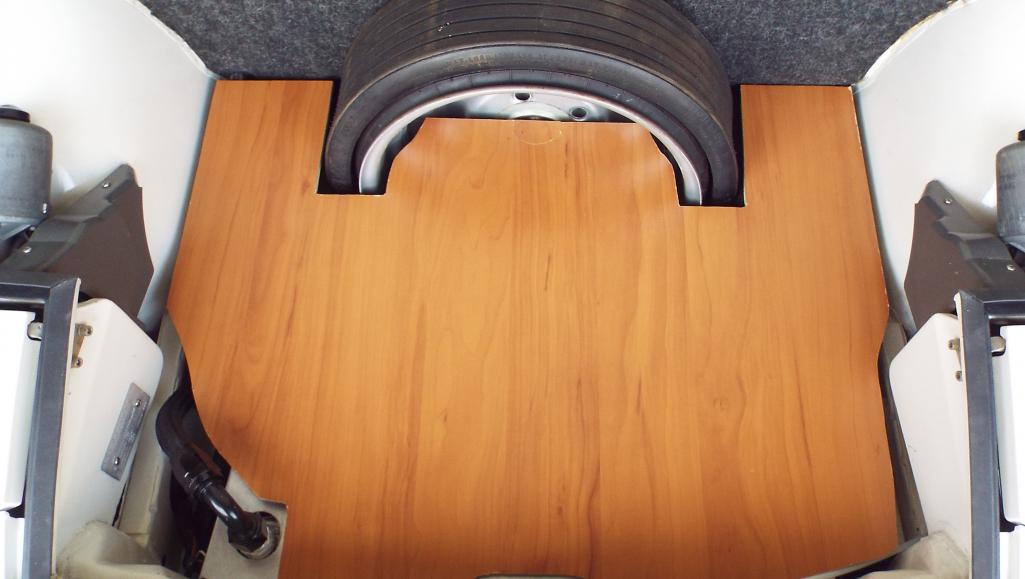
Began with a cutout for the spare tire bolt like Defianty has and then put it right back in as I realized the spare hold down bolt when turned sideways supplies additional support for the board inside the rim. Quarter inch is fairly sturdy so the jury is still out on whether to anchor it down as it seems to fit pretty well and I only see a car cover ever going there.
3M 90 spray glue and staples and I am a happy camper!. On to the next thing!

Posted by: moparrob Nov 19 2017, 10:36 PM
Nicely done my friend.
Posted by: defianty Nov 20 2017, 01:22 PM
Excellent Jim, looks nice and tidy now. I can't wait to get mine covered in Perlon to finish it off.
Posted by: Lucky9146 Nov 21 2017, 05:47 PM
Posted a separate thread looking to find out where people were mounting their fire extinguishers inside their interiors and learned a lot.
Check out that thread here http://www.914world.com/bbs2/index.php?showtopic=320030
Turns out I needed an education on fire extinguishers. There was a lot of really good information that is coming out of that thread and has changed my thinking completely. Some showed and recommended good places and even impressive on board systems but it was, IMHO, Coondog who provided an experienced perspective worth considering. I will add, not cheap extinguishers, but with what we have into these cars, well worth it.
This is the only BBQ I ever want to see 
As a public service you should know, and it was mentioned on that thread, that plastic top/nozzle type extinguishers have been recalled and I had heard last week all the way back to 1973. You can get a free replacement. Crazy but true.
My Amazon order placed!
Here is Coondog's choices and location.  Thanks! and I hope to post a similar picture in the 4 to 5 weeks it takes for them to arrive.
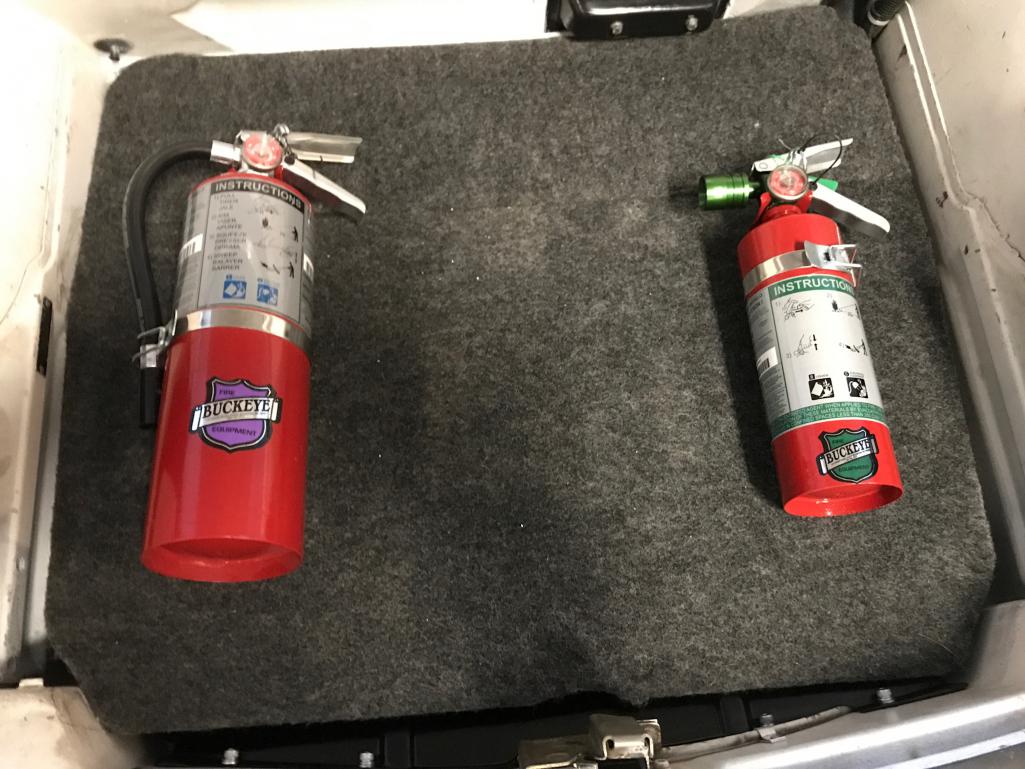
Posted by: whitetwinturbo Nov 22 2017, 10:31 AM
wow............that trunk
Posted by: Lucky9146 Nov 24 2017, 10:00 PM
Seat Belts Finally!
Doesn't seem as though seat belts would be a very big deal but it kind of turned into one! When I bought this project, which I have mentioned a few times, it had been off the road over 20 years. It came with some very old and outdated shoulder harnesses. At first I thought I too would do shoulder harnesses, and someday that may still happen, but for now I just want to go with stock seat belts.
Seems simple enough. Right?
Actually I thought this issue was way behind me when I bought what I thought were 914 belts 2 years ago from a buddy of mine. I came to find out recently, when trying to install them, they were actually VW, so they were way too long and attachment points were facing wrong. Larmo63 helped me out with info by texting pictures of correct belts and answering questions. Thanks
In the mean time I posted a WTB here for the chrome guides that go behind the recoilers. Got those from puebloswatcop thanks you very much for the great deal! Then I realized the chrome guides could not be installed unless the belt was completely disassembled DUH. Now I am thinking I have to buy "914" seat belts and post another WTB and got some leads.
Now here is the funny part if you are still reading. It dawned on me just last night that I could cut off the end that attaches down on the long and shorten the belt that way and while apart install the correct chrome guides. Both problems solved! I somehow had it stuck in my brain they could only be shortened from the recoil end and that did not look promising. Today I took them to my local upholsterer and we shortened the belts 2 and a half feet and installed the guides.
Ta Daaa! VW seat belts converted to 914 for a very modest price. And the recoilers work great! The interior is coming together.
On to the next thing…………..

Posted by: Larmo63 Nov 24 2017, 11:55 PM
You can pry the chrome guide apart at the end where it is joined and slip the belt through the small opening. Then, it all bolts behind the reel and doesn't show.
That's what I've done before to make a 911 belt work in a 914.
Moot point. 
Posted by: Lucky9146 Nov 25 2017, 11:31 AM
You can pry the chrome guide apart at the end where it is joined and slip the belt through the small opening. Then, it all bolts behind the reel and doesn't show.
That's what I've done before to make a 911 belt work in a 914.
Moot point.
I believe you but mine looked to be tacked together pretty well up further and even at the joined end of the guide. Have to admit I did not try to pry it apart. Oh well they HAD to be shortened anyway.
Thanks again! Posted by: Lucky9146 Nov 25 2017, 09:00 PM
Ah Yes The Console
The next thing I’m tackling is the console to house my center pull hand brake. Going to start with this console the PO furnished with the car and see if I can make it work.
It actually is a Porsche PN that starts with 964 so at the least it is a Porsche part! 
This project has been rattling around in my head for quite a while and it is now time. I’m a wood worker so here goes…… More to come.
Posted by: Lucky9146 Nov 26 2017, 08:06 PM
Console Complete!
Went way better than I hoped it would.
Lots of clamping to achieve the thickness needed to match the outsides after gluing structural pieces inside.
The bondo stage, one of several applications.
Posted by: Lucky9146 Nov 26 2017, 08:13 PM
That new piece of vinyl is somehow going to replace the original vinyl shown in the fore ground, pretty cool that grain matches on the new.
Gluing was the most stressful part but it went off without a hitch, just slow.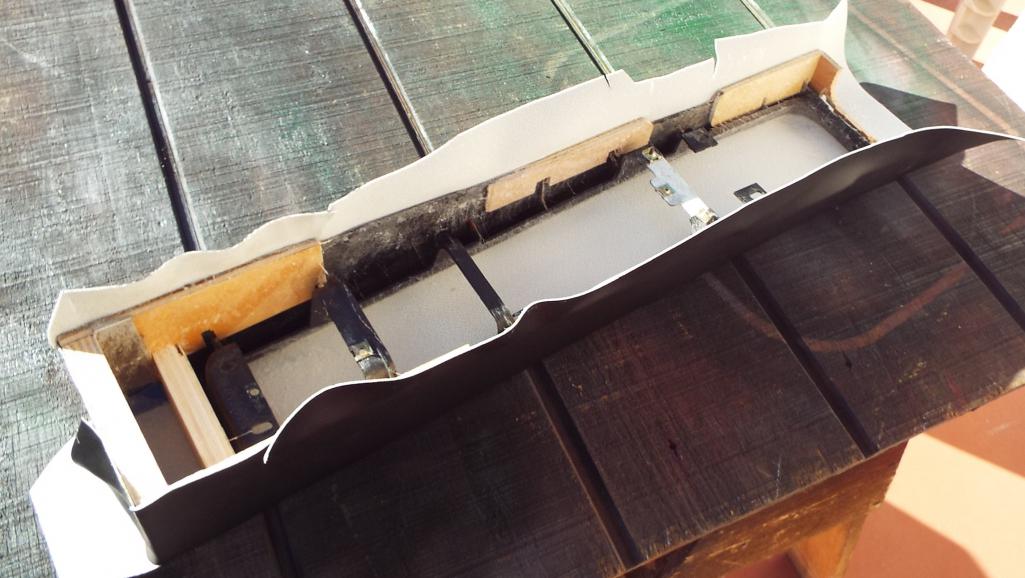
Totally happy with the end product and now a place for the interior light!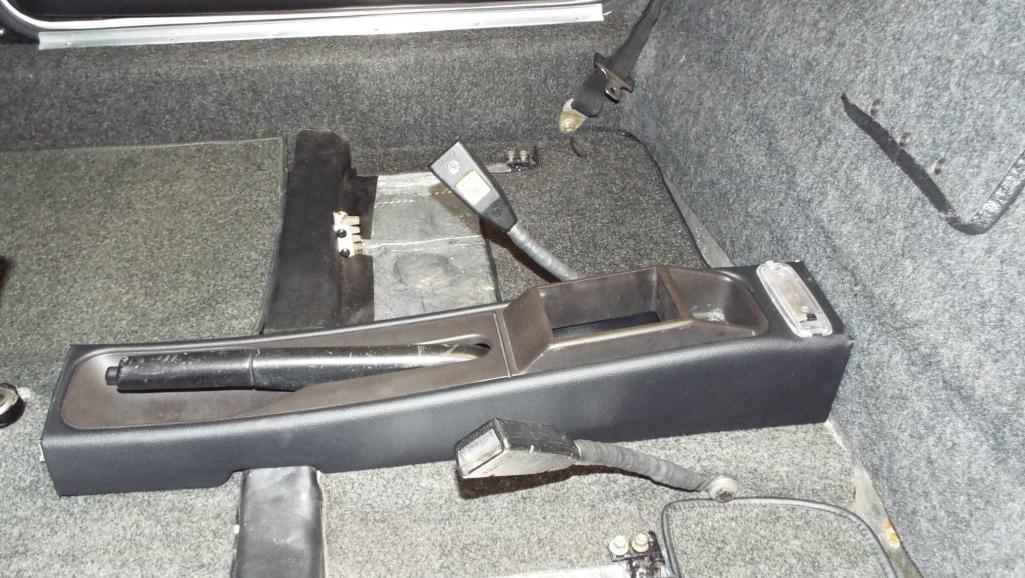
Posted by: Lucky9146 Nov 26 2017, 08:21 PM
The guy I got the vinyl from said this was thick vinyl and would be difficult to work with but a hot sunny day here sure helped. Would have liked to have made the front rounder but that would be my only improvement. As it is it still took several days to complete.
On to the next thing!
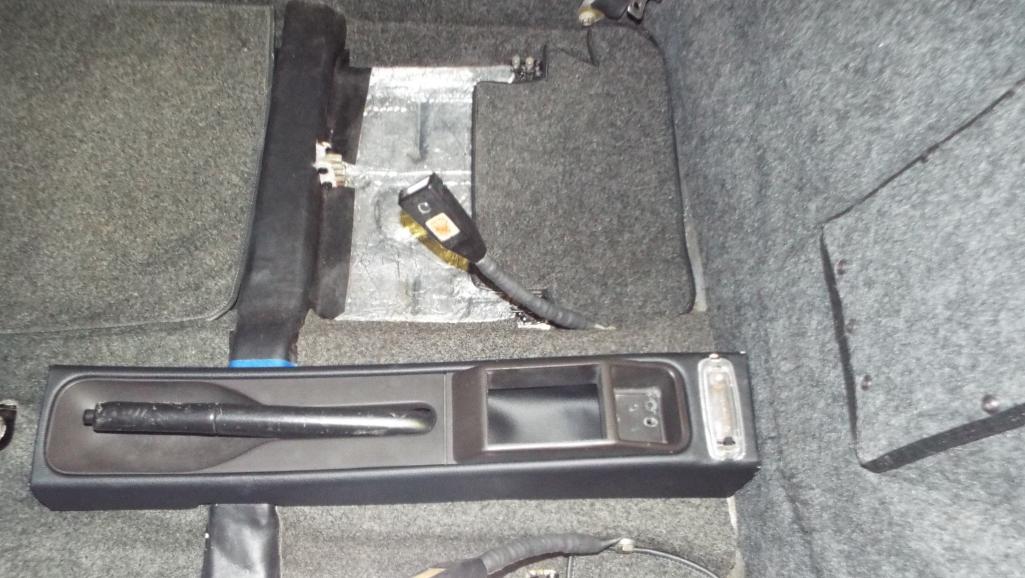
Posted by: porschetub Nov 26 2017, 09:12 PM
Nice work Jim almost factory eh,just ribbing you about when "are you going fire it up" you know your stuff and getting close,honestly I was the same ,older but wiser .
Used to crack up engine conversions to early and not think it out,stuff usually broke .
Go well mate
Posted by: whitetwinturbo Nov 26 2017, 09:25 PM
Wow ........... WAY nice.
Looks "factory"
Posted by: moparrob Nov 26 2017, 09:32 PM
Awesome work! I see you even left a space for a cup holder. Re-purposing that interior light was a nice touch also.
Posted by: Edward Blume Nov 26 2017, 09:37 PM
Cool mod. Reminds me of my old 993 (same part)....
Posted by: defianty Nov 27 2017, 03:44 AM
Very tidy - nice work Jim.
Posted by: Lucky9146 Nov 28 2017, 12:46 AM
Awesome work! I see you even left a space for a cup holder. Re-purposing that interior light was a nice touch also.
Porschetub, Whitetwinturbo, Edward Blume, and Defianty Thanks guys!
Thanks Rob and yes the cup holder was in work already but I was so happy with the way the vinyl came out I couldn’t wait to finish it to post pictures so here it is the cup holder!
Every 914 should have one

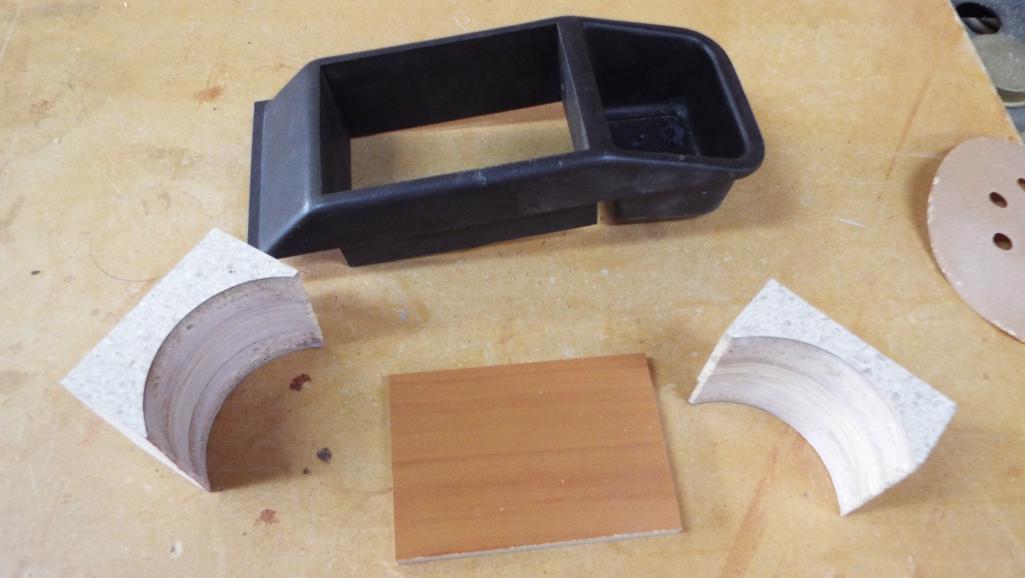
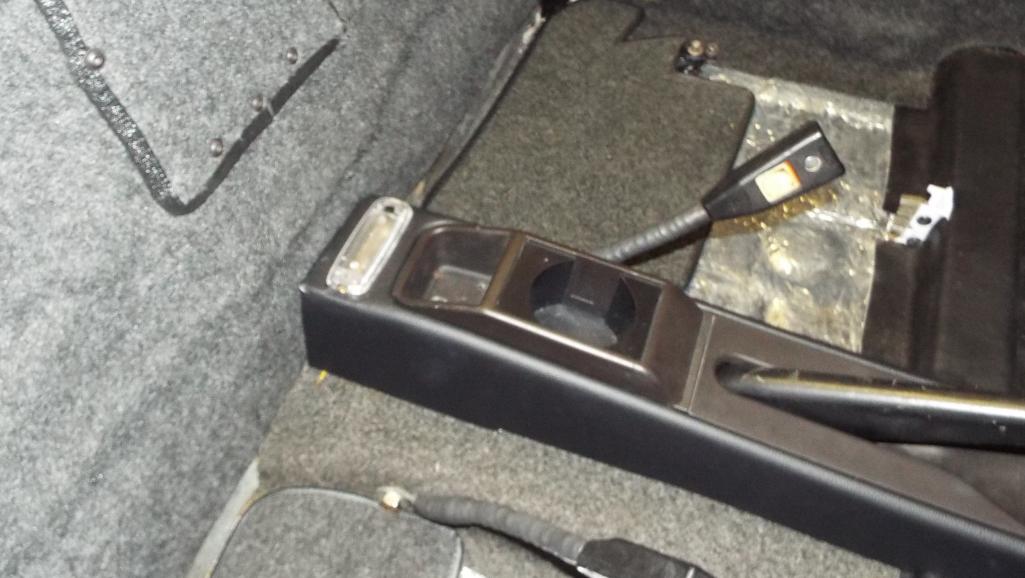
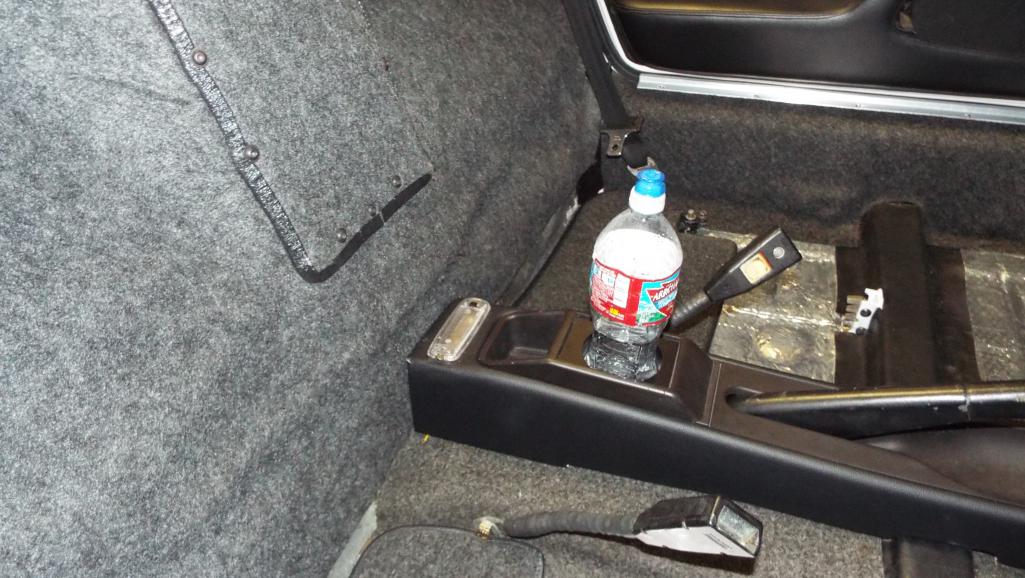
Posted by: Lucky9146 Nov 28 2017, 09:56 AM
One last thing on the console and that is there was a casualty with the project.
One of my Dewalt's bit the dust. I first tried some maple and should have used my drill press, the hand drill didn't like it. I may have, shall we say, "dropped" this drill before.
Christmas is around the corner
Posted by: Lucky9146 Nov 28 2017, 09:58 AM
The next Project (hopefully)
My big hurdle to firing it up, and this is what I have been dreading, is to finish sorting out my wiring mess and what will likely be the final frontier. The wiring is something that I got into 2 years ago and now will have to go through some it again because unlike my latest commitment to completion of this project, I did not do the best job then on notes like I have been doing diligently since April of this year. Especially problematic for me since I hadn’t finished it then when I stopped on it, and most importantly, electrical is not one of my strong suits. 
I have great schematics mind you but I really struggle with them and they give me a headache pretty quick. And worst of all I thought I did this fantastic job of wiring up my frunk fuel pump and fans for the oil cooler with relays and all, but they don’t work.
Waiting on a 914 electrical savy friend to free up some time to help me out in this regard.
Posted by: Lucky9146 Nov 28 2017, 01:43 PM
So in the meantime, while waiting to get back to the wiring, and trying to do as much as I could on the interior, the likely next couple of "details" are…………..
Going to give it a go on converting this old empty fire extinguisher into an oil breather catch can t Collins here on World provided detailed and helpful information that he painstakingly and thoroughly sent me. 
And have to get going on having this steering wheel leather wrapped that I found here in classifieds. Oh yeah, and now looking at the picture I have to order that dried out steering wheel cup too!
Oh wait, there still is quite a list left after all......
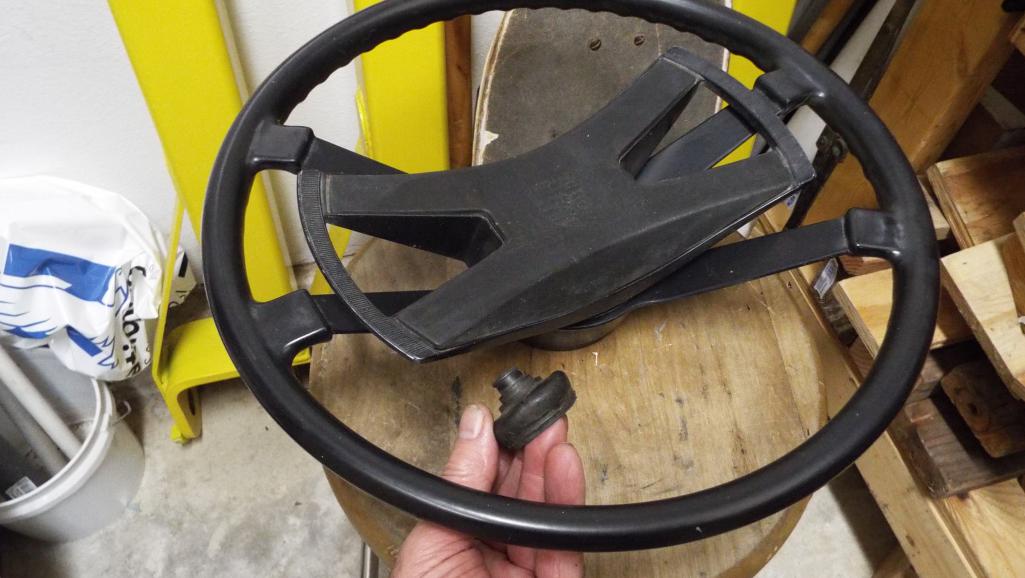
Posted by: Lucky9146 Dec 2 2017, 10:06 PM
Big Day Friday, No I didn’t fire it up yet! But getting closer!
And I sure had good intentions in my last post but got zero done on those fronts.
Friday was a good day because my buddy Toolguy came by to help me sort out some electrical “challenges”. Thanks
Back in Dec 2015 when I stopped working on the car some of the last things I did was wiring the relays and fuses on the Holly electric fuel pump and oil cooler fans in the frunk. Short story is I got all done wiring and neither one worked. Very frustrating!
Fuel pump and Filter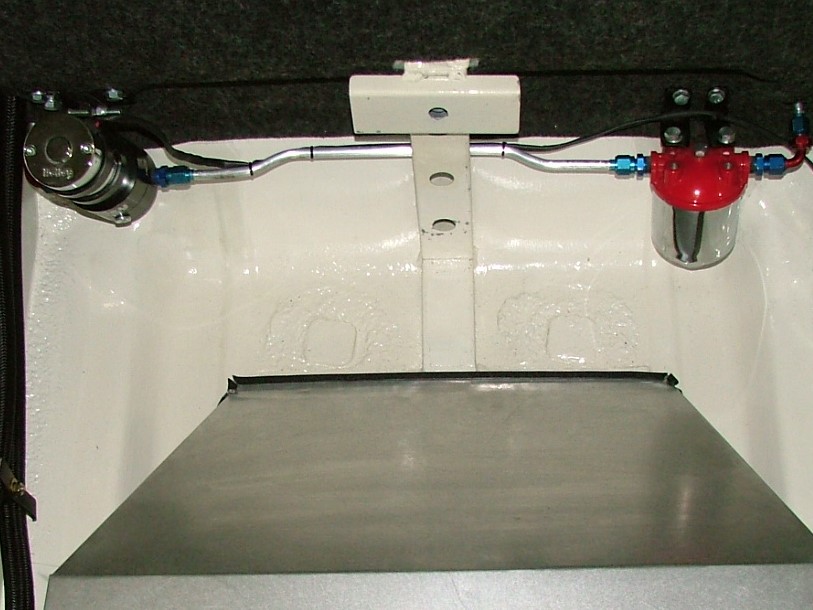

Fuse and relay sub panel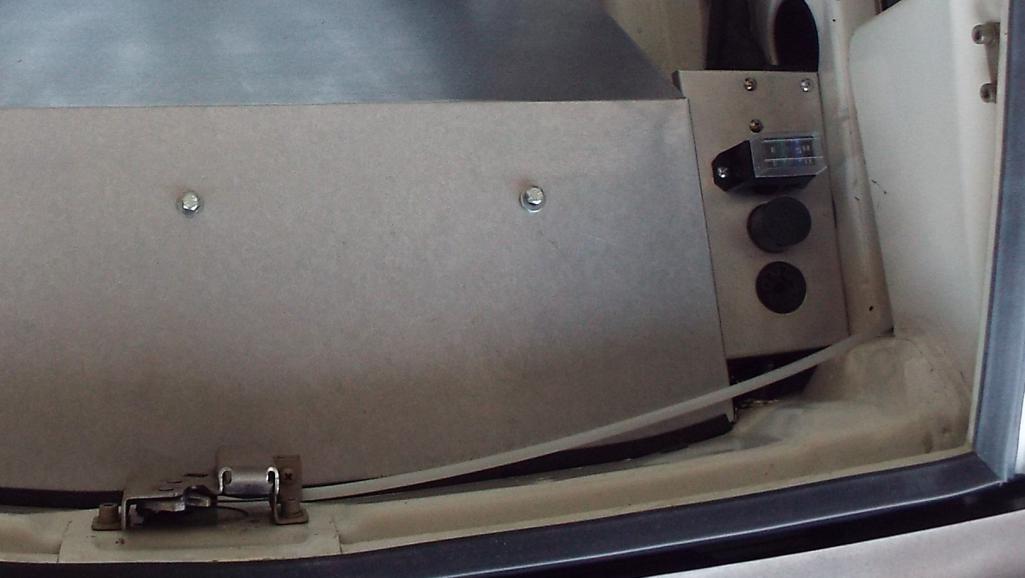
We trouble shot the crap out of both circuits to find out 4 things:
First is the good news that I basically had the fuel pump and fans wired correctly.
Second, it turns out I wasn’t powering the relay correctly on the fuel pump.
Third we ended up calling the fan manufacturer to understand how the integral relay on the fans actually worked and proper powering for over ride switch.
Forth, I really did not have a good plan on the switches and connections under the dash.
So, with proper connections the fans work now too. But the fan fuse could have been better placed in the circuit and I took care of that this morning.
We looked at some other minor things and fixed a few and it was a good non-stop 4 hours work on stuff I could not figure out.
I would love to report I can now read a wiring schematic better but I can’t.
Still more wiring to do!
Posted by: Lucky9146 Dec 3 2017, 09:57 PM
The bad news .No Progress today because I went to try to sell at the swap meet in Escondido. Worst turn out ever! Only 12 sellers there. Wow.
But the good news is that the swap meet yielded a first look at Coondog's car. It drew a lot of attention and looked Niiiicccceeee!
Plus a really good turn out of 914's 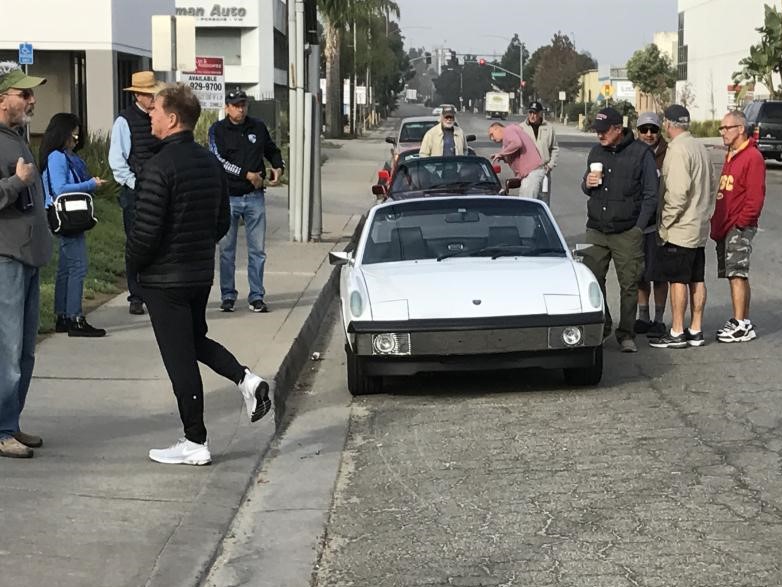
Afterward Lawrence, Oscar, and Steve stopped by the house and made the culdesac look the best it has in a long damn time. It was great to be around running/ driving 914's. Inspiriational
My awesome wife captured the moment!
Great day! Thanks guys!
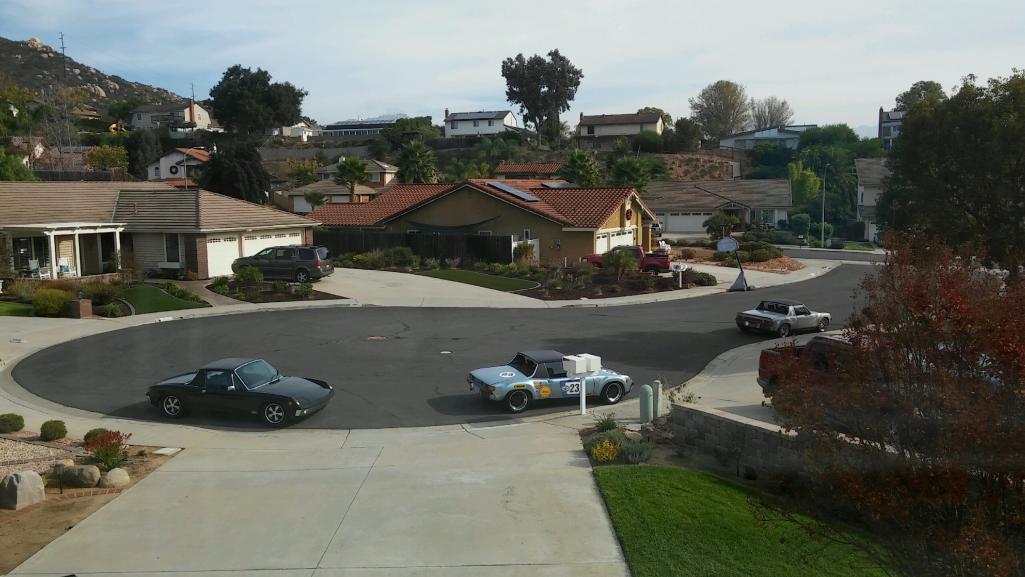
Posted by: whitetwinturbo Dec 6 2017, 11:02 AM
That's a PRETTY sight
Posted by: Lucky9146 Dec 6 2017, 10:50 PM
Ok so maybe I can figure out some of this electrical stuff after all.
Studying the wiring diagram last night trying to figure out how to stop my dash brake light from blinking when the key is on (normal function by the way on a ‘74 with the seat belt interconnect system in tack but long since MIA from my car) and also getting said brake light to work with the hand brake when pulled. It Did Not!
I actually figured out the solution and ran it by my electrical savvy friend toolguy and with his concurrence I tried it and PROBLEM SOLVED! I really wanted that behind me cuz it sure bugged me and I am very happy to see that light function properly now. This is me celebrating this small success I can finally push the gages in and attach the gage panel.
Interior assembly continues!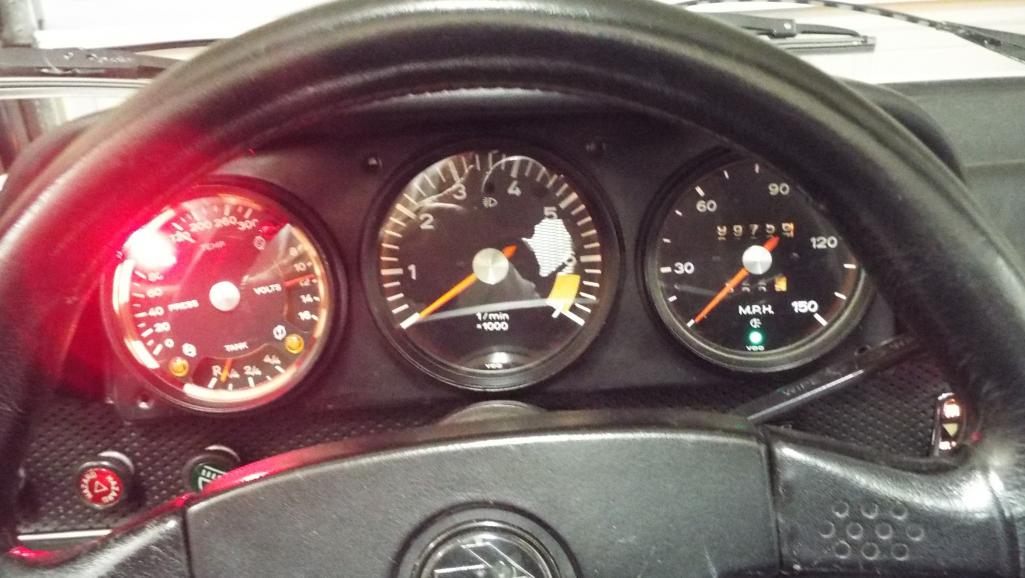
Today I finished the FINAL install of the forward tunnel carpet, center console attachment, and passenger seat.
Followed by the driver side upper forward kick panel carpet, pedal board and floor carpets and floor mats. Baby steps but progress and a full day!
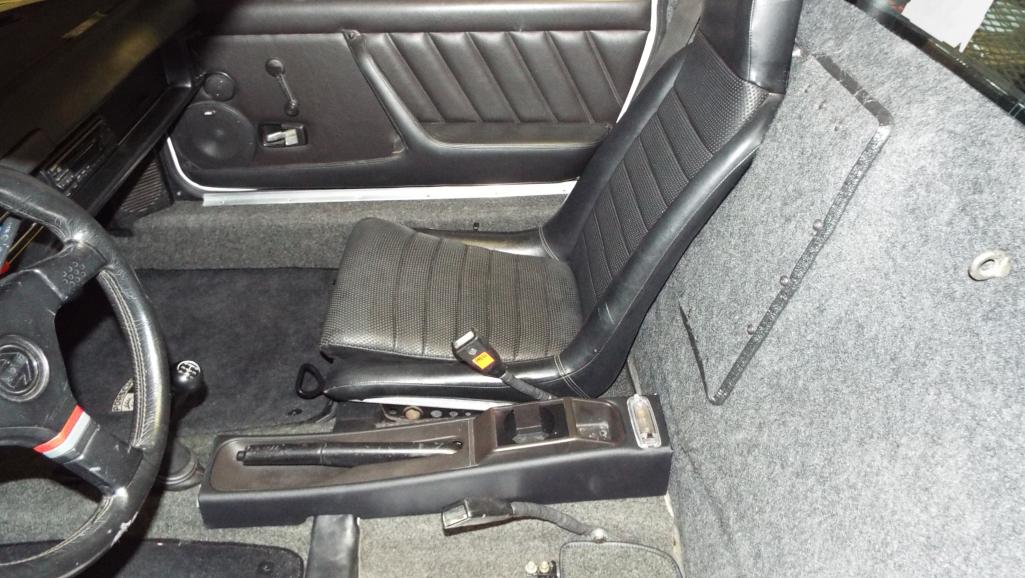
Dang A little blurry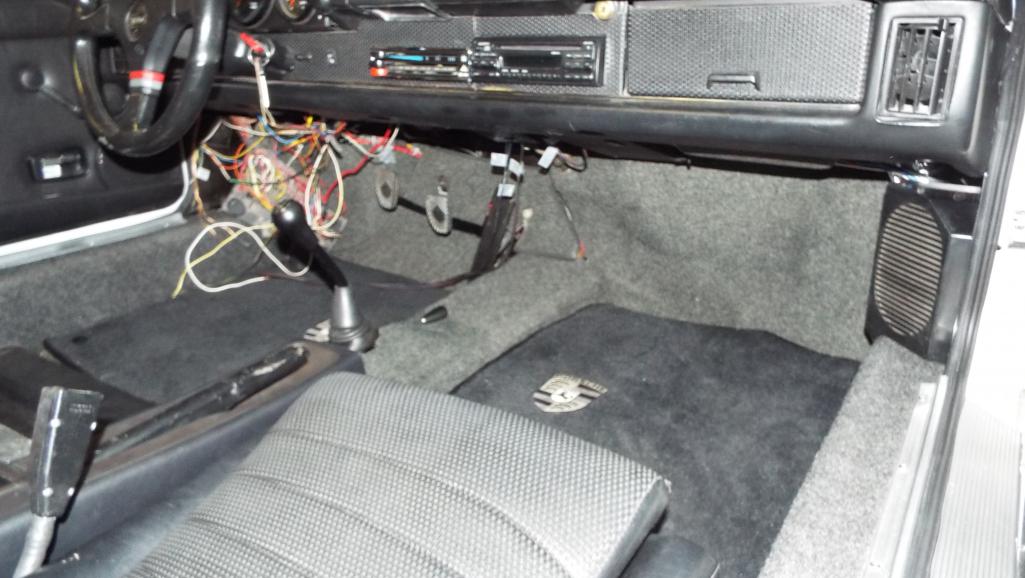
Posted by: whitetwinturbo Dec 7 2017, 10:20 AM
Purdddeey
Posted by: Lucky9146 Dec 7 2017, 11:14 PM
Dropped off my stock 914 steering wheel for leather wrap today. Decided not to go with the MOMO. Great guy does awesome work! Expensive to me, but likely chump change, small project to him. Here is why. He showed me around the shop and he had some early 911R seats and said the owner had paid 5k for the cores and was paying him 5k to cover them. Bit out of my league but here they are just absolutely exquisite work. Learned he also did an interior and saw pictures for a car that was at SEMA.
So, all that said, I feel a bit lucky he is even doing my piddley wheel. Even got to Pick the leather! I think my wheel is in good hands.
Here are the 10k seats, wouldn’t those be nice. 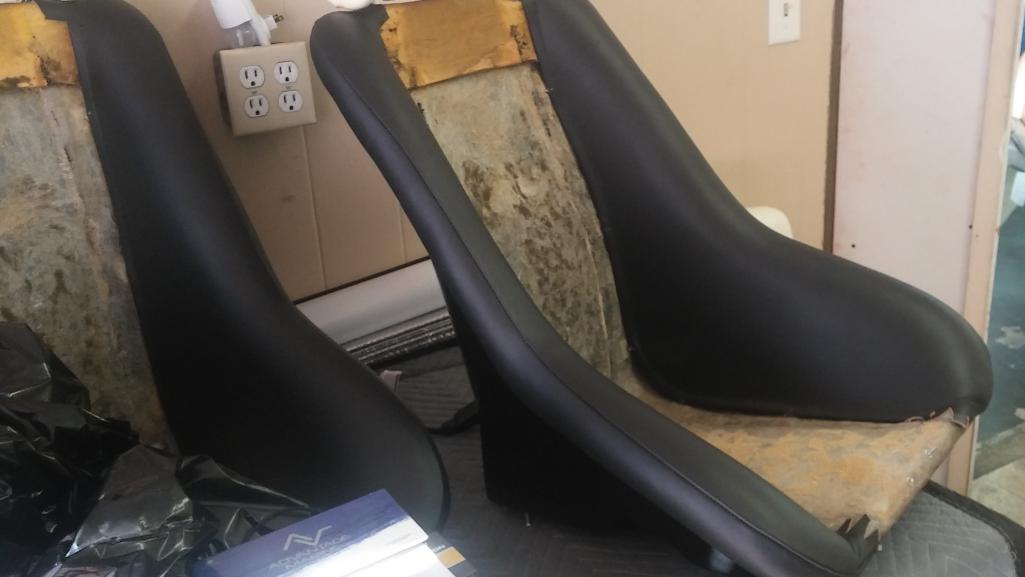
Gave up on fabricating my oil breather catch can myself. Just started to not make sense. I had started on that old fire extinguisher, cutting off the top, and putting a pet cock drain in the bottom. Then priced out a filter, a fitting, and then would still need to spend the time to weld and find a clamp it was already over $25 and I don’t think it would have looked that great all cobbled together anyway.
So, I went with this today for $55.00 Done! Thank you, Amazon!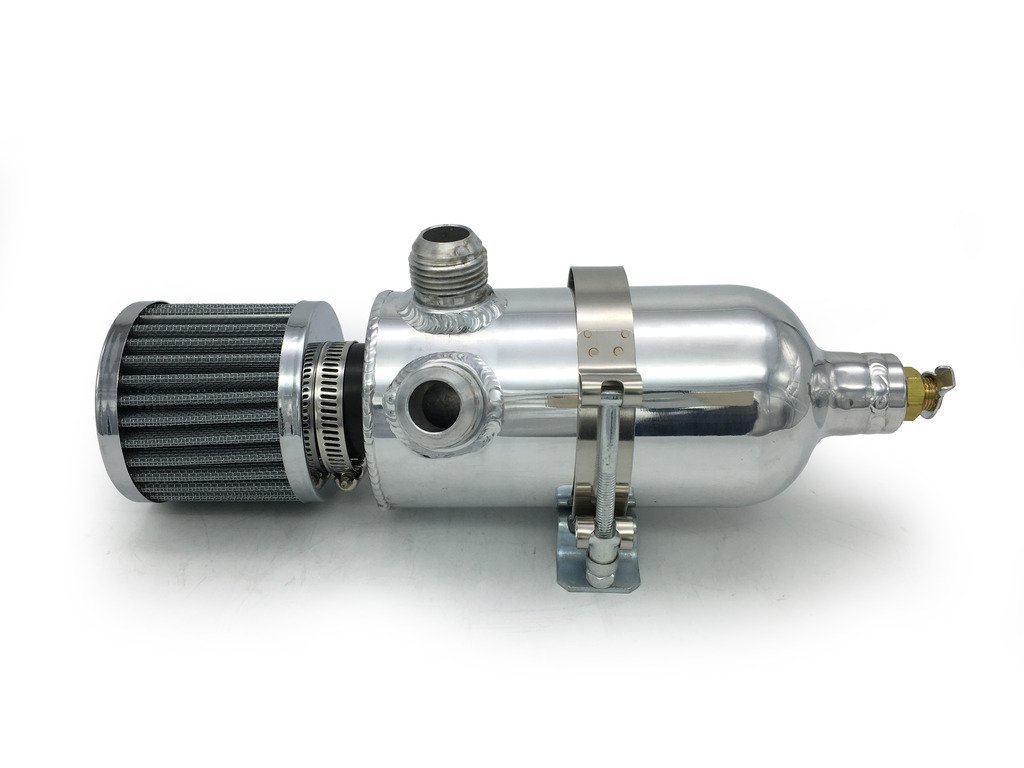
Posted a WTB tonight and Garold Shaffer came to the rescue with a quick response for my early window crank and interior door handle base.
These are mine I needed another set for the other door. Yeah I wanted the early look.
Can’t wait to see his! Thanks Garold!
progress
Posted by: Lucky9146 Dec 8 2017, 09:29 PM
Surprise! And a good one at that!
Went out to check to see if I needed to get in on the group buy for Mikey’s “vortex generators” and finally started address the underside of the floor pan. Been dreading it because I thought I was going to be scraping like Defianty with his “special tool” . I hope he knows I'm teasing.
To my surprise when I rubbed on it pretty good with some Prep Sol it seemed to just cut right through all the, whatever it is, road grime/ crud/ maybe light under coating? I couldn’t say for sure. But it looked like nice painted surface under all that crud. 
Well I couldn't stop there, and yes it took some rubbing and several applications, but this sure looks to be the original painted bottom to me. It looks like it is a light grey paint and I came to realize that the yellow stuff in the pictures is the factory cosmoline. The cosmoline will come off completely if desired it is like a wax. I mean I knew this car had very little rust in its history and I know the car was repainted 20 some years ago, but this floor bottom is crazy cool. Sure, it has a few extra holes that shouldn’t be there and of course there are some dents and scrapes to fix.
I bet when Moparrob sees this he is going to want it back even more.
Oh, and my “vortex generators” look to be OK, maybe I have ADD? Maybe it was the fumes? That's why I went out in the garage?
Made it all the way to the front on right side! Hope to finish tomorrow!
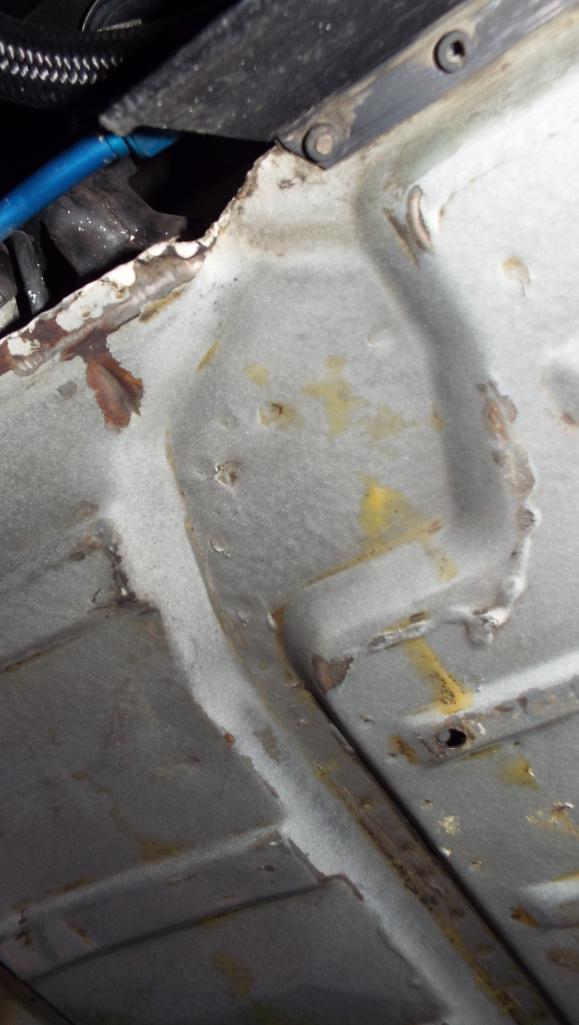

Posted by: Lucky9146 Dec 10 2017, 02:20 PM
Just a quick one here
My floor mats were in pretty good shape on the carpet side but the back sides were deteriorating and crumbling. They are original 914 floor mats I picked up at a swap meet. They have a couple of holes on the one end by the seats from some previous carpet attachment thingy that I may actually use. I was trying think of something I could do to the back to keep it intact and my wife suggested Flex Seal.
You know that commercial where the guy sprays a screen on the bottom of a boat with Flex Seal and then shows him driving the boat? Well I would have never thought of that stuff but it sure worked great on the floor mats! Sorry forgot before pics.
Downside is the coverage is pretty limited and it actually took almost 2 cans just for the two mats at $12.99 a can. That boat bottom at that rate would be like $1,000.00 I figure.
Pluggin away.
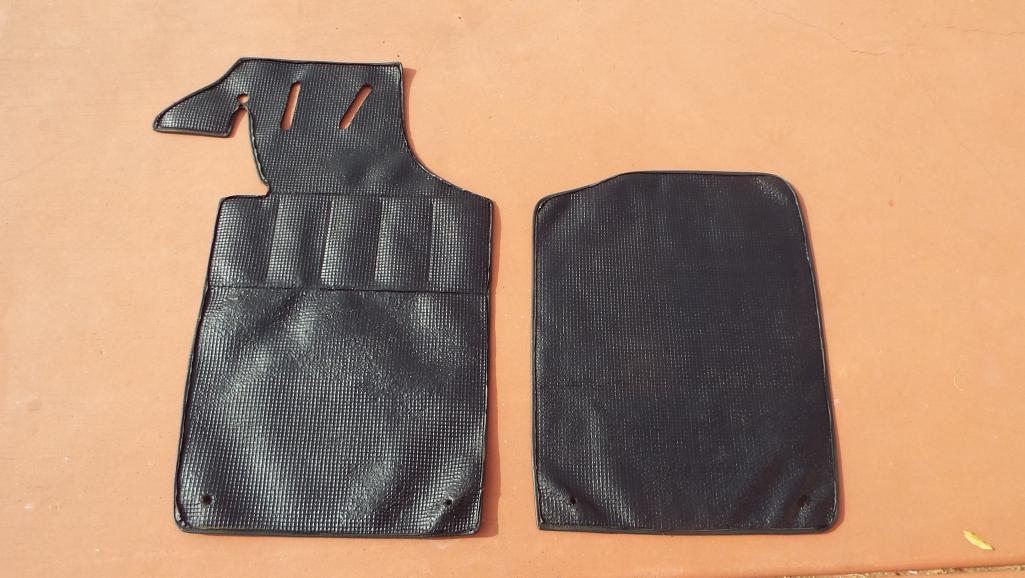
6868
Posted by: mepstein Dec 10 2017, 02:24 PM
Just a quick one here
My floor mats were in pretty good shape on the carpet side but the back sides were deteriorating and crumbling. They are original 914 floor mats I picked up at a swap meet. They have a couple of holes on the one end by the seats from some previous carpet attachment thingy that I may actually use. I was trying think of something I could do to the back to keep it intact and my wife
suggested Flex Seal. You know that commercial where the guy sprays a screen on the bottom of a boat with Flex Seal and then shows him driving the boat? Well I would have never thought of that stuff but it sure worked great on the floor mats! Sorry forgot before pics.
Downside is the coverage is pretty limited and it actually took almost 2 cans just for the two mats at $12.99 a can. That boat bottom at that rate would be like $1,000.00 I figure.
Pluggin away.
6868
Nice save. Smart wife.
Posted by: Lucky9146 Dec 10 2017, 09:46 PM
Nice save. Smart wife.
Thanks Mark! She's a keeper
Posted by: Lucky9146 Dec 13 2017, 09:20 PM
Well there is three days that I’ll never get back!
But the infamous under dash wiring went from this 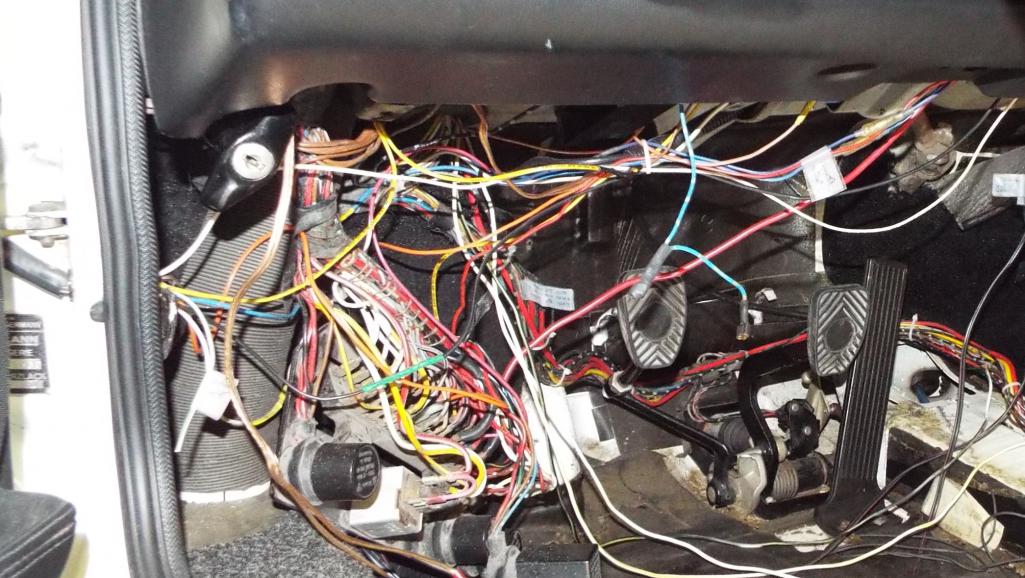
To this and I sure learned a lot! Some we-wiring was needed and some new with a lot of identifying and tagging in the process.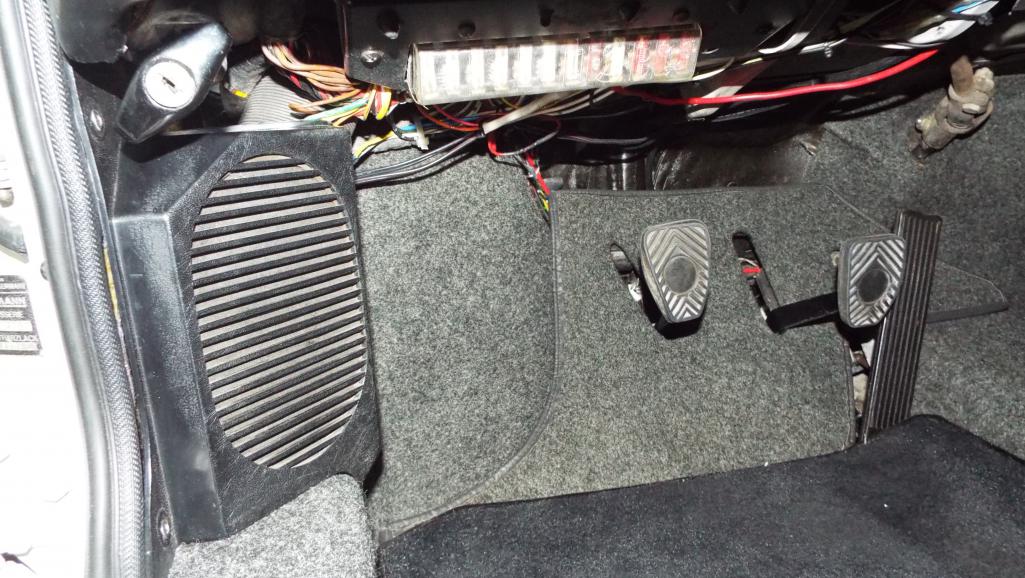
I may have maxed out my quota of dumb electrical questions to toolguy, what a trooper, and he would still answer the phone. Thanks!
Fuel pump switch and oil cooler fans over ride switch are located under the dash on my alum panel. Going to try it under here and may end up moving them. Fuel pump switch functions forward /aft and fan override works side to side.
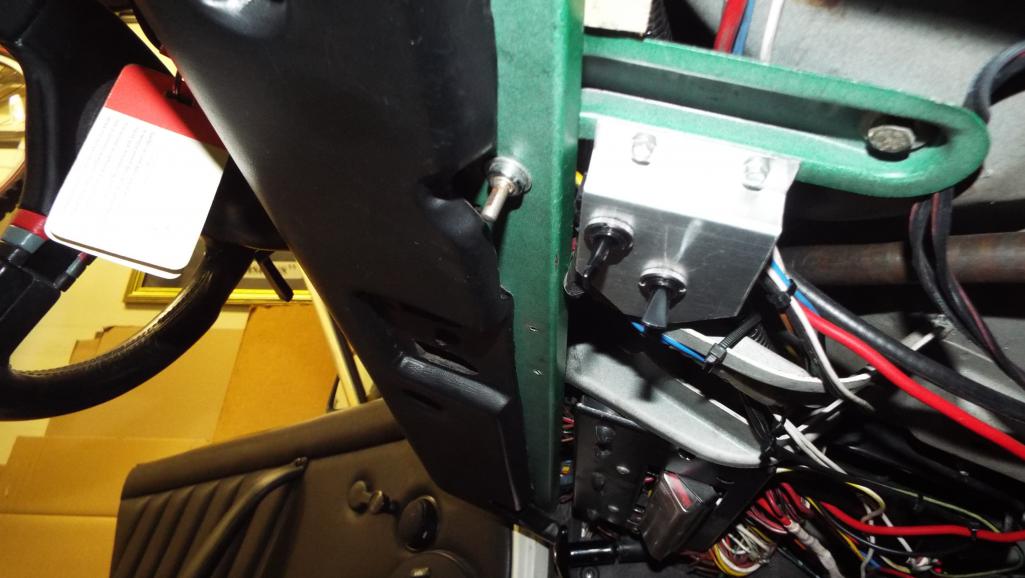
Posted by: porschetub Dec 14 2017, 02:51 PM
Looking tidy Jim,birds nest of wires gone .
Should get it running for Xmas eh ,great present to yourself .
Posted by: Larmo63 Dec 14 2017, 06:34 PM
You must not have the buttons on your floors that hold the mats?
Posted by: Larmo63 Dec 14 2017, 06:34 PM
You must not have the buttons on your floors that hold the mats?
Part II
Posted by: Lucky9146 Dec 14 2017, 06:58 PM
Looking tidy Jim,birds nest of wires gone
.Should get it running for Xmas eh
,great present to yourself .Birds nest I like that! Yup gone what a pain. Thanks!
But discovered today the fog lights now don't work so have to figure that out now. Didn't even touch that fuse area
Electrical Believe me I would like that Christmas present idea but while still up in the air I am going to do my best to clean up the bottom. Spent more time under there today. Gray Por 15 arrived yesterday which should pretty closely match the original finish I hope.
Thanks for looking in
Posted by: Lucky9146 Dec 14 2017, 07:13 PM
You must not have the buttons on your floors that hold the mats?
Buttons Hmmm I do but unfortunately I just looked and they buried in sound proofing from PPO. So that's what those were for.....
I guess there was a floor mat retainer eh? Oh well the mats seem to fit pretty securely in the well. Crud. Thanks for checking in
Posted by: Larmo63 Dec 14 2017, 08:01 PM
The mats should stay put without the stops.
Posted by: Lucky9146 Dec 15 2017, 08:59 PM
Wasn't going to post this but...............
l.a.brooks posted this thread about door panels this morning http://www.914world.com/bbs2/index.php?showtopic=321152
And I happened to take pictures of my door panels last night because I just received the matching early chrome window crank and door pull base from Garold yesterday. I had enough for one door and installed them last night.
Anyway thought I would post the door panel thread here because there seemed to be some interest and information to share. Check it out.
I love these door panels and that both sides are completely the same. My panels came with my project and I didn't know where they came from, so I learned from the thread too.
My panel with early chrome window crank and door handle base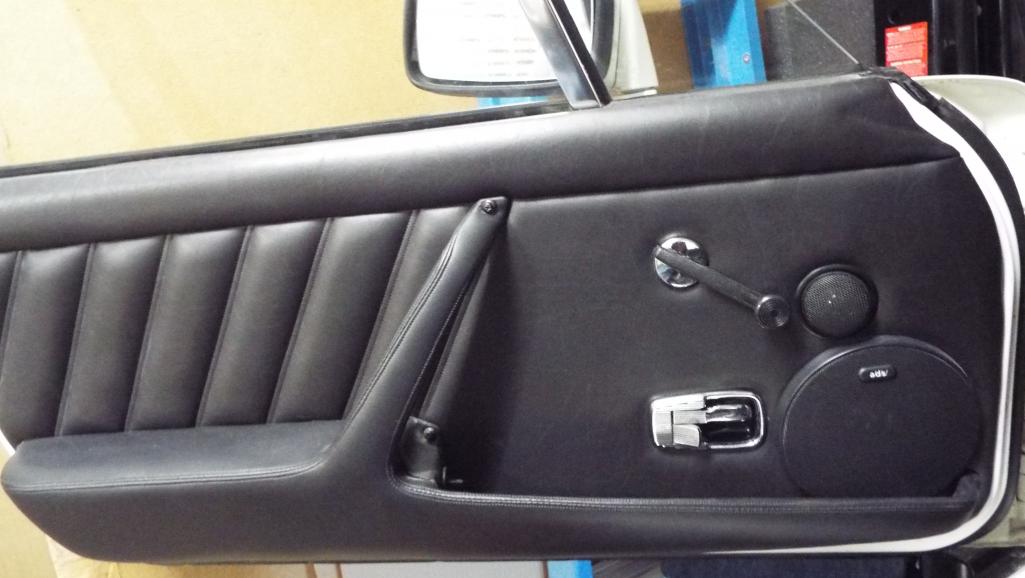
Posted by: Lucky9146 Dec 15 2017, 09:00 PM
Received the breather today.
Here it is pictured with a regular paint can for size. A little bigger than I thought but I should be able to find a decent spot for it.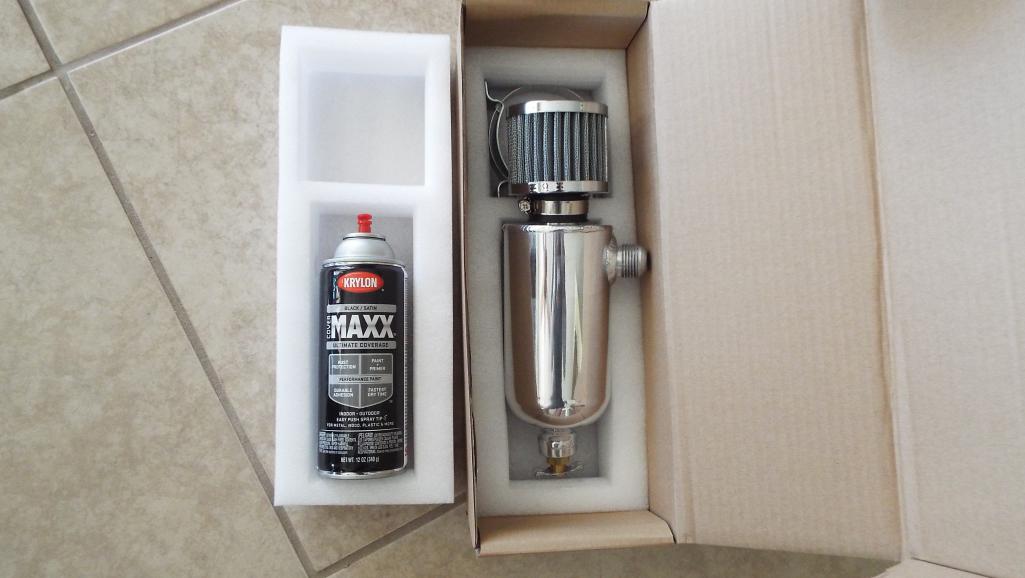
Posted by: Cairo94507 Dec 16 2017, 08:10 AM
Nice looking part.
Posted by: whitetwinturbo Dec 20 2017, 08:11 PM
Posted by: Lucky9146 Dec 20 2017, 11:13 PM
Cairo94507 post Dec 16 2017, 06:10 AM
Nice looking part.
Thanks for the support guys.
Progress has slowed considerably here but I have pretty much finished up the interior with the driver seat and roof now installed. Waiting on my steering wheel now.
I might have sat in it the other day and went vroom vroom when no one was looking. But there's no pics and I'll never admit it.
Next: more underside.
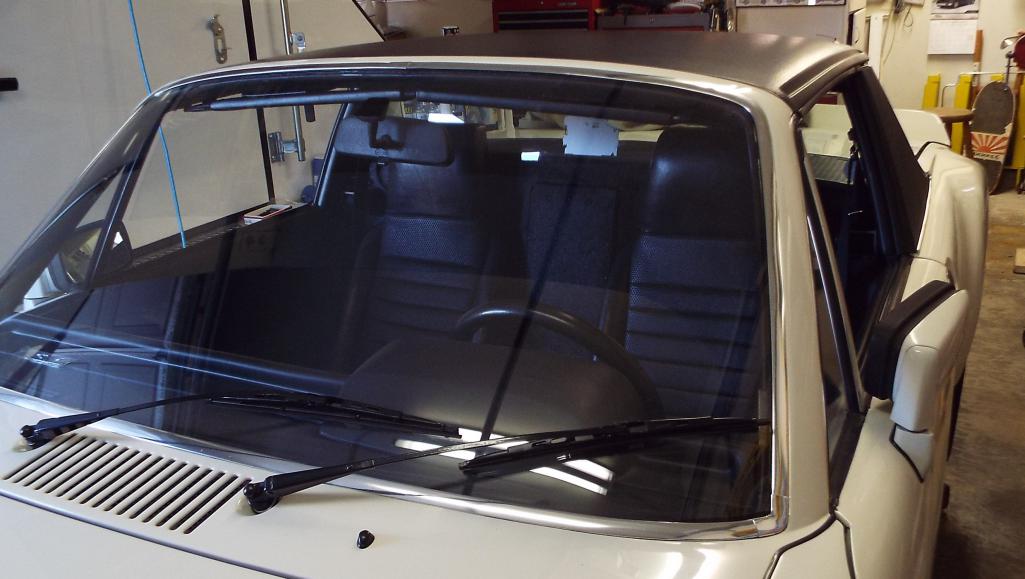
Posted by: Lucky9146 Jan 1 2018, 09:30 PM
A good lesson on what NOT to do (don’t put shit off)
Had always the thought the bottom of the floor pan would not be any kind of priority…..until I started cleaning it up. I just put it off never contemplating doing anything to it and should have done this way back.
Turns out to be in pretty good shape mostly. That's the good news!
This is how the car has looked for over 2 weeks as I have continued working on cleaning and doing a bit of minor repair on the bottom almost every day just a little bit. Waiting till late in the game meant wrapping up the car to keep the sanding dust off. This of course led to covering the underside of the engine too. And should have done all this when it was 80 instead of now! Almost done!
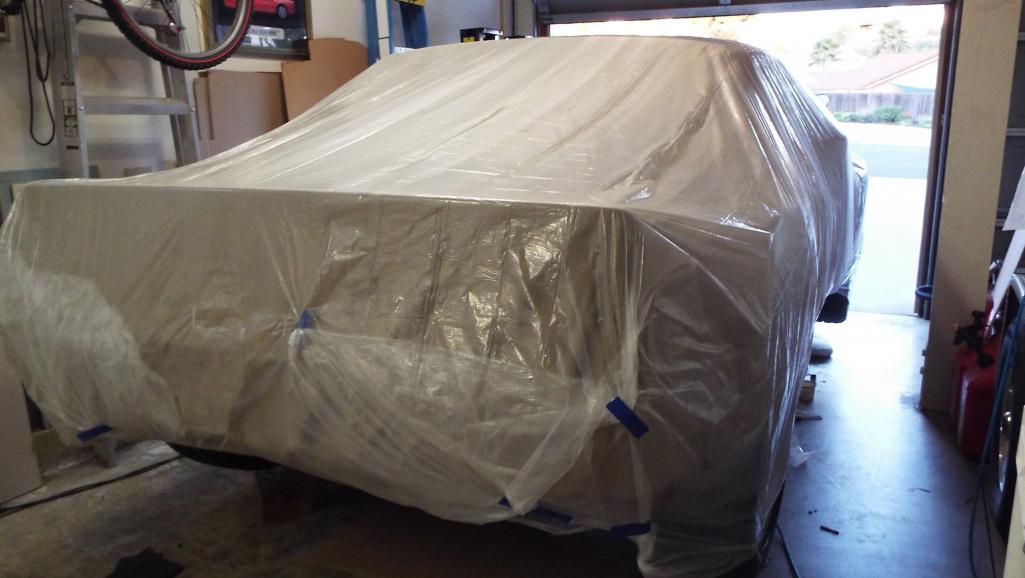
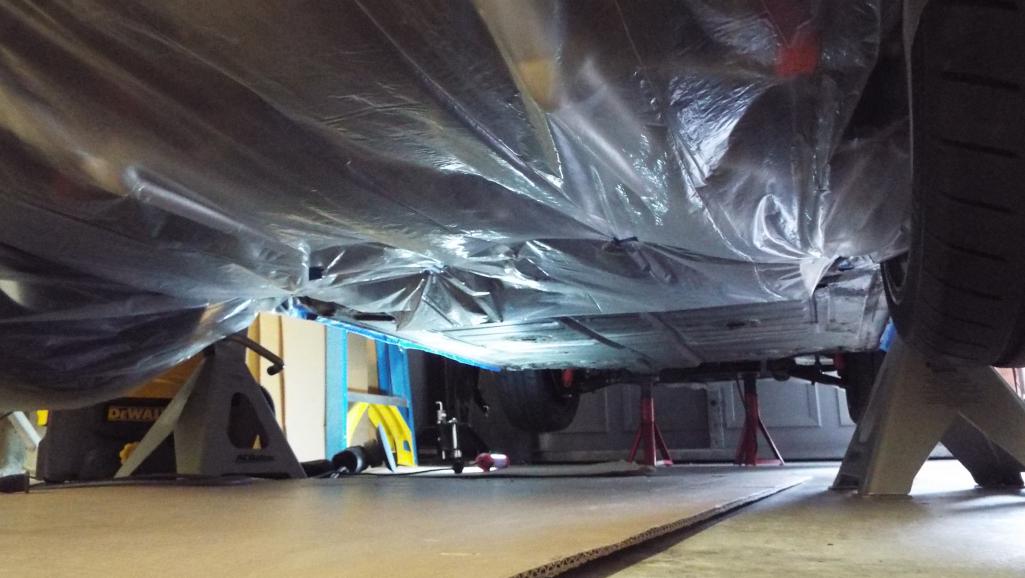
Posted by: Lucky9146 Jan 2 2018, 09:39 AM
Got my steering wheel back and the hand leather wrap came out fantastic! Local guy does very good work. Installing soon.

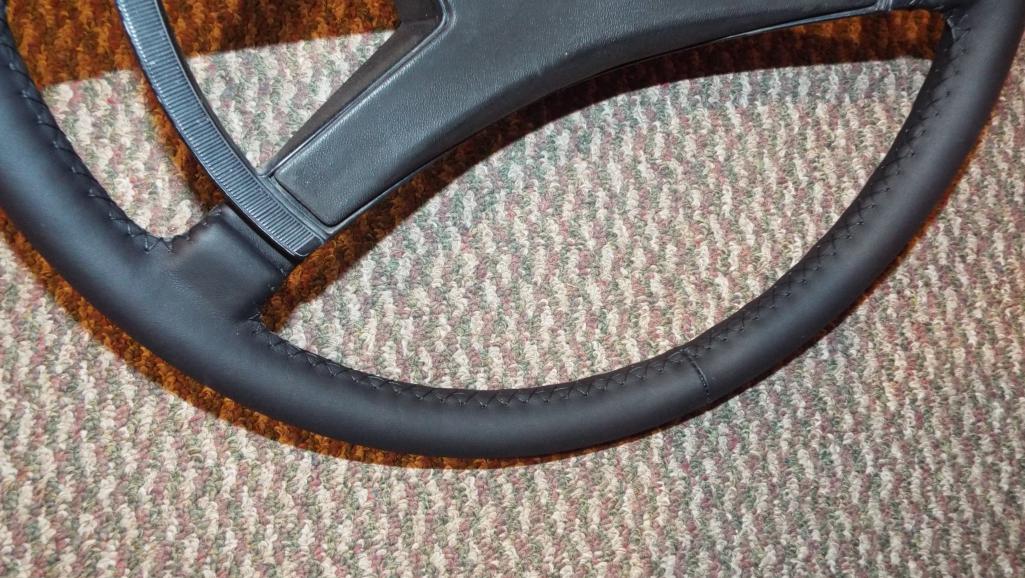
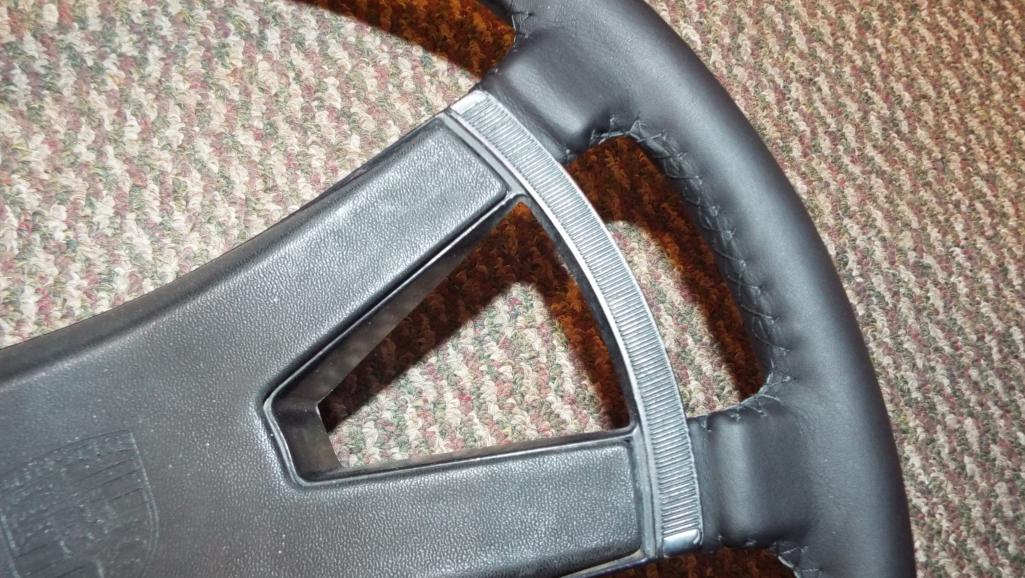
Posted by: Lucky9146 Jan 3 2018, 09:29 PM
Progress! I was out in the garage 11 hours.
Took 5 small things off the list yesterday, which sounds impressive……but then I added 2 more. Well the list is shorter ultimately. One of the small things was to fab this support bracket for the oil hard line under the engine, I felt it just needed to be supported. Several locations and bracket types explored this one seemed the best compromise.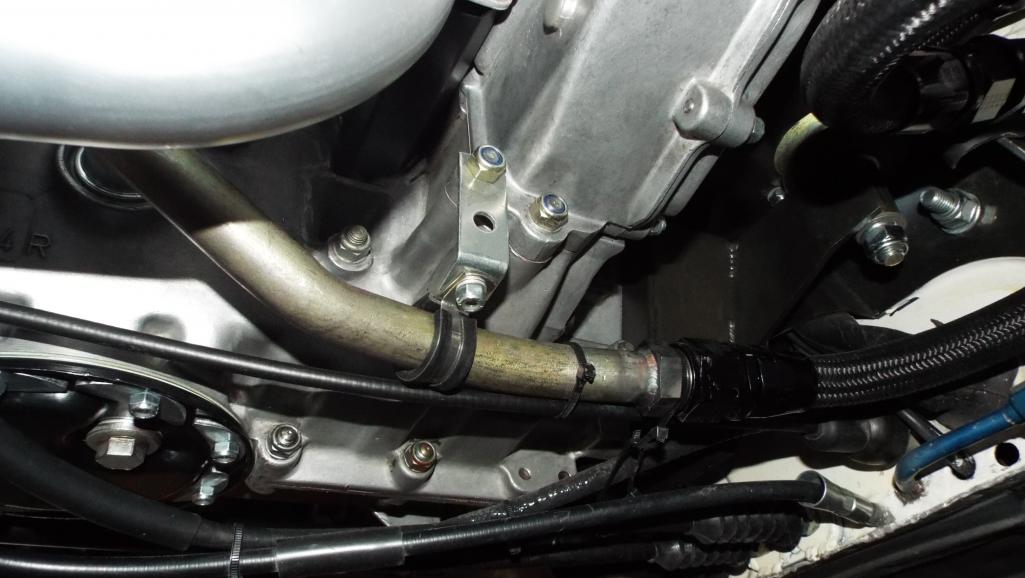
Saw somewhere posted on this site not that long ago a cool picture of a clock related to a car that took forever to finish and the thought got stuck in my head. I needed a clock like that! Today I made mine.
So here it is and it helps keep things in perspective. Every multi year project deserves one!
January looking good to finish it! Yes 2018
Posted by: mmichalik Jan 4 2018, 12:05 AM
Jim,
Where did you get the steering wheel wrapped?
I'm going to need mine done soon as well and yours looks great!
Mike
Posted by: Lucky9146 Jan 4 2018, 09:17 AM
Jim,
Where did you get the steering wheel wrapped?
I'm going to need mine done soon as well and yours looks great!
Mike
Escondido Custom Upholstery. Oscar is a great guy to deal with. Small shop, intensive detail. If you can stop by his shop soon you can see a car he is working on now. Amazing work!
He has done 2 for me now. Tell him I said Hi.
Posted by: mmichalik Jan 4 2018, 06:57 PM
Turns out thats is the same shop / guy that did the upholstery (what little there was of it) on my dads race car.
I will definitely be bringing my stuff to him.
Thanks Jim!
Mike
Posted by: Lucky9146 Jan 7 2018, 03:14 PM
Everything happens for a reason.
Drove up for the first time to Cars and Coffee yesterday in San Clemente hoping to meet up with and talk to 914 guys. Got to hang out with Lawrence, Steve, Keith, and Forrest. Yes, my car is still on jack stands. It helps with motivation to talk with 914-6 conversion guys and see their cars. Forrest was in from AZ and rode in with Keith.
Looking in Lawrence’s very clean frunk I got to talking with Forrest about expansion tank’s and charcoal canisters. Mine was removed apparently so I was all ears when Forrest was talking about long sweeping left curves generating strong fuel smell in the cabin without them.
This morning I went to check out my current set up. I like the clean look without the expansion tank or charcoal canister. But........
Right now I am missing the large overflow hose leading from the tank filler surround that exits under the car and I’m currently working on replacing that. But the small hose that is in the filler neck visible when you remove the gas cap had a small hose leading down below and behind the tank. Pulling up that hose I found it was far too short and would not have poked out the bottom of the car AND it appeared to be clogged! So, had I not gone to C&C I would not have discovered the clogged vent hose or length.
I’m in a quandary as to whether my ’74 6 conversion needs an expansion tank and canister? Found a thread here recently addressing 1970 expansion tanks and am resurrecting it to get wider insight and recommendations for my situation.
I see no evidence (in terms of holes at the red line by the antenna hole) on my car of the hoses being routed to the engine compartment so don’t know what a ’74 originally had and can't tell from this.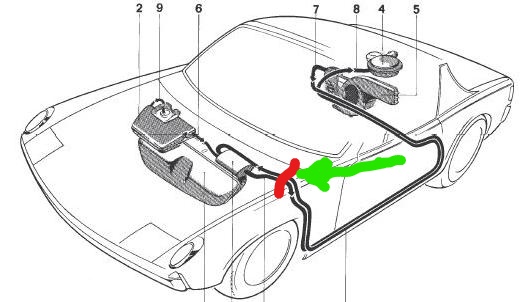
Of course now I wish I 'd have looked closer at Lawrence's set up or taken pics! Duh!
To be clear I am not looking for originality more functionality.
Posted by: defianty Jan 7 2018, 03:35 PM
I'm no expert on the expansion tank and charcoal filter but my car never had either connected in my ownership and I never had a problem with fuel smells. The car had been converted to carbs.
With the six conversion now both the charcoal canister and expansion will be left in the parts bin.
Posted by: mepstein Jan 7 2018, 04:08 PM
All the 4’s had the expansion tank and charcoal filter.
Posted by: rick8928 Jan 7 2018, 06:46 PM
While building a Factory Five cobra replica, created a homemade charcoal canister for less than $15. 8" PVC pipe, 2 PVC end caps (one drilled in the center to mount a brass hose coupling, the other perforated with multiple drill holes), a piece of screen to cover the perforations, and some aquarium charcoal.
Posted by: Lucky9146 Jan 8 2018, 10:58 AM
I'm no expert on the expansion tank and charcoal filter but my car never had either connected in my ownership and I never had a problem with fuel smells. The car had been converted to carbs.
With the six conversion now both the charcoal canister and expansion will be left in the parts bin.
That is the same direction I am headed and I will not install them either. Carbs here too. Thanks and hope your making good progress!
Posted by: Lucky9146 Jan 8 2018, 11:05 AM
All the 4’s had the expansion tank and charcoal filter.
I'm sure you are correct I just don't see where the hoses may have gone from the front trunk toward the engine is all.
Oh well.Thanks and as I said in my last post, planning to just keep the clean look without them. I was more concerned as to whether it was actually a necessity. Apparently not.
Posted by: Lucky9146 Jan 8 2018, 11:10 AM
While building a Factory Five cobra replica, created a homemade charcoal canister for less than $15. 8" PVC pipe, 2 PVC end caps (one drilled in the center to mount a brass hose coupling, the other perforated with multiple drill holes), a piece of screen to cover the perforations, and some aquarium charcoal.
Thanks Rick cool idea but on further digging I'm just running without them and fix my hose routing. I did have the expansion tank already and Lawrence was going to give me a charcoal filter so it was not a parts problem. Gook luck with your car.
Posted by: gothspeed Jan 8 2018, 11:32 AM
Good idea on the deletion of the expansion tank and charcoal canister ...
So to do this, one just needs to cap the nipple at the neck of the fuel filler?
Posted by: Lucky9146 Jan 8 2018, 11:52 AM
Good idea on the deletion of the expansion tank and charcoal canister ...
So to do this, one just needs to cap the nipple at the neck of the fuel filler?
No, I would not cap that small nipple in the neck but rather run a short hose to a "T" in the larger over flow hose coming from the filler surround.
I found these pics in a thread related to the same subject on real 914-6 expansion tank discussion.
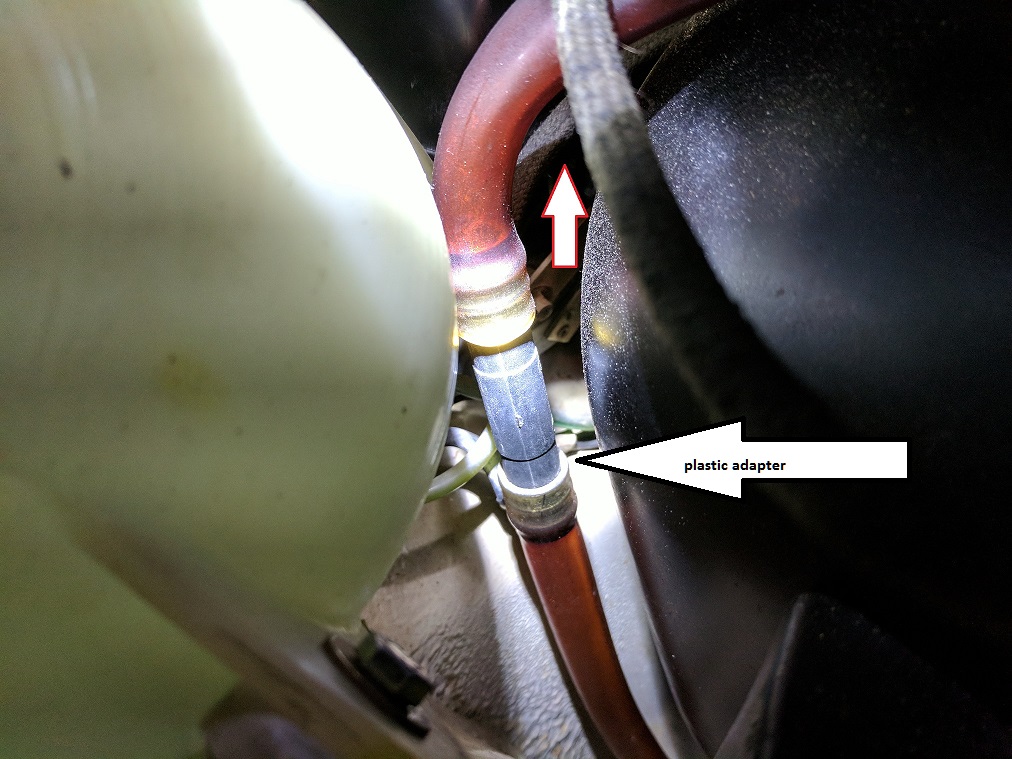
But as shown in this pic running the expansion hose to the "T", instead run the hose from the filler neck nipple to the "T". My current plan.
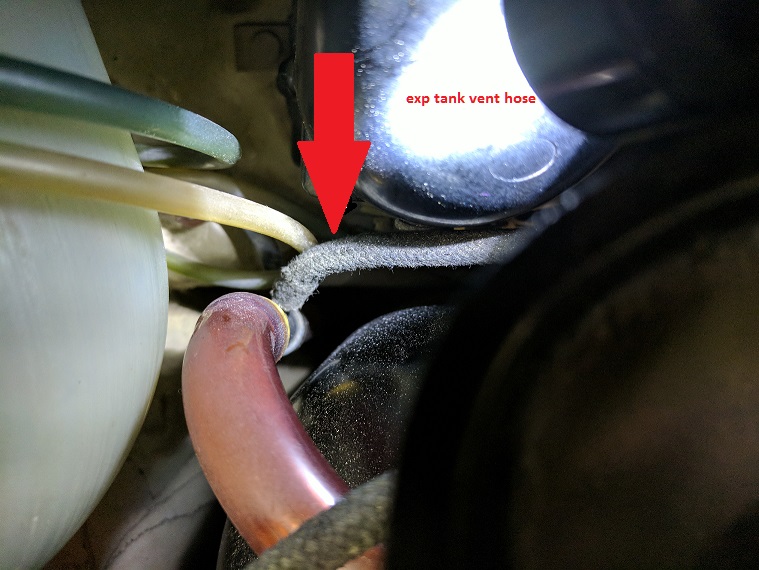
Or you could just run the small hose and the larger one out the bottom of the car if you can't find a "T"
Posted by: mepstein Jan 8 2018, 11:56 AM
You don't want the tank to "pressurize".
Posted by: gothspeed Jan 8 2018, 02:46 PM
Good idea on the deletion of the expansion tank and charcoal canister ...
So to do this, one just needs to cap the nipple at the neck of the fuel filler?
No, I would not cap that small nipple in the neck but rather run a short hose to a "T" in the larger over flow hose coming from the filler surround.
I found these pics in a thread related to the same subject on real 914-6 expansion tank discussion.
But as shown in this pic running the expansion hose to the "T", instead run the hose from the filler neck nipple to the "T". My current plan.
Or you could just run the small hose and the larger one out the bottom of the car if you can't find a "T"
You don't want the tank to "pressurize".Awesome, thanks for the expansion/charcoal deletion information. I like that it will look a lot cleaner in that area and lose a tiny bit of weight at the same time.
Posted by: Lucky9146 Jan 11 2018, 11:19 PM
Trunk Is Finished! I think….
Finally received my fire extinguishers after almost 2 months!
Look back a few posts to #365 where I learned all about fire extinguishers and took coondog’s recommendation on which ones to buy plus Defianty’s inspiration on the custom trunk board.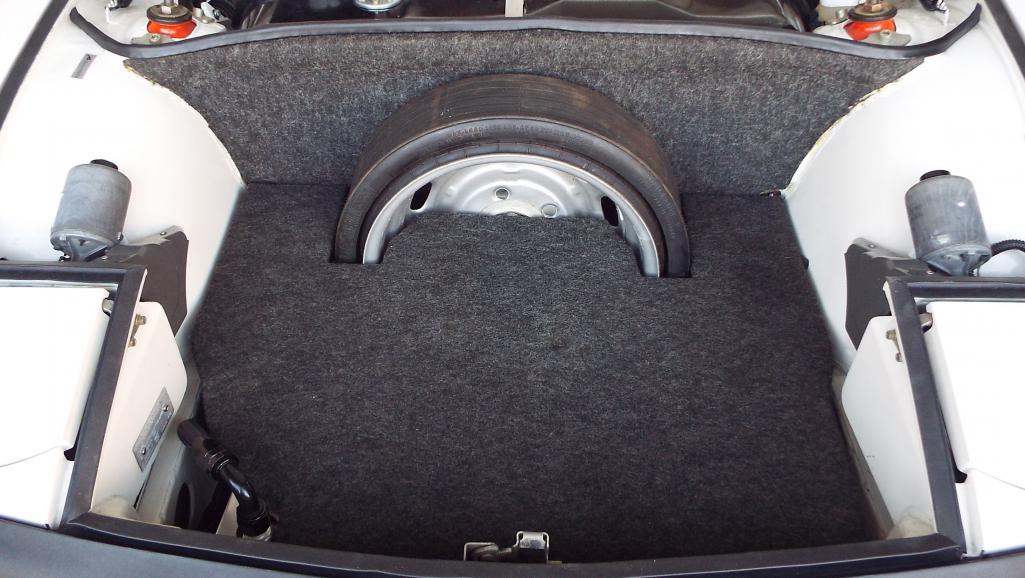
So I had a nice board in the frunk but I now had to anchor that board in order to mount the extinguishers to it so nothing can fly around. Created some mount brackets.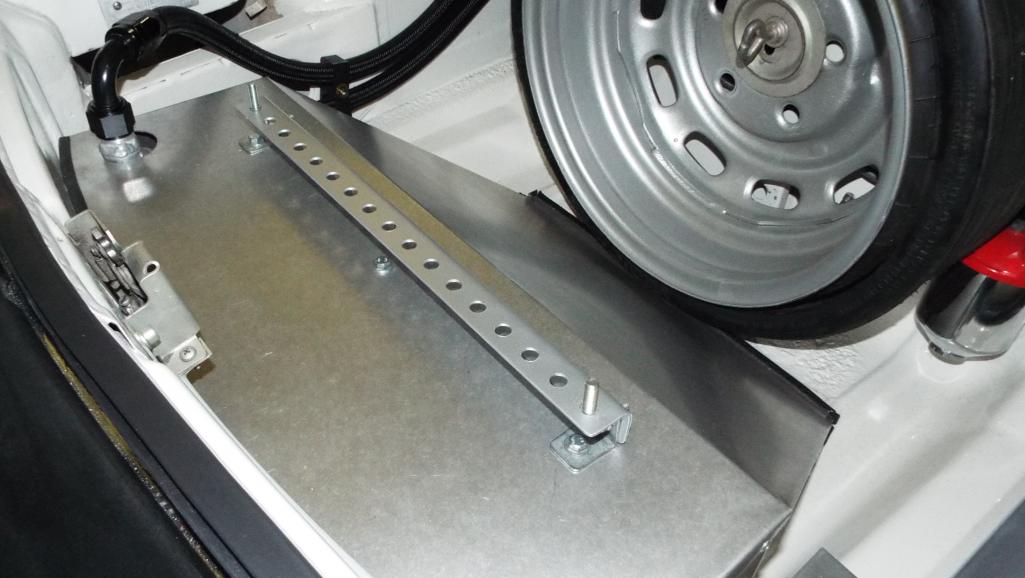
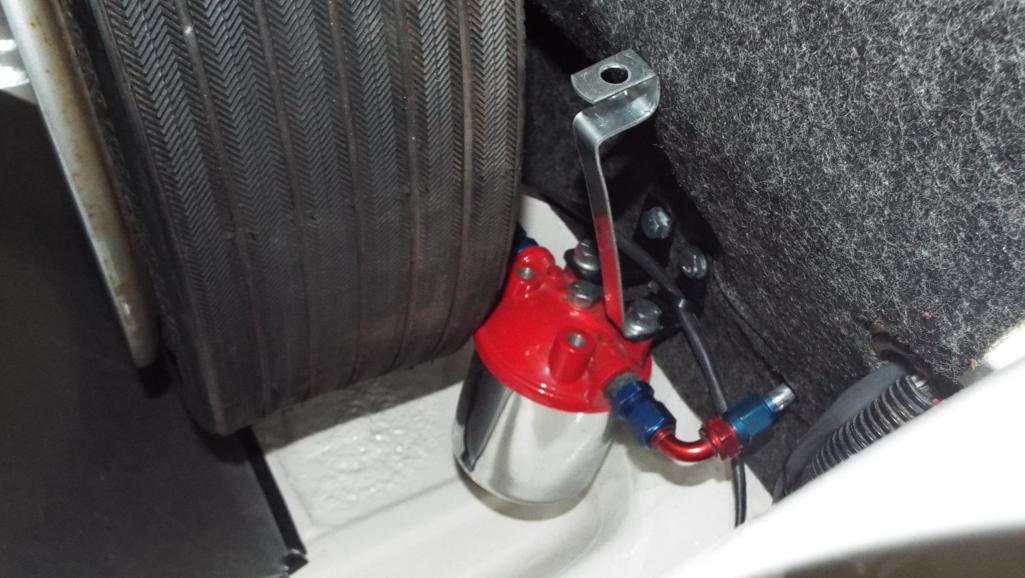
And an aluminum board stiffener / extinguisher mount.
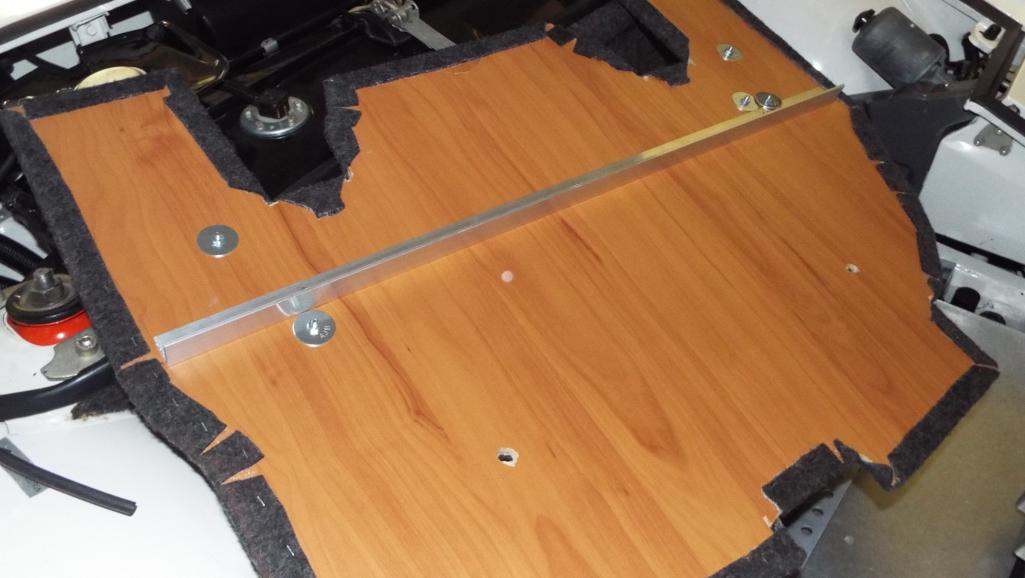
Posted by: Lucky9146 Jan 11 2018, 11:22 PM
And there is actually just a little room left
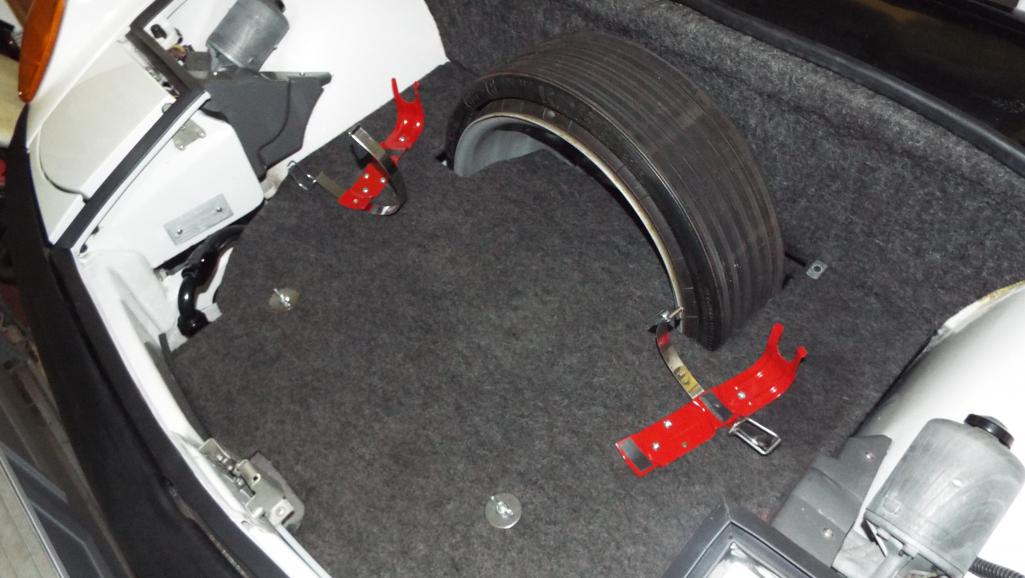
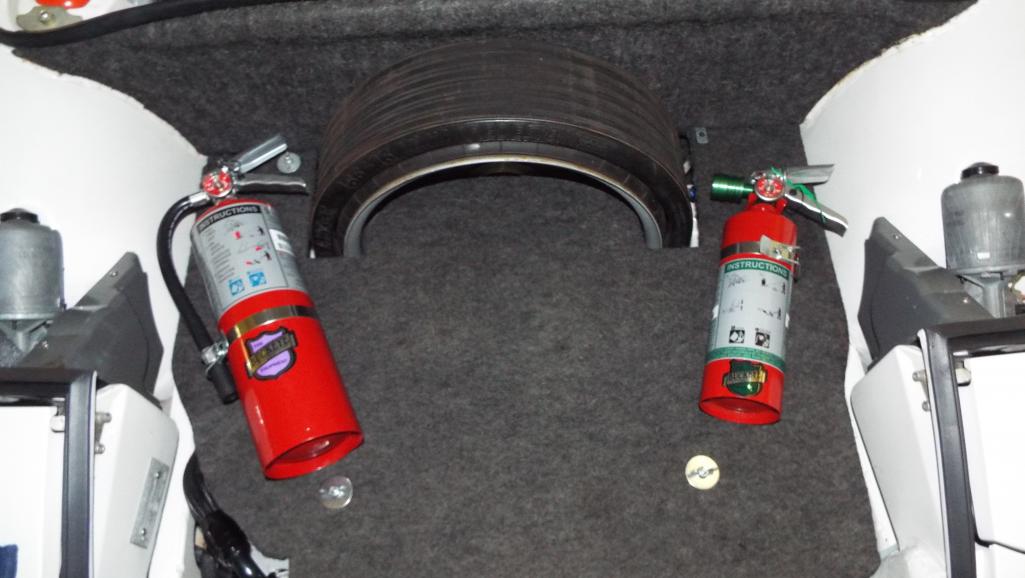
Posted by: moparrob Jan 12 2018, 12:29 AM
Stud. You are definitely obsessed.
Posted by: Larmo63 Jan 12 2018, 11:23 AM
Jim's car is awesome, he's right at that point before fire-up where you can't wait to just drive it and have a normal running car.
Been there, done that.
Posted by: 914Toy Jan 12 2018, 12:06 PM
And there is actually just a little room left
PM sent.
Posted by: ValcoOscar Jan 12 2018, 12:13 PM
Oh Jim-
Looking good!!!!
You are almost at the finish line...I think your temporary wall calendar slowed you down.

Congrats!!!!!!!
Oscar
Posted by: Lucky9146 Jan 12 2018, 05:55 PM
Stud. You are definitely obsessed.
Yes I guess I am. That was a complement right? Thanks!You said you wanted the car to go to someone who would finish it. That's me!
I had a goal to get it off the jack stands of last week and that didn't happen and now this week is already drawing to a close

Actually it is a good thing I am not rushed because I keep finding stuff under the car to do so it is OK. Got a lot done today including under the car about 10 times.
Posted by: Lucky9146 Jan 12 2018, 06:11 PM
Jim's car is awesome, he's right at that point before fire-up where you can't wait to just drive it and have a normal running car.
Been there, done that.
Thank you sir, that is quite a complement! Right on, I am getting closer to that point of right "before fire up"!
And you are 100% correct I am getting anxious to drive it.
Thing is I want it "done" like you took the car to someone and then you pick it up "DONE" done. Sure there will be sort out stuff getting it running but that's expected. Getting close now. 5 hours on it today again.
Posted by: Lucky9146 Jan 12 2018, 06:13 PM
And there is actually just a little room left
PM sent.
Thanks for the PM on fire extinguishers points taken!
Posted by: Lucky9146 Jan 12 2018, 06:21 PM
Oh Jim-
Looking good!!!!
You are almost at the finish line...I think your temporary wall calendar slowed you down.
Congrats!!!!!!!
Oscar
Thanks Oscar for weighing in! Yeah that temporary calendar slowed me way down.
Actually with what I got done today the list IS shorter and nothing got added to it for a change.
I will post more later with pics.
Posted by: Lucky9146 Jan 13 2018, 09:35 PM
Nope wasn’t done in the front trunk!
Not so funny but really good story in the end. A while back Jett posted WTB for an original gas tank overflow drain hose. I knew I had one and at the time was focused on the engine and engine compartment and had not visited the frunk in a while (there is a hint). I was happy to help him out and sell him this very dark colored somewhat stiff but still somewhat pliable original hose.
Fast forward a few months to when I realized I had sold Jett MY hose because when I sold it I completely thought mine was installed and this one was extra. 
I sent him a PM just wanting to share my experience, my stupid mistake, and word to the wise to always check your car before selling anything. Duh! I was not looking for it back, but that I was now looking for a replacement myself now.
To my surprise he said "Thanks for reaching out" and he had a friend who found some plastic tubing that was close. And he’d check and see if he still had it. Well he did and he got me a piece and he even shipped to me it free! How cool is that?
Have to say it is great hose and does not kink. Don’t know much more than that about the hose but it works perfect and I wanted give credit where credit is due to Jett for being such a cool guy. Thanks Jett I am totally happy with this hose.
"Jett" hose installed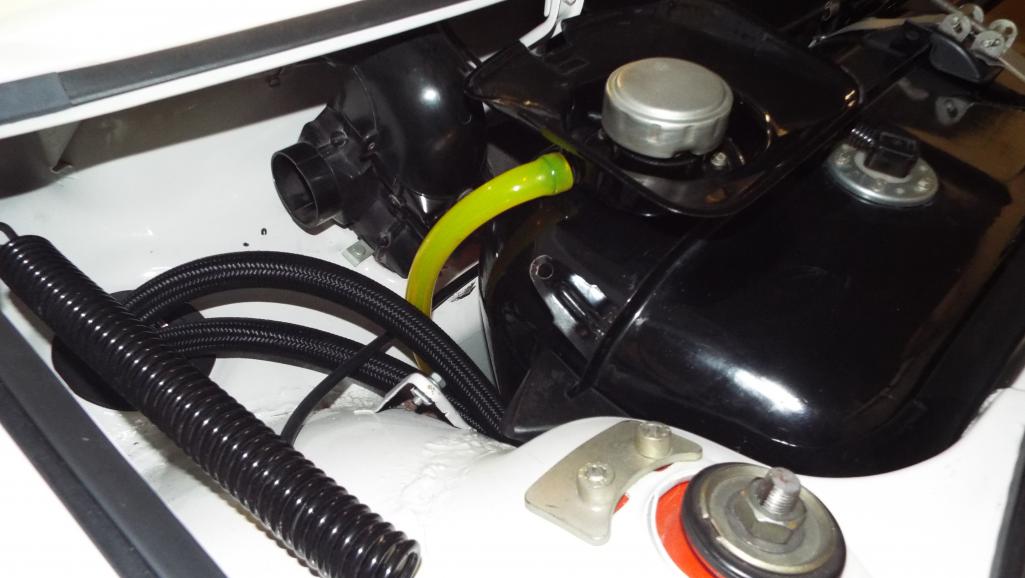
Looking at the picture above, to the left of the new "Jett" yellow gas tank overflow hose, are my oil cooler hoses headed back down toward the longs and to the engine. Always thought that hose routing decision had eliminated the windshield washer bottle. Until now. I was looking at dimpling in the bottom of the washer bottle yesterday to create room but it actually went right in. Crazy! Replaced brake reservoir hose, Gas tank vent hose, and windshield washer hoses too. Small stuff I know compared to guys doing major welding and such, which is humbling, but they will likely need to do all this little crap too one day. It all counts.
OK now done with the frunk! For real! Back to the engine compartment.
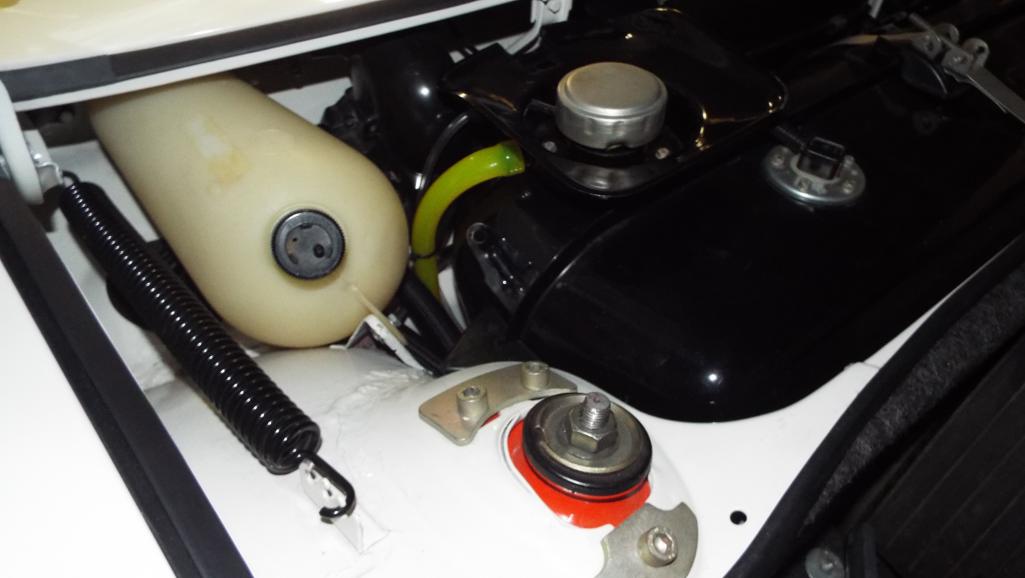
Posted by: Jett Jan 14 2018, 11:08 AM
Thank you for the kind words but it’s easy to help someone with such passion. I’ve been restoring cars as a hobby for many years and this is by far the best community of enthusiast’s and people. ...probably why we keep restoring 914’s
Btw. Now the cars are bonded by the hose
Cheers!
Attached image(s)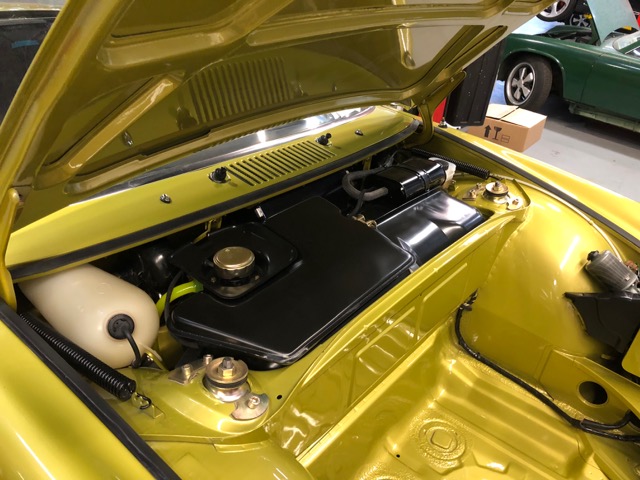
Posted by: moparrob Jan 14 2018, 02:51 PM
Funny, that hose looks like it is either filled with coolant or soylent green. Glad it works well though.
Posted by: Larmo63 Jan 14 2018, 03:39 PM
As a test, I too decided to ditch the charcoal and recovery tank set up on my car. I will report back as to gas smells. I rarely top off my tank, so that may lend itself to no fumes, but we shall see.
Posted by: Lucky9146 Jan 14 2018, 05:25 PM
Funny, that hose looks like it is either filled with coolant or soylent green. Glad it works well though.
Yeah that's it! Soylent Green!
This hose, although it may not be the correct color, is not your normal clear hose you get at Depot that kinks when you look at it. This does not kink on that radius out of the tank.
Posted by: Lucky9146 Jan 14 2018, 05:29 PM
As a test, I too decided to ditch the charcoal and recovery tank set up on my car. I will report back as to gas smells. I rarely top off my tank, so that may lend itself to no fumes, but we shall see.
Be sure to run a hose from that small breather at the top of the gas tank filler neck all the way down and out the bottom of the pan or you will get fumes. I wonder if that may have been Forresthaag's issue?
Can't wait to hear.
Posted by: Larmo63 Jan 14 2018, 09:20 PM
I did, of course.
I feel so good dropping 4.25 pounds out of the car!
Posted by: Lucky9146 Jan 17 2018, 09:17 PM
I did, of course.
I feel so good dropping 4.25 pounds out of the car!
Much faster now right? Bet you could tell right away!
Posted by: Lucky9146 Jan 17 2018, 09:25 PM
Here is where the breather ended up. I was trying to leave as much room as possible by the oil filter for changing.
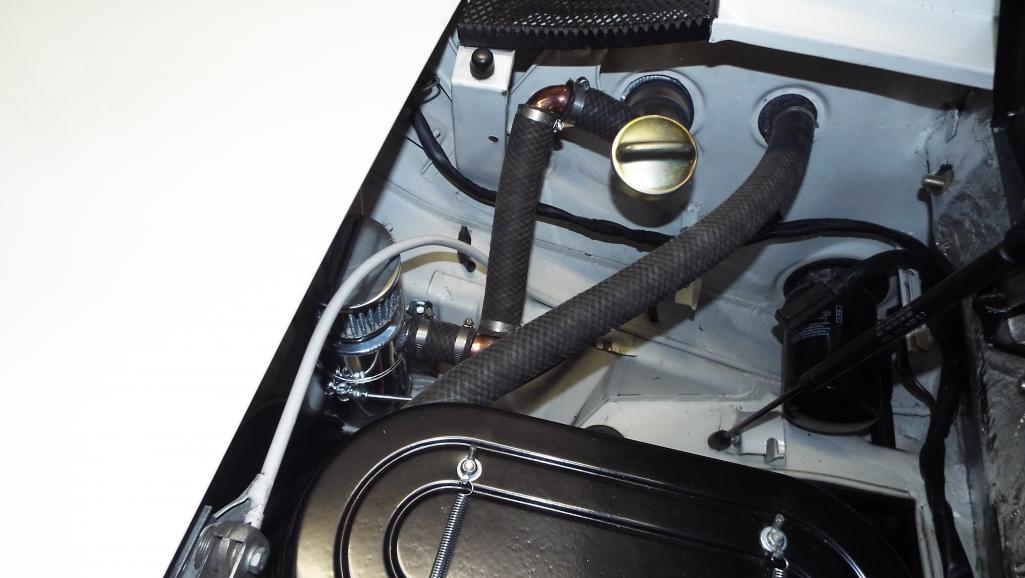

Posted by: Lucky9146 Jan 17 2018, 09:37 PM
Picture of Engine. Really close now!
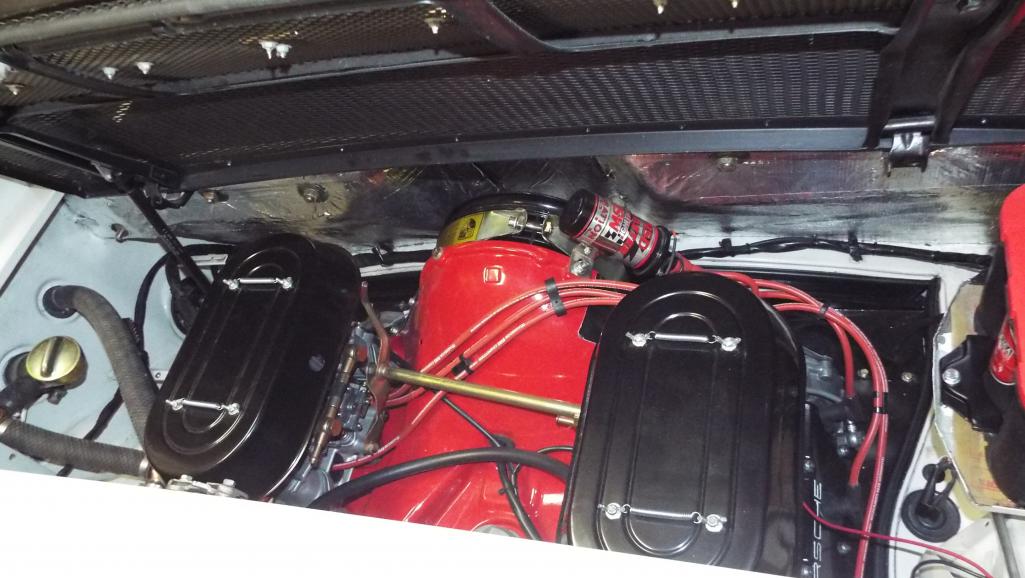
Posted by: Steve Jan 17 2018, 10:27 PM
Looks great!! When are we going to see you at the next Cars & Coffee with the car?
Posted by: moparrob Jan 17 2018, 11:48 PM
Wow, you are getting close! Give me a call when you are ready for the maiden voyage and I will bring down a batch of the commemorative ale I had brewed up for the car. 
Posted by: jkb944t Jan 18 2018, 07:07 AM
Picture of Engine. Really close now!
Firing the engine up and taking that first drive is a really exciting and special experience! This is especially true after all the great work you have done to your car.
Jeff B
Posted by: Lucky9146 Jan 18 2018, 11:04 AM
Looks great!! When are we going to see you at the next Cars & Coffee with the car?
Thanks Steve! I make no promises
Step 1. Get it down off jack stands.
Step 2. Get it running
Step 3. Sort it out
Posted by: ValcoOscar Jan 18 2018, 11:10 AM
Looks great!! When are we going to see you at the next Cars & Coffee with the car?
Same here Jim...keep us posted as I would enjoy meeting up at Cars & Coffee too.
Posted by: Lucky9146 Jan 18 2018, 11:10 AM
Wow, you are getting close! Give me a call when you are ready for the maiden voyage and I will bring down a batch of the commemorative ale I had brewed up for the car.
I will for sure take you up on that offer!
Commemorative ale who knew? I will let you know. Cool pic of the car on jack stands. Very cool
Thanks
Posted by: defianty Jan 18 2018, 11:45 AM
Looking great Jim! Can't wait to see pics of the car out on the road.
Posted by: Lucky9146 Jan 18 2018, 05:38 PM
Looks great!! When are we going to see you at the next Cars & Coffee with the car?
Same here Jim...keep us posted as I would enjoy meeting up at Cars & Coffee too.
Thanks, Looking forward to it!
Posted by: Larmo63 Jan 18 2018, 07:04 PM
At the end of my build and initial start up, I made list after list of "to do" stuff. I just kept at it, checking them off one by one, and sooner or later I ran out of excuses.
Then I went to get gas and started it. It started right up and even idled really well.
F*&%king great feeling!!!!!!
Posted by: Lucky9146 Jan 18 2018, 07:53 PM
Picture of Engine. Really close now!
Firing the engine up and taking that first drive is a really exciting and special experience! This is especially true after all the great work you have done to your car.
Jeff B
Yes it certainly will be BUT today was a bust with major steps backward.
Thanks Jeff for support and the complement on the work on the car.
Lots more to follow later this evening with a complete update.
Posted by: Lucky9146 Jan 18 2018, 07:59 PM
At the end of my build and initial start up, I made list after list of "to do" stuff. I just kept at it, checking them off one by one, and sooner or later I ran out of excuses.
Then I went to get gas and started it. It started right up and even idled really well.
F*&%king great feeling!!!!!!
Yeah I use a white board for my list. Deleting and Adding, really like the part of deleting the best
But like I just said in my last post things didn't go to well today. Will post with the latest update as I am a little behind in posting.
Posted by: Lucky9146 Jan 18 2018, 08:55 PM
Well yesterday was a big day as I felt it was finally time for it to come off the jack stands. But after a late start it was getting late last nite and I still needed to download pictures. I figured I would just post today.
Forgot just how low it was! Been up there since Sept 11 of last year. I forget a lot these days.
Wow it was actually kind of hard to get it down. I do not to use the side jack points (just a weird thing with me). Took a while to do it for sure.
I was feeling pretty good about life. Ahhh home stretch!
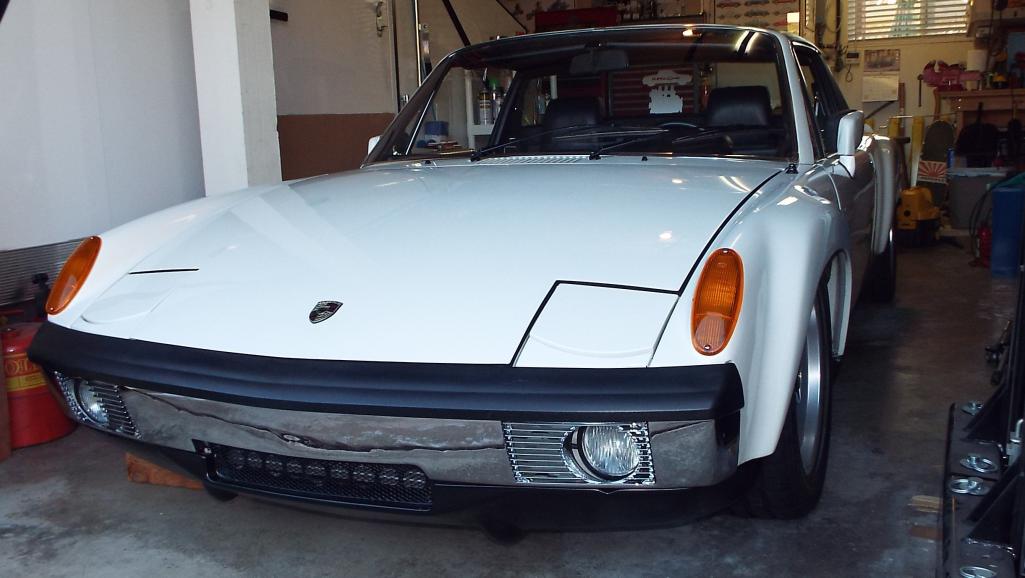
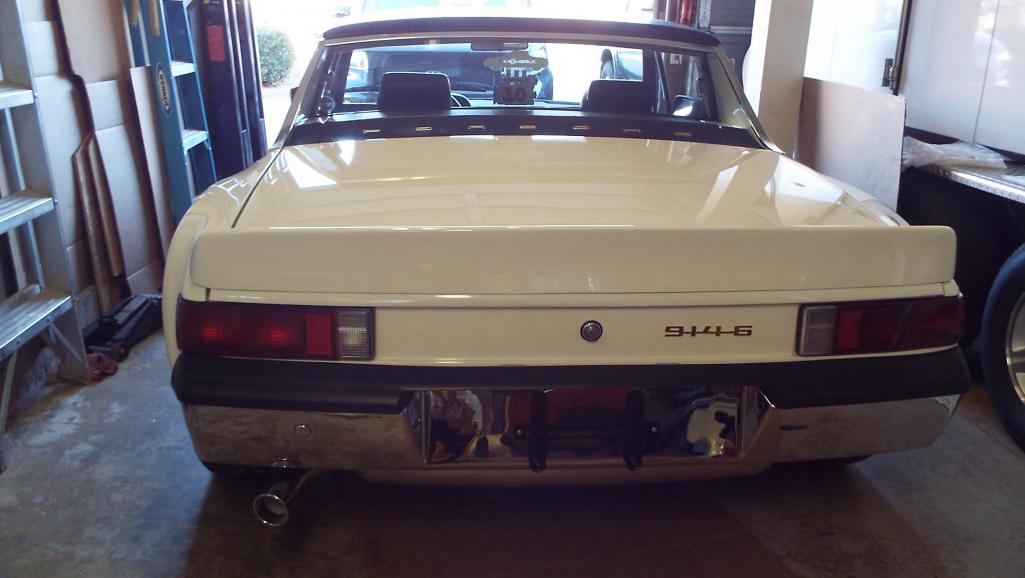
Posted by: Lucky9146 Jan 18 2018, 09:45 PM
The plan for today seemed simple enough get some Chevron 91 octane gas and put it in the tank 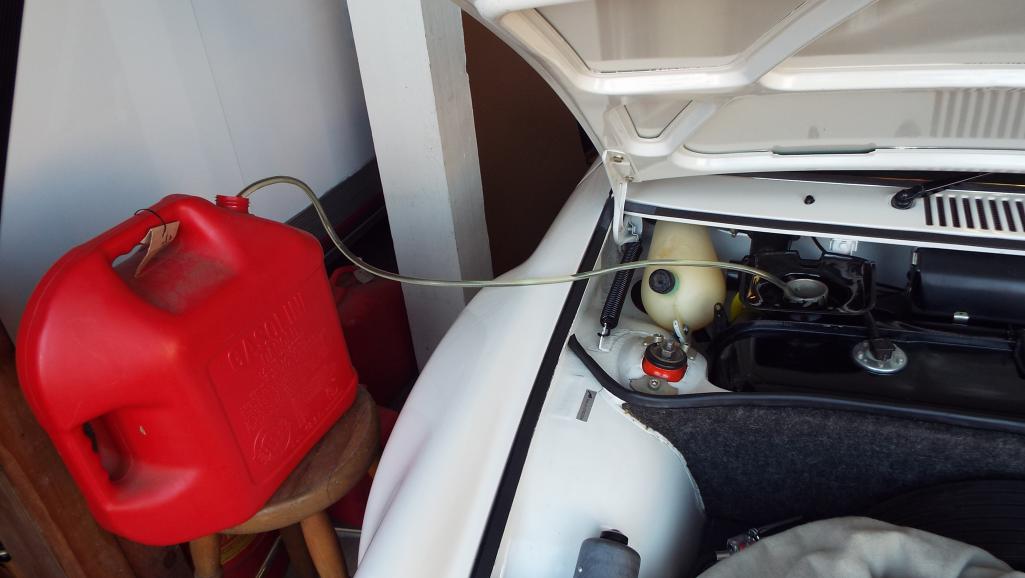
Next on the plan was to rig up some long hoses from the fuel block to a bucket then power up the fuel pump in order to flush the lines from the gas tank all the way back to the fuel block.
Easy peasy! Right? Never made it to this step. 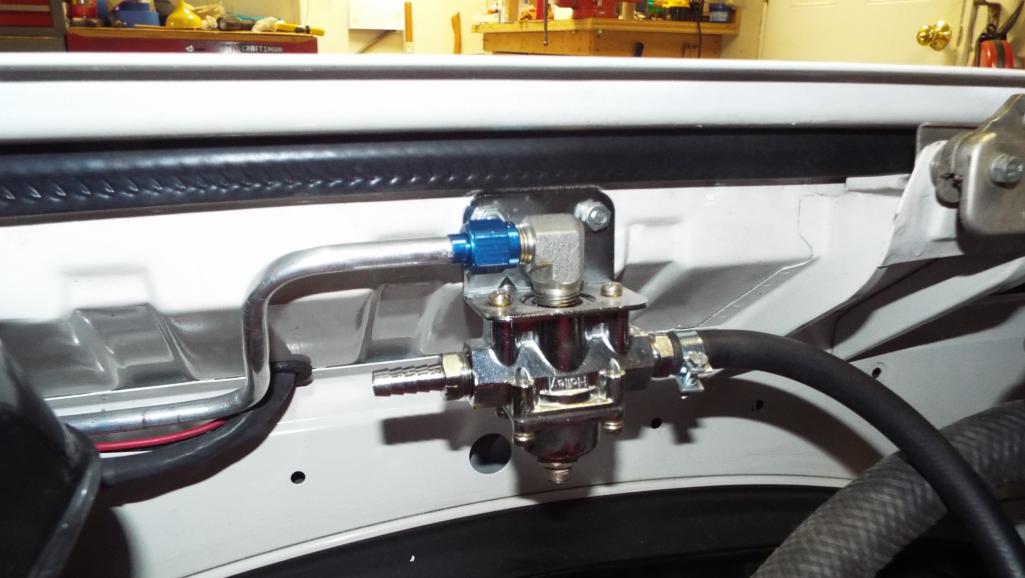
Yup after putting 10 gallons of gas in, there was a pretty good puddle under the fuel tank that had grown to about 2ft by 2ft which I did not notice right away.
Looking up the access hole under the tank, with fuel dripping all over the place, I see some coupling fittings on the fuel line that is right up next to the tank with no possible way to tighten them. ![hitfan[1].gif](style_emoticons/default/hitfan[1].gif)
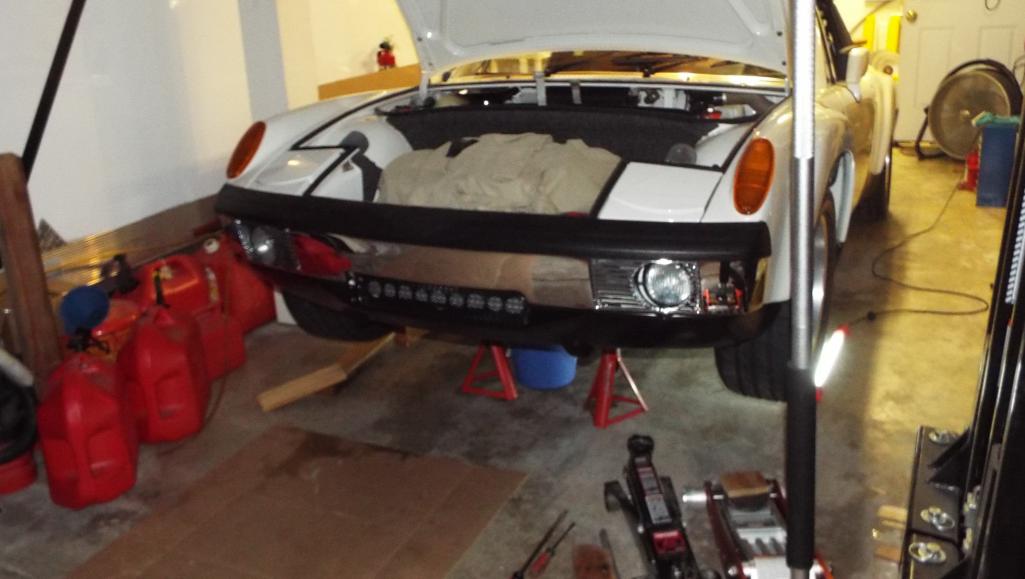
Gas has to come back out and you know how that goes, you can’t siphon it all out, so more mess was coming. Boy howdy mess! By now it is getting dark and damp out. Stinks to high heaven too.
Remember a minute ago I was talking about how tough it was to get down, yep just as hard to get it back up on stands.
Think I will consider parking on 2 X 10’s just to get it up a tad.
Tank comes out tomorrow! Still trying to figure out why I didn't put the gas in up on stands.
Still airing out the garage There we are all up to date.
Posted by: whitetwinturbo Jan 18 2018, 10:51 PM
.....................shut down water heater if in garage or ELSE 
Posted by: defianty Jan 19 2018, 02:41 AM
That's rough Jim. I had a similar problem when I removed the tank - gas everywhere. It's a scary position to be in. Hope it's an easy fix.
Posted by: jkb944t Jan 19 2018, 06:58 AM
Wow, I feel your pain! I went through the exact same issues and ended up removing the tank four times. Two bad fuel pumps located under the fuel tank and then a pinched line the third time. Ended up moving the fuel pump into the trunk where I could get to it. I still need to eventually remove it one more time to hook up a recirculating fuel line.
You might be able to get in and tighten the line without removing the tank. You will have to do it by feel since there is no way to see the fittings under the tank.
Jeff B
Posted by: Lucky9146 Jan 19 2018, 09:29 AM
.....................shut down water heater if in garage or ELSE
Nice! Well I sure hated injecting the cool damp air into the garage with a big fan most of the evening, but did so and got it aired out enough. Have a tankless so no open flame which is cool.
We're Ok
Posted by: Lucky9146 Jan 19 2018, 09:35 AM
That's rough Jim. I had a similar problem when I removed the tank - gas everywhere. It's a scary position to be in. Hope it's an easy fix.
Sorry to hear that but I kinda figured I was not alone. Sucks trying to move fast to jack it back up high enough to see what is going on with gas leaking out. I will share the problem and the fix. Thanks!
Posted by: Lucky9146 Jan 19 2018, 09:43 AM
Wow, I feel your pain! I went through the exact same issues and ended up removing the tank four times. Two bad fuel pumps located under the fuel tank and then a pinched line the third time. Ended up moving the fuel pump into the trunk where I could get to it. I still need to eventually remove it one more time to hook up a recirculating fuel line.
You might be able to get in and tighten the line without removing the tank. You will have to do it by feel since there is no way to see the fittings under the tank.
Jeff B
I would not wish 4 times on anybody
I do not envy your eventual 5th time.Once is more than enough for me!
Fuel pump and filter already in the front trunk. Thought I had double checked all the fittings but we'll see.
Thanks for weighing in.
Posted by: Lucky9146 Jan 19 2018, 09:56 AM
Thought I would show what I came up with as a battery clamp for my Optima.
Took a stock battery clamp and welded a piece of metal that I sculpted to fit around the center cell.
The gas tank awaits!.
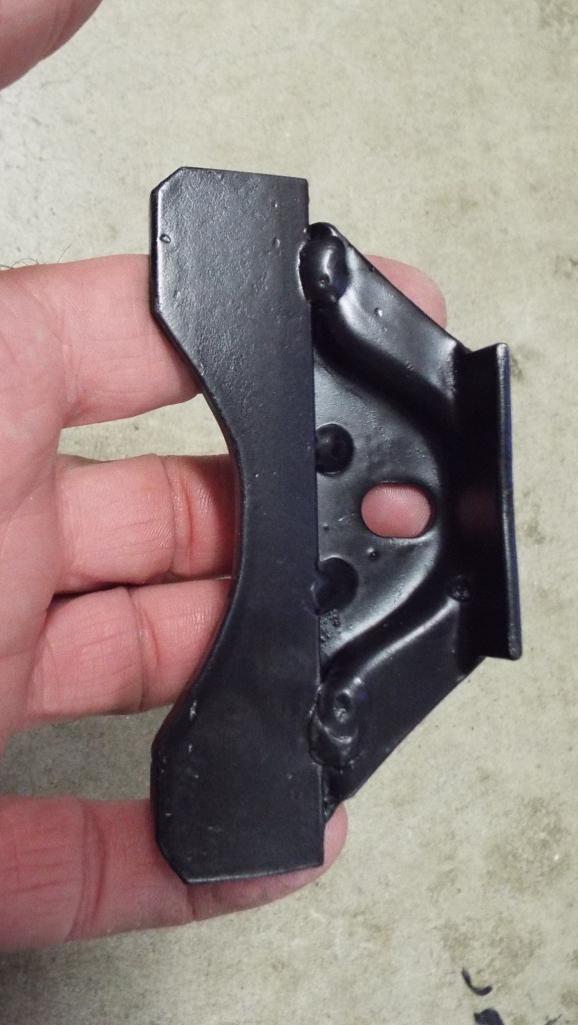
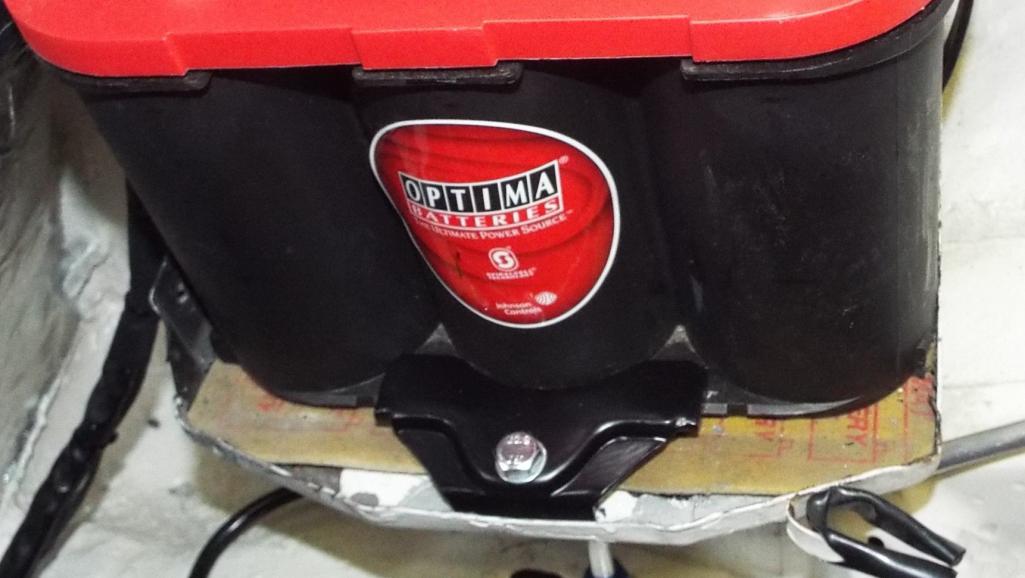
Posted by: Larmo63 Jan 19 2018, 10:05 AM
To be on the safe side, you only need to put a gallon or so of gas in, just enough to start it......
Posted by: bbrock Jan 19 2018, 11:32 AM
Thought I would show what I came up with as a battery clamp for my Optima.
Took a stock battery clamp and welded a piece of metal that I sculpted to fit around the center cell.
I like it!
 Curious though. Every Optima I've bought (for other cars) came with a kit of plastic pieces that snap to the base to accommodate a variety of mounting styles. Do none of those work on the 914?
Posted by: pete000 Jan 19 2018, 02:55 PM
Thought I would show what I came up with as a battery clamp for my Optima.
Took a stock battery clamp and welded a piece of metal that I sculpted to fit around the center cell.
The gas tank awaits!.
That is sweet, yo should market that I would buy one. Maybe 914 Rubber can make them.Posted by: Larmo63 Jan 19 2018, 07:32 PM
I modified a clutch pedal stop for a battery hold down.......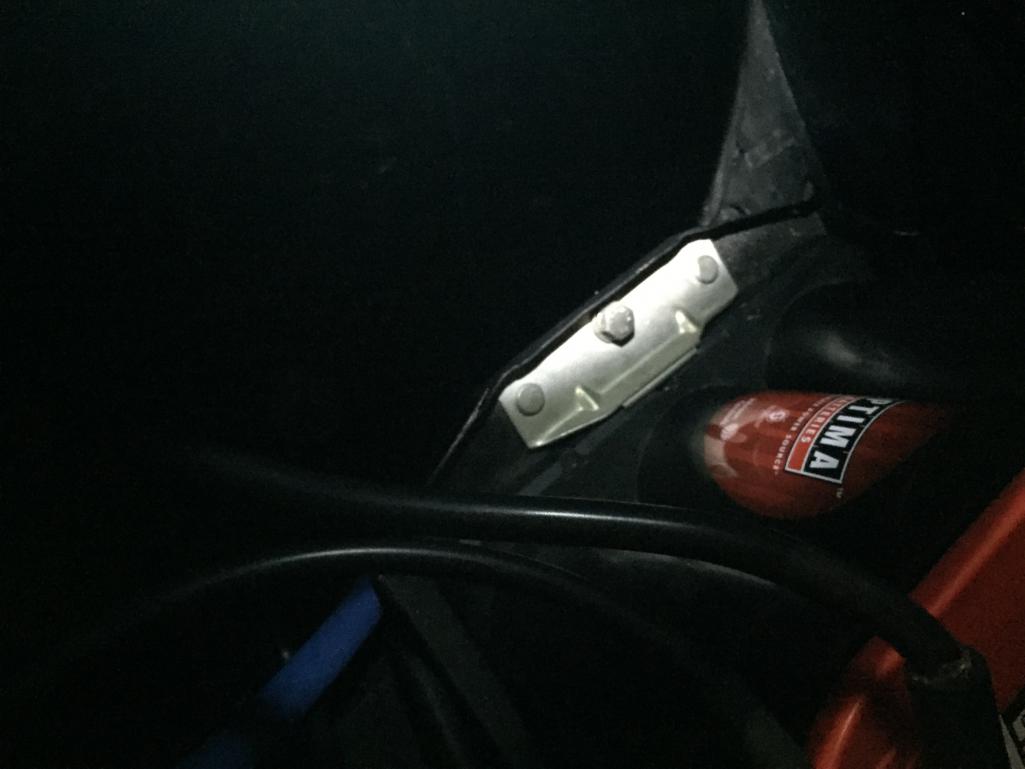
Posted by: Lucky9146 Jan 19 2018, 07:42 PM
Thought I would show what I came up with as a battery clamp for my Optima.
Took a stock battery clamp and welded a piece of metal that I sculpted to fit around the center cell.
I like it!
Curious though. Every Optima I've bought (for other cars) came with a kit of plastic pieces that snap to the base to accommodate a variety of mounting styles. Do none of those work on the 914?You know what that is an interesting point.
This batt came with the car project and I do recall seeing a red plastic thing but it was cracked or broke and I just tossed it. Meant to try to look at a new Optima today to see what they come with but was tied up all day fixing my gas leak. Oh well my clamp is done now. I apparently like doing things the hard way.
Posted by: Lucky9146 Jan 19 2018, 07:45 PM
To be on the safe side, you only need to put a gallon or so of gas in, just enough to start it......
True True True! But the thing is, it was that last gallon in the tank that made the biggest mess.
Posted by: Lucky9146 Jan 19 2018, 07:47 PM
I modified a clutch pedal stop for a battery hold down.......
Looks good but I wanted more clamp, kinda like more cow bell. Ya just can't have enough!
Posted by: Lucky9146 Jan 19 2018, 07:55 PM
Thought I would show what I came up with as a battery clamp for my Optima.
Took a stock battery clamp and welded a piece of metal that I sculpted to fit around the center cell.
The gas tank awaits!.
That is sweet, yo should market that I would buy one. Maybe 914 Rubber can make them.Thank you very much! Afraid it's a bit too labor intensive to make and sell, at least for me. I'd have to get like $120 for it
Slow welder with limited skills and lots and lots of grinding.
Posted by: Lucky9146 Jan 20 2018, 12:53 AM
Premature Dejackulation (when you take your car off jack stands a little too soon)
Not a good thing with fuel coming out under your car and not being able to figure out where it is coming from.
Well here we go it was a simple bad flare on the aluminum tubing on this part of the fuel line coming from the front trunk right after the fuel pump. Blue line runs back to the engine.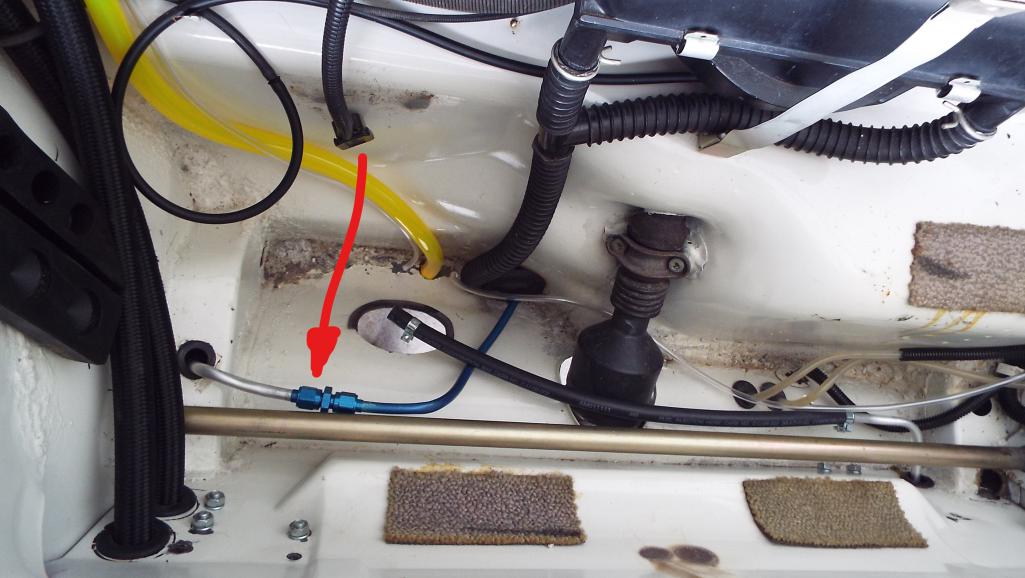
I’ve had the day to think about this, along with struggling with a fix myself.
Rob my PO did the fuel lines on this car and throughout the day I have checked many of the other flares he did and they are all good. So why did this one fail? Well I think I figured it out.
On this section of hard line, 10 inches total, the flare for the fuel pump end was done first, not on the car, easy. It was done first because it is so low on the bulkhead in the trunk and it would be impossible to do a flare in place in that location, just no room. With that good flare on the one end he then had to fight the line through the bulkhead hole back and miraculously bending it to come up vertically through the hole in the channel.
Then he somehow flared that very short end, only 3 inches showing, of tube coming up out of the hole and way in the cavern. I seriously don’t know how he even did it. So even though this caused me some grief I say hats off to Rob for all the good flares and getting a flare at all in that difficult location. I do not think I could have done any better with it and that’s the truth.
It took a lot of thinking and considering options before I headed to my tubing shop 25 minutes away. Nothing in my town.
Posted by: Lucky9146 Jan 20 2018, 01:04 AM
This is how short this line actually is and how it runs from the fuel pump through the bulkhead.
Yes that is one picture. 
Back from the tube shop with a solution! Convert that 10 inch section to 250 PSI rubber hose. I get having a hard line from the fuel pump to almost the engine, but I simply could not see making that line again with any better results. And we couldn’t come up with a good hard line solution.
Now it was time to remove the old line. It was then I saw there was a pretty tight bend in the line. So good call to replace.
It wasn’t exactly a picnic to run the rubber line either. Tight, Tight, Tight. About 4 hours just that part and I still got to put the tank back!
A glass of wine is in order. Took the whole day.
The finished project. 
Posted by: moparrob Jan 20 2018, 01:47 AM
Nicely done.
Posted by: defianty Jan 20 2018, 04:23 AM
Posted by: Lucky9146 Jan 20 2018, 10:15 PM
To be on the safe side, you only need to put a gallon or so of gas in, just enough to start it......
Gave this some thought today and had I only put in a gallon, the level in the tank would not have been high enough to find this leak. It would not be until the fuel pump fired up and then the leaking fitting would have sprayed everywhere. The fitting was leaking like a sieve with only gravity! I can't say if 5 gal would have found the leak with gravity or not.Tank in now back in and I created a longer drain tube rather than just having the cap that was way up there (see pic) so it now has easy access and could be drained quickly and cleanly.
In the situation I was in I pulled the fuel line hose off the red tube, which may not have been the best choice, but with the amount of gas present and coming down on me, it's what I did.
As I was almost finished writing this I decided to check the PET and realized there is suppose to be a strainer. None was there, none installed. Guess what I will be looking for next.
This is how the drain was with a cap, Red tube is the fuel line.
And now (I wanted to flip this pic but couldn't, it's upside down)
Posted by: defianty Feb 2 2018, 02:09 PM
I guessing with your lack of updates the car's finished and you haven't stopped driving it.
Posted by: 914forme Feb 2 2018, 02:16 PM
Strainer can be found on http://www.tangerineracing.com/stainlessfuellines.htm
Wow I must know that site to darn well
Posted by: moparrob Feb 2 2018, 03:35 PM
Posted by: Lucky9146 Feb 2 2018, 11:03 PM
Thanks for reaching out guys and the strainer tip. I sure wish "lack of updates the car's finished and you haven't stopped driving" I would not deny the start up after all this and Moparrob has promised a special brew! I'm going to hold him to it
It has been a combination of things that seemingly ground my project to a near halt or slo-mo progress. Had several urgent priorities come up that took my complete attention. Family member surgery. And out of state guests in for a few days.
But I also kinda ran out of steam when I hit all the gas tank stuff. Here I was thinking I was very close by putting gas in, first the leak, then I find something so simple missing, the in tank strainer sock and nipple. And it makes perfect sense they should be there, but it made me wonder what else I could have over looked. Ever heard the expression “You don’t know what you don’t know”? Well it happened twice in quick succession, read on. I had not thought of the need for a strainer in the tank and I believe the fuel system having been converted to AN at the tank by the PO led me to just overlook it. At first, I considered just moving forward and letting the external fuel filter catch anything, but having had the tank cleaned out and sealed convinced me an extra layer of protection was absolutely necessary.
Now I was on the hunt for parts and in the process got yet another education. Some of this stuff of course is getting harder to find. The strainer is fairly easy to get, but the nipple and the nut are not. The nut can be gotten new at AA for what I considered a pretty reasonable price. Then it was the waiting game for the various parts to arrive.
So, I made a trip to my 914 buddies house, toolguy, and was looking at his perfectly restored, newly installed, original front suspension, when I asked about some bolts I noticed on my car and that I couldn’t figure out what they were for. I then learned they are for the steering rack cover that I now realize I am missing. A WTB was posted here with good response. Ended up getting a great steering rack cover and a re-plated fuel nipple from Bruce Stone and at very good prices. Thanks Bruce! He also offered a couple of tips! Been cleaning up and painting the cover in the mean time.
Turns out there are 2 nipple sizes and Bruce is now sending me the larger one re-plated to replace this rusted one. The larger one will work fine with the hose I have and will then make the transition to AN from there.
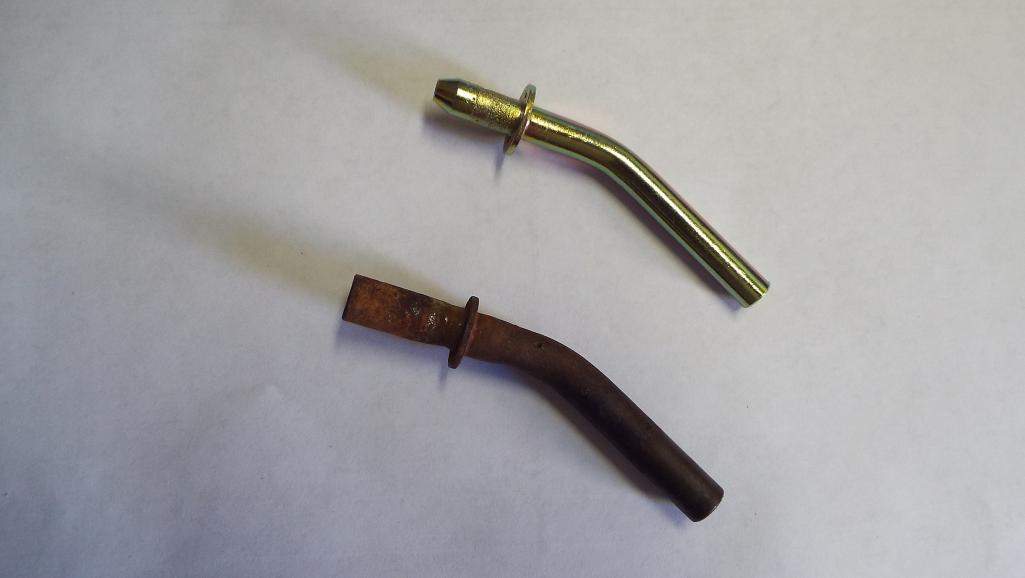
Posted by: defianty Feb 3 2018, 07:31 AM
I hope your family member is recovering well Jim.
Good to see you're moving along with it.
It's often the missing small parts that make you stall, especially nearing the end of a project when those parts are vital.
Looking at that nice plated fuel nipple I've added mine to my small pile for plating, thanks.
Posted by: Lucky9146 Feb 3 2018, 05:12 PM
I hope your family member is recovering well Jim.
Good to see you're moving along with it.
It's often the missing small parts that make you stall, especially nearing the end of a project when those parts are vital.
Looking at that nice plated fuel nipple I've added mine to my small pile for plating, thanks.
Glad I could shine some light on that little nipple. I can see how easily it could be overlooked. Can't wait for the re-plated one from Bruce! Thanks for looking in.
Posted by: lonewolfe Feb 3 2018, 05:57 PM
You can still buy this fuel tank nipple kits new for less than
Playing the old one. CB performance sells the whole kit for 8.95 and it comes with the nipple, securing nut and gasket. I’d install a brand new one. They are the same as what was in aircooled VW’s.
Posted by: Lucky9146 Feb 3 2018, 07:54 PM
You can still buy this fuel tank nipple kits new for less than
Playing the old one. CB performance sells the whole kit for 8.95 and it comes with the nipple, securing nut and gasket. I’d install a brand new one. They are the same as what was in aircooled VW’s.
Thanks for the tip that is amazing and possibly better suited to my situation.
If that nut is the same, and it looks like it is, Bruce Stone will be thrilled.
Will have to contact CB Perf on Monday to find out tube diameter.
Below is what is on their website.
3189 Fuel Tank Outlet Kit
Your Price: $8.95
Posted by: Lucky9146 Feb 4 2018, 11:36 PM
While I’m waiting for gas tank parts I got into a couple of small projects, one of which was the steering rack cover.
It needed a bit of straightening with hammer and dolly, then Por15 on the up side with prime / paint the bottom side that will be visible.
These cars are so low and I know you can't really see this part when installed but I was on a mission to see what I could do with it.
Before Pic - Unfortunately what you really can't see is the crease marked in red running the length of it was wavy and bowed.
The flat area marked in blue was actually curved in the center but not the ends.
Posted by: lonewolfe Feb 5 2018, 12:43 AM
Wow, nice improvement!
Posted by: Lucky9146 Feb 5 2018, 10:07 AM
Wow, nice improvement!
Thanks, I do what I can, but it sure doesn't hold a candle to the work being performed on Cairo94507's car! That's a double Wow!
Or Defianty's car also a double Wow! I have some added inspiration now (disclaimer I am by no means a computer guy)
I just figured out how to change my screen background in Windows 10 and I get to see this all the time on my computer now!
Unfortunately it is currently on jack stands
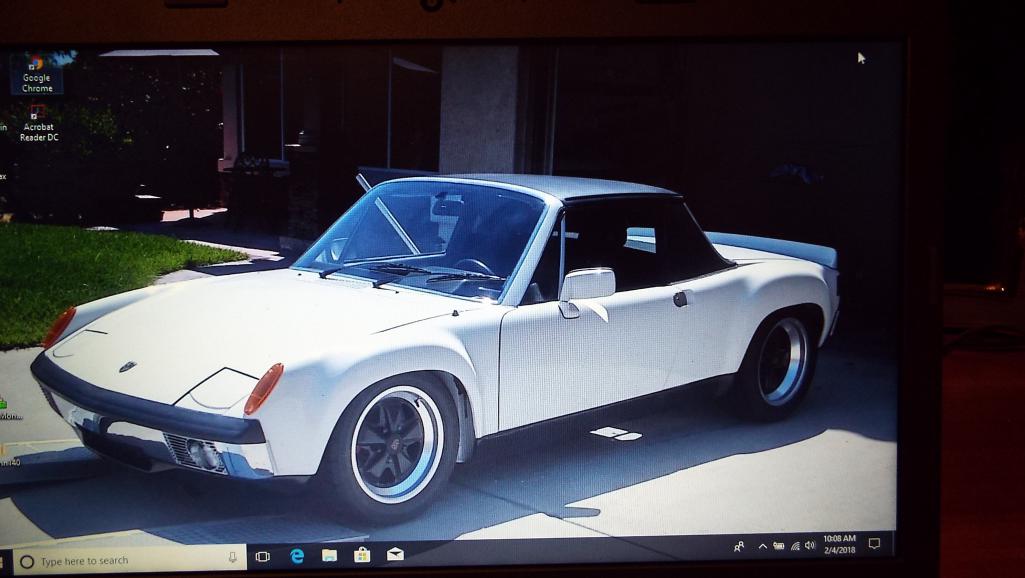
Posted by: Lucky9146 Feb 5 2018, 10:43 AM
You can still buy this fuel tank nipple kits new for less than
Playing the old one. CB performance sells the whole kit for 8.95 and it comes with the nipple, securing nut and gasket. I’d install a brand new one. They are the same as what was in aircooled VW’s.
Thanks for the tip that is amazing and possibly better suited to my situation.
If that nut is the same, and it looks like it is, Bruce Stone will be thrilled.
Will have to contact CB Perf on Monday to find out tube diameter.
Below is what is on their website.
3189 Fuel Tank Outlet Kit
Your Price: $8.95
Called CB Performance this morning and was told the tube is very small for VW. I do not know if they measured or not but said it was 4mm ID and 6mm OD. This could possibly work for 4 cylinder 914 but doubt it would be good on 6 cyl with Webers being fed with AN 6 fuel line.
Thought I would provide the follow up. Thanks again lonewolfe for suggestion.
Forgot to ask about the nut, might be a good deal
Posted by: Lucky9146 Feb 6 2018, 11:55 AM
The other project I’ve been working on while waiting parts is fitting Marty Schneider’s cool fiberglass GT rear valance. Nice little piece I was going to do later but getting past the gas tank fuel line issues has provided an opportunity. Figured a roto Zip might work and it does a nice job.
Thought of trying to make a template but it just seemed to be such a pain. Took my time and by eye nibbled at it and did several trial fits that got it on close enough to then determine a proper clearance to the tail pipe.
Pencil line generated by tracing a spacer to the exhaust.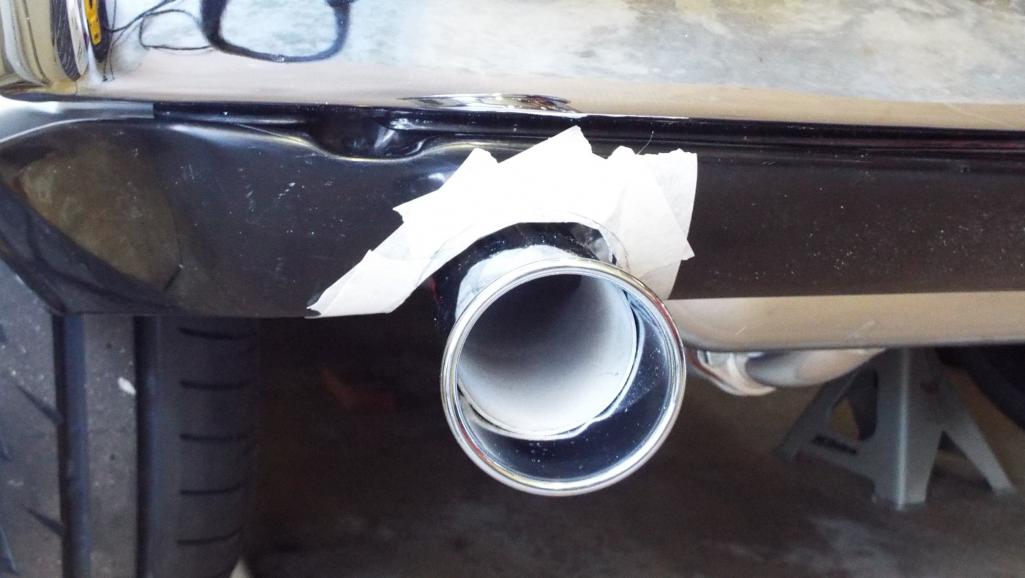
Rough cutting got it close enough!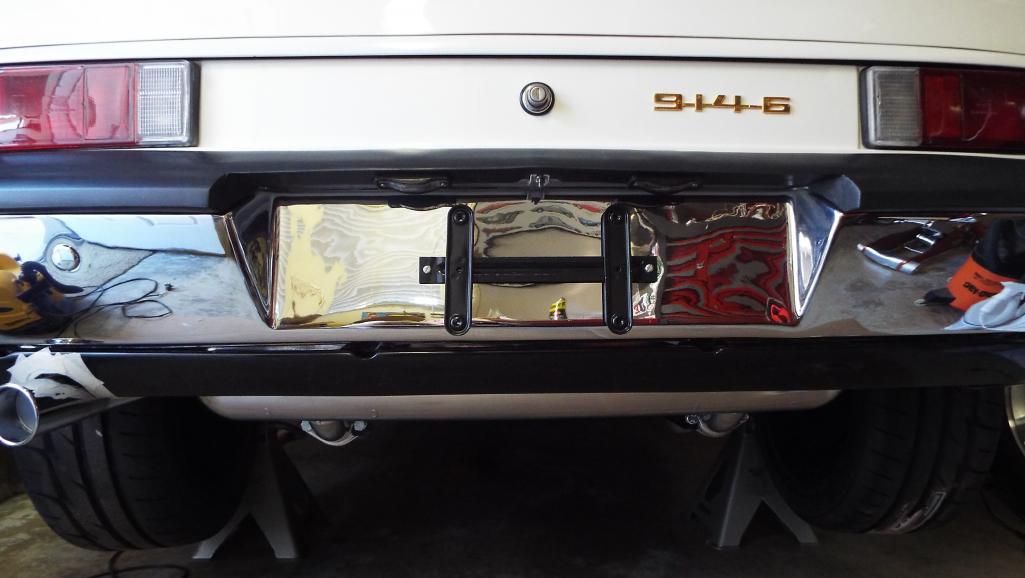
Great fit!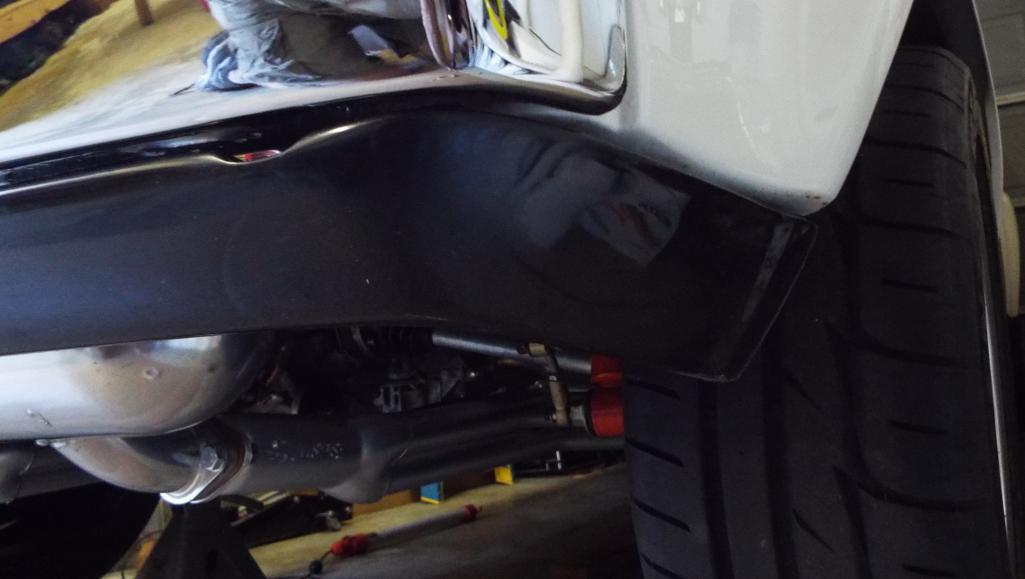
Posted by: Lucky9146 Feb 6 2018, 12:00 PM
Fitting and clamping and final sanding the opening went great!
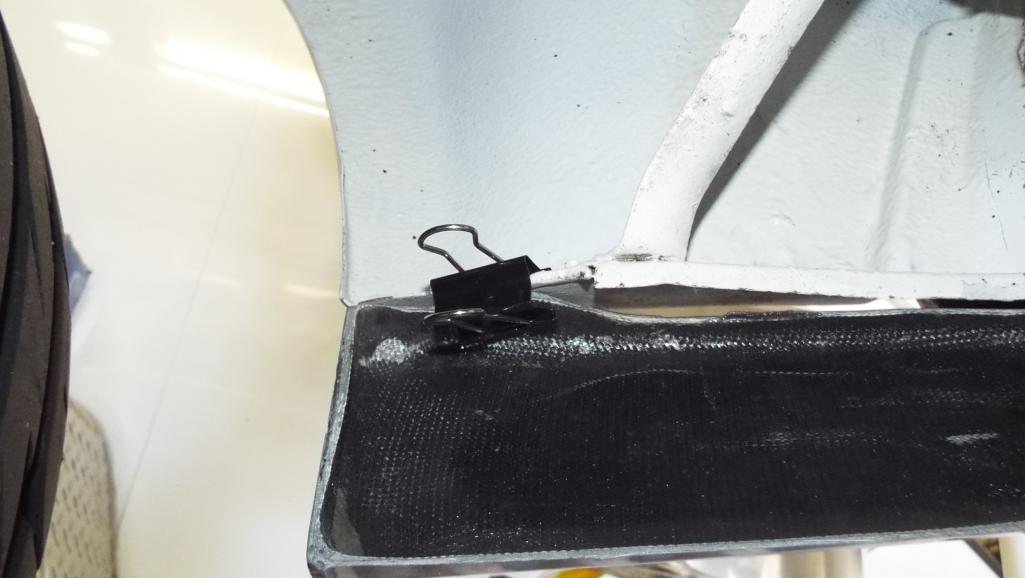
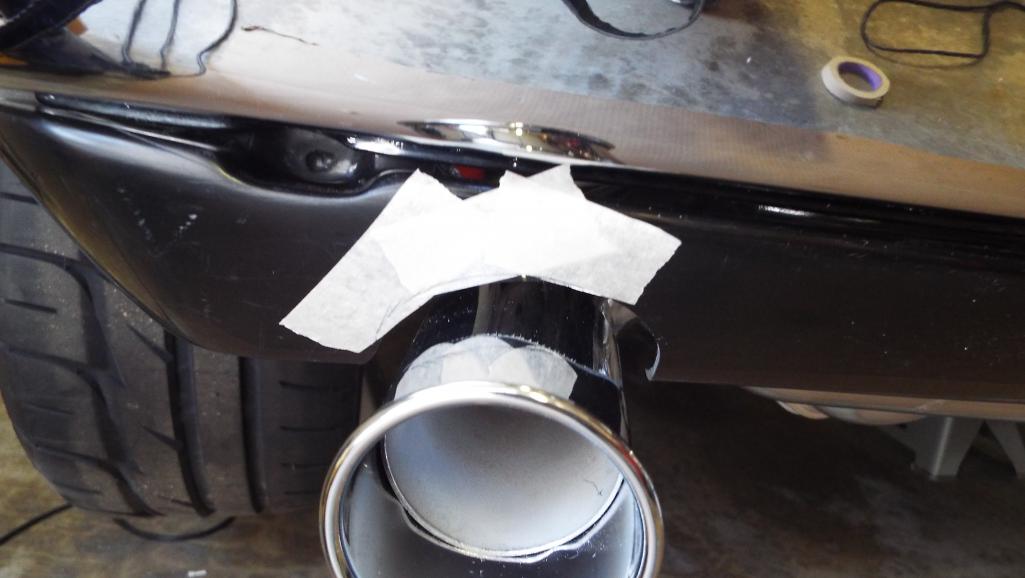
Posted by: Lucky9146 Feb 6 2018, 12:03 PM
All done. Next is prime and paint!
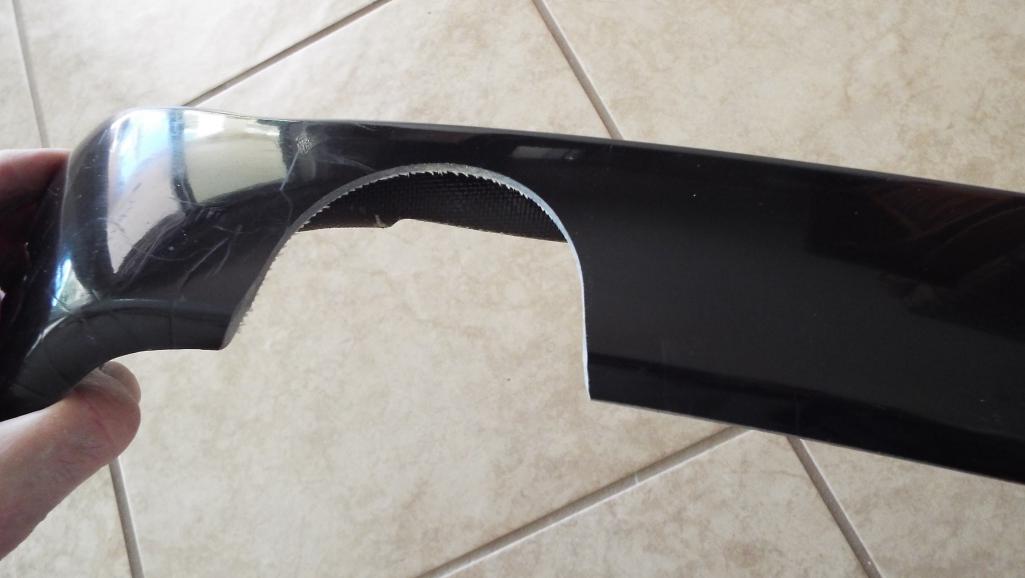
Posted by: Maltese Falcon Feb 7 2018, 01:25 AM
Nicely done Jim and the belt sander (looks like 6" x 48" belt) shapes a perfect mouse house . Looks like you will be having sound as soon as that fuel fitting is sourced !
Marty
Posted by: Lucky9146 Feb 7 2018, 12:52 PM
Nicely done Jim and the belt sander (looks like 6" x 48" belt) shapes a perfect mouse house . Looks like you will be having sound as soon as that fuel fitting is sourced !
Marty
Exactly what that sander is and I have done some pretty crazy things with it over the years. I contacted you a while back, and when asked, you advised what you used to cut the valance and of course I had none of that! The sander did a couple of things like allowing me to sneak up on my line and also provided a really nice finished edge. Hoping to get fuel part today.
Love that valance installed pics soon
Posted by: ValcoOscar Feb 7 2018, 01:08 PM
Very creative technique for cut out Jim...
Oscar
Posted by: Larmo63 Feb 7 2018, 03:20 PM
Let's get that thing started.....
Posted by: defianty Feb 7 2018, 03:33 PM
Let's get that thing started.....
Posted by: Lucky9146 Feb 8 2018, 12:05 AM
The fuel line nipple arrived today from Bruce Stone and it looks great! 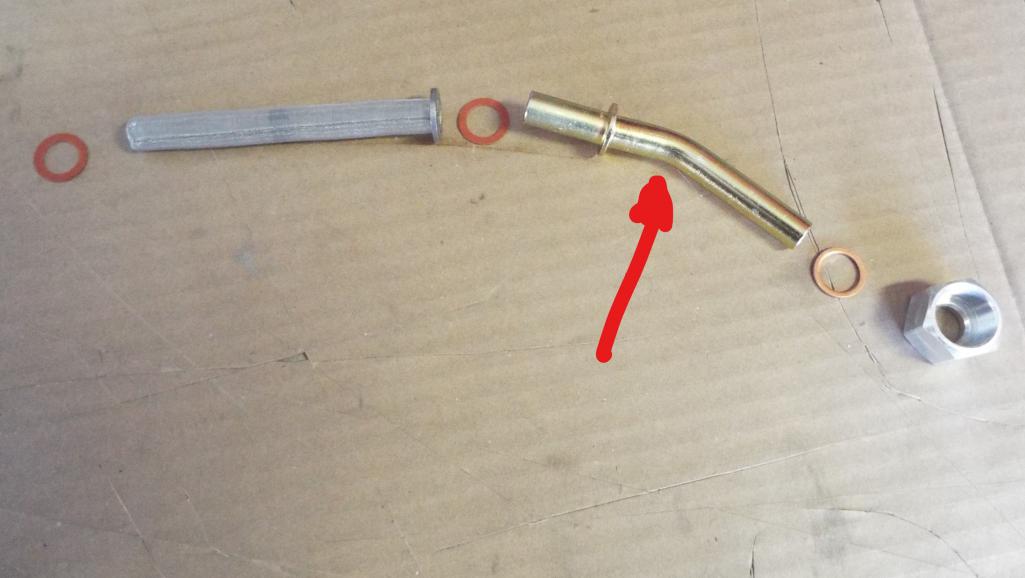
Now to install it is another story. I did not have a stock fuel line set up coming out of the tank. There was no screen and I wanted one. There was just been an AN adapter and an AN elbow going to a hose but now the stock nipple tube coming out of the tank is more angled down making my hose too short. Either remove the gas tank again to add longer hose or get creative. I chose the latter which involved making and adding a different elbow on the end of the stock nipple from Bruce. Lots of fun up in that hole. But thinking now, it turned out better than removing the tank anyway, and the clamps are very accessible. Finally fuel line done back to the engine.
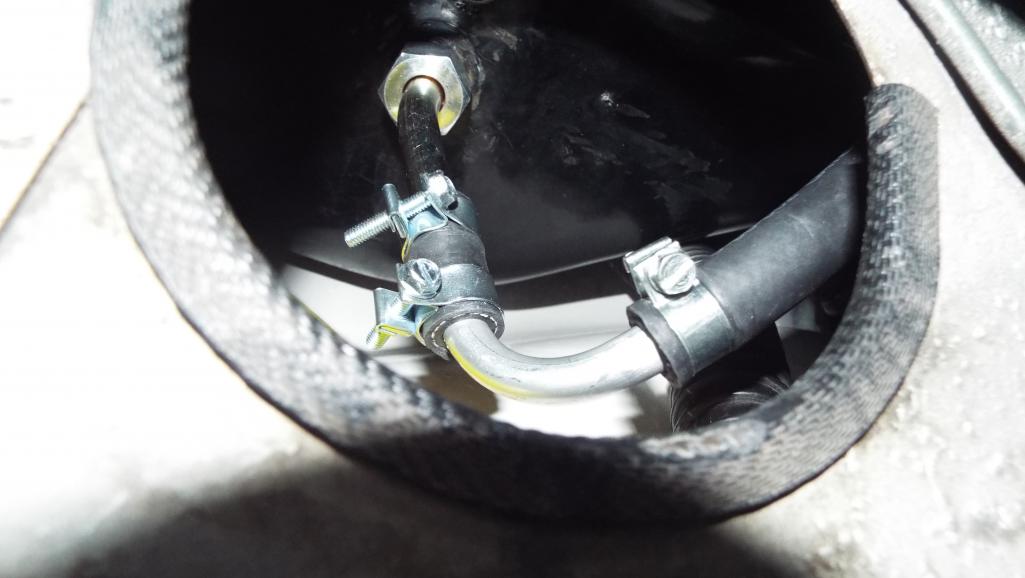 ,
,
Posted by: Lucky9146 Feb 8 2018, 12:13 AM
Let's get that thing started.....
Alright already!
Tomorrow gas in again. Did not want to put gas in this late just in case there is another issue like last time.
Next after gas tomorrow is flush the fuel system back to the carbs and then hook the fuel lines to the carbs. There are still a few other loose ends to tie up Friday.
What are you doing Saturday? Come on down. Bring Steve and Oscar.
Unless something else crops up gonna give it a try.
Posted by: Lucky9146 Feb 8 2018, 12:17 AM
Wow, you are getting close! Give me a call when you are ready for the maiden voyage and I will bring down a batch of the commemorative ale I had brewed up for the car.
Come down this Saturday and bring the ale.
Posted by: ValcoOscar Feb 8 2018, 01:12 AM
Wow, you are getting close! Give me a call when you are ready for the maiden voyage and I will bring down a batch of the commemorative ale I had brewed up for the car.
Come down this Saturday and bring the ale.
I can't miss this....
Posted by: moparrob Feb 8 2018, 01:43 AM
Wow, you are getting close! Give me a call when you are ready for the maiden voyage and I will bring down a batch of the commemorative ale I had brewed up for the car.
Come down this Saturday and bring the ale.
Rats, I won't be able to make it down Saturday.
Posted by: jkb944t Feb 8 2018, 06:54 AM
The fuel line nipple arrived today from Bruce Stone and it looks great!
Now to install it is another story. I did not have a stock fuel line set up coming out of the tank. There was no screen and I wanted one. There was just been an AN adapter and an AN elbow going to a hose but now the stock nipple tube coming out of the tank is more angled down making my hose too short. Either remove the gas tank again to add longer hose or get creative. I chose the latter which involved making and adding a different elbow on the end of the stock nipple from Bruce. Lots of fun up in that hole. But thinking now, it turned out better than removing the tank anyway, and the clamps are very accessible. Finally fuel line done back to the engine.
,See, I knew you could do it without removing the tank! I'm sure you have some skinned knuckles but still better than tank removal.
I like the elbow idea since it is very easy to kink the hose without an elbow.
Jeff B
Posted by: Lucky9146 Feb 8 2018, 11:12 AM
Finished the Rear Valance install late last night!
Gas going in now
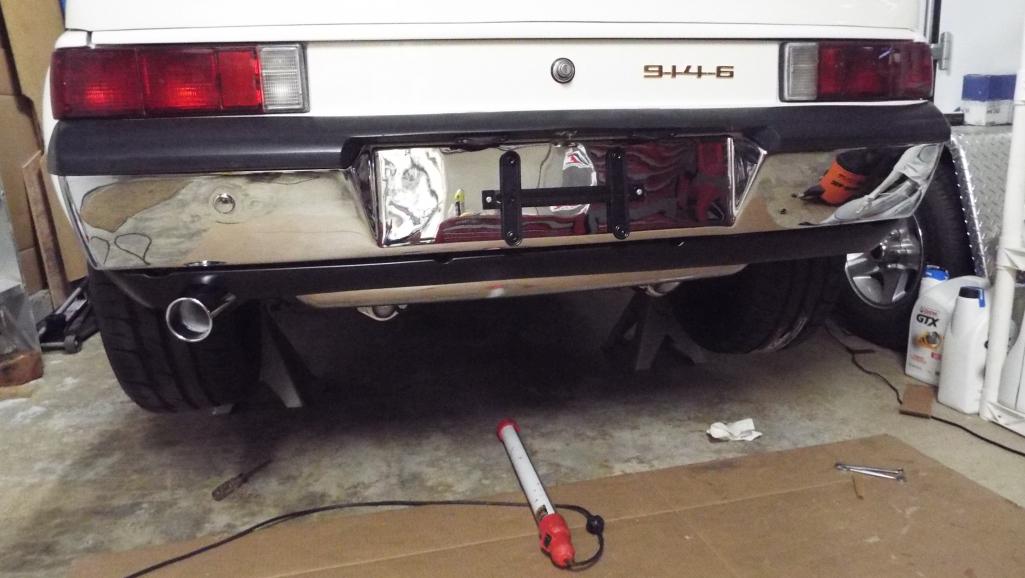
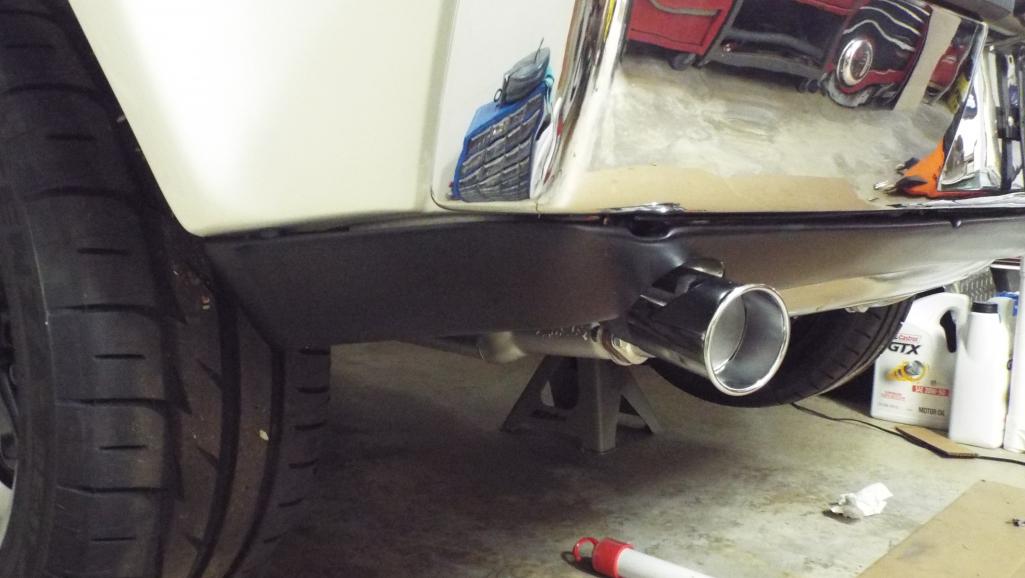
Posted by: Lucky9146 Feb 8 2018, 11:16 AM
Wow, you are getting close! Give me a call when you are ready for the maiden voyage and I will bring down a batch of the commemorative ale I had brewed up for the car.
Come down this Saturday and bring the ale.
Rats, I won't be able to make it down Saturday.
Better post a picture of the ale then so I know you didn't make it up!
Posted by: 914Toy Feb 8 2018, 11:18 AM
Bringing it to San Clemente C&C tomorrow?
Posted by: Mueller Feb 8 2018, 11:20 AM
See, I knew you could do it without removing the tank! I'm sure you have some skinned knuckles but still better than tank removal.
I like the elbow idea since it is very easy to kink the hose without an elbow.
Jeff B
^ +1
and he is using proper clamps that won't cut into the fuel hose!
Posted by: Lucky9146 Feb 8 2018, 11:26 AM
The fuel line nipple arrived today from Bruce Stone and it looks great!
Now to install it is another story. I did not have a stock fuel line set up coming out of the tank. There was no screen and I wanted one. There was just been an AN adapter and an AN elbow going to a hose but now the stock nipple tube coming out of the tank is more angled down making my hose too short. Either remove the gas tank again to add longer hose or get creative. I chose the latter which involved making and adding a different elbow on the end of the stock nipple from Bruce. Lots of fun up in that hole. But thinking now, it turned out better than removing the tank anyway, and the clamps are very accessible. Finally fuel line done back to the engine.
,See, I knew you could do it without removing the tank! I'm sure you have some skinned knuckles but still better than tank removal.
I like the elbow idea since it is very easy to kink the hose without an elbow.
Jeff B
Thanks Jeff it looks a bit "clampy" but so far no leaks and I like the way it turned out.
Wanted to keep it up on jack stands so I could actually see all the fittings with gas in the tank. The other line coming down is a length of AN tube for a drain that comes to the edge of the hole for easy access should I ever need to drain the tank it will be a nice clean shot.
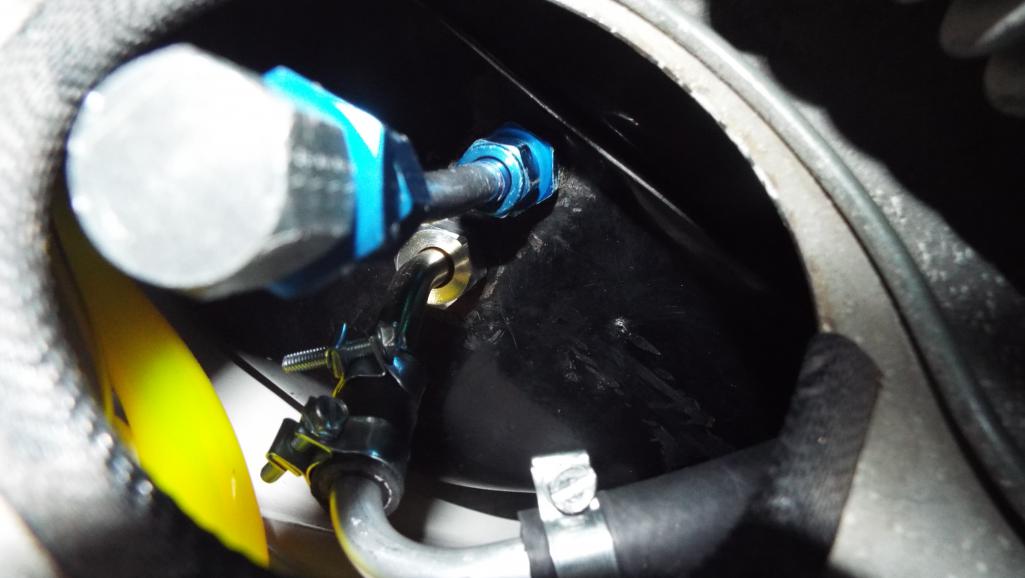
Coming off jack stands today!
Posted by: Lucky9146 Feb 8 2018, 11:29 AM
Bringing it to San Clemente C&C tomorrow?
UH that would be a stretch. I am sure there will be some bugs to work out before I venture too far. Thanks for the thought though.
Posted by: Lucky9146 Feb 8 2018, 11:36 AM
Wow, you are getting close! Give me a call when you are ready for the maiden voyage and I will bring down a batch of the commemorative ale I had brewed up for the car.
Come down this Saturday and bring the ale.
I can't miss this....
Saw your PM I will keep you posted. Thanks!
Posted by: Lucky9146 Feb 9 2018, 10:41 PM
I posted a separate thread this morning regarding my fuel tank coating, Red Kote, as I was concerned and looking for a wider audience.
I am posting the link http://www.914world.com/bbs2/index.php?showtopic=324029
so folks who are interested can look at the positive responses I got on using this coating and to provide an update.
Damon also suggested, for my peace of mind, filling the tank with gas, letting it sit over night, and then drain it back out and re-fill again with new fresh gas. So that is what is happening now. Supposedly this will help eliminate the majority of pinkishness in the fuel. Based on the input I received I will use the overnight removed fuel in my driver car.
This is suppose to be the best product on the market.
I had this done at my "go to" radiator shop locally about 2 years ago and when I had it boiled out and some welding done. Now keep in mind I am just now getting to the point of firing this car up for the first time so NO GAS was in the tank until now. After putting some fuel in, as a precautionary check, I decided to drain some fuel from the tank to see whatever I could from the drained fuel and it had a reddish tinge.
Called Damon Inc the manufacturer, this morning and spoke to the technical people and was told this is normal just the die coming off and will cause no harm they get this call all the time. BUT if were RED then that would be a problem. The red dye added to the coating to allow you to visually see that you have it fully coated vs. having it clear and not being able to tell the coverage.
Posted by: Lucky9146 Feb 11 2018, 11:42 PM
Been a super frustrating weekend of fighting fuel line leaks and fuel contamination. Not entirely sure the leaks are totally behind me.
Glad I had the car back up on jack stands (never thought I would say that) for draining and filling the tank, it sure helped. Did a flush of the fuel line back to just before carbs and found debris in the fuel coming out, twice! Keep in mind I have a good size Holly fuel filter after the tank located in the front trunk and just before the Holly 125 fuel pump, also in the frunk. 
The good news is the pinkish hue to the gas is now completely gone but where all the little shit in the fuel line is coming from beats me. I've decided, as extra protection, I am going to install 2 additional "pre-filters" after my splitter and just before the carbs. Probably look stupid, I don't care, should be temporary. Too much invested in these carbs and engine to take any chances. I remember Forrest dealing with carb contamination issues.
Maybe off the jack stands tomorrow, but is is suppose to rain, maybe not.
Posted by: defianty Feb 12 2018, 01:02 AM
Hang in there Jim. So close to the finish line.
Posted by: Larmo63 Feb 12 2018, 09:57 AM
From what I remember of the blur of my first "fire-up" day, I put about 2 gallons of gas in the tank and started it.
You might be over analyzing it. Leaks are bad for sure and need to be addressed, but get it started and drive it.
I check all of my car's systems constantly, and it seems to be consistently solid.
Posted by: Lucky9146 Feb 12 2018, 10:20 AM
Hang in there Jim. So close to the finish line.
Hanging but that dang finish line is so elusive.
Posted by: ValcoOscar Feb 12 2018, 10:40 AM
Jim-
ALMOST!!!
Weather permitting get some test miles during the week and let's plan a Cars & Coffee debut in OC. Crystal Cove preferred...I have an appointment near there this coming Sat morning.
Oscar
Posted by: Lucky9146 Feb 12 2018, 11:46 AM
From what I remember of the blur of my first "fire-up" day, I put about 2 gallons of gas in the tank and started it.
You might be over analyzing it. Leaks are bad for sure and need to be addressed, but get it started and drive it.
I check all of my car's systems constantly, and it seems to be consistently solid.
Thanks I would love to get it started and drive it. Believe me.
Happy to hear that things went well on your first startup.
Recall this car has been off the road for over 20 years and had a previous owner do some of the work on conversion. Not blaming him for anything just providing some history.That said there has been a small weeping that I thought was the fitting on the inlet side of the fuel pump. Drained the fuel tank changed the fitting, still weeping yesterday morning. Appears to be from this split line.
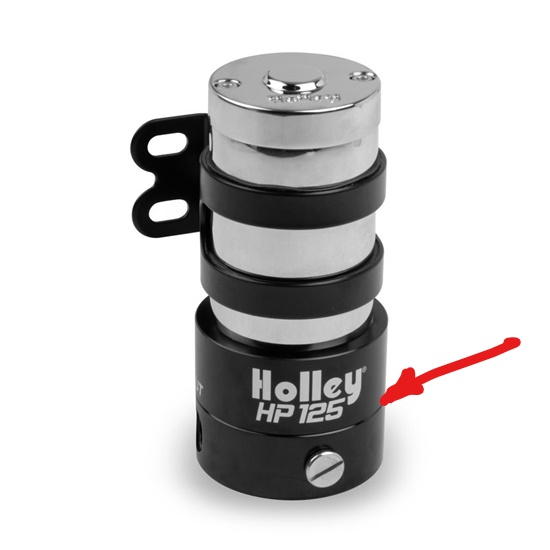
So I tried to tighten the 3 allen head screws underneath for that cap yesterday and they were tight. Still weeping this morning.
Called Holly technical this morning and explained the fuel pump has been mounted in position for 5 to 6 years and just saw fuel for the first time mid Jan of this year. He did not offer much other than to say it had dried out. Hmmmm seems to me pumps when new without fuel could sit on the shelf for years and be ok?
He agreed! Without proof of purchase all he could do was recommend a rebuild kit. Can't just get the gasket.
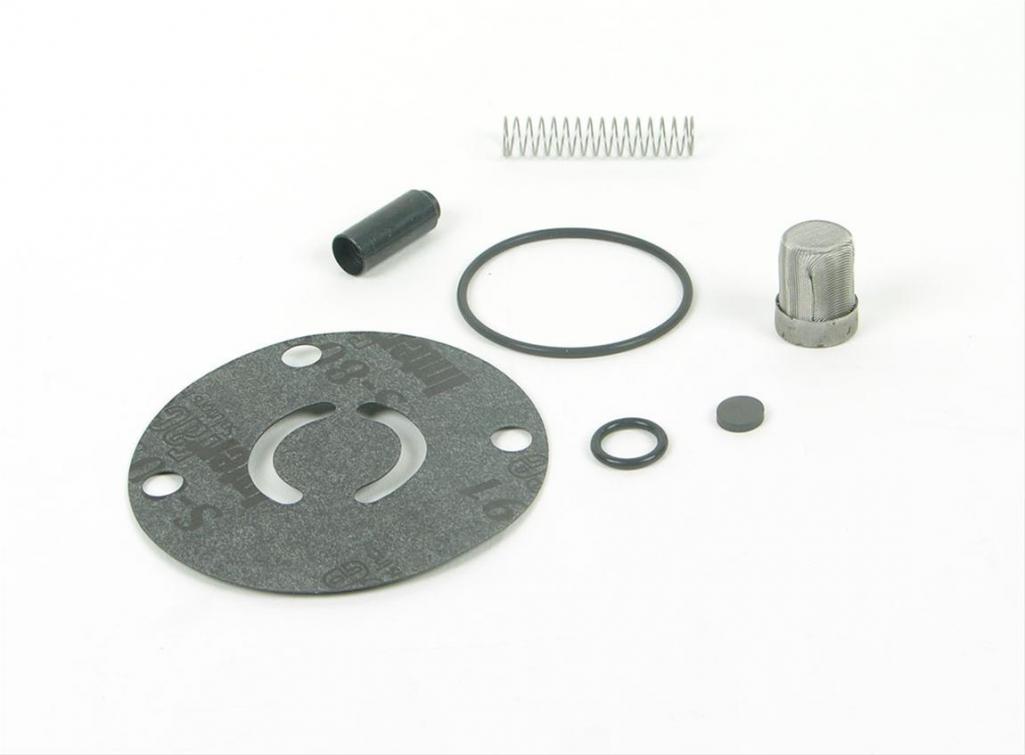
Tried to find one locally but after 9 calls, ordered from Summit.
Posted by: Larmo63 Feb 12 2018, 03:27 PM
Damn gasoline, that stuff screws everything up.
Posted by: moparrob Feb 12 2018, 07:05 PM
Damn gasoline, that stuff screws everything up.
Yes, especially when it ignites inside the automobile at the least opportune time.
Posted by: Lucky9146 Feb 12 2018, 10:21 PM
Damn gasoline, that stuff screws everything up.
Yes, especially when it ignites inside the automobile at the least opportune time.
It was actually quite surprising how much you could smell the fumes in the trunk from such a slow seepage, there was no dripping. You could see the bottom of the pump moist at times and wipe it away and it would take hours to look like that again so that tells me that a good part of it was evaporating. The groove around that split line I discovered, would stay wet, and wiping it dry it would fill up again relatively quickly. Down low in the trunk made diagnosing difficult. The hood has been mostly open allowing air circulation in the trunk but when it was closed for a while days or hours you could really smell fumes when opened again.
It is a shame there is no real estate to install a manual tank shut off at the fuel line tank outlet before the Holly filter and pump. Believe me I have looked and a major re-plumb would be needed.
I had my 67 bug burn in 1995. Probably why I may be a bit more cautious than most. Gas sure screwed this one up at an inopportune time! Still have that car, restored it again.
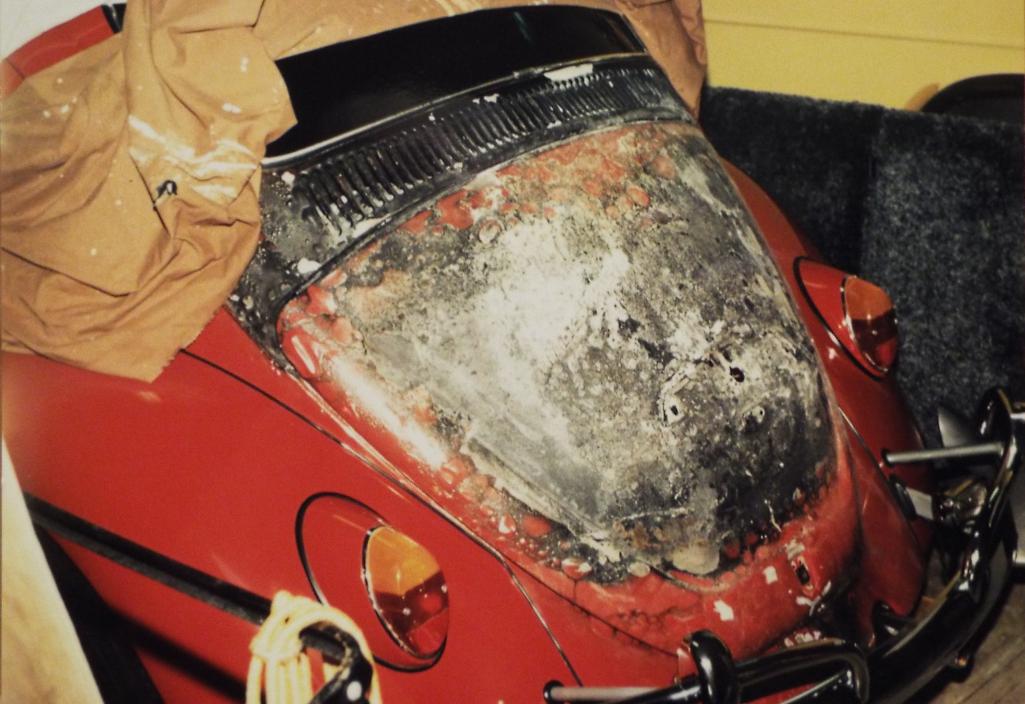
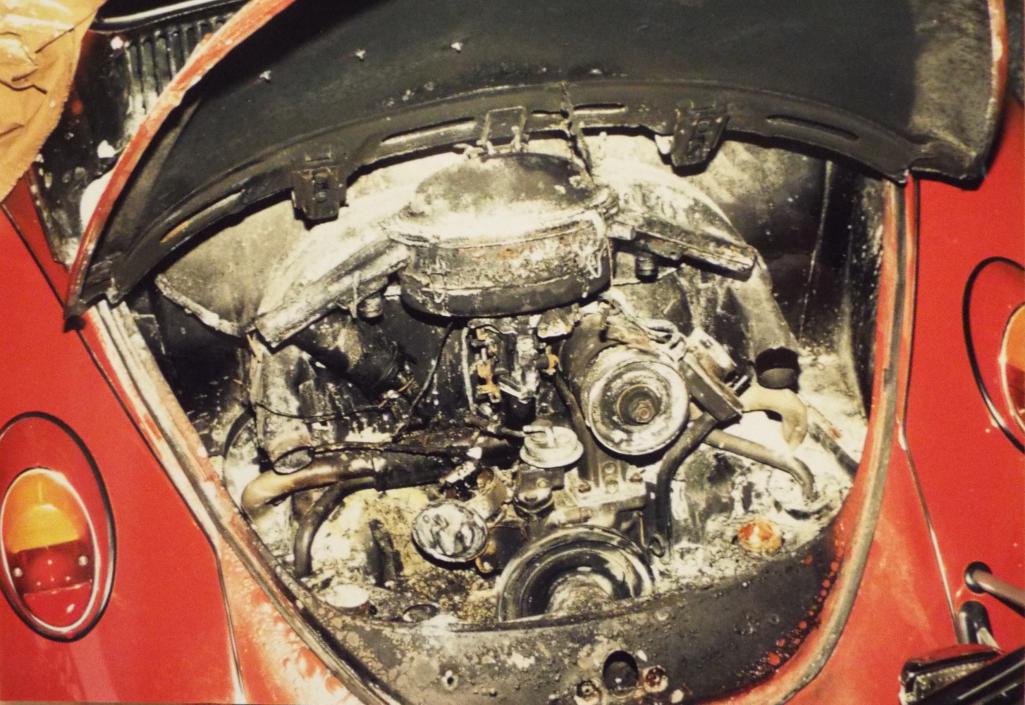
Posted by: Lucky9146 Feb 13 2018, 03:11 PM
Jim-
ALMOST!!!
Weather permitting get some test miles during the week and let's plan a Cars & Coffee debut in OC. Crystal Cove preferred...I have an appointment near there this coming Sat morning.
Oscar
Sounds fantastic Oscar but I kinda doubt it. I do like the optimistic time frame on getting it running and sorted out for a 70 mile run up there!
Few other things going on around here besides the car too.
Finish line, I think I see it! Keep you posted
Waiting parts as usual.
Posted by: ValcoOscar Feb 13 2018, 04:25 PM
Jim-
Sure, I'm like Tom Bodett of Motel 6, "we'll leave the light on for you"
Family and safety first...then 914's
Oscar
Posted by: porschetub Feb 13 2018, 04:32 PM
I did my fuel line set up like yours from underneath and yes it can be done,good move on the filters,I plan on fitting a second one in the near future,an all metal one nearer to the engine is my plan.
I was very fortunate to have a tank that was pristine inside,hell even the suction pipe filter was clean.
I have a regular pre-check of fuel line hoses and clamps before I start up ,only takes a few minutes better safe than sorry eh.
Jim I hope all your little nagging issues are sorted soon .
Posted by: Lucky9146 Feb 13 2018, 05:13 PM
Learning more than I want to about this Holly 125 fuel pump.
Just got off the phone again with Holly technical and learned the fuel pump MUST be mounted vertically or it will wear the main shaft (non-replaceable) and could actually have been the cause of this leaking I am experiencing and trying to fix. A few degrees OK but this is at 23 degrees and he says that is too much and should be corrected.
Sounds simple enough.
This shot below shows there are 3 bolts holding the pump bracket, 2 on the left and one on the right.
The nuts to these bolts are on the other side of the bulkhead and inaccessible so this means the gas tank comes out once again.
Then need figure out how to mount it vertically and re-make 2 AN6 fuel lines.
Fun
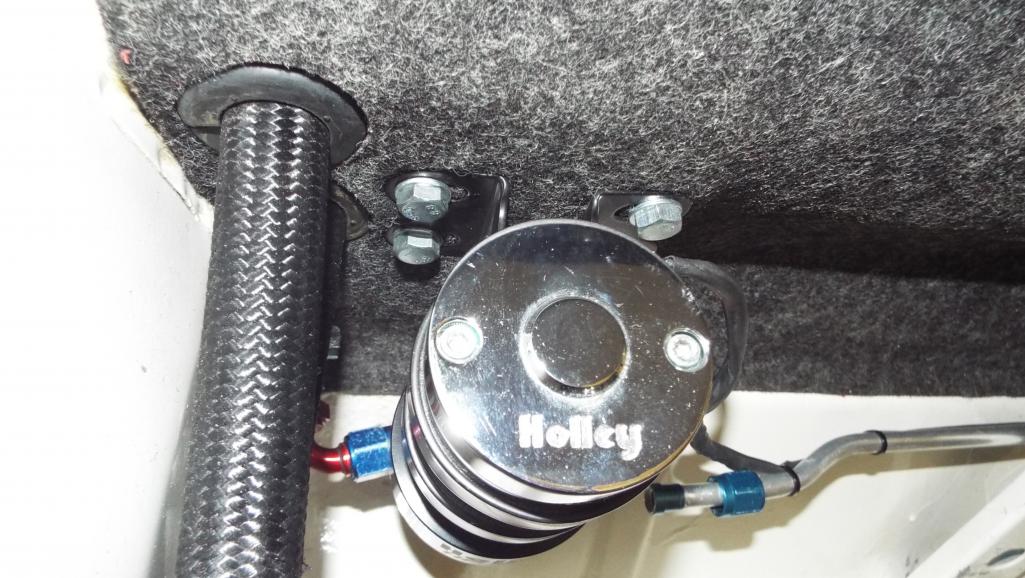
Posted by: Lucky9146 Feb 13 2018, 08:28 PM
Tank is out again
I sure get what the PO Moparrob was trying to do and the limitations he had of locating the fuel filter and pump either side of the vertical spare and keep it gravity fed. Going to take me a bit of time to get this to work now.
On the bright side Holly people are really responsive and willing to take the time to help you with whatever you are dealing with regarding their products. Inner workings of the pump are kinda cool
Posted by: Lucky9146 Feb 17 2018, 09:29 AM
Fabricated this bracket and it will do the trick.
Provides minimal clearance on both sides when installed, swings the bottom of the pump out at almost the same height it was, pump will still be securely attached, enables removal of the pump without removing the gas tank, and with new tighter AN fittings still allows room for the spare tire to be vertical mounted! Win, win, win, win, win.
Mounting and plumbing in progress! Pictures to follow.
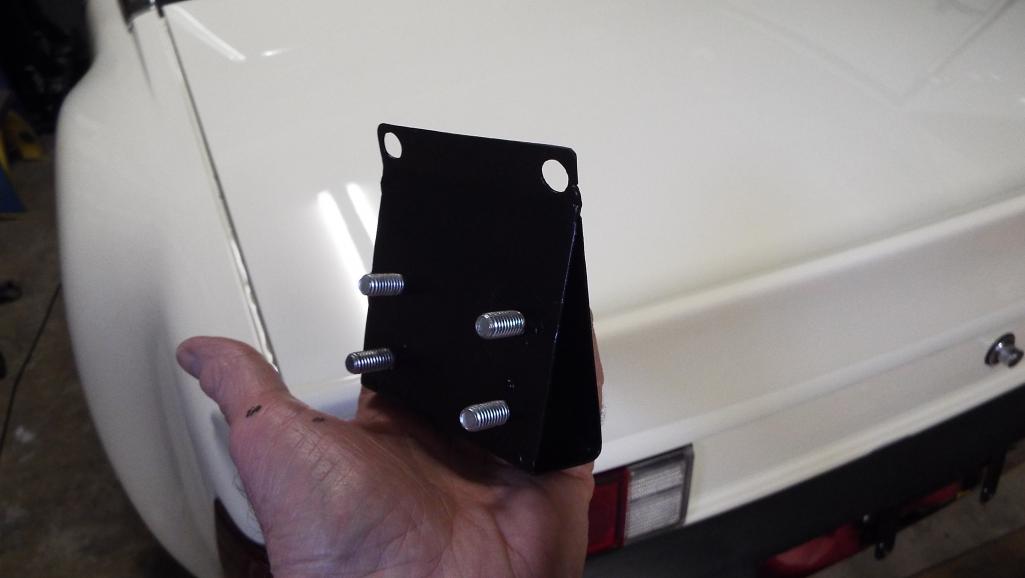
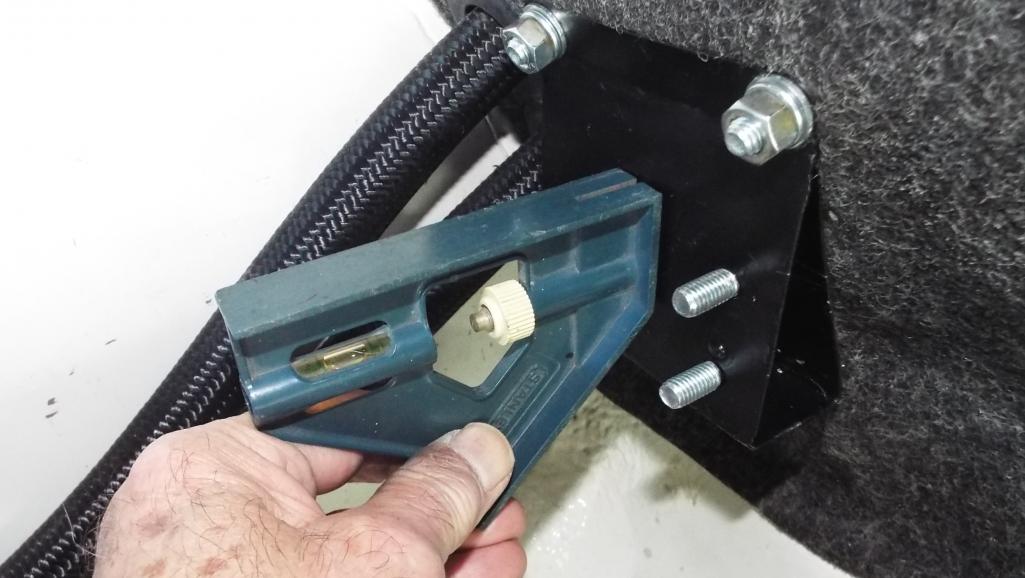
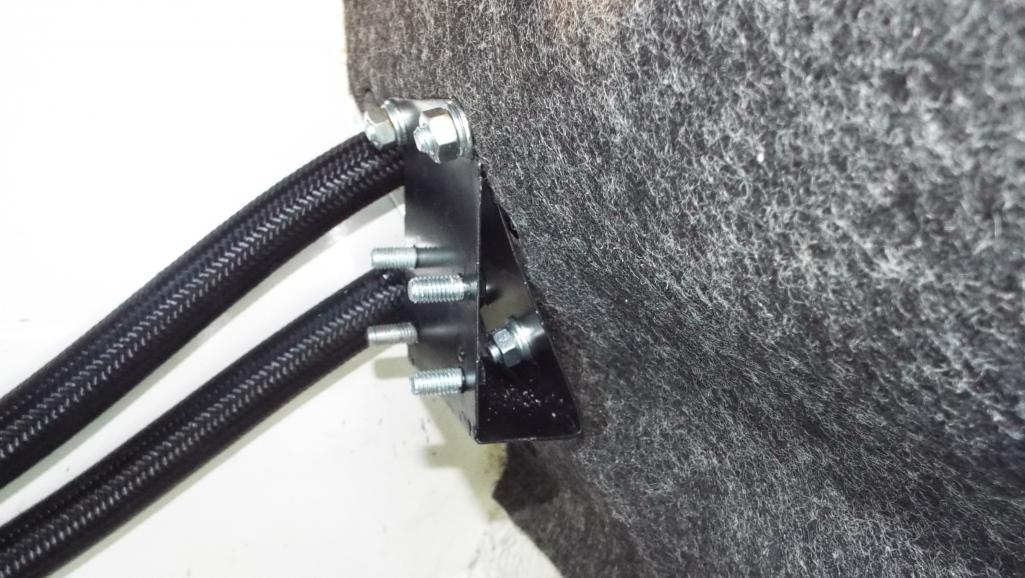
Posted by: rgalla9146 Feb 17 2018, 10:34 AM
Wow, nice improvement!
Thanks, I do what I can, but it sure doesn't hold a candle to the work being performed on Cairo94507's car! That's a double Wow!
Or Defianty's car also a double Wow! I have some added inspiration now (disclaimer I am by no means a computer guy)
I just figured out how to change my screen background in Windows 10 and I get to see this all the time on my computer now!
Unfortunately it is currently on jack stands
I can't wait to catch up to you.
Most excellent color choice !
Attached thumbnail(s)
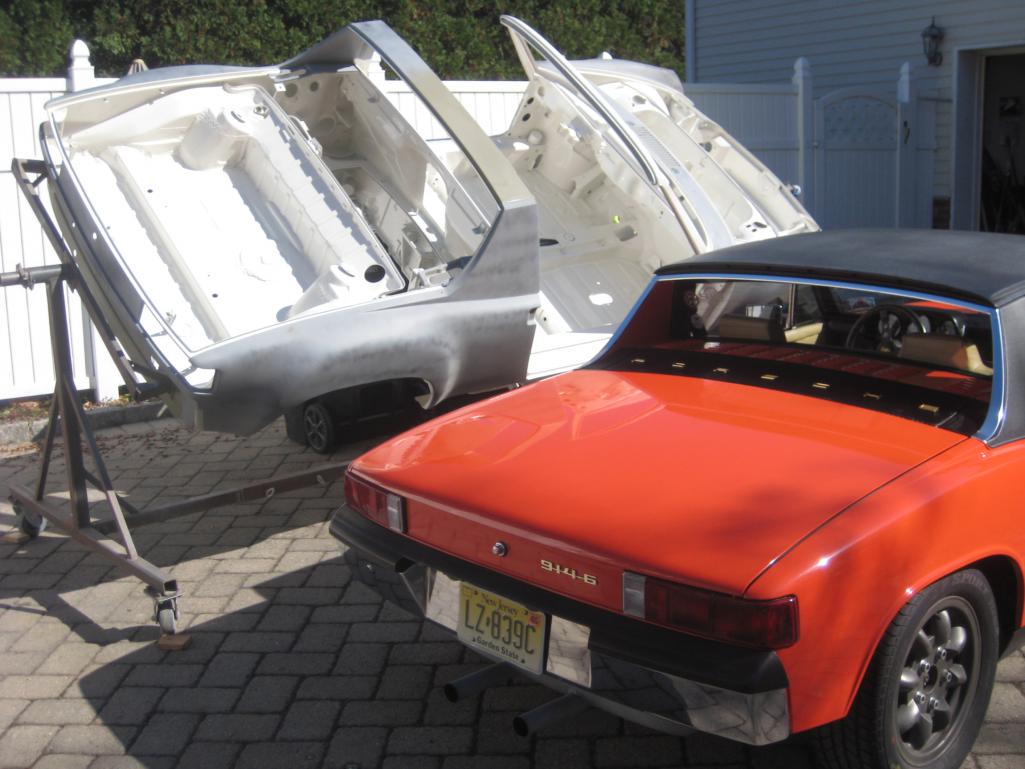
Posted by: Lucky9146 Feb 17 2018, 03:28 PM
Wow, nice improvement!
Thanks, I do what I can, but it sure doesn't hold a candle to the work being performed on Cairo94507's car! That's a double Wow!
Or Defianty's car also a double Wow! I have some added inspiration now (disclaimer I am by no means a computer guy)
I just figured out how to change my screen background in Windows 10 and I get to see this all the time on my computer now!
Unfortunately it is currently on jack stands

I can't wait to catch up to you.
Most excellent color choice !

Well come on!
You know that shell is kinda purdy, like a clean canvas. Best to you on your project I will stay tuned. Are you going white too? Thanks for looking in.
Posted by: rgalla9146 Feb 17 2018, 04:55 PM
Wow, nice improvement!
Thanks, I do what I can, but it sure doesn't hold a candle to the work being performed on Cairo94507's car! That's a double Wow!
Or Defianty's car also a double Wow! I have some added inspiration now (disclaimer I am by no means a computer guy)
I just figured out how to change my screen background in Windows 10 and I get to see this all the time on my computer now!
Unfortunately it is currently on jack stands
I can't wait to catch up to you.
Most excellent color choice !
Well come on!
You know that shell is kinda purdy, like a clean canvas. Best to you on your project I will stay tuned. Are you going white too? Thanks for looking in.
Black top. glued/bolted in place.
No appearance group.
Will look like the cheapest stripper '70.....even body color bumpers.
Carbed 3.0 , 915, probably AC etc.etc.
Still plenty to do.
Posted by: Lucky9146 Feb 17 2018, 09:46 PM
Finished up the fuel pump re-install with new seals. Tank and fuel back in.
No Leaks. Pump works!
Onward!
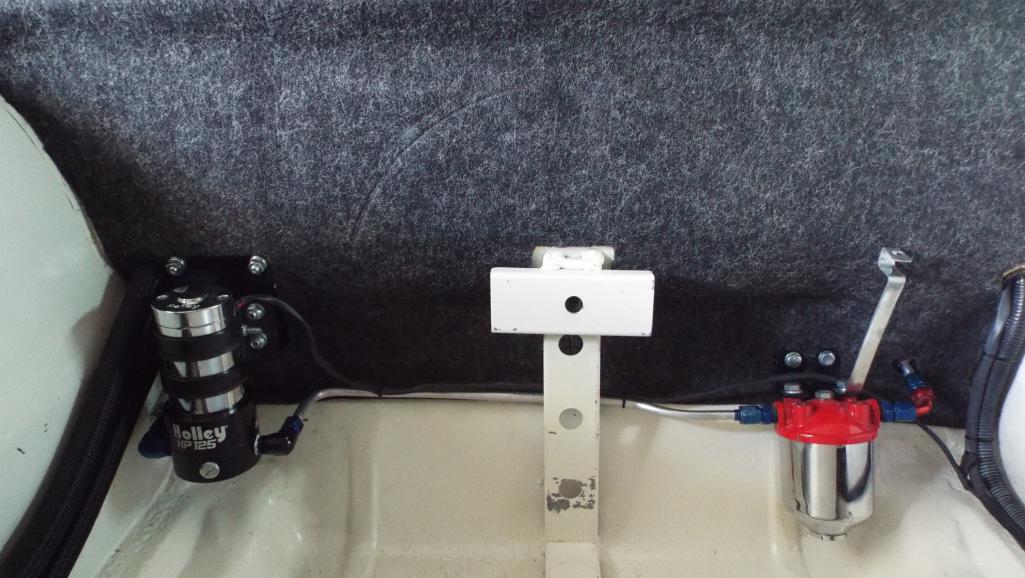
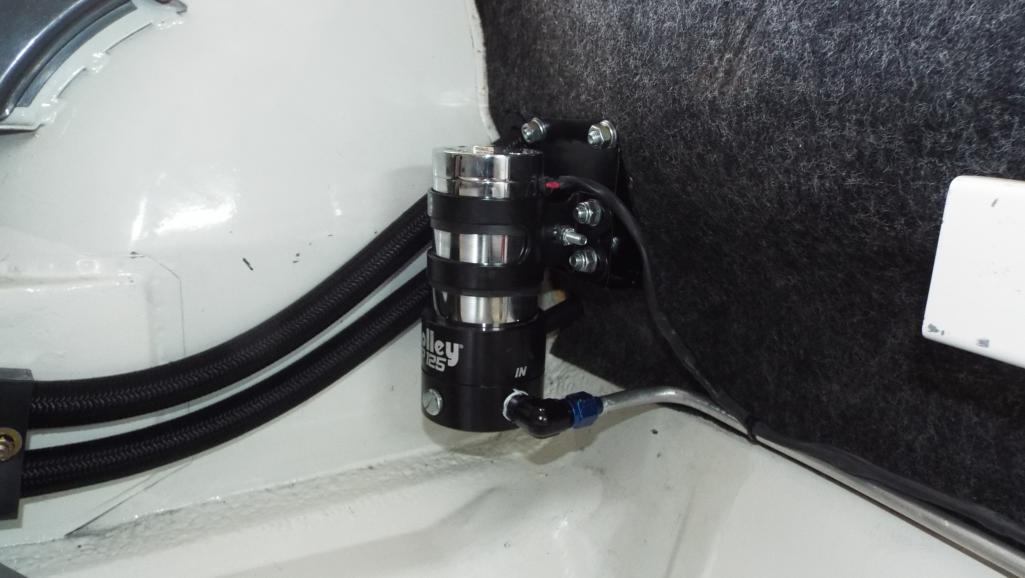
Posted by: moparrob Feb 18 2018, 12:17 AM
You are a stud! Great job on the fuel lines also.
Posted by: defianty Feb 18 2018, 02:43 AM
Nice work on that fuel pump bracket Jim. Very tidy.
Posted by: Lucky9146 Feb 19 2018, 11:21 AM
Thanks Rob and Stephen on the lines and bracket. An unplanned set back for sure, with the design and fabrication of the par,t but well worth it, and it even resulted in a few other benefits. One of which is that with the new mounting I have a better way to secure the trunk board and I was able to install a much improved fuel tank drain shut off.
Saturday added oil, 11 quarts to begin with, Removed the spark plugs to allow the engine to rotate more freely for first cranking to verify oil pressure and circulate the oil. Sorted through some more electrical issues with a lot of trouble shooting.
Sunday finished trouble shooting and then fabricated a new battery cable and fit. I even incorporated the battery terminal from 914 Rubber to top it off. Much better set up!
The car is still on jack stands at the suggestion of my buddy toolguy in the event of any oil leaks. Good idea!
FIRST CRANK, still with still no plugs yielded 25 psi oil pressure! No oil leaks! The thing isn't even running yet, but you have no idea what it was like to see and hear the engine cranking on starter, see the oil pressure building on my quad guage and look through the engine cabin access panel to see the engine turning. Big deal, in that as I have said many times, electrical is not my strong suit. Have learned an awful lot with this project and am more comfortable now. Not to mention building the engine myself.
After helping a neighbor all morning with his patio cover roof, I worked most of the day even missing, unfortunately, the majority of the Datona 500.
But it was worth it with the progress I made. Between the new battery cable and half the engine compartment fuel lines complete I am much closer. As I mentioned earlier I am incorporating "pre filters" from the regulator to the carbs as a safeguard further complicating my set up.
Have an opportunity to spend time with granddaughters today so that trumps things here and I just may take the time to install the Mark Henry Ford starter solenoid before coming off the jack stands. So we'll see. Almost there!
Posted by: Lucky9146 Feb 20 2018, 09:15 PM
Today started off pretty good! Thinking this IS the big day! Just a few things to get ready.
And finished up the fuel hoses in the engine compartment. Check!
Finished up the Mark Henry starter solenoid install and it looks and works great! Check!
Off jacks stands is next.
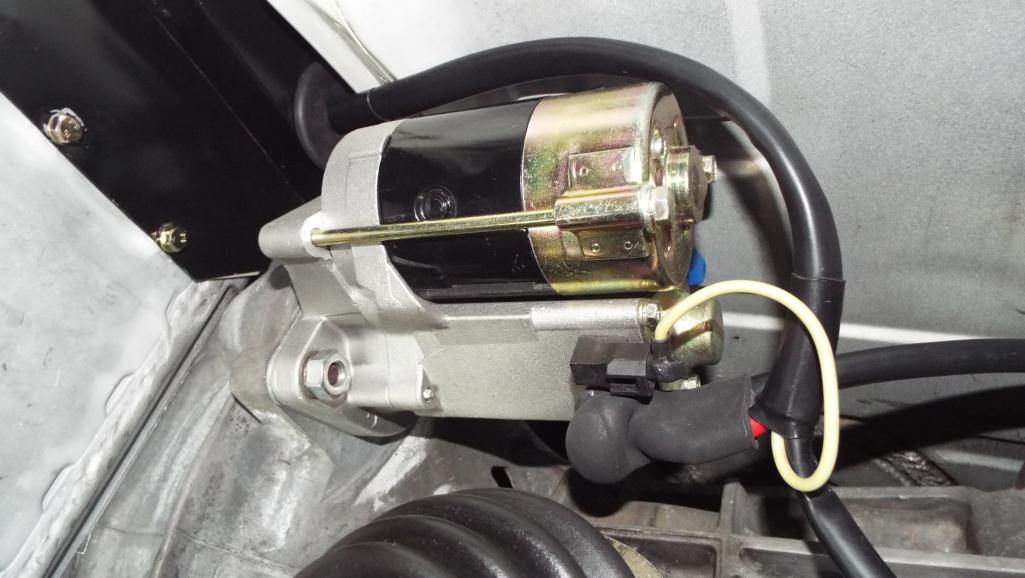
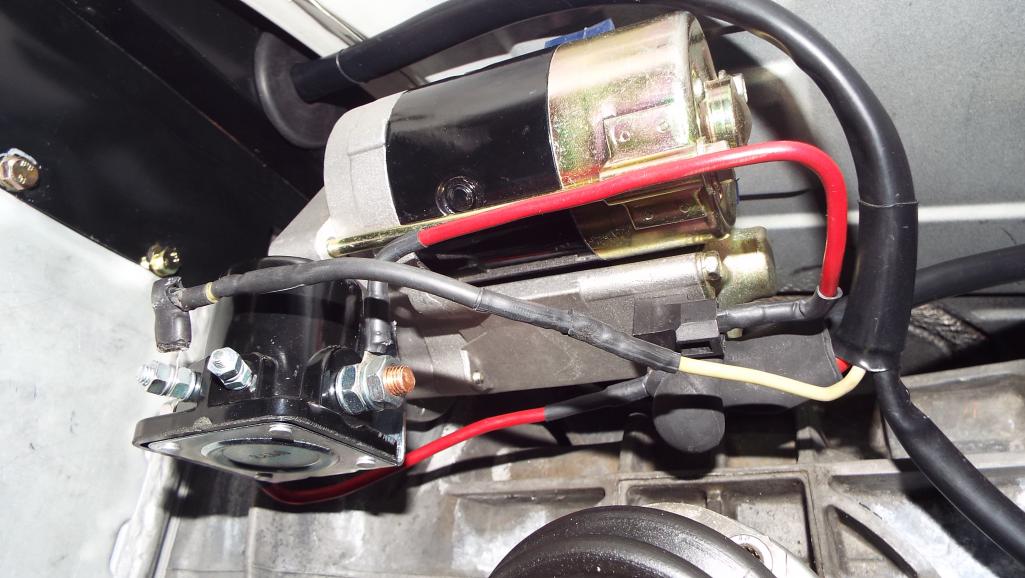
Posted by: Lucky9146 Feb 20 2018, 09:23 PM
One more setback! Kind of a biggie this time.
Man, this is getting old.
Was about to take it off the jack stands to fire it up and decided it might be smart, since I can run the fuel pump from a switch as I was doing to flush the system, to run the fuel pump now that they are hooked to the carbs and will have back pressure. I would then see what kind of fuel pressure I have and check all around and underneath the car for fuel leaks.
Right away there is a problem with the right carb, it seems to be leaking on the inboard side up high under the rain hat base. Weird. I can’t see where or why? Called my carb guy a couple times as we troubleshot the problem Further trouble shoot disassembly and removal of the rain hat and it is leaking past the seals and he wants the carb back, says its a bugger to fix, so off it came. Sucks.
Kinda like that Seinfeld episode “no soup for you!” No start for me!
Fuel was seeping past the seals here, blue arrows, getting the whole inboard side of the carb wet, and it would saturate pretty quickly. 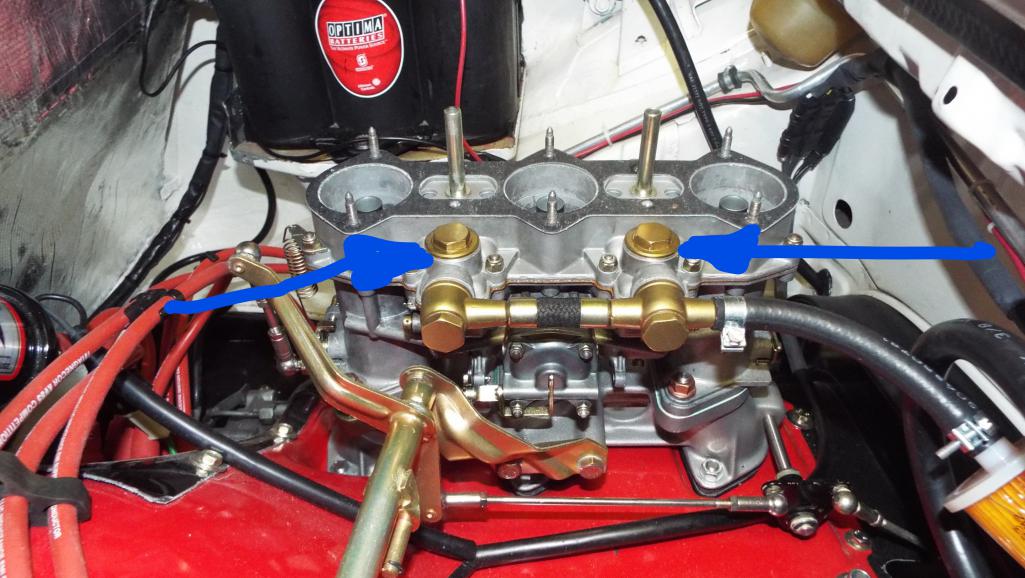
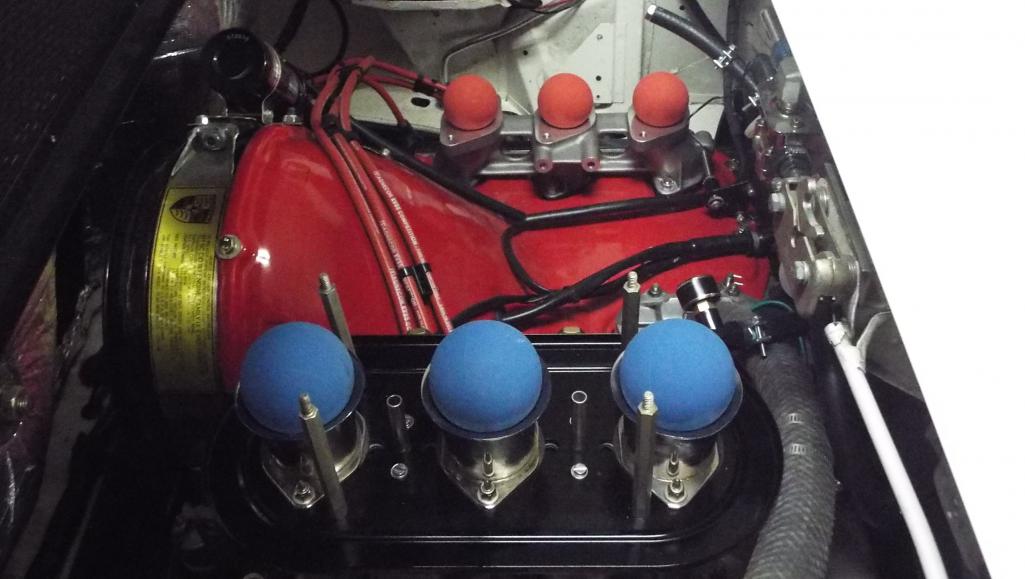
Posted by: moparrob Feb 20 2018, 11:36 PM
Damn! That old girl is fighting you every inch of the way.
Perhaps Roland put a hex on it or it is possessed?
How long before the carb comes home?
I may need to whip up a new batch of ale since I drank the old batch while waiting for you... 
Posted by: Lucky9146 Feb 21 2018, 12:08 AM
Damn! That old girl is fighting you every inch of the way.
Perhaps Roland put a hex on it or it is possessed?
How long before the carb comes home?
I may need to whip up a new batch of ale since I drank the old batch while waiting for you...
Ya ya like there really was a "batch" in the first place.
Yup every inch of the way.
On the bright side I have good fuel pressure and no leaks in the lines.
Carb ships out tomorrow to Salem OR, said he would turn it right around.
Great guy takes his work very seriously probably as frustrated or more than me. Pulling that carb was absolutely no fun!
Posted by: moparrob Feb 21 2018, 12:20 AM
OK, I am going to be optimistic and tentatively schedule the start up celebration for Saturday March 3rd.
Posted by: Lucky9146 Feb 21 2018, 10:46 AM
OK, I am going to be optimistic and tentatively schedule the start up celebration for Saturday March 3rd.
I'll be at the L.A. Lit Swap most of the day, won't you? Hope to see you there!
Since there will be a bit of down time now, well there is always something I can do on the car, thought I would share this story regarding what I like to call the "Mark Henry Ford starter solenoid".
As I was rounding you the bits to do the install I quickly realized I did not have any 10 guage wire that Mark prescribes.
Funny how your mind works because right then I remembered
I still have in a box, on the top shelf, all the way in the back, the Sun Tach from my first car, a 68 Camaro RS. Yup and there it was 10 guage red wire. Never had another car I needed it for. yet! 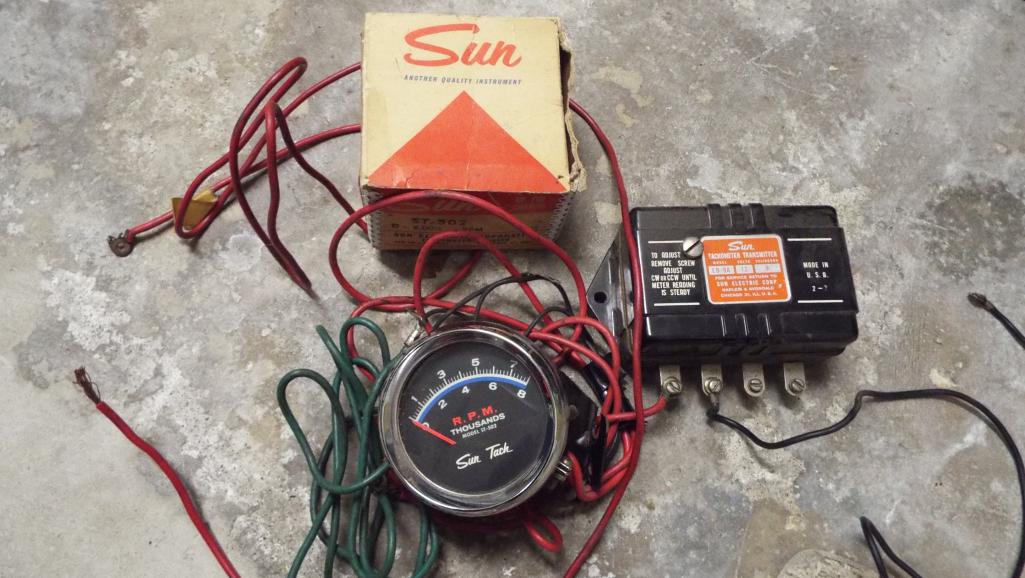
Posted by: sixnotfour Feb 21 2018, 01:54 PM
I first it sitting at Pacific raceway, Kent ,WA. it was sporting Type 4 sale engine.
Secomd time I saw it it had noengine and I sold the bodyshop a replacement tail panel..something about rolling out of the garage backwards
Looks Great
Attached image(s)
Posted by: gereed75 Feb 21 2018, 02:27 PM
That is an easy fix if it is leaking under the brass hex cap. The cap has a shoulder under the head that centers the copper washer. Sometimes the shoulder is “thicker” than the washer and the shoulder bottoms in the threads before closing on the washer. Simple fix to file the shoulder down a bit so it does not bottom before the washer seals.
BTDT
Posted by: sixnotfour Feb 21 2018, 02:38 PM
The last one I fixed it was the carb body itself had a few dings from over the years,, made a round flat piece with some 220 and lapped it flat.. and this was after total rebuild rebush re dip..
always use a new al. sealing washer
Posted by: Lucky9146 Feb 21 2018, 03:34 PM
I first it sitting at Pacific raceway, Kent ,WA. it was sporting Type 4 sale engine.
Secomd time I saw it it had noengine and I sold the bodyshop a replacement tail panel..something about rolling out of the garage backwards
Looks Great

That picture you posted is in front of the PO moparrob's house and how it looked when I bought it from him in 2013. Very cool to find out YOU sold the replacement tail panel to Eurotech. I have heard about the accident and rolling into a tree.
If you have any other info on the car I am always looking and it is great to hear that you saw it at the track back then. The Washington owner had a super built 4 he was very proud of.
I have been in communication with the Washington owner from time to time and have been working on him to provide pictures from "back in the day" with the 4. He has shared a few so far, and I am hoping for more.
Below is a picture from that track you mentioned in Kent, I think.
Posted by: Lucky9146 Feb 21 2018, 03:36 PM
That is an easy fix if it is leaking under the brass hex cap. The cap has a shoulder under the head that centers the copper washer. Sometimes the shoulder is “thicker” than the washer and the shoulder bottoms in the threads before closing on the washer. Simple fix to file the shoulder down a bit so it does not bottom before the washer seals.
BTDT
I suggested trying to fix it here to my carb guy and he really wants to see it because he bench tests each one and is truly puzzled that it leaks. He has quite the machine shop from what I gather and he talked specifically about the machining he does in that area.
Apparently he has had very few problems with his work and really stands behind it. For what I paid him to completely go through them they should be right so I agreed it is best he do it. Thanks and I appreciate your input.
Posted by: sixnotfour Feb 21 2018, 03:55 PM
I first it sitting at Pacific raceway, Kent ,WA. it was sporting Type 4 sale engine.
Secomd time I saw it it had noengine and I sold the bodyshop a replacement tail panel..something about rolling out of the garage backwards
Looks Great
That picture you posted is in front of the PO moparrob's house and how it looked when I bought it from him in 2013. Very cool to find out YOU sold the replacement tail panel to Eurotech. I have heard about the accident and rolling into a tree.
If you have any other info on the car I am always looking and it is great to hear that you saw it at the track back then. The Washington owner had a super built 4 he was very proud of.
I have been in communication with the Washington owner from time to time and have been working on him to provide pictures from "back in the day" with the 4. He has shared a few so far, and I am hoping for more.
Below is a picture from that track you mentioned in Kent, I think.
Yes, on my pic buts exactly like the one I took @ Kent,, sunny day top of goofy red rollbar... I look for the pic.
Posted by: Lucky9146 Feb 21 2018, 09:52 PM
I first it sitting at Pacific raceway, Kent ,WA. it was sporting Type 4 sale engine.
Secomd time I saw it it had noengine and I sold the bodyshop a replacement tail panel..something about rolling out of the garage backwards
Looks Great
I would be interested to hear how it came to be that you supplied the replacement tail panel to that body shop? Was it to Eurotech in Kirkland? Maybe that body shop was a different shop than the one that did a lot of the work on his car, including paint, in 1995 which was Eurotech. I have receipts for all that work.
The paint job is still amazing after all these years and a good part of that comes from being it being Imron.
Posted by: sixnotfour Feb 22 2018, 12:46 AM
I know Eurotech personnally and have lots of paint work by them and have done select jobs for them also.
Attached image(s)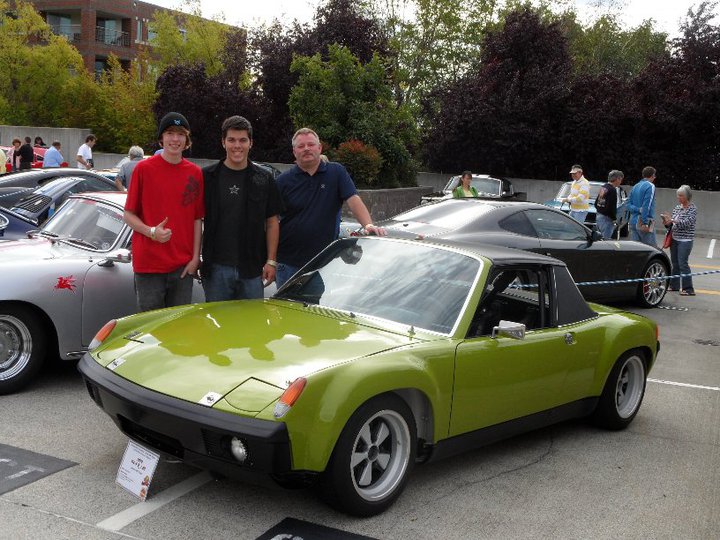
Posted by: rgalla9146 Feb 22 2018, 06:43 AM
That green car !
Can someone provide the details.
Very cool.
Posted by: sixnotfour Feb 22 2018, 10:58 AM
That green car !
Can someone provide the details.
Very cool.
Its mine see it on 914-6GT resource page, jeff hines/jon lowe
Posted by: porbmw Feb 22 2018, 10:59 AM
That green car !
Can someone provide the details.
Very cool.
Its mine see it on 914-6GT resource page, jeff hines/jon lowe
Welcome back, Jeff!
It IS a lovely car...I have lusted after it for a while....
Paul
Posted by: Lucky9146 Feb 22 2018, 11:36 AM
I know Eurotech personnally and have lots of paint work by them and have done select jobs for them also.

Great looking car, love the color! I will check out the resource page too. I gave Mark at Eurotech a call awhile back to see if he had any recollection or records or pictures of my car. He remembered Roland but had nothing else. Darn! I love gathering history. Thanks for weighing in and I'm heading your way around June, hope to look you up then.
Posted by: 914forme Feb 22 2018, 11:38 AM
That green car !
Can someone provide the details.
Very cool.
Its mine see it on 914-6GT resource page, jeff hines/jon lowe
Oh I wondered where that car ended up, I have lots of stories about that one. From the Jon Lowe days.
Posted by: porschetub Feb 22 2018, 01:05 PM
That is an easy fix if it is leaking under the brass hex cap. The cap has a shoulder under the head that centers the copper washer. Sometimes the shoulder is “thicker” than the washer and the shoulder bottoms in the threads before closing on the washer. Simple fix to file the shoulder down a bit so it does not bottom before the washer seals.
BTDT
I suggested trying to fix it here to my carb guy and he really wants to see it because he bench tests each one and is truly puzzled that it leaks. He has quite the machine shop from what I gather and he talked specifically about the machining he does in that area.
Apparently he has had very few problems with his work and really stands behind it. For what I paid him to completely go through them they should be right so I agreed it is best he do it. Thanks and I appreciate your input.
Had the same issue Jim but left carb leaked ,right hand side was fine,removed and checked caps and sealing rings,the new gasket seals were a tight fit and hadn't seated properly.
The leaked stopped after refitting,I do remember them being very tight when I rebuilt my carbs so think they just needed more torque as the left ones tightened a little more.
This is an issue with the webers as there are on the outside where my Zeniths have them on the inside of the carb top.
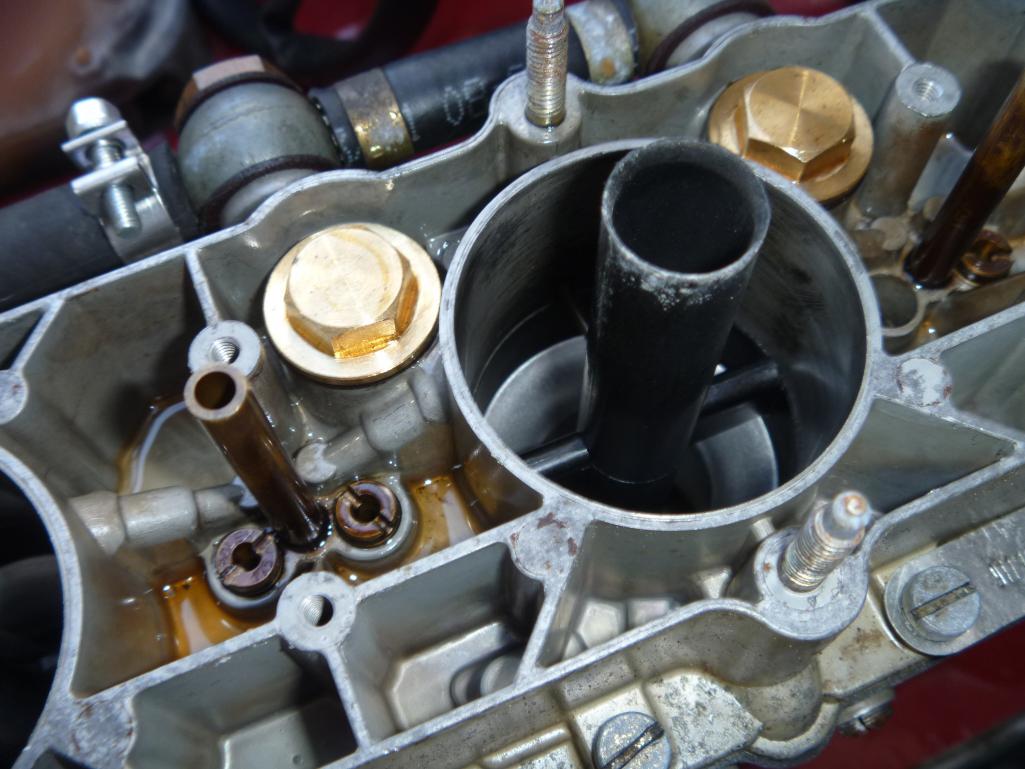
Posted by: bigkensteele Feb 22 2018, 05:16 PM
The last one I fixed it was the carb body itself had a few dings from over the years,, made a round flat piece with some 220 and lapped it flat.. and this was after total rebuild rebush re dip..
always use a new al. sealing washer
Curious where you got them re-dipped?
Posted by: Lucky9146 Feb 24 2018, 09:52 AM
The engine bay quietly awaits the return of the Weber. Yes, I suppose I could have tried to correct the leak but at this point I wanted to take no chances. If you have been following the thread you will recall the many unexpected challenges that have reared their ugly head along the way.
I was close to the first start (hopefully no other issues), in the middle of the carb leak, and on the phone with my carb guy who really wanted to see where the problem was, so I agreed to send the carb back. Slow me down, yup, for sure, but the way things have been going, maybe another surprise awaited me under that leaking cap. Maybe not. He stands behind his work, something that seems rare these days. Should be back mid next week so I'll pick it up from there.
Gives me time now to replace that fuel pressure guage I was not totally comfortable with to a higher quality Marshal guage. I said good enough for the short term start up but I want to feel more confident in the desired 3.5 PSI pressure to the carbs.
I appreciate all the comments and support.

Posted by: rgalla9146 Feb 24 2018, 10:48 AM
The seal under the brass covers should be a red fiber material not copper or aluminum.
In my experience new ones will leak when first installed.
If you soak them in gas before install they will swell and seal better.
Posted by: Lucky9146 Feb 24 2018, 11:57 AM
The seal under the brass covers should be a red fiber material not copper or aluminum.
In my experience new ones will leak when first installed.
If you soak them in gas before install they will swell and seal better.
My understanding is that it is an aluminum crush seal. Could be wrong.
I think it is these two shown here:
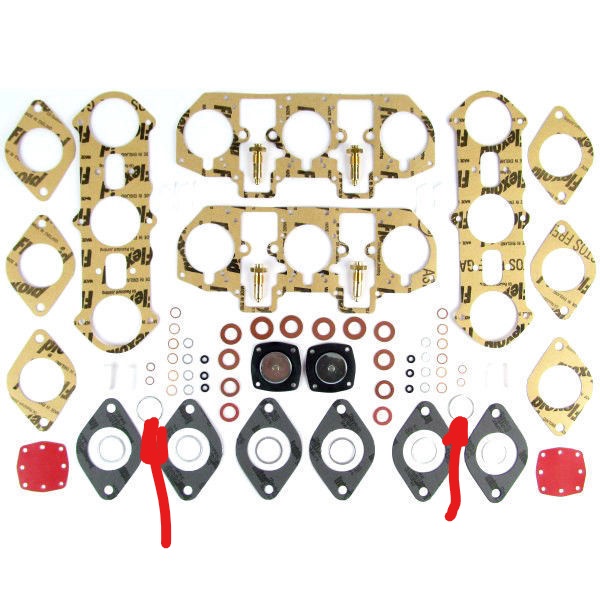
Posted by: sixnotfour Feb 24 2018, 12:34 PM
aluminum......
Posted by: Lucky9146 Mar 4 2018, 09:20 PM
Today was the big day! I finally fired up my 6 for the first time!
Because I had cranked it before it was lubricated, and because I had pressure checked the fuel system, fuel was in the carbs, and the pressure regulator was set.
I tuned the key and it sputtered.
Like it wanted to start, so I turned the dizzy just a bit and tried again and it fired right up, it was almost surreal.
It started right up to a very nice high idle. After a little over 4 years it runs and sounds fantastic!
I have tried to the best of my ability to post videos but they are just too big, even at only 19 seconds long, and I have tried everything I know to shrink them with no success.
Maybe later I can. This was the good news post.........
Posted by: Lucky9146 Mar 4 2018, 09:47 PM
Now for the bad news post, I just can't catch a break.
So after a reasonable run in, I decided to back it into the garage.
Put it in reverse and it wants to go forward. Hmmmm...
You know whats coming. Right?
Yup, I have one speed forward and 5 speed reverse. I knew right away what was wrong but called my buddy to commiserate and confirm my worst thoughts, the ring gear is in backwards. again.
Now, understand the trans came with the project from the PO where he had sent it out for the following, and it even had a tag on it from the builder which clearly said:
901
Install intermediate plate
1 gear
1 needle bearing
Gasket
Machining.
PO had stated the trans had been checked out thoroughly. This was one item I had not been concerned about with my build.
So there won't be any of this for a while longer.
Posted by: defianty Mar 5 2018, 03:51 AM
Unbelievable Jim, truly unbelievable. What a kick in the teeth that must have been. The only positive I can think of is that it's nothing terminal and it can be fixed relatively quickly without too much cost. At this stage you just have to say it could have been a lot worse.
Posted by: Lucky9146 Mar 5 2018, 08:43 PM
Unbelievable Jim, truly unbelievable. What a kick in the teeth that must have been. The only positive I can think of is that it's nothing terminal and it can be fixed relatively quickly without too much cost. At this stage you just have to say it could have been a lot worse.
Appreciate your weighing in. Sure didn't see this one coming.
I don't know at this point if this is something I can tackle myself or not, first step is to drop the trans. Might be someone local I can take it to as I think special tools may be required. I got a couple leads today for local trans folks to check out.
I have also reached out to Dr Evil and waiting to hear back.
I understand the trans can come out while leaving the engine in, so that is a relief.
Posted by: Lucky9146 Mar 5 2018, 11:21 PM
Heard back from Dr Evil and good news I can remove the trans and flip the ring gear myself.
Here is what the Dr said:
"If it was a 914 trans to begin with, you simply have to pull the transmission, pull the gear stack, plop the diff in the right way, put the stack back in, and yer good to go as the dimensions for R/P and backlash were likely conserved."
Many thanks to the Dr for his quick reply, info and reassurance.
Confirmed it is in fact a 914 trans.
So, last night I had been in contact with the PO sharing both the joy and down fall of the first start up run and I could tell my trans discovery really bothered him. He searched and sent me similar info to the Dr which I appreciated. The Dr provided a bit more credibility and confidence to the flip. Thanks Rob!
Posted by: Lucky9146 Mar 5 2018, 11:24 PM
I forgot to take any pictures at the Phoenix Club this weekend so I was really glad to see someone got a picture of me!
Yup that is me behind that cool 6
Photo credit to 914-300Hemi. He was probably saying to himself get out of my picture! Sorry about that.
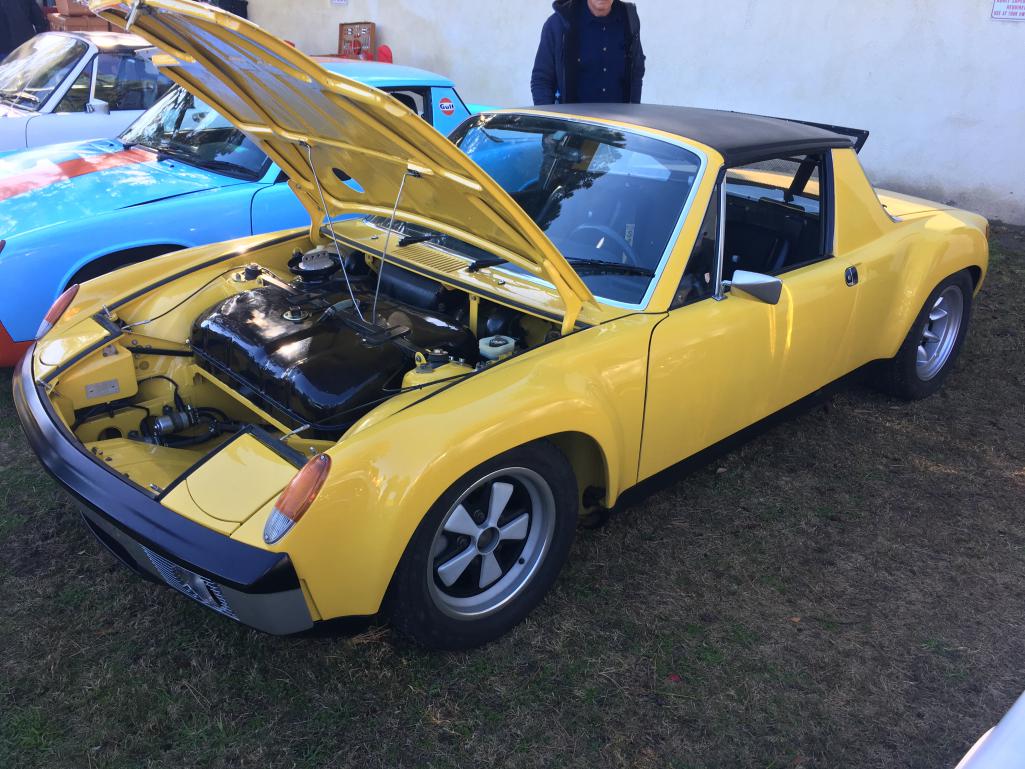
Posted by: Lucky9146 Mar 22 2018, 05:04 PM
Transmission hiccup now behind me. Well, it's back in the car at least.
Had a few other priorities and just took my time to feel my way through the trans “issue” with the extremely patient helpful Dr Evil. He walked me through many questions and details. Suffice it to say there was a bit more to it than “just pull the stack back and flip the ring gear” as it started out. He has done so many that it is all second nature to him I am sure. Many thanks Dr Evil much appreciated.
Crud, back out the trans came leaving the engine in place. 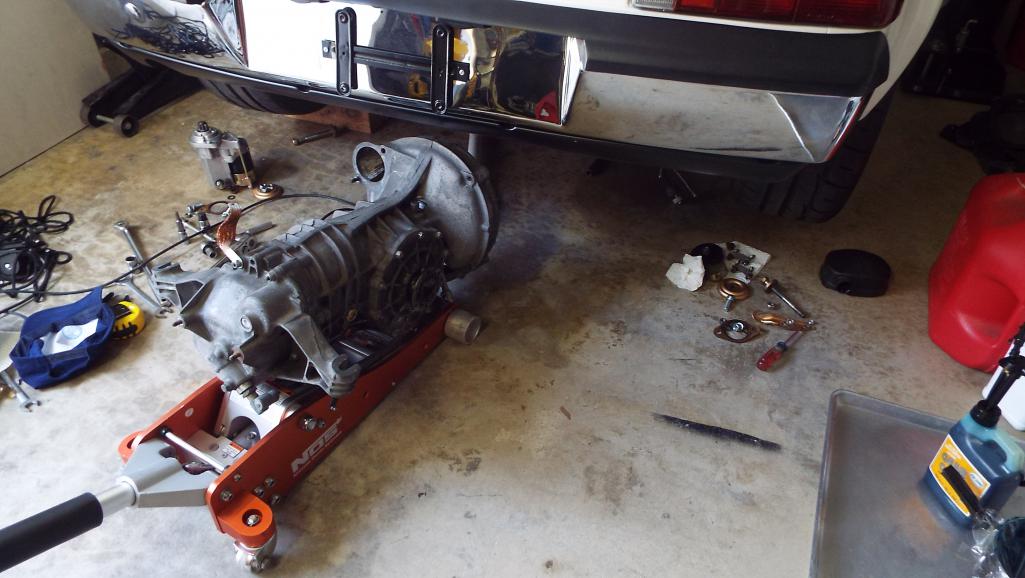
Some how I managed not to get a picture of the backwards ring gear but here is the differential correctly now!
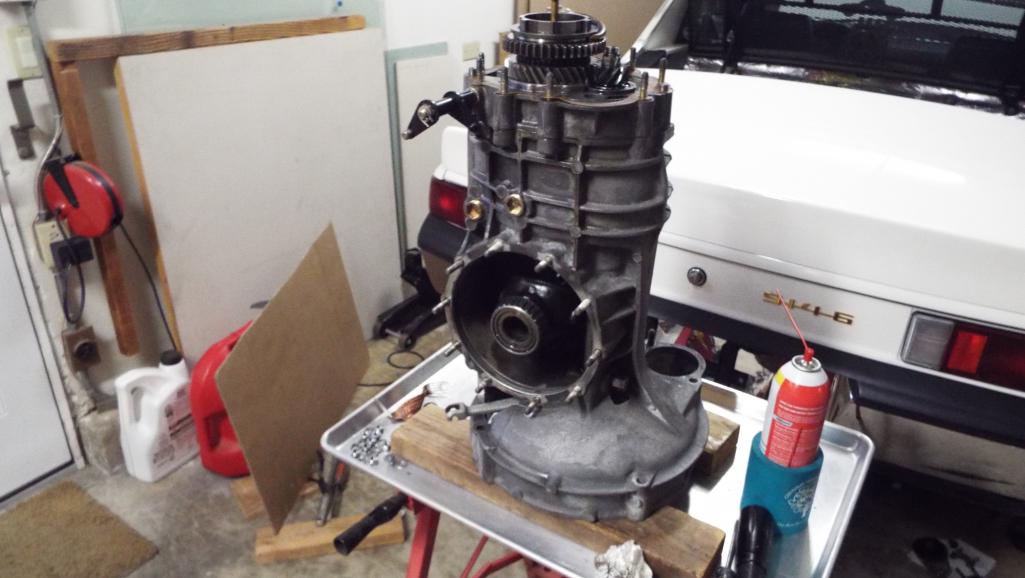
Posted by: Lucky9146 Mar 23 2018, 10:17 AM
The process
I applied Prussian Blue to 3 areas of the ring gear in 4 tooth sections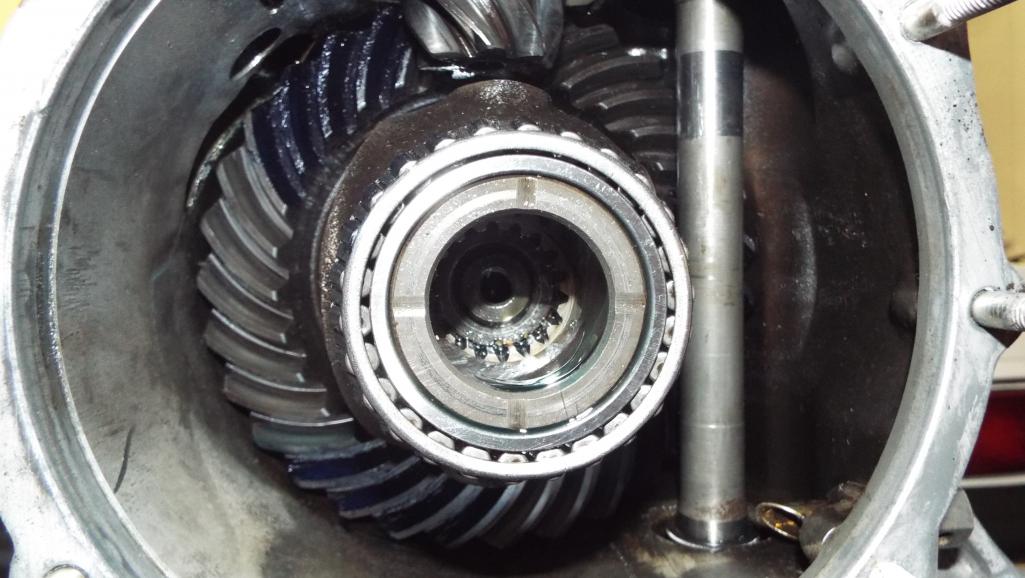
Difficult to get a good picture of the resultant pattern but contact appeared to be correct and consistent. The hardest part was cleaning off the blue when done.
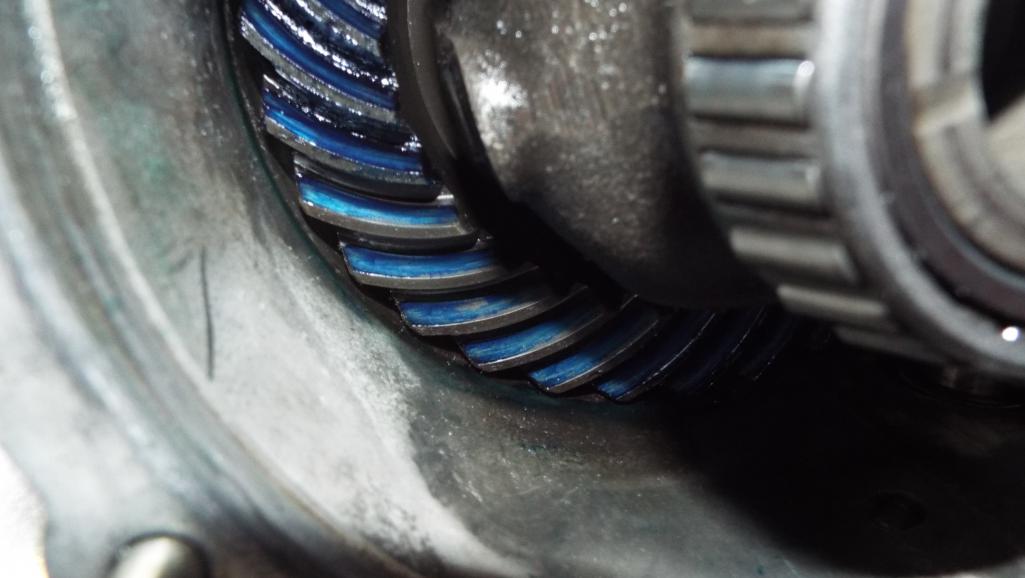
Posted by: Lucky9146 Mar 23 2018, 10:24 AM
The process allowed me to make a few more improvements along the way. Namely better fit of headers, muffler, and muffler bracket, half a day there.
And the home to which it returned. All in all, these are pretty good cars to work on because at first I thought I would have to drop the engine AND trans.
Not too bad really, I was just not in the mood to do it. Schnoor washers and repacking the CV joints and all.
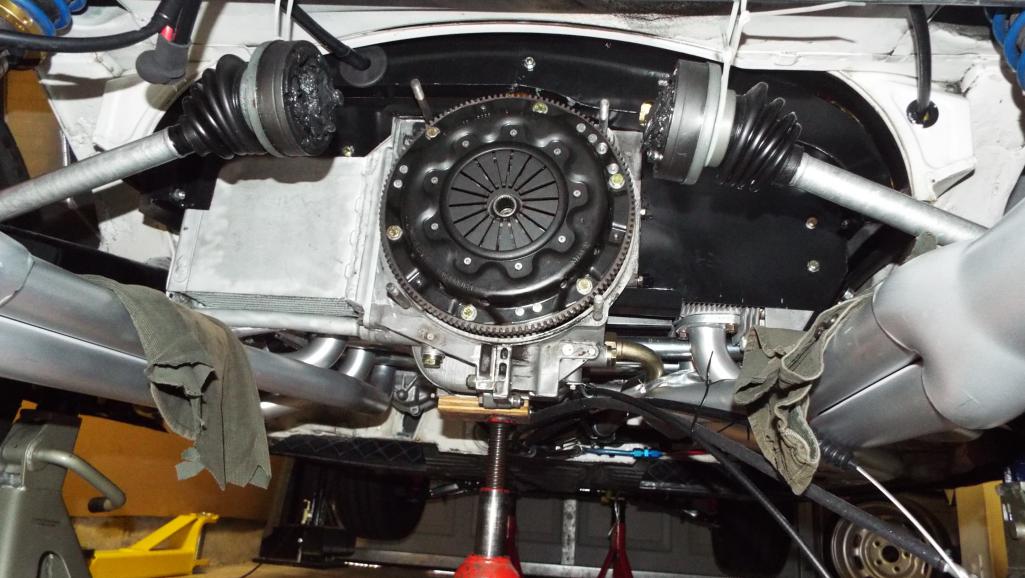
Posted by: mepstein Mar 23 2018, 11:42 AM
The process allowed me to make a few more improvements along the way. Namely better fit of headers, muffler, and muffler bracket, half a day there.
And the home to which it returned. All in all, these are pretty good cars to work on because at first I thought I would have to drop the engine AND trans.
Not too bad really, I was just not in the mood to do it. Schnoor washers and repacking the CV joints and all.
That's one clean car.
Posted by: Lucky9146 Mar 23 2018, 12:27 PM
Finally got the start up video with he help of a buddy of mine.
This was shot the day of first start up which was Mar 4. I love the sound
https://youtu.be/0iJWc_0Xwyw
Posted by: porschetub Mar 23 2018, 12:56 PM
Excellent Jim,contantly checking your updates,funny how aircooled engines sound like a rotating tin full of bolts on YouTube must be a sound recording buggered if I know why,seems they all sound like that .
So I'am assuming that if the side cover gaskets are replaced with same the diff go's from one side to the other ? or did you need to recheck diff bearing pre-load ?
Congrats and well done on a very clean tidy conversion,you must be really keen for a test run ,have you run in your cams yet?
.
Posted by: Lucky9146 Mar 23 2018, 08:38 PM
The process allowed me to make a few more improvements along the way. Namely better fit of headers, muffler, and muffler bracket, half a day there.
And the home to which it returned. All in all, these are pretty good cars to work on because at first I thought I would have to drop the engine AND trans.
Not too bad really, I was just not in the mood to do it. Schnoor washers and repacking the CV joints and all.
That's one clean car.
Thanks Mark! Only had about 2 hours of engine run time in the driveway at that point when I figured out the ring gear was in backwards!
Funny now but no so much then.
Great day today! Drove it for the first time today around the neighborhood!
Does the term shit eating grin sound about right here? What a feeling.
Hope to post a video tomorrow. It was a very good day, insurance, DMV at AAA. Everything just clicked for once.
Posted by: Steve Mar 23 2018, 08:57 PM
Great news!!
Posted by: Lucky9146 Mar 23 2018, 09:00 PM
Excellent Jim,contantly checking your updates,funny how aircooled engines sound like a rotating tin full of bolts on YouTube must be a sound recording buggered if I know why,seems they all sound like that
.So I'am assuming that if the side cover gaskets are replaced with same the diff go's from one side to the other ? or did you need to recheck diff bearing pre-load ?
Congrats and well done on a very clean tidy conversion,you must be really keen for a test run ,have you run in your cams yet?
.Thanks for checking in!!!
Yeah, I don't know why the sound is not right on You Tube and you are not the first to tell me that. Well it sounds like a beast in person even with the stock muffler.
Like I mentioned in the last post reply, I drove it for the first time today and looking forward to much more of that!
Did not check bearing pre-load and here is why.
I knew the disassembly was done to replace the mid plate with 914-6 mid plate, and a first gear and bearing. So it was more than likely that the ring gear was accidentally flipped. Doesn't say much for the shop I know but there was a tag on the trans stating what had been done. I figure if he was used to 901 trans for a 911, it was an honest mistake. I had a lot of helpful guidance and assurance from Dr Evil on the trans.
Now should it not pan out over time, maybe I see a 915 trans in my future.
Dc 40 cams seem to be coming along just fine. Hoping to post driving video tomorrow!
Posted by: Cairo94507 Mar 23 2018, 09:30 PM
Congratulations.
Posted by: defianty Mar 24 2018, 01:35 AM
Great news Jim, I'm so pleased for you to finally have the car driving. Enjoy every second of it! Looking forward to the video and more photos of the car in the wild!
Posted by: bbrock Mar 24 2018, 09:21 AM
Fantastic! I'm living vicariously.
Posted by: moparrob Mar 24 2018, 11:18 AM
Excellent!. Perhaps you should rename this thread to “finished a 914-6 conversion”.
Posted by: 914Toy Mar 24 2018, 12:40 PM
Excellent Jim,contantly checking your updates,funny how aircooled engines sound like a rotating tin full of bolts on YouTube must be a sound recording buggered if I know why,seems they all sound like that
.So I'am assuming that if the side cover gaskets are replaced with same the diff go's from one side to the other ? or did you need to recheck diff bearing pre-load ?
Congrats and well done on a very clean tidy conversion,you must be really keen for a test run ,have you run in your cams yet?
.Thanks for checking in!!!
Yeah, I don't know why the sound is not right on You Tube and you are not the first to tell me that. Well it sounds like a beast in person even with the stock muffler.
Like I mentioned in the last post reply, I drove it for the first time today and looking forward to much more of that!
Did not check bearing pre-load and here is why.
I knew the disassembly was done to replace the mid plate with 914-6 mid plate, and a first gear and bearing. So it was more than likely that the ring gear was accidentally flipped. Doesn't say much for the shop I know but there was a tag on the trans stating what had been done. I figure if he was used to 901 trans for a 911, it was an honest mistake. I had a lot of helpful guidance and assurance from Dr Evil on the trans.
Now should it not pan out over time, maybe I see a 915 trans in my future.
Dc 40 cams seem to be coming along just fine. Hoping to post driving video tomorrow!
Yes I remember, it does feel good - well done
Posted by: Lucky9146 Mar 24 2018, 07:22 PM
Congratulations.
Thanks much! Yours will be there too some day! I look at every one of your updates and all the great work being done to your car. Was hoping to meet you in Anaheim but missed you somehow. Thanks for looking in.
Posted by: Lucky9146 Mar 26 2018, 10:08 AM
Fantastic!
I'm living vicariously.Please do!
Well my friend I would say you are meeting the challenges well on your car. Your car is coming along very nicely. Your welding skills far exceed mine and thankfully I did not have that hurdle. I shall never again complain about it being cold in my garage here in So Cal. after seeing your winter pictures. I see you started in 2017, so, far less time than I have been working on mine and hopefully it will be done in a shorter amount of time. Mine has only been off the road since Clinton was in office.
Different hurdles we faced for sure but in the end you will have the pride of doing it yourself. Congrats on your progress and having the presence of mind to post the picture of fornicating frogs on your thread. Keep up the good work and I shall follow you more closely from now on. Posted by: bbrock Mar 26 2018, 10:24 AM
Fantastic!
I'm living vicariously.Please do!
Well my friend I would say you are meeting the challenges well on your car. Your car is coming along very nicely. Your welding skills far exceed mine and thankfully I did not have that hurdle. I shall never again complain about it being cold in my garage here in So Cal. after seeing your winter pictures. I see you started in 2017, so, far less time than I have been working on mine and hopefully it will be done in a shorter amount of time. Mine has only been off the road since Clinton was in office.
Different hurdles we faced for sure but in the end you will have the pride of doing it yourself. Congrats on your progress and having the presence of mind to post the picture of fornicating frogs on your thread. Keep up the good work and I shall follow you more closely from now on. LOL
Posted by: Lucky9146 Mar 26 2018, 10:35 AM
Great news Jim, I'm so pleased for you to finally have the car driving. Enjoy every second of it! Looking forward to the video and more photos of the car in the wild!
Thank you! Finally having a driving 914 is fantastic!
Was really hoping to get a driving video this weekend but had trouble lining up a willing participant, buddies were tied up.
Having never driven the car since I purchased it (had no engine installed) it was truly something to drive it for the first time.
Please keep the updates on your car progress coming! I know your goal for paint.
Posted by: Lucky9146 Mar 27 2018, 08:44 PM
Excellent!. Perhaps you should rename this thread to “finished a 914-6 conversion”.
Well not a bad idea but it is not finished yet! There is more to come so stay tuned!
Posted by: Lucky9146 Mar 27 2018, 08:46 PM
Driving Video as in today
https://youtu.be/dZnHasrS5Ps
Posted by: JmuRiz Mar 28 2018, 08:08 AM
Posted by: defianty Mar 28 2018, 08:11 AM
Posted by: jkb944t Mar 28 2018, 10:37 AM
Oh what a great feeling it is!!!
Jeff B
Posted by: bbrock Mar 28 2018, 10:50 AM

Posted by: whitetwinturbo Mar 30 2018, 10:26 AM
Posted by: ValcoOscar Mar 30 2018, 10:58 AM

Terrific Jim...time to party
Oscar
Posted by: mtn flyr Mar 30 2018, 09:51 PM
Posted by: Lucky9146 Apr 9 2018, 05:23 PM
Sometimes things just get done out of order.
Should I have installed my MaxJax before getting into this car? Probably, but I absolutely knew it would be more involved than just drilling some holes in the floor and making it level. Unfortunately, I was right, as it proved to be even more work than I anticipated, but now it is done. In actuality it is far more useful at this point because the car really pretty much was on jack stands anyway for the better part of 3 years. It wasn’t until near the end of the major work that it needed to go up and down a few times.
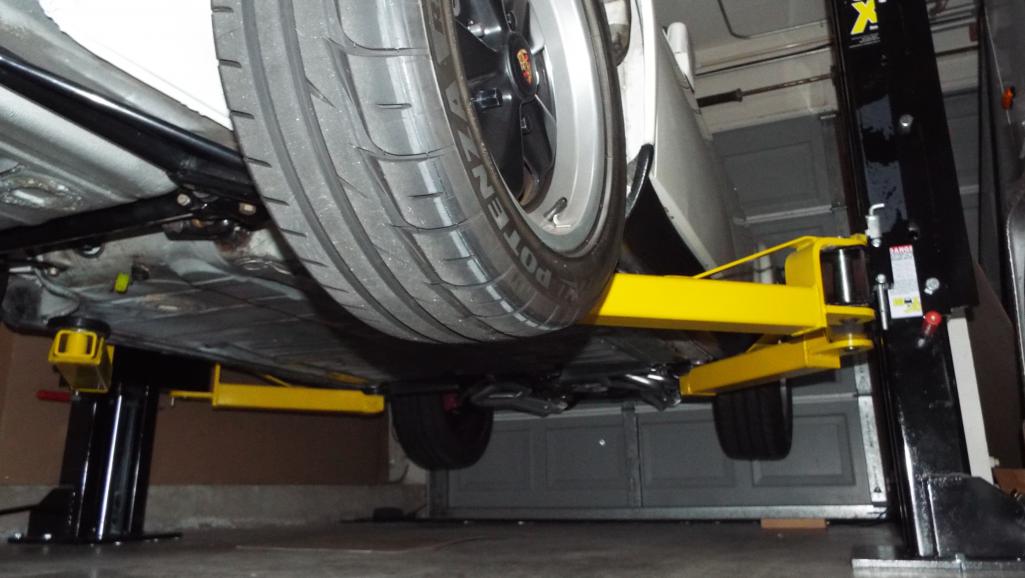
I was not willing to trust the relatively small foot print and 5 anchors on each post with my cars so I tied into the wall and ceiling on one side and to the ceiling on the other side. Now I trust it. Uprights are 2” X 2”, 1/4"angle iron welded back to back together to make a sturdy beam. 
MaxJax is intended to be a more portable but I am mounting it permanently to eliminate the cart and will mount the control unit to the wall this week.
It is a bit tight I know but the best I can do.
At least I got a lift now! 
Posted by: whitetwinturbo Apr 9 2018, 09:01 PM
That is both nice and SMART.........
Posted by: Lucky9146 Apr 9 2018, 10:08 PM
A few more pictures.
Ceiling mounting brackets shown here. Yeah, that antique garage door opener is going away soon and a side wider opener will be going in and really clean up that ceiling.
And a view from the rear.
I should note those license plates are just temporary and my personal plates are on order. I will unveil them when they arrive in 8 to 12 weeks.
Cant Wait.
Posted by: moparrob Apr 9 2018, 10:26 PM
Is this the new plate for the beast?
Actually that was the one I wanted for the turbo but someone has it...
Posted by: Lucky9146 Apr 9 2018, 10:44 PM
Is this the new plate for the beast?
Actually that was the one I wanted for the turbo but someone has it...
No but cool plate.
Hey when you coming down?
Thought you were coming for first ride?
Still working out a few bugs but the engine runs great!
Posted by: moparrob Apr 9 2018, 10:54 PM
I was going to come down for the first ride but you had five reverse gears at that time, and I don't know your driving skills well enough to determine if that would have been a fun outing or not.
Things have been a bit hectic the last few weeks, and the next three weekends are pretty much shot.
It looks like Cinco de Mayo is the next open weekend - which would seem to work perfectly for a celebratory cold beverage and drive. I may have to substitute Negro Modelo for the Jackstand Ale though, in honor of our neighbors south of the border.
Posted by: porschetub Apr 10 2018, 12:27 AM
Driving Video as in today
https://youtu.be/dZnHasrS5Ps
Excellent ,sounded great IMO none better,was that a cop in the layby...looked like it
.About time you told us how well it go's ????,I know it will be quick but how ....
Well done really pleased for you.
Posted by: Lucky9146 Apr 10 2018, 10:34 AM
Driving Video as in today
https://youtu.be/dZnHasrS5Ps
Excellent ,sounded great IMO none better,was that a cop in the layby...looked like it
.About time you told us how well it go's ????,I know it will be quick but how ....
Well done really pleased for you.
Thanks! No, there was no cop there.
Planning another video for "how well it goes" soon.
In the mean time, suffice it to say, it goes!!
However, in all honesty, it is taking me some time to get used to the 901 with a short shift. Way different from the 915 in my 78 911 SC and my daily driver Scion XB 5 speed. Getting better but its been years since I had a 901.
Short list of bugs to address:
1.) Latest discovery is the front Weltmeister sway bar drop link bushings crumbled. Saw bits on the floor of the garage and knew there was definitely a problem. 20+ years off the road sitting is not good.
New ones on order due this week. Need to check all the others now. 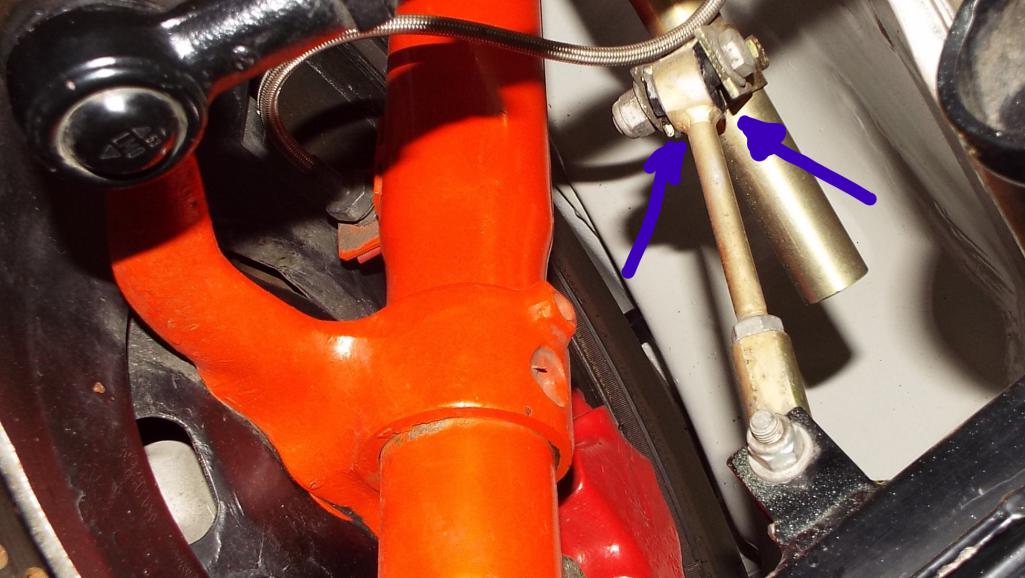
2.) Fuel guage is very erratic so got to get into that. Probably the sender. Did some searching here on 914 World and found some good info to work with.
3.) Speedometer works but not odometer, so got to replace that little nylon gear in there.
4.) And an exhaust leak between the right header and the muffler, leaking from the top of the flange. I've tried a few things to fix it already and now I got another plan. But I contacted Marty at MSDS and he suggested a few ideas to fix it and even offered to "repair or replace". Hope it doesn't come to that. But think about it, this is a guy that really stands behind his product! I did not directly buy the headers from him, the PO did and like 7 years ago! What a great guy! Thanks Marty I'll keep you posted!
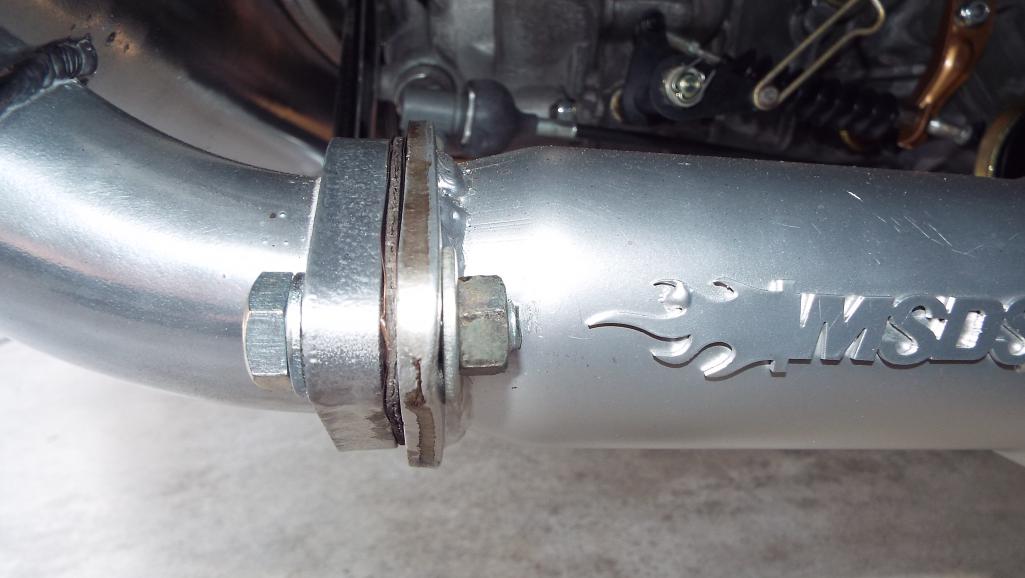
Posted by: Steve Apr 10 2018, 06:16 PM
It does look like the flange got trashed some how. For now you could double up on the gaskets.
Posted by: Mueller Apr 10 2018, 06:27 PM
Car looks great.... nice lift as well.
Posted by: Lucky9146 Apr 11 2018, 10:05 AM
It does look like the flange got trashed some how. For now you could double up on the gaskets.
Flange is not really trashed just a bit thinner on top on this side so will do some filing and maybe try a bit of JB Weld and yes that's a good idea to try extra gasket.
Thanks
Posted by: Lucky9146 Apr 11 2018, 10:51 AM
That is both nice and SMART.........
Thanks!
I have to say the convenience was worth the effort. There are a few short comings with the lift but all in all for the price it was a good choice and it does the job. It was surprising that their tolerances are pretty wide as far as how out of level the two lift sides can be. I am continuing to strive to make them as level as possible, right now I am at about 3/4" difference off side to side and their tolerance is 1.5" which would never be acceptable to me. Instructions could be vastly improved and I made numerous calls to their technical department for clarification. Have to say on the plus side that their technical department is very helpful and will take thew time to work with you in great detail.
Like I said I was not willing to trust my cars to their relatively small foot print and 5 anchors (per side) which by the way are not the most straight forward to install correctly. I felt additional insurance was needed and bracing a must. It had been years since I arc welded so I had a bit of a re-learning curve to make my side beams but rather enjoyed the welding.
Posted by: Lucky9146 Apr 11 2018, 10:53 AM
Car looks great.... nice lift as well.
Thanks!
If you or anyone is considering this lift PM me.
Posted by: Lucky9146 Apr 11 2018, 08:34 PM
Wanted to take a minute to give the utmost credit to Paul at Performance Oriented for the fine work he did on the Weber carbs for me. Part of his service is he sets them up and runs them, dialing them in on his test engine, and he claims they are ready to run.
Well this is no joke and in fact they were ready to run and I have not even had to adjust them further yet. I can do some checks, and will soon, but to be honest they are set up so well this engine just fires right up and idles so smooth.
This was one area I wanted to eliminate as a potential unknown on first start up and he did that for me. Paul really stands behind his work too.
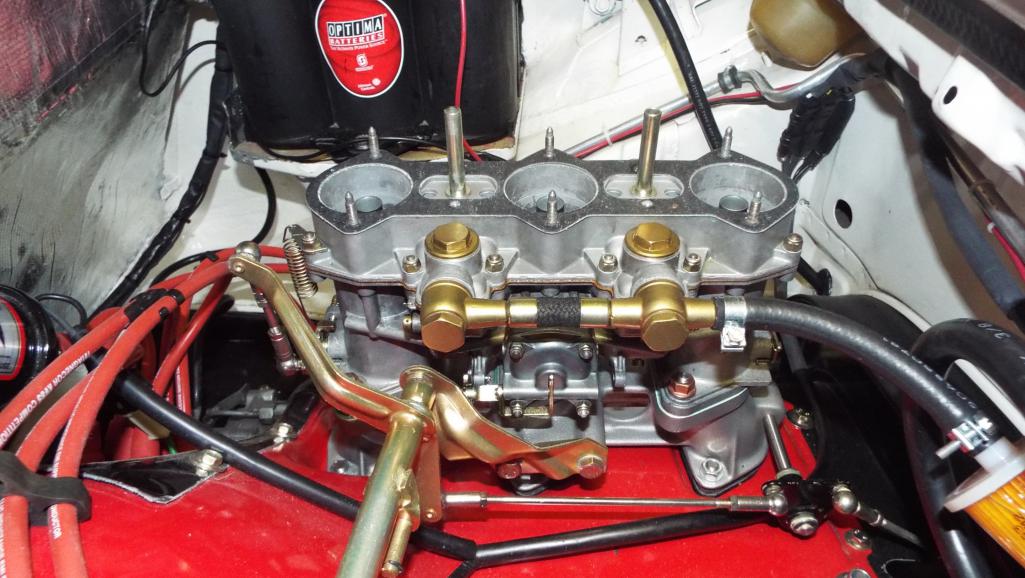
Posted by: pete000 Apr 11 2018, 10:56 PM
This is on my wish list...
Posted by: ValcoOscar Apr 12 2018, 07:33 AM
Wanted to take a minute to give the utmost credit to Paul at Performance Oriented for the fine work he did on the Weber carbs for me. Part of his service is he sets them up and runs them, dialing them in on his test engine, and he claims they are ready to run.
Well this is no joke and in fact they were ready to run and I have not even had to adjust them further yet. I can do some checks, and will soon, but to be honest they are set up so well this engine just fires right up and idles so smooth.
This was one area I wanted to eliminate as a potential unknown on first start up and he did that for me. Paul really stands behind his work too.
Hey Jim-
Rumor is Paul is retiring and thus NO longer taking on work.
Do you know anything about this?
Oscar
Posted by: Lucky9146 Apr 12 2018, 09:26 AM
Wanted to take a minute to give the utmost credit to Paul at Performance Oriented for the fine work he did on the Weber carbs for me. Part of his service is he sets them up and runs them, dialing them in on his test engine, and he claims they are ready to run.
Well this is no joke and in fact they were ready to run and I have not even had to adjust them further yet. I can do some checks, and will soon, but to be honest they are set up so well this engine just fires right up and idles so smooth.
This was one area I wanted to eliminate as a potential unknown on first start up and he did that for me. Paul really stands behind his work too.
Hey Jim-
Rumor is Paul is retiring and thus NO longer taking on work.
Do you know anything about this?
Oscar
Oscar.
I didn't know the answer so I went to the horses mouth to ask Paul about retiring and more jobs. I was surprised. Here is his reply of a few minutes ago.
Hi Jim,
Well yes & no. I am not taking on more work until all current customer obligations are completed and I have rebuilt my 35 sets of Webers for sale. By this time, I will have reached retirement age of 65 and will enjoy the benefits associated by that. Once all the above has been accomplished I will again take on customer projects as best I can. I expect this effort to extend through the better part of 2019 to achieve.
Cheers,
Paul Abbott
Performance Oriented
1040 Luradel Ave S
Salem, Oregon 97302
530.520.5816
www.PerformanceOriented.com
Posted by: ValcoOscar Apr 12 2018, 09:48 AM
Wanted to take a minute to give the utmost credit to Paul at Performance Oriented for the fine work he did on the Weber carbs for me. Part of his service is he sets them up and runs them, dialing them in on his test engine, and he claims they are ready to run.
Well this is no joke and in fact they were ready to run and I have not even had to adjust them further yet. I can do some checks, and will soon, but to be honest they are set up so well this engine just fires right up and idles so smooth.
This was one area I wanted to eliminate as a potential unknown on first start up and he did that for me. Paul really stands behind his work too.
Hey Jim-
Rumor is Paul is retiring and thus NO longer taking on work.
Do you know anything about this?
Oscar
Oscar.
I didn't know the answer so I went to the horses mouth to ask Paul about retiring and more jobs. I was surprised. Here is his reply of a few minutes ago.
Hi Jim,
Well yes & no. I am not taking on more work until all current customer obligations are completed and I have rebuilt my 35 sets of Webers for sale. By this time, I will have reached retirement age of 65 and will enjoy the benefits associated by that. Once all the above has been accomplished I will again take on customer projects as best I can. I expect this effort to extend through the better part of 2019 to achieve.
Cheers,
Paul Abbott
Performance Oriented
1040 Luradel Ave S
Salem, Oregon 97302
530.520.5816
www.PerformanceOriented.com
That was quick.
Thanks for the update Jim. I have only heard good things about Paul of Performance Oriented.

Posted by: Lucky9146 Apr 15 2018, 09:59 PM
Had a chance to go to the Peterson Museum today and Stop by and see Marty at MSDS working on his project.
If you have not been to the Porsche Effect Display at the Peterson, put it on your list of things to do....
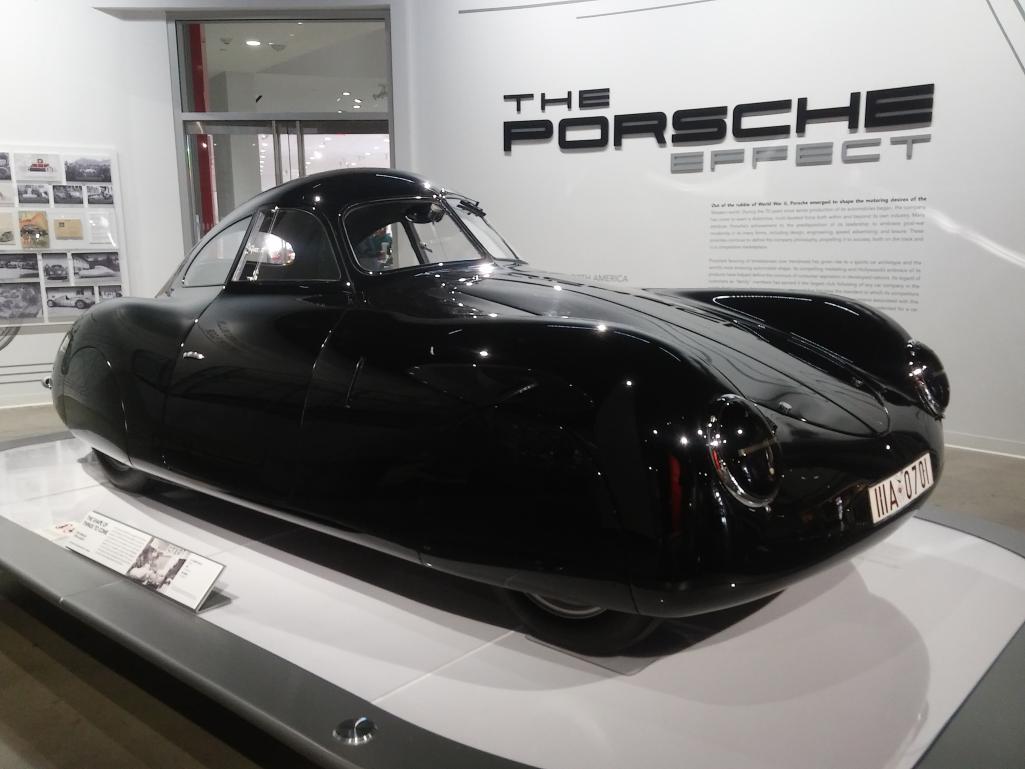
Posted by: Lucky9146 Apr 15 2018, 10:05 PM
There are some great cars at the Peterson and I won't ruin it for you with posting more pictures but they have an impressive display including race cars and a 917. Saw this cool poster and have to share it here.
Posted by: Lucky9146 Apr 15 2018, 10:17 PM
As I said we, as in my wife and I, got a chance to see Marty's "project" today. I am guilty of not having checked out his thread but will keep an eye on it from now on!!! Cool car
He is a pretty humble guy in my opinion and said he thought he posted so many pictures that people had seen enough well this site is about pictures of his project and I don't think you can post too many, so let Marty know you want to see more.
Had a great time there today and he graciously took time to describe in detail what he and his son are working on. His car is going to be a beast!
PS My picture does not do that engine and trans justice, it is just beautiful in person!
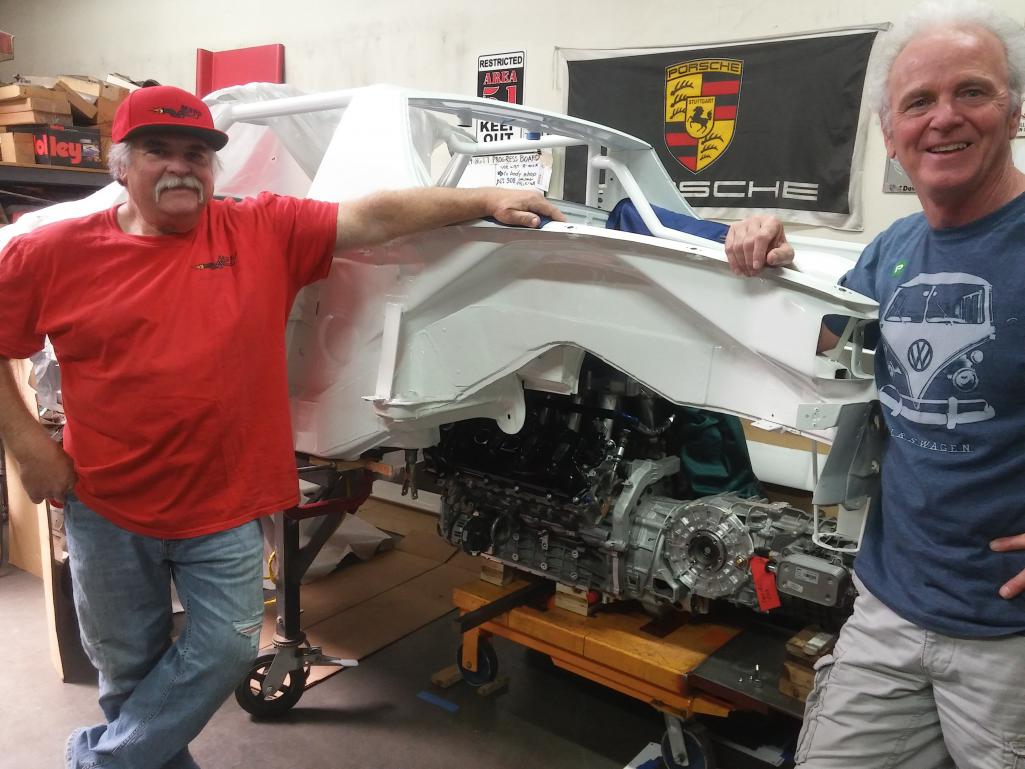
Posted by: Lucky9146 Apr 15 2018, 10:48 PM
Marty is going to do some rework to my Right header to solve my exhaust leak. The one flange is out of plane to the other and leaking and we can't explain why. He sold the headers to the PO like 7 years ago it is anybodies guess as to may have occurred during that time.
The upshot here though is Marty is such a stand up guy, and as I mentioned before he offered to fix it, and really does stand behind his work.
Note soot Right Flange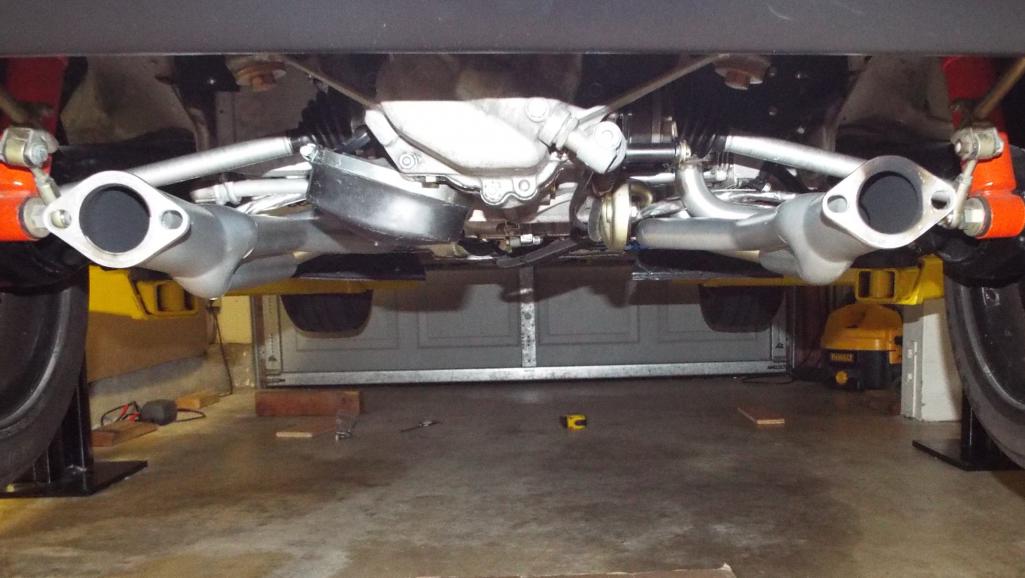
I had tried a number of things to fix the leak, and had the muffler off and on a number of times, trying to figure out what the hell the problem was. I finally noticed the angles of the flanges looked different from the side Took a 18" X 24" square and stood it on the floor and the left flange looked like this.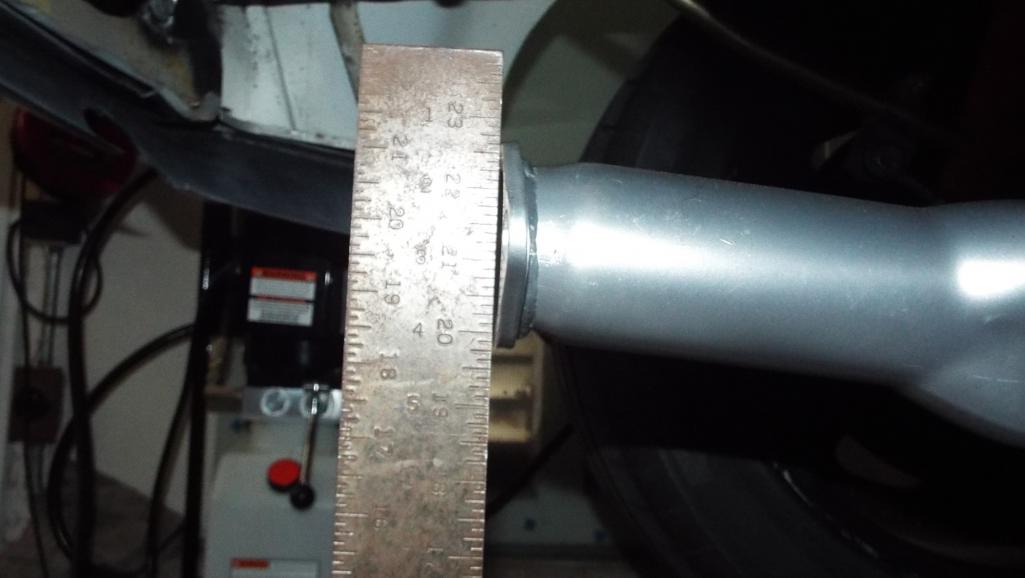
Then the right flange looked like this.
When Marty saw this he said send it up and he would fix it. He said there is no way gaskets and permatex would fix that! He is going to cut off the flange and weld on a new one. Thanks Marty!!!!
driving: 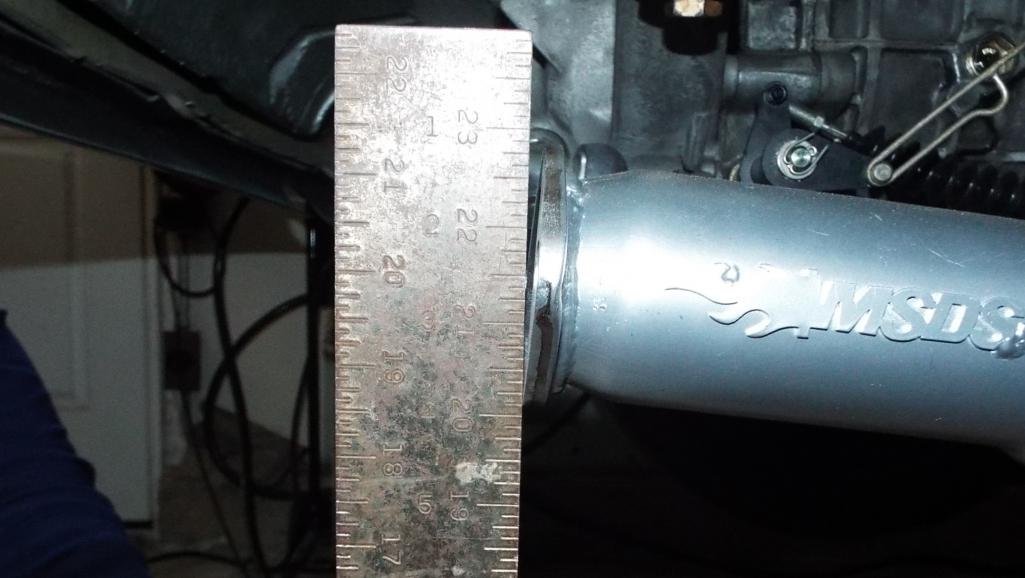
Posted by: moparrob Apr 15 2018, 11:53 PM
As I said we, as in my wife and I, got a chance to see Marty's "project" today. I am guilty of not having checked out his thread but will keep an eye on it from now on!!! Cool car
Sounds like a great day on all fronts.
I did not see that Marty had posted a thread on a new build, and could not find it on a search by his username. Do you happen to have the link Jim?
Posted by: porschetub Apr 16 2018, 01:06 AM
[quote name='Lucky9146' date='Apr 16 2018, 04:48 PM' post='2599849']
Marty is going to do some rework to my Right header to solve my exhaust leak. The one flange is out of plane to the other and leaking and we can't explain why. He sold the headers to the PO like 7 years ago it is anybodies guess as to may have occurred during that time.
The upshot here though is Marty is such a stand up guy, and as I mentioned before he offered to fix it, and really does stand behind his work.
Note soot Right Flange
I had tried a number of things to fix the leak, and had the muffler off and on a number of times, trying to figure out what the hell the problem was. I finally noticed the angles of the flanges looked different from the side Took a 18" X 24" square and stood it on the floor and the left flange looked like this.
Had the same issue,but the custom built headers I purchased from the PO were fine ,his supplied 2 in one out had bent flanges and leaked ..a real hassle to sort but ok now.
Wow Marty moved in there to sort it,pleased for you.
Posted by: Lucky9146 Apr 16 2018, 09:23 AM
As I said we, as in my wife and I, got a chance to see Marty's "project" today. I am guilty of not having checked out his thread but will keep an eye on it from now on!!! Cool car
Sounds like a great day on all fronts.
I did not see that Marty had posted a thread on a new build, and could not find it on a search by his username. Do you happen to have the link Jim?
Marty's Project is "Porsche 914 - 8 GTT" under the handle MATTYLITE Check it out if you haven't already. Pretty cool build and all Porsche!
Posted by: Lucky9146 Apr 16 2018, 03:24 PM
My car came with a Momo steering wheel. Posting Pics of my stock steering wheel that I bought here off a member and had leather recovered. It is a 1973 dated wheel so correct later for my '74. Trying to figure out the bits I need to complete the horn with mepstein. Thanks Mark!
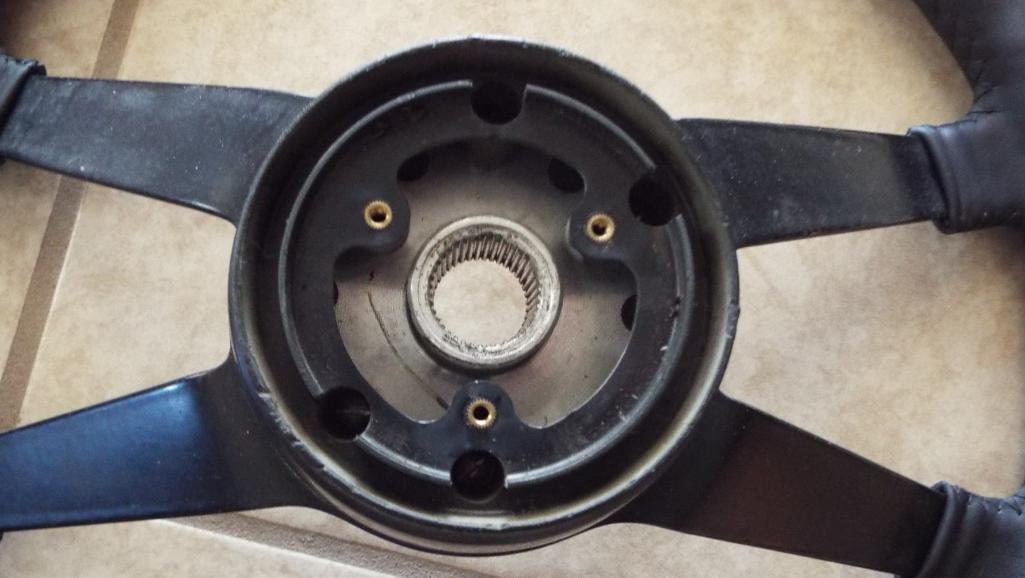

Posted by: mepstein Apr 16 2018, 04:02 PM
Looks like you have all the right parts except the plastic horn ring that has a wire attached. I’ll look through my stash for a good one.
Attached thumbnail(s)
Posted by: defianty Apr 17 2018, 07:23 AM
You'll need one of these too Jim. 
Posted by: Lucky9146 Apr 20 2018, 09:39 PM
Back a page to page 30 Post 596 I was showing my crumbling front sway bar drop link bushings.
I ordered what I was sure to be the correct ones, after being on the phone with what seemed to be a very thorough guy for about an hour, no exaggeration.
I received not the wrong ones but the wrong part entirely from a supplier I had never dealt with, they shall remain nameless and I will not flame them. What they sent was drop links instead of bushings, and not even MY drop link!
When this happened I became concerned because this sway bar is well over 20 years old and I began to think un-obtainable. I have the Weltmeister front sway bar and the picture below shows the 4 "K" bushings I am trying to get.
I did however find them at Paragon in Corpus Christie TX. Turns out the guy has a 914! Great guy! 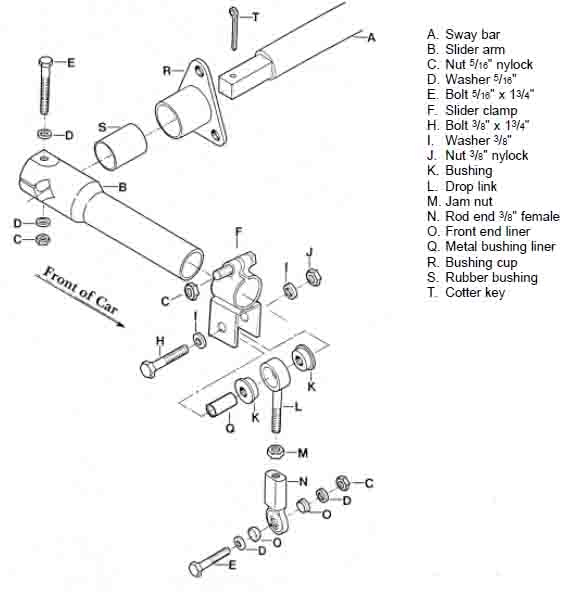
I decided to also replace the 2 sway bar bushings Part "S" that actually go in the bushing cups with bar running through the car. Trying to measure the driver side bar to figure out if I had a 19 mm or 22 mm bar, the bushing looked OK. 
When I looked at the passenger side I found this ugly sight.
How I never noticed this before I do not know. It looks like it may never been installed right. 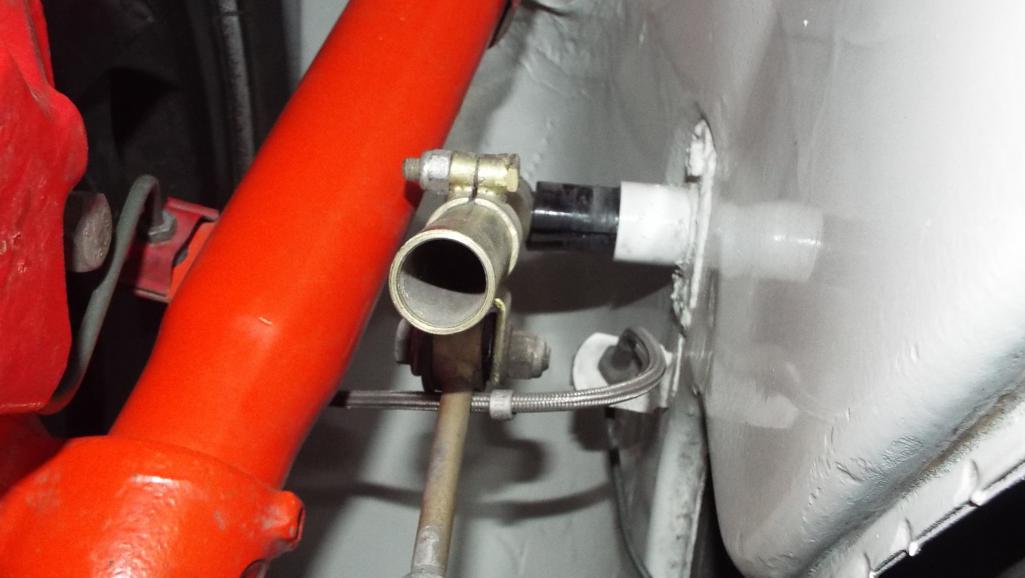
What I don't understand is what if anything actually holds the sway bar centered to keep this from ever happening again? Obviously the bar is longer by about 1 3/4 inches than the width of the installed bushing cup ends.
I have decided to post another specific topic thread and reach out to anyone else with this particular Weltmeister bar. http://www.914world.com/bbs2/index.php?showtopic=327883
Thanks for looking in any help appreciated!
Posted by: Lucky9146 Apr 27 2018, 12:35 PM
Below are the key points from the thread I posted that I wanted captured here in my build thread.
"Anybody Have This 22mm Weltmeister Front Sway Bar?, Don't understand what keeps it centered"
I thank you one and all for all the help. This is truly a great thread!
___________________________________________
pete000 Apr 20 2018, 09:28 PM Post #2
I have that same bar but haven't had any issues with it drifting.
___________________________________________
Steve Apr 20 2018, 09:33 PM Post #3
I used to have that Weltmeister bar. The bushing should look the same on both
sides with about an 1/8” sticking out on both sides. You center the bar with the
arms flush to the bushing on both sides. They do have a tendency to move side
to side. Either dump the whole thing and buy a tarret bar or buy some clamps
on the inside from McMaster Carr.
___________________________________________
defianty Apr 20 2018, 11:48 PM Post #6
I have the same bar Jim. Although I've never run with it yet I did purchase
two shaft collars with grubs to alleviate any lateral movement. Plan is to install
them on the inner wheel well next to the sway bar support plates. I also got some
large nylon washers to stop any contact.
I'm sure I got this idea from someone on here so hopefully they'll be along soon.
with pictures.
One problem I did have was finding a 19mm collar. In the end I got 18mm
and had a friend machine them out to size.
_____________________________________________
Luke M Apr 21 2018, 06:59 AM Post #7
I have a brand new welt bar that I haven't installed yet. I do see the kit comes
with 2 hose clamps which would clamp around the bar under the fuel tank. I
would say this is to keep the bar from drifting left to right. I plan on replacing
the clamps for collars when I do install it.
____________________________________________________
jcd914 Apr 21 2018, 10:20 AM Post #9
I have dealt with this in a few ways.
First push the bushing all the way in to the bush cup mounted to the inner fender, they should only stick a short distance.
Then loosen the arms on the bar and work them in as far as they will go.
The arms clamp on the square end of the bar and can move around if loose or
may not have been install pushed on to the bar as far as possible.
Now you will know how much gap you have to deal with.
I have had some where there was very little gap and the bar could only move
back and forth a few mm.
If you have enough gap your bar will move side to side much, there are different
ways to fill the gap.
However you deal with the gap you want to end up with the arms equally spaced
on each side of the car in order to keep the geometry of the swaybar arms, drop
links and A-arms the same.
The hose clamp the some kits come with is functional but I don't like it.
Clamp on collars work much better but you then might have metal rubbing
against metal depending on where you install them.
I have always put them on the outside, between the swaybar arm and the bushing.
It means you don't have to remove the fuel tank if you want to take the bar out
or if a collar worked loose and needs to be tightened.
I have had spacers made of plastic bushing material (turcite), basically a pair of
large plastic washers that fit over the bar and go between the arm and the
bushing end or the bushing cup.
I have had wider bushing made up that have a step so the push into the bushing
cup and stop against the outer edge and have a larger surface for the swaybar
arm to rub against.
I have also (in a pinch) taken a PVC pipe fitting that fit over the bar and cut it
into spacers to fit between the sway bar arm and the bushing to fill the gap.
Note: I did not do this on a customers car, not a real professional solution but it
worked.
You just want the bar centered and set up with very little play to move side to
side.
Jim
________________________________________
wysri9 @ Apr 23 2018, 02:30 PM)
I took a good look at mine and although this is only a test build, things seem to snug up nicely. I could detect no play between the bushings. here are some pics:-
Lucky9146 Apr 25 2018, 10:10 PM
Looks great and thanks for the pics. Your picture shows very well the large space from the arm to the cotter pin.
I have my issue figured out. When the car came to me I thought it was set up as I had been told the car had seen 145 mph clocked at a track with a big 4. I should have checked it and did not.
It appears that the arms either were not tight or had walked outboard toward the cotter pin. I plan to put some type of spacer between the arm and the cotter pin just to ensure it does stay in place. Thanks again
_______________________________________________
jcd914 Apr 25 2018, 04:30 PM Post #16
QUOTE(Lucky9146 @ Apr 25 2018, 09:53 AM)
Finally came to the realization that the drop links on mine are incorrect and way
too short.
This can be seen from the picture sent by wysri9 here. At the time this photo was
posted I was more concerned with the slider arm and all the extra space to the
cotter pin to digest this now obvious fact. It wasn't until I tried to reassemble that
things just did not make sense.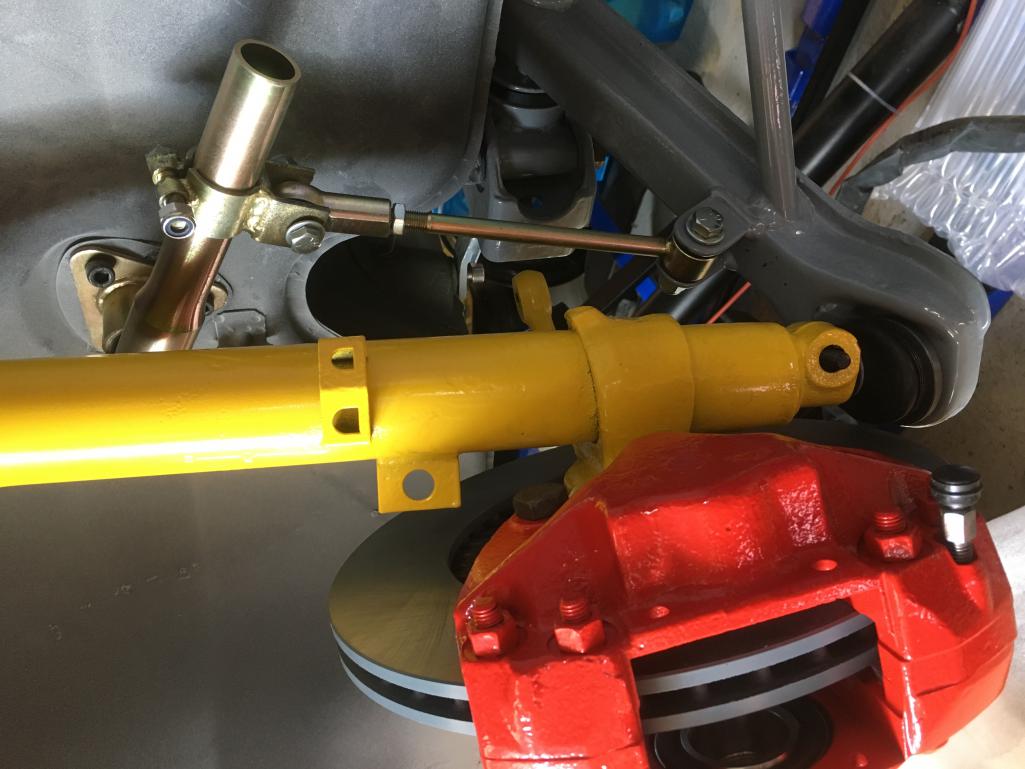
Spoke with Jason at Paragon Products in Corpus Christie TX and he confirmed it.
The drop link should be 6 7/8" long and mine is only 4 7/8' long.
Explains a lot. The front suspension was so pre-loaded and the A arms actually
hung on the sway bar arms as opposed to the struts. Now I understand why it was
so hard to get it apart. A full 2" too short?
Keep in mind I barely have this thing on the road, still sorting out the bugs and
break the engine in, so very few miles yet to guage anything.
The correct length for your drop link is dependent on the ride height of your car.
Ideally the sway bar arm should be parallel to the ground when the car is settled
on its suspension. So the length of the drop link would be different depending on
your ride height. I have shortened many sets of drop links to match them to the
car they are going on.
I think the Weltmeister drop links are too long to begin with except for car
sitting at full height.
I would wait to change the drop links until you can get the car on the ground and
settled and see where the arm is.
_______________________________________________
Lucky9146 Apr 26 2018, 10:10 PM
jcd914 is correct that the drop link is dependent on the ride height. My car is low.
I set the car on the suspension with the sway bar arms horizontal to the ground and the 4 7/8" drop links that I had fit perfectly!
Personally, I think the Weltmeister instructions suck.
Thank you jcd914 This is a great site!
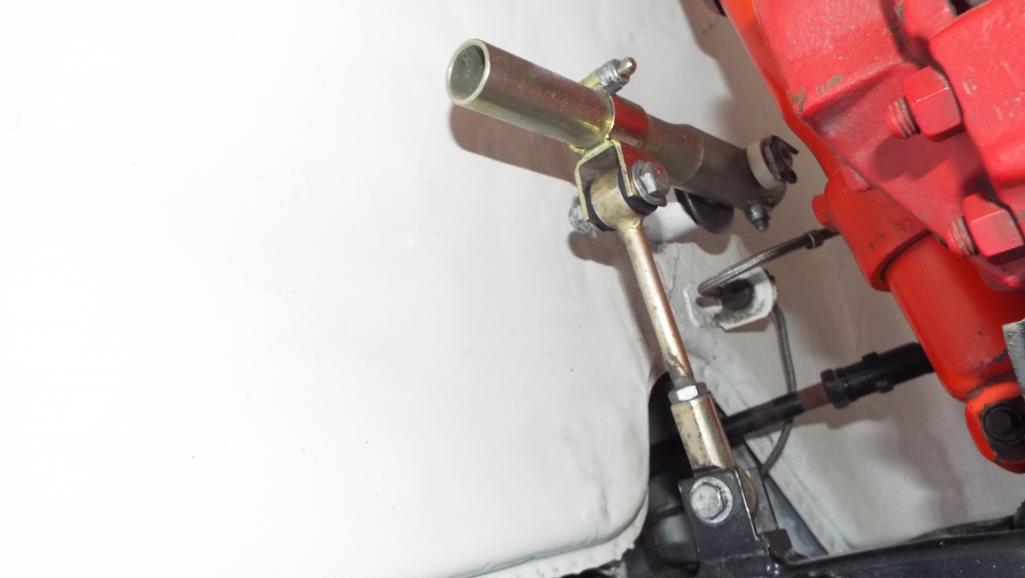
Posted by: moparrob Apr 27 2018, 01:40 PM
Man this is like a bad dream that just wont stop. When is that car going to be finished?
The ghost of Roland lives in that car.
Posted by: 914Toy Apr 27 2018, 01:54 PM
Below are the key points from the thread I posted that I wanted captured here in my build thread.
"Anybody Have This 22mm Weltmeister Front Sway Bar?, Don't understand what keeps it centered"
I thank you one and all for all the help. This is truly a great thread!
___________________________________________
pete000 Apr 20 2018, 09:28 PM Post #2
I have that same bar but haven't had any issues with it drifting.
___________________________________________
Steve Apr 20 2018, 09:33 PM Post #3
I used to have that Weltmeister bar. The bushing should look the same on both
sides with about an 1/8” sticking out on both sides. You center the bar with the
arms flush to the bushing on both sides. They do have a tendency to move side
to side. Either dump the whole thing and buy a tarret bar or buy some clamps
on the inside from McMaster Carr.
___________________________________________
defianty Apr 20 2018, 11:48 PM Post #6
I have the same bar Jim. Although I've never run with it yet I did purchase
two shaft collars with grubs to alleviate any lateral movement. Plan is to install
them on the inner wheel well next to the sway bar support plates. I also got some
large nylon washers to stop any contact.
I'm sure I got this idea from someone on here so hopefully they'll be along soon.
with pictures.
One problem I did have was finding a 19mm collar. In the end I got 18mm
and had a friend machine them out to size.
_____________________________________________
Luke M Apr 21 2018, 06:59 AM Post #7
I have a brand new welt bar that I haven't installed yet. I do see the kit comes
with 2 hose clamps which would clamp around the bar under the fuel tank. I
would say this is to keep the bar from drifting left to right. I plan on replacing
the clamps for collars when I do install it.
____________________________________________________
jcd914 Apr 21 2018, 10:20 AM Post #9
I have dealt with this in a few ways.
First push the bushing all the way in to the bush cup mounted to the inner fender, they should only stick a short distance.
Then loosen the arms on the bar and work them in as far as they will go.
The arms clamp on the square end of the bar and can move around if loose or
may not have been install pushed on to the bar as far as possible.
Now you will know how much gap you have to deal with.
I have had some where there was very little gap and the bar could only move
back and forth a few mm.
If you have enough gap your bar will move side to side much, there are different
ways to fill the gap.
However you deal with the gap you want to end up with the arms equally spaced
on each side of the car in order to keep the geometry of the swaybar arms, drop
links and A-arms the same.
The hose clamp the some kits come with is functional but I don't like it.
Clamp on collars work much better but you then might have metal rubbing
against metal depending on where you install them.
I have always put them on the outside, between the swaybar arm and the bushing.
It means you don't have to remove the fuel tank if you want to take the bar out
or if a collar worked loose and needs to be tightened.
I have had spacers made of plastic bushing material (turcite), basically a pair of
large plastic washers that fit over the bar and go between the arm and the
bushing end or the bushing cup.
I have had wider bushing made up that have a step so the push into the bushing
cup and stop against the outer edge and have a larger surface for the swaybar
arm to rub against.
I have also (in a pinch) taken a PVC pipe fitting that fit over the bar and cut it
into spacers to fit between the sway bar arm and the bushing to fill the gap.
Note: I did not do this on a customers car, not a real professional solution but it
worked.
You just want the bar centered and set up with very little play to move side to
side.
Jim
________________________________________
wysri9 @ Apr 23 2018, 02:30 PM)
I took a good look at mine and although this is only a test build, things seem to snug up nicely. I could detect no play between the bushings. here are some pics:-
Lucky9146 Apr 25 2018, 10:10 PM
Looks great and thanks for the pics. Your picture shows very well the large space from the arm to the cotter pin.
I have my issue figured out. When the car came to me I thought it was set up as I had been told the car had seen 145 mph clocked at a track with a big 4. I should have checked it and did not.
It appears that the arms either were not tight or had walked outboard toward the cotter pin. I plan to put some type of spacer between the arm and the cotter pin just to ensure it does stay in place. Thanks again
_______________________________________________
jcd914 Apr 25 2018, 04:30 PM Post #16
QUOTE(Lucky9146 @ Apr 25 2018, 09:53 AM)
Finally came to the realization that the drop links on mine are incorrect and way
too short.
This can be seen from the picture sent by wysri9 here. At the time this photo was
posted I was more concerned with the slider arm and all the extra space to the
cotter pin to digest this now obvious fact. It wasn't until I tried to reassemble that
things just did not make sense.
Spoke with Jason at Paragon Products in Corpus Christie TX and he confirmed it.
The drop link should be 6 7/8" long and mine is only 4 7/8' long.
Explains a lot. The front suspension was so pre-loaded and the A arms actually
hung on the sway bar arms as opposed to the struts. Now I understand why it was
so hard to get it apart. A full 2" too short?
Keep in mind I barely have this thing on the road, still sorting out the bugs and
break the engine in, so very few miles yet to guage anything.
The correct length for your drop link is dependent on the ride height of your car.
Ideally the sway bar arm should be parallel to the ground when the car is settled
on its suspension. So the length of the drop link would be different depending on
your ride height. I have shortened many sets of drop links to match them to the
car they are going on.
I think the Weltmeister drop links are too long to begin with except for car
sitting at full height.
I would wait to change the drop links until you can get the car on the ground and
settled and see where the arm is.
_______________________________________________
Lucky9146 Apr 26 2018, 10:10 PM
jcd914 is correct that the drop link is dependent on the ride height. My car is low.
I set the car on the suspension with the sway bar arms horizontal to the ground and the 4 7/8" drop links that I had fit perfectly!
Personally, I think the Weltmeister instructions suck.
Thank you jcd914 This is a great site!
My 2 cent worth - as a place to start, you have the drop links too close to the torsion bar - i.e. will probably be too resistant to car roll = hard ride and significant stress on the wheel well.
Posted by: Lucky9146 Apr 27 2018, 03:44 PM
_______________________________________________
Lucky9146 Apr 26 2018, 10:10 PM
jcd914 is correct that the drop link is dependent on the ride height. My car is low.
I set the car on the suspension with the sway bar arms horizontal to the ground and the 4 7/8" drop links that I had fit perfectly!
Personally, I think the Weltmeister instructions suck.
Thank you jcd914 This is a great site!
My 2 cent worth - as a place to start, you have the drop links too close to the torsion bar - i.e. will probably be too resistant to car roll = hard ride and significant stress on the wheel well.
I appreciate your input believe me. Here is my struggle. The Weltmeister instructions suggest "a starting position, place the slider clamps so the forward edge of the clamp is about 3" from the forward edge of the arm (away from the bar itself)".
Mine are at 2 3/4" right now.
I kind of thought the same as you, until hooking up the exact same hardware I had, but with new bushings. If the clamp is to come forward much, it looks to me, like it will bind the turnbuckle on the bottom to the corresponding mount.
The directions further say to reduce understeer slide the slider clamps forward away from the sway bar.
To reduce oversteer move the slider clamps back closer to to the rear.
I have very little seat time due to various reasons. Of that tiny seat time I did not notice anything radically peculiar in the steering, but time will tell. The concern you bring up about stress on the wheel well has me concerned. It is my understanding the suspension was set up by a reputable shop in WA. The car just may be too damn low, I don't know. I may need to find someone knowledgeable locally to bless this mess. Thanks!
Posted by: 914Toy Apr 27 2018, 07:13 PM
_______________________________________________
Lucky9146 Apr 26 2018, 10:10 PM
jcd914 is correct that the drop link is dependent on the ride height. My car is low.
I set the car on the suspension with the sway bar arms horizontal to the ground and the 4 7/8" drop links that I had fit perfectly!
Personally, I think the Weltmeister instructions suck.
Thank you jcd914 This is a great site!
My 2 cent worth - as a place to start, you have the drop links too close to the torsion bar - i.e. will probably be too resistant to car roll = hard ride and significant stress on the wheel well.
I appreciate your input believe me. Here is my struggle. The Weltmeister instructions suggest "a starting position, place the slider clamps so the forward edge of the clamp is about 3" from the forward edge of the arm (away from the bar itself)".
Mine are at 2 3/4" right now.
I kind of thought the same as you, until hooking up the exact same hardware I had, but with new bushings. If the clamp is to come forward much, it looks to me, like it will bind the turnbuckle on the bottom to the corresponding mount.
The directions further say to reduce understeer slide the slider clamps forward away from the sway bar.
To reduce oversteer move the slider clamps back closer to to the rear.
I have very little seat time due to various reasons. Of that tiny seat time I did not notice anything radically peculiar in the steering, but time will tell. The concern you bring up about stress on the wheel well has me concerned. It is my understanding the suspension was set up by a reputable shop in WA. The car just may be too damn low, I don't know. I may need to find someone knowledgeable locally to bless this mess. Thanks!
Obviously the diameter of the anti-roll bar is key. My comments are based on the pics. I would start more like 5” from the bar and then adjust as necessary.
Although the advice above on which way to move them to reduce under over steer is counter intuitive, I know it is correct based on my track experience.
Posted by: Lucky9146 Apr 27 2018, 09:31 PM
Man this is like a bad dream that just wont stop. When is that car going to be finished?
The ghost of Roland lives in that car.
Perhaps I should have taken you up on one of your three offers to buy it back when I had the chance
.
Posted by: Lucky9146 Apr 27 2018, 09:38 PM
_______________________________________________
Lucky9146 Apr 26 2018, 10:10 PM
jcd914 is correct that the drop link is dependent on the ride height. My car is low.
I set the car on the suspension with the sway bar arms horizontal to the ground and the 4 7/8" drop links that I had fit perfectly!
Personally, I think the Weltmeister instructions suck.
Thank you jcd914 This is a great site!
My 2 cent worth - as a place to start, you have the drop links too close to the torsion bar - i.e. will probably be too resistant to car roll = hard ride and significant stress on the wheel well.
I appreciate your input believe me. Here is my struggle. The Weltmeister instructions suggest "a starting position, place the slider clamps so the forward edge of the clamp is about 3" from the forward edge of the arm (away from the bar itself)".
Mine are at 2 3/4" right now.
I kind of thought the same as you, until hooking up the exact same hardware I had, but with new bushings. If the clamp is to come forward much, it looks to me, like it will bind the turnbuckle on the bottom to the corresponding mount.
The directions further say to reduce understeer slide the slider clamps forward away from the sway bar.
To reduce oversteer move the slider clamps back closer to to the rear.
I have very little seat time due to various reasons. Of that tiny seat time I did not notice anything radically peculiar in the steering, but time will tell. The concern you bring up about stress on the wheel well has me concerned. It is my understanding the suspension was set up by a reputable shop in WA. The car just may be too damn low, I don't know. I may need to find someone knowledgeable locally to bless this mess. Thanks!
Obviously the diameter of the anti-roll bar is key. My comments are based on the pics. I would start more like 5” from the bar and then adjust as necessary.
Although the advice above on which way to move them to reduce under over steer is counter intuitive, I know it is correct based on my track experience.
Just measured from the center of the bar to the center of the sliding clamp is 4 1/2 inches, so I am close. Thanks!
Posted by: Lucky9146 Apr 29 2018, 04:13 PM
Drove it for about an hour yesterday and it is running great! Hadn't driven it much yet because of the exhaust leak, which is now fixed, and trying to understand why so much smoke on start up.
I initially thought there may have been too much oil in the system and researched dip stick lengths among other things in an effort to prove there was or wasn't. Have a PMS tank with what appears to be a OEM oil filler neck bringing into question whether the oil level was correct. Oil level is fine. I had been concerned about the smoke on start up, but as many told me, "just drive it" and they were right, the JE rings were just a little stubborn breaking in. All OK now.
The suspension seems fine and even as low as the car sits, there is suspension travel. Did not detect any steering issues with the sway bar set up the way I got the car, but now with new bushings. Drop links are the correct length as reported earlier but now proven with road test. Great day yesterday!
Today debut at the local PCASD Cars and Coffee. The 914 received a lot of attention and positive comments this morning. My wife accompanied me and we had a great time. One of the best turn outs for C&C here locally.
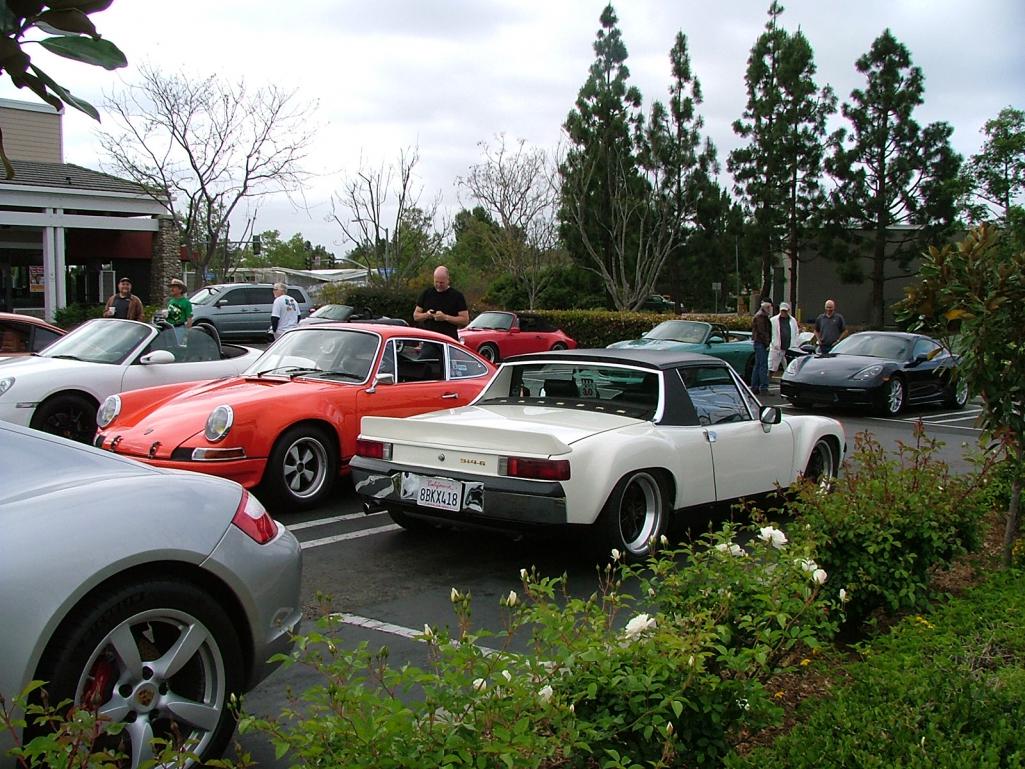
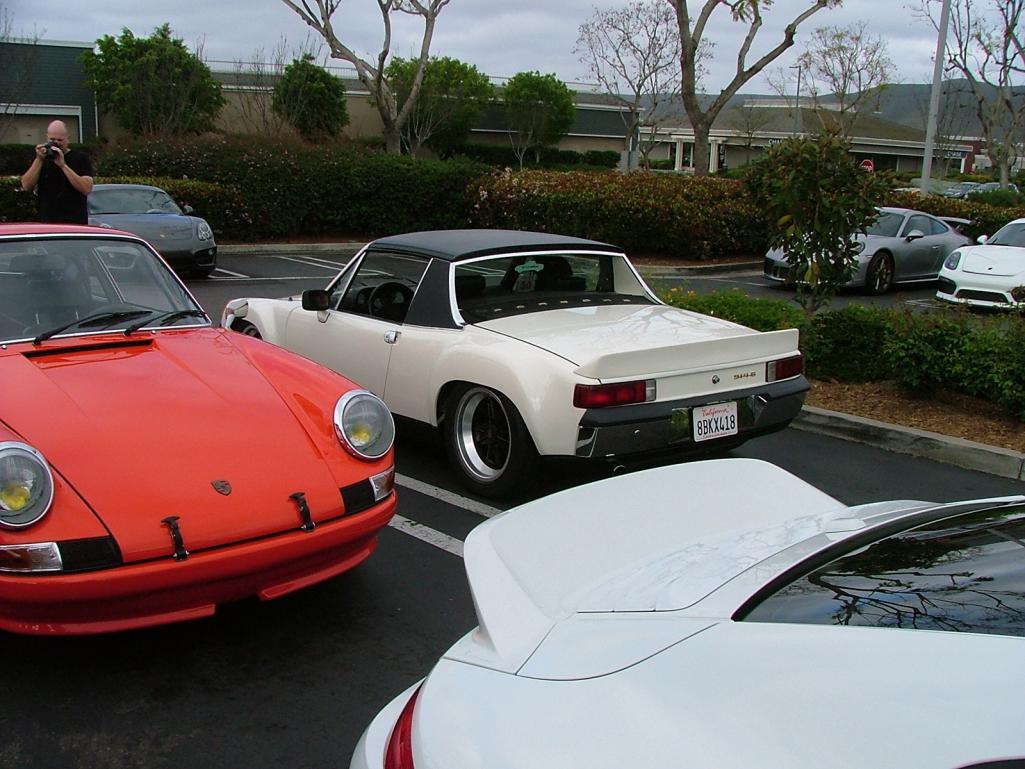
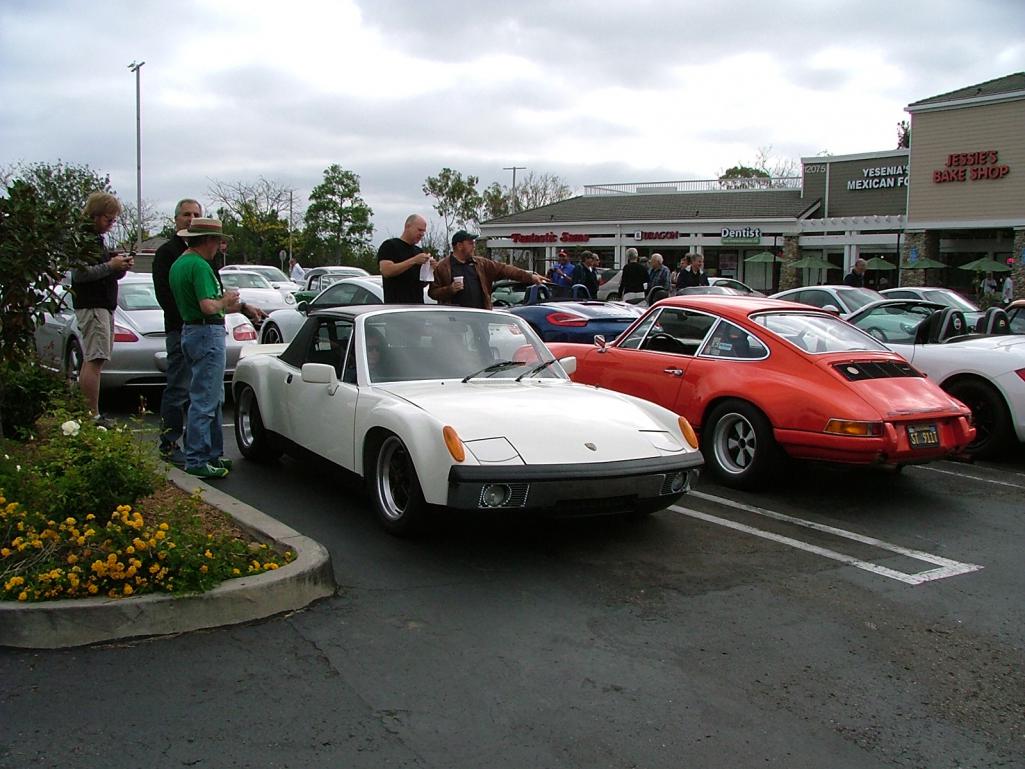
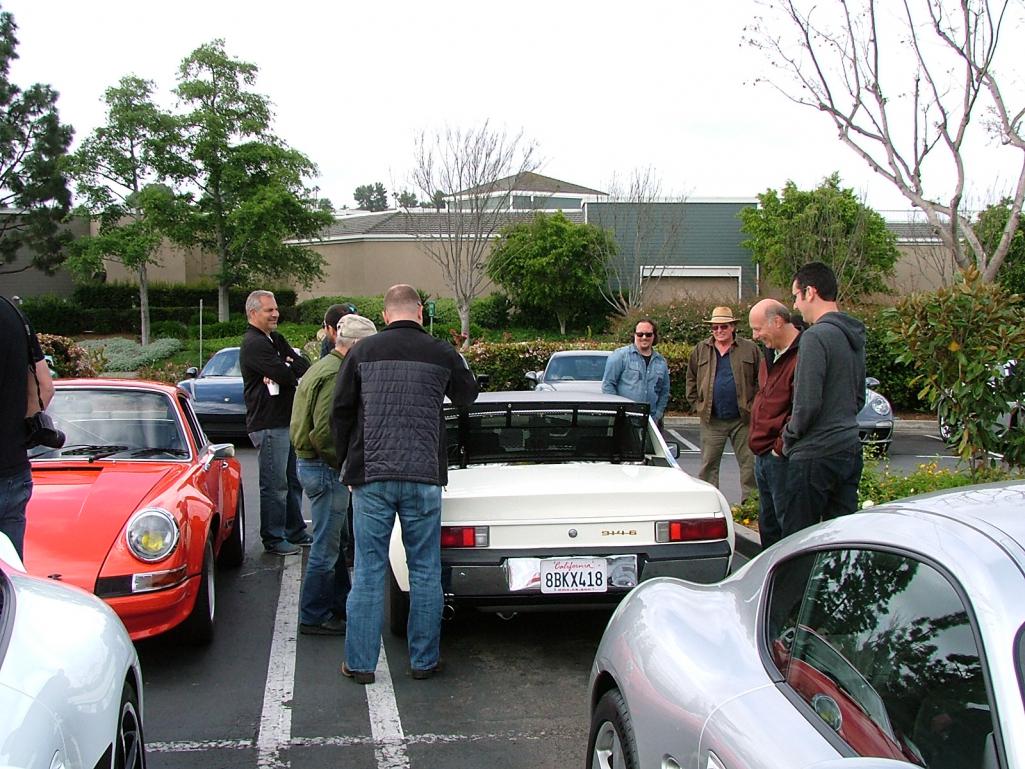
Attached thumbnail(s)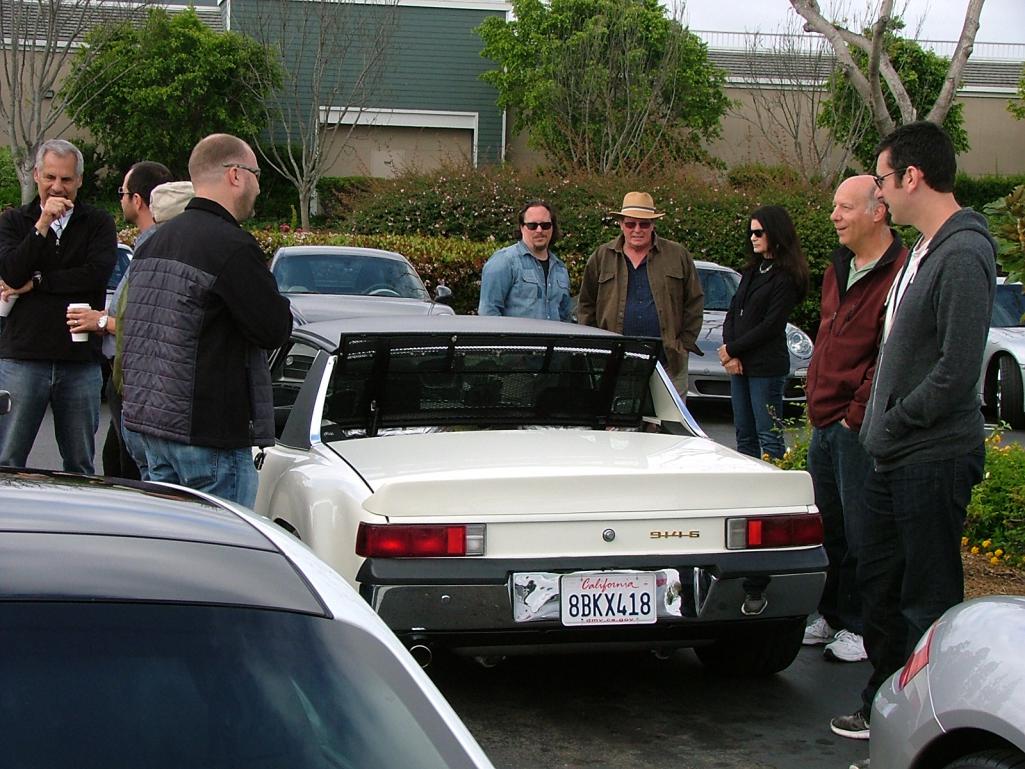
Posted by: Steve Apr 29 2018, 04:19 PM
Are you running a puke bottle? Dumb me I overfilled the oil tank which was causing excess oil into the intake. I had horrible smoke on startup, until I removed the oil breather from the intake and put it into a puke bottle. Otherwise some smoke on startup is normal. Maybe post a video of it.
Posted by: Lucky9146 Apr 29 2018, 04:30 PM
Are you running a puke bottle? Dumb me I overfilled the oil tank which was causing excess oil into the intake. I had horrible smoke on startup, until I removed the oil breather from the intake and put it into a puke bottle. Otherwise some smoke on startup is normal. Maybe post a video of it.
Check on the puke bottle. Nothing to the carbs related to the oil system. Pretty sure now it was just the rings breaking in slower than anticipated.
Hope to do another driving video soon. Thanks for weighing in Steve.
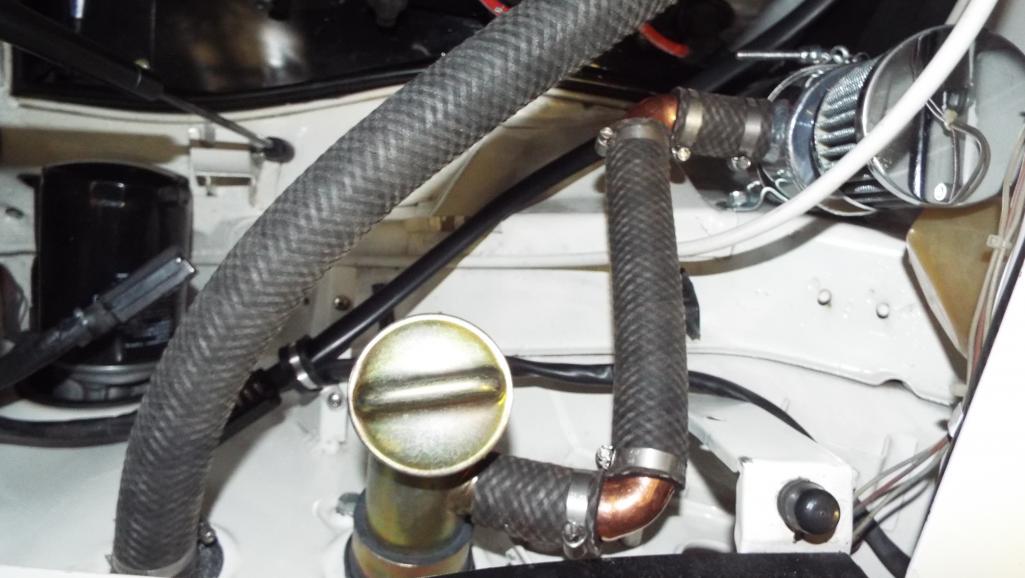
Posted by: Lucky9146 May 1 2018, 12:34 PM
One thing I always wanted, but never thought I would find, was a set of real Scheel seats to finish out my 6 GT conversion.
I was super excited I had found a set of vintage Scheel seats in early March. They arrived extremely well packed with great care.
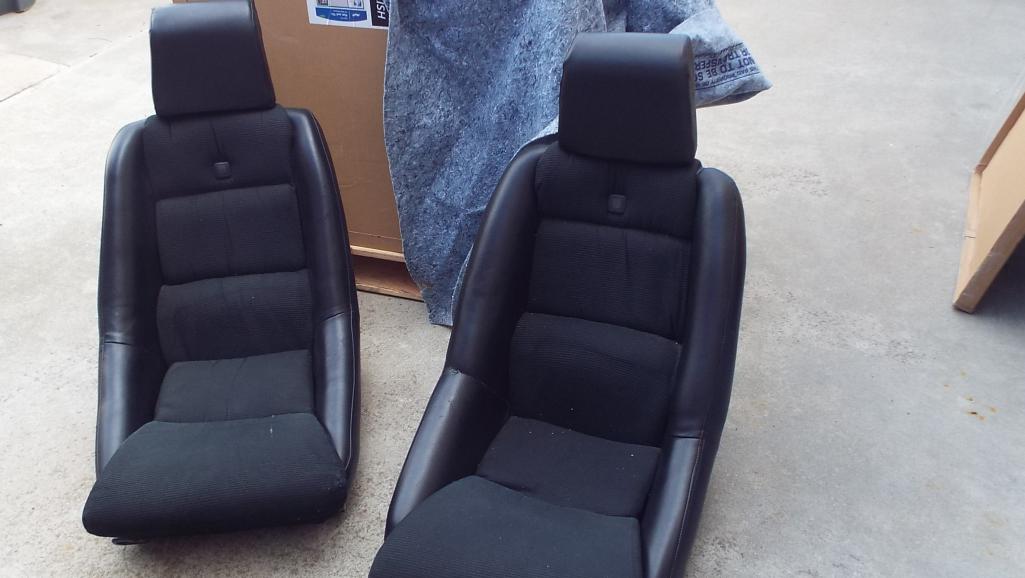
I knew from the pictures I’d seen before I bought them that they needed a little work so first thing I wanted to do was get them to my upholstery guy so that he could hopefully make repairs with some closely matched vinyl to a few problem areas.

I drove them almost immediately to the upholstery shop and that is where I got a rude awakening. Within minutes I learned the vinyl had been recovered. He informed me that the vinyl on the seats was not really a period correct vinyl and showed me the difference. I had thought these were original seats. Oh boy here we go.
Posted by: Lucky9146 May 1 2018, 12:44 PM
My upholsterer and I talked about recovering with a correct vinyl because he could not replace the damaged sections only. We thought we could keep what looked to be the original corduroy, so we planned a recover. The seats really did not seem to look the same though, somehow the shapes were a little different we noticed. When the seats sit side by side there were many differences, even in the corduroy sections. The head rests angles did not match either, with one being straight up vertical, while the other was tilted back. I was thinking the head rest was bent and would be something I could bend back. 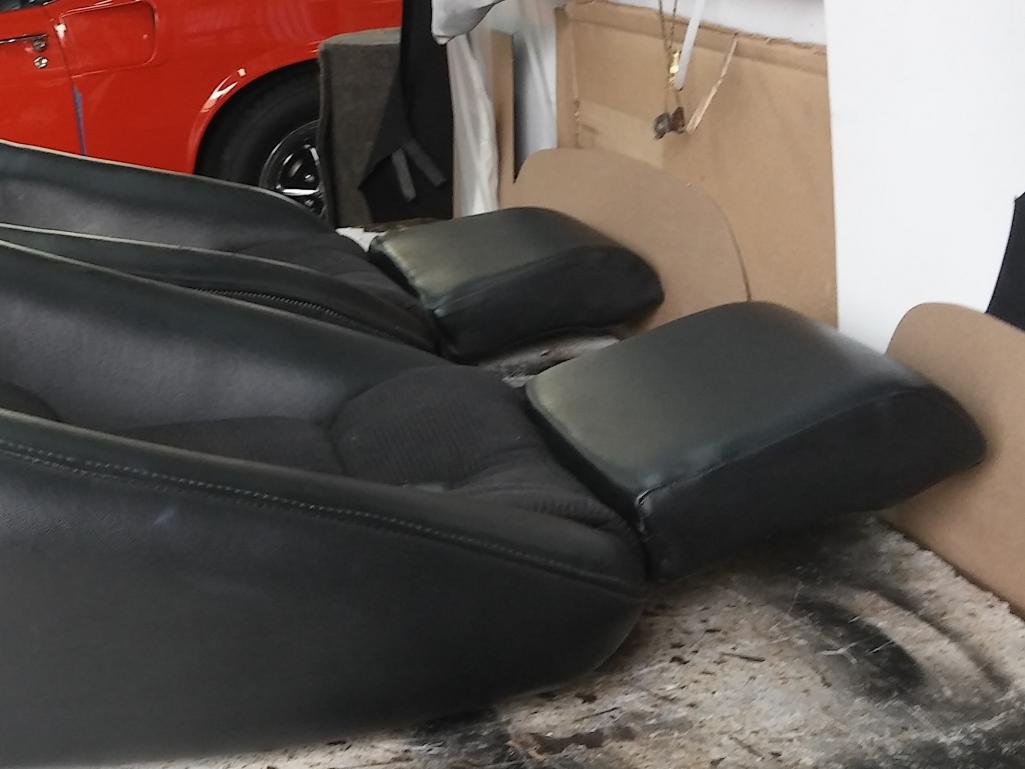
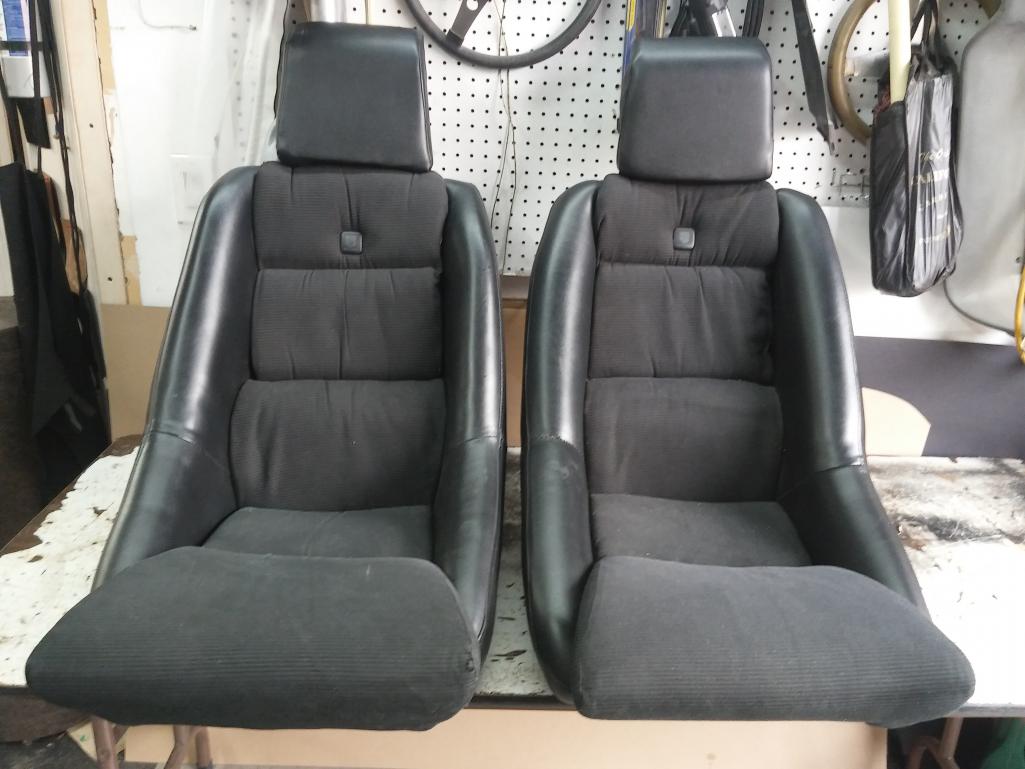
One seat bottom was not the same as the other as far as the cushion and attachment. Hard to describe this but one was fastened down well, and the other just lifted right up unattached.
Next was he would strip them down and a few days later I would pick up the frames to get them blasted.
Posted by: Lucky9146 May 1 2018, 12:50 PM
When I returned to the shop there was more bad news from the tear down. It wasn’t that the head rest was bent, it was that the actual frames were different, physically shaped different, even made slightly different, and one a tad shorter. One frame was now going to need to be modified to look like the other.
Then I learned even the corduroy had been re done as well. Plastic rosettes that finish off the head rests insertion to the seats were missing and broken. All the webbing was in fact original but was so tired it could not be re-used. One head rest foam was much denser than the other as well.
When I got home I began to really understand the differences in the seat frames.
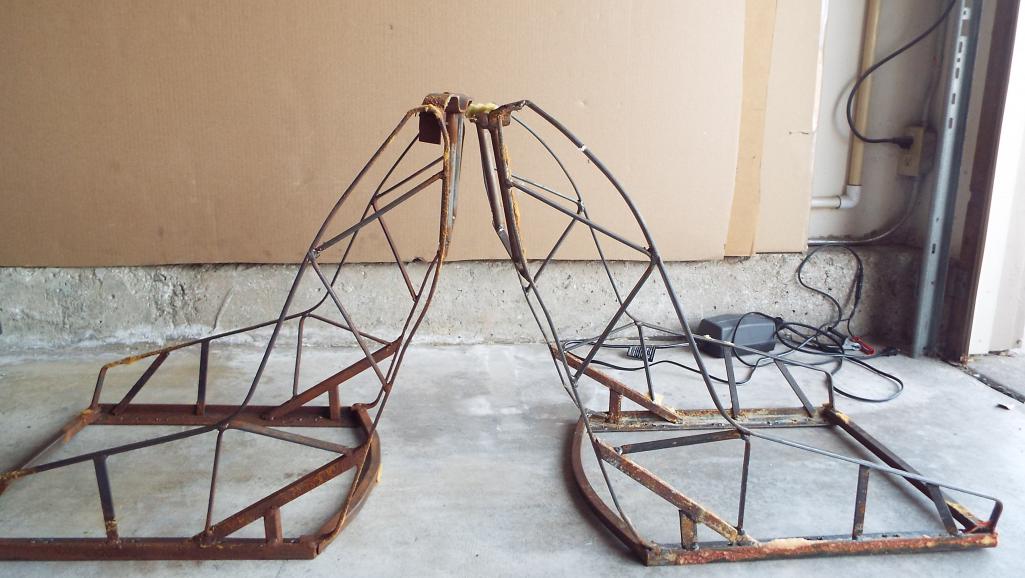
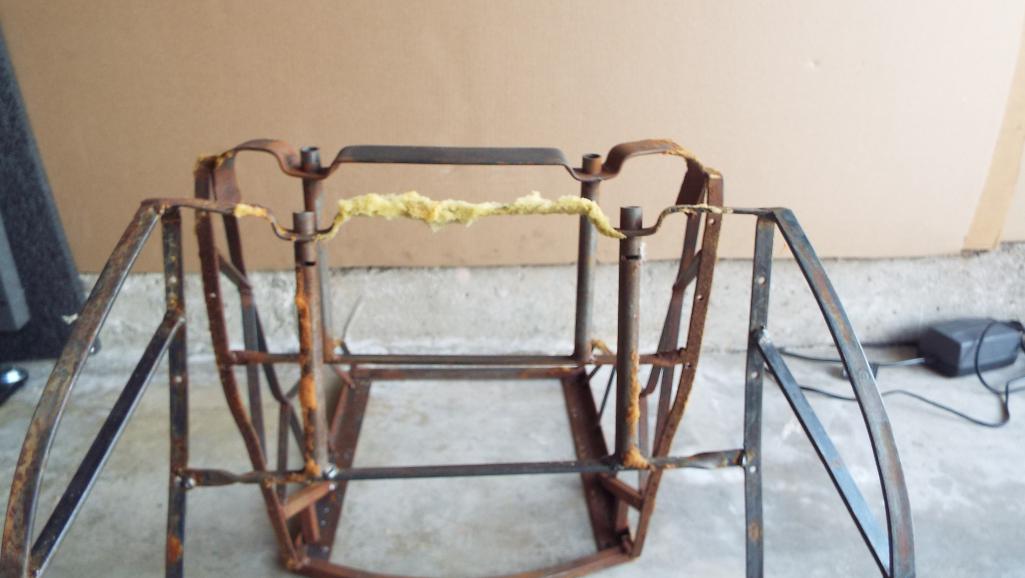
Posted by: Lucky9146 May 1 2018, 01:03 PM
First I had to figure out which seat configuration I had was correct, so did a lot of research and determined that the slightly tilted head rest was correct as opposed to straight up head rest version. 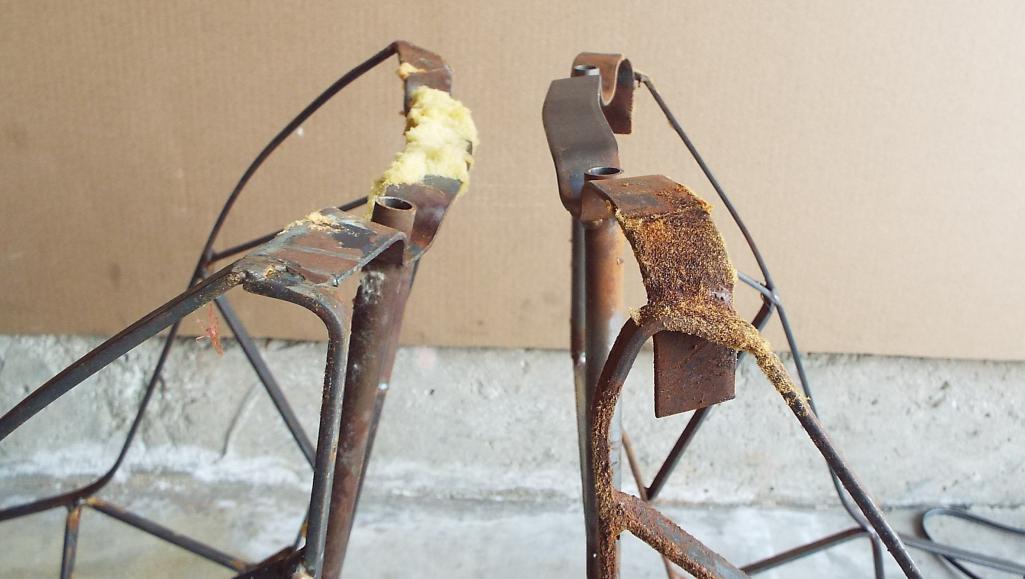
I then began cutting one seat apart with a saws-all. Measurements revealed the straight up seat was narrower at the top and the shape for the back was thinner from a template I made.
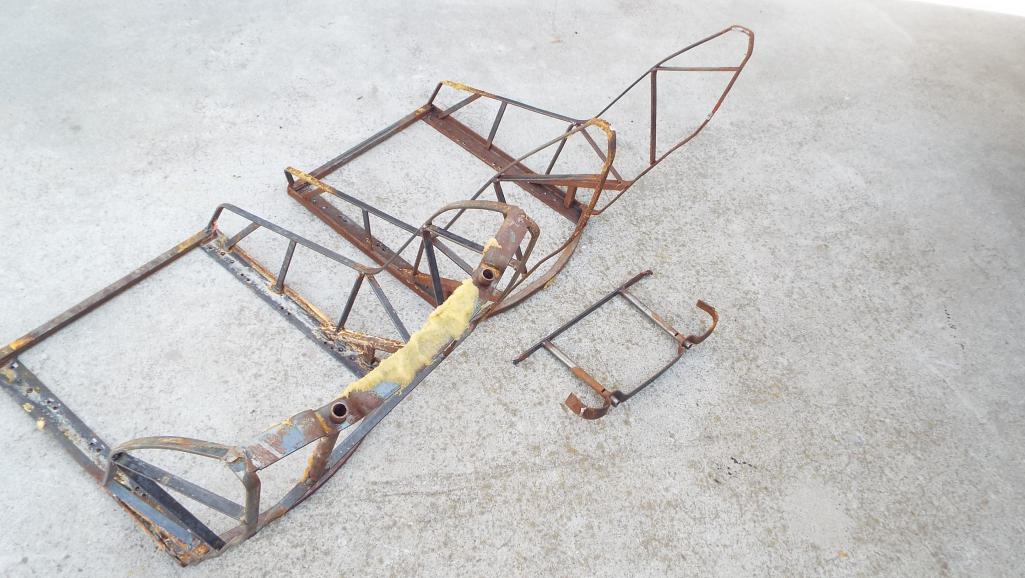
Posted by: Lucky9146 May 1 2018, 01:13 PM
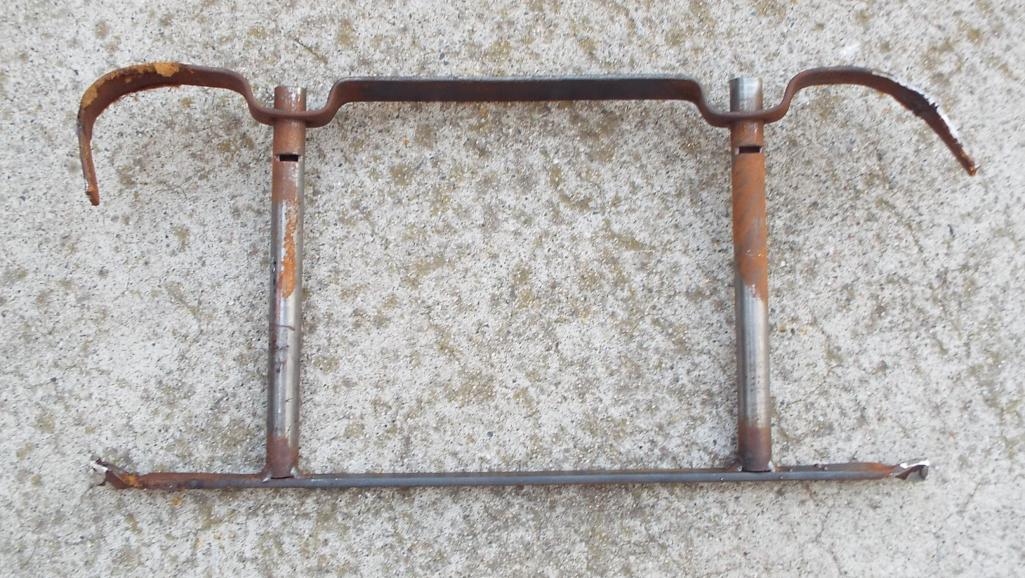
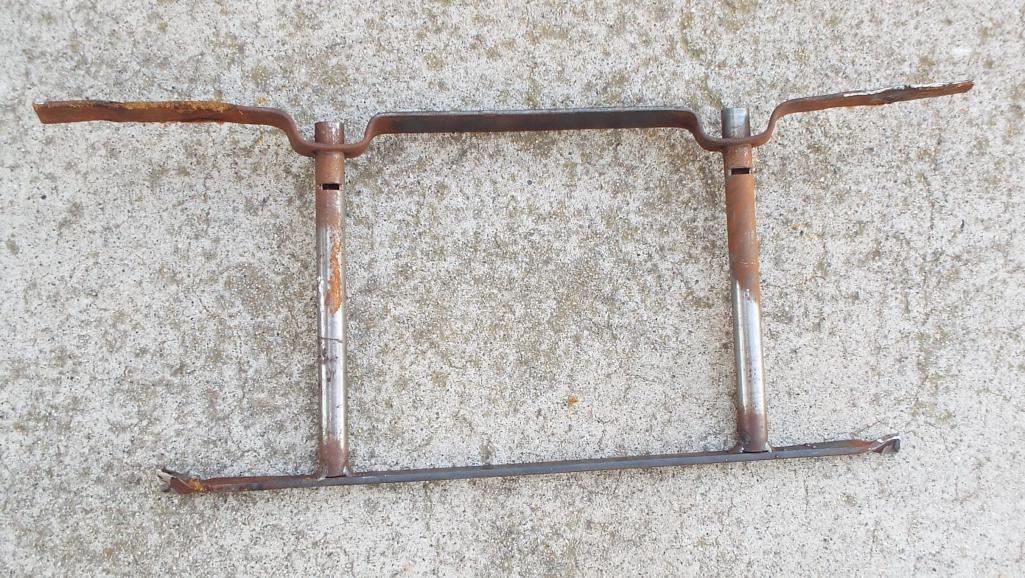
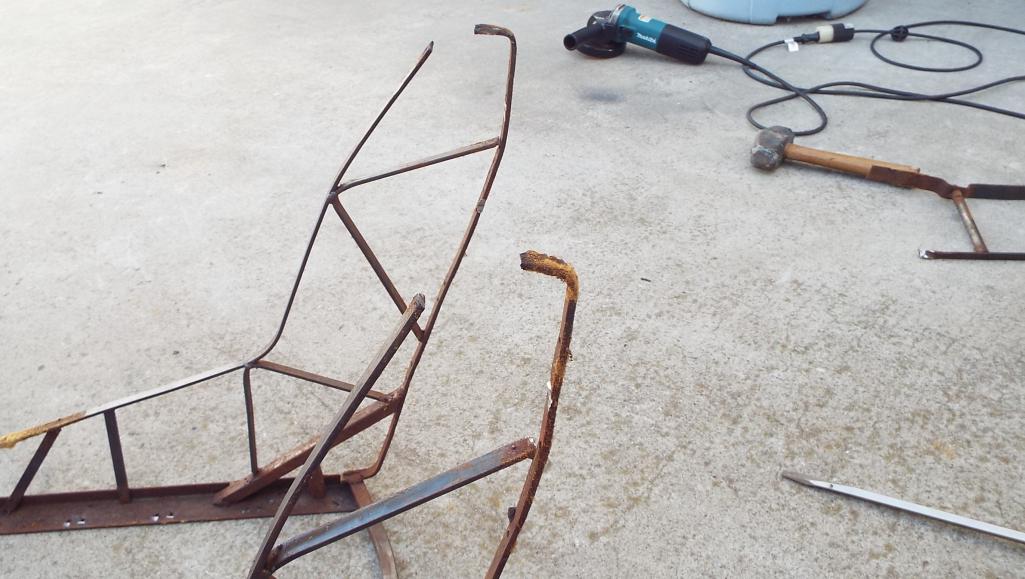
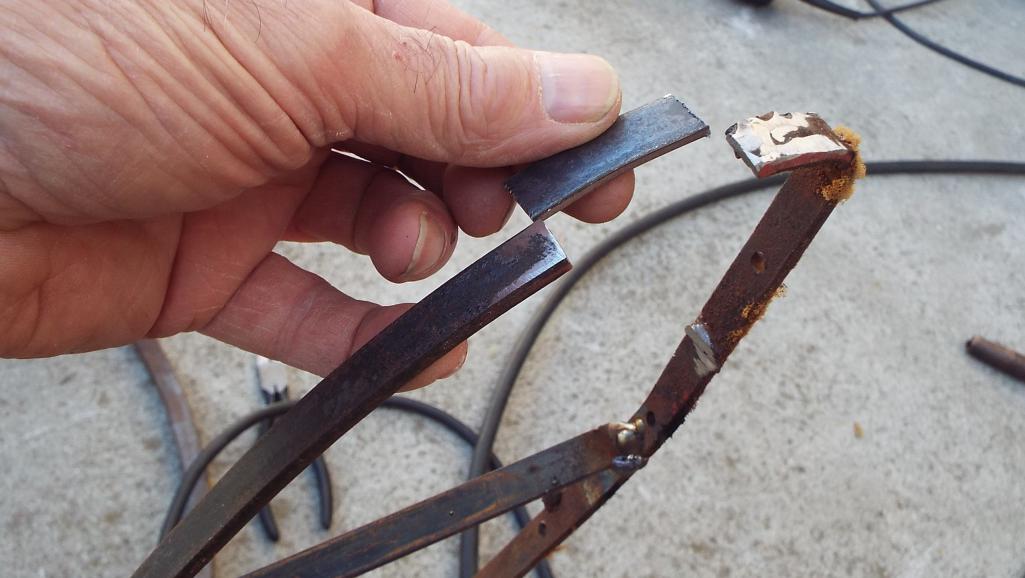
Posted by: Lucky9146 May 1 2018, 01:24 PM
The seat shapes really were different in several places. Backs slightly different and now the head rests are the same angle!
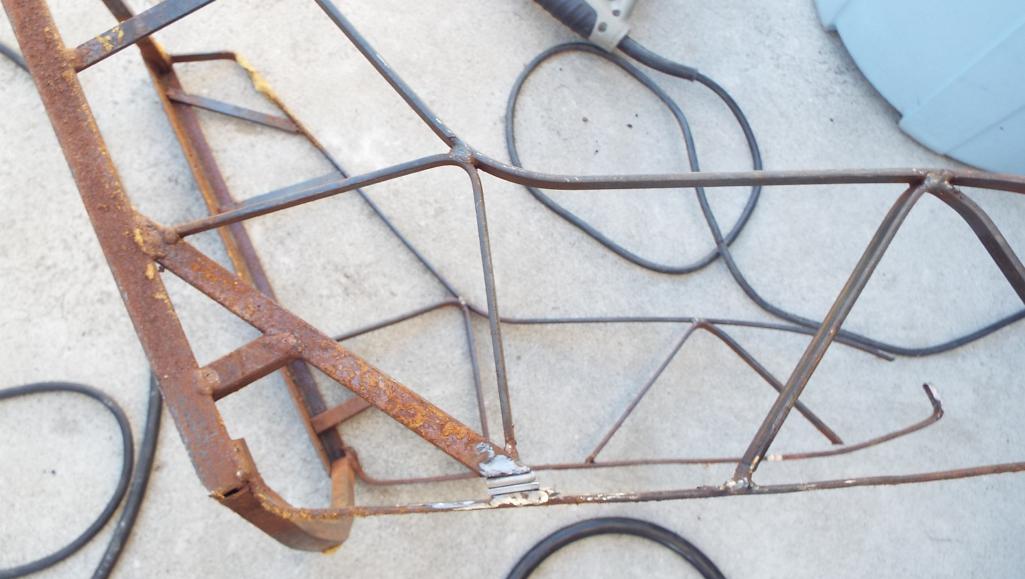
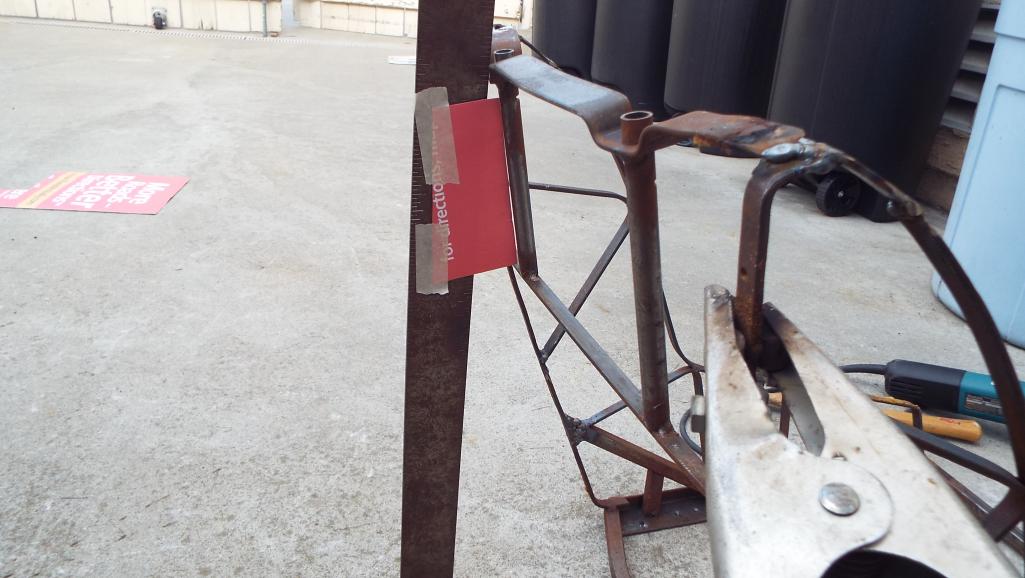
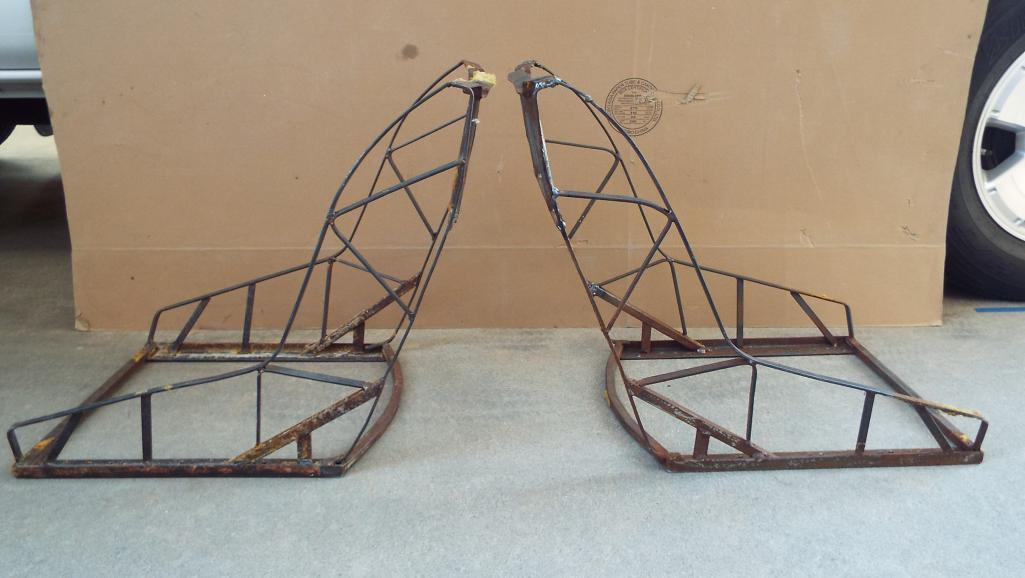
Posted by: Lucky9146 May 1 2018, 01:40 PM
I cleaned up the rust and hit them with Por15 silver.
Far cry from where I thought I would be, just bolting them in, not too long after receiving and repairing them.
I was telling Lawrence (larmo63) who has some nice Scheel seats about what I found on mine after buying them and he said that back in the day a lot of seats were sold individually, and a lot of times only the driver was a Scheel leaving the passenger stock.
If that were the case here, then likely someone took two seats and had them recovered to look like they were a pair, many years ago. Both frames were Scheel all right, but possibly many years apart or they just didn’t pay too much attention to having them look exactly the same.
A good lesson in buying by picture. As a friend of mine once said: “the camera doesn’t catch what the eye can”. Had I seen these seats in person I likely would not have bought them. All I saw was what looked to be original looking seats. I got caught up in the excitement.
Drove the frames and material up to the upholsterer last Monday. I know they will look great when he’s done.
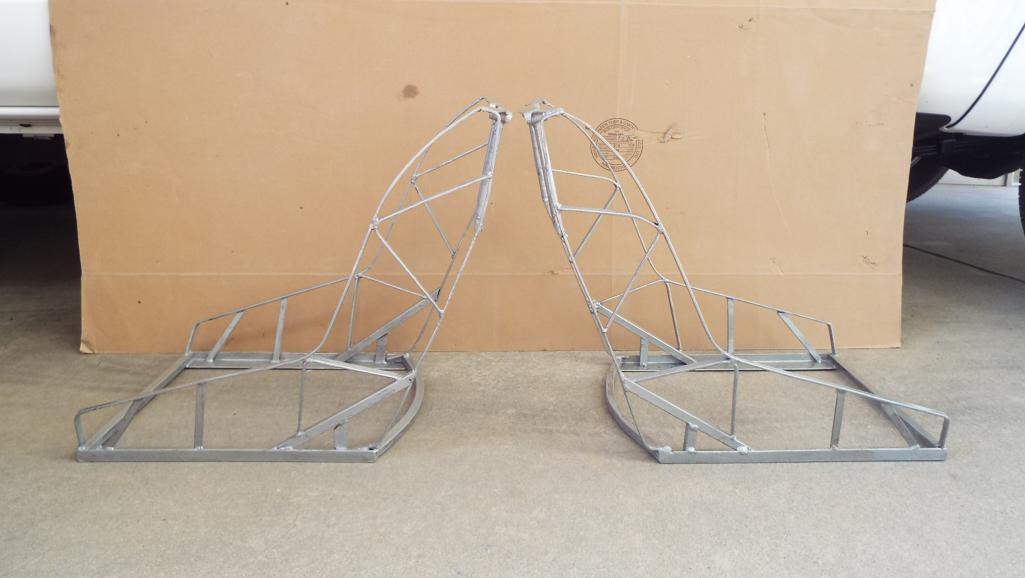

Posted by: 914Toy May 1 2018, 01:51 PM
Bummer. Judging by your words, you have a remarkable cheerful attitude which will propel you out of this disappointment
Posted by: raynekat May 1 2018, 02:15 PM
Good on you to correct the issues with these seats.
In the end, you'll have a pair of "matching" seats that will look wonderful in your car.
Lots of times it's 2 steps forward, 1 step back in these builds.
Keep your head down and keep moving ahead.
It will be killer in the end.
Posted by: mepstein May 1 2018, 02:18 PM
Good on you to correct the issues with these seats.
In the end, you'll have a pair of "matching" seats that will look wonderful in your car.
Lots of times it's 2 steps forward, 1 step back in these builds.
Keep your head down and keep moving ahead.
It will be killer in the end.
Now they will look perfect.
Posted by: ValcoOscar May 1 2018, 02:37 PM
Sorry about your latest seat challenge Jim but you've proven that you can fix practicality anything. March on my friend...can't wait to meet up soon.
Awaiting your next driving video!!!
Oscar
Posted by: porschetub May 1 2018, 06:10 PM
Bummer about the seats Jim, they could have been made years apart hence the difference,can you still get the needle corduroy for the inners ? .
Re: the oil level I had a similar issue but in reverse..PMS filler and stock tank,appears they don't match,I calculated I would need around 12 litres to reach halfway on the dipstick which is too much for my engine (no front cooler) so adjusted the filler neck to bring it closer to the tank ,did an oil change and added 9.5 litres and marked the dipstick ,finally I know where I am.
Car looks great and seems to be getting attention .
Posted by: Cairo94507 May 1 2018, 06:19 PM
Sorry to see what you had to go through with your seats. In doing a build it seems we all have to just keep our eye on the windshield and out of the rear view mirror. Stay as positive as possible. Those seats are going to look absolutely amazing once finished and every time you sit in them you will love them.
Posted by: Lucky9146 May 1 2018, 07:34 PM
Bummer about the seats Jim,
they could have been made years apart hence the difference,can you still get the needle corduroy for the inners ? .Re: the oil level I had a similar issue but in reverse..PMS filler and stock tank,appears they don't match,I calculated I would need around 12 litres to reach halfway on the dipstick which is too much for my engine (no front cooler) so adjusted the filler neck to bring it closer to the tank ,did an oil change and added 9.5 litres and marked the dipstick ,finally I know where I am.
Car looks great and seems to be getting attention
.I got as close as I could find on the corduroy after a month and a half of searching.
I pursued many avenues trying to find “correct” corduroy which at one point was starting to look unobtainable.
Called, searched,
, drove, and after numerous phone calls and samples gathered from around the country, even communicating with a place in Germany. I received the material I chose from these shown here. 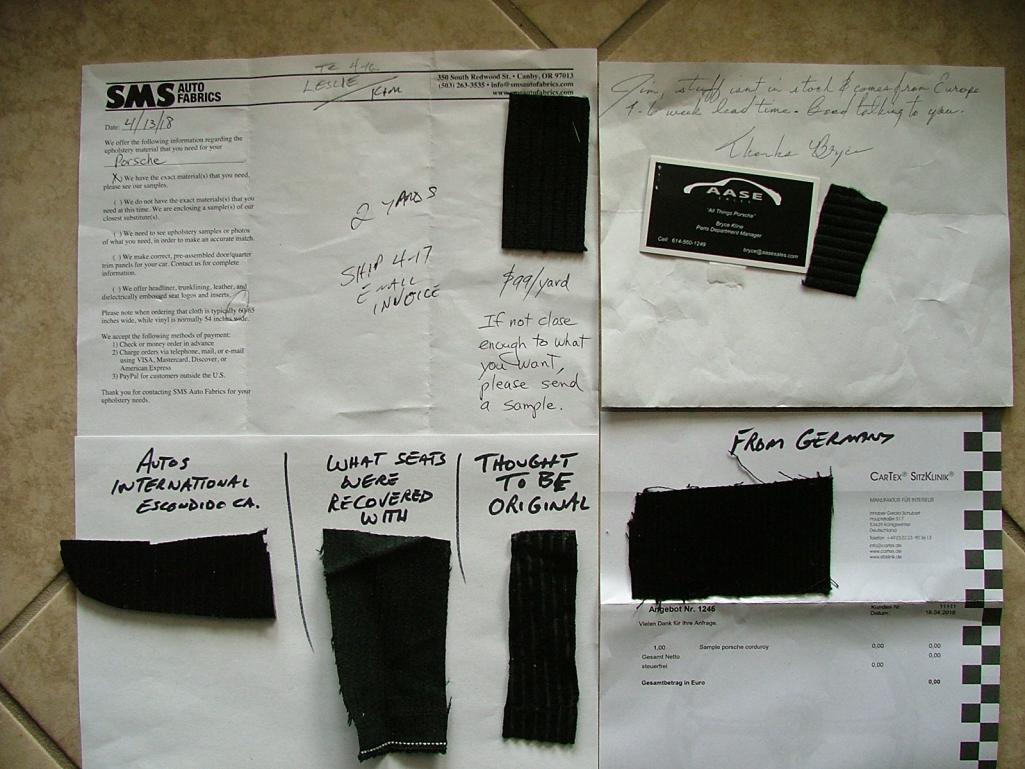
This is what I thought was closest from SMS to what was believed to be "original". It is a nice heavier weight fabric. I did not like the foam backed one from Autos International and it was THE most expensive. My upholstery guy could have gotten that one too but he knows it is not as correct as what I found. The AASE one was close too with the ribbing as well, but you can see it also came from Germany and was lighter weight but out of stock. SMS has terrible yelp ratings but I did well with them even shipping sooner than they promised. I would recommend them.
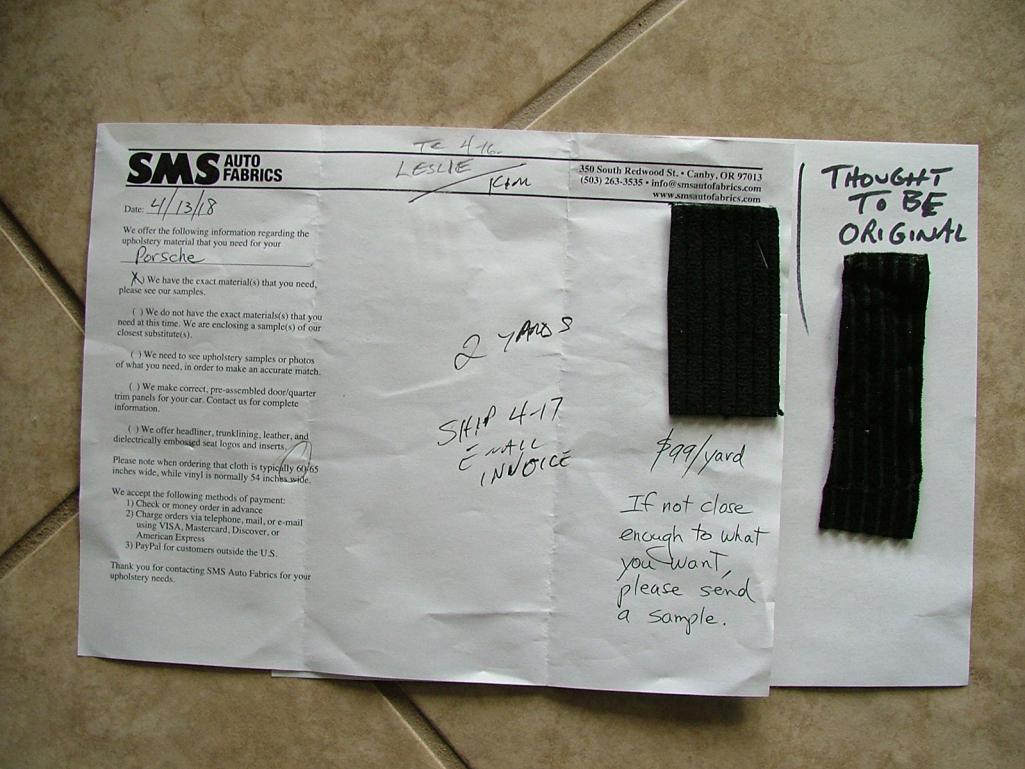
Posted by: Lucky9146 May 1 2018, 07:44 PM
Bummer. Judging by your words, you have a remarkable cheerful attitude which will propel you out of this disappointment
Thanks Keith
Make no mistake, I am not happy about it, just trying stay positive, make the best of it and move forward. Kind of a bitter pill to swallow. As I tried to lay out, it seemed rather simple to fix initially, but then just kept getting deeper as we went along.
Posted by: Lucky9146 May 1 2018, 07:47 PM
Good on you to correct the issues with these seats.
In the end, you'll have a pair of "matching" seats that will look wonderful in your car.
Lots of times it's 2 steps forward, 1 step back in these builds.
Keep your head down and keep moving ahead.
It will be killer in the end.
Thanks for weighing in!
Yes, on the positive side I was able to cut and shape them myself to look identical, so I am thankful for that.
Posted by: Lucky9146 May 1 2018, 07:54 PM
Good on you to correct the issues with these seats.
In the end, you'll have a pair of "matching" seats that will look wonderful in your car.
Lots of times it's 2 steps forward, 1 step back in these builds.
Keep your head down and keep moving ahead.
It will be killer in the end.
Now they will look perfect.Thanks Mark!
The upholstery shop, Escondido Custom Upholstery, is fairly close to me, like 15 minutes away, and the owner, Oscar does amazing work! I believe, based on everything I have seen of his, they will in deed be perfect! He has just started and they should be hopefully done next week.
Posted by: Lucky9146 May 1 2018, 08:28 PM
Sorry about your latest seat challenge Jim but you've proven that you can fix practicality anything. March on my friend...can't wait to meet up soon.
Awaiting your next driving video!!!
Oscar
Too funny!
"fix practically anything" I have been fortunate in that regard but Jeeze do I have to fix everything?
I hope to make it to San Clemente in the not too distant future. Next few weekends are tied up but I'm at least thinking about it now for real now.
Also hope to get a few San Diego 914'ers to make it to one of the monthly PCASD Cars & Coffee too!
My driving Video buddy is hard to nail down, but I'm working on it for sure.
Looked like the Route 66 was a great time for all. Nice trailer!
Posted by: Lucky9146 May 1 2018, 08:33 PM
Sorry to see what you had to go through with your seats. In doing a build it seems we all have to just keep our eye on the windshield and out of the rear view mirror. Stay as positive as possible. Those seats are going to look absolutely amazing once finished and every time you sit in them you will love them.
Michael,
Thanks, but compared to your car this is just child's play.
I do appreciate you checking though and I see more great progress has been made on your car lately too!
Posted by: whitetwinturbo May 1 2018, 08:40 PM
.........here's to the guy who sold you a "bill of goods" 
Posted by: moparrob May 1 2018, 10:33 PM
Man, you are a STUD!
Your level of detail keeps me constantly envious. Can't wait to plant my butt in those new seats for my test drive.
Posted by: defianty May 2 2018, 02:14 AM
I can only imagine the pain when you realised the seats weren't as good as you'd hoped. Despite the additional costs, these seats are going to be perfect once completed and you'll have pride in knowing you had a hand in making them so. Nice one Jim.
Great seats too, I'd love them in my car!
Posted by: Lucky9146 May 2 2018, 02:31 PM
.........here's to the guy who sold you a "bill of goods"
Karma
Posted by: Lucky9146 May 2 2018, 02:34 PM
Man, you are a STUD!
Your level of detail keeps me constantly envious. Can't wait to plant my butt in those new seats for my test drive.
Thank you!
Hey weren't you heading this way this coming weekend? Look back a few posts.
Posted by: Lucky9146 May 2 2018, 02:44 PM
So to finish off on all the drop link discussion last week I received the "correct" Weltmeister 6 7/8", which a few guys here verified the length on theirs, is what the standard Weltmeister drop link measures.
It is plain to see they will on work on this car, which apparently was lowered way back in the day by about 2 inches. As I said it drives just fine as set up. Case closed.
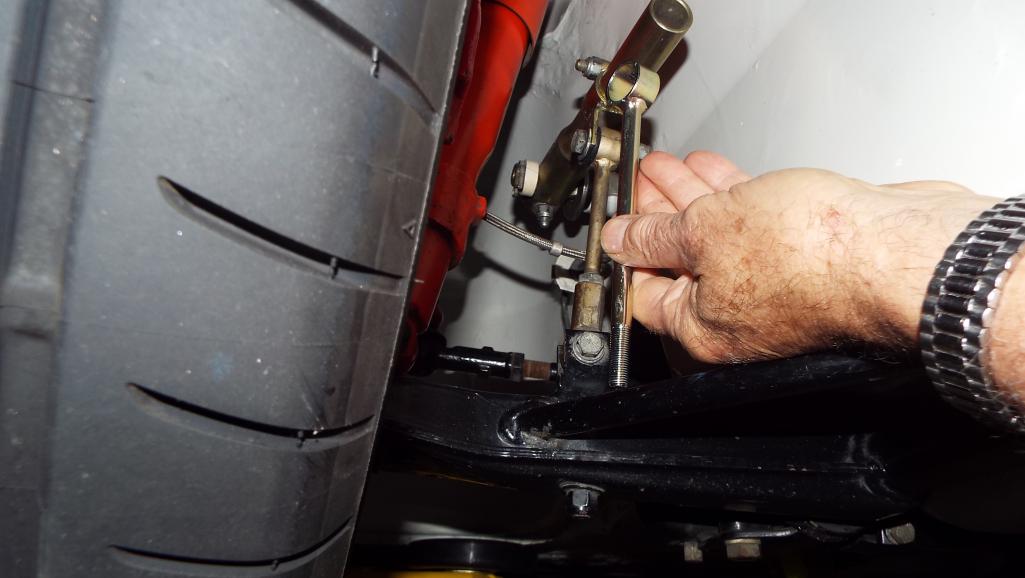
Posted by: moparrob May 2 2018, 07:31 PM
Thank you!
Hey weren't you heading this way this coming weekend? Look back a few posts.
I had planned to come down since I have been out of town the last 3 weekends. However I now have a chance to work on the Silver car this weekend AND go for a ride to Angeles Crest. As much as I want to see the car in person I am jonesing for a ride in my car and will have to see you another day. Have fun though.
Posted by: Lucky9146 May 3 2018, 10:52 PM
Seat Update
My upholsterer is pretty resourceful. Original webbing in NLA. He took the "best" of the old webbing (elasticity is pretty much gone) and reused it to make it look like the original webbing was still there on the bottoms. 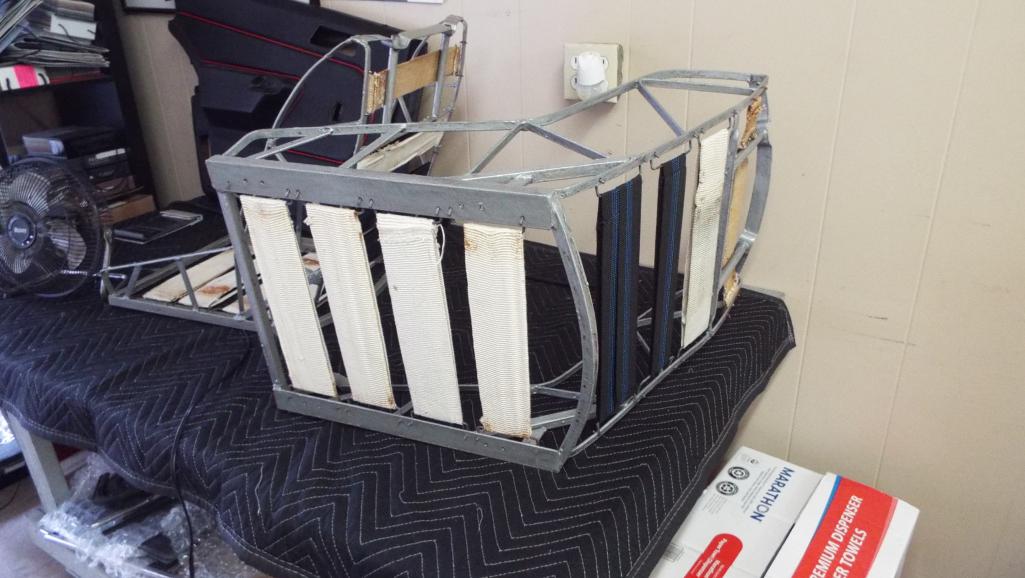
There was just enough of the better looking stuff left to do it on both seats! Inside the old webbing he put new. Very creative!
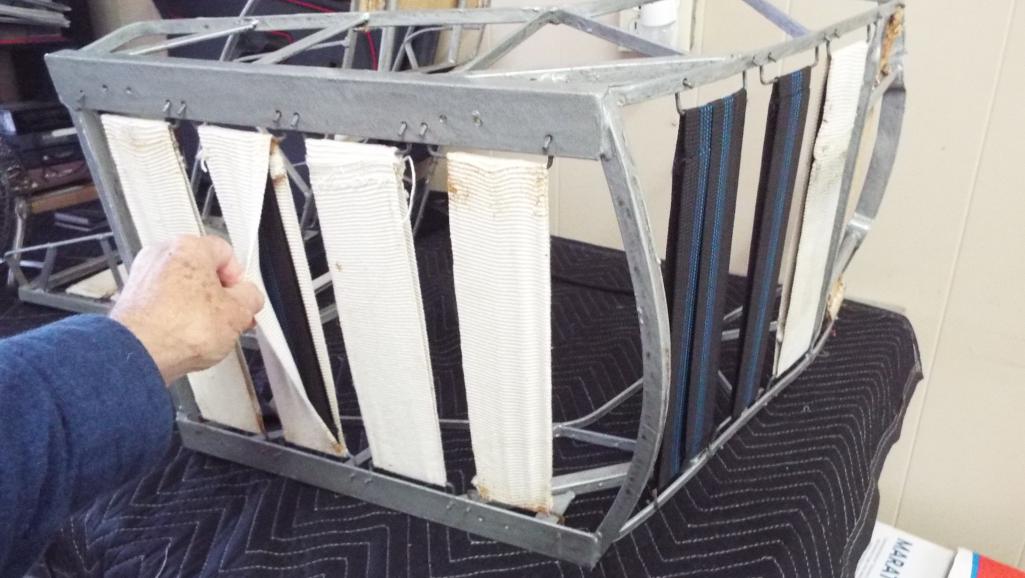
Posted by: moparrob May 3 2018, 11:32 PM
I think upholsterers must be part alchemist and part witch doctor.
Posted by: Lucky9146 May 5 2018, 08:43 AM
Next Update on the seats
He starts with the inner wall foam (yellow) and then fills all the frame cavities with foam (gray). This method provides strength to the inner walls and prevents them from sinking into the frame. Then he adds foam to the top rail.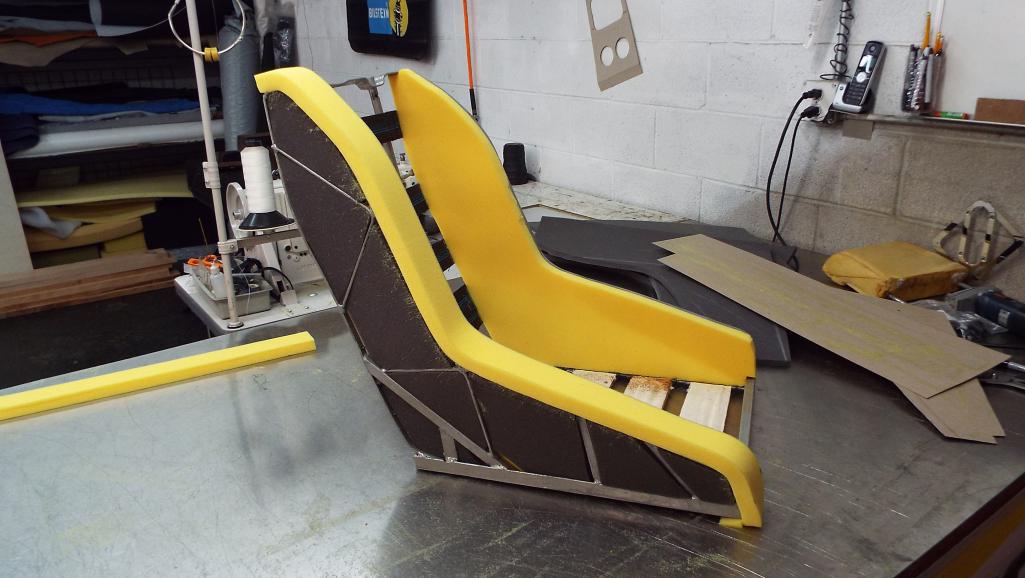
Here is a picture of the old foam used where it was just one piece wrapped around inside and out, which makes for a bulkier look because the foam is always pushing outwards against the vinyl.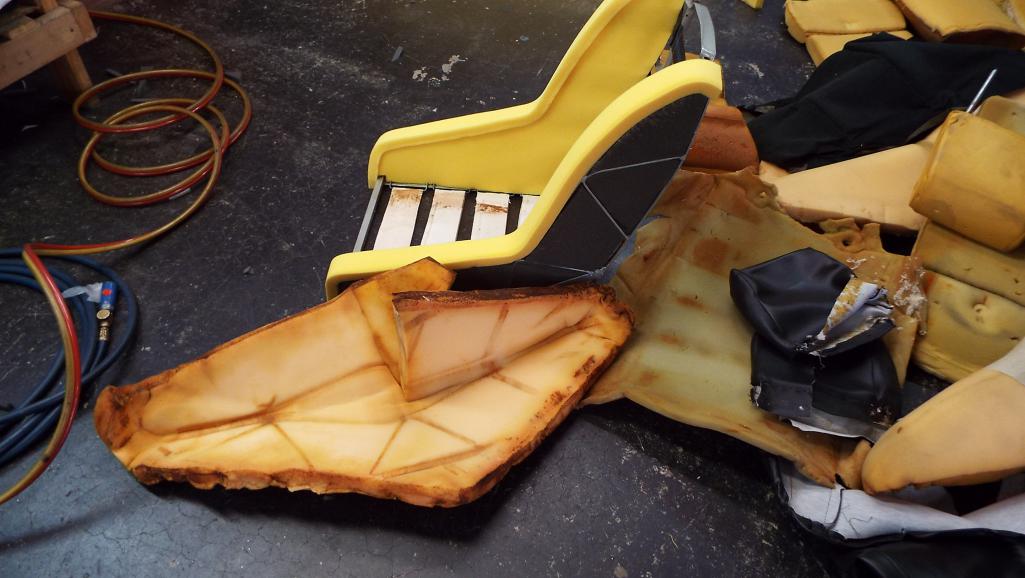
He told me to bring the head rest grommets next time up as he needed them.
Hmmmm interesting.
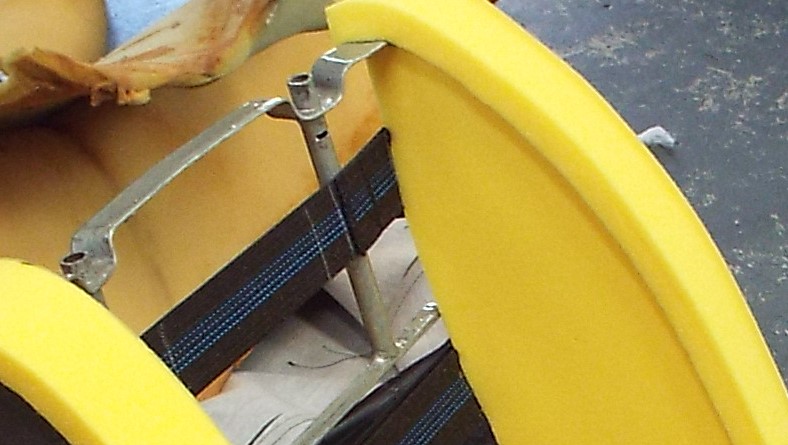
Posted by: Lucky9146 May 5 2018, 12:13 PM
Last weeks trip to local Cars & Coffee brought to my attention the targa top. I had long thought it was “ok” but now outside it clearly wasn’t and I could clearly see it needed a paint job. I have seen many threads about painting the targa top and decided to paint it with SEM Trim Black as a recommendation from a friend. Spray can on a large surface is not the greatest because the fan is so small.
After 3 attempts I still was not satisfied. It was a combination of things the gave the poor results. Number one with that small fan you really have to keep the “wet line” going or you end up with zebra stripes and I have been painting for years. Maybe shoot a little slower and heavier coat helps. Number two there must be no wind and that is maybe the most critical with the small fan too. Number three the SEM product is good mind you, but I don’t think it really likes spraying that big of a flat surface all at once (with the can horizontal for a prolonged period of time) because early coats sometimes the nozzle skipped or sometimes spattered and it usually happened 5 inches before you could get to the other edge.
Today was a total success, no wind, good coverage, cooperative can. Nice sheen, not shiny, and a good finish.
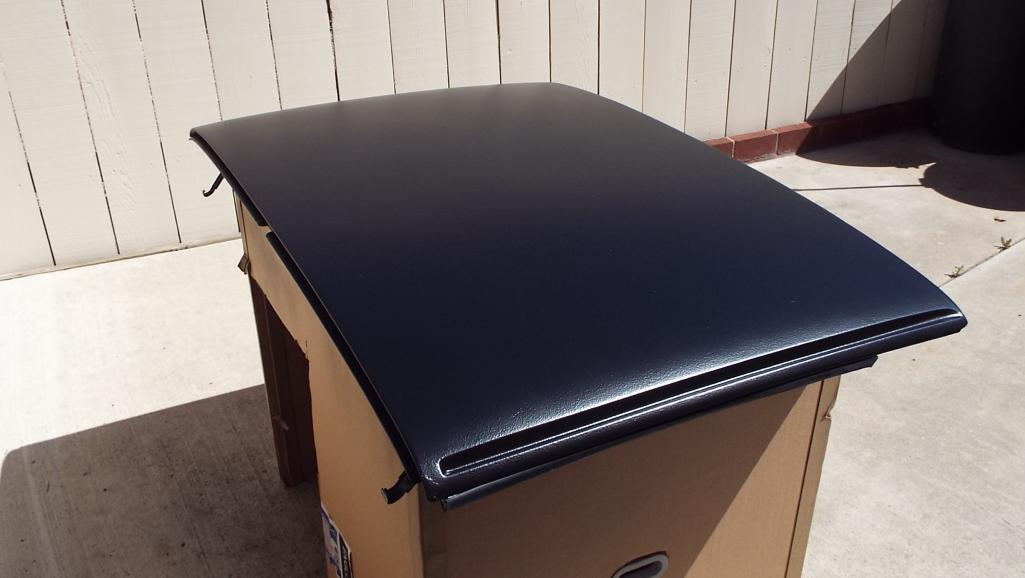
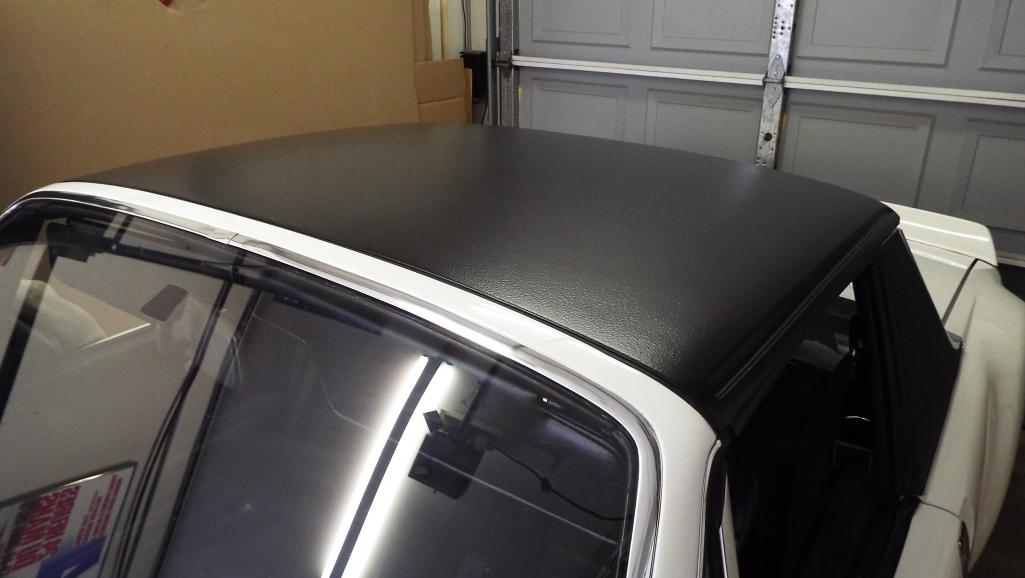
Posted by: altitude411 May 5 2018, 12:19 PM
Looks fantastic. Nice work
Posted by: Lucky9146 May 6 2018, 11:51 AM
I think upholsterers must be part alchemist and part witch doctor.
Rob,
I agree, good one (going to have to admit, had to look up alchemist
). He really is turning lead into gold! Here he was telling me how the original seat bottom was good but he was somehow going to improve it. Looking forward to seeing how! So far really nice work and ideas.
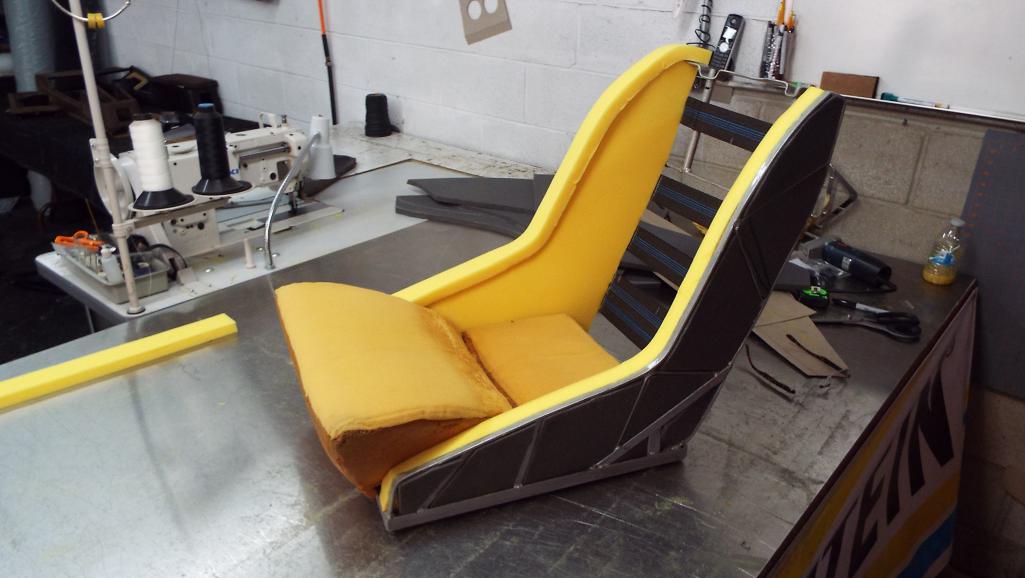
Posted by: Dougster May 6 2018, 12:26 PM
Hey Lucky, you should do yourself a favor and have your upholsterer order up some "Pirelli Webbing" before you go any further. It's a little more expensive but is worth it. It's the stuff they used to used on vintage car seats. My Volvo 1800E needed webbing replaced and instead of buying the original Pirelli material, I bought the cheaper Dunlop (looks like what you are using)... it hasn't help up well at all. I'm going to have to re-do it. The Pirelli is more of an off-white/cream colored rubber looking material, rather than the stretchy Dunlop. I can sort of relate to what you are doing... I bought E30 BMW sport seats off craigslist (because of their high side bolsters) and combined them with the relatively flat original recaros that were in my 1800E. So I had to weld frame pieces together and manipulate foam, add webbing, custom upholster. But now I have original looking seats (with original side brackets/hinges) but with nice firm side bolsters. It was a 'B' to do but worth the effort. Just trying to save you some frustration up the road with the webbing. Great job on everything, btw !!
Posted by: Lucky9146 May 6 2018, 12:39 PM
Hey Lucky, you should do yourself a favor and have your upholsterer order up some "Pirelli Webbing" before you go any further. It's a little more expensive but is worth it. It's the stuff they used to used on vintage car seats. My Volvo 1800E needed webbing replaced and instead of buying the original Pirelli material, I bought the cheaper Dunlop (looks like what you are using)... it hasn't help up well at all. I'm going to have to re-do it. The Pirelli is more of an off-white/cream colored rubber looking material, rather than the stretchy Dunlop. I can sort of relate to what you are doing... I bought E30 BMW sport seats off craigslist (because of their high side bolsters) and combined them with the relatively flat original recaros that were in my 1800E. So I had to weld frame pieces together and manipulate foam, add webbing, custom upholster. But now I have original looking seats (with original side brackets/hinges) but with nice firm side bolsters. It was a 'B' to do but worth the effort. Just trying to save you some frustration up the road with the webbing. Great job on everything, btw !!
Thanks for the tip I will talk to him first thing tomorrow morning. He may be too far along though I'm afraid, there has been more progress. Thanks again for weighing in!
Posted by: Lucky9146 May 7 2018, 11:10 PM
Well this is what the seats looked like last Friday. I didn’t post these pictures because they were on my cell phone and I got lazy. My camera had died and it’s a different process to get the pics off the phone and work with them. Any way he did some magic shaping of the foam and he added additional foam to the outsides which are now very nice and smooth and firm.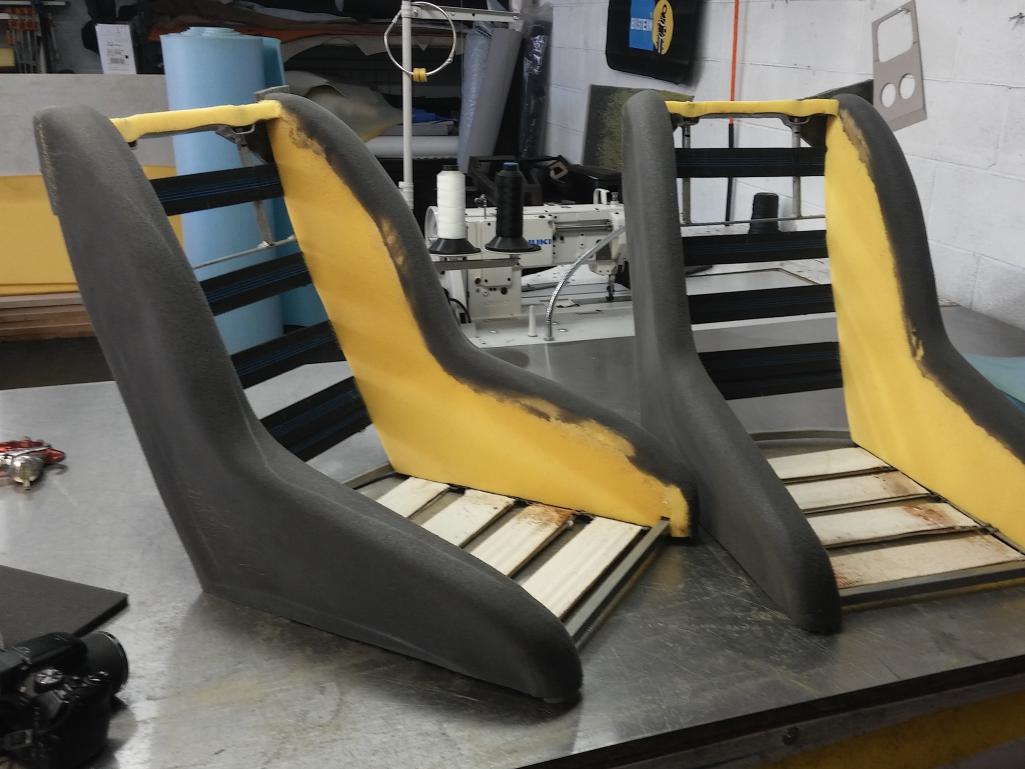
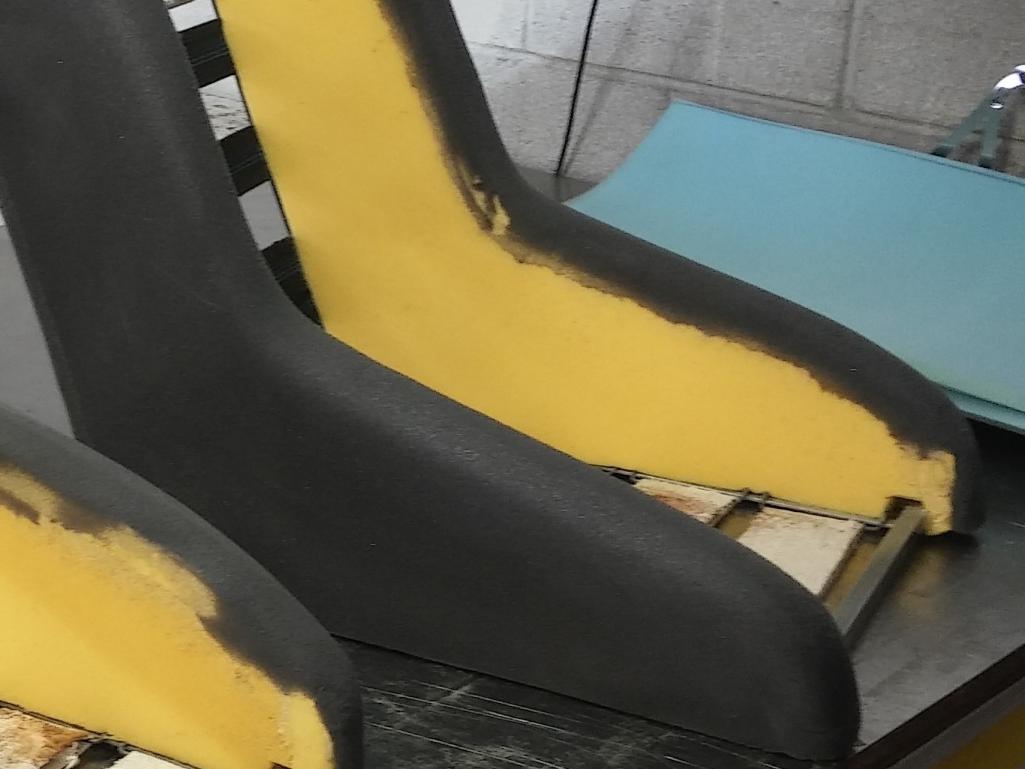
And the backs of the frames had a layer of foam to cover the webbing hooks, along with the foam along the top with the plastic bases of the head rest grommets which determine the height of that foam. He seems to be a master of foam densities and uses.
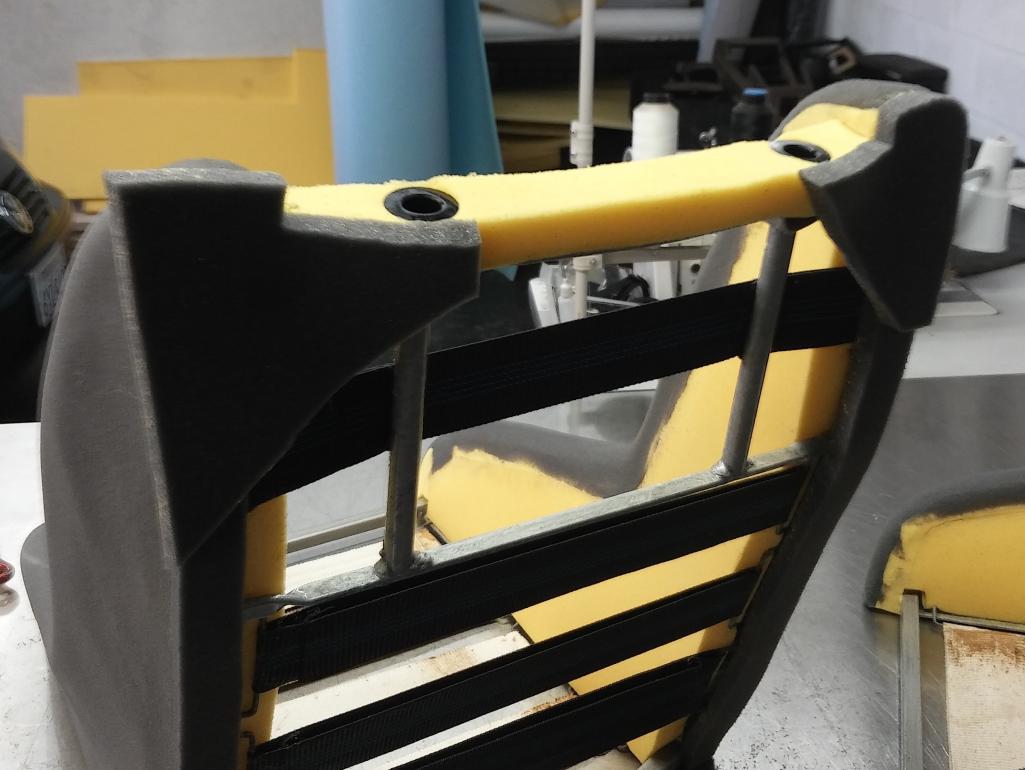
Posted by: Lucky9146 May 7 2018, 11:23 PM
Hey Lucky, you should do yourself a favor and have your upholsterer order up some "Pirelli Webbing" before you go any further. It's a little more expensive but is worth it. It's the stuff they used to used on vintage car seats. My Volvo 1800E needed webbing replaced and instead of buying the original Pirelli material, I bought the cheaper Dunlop (looks like what you are using)... it hasn't help up well at all. I'm going to have to re-do it. The Pirelli is more of an off-white/cream colored rubber looking material, rather than the stretchy Dunlop. I can sort of relate to what you are doing... I bought E30 BMW sport seats off craigslist (because of their high side bolsters) and combined them with the relatively flat original recaros that were in my 1800E. So I had to weld frame pieces together and manipulate foam, add webbing, custom upholster. But now I have original looking seats (with original side brackets/hinges) but with nice firm side bolsters. It was a 'B' to do but worth the effort. Just trying to save you some frustration up the road with the webbing. Great job on everything, btw !!
Dougster
Arriving at the shop at 9:30 this morning, the ship had sailed on the webbing, and it turns out he had the Pirelli webbing there for me to see and compare. I had to agree with Oscar the upholsterer that the webbing installed was more correct, with all due respect to your recommendation. He has done upholstery his entire life and I am going defer to his guidance.
Again, I always appreciate help and comment and thank you.
This is what the seats looked like this morning. Backs fully covered in foam. So cool looking.
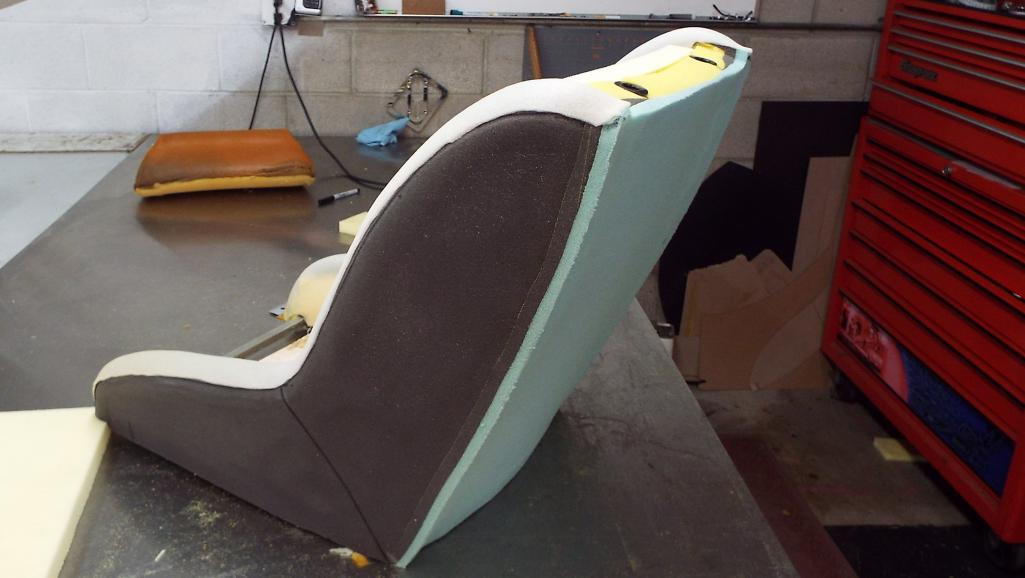
And, he had applied a ¼” layer of foam over the inner sides and top rails over the shaved sculpted foam earlier installed.
Plus, he had created the back foam pieces.
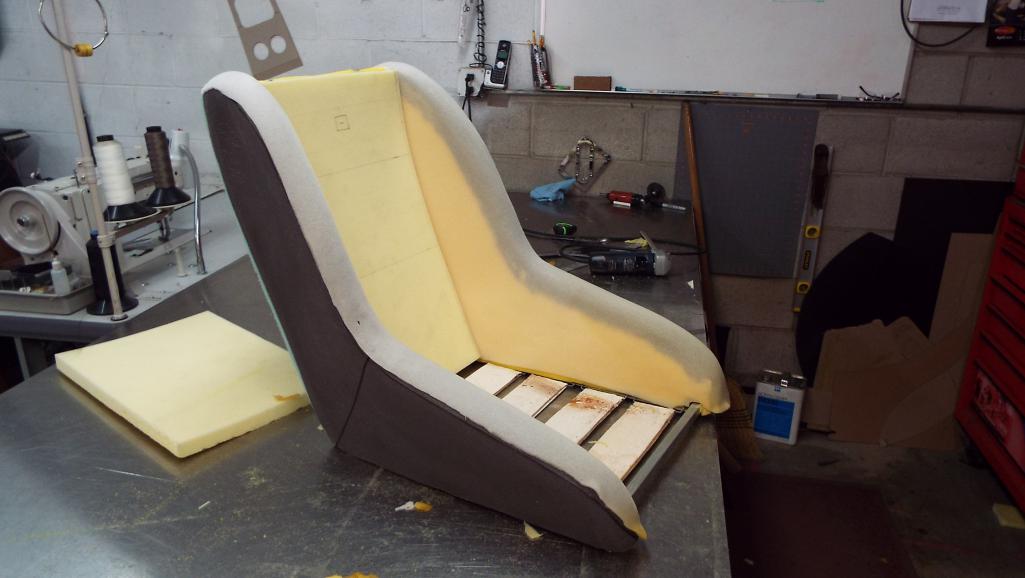
Posted by: Lucky9146 May 7 2018, 11:28 PM
He did this with the seat bottoms which I thought was duty above and beyond. Before and after pics shown. First pic the foam is upside down unfortunately.
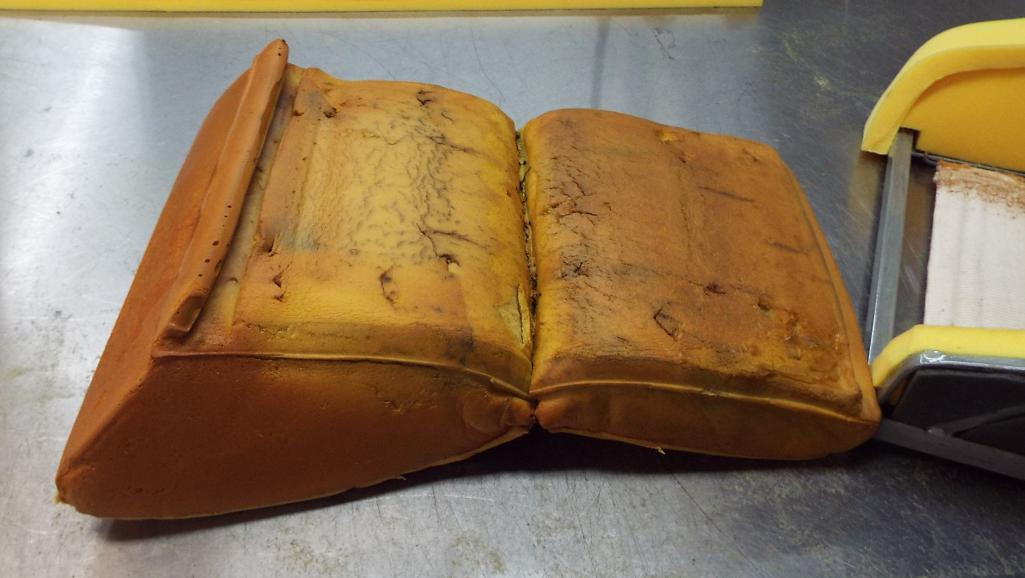

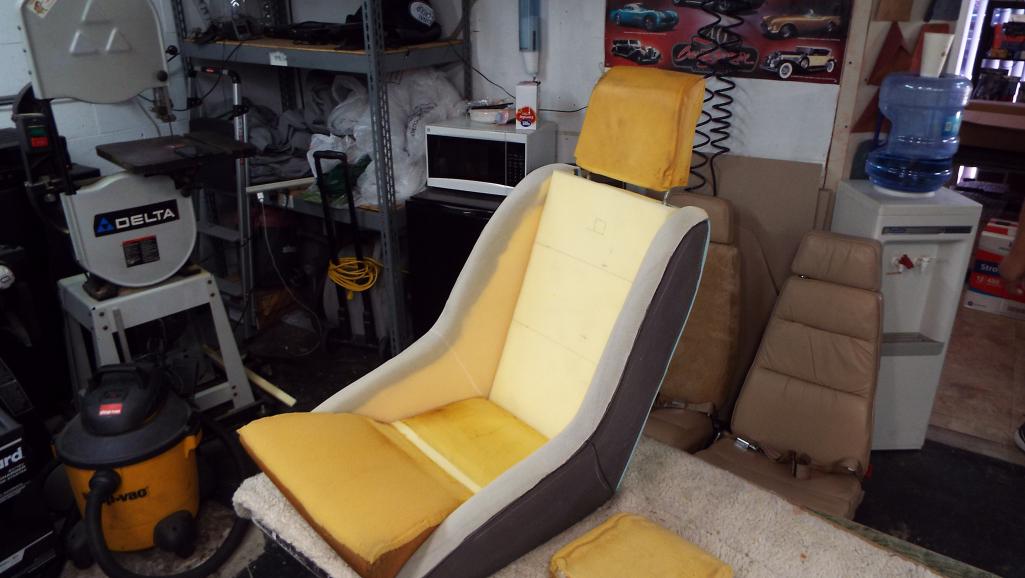
Posted by: Lucky9146 May 7 2018, 11:39 PM
He was cutting and fitting the vinyl this afternoon when I stopped by again. Check out that back! Clearly, like anything done well, it is all the work you never see that is the most important to yield a good result.
Unfortunately, I have other commitments the next few days and will miss further progress. I am hoping he will take pics for me. Should be done this week.

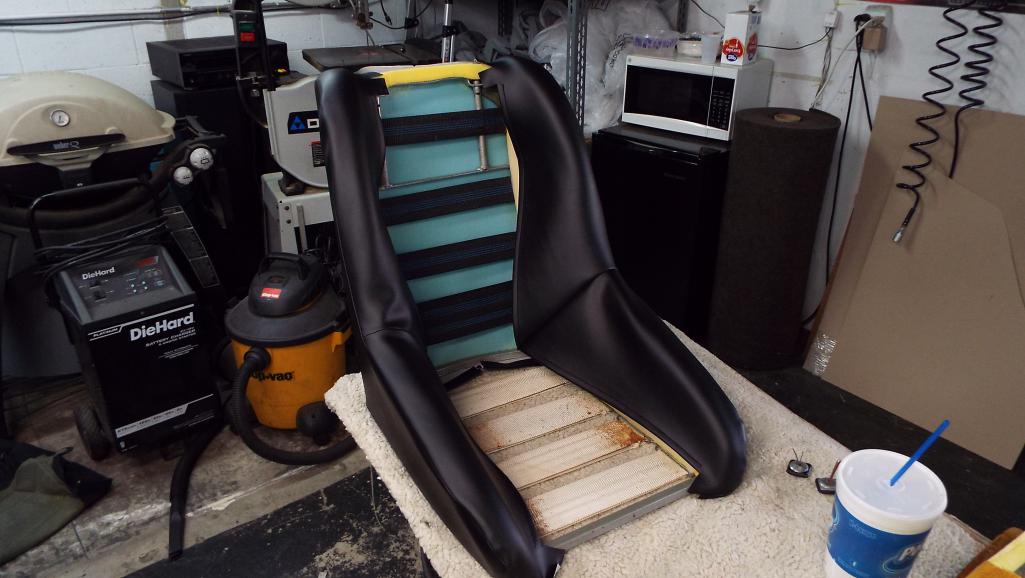
Posted by: defianty May 8 2018, 07:55 AM
Ooh, they're gonna look good!
Posted by: tygaboy May 8 2018, 08:05 AM
Thanks for posting all the details. I always appreciate better understanding the various processes that are used in making/rebuilding/fixing the different parts of our little cars.
Can't wait to see the finished results!
Posted by: Lucky9146 May 8 2018, 08:55 AM
Ooh, they're gonna look good!
Thanks! They are certainly coming along way different (better) than I thought.
This is the corduroy I found that very closely matches the original. Note the number 10 73 which I have no idea what it means, maybe a run number or lot number, I don't know but I am going to pretend it means Oct 1973 and means it is "period correct" material just for fun!.

Posted by: Lucky9146 May 8 2018, 09:01 AM
Thanks for posting all the details. I always appreciate better understanding the various processes that are used in making/rebuilding/fixing the different parts of our little cars.
Can't wait to see the finished results!
I am a wood worker and know a lot of "tricks" with wood, much like Oscar sure knows what he is doing here with all his exacting experience.
This is another in process picture from yesterday which shows how he pins/ fits the vinyl to the seat. I too like to see how things are done.
Thanks for looking in!
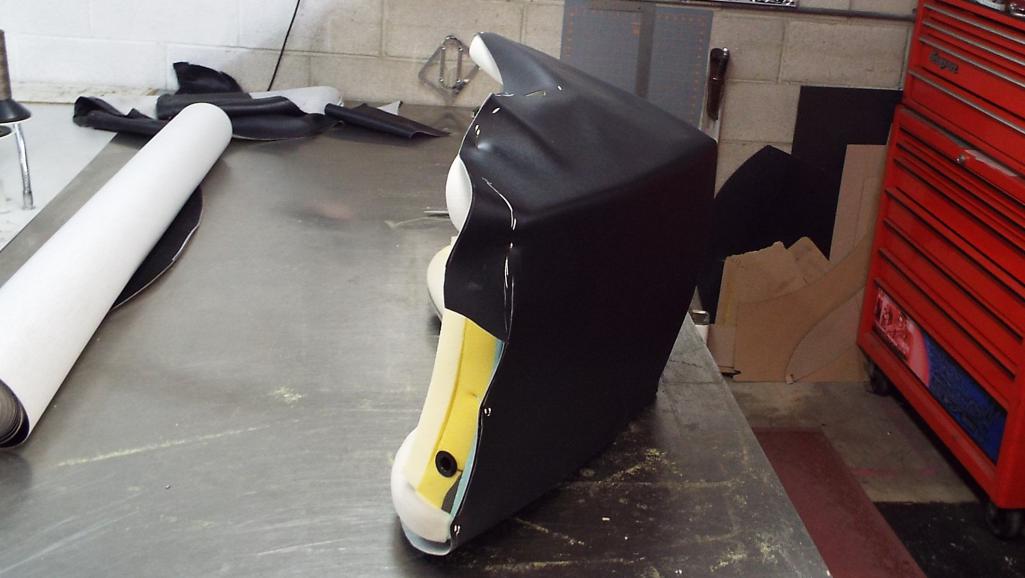
Posted by: Lucky9146 May 8 2018, 09:12 AM
And here is proof positive, from the back of the removed vinyl, that the seats were recovered in naguhyde years ago
The vinyl grain was way off with being too course.
Posted by: Lucky9146 May 11 2018, 10:58 PM
Returning to the shop yesterday afternoon I found the seat bottoms, which had I thought were ready to be covered, had been further enhanced from the post I did earlier. Now the sides have been faced and sculpted plus a thin layer of foam was applied to the top side.
Oscar noted that the back edge of the bottom cushion now matches the angle of the seat back. Details!
WAS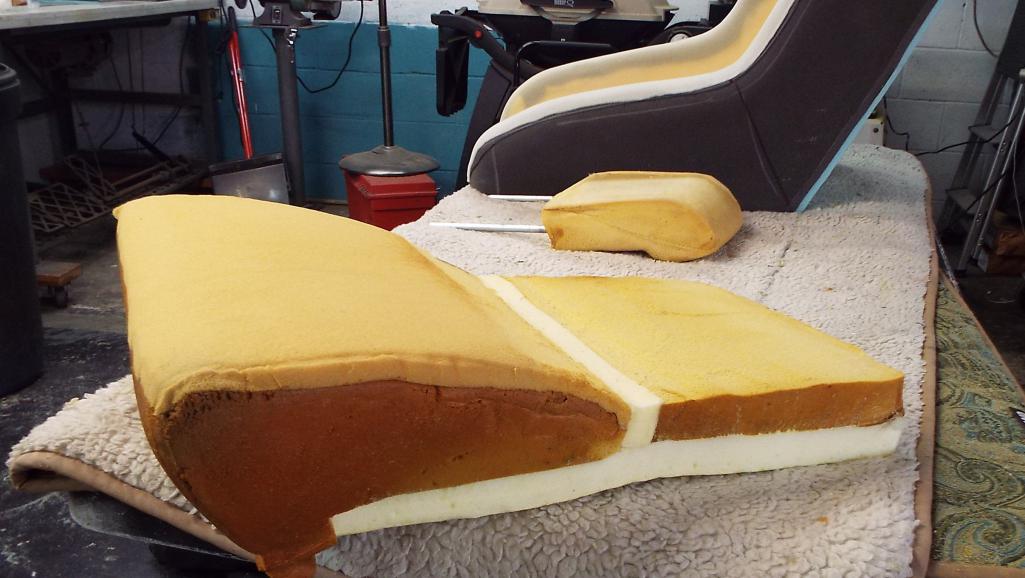
NOW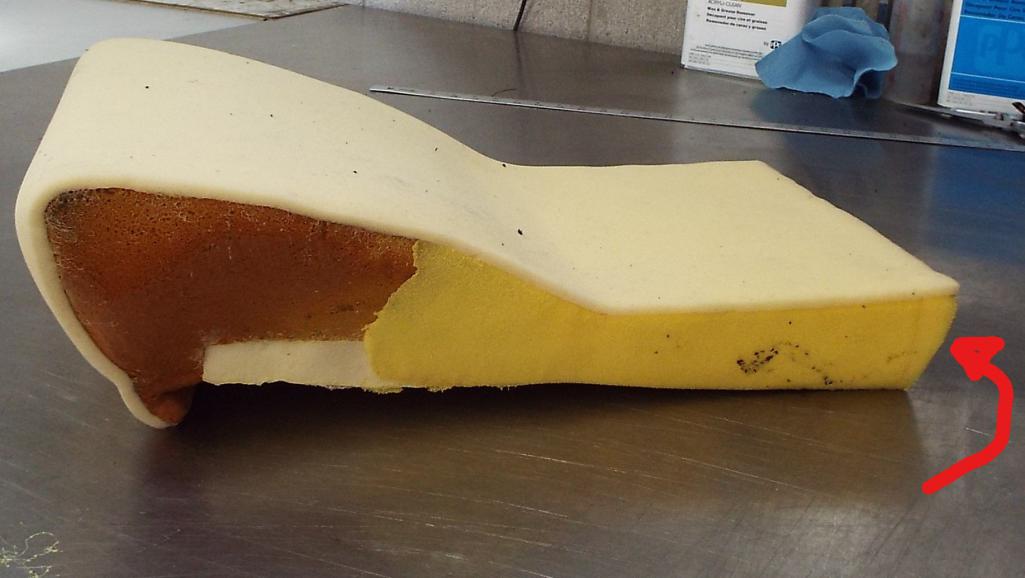
Posted by: Lucky9146 May 11 2018, 11:03 PM
He was working on the corduroy seat bottom panels and had attached this bar to the back side which will in turn be inserted into a slit he makes in the bottom foam to attach the fabric panel and secure it. And side pieces ready to be sewn to the seat bottom.
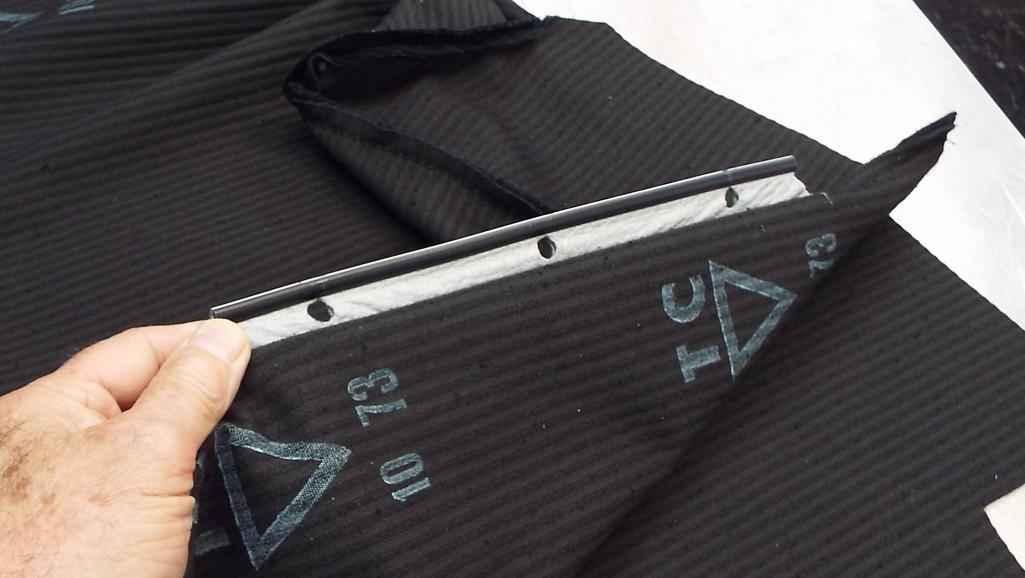
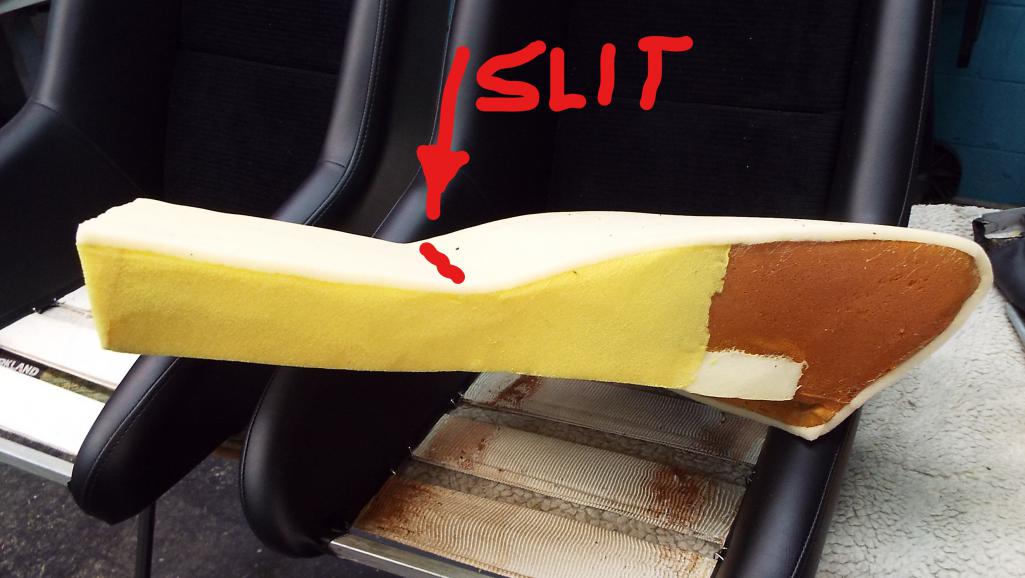
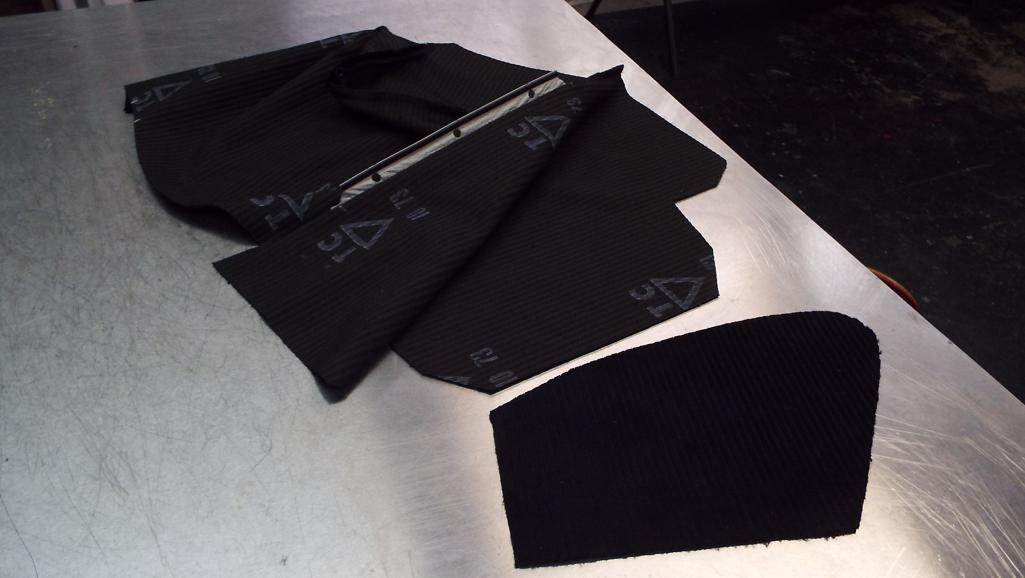
Posted by: Lucky9146 May 11 2018, 11:08 PM
The vinyl sides were now completely finished and the corduroy seat backs were done and also installed, The stitching was just amazing!
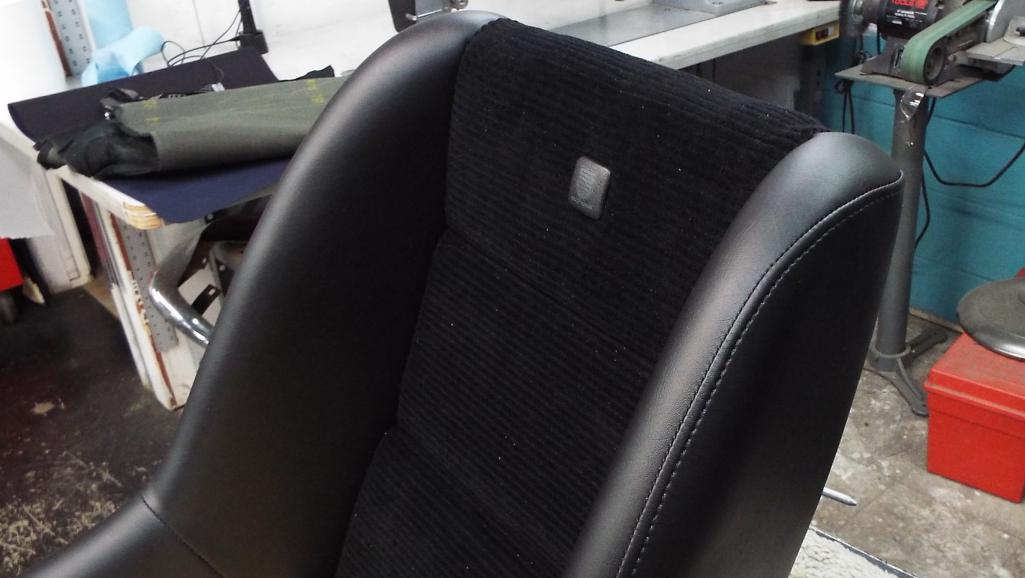
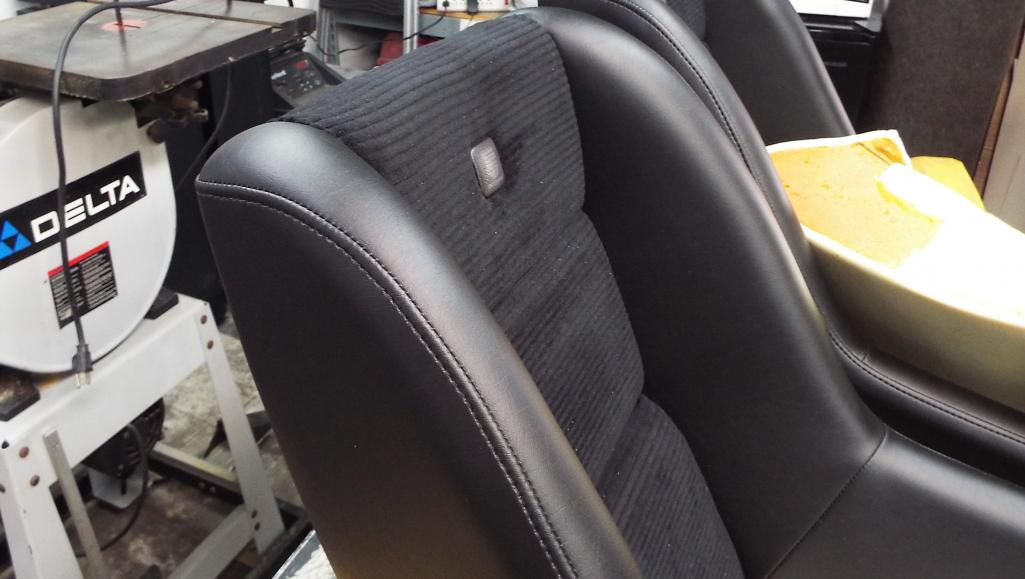
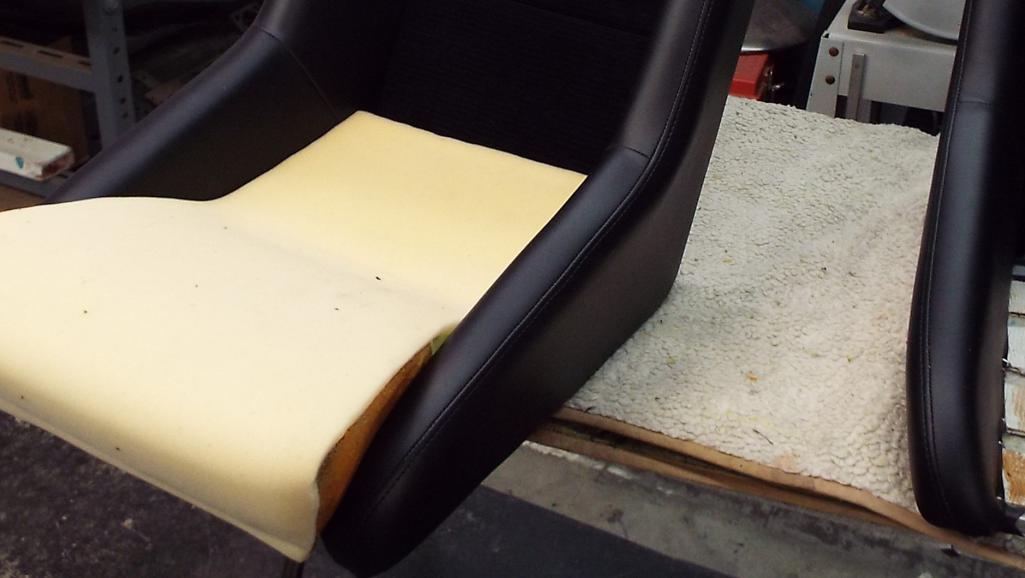
Posted by: Larmo63 May 12 2018, 12:24 AM
Wow, looking great!!! 
Posted by: Lucky9146 May 12 2018, 09:11 AM
Wow, looking great!!!
Thanks! and I was thinking about your stuck head rests yesterday and I shot this picture of my head rest post to show old dried glue from the previous recover in several areas. As I watched I could see how easy it was to end up with glue there. So he was careful to not spray near the post but even so we ended up wiping the posts down with lacquer thinner to be sure they were clean.
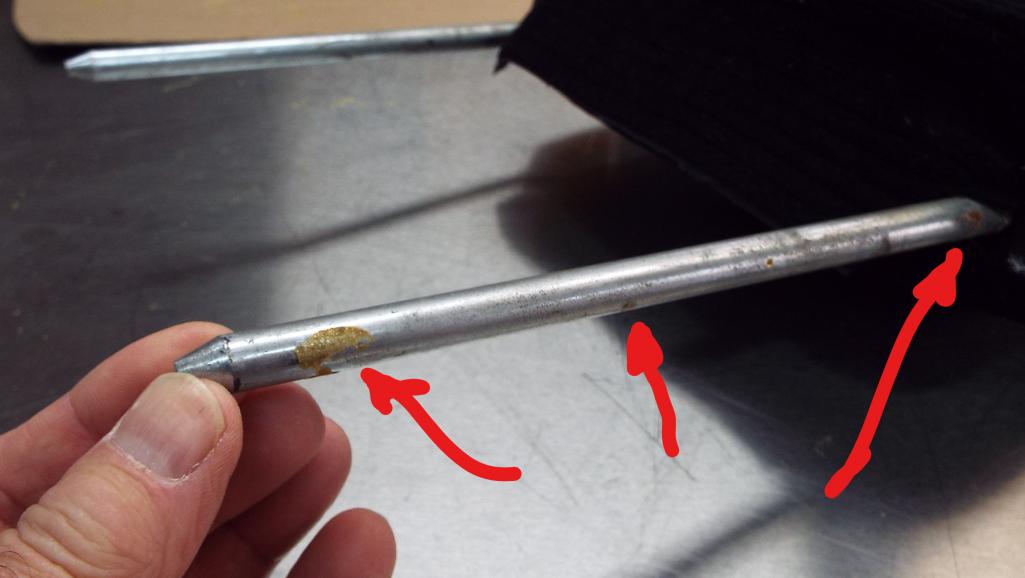
This picture below shows a slot which could possibly have some type of keeper to lock the head rest in place, but on my posts (above) you can see there is no corresponding slot that would allow locking. Not saying yours doesn't have a slot in the post and they are in deed locked.
Hope you figure it out.
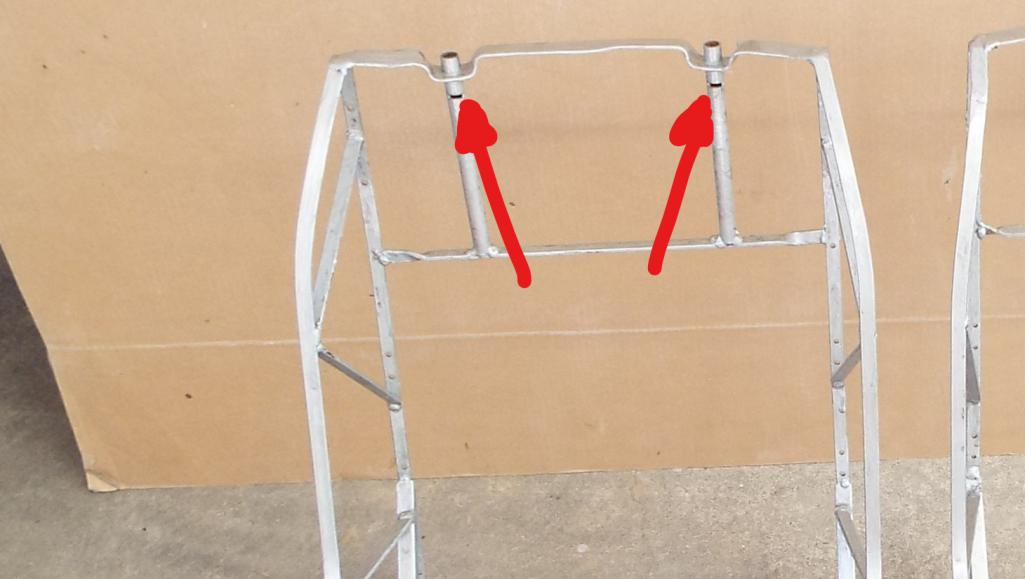
Posted by: Larmo63 May 12 2018, 04:07 PM
I have those slots too, but there is nothing in them.
Posted by: Lucky9146 May 12 2018, 06:26 PM
I’m running about a day behind in posting. I had the opportunity yesterday to witness the head rests rework and it proved to be much more involved than I’d imagined. For instance, this head rest had a crater in the face of it and Oscar said that it would show when done.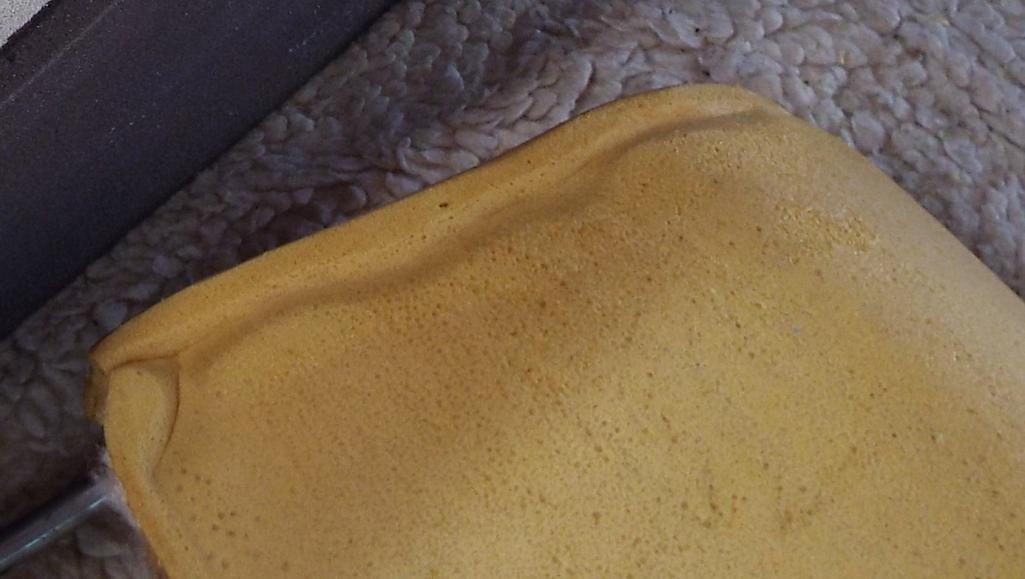
Here it is filled, and he did other things too, like filling & blending and correcting the bottoms which looked pretty funky.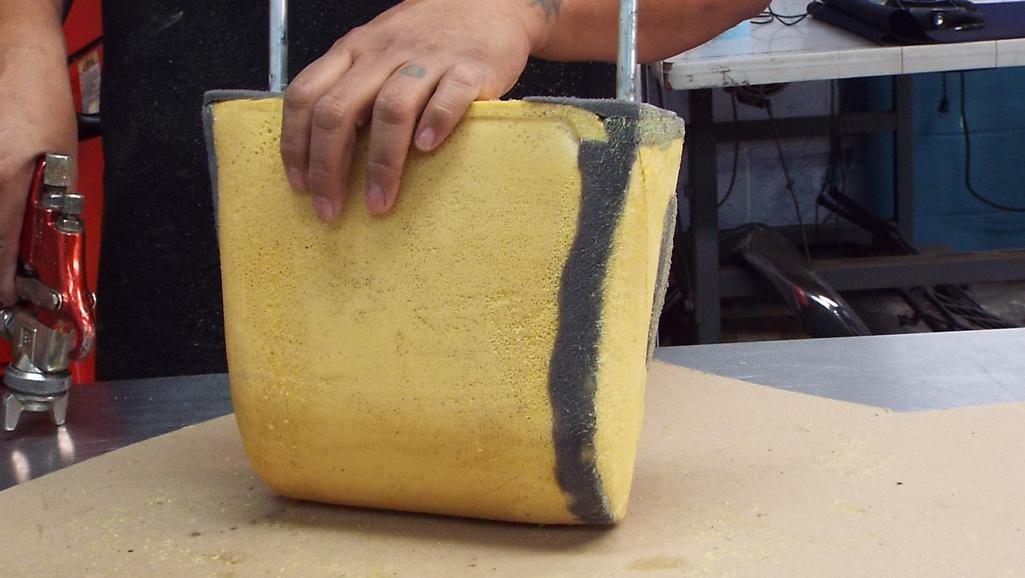
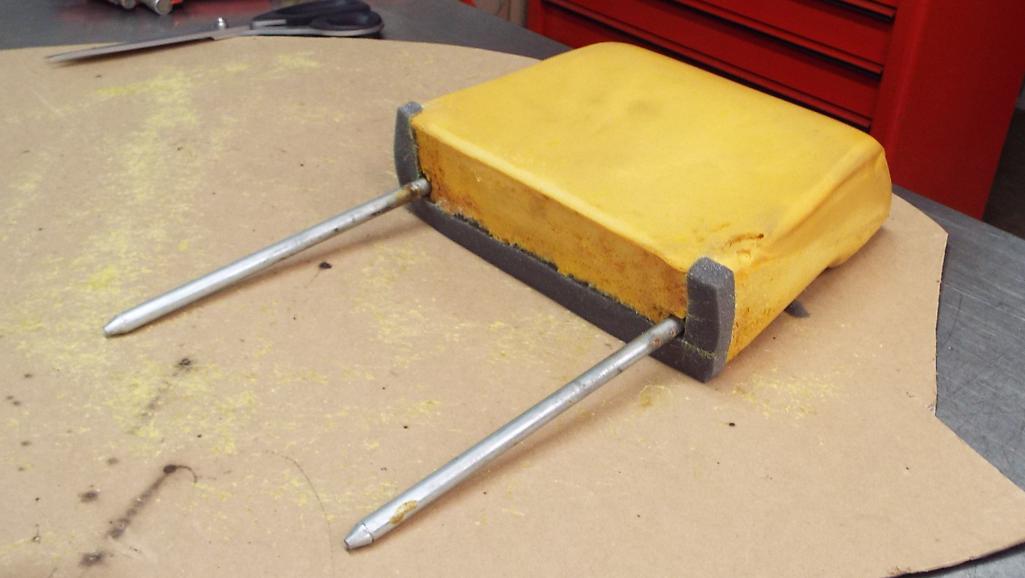
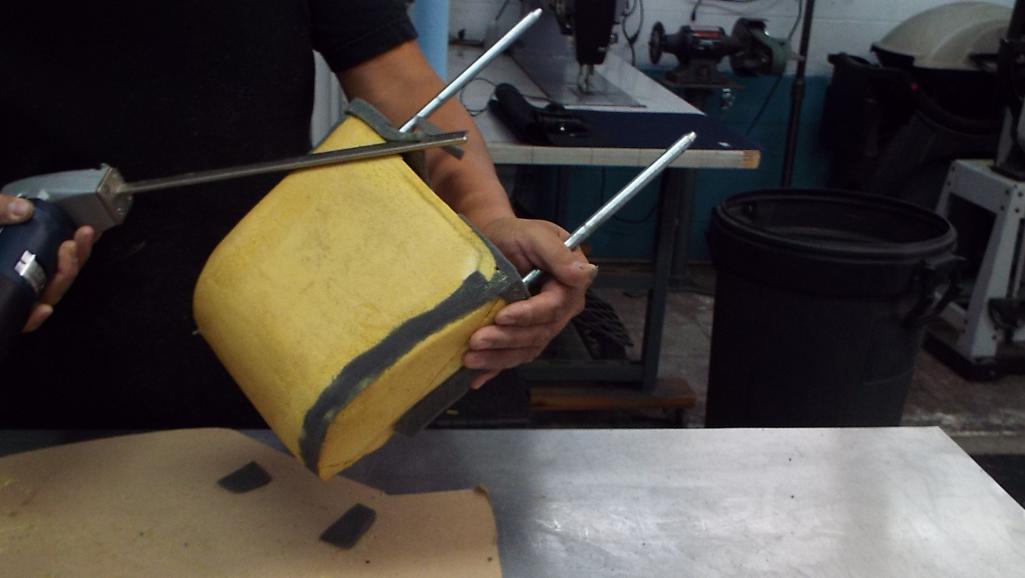
And then he added to the sides and blended. Saving some old original head rests for me.
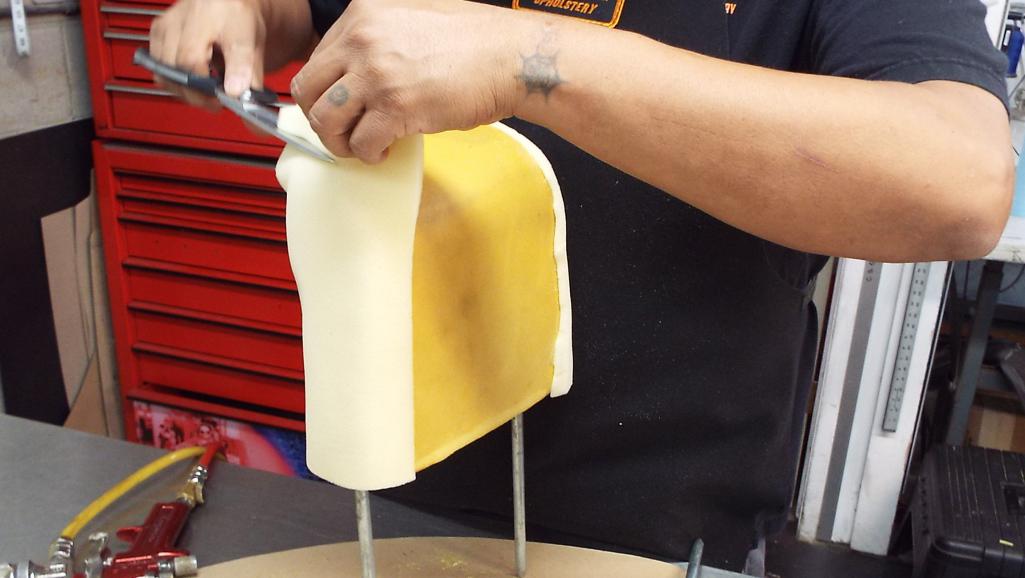

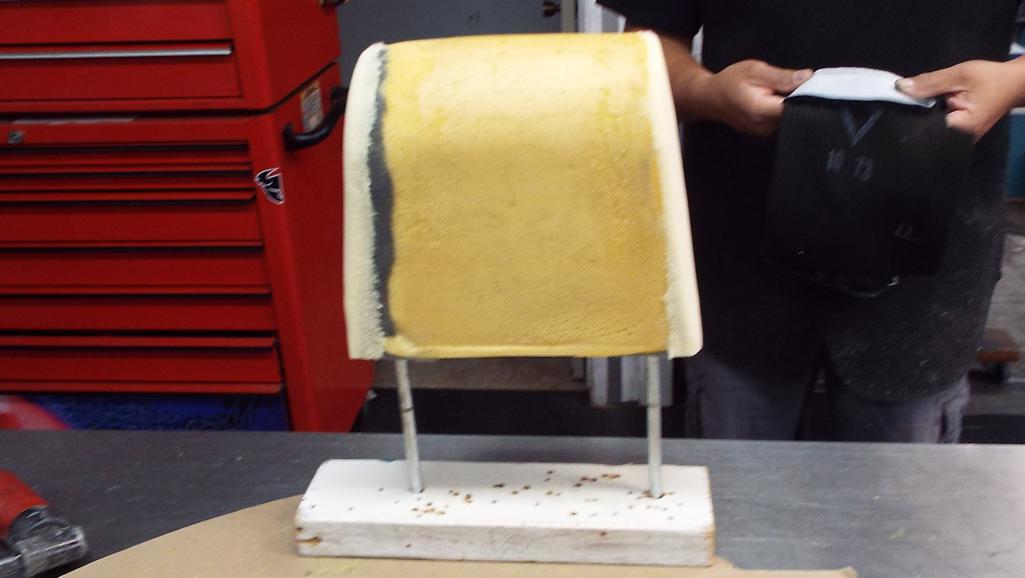
Posted by: moparrob May 12 2018, 07:24 PM
Posted by: raynekat May 12 2018, 11:30 PM
Looking crazy nice! Those will be some beauties to sit on.
Posted by: Lucky9146 May 13 2018, 03:05 PM
I agree
and Friday was the big day. The seats were finished Friday and I got to see it! As I said in my last post I got to hang out and witness the head rest repair and recover.
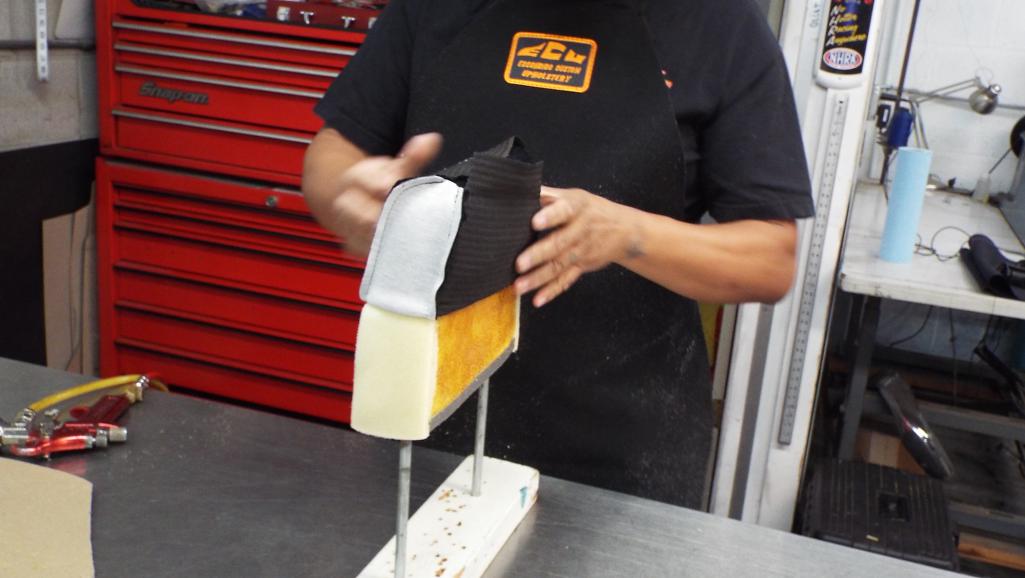
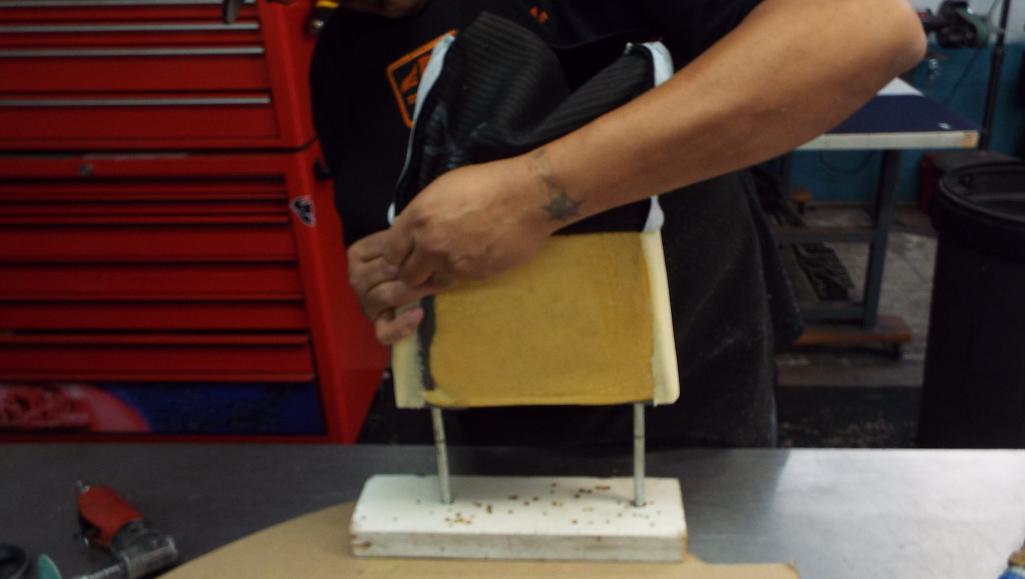
And add a little hand stitching to close up the bottoms, ready to install.
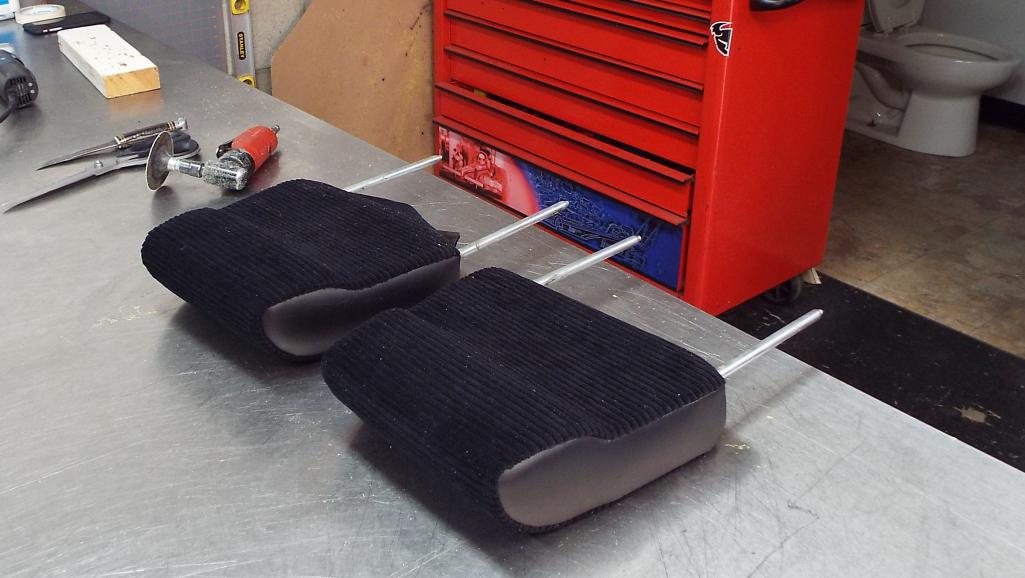
Posted by: Lucky9146 May 13 2018, 03:12 PM
Head rest installed with silicone on the post shafts
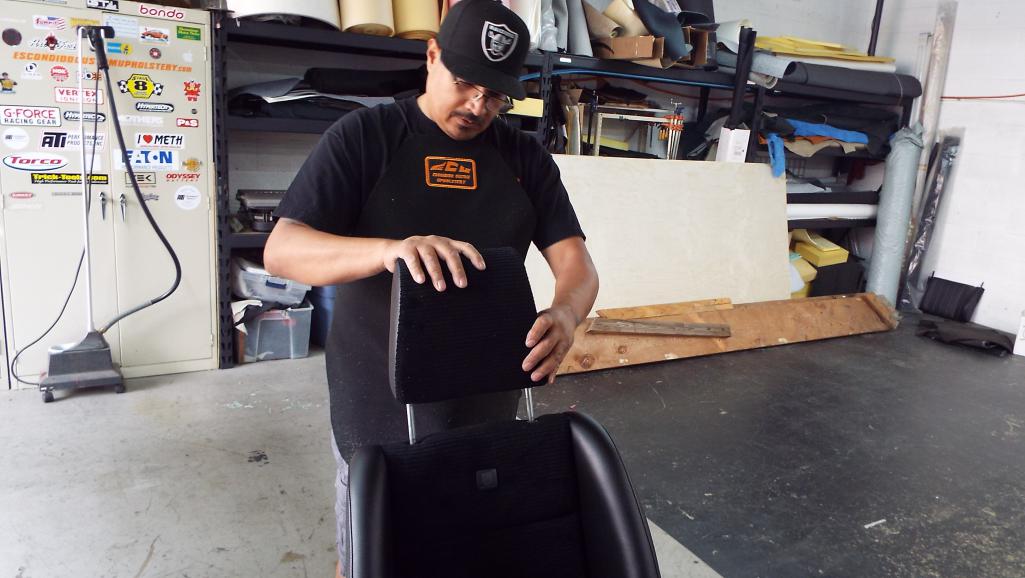
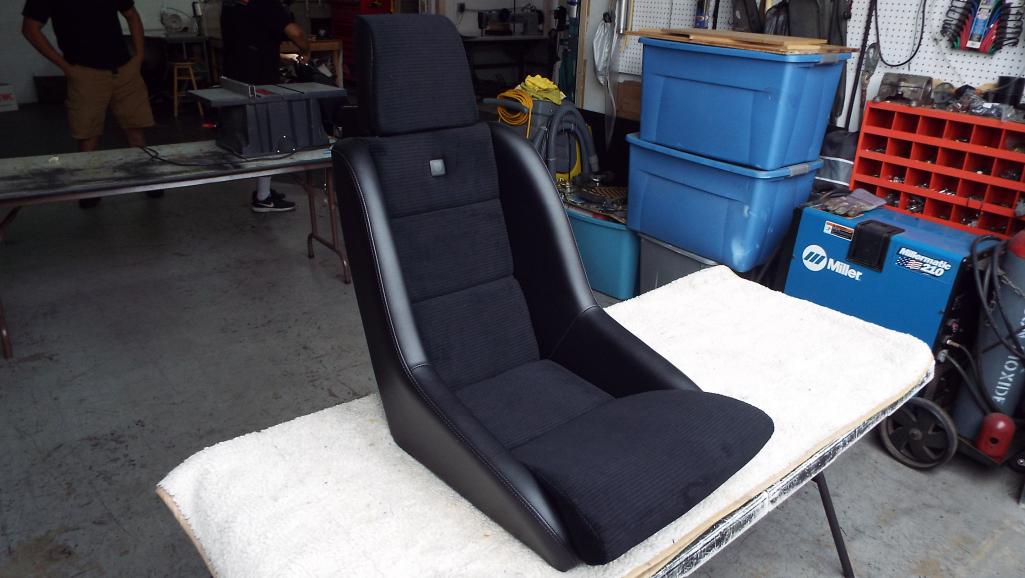
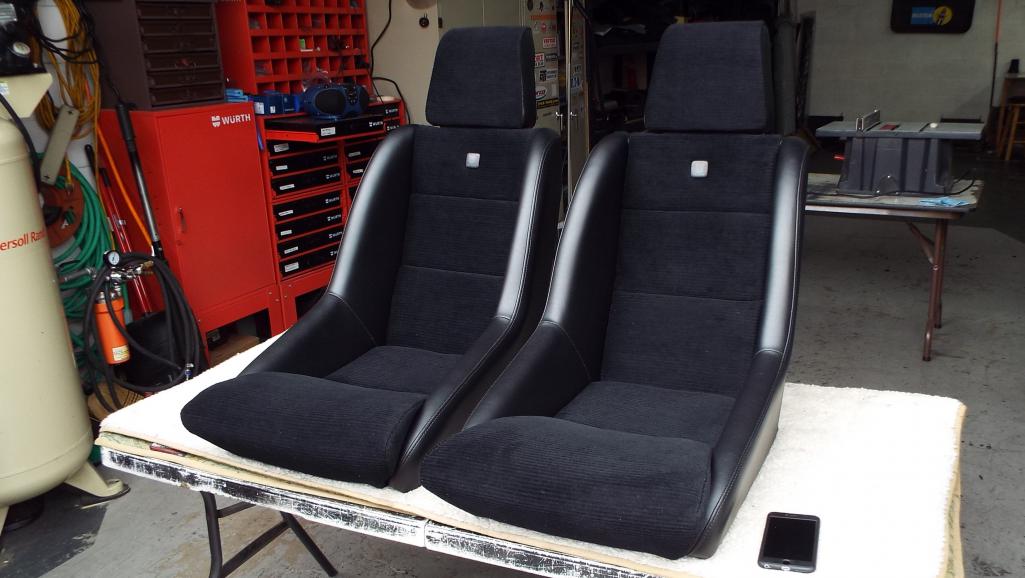
Posted by: Lucky9146 May 13 2018, 03:20 PM
What a great experience! I highly recommend his work!
Escondido Custom Upholstery
Oscar Reyes
520 N. Quince St. Suite 2
Escondido CA 92025
760.755.7015
My seats are going home! They Are Perfect!
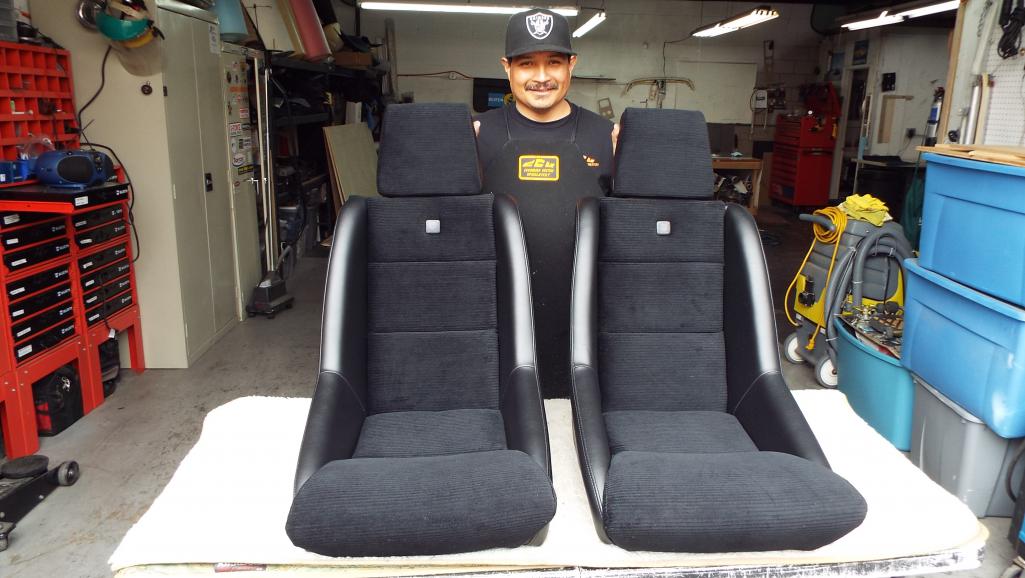
Posted by: Lucky9146 May 13 2018, 03:22 PM
Looking crazy nice! Those will be some beauties to sit on.
They did turn out "crazy nice" Now to install them!
Thanks for looking in!
Posted by: Cairo94507 May 13 2018, 03:24 PM
Terrific looking seats.
Posted by: defianty May 15 2018, 10:28 AM
I have seat envy! 
I think an upgrade to my stock seats is in my future!
Posted by: daytona May 15 2018, 10:42 AM
Beautiful seats.
It is a pleasure to see a craftsman at work, and with pride in the work he/she does.
I think it is our responsibility in the automotive hobby to keep craftsman like Oscar busy with work to help preserve the craftsmanship.
I have two seats that need redoing; too bad that I am at the other end of the country. Will have to find someone in the Daytona area to do the work.
Bill.
Posted by: Mueller May 15 2018, 11:06 AM
He did a great job on those seats. Interesting to see how ugly the bare metal frames are on those seats.
Posted by: ValcoOscar May 15 2018, 11:29 AM
Congratulations Jim on making these seats better than new.
So happy to see all your efforts paying off. Love your positive attitude.
 Congrats to Oscar (upholsterer) as well, great workmanship!!!
He must be a cool dude with a name like that.
Posted by: Lucky9146 May 15 2018, 12:40 PM
Terrific looking seats.
Thanks! Hey I don't know where you are on seats for your car but Oscar is certainly one option. Oscar is Kent level on seats.
Other shops in the area (who shall remain nameless) bring the difficult stuff to Oscar but I doubt they would ever admit it.
You have to be getting close to paint on your car, it sure is looking good!
Posted by: Lucky9146 May 15 2018, 09:04 PM
Beautiful seats.
It is a pleasure to see a craftsman at work, and with pride in the work he/she does.
I think it is our responsibility in the automotive hobby to keep craftsman like Oscar busy with work to help preserve the craftsmanship.
I have two seats that need redoing; too bad that I am at the other end of the country. Will have to find someone in the Daytona area to do the work.
Bill.
Thanks Bill, they really did come out well and I couldn't be happier with them.
As for your seats, there may be someone as thorough in your area, but you could ship them to Oscar. U-Haul wardrobe box works for great for this, fitting both seats clam shell like. Might be worth the cost of shipping. Tell you what, if you do, I will personally look in on them once in a while for you, he is about 15 minutes from my house.
Interesting what you said about preserving craftsmanship because on one of my visits to the shop he was telling me that he "is old school" meaning no cut corners and takes to time to do it right, giving several examples of how many do seats that look good but aren't really underneath.
Best of luck with whatever you choose to do.
Thanks for looking in
Posted by: Lucky9146 May 15 2018, 10:00 PM
He did a great job on those seats. Interesting to see how ugly the bare metal frames are on those seats.
Yes those frames are not much to look at for sure! And it wasn't until after they were in process at Oscar's that it came to mind that I should have made more detailed drawings and measurements to copy those frames.
You probably saw all the "fun" I went through to make the two frames look the same.
Wanting to install the seats today, I ran into more "fun". Wish I'd paid more attention when I removed the 914 seat rails that were installed on the seats when they arrived. I thought all was good. Turns out one seat had much smaller bolts than the 6mm they should have had. So that meant drill and tap the 8 seat frame holes. No biggie. But wish I'd caught it before upholstery.
Okay, then I saw the track rails had been modified with elongated holes because the frame holes were not necessarily located in the right location.
How do you mess that up?Wait, it gets better, the rails when mounted did not line up, fore and aft, hence the need for the square shown.
More hole elongation was then needed to properly match up the tracks! Does it ever end? 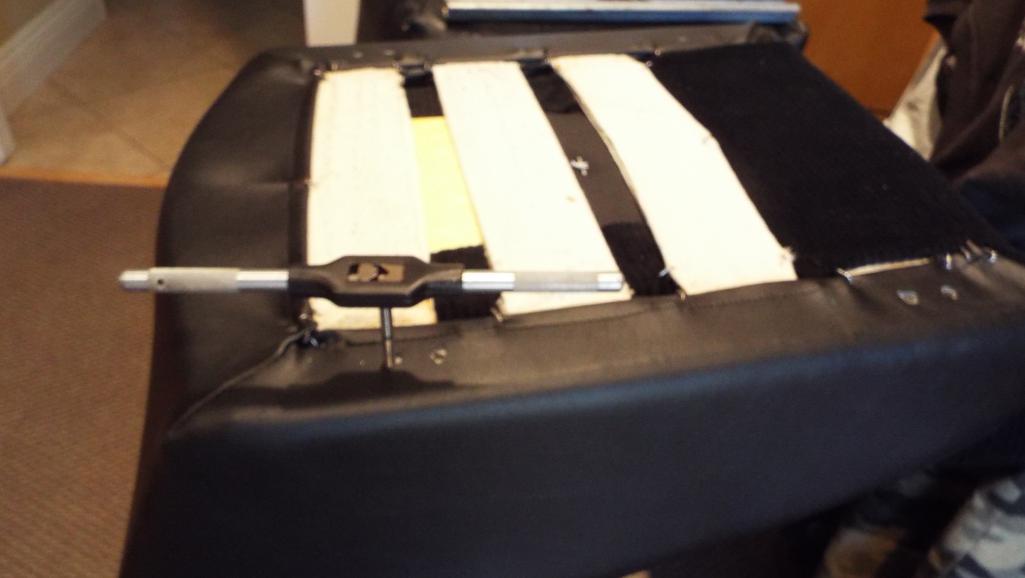
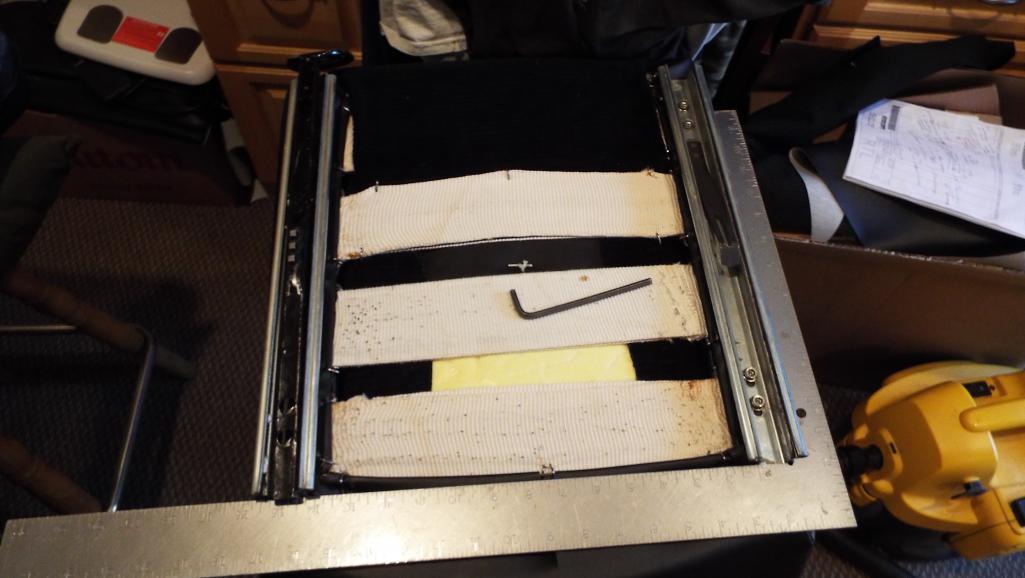
Posted by: Lucky9146 May 15 2018, 10:34 PM
I have seat envy!
I think an upgrade to my stock seats is in my future!
With the extra time spent today rectifying "issues" with the driver seat I was able to get it installed. That's right, only one seat today, but it was so cool to sit in the darn thing after all this work.
Way better and it feels so "right". Stephen, when you see the pictures below of the original next to the beautifully done Scheel it is an amazing comparison and you are really going to have "seat envy".
You sit on the stock seat and in the Scheel. If you can swing an "upgrade", I highly recommend it! Happy hunting! Oscar kept telling me that these seats would match the door panels perfectly and he was right! (Try not to notice the saw dust I managed to get on the driver seat side shot)
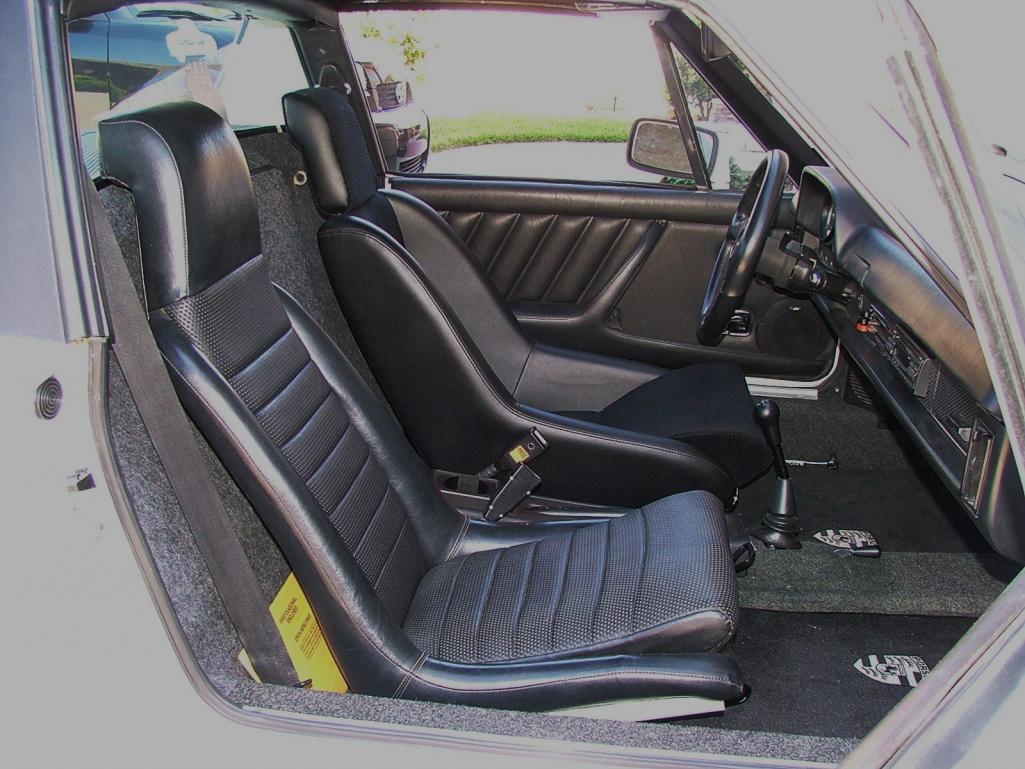
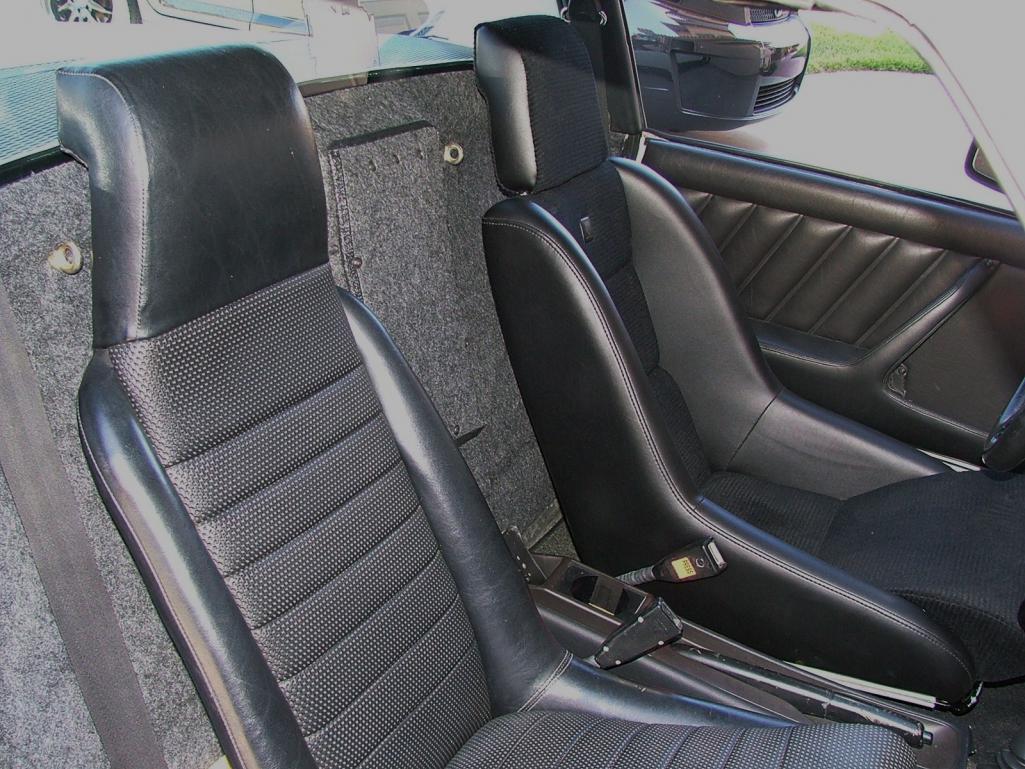
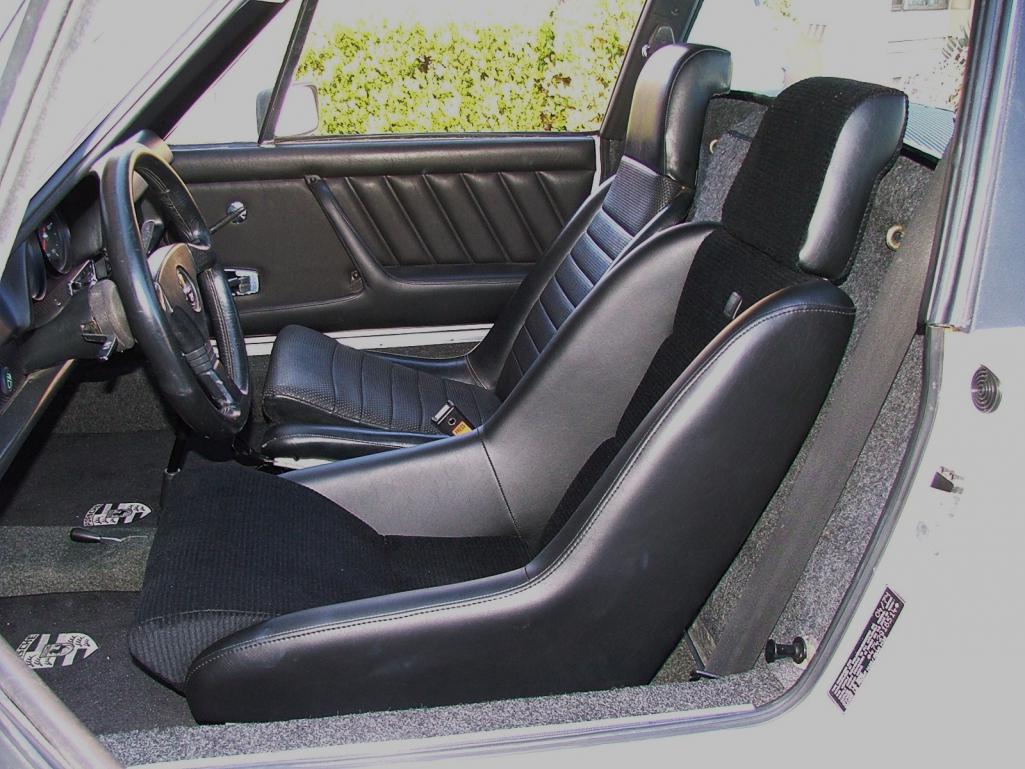
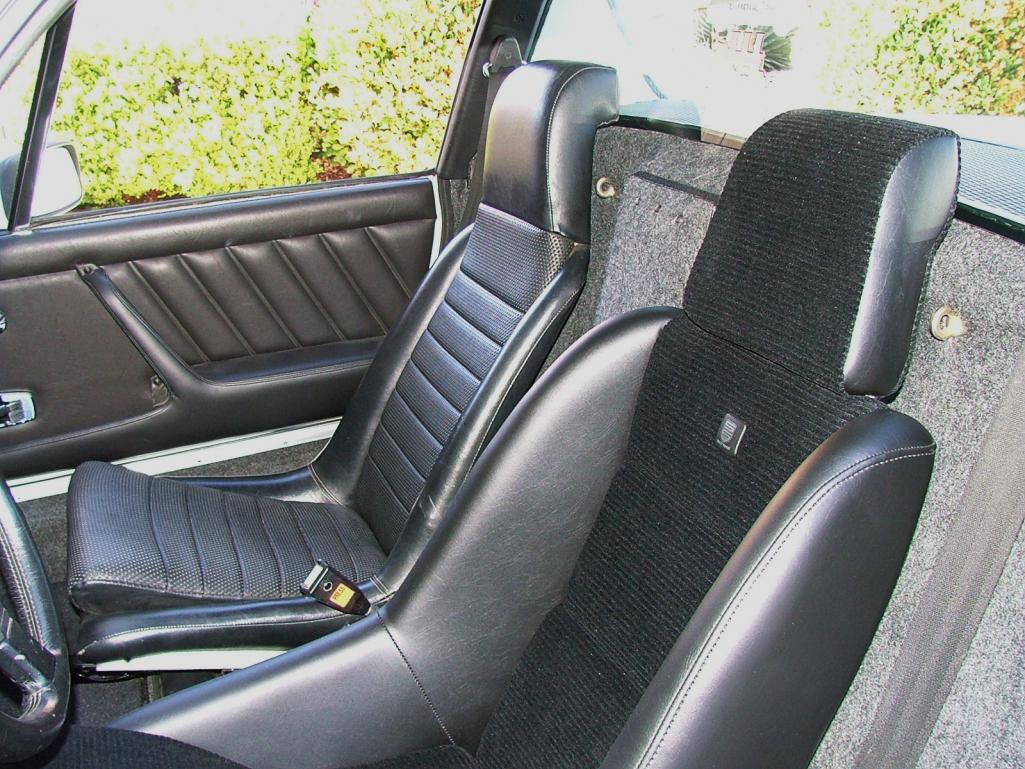
Posted by: mepstein May 16 2018, 05:04 AM
I missed the part were you removed the red roll bar. Good move. The interior looks great. I always like the backpad delete on a GT car.
Posted by: Coondog May 16 2018, 05:34 AM
Wow, my dream seats, Congrats....
Posted by: eric9144 May 16 2018, 02:16 PM
Damn they look good! It's amazing what a difference the seats make in the driving experience
Looks like we might have to set up a local back roads drive here pretty soon!
Posted by: raynekat May 16 2018, 05:20 PM
Drop dead gorgeous seats.
Posted by: Lucky9146 May 16 2018, 09:11 PM
Congratulations Jim on making these seats better than new.
So happy to see all your efforts paying off. Love your positive attitude.
Congrats to Oscar (upholsterer) as well, great workmanship!!! He must be a cool dude with a name like that.
Thank you Oscar!
He is a cool dude for sure and all the Oscar's I know are cool dudes! That would be 2 Oscar's altogether!
Cheers to Oscars's
Posted by: Larmo63 May 16 2018, 09:18 PM
I should have warned you about the smaller bolts to hold the tracks onto the bottom of these seats.
I had to use washers to shim because the vinyl was impeding the seats' ability to slide back and forth.
Posted by: Lucky9146 May 16 2018, 09:32 PM
I missed the part were you removed the red roll bar. Good move. The interior looks great. I always like the backpad delete on a GT car.
I agree on the red roll bar removal. It was in the car when I got it and in the beginning I thought I would track this car so I had it powder coated black. It was a custom made roll bar for this car, so I will hang on to it.
Pic of car with red roll bar and Sparco seats, circa 1998 I believe, in WA state. Just before it went silent for 20 some years.
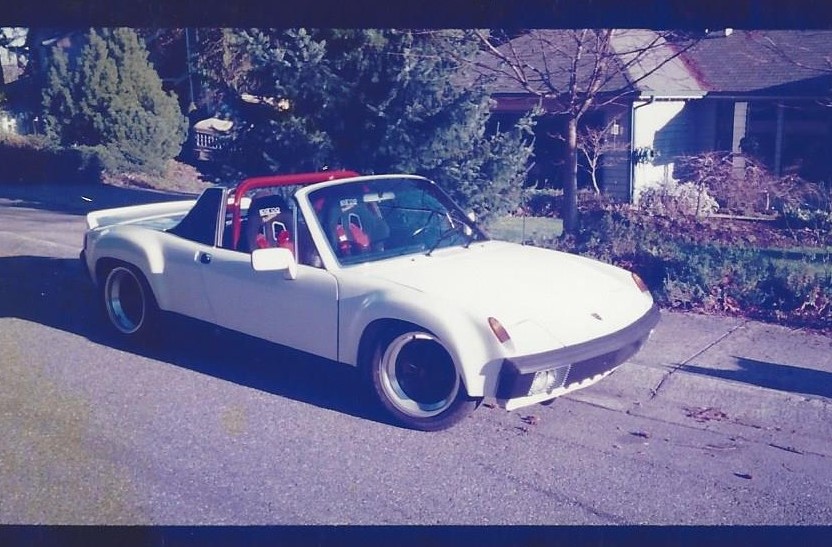
Thanks for weighing in on the interior, and the back pad delete was an easy one, as I never had one to begin with!
Thanks for the horn parts they arrived today! much appreciated!
Posted by: moparrob May 16 2018, 09:43 PM
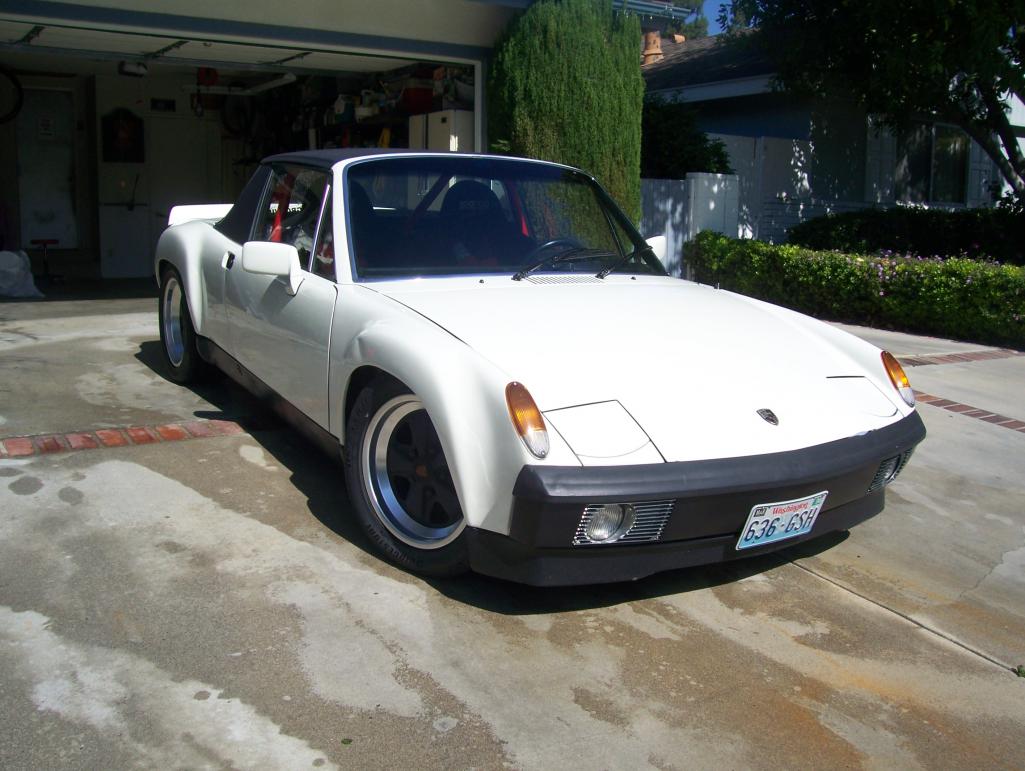
And in my driveway in 2010...
Posted by: Lucky9146 May 16 2018, 09:46 PM
I should have warned you about the smaller bolts to hold the tracks onto the bottom of the seats.
I had to use washers to shim because the vinyl was impeding the seats' ability to slide back and forth.
That's Ok! That is only part of what I have been messing with the last 2 days, in addition to what I mentioned a couple post's back about fitting the driver seat tracks.
I appreciate the thought though! Thanks!
I have not been able to do much on the passenger seat today but it is actually more than the vinyl that influences the tracks, it is that the webbing attachments on the bottoms of the seats is in the way requiring washers, or I just might have modified my tracks a bit to accommodate.
They were already horsed up anyway. Plus I am adding Mikey914 seat adjuster handles.
Posted by: Lucky9146 May 16 2018, 10:07 PM
Wow, my dream seats, Congrats....
I liked "my dream seats" and thank you.
To be honest I did not think I would ever end up with these myself!
Right after I bought the car I found a really nice set of Corbeau seats (that will hopefully soon be for sale).
Then I picked up a set of very nice stock seats at a swap meet a few years back.
Remember, you only live once!
Posted by: Lucky9146 May 16 2018, 10:43 PM
Drop dead gorgeous seats.
Thanks! Couldn't be happier!
And your paint job came out beautiful!
Great progress!
Posted by: Lucky9146 May 17 2018, 09:18 PM
Damn they look good! It's amazing what a difference the seats make in the driving experience
Looks like we might have to set up a local back roads drive here pretty soon!
Yes they do and I couldn't be happier! Thanks for weighing in Eric and yes we need to meet up some time, I'll PM you.
The seats are IN!
Finally! Going for a nice tomorrow! 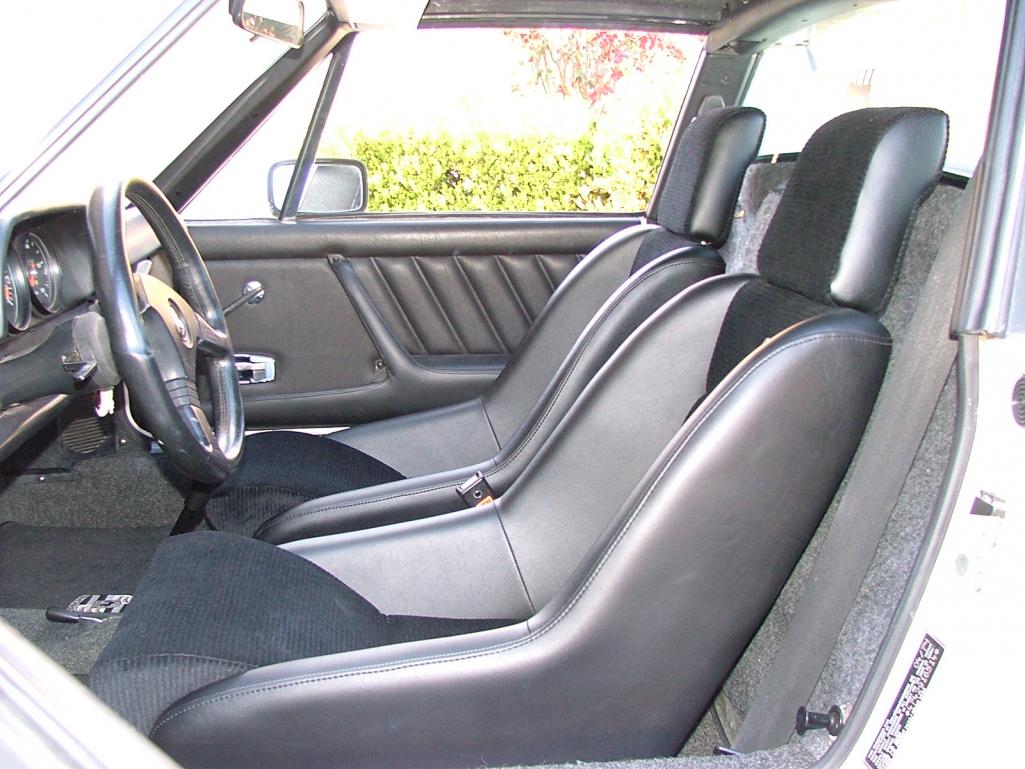
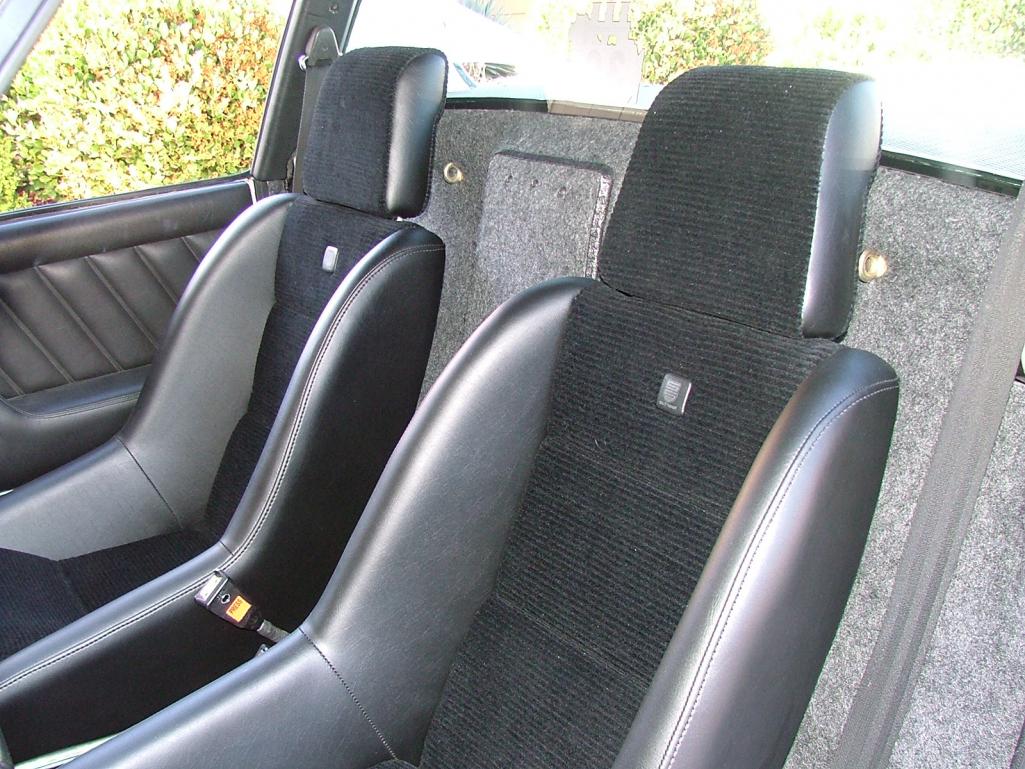
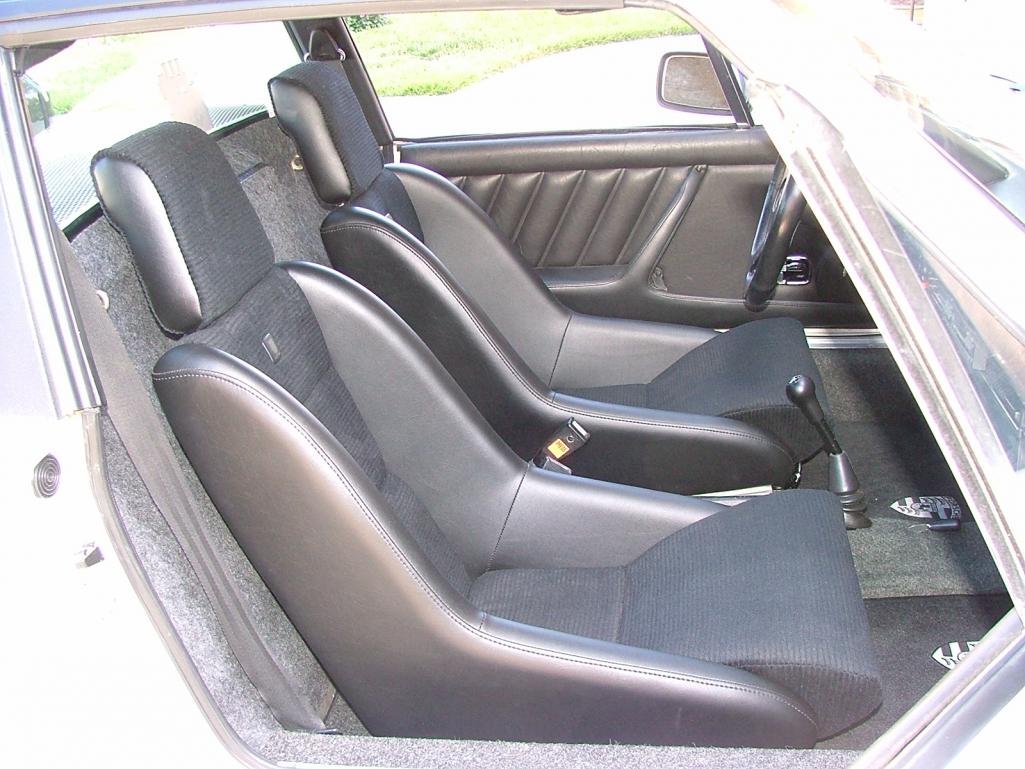
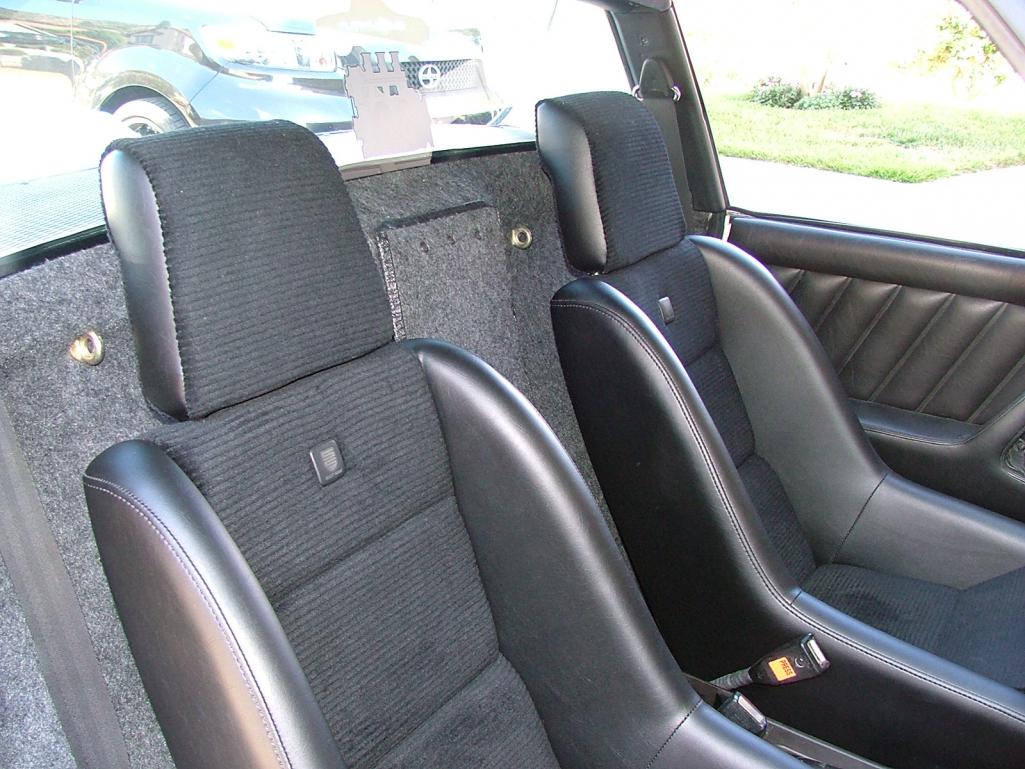
Posted by: Travis Neff May 17 2018, 09:22 PM
Those seats turned out excellent!
Posted by: Lucky9146 May 20 2018, 03:53 PM
I noted earlier in a post that one of the issues yet to be addressed was the erratic fuel guage, likely meaning the sending unit was faulty. Did a bunch of reading on the subject and looked at as many pictures as I could find and decided to tackle it today being as I ran out of gas last week
Took it out and then took off the bottom end and there was a wad of brown paper? cardboard? something? stuck at the end. I figure this is not normal and so I thought I would ask here
Was there something there that is now disintegrated? Was this an added piece of something by a previous owner? It seemed to be wrapped around one wire but really just kind of stuck there at the bottom. 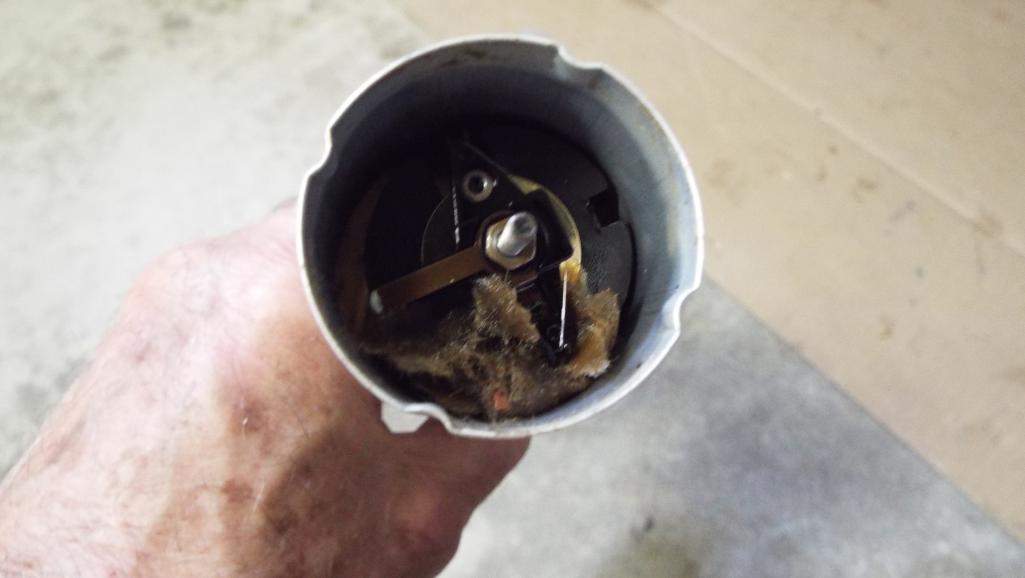
Tested the float and it in fact will float. Wires looked OK and I read some folks cleaned them with laquer thinner, so I did that too. Copper one looks a bit crooked in places but the float does go up and down with no problem.
Thanks, can't wait to hear!
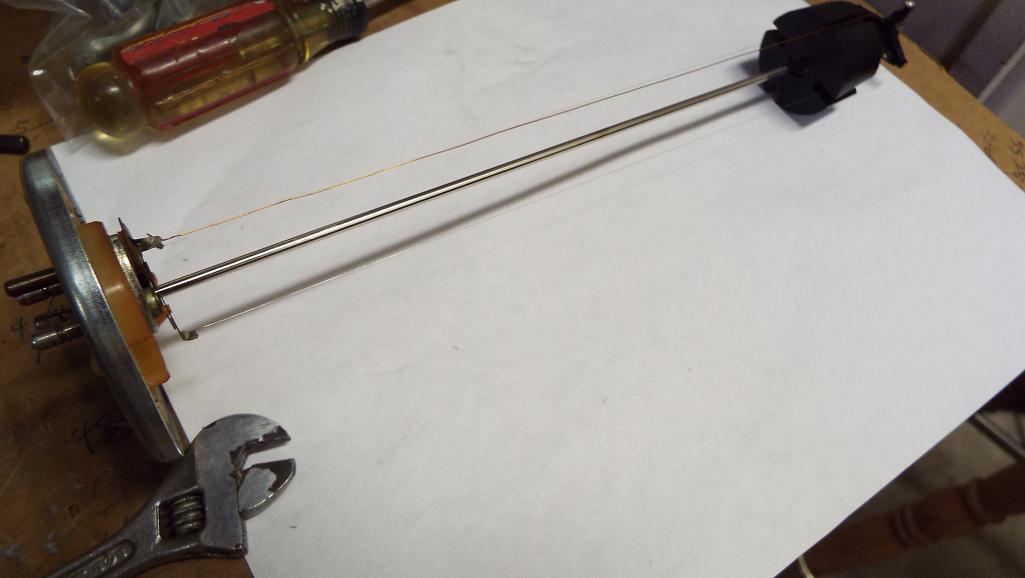
Posted by: moparrob May 20 2018, 04:07 PM
I think you have now officially had your hand in/on each and every component that makes up that car.
Frustrating for sure but that car is going to be EXTREMELY reliable and fun to drive for many years.
Posted by: Lucky9146 May 21 2018, 08:56 AM
I think you have now officially had your hand in/on each and every component that makes up that car.
Frustrating for sure but that car is going to be EXTREMELY reliable and fun to drive for many years.
There are, believe it or not, a few things I have not touched yet. Looking at this junk that was in the sender, it seems as though I need to.
I heard back through PM's that the debris I found was nothing they had ever seen before. Based on everything I see, the wires being in tack, and good movement of the float, I will reinstall for further evaluation. Tank is full and guage reads full.
In the mean time I finally remembered to install the steering rack cover I had restored a while back which which I got from Bruce Stone.
Nicely finishes off the bottom of the car. Enjoying the hell out of having my lift!
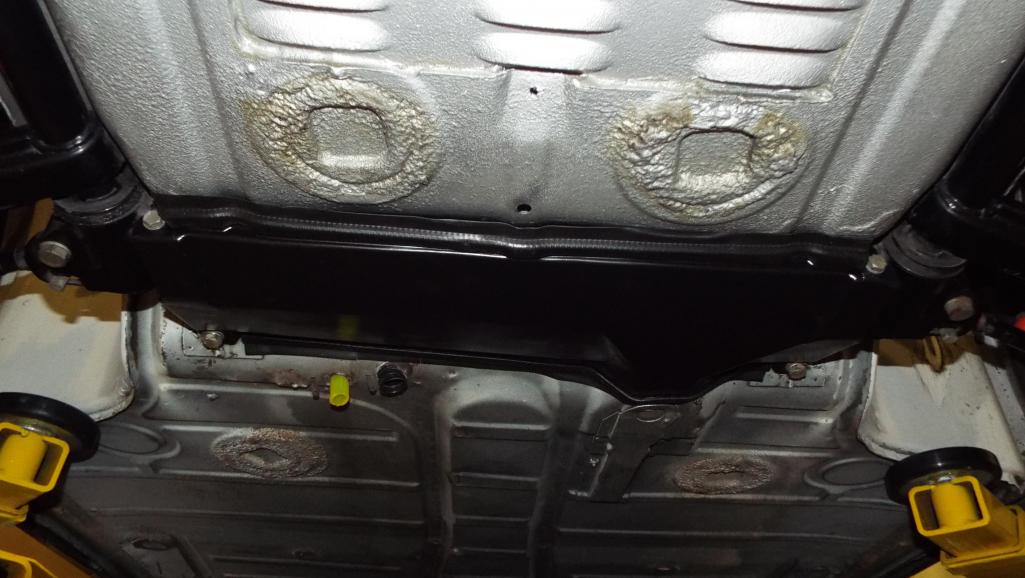
Posted by: Lucky9146 May 22 2018, 08:17 PM
Today I decided to install the stock steering wheel I had bought a while back, and then in January had leather wrapped by Oscar (same guy that did my seats and how I met him).
Received the horn ring from mepstein last week! Thanks Mark! The missing piece I needed.
Had the Momo previously (came with the car) which is smaller diameter plus thicker hand grip. The turn signal did not cancel with the Momo so I thought it would work now with the part I got from Mark. Not! Everything looks right but something isn't... 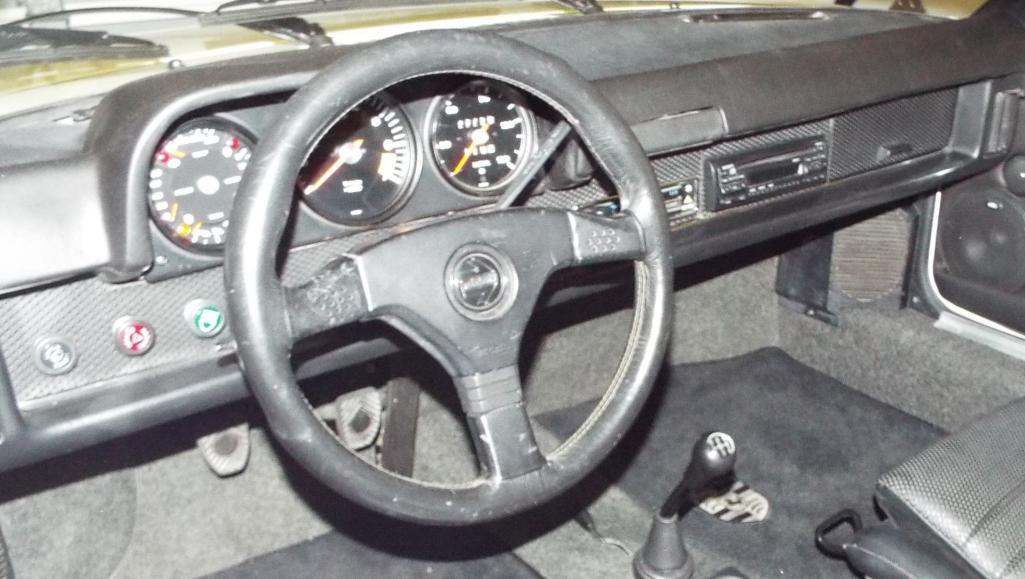
Since I have been driving the car with the smaller diameter Momo I now have another problem.
The larger diameter stock wheel plus the seat bottom difference of coming forward more and upward more than the original seat, then add corduroy, makes getting in and out a little more of a challenge. Didn't see that one coming.
Jury is still out and I will do more seat time to see if I can get used to the stock wheel.
Seats are awesome though! Great drive today.
Posted by: bigkensteele May 22 2018, 08:46 PM
Well, if you have to get rid of that leather wrapped stock wheel, I suppose I could do you a favor...
Posted by: jd74914 May 23 2018, 12:00 PM
Those seats look awesome!!
Posted by: Lucky9146 May 23 2018, 12:52 PM
Those seats look awesome!!
Thanks Jim and as Eric9144 recently said in a post "it's amazing what a difference the seats make in the driving experience" Couldn't agree more!
Driving yesterday felt more like a go cart than ever!
I see your avitar of the perfect gaps by your headlight. I am going to aspire to that example and based on the hour or two I spent the other day, that look is not something quickly achieved. Thanks for weighing in.
Posted by: Lucky9146 May 23 2018, 01:03 PM
Well, if you have to get rid of that leather wrapped stock wheel, I suppose I could do you a favor...
Your compassion does not go unnoticed and I truly appreciate the offer. You sir are a true problem solver! People like you are few and far between, you see a situation and immediately come to the rescue.
Seriously, if I decide to list it F/S, I mean "get rid of" I will contact you first!
Thanks for the post! Made my day!
Posted by: bigkensteele May 23 2018, 05:50 PM
Well, if you have to get rid of that leather wrapped stock wheel, I suppose I could do you a favor...
Your compassion does not go unnoticed and I truly appreciate the offer. You sir are a true problem solver! People like you are few and far between, you see a situation and immediately come to the rescue.
Seriously, if I decide to list it F/S, I mean "get rid of" I will contact you first!
Thanks for the post! Made my day!
I am told that selflessness is one of my most redeeming qualities.
Well, I've never actually been told that, but I imagine that someone has thought it sometime in the past.

Posted by: defianty May 27 2018, 02:53 PM
I was just browsing Instagram and came across this lovely Light Ivory GT. And then I realized - that's Jim's car! Looks fantastic Jim, hope you enjoyed the run out. 
Posted by: Lucky9146 May 27 2018, 11:50 PM
Stephen, thank you! How cool is that! Talk about a small world.
I have no idea how that works with Instagram but I think it amazing that you saw that picture over in the UK taken just this morning! Before I even got a chance to get my pics off my camera! Wow!!!
I took one almost exactly the same and a few others as well. Great turn out and........
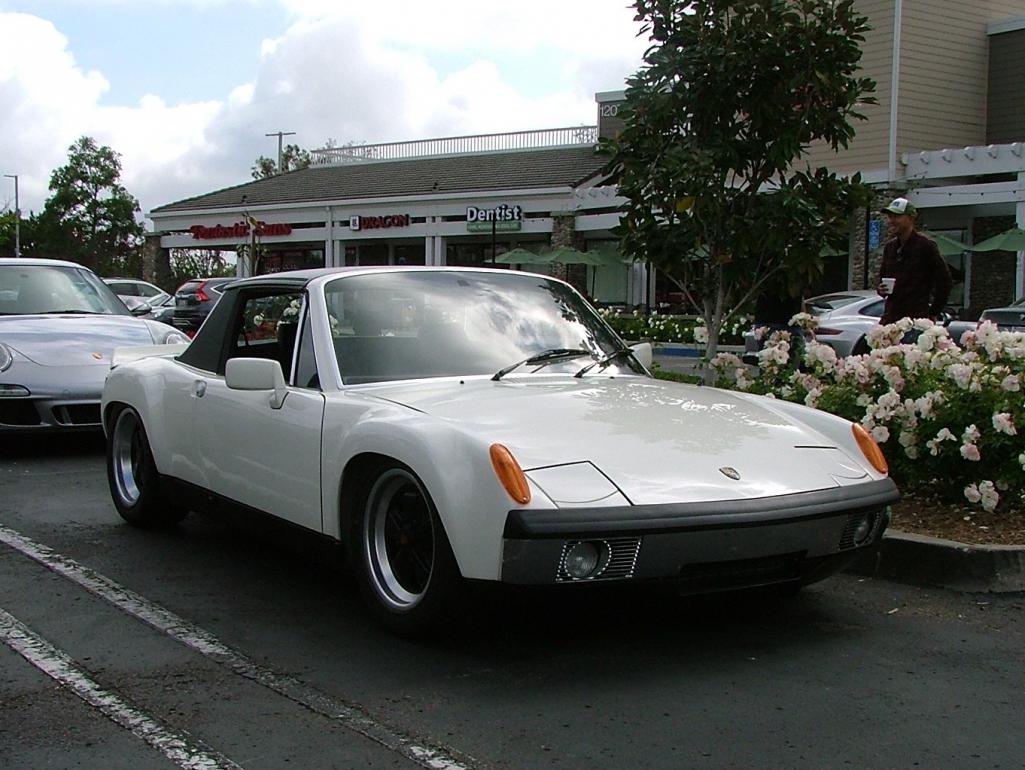
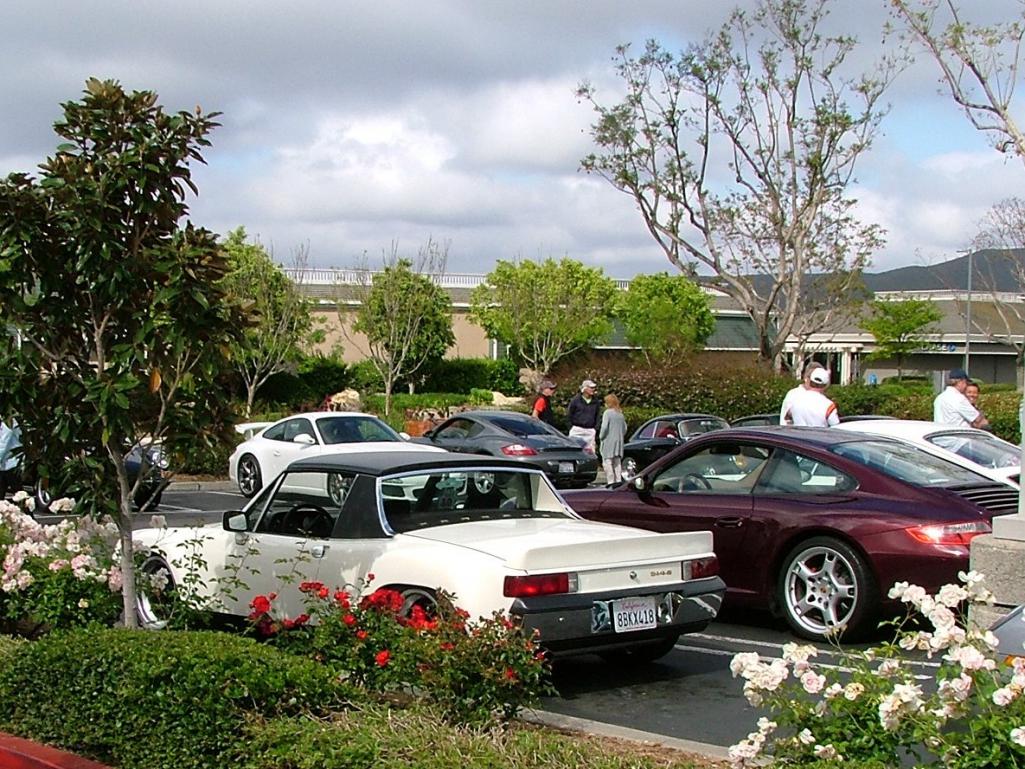
I met Eric9144 who lives near by with his very nice original paint silver 1974 2.0 
Posted by: Larmo63 May 28 2018, 10:30 AM
Damn, your cars BOTH look great!!!!!
Posted by: Lucky9146 May 29 2018, 03:48 PM
Damn, your cars BOTH look great!!!!!
I'll say thank you for both of us!
And I have to mention that there is nothing like an original paint car like his. Eric has made some nice tasteful changes but he keeps his options open with the ability to revert back to stock. For instance his Konig seats which look amazingly like Scheeel seats BTW. He still has the originals if he wanted to go back. His paint has some "patina" but who cares.
Mine on the other hand is so far from original it isn't even funny but Eric did like my center pull hand brake,
Fun day! And my car is running great! Still breaking in the motor and exploring higher RPM's So fun to drive!
Posted by: Lucky9146 May 29 2018, 03:56 PM
Decided to try to improve the gaps around the headlights over the weekend. I can't imagine anyone enjoying this fun task. Spent several hours on it and all I can report is that they are closer than they were. Weird shit happens when you mess with trying to adjust them. They may never be perfect!
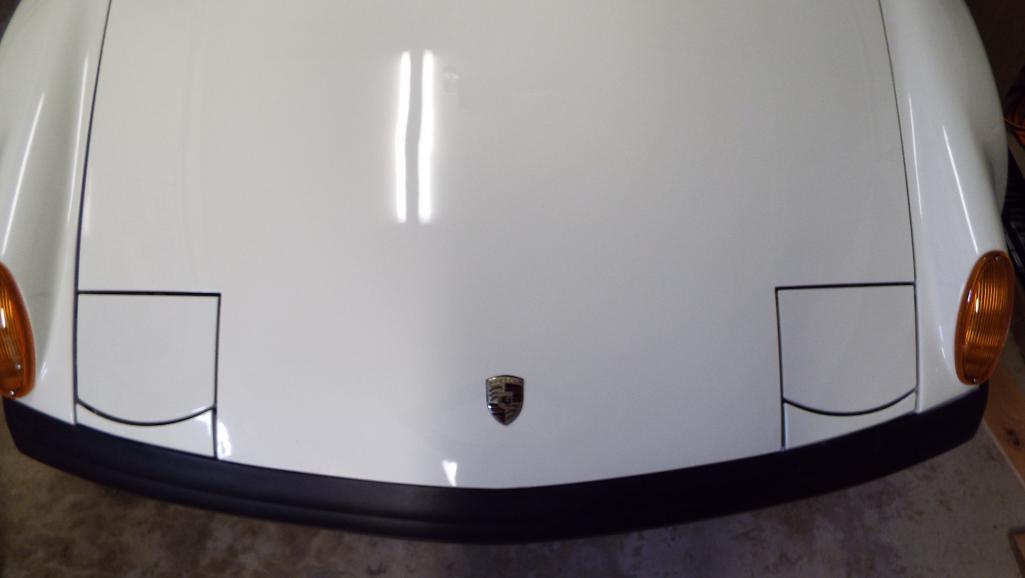
Posted by: eric9144 May 30 2018, 10:57 PM
I finally got to meet Jim and the car this past Sunday and I think he's living up to the moniker on both ends--Lucky9146--the car couldn't be in better hands and Jim was clearly the guy meant to be it's steward. Its really, really nice to see the product of all of his hard, meticulous work and damn does it look and sound amazing!
Love a great GT tribute and this really checks the boxes!
Posted by: Lucky9146 May 31 2018, 08:59 AM
Had the opportunity yesterday to go to the Peterson Museum again as an invitation by a friend who knew they had a two day Grand Reopening of the Vault. 60,000 sq ft, 250 vehicles. The ONLY 2 days pictures in the vault were allowed. I took lots but the lighting was horrible.
Overall it was ok. No ropes but if cars were parked next to each other you could not walk between them, making viewing some impossible. They enforced this rule vigorously I can report.
We arrived a little late for out 75 minute tour so we had less time to look, but it was enough. BTW it was $75 for this privilage
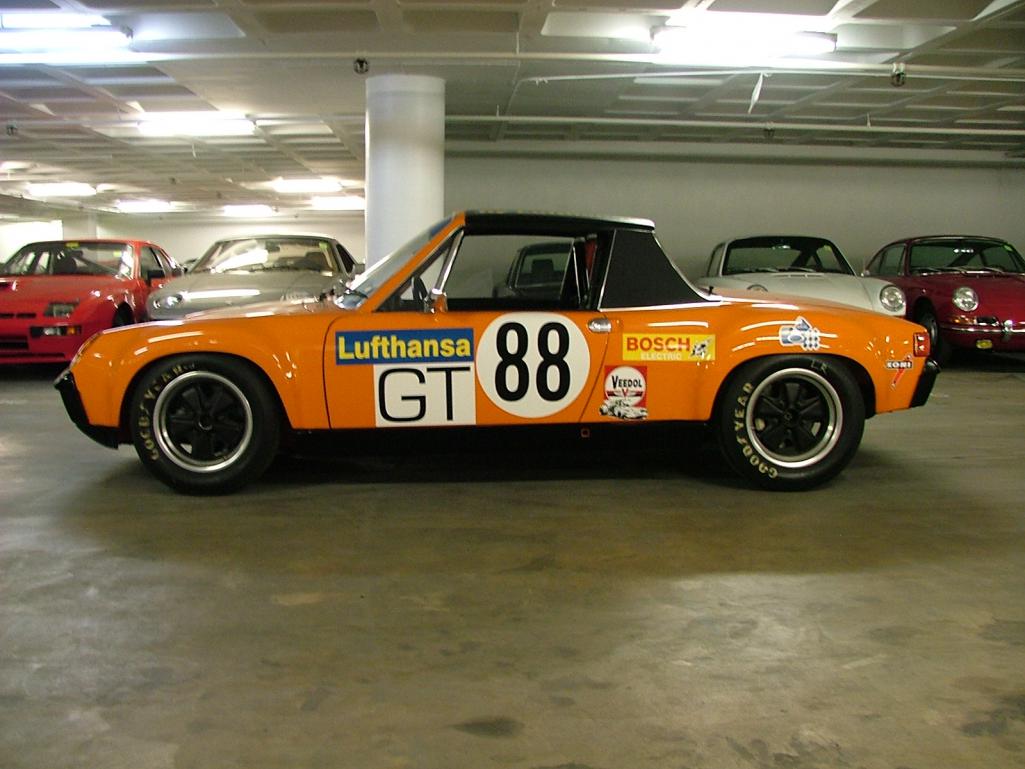
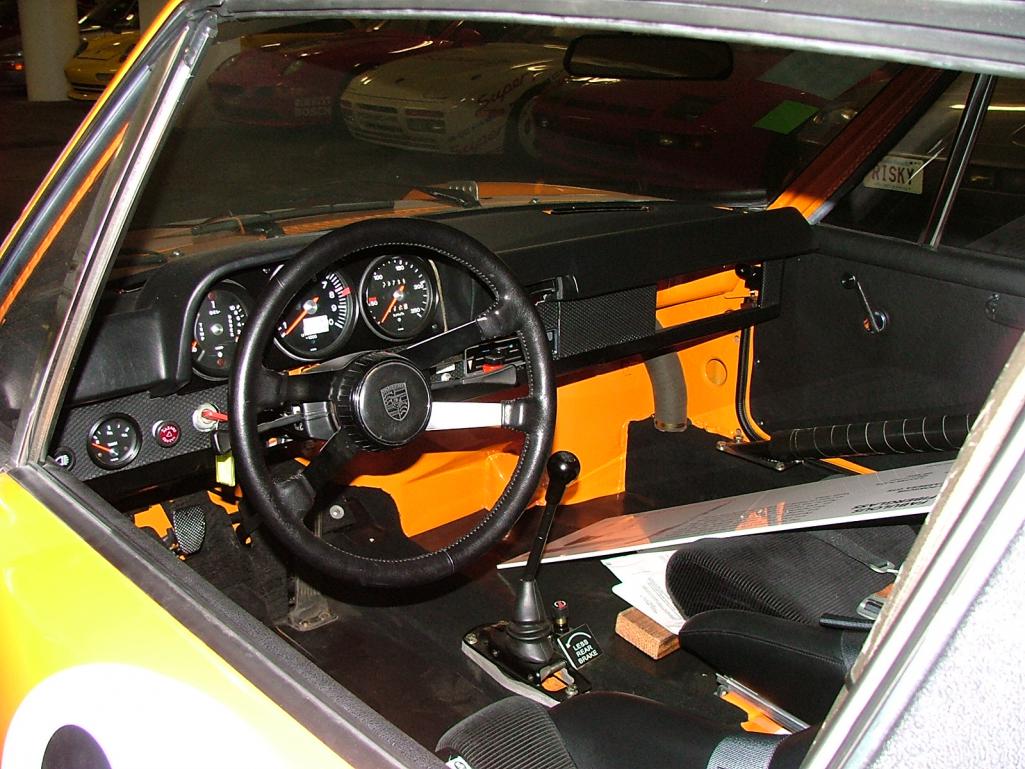
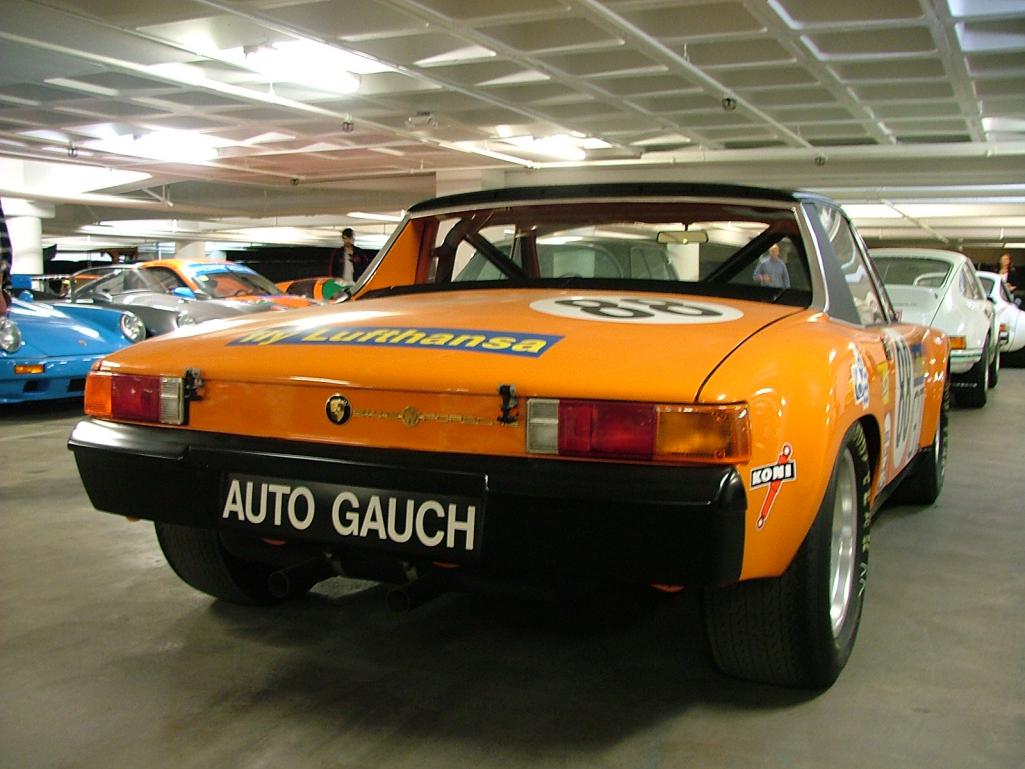
The Porsche Experience runs through Jan 2019 so I had a chance to see those cars again and took many more and better detailed pics there. Had not noticed this post my last visit with every model....
I am hard pressed to explain why they parked this big ole Mercedes smack in the middle of the Porsches 
Posted by: moparrob May 31 2018, 10:26 PM
Very nice. What is the story on the black 914-6 GT?
Posted by: Lucky9146 Jun 1 2018, 08:38 PM
Very nice. What is the story on the black 914-6 GT?
Sadly I did not get a story on it . With only 2 914's in the whole place you would think I would have done a better job eh.
We got really stuck in LA traffic and were late, they were less than caring, we just did the best we could. The deal was you paid for a time slot and that was that. Did not really get to ask many questions just see as much as possible. They had docents but I could see once engaged they were hard to shake.Below is the only other pic I got of that 914 and it sure would have been nice to have plaques by the cars like they do upstairs that tell you about the cars. Also, like I said if cars were parked next to each other you were not allowed to walk in between them to get a better look. Upstairs I took a pic of every plaque of each car I shot.
Posted by: moparrob Jun 1 2018, 10:58 PM
The reason I ask is that it has a 916 style front bumper and lower valance so I was wondering if the car had some special provenance or if it was just a tribute car.
Posted by: Travis Neff Jun 1 2018, 11:57 PM
71 916 #1
more info on the other board http://www.914club.com/bbs2/index.php?showtopic=437219
Posted by: defianty Jun 2 2018, 10:13 AM
Jim are you running 16x7 and 8's on your car? That's what I've got. Can you let me know what tire sizes are you using please?
Posted by: moparrob Jun 2 2018, 10:44 AM
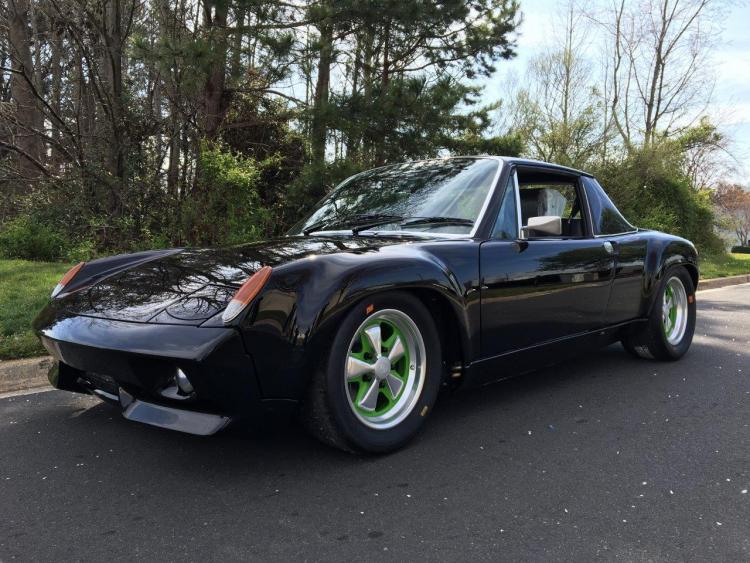
Holy crap! I did not realize the car was that significant. A 916 - and #1 to boot.
I wonder how it ended up at the Petersen?
Posted by: Lucky9146 Jun 2 2018, 11:52 AM
71 916 #1
more info on the other board http://www.914club.com/bbs2/index.php?showtopic=437219
Travis thanks so much for contributing! I had no idea either. Wish it was not crammed in like it was so I could have gotten some better pics.
Really amazing car and 916#1!
Posted by: Lucky9146 Jun 2 2018, 11:57 AM
Jim are you running 16x7 and 8's on your car? That's what I've got. Can you let me know what tire sizes are you using please?
Yes sir 16X7 and 8's
Tires:
205X55 Front
225X50 Rear
Posted by: dr914@autoatlanta.com Jun 2 2018, 12:41 PM
We are making the rounds with it, first it was at Amelia, then the Porsche museum here in Atlanta and now the Peterson. We hope to get a segment on Jay Leno Garage then the SEMA show in november
Holy crap! I did not realize the car was that significant. A 916 - and #1 to boot.
I wonder how it ended up at the Petersen?
Posted by: moparrob Jun 2 2018, 12:43 PM
Do you know which vendor's booth you will be in at SEMA?
Posted by: defianty Jun 2 2018, 12:56 PM
Yes sir 16X7 and 8's
Tires:
205X55 Front
225X50 Rear
Posted by: daytona Jun 2 2018, 02:39 PM
Yes dr914, which booth are you going to be at SEMA? My company exhibits at SEMA every year. There are a lot of cool cars to look at but never a 914.
Bill.
Posted by: Lucky9146 Jun 3 2018, 08:58 AM
Yesterday morning I woke to the sunniest morning in a while and that meant the had to hit the road! Enjoyed a beautiful ride over, with just a few twistys along the way, to a local cars and coffee.
My wife joined me so that made it all the better.
The 914 received a lot of interest and complements. mine being the only 914. but many very nice Porsches were in attendance.
Yeah, that's an F40 up there ahead in the first pics all right. (F40 got a lot more attention )
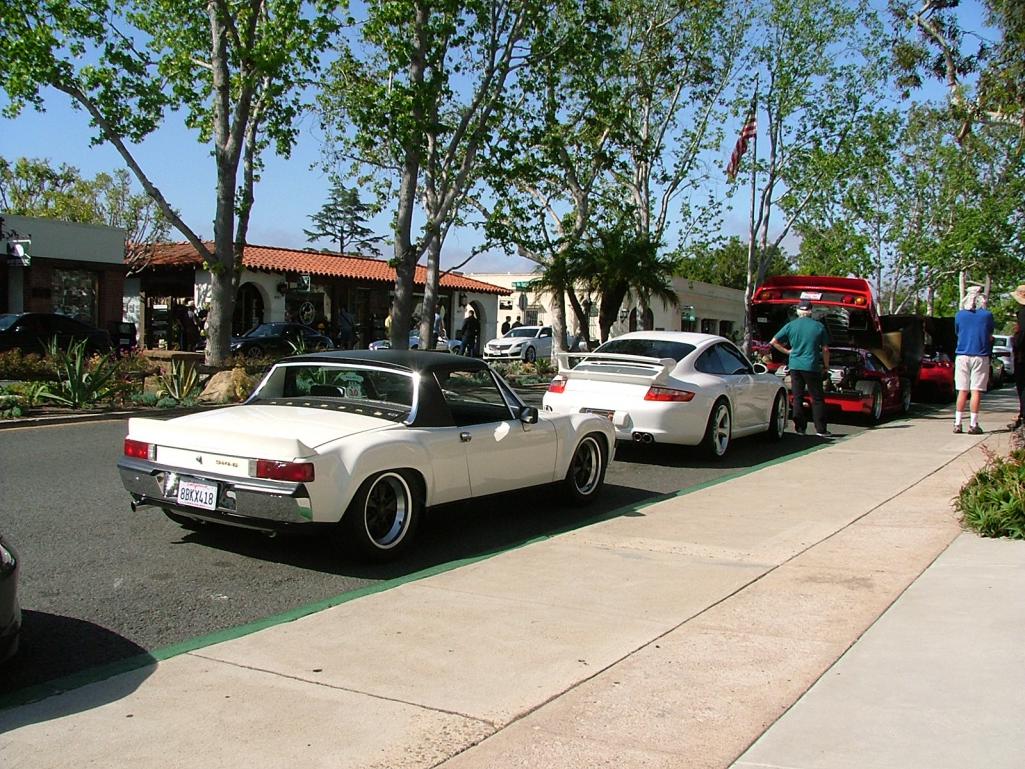
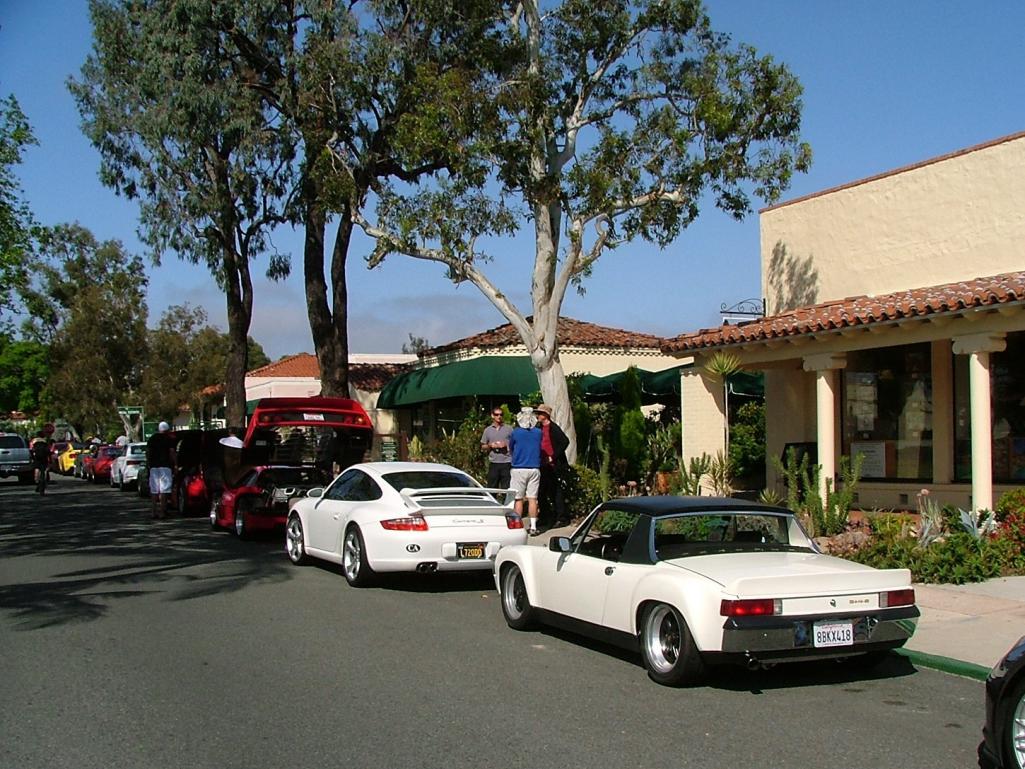
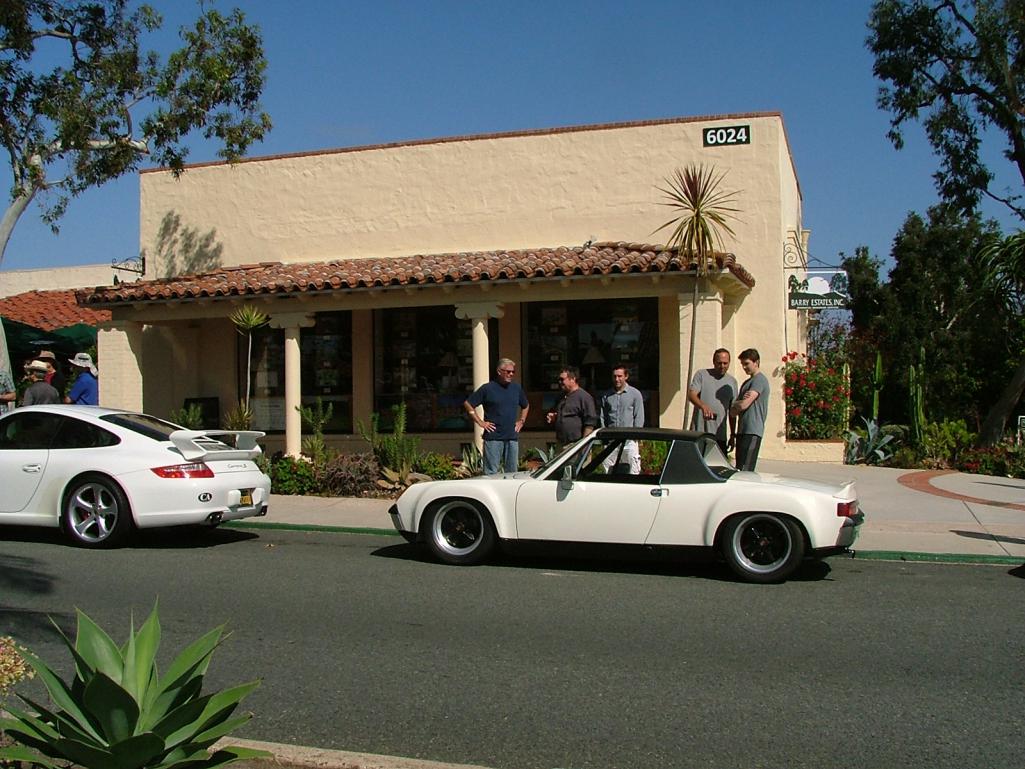
Posted by: Lucky9146 Jun 5 2018, 12:21 PM
Anybody using the Rennline Quick Disconnect on their steering wheel? Looking for input.
Thinking this is something that would solve a few problems but not cheap.
1.) Steering wheel seems too far away, this would bring it 2.3" closer.
2.) Would make entry and exit of vehicle easier.
3.) Slick anti-theft devise
Does create one problem though, they have no provision for horn, so would have to figure something out.
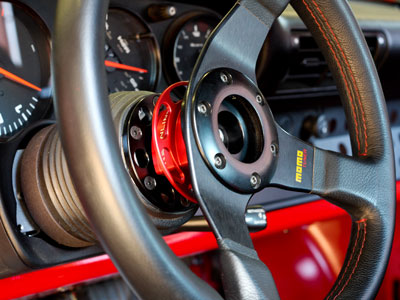
Posted by: moparrob Jun 5 2018, 12:35 PM
Back in the day when the horn was broken we used to extend the middle finger to signal our intentions.
Posted by: Lucky9146 Jun 9 2018, 11:49 PM
As a response from previous requests I was able to get a driving video today (link below).
Beautiful day in sunny southern California! Fun!
Best part was I didn't know he was shooting it at first.
Darn lights wouldn't cooperate though.
Hope the sound is good.
https://youtu.be/a7eXwdeXHfY
Posted by: Lucky9146 Jun 10 2018, 09:59 AM
Took the opportunity to attend the local San Diego Porsche Dealer 70th Year Celebration.
First freeway run over there and my wife didn't like being so low. I thought it was great!
Arrived early and scored this prime location to represent 914's and was the only one in attendance until later in the event as I was leaving, Margie Haas arrived in her 6.
Posted by: Lucky9146 Jun 10 2018, 10:07 AM
As the day progressed and the parking kept filling up the parking coordinator had me move it down to keep it on the end. I thought that was very cool!
Right next to the German Band.
Posted by: Lucky9146 Jun 10 2018, 10:13 AM
San Diego has 2 major Dealerships and the other one, Hoehn was not as highly attended per a friend who attended both. There were Porsches in every direction here and it filled to double parking. They had Beer great German food!
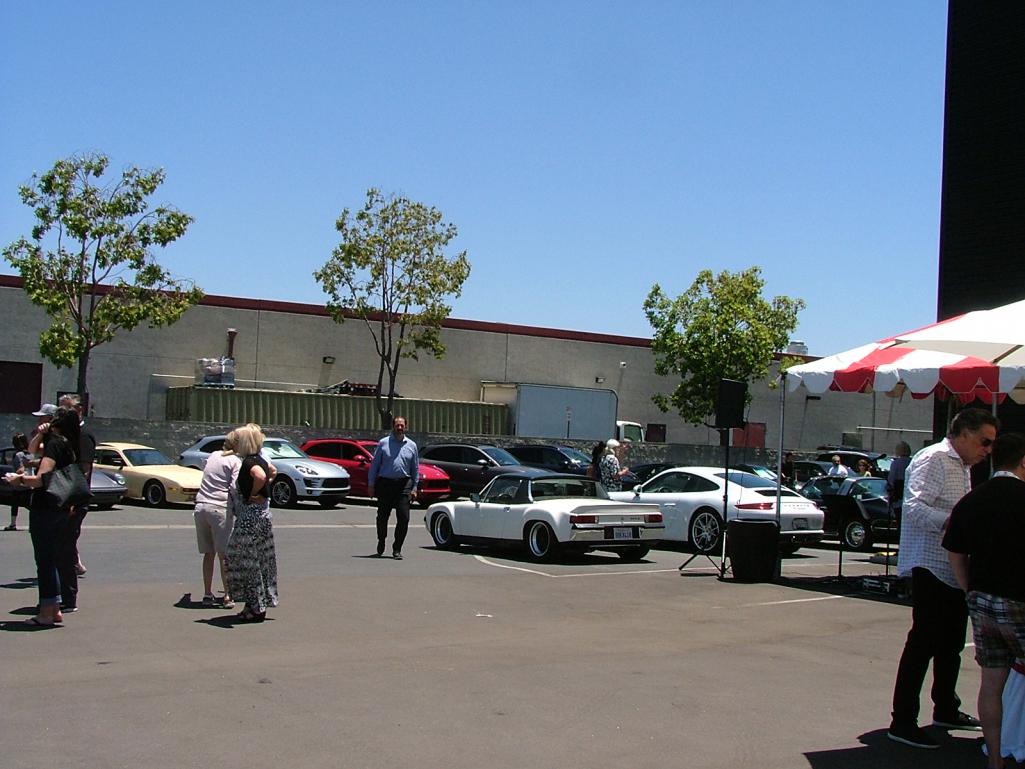
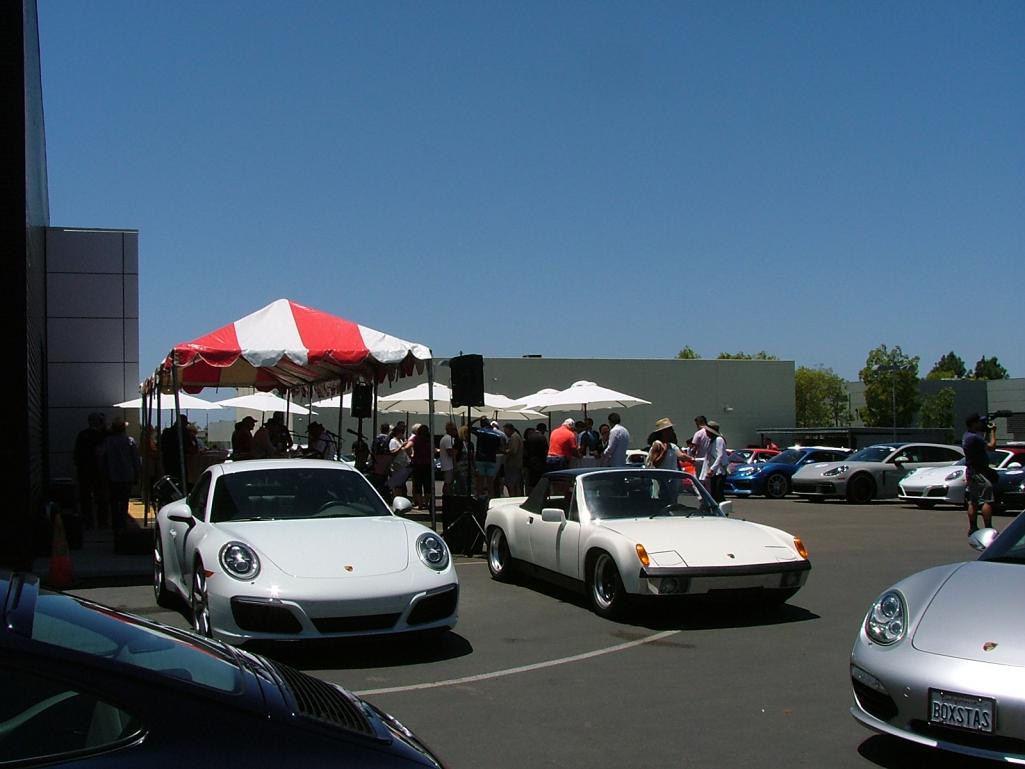
Posted by: Lucky9146 Jun 10 2018, 10:16 AM
I really enjoyed answering questions and showing the 914. Great Day! Especially so with having attended a Cars and Coffee earlier in the morning with the 914 and having my buddy do the driving video I posted last night. See Post #737.

Posted by: sixnotfour Jun 10 2018, 10:35 AM
its been a long time since the 914 has been a driver,,great to see it under its own power,,without the red rollbar..
Posted by: moparrob Jun 10 2018, 04:42 PM
its been a long time since the 914 has been a driver,,great to see it under its own power,,without the red rollbar..
I second that! Looking good.
Posted by: Maltese Falcon Jun 10 2018, 06:44 PM
...some red roll bars work well with black narrow bodies !
My Dad would rock your White gt/ red roll bar; every car he ordered since 1948 was White/ red 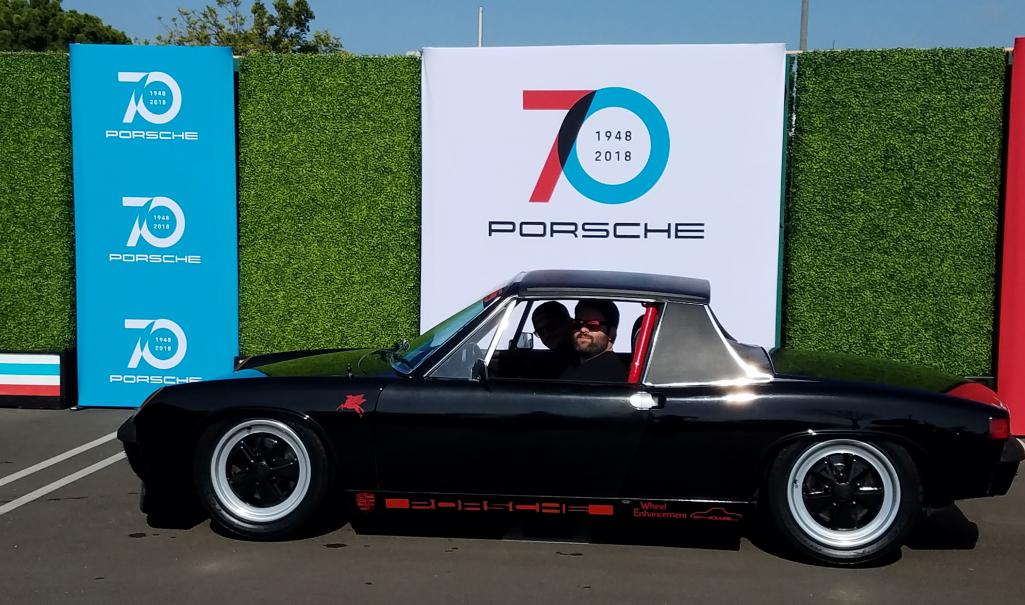
Posted by: Lucky9146 Jun 10 2018, 09:30 PM
its been a long time since the 914 has been a driver,,great to see it under its own power,,without the red rollbar..
Thanks, it is a blast to drive! Yes like maybe 23 years off the road! Mopar Rob might know how long since driven.
I never cared for the red roll bar so I had it powder coated black and who knows if it will ever get installed again.
Shot from "back in the day" when Roland had the car, circa 1995 I believe. I remember you saying you saw it back then. Same beautiful paint today.
Thanks for weighing in.
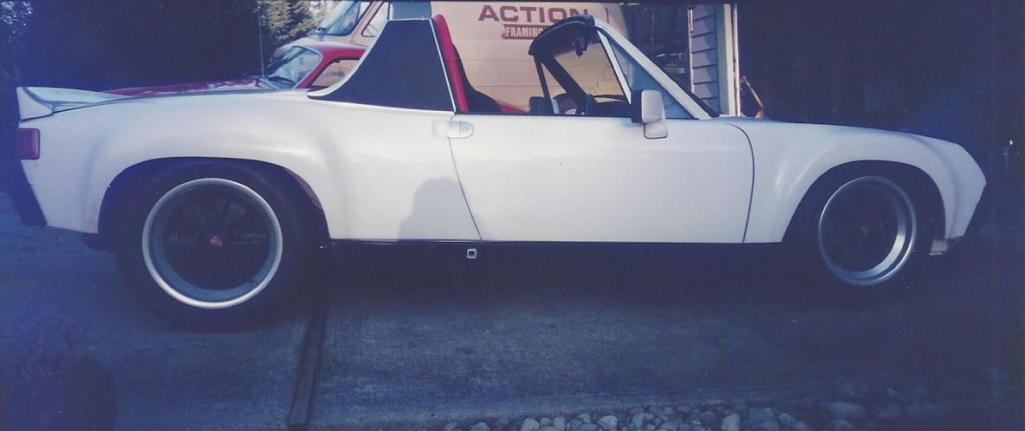
Posted by: Lucky9146 Jun 10 2018, 09:33 PM
...some red roll bars work well with black narrow bodies !
My Dad would rock your White gt/ red roll bar; every car he ordered since 1948 was White/ red
Marty, that black car does look good!
To your Dad!
Posted by: Lucky9146 Jun 11 2018, 01:48 PM
A couple weeks ago I met Eric9144 at the PCA San Diego Region Cars & Coffee. We looked at his car extensively and in his rear trunk was a rear trunk deck lid protective cover hand made by Garold Schaffer's mother. I had read that Garold's mother was not doing well and pretty sure she was no longer sewing but I contacted him to see if per chance he had any left to sell, and he did not. Best wishes Garold and family.
I reached out to Eric9144 and asked if we could borrow his to use as a pattern and he stopped by this weekend to drop it off. My wife has been sewing forever, so hopefully I will have one soon. EDIT add... If things go well maybe I can get her to make more if there is any interest.
Pictured below is Eric9144's cover made by Garold's mother on my car.
Thanks Eric9144
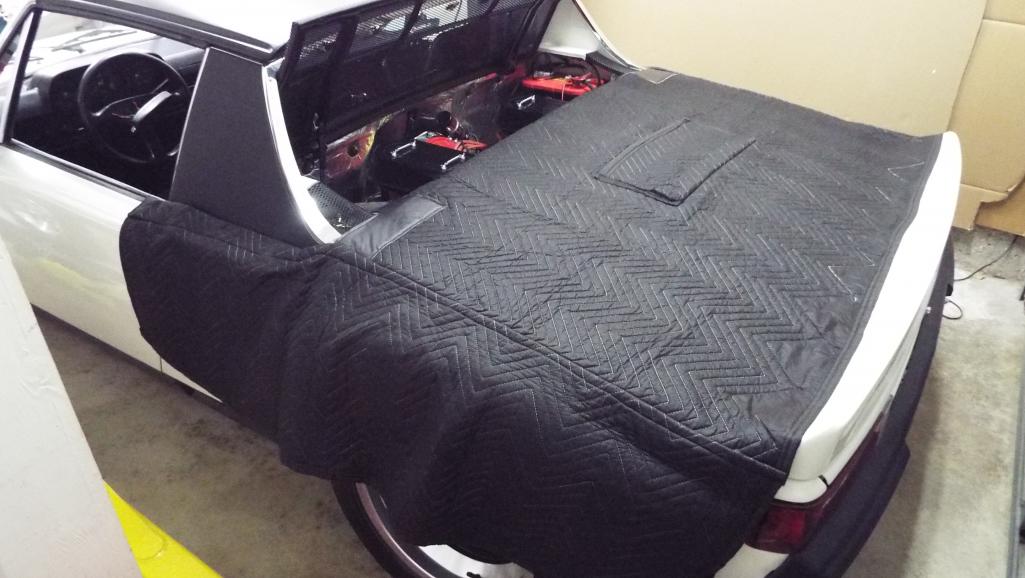
Posted by: Lucky9146 Jun 19 2018, 04:58 PM
Wishing my 914 a Happy Birthday #44!
I'm sure it sounds strange but I just happened to go through the owners manual yesterday and came to the realization that it was sold new, 44 years ago and a week, on 6-12-74.
California car originally sold at Carlsen Porsche Audi in Palo Alto, CA with 21 miles. Although I have no other actual early history of the car I captured a picture of a stock 914 that I can use to imagine it when new. When I look at my car today though it does not seem to be 44 years old at all.
Picture of my 914 as I can only imagine it looked like new (Actually a picture of a '73 owned by flat4guy) but close enough. 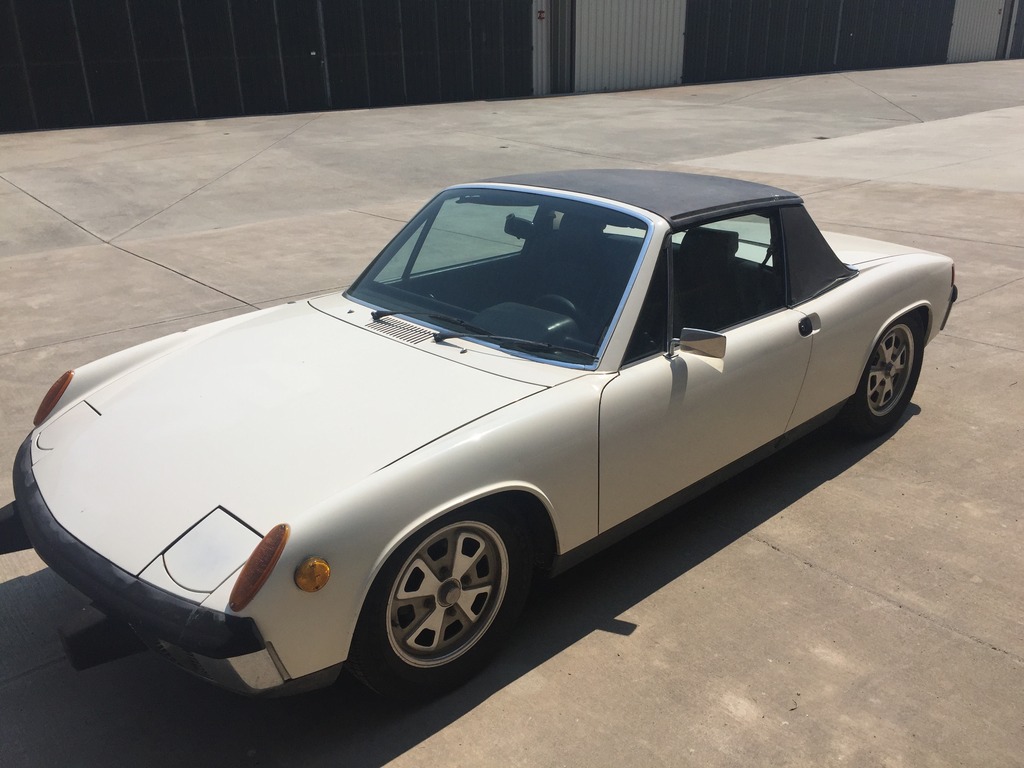
Mine at a recent Cars & Coffee
Posted by: moparrob Jun 19 2018, 08:00 PM
Amazing what a little cosmetic surgery did for the old girl.
Posted by: Lucky9146 Jun 20 2018, 11:14 AM
Amazing what a little cosmetic surgery did for the old girl.
This pictures below are the earliest I have been able to obtain from the owner prior to you. Circa 1995. While the GT conversion body work (cosmetic surgery) and the majority of assembly was done by Eurotech Bodyworks in Kirkland WA., Roland had a hand in some finishing touches at his home in the driveway pictured here. I have contacted Mark at Eurotech, and although he remembers Roland, he had no records, or more importantly pictures of the work done under his care in 1995. No surprise but was worth a shot.
Communication has unfortunately dried up from Roland since early this year. I enjoy history and will continue to try to learn more about the car and share. One thing I do have is spread sheet records showing where stuff was bought, for how much, and when. It looks as though almost every part on the car was replaced and bought new and many from Porsche, like the receipt I have for the factory steel flares.
Precarious cart the car was on! Can't imagine shoving that in and out of the garage
Wonder where them red horns went?
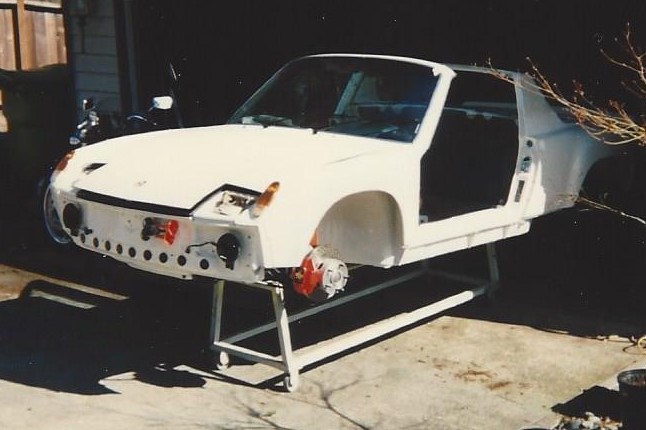
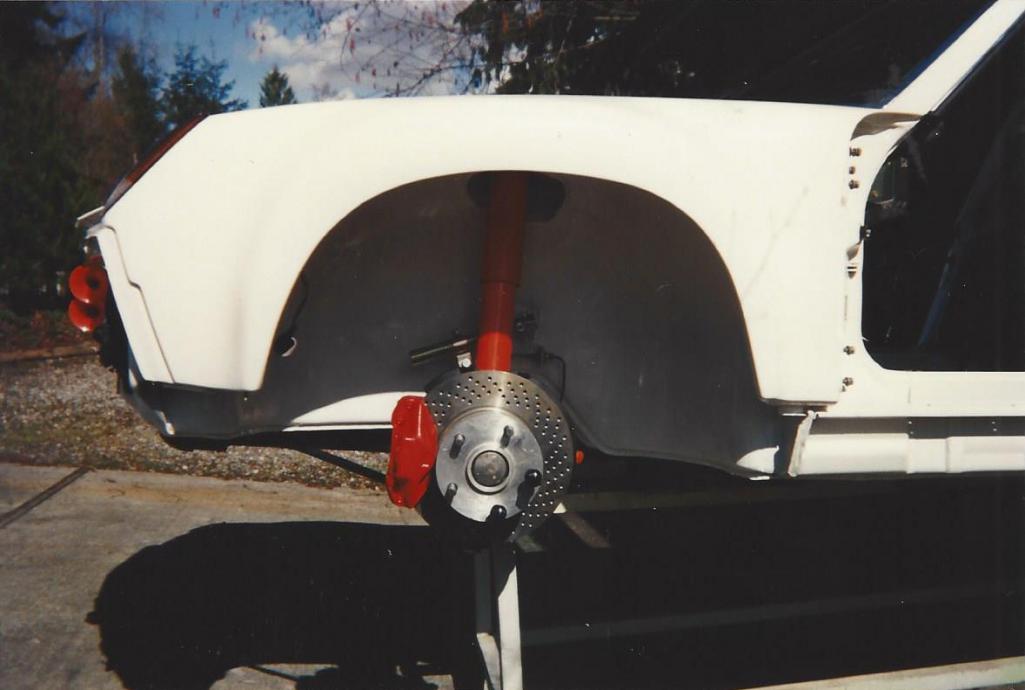
Posted by: Lucky9146 Jun 27 2018, 07:34 AM
My New Steering Wheel Quick Release
Back on post #735 I was looking at Rennline quick release but it had no horn provision.
At a local Cars & Coffee I met a guy with a Works Bell Rapfixll which to my understanding is possibly the only one that has horn connections.
It brings the wheel about 2.5 inches closer to the driver which is what I was looking for. So I am back to the Momo wheel, at least for now.
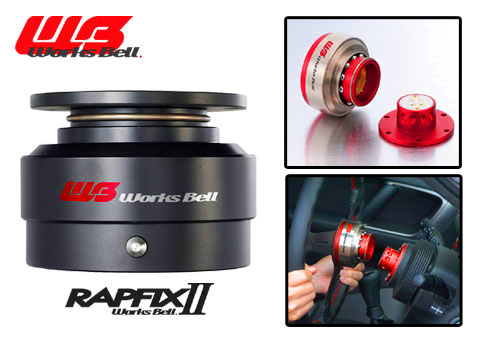
Posted by: Lucky9146 Jun 27 2018, 07:37 AM

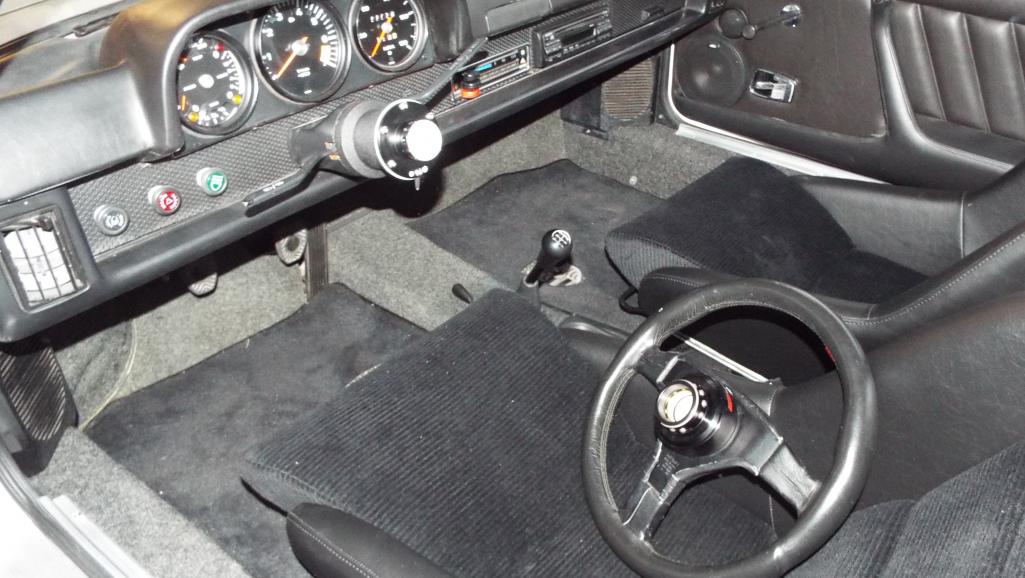
Posted by: eric9144 Jun 27 2018, 09:23 AM
Awesome
Posted by: Lucky9146 Jun 27 2018, 03:09 PM
Awesome
Thanks! You will have to try it. As I recall I think you said you wanted one. With the horn problem solved I really like it. Nice theft devise.
Probably would look a lot better with a Prototipo.
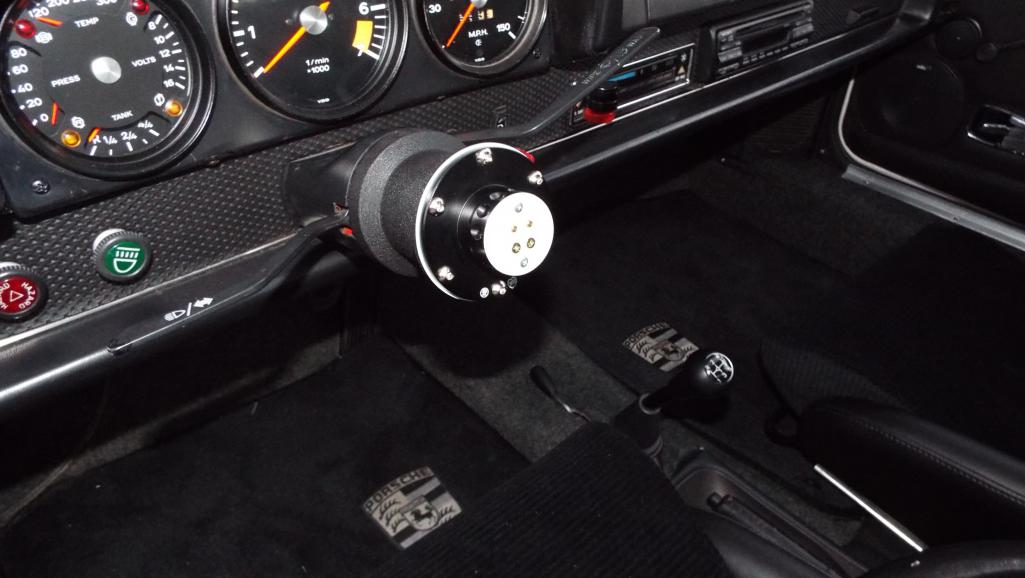
Posted by: 914forme Jun 27 2018, 06:37 PM
NRG also makes a quick release that has the horn function. Just to give people other options.
Love the build glad to see your enjoying it.
Posted by: Travis Neff Jun 27 2018, 11:35 PM
Looks good! I have the same wheel and like it a bunch.
Posted by: Travis Neff Jun 27 2018, 11:35 PM
Looks good! I have the same wheel and like it a bunch.
Posted by: Travis Neff Jun 27 2018, 11:36 PM
Looks good! I have the same wheel and like it a bunch.
Posted by: Travis Neff Jun 27 2018, 11:37 PM
Looks good! I have the same wheel and like it a bunch.
Posted by: Lucky9146 Jun 28 2018, 08:05 AM
NRG also makes a quick release that has the horn function. Just to give people other options.
Love the build glad to see your enjoying it.
Thanks, and wish I'd found NRG sooner as it is much cheaper! Also appears to be the same exact thing as the Works Bell Rapfixll with just a different name.
Too late now.
But others can benefit.
Posted by: Lucky9146 Jun 28 2018, 08:12 AM
Thought I would post the Driving Video Link again as I think it got a little buried.
Some had asked for another one so here it is. The back story here is I didn't know my buddy was doing this one.
https://youtu.be/a7eXwdeXHfY
Posted by: Edward Blume Jun 28 2018, 08:26 AM
Looks sweet! You need another project now...
Posted by: Mueller Jun 28 2018, 09:03 AM
Thought I would post the Driving Video Link again as I think it got a little buried.
Some had asked for another one so here it is. The back story here is I didn't know my buddy was doing this one.
https://youtu.be/a7eXwdeXHfY
Looks and sounds great!
Posted by: ValcoOscar Jun 28 2018, 12:21 PM
Thought I would post the Driving Video Link again as I think it got a little buried.
Some had asked for another one so here it is. The back story here is I didn't know my buddy was doing this one.
https://youtu.be/a7eXwdeXHfY
Top notch JIM
...I almost forgot what you looked like since I haven't seen you in a while.
Hope to meet up with you soon.
One more completed toy in your garage
What's next?
Oscar
Posted by: Lucky9146 Jun 30 2018, 03:49 PM
Looks sweet! You need another project now...
Thanks Ed! Believe it or not there are still some finishing touches left but it is getting there!
Posted by: Lucky9146 Jun 30 2018, 03:55 PM
Thought I would post the Driving Video Link again as I think it got a little buried.
Some had asked for another one so here it is. The back story here is I didn't know my buddy was doing this one.
https://youtu.be/a7eXwdeXHfY
Looks and sounds great!
Thanks, enjoying the hell out of it! Also, I am learning a lot from what you post! Thanks.
Posted by: Lucky9146 Jun 30 2018, 04:11 PM
Thought I would post the Driving Video Link again as I think it got a little buried.
Some had asked for another one so here it is. The back story here is I didn't know my buddy was doing this one.
https://youtu.be/a7eXwdeXHfY
Top notch JIM
...I almost forgot what you looked like since I haven't seen you in a while.
Hope to meet up with you soon.
One more completed toy in your garage
What's next?
Oscar
Thanks Oscar! Like I said a couple posts back, still some little things I want to get done but to your question of "What's next".
This little '78 SC showed up in the middle of the 914 project, almost 2 years ago. I rebuilt the engine, did shocks and struts, and turbo tie rods, plus a few other things. Then I went on to focus on the 914, and left it and a large list of things to do on it, so I plan to get going on that list soon. I hope..... SC drives really nice!
Trying to make it up to Carlsbad C&C in the not to distant future and we can catch up then!
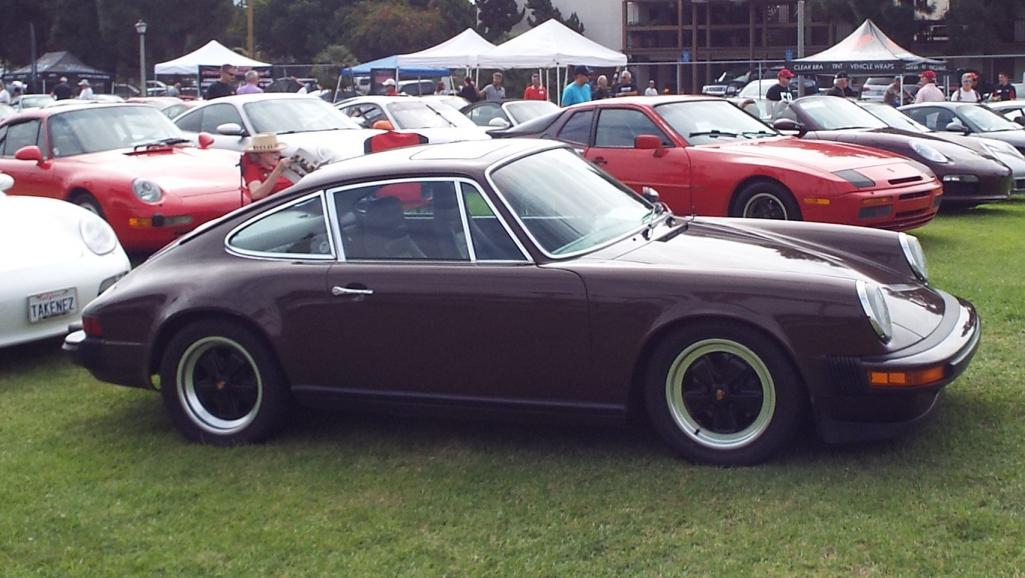
Posted by: moparrob Jun 30 2018, 11:45 PM
That '78 would be an awesome basis for a backdate hot rod. Problem is it is in pretty nice shape - almost too nice to cut up.
Posted by: porschetub Jul 1 2018, 12:19 AM
Thought I would post the Driving Video Link again as I think it got a little buried.
Some had asked for another one so here it is. The back story here is I didn't know my buddy was doing this one.
https://youtu.be/a7eXwdeXHfY
Wow it comes on cam and just hauls,really enjoyed that vid,such a great result really pleased for you man ....enjoy.
Posted by: Lucky9146 Jul 2 2018, 06:54 AM
That '78 would be an awesome basis for a backdate hot rod. Problem is it is in pretty nice shape - almost too nice to cut up.
Yes, the car is very original with the exception of the crappy repaint that everybody seems to say "looks fine just drive it and enjoy". Don't think I have it in me to do a back date anyway. Sure is a fun car to drive in a much different way than the 914-6 is a fun car to drive.
Want to finish up the Griffiths AC install and get it charged. Looking forward to that.
Here is the engine.
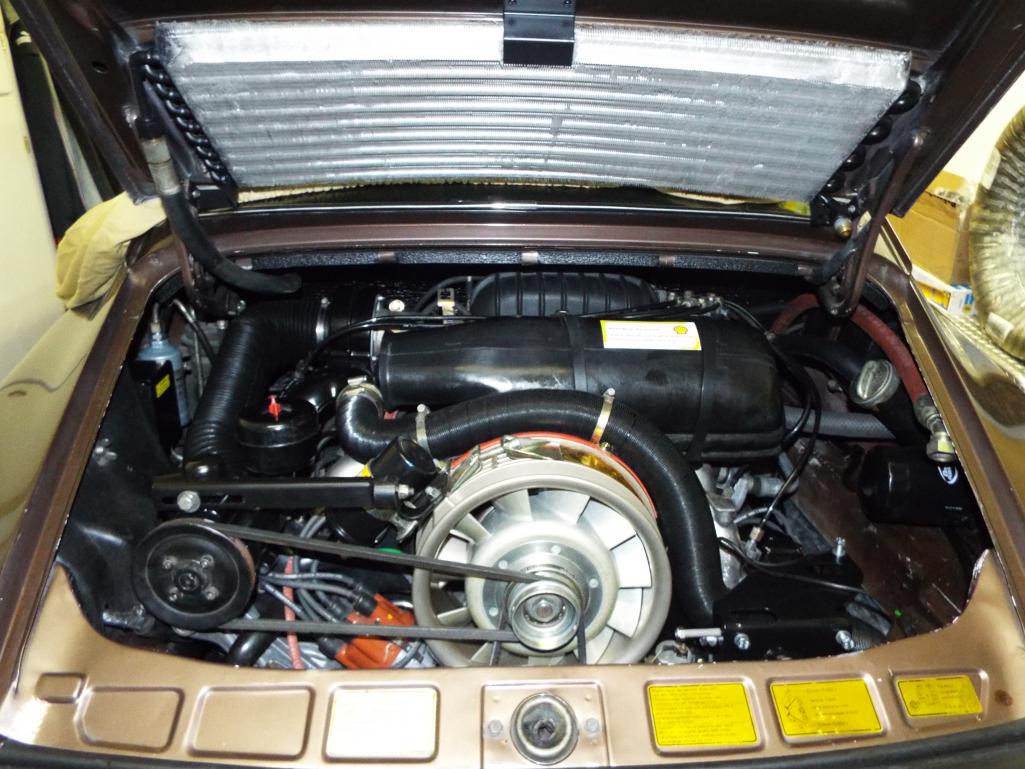
Posted by: Lucky9146 Jul 13 2018, 05:07 PM
Always wanted to have this cool wheel stud look on my car. 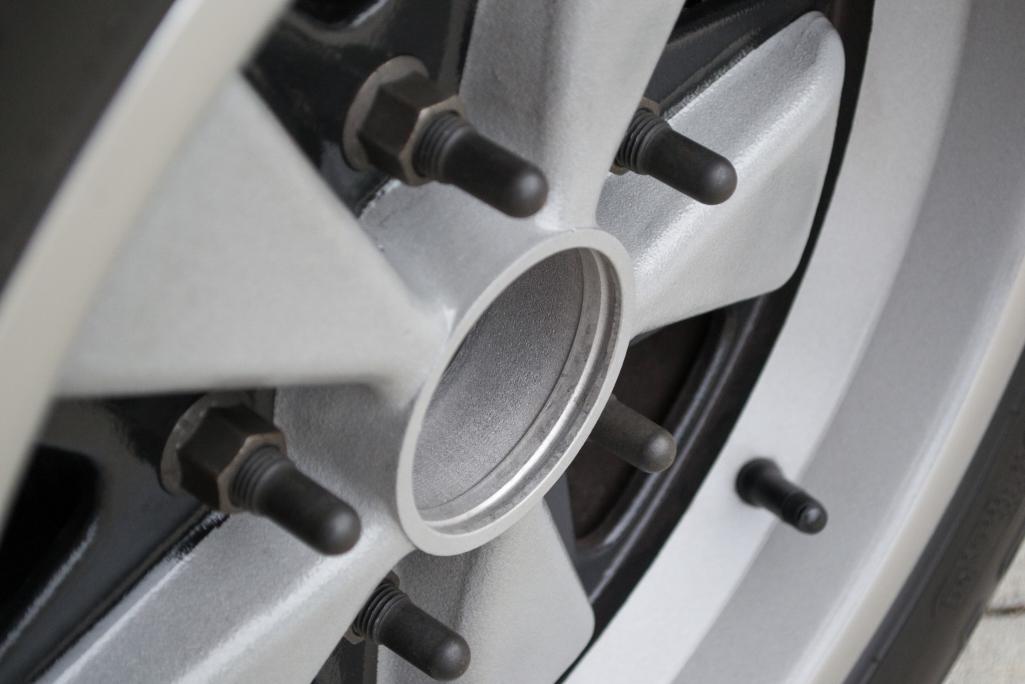
Posted this separate thread below looking for help finding them as I had searched a lot and could not locate them!
http://www.914world.com/bbs2/index.php?showtopic=331599
One suggestion was PMB Eric Shay who I called today and it just so happens he is in Europe for a couple weeks.
Learned they do not carry them and did not know where to get them so I told them SwayAWay based on the wonderful response I got to the thread I posted.
SwayAWay knowledgeable person is also out of town so I will work that angle.
Today I got these steel nuts from my friend Toolguy! Cleaning them up now.
Soon as I figure out what stud length to get, I will order some.
Posted by: 914forme Jul 13 2018, 05:30 PM
You could always go http://www.world-motorsports.com/titanium-porsche-air-cooled-lug-nuts-open-ended.html open end.
Posted by: Lucky9146 Jul 13 2018, 05:49 PM
You could always go http://www.world-motorsports.com/titanium-porsche-air-cooled-lug-nuts-open-ended.html open end.
Well those are purdy at $260 a set, I will take into consideration. Thanks!
Posted by: lonewolfe Jul 14 2018, 02:36 AM
Rennline makes them.
Posted by: 914forme Jul 14 2018, 10:54 AM
I only find steel lugs on their site unless they don't think the 914 needs to be even liter.
Posted by: Lucky9146 Jul 14 2018, 02:47 PM
Rennline makes them.
Not sure you mean Rennline makes bullet nosed studs or the titanium nuts?
Rennline appears to only sell "thread in" studs and not the "press in" studs that I am looking for. At least according to their site. Will likely stay with the steel nuts.
Will be going to SwayAWay for studs as soon as I nail down the correct length.
Thanks
Posted by: jmitro Jul 14 2018, 02:54 PM
https://www.elephantracing.com/porsche/wheel-spacers/wheel-spacers-studs/
Posted by: defianty Jul 14 2018, 03:11 PM
https://swayaway.com/product/wheel-stud-14mm-x-1-5-thread-bullet-nose/
Posted by: moparrob Jul 14 2018, 03:37 PM
https://swayaway.com/product/wheel-stud-14mm-x-1-5-thread-bullet-nose/
Nice, it looks like Swayaway is slightly less expensive
Posted by: Lucky9146 Jul 14 2018, 04:52 PM
Another great Cars and coffee this morning!
Superb real 427 Cobra was there! Guy that owns the Cobra also brought the perfect 959 in front of it. Must be nice.
Posted by: Lucky9146 Jul 14 2018, 04:55 PM
My 914 gets a lot of attention usually being the only one there. Fun drive over too!!!
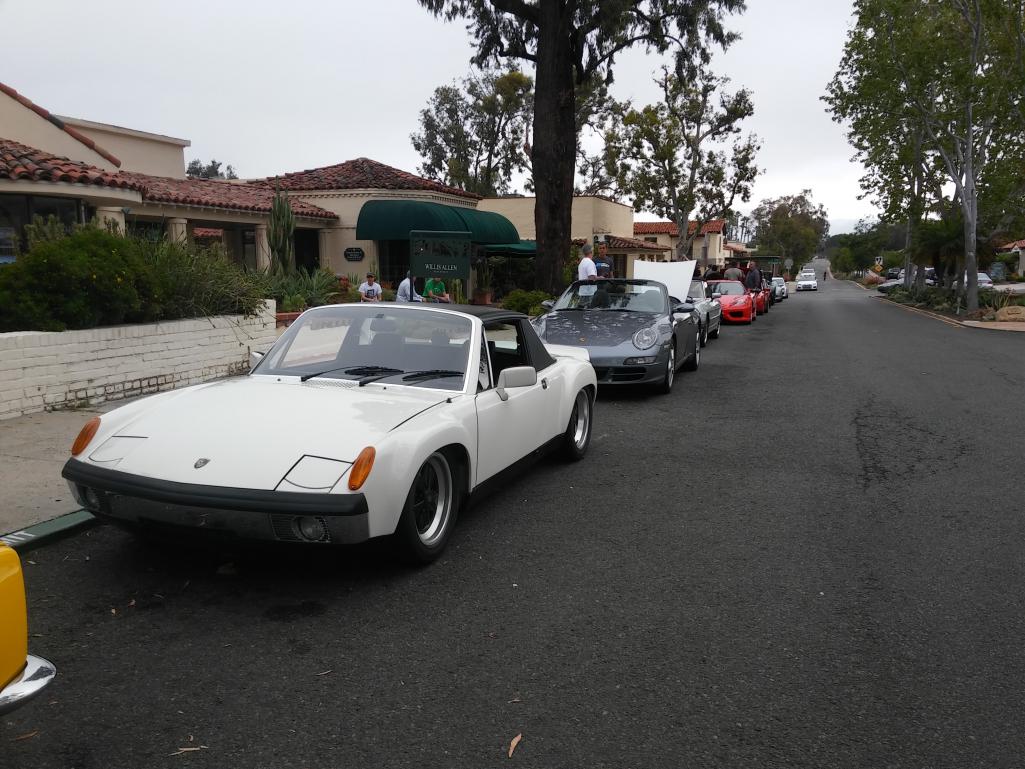
Posted by: mepstein Jul 14 2018, 05:11 PM
My 914 gets a lot of attention usually being the only one there. Fun drive over too!!!
People seem to relate to our 914's. Like a puppy. Though I wouldn't mind having the two previous cars in my garage.
Posted by: mepstein Jul 14 2018, 05:25 PM
Rennline makes them.
Not sure you mean Rennline makes bullet nosed studs or the titanium nuts?
Rennline appears to only sell "thread in" studs and not the "press in" studs that I am looking for. At least according to their site. Will likely stay with the steel nuts.
Will be going to SwayAWay for studs as soon as I nail down the correct length.
Thanks
Are you going to replace the rears with the hub on the car (I think it can be done) or pull the hub.
Posted by: Lucky9146 Jul 14 2018, 05:37 PM
Rennline makes them.
Not sure you mean Rennline makes bullet nosed studs or the titanium nuts?
Rennline appears to only sell "thread in" studs and not the "press in" studs that I am looking for. At least according to their site. Will likely stay with the steel nuts.
Will be going to SwayAWay for studs as soon as I nail down the correct length.
Thanks
Are you going to replace the rears with the hub on the car (I think it can be done) or pull the hub.
Hoping to be able to do on the car. Any insight appreciated!
Thanks
Posted by: mepstein Jul 14 2018, 07:01 PM
Rennline makes them.
Not sure you mean Rennline makes bullet nosed studs or the titanium nuts?
Rennline appears to only sell "thread in" studs and not the "press in" studs that I am looking for. At least according to their site. Will likely stay with the steel nuts.
Will be going to SwayAWay for studs as soon as I nail down the correct length.
Thanks
Are you going to replace the rears with the hub on the car (I think it can be done) or pull the hub.
Hoping to be able to do on the car. Any insight appreciated!
Thanks
Here’s a thread on pelican with links to other threads detailing some tips. http://forums.pelicanparts.com/porsche-911-technical-forum/977270-wheel-stud-confusion.html
I don’t know if you will have the same clearances with a 914 trailing arm vs 911.
Posted by: Lucky9146 Jul 14 2018, 09:03 PM
Finally addressing the Odometer!
The odometer has not worked since I got the car running in late March. Speedometer works just fine.
Usually an odometer that has stopped working is a broken plastic gear. I have never attempted to repair an odometer, but how bad can it be?
So here goes....................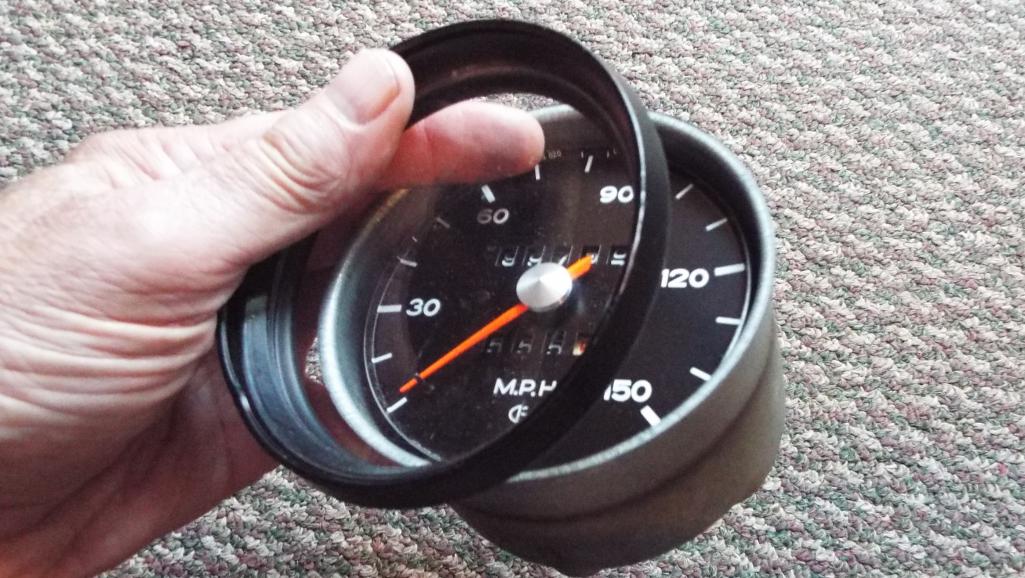
Once open, I found the main shaft that all the numbers ride on had come partially out of the housing and was no longer in contact with the worm gear at this end.
Cool, no broken gear but now what?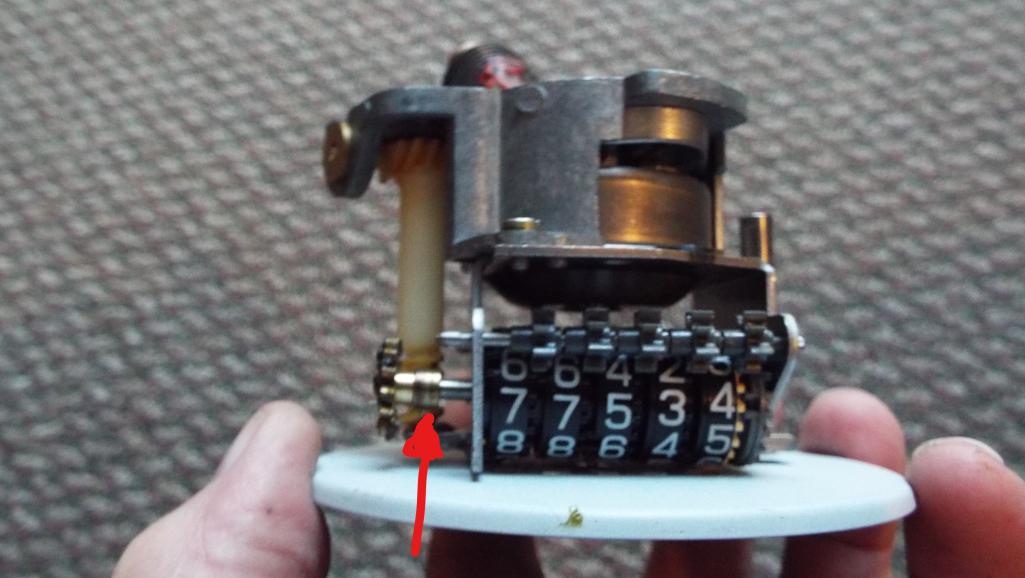
You can see the entire number cylinder has fallen away from the drive cogs at the other end because it was out of the housing.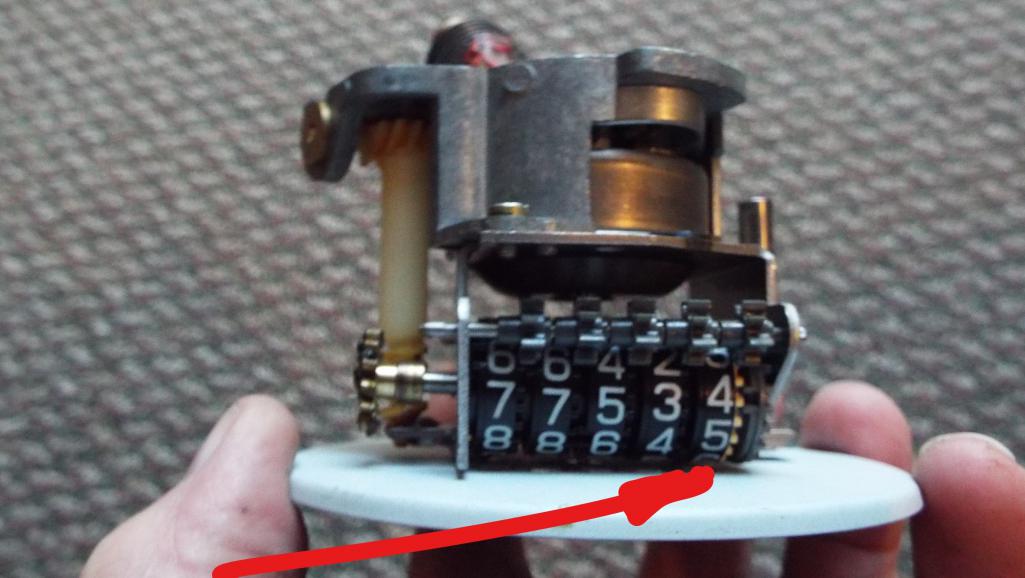
I realized this metal gear would normally be pressed on the shaft was no longer being driven by the shaft. Also, this gear pressed on feature holds the shaft in place. 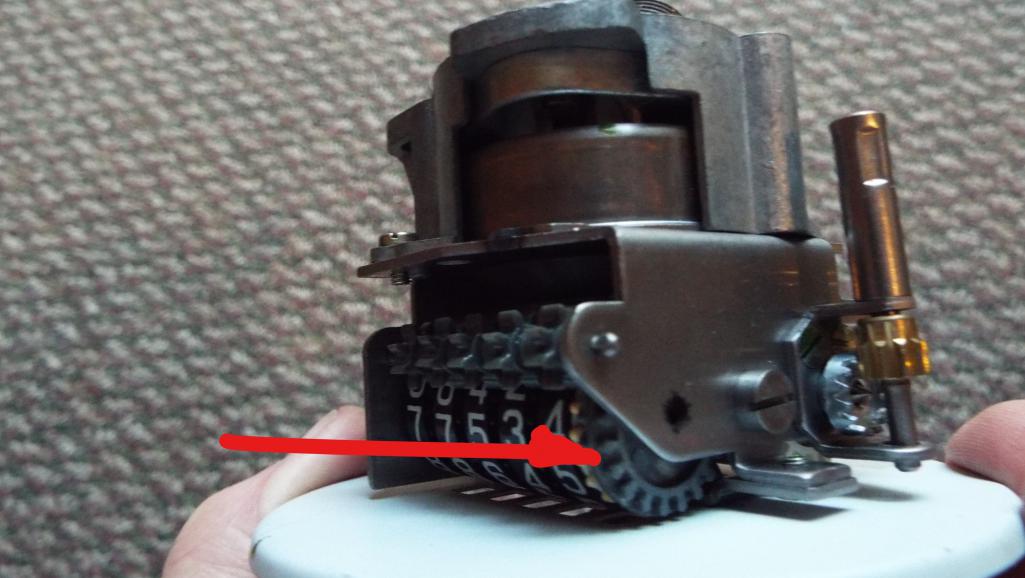
Since I was headed to Toolguy's house to pick up the metal wheel nuts, Might as well see what he thought about getting the shaft to drive this gear again.
Posted by: Lucky9146 Jul 14 2018, 09:13 PM
Toolguy suggested inserting a rod of the exact diameter of the shaft to push out the drive shaft and keep the spindle all in tact.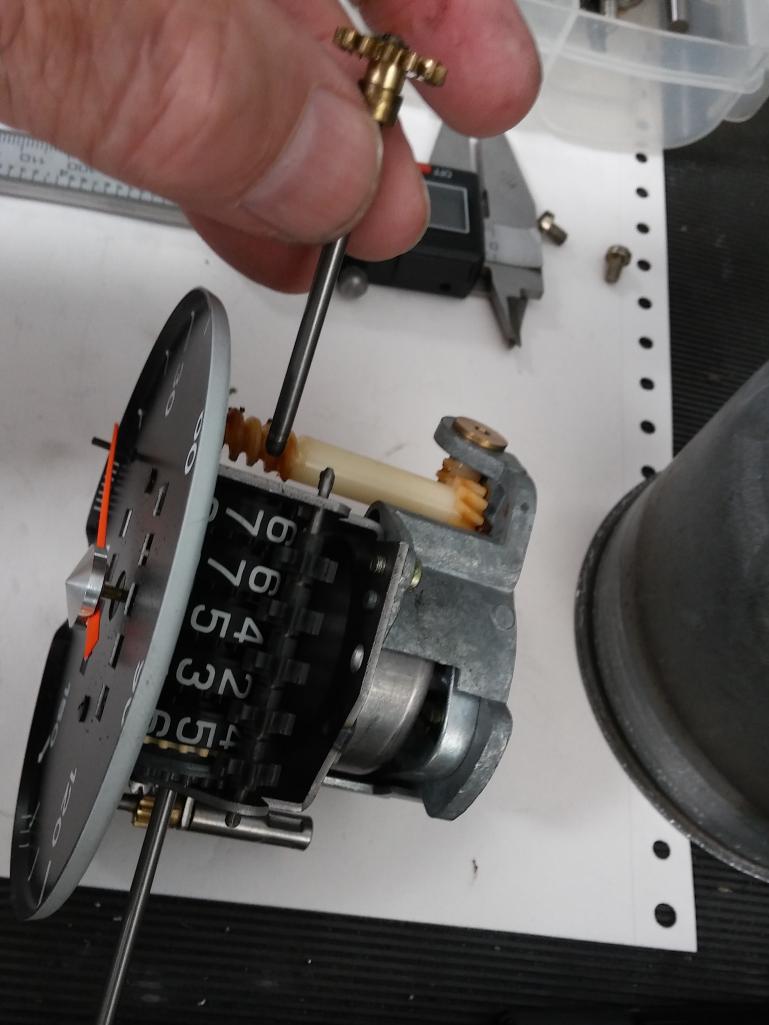
We then placed it in a V block and made small punch marks around the shaft where the gear rides.
Then we drove the shaft back through the housing where it grabbed the gear very well and after a couple tests with a drill driving to turn the speedometer about 60 mph it is good to go!
For some reason i thought the gage face was glass, but it is plastic, so I got that all spiffed up and all the scratches out too. I was able to reinstall the bezel as well!
Many thanks to my buddy Toolguy for your help!
Drove it today to C&C and it works great.
Posted by: moparrob Jul 15 2018, 12:11 AM
Awesome! He sounds like a very practical guy. I'm guessing some machining background if he owns V blocks.
Posted by: Lucky9146 Jul 15 2018, 10:25 PM
My 914 gets a lot of attention usually being the only one there. Fun drive over too!!!
People seem to relate to our 914's. Like a puppy. Though I wouldn't mind having the two previous cars in my garage.
Mark, my wife loved "Like a puppy"
Also, she made me a copy of Eric9144's rear trunk cover that was made by Garold's mother, and pictured here in black.
Cheers to Garold and his mother
Eric9144/ Garold's mother's

My wife's prototype here made in blue.
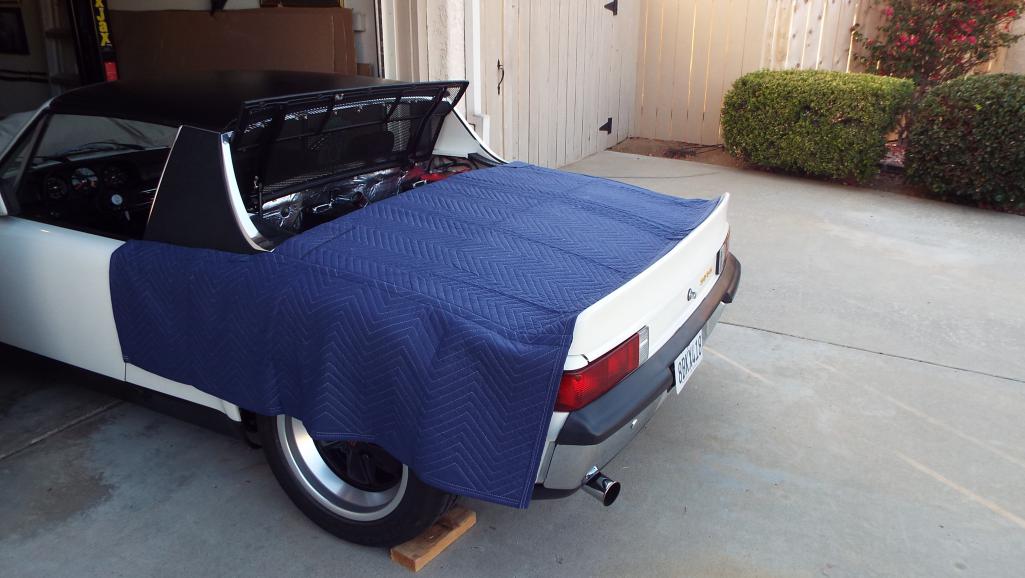
Many, many thanks to Eric9144 for lending us his cover. We will arrange that ride in the 6 hopefully sooner than later. Great seeing you!
Posted by: Lucky9146 Jul 15 2018, 10:30 PM
Awesome! He sounds like a very practical guy. I'm guessing some machining background if he owns V blocks.
Toolguy is his handle here on world and the perfect handle for him if you ever saw his shop.
Yes, he is a very talented guy with extensive machining background! Always great to see him too.
Posted by: Steve Jul 16 2018, 08:07 PM
There's plenty of odometer repairs articles. I think Pelican also sells the gears. I replaced mine years ago.
https://www.pelicanparts.com/techarticles/101_Projects_Porsche_911/89-Odometer_Repair/89-Odometer_Repair.htm
http://www.odometergears.com/products/Porsche/914+70-76/75
Posted by: 914forme Jul 17 2018, 06:23 AM
Toolguy suggested inserting a rod of the exact diameter of the shaft to push out the drive shaft and keep the spindle all in tact.
We then placed it in a V block and made small punch marks around the shaft where the gear rides.
Then we drove the shaft back through the housing where it grabbed the gear very well and after a couple tests with a drill driving to turn the speedometer about 60 mph it is good to go!
For some reason i thought the gage face was glass, but it is plastic, so I got that all spiffed up and all the scratches out too. I was able to reinstall the bezel as well!
Many thanks to my buddy Toolguy for your help!
Drove it today to C&C and it works great.
The gears are reproduced by Odo Gears, and pining the shaft helps to give them a bit of bite. It was designed that way though as a fail safe to protect all the mechanism. Re-lube all your gears also the grease in there gets a bit hard after 50 years.
BTW if your looking for it, it is officially called a lead gear.
Good work
Posted by: Lucky9146 Jul 17 2018, 12:38 PM
Toolguy suggested inserting a rod of the exact diameter of the shaft to push out the drive shaft and keep the spindle all in tact.
We then placed it in a V block and made small punch marks around the shaft where the gear rides.
Then we drove the shaft back through the housing where it grabbed the gear very well and after a couple tests with a drill driving to turn the speedometer about 60 mph it is good to go!
For some reason i thought the gage face was glass, but it is plastic, so I got that all spiffed up and all the scratches out too. I was able to reinstall the bezel as well!
Many thanks to my buddy Toolguy for your help!
Drove it today to C&C and it works great.
The gears are reproduced by Odo Gears, and pining the shaft helps to give them a bit of bite. It was designed that way though as a fail safe to protect all the mechanism. Re-lube all your gears also the grease in there gets a bit hard after 50 years.
BTW if your looking for it, it is officially called a lead gear.
Good work
Thanks, Yes I re-lubed and it works great! Just wish I had not put it off for a couple months.
Hopefully I will not need a lead gear and this fix will last, but good to know. The real point I was trying to make with my post was that a lot of people have an odometer stop working and either never address it or send it to a shop for an expensive repair. Most times it is a broken gear and so I felt I dodged a bullet from both a gear replacement, or the expense. Hopefully somebody can use the repair information.
Posted by: Lucky9146 Jul 18 2018, 09:06 AM
So I was at this Cars and Coffee last weekend and struck up a conversation with a father & son admiring my car. Father had a GT3RS and son had a 944. I would guess the son was maybe 19 but I am not much good at that stuff anymore. The son says to me "have you ever considered getting one of those personal black plates for your car". Of course I told him it has been on order for like 14 weeks now. Someone within ear shot chimed in and said it took 5 months for him! Yikes! 
Well I just checked my receipt and it has actually been 16 weeks today!
Thank you California. The receipt says 8-12 weeks.
I am going to hold off on the reveal until I actually receive it and put it on the car, so you will have to wait to see it.
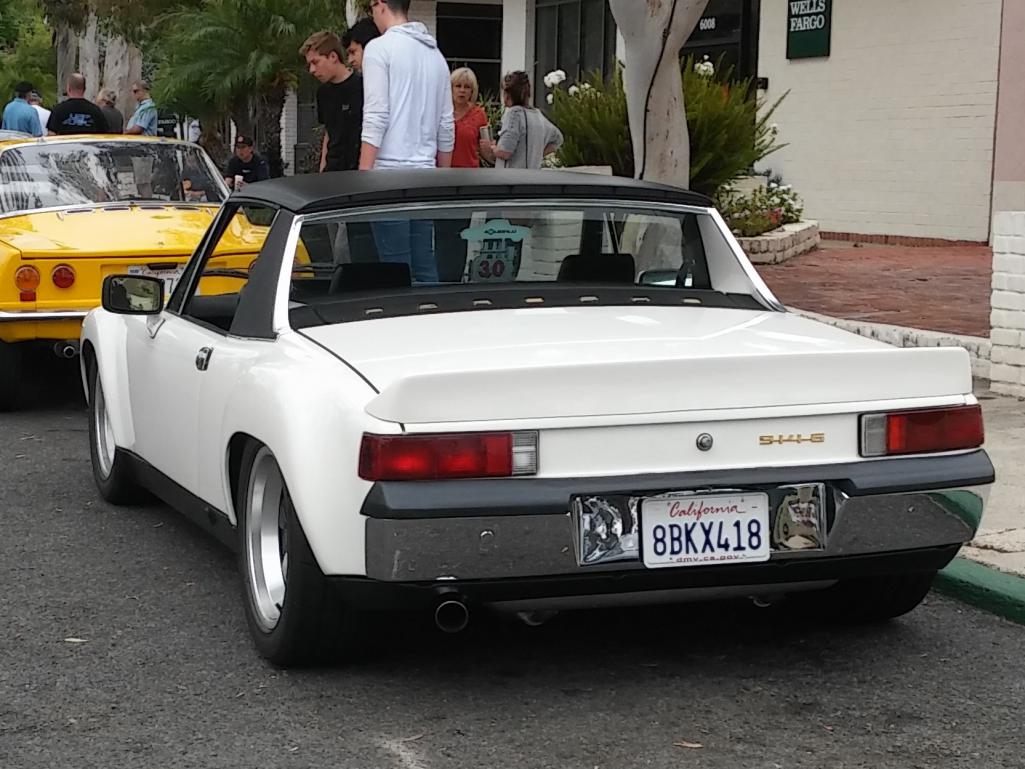
Posted by: moparrob Jul 18 2018, 09:49 AM
Let's start a guessing thread for the plate. My candidates:
LKY9146
911KILR
NARP 3.0
ROLLOSX
Posted by: Lucky9146 Jul 18 2018, 09:26 PM
Let's start a guessing thread for the plate. My candidates:
LKY9146
911KILR
NARP 3.0
ROLLOSX
Man those are all good and very creative guesses but none even close. Thanks!
Posted by: moparrob Jul 18 2018, 10:45 PM
I have had my plates (in my avatar) since 1979. Actually I let them lapse in 1982 and then got them back again last year!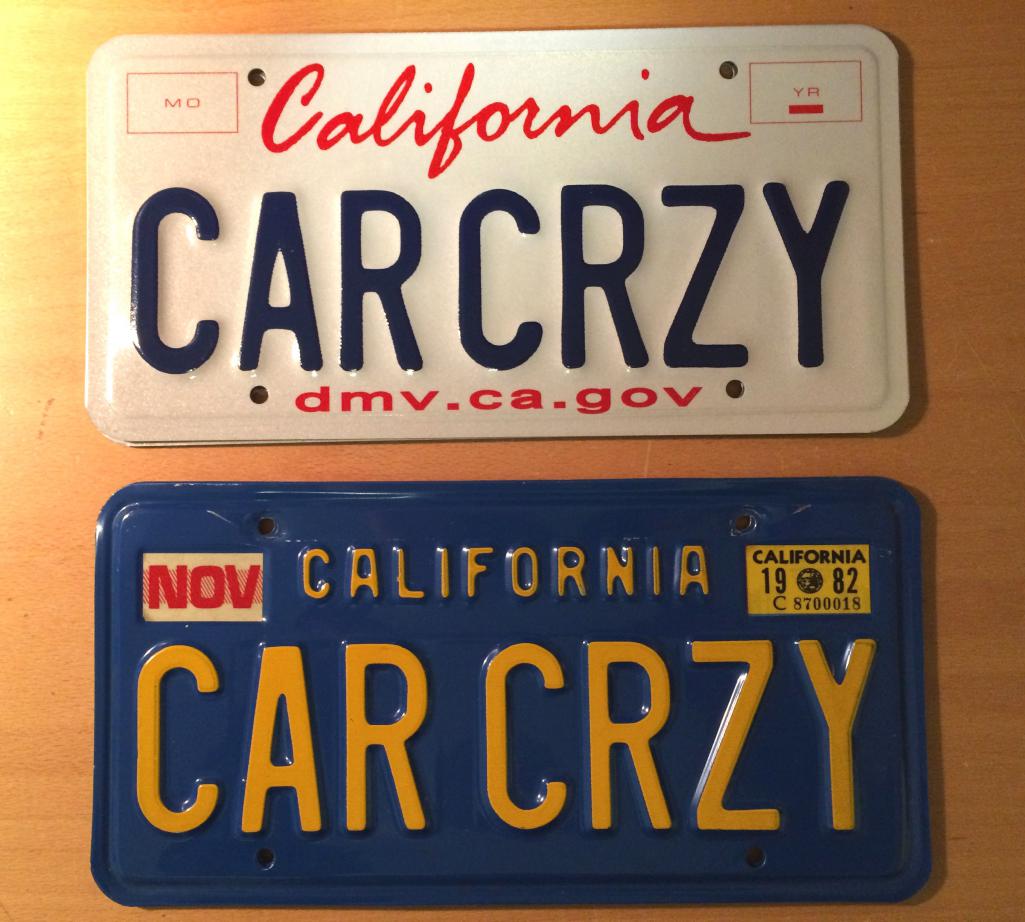
Posted by: Lucky9146 Jul 18 2018, 11:18 PM
I have had my plates (in my avatar) since 1979. Actually I let them lapse in 1982 and then got them back again last year!
Very Nice! On Your turbo maybe? Maybe they were destined for the 914?
Posted by: moparrob Jul 20 2018, 06:59 PM
Yes, they will go on the turbo. Funny thing is that they did start out on my first 914.
Posted by: moparrob Jul 21 2018, 10:53 PM
Hey Jim, for the guy (and the car) that has everything:
914 Factory Headlight Washer System (#34565)
Published: 07/21/2018
$2,500
OEM Headlight Washer System 1970-74 914. Many of the parts are no longer available new and are extremely rare. Included are NOS bumper top, NOS (not tested) pump, NOS (I believe) washer jets, a new (911) switch, NOS reservoir with new cap, NOS relay, new clear tubing, used 944 wiring harness, and used onnector parts. Price reflects completeness of kit, rarity and condition
Winnipeg, MB R3N1M2
Canada
found on PCA website
Posted by: Lucky9146 Jul 23 2018, 05:41 AM
Hey Jim, for the guy (and the car) that has everything:
914 Factory Headlight Washer System (#34565)
Published: 07/21/2018
$2,500
OEM Headlight Washer System 1970-74 914. Many of the parts are no longer available new and are extremely rare. Included are NOS bumper top, NOS (not tested) pump, NOS (I believe) washer jets, a new (911) switch, NOS reservoir with new cap, NOS relay, new clear tubing, used 944 wiring harness, and used onnector parts. Price reflects completeness of kit, rarity and condition
Winnipeg, MB R3N1M2
Canada
found on PCA website
Wow, that is an amazing kit, but as you can well imagine I have invested a bunch into my car already. That has got to be an extremely rare find for sure, and someone with a concourse car should probably have it. Hope it finds a good home with someone here on the World. Thanks for thinking of me! Just a few more things and I should have my car completed. Or are they ever completely done!
Posted by: Lucky9146 Aug 1 2018, 08:20 PM
Well they FINALLY arrived!
Posted by: Lucky9146 Aug 1 2018, 08:22 PM
And just installed
Posted by: Dion Aug 1 2018, 08:25 PM
That’s one very cool plate.
Posted by: Maltese Falcon Aug 1 2018, 08:49 PM
Posted by: moparrob Aug 1 2018, 08:59 PM
Awesome!
Posted by: defianty Aug 1 2018, 11:03 PM
Awesome!
Posted by: Lucky9146 Aug 2 2018, 11:43 AM
That’s one very cool plate.
Thanks Dion, Marty, Moparrob, and Stephen, it was a long time a coming! 18 weeks total!
All the time I was worried that it might get rejected. I mentioned to the DMV person when picking it up that it took a lot longer than the 8-12 weeks. She said you know why it took so long don't you? I said no why and she pointed to these words on the bottom of the envelope.
I guess good things come to those who wait.
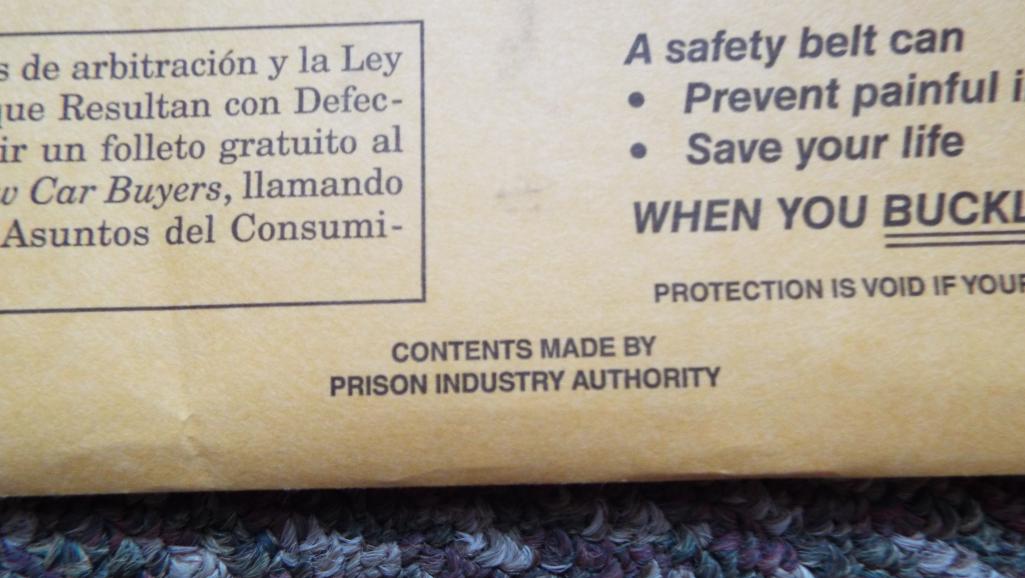
Posted by: Cairo94507 Aug 2 2018, 12:15 PM
Perfect!
Posted by: moparrob Aug 2 2018, 01:24 PM
Well, it appears they function as well as the rest of the state of California employees do.
Posted by: Lucky9146 Aug 5 2018, 11:57 AM
Got my first chance to show off my new license plate Friday at Cruisin' Grand German night in Escondido. They dedicate one night during the summer to German cars. I posted a separate thread here http://www.914world.com/bbs2/index.php?showtopic=332153
If you have not seen that thread check it out as 914's were well represented!
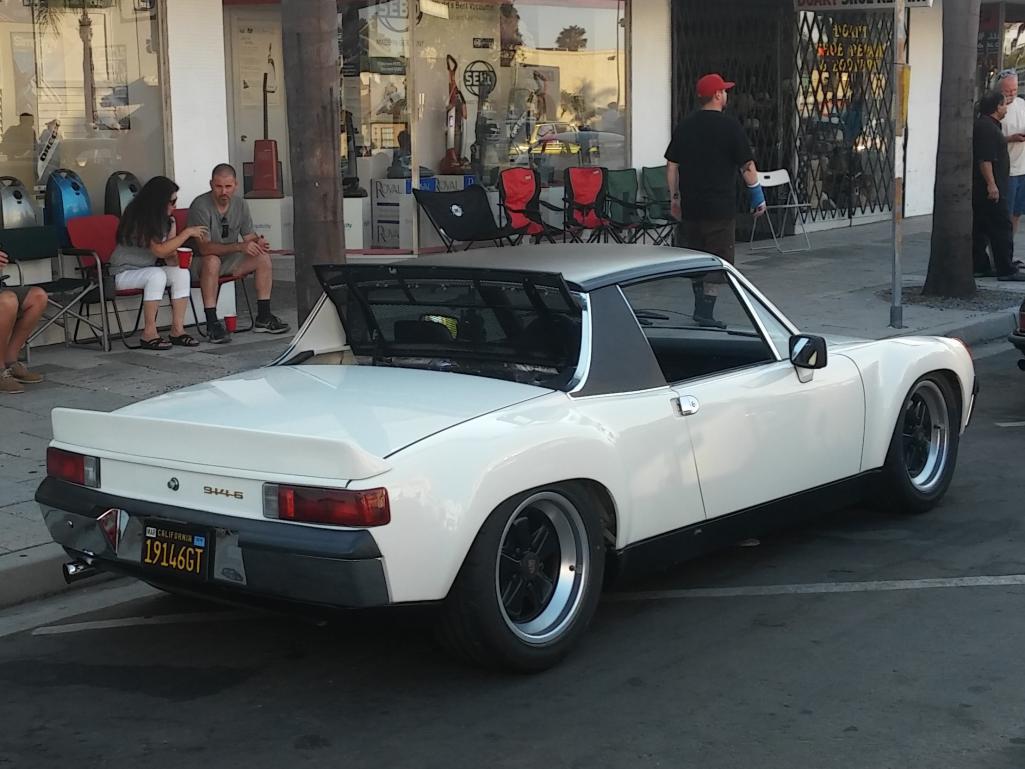
Posted by: whitetwinturbo Aug 14 2018, 10:42 AM
...cool
Posted by: Lucky9146 Aug 18 2018, 09:32 PM
Was on vacation in Michigan and heard of a Cars and Coffee preceding the 40th Annual Concours d'Elegance Of America at the St John's Inn which is in Plymouth Michigan. They were recognizing the Porsche 70th Anniversary. I had reached out to a 914 guy here on World, TJB/914, hoping to meet someone in Mich with a 914 while there. Although Tom was not available during my visit I did take his advice and tried to see what I could relative to this event.
Time did not permit my attending the actual concours, but the Cars and Coffee proceeding was right up my alley. I headed over fairly early July 28th and found a huge turnout, that I later learned was about 800 cars, the most they ever had, and it was amazing. Everything imaginable there with lots of Ferrari's, Ford GT's, a zillion Corvettes. just tons of really nice cars. There were lots of Porsche's too but sadly not a single 914 to be found.
I did find a mid engine Porsche though that they were in the process of unloading just as I walked up. Only 29 of these Porsche 910's were produced! I didn't know much about them, but soon learned.
Shout out to Tom TJB/914 thanks for the tip! Had a great time!
Posted by: moparrob Aug 18 2018, 10:07 PM
Any chance it was one of the uber rare 8 cylinder variants?
Posted by: Lucky9146 Aug 22 2018, 12:08 PM
Have been monitoring an oil leak from the engine for some time and this past weekend I came to understand it better.
I have a problem with the 16 AN hose between the tank and cooler, and it is leaking in 2 places.
It's not that it isn't tight, it is, but it is fitting itself is actually seeping, the one by the oil tank, and also appears to be seeping where the braided hose goes into the fitting as shown.
(photo shown is old and the ty-wraps holding heat shield have been replaced with safety wire)
But what I discovered next instantly became a top priority to fix. The support bracket holding the outer end of the oil cooler inlet tube next to where the large AN fitting had been attached had cracked and the inlet tube was loose. This then puts the strain on the inlet tube just before it enters the engine. We all know what happens if that inlet tube were to break while driving.
It becomes a priority because I have purchased laps at Laguna Seca at Renn6
Posted by: Lucky9146 Aug 22 2018, 12:15 PM
Thinking the worst that the engine had to come out. I did a lot of searching to learn what I could. Of course I found new coolers for $1275 but then I finally found a thread right here on World that Rich Johnson had posted in 2003 with info on 914-6 parts and a picture of what he did with coolers to convert to 914-6 type. Contacted him by e-mail and immediately heard back!
This is what it will look like when he is done. Man, I love this site!
The setup I had put the big 16 AN fitting very close to the suspension.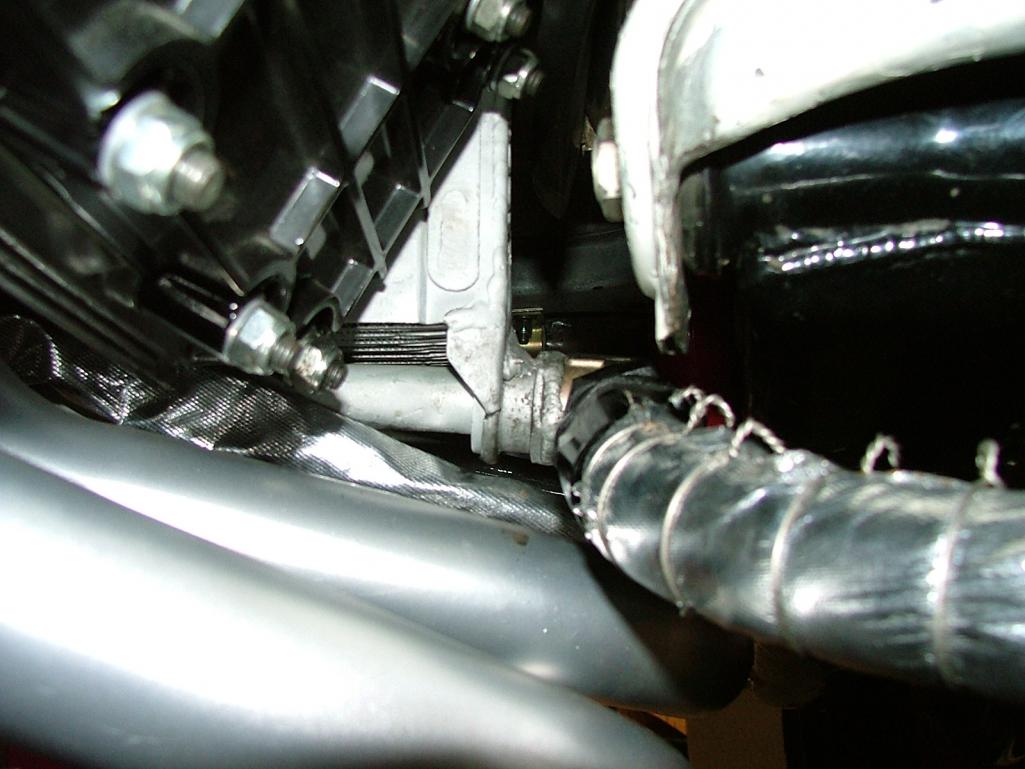
and his will position the inlet the same as a real 6 cooler
Removed the cooler, without having to drop the engine, yesterday and shipped to Rich. He vowed to jump right on it and return because I will need to make a new flex line due to change of location of the inlet and to resolve my leaking hose.
Rich is a great guy to deal with!
Posted by: defianty Aug 22 2018, 01:30 PM
The modified cooler looks great Jim. If only Rich was closer I'd send mine off to him. I'm yet to find anyone in the UK that will take on the job of modifying my 911 cooler.
Posted by: Lucky9146 Aug 22 2018, 05:22 PM
The modified cooler looks great Jim. If only Rich was closer I'd send mine off to him. I'm yet to find anyone in the UK that will take on the job of modifying my 911 cooler.
All I can say is have it done by someone who knows what they are doing. Not sure who did mine as it came done with the project and had an ugly weld. I installed it anyway not understanding the weak point. Rich makes a very robust fix, replacing the tube and fitting plus serious mounting flange for reasonable $$.
Posted by: mepstein Aug 22 2018, 06:42 PM
The modified cooler looks great Jim. If only Rich was closer I'd send mine off to him. I'm yet to find anyone in the UK that will take on the job of modifying my 911 cooler.
I just sent 4 shocks and a set of springs to the UK through a shipping company called parcelmonkey.com check them or a similar company. Shipping might be a lot less than you expect.
Posted by: mb911 Aug 22 2018, 07:44 PM
Looks really nice. I talk with Rich every once and a while. Known him virtually for year and we do business back and forth. He's a good guy.
Posted by: mepstein Aug 22 2018, 08:30 PM
Looks really nice. I talk with Rich every once and a while. Known him virtually for year and we do business back and forth. He's a good guy.
Same here. We haven’t met in person but have been trading parts for a couple years. His 914-6 throttle linkage is excellent.
Posted by: Lucky9146 Aug 22 2018, 09:07 PM
Looks really nice. I talk with Rich every once and a while. Known him virtually for year and we do business back and forth. He's a good guy.
Same here. We haven’t met in person but have been trading parts for a couple years. His 914-6 throttle linkage is excellent.
I have his 6 conversion mount, nice part! Just got to know him through this experience and he has been great to work with. Really willing to help.
Posted by: Larmo63 Aug 22 2018, 09:28 PM
I had Rich do my oil cooler too, and I'm using his carb/accelerator cable set up.
Good guy!!!
Posted by: Lucky9146 Aug 26 2018, 12:22 PM
Heard from Rich Johnson while I was in Monterey that upon receiving my cooler for repair, it turns out it is from a 1973 911 T and not suited for a 3.0. It is better for a 2.4 or 2.7. He said the main boss that he machines to install the new tube does not have enough meat to machine for the larger diameter tube. I am now getting a reworked correct cooler from Rich this coming week.
He made me a deal I couldn't refuse. The cooler I had on the engine he said was likely restricting oil to the pump because the 3.0 has the larger oil pump.
I firmly believe all things happen for a reason and my leaking hose, leading me to look and find the cracked weld on the cooler, now wrong cooler, potentially saved my excellent running engine from oil starvation. I guess I really am lucky. Shame on me for not having caught this and thoroughly vetting my cooler.
Pictures of Rich's cooler when it arrives.
Posted by: 914forme Aug 26 2018, 02:22 PM
That is great news why always having knowledgeable extra eyes are worth their price.
Posted by: live free & drive Aug 26 2018, 04:09 PM
So does this mean that if you are using, or intending to use, an original 914/6 oil cooler on a 3.0, 3.2 or 3.6 displacement engine you are starving it for oil supply?
Seems like many folks use an original 914/6 cooler - I've never heard about this issue before, anybody else have some knowledge about this?
Posted by: a914guy Aug 26 2018, 10:01 PM
So does this mean that if you are using, or intending to use, an original 914/6 oil cooler on a 3.0, 3.2 or 3.6 displacement engine you are starving it for oil supply?
Seems like many folks use an original 914/6 cooler - I've never heard about this issue before, anybody else have some knowledge about this?
The cooling system design was changed by Porsche as temp. issues were becoming prevalent and the oil pumps became better (higher volume). One of the small changes was the supply side oil cooler tube diameter going from a 20ish OD to about 28mm.
I wouldn't say the smaller stock inlet line from an original six cooler would "starve" an engine but it was designed and changed for a reason.
As for using six coolers on bigger engines and in our conversion community, I bet it's a rarity.
Posted by: live free & drive Aug 26 2018, 10:42 PM
Thanks for the feedback.
I'd say it fairly significant with about 100% more cross sectional area!
Posted by: Lucky9146 Sep 9 2018, 09:38 PM
Got my new oil cooler from Rich Johnson and it looks amazing! Thanks Rich!!
The difference in size of the tube he installs is obvious. A real shame the cooler I had did not have enough real estate to accommodate the larger tube. My repaired cooler on the left and new one on the right.
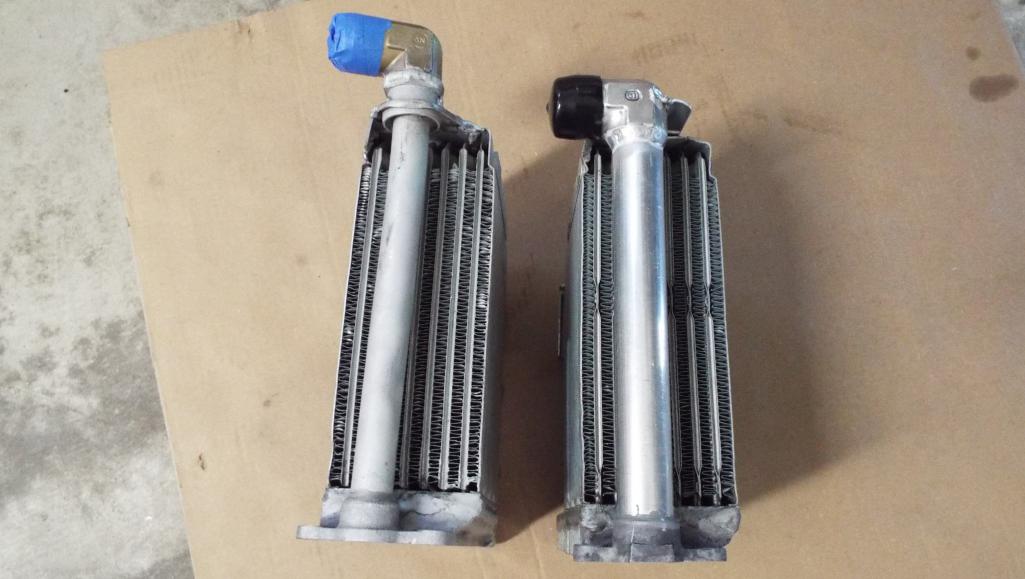
Back a few posts was a picture of the cracked bracket on my cooler, in case you're just tuning in. Also where I learned I should have a larger delivery tube on the cooler.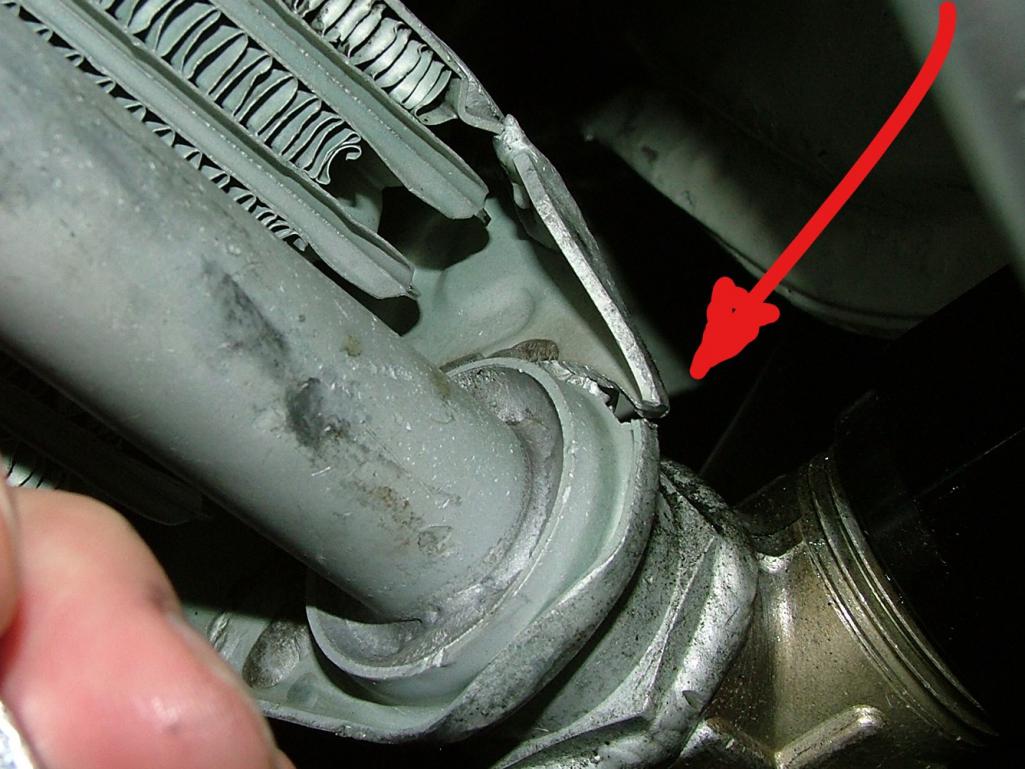
Received the cooler at 1:30 PM FedEx, had my hose remade and cooler installed by 8 PM.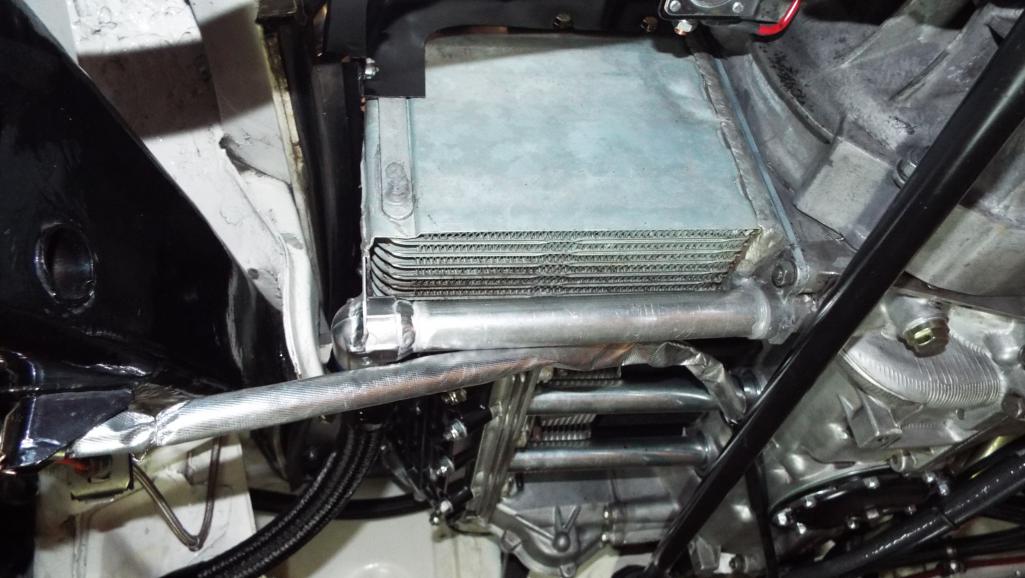
My goal was to get the cooler back in time Friday to make it to the hose shop before it closed and get it all reinstalled to attend the San Diego PCA Concours the next morning. Just a spectator but the turn out was fantastic!
I was there to cheer on my buddy Toolguy and his son Matt, who not only won his class, but BEST OF Show! 
Posted by: pete000 Sep 9 2018, 10:31 PM
You were able to replace the cooler with the engine in the car? Don't you have to remove the upper fan shroud to do that?
Posted by: Larmo63 Sep 9 2018, 11:01 PM
If you have the 'sectioned' oil cooler shroud, you can unscrew that and access everything from the bottom.
It's not simple, but doable.
Posted by: Lucky9146 Sep 10 2018, 12:02 AM
You were able to replace the cooler with the engine in the car? Don't you have to remove the upper fan shroud to do that?
Exactly what I first thought, is that I had to drop the engine, but then I realized that it looked like it was possible and No, I did not have to remove the upper fan shroud.
Had to remove the left side sheet metal and the gray plastic air director on top of the cooler. Both a bugger.
I found a picture below from before the original engine install showing the 2 parts. Was not easy to get them off and on, but it can be done with patience. Thanks for asking.
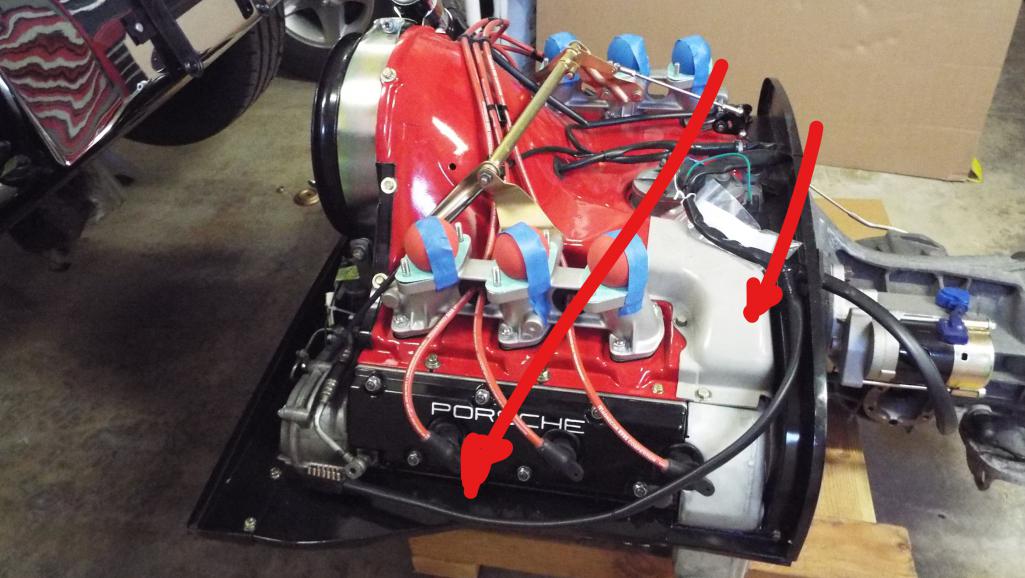
Posted by: Lucky9146 Sep 12 2018, 02:24 PM
Oil cooler reinstalled and leaking oil line are now behind me.
Next up is build a 916 transmission.
Step one completed. Found a rebuilt 1984 915 trans with all new syncros and resealed from a shop in northern CA.
Step two completed. Martin Bott 916 kit on order.
I see this as a longer term project because there are several hurdles I know. Hope to get some guidance from Steve who has this set up.
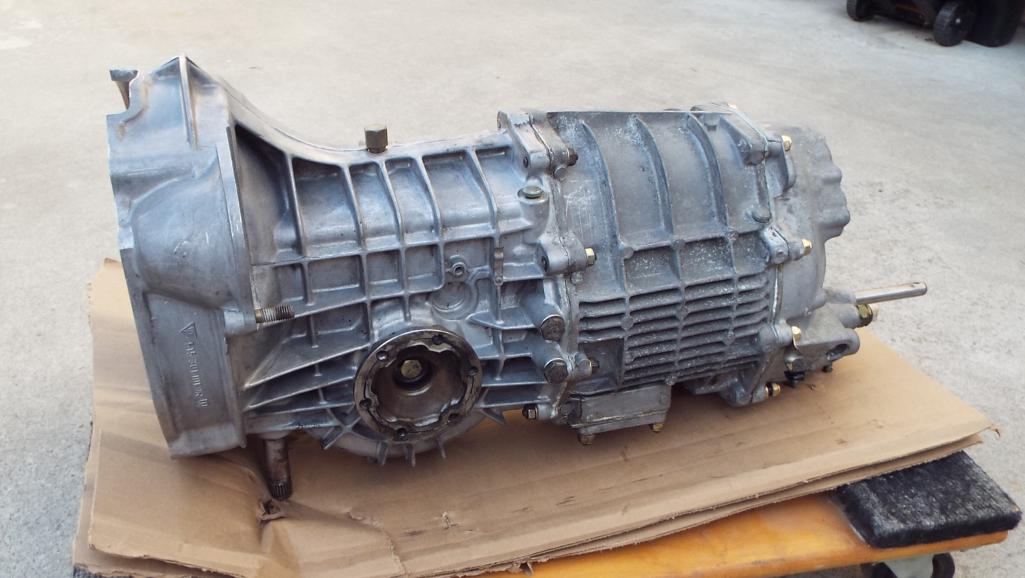
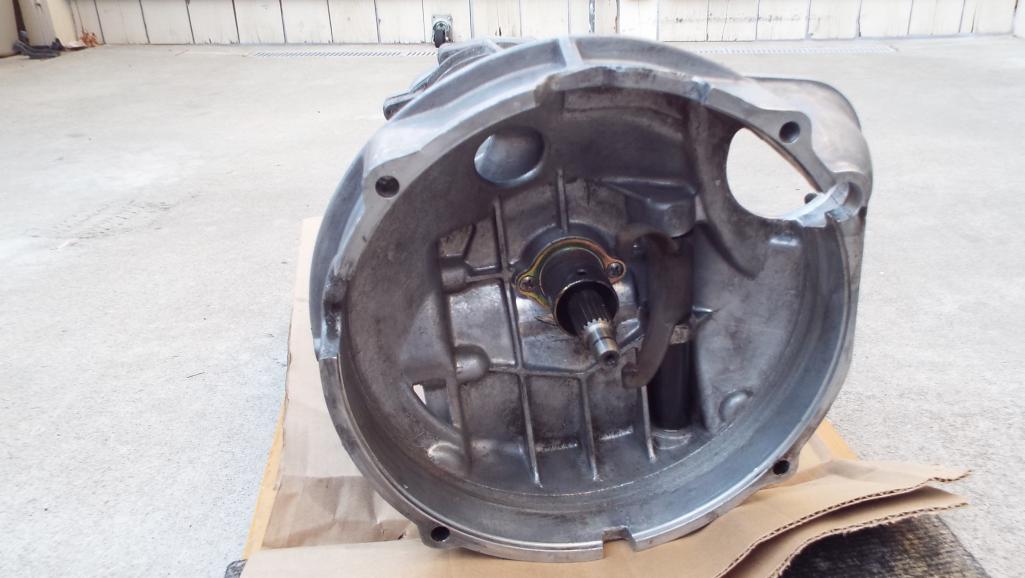
Posted by: pete000 Sep 12 2018, 02:37 PM
My early six has that grey cooler shroud riveted on. I think my cooler replacement is going to require the engine drop...Don't want to drill out the OE rivets...
Posted by: defianty Sep 12 2018, 02:44 PM
That's going to be a great upgrade Jim! Look forward to following you progress with it.
Posted by: porschetub Sep 12 2018, 02:57 PM
You were able to replace the cooler with the engine in the car? Don't you have to remove the upper fan shroud to do that?
Exactly what I first thought, is that I had to drop the engine, but then I realized that it looked like it was possible and No, I did not have to remove the upper fan shroud.
Had to remove the left side sheet metal and the gray plastic air director on top of the cooler. Both a bugger.
I found a picture below from before the original engine install showing the 2 parts. Was not easy to get them off and on, but it can be done with patience. Thanks for asking.
I did my replacement with engine in,wasn't too bad just takes a while to get to it, interesting point Rich made about the coolers ...I didn't know that,my replacement was a latter one and seemed to be different other than the inlet pipe as I had a gap @ the cooling duct I never had with the original one.
I wasn't happy and thought I could be down on air flow for that reason, I fitted a piece of high temp rubber in the gap,worked out fine and certainly nice to have a large oil leak fixed also
.Posted by: mepstein Sep 12 2018, 03:14 PM
Oil cooler reinstalled and leaking oil line are now behind me.
Next up is build a 916 transmission.
Step one completed. Found a rebuilt 1984 915 trans with all new syncros and resealed from a shop in northern CA.
Step two completed. Martin Bott 916 kit on order.
I see this as a longer term project because there are several hurdles I know. Hope to get some guidance from Steve who has this set up.
wow. you are going all in.
Posted by: Lucky9146 Sep 13 2018, 08:00 AM
My early six has that grey cooler shroud riveted on. I think my cooler replacement is going to require the engine drop...Don't want to drill out the OE rivets...
Yes I do believe I lucked out with my shroud being a 3.0 and not riveted. Dropping the engine to change an oil cooler would seem a poor design in the bigger scheme of things. I can certainly understand not wanting to drill rivets in your case.
This chart of shrouds has been posted before by others but it clearly shows many have riveted cooler shrouds.
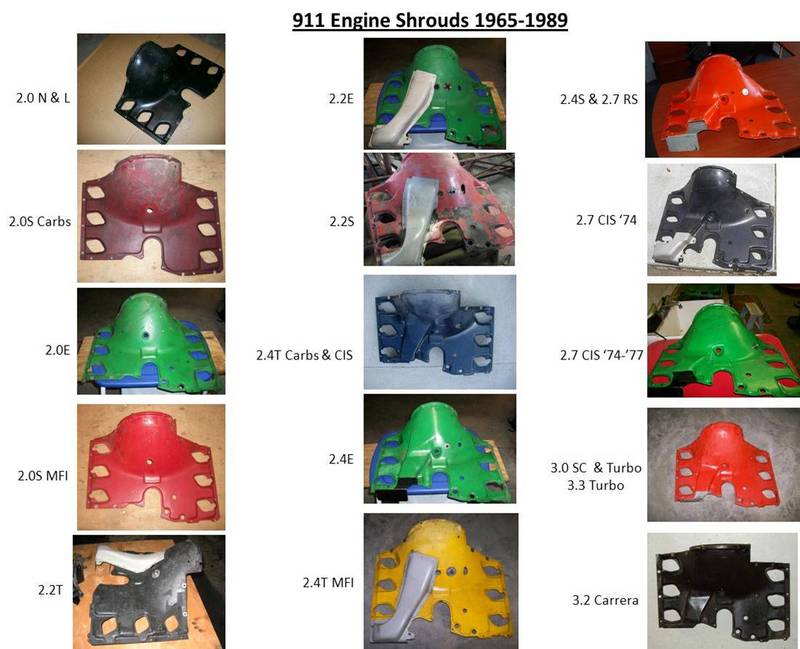
Posted by: Lucky9146 Sep 13 2018, 08:10 AM
That's going to be a great upgrade Jim! Look forward to following you progress with it.
Thanks! I am pretty excited about it but fully realize there will be some surprises and expense involved. Like I said, I see it as a long term project. Finding a decent 915 trans was in my opinion the hard part but I suspect there will be many more hard parts. Have a pretty good idea of what's involved but then again the devil is in the detail.
Hope your paint job is progressing well.
Posted by: defianty Sep 13 2018, 08:36 AM
Hope your paint job is progressing well.
I'm going to see it at the weekend, where I expect to see the underside of car blasted too. The painter had another project that he was finishing off so mine has been waiting. It's what I expected though.
Posted by: Lucky9146 Sep 13 2018, 02:37 PM
Visited Eric Shea at PMB Performance today in SLC. Great guy!
I just paid a visit to my older brother who has lived in SLC for over 30 years. I have always said "next time I make it up the SLC I have to stop in and see Eric Shea". My brother, who is not a car guy, agreed to go to Eric's shop which as it turns out is only 3.4 miles from my brothers house! In the end he really enjoyed going and meeting Eric who as it turns out had worked with my brothers son for many years. Small world!
When we arrived, Eric was in the process packaging up a set of brake lines. It looked like 8 sets of calipers were also ready to go. Eric took the time to tell us all about his business, how it all got started, show us around, while being very gracious with his time.
With my next project being 915/916 trans, it looks like the timing was perfect and Eric and I will be talking more about the axles I will need.
Eric is out growing his shop and has a 5 year back log for restorations with two 914's in process. I really loved his current shop though, cramped yes, but a real shop that work is actually getting done in, functional looking, and he has a great bunch of guys there as well. Thanks Eric 
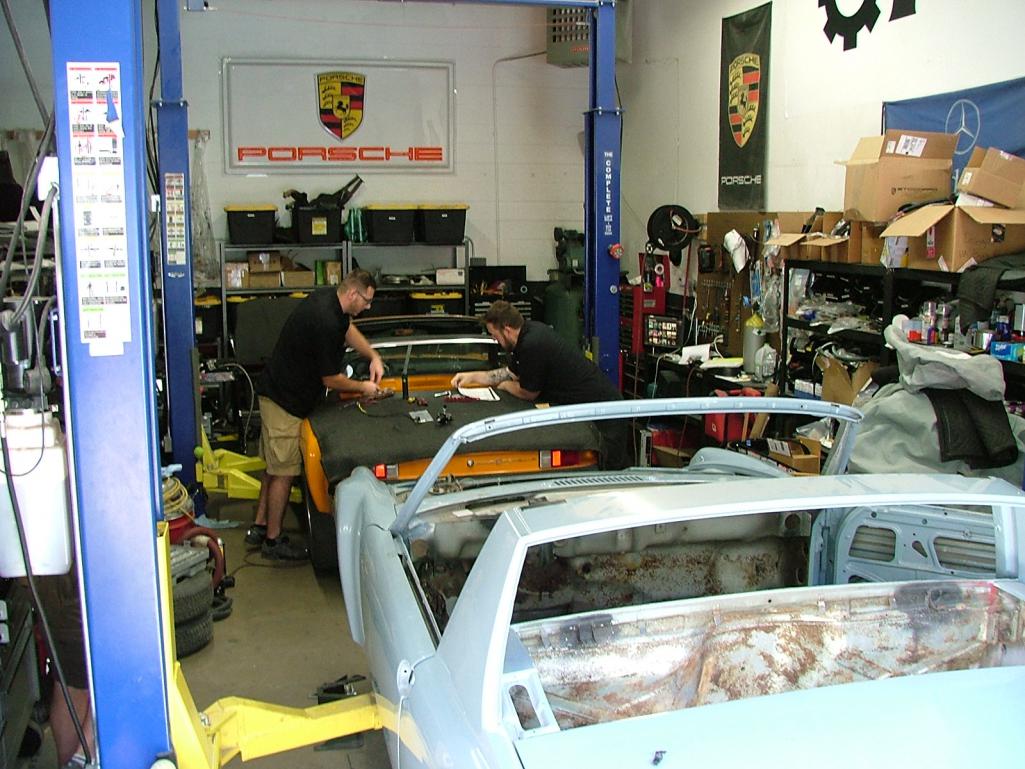

Posted by: Lucky9146 Sep 16 2018, 09:14 PM
Look what showed up yesterday from Germany!
Martin Bott came through with his beautiful 916 kit!
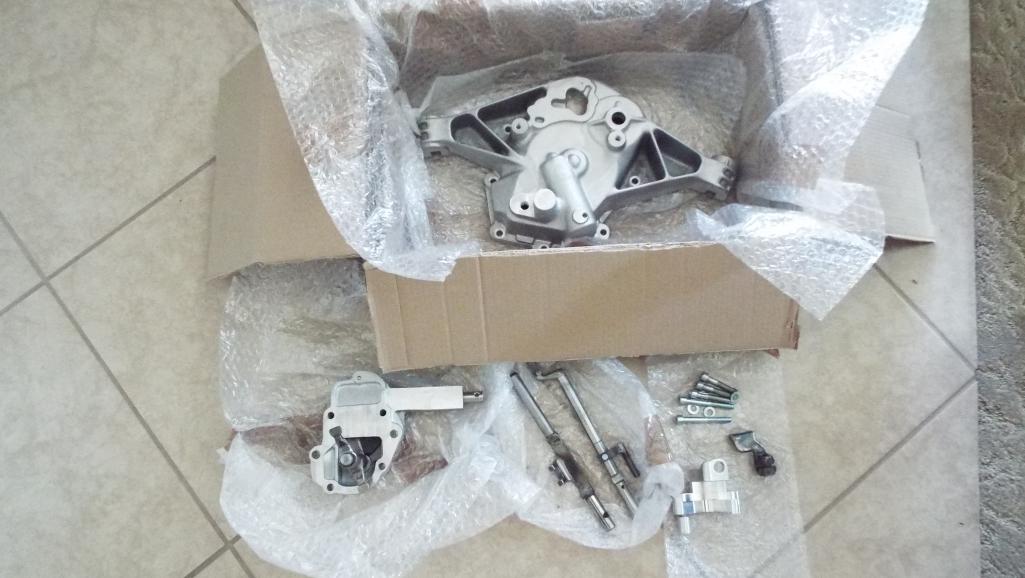
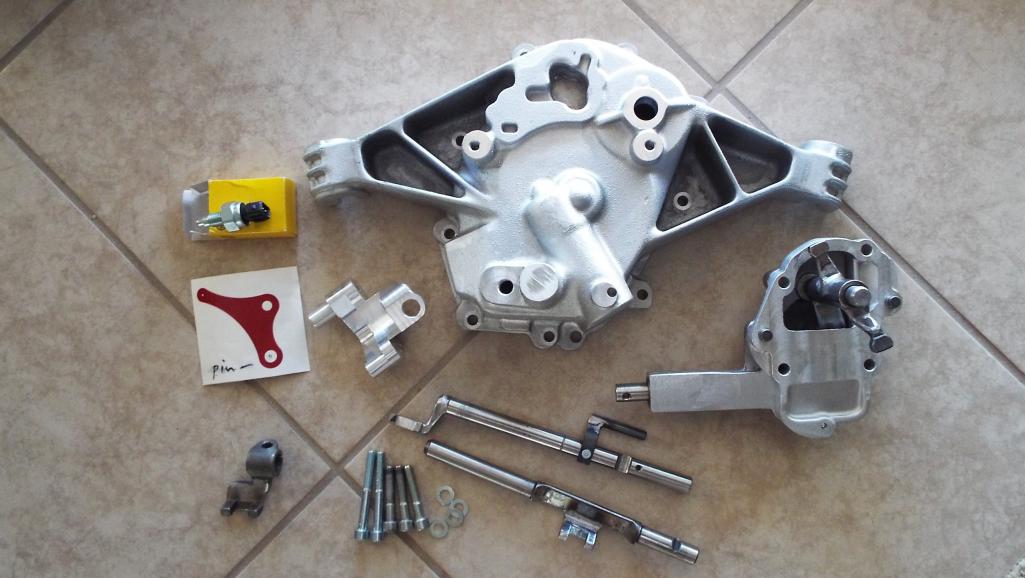
Posted by: seanery Sep 17 2018, 06:54 AM
after 15 years, I'm still looking for the "LIKE" button!
Damn, can't wait to see your 916 conversion goes. That's in the cards for me, as well.
Posted by: Lucky9146 Sep 17 2018, 10:57 PM
after 15 years, I'm still looking for the "LIKE" button!
Damn, can't wait to see your 916 conversion goes. That's in the cards for me, as well.
It is a major decision for sure to go this route and the hardest part, in my opinion, was finding the 915 trans. Its seems to be getting harder and harder to find good ones and later ones with the most improvements is the challenge. I have found there is a lot of information out to help there but you still have a lot of decisions to make as well. Fasten your seat belt on cost.
Thanks for looking in and good luck on yours.
Posted by: Lucky9146 Sep 22 2018, 12:45 PM
Years ago when I was in the infancy stage of looking for my 914, a friend made a copy of an article in the Feb 1972 Road & Track of a 916 for me.
Being as I am now going down the 916 trans route, I found that crappy xerox copy to read up to see what it might say, and in deed it did show the trans gearing!
About a week ago I decided to look on Ebay to see if I could find an original 1972 magazine just to have. The magazine I received was an excellent copy.
Turns out this is George Hussey's car and he has a thread going on it right now where he is going to show it. http://www.914world.com/bbs2/index.php?showtopic=333370
Posted by: mepstein Sep 22 2018, 01:58 PM
after 15 years, I'm still looking for the "LIKE" button!
Damn, can't wait to see your 916 conversion goes. That's in the cards for me, as well.
It is a major decision for sure to go this route and the hardest part, in my opinion, was finding the 915 trans. Its seems to be getting harder and harder to find good ones and later ones with the most improvements is the challenge. I have found there is a lot of information out to help there but you still have a lot of decisions to make as well. Fasten your seat belt on cost.
Thanks for looking in and good luck on yours.
I bought a 72 that needs a rebuild for $900. 2nd gear has chipped teeth but found a good replacement for $100. I will rebuild at the shop so just the cost of seals and hopefully not too many bearings. Just bought 2 more in good condition for 1,800. they were spares and seller sold the car. It's was worth throwing in the corner for that price. .
Posted by: Dion Sep 24 2018, 08:23 PM
Jim I just read this entire thread page 1 to here. What an adventure! Congrats on a beautiful project.
I had to laugh about the 5 reverse gears. Same thing happened to me, a screaming slow 1st gear and pretty quick reverses hehehe. Car is awesome, love the details. So many nice touches. Look forward to seeing the next chapter. Cheers mate!
Posted by: Lucky9146 Sep 25 2018, 10:47 AM
after 15 years, I'm still looking for the "LIKE" button!
Damn, can't wait to see your 916 conversion goes. That's in the cards for me, as well.
It is a major decision for sure to go this route and the hardest part, in my opinion, was finding the 915 trans. Its seems to be getting harder and harder to find good ones and later ones with the most improvements is the challenge. I have found there is a lot of information out to help there but you still have a lot of decisions to make as well. Fasten your seat belt on cost.
Thanks for looking in and good luck on yours.
I bought a 72 that needs a rebuild for $900. 2nd gear has chipped teeth but found a good replacement for $100. I will rebuild at the shop so just the cost of seals and hopefully not too many bearings. Just bought 2 more in good condition for 1,800. they were spares and seller sold the car. It's was worth throwing in the corner for that price. .
Hey Mark congrats on the transmissions, nice score, I think you may have a few more connections than I do
and I paid more for mine but it is a newer one like I wanted and it had all the syncros and a few sliders replaced by a reputable shop.
Posted by: Lucky9146 Sep 25 2018, 11:15 AM
Jim I just read this entire thread page 1 to here. What an adventure! Congrats on a beautiful project.
I had to laugh about the 5 reverse gears. Same thing happened to me, a screaming slow 1st gear and pretty quick reverses hehehe. Car is awesome, love the details. So many nice touches. Look forward to seeing the next chapter. Cheers mate!
Hey man thanks for doing that!
I have read a few threads as well, it can be a lot of fun. And it sure has been quite the adventure with lots of ups and downs. Have a buddy in Atlanta who recently joined World and he once told me he read all 542 pages of my thread (there are really only 43) but it seems like it when your done. He now owns 2 914's! Like to believe I played a part in that!
Heading to Renn6 next and hope to get some video on Laguna Seca
Posted by: Lucky9146 Nov 4 2018, 11:01 AM
A lesson in NOT getting in a hurry. Well, I finally got around to restoring those seat sliders.
When my Scheel seats were done, I guess I just couldn't wait to see what they looked like in the car. Taking the stock seats out I transferred the seat base mechanisms over to the Scheels and in they went. The seats looked fantastic and I Just started driving it.
Most I am sure did not notice my crappy looking sliders because there is really not much visible, but it sure bugged the hell out of me!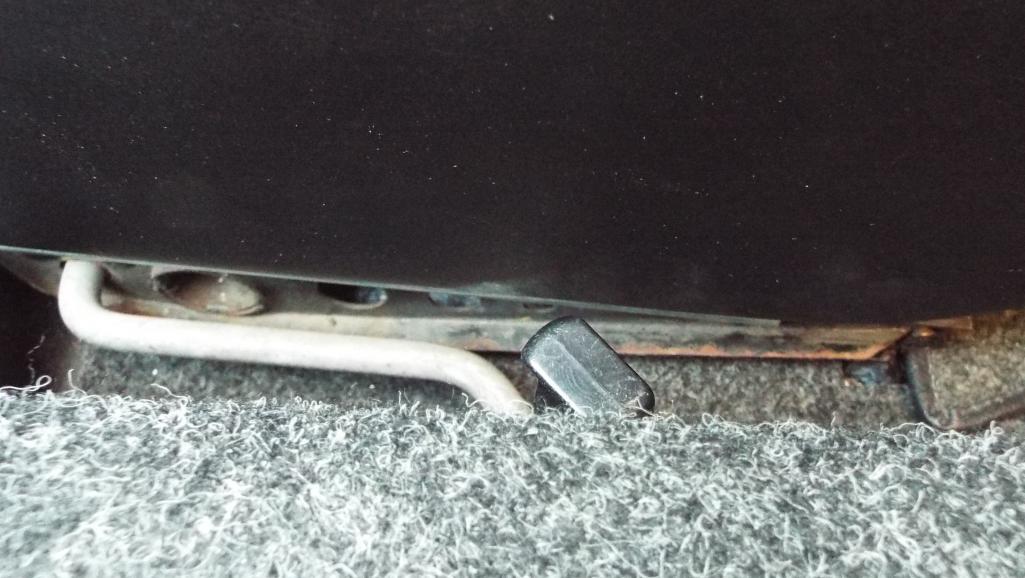
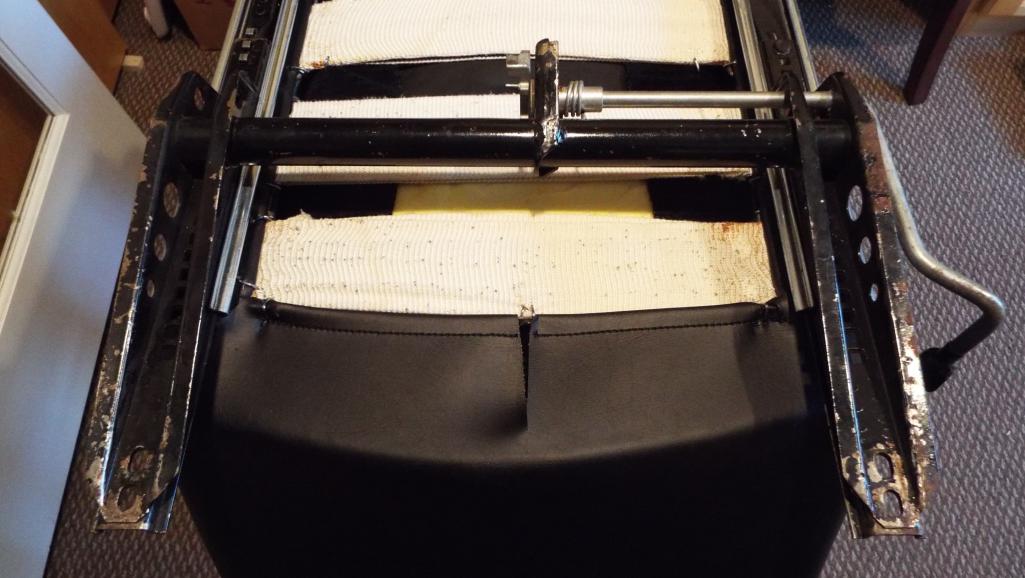
And the after pic. I realize this is a small deal but still, details are important, and I also wanted to point out that I ordered and installed the 914Rubber bushing kit.
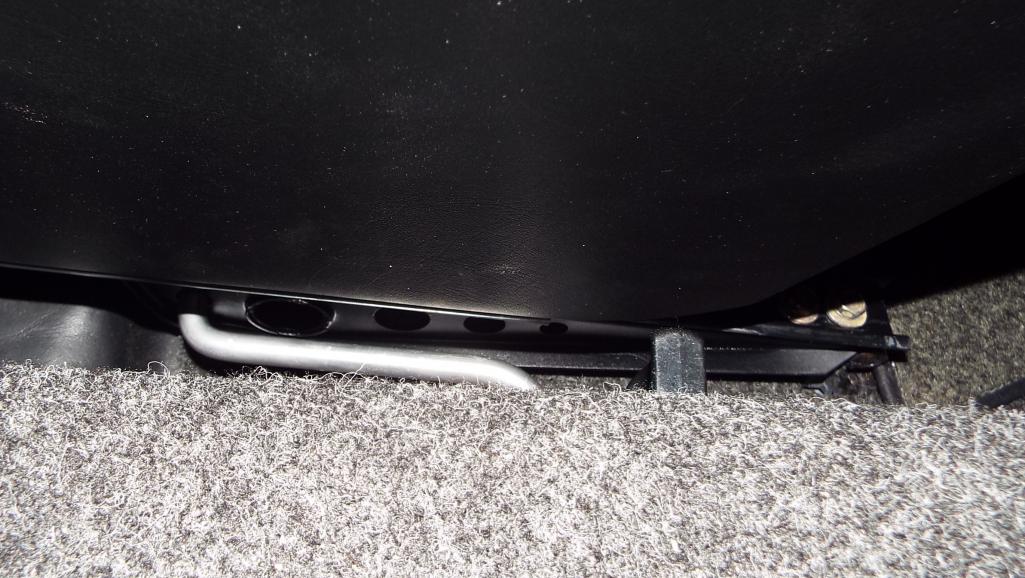
Posted by: Lucky9146 Nov 4 2018, 11:06 AM
And I get to look at this view of the passenger seat slider now. Amazingly there still are a few things left to do. Is this car ever finished?
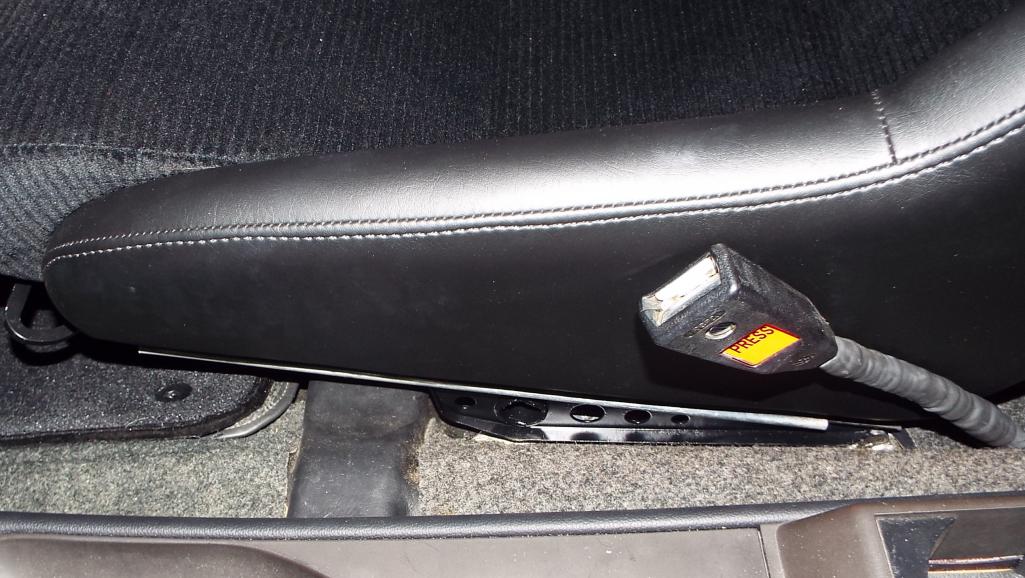
Posted by: bbrock Nov 4 2018, 11:28 AM
And the after pic. I realize this is a small deal but still, details are important, and I also wanted to point out that I ordered and installed the 914Rubber bushing kit.
Yes, details are important! I totally get it. Those seats will feel even more comfortable now. I love seeing your work.
Posted by: Lucky9146 Nov 4 2018, 01:11 PM
And the after pic. I realize this is a small deal but still, details are important, and I also wanted to point out that I ordered and installed the 914Rubber bushing kit.
Yes, details are important! I totally get it. Those seats will feel even more comfortable now. I love seeing your work.
Thanks! WAY more comfortable!
Now I can sleep at night knowing it looks like this under there!
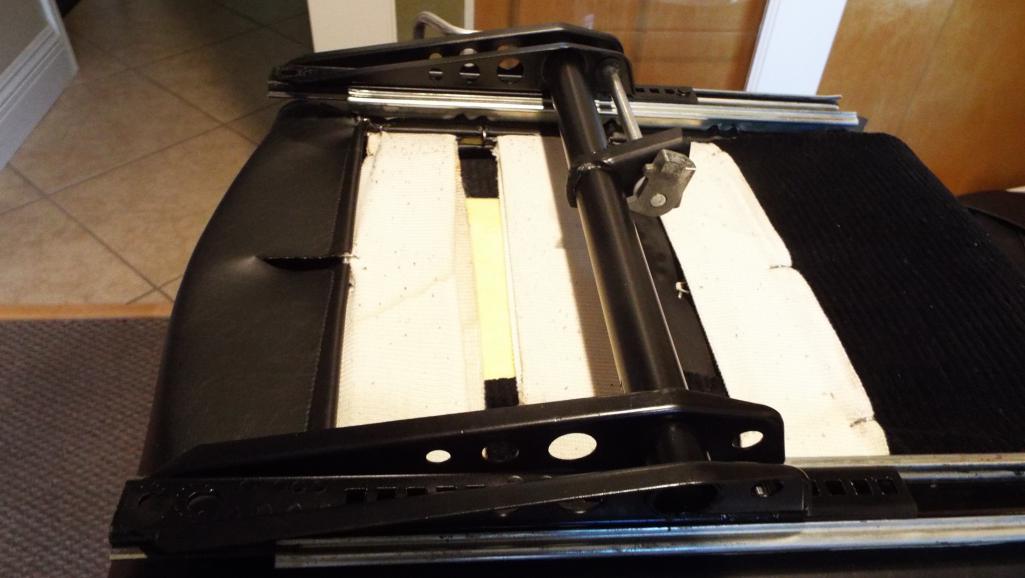
Posted by: mepstein Nov 4 2018, 03:01 PM
What paint did you use? I was thinking of using cerikote since it has a lot of abrasion resistance but doesn’t have any thickness like powder coat or epoxy.
Posted by: Lucky9146 Nov 4 2018, 04:24 PM
What paint did you use? I was thinking of using cerikote since it has a lot of abrasion resistance but doesn’t have any thickness like powder coat or epoxy.
Hey Mark,
After I blasted my frames, I taped off the edges of the runners (red arrows) that end up inside the two side rails as you never see them, except the last 4 inches on the top side were painted because you do see that. This avoids clogging up the rails with paint. Now I wish I'd taken in process pics.
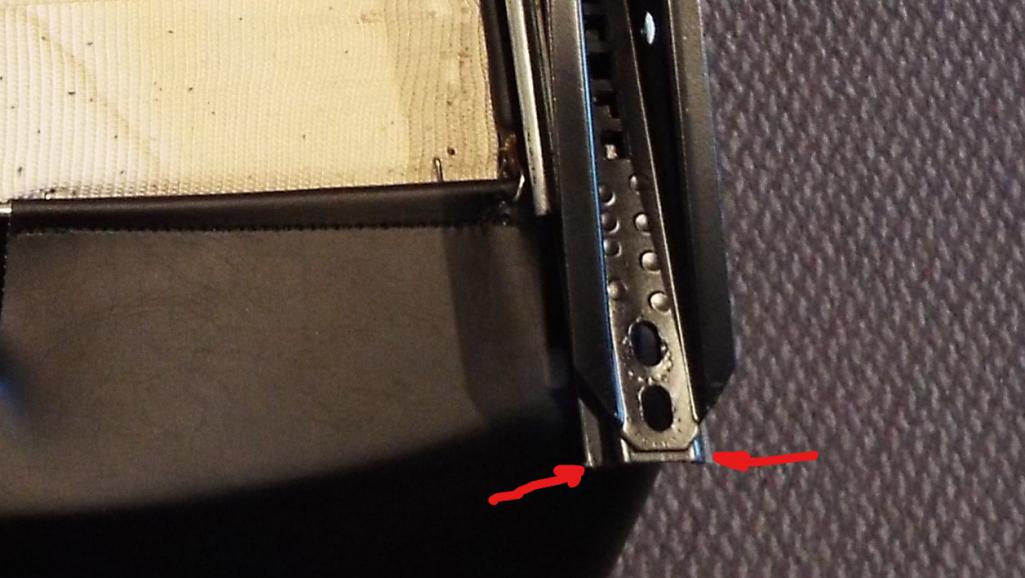
I used Krylon MAXX Gray primer #9183 and Krylon MAXX Satin Black #9158
Gave me very good results. Thanks for asking. Hope this helps.
Posted by: Lucky9146 Nov 10 2018, 09:52 PM
Weather was amazing this morning so I couldn't wait to head over to Cars & Coffee in Rancho Santa Fe. Always a fun drive as I take back roads. Met a guy named Darren with a 944, with what I believe he said, has an LS 5, and who works with Steve. He was texting pictures of the car while there and Steve said he knew my car. Small world. Got me to thinking....
I am for the most part the only 914 that shows up and my car always gets a lot of love. It is a small venue and basically a main drag of a very small town. Wondering if Steve, Oscar, Larmo63, SoCcalandy, 914toy, Siverson, Effutro101, Jim Hoyland, Eric9144, 76-914, Cal44, Mmichalik, 73-914kid, Fatboy007, 9147T3, and others might amble over some Saturday morning? Lots of great cars nice atmosphere and I would say the majority that show up are Porsche. PM with interest.
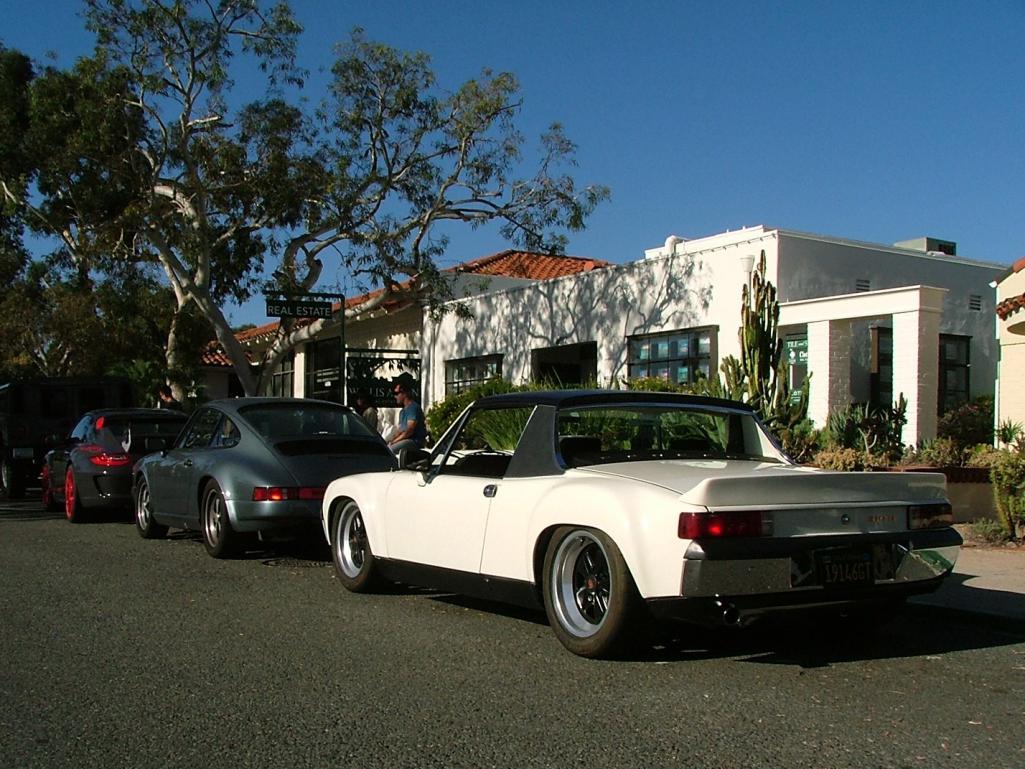
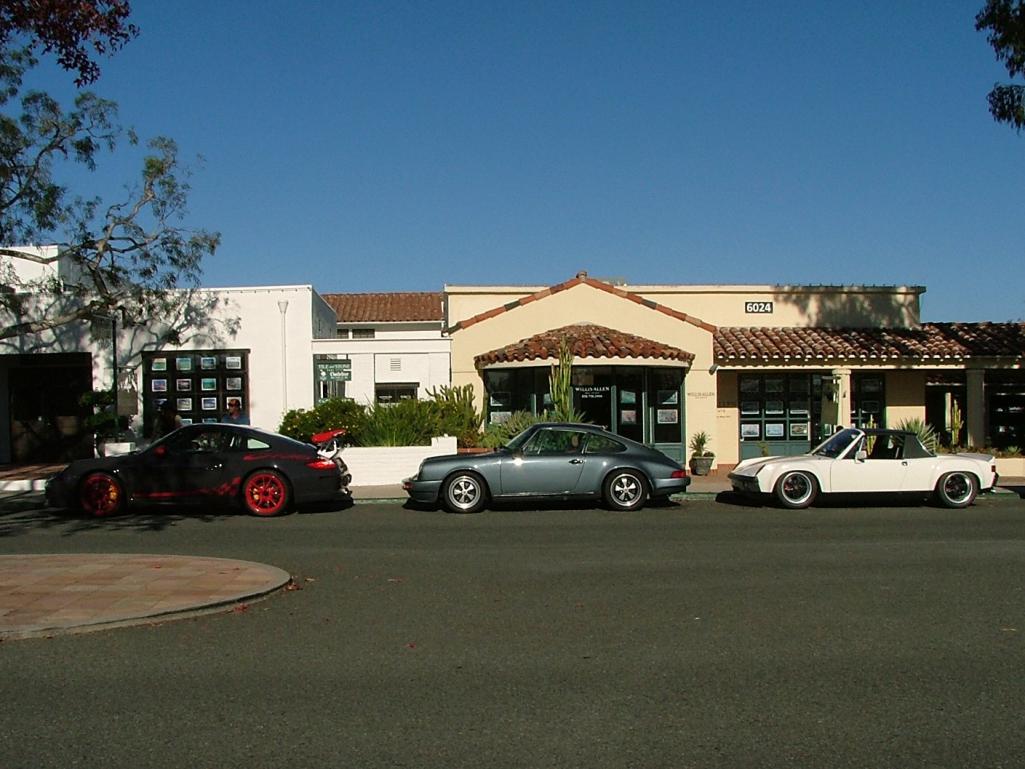
Posted by: Steve Nov 10 2018, 10:37 PM
Small world!! Darren is sending me pictures of your car and I’m sending him pictures of Cobras at my Cars & Coffee. He is quite the fabricator and has a nice Cobra as well as the 944. I don’t know about the other OC guys, but I would love to check out your Cars & Coffee.
Posted by: 914Toy Nov 11 2018, 09:09 AM
Sounds interesting, err, what time do it start?
Posted by: Lucky9146 Nov 11 2018, 10:04 AM
Sounds interesting, err, what time do it start?
Hey Keith , guess I left that part out! Usually 8-10 but this last week quite a few were there when I arrived at 7:45. Anybody who decides to come let me know.
Posted by: 914Toy Nov 14 2018, 03:43 PM
What is the address?
Posted by: Lucky9146 Nov 15 2018, 09:31 AM
What is the address?
The main drag is S8 or Paseo Delicias with the major cross street La Granada in Rancho Santa Fe. I never knew the names so had to look them up. Coming down 5 from the north you would likely take the Encinitas Blvd exit and go east.
Posted by: 914Toy Nov 15 2018, 11:51 AM
What is the address?
The main drag is S8 or Paseo Delicias with the major cross street La Granada in Rancho Santa Fe. I never knew the names so had to look them up. Coming down 5 from the north you would likely take the Encinitas Blvd exit and go east.
I found: 5978 Paseo Delicias, Rancho Santa Fe, CA 92o67, Saturdays 8 - 11 am. See you there.
Posted by: Lucky9146 Nov 19 2018, 01:36 AM
Saturday morning was another beautiful day and 914Toy headed down to join me and check things out in RSF. But I forgot to get any pictures of his car before he left, sorry Keith. We did get a chance to check out each others cars, he has a nicely done car, and I'm kinda liking his Clewett crank fire set up. Hmmmmm and his reflector idea.
My wife is not thrilled to ride in the 914 but after some begging I talked her into coming along. She helped me in trying to learn and develop my GoPro skills so check out my link here: https://www.youtube.com/watch?v=_YFhRjbQlTo I like the sound and more to come I hope.
There was a videographer present Saturday as well, developing her skills, and she spent quite a bit of time on my car so I hope to get a copy of her work.
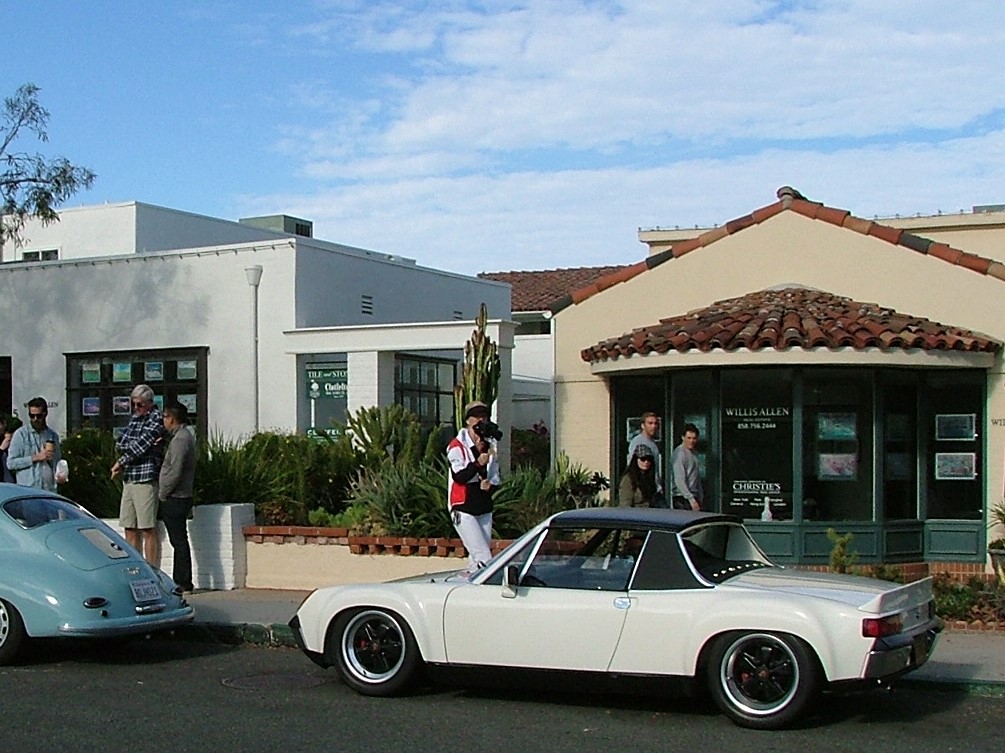
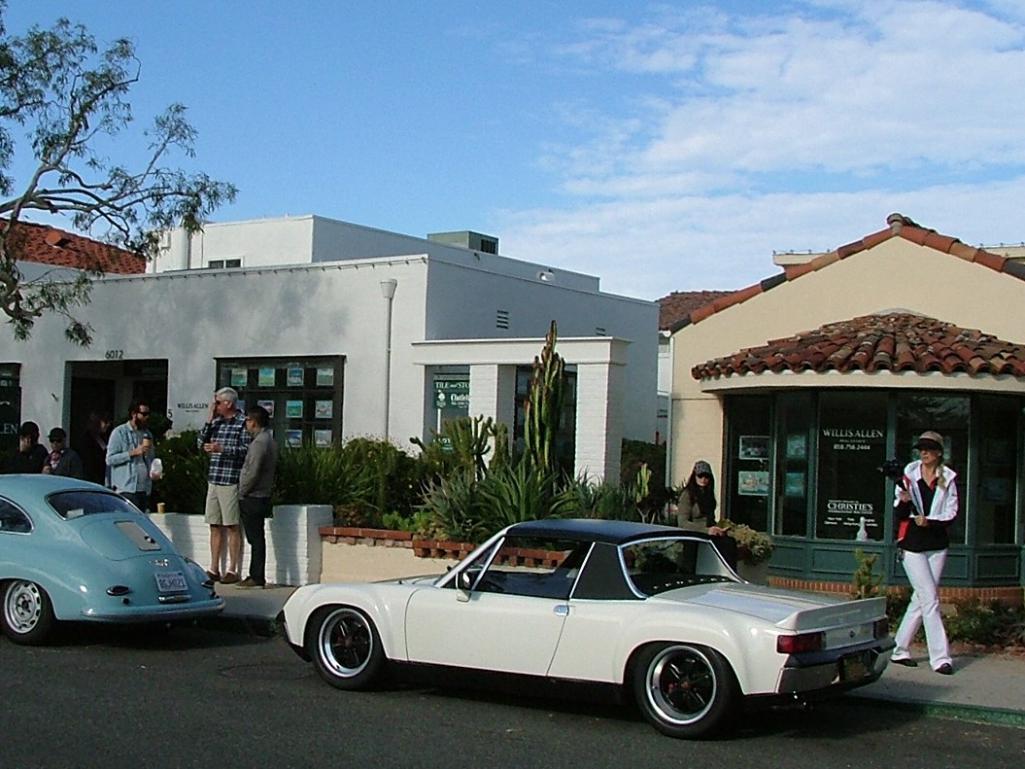
Posted by: Cairo94507 Nov 19 2018, 07:40 AM
Your car looks great.
Posted by: Lucky9146 Nov 19 2018, 11:44 PM
Your car looks great.
Thanks Michael! I always look forward to seeing the next steps on your car and hope to see it in person one day.
Posted by: whitetwinturbo Nov 19 2018, 11:58 PM
..............I like white!
Posted by: jmitro Nov 20 2018, 06:35 AM
beautiful
Posted by: Lucky9146 Nov 20 2018, 05:18 PM
..............I like white! beautiful
whitetwinturbo
Jmitro
Really want to say thanks to you two! You were # 3 and #4 to weigh in on this thread in the very beginning Aug 3, 2015
I thought it interesting you are right here, right after each other again.
Posted by: Lucky9146 Nov 24 2018, 08:50 AM
Last weekend I met someone video taping my car at Cars & Coffee (pictures above) and since she had given me her contact info I reached out to see how it came out. Unfortunately this was her first outing she said her gimball didn't work well for her and the video did not come out well.
I mentioned all this to my buddy who said he had some video of my car at Renn6.
So now I have this video of my car and other 914's there, but what I really like is the sound of the announcer over the loud speaker in the quiet morning. Turn up your sound it's pretty cool.
https://www.youtube.com/watch?v=MxyeanCuJMM
Posted by: defianty Nov 24 2018, 09:17 AM
Looks great Jim I can't tire of looking at your car. Knowing that I'm going to have one that looks just as good soon excites me no end! I'm particularly fond of the ride height, it looks spot on.
Posted by: Lucky9146 Nov 24 2018, 11:53 AM
Looks great Jim I can't tire of looking at your car. Knowing that I'm going to have one that looks just as good soon excites me no end! I'm particularly fond of the ride height, it looks spot on.
Thanks Stephen but I think yours will be a better example with your new paint and mine being over 20 years old. The engine compartment on mine could have used a re do and I did not realize it at the time.
There is a price to be paid with that ride height, just something to think about.
Keep us posted on your paint job.
Posted by: Lucky9146 Nov 24 2018, 09:17 PM
My friend who shot the Renn6 video I posted above is an IT guy and dabbles in a lot of electronic/ pictures/ video stuff, and I mean a lot. One of his new found loves is artfully customizing photographs to where they look like painting's and giving them to people. Today he showed up with a couple pictures he had printed up that he shot at last weeks Cars & Coffee. I asked for the electronic files so I could post here. These are 12"X18" prints!
The third one is the same picture as the second, but now to a whole nother level, almost cartoon-ish, but oh so cool.
I'm going to frame them!
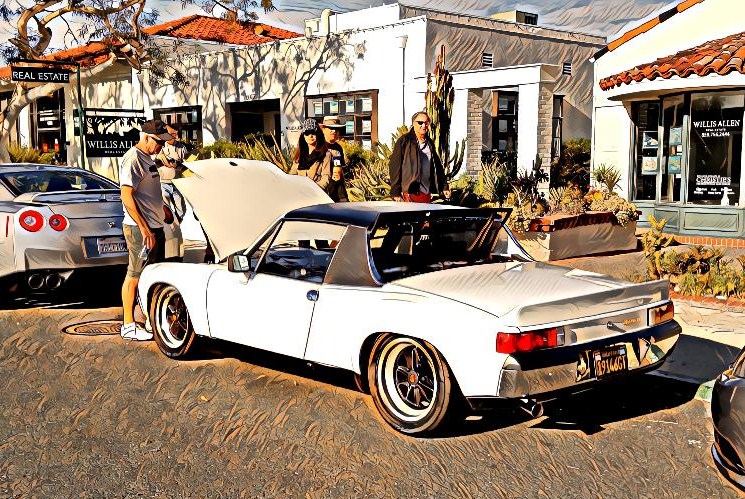
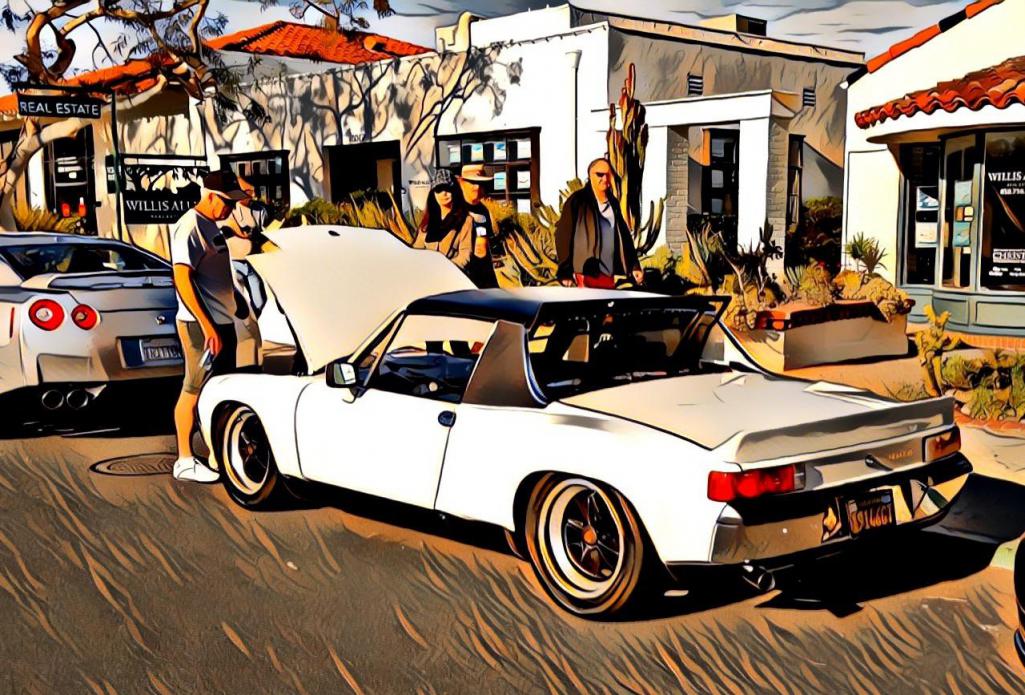
Posted by: Larmo63 Nov 24 2018, 09:29 PM
I'm not parking my jalopy anywhere near Jim's nice white car.
Is there an alley I can park in next week?
Posted by: Lucky9146 Nov 24 2018, 10:45 PM
I'm not parking my jalopy anywhere near Jim's nice white car.
Is there an alley I can park in next week?
Your car is not a jalopy! Looks good to me!
Seems I recently saw a perfect front bumper that you were going to sleep next to, if I'm not mistaken So, you coming next week?
Cool, looking forward to it. 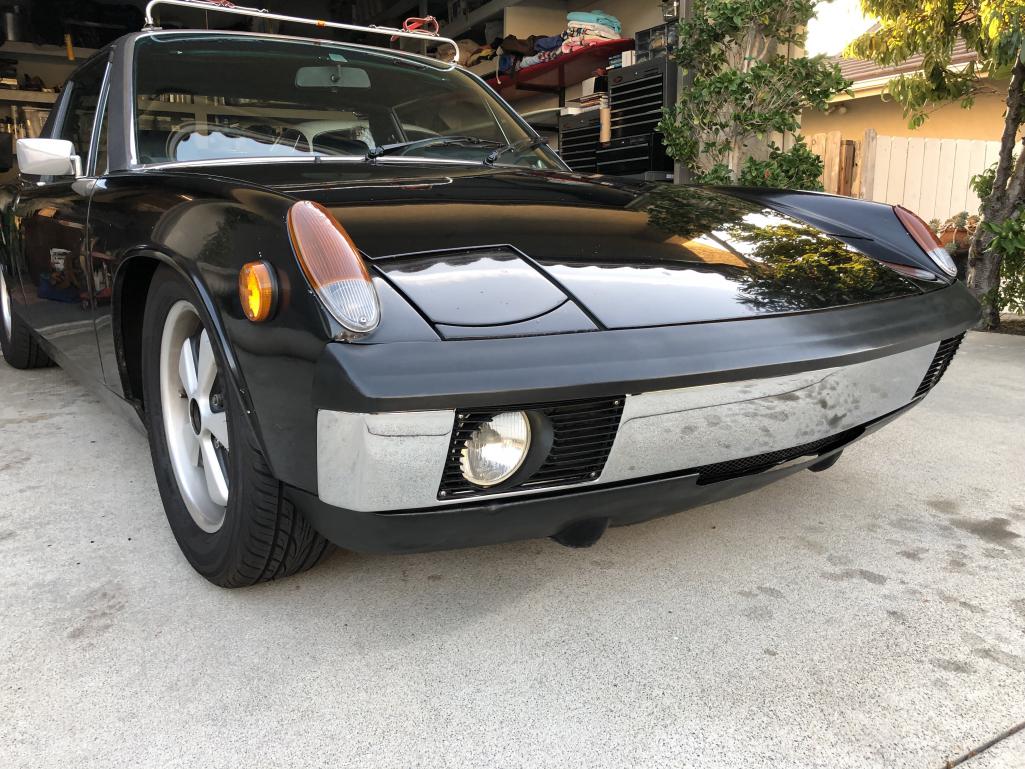
Posted by: Coondog Nov 24 2018, 11:33 PM
Great looking build, now I know what mine will look like in white.....thanks
Only real changes, I am going with stock mirrors, polished Fuch pedals and I am on the fence concerning the rear spoiler. I am also going to delete the windshield H20 squarters, antenna and rear trunk button.
Posted by: Lucky9146 Nov 25 2018, 12:35 PM
Great looking build, now I know what mine will look like in white.....thanks
Only real changes, I am going with stock mirrors, polished Fuch pedals and I am on the fence concerning the rear spoiler. I am also going to delete the windshield H20 squarters, antenna and rear trunk button.
Hey Greg Thanks!
Wait what? Are you going to flare your 3.2 car now, cuz it's already white? Must be a different car? Right?
As for my mirrors I did not make that selection, unfortunately, car was built this way when I got it with the beginnings of the 6 conversion. Paint is Imron from 1995 and I can't match it so I'm not going to try anything like changing the mirrors and the same goes for the spoiler, it was already there too. At first I didn't care for the spoiler but it has grown on my and I love it now. Looke forward to hearing more on yours.
Thanks for weighing in and for all the info on fire extinguishers a while back, I copied you.
Posted by: Lucky9146 Dec 10 2018, 03:59 PM
While I figure out next steps (I am not in a big hurry) on my transmission upgrade to a 915 with Martin Bott 916 kit, I find driving my car something I really look forward to. The cars and coffee I attend fairly regularly is a nice all back roads drive and good place to exercise it about 15 miles one way. I want to venture further like Carlsbad or Crystal Cove, the 5 freeway is not my favorite, but we'll see.
Saturday morning my car was nestled nicely between a perfect Ferrari F50 and a very nice Speedster. It doesn't get near the attention of an F50 for sure but it is well appreciated by many.
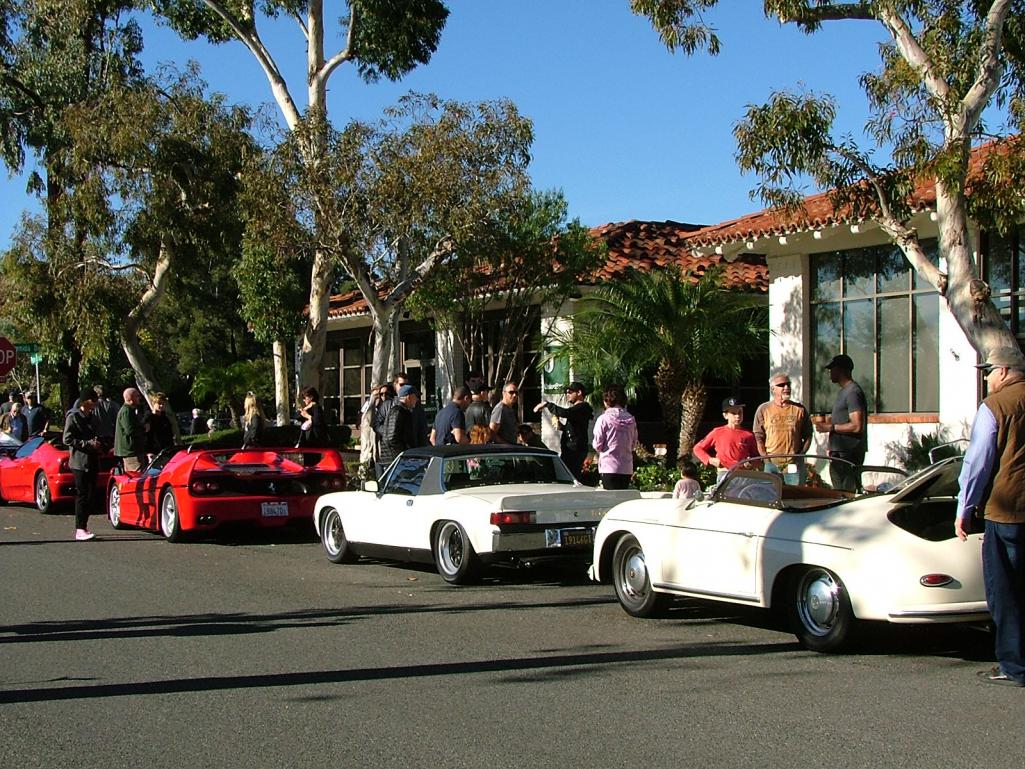
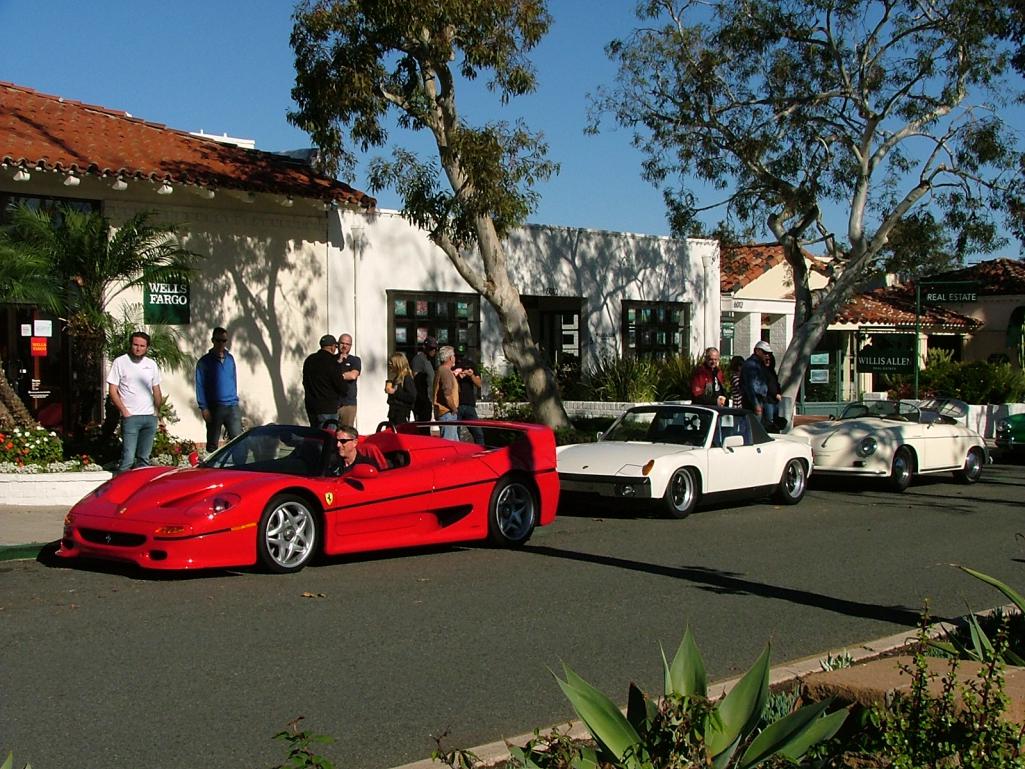
Posted by: whitetwinturbo Dec 18 2018, 09:25 PM
..............I like white! beautiful
whitetwinturbo
Jmitro
Really want to say thanks to you two! You were # 3 and #4 to weigh in on this thread in the very beginning Aug 3, 2015
I thought it interesting you are right here, right after each other again.
...........love your efforts!
Posted by: Lucky9146 Mar 28 2019, 09:51 PM
Came across this link here to an earlier thread about 915 trans, read it all, and it got me going again.... So, thank you all who posted to that thread!
http://www.914world.com/bbs2/index.php?showtopic=298292
Haven't posted in a while because there is not much to report yet on my 916 trans. project and I have had a rather big iron in the fire taking all my time. The news is, I found someone locally who I think can help me out, has actually worked on a real 916 years ago, and seems to really know 915 boxes. He has done conversions but had never heard of the Martin Bott kit, only Vellios.
Kinda getting a list of few things I want to address while the engine is out too.
Hope to post some progress in a few weeks but until then I just get to look at these cool parts and keep

Posted by: Lucky9146 Mar 31 2019, 08:56 PM
Met with the transmission guy yesterday and I learned a lot. He figured out pretty quick where all the bits go on one of many cases he had. But it looks like there could be a problem with this little support circled here. Not sure yet but some investigation yet to do.
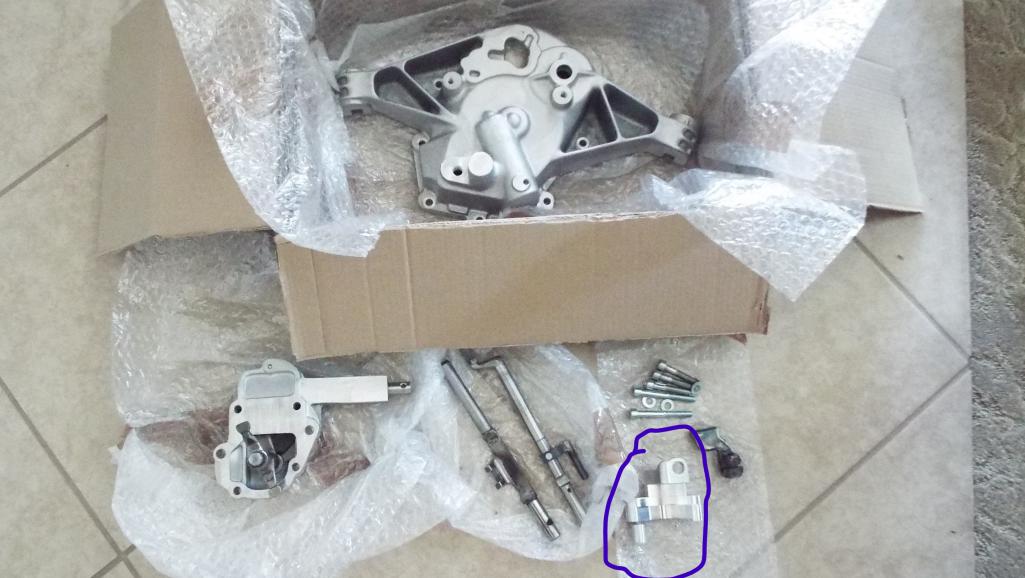
Posted by: Lucky9146 Mar 31 2019, 09:00 PM
He had this cut away that showed how the little carrier fits to the side shifter. 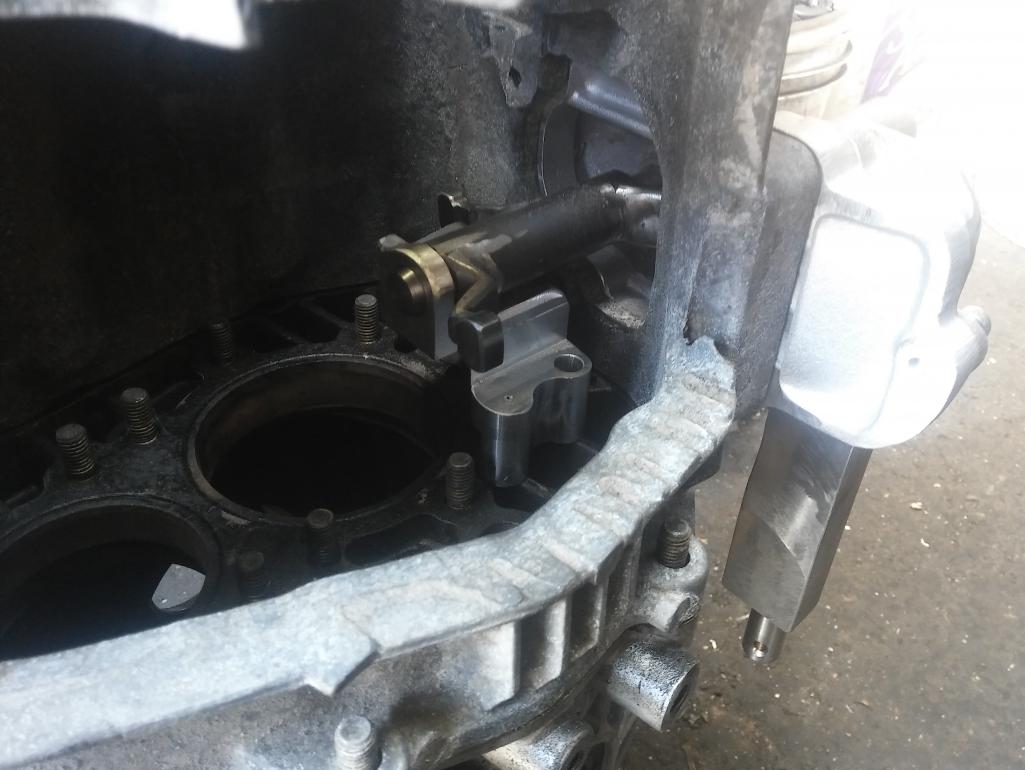
This is a little exaggerated picture below but it looks like the little carrier does not line up to the boss in the case. I know in the first picture above it looks lined up but it isn't. This is not my gearbox only his old case mock up, so time will tell. At least I can see where everything goes now.
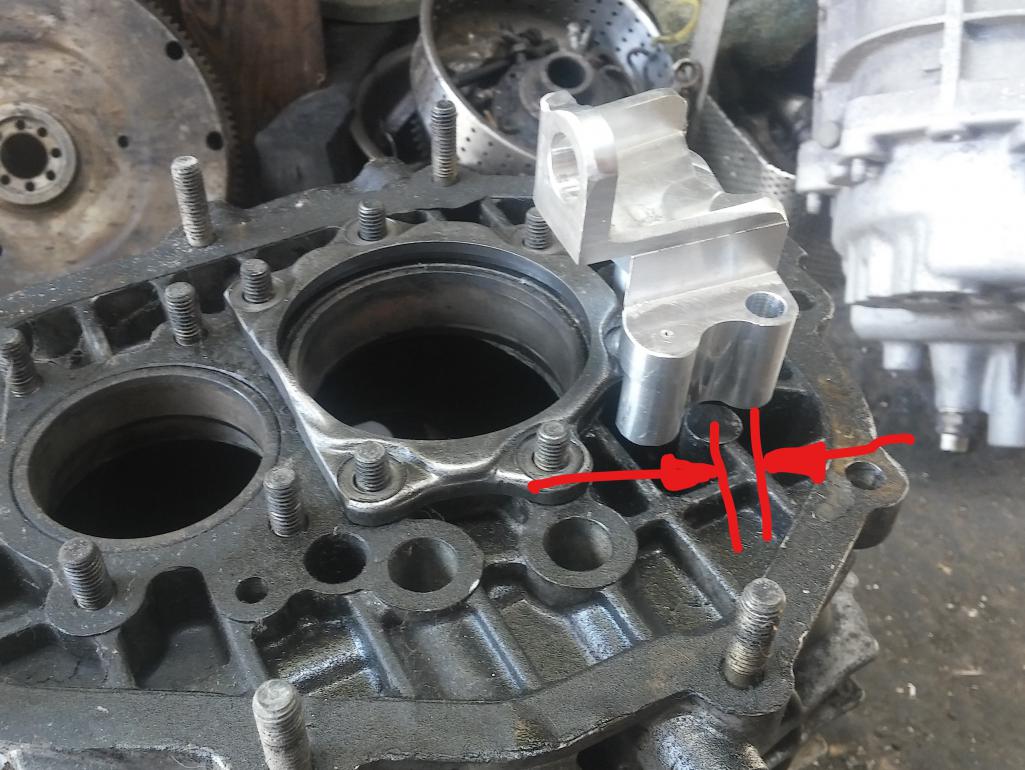
Posted by: mepstein Mar 31 2019, 09:19 PM
I'm pretty sure Chris Foley said he needed to do some work in the trans to make everything fit.
Posted by: Lucky9146 Mar 31 2019, 09:33 PM
I'm pretty sure Chris Foley said he needed to do some work in the trans to make everything fit.
Wish he was not so far away. Going to get another estimate locally as I got another lead late yesterday. Thanks
Posted by: Steve Mar 31 2019, 09:45 PM
Martin Bott does make specific kits to specific year trans. Check out his thread in the members vendor section. Chris looked like he had the wrong parts and welded up a case to make it work. Your problem looks similar to those pictures.
Posted by: Lucky9146 Mar 31 2019, 09:50 PM
Martin Bott does make specific kits to specific year trans. Check out his thread in the members vendor section. Chris looked like he had the wrong parts and welded up a case to make it work. Your problem looks similar to those pictures.
Thanks Steve good point will do. In the pictures the parts are fitted to an early case and mine is a later so that may do the trick.
Thanks for weighing in and the tip.
Posted by: Lucky9146 Apr 15 2019, 11:03 PM
Baby steps on the 915 to 916 Trans. project
Have decided on a local San Diego shop to do the Martin Bott Kit work. I will continue to show my progress on the "916 box" as I know others are looking for a shop.
It was recommended that I get the one piece bearing retainer from California Motorsports, which I have now received.
Amazing looking piece going into the box not to be seen again, so I just had to share a pic. One of many things I had not planned on and I am sure there will be more to come.
Did a lot of research as Steve suggested and it was well worth the time. Have confirmed I do have the right part I spoke of last time and as Steve mentioned that Chris Foley had the wrong one which in fact did. Have to get into my box and make sure it works as advertised as opposed to the mock up. I know for sure that at least one hole needs to be tapped in my case.
Hoping to get the box into work soon now.
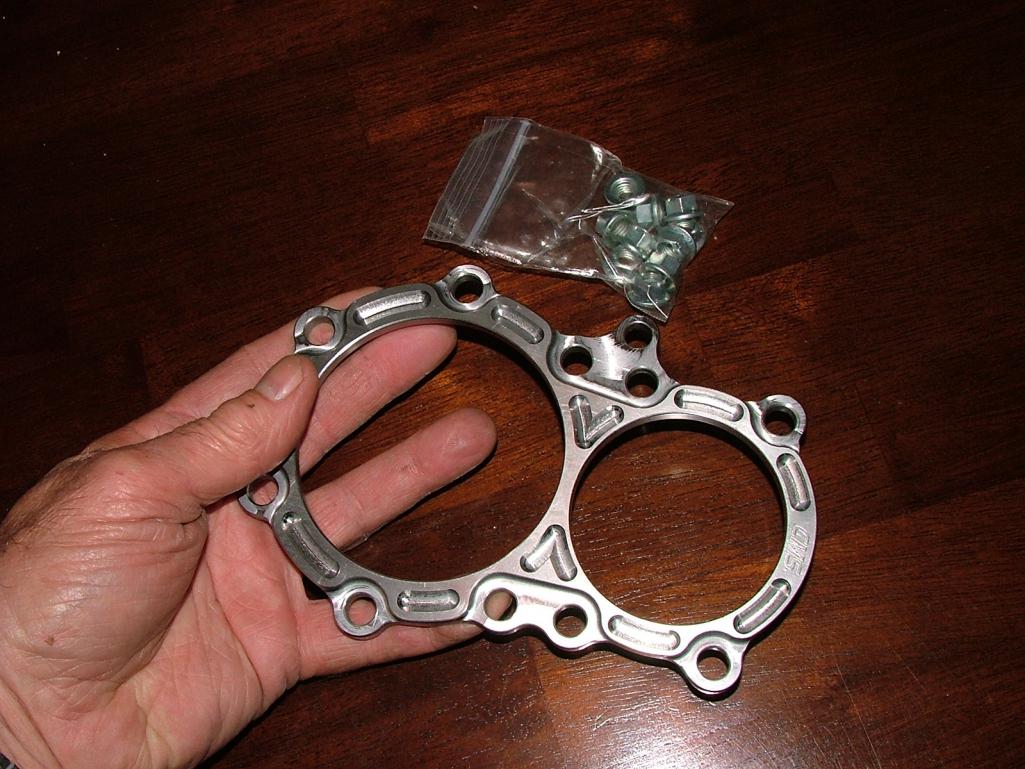
Posted by: whitetwinturbo May 1 2019, 11:16 PM
.................I'd wear that around my neck...beautiful
Posted by: rgalla9146 May 2 2019, 06:24 AM
My mag case 915 with the Bott kit has been assembled for years but not
yet installed. My excuse being I needed to build the car to put it in.
Anyway, the shaft support you focused on needed attention in my box too.
I had to locate and tap into an existing boss. Not the end of the world.
As I recall Chris Foley had to create a boss by welding.
The time consuming issue for me was that that support had to be shimmed off its
mounting surface to allow the shift console to fit flush on the case.
I have to see if I have pics of the assembly.
This thing looks filthy.
Attached thumbnail(s)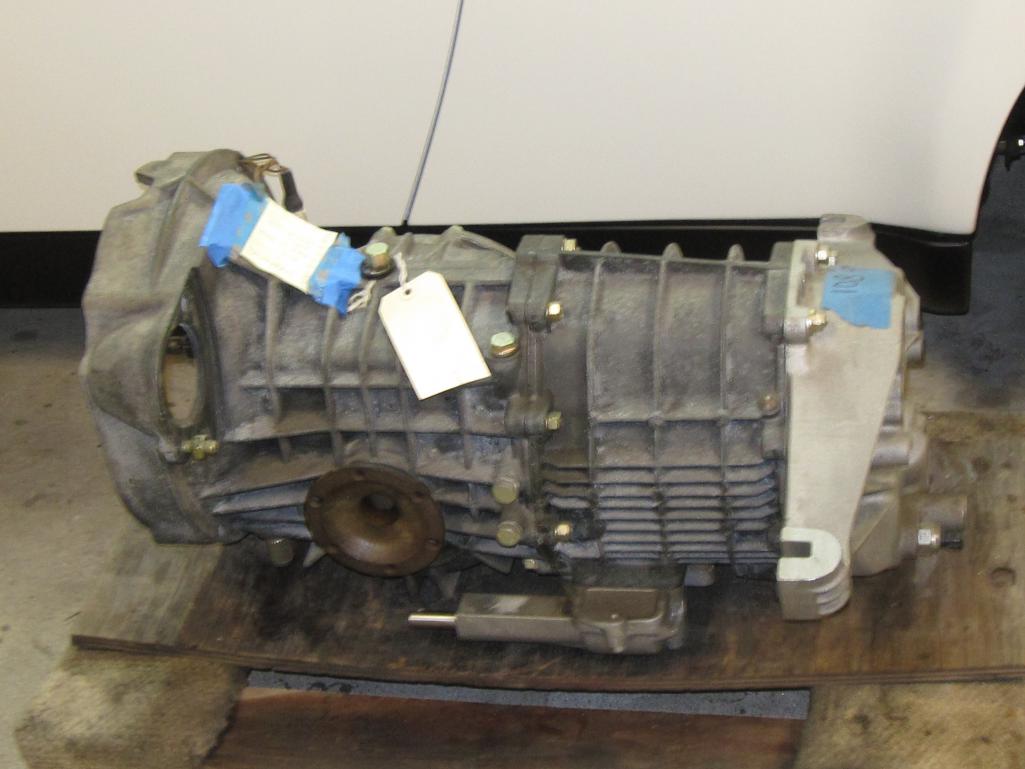
Posted by: Lucky9146 May 2 2019, 09:49 AM
My mag case 915 with the Bott kit has been assembled for years but not
yet installed. My excuse being I needed to build the car to put it in.
Anyway, the shaft support you focused on needed attention in my box too.
I had to locate and tap into an existing boss. Not the end of the world.
As I recall Chris Foley had to create a boss by welding.
The time consuming issue for me was that that support had to be shimmed off its
mounting surface to allow the shift console to fit flush on the case.
I have to see if I have pics of the assembly.
This thing looks filthy.
Thanks for weighing in on my thread. I saw you had done the Martin Bott kit and kept meaning to reach out to you about it.
This site is awesome! I have since my post, been in touch with Martin and he has assured me I have the correct part for my alum trans and that his included template should do the trick. I was concerned about exactly what you were talking about, that even with the template, the shift console fits flush! Couple that concern with Steve having problems with his and I decided to do all I could to ensure success and make things as straight foreword (ie keep the cost down) for my trans guy.
Martin is very responsive by the way.
I knew I had to have the boss drilled and tapped but the location became a concern. Hopefully this issue will be tackled soon, it's just other things have gotten in my way.
Can't wait to get this into work. Thanks again.
Posted by: Lucky9146 May 31 2019, 12:42 PM
Ok finally getting to installing the Martin Bott 916 kit on my transmission. It was a good news bad news day, mostly good though! Keep in mind I bought a "rebuilt 915"
Here we go!
First thing we find is a double staked lock tab, not the end of the world my trans guy says, but something I would have replaced on a rebuild.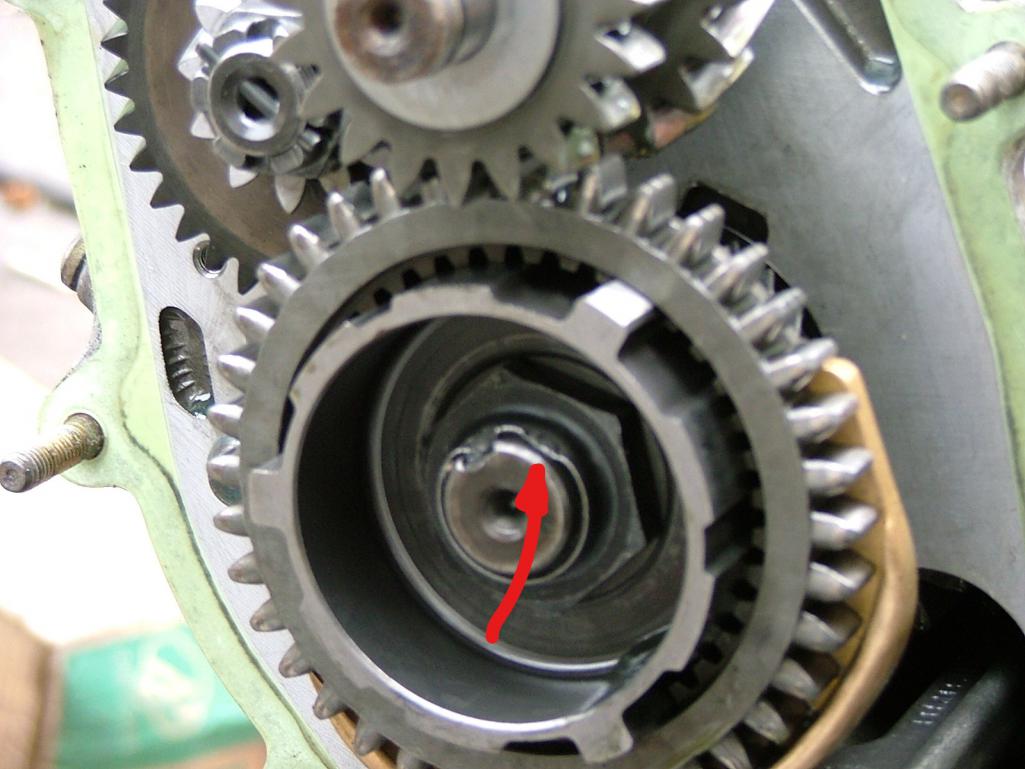
Ring and pinion looked great! The speedo plate pretty dirty but it goes away anyway.
Now we see a problem.....
Posted by: Lucky9146 May 31 2019, 12:55 PM
But before we get to the missing teeth a check of the pinion depth..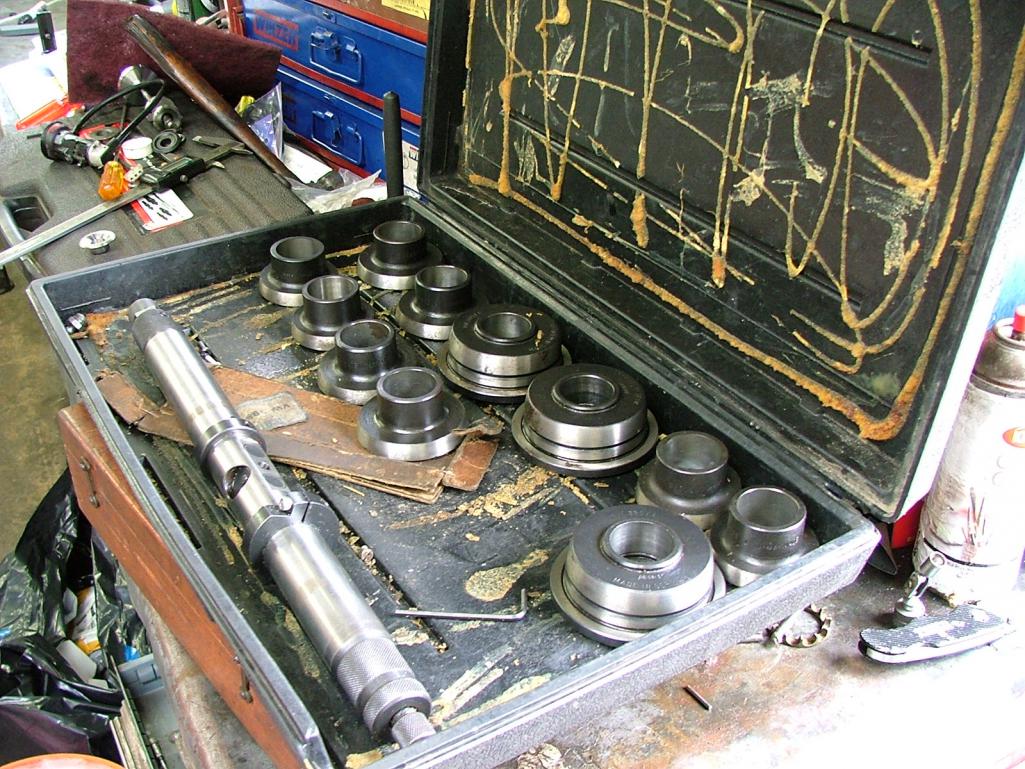

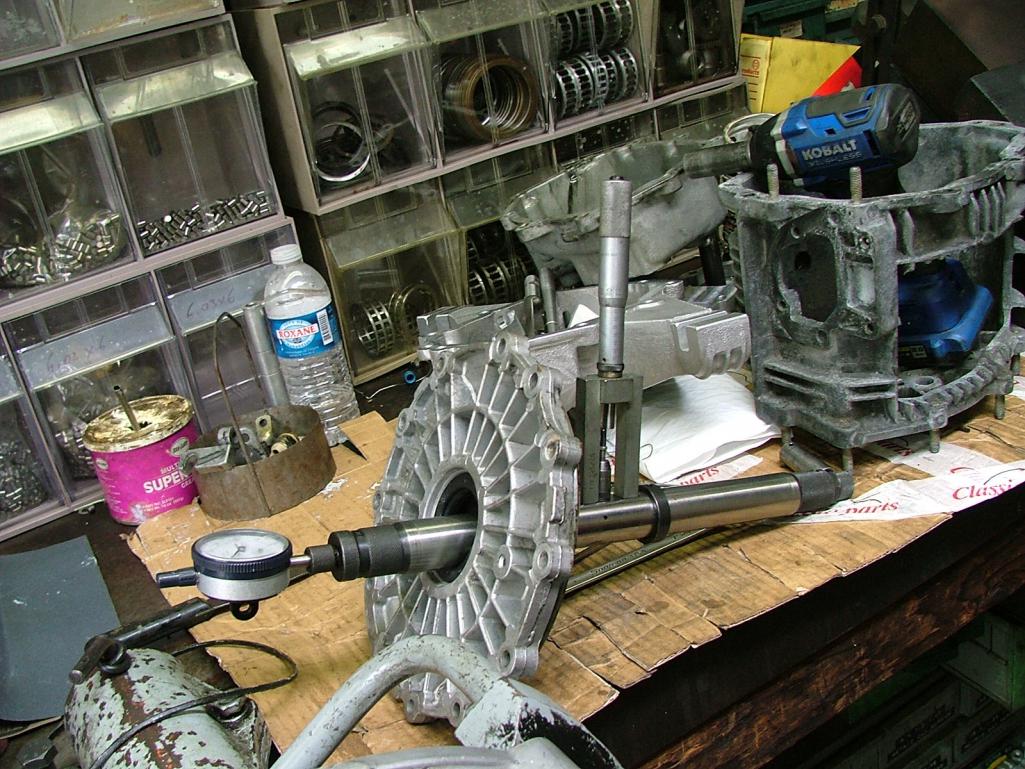
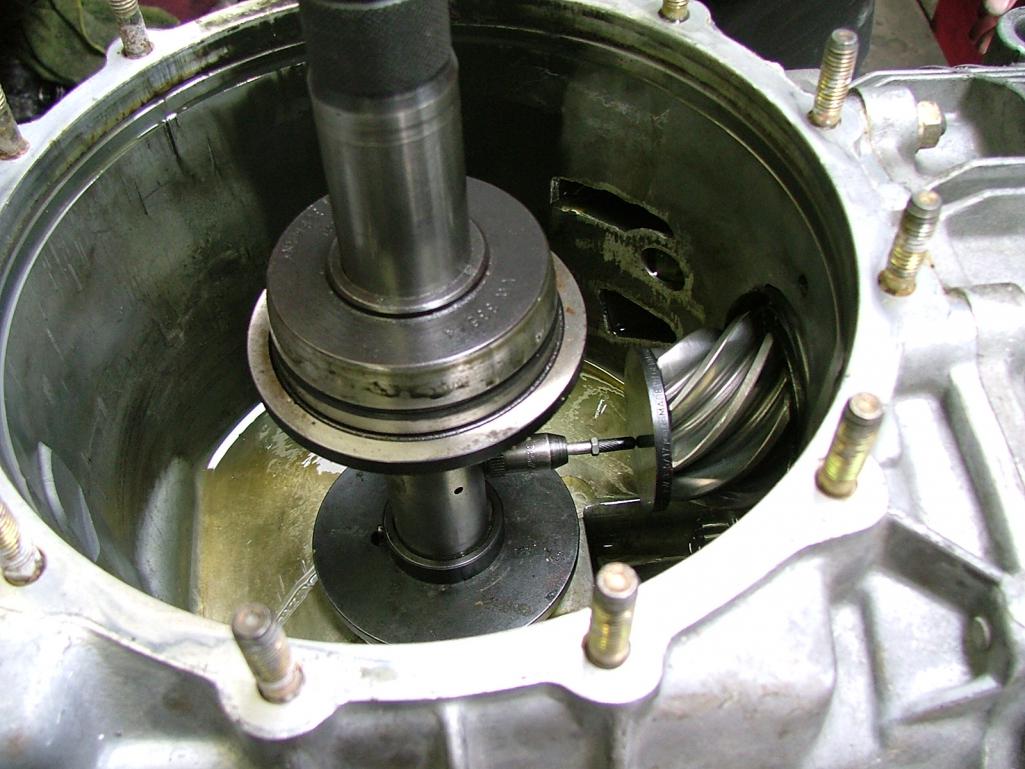
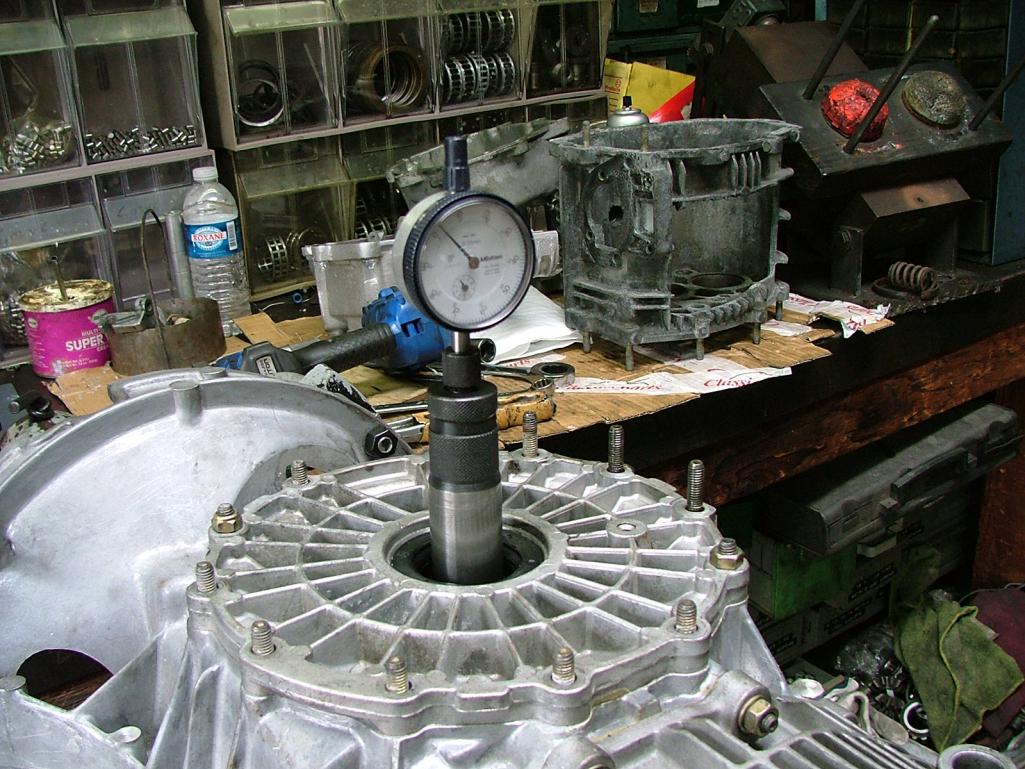
And we are good! 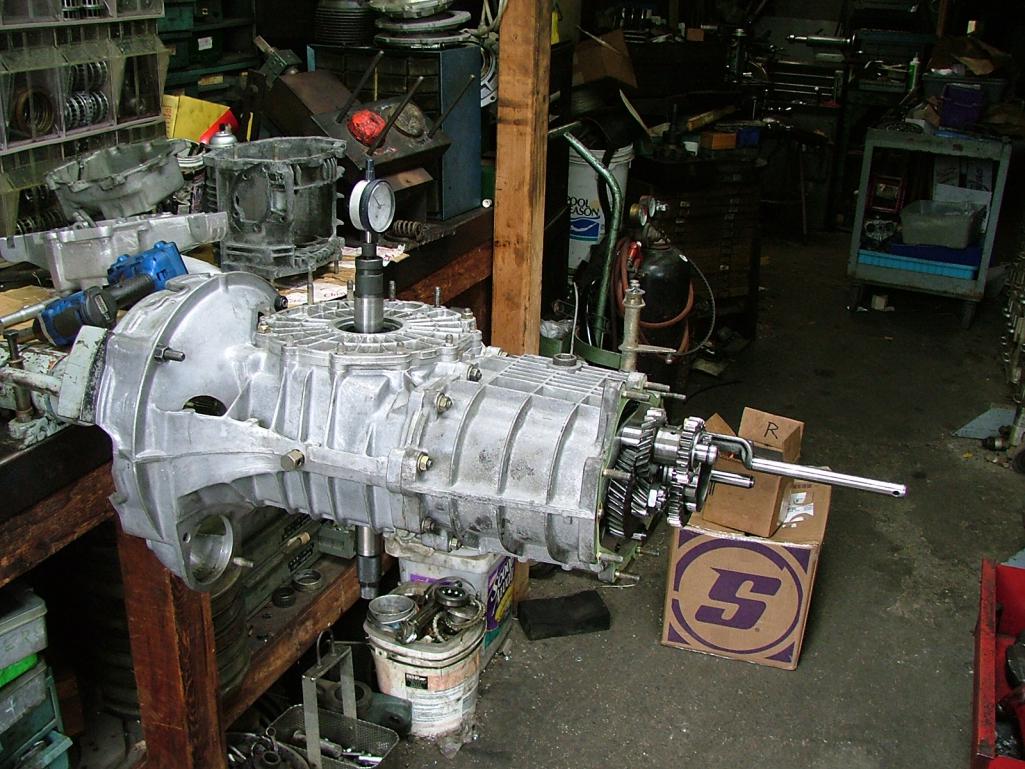
Posted by: Lucky9146 May 31 2019, 01:32 PM
Removal of the bottom plate lowest point of the gearbox was a lot dirtier than I liked but my guy said not that bad. Rebuilt gear box? 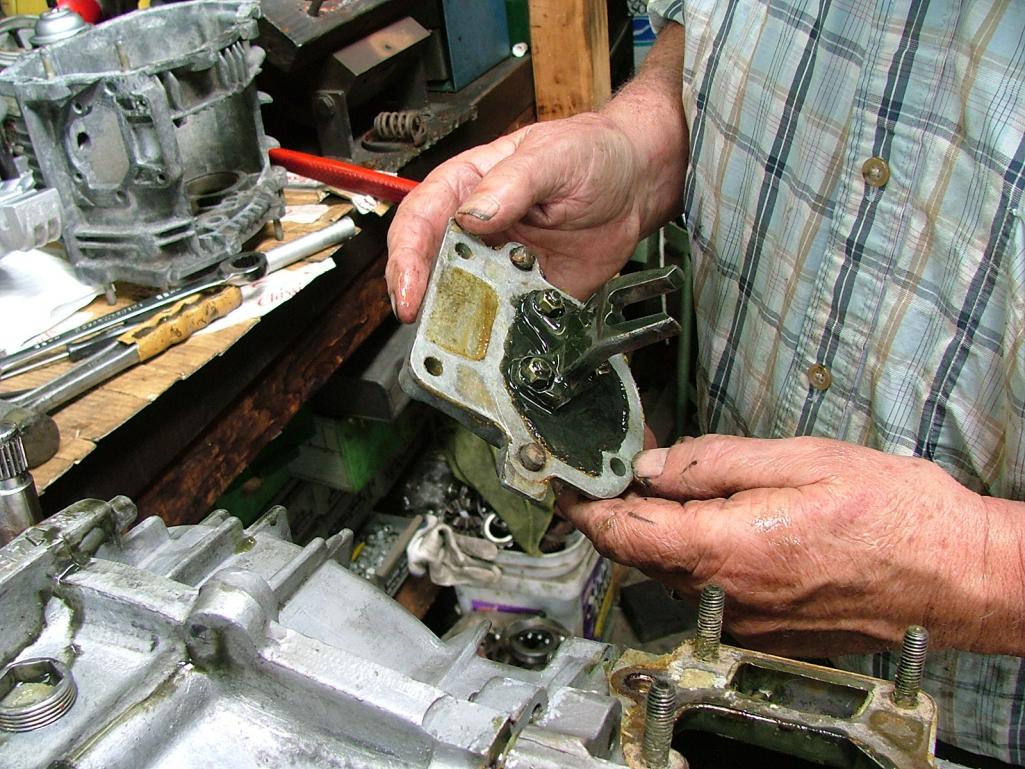
Now on to the missing teeth......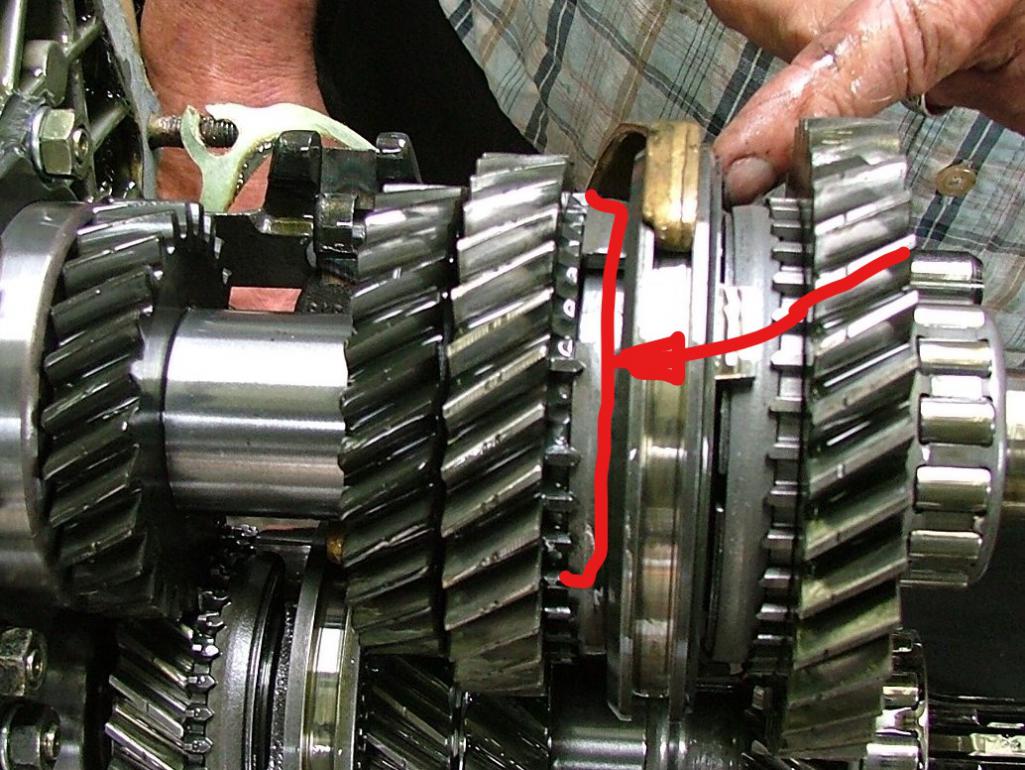
So I got on the phone with the guy I bought the "rebuilt" trans from and had my trans guy explain it and long story short the offending parts are coming to me overnight!
Sliders and syncros are good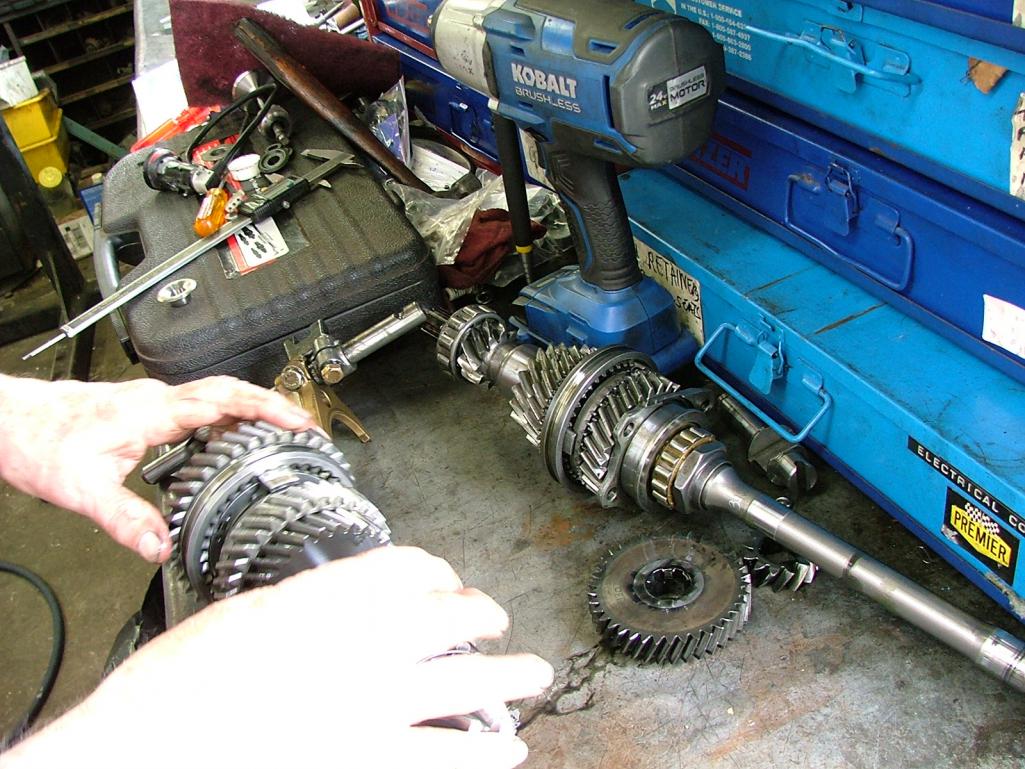
Completely disassembled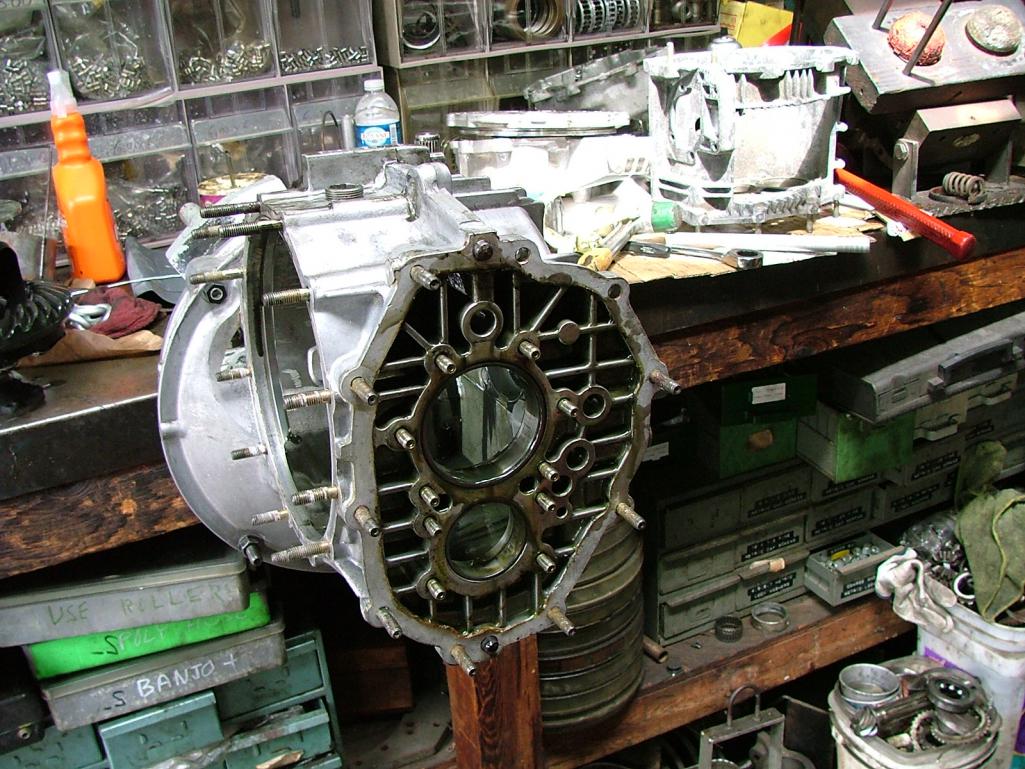
Posted by: Lucky9146 May 31 2019, 01:36 PM
It was on to the little support block we were so concerned about and it turns out that will match up as designed by Martin and so marked to drill that boss should happen today if all goes as planned. My trans guy has this cut away housing that makes everything so much easier to see. So far so good!
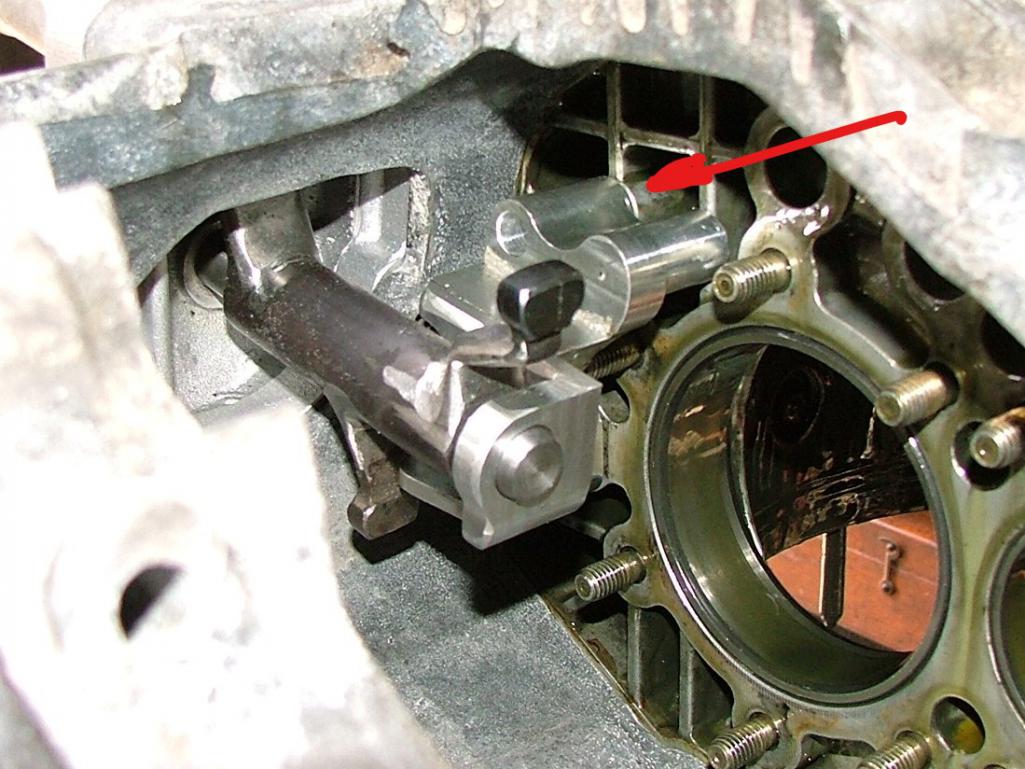
Posted by: aturboman May 31 2019, 02:49 PM
Still watching this great progress with baited breath. My mechnical speedo Bott kit is waiting in the wings.
Posted by: Steve May 31 2019, 02:54 PM
Nice!! I like the Electric speedo on mine! No more bouncy needle and much better trip odometer. Are you going for originality?
Posted by: Lucky9146 May 31 2019, 03:53 PM
Still watching this great progress with baited breath. My mechnical speedo Bott kit is waiting in the wings.
I have told him there are others out there with the kit, and I was going to ping you soon on progress pics, so thanks for keeping track. Parts arrived later today than expected but we are back at it tomorrow morning and I can't wait! The guy I found and I have hit it off really well and I think he is enjoying my taking pictures and documenting. This guy knows these things like the back of his hand, sees things so quick. He knows I have engine experience but no gearbox experience so he is taking me through it. His shop is old school and I love it, watching him go into drawers and pull out old tools, while saying "I haven't done one of these in a while", cracks me up.
Posted by: aturboman May 31 2019, 05:29 PM
Yes I'm looking to keep things as original as possible so I opted for the mechanical speedo. Admittedly they are a far cry from the electronic ones but I have a perfect 1973 Mag 915 donor so very close to the proper 916 box.
I'm in the queue to get mine completed once Jim complete's his.
Good to see some of the old school guys are still around.
Posted by: moparrob Jun 1 2019, 12:21 AM
I'm enjoying this portion of the thread and your 916 follies. What a great chance for you to learn another aspect of these precision vehicles.
Posted by: defianty Jun 1 2019, 02:22 AM
Very nice Jim, this will be great reference for anyone looking to do the same.
Posted by: Lucky9146 Jun 4 2019, 12:28 PM
I'm enjoying this portion of the thread and your 916 follies. What a great chance for you to learn another aspect of these precision vehicles.
Cool! and great seeing you at Luft6. For those that may not know, I bought this car from Moparrob and happy to say we have become friends as a result. He stopped by at Luft twice, to show the car "that got away" to his buddies that recalled stores of seeing it on jack stands in his garage for a few years. Moparrob had started the 6 conversion and hence the title of my thread.
Posted by: Lucky9146 Jun 4 2019, 12:34 PM
Saturday morning started with taking a picture of the 1st and 2nd gears and slider I received from the guy I bough the 915 box from.
A stand up guy to supply the parts after the fact and much appreciated for sure!
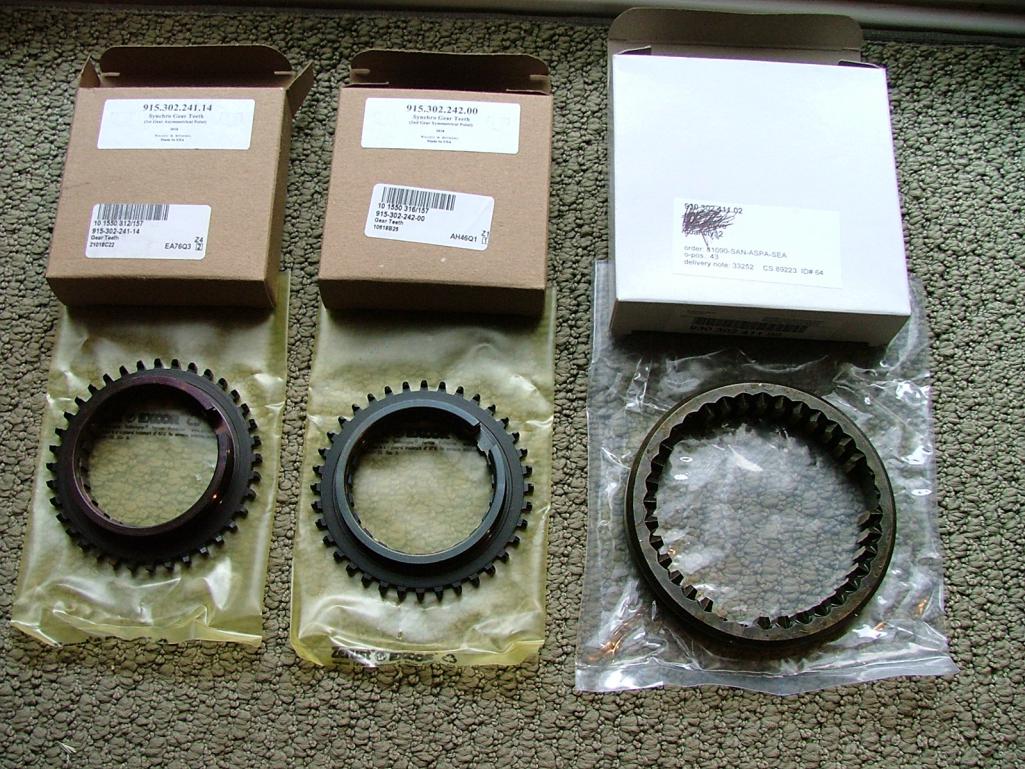
Posted by: Lucky9146 Jun 4 2019, 12:45 PM
Very nice Jim, this will be great reference for anyone looking to do the same.
Thanks! There is information out there for sure, but requires digging, with bits and pieces here and there, not to mention Steve who is a wealth of knowledge and extremely helpful, plus gracious with his time.
But as far as "in process pics" and pitfalls, not much at least that I could find. So I am doing what I can to show in pictures, at least my experience to hopefully help.
Posted by: Lucky9146 Jun 4 2019, 01:13 PM
Back at the shop we started with changing the gear dogs. Of course this is not part of the kit install but something that needed to be done on my build. First was the worst!
Again my thanks to the seller of the gear box for stepping up.
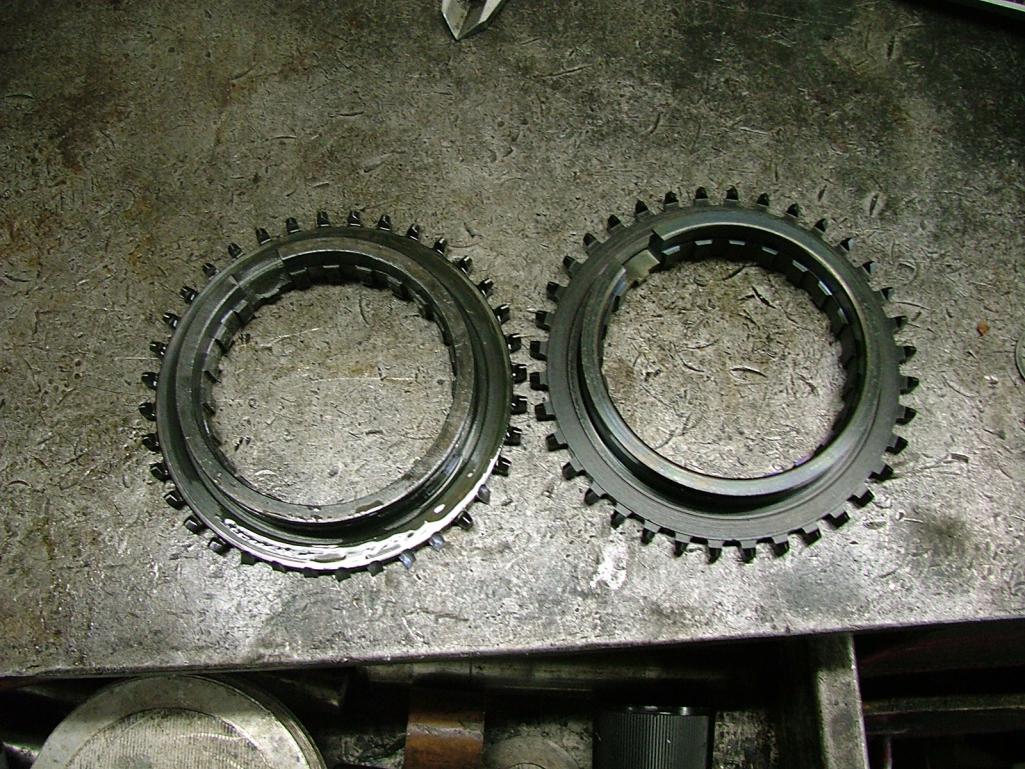
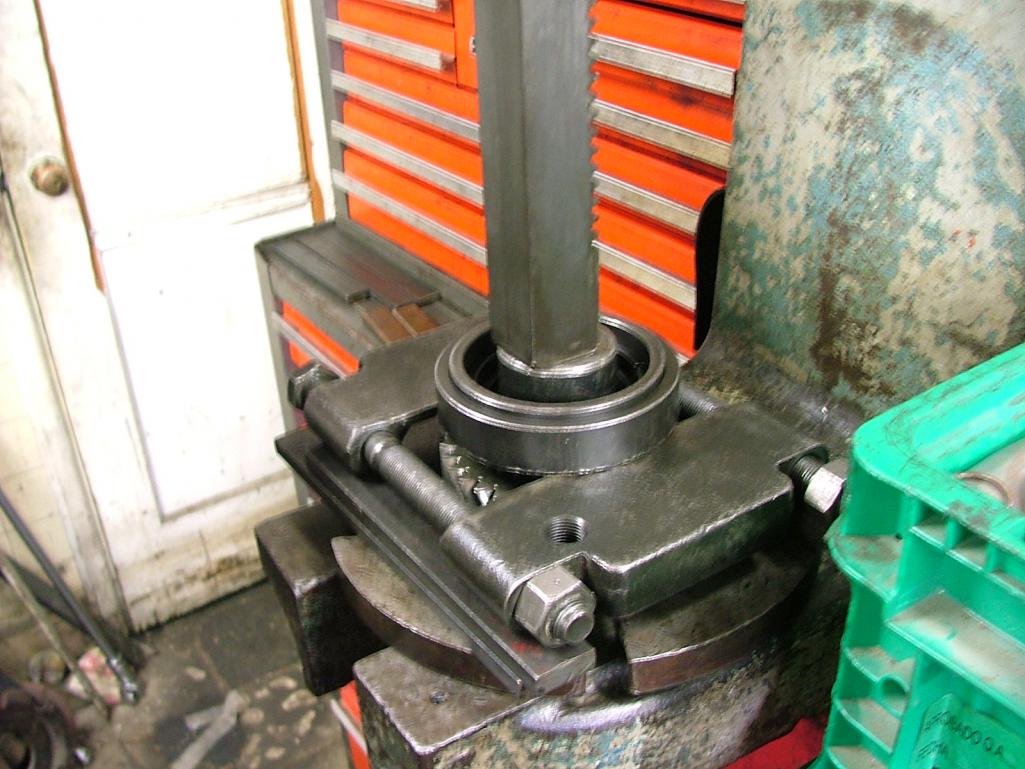
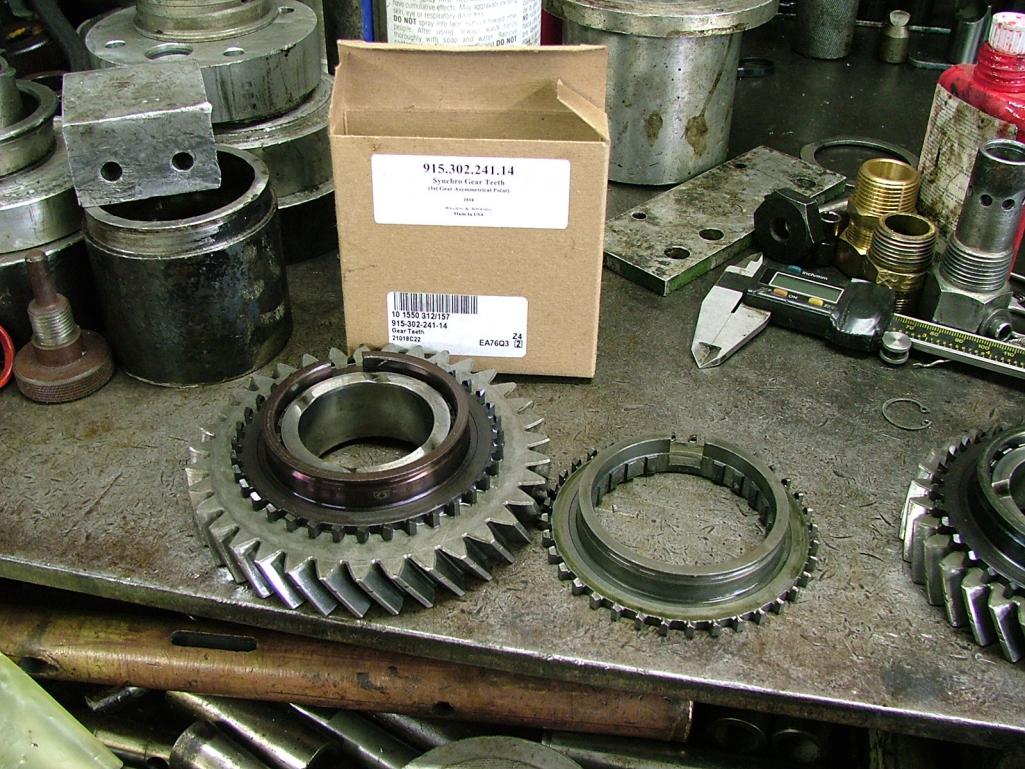
And here is second gear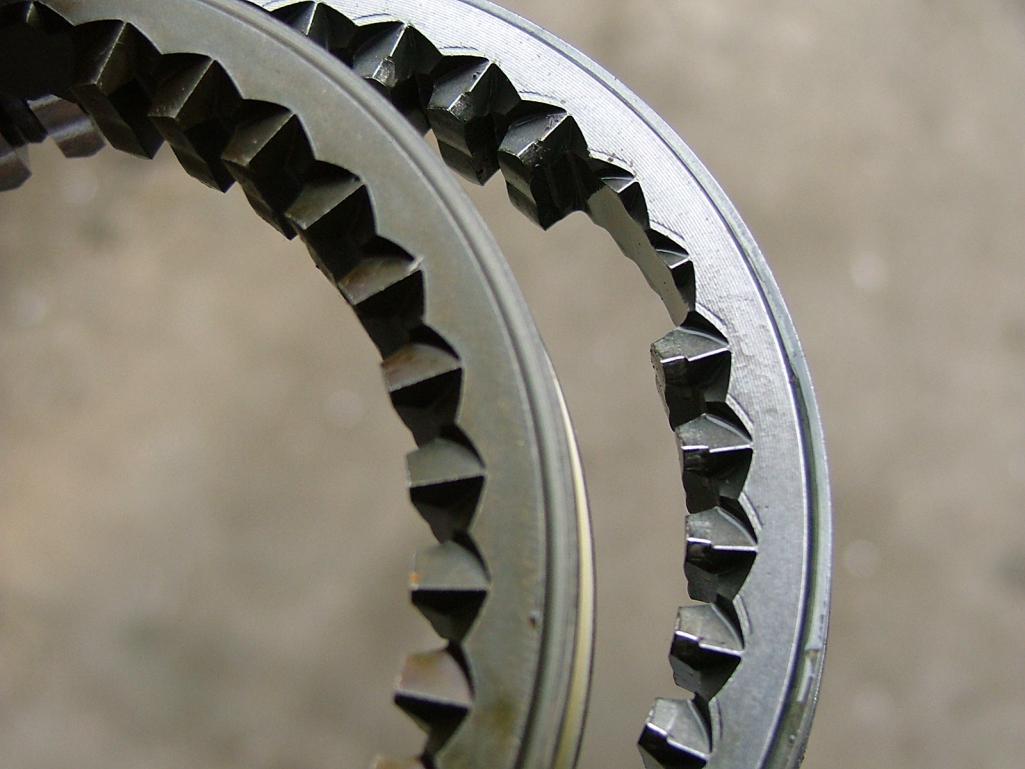
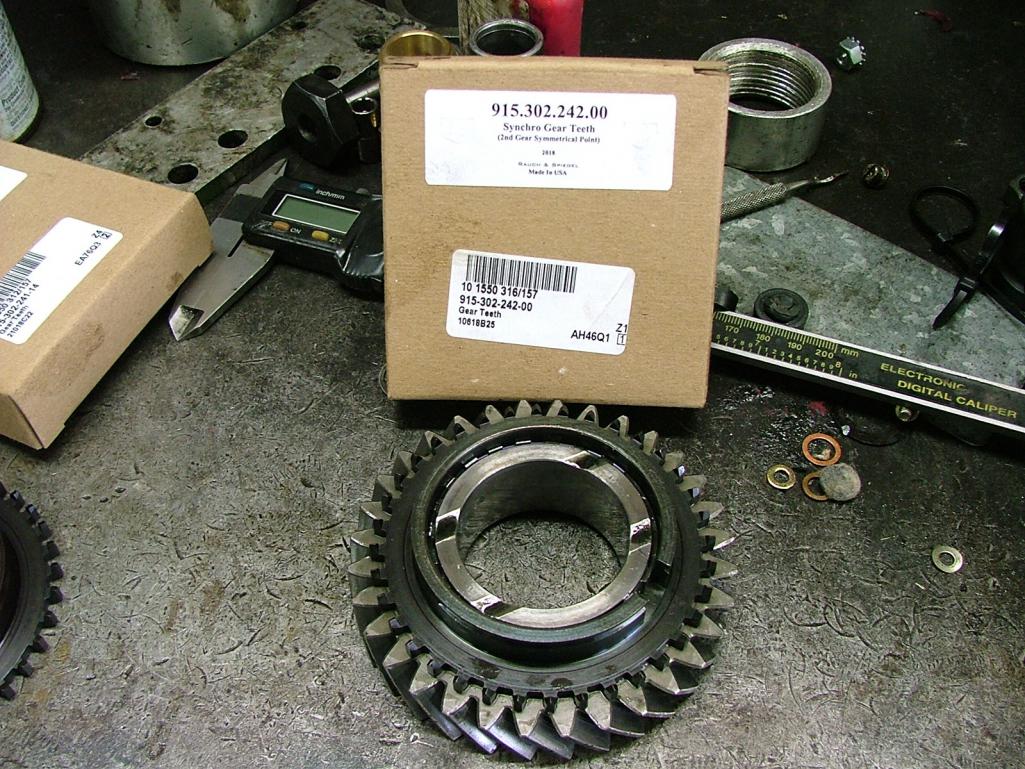
Posted by: Lucky9146 Jun 4 2019, 01:29 PM
Next was disassembly of the main shaft to install the one piece bearing clamp.
Granted this was not part of the kit either, but my guy recommended it, so I did as he said and got it from California Motorsports. Not cheap!

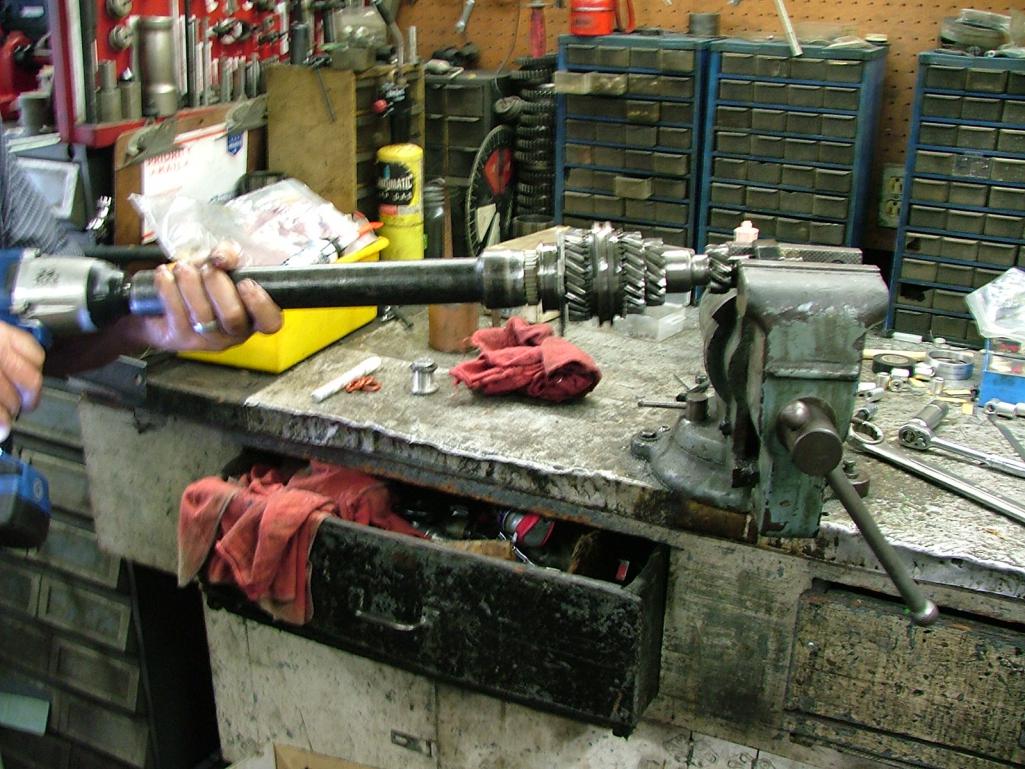
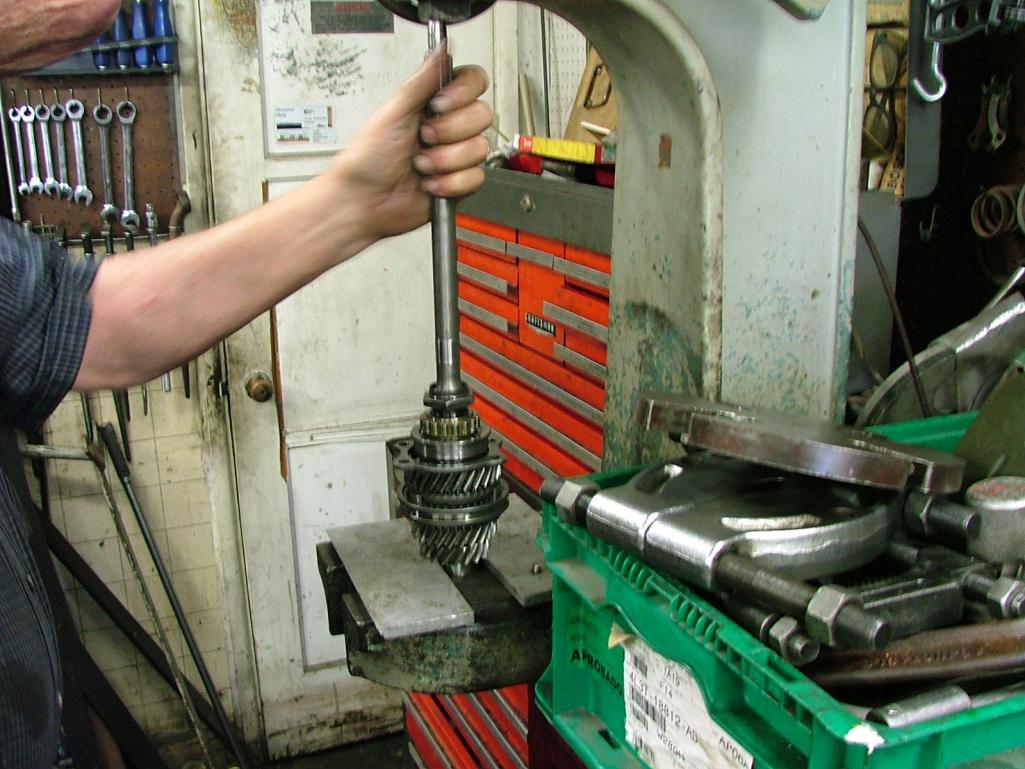
A thorough inspection of the pinion gear, yes that is a 356 Carrera 2, 4 cam head behind.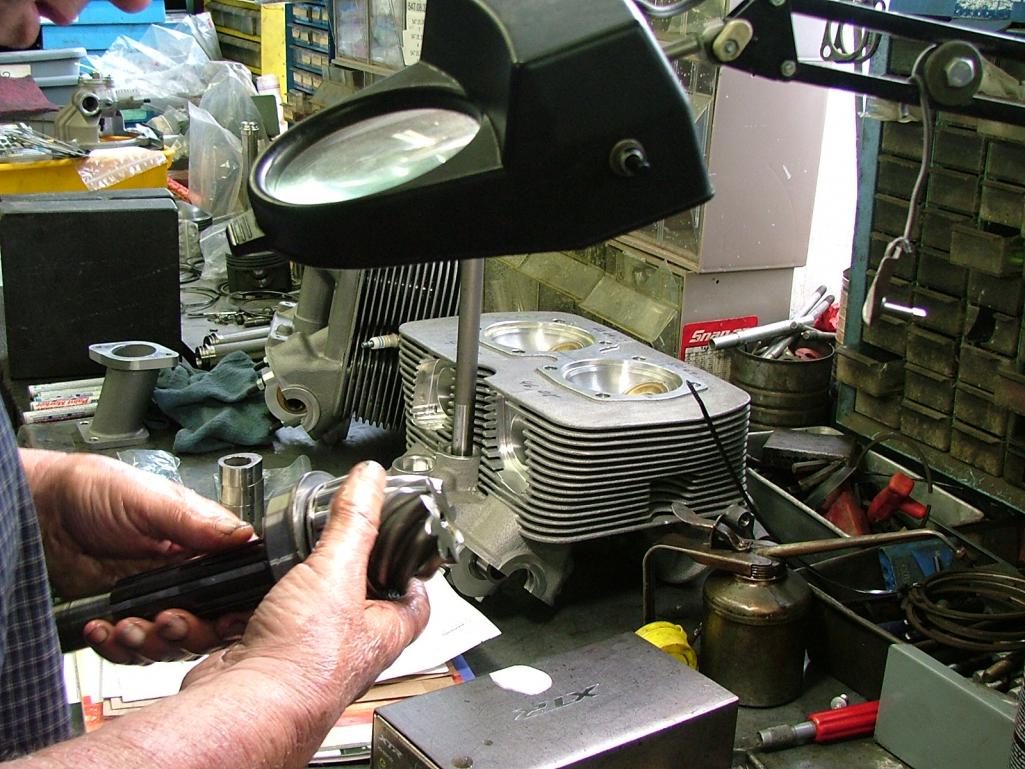
Random shot of his cut away case that would come to make a major contribution to the build.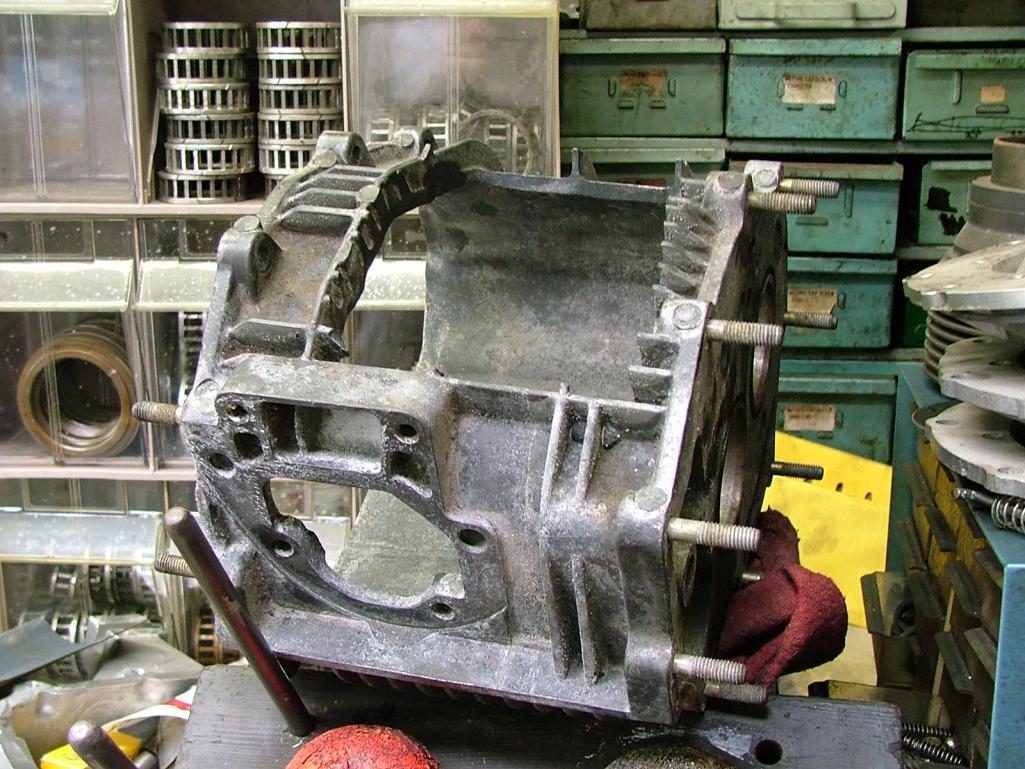
Posted by: Lucky9146 Jun 4 2019, 01:42 PM
So now totally disassembled.
Reassembly begins
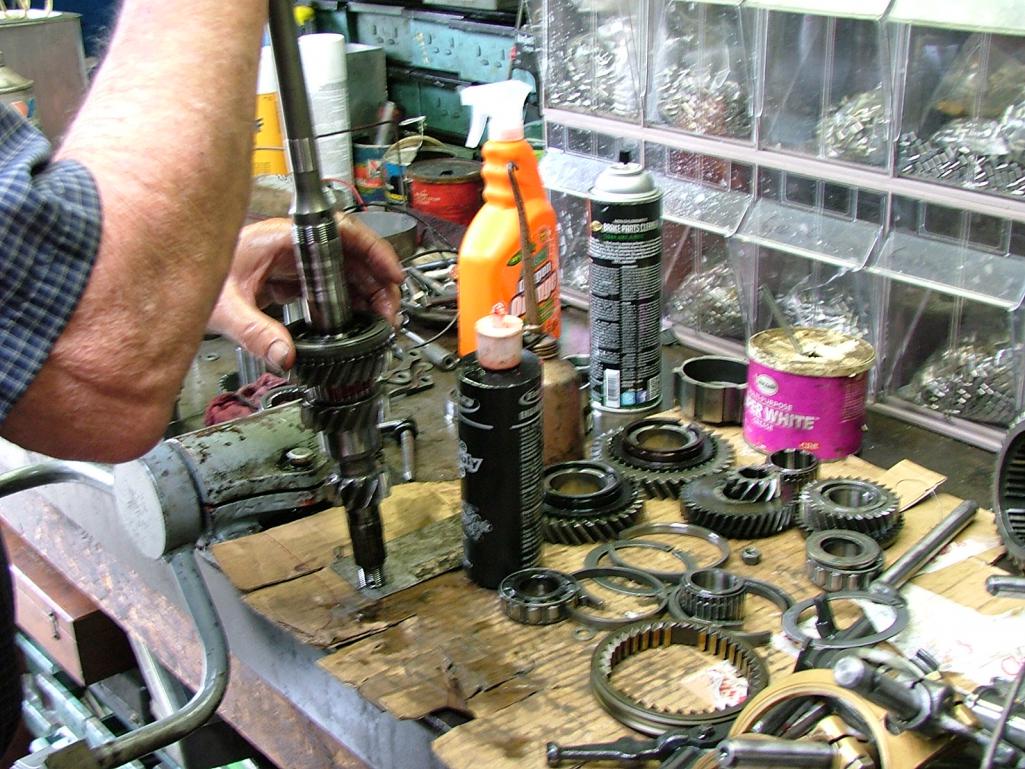
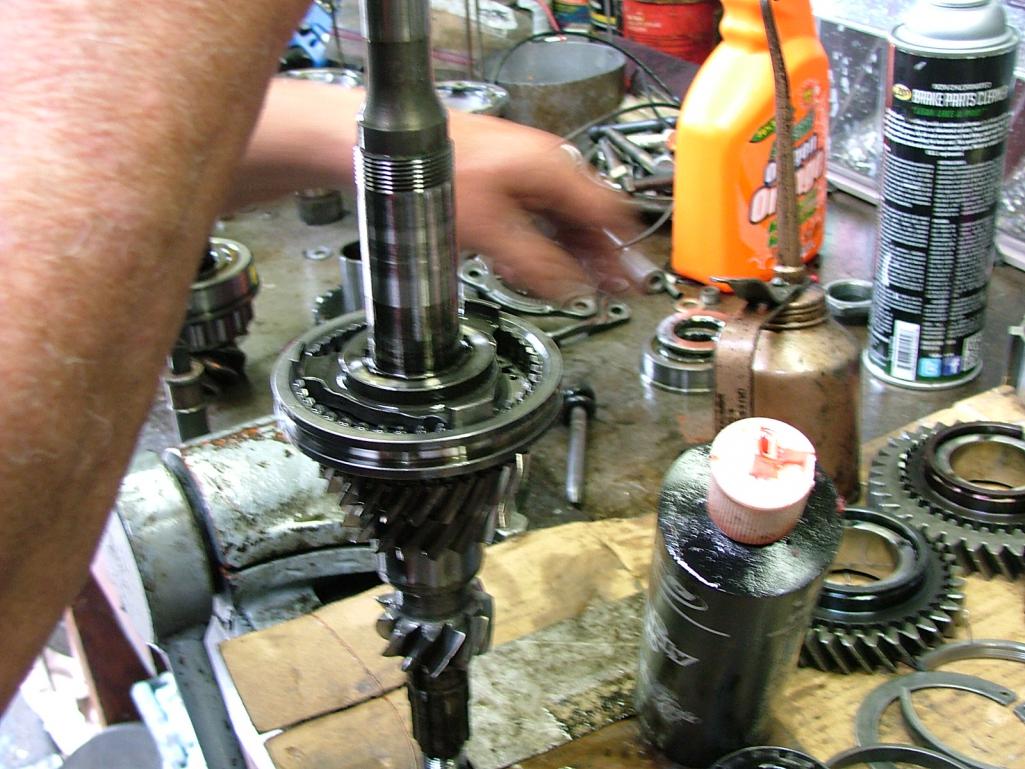
Posted by: Lucky9146 Jun 4 2019, 02:04 PM
Here comes the bearing clamp and bearing, nut and torque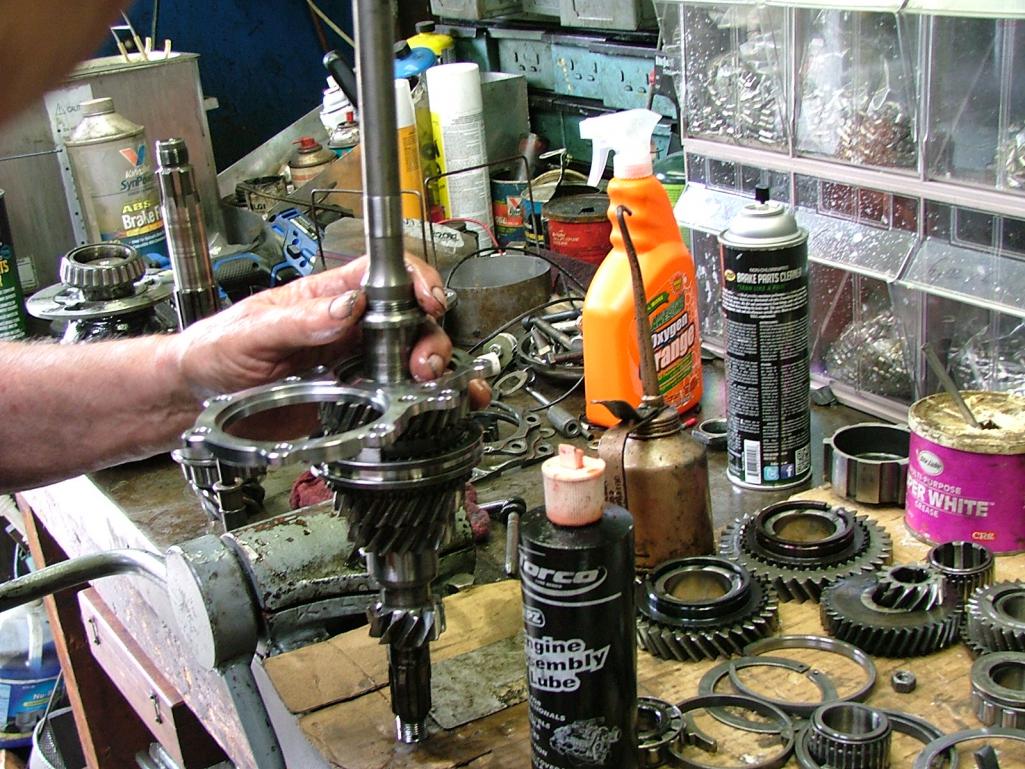
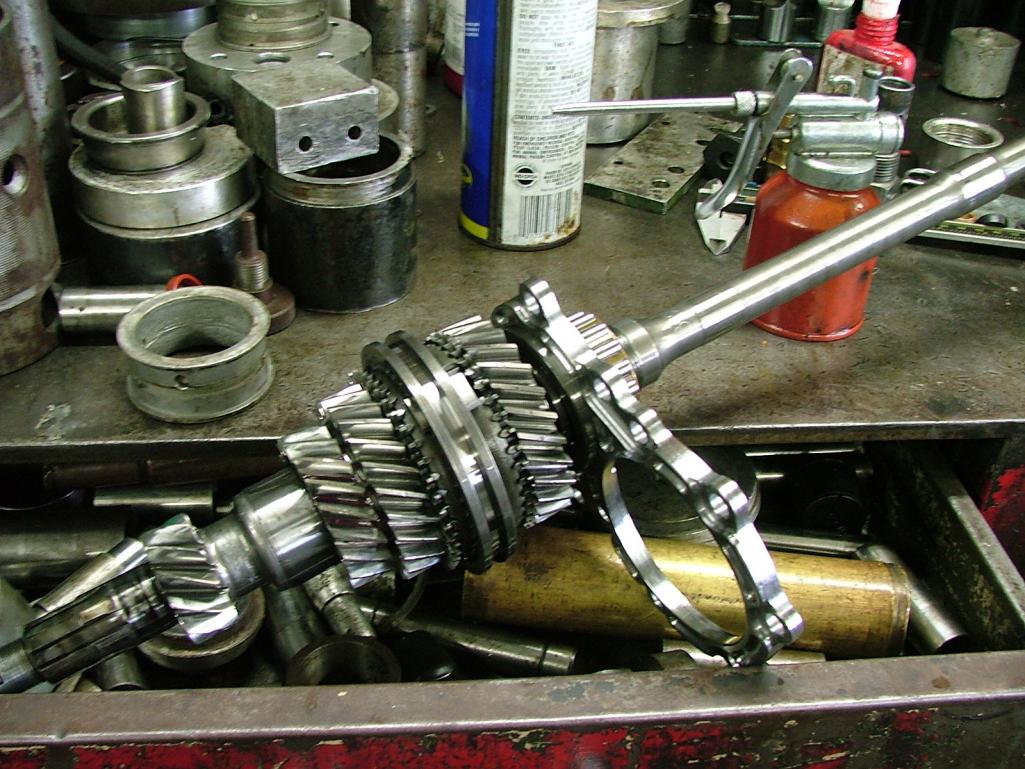
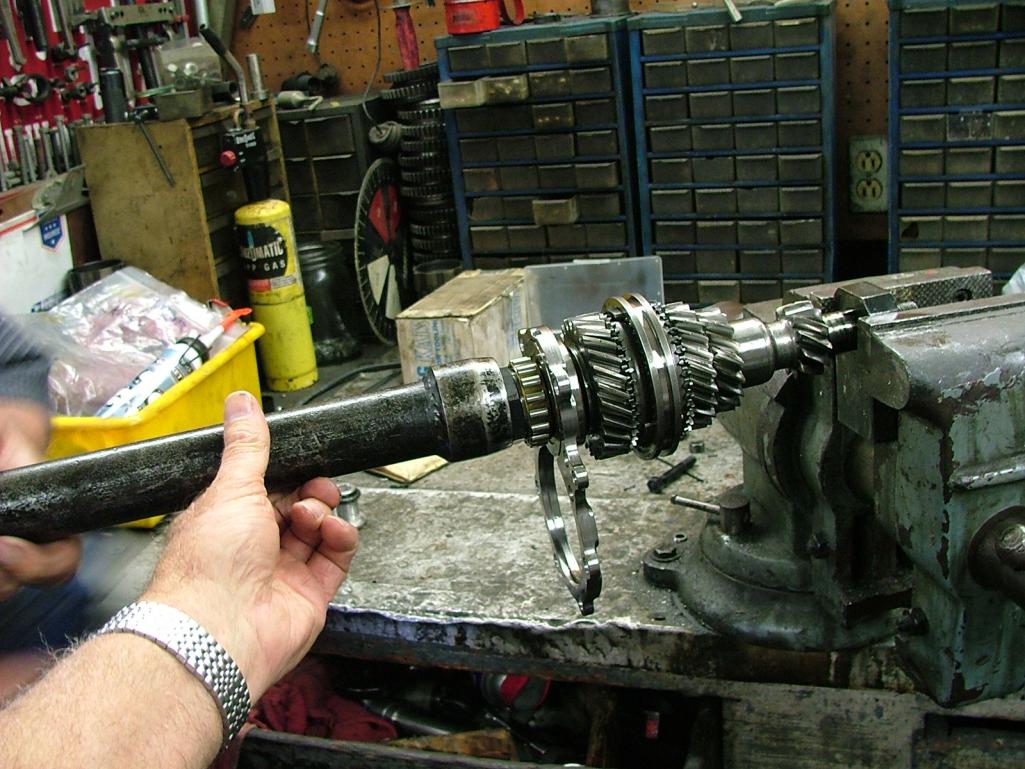
So now on to drilling and tapping the hole for the inner support block. That is the template provided by Martin Bott as a means to locate the hole but my guy was not impressed and with the use of his cut away case made a true center punch mark. Not to say this would not work and they were very close to be fair.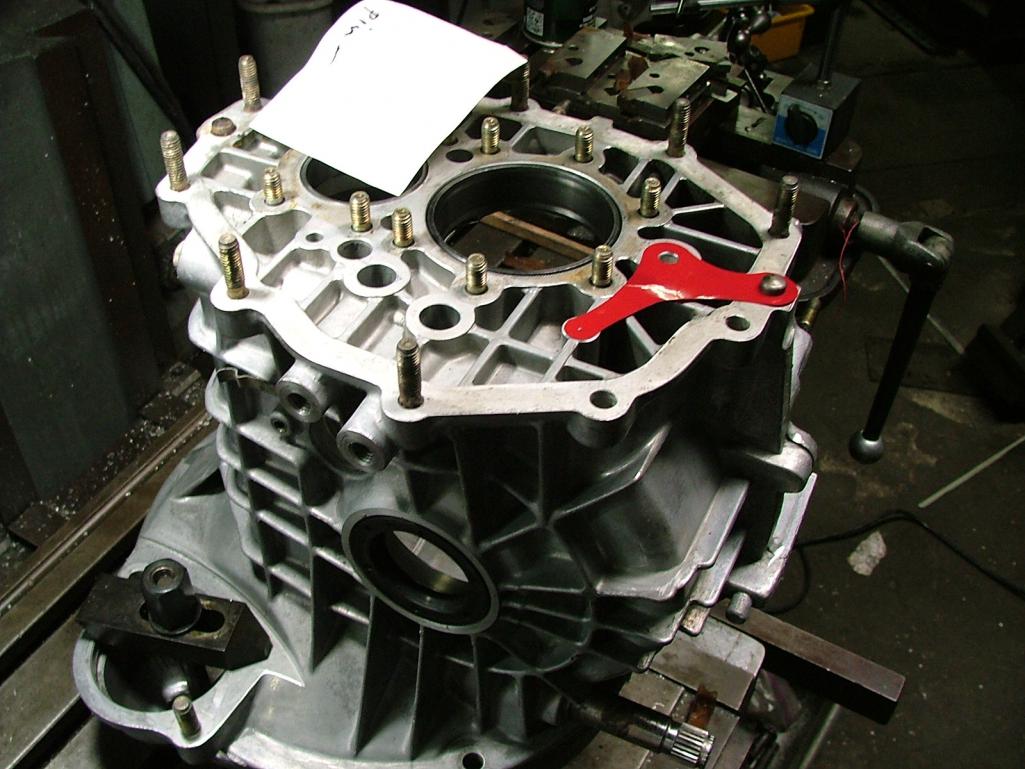
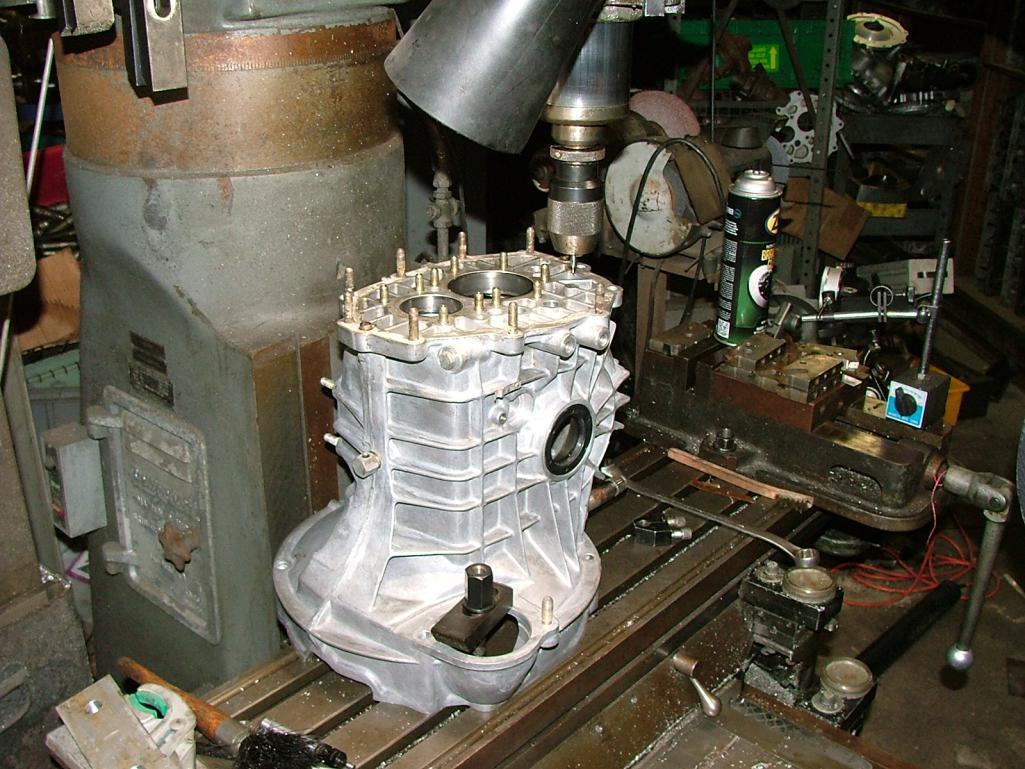
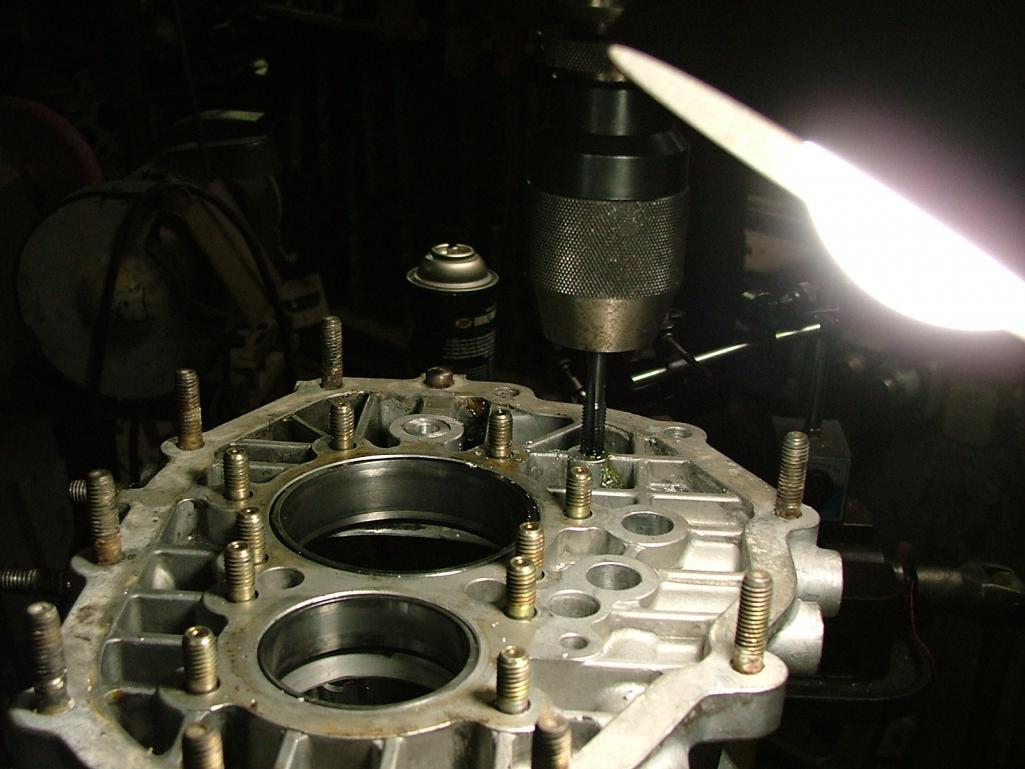
Posted by: rgalla9146 Jun 4 2019, 03:35 PM
I love it.
Beautiful illustration.
Done by a guy who is obviously very experienced.
Just happens to have a pair of 356 Carrera 4 cam heads on the bench too.
Made my day.
Nice GT too.....what color is that again ?
Posted by: Lucky9146 Jun 4 2019, 10:08 PM
Continuing on with Saturday work which by the way started at 9 am and went to 6 pm.
Switching the shifter fork from the old rod on left to the new on right. By the way this is the rod you have to make a deposit on to a guy in New Jersey for Martin until you return the old rod something I did not know until purchase time.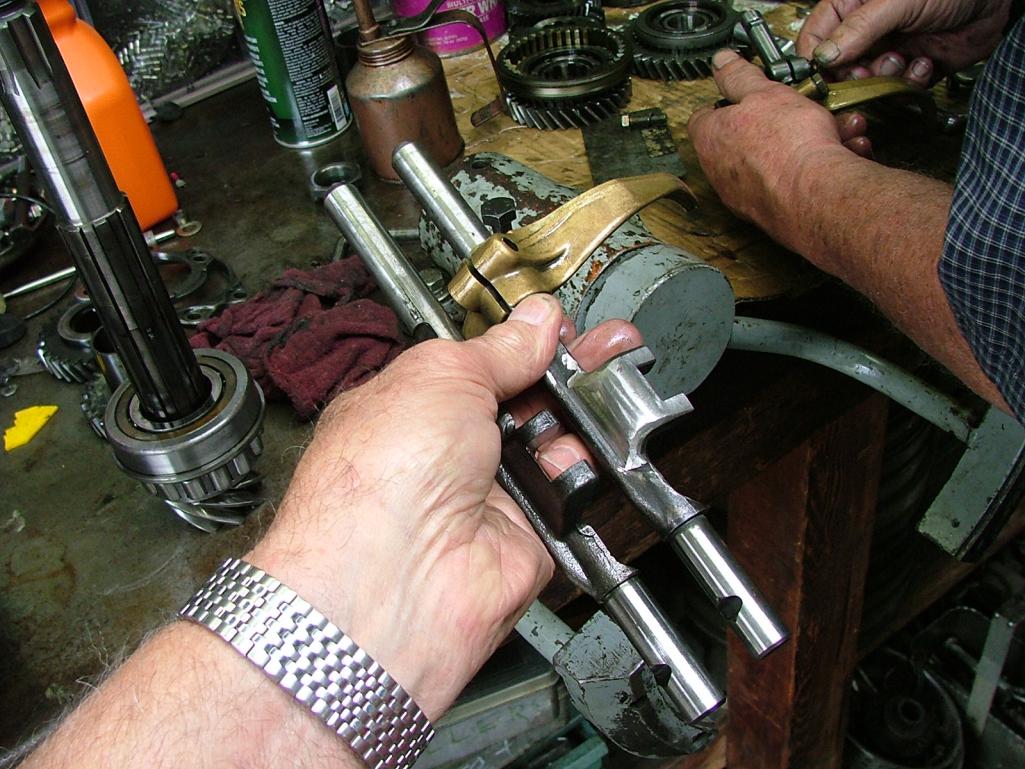
Now with the block installed a trial fit of the side shifter housing to the inner support block with shift rods.
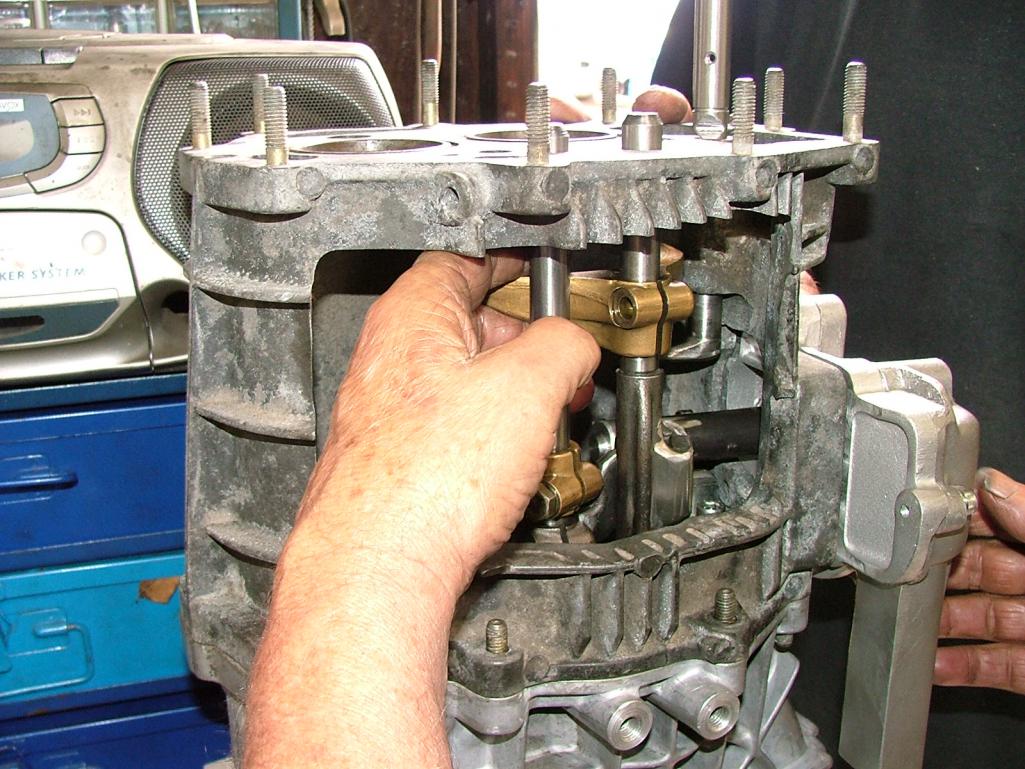
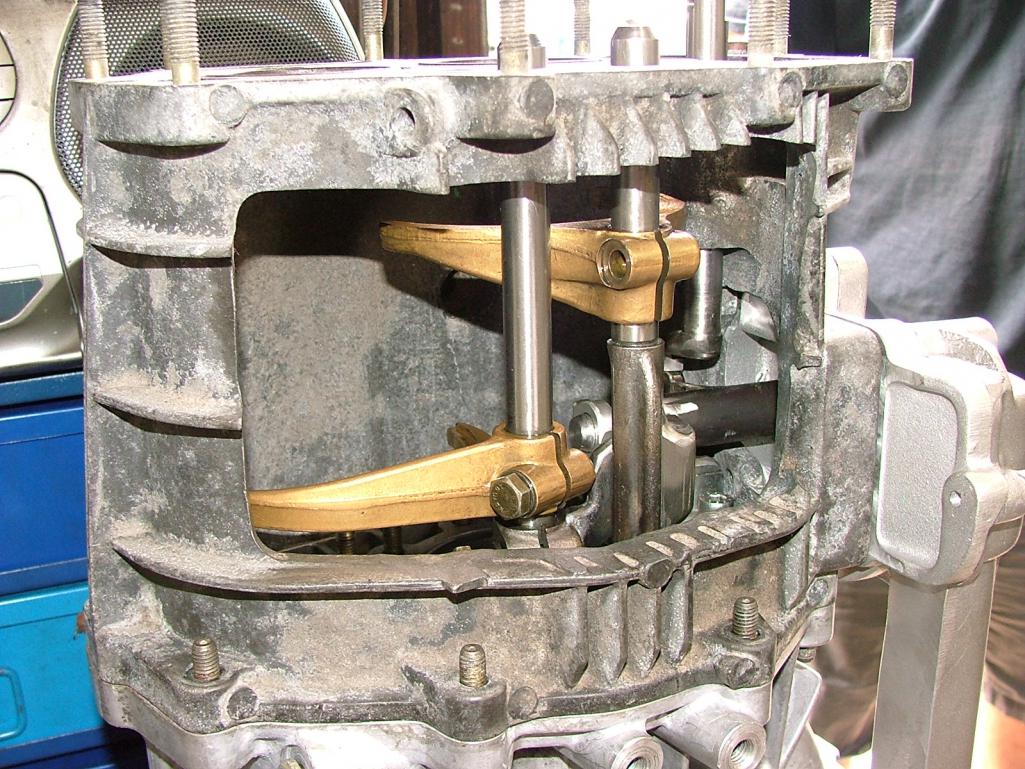
Next was a fit of the ring gear assembly which yielded those score marks on the housing, right where the speed pick up used to be.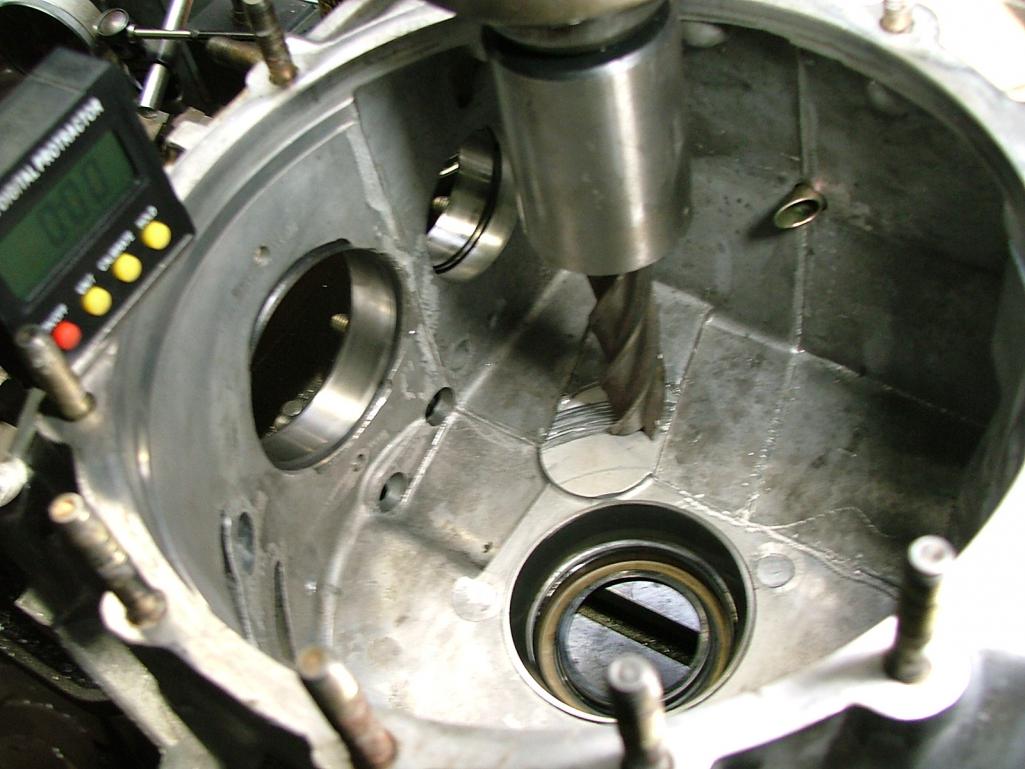
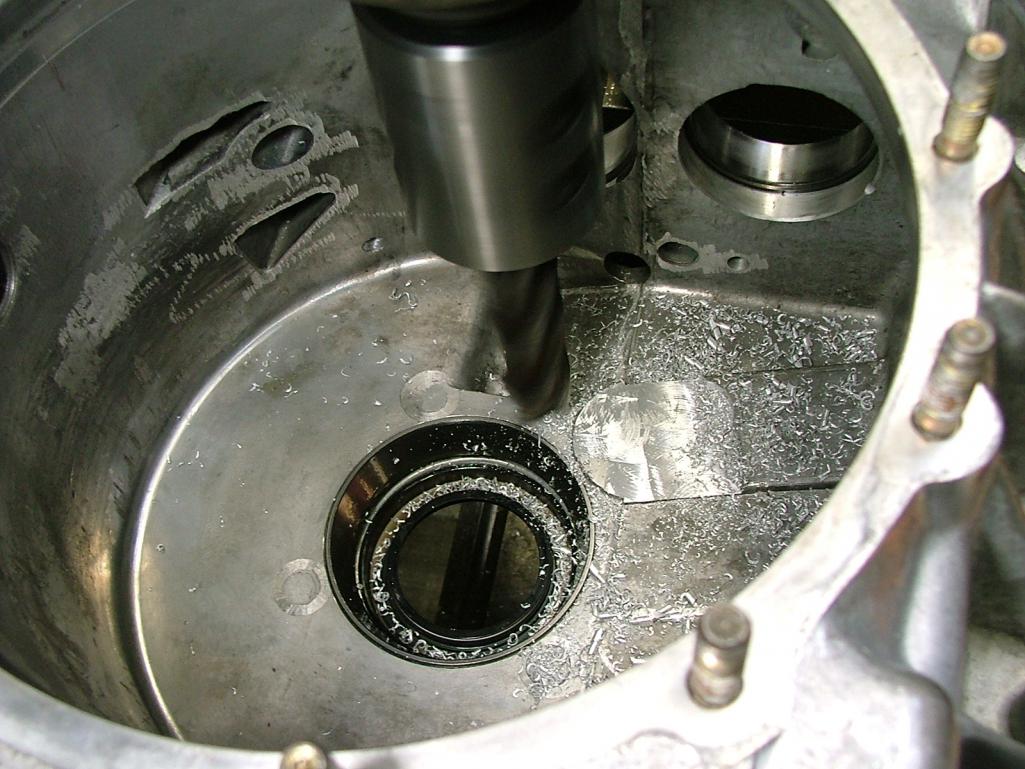
Posted by: Lucky9146 Jun 4 2019, 10:28 PM
I'd like to say it went well machining but we went through. A plug will be fitted to the hole later.
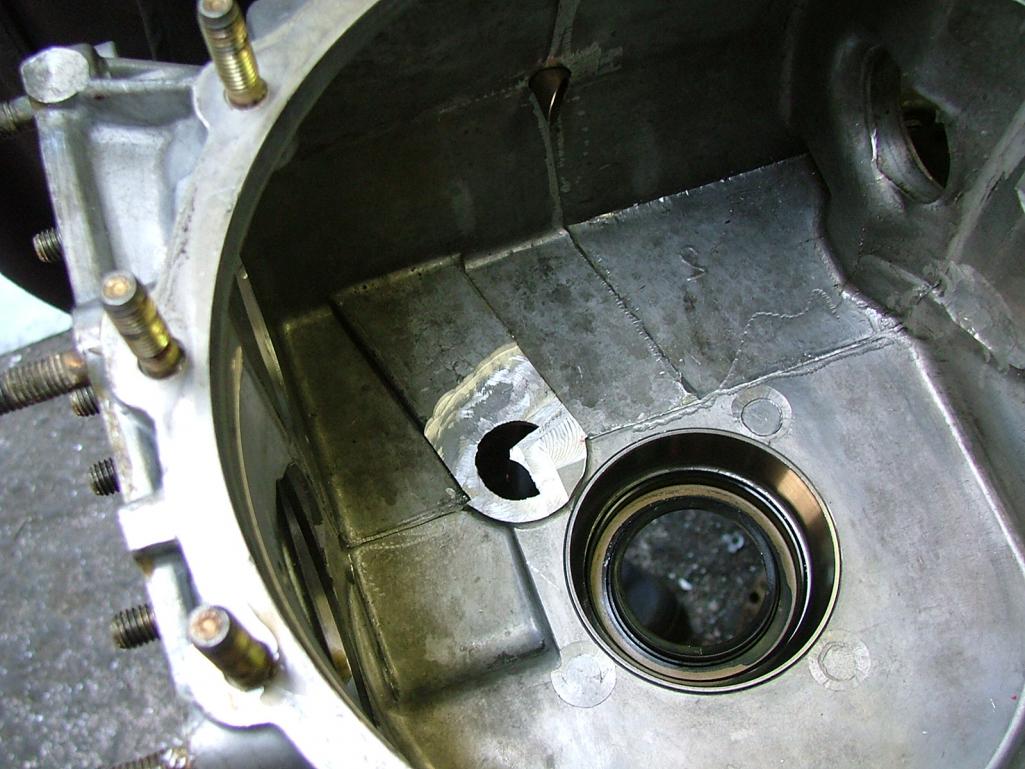
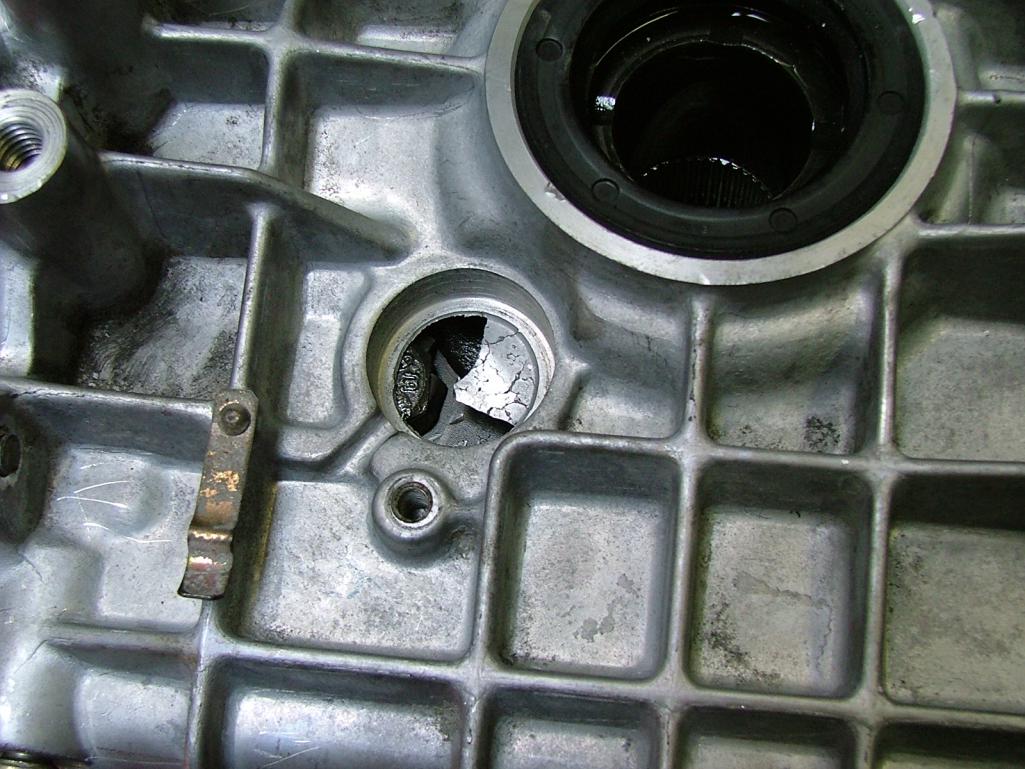
I forget why the bearing had to come off here? 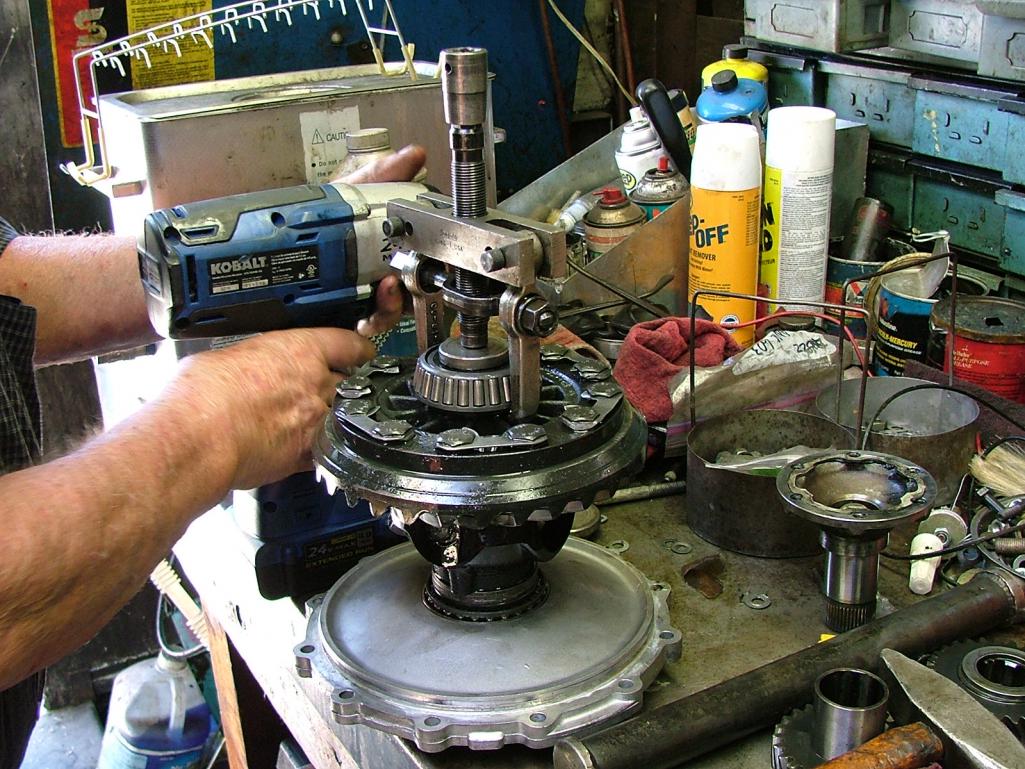
Installing the two shafts now simultaneously because of the new double bearing clamp pictures above in post 904 above, creates this situation, and this was tricky.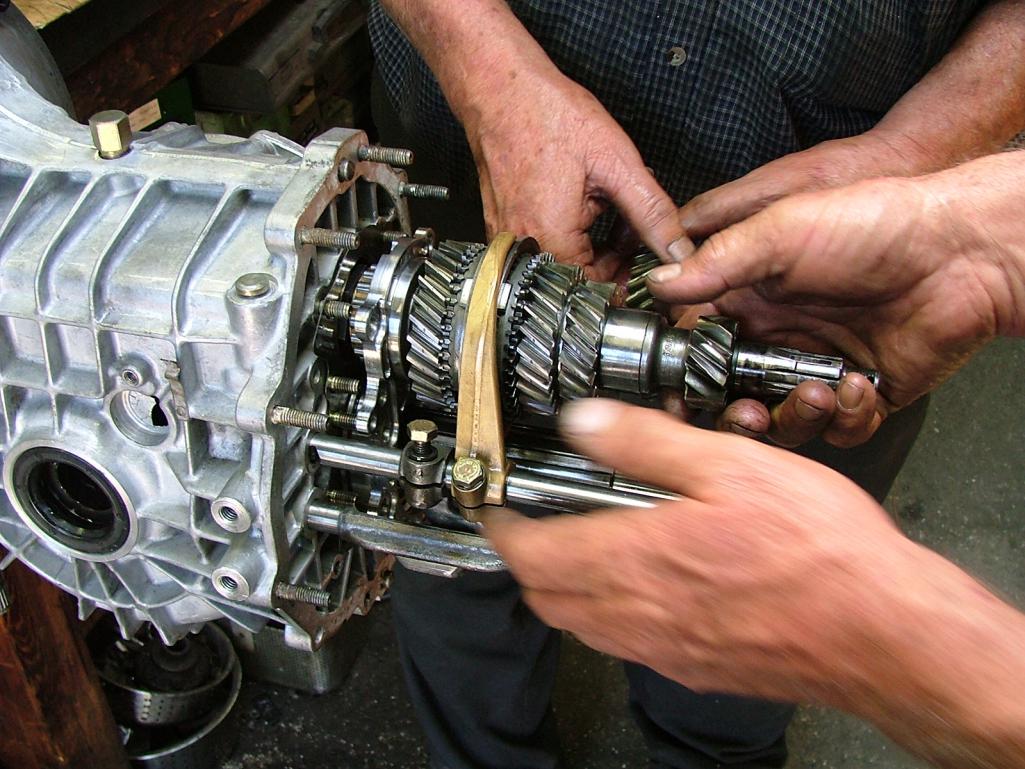
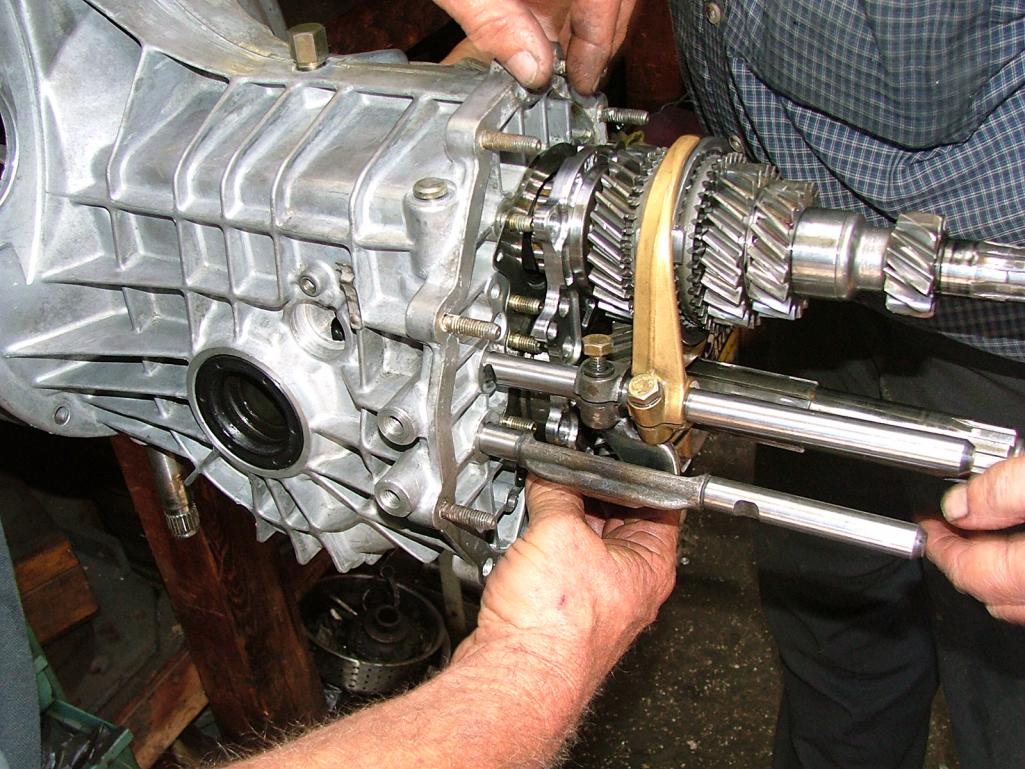
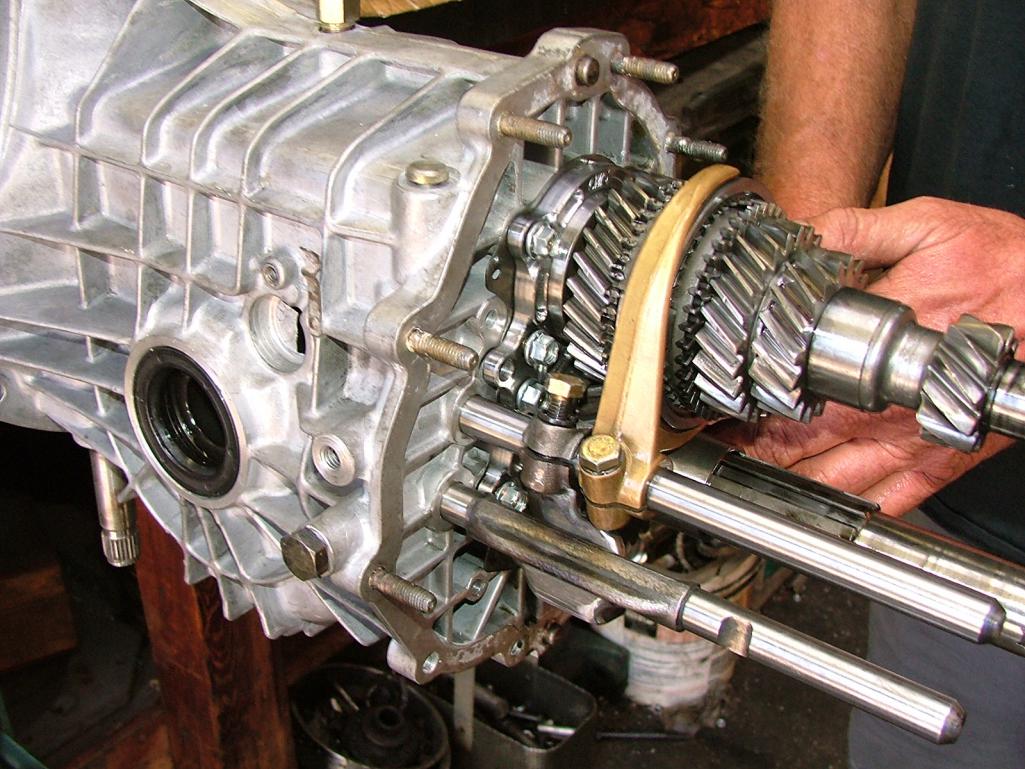
Posted by: Maltese Falcon Jun 4 2019, 10:34 PM
Looking good, and a top-shelf technician
Posted by: Lucky9146 Jun 4 2019, 10:43 PM
With that bearing clamp tightened it is time to fit the inner support block which needed two clearances shown.
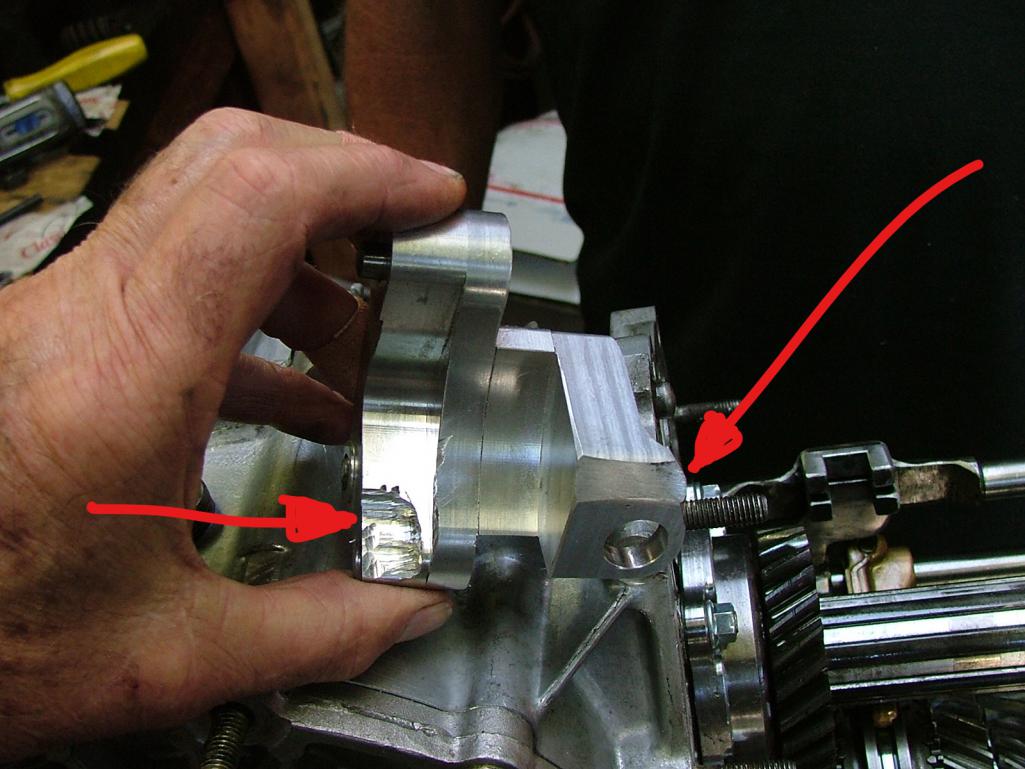
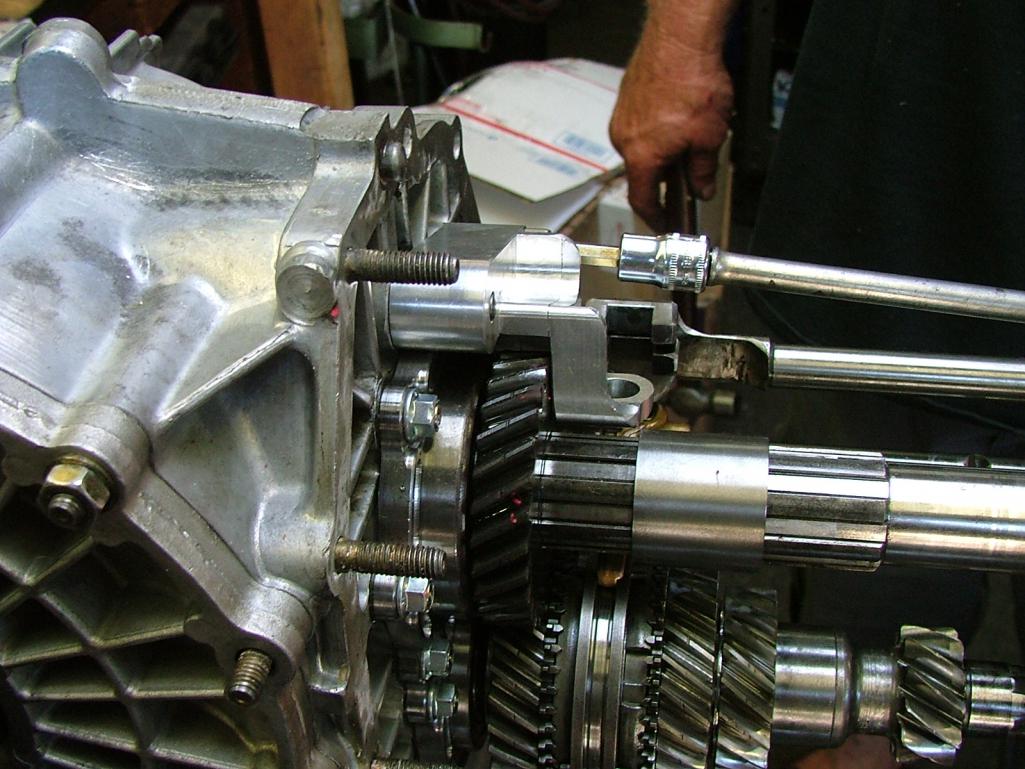
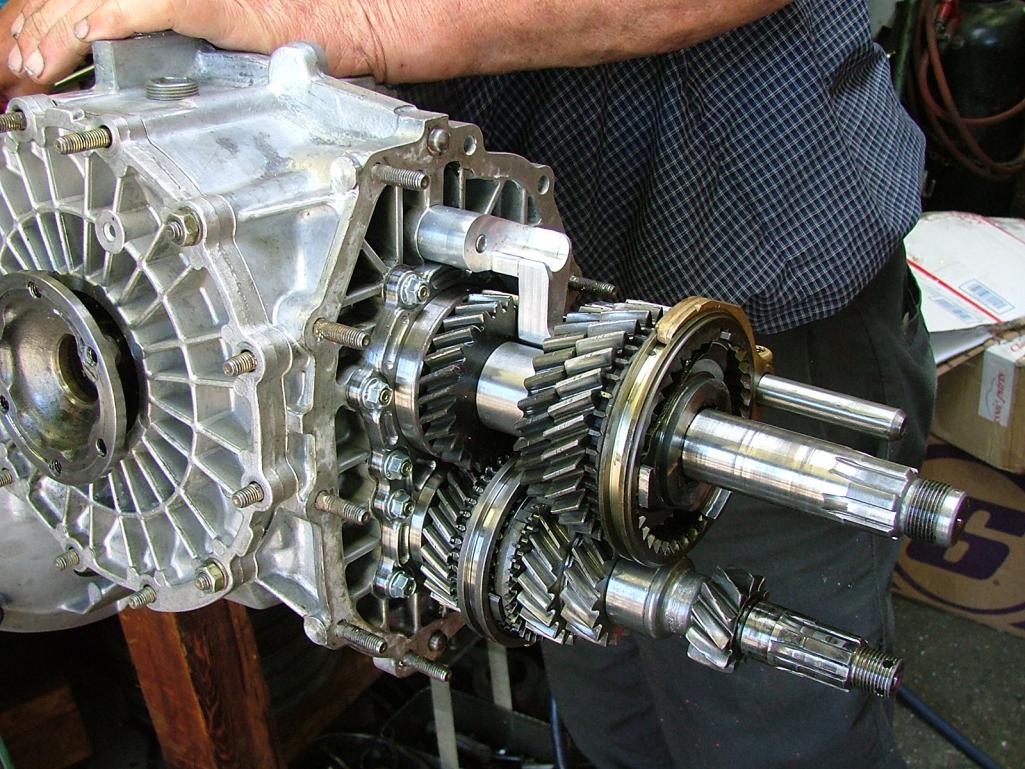
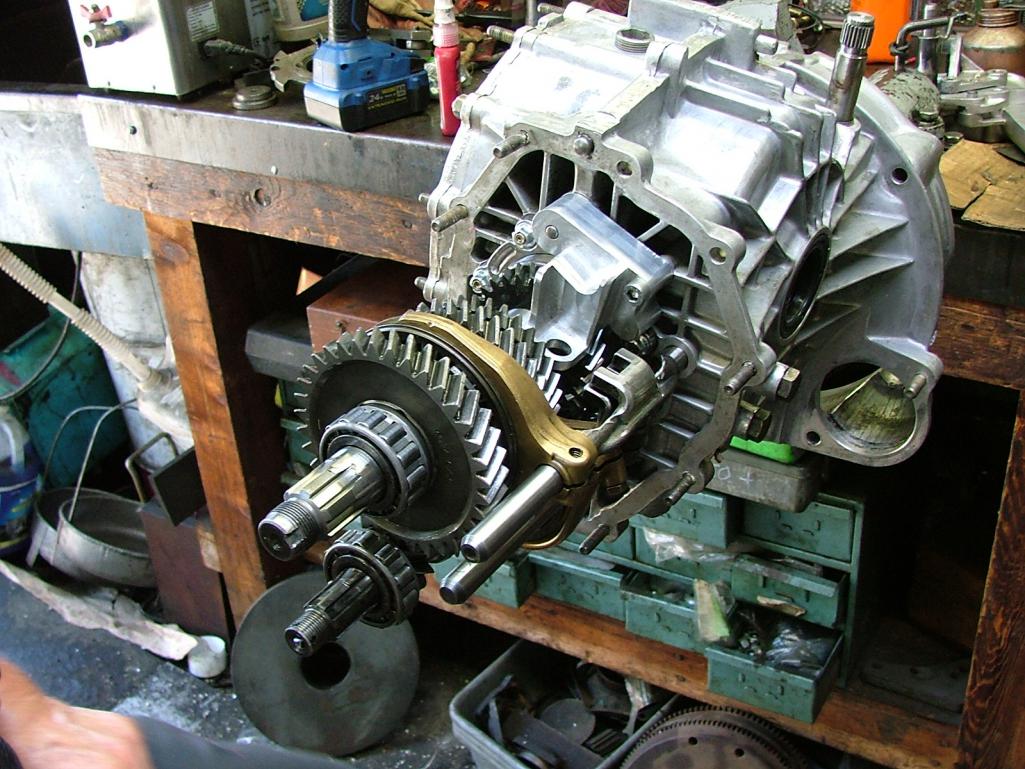
Shift rod adjustment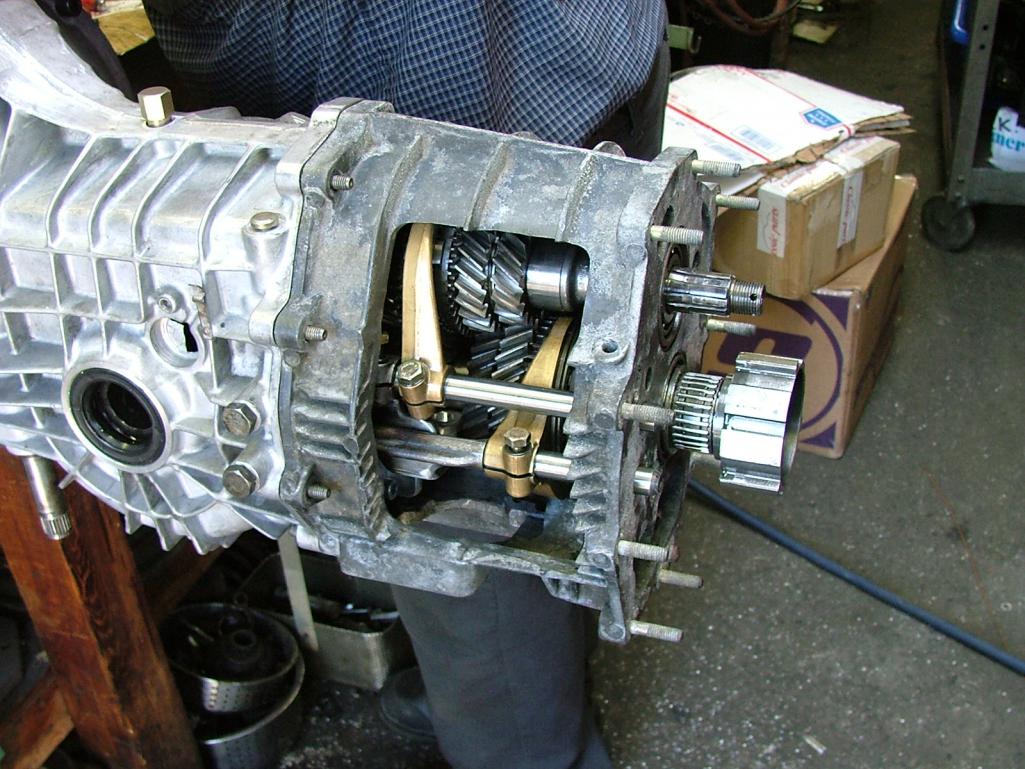
Posted by: Lucky9146 Jun 4 2019, 10:47 PM
I love it.
Beautiful illustration.
Done by a guy who is obviously very experienced.
Just happens to have a pair of 356 Carrera 4 cam heads on the bench too.
Made my day.
Nice GT too.....what color is that again ?
Thanks! I know you have this kit too. My car color? Light ivory
Posted by: Lucky9146 Jun 4 2019, 10:50 PM
Looking good, and a top-shelf technician
Thanks Marty! Yes, I think the planets aligned for me to find him here in my back yard, well about 35 minutes drive, but darn close. Very talented knowledgeable guy.
Posted by: Lucky9146 Jun 4 2019, 11:07 PM
Old school torque wrenches
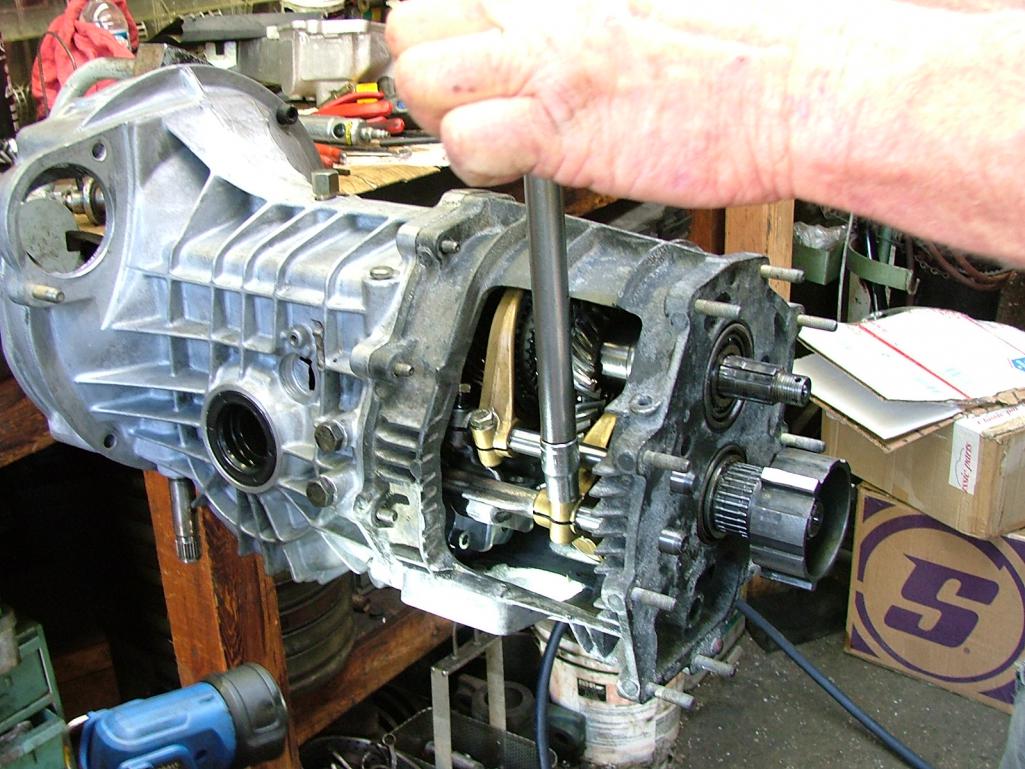
Another trial fit of the side shifter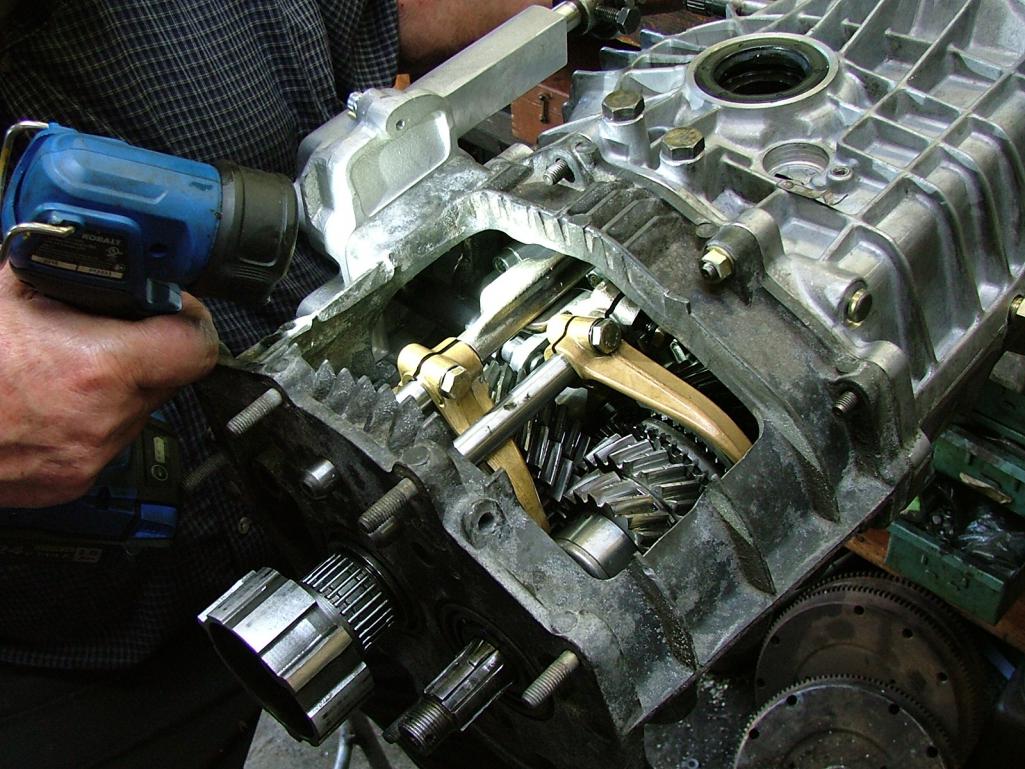
And more adjustment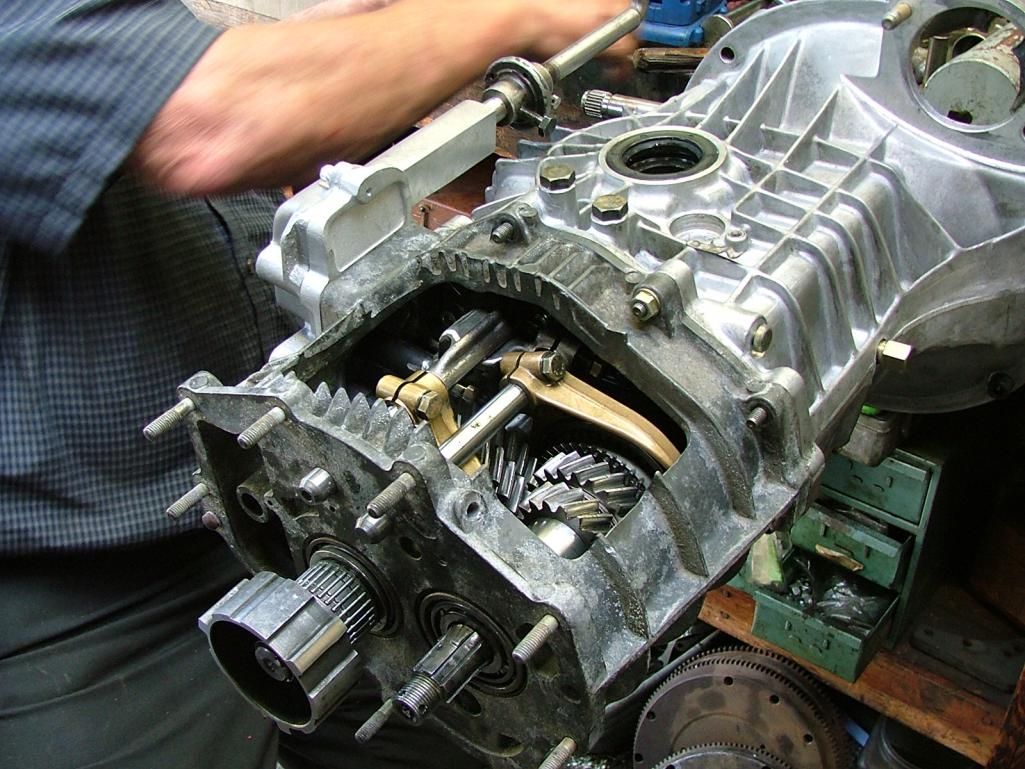
And now for the real case............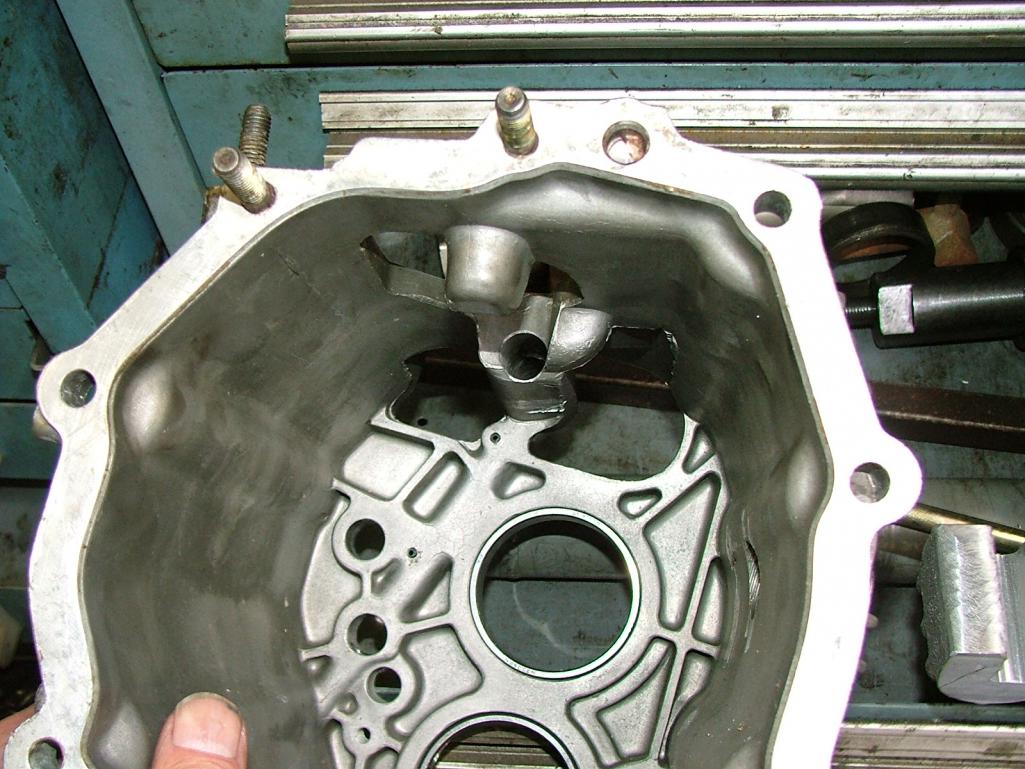
Posted by: Lucky9146 Jun 4 2019, 11:22 PM
Well there is just two problems. This rod now has to be installed from the inside in the real case.
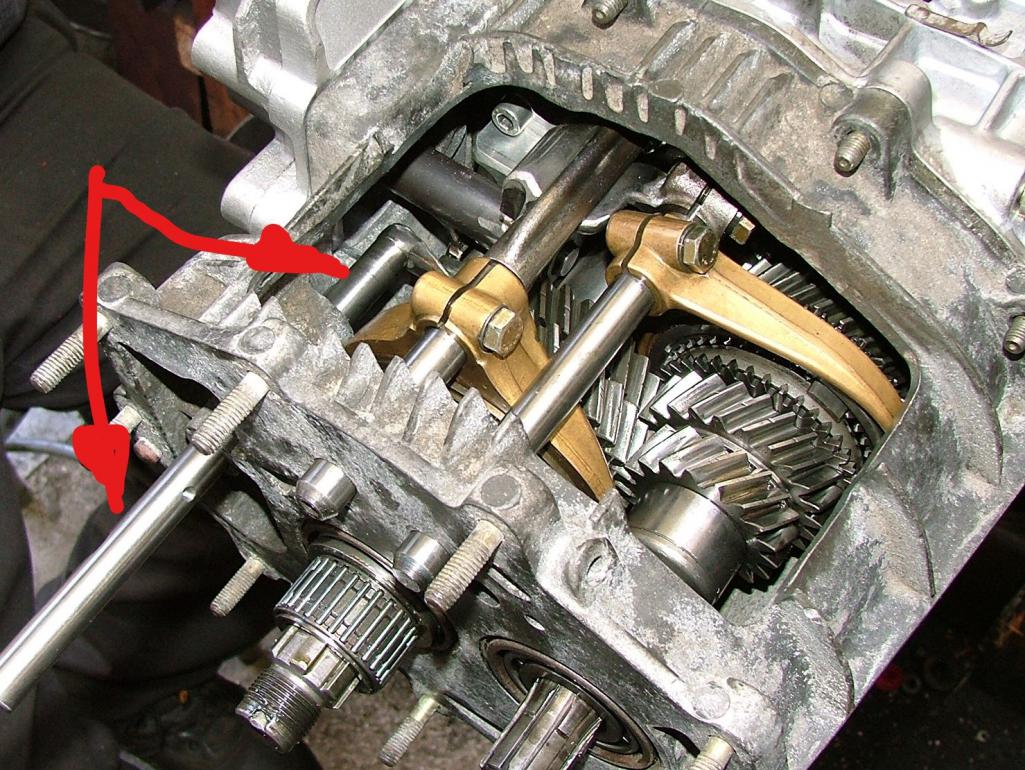
So these are now in the way and must come off!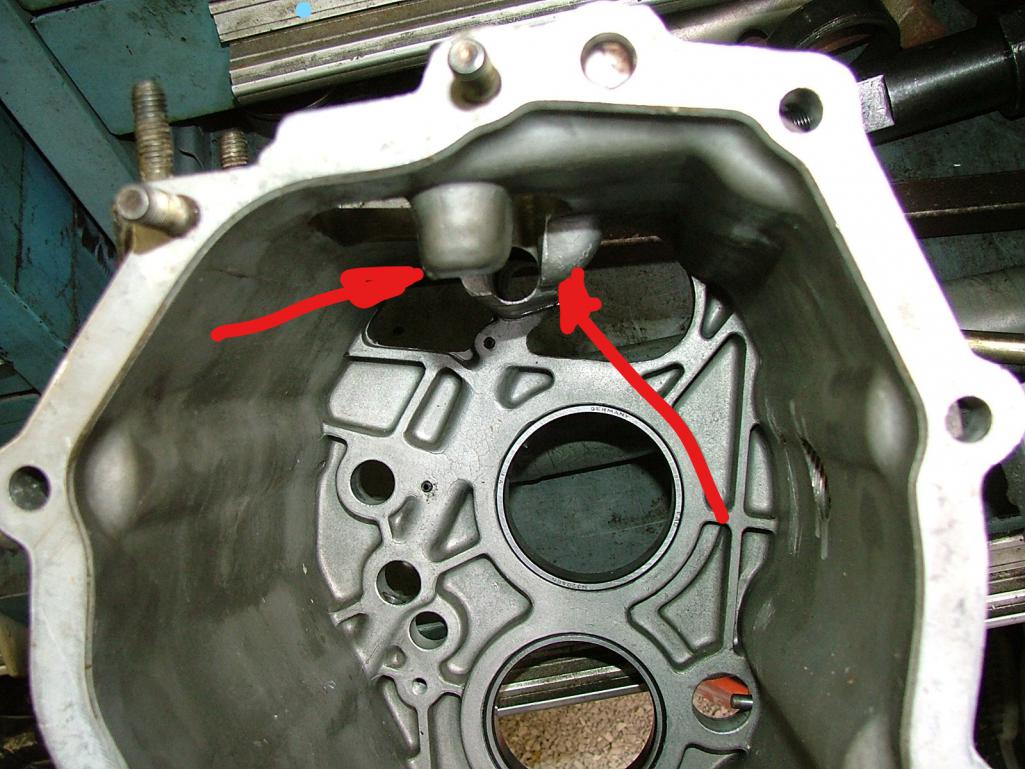
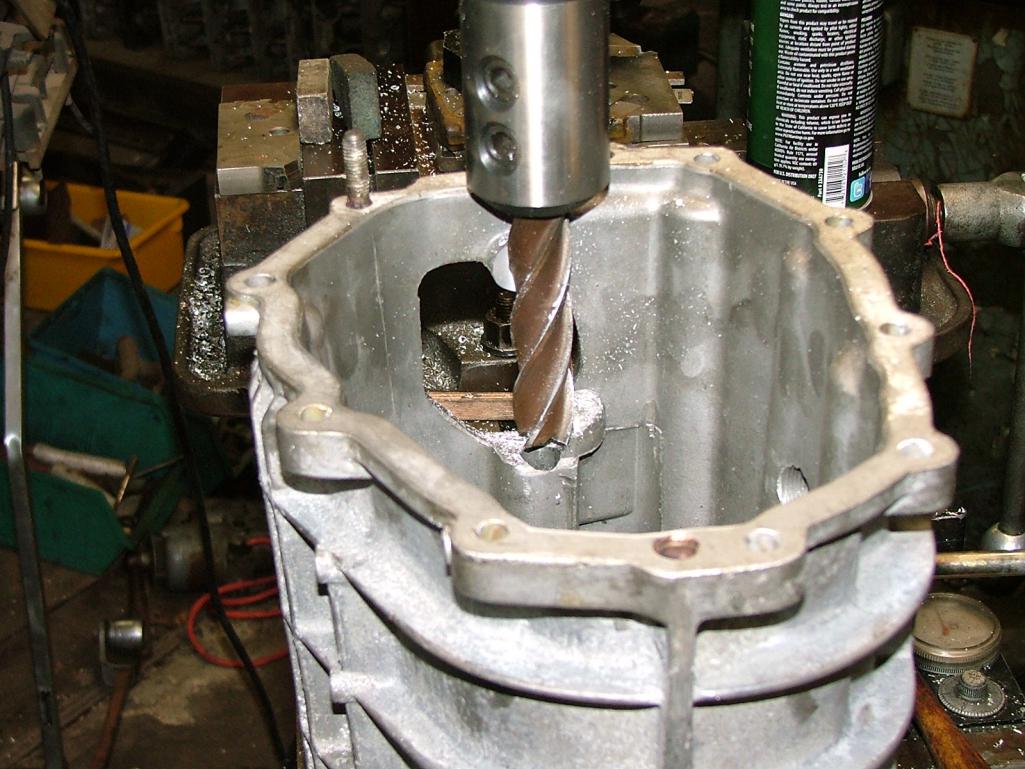
Posted by: rgalla9146 Jun 5 2019, 05:10 AM
Well there is just two problems. This rod now has to be installed from the inside in the real case.
So these are now in the way and must come off!
Some of your clearancing was due to installation of the bearing support plate,
some for the later case speedo pickup.
I didn't have to remove the protrusions in the center housing. ????
Older mag case ?
Great pics.
You're Lucky to have such an experienced tech.
I was pulling you leg about the color.
My GT is light ivory too.
Posted by: Lucky9146 Jun 5 2019, 10:20 PM
Well there is just two problems. This rod now has to be installed from the inside in the real case.
So these are now in the way and must come off!
Some of your clearancing was due to installation of the bearing support plate,
some for the later case speedo pickup.
I didn't have to remove the protrusions in the center housing. ????
Older mag case ?
Great pics.
You're Lucky to have such an experienced tech.
I was pulling you leg about the color.
My GT is light ivory too.
Agreed on the bearing support plate and was trying to say that the improvement did lead to further clearancing. Don't know what to say about your not having to remove protrusions
Maybe like you said older mag case? Just trying to share my experience. Thanks for chiming in.
Posted by: Lucky9146 Jun 5 2019, 10:34 PM
Keep in mind I am still documenting all that went on last Saturday.
So now with the case nubs machined off we are back at it and this shift rod goes in...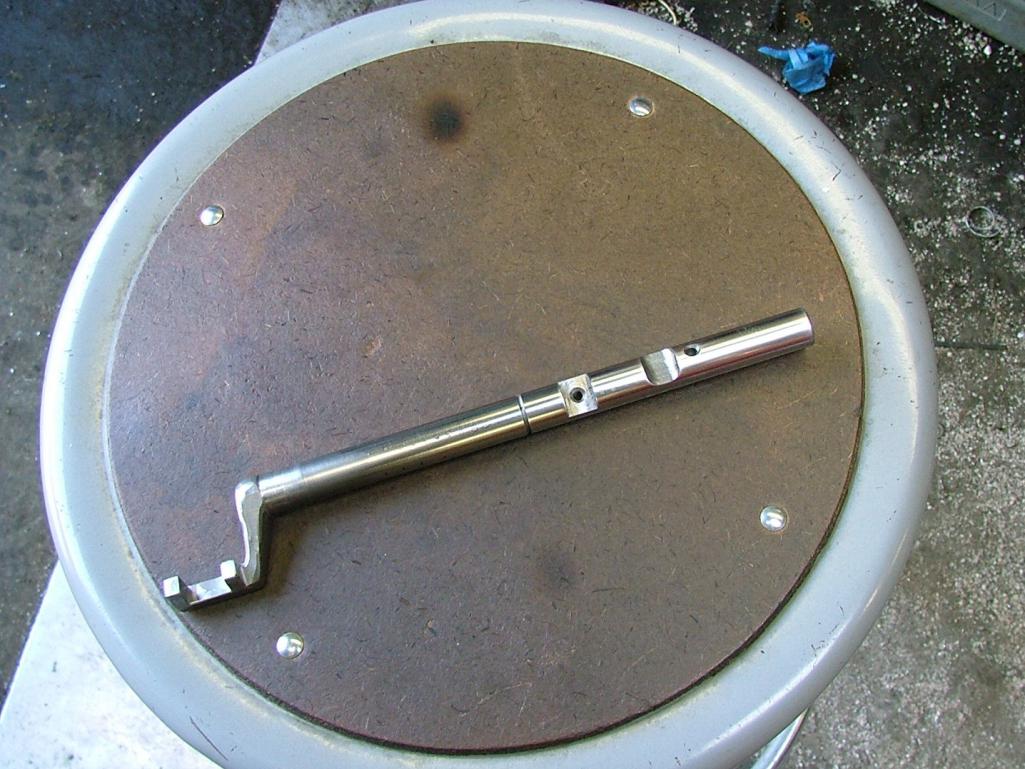
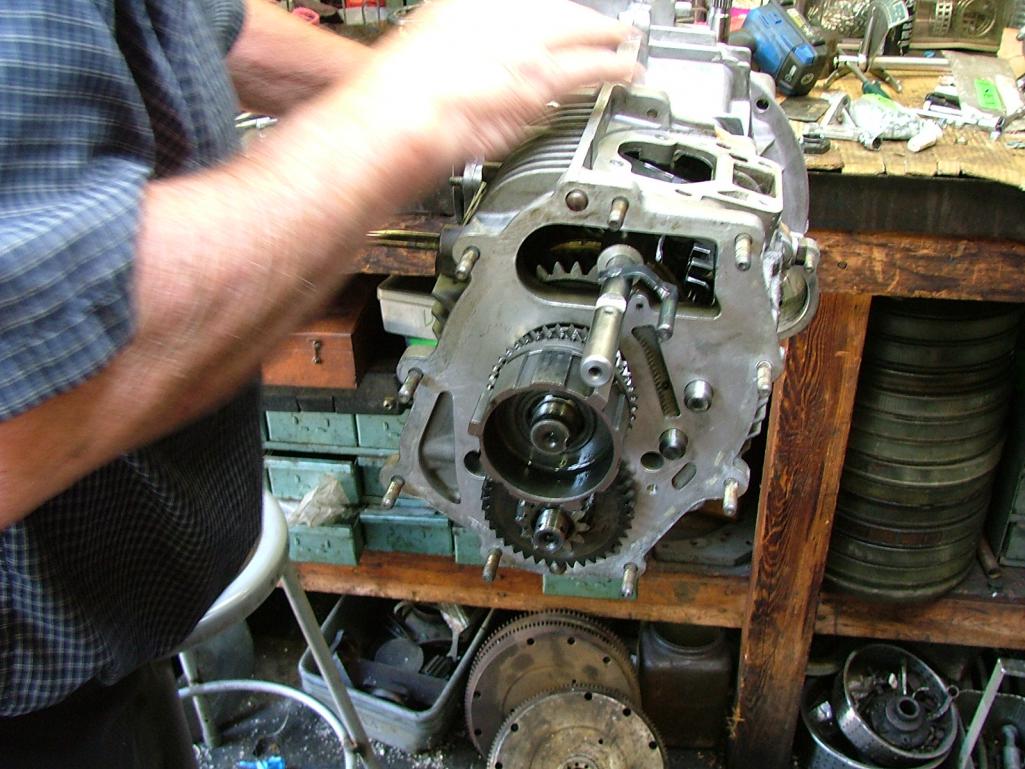
And on the 1st and 2nd gears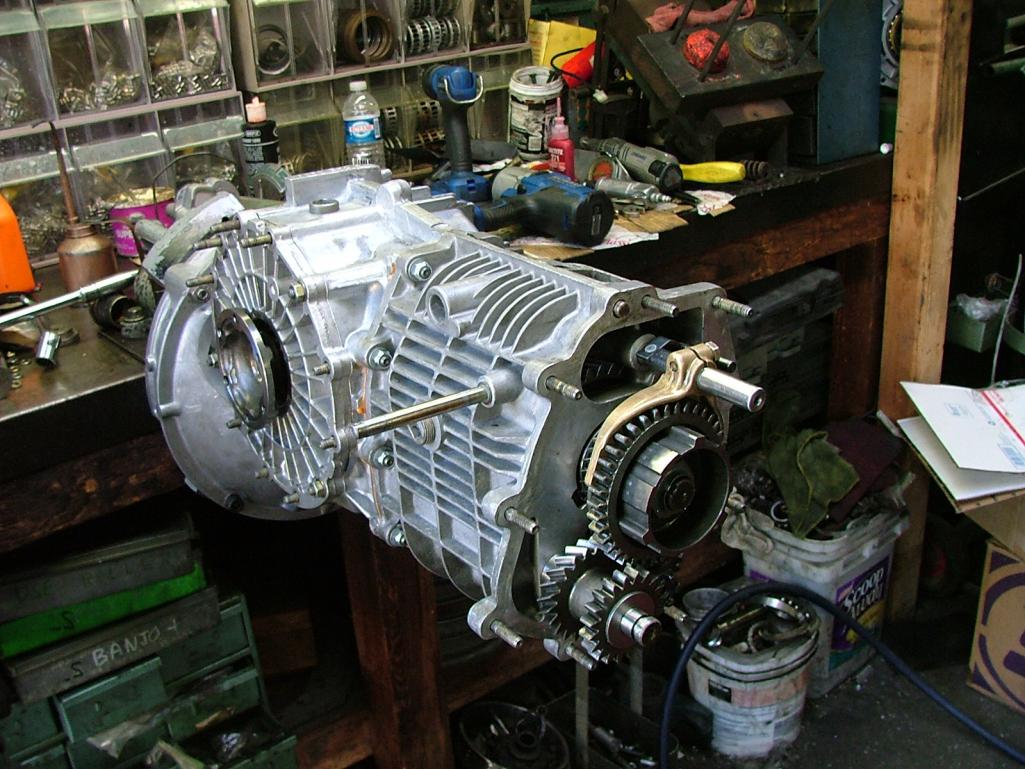
Trial fit of the aft cone said we still had material to remove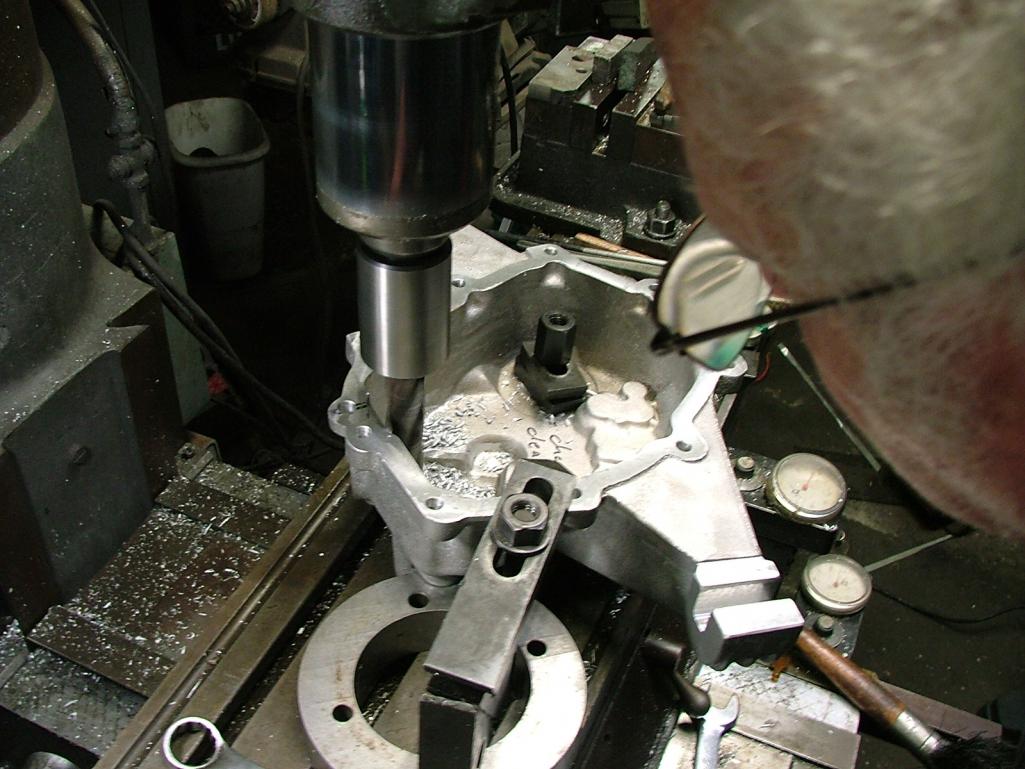
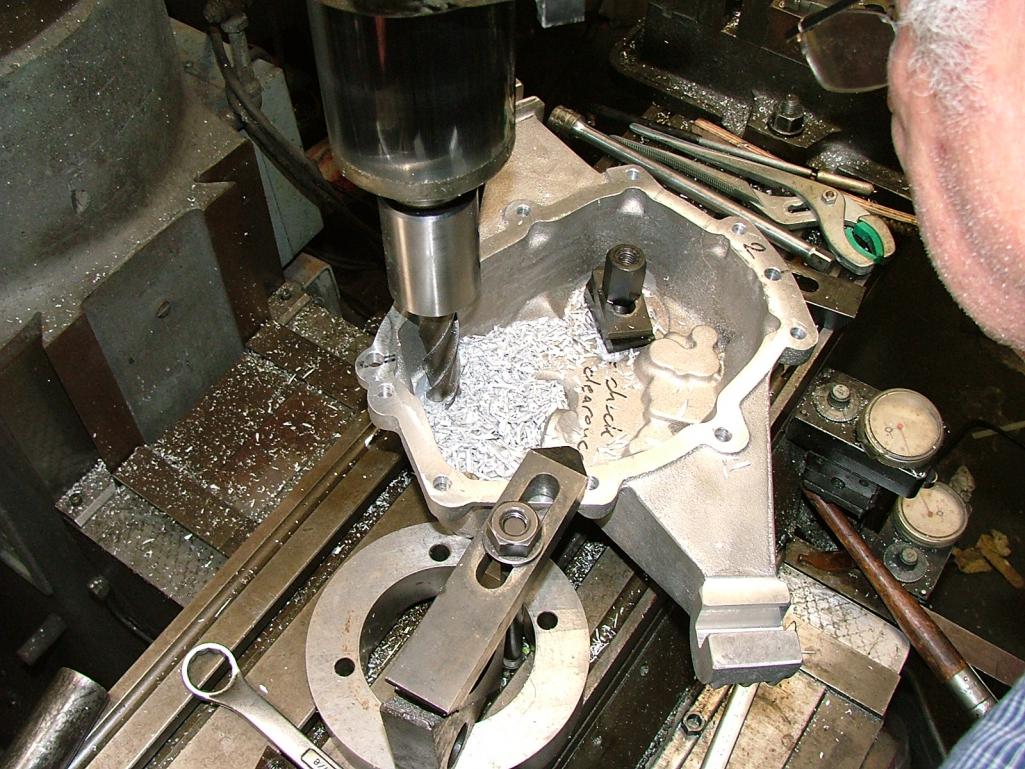
Posted by: Lucky9146 Jun 5 2019, 10:57 PM
With this additional machining complete and some hand work we are finally clear by the shift rod and fork and housing.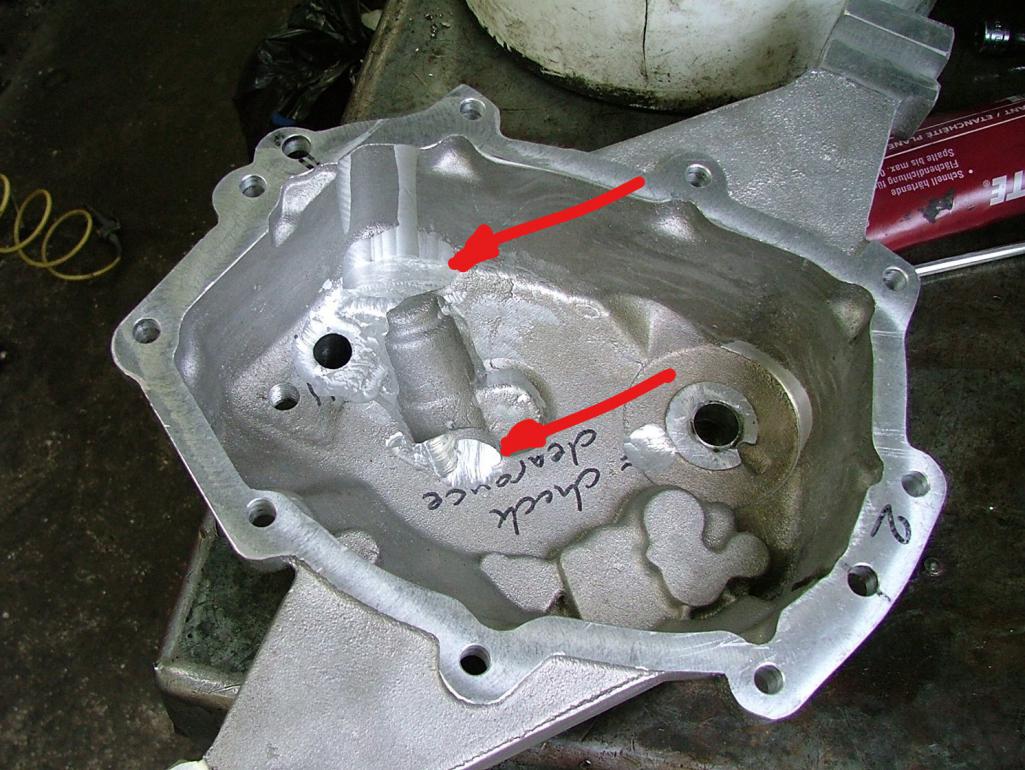
Here we are with the nose cone on and everything works, we call it quits on a very long Saturday.
Final assembly and button up to take place Monday morning.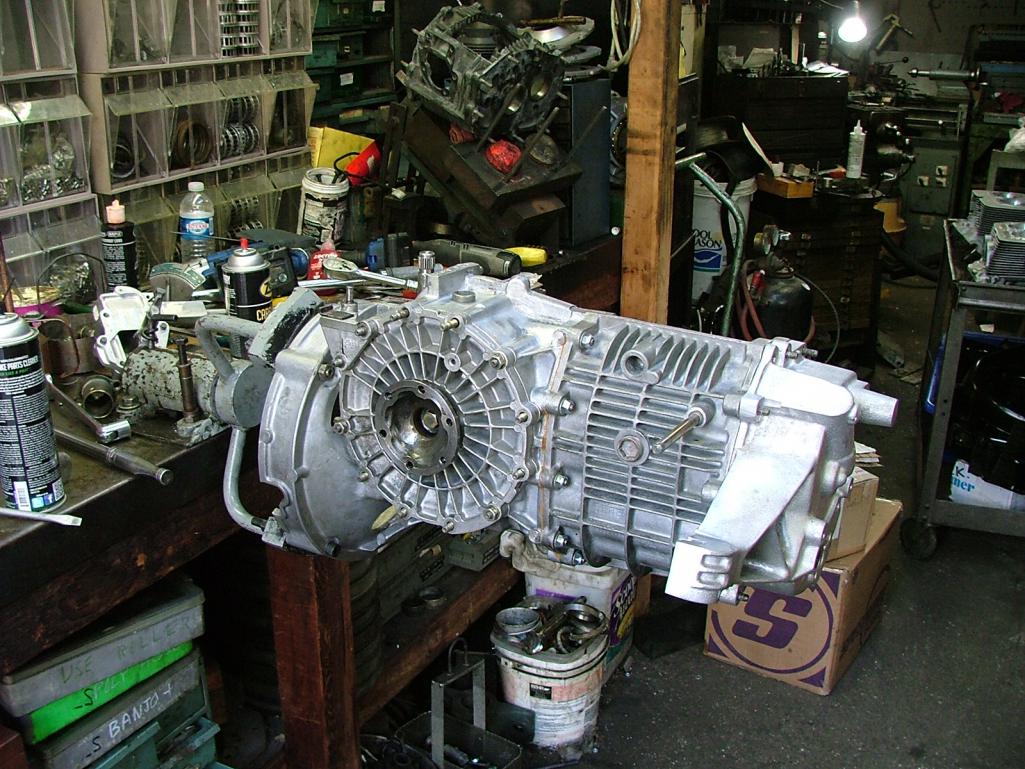
Posted by: Lucky9146 Jun 7 2019, 08:12 AM
Luft 6 happened almost a month ago already and I posted pictures on a tread shortly there after but did not post any of my car on this thread. This is one of my favorites that I took right after arriving.
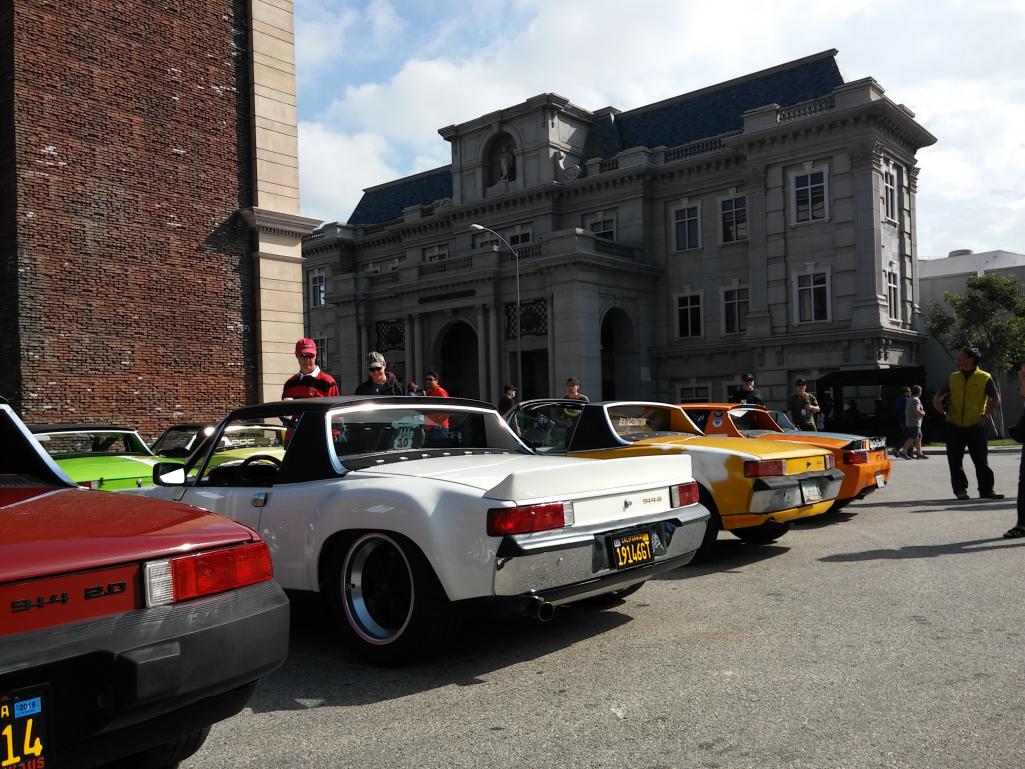
Posted by: Lucky9146 Jun 7 2019, 08:15 AM
I just received an email from Road Scholars with latest issue, that has toward the bottom of the article a picture of my car exiting the event. What a great day and how lucky to get a picture in the magazine. Will try to post link to article. https://roadscholars.com/luftgekuhlt-2019-goes-hollywood?
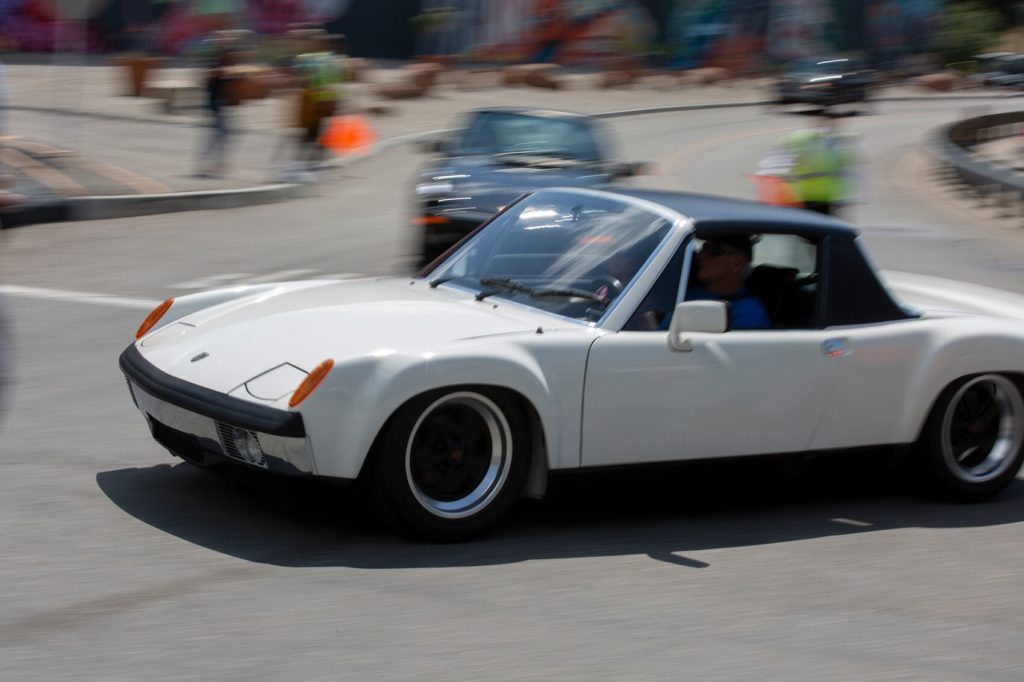
Posted by: moparrob Jun 7 2019, 07:50 PM
I just received an email from Road Scholars with latest issue, that has toward the bottom of the article a picture of my car exiting the event. What a great day and how lucky to get a picture in the magazine. Will try to post link to article. https://roadscholars.com/luftgekuhlt-2019-goes-hollywood?
Wow, just wow. What a beauty.
Posted by: flat4guy Jun 7 2019, 09:09 PM
Love your car
Posted by: Lucky9146 Jun 9 2019, 06:47 AM
Love your car
Thanks! Much appreciated.
It is a hoot to drive and one of the most fun cars I have ever owned.
Posted by: Lucky9146 Jun 9 2019, 07:11 AM
I need to finish up on the transmission that was completed almost a week ago.
Last Monday 9 am sharp I was back to the shop to finish things up.
This is a picture of the inner support block the shift console mates to. 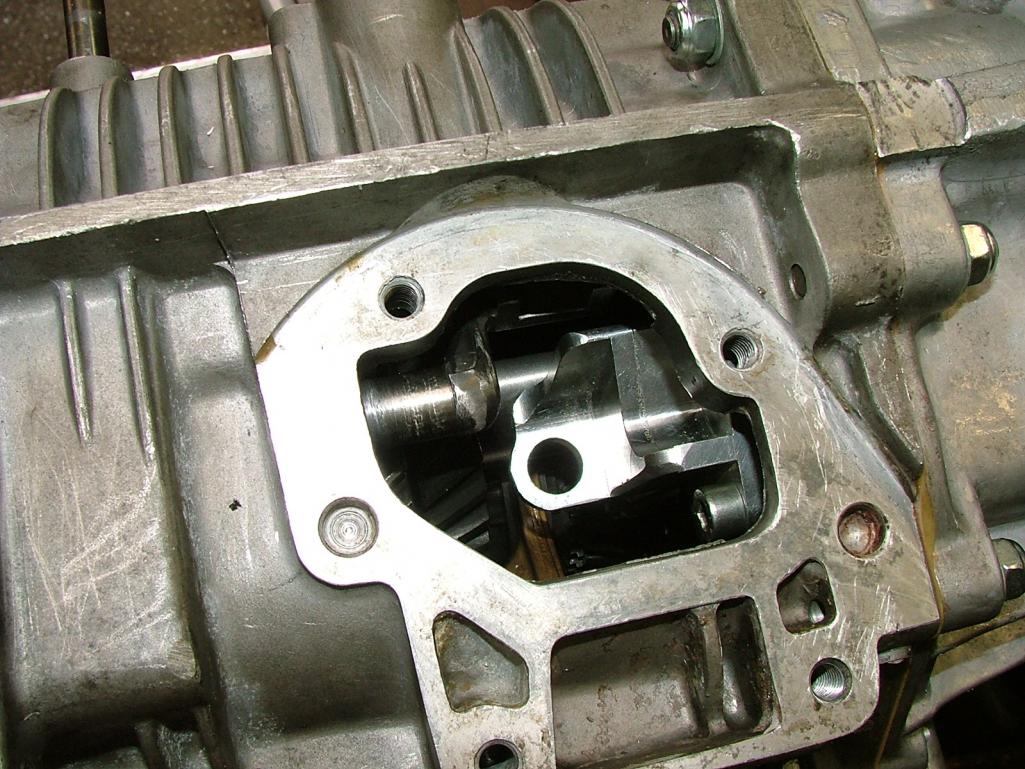
The hole for the reverse rod needed to be opened up and my guy came up with this cool approach by taking a shaft and putting a sharp corner on it making it a shaver. If you try to push it into the side of the hole while pushing in and out. Very cool idea and worked well!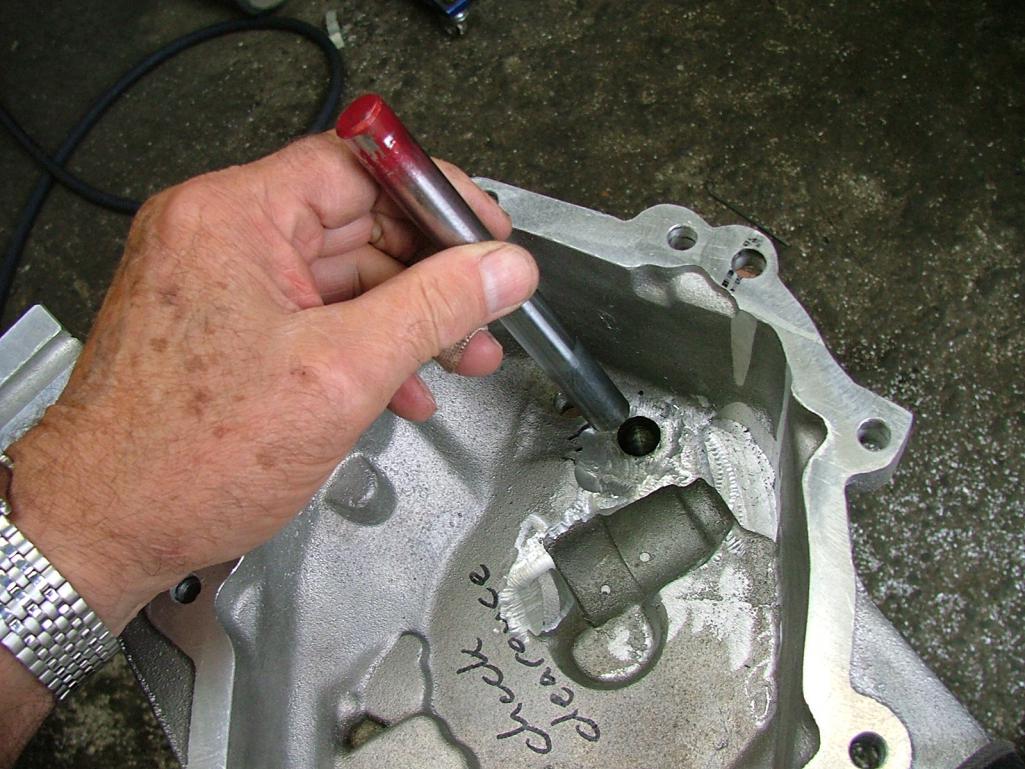
Ring gear now on the proper side for a 914.
Since trans is pictured upside down, that vent tube at the bottom needs to be rotated 180 deg since the trans will now be the opposite direction from a 911.
And this is correctly positioned now, failure to do this will result in oil coming out of the top of the box.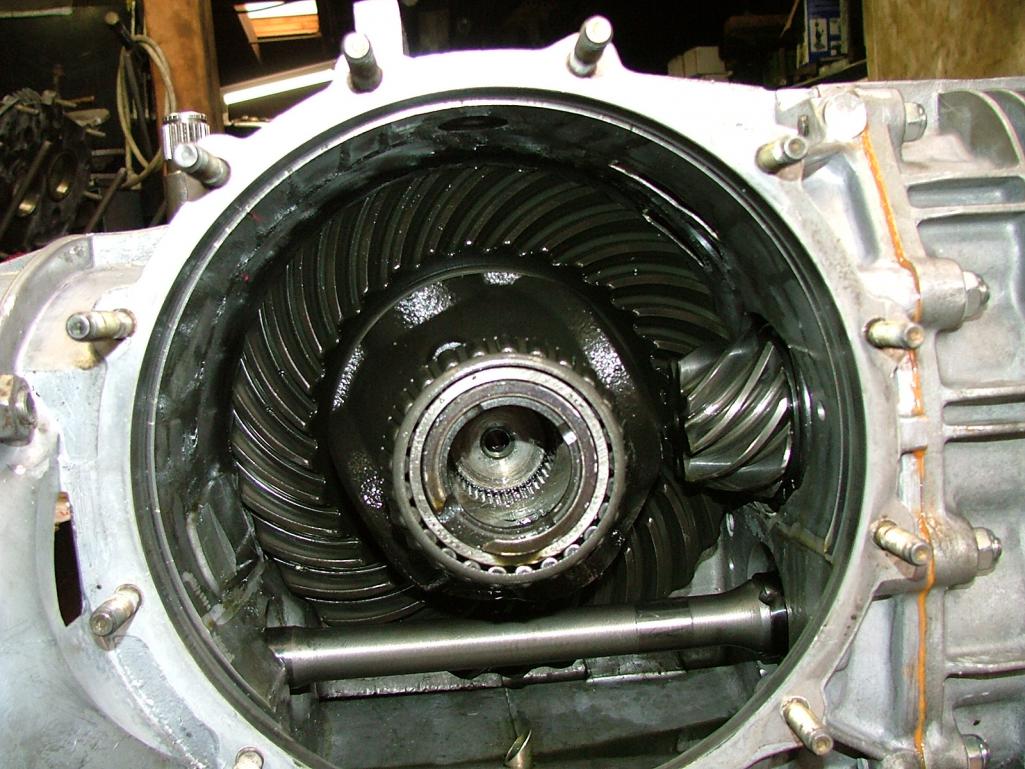
I had read that Lock-tite should be applied to the reverse rod screw. Done and hope it works.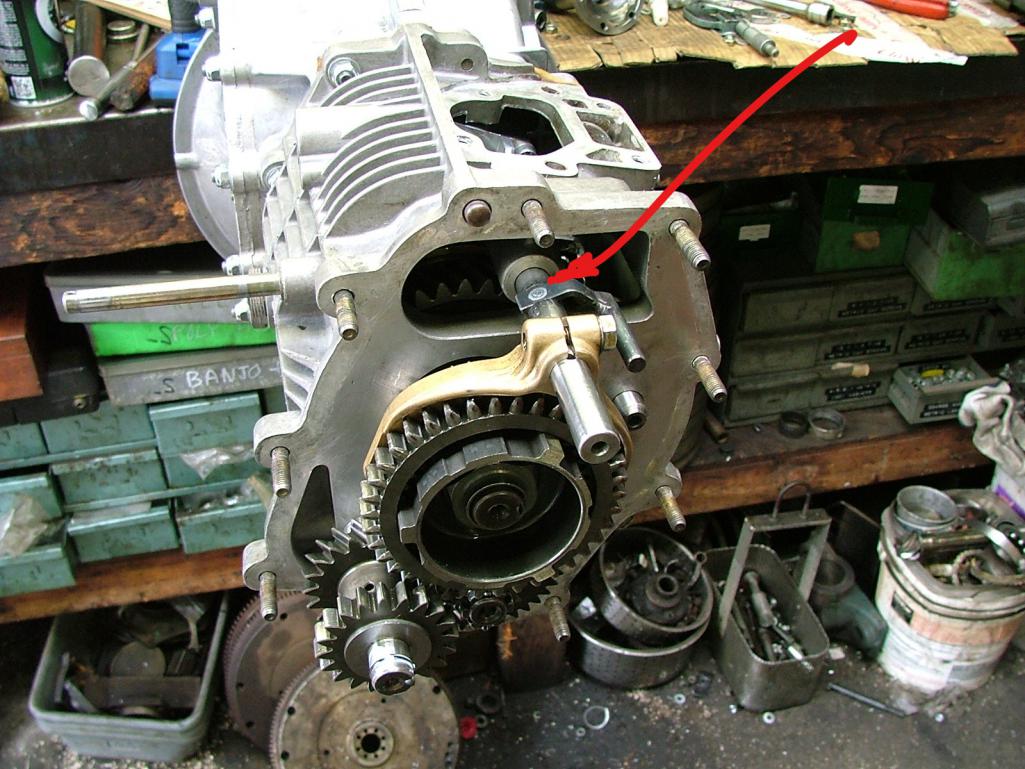
Posted by: Lucky9146 Jun 9 2019, 07:31 AM
No gasket is supplied with the shift console so we used Lock-tite 574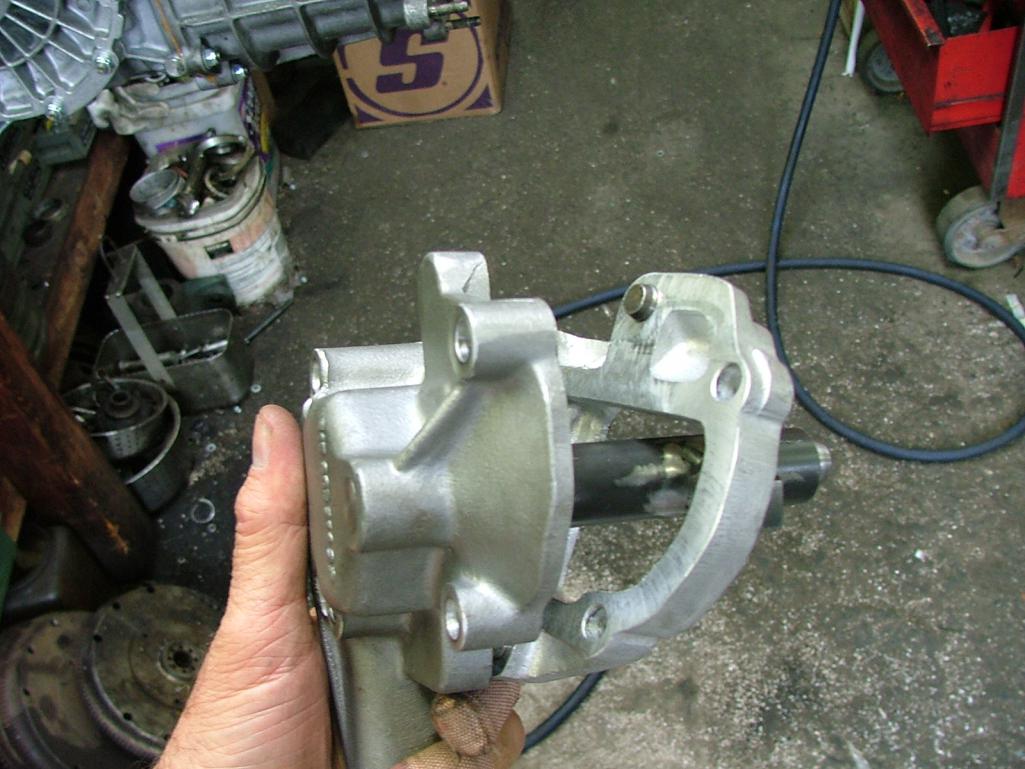
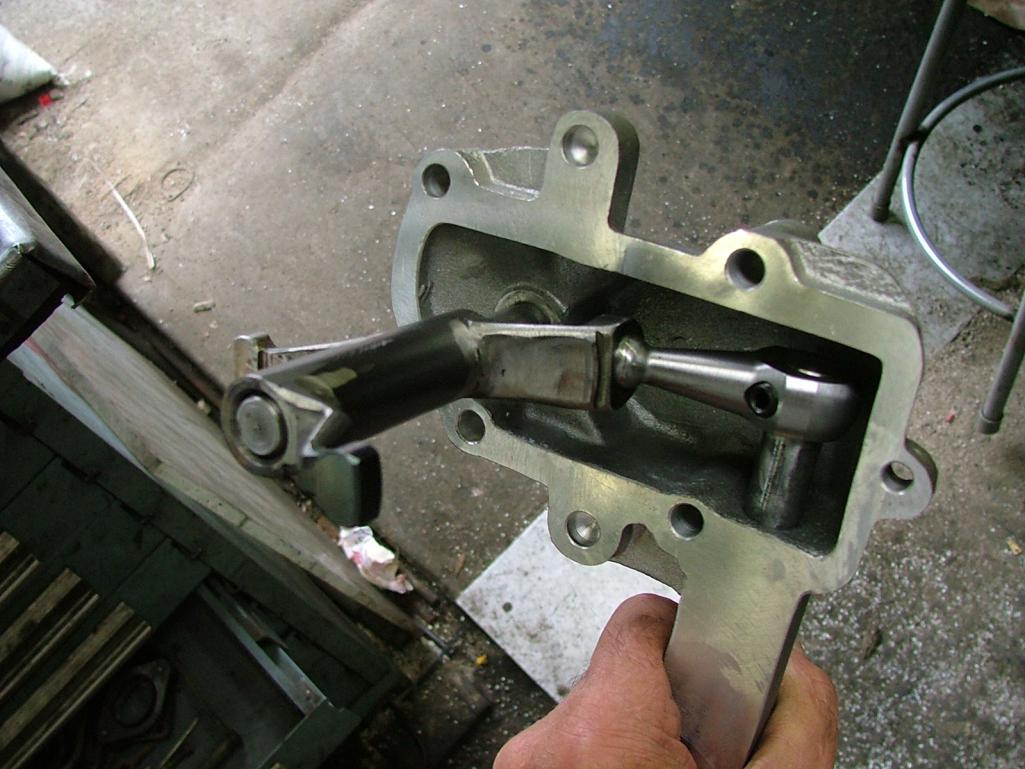
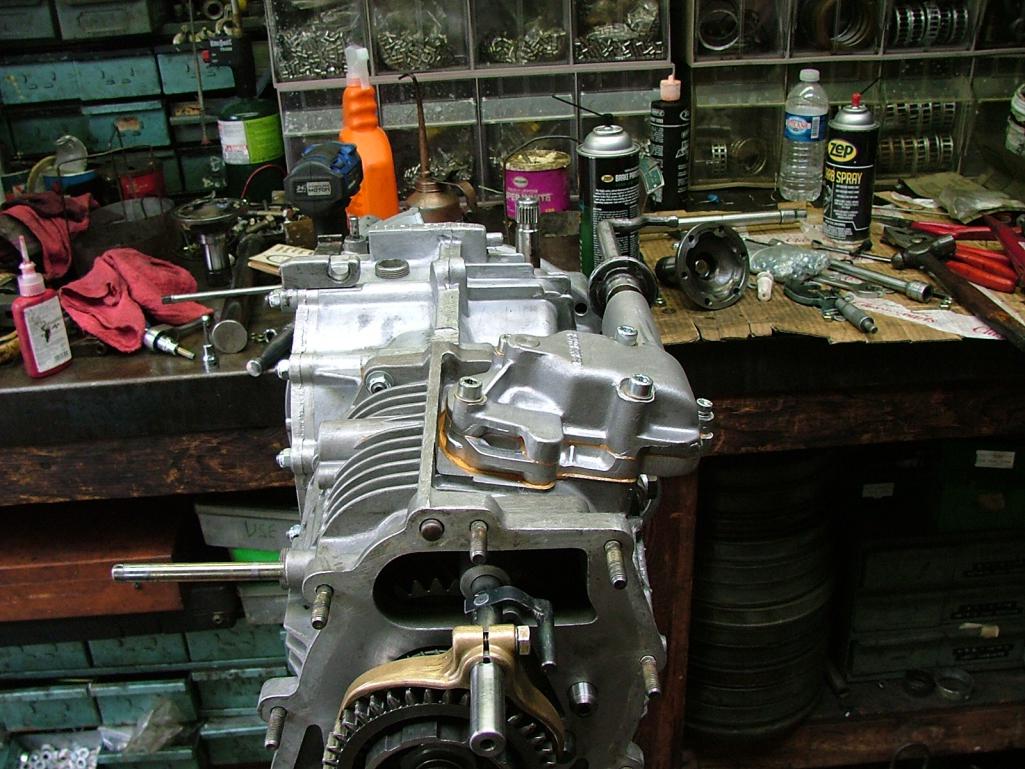
Nose cone on and home we go
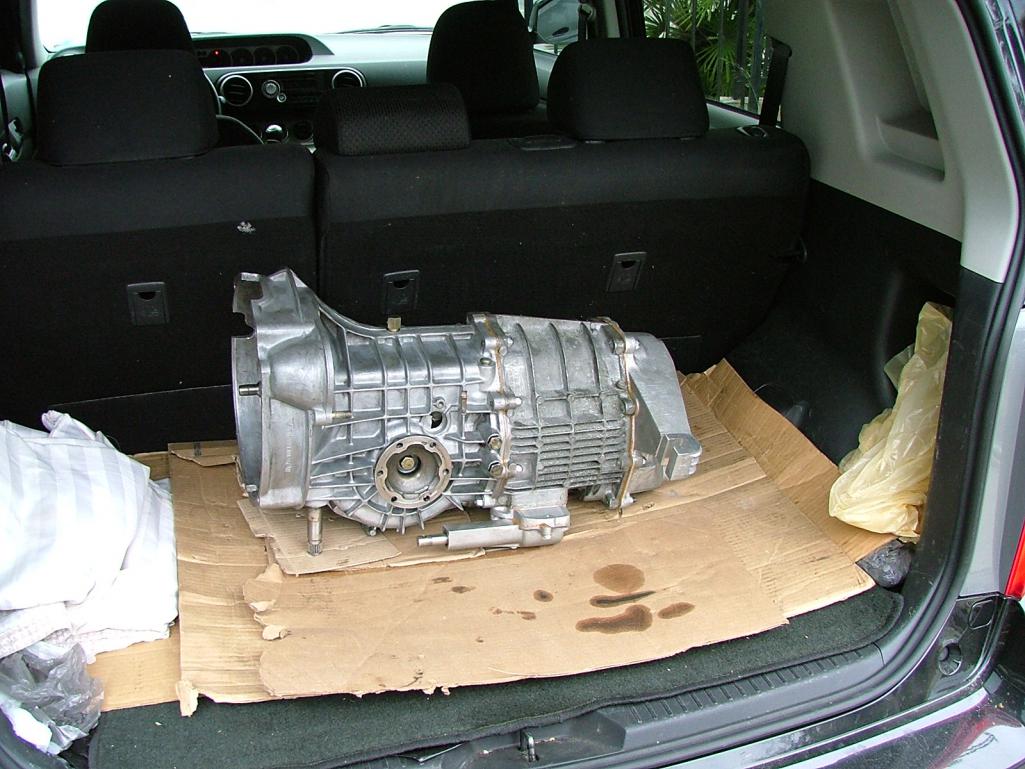
Step 1 find transmission
Step 2 buy Martin Bott 916 kit
Step 3 find a shop to do the work
Step 4 actually install the kit
Step 5 look at how cool it is!
Step 6 figure it out from here with the help of Steve and others
Posted by: Steve Jun 9 2019, 05:09 PM
I hope they used loctite on this screw. It backed out on me and another person mentioned the same thing in another thread.
Pro or con I swapped it out with a 914 shift rod tapered screw.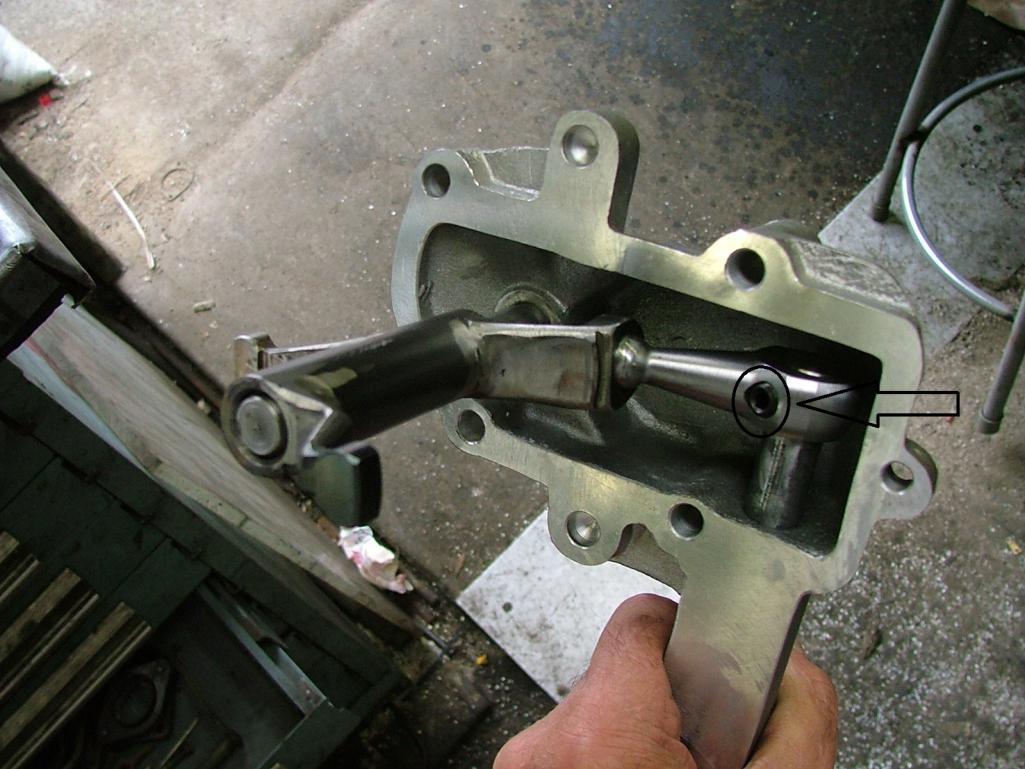
Posted by: Cairo94507 Jun 10 2019, 11:07 AM
Drooling over that....
Posted by: Lucky9146 Dec 30 2019, 05:44 PM
OH MY! Last post June 9th, I wish I could say I have my 915 trans installed but life has gotten in the way and unfortunately it is not!
A small bit of headway in the form of purchasing a 1972 911 shifer off Pelican is about as far as I've gotten. BTW that selection is thanks to Steve as he had been trying to sort out his shifting problem and came about the 1972 shifter as the answer. Apparently it has a wider neutral needed for this set up and is one year only part. So I will happily follow his lead.
And I should say I owe Steve a huge thank you for his consistent plentiful advice and occasional prodding I need. Thanks @http://www.914world.com/bbs2/index.php?showuser=822 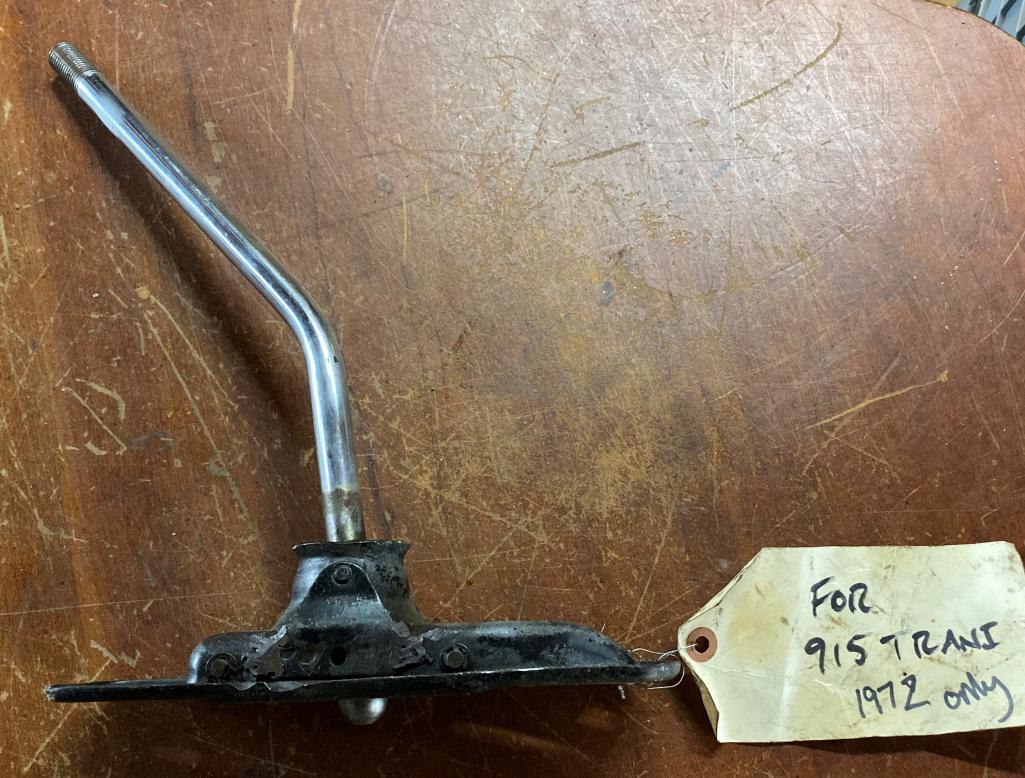
Much has happened NON 914 since last June but I was able to get the 914 to Werks Reunion Monterey this past August. What a beautiful day and I registered for judged mostly to get the parking on the lawn. Met up with the previous owner there as well. Always great to see him and he has been such a great supporter of what I have done with the car. @http://www.914world.com/bbs2/index.php?showuser=11663 
Have made several cars and coffee's locally and am usually the only 914 around which is kinda fun in a way but I would like to see more 914's come out.
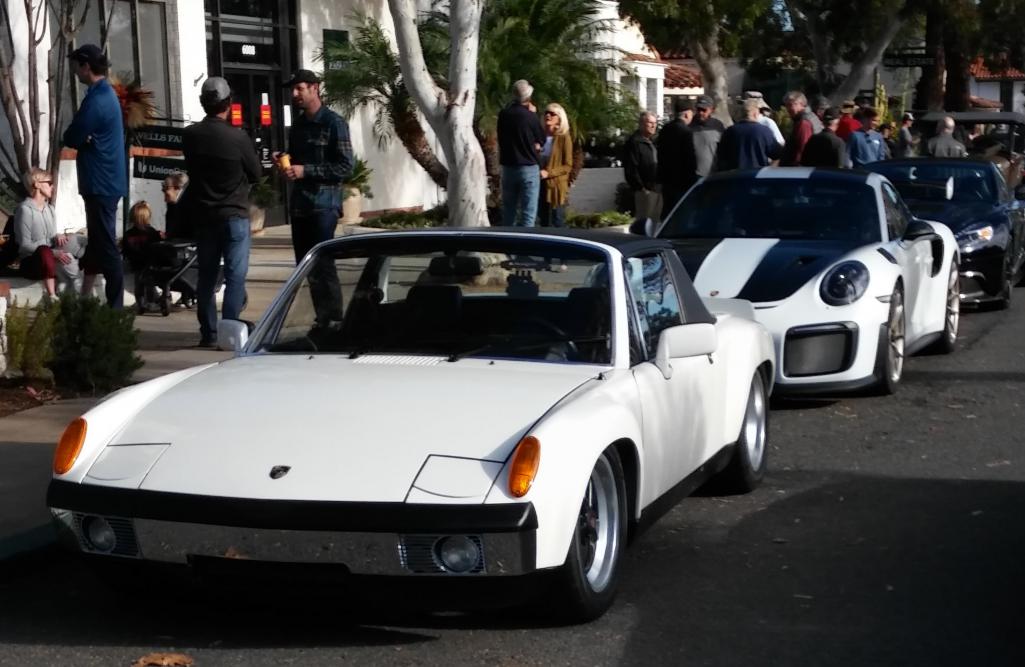
Really enjoying this car, to say the least and am having a hard time taking it off the street to do the trans but I remain committed.
Posted by: sixnotfour Dec 30 2019, 08:55 PM
Good to see it again with Six Power....like I have said before , last time I saw it was at Eurotech in Washington State....
Posted by: eric9144 Jul 13 2020, 04:32 PM
How's that transmission coming along
Posted by: Lucky9146 Apr 7 2021, 10:07 PM
My my my where has the time gone? I was looking through some of the latest Garage posts this morning and came across @http://www.914world.com/bbs2/index.php?showuser=12876 PMS built "Big Laguna" thread and realized after reviewing every page I had totally missed this thread.
How does that happen? Well for me it has been quite the year and I don't mean all the Covid stuff but I was pulled in a lot of different directions, mostly good. We have fortunately not had Covid although son in law did (mild case just quarantine).
I am going to post some of the things that happened in the next several posts as I gather up what I can find pictures of.
So to start, in reviewing Eric's thread, it reminded me that we had participated in the Julian drive together October 24, 2020 and met up with the cars that started out well north of us. It was great to see and meet some of the guys like Steve and Oscar and Keith. There was a cruise thread where many of us posted pictures at the time but I had not taken the opportunity to post anything here and wish I would have. So here are my fav's. BTW Eric was tough to keep up with!
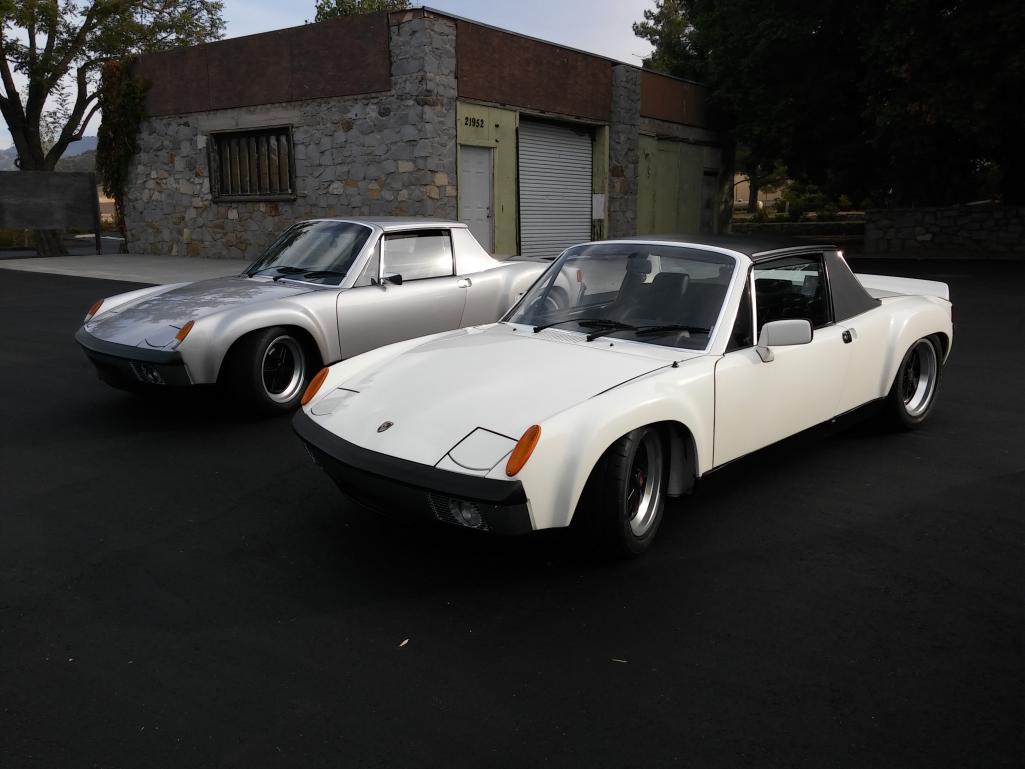
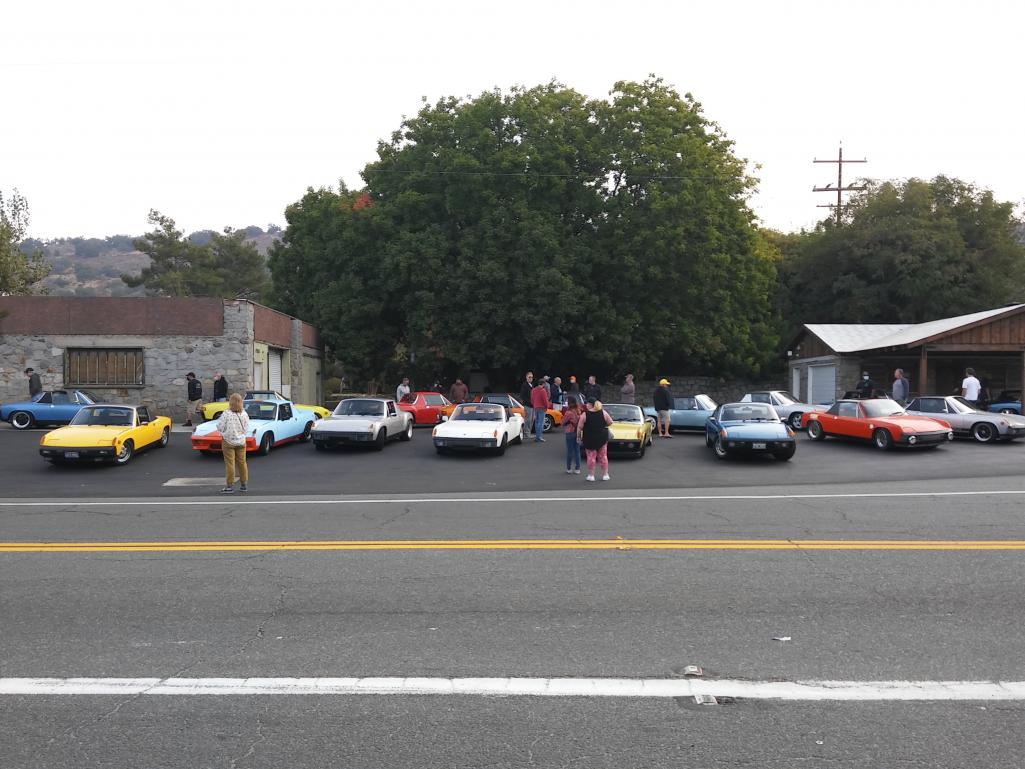
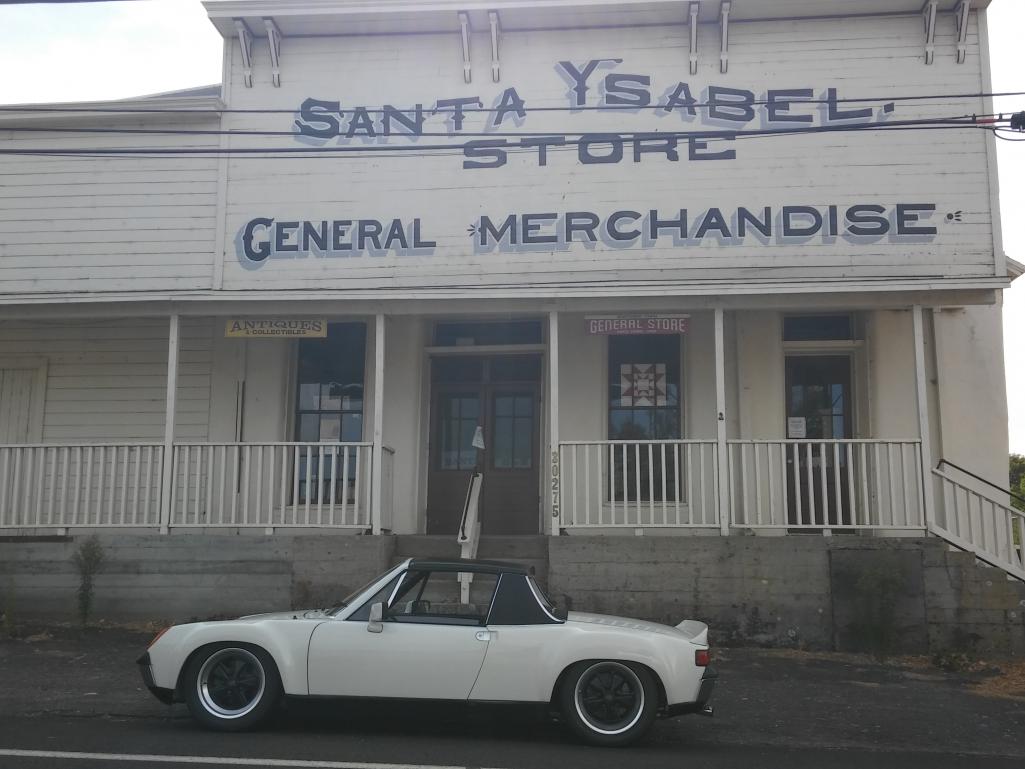
Posted by: Lucky9146 Apr 7 2021, 10:34 PM
It's not like I totally missed everything but I wasn't checking all the latest postings like I used to. I do know one thing and that this is a great site with a bunch of great people. I saw many very compassionate threads, Oscar's Christmas give away. (I did manage to score one of the prizes, thanks again Oscar), and a lot of hard work and good progress by many.
Continuing on,
I saw in Eric's thread he had tackled his roof, texture and all, and it came out great! That reminded me I had bought a spare roof at one of Bruces swap meets because I wanted a smooth roof like I had seen at Luft 6 that I just could not get out of my mind. I did not want to commit my roof so now I have choices.
So in Mar 2020 I started by filling the rain troughs sanding it down to primer while avoiding getting into the fiberglass.
These are the only pictures I can find so far and I guess I will have to take a picture of the finished product and post tomorrow! All I remember is there was a lot of wet sanding and re-primering.
I know, filling the troughs with Bondo may not be the recommended method but it worked fairly well. More pictures to follow.
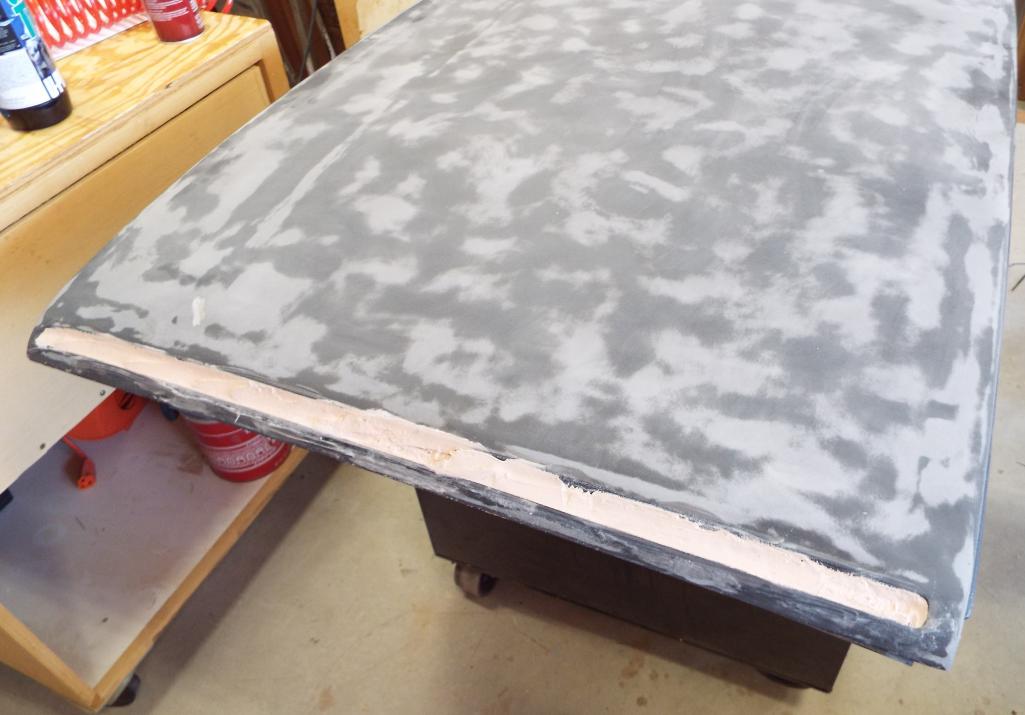
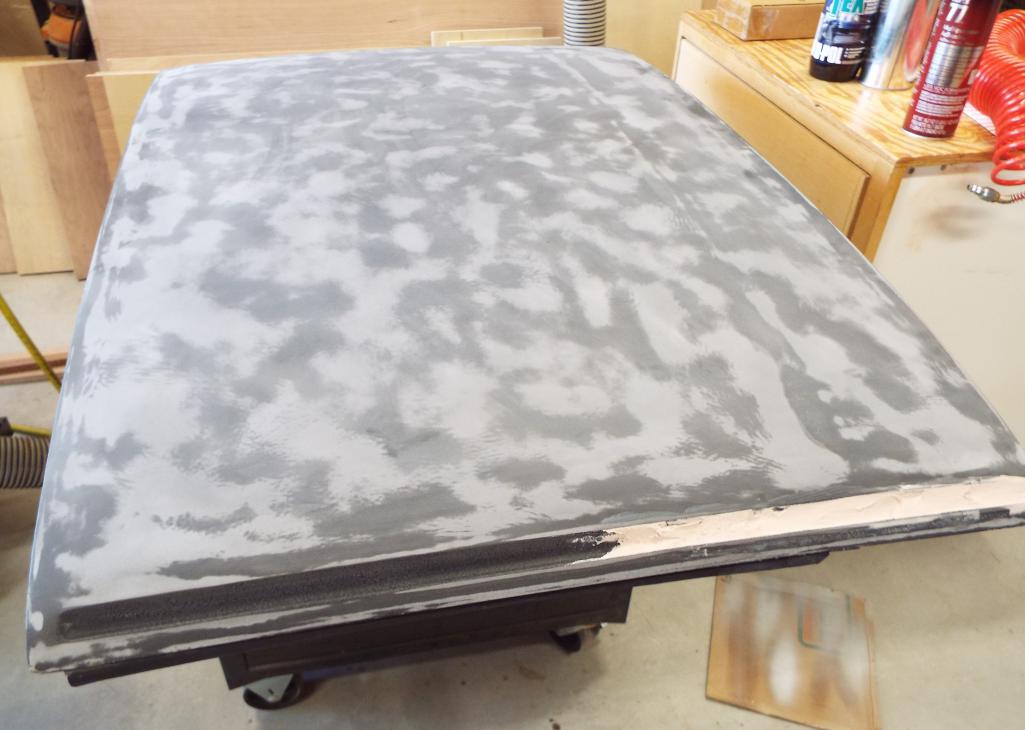
Posted by: Lucky9146 Apr 7 2021, 11:55 PM
We called this the "Covid Project" which was my wife and I completely rebuilding this deck I had originally built in 1988. It was tired and rotting and of course had a few termites. Worst of all it had "occupants" under it from time to time over the years attracted by my neighbors fruit and nut trees. Lots of clean up of nut shells.
It is 28 ft long. We started in April 2020 and it took 6 months to finish working pretty steady. What you can't see is under that deck is all cement to the tune of about 160 90# bags of Redicrete which we used a mixer to mix and wheel barrow in. I doubled the 2 X 6 and some 4 X6 stringers spaced to every 12 inches and redid all the footings to support 3/4' Exterior Plywood with thin set Hardiboard laid in herringbone pattern and then thin set 6" X 24" tile. Lost count of how many decking screws I put in. Should be there long after I'm gone! I won't bore you with all the in process but suffice it to say it is now designed so no varmints can get under it. I see now that I posted it the last facer board was not installed yet.
Posted by: Steve Apr 8 2021, 09:24 AM
Very nice!! I know our deck is home to many rats and drive our Aussies crazy.
Posted by: Lucky9146 Apr 8 2021, 09:45 AM
Very nice!! I know our deck is home to many rats and drive our Aussies crazy.
Hey Steve! Thanks. Yeah I was trying not to say rats
, yup those and raccoons, squirrels, and rabbits too! But no more!Thanks for not bringing up the 915 transmission, it has just been on the back burner, and especially since I got the 901 shifting so well by addressing some looseness in the linkage plus all the other things that got in the way that I plan to post here. I was hoping to catch up with you on the drive May22nd, but have other commitments.
Posted by: Lucky9146 Apr 8 2021, 10:02 AM
Pictures shot this morning of the smooth gloss black Targa Top I refinished as a spare. It was way, way, way more work than I anticipated. Many primer coats and wet sand, plus many paint coats and wet sand to achieve this finish. I'm not one to give up!
Reflection of the ceiling of my patio cover!
Love the slick top look and it will never see rain, at least that's the plan.
That blemish looking thing in the upper right corner is actually a reflection of a tree out in the yard. 
Posted by: mepstein Apr 8 2021, 10:07 AM
Very nice. Looks like black glass.
Posted by: Lucky9146 Apr 8 2021, 09:04 PM
I am realizing I neglected to post some things that happened before Covid hit so in late Jan 2020 I was able to participate in the Local Dealer Porsche 70th Anniversary Cars & Coffee. Billed at the time as the "Inaugural Annual Dealer Cars & Coffee", sadly the follow on second was not to materialize earlier this year with everything getting pushed out or cancelled.
How about this red carpet treatment. It was a highly attended event and done up right Dealer style. I think there were 2 other 914's there.
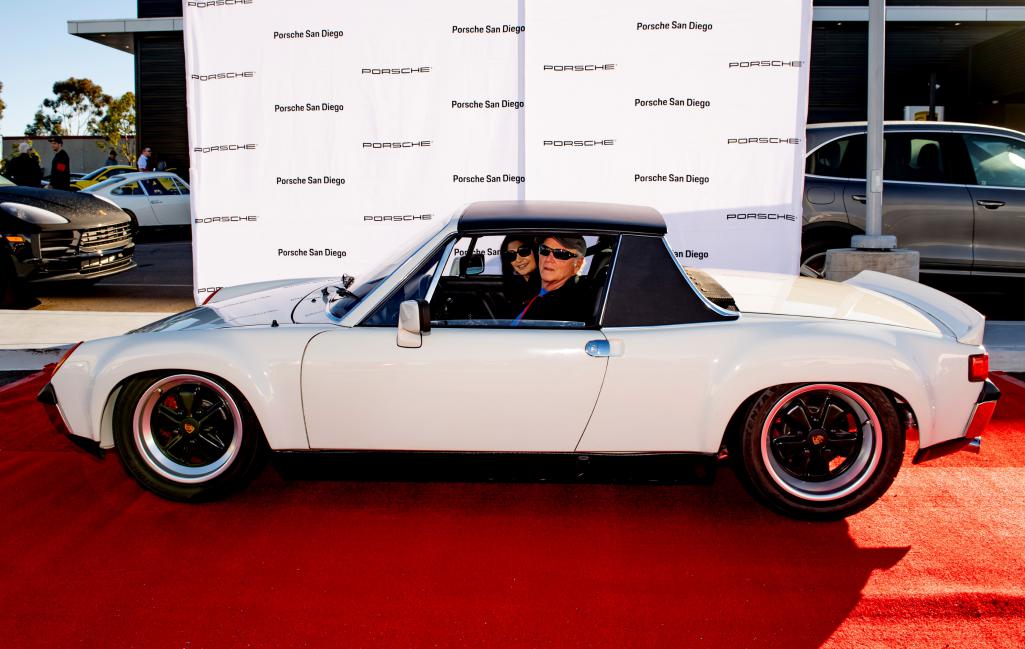
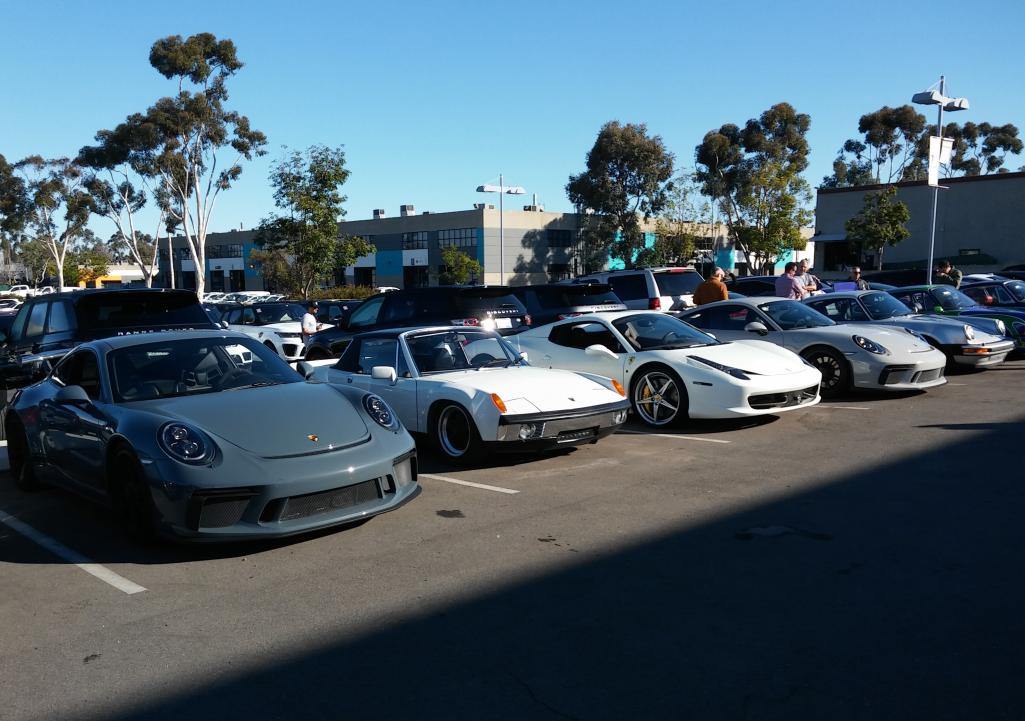
Posted by: Lucky9146 Apr 8 2021, 09:39 PM
In March 2020 I was extremely fortunate to attend Amelia Island Concours and Werks Reunion and I have to say that this all wasn't cancelled was a miracle!
While on my way up from my daughters to Amelia, the Brumos exhibit had not been open too long and I got a ticket to that. If you get the chance, when things open up more it is truly great. The Brumos 914 was not there at the time as it was at the Concours but the cars there you can walk right up to, no ropes. My God a 550 Spyder and a 917 it was like Porsche heaven at least for me.
Posted by: Lucky9146 Apr 8 2021, 09:42 PM
While at Brumos I ran into our own Eric Shea, what are the chances?

Posted by: Lucky9146 Apr 8 2021, 09:50 PM
So many amazing cars there at Brumos and this 959 is actually a prototype.

Posted by: Lucky9146 Apr 8 2021, 10:09 PM
I have a friend in Fernandina Beach who I stayed with and he had his best friend in from NJ staying there too with his nice 914-6 3.2.
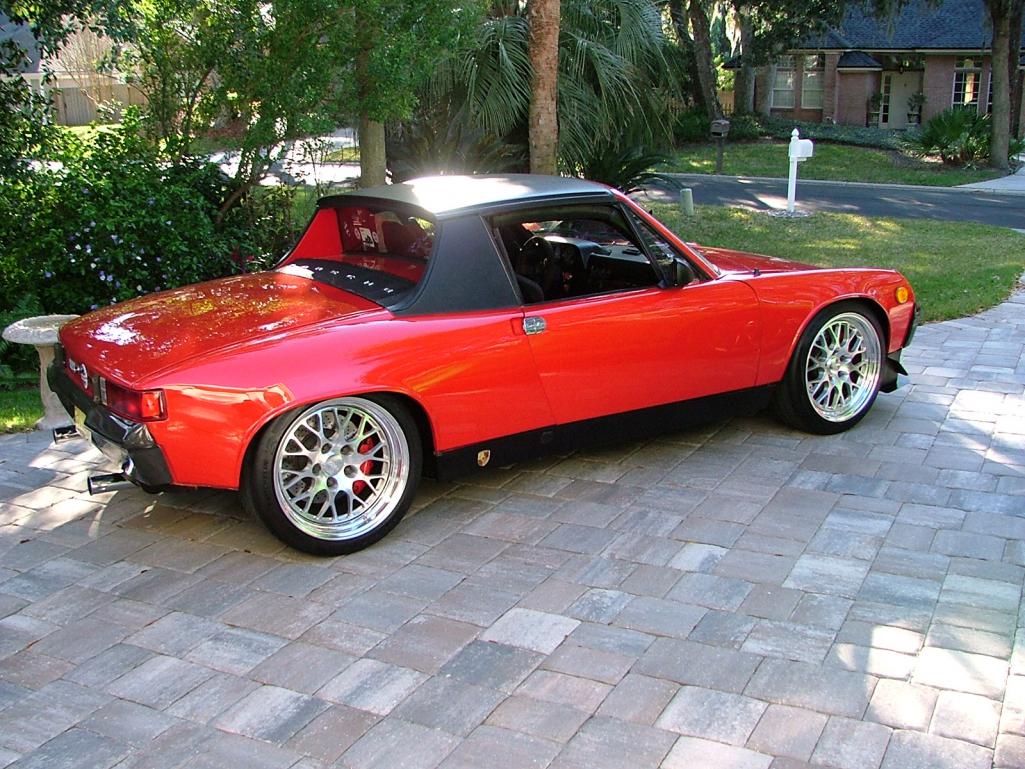
Posted by: Lucky9146 Apr 9 2021, 03:33 PM
Mike, big guy I do not know how he got in and out with the roll bar?
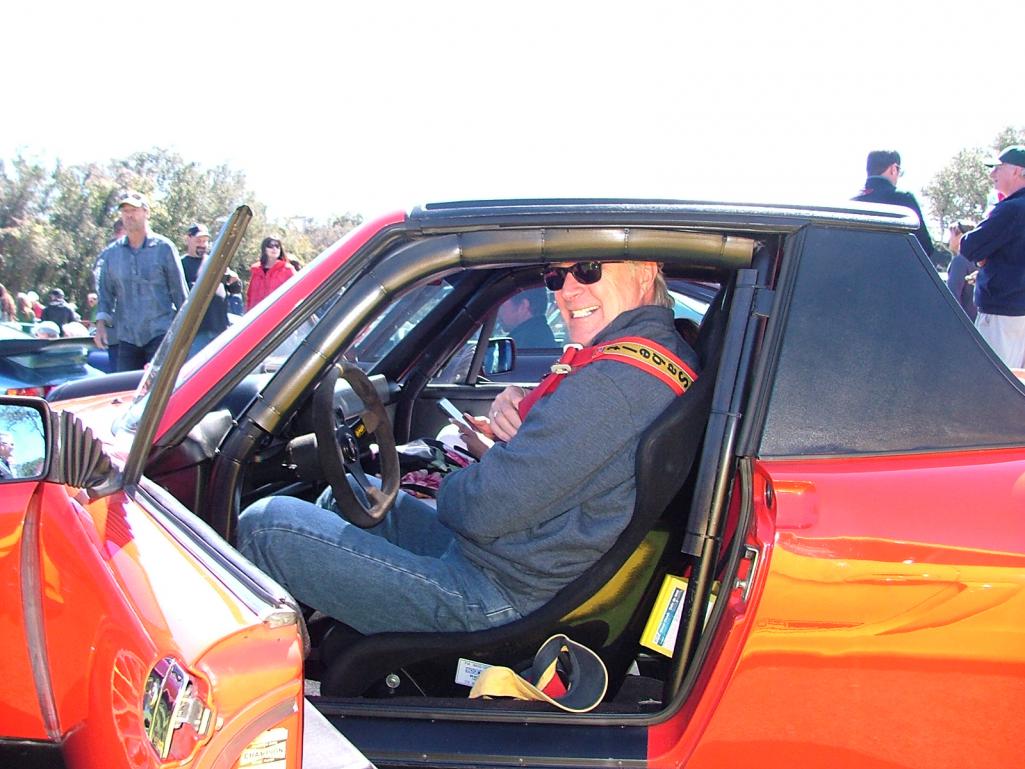
Posted by: Lucky9146 Apr 9 2021, 04:01 PM
Got a ride in Mike's 914 and it was a brute sounding and performing car.
Posted by: Lucky9146 Apr 9 2021, 07:31 PM
And of course Brumos car which I took a lot of good detail pictures of. Good stuff
Posted by: Lucky9146 Apr 9 2021, 08:57 PM
One of the coolest things that happened to me at last years Amelia was meeting Jacky Ickx. Got to listen in on some conversation. I've not met many race car drivers, let alone a famous one who won 6 times at Le Mans!
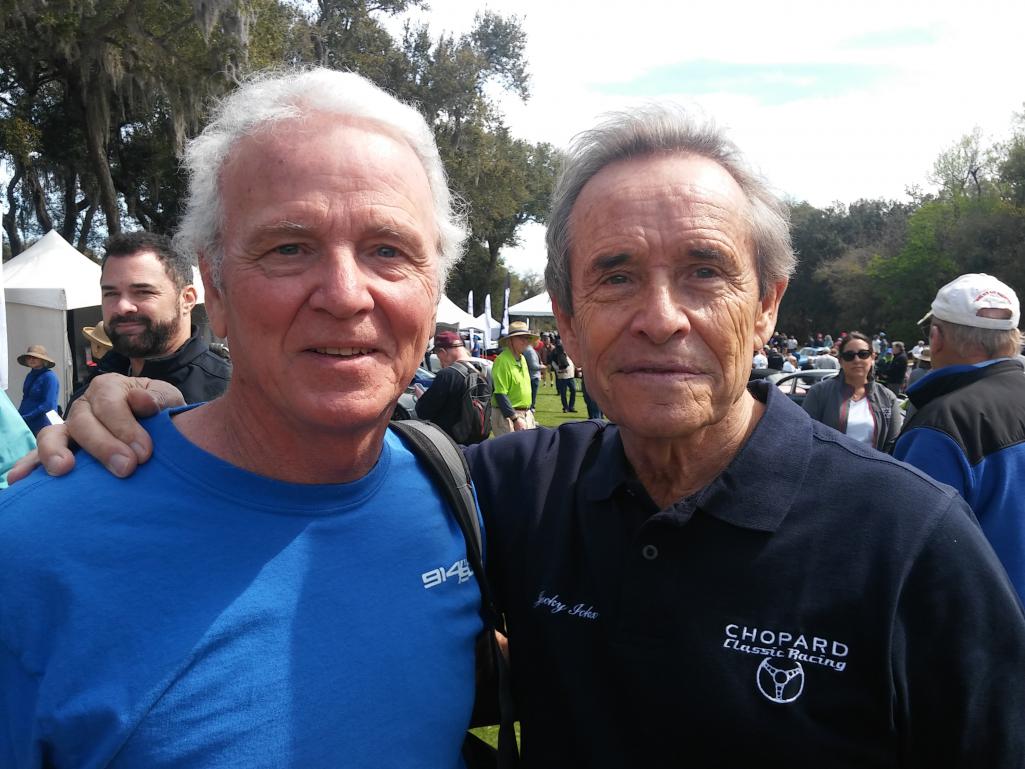
Posted by: Lucky9146 Apr 9 2021, 09:01 PM
Still catching up......
Like I said earlier, I got some really good pics of Brumos #59 914
In this case I noted no Mark Henry Starter Relay
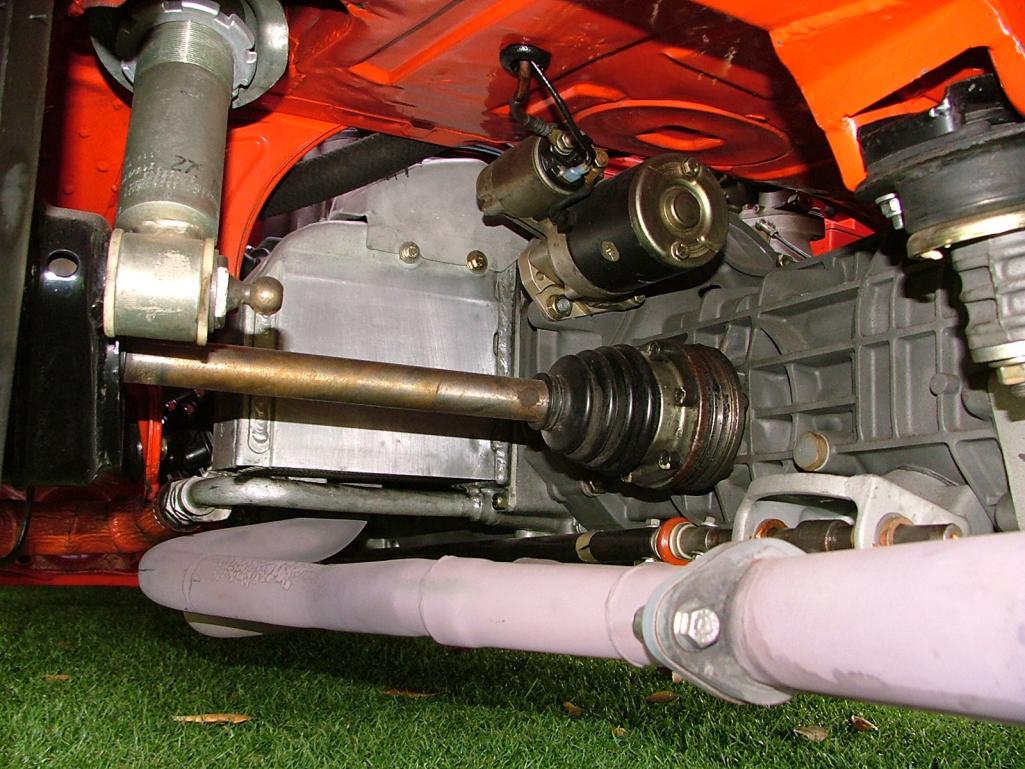
Posted by: Lucky9146 Apr 9 2021, 09:04 PM
Here I was surprised it still had heater contorls.
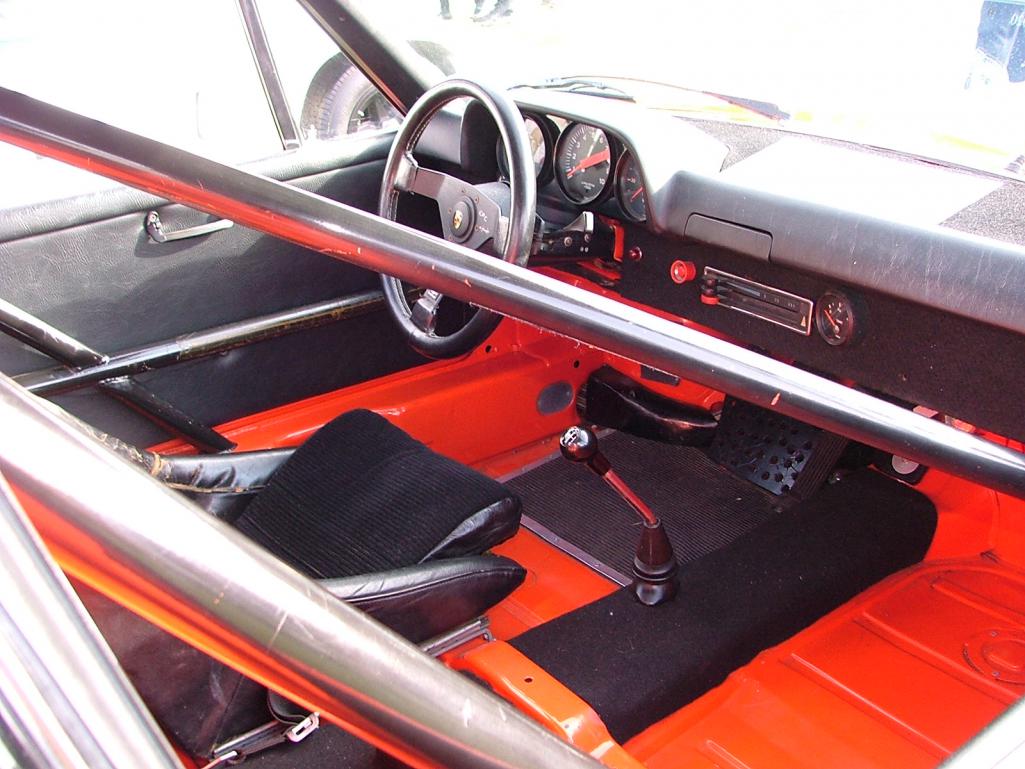
Posted by: Lucky9146 Apr 9 2021, 09:07 PM
I thought the Throttle linkage was too close to the axle.
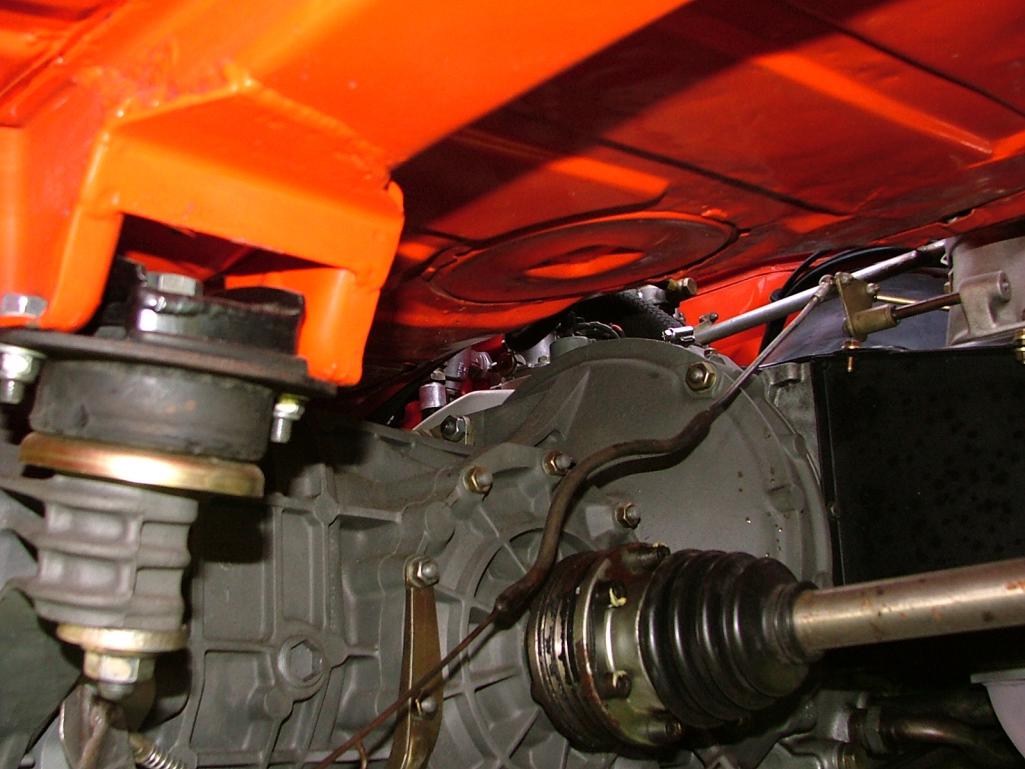
Posted by: Lucky9146 Apr 9 2021, 09:11 PM
All Business dash with 10k tach, very wide red line.
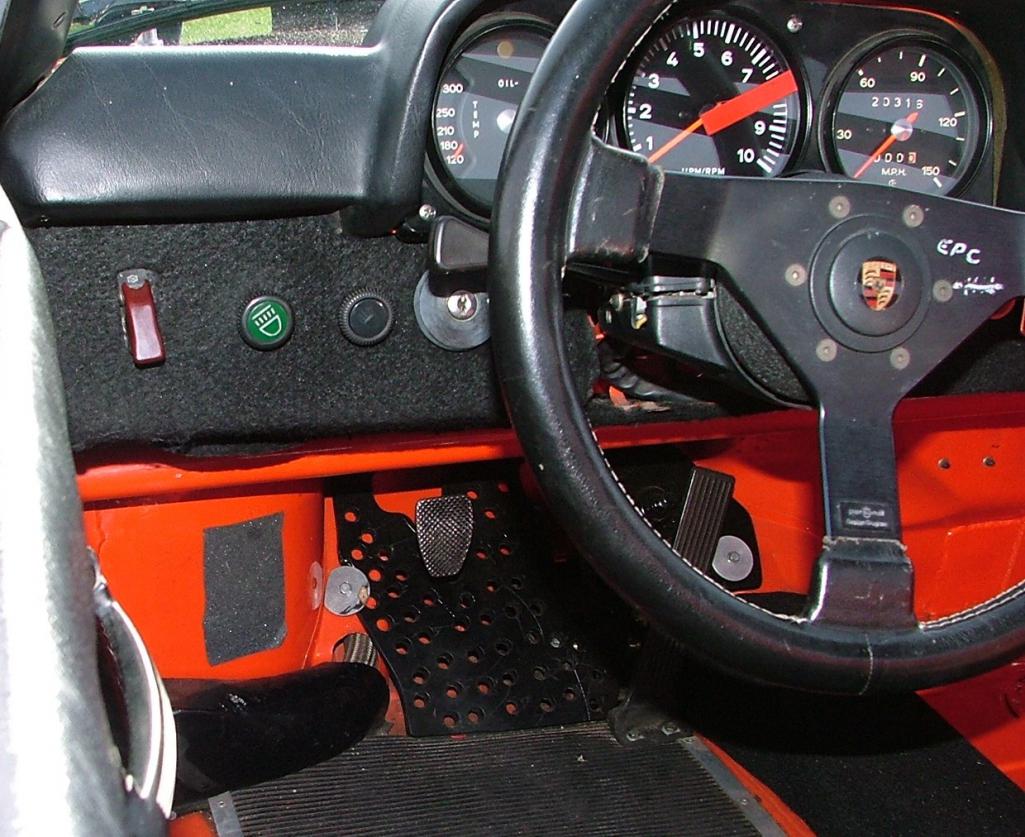
Posted by: Lucky9146 Apr 9 2021, 09:14 PM
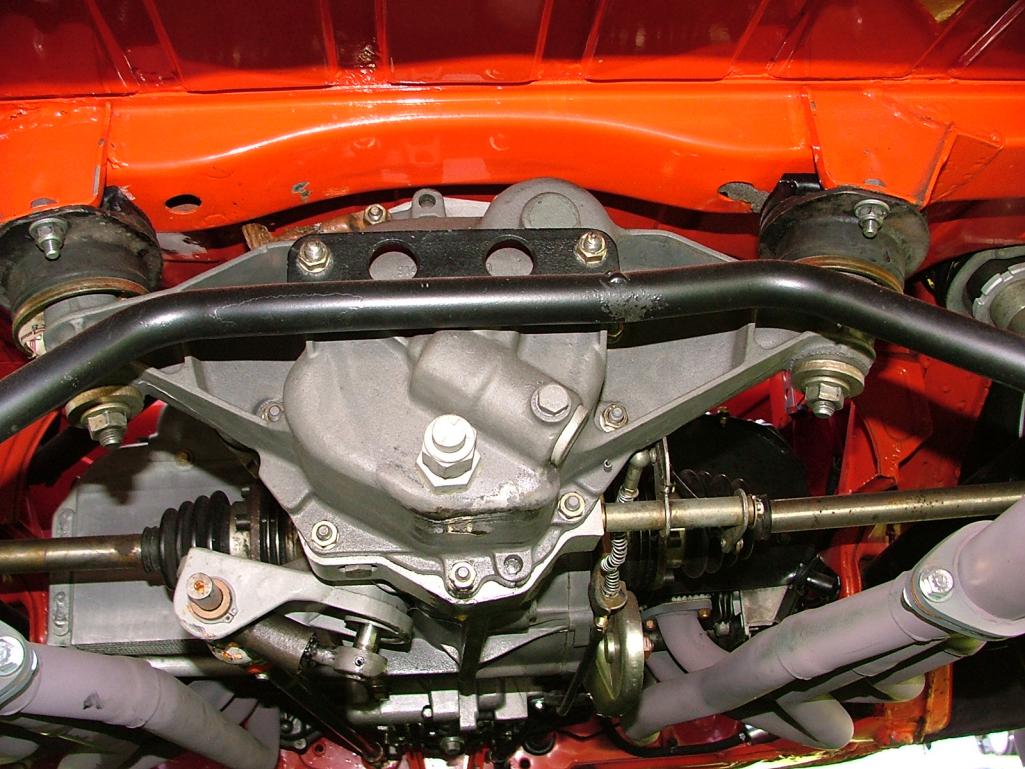
Posted by: Lucky9146 Apr 9 2021, 09:20 PM
And some close ups pics of other 914's too
Posted by: Lucky9146 Apr 9 2021, 09:24 PM
Well here is something I did toward the end of 2020 just before Christmas, I bought this beautiful 10 K tach from Tony, AKA retroracer, who builds them and sells here on 914 World.
Seeing the 10K tach on the Brums car picture reminded me I had purchased this beauty.
It will certainly help with the GT look. I have not installed it as yet but it is on the list! Beautiful piece. and he even wrapped it for Christmas!
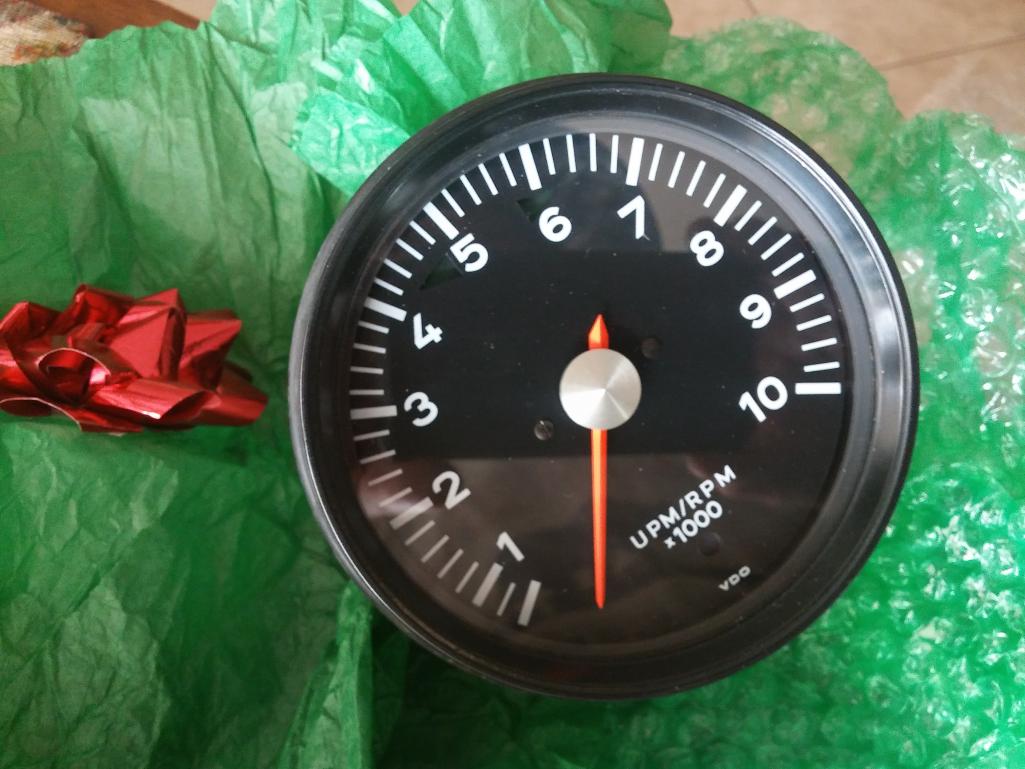
Posted by: Lucky9146 Apr 9 2021, 10:47 PM
When I realized 2 days ago, awakened by eric9144's thread on "Big Laguna", that I was woefully behind in posting anything and wondered how does that happen? Well for me it has been quite the year and I don't mean all the Covid stuff but that I was pulled in a lot of different directions, mostly good, but not necessarily car related.
I committed to post some of the things that happened over several posts as I gathered up what I could find pictures of.
In addition to the 6 month deck project shown earlier, I built custom cherry cabinets for my son over another several months.....
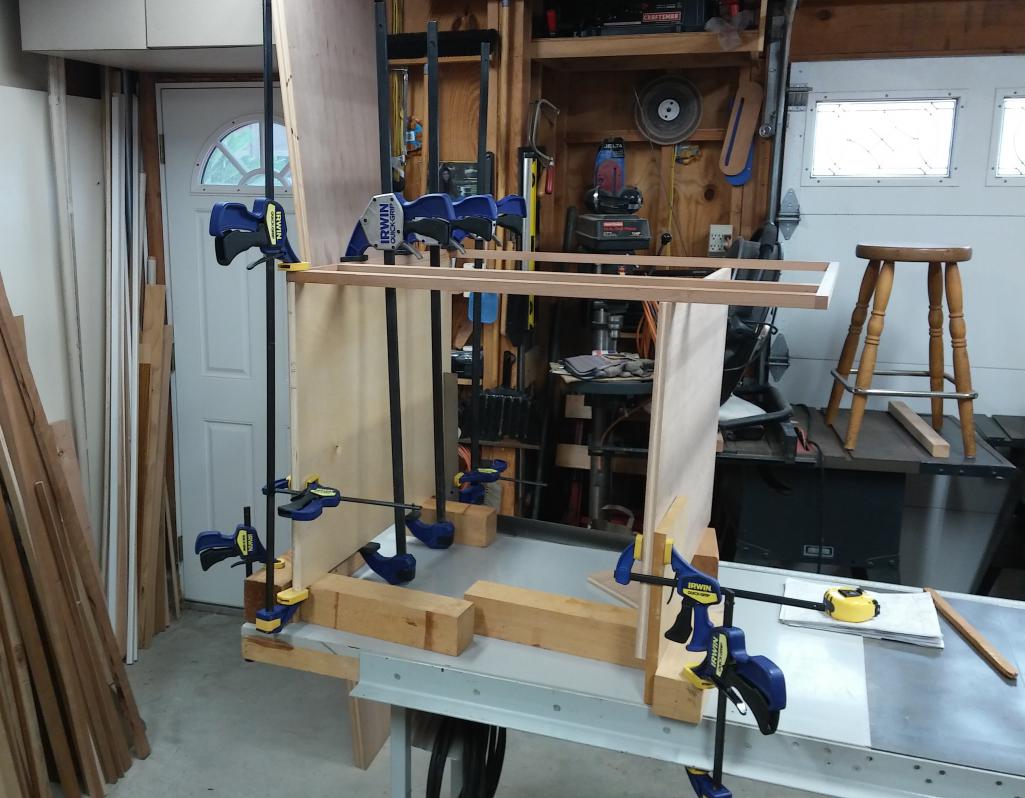

Posted by: Lucky9146 Apr 9 2021, 10:54 PM
I did all the engineering and construction and finishing and he did the installation...

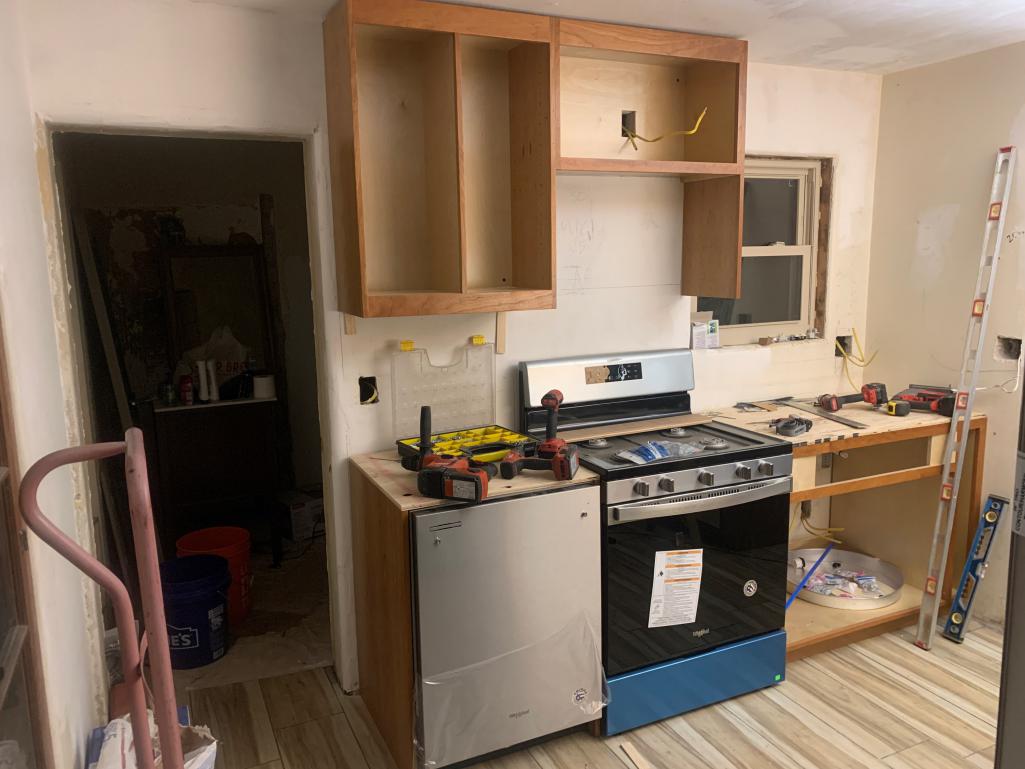
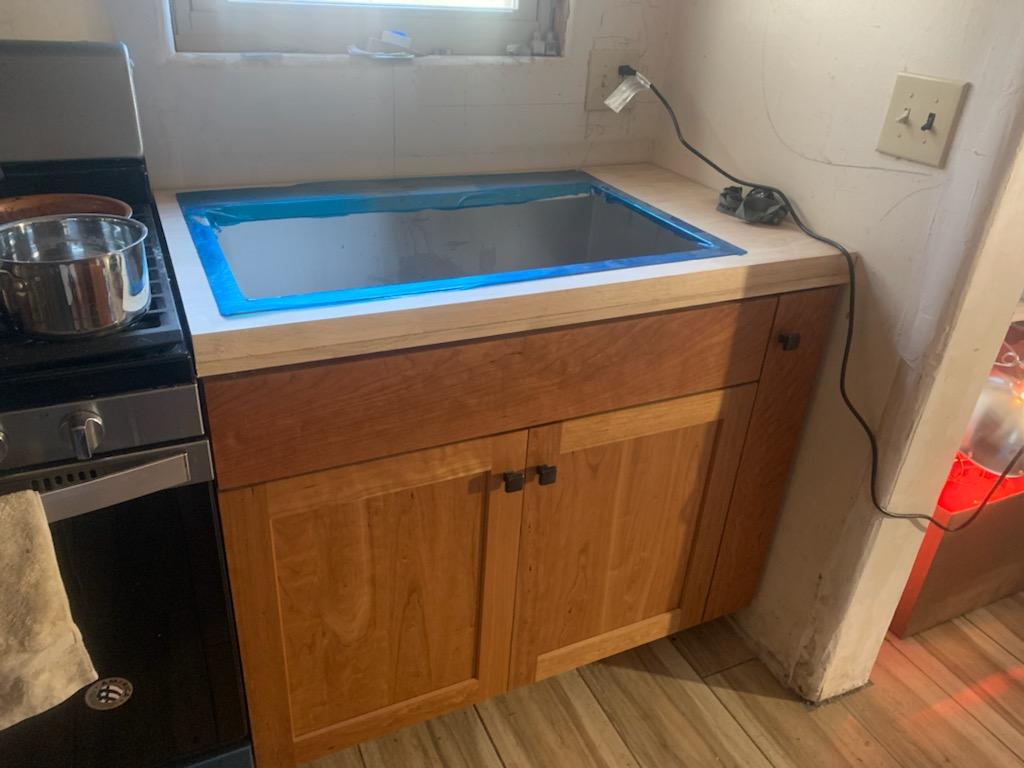
Posted by: Lucky9146 Apr 12 2021, 10:51 PM
One of the longer term small projects I have been working on is to have an early jack in my trunk as opposed to the correct for the year green dot jack that a '74 would have.
When I got the car it did not come with a jack so I posted a WTB green dot jack. Rhodyguy answered and I bought one from him.
It was not until years later I realized that an early jack just looked better to me. I eventually located one and restored it.
Posted by: Lucky9146 Apr 12 2021, 10:57 PM
Next, I needed the correct bracket for an early car. Finding one was not straight forward as to my knowledge no one sells just the bracket. The jack just sat while looking.
Finally, it occurred to me that I have bought parts from Garold before and wondered if had a parts car with one, so I reached out to him and he quickly came through for me. He literally cut the fender piece with the bracket still welded and sent it to me. I ground the welds and separated the two, cleaned up the bracket and primed it.
Next step paint match for my car as it was painted about 1998 I did not have the match.
I plan to JB weld when painted. It fits very well. More to come.
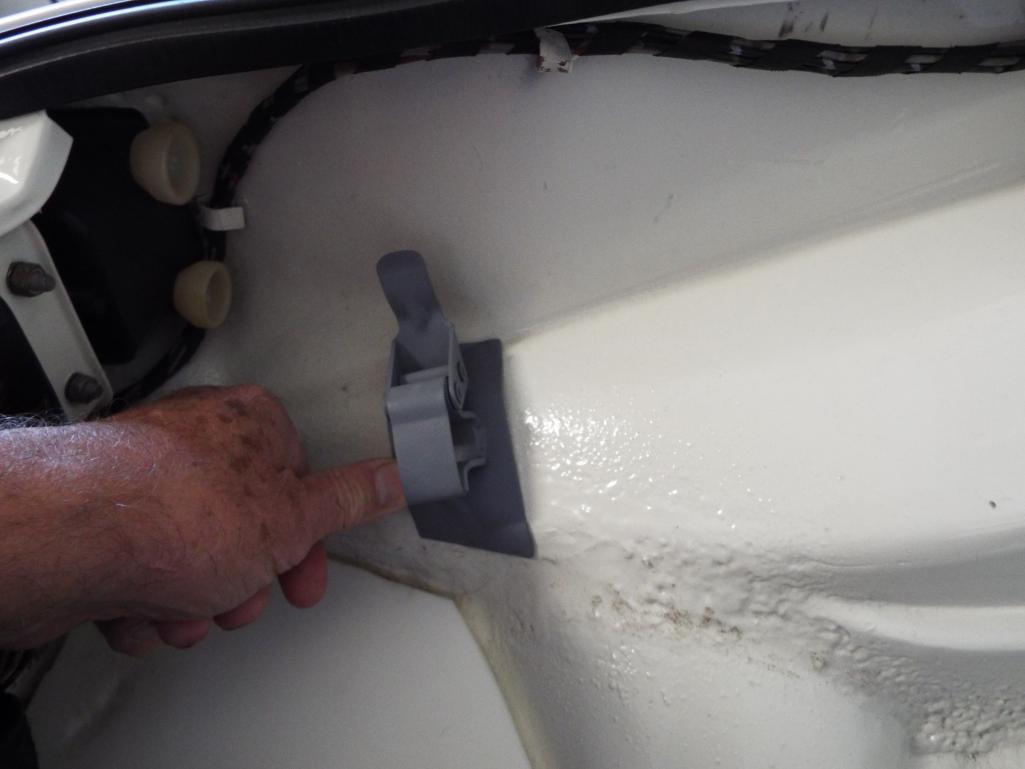
Posted by: eric9144 Apr 13 2021, 09:28 AM
That roof came out incredible
Like that you filled the rain channels
Sounds like the local C&C put on by the PCA is finally going to start back up at the end of this month, hopefully will catch you at those
Posted by: Lucky9146 Apr 13 2021, 04:34 PM
That roof came out incredible
Like that you filled the rain channels
Sounds like the local C&C put on by the PCA is finally going to start back up at the end of this month, hopefully will catch you at those
Thanks Eric!
Have not been to PCA C&C for a while, I know they have kept on having it just not SDPCA sanctioned again until now. Plan to be a the next. I'll text you.
Posted by: Lucky9146 Apr 13 2021, 04:38 PM
One of my passions in life was to find a nice 911 M491 or as some call it a “wide body” or “Turbo-Look”.
For those not familiar, M491 is the option number and was only available from 1984 through 1989, first because there was no turbo available in 1984 or 1985 in the US and then as the Trubo came back into production they retained the option as I said through 1989. Ever decreasing numbers were produced each year. The advantage of course is you get the turbo wide body and all the suspension and handling, but with the normally aspirated 3.2 which is much less costly to maintain. Some say the best of both worlds, some scoff at the idea. To each his own.
I have looked off and on over the years and seen at a lot of cars in that time. I can’t remember when I actually started the hunt but I would say early 90’s. I “settled” when I came across an outstanding 911 example pristine low mileage 1988 911 cab (not wide body) which I had for about seven years. Was not a fan of cab’s as it turned out and the hunt has always continued since. In 2016 I began my BAT habit and found one local to me in San Diego, but it seemed so out of reach and I just drooled thinking my wife might not be quite as enthused as me. Well surprise, surprise, I found she was, …….after the auction ended.
Now with the auction over I intensified my quest and actually looked at a number of cars that year locally several and then taking me to LA, Houston and of all places Montgomery Alabama. The Alabama M491 was not officially “on the market”, I’d heard about it through a friend and it was very nice, but as it turned out, he really did not want to part with it, and so I got to know the guy and we became friends over time. He was a car lover and multi car collector and owner and had had many various makes of cars over the years buying several and selling several while I knew him, but always hanging onto the M491. When I first met him, he had an Audi R8 and a beautifully restored ’67 Jag that eventually I watched him sell at RM Sotheby’s in Scottsdale, and the M491.
Fast forward a few years to last year and my friend decided to leave Montgomery for Florida and now did not have the room for his M491. I got the call, did I want it?
Duh! So my wife of 50 years and I hooked up our trailer and were off to Alabama!
Turns out there were a few things needing attention and this consumed several months doing so, but it sorted out nicely, unfortunately continuing to put the 914 on the back burner until recently.

Posted by: tygaboy Apr 13 2021, 04:46 PM
You win. That's an all time favorite of mine, too. Beautiful and big congrats!
Posted by: eric9144 Apr 13 2021, 04:55 PM
You win. That's an all time favorite of mine, too. Beautiful and big congrats!
Even more amazing in person! Also one of my all time fav's and Jim's is a remarkable example, was well worth the wait
Posted by: Lucky9146 Apr 13 2021, 08:26 PM
Thanks @http://www.914world.com/bbs2/index.php?showuser=19241 and @http://www.914world.com/bbs2/index.php?showuser=12876 much appreciated. It is really something when you realize a dream.
Car has black interior, sport seats, limited slip, Dansk muffler, and 71k miles.
Engine bay was super clean from the previous owner and I'm grateful for that!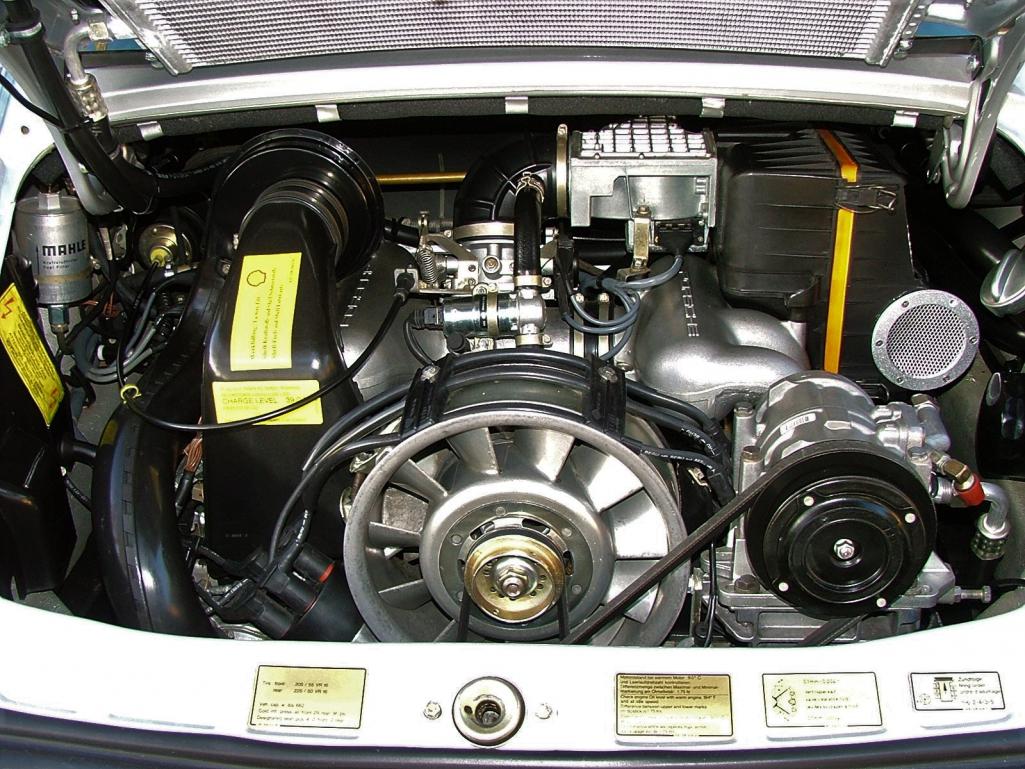
The underneath was a little above average so I had it ice blasted and then I detailed it more and painted the heat exchangers. What a difference!
There is more I did to the car but I want to get back to 914 stuff.
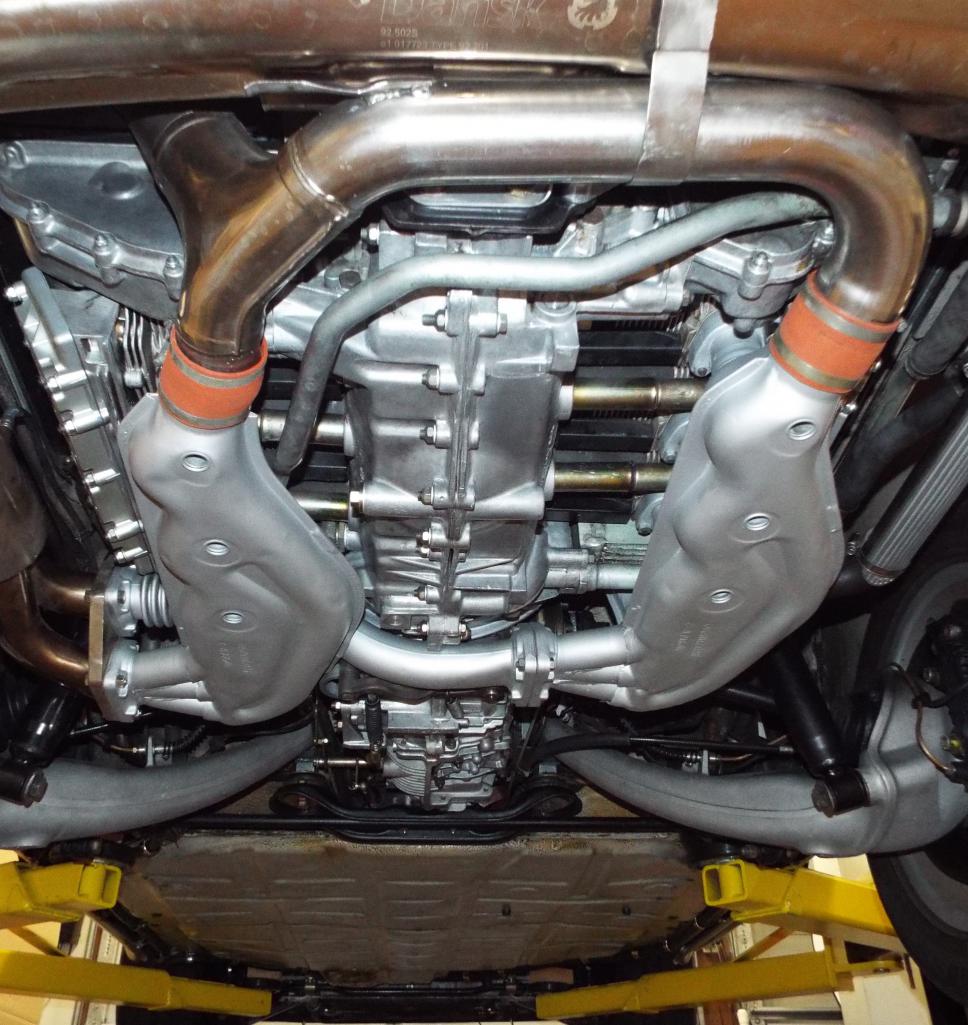
Posted by: Lucky9146 Apr 14 2021, 10:16 AM
Not sure how much viewing threads get posted in Originality and History? I have never posted there until yesterday and only in replying to an old thread about paint code labels and where to find them.
Posting the link here to see if it helps. Post 38 in the thread. Thanks for any leads.
http://www.914world.com/bbs2/index.php?showtopic=227846
Looking for this one
Posted by: Lucky9146 Apr 23 2021, 01:49 PM
Not sure how much viewing threads get posted in Originality and History? I have never posted there until yesterday and only in replying to an old thread about paint code labels and where to find them.
Posting the link here to see if it helps. Post 38 in the thread. Thanks for any leads.
http://www.914world.com/bbs2/index.php?showtopic=227846
Looking for this one
Took the advice of @http://www.914world.com/bbs2/index.php?showuser=20845 from the thread posted above and contacted the same people he did. It was on Ebay and they are in the UK, just use the link Brent provided, worked great, very responsive.
Sticker ordered yesterday, shipped today.
Thanks Brent!
I'll update when it arrives to show how they did.
Posted by: bbrock Apr 23 2021, 02:55 PM
Not sure how much viewing threads get posted in Originality and History? I have never posted there until yesterday and only in replying to an old thread about paint code labels and where to find them.
Posting the link here to see if it helps. Post 38 in the thread. Thanks for any leads.
http://www.914world.com/bbs2/index.php?showtopic=227846
Looking for this one
Took the advice of @http://www.914world.com/bbs2/index.php?showuser=20845 from the thread posted above and contacted the same people he did. It was on Ebay and they are in the UK, just use the link Brent provided, worked great, very responsive.
Sticker ordered yesterday, shipped today.
Thanks Brent!
I'll update when it arrives to show how they did.
Cool! Did you have them double space the letters on the code? It's the one thing I would do different, but if you sent them that photo, they'll probably get it right.
Your car is looking fantastic and those cherry cabinets are... well... CHERRY! I hope your son knows how much those would have cost.
Posted by: Lucky9146 Apr 23 2021, 07:29 PM
Your car is looking fantastic and those cherry cabinets are... well... CHERRY! I hope your son knows how much those would have cost.
Yes through several emails and the picture we hopefully sorted out the spacing. We will see!
Actually my son was the cabinet maker and worked in the trade years ago, he knows very well. He just doesn't have the tools anymore.
And, who do you think taught me?
Posted by: Lucky9146 Apr 28 2021, 10:09 PM
As I mentioned back a few posts in #958, I had long wanted to have an early jack. I just like the look and position better than a "74 jack and placement.
Got A quart of paint match and one of those rattle cans with hardener in it you have to activate that you can get at an automotive paint store. Had never used one of those cans they fill for you before, but it was a one timer and I wanted to give it a try rather than set up a paint gun for a small job. Another small project materialized to not let the remaining rattle can paint go to waste that I will cover soon.
Once painted I installed the bracket with JB Weld and I am very happy with the results.
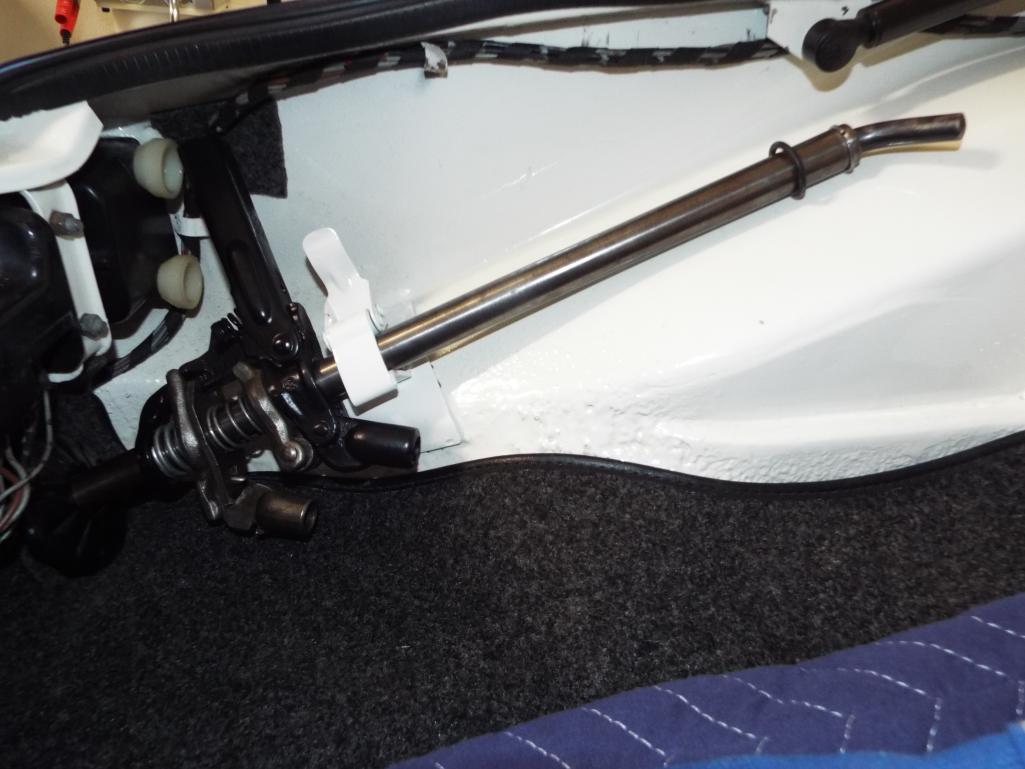
Posted by: Larmo63 Apr 28 2021, 11:09 PM
Jim and his friends ALL have M491 cars. I saw them at the Rancho Santa Fe cars and coffee a few weeks ago. Great cars, great turn out.
Jim's is the best (cleanest) of the bunch!
Posted by: Lucky9146 Apr 29 2021, 02:30 PM
Jim and his friends ALL have M491 cars. I saw them at the Rancho Santa Fe cars and coffee a few weeks ago. Great cars, great turn out.
Jim's is the best (cleanest) of the bunch!
Thanks Lawrence! @http://www.914world.com/bbs2/index.php?showuser=17068
Your recent white 911 find is awesome, as is the story of how you found and bought it.
Great to see you and hope to see you again soon. Kicking myself for not taking a pic your car.
Posted by: Lucky9146 Apr 30 2021, 10:25 PM
Well this was fun...............
When I got this car in 2013 it had the steel flares, all the body work, and Imron paint, ALL DONE!
This was huge for me, the car was in the middle of a 6 conversion. The paint job was in great condition for having been done about 1998. Still looks fabulous today.
I had lots to do to finish the conversion (5 years) so not having to worry about the above mentioned was fantastic and left me to focus 6 conversion, engine rebuild, and a bit more.
I was not too concerned at the time about the underside and only did some touch up here and there. Being as the car turned out well, something has bugged me for some time now, and that is the areas below I painted, which is basically the underside of the engine compartment. Of course having the paint I got to do the jack bracket project certainly helped!
Have no idea how long it took me to tape this off but it was a while. pictures are huge so will take a couple posts.
The left side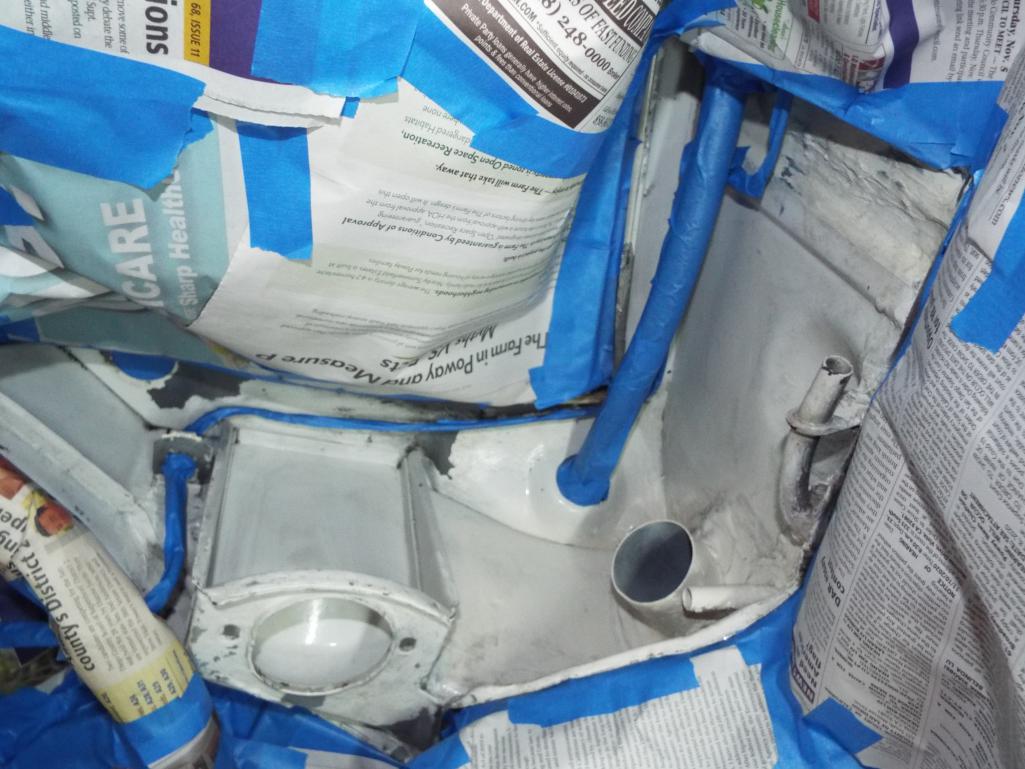
Posted by: Lucky9146 Apr 30 2021, 10:26 PM
The left side done!
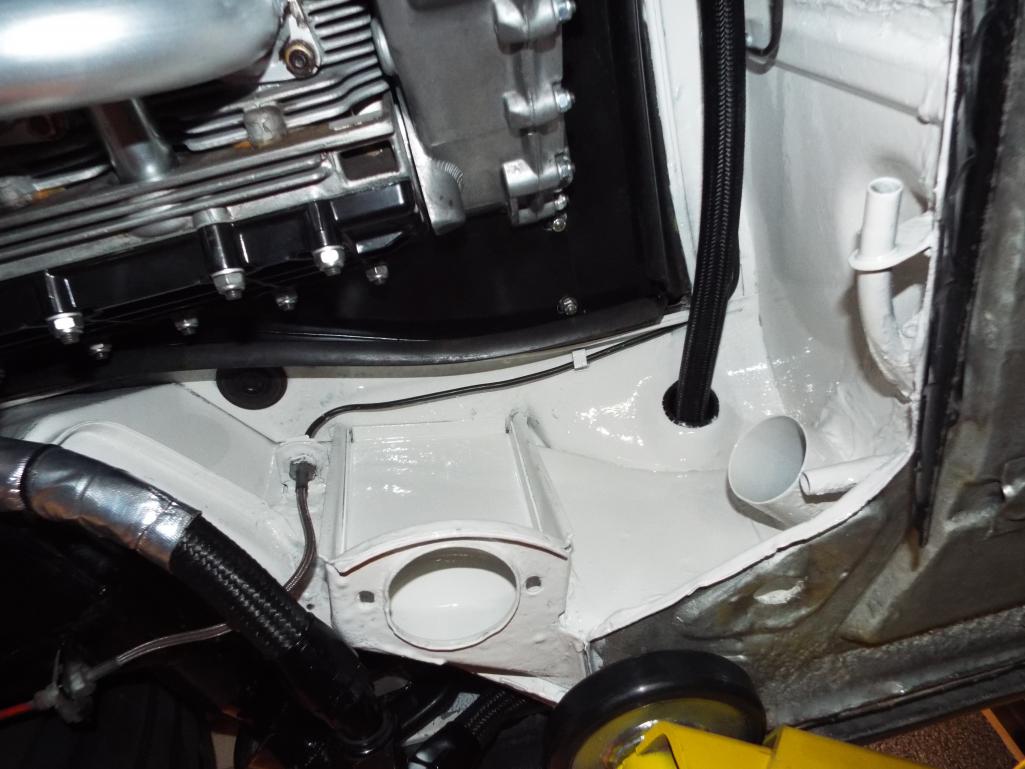
Posted by: Lucky9146 Apr 30 2021, 10:29 PM
Right side...
Both sides had their challenges. And why didn't I paint this when the engine was out?
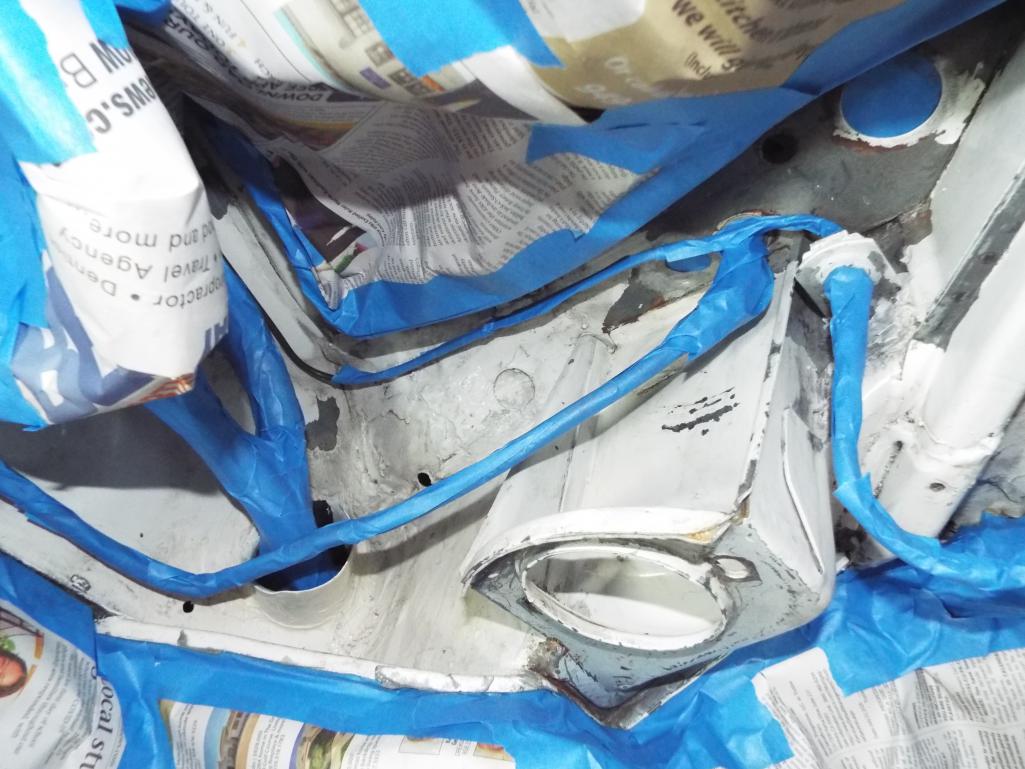
Posted by: Lucky9146 Apr 30 2021, 10:36 PM
And the right side done. not sure what took longer taping off or removing? I think it is a toss up and the reason for the delayed posting.
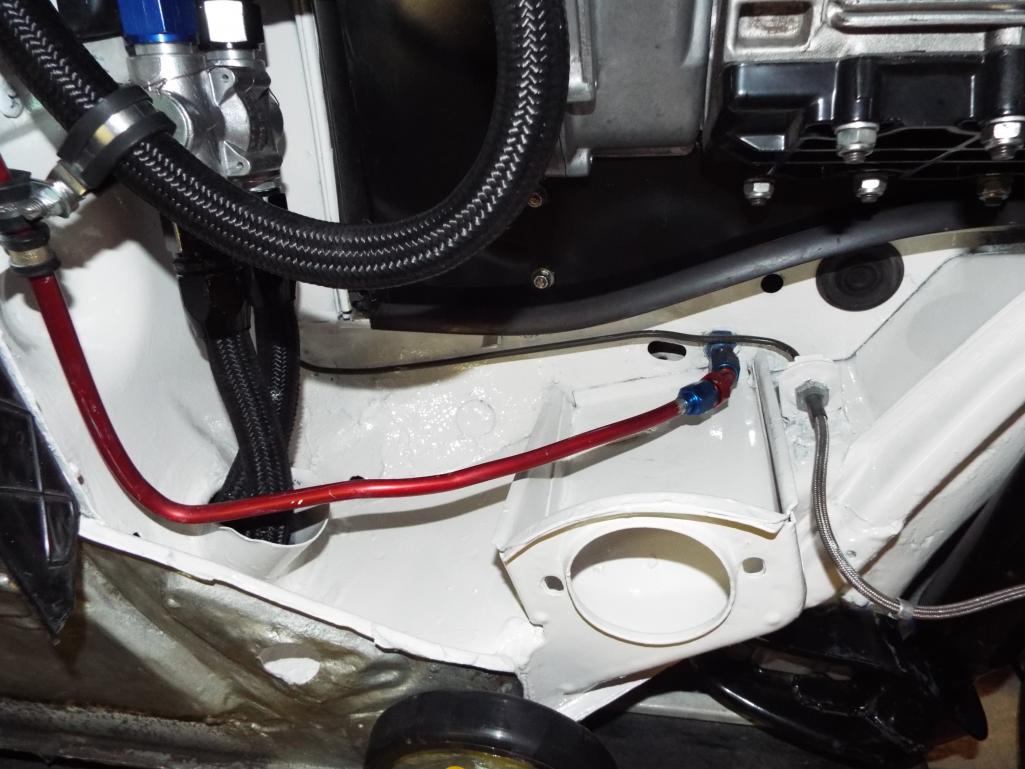
Posted by: Cairo94507 May 1 2021, 06:59 AM
That may have been a pain in the rear to prepare and tape off but it looks so much nicer.
Posted by: Lucky9146 May 1 2021, 02:03 PM
Thanks Michael !
Post up some pics of your car out in the wild on your thread. I do recall seeing one a little while back but more is always good.
I went to Rancho Santa Fe today and as you can see from the other thread posted I got to meet up with Larmo63, Steve, and I don't know Brandons handle if he has one here on world.
Posted by: Cairo94507 May 1 2021, 06:49 PM
@http://www.914world.com/bbs2/index.php?showuser=17942 - THat's a good idea; I will post some of my next road trip when I head up north. I am doing some minor intake mods right now and waiting for parts to come back from the powder coater.
Posted by: Lucky9146 May 2 2021, 11:12 AM
Results on the paint color decal I ordered and mentioned a few posts back.
Communication with supplier in UK-----Excellent/OK
Making and shipping-----Excellent
Packaging ----------------Excellent
Quality--------------------Excellent
Making the decal exactly like the picture I sent---------Close
In spite of spelling out desired wider spacing was needed between the L 80 E and providing this exact picture shown here.
This is what I received................ @http://www.914world.com/bbs2/index.php?showuser=20845 same as your experience.
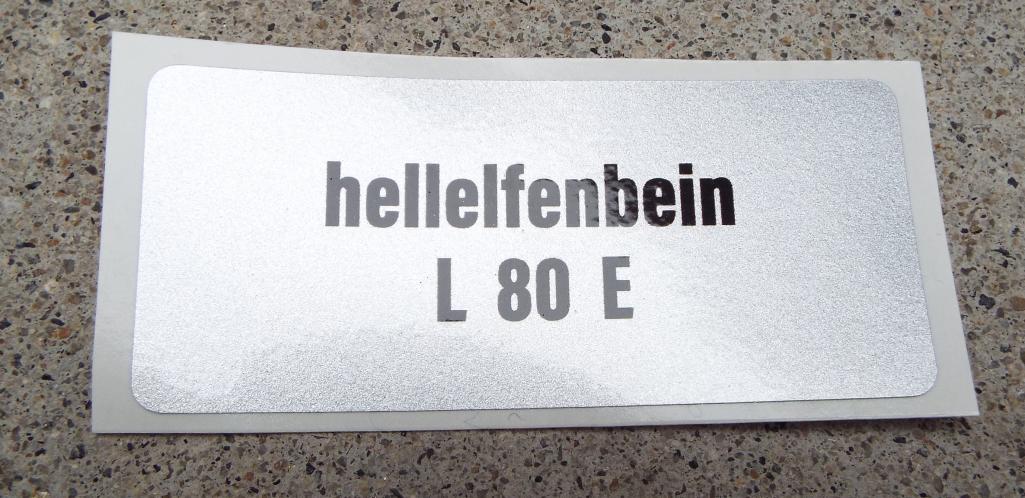
Posted by: bbrock May 2 2021, 12:09 PM
I think yours looks better than mine (more spacing), but still not quite there, is it? Looks to me like they need to about double the spacing they used for yours and they would have it.
I'll say though that the sticker is so tucked away that you'll soon forget about the spacing. I doubt even the most anal judge would catch that it was a repro. Still, I share the desire to have things replicated perfectly. If it was made a certain way once, it can be done that way again.
Posted by: Lucky9146 May 2 2021, 03:59 PM
As I am trying to make the underneath look better, something I have tried a number of times to do is get a match for the bottom gray finish of the pan.
My 74 appears to have the original paint/coating/ finish on the bottom of the floor pan. It is a gray color with a very slight orange peel finish, almost smooth. And I truly do believe it is an original finish with a few scrapes here and there. It kind of reminds me of an old an old porcelain oven inside color/look. Wondering if anyone has seen it, come across it, knows anything about it? Have tried to look up with no success. It seems that most folks who repaint a car paint the bottom the body color or black.
Any ideas what the factory may have used on a 74? I have no real way for the paint match people to get a good shot at it with the car so low and no lift at the paint place of course.

Posted by: Lucky9146 May 2 2021, 04:01 PM
A couple more close ups

Posted by: Lucky9146 May 3 2021, 10:16 PM
A baby step toward my 915 trans swap was getting my electric speedometer done.
Slowly and I mean slowly, I continue gathering the bits and pieces for this project. Sitting on the shelf for about a year, I now have an electric speedometer ready to go!
Received back over the weekend I had it done by John Bell who is on Pelican & Early S Registry as jbell959.
He performed excellent work and I felt quite fairly priced. I learned of him through a friend who had a lot of custom work done by John.
I recommend him for his work, price, communication + turn around time. Wish I had taken a before pic.
John:
- Swapped needle with early silver button needle to match my current gauges.
- Replaced odometer gear
- Reset odometer to 0
- Repainted bezel
- Installed new acrylic lens
- Removed the word Electric for a cleaner look (his idea)
- Recalibrated and tested it
In talking to @http://www.914world.com/bbs2/index.php?showuser=822 over the weekend, he pretty much confirmed that I will be back into my 915 trans to add the side cover with speed pick up feature.
I had elected not to buy that part, as I had heard there were other avenues like GPS or a pickup on the rear axel.
Someday..................
Posted by: Lucky9146 Nov 14 2023, 11:54 AM
Posting Link from my 2021 Werks Reunion Monterey experience.
http://www.914world.com/bbs2/index.php?showtopic=355634&hl=
Kicking myself for not posting more of the wonderful events I've had the opportunity to participate in with this car and the places my car has been.
Have wanted to resurrect this thread for some time now and share my experiences and the great people I've met along the way.
More to come....
Posted by: Cairo94507 Nov 14 2023, 12:14 PM
Hi Jim,
Damn, a 915 transaxle...that would be very nice indeed. I hope to see you at an event in the near future.
Cheers,
Michael
Posted by: Steve Nov 14 2023, 12:27 PM
Hi Jim!! Nice to see you at UnStock. Car looks great!!
Posted by: Lucky9146 Nov 14 2023, 12:56 PM
Hi Jim,
Damn, a 915 transaxle...that would be very nice indeed. I hope to see you at an event in the near future.
Cheers,
Michael
Werks 2021 Monterey was I posted I think the last time we met up! Yes we must meet up again!
915 is still in the planning / holding stage
Best
Jim
Posted by: Lucky9146 Nov 14 2023, 12:59 PM
Hi Jim!! Nice to see you at UnStock. Car looks great!!
Thanks will post picture from Unstock soon.
I think the last time we met up was the Julian Cruse Oct 2020 and you let me drive your car!!. Good to see you as well!
Posted by: Lucky9146 Nov 14 2023, 01:25 PM
Unstock #3 Sunday at HRE Performance Wheels in Vista CA
I volunteered to help at the event and got there early, doing so afforded me the first parking place, an end spot, right in front of the PCA tent.
Great day! Saw lots of people I knew, amazing cars, great weather, you couldn't ask for a better event.
I would say this being the third Unstock and continuing to grow, that this venue with cars placed inside their manufacturing building was close to Luft 5 at the lumberyard.
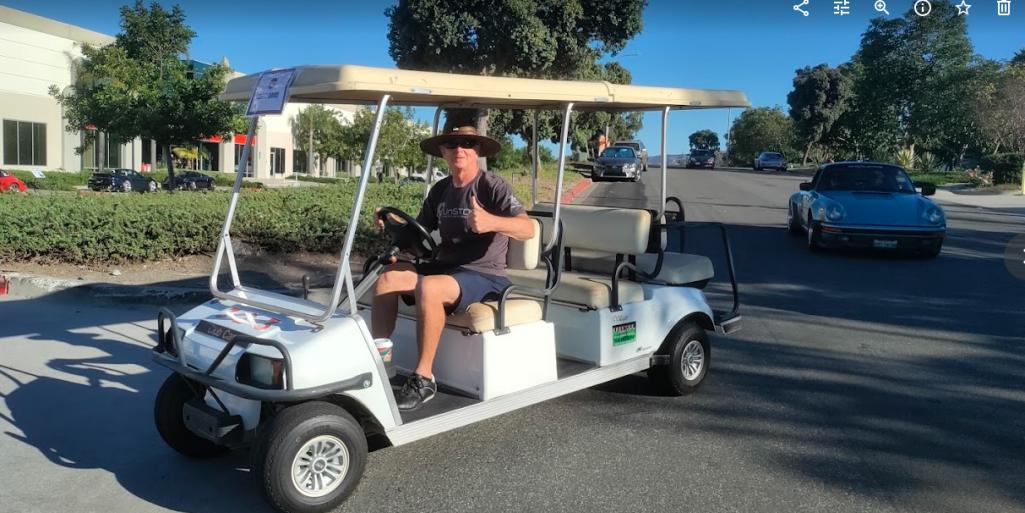
@http://www.914world.com/bbs2/index.php?showuser=12876 was there with his beast.
and got an inside spot!!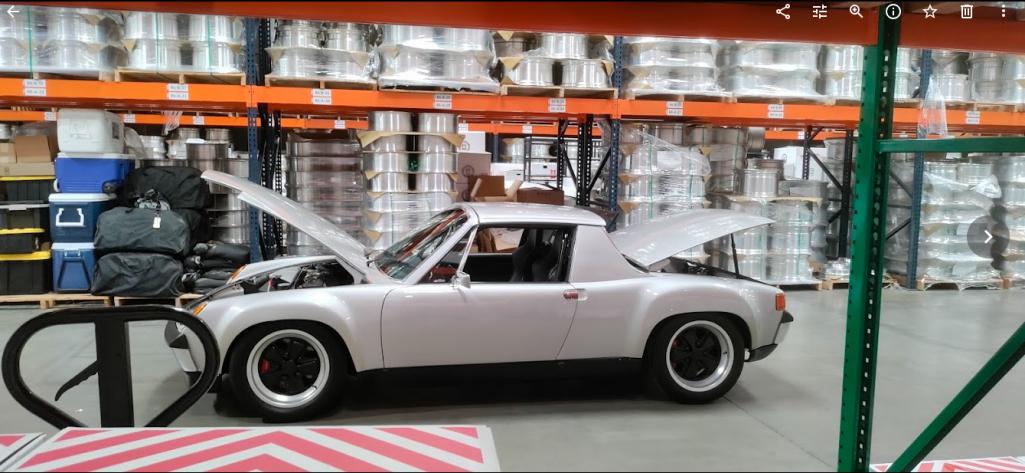
Posted by: Lucky9146 Jan 10 2024, 10:44 PM
Had a good surprise this past Saturday of a friend coming down to San Diego from Venice Beach with his just finished 3 year project '73 914-6 Tribute
Chalk Gray over black interior. He is not a World member.
Built 3.2 L with ITB's. 915 Trans
Fun time! His first visit to RSF

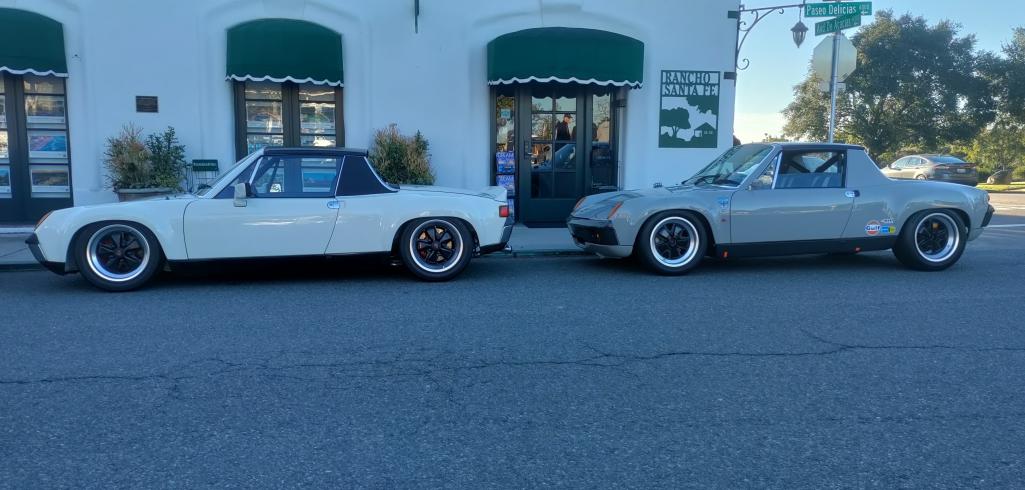
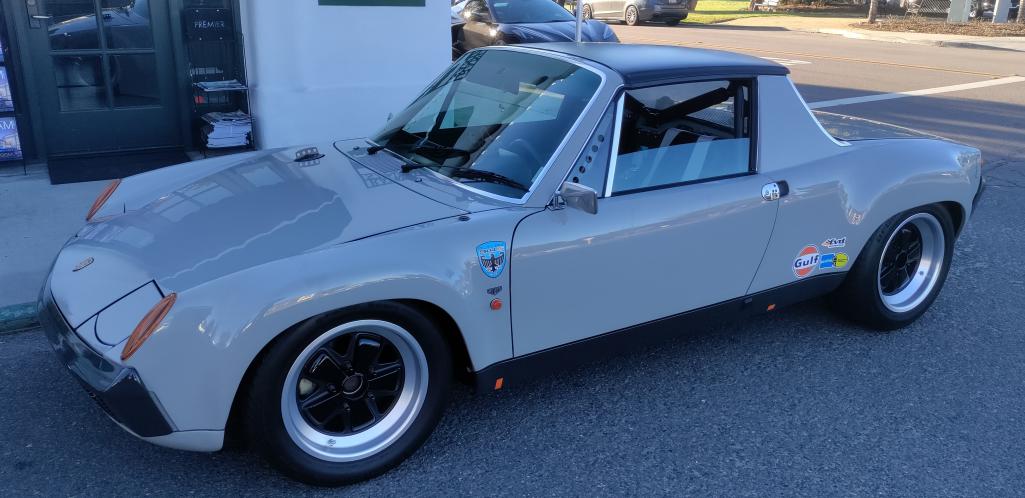
Posted by: Lucky9146 Jan 10 2024, 10:54 PM
My lovely wife made this service cover for me a while back, a copy of Garold's Mothers.
She has made a few since. PM if interested.

Posted by: Justinp71 Jan 12 2024, 10:41 AM
Had a good surprise this past Saturday of a friend coming down to San Diego from Venice Beach with his just finished 3 year project '73 914-6 Tribute
Chalk Gray over black interior. He is not a World member.
Built 3.2 L with ITB's. 915 Trans
Fun time! His first visit to RSF
Both cars look sweet! I'm really diggin the partial GT look on that Grey car. Any more pics somewhere? That 3.2L with ITB's if you set it up properly it can be a 300hp screamer... so fun.
Powered by Invision Power Board (http://www.invisionboard.com)
© Invision Power Services (http://www.invisionpower.com)