Printable Version of Topic
Click here to view this topic in its original format
914World.com _ 914World Garage _ Ex BUILD-OFF CHALLENGE: Brett's 914
Posted by: brettrarnold Oct 1 2015, 12:24 AM
Background
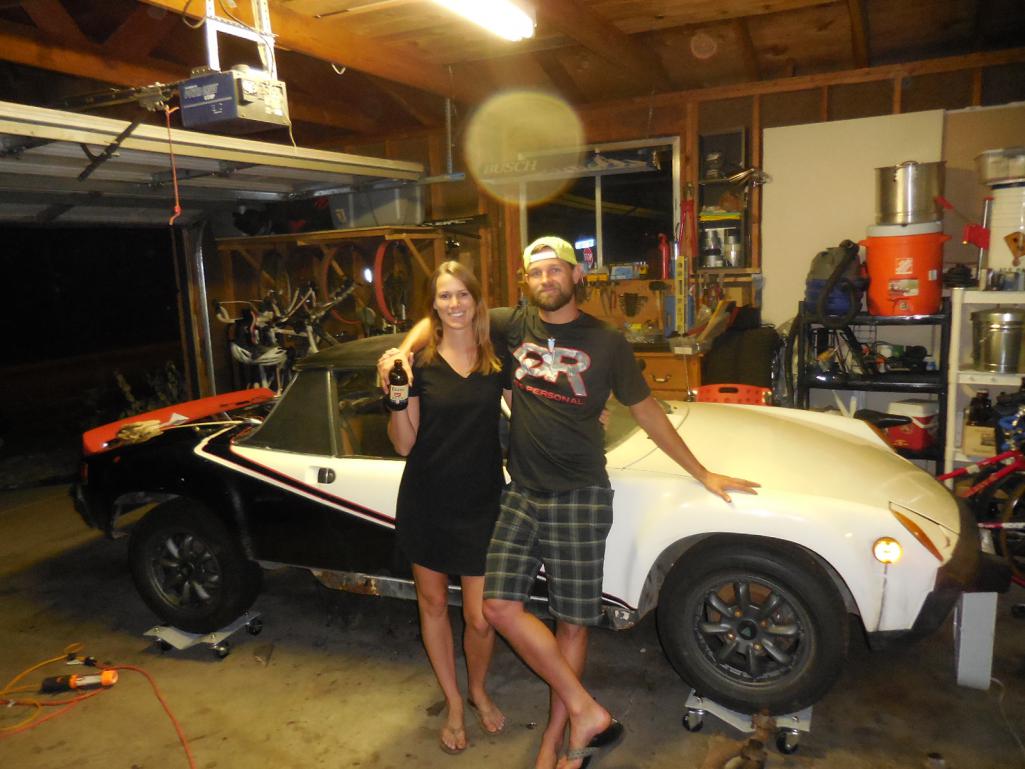
This car was the first car that Brett drove when he was 13 and was given to us in 2014. It had been sitting idle back in Indiana under a family friend's carport for the past 15 years before Brett went back to Indiana and towed it out to Colorado with his father in July 2014. 
When we got it, we didn't have a garage to work on it and it sat idle being stored outside for another year until we could afford a house with a garage. Colorado is pretty expensive so after we got a house with a garage, we then needed to save up more money to work on it.
Also I must mention in my ignorance, there were 3 distinct phases of thinking for getting this car fixed which I now find funny and are listed below
Phase 1: I will tow this car out to Colorado and get it the engine running for maybe $2,000 and have a working car.
Phase 2: Holy shit after researching this is impossible and will have to pay somebody to fix it for $15-20k.
Phase 3: I have enough local support and 914world resources and can fix this myself for around $10-15k.
Build-Off Challenge
So Amy and I are going to be tackling different aspects of this car so the posts will be coming from both of us. I will handling the rust/engine work and Amy will be on Interior and Exterior. Also she may help with some of the posting so we will start each post with name.
Brett
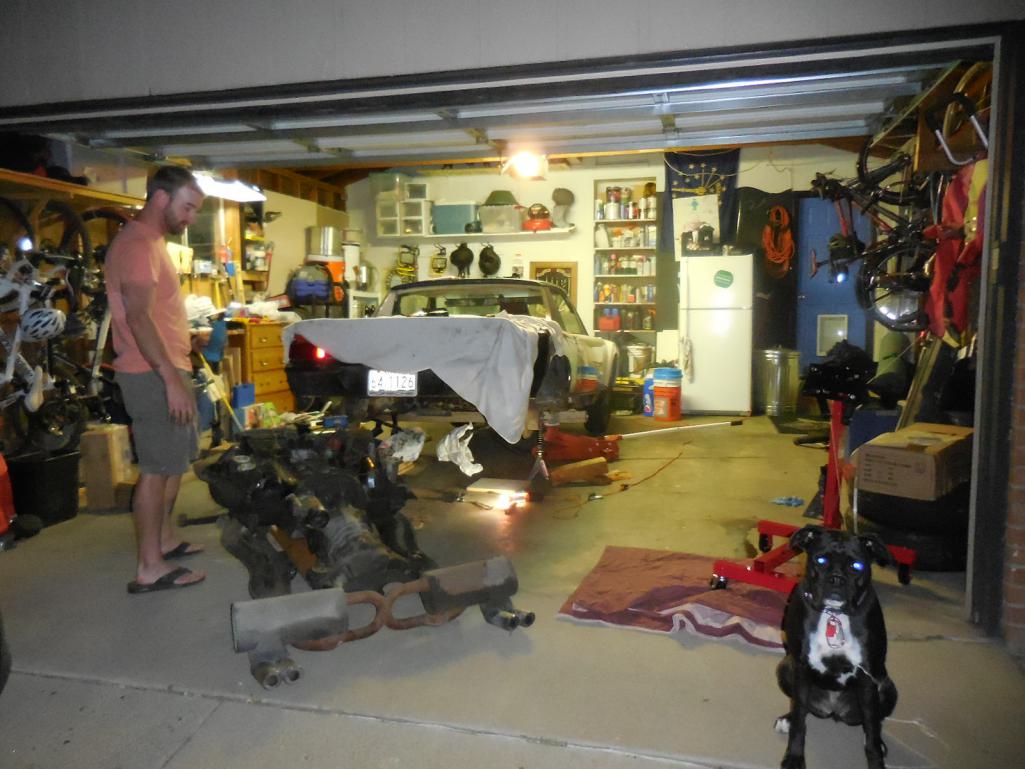
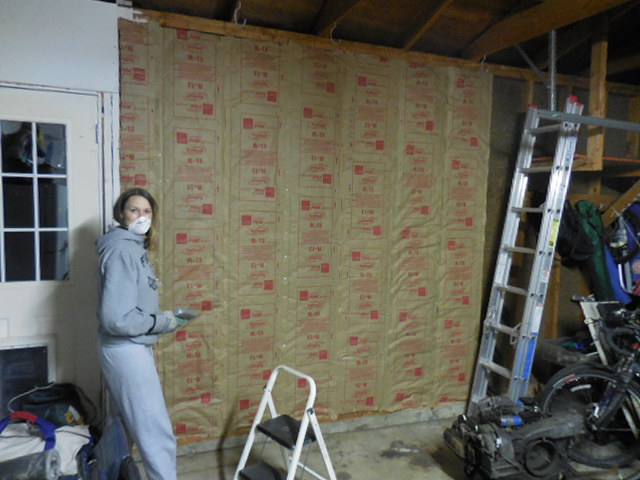
Step 1 (Complete) was to remove the engine and assess the frame rust situation. Never having removed an engine from a car, this was an extremely daunting task. The steps listed in Pelican Parts tutorial - http://www.pelicanparts.com/techarticles/914_engine_drop/914_engine_drop.htm is by far the most difficult thing I have done to a vehicle thus far. Hell I don't even know the difference between a camshaft and a carburetor much less a CV joint or a clutch cable. But after staring at it for about 2 weeks, I decided to just start unhooking shit and labeling. Made a ton of progress and finally got the engine about 95% unhooked. Had a friend come over to help me out and we actually got it out. WOOHOO!!!
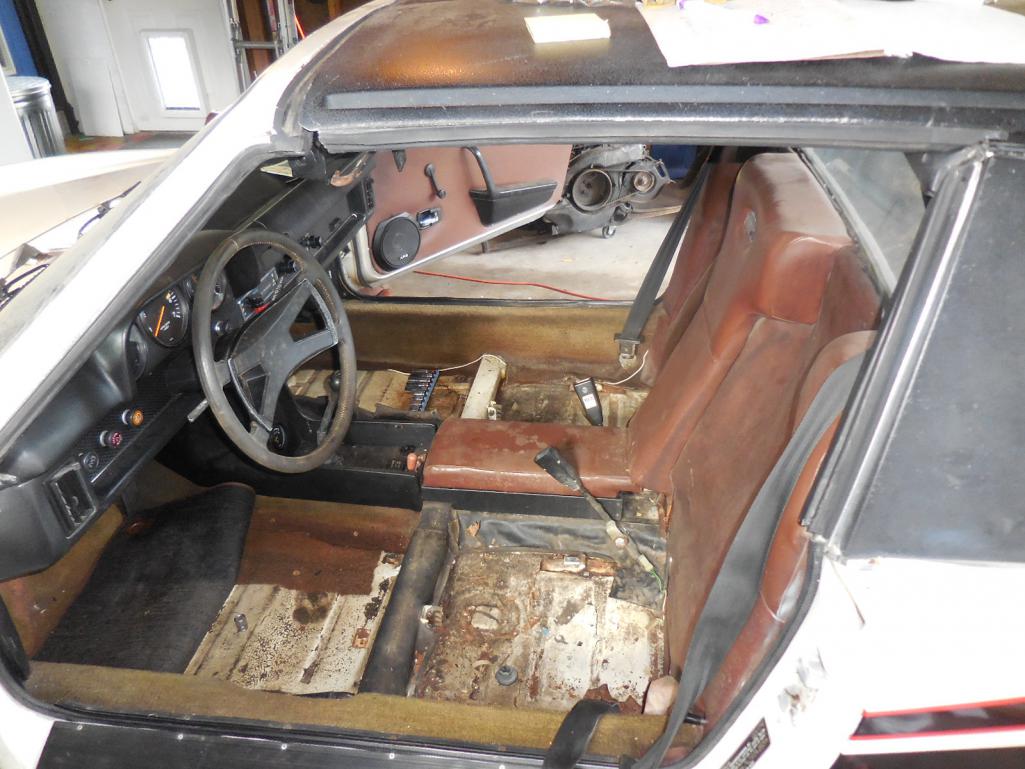
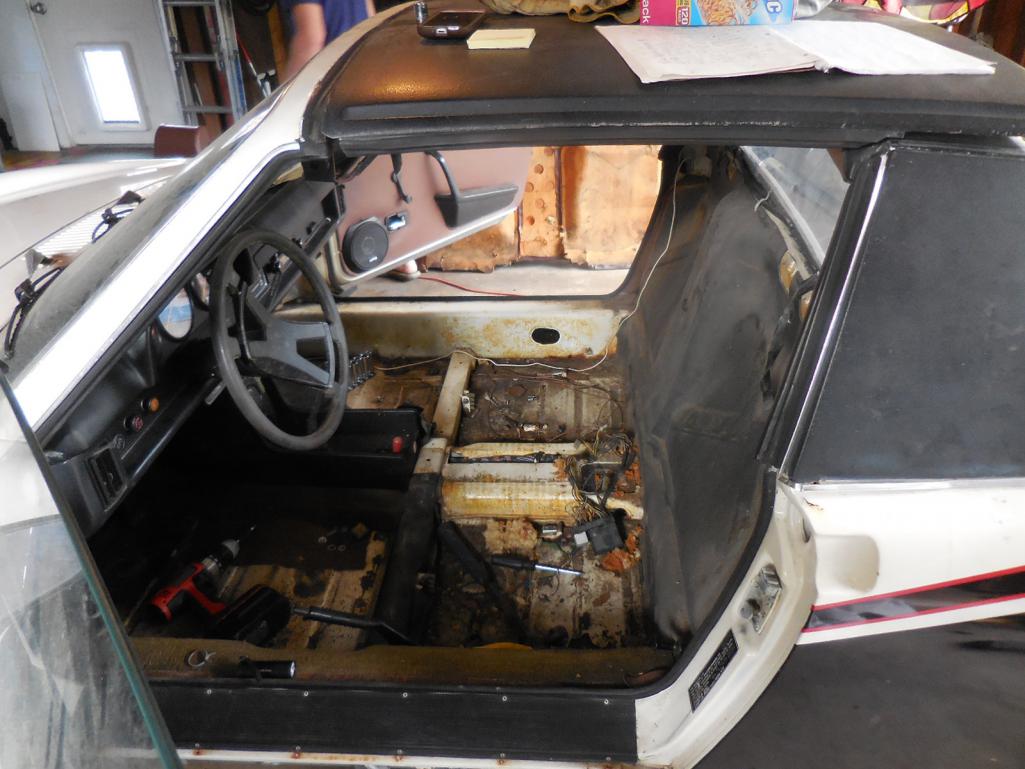
Step 2 (Complete) is to strip out all the interior. I ordered chassis braces and other misc items from Tangerine racing and am still in the process of identifying all the rust areas that need repair.
Attached thumbnail(s)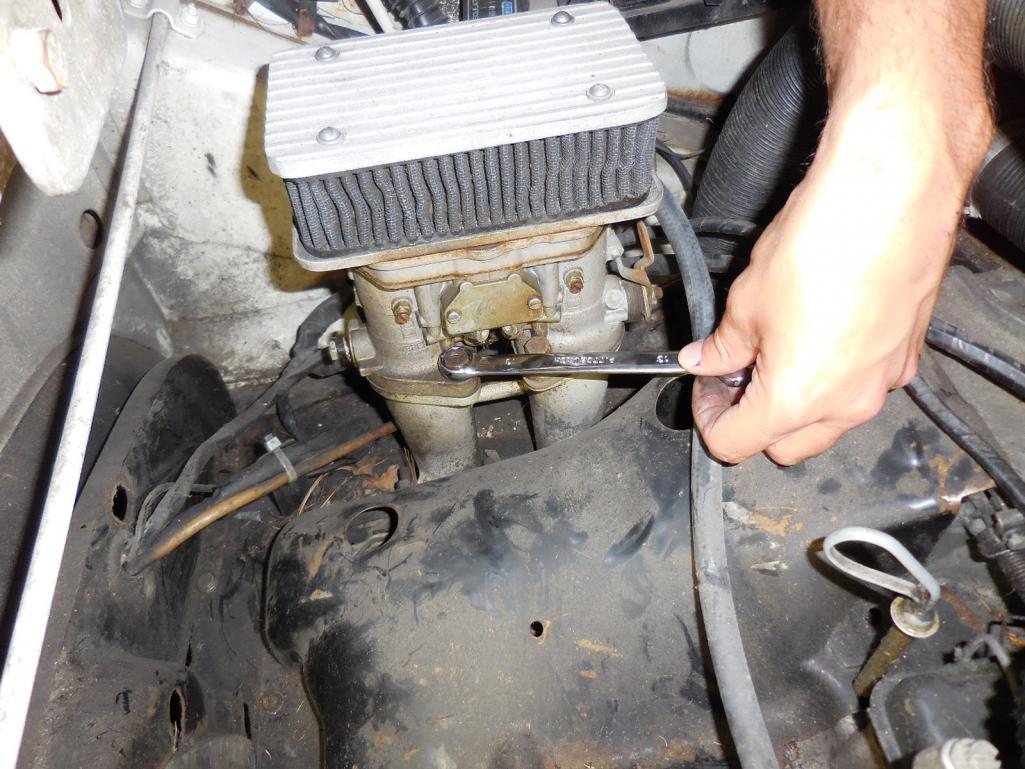
Attached image(s)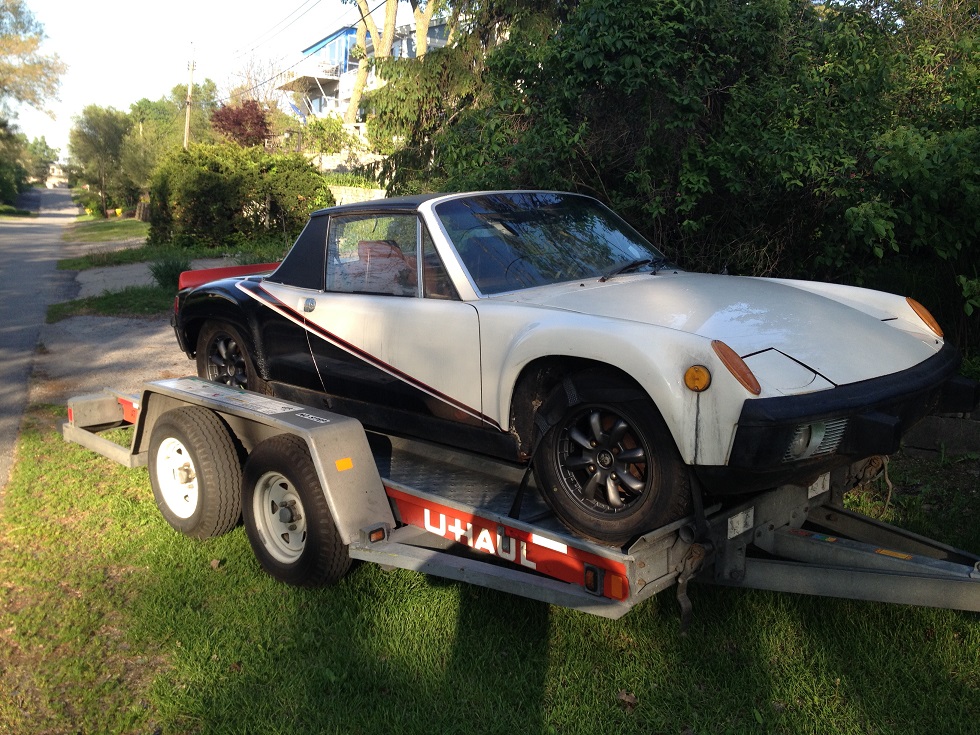
Posted by: Cairo94507 Oct 1 2015, 06:52 AM
 Welcome to you and Amy. Looks like a nice car to start with. I love that both of you are committed to building it. You should have fun in the process. Just stay organized and work in sections so as not to get overwhelmed. Tackling the rust first is definitely the best approach in my opinion. Once that is done the rest will be smooth sailing.
Posted by: rnellums Oct 1 2015, 07:11 AM
Just wait till they start posting pictures of that rust! This car is going to be a labour of love, but Brett and Amy have the drive!
I'm looking forward to seeing the progress on this one!
Posted by: RobW Oct 1 2015, 08:27 AM

If the motor pull was intimidating... get some of your CO brothers give you a hand. This is one of the best things about the world site.
and good luck!
Posted by: mbseto Oct 2 2015, 07:25 AM
Man that's is one accusing look from your dog.
"I would rather they'd gotten a cat."
Posted by: Mueller Oct 2 2015, 11:08 AM
Nice looking car and seems like pretty solid foundation...good luck!
Posted by: brettrarnold Oct 2 2015, 11:13 AM
 Welcome to you and Amy. Looks like a nice car to start with. I love that both of you are committed to building it. You should have fun in the process. Just stay organized and work in sections so as not to get overwhelmed. Tackling the rust first is definitely the best approach in my opinion. Once that is done the rest will be smooth sailing.
Ya it wasn't until a competition of sorts came about that amy seemed to show any interest... Go figure. It is cool with her involved as she has a much better design eye than myself and will be tackling all the inside to have a much better product in the end. But I guess downside is that now i'll have to let her drive it...... ha jkjk. Rust will hands down be the main challenge. I got a shit ass welder for another project that I screwed up and already wishing I wouldn't have gone cheap on it. Oh well live and lose.
-Brett
Posted by: brettrarnold Oct 2 2015, 11:16 AM
Just wait till they start posting pictures of that rust! This car is going to be a labour of love, but Brett and Amy have the drive!
I'm looking forward to seeing the progress on this one!
Ya the rust ohh that rust. I feel that it really is a double edge sword. Without 914 rust there wouldn't be soo many good 914 welders..... Also I feel it creates a sense of camaraderie between us 914 owners. Everyone whose owned one has atleast one thing in common..... fixing the RUST....
Probably a more optimistic way of looking at than most have but my 2 cents. Looking forward to learning how to weld!
I've joined the 914 Colorado yahoo group and as I get further along I will be reaching out to everyone and anyone here local for help with rust. On the plus side, Amy works for Breckenridge beer and the fridge is almost always full of the stuff. Hope welders like breck beer is my saving grace.
Will post photos of the rust tonight and any comments or tips is much much MUCH appreciated!
As for the pup, ya she just sits outside and is constantly wishing for a cat or bunny to chase. Right now she's wearing a cone from an accident chasing a bunny across the street. Funny photo forthcoming.
The car looks solid at the moment but after talking with Ross (rnellums) I realize I am going to have to cut the body to get to the frame rust. That is really disheartening to me as I enjoy the current paint scheme. It happens.
Great comments and thanks for posting everyone. Feedback is going to be important for us.
-Brett
Posted by: turk22 Oct 2 2015, 11:55 AM
Yea, my first thought in looking at those pictures was "That dog does not look happy!"

Posted by: Nutter965 Oct 2 2015, 01:29 PM
Good luck guys, I hope the rust isn't to bad .. I hate rust with a passion !!!! Think the dog does to
Posted by: PlantMan Oct 2 2015, 01:49 PM
That dog is killing me!!!!! Looks a little evil!!! 
Are you drinking a Coors????
Posted by: 914forme Oct 2 2015, 02:05 PM
Good luck, the rust is everyones biggest concern as it can get out of hand quickly. Good luck with the build.
I love build threads, no I' am not an addict.
Yes yes yes I am.....
Posted by: Stacks914 Oct 2 2015, 02:08 PM
Goodluck! love that paint on the car!
Posted by: DirtyCossack Oct 2 2015, 04:55 PM
The car looks solid at the moment but after talking with Ross (rnellums) I realize I am going to have to cut the body to get to the frame rust. That is really disheartening to me as I enjoy the current paint scheme. It happens.
I'm experimenting with fixing without cutting up much of the body. It seems difficult and will require some creative solutions, but I'm hoping it's possible.
Posted by: brettrarnold Oct 4 2015, 02:41 PM
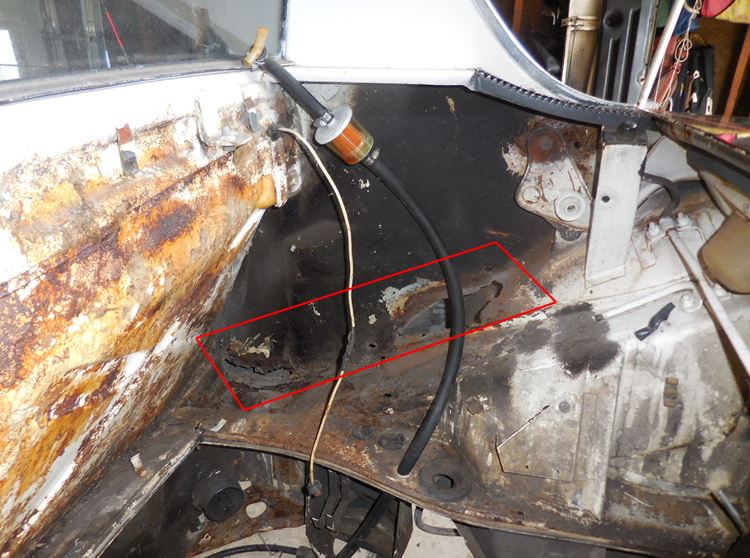
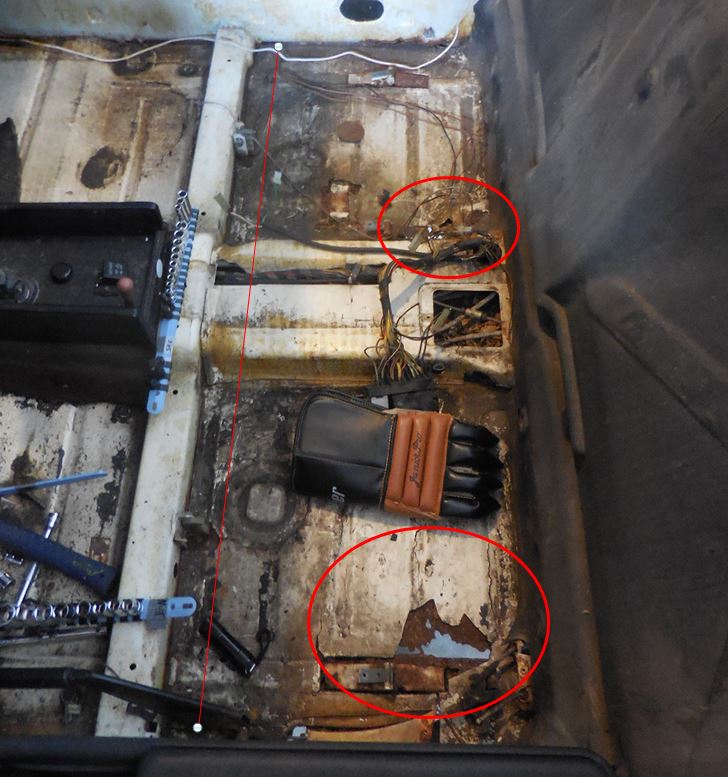
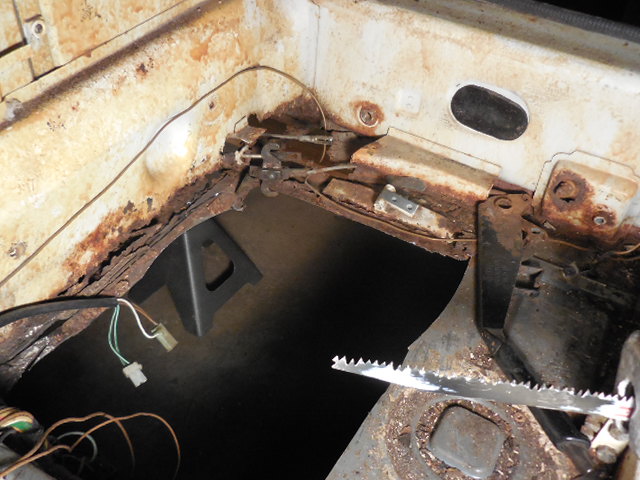
Rust Update.
While im waiting for chassis braces to arrive, here are some photos of the rust that that I have to tackle. My plan of attack is to cut along the red lines with a grinder, but my friend mentioned that it may be beneficial to cut rounded. I have no welding experience so any feedback would be welcomed.
My plan parts list is as follows:
http://www.restoration-design.com/store/product/PP345
http://www.restoration-design.com/store/product/PP301R
http://www.restoration-design.com/store/product/PP352R
Is there anything else I am missing?
-Brett
Attached thumbnail(s)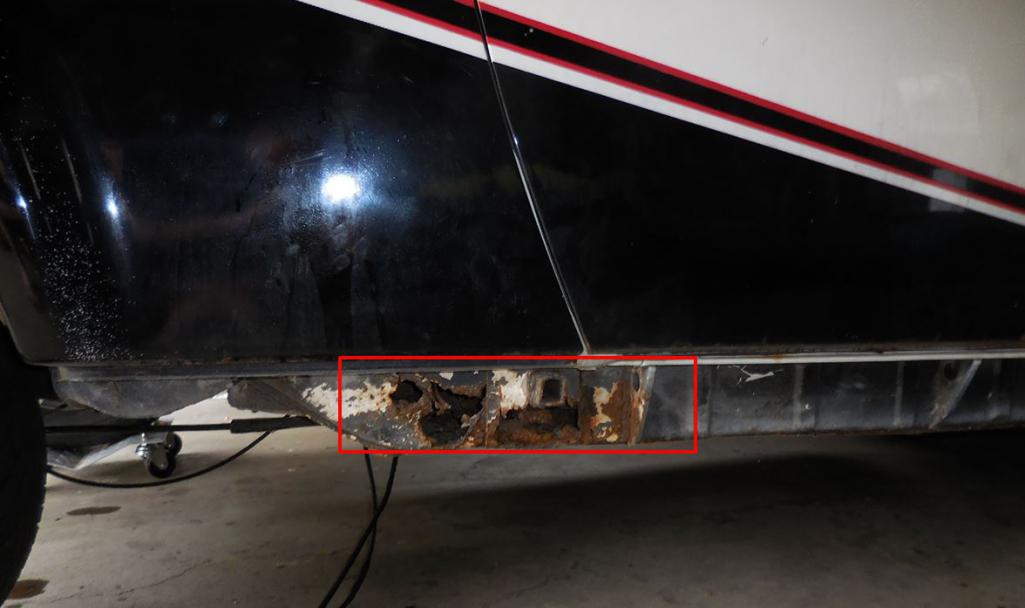
Attached image(s)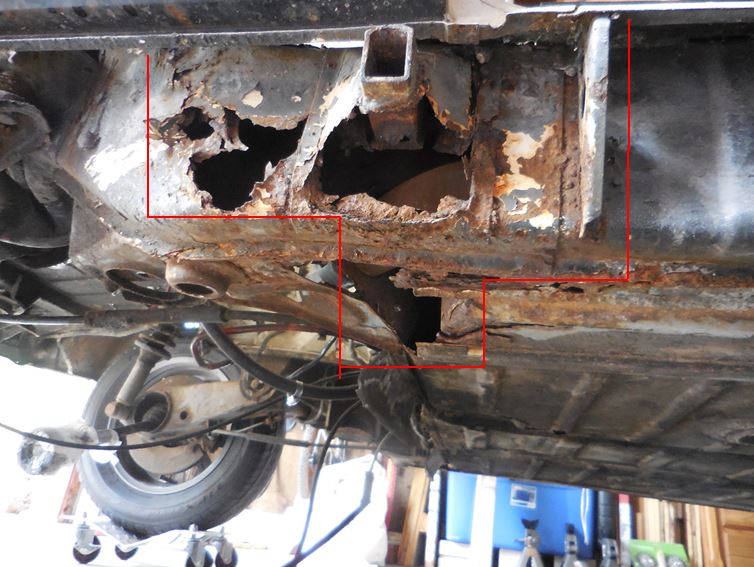
Posted by: mepstein Oct 4 2015, 03:21 PM
Once you start removing paint, floor tar and undercoat, you will find a lot more rust. I guarantee it.
Posted by: brettrarnold Oct 4 2015, 04:02 PM
Once you start removing paint, floor tar and undercoat, you will find a lot more rust. I guarantee it.
Ya I imagine that is going to be the case and just waiting on the chassis braces before starting any cutting.
Posted by: stevegm Oct 4 2015, 04:18 PM
After you cut out all of the rust, make sure you treat the inside of the longitudinals. I am not sure what Scotty and Rick use inside them, but, I would find out and use that. They have a lot of experience with it.
Posted by: brettrarnold Oct 19 2015, 08:49 AM
Howdy folks,
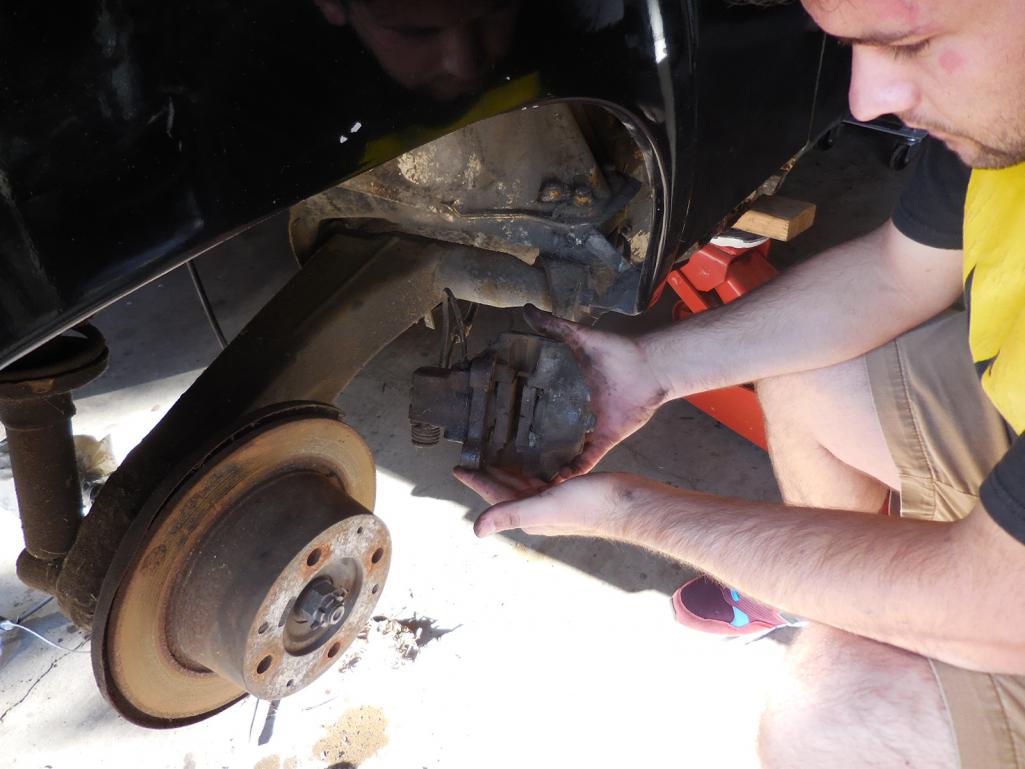
So have kind of been in somewhat of a holding pattern on the rust repair until the chassis braces arrived. While I waited I started working on the brakes and had planned on replacing the pads; however, upon removal, the old pads are about the same size as the new ones and I figured I would just leave em on.
Questions:
1.) The rotors appear in decent shape and the car has only 73k miles so I'm wondering do I need to replace the rotors or just get them turned? Right now leaning towards getting them turned but with putting a Subaru engine in it, would it be wise to upgrade the brakes anyhow?
2.) Im planning on painting the calipers but wanted to get any advice beforehand. I am not sure on the color yet but wanted to get em looking good again. Any tips are appreciated.
3.) I'm planning on purchasing a wiring kit from Jeff's 914, but not sure which one to go with since I'm doing a Subaru conversion. Any ideas? Also, Amy's seat heaters arrived last week so any wiring harness I get must accommodate seat heaters for both seats.
Next topic of business: I am going to be getting married next weekend to the lady whose working on the interior of the 914. So I/we haven't been posting as much as we'd like and wont be doing anything for next few weeks until we return from our honeymoon on the 9th. After we get back though it will be balls to the wall on the rust and Amy is going to start on the reupholstering and interior.

Thanks Everyone!
-Brett
Attached thumbnail(s)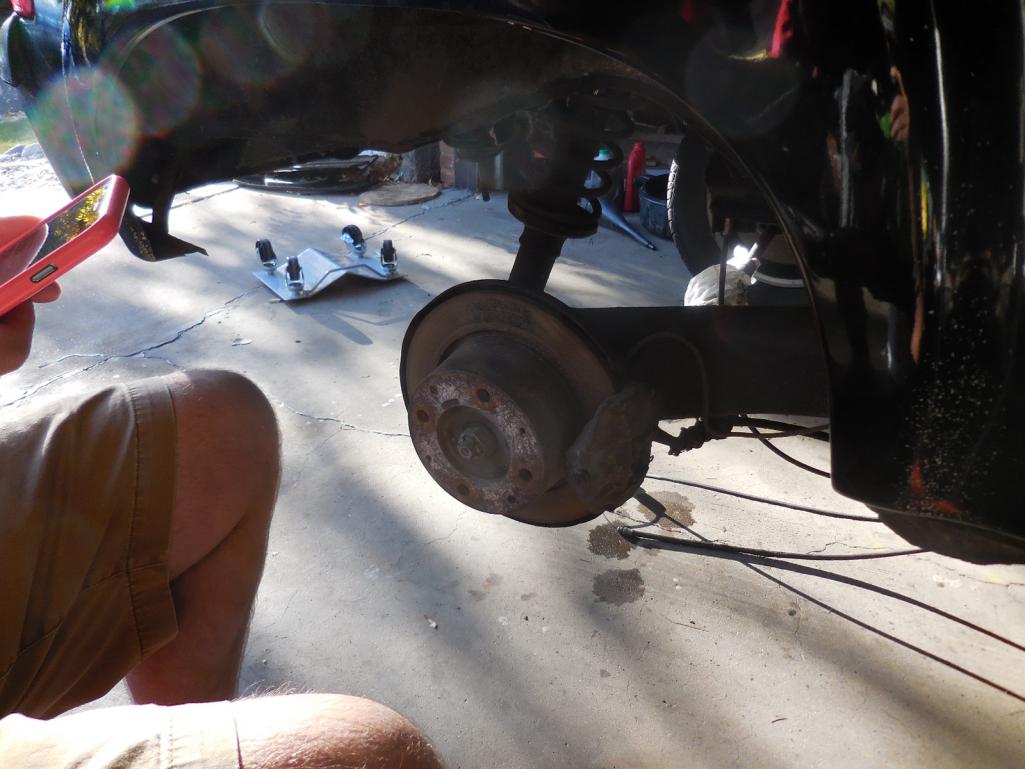
Posted by: RobW Oct 19 2015, 11:41 AM
1) You can turn the rotors but you can also buy them.
2) PMB
3) I have no idea about Subie's but its been done before.... others will chime in.
Keep it up! 
Posted by: brettrarnold Oct 19 2015, 11:47 AM
1) You can turn the rotors but you can also buy them.
2) PMB
3) I have no idea about Subie's but its been done before.... others will chime in.
Keep it up!
Actually just took the rear ones into O'Reilly next to my house and they said they were in good shape and just needed turned. 15/each wasn't too bad but saw they are on amazon for 60 brand new. Oh well.
For PMB I saw the caliper kits and rebuild kits but was thinking of just giving them a little tlc and see how they work once I get it moving.
-Brett
Posted by: injunmort Oct 19 2015, 04:43 PM
did your e-brake function before dismantling? most that I have had didn't and the rear brakes didn't fuction. there are very good how toos on here to recondition rear calipers. I drove my dd for two years until it was suggested that i rebuild the rears, made a huge difference in braking.
Posted by: JamesM Oct 19 2015, 05:06 PM
For someone that has never pulled an engine that looks like a pretty insane amount of rust repair to undertake. Bravo for trying to save the car, but man, I have scrapped multiple chassis for having rust issues that don't come near this.
For some reason though i really dig the paint scheme and interior color of this car. Best of luck with it.
Posted by: brettrarnold Oct 20 2015, 07:20 AM
did your e-brake function before dismantling? most that I have had didn't and the rear brakes didn't fuction. there are very good how toos on here to recondition rear calipers. I drove my dd for two years until it was suggested that i rebuild the rears, made a huge difference in braking.
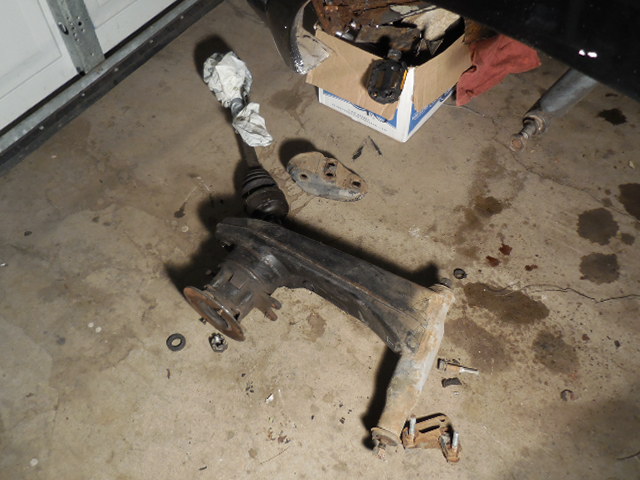
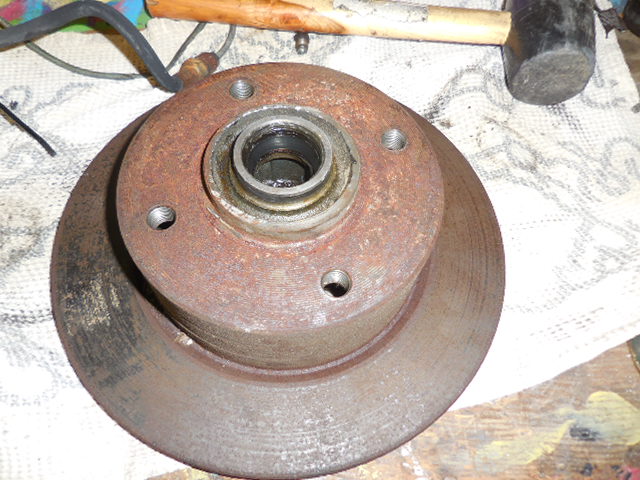
Yes the e-brake worked before dismantling and I think I got it off okay. Setting the thickness may be difficult but will cross those bridges when I get to them. Spent a lot of time yesterday scraping gunk off of the rear control arm and spring/shock (**not sure on the terminology). Right now planning on painting the control arm and also the spring with some chassis paint that I ordered.
Once I get the rears back on and see how they work will probably decide to rebuilt or not to rebuild. On the plus side rotors came back and looked fantastic (picture forthcoming)!
-Brett
Posted by: brettrarnold Oct 20 2015, 07:27 AM
For someone that has never pulled an engine that looks like a pretty insane amount of rust repair to undertake. Bravo for trying to save the car, but man, I have scrapped multiple chassis for having rust issues that don't come near this.
For some reason though i really dig the paint scheme and interior color of this car. Best of luck with it.
Trust me I feel the same way, I stared at the stupid how-to guide for pulling the engine for literally 2 weeks, overwhelmed, but once I started getting into it, it wasn't so bad. This has been such a great learning experience for me thus far.
As for the paint, hoping to save the paint scheme but we'll see how difficult it is to match once I cut out part of the body to tackle the rust. Luckily I have a lot of great resources helping me get this baby back on the road. Thanks for the feedback!
-Brett
Posted by: 76-914 Oct 20 2015, 09:27 AM
Unless you plan to AX the stock brakes are fine. I haven't seen Jeffs914's harness' but I can tell you that you can make your own harness (if you have a donor harness from the Subaru donor car) for pennies then tie into the existing 914 harness. 
Posted by: rnellums Oct 20 2015, 11:48 AM
Unless you plan to AX the stock brakes are fine. I haven't seen Jeffs914's harness' but I can tell you that you can make your own harness (if you have a donor harness from the Subaru donor car) for pennies then tie into the existing 914 harness.
Even in an AX the brakes should be fine. My understanding is that stock brakes have plenty of stopping power, but since they aren't vented and are fairly small they'll over heat and fade faster than the upgrades. An autocross is short enough that heat fade may not be a problem.
For the harness, He's got someone in the know who can pare down an ez30 harness in about and hour
 . I even have a few spare ECUs...
Posted by: brettrarnold Oct 20 2015, 12:39 PM
Unless you plan to AX the stock brakes are fine. I haven't seen Jeffs914's harness' but I can tell you that you can make your own harness (if you have a donor harness from the Subaru donor car) for pennies then tie into the existing 914 harness.
Even in an AX the brakes should be fine. My understanding is that stock brakes have plenty of stopping power, but since they aren't vented and are fairly small they'll over heat and fade faster than the upgrades. An autocross is short enough that heat fade may not be a problem.
For the harness, He's got someone in the know who can pare down an ez30 harness in about and hour
. I even have a few spare ECUs...Ha I didn't even know what AX meant. I wont be doing much autocross racing and if it becomes a problem I can always choose to upgrade later.
Appreciate the help everyone, Ross just let me know if I need to get anything.
-Brett
Posted by: brettrarnold Oct 31 2015, 10:48 AM
hello 914 crew! This post is going to be more brief than i would like because i am currently in colombia on a honeymoon and internet here is a bit scant. I havent made any progress since my last post because i got married in fort lauderdale and immediately left to go to Colombia.
For the progress on the car in the past month, i got the majority of the interior out and had a few problems getting the back interior piece out. The emergency brake handle was pretty rusted and it broke. Getting the engine out was also pretty difficult for me but ended up getting it. If i had it do it again i would probably have purchased larger jack stands. Being a cheap ass i opted to get the cheap harbor frieght small ones and it was somewhat of a hassle. I did get the rear rotors and calipers off prior to leaving and plan on painting them when i get back. I took the rotors in to get turned at Oreillys auto parts for $15/each and they came back looking brand new. Sweet! That was really the only service that i used thus far. Amy was pretty overwhelmed with wedding junk so she didnt make any progress any of the interior but its understandable.
Unrelated to the porsche the wedding was a blast. We did a destination wedding on a boat in florida and it was tons of fun. 100 guests for a destonation wedding was a little much but everything turned out really well. These are the only real photos that i have available at this point so sorry for not posting an official Porsche photo.
The keyboard here is also pretty funky making this post a little difficult but oh well. Im actually at a small little hotel on an island off the coast of colombia. The place has a monkey that has taken a strong liking to me for some odd reason. Maybe because i am about as hairy as him. Everytime my brother or anyone tries to take him off me he gets really mad and tries to bite them. Ha. This is my first time in Colombia and it is much much safer than i was expecting. everyone says its extremely dangerous and its just not true. Everyone here is just really friendly.
Once again really sorry for this type of post but thanks for understanding.
I have been trying to save the photo for a while and just figured it out. Alright thanks for understanding such a crappy porsche post.
Brett and Amy
Ha and adding photos of the misses from phone. Was impossible on the computer here.
Attached thumbnail(s)

Attached image(s)
Posted by: KELTY360 Oct 31 2015, 11:01 AM
hello 914 crew! This post is going to be more brief than i would like because i am currently in colombia on a honeymoon and internet here is a bit scant. I havent made any progress since my last post because i got married in fort lauderdale and immediately left to go to Colombia.
For the progress on the car in the past month, i got the majority of the interior out and had a few problems getting the back interior piece out. The emergency brake handle was pretty rusted and it broke. Getting the engine out was also pretty difficult for me but ended up getting it. If i had it do it again i would probably have purchased larger jack stands. Being a cheap ass i opted to get the cheap harbor frieght small ones and it was somewhat of a hassle. I did get the rear rotors and calipers off prior to leaving and plan on painting them when i get back. I took the rotors in to get turned at Oreillys auto parts for $15/each and they came back looking brand new. Sweet! That was really the only service that i used thus far. Amy was pretty overwhelmed with wedding junk so she didnt make any progress any of the interior but its understandable.
Unrelated to the porsche the wedding was a blast. We did a destination wedding on a boat in florida and it was tons of fun. 100 guests for a destonation wedding was a little much but everything turned out really well. These are the only real photos that i have available at this point so sorry for not posting an official Porsche photo.
The keyboard here is also pretty funky making this post a little difficult but oh well. Im actually at a small little hotel on an island off the coast of colombia. The place has a monkey that has taken a strong liking to me for some odd reason. Maybe because i am about as hairy as him. Everytime my brother or anyone tries to take him off me he gets really mad and tries to bite them. Ha. This is my first time in Colombia and it is much much safer than i was expecting. everyone says its extremely dangerous and its just not true. Everyone here is just really friendly.
Once again really sorry for this type of post but thanks for understanding.
I have been trying to save the photo for a while and just figured it out. Alright thanks for understanding such a crappy porsche post.
Brett and Amy
Slacker...
 Congratulations on the nupitals, sounds like a great memory.
BTW, it's unfortunate that you closed with "Brett and Amy" and then posted that pic underneath. People could get the wrong idea.

Posted by: brettrarnold Oct 31 2015, 11:20 AM
hello 914 crew! This post is going to be more brief than i would like because i am currently in colombia on a honeymoon and internet here is a bit scant. I havent made any progress since my last post because i got married in fort lauderdale and immediately left to go to Colombia.
For the progress on the car in the past month, i got the majority of the interior out and had a few problems getting the back interior piece out. The emergency brake handle was pretty rusted and it broke. Getting the engine out was also pretty difficult for me but ended up getting it. If i had it do it again i would probably have purchased larger jack stands. Being a cheap ass i opted to get the cheap harbor frieght small ones and it was somewhat of a hassle. I did get the rear rotors and calipers off prior to leaving and plan on painting them when i get back. I took the rotors in to get turned at Oreillys auto parts for $15/each and they came back looking brand new. Sweet! That was really the only service that i used thus far. Amy was pretty overwhelmed with wedding junk so she didnt make any progress any of the interior but its understandable.
Unrelated to the porsche the wedding was a blast. We did a destination wedding on a boat in florida and it was tons of fun. 100 guests for a destonation wedding was a little much but everything turned out really well. These are the only real photos that i have available at this point so sorry for not posting an official Porsche photo.
The keyboard here is also pretty funky making this post a little difficult but oh well. Im actually at a small little hotel on an island off the coast of colombia. The place has a monkey that has taken a strong liking to me for some odd reason. Maybe because i am about as hairy as him. Everytime my brother or anyone tries to take him off me he gets really mad and tries to bite them. Ha. This is my first time in Colombia and it is much much safer than i was expecting. everyone says its extremely dangerous and its just not true. Everyone here is just really friendly.
Once again really sorry for this type of post but thanks for understanding.
I have been trying to save the photo for a while and just figured it out. Alright thanks for understanding such a crappy porsche post.
Brett and Amy
Slacker...
Congratulations on the nupitals, sounds like a great memory.BTW, it's unfortunate that you closed with "Brett and Amy" and then posted that pic underneath. People could get the wrong idea.
Ya I think the monkey likes me more than she does.
Posted by: Andyrew Oct 31 2015, 04:38 PM
Congrats!!! Enjoy your Honeymoon!
Posted by: PanelBilly Oct 31 2015, 06:25 PM
Get back to your honeymoon job. The rust can wait.
Posted by: injunmort Oct 31 2015, 06:49 PM
congrats enjoy
Posted by: rightpedal Jan 4 2016, 06:21 AM
Saw the update about sawzal blades on the contest thread and I have thoughts. I do a lot of sawzal work and the only blade I use is the Milwaukee torch. They hold up really well. Look at my build thread all that was done with 3 blades. Part of your problem might be the Dewalt, They have notoriously sloppy blade holders. It shouldn't have any slop. The jig saw will provide more precision but will require a lot of patience. Given the nature of jig saws it will dull the blade quickly in the one little portion. If you don't have one you need to get a 4 1/2 angle grinder. Harbor freight has cut/grind/flap wheel combos that are a good intero pack.
Good luck with the project.
Steve
Posted by: 3d914 Jan 28 2016, 06:59 PM
Brett, congrats on the marriage. Hope shes as much into cars as you appear to be - or should I say - going to be. Don't be discouraged by all the work, even if you're unfamiliar with it. If you continue to approach it as a learning experience, you'll come out the other side of the experience wanting to do more.
PS:I had a similar experience in Columbia years back in that it turned out to be a wonderful trip and the people were terrific. Not at all like the state department painted it.
Enjoy!
Posted by: rick 918-S Jan 31 2016, 10:12 PM
Tick Tock....
Posted by: brettrarnold Mar 3 2016, 09:25 AM
Alright alright, so if you have read the front description the Porsche has been on hold, but not forgotten. We found out that Amy is pregnant basically when we landed from our honeymoon so lets just hope he comes out Colombian, brings some wrenches, and knows a thing or two about fixing cars. Jokes aside we are both very excited and have been spending the past couple months prepping for the baby. Planned doctors due date is 9/1 but im saying he due date 9/14 for the purpose of this thread.
Last, a friend I met at work said that I need to name the car and I started talking about it with amy and yes we both agree a name is necessary. Amy came up with Freude Fhart, which means Joy Ride in German. I like it! Any comments or thoughts here are appreciated as we have never named a car.
Alight onto the 914. Amy has started on the seats and she will explain below.
This is Amy,
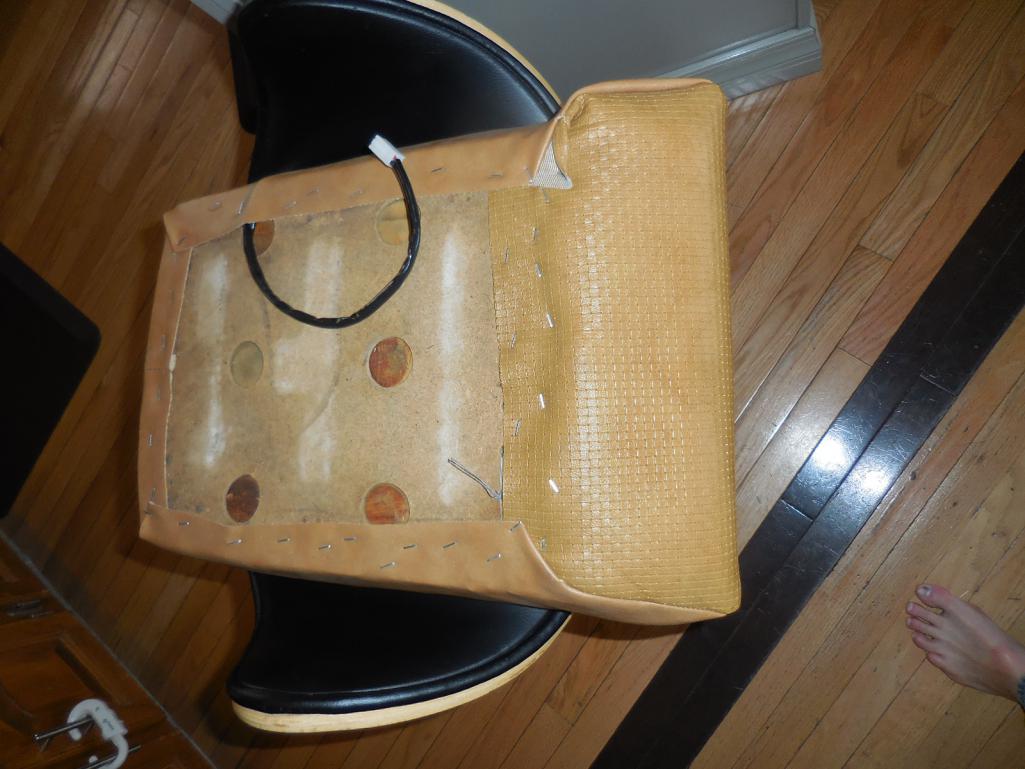
I started to remove the seat covers by removing the old staples. 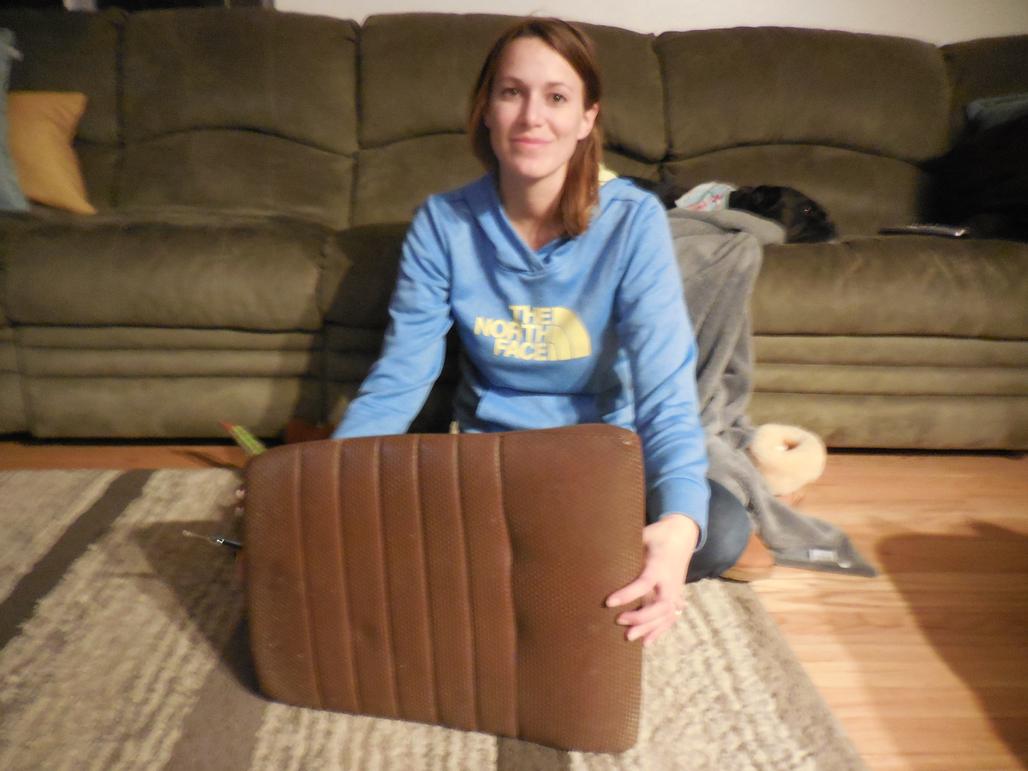
I was able to keep the bottom cushion and seat forms in tact, thankfully. I decided to wait until we got the new seat covers we ordered online before I completely removed the old covers. 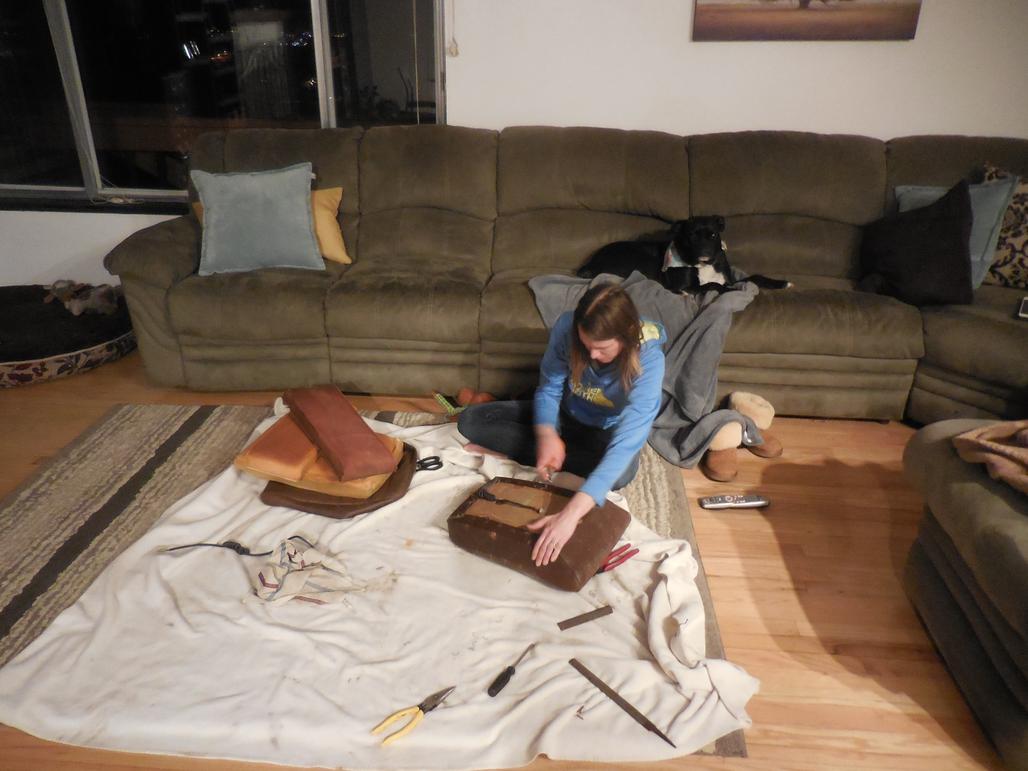
Hopefully, I will be able to re-trace my steps and put the new ones on with ease! We are doing a buckskin and black theme on the new ones. Wish me luck!
In the meantime, I plan to remove the back pad covering and get started on that with a new kit that we bought. The back pad will be black and should match the seats really nicely.
This is Brett
I have gotten around to removing more cancerous rust and also have finished scraping off all of the rubber that was stuck to the bottom floor pans and i was pleasantly surprised with the quality of metal underneath. 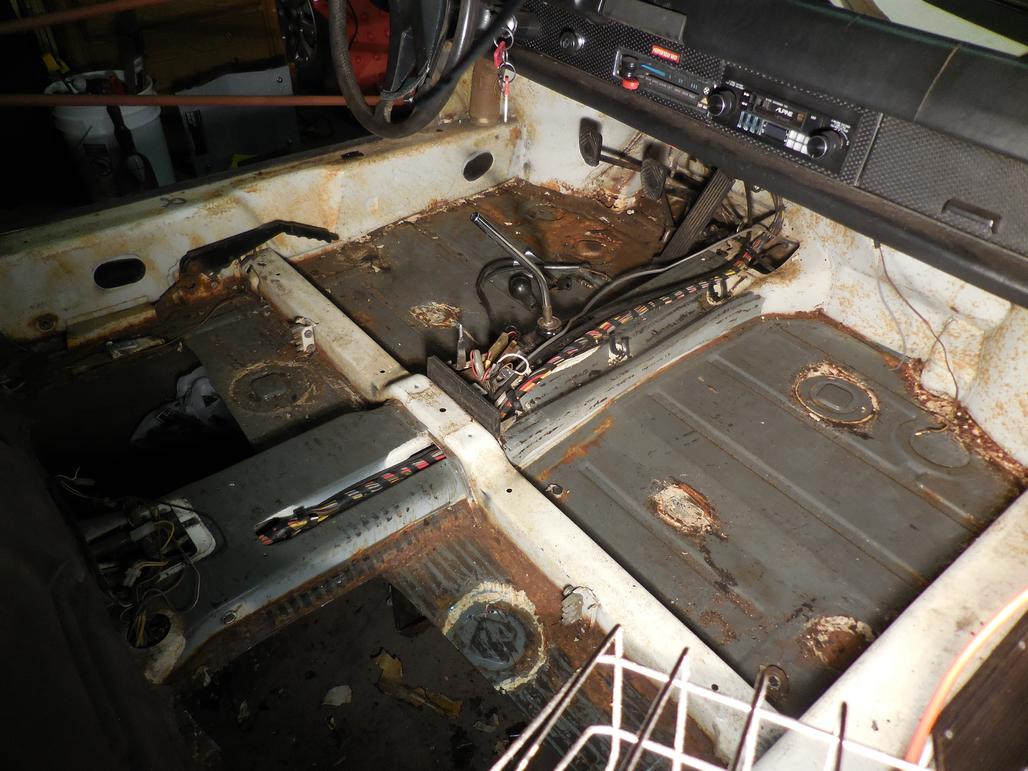
I did find a few bad more rust spots that i wasn't really expecting next to the ebrake handle so now i will have to remove that as well. 
There is some rust near the front and im not exactly positive how to address it. I can cut it out pretty easily but i dont think id be able to reweld a panel in very well so we will see. 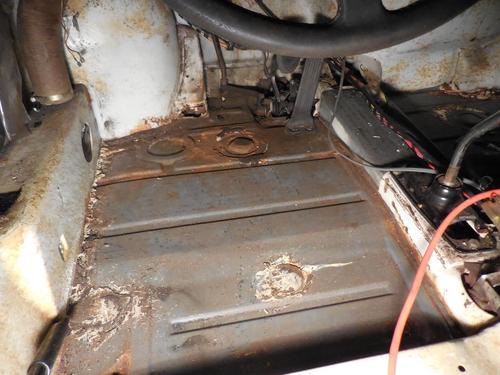
Good news is that i have been practicing my welding and have gotten proficient enough to weld up two bikes. 
Alright i will spend some more time replying to those who comment because i will begin throwing out lots of questions on this forum.
Questions:
Alright need some help here, what parts do i purchase for this 1 and 2?
Alright thanks everyone for checking out my post.
-Brett & Amy
Posted by: brettrarnold Mar 3 2016, 09:29 AM
Saw the update about sawzal blades on the contest thread and I have thoughts. I do a lot of sawzal work and the only blade I use is the Milwaukee torch. They hold up really well. Look at my build thread all that was done with 3 blades. Part of your problem might be the Dewalt, They have notoriously sloppy blade holders. It shouldn't have any slop. The jig saw will provide more precision but will require a lot of patience. Given the nature of jig saws it will dull the blade quickly in the one little portion. If you don't have one you need to get a 4 1/2 angle grinder. Harbor freight has cut/grind/flap wheel combos that are a good intero pack.
Good luck with the project.
Steve
Ya i have had two blades that got stuck in that blade holder on that sawzall. A friend brought over some cutting wheels that attached to my grinder and my god that is the way to go. Thanks for the tip. Soo soo much easier. I feel like an idiot when i switch to something that works a million times better but oh well, all part of the process i suppose.
Thanks Steve for the info.
-Brett
Posted by: brettrarnold Mar 3 2016, 09:32 AM
Brett, congrats on the marriage. Hope shes as much into cars as you appear to be - or should I say - going to be. Don't be discouraged by all the work, even if you're unfamiliar with it. If you continue to approach it as a learning experience, you'll come out the other side of the experience wanting to do more.
PS:I had a similar experience in Columbia years back in that it turned out to be a wonderful trip and the people were terrific. Not at all like the state department painted it.
Enjoy!
So soo true. I get frustrated all the time but yes I really need treat this as a learning experience. Ya colombia was awesome.. food was great and cheap, everyone was really nice, and weather was pleasant.
She is getting more into it but certainly a learning experience for her too. The first semester of the pregnancy, was pretty slow going as one would expect, but were both back at full energy now.
-Brett
Posted by: DirtyCossack Mar 3 2016, 07:44 PM
#1 is the Inner Wheelhouse Restoration Design part #PP331
#2 is the Rear Floor Jack Point RD part #PP342
Posted by: brettrarnold Mar 7 2016, 10:45 PM
Thank you Dirty Cossack for the help. Parts are on order!
Luckily my friends here in Denver realized how much money was being diverted away from the Porsche and offered to step in and donate about $2k of baby stuff. 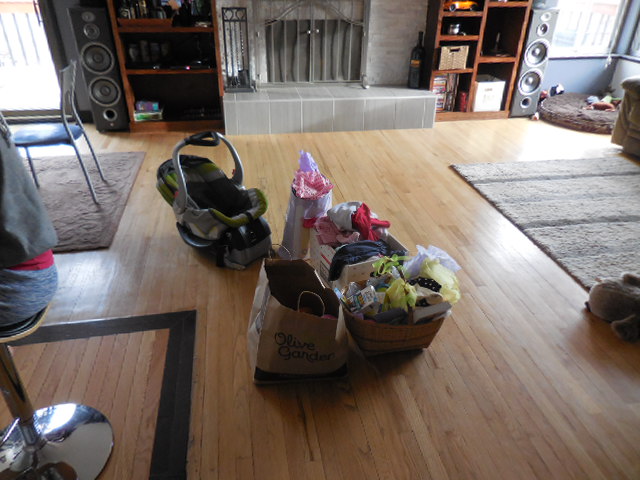
Yes it doesn't look like $2k but have you guys seen the price of some of this shit. I can get like 2 whole seat kits from 914 Rubber for the price of half of a car seat. Or one stroller for the same cost as and Inner Wheelhouse from RD. Easy choice in my book but others may disagree.
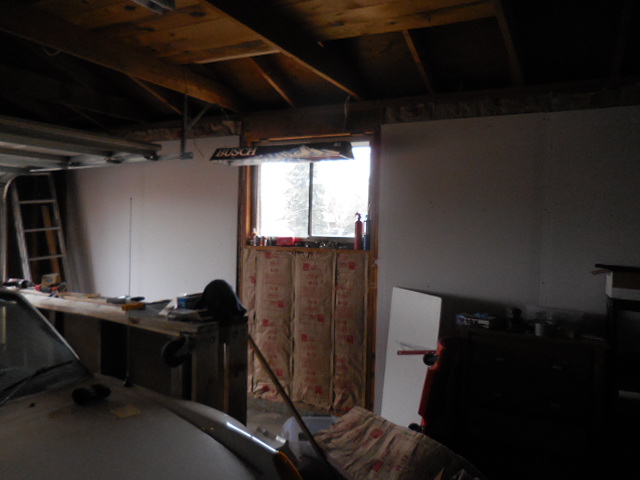
Last, i saw a real garage for the first time in my life. Sad to say but it has taken 31 years to appreciate a well laid out and finely tuned man workshop. I wont go into specifics on this one, but suffice to say my dad was more into the outdoors than in, so I hadn't spent much time in a garage until I was blessed with a 914.
Thanks to user "grantjd" who motivated me to spend some time on my workshop to make it more comfortable while I'm out there. So, put up insulation on Sunday and started in on drywall tonight. Really looking good and am excited to get this cave finally in order. 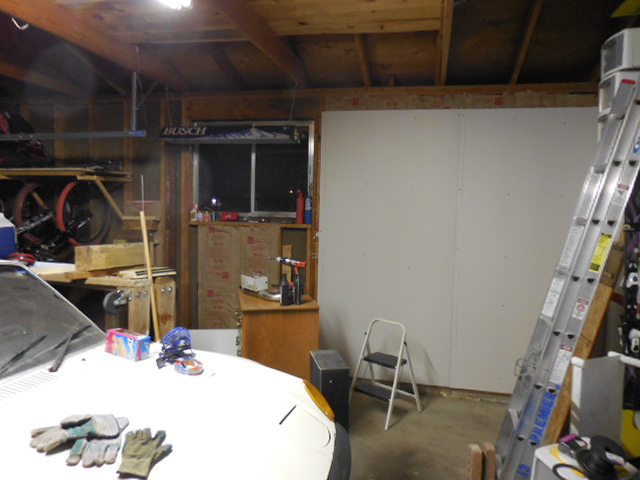
Alright not much progress has been made on the Porsche but figured i would give a shop update.
-Brett
Posted by: 914forme Mar 8 2016, 06:01 AM
Nope shop space is more important than the car. A great environment helps you build a great car. It does not need to be fancy, not being cold or hot goes a long way. Having good lighting goes a really long way. Just be aware you are on a slippery slope when you start looking at the comfort of your environment.
Most off enjoy your garage / shop. It can be a place to bond with friends, solve a domestic problem, or as simple as building a bike with your kids, and painting it the way they want.
Posted by: Darren C Mar 8 2016, 06:15 AM
$2K….This is just the beginning Brett, :-)
Overall the basic cost of raising a child in the UK from birth to the age of 21 has increased by 63 per cent since 2003, when the survey was first carried out, to £229,251 ($326,000) at present. It has risen by just under £2,000 ($2850) in the last year alone, almost twice the current rate of inflation.
That said I wouldn’t change it for the world. Kids are the most important things in life. You and Amy are at the start of a most wonderful journey. Make the most of them while they’re young, you’ll be surprised how quickly time passes.
Congratulations to you both.
Posted by: brettrarnold Mar 8 2016, 10:33 PM
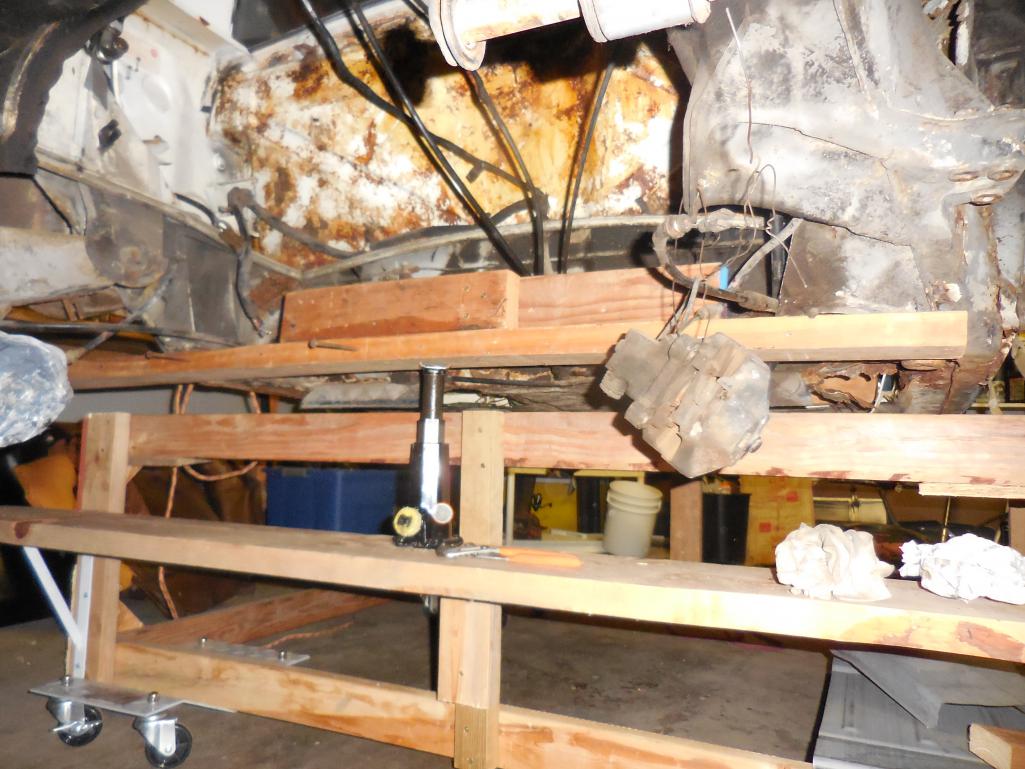
Tonight RNellums swung by and helped me identify some next steps. I took a break from cleaning and fixing up the garage to remove the rear right trailing arm and also got the original back pad off. Fortunately everything looked pretty decent on the trailing arm and the back metal, except by the e-brake. But that was to be expected. 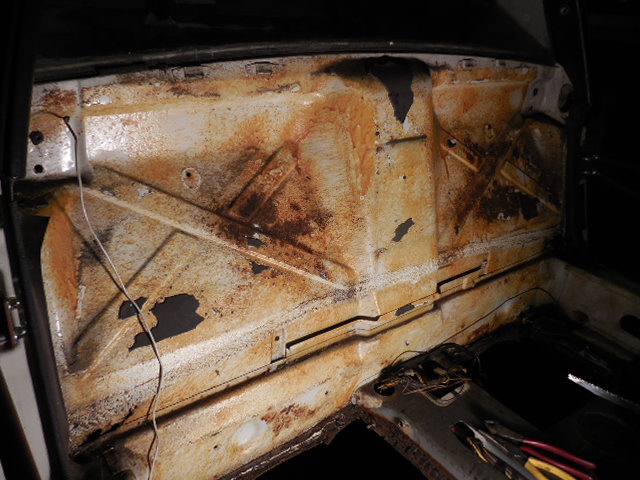
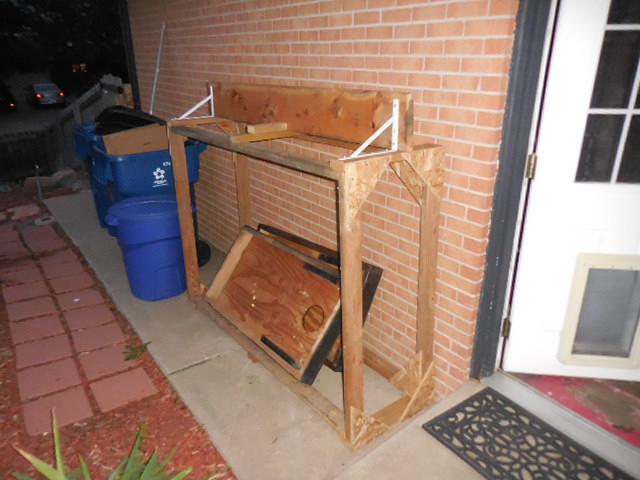
Back at the garage this week and hoping to make a workbench like this one. 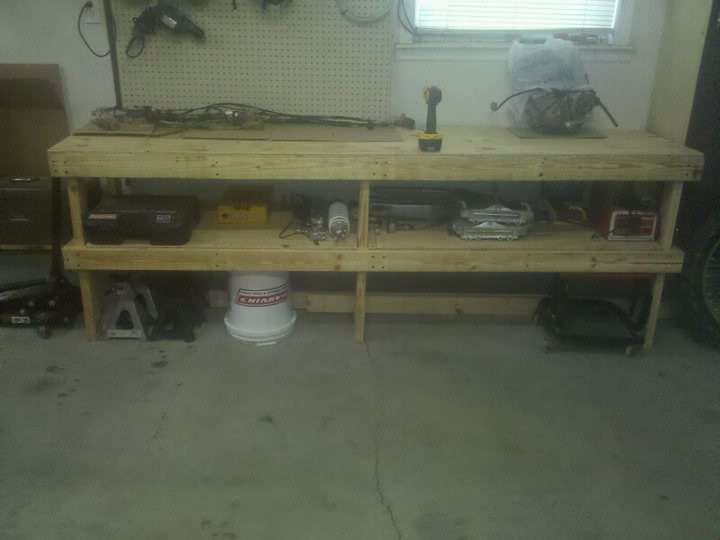
My plan is to use reclaimed 2x4's from the previous owners workbench. You cant see too much of it but it is in the left corner.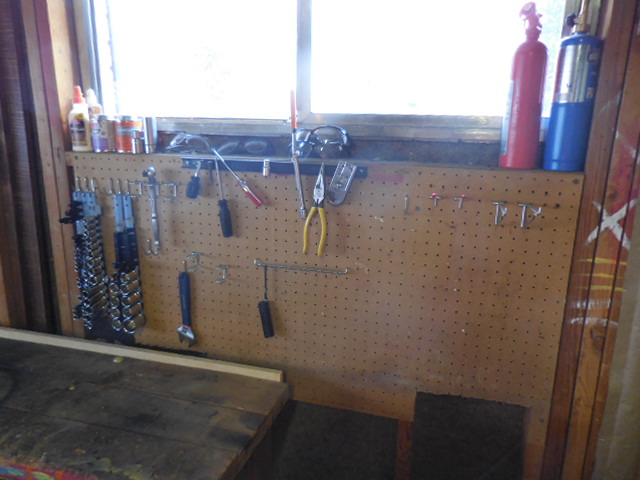
The previous homeowner was one hell of a woodworker so i would have expected a little more, but maybe he took the other workbench with him.
Alright off to bed,
-Brett
Posted by: brettrarnold Mar 14 2016, 10:39 PM
Just a quick Garagin' update with mainly photos.
Amy and I spent the last week/weekend in the garage kickin names and takin ass. I've been off the sauce since 3/1 and while boring, its been productive as ever. We got the south wall done and built some shelves that make storing shit a hell of a lot easier and convenient. Workbench isnt quite finished yet but in progress. 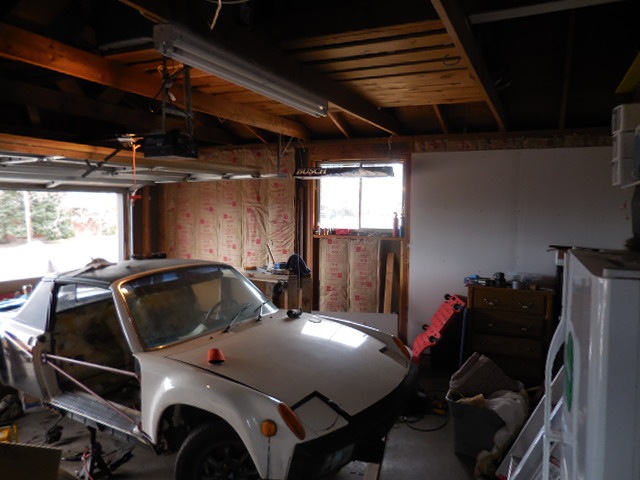
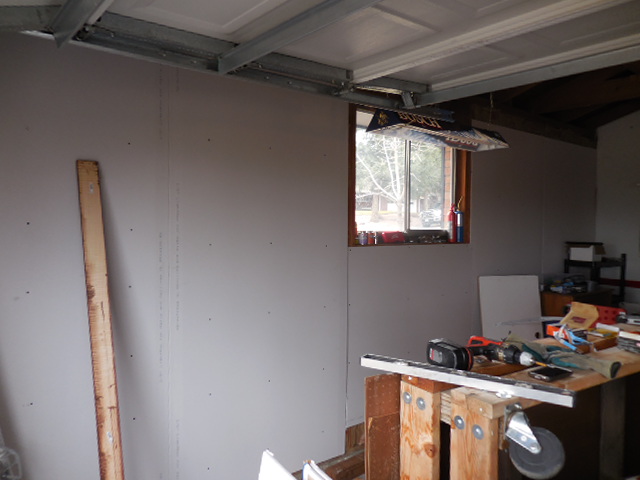
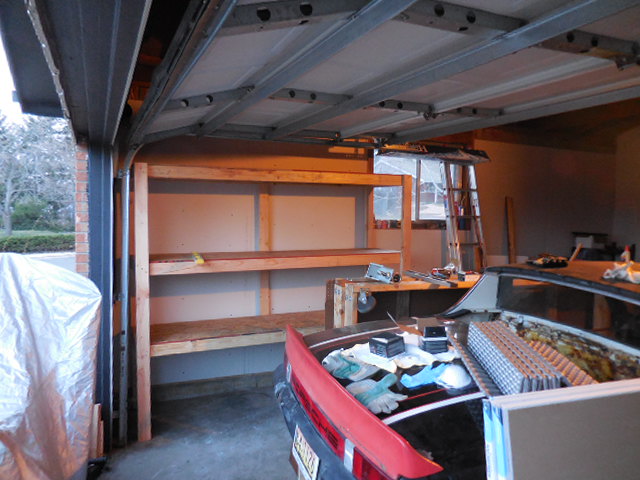
Moved to the North wall and got 64sf done with another ~64sf remaining. Once done (should be this weekend), organizing is priority 1 and then back at the 914! 
Yep that's my pregnant beauty with the gun in her hand. After a comment on her workmanship, I took 4 shots to the back but I was able to walk it off with relatively little bleeding. Boy am I glad I went with the 1/4" staples and not the 1/2"!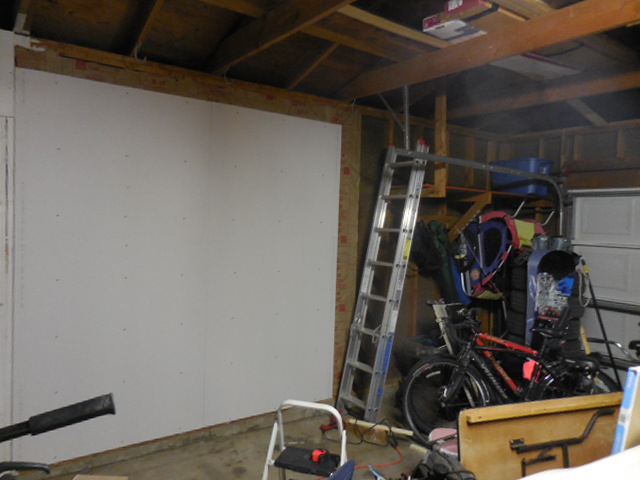
Alright enjoy some photos and wish me continued motivation! If any of you are wondering Clausthaler has been the most enjoyable NA beer I have sampled of the past 14 days.
Happy Saint Pats and will someone enjoy a Guinness for me! In Honor of Ol' Saint Pats, here is Amy and I at Cliffs of Mohr 2 years ago.

Posted by: rgalla9146 Mar 16 2016, 01:01 PM
Just a quick Garagin' update with mainly photos.
Amy and I spent the last week/weekend in the garage kickin names and takin ass. I've been off the sauce since 3/1 and while boring, its been productive as ever. We got the south wall done and built some shelves that make storing shit a hell of a lot easier and convenient. Workbench isnt quite finished yet but in progress.
Moved to the North wall and got 64sf done with another ~64sf remaining. Once done (should be this weekend), organizing is priority 1 and then back at the 914!
Yep that's my pregnant beauty with the gun in her hand. After a comment on her workmanship, I took 4 shots to the back but I was able to walk it off with relatively little bleeding. Boy am I glad I went with the 1/4" staples and not the 1/2"!
Alright enjoy some photos and wish me continued motivation! If any of you are wondering Clausthaler has been the most enjoyable NA beer I have sampled of the past 14 days.
Happy Saint Pats and will someone enjoy a Guinness for me! In Honor of Ol' Saint Pats, here is Amy and I at Cliffs of Mohr 2 years ago.
We were told when we visited there that every year many people fall from those cliffs while posing, playing and who knows what else.
Glad you survived.
Great progress on your car, your garage and your marriage.
Keep up the good work.
Happy St. Pattys Day !
Rory
Posted by: brettrarnold Oct 25 2016, 09:45 PM
I installed the bracket that will host the jack to lift the car above the square of the stand so that i can cut and weld away panels. Here are some photos. 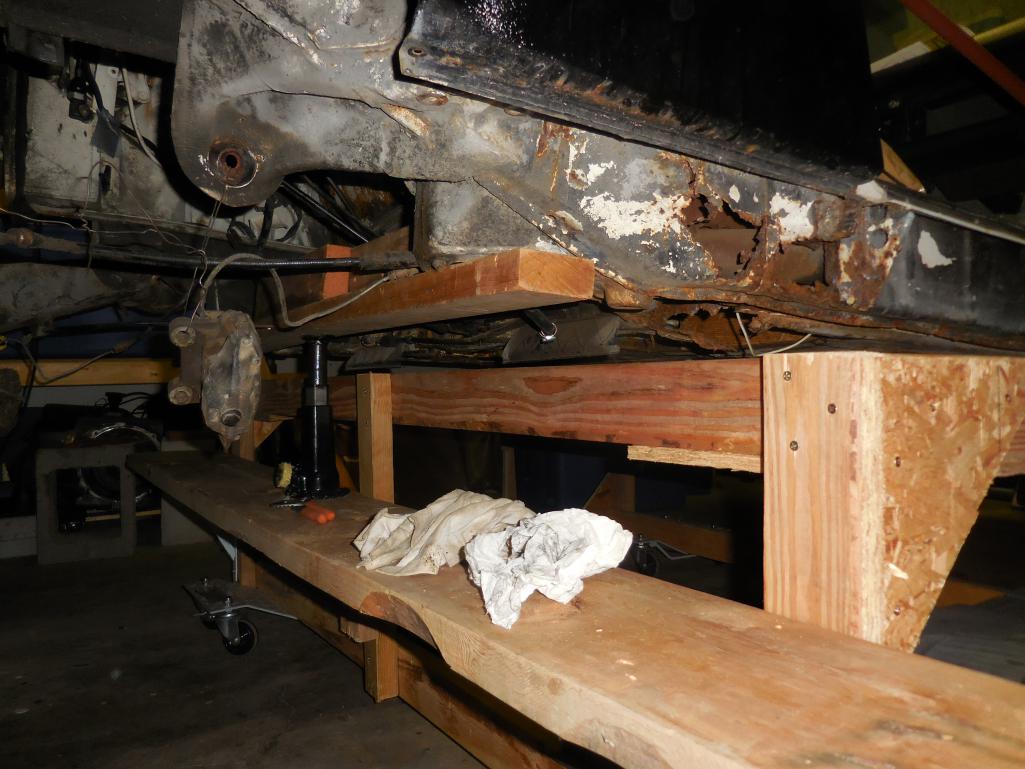
Posted by: mbseto Oct 26 2016, 07:27 AM
Having kids changes your perspective on life more than any other thing. Hope you all have good times together whether it is car related time or not. Cool to see you back in the garage, looking forward to seeing you replace that long! :-)
Posted by: brettrarnold Jan 19 2018, 11:13 PM
Welding is Completed!!!!
Rear Left side
Left side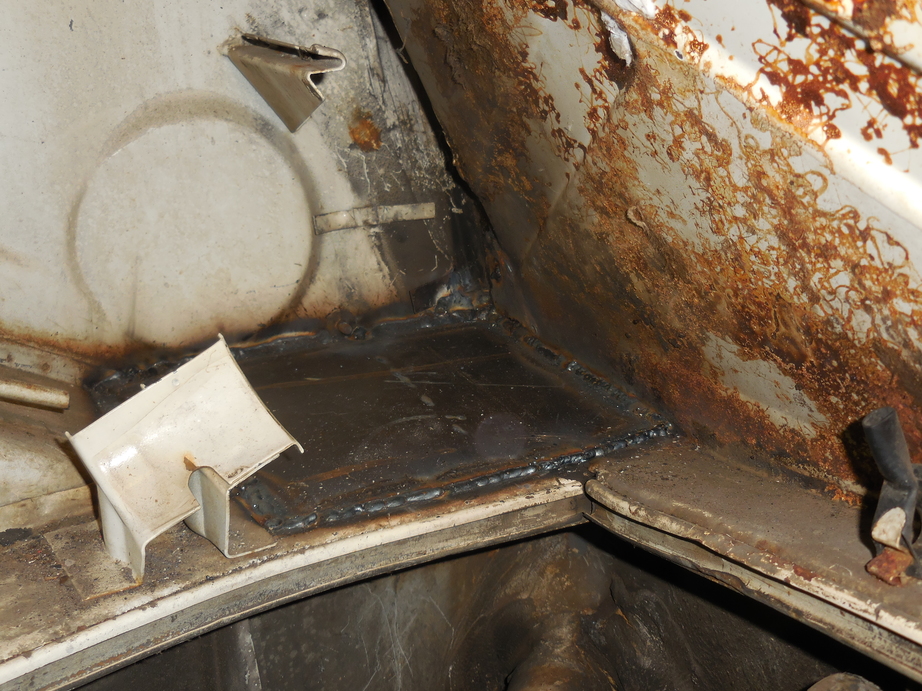
Right side battery tray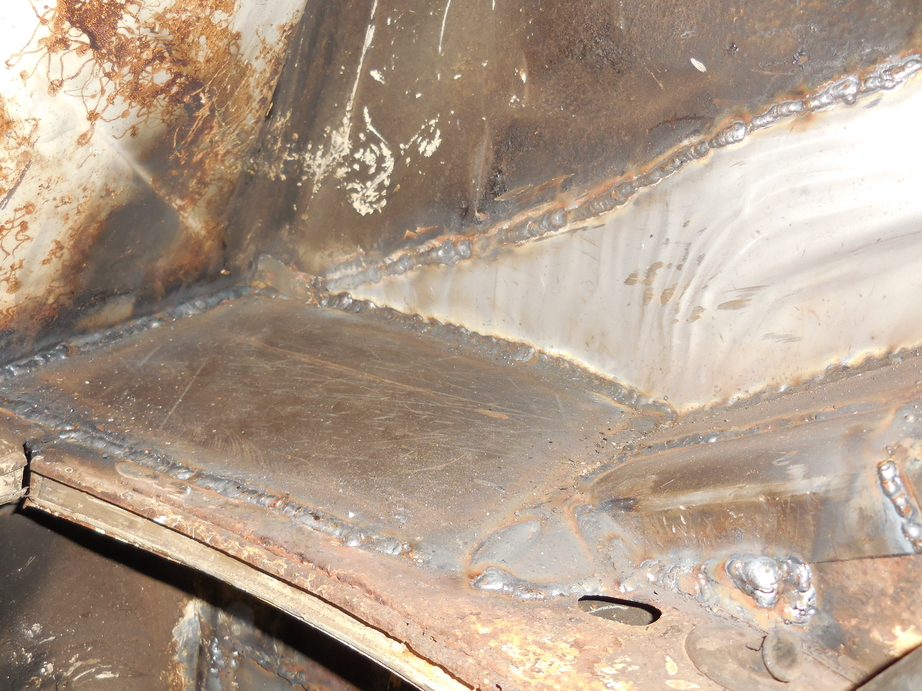
Right rear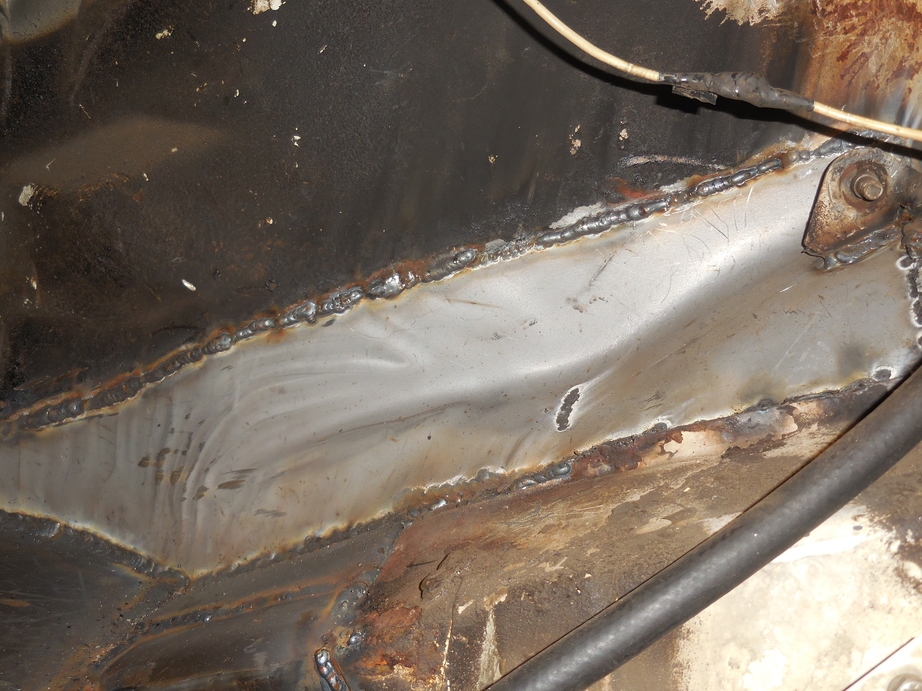
right rear fender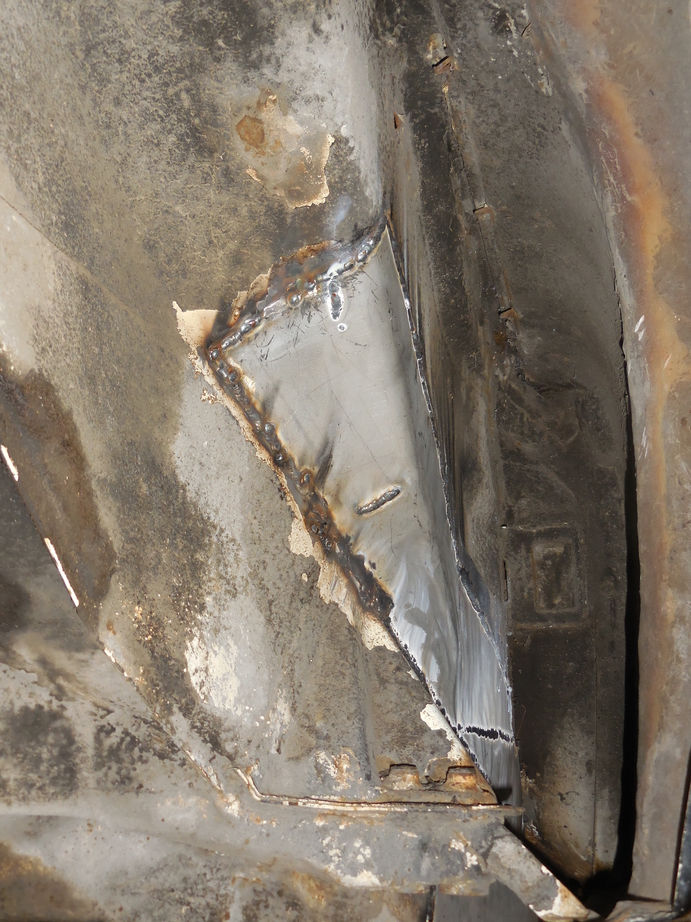
Bottom rear pan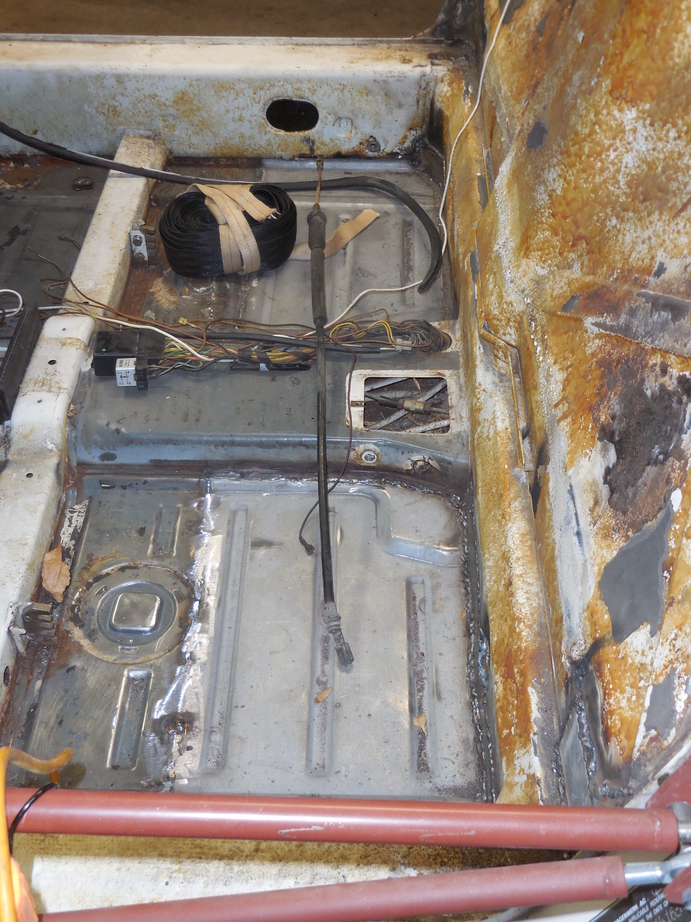 R
R
Posted by: raynekat Jan 19 2018, 11:23 PM
Making progress....great job.
Posted by: brettrarnold Jan 28 2018, 02:58 PM
I recently purchased an EZ30D engine and transmission and have a few questions regarding next steps. I pulled the motor from a LL bean subaru at the junkyard so dont have the mileage. The transmission is from a 5 speed forester.
My questions are as follows:
Mount
- I am having trouble finding a mount/cradle from coldwater or anywhere online. Is it a bad idea to fabricate my own given the increased hp?
- Are there other alternatives for mounting
Engine
- Is the best approach to just rebuild the engine before putting it in?
- Is cost to rebuild about $300? Saw seal kits and bearings for this but not sure if there is anything else i need
- Can I do some testing on the engine to make sure it's good?
- Check compression on each cylinders?
- Check valve lash?
- Use a camera to look inside cylinders?
Electrical
- Are there any other accessory type items we need from the Subaru?
- Anything from the dash
- PCM stuff?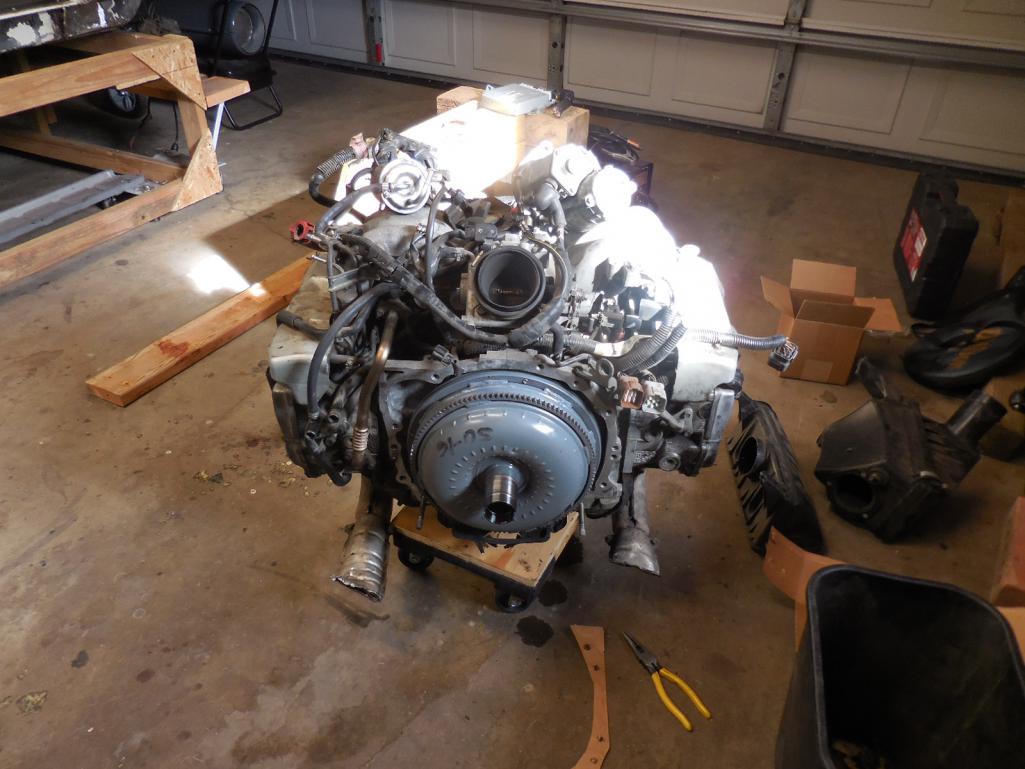

Posted by: hockeymutt Jan 28 2018, 05:05 PM
Yea I'm in the same boat! I need a cradle asap! I found someone that would replicate anything I brought to him I just need to get my hands on one and Ian won't respond to anything. He really needs to take his site down.
Have found someone that has done this conversion but never made it to public that has everything figured out( trans mounts, engine mounts, and clutch) the only issue I have with his mounting system is I can't use the stock exhaust.
Posted by: mb911 Jan 28 2018, 08:08 PM
I would love make these but never was able to get anything for a sample.. I think if someone made a wooden mock up I could make one out of steel (re cradle)
Posted by: rnellums Jan 28 2018, 09:14 PM
Brett, don't rebuild the motor, is cheaper and faster just to get another one from the boneyard. (Most junkyards have a 30 day return policy for bad motors, so we need to get cooking on the wiring!).
You can check compression, but you'll need to have a started hooked up to get a decent measurement. You can look at the clyinders through the spark plugs holes (I have an endoscope that fits in a micro USB you can borrow).
Don't need anything electrical from the car besides and ECU and the wiring harnesses from the engine side and ECU side. What year was the LL BEAN (It matters for wiring).
Posted by: rnellums Jan 28 2018, 09:18 PM
Stick with the hydraulic clutch. After looking back at your photos some more looks like you have almost everything you need. Now you just need someone to.come with it for you
You'll still need the flywheel and clutch that mates with the transmission.
Posted by: 76-914 Jan 28 2018, 10:02 PM
Make it yourself. Doesn't matter what it looks like. Round tubing is simple to work with. IIRC, 10ft of 1.5" .095 Chromoly is what I used . Using a wooden mock up as described above and a cheap $99 Harbor Freight bender. The HF bender will Bust a Gut bending Chromoly, but will work, Just a series of small bends creating the Arc you need to go from rear mounts to front mounts The crossmember will be very close to the exhaust opening on the heads. Work around that and your home free. There are a few build threads here showing some different cradles, mounts, etc. Post lots of pics.
Posted by: brettrarnold Jan 28 2018, 11:08 PM
Sweet i will make myself available if you get a night free to come lend a hand. My friend who i got the motor with is also excited to learn the process as he is starting his own garage.
Have the ECU and believe most all harnesses. will take photos and upload them.
Subaru Outback 2001 VIN 4S3BH806817624691.
Congrats on the wedding!
Brett
Brett, don't rebuild the motor, is cheaper and faster just to get another one from the boneyard. (Most junkyards have a 30 day return policy for bad motors, so we need to get cooking on the wiring!).
You can check compression, but you'll need to have a started hooked up to get a decent measurement. You can look at the clyinders through the spark plugs holes (I have an endoscope that fits in a micro USB you can borrow).
Don't need anything electrical from the car besides and ECU and the wiring harnesses from the engine side and ECU side. What year was the LL BEAN (It matters for wiring).
Posted by: brettrarnold Jan 28 2018, 11:09 PM
I like the sound of this, i have seen a decent number of them on here so have a rough idea of what to do. And will take lots of photos.
Thanks for the advice!
-Brett
Make it yourself. Doesn't matter what it looks like. Round tubing is simple to work with. IIRC, 10" of 1.5" .095 Chromoly is what I used . Using a wooden mock up as described above and a cheap $99 Harbor Freight bender. The HF bender will Bust a Gut bending Chromoly, but will work, Just a series of small bends crating the Arc you need to go from rear mounts to front mounts The crossmember will be very close to the exhaust opening on the heads. Work around that and your home free. There are a few few build threads here showing some different cradles, mounts, etc. Post lots of pics.
Posted by: brettrarnold Jan 28 2018, 11:11 PM
Junkyard find or should i buy something newer? Working at the junkyard was quite a good time. There were a bunch of subarus to scavange.
-Brett
Stick with the hydraulic clutch. After looking back at your photos some more looks like you have almost everything you need. Now you just need someone to.come with it for you
You'll still need the flywheel and clutch that mates with the transmission.
Posted by: rnellums Jan 29 2018, 07:13 AM
Junkyard find or should i buy something newer? Working at the junkyard was quite a good time. There were a bunch of subarus to scavange.
-Brett
Stick with the hydraulic clutch. After looking back at your photos some more looks like you have almost everything you need. Now you just need someone to.come with it for you
You'll still need the flywheel and clutch that mates with the transmission.
Which yard did you go to?
I would buy new, and honestly, would think about getting a slightly lighter flywheel. I have been wanting to swap mine for a lightened one for a while!
Posted by: brettrarnold Jan 29 2018, 08:45 AM
upullandpay near washington and 70th.
saw this on https://www.ebay.com/i/122412522796?chn=ps. Would i just search for subaru 5spd clutch and lightweight flywheel. Anything else specific that i should get? The trans came off a forester and ebay link says impreza/wrx if that matters.
-Brett
Junkyard find or should i buy something newer? Working at the junkyard was quite a good time. There were a bunch of subarus to scavange.
-Brett
Stick with the hydraulic clutch. After looking back at your photos some more looks like you have almost everything you need. Now you just need someone to.come with it for you
You'll still need the flywheel and clutch that mates with the transmission.
Which yard did you go to?
I would buy new, and honestly, would think about getting a slightly lighter flywheel. I have been wanting to swap mine for a lightened one for a while!
Posted by: 76-914 Jan 29 2018, 09:20 AM
Shouldn't be if it's early 2000's. The only difference will be the 4:11's vs 3:90. You'll have a great Hi Way cruiser.
Posted by: brettrarnold Feb 4 2018, 09:47 PM
Spent the super bowl working on the seats seat and i get frustrated with myself for getting frustrated. I working painstakingly slow and one would expect my outcome to be comparable to a perfectionist.... but its not. Anyway spent an hour and got the back of one seat done. I had to screw some of the hooks back onto the "bone" of the seat. I will be adding seat heaters to these seats.
Screws going into hooks. I used #4-40x3/8" and i may have to grind off the lip on the back end. 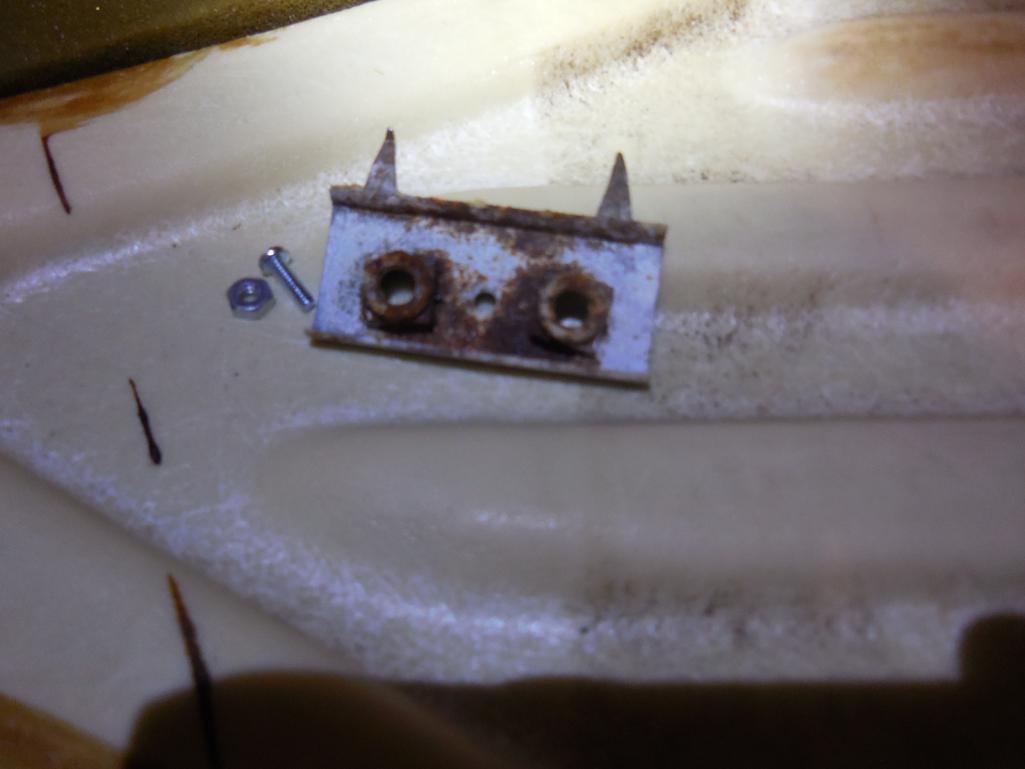
First side down and hooks are in!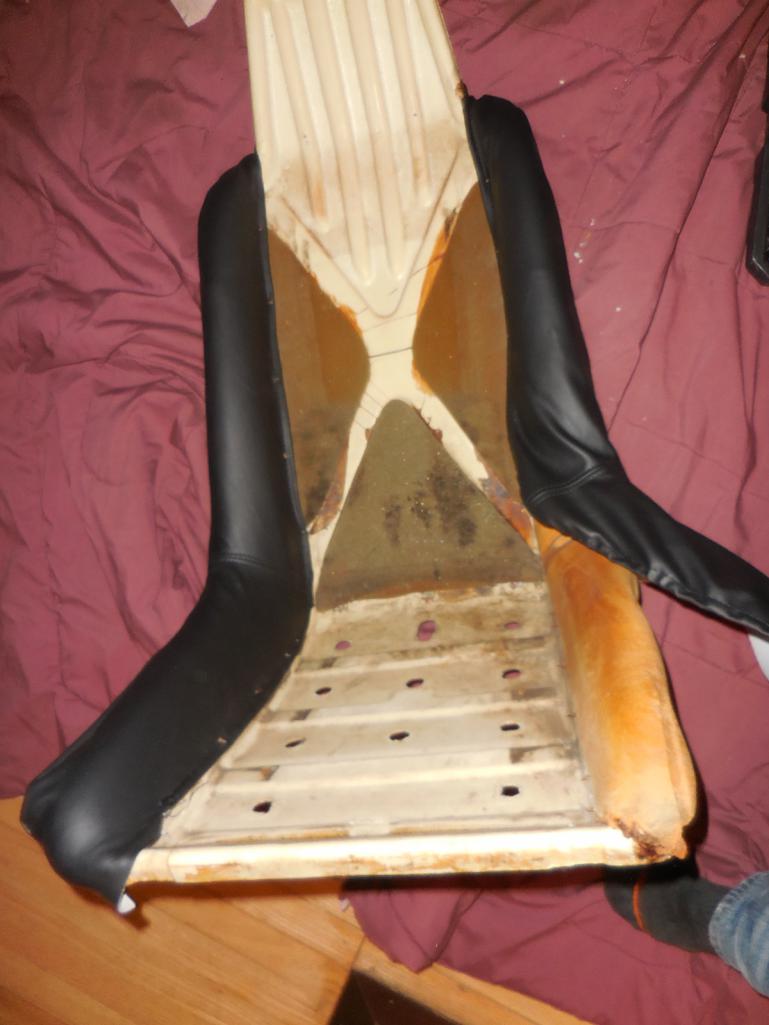
Both sides down.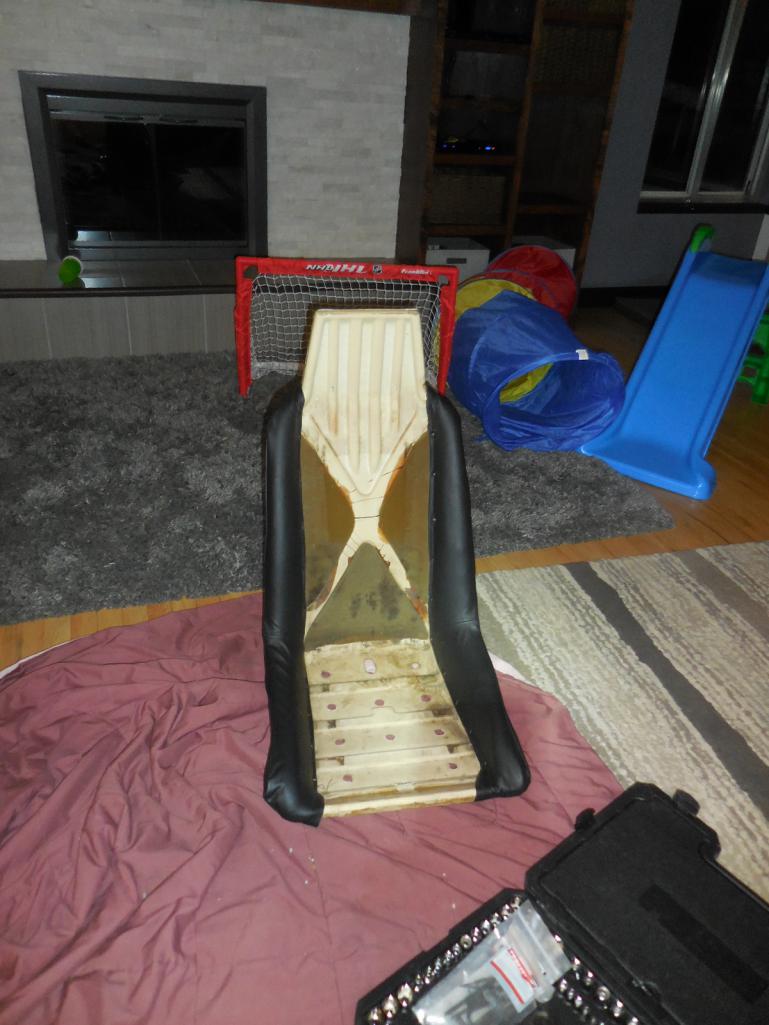
And the completion of the bottom pads with seat heaters. 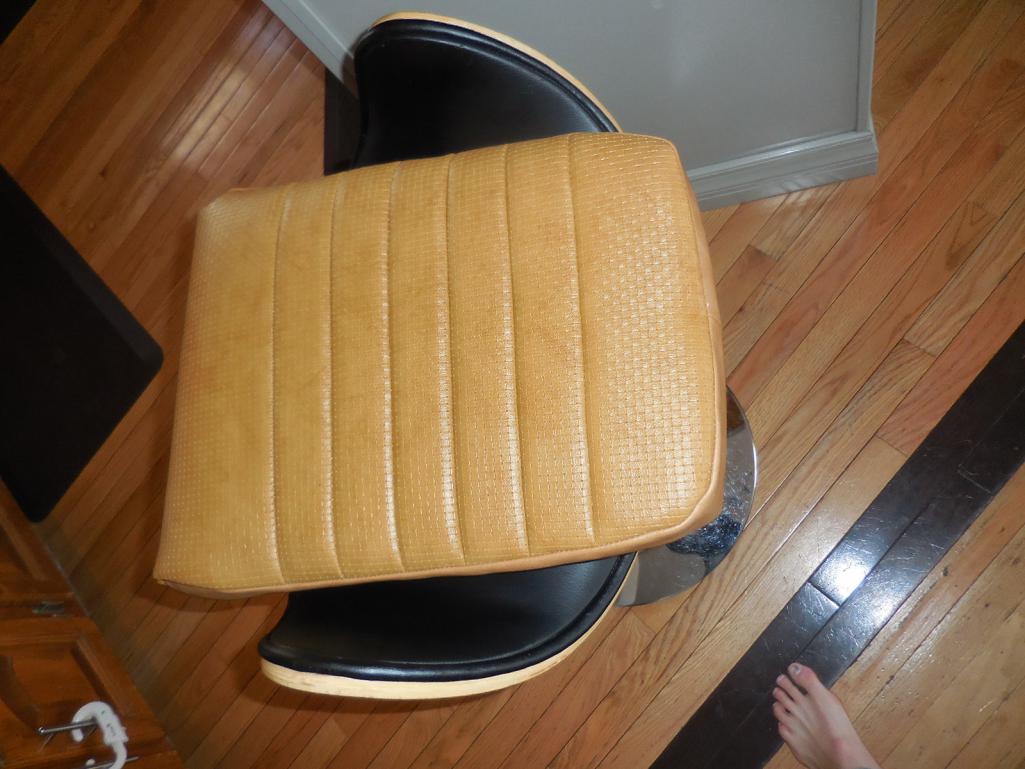
Posted by: 76-914 Feb 5 2018, 09:35 AM
Looks great! May I make a suggestion? While your at it, throw in some heated seats. Your running at least a 150A alternator and they can be had for < $70 pr. Plus you live in CO and could really use those. They come compete with relays and switches. I remember being in AZ when it was 29F with those heated seats. My engine and wife were both purring.
Posted by: mepstein Feb 5 2018, 09:38 AM
Looks great! May I make a suggestion? While your at it, throw in some heated seats. Your running at least a 150A alternator and they can be had for < $70 pr. Plus you live in CO and could really use those. They come compete with relays and switches. I remember being in AZ when it was 29F with those heated seats. My engine and wife were both purring.
I'm pretty sure I got a kit from ebay. 2 seats, top and bottom, $40.
Posted by: brettrarnold Feb 5 2018, 09:53 AM
Yep have the heated seat kits and put in the bottom pads so far. Need to do the back pad but this is a must!
-Brett
Looks great! May I make a suggestion? While your at it, throw in some heated seats. Your running at least a 150A alternator and they can be had for < $70 pr. Plus you live in CO and could really use those. They come compete with relays and switches. I remember being in AZ when it was 29F with those heated seats. My engine and wife were both purring.
Posted by: mepstein Feb 5 2018, 10:52 AM
Yep have the heated seat kits and put in the bottom pads so far. Need to do the back pad but this is a must!
-Brett
Looks great! May I make a suggestion? While your at it, throw in some heated seats. Your running at least a 150A alternator and they can be had for < $70 pr. Plus you live in CO and could really use those. They come compete with relays and switches. I remember being in AZ when it was 29F with those heated seats. My engine and wife were both purring.
At the point on mine that I have to sew the center back pad around the cardboard stiffeners, just not sure how I'm going to do it.
Posted by: brettrarnold Feb 5 2018, 11:20 AM
Ya not sure myself. I saw in the master seat upholstery post the guys used zip ties. so may try that.
Also i ran into an issue with the foam headrest breaking apart when i was removing it from the seat. I used spray adhesive to get it back together and am hoping that will hold it. Photos forthcoming.
Posted by: mepstein Feb 5 2018, 11:49 AM
Ya not sure myself. I saw in the master seat upholstery post the guys used zip ties. so may try that.
Also i ran into an issue with the foam headrest breaking apart when i was removing it from the seat. I used spray adhesive to get it back together and am hoping that will hold it. Photos forthcoming.
I meant the rectangular ones that are about 18" long.
There are lots of old seat cores to borrow parts from if the headrest doesn't hold together. talk to bruce stone/bedstone or Garold or who ever is your local parts hoarder.
Posted by: 76-914 Feb 5 2018, 11:17 PM
Looks great! May I make a suggestion? While your at it, throw in some heated seats. Your running at least a 150A alternator and they can be had for < $70 pr. Plus you live in CO and could really use those. They come compete with relays and switches. I remember being in AZ when it was 29F with those heated seats. My engine and wife were both purring.
I'm pretty sure I got a kit from ebay. 2 seats, top and bottom, $40.
Me too. Just didn't want to undersell or guys. On eBay they wanted $60. They had a make offer price. I did and paid $45. You 2 guys really need these and they work sooooooo well.
Posted by: GenosYourGarage Feb 8 2018, 01:45 PM
New to the forum and wanted to say hello/ask a quick question for Brett's build. I'm a good friend of Brett's and will be helping him when I can for his 914 build. I don't have much experience with the 914's, but I have done some conversion work in the past and love to learn new things.
On to the question:
I was looking at flywheel/clutch kit options for the 04' Forester 5MT we brought home from the salvage yard. I just wanted to be certain that Brett can buy the flywheel/clutch kit that fits the 04' forester and it will bolt up to the 01' Outback H6. If so, I think we are going to get that coming along with a engine gasket set (upper and lower). Then we will have some things to work on.
Posted by: brettrarnold Feb 19 2018, 10:21 PM
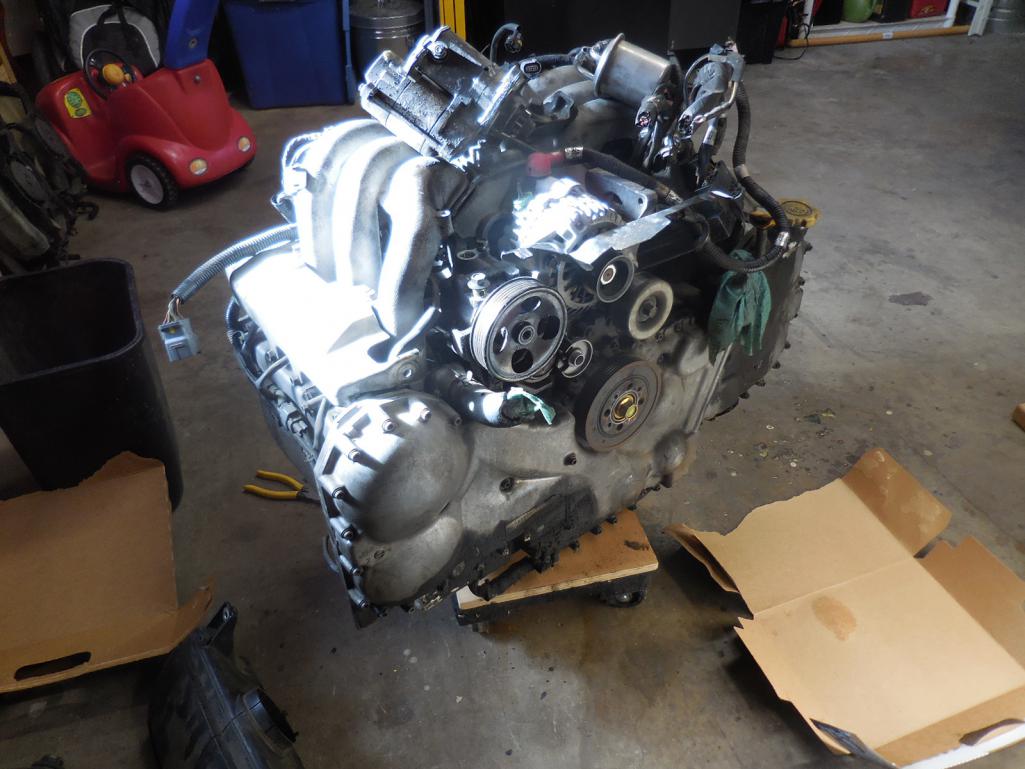
So i started in on replacing the gaskets on the ez30 subaru engine and holy shit im learning a ton. Got her up on an engine stand and i watched a youtube video of a guy that did this project without taking it out of a subaru. gives me a new respect for those that attempt it.
Step 1 of 2,600: Got her up on the engine stand
(yes we all felt accomplished so we sat around patting each others backs for the next 40 minutes)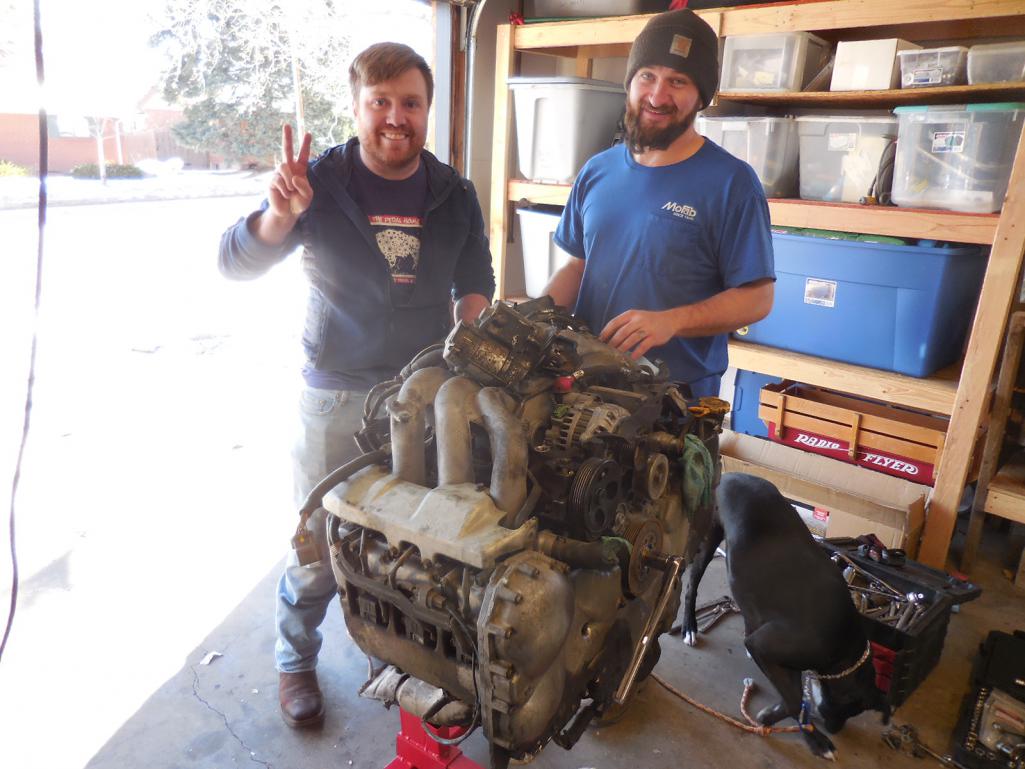
got one side off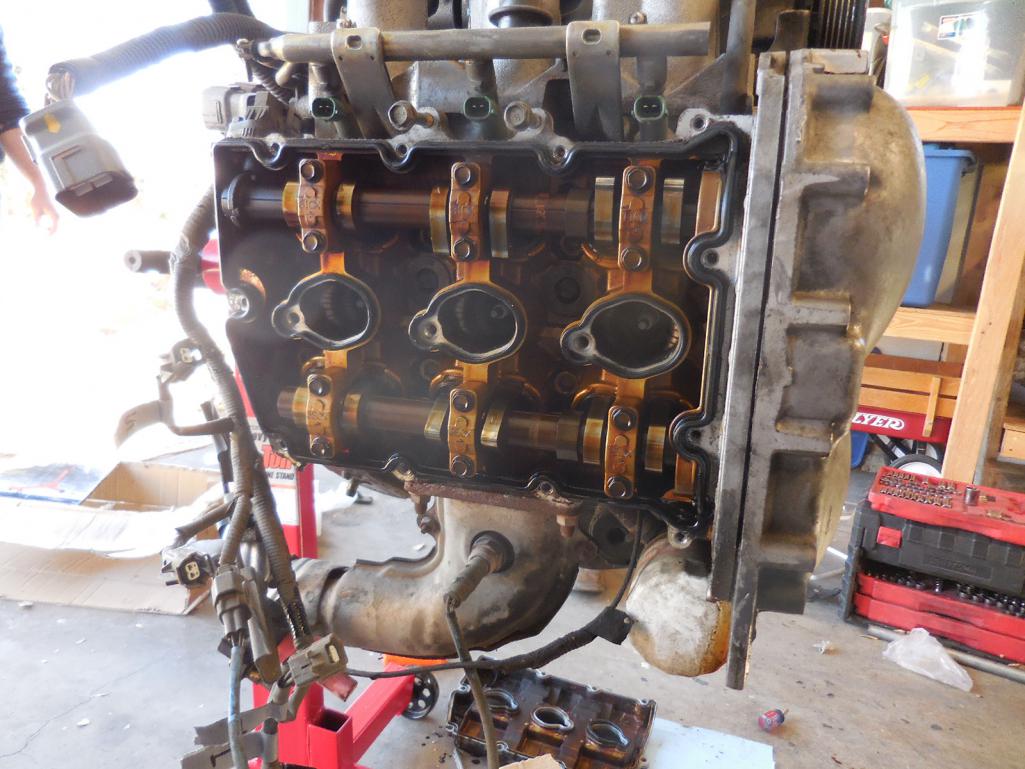
removed cover to expose timing chain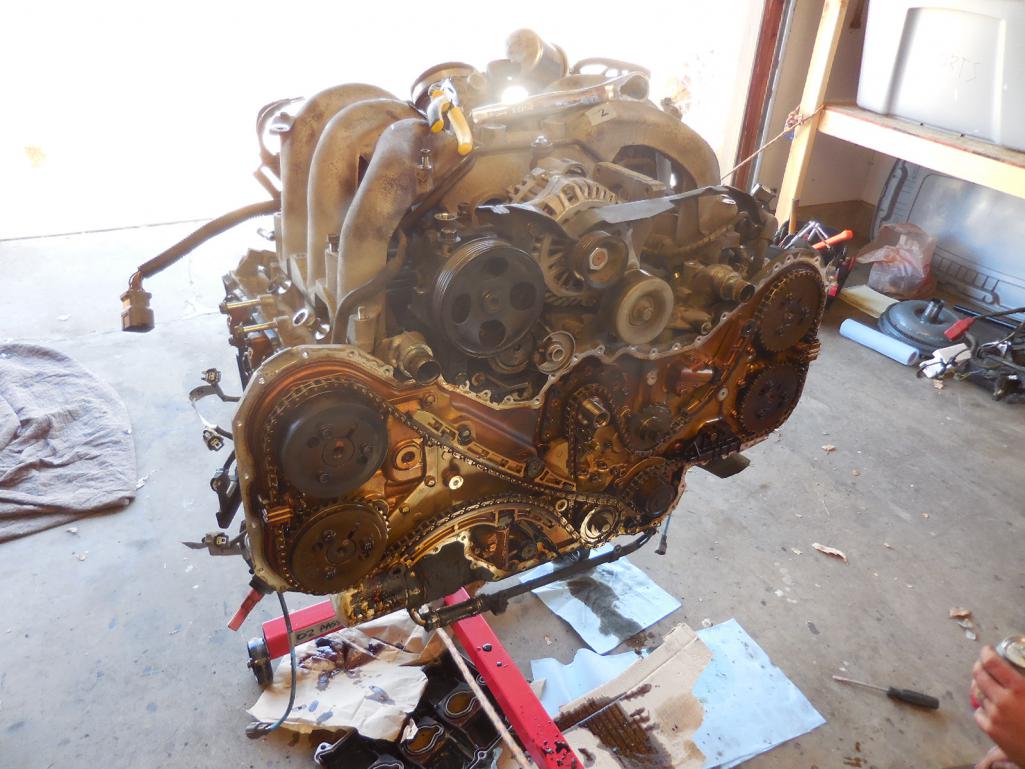
removed exhaust on each end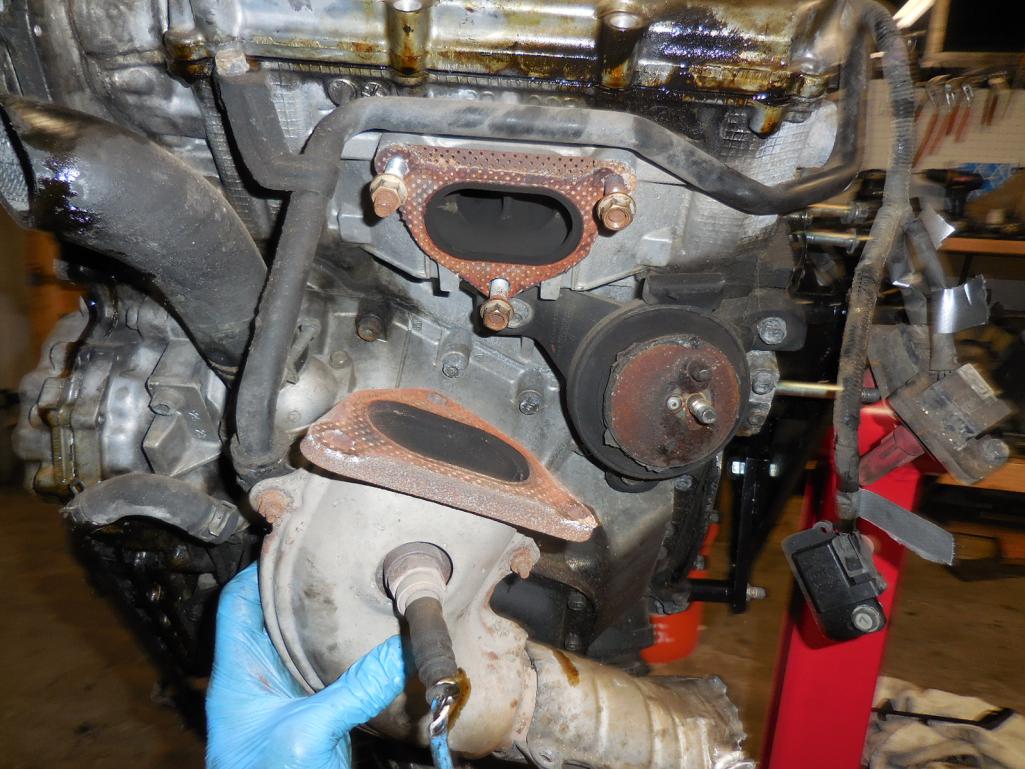
Posted by: brettrarnold Jul 17 2019, 09:22 PM
Questions for the 914 community.
1st my wife is laughing at me as it has been a year or so since i posted. Apparently no burglars wanted to break in, fix the porsche, and drive off in a sports car.... i even left the keys in the ignition, c'mon!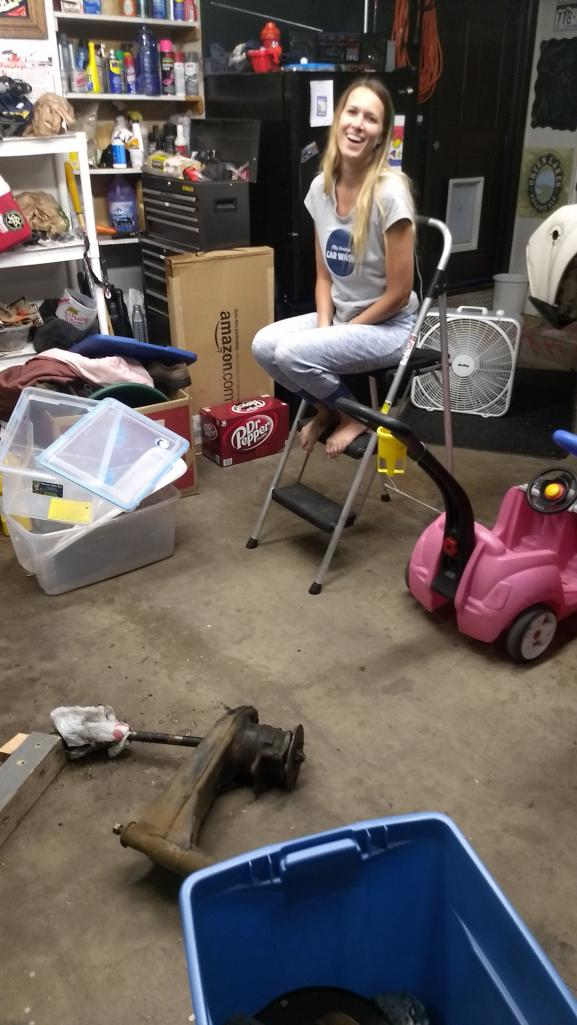
- How do i clean the rotors with the bearing in them?
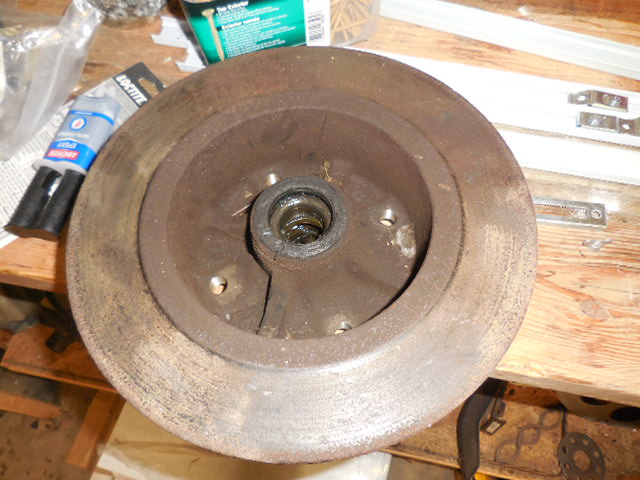
- How do I remove the transaxle from the rear trailing arm?
Posted by: mepstein Jul 17 2019, 09:33 PM
Remove cotter pin from castle nut (nut inside of rear hub). Use an impact wrench to remove castle nut. If you don't have an impact gun, borrow or buy one. You will wonder how you ever got along without it. If you really don't want to make it easy on yourself, use a long breaker bar on the castle nut and a pretty good size pipe wrench to hold the axle.
The impact wrench will also work great on the top nut of the front struts. The pipe wrench will work well to remove the top cap on the strut body.
Good to see you back on it.
Posted by: Cairo94507 Jul 19 2019, 06:45 AM
![popcorn[1].gif](style_emoticons/default/popcorn[1].gif)
Posted by: 76-914 Jul 19 2019, 08:01 AM
Drive the bearings and races out with a large socket and replace with new bearings and seals. They're cheap. Be sure to mic that rotor to check min thickness. BTW, that engine looks clean. No sludge buildup.
Posted by: brettrarnold Jul 22 2019, 10:58 AM
Got the castle nut off using the impact gun!! Too EASY! Thanks
Haven't done the bearings yet but thanks for the tip. Will do that tonight.
Nice to hear my engine doesn't have much sludge. I had the head gaskets replaced, new timing chain, and a number of other components replaced from Dave @ Simply Subaru's. It too was also very reasonable. I am a little nervous about the first time starting it up though. But as you all know that is probably a year or two out.
My seats got finished and i think they really came out nice. Dominick @ Monaco Auto Trim in Englewood CO was awesome to work with and cheap!
Before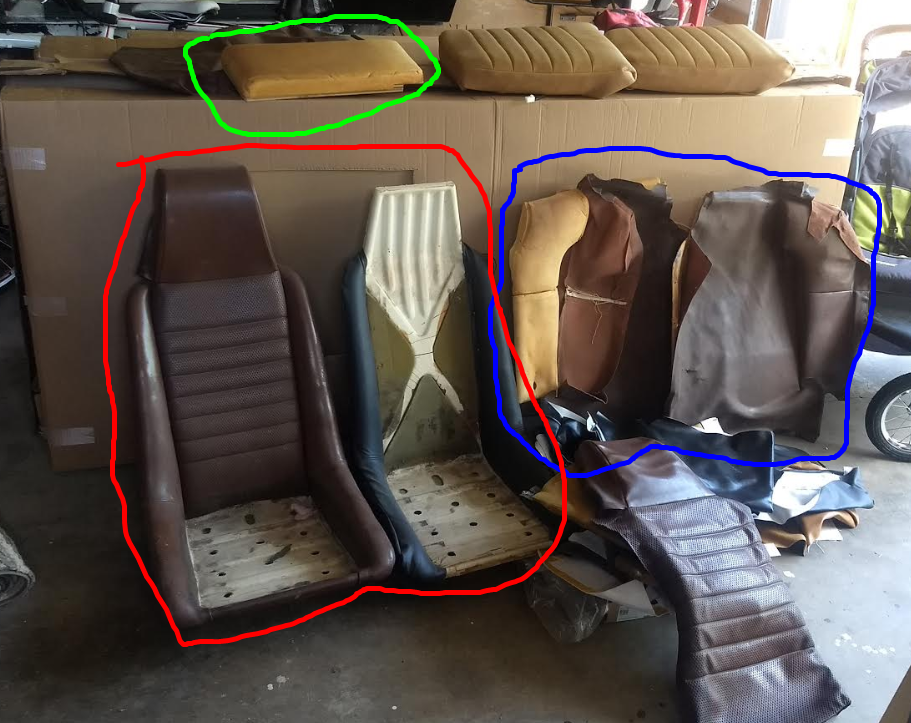
After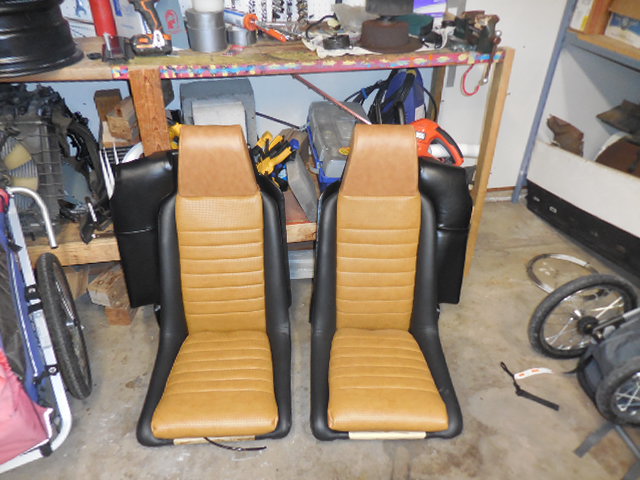
Thanks for all the feedback and help!
-Brett
Posted by: 76-914 Jul 22 2019, 11:59 AM
I'm surprised he sourced the chains. I couldn't find them or the oilers but mine seemed in good shape. I've heard stories of these EZ30's turning 300,000 miles with proper care. Seats look great!
EDIT: you can open up those headers at the merge and pick up a little umph. There is a lot of meat in that area.
Posted by: brettrarnold Jul 22 2019, 01:40 PM
I'm surprised he sourced the chains. I couldn't find them or the oilers but mine seemed in good shape. I've heard stories of these EZ30's turning 300,000 miles with proper care. Seats look great!
EDIT: you can open up those headers at the merge and pick up a little umph. There is a lot of meat in that area.
Nice to hear on the 300k miles. I pulled this bad boy from a junkyard of a nonrunning vehicle so not sure on its mileage. The guy who put it back together guessed around 100k.
Apologize but not following on opening up the headers but wouldn't argue with a bit more umph! Should i do this now or wait until after its in the car?
After looking at it, he replaced the following:
- 2 timing chains
- 2 levers
- 2 tensioners
- 4 guides
- a few other o-rings and gaskets
Posted by: brettrarnold Jul 24 2019, 04:46 PM
The car sat mostly covered in Indiana for 15 years however the tarp that was used, didn't quite cover the rear 2' or so of the car. I have ground the majority of the rust from the rear trunk pan.
Should I replace cut out and reweld the hole spot and cover the trunk with something or cut out the rear trunk pan and weld in a new one?
Before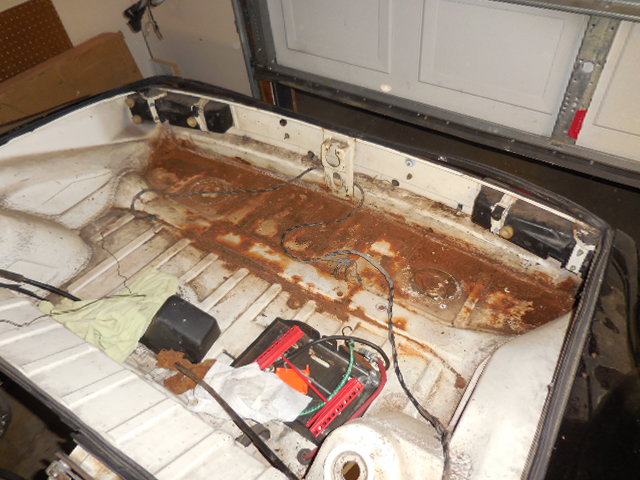
After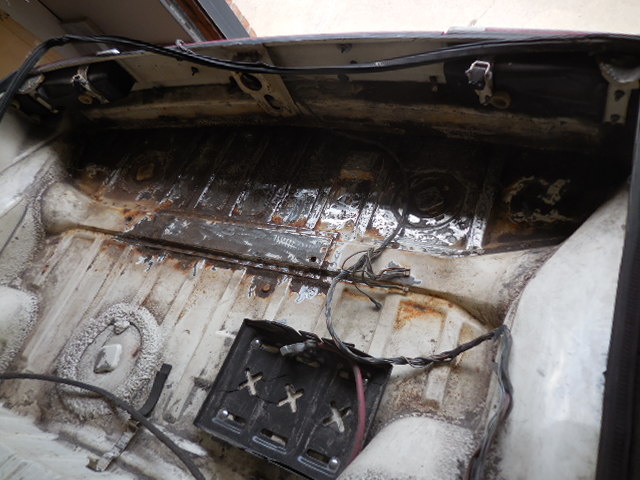
Hole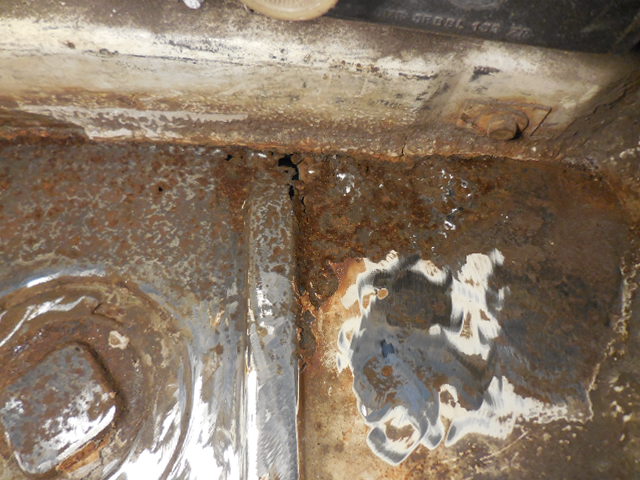
Attached image(s)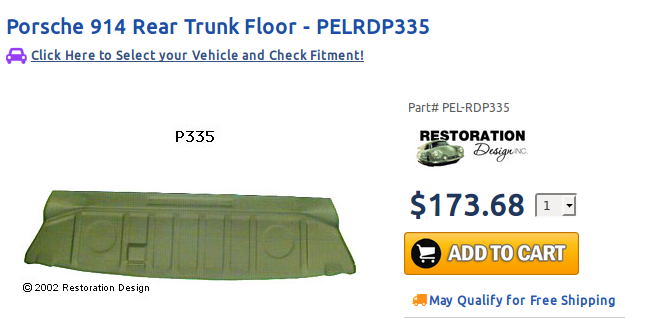
Posted by: 76-914 Jul 24 2019, 05:33 PM
Replace it. One of the easier pieces to do. Re: opening the headers. The exhaust manifold merges into one outlet (3 into 1). I used a rotary file to remove some of the metal and increase the opening size. Dealers choice as to whether it's done with the engine in the car or not. I wouldn't want to try it with the engine in place unless you have a lift. Or have the guy that built your engine open it up a bit.
Posted by: brettrarnold Jul 24 2019, 05:54 PM
Replace it. One of the easier pieces to do. Re: opening the headers. The exhaust manifold merges into one outlet (3 into 1). I used a rotary file to remove some of the metal and increase the opening size. Dealers choice as to whether it's done with the engine in the car or not. I wouldn't want to try it with the engine in place unless you have a lift. Or have the guy that built your engine open it up a bit.
Do i spray it when I am done with something?
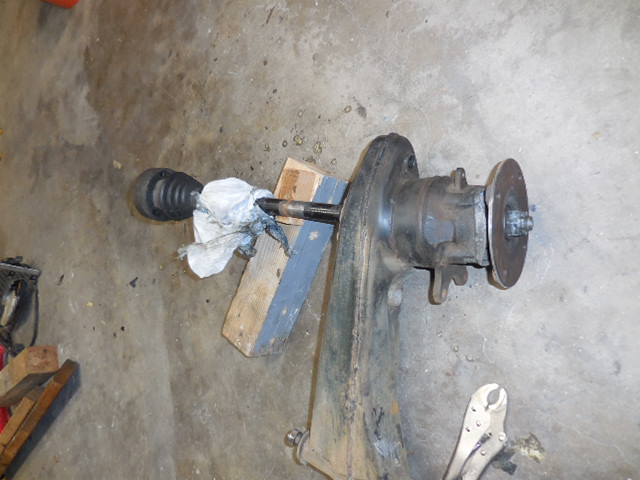
Posted by: brettrarnold Aug 11 2019, 09:34 PM
First things first. Ive decided to name my car Gertrude. I like it because i can call her Gertrude or Gerdy for short.
Okay now that i got that out of the way I have finally made some progress on getting ol Gerdy off the wooden stand and boy that feels good. Its like shes a new car again. 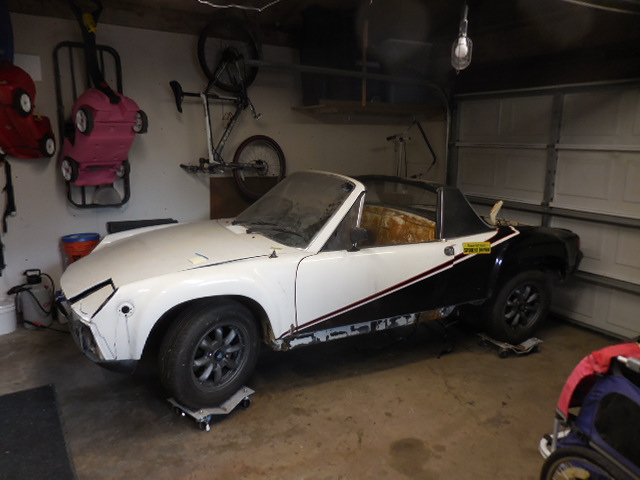
Two questions for the 914 community.
- Anyone in the Colorado area want my car stand? It measures 50" long x 73"wide x 22"tall. The width is a little wide for the 914 but all else works well. It has a little shelf for mounting a jack and lifting the rear end up and down easier.
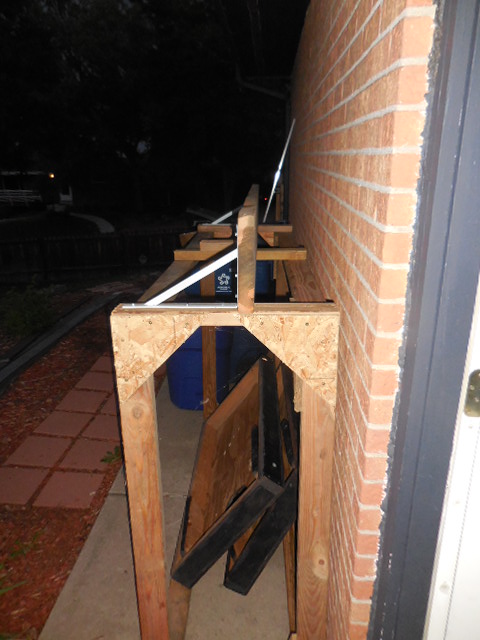
- What is this metal disk? i think it comes from the suspension somewhere but i couldn't figure it out.
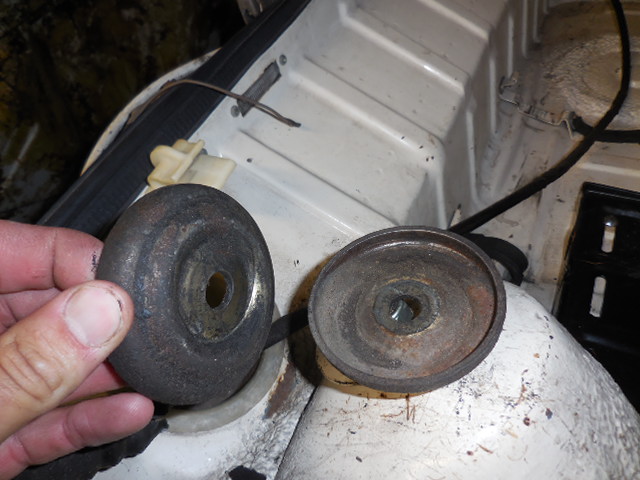
Posted by: mepstein Aug 11 2019, 09:39 PM
#37
https://nemigaparts.com/cat_spares/pet/porsche/914/570u/302050/
Attached thumbnail(s)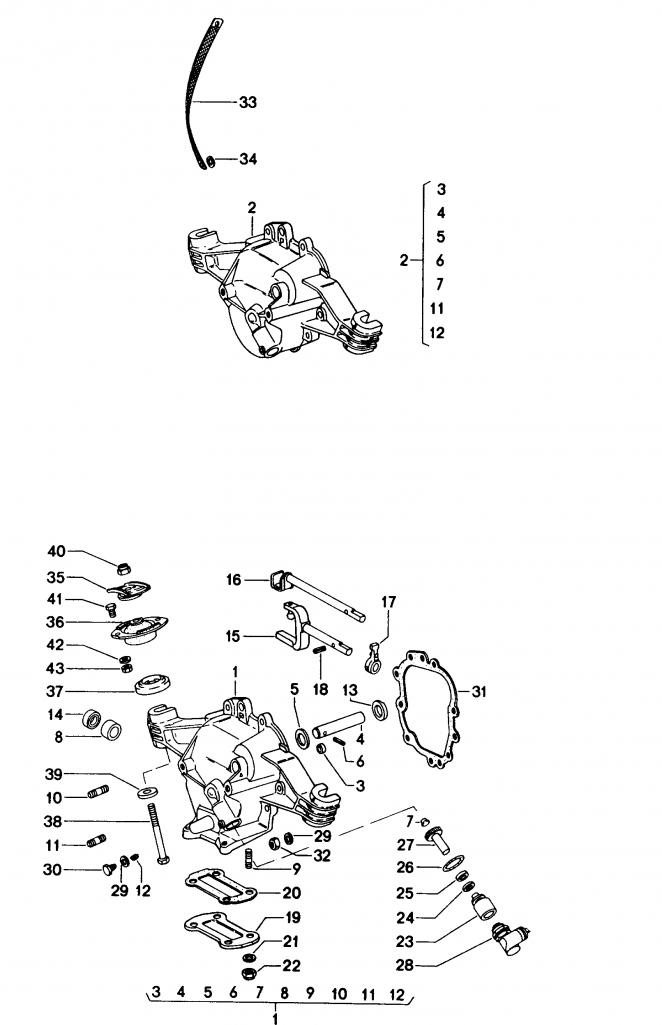
Posted by: brettrarnold Aug 11 2019, 09:45 PM
#37
https://nemigaparts.com/cat_spares/pet/porsche/914/570u/302050/
When i am doing the subaru transmission mount would i need these?
Posted by: 76-914 Aug 12 2019, 09:59 AM
I didn't but I made my own cradle. I can't speak to other cradles.
Posted by: Gint Oct 16 2020, 10:11 PM
(yes we all felt accomplished so we sat around patting each others backs for the next 40 minutes)
Let's have an update Brett. Do I have to come over there? LOL
That could be McMark's brother...
Posted by: brettrarnold Sep 24 2023, 08:23 PM
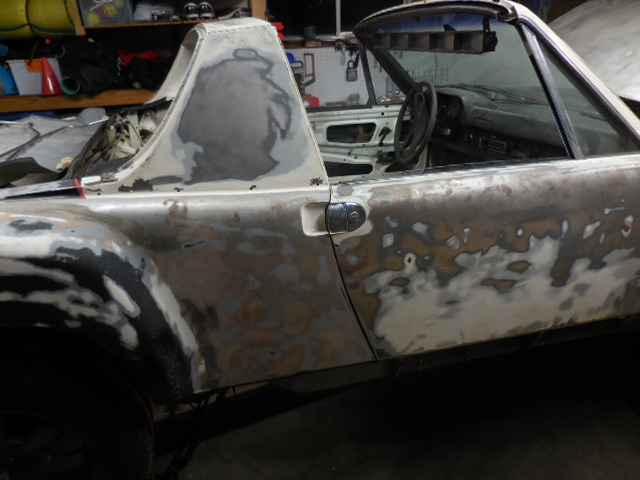
Alright alright getting back into working on the 914 after a long hiatus and some serious life changes that have freed up some time for me. That being said I'm excited to get back to working on her and posting on here.
So after doing welding I must've installed the chassis braces incorrectly or something because both doors are quite tight but the passenger door is the sticky wicket. Is there anything I can do to expand it to give the doors some more space? I mean it will work in the current state but certainly not ideal. 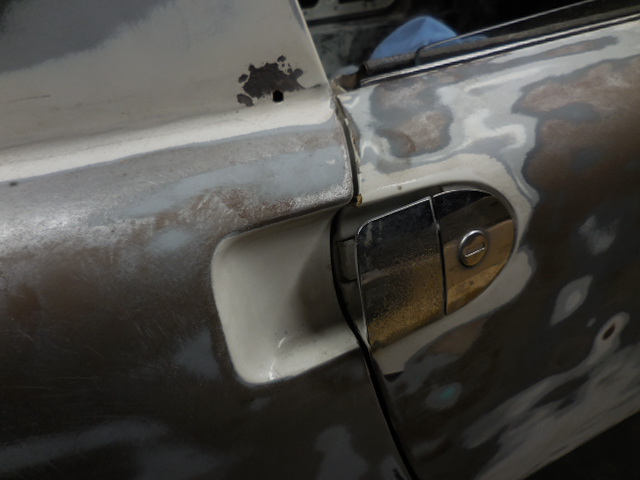
Second, for the engine bay Gint stopped by today and gave me some pointers and he mentioned to use lizard skin. Ive seen other folks using the spray in bedliner raptor stuff. Has anyone used either or something else and have any recommendations?
Third I am going to start making a bracket to install the radiator. Is there any issue with having it angled in here?

Alright so next on this list is going to be dry fitting the motor and transmission to see if there is anything that I need to fabricate. This was so long ago, what exactly is this black mounting piece?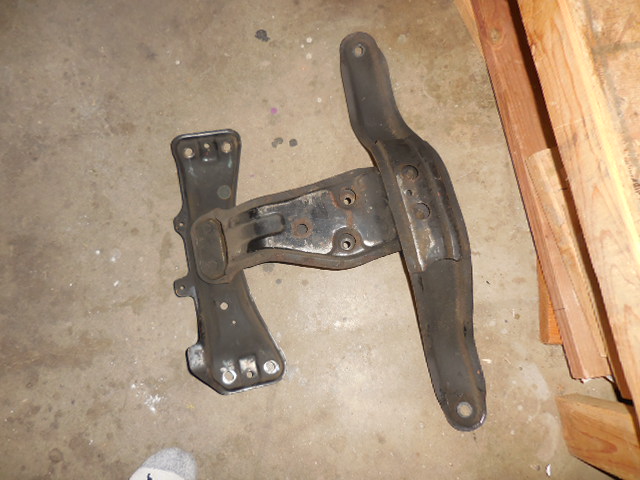
Another item that im quite confused on is wiring. I have the ECU from the donor car (LL bean outback) but not sure exactly how to go about pairing it to the 914. What is the process? Do i have to pull everything out and lay it out then reinstall the wires or should i just leave all the wires in place and label them? Here is a photo of the ECU i pulled out of the car. 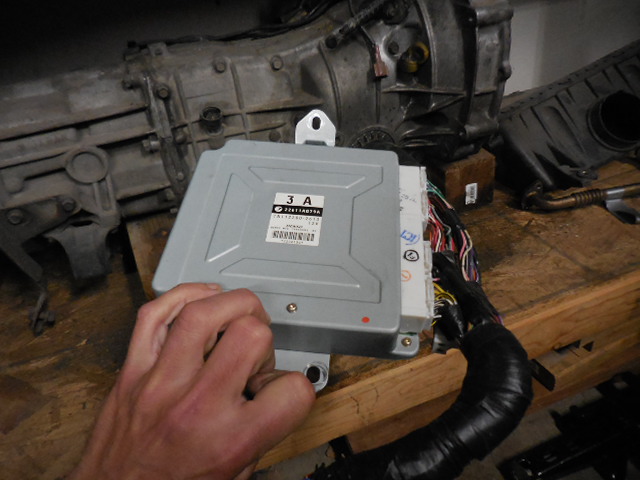
Anyways glad to be back at this and now that i found my old digital camera that takes photos small enough to post, this should be pretty cruzy!
-Brett
Posted by: brettrarnold Sep 24 2023, 09:12 PM
Unless you plan to AX the stock brakes are fine. I haven't seen Jeffs914's harness' but I can tell you that you can make your own harness (if you have a donor harness from the Subaru donor car) for pennies then tie into the existing 914 harness.
How do i tie into the existing 914 harness?
Posted by: targa72e Sep 24 2023, 09:47 PM
What I find as the easy way to post pictures since I prefer to do from my computer is to do the following.
Take picture with your phone. Send to yourself or transfer via cable.
Open picture on PC. Use snipping tool that has been part of all windows OS since at least Windows 7. Save Snip and upload. You can edit, crop add text or circle in snipping tool.
john
Posted by: mepstein Sep 24 2023, 10:22 PM
Unless you plan to AX the stock brakes are fine. I haven't seen Jeffs914's harness' but I can tell you that you can make your own harness (if you have a donor harness from the Subaru donor car) for pennies then tie into the existing 914 harness.
How do i tie into the existing 914 harness?
You don’t just tie in. You sit down with the harness and a Subaru wire schematic and 30-50 hours later, you have a harness that will plug into your car. Seriously, if you aren’t good at wire schematics, send it out to a pro.
Posted by: brettrarnold Sep 25 2023, 05:52 AM
Unless you plan to AX the stock brakes are fine. I haven't seen Jeffs914's harness' but I can tell you that you can make your own harness (if you have a donor harness from the Subaru donor car) for pennies then tie into the existing 914 harness.
How do i tie into the existing 914 harness?
You don’t just tie in. You sit down with the harness and a Subaru wire schematic and 30-50 hours later, you have a harness that will plug into your car. Seriously, if you aren’t good at wire schematics, send it out to a pro.
I would be more than happy to send it to a pro... just need to find said pro!
Posted by: brettrarnold Sep 25 2023, 05:53 AM
Unless you plan to AX the stock brakes are fine. I haven't seen Jeffs914's harness' but I can tell you that you can make your own harness (if you have a donor harness from the Subaru donor car) for pennies then tie into the existing 914 harness.
How do i tie into the existing 914 harness?
You don’t just tie in. You sit down with the harness and a Subaru wire schematic and 30-50 hours later, you have a harness that will plug into your car. Seriously, if you aren’t good at wire schematics, send it out to a pro.
I would be more than happy to send it to a pro... just need to find said pro!
Posted by: brettrarnold Sep 25 2023, 05:56 AM
What I find as the easy way to post pictures since I prefer to do from my computer is to do the following.
Take picture with your phone. Send to yourself or transfer via cable.
Open picture on PC. Use snipping tool that has been part of all windows OS since at least Windows 7. Save Snip and upload. You can edit, crop add text or circle in snipping tool.
john
I actually got a pretty nice little system with an old camera just sized down basically to thumbnails and then i have an SD card slot that reads the card and then am able to add them to 914 world.... so pretty easy all things considered.
Posted by: mepstein Sep 25 2023, 06:39 AM
Unless you plan to AX the stock brakes are fine. I haven't seen Jeffs914's harness' but I can tell you that you can make your own harness (if you have a donor harness from the Subaru donor car) for pennies then tie into the existing 914 harness.
How do i tie into the existing 914 harness?
You don’t just tie in. You sit down with the harness and a Subaru wire schematic and 30-50 hours later, you have a harness that will plug into your car. Seriously, if you aren’t good at wire schematics, send it out to a pro.
I would be more than happy to send it to a pro... just need to find said pro!
Jeff Robenolt
jeffrobenolt@gmail.com
Great guy, very experienced with Suby wire harness conversions. Way better than sending to smallcar.
Posted by: brettrarnold Sep 26 2023, 10:05 PM
Unless you plan to AX the stock brakes are fine. I haven't seen Jeffs914's harness' but I can tell you that you can make your own harness (if you have a donor harness from the Subaru donor car) for pennies then tie into the existing 914 harness.
How do i tie into the existing 914 harness?
You don’t just tie in. You sit down with the harness and a Subaru wire schematic and 30-50 hours later, you have a harness that will plug into your car. Seriously, if you aren’t good at wire schematics, send it out to a pro.
I would be more than happy to send it to a pro... just need to find said pro!
Jeff Robenolt
jeffrobenolt@gmail.com
Great guy, very experienced with Suby wire harness conversions. Way better than sending to smallcar.
I sent Jeff an email but haven't heard anything back. Do you happen to have his number?
Posted by: brettrarnold Sep 28 2023, 09:31 AM
Unless you plan to AX the stock brakes are fine. I haven't seen Jeffs914's harness' but I can tell you that you can make your own harness (if you have a donor harness from the Subaru donor car) for pennies then tie into the existing 914 harness.
How do i tie into the existing 914 harness?
You don’t just tie in. You sit down with the harness and a Subaru wire schematic and 30-50 hours later, you have a harness that will plug into your car. Seriously, if you aren’t good at wire schematics, send it out to a pro.
I would be more than happy to send it to a pro... just need to find said pro!
Jeff Robenolt
jeffrobenolt@gmail.com
Great guy, very experienced with Suby wire harness conversions. Way better than sending to smallcar.
I sent Jeff an email but haven't heard anything back. Do you happen to have his number?
Got ahold of Jeff at AV Subaru and he confirmed what a few others have said. I need the whole wiring kit and kaboodle which im sure a lot of you already knew. Alright back to the junkyard to try to get a full harness from a subaru with an ez30d engine
Posted by: brettrarnold Sep 28 2023, 08:25 PM
Okay i have a couple of questions before just attacking this with the angle grinder.
I am planning to spray on bedliner in the engine compartment. Should i be grinding all of that down to bare metal as well? Do i need to spray Primer on everything before spraying on the bedliner?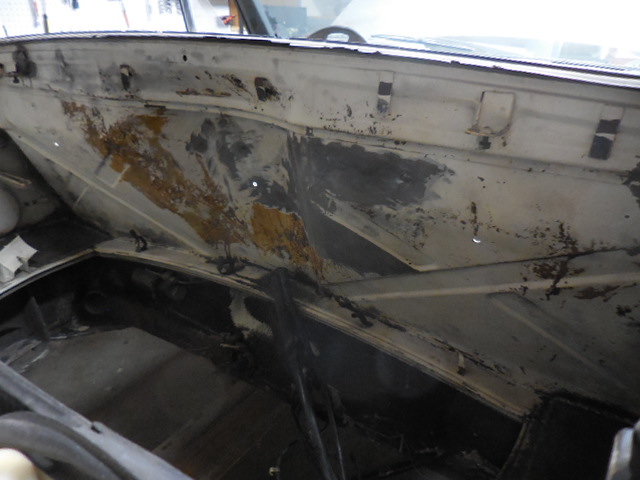
How much grinding on the rear metal behind the seat? Should i be getting it all down to bare metal all over on the inside?? Does the bedliner really help with sound dampening?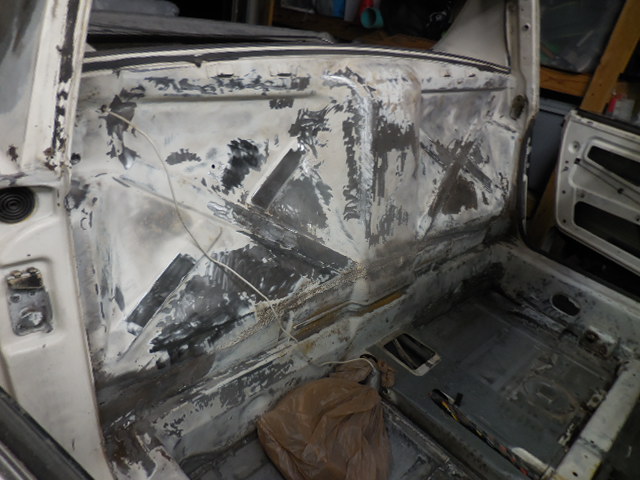
Posted by: jd74914 Sep 29 2023, 01:33 PM
I would epoxy primer everything before coating. 
Taking down to metal is nice because you know there will be no hidden rust or paint incompatibilities, but I wouldn't say it's necessary.
Posted by: brettrarnold Sep 29 2023, 07:36 PM
I would epoxy primer everything before coating.
Taking down to metal is nice because you know there will be no hidden rust or paint incompatibilities, but I wouldn't say it's necessary.
Ya i think ill do a bit more griding on it but thanks for the input. Nice knowing that its not crucial just ideal.
Thanks!
Posted by: Gint Sep 29 2023, 08:31 PM
Hey Brett
I would prime any bare metal I was going to spray bedliner on. There is no need to take it all down to bare metal. Better off leaving good paint alone if you're confident the metal underneath is solid.
Posted by: brettrarnold Sep 29 2023, 10:02 PM
Hey Brett
I would prime any bare metal I was going to spray bedliner on. There is no need to take it all down to bare metal. Better off leaving good paint alone if you're confident the metal underneath is solid.
Ahh thats a good point. Since i cut out the majority of the metal rott except the trunk where i showed ya, i think i should be good to prime and raptor! May try the Hercules stuff over the raptor but its all the same sounds like.
Cheers
Posted by: brettrarnold Sep 29 2023, 10:45 PM
Hey Brett
I would prime any bare metal I was going to spray bedliner on. There is no need to take it all down to bare metal. Better off leaving good paint alone if you're confident the metal underneath is solid.
Also i spoke with the Chris at tangerine racing about my door gap issue and he said to support the car on the jack donuts and put weights in the front and rear trunk to try to get the gap to spread open a bit. Need to keep checking the frame to frame measurement on the corners though for 25-1/4". I have 25-1/8" now so just need to pull another 1/8" outta her.
Powered by Invision Power Board (http://www.invisionboard.com)
© Invision Power Services (http://www.invisionpower.com)