Printable Version of Topic
Click here to view this topic in its original format
914World.com _ 914World Garage _ Muellers Honda V6 914 project
Posted by: Mueller Oct 1 2015, 08:42 PM
Greeting Earthlings!
Got my 1st of many 914's back in '96 or so...'75 with a bad 1.8, installed new motor, drove it for a while and took apart...sold or cut it up, I don't remember...I've repeated that process about 4 times. Then finally in '07 I sold my last 914 along with my trailer and sold or gave away almost everything I had Porsche related except for a few small models and tee shirts. If you look at my member number, I have been around for a long time...I even have a "Smilie" 
At the beginning of '15 I mentioned to a co-worker I'd like another 914 and we made a deal for his in which I was able to make payments and I paid it off last week. ($200 a month for a grand total of $2000)
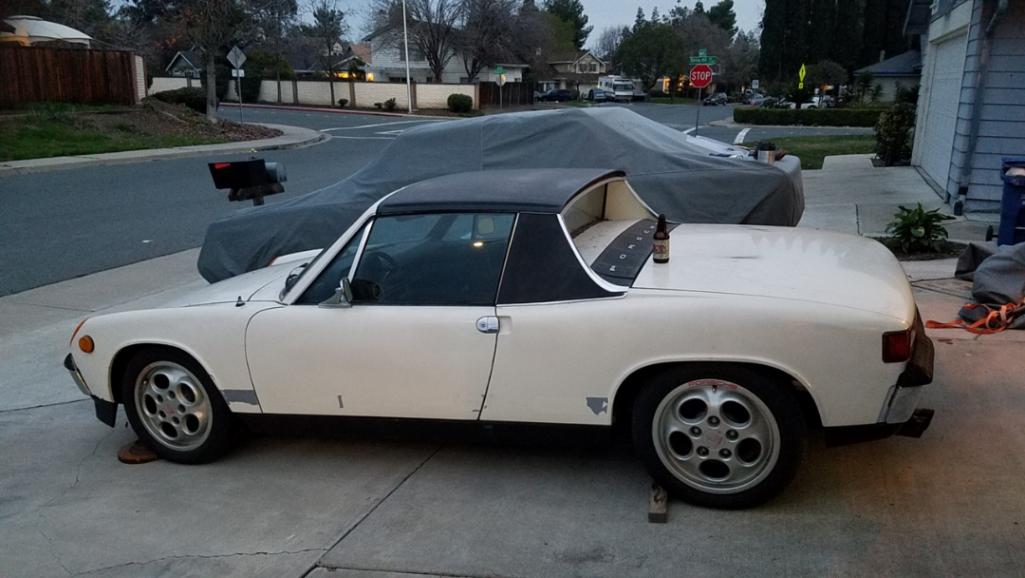
The car:
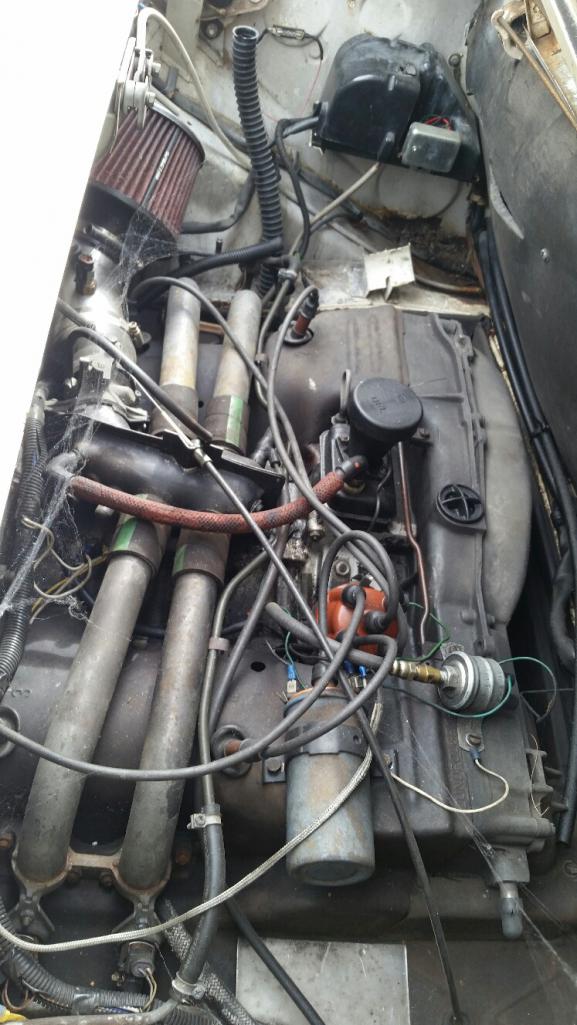
1973 which originally had a 1.7 in it. The PO installed a 2.0 bus motor with megaquirt on it and drove it for a few years and parked it about 4 years ago due to no more compression in cylinder #3.
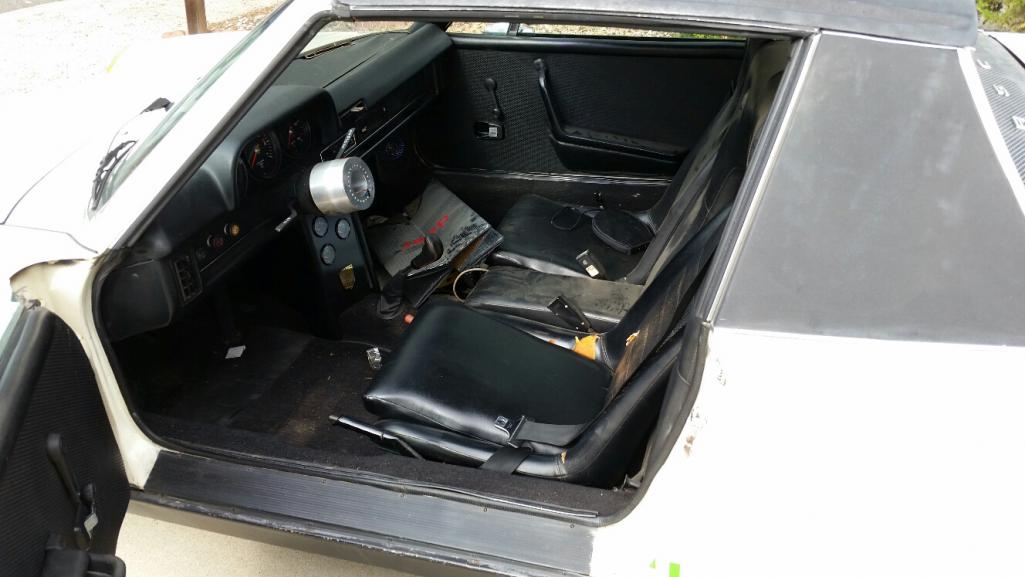
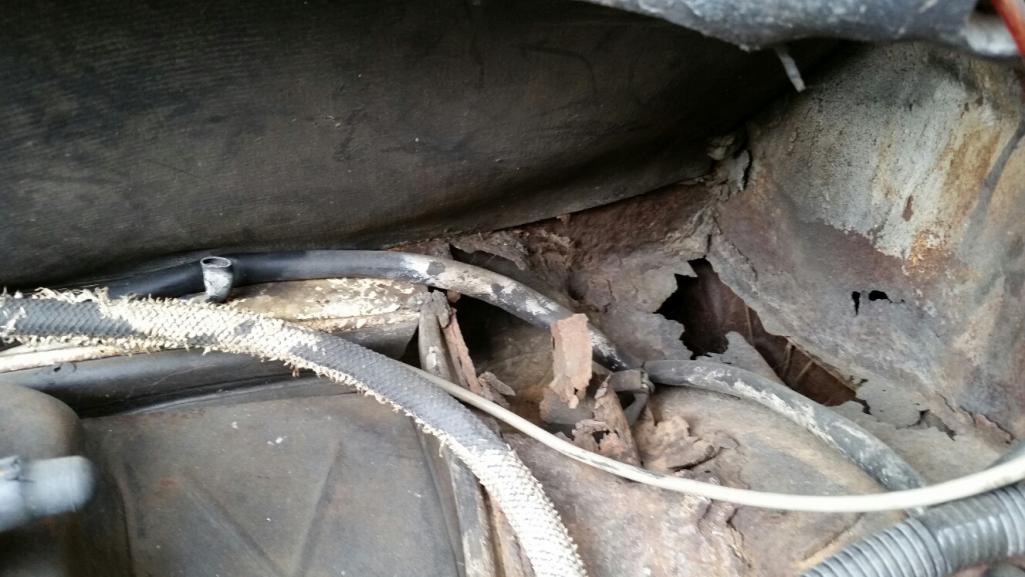
I knew the car had some engine compartment rust in the hell hole, but it is worse that I thought it had, but I still think I got an okay deal on the car considering I was able to make payments and I knew the history of the car before I even considered buying it.
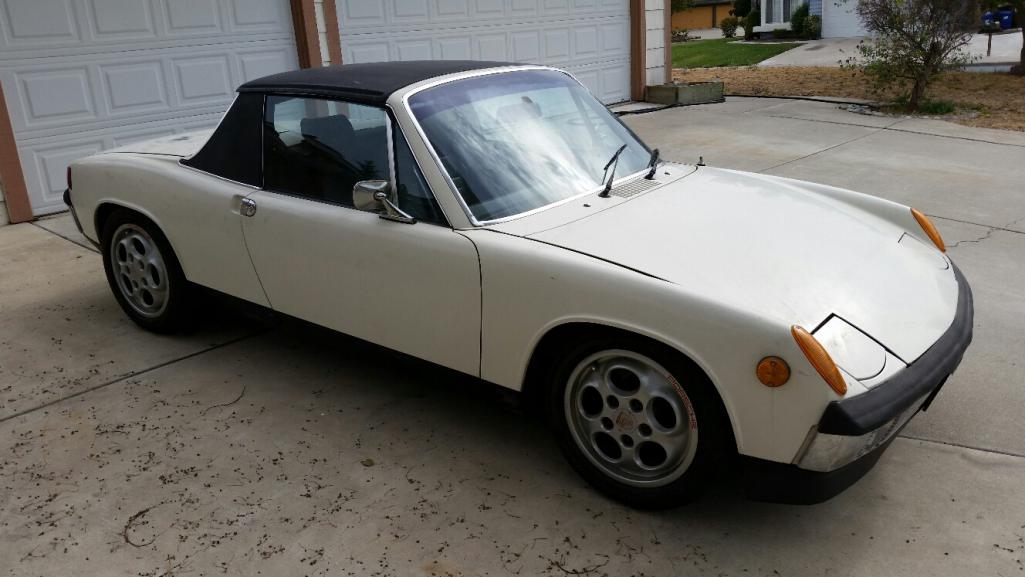
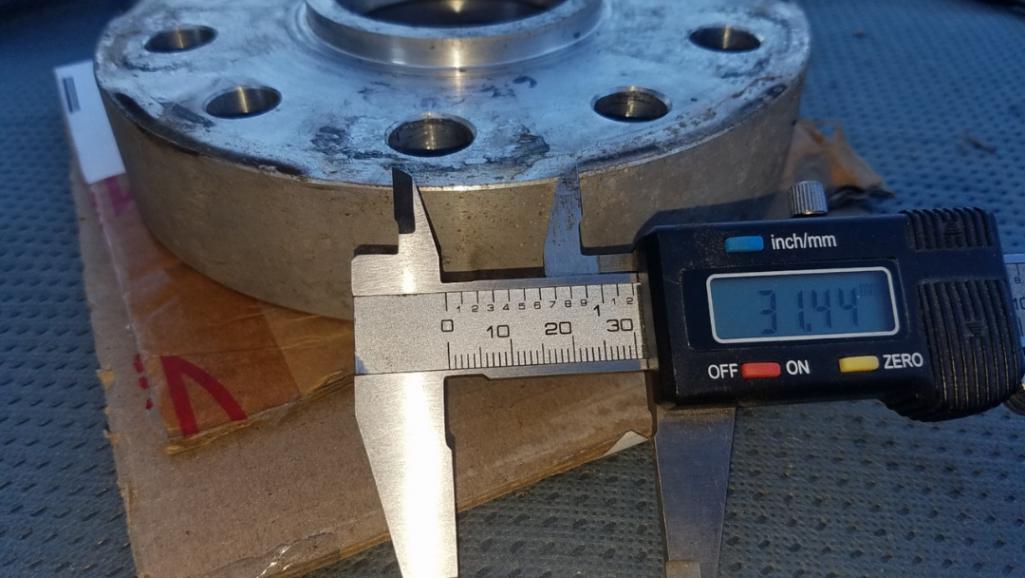
5x130mm redrilled /4 hubs with extra long studs up front with slide on spacer and bolt on 5x130 to 5x130 bolt on spacer in the back, not keen on either end.
Plans:
Install 1.8 motor I picked up from McMark after I fix a few broken exhaust studs (not Marks fault)
Redo all suspension bushings and possibly the shocks (I think it has KYB's)
Undecided on the wheels, now it has 16x7 53mm offset Phonedials with 205/50/16s.
Fix hell hole.
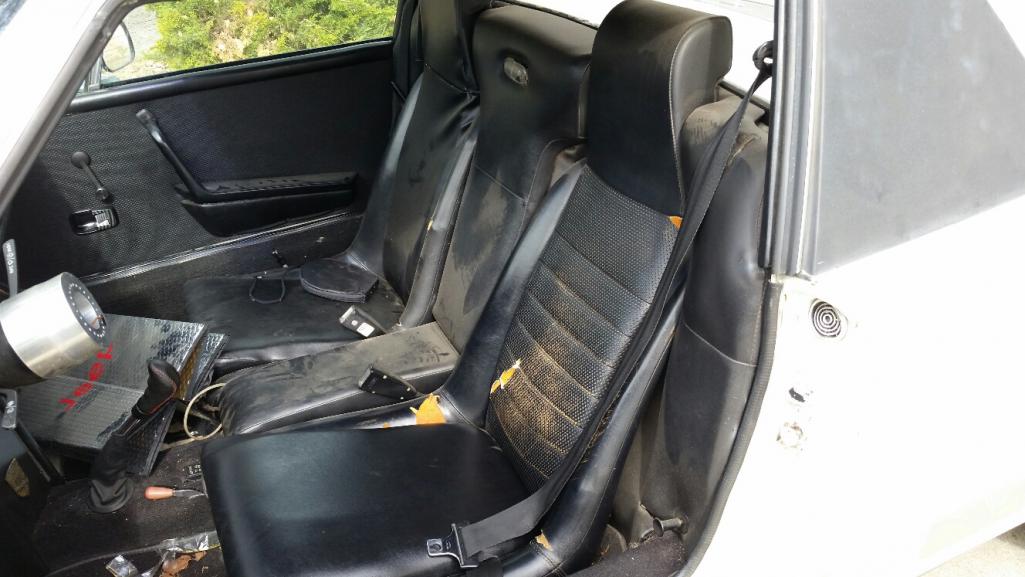
Fix up the interior.
Do "something" with the turn signals front and back, I don't like 'em 
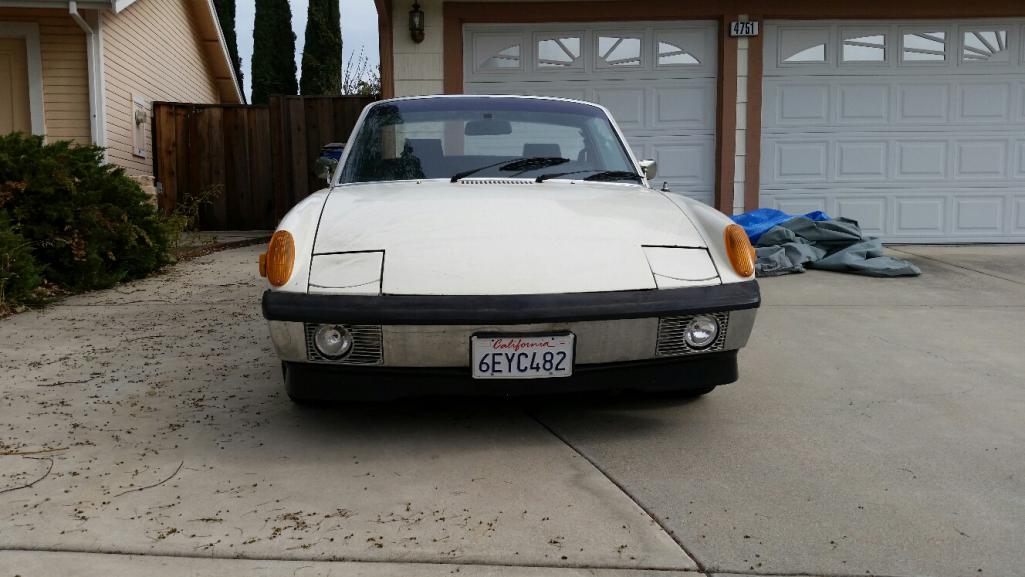
Body needs some straightening and paint for sure. I might toss the green Porsche decal(s) for nothing at all or a different color.
Below are pictures as the car sits across the street. Why across the street and not at my house? Well, I made a deal with the wife that my on going 6 year project car will be driving before I bring the 914 home, that will happen once I install the entire front suspension, install a wiring harness and finish building the engine and install that also.
So possibly before the end of the year the 914 will be home!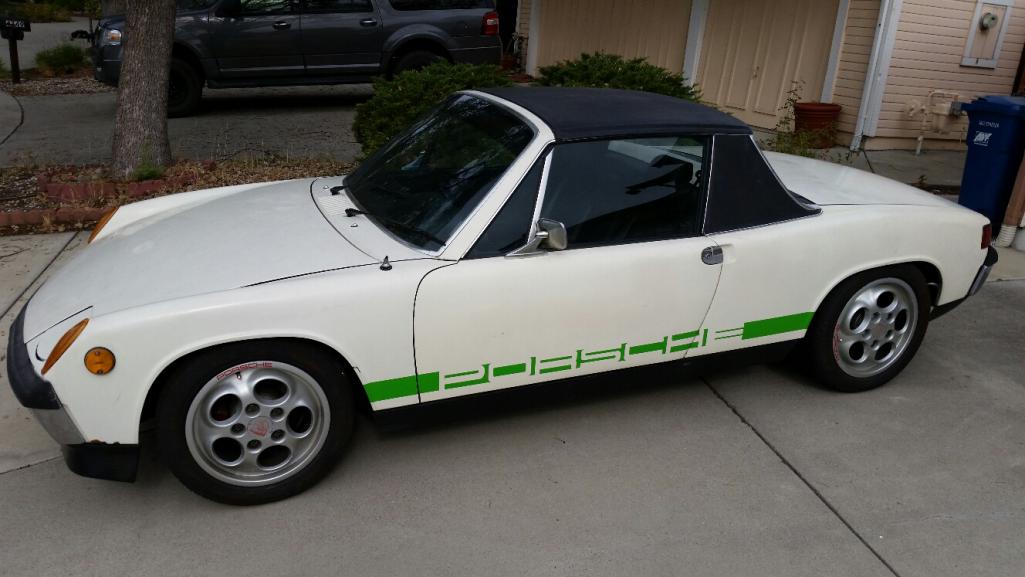
Posted by: Mueller Oct 1 2015, 08:45 PM
Picture of me and my twins, I told them we'll take another picture of them next year at the same time.
Oh yea, my 1.8 motor underneath the wheels and tires that belong on the Volvo 242 I should be working on! 

Thanks for the inspiration everyone and the vendors!
Posted by: Jeff Bowlsby Oct 1 2015, 08:58 PM
You know Mike, that's a lot of 914 for 2 bills, should clean up nice. Get that 1.8L in there running on the MS after the peripheral repairs.
Thought about losing the JC Whitney mirrors?
Posted by: Mueller Oct 1 2015, 09:11 PM
To be honest with you, I couldn't have told you if those are stock or aftermarket mirrors...been out of touch for so long 
Posted by: shoguneagle Oct 1 2015, 10:53 PM
Mike, I like the car you purchased and as Jeff says, "it will clean up nicely". It has been a while but once you put your head back into the 914 you will be right at home again. You are too much of a high quality "machinist/frustrated engineer" to not get back into stride. If you need any equipment or whatever, just let me know. I do have a mig welder which I can lend you, as an example. This can be done without any time constraints.
I do remember you helped me with software, etc. when I need info and knowledge.
Glad you are back in full swing.
Steve
Posted by: Krieger Oct 1 2015, 11:40 PM
Looks like a great project! See if you can get the girls involved.
Posted by: ConeDodger Oct 1 2015, 11:46 PM
A build-off challenge might be just what you need to keep focused Mike! 
Posted by: OllieG Oct 2 2015, 02:10 AM
Hi Mike,
Did you ever own a white, later sprayed metallic blue, original 6 with fibreglass flares? Bought it in around 2004 in Las Vegas...I sold it since but I'm almost certain it had 'Mike Mueller' on the Title.
Cheers, Ollie.
Posted by: A&P Mech Oct 2 2015, 05:57 AM
Looks like a great starting point. I can't wait to watch the progress.
Posted by: Olympic 1.7 Oct 2 2015, 06:05 AM

Well, I made a deal with the wife that my on going 6 year project car will be driving before I bring the 914 home, that will happen once I install the entire front suspension, install a wiring harness and finish building the engine and install that also.
So possibly before the end of the year the 914 will be home!
So let get this straight.. You have another project car to finish before you start on this??
You really are a glutton for punishment..
Good luck Looks like a good car to start with..
Posted by: tdgray Oct 2 2015, 08:51 AM
I think I'm getting old (okay I know I am)...isn't a 73 supposed to have a 1.7 not a 1.8? 
Maybe I've been '14-less for too long and don't remember correctly
Posted by: Mueller Oct 2 2015, 10:10 AM
I think I'm getting old (okay I know I am)...isn't a 73 supposed to have a 1.7 not a 1.8?
Maybe I've been '14-less for too long and don't remember correctly
You are correct...my bad...I fixed that!
******
Yep, need to finish the other project 1st..at least get it driving which reminds me to call the machine shop and see if my crankshaft can just be polished or does it have to be turned down to fix the scratches on the journals

*******
I did in fact own an original blue /6 with flares for a few weeks. I bought it and then sold it to BradR, he dumped a bunch of time and some money into it and ended up selling it for the same price I sold it to him for. I thought it went to Germany? I should have kept it! Oh well...lots of things I should have, could have done, hahaha
Posted by: Andyrew Oct 2 2015, 10:24 AM
You gonna put roller bearings in the suspension? 
Posted by: OllieG Oct 2 2015, 10:43 AM
I think I'm getting old (okay I know I am)...isn't a 73 supposed to have a 1.7 not a 1.8?
Maybe I've been '14-less for too long and don't remember correctly
You are correct...my bad...I fixed that!
******
Yep, need to finish the other project 1st..at least get it driving which reminds me to call the machine shop and see if my crankshaft can just be polished or does it have to be turned down to fix the scratches on the journals
*******
I did in fact own an original blue /6 with flares for a few weeks. I bought it and then sold it to BradR, he dumped a bunch of time and some money into it and ended up selling it for the same price I sold it to him for. I thought it went to Germany? I should have kept it! Oh well...lots of things I should have, could have done, hahaha
Yep, that's it - I remember a Brad had worked on it. I got it from Steve Hill in Vegas. I keep telling myself I should've kept it too! I shipped it to Germany when I moved from Seattle to a new job in Nuremberg, Germany (although I'm British and now back in the UK now). Last I heard the car's owned by a German car dealer I believe in Ulm near Munich. I guess life is full of 'if onlys'...ah well, onwards and upwards. I have 2 914s now, a driving 6 conversion and a project 6 conversion.
Here's a link for old times sake...
https://www.youtube.com/watch?v=c97MYkyx3rg
Good luck with your latest project!
Ollie.
Posted by: RobW Oct 2 2015, 11:20 AM
Let me know when you need a hand or a part. Love to help.
Posted by: RobW Oct 2 2015, 11:20 AM
Shouldn't your daughters have cats in their hands?
Posted by: madmax914 Oct 2 2015, 12:27 PM
So Mike was the motor built by McMark? What internals are lurking in there? Looks like an awesome build, can't wait to watch the progress!
Posted by: Mueller Oct 2 2015, 02:11 PM
So Mike was the motor built by McMark? What internals are lurking in there? Looks like an awesome build, can't wait to watch the progress!
Nope, supposedly built by HPH, no idea what was done to it. I was told the PO kept chasing fuel injection problems and out of desperation bought a complete running 2.0 to throw in there.
The motor looks great, all powder coated parts, the screws that hold the sheet metal on look brand spanking new. I'll pop off the heads to get the broken studs fixed and do a quick inspection.
Posted by: 914forme Oct 2 2015, 02:18 PM
Say Grasshopper  God luck Mike, and yes it needs to have roller bearings, and vented 4 bolt fronts.
Not doing that would be like me not putting in a 904 gauge or a quad gauge.
Subaru, Subaru, Subaru, Eg33 EG33 EG33  you know you want to. Oaky I am done, build it as the 1.7, or it could be a 1.8L as HPH could have done anything they wanted. Short stroke bigger bore type-IV are a great motor.
Posted by: matthepcat Oct 2 2015, 02:27 PM
I vote you do the custom drilled bolt pattern for the wheels!!
Posted by: Johny Blackstain Oct 2 2015, 02:53 PM
Mike- I agree w/ the gang; go for the grasshopper look!
Here is the photo you asked for of my car w/ my Mahle rims fitted with Dunlop SP Sport 195/65HR15s. I have no clearance issues at all & my speedo/odometer is spot on with this tire size.
Attached thumbnail(s)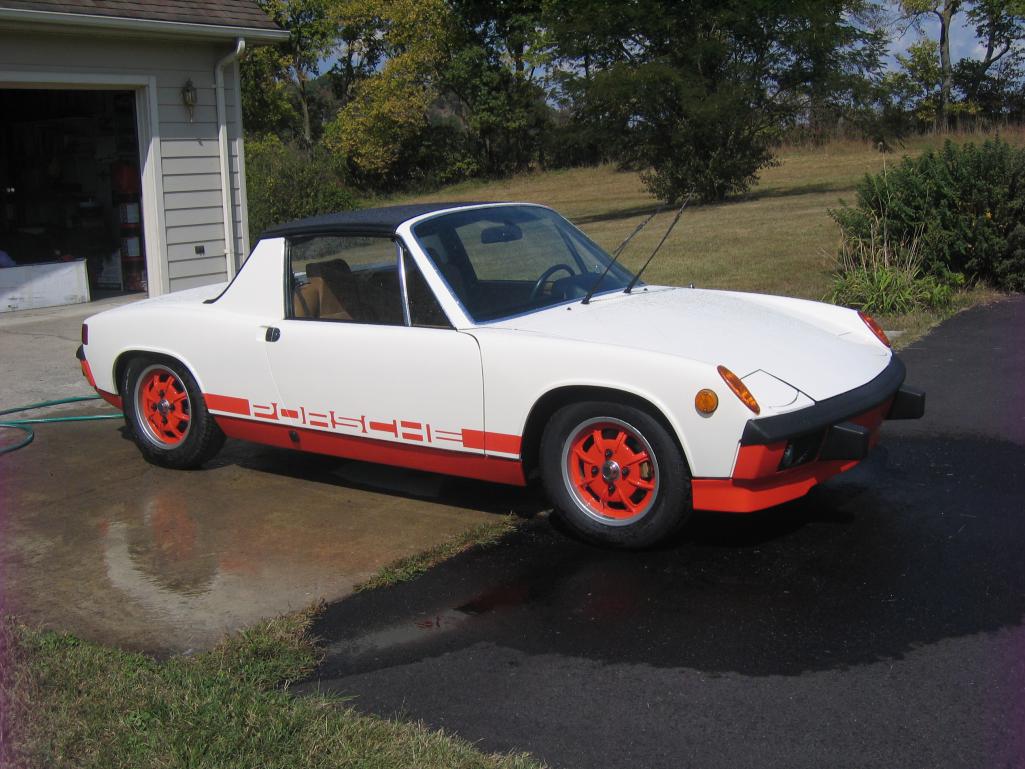
Posted by: Mueller Oct 2 2015, 03:13 PM
Mike- I agree w/ the gang; go for the grasshopper look!
Here is the photo you asked for of my car w/ my Mahle rims fitted with Dunlop SP Sport 195/65HR15s. I have no clearance issues at all & my speedo/odometer is spot on with this tire size.
thanks....those do look great!
I vote you do the custom drilled bolt pattern for the wheels!!
^Stop feeding the voices in my head, hahaha
Posted by: Mueller Oct 12 2015, 10:47 PM
Still in the hunting and gathering stages of the build.....
Picked this up tonight...$200 for low mileage '03 Passat gear box....more or less the same transmission as used in the base Boxsters, just at 1/3 the price 
Posted by: Chris H. Oct 12 2015, 11:12 PM
Dang that's almost junkyard cheap. You gonna look for an engine to bolt that to or use your Type 4? KEP will make any adapter but it will cost some dough. 2.8 is a nice engine if you like v6's. Almost went that way myself.
Posted by: Andyrew Oct 12 2015, 11:24 PM
Nice!
Posted by: 76-914 Oct 13 2015, 07:48 AM
Which power plant you going with??
Posted by: Mueller Oct 13 2015, 02:35 PM
Which power plant you going with??
My 1.7 while I save up for the engine I really want....
Posted by: 76-914 Oct 13 2015, 03:27 PM
Turbo that puppy. McMarks pulled pretty good.
Posted by: Mueller Oct 13 2015, 10:58 PM
Turbo that puppy. McMarks pulled pretty good.
I might go that route, I have an extra 13c from my Volvo build that wouldn't be too bad on this 1.7...might be better choices but this one is paid for
Playing on the computer tonight, overlay aircooled (green) on the Audi gearbox bell housing.
Need a 914 transmission so I can see where the starter mounts and see where to move it or clock it relative to the input shaft.

Posted by: 76-914 Oct 14 2015, 09:38 AM
Turbo that puppy. McMarks pulled pretty good.
I might go that route, I have an extra 13c from my Volvo build that wouldn't be too bad on this 1.7...might be better choices but this one is paid for
Playing on the computer tonight, overlay aircooled (green) on the Audi gearbox bell housing.
Need a 914 transmission so I can see where the starter mounts and see where to move it or clock it relative to the input shaft.
I have an old tail shifter case you can have but I'm a few hundred miles south of you. Yours if you can arrange transportation.
Posted by: Andyrew Oct 14 2015, 09:42 AM
Turbo that puppy. McMarks pulled pretty good.
I might go that route, I have an extra 13c from my Volvo build that wouldn't be too bad on this 1.7...might be better choices but this one is paid for
Playing on the computer tonight, overlay aircooled (green) on the Audi gearbox bell housing.
Need a 914 transmission so I can see where the starter mounts and see where to move it or clock it relative to the input shaft.
Did you get that cad drawing from somewhere or did you make it somehow?
Your engineering skills continue to amaze me... Glad your back
Posted by: Mueller Oct 14 2015, 02:46 PM
I found a drawing online that has the bolt hole locations and I imported it in and manually traced the outline. I will add the holes later on.
That was drawn using Geomagic, it used to be called Alibre...a poor man's version of Solidworks.
Posted by: Mueller Oct 24 2015, 10:40 AM
No physical progress...just virtual progress
Ordered a 964/993 starter gear and friction surface for the aluminum flywheel I'll be making to adapt my motor to the Boxster transmission.
I should be getting the pressure plate and clutch next week and will model those up as well.
I just made these based on some dimensions I found online and will correct them once I get the parts in hand. I know the teeth are off for sure. Still researching starters.....
Posted by: Andyrew Oct 24 2015, 01:28 PM
Ya... Thats awesome...
I would love to employ your services to help me with my wheel speed sensors...
How are you going to cut that adapter?
Posted by: Mueller Oct 25 2015, 01:10 PM
Ya... Thats awesome...
I would love to employ your services to help me with my wheel speed sensors...
How are you going to cut that adapter?
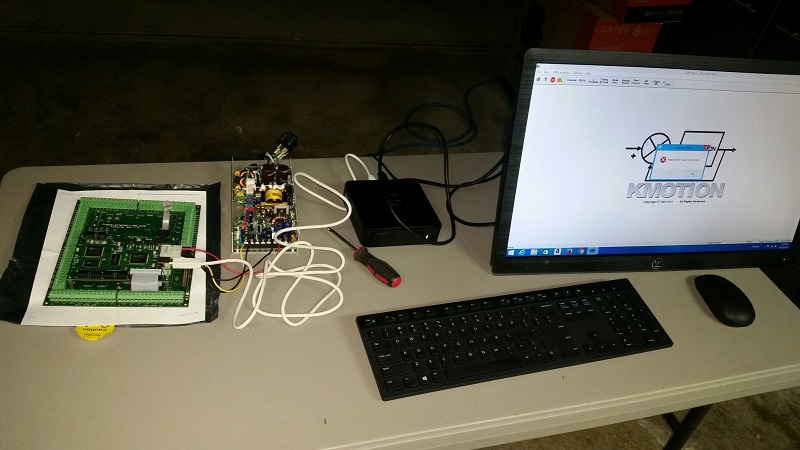
If the plate fits my mill, I'll use that..if not I have a co-worker with a bigger mill in his garage that can cut it out.
First I need to install the new motion contoller on the BP mill....need to learn some C++ 1st for the interface...
My old tower PC with Win98 finally bit the dust (I could replace the capacitors on the motorboard)
So I bought this $150 Dell mini-PC you see in the middle running Win8.1 and boards on the left is an 8 axis motion controller (only using 4 axis right now, XYZ and rotary table)
Posted by: Andyrew Oct 25 2015, 02:41 PM
Ya... Thats awesome...
I would love to employ your services to help me with my wheel speed sensors...
How are you going to cut that adapter?
If the plate fits my mill, I'll use that..if not I have a co-worker with a bigger mill in his garage that can cut it out.
First I need to install the new motion contoller on the BP mill....need to learn some C++ 1st for the interface...
My old tower PC with Win98 finally bit the dust (I could replace the capacitors on the motorboard)
So I bought this $150 Dell mini-PC you see in the middle running Win8.1 and boards on the left is an 8 axis motion controller (only using 4 axis right now, XYZ and rotary table)
Nice! What CNC mill do you have? Can you mill steel or only aluminum?
Posted by: Mueller Oct 25 2015, 03:27 PM
Ya... Thats awesome...
I would love to employ your services to help me with my wheel speed sensors...
How are you going to cut that adapter?
If the plate fits my mill, I'll use that..if not I have a co-worker with a bigger mill in his garage that can cut it out.
First I need to install the new motion contoller on the BP mill....need to learn some C++ 1st for the interface...
My old tower PC with Win98 finally bit the dust (I could replace the capacitors on the motorboard)
So I bought this $150 Dell mini-PC you see in the middle running Win8.1 and boards on the left is an 8 axis motion controller (only using 4 axis right now, XYZ and rotary table)
Nice! What CNC mill do you have? Can you mill steel or only aluminum?
Early 1970's Bridgeport knee mill, currently steppers (open loop) , soon to be servo driven (closed loop)
I can mill steel, it just takes longer due to having to go slower with the feds and speeds.
Posted by: trojanhorsepower Oct 25 2015, 06:21 PM
I like the little computer, where did you get it? What kind of A V IO's dose it have?
Posted by: Mueller Oct 25 2015, 06:27 PM
Best Buy, I'd bet you can find them cheaper on Amazon but it was one of those I gotta have it now moments..hahaha
HDMI and DisplayPort for video output.
Came with wireless mouse and keyboard and Wifi (will be going with cable keyboard and mouse when I have it connected to my mill, a little safer that way)
Posted by: trojanhorsepower Oct 25 2015, 06:34 PM
Cool. Does it have mic and headphone/speaker ports?
Posted by: Mueller Oct 25 2015, 07:50 PM
Cool. Does it have mic and headphone/speaker ports?
Headphone/speaker port only.
I like the solid state drive, we've been replacing disc HDD at work with solid state drives and even a few older machines with SD cards running the OS
Posted by: Andyrew Oct 25 2015, 09:59 PM
Cool. Does it have mic and headphone/speaker ports?
Headphone/speaker port only.
I like the solid state drive, we've been replacing disc HDD at work with solid state drives and even a few older machines with SD cards running the OS
SSD's rock when running the OS
Posted by: mgp4591 Oct 25 2015, 10:30 PM
Cool. Does it have mic and headphone/speaker ports?
Headphone/speaker port only.
I like the solid state drive, we've been replacing disc HDD at work with solid state drives and even a few older machines with SD cards running the OS
SSD's rock when running the OS
Just wait til you see what's coming up next. Would you like an SSD that fits your laptop and gives you 3.5TB? We're making them and they should be available within the year- none of this is classified btw!
Posted by: madmax914 Oct 26 2015, 11:56 AM
This computer conversation is making my brain hurt.
Can't wait to see the transmission in your car!
Posted by: Andyrew Oct 26 2015, 01:08 PM
Cool. Does it have mic and headphone/speaker ports?
Headphone/speaker port only.
I like the solid state drive, we've been replacing disc HDD at work with solid state drives and even a few older machines with SD cards running the OS
SSD's rock when running the OS
Just wait til you see what's coming up next. Would you like an SSD that fits your laptop and gives you 3.5TB? We're making them and they should be available within the year- none of this is classified btw!
I would hate to have to buy that...

I remember when the SSD's were coming out in decent sizes a few years ago.. $500 bucks was insane!
I much prefer to have the OS around 100gb (40 for the OS and the rest for Office, adobe, ect ect) then have a couple of 3 TB HD's running RAID for storage.
Posted by: Chris914n6 Nov 4 2015, 10:50 PM
LA Dismantling had a booth at SEMA. Technically a new 911 but I think it's the same holes.
Posted by: Mueller Dec 29 2015, 05:27 PM
Update per request by Jeff....
Nada, nothing done to 914 unless you count me getting caught by the wife web surfing for possible new rims for a car that doesn't run! No, I really don't plan on buying any new rims...just killing some time and dreaming.
Posted by: Mueller Jan 24 2016, 02:23 PM
My update for sake of doing an update....
0 progress on the 914, working on a 14'x8'x8' playhouse for my girls, it is keeping me too busy.
Playhouse is almost finished, just in time for me gone for 2 weeks for vacation!
I fully expect to be at or near the bottom of the list and I'm okay with that....I have not thrown in the towel and given up yet!
Posted by: r_towle May 30 2016, 11:39 PM
Update?
Posted by: Mueller May 31 2016, 10:12 AM
Update?
No real progress unfortunately, I did score some major brownie points with the wife by knocking out projects the last few weekends for her and my daughters.
I told her there is a VW - Porsche car show on the 1st weekend of August that I want to go to with the 914, so the car will be coming home in the next week or so for me to start working on it.
Time to start ordering parts for it, 1st on the list is all new fuel lines and rear brake lines for sure. Car has not run in about 4 years so lots of work to do.
I'll need to replace a few broken exhaust studs as well on the replacement motor, hope that goes better than the time I drilled into the combustion chamber!
Posted by: r_towle May 31 2016, 12:19 PM
I saw you talking about going to the August show so I figured it's time to blow the dust off and get it running. I am excited to see you in a new to you 914
Posted by: Mueller Jun 24 2016, 11:07 PM
The car is still across the street, however I have started to buy some items for the soon to happen motor installation.
$164 shipped from Rotary '14 , so far they look like nice parts.
Posted by: A&P Mech Jun 25 2016, 07:34 AM
Mueller, what machine control software are you using? I put together a knee mill running a cnc4pc breakout board and Mach3 for software. It runs great. I can run at 30+ inches a minute with steppers. There is no need to learn c++ to interface Mach3.
Posted by: 76-914 Jun 25 2016, 08:05 AM
Update?
No real progress unfortunately, I did score some major brownie points with the wife by knocking out projects the last few weekends for her and my daughters.
That, most definitely, counts as progress. W/O that there can be no real progress!
I'll need to replace a few broken exhaust studs as well on the replacement motor, hope that goes better than the time I drilled into the combustion chamber!
Do tell. Day dreaming or did the bit catch and pull through? Were there any new curse words created at that moment?
Posted by: Mueller Jun 25 2016, 11:11 AM
Mueller, what machine control software are you using? I put together a knee mill running a cnc4pc breakout board and Mach3 for software. It runs great. I can run at 30+ inches a minute with steppers. There is no need to learn c++ to interface Mach3.
I was using Mach with a PC as well, no longer going to use the Kflop for the motion controller since the Bridgeport is for sale , or it will be once I put it back together and get the cheaper controller working on it. I had to take the X motor and ballscrew out and remove the 300+ lb table to get the mill out of my workshop since I literally built the walls for the shop after the BP mill was placed on the concrete pad.

I am buying a new 4th axis mill, the 4th axis can do indexing as well as cordinated movements with the spindle for making stuff such as cams or cranks if i wanted to (model stuff of course) X is 18, Y is 10, Z is 14 (might be off on the numbers a little) 8 position automatic tool changer, flood coolant as well.
For the BP mill, I bought from banggood Chinese import CNC controller.
http://www.banggood.com/50KHZ-CNC-4-Axis-Offline-Controller-Breakout-Board-Engraving-Machine-Control-System-Card-p-1021134.html (I think I paid $158 shipped)
Not much out there on installs and use, so far one guy that did a router install a few months back.
Update?
No real progress unfortunately, I did score some major brownie points with the wife by knocking out projects the last few weekends for her and my daughters.
That, most definitely, counts as progress. W/O that there can be no real progress!
I'll need to replace a few broken exhaust studs as well on the replacement motor, hope that goes better than the time I drilled into the combustion chamber!
Do tell. Day dreaming or did the bit catch and pull through? Were there any new curse words created at that moment?
Stupidity I'd say and rushing the job, I had a track event at Thunderhill the next day and screwed up while trying to drill the stud while under the car. I screwed up the head and ended up calling the wife and telling her I was going to go get brand new Kuhmo tires for her Volvo since that is what I was going to track instead! Turns out I had a blast in my run group in the family Volvo!
Wife also felt bad for me screwing up my 914 and bought me a '91 964 C2 a month later for my birthday.
Posted by: Mueller Jun 27 2016, 08:33 AM
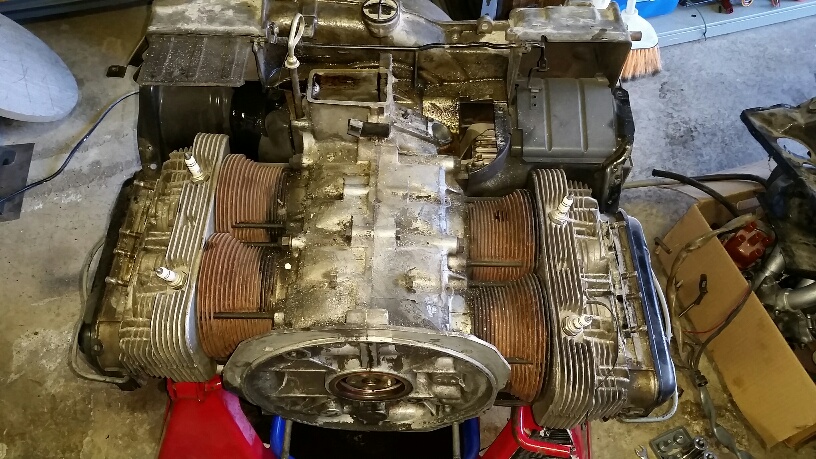
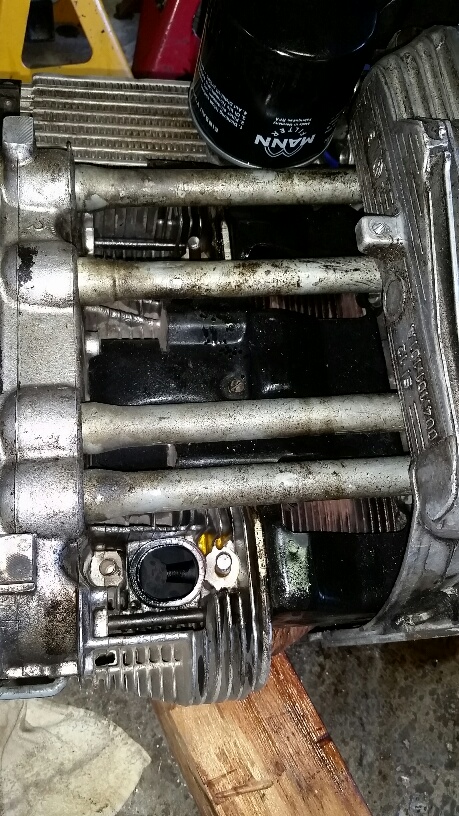
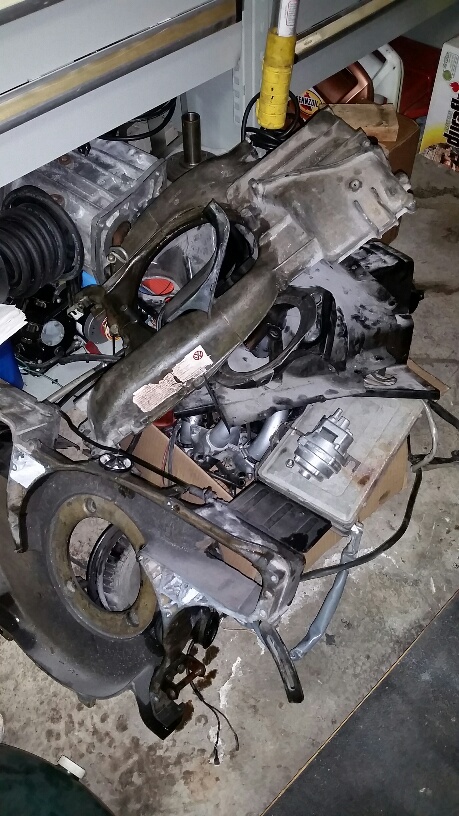
Started to work on the 1.7 engine....
4 out 8 exhaust studs are broken, I started to spray them with a penetrate, next will be welding nuts to them and hopefully they screw right out!
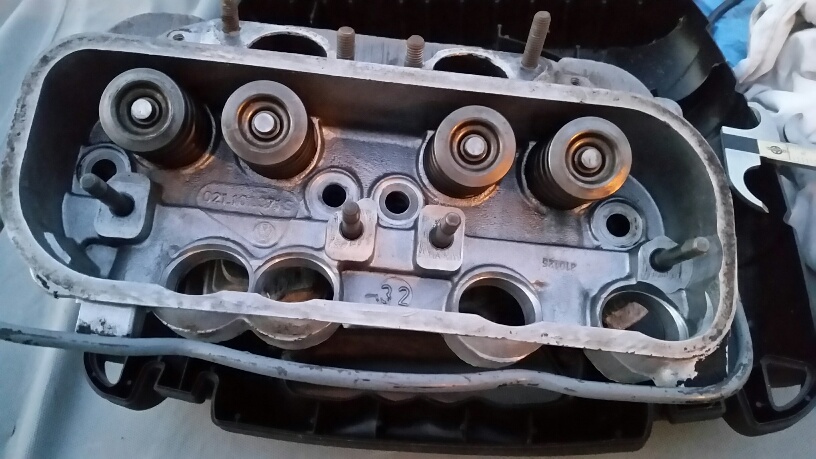
I popped off the valve covers and it is very, very clean in there, no sludge. I drained the oil and it was nice and clean (for engine oil, hahaha)
Time to clean off all the tin from it sitting for a few years, and install L-Jet instead of the current D-Jet (so all the D-Jet stuff will be for sale)
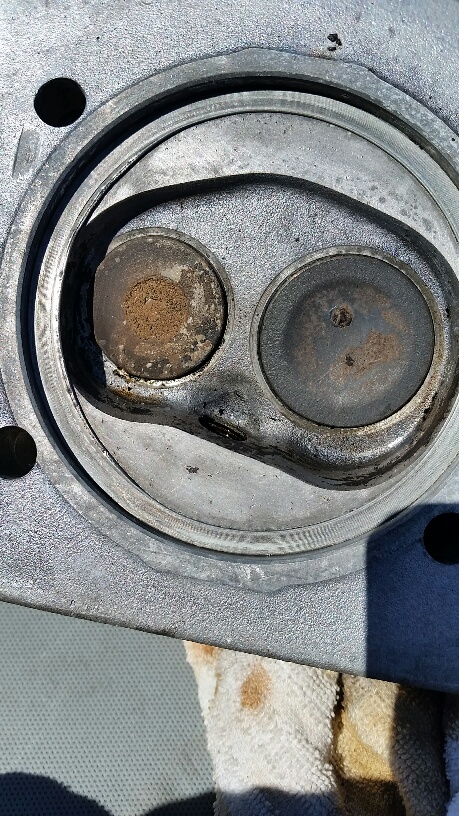
Debating whether or not to pull the heads, I figure at this point it might not be a bad idea so I can do a quick inspection. I was a little surprised that it does not have the 911 swivel adjusters, no idea yet if these rockers can be modified for using them or not. 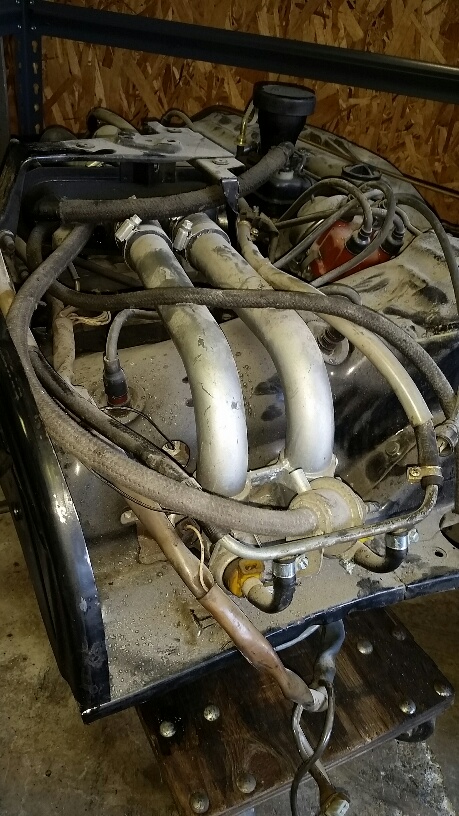
Posted by: Mueller Jun 27 2016, 08:39 AM
I am glad to see that it looks like the missing exhaust studs threads are in great shape, I see no signs of stripping or that they have been damaged before.
Posted by: Mueller Jun 29 2016, 01:02 AM
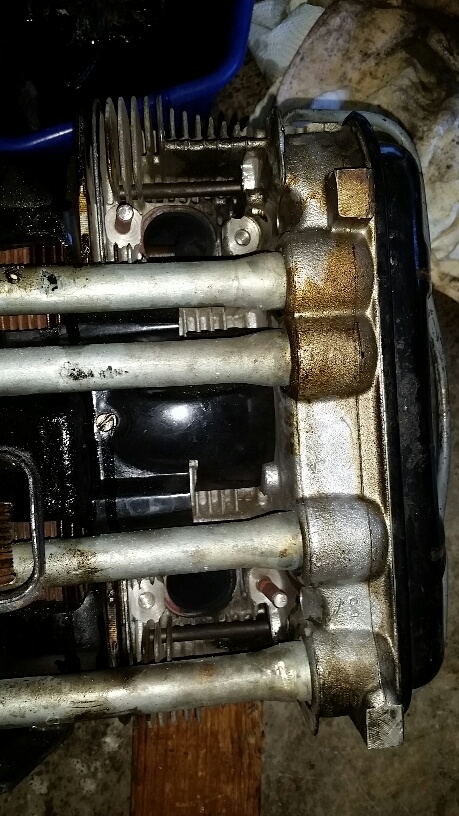
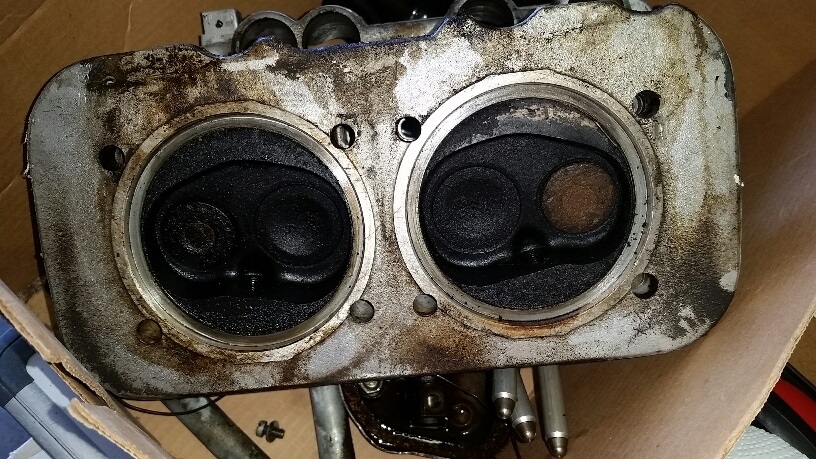
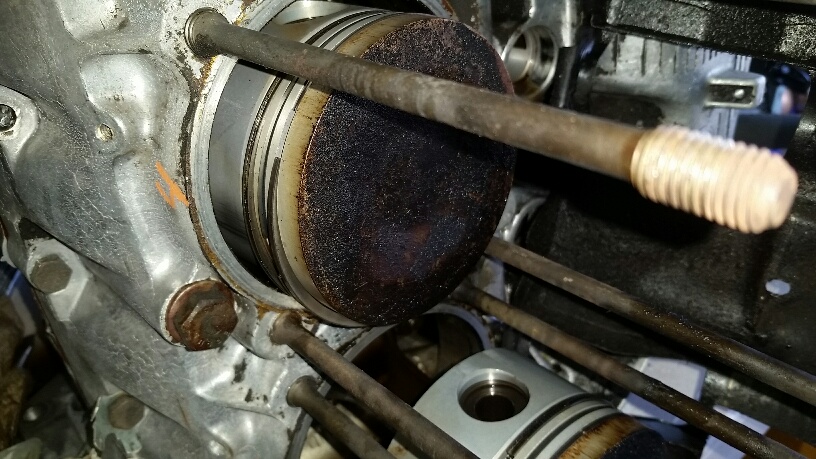
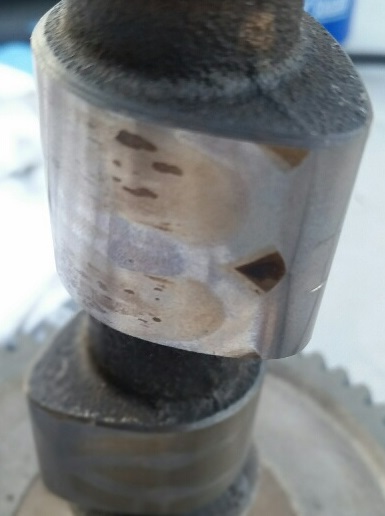
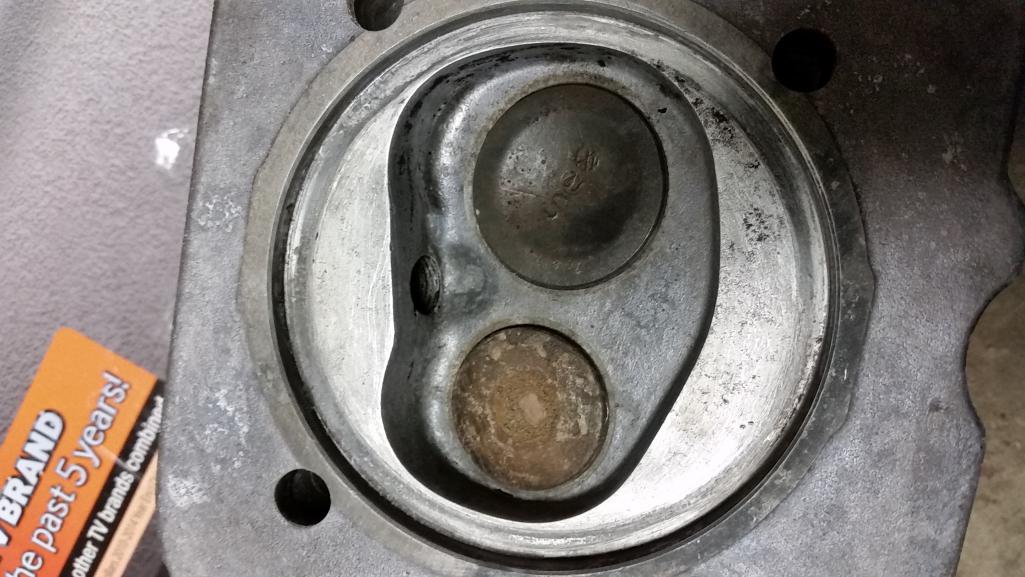
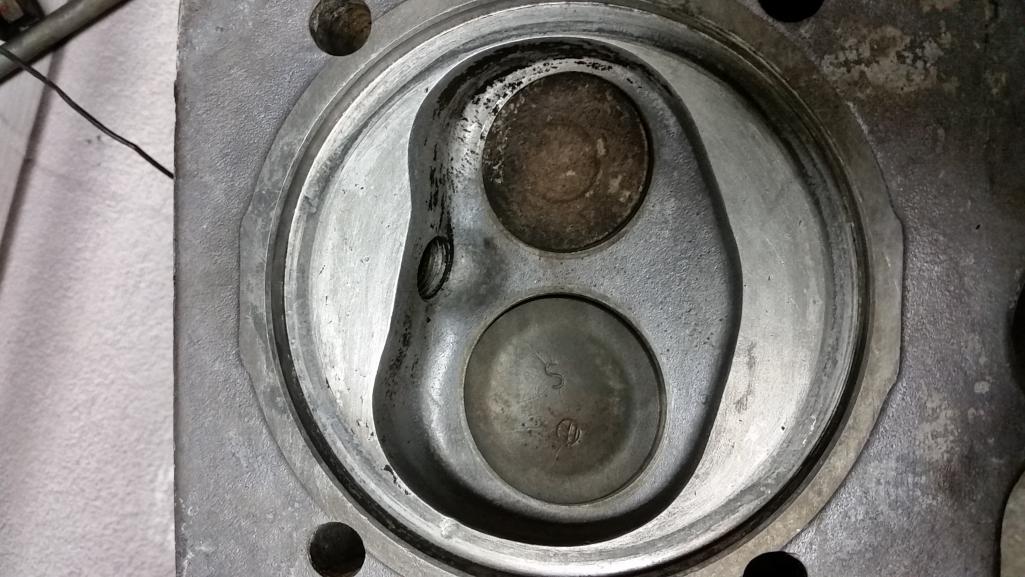
Took heads and cylinders off tonight, didn't like how one side had more oil leakage than the other.
Measured the cylinders and they are 93mm which makes this motor a 1911, which is cool since I thought it was a 1700. Pistons and cylinders in great shape, not many miles on this motor at all!
I'll have to run the part numbers but I think they are stock cylinders bored out.
No 911 swivel foot adjusters which sucks. No idea what camshaft used, not sure if I want to pop off the oil pump to look for some markings on it or not.
Posted by: G e o r g e Jun 29 2016, 08:55 AM
Took heads and cylinders off tonight, didn't like how one side had more oil leakage than the other.
Measured the cylinders and they are 93mm which makes this motor a 1911, which is cool since I thought it was a 1700. Pistons and cylinders in great shape, not many miles on this motor at all!
I'll have to run the part numbers but I think they are stock cylinders bored out.
No 911 swivel foot adjusters which sucks. No idea what camshaft used, not sure if I want to pop off the oil pump to look for some markings on it or not.
93 and a 66mm crank make it a 1.8. you need 96's to get to 1911.
Posted by: Marty Yeoman Jun 29 2016, 10:43 AM
93 bore x 71 stroke = 1929cc. Maybe that's what Mike meant.
Posted by: Mueller Jun 29 2016, 02:22 PM
93 bore x 71 stroke = 1929cc. Maybe that's what Mike meant.
93 and a 66mm crank make it a 1.8. you need 96's to get to 1911.
Oops, I'm an idiot...oh well, I guess I have a 1.8 motor now after all.
Posted by: G e o r g e Jun 29 2016, 03:19 PM
are the pistons dished or flat?
turning this into a 1911 would be an easy upgrade since you have the heads off. the 1.8 heads have the larger opening and you can use the same 96 cans as a 2 ltr, just get the short stoke pistons to fit your rods.
Posted by: 2mAn Jun 29 2016, 03:26 PM
I vote you do the custom drilled bolt pattern for the wheels!!
I second this!
2 sets of 4x114? One for me

Posted by: Mueller Jun 29 2016, 04:54 PM
are the pistons dished or flat?
turning this into a 1911 would be an easy upgrade since you have the heads off. the 1.8 heads have the larger opening and you can use the same 96 cans as a 2 ltr, just get the short stoke pistons to fit your rods.
Dished....i'm trying to not spend too much money on this, the new piston and cylinders really start to add to the cost.
Posted by: Mueller Jul 1 2016, 10:18 PM
July 1st update for Build-Off Challenge.
Took the motor out of storage and started to tear it apart for a camshaft swap, I will also be adding 911 swivel adjusters to the rocker arms.
Still undecided on fuel management right now. Waiting to see if Jake chimes in again on my engine build thread on what direction to go with it, I am open to all known good options.
http://www.914world.com/bbs2/index.php?showtopic=288618
Posted by: Mueller Jul 5 2016, 09:32 PM
Figured I'd throw some of my engine rebuild pics here.
I will not be installing head gaskets like the previous builder did.

Last few pictures show the damages head gaskets, looks like uneven clamping or something odd with how they are only squished or deformed on the exhaust side (more heat?)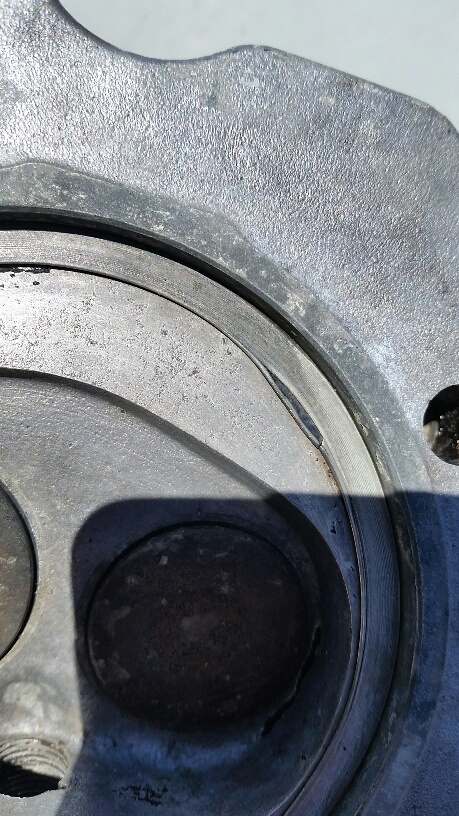
Posted by: Mueller Jul 5 2016, 09:33 PM
Got some goodies in the mail today.
Real 911 swivel adjusters and a 4 channel CHT gauge with sensors!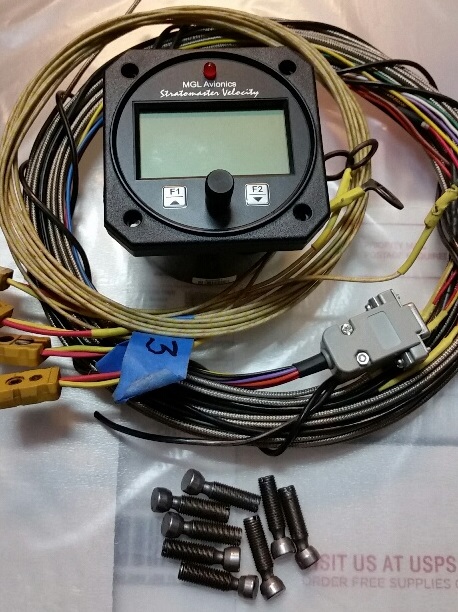
Posted by: Andyrew Jul 5 2016, 11:05 PM
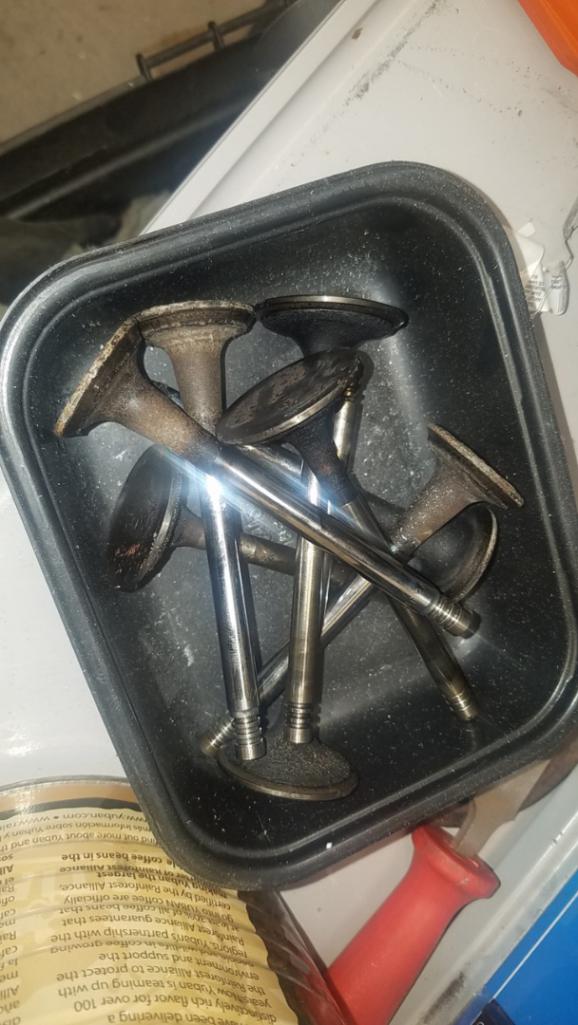
Leakdown test yet? For some reason those valves dont look like they sit flat...
Posted by: Mueller Jul 5 2016, 11:10 PM
Leakdown test yet? For some reason those valves dont look like they sit flat...
No test yet, I'm going to remove them all and inspect. Might be the picture (phone)
Posted by: matthepcat Jul 5 2016, 11:34 PM
Can't wait until you put a turbo on this motor......come on....do it.
Posted by: Mueller Jul 13 2016, 02:07 PM
Saved for future update..........
Posted by: 2mAn Jul 13 2016, 02:41 PM
Which MS setup are you using? Why are you trashing the old one? gimme gimme! I plan on setting up whatever 914 I get (broken record) on megasquirt as well and want to start collecting parts for it.
Posted by: Mueller Jul 13 2016, 03:19 PM
Which MS setup are you using? Why are you trashing the old one? gimme gimme! I plan on setting up whatever 914 I get (broken record) on megasquirt as well and want to start collecting parts for it.
The harness is sorta hacked together..I'm friends with the previous owner, he planned on building a new "proper" one, but got tired of spending time and money on the car once the motor popped.
FI , L-jet for now if it will work with motor combo.
Posted by: Andyrew Jul 13 2016, 04:14 PM
Megasquirt would be perfect for a turbo motor
I still have your old Megasquirt board you gave me many years ago somewhere
Posted by: Mueller Oct 18 2016, 08:59 AM
I failed miserably for the 1st Build-Off Challenge
Anyway, back to some small progress. Recently received my new lifters, chromoly push rods and all the assembly lube and seal material sold by The Type IV store, I think I should replace my springs so I will bump my engine build thread for that question.
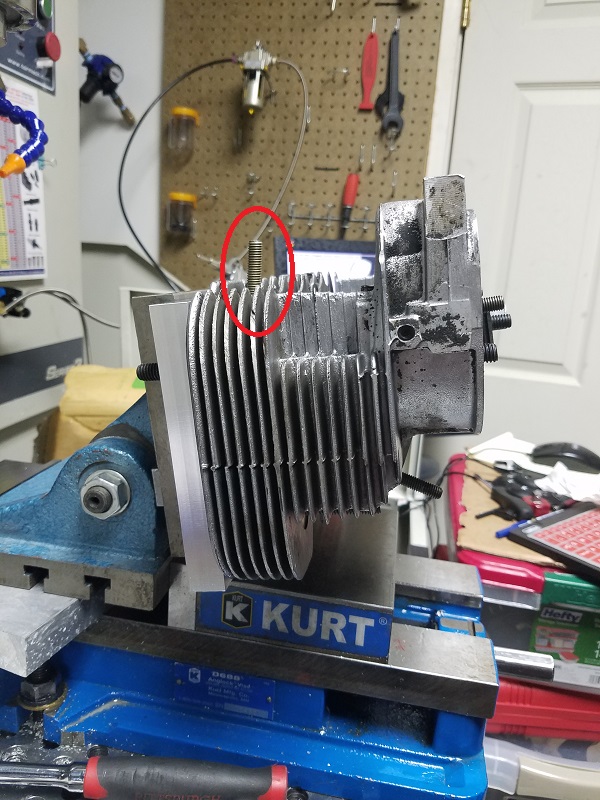
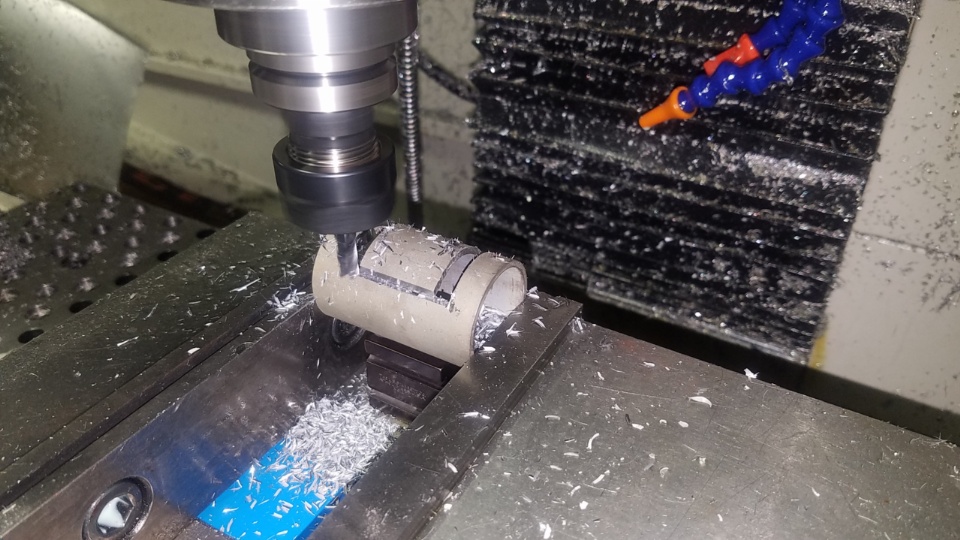
I made a plate to bolt my heads to so that I can mill out the broken exhaust studs.
The stud circled in red is just for a quick reference, I'll make sure the stud holes are aligned near perfect before milling and tapping. 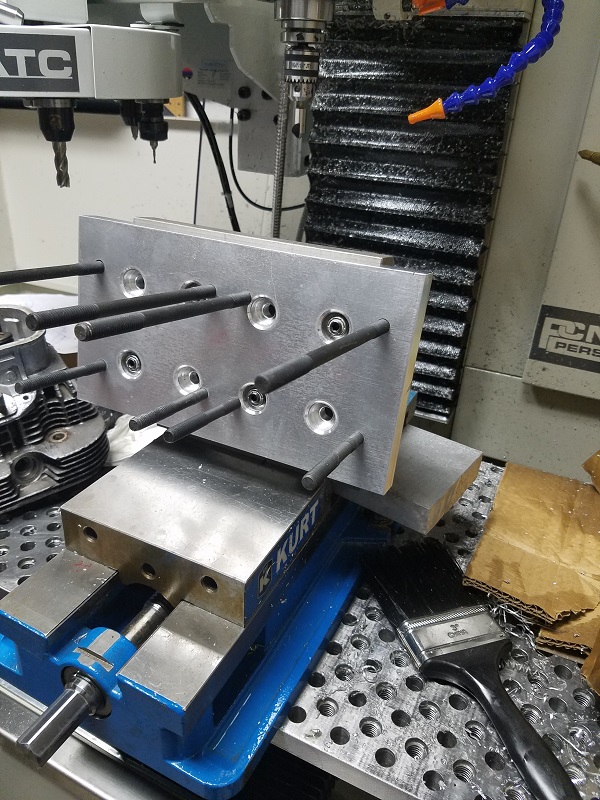
Posted by: Mueller Jan 21 2018, 08:11 PM
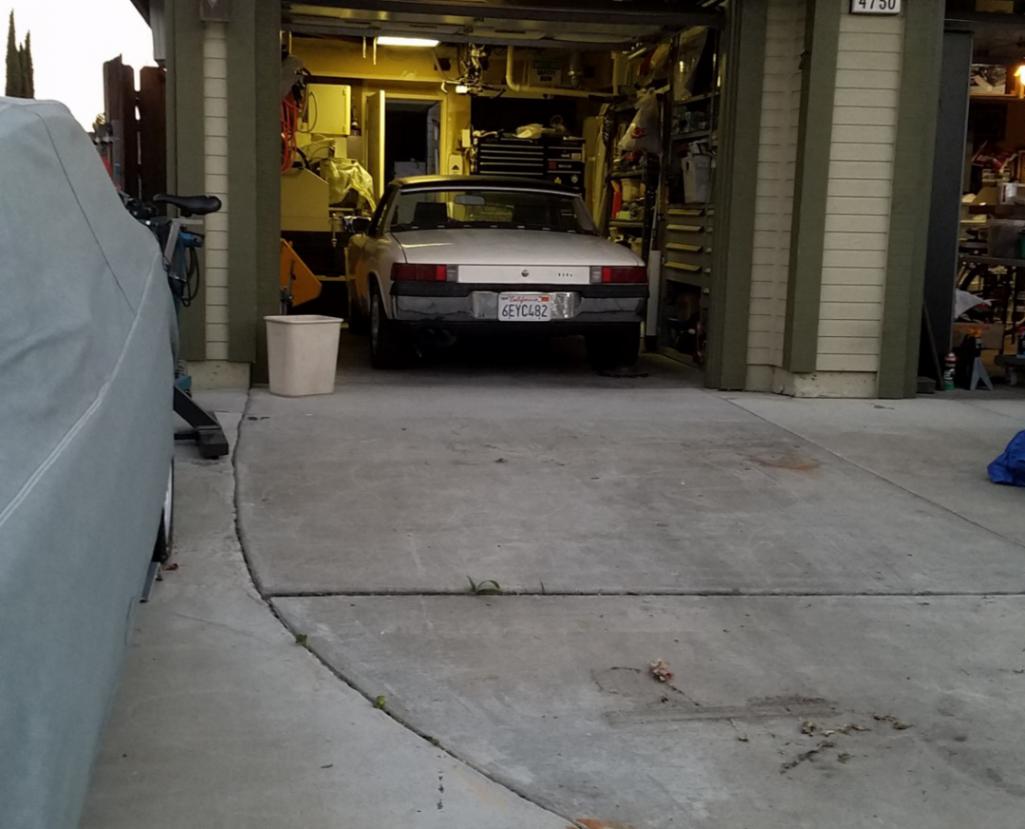
I finally have a 914 at my own house after almost a 10 year absence.
For the last year and half my latest one was stored across the street, finally pushed it home and I didn't even get a chance to "drive" it.....my lovely wife Sherryl had the honors of steering it.
I had a green Porsche script on it that I added to it a year ago, nobody in the family really cared for it the more we looked at it. I must have had the worlds cheapest paint job, much of the paint under the decal came off...oh well it needs new paint badly. 
Posted by: r_towle Jan 21 2018, 08:30 PM
Slacker thread?
Posted by: Krieger Jan 21 2018, 08:44 PM
Nice! Good to see things movin!
Posted by: Mueller Jan 21 2018, 09:14 PM
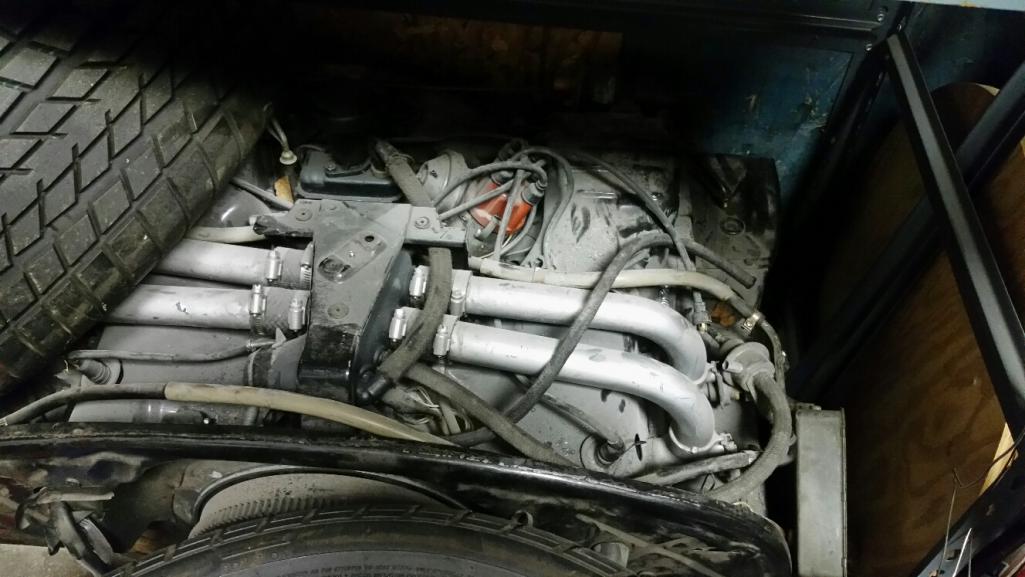
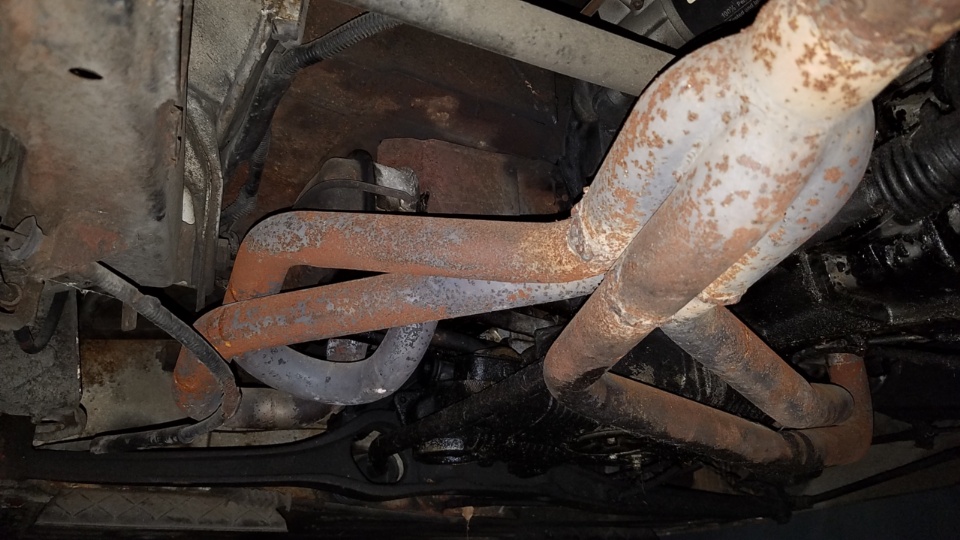
Pictures of ugly unknown brand headers.
Attached image(s)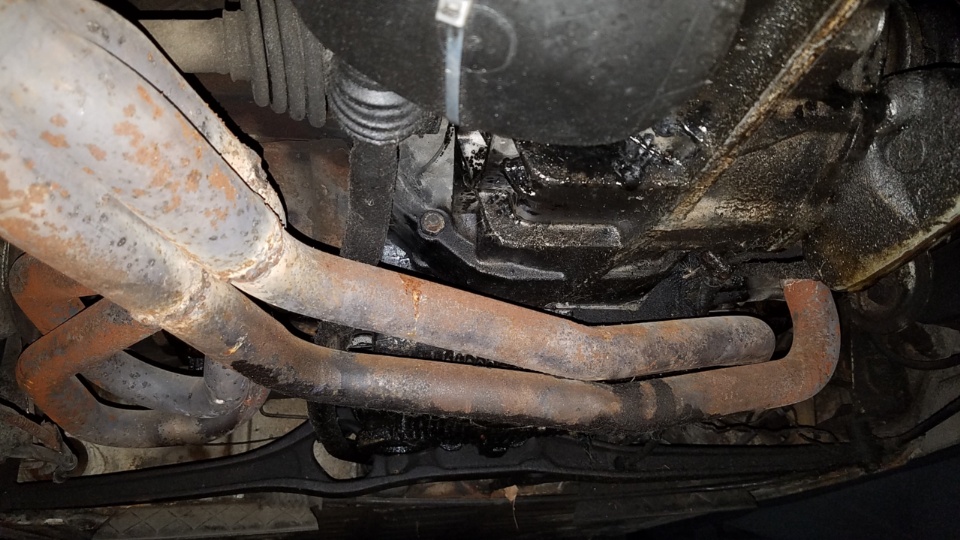
Posted by: tygaboy Jan 22 2018, 08:48 AM
Mike - Great to see it's back home!
Posted by: Mueller Jan 27 2018, 11:21 PM
Drove up to Pet-a-llama and hung out with Chris (tygaboy) today for a few hours while he made a few tweaks to his car, he is pretty good with that tube bender!
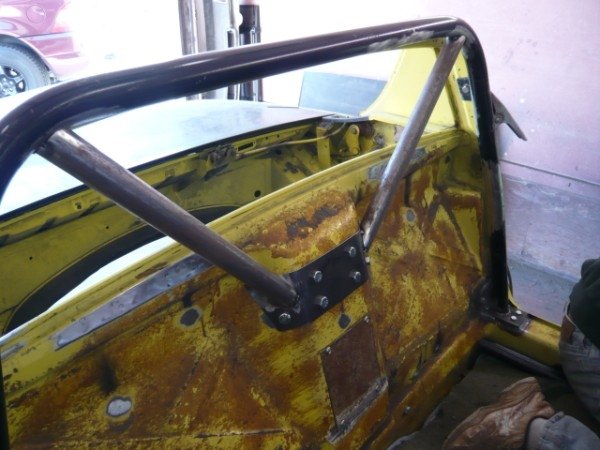
Speaking of tube bending, this hoop just happened to find its way into the back of my truck courtesy of Chris...thanks man! I owe you.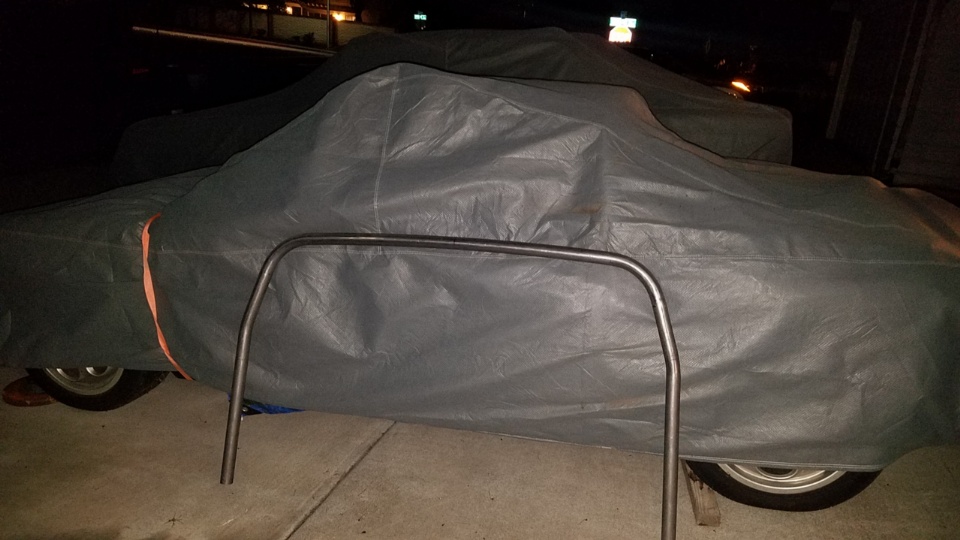
Posted by: tygaboy Jan 28 2018, 08:40 AM
Mike - Always great to see you! I'll have to plan better next time and leverage your help.
It's certainly possible to mix and match tube sizes and wall thickness, particularly when the final product isn't going to have to pass any sort of tech inspection.
That said, unless there's some compelling reason beyond aesthetics, I'd keep everything 1.5".
I went with the .095 wall as that was spec'd for cars in the 914 weight range.
And here are the pics of the bolt in set up that I believe was done by Eric Shea.
Attached image(s)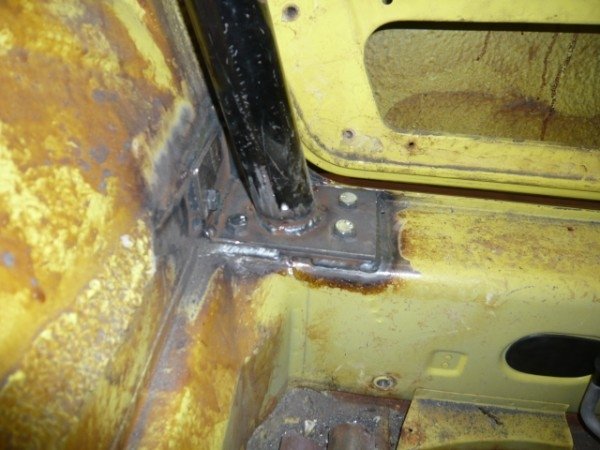
Posted by: Mueller Jan 28 2018, 10:37 AM
Thanks again Chris, much better pictures than viewing the thumbnails on your computer
I talked to Tony at TC Design last night and he too confirmed what I was doing is "okay" however he did recommend all same size if I could do it. I forgot we hired a new mechanic at work and he has a side business building fast 1/4 mile and track FWD cars and I can get the tubing from him, $3 a foot, not too bad so a 10 foot section should do it.
Posted by: Mueller Jan 28 2018, 11:33 PM
Drilled and tapped all the exhaust stud holes for Time-Serts.
Wondering if better than stock valves should be installed right now or not.
Will be installing dual valve springs for the bigger camshaft.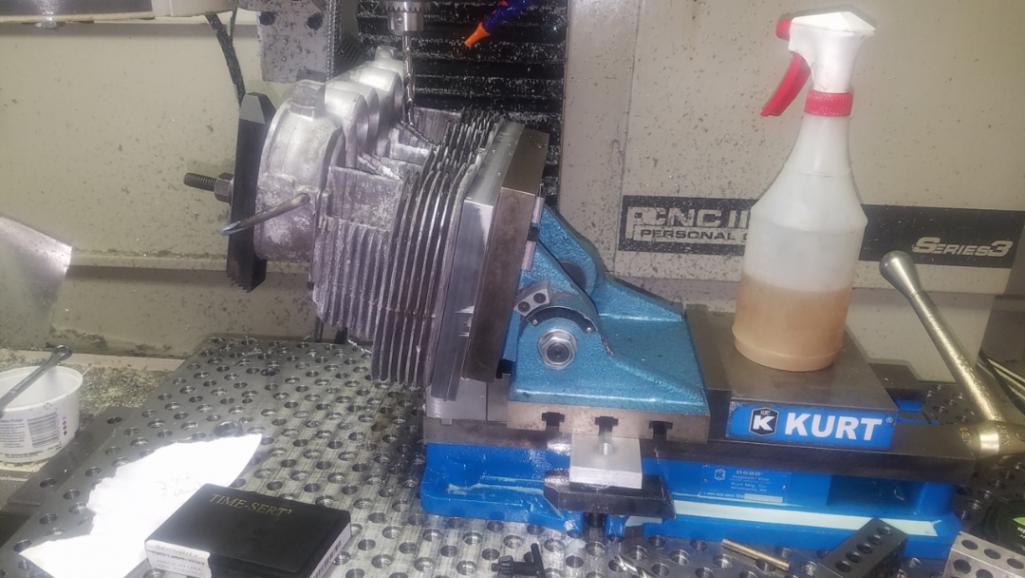
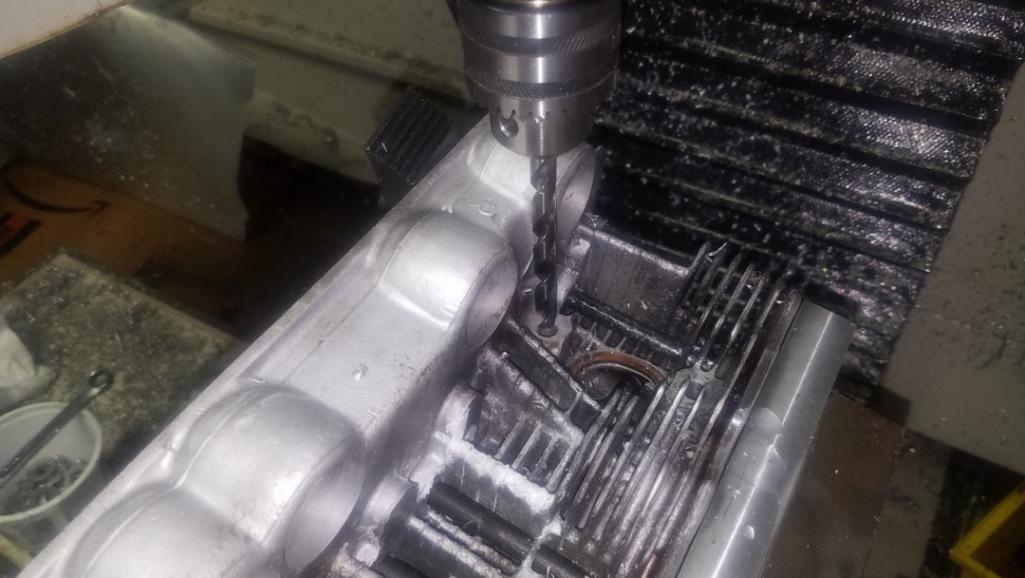

Posted by: Mueller Jan 28 2018, 11:44 PM
The picture of the tube being cut is for a homemade valve spring compression tool I made today to remove the springs.
Posted by: Mueller Feb 16 2018, 12:40 PM
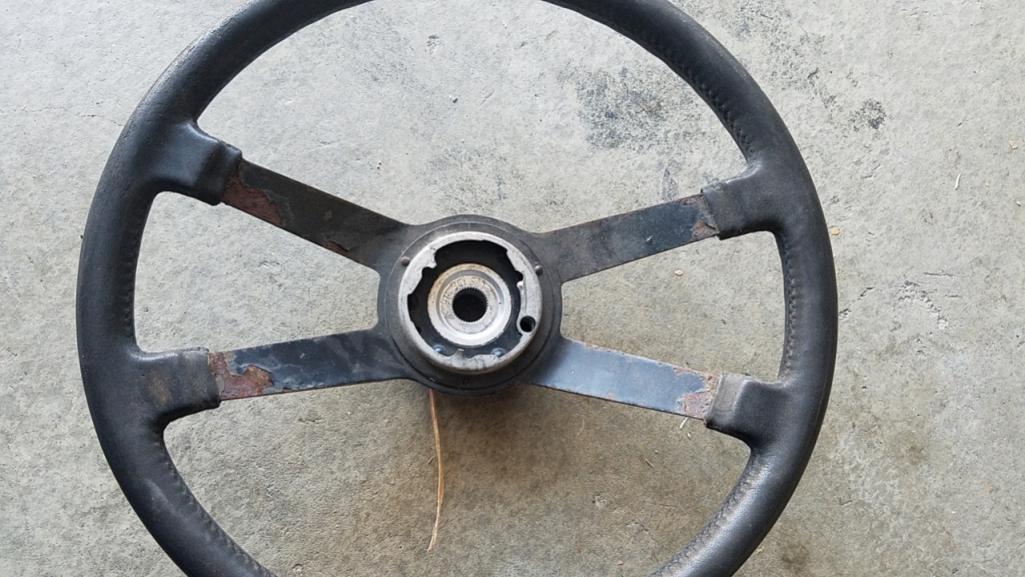
Started to gather parts to rebuild/restore my ugly steering wheel. Ring for hockey puck horn button replica that I will be making from billet alum instead of the usual plastic. Pricey little sucker, found on eBay for $42 shipped, not sure if I like it now. 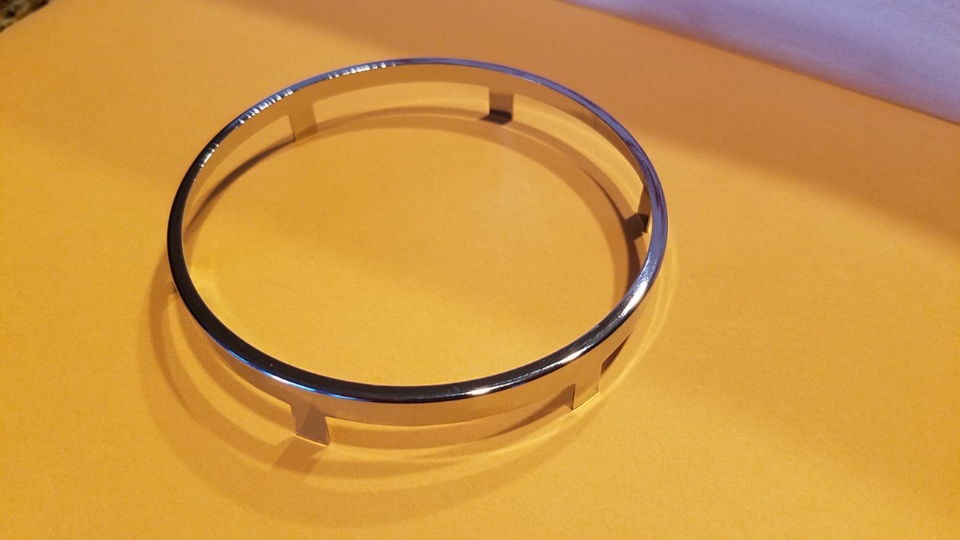
Posted by: Mueller Feb 25 2018, 09:48 PM
Drew up my version of a hockey puck horn pad. Waiting for the leather to show up. Not going with standard Porsche crest. 
Posted by: Mueller Feb 25 2018, 11:18 PM
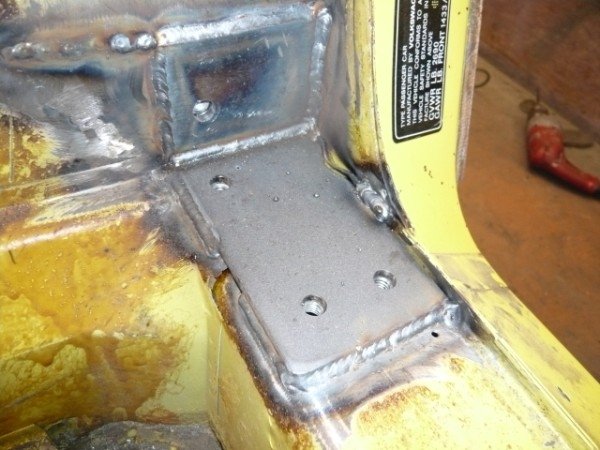
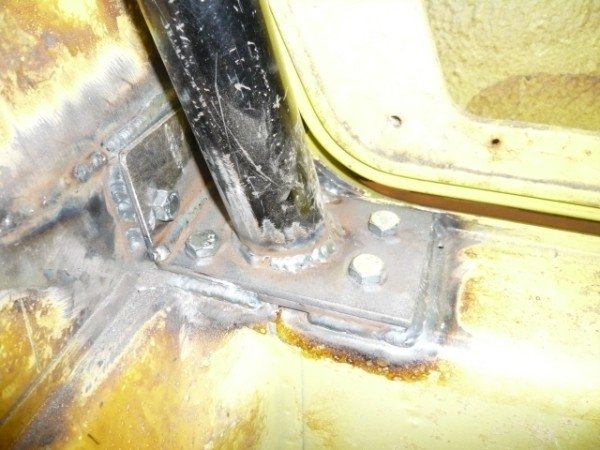
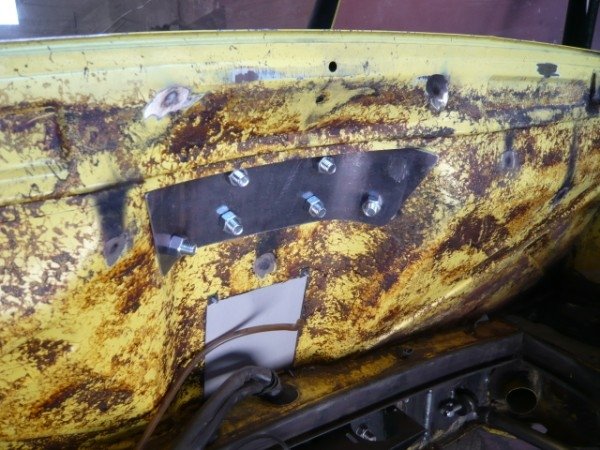
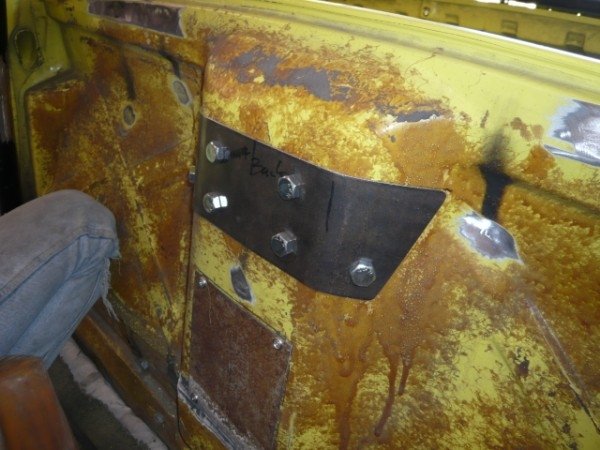
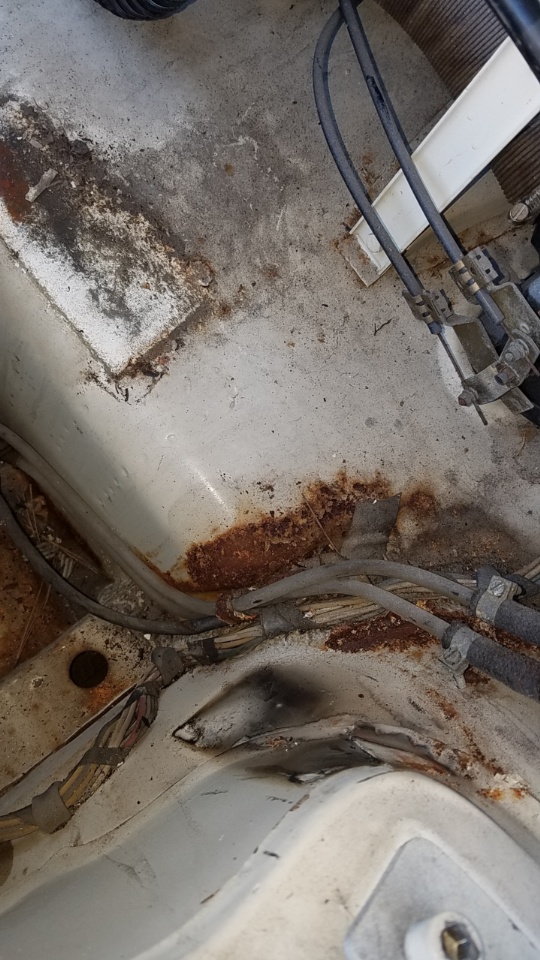
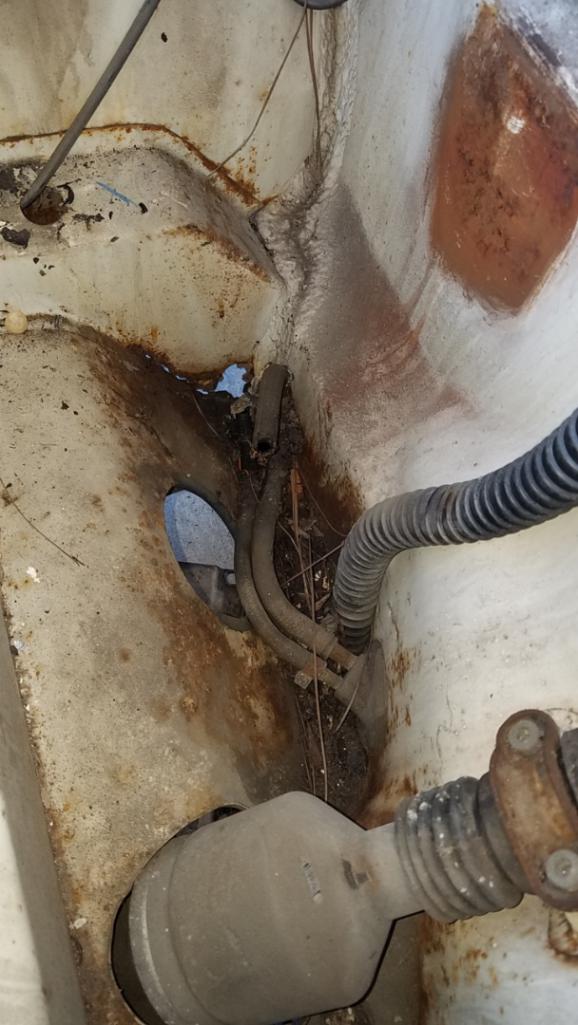
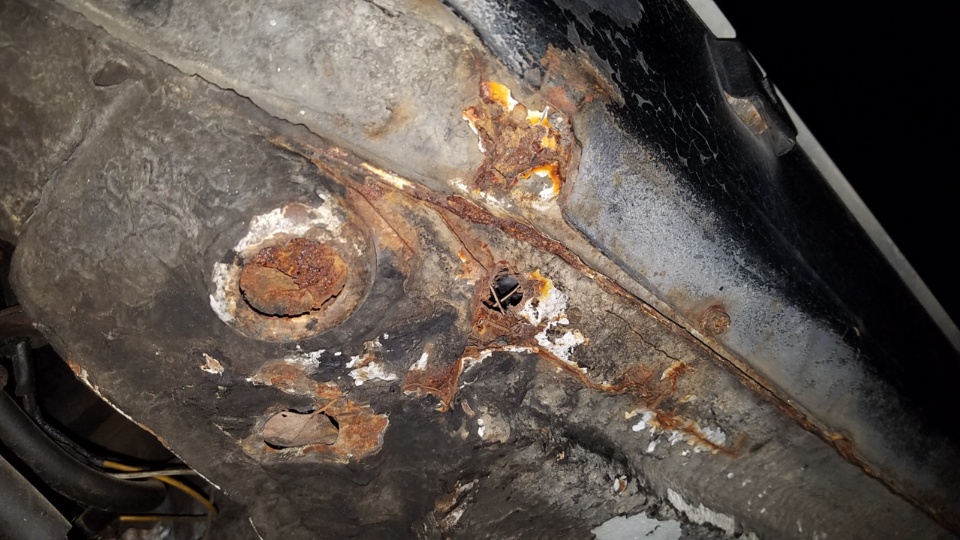
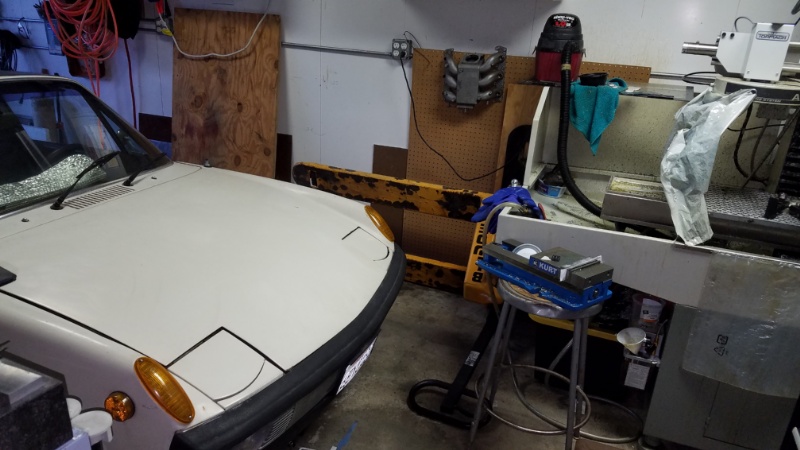
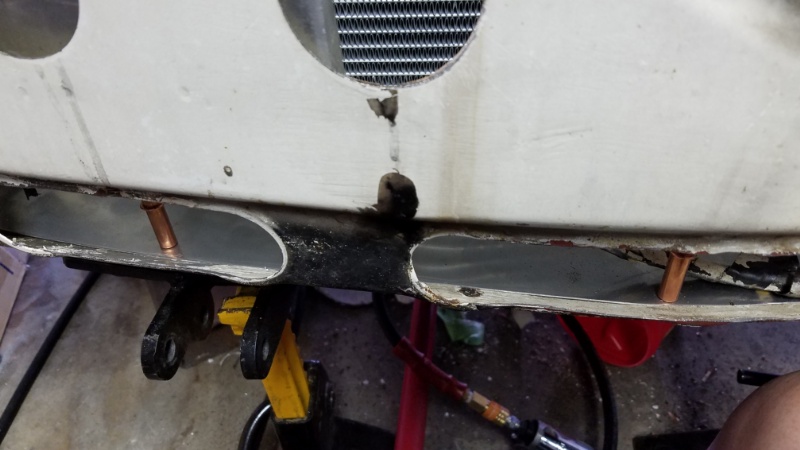
Removed gas tank today, the rubber hoses just snapped in half so who knows how old the suckers are.
Car is much rustier than I thought it would was originally. Front trunk has a 'glass panel riveted in to cover a bunch of rust and missing sheet metal. Hell hole is gone and rust made it all the way down to the jack pad and long.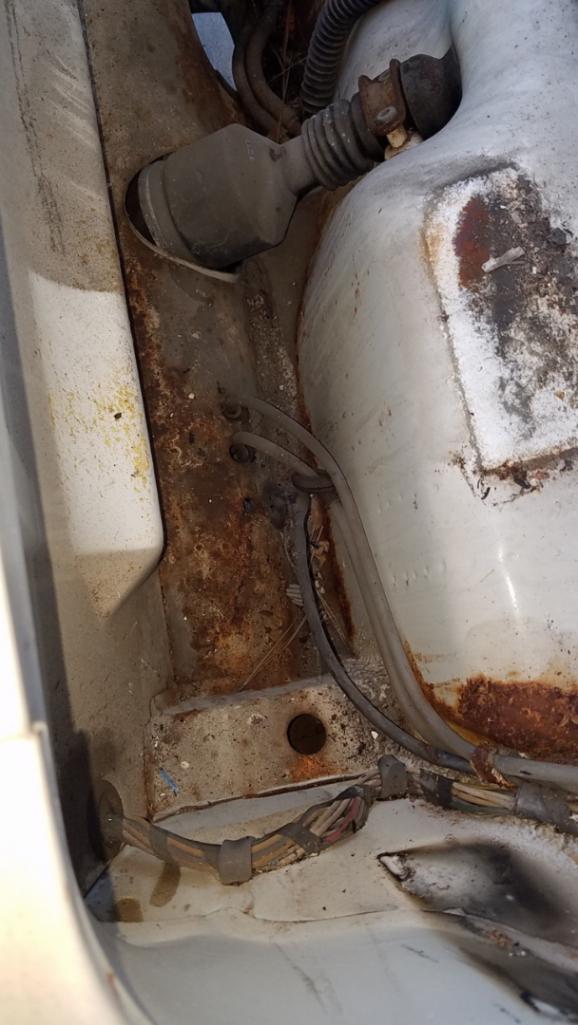
Posted by: Mueller Feb 25 2018, 11:32 PM
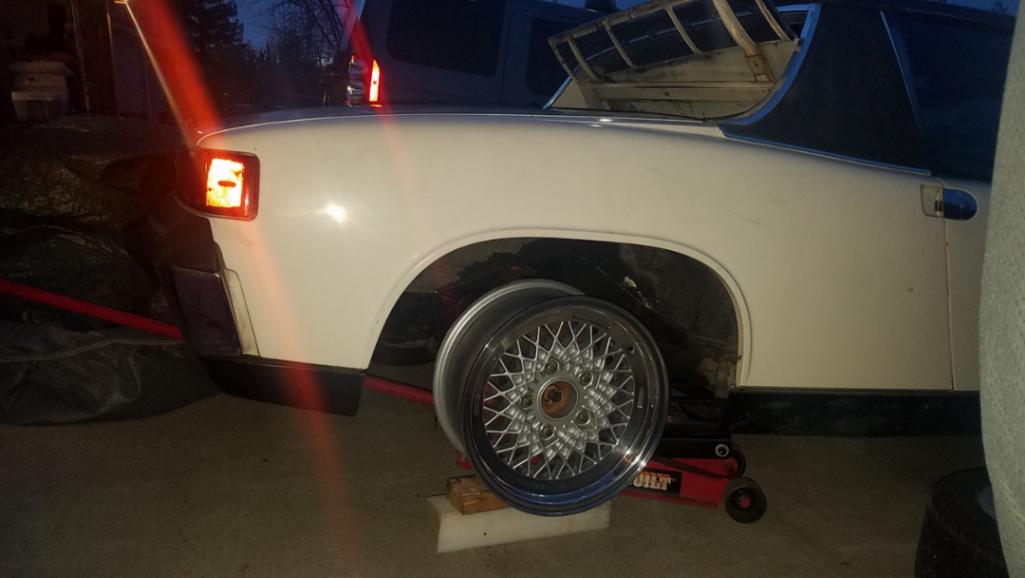
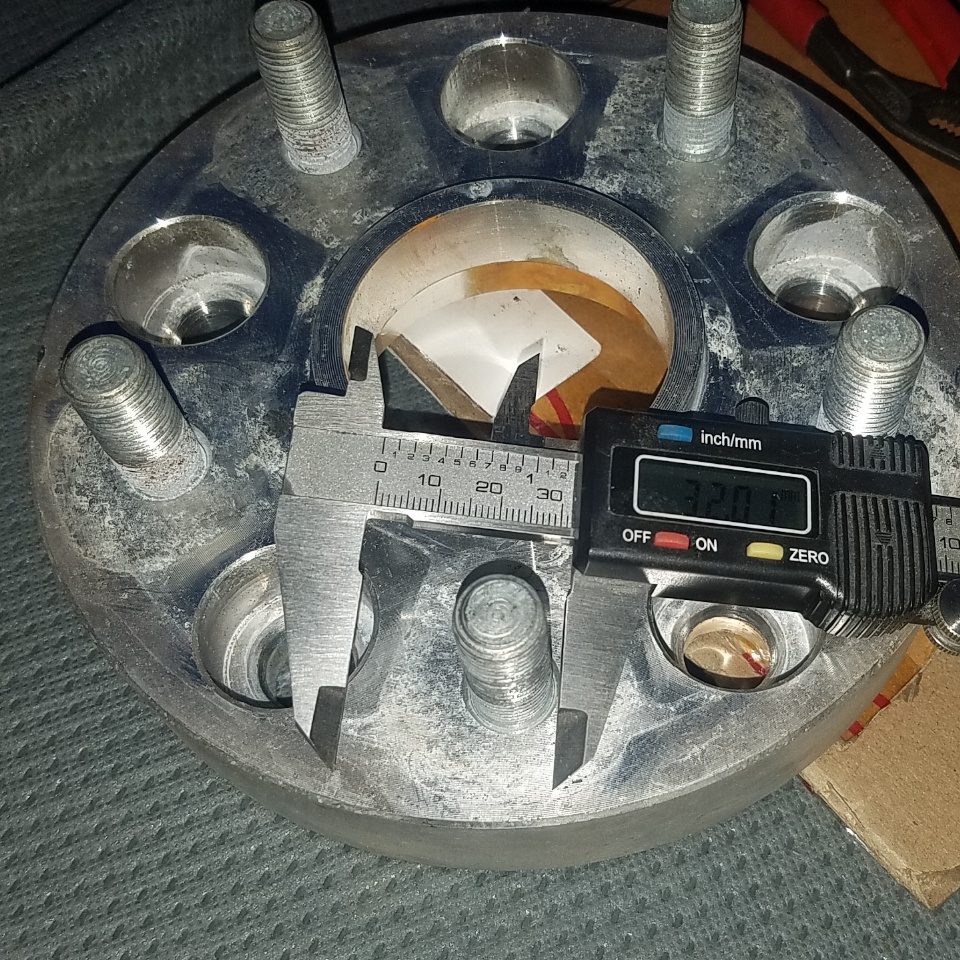
Finally test fit my new-to-me BBS wheels and measured the spacers the PO installed on the car to fit the old Phonedials.
I like the look of the too long studs on the front, might trim them down a little or remove and turn them so they are like the racing quick change studs.
Fronts have the 32mm spacer, rears are 32 bolt on spacers. (and will be for sale in the near future and I can make the rear into true slip-on spacers by removing the studs and drilling them out.
Rear fenders will need to be pulled a little more to fit when I put some tires on those rims. 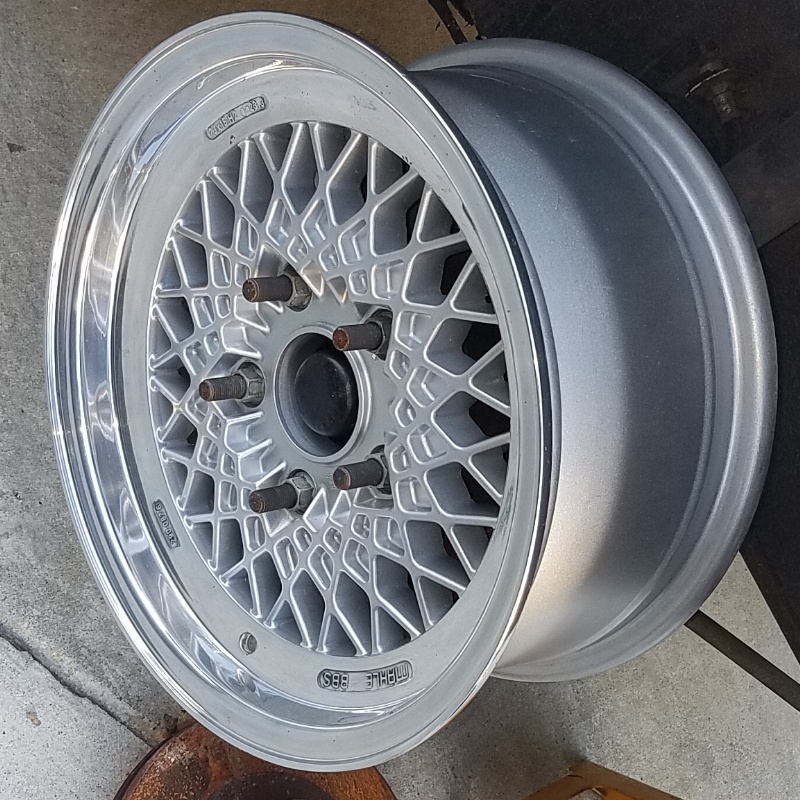
Posted by: mb911 Feb 26 2018, 07:25 AM
Looking good.. Keep up the good work
Posted by: Mueller Feb 26 2018, 05:35 PM
All these hoses look original to me, I'd like to replace....source for new ones?
I bought a new 914rubber master cylinder (I think I got the quick install kit but don't remember what parts came with it )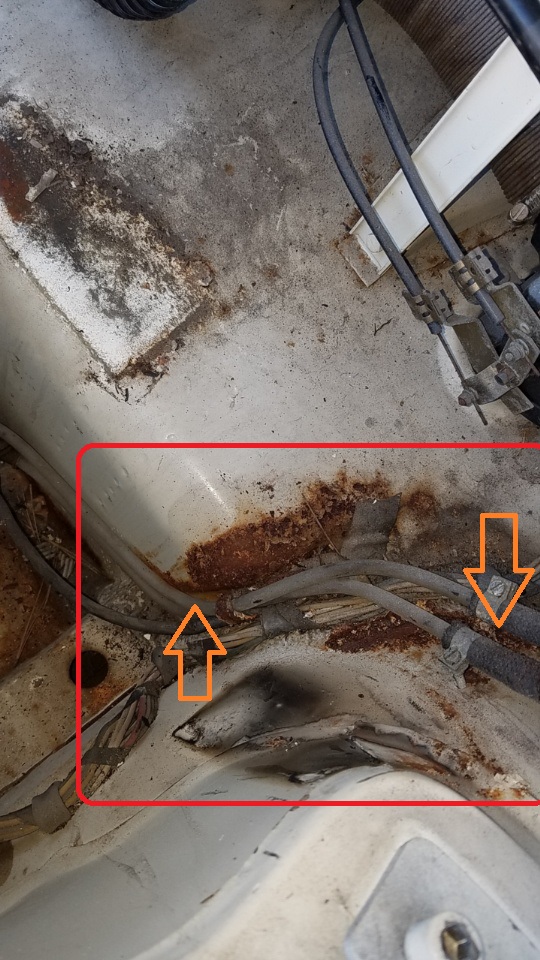
Posted by: Andyrew Feb 26 2018, 08:13 PM
Removed gas tank today, the rubber hoses just snapped in half so who knows how old the suckers are.
Car is much rustier than I thought it would was originally. Front trunk has a 'glass panel riveted in to cover a bunch of rust and missing sheet metal. Hell hole is gone and rust made it all the way down to the jack pad and long.
Wow, thats a lot rustier than I would have imagined!
Fixable... but thats a PITA..
I mean that front gas tank area never gets rust..
Throw some patches over it and make it a driver??
Posted by: Chris H. Feb 26 2018, 08:17 PM
Those wheels are PERFECT Mike. Love the long stud outlaw look. Sucks about the rust but you'll fix it. Those pre-'74 fuel likes crumble like pasta don't they?
If 914Rubber doesn't have the brake stuff you need maybe PMB Performance?
Posted by: 914forme Feb 26 2018, 08:19 PM
More than likely rusty from a couple of items.
Salt water - I hope not, or animal urine. More likely the latter.
Posted by: Mueller Feb 26 2018, 11:03 PM
More than likely rusty from a couple of items.
Salt water - I hope not, or animal urine. More likely the latter.
I found out the car sat in a field for a few years before the PO bought it, then it sat in his front yard for a few years as well. We think the car could have been on the coast for a bit as well. I've owned for 2 years, no battery and fully covered.
Sh!t happens, I'll slowly fix it. I was telling the wife that with the amount of rust it has I won't feel guilty making small modifications to the car. She said fine do what I want as long as I don't add flares! hahaha
I love the new BBS/Mahle rims so this will remain a narrow bodied car for sure.
Posted by: Mueller Feb 26 2018, 11:15 PM
Those wheels are PERFECT Mike. Love the long stud outlaw look. Sucks about the rust but you'll fix it. Those pre-'74 fuel likes crumble like pasta don't they?
If 914Rubber doesn't have the brake stuff you need maybe PMB Performance?
Thanks, I like those extra long studs as well. I never planned to quite fit in will all the crowds
I need to find all my new-to-me brake parts and put it together. Luckily the car had brand new rotors and pads on all for corners. I just need to clean off the rust on the rotors. I bought a set of PMB rebuilt front calipers and just need to figure out what I am going to do with the rear calipers. $325 for rebuilt units hurts...we'll see.
Posted by: Krieger Feb 27 2018, 12:01 AM
I have not seen the plastic brake lines fail or crack unless it was crushed. There is no pressure in them unless you use a power bleeder. The hoses from the reservoir to the lines do fail and should be replaced. There is a a blue braided hose that is available for replacement. I bet PMB has it.
Posted by: Mueller Mar 4 2018, 01:25 PM
My car does not have a front swaybar, never had one.
So I bought a stock 15mm bar, didn't realize it had no hardware until I committed to buy it, still think it was a good deal. This thing looks brand new so I am not complaining.
Spent a little time drawing up some parts for it while I wait for the garage to warm up this morning.
The idea is to make a 15mm ID by 24mm OD split spacer, (green parts, hard to tell there are 2 pieces there) this will allow me to use an Igus MFM2430-30 bushing (dark colored part) to replace the factory rubber bushings. These are <$5 each (accounting for shipping, I bought 6 of them)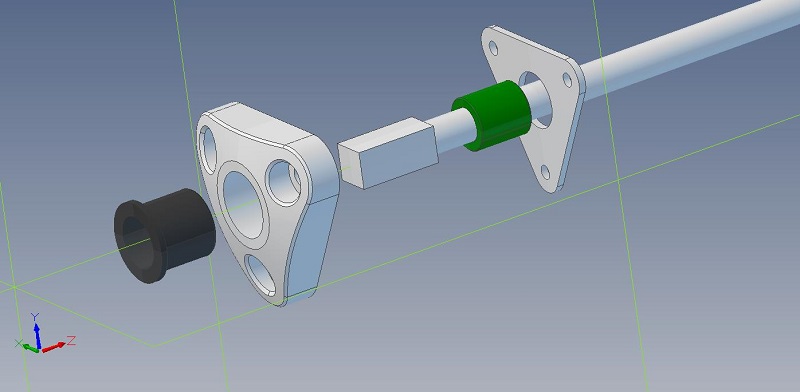
Posted by: Mueller Mar 25 2018, 11:16 AM
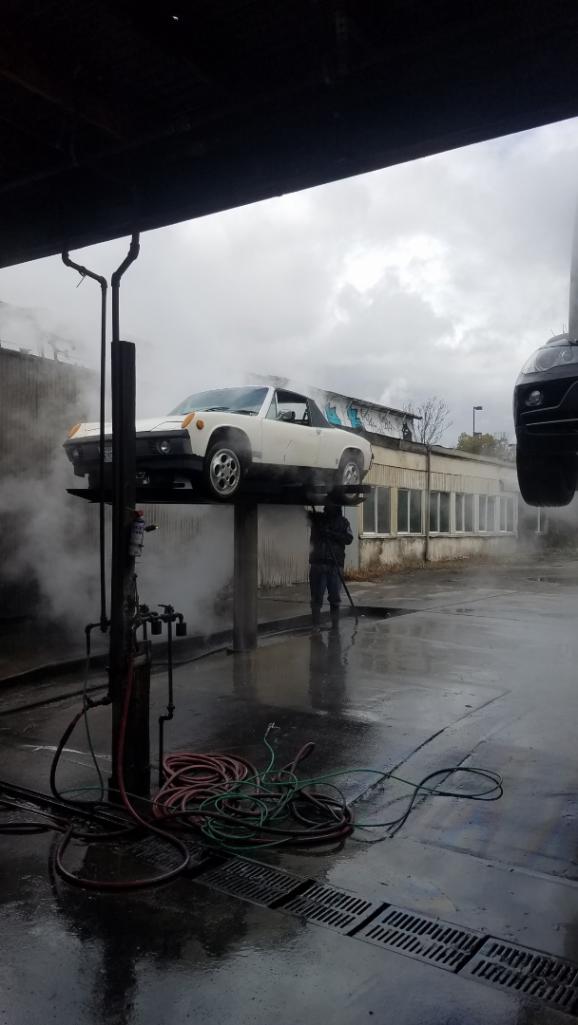
Had car professionally steam cleaned down in San Jose.
Co-worker gave me these prints last week, his girl friend had a 914 (and just sold it last year for a grand and is local to me and wondering if it stayed in the area) Getting some more boxes of stuff from him, told if I sell any I will split profits and give away what I don't need or cannot sell.

Posted by: Cairo94507 Mar 25 2018, 12:01 PM
Hey Mike - I believe that is the same place where I had my 6 steam cleaned after I bought it. Mine looked like it was at the bottom of an oil drum for years and had oil and caked on crud that was like 1/4" thick all over the bottom.
The steam cleaner did a good job. Ultimately, that is what allowed me to realize the whole car needed to come apart rather than just fixing the major components and trying to drive it. Not a lot of places with a lift that do steam cleaning anymore.
Posted by: Mueller Mar 25 2018, 12:17 PM
Hey Mike - I believe that is the same place where I had my 6 steam cleaned after I bought it. Mine looked like it was at the bottom of an oil drum for years and had oil and caked on crud that was like 1/4" thick all over the bottom.
The steam cleaner did a good job. Ultimately, that is what allowed me to realize the whole car needed to come apart rather than just fixing the major components and trying to drive it. Not a lot of places with a lift that do steam cleaning anymore.
3rd gen operators there, the hot water tank is from 1927 and looks in great shape.
Posted by: Mueller Apr 28 2018, 12:26 PM
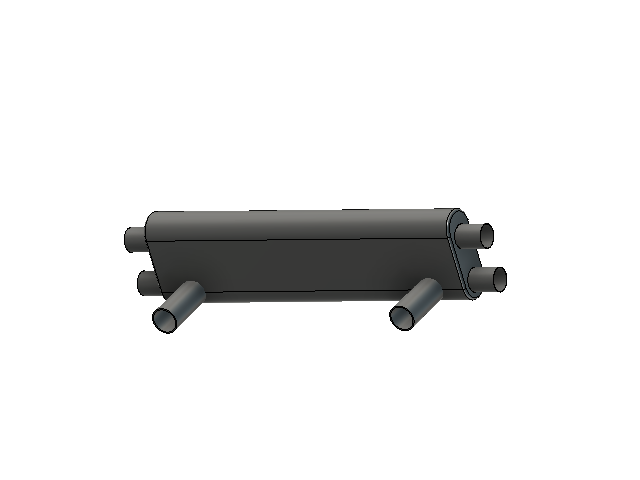
Test fitting muffler ...... Flowmaster 80 dual in, dual outlet. Want to make a poormans GT muffler. $50 brand new on Amazon for the muffler.
I found a company in Germany making these for 911's (cannot find the darn link now)
Plan is to cap the lower outlets on the side.
Once I get my HE's I can model up the rest.
Posted by: tygaboy Apr 28 2018, 12:55 PM
So that muffler has an "X" pipe inside, like this one?
I'm looking for something like this pic, a true cross over that I can use to have an inlet and and outlet each end - but I'm limited to about 5" height/thickness.
This schematic is for a 370Z muffler but it's 6"...
Attached thumbnail(s)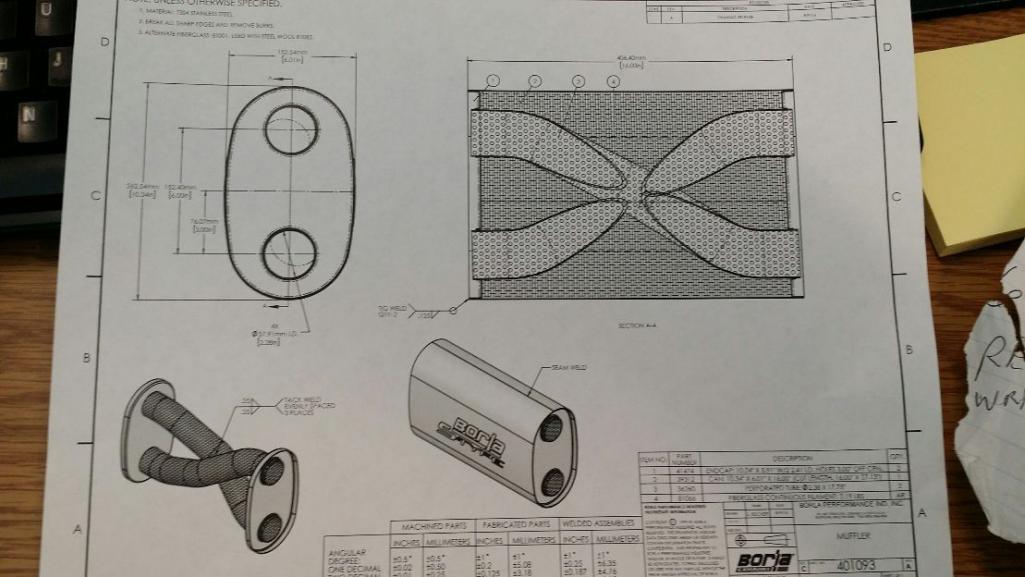
Posted by: Mueller Apr 28 2018, 01:38 PM
No, not a crossflow
Roughly like the pic below. Harry with the 3.5 Honda/Acura V6 powered 914 has this muffler however his only has one outlet. He didn't know of the 2 outlet option when building his car. Sounds great with his motor. 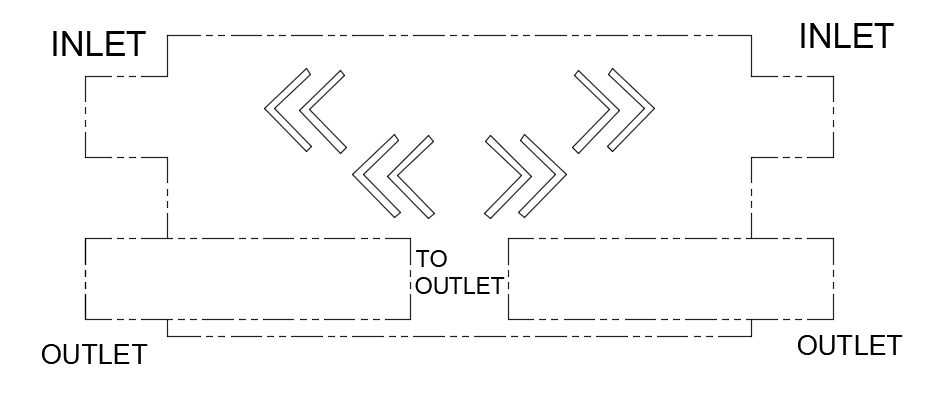
Posted by: Chris914n6 Apr 28 2018, 03:06 PM
So that muffler has an "X" pipe in side, like this one?
I'm looking for something like this pic, a true cross over that I can use to have an inlet and and outlet each end - but I'm limited to about 5" height/thickness.
This schematic is for a 370Z muffler but it's 6"...
Sounds like you want the Magnaflow I've been eyeballing for my 3.5L upgrade.
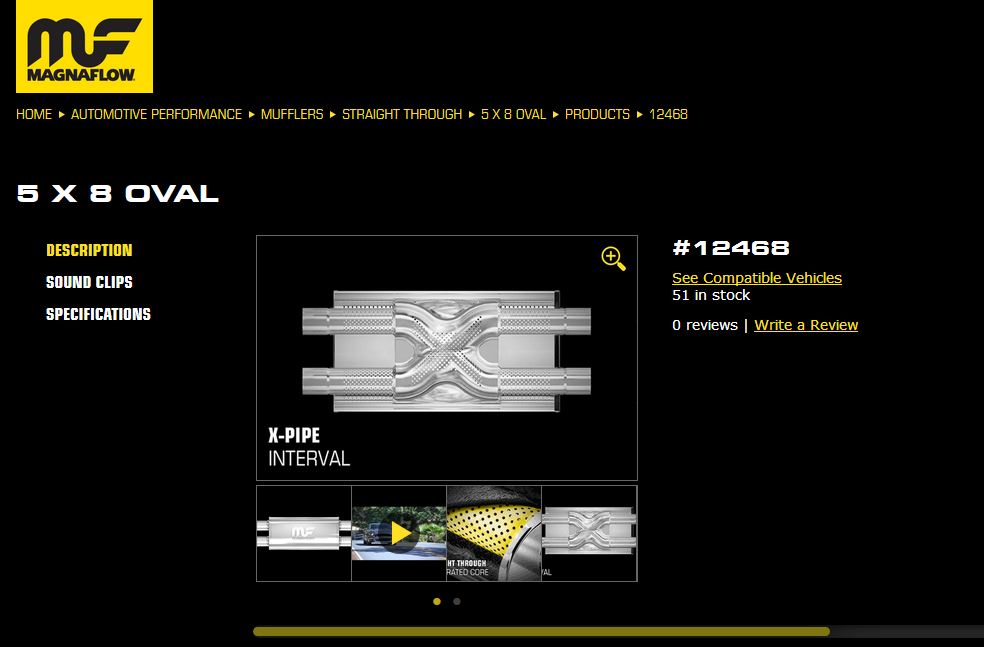
Posted by: tygaboy Apr 28 2018, 05:52 PM
So that muffler has an "X" pipe in side, like this one?
I'm looking for something like this pic, a true cross over that I can use to have an inlet and and outlet each end - but I'm limited to about 5" height/thickness.
This schematic is for a 370Z muffler but it's 6"...
Sounds like you want the Magnaflow I've been eyeballing for my 3.5L upgrade.
Is this what you're talking about? Hmmm, not quite the same as the Borla and its two, separate inner pipes, but maybe... I'll have to give Magnaflow a call and see what they say. Thanks!
Attached image(s)
Posted by: Andyrew Apr 29 2018, 11:22 PM
So that muffler has an "X" pipe inside, like this one?
I'm looking for something like this pic, a true cross over that I can use to have an inlet and and outlet each end - but I'm limited to about 5" height/thickness.
This schematic is for a 370Z muffler but it's 6"...
Why not just build one yourself?

I believe your looking for a Camaro style muffler. I believe magnaflow and flowmaster make one similar. Various sizes.
Posted by: Mueller Jul 10 2018, 05:46 PM
Well......
Got an offer I couldn't pass up and the wife didn't offer any resistance when I brought it up.
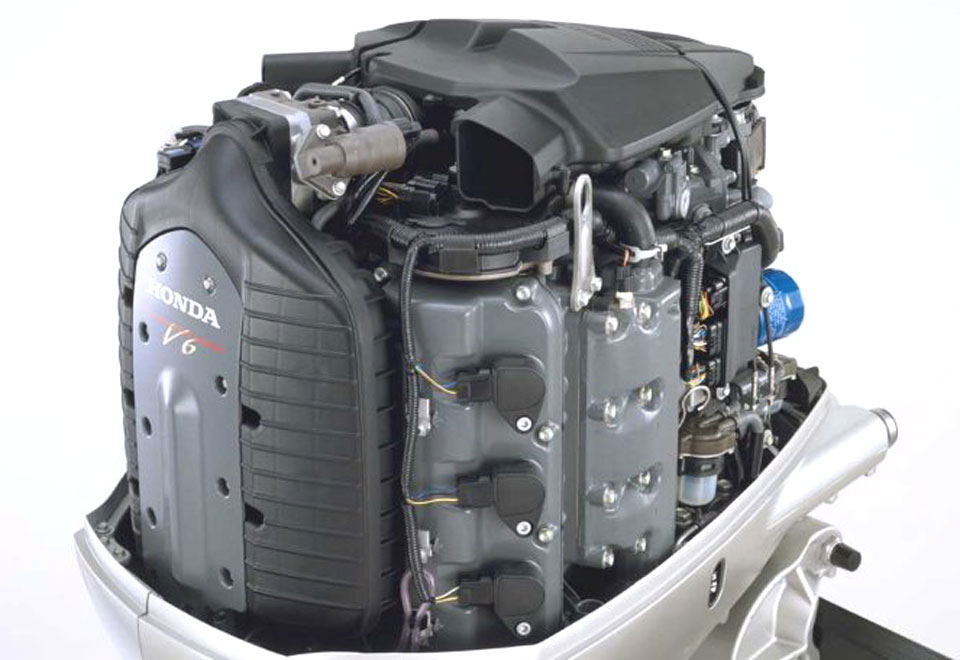
Remember a month ago when I drove a Honda/Acura 3.5 J series V6 converted 914? (250 to 275+ hp depending which model it came out of)
I'm buying the entire engine swap minus radiator setup and transmission. He is not sure what he'll be replacing it with but I'm sure it'll be at least twice the power.
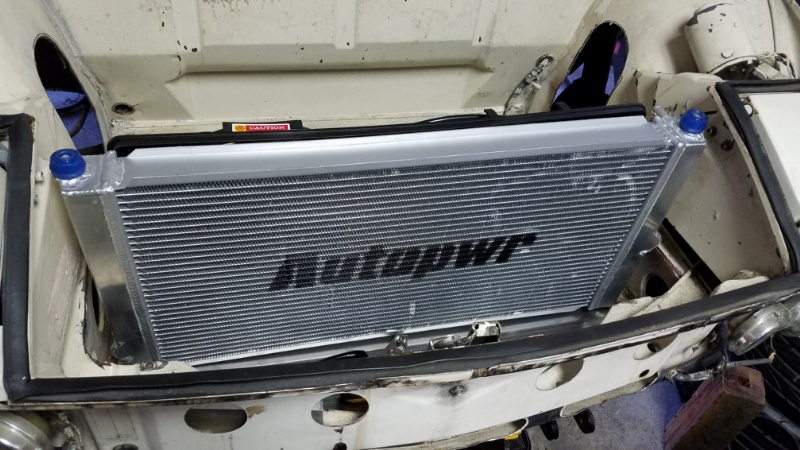
Going with Celica GT based radiator and fan setup.
Radiator should be here this week and then I'll start cutting holes and picking up the aluminum sheet for the shrouding.
Now to see if I can unload the 1.8 I was building, lots of nice parts for it.
Anyone know off hand which is the primary and secondary fan? 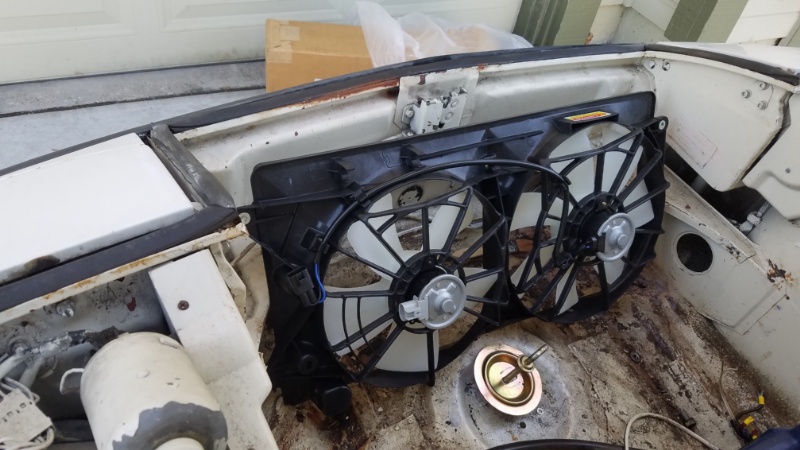
Posted by: Chris H. Jul 10 2018, 05:55 PM

Nice buy Mike! You'll love it...but then again you know that if you have experienced the drive train already. Maybe you can coordinate a swap weekend and get that thing installed! Is the adapter plate for a 901?
I'll send you some measurements for my shroud when it gets here.
Posted by: Mueller Jul 10 2018, 06:07 PM
Nice buy Mike! You'll love it...but then again you know that if you have experienced the drive train already. Maybe you can coordinate a swap weekend and get that thing installed! Is the adapter plate for a 901?
I'll send you some measurements for my shroud when it gets here.
Yes, 901 which I have 2 to choose from
It uses a factory Honda ECU with a modified Honda harness so only 8 wires needed to hook up to the engine or something crazy like that. No need to tune or dyno which is nice.
Posted by: 914forme Jul 10 2018, 06:08 PM
Nice Mike, the 3.5 is a great engine and so many out there. Should move that car along nicely.
Posted by: tygaboy Jul 10 2018, 06:59 PM
Welcome to the wild world of engine swapping! 
Let's see if we can come up with other custom stuff can you add to the list of mods that'll ultimately slow down your build!
(Ask me how I know...) 
Seriously, that is a cool engine. If I wasn't doing the LS, I think I'd have gone Honda.
I gotta get out your way and check this out in person...
Posted by: Andyrew Jul 10 2018, 07:52 PM
Love this! My wife's Pilot has loads of power and is twice the weight of a 914!
That's a good motor right there. Great initial punch and amazing power on the top end!
I think the Celica radiator should do well for it but I would think 1.25" hoses might be a better choice.
Posted by: Chris H. Jul 10 2018, 08:43 PM
Nice buy Mike! You'll love it...but then again you know that if you have experienced the drive train already. Maybe you can coordinate a swap weekend and get that thing installed! Is the adapter plate for a 901?
I'll send you some measurements for my shroud when it gets here.
Yes, 901 which I have 2 to choose from
It uses a factory Honda ECU with a modified Honda harness so only 8 wires needed to hook up to the engine or something crazy like that. No need to tune or dyno which is nice.
8 wires???? You're bypassing the WORST part of the conversion process. It takes weeks and a huge piece of plywood to parse out an entire donor car harness. You don't have to deal with any of that!
Posted by: Mueller Jul 10 2018, 09:06 PM
Welcome to the wild world of engine swapping!
Let's see if we can come up with other custom stuff can you add to the list of mods that'll ultimately slow down your build!
(Ask me how I know...)
Seriously, that is a cool engine. If I wasn't doing the LS, I think I'd have gone Honda.
I gotta get out your way and check this out in person...
Only complaint I have with the Honda motor is how tall it is since it is a 60° narrow V6 and the manifold they use is huge!
Posted by: Andyrew Jul 10 2018, 09:19 PM
Nice buy Mike! You'll love it...but then again you know that if you have experienced the drive train already. Maybe you can coordinate a swap weekend and get that thing installed! Is the adapter plate for a 901?
I'll send you some measurements for my shroud when it gets here.
Yes, 901 which I have 2 to choose from
It uses a factory Honda ECU with a modified Honda harness so only 8 wires needed to hook up to the engine or something crazy like that. No need to tune or dyno which is nice.
8 wires???? You're bypassing the WORST part of the conversion process. It takes weeks and a huge piece of plywood to parse out an entire donor car harness. You don't have to deal with any of that!

That's just not fair!!
Posted by: Mueller Jul 10 2018, 09:25 PM
Nice buy Mike! You'll love it...but then again you know that if you have experienced the drive train already. Maybe you can coordinate a swap weekend and get that thing installed! Is the adapter plate for a 901?
I'll send you some measurements for my shroud when it gets here.
Yes, 901 which I have 2 to choose from
It uses a factory Honda ECU with a modified Honda harness so only 8 wires needed to hook up to the engine or something crazy like that. No need to tune or dyno which is nice.
8 wires???? You're bypassing the WORST part of the conversion process. It takes weeks and a huge piece of plywood to parse out an entire donor car harness. You don't have to deal with any of that!
That's just not fair!!
Hey, I still have to struggle wiring up the fans correctly
Posted by: Andyrew Jul 10 2018, 09:37 PM
What water pump does it use? What ECU does it use?
My Davies Craig water pump and controller is awesome... Highly recommended and let's you pick the maintained temp....
The fan wiring should be really simple. Just link them together and go. Run a big enough wire to the relay and to the fans themselves to deal with the load and you won't have anything to worry about.
Posted by: Mueller Jul 10 2018, 11:08 PM
What water pump does it use? What ECU does it use?
My Davies Craig water pump and controller is awesome... Highly recommended and let's you pick the maintained temp....
The fan wiring should be really simple. Just link them together and go. Run a big enough wire to the relay and to the fans themselves to deal with the load and you won't have anything to worry about.
Factory water pump is all that Harry ran and he was told it was good enough for the sand rail guys.
Factory ECU, uses a MAP sensor in the manifold. Should be very reliable and depending on serial number of unit, can be data logged and tweaked with a Hondata $300 program/hardware.
For the fans I have an older SPAL pwm controller that I got dirt cheap due to a bad assembly procedure at the factory. They soldered a few capacitors too far off the board and the leads would break due to vibration. Easy fix.
or just going old school with a temp sensor and simple relays.
Posted by: Chris914n6 Jul 10 2018, 11:21 PM
Pretty sure I figured out 1 is drivers side, 2 pass.
I ran an 8 gauge from the battery to the frunk --> fuse distribution block --> relays to fans and headlights with a couple extra for amps.
Also ran the fan trigger wires past idiot lights in the gauges just to be in the know.
Just 8 wires... lucky you  I basically copied the factory fuse box for like 3 dozen connections.
Amazon had the 50ft roll of Gates hose down to $100 at one time.
Now that you have a water pumper, use the 924/944 combo gauge plus the temp sender. I can't imagine Honda didn't use a 1/8npt like everyone else.
Posted by: Andyrew Jul 10 2018, 11:49 PM
I am using one of these cheap controllers for the intercooler fan. Seems to be working fine and I dont see why it cant work for something bigger like a radiator with an appropriate relay setup.
https://www.amazon.com/outstanding-Temperature-Controller-Thermostat-Controlled/dp/B073W425LW/ref=sr_1_3?ie=UTF8&qid=1531287313&sr=8-3&keywords=temp+controller+12v
If I were to do it again I think maybe I would go with this one, as I cant find the one that had my nice black lexan overlay with buttons.
https://www.amazon.com/dp/B008KVGWT4/ref=sspa_dk_detail_1?psc=1&pd_rd_i=B008KVGWT4&pf_rd_m=ATVPDKIKX0DER&pf_rd_p=1713835751726239774&pf_rd_r=7W7M0ANCQRAF5G81ZEA2&pd_rd_wg=Rbr9P&pf_rd_s=desktop-dp-sims&pf_rd_t=40701&pd_rd_w=QAnaj&pf_rd_i=desktop-dp-sims&pd_rd_r=ba04036c-84cc-11e8-a101-fb9e1a980f76#customerReviews
My radiator fan controller, electric pump and electric pump controller were all Davies Craig which was completely awesome.
https://www.ebay.com/itm/Davies-Craig-150L-min-Aluminium-Electric-Water-Pump-LCD-Controller-DC8970/253415914794?epid=905734452&hash=item3b00c3fd2a:g:iJAAAOSwjUxbLFVK
Posted by: Mueller Jul 11 2018, 12:51 AM
I am using one of these cheap controllers for the intercooler fan. Seems to be working fine and I dont see why it cant work for something bigger like a radiator with an appropriate relay setup.
https://www.amazon.com/outstanding-Temperature-Controller-Thermostat-Controlled/dp/B073W425LW/ref=sr_1_3?ie=UTF8&qid=1531287313&sr=8-3&keywords=temp+controller+12v
If I were to do it again I think maybe I would go with this one, as I cant find the one that had my nice black lexan overlay with buttons.
https://www.amazon.com/dp/B008KVGWT4/ref=sspa_dk_detail_1?psc=1&pd_rd_i=B008KVGWT4&pf_rd_m=ATVPDKIKX0DER&pf_rd_p=1713835751726239774&pf_rd_r=7W7M0ANCQRAF5G81ZEA2&pd_rd_wg=Rbr9P&pf_rd_s=desktop-dp-sims&pf_rd_t=40701&pd_rd_w=QAnaj&pf_rd_i=desktop-dp-sims&pd_rd_r=ba04036c-84cc-11e8-a101-fb9e1a980f76#customerReviews
My radiator fan controller, electric pump and electric pump controller were all Davies Craig which was completely awesome.
https://www.ebay.com/itm/Davies-Craig-150L-min-Aluminium-Electric-Water-Pump-LCD-Controller-DC8970/253415914794?epid=905734452&hash=item3b00c3fd2a:g:iJAAAOSwjUxbLFVK
I just ordered the cheaper unit, can replace the 20A relay with higher amp solid state relay I have already that is similar to the units Mike B is running.
Posted by: 76-914 Jul 11 2018, 08:59 AM
Welcome to the "Dark Side" Mike.
Posted by: Chris H. Jul 11 2018, 10:02 AM
I knew we'd get him . Mike didn't you stuff a VR6 into a green 914 a long time ago? My memory stinks but think you aborted the mission to focus on a Volvo 200 series maybe?
Posted by: Mueller Jul 11 2018, 10:52 AM
I knew we'd get him
. Mike didn't you stuff a VR6 into a green 914 a long time ago? My memory stinks but think you aborted the mission to focus on a Volvo 200 series maybe?I got the VR6 installed in the white 914 that had the cage in it, I want to say California was changing the smog requirements again so I bailed on it thinking it'll never pass smog. The guy I sold that car to still has it....just sitting around collecting dust.
The motor went into a sand rail from what I understand.
Posted by: Mike Bellis Jul 11 2018, 07:11 PM
Factory water pump is all that Harry ran and he was told it was good enough for the sand rail guys.
Factory ECU, uses a MAP sensor in the manifold. Should be very reliable and depending on serial number of unit, can be data logged and tweaked with a Hondata $300 program/hardware.
For the fans I have an older SPAL pwm controller that I got dirt cheap due to a bad assembly procedure at the factory. They soldered a few capacitors too far off the board and the leads would break due to vibration. Easy fix.
or just going old school with a temp sensor and simple relays.
Sand rail guys aren't pushing water 16' in a loop. Their rads are mounted closer to the engine. My Audi pump was not up to the task. I don't have a fancy controller for my pump like Andyrew but I don't need it. Both of our cars run cool.
My fan controller is just a dual relay with a thermistor on the radiator. On temp is adjustible on a mini potentiometer for each relay. Simple and effective.
I hit up a junk yard for the Toyota plugs for the fan harness.
Posted by: Mueller Jul 12 2018, 12:15 AM
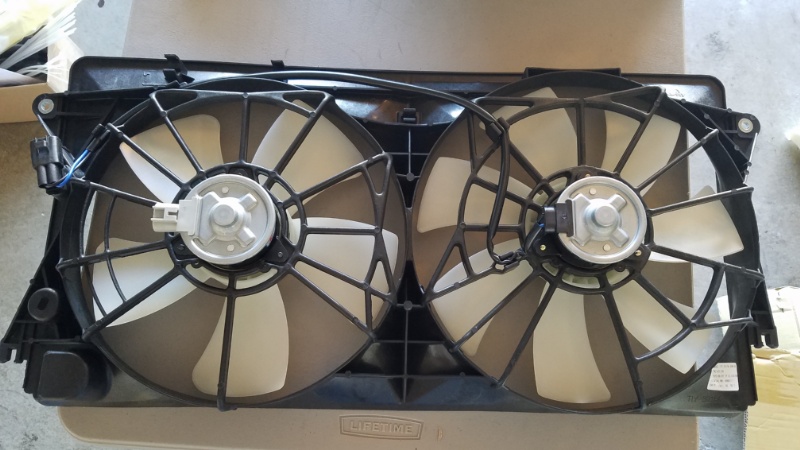
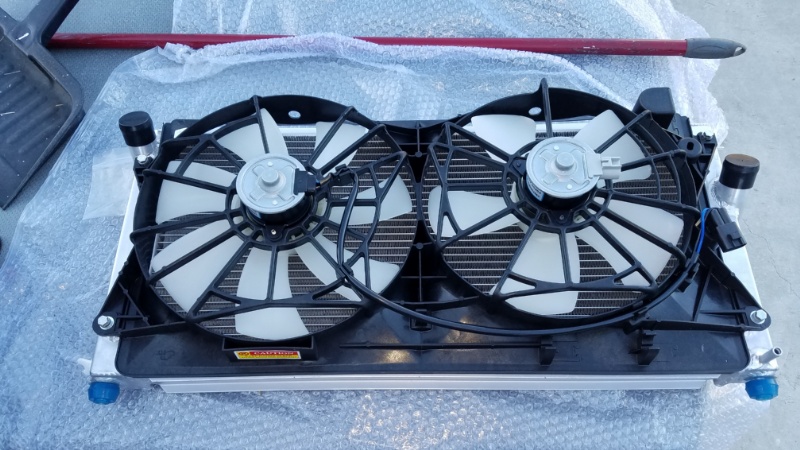
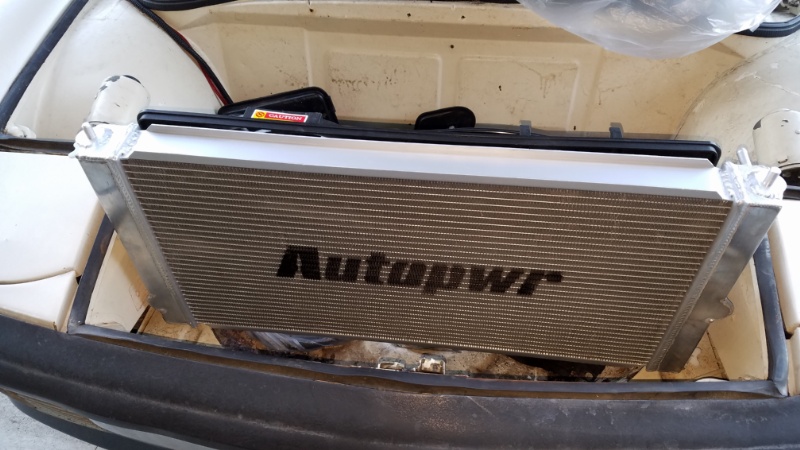
Radiator came in today.
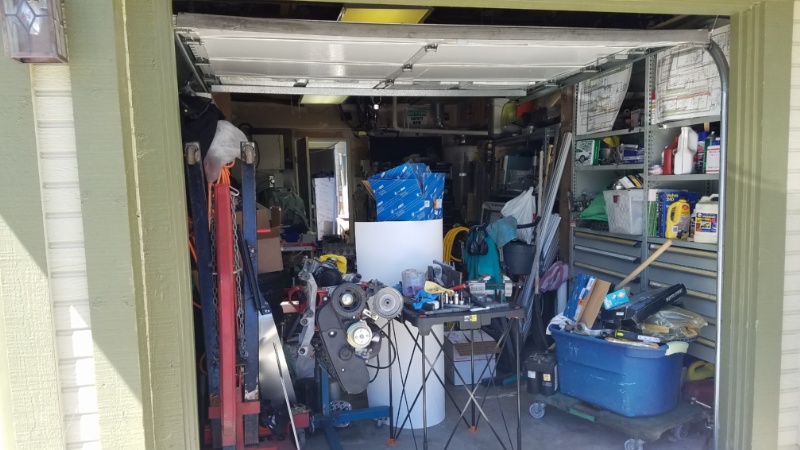
More importantly is that I got the 914 moved into the garage. Took all day to move and organize all that crap.
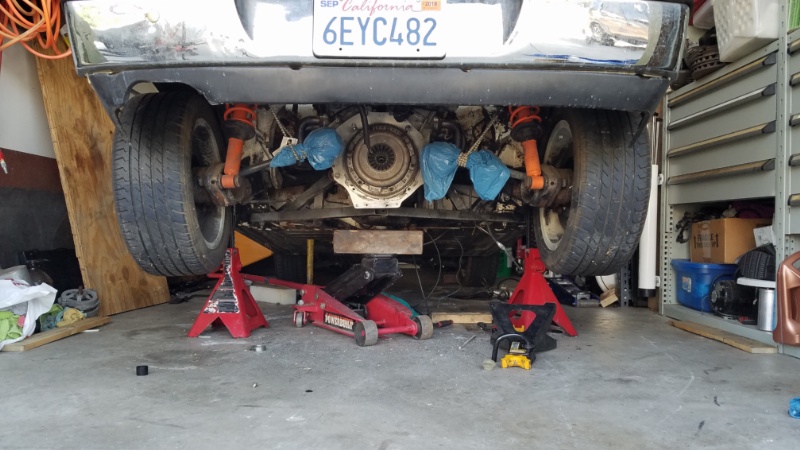
Removed axles and shifter tonight, hope to drop motor/transmission in the morning.
A few before pics of garage.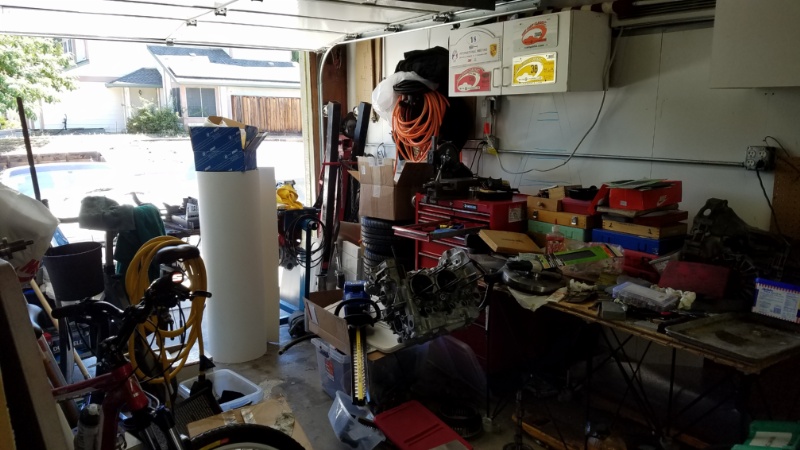
Posted by: maf914 Jul 12 2018, 06:28 AM
Impressive looking radiator and fan set-up. Looks like you will need plenty of exhaust air outlet area from the front trunk. 
Posted by: Edward Blume Jul 12 2018, 06:50 AM
I know where you can get a 3.5 emblem... 
Posted by: Chris914n6 Jul 12 2018, 04:01 PM
Sand rail guys aren't pushing water 16' in a loop. Their rads are mounted closer to the engine. My Audi pump was not up to the task. I don't have a fancy controller for my pump like Andyrew but I don't need it. Both of our cars run cool.
My fan controller is just a dual relay with a thermistor on the radiator. On temp is adjustible on a mini potentiometer for each relay. Simple and effective.
I hit up a junk yard for the Toyota plugs for the fan harness.
My Nissan pumped just fine. Ran the fans off the ECU and it kept itself cool. The hoses will cool 5-10F just being in the airflow under the car, so adjust the controller accordingly.
The fan terminals are a common size, I just bought crimp connectors for mine.
Posted by: worn Jul 12 2018, 04:37 PM
Impressive looking radiator and fan set-up. Looks like you will need plenty of exhaust air outlet area from the front trunk.
Impressive moving stuff to make it work. That is back breaking challenging stuff, cause everything needs to find a home. Well done!
Posted by: ClayPerrine Jul 12 2018, 06:10 PM
Radiator came in today.
More importantly is that I got the 914 moved into the garage. Took all day to move and organize all that crap.
Removed axles and shifter tonight, hope to drop motor/transmission in the morning.
A few before pics of garage.
Reminds me of our garage. 10lbs of
 in a 5lb bag.
Posted by: Mueller Jul 12 2018, 06:20 PM
A huge shout out to Cali914 (Harry)
Not only did he deliver the V6 to my home, he stuck around for hours helping me install it (I think he did more work than I did)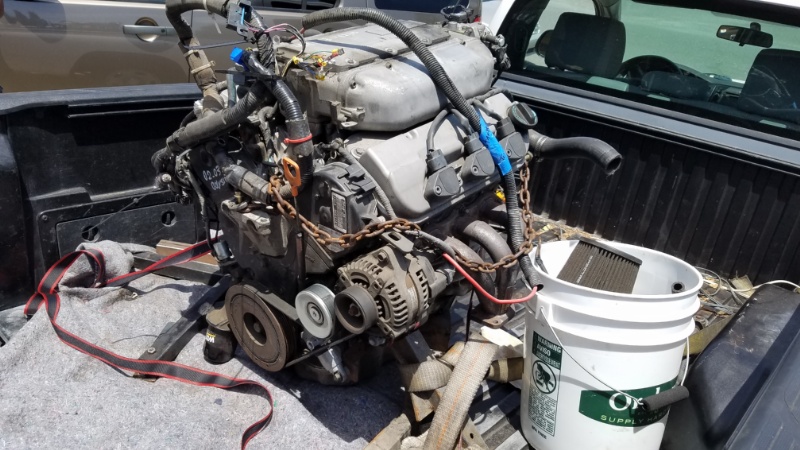

Posted by: sixnotfour Jul 12 2018, 06:40 PM
 Rock On Mike...
Posted by: Chris H. Jul 13 2018, 07:15 AM
Wow that's great Mike. Looks like it fits pretty well. Did you get axles with it? Just curious if you are running stock CVs.
Posted by: 914forme Jul 13 2018, 10:51 AM
I know what would happen if I ran stock CVs 
In reality since he is running the 901 he should play nice in first gear and have no real trouble.
Now with the torque he should be able to launch in 2nd gear the majority of the time and well that being done who knows.
My new attitude thanks to Mark is a running 914 and driving 914 is better than any 914 on jack stands, rotisserie or other form of none operation.
Now if only I applied that truth, soon, very soon......
Mike glad to see it coming along so quickly for you, If I was a bit closer I would be there with trans on my chest helping you get this thing together.
Posted by: Dion Jul 13 2018, 02:13 PM
Awesome stuff Mike. I had no idea you were going this route. Wow!
Posted by: mb911 Jul 13 2018, 02:16 PM
Awesome stuff Mike. I had no idea you were going this route. Wow!
But glad you're working on the car. Gonna be great.
Posted by: shoguneagle Jul 14 2018, 04:41 PM
WHEN ONE GOES TO THE "DARK SIDE", HE REALLY GOES ALL OUT. Great looking project that is a lot further along than I realized. Conversion looks great and very well done. Results of a frustrated "Garage Engineere".
Posted by: Mueller Jul 15 2018, 03:34 PM
Busted out the heat gun today, didn't have enough time get real dirty so this little project was perfect for the short time slot.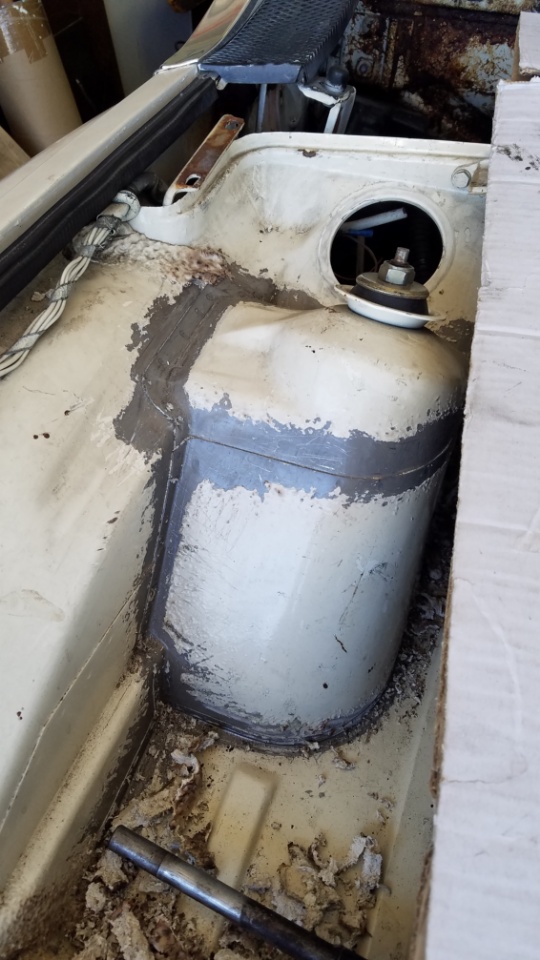
Posted by: 914forme Jul 15 2018, 07:24 PM
Your seams look really nice, mine where so full of crude, I think Hans was show Anton how to put ten pounds of seam sealer in a 2 pound space. I also took a MAP torch and heated the seam to burn out the crap. And even when I was welding them I still got stuff coming up into the weld puddle.
Posted by: Mueller Jul 18 2018, 10:58 PM
Cut out the inlet and outlet holes for the cooling system.
Need to trim the valance, not sure if I need to cut the bumper or not. A few Subaru guys have not needed to cut the bumper so I might get lucky.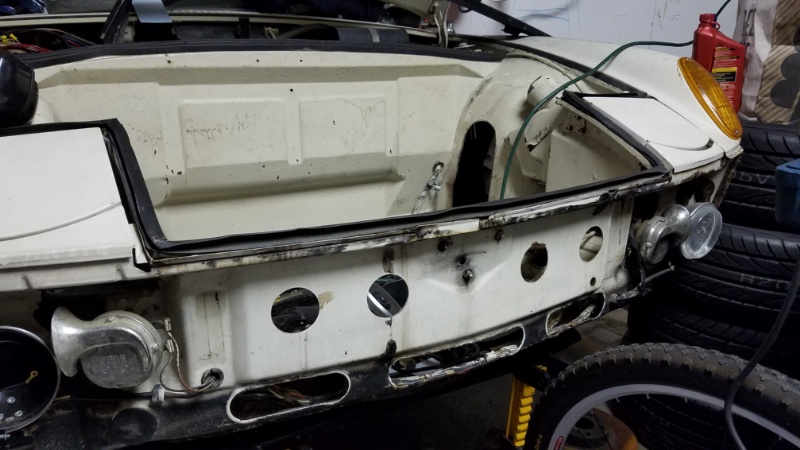

Posted by: Chris914n6 Jul 19 2018, 01:08 AM
You have seen mine right? Air enters thru the fog grills and gets directed towards the center. I had to rivet a piece of plastic to the bumper bracket to block flow the wrong way. I also didn't cut between the holes. Cooling air volume in the sweet spot. You should be fine with what you have so far.
edit: added pics. No fogs obviously and 75 so horns under chassis. 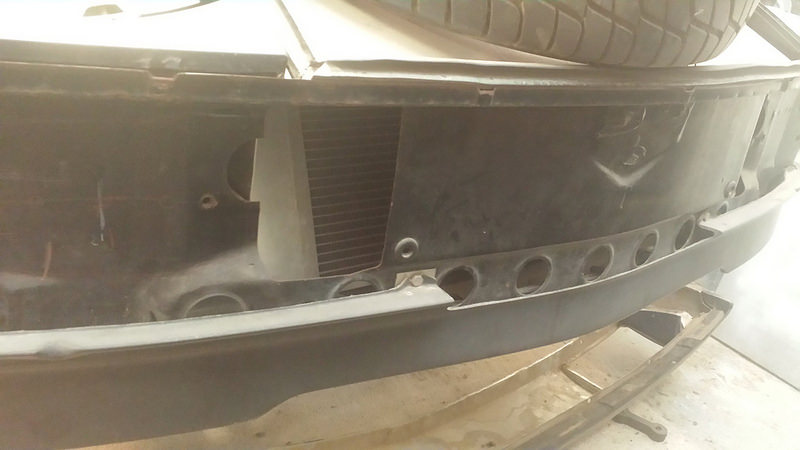
Posted by: tygaboy Jul 19 2018, 07:26 AM
Looking good, Mike!
Don't you just love the knock out punches? I've been wondering if I could get away without notching the bumper on my car so I'll be interested to see how your plan works out.
Take care and keep up the great work.
Posted by: Chris H. Jul 19 2018, 07:43 AM
Great start. It's easy to cut more if you need to but that should be fine.
What's with those horns man ?
Posted by: tygaboy Jul 19 2018, 08:17 AM
Mike - I forgot to ask: What size holes are those? I have some dimple dies that you're welcome to borrow, if I have the right size.
That press is looks to be the same one I have and it should work fine, again, assuming I have the right size die.
Let me know...
Chris
Posted by: Andyrew Jul 19 2018, 08:42 AM
You'll rely on your fan more than you would otherwise but I think that it'll still be fine that Honda motor runs pretty cool being all aluminum. If you shroud your exit you'll have much better flow, and ducting or shrouding your entering air would increase your flow as well.
Posted by: Dion Jul 19 2018, 11:09 AM
So this engine is going to have an equivalent of, if not more , of the power and of
a 3.2? Good god, that’s gonna be a rocket.
Keep at it Mike.
Posted by: BIGKAT_83 Jul 19 2018, 12:06 PM
Mike - I forgot to ask: What size holes are those? I have some dimple dies that you're welcome to borrow, if I have the right size.
That press is looks to be the same one I have and it should work fine, again, assuming I have the right size die.
Let me know...
Chris
The harbor freight punch set is for pipe sizes and most dimple die sets are for tubing sizes and won’t work.
Posted by: 914forme Jul 19 2018, 12:35 PM
That being said http://www.swagoffroad.com/SWAG-Pipe-Dimple-Dies-5-Piece-Set-_p_112.html will work with the punches and press you have if you want to dimple dies them.
Posted by: Mueller Jul 19 2018, 02:01 PM
That being said http://www.swagoffroad.com/SWAG-Pipe-Dimple-Dies-5-Piece-Set-_p_112.html will work with the punches and press you have if you want to dimple dies them.OUCH! Those are nice, but I don't see using them that often. Makes sense for a pro shop or someone doing a lot of that type of work.
I didn't notice until yesterday that they are pipe sized, so far that has not been a problem. I can buy used Greenlee punches on ebay or craigslist if I need a true tube diameter.
Posted by: tygaboy Jul 19 2018, 02:01 PM
Mike - I forgot to ask: What size holes are those? I have some dimple dies that you're welcome to borrow, if I have the right size.
That press is looks to be the same one I have and it should work fine, again, assuming I have the right size die.
Let me know...
Chris
The harbor freight punch set is for pipe sizes and most dimple die sets are for tubing sizes and won’t work.
Ah, yes, I forgot about that...
EDIT: Mike, you beat me to my reply. In any case, let me know if I can help w/anything.
Posted by: JRust Jul 19 2018, 02:49 PM
Need to trim the valance, not sure if I need to cut the bumper or not. A few Subaru guys have not needed to cut the bumper so I might get lucky.
My bumper is stock. I do have the renegade valance that pushes the air up in the center. No cooling issues at all with my NA motor. I'll be shocked if I have any with my new turbo motor. I'd think what you have there is enough. Although the upper holes you added won't get much flow unless you do more to direct air up there. Those will be pretty square behind the bumper. No sure the best way to force air to them. Something from the fog light grills like Chris mentioned maybe?
Posted by: Chris H. Jul 25 2018, 07:26 PM
![]() How's it going Mike? Had a chance to work on the car this week or no?
How's it going Mike? Had a chance to work on the car this week or no?
Posted by: Mueller Jul 29 2018, 08:36 PM
Went up to Canada for 5 days, back to working on the car once home and recovered from traveling.
Radiator going in. 1st time using my HF sheetmetal shear, works great so far.
Even broke out the Clecos 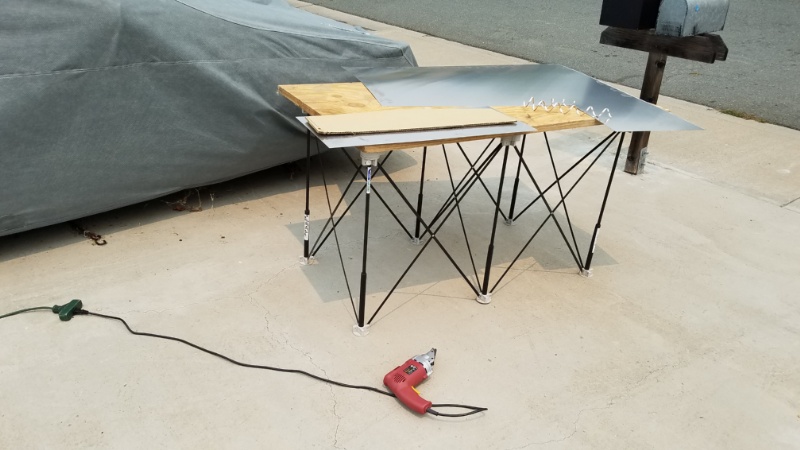
Posted by: Mueller Jul 29 2018, 08:41 PM
The bottom of the radiator is on rubber bushings that are on studs like the top have. To locate and stop the bottom of the radiator from moving there are 2 thru holes in the bottom shroud that are slightly larger diameter than the rubber bushings.
The blue bushings on the top I found in my junk drawer just like the bottom bushings.
Cardboard template I made, the curve matched up pretty darn good.
Now if I had them fancy Chris Baker tools....hahaha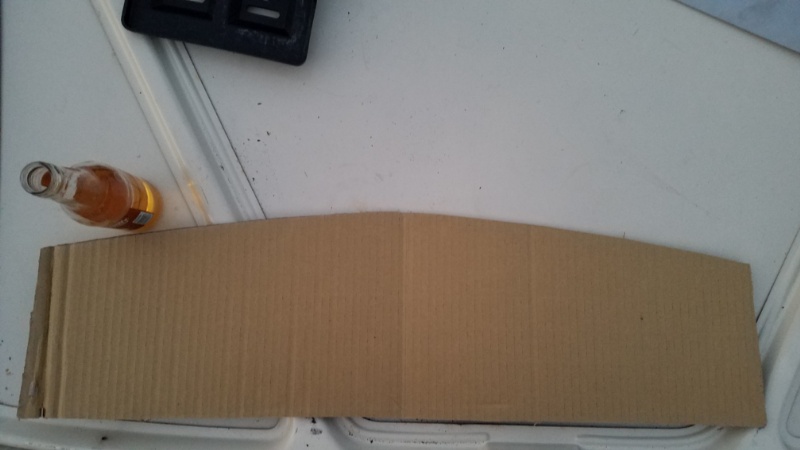
Posted by: Andyrew Jul 29 2018, 10:29 PM
Looking good!! Started from the bottom now your here (On your radiator build) 
Thats the same way I did mine. I like that electric sheer from HF, lots of power in that cheep tool!
Are you using aluminum or steel for the shroud?
Posted by: Mueller Jul 30 2018, 12:35 AM
Looking good!! Started from the bottom now your here (On your radiator build)
Thats the same way I did mine. I like that electric sheer from HF, lots of power in that cheep tool!
Are you using aluminum or steel for the shroud?
.040" (I think) aluminum, should have used a little thicker. It should be okay.... if course in my mind I'm already designing it differently for a future upgrade when I repair the rust in the front trunk.
Posted by: 76-914 Jul 30 2018, 07:59 AM
Looking good!! Started from the bottom now your here (On your radiator build)
Thats the same way I did mine. I like that electric sheer from HF, lots of power in that cheep tool!
Are you using aluminum or steel for the shroud?
.040" (I think) aluminum, should have used a little thicker. It should be okay.... if course in my mind I'm already designing it differently for a future upgrade when I repair the rust in the front trunk.
As much reinforcement as you'll use in such a small area you could go .032"-.028". FYI, Aircraft Spruce will usually cut and ship the same day. LMK if you need anything for rivet work.
Posted by: tygaboy Jul 30 2018, 08:00 AM
The bottom of the radiator is on rubber bushings that are on studs like the top have. To locate and stop the bottom of the radiator from moving there are 2 thru holes in the bottom shroud that are slightly larger diameter than the rubber bushings.
The blue bushings on the top I found in my junk drawer just like the bottom bushings.
Cardboard template I made, the curve matched up pretty darn good.
Now if I had them fancy Chris Baker tools....hahaha
Hey now! No fair proving that I don't need to be such a tool whore!

Mike, your build is looking good!
Posted by: Andyrew Jul 30 2018, 08:26 AM
Looking good!! Started from the bottom now your here (On your radiator build)
Thats the same way I did mine. I like that electric sheer from HF, lots of power in that cheep tool!
Are you using aluminum or steel for the shroud?
.040" (I think) aluminum, should have used a little thicker. It should be okay.... if course in my mind I'm already designing it differently for a future upgrade when I repair the rust in the front trunk.
Should be fine, When you box the sides it'll be plenty strong. I used 18ga steel because I was lazy.
Posted by: Mueller Aug 5 2018, 10:50 PM
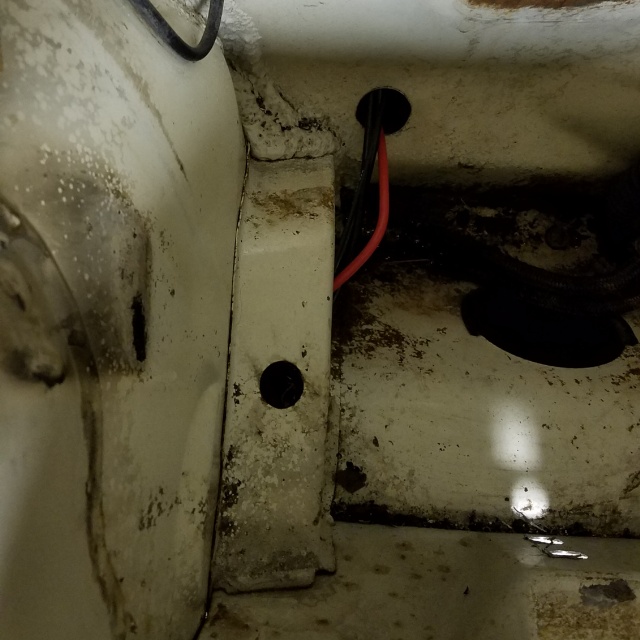
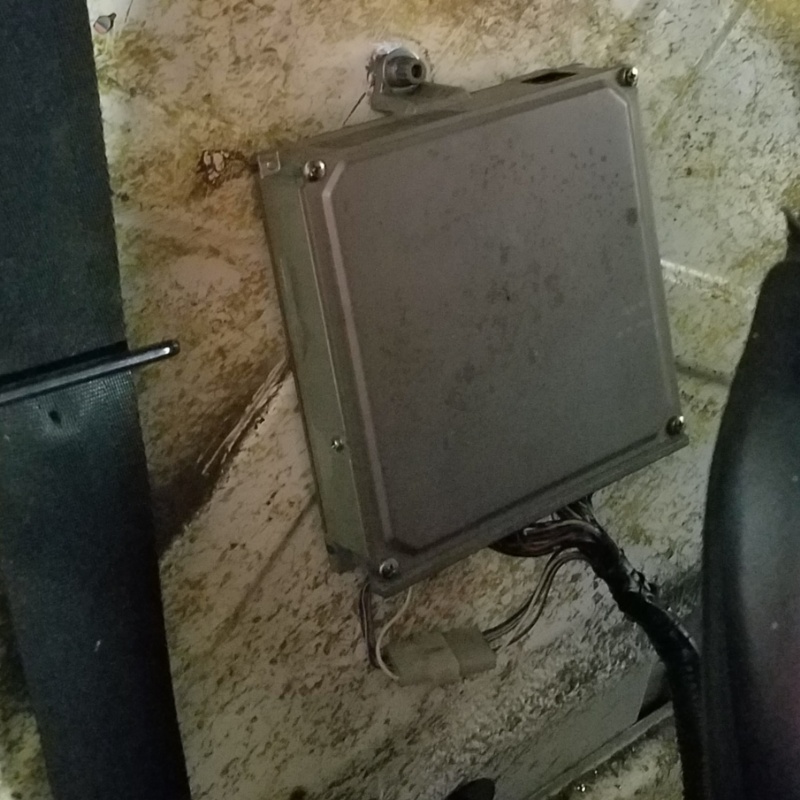
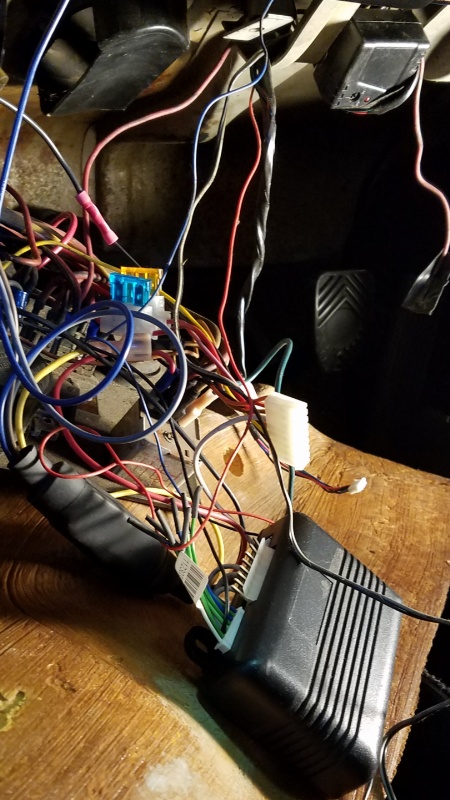
Still adding the new wiring for the up front fuel pump and radiator fans.
New ECU mounted, I need to get a few higher amp relays, I was going to use a solid state relay, didn't like the spec sheet saying I may lose 1.5volts. Might run some test, we'll see.
The fuel pump and each fan will get a dedicated relay and a dedicated power fed. After I ran these wires I found a large enough and long enough wire that would be fine to replace all 3 in a cabinet. These will do for now.
Yes I know I need grommets to protect the wire covers.
I also removed the old stereo and alarm system. So far the motor cranks over when I turn the key, next will be the ECU wiring into the 914 starter circuit.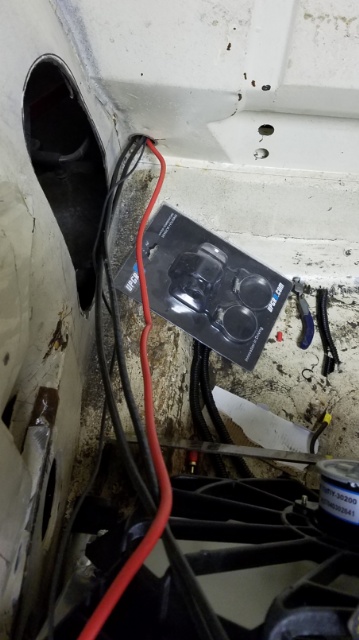
Posted by: Mueller Aug 12 2018, 09:36 PM
I have 914 with a running engine again!
Now to clean up the wiring and the cooling system. Then put the suspension back on.
https://www.youtube.com/watch?v=jDr4ctNF08A
Posted by: Andyrew Aug 12 2018, 10:25 PM
WOW! That was way to quick and easy.... Congrats!!
Posted by: Chris H. Aug 12 2018, 10:47 PM
Wow that thing runs smooth! You'll be driving it in no time.
Posted by: 76-914 Aug 13 2018, 08:53 AM


Posted by: tygaboy Aug 13 2018, 09:09 AM

Wow - that was fast! You need to drive it over to my place and help get mine to make running noises!
Seriously, what a great milestone, Mike. Big congrats!
Posted by: ValcoOscar Aug 13 2018, 09:18 AM
Gee Mike..you make it look easy. Sounds sweet
You may start a new 914 engine swap trend.
Nice to see your car making such progress.
Job well done.

Oscar
Posted by: Mueller Aug 13 2018, 09:18 AM
Wow that thing runs smooth! You'll be driving it in no time.
Got to admit it is nice running the factory Honda ECU, still has the OBD port (have not plugged into it to see if it works or not)
If I do decide to go with an aftermarket ECU, Haltech has a plug and play unit with maps already installed for stock motors.
Posted by: mgp4591 Aug 13 2018, 08:17 PM
Wow that thing runs smooth! You'll be driving it in no time.
Got to admit it is nice running the factory Honda ECU, still has the OBD port (have not plugged into it to see if it works or not)
If I do decide to go with an aftermarket ECU, Haltech has a plug and play unit with maps already installed for stock motors.
You can go aftermarket but for an upgrade to your stock ECU it's a quick fix and it'd probably give you more power than you'd ever need with the same reliability of a stock Honda. I worked with them for years and it's a hard setup to beat! Congratulations on kickin' ass on this build!
Posted by: Mueller Aug 18 2018, 10:35 PM
Needed some hose adapters for 1" to 1 5/16".
Hit up Lowes and broke out the solder and propane.
Beads came out okay. 
Posted by: rupert14 Aug 19 2018, 01:01 PM
Great to see your build. I just bought a 914 (my 4th) from a forum member and I am having a shop do this same swap. I will be running a Mendeola trans and stock 3.5 just line yours. Do you think the throttle body would clear the firewall if the intake was swapped the other way? I am trying to minimize the amount of cutting in the trunk. I realize it will need a fair amount of fabrication anyway as I plan to have the rear shock towers tied together.
Posted by: JRust Aug 19 2018, 02:29 PM
Congrats Mike. That is great to see
Posted by: Mueller Aug 19 2018, 03:24 PM
Great to see your build. I just bought a 914 (my 4th) from a forum member and I am having a shop do this same swap. I will be running a Mendeola trans and stock 3.5 just line yours. Do you think the throttle body would clear the firewall if the intake was swapped the other way? I am trying to minimize the amount of cutting in the trunk. I realize it will need a fair amount of fabrication anyway as I plan to have the rear shock towers tied together.
I bought a Marine intake manifold, have not tried it yet but it is shorter and puts the TB up near the motor "V" ($60 shipped on ebay)
This would put the TB up near the cabin firewall.
Make sure to have a build thread, would love to see a "pro" build....I'm a hack and a half

Posted by: Mueller Aug 19 2018, 03:24 PM
Congrats Mike. That is great to see
Thanks, won't be half as nice or clean as your conversion(s)!
Posted by: rupert14 Aug 19 2018, 04:05 PM
That's a great idea! I will be running AC as well. Here is what I am starting with.
http://www.914world.com/bbs2/index.php?showtopic=331539
I needed a good builder car so I picked that up from Mike here on the forum. I have had Don in Phoenix do several engine/transaxle builds for my race cars including my Class 5 unlimited car. He is building me a Honda 3.5 and Mendeola for 12k, which is less than I can buy a 6cly Porsche motor for. His shop will also be doing the install. They put these 3.5 motors in VW busses monthly. He is an amazing builder and quite affordable compared to the CA prices.
www.donsbusbox.com is his website.
I am still debating whether or not to use the Renegade radiator system or Fab my own. I will be running Porsche 930 CVS on the mendeola and need something 28 spline on the outside. Mike has given me a bunch of great ideas and I'll be calling Patrick Motorsports to inquire about reinforced trailing arm mounts and trailing arms as well as upgraded outer CVS. I steel widebody kit is also on the list. I bought the complete classic auto air kit for a 74 914 and that will be going in with the Honda compressor as well. It's a pretty long list but we're moving on it fast so hopefully the build doesn't take too long. You are thread is giving me lots of great ideas. Keep it up. Know anyone that has driven one of these swaps before? Don can slap a low boost turbo on there making it a clean 400 hp but I really don't think I will need it. I am hoping to keep the car light which is why I did not make the jump to a LS motor.
Keep the pics coming
Posted by: shoguneagle Aug 19 2018, 07:12 PM
NICE! NICE! NICE!
Posted by: mepstein Aug 19 2018, 07:35 PM
Mike - I think you were really smart to jump ship on your original build and go with this plan. Sounds like you will have a car you can drive very shortly. A pretty build is nice but you don't see any of it when you are driving. 
Posted by: worn Aug 19 2018, 08:11 PM
I have 914 with a running engine again!
Now to clean up the wiring and the cooling system. Then put the suspension back on.
https://www.youtube.com/watch?v=jDr4ctNF08A
One month post to start! Wow. I mean that is amazing. Nice job. Have fun driving.
Posted by: rupert14 Aug 19 2018, 08:51 PM
Those motors polish up pretty good as well. Here is a pic of my Bag with a 3.5L Honda. I got tons of compliments. It was a screamer.
Attached thumbnail(s)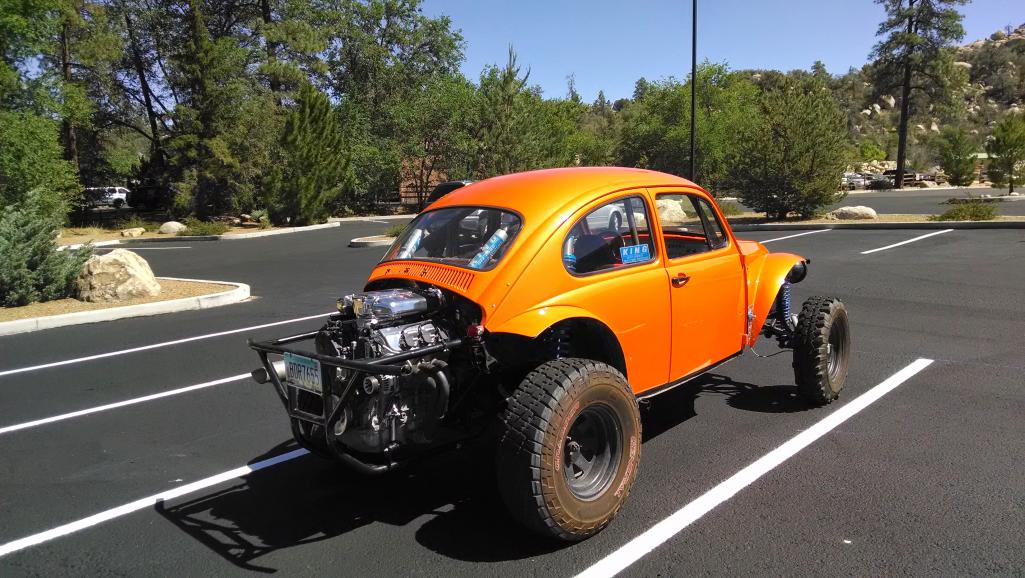
Posted by: Mueller Aug 19 2018, 11:30 PM
That's a great idea! I will be running AC as well. Here is what I am starting with.
http://www.914world.com/bbs2/index.php?showtopic=331539
I needed a good builder car so I picked that up from Mike here on the forum. I have had Don in Phoenix do several engine/transaxle builds for my race cars including my Class 5 unlimited car. He is building me a Honda 3.5 and Mendeola for 12k, which is less than I can buy a 6cly Porsche motor for. His shop will also be doing the install. They put these 3.5 motors in VW busses monthly. He is an amazing builder and quite affordable compared to the CA prices.
www.donsbusbox.com is his website.
I am still debating whether or not to use the Renegade radiator system or Fab my own. I will be running Porsche 930 CVS on the mendeola and need something 28 spline on the outside. Mike has given me a bunch of great ideas and I'll be calling Patrick Motorsports to inquire about reinforced trailing arm mounts and trailing arms as well as upgraded outer CVS. I steel widebody kit is also on the list. I bought the complete classic auto air kit for a 74 914 and that will be going in with the Honda compressor as well. It's a pretty long list but we're moving on it fast so hopefully the build doesn't take too long. You are thread is giving me lots of great ideas. Keep it up. Know anyone that has driven one of these swaps before? Don can slap a low boost turbo on there making it a clean 400 hp but I really don't think I will need it. I am hoping to keep the car light which is why I did not make the jump to a LS motor.
Keep the pics coming
My engine came out of another 914 that did the conversion, I test drove it a few months earlier and was half-joking about wanting to buy the motor and parts and he said yes! Car was a blast, 1900 pounds, no window glass, fiberglass decklids and bumpers and stripped out wherever he could remove weight. (he kept the radiator setup since he is going with a turbo Ecotech, he used to have a V8 in there and is running the Renegade setup now)
There is another V6 Honda swapped 914 back East, super clean install on a 20K mile car! He flipped the manifold and welded the TB to the side.
Thread here: http://www.914world.com/bbs2/index.php?showtopic=272084&hl=
Nice bug, I saw one very similar at a VW show in Concord last year, I think he was from Nevada.
Posted by: Dion Aug 20 2018, 05:49 AM
Great going Mike. That Honda purrs like a kitten! Man, what progress.
Fantastic.
Posted by: rupert14 Aug 20 2018, 03:40 PM
There is another V6 Honda swapped 914 back East, super clean install on a 20K mile car! He flipped the manifold and welded the TB to the side.
Thread here: http://www.914world.com/bbs2/index.php?showtopic=272084&hl=
Nice bug, I saw one very similar at a VW show in Concord last year, I think he was from Nevada.
[/quote]
Thanks for the reference. I will definitely look into doing the manifold modification. That looks great. I was thinking of using the stock exhaust manifolds as well because they sometimes give better bottom end. does it look like there will be room for the exhaust that way?
My Baja went to either LA or Vegas. I had two and sold them both withing a few months so I can't remember which one went there. Mine had a notched dog house up front to accomodate the fuel cell and radiator. You may have seen it.
Posted by: Mueller Aug 20 2018, 04:03 PM
Looks like the headers just come down a little more than the factory manifold. 
Posted by: rupert14 Aug 20 2018, 07:39 PM
Awesome. My previous system routed the exhaust under the pan on one side. I found some headers but they stick out to the side pretty far. From that pic it looks like they may just work great. I am also considering this radiator. I have used it before. Think it is overkill and just too much weight?
https://rover.ebay.com/rover/0/0/0?mpre=https%3A%2F%2Fwww.ebay.com%2Fulk%2Fitm%2F263028298904
Or this one
https://rover.ebay.com/rover/0/0/0?mpre=https%3A%2F%2Fwww.ebay.com%2Fulk%2Fitm%2F301914245196
I will be running AC so I want plenty of capcity. ( I live in Arizona ). I did notice that you used braded line. That seems easy. I also plan to do the remote water pump like you did. How did you route your lines from the engine to the front?
Posted by: Mueller Aug 20 2018, 07:53 PM
Awesome. My previous system routed the exhaust under the pan on one side. I found some headers but they stick out to the side pretty far. From that pic it looks like they may just work great. I am also considering this radiator. I have used it before. Think it is overkill and just too much weight?
https://rover.ebay.com/rover/0/0/0?mpre=https%3A%2F%2Fwww.ebay.com%2Fulk%2Fitm%2F263028298904
Or this one
https://rover.ebay.com/rover/0/0/0?mpre=https%3A%2F%2Fwww.ebay.com%2Fulk%2Fitm%2F301914245196
I will be running AC so I want plenty of capcity. ( I live in Arizona ). I did notice that you used braded line. That seems easy. I also plan to do the remote water pump like you did[color=#FF0000]. How did you route your lines from the engine to the front?
Stock water pump, that is what the previous owner of the swap did. Going to go underneath the car like Renegade does.
Posted by: Mueller Oct 15 2018, 12:45 PM
Slowly making progress, a little more radiator install work done yesterday. Hope to get the top shroud made and mounted this week.
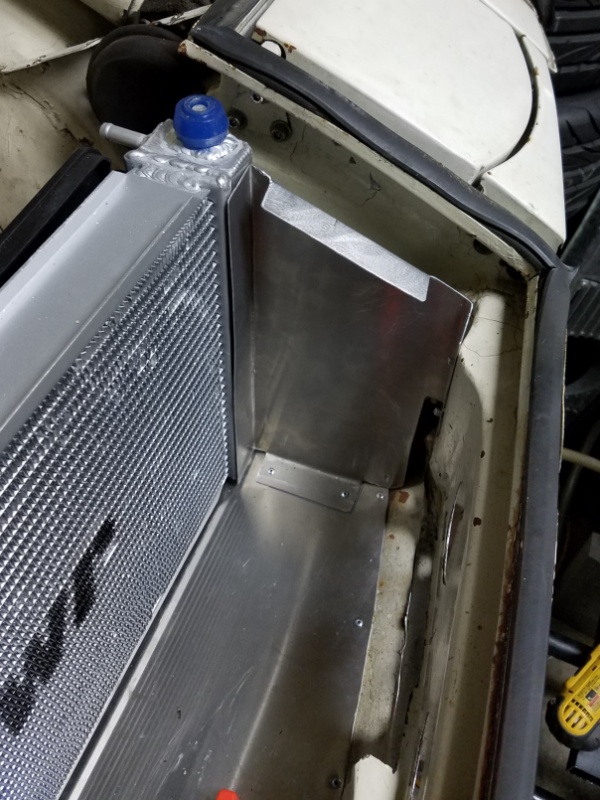
Posted by: Dave_Darling Oct 15 2018, 11:11 PM
Mike, you should probably change your user pic and user title. You're not keeping this one stock after all.
--DD
Posted by: Mueller Oct 28 2018, 10:19 PM
Progress...sorta...got a whole 4 rivnuts installed tonight 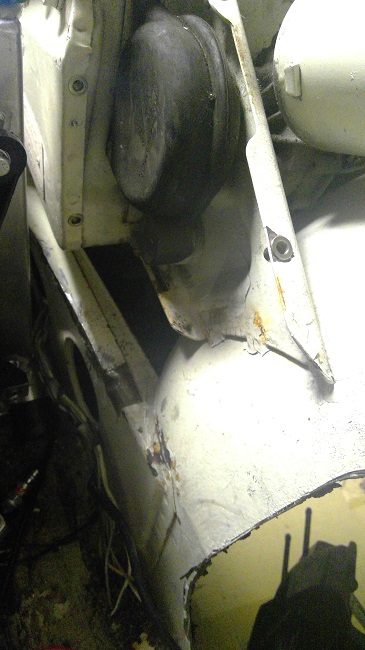
Posted by: FourBlades Oct 28 2018, 10:44 PM
Keep it going!
Little by little is what it takes sometimes.
John
Posted by: tygaboy Oct 29 2018, 08:07 AM
Frustrating though it may be at times. One of my favorite sayings, of which I constantly remind myself when I look at my own glacial progress is:
A little pie is always better than no pie!
Chip away at it, my friend and before you know it:
Posted by: seanery Oct 30 2018, 07:34 PM
you did 4 rivnuts more than me today!
Posted by: Mueller Nov 4 2018, 09:27 PM
Remember those rivnuts I installed earlier?
These plates will help hold the radiator I'm place, I will install foam between the plate and radiator.
I think 1/8" thick should be good enough.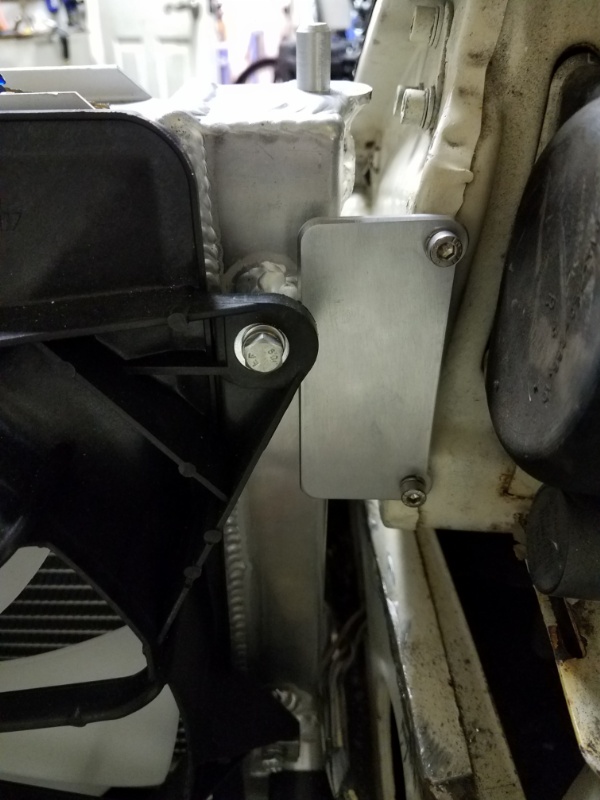
Posted by: Mueller Nov 12 2018, 01:31 AM
A few more pics of radiator install. Also bought a new to me large, old Atlas lathe made for Sears, Roebuck and Co. Not bad for $200.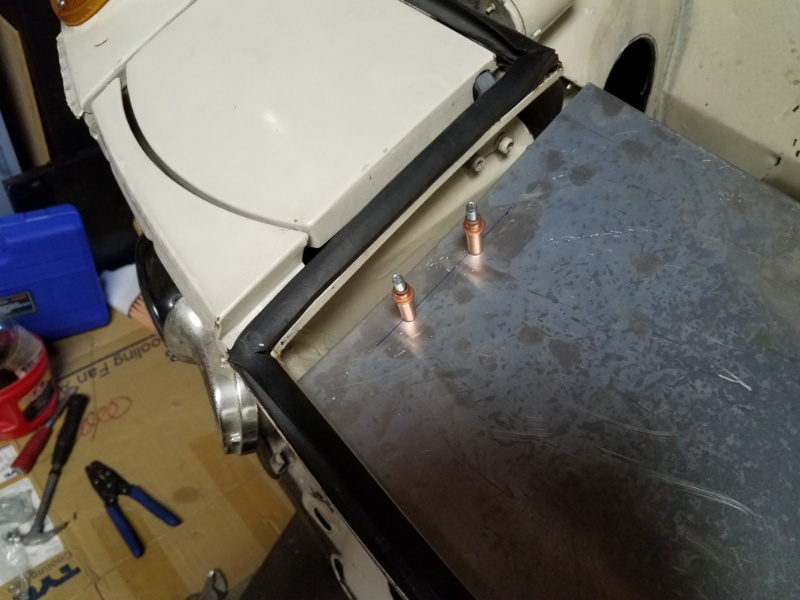
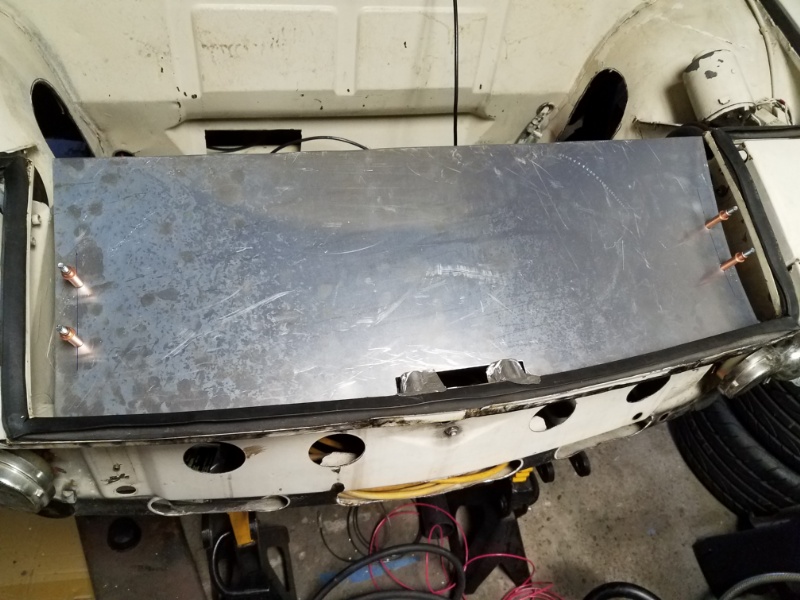
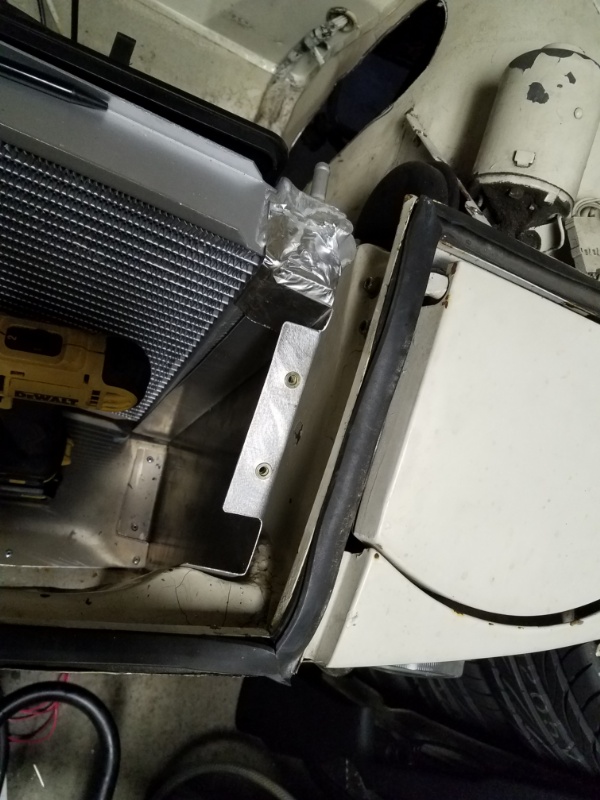
Posted by: dan10101 Nov 12 2018, 11:01 AM
Nice brackets, Looks pro.
I get to try out my clecos here in a couple weeks. woot!
I love the lathe, I found someone shutting down a business a few months ago. Lots of great equipment... starting at 5000... Ug.
Posted by: horizontally-opposed Jan 23 2019, 08:33 PM
A huge shout out to Cali914 (Harry)
Not only did he deliver the V6 to my home, he stuck around for hours helping me install it (I think he did more work than I did)
Harry is such a good dude.
Posted by: Mueller Feb 24 2019, 11:46 AM
I know I said I was taking a break on the 914 for a while, however I needed to finish this for some cuts I will need in the future.
I could have bought a premade stand from SWAG but I wanted to make it myself. All the aluminum is scrap that I've had for over 15 years!
I originally thought I could bolt the stand to the saw..didn't work out too well. (see 3 unused countersink holes)
Total cost was less than $20, I bought a bunch of the clamps on ebay for a really good price.
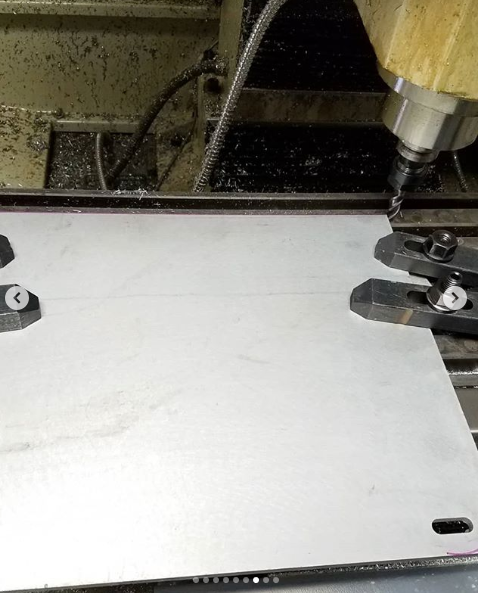
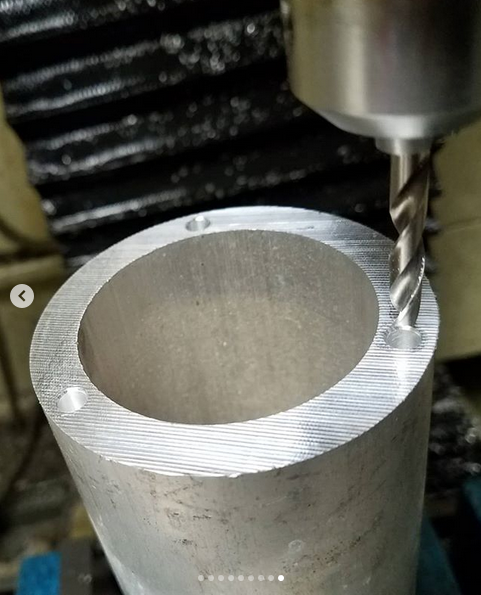
Posted by: tygaboy Feb 25 2019, 09:07 AM
Mike - Love your bandsaw stand! I hope you get the same enjoyment out of making stuff as I do. It all adds up to making the car fab go faster/better.
Keep up the great work!
Chris
Posted by: Mueller Apr 20 2019, 11:04 PM
Amazon to the rescue.
Found my Boge strut Bilstiens there.
The struts I soaked in straight vinegar for a bit to clean off the rust.
Plans are to paint them this Monday.
I also cleaned my garage on the drivers side of the 914 so I can finally access the front and rear suspension from the side finally, can now open the drivers side door all the way!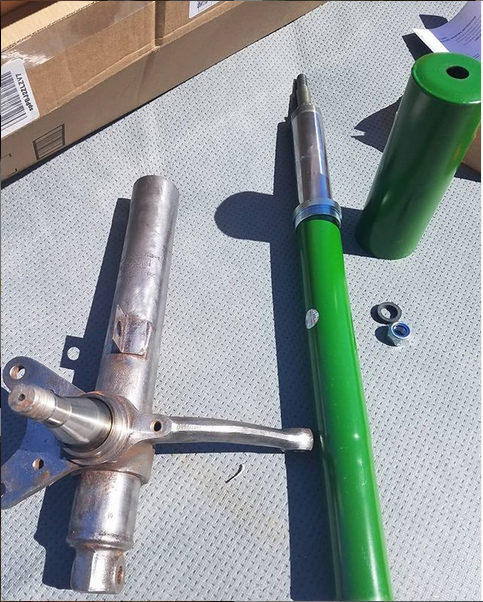
Posted by: dan10101 Apr 20 2019, 11:14 PM
The struts I soaked in straight vinegar for a bit to clean off the rust.
Plans are to paint them this Monday.
Love to see the progress!
I get to do that this week. But I get to change the outsides, not the insides.
I also cleaned my garage on the drivers side of the 914 so I can finally access the front and rear suspension from the side finally, can now open the drivers side door all the way!
I can relate to this too. I just keep moving my mess around to make room.
Posted by: Mueller Apr 20 2019, 11:22 PM
The struts I soaked in straight vinegar for a bit to clean off the rust.
Plans are to paint them this Monday.
Love to see the progress!
I get to do that this week. But I get to change the outsides, not the insides.
I also cleaned my garage on the drivers side of the 914 so I can finally access the front and rear suspension from the side finally, can now open the drivers side door all the way!
I can relate to this too. I just keep moving my mess around to make room.
I've been getting rid of stuff, a junk man comes thru the neighborhood a few times a month....items tossed (not all)...Volvo 242 front bumper, flywheel, 2 pressure plates, 4 cylinder heads, a few starter sized DC servo motors, a 5HP 3phase motor plus much more. Took me all of last Sunday to do it. I was beat afterwards.
Posted by: mepstein Apr 21 2019, 07:49 AM
Find a teenager to do the work. You do the directing. They do the lifting. Leaves you with energy for you and your family. Overpay them a bit so they want to help any time you call them.
Posted by: rhodyguy Apr 21 2019, 09:58 AM
sit in your chair and direct traffic. Divide wages by the number of hours or DAYS it takes you to recover from the strenuous activity. It will be a pittance. This may be the year I start farming out the lawn mowing to a couple twins in the neighborhood. One of my knees can't handle the 3+ hours and 3.2 miles of walking it takes anymore.
Posted by: mepstein Apr 21 2019, 10:22 AM
sit in your chair and direct traffic. Divide wages by the number of hours or DAYS it takes you to recover from the strenuous activity. It will be a pittance. This may be the year I start farming out the lawn mowing to a couple twins in the neighborhood. One of my knees can't handle the 3+ hours and 3.2 miles of walking it takes anymore.Let someone else do the grunt work. There is always more stuff to do in the yard.
Overpaying for work is a winning strategy. We overpay for kids to take care of our dog when we are away. They cancel their plans because they know they are getting paid well. It's not a lot more but more than the going rate. We have a kid stopping by today while we are going to family for Easter. A young teenager will get $20 for water and a quick walk. He lives 2 doors away so it's easy money for 15 minutes but lets us do our thing.
Posted by: horizontally-opposed Apr 21 2019, 10:28 AM
Take care of yourself, Mike, so that you'll be around more Saturdays at EASY. I can't wait (but can) to see your car with the new engine, and your smile when you get out of it.
Posted by: Mueller May 19 2019, 09:14 PM
Put a few hours in on the 914...
Took seats out to look at the floor, will know more when the tar comes off.
A few ugly holes....
The seats will be for sale....sans the rails.
The engine compartment looks like hell from the engine install...that'll be fixed in the future.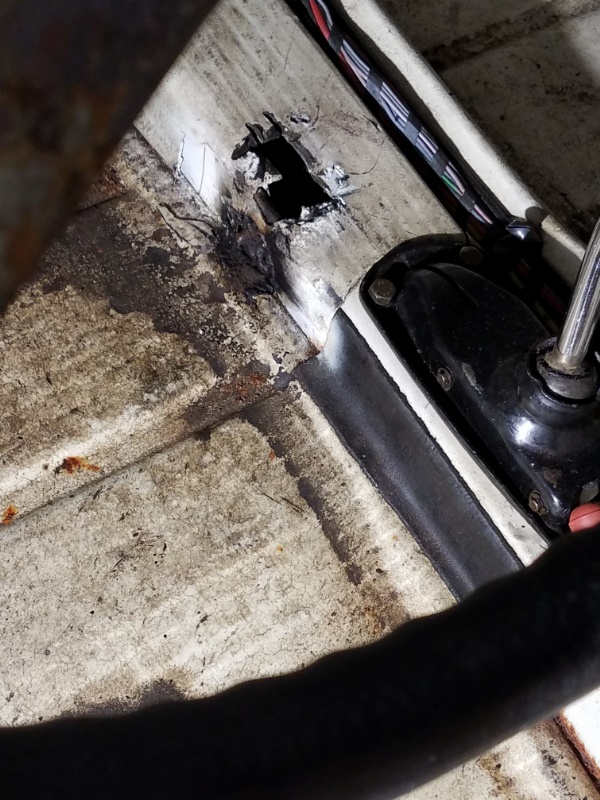

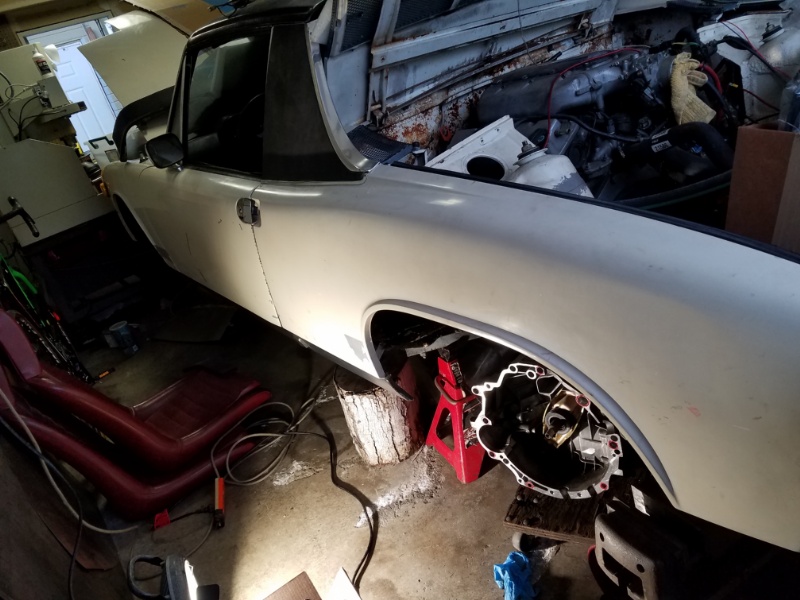
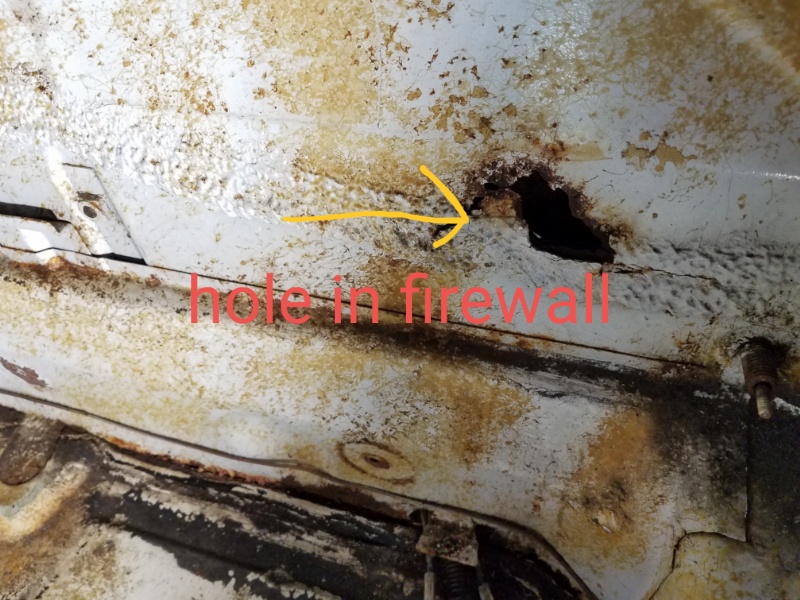
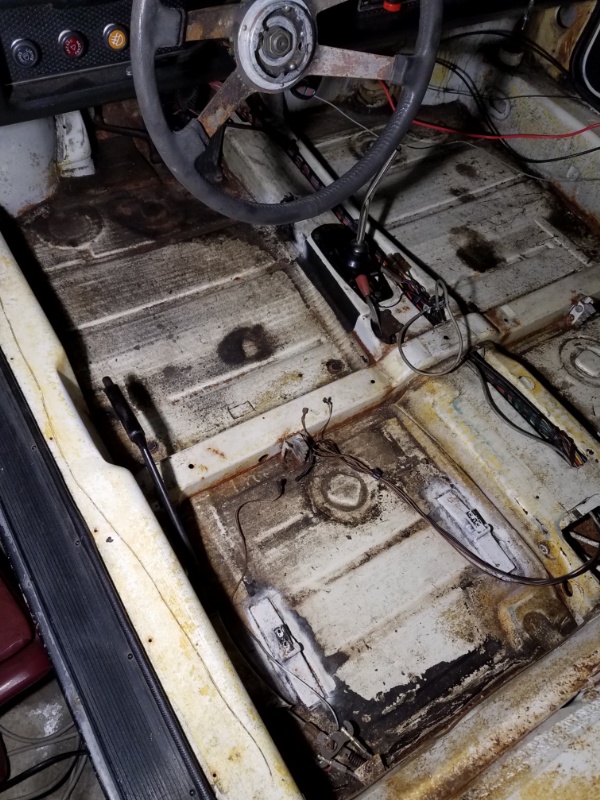
Posted by: Mueller Sep 2 2019, 04:55 PM
Working in the garage myself today. (Until called me in to take a break)
Taking the hubs out of the Boxster rear carriers.
The tube fits with the pads removed.
Right before I was called inside I finally started to get a stuck race off the hub. Bearing puller is junk and inside contact area keeps breaking.
I have had this aluminum tube for over 15 years, just recently was put into commission as a brush holder.
I put a socket inside of hub to hold the driven socket
From moving side to side. No press pressure on small socket or inside hub.
Posted by: Mueller Sep 2 2019, 07:34 PM
We got a pair!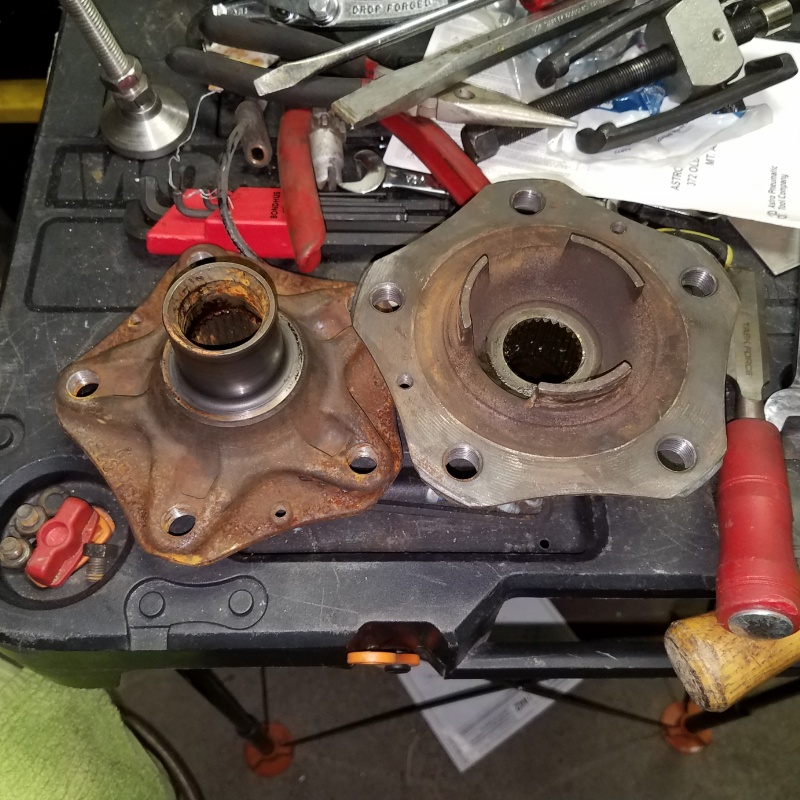
Posted by: thelogo Sep 3 2019, 02:08 PM
sit in your chair and direct traffic. Divide wages by the number of hours or DAYS it takes you to recover from the strenuous activity. It will be a pittance. This may be the year I start farming out the lawn mowing to a couple twins in the neighborhood. One of my knees can't handle the 3+ hours and 3.2 miles of walking it takes anymore.Let someone else do the grunt work. There is always more stuff to do in the yard.
Overpaying for work is a winning strategy. We overpay for kids to take care of our dog when we are away. They cancel their plans because they know they are getting paid well. It's not a lot more but more than the going rate. We have a kid stopping by today while we are going to family for Easter. A young teenager will get $20 for water and a quick walk. He lives 2 doors away so it's easy money for 15 minutes but lets us do our thing.

You cheap sob
Thats not overpaying ... The going rate for walk and water is 35 ...."
.conyo "( do we look like baggage handlers ?)Posted by: Mueller Sep 5 2019, 11:23 PM
Not sure what to do now.
The 986 hubs going to take a bit of work to get going. I need to find the width of the bearings, it looks like too much room between the hub and the 951 stub.
The plan was to make adapters to use the smaller 914 cv joints for a short time however they look beat to heck. I guess I can just drive slow to the car show in 3 weeks.
Anyone know the CVs used for the Renegade axle kit?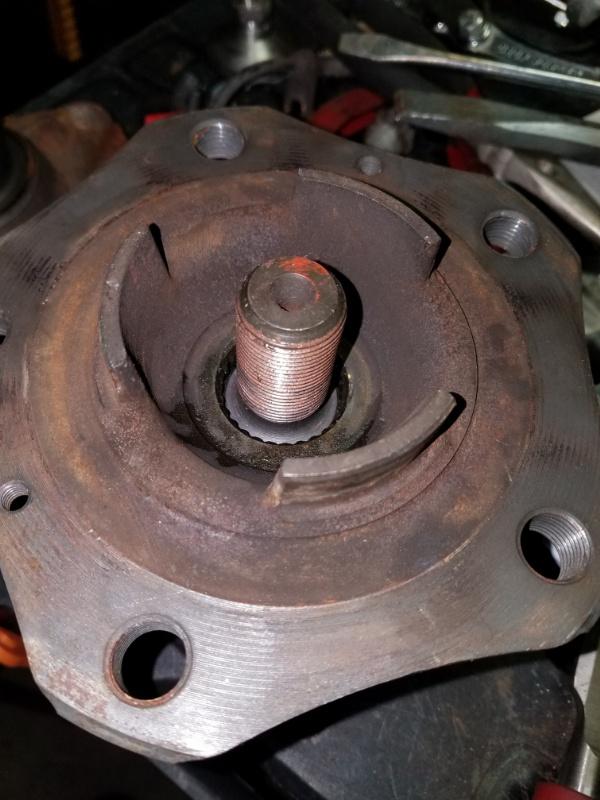
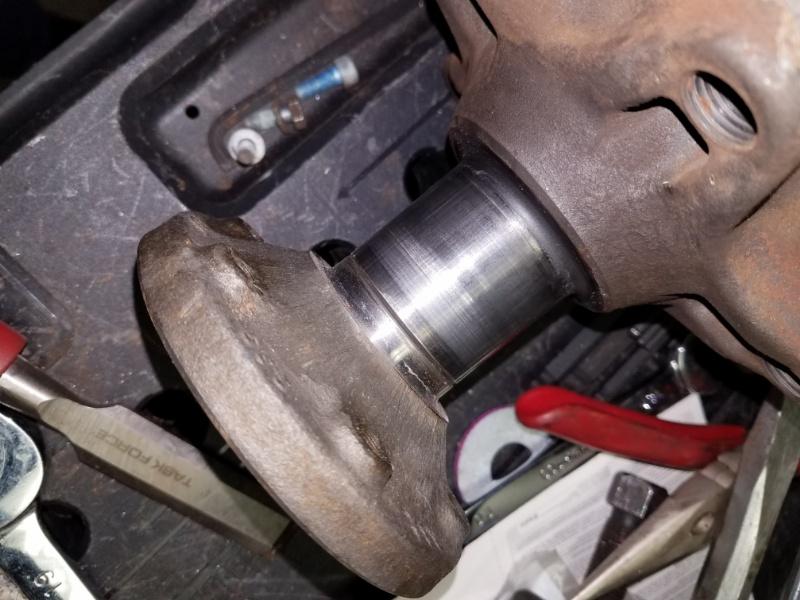
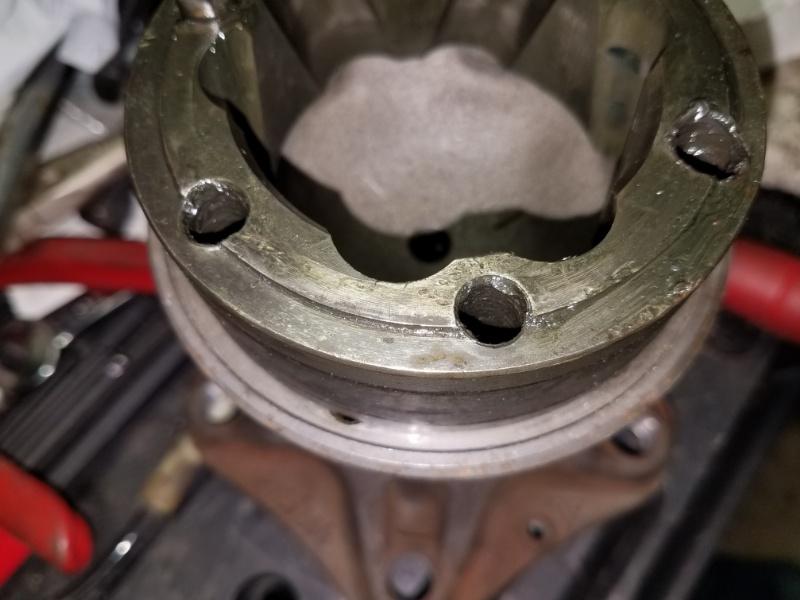
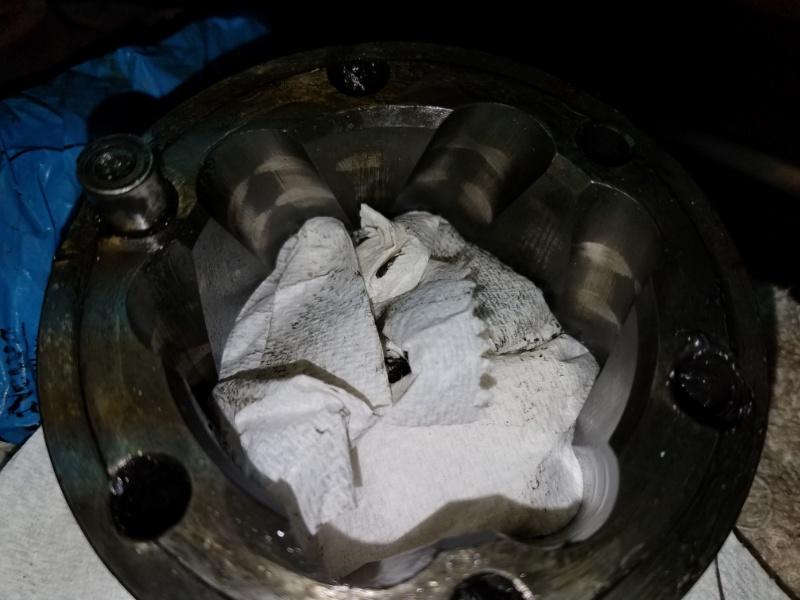
Posted by: Andyrew Sep 5 2019, 11:28 PM
Not sure what to do now.
The 986 hubs going to take a bit of work to get going. I need to find the width of the bearings, it looks like too much room between the hub and the 951 stub.
The plan was to make adapters to use the smaller 914 cv joints for a short time however they look beat to heck. I guess I can just drive slow to the car show in 3 weeks.
Anyone know the CVs used for the Renegade axle kit?
Vw bus. I buy these. Note they make different shaft lengths. This is the same size as in the Rennegade kit.
SurTrack VW-8045 CV Axle Shaft https://www.amazon.com/dp/B00DCO5ZGA/ref=cm_sw_r_cp_apap_GVUHmrXuXxY72
Posted by: Mueller Sep 5 2019, 11:33 PM
Thanks, will order tomorrow.
Posted by: SirAndy Sep 5 2019, 11:40 PM
I thought the Boxster used the same wheel bearings as the 914?
Posted by: Mueller Sep 6 2019, 12:00 AM
I thought the Boxster used the same wheel bearings as the 914?
It does. The bearing is 1.46" wide
The space between my combo is almost .25" wider.
Posted by: SirAndy Sep 6 2019, 12:20 AM
I thought the Boxster used the same wheel bearings as the 914?
It does. The bearing is 1.46" wide
The space between my combo is almost .25" wider.
Got it, that sucks ...
Posted by: jcd914 Sep 6 2019, 08:20 AM
I thought the Boxster used the same wheel bearings as the 914?
It does. The bearing is 1.46" wide
The space between my combo is almost .25" wider.
Got it, that sucks ...
Would machining the hub shorter and adding a spacer to the nut side of the stub axle be an option?
Just take off enough to create the clamping necessary for the bearing.
Jim
Posted by: Mueller Sep 6 2019, 09:31 AM
Would machining the hub shorter and adding a spacer to the nut side of the stub axle be an option?
Just take off enough to create the clamping necessary for the bearing.
Jim
Thought about that, it would make it more difficult to remove the stub axle since part of it is in the bearing.
If my research is correct, the 951 bearing is 5mm wider. (and bigger OD)
Posted by: Mueller Sep 6 2019, 09:34 AM
Would machining the hub shorter and adding a spacer to the nut side of the stub axle be an option?
Just take off enough to create the clamping necessary for the bearing.
Jim
That is an option I thought about.
Posted by: 914forme Sep 6 2019, 10:20 AM
Most of the time you just machine a spacer between the hub and the bearing, - problem solved PMS sells them also. Make sure you put it on the proper side, as it will change the flange placement in relationship to the old flange, moving the rotor accordingly and then affecting its relationship with the brake caliper also.
Lots of things going on that are placed via the hub, so make sure you measure calculate, and measure again to make sure you get this correct.
Posted by: Mueller Sep 6 2019, 11:14 AM
Most of the time you just machine a spacer between the hub and the bearing, - problem solved PMS sells them also. Make sure you put it on the proper side, as it will change the flange placement in relationship to the old flange, moving the rotor accordingly and then affecting its relationship with the brake caliper also.
Lots of things going on that are placed via the hub, so make sure you measure calculate, and measure again to make sure you get this correct.
Thanks, I found a thread by Clay detailing what he did and now that I think of it I might have made SirAndy a pair of spacers 10 years ago or so.
Posted by: SirAndy Sep 6 2019, 11:18 AM
You did and i ended up not using them. Not sure what happened to them, they're probably in one of the boxes of stuff i left with McMark.

Posted by: 914forme Sep 6 2019, 12:27 PM
Glad I could jog your memory a bit. 
Posted by: ClayPerrine Sep 6 2019, 01:30 PM
I pulled the 944 turbo axles and stubs from my car. That includes the spacers.
Do you need them?
Clay
Posted by: Mueller Sep 6 2019, 01:52 PM
I pulled the 944 turbo axles and stubs from my car. That includes the spacers.
Do you need them?
Clay
Thanks, I think I am good now.
Posted by: Mueller Sep 7 2019, 09:25 AM
Early morning surprise.
Mark Howard drove down in his beautiful 911 SC to drop off a pair of cleaned up and powder coated trailing arms. That is a 100 mile round trip for him.
I showed him the 914 and my shop and 20 minutes later he was headed back home. Thanks Mark. Now to get my tail out in the garage and make some progress.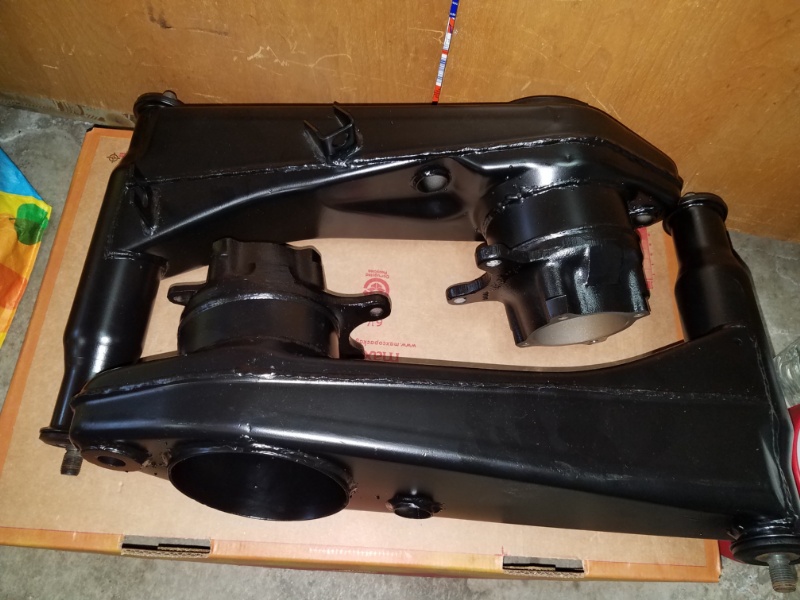
Posted by: cali914 Sep 7 2019, 09:33 AM
Mike you have a 914 guardian angel.
Posted by: 914bub Sep 7 2019, 10:37 AM
Mike, I picked up that core 1.7 motor from you a couple years ago. Thanks again for that. It sounds like you're through your bearing issues but if not keep me in mind. I do a lot with bearings every day as I rebuild electric motors, gear boxes and pumps for a living. I know we get a better deal than anybody around here,(Modesto). I also have all the dimensional bearing charts and stuff to ID bearings.
Can't wait to see this done as I have the same 6 in my Honda pilot. I always thought that would be a great swap and I'm at 155k with only a routine timing belt/water pump so far. Those engines are awesome!
@http://www.914world.com/bbs2/index.php?showuser=87
Posted by: Mueller Sep 7 2019, 02:23 PM
Hey 914 bub, yes I do remember you, recommended your shop for a motor rewind, they went with new instead.
John* is in the process of doing the bearings once he gets back from the store.
Anyone guess what I am making on the mill besides a mess?
*cannot think of his screen name right now.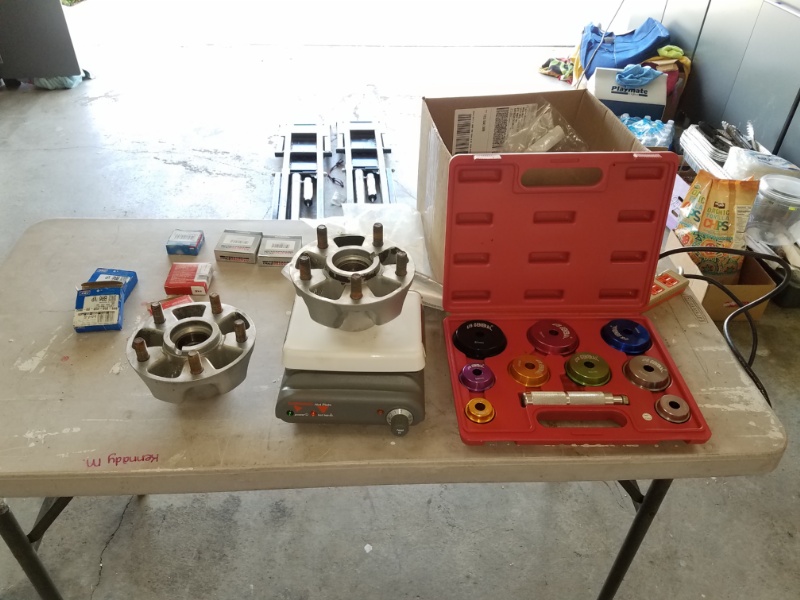
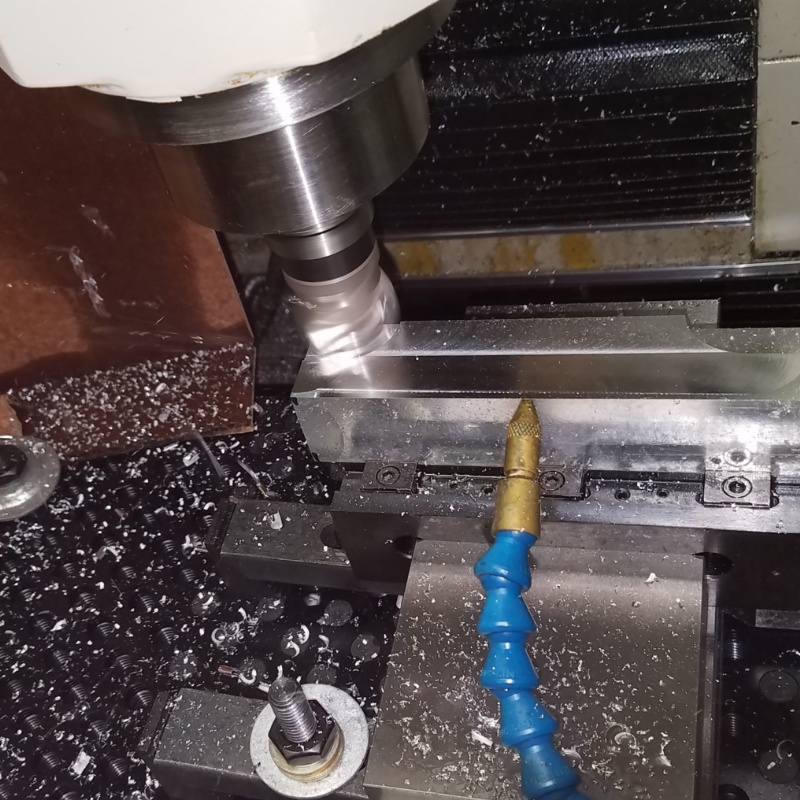
Posted by: mb911 Sep 7 2019, 03:53 PM
Brake adapters?
Posted by: worn Sep 7 2019, 07:28 PM
Brake adapters?
Me, i am wondering why you have car parts on a magnetic stir pkate.
Posted by: Mueller Dec 22 2019, 03:26 PM
Worked on the 914 today...
Was making progress until I put the front wheels on.
Studs too short.
Oh well. Will order some longer ones.
Boxster front calipers fit under the 15x7 Bbs-mahles luckily, today was the 1st time testing it out.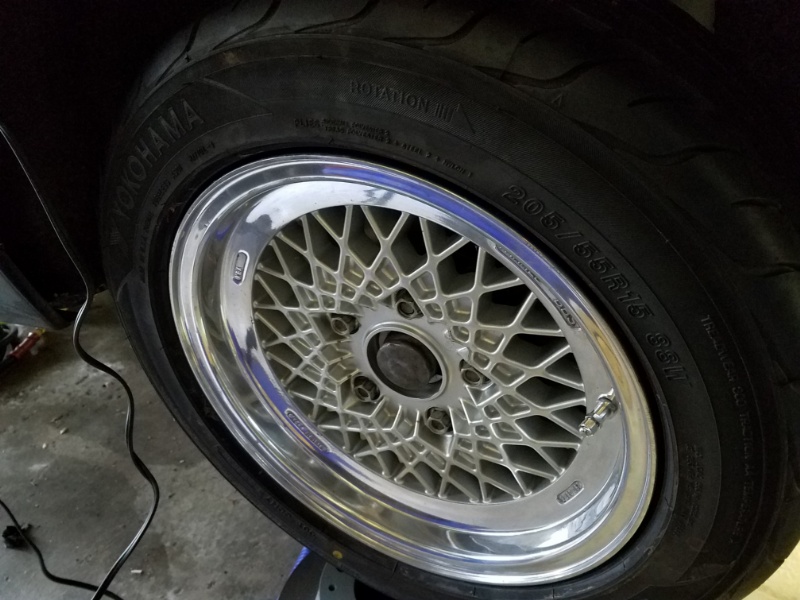
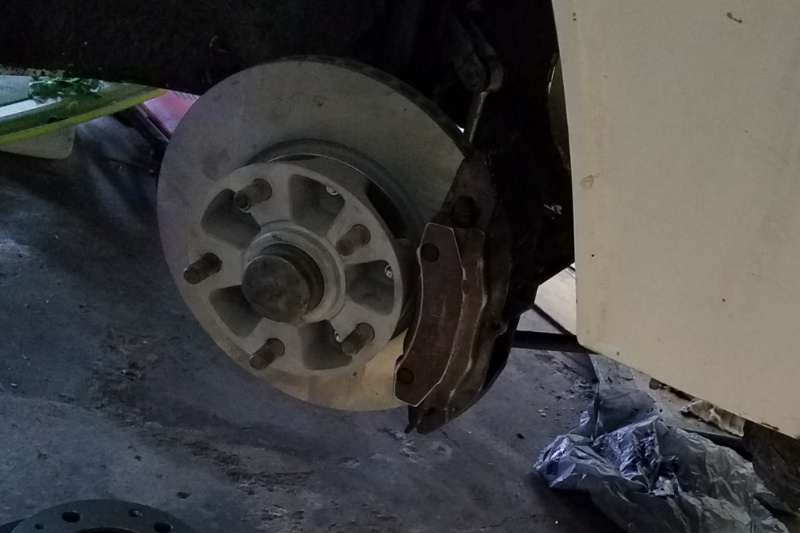
Posted by: tygaboy Dec 22 2019, 03:55 PM
Mike - Awesome to see you're back working on your car!
Here's to a wonderful holiday season to you and yours. 
Posted by: fiacra Dec 22 2019, 04:02 PM
I've been waiting to see an update! Glad you are back at it. I remember that you have AC in your garage, and I'm hoping you have heat as well! Let me know if you organize another work day.
Posted by: Mueller Dec 22 2019, 11:49 PM
I've been waiting to see an update! Glad you are back at it. I remember that you have AC in your garage, and I'm hoping you have heat as well! Let me know if you organize another work day.
Mike - Awesome to see you're back working on your car!
Here's to a wonderful holiday season to you and yours.
Thanks, felt good working out there, been too long.
Not shown are the braided brake lines with banjo bolts for the calipers.
Posted by: sixnotfour Dec 22 2019, 11:53 PM
![popcorn[1].gif](style_emoticons/default/popcorn[1].gif)
Posted by: Cairo94507 Dec 23 2019, 08:38 AM
Posted by: MM1 Dec 23 2019, 12:07 PM
Inspirational! 
Posted by: Mueller Jan 1 2020, 04:16 PM
Happy New Year...1st day of 2020 and I am working on the 914. Not a bad start.
Test fitting Boxster rear hubs and calipers.
I took an old rear bearing and ground the ID and OD to make it slip fit for testing.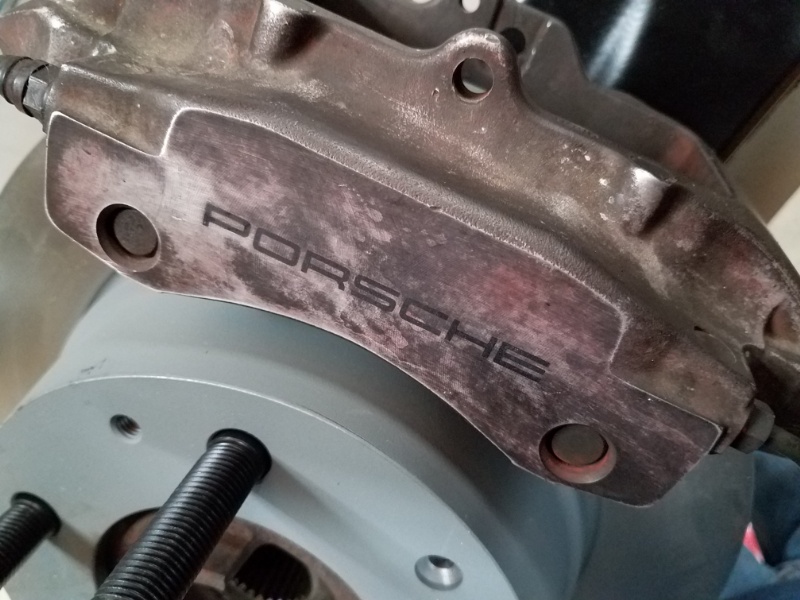

Posted by: tygaboy Jan 1 2020, 04:24 PM
Look at that! 2020 starts with the proverbial "good day's work" and ends with what looks like a wonderful outcome!
Excellent, Mr. Mueller. Simply excellent.
Posted by: mb911 Jan 1 2020, 04:28 PM
Looks great
Posted by: Chris H. Jan 2 2020, 11:46 AM
Nice work Mike! Man I love those wheels. BTW I have a pretty large collection of coolant hose pieces, fittings, reducers, etc so once you get around to the final cooling system plumbing let me know what you need and I might have it.
Posted by: Mueller Mar 20 2020, 10:16 PM
Like many around the World I have a few weeks to spend at home.
So after finishing a few jobs at home for the wife I am bacl on the 914.
Today I spent way too much time repositioning the jack stands under my car and fitting my Quickjack lift under it.
I also trimmed the too wide plastic bushings for the trailing arms.
[attachmentid=735186]
[attachmentid=735187]
[attachmentid=735188]
Posted by: Krieger Mar 20 2020, 11:35 PM
 holy mother of all duplicate posts Cool lift though.
Posted by: djway Mar 20 2020, 11:57 PM
Beer
Posted by: Andyrew Mar 21 2020, 07:54 AM
Mike, ya gotta work on that stuttering problem
Glad to see some progress!!! How are you feeling?
Posted by: Krieger Mar 21 2020, 08:11 AM
Maybe I am wrong though. Is this you way of showing us you drank twelve beers?
Posted by: Andyrew Mar 21 2020, 08:31 AM
Maybe I am wrong though. Is this you way of showing us you drank twelve beers?
Posted by: 76-914 Mar 21 2020, 10:27 AM
Is it too late to talk you out of those plastic trailing arm bushings? After 5 years of listening to squeaks and snaps I finally removed mine and replaced them with the rubber bushings.
Posted by: Mueller Mar 21 2020, 02:09 PM
Is it too late to talk you out of those plastic trailing arm bushings? After 5 years of listening to squeaks and snaps I finally removed mine and replaced them with the rubber bushings.
I cannot find rubber bushings, I tried the usual places.
Talk about duplicates posts...clean up on Aisle 2!
Posted by: SirAndy Mar 21 2020, 04:48 PM
@http://www.914world.com/bbs2/index.php?showuser=87
Well that didn't work as intended. I removed the duplicate posts and when i got to the last one it also deleted the images from the first post.
Never seen that before.
Anyways, you'll have to upload the images again i'm afraid ...
Posted by: SirAndy Mar 21 2020, 04:50 PM
Nevermind, found the pictures in the trash can.

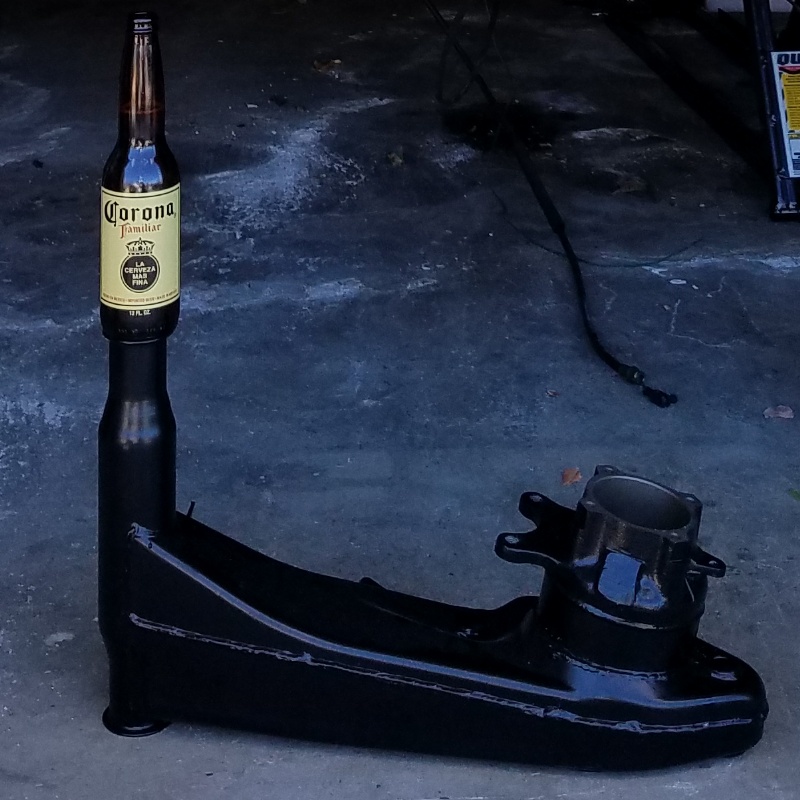
Posted by: dan10101 Mar 21 2020, 06:34 PM
Anyways, you'll have to upload the images again i'm afraid ...
No! not again!
Posted by: Mueller Mar 29 2020, 09:03 PM
*********
Posted by: Mueller Mar 30 2020, 11:38 PM
Got the pressure regulator back together with the new seals from @pmb.
New hard lines installed for the rear brakes.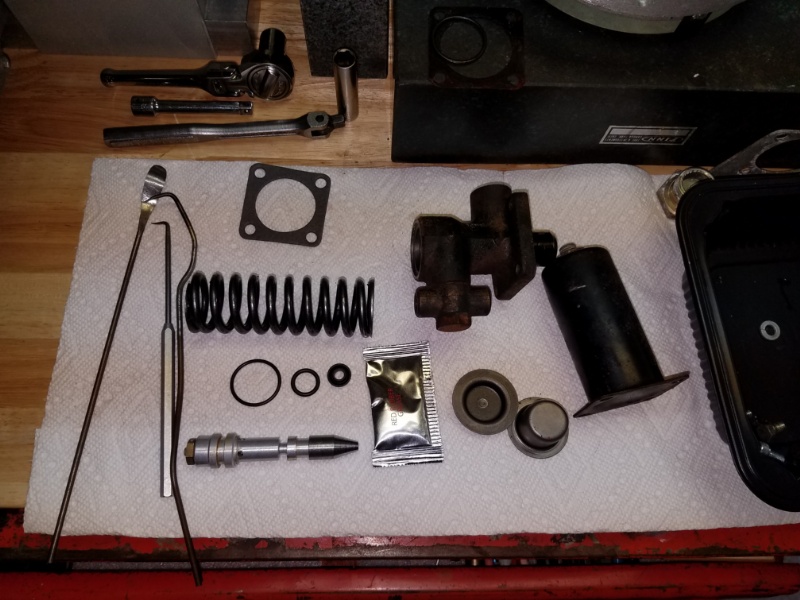
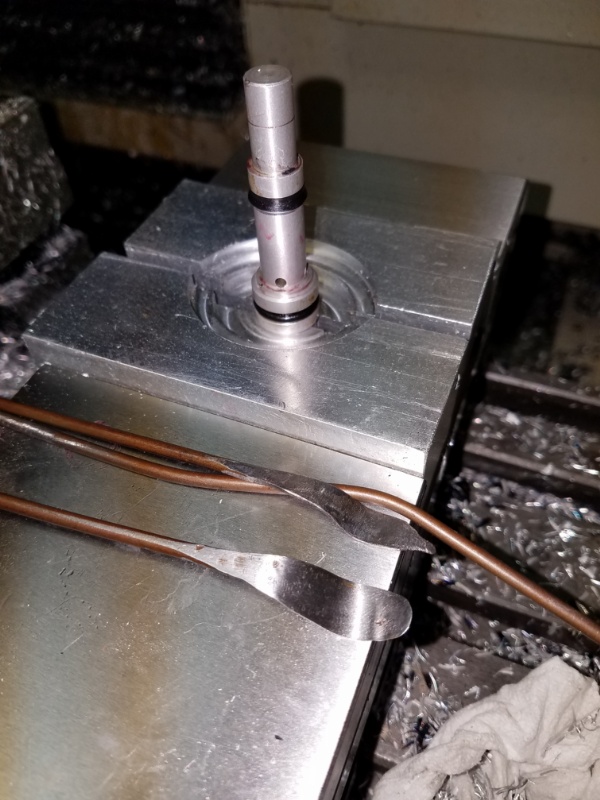
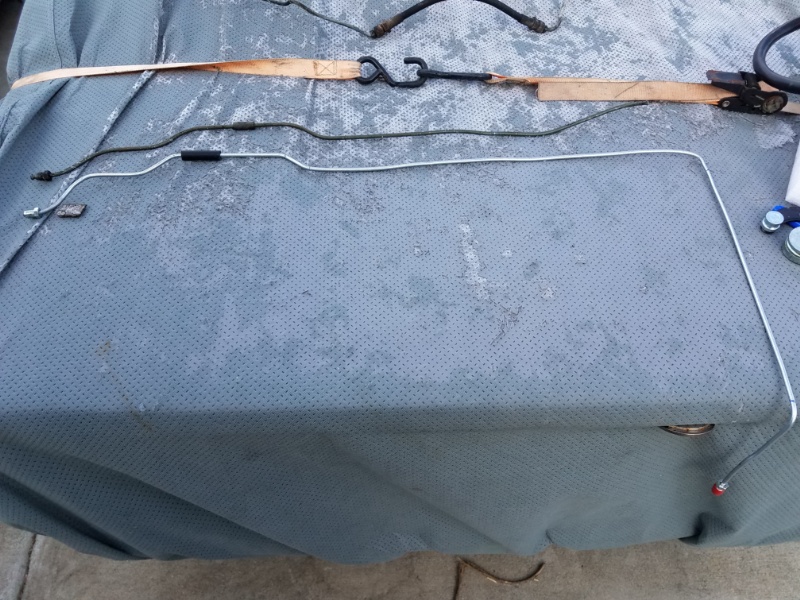
Posted by: cali914 Mar 31 2020, 07:26 PM
your pedal should feel good with the hard lines and new seals. looking good mike
Posted by: Mueller Mar 31 2020, 10:01 PM
^thanks!
I'd make more progress if I didn't spend sooooo much time looking for stuff in my garage.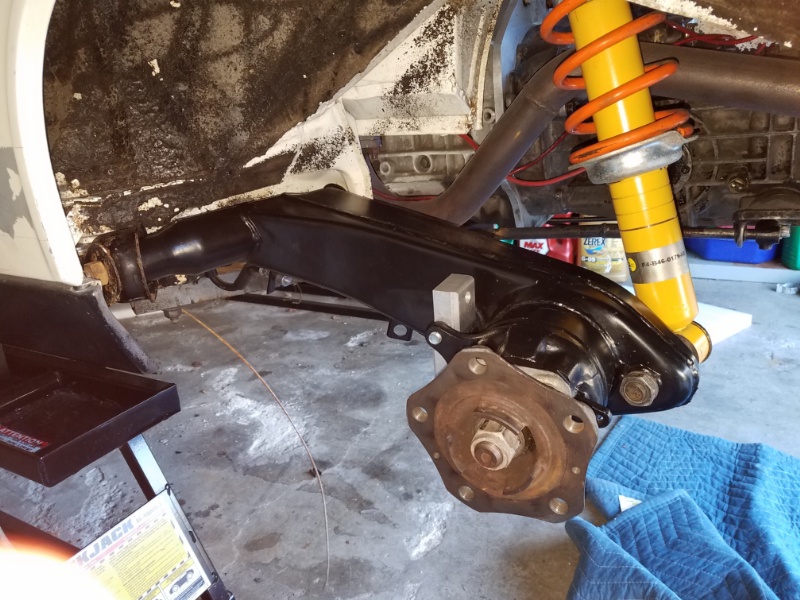
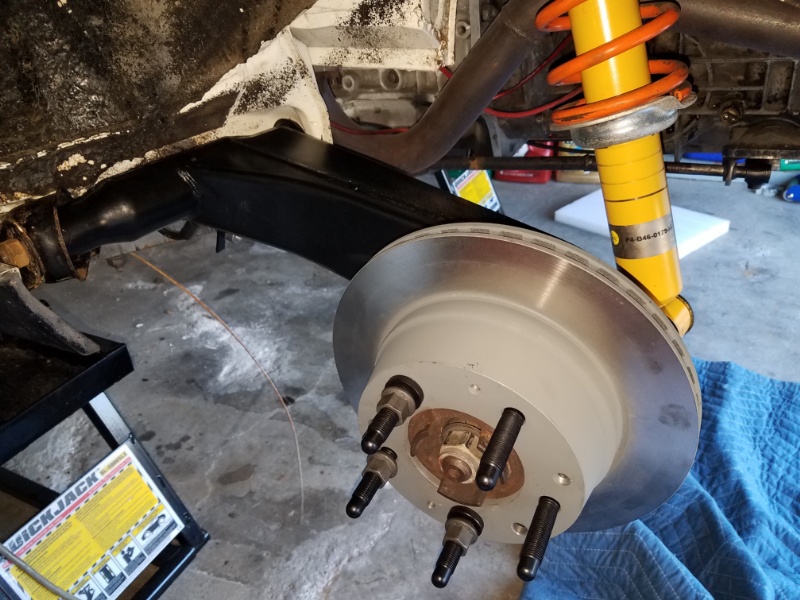
Posted by: sixnotfour Apr 1 2020, 01:14 AM
Great progress, I have a question about your Bilstein's ,,,Are those lower perches upside down ?? The old ones have a recess to hold the ring clip contained ..and the shoulder keeps the spring centered.. see pic
Attached image(s)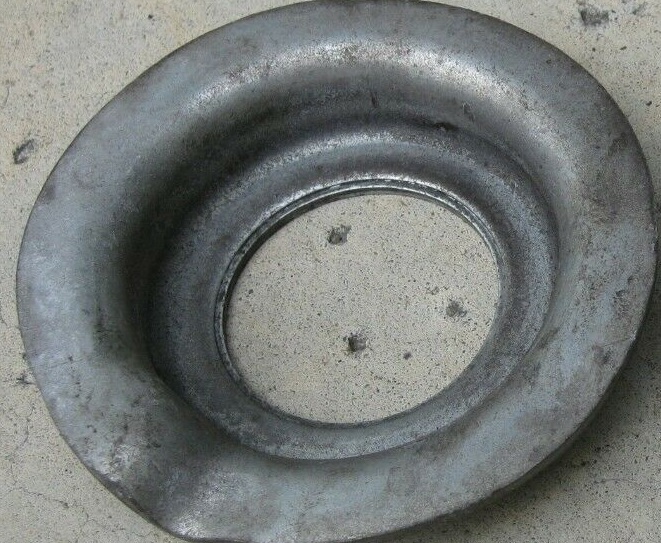
Posted by: mepstein Apr 1 2020, 06:45 AM
Great progress, I have a question about your Bilstein's ,,,Are those lower perches upside down ?? The old ones have a recess to hold the ring clip contained ..and the shoulder keeps the spring centered.. see pic
They are upside down. Sorry.
Posted by: Chris H. Apr 1 2020, 07:44 AM
^thanks!
I'd make more progress if I didn't spend sooooo much time looking for stuff in my garage.
Ain't that the truth. In addition to various tools I've lost a dowel pin and the woodruff key during my WBX rebuild. Luckily they are pretty universal and were only a few $ to replace. The originals will turn up someday since I put them "somewhere safe".
Keep at it Mike
!
Posted by: Mueller Apr 1 2020, 08:52 AM
Dang it, they are upside down. I kept thinking to myself what a terrible design. Will fix that today. Thanks.
Posted by: Mueller Apr 1 2020, 08:52 AM
Dang it, they are upside down. I kept thinking to myself what a terrible design. Will fix that today. Thanks.
Posted by: mepstein Apr 1 2020, 05:13 PM
^thanks!
I'd make more progress if I didn't spend sooooo much time looking for stuff in my garage.
Ain't that the truth. In addition to various tools I've lost a dowel pin and the woodruff key during my WBX rebuild. Luckily they are pretty universal and were only a few $ to replace. The originals will turn up someday since I put them "somewhere safe".
Keep at it Mike
!I bought a couple of these with a 25% off coupon. They work well for my needs.
Attached thumbnail(s)
Posted by: JRust Apr 2 2020, 10:14 AM
Dang it, they are upside down. I kept thinking to myself what a terrible design. Will fix that today. Thanks.
I appreciate you doing something wrong every once in a while
. Makes me feel better when I sit there scratching my head why won't this go on. Then it finally dawns on me because I'm doing it wrong . A pretty common occurrence unfortunately for me
Posted by: scotty914 Apr 4 2020, 04:59 PM
If it was not from 15 years ago, I would swear Mueller did not like the thought of my suby conversion. I could be wrong, but so many said it would not work, why cut an original car etc etc
Posted by: 76-914 Apr 5 2020, 10:22 AM
If it was not from 15 years ago, I would swear Mueller did not like the thought of my suby conversion. I could be wrong, but so many said it would not work, why cut an original car etc etc
Oh they still say this. Surprising how many people this offends.

Posted by: ValcoOscar Apr 5 2020, 11:23 AM
BTW...  Mike
Mike
Posted by: Mueller Apr 5 2020, 11:50 AM
If it was not from 15 years ago, I would swear Mueller did not like the thought of my suby conversion. I could be wrong, but so many said it would not work, why cut an original car etc etc
I probably did..how times change.
Thanks Oscar...I think,hahaha
Posted by: Mueller Apr 17 2020, 01:13 AM
Tracing an electrical problem, it lead me to the wiper assembly.
Also notice the nice over spray on the ducting.
Even with the leaves cleaned out of the fan it does not turn easily. 1st time taking one apart to this level. Cast steel impeller from what it looks like in there. Wonder if a lighter fan with BLDC motor would work in there?
Picture does not show how filthy the other side of the wiper system is..nasty.
Did they really need 3 holes for the antenna cable?

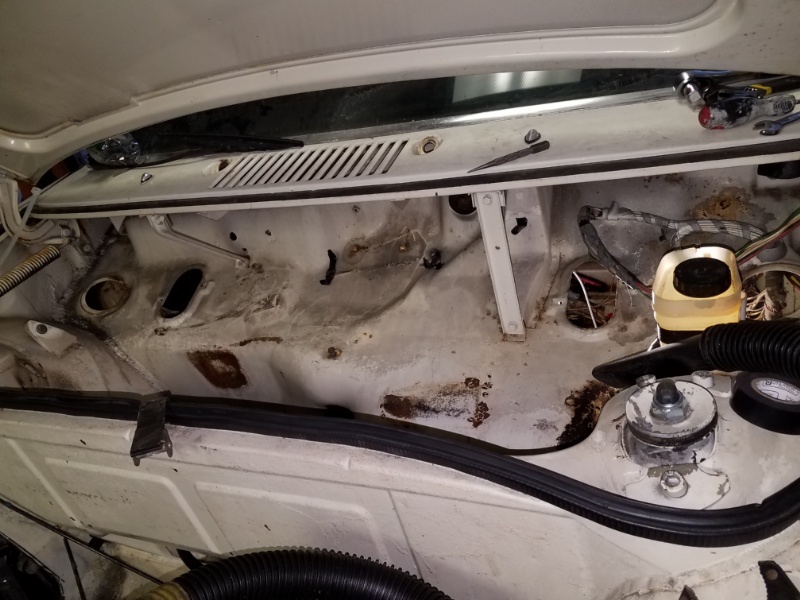
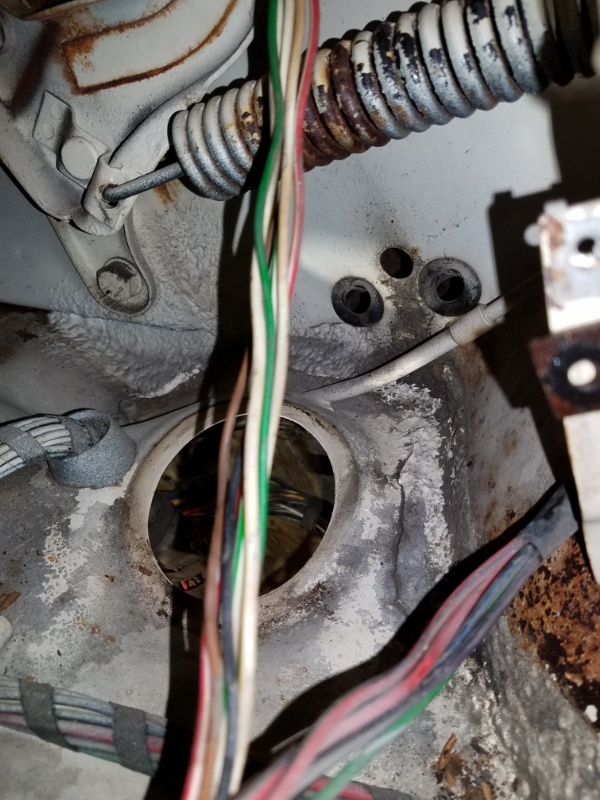
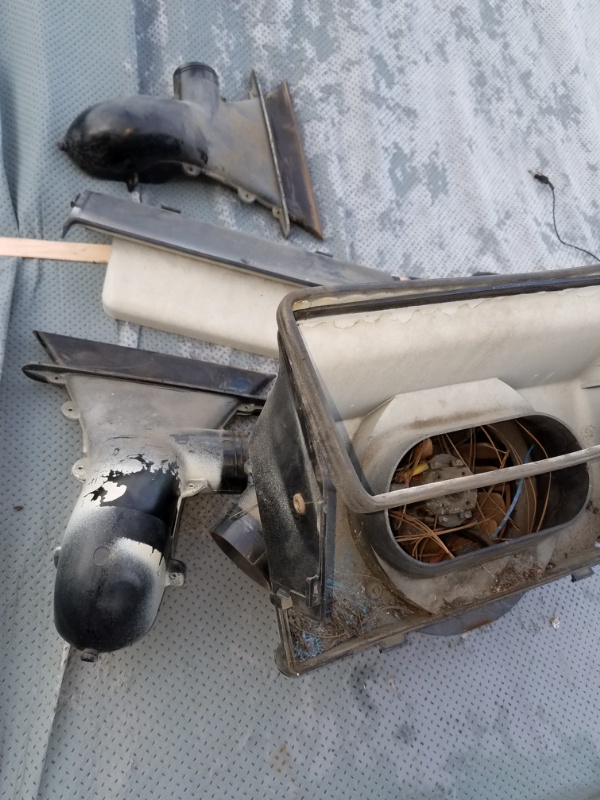
Posted by: 76-914 Apr 17 2020, 09:51 AM
Mike, what are you doing for heat? Any AC plans?
Posted by: Retroracer Apr 17 2020, 11:35 AM
RE: "three holes for antenna cable"
So I have the same three holes on my car; IIRC two of them were for hoses running to the engine intake to the carbon canister and back, routed down the rockers. Plus one for the antenna. Now in hindsight: I wish I'd welded all those shut before paint....
Good luck with the blower motor. I found a cheapish modern equivalent that needed some slight tweaks to fit.
- Tony
Posted by: Mueller Apr 17 2020, 04:47 PM
RE: "three holes for antenna cable"
So I have the same three holes on my car; IIRC two of them were for hoses running to the engine intake to the carbon canister and back, routed down the rockers. Plus one for the antenna. Now in hindsight: I wish I'd welded all those shut before paint....
Good luck with the blower motor. I found a cheapish modern equivalent that needed some slight tweaks to fit.
- Tony
So right you are, I totally forgot I pulled those lines while I was installing my brakes. I kept them all so I can put them back later on in the build.
76-914,
While I would like to have both, poor planning on my side means I shall have neither for the short term.
For heat I could tap into my radiator lines and run a simple heater core, A/C will be a little more tricky.
Posted by: rgalla9146 Apr 17 2020, 06:37 PM
Mike I'm sorry to admit I've missed this until now.
Mad skills.....you don't take the easy path, that's for sure.
keep up the great work.
Posted by: Mueller Apr 22 2020, 11:56 PM
Took the blower apart. Found a replacement Bosch motor for $84 or so.
I did get the blower motor to spin freely by cleaning it with Brake Parts Cleaner. I'm sure if I clean the commutators and oil the bearings it'll live for a while longer. (sometimes you can use a pencil eraser to clean commutators)
Put gas tank back in, new seals for the sending unit and filler.
Decided to work from front bumper back to rear of car for remaining work
Will be tackling the wiring inside the cabin next.
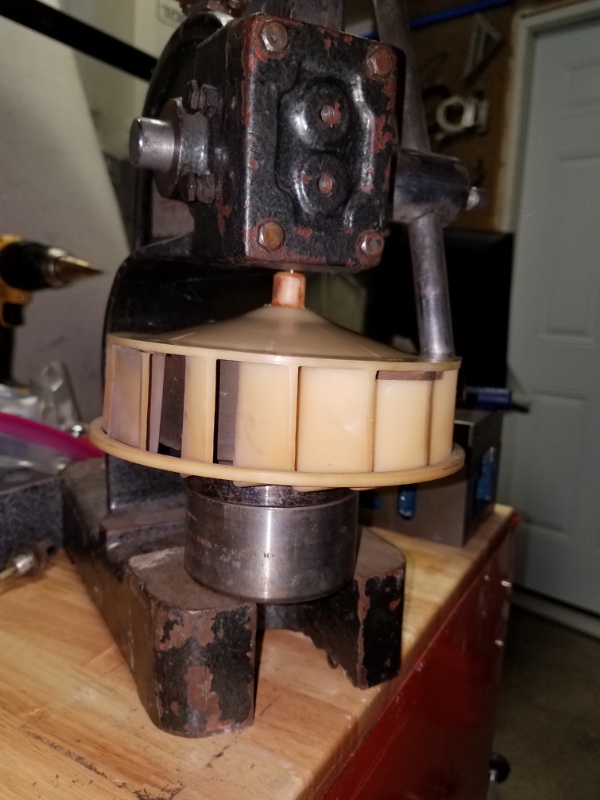
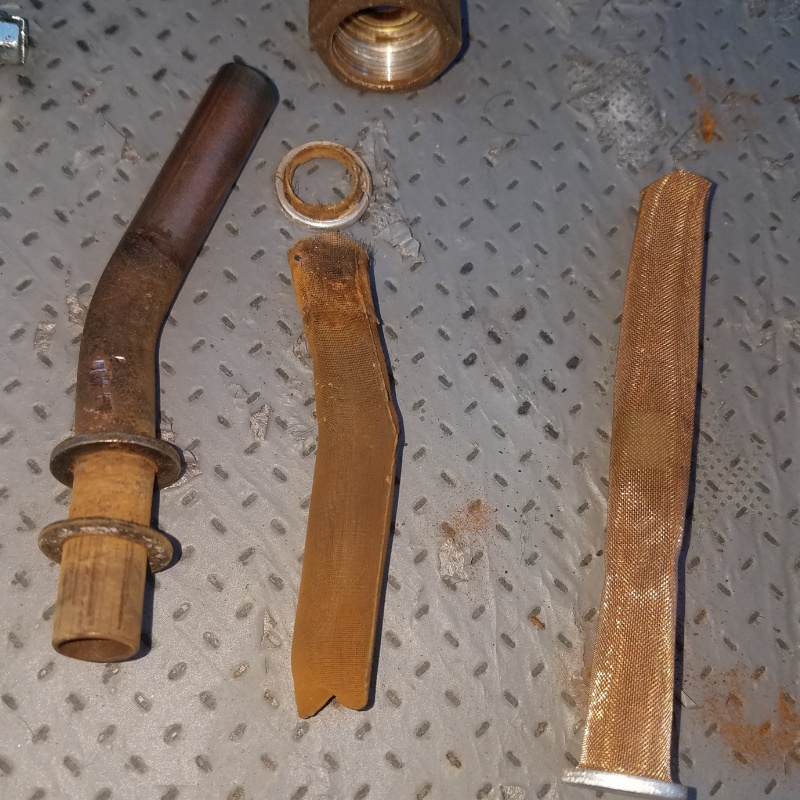
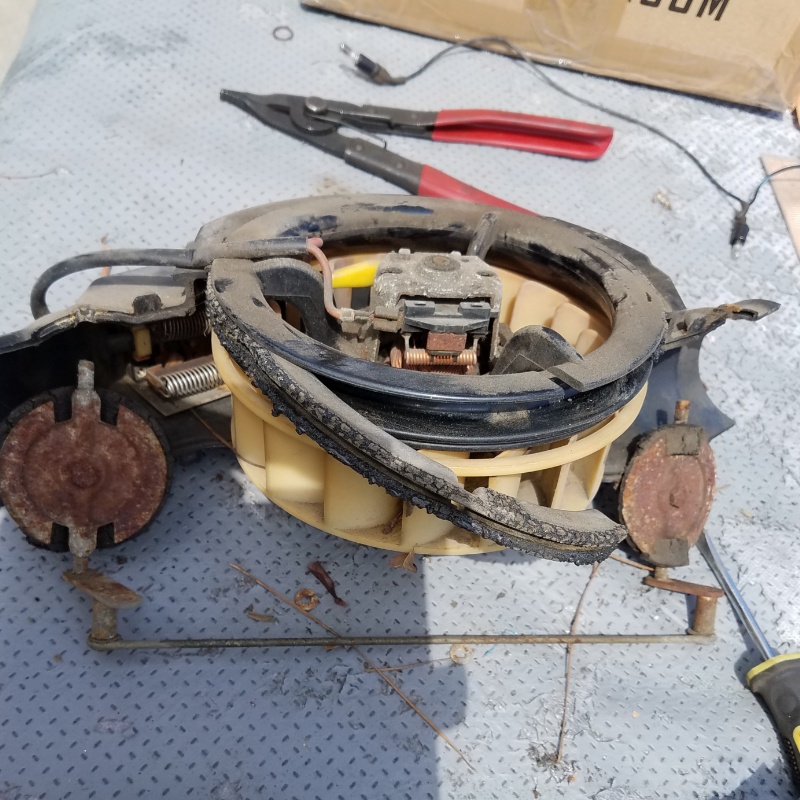
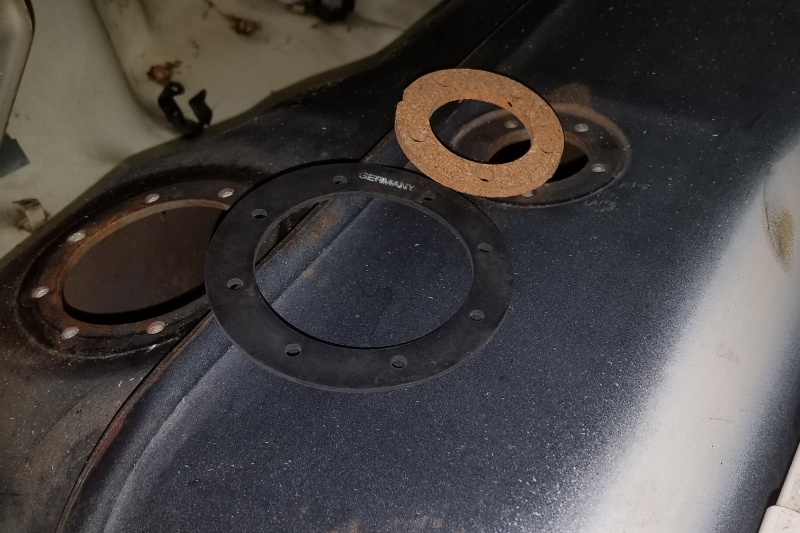
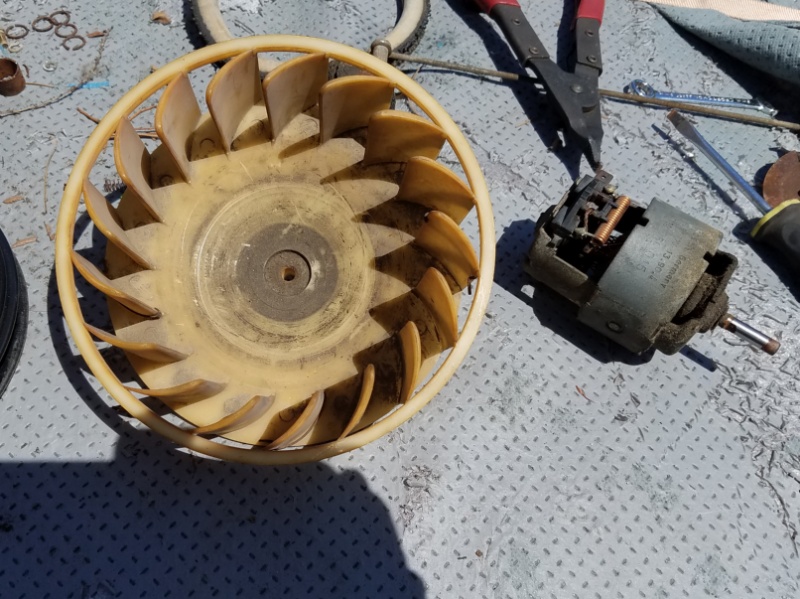
Posted by: Andyrew Apr 23 2020, 12:10 AM
Took the blower apart. Found a replacement Bosch motor for $84 or so.
I did get the blower motor to spin freely by cleaning it with Brake Parts Cleaner. I'm sure if I clean the commutators and oil the bearings it'll live for a while longer. (sometimes you can use a pencil eraser to clean commutators)
Put gas tank back in, new seals for the sending unit and filler.
Decided to work from front bumper back to rear of car for remaining work
Will be tackling the wiring inside the cabin next.
Nice work on that motor and blower rebuild! IMHO the heater and fresh air system on the 914 is more complicated than the damn T4 motor...
Posted by: Mueller Apr 23 2020, 12:15 AM
Nice work on that motor and blower rebuild! IMHO the heater and fresh air system on the 914 is more complicated than the damn T4 motor...
It's those darn ring clamps and all those circular rings that are a pain.
Posted by: 76-914 Apr 23 2020, 09:16 AM
Did you find any pencils or pens in the defrost ducts? If the slide control only moves half way then one has dropped in there. BTW, the white erasers clean better than the pink erasers. They have a little grit in the white ones. Keep after it.
Posted by: Mueller May 2 2020, 03:51 PM
*********
Posted by: Mueller May 3 2020, 07:35 PM
1st time on the ground with the new wheels and tires.
205/55-15 on 15x7 23.3mm offset 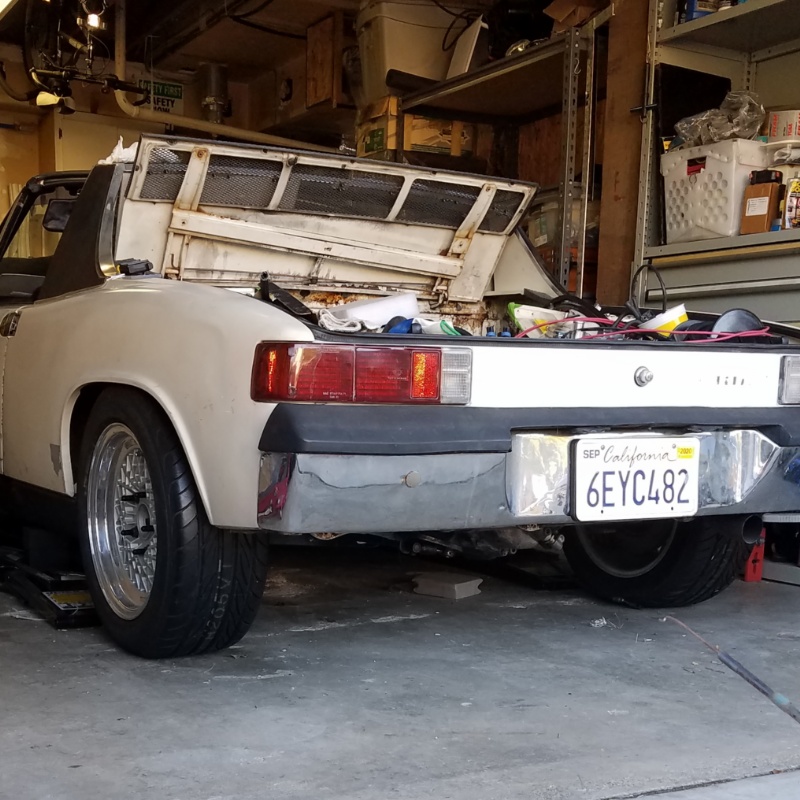
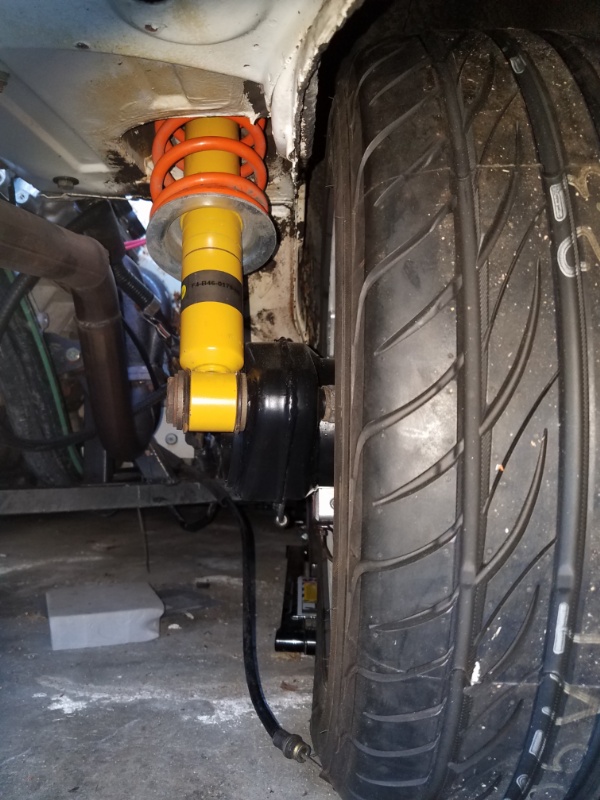
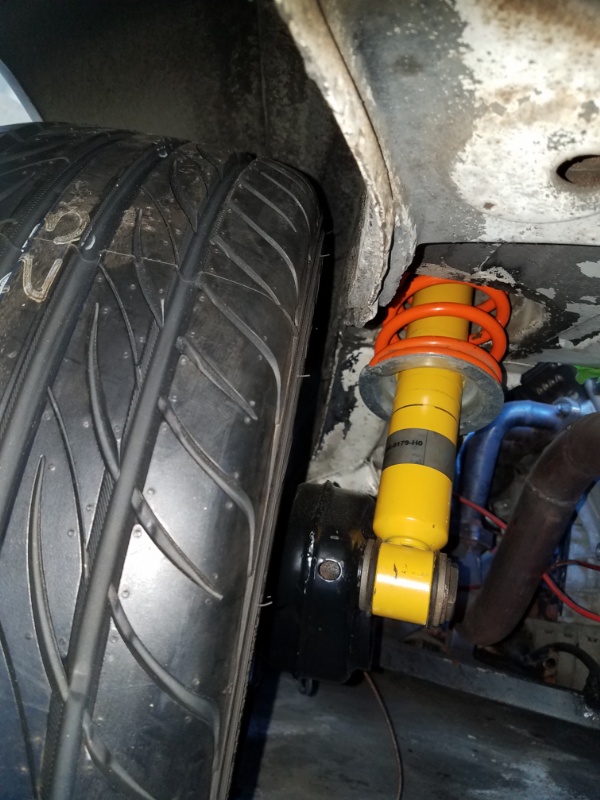
Posted by: dan10101 May 3 2020, 08:10 PM
That looks awesome! Love the deep dish.
Posted by: Cairo94507 May 4 2020, 07:22 AM
That's a nice fit. A decent amount of tire for a 914 narrow body.
Posted by: tygaboy May 4 2020, 08:27 AM
Yeah, baby! Those looks great, Mike!
It's coming right along...
Posted by: Mueller May 10 2020, 01:20 AM
-----------
Posted by: tygaboy May 10 2020, 08:31 AM
Watching with interest since I'm about to wire up, too. I'd be interested in hearing about the tools you use, where you source the little bits, etc.
Posted by: Mueller May 10 2020, 03:37 PM
Watching with interest since I'm about to wire up, too. I'd be interested in hearing about the tools you use, where you source the little bits, etc.
These solderless terminals are from Digi-Key, I wouldn't waste my time and money on cheaper ebay/Amazon pieces. I'll post some pics later on comparing a few.
Posted by: EdwardBlume May 10 2020, 11:58 PM
Posted by: Andyrew May 11 2020, 10:36 AM
Wiring,
My favorite part! (Not!)
Im curious what fun little tools you are going to use for everything.. That notes paper looks really well laid out!
Posted by: djway May 12 2020, 10:12 PM
Watching with interest since I'm about to wire up, too. I'd be interested in hearing about the tools you use, where you source the little bits, etc.
These solderless terminals are from Digi-Key, I wouldn't waste my time and money on cheaper ebay/Amazon pieces. I'll post some pics later on comparing a few.
The Digi Key terminals are the only way to go. You should also get the corresponding male pieces.
I use the Tool Aid krimper
https://www.amazon.com/Tool-Aid-18930-Ratcheting-Weatherpack/dp/B000K1CFXO
I have probably gone through 400 pieces in the last few years
Posted by: Mueller May 15 2020, 04:17 PM
............
Posted by: 76-914 May 16 2020, 12:15 PM
Hey, where did the pic of the harness go? The harness didn't up in smoke did it?
Posted by: Mueller May 29 2020, 12:37 AM
Got to run some bigger wire for the front power module, gave me a chance to use my $40 special crimper from Amazon. That is a #2 wire.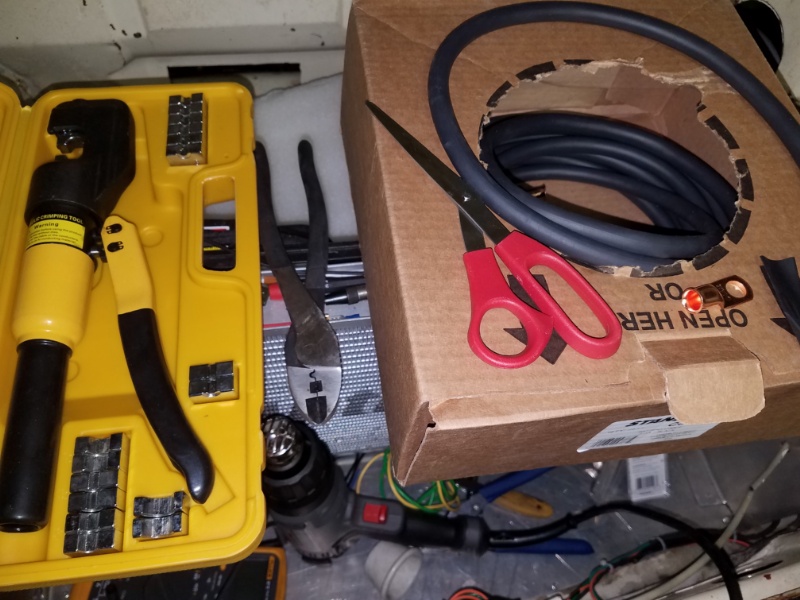
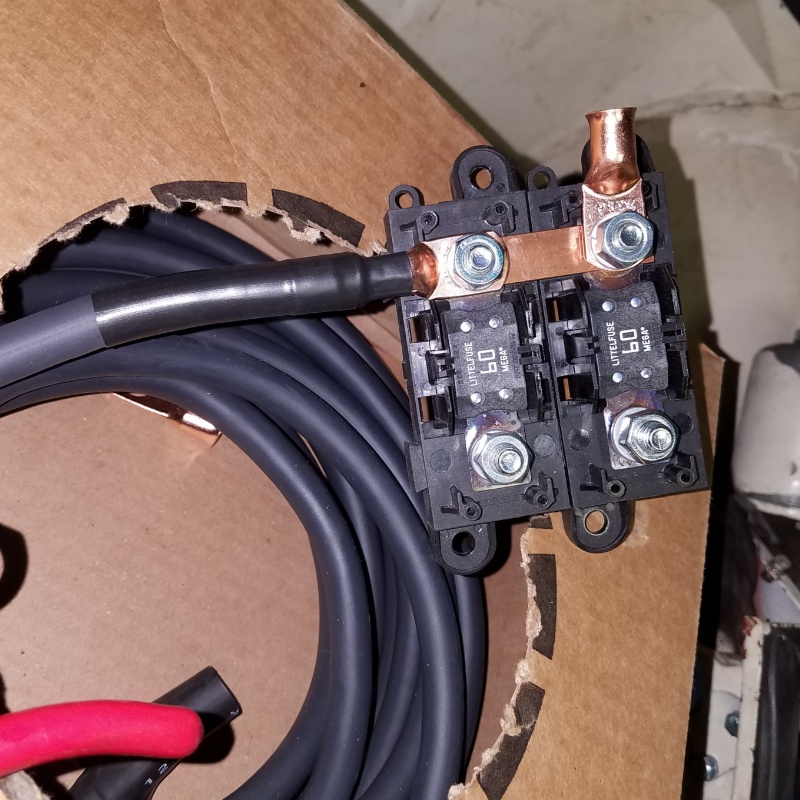
Posted by: cali914 May 29 2020, 10:21 AM
Damn Mike what are you running 15 speaker 4 amp Bose stereo. 60amps seems like a lot. Looks damn good though. We fired up car got it running but the engine had a blown head gasket. Pulled it all apart and rebuilding thats life.
Posted by: Mueller May 29 2020, 11:08 AM
The Digi Key terminals are the only way to go. You should also get the corresponding male pieces.
I use the Tool Aid krimper
https://www.amazon.com/Tool-Aid-18930-Ratcheting-Weatherpack/dp/B000K1CFXO
I have probably gone through 400 pieces in the last few years
I have a Paladin Tools 1300 crimper with interchangeable dies.
Posted by: 76-914 May 29 2020, 04:11 PM
Good God Almighty, Mike. Which sizing table did you use? 
Posted by: Mueller May 29 2020, 04:57 PM
Good God Almighty, Mike. Which sizing table did you use?
I have another 70amps that I am going to daisy chain off the end of that line. I already had this cable and I'm tired of spending money on the car so I figured I'd use it.
I also have about 30 feet of 4/0 that is sitting in one of my storage units on the side of the house...that would have been overkill
Posted by: Mueller May 31 2020, 12:22 AM
Removed the rest of the seam sealer in the rear trunk.
Threw a 3.5 emblem on the back...
Cleaned injectors back to me.
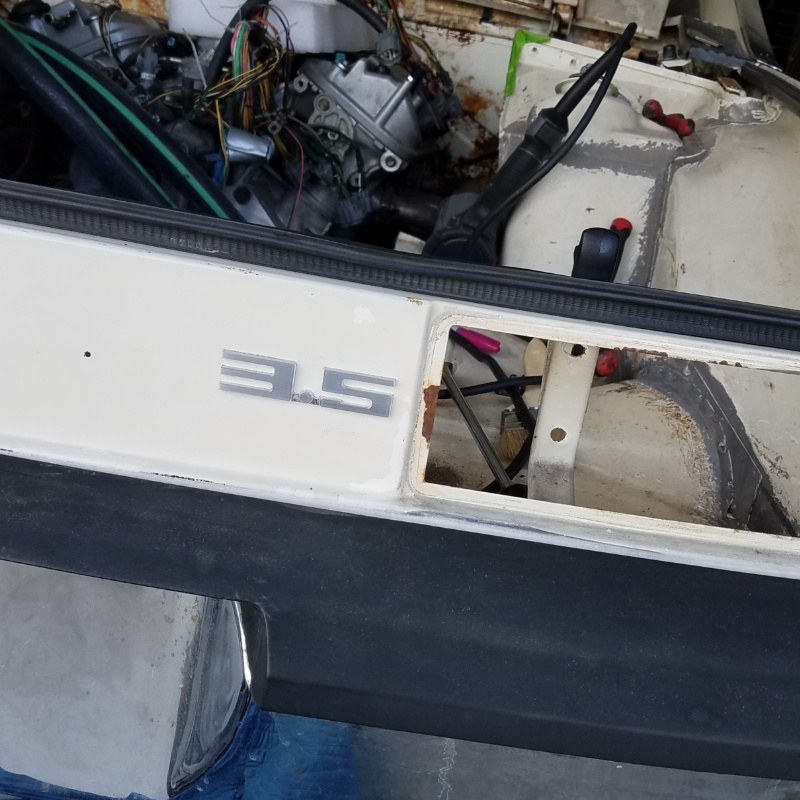
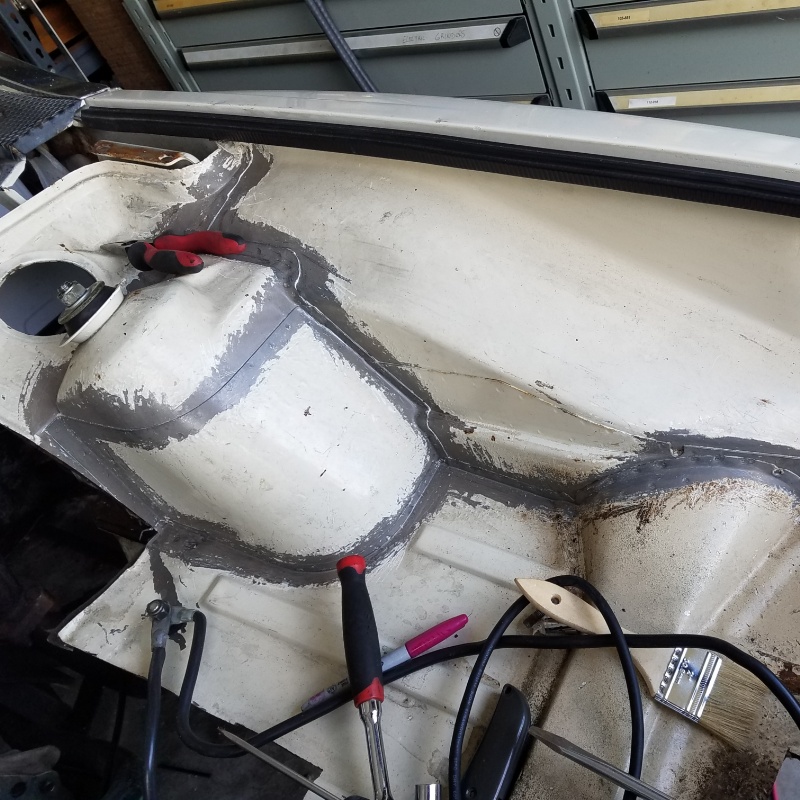
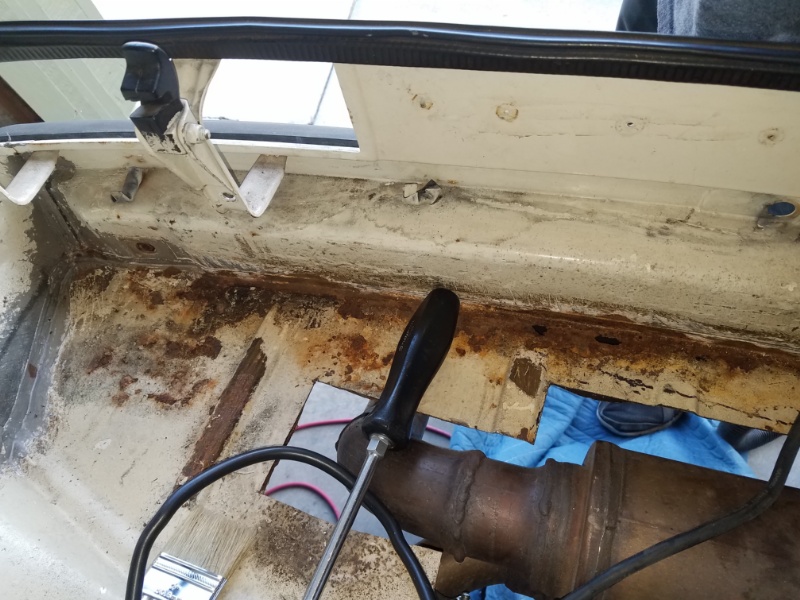
Posted by: Mueller Jun 8 2020, 11:58 PM
Trimmed more sheetmetal, got rid of the sharp edges.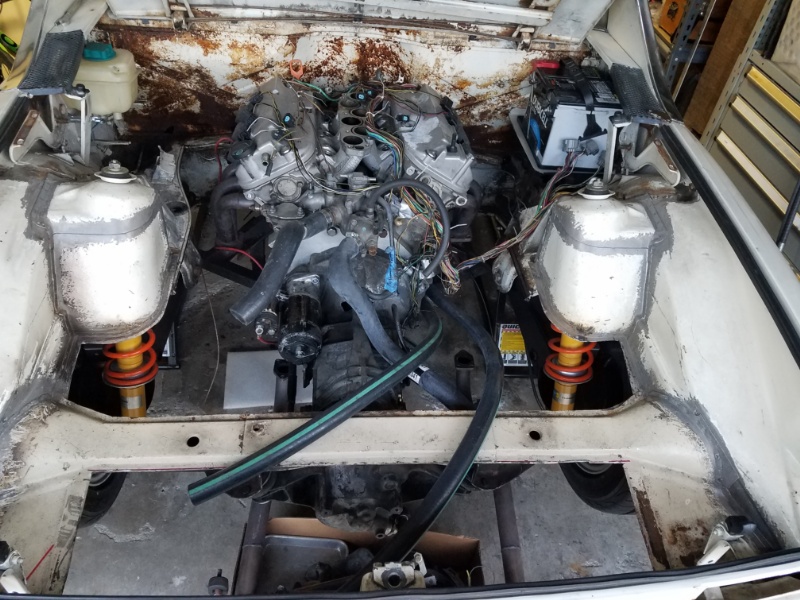
More wiring harness work, on table is stock engine harness.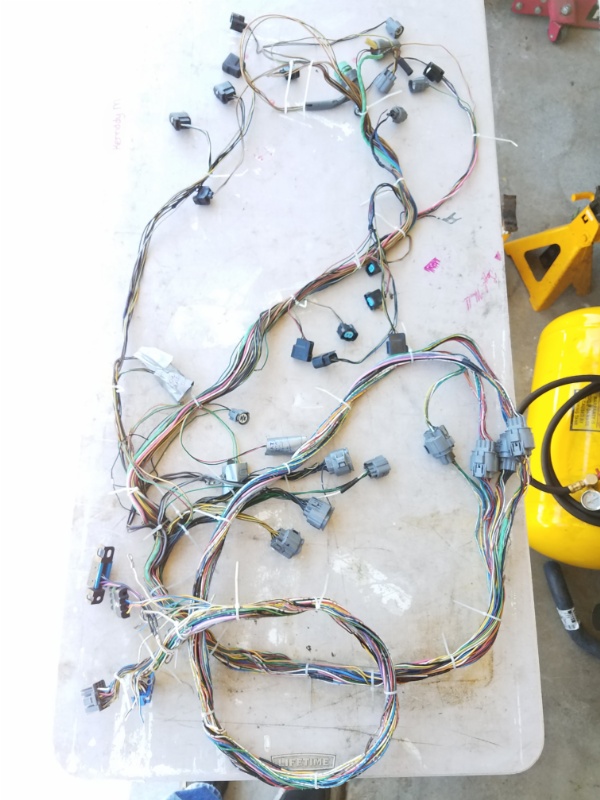
After dissecting the harness I have each component separated. 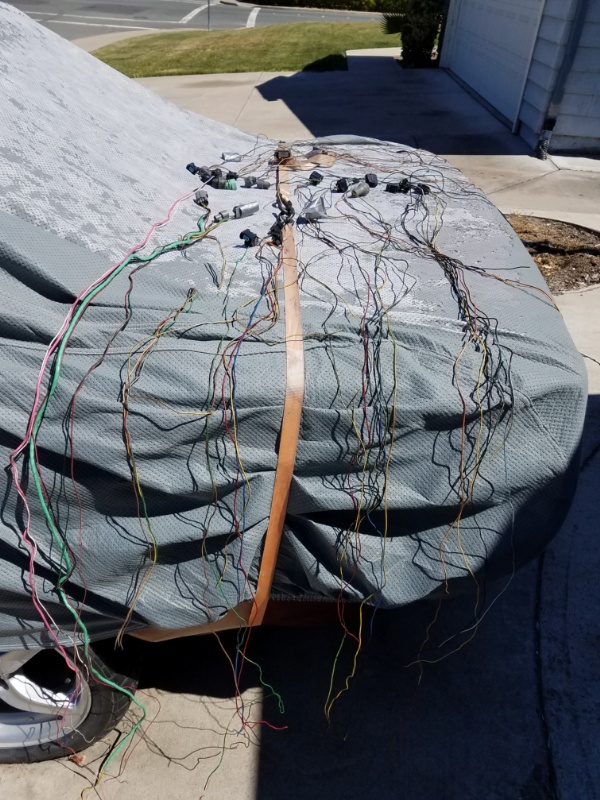
Decided to do some PM and replace some gaskets, glad I took it apart. The water crossover tube from the water pump (front of motor) to the water manifold (rear of motor) has some rust so it'll be replaced. Luckily I can get a factory replacement for $20.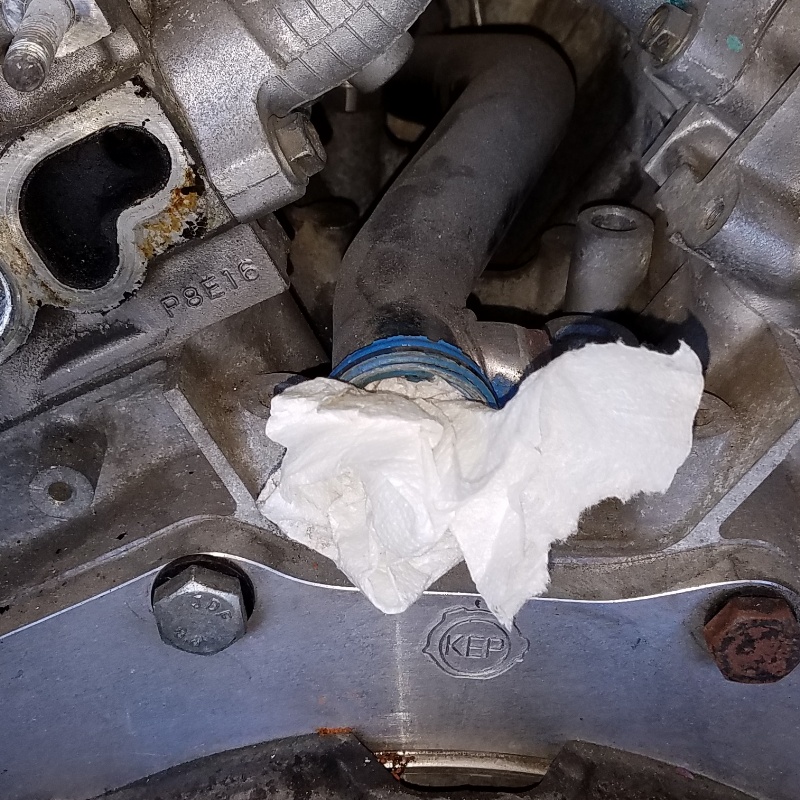
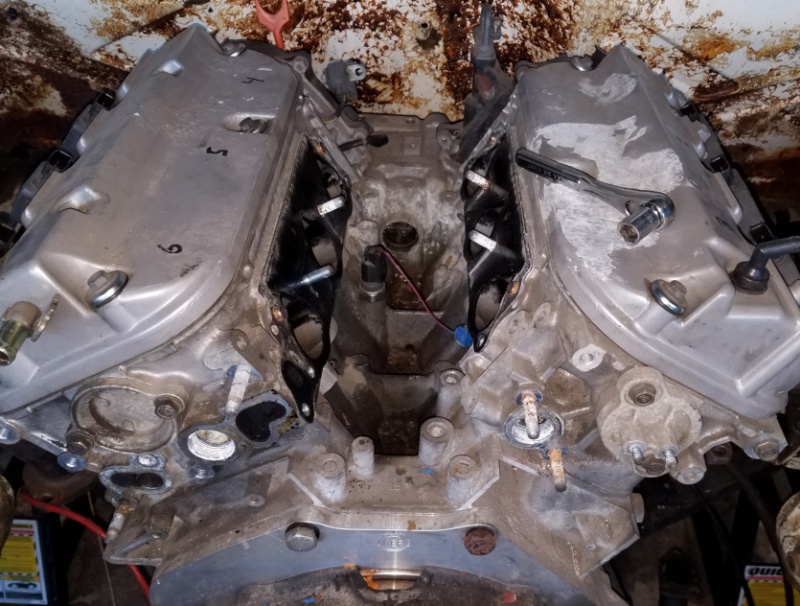
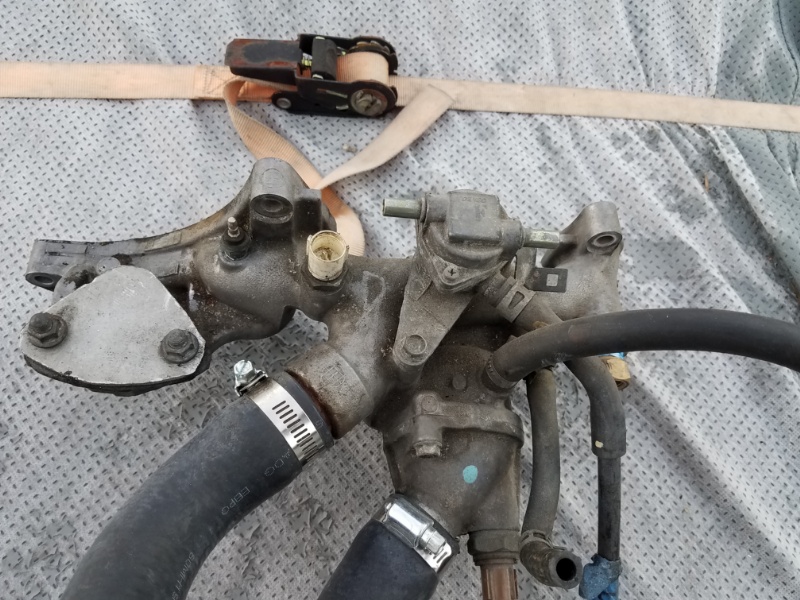
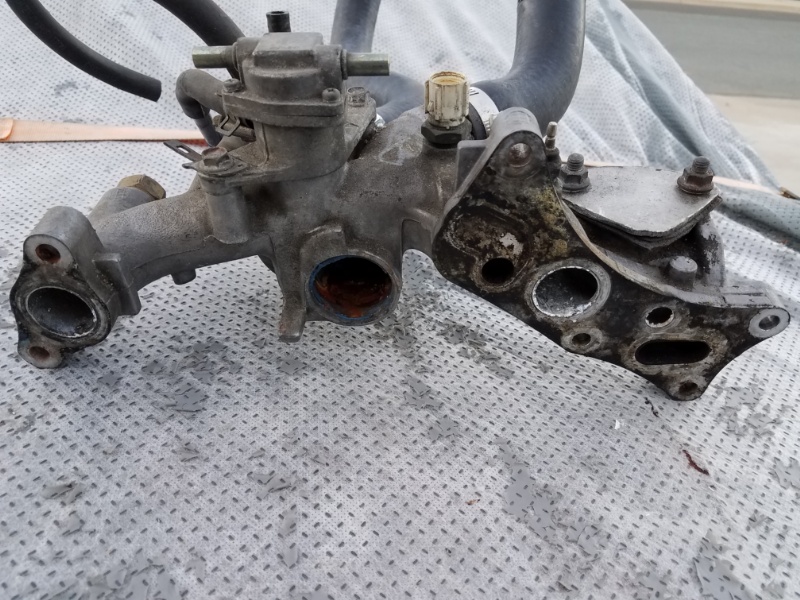
Posted by: Mueller Jul 21 2020, 12:52 AM
Infinitybox PDU's almost all done. Need to clean up the wiring. Tomorrow will be getting the engine harness back together.
https://www.youtube.com/watch?v=SxQiTVPpKp0
Posted by: 914forme Jul 21 2020, 05:38 AM
Great Progress
Posted by: 76-914 Jul 21 2020, 07:50 AM
Wiring is always a hurdle. Getting close.
Posted by: tygaboy Jul 21 2020, 07:58 AM
Nice work, Mike! I'm right there with you on the wiring "fun". That said, it really is satisfying when it works as expected, isn't it?
Are you targeting any sort of time frame to have the car running/driving?
Posted by: Mueller Jul 21 2020, 09:35 AM
Ideally I'd like the car to be up and running ASAP, however I think realistically I'm another month or 2 out.
I did decide to keep my side markers and turn them into blinkers.
https://www.youtube.com/watch?v=CqZL8A2vMUk
Posted by: Cairo94507 Jul 21 2020, 09:55 AM
Hi Mike,
Great progress. I like the side markers being blinkers. As small as our cars are the more lighting the better so people see and hopefully don't hit us.
Cheers,
Michael
Posted by: jd74914 Jul 21 2020, 11:23 AM
Sweet! Any initial impressions of the InfinityWire you can share?
Posted by: Mueller Jul 21 2020, 12:30 PM
Sweet! Any initial impressions of the InfinityWire you can share?
I have a love/hate relationship with the InfinityWire setup.
If I didn't have the radiator in the front trunk I would have mounted the Mastercell (inputs) and 1 Powercell (outputs) in there, that I think would have saved me some headache and install time. (they are rated for decently high temp) The system has so many features and options that they are really better suited for a vehicle with a lot more features like power windows, power doors. It can control on/off 12vdc or supply PWM signals (5% to 80% I think?)
The instructions and other videos are good, phone support is awesome. I have had a call a few times and every problem I had was resolved (operator issues, nothing major)
I was looking at buying the Ecumaster PMU16 right before I was offered the InfinityWire at a hard to pass deal. When I get to working on my '78 Volvo 242 I might revisit the idea of the PMU16 or similar. (Holley has great looking PDM , almost double the price)
https://ecumasterusa.com/products/ecumaster-pmu16-power-management-unit?variant=8318139269181
.
Posted by: jd74914 Jul 21 2020, 12:49 PM
I have a love/hate relationship with the InfinityWire setup.
...
I was looking at buying the Ecumaster PMU16 right before I was offered the InfinityWire at a hard to pass deal. When I get to working on my '78 Volvo 242 I might revisit the idea of the PMU16 or similar. (Holley has great looking PDM , almost double the price)
That's where I am. I have an InfinityWire setup because the price was too good to pass up, and at the time nothing was even close to cost effective. A bit after I bought it ECUmaster unveiled their PDM.
The part that really bugs me is that you need IW to supply the programming anytime it needs to be changed. They've been saying since 2018 that they would be releasing a package for user's to program, but that still doesn't exist... I would far rather have something user programmable which is in a single box, but that means spending more money, etc.Glad to see it working for you!
Posted by: Mueller Jul 21 2020, 03:37 PM
@http://www.914world.com/bbs2/index.php?showuser=19241
Challenge accepted.
All of my light controls (and future ignition/starting controls) are factory switches.
https://www.youtube.com/watch?v=2cbiriMVVfQ
@http://www.914world.com/bbs2/index.php?showuser=1659
I just spoke with Jay @ Infinity, he said the diy programmer should be done in a few months, said the Covid thing messed it up from being released back in April.
Posted by: burton73 Jul 21 2020, 05:03 PM
Yep, you guys have all the cool stuff.
Be well!
Bob B
Posted by: tygaboy Jul 21 2020, 05:08 PM
@http://www.914world.com/bbs2/index.php?showuser=19241
Challenge accepted.
All of my light controls (and future ignition/starting controls) are factory switches.
It's ON!
Mike - Looking very good! I really like those LED light boards. Maybe a future upgrade for me...
I am going to run the factory ignition switch as I want to retain the steering lock and have one key for the whole car. Keep up the great work!
Posted by: dan10101 Jul 21 2020, 05:16 PM

I'm getting dizzy...

Posted by: Retroracer Jul 21 2020, 07:40 PM
Great seeing the progress on this @http://www.914world.com/bbs2/index.php?showuser=87 ! Also interesting to watch two custom wiring installations on a teener happening in parallel.... (you and @http://www.914world.com/bbs2/index.php?showuser=19241 )
- Tony
Posted by: jd74914 Jul 22 2020, 07:21 AM
@http://www.914world.com/bbs2/index.php?showuser=1659
I just spoke with Jay @ Infinity, he said the diy programmer should be done in a few months, said the Covid thing messed it up from being released back in April.
That's awesome-finally! Every time I've talked to Jay its been coming, hopefully this is it. Have to say I do like the guy, he responds so quickly/completely every time we've communicated.
Posted by: Mueller Jul 30 2020, 05:15 PM
Nothing ground breaking, just doing a few small items on the car.
Made a battery hold down bracket.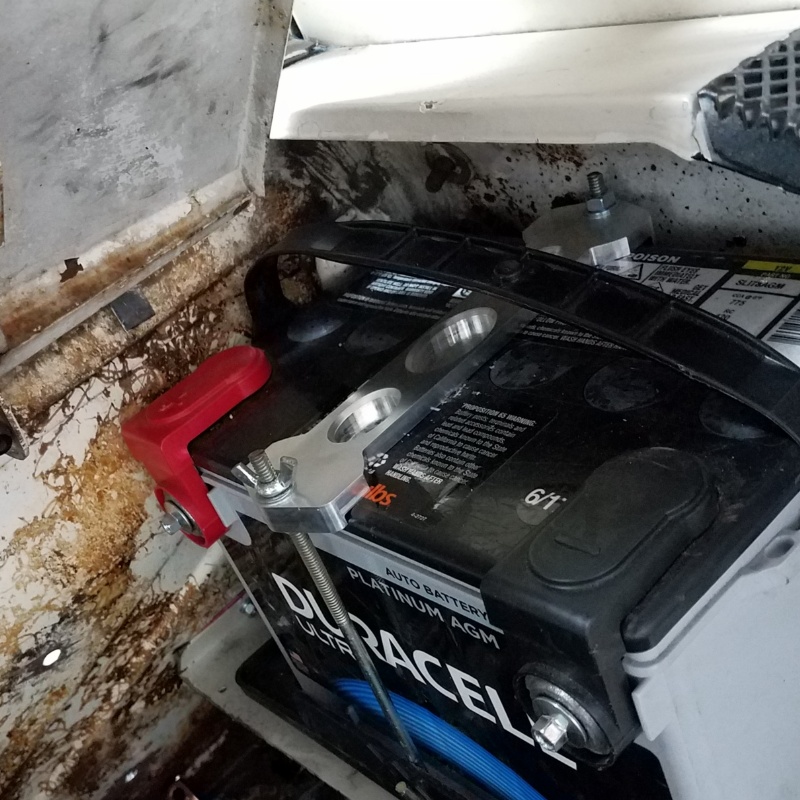
I didn't care for the stock heavy aluminum intake manifold so I made an adapter to use the stovk Honda throttle body. 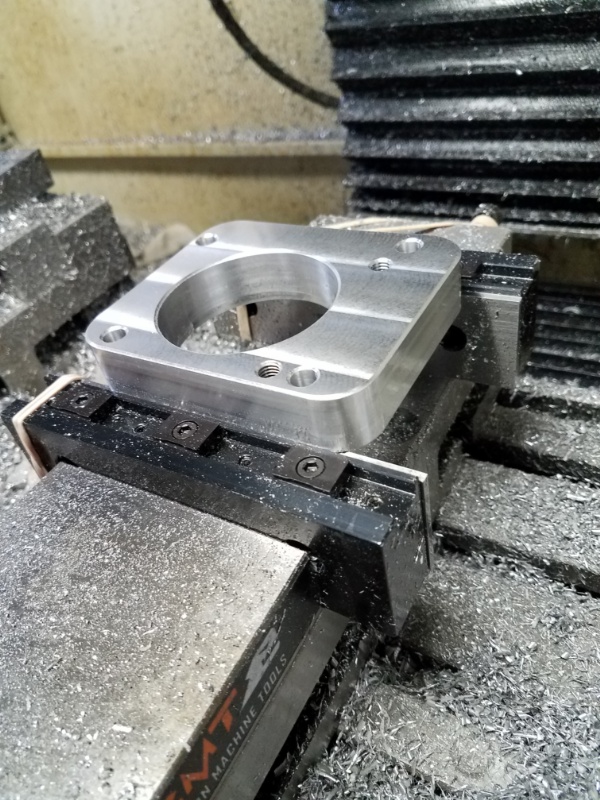

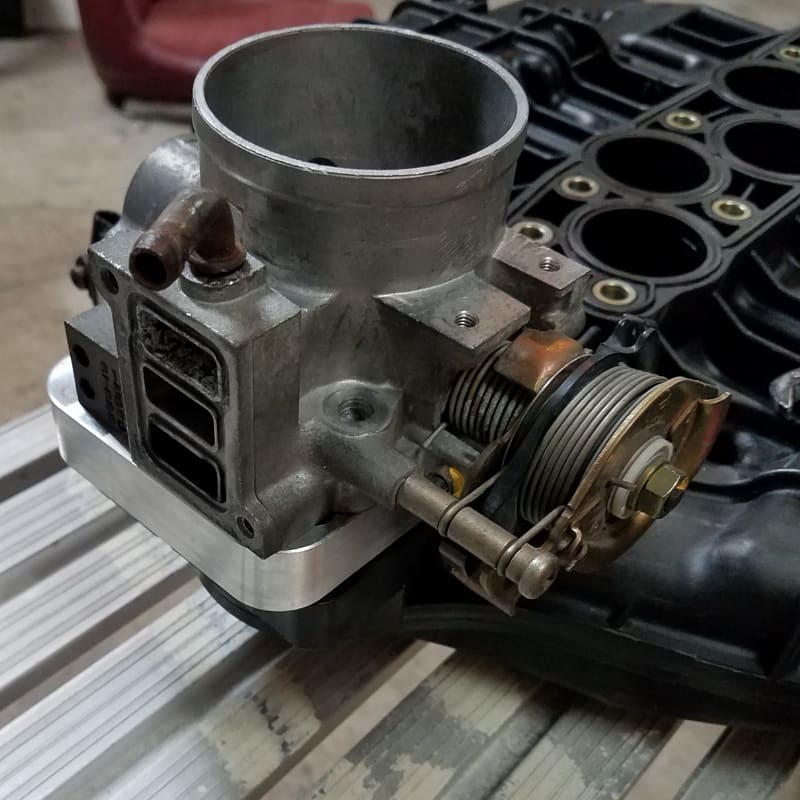
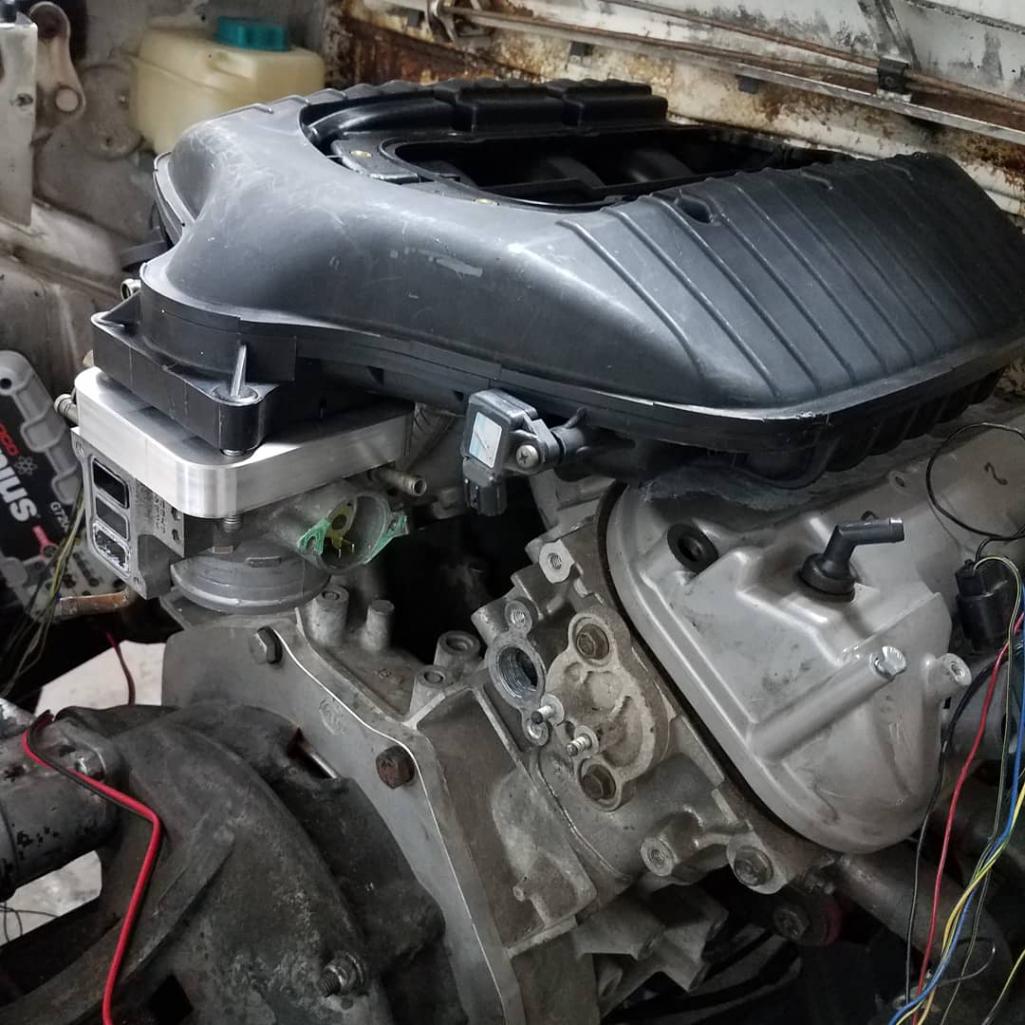
Posted by: tygaboy Jul 30 2020, 05:40 PM
Wow, great work on the milled parts! Looks fantastic!
Posted by: dan10101 Jul 30 2020, 11:45 PM
Progress is progress. Keep nipping away at it!
Posted by: Andyrew Jul 31 2020, 09:57 AM
Which manifold is that from? Lookin good
Posted by: Mueller Jul 31 2020, 01:06 PM
Which manifold is that from? Lookin good
Outboard motor
I'm really pushing this water cooled conversion using boat parts.

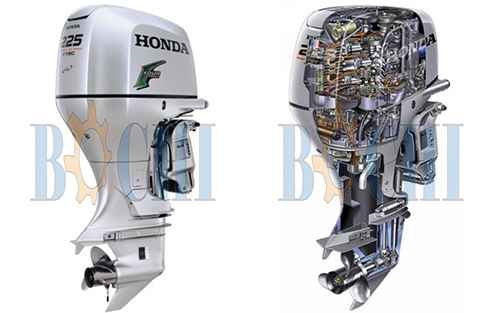
Posted by: Mueller Aug 19 2020, 10:32 PM
Back to working on the cooling system. I had to tap the heads to clean up the M28 threads. No idea why the heads had the holes tapped im tje 1st place, these are the outlets going to the radiator.
I'll be using hoses instead of the stock Honda aluminum water manifold. 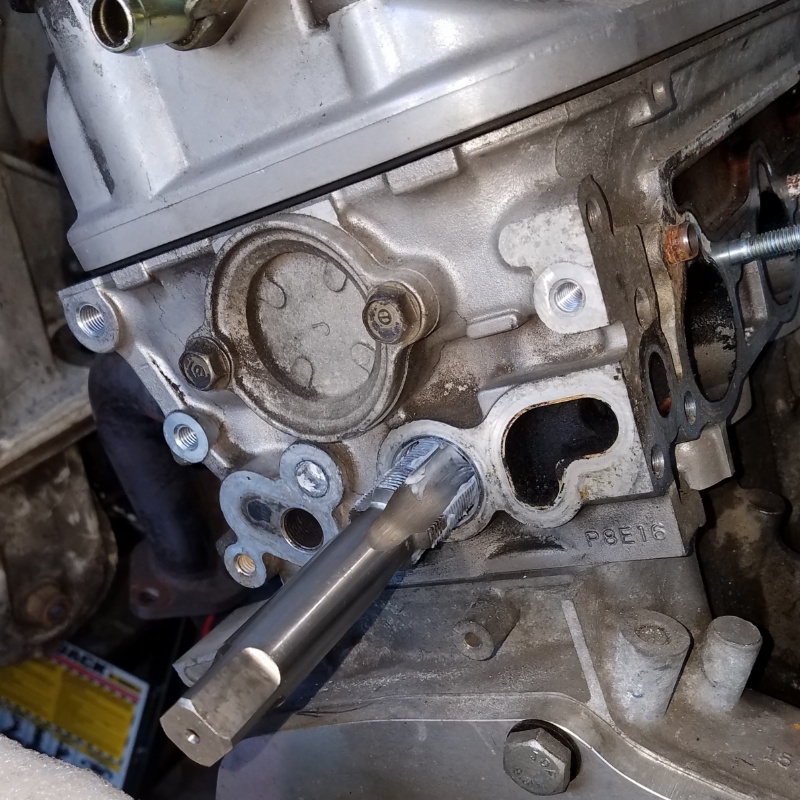
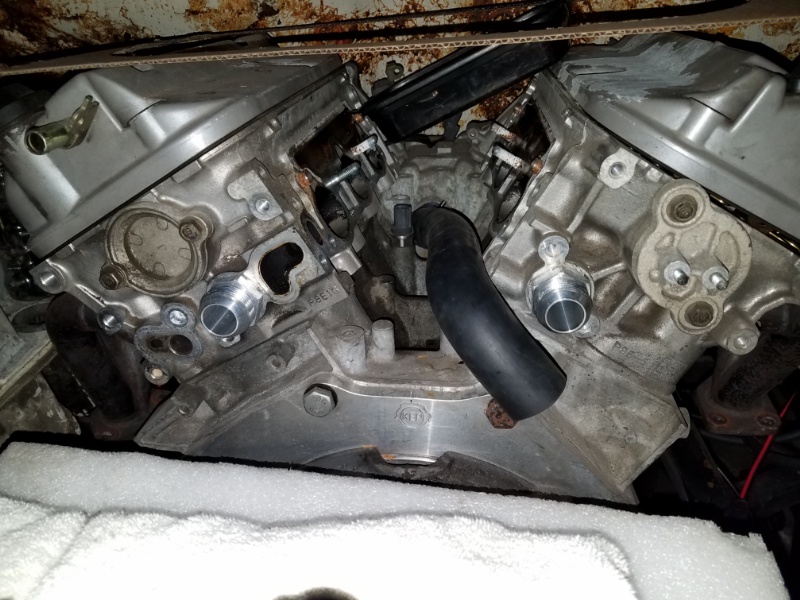
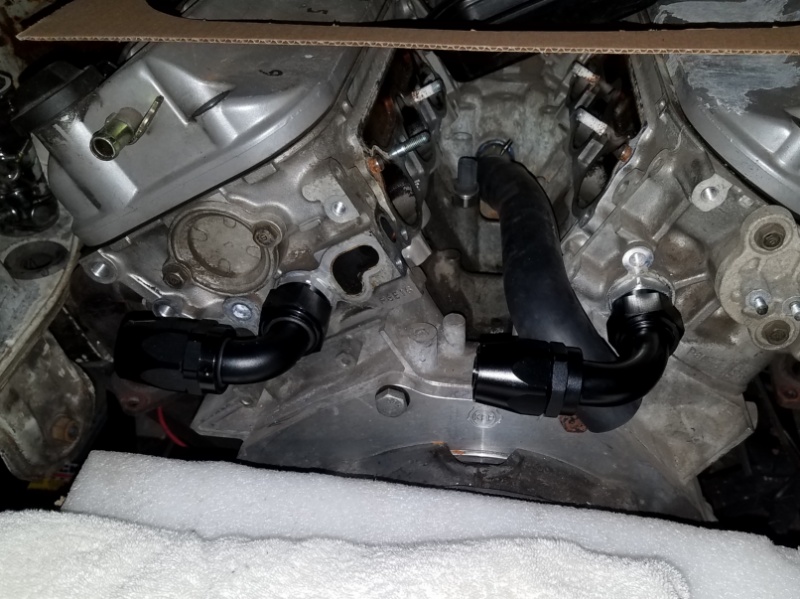
Posted by: 76-914 Aug 20 2020, 08:40 AM
Looking good Mike. Have you done your axels yet?
Posted by: Mueller Aug 20 2020, 10:41 AM
Looking good Mike. Have you done your axels yet?
Thanks...no, I have not installed the axles. I need to make an adapter for the larger CV joints (transmission side only since I have the larger stub axles on the trailing arms)
Posted by: Andyrew Aug 20 2020, 11:20 AM
Which manifold is that from? Lookin good
Outboard motor
I'm really pushing this water cooled conversion using boat parts.
Woah, What witchcraft is used to keep the crank lubricated on the top cyl journals and keep the oil out of the cylinders on the bottom?
Posted by: 76-914 Aug 20 2020, 09:34 PM
Which manifold is that from? Lookin good
Outboard motor
I'm really pushing this water cooled conversion using boat parts.
Woah, What witchcraft is used to keep the crank lubricated on the top cyl journals and keep the oil out of the cylinders on the bottom?
There is a write up in Apple News about that very same thing. Might have been in the Popular Mechanics section. Multiple & separate head thermostats on the Marine version as well. The guy in Alaskan waters Has different cooling needs than the guy in the Caribbean.
Posted by: EdwardBlume Aug 21 2020, 06:45 AM
Looking good Mike! Keep up the 914 therapy!
Posted by: dakotaewing Aug 21 2020, 09:31 AM
Looking for one of these?
https://www.racetronix.biz/p/y-block-male-16an-2-x-16an-black/yblk-1616
Posted by: Andyrew Aug 21 2020, 11:17 AM
Which manifold is that from? Lookin good
Outboard motor
I'm really pushing this water cooled conversion using boat parts.
Woah, What witchcraft is used to keep the crank lubricated on the top cyl journals and keep the oil out of the cylinders on the bottom?
There is a write up in Apple News about that very same thing. Might have been in the Popular Mechanics section. Multiple & separate head thermostats on the Marine version as well. The guy in Alaskan waters Has different cooling needs than the guy in the Caribbean.
I'll have to look that up, Very crazy!! Imagine installing an engine like that in a car!
Posted by: Mueller Sep 14 2020, 09:48 PM
Have not touched the 914 in a few weeks, other projects around the house and such.
Decided to make my own "wye" fitting today. It also gave me a chance to learn how to threadmill NPT threads. These are 3/4-14 NPT for the fittings to connect the hoses.
It will be 2 inlet and 1 outlet going to the radiator.
The video is showing my machine cutting the threads. The same cutter can cut multiple thread pitches, internal and external.
https://www.youtube.com/watch?v=azz8zstPheM
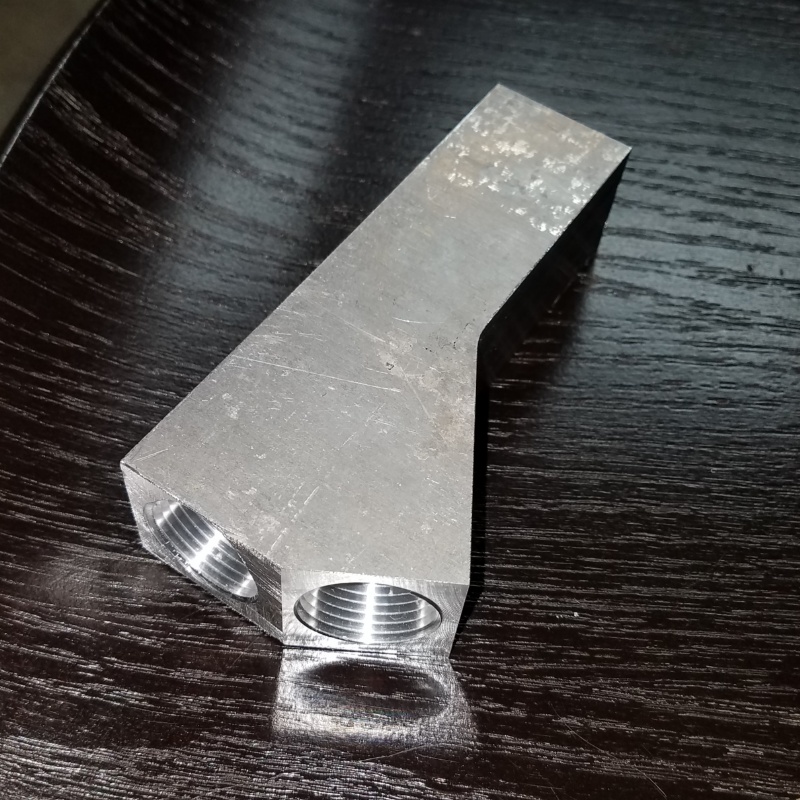
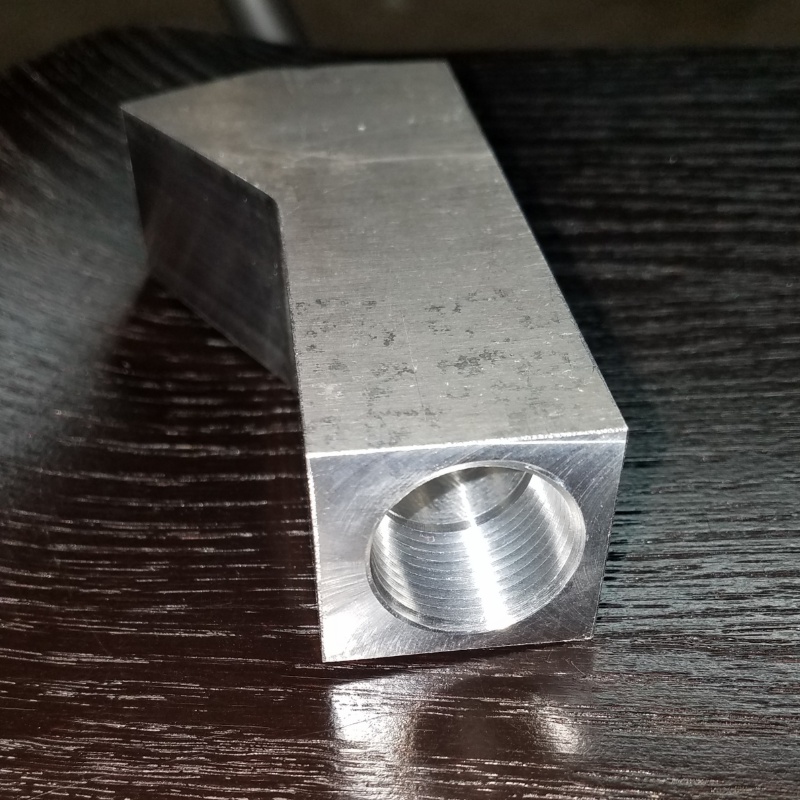

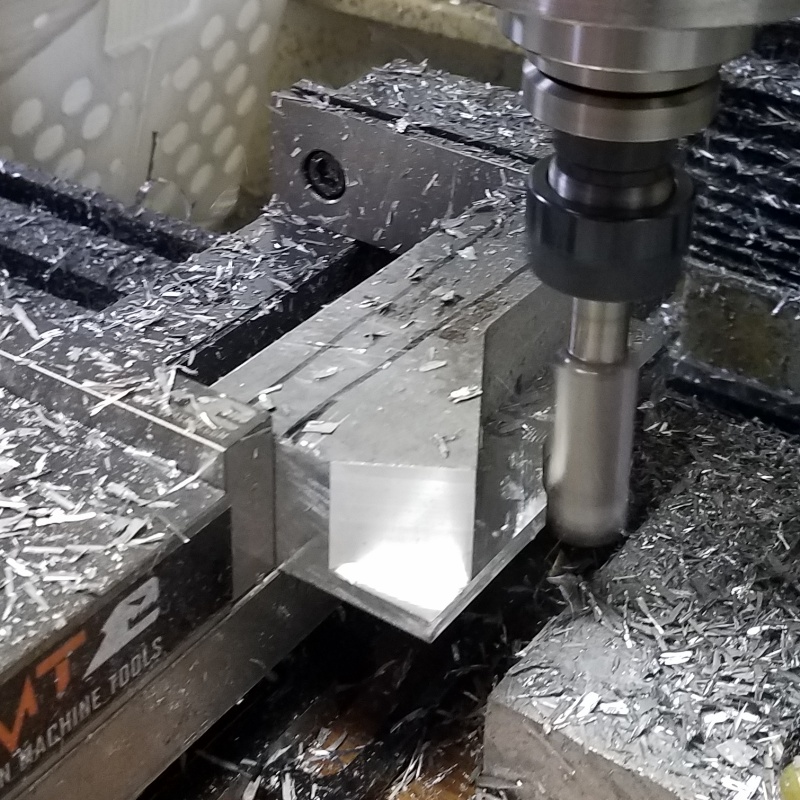
Posted by: Andyrew Sep 15 2020, 08:02 AM
Thats pretty trick how it mills the threads one at a time!
How difficult is that to program and setup?
Posted by: tygaboy Sep 15 2020, 09:27 AM
Mike - Thanks for posting stuff like this. I love your build and your "do whatever it takes" attitude. Your one-of-a-kind parts like this are like sprinkles on the frosting! 
Keep up the great work.
Posted by: horizontally-opposed Sep 15 2020, 09:56 AM
That is a pretty cool video—thank you for posting it, and I too dig this thread.
Keep it up, Mike—the car is going to be super cool when you get it running. That engine sounded great in Harry's 914.
Posted by: Mueller Sep 24 2020, 08:35 PM
Not the most ideal material, didn't have any copper and I'm tired of spending money on this car so aluminum will do for now.
Need to see if I have some delrin or see if my 3D printer still works to make a cover for it.
The 3 large 12vdc lines are for the starter (1) and the other 2 go to the Powercells.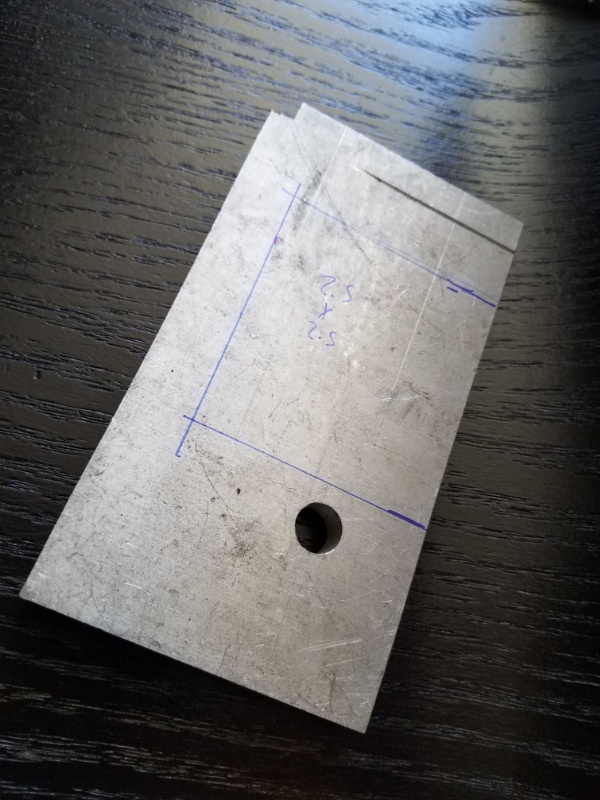
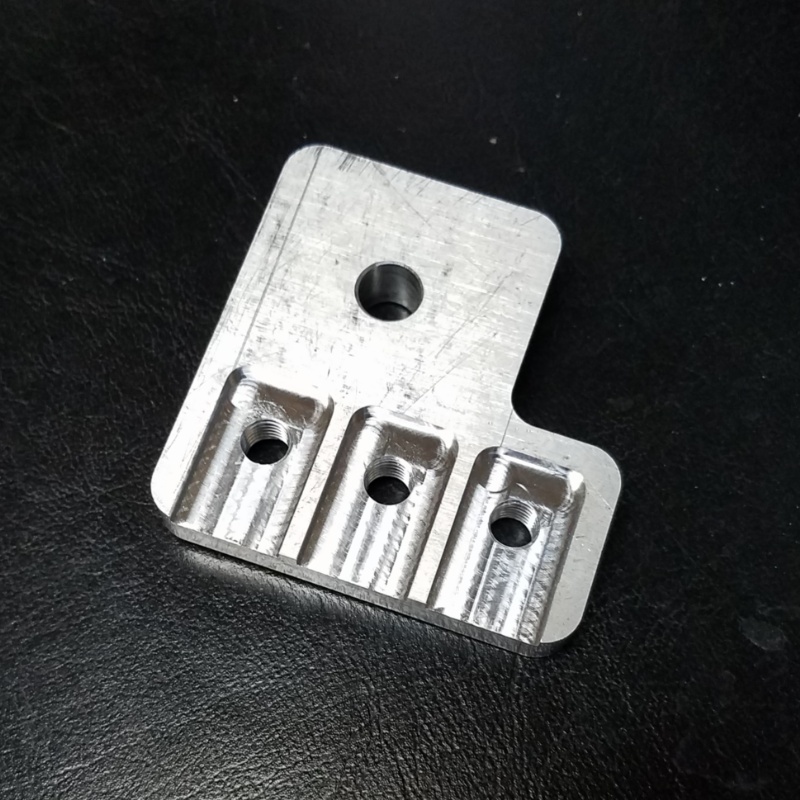
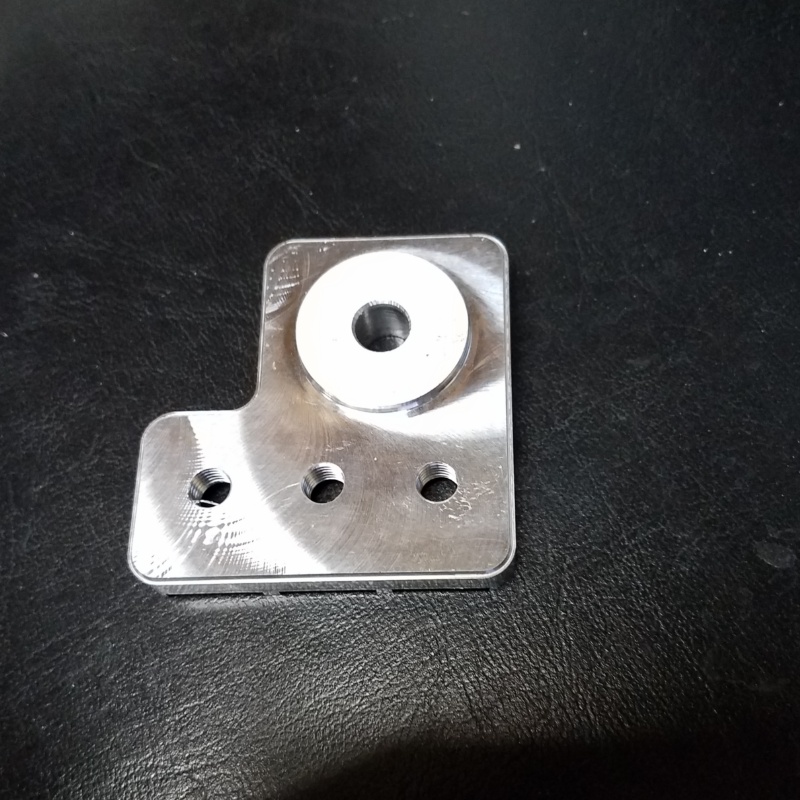
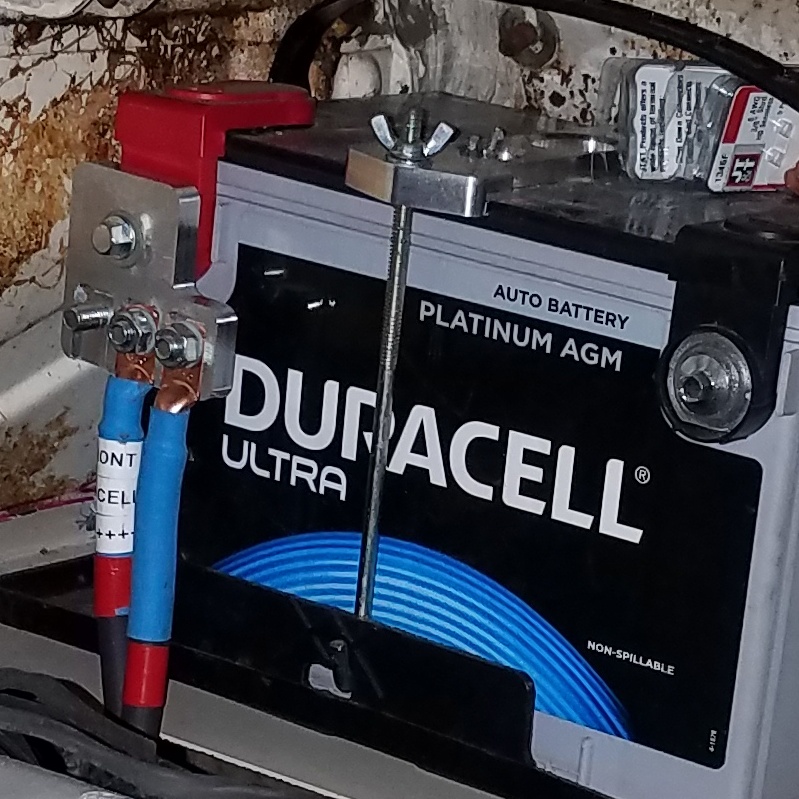
Posted by: Krieger Sep 24 2020, 10:59 PM
Wow! Great design and super clean look.
Posted by: Coondog Sep 24 2020, 11:07 PM
Nothing wrong with aluminum as a conductor....looks great.
Posted by: 76-914 Sep 25 2020, 02:57 PM
Nothing wrong with aluminum as a conductor....looks great.
Not unless your house was wired with it. Granted it wasn't the material but the installer. You as a fireman probably know this all too well.
Posted by: Mueller Sep 25 2020, 03:28 PM
Nothing wrong with aluminum as a conductor....looks great.
Not unless your house was wired with it. Granted it wasn't the material but the installer. You as a fireman probably know this all too well.
Our home AC is wired using aluminum wire, the circuit breaker kept tripping until I realized the at the box was loose. A few turns till nice and tight and no more problems.
I did look up the charts for bus bar ampacity and figured this thickness should be fine for the 914.
Posted by: Mueller Oct 16 2020, 01:13 AM
Exhaust is back on, took some trial an error finding the correct gaskets from the headers to the down tubes. Finally found an online catalog for Walker.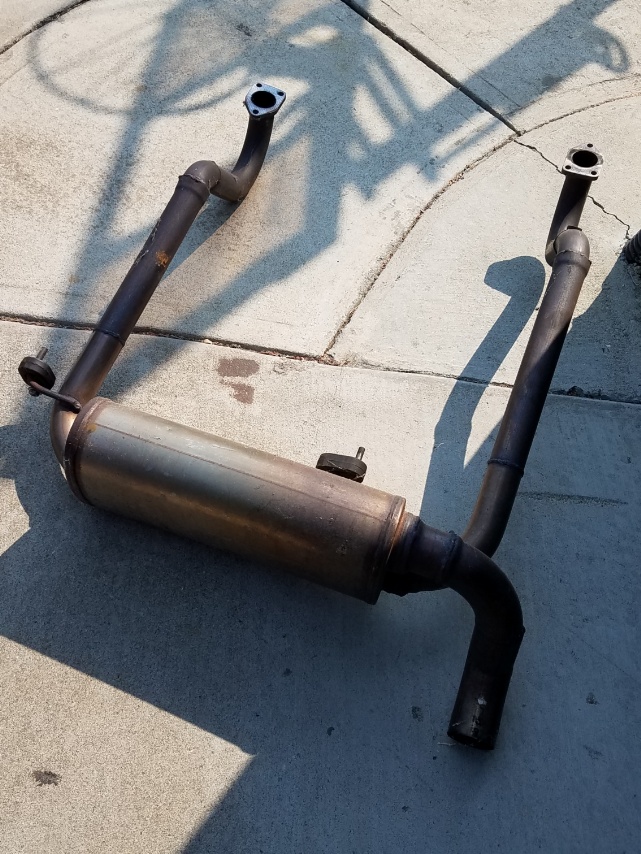
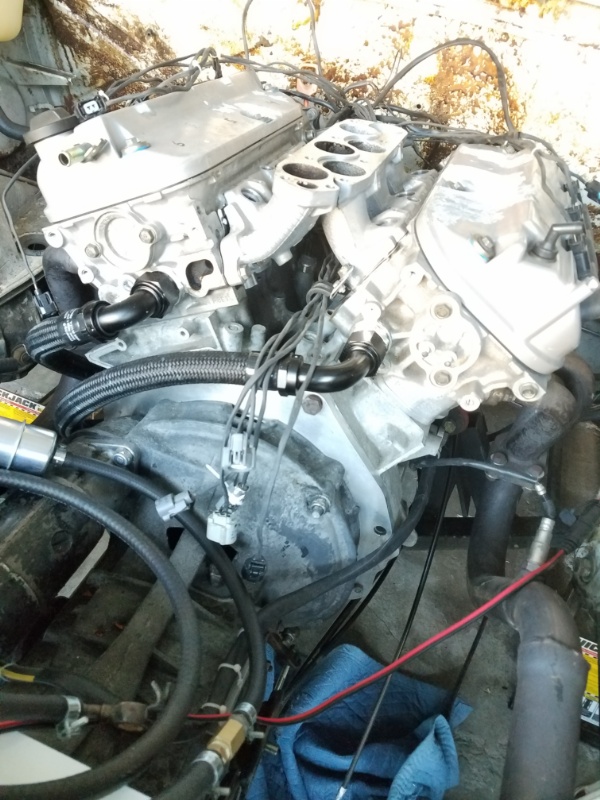
The cooling system is all done, tomorrow I hope to fill it and test it. It was recommended that I drill a few small holes in the thermostat. I am using an inline unit.
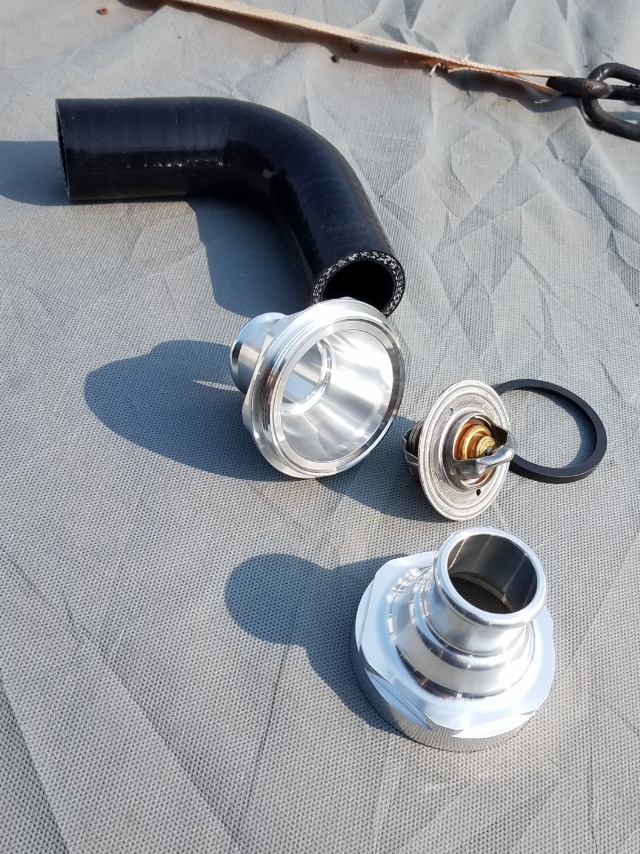
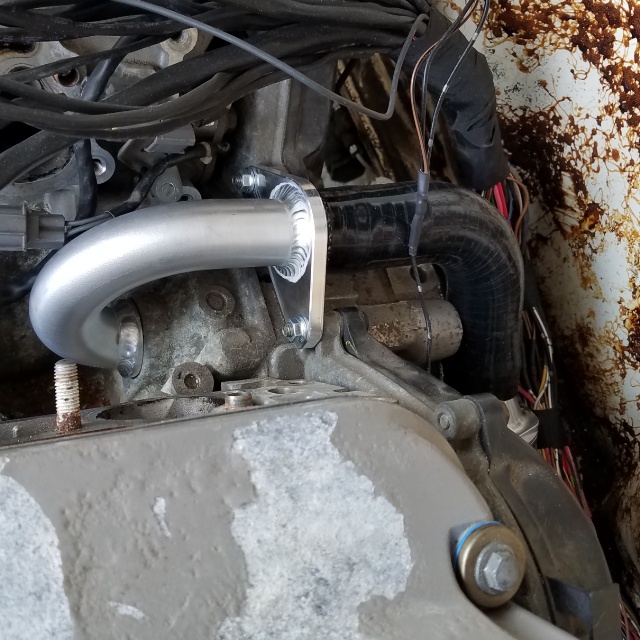
In order to fit my throttle body I needed to counter bore the adapter for 2 of the screws. 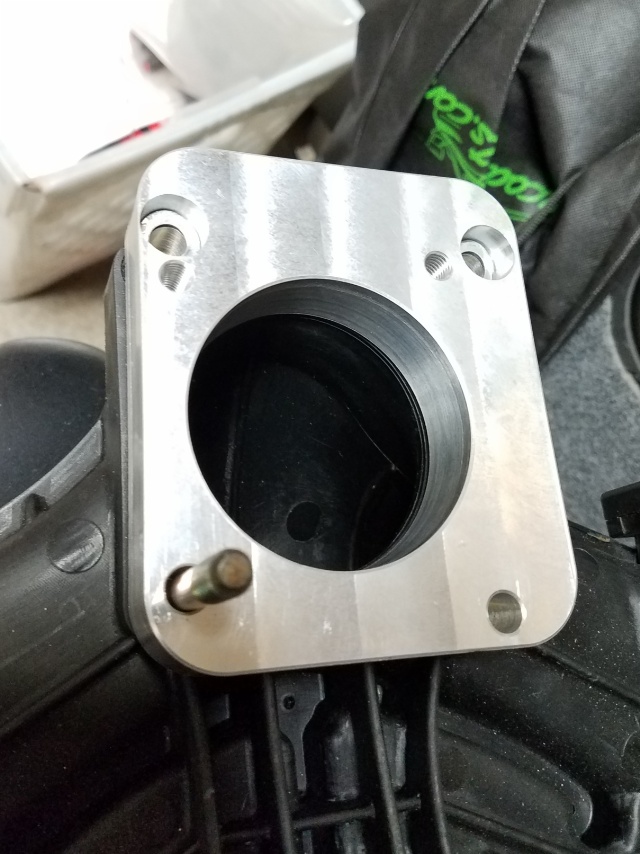
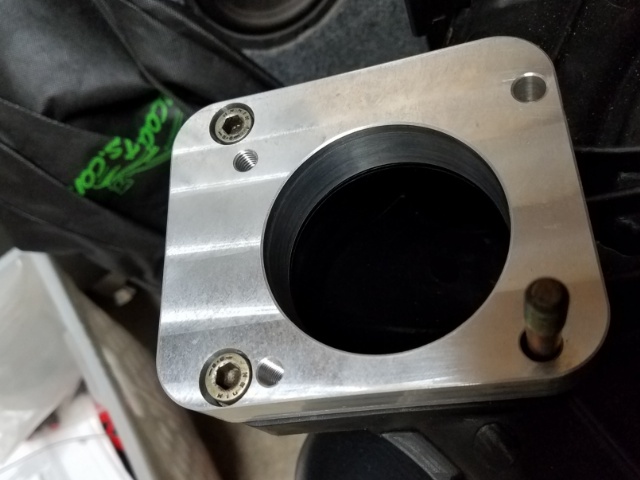
Posted by: 76-914 Oct 16 2020, 08:17 AM
Nothing wrong with aluminum as a conductor....looks great.
Not unless your house was wired with it. Granted it wasn't the material but the installer. You as a fireman probably know this all too well.
Our home AC is wired using aluminum wire, the circuit breaker kept tripping until I realized the at the box was loose. A few turns till nice and tight and no more problems.
I did look up the charts for bus bar ampacity and figured this thickness should be fine for the 914.
Mike, this is the exact situation that caused the fires. Loose connections caused arcing. Arcing caused black sooted buildup which in turn causes high resistance and heat build up to the point of ignition. The preventative fix is a cheap compound that electrical supplies will have. IIRC, it is called No-Lox or something like that. Coat the wire ends at wire nuts or other junctions. It will prevent arcing. We used the stuff when changing out electric water heaters but I haven't seen any aluminum wiring in years so we no longer carry it.
Posted by: Maltese Falcon Oct 17 2020, 02:41 PM
Machinist extraordinaire!
Posted by: Gint Oct 17 2020, 06:57 PM
I've always enjoyed seeing what Mike was turning out of bare stock.
Posted by: rick 918-S Oct 17 2020, 07:18 PM
we need a new Meuller emoji
One that is operating a lath
Posted by: hcdmueller Oct 18 2020, 12:04 PM
New houses in my area went to stranded AL wire for 220v circuits. The solid copper is too expensive I guess. A corrosion inhibitor is a must in that situation. We noticed the lights dim when the AC kicks on less than a year into our house. Guess what the builder didn't do to the 220v connections. In the end I had to clean up all the connections in the circuits and add the NOALOX. Not sure how a 12v connection would hold up, but seems like cheap insurance.
Great build, I love the Honda v6. Eventually I'll stuff one in a Bay bus.
Posted by: Mueller Oct 22 2020, 05:33 PM
The PO of my 914 told me the transmission is in need of internal work, I'm going to drive as is for now. (Once I do drive it)
However this 2014 WRX 5 speed with 30K miles just happened to go up for sale not too far from me. I hope I can sell the rear diff to offset the cost.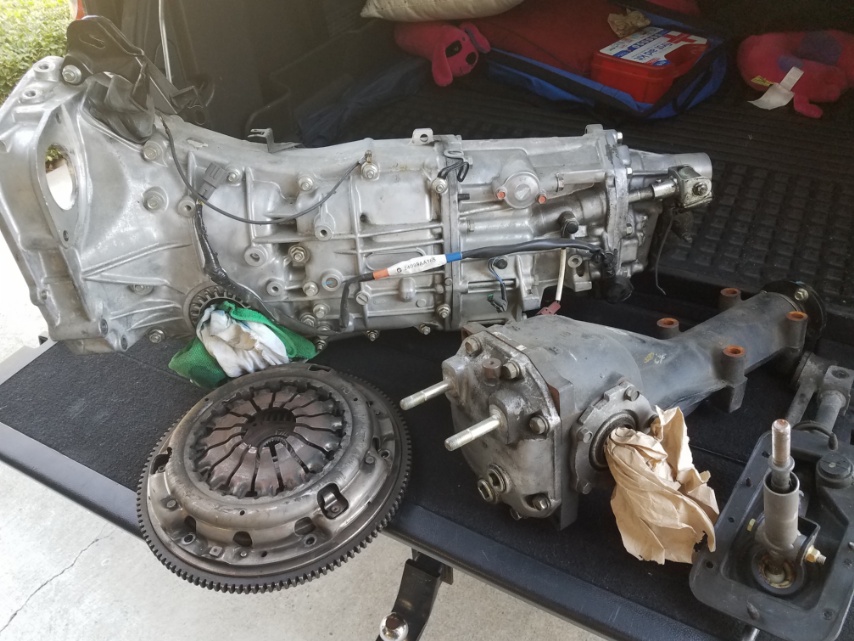
Posted by: Chris914n6 Oct 22 2020, 06:56 PM
^^ practically bolts to my Nissan motor, so maybe you'll be as lucky. Only a 32mm thick adapter plate and a little machining to the Suby flywheel. A Nissan truck clutch slave bolts on and is lower profile.
The center diff is usually worth a bit more then the coupler. But knowing you... you'll probably be machining your own, in which case I can use one
Posted by: Chris H. Oct 22 2020, 08:24 PM
Nice score Mike! Yes the center diff is one of the weak points on AWD cars so it's worth $$$ and you pull it out to convert to 2WD. I think I sold mine for $250 way back in 2012.
Posted by: Mueller Oct 28 2020, 07:03 PM
We have a runner, Part 2.
Since the last time I posted the motor running I have done a few things that made me question whether or not it would ever run again.
Replaced vehicle wiring with https://infinitybox.com/
Took apart the factory Honda engine wiring harness, removed a few feet from it due to it being too long. Also recovered all the wires.
Installed new intake manifold which required me to come up with a new way to control the throttle body. In the end I used a /6 throttle cable and made an adapter to screw on a short section of cable to attach to the Honda TB.
Next will be using the Amazon sourced cooling system vacuum purge and coolant refill kit to get all the air out of the system. So far no leaks.
Now to get insurance for it so I can register it to test it out on the street.
https://www.youtube.com/watch?v=zhqoTxPJ7KQ
Posted by: dan10101 Oct 28 2020, 07:08 PM
We have a runner, Part 2.
Awesome!!
Posted by: tygaboy Oct 28 2020, 08:07 PM
Mike - That is AWESOME!!! Great work all around. Can't wait to see it in person, and catching up with you at WCR.
Again, way to go, dude!
Posted by: Coondog Oct 28 2020, 08:09 PM
Long time coming, congrats.
Posted by: Chris H. Oct 29 2020, 08:29 AM
Nice work Mike! It sounds great.
Posted by: ValcoOscar Oct 29 2020, 10:34 AM
Congrats Mike, I hope to see your car in person soon.
Stay Safe...
Posted by: Amenson Oct 29 2020, 10:54 AM
So awesome, keep up the great progress!
Posted by: Gint Oct 29 2020, 11:53 AM
Had to happen soon!
Posted by: rmarx Oct 29 2020, 12:06 PM
Great job Mike! It sounds great! See you at WCR.
Posted by: 76-914 Oct 29 2020, 04:47 PM
The PO of my 914 told me the transmission is in need of internal work, I'm going to drive as is for now. (Once I do drive it)
However this 2014 WRX 5 speed with 30K miles just happened to go up for sale not too far from me. I hope I can sell the rear diff to offset the cost.
What is the model #? How much did you pay for it? Once you remove the center differential you'll need to add 12-14 oz's of trans oil over the std amount. Park it level then mark the dipstick w/ the "new full" mark.
Posted by: Mueller Oct 29 2020, 05:16 PM
What is the model #? How much did you pay for it? Once you remove the center differential you'll need to add 12-14 oz's of trans oil over the std amount. Park it level then mark the dipstick w/ the "new full" mark.
Thanks for the info.
TY758VW1AA, 2014 WRX that was converted to 6 speed.
I'm confused by the axles or lack of axles I should say. Still trying to wrap my head around if I need axles with a drive spline for inside the transmission or get the stub axles.
Posted by: 76-914 Oct 29 2020, 06:51 PM
What is the model #? How much did you pay for it? Once you remove the center differential you'll need to add 12-14 oz's of trans oil over the std amount. Park it level then mark the dipstick w/ the "new full" mark.
Thanks for the info.
TY758VW1AA, 2014 WRX that was converted to 6 speed.
I'm confused by the axles or lack of axles I should say. Still trying to wrap my head around if I need axles with a drive spline for inside the transmission or get the stub axles.
That was the last year for that model # transmission. Converted to a 6 speed? Wow, that's a new one. I'll look into that. The final drive will be 3.9 regardless. Although I'm not sure the quantity of oil I stated is accurate given it's been converted to a 6 speed. I came to this conclusion by immersing the center diff and related bearings and washers in a can of transmission oil and measuring the displacement. You can do the same thing after removing the diff. Just make sure that you measure the amount of oil that the rear cone takes vs. the flat plate you will use in it's place. The glove is blocking the view of the output. Post another pic of that area.
Posted by: Cairo94507 Oct 30 2020, 07:24 AM
Very cool. It is great to hear it running and it sounds good. Will it be making an appearance at WCR? Regardless, hope to see it one day. Congratulations Mike.
Posted by: Chris H. Oct 30 2020, 07:34 AM
I think the 5MT was removed to install a 6 speed trans Kent. That one should be a 5.
On the axles/joints, I think @http://www.914world.com/bbs2/index.php?showuser=194 has used male Subaru CV joints inboard, you just have to lower the trailing arm to get them in. He would know a lot more than me. On mine I used stub axles and female CVs. Mine is a 2006 removed for the same reason (converted car to 6 speed trans).
Posted by: Mueller Oct 30 2020, 12:09 PM
I think the 5MT was removed to install a 6 speed trans Kent. That one should be a 5.
On the axles/joints, I think @http://www.914world.com/bbs2/index.php?showuser=194 has used male Subaru CV joints inboard, you just have to lower the trailing arm to get them in. He would know a lot more than me. On mine I used stub axles and female CVs. Mine is a 2006 removed for the same reason (converted car to 6 speed trans).
^thanks, I talked to my friend Steve last night, he made the CV adapters that use the 100mm CV joints which I happen to be using.
He might have a set of adapters left over.
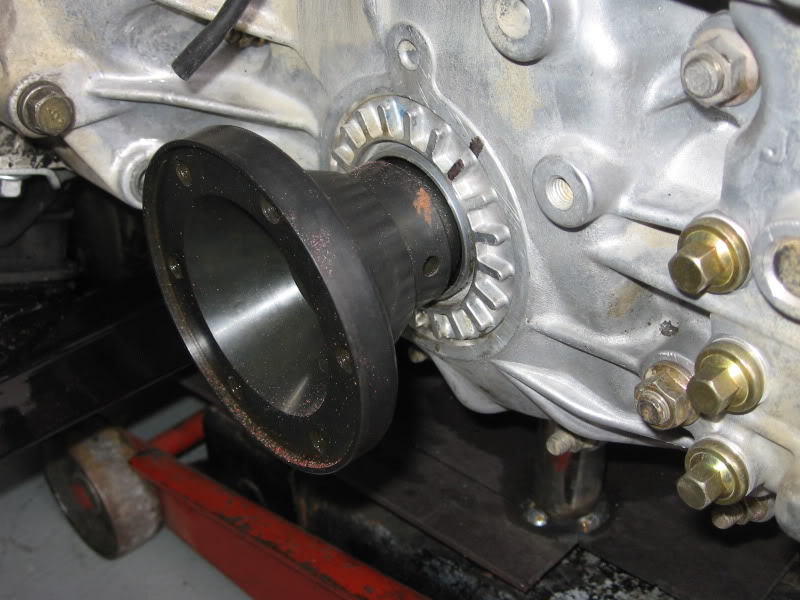
Posted by: mgp4591 Oct 30 2020, 03:52 PM
I think the 5MT was removed to install a 6 speed trans Kent. That one should be a 5.
On the axles/joints, I think @http://www.914world.com/bbs2/index.php?showuser=194 has used male Subaru CV joints inboard, you just have to lower the trailing arm to get them in. He would know a lot more than me. On mine I used stub axles and female CVs. Mine is a 2006 removed for the same reason (converted car to 6 speed trans).
^thanks, I talked to my friend Steve last night, he made the CV adapters that use the 100mm CV joints which I happen to be using.
He might have a set of adapters left over.
Those look like an exact replacement for the ones offered by Subarugears. They look like some great workmanship!
Posted by: Mueller Nov 14 2020, 10:04 PM
Not only a runner also a driver.
I drove it around the block for the 1st time right before I hooked it up to my truck for the ride up to Petaluma for the 2020 WCR last week.
For the WCR I only drove it Saturday night for the picture and dinner. I didn't trust the car for the 2 drives thru the unknown roads.
Now to fix a bunch of little things and put a heater in it. 
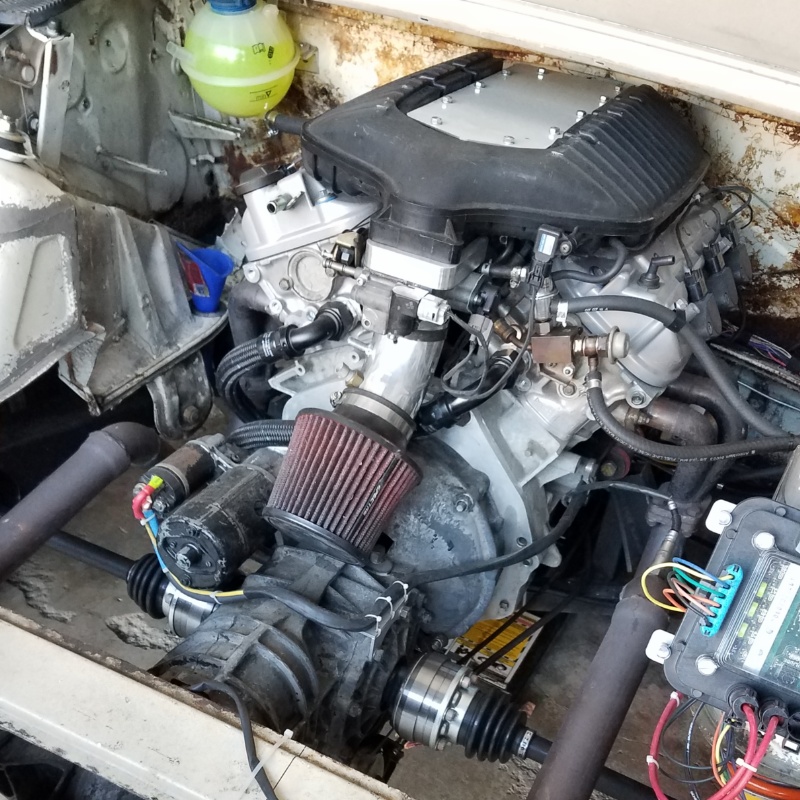
Posted by: Retroracer Nov 14 2020, 10:23 PM
Great meeting you and seeing the car in person Mike!
- Tony
Posted by: Andyrew Nov 15 2020, 12:51 AM
We were talking about how much your J series sounds like a flat 6 when you were idling it in the parking log!!
Great progress mike! It was GREAT seeing you!
Posted by: JRust Nov 15 2020, 01:01 AM
Great seeing you & your car last weekend Mike! You are making great progress with that project. Always great seeing them in progress as well as finished. Keep it up
Posted by: Steve Nov 16 2020, 12:07 PM
Great seeing you & your car last weekend Mike! You are making great progress with that project. Always great seeing them in progress as well as finished. Keep it up
Nice to meet you and see your car. Hopefully see you at the next one!!
Posted by: flat4guy Nov 17 2020, 09:01 PM
Nice talking to you in the hotel parking lot Saturday - great build and I was behind you going to dinner - it scoots.
Posted by: RoadGlue Nov 18 2020, 04:52 PM
Mike, it looked like you got some of the running issues sorted out from what I saw on your Instagram post. Updates?
Posted by: Mueller Dec 6 2020, 10:00 PM
Randy, having some cooling issues, ordered an electric water pump to assist and crossing my fingers it helps. @http://www.914world.com/bbs2/index.php?showuser=108
I changed the design a little for my version of the 911 hockey puck horn button.
The 914 is laser engraved from my cheap CO2 laser. The laser also cut the OD diameter....it sure stinks while it gets zapped.
..
The chrome ring is a replacement part for remanufactured hockey pucks.
360 serrations along the OD taped section. Part is far from perfect, not sure if operator error or bad programming on my part. The more I look at it I'd like to sink the center section in a bit more.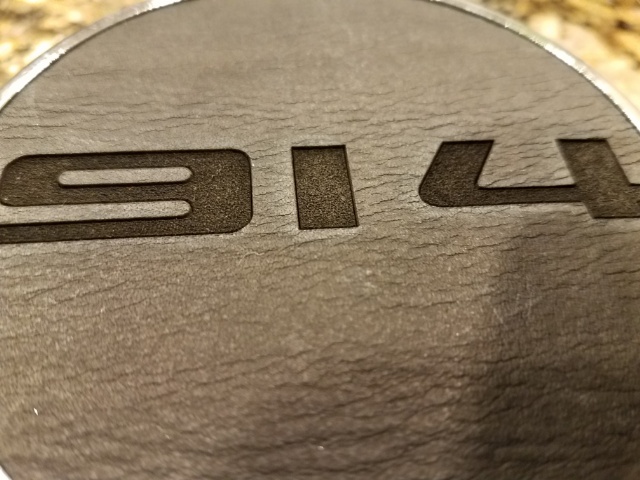
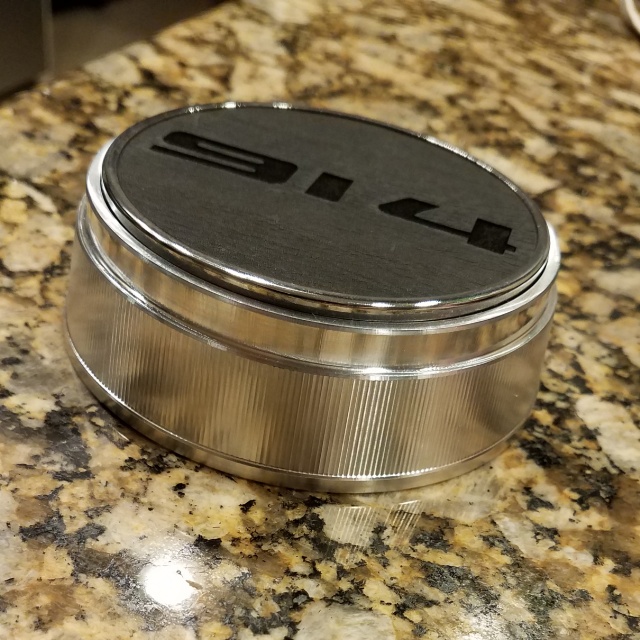
Posted by: Andyrew Dec 7 2020, 12:50 PM
Hot Damn that looks good!!!!!
Posted by: Chris H. Dec 7 2020, 01:55 PM
Yeah that GT horn ring looks nice Mike!
Are you SURE you need an electric water pump? The stock pump should do it I would think. Maybe post some pics of the completed setup if you can.
Posted by: RoadGlue Dec 7 2020, 02:13 PM
Sorry to hear about the cooling issues. Hopefully it's something pretty straight forward.
Posted by: Mueller Dec 8 2020, 02:00 PM
Here is a bad representation of my cooling system.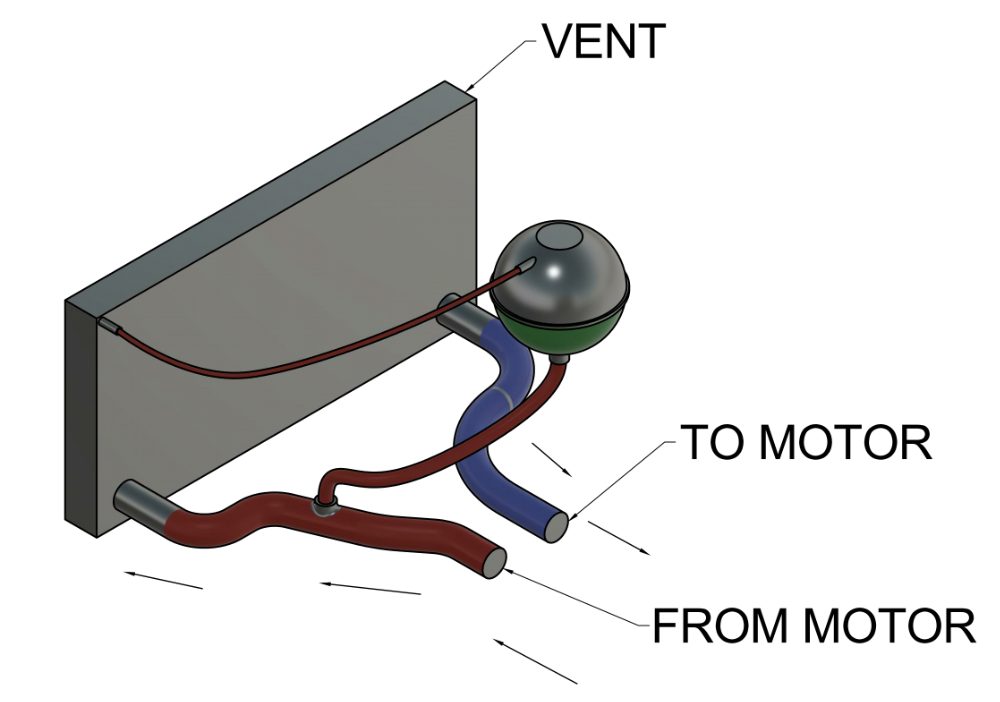
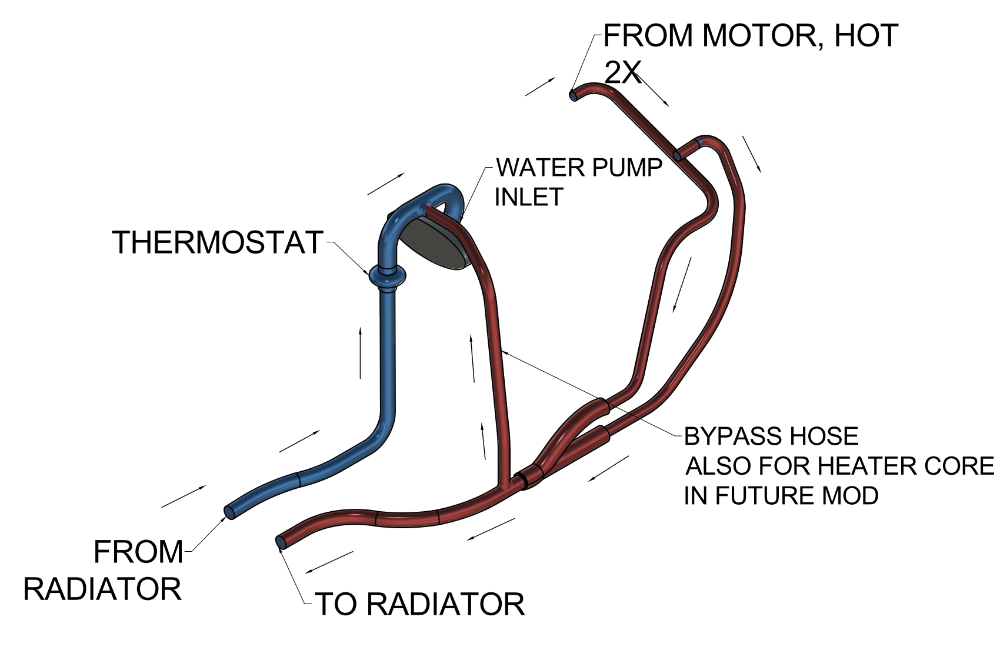
Posted by: Chris H. Dec 8 2020, 02:14 PM
That's pretty good actually!
So just a few things to check....
1. Is the coolant overflow/fill tank at the highest point in the system?
2. Is your air bleed line at or near the highest point?
3. Is the system sealed? (is there a pressure release if you open the overflow tank when warm (be careful! Not when hot!).
3. Have you tried running it without the thermostat?
4. Are you SURE the coolant flow is as your diagram shows? I had my lines swapped for a bit.
It's usually an air pocket somewhere and once the system bleeds that out it's fine, BUT your system should technically be self bleeding.
Posted by: Chris H. Dec 8 2020, 02:17 PM
Also what happens if you pinch off that "bypass hose" to stop the flow? I think that's part of the "warmup loop" so probably will not help unless it's diverting too much hot coolant back into the engine after it warms up.
Posted by: Chris H. Dec 8 2020, 02:29 PM
When is it overheating BTW? Is it normal until you lean on it a bit or does it run hot right out of the gate? Are the main hoses connected to the rad up front getting hot?
Posted by: Mueller Dec 8 2020, 02:32 PM
That's pretty good actually!
So just a few things to check....
1. Is the coolant overflow/fill tank at the highest point in the system?
2. Is your air bleed line at or near the highest point?
3. Is the system sealed? (is there a pressure release if you open the overflow tank when warm (be careful! Not when hot!).
4. Have you tried running it without the thermostat?
5. Are you SURE the coolant flow is as your diagram shows? I had my lines swapped for a bit.
6.What happens if you pinch off that bypass line?
It's usually an air pocket somewhere and once the system bleeds that out it's fine, BUT your system should technically be self bleeding.
1. pretty sure the upper small line is at highest point.
2. see above
3. yes it is sealed
4. no I have not removed the thermostat. I have the thermostat with the wax portion facing upwards.
5. I am wondering if the radiator lines should be swapped. I could have the upper and lower inlet/outlet mixed up?
6. Have not tried that.
I thought the system was good until I had it idling for about 10 minutes in the driveway and then it just puked out the coolant.
Posted by: Chris H. Dec 8 2020, 02:50 PM
That's exactly what happened to mine when I had some air pockets initially. Had the same overflow tank as well. The only thing that sucks about that one is that it pukes coolant everywhere and there is no option to add a secondary overflow to catch it.
You really have to drive it a bit or at least rev it and get the RPMs up in order it push the air out if you have an air pocket. Couple of spirited laps around the block and then let it cool down and see if the coolant level goes down after a couple of hours. You can also try jacking up the front and rear to move the air around. If air is purging out it sounds like an office water cooler glugging.
Next time you fire it up make sure the hoses up front are actually getting hot when it comes up to temp. If not then your thermostat is not opening for some reason or your hose configuration needs to be revised. If that's not the issue it's most likely air in the system.
This is pretty normal BTW.
Posted by: targa72e Dec 8 2020, 05:07 PM
Do you have a vent on the engine as well? Looks like hoses on engine would have to push any trapped air down (that,s not going to happen) to get to front car and radiator to vent air out of system. generally need a way to get air to highest point to get complete coolant fill. Many vehicles have the expansion tank you show at front of car at highest point in cooling system so that any air will migrate to tank.
john
Posted by: Chris914n6 Dec 8 2020, 07:14 PM
First obvious thing is the thermostat needs to be in the flow of the hot water. Was there something wrong with the factory location? Usually the thermostat will close off the bypass when it opens to the radiator.
Also my stock pump works just fine, I don't think you need something else.
Posted by: 76-914 Dec 8 2020, 07:32 PM
So the thermostat is remotely mounted and not on the block?
Posted by: 76-914 Dec 8 2020, 07:32 PM
Duplicate
Posted by: Retroracer Dec 8 2020, 08:47 PM
First obvious thing is the thermostat needs to be in the flow of the hot water.
FWIW - and from years of dealing with dodgy water cooled British cars - the thermostat does seem to be in the wrong place. It's the controlling and sense element for redirecting the coolant AWAY from the engine once operating temp is reached. Per your (excellently drawn) diagram, its not exposed to the water temp coming out of the engine.
Seconded, the idea of trying no thermostat, to see if anything changes....
- Tony
PS. air pockets could be an issue too.
Posted by: Mueller Dec 8 2020, 09:04 PM
In no particular order:
In the stock application shown below the thermostat [5] is on the on the backside of the motor while the water pump is at the front of the motor.
Item [11] is the transfer pipe which I have a modified version which relocates the thermostat to the front of the engine.
I do not have a vent on the top of the water plumbing on the engine side, I could add one.
Looking at the diagram it now seems to me that the thermostat could be getting additional heat from the outlets of the cylinder heads since it is a common manifold housing.
The stock location for the thermostat is an ugly casting and if I ever wanted to put the rear trunk wall back in I believe it would have interference problems. 
Posted by: Chris H. Dec 8 2020, 09:29 PM
Ah its starting to make more sense now. I agree it'd help with air bleeding to add a small (like 5/16) bleeder somewhere at the high point by the engine. When I changed mine from where you have it on the radiator to the highest point of the coolant flow on the engine itself my system bled itself WAY better. I added a bleeder valve at the radiator port but have never needed to open it. If your overflow tank is up front you can also move that to the engine bay where it is definitely at the high point. I thought I saw it in the engine bay a few pages back. Maybe try running it without the thermostat and see what happens. Coolant should flow freely all the way through and it might take a while for the the engine to warm up. Keep us posted!
Posted by: Mueller Dec 8 2020, 09:35 PM
Ah its starting to make more sense now. I agree it'd help with air bleeding to add a small (like 5/16) bleeder somewhere at the high point by the engine. When I changed mine from where you have it on the radiator to the highest point of the coolant flow on the engine itself my system bled itself WAY better. I added a bleeder valve at the radiator port but have never needed to open it. If your overflow tank is up front you can also move that to the engine bay where it is definitely at the high point. I thought I saw it in the engine bay a few pages back. Maybe try running it without the thermostat and see what happens. Coolant should flow freely all the way through and it might take a while for the the engine to warm up. Keep us posted!
Thanks,
I did have the tank in the engine compartment. It came down to not knowing where to plumb the top smaller hose so it seemed easier to relocate it up front near the radiator.
I will put a T in the bypass hose and then try it without a thermostat.
Posted by: Mueller Dec 9 2020, 06:50 PM
After spending an hour or so online reading I figured out I screwed up with my thermostat location. Highly unlikely for it to ever open up being so far away from the motor and in the inlet side. Fix coming soon.
I did get a chance to install my homemade horn button in the car. That is a sorry looking steering wheel. A project for another day. 
Posted by: RoadGlue Dec 9 2020, 07:42 PM
The horn button looks great too!
Posted by: Retroracer Dec 9 2020, 08:34 PM
RE: "I did get a chance to install my homemade horn button in the car. That is a sorry looking steering wheel"
Mike - I believe that should be referred to as "patina". I actually love the look of the wheel & horn button as is!
- Tony
Posted by: Mike Bellis Dec 10 2020, 09:01 PM
You also need to drill a couple 1/8" holes in the thermostat diaphram. This allows water and air to move with the electric pump, and not deadhead when the engine is cold.
Posted by: Mike Bellis Dec 10 2020, 09:02 PM
After spending an hour or so online reading I figured out I screwed up with my thermostat location. Highly unlikely for it to ever open up being so far away from the motor and in the inlet side. Fix coming soon.
I did get a chance to install my homemade horn button in the car. That is a sorry looking steering wheel. A project for another day.
You need to mill a billet steering wheel now.
Posted by: Mueller Dec 20 2020, 01:45 PM
Changing the cooling lines and routing again today.
1st off this cr@p in the bucket came out of the coolant lines while draining. Not sand, it easily breaks up and turns to a powder. I am thinking corrosion in the aluminum block/heads?
And I think I sunk to a new low in using donor parts for my build.
The hose adapter is an old mop handle that just happened to be the right size.
Posted by: dan10101 Dec 20 2020, 02:40 PM
Changing the cooling lines and routing again today.
1st off this cr@p in the bucket came out of the coolant lines while draining. Not sand, it easily breaks up and turns to a powder. I am thinking corrosion in the aluminum block/heads?
And I think I sunk to a new low in using donor parts for my build.
The hose adapter is an old mop handle that just happened to be the right size.
So did you knurl the ends? That takes talent and tools..
I'm going to agree on the corrosion to the alumn.
Posted by: 76-914 Dec 20 2020, 03:12 PM
I'd put a magnet in that crude to verify that it is all aluminum.
Posted by: Mueller Jan 11 2021, 08:59 PM
Repurposed the old rear trunk shocks from our '98 Volvo S70T5. Now I have gas lifts on the 914. Made some aluminium brackets and bolted it all together. Works as if I actually put some thought into it.
That is a 6 inch diameter slitting saw, 1st time using it I think.
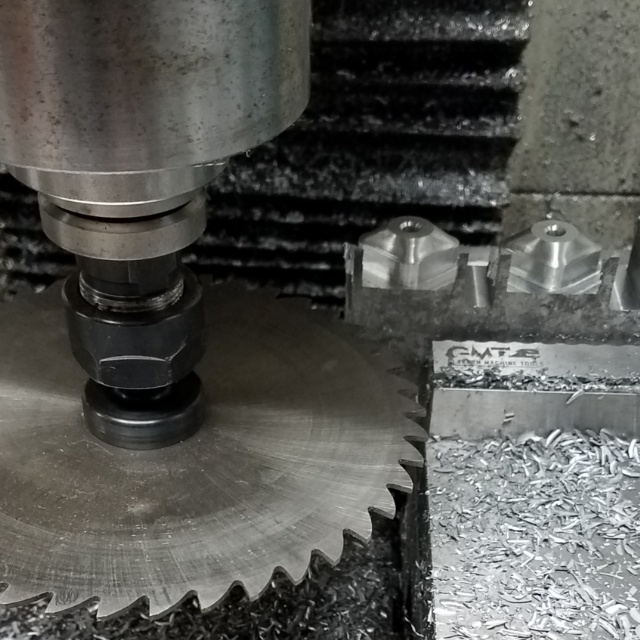

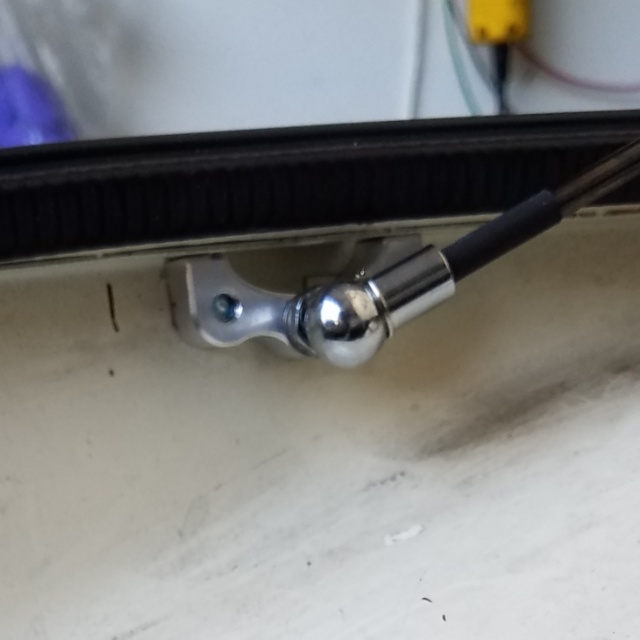
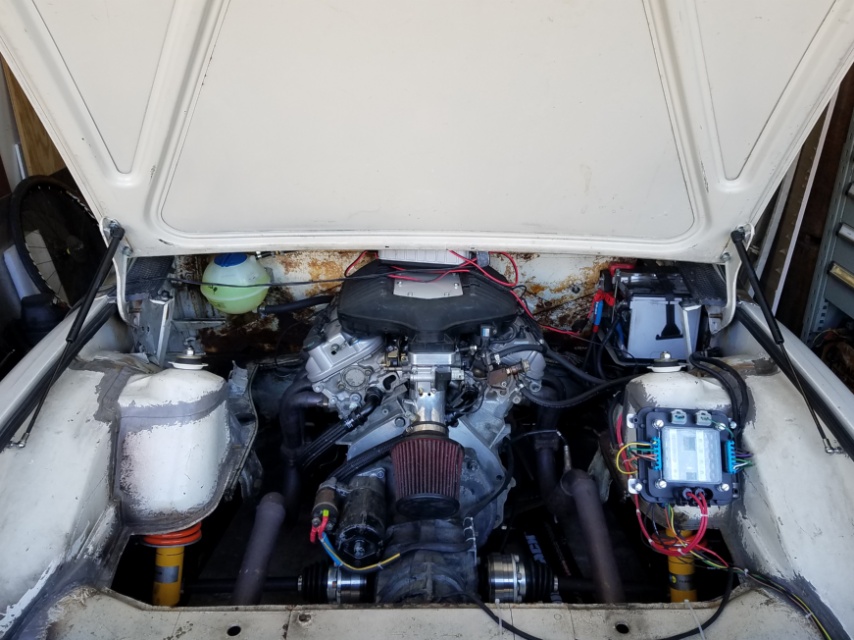
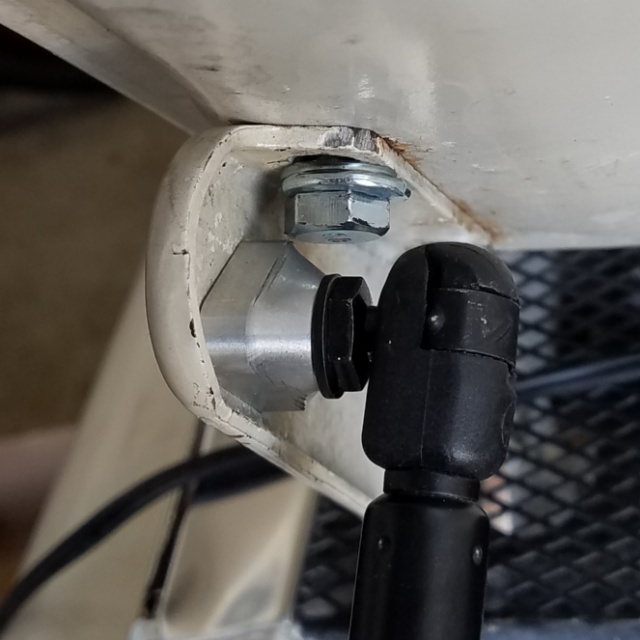
Posted by: djway Jan 12 2021, 01:58 AM
Repurposed the old rear trunk shocks from our '98 Volvo S70T5. Now I have gas lifts on the 914. Made some aluminium brackets and bolted it all together. Works as if I actually put some thought into it.
That is a 6 inch diameter slitting saw, 1st time using it I think.
Those mounts are nice

Posted by: Mueller Jan 28 2021, 04:18 PM
One step forward, two steps backwards...story of my 914 owning life...
Put the stock water manifold back on, hope to test fire this weekend to see if my overheating issues are fixed.
Made a bracket for my inexpensive radiator fan controller. Lots of good reviews so we will see. I do have a switch in the cabin to manually turn in the fans just in case.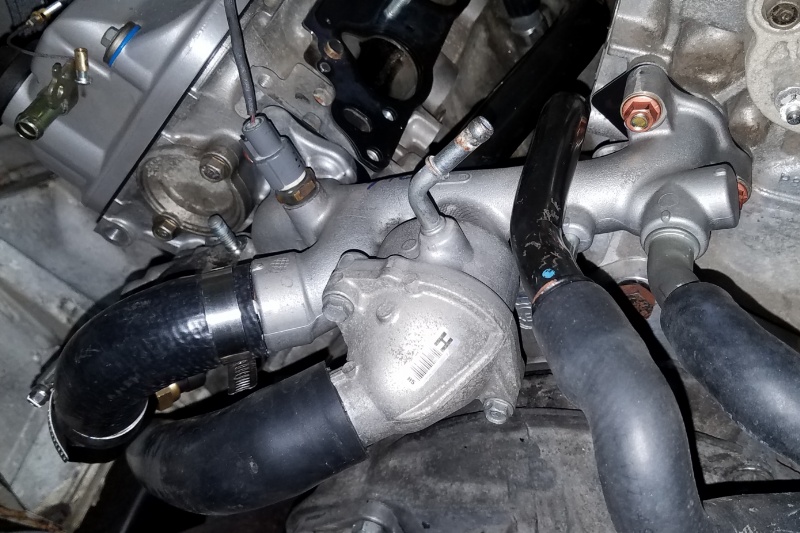
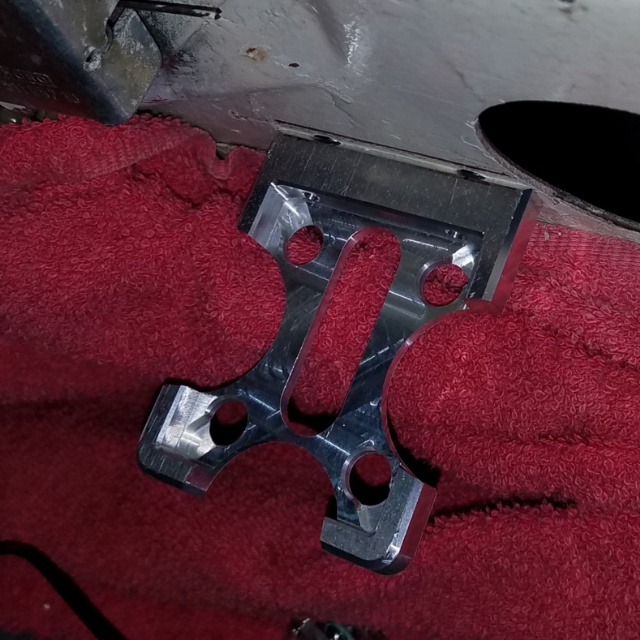
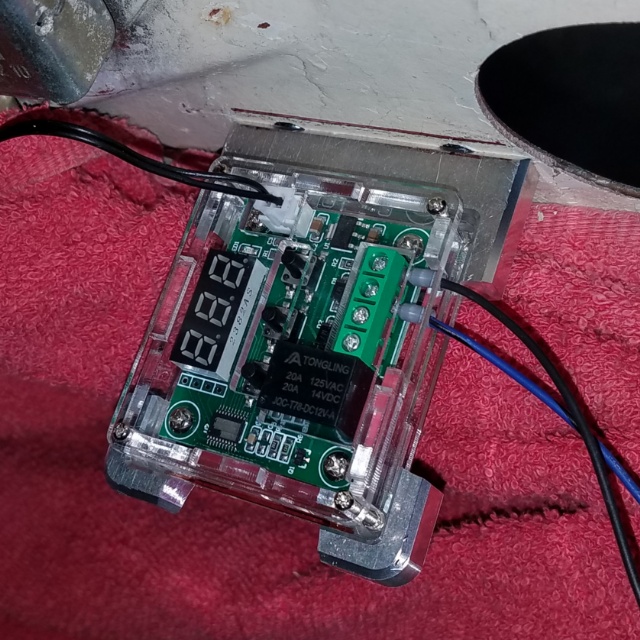
Posted by: rick 918-S Jan 28 2021, 04:34 PM
Nice stuff.
Posted by: Andyrew Jan 29 2021, 07:32 AM
Mike, I run that same temp controller for my intercooler, it works
Just be careful, it's probably in celcius.
Posted by: Mueller Mar 2 2021, 11:52 AM
Speedhut gauges installed. I used a flat sheetmetal piece from an old filing cabinet.
The gauges fit inside the stock formed gauge housing.
The smaller gauges needed the lock ring to be modified to fit in the bore.
Need to decide on a color for the sheetmetal, not sure if I want to go with black like stock.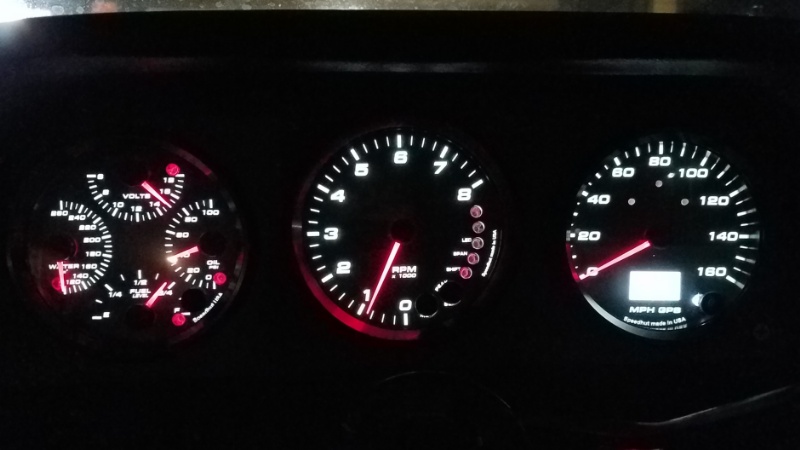
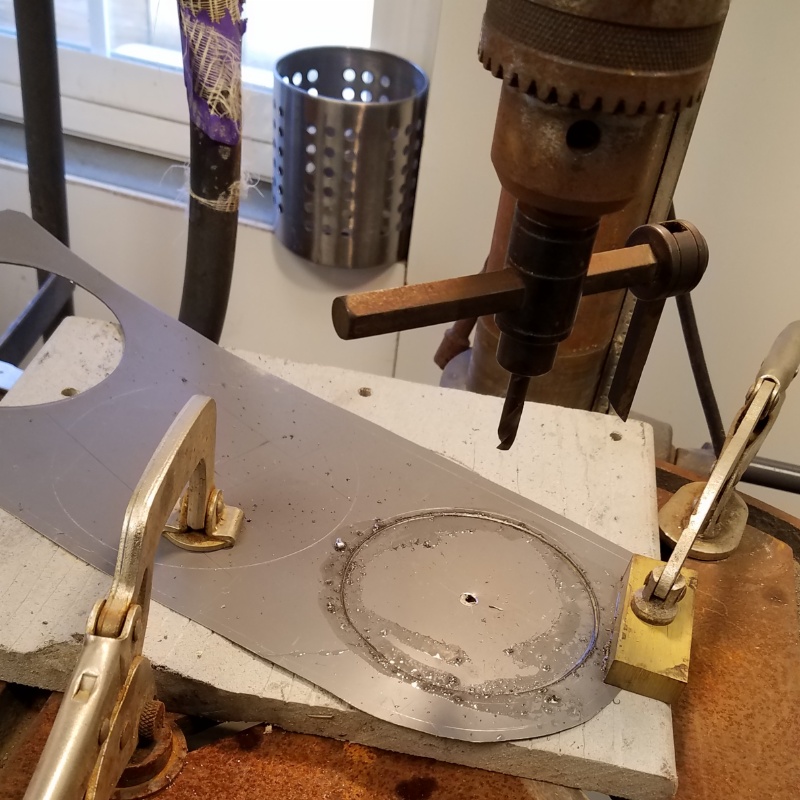
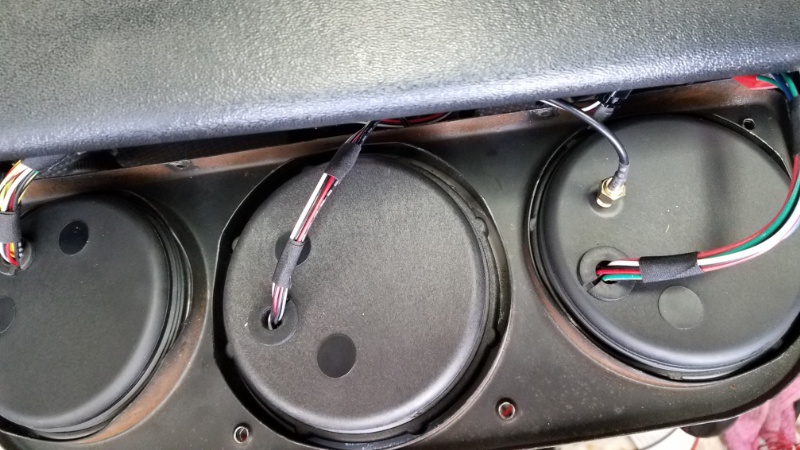
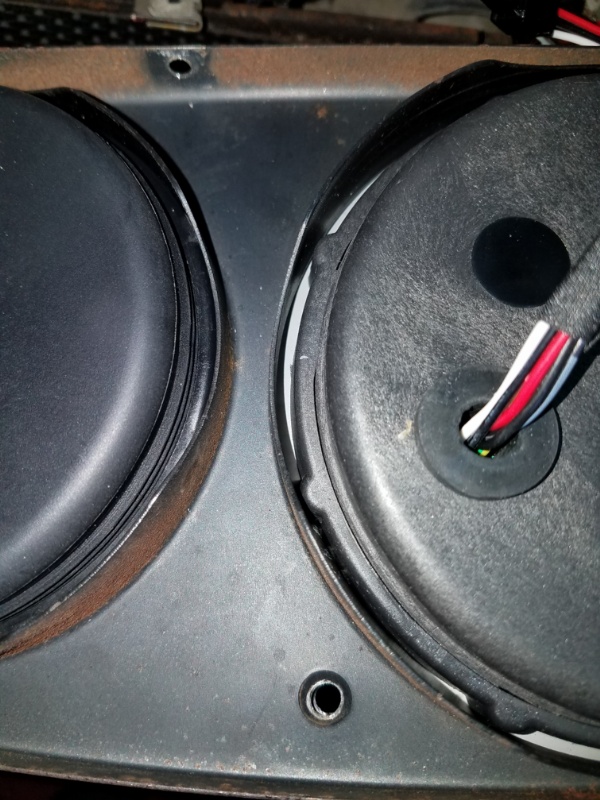
Posted by: ValcoOscar Mar 2 2021, 12:09 PM
Looks familiar...I did the same for my Speed Hut set up.
Congrats....
Hope to see you and your 914 again @ WCR2021
O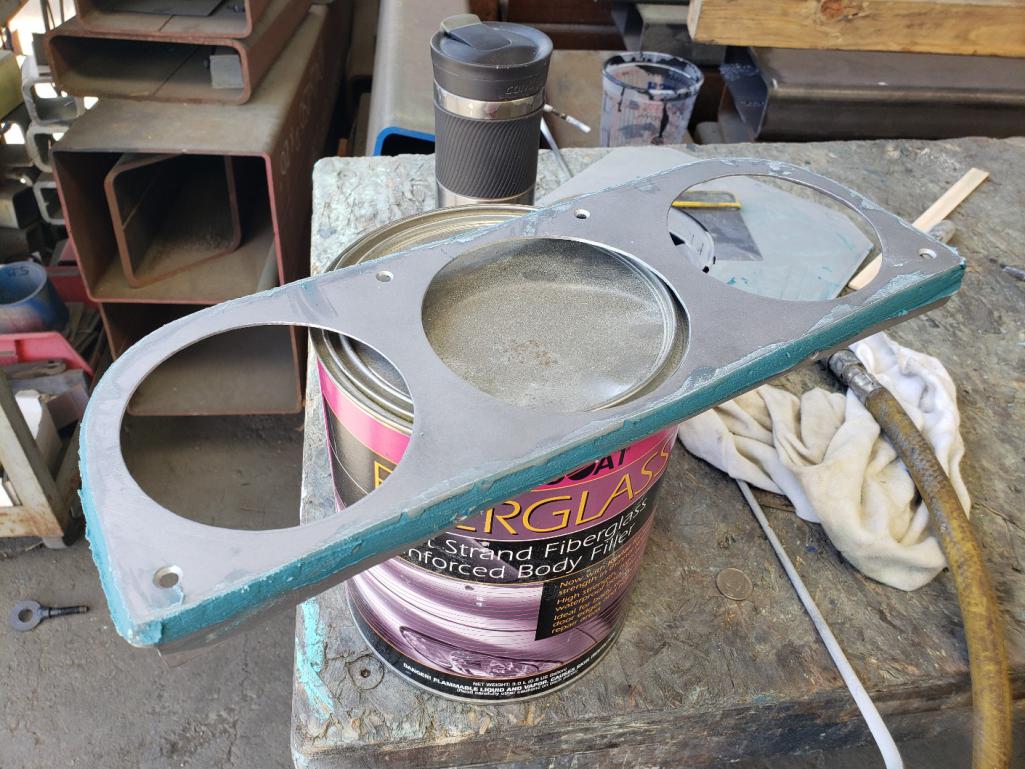
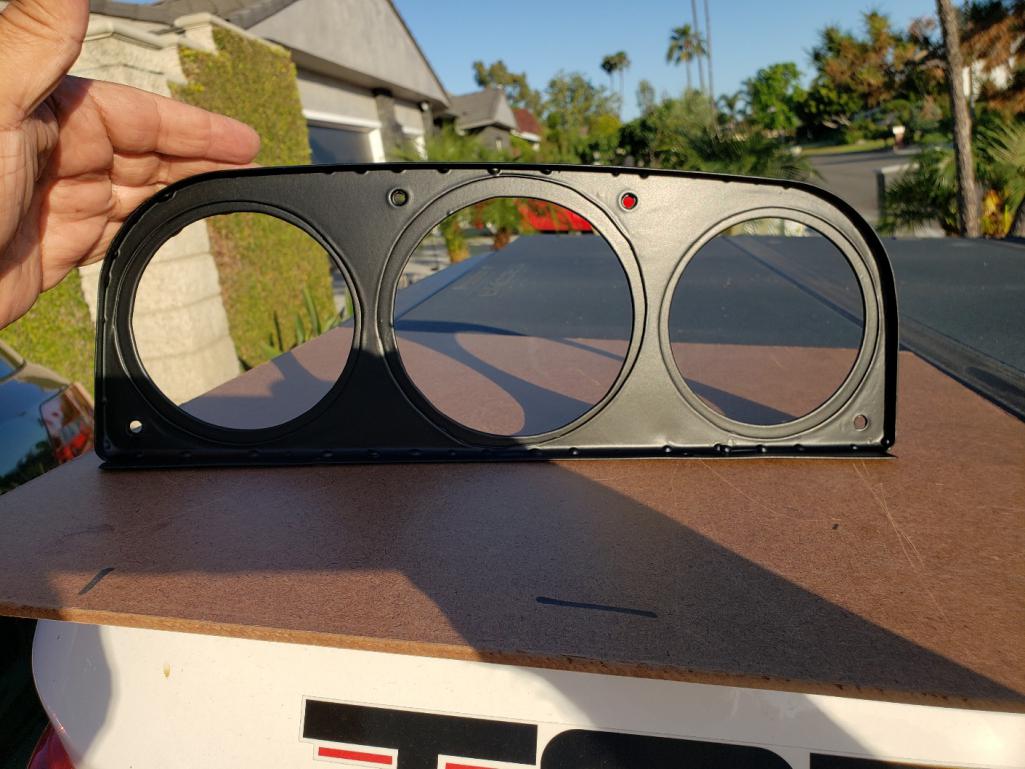
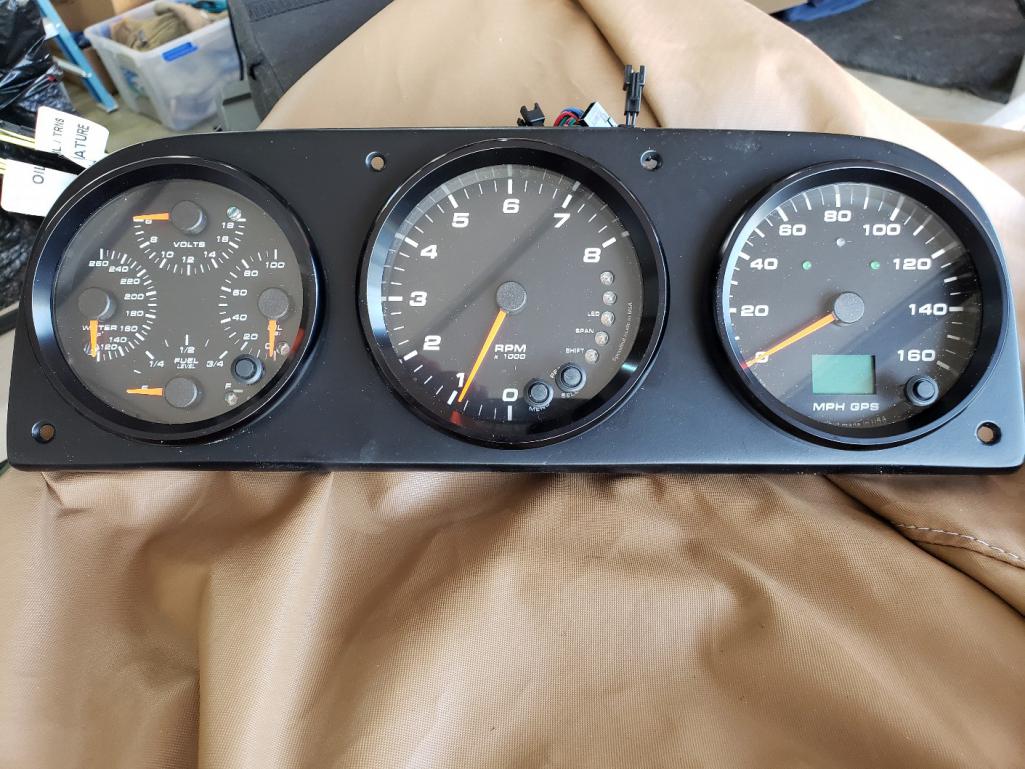
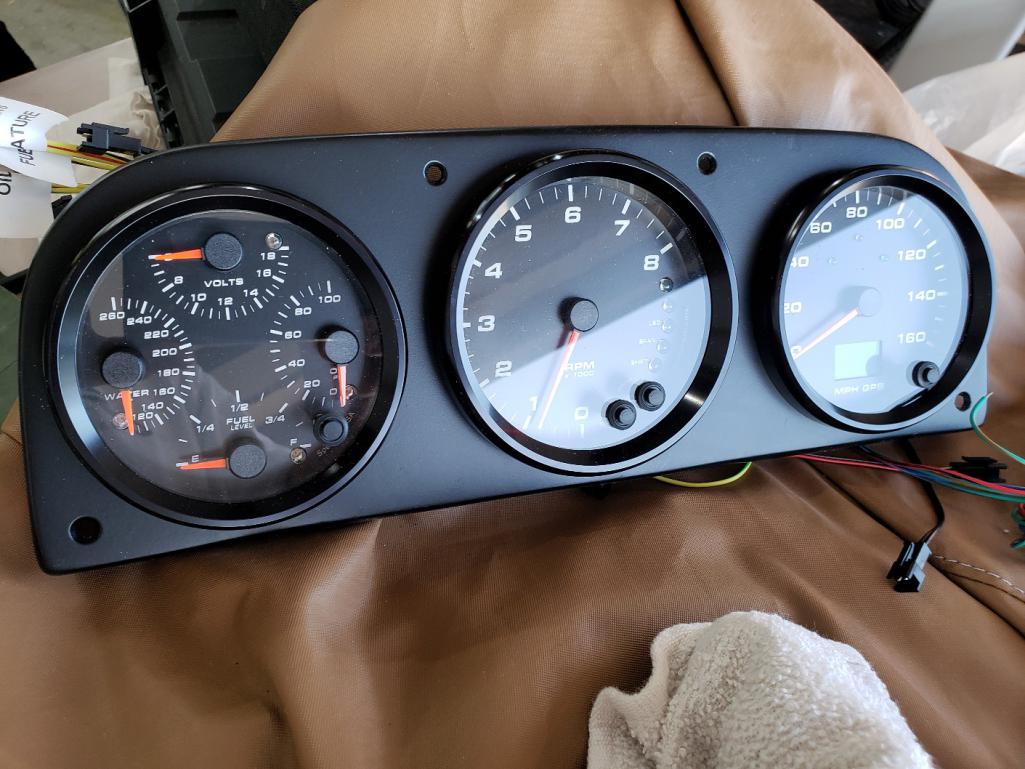
Posted by: RoadGlue Mar 2 2021, 12:14 PM
Posted by: cali914 Mar 2 2021, 01:42 PM
Mike you are doing it. Get that cooling figured out and drive it.
Posted by: Mueller Mar 15 2021, 11:00 PM
I took off the valve covers and rocker arms with nothing glaringly wrong. So the motor and transmission will be coming out.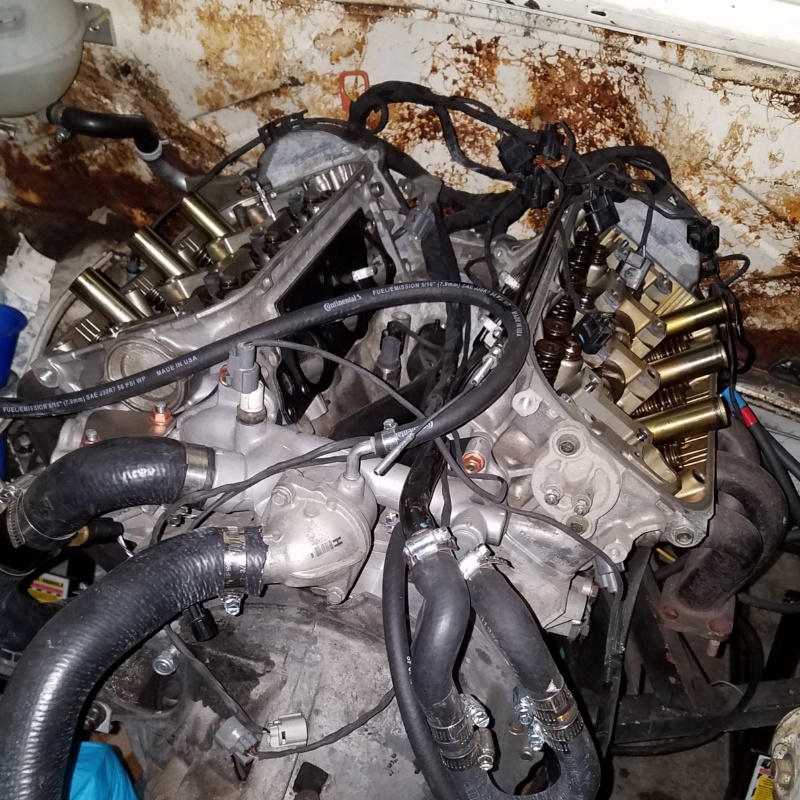
Posted by: Chris H. Mar 16 2021, 07:32 AM
what happened Mike? Bad noises? High temps?
Posted by: Mueller Mar 16 2021, 11:41 AM
what happened Mike? Bad noises? High temps?I was out driving and pushed the rpms too far I believe.
Strange noise (does not sound like a bad bearing) and it seemed to be running on only half the engine.
Posted by: Curbandgutter Mar 16 2021, 12:24 PM
Mueller love how you can handle all of the electrical the way that you do. You're a wizard! Love the sound on that 6. It really does sound like a flat 6. How did it pull? Great job!
Posted by: Chris H. Mar 16 2021, 12:41 PM
Just a thought...
From Wikipedia:
"One unique feature of some J-family engine models is Honda's Variable Cylinder Management (VCM) system. Initially, the system turns off one bank of cylinders under light loads, turning the V6 into a straight-3. Some versions were able to turn off one bank of cylinders or one cylinder on opposing banks, allowing for three-cylinder use under light loads and four-cylinder use under medium loads. "
Maybe VCM system is stuck on.
Posted by: Mueller Mar 16 2021, 04:24 PM
Chris, the later motors have that feature.
Motor is out, is that style of clutch plate a friendly type for street use?
Seems to be on or off for me.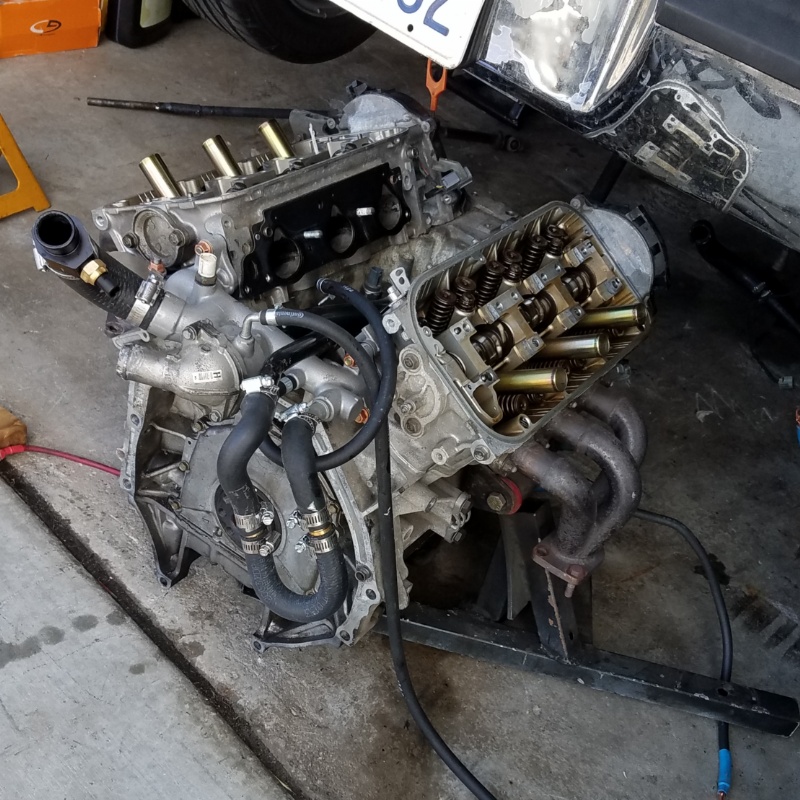

Posted by: Mike Bellis Mar 16 2021, 08:33 PM
That metallic puck clutch is unforgiving. You should put an organic stock disc in there. I'm running a stock LUK clutch setup on my 1.8t and love it.
Posted by: Chris914n6 Mar 16 2021, 09:27 PM
Dump the 6 puck springless racing disc.
I don't know if a stock 914 disc will hold but you want that style. Kennedy might be the better place to go. They will ask if it's 9 inch (bus 228mm iirc) vs 215mm so measure first.
Mine is a Sport Kevlar from Clutchmasters good for 320hp or so but I planned ahead for a turbo... 20 years ago
Posted by: Andyrew Mar 17 2021, 11:09 AM
That metallic puck clutch is unforgiving. You should put an organic stock disc in there. I'm running a stock LUK clutch setup on my 1.8t and love it.
Posted by: 76-914 Mar 17 2021, 11:40 AM
I get the feeling you are  . You know what my recombination would be! Good luck Mike.
Posted by: Mueller Mar 17 2021, 02:45 PM
I get the feeling you are
. You know what my recombination would be! Good luck Mike. Yea, I keep looking at the Subaru 5 speed transmission sitting next to my car thinking how easy it would be to just grab a Subaru 6 cylinder and go with that.
Posted by: horizontally-opposed Mar 17 2021, 03:15 PM
I get the feeling you are
. You know what my recombination would be! Good luck Mike. Yea, I keep looking at the Subaru 5 speed transmission sitting next to my car thinking how easy it would be to just grab a Subaru 6 cylinder and go with that.
Agree with everyone on the clutch, and can sure see why a Subaru flat six is appealing from a design and philosophical standpoint.
What's the power delta against the V6, Mike?
Posted by: Coondog Mar 17 2021, 03:17 PM
I get the feeling you are
. You know what my recombination would be! Good luck Mike. Yea, I keep looking at the Subaru 5 speed transmission sitting next to my car thinking how easy it would be to just grab a Subaru 6 cylinder and go with that.
While I commend you for tackling the road less taken, I have to agree with the Subaru route. We’re all pulling for
you to get your car on the road.
Posted by: Mueller Mar 17 2021, 03:42 PM
I get the feeling you are
. You know what my recombination would be! Good luck Mike. Yea, I keep looking at the Subaru 5 speed transmission sitting next to my car thinking how easy it would be to just grab a Subaru 6 cylinder and go with that.
Agree with everyone on the clutch, and can sure see why a Subaru flat six is appealing from a design and philosophical standpoint.
What's the power delta against the V6, Mike?
From a quick search it looks like about 30hp to 50hp advantage for the Honda motor.
Another option is to part the car out, recoup a few grand and sink that money into our 242

Posted by: Chris H. Mar 17 2021, 03:57 PM
Eh you’ll get a lot less for it parting it out Mike. Any idea what’s wrong with the engine? Is it toast for sure?
Posted by: RoadGlue Mar 17 2021, 04:11 PM
I'd be very inclined to just figure out what went wrong first, and then go from there.
Posted by: Mueller Mar 17 2021, 04:27 PM
Eh you’ll get a lot less for it parting it out Mike. Any idea what’s wrong with the engine? Is it toast for sure?
No, I think it is something minor, I think the frustration of working on our 20 year old stove top and oven right now is making me grumpy.
I'm taking this as a sign to fix up the engine compartment and do some welding, there are some holes in the firewall that really need to be addressed properly.
Posted by: dan10101 Mar 17 2021, 04:46 PM
No, I think it is something minor, I think the frustration of working on our 20 year old stove top and oven right now is making me grumpy.
I'm taking this as a sign to fix up the engine compartment and do some welding, there are some holes in the firewall that really need to be addressed properly.
I know the frustration. I have parts everywhere.
But hang in there, things will come around.
The good news for my build is that I get to put lower compression pistons in it to handle the boost better. There's always a bright side. Well, most always.

Posted by: Mueller Mar 17 2021, 11:10 PM
I was going through my tool box tonight and found my compression tester and leak down tester.....after I removed 1 cylinder head already..doh!
This head looks good, no signs of valves kissing the pistons.
The other head is going to be a challenge, 2 of the head bolts are damaged so I'll have to drill the heads off.
All 3 marks for TDC for the cams and crank line up perfectly so I highly doubt the belt jumped. 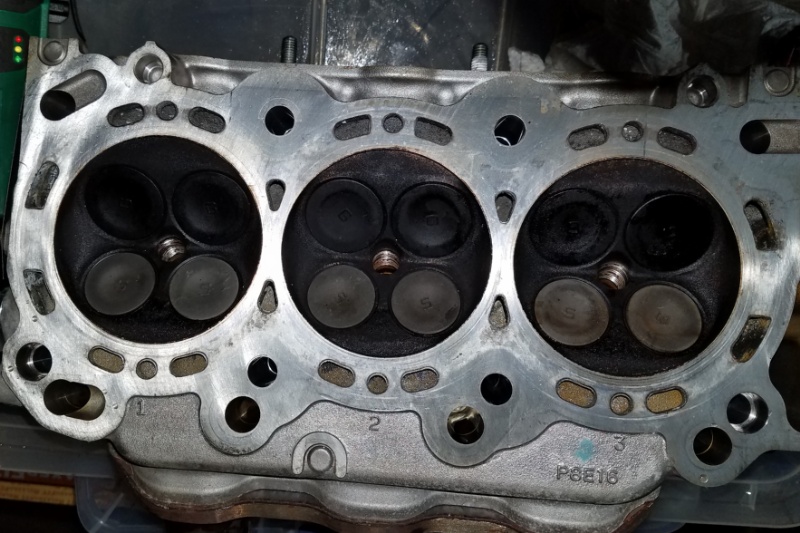
Posted by: Jack Standz Mar 18 2021, 12:39 AM
I was going through my tool box tonight and found my compression tester and leak down tester.....after I removed 1 cylinder head already..doh!
This head looks good, no signs of valves kissing the pistons.
The other head is going to be a challenge, 2 of the head bolts are damaged so I'll have to drill the heads off.
All 3 marks for TDC for the cams and crank line up perfectly so I highly doubt the belt jumped.
Sorry to hear you're having problems and it seemed to be running well, except for running too hot. But, you will for sure get it sorted out.
I like Centerforce Dual Friction clutches (use with a matching Centerforce pressure plate and balance with everything). On 914s and other mid-engined cars too. Not as harsh as the 6 puck ones, but can handle lots of torque.
Posted by: CharlieTuna Apr 15 2021, 01:01 PM
I come back for a visit and find Mr Mueller is at it again - reengineering the 914 world. I have to go back and read everything again so I can understand what our "ENGINEERING GENIUS" has done! The world is much happier with Mike involved in his 914 project again. Great reason for getting involved again. Happy for you Mike and really like what you have done, are doing, and will be doing.
Steve Hurt
aka. CharlieTuna and Shoguneagle
Posted by: RoadGlue Apr 15 2021, 01:09 PM
Posted by: 76-914 Apr 15 2021, 02:15 PM
It's gone. Mike sold it to a member.
Posted by: Mueller Apr 16 2021, 12:40 PM
Yes, it has been sold to a fellow member. While I loved having the 914 again and it was an absolute blast with that Honda engine, I was having a slight mental breakdown every time I wanted to do something on the side of the garage where the 914 was parked.
Something had to go and I see more value in my mill and lathe than another car. If we ever moved into a bigger place or funds allowed me to have an offsite garage/shop then maybe 914 ownership will be for me again.
Pic below is the 914 being towed to its new home.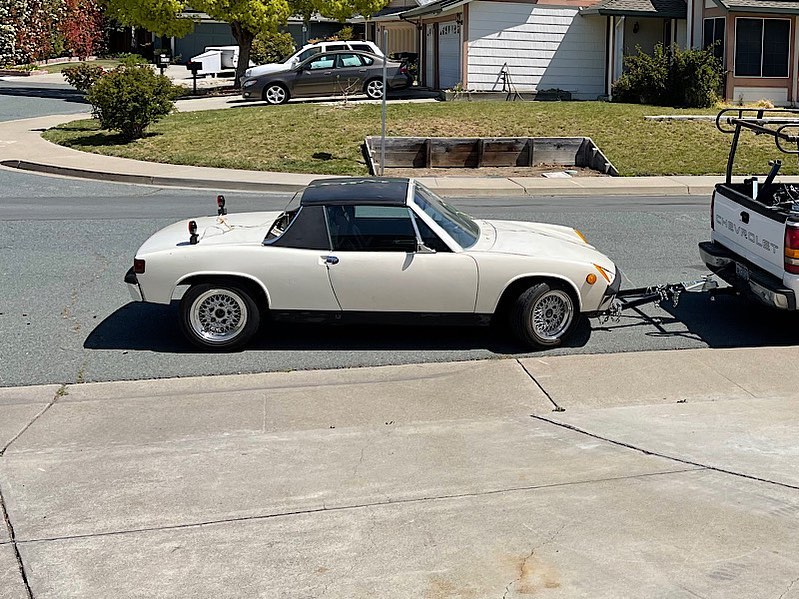
Posted by: Coondog Apr 16 2021, 02:18 PM
Your always welcome to be my co pilot again Mike...... 
Posted by: Chris H. Apr 16 2021, 02:52 PM
Bummer Mike, but I get it. I have too many cars myself. Just don't go anywhere! We like you too much .
Posted by: Retroracer Apr 16 2021, 03:58 PM
Should the new owner lose interest in continuing / finishing the project - please reach out?
Am a big fan of the Engineering, novel engine choice and overall vibe of that vehicle.....
- Tony
Posted by: Dion Apr 16 2021, 05:18 PM
It’s been an adventure Mike. Always enjoyable. Glad you made decisions that made you happier. Keep us posted on you next project. Don’t be stranger.
Cheers mate, Dion
Powered by Invision Power Board (http://www.invisionboard.com)
© Invision Power Services (http://www.invisionpower.com)