Printable Version of Topic
Click here to view this topic in its original format
914World.com _ 914World Garage _ BUILD-OFF CHALLENGE: Vysoc / Yellow Sub
Posted by: Vysoc Oct 2 2015, 01:48 PM
Here we go,
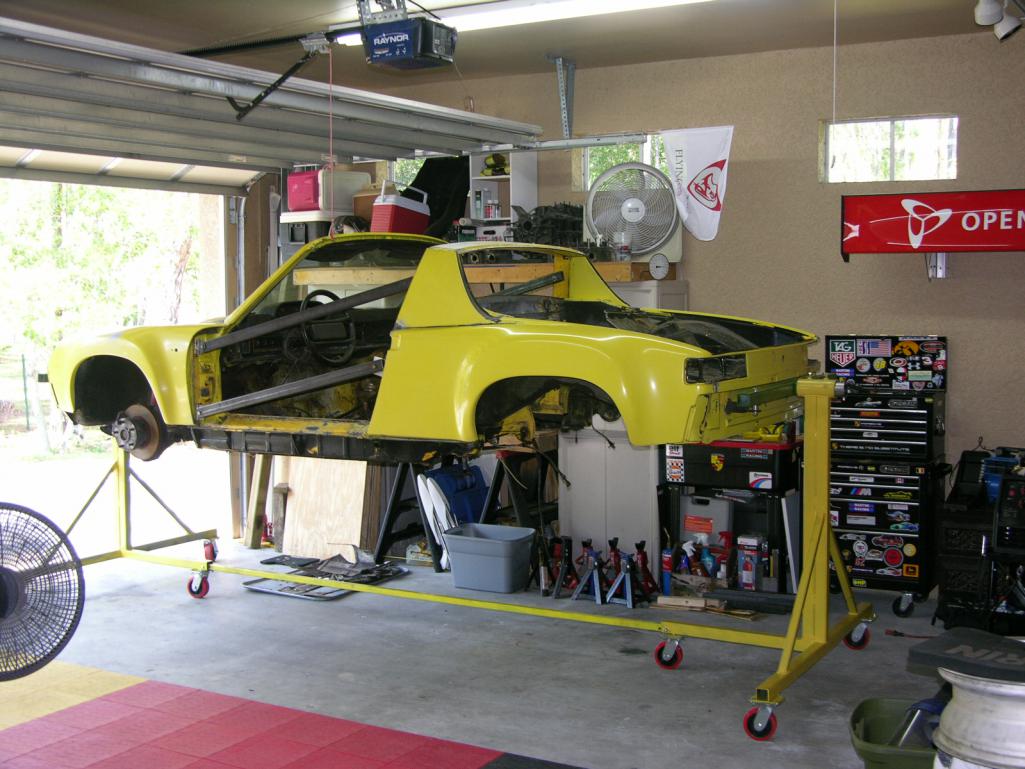
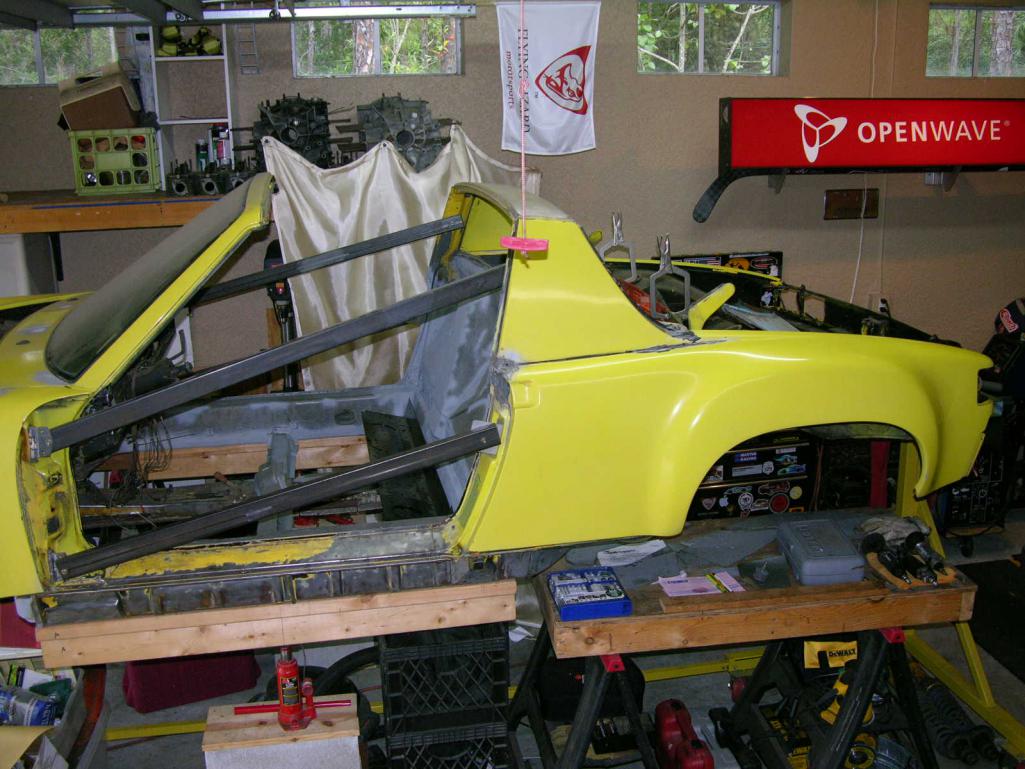
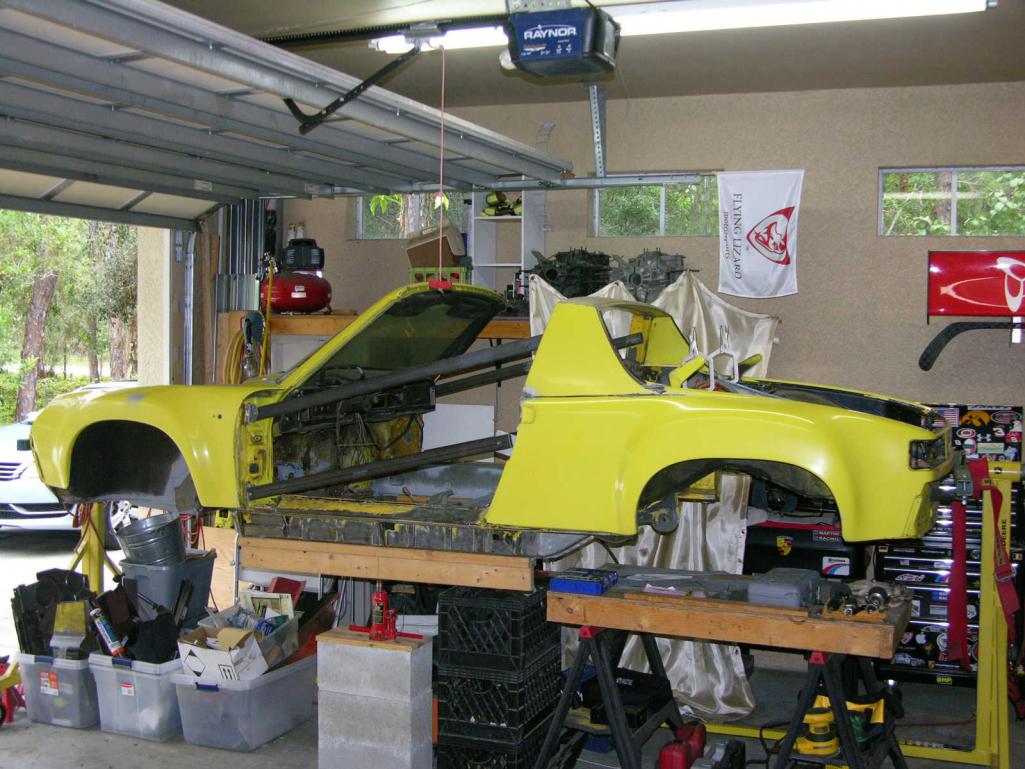
I bought this chassis several years ago and have been cutting out sections with rust. This roller was a 1976 with Fiberglas Flares, I like them. There is much work to be done.
My 5 Major Project Points are:
1) Repair & Replace all rusted areas and weld in;
* - New Floor Pans.
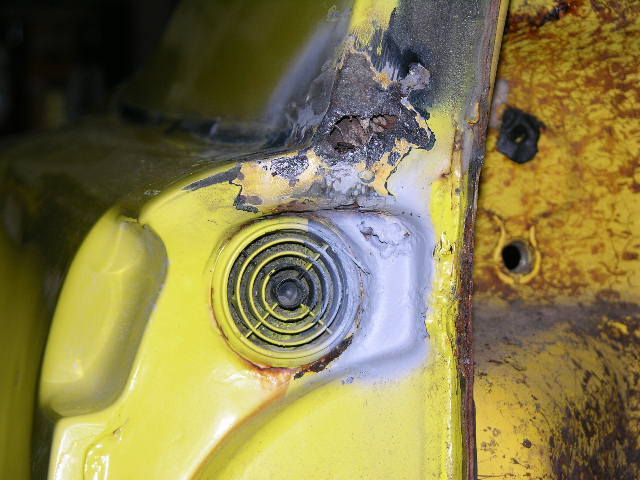
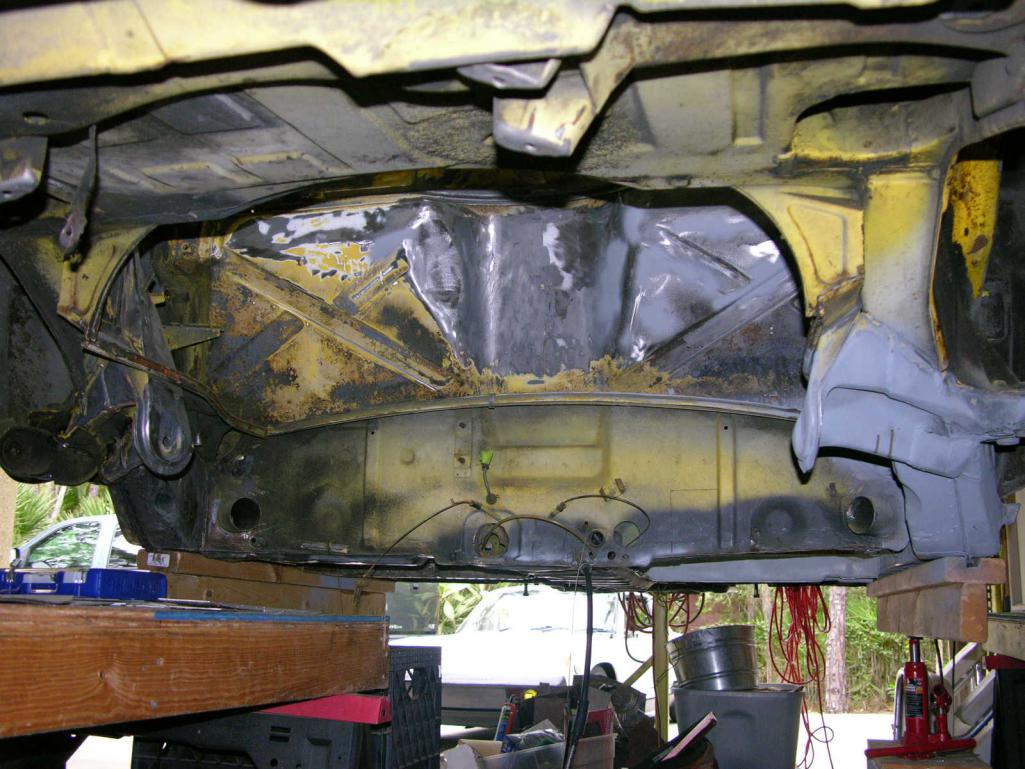
*- Repairs to the Hell Hole area.
*- Engman Kit.
*- Weltmeister Chassis Stiffening Kit.
*- McMark's Roll Bar.
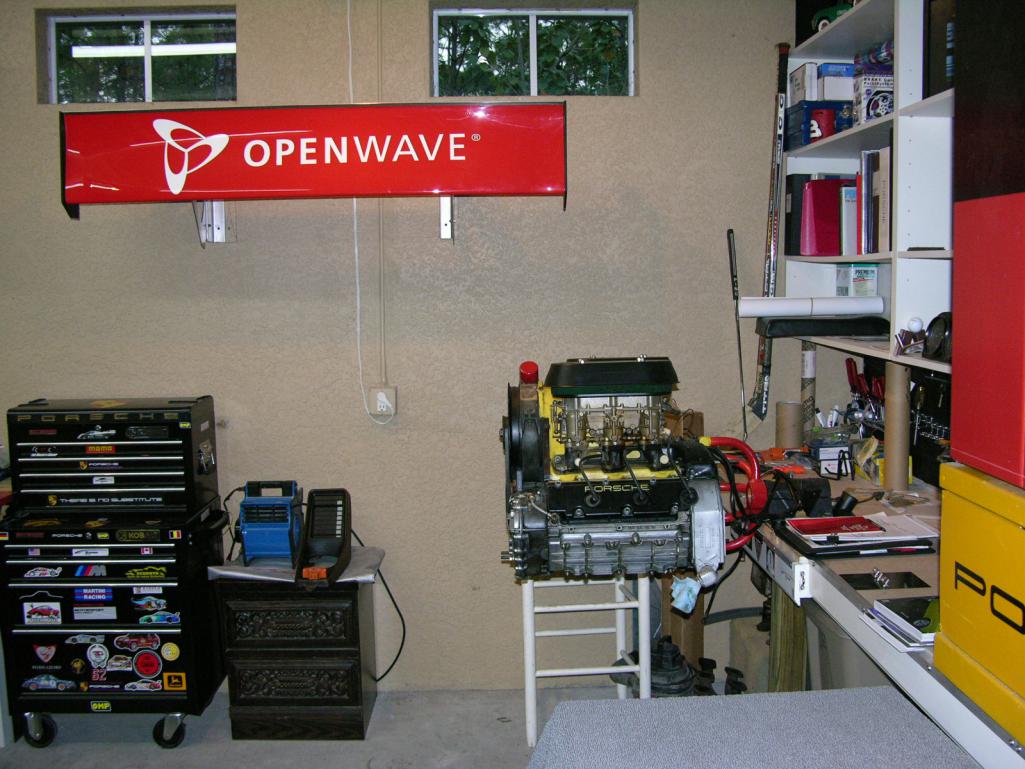
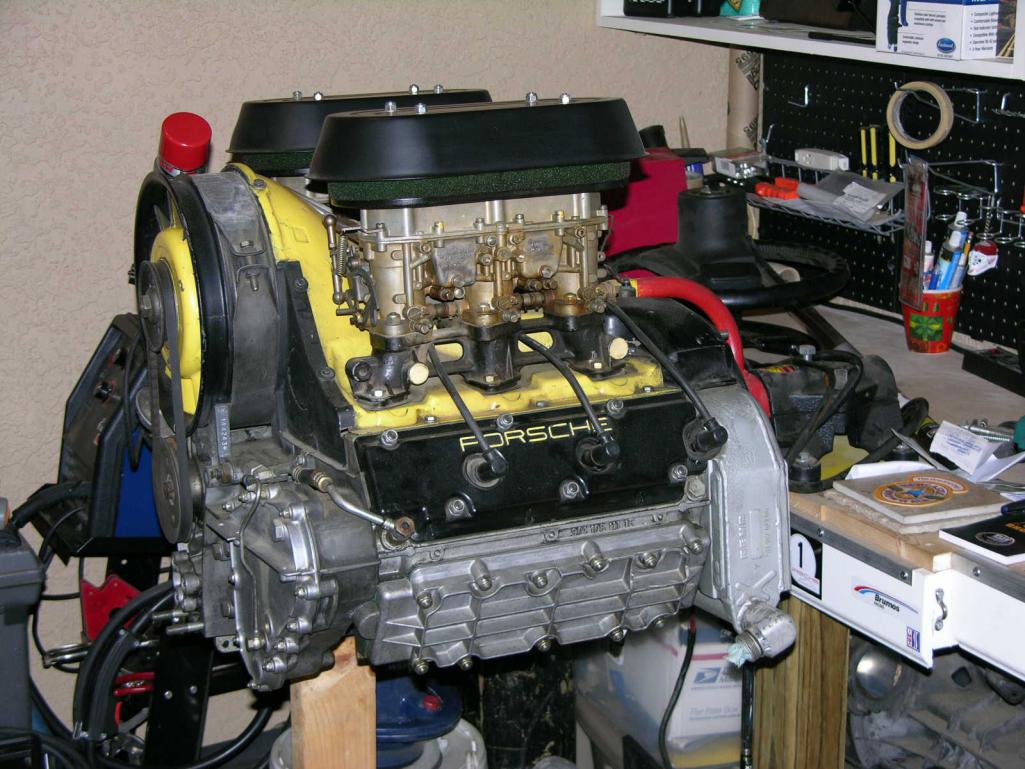
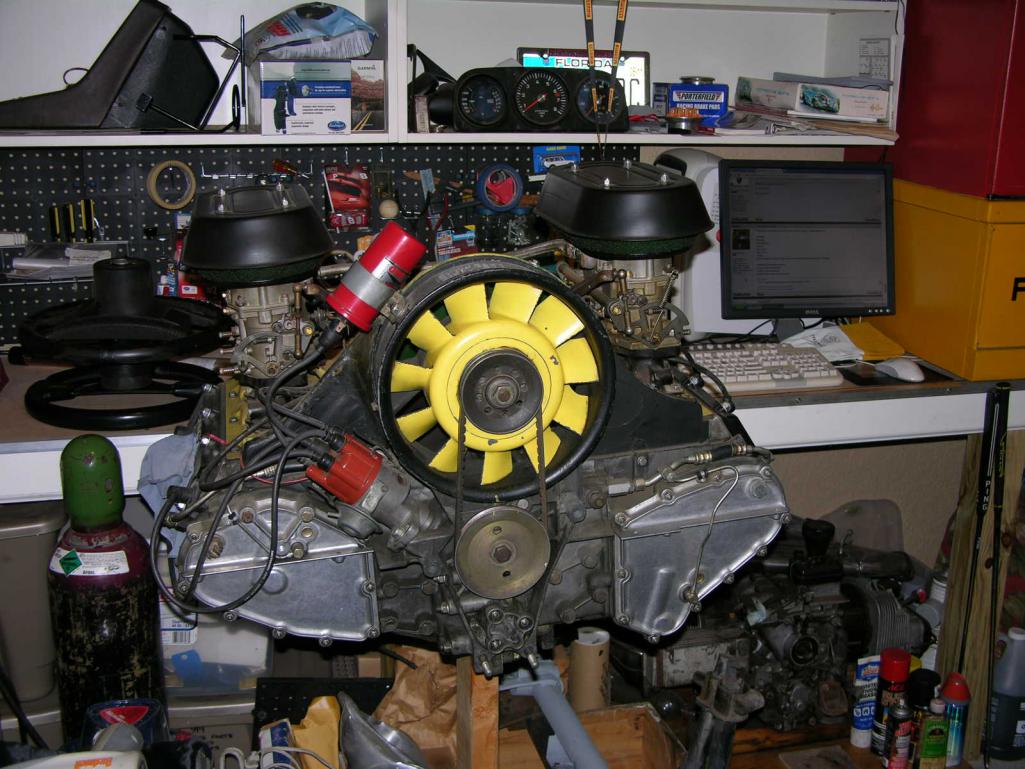
2) Install Patrick Six Engine Mount, Install Engine, Have Transmission Rebuilt, Install
Patrick Oil Tank and all Lines necessary, Install Oil Cooler, Rewire complete car.
Replace and treat inside of Gas Tank, install new CF/ Fuel Lines.
3) Replace Doors, Windshield, Install Spartan Street/DE Interior, Sparco Vintage
Seats, New Console, MoMo Wheel.
4) Prep car for Paint, all panels prepped, Hood, Trunk, Doors, Targa Top.
5) Replace & Upgrade all Suspension, Brakes, Bushings, Wheels & Tires. 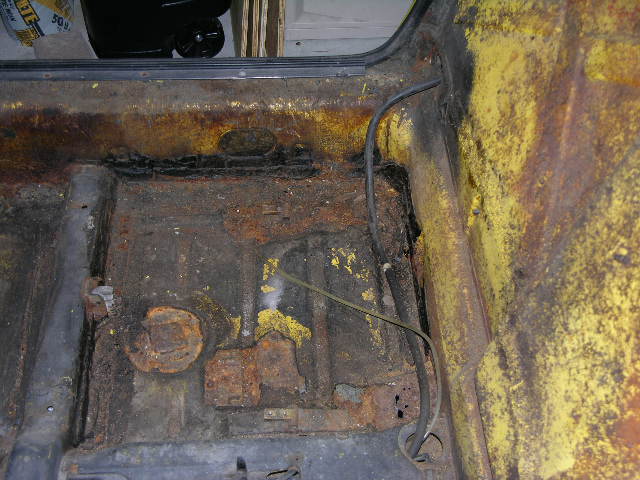
Posted by: Vysoc Oct 2 2015, 01:53 PM
More Pictures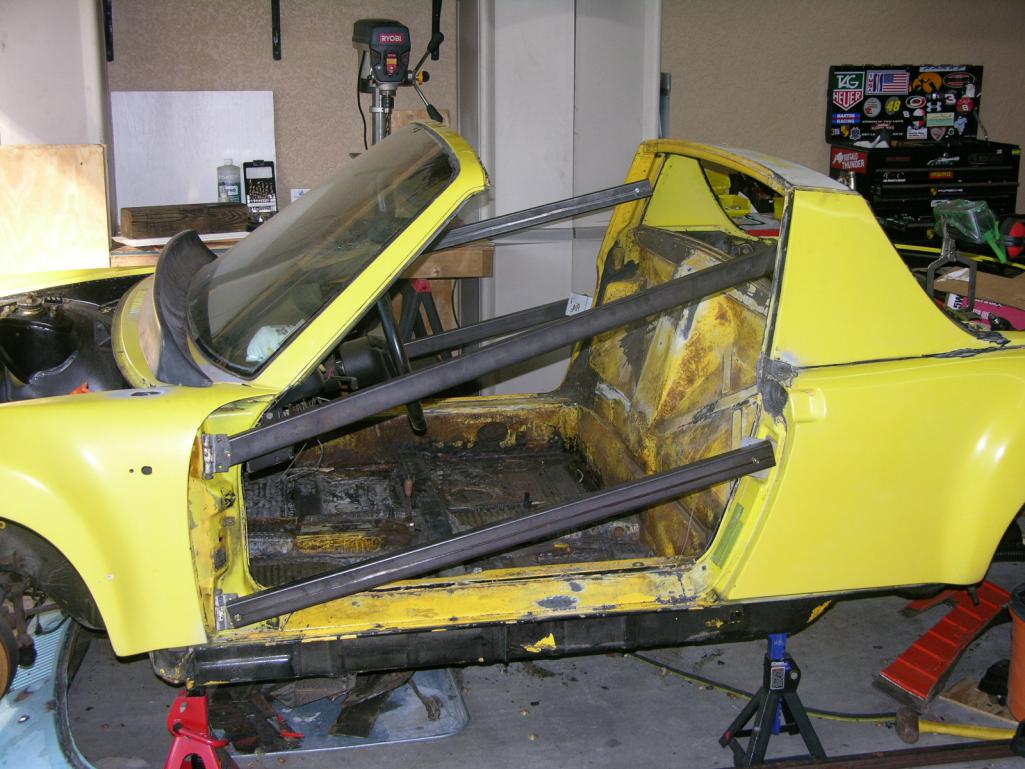

Posted by: Vysoc Oct 2 2015, 02:02 PM
More Pictures


Now the real work must begin! 


Posted by: RobW Oct 2 2015, 02:09 PM
Awesome! You rock. Good luck!
Posted by: Nutter965 Oct 2 2015, 02:17 PM
Love that motor ! Very envious as mine is still in Arizona !! Hope you aren't putting a John Deere influence on it 
Posted by: 914forme Oct 2 2015, 02:23 PM
![popcorn[1].gif](style_emoticons/default/popcorn[1].gif) I can't wait for this to unfold.
I can't wait for this to unfold.
BTW, I get carried away at times, those are some serious door bars.
Posted by: injunmort Oct 2 2015, 03:17 PM
I love the color and the engine, good luck with the build
Posted by: Vysoc Oct 2 2015, 04:59 PM
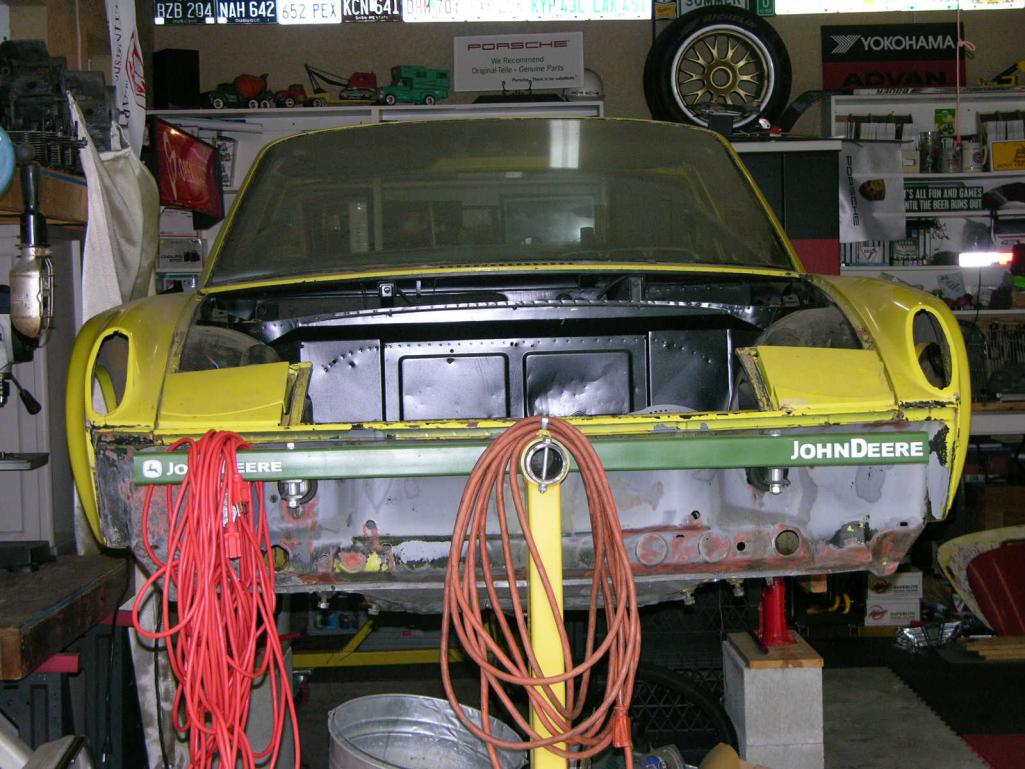
Nutter965,
No John Deere influence other than my Dad worked for Deere & Co. for 38 years.
He winters down here and I stickered it up for him, unfortunately his area was Industrial (Yellow Equipment) which is branded as DEERE, he made that clear to me as I have AG (Green) stickers on....oops?
Thats alright the Rotis is solid. Paint scheme will NOT be Yellow or Green.
Thanks for checking it out!
Vysoc
Posted by: Vysoc Oct 22 2015, 05:27 AM
OK,
Day off today, my season is just starting (Golf in Florida) as the temps have finally dropped, hell it got down to 68 degrees the other morning almost a cold front which means the garage only gets up to 90.
October for me has been a reorganization month in the garage to get my White 75 placed in another garage so that I can spread things out and have some working room.
That said and done, I now have my garage in a position to work, just cut out the Driver's side Cross Brace that was heavily rusted and have fitted up the Restoration Design replacement piece. I also fitted up the drivers side floorboards, I have more trimming to do to the old floor pan to get things in a position where I can use Clecos to fit them properly.
I was also able to pick up a Miller TIG Welder and I need to get up to speed on it, I do not have a 220V feed in my garage so I have moved my Hurricane Generator in place to power that thing from outside the garage. I have several areas on the car that I believe will benefit from TIG rather than MIG as the heat from MIG causes alot of Blow through and warping.
So today will be a day to learn my new/old used machine and trim the rest of the old floor pan out, I may even get something welded today. Photo's of updates forth coming.
Slowly moving forward!
Vysoc
Posted by: carr914 Oct 22 2015, 05:49 AM
Posted by: Philip W. Oct 22 2015, 07:27 AM
looking good Peter, you are a glutten for punishment for sure!. - let me know how the tig thing works out, I started a thread asking about welders etc and got some great advice , now looking for one to be able to do a couple of the small projects that I have!
POST LOTS OF PICTURES 
Posted by: Vysoc Oct 22 2015, 08:27 PM
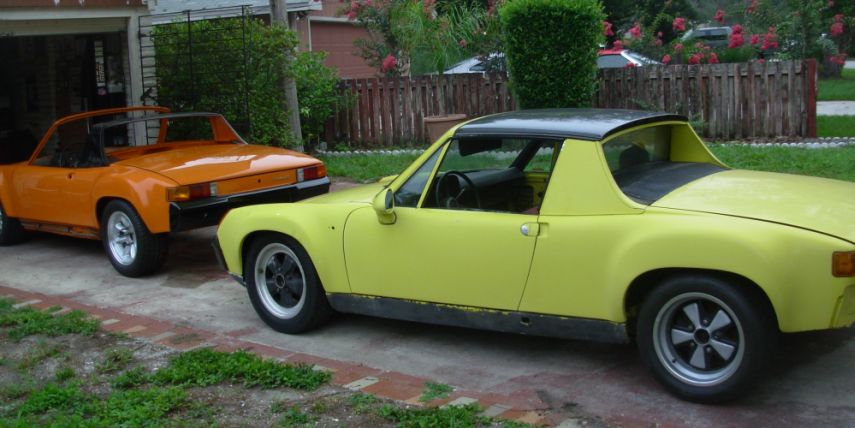
Nice photo TC, she will look good again with those Fuchs, somewhere down the road.
Thanks for the photo! Believe it or not I was able to get that dashboard out without cracking it and keeping all the plastic studs intact?
Dr. Phil,
The welding thing did not go so well today, the 220 volt Male connector on the Miller TIG did not match up to my generator, nor did it match up to the Dryer?
After much research.... the classic Amp versus breaker issue, so I will need to run a 220 volt receptacle into the garage that has a 50 amp breaker. My panel is in the mud/laundry room right off the garage so this should not be that much drama. I was reading up on prices from guys that have rewired to handle the charging of their new TESLA's, so their estimates on pricing should be pretty up to date.
I can run the wires in romax and mount the receptacle, the electrician can wire it up in the box and I can burn metal soon hopefully.
I did get a chance to sharpen up some tungsten's today and continue to set up the garage.
Sometimes you have to crawl before you can run.
Dr. Phil, I have a MIG & a TIG now so if you have any questions or need something welded, I am only 10 or 11 hours away or you can send it to Bonita.
Formula 1 in the USA this weekend, just wish I did not have to work through the weekend, that's what the DVR is for.
Vy ![yellowsleep[1].gif](style_emoticons/default/yellowsleep[1].gif) soc
soc
Posted by: Vysoc Nov 29 2015, 03:16 PM
TIG TIME only took a full month to get things set up, as usual you would not think it would be that difficult to run 240 - 6 AWG 3 wire through a garage attic into the Mud room where the panel is?
Wrong, took two separate dates with my maintenance/Electrician friend but it is now set-up safely correctly and by the Electrical Codes.
Just plugged her in and fired her up, and she roared to life, looks like Thursday, my next day off will be the big day to start really burning some metal....now I can start
moving forward.
I also need to update this thread to reflect what I put in on my October Update and my November Update.
Photo's of the electrical work coming!!
Vysoc
Posted by: Vysoc Dec 4 2015, 01:10 PM
Update to my regular thread as I put the October update on the main thread and did not update on this thread.
This will be a shorter cliff notes edition.
October Floor Pan Fit-Up.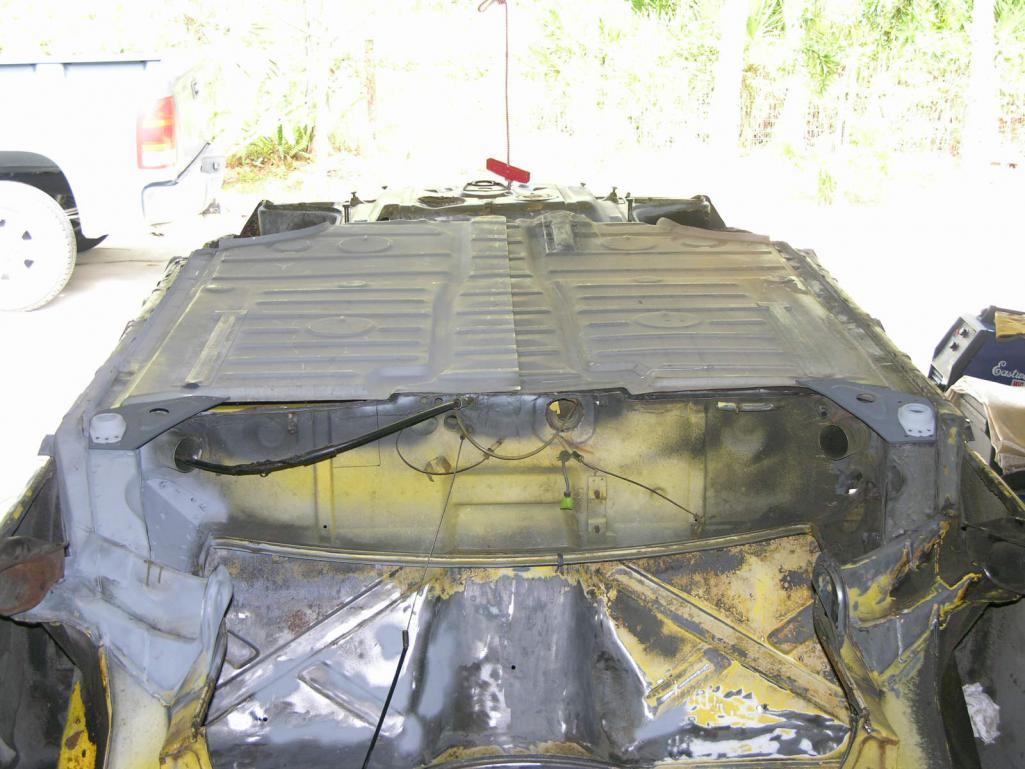
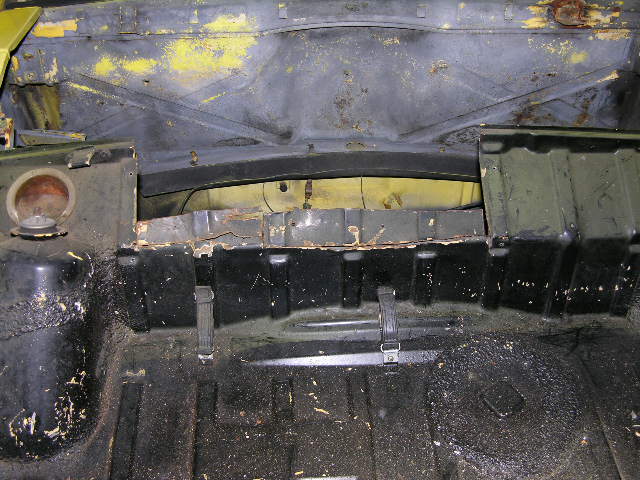
Rear Corner Brace Fit-Up.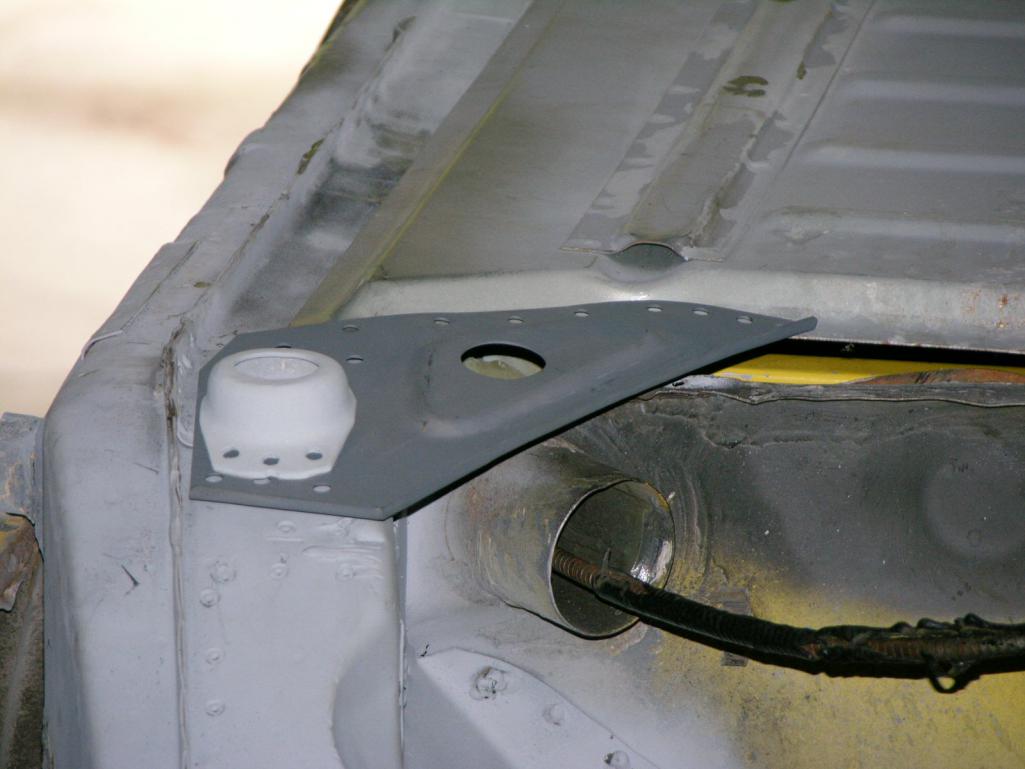

November Stuff TIG WELDER
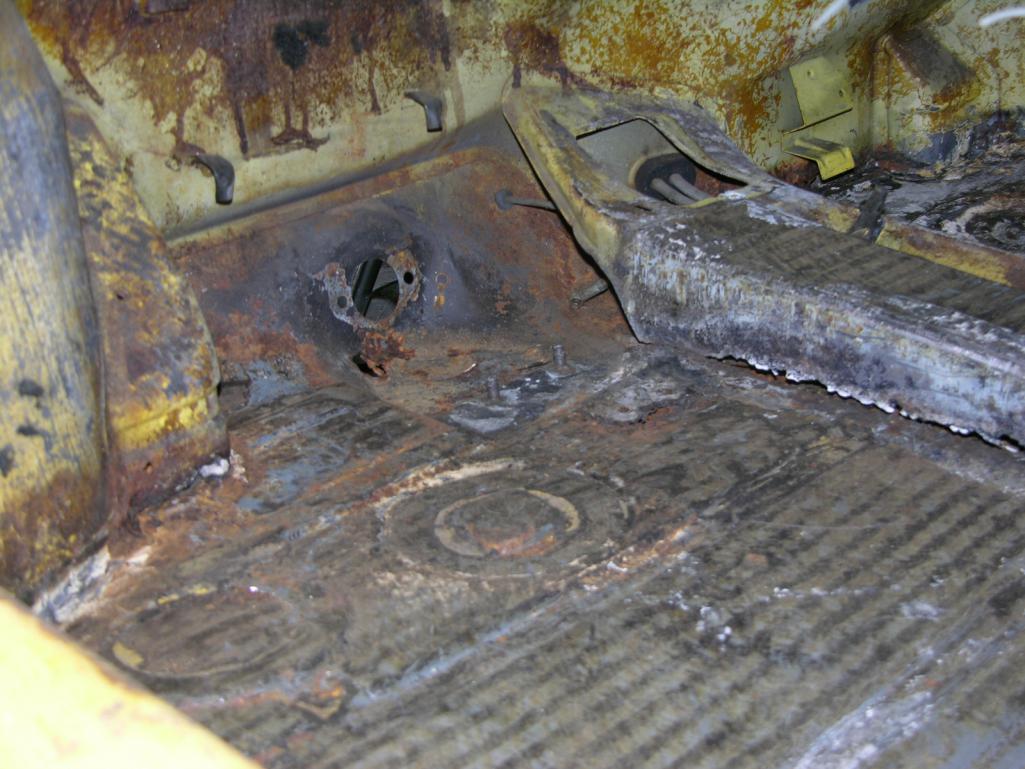
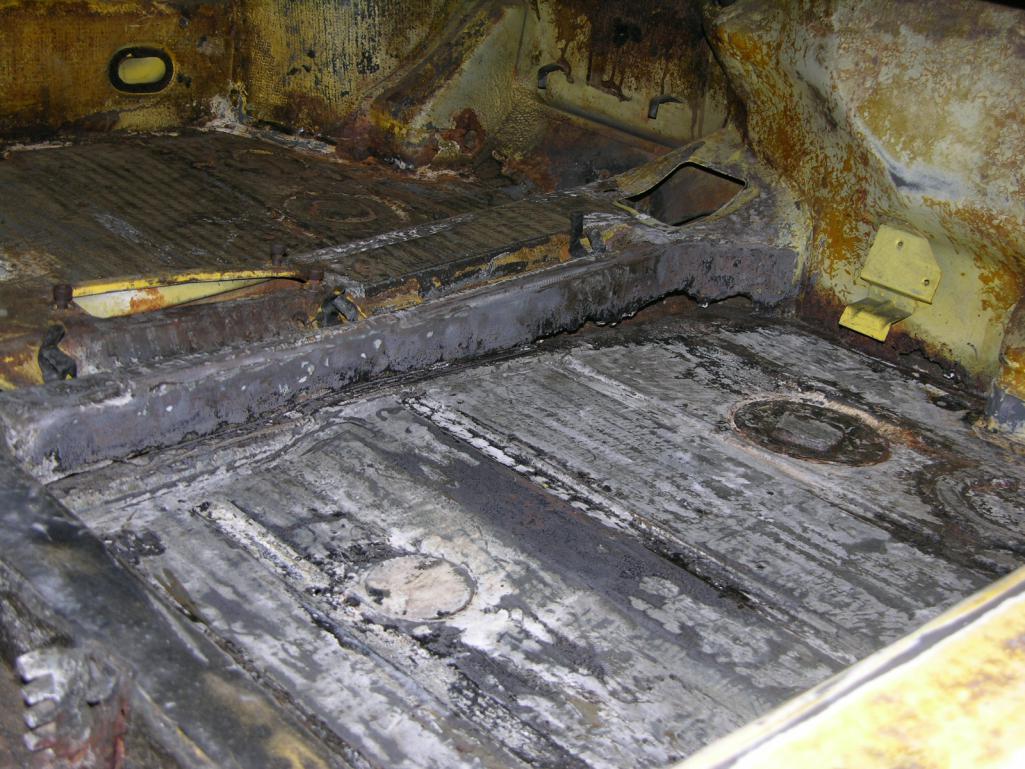
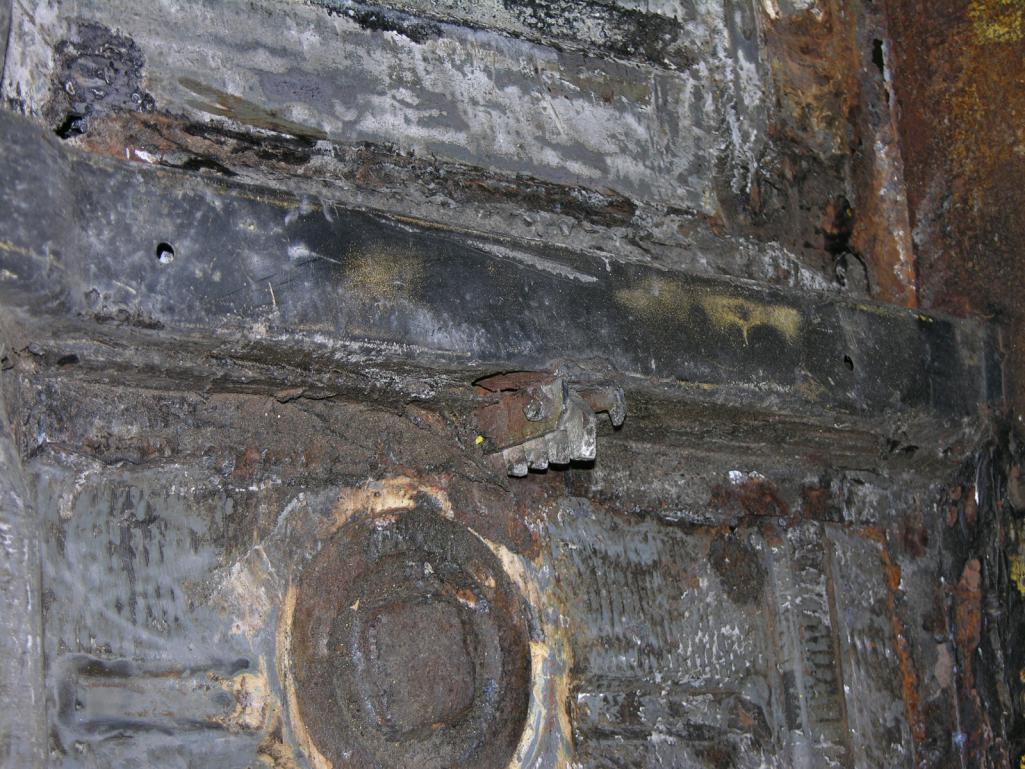
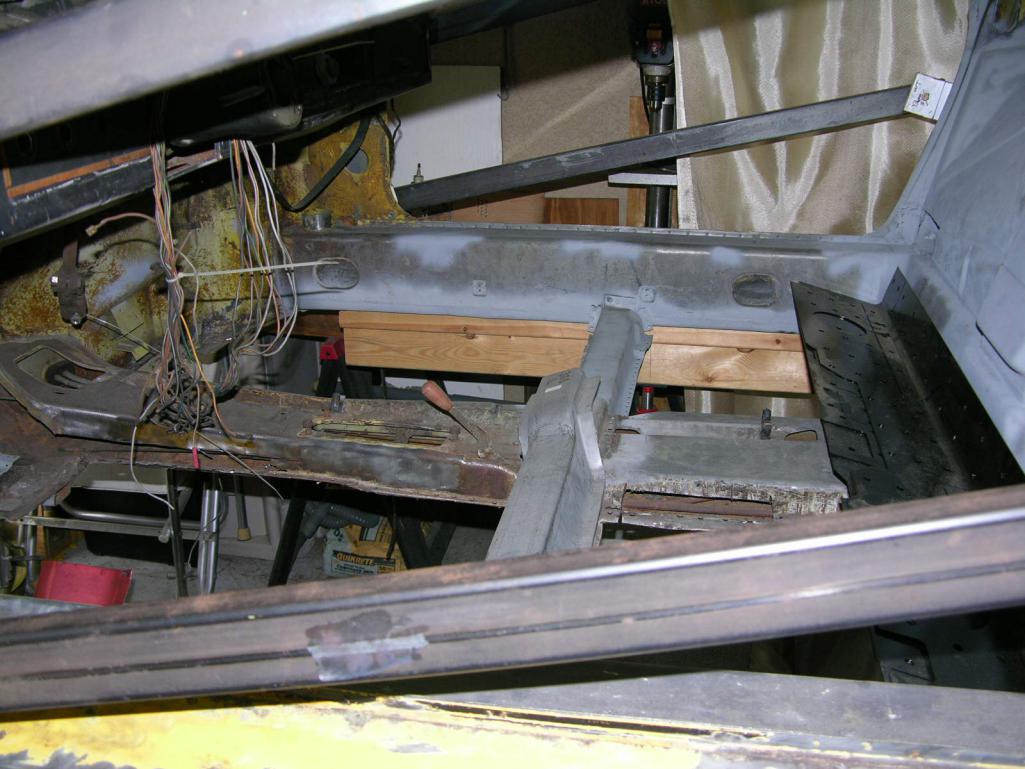
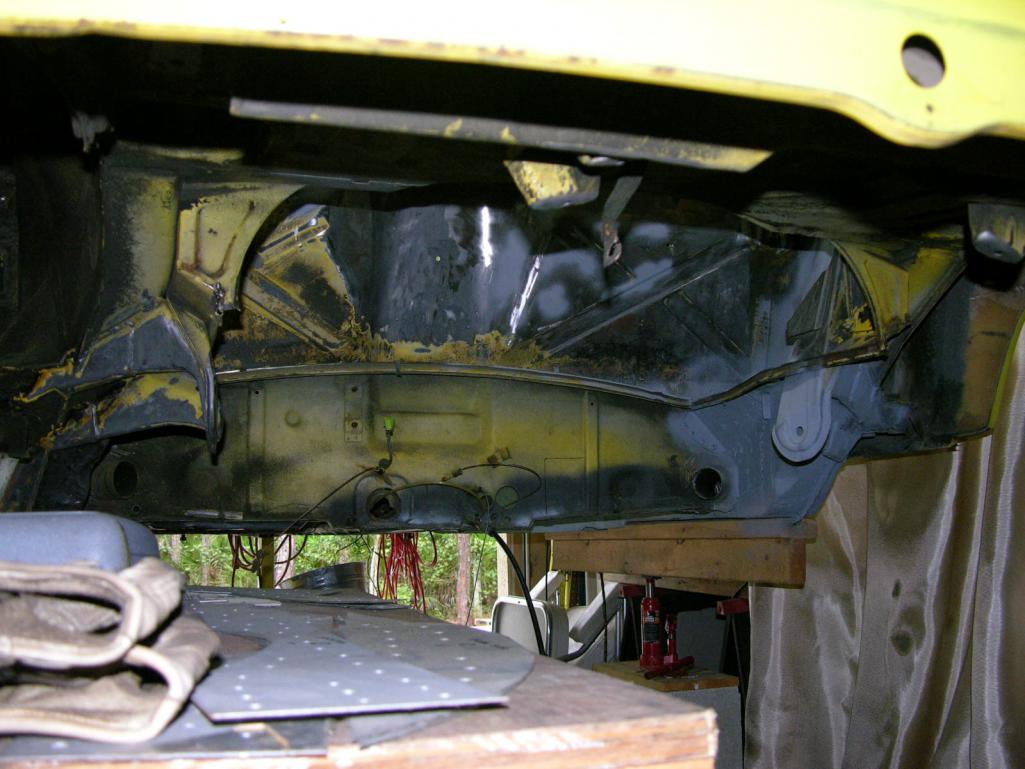
December drilled out all of the Spot welds in the base of the Tunnel. Cut out what I could and prepared myself for what I thought was going to be a rusty mess?
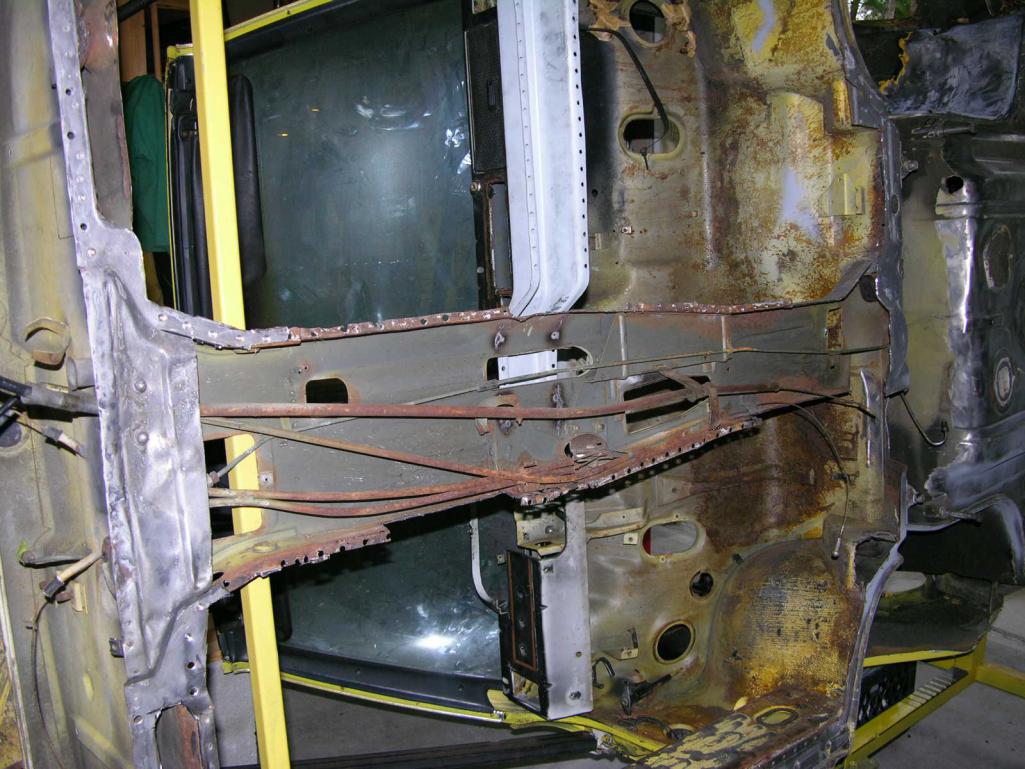
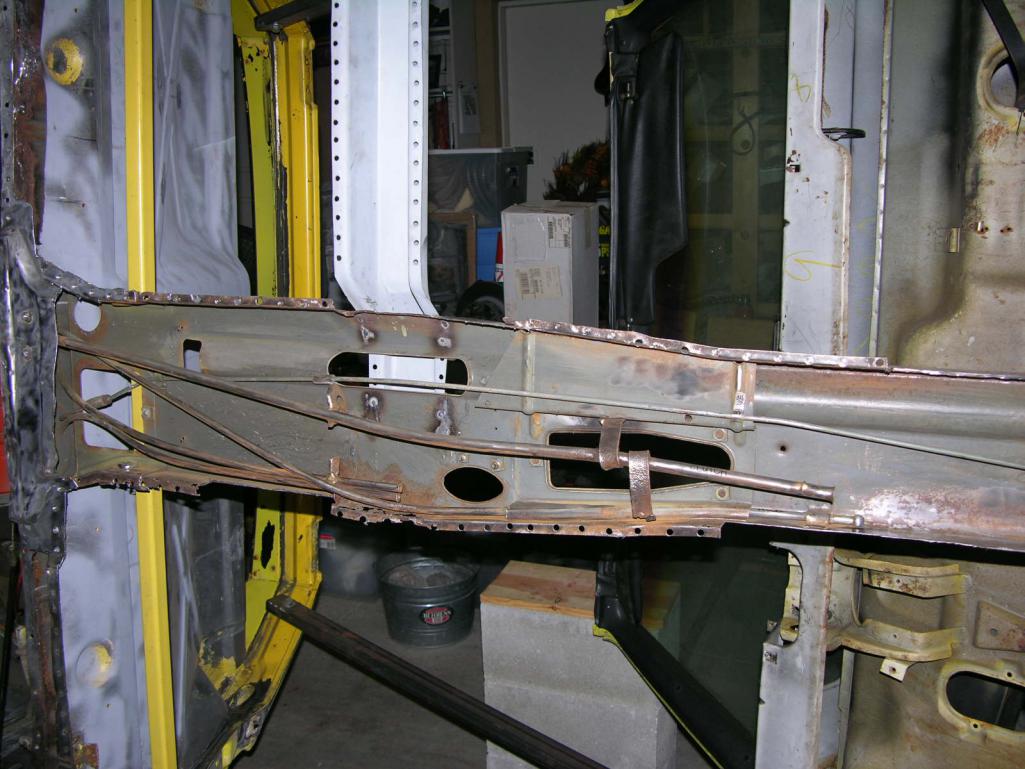
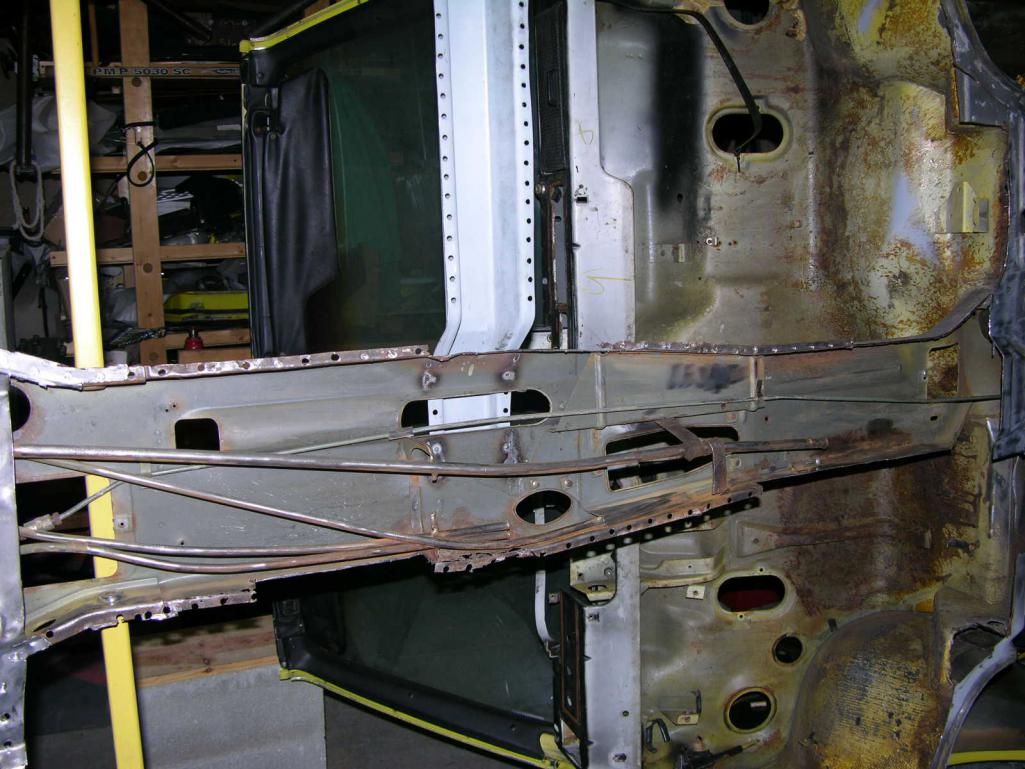
It may not appear that this is clean but I expected a lot more rust and was really quite happy with what I found. Obviously I have to patch in three sections along the tunnel in three different areas, but other than that and to shore up several holds on the Clutch tube, I am happy. I continued to clean up the areas with sandpaper used a little Ospho and put a coat of primer on them to keep them in check. This whole tunnel will get a healthy dose of the Eastwood inside panel green stuff and should be good to go. The Restoration Design Driver's side middle brace is next to get welded in and then I will clean-up all the little stuff while I have such good access before the Floor pan is attached.
Posted by: Dion Dec 6 2015, 03:35 PM
Go Vysoc Go! 
Looking good. Keep at it.
I'll be following closely when you start plumbing that six.
Will you need an access door in firewall for timing?
Posted by: Vysoc Dec 7 2015, 03:21 PM
Hey Dion,
I am hoping your car won COTM for December!
To your question on access for timing.
Yes, access will be cut just below where McMarks roll bar will attach to center of firewall.
Just need to button up a lot of metal work and get the floor pans welded in and then the Engman Inner Long Kit.
I feel as if I may be starting to get this thing moving now that both welder's are working.
Thanks for watching!
Vysoc
Posted by: Dion Dec 7 2015, 10:10 PM
Thanks Vysoc,
I'll be needing an access plate for my six when the time comes. Prolly start that
phase of work next fall.
When you are at that stage, I'll be bugging you for closeup photos and
measurements. Have at it!
Cheers. Dion
Posted by: Vysoc Dec 13 2015, 10:16 AM
OK December 2015,
I was able to take advantage of Thursday the 10th of December and get the 1st of 3 patches welded in on tunnel.
Working with the new TIG welder has strangely helped with my thin gauge work on my MIG welder. Anyway things were grabbing very nicely and I was able to really get things dialed in on Thursday.
I feel like for the first time that I may be creating some forward momentum on this project.
Here are a few photo's of what I got done the other day!
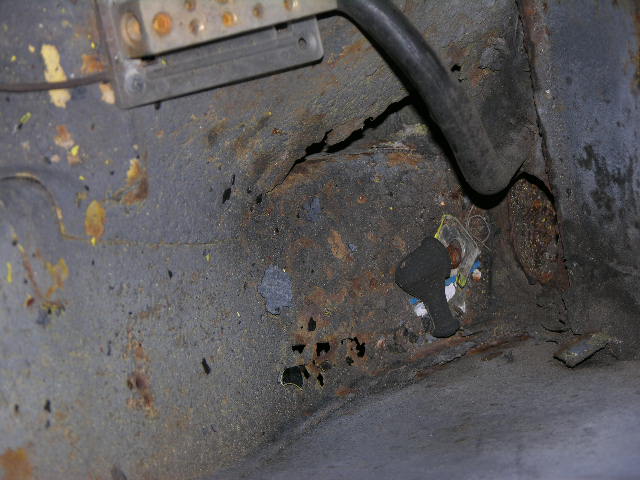
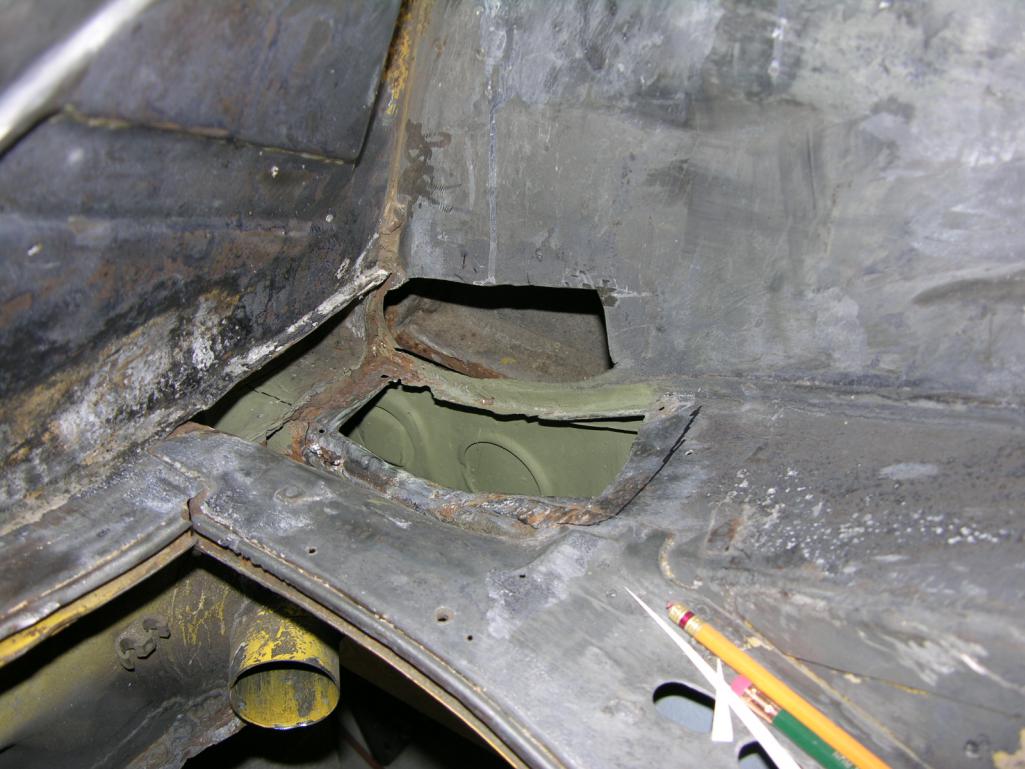
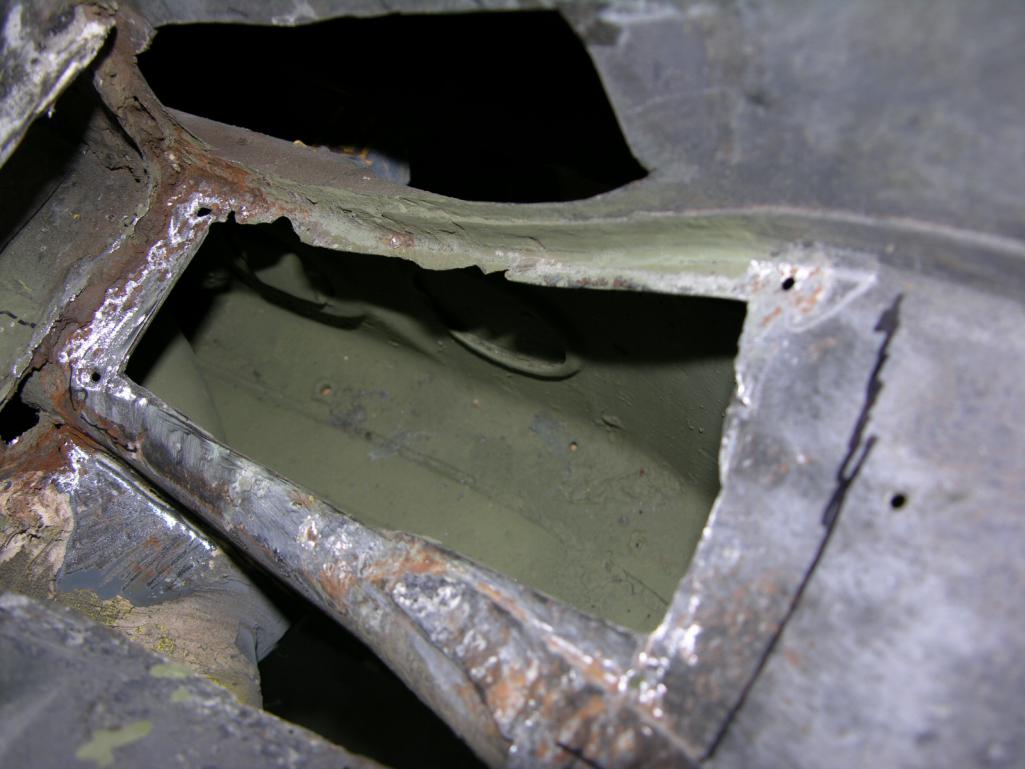
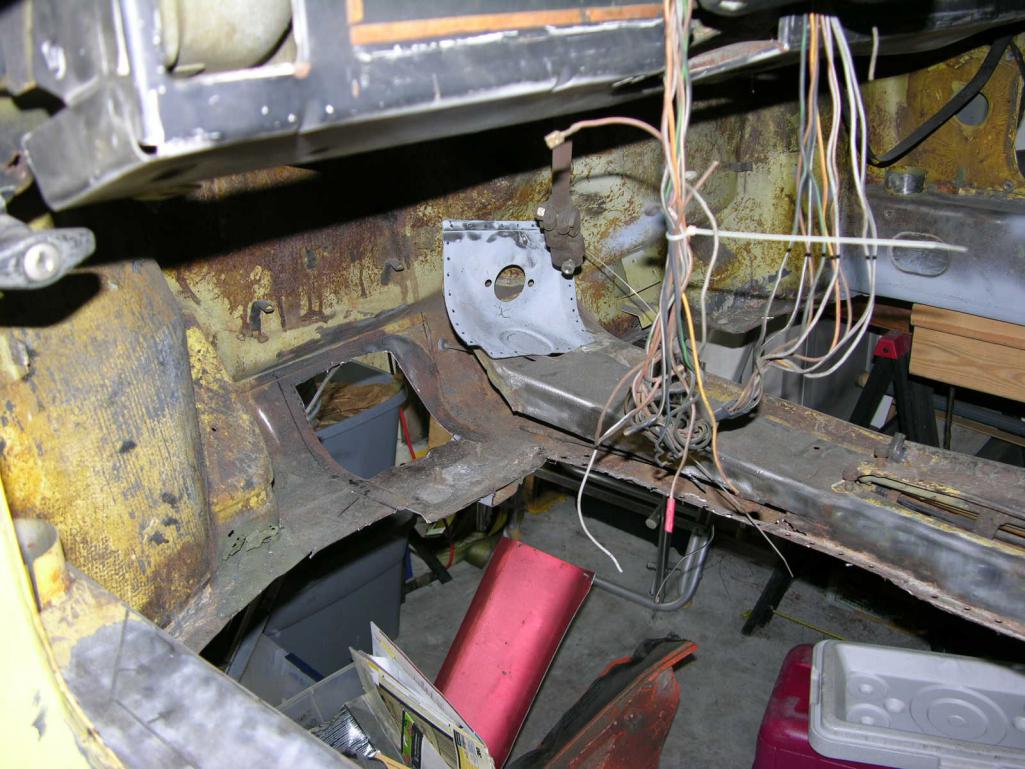
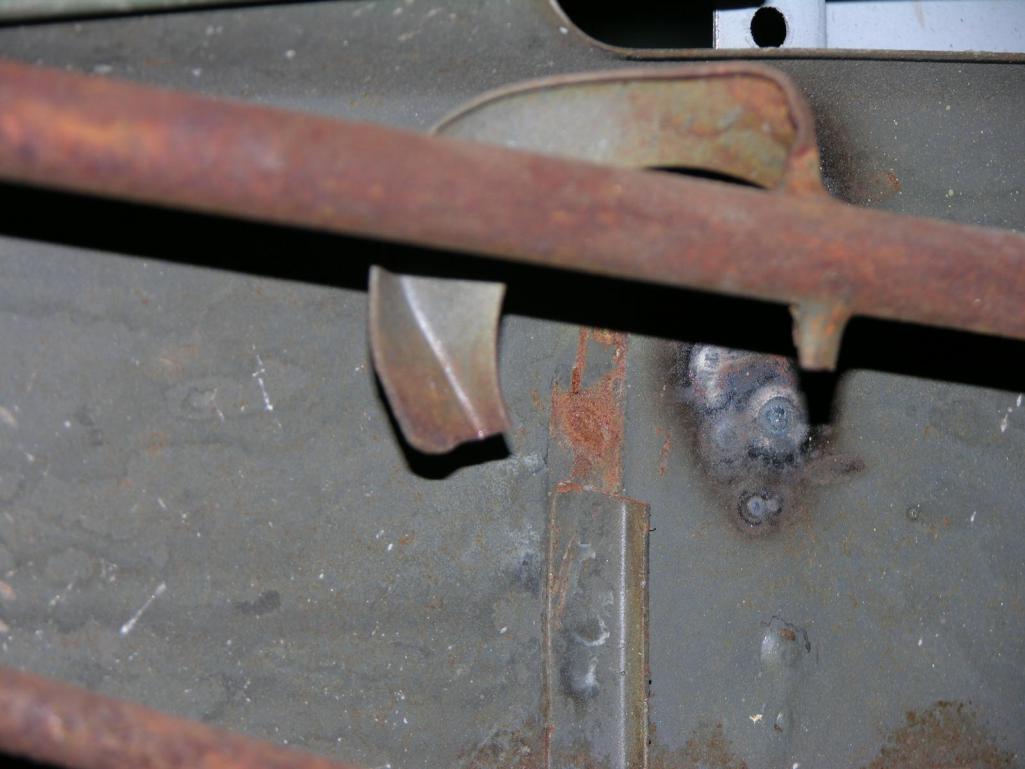
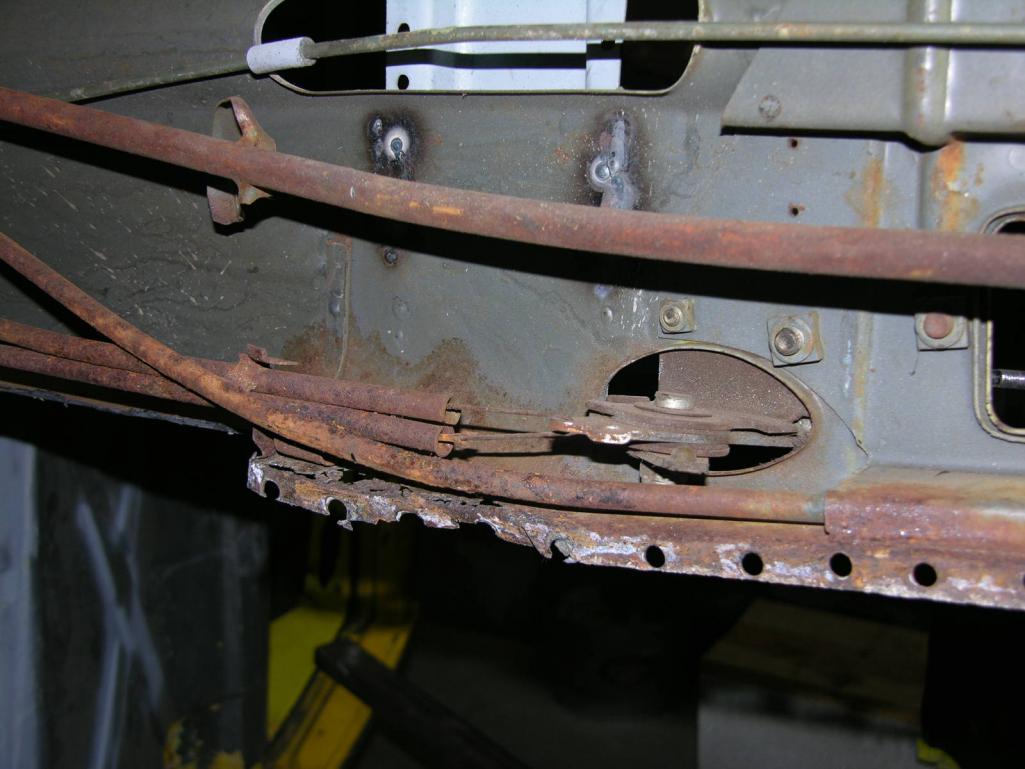
Prior to patch, as you can see water must have sat at the base of the tunnel in several places and the tin worm did his thing.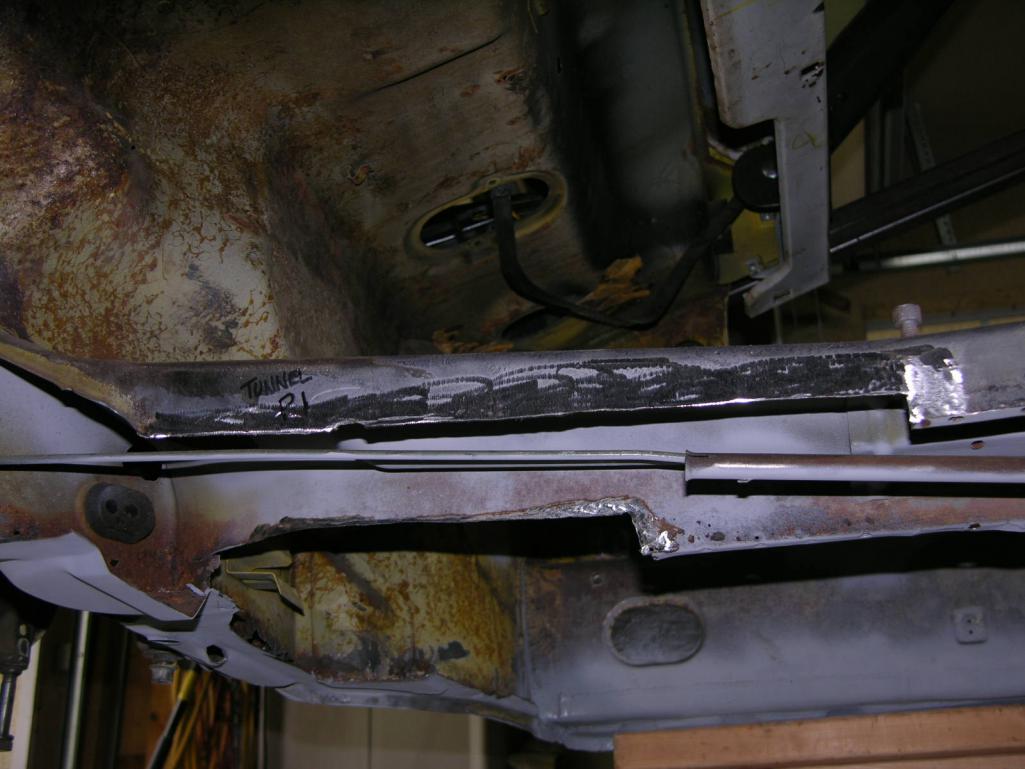
Another photo of area to be patched - Tunnel Patch 1.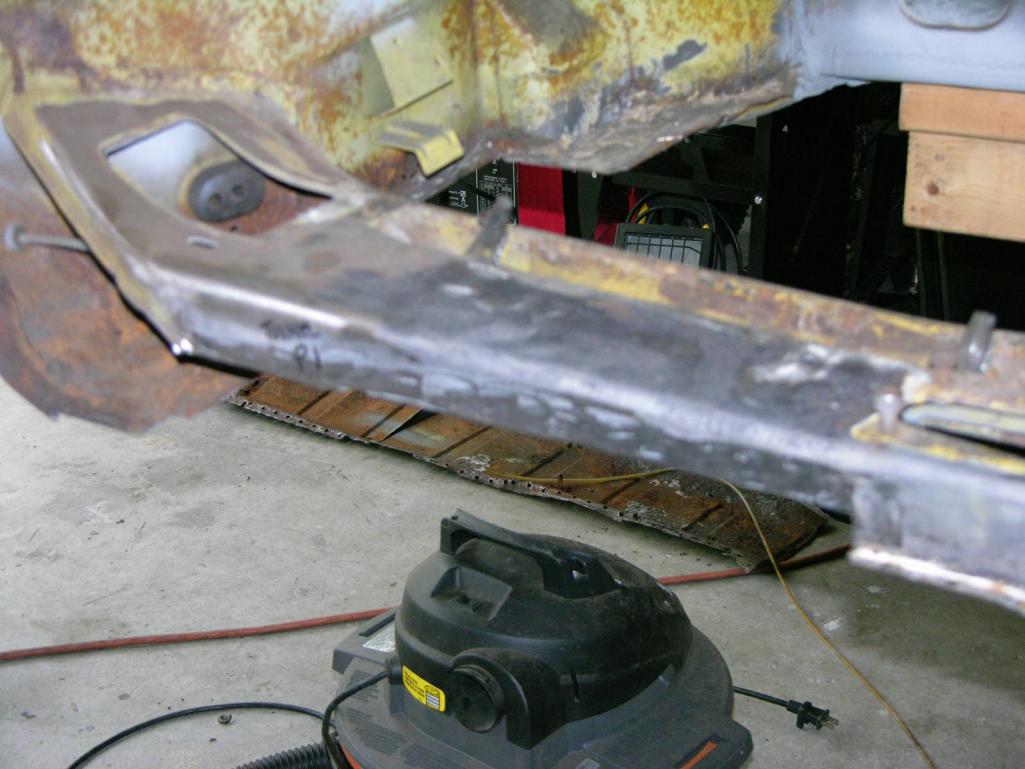
Pattern Designed & Test Fit.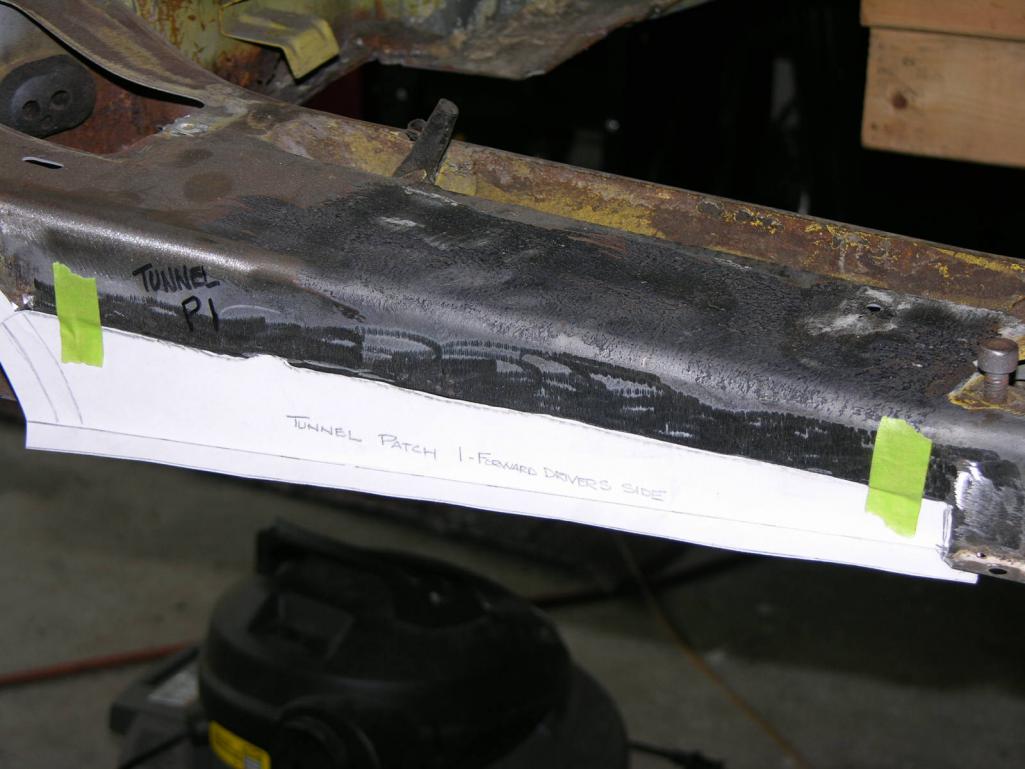
Second Test Fit.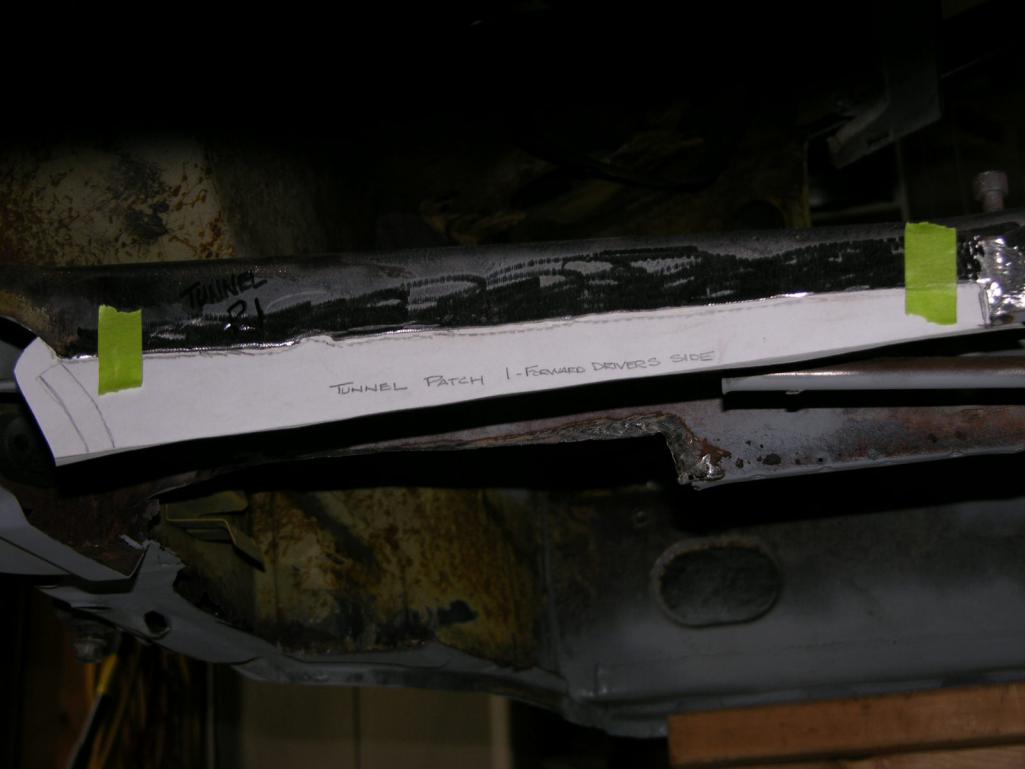
Sheet Metal cut out and formed up.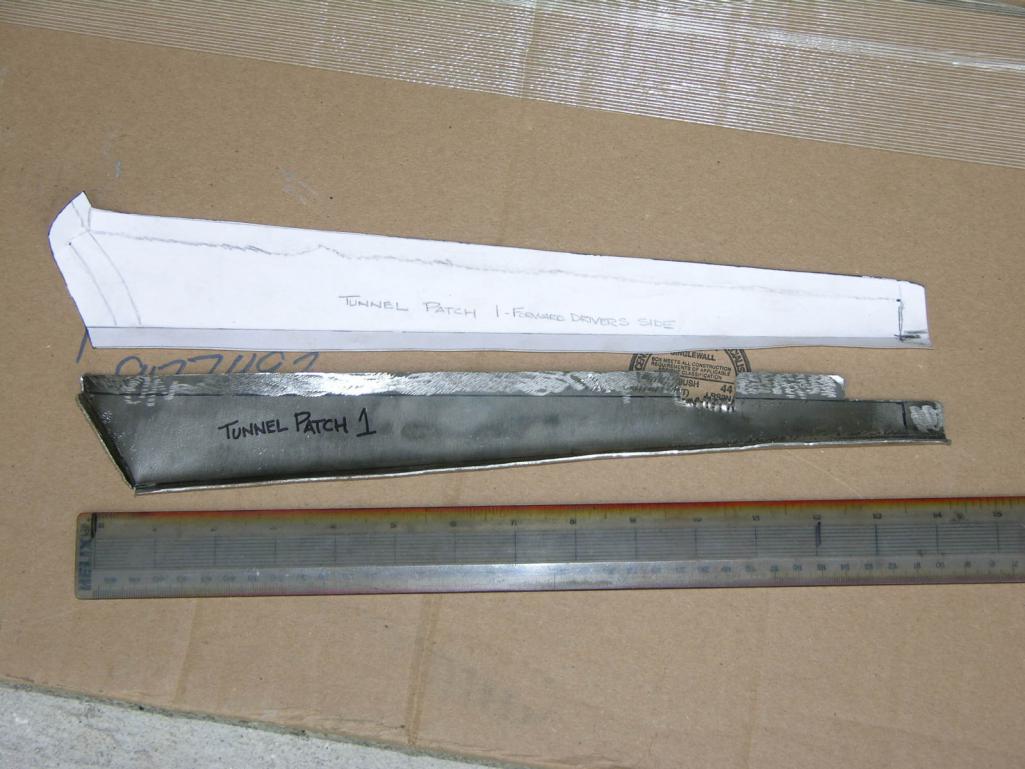
Tunnel drilled for rosette welds and prepped for MIG.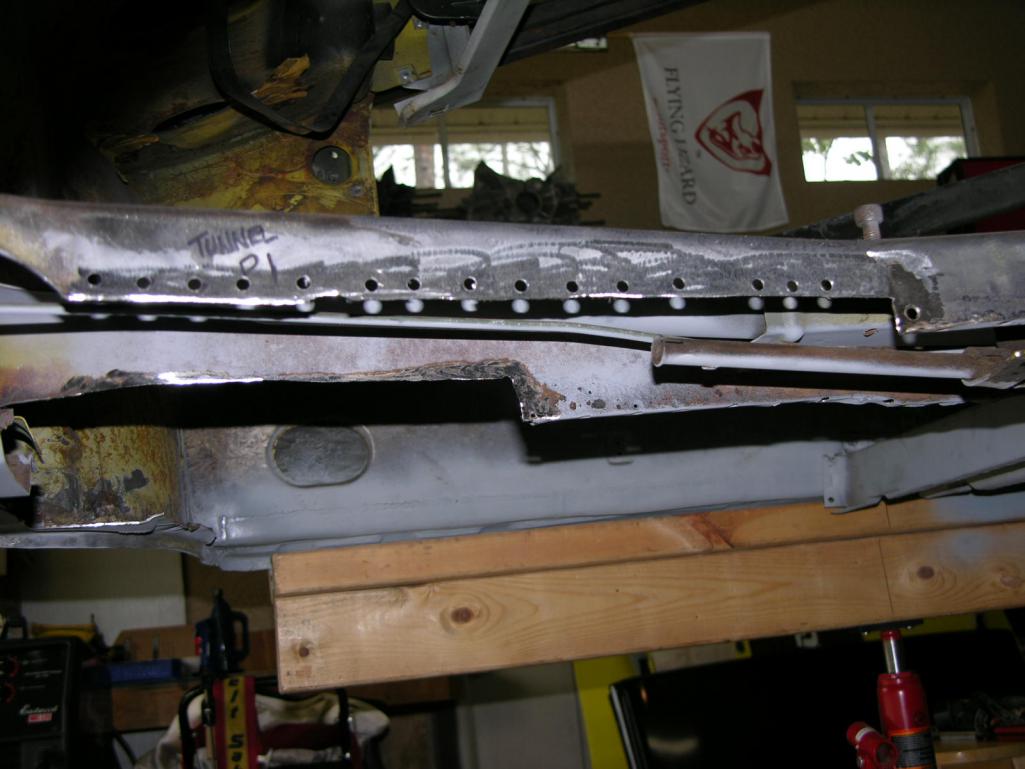
New piece clamped in with C-Clamps.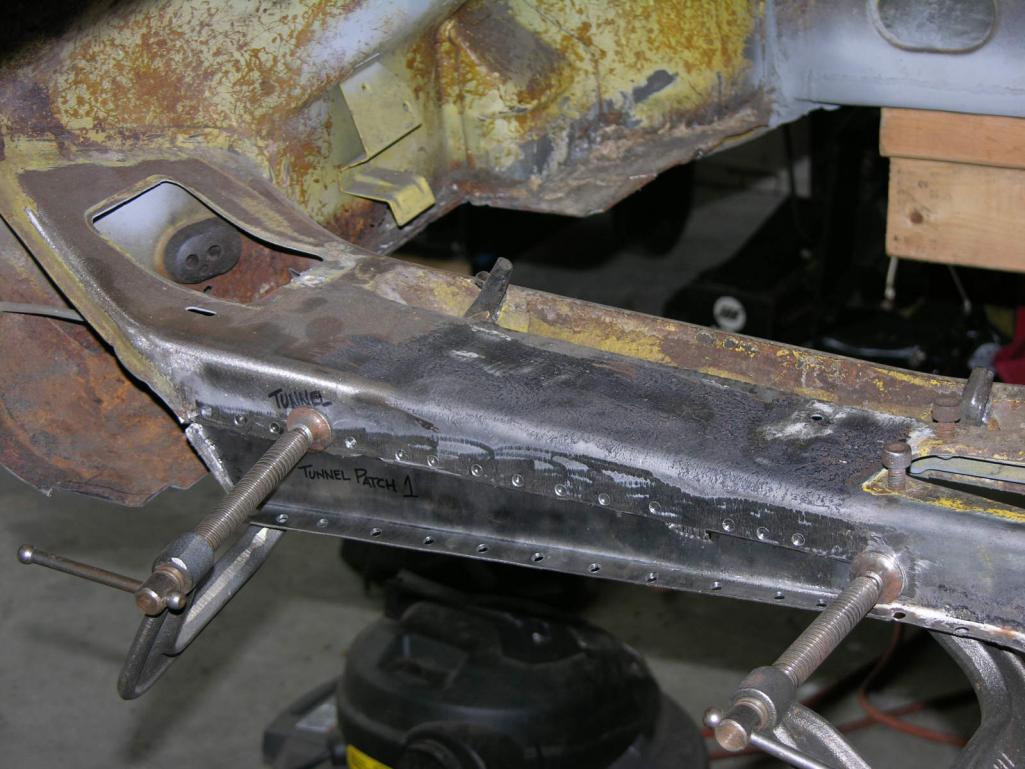
In place and ready to join the Yellow Sub forever.
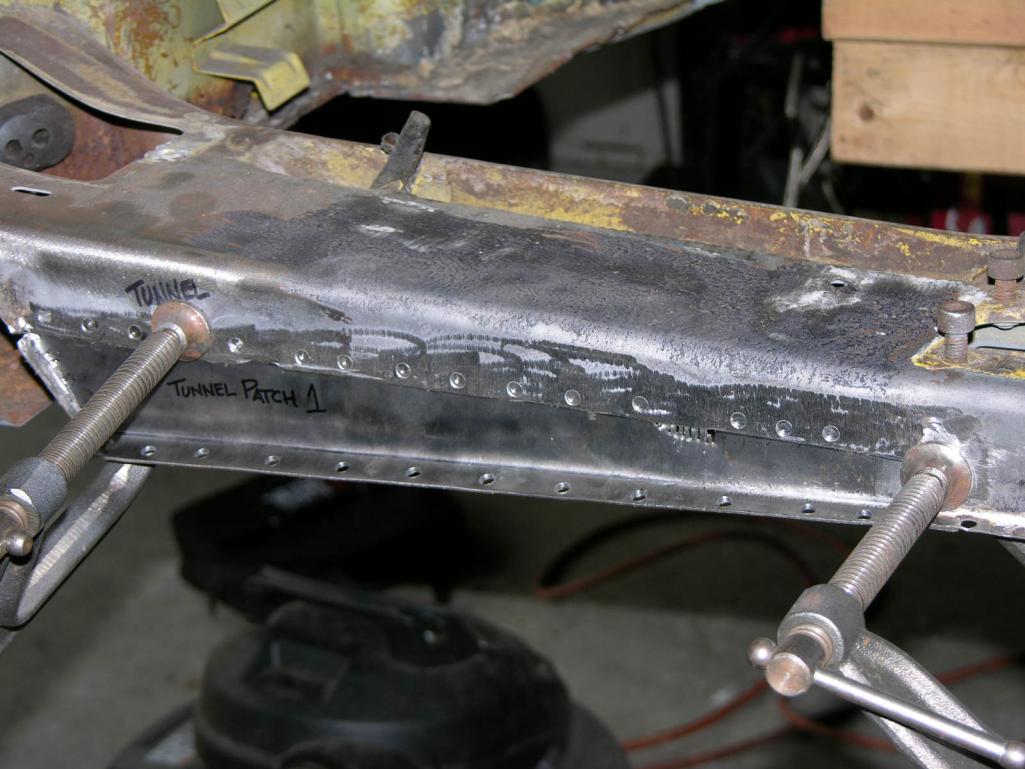
Another Angle.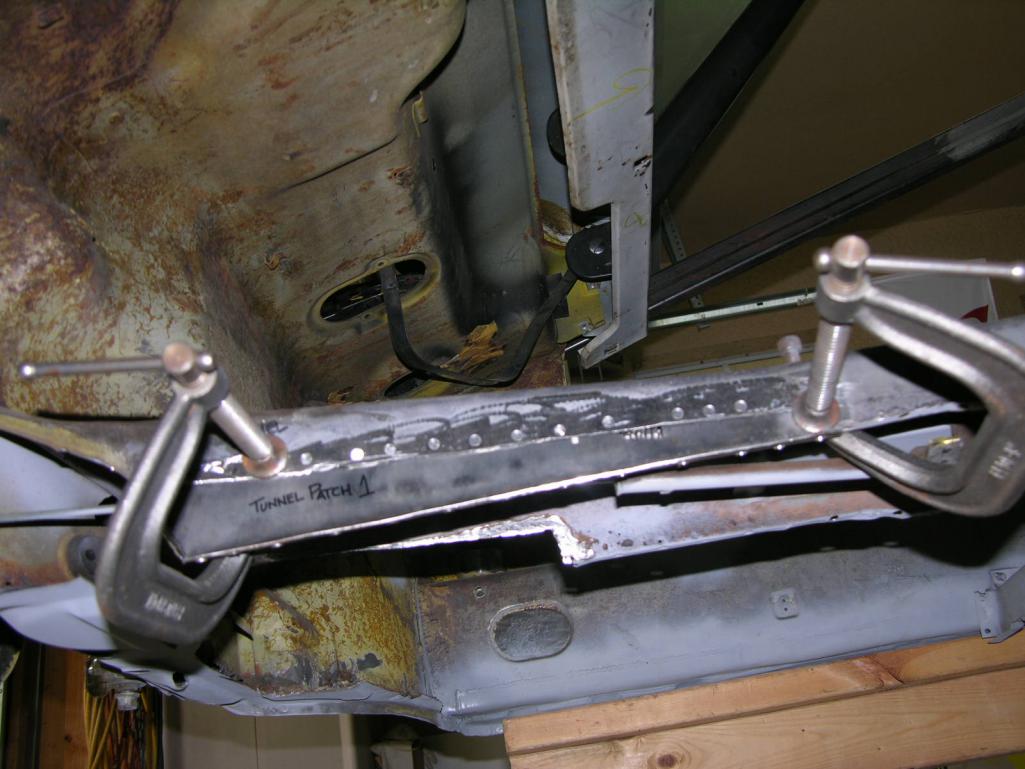
First welding pass with the MIG.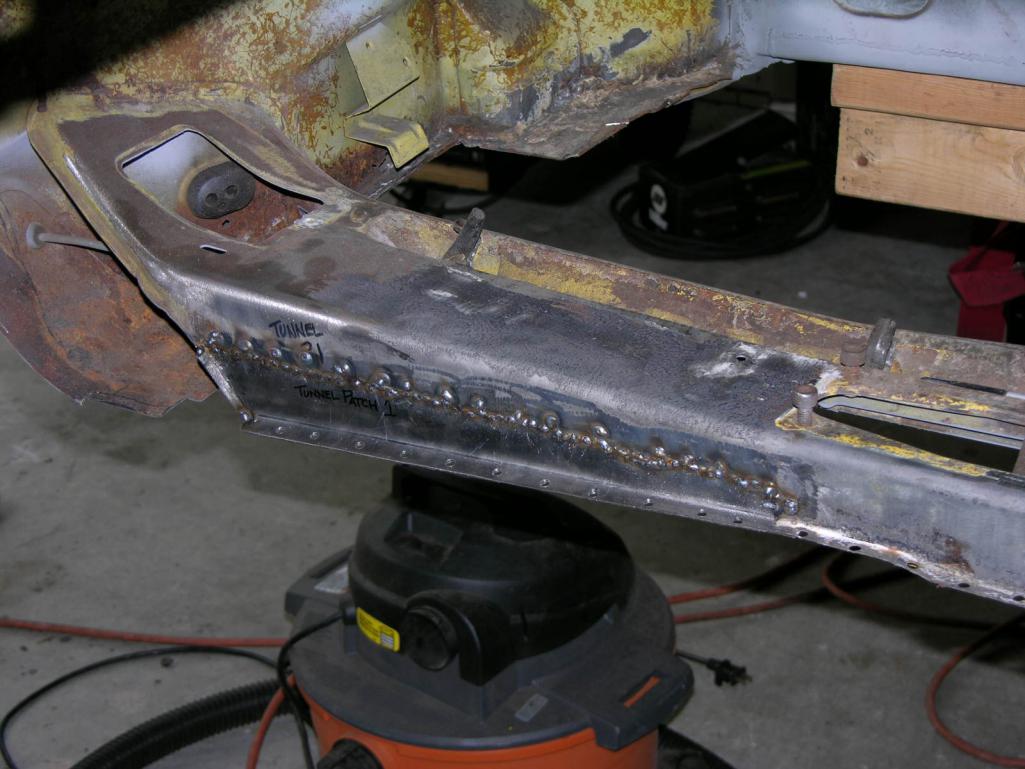
I think that will hold it.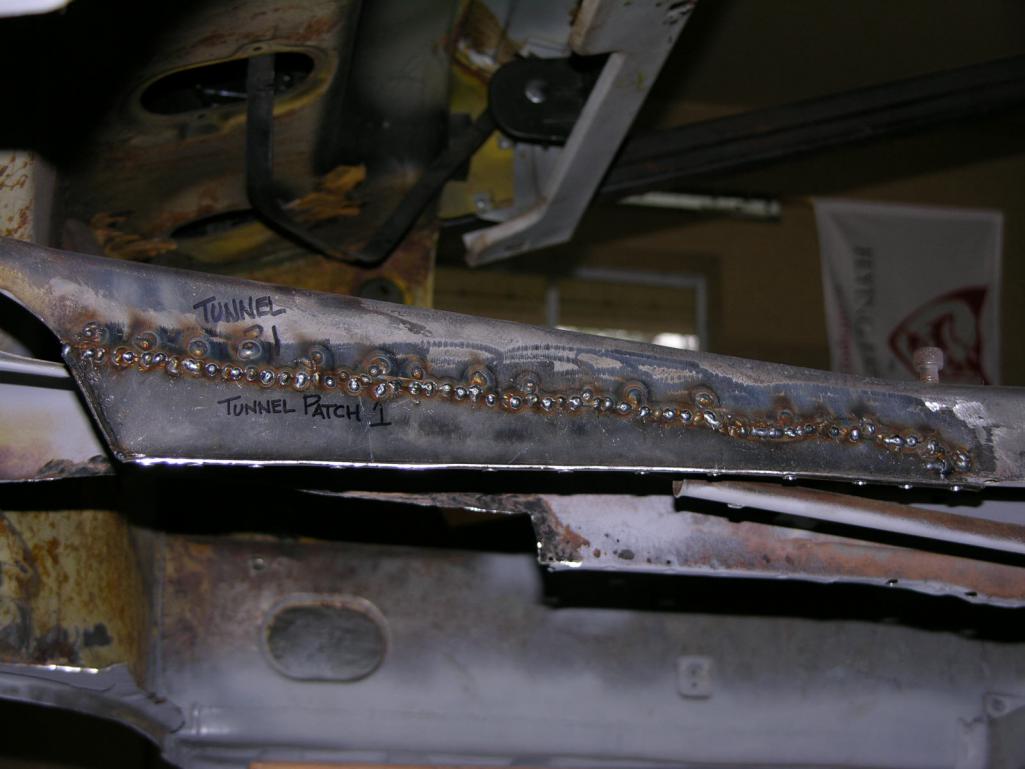
Another Angle.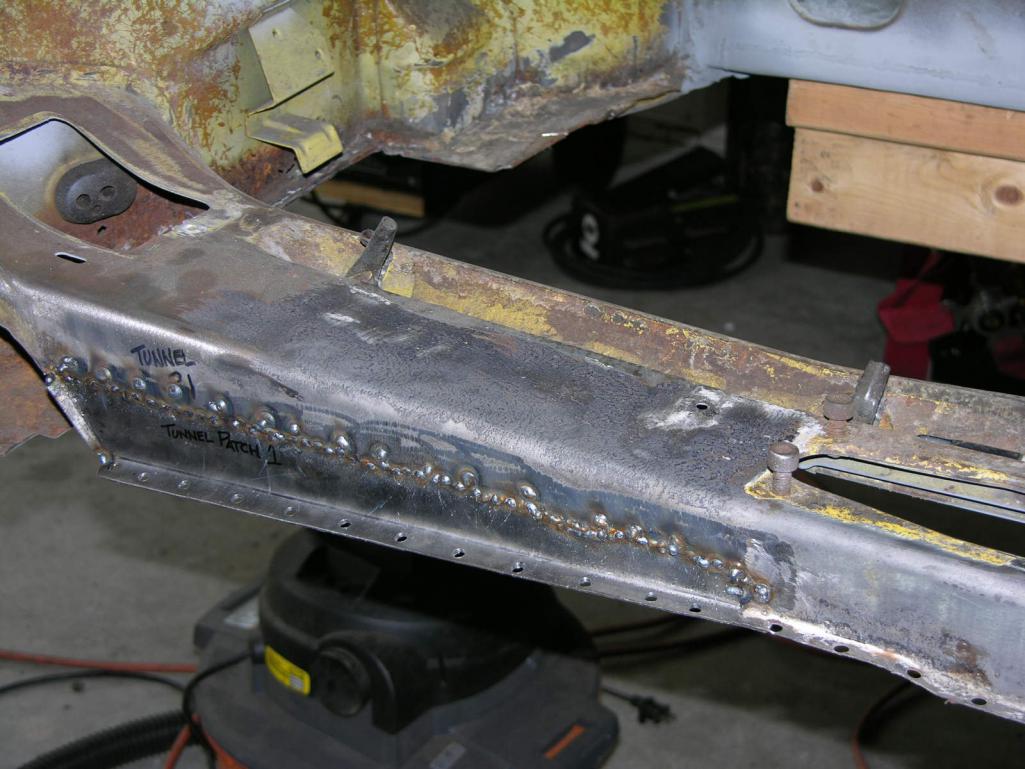
First pass at grinding & sanding of the welds, please remember that this area will be covered with Dynamat and carpet other wise I would have done pretty butt welds.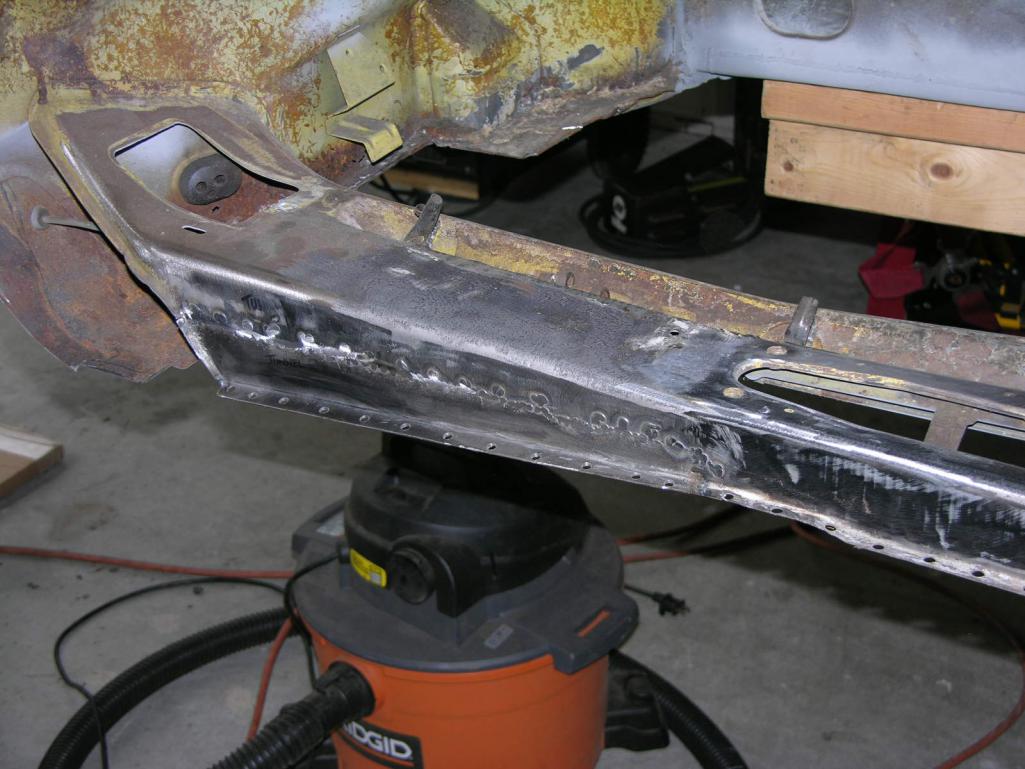
Close Up of the edge, was even able to tie in the little openings on the lip where they attached.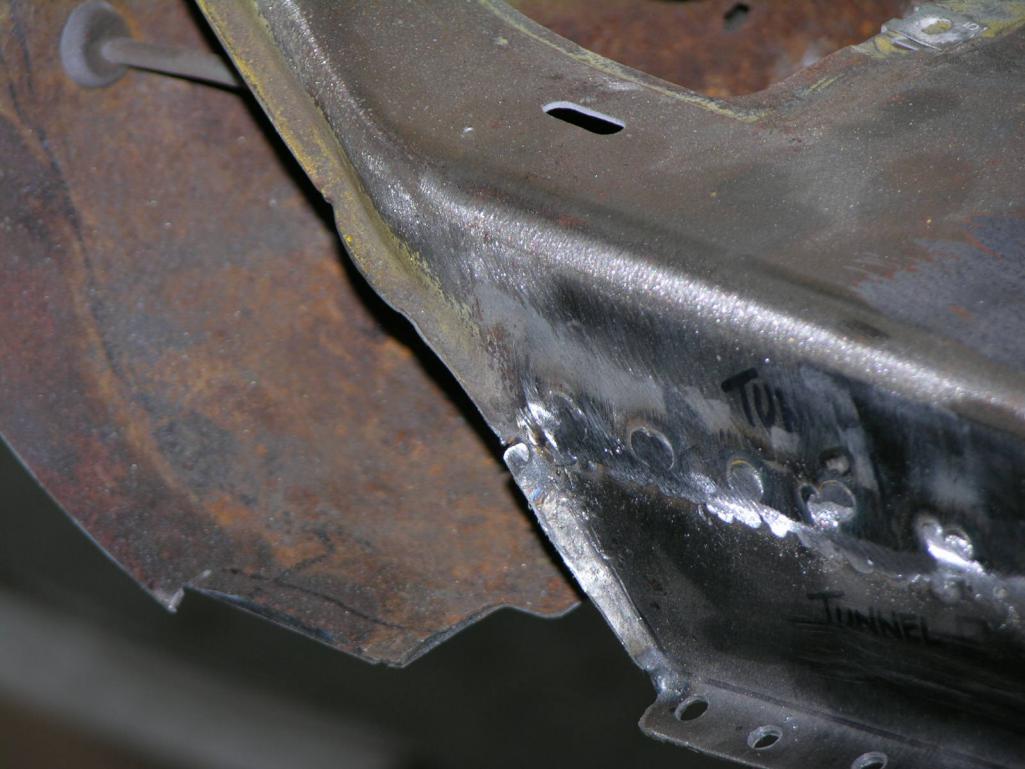
In primer.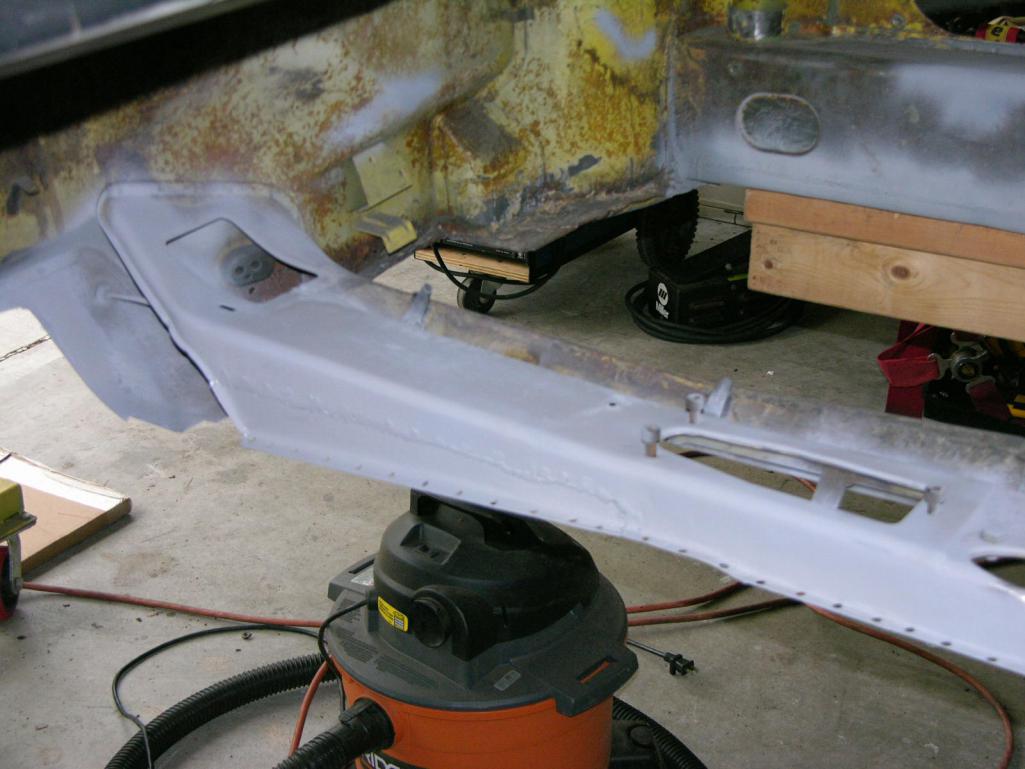
On to the next patch!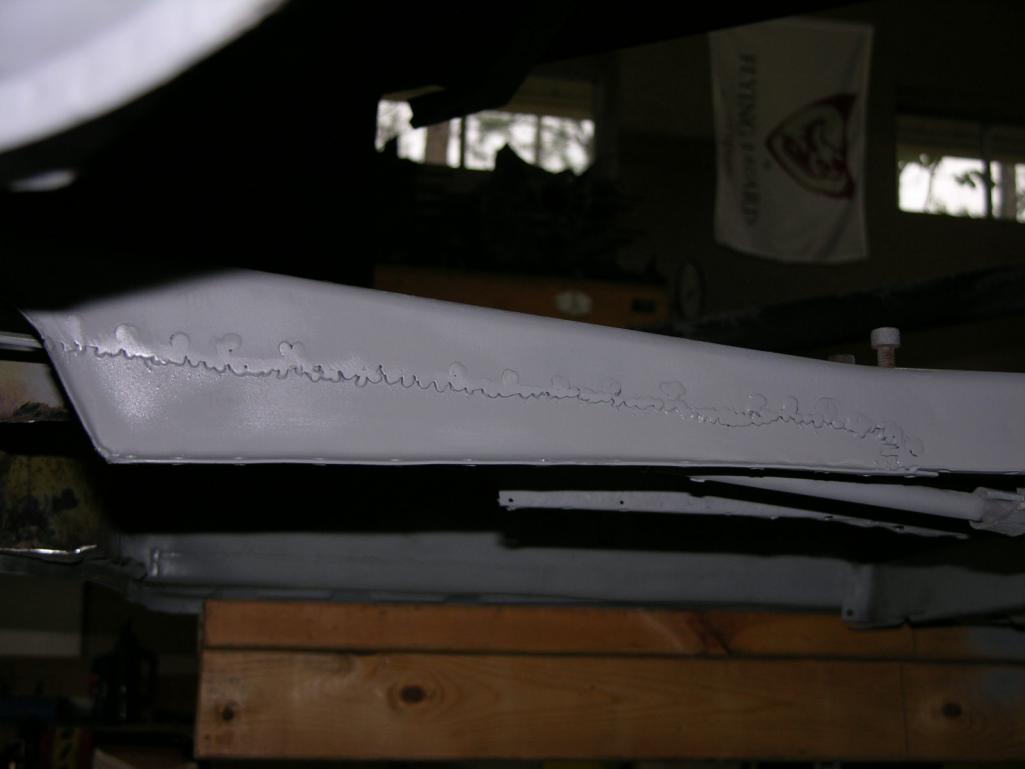
More coming, once the other two patches in the tunnel are accomplished I can weld the Driver's Side Middle Brace in from Restoration Design!
Thanks,
Vysoc
Posted by: Andyrew Dec 16 2015, 08:45 AM
Thin guage is all about watching the puddle and travel speed, which is exactly like tig.
Good looking work!!
Posted by: mgp4591 Dec 16 2015, 10:49 AM
Nice to see someone else suffering through replacing the floor and lower center console issues! I've cut all of mine out and ordered new floor kits from RD- they should be here anyday. I'm still mending my legs from this summer so it will be awhile before I'm as far as you but I'm working on it. I'm actually back to work now so progress is made- just none on the car. I should be ready to commence by spring but meanwhile it's great to see your progress and good work- Keep it up!
Posted by: Vysoc Dec 25 2015, 08:04 AM
Merry Christmas to all!
Floor Pan question, it is within a couple of days and I will finally be putting both of my floor pans in. As you can see in my above photo's of the floor pan fit-up there is an overlap between the two panels in the middle 2 to 3 inches.
My question is what is the best way to attach them where they join up?
1) Rosette welds every 3 cm's and then stitch where they join together, they will also be attached all the way along where the tunnel meets the panels.
2) Trim one side to make it meet up as close to the center as possible and then butt weld the entire seam?
3) Measure everything out and trim to make both halves fit perfectly. Then with both halves away from car weld in a union piece between the seam at several different spots to hold the panels together. Obviously the issue is all the changes along the seam with the shapes in the sheet metal. My other fear is the amount of heat that will be created in making the butt weld?
Thanks for your input as always!!!
Vysoc 
Posted by: stevegm Dec 25 2015, 08:31 AM

Merry Christmas to all!
Floor Pan question, it is within a couple of days and I will finally be putting both of my floor pans in. As you can see in my above photo's of the floor pan fit-up there is an overlap between the two panels in the middle 2 to 3 inches.
My question is what is the best way to attach them where they join up?
1) Rosette welds every 3 cm's and then stitch where they join together, they will also be attached all the way along where the tunnel meets the panels.
2) Trim one side to make it meet up as close to the center as possible and then butt weld the entire seam?
3) Measure everything out and trim to make both halves fit perfectly. Then with both halves away from car weld in a union piece between the seam at several different spots to hold the panels together. Obviously the issue is all the changes along the seam with the shapes in the sheet metal. My other fear is the amount of heat that will be created in making the butt weld?
Thanks for your input as always!!!
Vysoc
Good question for Scotty or Rick or Ken. Hopefully one of them will chime in.
Posted by: budk Dec 25 2015, 10:56 AM
Merry Christmas to all!
Floor Pan question, it is within a couple of days and I will finally be putting both of my floor pans in. As you can see in my above photo's of the floor pan fit-up there is an overlap between the two panels in the middle 2 to 3 inches.
My question is what is the best way to attach them where they join up?
1) Rosette welds every 3 cm's and then stitch where they join together, they will also be attached all the way along where the tunnel meets the panels.
2) Trim one side to make it meet up as close to the center as possible and then butt weld the entire seam?
3) Measure everything out and trim to make both halves fit perfectly. Then with both halves away from car weld in a union piece between the seam at several different spots to hold the panels together. Obviously the issue is all the changes along the seam with the shapes in the sheet metal. My other fear is the amount of heat that will be created in making the butt weld?
Thanks for your input as always!!!
Vysoc
Restoration Design shows the seam being butt welded.
https://www.youtube.com/watch?v=3kMOMNhxg-A
Posted by: Vysoc Dec 25 2015, 01:52 PM
Great information, my seam actually runs from front to back, but that tip that he gives about using the seam clamps will help quite a bit to stitch in front and behind the clamp and then move the clamp to the next spot. With four clamps you should be able to keep the gap fairly consistent.
Thank you for the link to the video!!
Vysoc
Posted by: Vysoc Dec 31 2015, 02:31 PM
OK the end of December is hear and time for the big update.
What was accomplished in December?
Actually a great deal and I am now well on my way!!!
So in December I was able to:
1) Repair 4 different rusted out areas in my tunnel.
2) Cut out and repair the bad remaining sheet metal in my floor pans.
3) Weld in my new Driver's Side Middle brace from Restoration Design.
4) Clean up and treat tunnel and tubes in tunnel with Internal Frame Coating.
5) Strengthen and reinforce Clutch Tube in the tunnel.
6) Fit-Up Driver's & Passenger side Floor pans and then trim
and cut pans in preparation to Butt Weld together.
7) Butt Weld floor pans together and spray primer in preparation for attachment.
Here we go with a few photo's:
Driver's side Mid Tunnel Repair piece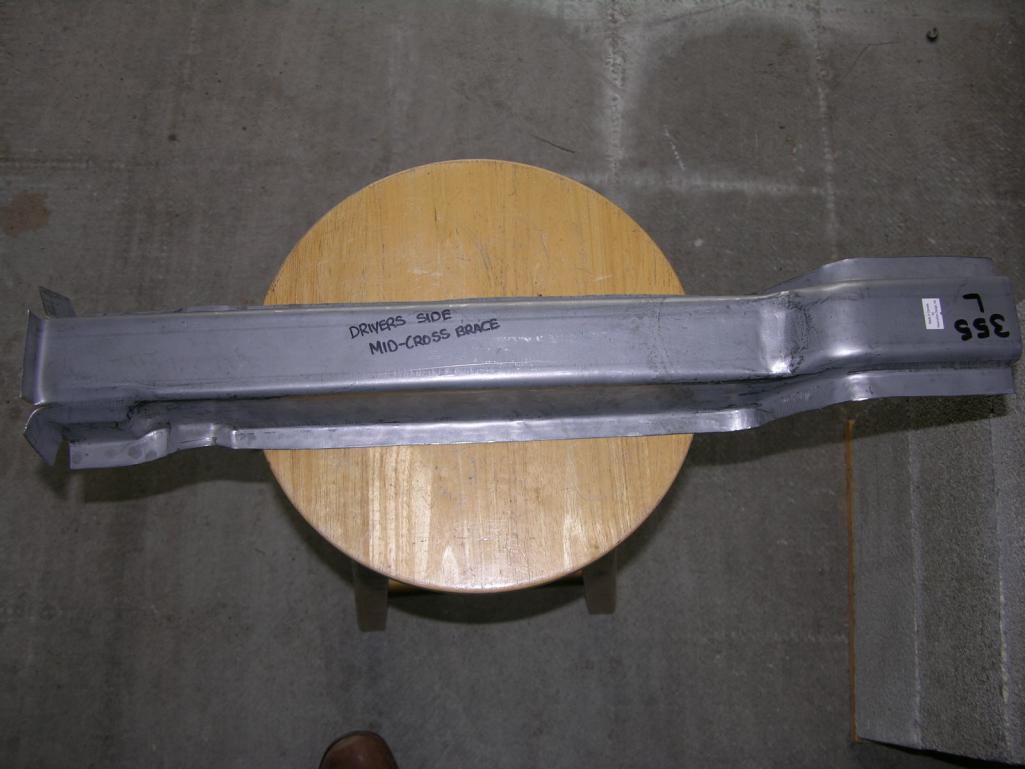
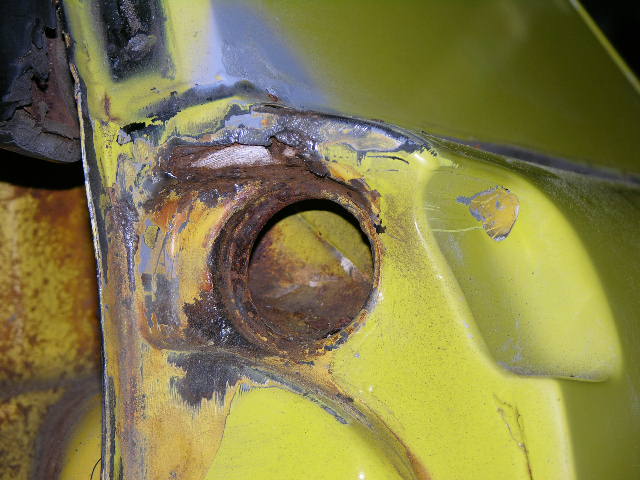
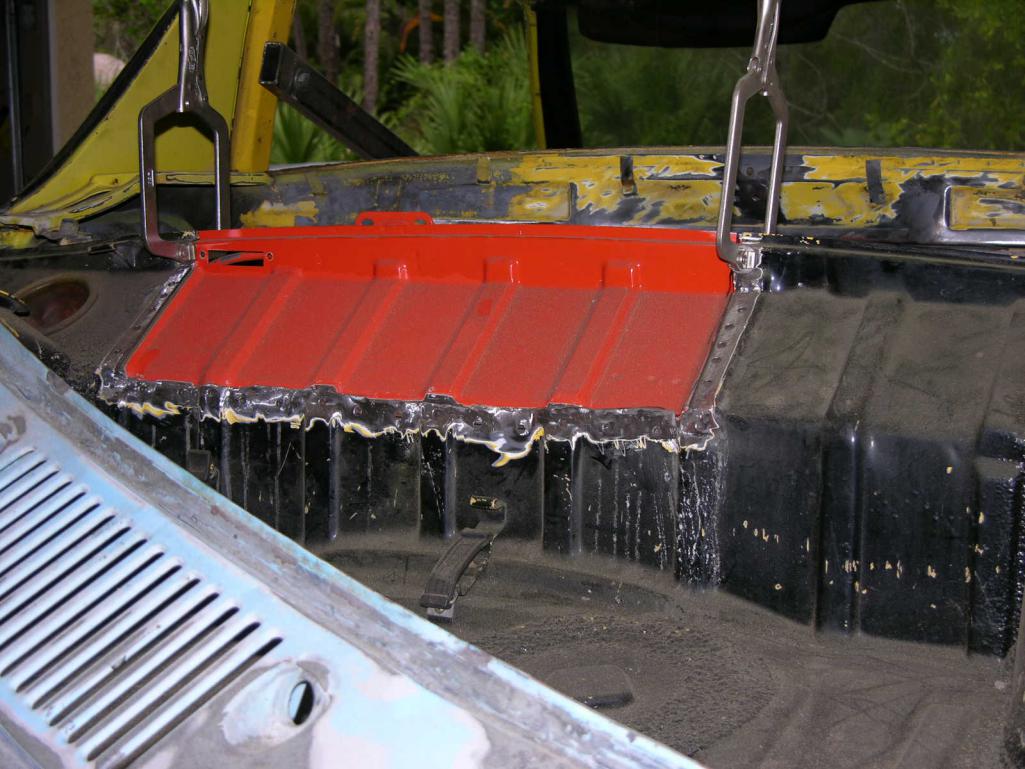
Pass Side Front Firewall Repair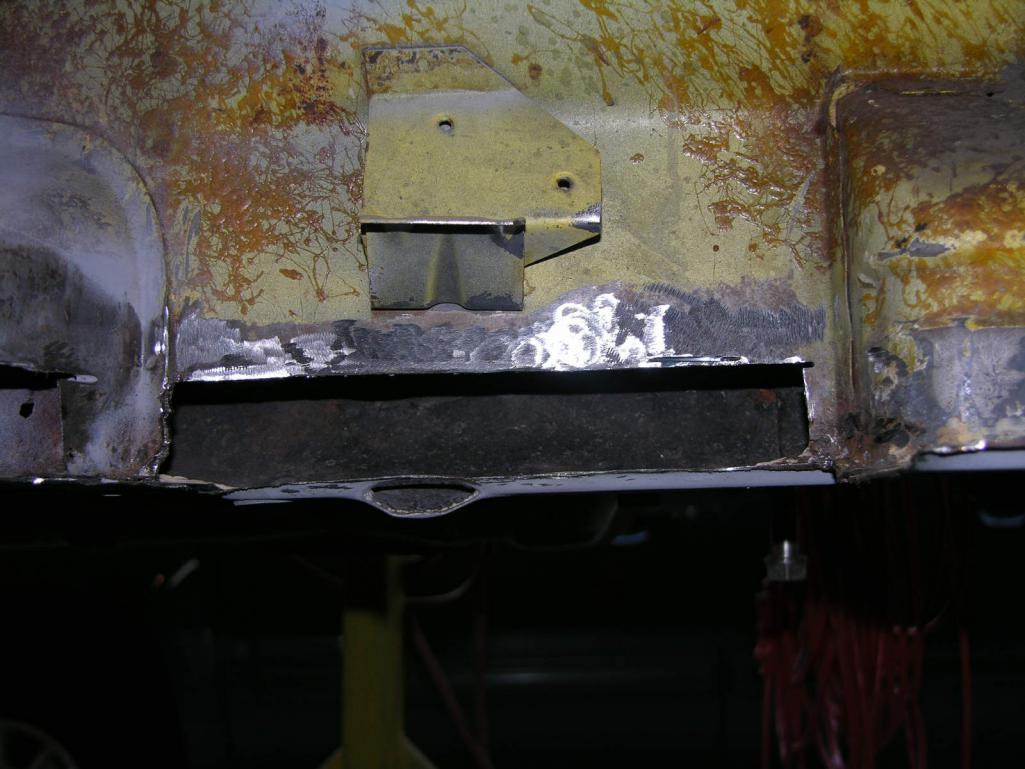
Pass Side Front Tunnel Repair Area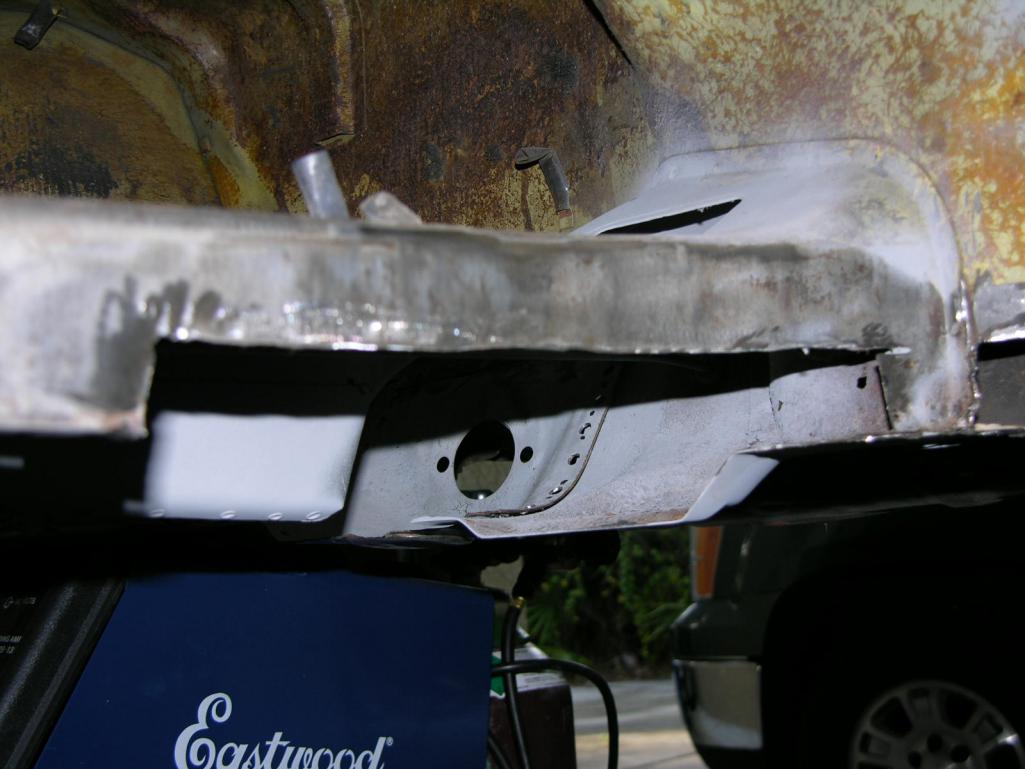
Pass Side Tunnel Repair Piece Fabbed Up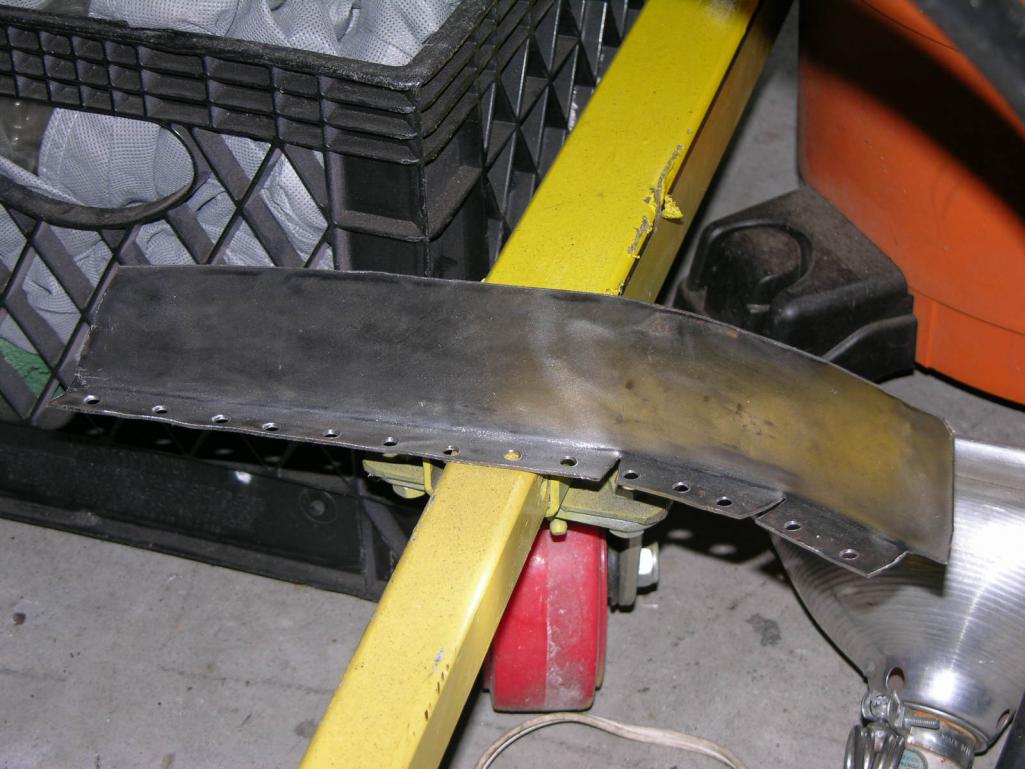
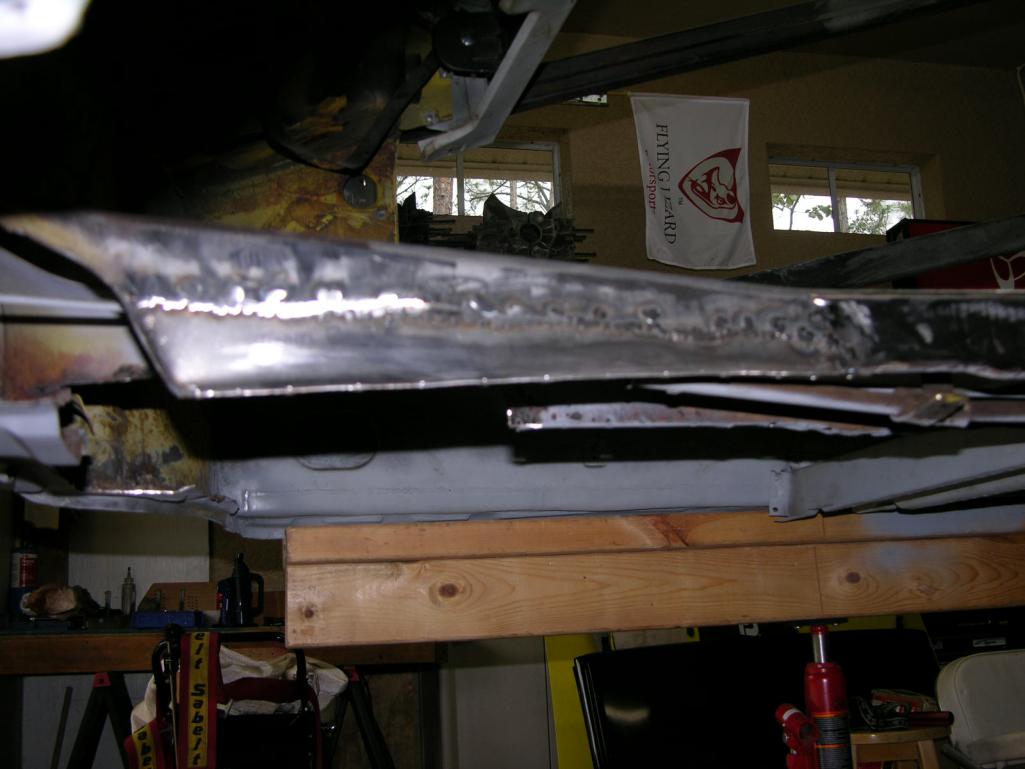
Both Pieces Welded in and Rough Grinding done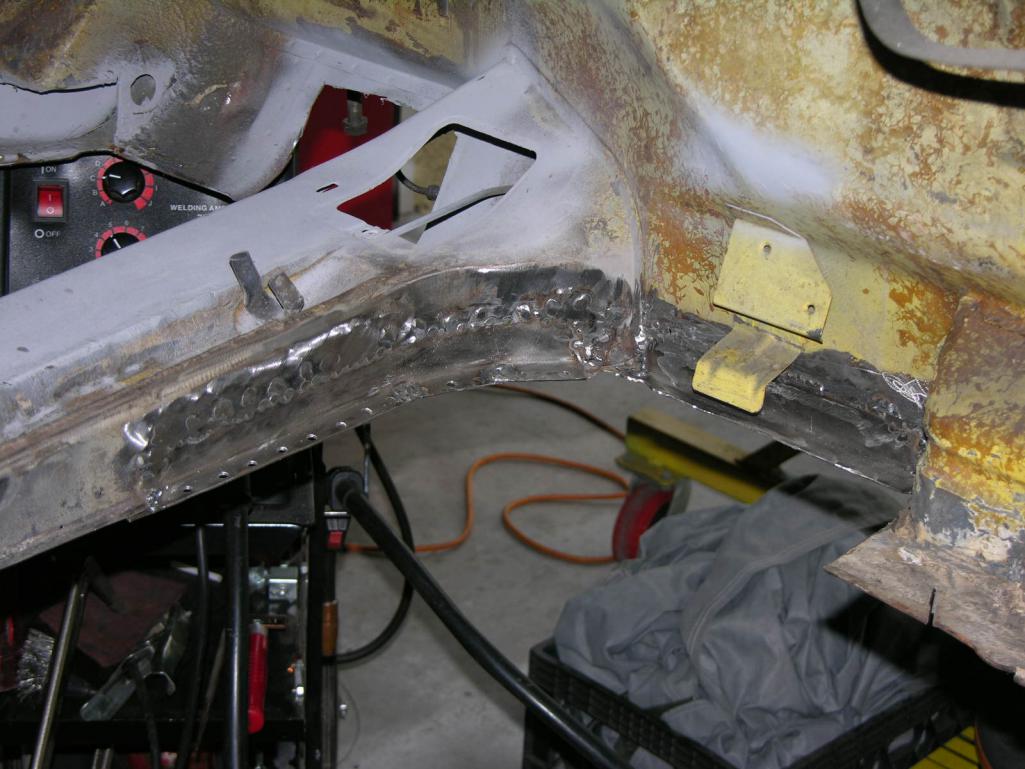
Clutch Tube strengthening, looked at the original and created this with 16 gauge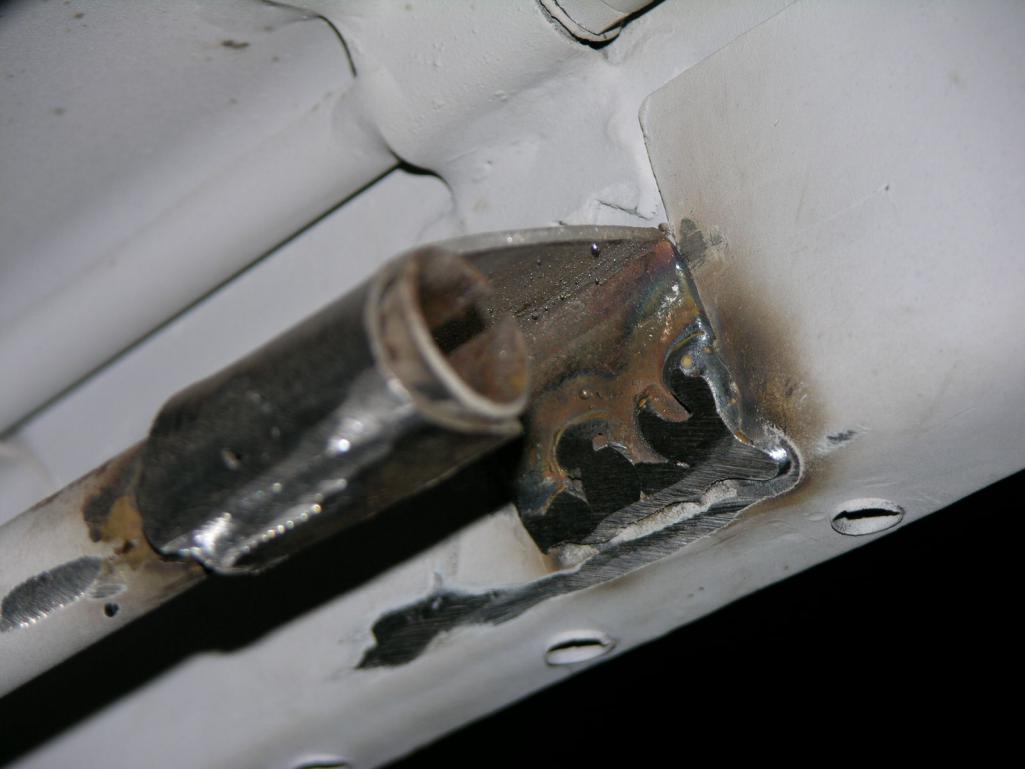
Fit-Up of Driver's Side Middle Brace (Restoration Design Piece 355L)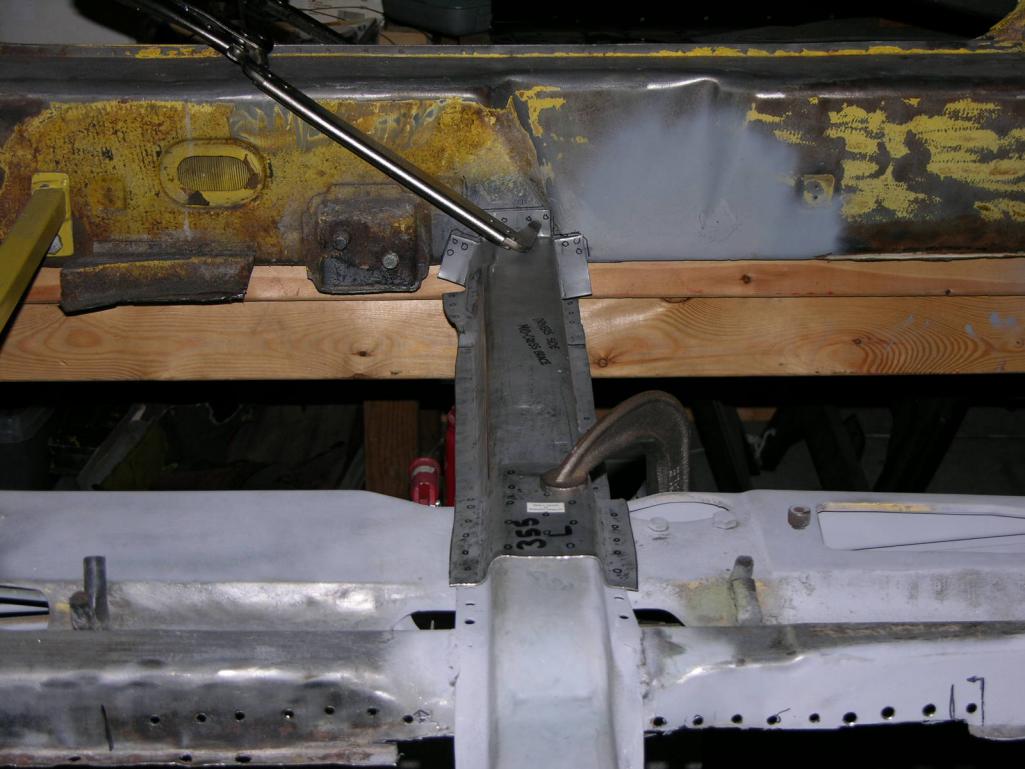
Fit-Up of Pass Side Middle Tunnel Repair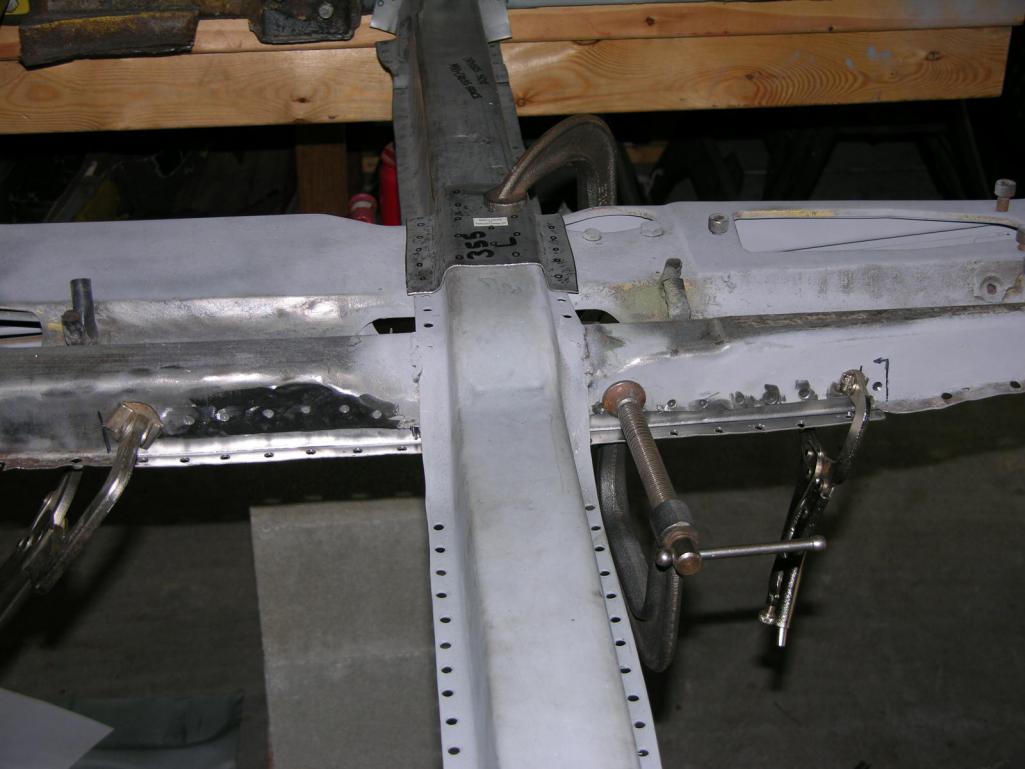
Right after initial welds to both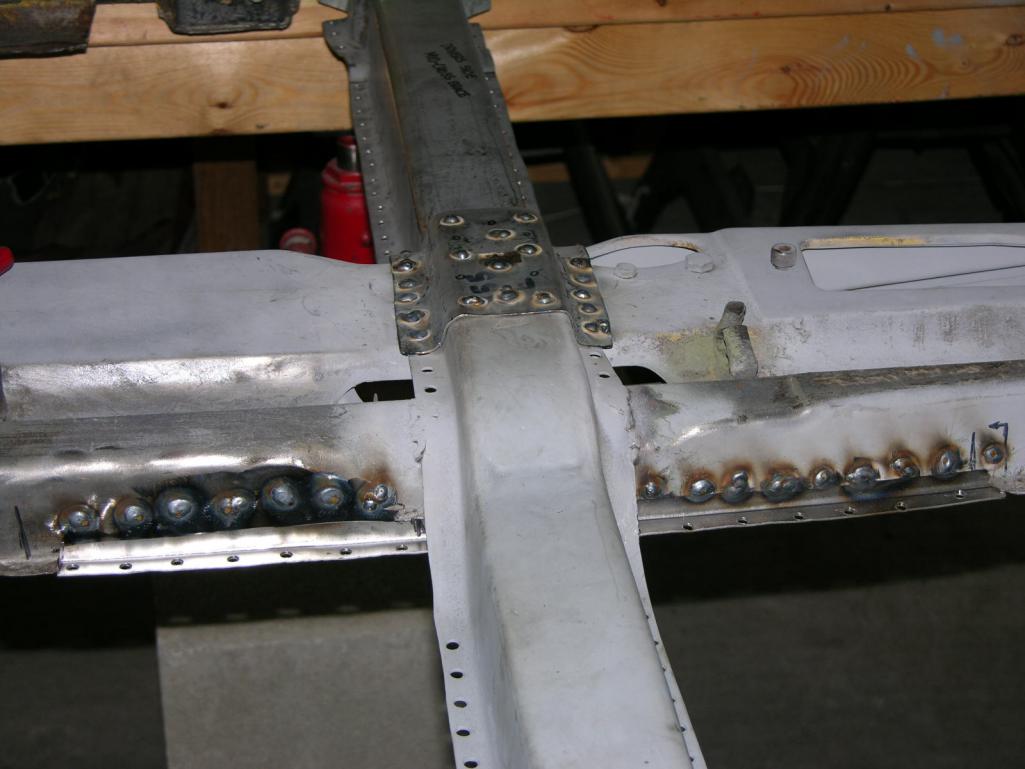
Grinding done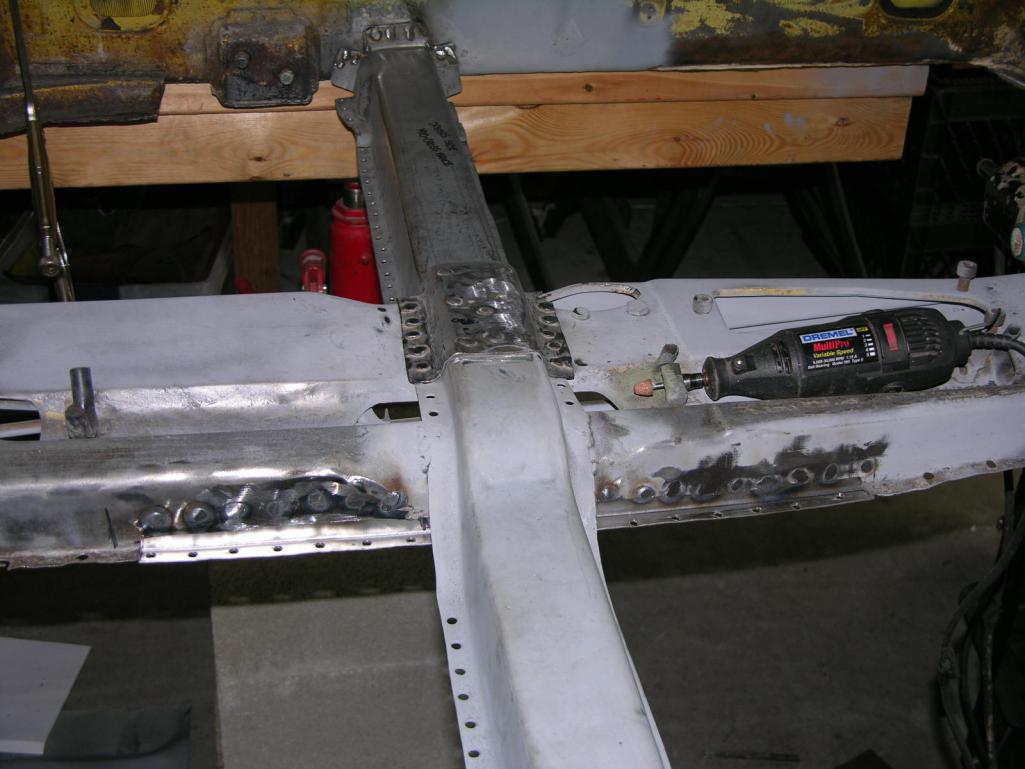
I think that will hold?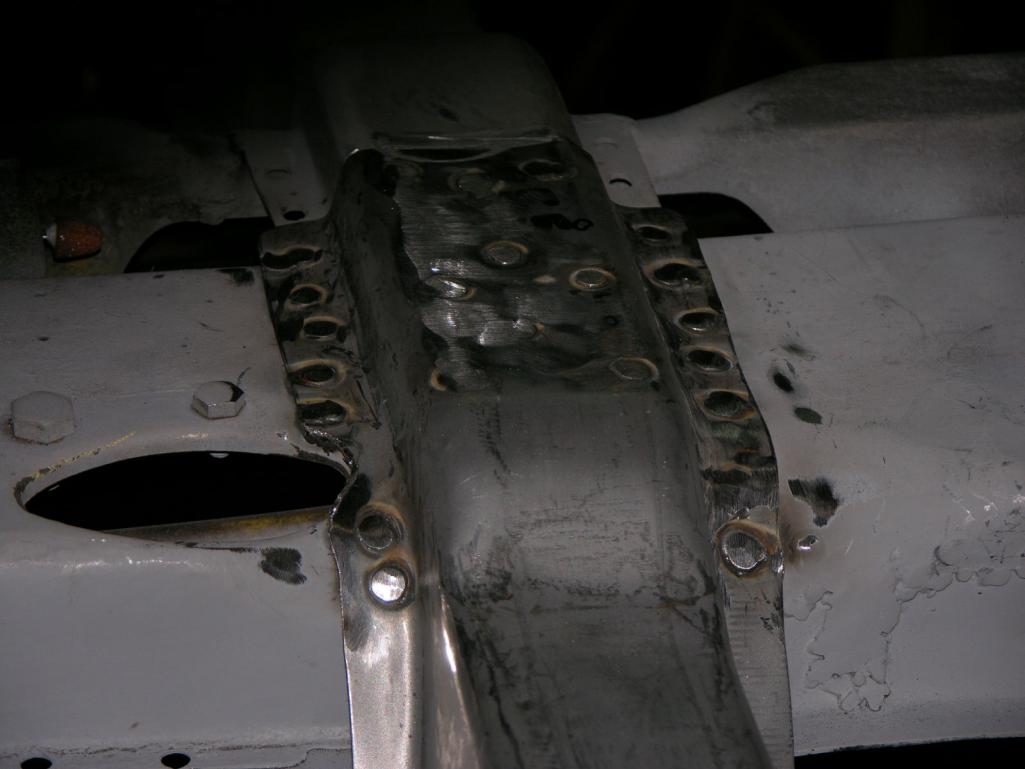
Initial Fit-Up and tack down of Floor Pans done in place. Please note the Cleco's doing their job they are the best!
Once tacked we were able to rotate the rotiserrie and then start to stich the seam
together
I called in the BIG GUNS for this job!
Dr. Kristoph Kinzli many of you may be familiar with his amazing thread on Pelican called "Saving the Rat" a 66 page journey about his beautiful 1969 911T that he found in a field in Northern New Mexico. Kristoph took the car through an amazing transformation and drives it to his Engineering job at Florida Gulf Coast University on a daily basis. I cannot thank Kristoph enough as his enthusiasm has helped me to get going on my project. He has 3 children under the age of 2 so he is very busy, we did get a lot done on Monday Floor pan wise though.
We did a lot of stitch welds on the seam but also decided to add some 16 gauge plates along the flat ribs to just OVER-Engineer it a little! 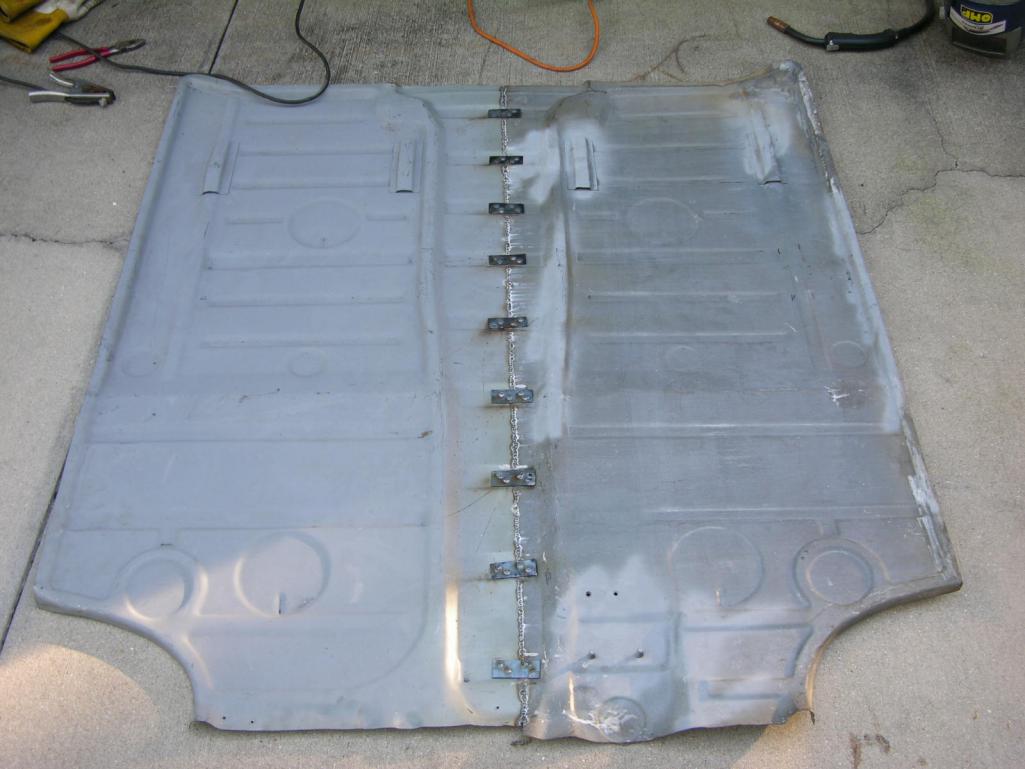
Kristoph was loving the chance to get some welding time in!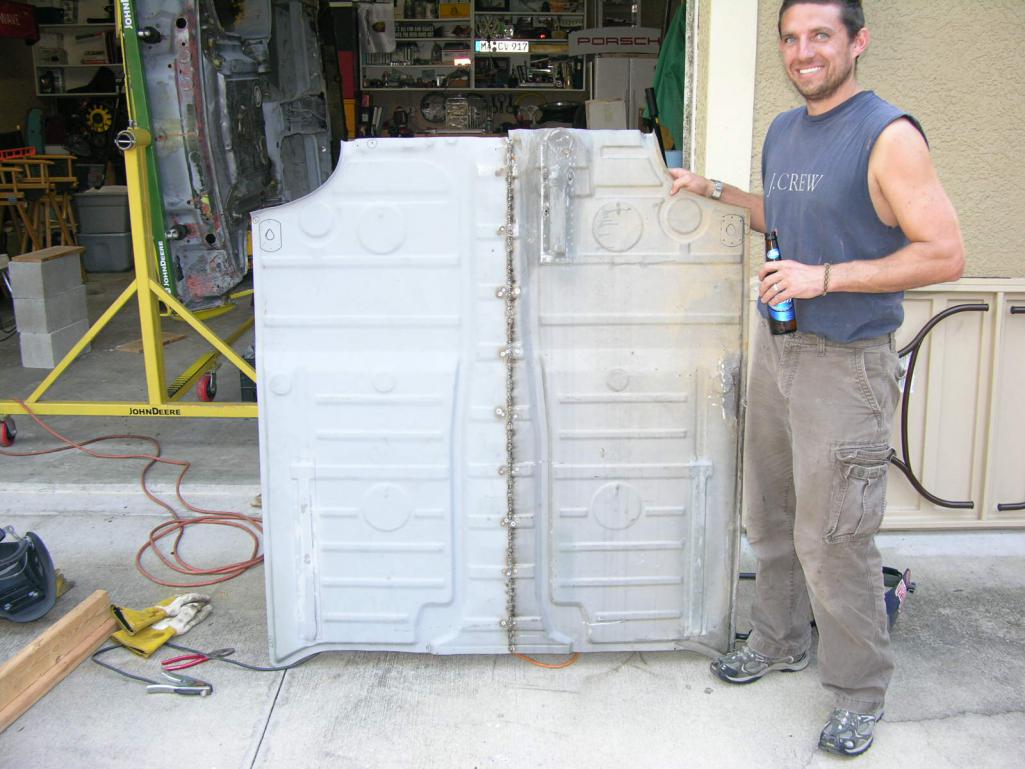
Prior to grinding down the seam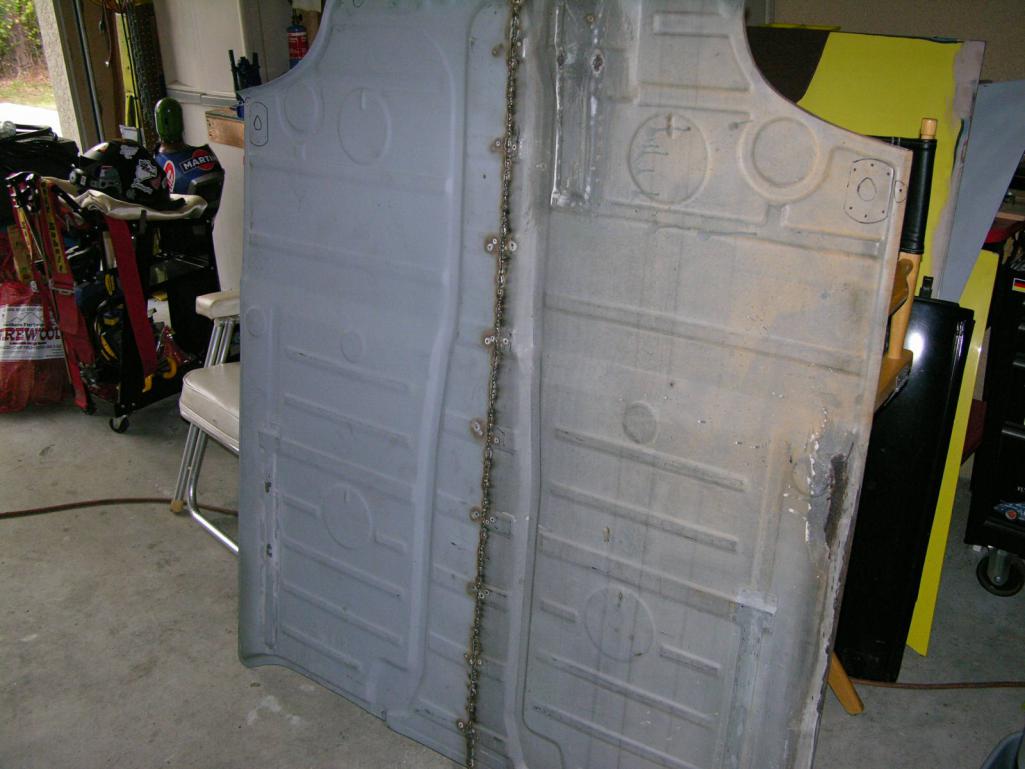
Posted by: Vysoc Dec 31 2015, 02:38 PM
Close-Up of 16 gauge plates
Initial grinding of the seam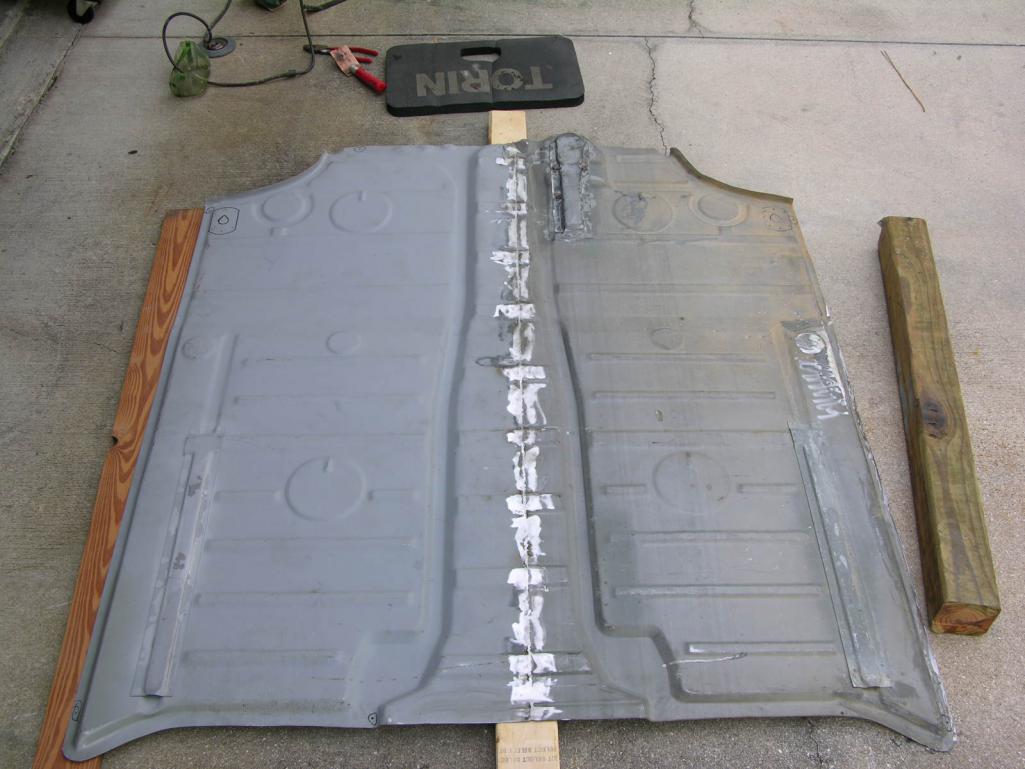
Another angle of grind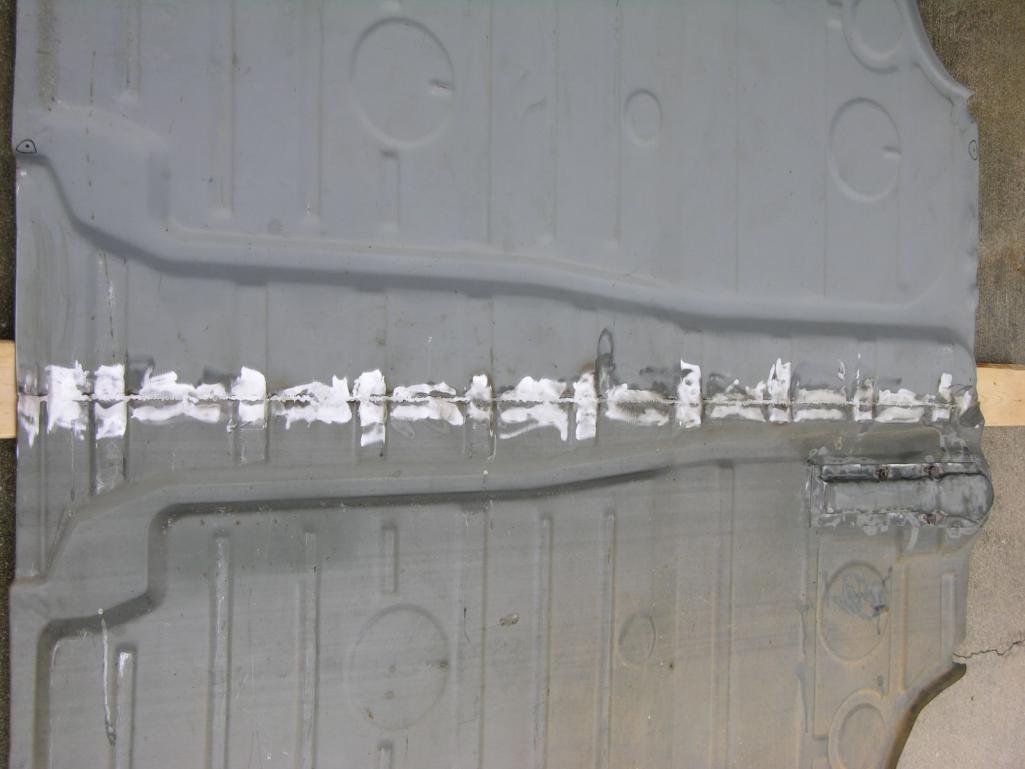
Inside of Tunnel before Rust Proofing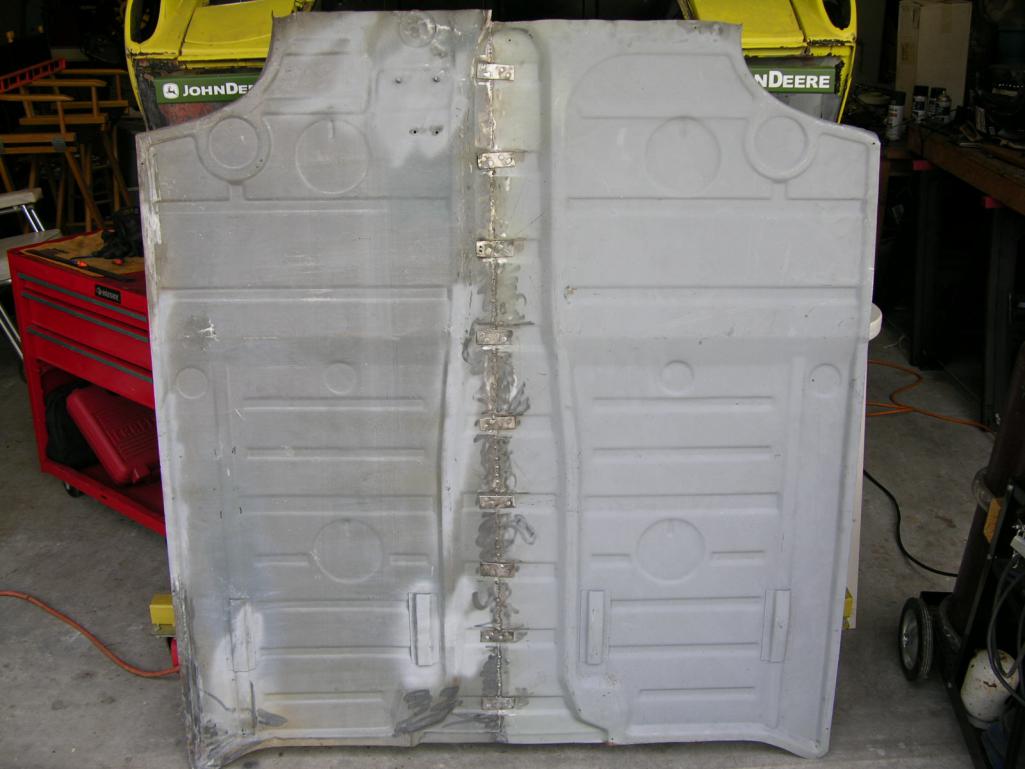
Eastwood Internal Green Rust Proofing Stuff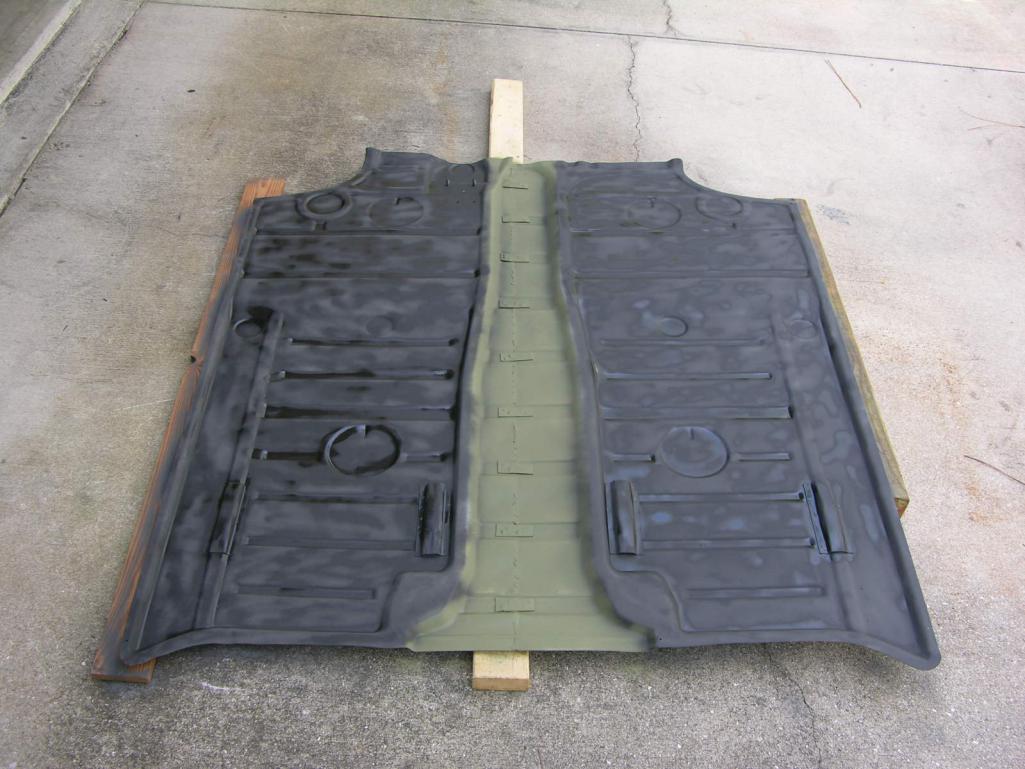
Outside of Seam in Black Primer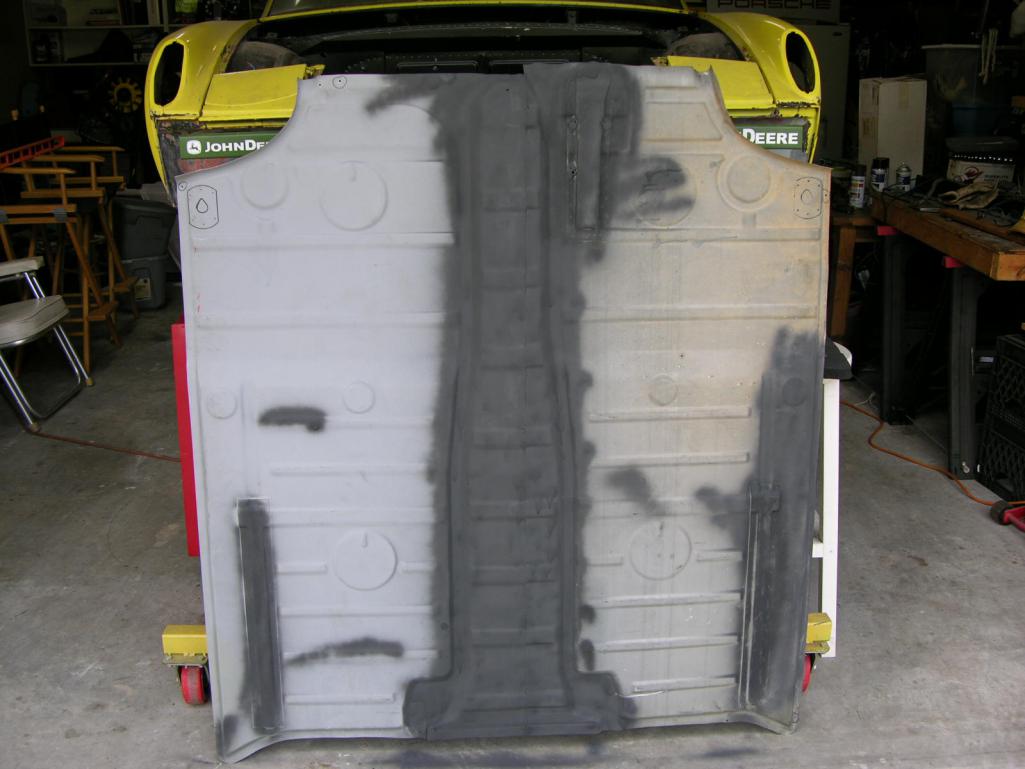
Thanks for looking Happy New Year to everyone in 2016 keep the momentum going and see you at Okteenerfest 2016!!!
Vysoc
Posted by: Vysoc Apr 10 2016, 10:46 AM
Master's Sunday, my little white car is sold and left for England this past Tuesday.
Finally I can get back to the Yellow Sub.
Spring is a great time as our Snowbirds have started to make their migration back North we can begin to enjoy our area again and I can finally start to burn some serious metal and finish my rustoration work.
Happy Spring for those that like golf enjoy the Master's today!!
Vysoc
Posted by: Philip W. Jul 25 2016, 12:15 PM
Peter,
any progress on the yellow submarine??, or are you playing too much golf down there in florida?? HOT up here in Sc,! is it going to be ready for the Okteenerfest?
Posted by: Vysoc Jul 25 2016, 06:47 PM
Hello Dr. Phil,
Actually worked on strengthening the firewall today for the 914-6 Engine mount, other than that big changes happening this fall.
The house is for sale and we are going to relocate to Northern Georgia/Southern North Carolina. Time for an Early Retirement Career Change thing, I have worked in the Golf Business for 41 years and need a break from adult day care in Florida. I have always wanted to live in the mountains and my wife and I ARE going to do so. The fact that we can sell our house here and move up to a beautiful area, where I can also buy or build the shop set-up I want is a big bonus. I will miss this years Okteenerfest but will be back next year with a mean and lean 914-6 GT Clone type car. I cannot wait to get away from the heat and humidity of Florida. I know everyone wants to live in Florida and I did for 30 years, at 53 I am too young to retire but not to young to have a career change. I am looking forward to the future, once the house sells we will be on our way. Sleepy Fort Myers is getting a little too big, bunch of punks opened fire last night with a semi-automatic gun on a Night Club with an under aged event .....2 dead, 17 injured as young a 12 years old, what the hell is going on?
Hope all is well with your project.
Vysoc
Posted by: Vysoc Jun 13 2017, 08:21 PM
Update: June 13, 2017
New storage Unit rented today 20' x 40', my 914-6 GT Project gets to move from its packed 10 x 30 quarters to where I can go back to work.
Time to get back to work, Okteenerfest coming only 20 miles away, too big of an ask to have this one done though .
Start back at it tomorrow!
Vysoc
Posted by: Dion Jun 13 2017, 09:14 PM
Nice to hear your back at it Peter. Hope the move went smoothly.
Look forward to seeing your progress.
Cheers
Posted by: Vysoc Jun 15 2017, 07:57 PM
Thanks Dion,
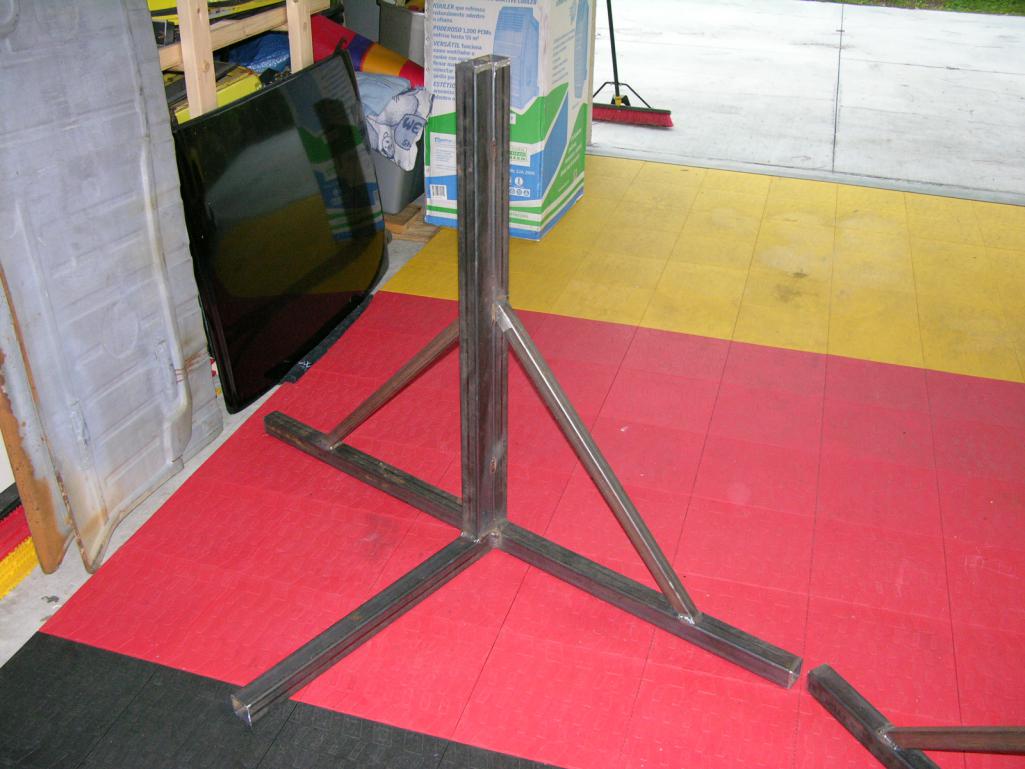
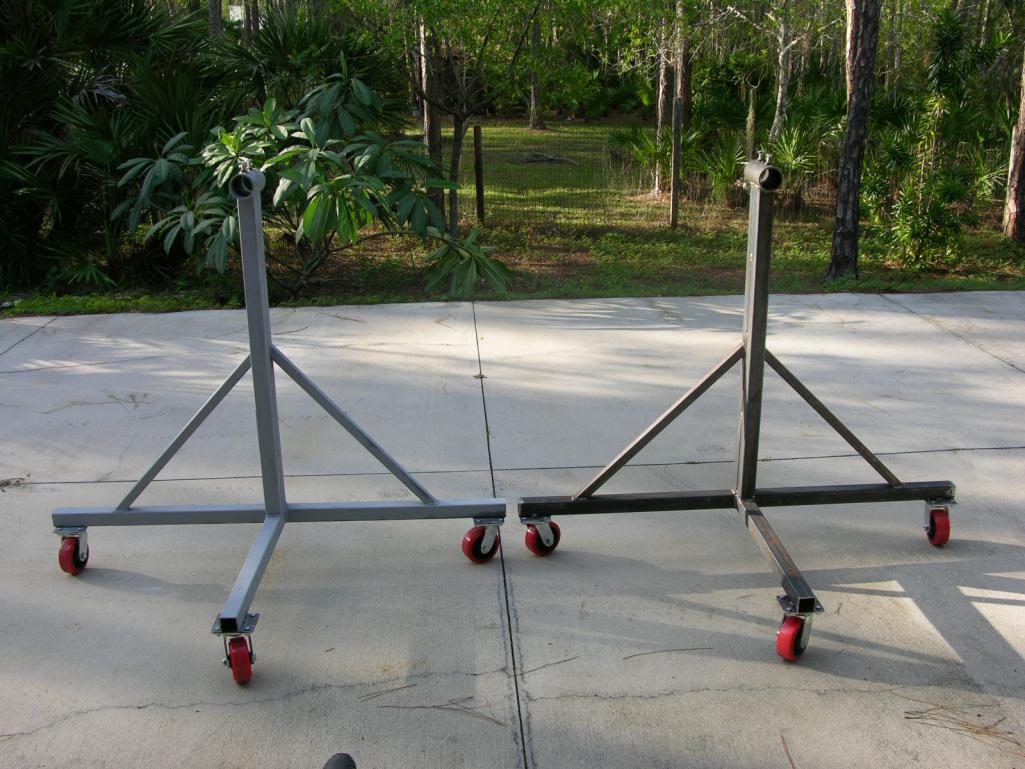
Building new movable workbenches as I am renting the 20 x 40 unit and waiting to find the perfect Barn / Pole Barn scenario to buy.
Feels good to have some space to work and not deal with the humidity of SW Florida.
Back at it tomorrow!
Vysoc
Powered by Invision Power Board (http://www.invisionboard.com)
© Invision Power Services (http://www.invisionpower.com)