Printable Version of Topic
Click here to view this topic in its original format
914World.com _ 914World Garage _ BUILD-OFF CHALLENGE: Budk – Bumblebee
Posted by: budk Oct 4 2015, 05:00 AM
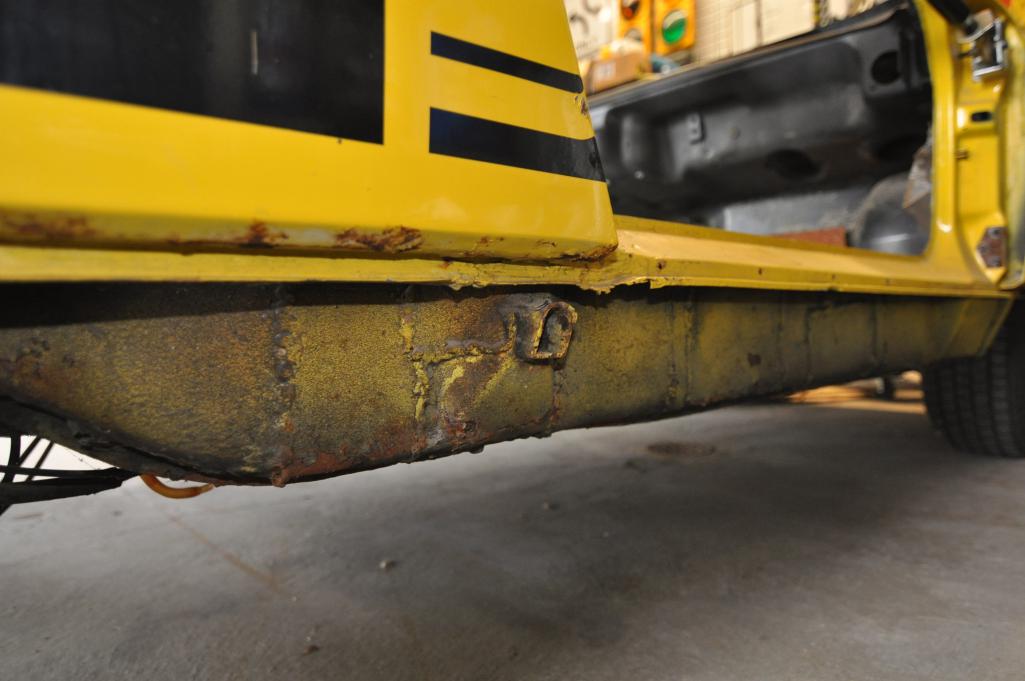
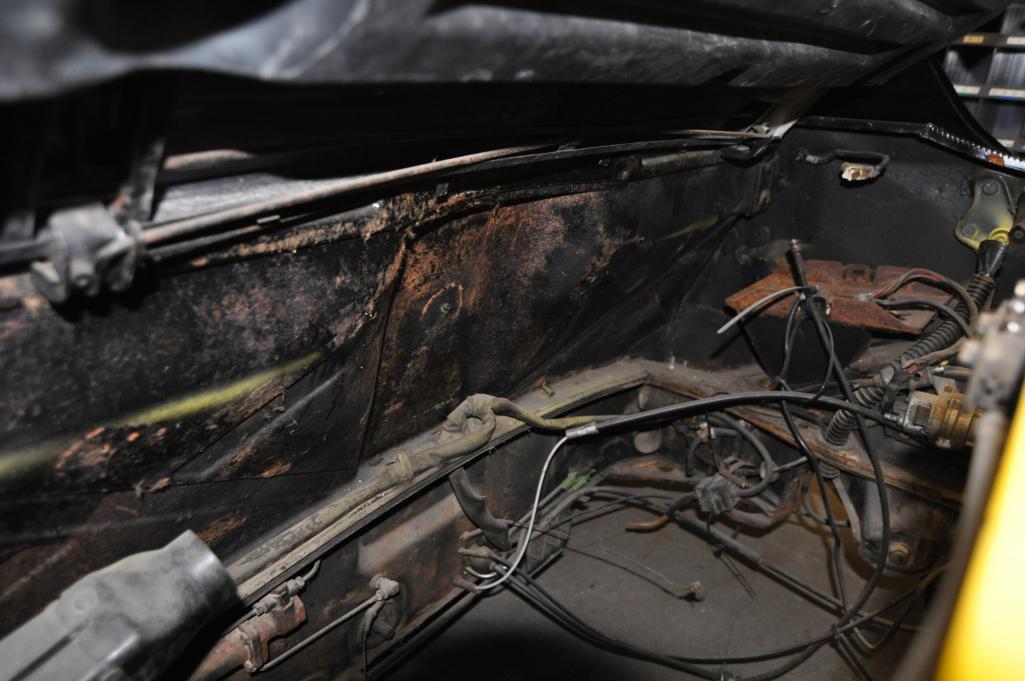
This car was found in a garage in Columbus in 2010. A member here, Tornik550 posted in the forum that he found it at a garage sale and that it may be an LE.
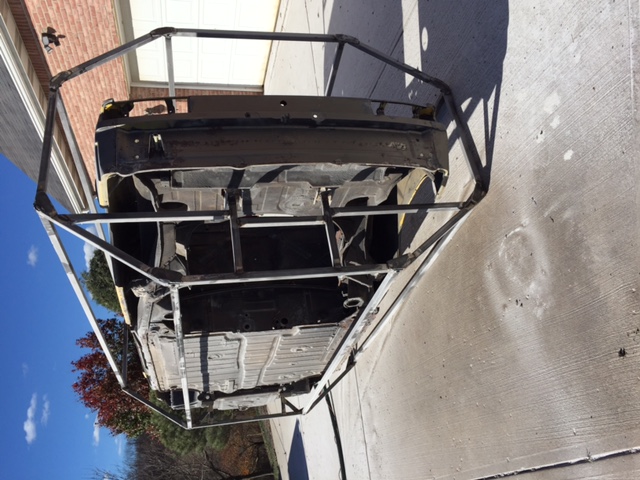
He wasn’t interested so I went and looked at it and brought it home. It turned out to be an LE and this is what it looked like when I got it home.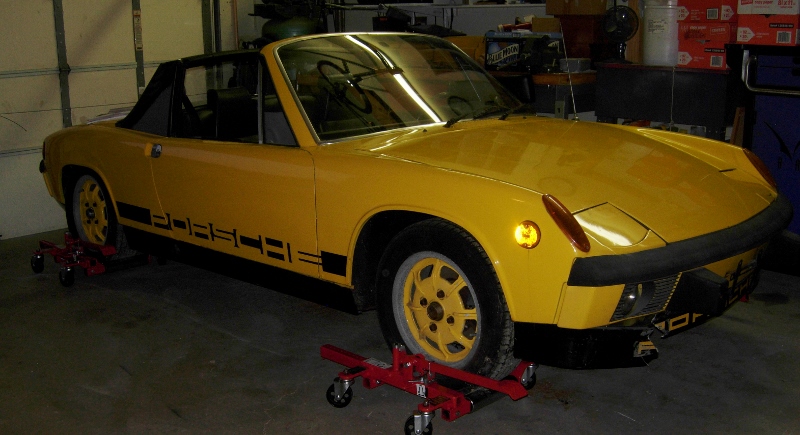
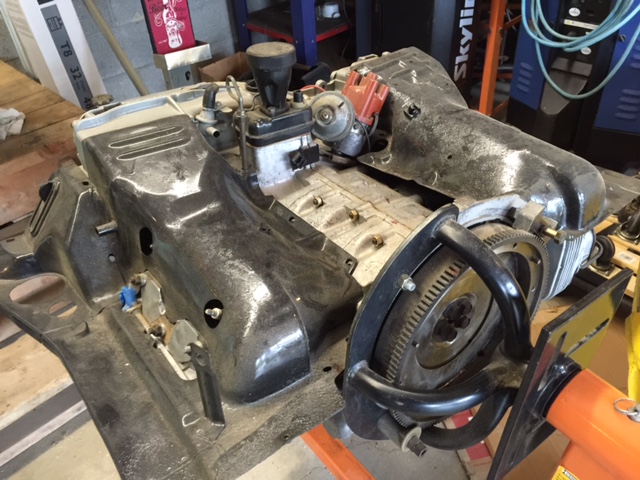
Someone suggested I contact Dr. Evil who was lived about 15 miles from me. Mike came over and we pulled the engine and tranny as well as other parts while he assured me that he knew where everything belonged. Mike rebuilt the tranny and then, long story short, life got in the way for both of us, a couple of years went by and Mike ended up moving to Ohio. Before Mike moved, I realized that he was going to be too busy growing his family and his practice and I didn’t know anything about these engines so I put an ad on the Pittsburgh Craigslist looking for an air cooled engine enthusiast to help me finish put the engine together that Mike and I had torn apart. The ad stated that my preferred choice of payment was beer and that I kept the fridge in the garage full.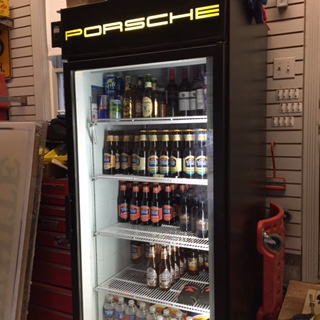
I got a couple of replies with suggestions of books/videos to buy but then I heard from a guy who lives a little over an 1.5 hr drive from me. It turns out that he is a 914world member and I believe he has had something like 6 of these cars over the years. His name is Ray (reharvey) but I refer to him as my Mentor. Ray drove down and we developed a list of parts to buy to finish rebuilding the engine. A few months later, after a couple of trips, the case was back together with new bearings, cam and 2056 piston/cylinders but minus the injection, wiring harness, most of the tin and a few other parts. All the original parts that were taken off were kept since this is a numbers matching car. 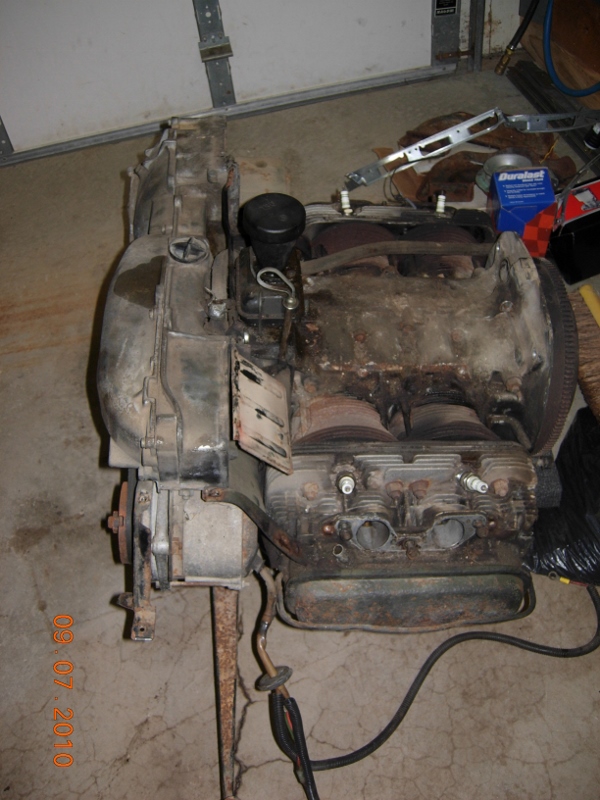
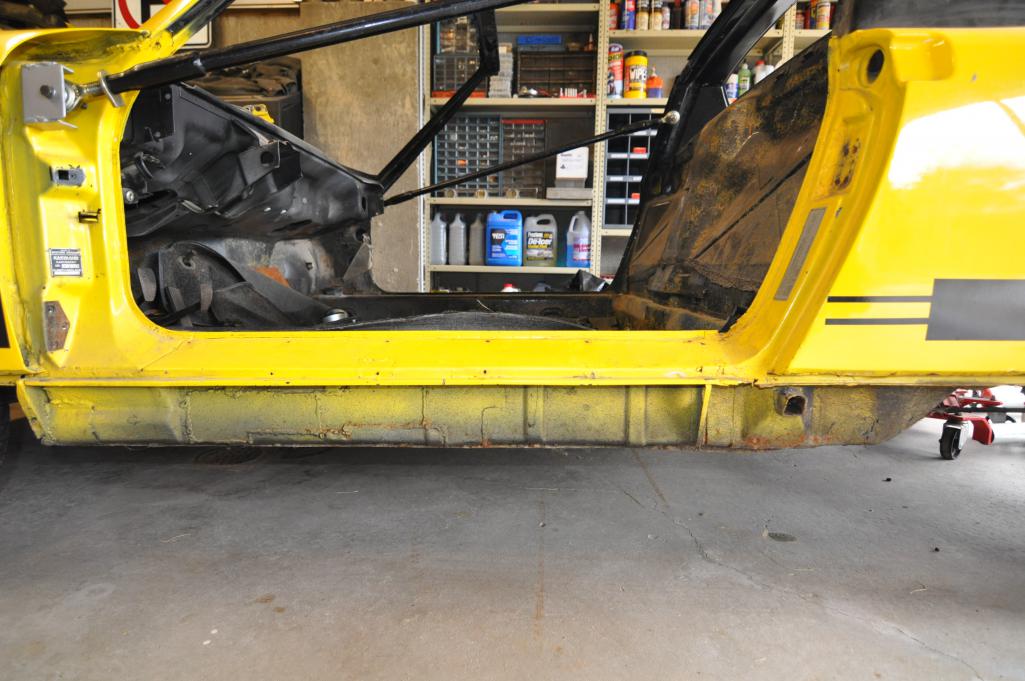
That was 2 years ago. Nothing else got done in 2014 and now that 2015 is winding down it is time to get back to working on the car… and this challenge is the perfect motivation. The car will need the floor and firewall patched, door sills, longs and a few other pieces including work around the front marker lights. Are new fenders available? One of the PO’s had some work done (poorly) on the sills and the longs so I’m not sure yet what all is going to need replaced. Ray is coming down in a few days to give me his opinion on the body and I expect to be placing an order with Restoration Design soon after.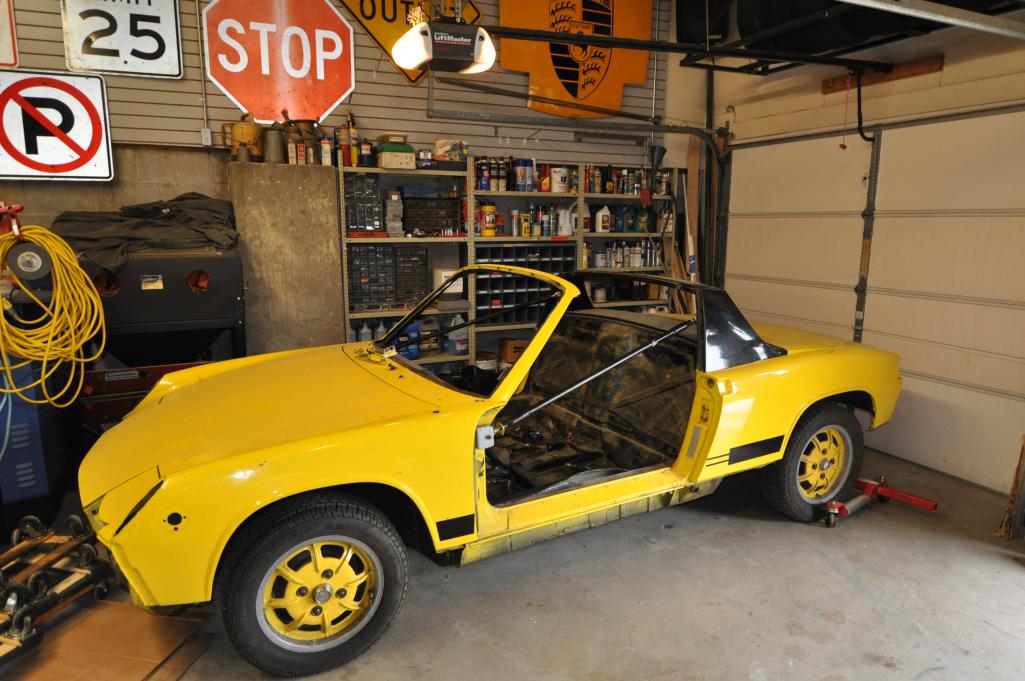
Posted by: budk Oct 4 2015, 05:07 AM


I know this a big challenge and to have a shot at getting done I will need to get all the bodywork done within the next 6 months. Since I live in a cold weather climate and I don’t have a permanent heat source in the garage it will be even more challenging. What I do have is free time, a supportive wife and a Mentor who I can bounce things off even though he will be heading south for a good bit of the winter.
It will be restored as a Bumblebee even though that color scheme is not my favorite. I keep telling myself that it is only metal - it is only metal.... and fortunately I’m not smart enough to be intimidated by it, at least not yet. 
More to come.
Posted by: Olympic 1.7 Oct 4 2015, 06:41 AM
Howdy neighbor. I'm about 1 1/2 hr away from you also.. Not much of a welder either but I can provide moral support. and I'm not a bad wrench. if you need help.
Tom
Posted by: 914forme Oct 4 2015, 06:57 AM

I keep telling myself that it is only metal - it is only metal.... and fortunately I’m not smart enough to be intimidated by it, at least not yet.
More to come.
Welcome to the challenge, I think most of us are using it for motivation to finish out builds also

I had to chuckle at tthat line, as I tell my wife there ar reasons I work with metal. Metal is more forgiving than lets say wood. Dome times you need accurate measurements etc... think roll bars. But for body work, you can always re-weld your mistakes.
Have fun enjoy the ride.
Posted by: budk Oct 4 2015, 07:37 AM
Howdy neighbor. I'm about 1 1/2 hr away from you also.. Not much of a welder either but I can provide moral support. and I'm not a bad wrench. if you need help.
Tom
Thanks Tom, Good luck to you as well. What part of Pgh are you in?
Posted by: hot_shoe914 Oct 4 2015, 08:51 AM
Get the job done Bud, I might need you to restore my Bumble bee, since she is already familiar with the inside of your garage.
Shoe
Posted by: sfrenck Oct 4 2015, 09:01 AM
Paint the wheels black an call it an Unbumblee...
Posted by: Olympic 1.7 Oct 4 2015, 09:15 AM
Howdy neighbor. I'm about 1 1/2 hr away from you also.. Not much of a welder either but I can provide moral support. and I'm not a bad wrench. if you need help.
Tom
Thanks Tom, Good luck to you as well. What part of Pgh are you in?
Irwin really. about 25 mi east of da Burgh.
Posted by: Mueller Oct 4 2015, 09:18 AM
I really like the current paint scheme myself as well.
Good luck with the project, you are off to a great start.
Posted by: Johny Blackstain Oct 4 2015, 09:35 AM
Between the Pirates, Penguins & Steelers, I'd think Bumblebees would do very well in the Pittsburg area. I'd presume it has to be one of the most desirable antique cars in the region, & there would have to be a few other owners about. Good luck w/ the restoration.
Posted by: Olympic 1.7 Oct 4 2015, 09:53 AM
Between the Pirates, Penguins & Steelers, I'd think Bumblebees would do very well in the Pittsburg area. I'd presume it has to be one of the most desirable antique cars in the region, & there would have to be a few other owners about. Good luck w/ the restoration.
Couple years ago I missed on a Bumblebee that was for sale at an estate sale. They were calling it a Steelers edition..

I got there over 1 hour early and there were already 3 other people in line. number 2 guy was a neighbor, knew what it was and bought it for $6000. It was really nice.. it had carbs and the FI and full set of manuals were included. Damn....
Posted by: Johny Blackstain Oct 4 2015, 10:05 AM
Couple years ago I missed on a Bumblebee that was for sale at an estate sale. They were calling it a Steelers edition..
I got there over 1 hour early and there were already 3 other people in line. number 2 guy was a neighbor, knew what it was and bought it for $6000. It was really nice.. it had carbs and the FI and full set of manuals were included. Damn....
If it wasn't a bucket I'd say he did very well. Sorry for your loss.

I wonder if Creamsicles do well in Tampa?
Posted by: budk Oct 4 2015, 12:00 PM
Between the Pirates, Penguins & Steelers, I'd think Bumblebees would do very well in the Pittsburg area. I'd presume it has to be one of the most desirable antique cars in the region, & there would have to be a few other owners about. Good luck w/ the restoration.
You're correct, I assume it will be popular once it's done for the reasons you mentioned. I don't think I'd be able to drive it in Baltimore or Cleveland once it's finished but I can get away with it in Pittsburgh .
I'll make the next one the color and style that I want.
Posted by: budk Oct 4 2015, 12:11 PM
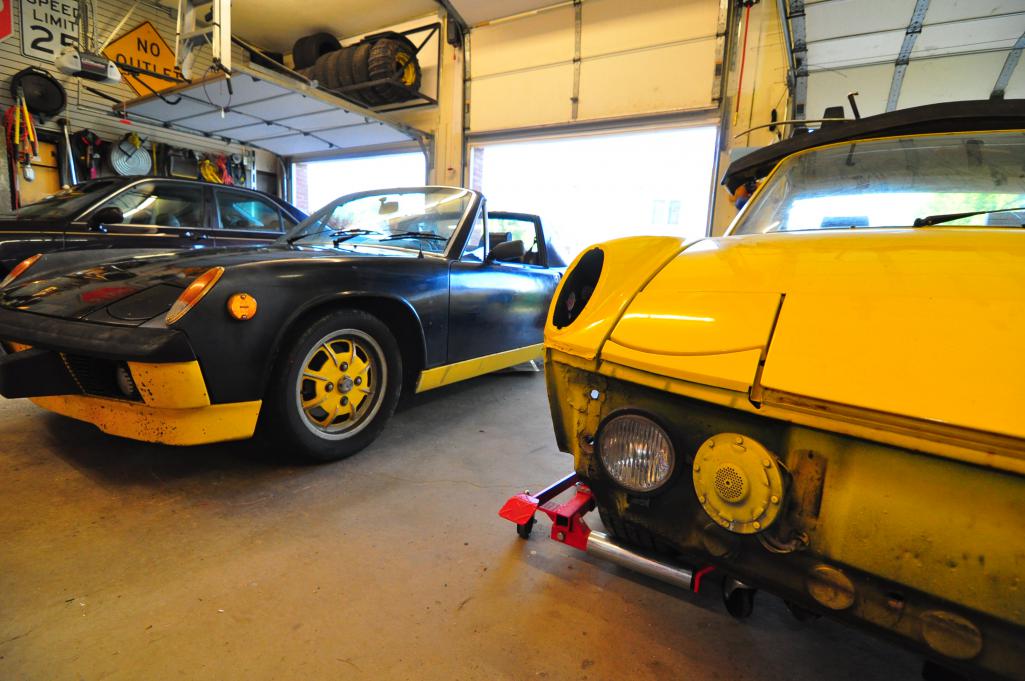
Get the job done Bud, I might need you to restore my Bumble bee, since she is already familiar with the inside of your garage.
Shoe
It will always have a home here... I'll need it for reference to put this one back together!

Posted by: budk Oct 31 2015, 01:41 PM
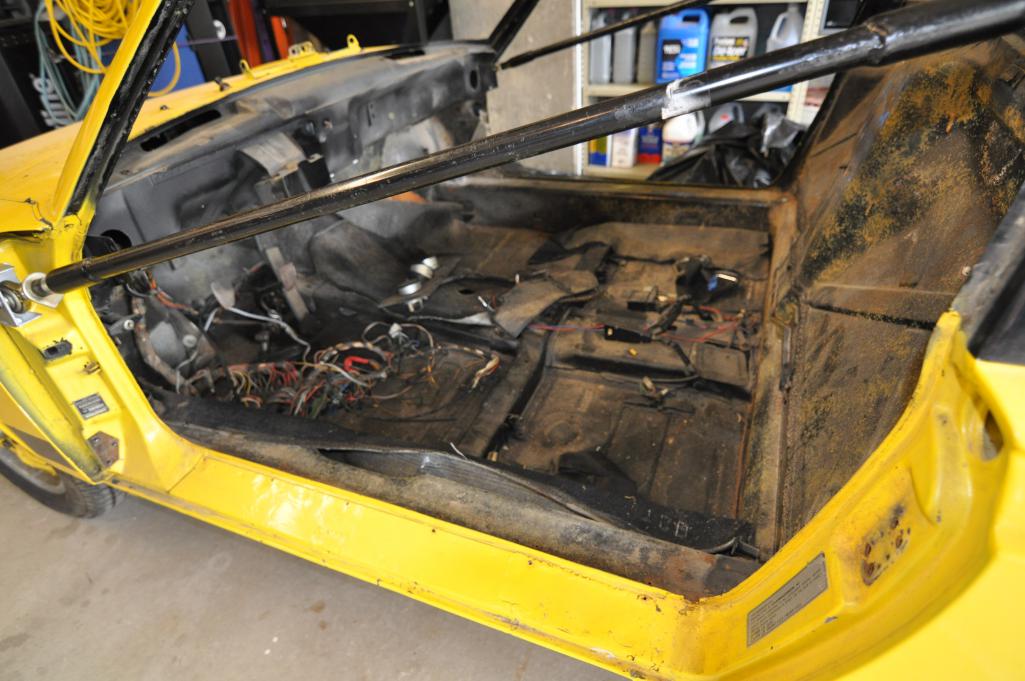
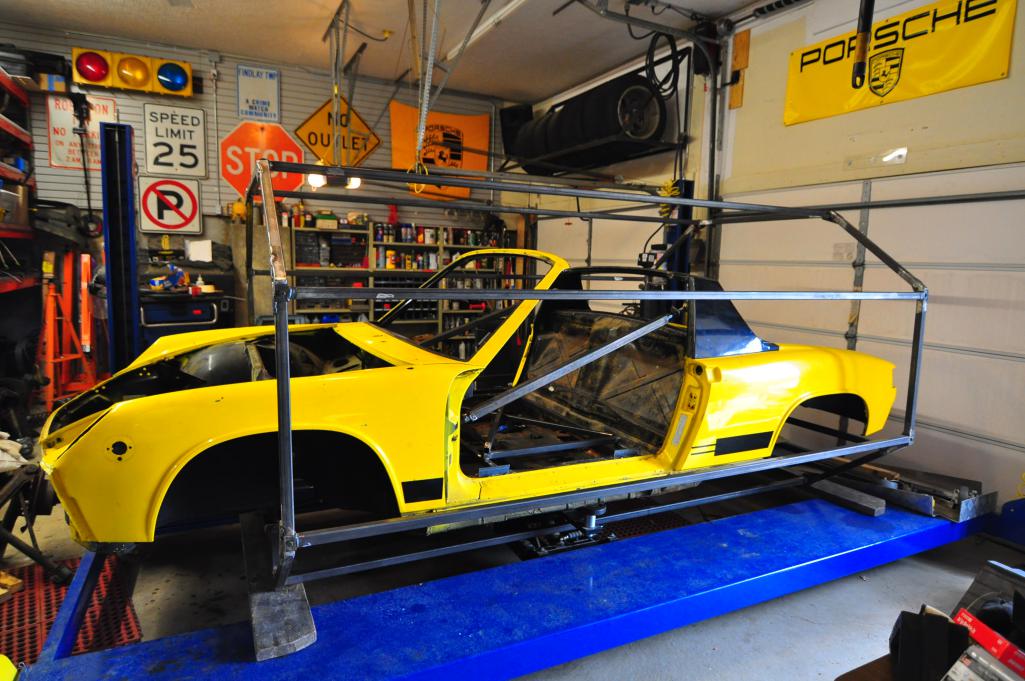
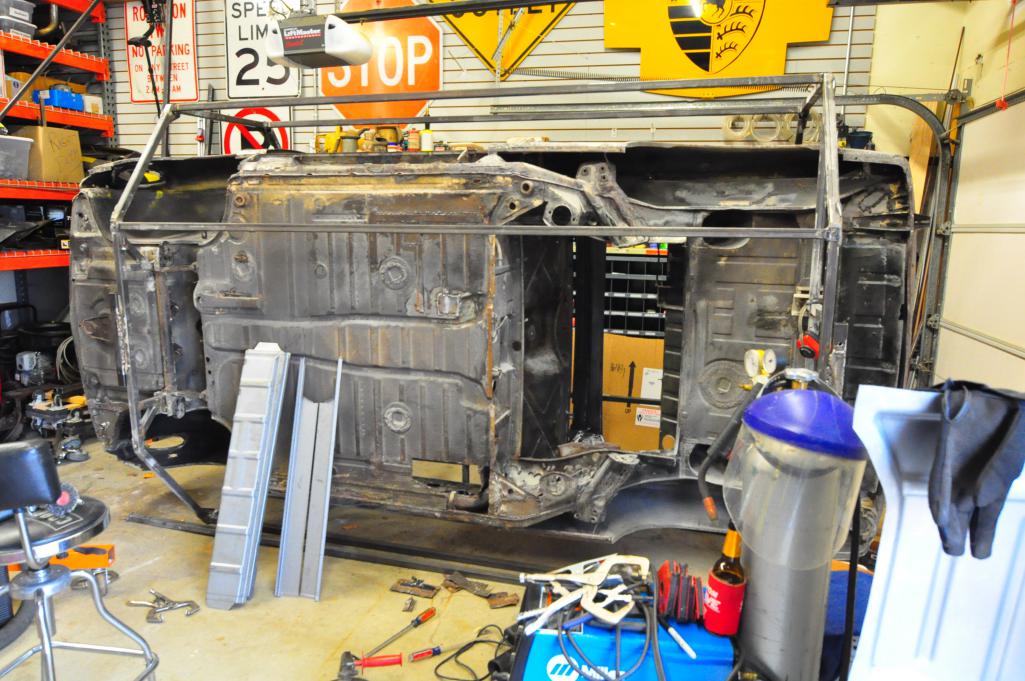
I spent the first two weeks of October removing everything left on the car except the suspension/wheels. I wanted to have the car sitting on the wheels so that I could install some bracing in the floor area. I know that bracing will need to come out at some point but until I know which panels need replaced I want the additional support. I also decided that I want to be able to hang the doors to check the gaps as panels are replaced so I had to change where I attached the door braces so that I can fit a door with the braces in place. And, I wasn’t really happy with the door braces that I had previously made using black pipe. The pipe flexed much more than I expected so I remade the braces with some extra square tubing I had laying around.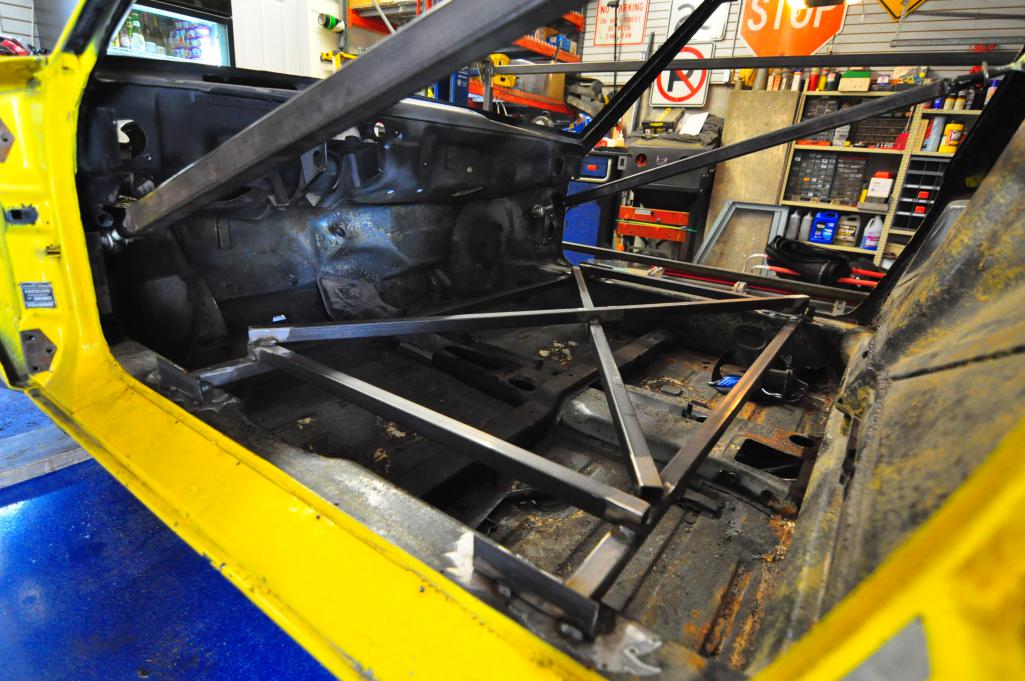
The last 2 weeks of October were spent building a rotisserie. I went with Restoration Design’s rotisserie because I think it best fits my particular needs of wanting to be able to move it around a lot and be able roll it onto my lift if need be. $250 worth of steel got the job done but I wasn’t prepared for the amount of time it took to fabricate it and for the amount of dirt created cutting and grinding new steel with the oily mill finish on it. It was however fun welding thick steel and it gave me a reason to buy a better welding helmet. I’ve been using a Harbor Freight helmet and while I haven’t done much welding before, when I did I struggled with being able to see where I was welding. So, I bought a Hobart Pro helmet and the difference is night and day. Much easier to see, lots of adjustments and the head strap assembly works really well. I also bought a better ground clamp as the clamp that came on my Millermatic 180 was practically useless. Once I got the settings on the welder dialed in and my technique correct I was able to lay down some pretty good welds. 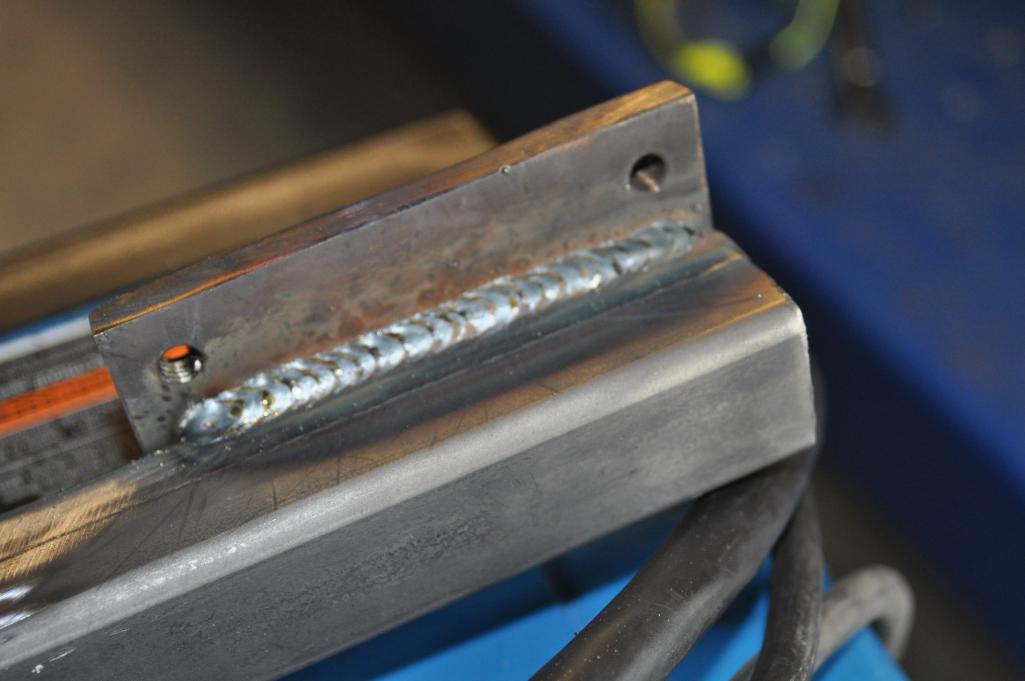
Once the rotisserie was attached I removed the remaining suspension and with my wife’s help we removed the entire wire harness .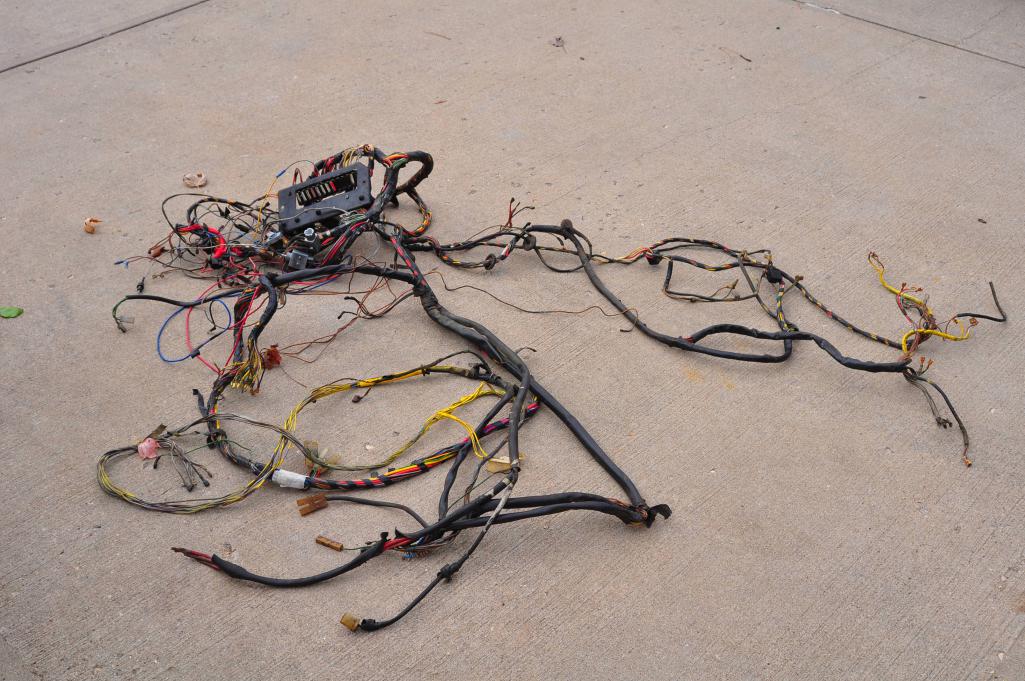
So, what’s next is to strip the car of paint so I can see all the parts that need cut out. I have a guy coming out next week to soda blast it in my driveway. His business is called Stripper for Hire (http://www.stripperforhire.com)…… I’m sure I’ll be the talk of the neighborhood! I still need to put dolly wheels on the rotisserie but I am waiting for a piece of steel so I will use cheap furniture dolly’s from Harbor Freight to get the car off my lift and outside for the stripper.
Posted by: Andyrew Oct 31 2015, 02:36 PM
Great looking rotisserie and bracing!
Posted by: 914forme Oct 31 2015, 04:37 PM
Wow that rotisserie looks like something I need for my son's car at UC. Love this build.
Posted by: budk Nov 1 2015, 05:00 PM
Wow that rotisserie looks like something I need for my son's car at UC. Love this build.
The design of the rotisserie is available on the Restoration Design website. Or, just go to Youtube and search for it. Thanks to Peter at RD for sending me the drawings and for being so helpful. I'll be placing a big order with RD soon.

Posted by: budk Nov 5 2015, 04:24 AM
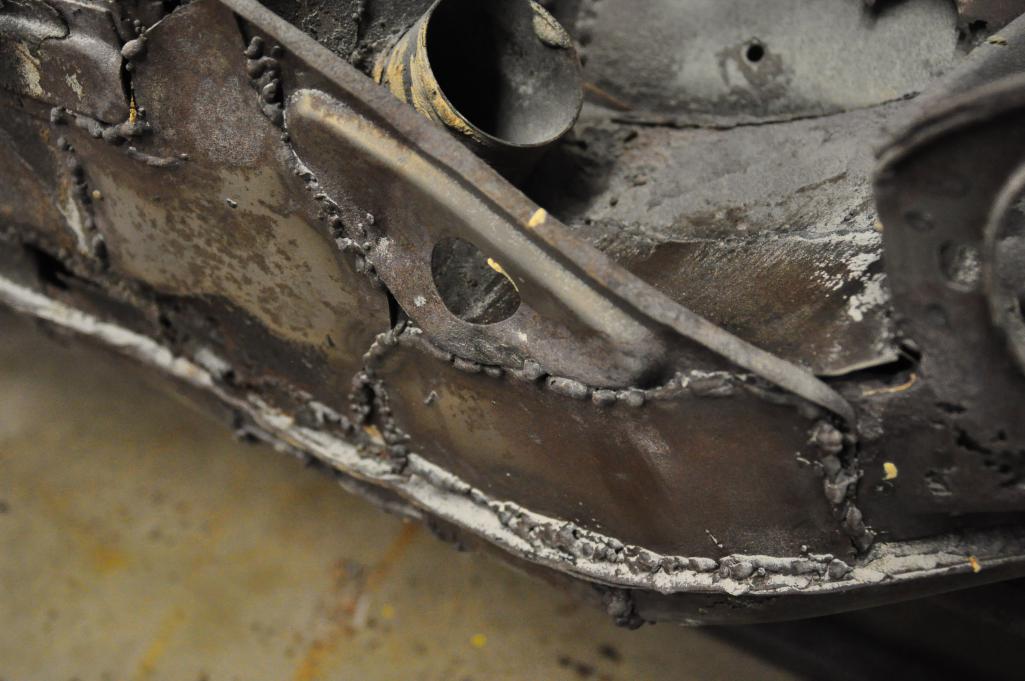
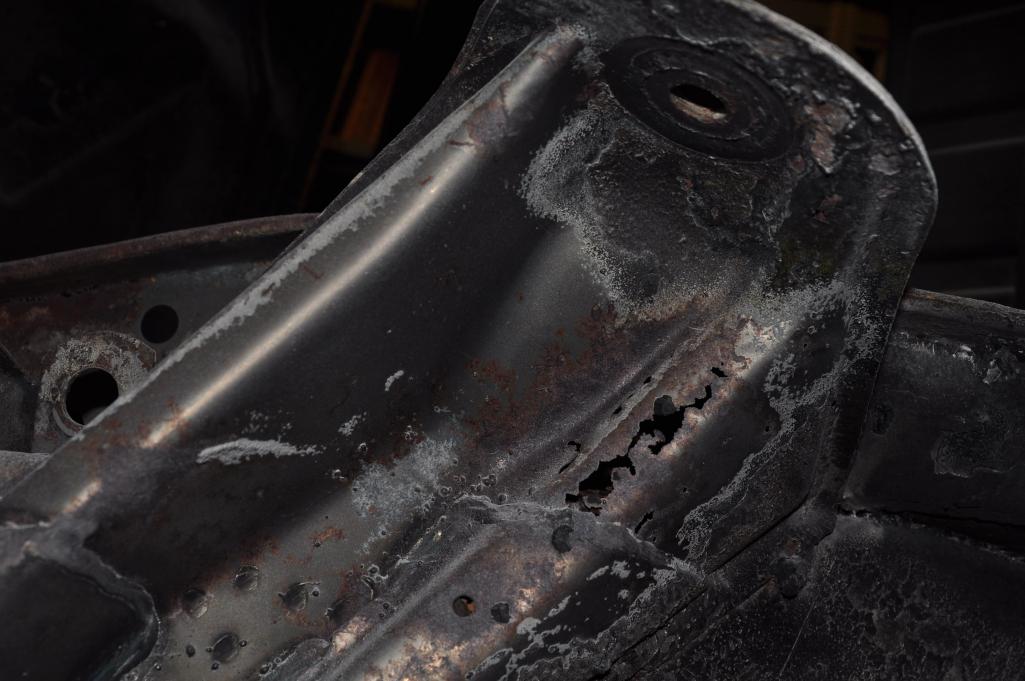
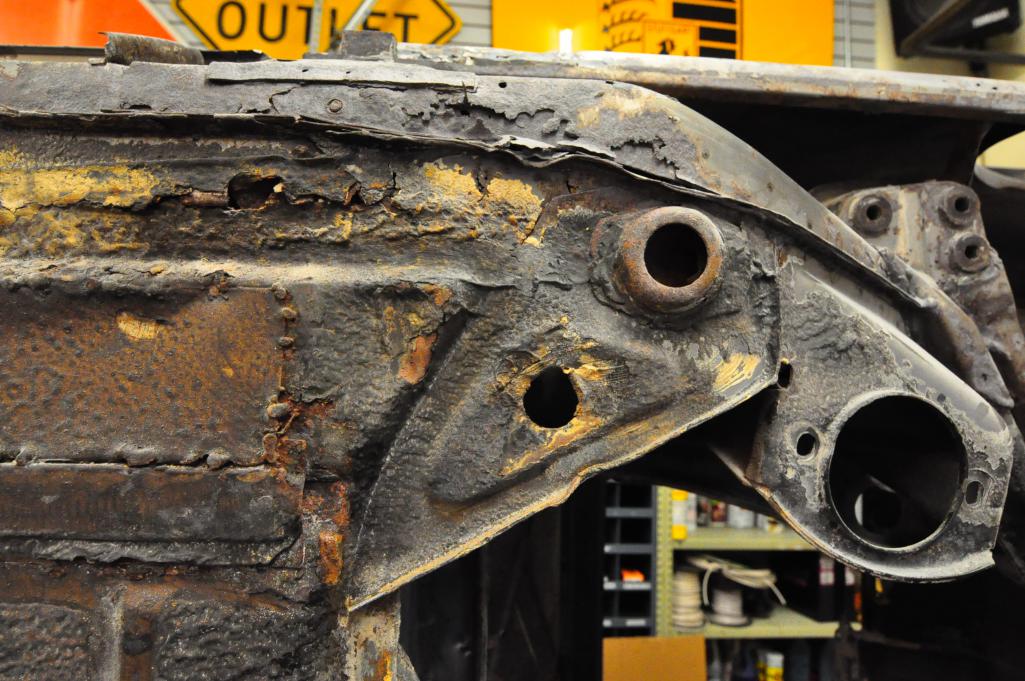
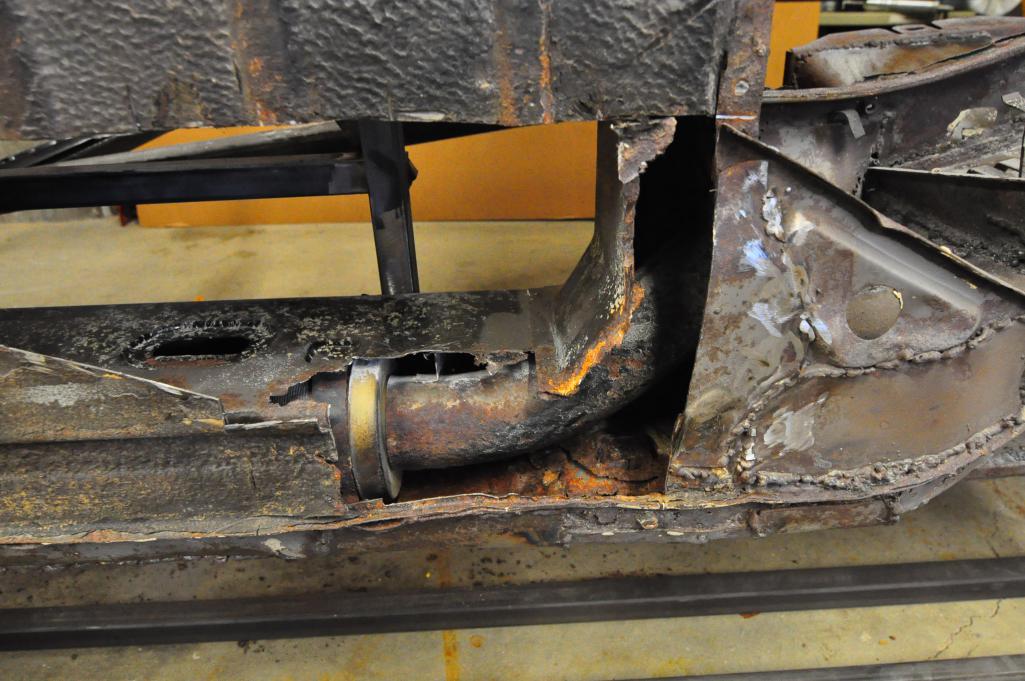
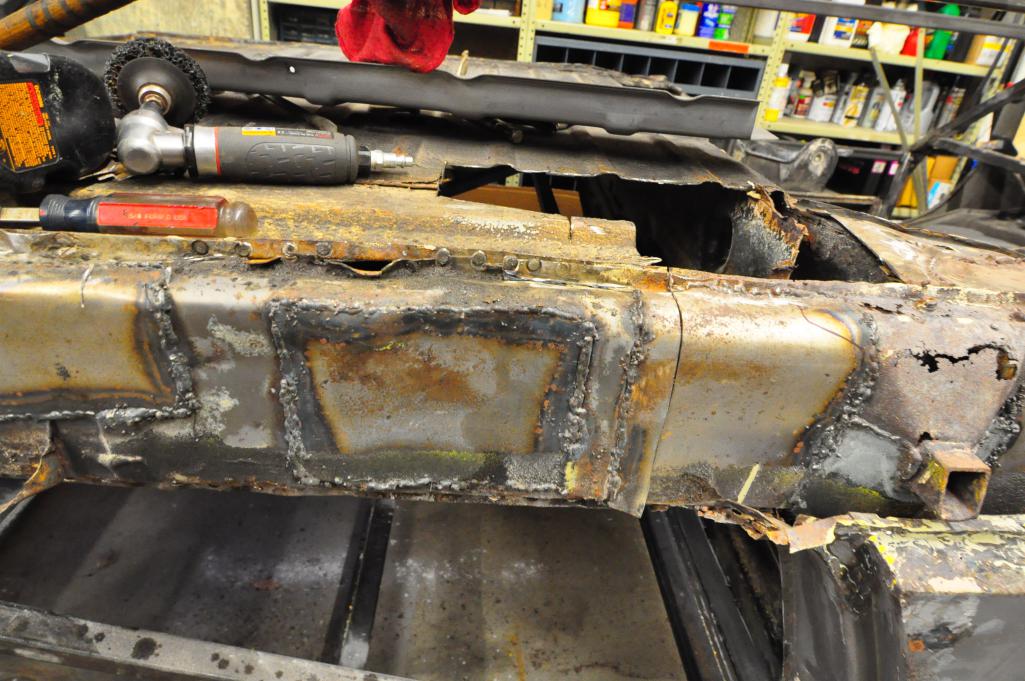
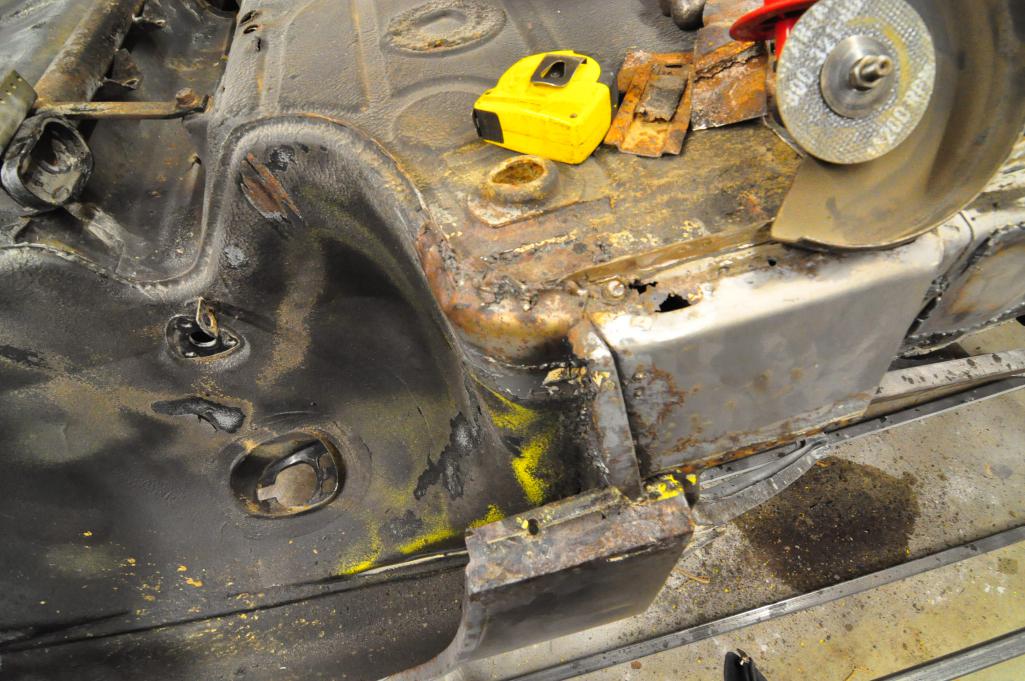
Hera are a few pics of the car in process and a surprise find after it was stripped.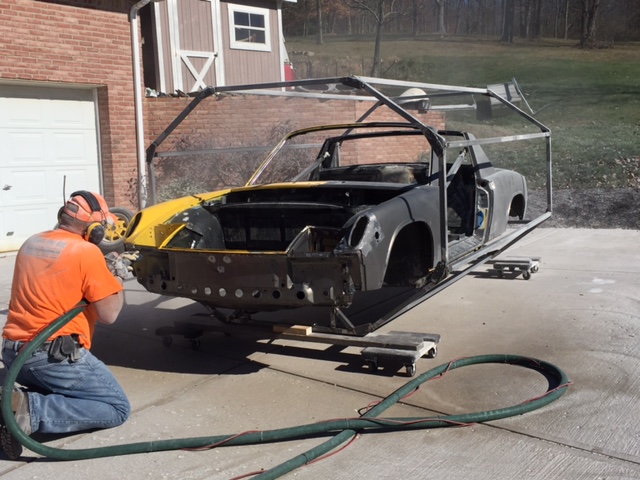
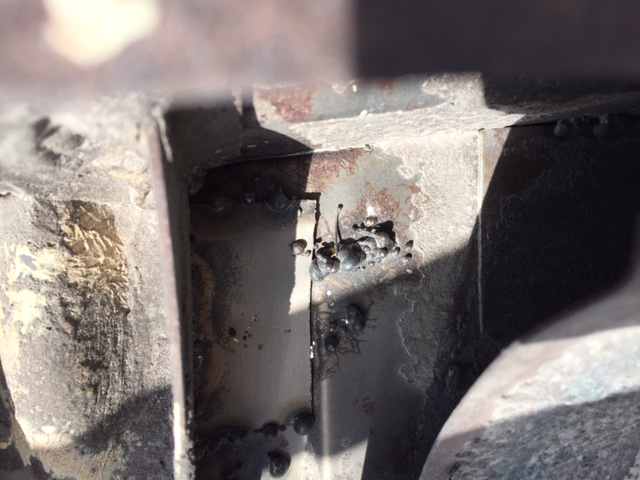
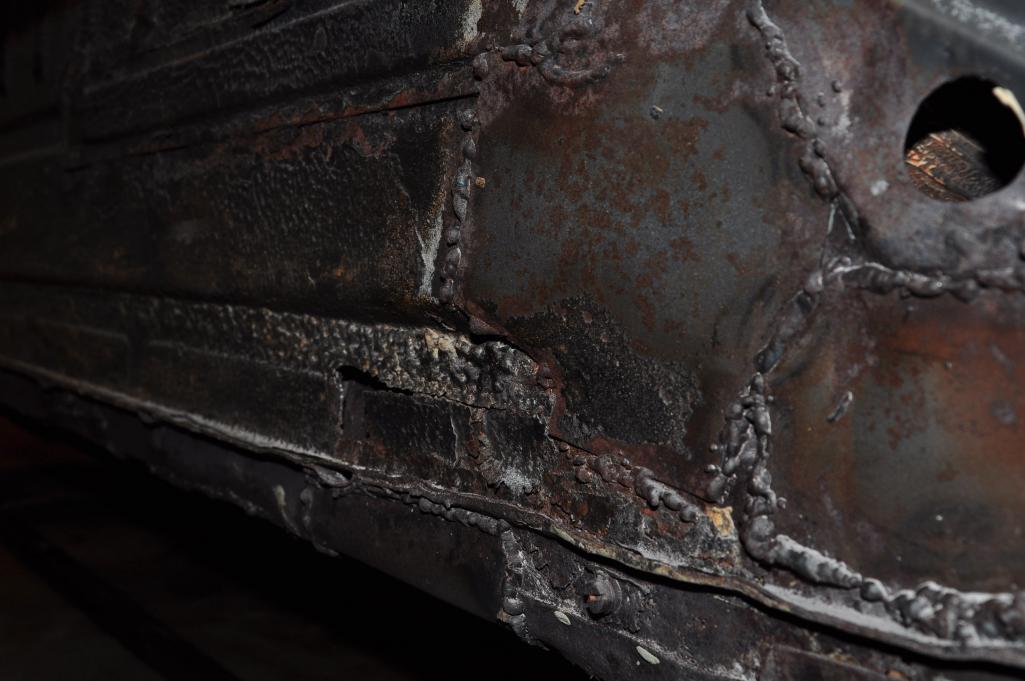
A few examples of the "quality" of patches that are now able to be seen.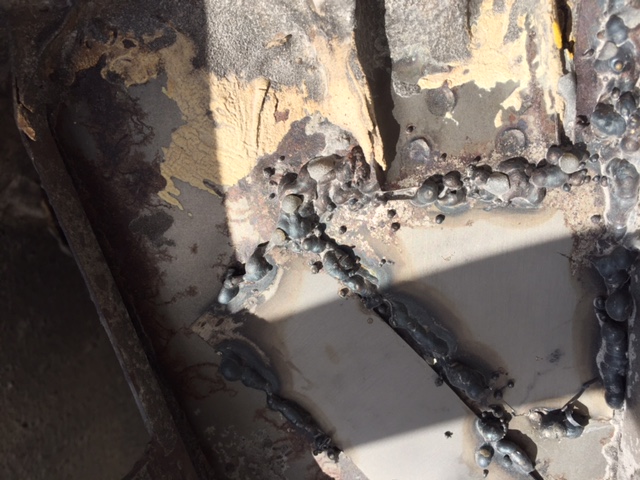
Here is one of the many patches done by a PO, this one on one of the doors. 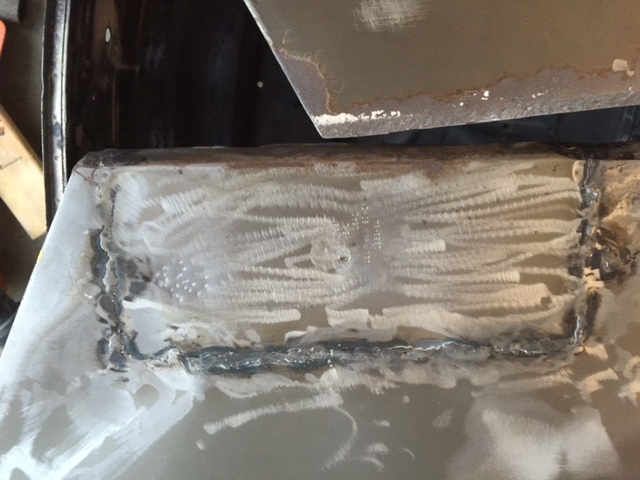
If you look closely, the patch is stamped with "120V 60 HZ, etc." ! Evidently this patch was made within the last 31 years or so.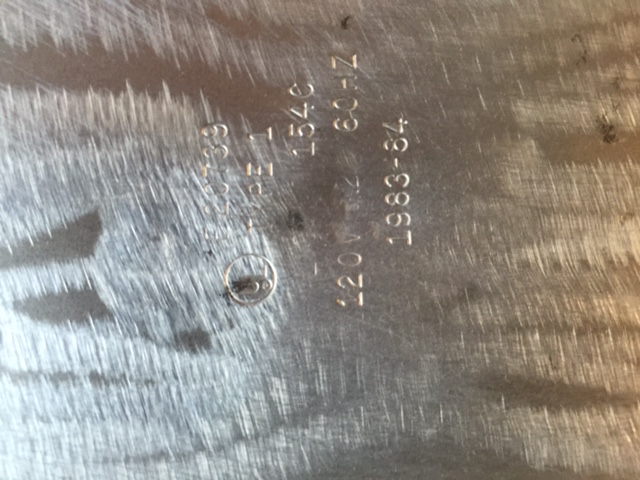
Posted by: DirtyCossack Nov 5 2015, 06:26 PM
Those welds make me feel better about my own.
Posted by: budk Dec 1 2015, 05:16 AM
Car was soda blasted the first week of November. I had the guy concentrate on removing the yellow paint and cleaning all the area’s that I knew were bad and wanted to get a better look. Some parts of the car like the floor are likely to be replaced so I only had the edges of those panels blasted but didn’t waste time (and money) thoroughly cleaning all the panels. 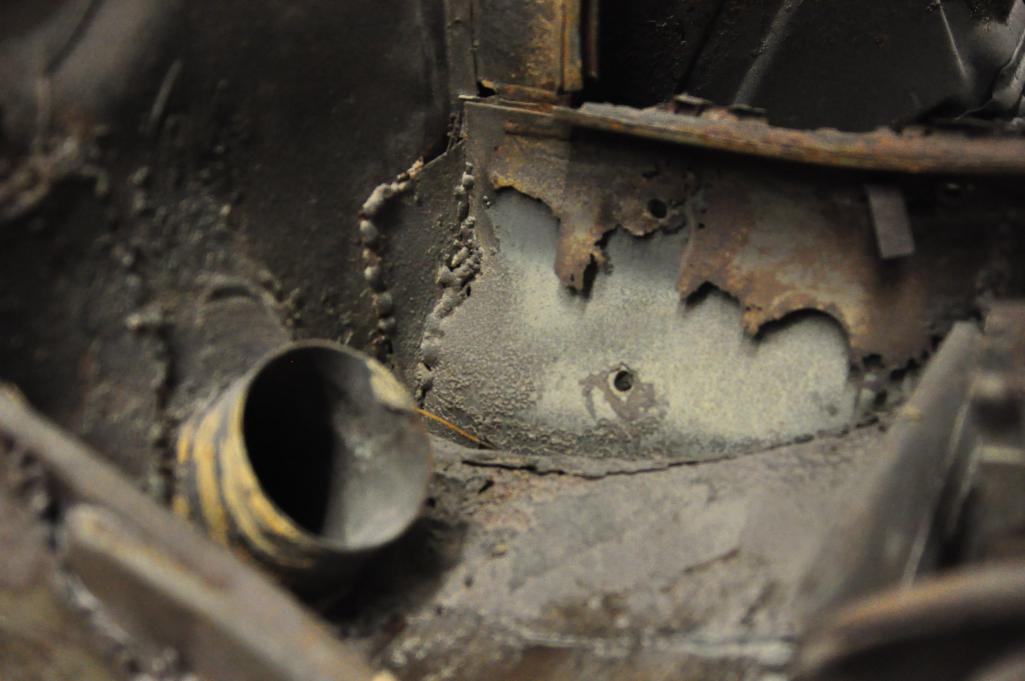
 [attachmentid=529
772]
I’m waiting for a sheet of 18ga to get here, hopefully this week. Also expect to be ordering RD parts this week.
Attached thumbnail(s)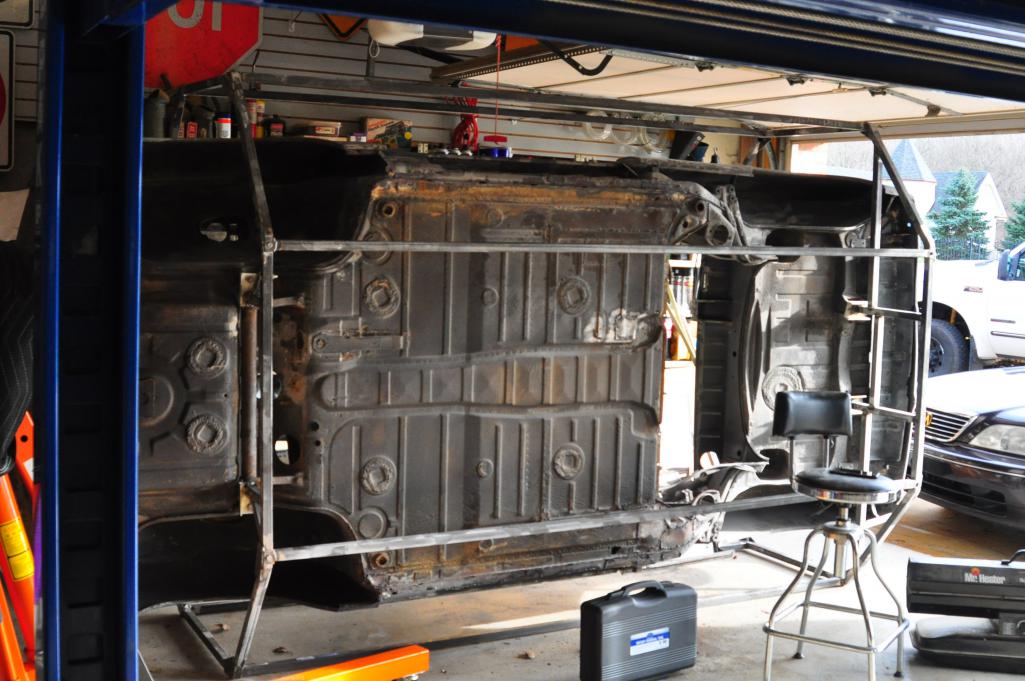
Posted by: budk Dec 1 2015, 05:27 AM
All in all the soda blasting revealed that there are more areas to be addressed than I had hoped. Luckily, it’s only metal. Fortunately, Christmas came early in the form of this amazing tool.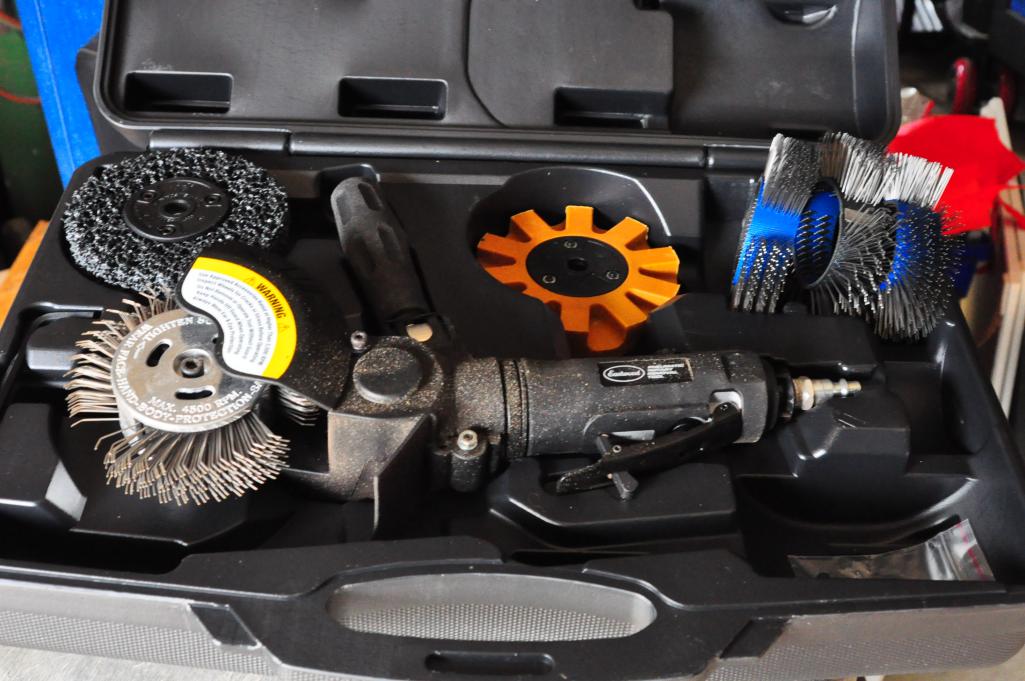
Posted by: budk Dec 5 2015, 07:22 AM
Just a to the guys at Restoration Design. I placed an order Thursday morning, had some issues getting the credit card to go through because of my fat-fingers. They called me about and it took until 11:30AM until we got it all straightened out. Amazingly, the parts were waiting for me when I got home from work on Friday!
Outstanding service and the parts look amazing.  Thanks guys!
Posted by: mepstein Dec 5 2015, 07:57 AM
All in all the soda blasting revealed that there are more areas to be addressed than I had hoped. Luckily, it’s only metal. Fortunately, Christmas came early in the form of this amazing tool.
What is this tool called?
Posted by: budk Dec 5 2015, 08:50 AM
All in all the soda blasting revealed that there are more areas to be addressed than I had hoped. Luckily, it’s only metal. Fortunately, Christmas came early in the form of this amazing tool.
What is this tool called?
Eastwood Pneumatic Rotary Removal Tool
http://www.eastwood.com/eastwood-pneumatic-rotary-removal-tool.html
It's not cheap (it was just on sale for $250 I think), but it pays for itself given how well it works. It's a huge timesaver.
Posted by: mepstein Dec 5 2015, 09:02 AM
All in all the soda blasting revealed that there are more areas to be addressed than I had hoped. Luckily, it’s only metal. Fortunately, Christmas came early in the form of this amazing tool.
What is this tool called?
Eastwood Pneumatic Rotary Removal Tool
http://www.eastwood.com/eastwood-pneumatic-rotary-removal-tool.html
It's not cheap (it was just on sale for $250 I think), but it pays for itself given how well it works. It's a huge timesaver.
Have you used it on the car? The video wasn't too impressive but if you say real world is good, I believe you.
Posted by: budk Dec 5 2015, 04:27 PM
All in all the soda blasting revealed that there are more areas to be addressed than I had hoped. Luckily, it’s only metal. Fortunately, Christmas came early in the form of this amazing tool.
What is this tool called?
Eastwood Pneumatic Rotary Removal Tool
http://www.eastwood.com/eastwood-pneumatic-rotary-removal-tool.html
It's not cheap (it was just on sale for $250 I think), but it pays for itself given how well it works. It's a huge timesaver.
Have you used it on the car? The video wasn't too impressive but if you say real world is good, I believe you.
I used it enough to see if it works and it worked great in my test. I've seen it labeled as a Wurth Master - Jeff Hail references it in his Bring out the Dead thread. I've seen it mentioned in a couple other of threads which is why I bought it.
Posted by: budk Dec 31 2015, 01:44 PM
Time for an update. I have to say that keeping this thread updated is more of a challenge and a lot more work than I would have expected. Hats off to those of you who write detailed and informative threads, particularly those step by step how-to threads.
I spent most of the month working on determining what parts to replace, which ones to buy and which ones to make. I received a nice shipment from Restoration Design and I have another order in with them and with Pelican and both of those should be here next week. I’m confident that next month’s report will show significant progress as my plan has been to start patching in January. 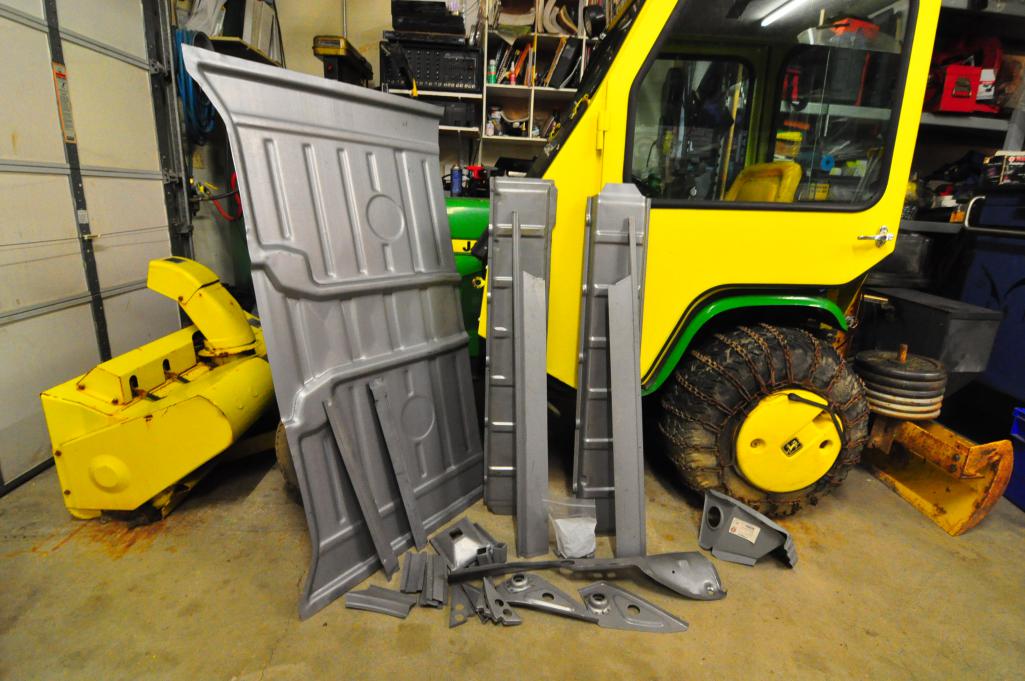
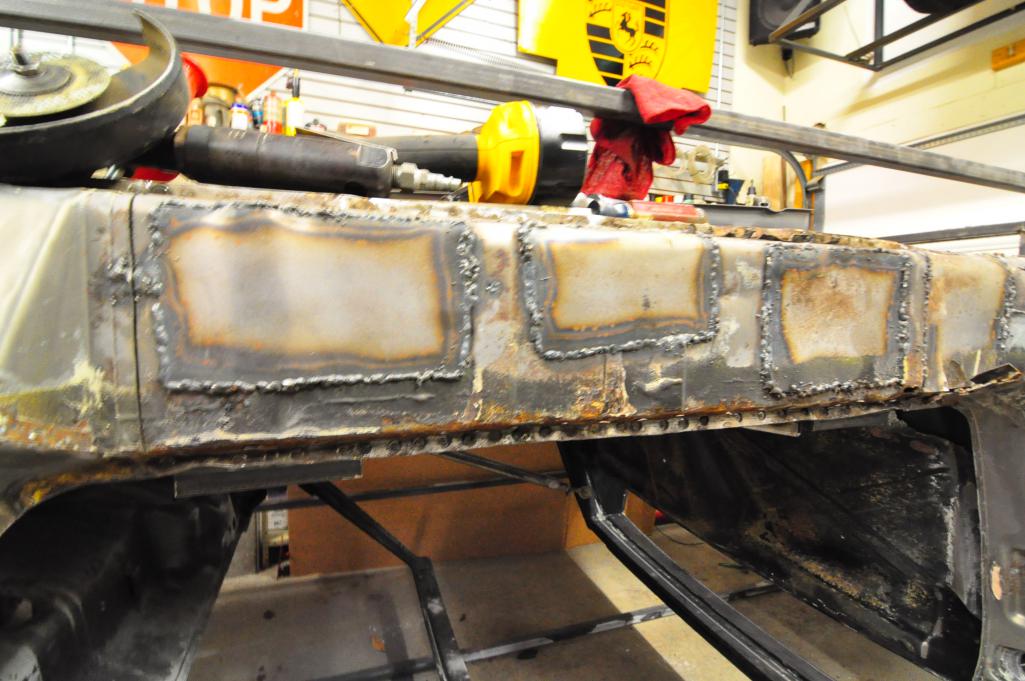
Speaking of patching, I counted over 30 patches on this car that were done (and done poorly) by the previous owner(s). Every one of those will need to redone or replaced by new panels. So, as far as what challenges were encountered I would have to say that getting the car soda-blasted revealed a lot more body work problems than I, or anyone else who looked at this car, expected to find. 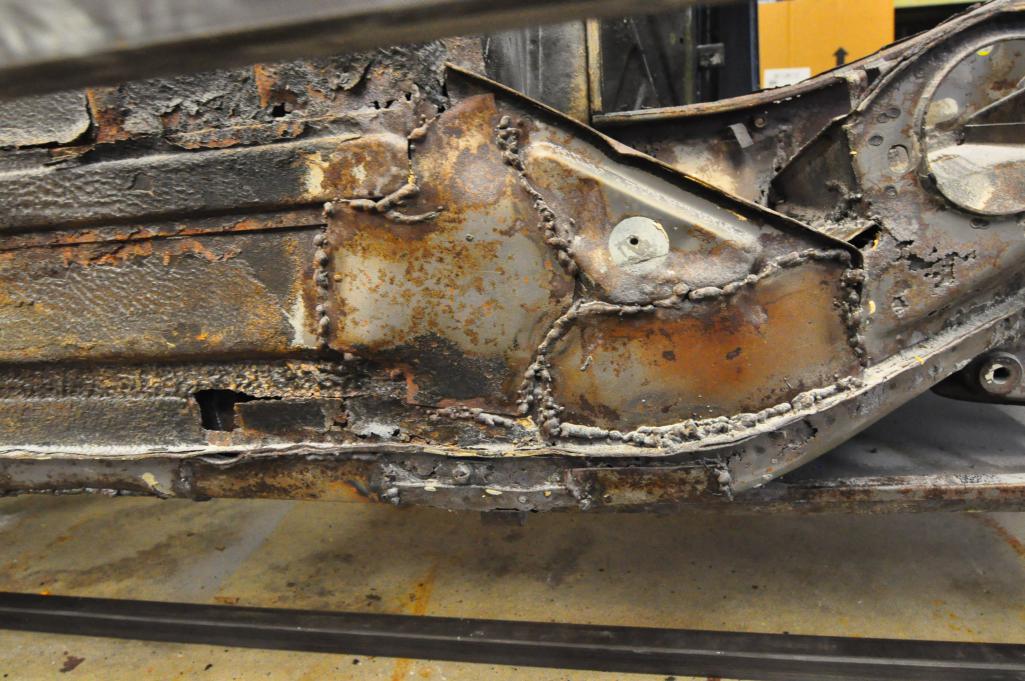
Posted by: budk Dec 31 2015, 01:47 PM
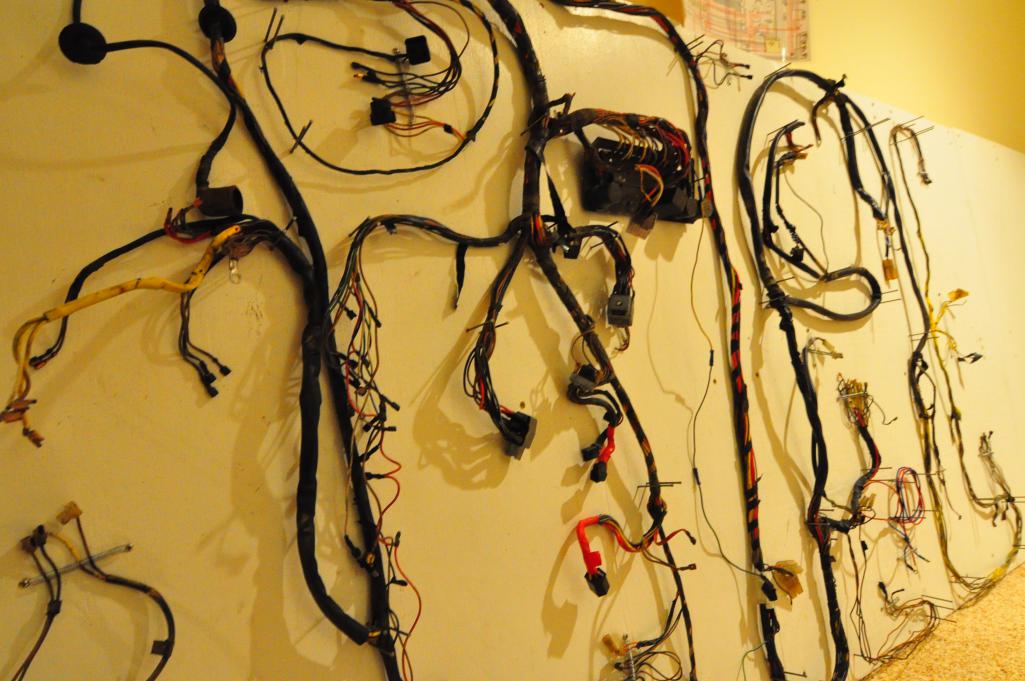
I decided to layout my wire harness on some plywood in my basement. I plan to check every wire and replace as needed, clean every connector and rewrap the harness as needed. If I get ambitious, I might label every wire so that it will be easier to install it when that time comes. As bad as the body is, the harness is not much better. Lots of wires that have multiple splices in them, wires that have damaged insulation and wires that appear to go nowhere. I don’t know how much I will work on this in the coming months since it is a low priority task, but the goal will to have the harness done by the time the car is ready to paint.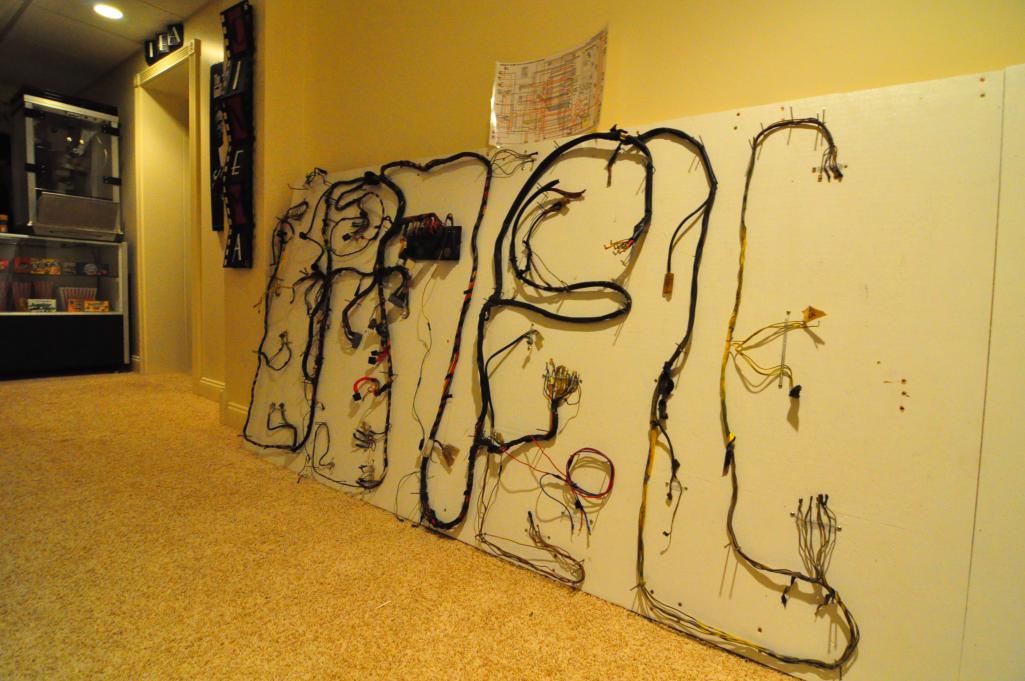
Posted by: budk Jan 11 2016, 02:49 PM
Someone else posted that it's harder to fix someone else's mistakes than to work on a unmolested POS. Well, I agree. I spend more time trying to figure out how the pieces go together and whether something was modified by the PO.
If this car wasn't a LE I would scrap the tub and buy a roller. 
I spent a good bit of time drilling out spot welds but then I realized I was spending time drilling out the welds on parts that I was going to replace anyway. so out came the electric grinder but as soon as I touched the rocker with the cutoff wheel the wheel exploded. I was wearing a full face shield so no damage there but it hit my left hand so hard I was afraid to look at it. Hurt like hell but nothing broken and only a few cuts, luckily it missed a vein. I learned to wear gloves as well as the full face shield. I also learned to use my pneumatic grinder which has a much better speed control. I wore out the only cutoff wheel for the pneumatic grinder I have so I am done for today. I'll buy more wheels tomorrow and will finally get the inner rocker panel off the car.
Posted by: Andyrew Jan 11 2016, 04:10 PM
Replace your cut off wheels before they get down that far, Dont put much pressure on the wheel, let the RPM do the action.
Are those welds on the longs yours or the PO?
I always wear welding gloves when I use cut off wheel. They offer the most protection.
Posted by: budk Jan 11 2016, 05:36 PM
Replace your cut off wheels before they get down that far, Dont put much pressure on the wheel, let the RPM do the action.
Are those welds on the longs yours or the PO?
I always wear welding gloves when I use cut off wheel. They offer the most protection.
Those are NOT MY WELDS! I would not make welds like that and if I did I wouldn't show them to anyone! Look at the rest of my thread to see examples of the poor welds done by the previous PO's. Sadly those welds are some of the better ones that were done on this car.
I didn't put any pressure on the wheel. The grinder was moved around a lot and I assume the wheel got a chip in it. I know better now, but the pneumatic grinder is so much easier to use I don't think I'll have any other problems.
Posted by: Andyrew Jan 11 2016, 05:42 PM
I have found that the fastest way to destroy a cut off wheel was to use it like a grinder. Do not put pressure on the face of the cut off wheel, If you dont have another go out and grab a $25 harbor freight electric grinder and put your grinding wheel on that.
I have two grinders, a harbor freight I have had for 10 years and a Makita that was my Grandpa's. One is set up for my cutoff wheel and one with my flap wheel for grinding.. I find I go through far less consumables this way and my time is spent better. I typically leave both plugged in while I am working and readily switch back and forth.
Posted by: budk Jan 11 2016, 06:29 PM
I have found that the fastest way to destroy a cut off wheel was to use it like a grinder. Do not put pressure on the face of the cut off wheel, If you dont have another go out and grab a $25 harbor freight electric grinder and put your grinding wheel on that.
I have two grinders, a harbor freight I have had for 10 years and a Makita that was my Grandpa's. One is set up for my cutoff wheel and one with my flap wheel for grinding.. I find I go through far less consumables this way and my time is spent better. I typically leave both plugged in while I am working and readily switch back and forth.
I have 2 electric grinders, one that had a cutoff wheel and one with a flap type grinding disc. I think the disc was damaged over the course of moving stuff around. I'm not worried about it. I would not be stupid enough to try and use it as a grinding wheel.... I'm not sure why anyone would try to do that. My pneumatic grinder with a cut off wheel is much easier to use. I should have been using it all along.
Posted by: krazykonrad Jan 11 2016, 09:32 PM
I guess its not original, but that yellow reverse-bumblebee paint scheme is pretty sharp.
Looks like a great build. I'm looking forward to following along. ![popcorn[1].gif](style_emoticons/default/popcorn[1].gif)
Konrad
Posted by: rick 918-S Jan 31 2016, 11:38 PM
Wow, just like a Cracker Jack box. There's a surprise in every package. The car will be much improved when your done.
Posted by: budk Feb 1 2016, 03:20 PM
Adding a January update.
Not much progress this month. I had hopes of working on it all winter by heating my garage with a combination of kerosene and propane heaters but then I read the posts of the problems causes by using combustion type heaters in a sealed space. I am mostly concerned about rust so I have decided to only use electric heat in the garage but given some of the low temps we had even that wasn't possible. I'll only be able to work on it on mild weather days - I just don't have enough electric heat to make it comfortable nor do I want a ridiculous electric bill.
I did start cleaning some of the contacts on my wiring harness. I'm trying a few different methods, mostly vinegar and salt to clean and water/baking soda to neutralize afterwards. I had some success with although I think I wtill try the vinegar/salt solution in an ultrasonic cleaner. That should give the same results only more quickly. All in all the harness isn't that bad. There are a few pieces that will need to be replaced and a lot of it will need to be re-wrapped but it's not as bad as I had thought.
I did get some more metal pieces to add to the to-do pile. Other than that, no real progress this month.
Pics will be added <here> soon.
Posted by: Jeff Bowlsby Feb 1 2016, 08:52 PM
I did start cleaning some of the contacts on my wiring harness.
Get some DeOxit spray Bud...its the cats meow for electrical contacts.
Posted by: budk Feb 2 2016, 09:49 AM
I did start cleaning some of the contacts on my wiring harness.
Get some DeOxit spray Bud...its the cats meow for electrical contacts.
For cleaning or for protection? Either way, thanks for the tip!
Posted by: PlantMan Feb 3 2016, 02:53 PM
I decided to layout my wire harness on some plywood in my basement. I plan to check every wire and replace as needed, clean every connector and rewrap the harness as needed. If I get ambitious, I might label every wire so that it will be easier to install it when that time comes. As bad as the body is, the harness is not much better. Lots of wires that have multiple splices in them, wires that have damaged insulation and wires that appear to go nowhere. I don’t know how much I will work on this in the coming months since it is a low priority task, but the goal will to have the harness done by the time the car is ready to paint.
Just catching-up on some threads.
Great idea with the wiring harness!!!
Posted by: budk Mar 31 2016, 01:22 PM
March update... nothing done this month except for a few hours of work on the wiring harness.
I know I have no shot of getting done within the timeframe of the challenge, but I knew that when it started. I needed the motivation but the cold weather dealt me a bigger blow than I had anticipated. Looking forward to a fruitful spring and hope to show some progress soon.
No outside help was used this month nor will it be used in the future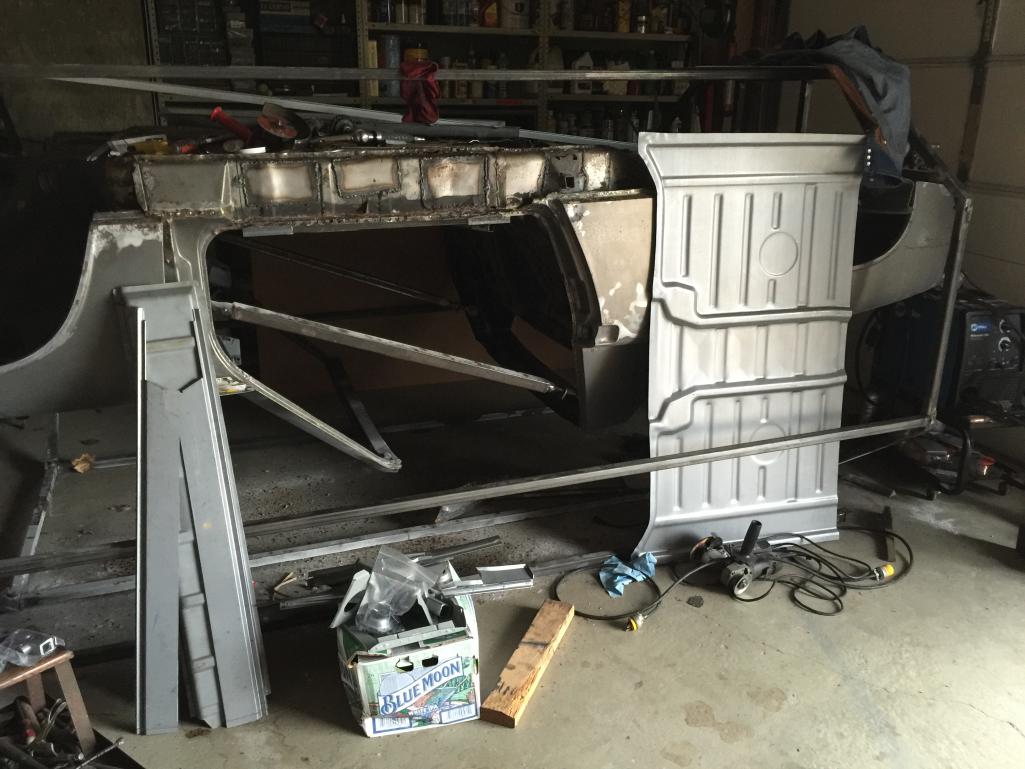
Powered by Invision Power Board (http://www.invisionboard.com)
© Invision Power Services (http://www.invisionpower.com)