Printable Version of Topic
Click here to view this topic in its original format
914World.com _ 914World Garage _ Wish i could be in the build off
Posted by: vinniedatorch Oct 5 2015, 11:34 PM
Hey all,
Took possession of a car I had been trying to buy for 20 years from a friend. Ultimately he gave it to me. Shortly thereafter I joined the world and made a few contacts that have been very help full. This thread is being generated as a thank you to all the members that helped me along the way. Thanks guys. This is what my 73 2.0 looked like when I loaded it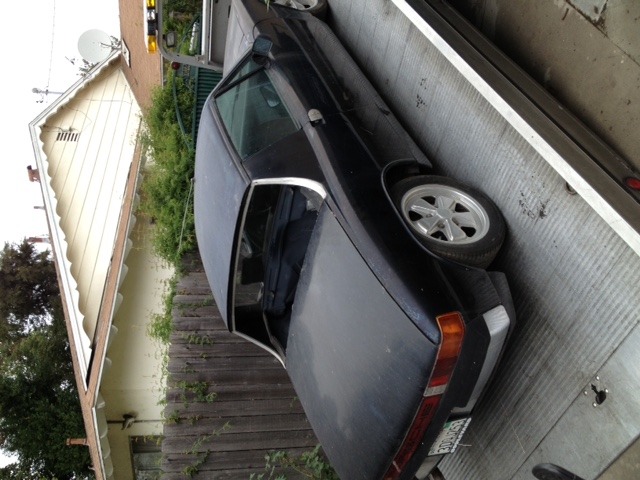
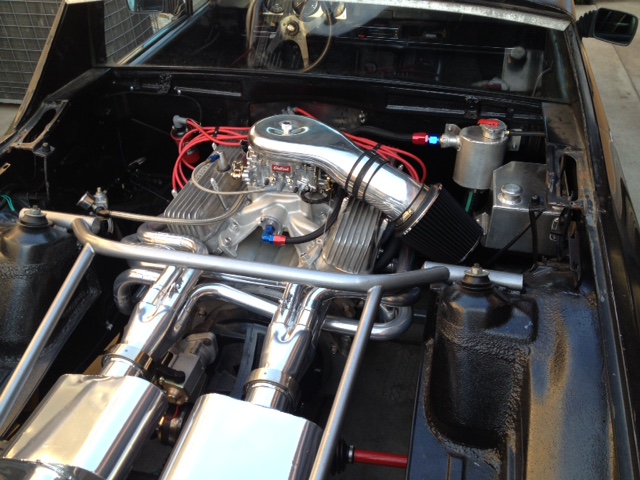
I built a sandrail in the late 80's and I put a 215 Buick in a mid engine chassis and really loved driving it, so I started to hunt for one when I made contact with JRust. Thanks for providing a buildable core.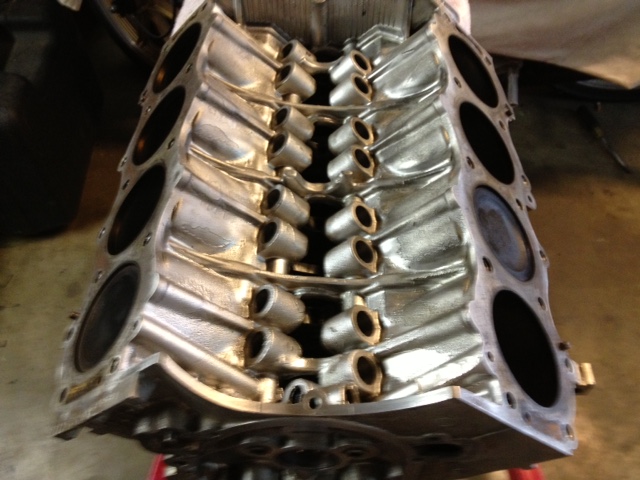
Having saved the headers I built for the sand car when I sold the motor to a guy that said he was building a replica Dan Gurney Indy car from I think he said 1965, some minor cutting and welding to reconfigure and presto a set of 180 degree bundle of snakes for my new project. Decided 3" would sound and run well so here is what I did.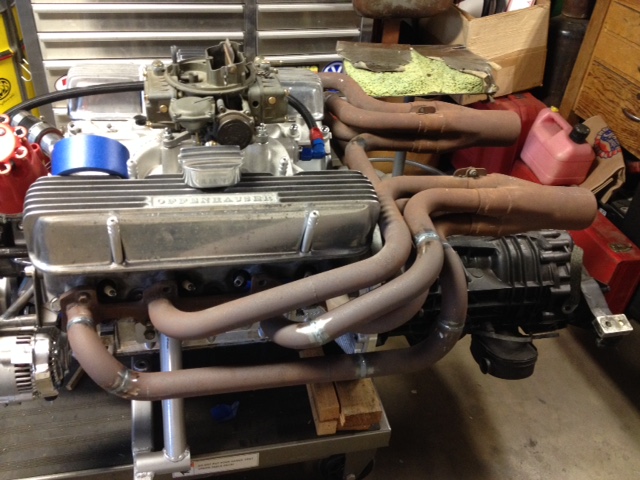
Stay tuned everyone, I'll try and make time tomorrow to post more progress
Posted by: Mike Bellis Oct 5 2015, 11:39 PM
Very cool!
Posted by: jcd914 Oct 5 2015, 11:44 PM


Jim
Posted by: Cairo94507 Oct 6 2015, 07:05 AM
Nice. This is going to be a fun build. Keep the pictures coming. 
Posted by: vinniedatorch Oct 6 2015, 07:19 AM
well things began to move along well but that's not to suggest there wouldn't be a glitch every now and again. Because the distributor is on the front of the motor there was an issue with clearance with the firewall so I had to as much as I didn't want to cut an access panel hole so I could time dizzy and service cooling system without having to break the egg to get to the yoke. these pics show the access cut and how I finished by making a cover that would look sweet inside the car
[attachmentid=521246]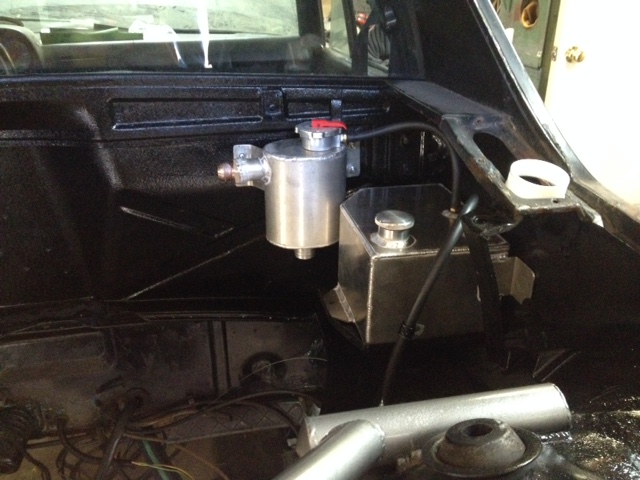
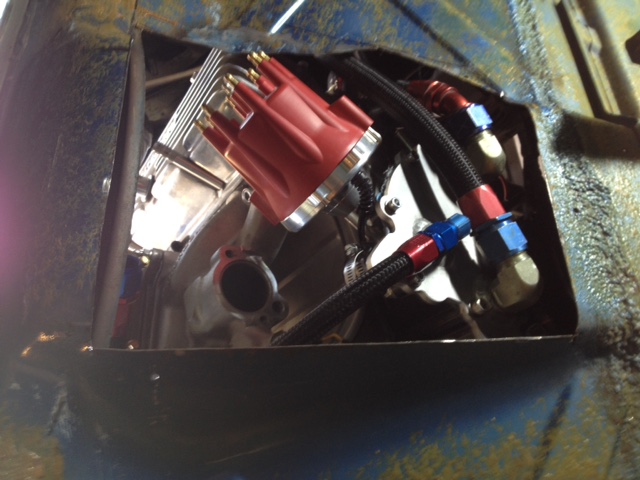
[attachmentid=521249]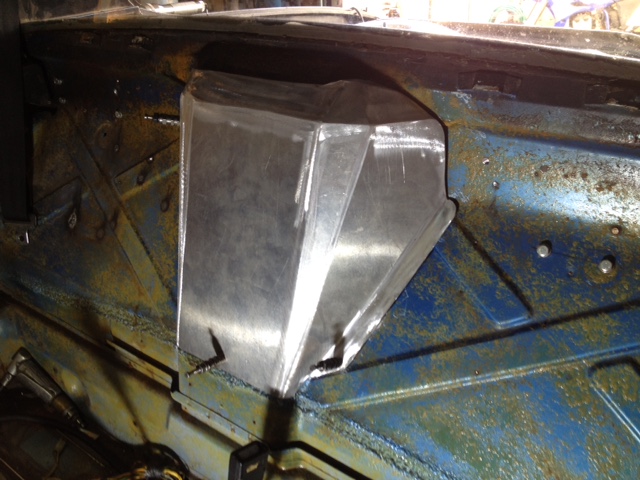
Posted by: vinniedatorch Oct 6 2015, 07:34 AM
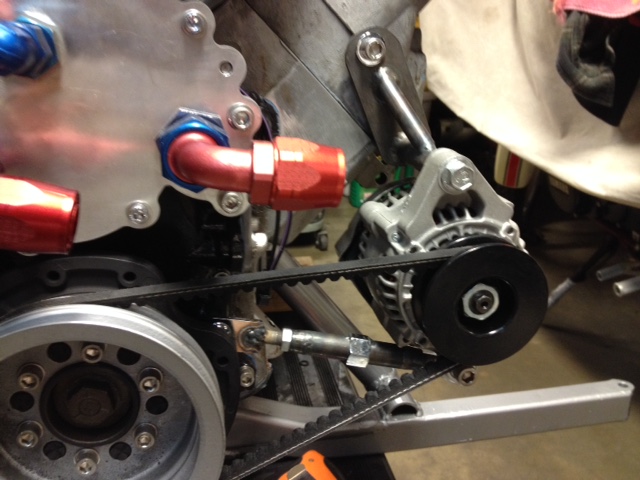
Next phase would be setting up a system to keep this thing from scrambling an egg so I sourced out an aluminum radiator and began fabbing up some cooling recovery and expansion pots as well as all the braided lines for the electric water pump. Water pump on motor was abandoned and blocked off as can be seen in a previous pic also in an effort to fit behind firewall.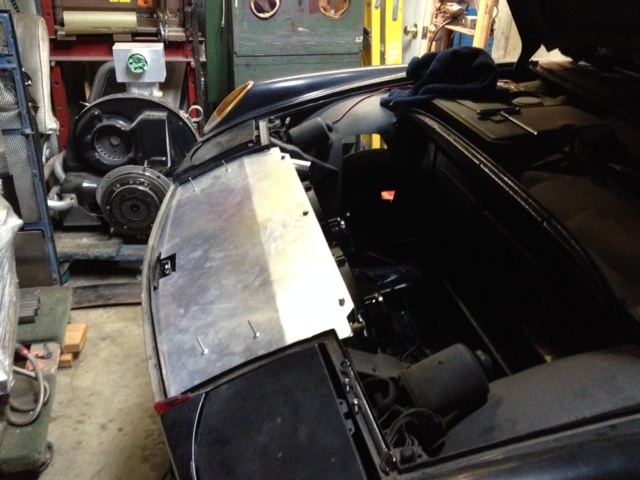
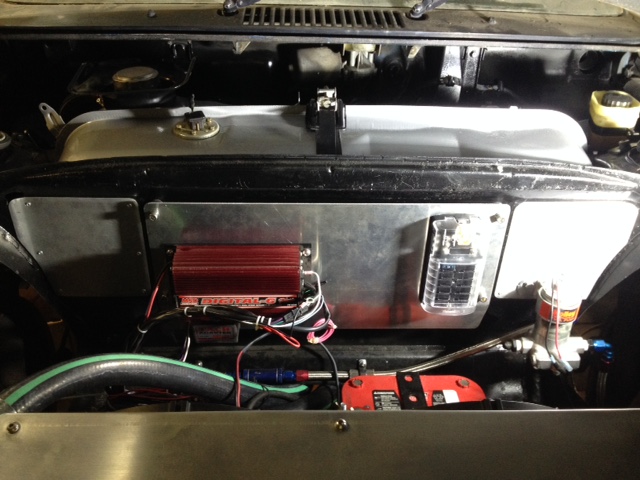
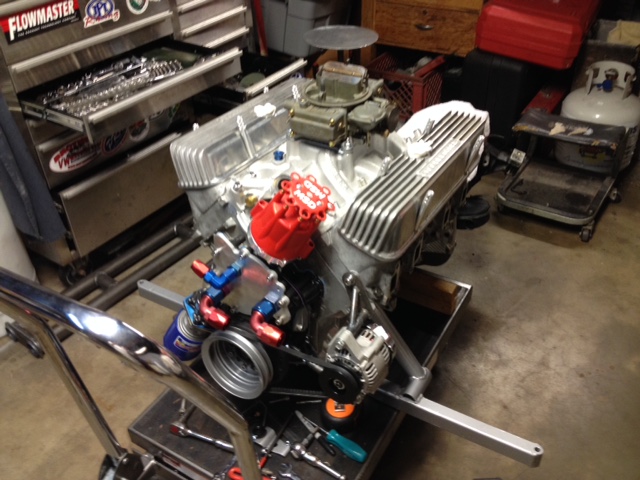
Ignition is all located in the front compartment and I went with a complete MSD as they are easy to install and pretty idiot proof which works out well for me as im not the sharpest tool in the shed when it comes to electrical. I'm better at cutting and welding or assembling engines than trying to find out why my horn won't work.
Posted by: sb914 Oct 6 2015, 07:37 AM
Cool car dude!
Posted by: vinniedatorch Oct 6 2015, 07:47 AM
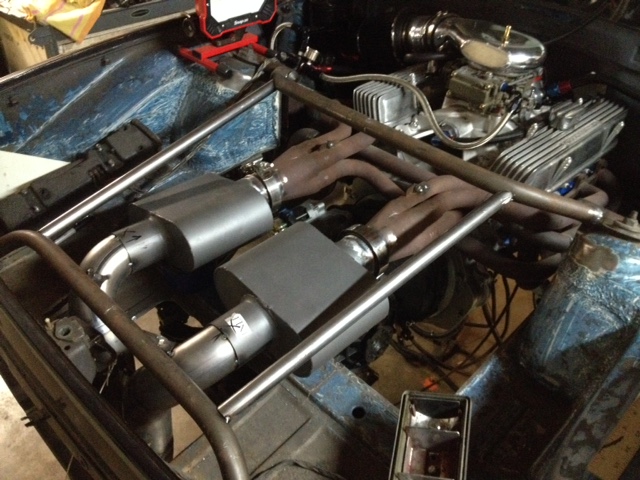
Sent the retrofit set of headers and the 3" flowmaster exhaust out to be ceramic coated and finished up some wiring and plumbing in the front and rear compartments and decided building a truss to keep things from flexing too much in rear compartment would be to my benefit as I had removed most of the sheet metal so I could see engine and exhaust set up. figured it might help if any service was required.
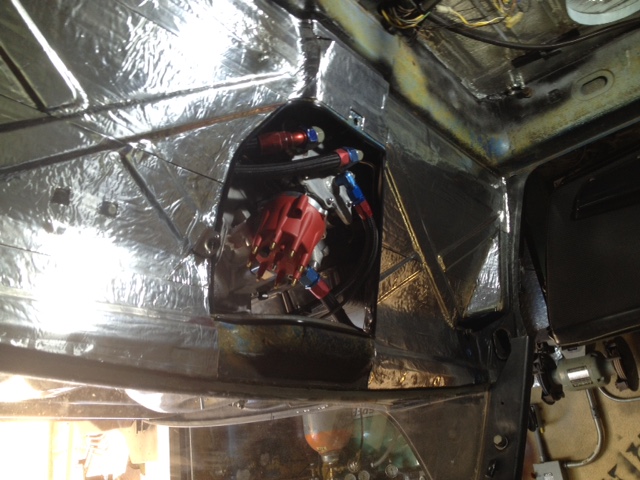
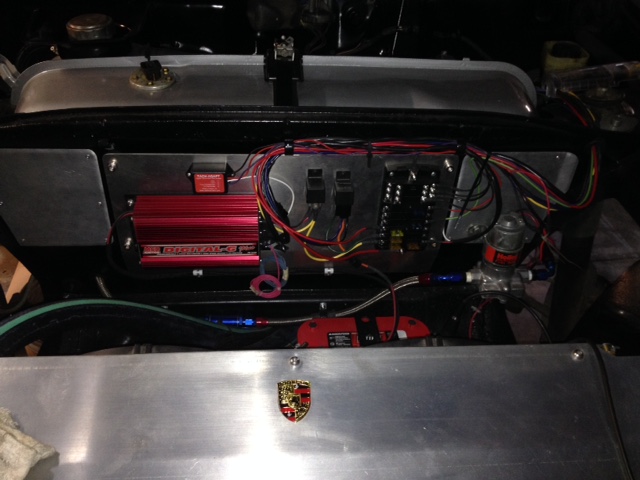
sorry about second pic of firewall covered in dynamat (its actually a much cheaper product available at home depot in the roofing section. comes in a 6" wide roll about 40 feet long. trust me its exactly like dynamat just 5 times easier on the checkbook)
Posted by: mbseto Oct 6 2015, 07:49 AM
Sweet engine! Watching this one...
Posted by: vinniedatorch Oct 6 2015, 07:49 AM

Cool car dude!
You got to see it in the garage! Mr. senior member
Posted by: whitetwinturbo Oct 6 2015, 02:46 PM
.......... ![popcorn[1].gif](style_emoticons/default/popcorn[1].gif)
Just down the street from you by OC / John Wayne Airport. Looking forward to seeing this beauty up close 
Posted by: twistedstang Oct 6 2015, 03:21 PM
Love the exhaust system! Very nice.
Posted by: madmax914 Oct 6 2015, 05:05 PM
Where you going to put your Targa Top?
Just kidding, Very nice quality build. Please keep posting updates, I'm hooked.
Posted by: LeftCoastErik Oct 7 2015, 03:57 PM
Love it! I have one of them thar Buicks in my ride as well, running the MSD Atomic FI. Check it out in my signature link. Keep going, it looks great so far!
Posted by: r_towle Oct 7 2015, 05:37 PM
Please let me know if you plan on selling it.
Honestly, have you thought about putting the roof in the trunk?
Posted by: vinniedatorch Oct 7 2015, 07:42 PM
Love it! I have one of them thar Buicks in my ride as well, running the MSD Atomic FI. Check it out in my signature link. Keep going, it looks great so far!
Eric Thanks, checked out your little ol little ol and loved it. hope you went with the multicolored herringbone interior. loved the wrap and really curious about the atomic EFI. my biggest issue is the gearbox ratio and runnin out of gearbox too quickly. car is almost 100% now just need to post more pics.
Posted by: LeftCoastErik Oct 7 2015, 09:11 PM
Mine was regeared by dr. Evil and a previous owner. 1st locked out. It works great but I don't know what the ratios are. The gears are pretty long, 2nd is good for a little over 60. Good for autocross. What redline are you running with that motor?
Posted by: Chris Pincetich Oct 7 2015, 09:23 PM
That looks so nice I think you should drive it around town w/o rear lids!
That would be "outlaw!" 
Posted by: vinniedatorch Oct 10 2015, 09:10 AM
Mine was regeared by dr. Evil and a previous owner. 1st locked out. It works great but I don't know what the ratios are. The gears are pretty long, 2nd is good for a little over 60. Good for autocross. What redline are you running with that motor?
Not sure where i'm red, just would like to lower RPM on frwy some so it doesn't sound like a VW bus screaming at 75 MPH. power band is sweet and wont stop pulling hard but long cruises on frwy concern me.
Posted by: RobW Oct 10 2015, 10:14 AM
Posted by: vinniedatorch Oct 10 2015, 05:45 PM
Im having trouble posting more pics and should probably walk away before a hammer sounds like a good option. I'll see what can be done to correct the issue and try again later.
Posted by: vinniedatorch Oct 10 2015, 06:09 PM
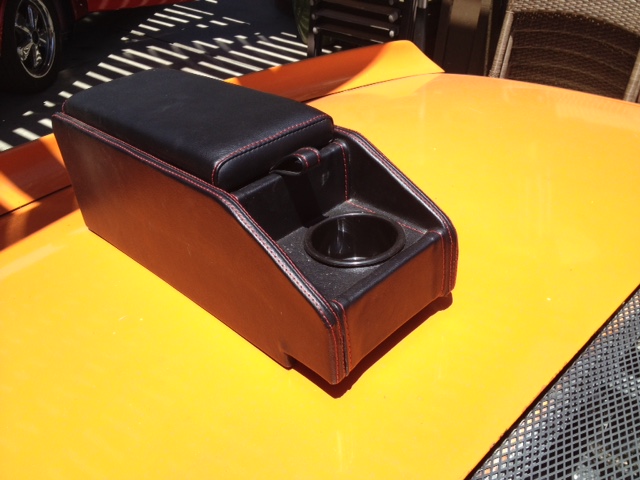
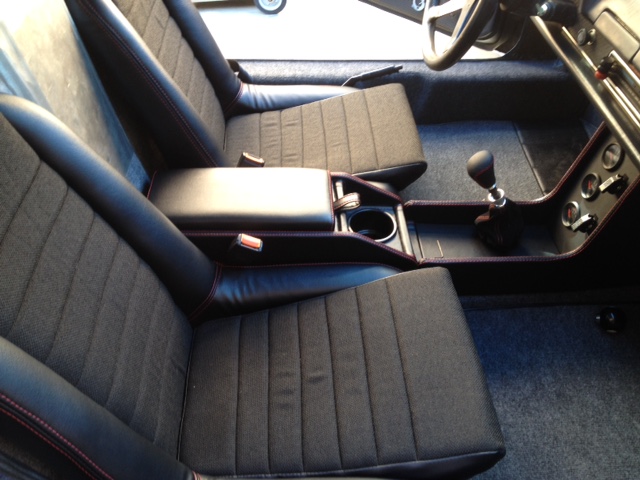
Did a little work on interior to get it looking presentable, grey pepper carpet throughout, and some leatherette and tweed with some red stitch covered all the pieces as well as the home built console and armrest console gave me the look i'd hoped for. Nachos in Long Beach does good work and was happy to help. Now its off to paint
Posted by: whitetwinturbo Oct 11 2015, 11:25 AM

Posted by: Cracker Oct 11 2015, 11:53 AM
Very nice...I like your style. One word of caution...mounting your fuel pump up front makes it susceptible to vapor lock. I did the same with my first build years ago and ultimately had to relocate it to under the gas tank. My current build has it mounted under the cowl in front of the passenger foot well. Good luck!
My problematic Set-up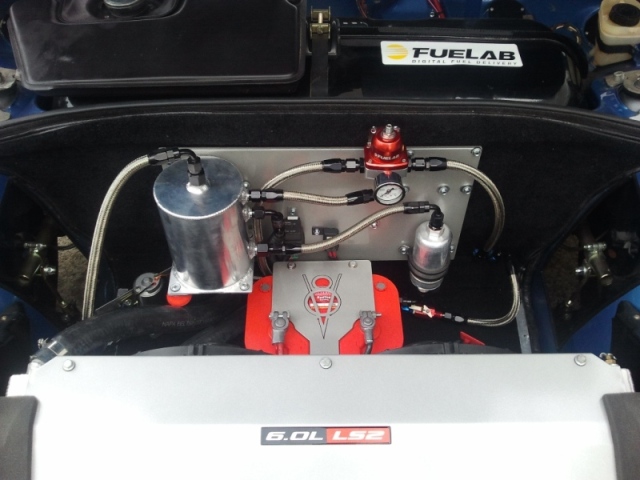
Posted by: vinniedatorch Oct 11 2015, 06:03 PM
Very nice...I like your style. One word of caution...mounting your fuel pump up front makes it susceptible to vapor lock. I did the same with my first build years ago and ultimately had to relocate it to under the gas tank. My current build has it mounted under the cowl in front of the passenger foot well. Good luck!
My problematic Set-up
clean install, i'm amazed at the talent shown in some of the home builds in the threads here. Thanks for the heads up on fuel
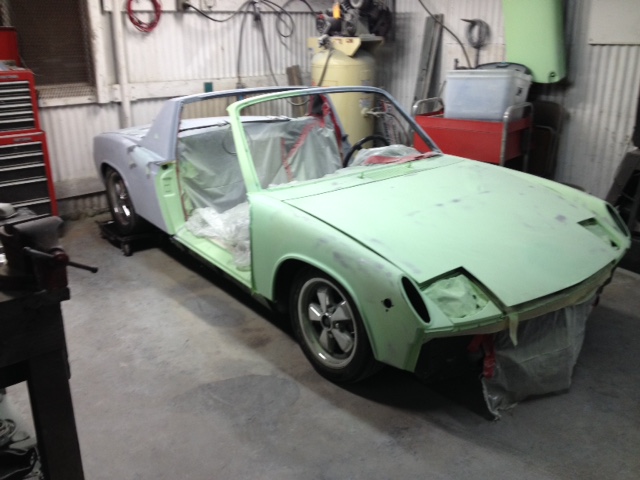
Posted by: vinniedatorch Oct 11 2015, 08:55 PM
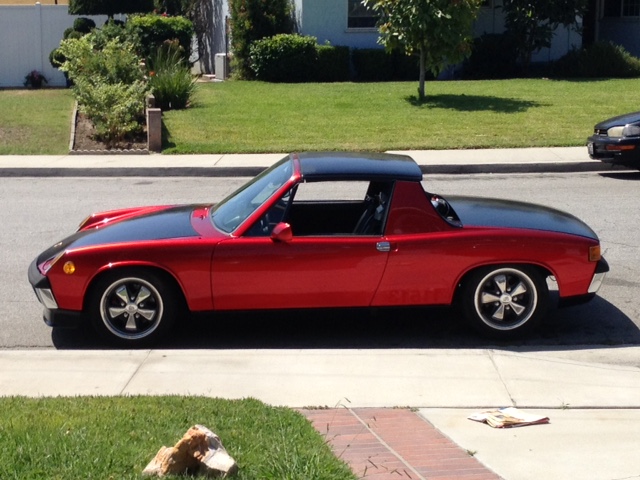
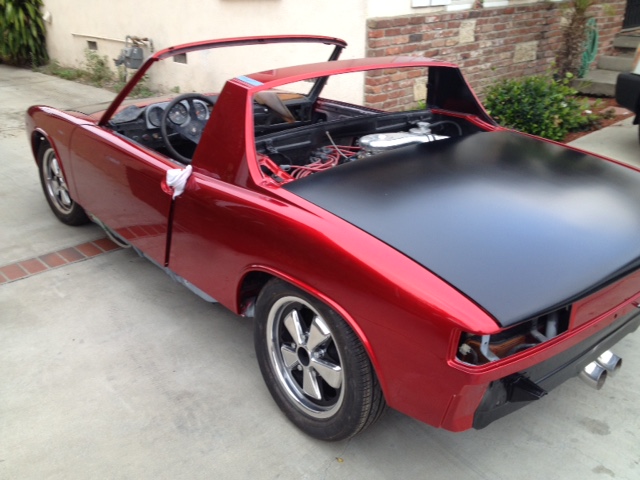
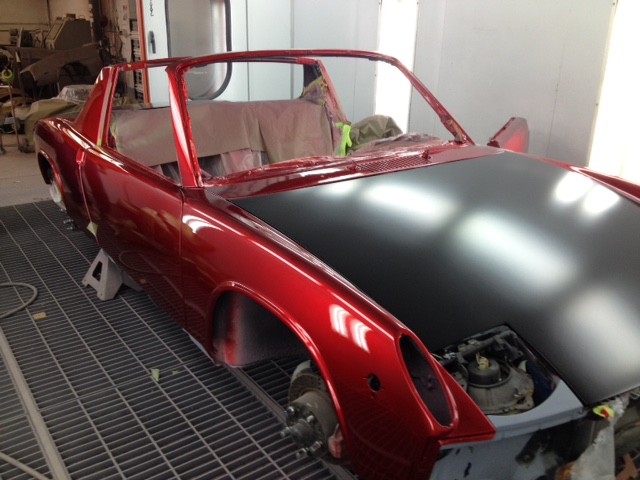
after a bit of work the car looks spectacular and the painter was happy that there wasn't any rust repair or body work(dents) that needed to be repaired. Paint and body was all provided by a friend in Huntington Beach Lance "Bones" Rowlett. Car is currently being driven and is a blast to drive. there are some finishing touches required a little overspray here and there, gauge cluster lighting needs to be looked at as the headlight switch needed to be replaced and I may have connected something wrong or blown a fuse. Next major acquisition would be a gearbox with taller gears as this thing gets up and boogies but runs out of gear on the frwy.
Thanks for all the kind comments, hope to see you all at the gatherings and on the frwys.
Posted by: Chris H. Oct 12 2015, 09:26 AM
Fantastic build. Paint is really amazing. Dr Evil can take care of your trans needs if you don't have anyone in mind already.
Enjoy it!
Posted by: Blue6 Oct 12 2015, 09:46 AM
That looks so nice I think you should drive it around town w/o rear lids!
That would be "outlaw!"
We got the opportunity to see this beauty at Bruce Stones swap meet on Sunday. The craftmanship is outstanding. Looks like Vinnie set a 914 body on a Pantera chassis....
Posted by: Mueller Oct 12 2015, 10:12 AM
Nice, nice and more nice.....makes me not want to take pics of my car and work 
(when I start working on it)
Posted by: matthepcat Oct 12 2015, 10:29 AM
What is that paint color called?
Posted by: Andyrew Oct 12 2015, 10:42 AM
Did a little work on interior to get it looking presentable, grey pepper carpet throughout, and some leatherette and tweed with some red stitch covered all the pieces as well as the home built console and armrest console gave me the look i'd hoped for. Nachos in Long Beach does good work and was happy to help. Now its off to paint
Great stitch work! What did that cost you if you dont mind me asking?
Posted by: Spoke Oct 12 2015, 02:59 PM
Awesome looking car.
That's a kickass power unit.
What kind of brakes do you have for it? Couldn't tell from the pics.
Posted by: vinniedatorch Oct 13 2015, 08:43 AM
What is that paint color called?
It's house of color candy red over Orion silver base
Posted by: vinniedatorch Oct 13 2015, 08:46 AM
Did a little work on interior to get it looking presentable, grey pepper carpet throughout, and some leatherette and tweed with some red stitch covered all the pieces as well as the home built console and armrest console gave me the look i'd hoped for. Nachos in Long Beach does good work and was happy to help. Now its off to paint
Great stitch work! What did that cost you if you dont mind me asking?
All the stitch and interior was done in stages as the project progressed and components were built but what I will say is I couldn't have had the work done anywhere else for less.
Posted by: vinniedatorch Oct 13 2015, 09:13 AM
Awesome looking car.
That's a kickass power unit.
What kind of brakes do you have for it? Couldn't tell from the pics.
Brakes are 5 lug conversions from 911
Posted by: matthepcat Oct 13 2015, 10:45 AM
I might suggest you add a thermal protector on the bottom of your rear trunk lid. Those mufflers could hear up your new paint unfavorably.
Great looking project!
Powered by Invision Power Board (http://www.invisionboard.com)
© Invision Power Services (http://www.invisionpower.com)