Printable Version of Topic
Click here to view this topic in its original format
914World.com _ 914World Garage _ BUILD-OFF CHALLENGE: MichiganMat
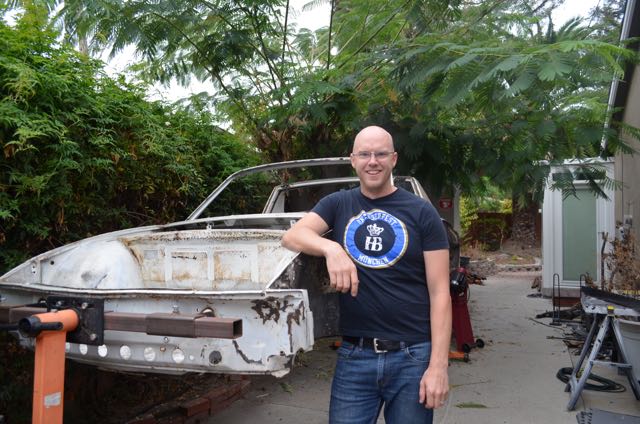
Posted by: MichiganMat Oct 7 2015, 02:41 PM
Hey er'body, Im MichiganMat from San Jose and Im building a 914.
Backstory:
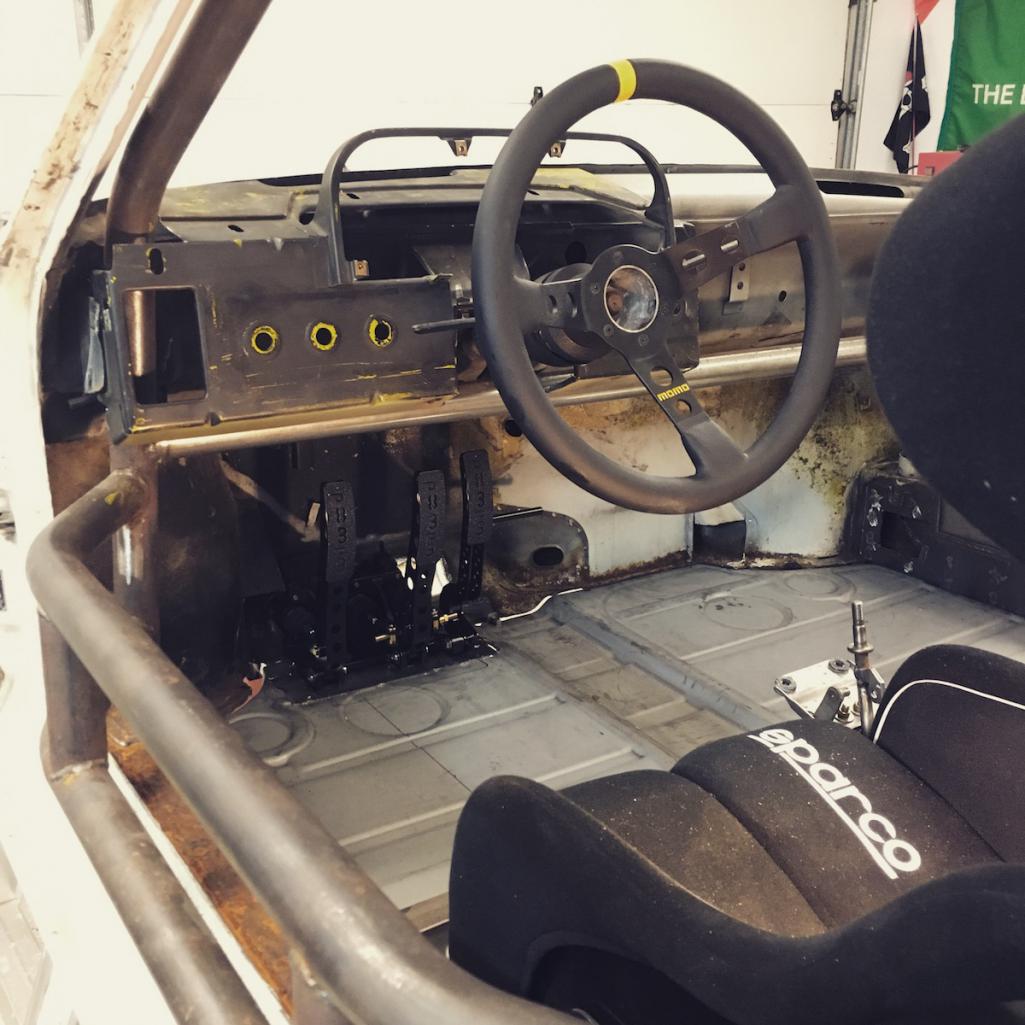
This summer I had the pleasure of picking up a '75 914 chassis here in San Jose for a mere $300.
It came with with virtually nothing:
no driveline, no interior, no pedals, etc. Stripped, but solid, with minimal overhead and cost.
I've been building 911s for many years now and had an extra set of wheels and 911 front struts in my shed, so I thought hey, lets do this.
http://forums.pelicanparts.com/porsche-911-technical-forum/488187-help-me-style-beat-up-old-912-a.html too, so with that project wrapping up Im ready to jump into another.
The Plan:
Well, I got the car for cheap, and I've already got a perfectly good '75 911S to daily/rally/etc with, so the plan is to build a stripped down 914 racer for AX and track fun.
The car will be getting:
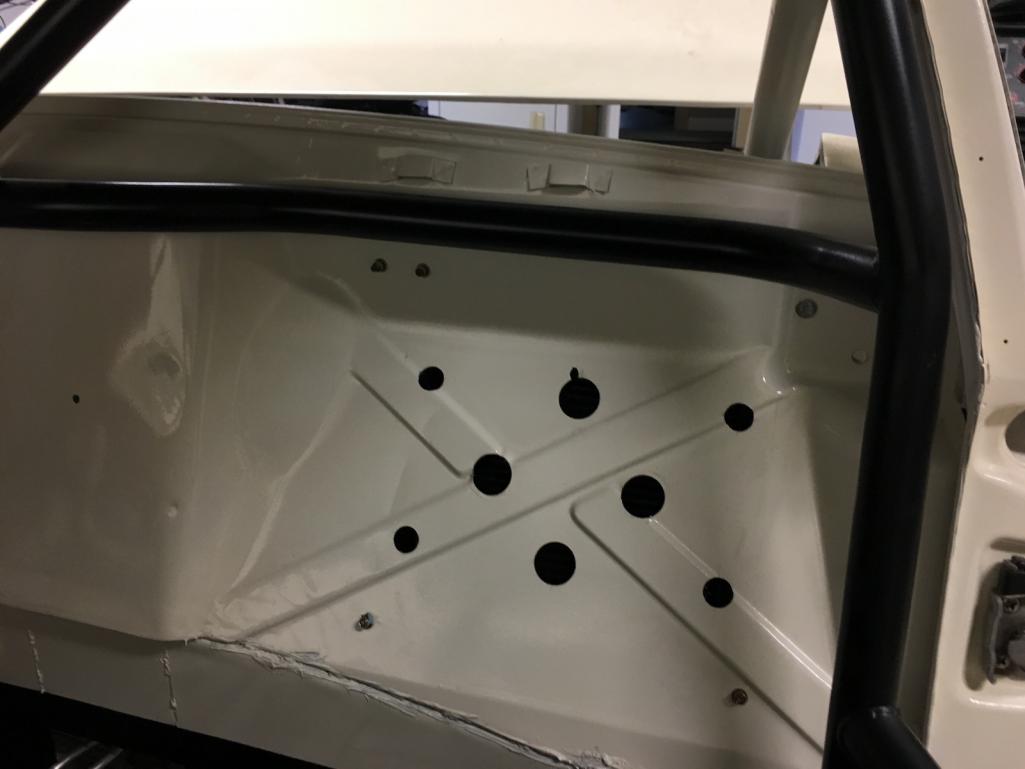
- Tangerine Racing rollcage, tied to 8pts, with nascar door-bars
- Rennspeed fiberglass body (fenders f&r, hood, trunk, and both bumpers)
- Mad Dog chassis reinforcement kit and hell-hole repair
- Resto-Design floorpans, seat areas dropped by 2", with custom tunnel
- Tilton pedals
- 5 lug conversion
- 16x7 Fuchs all the way around with 2nd option of 15x7ATE's with canti slicks
- /likely/ wrx drivetrain, but Im exploring my options...
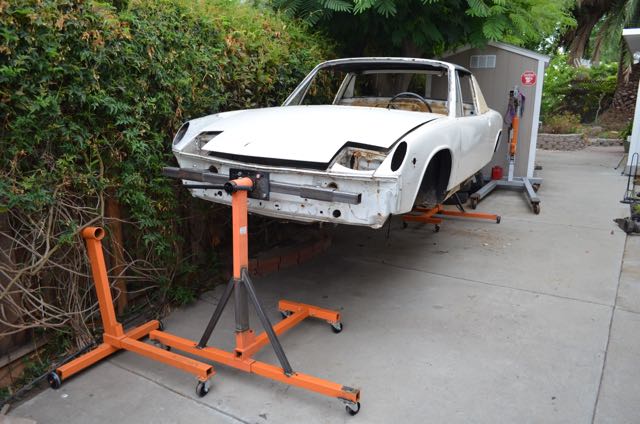
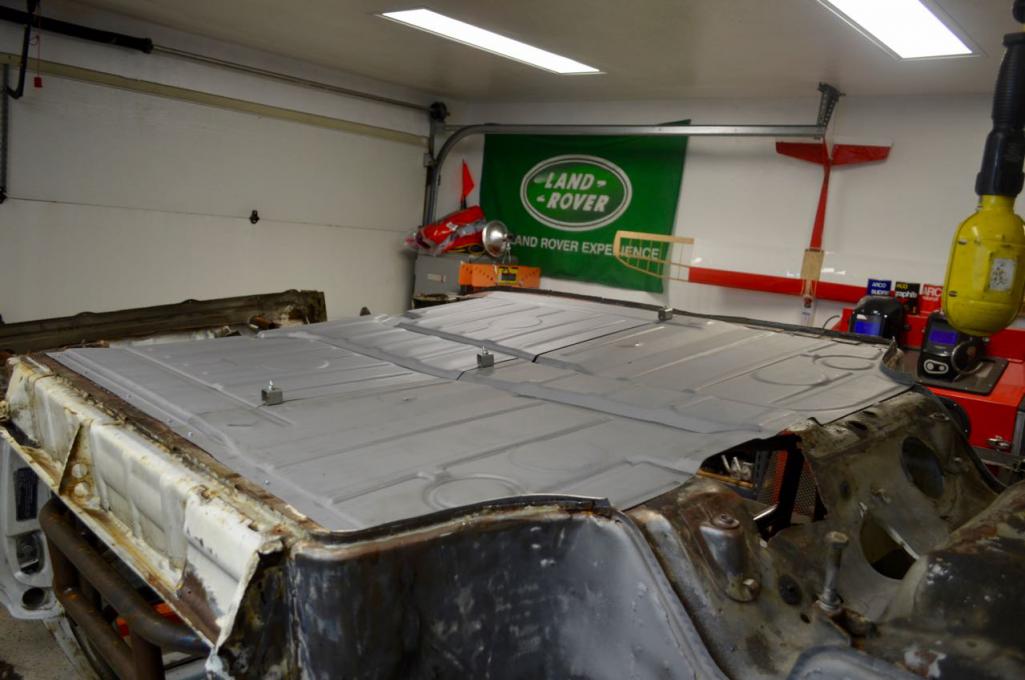
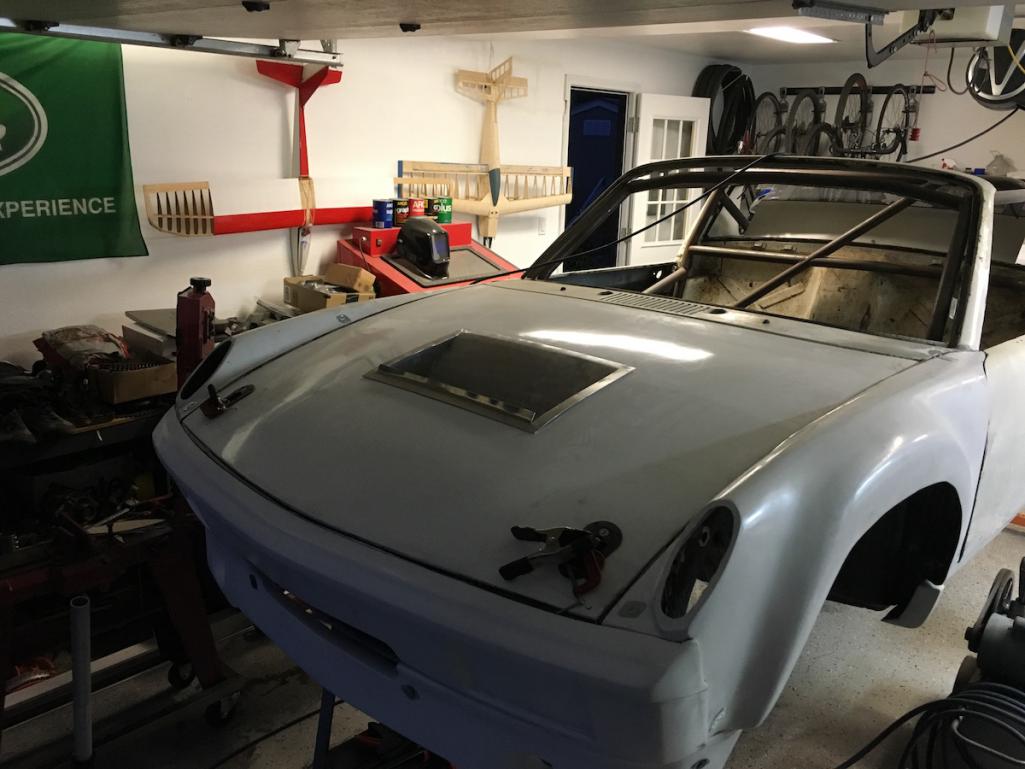
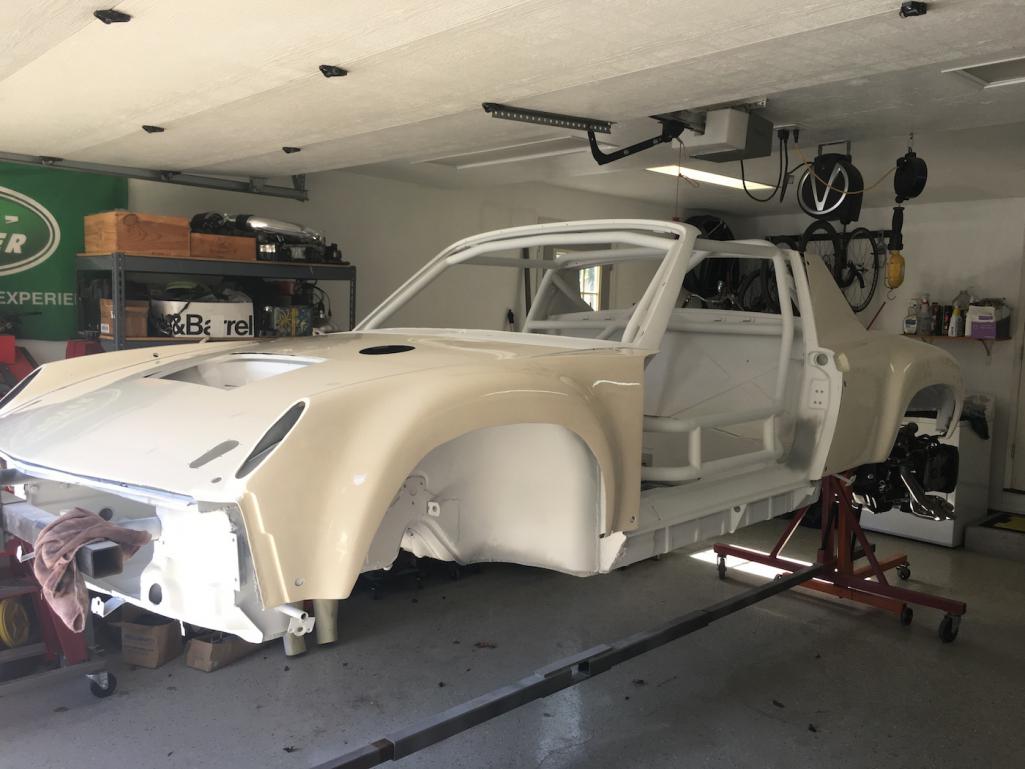
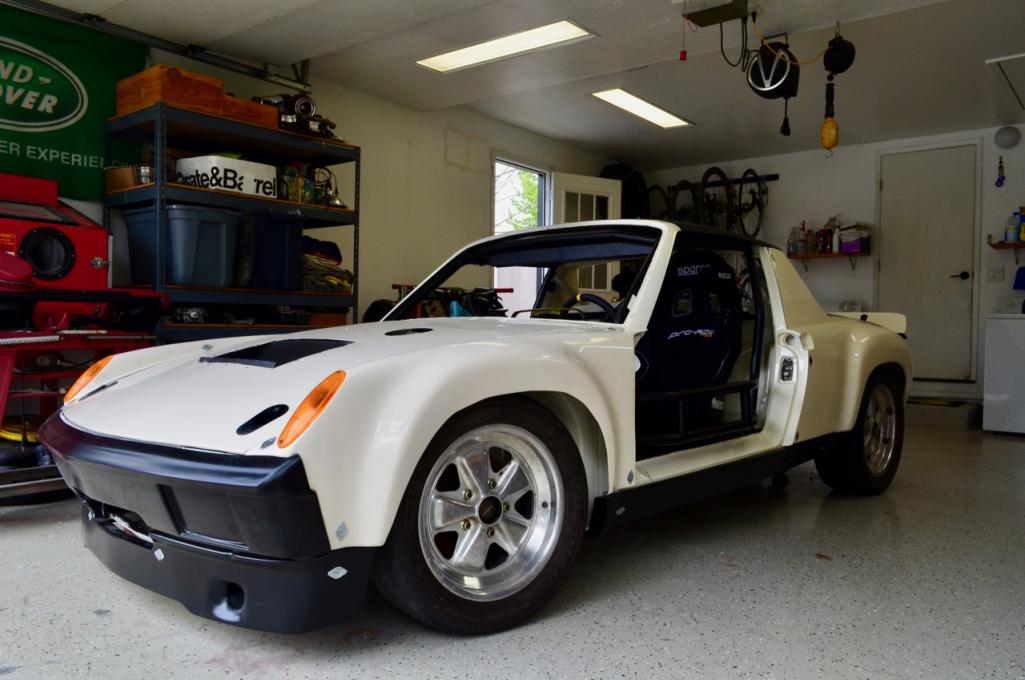
Where sits today:
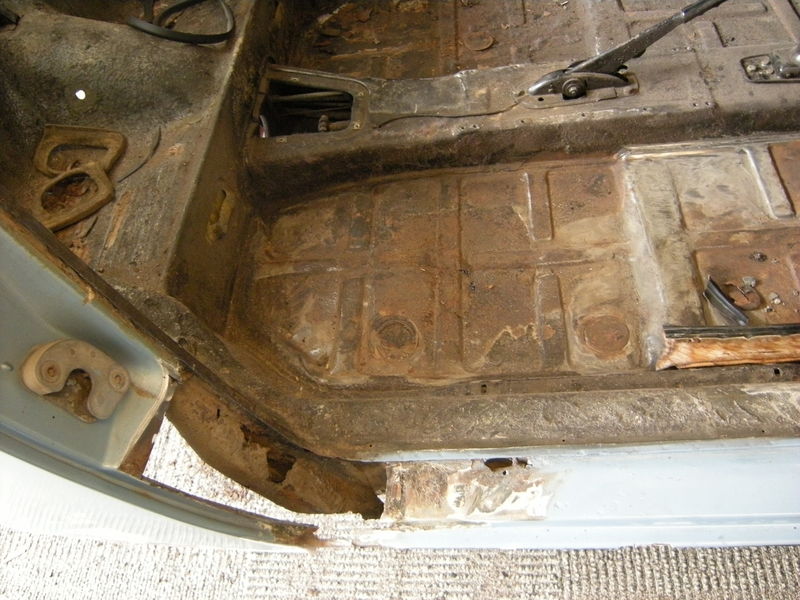
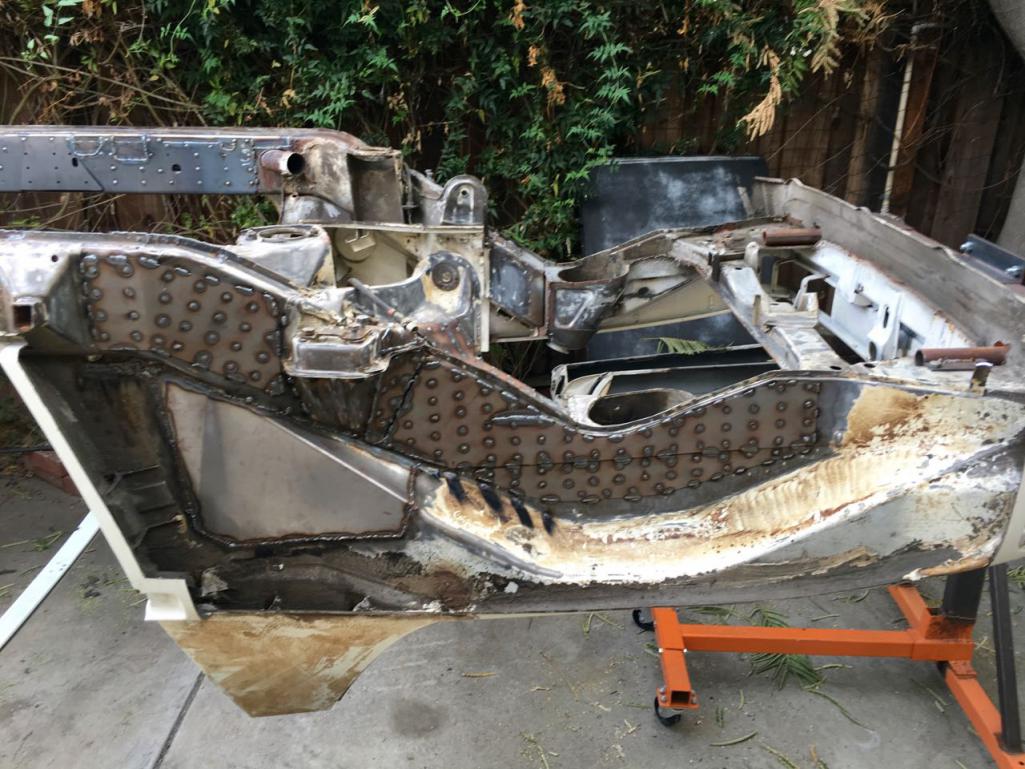
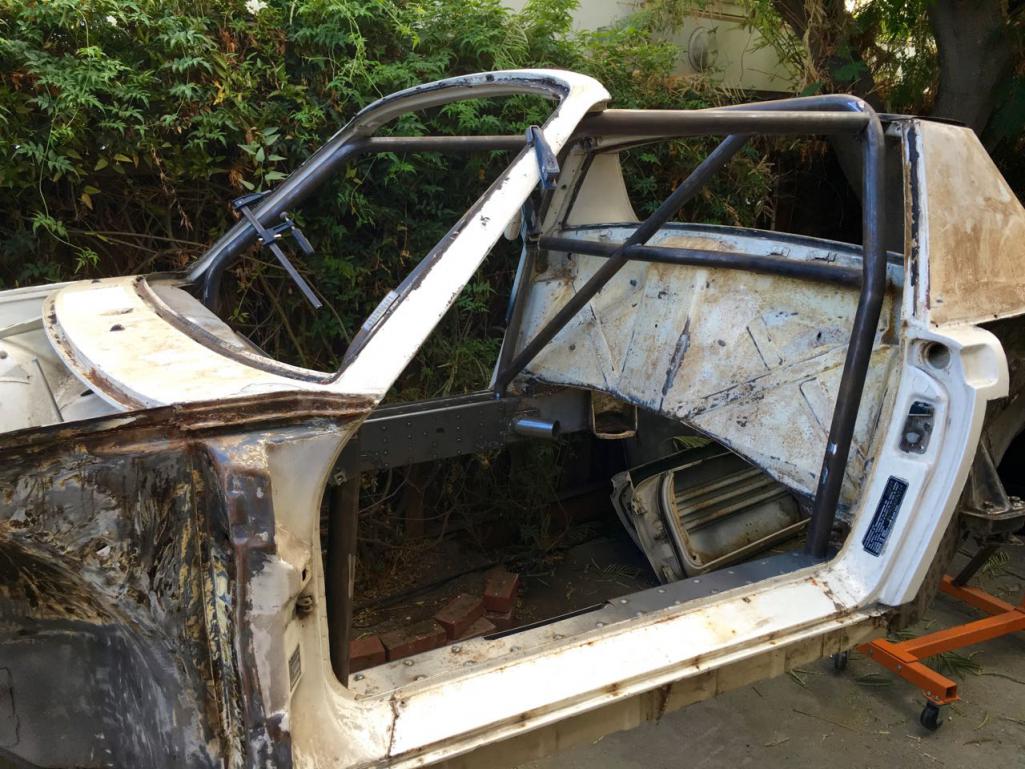
I picked up the car in May and I've since then I've put it on a home-built rotisserie, cut the pans, tunnel, trunk, headlight buckets, and front fenders out of it, and fixed the hell-hole area.
The pans were totally rotted, the battery tray was nonexistent, the fenders on all 4 corners had damage. Pretty easy to make the decision to start fresh, haha.
Today, most of the chassis kit is installed but I can't finish it until the roll-cage is put in. Tangerine is almost done with the cage so it'll be another week or so until I see it.
In the meantime, the plan is to clean up the wheel-wells, fix the rust in the longs, put in the trunk cross-sections, and primer the reinforcements.
Then I'll get to work on the tunnel, mod'ing the pans, installing the fiberglass, etc.
Anyways, hello, nice to meet you guys, and Im looking forward to the challenge!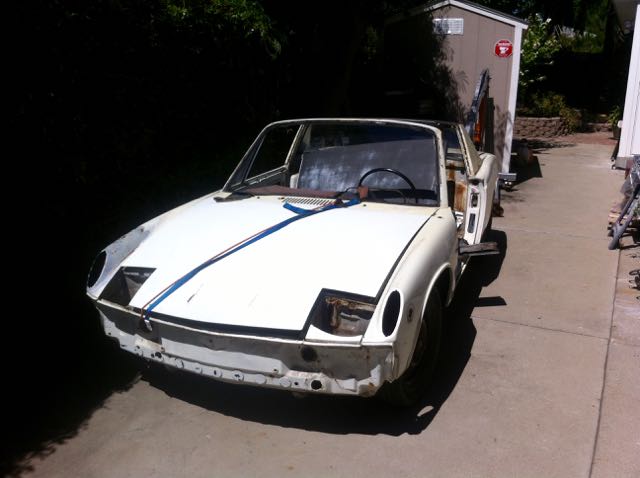
Posted by: mikedsilva Oct 7 2015, 03:05 PM
awesome!
Now let's see that 912 with the sti motor!!
Posted by: MichiganMat Oct 7 2015, 03:39 PM

awesome!
Now let's see that 912 with the sti motor!!
I added a link to the build in the description, but its here too: http://forums.pelicanparts.com/porsche-911-technical-forum/488187-help-me-style-beat-up-old-912-a.html
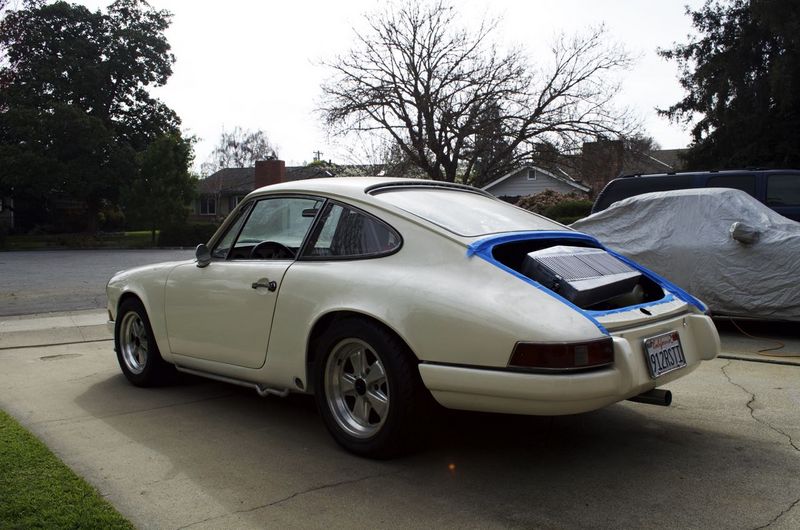
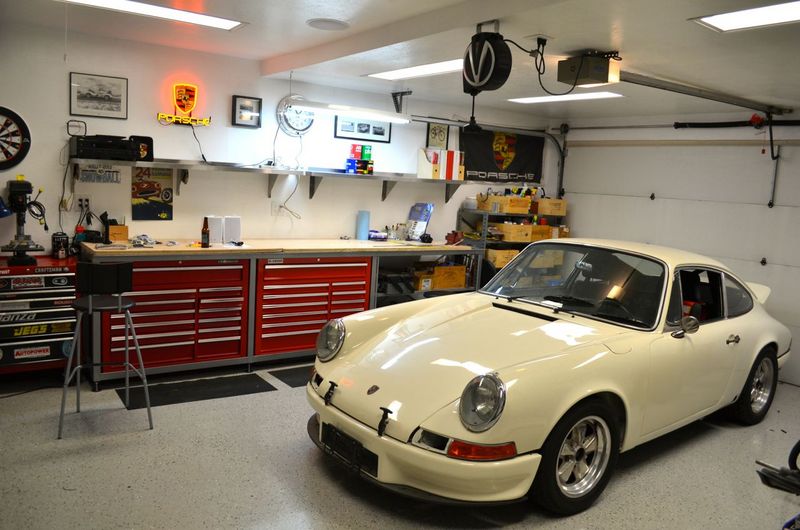
Started with this:

Dealt with this:

Finished with this:
Posted by: 914forme Oct 7 2015, 05:31 PM
Wow 
And I would add to your list if it was me. Get a set of 914LTD stiffeners, the Mad Dog is good stuff, 914LTD goes front to back. Pickups the rear suspension point, unless your moving the pickup points. Since you found tangerine racings website I am sure you noticed all of Chris trick suspension modifications. 
Enjoy the ride, can't wait to watch the build
![popcorn[1].gif](style_emoticons/default/popcorn[1].gif)
Posted by: matthepcat Oct 7 2015, 05:51 PM
That 912 is fuch'n awesome. I want to come see it in person!
Looking forward to seeing your 914 project....I am local to help.
Matt
Posted by: RobW Oct 8 2015, 01:01 AM

Posted by: MichiganMat Oct 15 2015, 09:25 PM
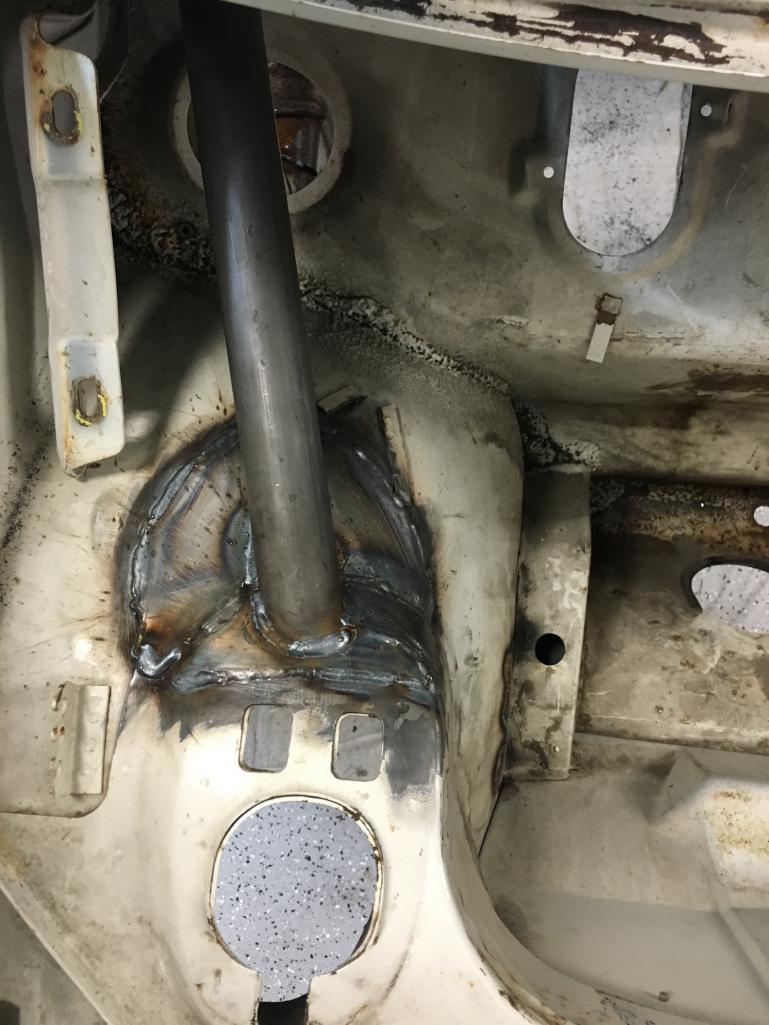
Made some good progress recently:
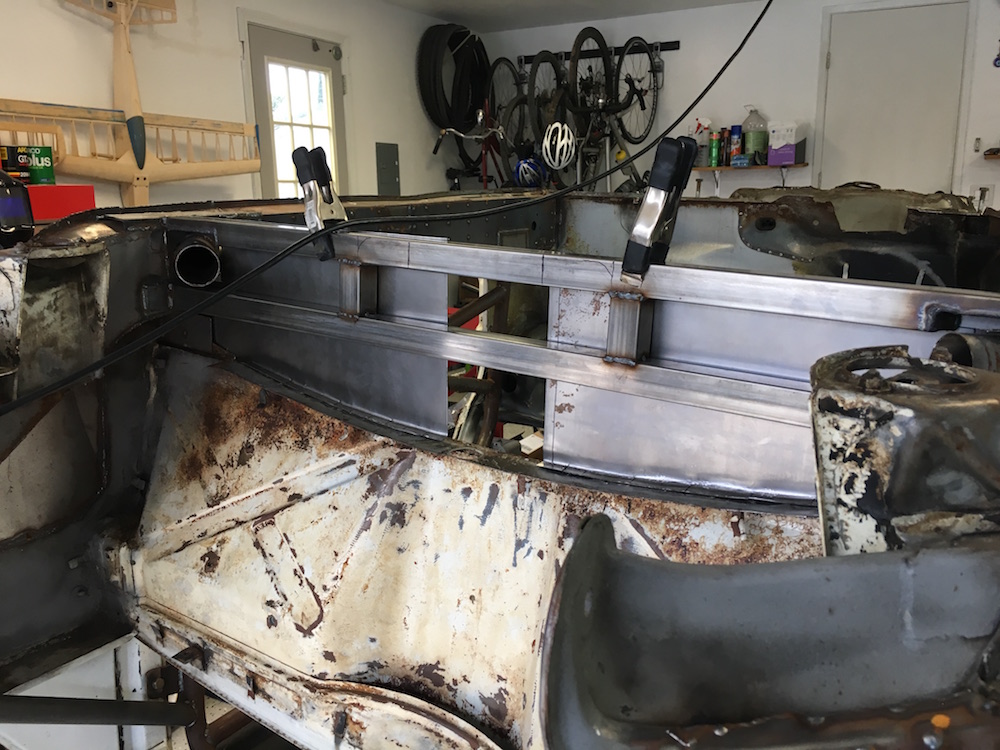
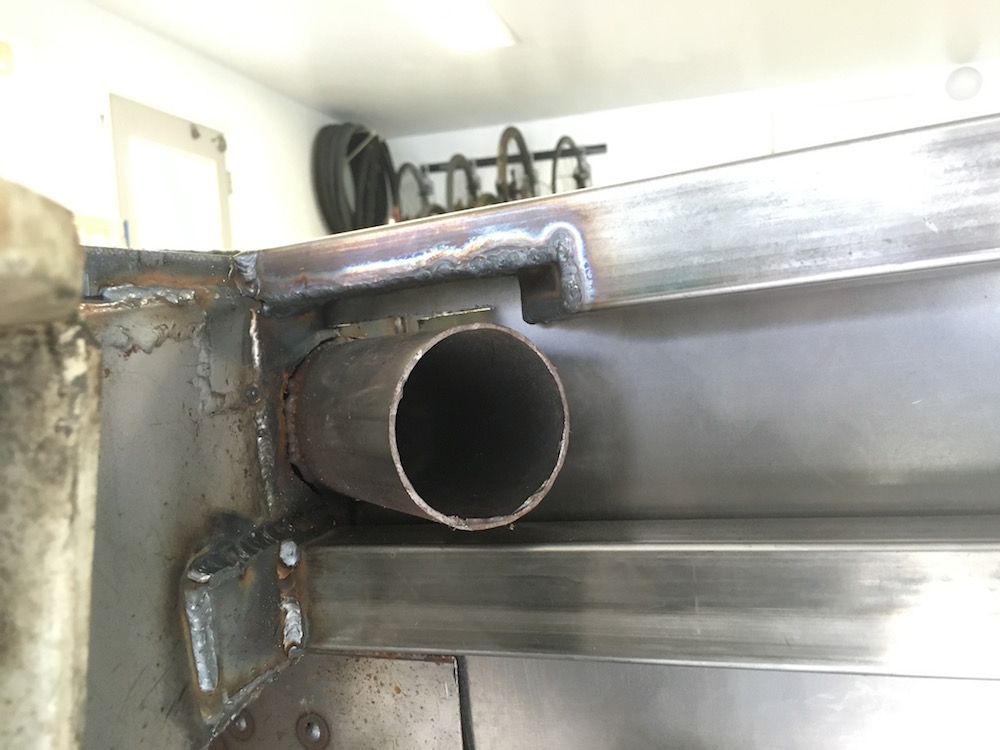
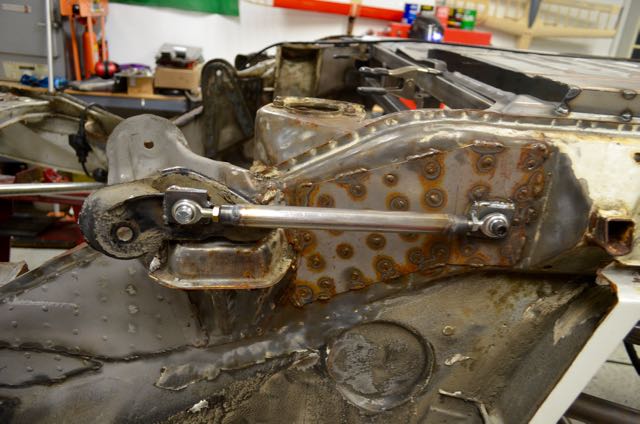
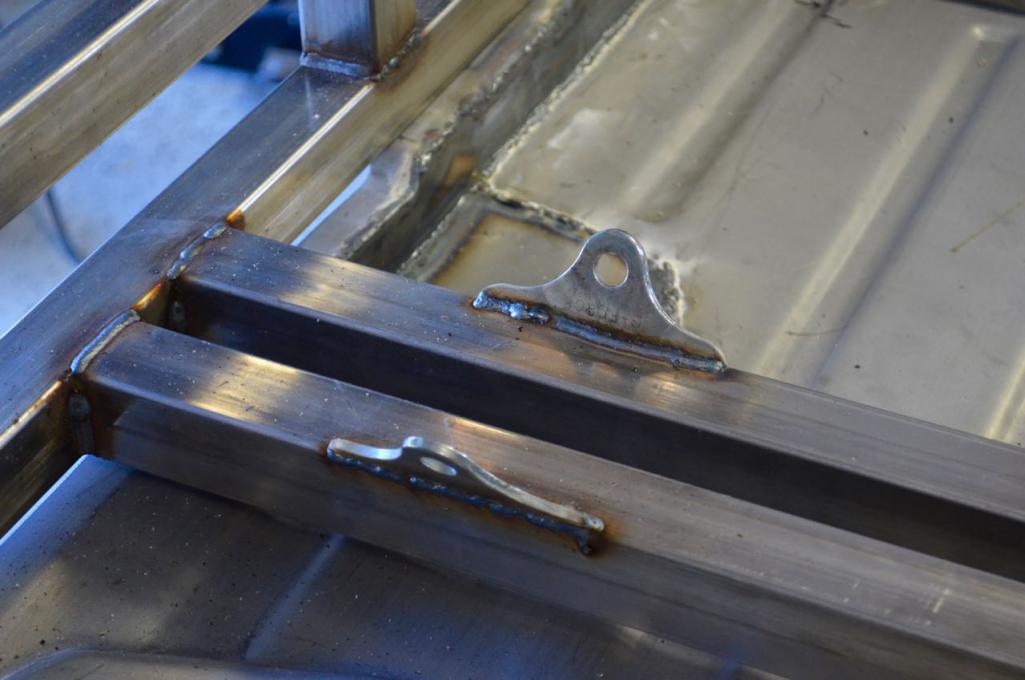
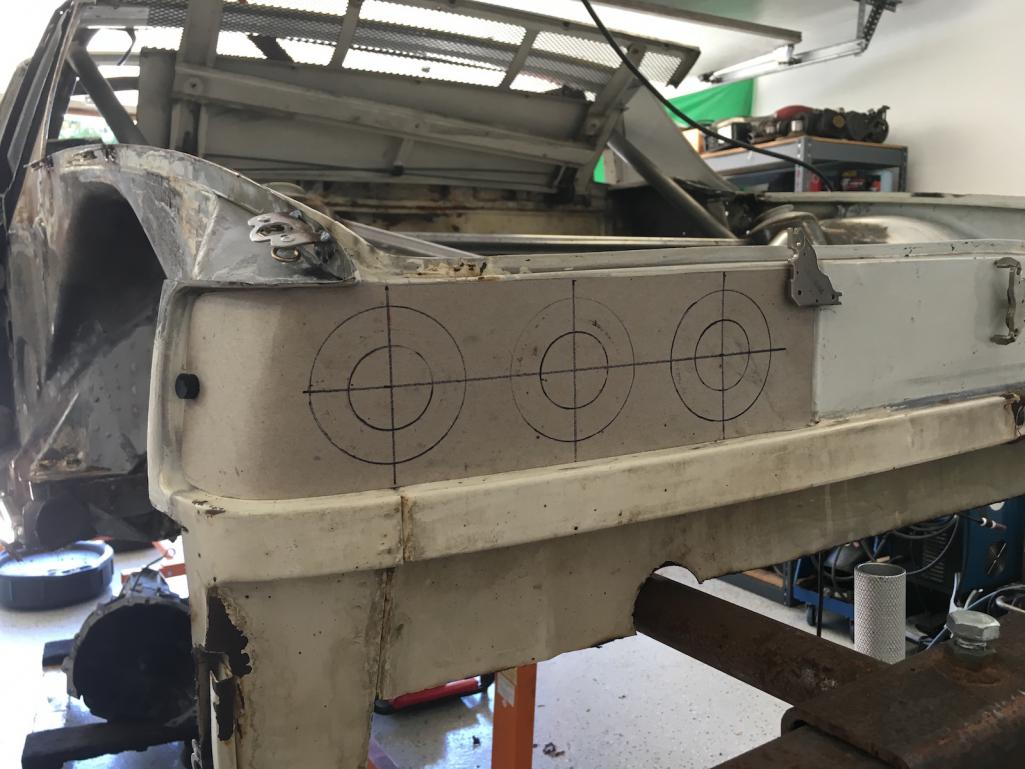
- Welded in mounting plates for rear suspension trans-mount crossbar
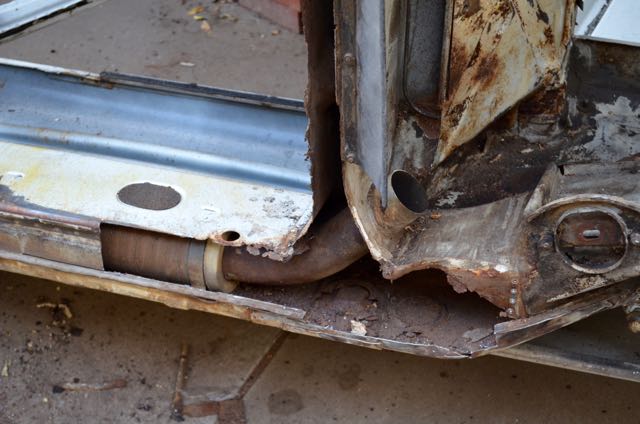
- Finished up rebuild of passenger side heater tube
- Finished repairs to passenger long, lots of rot to replace
- Finished up work on the chassis stiffening kit. The longs are burned in.
- Received my roll cage kit from Tangerine today, started with mock-up
Feels like good progress, though welding this stuff always seems to take longer than expected :/ Working hard to get the wheel-wells stripped and cleaned up, still thinking about paint. I would absolutely *love* to get this chassis acid-dipped or bead-blasted, but Id really rather put that cost towards speedy bits. Its a trade-off, need to think about it a bit more.
Thanks for reading!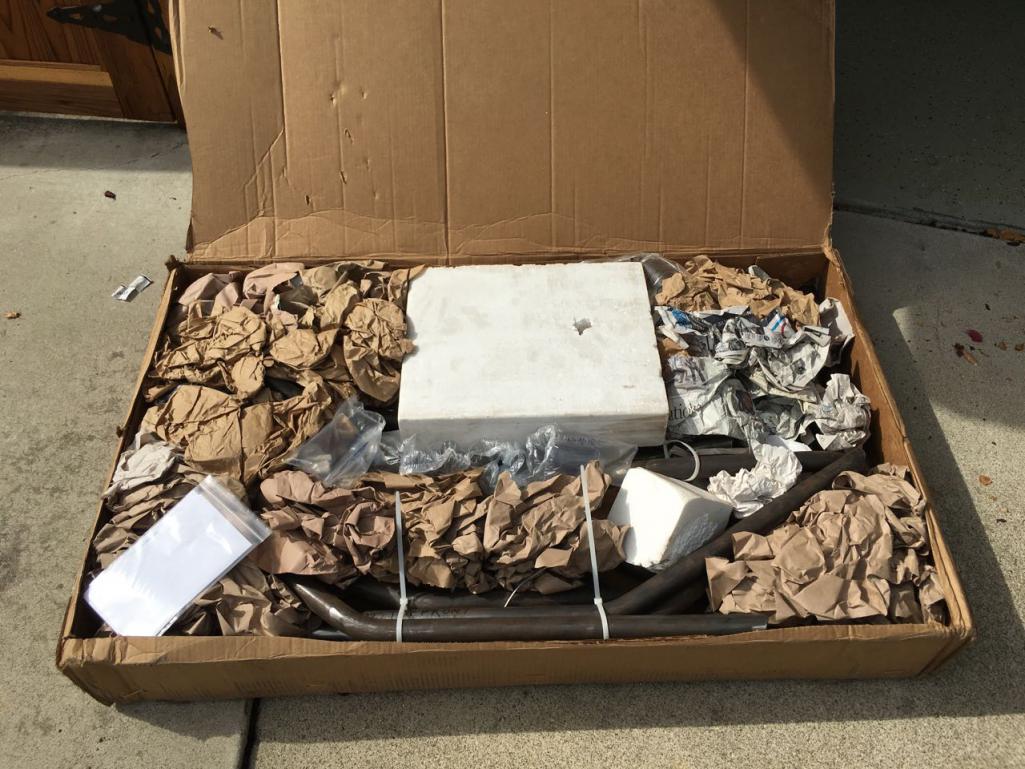

Posted by: ThePaintedMan Oct 15 2015, 09:41 PM
Cool build(s). I know you're still in mock-up phase, but can I suggest, from experience, that you consider bracing the door gaps, checking dimensions and consulting with Racer Chris before you finalize the cage? Welding that cage in can REALLY change the dimensions from all the heat. I believe the common practice is to actually have the car on jackstands when welding it in. But Chris would know the best method for sure.
Posted by: MichiganMat Oct 15 2015, 10:58 PM
Cool build(s). I know you're still in mock-up phase, but can I suggest, from experience, that you consider bracing the door gaps, checking dimensions and consulting with Racer Chris before you finalize the cage? Welding that cage in can REALLY change the dimensions from all the heat. I believe the common practice is to actually have the car on jackstands when welding it in. But Chris would know the best method for sure.
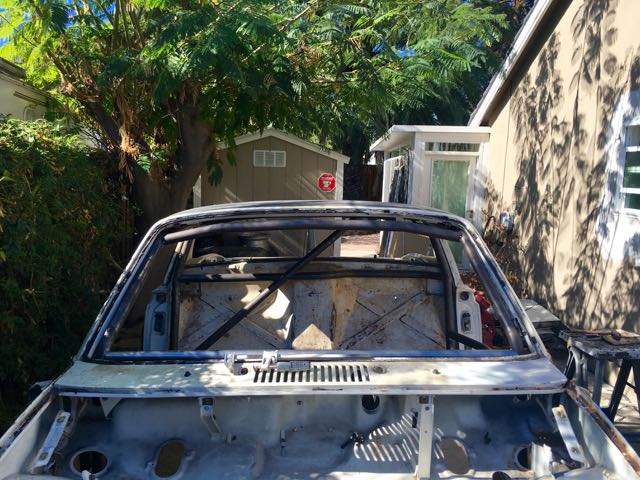
Thanks, will do. I measured today and Im pleased to say my windshield-to-targa bar is perfect on both sides.
I am sympathetic to the weight of the cage flexing the longs while its on the rotisserie, so Im going to keep a close eye on it. Tangerines instructions are pretty specific on the installation too, basically tack it all up, then burn in everything but the feet, then cut the tacks on the feet to relive tension, then finally burn in the feet. Seems logical, heh.
Question for you: concerning the chassis kit, is it common to just stich-weld every few inches or should I be welding a solid bead around the entire outside the panels? Do you know?
Posted by: Racer Chris Oct 16 2015, 05:03 AM
Question for you: concerning the chassis kit, is it common to just stich-weld every few inches or should I be welding a solid bead around the entire outside the panels? Do you know?
Stitch is better.
Use sealant if you want to keep moisture away from the space between.
Posted by: mgp4591 Oct 22 2015, 02:47 AM
Looking forward to more of this build! You've obviously got the skill and the tools, your experience speaks for itself with the pics of your previous builds. I'm getting ready to tackle my floor and my car looks really similar to yours in the progress phase. You're ahead of me in a few areas but seeing someone else in the same general spot of their build is always intriguing! Keep up the good work while I hijack your ideas! 


Posted by: 914forme Oct 22 2015, 02:55 PM
Did not see it listed, what motor are you planning on stuffing into this 914?
Seeing how nice Chris' roll cage fits to the A pillars, I need to send him a note. Thank you for posting the pictures.
Posted by: MichiganMat Nov 2 2015, 10:41 PM
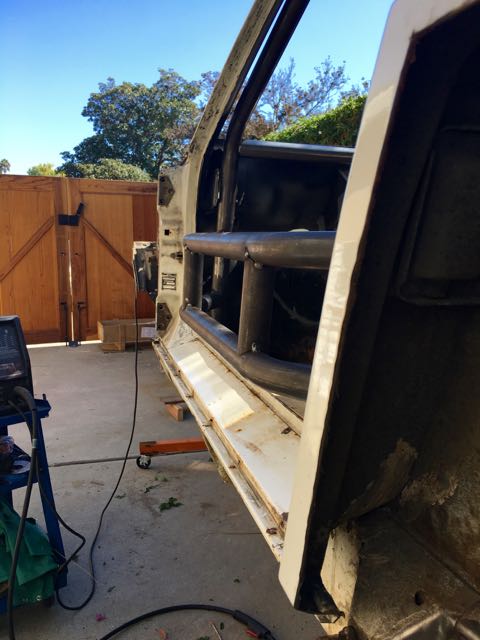
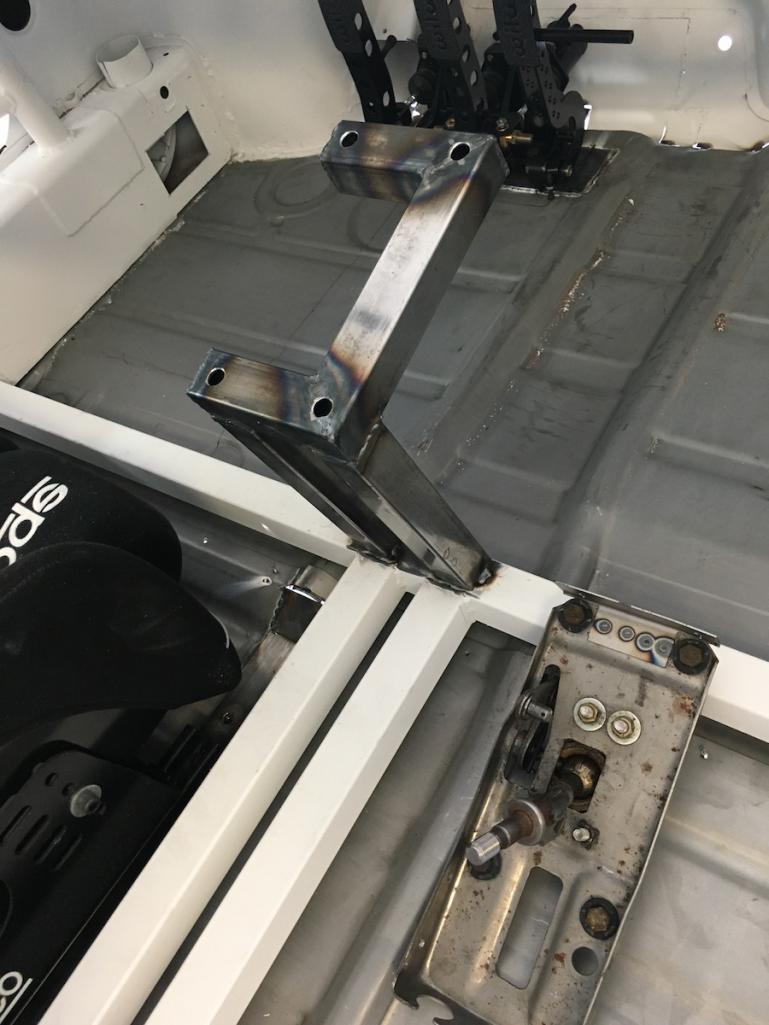
Finally was able to get some time on the project this weekend, and it was all dedicated to the roll cage. Was able to fit the driver door bars, the knee bar, and the windshield bar. These are just tacked in for now. The passenger door bars still need to be cut down and fitted.
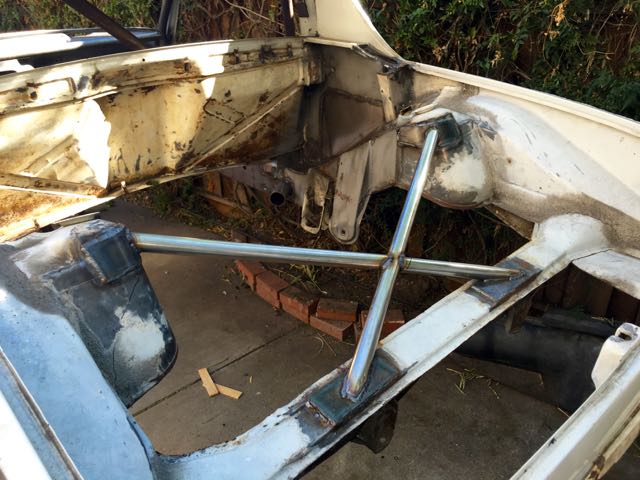
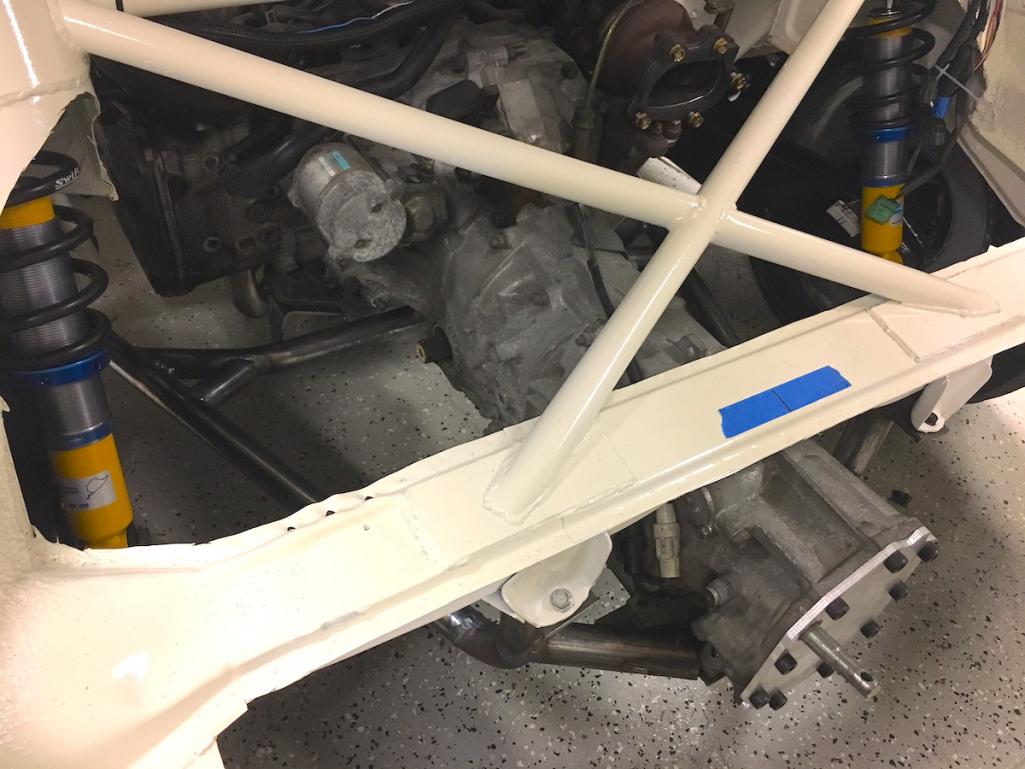
I was also able to add the trans reinforcements, but I still need to add a cross bar between the towers.
Finally, I was able to cut and burn in the backing plates to tie the main hoop of the cage to the rear shock towers. I also plan to tie in the front towers to the forward hoops but I haven't gotten around to making the plates yet. Soon.
This chassis fab stuff just takes so long and its so tempting to cut corners for the sake of expediency. A day here, a day there, its just a matter of being patient and working hard. I got the sign-off from Chris @ Tangerine on the placements, so Im feeling pretty good about burning it all in once the passenger bars are fit. Onward!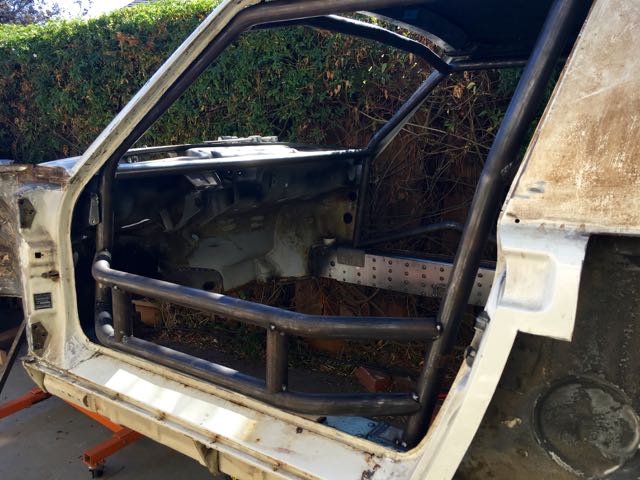
Posted by: Andyrew Nov 2 2015, 10:59 PM
Great looking progress!
Posted by: 914forme Nov 3 2015, 08:39 PM
Reason I asked what engine your running, if it was anything I could do a firewall mount with, I would cut out the -4 mounts. Get rid of the heater channel, and box this up to the rear shock towers that also ties in the rear suspension pickup.
Red Cut, blue add.
Keep up the great work
Posted by: Mueller Nov 3 2015, 10:47 PM
Awesome progress....terrible use of the word "burn" 
Posted by: MichiganMat Jan 16 2016, 03:37 PM
Its been a long time since my last post, the holidays really sucked up all of our time. My brother and I were able to get his car out on the road and I was able to start finishing up projects on my 911. The 911 is just about wrapped up so the 914 will be coming into the garage shortly, so I get started on the 914 floorpans.
So the floorpans... The plan is to cut the bottom out of the driver side of the rear pan and drop the driver seat down by an inch or two. I've seen a few examples, Patrick Motorsports has a couple of cars that they've done this to, I think its smart: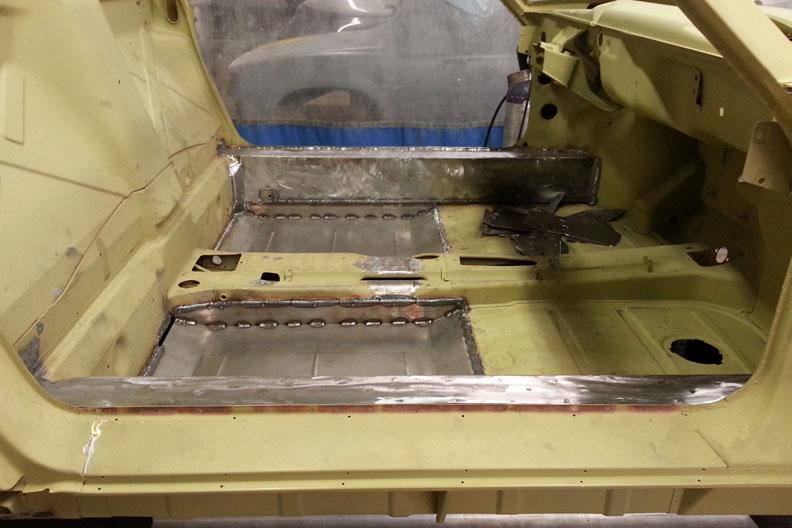
I had to cut the entire floorpan and center tunnel out of the car to fix the longs, so before I can start putting in the pans I need to fit the seat. I've been hedging about what seat to buy for a few weeks now, but was lucky that a friend had the exact seat I was thinking of. I picked it up this morning and will start fitting it with a custom tunnel.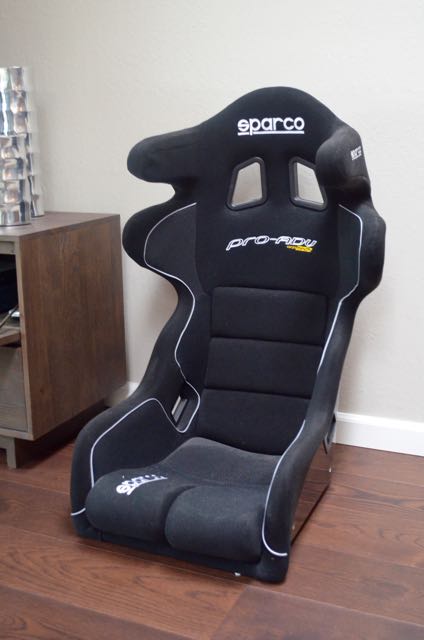
Progress is slow but it'll start ramping up in the coming weeks.
Posted by: MichiganMat Jan 26 2016, 02:49 PM
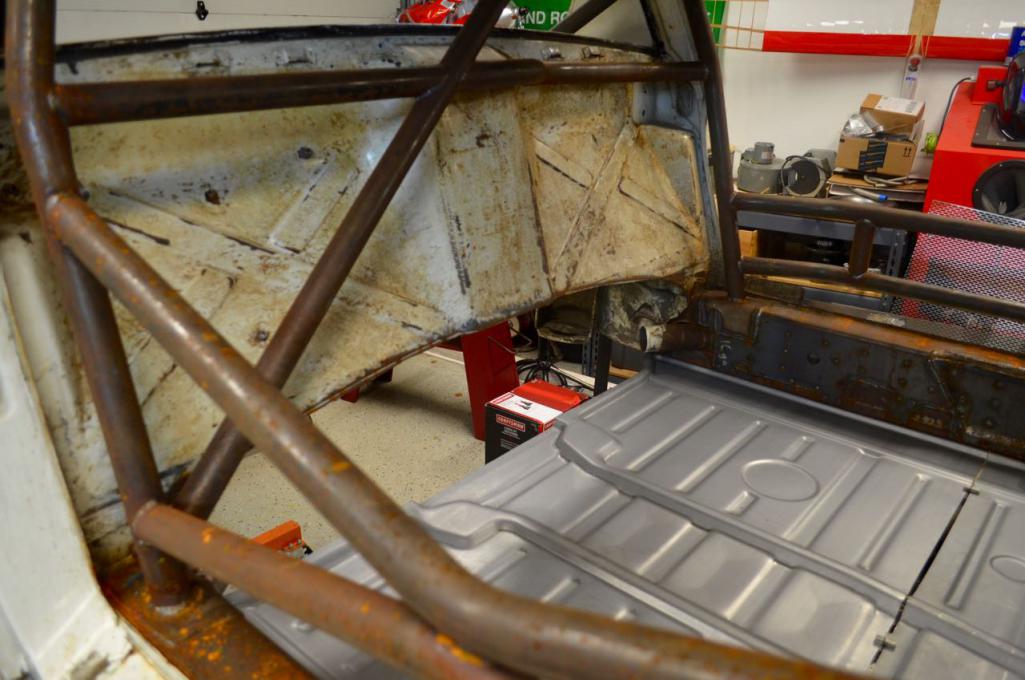
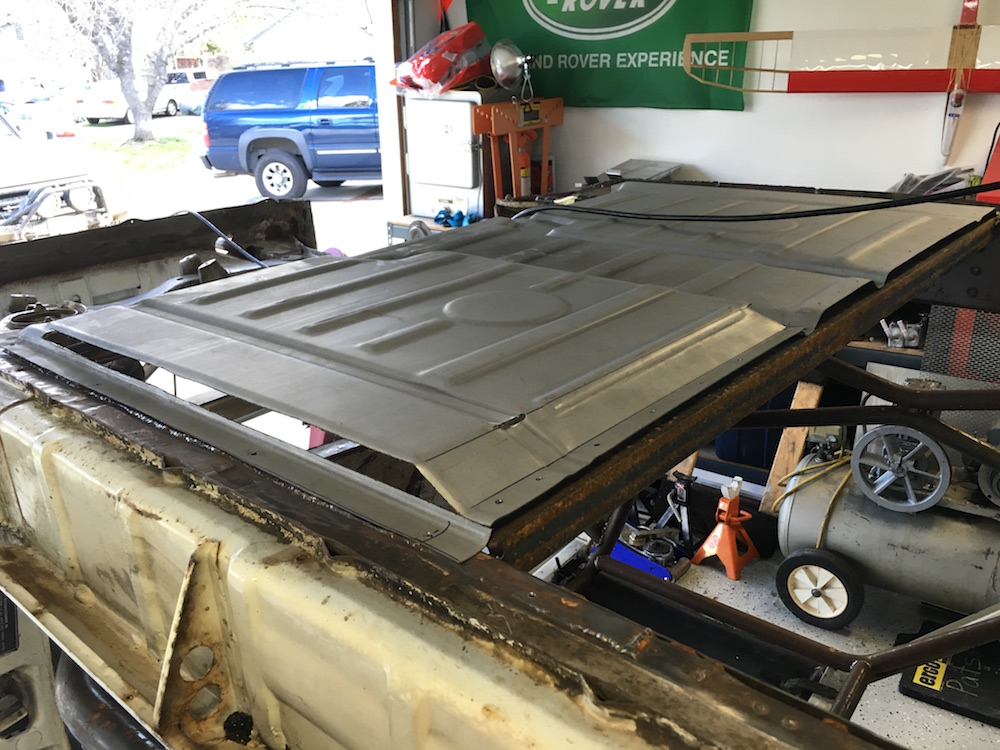
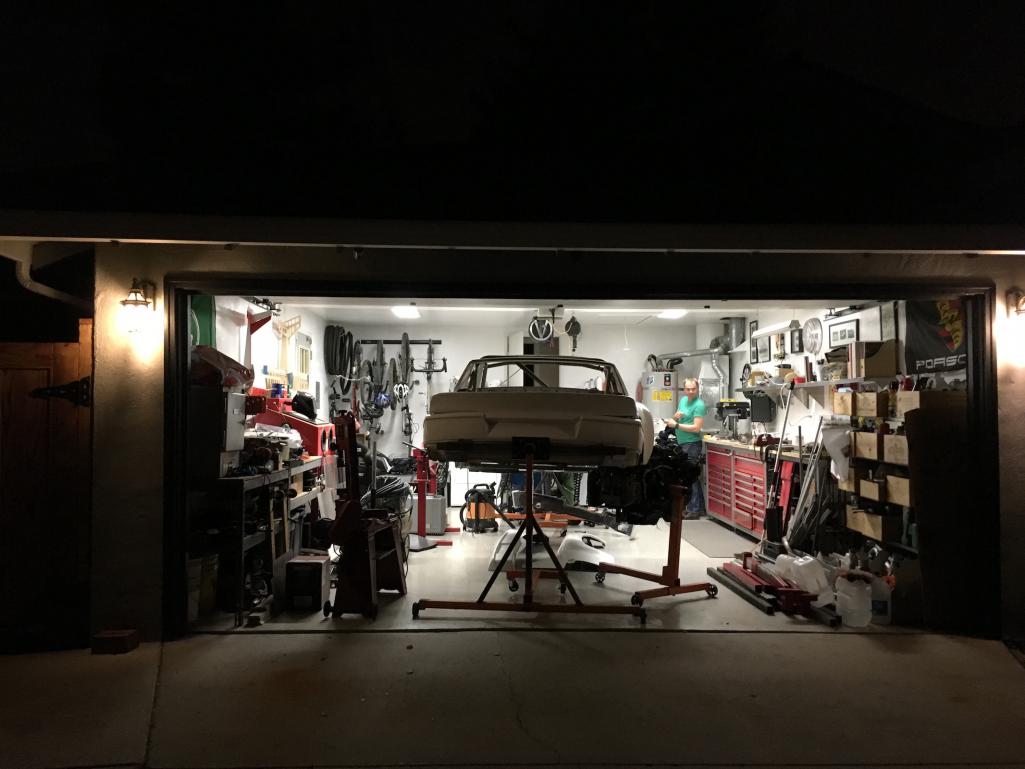
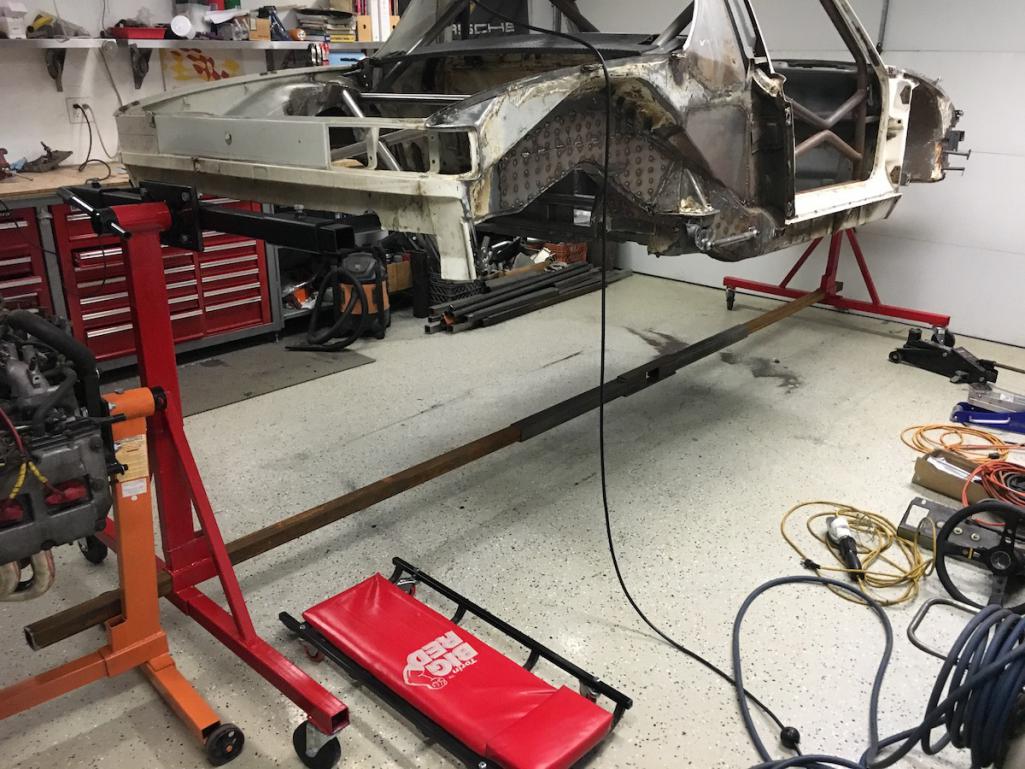
Brought the chassis into the garage, she's finally out of the elements and the real work can get started.
I've started test fitting the front and rear floor pans. Don't sweat that rear pan placement, I found out I was doing it wrong AFTER screwing it down. No worries, it's not permanent.
Fitted the seat, looks like its going to work. Im still planning to drop the seat pan down by 2" and I need to get busy on the custom tunnel.
Im investigating drivetrains (likely EJ205) and pedal clusters this week and will be picking up the Rennspd bodywork in February, excited to get my hands on it all.
Also thinking about gusseting the front hoops of the cage to the A-pillars. Does anyone have an opinion on it?
Thanks for looking! 
Posted by: 914forme Jan 27 2016, 06:33 AM
Unless you tie in the roof, you are only gusseting 18 ga sheet metal. You are basically re-enforcing the A-pilar. Worth anything, maybe in a crash, for stiffening on an open car, not really. Now if your going 916 style roof, I would say go for it. But DOM always wins over sheet metal. And depending on the class if you ever get the racing bug, they count as another point of attachment. For attachment points I try to make them as big as I can and cover at least 3 planes of contact. But again, people have rules, so you have to read them carefully. In NASA we get points per attachment point of the cage beyond 6 "older rules when I built the car" have not read this years yet. So if I was taking points I would make sure it had a valid result. Also if I was gusseting a bar into the chassis it would be the cross bar at the front. And I would take the dash out, run it to the front fire wall and gusset it across the entire wall. That gets it away from your knees and adds a huge amount of chassis tie in. I also added a bar across the back behind my seat that went down picked up the center seatbelt points and back across. Any time you can make a complete hoop, and not rely on the chassis the better off you are. Next I would concentrate on the tie into the suspension points.
? how much of a street car do you want this to be 
Posted by: MichiganMat Jan 31 2016, 12:33 PM
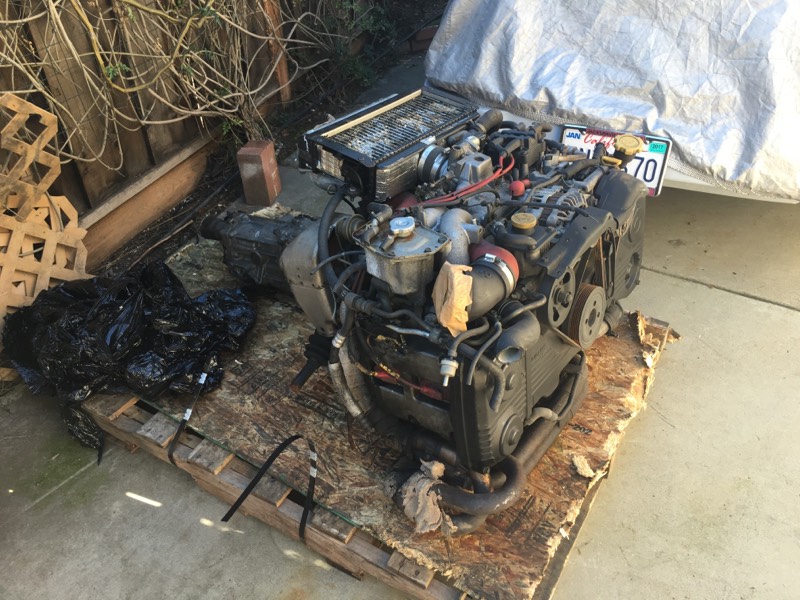
Bought the motor and trans this past week. EJ205T from eBay. Great deal, couldn't pass it up.
Also started work on replacing the firewall that rotted away. Its coming along nicely and will be a good foundation for a center tunnel, for tying in the dog-ears, and for mounting the engine.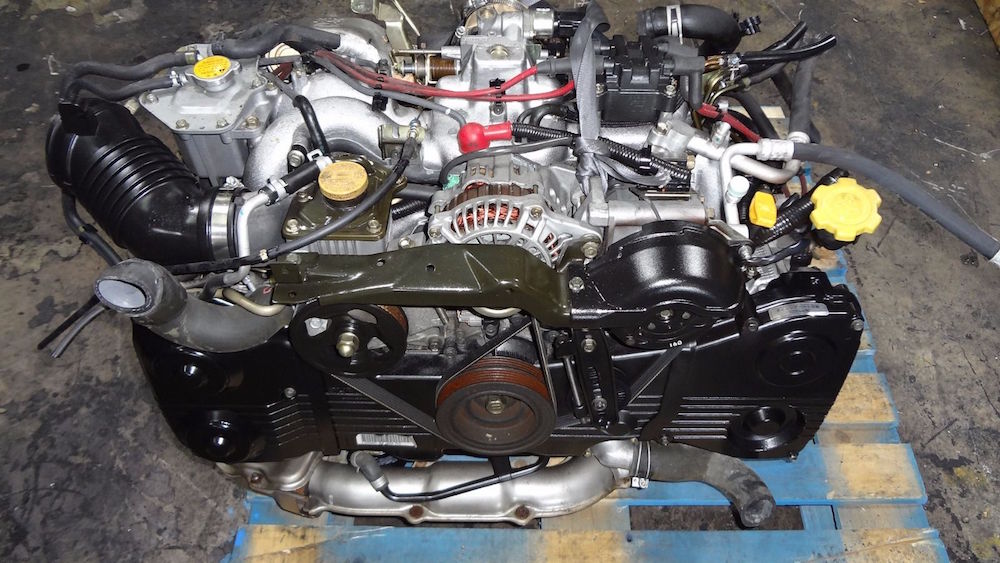
Posted by: MichiganMat Jan 31 2016, 10:32 PM
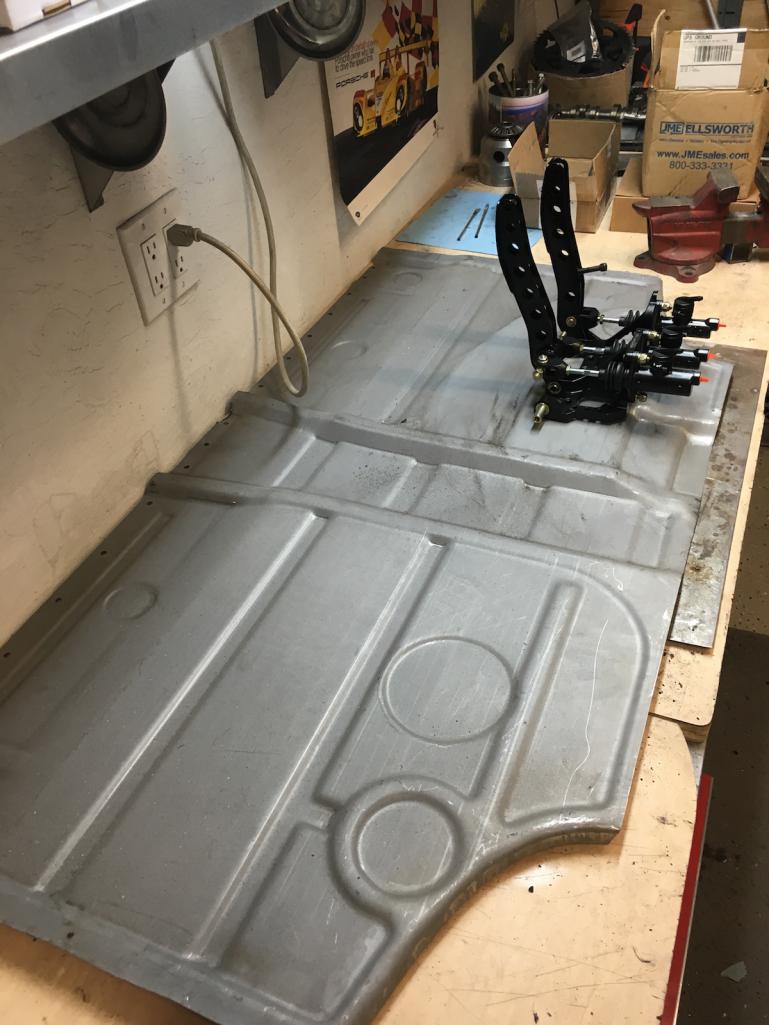
Today I worked on dropping the drivers floor pan down by 1 inch. Cut along the outside of the pan, made a few bends in the metal brake, and welded a 1" strip of 16ga around the perimeter. The goal is to get the driver seat nice and low, Im 6'1", need to get my helmet away from the top of the roof and below the roll cage. I've seen this done on a few of the Patrick Motorsports builds, seems like a well-known mod. I still need to figure out how to mount the seat brackets to the pan and decide if I'll use sliders or not. A few questions left to be answered...
I also started thinking about how to build the custom tunnel / shifter console. I have a few ideas but Im going to need more steel and welding gas. I'll likely start in on it next weekend after gathering parts. Its tough to fit anything without the seat mounted in :/ I need to pick up used shifter (seems like people are using Toyota MR2, I wonder if there are other options?) and a pedal cluster (thinking Tilton or Wilwood at the moment).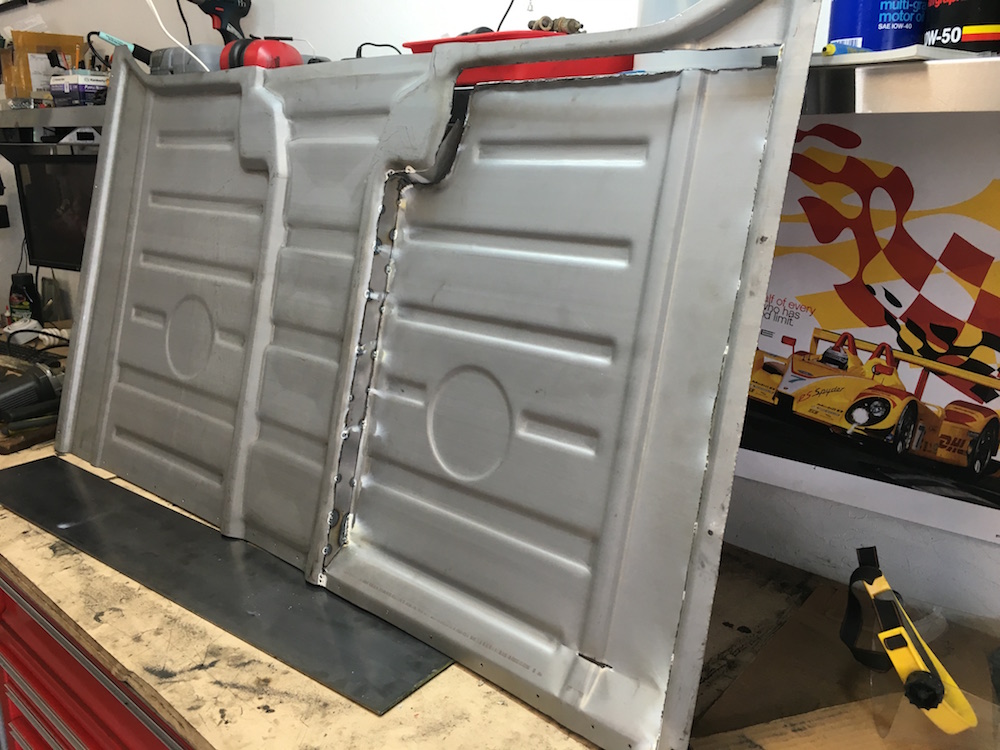
Posted by: rick 918-S Jan 31 2016, 10:43 PM
Like the dropped pan!
Posted by: MichiganMat Feb 2 2016, 09:03 AM
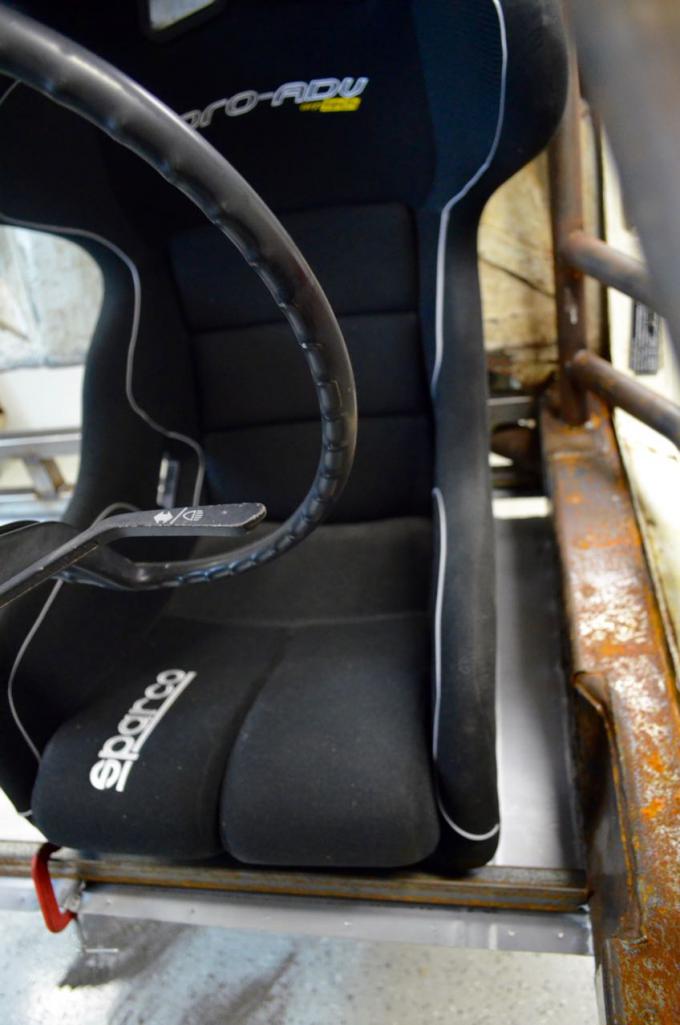
Ok, question for you guys: how aligned should the seat be with the steering wheel? haha, i kid.
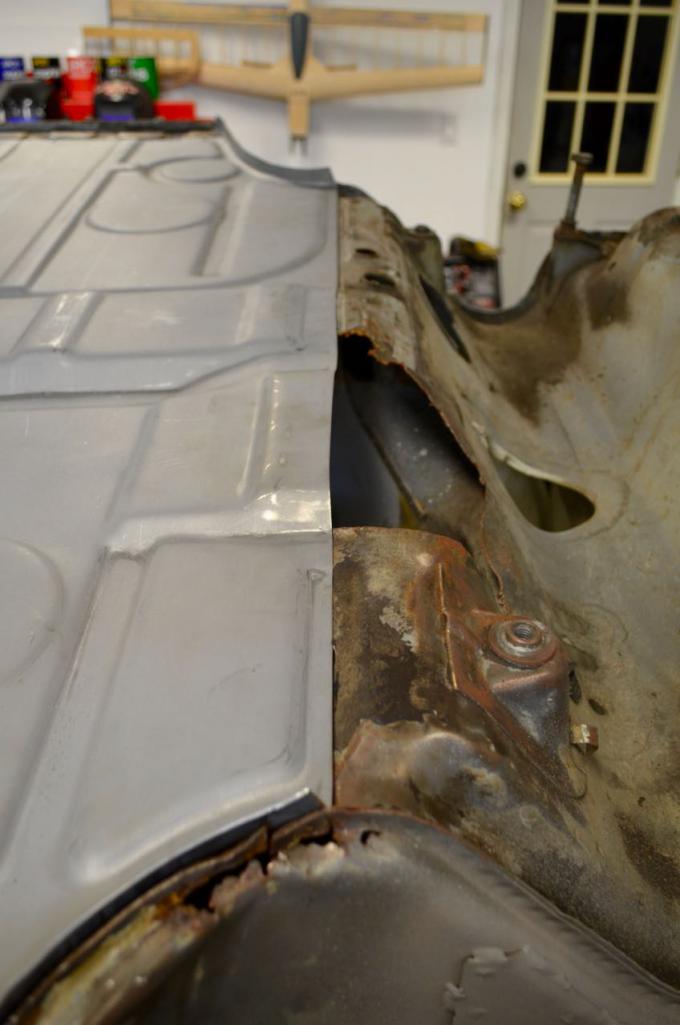
I started lining up the seat last night and noticed the only way I could get a proper alignment of the seat + wheel is to move the seat towards the center so much so that its no longer sitting in the stock areas of the floorpan. This seems like a bug. Is this a common thing?
You can see in the pics that I've got the seat lined up nice and straight, but then look at where the brackets are sitting. Im already planning to make my own custom tunnel / shift console, so its not a big deal to me to mod the pan. I just want to know if Im headed down the right road here.
Is this correct? Thoughts?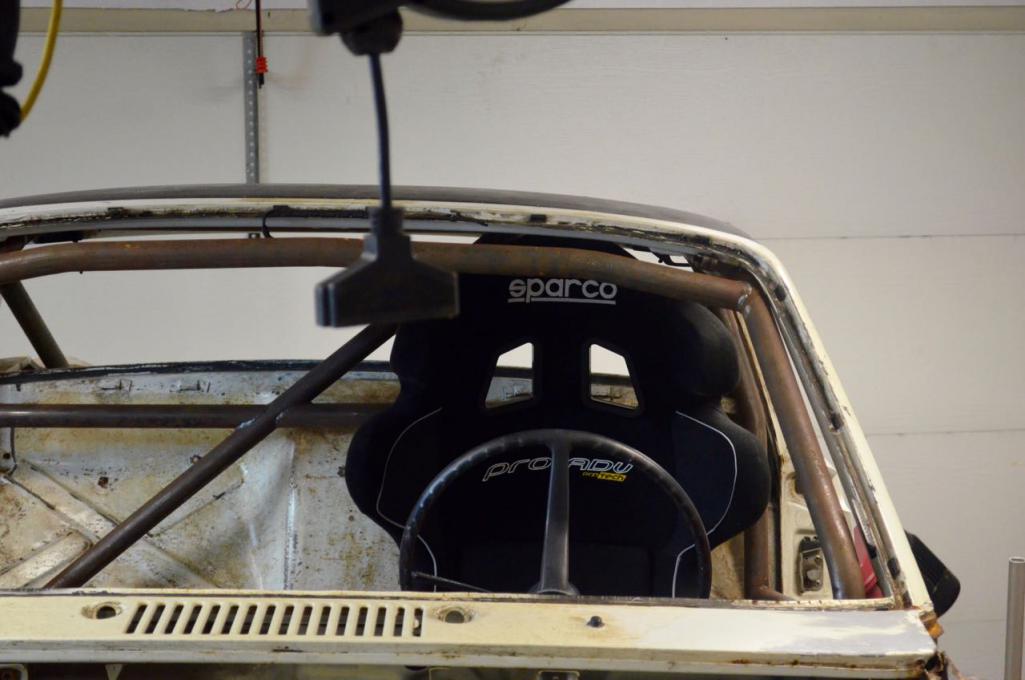

Posted by: siverson Feb 2 2016, 10:53 AM
Neat build. I can double check, but I don't think the seat, steering wheels, and pedals line up well on a stock 914. I know the pedals don't for certain.
I think I just got used to it after 25+ years.
-Steve
Posted by: MichiganMat Feb 8 2016, 08:54 PM
Another productive weekend!
I was able to get a bit more work done on the floorpan. I really had to cut out and drop a huge section to get the seat to line up, I really had no idea that the alignment was this bad in these cars. Oh well, the cuts are made, need to get in there and patch it all up, reinforce the lowered areas, and mount the seat sliders. Feels like good progress though.
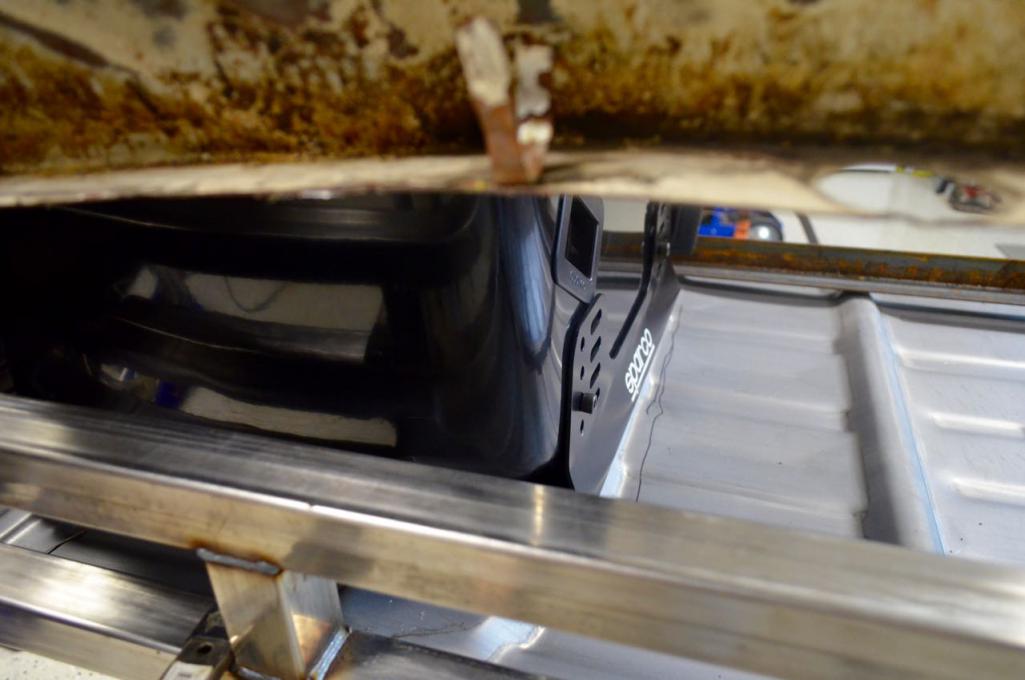
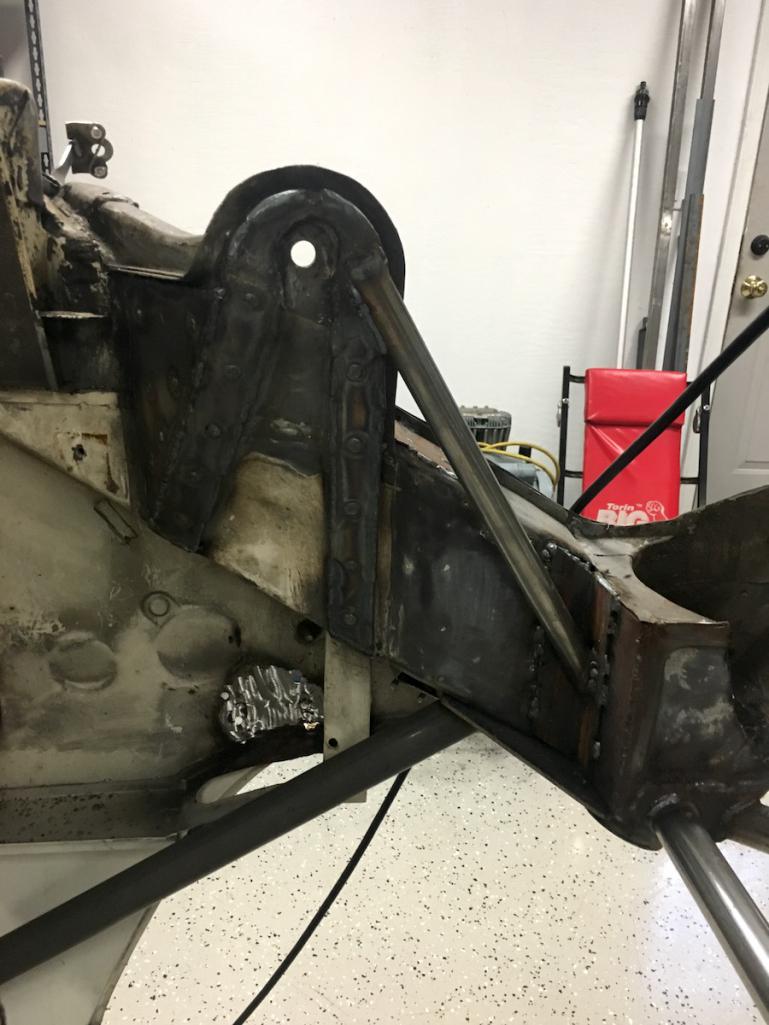
I also did a bit of work on the rear suspension points. The inner points got a bit of reinforcement and I'll be adding a heim-joint connector from the dog-ear to the firewall soon. The reinforcements are not quite finished, I'll take some pics when its ready.
Oh, and I also fab'd up the outer rear suspension console adjusters / supports / etc. That was a neat job to do, and I really feel I saved myself a ton of money and trouble by doing it myself. Don't mind the surface rust (its ugly, I know), its all going away when I get the chassis media blasted.
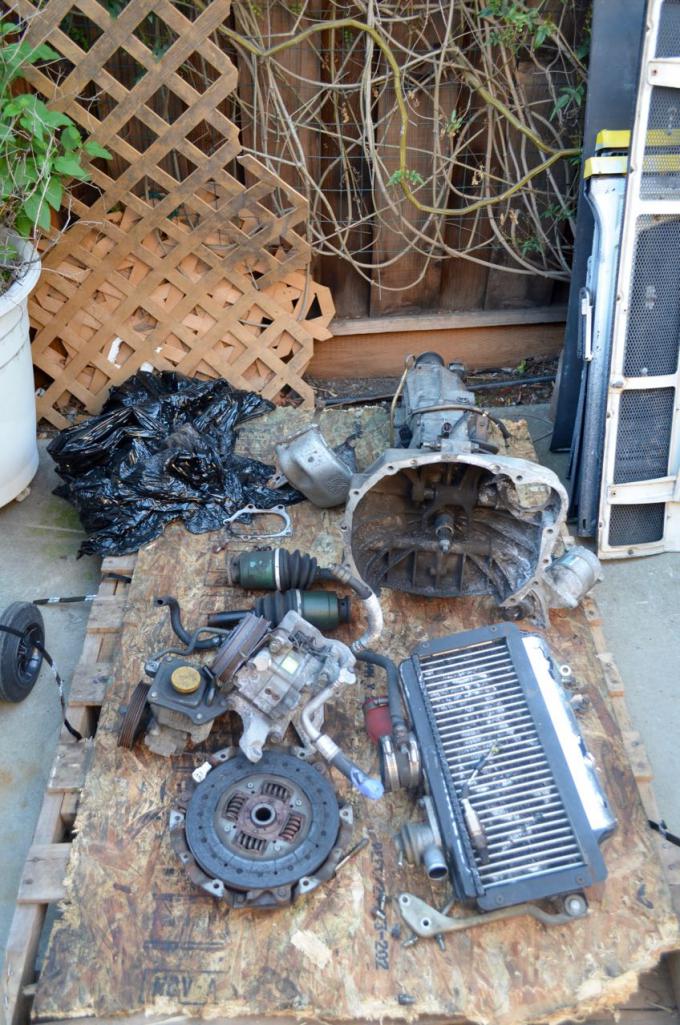
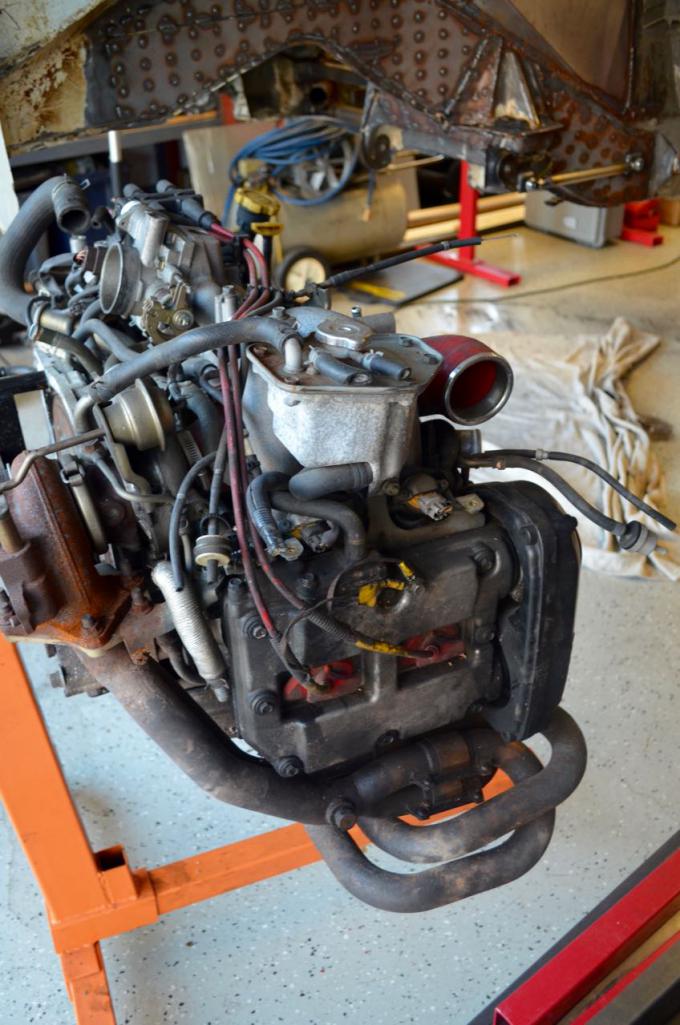
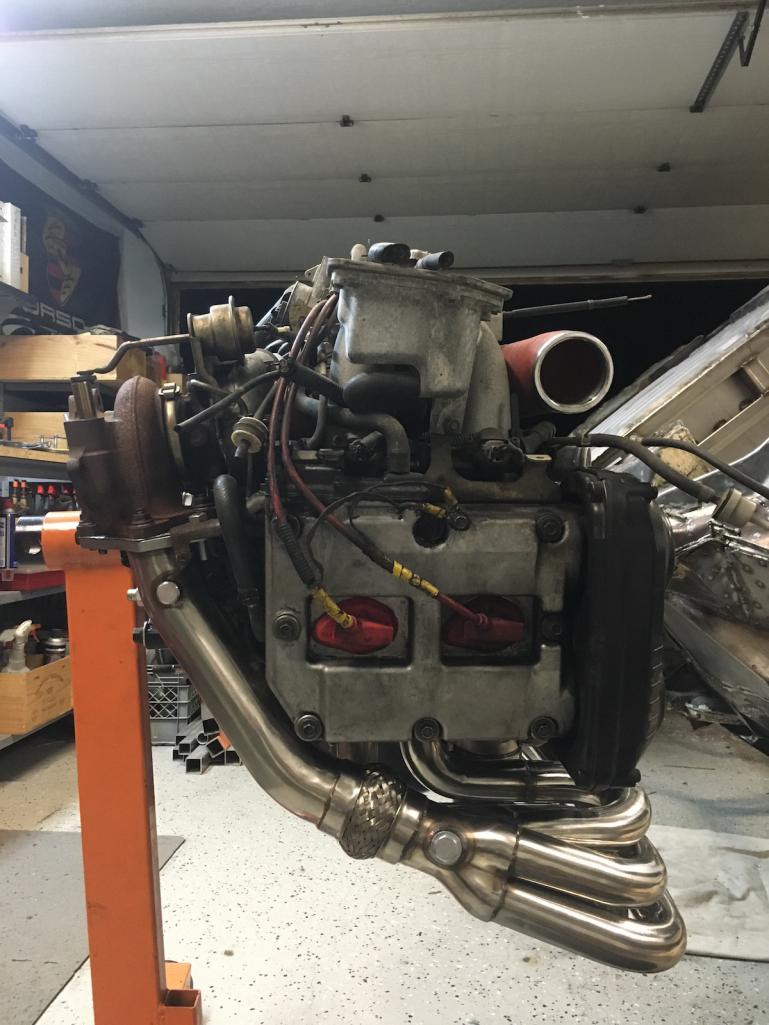
Finally, the motor and trans arrived. Its a big dirty lump, but its here and its ready to go in. Excited!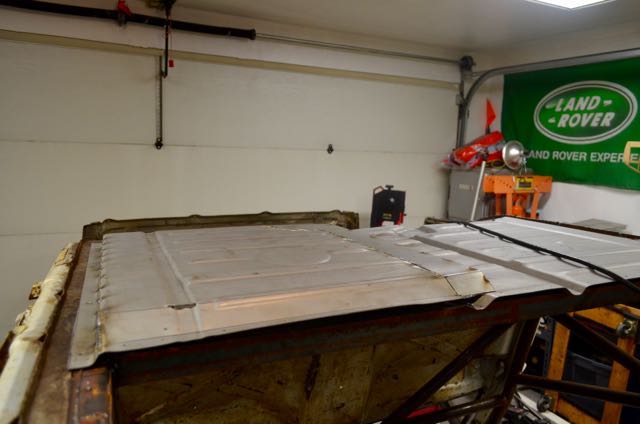
Posted by: MichiganMat Feb 15 2016, 11:05 PM
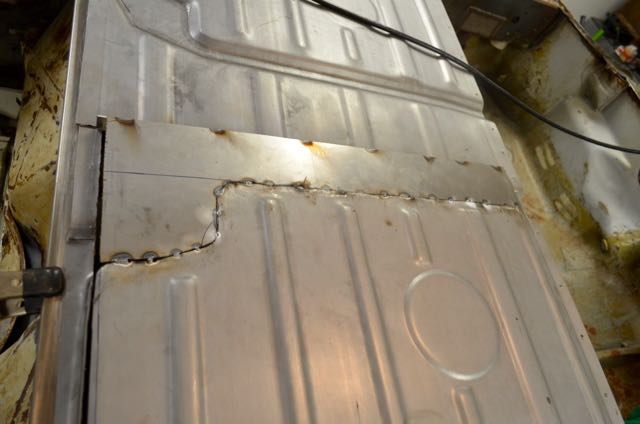
Made a bunch more progress in the last few days:
• Finished welding up the floorpan drop
• Fab'd and welded in the seat rails where the sliders will attach.
• Welded in the floorpan cross bracing and center tunnel
• Welded in seatbelt attachment points on center tunnel and chassis
• Broke down the engine/trans, put the engine on the stand
• Cut the backing plates needed to tie the rollcage into the front struts, will weld in tomorrow. No pics yet.
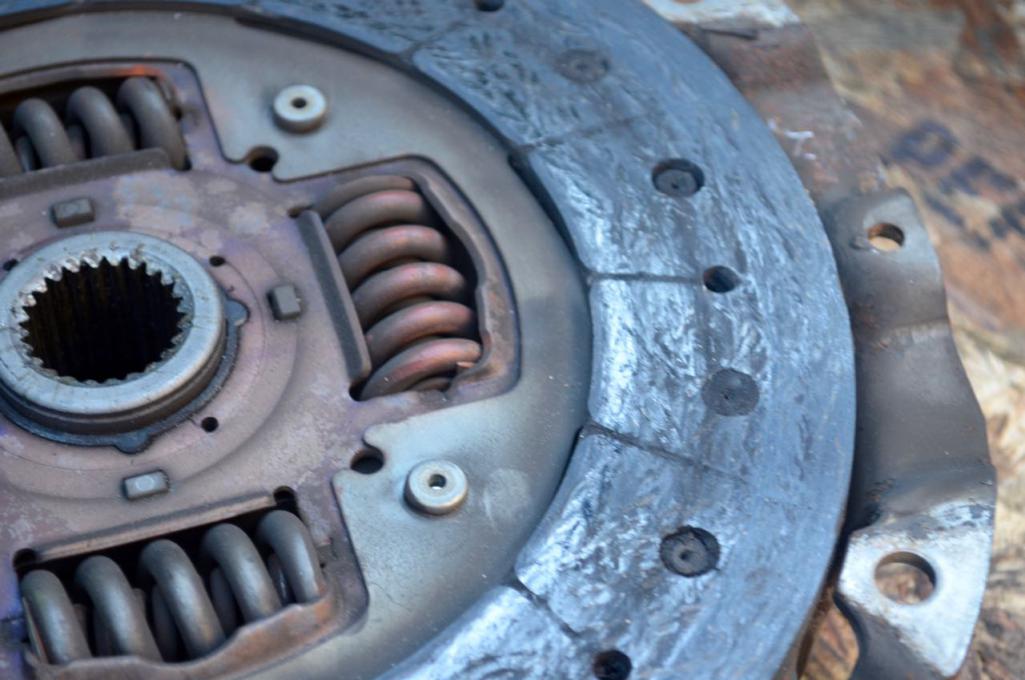
The engine is looking like it was driven pretty hard. The clutch is showing wear and the non-stock exhaust, plug wires, and silicone lead me to believe it was somebody young and reckless, heh. Im sure its fine, but its not quite what I was hoping for when I hit "buy now" on eBay.
So, next steps are:
- I need to buy a pedal cluster (likely Wilwood) before I can finish the floorpan and weld it in.
- Planning to tie in the roll cage to the front struts tomorrow
- I have one of the dog-ears reinforced, need to do the other, and then Im going to build heim-joint connectors to the lower firewall.
- My brother is bringing the fiberglass body in 2 weeks, so trying to get all this prep work done before it arrives. Should have the body mounted by the end of the month!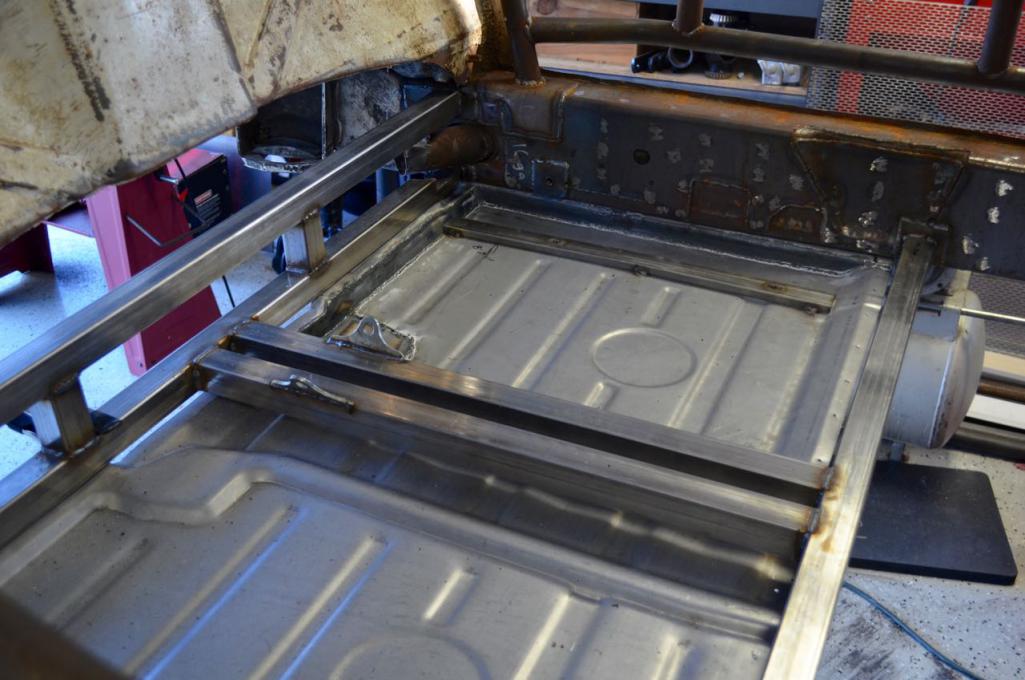
Posted by: Andyrew Feb 16 2016, 12:37 AM
Great looking progress! What are you going to do for the intercooler?
Posted by: 76-914 Feb 16 2016, 09:13 AM
"The engine is looking like it was driven pretty hard. The clutch is showing wear and the non-stock exhaust, plug wires, and silicone lead me to believe it was somebody young and reckless, heh. Im sure its fine, but its not quite what I was hoping for when I hit "buy now" on eBay."
This was the reason I went with a 6. That being said, if there are issues it will probably be with the center differential. But you'll be trashing the diff anyway. 
Posted by: MichiganMat Feb 21 2016, 09:45 PM
The next challenge: how to plumb the radiator.
Im struggling here. Im looking over the various approaches here on 914World.com and Im trying to reconcile longevity, complexity, and cost. The last time I built one of these systems I used all aluminum piping, not long runs of hose, and I built them into protected places that would never fail.
So our options are:
- under the floorpan
- along the rocker panels
- inside the longitudinals in the heater ducts
- inside the the cabin, either along the longs or down the middle of the center tunnel.
Materials:
- gold-stripe radiator hose
- aluminum tubing with silicone connections
I really don't feel comfortable running lines under the floorpan of the car where they can get hit or cut by road debris.
Id prefer to run along the rockers, but I don't see how to do cleanly.
I've seen many different methods of running hose inside the heater ducts of the longs, but that feels like too much hose over too long of a distance.
Id like to run mostly aluminum tubing, but I cant' see way to run it along the longs inside the cabin. The seatbelt mounts on the passenger on both sides will conflict.
So Im at a bit of an impasse here. Im even thinking of how to put the radiator not at the front of the car but back in the trunk or in the engine compartment (some builds have done that too!). I dunno, I just want to make it last, but the locations and materials are just not friendly at the moment.
There has to be a solution in there someplace...
Posted by: 76-914 Feb 21 2016, 10:31 PM
Someone on here ran 1.25" SS bent to follow the channels of the floor pan and reported an exposure of 1". That's about equal to the OEM air deflectors. Down the rocker panels you'll have to turn into the cabin or wheel well.
Posted by: mgp4591 Feb 22 2016, 12:07 AM
Mount it at an angle in the trunk with ducting under the car coming out of the top before your rear spoiler or ducted out between the taillights. Hose run is shorter, you retain the frunk and possibly part of the trunk too if isolated properly. You will have more weight in the rear though which may (but not totally) negate the benefits of a mid engined car...
Posted by: 914forme Feb 22 2016, 12:34 PM
The next challenge: how to plumb the radiator.
Im struggling here.
Id like to run mostly aluminum tubing, but I cant' see way to run it along the longs inside the cabin. The seatbelt mounts on the passenger on both sides will conflict.
Do it like a Buel, run it through the frames, Porsche also did the same thing on the 917. In your case, add some DOM and run it that way. More of a joke than a solution BTW, But I have thought about it.
One of the first documented sub conversion did it right down the tunnel with copper pipe.
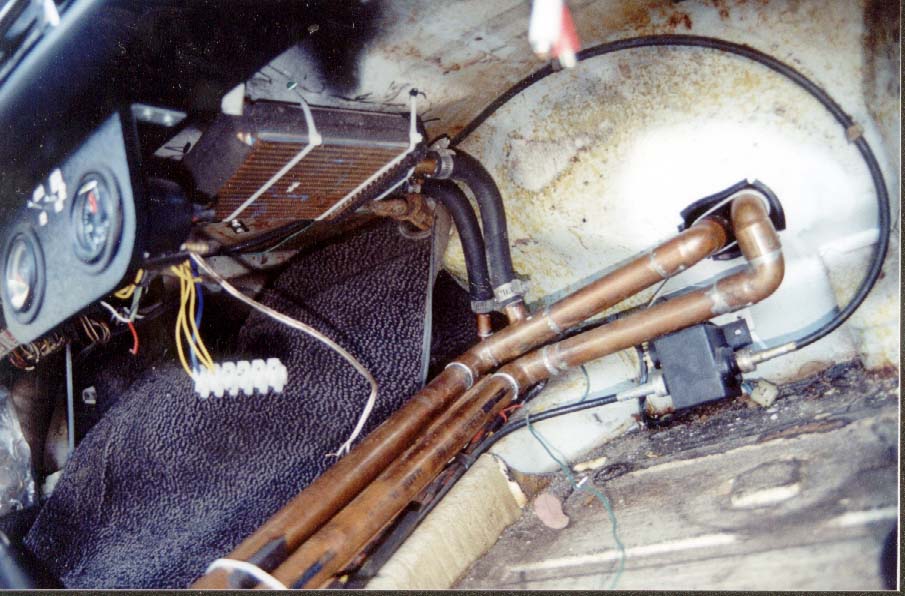
Might not be the way you would go, but it has been done.
Here is what You have to look at.
What has been done. The Alien has racked up many miles, Rick used hard lines under the car.
Renegade Hybrids have racked up many a mile on their V8 conversions same idea, but they use green stripe under the car.
But I am with you, when I look at the floor pan, and the dents I have, I think Norfolkingwaypal, but proven designs are what they are. I have thought about moving everything under the car, fuel lines, brake lines, coolant, etc. Maybe add a couple of beams to make it a little more protected. None of my modern cars have any lines fuel, brake, or other lines on the inside. Only thing in the cabin are electrical harnesses.
Doubt I solved your problem.

Posted by: mgp4591 Feb 22 2016, 01:19 PM
The next challenge: how to plumb the radiator.
Im struggling here.
Id like to run mostly aluminum tubing, but I cant' see way to run it along the longs inside the cabin. The seatbelt mounts on the passenger on both sides will conflict.
Do it like a Buel, run it through the frames, Porsche also did the same thing on the 917. In your case, add some DOM and run it that way. More of a joke than a solution BTW, But I have thought about it.
One of the first documented sub conversion did it right down the tunnel with copper pipe.
Might not be the way you would go, but it has been done.
Here is what You have to look at.
What has been done. The Alien has racked up many miles, Rick used hard lines under the car.
Renegade Hybrids have racked up many a mile on their V8 conversions same idea, but they use green stripe under the car.
But I am with you, when I look at the floor pan, and the dents I have, I think Norfolkingwaypal, but proven designs are what they are. I have thought about moving everything under the car, fuel lines, brake lines, coolant, etc. Maybe add a couple of beams to make it a little more protected. None of my modern cars have any lines fuel, brake, or other lines on the inside. Only thing in the cabin are electrical harnesses.
Doubt I solved your problem.
It would be good to hear (and see!) how you ran your fluid lines outside the cabin...
Posted by: MichiganMat Feb 27 2016, 06:42 PM
Had a couple of good nights of work lately:
- Tied the cage into the front suspension points, its now an official 8-pt cage
- Working on gusseting the cage in a few places, no pics at the moment
- Purchased the fiberglass body parts from Rennspeed.com
- Did some more work on the floorpan, need to purchase pedal set before I can do more
- Worked on reinforcing the dog-ears, still in progress
- Found a solution for plumbing the engine coolant up to the front trunk, cut the holes in the longs to route the green-stripe hose I plan to use.
- Fit the engine lid today, made it go around the roll cage
- Bought an MR2 shifter, haven't started mounting it yet.
- Researched lexan windshield options, parts needed for the engine, suspension options, vents for the hood, and a bit more. The research takes the longest, just of forum time, eBay, Craigslist, and of course 914World.com
I need to pick up the pedal cluster and the radiator before I can do much more. Once I have the pedals, I can get them mounted firmly to the pan, then the pans can both be welded in. Then I can mount the seat and the shifter. Once thats done, the car can be shipped out to the media-blaster for cleaning and paint. Then its all just fitting the panels, putting it down on the suspension, installing the engine, and we're in business.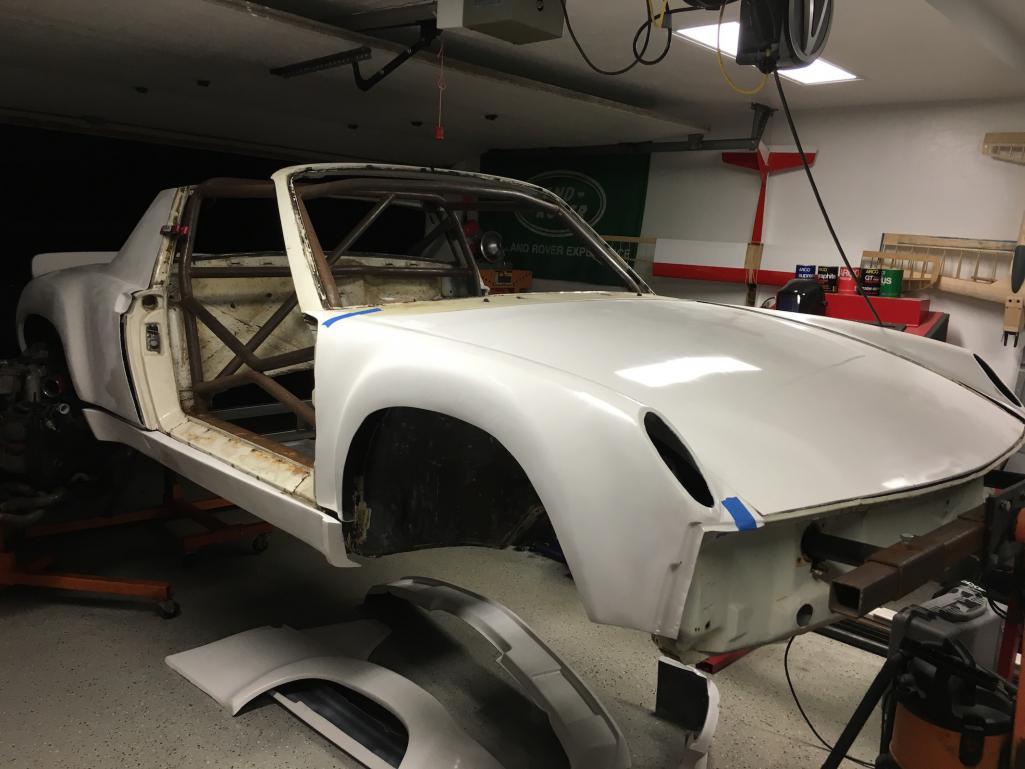
Posted by: 914forme Feb 29 2016, 04:35 AM
Nice progress 
Radiator the current darling of 914 world seems to be the Ebay Toyata Celica GT with shroud and fans, I think t is ~$150 I being different and having to cut my own path IE the harder way went Griffen and now get to build everything.
For the pedals I went Wilwood and used Titon M/Cs 5/8" for clutch, 3/4" for the brakes. I am currently running 1988 911 Calipers. They are heavy SOBs so I will most likely go Wildwood there also.
Here is the point to that above, the Tilton M/C are pretty short, almost as short as the Howe racing, more sizes. Not sure how tall you are, but you loose at least 2" if you keep everything inside the cabin. If you redo the pedal wall, you run into items on suspension tie in. Trying to figure my way around this one. The Tilton's also exit out the back, the howe's are angle up.
Other items of note, don't forget about your Intercooler. Most here have hound they get heat soaked when sitting still. And most go for Air to Water Intercoolers. That means two extra lines going forward. Another Rad up front, and a pump and box. But it is the best way to go. You can also do an ice box if you wanted to, for that extra bit of cooling.
Keep up the great work here!
Posted by: MichiganMat Feb 29 2016, 11:34 AM
Nice progress
Radiator the current darling of 914 world seems to be the Ebay Toyata Celica GT with shroud and fans, I think t is ~$150 I being different and having to cut my own path IE the harder way went Griffen and now get to build everything.
For the pedals I went Wilwood and used Titon M/Cs 5/8" for clutch, 3/4" for the brakes. I am currently running 1988 911 Calipers. They are heavy SOBs so I will most likely go Wildwood there also.
Here is the point to that above, the Tilton M/C are pretty short, almost as short as the Howe racing, more sizes. Not sure how tall you are, but you loose at least 2" if you keep everything inside the cabin. If you redo the pedal wall, you run into items on suspension tie in. Trying to figure my way around this one. The Tilton's also exit out the back, the howe's are angle up.
Other items of note, don't forget about your Intercooler. Most here have hound they get heat soaked when sitting still. And most go for Air to Water Intercoolers. That means two extra lines going forward. Another Rad up front, and a pump and box. But it is the best way to go. You can also do an ice box if you wanted to, for that extra bit of cooling.
Keep up the great work here!
Thank you, its been an interesting journey so far. Its fun that we're all building together, loving the progress from the other threads.
Radiator: thats great info, thank you, i'll check them out.
Pedals: Also, great to know. I am really kind of concerned about pedal travel / feel and total size of the cluster. I haven't pulled the trigger on anything yet, but any advice on it would be welcomed. Im 6 feet tall and would prefer to not lose any space in the cabin. Cutting out the pedal wall would not be my first choice either. Tilton (I think) makes a cluster where the masters effectively sit under the heels of your feet, so those may be an option, but I know nothing about the feel of the travel on those things.
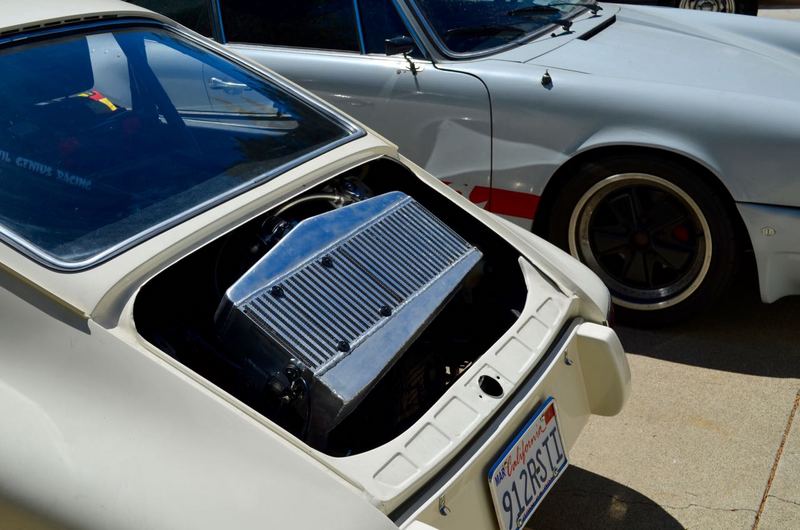
Intercool: {sigh}. Yeah. On our 912-STi build we tucked a huge intercooler under the ducktail and put a full-time fan on it which worked pretty well, but there are plenty of disadvantages. Not sure what I'll do yet, need to do more research. Are air-to-water ICs as efficient as air-only ICs?
Thanks a bunch
- Mat
Posted by: 914forme Feb 29 2016, 12:19 PM
I'll let the people who build a good system let you know
Following lifted from http://www.frozenboost.com/liquid-air-intercooler/water-to-air-intercooler-p-1006.html
"Is Water to Air for me?
A Water to Air Intercooler setup is similar in principle to a traditional air to air setup, except that there is water passing through the core of the intercooler instead of air which is responsible for drawing the heat out of the intake air. There are many benefits of using a water to air intercooler setup.
Water to air means incredibly low pressure drop.
Pressure drop on a standard water to air intercooler core is only .05 PSI. That's not a typo, pressure drop on a water to air intercooler setup is up to 20 times less than a comparably performing air to air setup.
Water to air means better engine cooling.
Many people who try to road race with a front mount intercooler have overheating problems because the air going to the radiator has to pass through the hot intercooler first. With a water to air setup, you have far more flexible options. The core will probably be in the engine bay, and the radiator can be mounted in the trunk, under the car, or in some applications a radiator is not even needed.
Water to air means better throttle response.
Instead of the horrible mess of pipes that is normally associated with an air to air intercooler, a water to air intercooler can be mounted in the engine bay, directly between the turbo outlet and the throttle body. A shorter intake route with fewer bends is beneficial in every way.
Water to air means no heat soak.
A water to air intercooler setup circulates water through the core even when the car is not moving. This is especially useful during drag racing, when the core temperature raises significantly during a pass, and then the car sits still for several minutes waiting for the next pass.
Water to air means extreme auto-x racing advantage.
You can add ice to your reservoir, if so equipped, which will drop your intake temperature BELOW ambient. Of course, the ice melts, which is why this is so good for auto-x racing.
Water to air means Mid Engine No Problem.
Every modified mid or rear engine turbo vehicle should have a water to air intercooler setup. It is not practical to have a front mounted air to air setup in these applications, but you can have a water to air intercooler in the back of the vehicle and the radiator in the front, providing greater cooling than an air to air setup."
I'll let you decide 
Posted by: MichiganMat Mar 28 2016, 09:32 PM
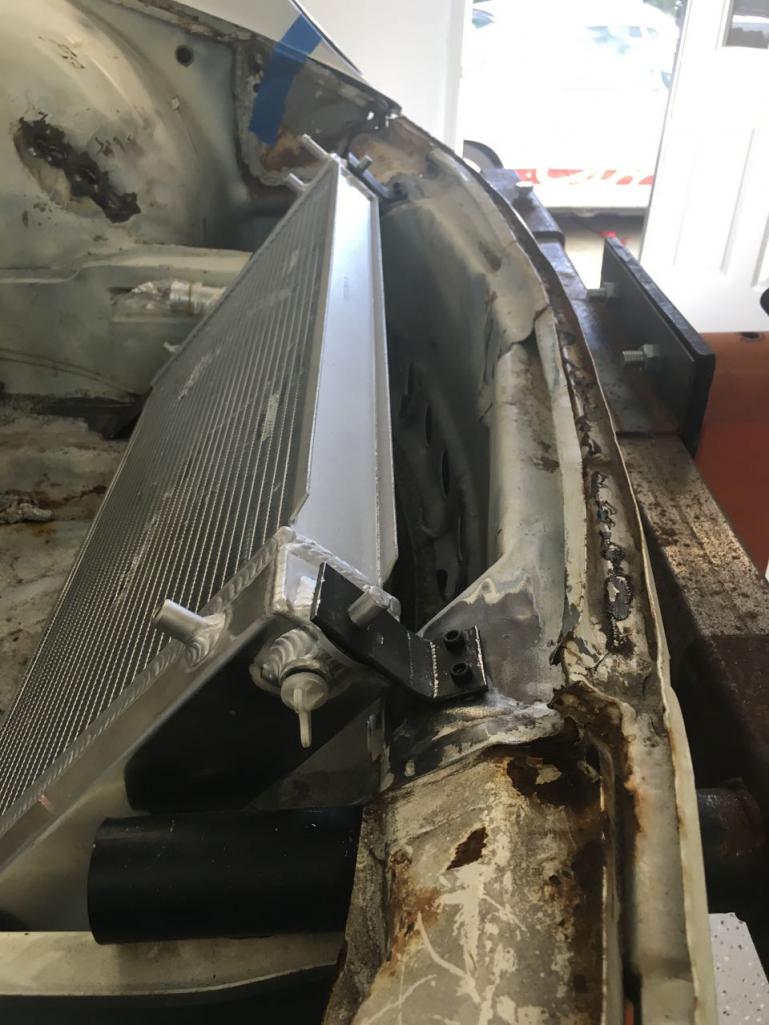
Bought a radiator!
The eBay Celica Gt radiator that was suggested to me is a *perfect* fit.
Mounting was easy enough: Bend metal, drill hole, weld in, repeat.
The feet are welded in, the top tabs are backed by riv-nuts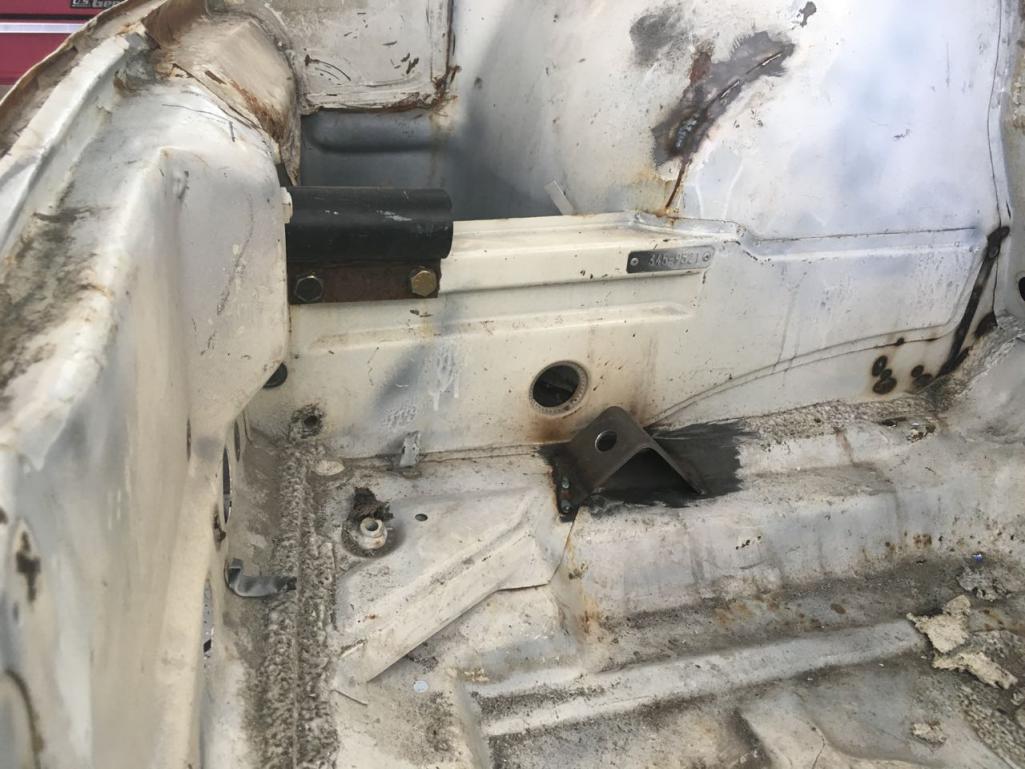
Also got around to mounting the new hood. The latches are basic eBay models, super affordable, nothing special. I really like the look of them though, they look like business. Getting them all squared up on the hood was probably the hardest part, welding the backing plates wasn't too bad.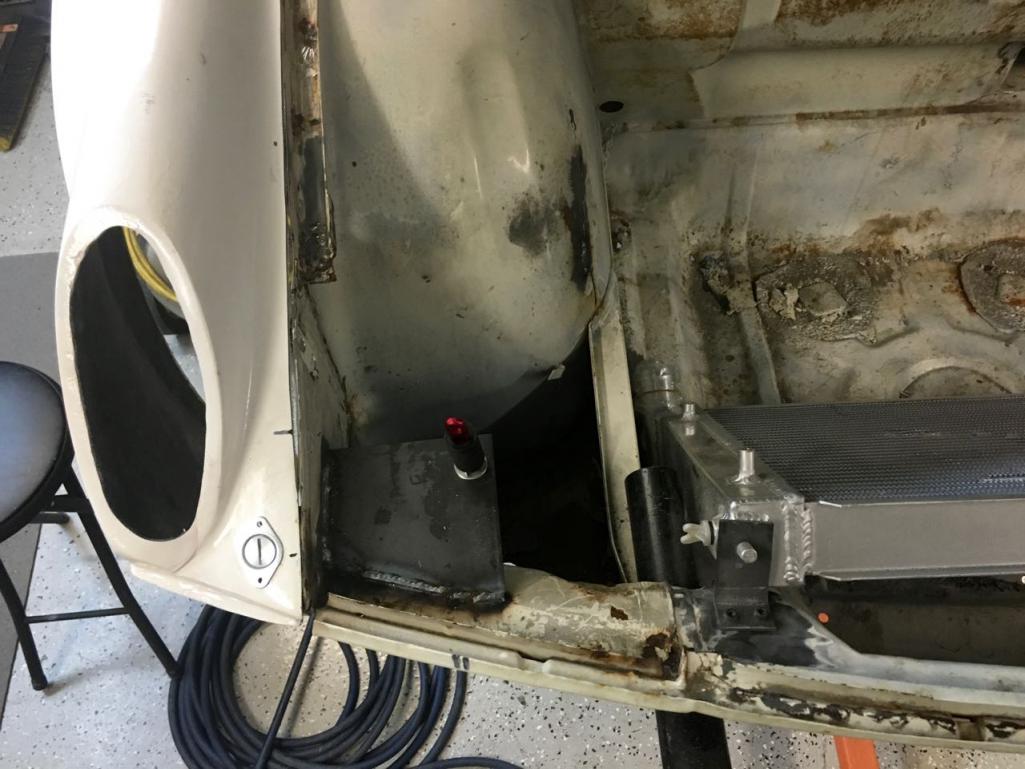
My friend Alex gave me all his parts to build the rotisserie that the 914 is on right now. He needed one to put his Z project on, and he refused to ask me to take the 914 off the stand, so we bought a whole new set of parts and built another one. The new red one is so much better than the orange one my car is on, its got probably $100 worth of casters on it, its so easy to move around. He's happy, so Im happy.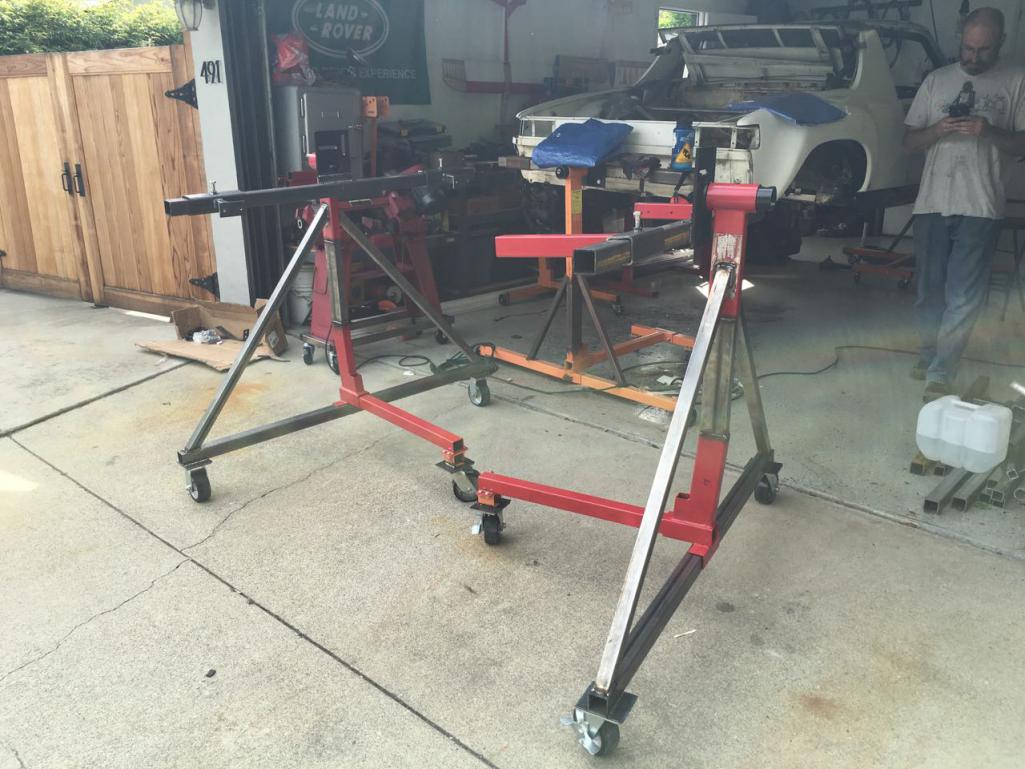
I was also able to get the passenger side body work /mostly/ done. The fender and quarter are 95% mounted up and I've started in on the drivers side. I need to take more pictures, not taking nearly enough.
So yeah, next update will be all the driver-side bodywork, then I'll probably cut the hood open and route the radiator cooling out of it. I'll probably work up some aluminum shrouding, something simple to keep the water out of the tub when washing the car. It'll take some time but I think it'll be worth it. Then the rear trunk, going to use J-West mounts and the same black racing latches. Eventually tail-lights too, I plan to make my own.
Ughs, bodywork takes so long...
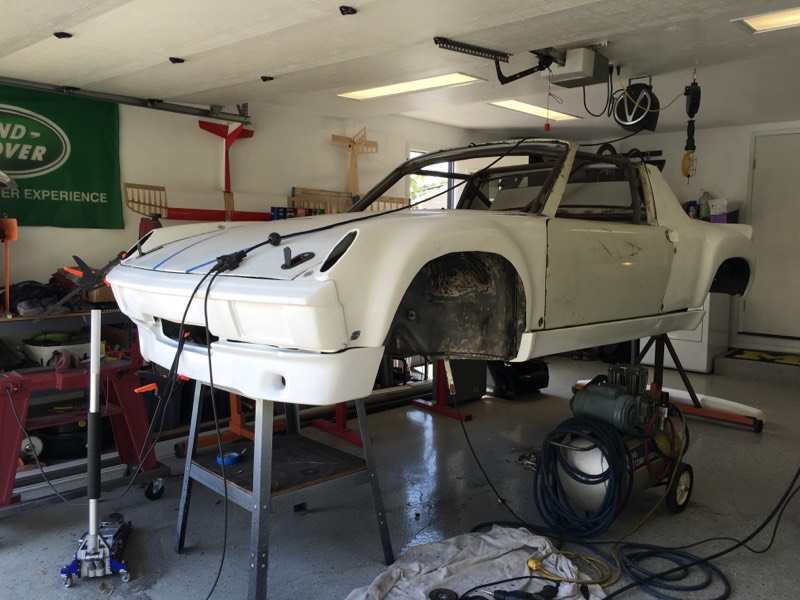
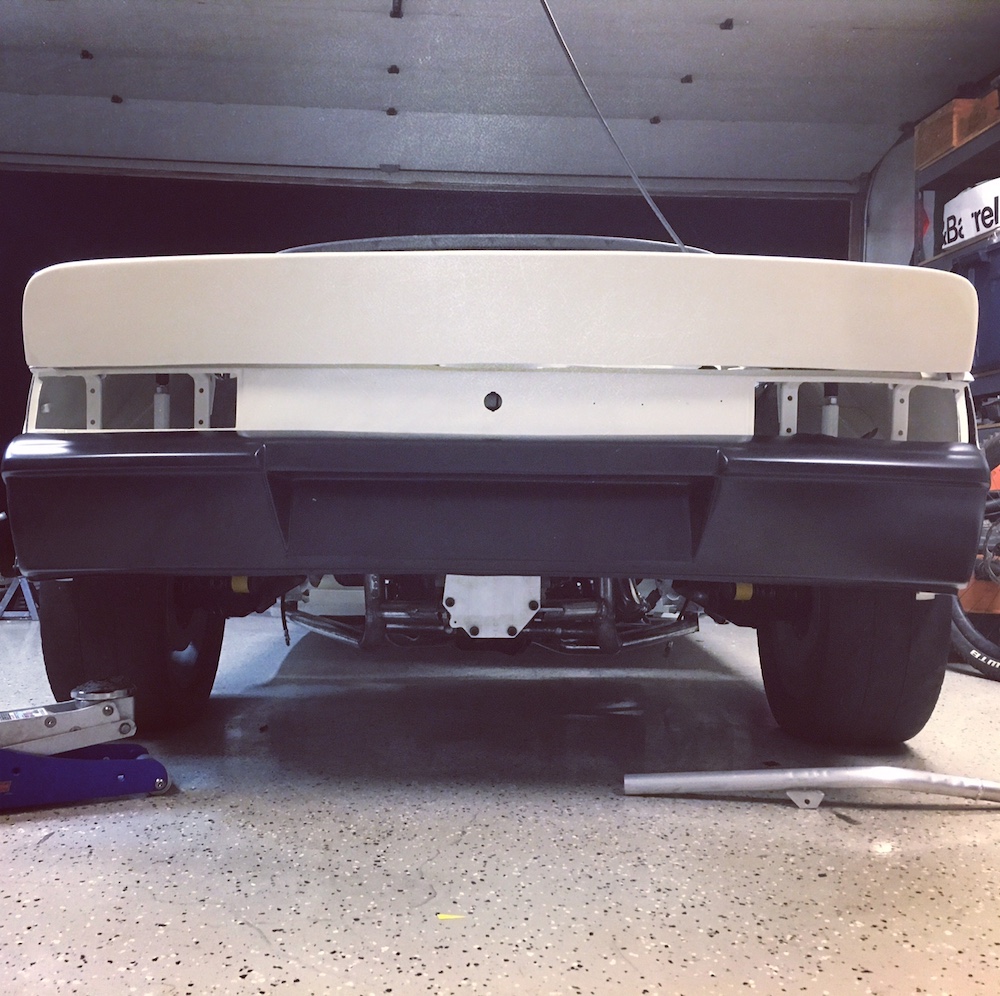
Posted by: MichiganMat Apr 2 2016, 04:06 PM
Open a hole.
Close a hole.
Man, that lower lip is going to need all kinds of fab work to get right. Its just mocked up for now.
JWest trunk mount kit arrived today too, so trunk can be mounted up.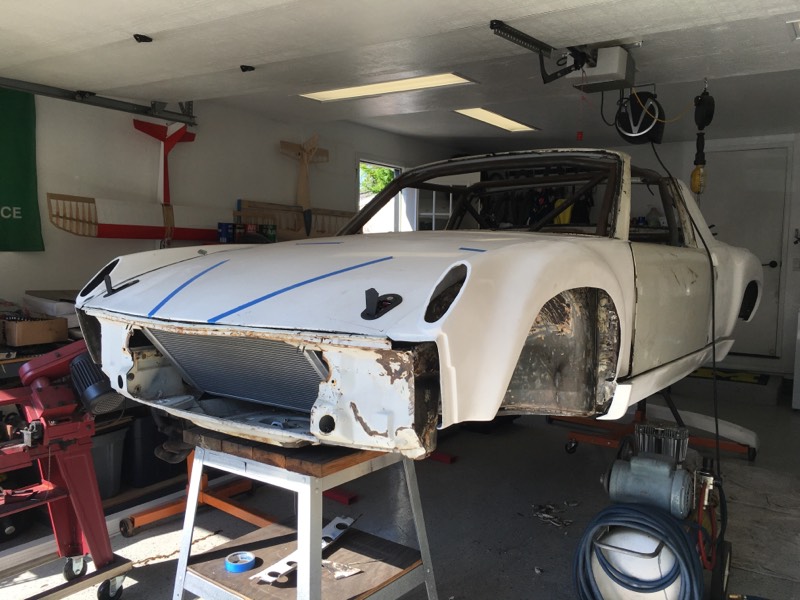
Posted by: MichiganMat Apr 11 2016, 10:25 PM
Busy couple of days!
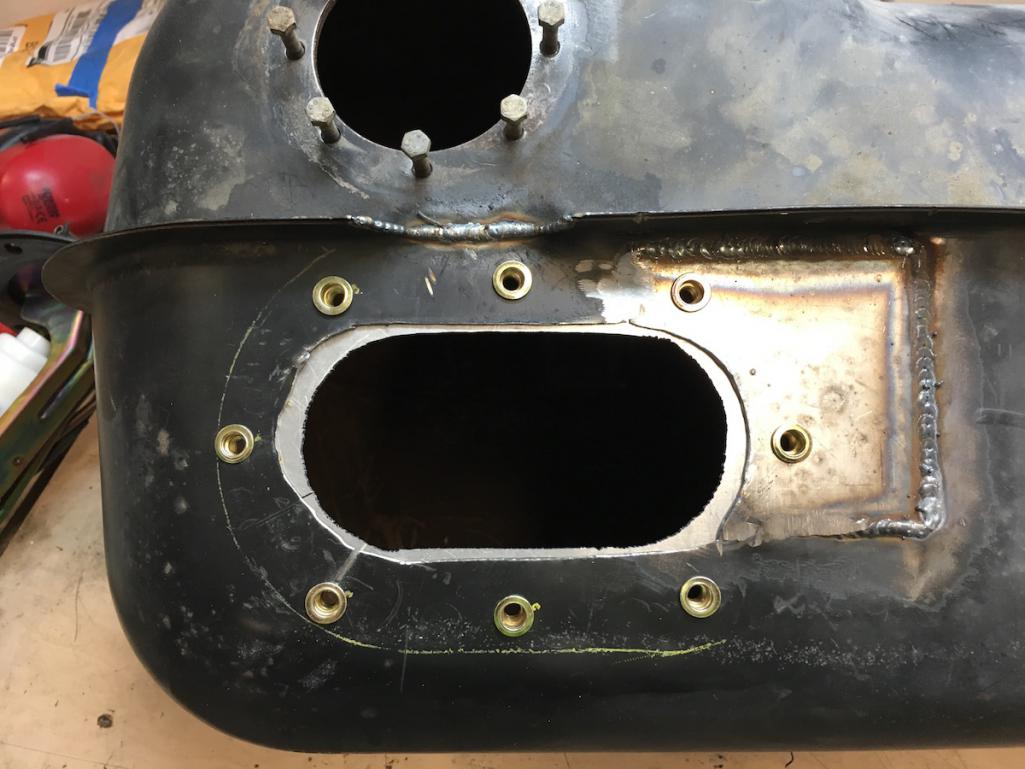
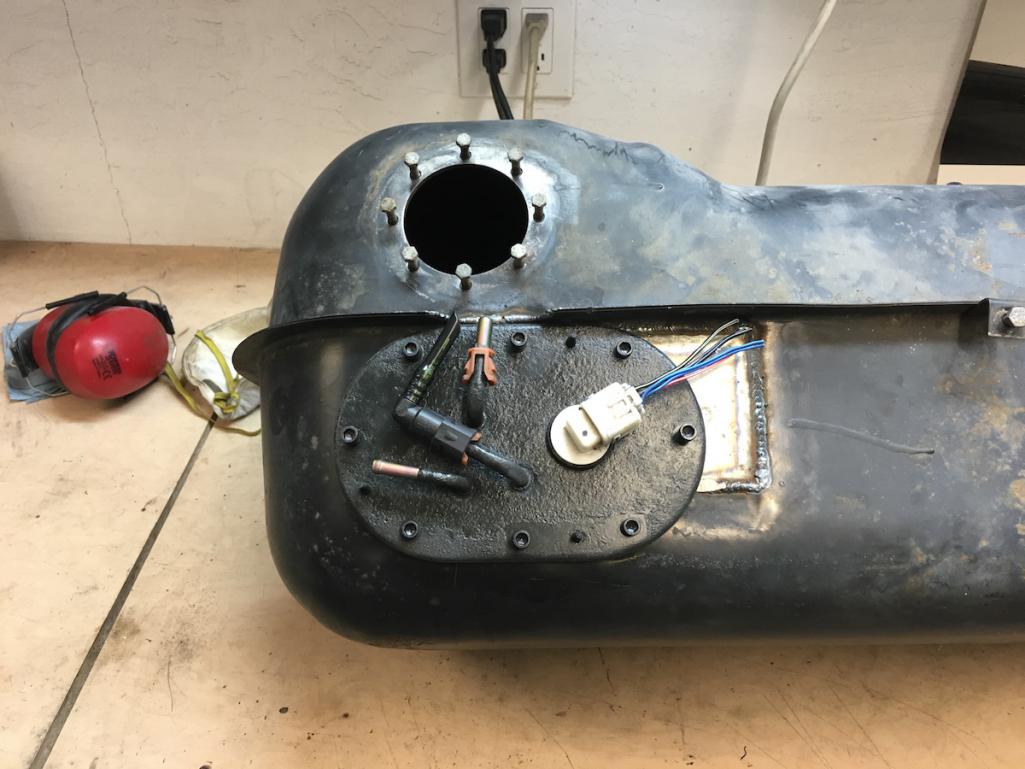
Bought a WRX fuel sender/filter/pump and modified it to work in the 914 tank.
Cut and bent the lower portion downwards to fit well and pull from the lowest portion of the tank.
Modified the internals of the tank, pulled out some baffles, and welded up the bottom.
Installed an aluminum inner ring and then riv-nut'd that in to give support to the tank area.
Bought a fuel filler neck, more on that later...
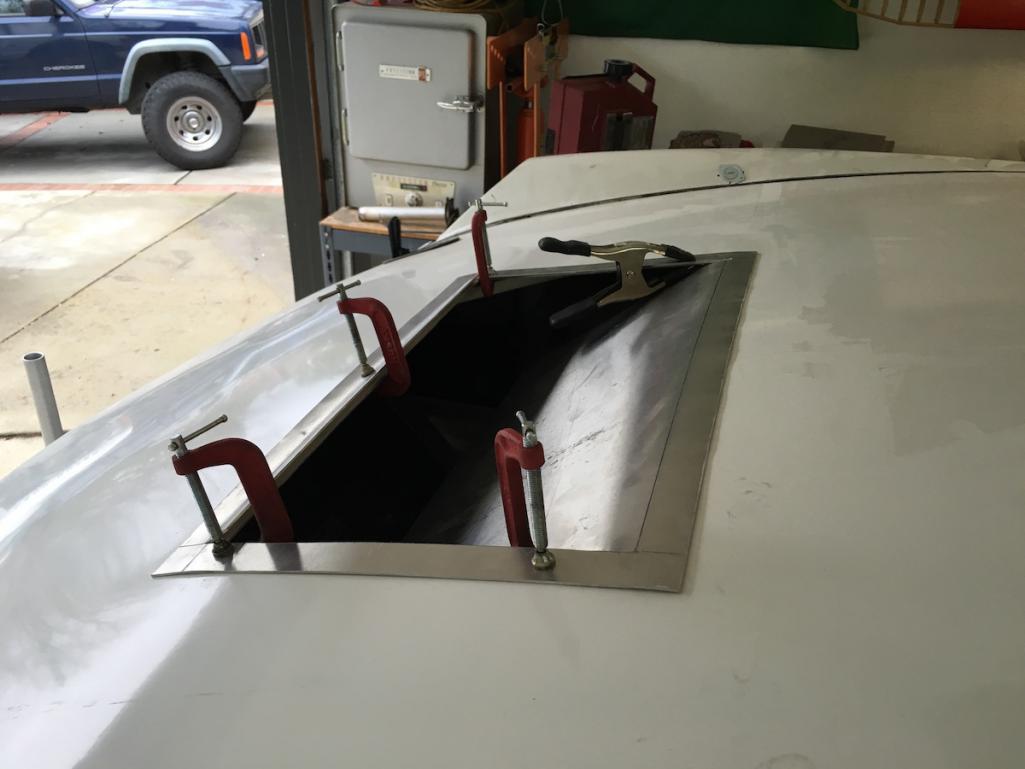
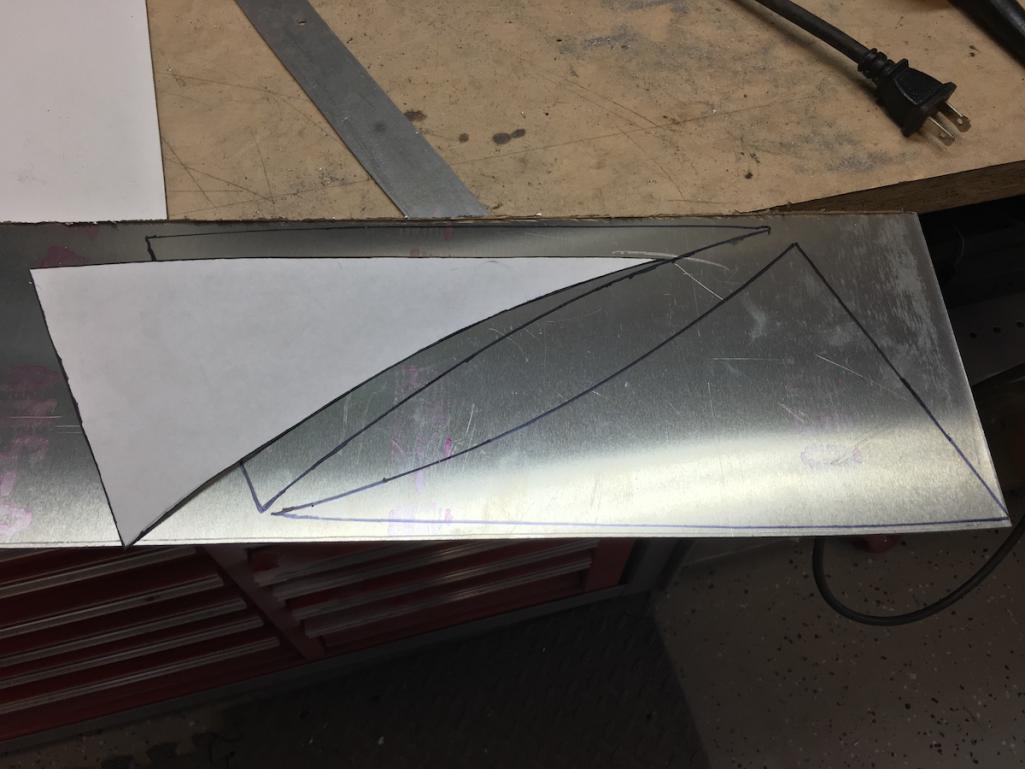
Next up was the air outlet through the hood.
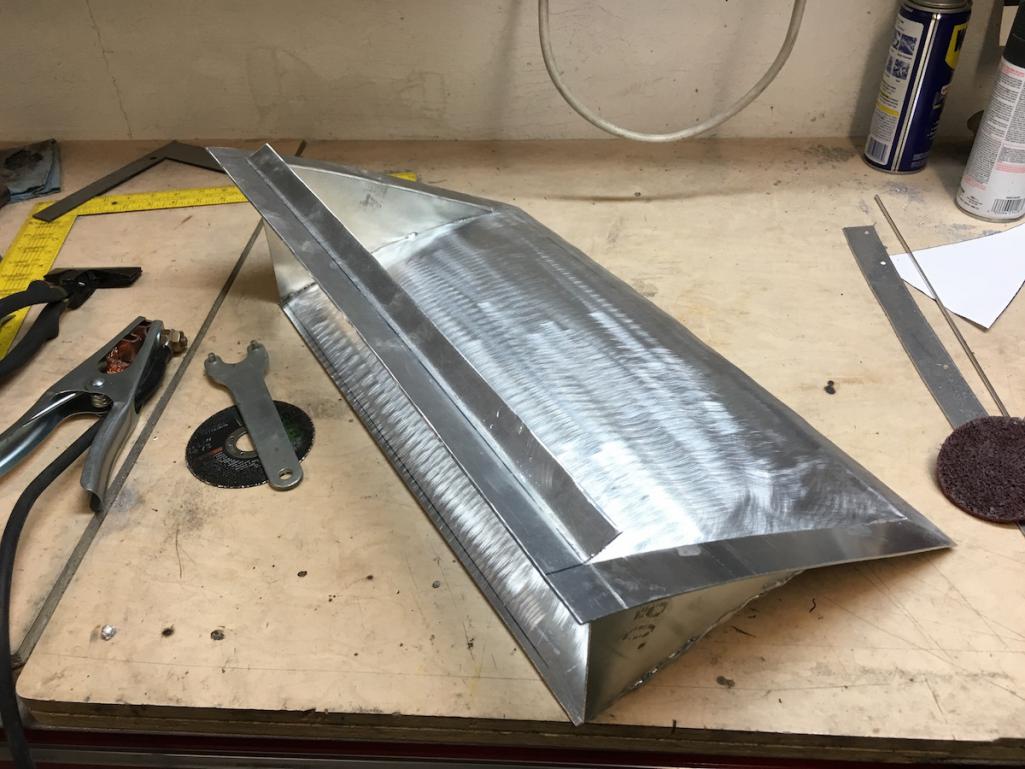
Cut a nice big hole and fab'ed up as best I could an outlet vent.
I need to work on my aluminum welding, I've done better work :/ But it'll do for now.
I plan to finish it in black paint and mount externally. It'll be industrial looking, and functional.
I was also able to get the front lower lip mounted, the drivers rocker, and the rear trunk hood pins all attached. Pics aren't too sexy so maybe I'll skip 'em for now.
Next up: fuel filler neck install on the tank and through the hood, put the rotisserie back on the front of the car, fit and mount the rear bumper, reinforce the drivers-side dog-ear, and buy a bunch more parts, haha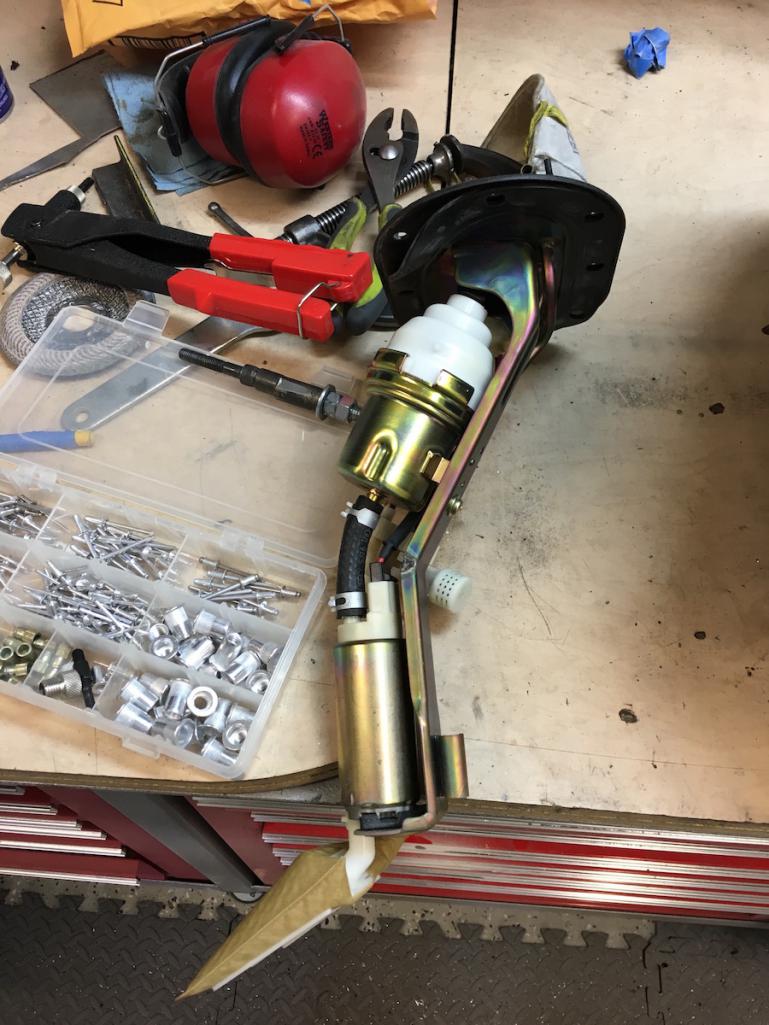
Posted by: 914forme Apr 12 2016, 05:13 AM
That is looking very nice. Like the hood opening, BTW, you don't need that much of an inlet, and you might want to put a brace between the two front torsion bar mounts. Since they can move around a bit and you cut that vertical section out of the front of the trunk.
Other items I see that might need attention: Not to pick your build, just trying to save you future grief.
Radiator mount should not be hard mounted. From the pictures it looks like you hard mounted at least the top. It needs to be floating, otherwise you have made it into a structural member, and it will over time crack. If your luck is like mine, it will happen at the least opportune time and make your day.
Other than these two items get back to work, love the build.
Posted by: falcor75 Apr 12 2016, 06:22 AM
Be very carefull with those noname hood pins. A friend had his break at 100 mph on track causing broken hood, windshield dented roof and front spoiler damage. Needless to say the money "saved" by buying cheap parts were long gone...
Posted by: MichiganMat Apr 12 2016, 09:25 AM
That is looking very nice. Like the hood opening, BTW, you don't need that much of an inlet, and you might want to put a brace between the two front torsion bar mounts. Since they can move around a bit and you cut that vertical section out of the front of the trunk.
Other items I see that might need attention: Not to pick your build, just trying to save you future grief.
Radiator mount should not be hard mounted. From the pictures it looks like you hard mounted at least the top. It needs to be floating, otherwise you have made it into a structural member, and it will over time crack. If your luck is like mine, it will happen at the least opportune time and make your day.
Other than these two items get back to work, love the build.
Thank you for the feedback, I really appreciate it. You know, I always get a little insecure when I post up pics of the build, there are so many amazing builders and lots of guys on here that have "done it all". Im really here to learn and to improve my skills, so the feedback is so valuable to me.
Re: Inlet. - Yeah, I agree, its a bit over the top but its nice to have the accessibility. I need to clean up the cuts a bit and I do plan to reinforce it.
Re: Radiator - Agreed. It will be rubber-isolated when its done. Chassis-flex actually cracked your radiator? Interesting... I didn't' think it would be much of an issue given the way the torsion-bar suspension is designed.
Thanks again!
Posted by: MichiganMat Jun 2 2016, 05:16 PM
I know its been a bit of radio-silence on my end, but I've been busy!
So what have I been up to:
- pulled the wheel bearings out of the trailing arms, bought new bearings
- discovered one of my front a-arms was bent, sourced new arms on eBay for cheap
- bought new front turn signal lenses
- bought dash gauge panel
- researched and bought rear brake calipers
- sourced a powder-coating shop, going to take all the suspension pieces in for coating
- converted my subaru trans to 2wd (found some ugly bits in there, turned out be harmless)
- installed my through-hood gas cap
Its been a busy couple of weeks, no? I need to take more pictures! Every time I do one of these updates I realize how few pics I have to show, heh.
Generic gas filler from some internet site: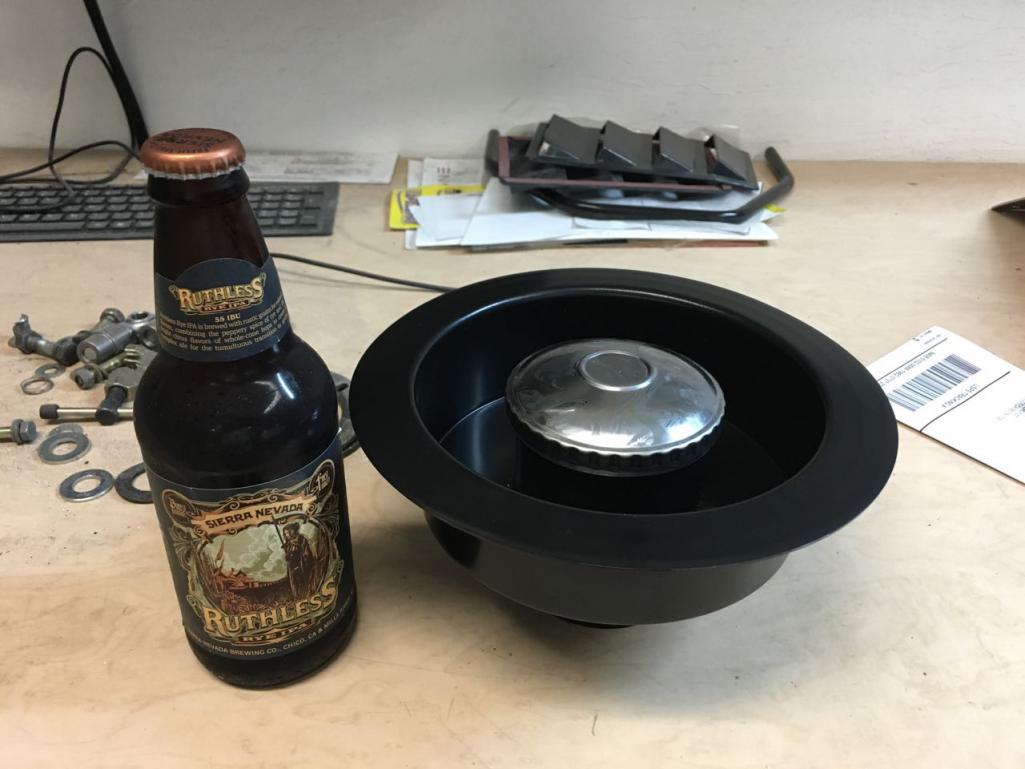
Installed. Separated the neck from the ring, welded in. Took off the bottom of the bowl and welded around the perimeter. Need to add a drain, but that ain't no biggie. Not a lot of room to work with in there!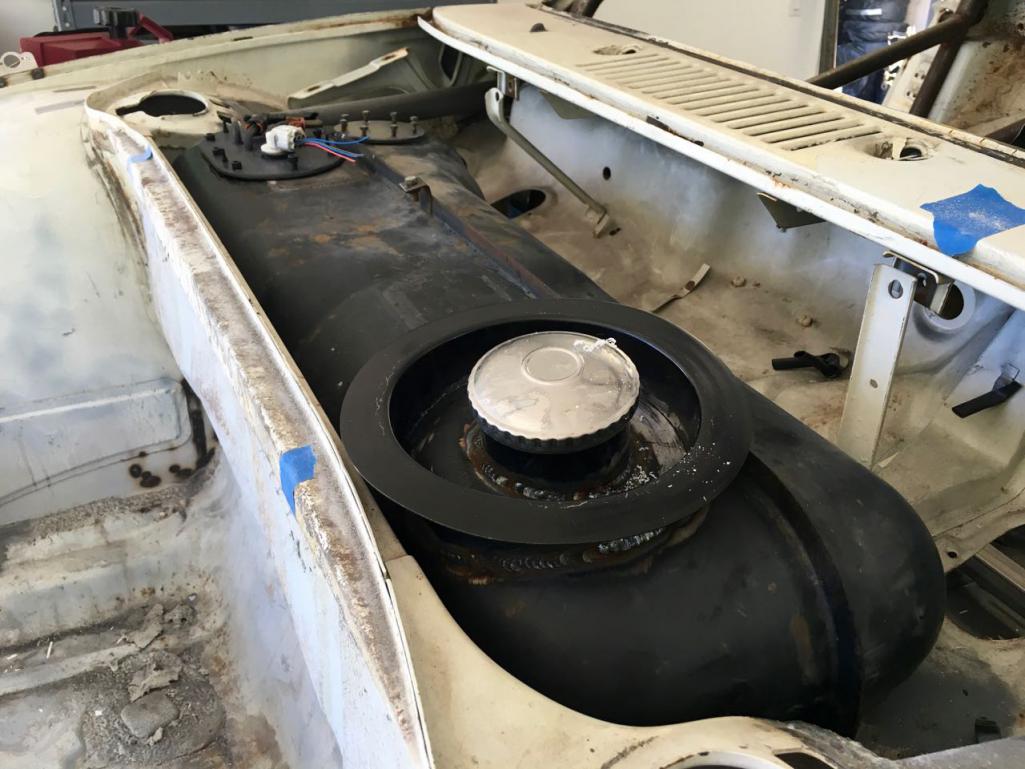
Not a bad look, no?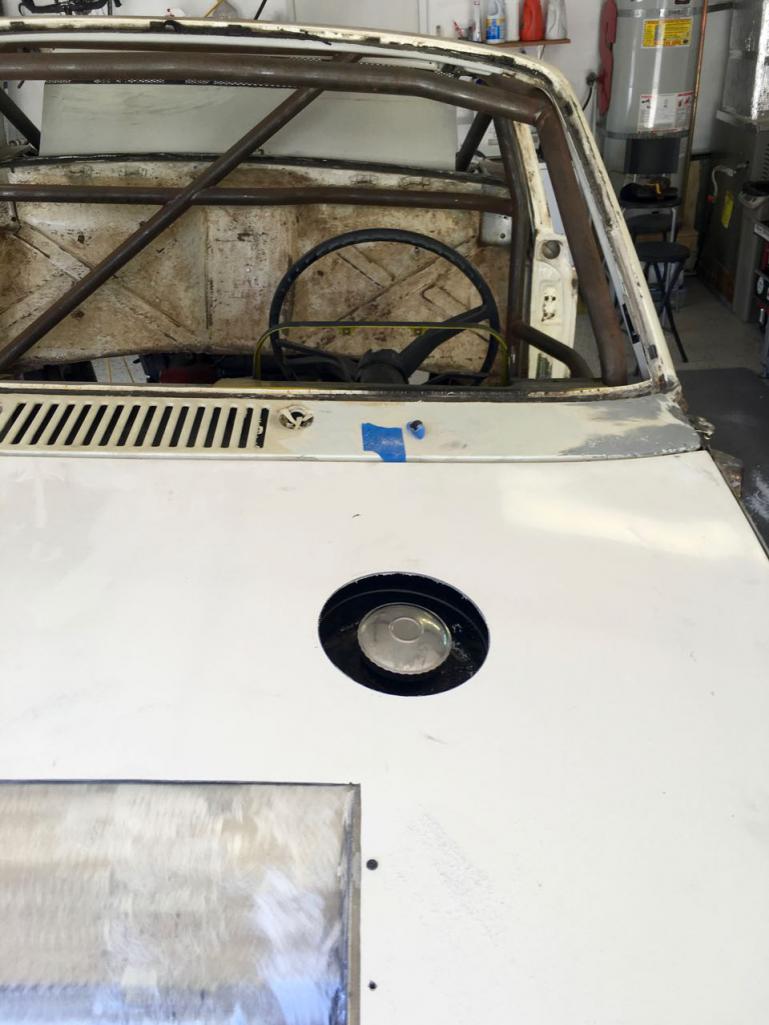
Bits of ground up center-diff c-clip. Had me worried! Turned out to be just fine.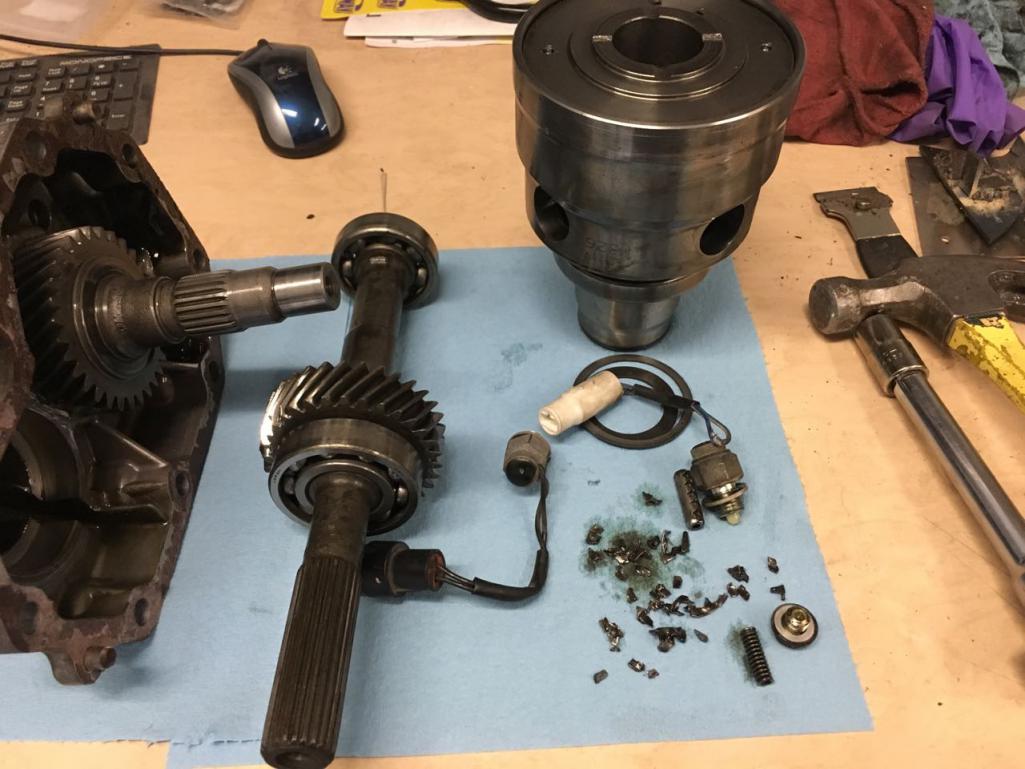
Tail panel bolted up after the conversion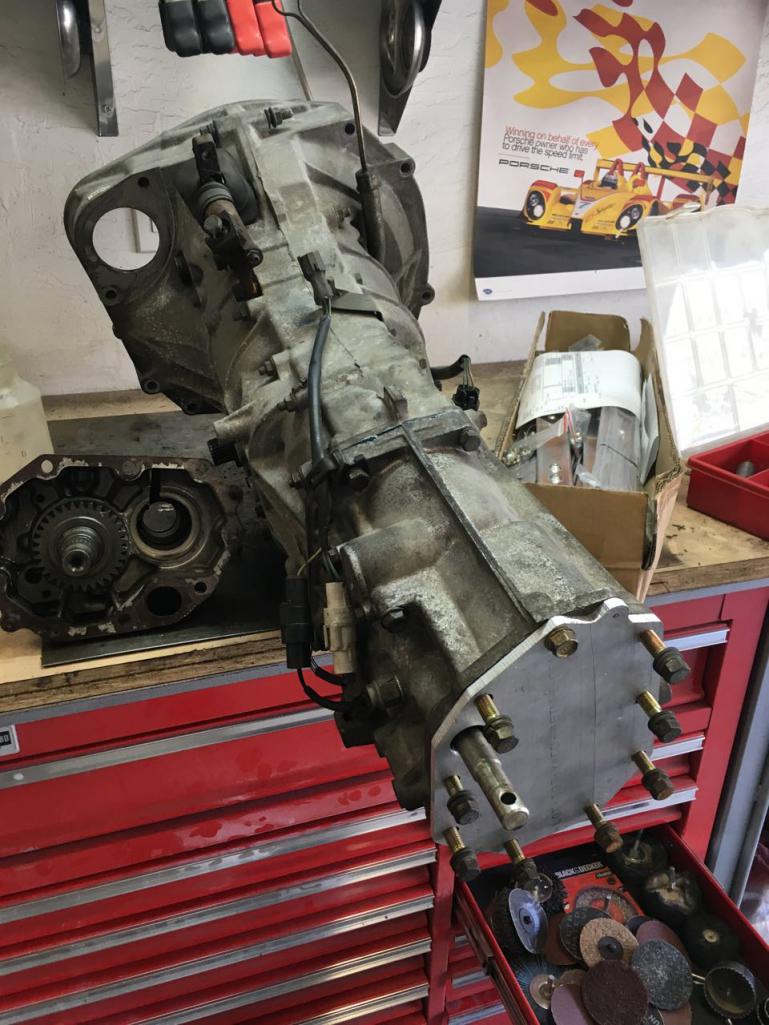
So making good progress I think. The next steps are:
- Take the suspension bits off to the powder-coater
- Strip down the gas tank and paint it
- Buy a pedal cluster, fab into the floorpan, then the pans can go in permanently
- Then take the chassis off to the blasting shop, strip and prime
Easy peasy, right?
Posted by: Mueller Jun 2 2016, 06:05 PM
Neat gas tank filler mod!
Posted by: MichiganMat Aug 10 2016, 08:39 AM
Where have I been lately?
Weeellllll.... not working on the car nearly as much as Id hoped. But there has been progress!
• Rebuilt a set of Carrera rear calipers to use instead of 914 calipers which will allow me to use vented disks in the rear.
• Bought new front suspension arms (mine were damaged, grr), sent all the suspension pieces off to the powdercoater
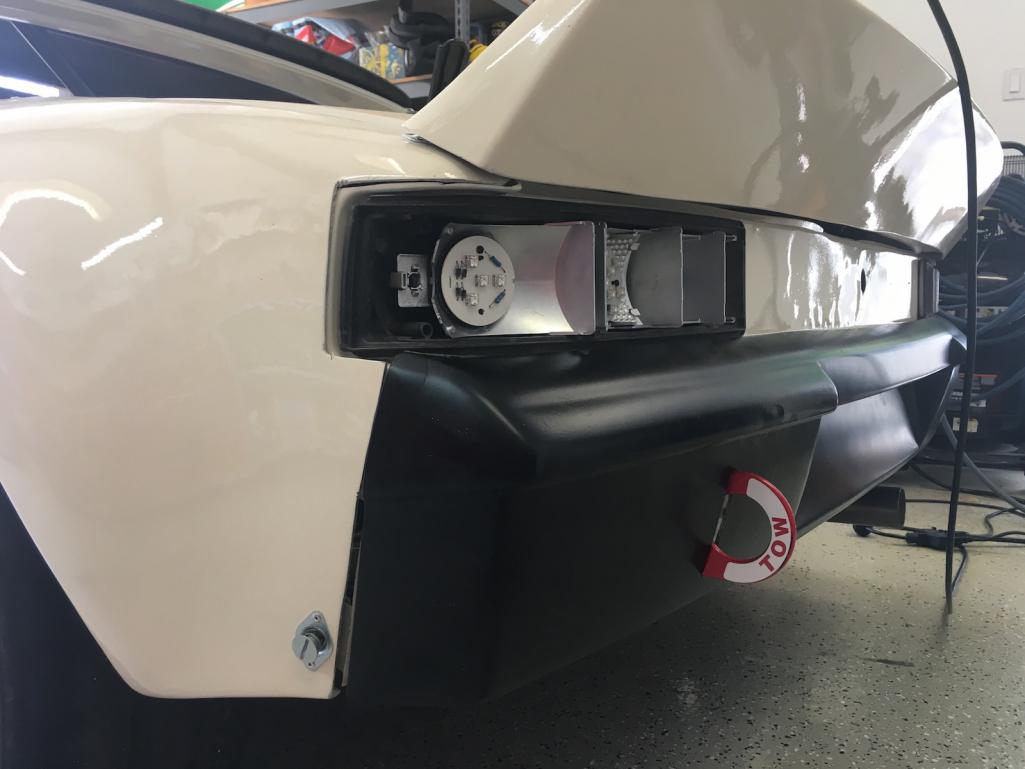
• Started mock-up of the lightweight custom LED (cheap) tail lights Im building
• Welded in the lower rear firewall and rear pan section
• Bought Wilwood pedals, MCs, and bias adjuster. Now I can start fab / install of the front pan section
• Put a new header and oil pan on the WRX engine. The old header was rusty and the pan had a crack.
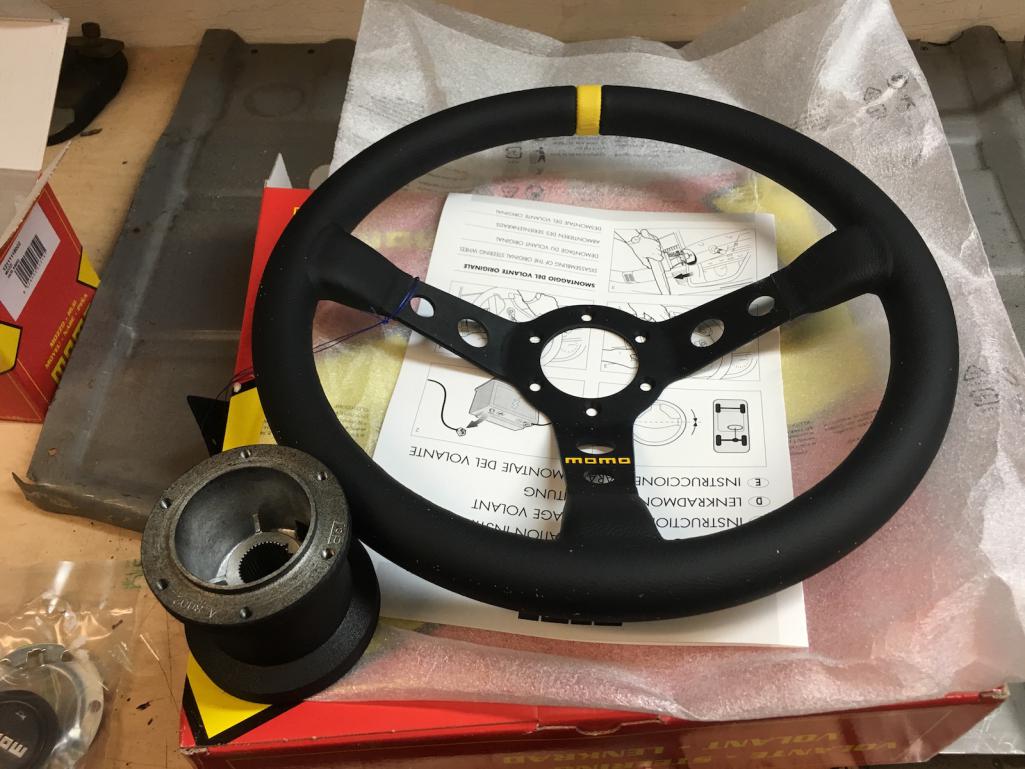
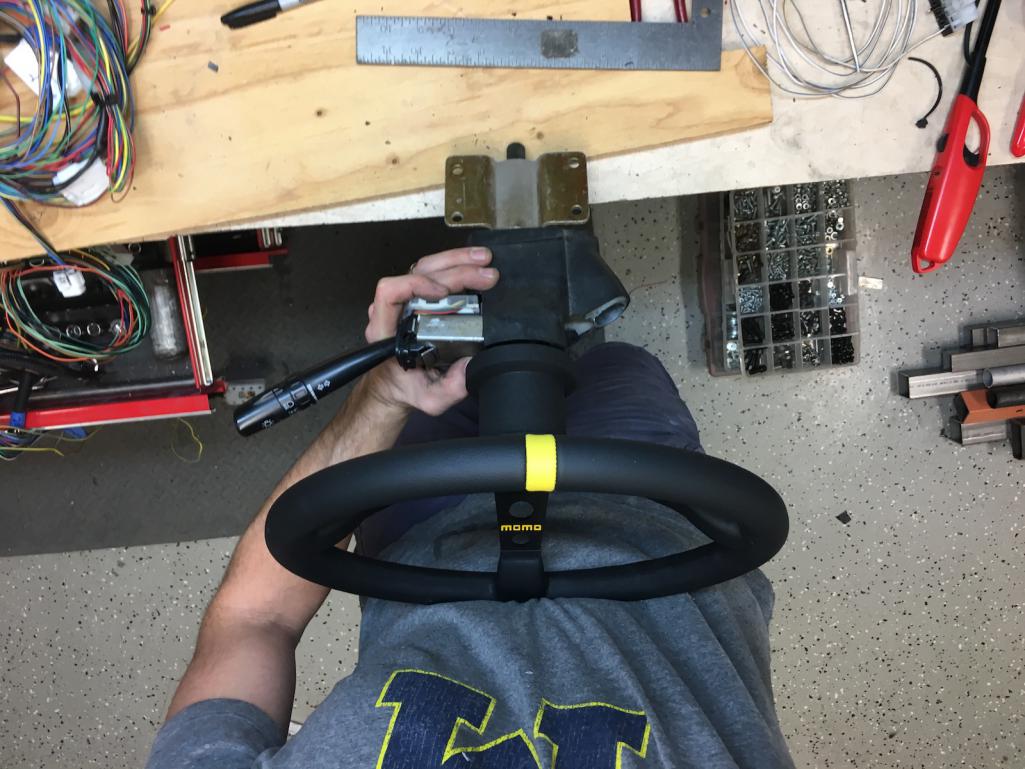
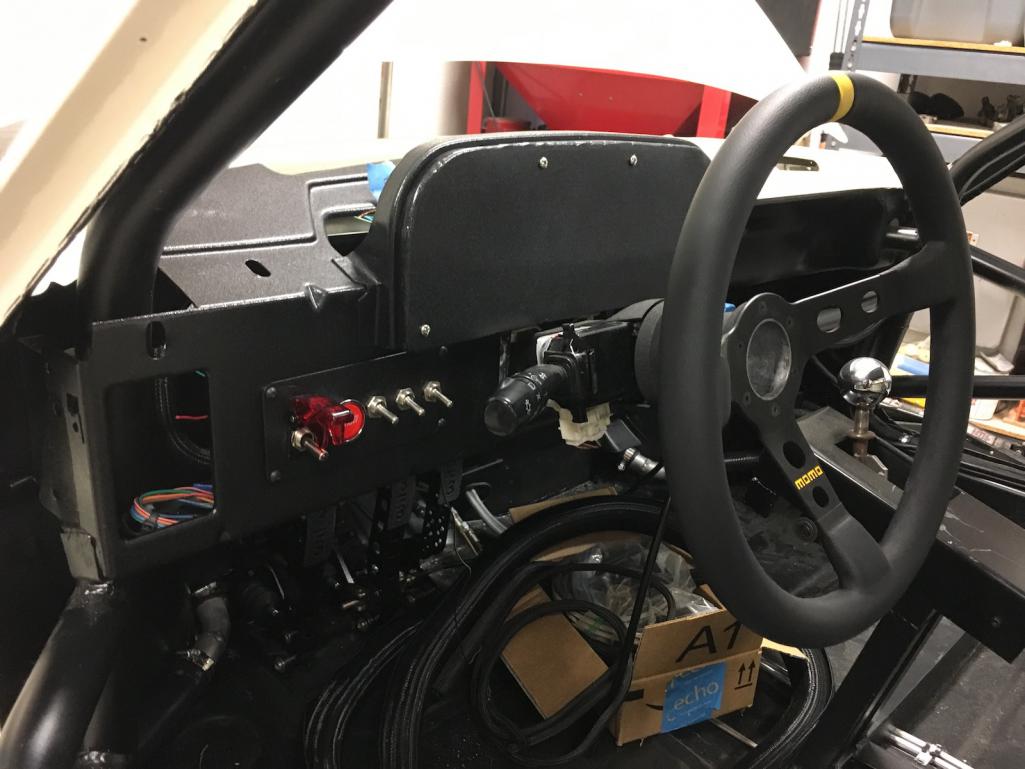
• Bought a new Momo wheel and hub. Looks so good in the car, loving it.
I spoke with the local blaster / powdercoater and he'll blast and prime the chassis for around $1400 so I may go that route. It'll be a real challenge to get the car over to him, but we'll see. Its going to be a busy couple of weeks coming up (dad in town, Monterey Car Week, work, etc), but ill find a way to get some work in.
This weekend I'm aiming to:
• Fab a plate to mount the pedals to the floorpan
• Cut open the header tubes to run the coolant hose
• Weld in the front section of the floorpan
• Finish fab work on the rear pan and firewall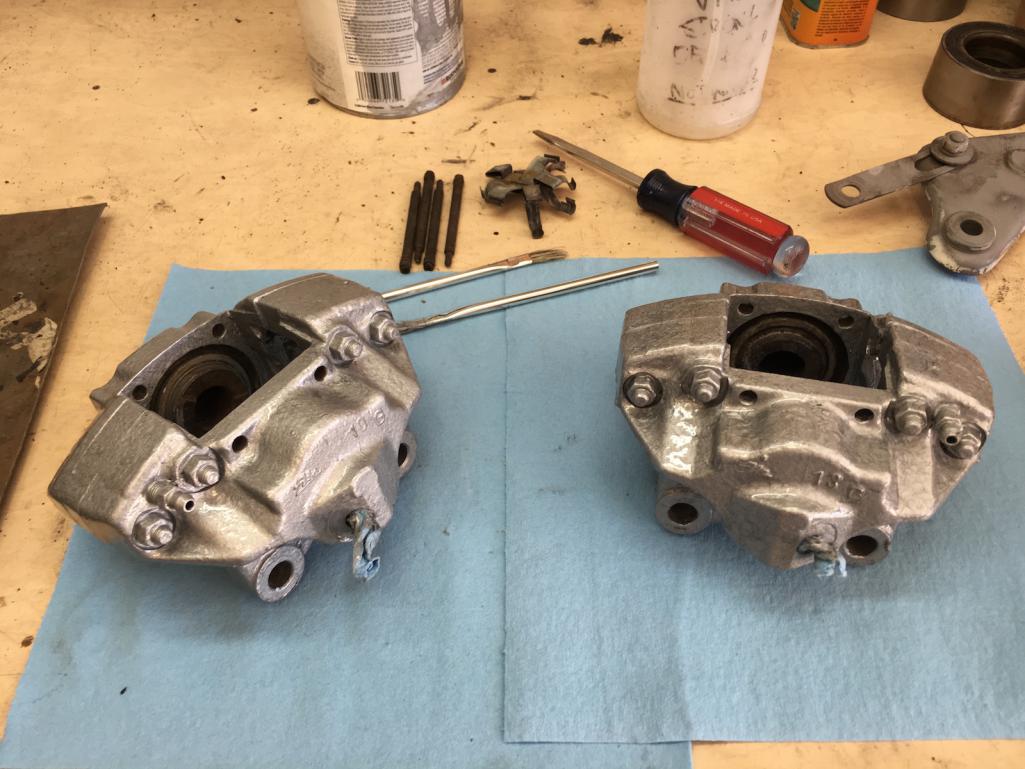

Posted by: MichiganMat Aug 11 2016, 08:21 AM
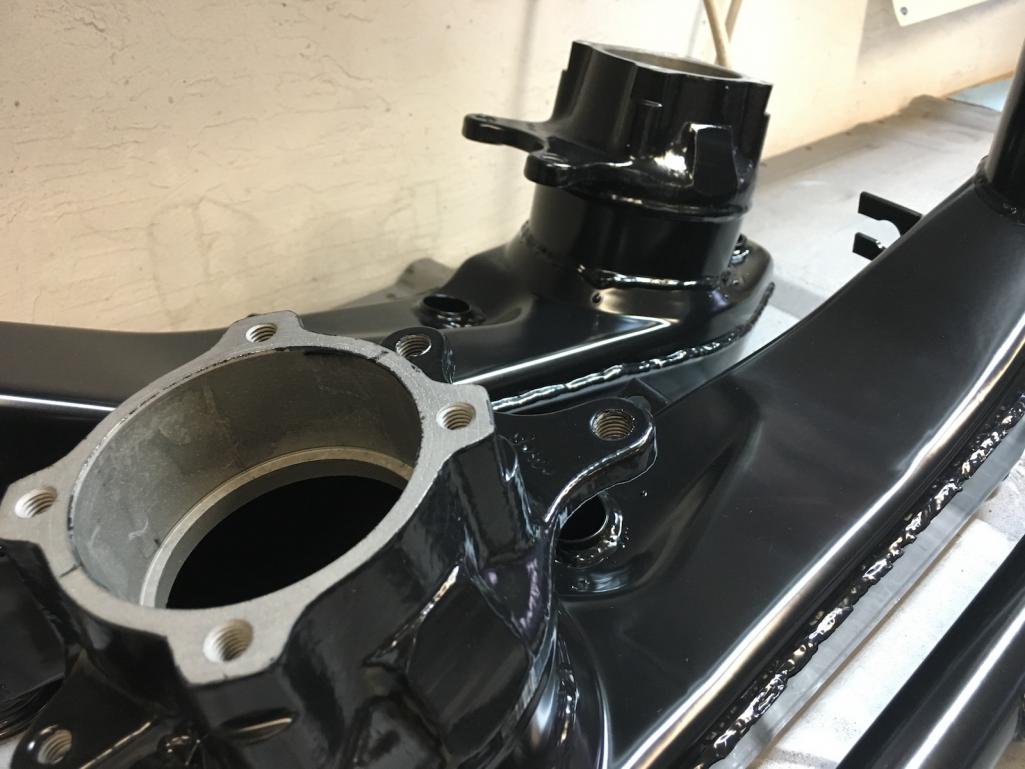
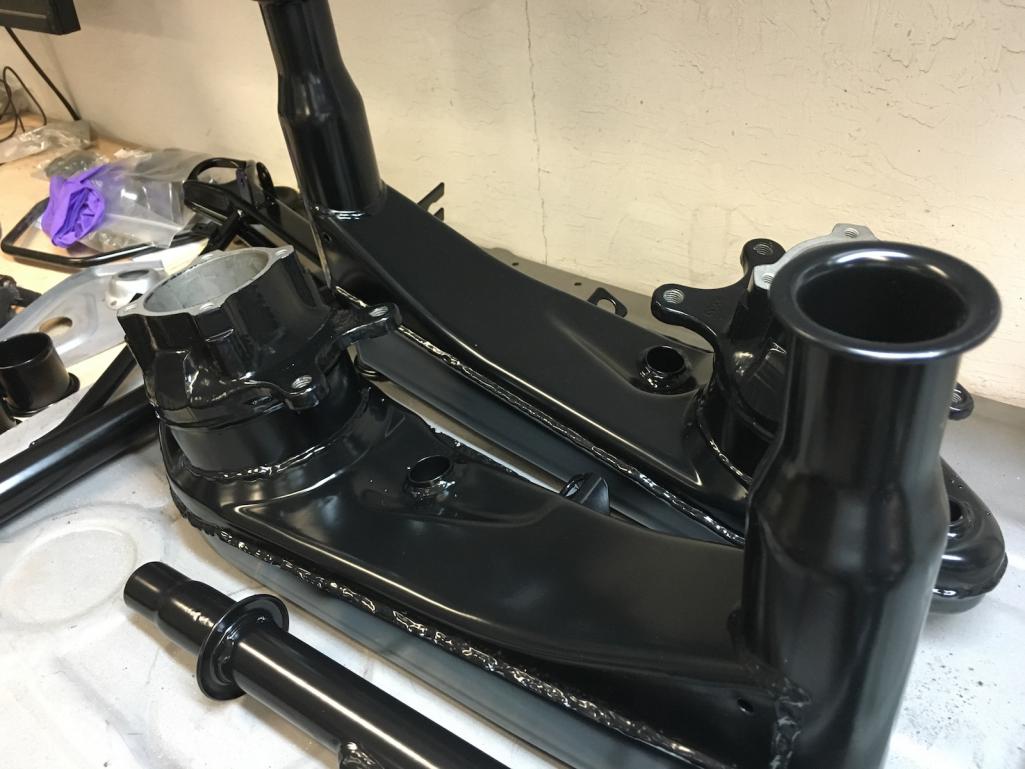
Picked the suspension pieces from the powder-coater yesterday too, super happy with the results:
Posted by: MichiganMat Sep 13 2016, 08:49 AM
Some good progress lately, chassis is ready to go off to the blasting shop!
A few things of note since the last update:
- mocked up the floors and Wilwood pedal cluster, looking good so far
- reinforced the rear suspension consoles. its not the most /technical/ solution, but I think it'll work
- rebuilt the rotisserie with a center connector and better wheels, should be able to get it onto a trailer now
- finished up a bit more of the rear firewall
Not a huge amount of progress, but trying to keep the ball rolling here. Took my 911 to the racetrack and beat the crap out of it, repairing it took a few extra days. Theres been a bunch of family events this summer too, so thats been taking up time.
So whats next:
- I've got a trailer scheduled, going to take the chassis to the blaster early next week
- Going to put in a big order for the rest of the suspension bits (shocks, t-bar, ball joints) soon, get all that wrapped up and ready..
- Once the chassis is back from blasting & prime, Im going to install the floors and shifter console.
- Once the shifter and floors are in, well, its probably ready for paint at that point!
Feeling good, moving forward, getting closer.... sorta, haha.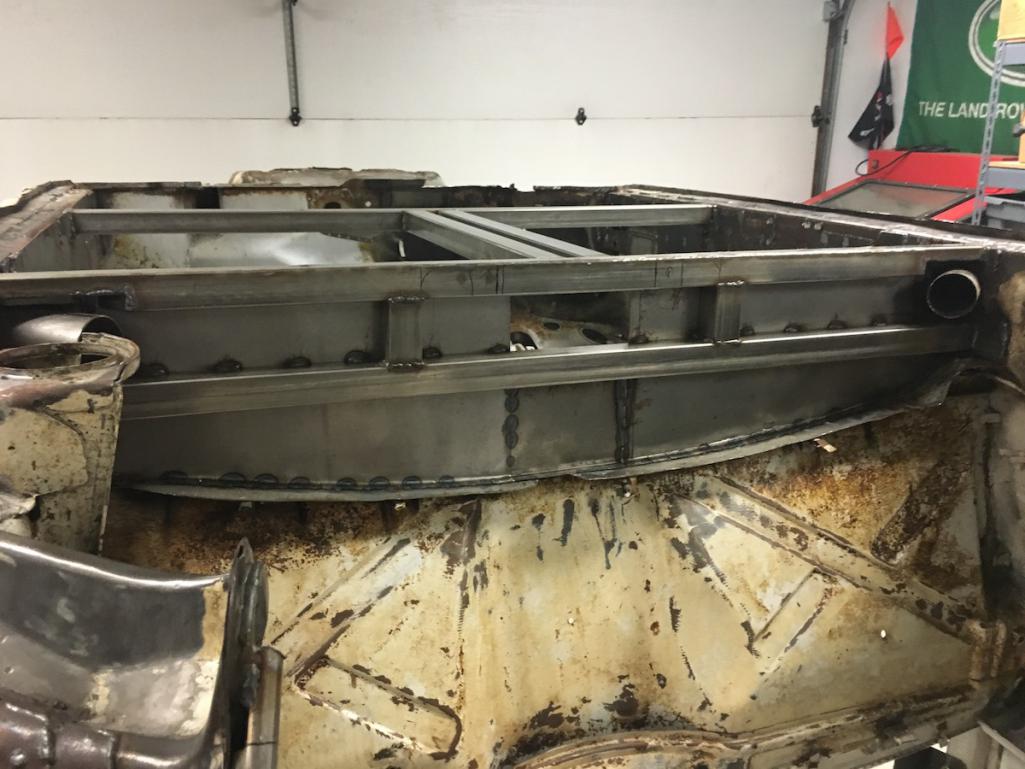
Posted by: MichiganMat Sep 27 2016, 10:59 AM
Well, the Build-Off Challenge is over but work continues at the MichiganMat house.
So whats new:
- Loaded up the trailer and took the car off to the blaster. Came back minty-fresh
- Pretty happy with the result, not too much blow-through from the blaster, chassis is pretty much ready to take to paint
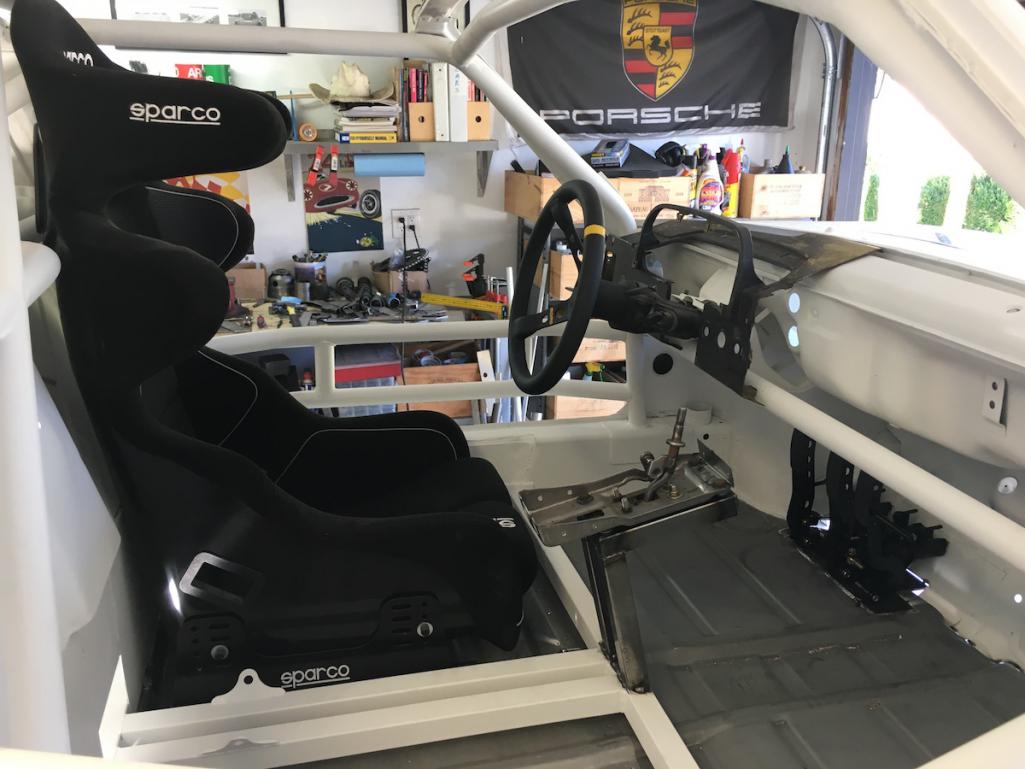
- Fully welded in the floor pans and the shifter console
- Liking the ergonomics, its coming along
I waited to install the pans before blasting on purpose. I wanted to make sure all the shitty stuff under the dash got a good blast. The pics don't show it but I also tied the pan into the center "tunnel" structure, its nice and firm now, structurally sound.
Next steps:
- Friend who loaned me the trailer is moving, so I gotta get this thing off to paint ASAP.
- I need weld in some tabs for the dash, weld in mounts for the passenger rocker, and seam-seal the driver compartment, and then I get off to paint.
- I expect to be at painter in the next two weeks.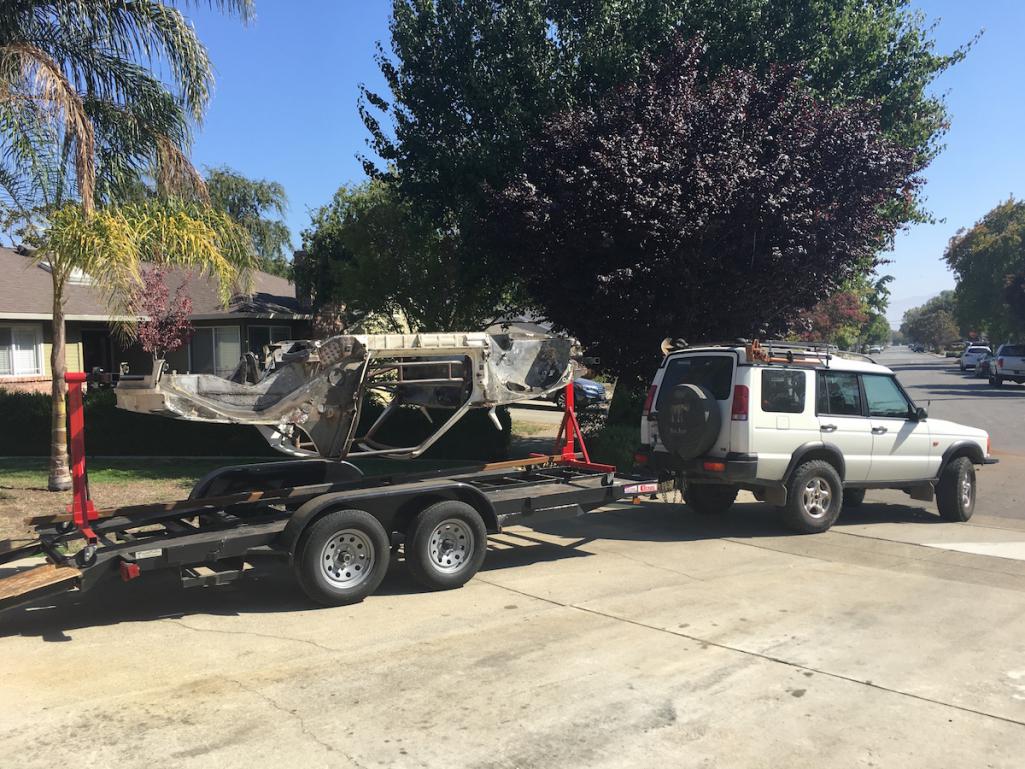
Posted by: trojanhorsepower Sep 27 2016, 03:25 PM
Looks good!
Posted by: MichiganMat Oct 9 2016, 10:12 AM
So, I ordered the wrong color paint from TCPGlobal, but I have an idea for the paint scheme. This is just a photoshop of the idea, and the bumper is different from what I'm using, but I think the idea is there. Gray bumpers and greenhouse, bright white body, with blue rockers and front lip. I think the graphics (Shell, the number, and the script) really bring it all together.
Thoughts?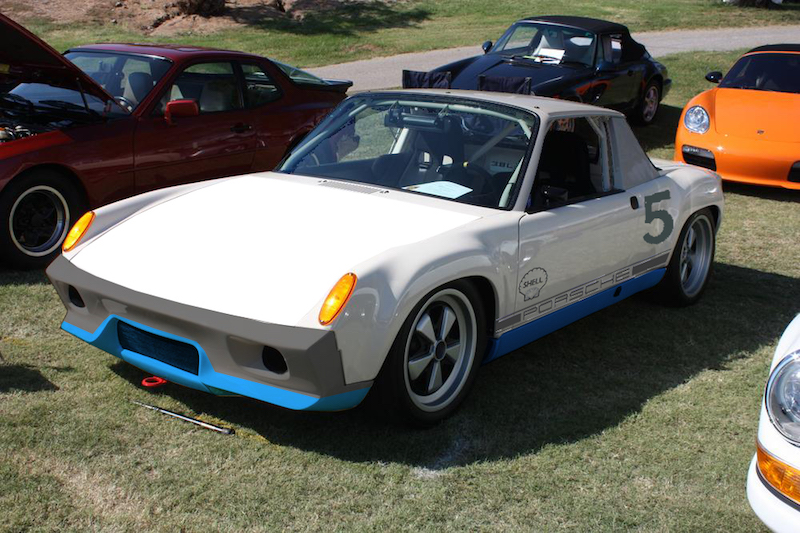
Posted by: altitude411 Oct 9 2016, 10:50 AM
I like it! Nice work!
How was it loading the car on the trailer while on the rotisserie?
Posted by: MichiganMat Oct 9 2016, 01:05 PM
I like it! Nice work!
How was it loading the car on the trailer while on the rotisserie?
I rebuilt the rotisserie with larger casters so it was piece of cake to load up. Did it by myself!
Posted by: MichiganMat Oct 24 2016, 10:47 AM
Sometimes you just have to say "screw it", put on your big-boy pants, and get down to work.
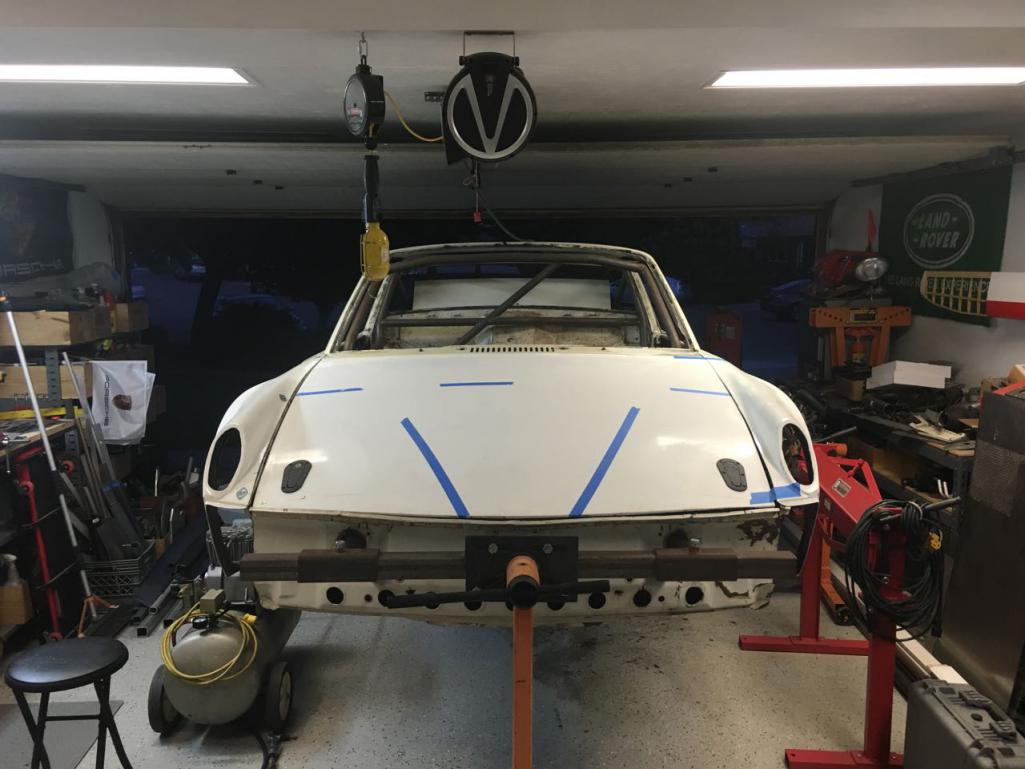
I've been toying with the idea of painting the car myself and this past Saturday I got down to business and started spraying. Yes, I used a cheap HF gun (I've got a new Eastwood gun on order). Yes, the panels did not come out as perfect as they would if I had paid someone.
Do I care? Well, yes and no. I figure, this is my project, for better or worse, and the only way Im going to learn is by making mistakes. Im precise all week long for my job, on the weekends I think Im entitled to a bit of /experimentation/ I've been using this HF gun for a few years now so Im not totally new to painting with it. The fenders all turned out great actually, while the hood has some pitting that Im not too happy about, but the white paint does a lot to hide the flaws.
The color is Wimbledon White, its kinda creamy. Its the same paint we used on my brothers 912-STi project. The bumpers, rockers, roof, and sail panels will be finished in satin black. 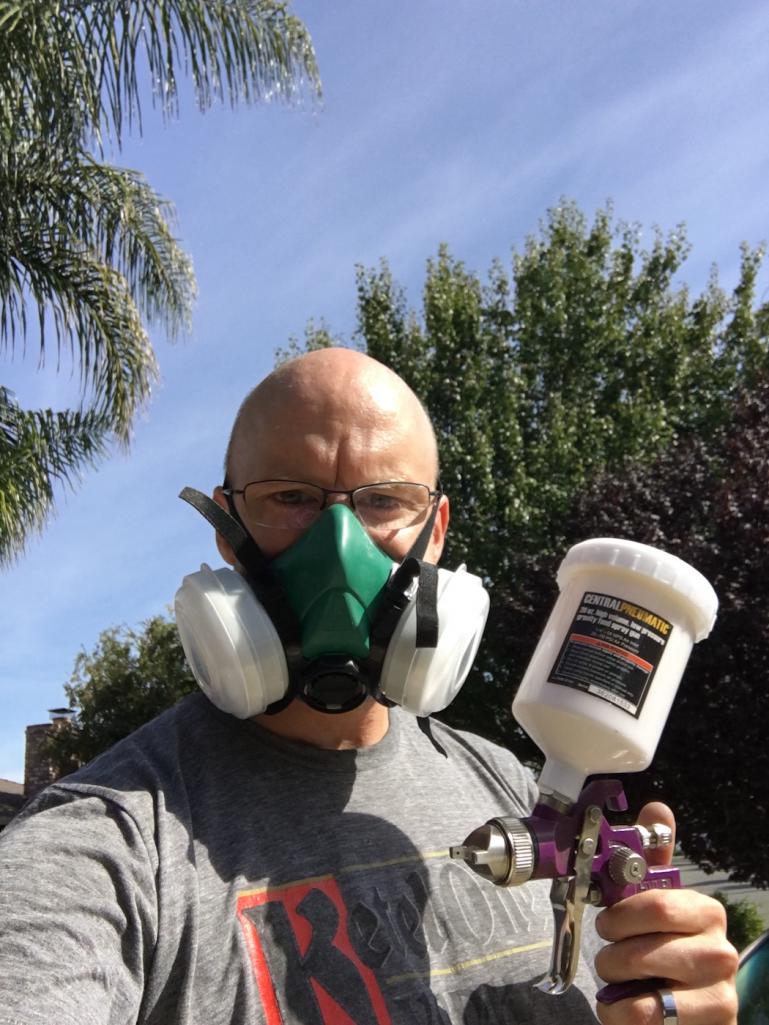
Posted by: matthepcat Oct 25 2016, 12:39 AM
Will be worth the risk in the end for the learning experience and saved money.
I like this project.
Posted by: mgp4591 Oct 25 2016, 01:24 AM
I love the Wimbledon White - I'm looking at doing that also but in a satin or possibly flat. I also love the chassis floor mods becuz extra strength isn't a bad thing. I may have to steal a knock off of that myself. Keep it coming - I look forward to your posts to see what's up next!
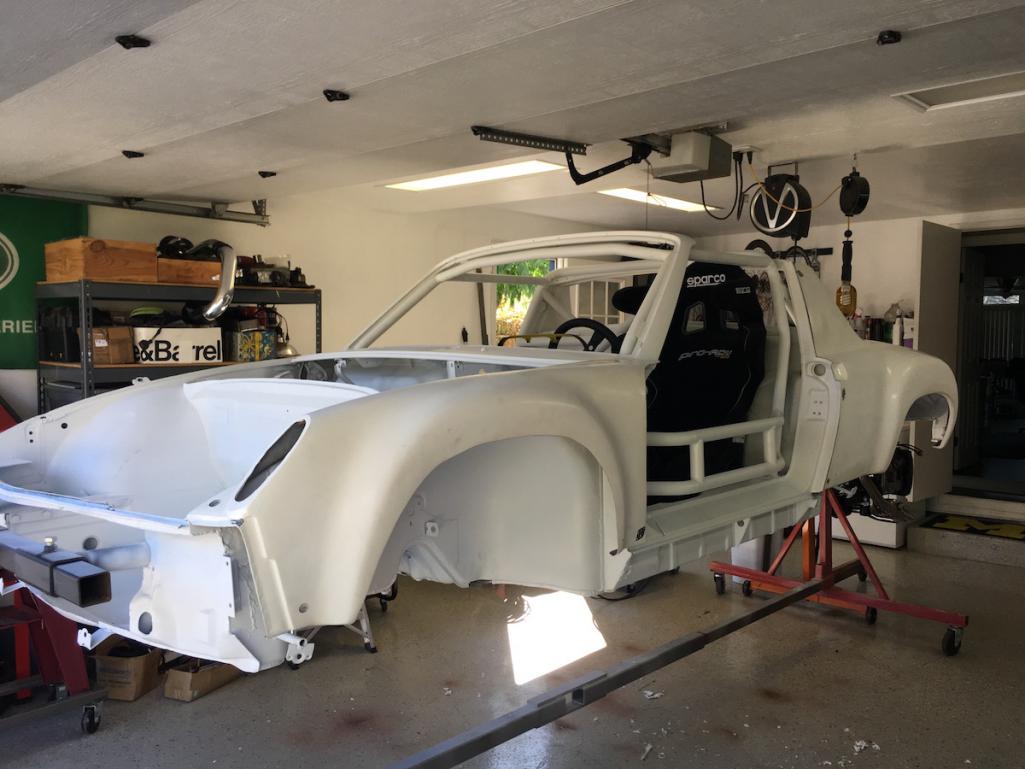
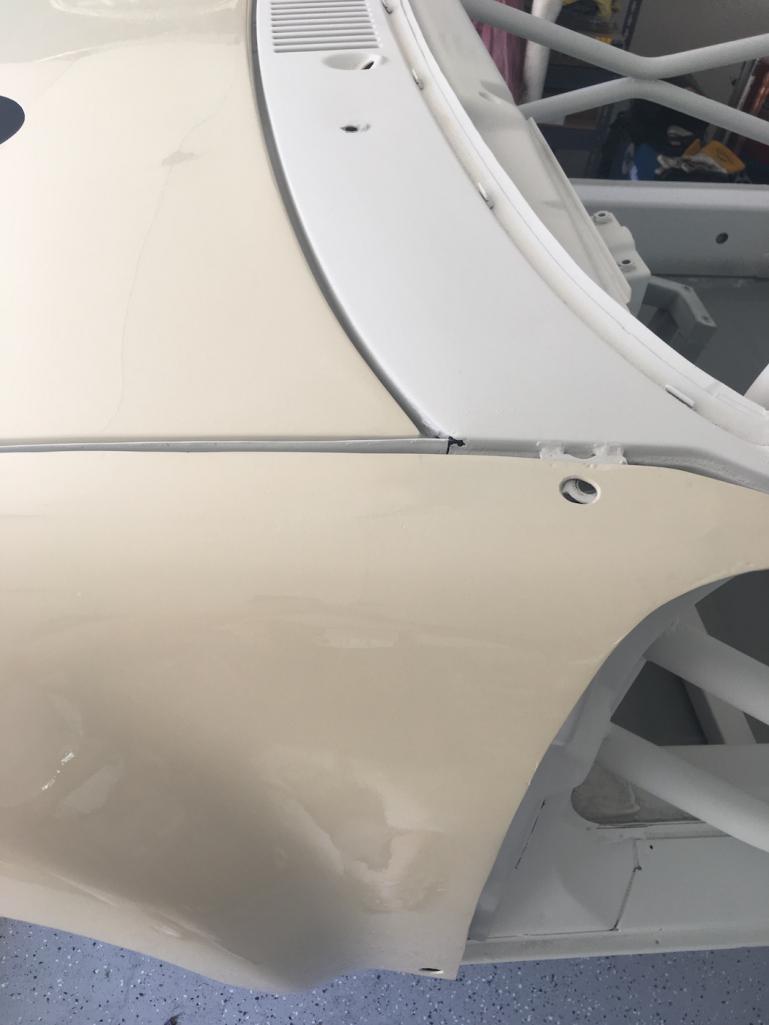
Posted by: MichiganMat Nov 7 2016, 01:03 PM
Put some paint on the 914 chassis:
- front trunk
- wheel wells
- rockers
- engine compartment
Painted the black bits (satin black) too:
- targa top
- front bumper and lip
- rear bumper
- rocker panels
Going to tape off the interior and shoot it probably next weekend. In the meantime I have about 50 dzus fasteners to rivet into place.
did a bit of work on the doors, got them filled in but sanding them was PITA so I gave up until next weekend.
started labeling and sorting through the wiring harness too. I've got 75% of a 2002 WRX harness, going to get the other 25% and wire up the whole car with a full modern harness.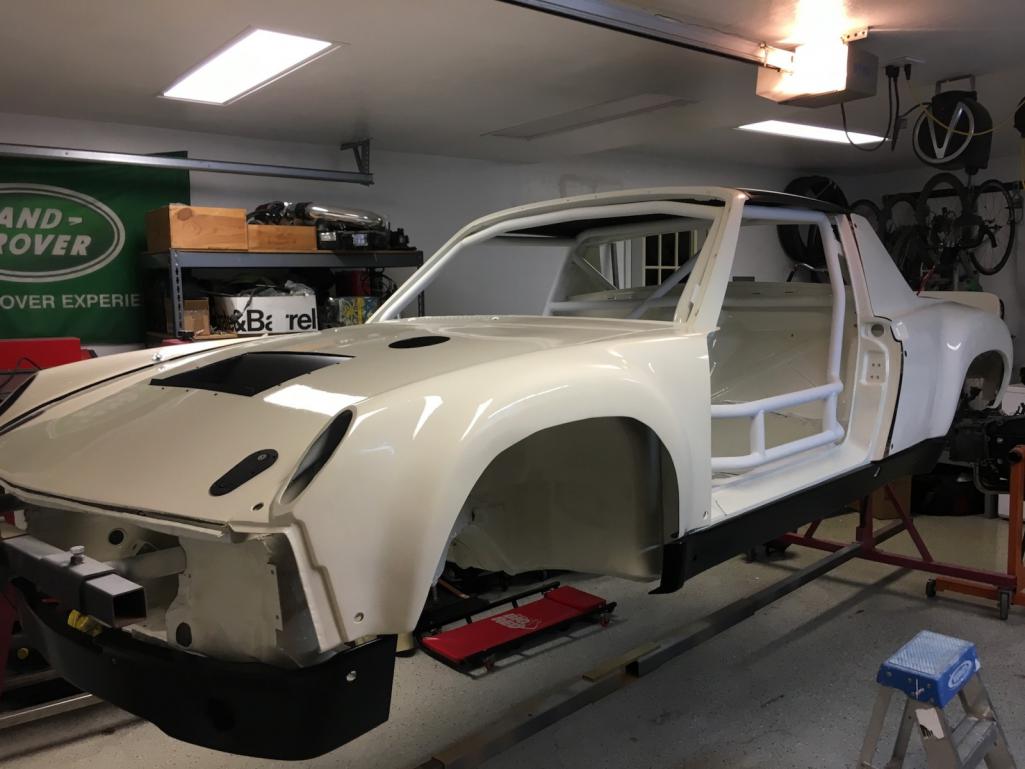
Posted by: Andyrew Nov 7 2016, 01:24 PM
Paint looks good!!! Always happy with the quality of paint TCP puts out. I dont see any big runs so good job!
I think your making the right decision regarding the wire harness. Ive been happy with my full harness conversion. But I keep telling myself I'll pull the harness someday and strip it down to half the size when I finish all my wiring.
Posted by: trojanhorsepower Nov 7 2016, 08:04 PM
Hi Matt, looks good!
Did you burn the bushings out or do you have another way?
Posted by: Curbandgutter Nov 8 2016, 03:12 PM
Love what you did to your lower firewall. Good Job! Car is looking fantastic. These 914's sure are a great platform to modify.
Posted by: MichiganMat Dec 23 2016, 10:59 PM
Big update: Wiring.
About a month ago I was able to pick up a 2002 wiring harness from eBay. Luck smiled on me back around Thanksgiving and my local junkyard had a 2002 WRX in the lot and I was able to scrounge the complete rear harness, fuel pump controller, turn signal stalk, and a few other various bits for $50. Found an engine fuse panel on eBay and *boom* I've got the complete harness.
~40 hours later and I've finally got the harness all trimmed down and ready for installation.
My advice: Print out the complete wiring diagrams and become extremely familiar with them. Label every connector. Once confirmed what things are, start trimming. EASY. Haha.
Anyways, today I had the day off so I finished up the work on the harness. I've got all the mystery wires identified and marked, all the connectors are trimmed down, and its basically ready to put in the car. Im, of course, going to wire-wrap the whole thing and mount it all to a board before installation, blah blah blah, but the trimming part is done. Phew!
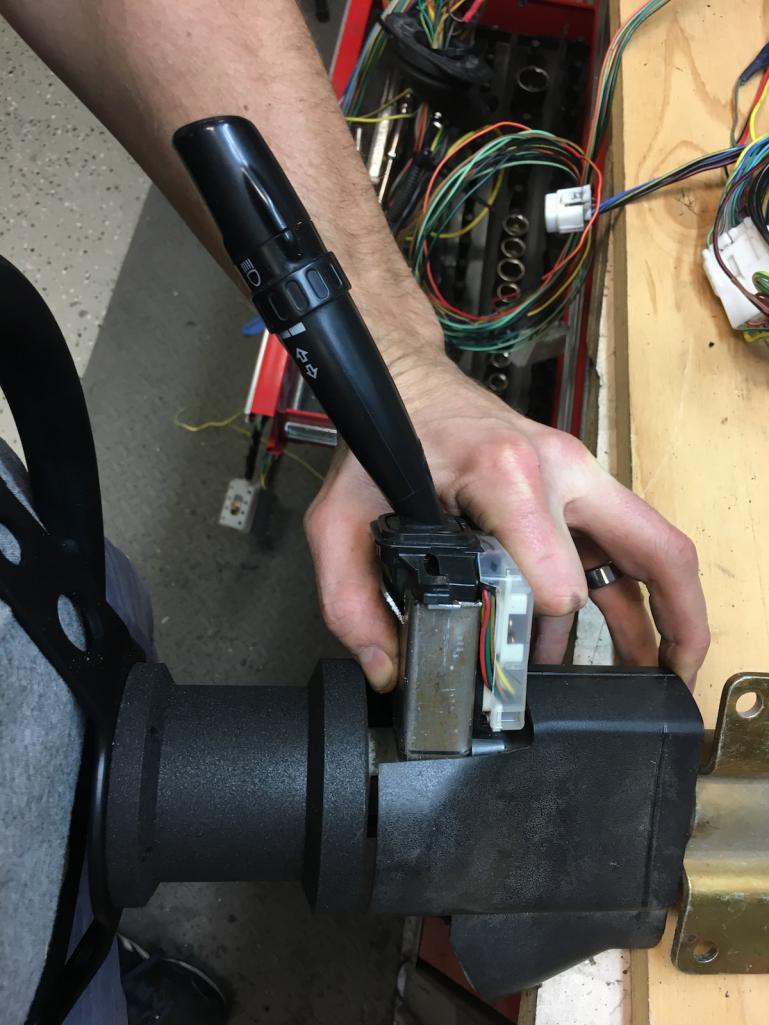
I also had some *spare* time on my hands tonight so I started making the mount for the WRX turn-signal / headlight stalk to mount to the existing 914 steering column. I removed the old controls from the 914 column, including the old tumbler and wheel lock. The mount is made from some 2x2 that I had laying around. Bunch of cutting and bending and I've got a pretty good mount.
The detail work on this stuff will take some time but the bulk is finished. Feeling pretty good about mounting it all in the car next week.
Thanks for following along!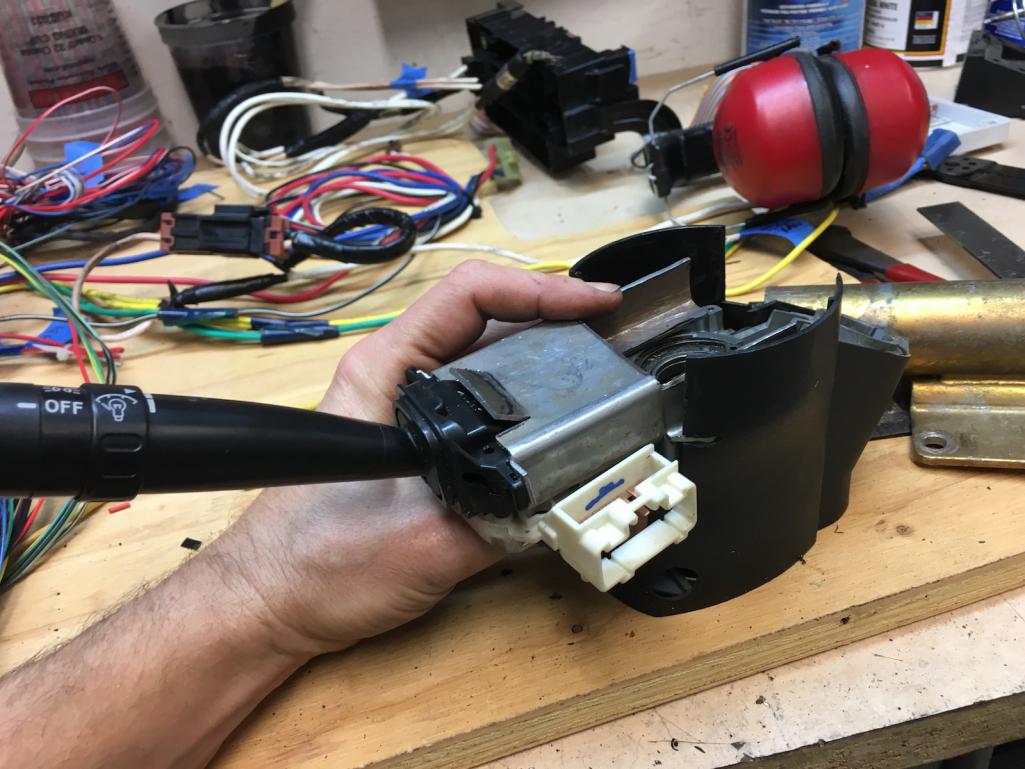


Posted by: 76-914 Dec 24 2016, 10:23 AM
If you need an excuse to drink, this is it. Good job! Wiring is a tremendous hurdle.
Posted by: MichiganMat Dec 24 2016, 04:30 PM
Mounted all the wiring to an aluminum panel which will go behind the driver seat.
Im going to wrap everything in weaved wire wrap before install, should be pretty pimp.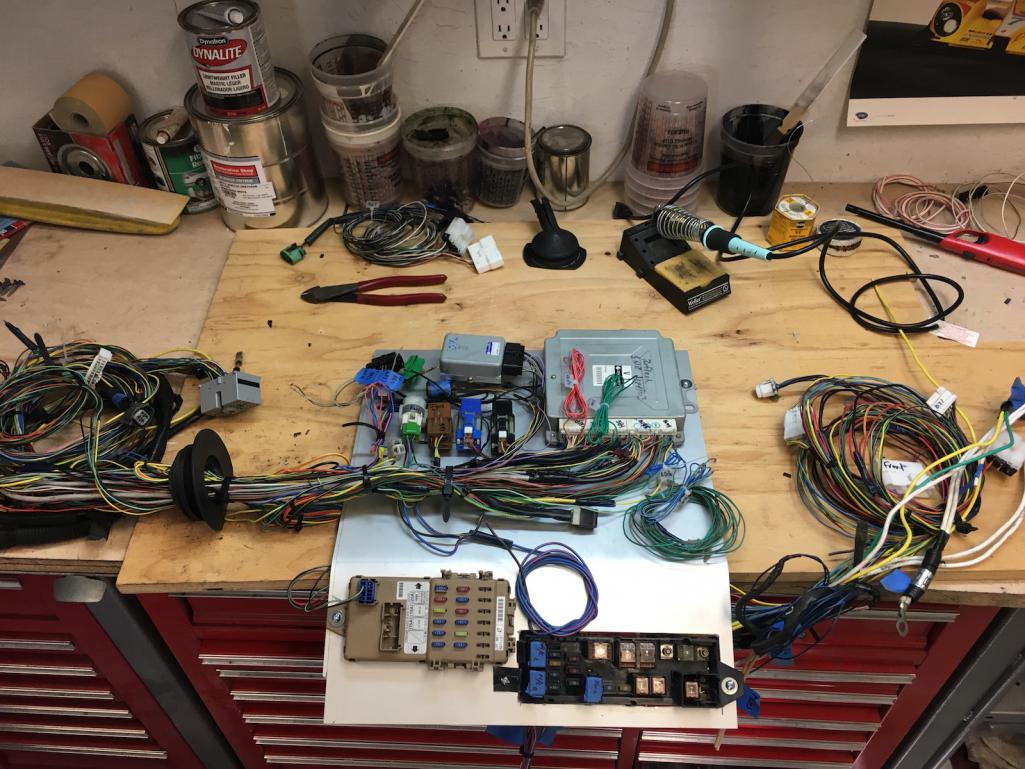
Posted by: MichiganMat Mar 19 2017, 10:27 PM
BIG NEWS: The car is on the ground.
Im trying to think of what to update you guys on as far as the last few months. Lets see..
• Wrapped and installed the wiring harness
• Started work on the tail lights, Im gluing 3" LED trailer light cores into 914 buckets
• Bolted up the suspensions bits, plug-n-play for the most part.
• Ran brake, clutch and fuel lines. Easy, just time consuming.
Yeah, other than that, just invited a group of friends over and we got to work on lowering the chassis off the rotisserie today. Then we lifted the rear and slid the drivetrain underneath and put all into position. Now I have a big shit-eating grin every time I turn on the garage lights! Almost 2 years, countless weekends, yada yada yada, but I'll be damned, I've got a 914 roller in my garage.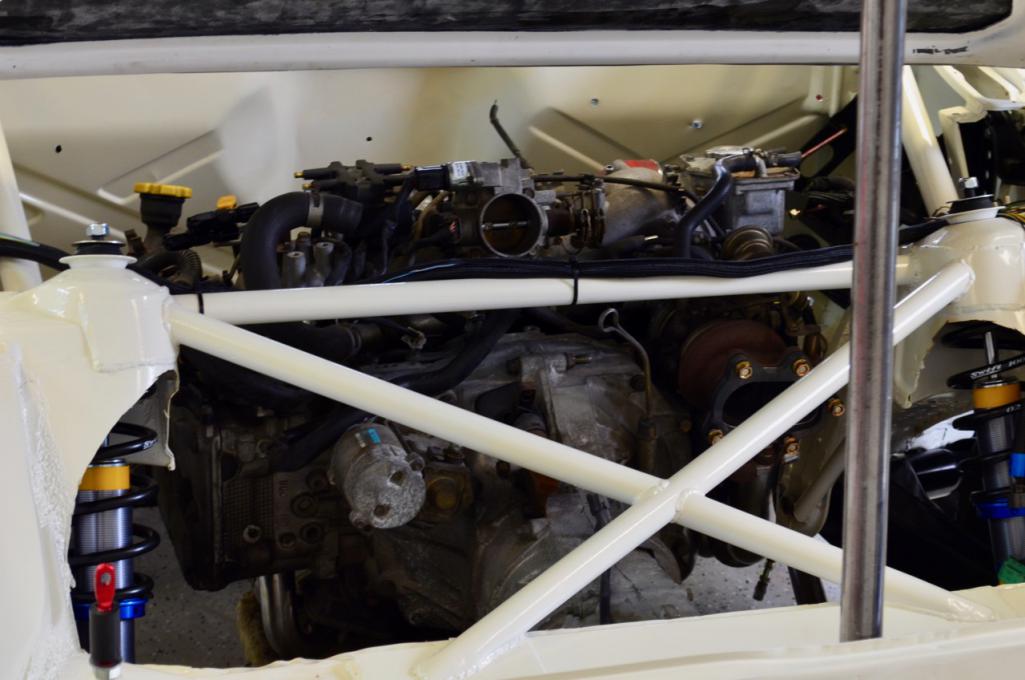

Posted by: Dion Mar 20 2017, 05:27 AM
Seeing 914Dave's harness out of the car and just 1/2 of mine out, I thought that was daunting. Nice work! Looks fantastic. Really looks good.
Cheers
Posted by: Chris H. Mar 20 2017, 08:23 PM
Wow that thing looks GREAT!!!! Nice work.
Posted by: MichiganMat Mar 27 2017, 03:57 PM
Had a busy weekend with the 914.
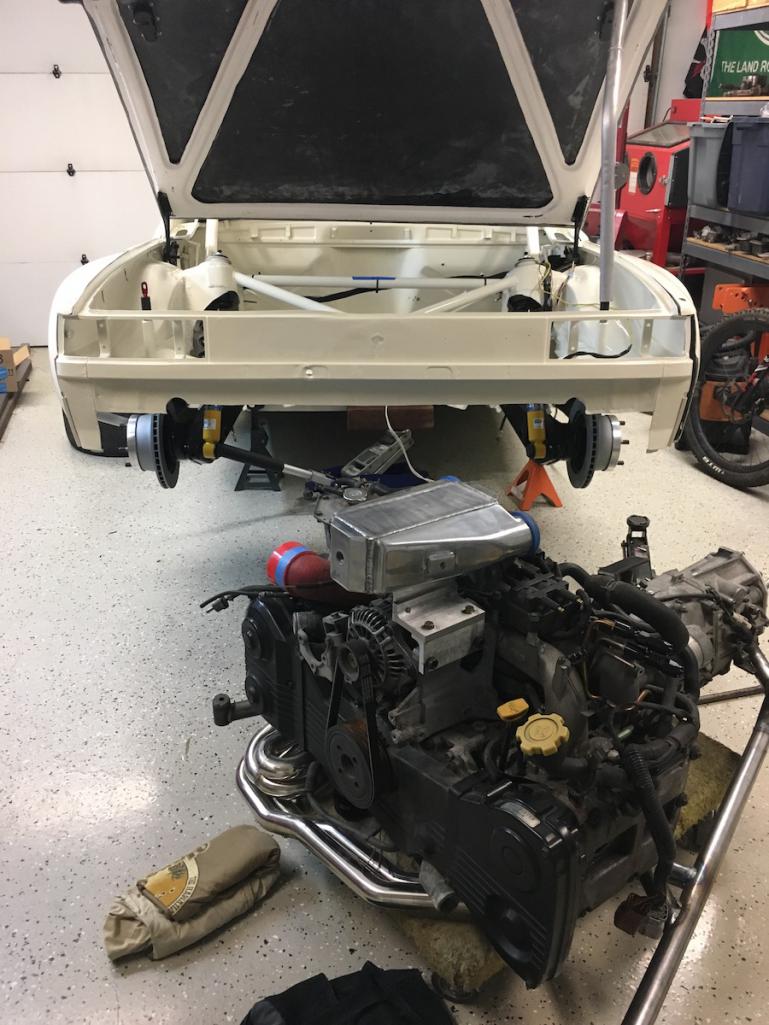
Built the engine+trans mount, installed it into the car. Took about 9hrs. Pretty happy, the distances from the trans output stubs to the hubs is a perfect 20" on each side. Easy peasy.
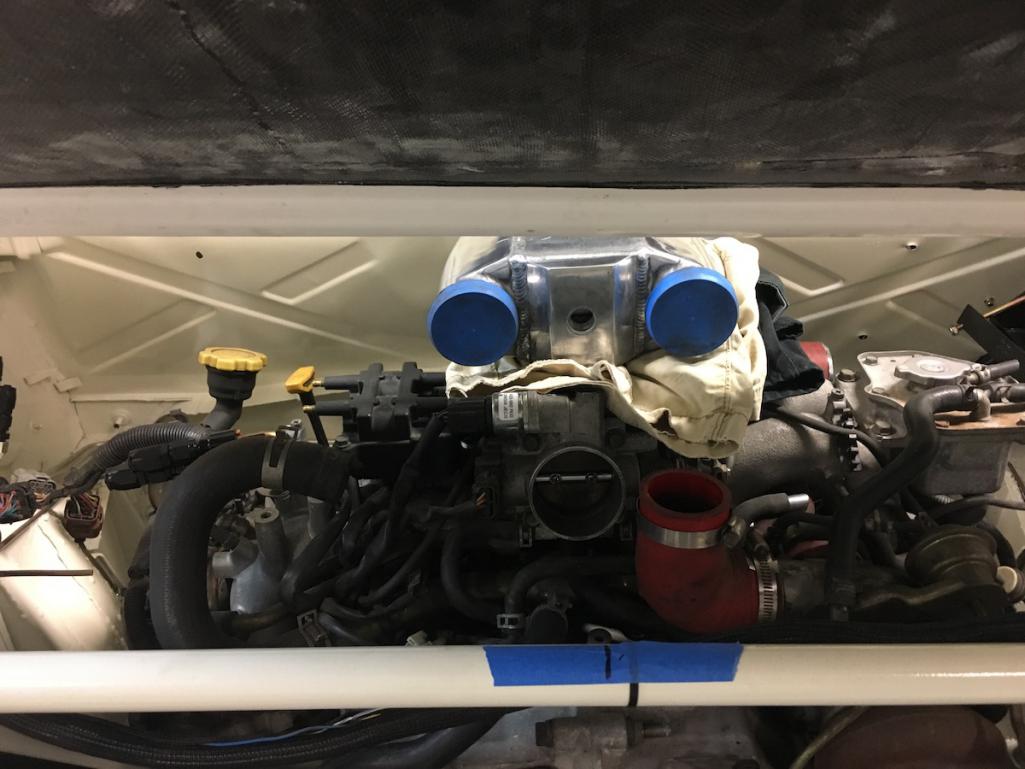
Started work on the IC, found a good location, will start making mounts and ordering tubing and connectors this week. Shouldn't be too hard to mount up.
Im really liking the location of the IC, I think it'll be a nice showpiece, something to look at when she's parked. 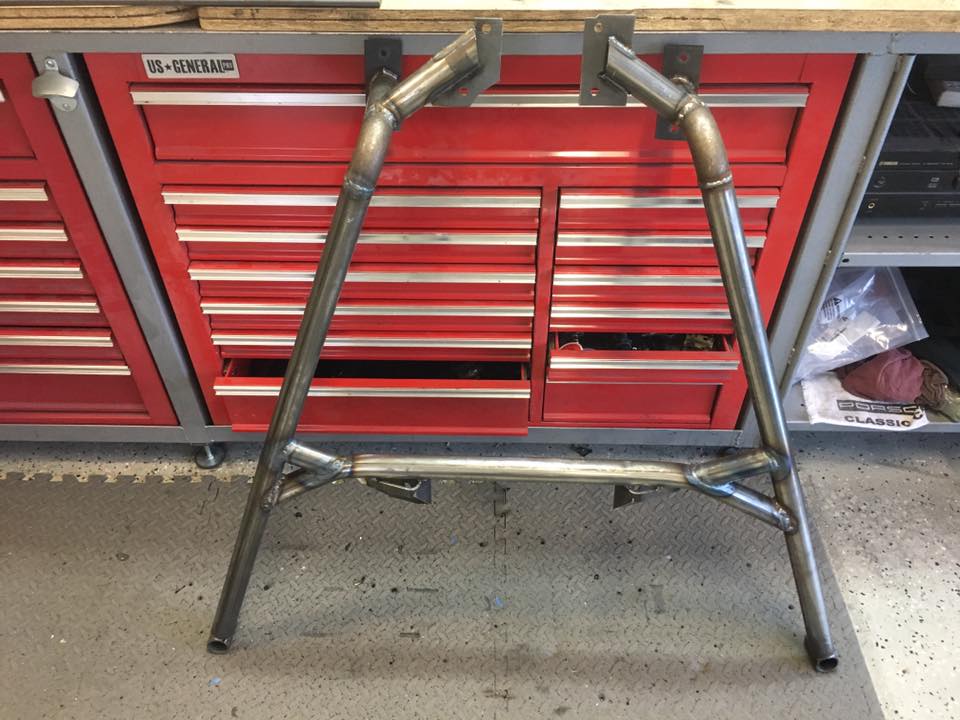

Posted by: tygaboy Mar 27 2017, 04:41 PM
That's looking great! Curious about the cut-away of the lower portion of the rear shock towers. Was there a specific reason? I ask because I was looking at doing something similar. In my case, it was essentially cosmetic.
Keep up the great work.
Posted by: MichiganMat Mar 27 2017, 07:29 PM
That's looking great! Curious about the cut-away of the lower portion of the rear shock towers. Was there a specific reason? I ask because I was looking at doing something similar. In my case, it was essentially cosmetic.
Keep up the great work.
Yeah, its basically cosmetic, though it does give better visibility into the shock piston / spring area. I was looking over the metal and the bracing and the lower parts of the towers weren't providing any value so I decided to snip them out.
Thanks for the compliments, looking forward to tossing this thing into a corner and full wail!
Posted by: MichiganMat Mar 28 2017, 01:15 AM
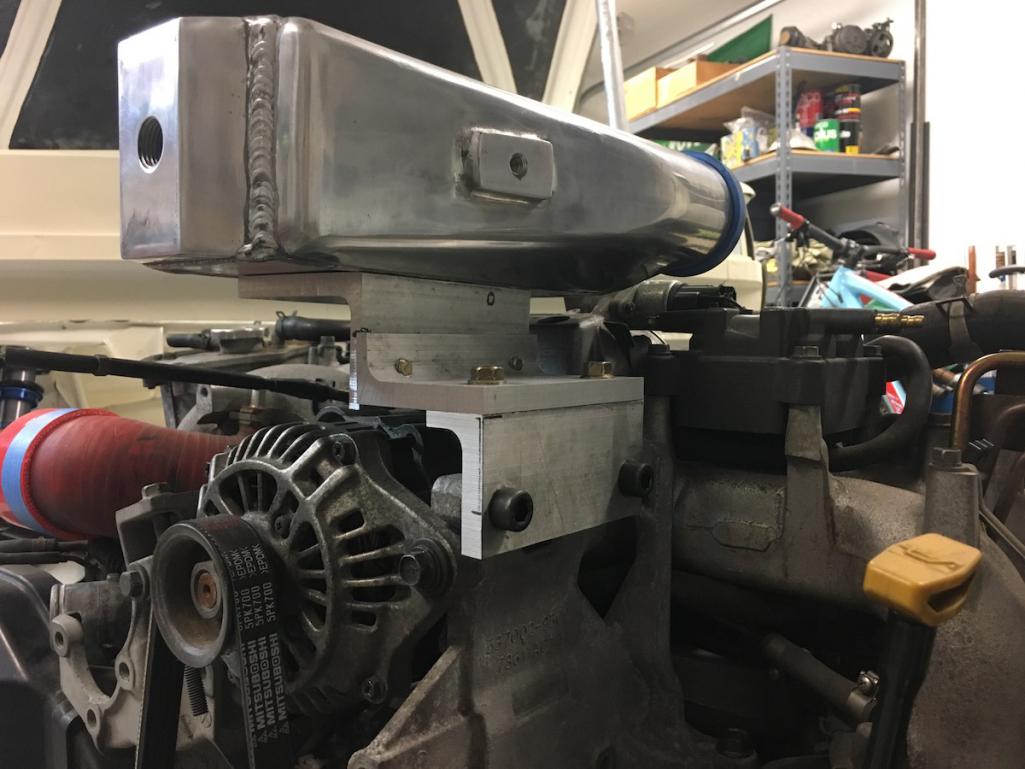
Mocked up the location of the IC, yanked the driveline, cut some material, and mounted it up.
Its just a little platform at this point, but I'll weld some threaded rod to the bottom of the IC, drill some holes in the platform, isolate it with some rubber, and bolt it down. The IC is going to be full of water so I figured Id build a tough strong mount for it.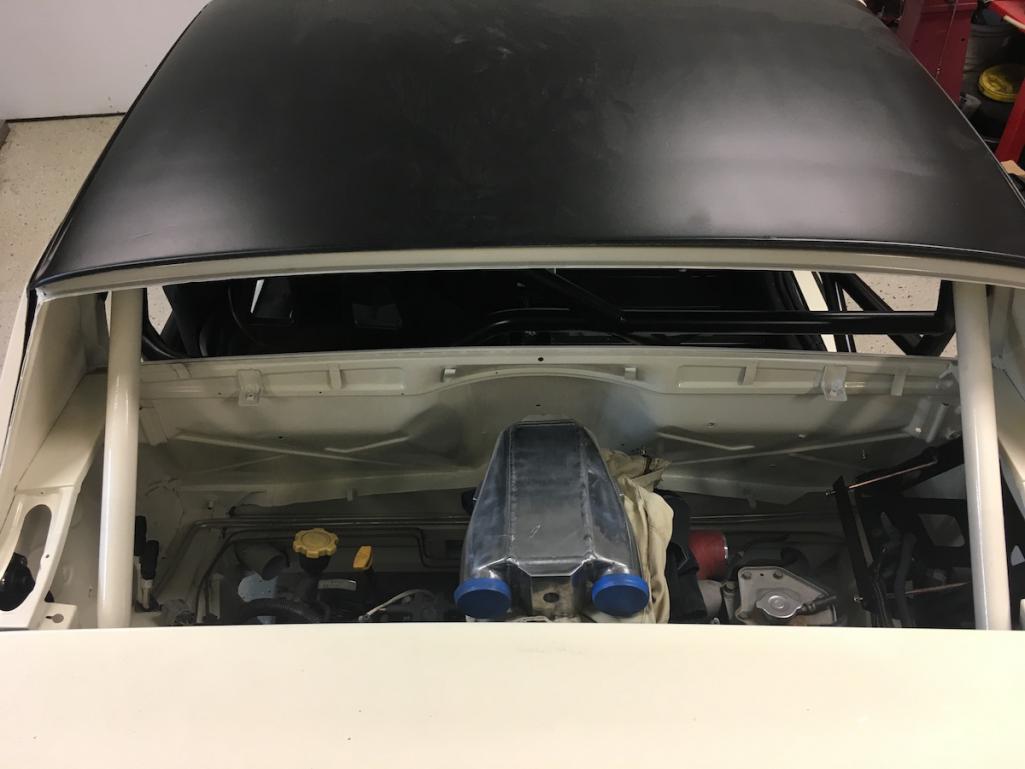
Posted by: MichiganMat Aug 14 2017, 09:38 PM
Its been a busy couple of months since my last update!
•Finished the IC mount and plumbing. Welded in a flange for the stock BOV, mounted it all up...
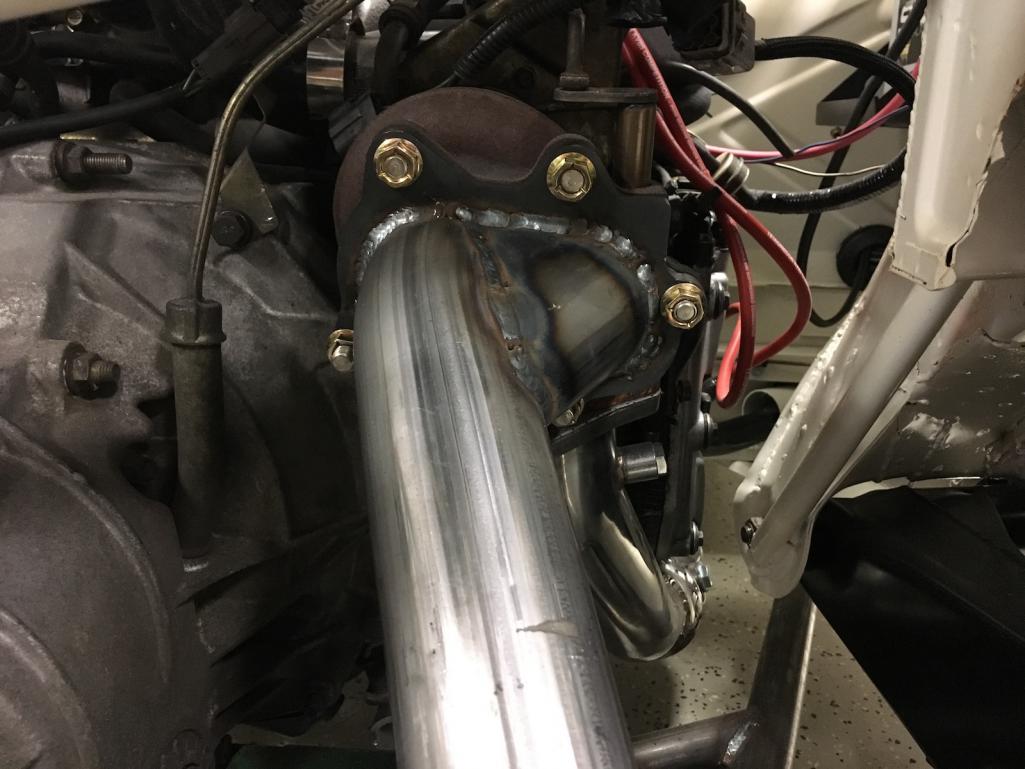
• Exhaust is done. 3" stainless, no cat, right out the back.
• IC radiator is mounted, right behind the driver seat. It's the best place I could think of to get air flow that was near the engine. May not be "race" legal, I know theres some controversy about holes in firewalls, but it'll be good enough as a big-boy toy.
• Dash panel is in, waiting on the tablet mount and it'll have an 8" Fire Tablet running RaceCapture mounted to it. Going to installl oil and check-engine lights into it too.
• Tail lights are in.
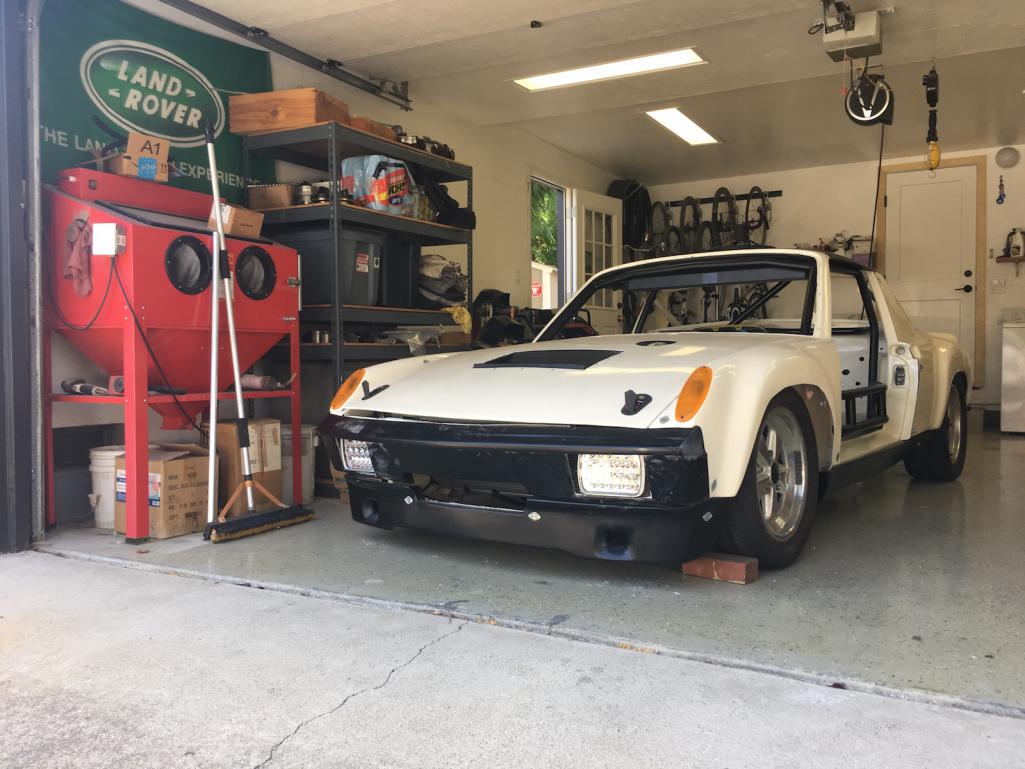
• Tow hook is mounted up
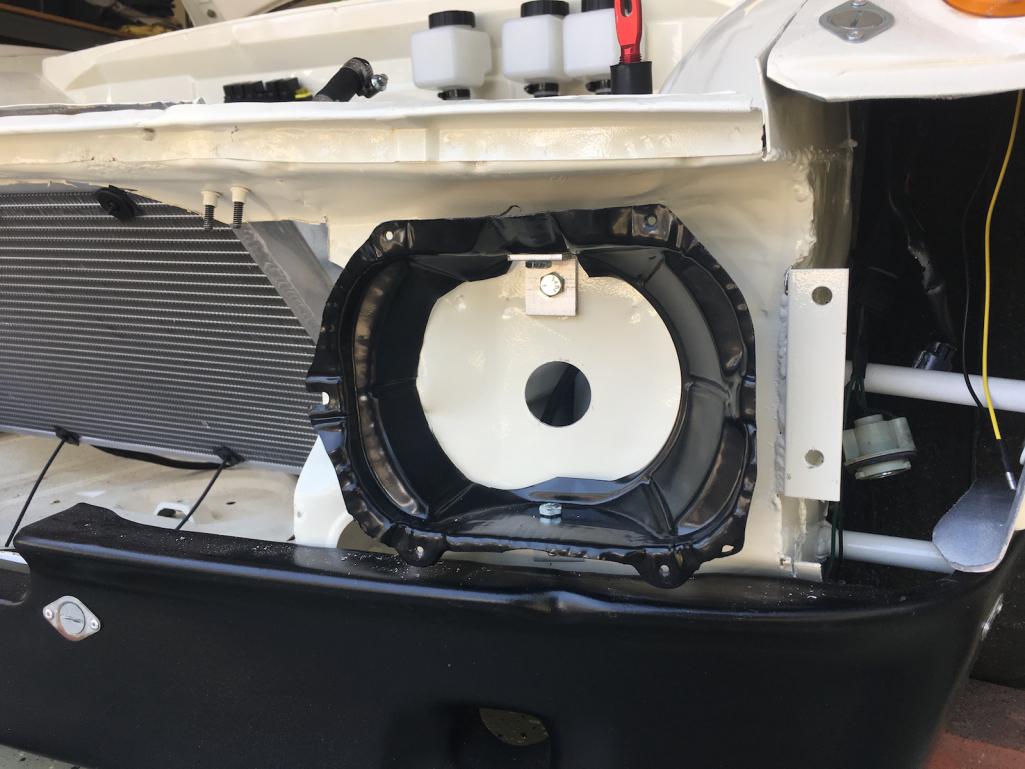
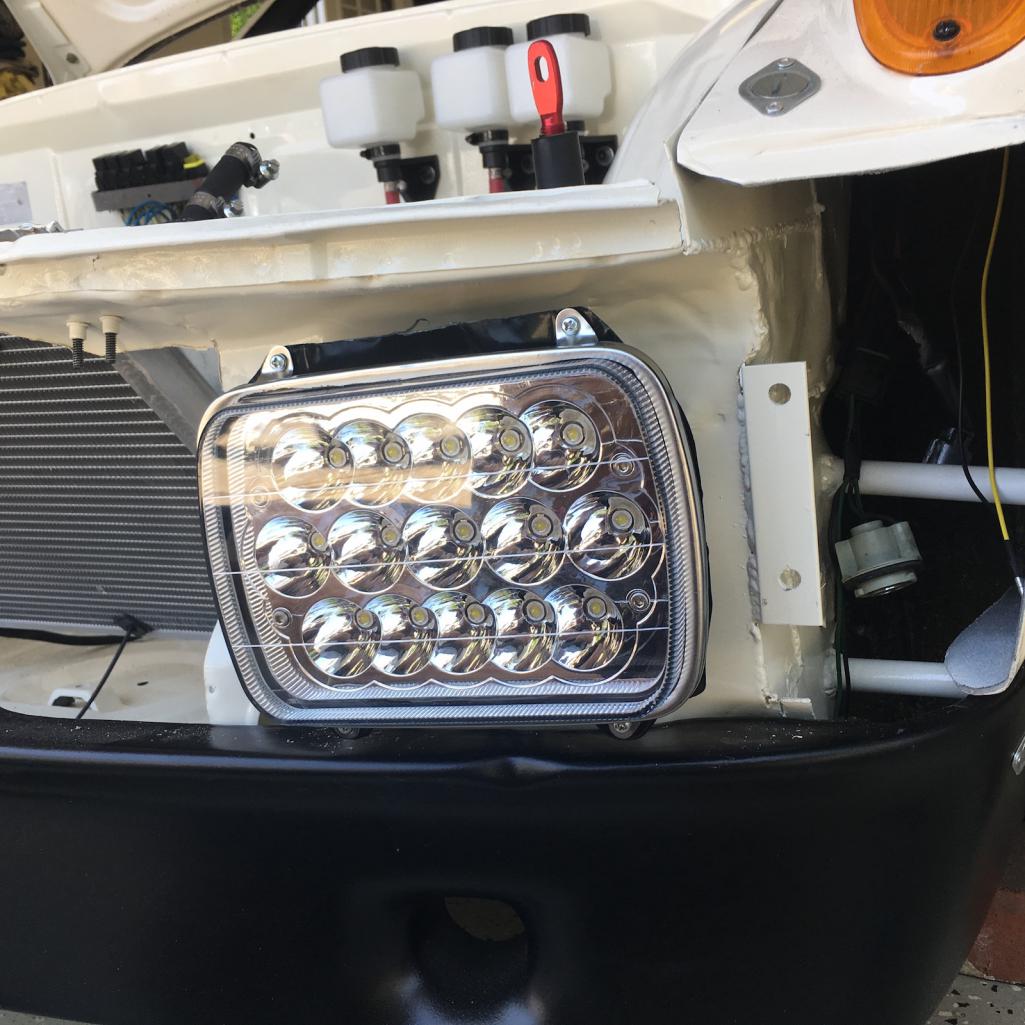
• Added some LED headlights to the front bumper. The WRX harness already had the wiring, might as well make the car road legal. The lenses are too bright for my tastes, Im going to smoke them with some nice vinyl this week. 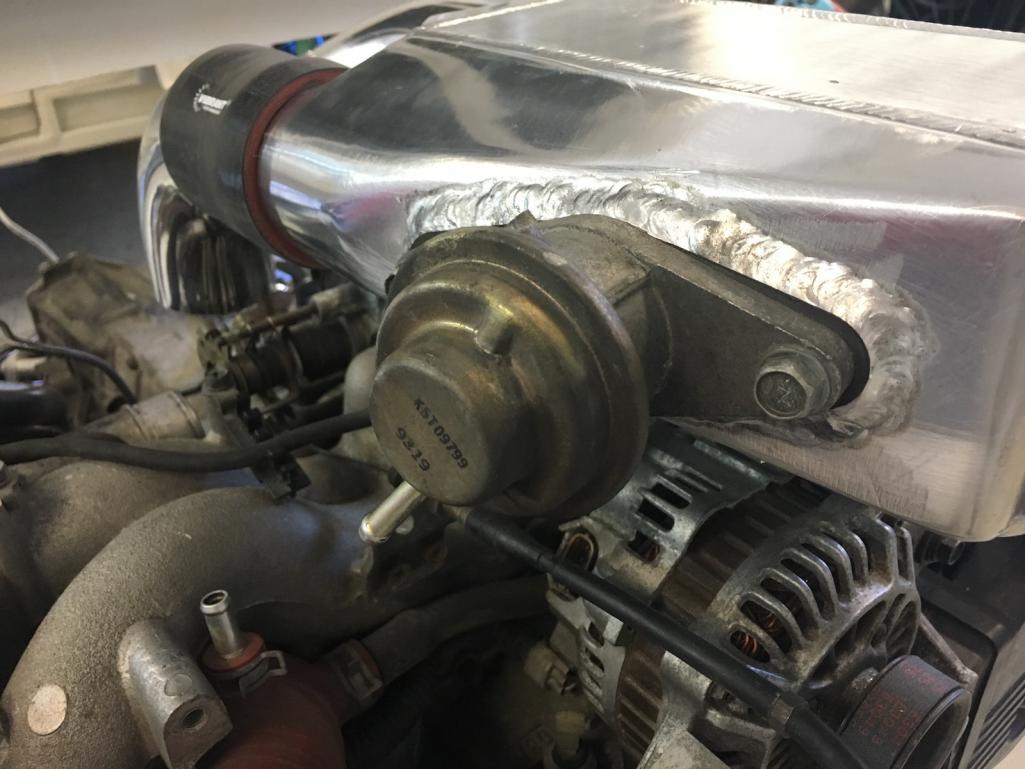
Posted by: mgp4591 Aug 15 2017, 02:16 AM
Those are some serious LEDs.... are you gonna blind the other lane?!
And I love the details of your build - I've stolen several...!!
Posted by: MichiganMat Dec 17 2017, 10:48 PM
First start!
https://www.youtube.com/watch?v=0sIbpQJs0ck
But she is smokey:
https://www.youtube.com/watch?v=J2QeBiHwc50
We've had quite a journey since the last post. The WRX conversion hit a snag or three: the cam and crank gears had teeth that were not compatible with the US ECU, they were set up for the JDM ECU. That took a loooong time to figure out, and a few minutes to rectify.
The US throttlebody did not fit on the JDM intake, so I had to buy a small adapter and then weld a tab on it to cover up IACV flange that was left exposed.
A lower cam gear was cracked through and easily could have exploded had the car started. Also, the timing belt tensioner bracket was badly stripped out, the tensioner could have popped right out and taken the engine with it.
Lots and lots and lots of wiring debugging of the self-made harness. Still happy I made it myself but the time I have into it is immense.
But here we are, with a running engine. So much more to finish up, just in terms of debugging, but getting it started feels like a huge step forward.
Posted by: MichiganMat Dec 17 2017, 10:53 PM
Painting the doors took forever, but I finally got around to finishing them. They had a bunch of damage which I filled and sanded about 6 times. Then I had to figure out my gun (again), prime, and paint. Bodywork, man...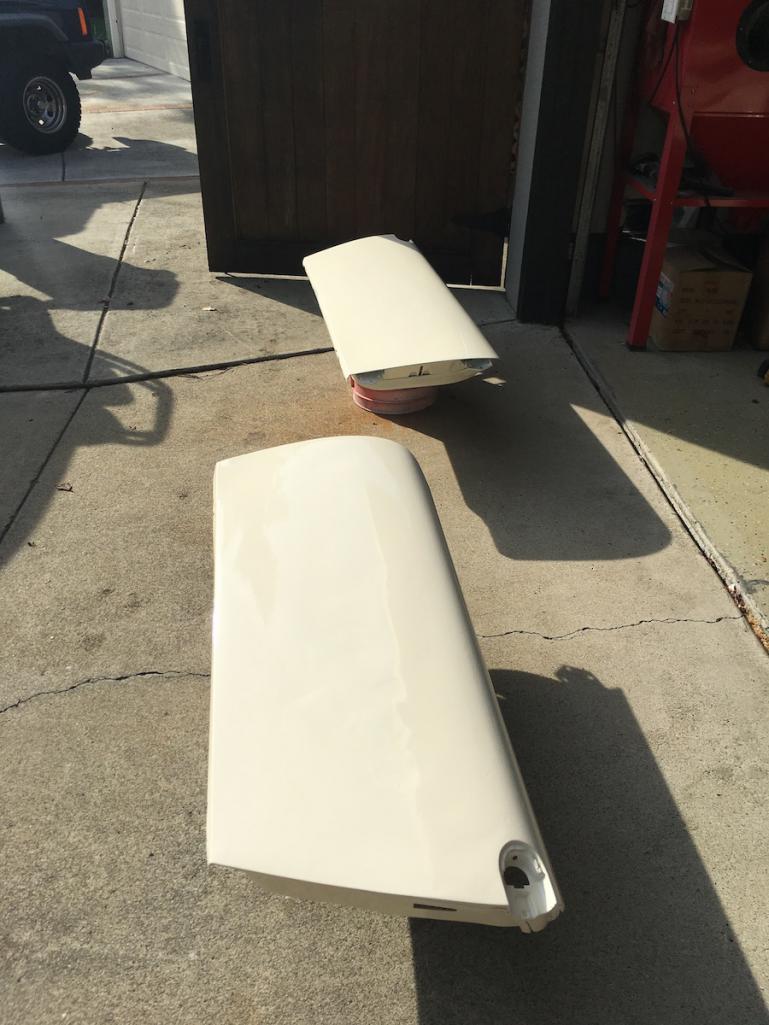
Then when the doors were finally mounted up, I added some porsche scripts and some meatballs on the doors and hood.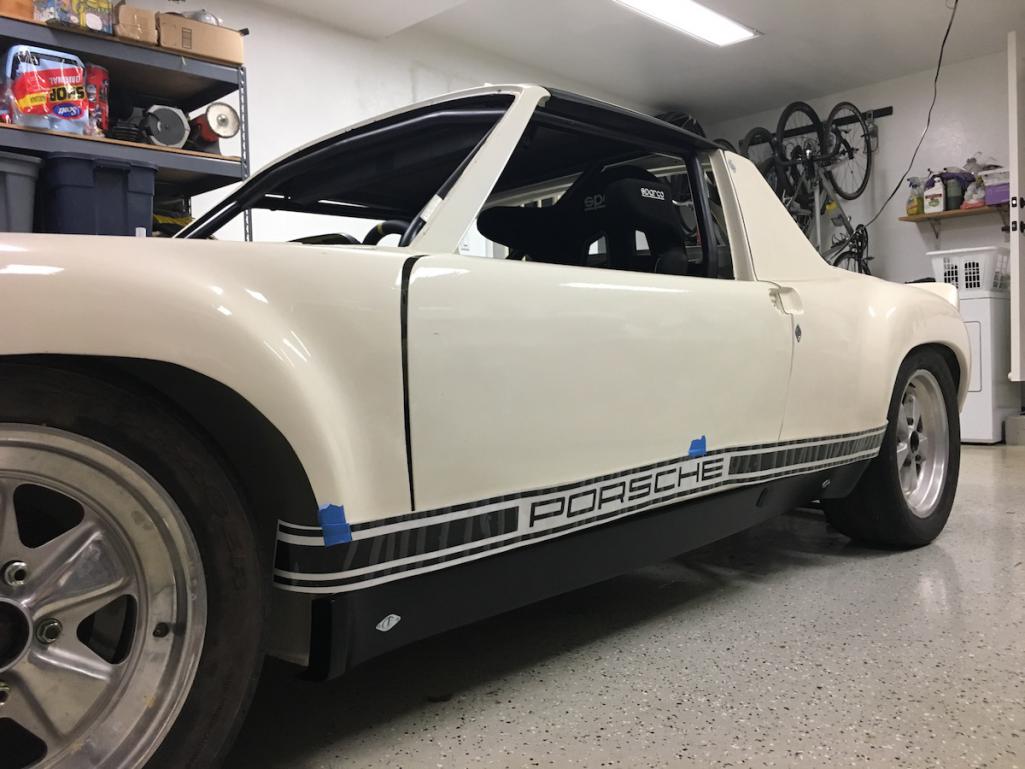
And heres the cam gear which could have ended the life of the engine had I not found it: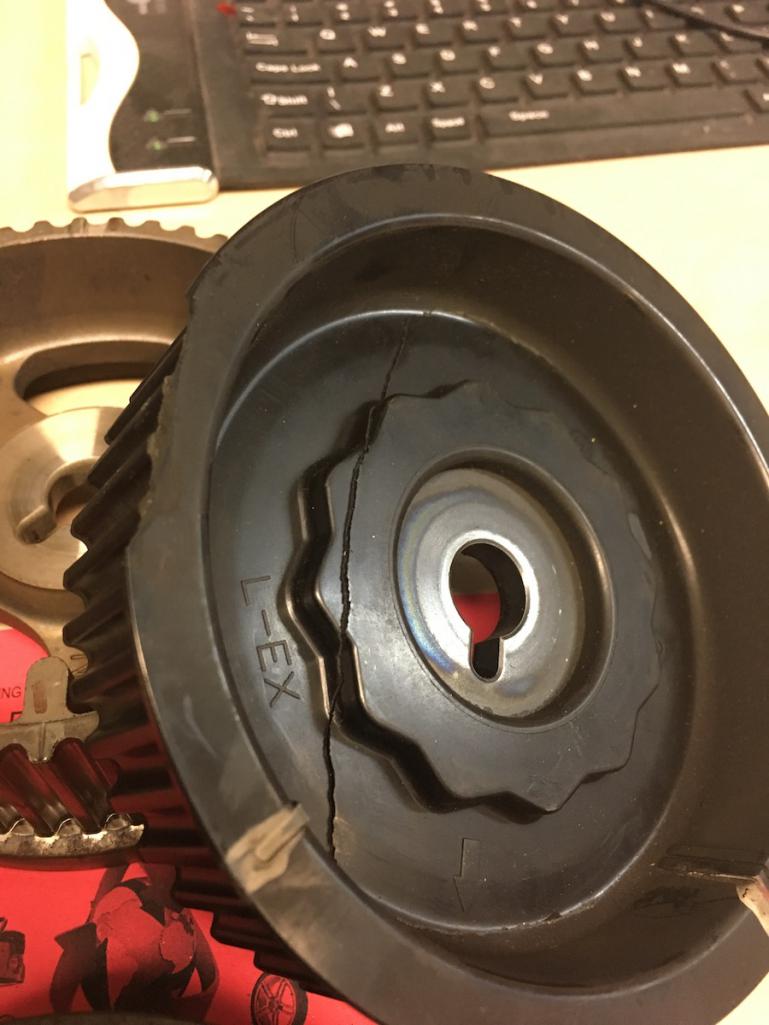
Posted by: Mueller Dec 17 2017, 11:50 PM
Congrats on the firing up the engine...sounds great!
Posted by: Amenson Dec 18 2017, 07:53 AM
Congratulations! Sounds rowdy, ready to party.
Posted by: Cairo94507 Dec 18 2017, 07:55 AM
Jesus - that engine sounds beautiful.
Posted by: matthepcat Dec 18 2017, 11:32 AM
I would love to come see your car, and live in San Jose too. Rad sounding idle (almost rotary sounding).
Posted by: MichiganMat Apr 12 2018, 02:07 PM
Time for an update!
Been busy with a few things:
• It drives! Took it around the block just to shake it down a bit, car feels great. Still needs a windshield, heh.
• Found out why it was running so rich, I hadn't plumbed the bypass valve correctly. Plumbed it to the intake and *boom* no more super-rich exhaust.
• Added number meatballs to the doors for that racer effect
• Found out the water pump is leaking badly, so that will need to replaced ASAP.
• Been working on the digital dash via RaceCapture. This is where the bulk of my time has been spent.
A bit more about the RaceCapture: Bought a used RaceCapture Track module from eBay and it came with a bad wifi module. $10 and an hour with a soldering iron and a new wifi module is installed and the Racecapture works as expected.
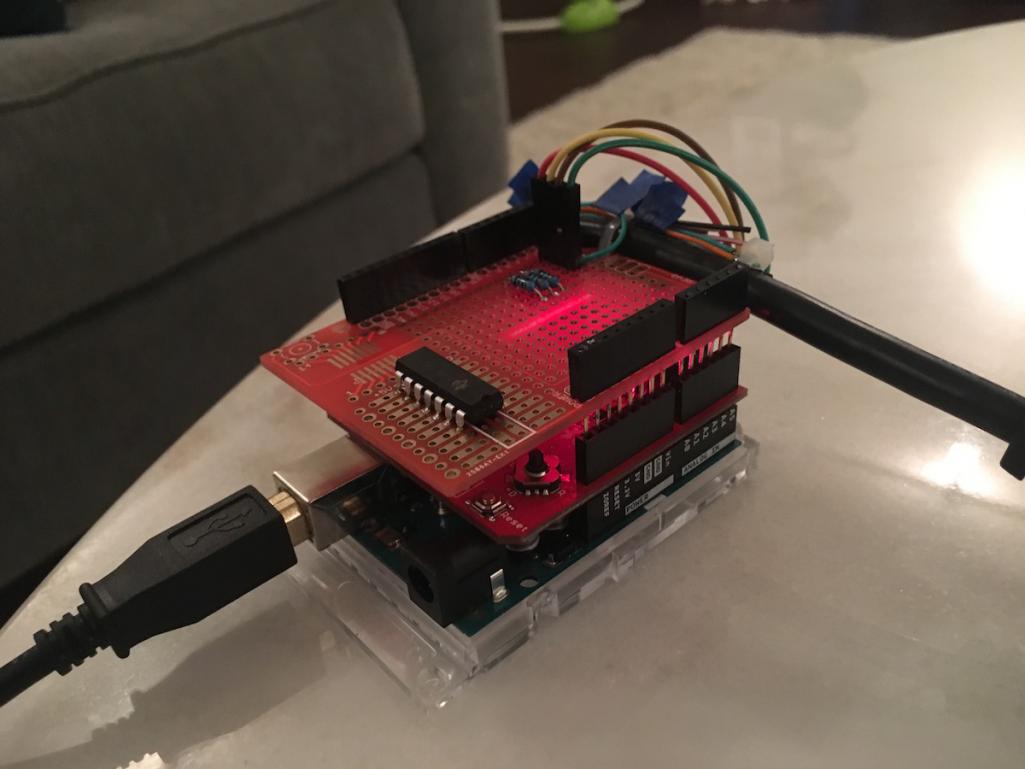
Next problem: Older Subaru ECUs don't speak CAN bus. They speak a Subaru-only message format called SSM. This means that I can't just plug the RaceCapture into the OBD2 port and get signals. There is, however, a project out there which uses an Arduino to translate SSM to CAN:
https://github.com/rpkish/Subduino-SSM
I've started building one of these and I've made pretty good progress. Im able to send test signals from the Arduino to the RaceCapture and have the data appear on the tablet dash. The next step is to wire up the SSM side and plug into the ECU.
Otherwise, we've got a huge backyard remodel going on and my garage is completely stuffed with BBQ and firepit equipment so I haven't had any space to work.
SSM to CAN video is here: https://www.youtube.com/embed/qNpLpvHHIXg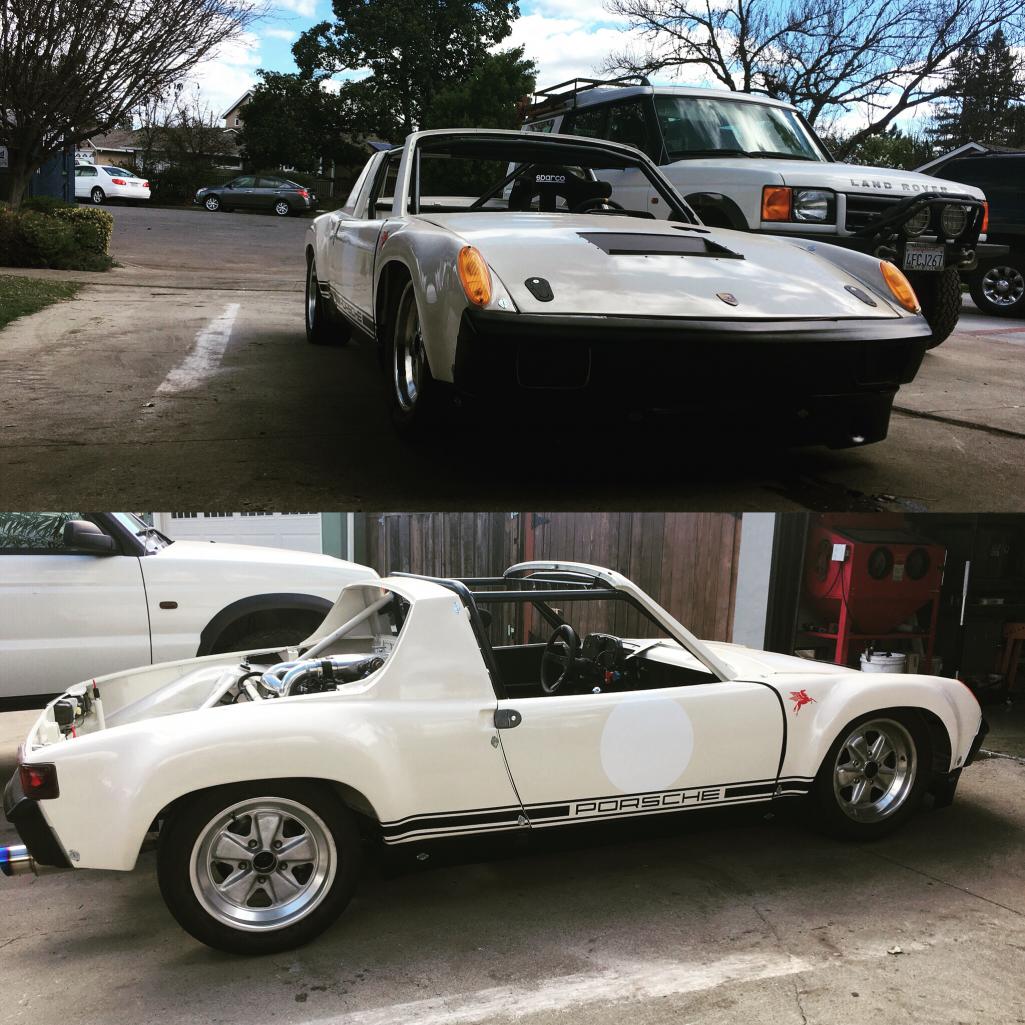
Posted by: Mueller Apr 12 2018, 04:30 PM
Cool adapter you are building for the communication betweeen systems.
Posted by: MichiganMat May 8 2018, 02:15 PM
Video updates of the SSM-to-CAN Arduino project! I've got a working digital dash for the 914 now, which Im pretty excited about. I just have a few basic signals being sent to the dash but adding new ones is a simple as flashing the arduino with new code, then updating the dash app to read and interpret the new CAN packet. Easy-peasey.
https://www.youtube.com/watch?v=y5HfEexC8aQ
https://www.youtube.com/watch?v=vfkFrv7F5E4
Posted by: MichiganMat Aug 27 2018, 03:03 PM
Made a few changes recently:
• Added a front tow-hook
• Blacked out the front trim
• Installed a glass windshield, blacked the trim
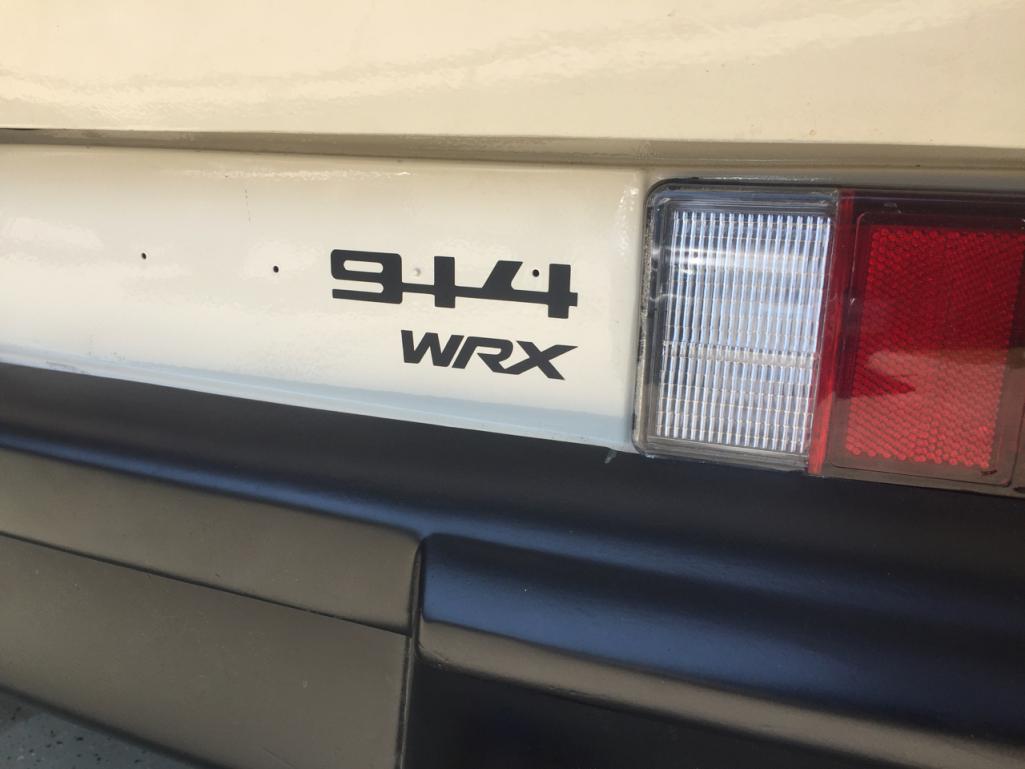
• Added some badge stickers
• Finished up lighting wiring: front and rear illumination bulbs are working
The car is ready to drive and I've done some testing around the neighborhood, but its short and quick stuff until I can get it plated. Im working with the DMV right now to get a title but it'll take about 90 days, fingers crossed it gets solved without a hitch. Im ready to shake down the car, but Id rather do it on the streets near my house instead of on a far-away race track, so Im going to wait for the plates before hammering on it. Im sad that the car won't see track time this year but, well, thats life. 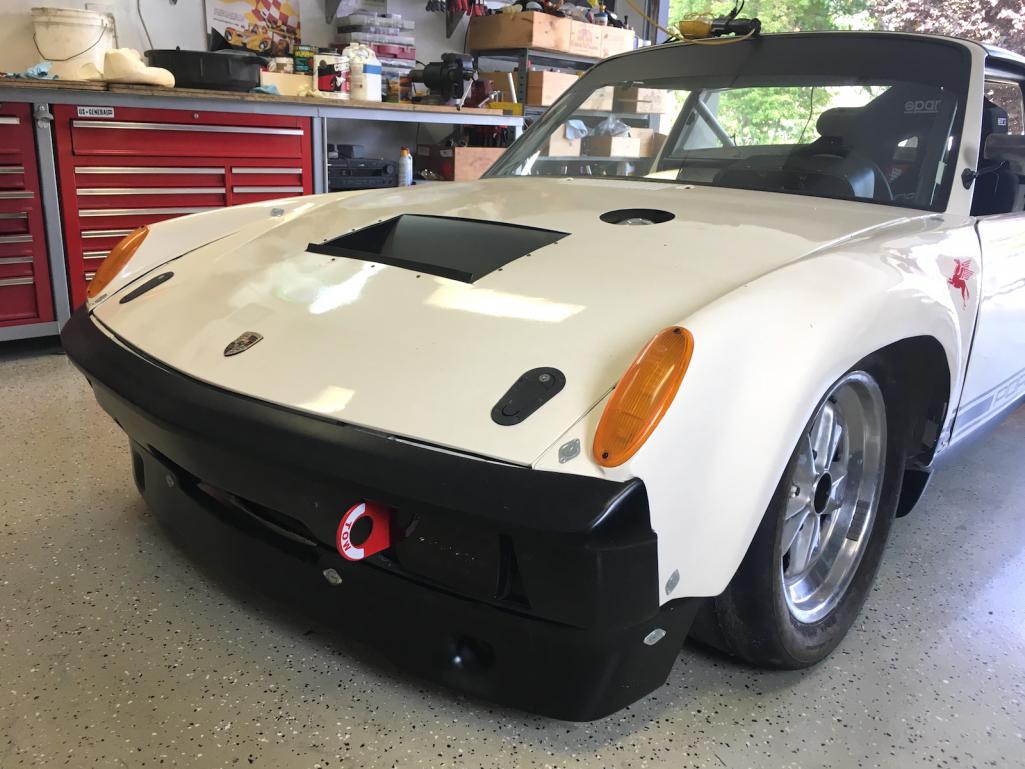
Posted by: Mueller Aug 27 2018, 04:28 PM
Cars looking great.
What advantage does the racecapture offer over just plugging in bluetooth OBD reader and use Torque Pro for a display?
Posted by: MichiganMat Aug 27 2018, 08:21 PM
Cars looking great.
What advantage does the racecapture offer over just plugging in bluetooth OBD reader and use Torque Pro for a display?
Thanks for the kind words.
Loads of features with the Racecapture module & app. Built-in GPS so it has predictive lap-timing on any track. Support for cameras (i.e. GoPro) to turn them on when the car is on-track. Fully configurable for any car, so friends can borrow it. Its programmable so you can tell it when to change the color of, say, the RPM gauge, on different value ranges. There are just loads of things that are great about the RCP hardware and app, check them out.
Posted by: MichiganMat Nov 18 2018, 12:01 AM
It lives.
First track day for the car is in the books. A few thoughts:
• The combo of the MR2 shifter + ZeroDB linkage is not great. The throw is way too short and I missed the 4-to-5 shift twice, nearly blew up the motor.
• I need to rebuild the brakes, they are terrible.
• The chassis / suspension setup needs major tuning, the car was wanting to swap ends on every turn-in
• The WRX motor and trans is fantastic. Smooth power, and loads of it.
• The RaceCapture module + Fire tablet worked flawlessly all day.
Spun the holy-hell out of the car coming out of the carousel. The chassis setup needs to be updated ASAP, its just too twitchy to drive with any confidence. I missed turn-in's all day because of how sketchy the rear of the car felt. That, combined with the terrible brakes and the scary-turbo-power made for a tricky, worrying, anxiety-filled day.
Looking forward to sorting out the brakes, shifter, and suspension. Im hoping it will make a huge difference and bring the car to a much better place.
https://www.youtube.com/watch?v=iN0pI9DFoT0
Posted by: raynekat Nov 18 2018, 12:34 AM
Car looks and sounds great.
Yeah, get that handling and braking figured out and you'll have a great little car there.
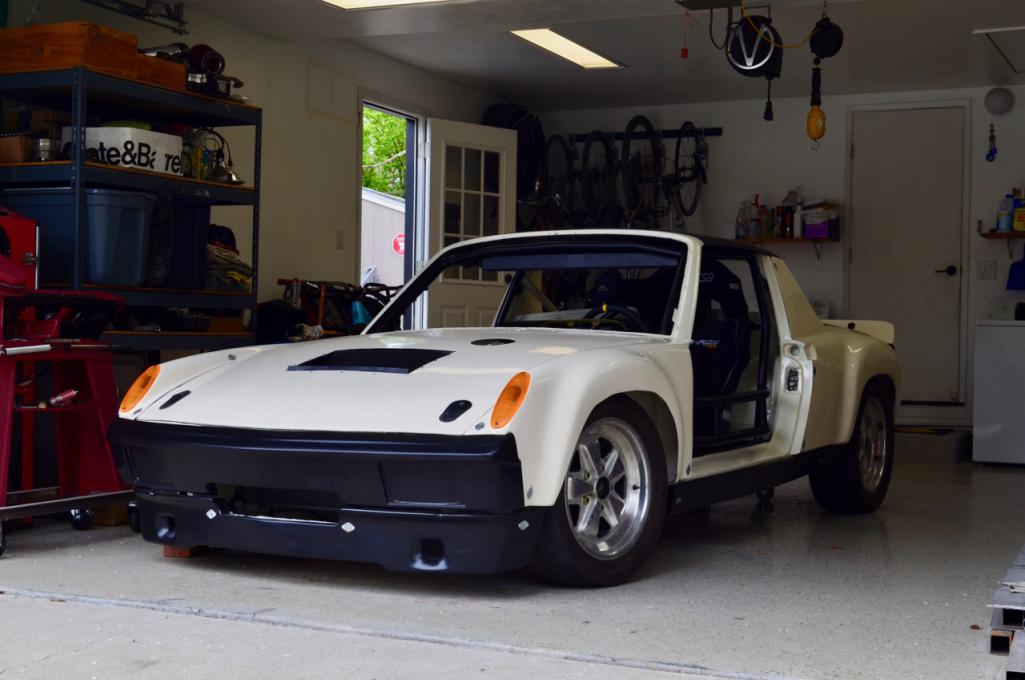
Posted by: MichiganMat Nov 18 2018, 08:53 AM
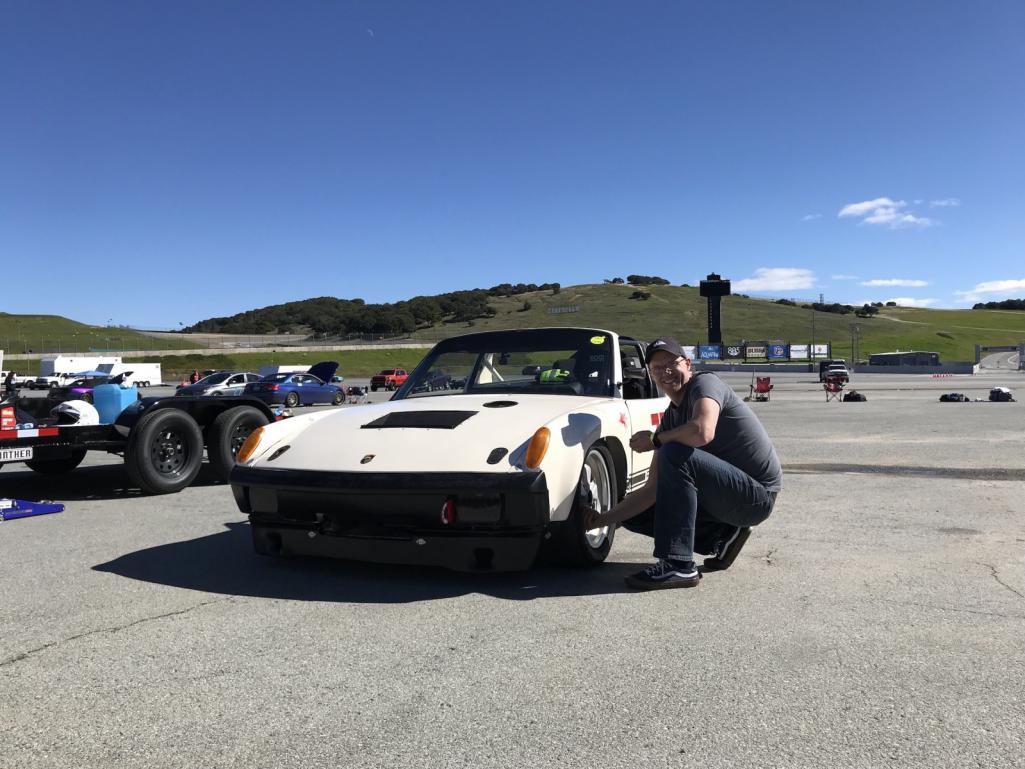
Heres a pic of the car in the paddock @ Sonoma. She looked the business even if she drove like a manic-depressive rodeo bull.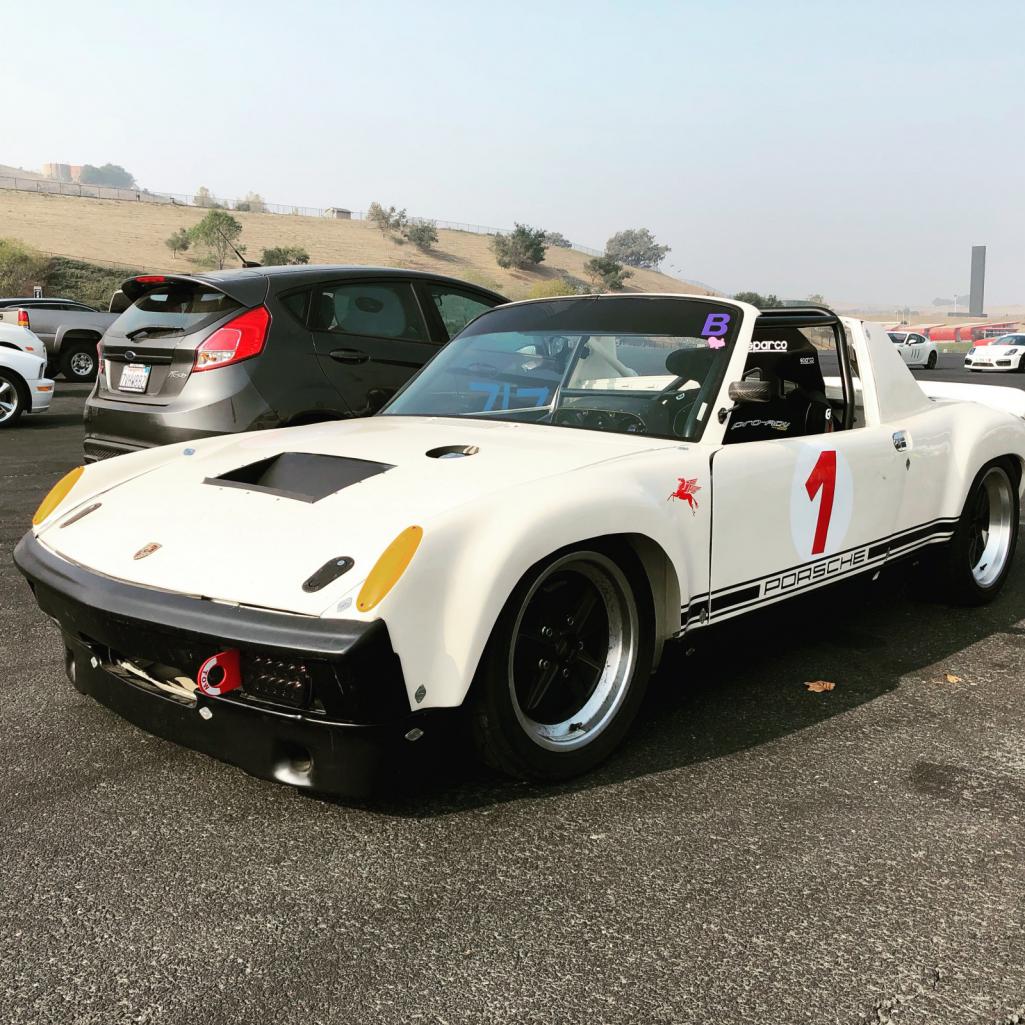
Posted by: ConeDodger Nov 18 2018, 09:11 AM
P
It lives.
First track day for the car is in the books. A few thoughts:
• The combo of the MR2 shifter + ZeroDB linkage is not great. The throw is way too short and I missed the 4-to-5 shift twice, nearly blew up the motor.
• I need to rebuild the brakes, they are terrible.
• The chassis / suspension setup needs major tuning, the car was wanting to swap ends on every turn-in
• The WRX motor and trans is fantastic. Smooth power, and loads of it.
• The RaceCapture module + Fire tablet worked flawlessly all day.
Spun the holy-hell out of the car coming out of the carousel. The chassis setup needs to be updated ASAP, its just too twitchy to drive with any confidence. I missed turn-in's all day because of how sketchy the rear of the car felt. That, combined with the terrible brakes and the scary-turbo-power made for a tricky, worrying, anxiety-filled day.
Looking forward to sorting out the brakes, shifter, and suspension. Im hoping it will make a huge difference and bring the car to a much better place.
https://www.youtube.com/watch?v=iN0pI9DFoT0
Mat,
I was so excited to see the video that I watched it before I read the text. My first thought was why did he spin there? But after the video was over and I read the text, I see. Bad brakes and no suspension set-up.
Cars got really great potential though!
Posted by: 914forme Nov 18 2018, 09:50 AM
Great to see the car get out on the track, that is a big day. 
Time to get to sorting all the issues out, nobody nails this right on the money. Everyone likes their cars setup slightly different.
Modify the shifter. Extended the lever to increase the perceived throw, move the cable points so that it increases the throw, that is pretty easy one. Lots of 818 guys run this setup with out issue. BTW, in two different shifters where made from Toyota, early cars had a longer throw, the later cars got it shortened up. If you used after market short throw kits they are not know to be the best quality and can add some error to the movement.
Suspension start with alignment, and worn components. To make an educated guess we would need to know what you're running for all the various bits and pieces.
Spring rates in the back
Running a rear swaybar? If yes size
Running a front sway bar? I hope so, If yes size
Torsion Bar size
Shocks - settings come into play, and valving.
Bushings in the Front
Bushings in the Rear
Tire sizes front and rear also come into play
My one suggestion is document everything as it sits now, and build out a list from there, and change one thing at a time, then recheck the alignment.
You most likely know all this stuff, just wanting to help get the car sorted fast here is a simple cheat sheet, image quality is poor.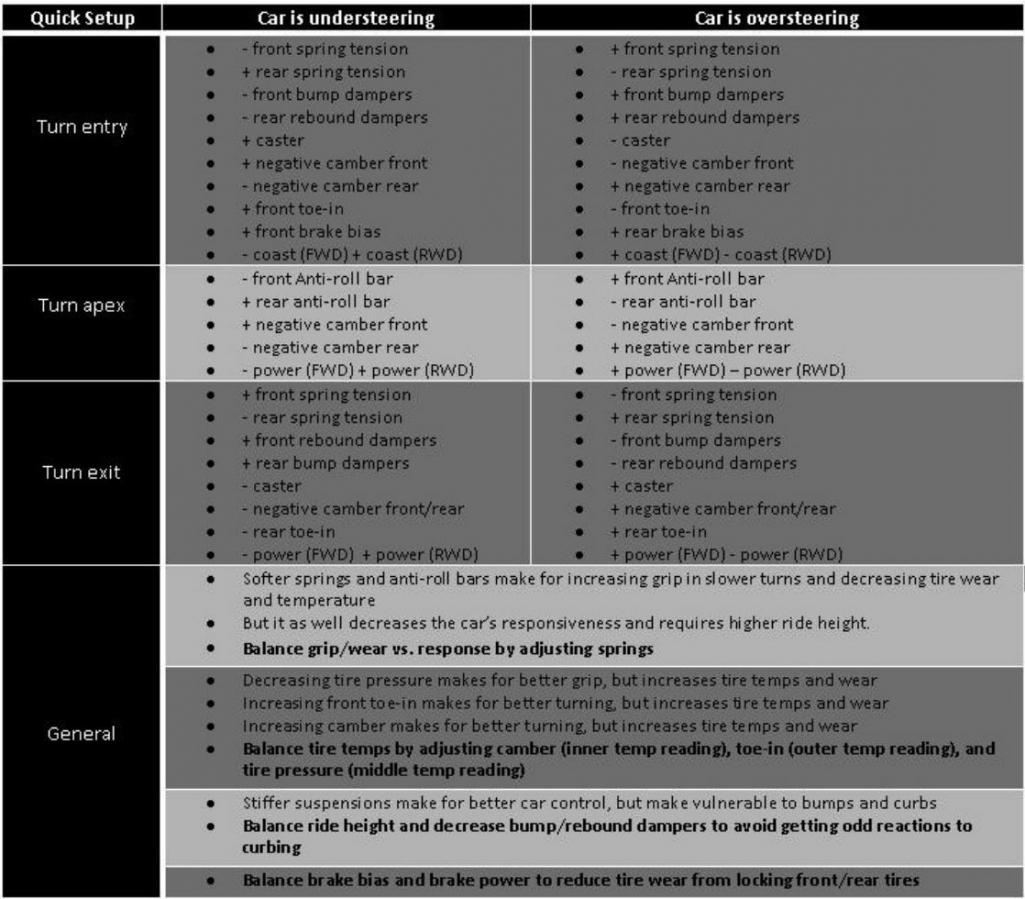
Posted by: MichiganMat Nov 18 2018, 11:27 AM
• Rear: 250lb Swift springs over new Bilstein struts
• Front: 23mm t-bars
• Plastic bushings, front and rear
• No sway-bars, front or rear
• 8" front, 9.5" rear wheels, Direzza Star-spec tires, from my 911.
Everything in the suspension is brand new.
Recently had the car aligned, my wrench encouraged me to lower the car to get more rear camber, Im at 2 degrees in the rear.
I run sway-bars front and rear on my 911 and they make a huge difference, may think about using them on the 914.
I remember my 911 being really twitchy on turn-in before I started tightening up the sway-bars, a small front and rear adjustment calmed the car down immensely. Its a bit what I was feeling yesterday: tail-happy, scary on turn-in, rear wanting to come around.
Wish I could get more camber in the rear but the exhaust header and oil pan are pretty close the ground as it sits now :/
- m
Great to see the car get out on the track, that is a big day.
Time to get to sorting all the issues out, nobody nails this right on the money. Everyone likes their cars setup slightly different.
Modify the shifter. Extended the lever to increase the perceived throw, move the cable points so that it increases the throw, that is pretty easy one. Lots of 818 guys run this setup with out issue. BTW, in two different shifters where made from Toyota, early cars had a longer throw, the later cars got it shortened up. If you used after market short throw kits they are not know to be the best quality and can add some error to the movement.
Suspension start with alignment, and worn components. To make an educated guess we would need to know what you're running for all the various bits and pieces.
Spring rates in the back
Running a rear swaybar? If yes size
Running a front sway bar? I hope so, If yes size
Torsion Bar size
Shocks - settings come into play, and valving.
Bushings in the Front
Bushings in the Rear
Tire sizes front and rear also come into play
My one suggestion is document everything as it sits now, and build out a list from there, and change one thing at a time, then recheck the alignment.
You most likely know all this stuff, just wanting to help get the car sorted fast here is a simple cheat sheet, image quality is poor.
Posted by: 914forme Nov 18 2018, 02:00 PM
 Add a front sway bar NOW!!!!!!!!
Nice adjustable one, several sources, Us cheap people that like to fabricate stuff use Nascar hand me downs. If you build one your self make it adjustable.
That will most likely solve you wanting to swap ends issue.
Posted by: MichiganMat Nov 18 2018, 02:03 PM
Add a front sway bar NOW!!!!!!!!Nice adjustable one, several sources, Us cheap people that like to fabricate stuff use Nascar hand me downs. If you build one your self make it adjustable.
That will most likely solve you wanting to swap ends issue.
Yeah, I figured as much. The rest of my setup checks out though, yes? 23mm + 250lbs?
Seems like the used Nascar market has dried up a bit. I remember seeing loads of used lexan windshields and carbon splitters up on eBay, haven't seen any for like 2 years now. I've only heard rumor of using Nascar / circle-track sways on these cars, I've not tried yet. Will likely toss a Tarret in the front, I like the one I have in my 911.
Posted by: mepstein Nov 18 2018, 02:11 PM
Add a front sway bar NOW!!!!!!!!Nice adjustable one, several sources, Us cheap people that like to fabricate stuff use Nascar hand me downs. If you build one your self make it adjustable.
That will most likely solve you wanting to swap ends issue.
That was my first thought and second and third.
Posted by: 914forme Nov 18 2018, 02:14 PM
I missed the lowered car part, it is fine to lower the car, but to do it right lots of things have to change.
On the front you can do it a bit with the Torsion bar adjustments, but to get full travel you need to raise the spindles.
On the rear you can use adjustable perches, but the way the rear is setup lowering the rear cause all sorts of changes in the back of a 914. You might have to go higher, cheap solution. Or raise the pickup point, cut the arms.
Best guy I know to talk to about this stuff is @http://www.914world.com/bbs2/index.php?showuser=209 . He also makes all the stuff to solve the issues you're having.
BTW, running stock Bilsteins with larger rear springs and front torsion bars means they should be shipped to Bilstein and be revalved for proper dampening. Factory offers the service, and they are right there in CA. When I did mine it was I think $50 per shock. They had to mill my heat on coil over thread adapter. Made a huge difference in the suspension dampening.
Posted by: 914forme Nov 18 2018, 02:23 PM
I think your close on the spring rates.
Stock with a smallish sway was like 90lbs front and lots of arguments about the rear, but 100 lbs aftermarket springs seem to be the norm.
Back several pages I gave you the spring rates, I would think your close enough to get where you want to be with a swaybar.
BTW, you can pickup the round round bits new also.
Chris also has swaybars and all the bits you need for the installation. 914LTD makes the best kit for reinforcement of the bar mounts. LOL I used one of Mad Dogs units way overkill after I did roller bearings as I get no binding of the bar, the binding is what puts the stress on the mounting area. So for my installation the Mad dog unit was / is overkill. Thing I like about the 914LTD mount is not cutting up the box section below the tank. I used one of them on my fathers 914-6, installation was easy.
Posted by: tazz9924 Nov 18 2018, 03:40 PM
Busy couple of days!
Bought a WRX fuel sender/filter/pump and modified it to work in the 914 tank.
Cut and bent the lower portion downwards to fit well and pull from the lowest portion of the tank.
Modified the internals of the tank, pulled out some baffles, and welded up the bottom.
Installed an aluminum inner ring and then riv-nut'd that in to give support to the tank area.
Bought a fuel filler neck, more on that later...
Next up was the air outlet through the hood.
Cut a nice big hole and fab'ed up as best I could an outlet vent.
I need to work on my aluminum welding, I've done better work :/ But it'll do for now.
I plan to finish it in black paint and mount externally. It'll be industrial looking, and functional.
I was also able to get the front lower lip mounted, the drivers rocker, and the rear trunk hood pins all attached. Pics aren't too sexy so maybe I'll skip 'em for now.
Next up: fuel filler neck install on the tank and through the hood, put the rotisserie back on the front of the car, fit and mount the rear bumper, reinforce the drivers-side dog-ear, and buy a bunch more parts, haha
Late to the party but im curious if you have ducting from the outlet of your radiator to the vent coming out the hood? Im gonna make a vent like that so an image with the hood open for inspiration would help me out if you could
Posted by: FourBlades Nov 22 2018, 01:33 PM
Great project, love the look of the car.
Tarret makes great stuff for 914s.
John
Posted by: Andyrew Nov 26 2018, 09:00 AM
Your setup sounds exactly like mine and your experience at the track sounds like mine as well! My car had slow turn in response as well as a tendancy for what felt like understeer but it never lost front grip. The rear on the other hand would spin the inside tire on any throttle adjustment mid/late corner. We were probably similar for power as my boost was on the wastegate and my confidence level in the car was extremely low.
I've been thinking that the fix is to finish up my nascar front sway bar as well as see about some more toe/camber/sticky rubber.
Posted by: MichiganMat Nov 26 2018, 03:42 PM
Late to the party but im curious if you have ducting from the outlet of your radiator to the vent coming out the hood? Im gonna make a vent like that so an image with the hood open for inspiration would help me out if you could
Its nothing special, just an open hole, heh. I haven't seen the need (yet!) to fully enshroud and duct the radiator out of the hood, so I just made an opening and bolted it in. Maybe if theres a real need (aero, efficiency, etc) for something better, I'll add more shrouding to it. But really, its a race-car, I don't mind if its a bit rough around the edges
Posted by: MichiganMat Nov 26 2018, 03:45 PM
Your setup sounds exactly like mine and your experience at the track sounds like mine as well! My car had slow turn in response as well as a tendancy for what felt like understeer but it never lost front grip. The rear on the other hand would spin the inside tire on any throttle adjustment mid/late corner. We were probably similar for power as my boost was on the wastegate and my confidence level in the car was extremely low.
I've been thinking that the fix is to finish up my nascar front sway bar as well as see about some more toe/camber/sticky rubber.
Im going to throw some $ at it and get the front Tarett bar, it made a huge difference in the handing of my 911 so Im truly hoping for a dramatic change in the character of this 914. Its... undrivable in its current form. The hyper-aggressive turn-in, coupled with a tail that has no grip is just too much to wrangle on a racetrack.
If you get there before me, let me know what find, Im curious.
Posted by: Andyrew Nov 26 2018, 04:18 PM
Your likely to get there before me.. Im still wrangling wiring issues and then I have to redo my steering linkage. Just trying to make it driveable for WCR 2019..
Posted by: matthepcat Dec 3 2018, 03:36 PM
This car sounds awesome. Seems like you were moving pretty quick when it spun out, does the car want to rotate like that at slower speeds?
Posted by: MichiganMat Feb 12 2019, 11:27 AM
Took the cars out to Laguna Seca yesterday, my 914WRX and my brothers 912STI.
• Got about 4hrs of sleep the night before, anticipation and anxiety woke me up at 2am and I couldn't get back to sleep.
• Cold as balls on the way there, terrible, but sooooo glad Im towing instead of driving a racecar to the track these days. Stereo, cup holders, heat, relative silence.
• Laguna is the most convenient track I've been to yet, so close and easy to get to. I'll be going back soon.
• Soooo glad my Rover has a low gear because the 16% grade going into Seca is *steep*.
We get all set up, get the 914 off the trailer and prep some things for the first session...
• I roll out onto track, accelerate into turn 3 and theres a 5' wide stream of water going across the track. Cold tires and I go full opposite-lock, Tokyo Dorifto through the entire corner, thinking to myself "please don't be that guy, please don't be *that guy*". I save it.
• By the time I start going up the hill I see water shooting over my shoulder. By the time I the corkscrew, the car is full-on puking steam and boiling water. I pull over to the far right of the screw and shut it off. I wait for a quiet moment and coast the car down the screw, down 9, into the paddock. allllll the way across the paddock, and pull it directly into our pits, all on gravity power. Not even a full lap of Seca
• I triage the situation for ~1hr, finally pull the thermostat and cut it open, rusty water drains from the motor (not good). We fill it, and after an hour I try for the 2nd session. Temps are all over the place, 170, 220, 190, 230(!!!). I get a few laps, maybe 3, and the car is spitting again so I bring it back in. Another hour goes by and we finally get it burped, temps are stable.
Meanwhile, Mike is driving the doors off the 912 and having a blast
• Session 3 we go out together, temps look great, so we chase each other for the whole session. It was amazing. The 912 is sooo goddamned fast, he walked me on every straight, but I would catch him on the tight corners. The sway-bars we added to both cars have worked wonders, so stable and predictable through all steering input. The 914 is still a bit tail-happy, may need some bigger rubber.
• Session 4, no drama, just fast and fun laps
• Session 5, getting *realllllly* tired now, the lack of sleep has caught me bad. About 3/4 of the way through the session I loop the car diving into 9 at pretty high-speed. Wiggle-wiggle-scccccrreeeeaaacccchhh. 360, all on the pavement, but the car won't start or bump-start, so I coast it down 10 into the pits, alllll the way past the pit garages, and ever-so slowly into our pits. Got some weird looks, seeing the car silently rolling by, so I yelled "ITS A HYBRID!" and just kept going.
Car is fine, just needed a moment to cool off and she started right up. A few take-aways:
• The '02 WRX motor really isn't enjoying life at 5500+ RPM. All the grunt in the power band is 3-5K. The engine is vibrating, not smooth, at 5K+, so not sure whats going on there, so I kept it under 6K for the whole day. Redline is 7K.
• The Racecapture computer in the car is pretty good but the shitty Fire tablet Im using for it kinda sucks, makes things complicated. Going to find a fix.
• BRAKES. OMG, the 914 needs race pads. I had good pressure and decent proportioning, but no bite. Going to upgrade those for sure.
We stopped in Salinas for mexican food and beers, had the trailer parked in the driveway by 8pm. A solid day. Can't wait for the next one.
Posted by: mepstein Feb 12 2019, 11:38 AM
Sounds fun. What engine is the 912 running.
Posted by: MichiganMat Feb 12 2019, 11:58 AM
Sounds fun. What engine is the 912 running.
Stock '06 STi mated to a Porsche 915 box + Wavetrak LSD
Makes 315hp at the wheels and revs to 8K, its a savage motor. Equal-length headers to twin-scroll turbo too.
Posted by: Andyrew Feb 14 2019, 10:28 AM
Sounds like a blast! Congrats on the successful day!!!! What group did you run with?
Posted by: MichiganMat Feb 14 2019, 11:33 AM
Sounds like a blast! Congrats on the successful day!!!! What group did you run with?
Still shaking the bugs out of it, so we both ran in Solo, which basically the novice group. Plenty of fast cars in the group, we didn't feel held-up by anyone but a single car, so it was the right choice.
Been thinking about ways to squeeze more speed out of the car all week, heh. Definitely needs better brake pads. Also thinking a lot about that top-end 5500+ RPM vibration / lack of power too. I never hit the rev-limiter during the day, I just didn't have confidence in the motor and wanted to get through the day. The next day out will be exploring the top-end of the rpms.
Baby-steps I suppose. Before this car, I had loads of days in my 911 and all the bugs were worked out. This new chassis and motor are taking some time to get sorted.
Posted by: andys Feb 14 2019, 01:49 PM
Interesting thread! For your track days, do you have a tire pyrometer to run some tire temp profiles? It would aid greatly in how the suspension and tires are behaving, and what course of action you need to take. Can't remember, do you have LSD, or open diff?
Good luck,
Andys
Posted by: Andyrew Feb 14 2019, 02:39 PM
Sorry I was curious what organization you went with for Laguna. I normally run OnGrid and they just picked up Laguna a couple times this year I believe. But I don't trust myself at Laguna with the 914.
Braking was an issue for me but more locking one tire and not feeling confident in it. Hard to push a car hard ok the track if you can't get on the brakes... Especially a track like Laguna with turn 2 and a HP car.
Did you limit yourself on the front straight? I know I doubt I would take turn one over 100... That is one of the scariest corners I've driven in simulation, especially in an mid engine car.
Posted by: Andyrew Feb 14 2019, 02:46 PM
Also did you add just front sway bars or both front and rear?
Sounds like that was a great addition
Posted by: MichiganMat Feb 14 2019, 04:37 PM
Tire pyrometer: No, tire tuning will be part of my next day. I tried to keep the pressures when hot at ~ 27 rear, 24 front. Will be chalking the sidewalls next time out. The car also sits a bit high (because of the WRX oil pan and exhaust hang low) so Im not getting optimal negative rear camber.
Diff: Yeah, its open. Really didn't feel any tire-spin while out there tho. I used to get it a lot in my 911, but doesnt feel like much of a factor in the '14.
Run group: This event was with NCRC, who I recommend. Low on BS. I run other events with TrackMasters and HOD, all good orgs.
Limits: No limits baby, foot to floor, deep into 5th gear. Just a bit of drift but nothing terrible. Hug the wall and point her straight! Found that I was much more hesitant in 9, and maybe 4, and eventually got stung in 9 as I got tired and looped it hard.
Sway-bar: Added a front sway from Tarret, worth every penny. Not running a rear bar. The car is transformed (as expected) and feels so much less twitchy, it was nearly undriveable without the bar.
Posted by: andys Feb 15 2019, 10:19 AM
Tire pyrometer: No, tire tuning will be part of my next day. I tried to keep the pressures when hot at ~ 27 rear, 24 front. Will be chalking the sidewalls next time out. The car also sits a bit high (because of the WRX oil pan and exhaust hang low) so Im not getting optimal negative rear camber.
Diff: Yeah, its open. Really didn't feel any tire-spin while out there tho. I used to get it a lot in my 911, but doesnt feel like much of a factor in the '14.
Run group: This event was with NCRC, who I recommend. Low on BS. I run other events with TrackMasters and HOD, all good orgs.
Limits: No limits baby, foot to floor, deep into 5th gear. Just a bit of drift but nothing terrible. Hug the wall and point her straight! Found that I was much more hesitant in 9, and maybe 4, and eventually got stung in 9 as I got tired and looped it hard.
Sway-bar: Added a front sway from Tarret, worth every penny. Not running a rear bar. The car is transformed (as expected) and feels so much less twitchy, it was nearly undriveable without the bar.
For me, monitoring tire temp profiles is a great tuning tool. Takes much of the guess work out of making adjustments, and gets you close in a much shorter period of time. This is particularly important for setting up your suspension during a track day, where your time is usually limited. Getting the camber and tire pressures right is very quick and easy. I simply make it a habit of recording the profiles every time I pit. You'll be able to answer that rear camber issue right away. I think you said you're a 2 degrees, right? I ran 2.5 degrees on my LS1/914 (not a track car), and the tire temp profiles were perfect. Also, I like to run a little toe out to help turn-in; I know many don't like to, claiming it tends to wander at high speed, but I've never had a problem in that regard. Yeah, the front sway bar is a must. With the open diff, don't run a rear sway bar.
If you ever decide to run Willow Springs, give me a heads-up and I'll meet you there (I'm only an hour away). BTW, The Streets of Willow is a good track for suspension tuning, with its many low and medium speed turns; gets the tires working quickly.
Cheers,
Andys
Posted by: MichiganMat Jul 9 2019, 12:47 PM
So what has MichiganMat and the 914WRX been up to in the last couple of months anyways? Well.....
Took the car to BWillow back in May and had a grand ol' time until I spun two rod bearings in session #4 and had to put it back on the trailer. I knew something was up because the exhaust note changed, it got *louder*, and a few laps later I got a hard tap-tap-tap out of the engine and knew something had gone seriously wrong. Took the car home, a few days later had the engine torn down and washed, and sure enough the bearings were toast.
Ordered a new crank, rods, and bearings from FlatIron's Tuning and slapped on a lightweight flywheel while I was in there. I also installed a performance baffle plate between the oil pan and the block to prevent the oil from washing out, and filled the engine with 20w50. I cleaned, but did not replace the oil pump, the oil cooler, or the oil pan... more on that later.
Lightweight flywheel review: An affordable upgrade that makes a *huge* difference in engine rev response. The new fw is 10lbs, taking nearly 10 lbs off the rotating assembly and its soooo noticeable. Im glad I bought that bit, however the green break-in compound on the face of it bound up the clutch and it would not disengage. I had to fight the car repeatedly to break it loose and that was unfortunate. Now that it has a few miles on it, the clutch has not froze up on me since.
OK, so back to the story...
Buttoned up the engine by the end of May and was feeling good about it, scheduled another track-day in late June at Seca. Had a wonderful day on track, but did have to fight a few gremlins, specifically overheated the front brakes and had to bleed them 2x before just removing the front air-dam altogether which solved the problem. End of the day though, well, the exhaust note got louder and louder and by the last session of the day the rod bearings let go again and tap-tap-tap back to the trailer.
So, Im living that EJ-rod-bearing-lifestyle and I've said goodbye to $1000 in parts. The car is on the trailer while I wait for my 2nd child to be born and Im looking forward to January where I'll start tearing into the engine for another rebuild. I've started going through the data from the day and its clear as day that the oil pressure was going down down down after nearly every lap... I can only guess at why, but I suspect the old stock 10mm pump, combined with hot oil, contributed to bearing wear lap after lap until it just let go.
I'll be starting the rebuild in Jan, but this time I'll be doing it better. The rebuild plan:
• replace the oil heat exchanger with a proper oil cooler
• replace the stock 10mm pump with a shimmed 12mm pump
• standard size rod bearings instead of the oversize ones I used last time
• calibrate the oil pressure sending unit to perfection, as the numbers it was producing for my computer were far from acccurate
It makes me sad, really sad, to have to dig into this engine again but ya know, thats racing and theres still much to learn about this setup.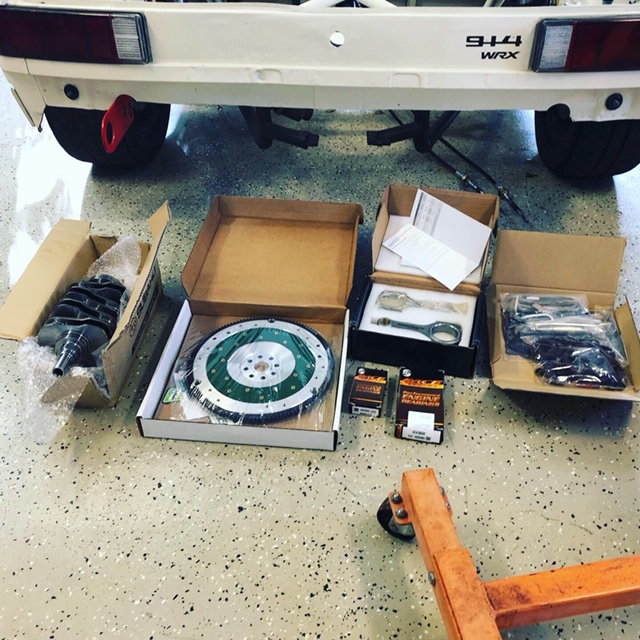
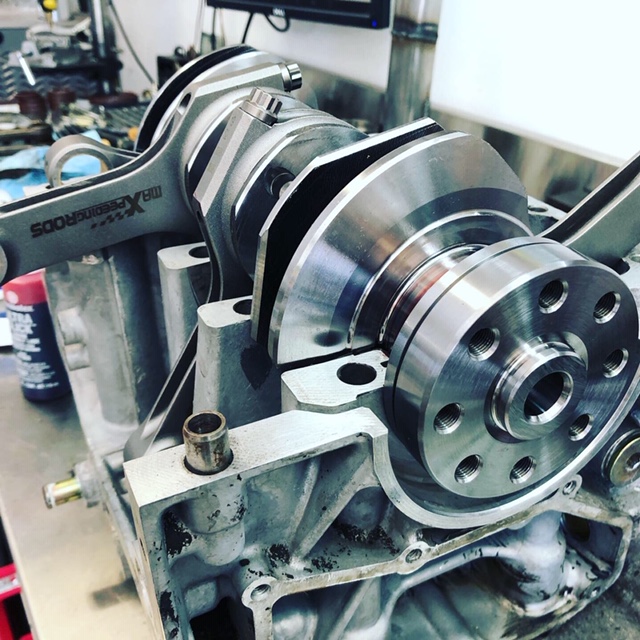
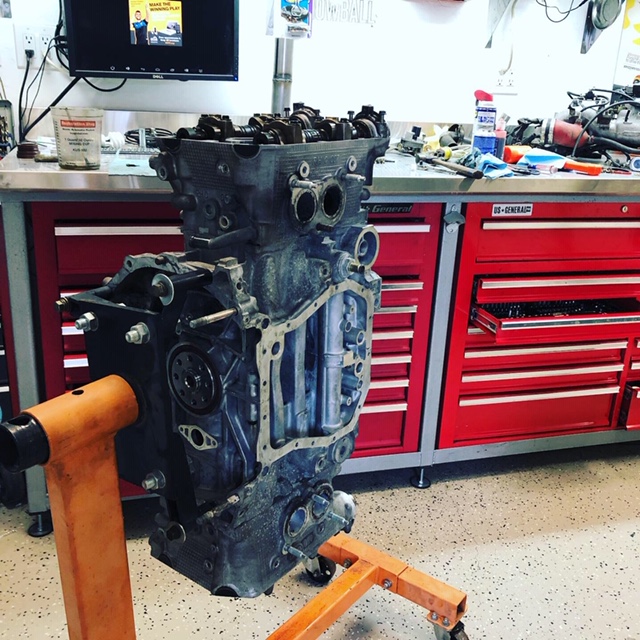
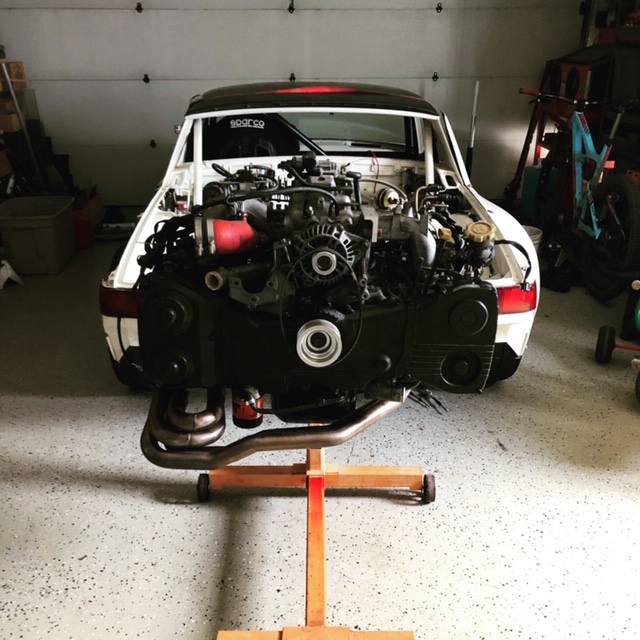
Posted by: MichiganMat Jul 9 2019, 12:55 PM
Some pics of the carnage from the May BWillow date (because who doesn't love a bit of disaster-porn, right?)... 
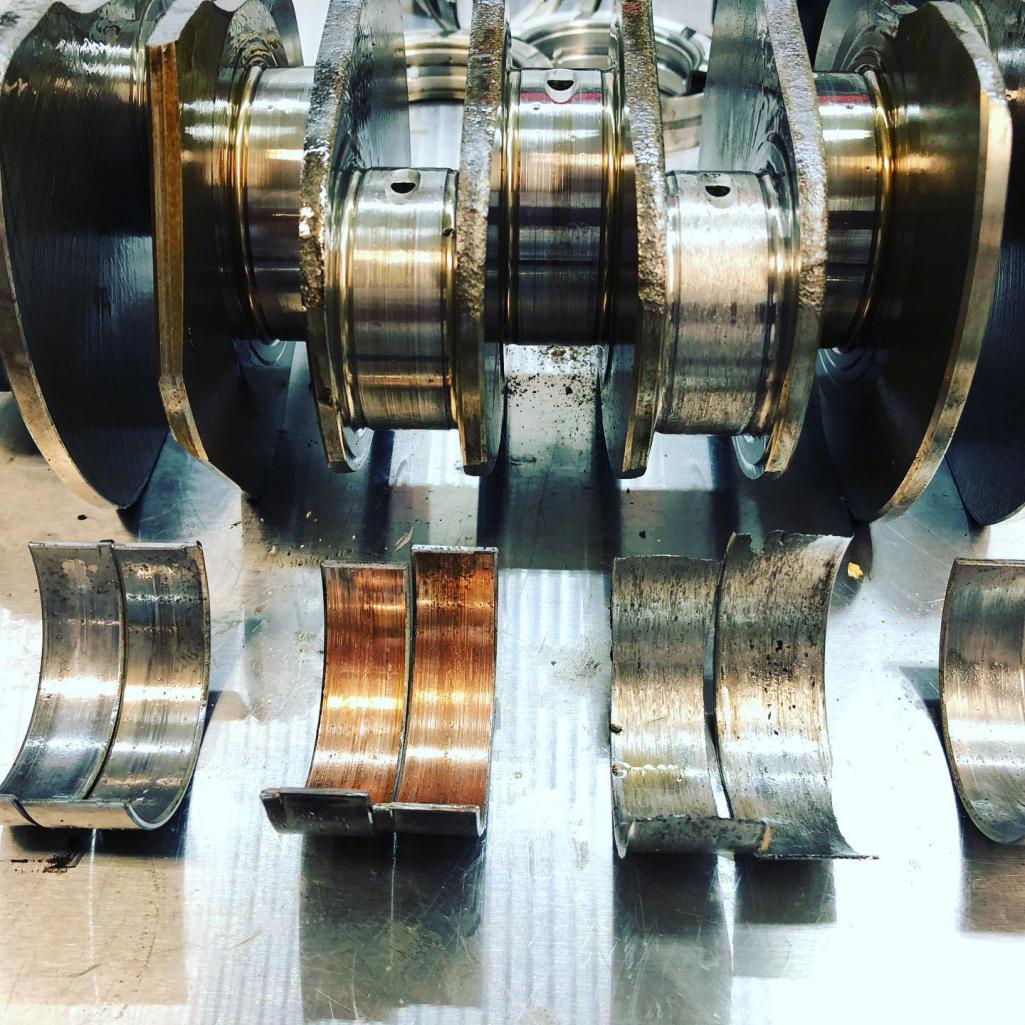
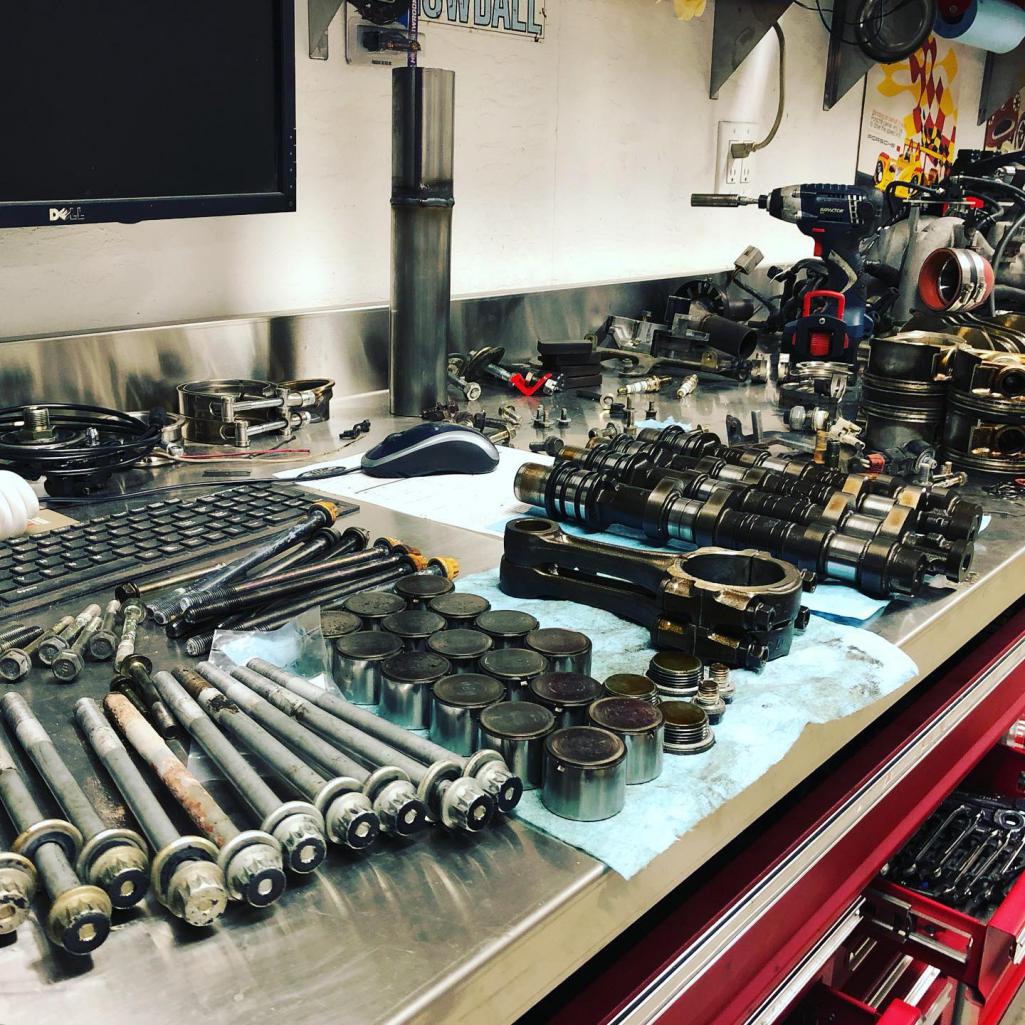
Posted by: 76-914 Jul 9 2019, 12:59 PM
Any changes to the stock oil pan coming?
Posted by: MichiganMat Jul 9 2019, 01:00 PM
And some pics from the Seca date in June...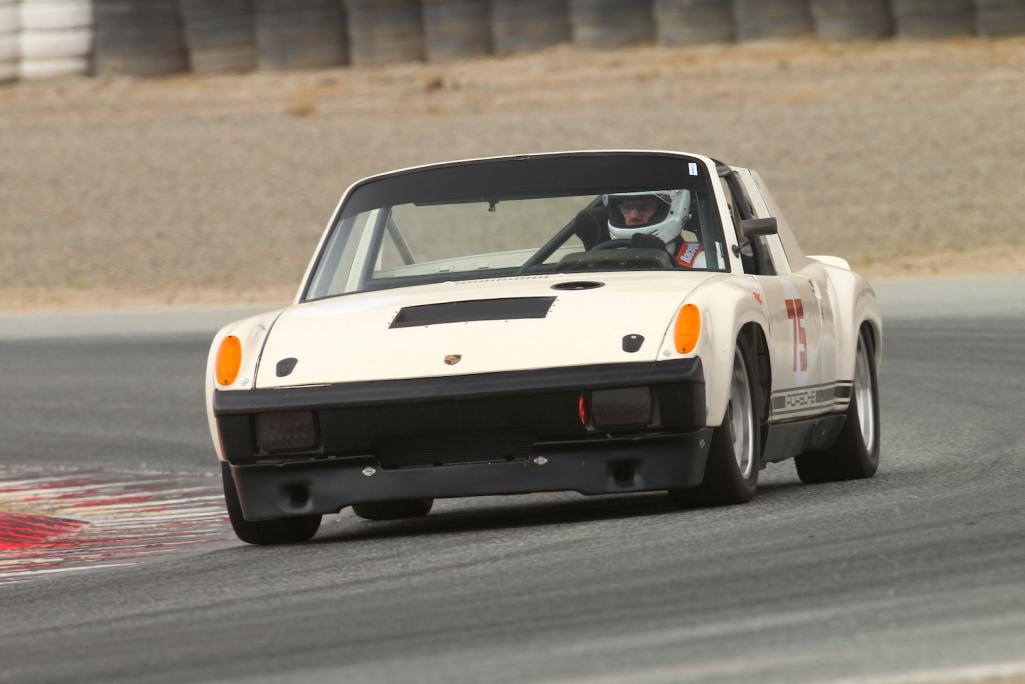
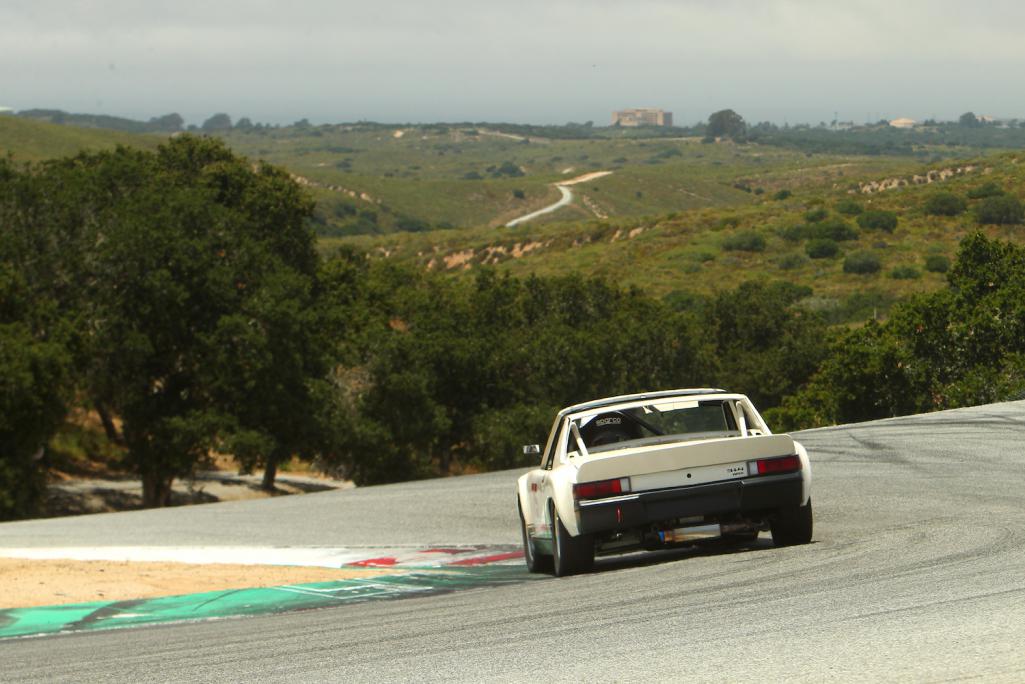
Posted by: MichiganMat Jul 9 2019, 01:04 PM
Any changes to the stock oil pan coming?
I've not read anything about needing to change the stock pan for performance reasons. Cleanliness yes, but not performance.
I have read other issues though:
- the pick-up brazings can fail
- the oil can spill out over the top of the pan at high-g's (which I've solved with a block-off plate)
- oil capacity can be an issue, so the subaru guys suggest running an extra 1/2qt over the full mark.
- bearing material can be hard to remove from the pan once its in there, but I saw good results with a good gasoline flush of it. Still, may replace, not sure yet.
I guess its cheap insurance to just replace it, right?
Posted by: mepstein Jul 9 2019, 01:48 PM
Any changes to the stock oil pan coming?
I've not read anything about needing to change the stock pan for performance reasons. Cleanliness yes, but not performance.
I have read other issues though:
- the pick-up brazings can fail
- the oil can spill out over the top of the pan at high-g's (which I've solved with a block-off plate)
- oil capacity can be an issue, so the subaru guys suggest running an extra 1/2qt over the full mark.
- bearing material can be hard to remove from the pan once its in there, but I saw good results with a good gasoline flush of it. Still, may replace, not sure yet.
I guess its cheap insurance to just replace it, right?
I think it was asked because some people need it modified for ground clearance.
Posted by: 914forme Jul 10 2019, 06:22 AM
Dry sump in your future  Reason Porsche did it back in the 60s. 1/2 Quart over was used by type-4 racers also, what is old must be new again.
Sorry about your luck with the motor as you said it is racing or lapping and things happen.
Posted by: MichiganMat Mar 6 2020, 11:16 PM
A few updates to the project:
• Added an oil cooler and remote oil filter. Welded up the brackets in aluminum, painted, etc. I located the cooler in a place where Im hoping theres going to be airflow, and with its size and all the added lines I should be increasing oil capacity by a quart or two. Looking to keep those temperatures in the safest possible ranges.
• Added brake cooling ducts with aluminum pipe redirects to the existing 993 air deflectors mounted to my a-arms. I cooked the crap out of my M calipers at Seca, boiled them in multiple sessions. The last session of the day I ran without the front airdam an survived the session without fade or boil, so it made sense to me to work on getting more air into the rotors. I like the aggressive look of the larger ducts too.
• Currently working on a skunk-works project to add more pad capacity to the front brakes by using calipers from a Volvo 240, which just happen to be the 3" bolt spacing of my existing M calipers and Boge struts. This will require that I drill, then trim, the Boge's , but the 3" struts are unloved enough that I don't feel *too* badly about it. The extra size in pad area is significant, so thats the appeal here. It doesn't make sense to me run brakes that are jusssstt on the edge of boiling, thats not gear that is confidence inspiring, and its not safe.
[attachmentid=733432] 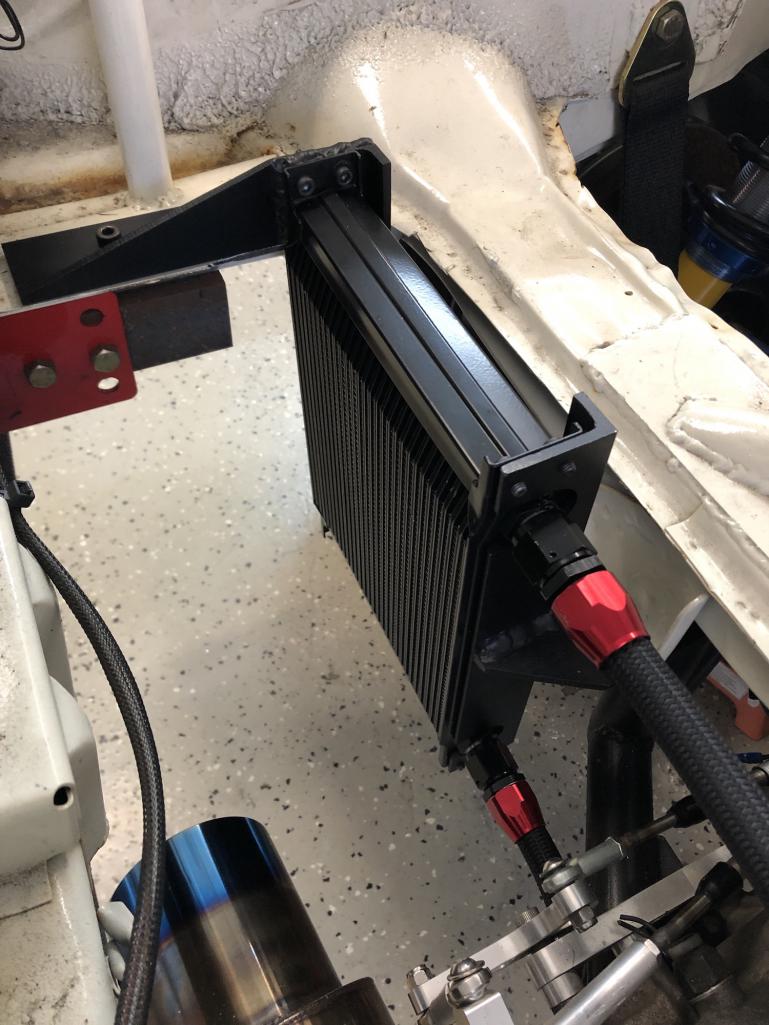
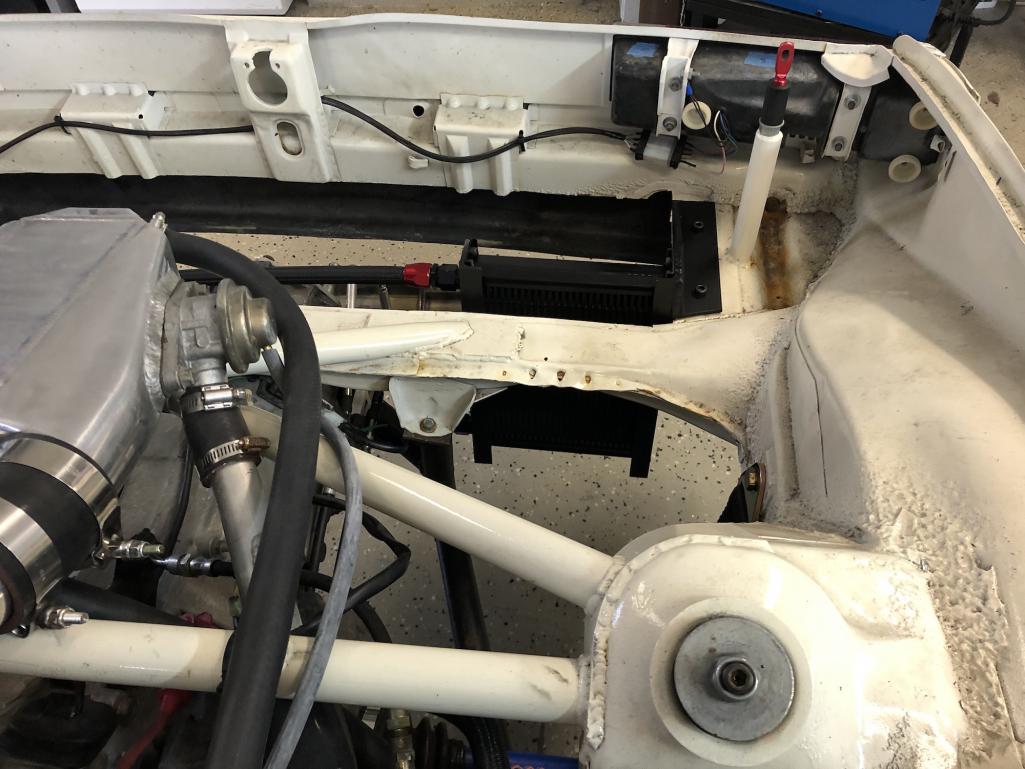
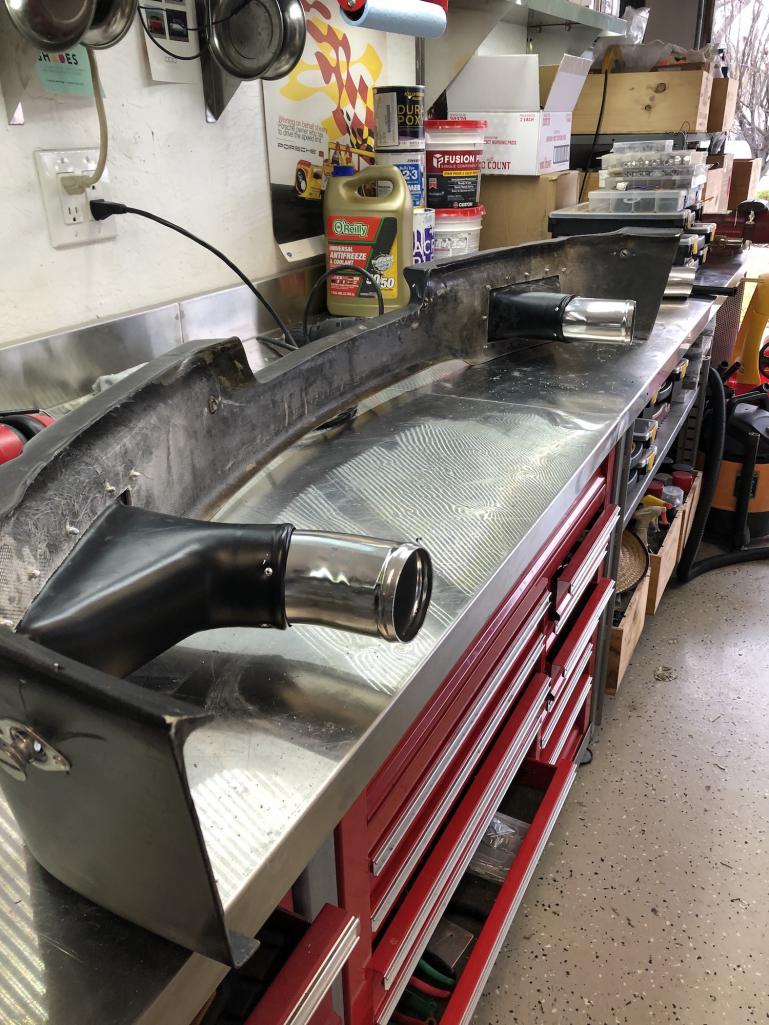
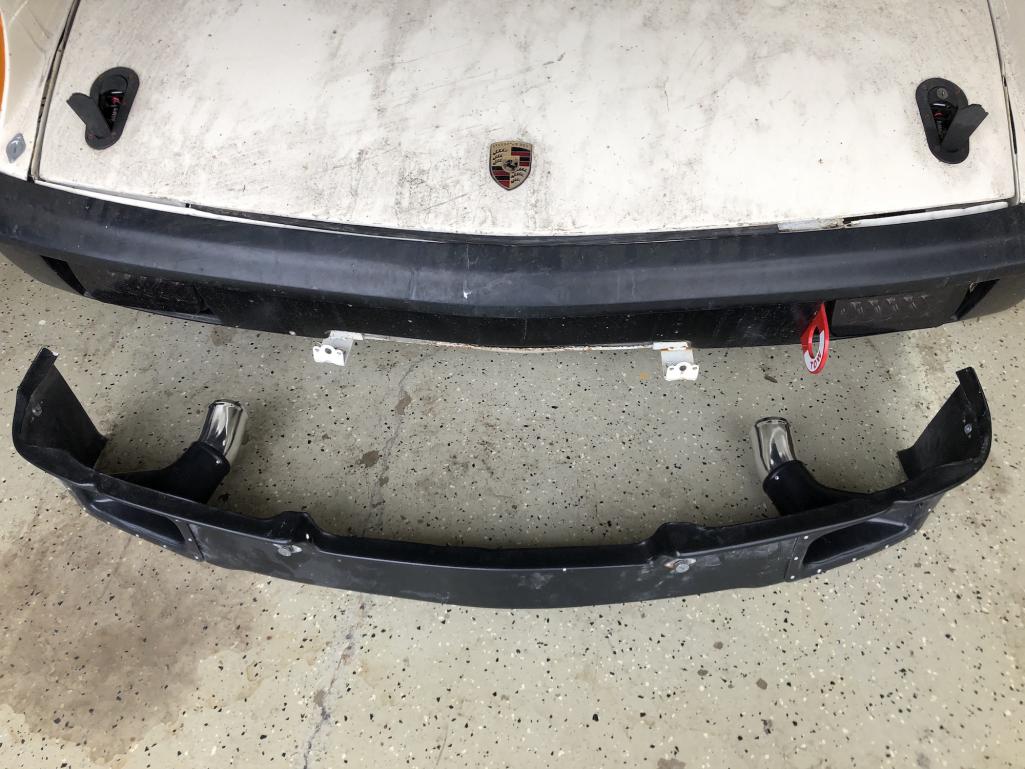
Attached thumbnail(s)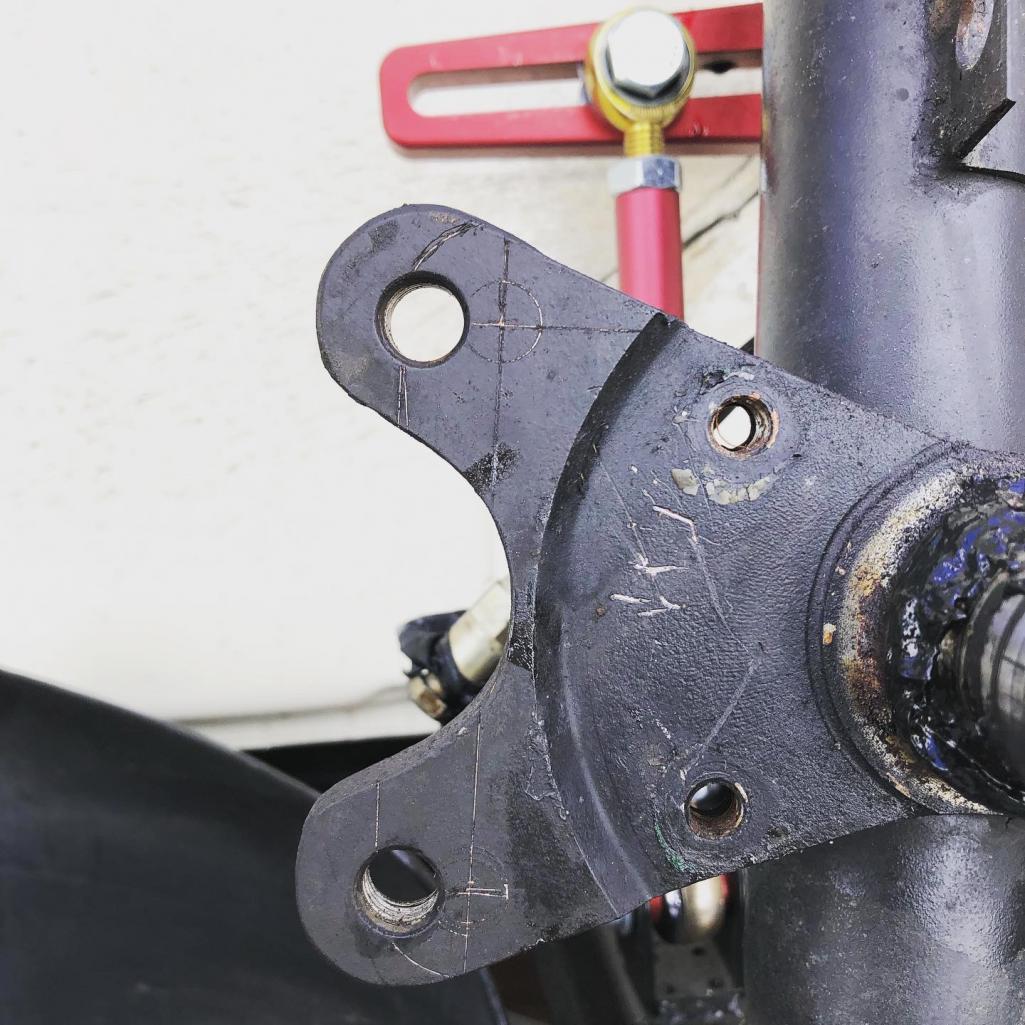
Posted by: MichiganMat Mar 6 2020, 11:17 PM
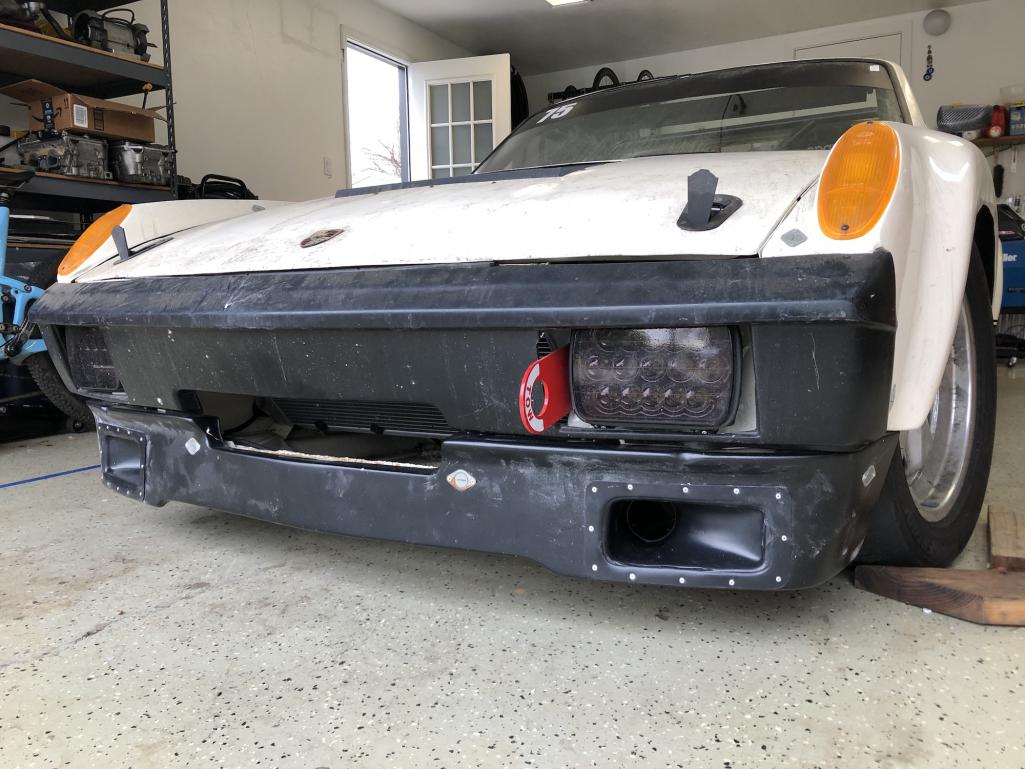
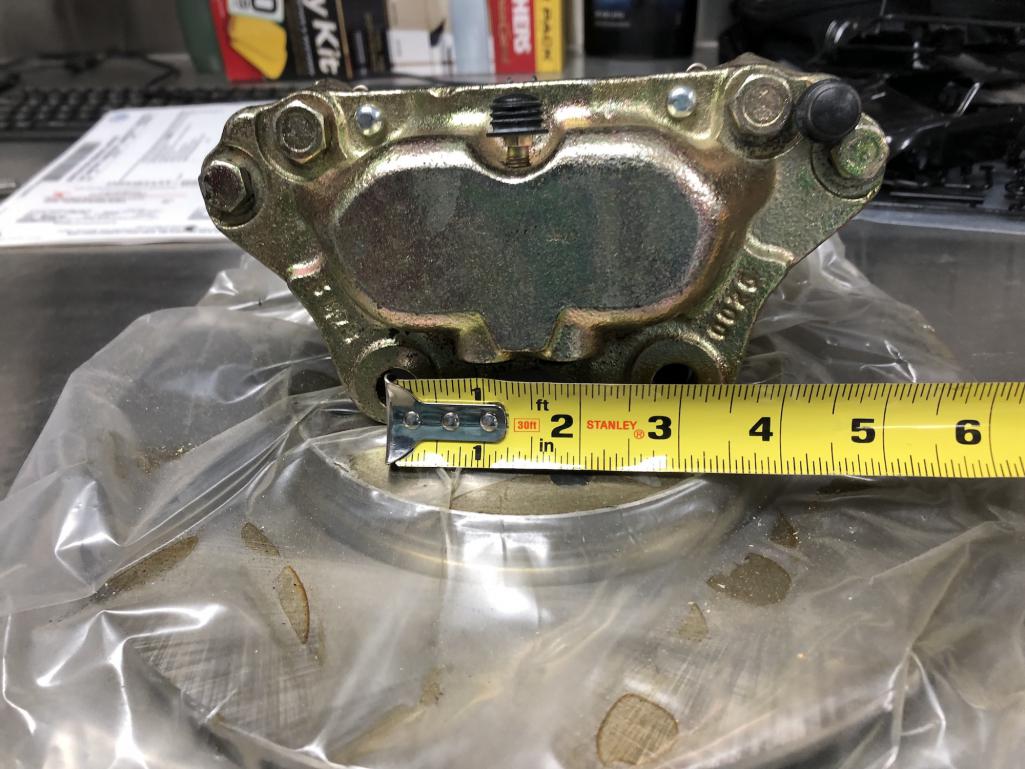
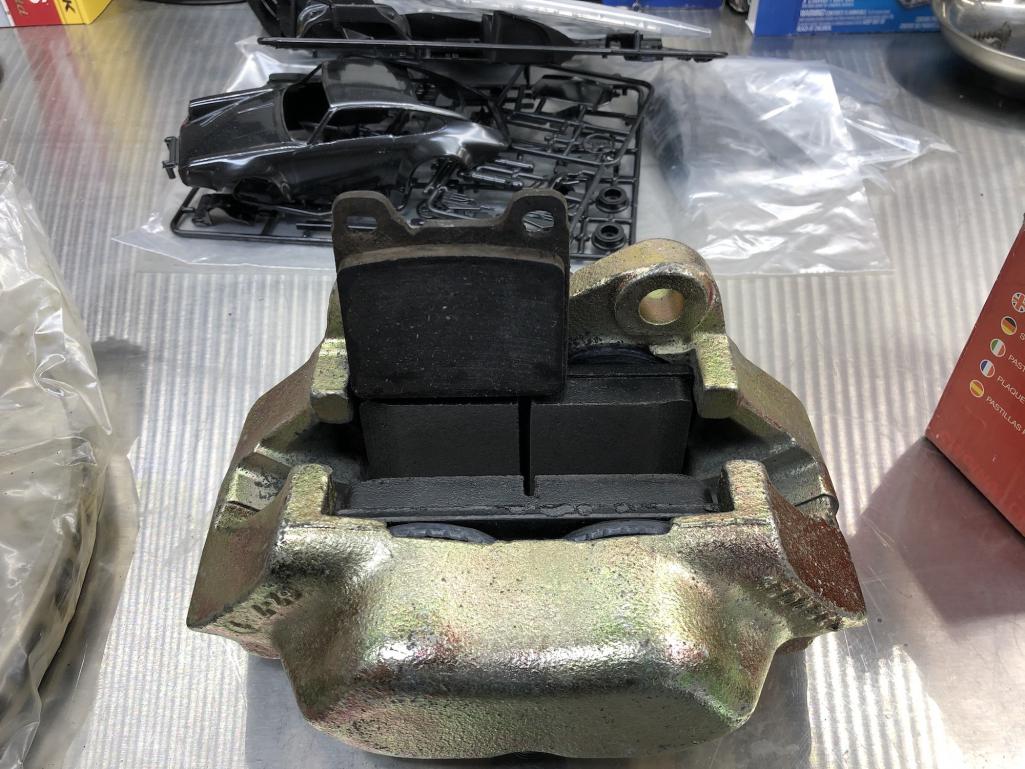
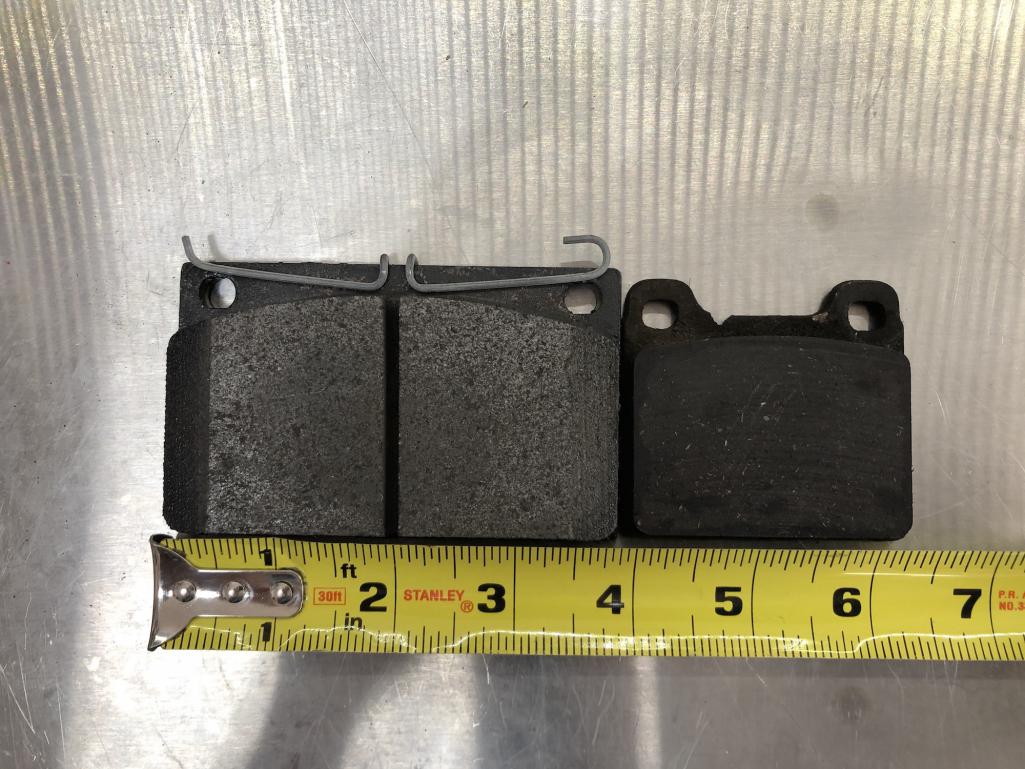
Posted by: Andyrew Mar 7 2020, 10:57 AM
Curious... What do those calipers look like on the rears? I've got vented rear rotors and spaced out stock calipers.... Would love more rear pad.
Posted by: Retroracer Mar 7 2020, 11:02 AM
Matt - are you going to plug weld the original holes in the strut before drilling out the new ones? The new holes you marked up look rather close... Also, what thickness rotor are they designed for?
- Tony
Posted by: FL 000 Mar 7 2020, 01:09 PM
Cool build; just binge-read your thread. You made some quick work of getting it on the road.
Posted by: MichiganMat Mar 7 2020, 03:18 PM
Matt - are you going to plug weld the original holes in the strut before drilling out the new ones? The new holes you marked up look rather close... Also, what thickness rotor are they designed for?
- Tony
Hey Tony,
Yeah, the holes will be filled and Im going to add material all around the new holes with the welder to really beef up the connections. Then I'll machine the surfaces, should look close to "stock" when Im done. Im pretty sure the loads are distributed in safe directions, but going to weld in some insurance anyways. Pics coming shortly.
As for the rotors, the Volvo 240 caliper came in two forms: The early caliper (1975-1985) was for non-vented, the "later" caliper (1986-1993) was designed for the same size 298mm x 28mm rotor we use on the early Porsches.
The calipers weigh a bit more fully dressed (11lbs Volvo 240 vs 9lbs for the Porsche M caliper), but its worth the benefits of the larger pad IMO.
Like I said, its a skunk-works project, Id be lying if I said I didn't have a bit of anxiety about messing with the /brakes/ of a car I'll be driving on a race track. Going to try anyways, approaching the mod with the utmost skepticism.
Posted by: MichiganMat Nov 13 2020, 11:50 AM
Big updates from the MichiganMat garage!
My 1yo has been demanding 110% of my time, but I did manage to sneak in some time on the car in the last few months. So whats happened:
- Finished the change-over to Volvo 240 front brakes. They are awesome, plenty of braking power, no fade, no boil.
- Added brake cooling to the nose of the car, its working well
- Built a new Subaru SSM-to-CANBUS computer using a much more powerful micro controller, the STM32, rather than Arduino.
- Built a new-to-me junkyard EJ motor, cleaned it all up, added remote oil cooling and STi pan + pickup, larger oil pump too.
- Took the car to the track and blew up the motor, more spun bearings.
New plan: Im done with EJs. Im swapping in a Honda J32 and adapting it to my existing Subaru 5-speed. Kennedy Engineering makes an adapter, its not cheap at $1000, but its cheaper and easier than replacing motors.
The EJ motor is just too temperamental and too fragile to put on a racetrack. Every topic I've read on this motor is littered with excuses: oil weights, bearing sizes, oil pump sizes, oil pick up types, crank oiling design, centrifigal forces at the rod bearings, sub-optimal location of the IAT sensor, tuning, tolerances... and on and on and on. Im not convinced that a solid track-worthy EJ can be built without substantial expertise and cost, where in contrast Honda J motors are ubiquitous, cheap, powerful, and so far seem to come with none of the fragility we're all seeing on the EJ motor.
I've added a pic of the oil pressure sensor data, and I had a super-bright LED on my dash for any oiling alerts, so I don't suspect that oil starvation was the cause of the failure on this motor. It could have been that the engine was injured before we got to the track, thats entirely possible, but for me and for what Im trying to accomplish I can't find the logic in trying over and over again with these motors.
My JDM J32A2 motor is on the way, I'll be cleaning it up and getting it wired through the winter with the intent of running it in 2021. Looking forward to hacking the Honda diagnostics protocol, its K-Line just like the Subaru protocol, so mapping it to CAN-BUS should be a breeze.
I'll also be adding a fuel surge-tank in the coming year, my current tank design isn't any good on the track.
Enjoy the pics!
Modified the struts, and drilled the bolts, so both calipers are safety-wired: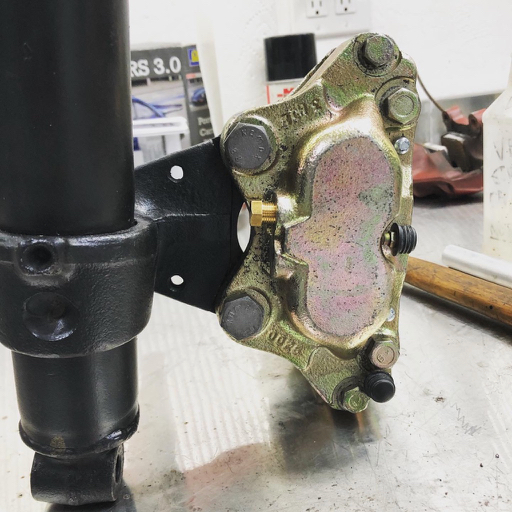
Yellow brakes add 5hp: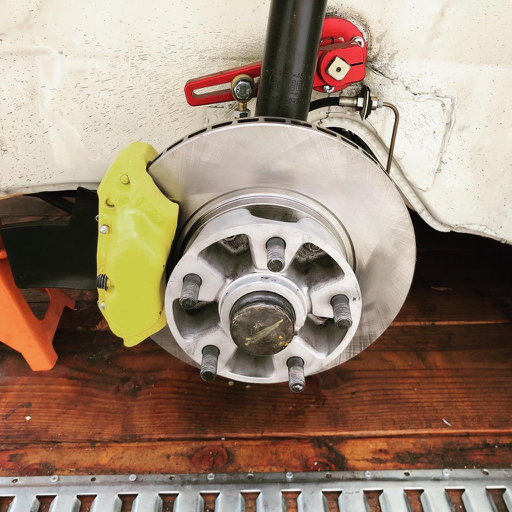
Spent a lot of time cleaning this engine: Painted the intake and cooling tank, soda-blasted the turbo housings, wrapped the header. It was a pretty motor...
WRX vs STi oil pans. Modified an STi pick-up for the pan to work with my windage tray too.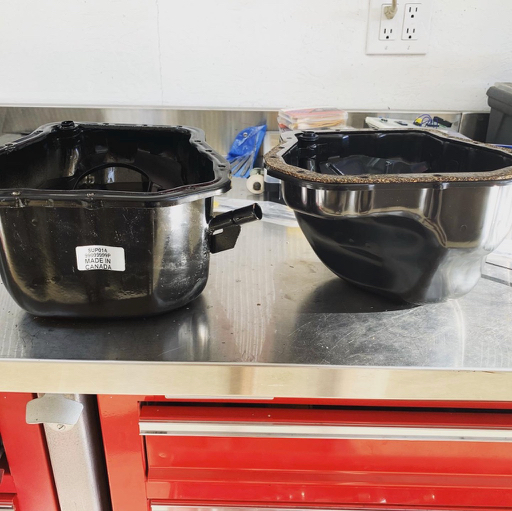
Looking tough at Thunderhill: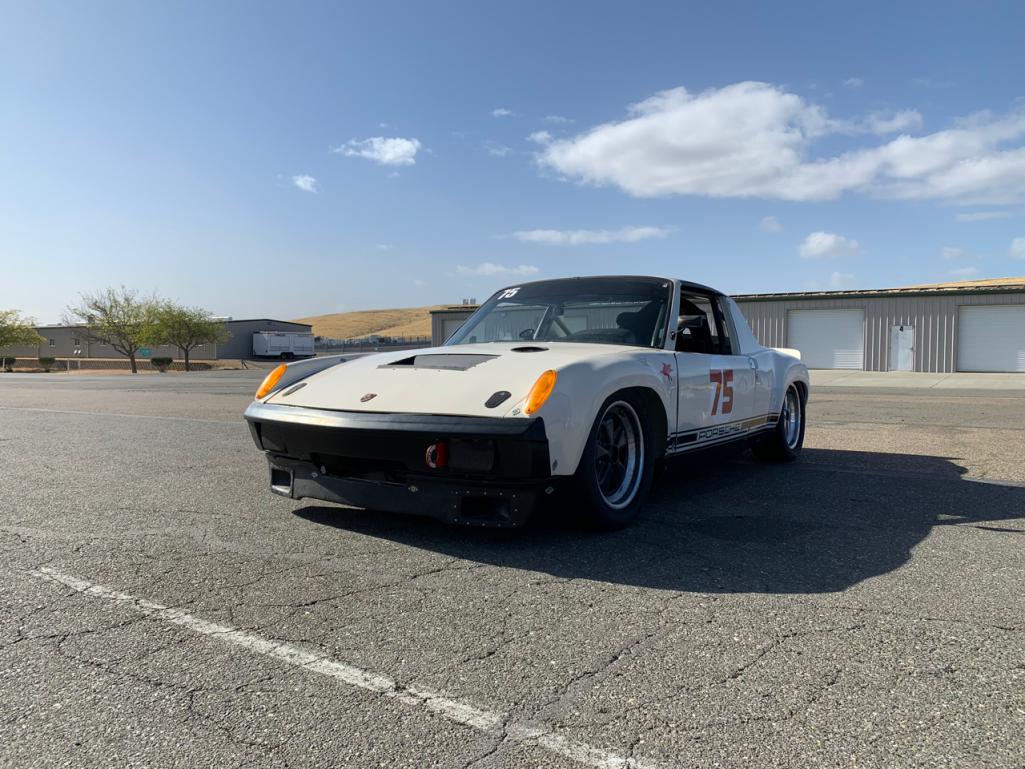
Anger when the bearings let go, again: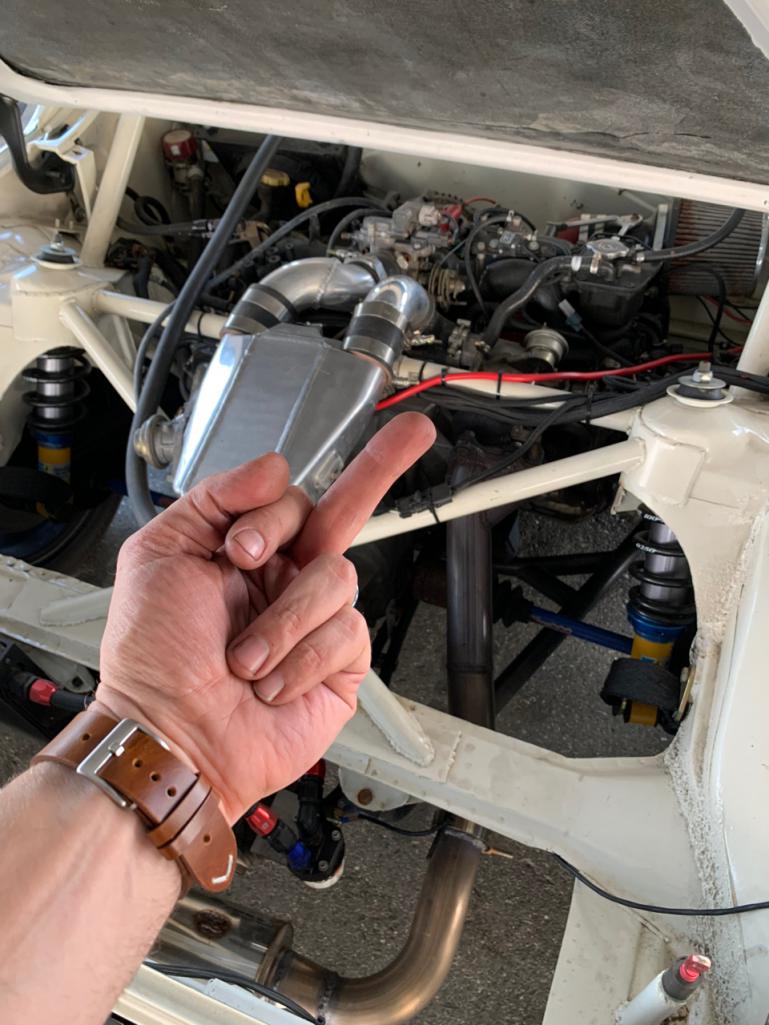
Lap after lap, you can see the oil pressure dropping down down down...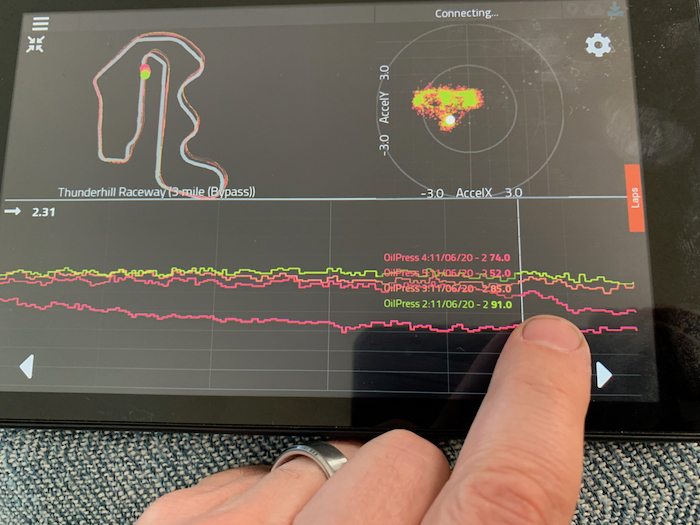
Posted by: Cairo94507 Nov 13 2020, 12:41 PM
well that sure sucks. Looking forward to the Honda swap.
Posted by: mgp4591 Nov 13 2020, 02:44 PM
Are you looking to boost the J32 or get more aggressive with the cam profile for your track attack? Those engines are plentiful and are held in high respect among the Honda crowd... good luck!
Posted by: Mueller Nov 15 2020, 03:02 PM
Hey Mat,
Any reason for the smaller J32 instead of the J35 like I have?
I'm going to have to do some more reading about the K-Line, but I like it is ISO 9141
Posted by: MichiganMat Sep 2 2021, 01:32 PM
Big update from the MichiganMat garage:
- The J32A2 engine is in and running really really well.
- Added a 71" #BigWang from 9LivesRacing.com
- Upgraded my wheels to 17" Fikse FM10's, 235/255 Nitto's
- Added a front splitter
Headed to Seca tomorrow with NCRC to shake down all the new gear, can't wait to see how it all performs. The car has been running great ever since the J installation, have had a few solid track days with the car without incident (though I did destroy 2 CVs at the last track day due to bolts backing out).
Mostly Im just super proud of how this car has turned out and wanted to share the picks with the forum, thanks for all the support.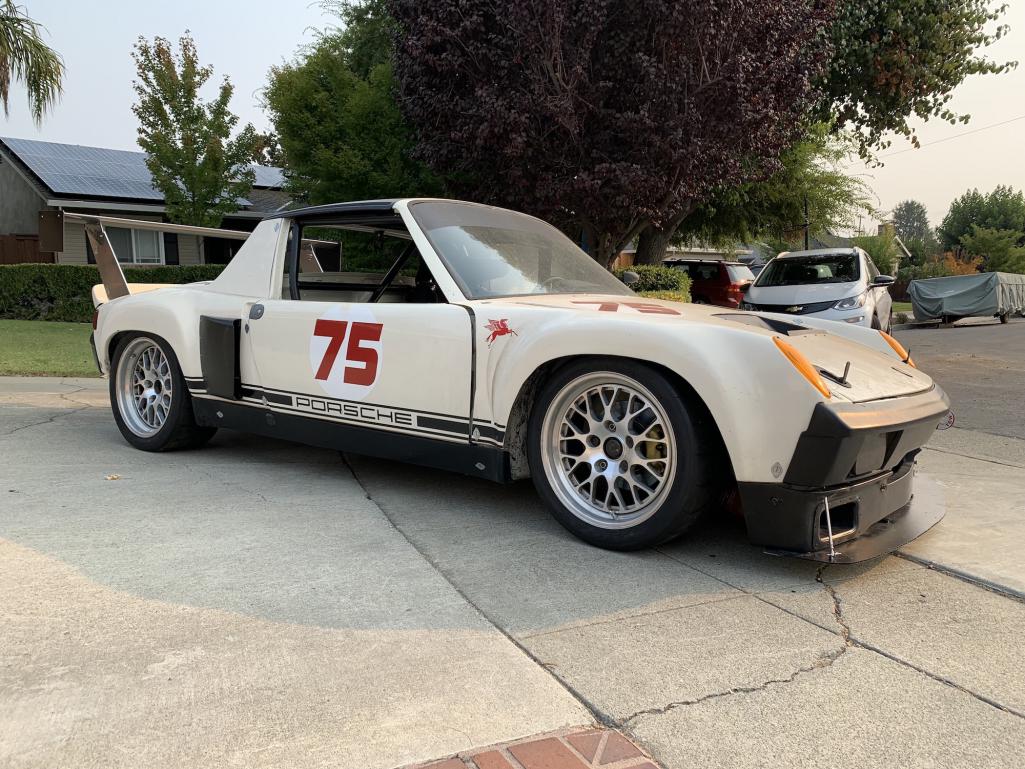
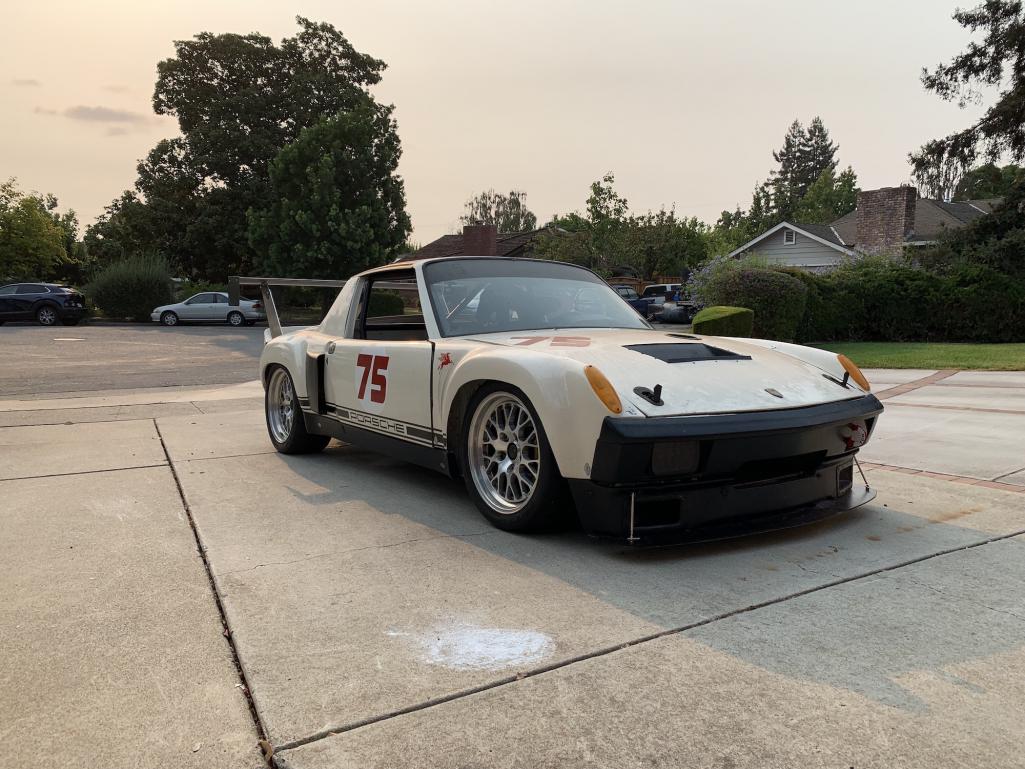
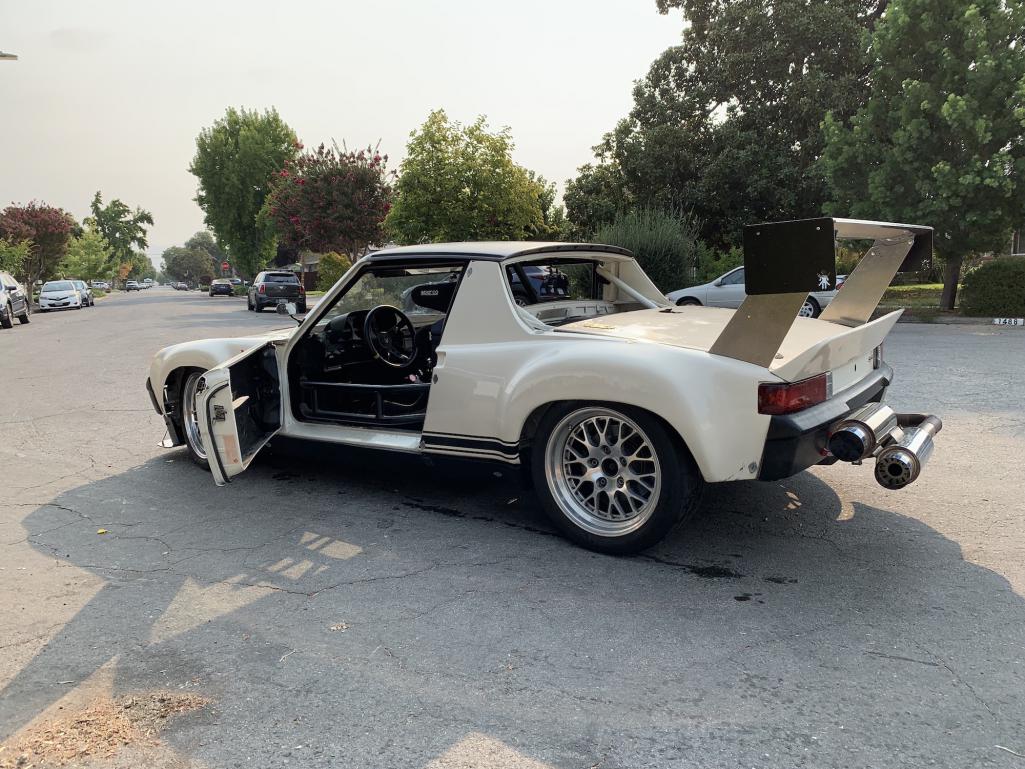
Posted by: mgp4591 Sep 2 2021, 08:40 PM
Great job on seeing you vision come to life! What is up with the exhaust system in the back? A spare muffler on a bike rack??
Posted by: krazykonrad Sep 3 2021, 07:13 AM
Great to get an update! There is a safety wiring kit floating out there somewhere for safety wiring CV joints. Well worth the couple of bucks.
Posted by: jd74914 Sep 3 2021, 07:31 AM
Let's see some pictures of that new engine install!
Posted by: Retroracer Sep 3 2021, 10:01 AM
Great job on seeing you vision come to life! What is up with the exhaust system in the back? A spare muffler on a bike rack??
So Laguna Seca has aggressively enforced track noise limits, which if you exceed will get you black flagged until you get it fixed. There is one spot particularly where the mic is located which is on the RHS of the track; so the guys with loud cars have to get creative with exhaust routing and mufflers, some of which end up a cartoonish aspect, but most of which "exit stage left", to try to direct the SPL thatatway. Matt's solution looks neater than most I've seen!
- Tony
Powered by Invision Power Board (http://www.invisionboard.com)
© Invision Power Services (http://www.invisionpower.com)