Printable Version of Topic
Click here to view this topic in its original format
914World.com _ 914World Garage _ SS Fuel Lines (Tangerine) Install
Posted by: sdoolin Oct 11 2015, 11:22 AM
Have OE flexible lines removed. Engine still in car, gas tank out.
Does it matter which fuel line goes where? They all have slightly different bends so I would guess that it matters at least a little bit. I mean I know that the long ones go through the tunnel and the short ones into the engine compartment (duh), but not sure otherwise.
My kit from Tangerine did not have instructions, so looking for any help.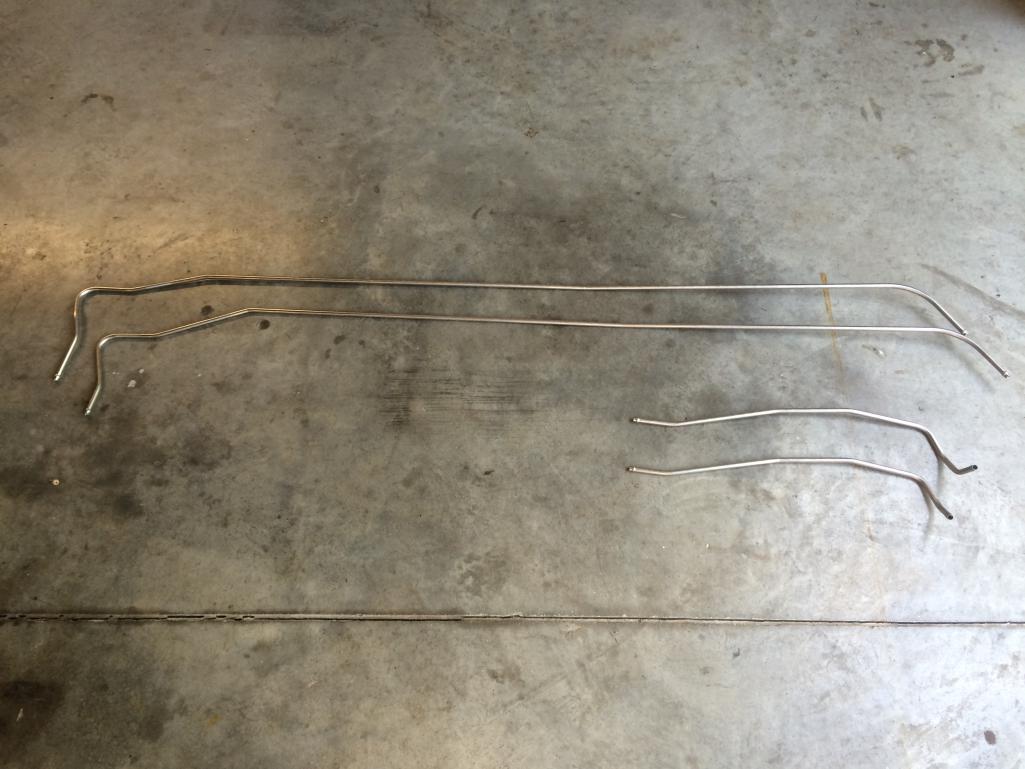
Posted by: Racer Chris Oct 11 2015, 11:47 AM

My kit from Tangerine did not have instructions, so looking for any help.
I can email you the instructions.
The one with the extra bend along the back end goes on the left.
It is the return line.
The engine compartment lines nest with the longer one above (return). The bent ends go towards the rear.
Posted by: RobW Oct 11 2015, 11:50 AM
Definitely makes a difference.
Great product. Should be on every 914.
Posted by: 914itis Oct 11 2015, 11:53 AM
http://www.914world.com/specs/tech_fuellines_ss.php
Posted by: sdoolin Oct 11 2015, 12:03 PM
So in my pic, top to bottom first line is feed from tank (right hand side facing forward at firewall), second line is return to tank, then return line in engine compartment and last is the feed line to the engine compartment?
Chris thanks for the email, still didn't get me all the info that (I think) I need.
Posted by: dangerranger01 Oct 11 2015, 12:19 PM
I haven't installed mine yet, but I saved this picture as a reference...forgot who posted it. But it shows a nice spot for the fuel pump as well...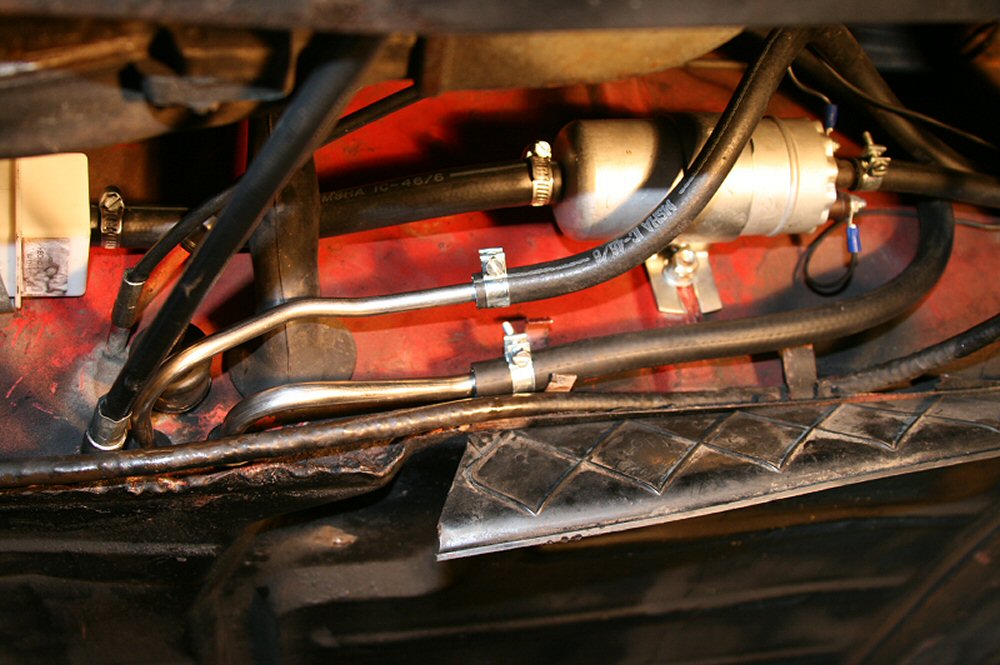
Posted by: sdoolin Oct 11 2015, 02:37 PM
Thanks for all the replies, long lines are installed, buffered (wrapped with spare fuel hose in a couple of places) and clamped down.
On to the engine compartment...
I took it apart long enough ago that I don't recall which side is the feed and which is the return. The injectors on drivers' side get the "feed" first, then back across to the passenger side, then return to tank?
If I had a pump mounting bracket I think I'd be driving it tonight...
Posted by: pete000 Oct 11 2015, 03:57 PM
Good investment !
Posted by: sdoolin Oct 12 2015, 10:55 AM
I have the long lines and the engine bay lines installed. Also new grommets in firewall and engine bay floor. Might not be exactly correct, but better/safer than the 42 year old OE lines. Still have a few lines on the engine to replace, but will wait until engine comes out this winter.
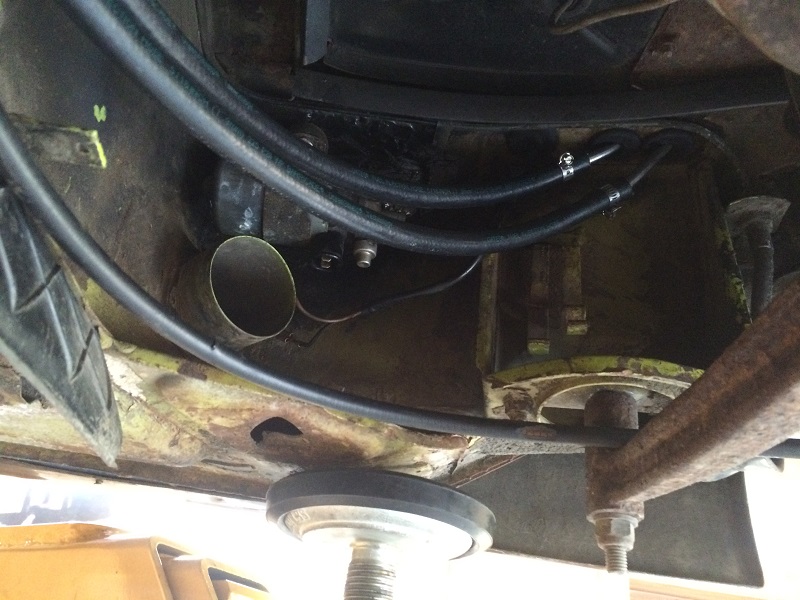
That OE fuel pump (above) will live the rest of its life right where it is. I cannot get a ratchet or a wrench on the bolts that hold the clamp in place. I have a new pump and am relocating to the front. I do run heat in the car, so these lines will live above the heater hose from flapper to body. 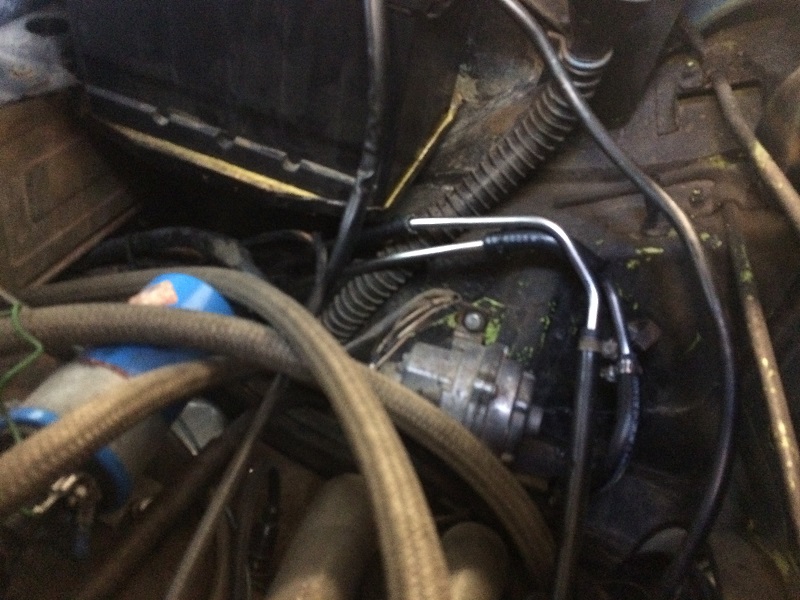
Engine bay lines were tricky, not much room to work, but they are in and protected from any rubbing/chafing due to vibration.
I need to sort out getting power to the pump up front, still looking for a pump bracket, then can re-install tank and drive...
Posted by: Racer Chris Oct 12 2015, 12:37 PM
The engine lines appear to be reversed, ie the shorter one goes below.
Also, I think they will fit better behind the drain hose.
Posted by: sdoolin Oct 12 2015, 01:30 PM
Also, I think they will fit better behind the drain hose.
Good to know. I will re-install them when the engine comes out this winter. For now, I plan to drive it as is.
Posted by: jim_hoyland Oct 12 2015, 04:51 PM
Nice job: reminds me, I bought the SS lines and forgot to install them. Did you do the install with the motor in place ? Any problems "pushing" the new lines up through the tunnel ? And, did you use a helper ?
Posted by: mepstein Oct 12 2015, 05:36 PM
Nice job: reminds me, I bought the SS lines and forgot to install them. Did you do the install with the motor in place ? Any problems "pushing" the new lines up through the tunnel ? And, did you use a helper ?
I used a helper. With the engine out it took 5 minutes.
Posted by: sdoolin Oct 13 2015, 06:06 AM
I had engine in, gas tank out, drivers seat out, steering wheel removed, center console out, gas pedal removed and both tunnel cover plates removed. Right rear wheal removed. Lines pushed in very easily, but I had a helper after getting the tunnel lines bound up by the brake line once or twice. Helper really helped.
Engine compartment lines more difficult for me than tunnel lines, just because of lack of space to work.
Posted by: jim_hoyland Oct 13 2015, 06:20 AM
I had engine in, gas tank out, drivers seat out, steering wheel removed, center console out, gas pedal removed and both tunnel cover plates removed. Right rear wheal removed. Lines pushed in very easily, but I had a helper after getting the tunnel lines bound up by the brake line once or twice. Helper really helped.
Engine compartment lines more difficult for me than tunnel lines, just because of lack of space to work.
Thanks. Good tip on removing the driver seat and right rear wheel....
 What size hose/type hose did you buy ? and where ?
Posted by: sdoolin Oct 13 2015, 07:21 AM
I purchased the full monty kit from Tangerine Racing, so it came with hoses, lines, clamps, adapters, the whole deal. Not exactly sure what size flexible lines (but I think 8mm & 12mm).
Talk to Chris at Tangerine, he is very helpful and supports his product(s).
Posted by: sdoolin Oct 14 2015, 07:34 AM
Potentially stupid question.....
Best way to get power to my relocated fuel pump (up front under fuel tank)? I have searched (believe me) and read quite a bit, but nothing I have found has helped.
I can run long wires from the existing power/ground leads in the engine bay through the tunnel and out the firewall to the new pump but that just doesn't seem "clean".
Electrical systems not my strong suit, I am learning. I don't have a wiring diagram for the thing either 
Posted by: andrewck Sep 15 2020, 05:14 PM
Does anybody have a photo of how the SS fuel lines sit in the center tunnel?
I'll be installing this weekend, and not sure how these should lay. There appear to be some metal tabs on the right-hand side, but unsure what they hold down.
Posted by: mepstein Sep 15 2020, 05:21 PM
The tabs hold down the oem plastic line. I don’t think I used them for the stainless line. It helps to have a spotter. Makes it a 5 minute job. Lube the ss lines so they slip through the rubber grommets easily.
The gas tank does have to come out.
Posted by: andrewck Sep 15 2020, 05:24 PM
The tabs hold down the oem plastic line. I don’t think I used them for the stainless line. It helps to have a spotter. Makes it a 5 minute job. Lube the ss lines so they slip through the rubber grommets easily.
The gas tank does have to come out.
Appreciate it! Everything (including gas tank) are out of the car, so hoping for easy installation.
Posted by: mmichalik Sep 15 2020, 10:42 PM
I have to do this real soon on the restoration project. Been putting it off because it seemed like a real PIA even though the motor and tank are out.
Thanks for posting this. Very helpful.
Posted by: mepstein Sep 16 2020, 06:14 AM
I have to do this real soon on the restoration project. Been putting it off because it seemed like a real PIA even though the motor and tank are out.
Thanks for posting this. Very helpful.
Once I used my wife as a spotter, once my teenage son. Gave them a small flashlight and sat them out in the car at the tunnel windows, Each time it was 5 minutes and no cursing. Don’t forget the lube.
Posted by: AZBanks Sep 16 2020, 11:50 AM
Getting the lines through the tunnel is a "feel" thing. I found it worked best for me to try to push the lines in keeping the tip of the line low on the passenger side of the tunnel.
Posted by: JOEPROPER Sep 16 2020, 12:34 PM
With the gas tank and engine out, this is an easy upgrade.
Posted by: iankarr Sep 16 2020, 09:31 PM
This may help with visualizing things...
https://youtu.be/IDFsZoI_W3g
Powered by Invision Power Board (http://www.invisionboard.com)
© Invision Power Services (http://www.invisionpower.com)