Printable Version of Topic
Click here to view this topic in its original format
914World.com _ 914World Garage _ Mini V8 Thread
Posted by: Andyrew Oct 20 2015, 08:19 AM
There will be a lack of progress on my car until I get this members 914 running with my v8 setup. The only requirement is that the engine will start, run, and move the car. 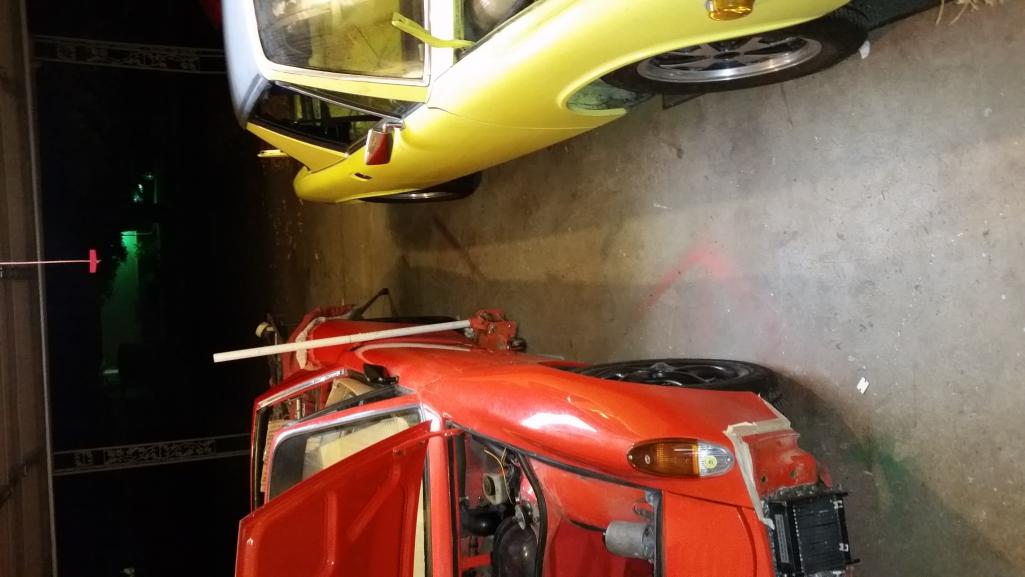
Below is my list of work to do.
Pull Fuel Tank
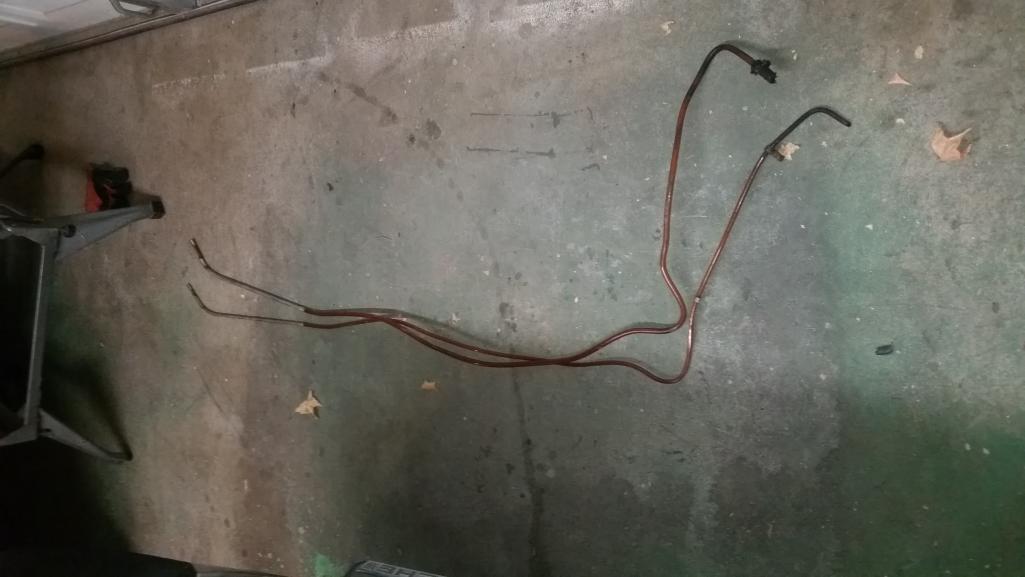
Replace stock fuel lines
Plumb fuel pump
Replace firewall shift bushing
Cut holes for radiator lines in front trunk
Mount radiator lines
Cut notch for HEI Dizzy
Clearance valve cover
Bolt up engine/trans
Bolt up cv joints
Install shoft linkage and adjust
Install distributor and carb
Install clutch, throttle and speedo cables
Wire starter, dizzy, alternator
Test fire
Flush coolant
Bleed brakes
Drive
Total hours involved is anticipated at 26 by myself. I origially agreed that the owner would have the car 100% ready for the swap and I would only have to do the v8 portion, (which I have a anticipated at 20.5hrs) however the fuel line issue, firewall shift bushing, and bleeding the brakes are all going to be done on a T&M basis.
Overall its a good looking body with a few dents and paint that shows its age. There is a bit of rust in the firewall and battery tray and some in the pass front door jamb, but the rear suspension console looks great. I think its a great candidate for a conversion.
Posted by: rhodyguy Oct 20 2015, 08:22 AM
That yellow will be a sleeper for sure.
Posted by: Andyrew Oct 20 2015, 08:23 AM
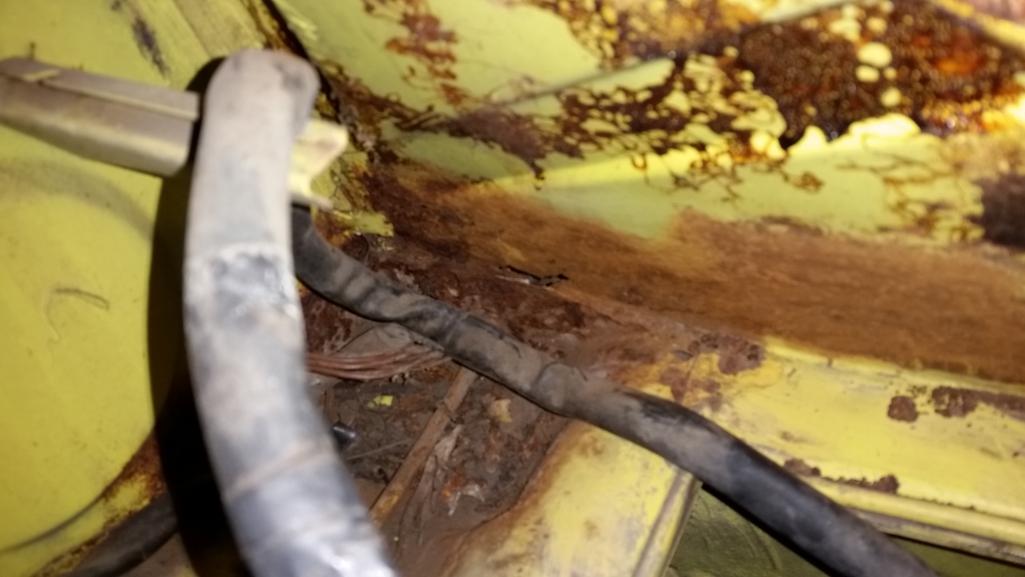
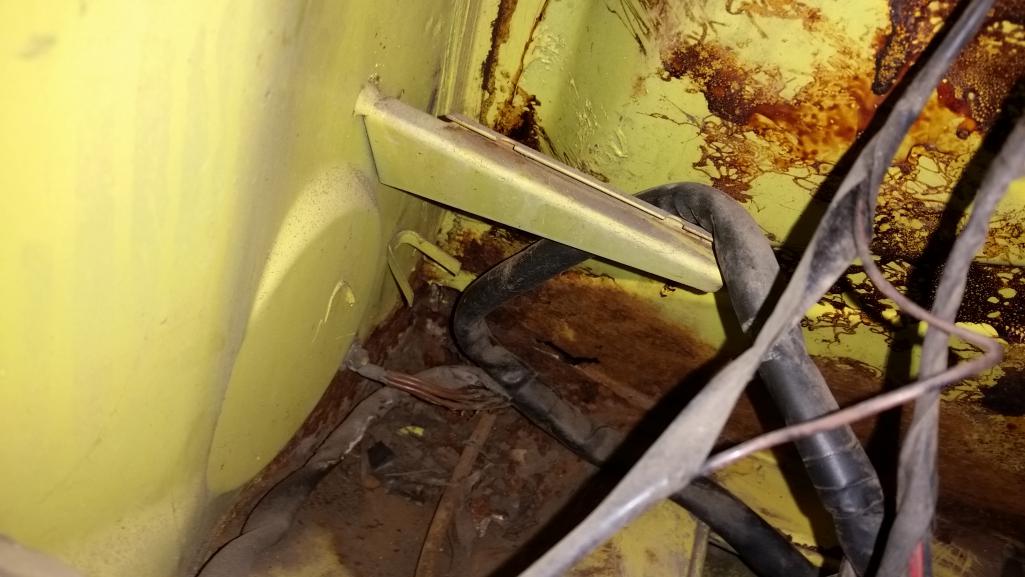
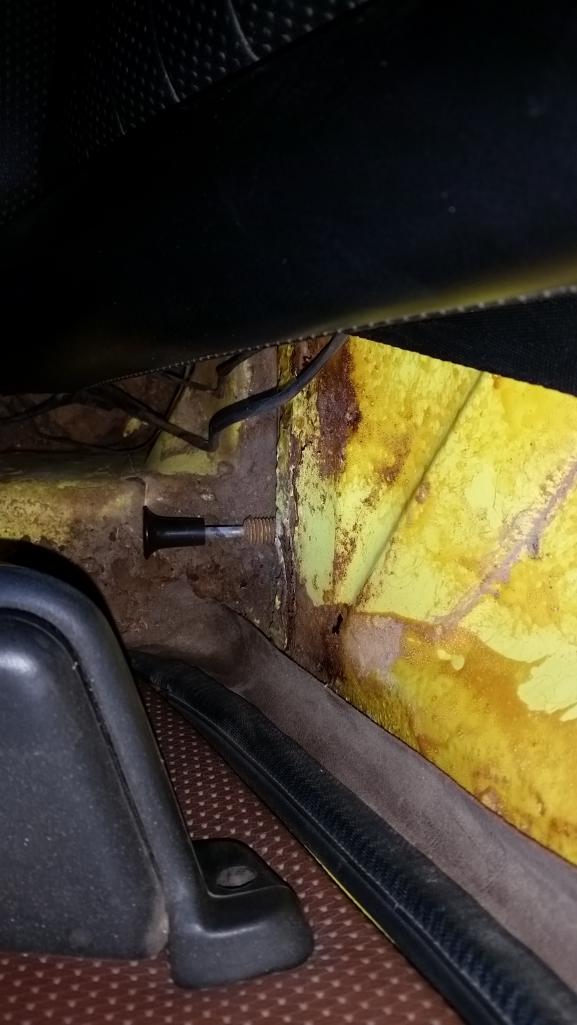
Progress from last night.
Ready for installing the new prebent lines. Going to remove the shifter and rod and the fuel line grommet up front to hopefully make the install easier. I dont anticipate it to be fun...
Attached thumbnail(s)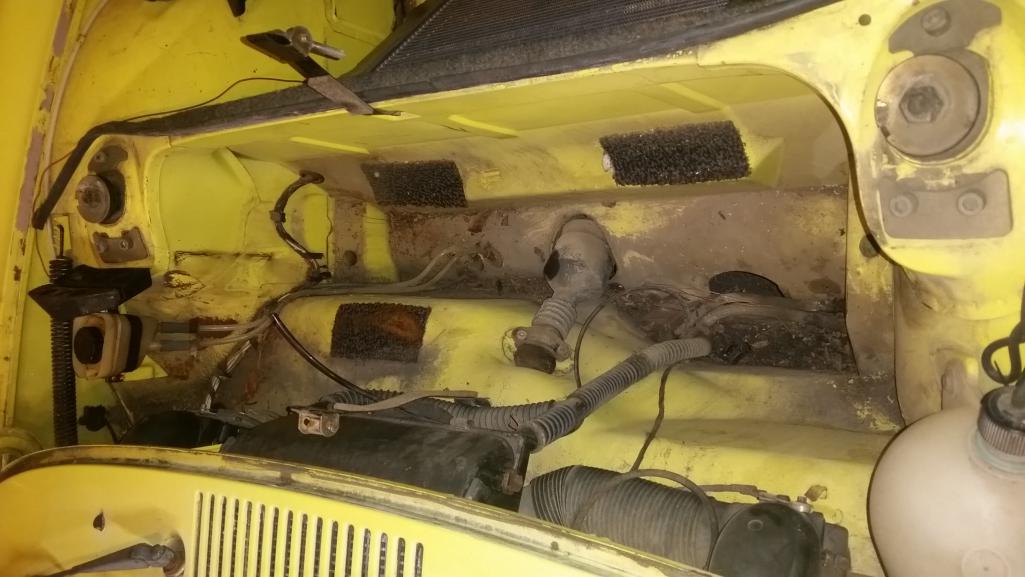
Posted by: JmuRiz Oct 20 2015, 08:35 AM
Off topic: But what's with the oil coolers on the orange car... hmmmm 
Posted by: 76-914 Oct 20 2015, 08:35 AM
![popcorn[1].gif](style_emoticons/default/popcorn[1].gif) Were the OE plastic lines still good? Mine were. WD40 that front grommet and they will slip right thru w/o effort. Are you using Robert's or Chris' lines. Robert has a "how to" video for his lines. Probably the same for Chris'. 26 hr's huh? That's old age for ya. I take that long to decide if I want to, anymore.
Were the OE plastic lines still good? Mine were. WD40 that front grommet and they will slip right thru w/o effort. Are you using Robert's or Chris' lines. Robert has a "how to" video for his lines. Probably the same for Chris'. 26 hr's huh? That's old age for ya. I take that long to decide if I want to, anymore. 
Posted by: Andyrew Oct 20 2015, 08:47 AM
Plastic lines looked good. Fabric lines were ready to explode.
To many 914 fires for me to let a 914 go through my garage without new fuel lines...
Posted by: Mueller Oct 20 2015, 09:36 AM
Slightly disappointed in thread title
I was hoping for "mini-V8" install, you know something in the 2 or 3liter department 
Too much work for me....but you are young and driven.
Is the soon to be V8 car local?
Posted by: Andyrew Oct 20 2015, 10:02 AM
San Jose local, yes. Member also has a 6 conversion.
I chose the thread title as my goal for this thread is 2-3 pages of how to and what all is required in a v8 build, showing how easy it can be.
Also an easy reference to the owner to see progress and how it all goes together.
Posted by: matthepcat Oct 20 2015, 02:13 PM

Slightly disappointed in thread title
I was hoping for "mini-V8" install, you know something in the 2 or 3liter department
Too much work for me....but you are young and driven.
Is the soon to be V8 car local?
I was thinking the same thing. Maybe the McLaren 3.8l twin turbo out of the MP4-12c
Posted by: screenguy914 Oct 20 2015, 02:56 PM
Not sure how fast you work or your personal level of thoroughness, but FWIW, I'd multiply your estimated time for completion by at least 3 to be more realistic. Sometimes even the most mundane procedures eats up time.
MHO,
Sherwood
Posted by: jimkelly Oct 20 2015, 05:23 PM
he is one lucky guy 
and will be one happy guy very soon 
but he will never be satisfied, ever
Posted by: Andyrew Oct 20 2015, 05:38 PM
Slightly disappointed in thread title
I was hoping for "mini-V8" install, you know something in the 2 or 3liter department
Too much work for me....but you are young and driven.
Is the soon to be V8 car local?
I was thinking the same thing. Maybe the McLaren 3.8l twin turbo out of the MP4-12c
An Audi 4.2 isnt out of the question for a future car
In response to the oil cooler question
http://www.914world.com/bbs2/index.php?s=&showtopic=114780&view=findpost&p=2206628
Regarding time frame, I am pretty confident in my time. There is no fabrication involved, I have this figured out pretty well, I mean I uninstalled everything from the orange car(mine) in 4 hours, I have a detailed spreadsheet with hourly figures on what things will take me. And I have done this before multiple times... There is wiggle room figured in.

Posted by: whitetwinturbo Oct 20 2015, 10:58 PM
Posted by: Mike Bellis Oct 20 2015, 11:16 PM
You crazy! 
Posted by: Andyrew Oct 20 2015, 11:53 PM
Progress from tonight,
Fuel lines in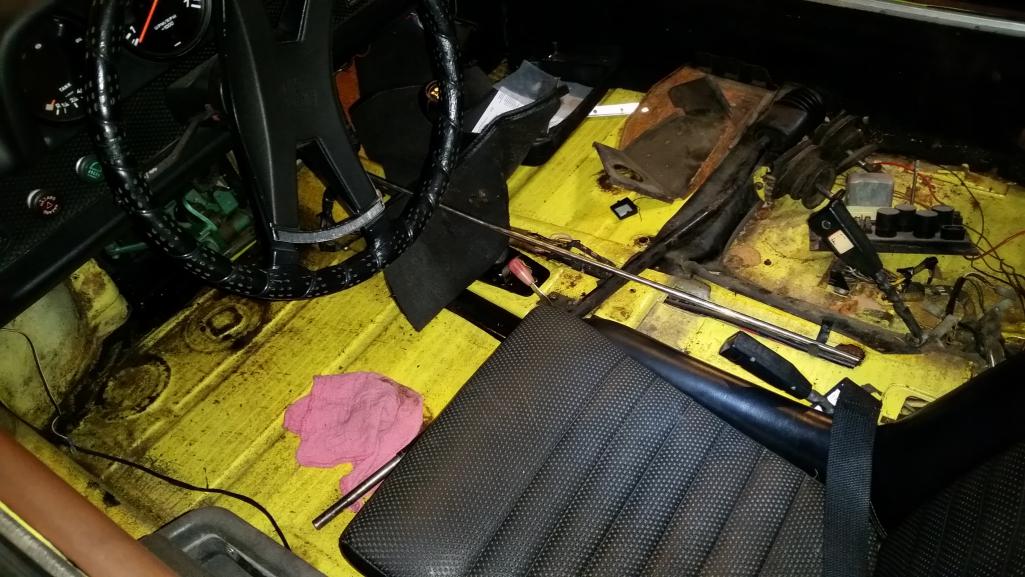
Just kidding 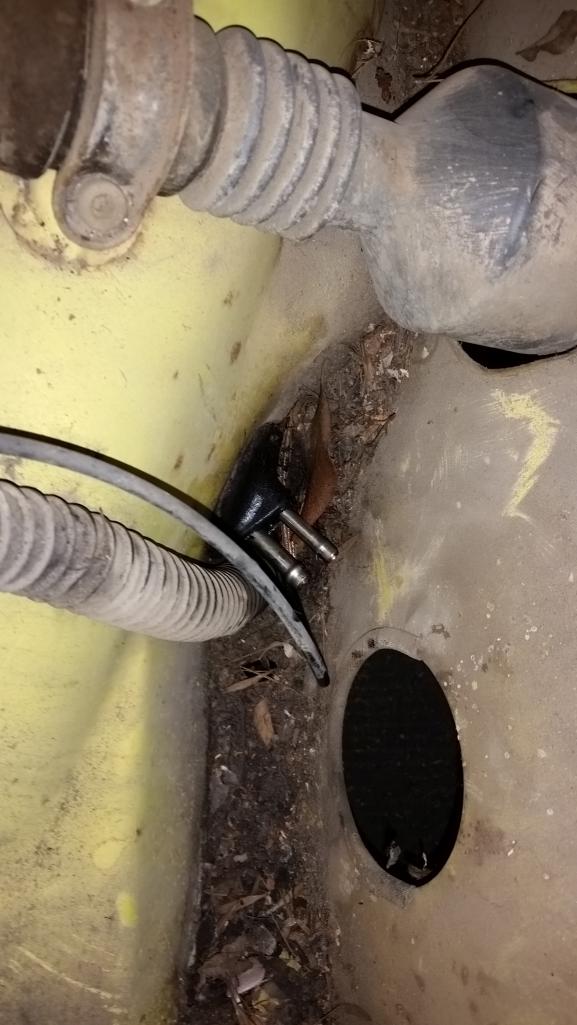
Still have about 45mins to install the rubber lines tank side and put in the tank, then I can cross that out. Right on schedule
Posted by: jimkelly Oct 21 2015, 06:49 AM
on my V8 car i cut that hole below the fuel lines much bigger so i can access the fuel lines easier and get clamps on easier.
Attached image(s)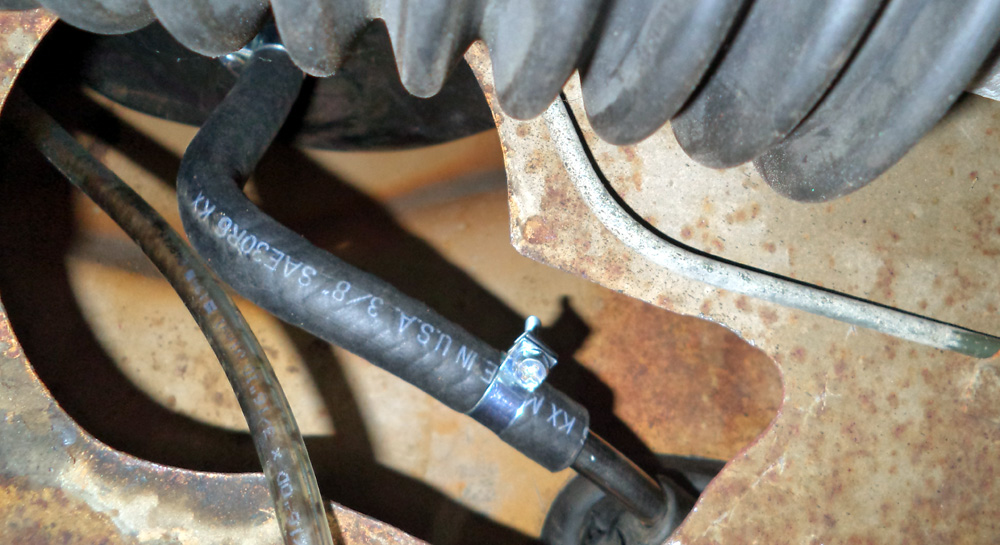
Posted by: Andyrew Oct 21 2015, 08:46 AM
I will likely take the typical route of making the hoses ~ 2.5' long and coil it up under the tank, this way I can remove the tank and set it on top with the hoses connected.
Posted by: Andyrew Oct 22 2015, 11:43 AM
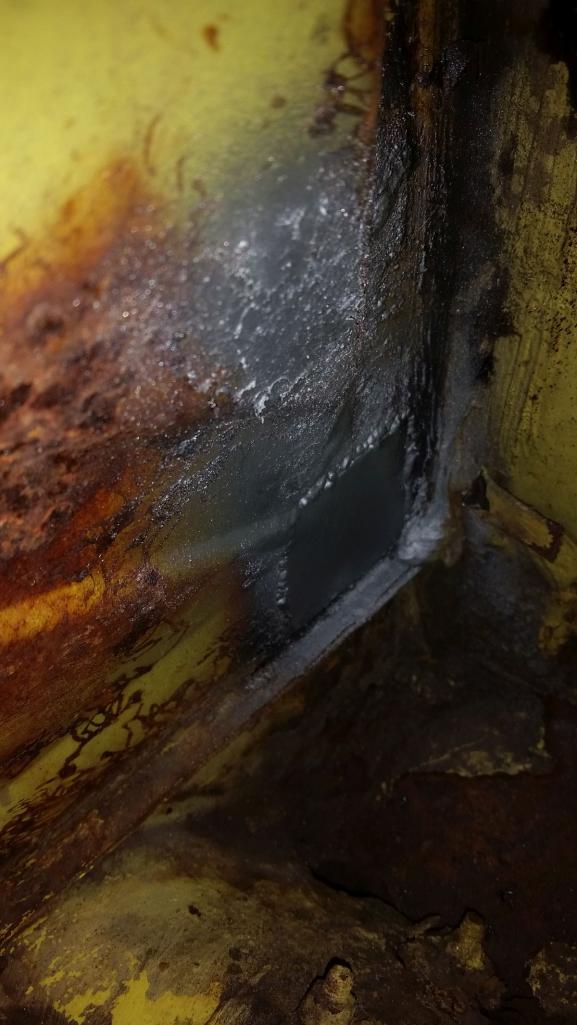
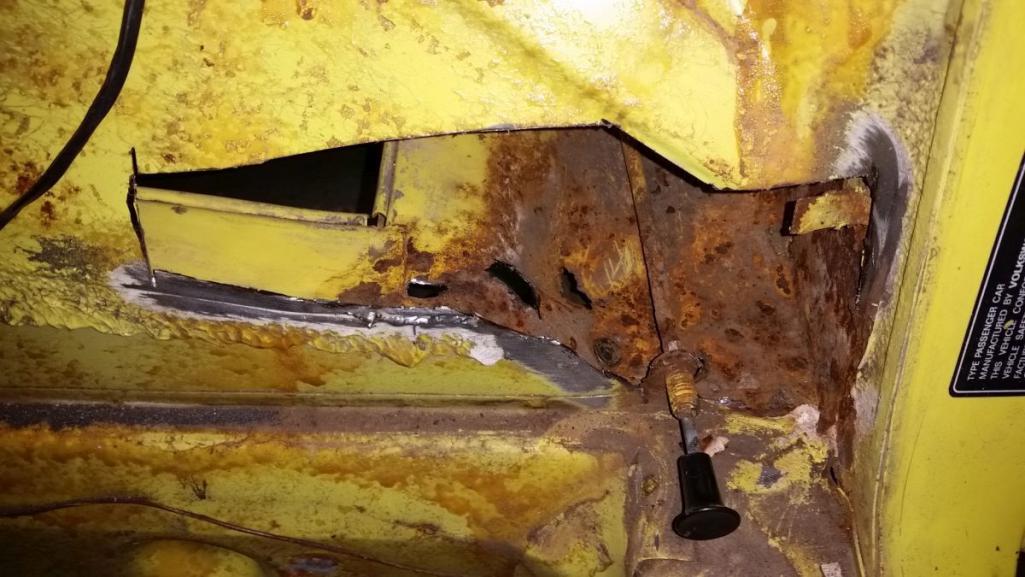
Firewall rust 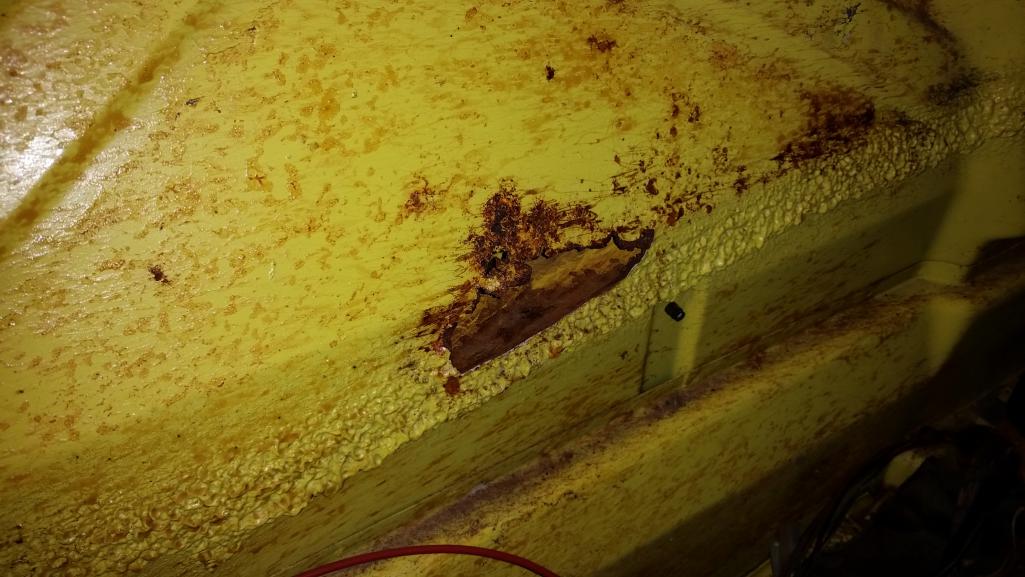
The owner and I are discussing the possibility of me doing the rust repair.
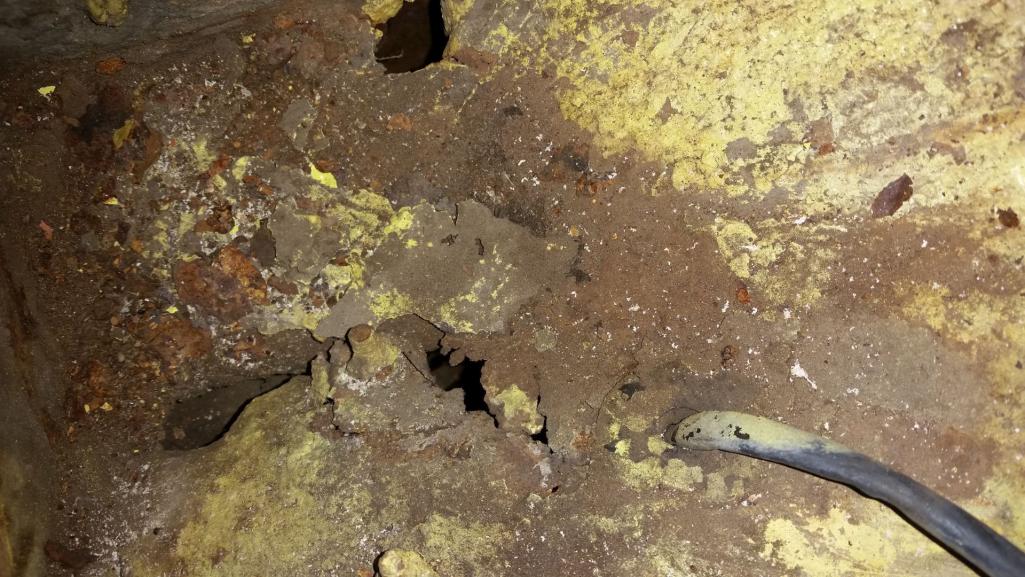
Posted by: Andyrew Oct 22 2015, 11:48 AM
More..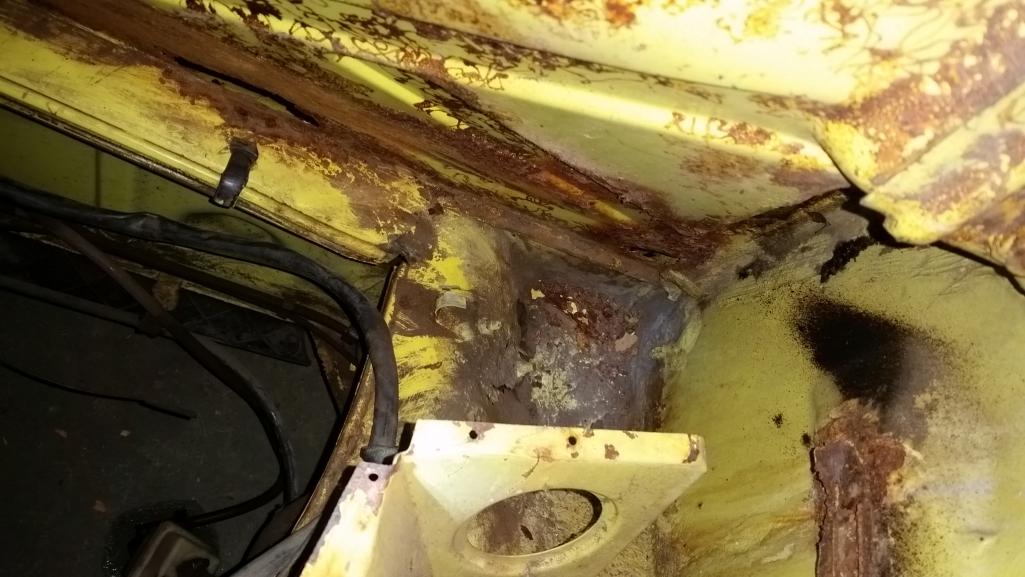
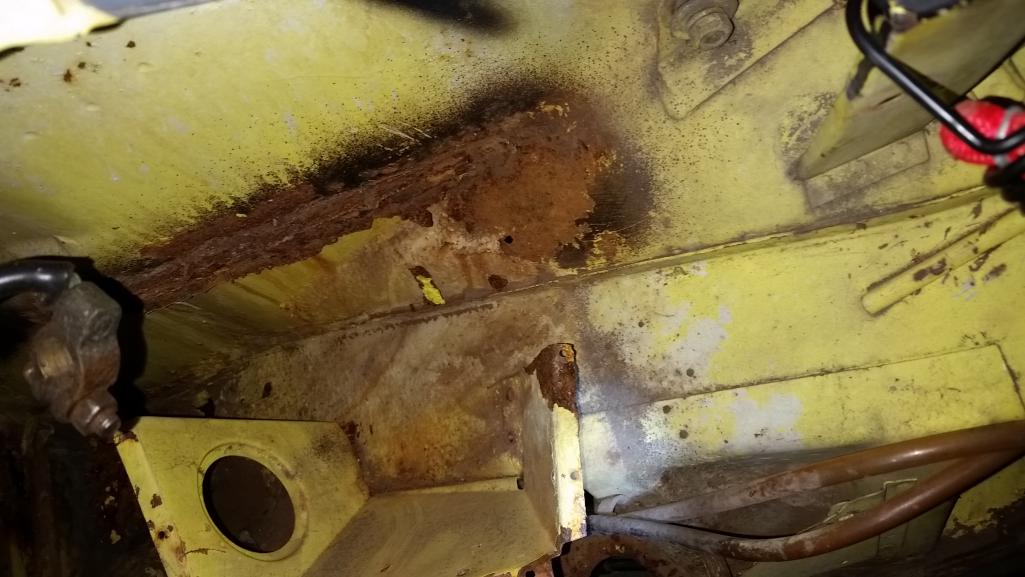
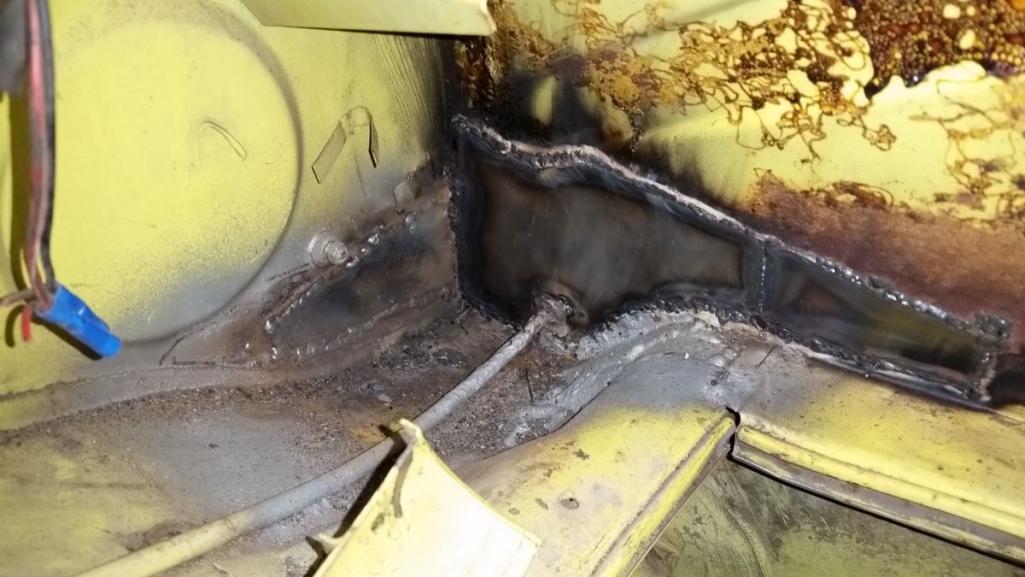
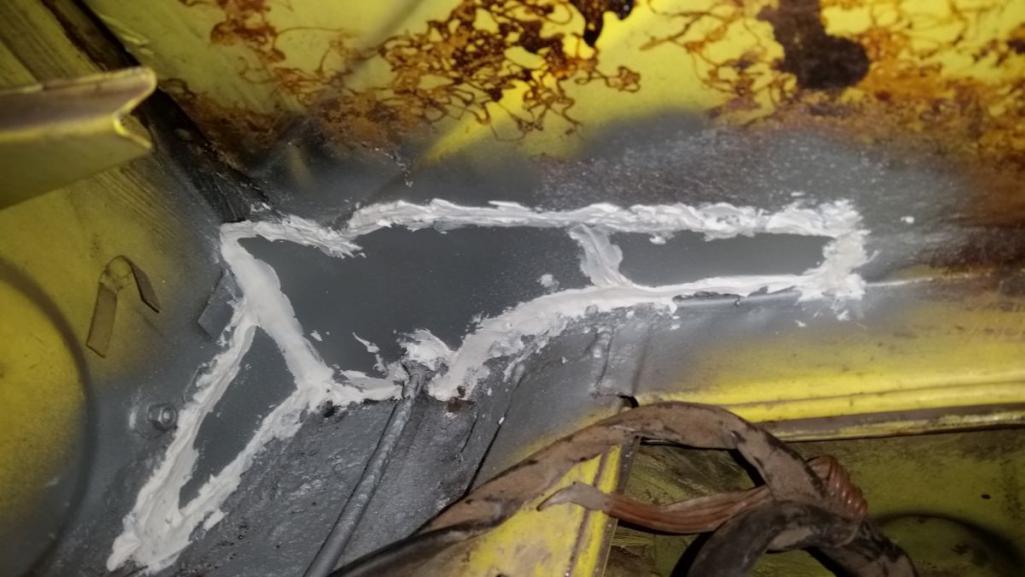
Posted by: Andyrew Oct 23 2015, 06:38 PM
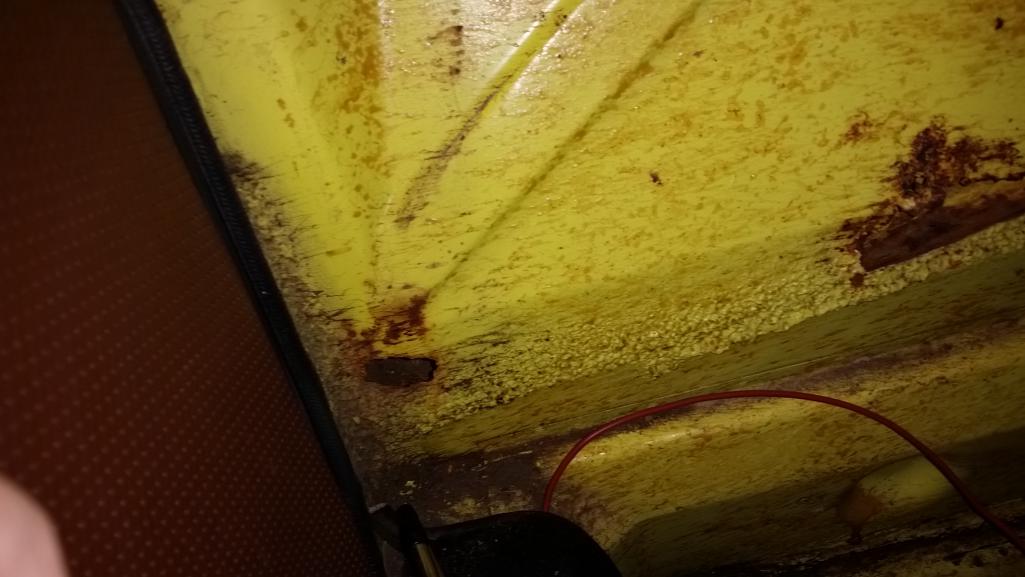
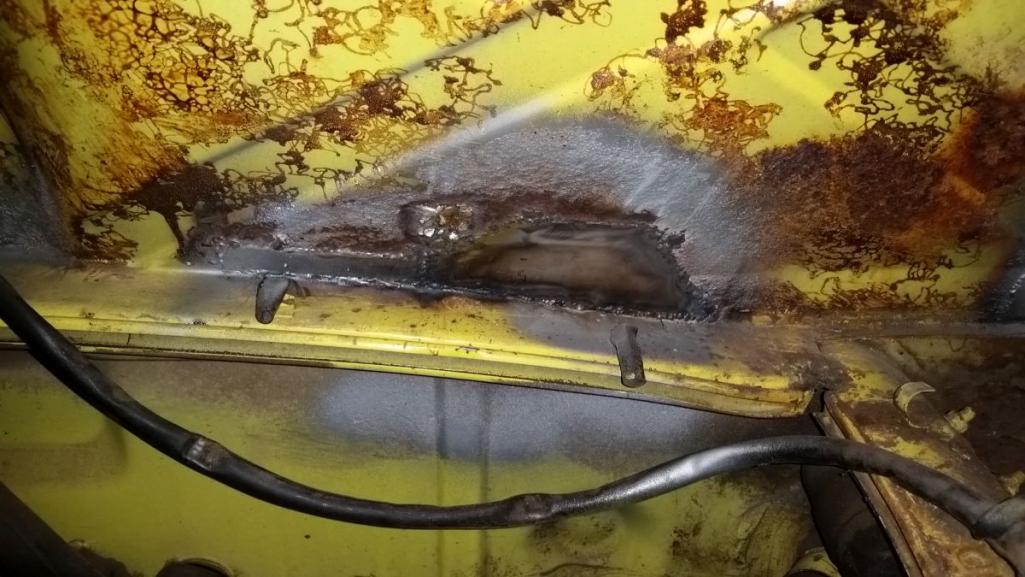
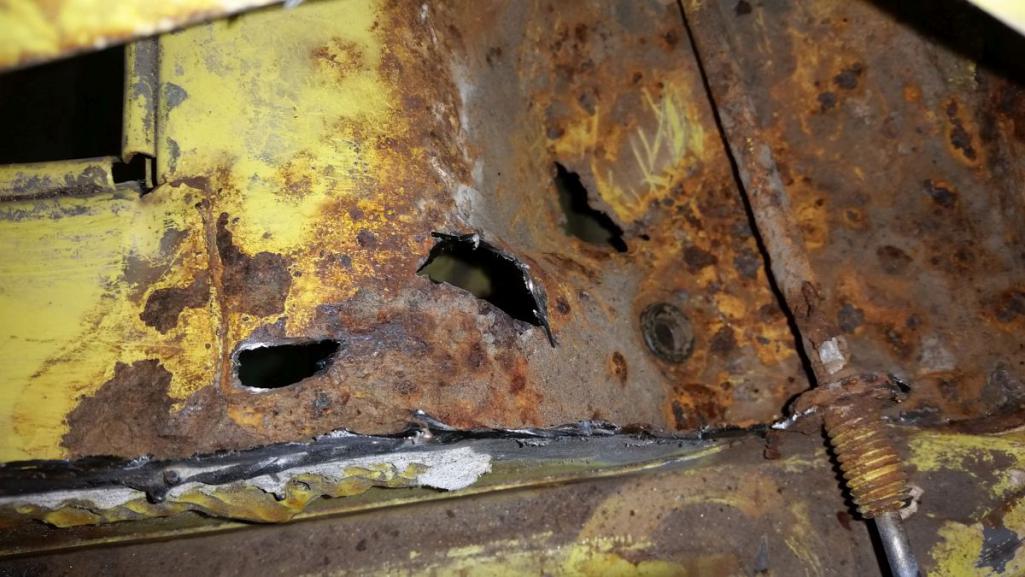
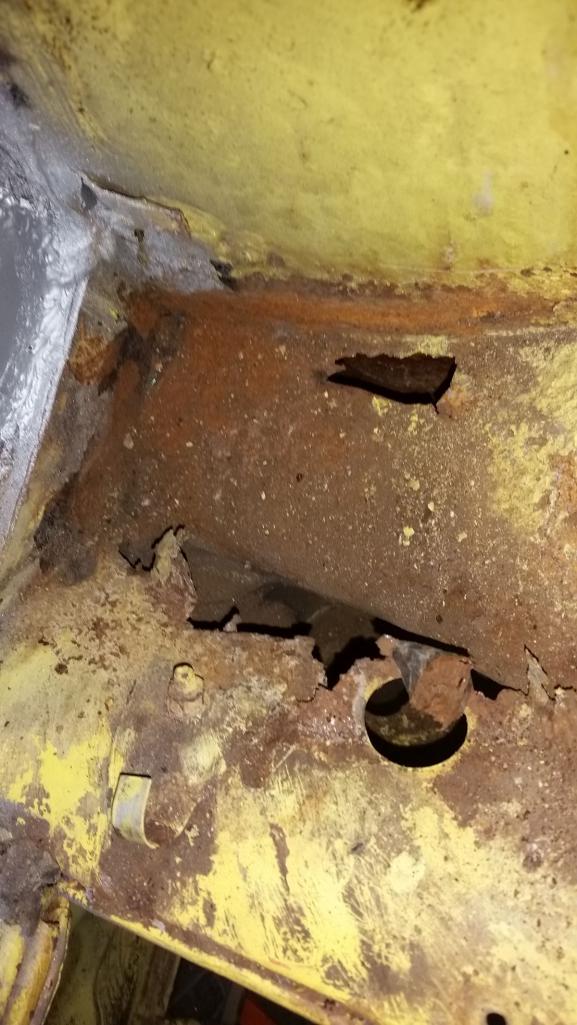
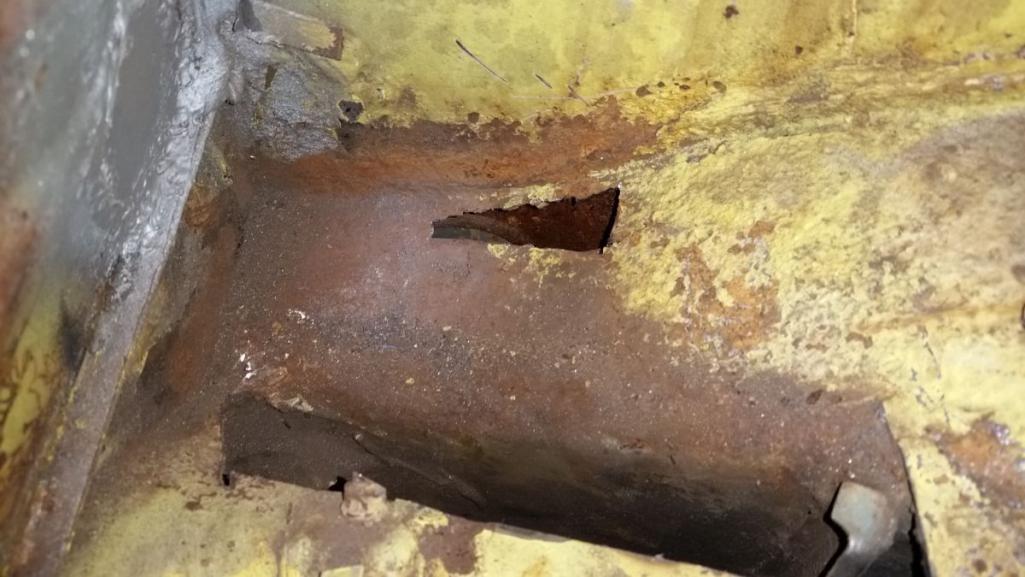
A bit more digging of the rust. As I anticipated it was a bit more than what you could originally see. I see the longs are going to need some work as well. The firewall near the drivers side is pretty bad. 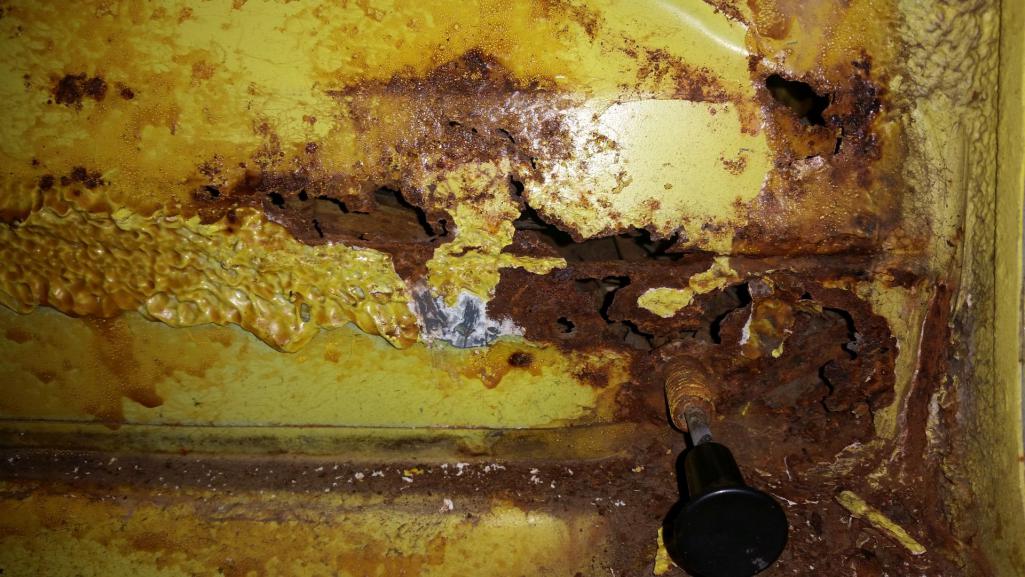
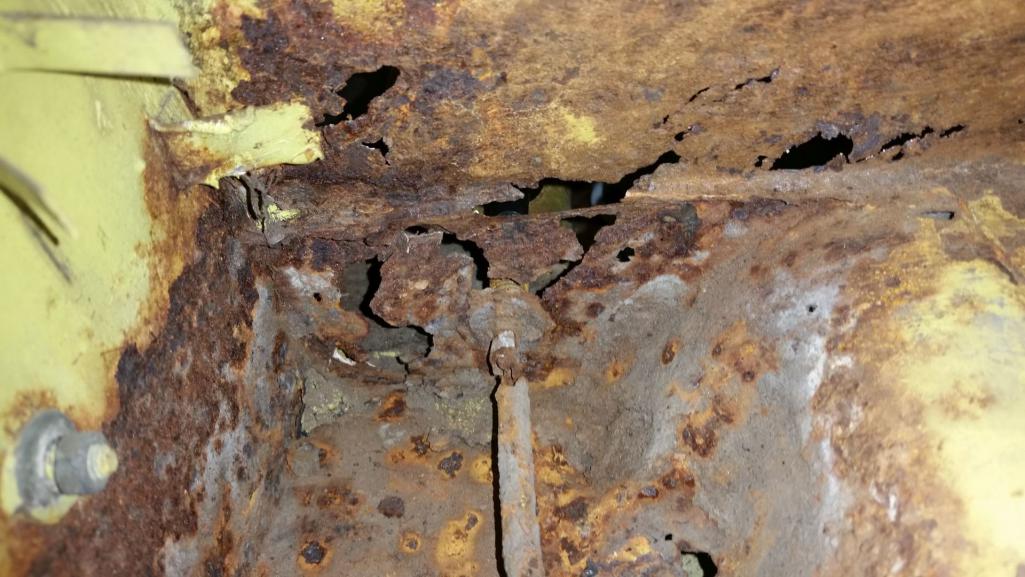
Drivers side below the battery tray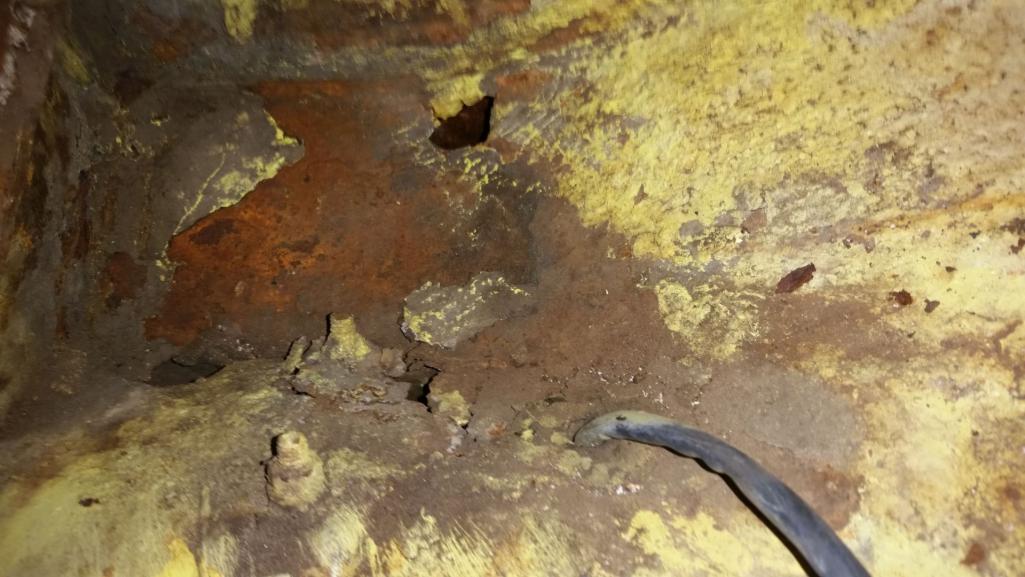
Posted by: matthepcat Oct 23 2015, 09:52 PM
Yikes. The owner might want to delay engine install.
Posted by: Andyrew Oct 23 2015, 10:05 PM
The owner has agreed to have me repair the rust. I'm going to stop at 20 hours worth of rust repair. It MIGHT be enough to do all the repair shown, we will see.
Posted by: Andyrew Oct 24 2015, 02:44 AM
Got the easy ones out of the way this evening....
4.5 hours down, 15.5 hours of rust repair left in the books.
Going to cut open the firewall drivers side tomorrow morning. Then I'll see what else needs to be done in that area.
FYI Replacement metal is 16ga, a bit thick for the 18ga metal in there currently but eh, it works.
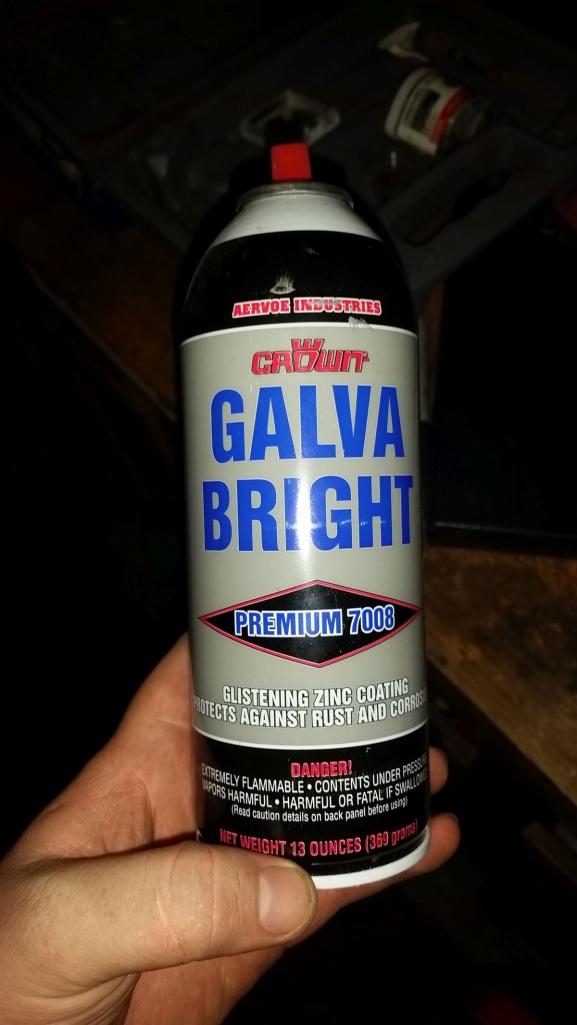
After all the firewall is fixed I'll seal it up and hit it with more galvanized primer for the owner to paint.
Pics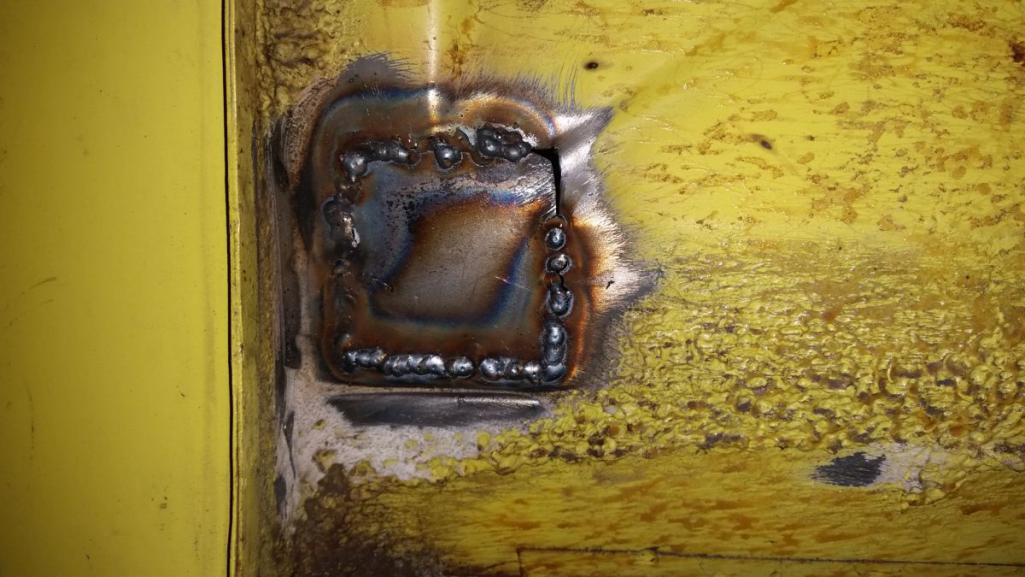

Posted by: RobW Oct 24 2015, 05:14 AM
Nice work. Full service. 
Posted by: Andyrew Oct 25 2015, 09:37 AM
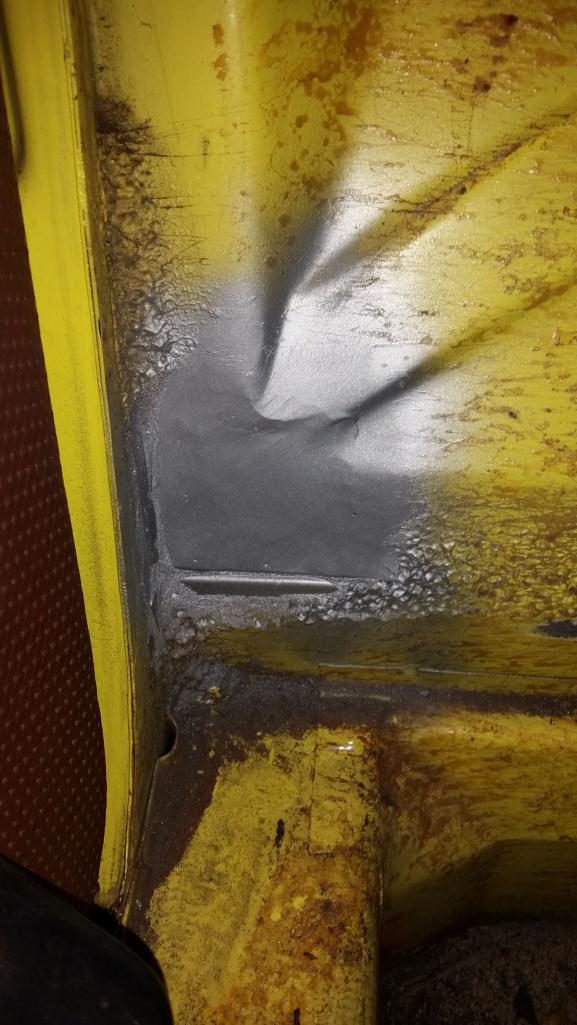
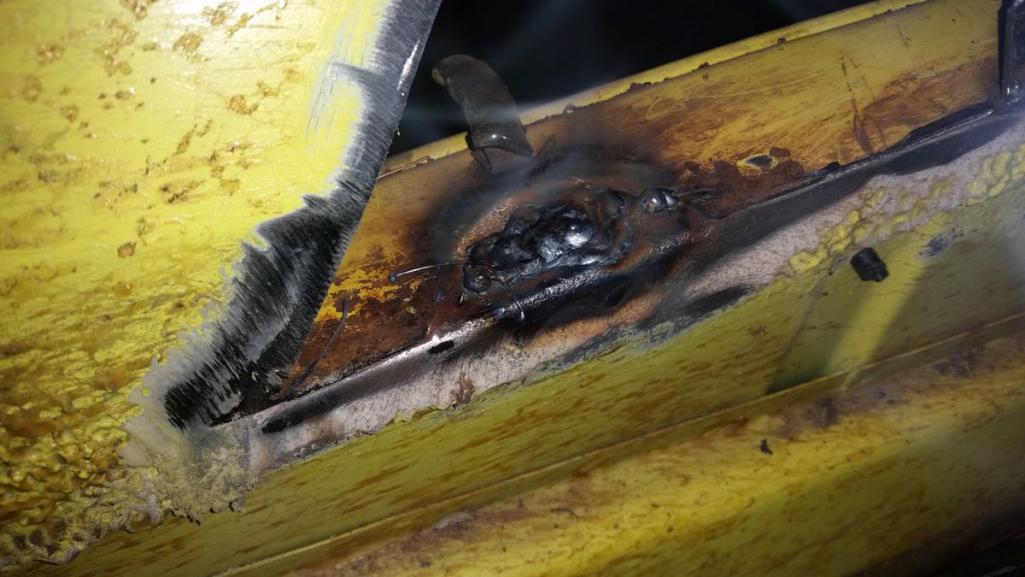
Progress from yesterday morning. Had a concert to go to so progress was stalled... 3 hrs down here. 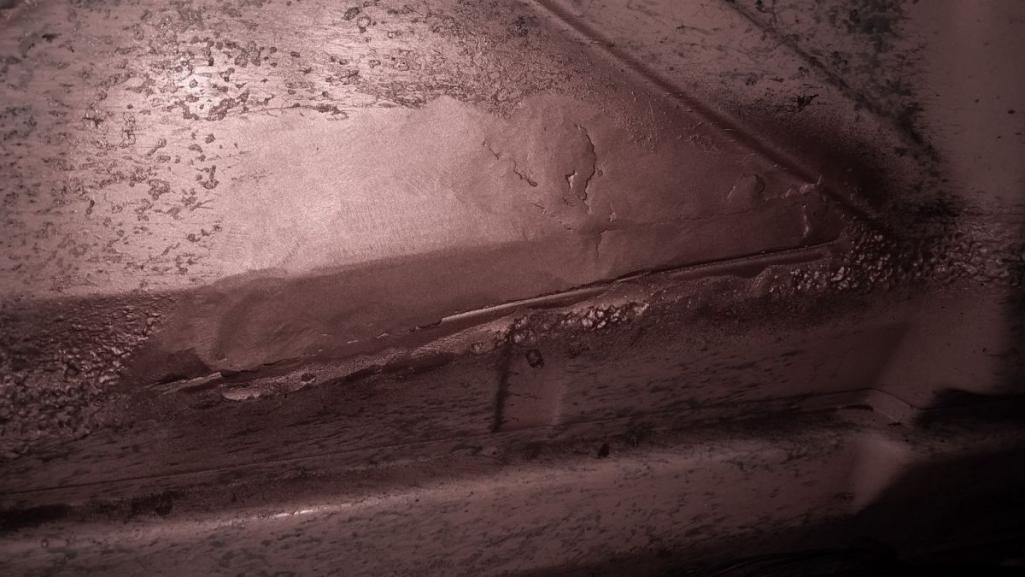
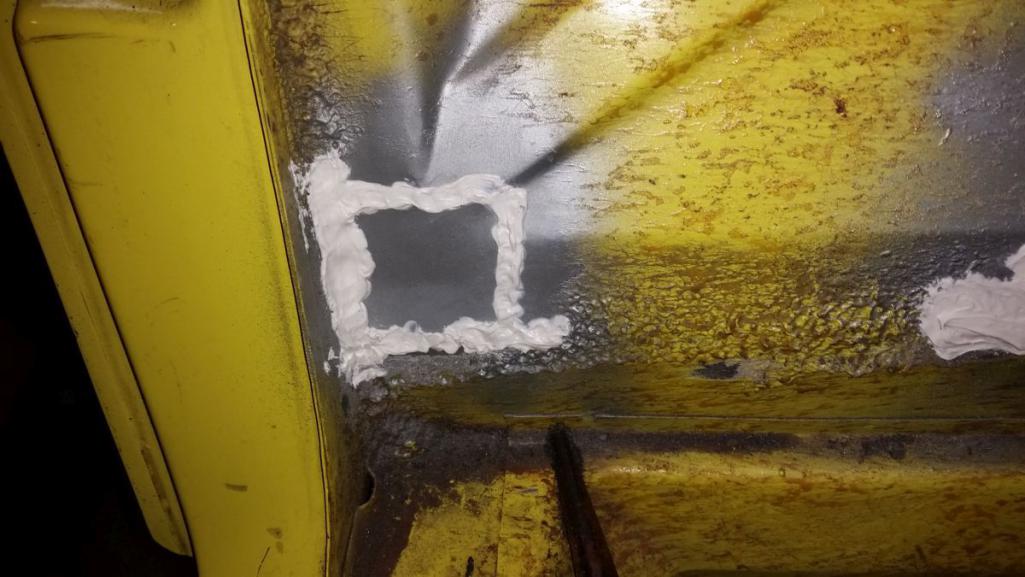
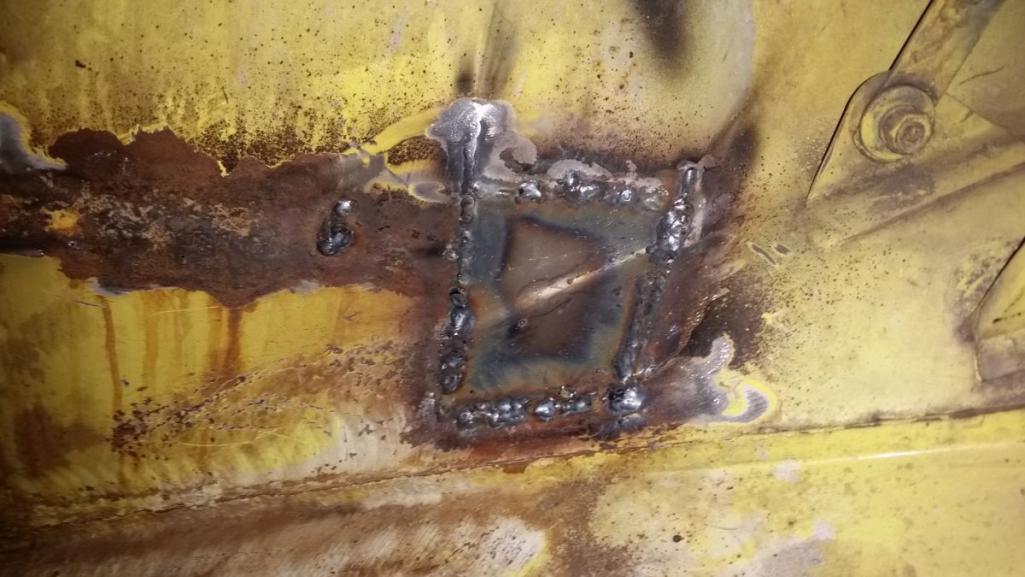
I really debated even replacing this steel as its not part of the suspension console. But I didnt want to leave it alone. I did a quick and easy patch job on it and will seal it up today after I repair the firewall. Luckily the suspension console seems solid.
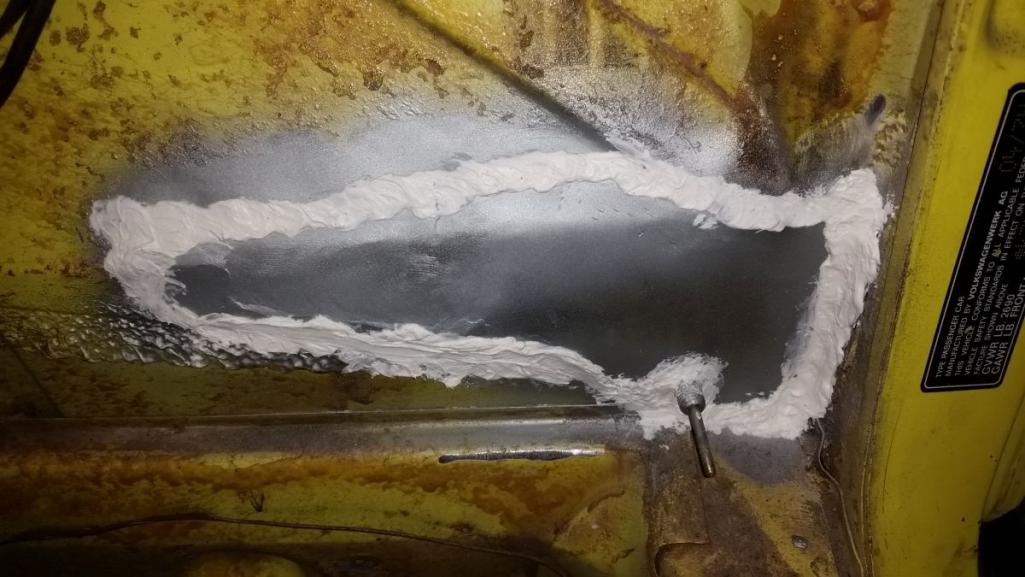
Posted by: whitetwinturbo Oct 25 2015, 09:53 AM
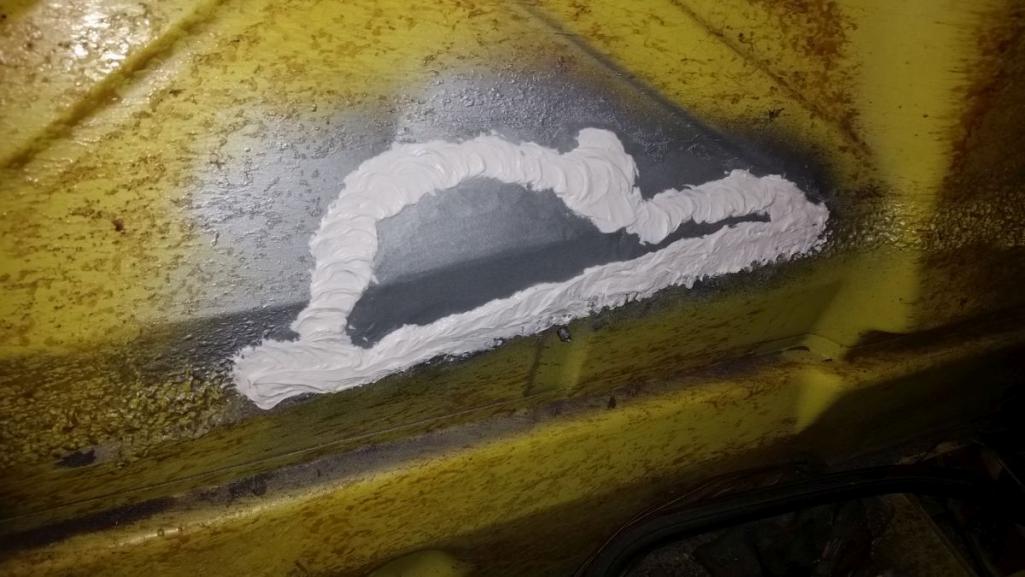
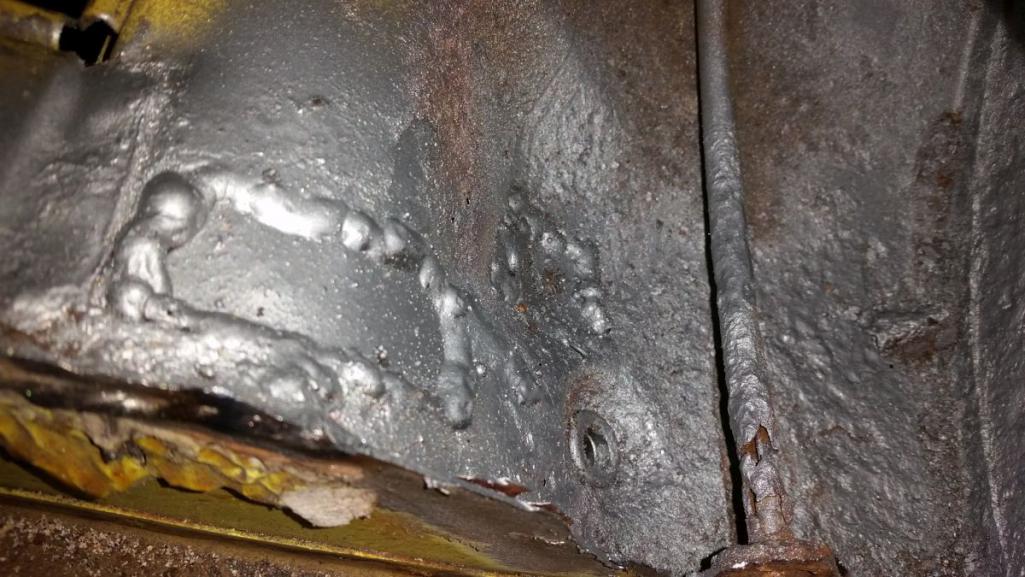
What is the gooey stuff on the weld line 
Posted by: Andyrew Oct 25 2015, 10:04 AM
What is the gooey stuff on the weld line
Silicone calking over the galvanized primer. Prevents water getting into the weld and is impenetrable to moisture. Not entirely necessary on a perfectly ground down piece of flat metal, but where I dont grind the weld down all the way or in the engine compartment where I dont grind the weld down at all it prevents the thousands of spots for moisture to be trapped. It also helps fill in the little pin holes in the welds that I sometimes miss.
Its a procedure we use in metal door frame building in our industry for quite some time and has worked really well.
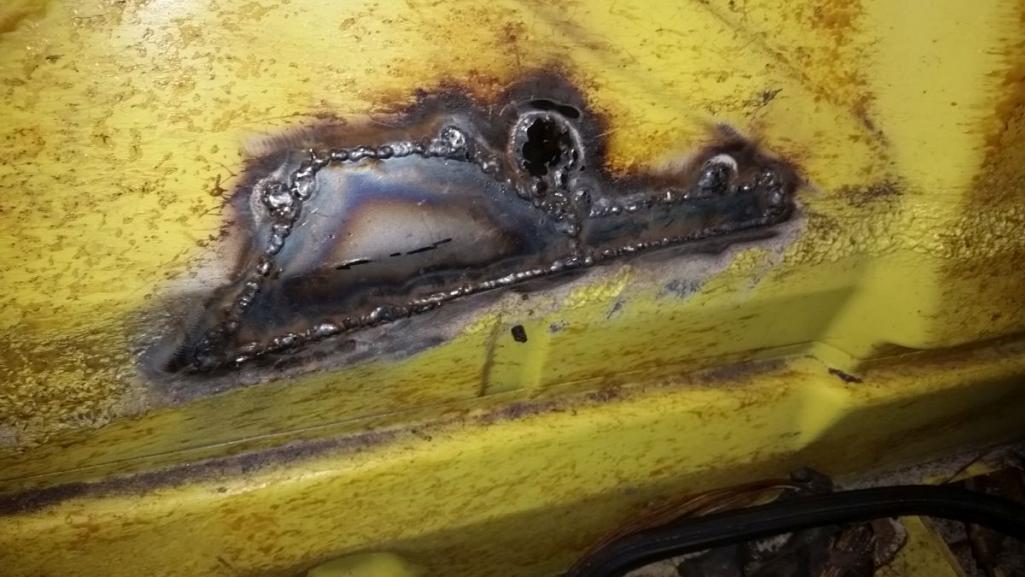
Posted by: Andyrew Oct 25 2015, 07:10 PM
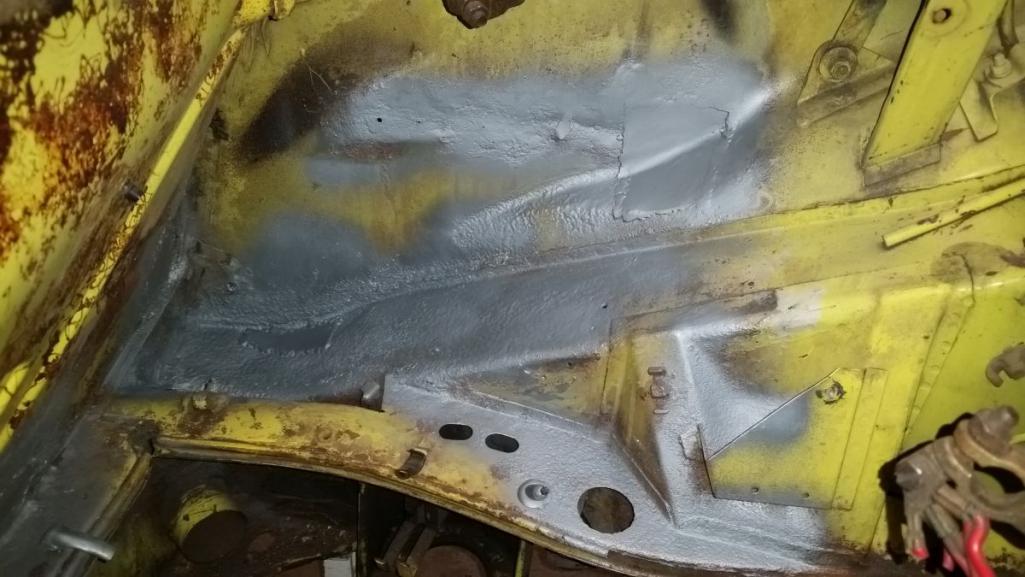
Drivers side done 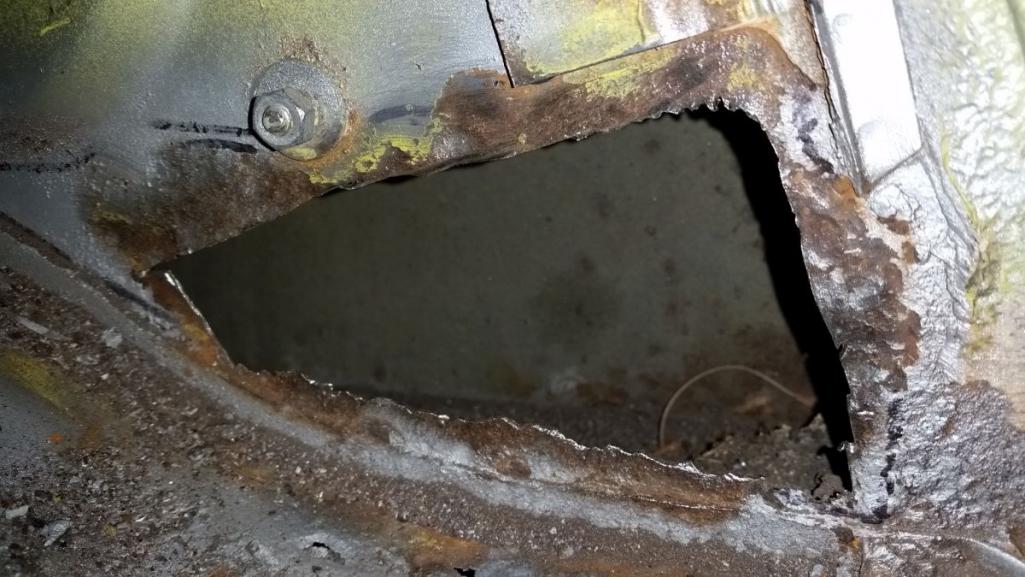
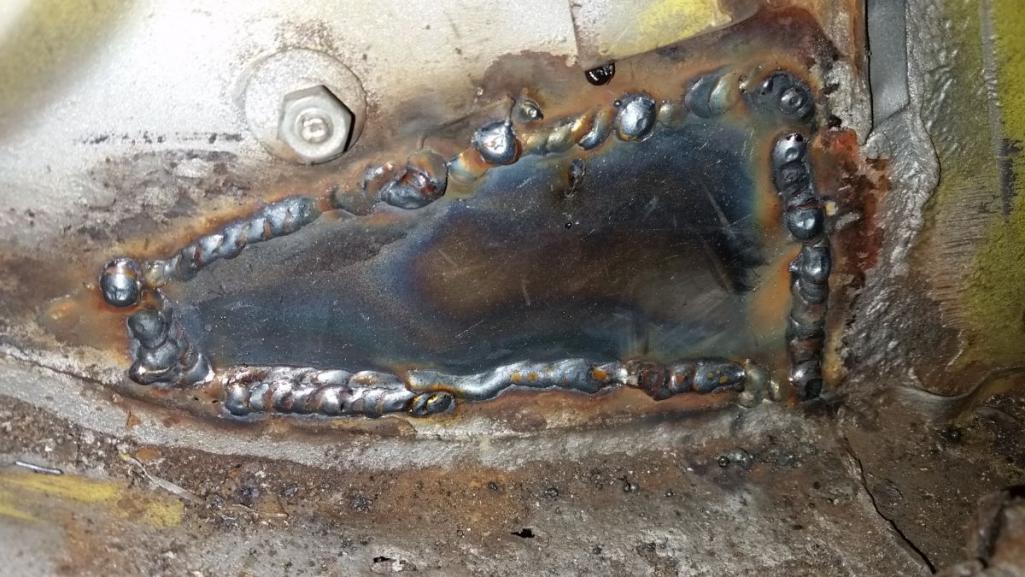
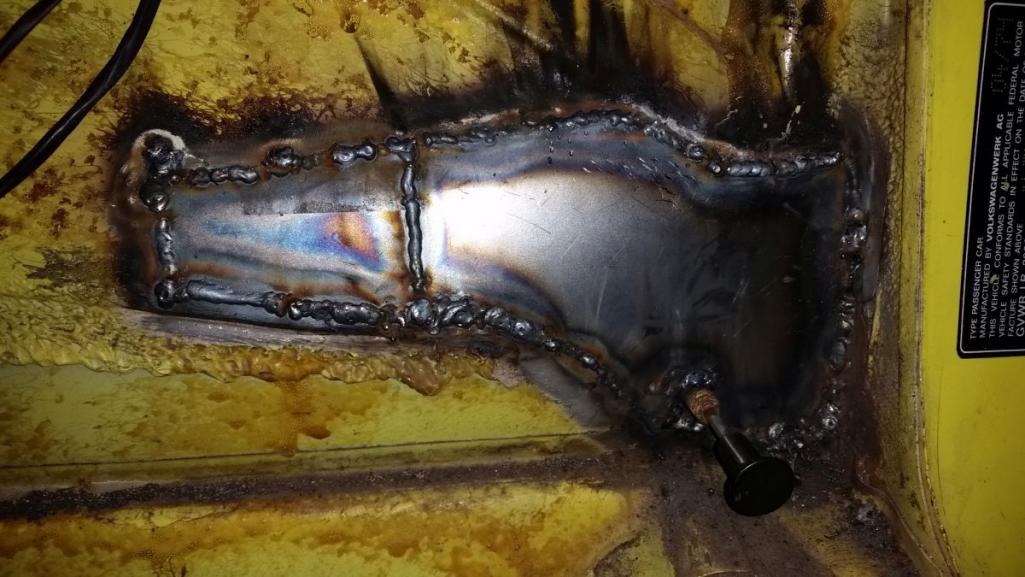
Now onto the pass side The suspension console has a small patch needed, then the engine tin tray could either be cut out or fabricated. Im going to ask the owner which one he wants me to do. So far 7 hrs today. 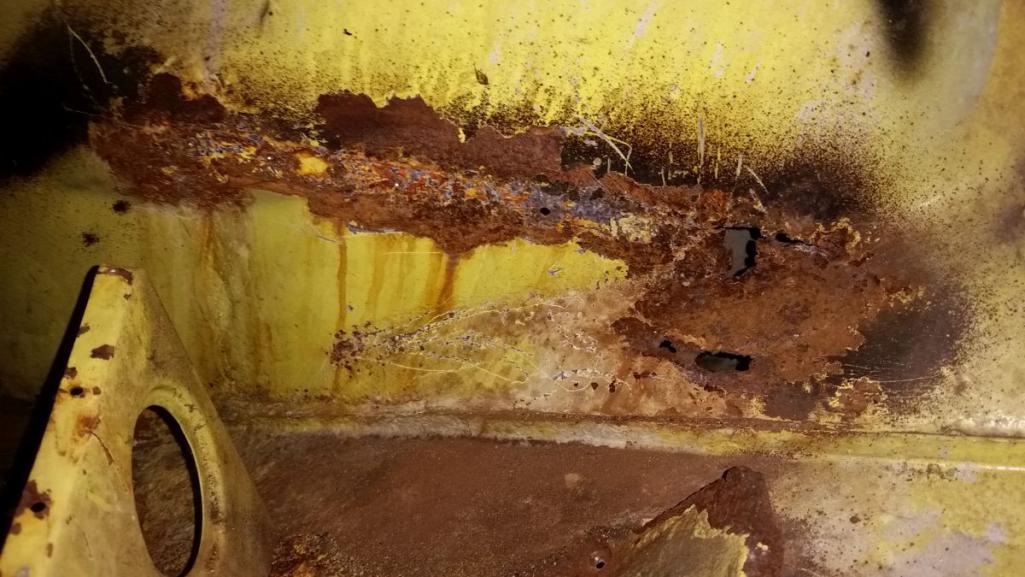

Posted by: Andyrew Oct 25 2015, 11:36 PM
The answer was leave the hole and rip the battery tray out. Apparently he is going to relocate the battery and forgot to tell me.
SO we are DONE with the rust repair. 3 hours later. We have some time left on the books still but I have a good idea how we can use that 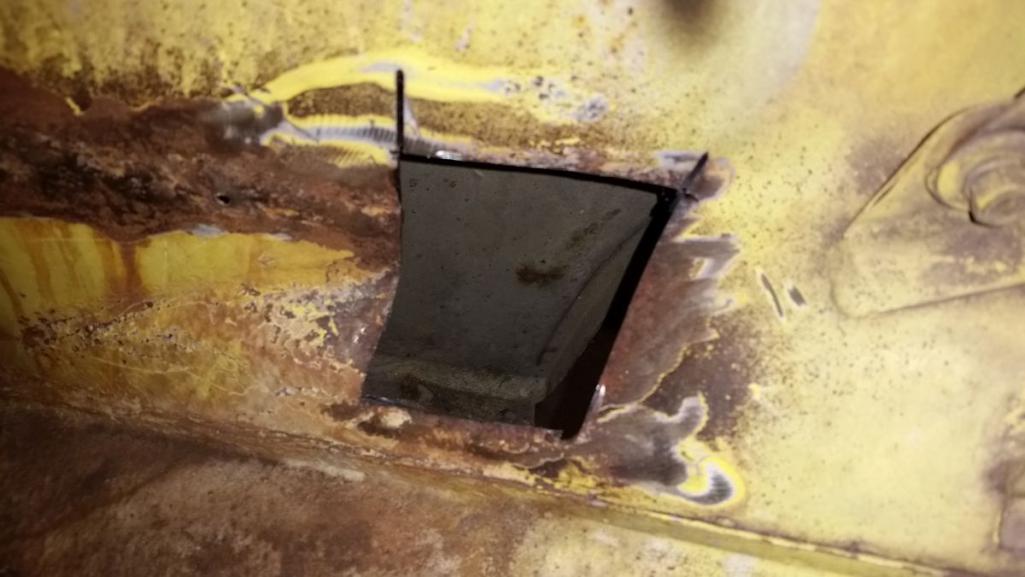

Posted by: 76-914 Oct 26 2015, 10:57 AM
Posted by: bigkensteele Oct 26 2015, 05:44 PM
I will likely take the typical route of making the hoses ~ 2.5' long and coil it up under the tank, this way I can remove the tank and set it on top with the hoses connected.
If you go this route, after you put the tank back in, use a mirror and light to make absolutely, positively sure that you haven't pinched a line between the bulkhead and the tank. Ask me how I know.

Posted by: whitetwinturbo Oct 27 2015, 06:40 PM
What is the gooey stuff on the weld line
Silicone calking over the galvanized primer. Prevents water getting into the weld and is impenetrable to moisture. Not entirely necessary on a perfectly ground down piece of flat metal, but where I dont grind the weld down all the way or in the engine compartment where I dont grind the weld down at all it prevents the thousands of spots for moisture to be trapped. It also helps fill in the little pin holes in the welds that I sometimes miss.
Its a procedure we use in metal door frame building in our industry for quite some time and has worked really well.
Who is manufacturer of the sealing material?
Posted by: Andyrew Oct 31 2015, 07:35 PM
Fought a cold ALL week so I didnt make any progress durring the week.
This morning before Halloween prep I did a little bit of work. 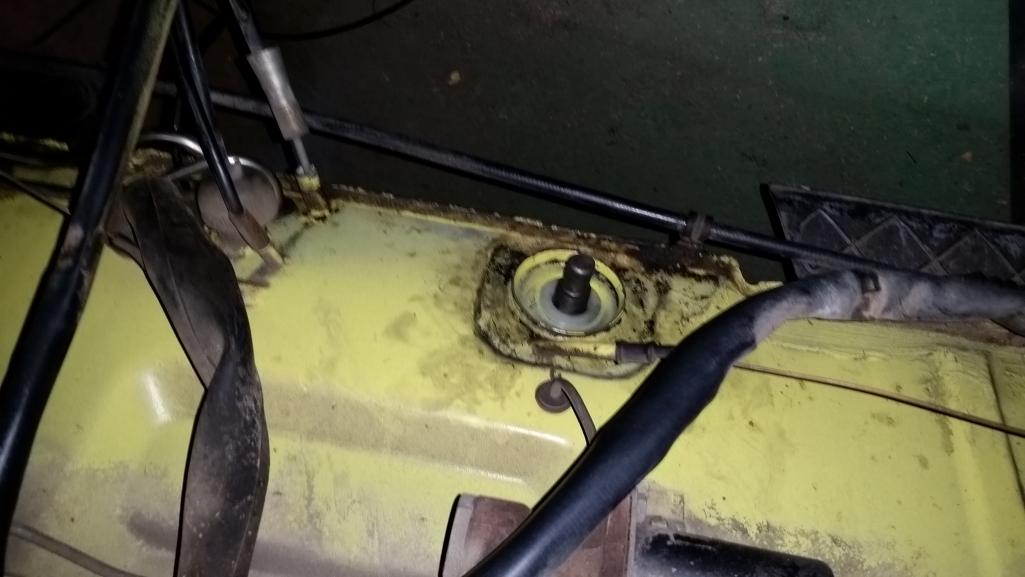
Installed the firewall bushing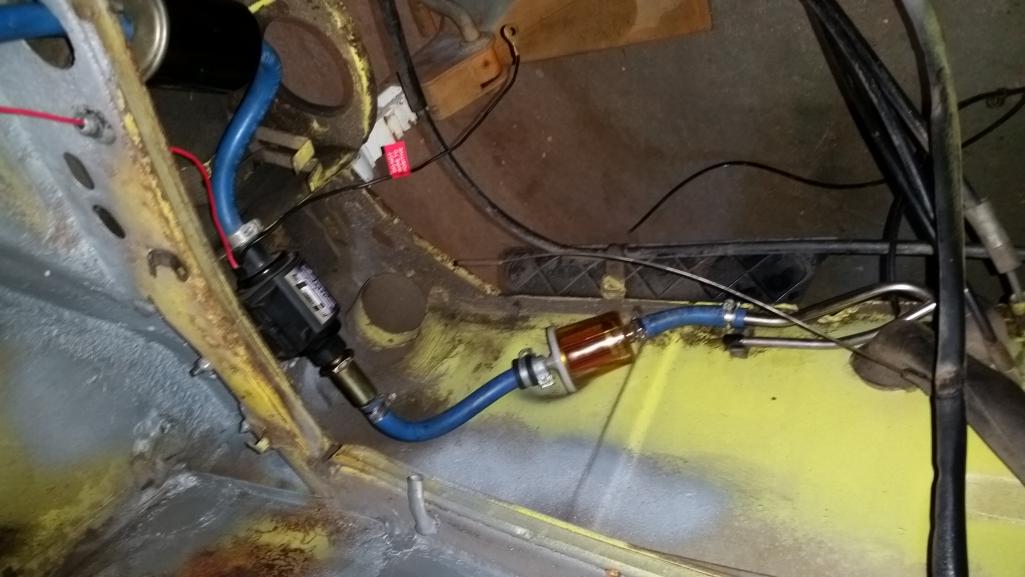
Installed the fuel pump and filters onto the new fuel lines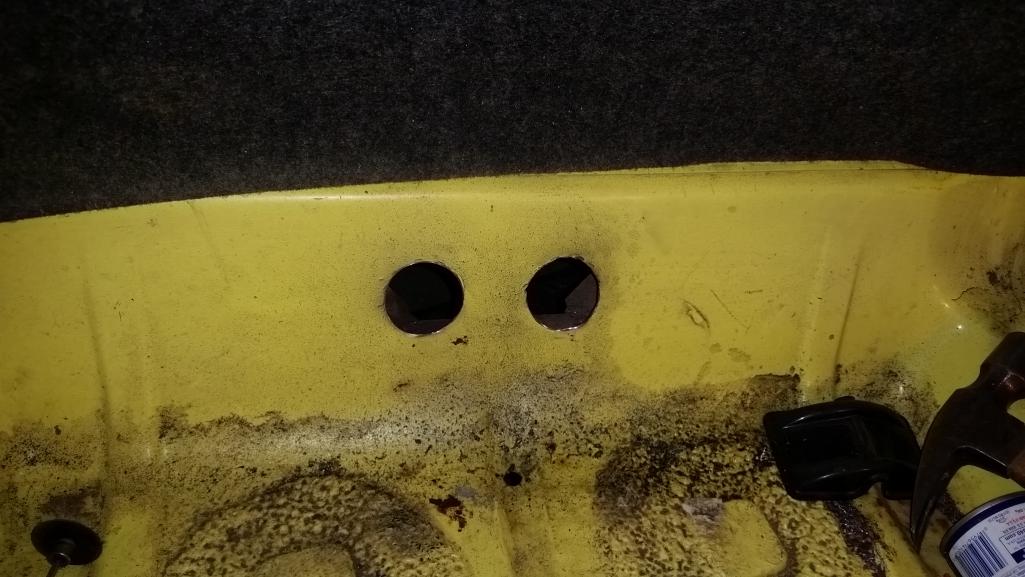
Cutout the holes for the radiator lines in the front trunk.
Posted by: Andyrew Nov 2 2015, 12:39 AM
Installed new water and alternator belts.
Removed the exhaust as I didnt want to bother breaking the stub axles loose. Seemed like an easier option since there was no handbrake or anything and the piping was in the way of the CV joints. Luckily the bolts were not rusted and it only took about 40 minutes to remove the exhaust, Hopefully it goes back on that quickly..
Clearance for the dizzy and removed the hood torsion bars (Brett you'll need to order some trunk shocks or use a hood prop)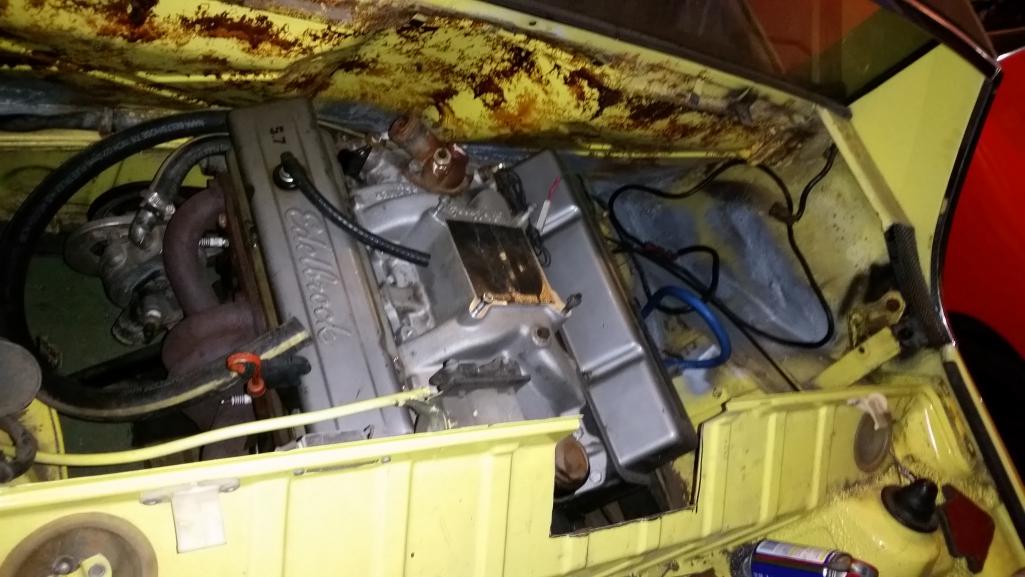
Mounted the new rear trani mounts and the trani 100%, and I got the front bolted up but not snugged up. The engine should raise about an inch once its all snugged up. 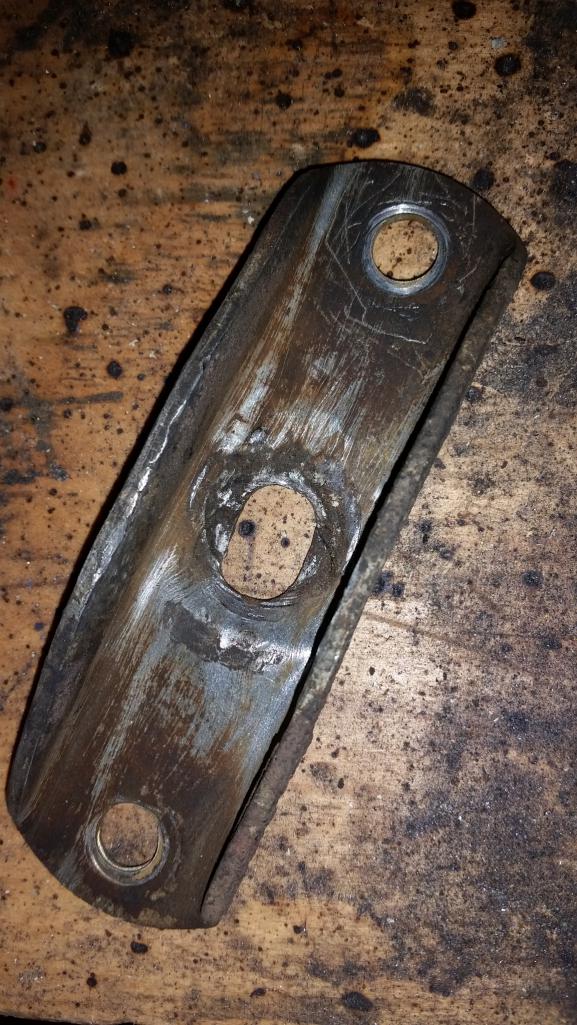
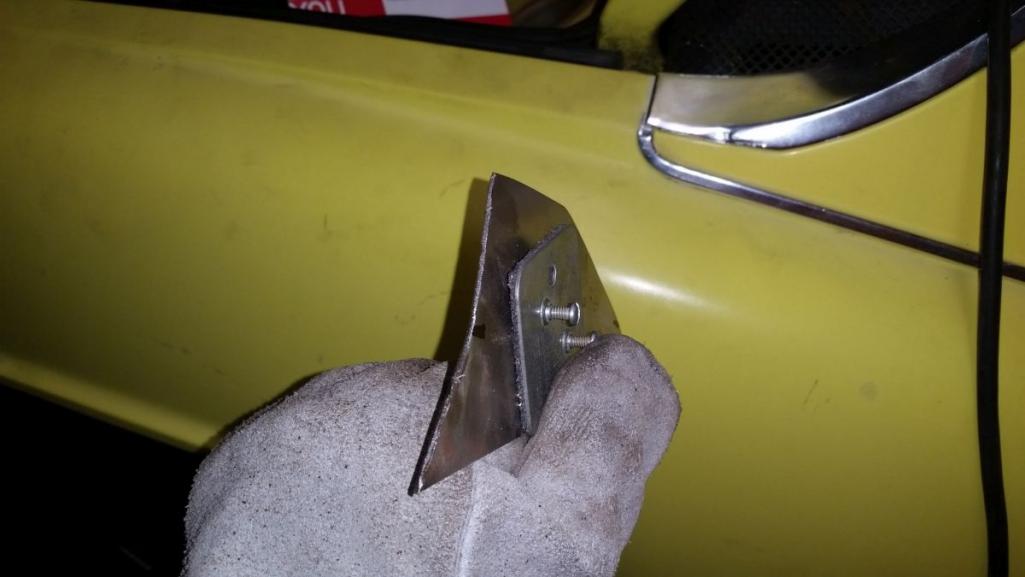
Had to use my mounts for the front since the car didnt have any on them, and the rear trani mount bolts had no nuts so I had to use mine..(Brett, you'll need to give me these AND the big bolts that go to the crossmember from your car) In doing so I saw that the front brackets from my car one of them was pretty damaged so I welded on a reinforcement to it. No pics of the repair with 1/8" steel.
So engine is in place and the rest of my time is all the little things.
Left on the list are....
Mount rad lines
Snug engine bolts
Install CV's
Install Exhaust
Install Shift rod and adjust
Install carb, dizzy
Install clutch,throttle,speed cables
Wire starter, dizzy, fuel, alt
Test fire
Flush coolant.
Bleed brakes
Drive
Posted by: bfrymire Nov 2 2015, 01:56 AM
I will look for the mounts and I have the rear hood shocks. I was going to remove that torsion spring when I had the chance. So, that is good.
-- brett
Posted by: Chris Pincetich Nov 3 2015, 10:28 AM


Posted by: Andyrew Nov 9 2015, 02:15 PM
Made some progress a bit last week and on Saturday.
The following is completed.
Snug engine bolts
Install CV's
Install carb, dizzy
Wire starter, dizzy, fuel, alt (New ignition switch in engine compartment. Either relay board is bad or the ignition switch is bad.)
Install clutch,throttle,speed cables
Temp mount battery in engine bay
Left to do in order:
Install Exhaust
Test fire
Mount rad lines
Install Shift rod and adjust
Flush coolant. (Built a tube to connect the radiator lines at the front trunk to bypass the radiator. This will let the system flush the lines and prevent gunk clogging up the new radiator)
Bleed brakes
Drive
Posted by: Andyrew Nov 14 2015, 09:50 PM
Everything is in!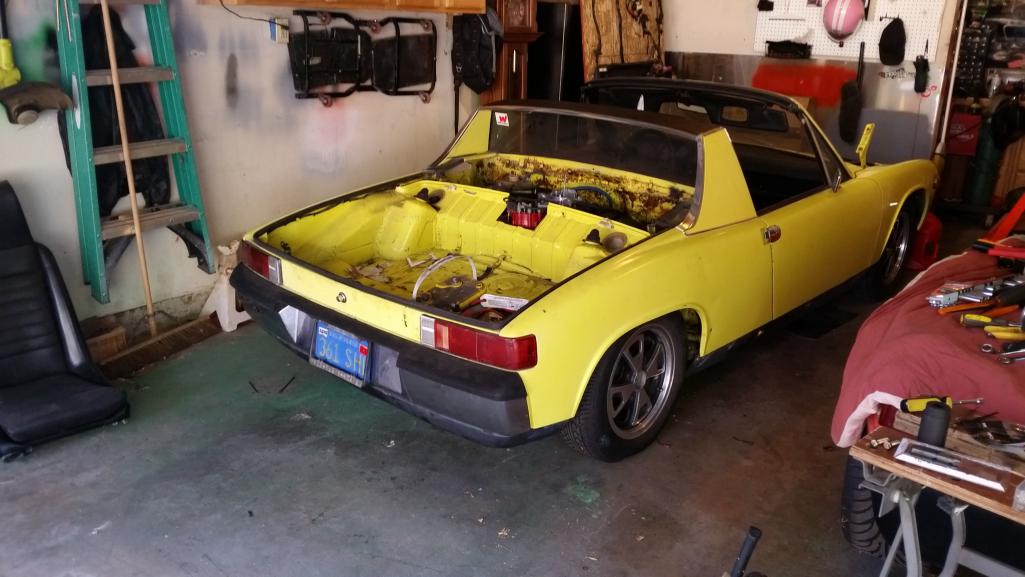
As per normal v8 conversions the throttle cable is like pushing a brick, but the engine is really responsive, feels like it tuned it self when it was sitting 
Tomorrow morning I am going to flush the water (i have engine flush in there now) and bleed the brakes to get some more pedal.
Biggest issue is the rear needs to be raised about 2" go get some ground clearance, its going to be a bitch to get it on the trailer... it scraped when I took it for a test drive on my very mild driveway.
Posted by: JRust Nov 14 2015, 11:04 PM
Nice Andrew! That will be a kick for the owner first drive 
Posted by: arkitect Nov 15 2015, 08:01 AM
Andrew,
Nice looking work...looks like a shop did it, impressive. Too bad you didn't have the matching paint, could have painted before the new v8 went in.
Nice looking welds, I have a gas set up for my lincoln, need to hook it up one of these days. How is your car doing, the audi engine in yet?
Dave
Posted by: Andyrew Nov 15 2015, 12:15 PM
Jamie, I agree. This engine runs heaaaalthy... got it up to temp and reved it a little... I am sure gonna miss that.
Dave,
I could have got a pint of paint and sprayed it. I even considered doing it as a gift for the owner, but it would have taken many, many hours to clean up the firewall in such a way that the paint would have stuck well.
Audi conversion has been on pause for the last 4 weeks. All progress has been made on my thread
Im going to take the yellow car for a quick drive in about 15 minutes. Just finished doing my best with the brakes (something is broke.. likely rear calipers or proportioning valve as I nor the owner could get any pressure in the brakes. And I finished flushing the fluid.
Posted by: Andyrew Nov 15 2015, 12:28 PM
Quick test fire
https://www.youtube.com/watch?v=wjAddAmtpRc
Posted by: Mueller Nov 15 2015, 12:35 PM
Sounds great...what a sleeper* that sucker is going to be!
*except for the exhaust which is really going to throw people off!
Posted by: whitetwinturbo Nov 15 2015, 01:02 PM

Posted by: mgp4591 Nov 15 2015, 04:36 PM
IT'S ALIVE!!!
Posted by: arkitect Nov 15 2015, 08:14 PM
Andrew,
You are a master metal man, what you spent 20 hours on would take me 20 months and not be near as clean.
Dave
Posted by: Andyrew Nov 15 2015, 09:48 PM
Thats why I charge the big bucks
Posted by: bfrymire Nov 16 2015, 12:45 AM
Thanks Andrew and great work!
Posted by: Justinp71 Nov 16 2015, 02:51 PM
Nice Work!
Powered by Invision Power Board (http://www.invisionboard.com)
© Invision Power Services (http://www.invisionpower.com)