Printable Version of Topic
Click here to view this topic in its original format
914World.com _ 914World Garage _ My '74 Barn Find project
Posted by: tygaboy Oct 26 2015, 06:12 PM
Hi folks. Been a while since I've been a Porsche owner. I've had a '62 356, a few 914s, a '74 911 and even worked for a while at an independent Porsche shop here in the SF Bay Area. Anyway, I just purchased a '74 914 that's been sitting since 1987. Good news is it was in a covered garage. Got it home and started poking around only to find...
...it's in remarkably good shape. It's got a couple small dings on the body and a crap respray that's literally falling off but other really, no sign of any rust.
I've begun collecting parts for the chassis stiffening and 5 lug conversion but have yet to decide on narrow body or flares. Also have to determine V8, 6 conversion, Subaru. (Is it true a Cayenne won't fit?)
Anyway, I wanted to introduce myself and thank you all for creating and maintaining such a great community.
And thanks in advance for answering all the questions that are sure to come.
Wish me luck, I'm goin' in!
Chris
Attached thumbnail(s)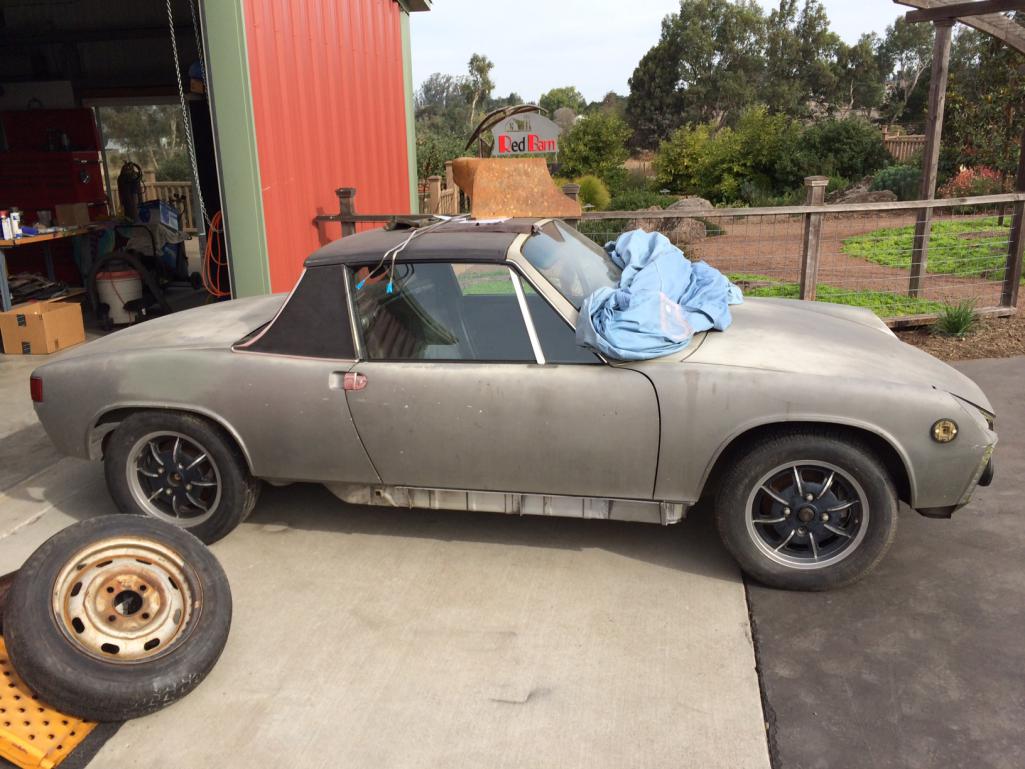
Posted by: 914Sixer Oct 26 2015, 06:24 PM
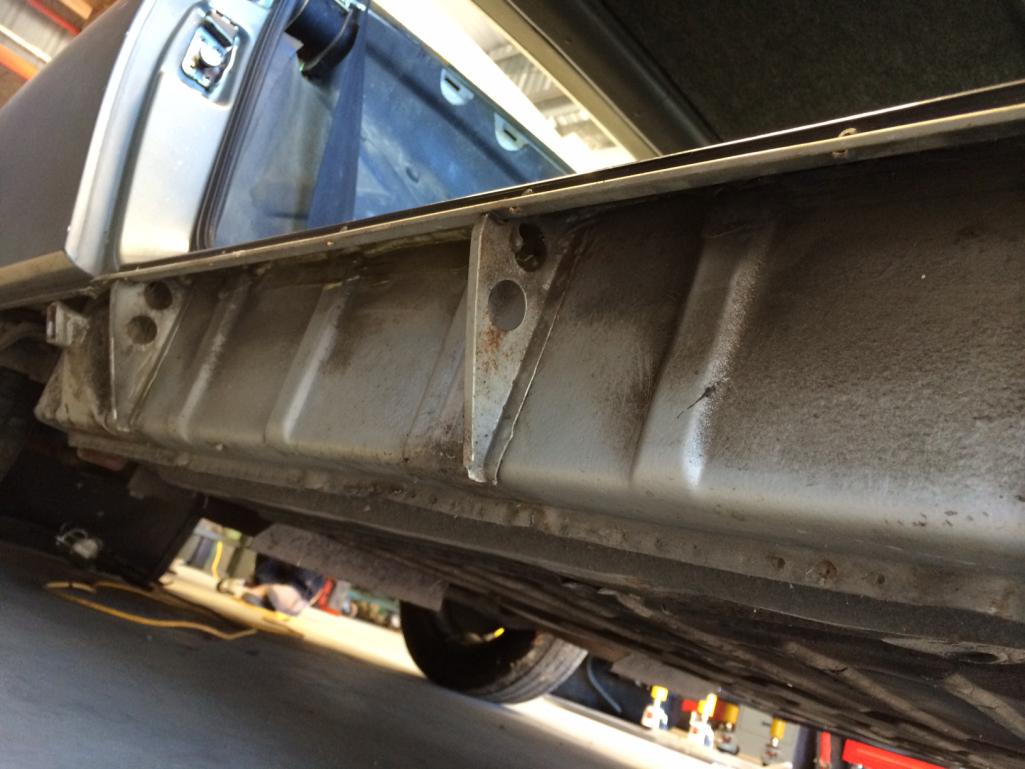
WOW that is a REALLY clean rocker panel area! Being inside for 28 years SAVED the car.

Posted by: tygaboy Oct 26 2015, 06:43 PM
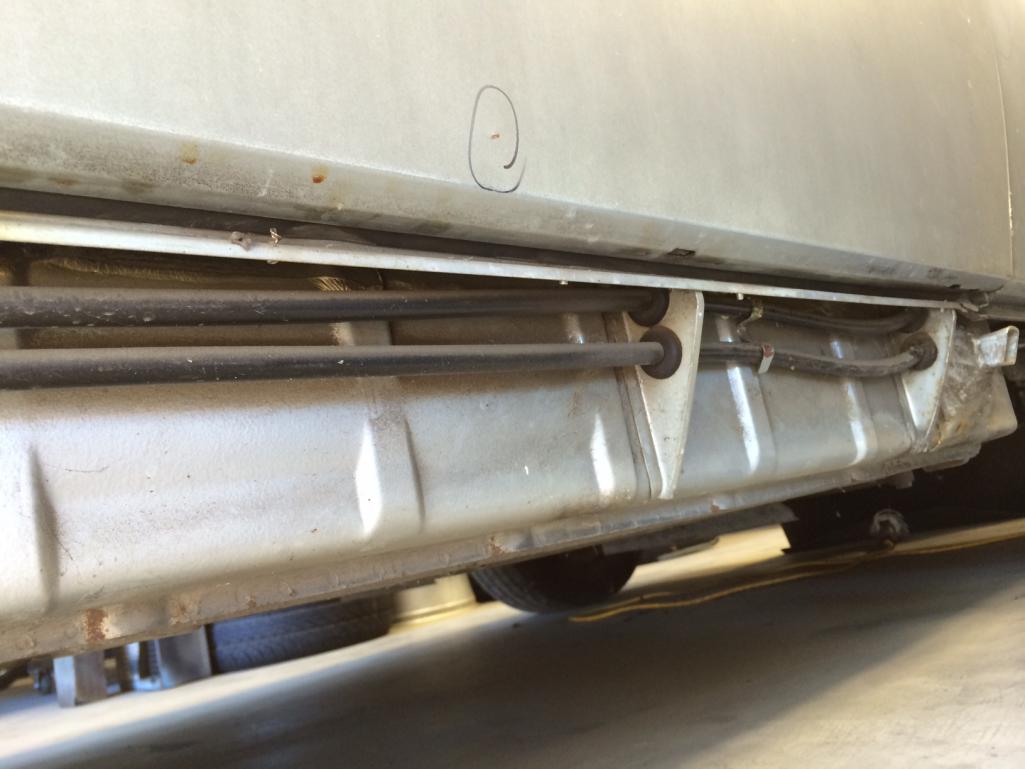
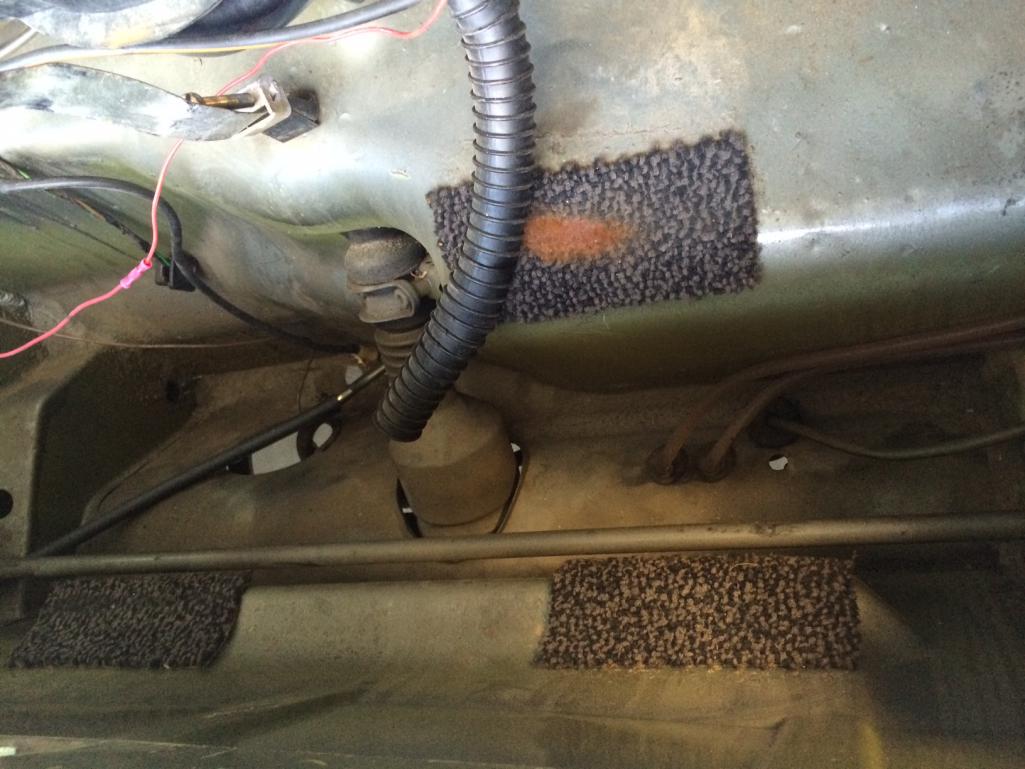
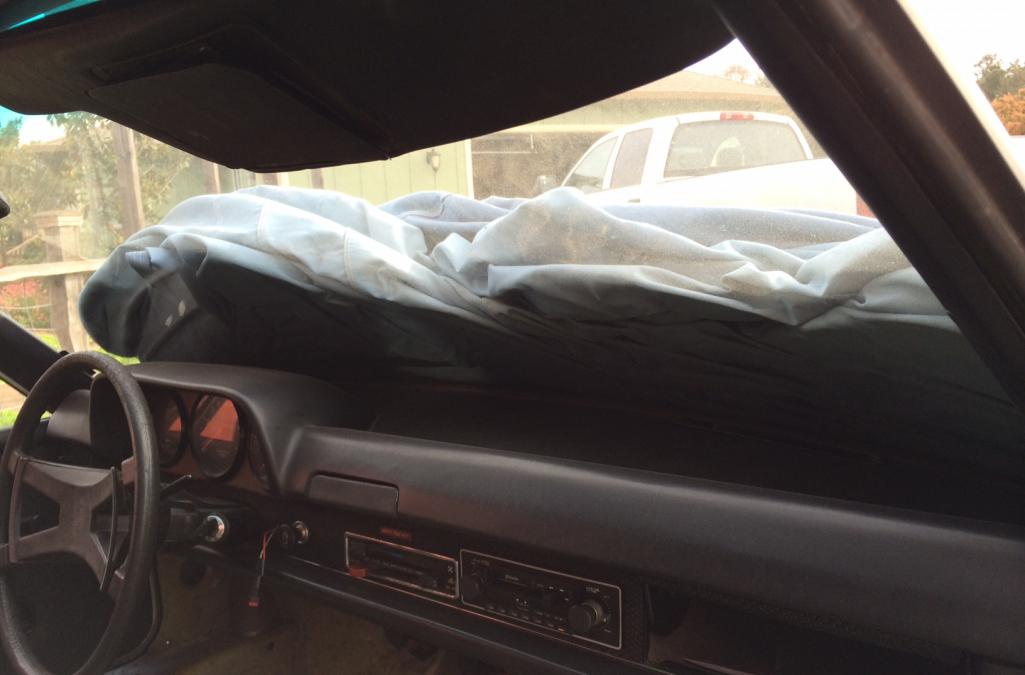
Couple more pics. Dash has no cracks, all electrical works. Removed the tar and no rust on the floor. No surprises under the tank, either. Though the tank had about 25 lbs of varnish goo in it. Replacement tank and Tangerine SS fuel lines are here already. And the brakes even stopped it as I rolled it off the trailer. Not that I'd drive it as it sits but hey, way better than I'd expected! 
Attached thumbnail(s)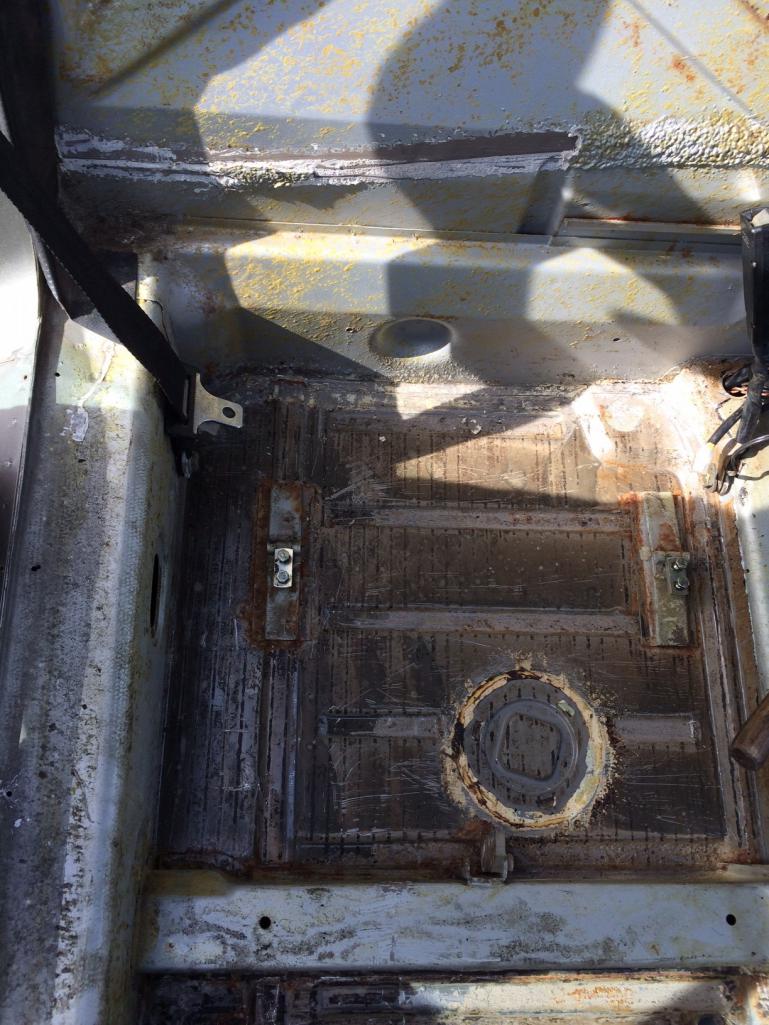
Posted by: jor Oct 26 2015, 06:46 PM
I don't think my car's rust-free parts are as rust-free as those longs.
Posted by: altitude411 Oct 26 2015, 06:48 PM
Wow, nice find! She's a sweet one. Not even a crack in the dash. Keep postin and
Posted by: Cairo94507 Oct 26 2015, 07:00 PM
Chris - She looks like a keeper. As clean as that chassis is.....I would have a hard time cutting the body up to add flares.
But, if you elect to go with more HP, I would lean towards a nice six, then a massaged 4 with fuel injection and finally the Subaru engine. Personally I don't like V-8's in our cars.
Regardless, I am sure you will have a terrific car.
Posted by: tygaboy Oct 26 2015, 07:08 PM
 Chris - She looks like a keeper. As clean as that chassis is.....I would have a hard time cutting the body up to add flares.
 But, if you elect to go with more HP, I would lean towards a nice six, then a massaged 4 with fuel injection and finally the Subaru engine. Personally I don't like V-8's in our cars.
Regardless, I am sure you will have a terrific car.
I'm with you on the body being too nice to mess with. In fact, I've already got a set of 6 and 7 x 16 Boxster wheels so I can get on the road with the 5 lug and buy some time to enjoy the car "as is" while I decide what to do.
I'm a big fan of mods that can be unbolted.
Here's a link to a previous custom motorcycle project I did. Made it all the way to a 4 page feature article in Cycle World. Every mod, including the carbon fiber gas tank I made, was, in the end, a bolt on and it turned out great, if I do say so.
http://bayarearidersforum.com/forums/showthread.php?t=173852
Anyway, nothing permanent for a while.
Posted by: iwanta914-6 Oct 26 2015, 08:05 PM
wow, how did you find this gem?
Posted by: stevegm Oct 26 2015, 08:06 PM
Nice.
Posted by: Mueller Oct 26 2015, 08:18 PM
Dang...that is a nice chassis...great score, I'm jealous!
There are some steel GT flares in the classifieds at a good price, or at least a few days ago there had been some.
2 Mahle rims or does it have all 4?
Posted by: PlantMan Oct 26 2015, 08:50 PM
Nice find for sure!
Is the FI still in the car????
Posted by: Larmo63 Oct 26 2015, 09:03 PM
Your new baby looks great!!!
Posted by: Mueller Oct 26 2015, 09:05 PM
I wonder if Randy W knew about this car...doesn't he live in Petallama?
Posted by: Montreal914 Oct 26 2015, 09:20 PM
Very nice base for a project. 
I would keep the sleeper look and put 5 lugs Fuchs. Proven setup.
As for power train, if you stay in the family you will keep the value and the functionality of the front trunk.
Enjoy!
Posted by: boxsterfan Oct 26 2015, 09:42 PM
Build a 2270 4-cylinder and stay narrow body with 5-lug.
Posted by: Shadowfax Oct 26 2015, 10:17 PM
Nice car! Looks like it's in good hands.
Posted by: tygaboy Oct 27 2015, 07:53 AM
To answer some of the questions:
It (I'm not yet sure if it's a boy or girl!) was found on Craigslist and has all 4 Mahle wheels, FI still in the car. I've started working on the engine and it cranks to oil pressure. Hopefully, I'll get the new fuel pump and lines in this weekend and see what's what.
And who is Randy W. in Petaluma? I'd love to meet up w/any local 914 fans.
Posted by: 74ravenna Oct 27 2015, 08:27 AM
Great find. I'd love to see photos of the engine.
Is it possible for you to video your first attempts at starting it? It'd be great to see that after 2 1/2 decades.
Posted by: Dave_Darling Oct 27 2015, 08:28 AM
His user name on here is "RoadGlue".
http://www.914world.com/bbs2/index.php?showuser=108
--DD
Posted by: porschetub Oct 27 2015, 12:42 PM
To answer some of the questions:
It (I'm not yet sure if it's a boy or girl!) was found on Craigslist and has all 4 Mahle wheels, FI still in the car. I've started working on the engine and it cranks to oil pressure. Hopefully, I'll get the new fuel pump and lines in this weekend and see what's what.
Exceptional car,congrats,goes to show there are still great cars around.
Posted by: tygaboy Nov 3 2015, 02:56 PM
OK, I've decided to go with a 6 conversion. Put the word out that I'm looking for a 3.2!  Parts collection continues and my UPS driver is asking "what are you building this time?"
Posted by: tygaboy Nov 11 2015, 02:03 PM
So maybe not as perfect as first assumed. Got the tar pads out only to find a PO floor repair that I've decided I want to correct. So an order goes in to our great friends at Restoration Designs. The order shows up way sooner than I expected!
So I open it up and think, "Should I be concerned they consume enough beer to use the packaging to pad up their shipments?" 
And God love my wife. I showed her some pics of some finished cars and she says, "You're flaring it." It wasn't a suggestion.
"Hello, RD? I need some other stuff..."
Attached thumbnail(s)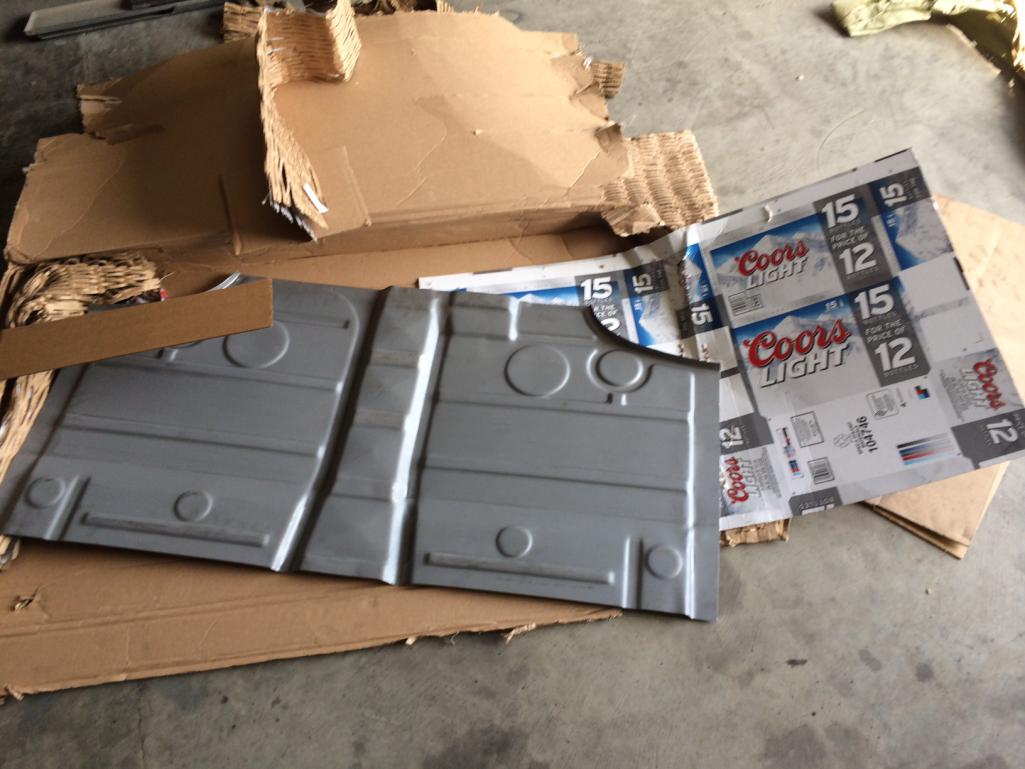
Posted by: peteyd Nov 11 2015, 03:36 PM
Just like the Germans, we get three beer brakes a day!
Who wants a job?
Posted by: napasteve Nov 11 2015, 03:58 PM
I'm looking forward to watching your project tygaboy. Where does one look for a 3.2?
Posted by: tygaboy Nov 11 2015, 06:18 PM
I'm looking forward to watching your project tygaboy. Where does one look for a 3.2?
I have some buddies in the Porsche business so I'm letting then know, checking with the Porsche yards, leveraging this forum, etc. Wish me luck!
On a non-914 note, I see you're in the wine biz - my wife just retired from a private label beer/wine/spirits company. And you're right in Napa. We should meet up some time.
Posted by: Briby37 Nov 11 2015, 06:45 PM
Awesome find! Looks great!
Posted by: Larmo63 Nov 11 2015, 07:12 PM
A Porsche motor in a Porsche automobile seems right to me.

Posted by: veekry9 Nov 11 2015, 07:31 PM
Well,I can honestly say I'm thrilled you discovered a cherry 9.14 in ..California.

A perfect vessel for the 3.2 and the requisite tubs,the 928 brakes to go with those enhancements.
I suppose,from perusing the bike pix,that you will do the flares personally.
I did a closeup to show the flanging technique with the tig torch,stitch-welding the sheetmetal to circumvent a warp factor.
(A phrase all too familiar from the '60s StarTrek,originally used by Rodders chopping T's n A's).
With a O2C2H2 torch we used the same 'Trick' to make butt and lap joints with bronze fillrod.Small bronze Robertson screws did the job too.
Show-goers would approach a custom Rod and say "Cool,the purple 'T' is Tricked out,Warp Factor 5".
Some grinding and hammering was involved,usually to begin again when things got ugly.
Enjoy the process,it should be a lot of Fun.
Posted by: RobW Nov 11 2015, 08:51 PM
Let us know if you need a hand.... 
Posted by: PanelBilly Nov 11 2015, 09:04 PM
What an excellent find. Take lots of pictures and share with those of us who are too far away to watch over your shoulder
Posted by: Cairo94507 Nov 11 2015, 09:25 PM
Post a WTB over on Pelican in the 911 section. That was how I found my 3.2.
Posted by: tygaboy Nov 15 2015, 11:29 AM
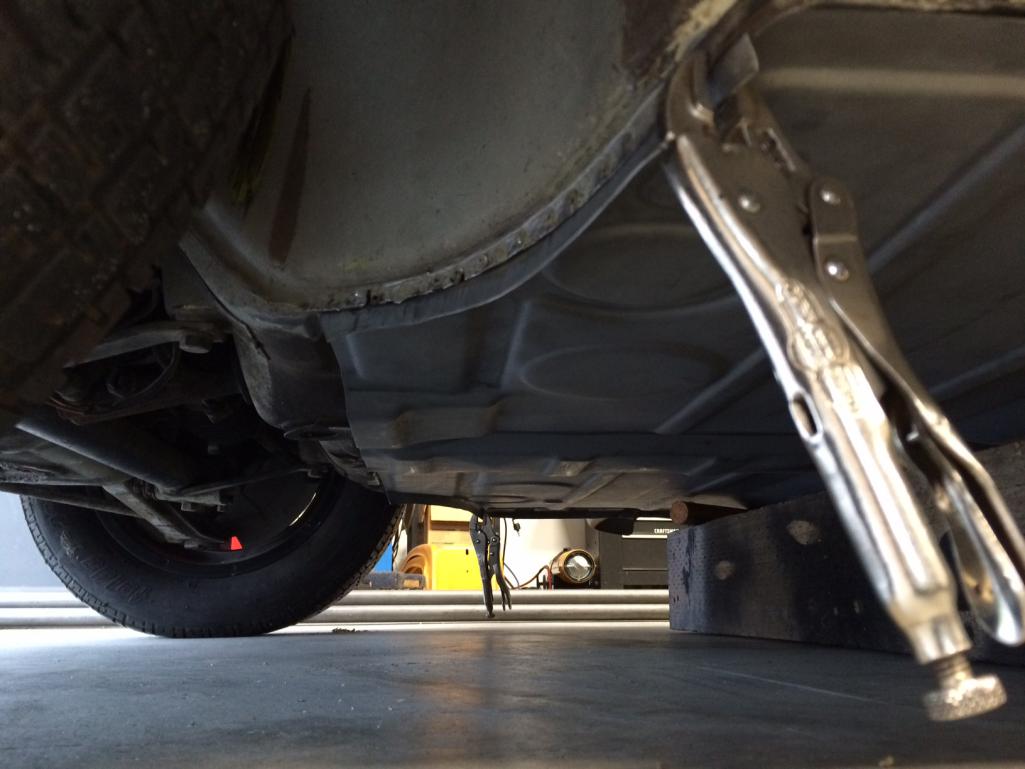
Working on the 911 e-brake set up. Got so excited about getting one done I spaced out on the fact that I have to modify the backing plate to fit the 914 trailing arm. Oh well, it's only paint and I wanted to powder coat them anyway!
Attached thumbnail(s)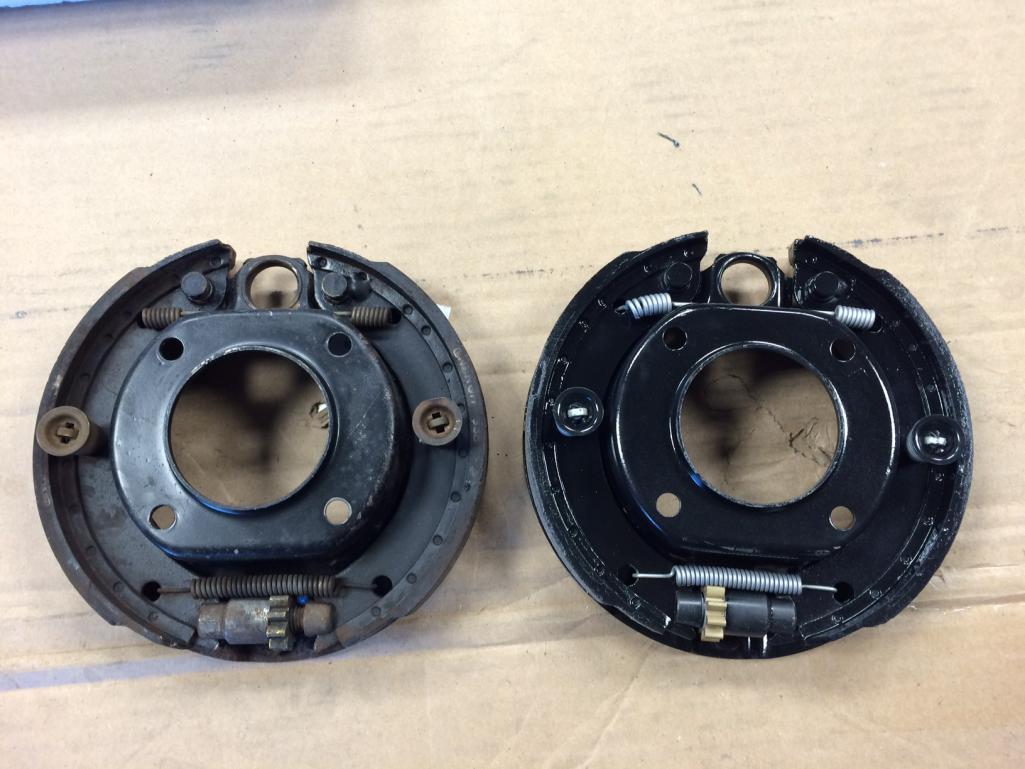
Posted by: tygaboy Nov 15 2015, 11:37 AM
And I have to get better at taking "before" pics. Here's the guard from under the steering rack. It was bashed in and sorta twisted in the rusty area. (Extra holes from PO 'who knows what' attachment.)
I'm very interested in developing strong metal working skills and some of these less visible parts are great for practice. A bit of hammer and dolly work, some "Hmm, why is the metal doing that???", some review of "The Key to Metal Bumping" by Frank Sargent and ta-da! I got myself a pretty decent repair!
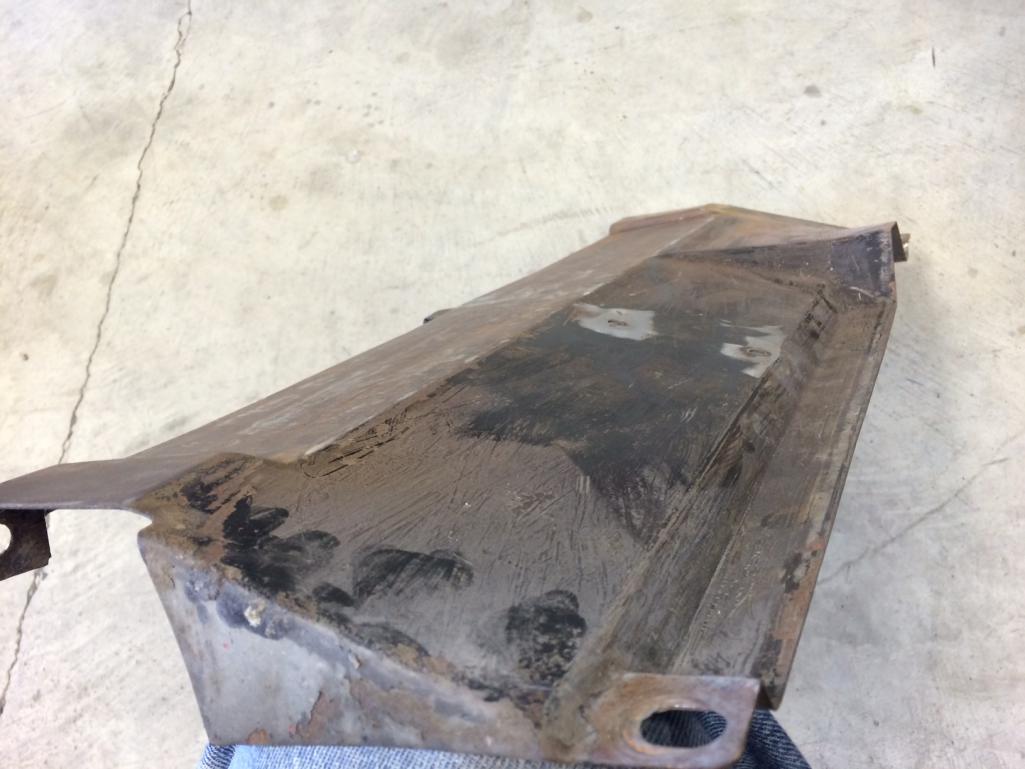
Anyway, maybe not the most exciting picture without that "before" shot but I'm happy.
And those interested in upping their metal skills, I highly recommend the "metal bumping" book. Easy read and really helpful.
Happy Sunday!
Attached thumbnail(s)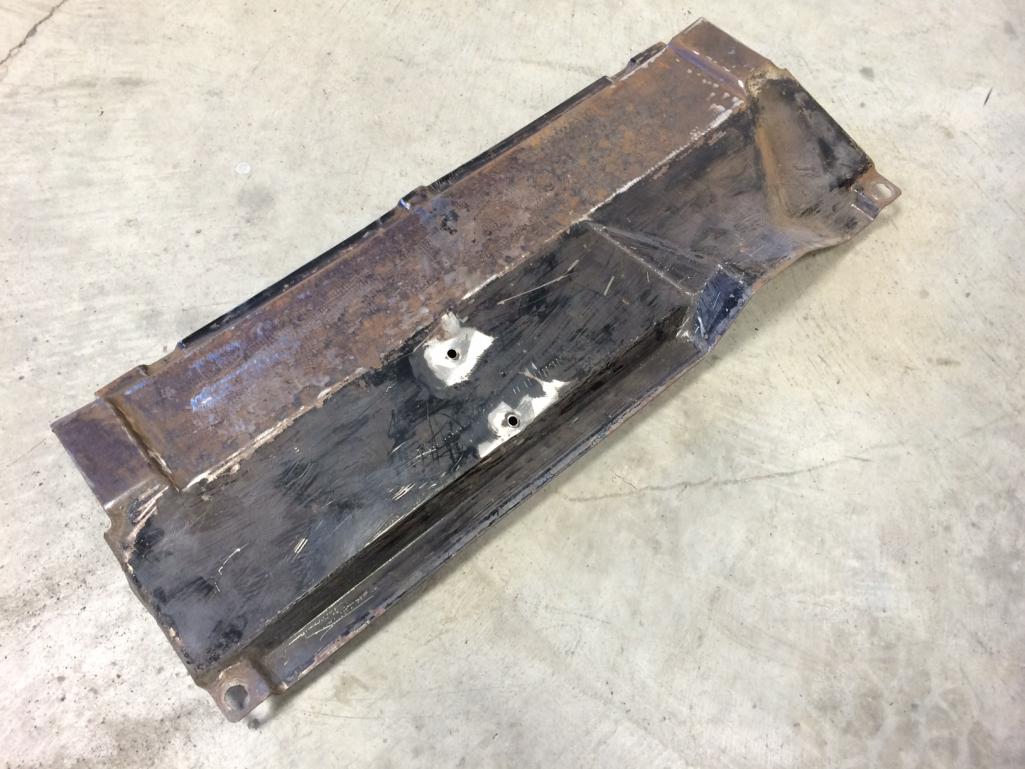
Posted by: zambezi Nov 15 2015, 10:10 PM
The holes are probably from a relocated fuel pump. Not all that bad on an idea.
Posted by: tygaboy Nov 29 2015, 08:16 AM
Not too exciting as everyone has seen any number of inner long stiffener kits installed but, hey, it's exciting for me! Kit ready for welding. I went w/Tangerine Racing's door brace kit. Sure, I coulda built my own but it's so nice to have a proven, bolt on solution show up and in 5 minutes, I'm back focused on the car. Thanks Chris Foley!
Attached thumbnail(s)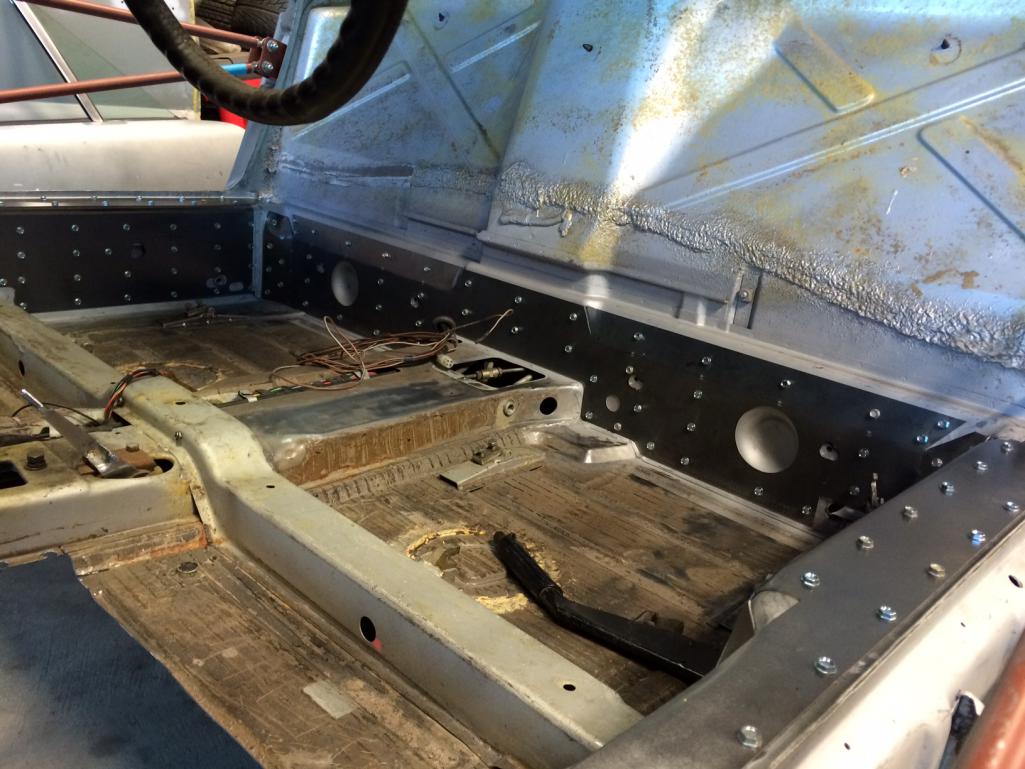
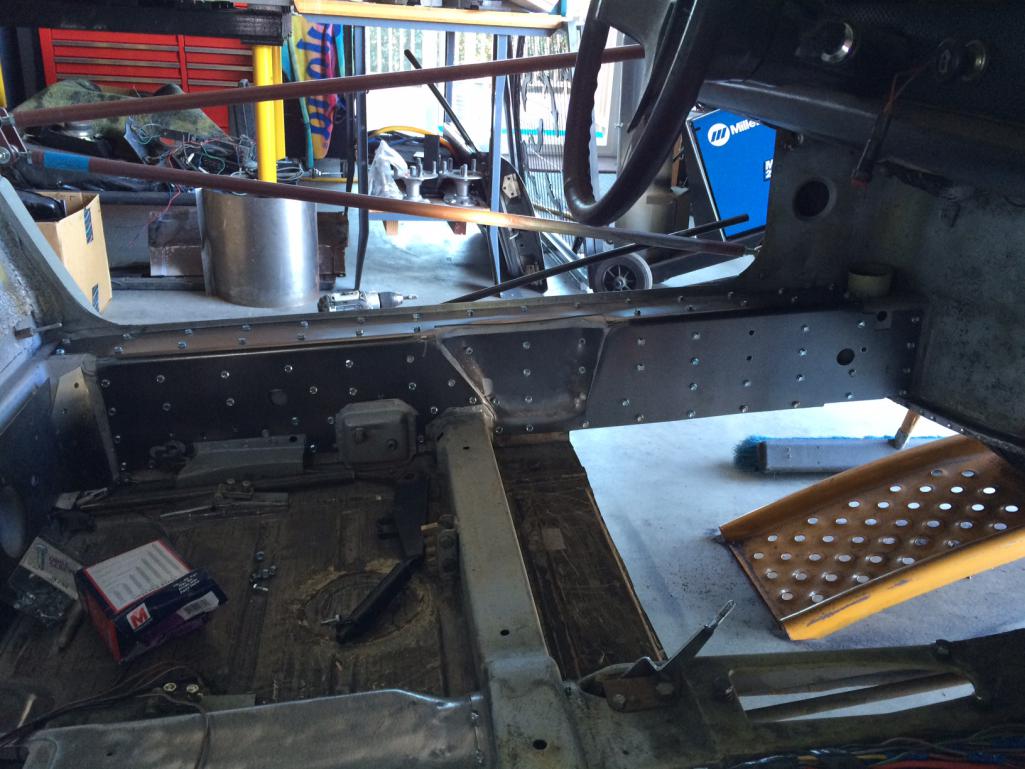
Posted by: tygaboy Nov 29 2015, 08:19 AM
I sliced a relief cut at the corners and bonked down the edge to create a smoother transition. Is this a common practice? I figured it'd make the carpet fit a bit better...
Attached thumbnail(s)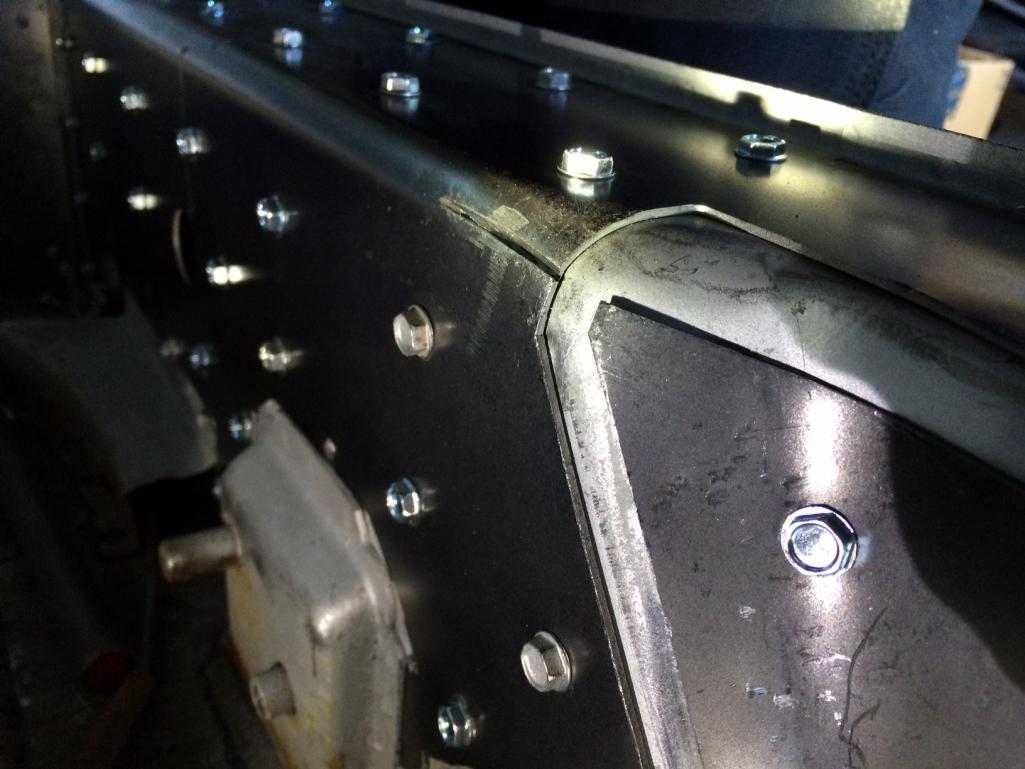
Posted by: tygaboy Nov 29 2015, 08:26 AM
More goodies from Restoration Design! Mmmmm... flares...
And if you're like me, you like your vendors to be consistent and predictable. These guys are: great parts and: BEER CASE packing materials. Just like last time!
Makes me chuckle. I have another RD item arriving tomorrow. We'll see if they can go three for three. For now, I say to our Canadian friends: 
Attached thumbnail(s)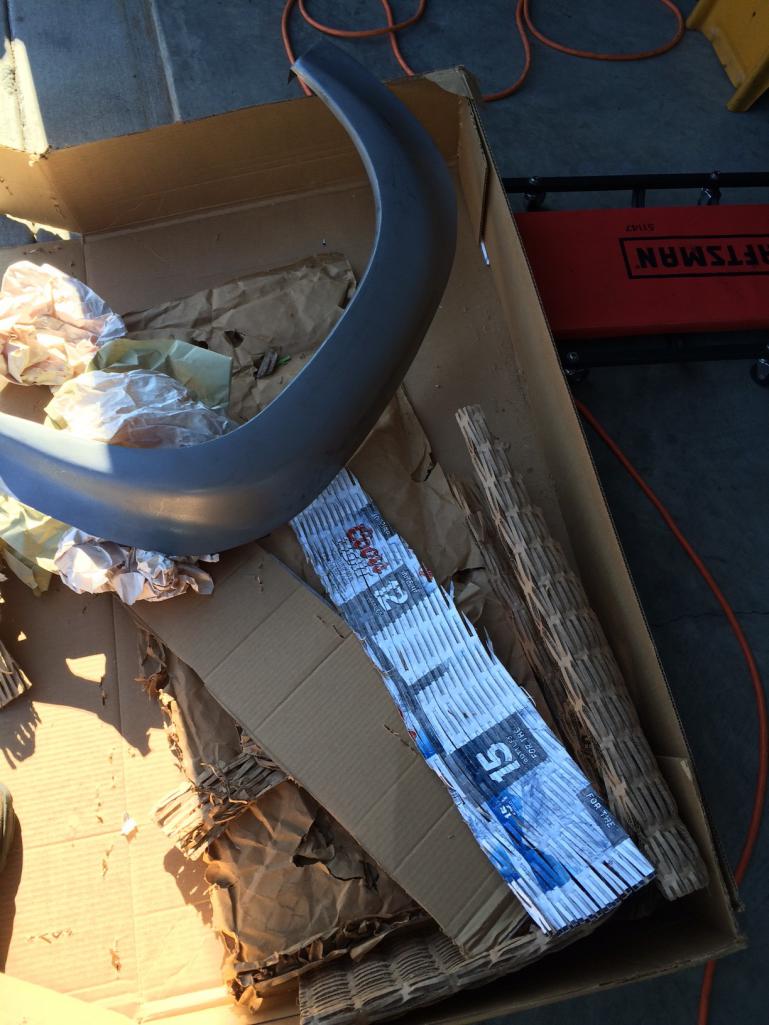
Posted by: Dave_Darling Nov 29 2015, 02:47 PM
I sliced a relief cut at the corners and bonked down the edge to create a smoother transition. Is this a common practice? I figured it'd make the carpet fit a bit better...
I would be concerned that this would take away some of the needed strength on those corners. I remember reading that the indent for the handbrake handle is one of the weaker spots of the long, and the corners say "stress riser" to me; I'd feel happier about having the second layer of material over them.
--DD
Posted by: tygaboy Nov 29 2015, 04:28 PM
I sliced a relief cut at the corners and bonked down the edge to create a smoother transition. Is this a common practice? I figured it'd make the carpet fit a bit better...
I would be concerned that this would take away some of the needed strength on those corners. I remember reading that the indent for the handbrake handle is one of the weaker spots of the long, and the corners say "stress riser" to me; I'd feel happier about having the second layer of material over them.
--DD
I'll be welding the relief cut so I think all I've done is closed the gap that would otherwise be there. I'll post pics when done and look to hear what you think. Thanks for the input - I'll take all I can get.
Posted by: Cracker Nov 29 2015, 07:00 PM
Impressive find...the kind folks dream of! Looking forward to seeing the progress. I'm sure you're aware of this but 3.2's are getting harder to find. All the best!
Tony
Posted by: tygaboy Nov 29 2015, 07:30 PM
Impressive find...the kind folks dream of! Looking forward to seeing the progress. I'm sure you're aware of this but 3.2's are getting harder to find. All the best!
Tony
Yep and so I've expanded the search to include 3.6, as well. Pricey items, those. I'm not really in a hurry but if I can't find something 'reasonably priced' in a the next few months, I think I may just go with an LS3.
I believe you know a bit about those?
I may be in touch with some questions.
Posted by: Cracker Nov 29 2015, 08:42 PM
I have owned many quick cars - I gotta say this one absolutely ridiculous.
Good luck figuring out what you want to do...either way, I can't say enough about the 986 gear box. Food for thought..
Posted by: tygaboy Dec 6 2015, 04:35 PM
More boring stuff for - Long stiffener kit is in!
I found it very therapeutic as I worked through the whole "remove a sheet metal screw, spot weld, cool with compressed air, move to the other side and do it again". Took my time, did the welding over 3 days and checked the door measurements 4-5 times as I went. I even pulled the braces and put the door back on when I was about 1/2 way through, just to be sure.
All the advice given on this forum is spot on and my doors fit just like they did before I started this improvement!
I didn't think it would be a problem if I didn't grind the welds all the way down on the rear section.
Now it's on to the front floor install. 
Attached thumbnail(s)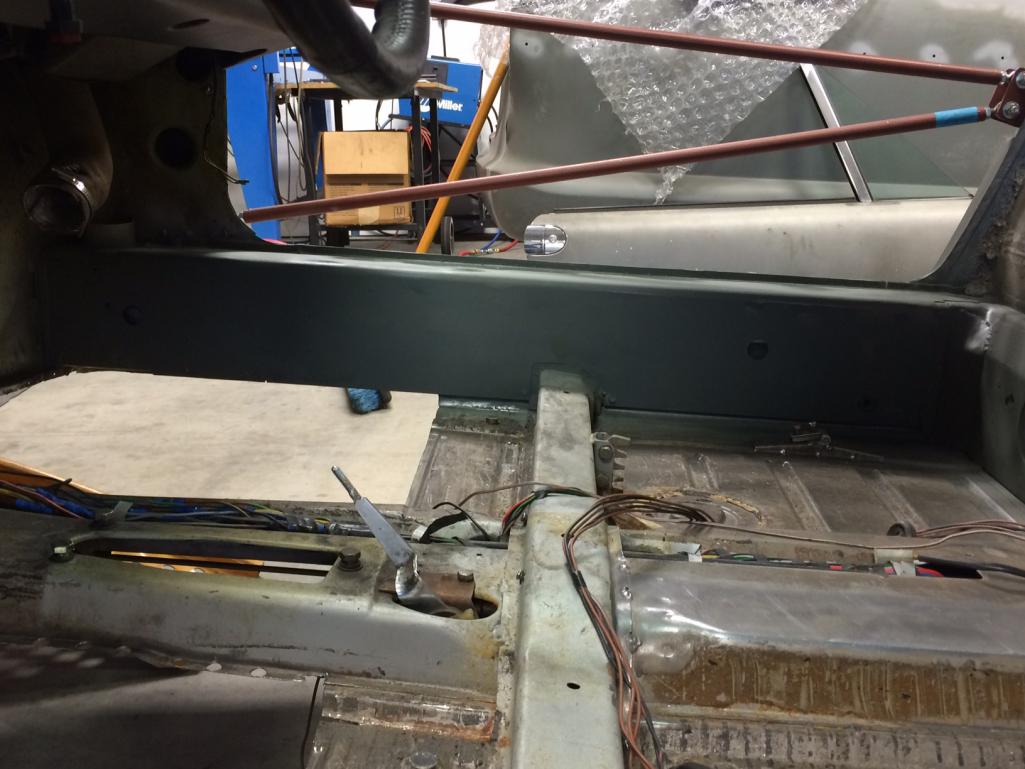

Posted by: Cairo94507 Dec 6 2015, 06:49 PM
Way to go! 
Posted by: Cracker Dec 6 2015, 07:46 PM
Wow. Super clean install...keep the momentum going!
T
Posted by: tygaboy Dec 8 2015, 07:33 PM
Well, Christmas is coming early! I'm working with Rich Johnson who's done a great job helping me w/a complete front and rear suspension package: raised spindles, Boxster calipers, Koni yellows, etc., etc.
Anyway, the first of the components have arrived!  Very exciting...
Gotta say, having only been dealing with 40+ year old, dirty ol' parts, it's a real treat to handle some brand spankin' new goodies. And that Elephant Racing stuff is just gorgeous.
A safe and happy holiday season to you and yours.
Attached thumbnail(s)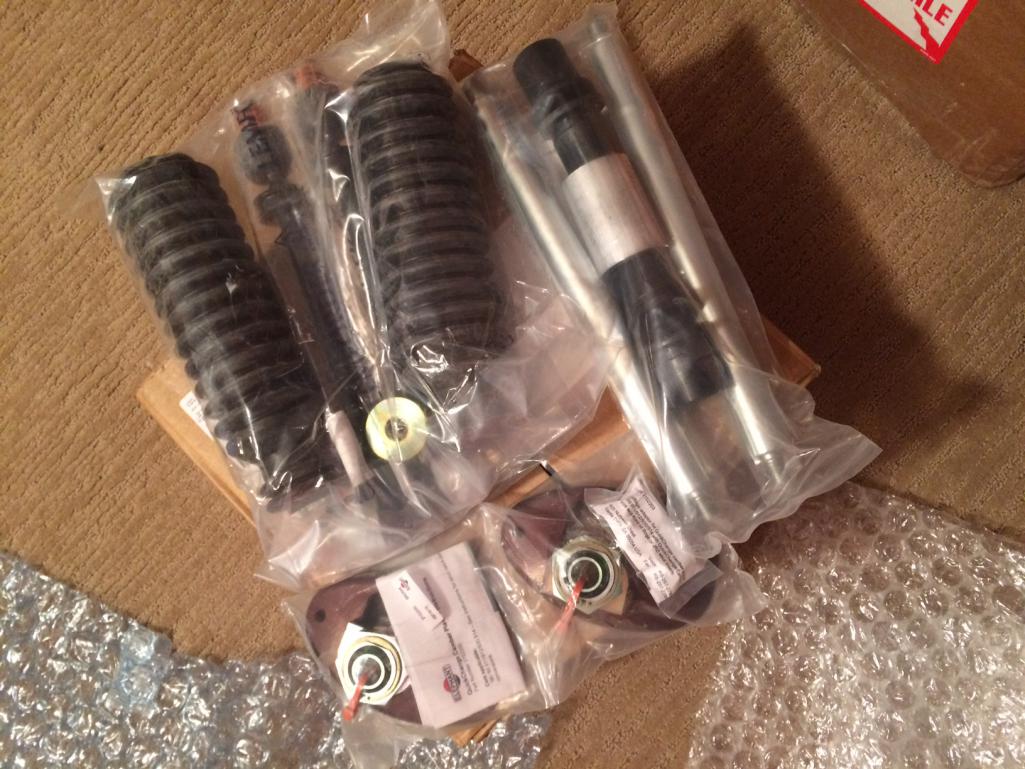
Posted by: Cracker Dec 8 2015, 07:40 PM
Good for you...contact me if interested. I had a little teething issues blowing shocks
with raised spindle mounts. Sounds very similar to my set-up - it works! Happy to help.
Tony
Posted by: tygaboy Dec 9 2015, 07:56 PM
Good for you...contact me if interested. I had a little teething issues blowing shocks
with raised spindle mounts. Sounds very similar to my set-up - it works! Happy to help.
Tony
Thanks for the offer, Tony. PM sent!
Posted by: tygaboy Dec 18 2015, 05:49 PM
Some more goodies arrived! Fachs. I decided to go 17", 7 and 9. Pic make me want to see if these would look good on the Rambler. She's a 1962 American, just like my lovely wife! 
And the drive train decision has been made, too:
LS3 and a Boxster 6 speed
The trans arrived today, too but it's still in the crate so pics later. I'm excited.
Attached thumbnail(s)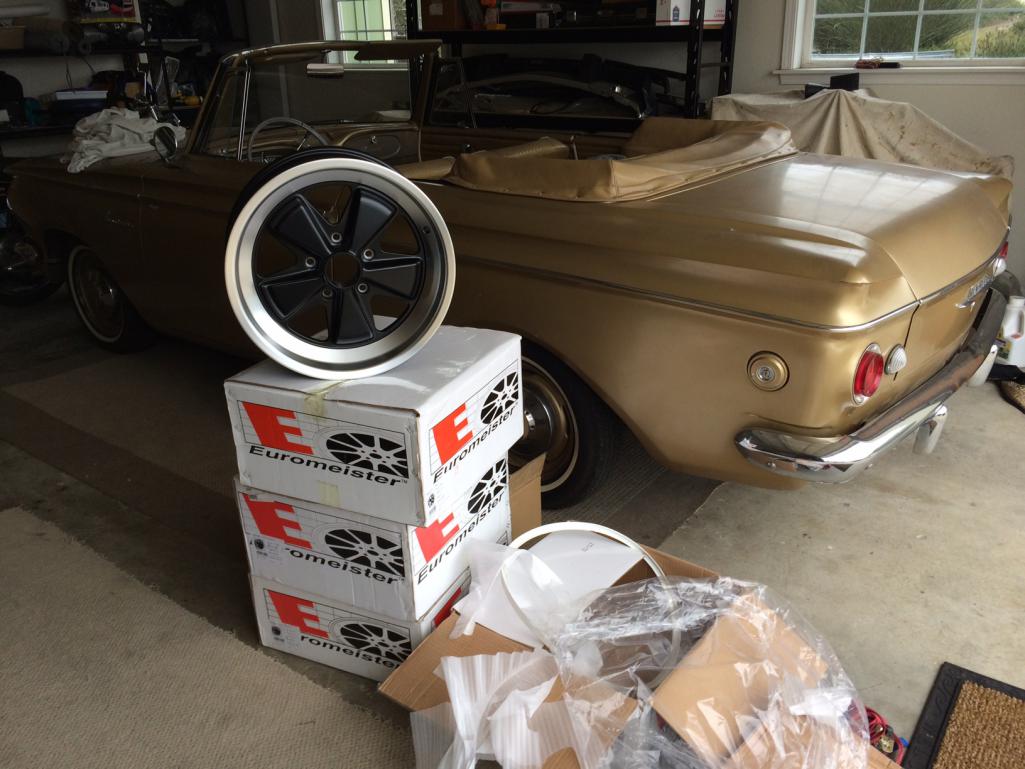
Posted by: tygaboy Dec 18 2015, 05:55 PM
Got to working on fitting the front 1/2 floor panel. A buddy is bringing his track day 911 project over tomorrow and we're bending up his roll cage. I took my car off the stands in prep to move it and ended up having time to get the floor rough fit.
I was done before I really stopped to think I'd just done all this with the car on it's wheels and me working on the ground. What a dufus... 
Oh well. It's fitting really nicely but I still have to do the final cuts on the front and rear of the original floor.
It'll be back on the stands for that!
Attached thumbnail(s)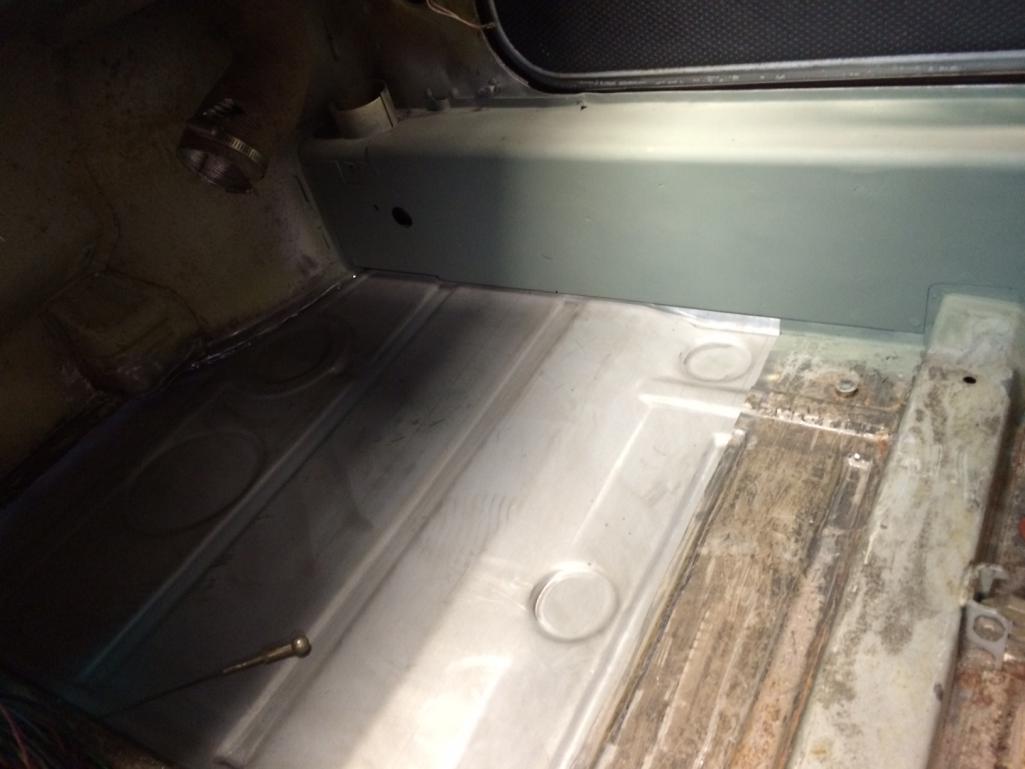
Posted by: jmill Dec 18 2015, 08:03 PM
Very nice! You'll need to let me know if the Euromeister 9's fit with your rear flares. I planned on buying the same rims but am unsure if they'll fit. I see they don't make 8's so it's 7's or 9's.
Posted by: tygaboy Dec 27 2015, 04:50 PM
Gotta say, I'm really impressed with the Restoration Design parts. I've done some hot rod stuff and the repro body panels can leave a lot to be desired, fit wise. Maybe it's the mfg tolerance improvements that came between the '50s and the 70s.
Fitting of the front floor 1/2 is nearly complete so it's time to attach the pedal support bracket. Welding in the inner long stiffener gave me a chance to improve my spot/plug/rosette welding and I'm happy with how this turned out.
Again, probably boring for you but making regular, consistent progress is important to my emotional commitment to these sorts of projects.
Everybody have a safe and happy new year! 
Attached thumbnail(s)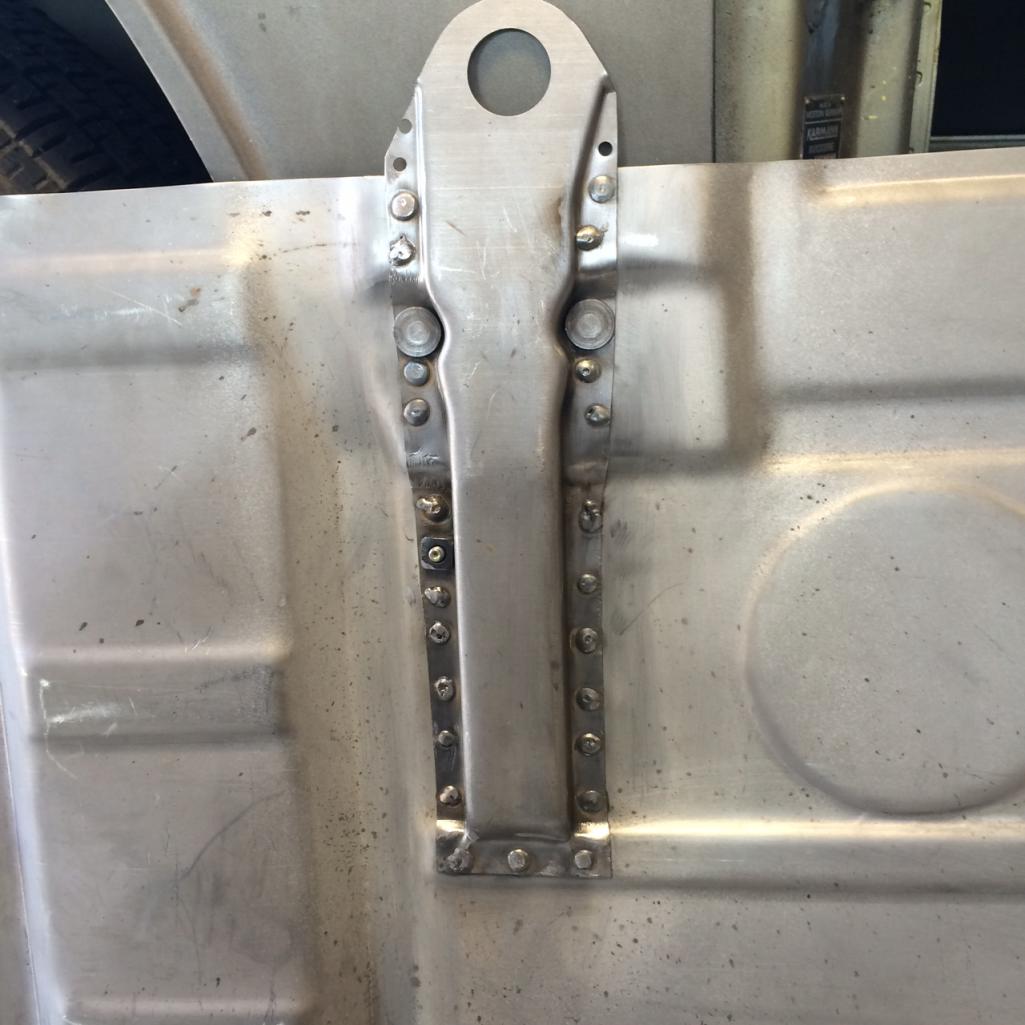
Posted by: SKL1 Dec 27 2015, 07:53 PM
Nice find- I guess they're still out there if you're lucky enuf to stumble upon them!
Should be a fun project!
Posted by: Martin Baker Dec 27 2015, 08:09 PM
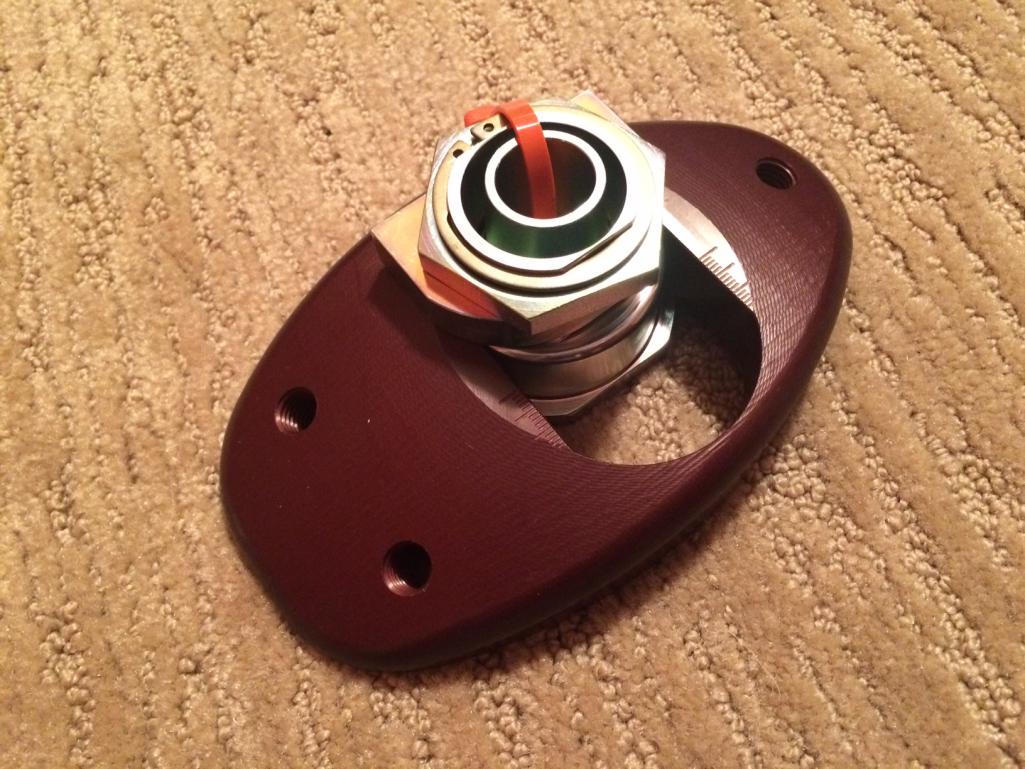
Ready for pick up! Here are your signal housings. Plug and play.
MB
Attached image(s)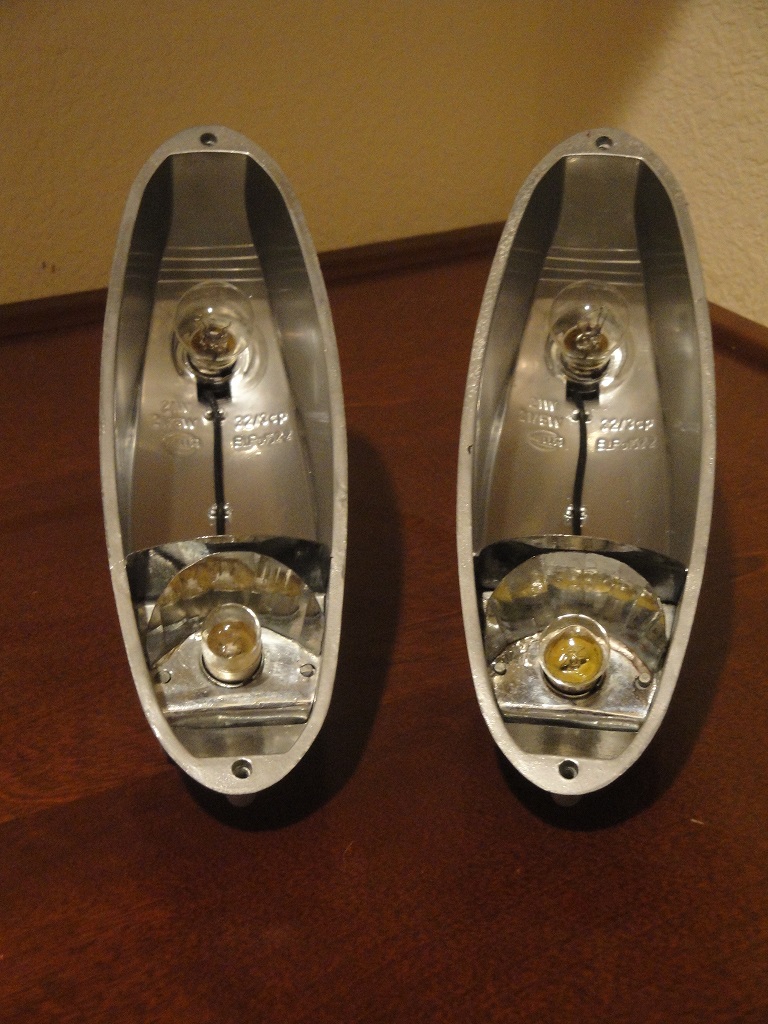
Posted by: tygaboy Dec 30 2015, 03:25 PM
It is FREEZING here in foggy Petaluma, CA so during my holiday break, I'm not getting as much done as I'd hoped. Plus, some more Boxster drive line goodies showed up and I couldn't resist hooking them up and making engine/shifting noises!
And all I could think was "my shifter control can go around corners!".
Let's hope this is the only time these parts will be in this orientation!
And as you've all heard, this trans set up really does go "snick snick", with very little effort. And that's with the shifter just floating around on the floor. It's certainly going to be a little while but man, I can't wait to drive/shift this thing! 
Attached thumbnail(s)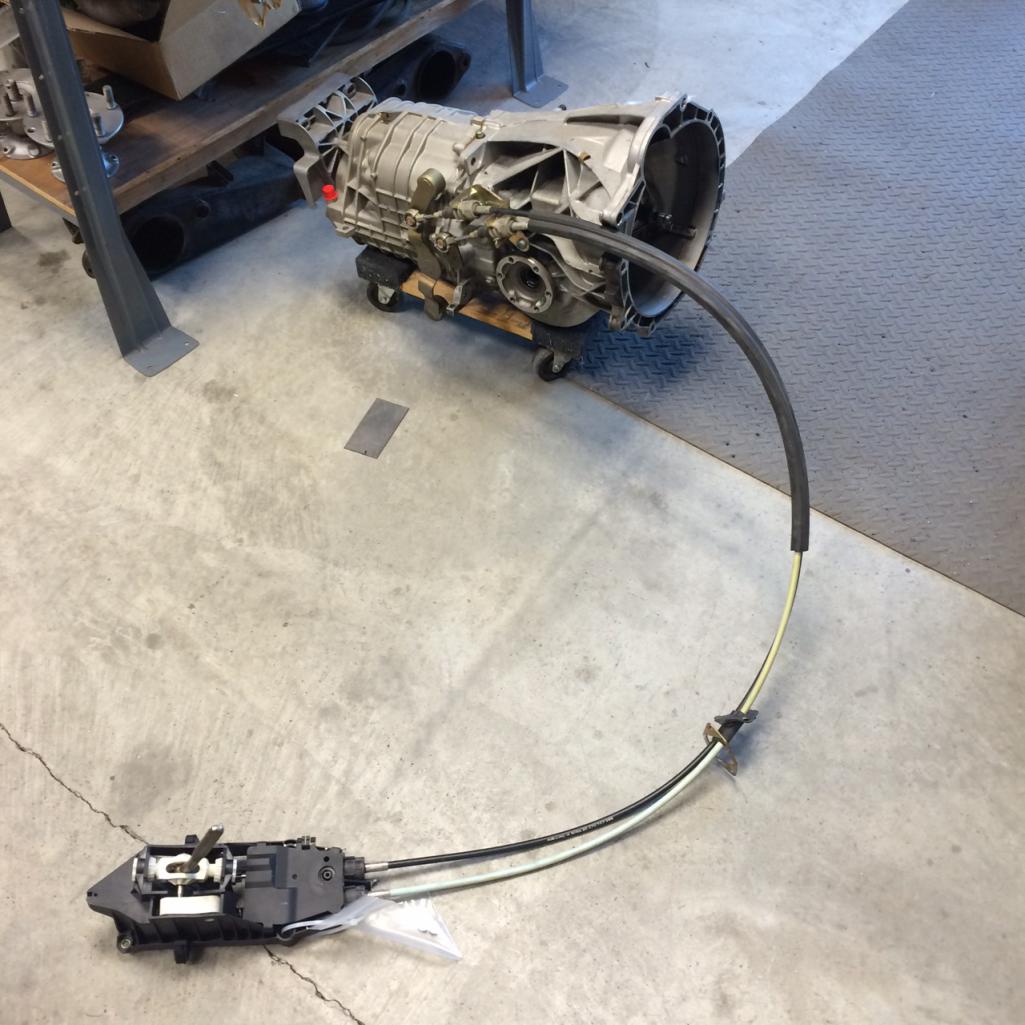
Posted by: Nemisus Dec 30 2015, 04:14 PM
Welcome back Chris,
Your not too far from from me. I am just located a few minutes north in Rincon Valley!
What a wonder find you have. I've seen quite a few 914s and this one sure looks well kept for as long as its been sitting.
Cheers friend and maybe some day we can cruise together.
Nemi
Posted by: tygaboy Dec 31 2015, 06:00 PM
Floor fitted and ready for welding. Hope to get to that on New Years Day.
The gaps are smaller than they look as there's a bit of Sharpie ink right at the edge.
Attached thumbnail(s)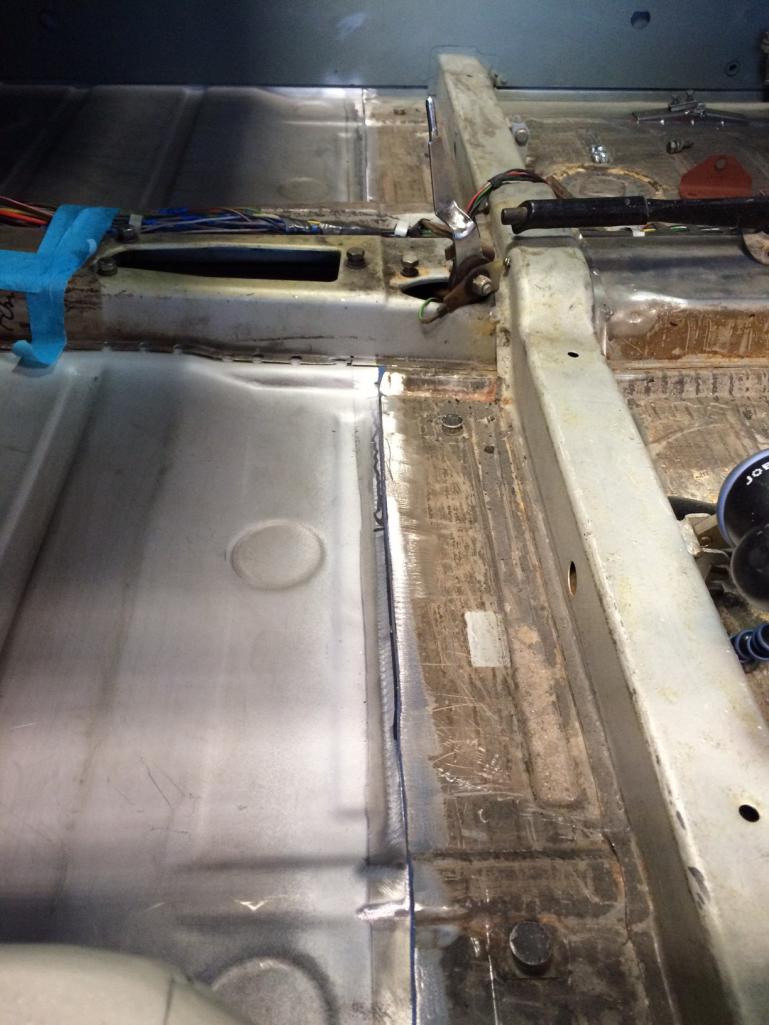
Posted by: tygaboy Dec 31 2015, 06:06 PM
I applied weld through primer between all the panels. I'm really after improving my metal working/finishing skills so to make the rosette welds as nice as possible, I wanted to eliminate the spatter I get from the primer. So, I flatted the tip on one of the 7/16 spot weld drill bits and used it to remove the primer from each of the holes.
Hard to tell from the pic but I have nice clean, bare metal for the welds!
Too anal? I don't think so!
Attached thumbnail(s)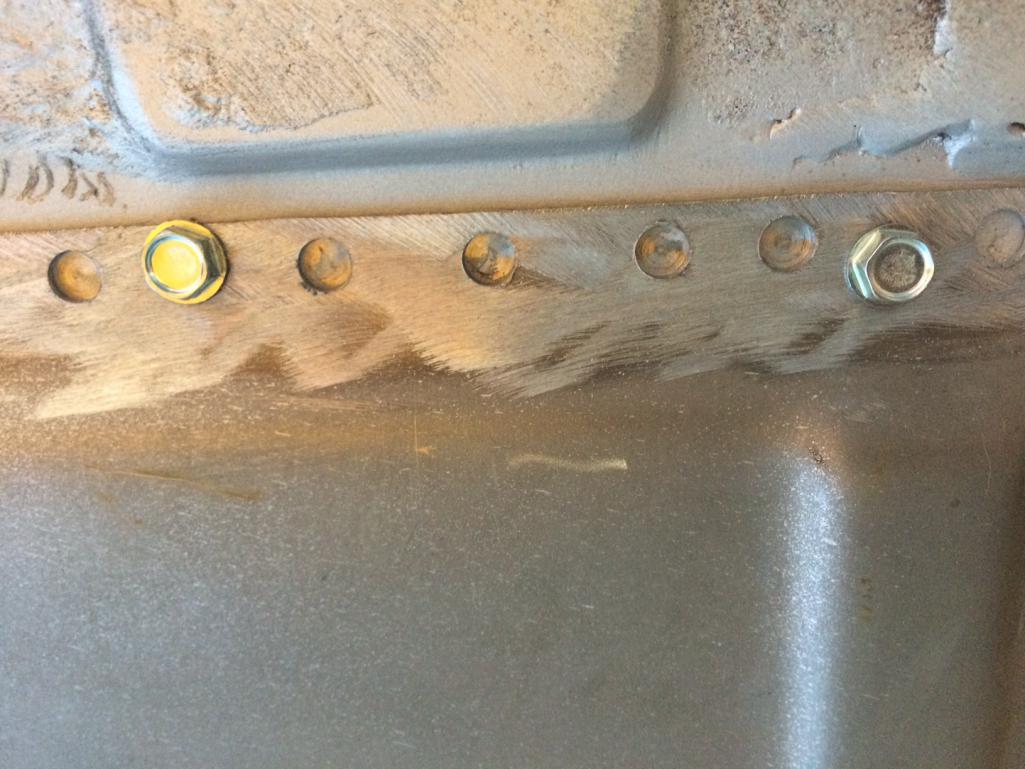
Posted by: tygaboy Jan 10 2016, 08:01 PM
Finished my buddy's 911 roll cage and finally got some time on my own car! Completed the rear seam butt weld... well, nearly complete, anyway. One minor gap to close but it's turning out nicely. Seam should all but disappear after the weld is ground. That's the plan anyway...!
Attached thumbnail(s)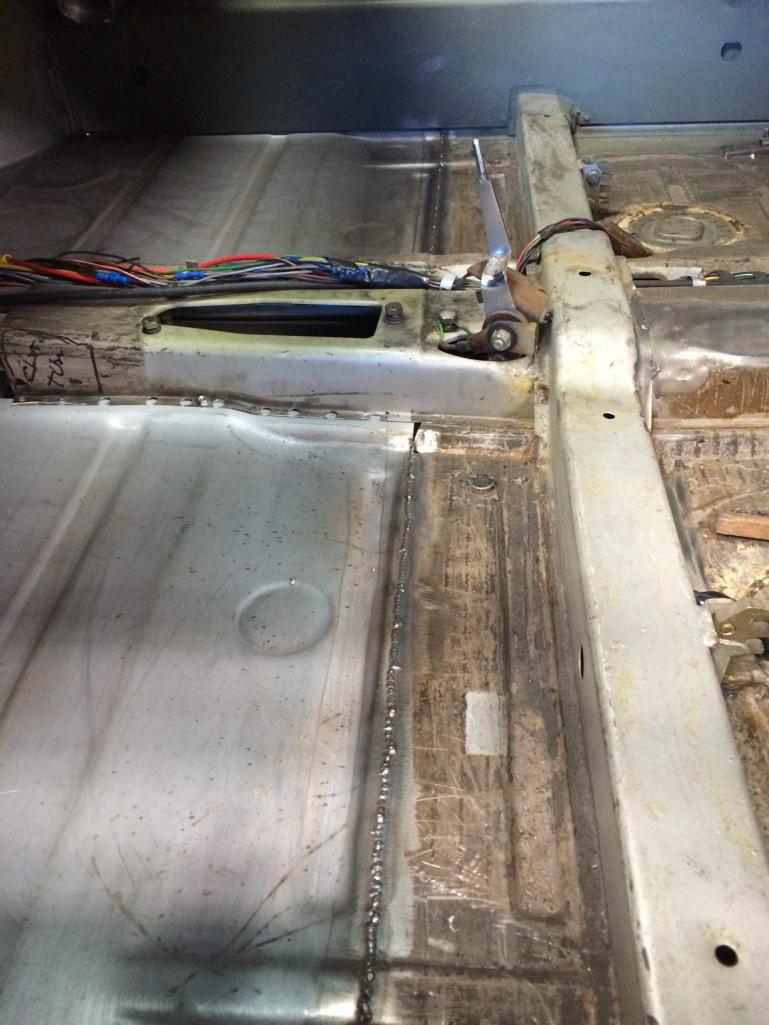
Posted by: peteyd Jan 11 2016, 07:14 AM
Looks good!
Pete
Posted by: tygaboy Jan 11 2016, 09:52 AM
Looks good!
Pete
Well, after watching your YouTube floor panel install video about 100 times, I was hoping so!
Seriously though, I can't say how much we all appreciate all the great things Restoration Design has done for our little cars. Great products, great people. What more could a consumer want? Keep up the great work!
Posted by: tygaboy Jan 16 2016, 06:42 PM
Little bit of and the front floor half is in. I'm working to up my welding skills to metal finish on all my butt welds. And even though one side of this will be under sound proofing and carpet and the other side will be undercoated, it was great practice. I'm happy with how it turned out.
Attached thumbnail(s)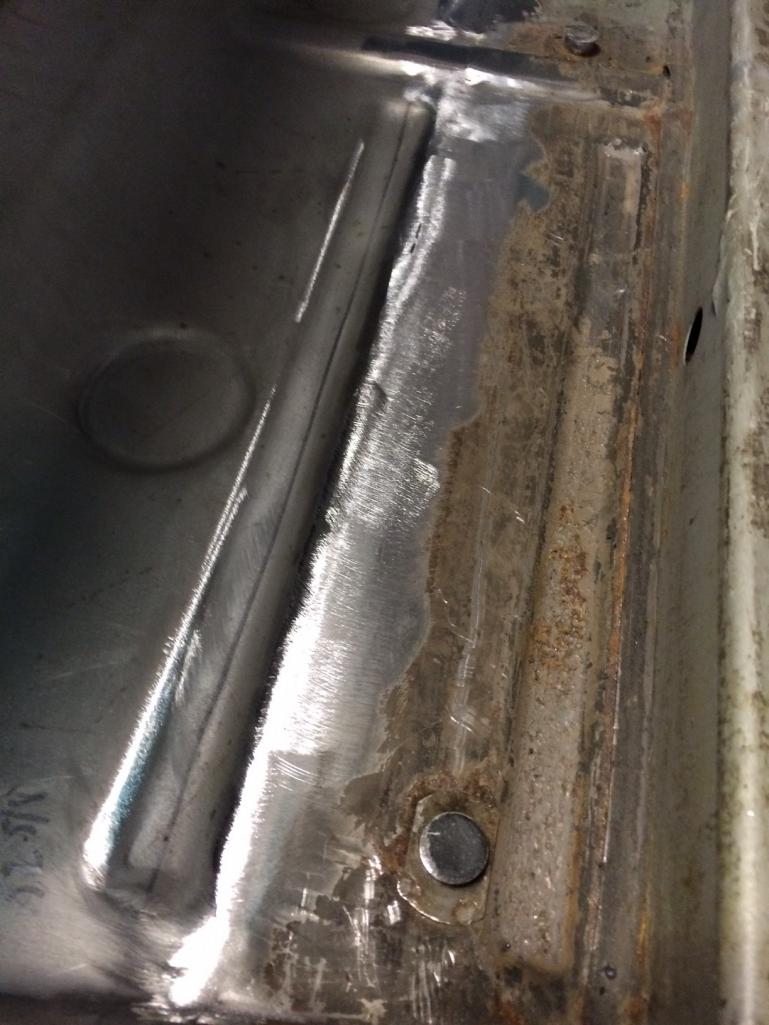
Posted by: tygaboy Jan 17 2016, 06:17 PM
Part of the floor repair includes a fix to the tunnel. No idea what the PO was thinking/doing but there were some gaks that I had to fix. I decided that it would be far simpler if I did the repair with the tunnel, or at least part of it, out of the car.
With 1/2 the floor already out, I figured, why not. More welding practice ahead of tackling the flares.
So, here's what I started with. Gotta get better at the entire "before" picture taking. Anyway...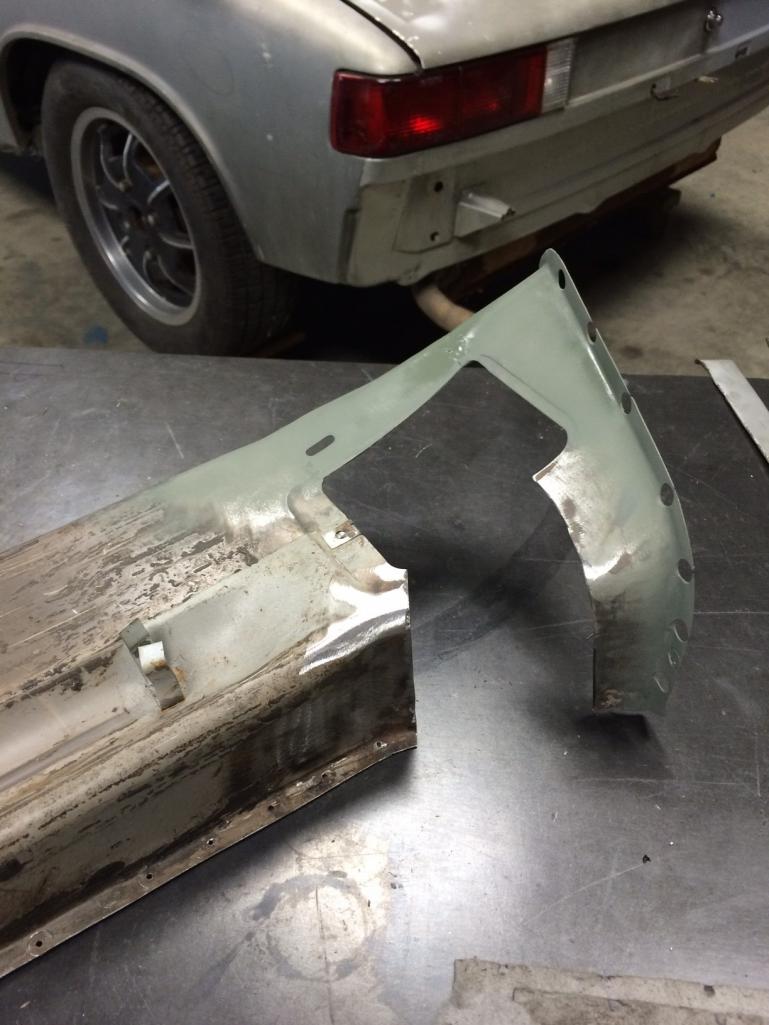
Posted by: tygaboy Jan 17 2016, 06:19 PM
Next, I had to fab the patch. Different radius on each end of the patch... what to do?
I made a tool! Well, if you call two round things partly in a vice a tool.
Attached thumbnail(s)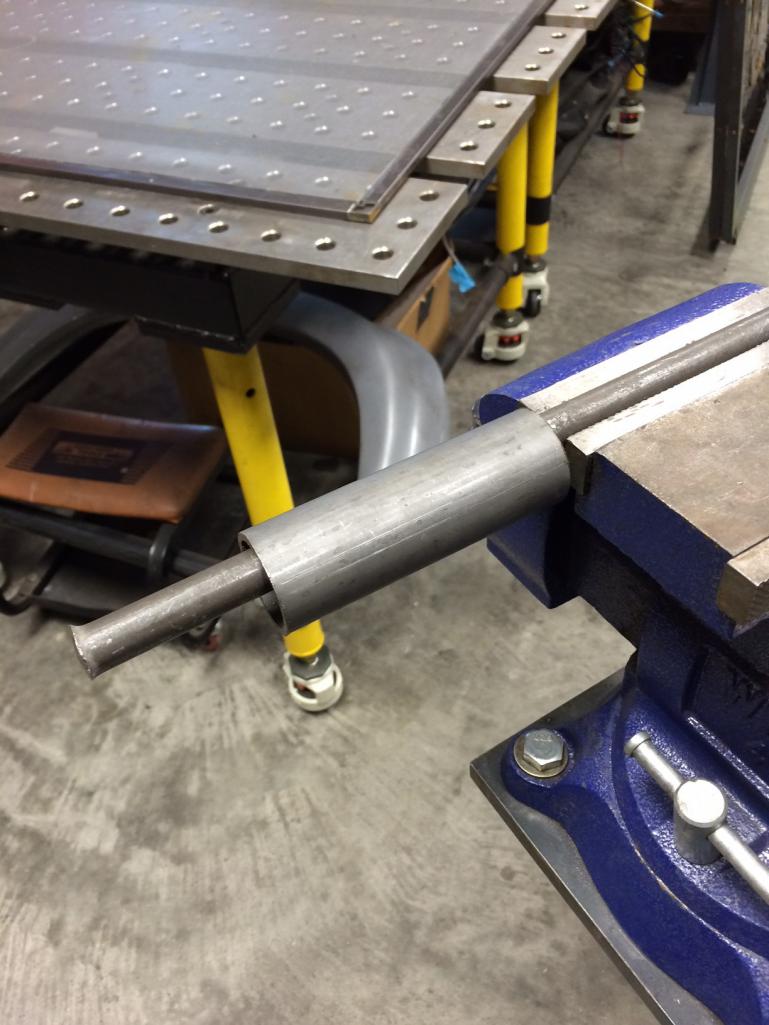
Posted by: tygaboy Jan 17 2016, 06:20 PM
rough cut the patch, figure where the radius needs to be and wrap it round the tool to get the desired two radius part.
Attached thumbnail(s)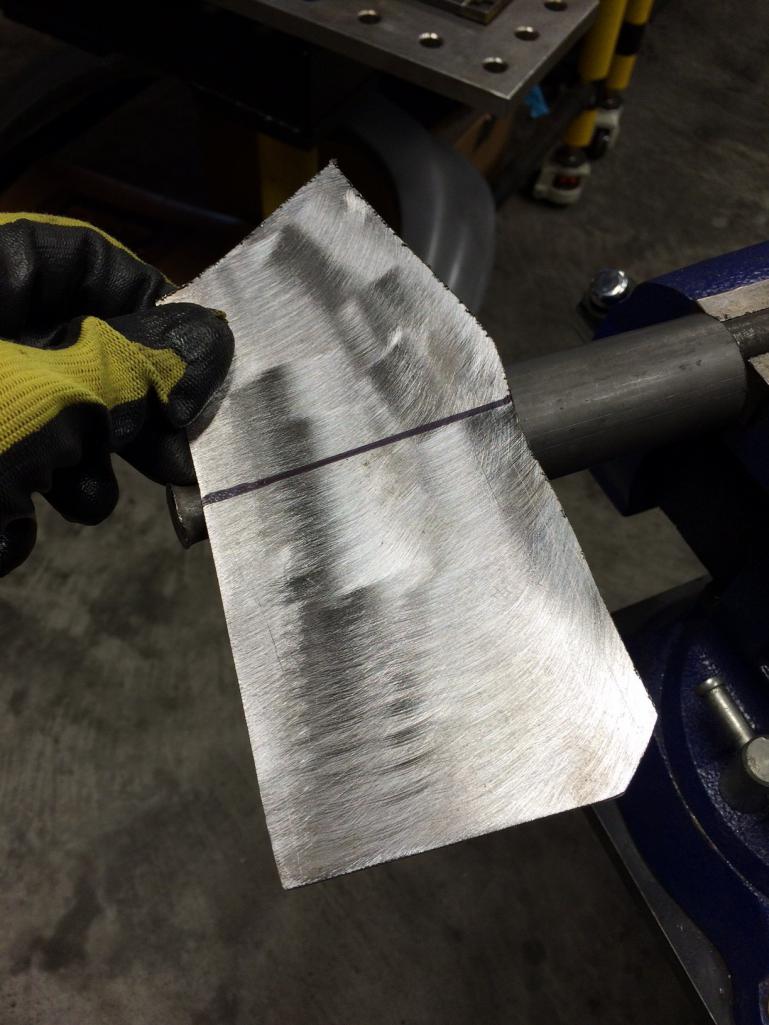
Posted by: tygaboy Jan 17 2016, 06:21 PM
Ta da. Just like I'd hoped!
Attached thumbnail(s)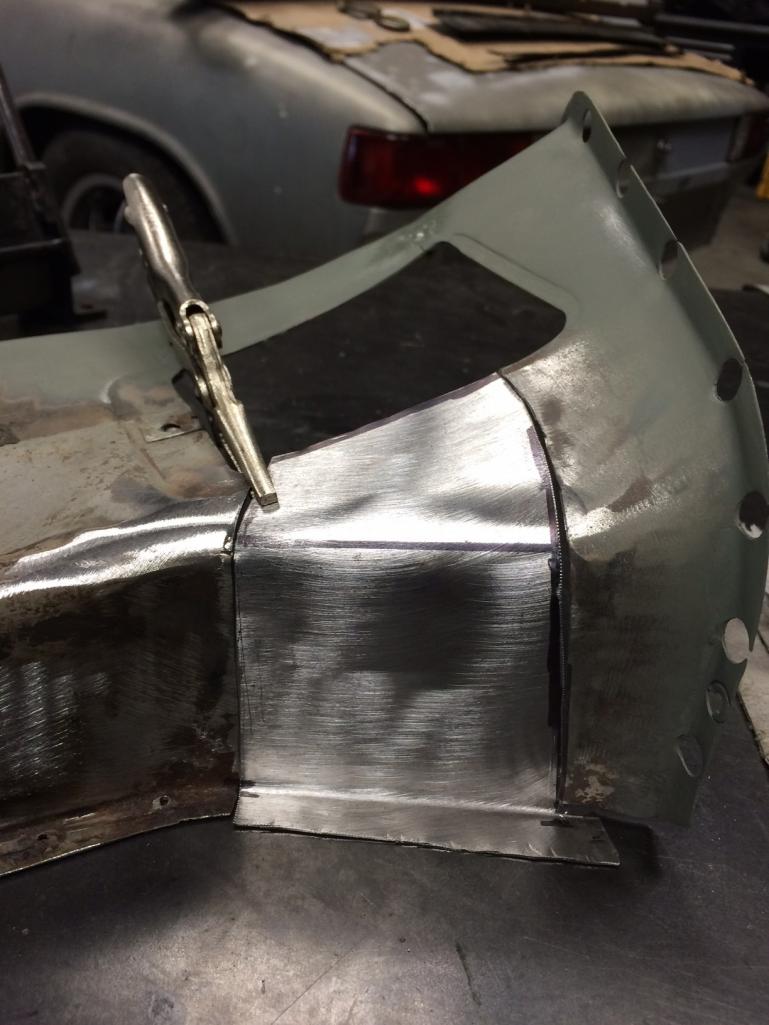
Posted by: tygaboy Jan 17 2016, 06:23 PM
Trim, fit, trim, fit, trim, fit... then grind, grind
Almost done.
Attached thumbnail(s)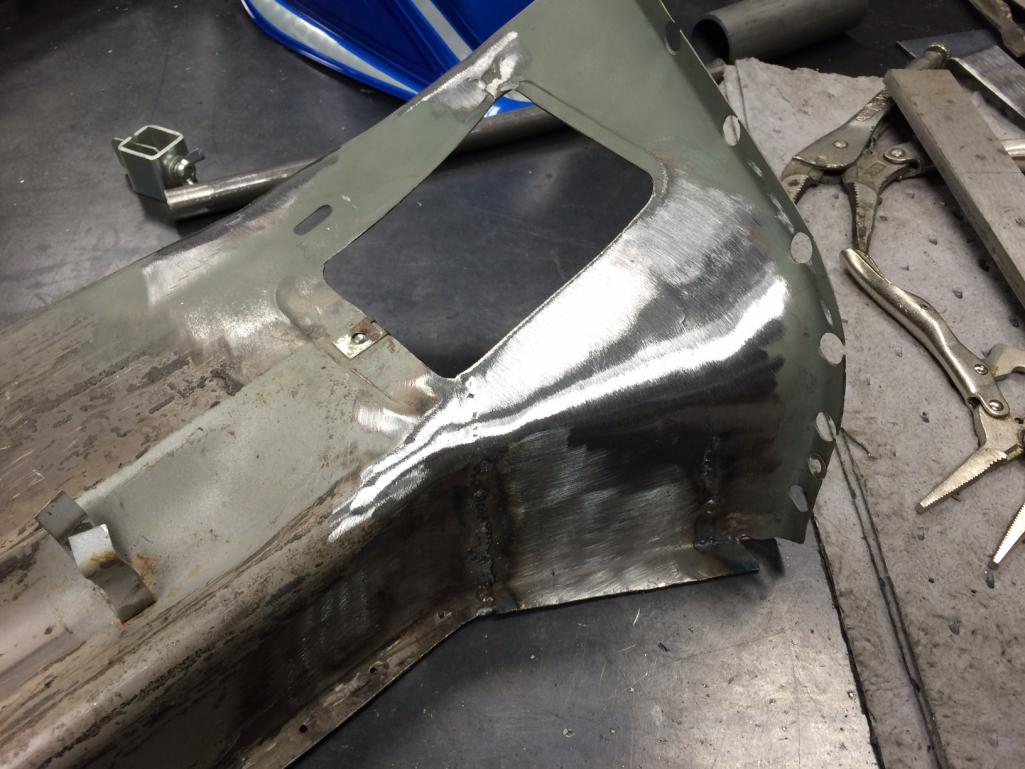
Posted by: Cracker Jan 17 2016, 06:26 PM
Great job!
Bummer about the "Club Race at RA"...darn GT-4 Cup! 
Tony
Posted by: tygaboy Jan 17 2016, 06:26 PM
Then I decided to get fancy and I broke out the HF hole punch / flange tool and did my best to replicate the indent for the access cover. Not quite to the point that I'll be quitting my day job but I feel like I'm getting there re: the quality level I'm trying to achieve.
Still have a few touch ups but this was it for today.
Attached thumbnail(s)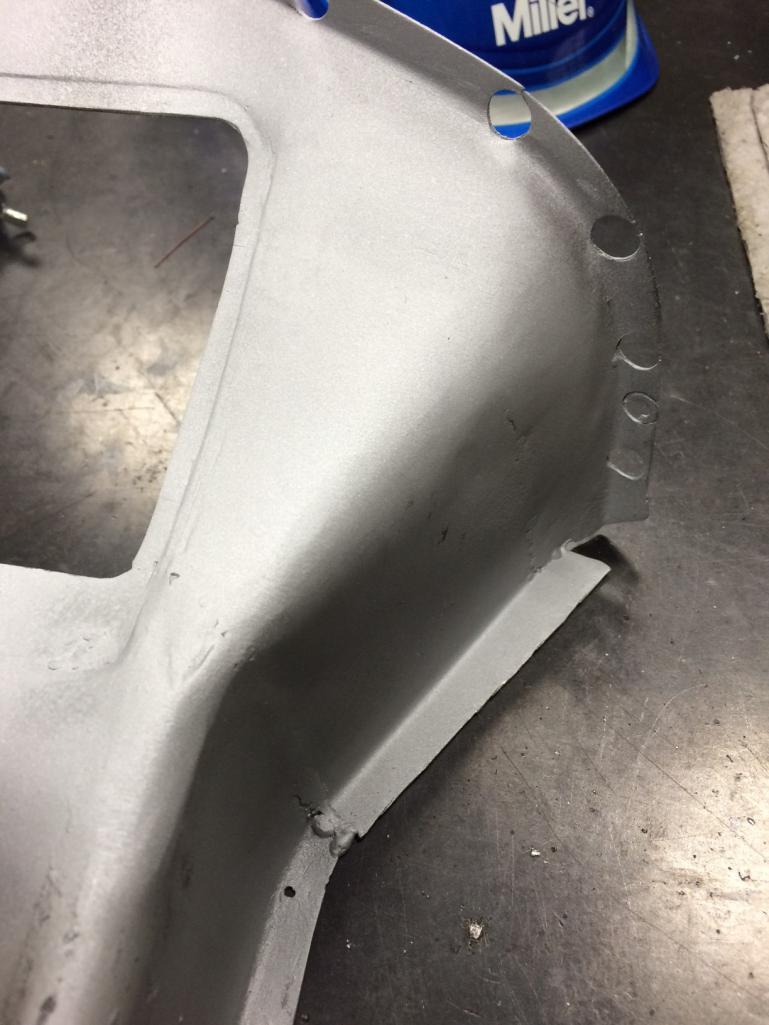
Posted by: mbseto Jan 18 2016, 10:02 AM
Nice fab work.
Posted by: bigkensteele Jan 18 2016, 07:19 PM
Nice fab work.
 Great job!
Posted by: tygaboy Feb 1 2016, 12:22 PM
As mentioned, I'm working with Rich Johnson on a suspension package and it's almost done. So here's a little suspension porn to start the week!
Raised spindles, Koni yellows. Not pictured are the Boxster calipers. Can't hardly wait!
Attached image(s)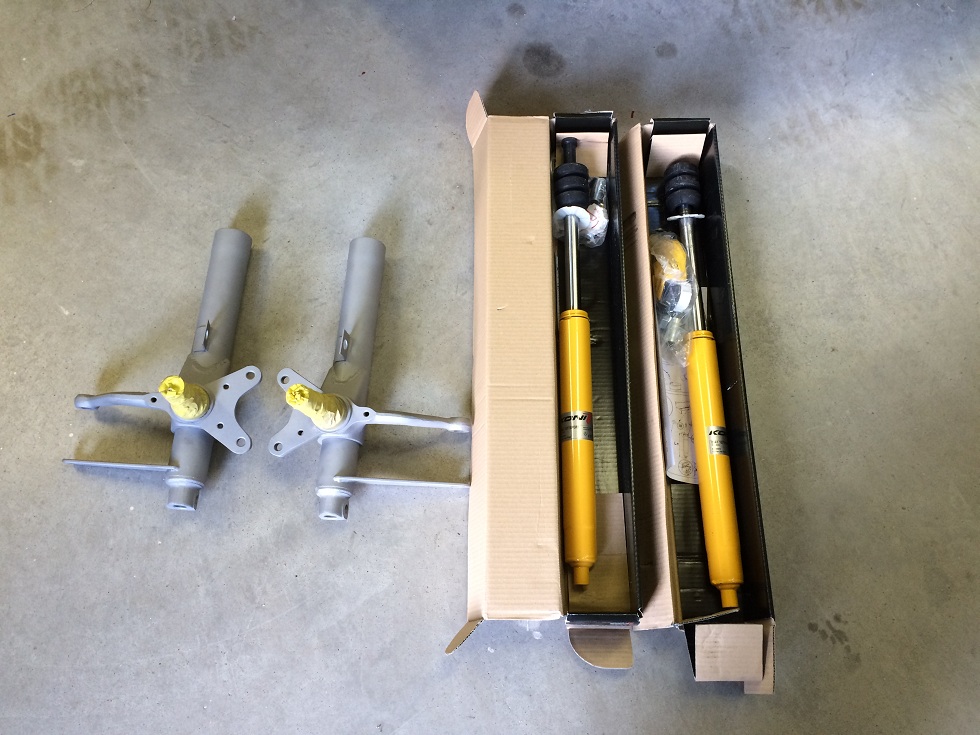
Posted by: tygaboy Feb 1 2016, 12:48 PM
On the drive train front, I'm getting to know our friend Tony (Cracker) and his experiences with the LS3 and Boxster S transaxles, as well as other V8-in-your-914 info. Tony's a wealth of info and VERY willing to share. Great guy. That's a long way around to:
I'm about to pull the trigger on all the Renegade stuff
And I may end up sourcing my engine from Tony as he may have an LS3 that suits my needs. But I'm still educating myself ahead of making that decision.
Sorry, no pics on this one... yet! 
Posted by: tygaboy Feb 5 2016, 04:13 PM
Struts are all done. Almost too pretty to hide under the car! Big thanks to Rich Johnson for all the boingy bits!
Attached image(s)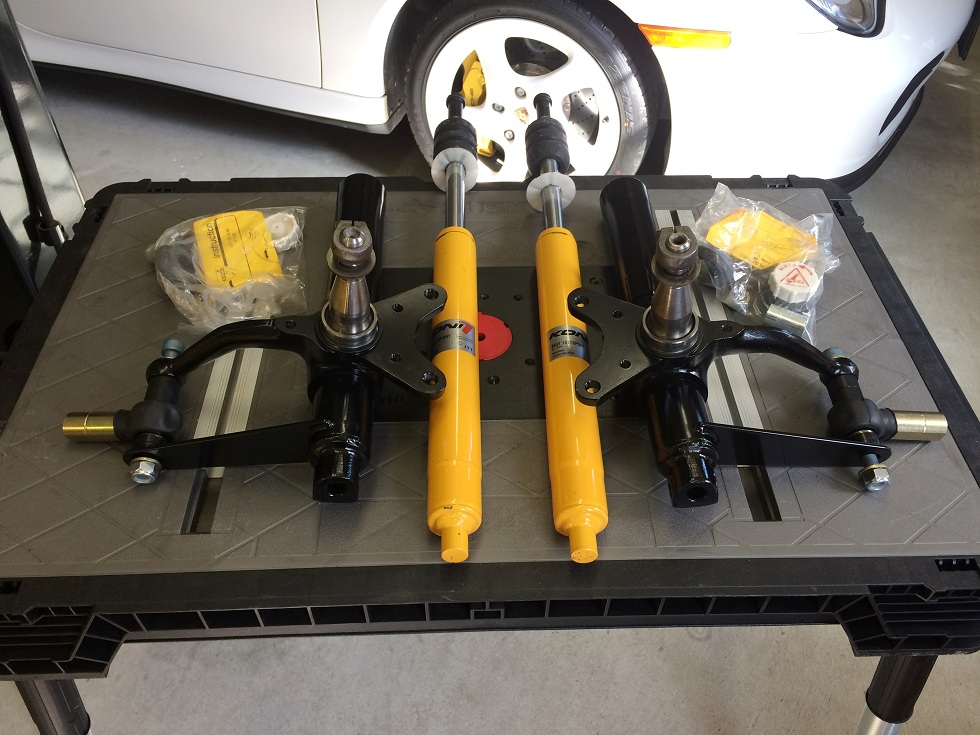
Posted by: tygaboy Feb 6 2016, 04:55 PM
Fit the door sills. Learning that I get a better "spot weld" result when I sheet metal screw each hole. Coming along...
Attached thumbnail(s)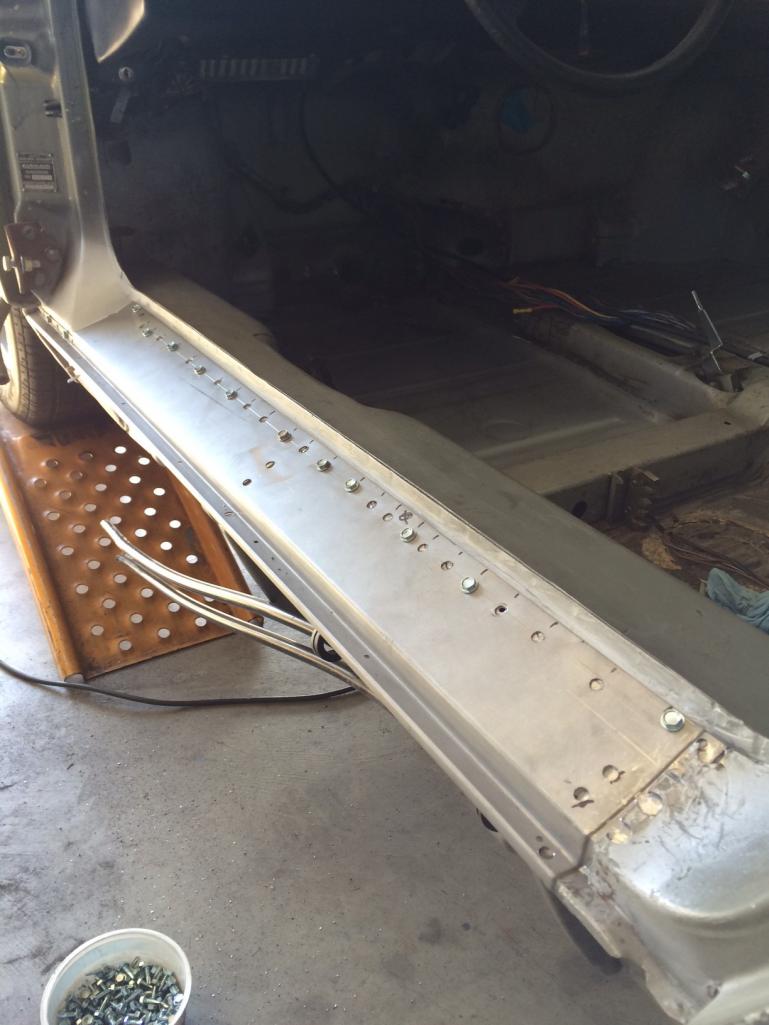
Posted by: tygaboy Feb 6 2016, 04:56 PM
Welded, ground and primer on! On to seam sealing.
And I have to say, the Restoration Design parts are so nice to work with. I mock fit the outer rocker and the rivet holes align perfectly with the pre-drilled holes in the sills. So satisfying...
Attached thumbnail(s)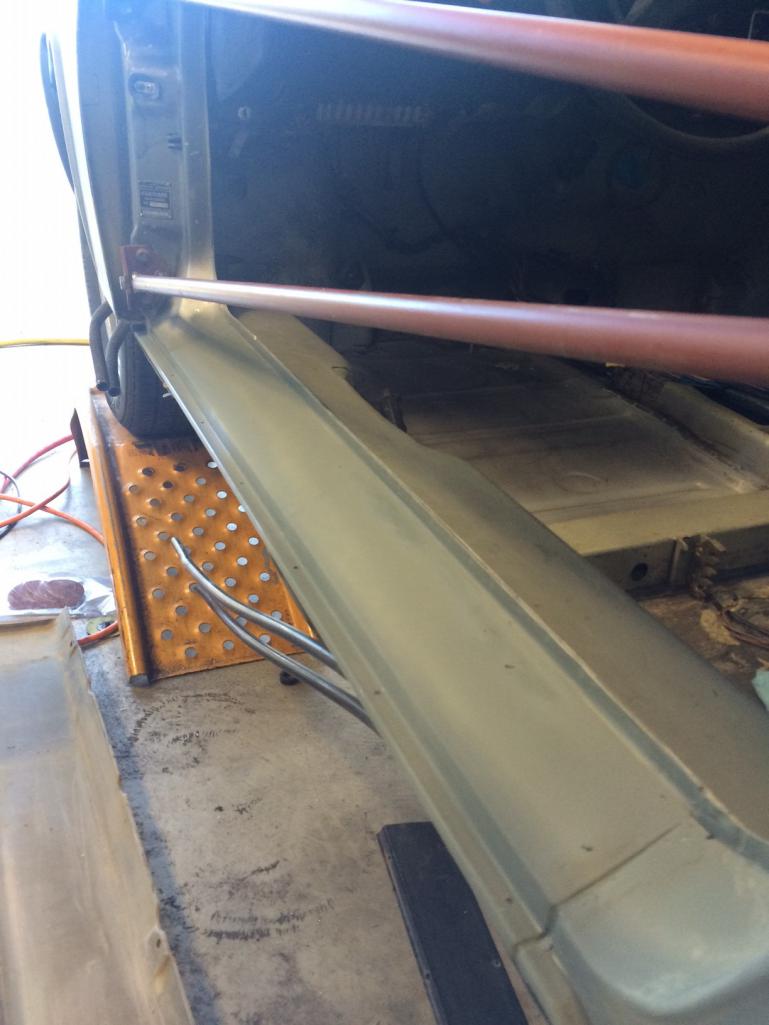
Posted by: tygaboy Feb 7 2016, 05:42 PM
Did I say "on to seam sealer"? Maybe not so fast. After seeing mrfourteen's 74 Sunflower Yellow Build Off car's trunk, I decided that look was for me and it would be "OFF with the seam sealer in the rear trunk.
Again, shoulda taken some before pics. Short story is the factory tech who applied the seam sealer to my car's trunk was particularly enthusiastic in his application! There was A LOT of it and it was uneven, etc. No matter, it's all gone now.
I just hit it with a wire wheel and, other than the "sealer storm" I created (respirator required!), it went pretty quickly.
I may tape all the seams off and apply a tidy layer just at the seams. Still tbd on that.
Attached thumbnail(s)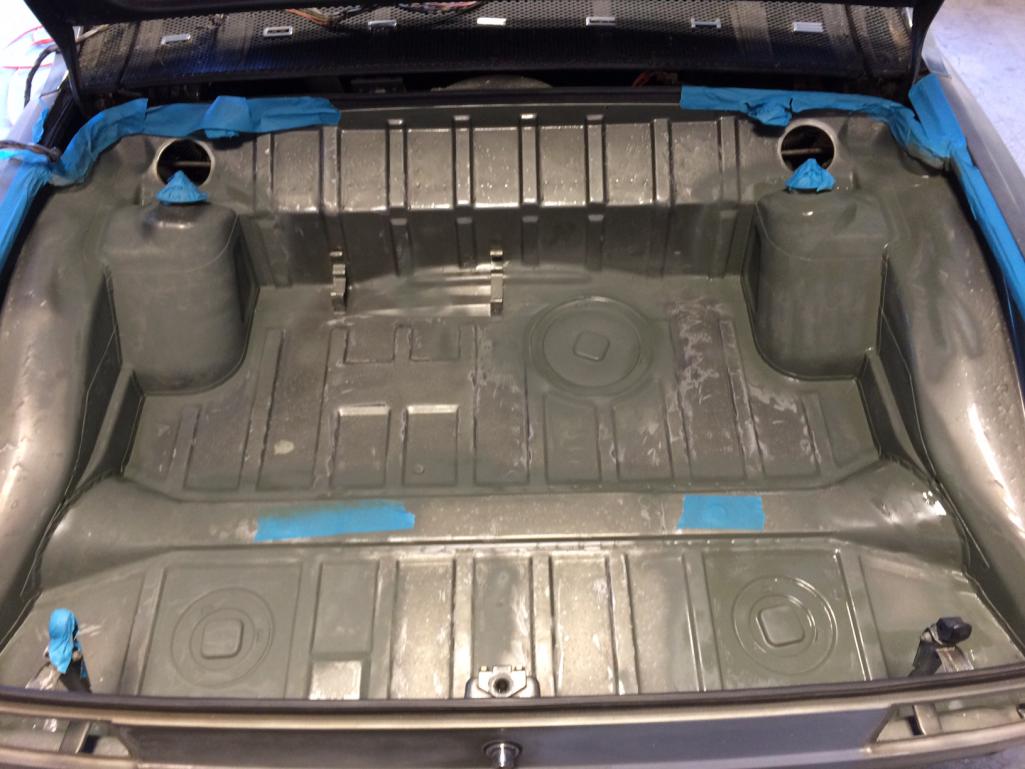
Posted by: Larmo63 Feb 7 2016, 06:48 PM
That is a pretty clean trunk you have there.
Nice work!!!
Posted by: tygaboy Feb 23 2016, 04:45 PM
Another repair of PO hole drilling. There were some odd holes in the frunk bulkhead so I went after it. Whatever had happened, it appeared that there had also been some grinding / thinning of the material because I almost immediately blew holes in the holes! (My God, that's hideous! Look away!)
Attached thumbnail(s)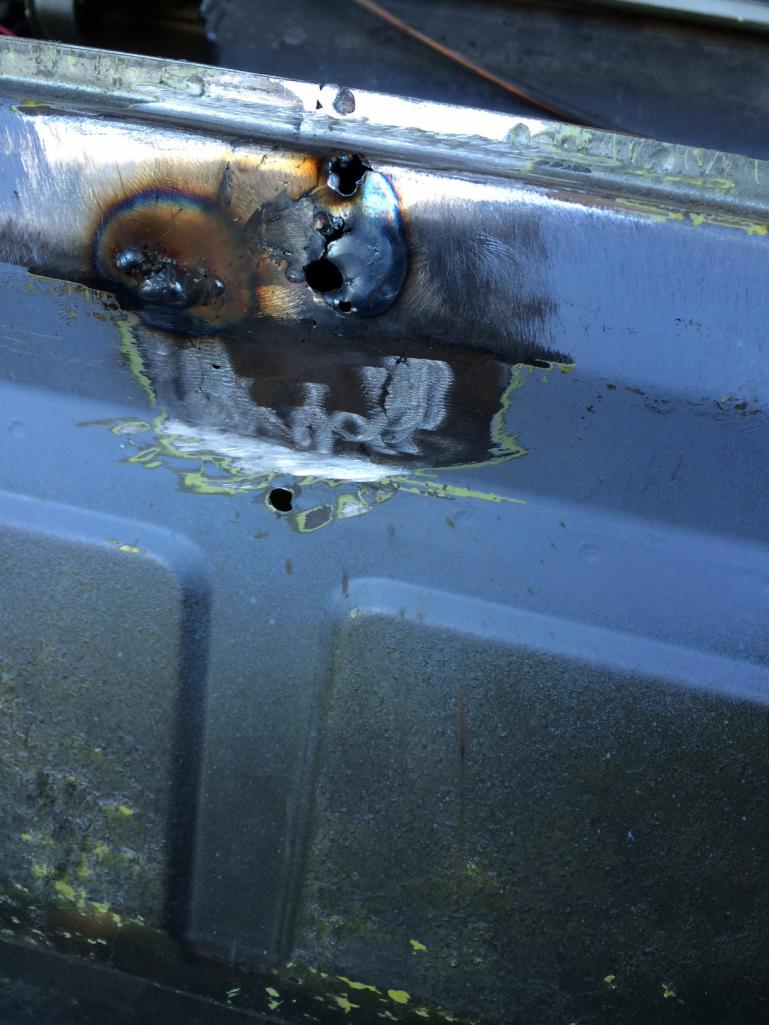
Posted by: tygaboy Feb 23 2016, 04:48 PM
So, it's time to fab up a patch. Here's a good answer for Jeopardy:
"It" can be used to fabricate a 914 frunk bulkhead patch panel.
The answer is: a 1 x 1 square tube!
It's the exact same radius. Thankfully, I had some laying around.
Attached thumbnail(s)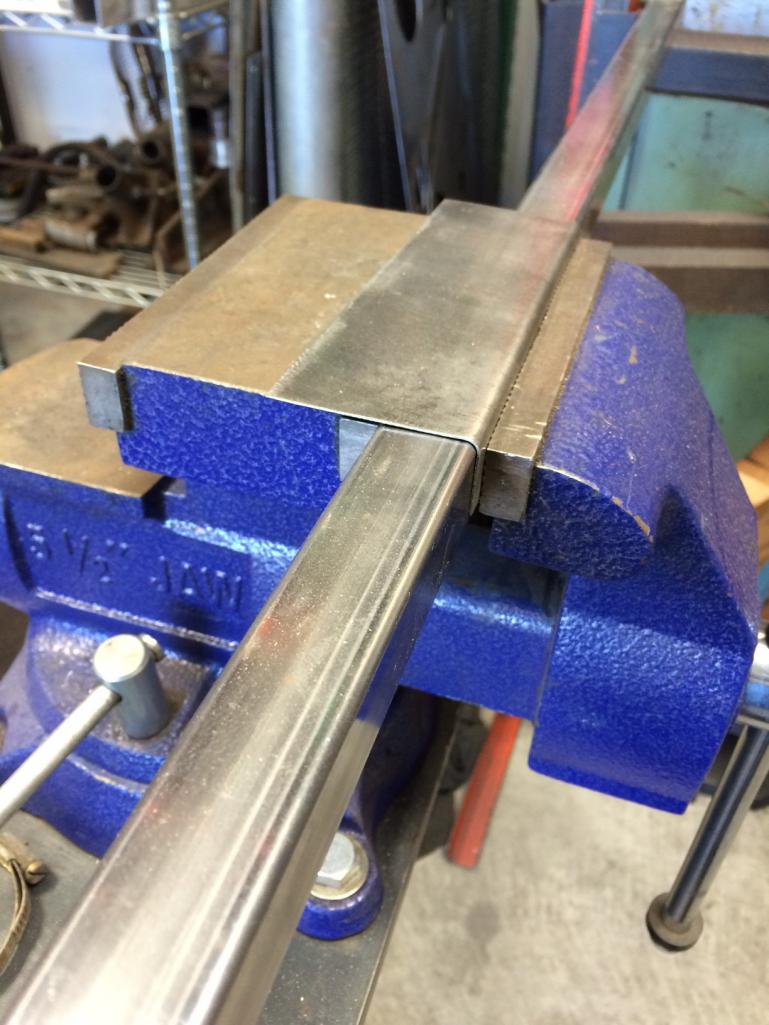
Posted by: tygaboy Feb 23 2016, 04:51 PM
Time to trim / fit the patch.
Attached thumbnail(s)
Posted by: tygaboy Feb 23 2016, 04:55 PM
 then then (insert grinder emoji here) then prime and...
like new! Well, OK, except for that little dent thingy that used to be there.
I think I can live without it. Maybe that will be my signature modification.
Yeah, that's it...
Attached thumbnail(s)
Attached image(s)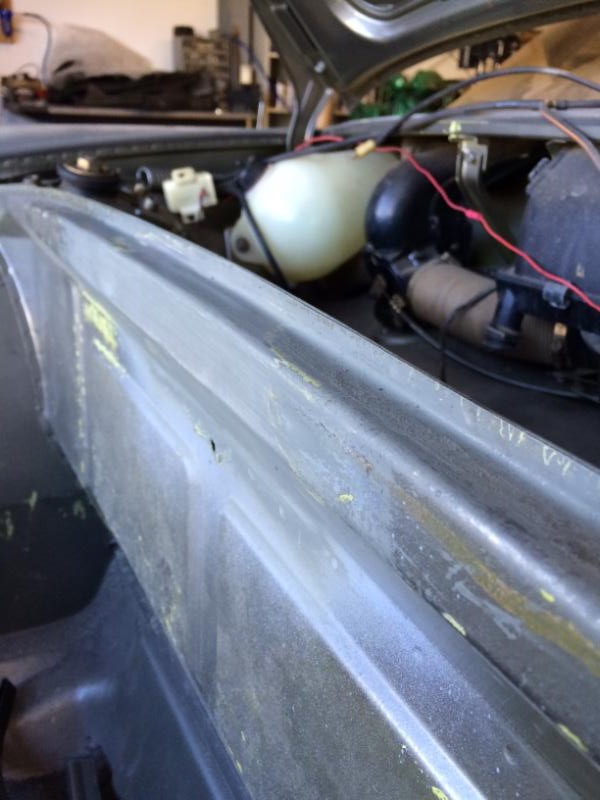
Posted by: tygaboy Feb 23 2016, 05:37 PM
Oh, and I almost forgot: After 28 years, that's right, 28, it's ALIVE!
Did a very minor service and it fired right up! Gotta love the ol' Type IV!
https://www.youtube.com/watch?v=HprL5s4Cgjo
Posted by: tygaboy Mar 3 2016, 12:10 PM
Total Change of plan:
This car will be left stock - or as stock as it can remain, given what I've already done - get completed and be put up for sale.
I'd sell it as is, too, so if interested, PM me. (Hope this doesn't mean I get punted to the "Classified" section...!)
And what of all the goodies I've purchased?
Well, I've just purchased another car (very clean '75 roller) that will serve as the platform for the LS3 conversion. I'll post that in a separate build log.
So this build will move to a 'get it mechanically dialed in, get it painted, put back together and sold!
The fun continues, as always.
Posted by: iwanta914-6 Mar 3 2016, 12:25 PM
I'm interested when it's all put back together!
Posted by: tygaboy Mar 3 2016, 12:44 PM
I'm interested when it's all put back together!
PM sent - You can pick your color and other details...
Posted by: iwanta914-6 Mar 3 2016, 03:27 PM
I'm interested when it's all put back together!
PM sent - You can pick your color and other details...
That would be sweet! I just don't have a clue how much everything would cost. Most likely out of my range but who knows...
Posted by: iwanta914-6 Mar 3 2016, 03:28 PM
What was the original color anyway?
Posted by: tygaboy Mar 3 2016, 07:10 PM
What was the original color anyway?
L 99 A - Delphi Green Metallic
Posted by: iwanta914-6 Mar 3 2016, 07:50 PM
What was the original color anyway?
L 99 A - Delphi Green Metallic
Awesome color!
Posted by: tygaboy Mar 7 2016, 05:09 PM
Wrapping up the front floor half install. Got to the seam sealing and since I'd only replaced 1/2 the floor, I decided to try and duplicate the factory seam sealer. Worst case, I could strip off the sealer on the back half and redo the entire outer seal.
Anyway, I saw that if you apply the sealer and blast it with an air hose, it creates what starts to look a lot like the factory sealer. So, I started practicing.
Attached thumbnail(s)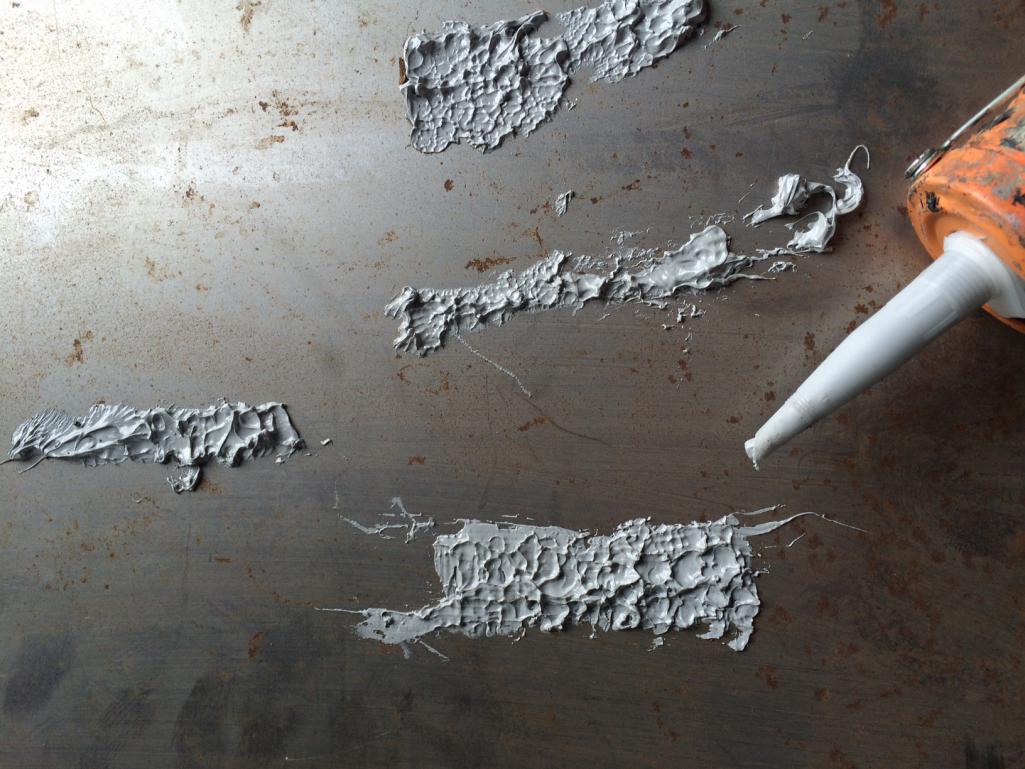
Posted by: tygaboy Mar 7 2016, 05:12 PM
Then I went after it on the car. I did my current best to try and blend/match. I think it turned out OK.
I may replace all the old stuff, just to make it all really matchy-matchy. We'll see how it all looks after I Wurth Stone Guard the bottom. I'm thinking that will soften some of the sharper peaks I got with the air hose approach.
Attached image(s)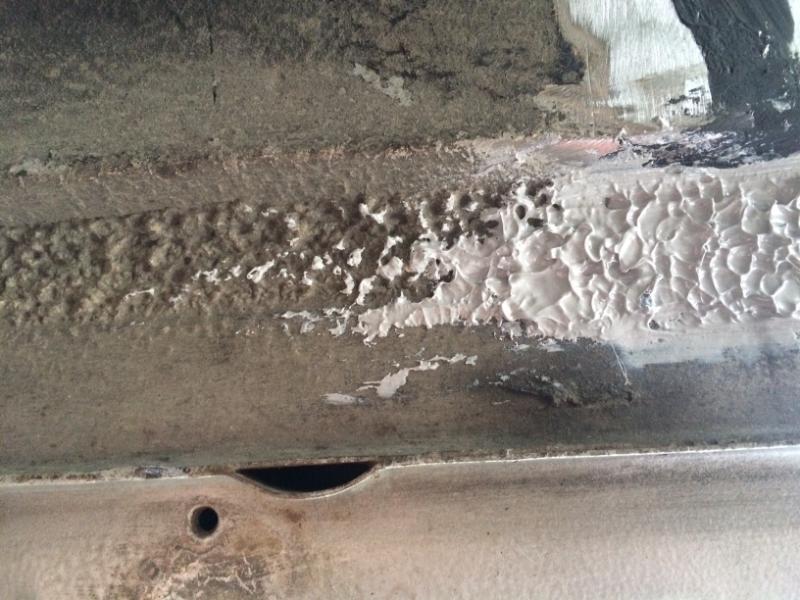
Posted by: Mikey914 Mar 9 2016, 12:21 AM
You may be able to duplicate the look of the seam sealer, but make sure the material you are using is just as durable or you will be inviting rust in. I never thought the seam sealer was that tough until we did the media blasting in the trunk. We would actually have to apply a lot of media to get it off. In the end we left in the areas that we didn't have to remove, but I plan to use the Wurth product even though it's expensive as I know it will not have an issue later.
Posted by: tygaboy Mar 12 2016, 03:58 PM
You may be able to duplicate the look of the seam sealer, but make sure the material you are using is just as durable or you will be inviting rust in. I never thought the seam sealer was that tough until we did the media blasting in the trunk. We would actually have to apply a lot of media to get it off. In the end we left in the areas that we didn't have to remove, but I plan to use the Wurth product even though it's expensive as I know it will not have an issue later.
Thanks for the reminder. Yes, this is a 3M product, urethane, recommended by a local high end auto paint supply place.
Posted by: tygaboy Mar 12 2016, 04:03 PM
Let's finish up the floor, shall we? Found time to wrap up the tunnel repair. I'm happy with the fact that I was able to get the piece to fit exactly as it did before I did the cutting and welding. It was tough to do the repair and get the patch tacked on both ends while ensuring I didn't build a twist into the part of the tunnel I'd removed. Hard to explain but no worries as it all lined right up.
Attached image(s)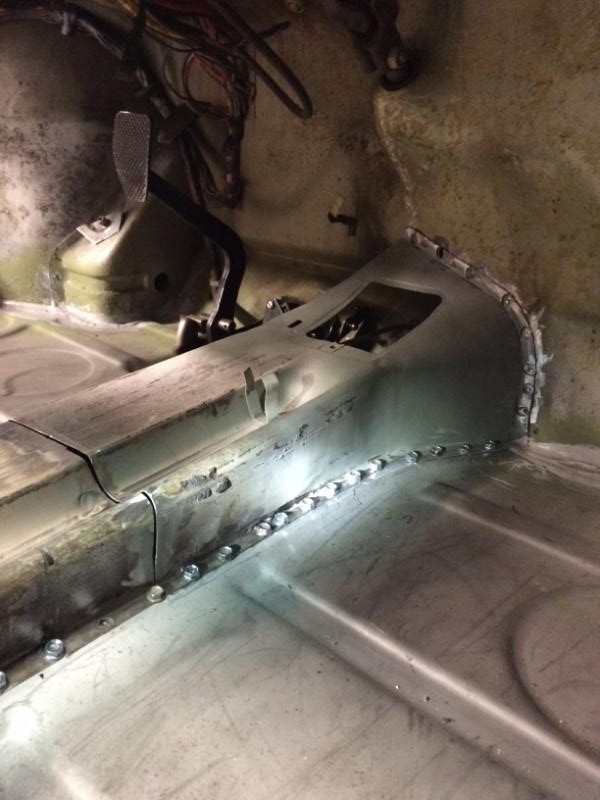
Posted by: tygaboy Mar 12 2016, 04:05 PM
and I have a repaired tunnel! As Edd from Wheeler Dealers would say, "Result!"
Attached image(s)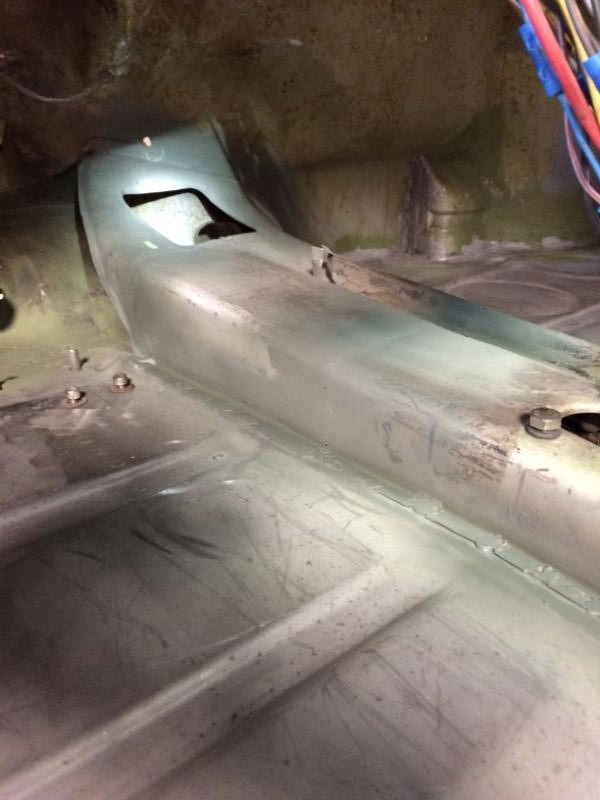
Posted by: iwanta914-6 Aug 11 2016, 01:18 PM
I see she's up for sale at a very reasonable price. Good luck!
http://sfbay.craigslist.org/nby/cto/5727406271.html
Posted by: tygaboy Aug 15 2016, 06:41 PM
And....... she's sold! Kind of a sad day but I need the space.
I'm about to start posting the build of the car that replaced this one as the base for the LS/Boxster set up. Lots to come.
Posted by: Reverend Troublemaker Aug 15 2016, 07:15 PM
and congrats to you Sir! Looking forward to seeing the PDK in there!!! 
T
Powered by Invision Power Board (http://www.invisionboard.com)
© Invision Power Services (http://www.invisionpower.com)