Printable Version of Topic
Click here to view this topic in its original format
914World.com _ 914World Garage _ 914-6 conversion/ rusturation GT style
Posted by: mb911 Nov 18 2015, 07:11 AM
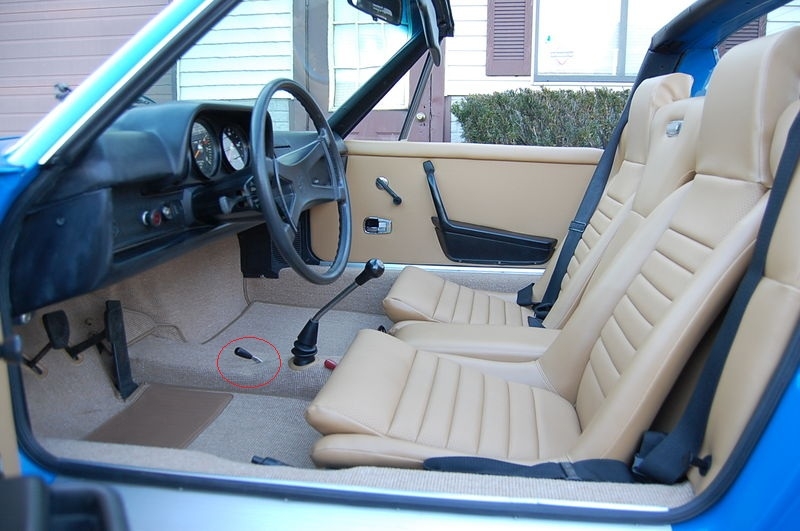
Just a quick introduction. I am picking up a 74 1.8 this weekend to do a 6 conversion on. I built one about 15 years ago but then sold it and had a 964 and a 911 turbo in its absence. I have since sold everything and have not had a porsche in about 3 years.
Technology has changed since my absence and was looking for a quick list of must do's when doing a conversion..
Thanks
Posted by: Cairo94507 Nov 18 2015, 07:17 AM
Welcome back to the madness and 
There is a ton of information on this club site regarding conversions. Spend some time and all will be revealed. But, first and most importantly, we need to see pictures of the car and the usual rust spots. Welcome aboard.
Posted by: mepstein Nov 18 2015, 07:20 AM
lots of great conversion threads
lots of gread vendors and members
this site rocks!
Have fun!
Posted by: mb911 Nov 18 2015, 08:16 AM

lots of great conversion threads
lots of gread vendors and members
this site rocks!
Have fun!
I actually am buying the car from a current member and will post pictures when I get it back..
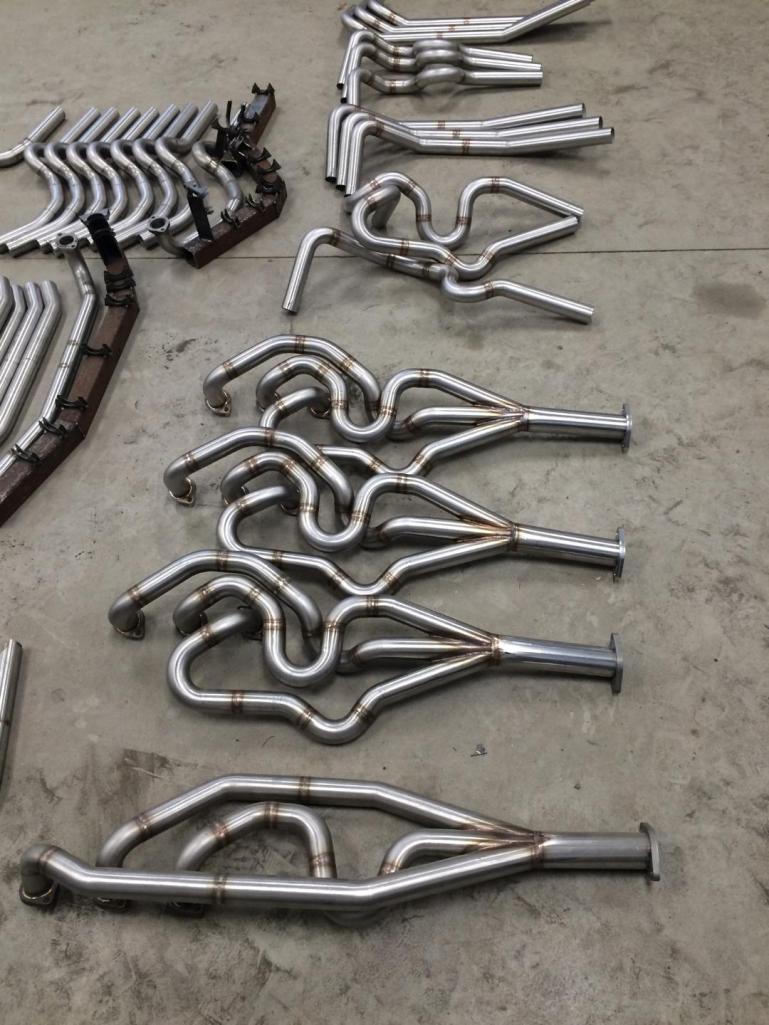
Just a little more information about myself. When I did my conversion I had CNC'd a bunch of intermediate plates and also made a bunch of engine mounts along with rear sway bar mounts.. I then built 914-6 headers for my car and then a muffler and all the sudden mkexhaust.com was born. I sold M&K about 3 years ago after growing the business to a point that it was time to sell. I plan to make some more parts for the 914 market but to a much lower level then M&K was.
I am really looking forward to this experience again. My first project will be 5 bolt conversion then I will be hand making steel flares off of paterns I have. Then on to oil tanks and engine mounts and possible engine sheet metal.
Posted by: Cracker Nov 18 2015, 08:22 AM
...and you're asking everyone here for advice? Is your real name "Dr. 914"? LOL
Welcome back.
Tony
Posted by: mb911 Nov 18 2015, 08:39 AM
...and you're asking everyone here for advice? Is your real name "Dr. 914"? LOL
Welcome back.
Tony
Ha ha no not hardly.. I have just been away from 914's so long I need to relearn them. The reason why I chose this car is because of all the Porsches I have owned my 6 was the most fun car I had. The turbo was wicked fast but was dangerous at the same time to a point I said enough.. The 914 is just a much more forgiving car and its the only car that should be a "targa"
Posted by: mepstein Nov 18 2015, 09:36 AM
Is this Ben?
Posted by: Mueller Nov 18 2015, 09:53 AM
Just a quick introduction. I am picking up a 74 1.8 this weekend to do a 6 conversion on. I built one about 15 years ago but then sold it and had a 964 and a 911 turbo in its absence. I have since sold everything and have not had a porsche in about 3 years.
Technology has changed since my absence and was looking for a quick list of must do's when doing a conversion..
Thanks
huh?
Only thing that has changed is fuel management and you had the some of the newer stuff in the 964 and possibly the turbo depending on the year.
The cost has gone up a lot, other than that nothing else is really different.
Posted by: mb911 Nov 18 2015, 10:21 AM
Is this Ben?
Yup
Posted by: mepstein Nov 18 2015, 10:30 AM
Is this Ben?
Yup
Awesome!
Posted by: porschetub Nov 18 2015, 11:32 AM
Welcome back to the madness and
There is a ton of information on this club site regarding conversions. Spend some time and all will be revealed. But, first and most importantly, we need to see pictures of the car and the usual rust spots. Welcome aboard.
Good points,yea there is a lot info on a lot of sites but there is also lots of incorrect info out there ,my experience is the best info is on here and Pelican.
These conversions IMO have gone from being straight forward to more difficult in recent years due to original parts supply and cost,if you are doing a less than original conversion the aftermart stuff is easy enough to source but due to the limited market the parts really aren't cheap.
Judging by the amount of Subaru and V8 conversions being done many are finding -6 conversion is just too expensive,prices for good running donor motors for example have risen steeply in recent times so we are seeing more later 3.2 and 3.6 engines being used.
Buying a core motor and overhauling it can better option as you know what you have from the start.
If you have the $$ up front there are converted cars for sale for way less than the cost of doing a build,some I have recently seen can be real bargains considering the outlay of time and money by the sellers.
It is really hard to put an accurate cost on conversions unless you have a really clean car as a starting point,I feel I'am very lucky in that respect.
Posted by: RobW Nov 18 2015, 11:58 AM
If I were starting another /6 conversion, I'd map out the whole thing on paper so I'm happy with the results.
Enjoy!
Posted by: whitetwinturbo Nov 18 2015, 12:21 PM

Posted by: Dave_Darling Nov 18 2015, 02:11 PM
The basics really haven't changed. The availability of some parts has, but several vendors have stepped up and are making parts. Check 914rubber, for example.
The engines still mostly bolt up to the transmissions, though some particular flywheel/clutch combinations may need to be used. (For instance, a 3.0 or later motor needs a special "conversion flywheel" to mate with the 914's 901-based gearbox. Kennedy sells those.) Going with a 915-based box means you work out the mounting, shifting, and clutch linkage issues yourself, or pay someone like Wevo a bunch of money for a setup that's pretty well sorted.
Welcome back to the 914 fold. The li'l buggers really are hard to walk away from, aren't they?
--DD
Posted by: PanelBilly Nov 18 2015, 02:18 PM
Burlington WA?
Posted by: KevinGieg Nov 18 2015, 02:55 PM
Hey welcome and let us know when you fab
Those 914 six oil tanks. 
Posted by: 11tenths Nov 18 2015, 03:31 PM
Holy Crap! One of the most revered 'blasts from the past' in the 911 world (MK Exhaust) takes a sabbatical and lands back in our 'World!
That has to be one of the most ringing endorsements for our little cars yet!
Welcome aboard Ben!
Cheers- Harry
Posted by: JmuRiz Nov 18 2015, 03:51 PM
...I then built 914-6 headers for my car and then a muffler and all the sudden mkexhaust.com was born. I sold M&K about 3 years ago after growing the business to a point that it was time to sell. I plan to make some more parts for the 914 market but to a much lower level then M&K was.
I am really looking forward to this experience again. My first project will be 5 bolt conversion then I will be hand making steel flares off of patterns I have. Then on to oil tanks and engine mounts and possible engine sheet metal.
Now we're talking!!!
BTW I have an old M&K to put on my 914/6 conversion...to whom should I send it if I want to modify it? Looking to do the rally-style 3rd pipe, in the stock location, put on my 2-pipe sport style.
Posted by: Mueller Nov 18 2015, 04:24 PM
lots of great conversion threads
lots of gread vendors and members
this site rocks!
Have fun!
I actually am buying the car from a current member and will post pictures when I get it back..
Just a little more information about myself. When I did my conversion I had CNC'd a bunch of intermediate plates and also made a bunch of engine mounts along with rear sway bar mounts.. I then built 914-6 headers for my car and then a muffler and all the sudden mkexhaust.com was born. I sold M&K about 3 years ago after growing the business to a point that it was time to sell. I plan to make some more parts for the 914 market but to a much lower level then M&K was.
I am really looking forward to this experience again. My first project will be 5 bolt conversion then I will be hand making steel flares off of paterns I have. Then on to oil tanks and engine mounts and possible engine sheet metal.
Now kinda feel like an a-hole with my response

Looking foward to seeing your build....especially the flares.
Posted by: mb911 Nov 18 2015, 04:36 PM
...I then built 914-6 headers for my car and then a muffler and all the sudden mkexhaust.com was born. I sold M&K about 3 years ago after growing the business to a point that it was time to sell. I plan to make some more parts for the 914 market but to a much lower level then M&K was.
I am really looking forward to this experience again. My first project will be 5 bolt conversion then I will be hand making steel flares off of patterns I have. Then on to oil tanks and engine mounts and possible engine sheet metal.
Now we're talking!!!
BTW I have an old M&K to put on my 914/6 conversion...to whom should I send it if I want to modify it? Looking to do the rally-style 3rd pipe, in the stock location, put on my 2-pipe sport style.
I can do the mods. The new owner still has me do all of his mods anyhow for the m&k stuff anyhow..
Posted by: mb911 Nov 18 2015, 04:37 PM
lots of great conversion threads
lots of gread vendors and members
this site rocks!
Have fun!
I actually am buying the car from a current member and will post pictures when I get it back..
Just a little more information about myself. When I did my conversion I had CNC'd a bunch of intermediate plates and also made a bunch of engine mounts along with rear sway bar mounts.. I then built 914-6 headers for my car and then a muffler and all the sudden mkexhaust.com was born. I sold M&K about 3 years ago after growing the business to a point that it was time to sell. I plan to make some more parts for the 914 market but to a much lower level then M&K was.
I am really looking forward to this experience again. My first project will be 5 bolt conversion then I will be hand making steel flares off of paterns I have. Then on to oil tanks and engine mounts and possible engine sheet metal.
Now kinda feel like an a-hole with my response
Looking foward to seeing your build....especially the flares.
No worries
Posted by: mb911 Nov 18 2015, 04:38 PM
Hey welcome and let us know when you fab
Those 914 six oil tanks.
I need to find a sample and then improve on it..
Posted by: mtndawg Nov 18 2015, 05:10 PM
Former 911/914 person here...I too am considering a conversion of my newest '75 for the future so I'm subscribed to what you're doing.
Posted by: mb911 Nov 18 2015, 06:54 PM
Former 911/914 person here...I too am considering a conversion of my newest '75 for the future so I'm subscribed to what you're doing.
Should be fun.. I can't wait to get it home.. I am going to start posting pictures asap..
Posted by: raynekat Nov 18 2015, 06:54 PM
In the midst of doing one (-6 conversion) on my 1971. I'll be doing it half factory/half aftermarket. Factory oil tank/filler neck/lines. Aftermarket engine mount and sheet metal. Will have a 2.4 E/S MFI engine installed along with upgraded 901 tranny complete with 904 mainshaft and all the Guard tranny upgrades possible.
Posted by: GeorgeRud Nov 18 2015, 10:35 PM
Still one of the nicest projects out there as the final, sorted product is about the best ride you can have. I love my 911 Carrera, but absolutely go nuts when I can take my conversion -6 out for a spin!
Posted by: mb911 Dec 2 2015, 07:00 AM
Ok so an update..
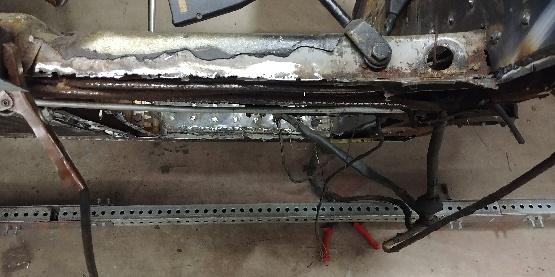
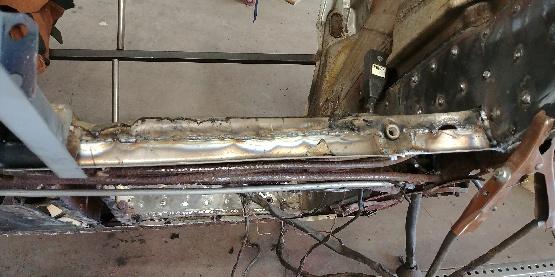
I have the car though the seller was less then truthful as the pictures sent were not of the current condition of the car  He replaced one rocker and did a poor job as he did not cut out all the old rust he then did not have the paperwork on the car and has since stopped trying to help me with that and the worst is he was a board member here)
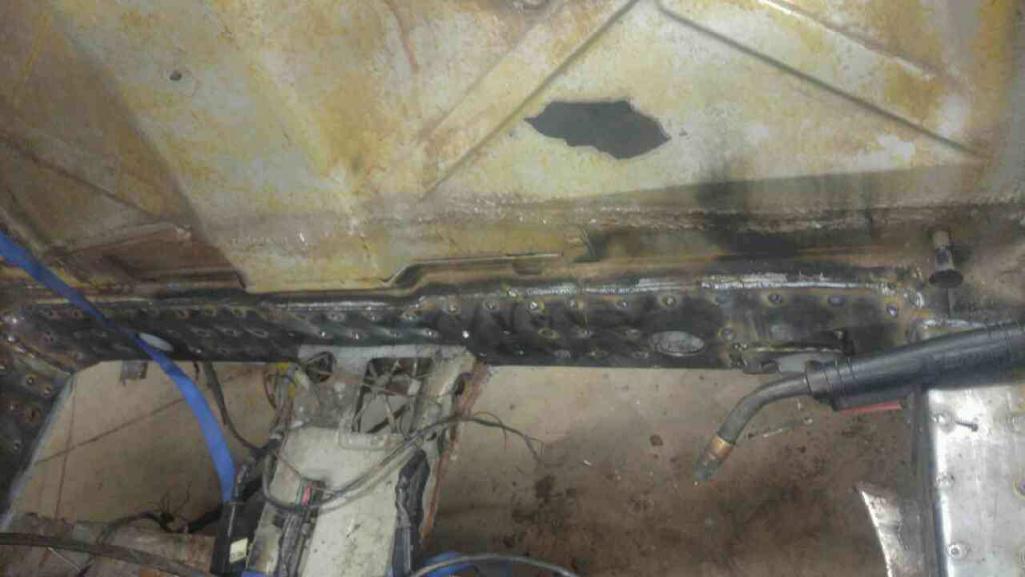
The good news is that I know my way around Porsche's pretty well and I also am a welder Fabricator /instructor at a college, and the Paperwork issue has been solved with the help of a few on this board. I also have ordered a rear floor pan , new rockers, and have fabbed up the new front trunk floor with venting for the front oil cooler.
anyhow its moving forward.. I wish I could post pictures but every thing I try and post is too big so I have to learn to resize pictures.
Posted by: Mark Henry Dec 2 2015, 08:41 AM
One thing that has changed since you did your last 914 is the flares, there is now quality reproduction steel flares being made.
They are made by AA, but I'm a hater so I personally will never buy from them.
Restoration Design is your best source for repair panels and your steel flares.
RD has changed hands since you last had a 914. It's now a top notch supplier with many parts. Also it's now based out of Canada which is no big deal.
Ordering and shipping is no BS you will have the parts in your hands within days.
http://www.restoration-design.com/store/category/914
Posted by: mb911 Dec 2 2015, 09:03 AM
One thing that has changed since you did your last 914 is the flares, there is now quality reproduction steel flares being made.
They are made by AA, but I'm a hater so I personally will never buy from them.
Restoration Design is your best source for repair panels and your steel flares.
RD has changed hands since you last had a 914. It's now a top notch supplier with many parts. Also it's now based out of Canada which is no big deal.
Ordering and shipping is no BS you will have the parts in your hands within days.
http://www.restoration-design.com/store/category/914
and the nice thing is right now their prices are cheaper the advertised. I am guessing because Steel prices are in the toilet along with fuel costs..
I am working some hand made steel flares right now on the english wheel and planishing hammer.. I will see how they turn out.. worst case is I buy them new from RD.
Posted by: Rav914 Dec 2 2015, 10:22 AM
Great mufflers Ben! I bought two for 911's I had about 10-11 years ago. Wonderful sound.
Posted by: Mark Henry Dec 2 2015, 10:45 AM
My first project will be 5 bolt conversion
http://www.914world.com/bbs2/index.php?showtopic=105728
Posted by: SirAndy Dec 2 2015, 12:37 PM
As far as /6 engines go, i'm partial to the 3.6L ...

Posted by: gms Dec 2 2015, 12:37 PM
Just a quick introduction. I am picking up a 74 1.8 this weekend to do a 6 conversion on. I built one about 15 years ago but then sold it and had a 964 and a 911 turbo in its absence. I have since sold everything and have not had a porsche in about 3 years.
Technology has changed since my absence and was looking for a quick list of must do's when doing a conversion..
Thanks
If you need to look at any -6 parts I am just 90 min away
Posted by: Chris Pincetich Dec 8 2015, 12:08 AM


Posted by: JmuRiz Dec 8 2015, 09:12 AM
As far as /6 engines go, i'm partial to the 3.6L ...
I'm sure you are...any ideas where to get a 3.6, 3.2 or 3.0 without paying an arm and a leg?
I'm beginning to wonder if my 2.7 may be a money pit if I have to do case work.
Posted by: ClayPerrine Dec 8 2015, 11:52 AM
As far as /6 engines go, i'm partial to the 3.6L ...
Problem is, they are becoming unobtanium. I am currently looking for a 3.6 964 motor for my car. When they show up, they are going for over 10K in running condition. Long blocks are going for 7 to 8K.
If anyone knows where I can find a 964 engine, let me know. I have the cash on hand, but I can't find one.
Posted by: thelogo Dec 8 2015, 09:29 PM
http://m.ebay.com/itm/Porsche-911-3-6L-Engine-Rebuilt-w-1K-Miles-993-Carrera-95-98-15K-Build-/331658958344?nav=SEARCH
This is one expensive engine
And doesn't it take like 28 quarts of oil or something
I am assuming this is the max displacement /6 one
Can upgrade to but seems awfully overkill to me
Just to stir the pot

Is the 3.6 / conversion
 performance.
 to be considered superior to
A equivalent 911
Posted by: ClayPerrine Dec 8 2015, 09:57 PM
http://m.ebay.com/itm/Porsche-911-3-6L-Engine-Rebuilt-w-1K-Miles-993-Carrera-95-98-15K-Build-/331658958344?nav=SEARCH
This is one expensive engine
And doesn't it take like 28 quarts of oil or something
I am assuming this is the max displacement /6 one
Can upgrade to but seems awfully overkill to me
Just to stir the pot
Is the 3.6 / conversion
performance. to be considered superior to
A equivalent 911
They are WAY too proud of that one. It has been on the market for a year now.
Current price range for a conversion motor is in the 10K range. I have that waiting for the right engine.
Posted by: mb911 Dec 9 2015, 04:49 PM
As far as /6 engines go, i'm partial to the 3.6L ...
Problem is, they are becoming unobtanium. I am currently looking for a 3.6 964 motor for my car. When they show up, they are going for over 10K in running condition. Long blocks are going for 7 to 8K.
If anyone knows where I can find a 964 engine, let me know. I have the cash on hand, but I can't find one.
Funny thing is I sold a 964 3 years ago had a lsd g50 and got 19 for the whole car and that was a hard sale.. It was a really nice Car.. Prices are crazy right now..
Posted by: wndsnd Dec 9 2015, 05:18 PM
As far as /6 engines go, i'm partial to the 3.6L ...
I'm sure you are...any ideas where to get a 3.6, 3.2 or 3.0 without paying an arm and a leg?
I'm beginning to wonder if my 2.7 may be a money pit if I have to do case work.
Yes. I am there now... I resisted the case work and tried just timecerting studs but in the end had to tear it down again to do it right. The casework alone was expensive. Now on heads, thats another mortgage.
Posted by: Dave_Darling Dec 9 2015, 05:29 PM
I am assuming this is the max displacement /6 one
There are 4-liter versions of this motor out there...
--DD
Posted by: ClayPerrine Dec 9 2015, 05:49 PM
I am assuming this is the max displacement /6 one
There are 4-liter versions of this motor out there...
--DD
That is what I am going to do with the one I buy... 4.0L. Got the pistons, cylinders and rods for it already.
Posted by: mb911 Dec 15 2015, 11:08 AM
here is the diamond in the rough.. Much rustier then it appeared but Not something I can't handle
Attached thumbnail(s)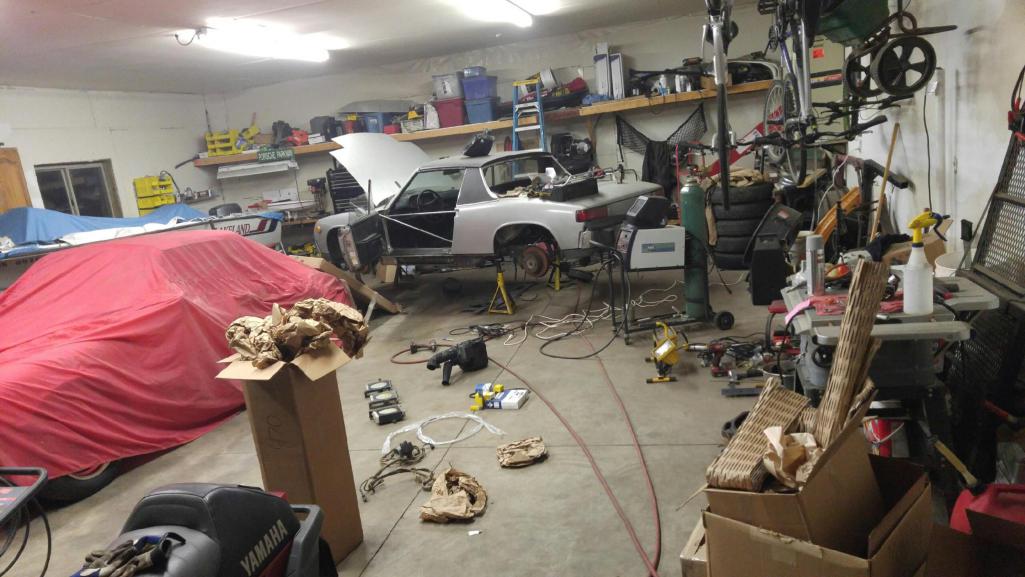
Posted by: 11tenths Dec 15 2015, 11:22 AM
Even your lawn spreader has Fuchs...
Posted by: 914_3.0 Dec 15 2015, 01:39 PM
Welcome to the madness!! I believe the 3.0 with the original 901 is actually the best combination
Here's a nice reference guide for the conversion, if you're interested. Cheers.
http://www.pelicanparts.com/914/914-6_construction_kit/914-6_construction_kit.htm
Posted by: Mueller Dec 15 2015, 02:34 PM
As far as /6 engines go, i'm partial to the 3.6L ...
Problem is, they are becoming unobtanium. I am currently looking for a 3.6 964 motor for my car. When they show up, they are going for over 10K in running condition. Long blocks are going for 7 to 8K.
If anyone knows where I can find a 964 engine, let me know. I have the cash on hand, but I can't find one.
Funny thing is I sold a 964 3 years ago had a lsd g50 and got 19 for the whole car and that was a hard sale.. It was a really nice Car.. Prices are crazy right now..
When my 964 got totaled about 4 years ago I go $18K from insurance and could have bought the car back for $5K, I'm sure I could have sold the Fikse wheels and perfect black interior for that amount
Posted by: mb911 Dec 17 2015, 02:33 PM
I am making progress. I have the outer driver side rocker on and the Jack post and reworking the inner long on driver side .. I am off of work now for the next 2 weeks so hope to get more done.. I am also finishing up my template oil tank and will fan up a working prototype next week.. I have a bunch of updates on my 914-6 oil tank fittings thread..
Posted by: mb911 Dec 27 2015, 02:32 PM
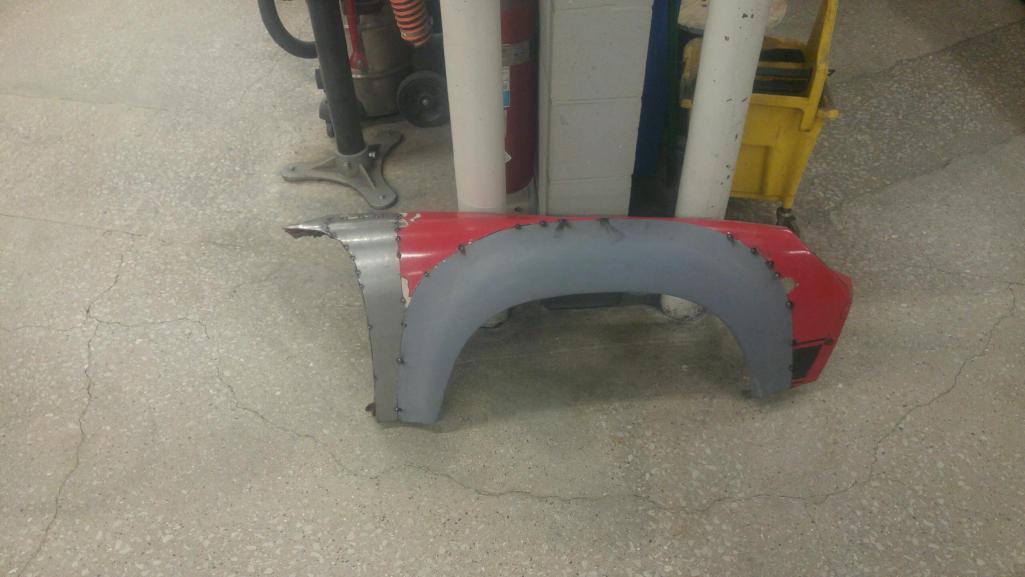
Driver side rocker is in.. The floor pan short section is removed.. The chassis stiffener is screwed in place.. Front trunk floor has been cut out and the replacement louvered floor pan has been fabricated.. I have sandblasted the engine lid, shift linkage, heater flappers, brake dust shields, all primed is aviation epoxy primer.. Was able to locate some steel flares, and a 2.4 engine that's will be picking up shortly thanks John and Rusty.. Making progress.. I will post pictures shortly.
Posted by: jmill Dec 27 2015, 03:32 PM
Awesome 
I have parts for at least 2 cars boxed up on the shelves. If you looking for minor parts let me know. Chances are I have doubles and one is yours for the taking. The 6 conversion bits are about all I'm missing.
Posted by: wndsnd Dec 28 2015, 12:10 PM
Driver side rocker is in.. The floor pan short section is removed.. The chassis stiffener is screwed in place.. Front trunk floor has been cut out and the replacement louvered floor pan has been fabricated.. I have sandblasted the engine lid, shift linkage, heater flappers, brake dust shields, all primed is aviation epoxy primer.. Was able to locate some steel flares, and a 2.4 engine that's will be picking up shortly thanks John and Rusty.. Making progress.. I will post pictures shortly.
![popcorn[1].gif](style_emoticons/default/popcorn[1].gif)
Posted by: mb911 Jan 4 2016, 03:39 PM
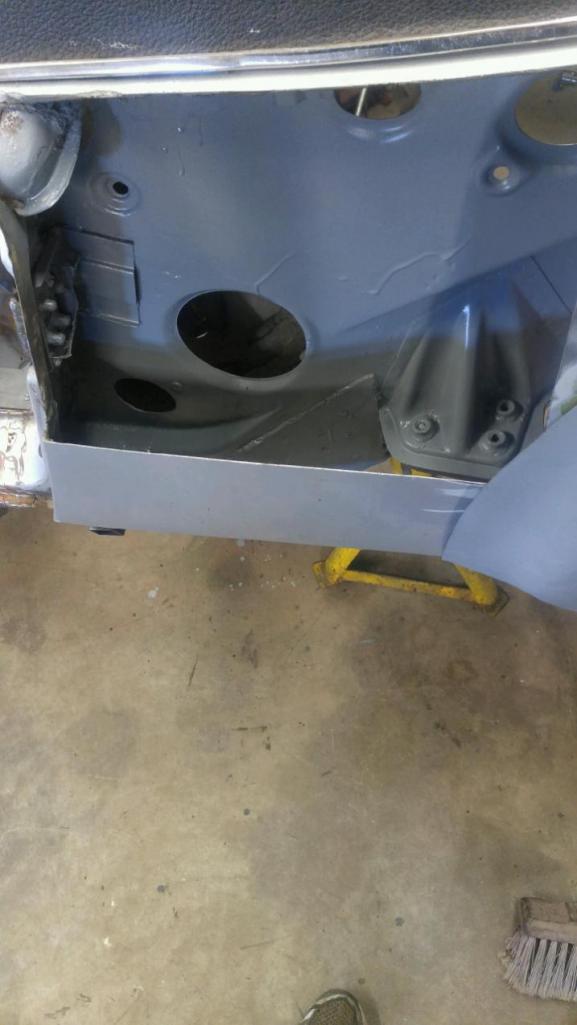
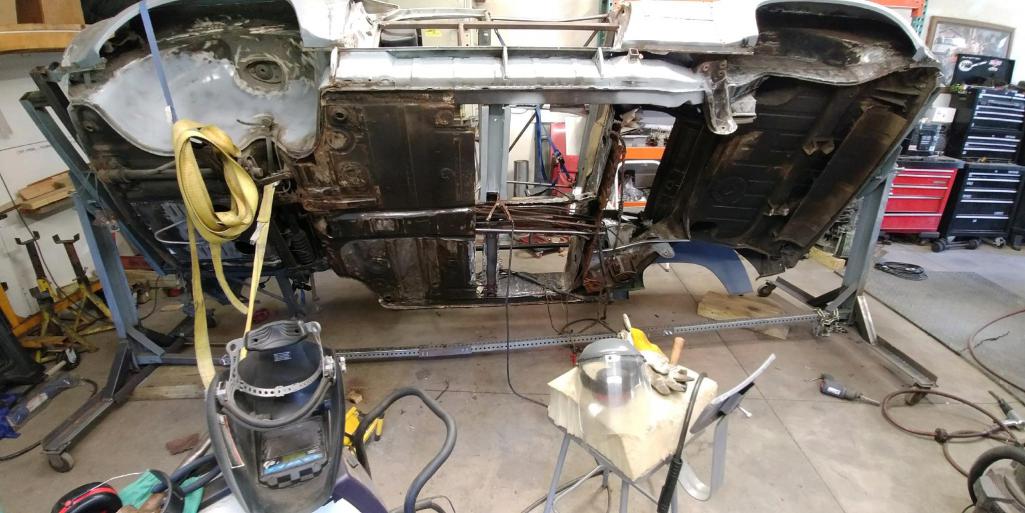
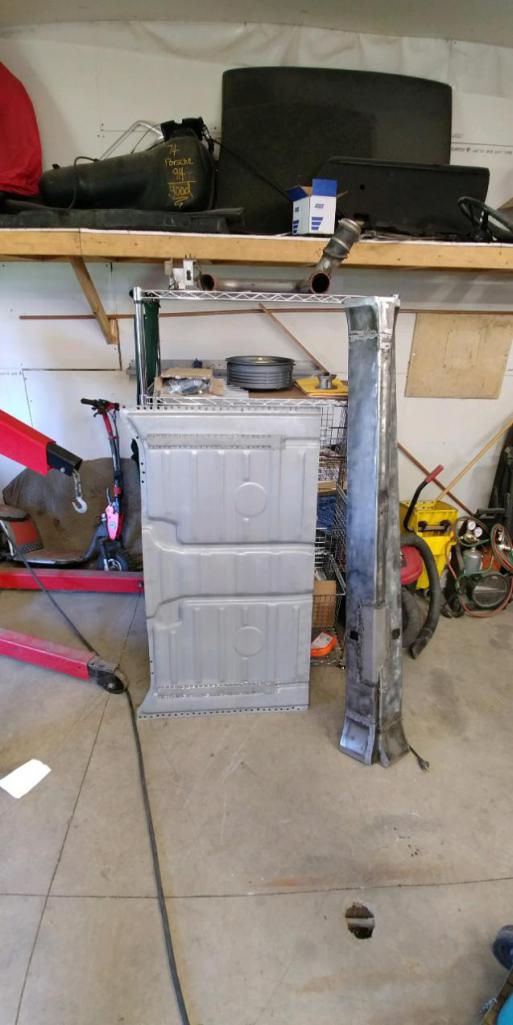
Took the driver side door off today and sandblasted it. Omg why people Bondo over stuff like that is beyond me. Looks like a bit more welding to do.. Had to return my short floor pan for the whole half.. It will be nice when it's done but wow.. It's amazing how much these cars hide.. Good thing welding is my thing.
Posted by: wndsnd Jan 4 2016, 04:43 PM
Good Thing!
Posted by: bcheney Jan 4 2016, 05:37 PM
In the midst of doing one (-6 conversion) on my 1971. I'll be doing it half factory/half aftermarket. Factory oil tank/filler neck/lines. Aftermarket engine mount and sheet metal. Will have a 2.4 E/S MFI engine installed along with upgraded 901 tranny complete with 904 mainshaft and all the Guard tranny upgrades possible.
If I were doing another 6 conversion I would opt for the aluminium oil tank that Patrick Motorsports makes vs. trying to find a Porsche tank. I put a NOS Porsche tank in my car because I picked it up very cheap with many other parts from a guy who was liquidating and needed cash. I believe you will pay less and be happier with aluminum in the long run...
Posted by: mb911 Jan 4 2016, 05:52 PM
In the midst of doing one (-6 conversion) on my 1971. I'll be doing it half factory/half aftermarket. Factory oil tank/filler neck/lines. Aftermarket engine mount and sheet metal. Will have a 2.4 E/S MFI engine installed along with upgraded 901 tranny complete with 904 mainshaft and all the Guard tranny upgrades possible.
If I were doing another 6 conversion I would opt for the aluminium oil tank that Patrick Motorsports makes vs. trying to find a Porsche tank. I put a NOS Porsche tank in my car because I picked it up very cheap with many other parts from a guy who was liquidating and needed cash. I believe you will pay less and be happier with aluminum in the long run...
I agree buy one from me lol. Check my oil fitting thread. Making a run of 10 right now
Posted by: Larmo63 Jan 4 2016, 11:25 PM
Put me in line for an oil tank….
Thank you.
Posted by: wndsnd Jan 26 2016, 07:34 PM
Did you decide on putting a drain plug on your tank offering?
Posted by: mb911 Mar 14 2016, 01:42 PM
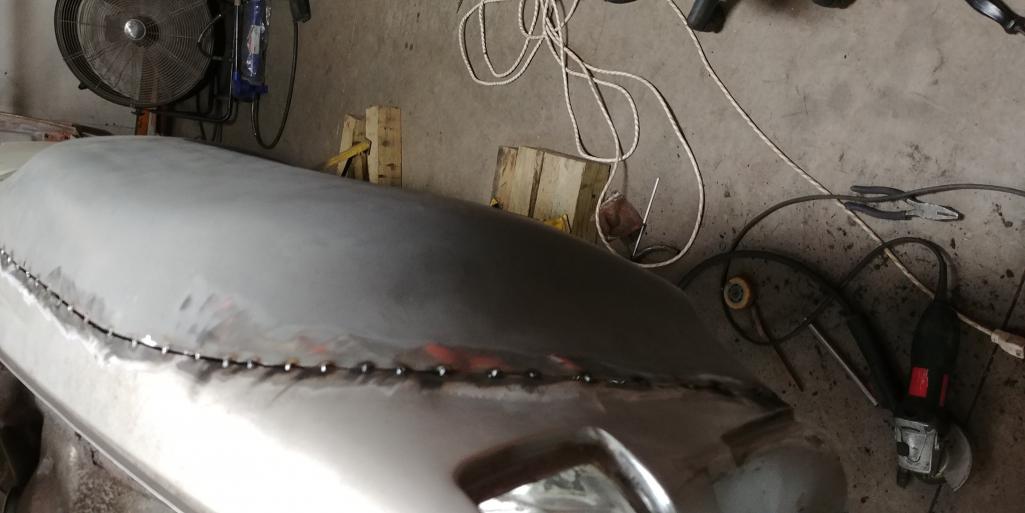
As I was waiting for the parts to cut today I found some time to Cleco on the flares and do a little welding..
Attached thumbnail(s)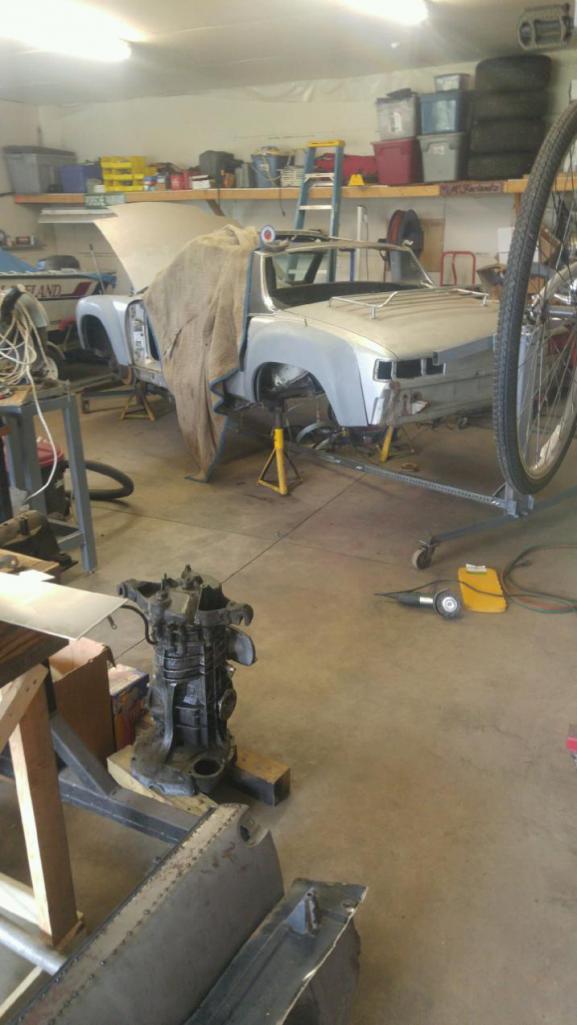
Posted by: mb911 Apr 13 2016, 09:50 AM
Well made some progress.. I have welded in some of the Gt chassis stifeners and cleaned some rust and painted with rust shield.. Its pretty waterey like por15 so got a run but that's fine I will have to sand before it gets color anyway.. I also built a stock looking six mount and a firewall reinforcement plate.. Will get some more work done on it shortly going to be off work for about a month coming up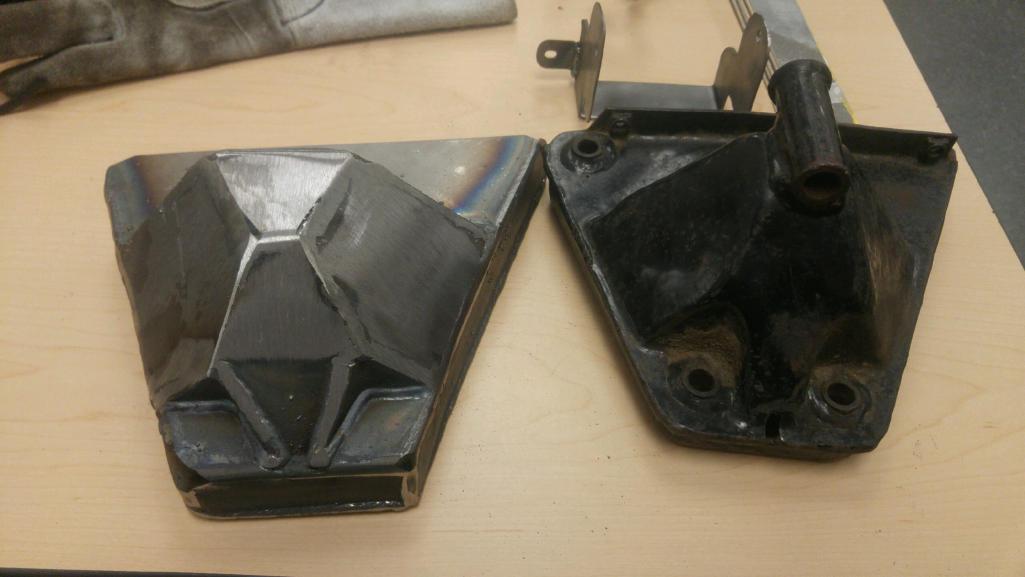
Posted by: mb911 Apr 13 2016, 09:53 AM
Gotta fab or find the cap that fits over the door jamb nut plate.. Any idea s?
Posted by: mepstein Apr 13 2016, 10:22 AM
We were installing my oil tank and lines last night. Bob Russo took a break from working on the 962 to help us run the oil lines. He said your tank was impressive. 
Posted by: mb911 Apr 13 2016, 10:35 AM
We were installing my oil tank and lines last night. Bob Russo took a break from working on the 962 to help us run the oil lines. He said your tank was impressive.
That's a great compliment.. It helps to fund the fun projects like what I am working on and am blessed to be able to provide the tanks in a cost effective manor so that the dream of a porsche powered 914-6 can be realized.. Not that there is anything with other power plants .
Posted by: whitetwinturbo Apr 13 2016, 10:42 AM
Posted by: mb911 Apr 13 2016, 11:40 AM
Here are some other pictures of few projects as I was showing some students how to fabricate.. Probably the single best tool to teach on is a rusty car.. It gets students so excited to work with their hands and make something and be proud of it..
Posted by: mb911 Jul 19 2016, 04:37 PM
Been up to some more work.
I have the rear suspension done and powdercoated, Gt lid is done. I did that a bit different then others have done but I like the way it will finish off, front struts are done, I purchased front calipers from PMB (911 sc) , chassis reinforcement is almost all welded in.. I only work on it about 45 minutes a day to keep it exciting and fun.. Made 3 engine mounts copied from an original. Going to powder coat them to keep them from rusting. Then weld areas will be ground.. Making good progress.
Posted by: 396 Jul 19 2016, 04:53 PM
Your reproduction of the factory bulkhead mount is the best I've seen. A Big Congrats to you.
Posted by: raynekat Jul 19 2016, 05:23 PM
Been up to some more work.
I have the rear suspension done and powdercoated, Gt lid is done. I did that a bit different then others have done but I like the way it will finish off, front struts are done, I purchased front calipers from PMB (911 sc) , chassis reinforcement is almost all welded in.. I only work on it about 45 minutes a day to keep it exciting and fun.. Made 3 engine mounts copied from an original. Going to powder coat them to keep them from rusting. Then weld areas will be ground.. Making good progress.
Are these mounts for sale?
Posted by: mb911 Jul 19 2016, 05:25 PM
Your reproduction of the factory bulkhead mount is the best I've seen. A Big Congrats to you.
Thanks I made 1 extra in case I need a pattern to make some for someone else.. I added some plug hole locations as well..
I need to send the original back with a reproduction for a special thanks to the lender.
Probably tackle the engine compartment next week. Too hot for rest of the week to weld and grind.
Posted by: mb911 Jul 19 2016, 05:30 PM
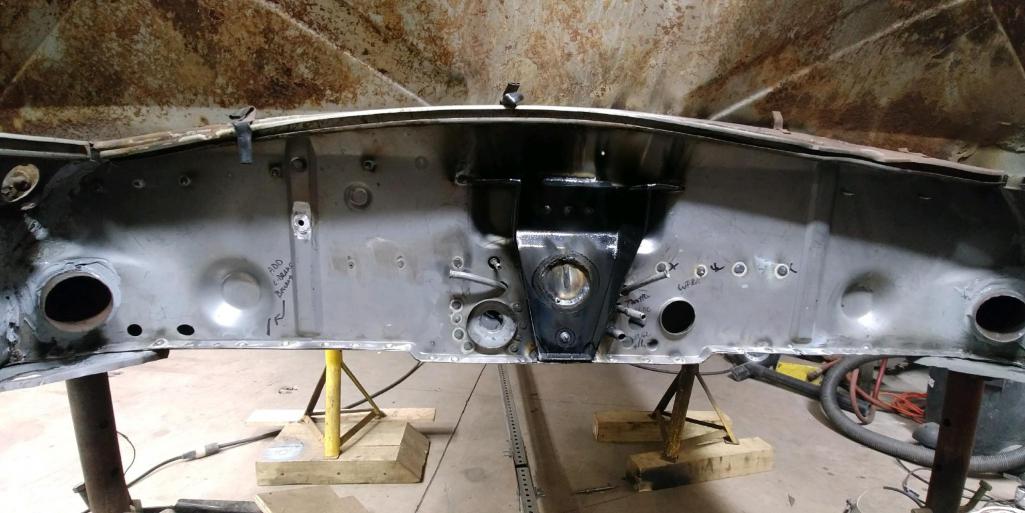
Here is the engine side before I finished and powdercoated it.
Posted by: mb911 Jul 19 2016, 05:31 PM
Been up to some more work.
I have the rear suspension done and powdercoated, Gt lid is done. I did that a bit different then others have done but I like the way it will finish off, front struts are done, I purchased front calipers from PMB (911 sc) , chassis reinforcement is almost all welded in.. I only work on it about 45 minutes a day to keep it exciting and fun.. Made 3 engine mounts copied from an original. Going to powder coat them to keep them from rusting. Then weld areas will be ground.. Making good progress.
Are these mounts for sale?
I could make you one if you wanted one.. Let me know.
Posted by: whitetwinturbo Jul 20 2016, 09:45 AM
Whoa........mad man cool 
Posted by: mb911 Jul 21 2016, 11:41 AM
Thanks I appreciate the words of encouragement.
I installed my strut inserts in the 87 carrera strut housings today so that is done. The 6 engine mounts are all powdercoated and will pick up Monday and share pictures..
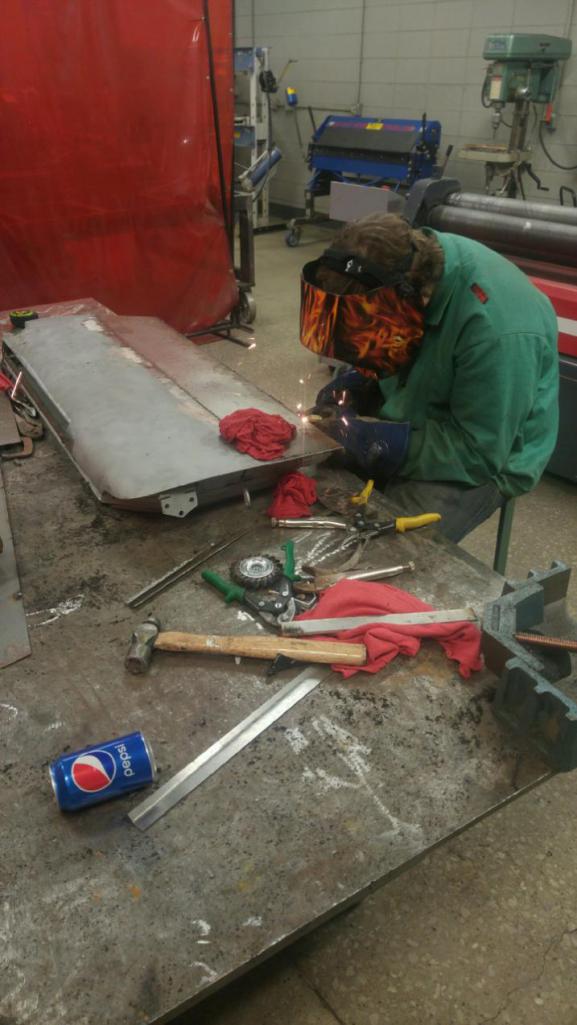
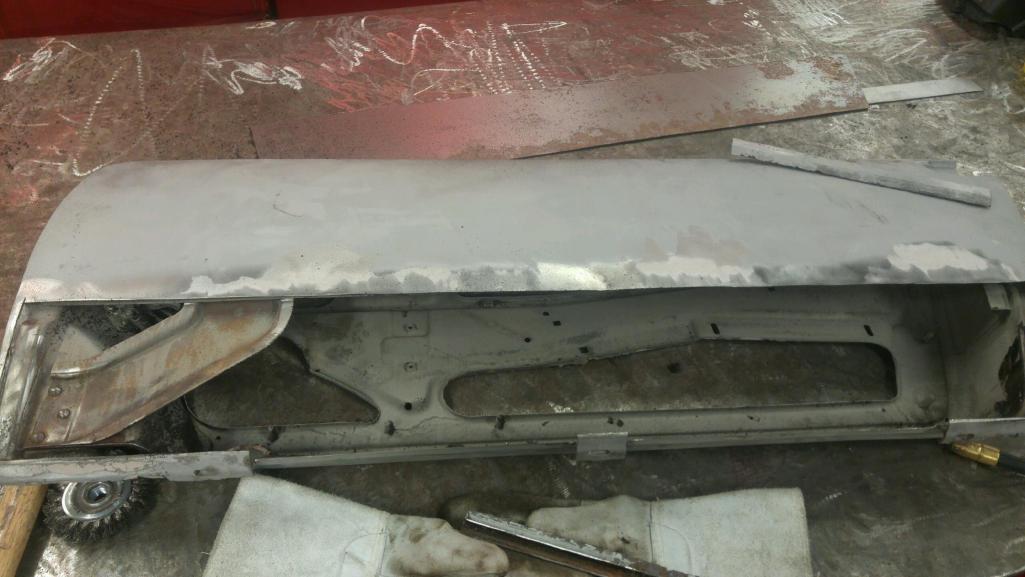
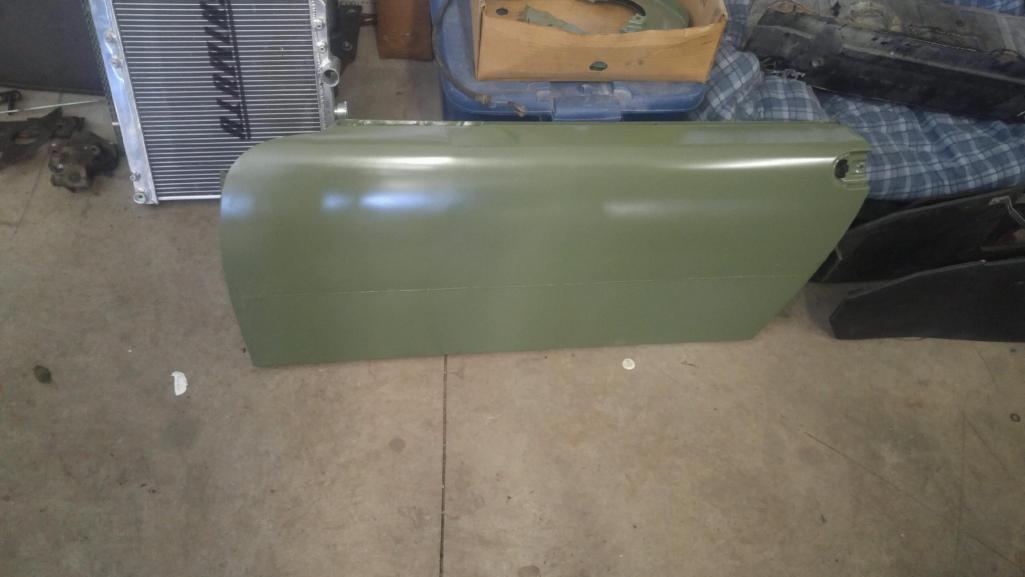
Picked up my other door I sand blasted and then I painted with epoxy primer and left at work to cure. Making good headway.
Posted by: whitetwinturbo Jul 23 2016, 08:50 PM


Posted by: mb911 Jul 25 2016, 12:45 PM
Finished the 3.. Powdercoated to prevent rusting and obviously where it will get welded will be ground 1st.
Posted by: mb911 Jul 30 2016, 12:03 PM
He'll hole done, just sprayed it with cold galvinizing to protect the bare metal. I have to check for pin holes and then decide if I am going to fab the engine shelf. I have been fabbing everything to this point but that piece looks pretty labor intense but not that I am being paid by the hour lol
Posted by: sixnotfour Jul 30 2016, 12:11 PM
Got my OG plus a nice spare returned Thanks
Posted by: mb911 Jul 30 2016, 12:20 PM
Great news and thank you for lending it to me.. Stupid me I had you original layed out on my firewall for height etc and I wirebrushed the marks off  .
.
I should be able to figure out the height.. I am have been thinking though of making about 10 mounts to sell but I don't want to step on mad dogs toes
Posted by: sixnotfour Jul 30 2016, 12:30 PM
Great news and thank you for lending it to me.. Stupid me I had you original layed out on my firewall for height etc and I wirebrushed the marks off
.I should be able to figure out the height.. I am have been thinking though of making about 10 mounts to sell but I don't want to step on mad dogs toes
toes..others make mounts , others make tanks ,others do rust repair, others build engines , others make gas lines, others make the -6 rubber mount, others make replacement sheet metal, others rebuild calipers , others build wheels .....
reality is you will be an option for others who are shopping.. weld on
Posted by: rhodyguy Jul 30 2016, 12:30 PM
The red one is VERY funny.
Posted by: mb911 Jul 30 2016, 12:46 PM
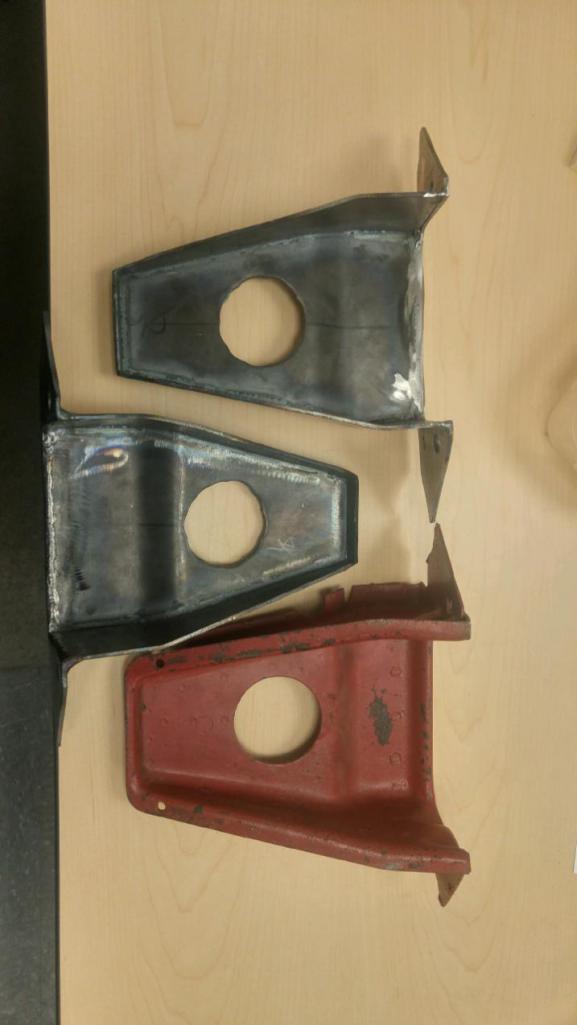
The best part is I have a fixture to convert the 911 engine side mount into a 914-6 mount so could probably do the engine side conversion and the firewall side for about 275 powdercoated and it would look darn near factory.
Posted by: sixnotfour Jul 30 2016, 12:48 PM
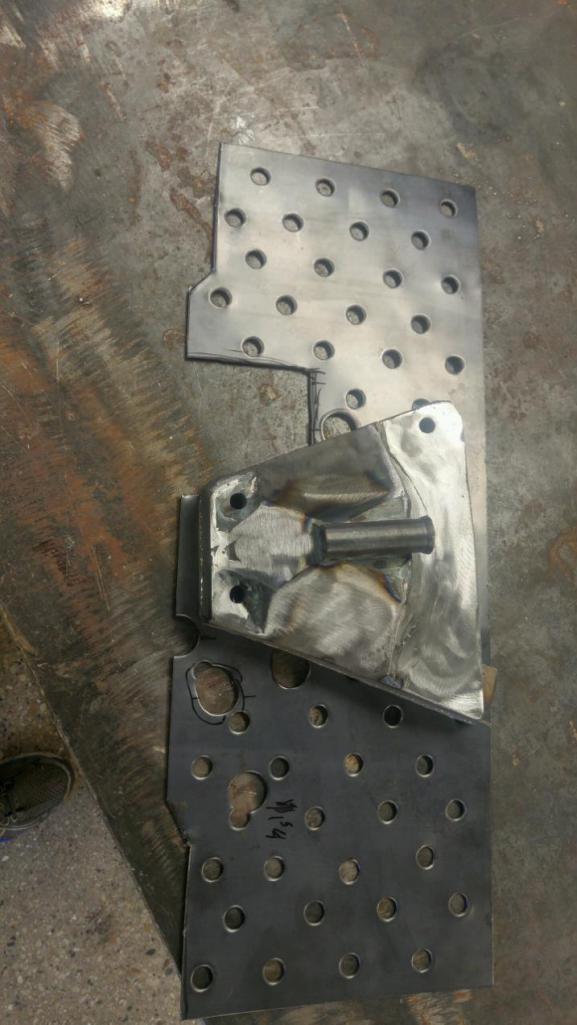
The factory piece sits on the bottom pinch weld...comparing the one you made and sent me to the OG one your need to be 1.5mm above the pinch weld..
Attached thumbnail(s)
Attached image(s)
Posted by: sixnotfour Jul 30 2016, 12:52 PM
lets just say I still have some other loaned parts to collect..
not Ben..thanks again for the spare..
Posted by: rhodyguy Jul 30 2016, 12:54 PM
I catch your meaning. And your drift.
Posted by: mb911 Jul 30 2016, 12:57 PM
lets just say I still have some other loaned parts to collect..
not Ben..thanks again for the spare..
That's to bad.. I always worry about not getting loaned parts back in a timely manner and timely is different to everyone.. I have some factory 6 heat exchangers that I will be working that are lent to me by Danny gets out this way and will be stopping by from time to time so that keeps things in check for everyone.
Posted by: 396 Jul 30 2016, 01:16 PM
Funny that the sidebar topic is getting items back on a timely basis. I bought an high end lawnmower from brother. He borrow it one day....that was 20+ years ago.
Posted by: porschetub Jul 30 2016, 05:48 PM
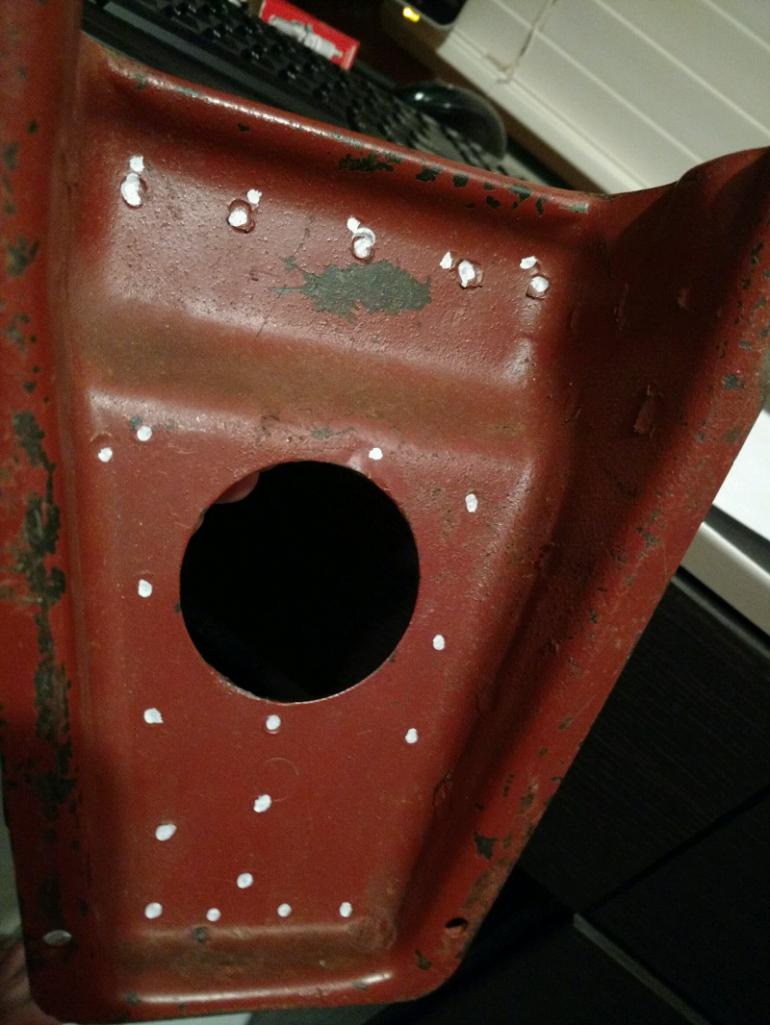
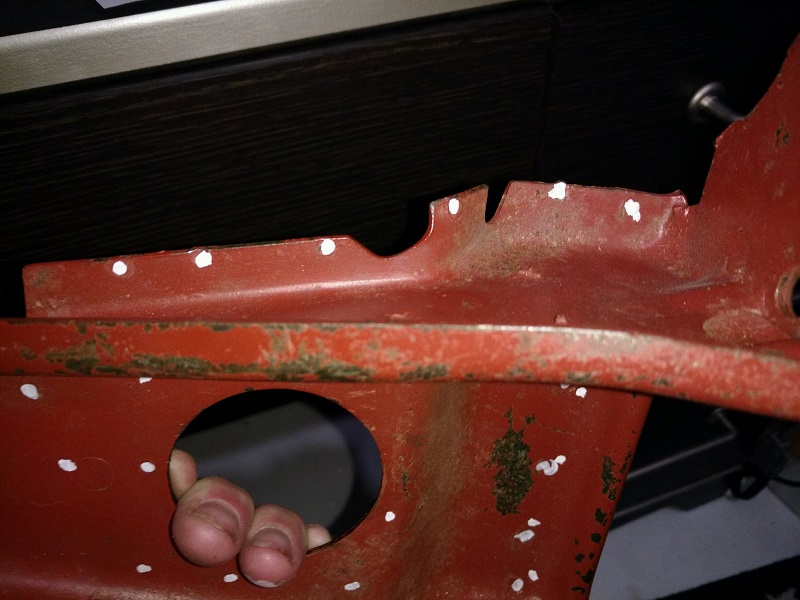
The factory piece sits on the bottom pinch weld...comparing the one you made and sent me to the OG one your need to be 1.5mm above the pinch weld..
Appears to be spot-welded directly to the body ...wonder in how many places,mines a copy just like the on shown but is plug welded and the round cutout has been welded also.
Great pic thanks.
Posted by: raynekat Jul 30 2016, 08:20 PM
Ben:
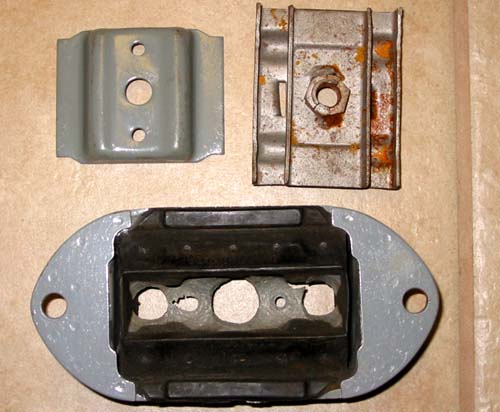
Wonder if you can fab up the upper and lower sandwich metal plates on either side of the factory 914-6 rubber mount.
I know you've made the part that bolts to the engine and the other one that welds to the car, but I'm looking for the 2 smaller pieces that above and below the rubber mount.
Aesthetics are not important to me...meaning it doesn't have to look factory, just function as needed.
Not sure where I can get an example for you to copy or a "go by." Perhaps someone on this site has a set???
Posted by: sixnotfour Jul 31 2016, 01:53 AM
approx. 40 spot welds
Attached thumbnail(s)
Attached image(s)

Posted by: sixnotfour Jul 31 2016, 02:05 AM

Attached thumbnail(s)
Posted by: sixnotfour Jul 31 2016, 02:29 AM
here is a version of the nut plate made the hard way for socalandy,,and the factory one below
Attached image(s)
Posted by: mb911 Jul 31 2016, 05:27 AM
Ben:
Wonder if you can fab up the upper and lower sandwich metal plates on either side of the factory 914-6 rubber mount.
I know you've made the part that bolts to the engine and the other one that welds to the car, but I'm looking for the 2 smaller pieces that above and below the rubber mount.
Aesthetics are not important to me...meaning it doesn't have to look factory, just function as needed.
Not sure where I can get an example for you to copy or a "go by." Perhaps someone on this site has a set???
I sure could make them again would need samples.. Looks like it could be machined out of steel plate.
Posted by: raynekat Jul 31 2016, 08:14 PM
Some saint or hero needs to loan Ben his upper and lower sandwich plates so the rest of us mere mortals can use the factory-like set up. I'll pay the shipping....just give me your PayPal.
Posted by: mb911 Aug 4 2016, 10:39 AM
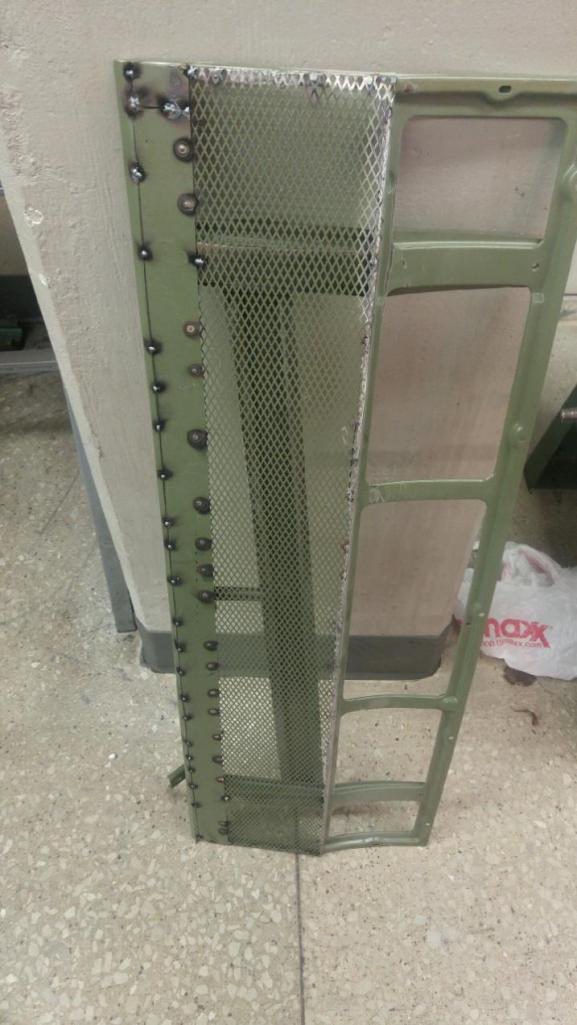
A few update pictures. I have a pile of sand blasted and aviation epoxy primed parts for the car now done. Also a student and I are working making the flares rockers out of steel. That part is hard for me as it only takes me a few minutes but the students much longer to make parts but they really learn allot about fabrication when they start building these types of things 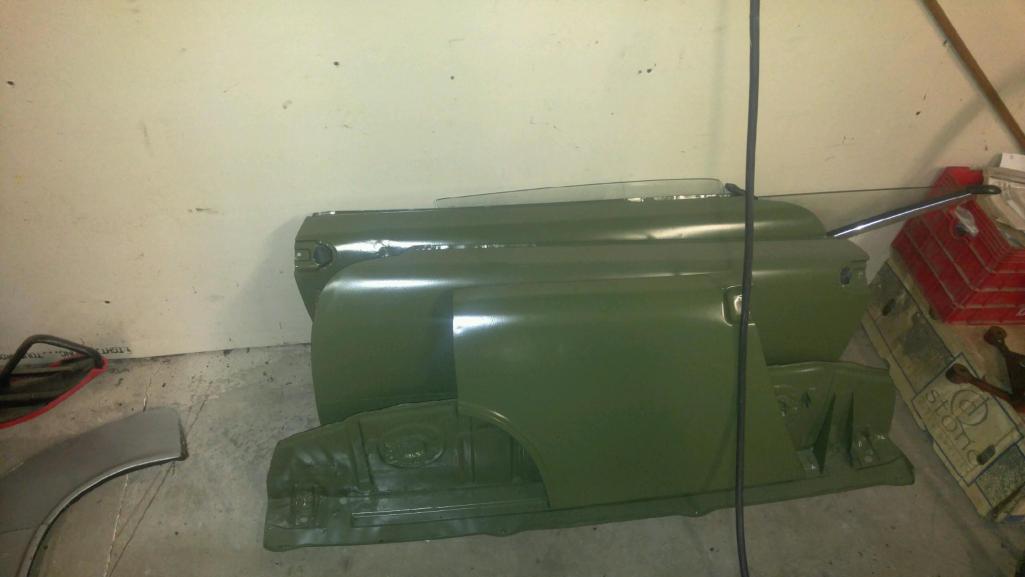
Posted by: mb911 Aug 5 2016, 04:43 PM
Closer to finished product
Posted by: mb911 Nov 3 2016, 05:47 AM
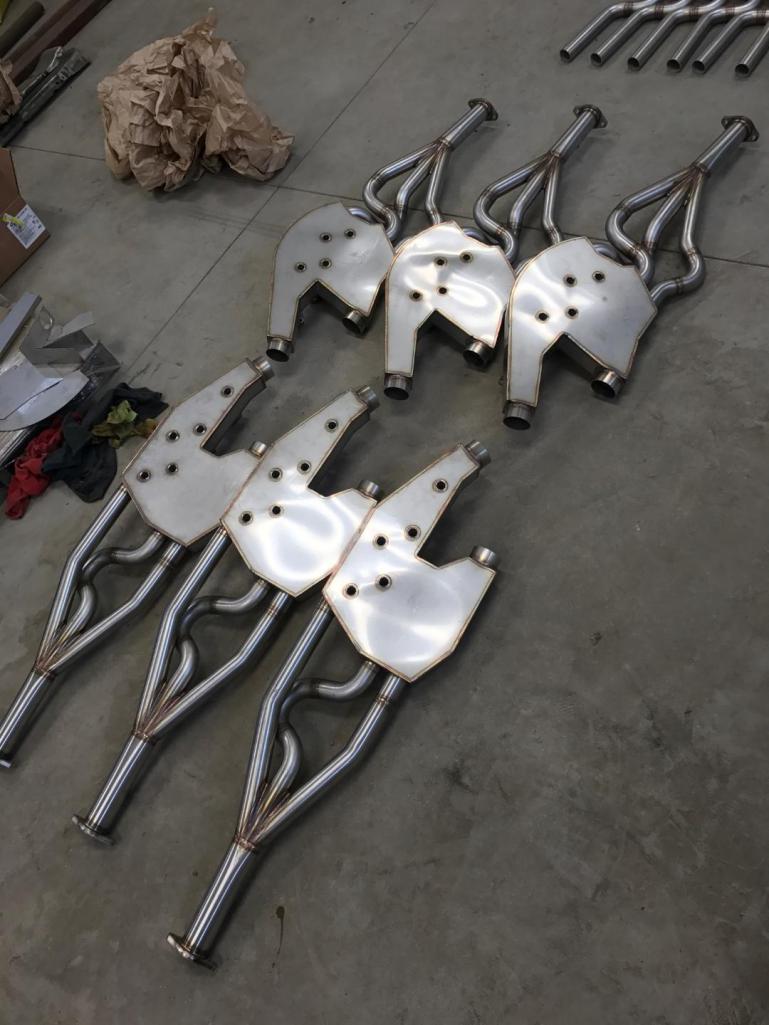
Been a while since I posted on this thread.. I make small progress as I work on oil tanks and heat exchangers..
Posted by: mbseto Nov 3 2016, 08:11 AM
Early in the thread you mentioned wheeling out some flares, then later said you located some. Did you end up making any?
Posted by: mb911 Nov 3 2016, 08:32 AM
I made one rear and then found a great deal on a set so I bought a set..much easier
Posted by: mlindner Nov 3 2016, 09:19 AM
mb911, love your headers......any chance of making 1 1/2 for 2.2L engine sizes. Best, Mark
Posted by: mb911 Nov 3 2016, 12:02 PM
mb911, love your headers......any chance of making 1 1/2 for 2.2L engine sizes. Best, Mark
Possibly but not on radar right now.
Posted by: mb911 Nov 3 2016, 01:21 PM
Did this today.
Posted by: mb911 Nov 4 2016, 04:34 AM
And some parts back from the plater.. I like doing flywheels and brake rotors..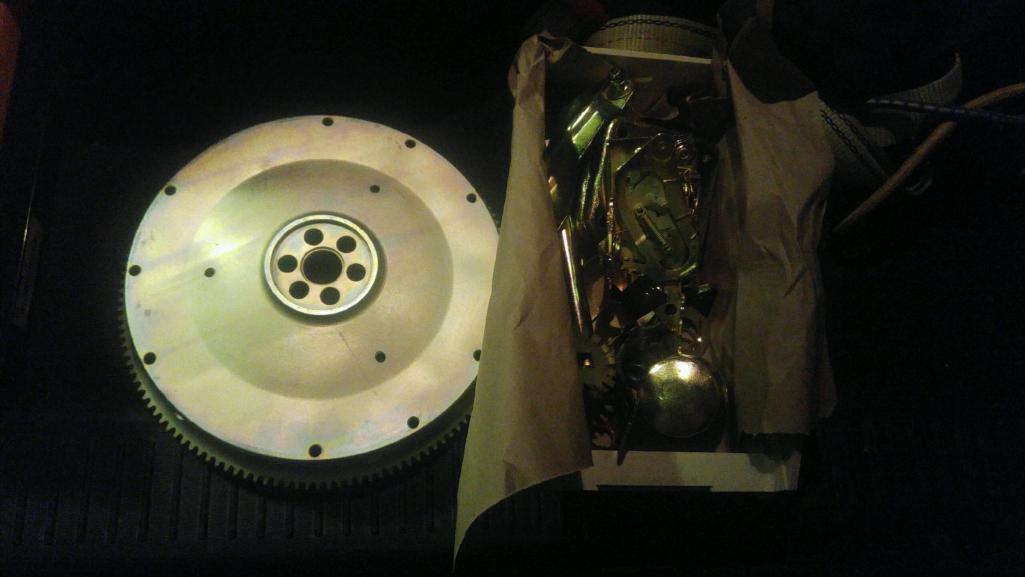
Posted by: mb911 Dec 3 2016, 02:37 PM
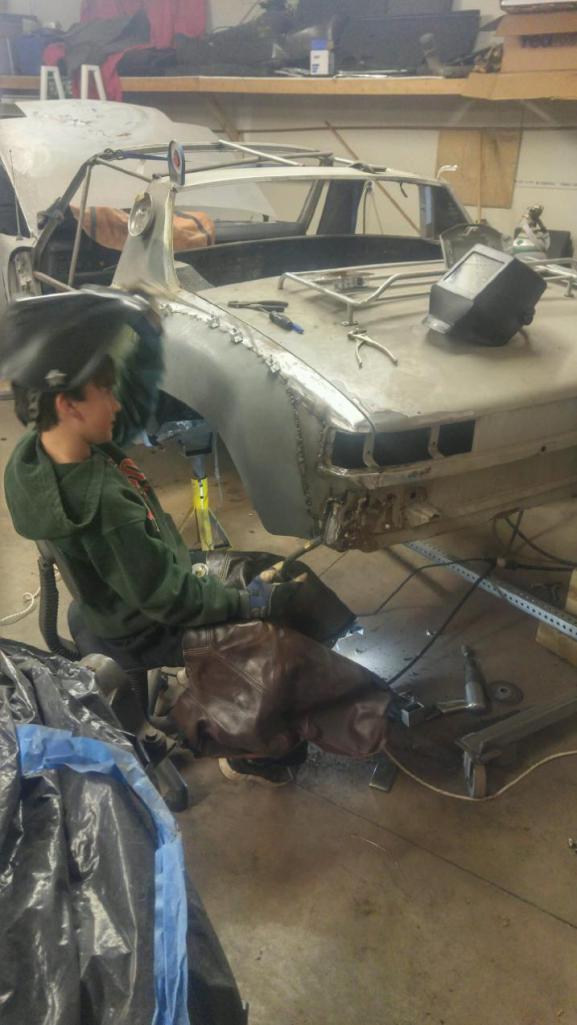
Son did some work on the car. He has never welded before but not much to screw up so perfect learning for him.
Posted by: jd74914 Dec 3 2016, 03:01 PM
That's awesome! I have some great memories welding with my dad and grandpa as a kid.
Posted by: mb911 Jan 7 2017, 02:04 PM
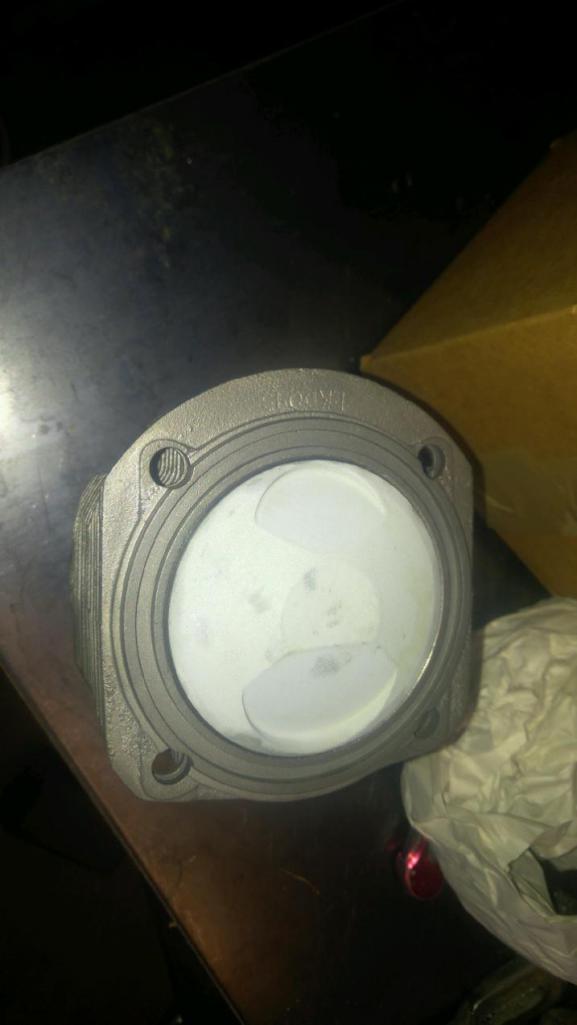
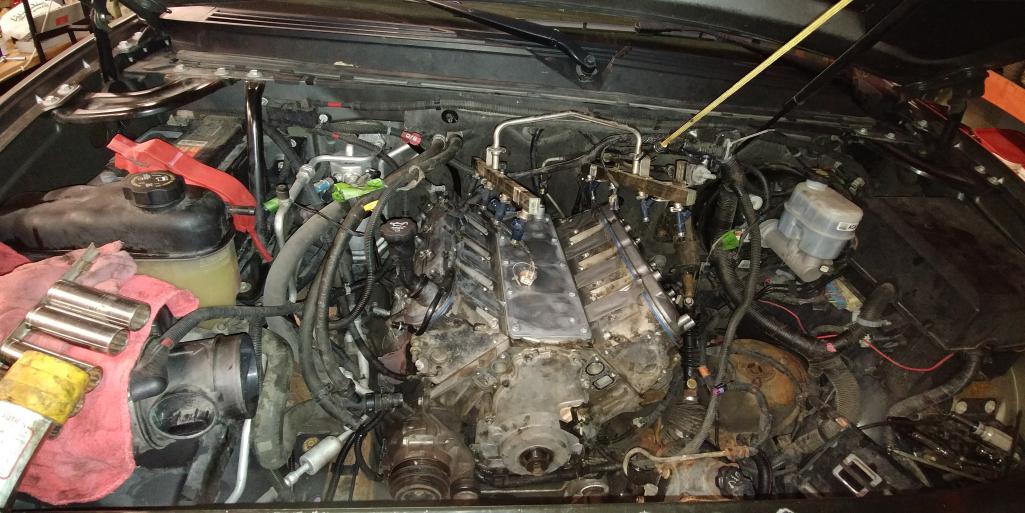
Well haven't worked on it much lately as been concentrated on shipping the 1-5/8" heat exchangers. I received some goodies though some 2.2 S pistons for my 2.4 , my heads redone and ported to 36mm ports both courtesy of Henry @supertec.
I will resume some welding this week and looks like I need to send the crank out for inspection probably case for a line hone both going to supertec.. Guess I need to make some new products to fund this. 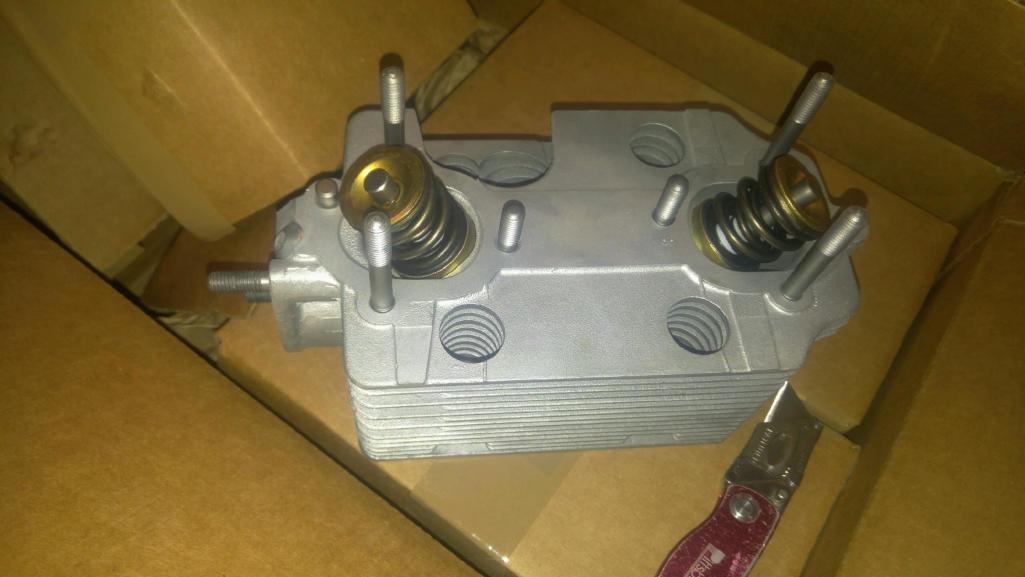
Posted by: Steve Jan 8 2017, 02:40 PM
Well haven't worked on it much lately as been concentrated on shipping the 1-5/8" heat exchangers. I received some goodies though some 2.2 S pistons for my 2.4 , my heads redone and ported to 36mm ports both courtesy of Henry @supertec.
I will resume some welding this week and looks like I need to send the crank out for inspection probably case for a line hone both going to supertec.. Guess I need to make some new products to fund this.
Lookin good!!! Can't wait to get my heat exchangers!!
Posted by: mb911 Jan 8 2017, 02:54 PM
Well haven't worked on it much lately as been concentrated on shipping the 1-5/8" heat exchangers. I received some goodies though some 2.2 S pistons for my 2.4 , my heads redone and ported to 36mm ports both courtesy of Henry @supertec.
I will resume some welding this week and looks like I need to send the crank out for inspection probably case for a line hone both going to supertec.. Guess I need to make some new products to fund this.
Lookin good!!! Can't wait to get my heat exchangers!!
Yours are 1 of the sets pictured..
Posted by: Steve Jan 8 2017, 11:28 PM

 Yea!! Can't wait!!
Posted by: JmuRiz Jan 9 2017, 09:03 AM
Son did some work on the car. He has never welded before but not much to screw up so perfect learning for him.
Well...at least he has a good instructor!
Posted by: jmill Jan 9 2017, 10:44 AM
Are those S Pistons ceramic coated? I swear, every time I look at one of your threads it costs me money. 
Posted by: mb911 Jan 9 2017, 11:31 AM
Are those S Pistons ceramic coated? I swear, every time I look at one of your threads it costs me money.
Yup.
Posted by: mb911 Apr 20 2017, 09:02 AM
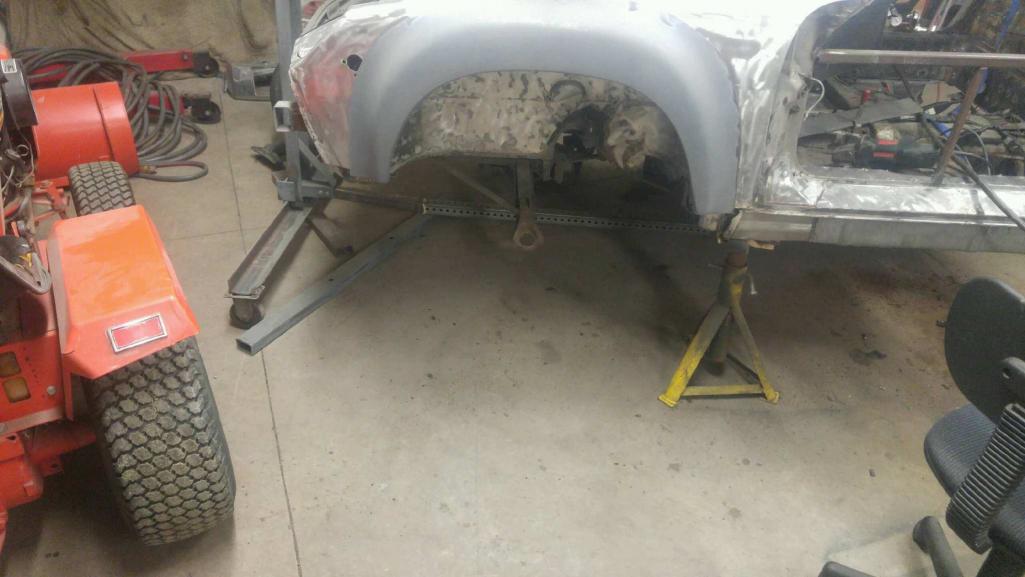
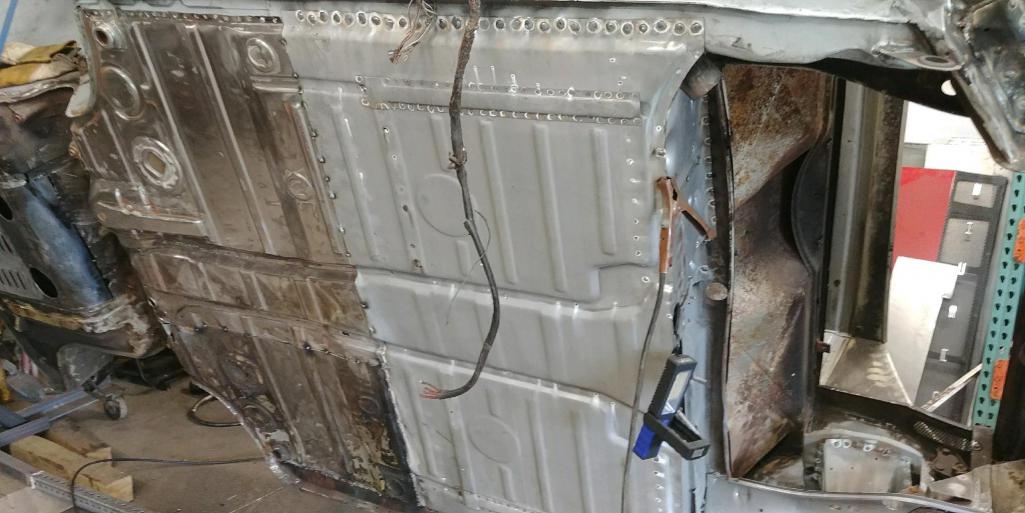
All the major structural repair has been done so now floor pans and cleaning up underside and repair some bad areas (i know there are allot of those
Finished up rear suspension etc. Plated everything.. See some progress.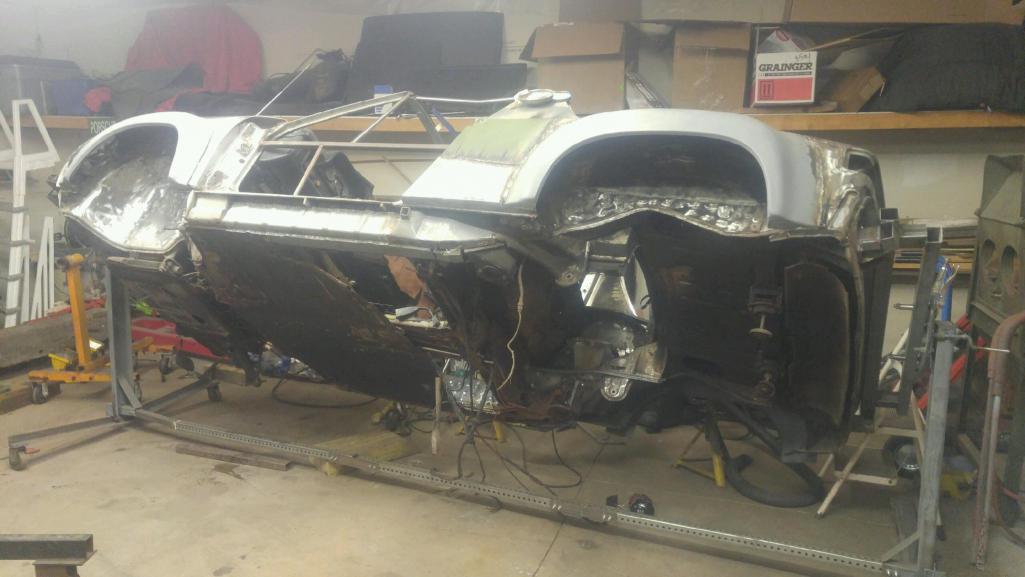
 .
.
Posted by: PanelBilly Apr 20 2017, 09:41 AM
I see holes in the floor pans. Are you going to make lower seat mounts to give you more head room?
Posted by: mb911 Apr 20 2017, 11:34 AM
I see holes in the floor pans. Are you going to make lower seat mounts to give you more head room?
No needs a rear floor pan so this is the easy way for me to get in there and weld em up.
Posted by: pete-stevers Apr 20 2017, 08:26 PM
I sure like six threads
It warms my heart! 
Posted by: mb911 Apr 23 2017, 08:27 AM
I sure like six threads
It warms my heart!
Things are coming together still slow but that is fine by me
Posted by: mb911 May 4 2017, 07:54 AM
So made some progress this week. I welded a bit more small repair areas. Waiting on a firewall and floor pan section and then I will finish the underside this summer for sure.
The case came in yesterday from all the machining. Looks great now lots of cleaning.
Posted by: mepstein May 4 2017, 01:44 PM
Tomorrow I'm sending you that long promised sideshift transmission.
Tried to clean the undercoating off and the steam pressure washer gave out after a couple minutes.
Posted by: Justinp71 May 4 2017, 01:53 PM
I sure like six threads
It warms my heart!
Totally Agree
Posted by: mb911 May 5 2017, 05:49 AM
Thanks everyone.
The trans I currently have is a core at best as the ears were broken off at some point and the gear lube is black as black can be so Mark you are helping me out big..
Yesterday I removed one of the 4cyl engine mount on driver side. Fixed some more rusty areas.. I am plugging away.
Talked to Henry on more parts for my engine. Going to have about 6k in parts but the engine will basically be new. The crank and bearings are the most expensive part and would make all of you sick. Good thing no timeline on this.
Posted by: mb911 May 5 2017, 11:51 AM
Spent a little time today blending the inner long I fabricated on the driver side. Turning out nice. I will post pictures soon..
Posted by: mb911 May 11 2017, 01:53 PM
Here are some pictures and updates.. Everyday been making a little progress. Go out at 5am work until 5:45 then leave for work so it is slow going.
The case was at supertec. The fan assembly I restored myself.. Almost done on driverside rust repair. Passenger side next week then waiting on firewall and a driverside patch panel from a member that is down for the count with a shoulder injury for a bit. 
 [attachmentid=604
095]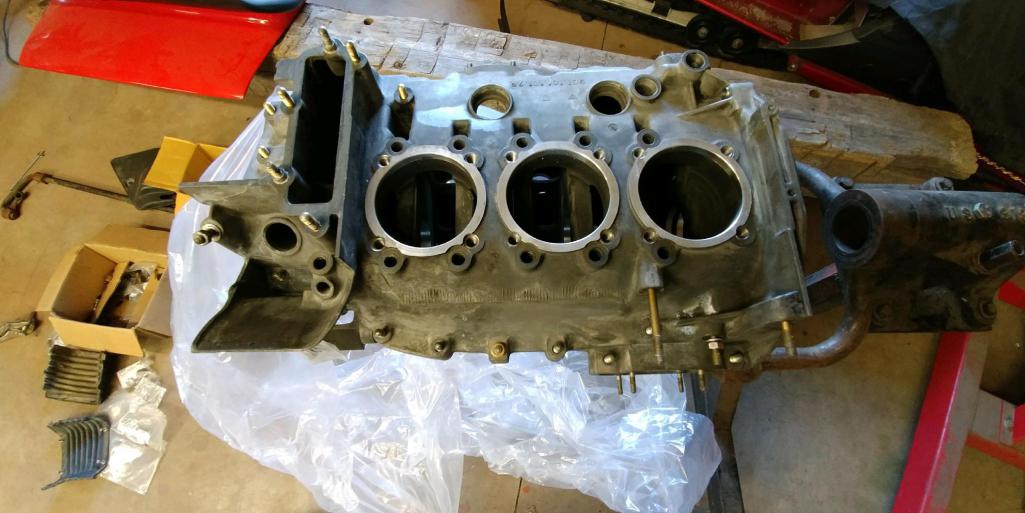
Attached thumbnail(s)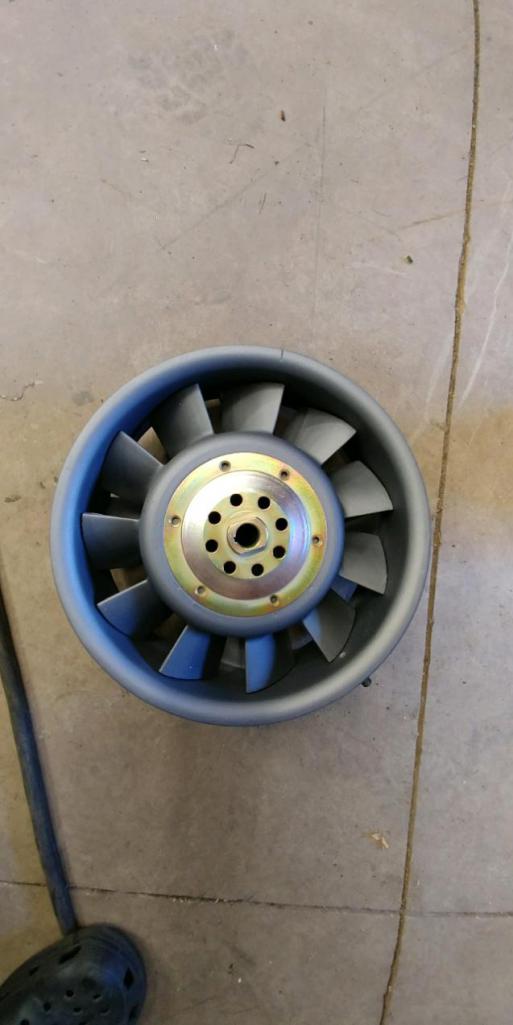
Posted by: mb911 May 16 2017, 09:19 AM
So made some progress as the bottom flange lip on the tunnel was rusted . I need to just grind and blend it now along with punching a hole in it for wire pass through. Lots of grinding in my future
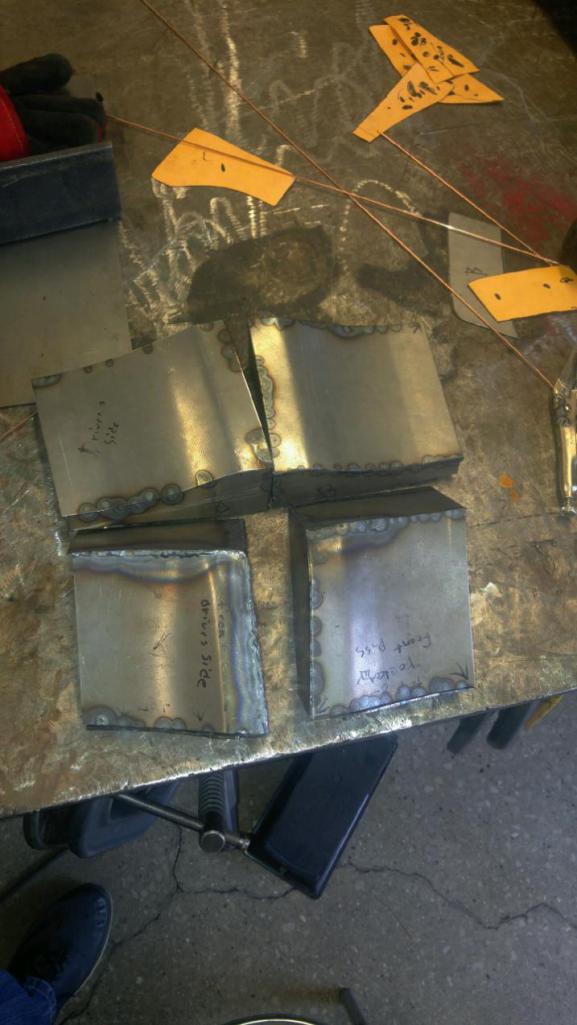
I also took some time to make some of the engine sheet metal. These 2 pieces and took about and hour.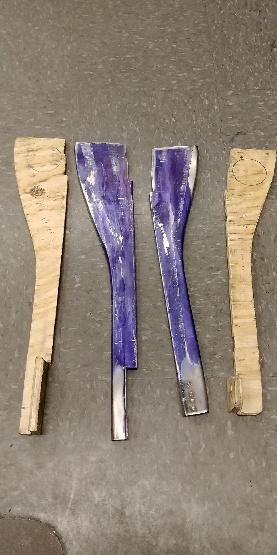
Posted by: restore2seater May 16 2017, 11:54 AM
Any thoughts on selling engine sheet metal for a 6 conversion?
Posted by: mb911 May 16 2017, 12:15 PM
Any thoughts on selling engine sheet metal for a 6 conversion?
I think i might but not just yet...
Posted by: mb911 May 17 2017, 05:52 AM
Finished off the tunnel repair.
Posted by: mb911 May 17 2017, 10:01 AM
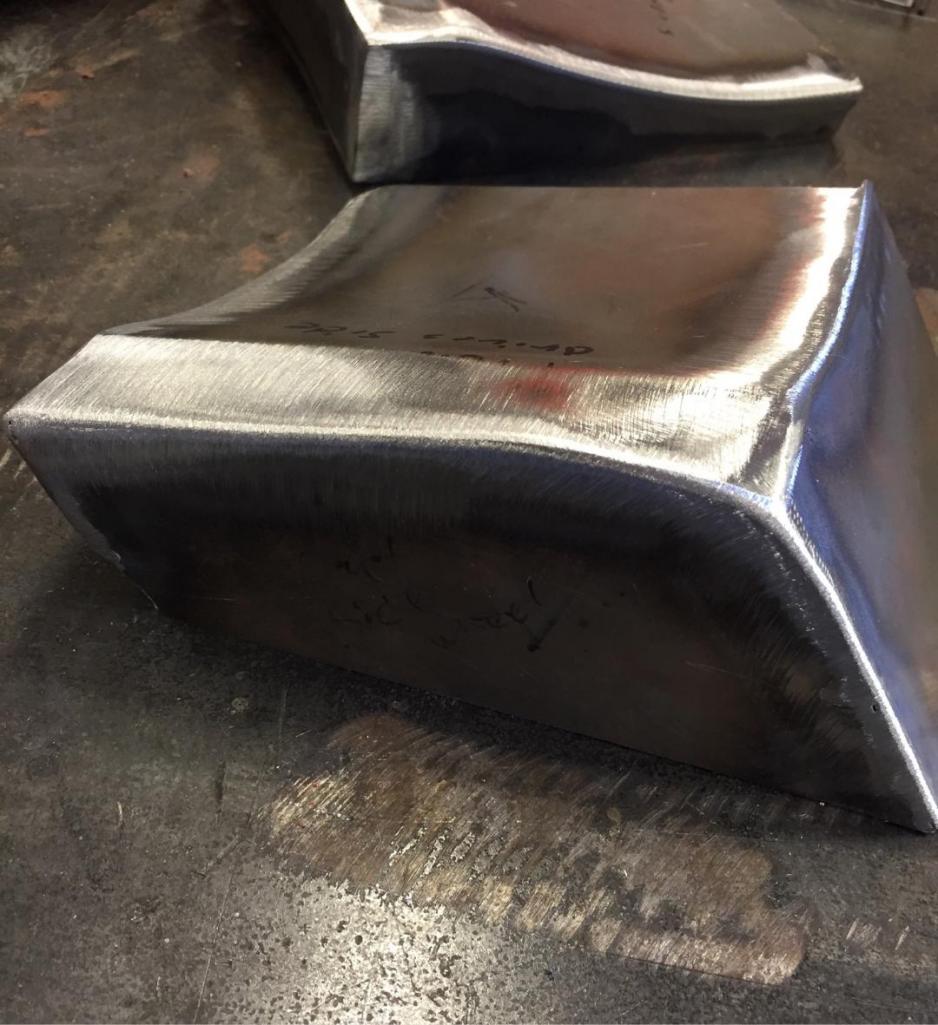
Made the hardest of the sheet metal pieces today. It is 2 pcs as i am not sure how else to make it without a die or having it look horrible. I will probably draw these up and have laser cuts made.
Posted by: mb911 May 18 2017, 02:09 PM
Another piece done.
Soon bigger sections will be done. Once the floor pan is on it will really look like headway is being made.
Posted by: mb911 May 23 2017, 01:28 PM
Finished all 5 pieces of sheet metal just need to drill and sand a few spots. Finished gt reinforcement kit on passenger side, have to grind and blend a bit.. Welded -6 oil line hook from mcmark on
Firewall soon as soon as tygaboy is healed he will ship me his and the rear floor pan will go on.
Received my latest batch of replated parts/ hardware today including my head studs for the engine and misc parts. Thats always fun..
I have about 4 more weeks that i will put in a 3-4 hours a week amd then a break for a while as i have some vacation coming soon.
Posted by: mb911 May 23 2017, 05:06 PM
Posted by: whitetwinturbo May 23 2017, 09:04 PM
.............love the look of new zinc plate
Posted by: mb911 May 24 2017, 05:41 AM
.............love the look of new zinc plate
Mee too. Best part is that it is so inexpensive.
Posted by: mb911 Jun 3 2017, 10:24 AM
Found some pictures of my last conversion today.. Some of the details i want to do on this build. Though i am thinking black instead of red.


Posted by: 11tenths Jun 3 2017, 12:37 PM
And I thought clear filter tops so you can see the stacks was my idea.
May I ask what material you found to withstand the fuel/possible backfire environment?
-Harry
Posted by: mb911 Jun 3 2017, 12:45 PM
I used plexiglass from glass shop.
Posted by: mb911 Jun 3 2017, 12:48 PM

These cars i owned inbetween 914s and built the turbo from a 77s and built a 3.2 ss turbo engine.
Posted by: mb911 Jun 3 2017, 12:53 PM
Just went out for another hour and fixed the passenger side tunnel flange, lower corner of passenger long.
My issue is the stamping done on the bottom of the passenger long(inner) is really not easy to replicate so i need to think on that as that is what the floor pan welds too. I can patch it but I really only need a 1.5" 90 degree piece about 30" long but have to have the stampings to lool right.
Posted by: mepstein Jun 3 2017, 06:22 PM
The 964 looks so generic next to the turbo. It's partly the color but it really seems like porsche went the wrong direction with the cosmetics on that car. JMO.
Posted by: horizontally-opposed Jun 3 2017, 09:31 PM
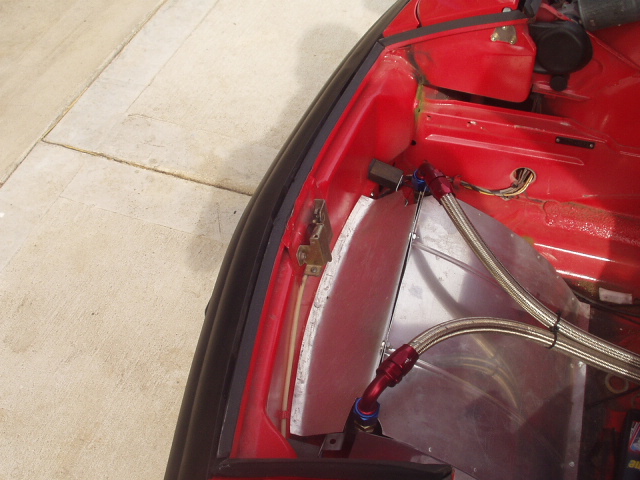
This pic has me wishing someone would do rain hat carb covers in real glass. Just so sexy to look down on the trumpets...
Attached image(s)
Posted by: mb911 Jun 4 2017, 05:28 AM
914rubber maybe a new product.
Posted by: forrestkhaag Jun 5 2017, 12:17 PM
We have injection moulding experts in the Urban Workshop / I will do a little asking on what would be the best Lexan or other clear plastic to form / most likely a copy of my rain hats....... hmmmmm $$???
Posted by: GeorgeRud Jun 6 2017, 11:57 AM
I'd think you'd want to use something non-flammable. I remember seeing the mess an original -6 was when a backfire ignited a stock plastic air box and the melted plastic was dripping down the carbs. Ugly to say the least!
Posted by: JmuRiz Jun 6 2017, 02:42 PM
+1 what GeorgeRud said.
My engine mechanic isn't a fan of pipercross filters because of this as well.
They flow great, but if you get them soaked in fuel and backfire...it's a REAL mess.
Posted by: mb911 Jun 18 2017, 07:25 AM
My engine sheet metal is getting powdercoated right now. Floor pan goes on this week. Drilled all the areas for the plug welds. Sprayed cold galv on all thw areas that are hidden. Did a bunch of grinding and blending.. Almost over the hurdle.
Posted by: mb911 Jun 20 2017, 08:29 AM
Here is a bottom long replacement.. You can see some of the previous owners repair. Gotta clean all of that up yet. Making good headway. Rear half floor pan starts tomorrow
Posted by: mb911 Jun 21 2017, 05:46 AM
And floor is tacked in.
Posted by: mb911 Jun 21 2017, 05:47 AM
Posted by: GeorgeRud Jun 21 2017, 06:24 AM
Looking great! New metal always looks nice and the welding looks sublime.
Posted by: mb911 Jun 21 2017, 06:54 AM
Looking great! New metal always looks nice and the welding looks sublime.
Funny thing is I bought that floor pan 2 years ago.. Unreal it took this long to put it in place..
Posted by: whitetwinturbo Jun 21 2017, 10:09 AM
Posted by: mepstein Jun 21 2017, 11:37 AM
He's waiting on a piece from me

Posted by: tygaboy Jun 21 2017, 01:23 PM
He's waiting on a piece from me
...and on a chunk of floor from me, too. It shipped yesterday!

Posted by: mb911 Jun 22 2017, 09:35 AM
He's waiting on a piece from me
...and on a chunk of floor from me, too. It shipped yesterday!
The best part is we just got a really nice pressure fed sand blast cabinet at work that I can blast it and make it really nice before install.
Posted by: mb911 Jun 22 2017, 02:33 PM
Pmb restored calipers came in the mail today.. So now just a few little brake parts to finish up.
Posted by: mepstein Jun 22 2017, 03:57 PM
Pmb restored calipers came in the mail today.. So now just a few little brake parts to finish up.
What size calipers?
Posted by: mb911 Jun 22 2017, 08:34 PM
Pmb restored calipers came in the mail today.. So now just a few little brake parts to finish up.
What size calipers?
Front are A's rear stock.. Was Eric's suggestions.
Posted by: mb911 Jul 25 2017, 11:18 AM
Not much to report but finally have all of the engine parts back less cams. I may wait until winter to assemble that as still grinding amd welding amd don't want them to intertwine.
Posted by: mb911 Jul 27 2017, 01:41 PM
Spent some time today and welded in the firewall patch areas and prepped amd painted and ready for rear firewall. Decided I am going to leave the top half installed and sister up to the new firewall and plug weld to each other this will give the chassis a bit more strength.. 
Posted by: mb911 Jul 28 2017, 02:24 PM
And 1 half of the rear firewall on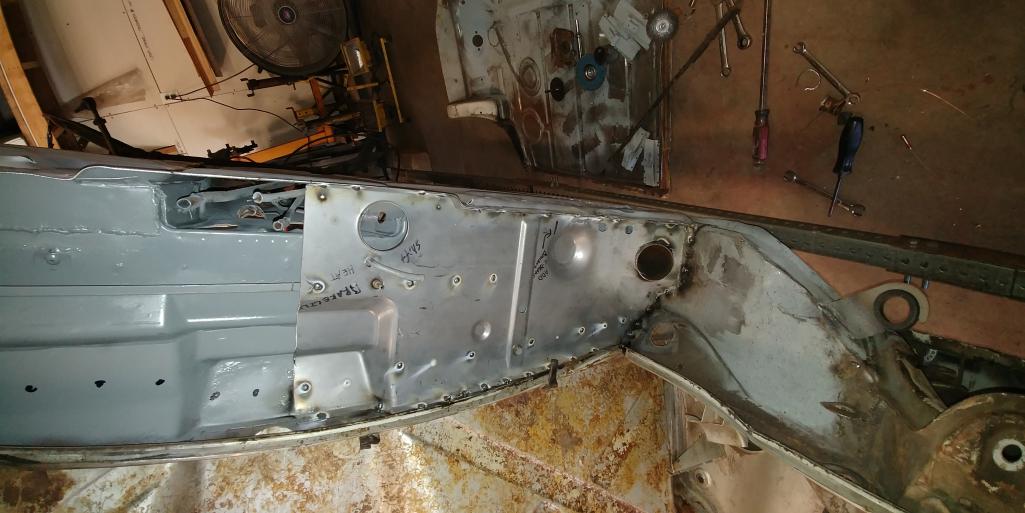
Posted by: mb911 Aug 5 2017, 06:12 AM
So no updates just been working on my dd as I am off a few weeks from work was able to change cam and lifters in that as it is dod or displacement on demand and the lifters are worn out.. 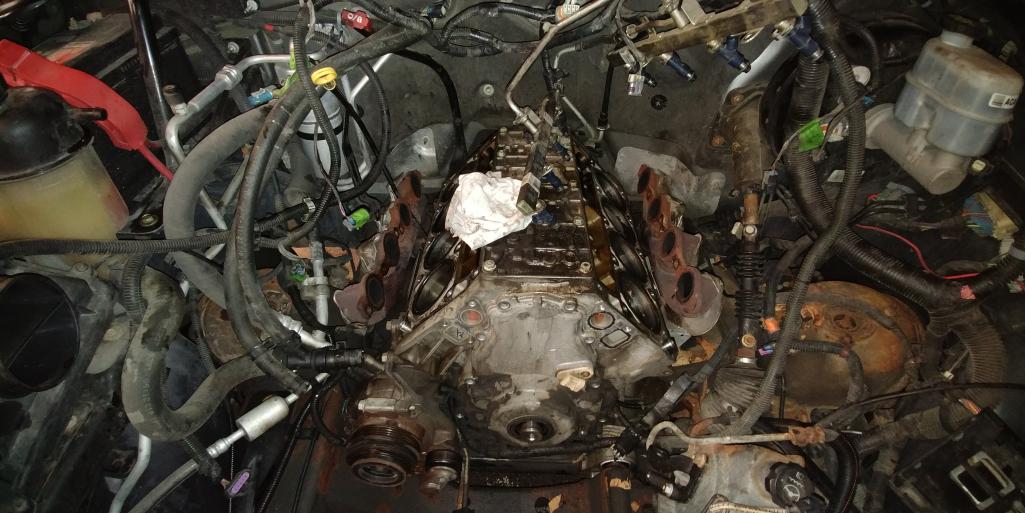
I did buy a new used set of cam towers from Henry @supertec so I can assemble the heads and get the engine back together as I need it for fixturing for some new exhaust..
Also testing the new -6 muffler is showing great promise.. Sound levels are perfect..
Posted by: GeorgeRud Aug 5 2017, 07:10 AM
Looks like you're not sitting around bored! It's always more fun to work on the Porsche than have to deal with a daily driver.
Posted by: mb911 Aug 5 2017, 07:47 AM
Thats for sure.
Posted by: mb911 Aug 5 2017, 07:24 PM
Made progress today.
Posted by: mb911 Aug 21 2017, 01:37 PM
So finally done with the flood damage repair, cam and lifter change out in my suburban, going on our honeymoon after being married for 18 years I am back at it it.. I fit the floor pan section in from chris.. I cut a bit too far in the wheel well but I can fix that easy enough.. 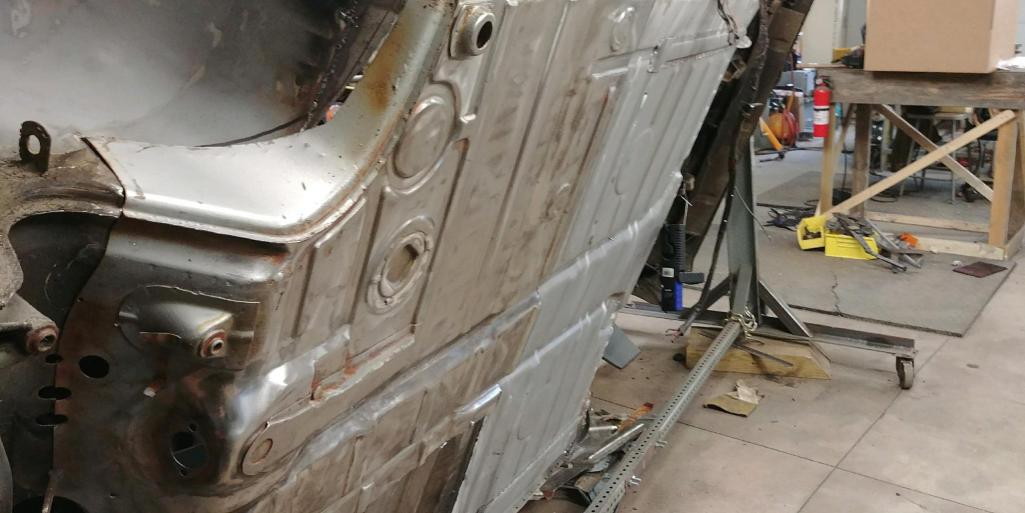
Posted by: tygaboy Aug 21 2017, 01:43 PM
Ben - It's really coming along! The floor looks great... But man, that's a big ol' chunk of the car you cut out to fit it. Glad to see the car I parted is going to such good use.
Chris
Posted by: mb911 Aug 21 2017, 02:53 PM
Ben - It's really coming along! The floor looks great...
But man, that's a big ol' chunk of the car you cut out to fit it. Glad to see the car I parted is going to such good use.Chris
Thats for sure its good that I have it braced pretty well..
Posted by: GeorgeRud Aug 21 2017, 03:49 PM
Looks great! Please keep posting pics of your progress.
Posted by: mb911 Aug 21 2017, 06:07 PM
Looks great! Please keep posting pics of your progress.
Will do as I make progress.. I think my next project is to make a copy of your mid rise lift..
Posted by: mb911 Aug 27 2017, 12:22 PM
Well its tacked in.. Pretty happy with the fit. Going be really nice once welded and ground and blended. Thanks again Chris for the huge help.. Even if I would have bought a front floor pan from RD it would have not come with the metal I needed.. So i saved about 1/4 of the orginal floor pan.. 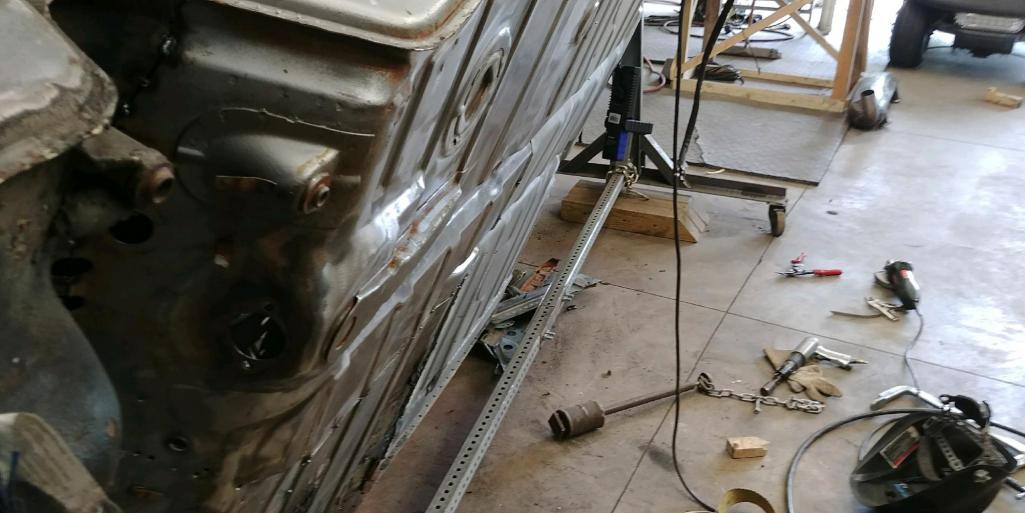
Posted by: mb911 Aug 28 2017, 08:46 PM
And now its completly welded in.. Now to grind and blend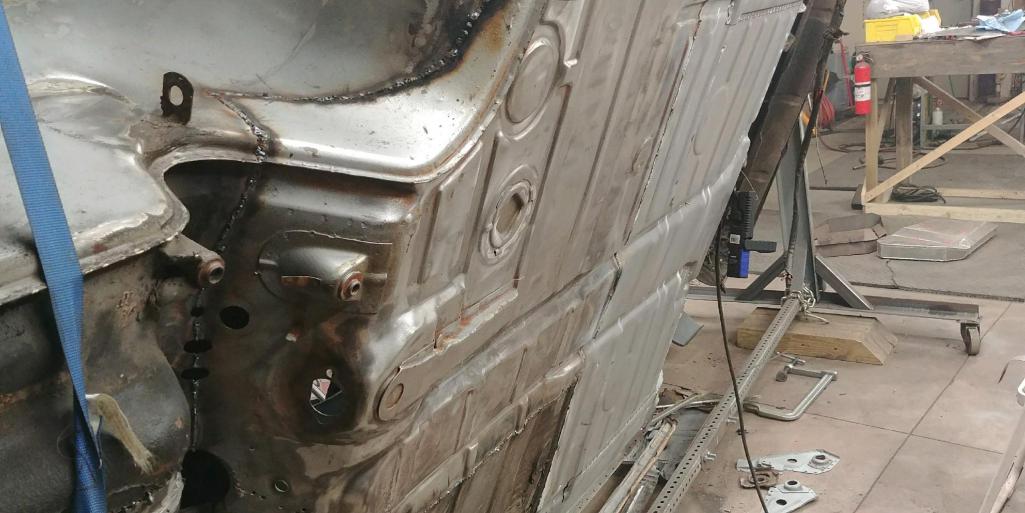

Posted by: whitetwinturbo Aug 29 2017, 10:22 PM
Posted by: tygaboy Aug 30 2017, 08:54 AM
Looking really nice, Ben!
Posted by: mb911 Aug 30 2017, 01:55 PM
Thanks guys the grinding started last night..i might do that some more tonight but if I take my time the results are better so slow as I go..
Posted by: mb911 Sep 3 2017, 01:58 PM
Taking the grinding really slow as if you rush it the seem will be noticable .. 1st step is to take the high spots off the weld with a 4.5 " grinder. Once thats done I use a die grinder with an abrasive wheel to further knock it down.. Next step is a blending disc and then check for any pinholes..
Once this is done only have half the firewall to weld on and the jack points and then done underneath the car.. 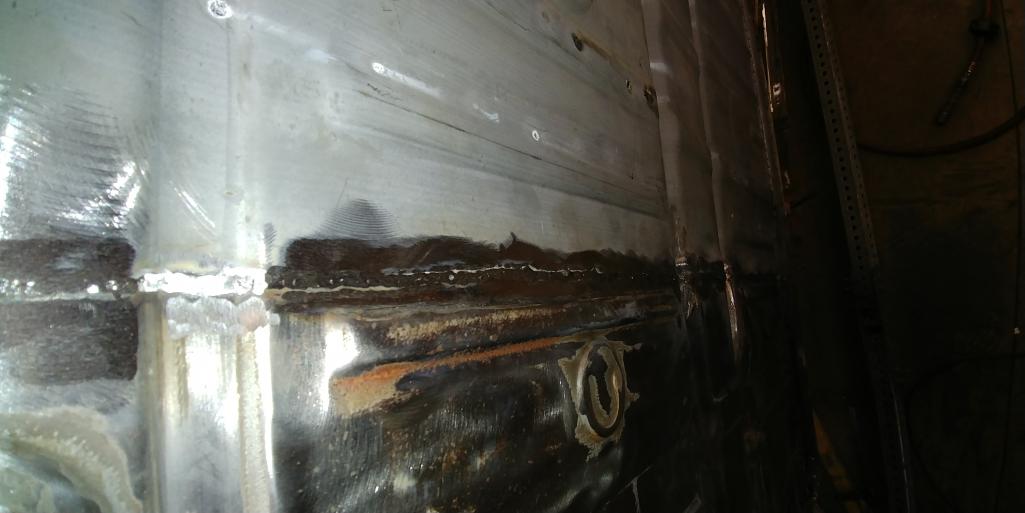
Posted by: mb911 Sep 4 2017, 05:45 AM
And now other firewall half in along with tge chassis reinforcement plates.. I think welding will be wrapped up by the start of winter..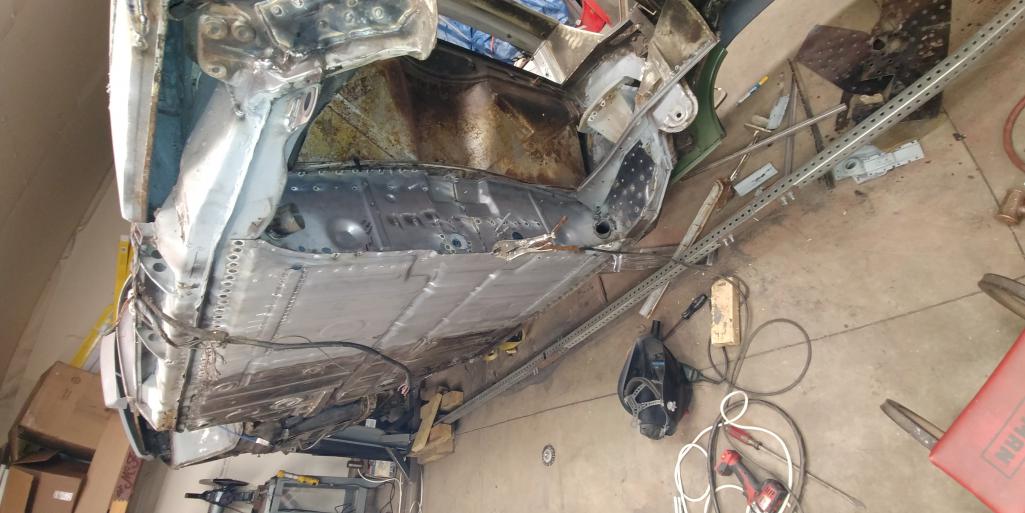
Posted by: mb911 Sep 4 2017, 06:57 PM
A little more progress.. The triangle jack plates are tacked on.. Once welded going to have a bunch of grinding to do..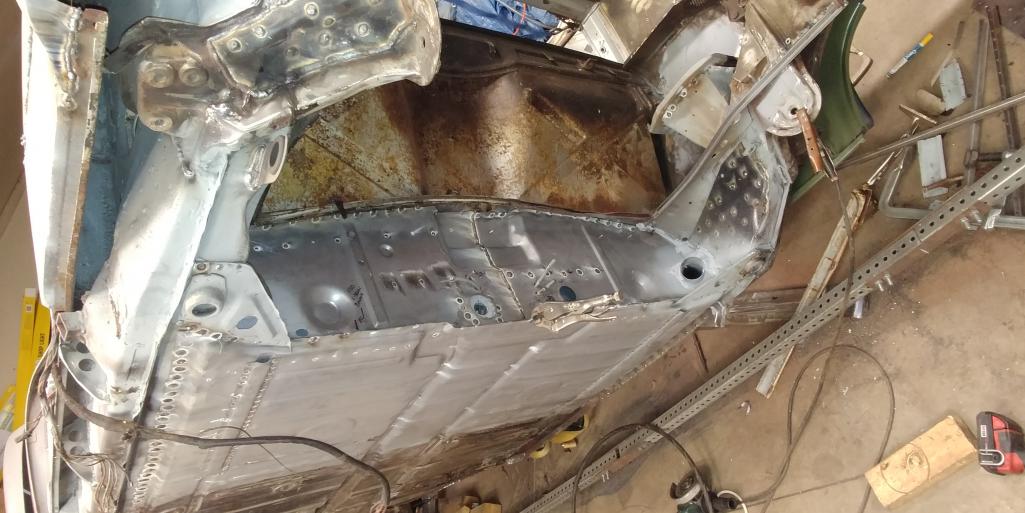
Posted by: GeorgeRud Sep 4 2017, 07:39 PM
Are you going to install the GT stiffening panels in back as well? How about the inner longitudinal panel stiffening braces? With enough power, they might come in handy!
Posted by: mb911 Sep 4 2017, 07:52 PM
Are you going to install the GT stiffening panels in back as well? How about the inner longitudinal panel stiffening braces? With enough power, they might come in handy!
Yes actually both already installed. I have one other reinforcement to make that I see Eric shae does and I will do the same.
Posted by: whitetwinturbo Sep 4 2017, 08:19 PM
Posted by: mb911 Sep 5 2017, 05:57 PM
Grinding will begin tomorrow..
Posted by: mb911 Sep 10 2017, 06:34 PM
Took a little break from welding and grinding and put 1 head set together. I prefer to preassemble the whole assembly vs how waynes book suggests.. 
Posted by: mb911 Sep 11 2017, 12:36 PM
I need to now source the "freeze" plugs for the cam towers..
Going to finish welding frunk floor in with the louvers this week then put back on jack stands so i can do the trunk floor.
Posted by: mb911 Sep 11 2017, 06:02 PM
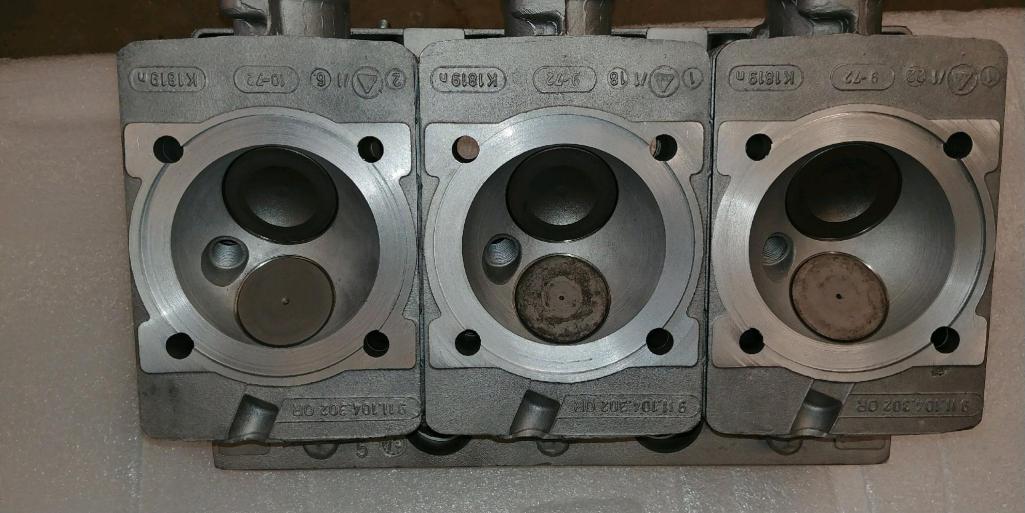
The other head set. 1st time I have used three bond but like it so far. Henry says it works great. Pictures of supertecs head refurb. These were done months ago and just finally getting them together.
Then attached is a picture of what I think I am going to go with.. 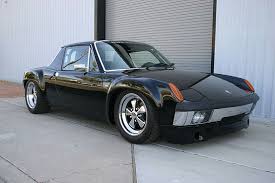
Posted by: mepstein Sep 11 2017, 06:22 PM
I was thinking of shipping merging similar for my suby build. But I have to do it on the cheap so it will probably be a vinyl wrap.
Attached image(s)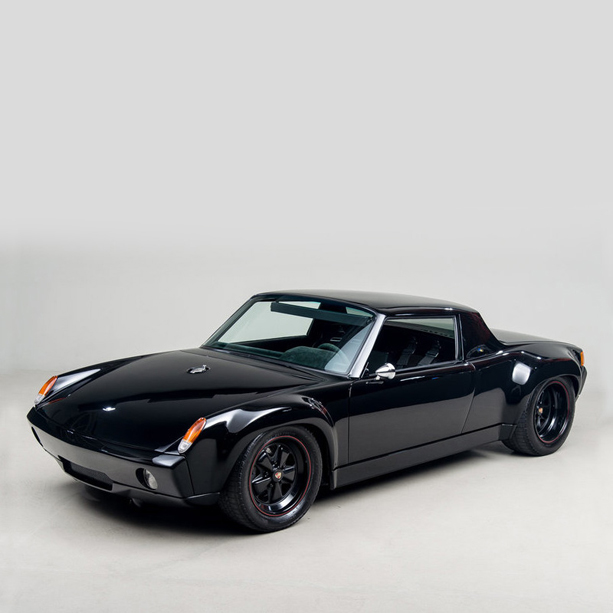
Posted by: mb911 Sep 11 2017, 06:39 PM
Thats very nice as well. For me its either some variation of red or black. Leaning towards black and I know I will have a ton of body work but I painted this car in my garage.
Posted by: tygaboy Sep 12 2017, 10:19 AM
Ben - killer paint job you did! If you want to practice paint a 914, I'll volunteer my car. 
And you can't go wrong with black. It was always one of my favorites on a flared car.
Posted by: mepstein Sep 12 2017, 10:35 AM
First 914 I ever saw was a stock mid year car in black. Parked next door while my neighbors were having a party. Early 70's but I remember like yesterday. Ironic since I can barely remember yesterday.
Posted by: mb911 Sep 12 2017, 10:38 AM
Spent a couple hours this morning and welded the rest of the front trunk floor and then ground. Now to find pin holes and hammer out a few spots. I will wait until car is upside right to finish that.. Next week.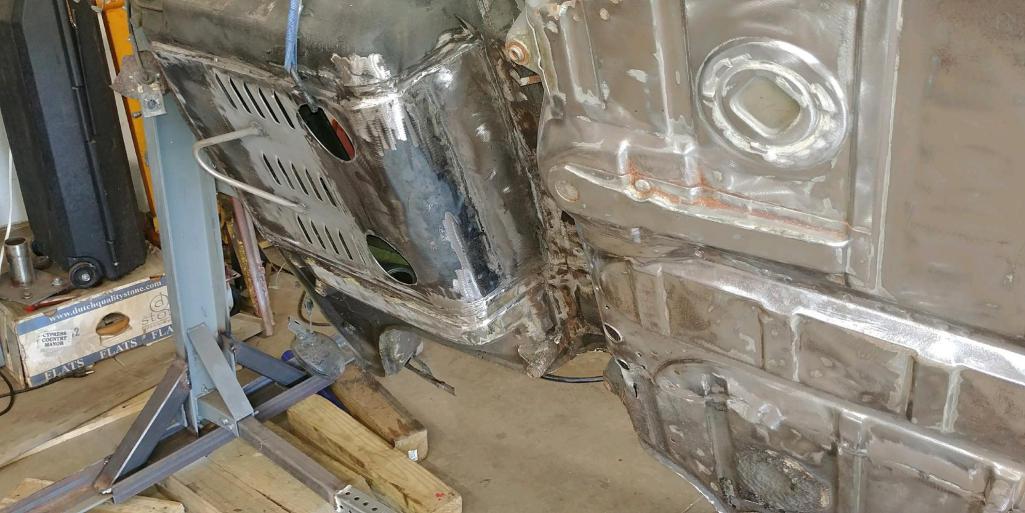
Posted by: mb911 Sep 13 2017, 06:09 PM
Rear trunk work has started..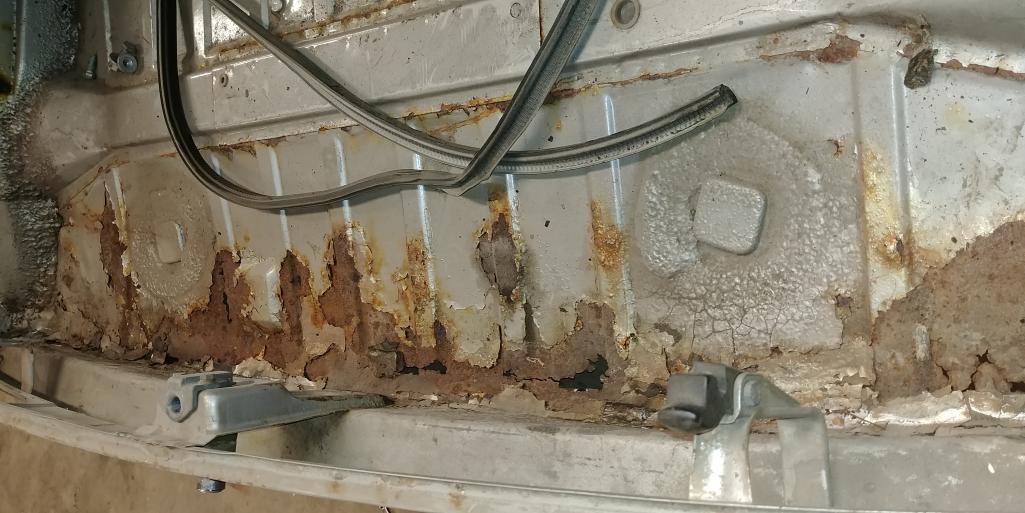
Posted by: mb911 Sep 14 2017, 05:46 AM
And out with the old.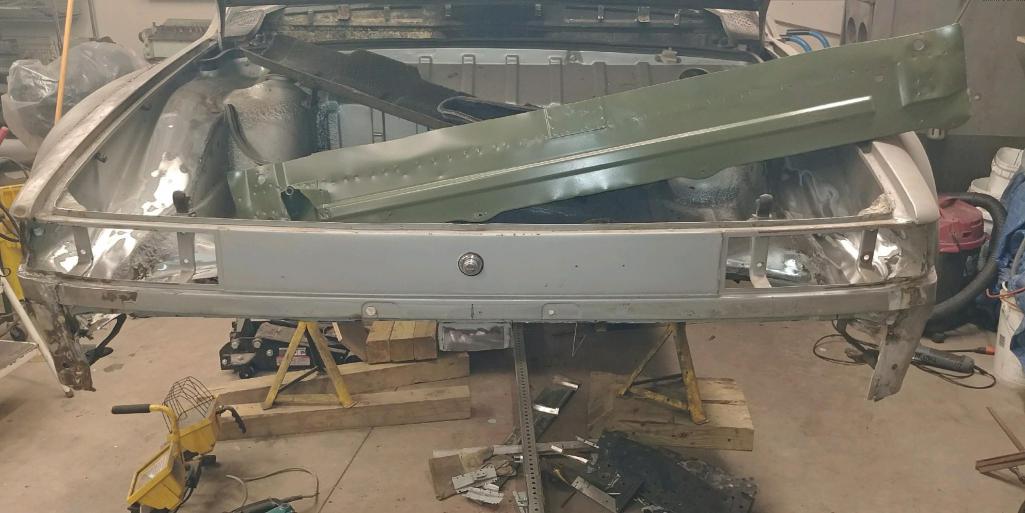
Posted by: mepstein Sep 14 2017, 09:25 AM
Go Ben go!
Posted by: mb911 Sep 14 2017, 04:19 PM
Thanks making headway.. Still thinking 90 of welding will be done in the next few weeks..
Posted by: mb911 Sep 15 2017, 12:23 PM
Took some time to redo rotisserie a bit.. Make it a bit more stable.. 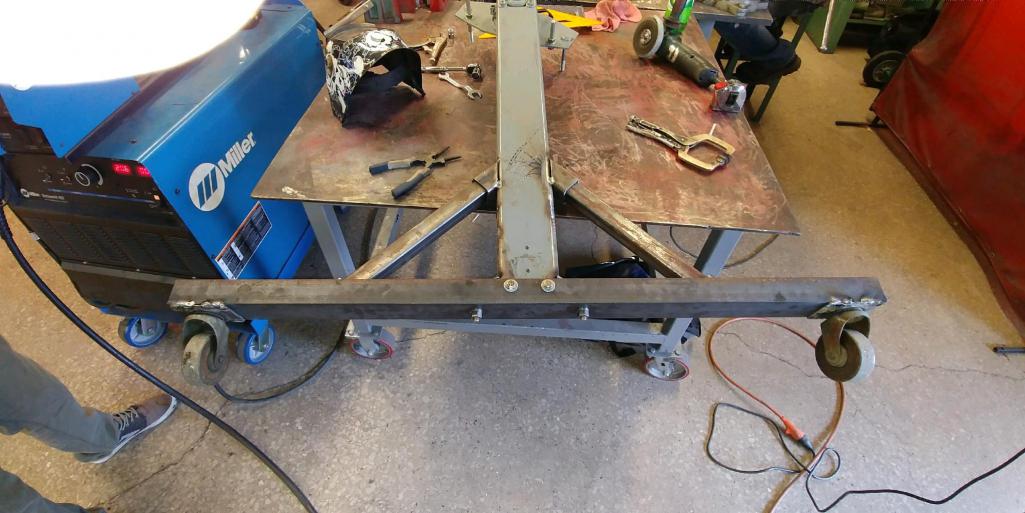
Posted by: mb911 Sep 15 2017, 12:24 PM
I should note this was a student fab project.
Posted by: mb911 Sep 19 2017, 05:05 PM
Latest batch from platers.. I am sure I will have fun sorting.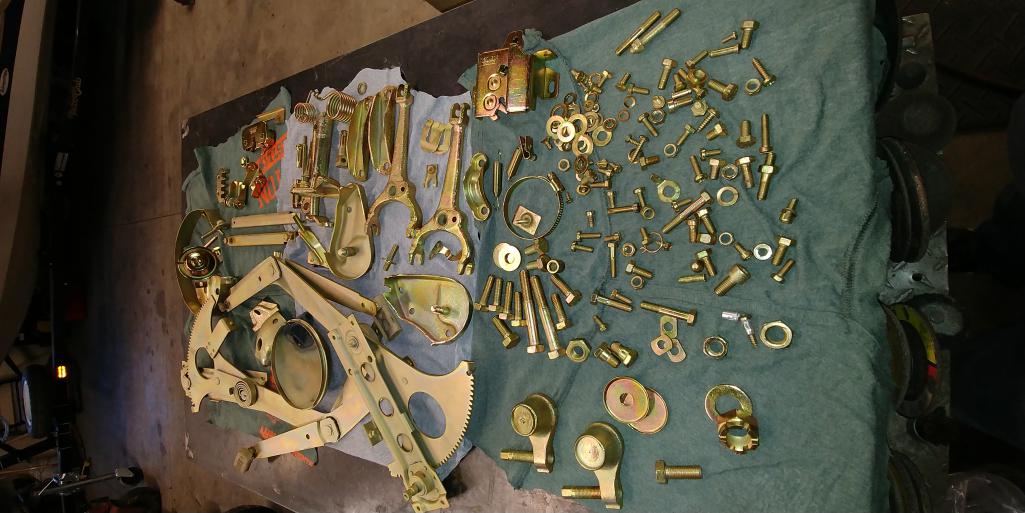
Posted by: mb911 Sep 20 2017, 07:23 AM
And a quick assembly of the pedal cluster freshly powdercoated and replated. It was really rough to start so looks pretty good now.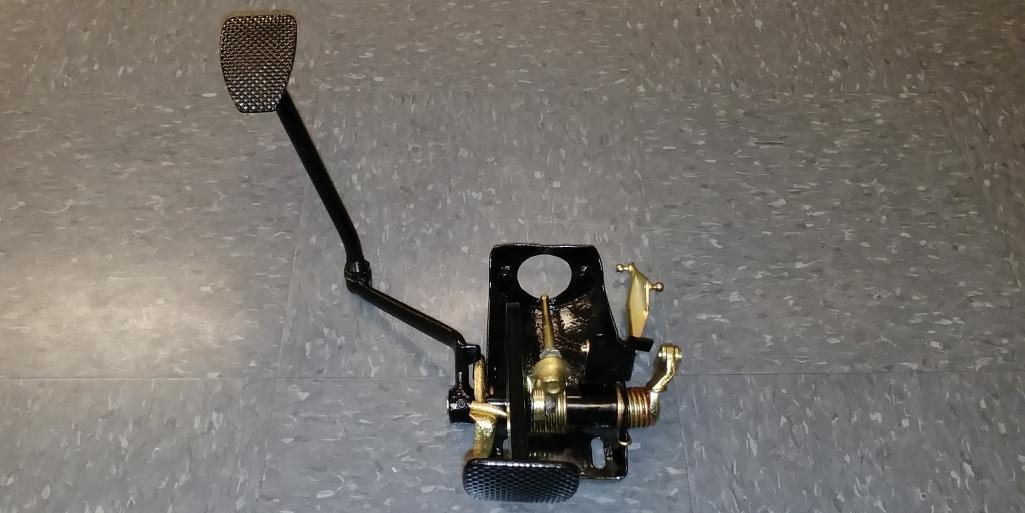
Posted by: GeorgeRud Sep 20 2017, 03:37 PM
Latest batch from platers.. I am sure I will have fun sorting.
Those do look nice! The level of restorations are amazing these days!
Posted by: mb911 Sep 20 2017, 07:32 PM
George the funny thing is this car doesn't deserve that level of restoration but its getting it because its fun.
Posted by: Lucky9146 Sep 20 2017, 08:00 PM
And a quick assembly of the pedal cluster freshly powdercoated and replated. It was really rough to start so looks pretty good now.
Following your thread and you are doing great work! The pedal cluster looks fantastic! and your metal work skills are impressive
Posted by: Dave_Darling Sep 21 2017, 11:35 AM
No hand throttle, then?
--DD
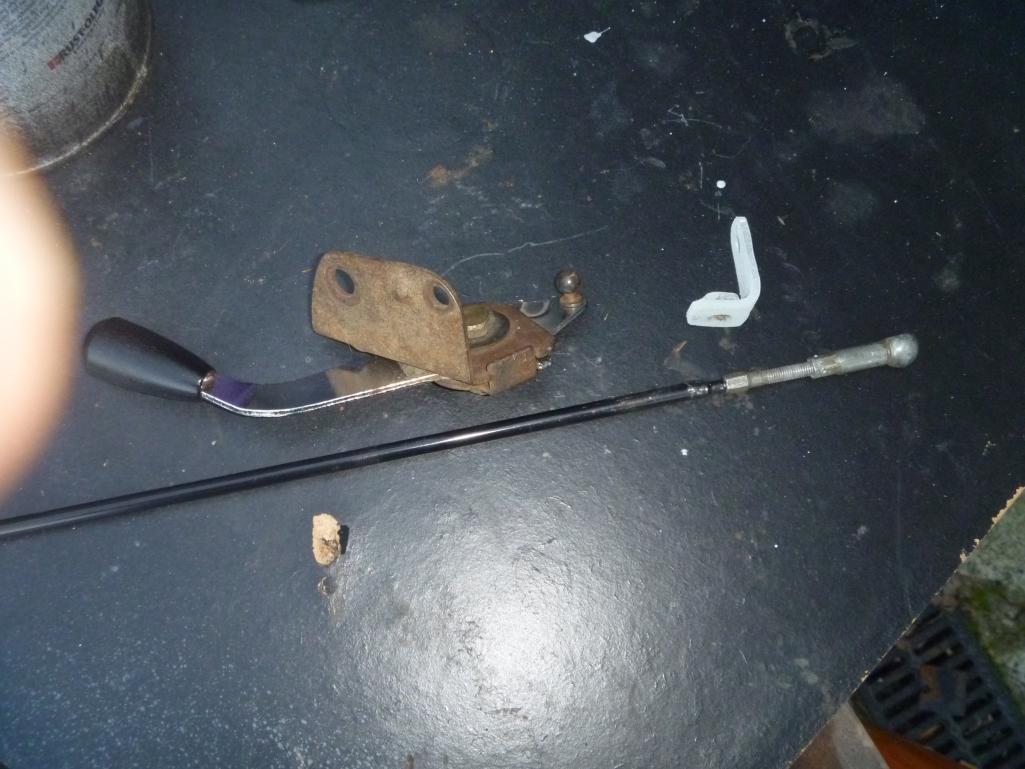
Posted by: mb911 Sep 21 2017, 12:07 PM
No hand throttle, then?
--DD
Need to do that yet.. Gotta find the parts..
Posted by: GeorgeRud Sep 21 2017, 04:00 PM
I think Mikey914 has them available.
Posted by: mb911 Sep 21 2017, 04:03 PM
I think Mikey914 has them available.
I think your right..
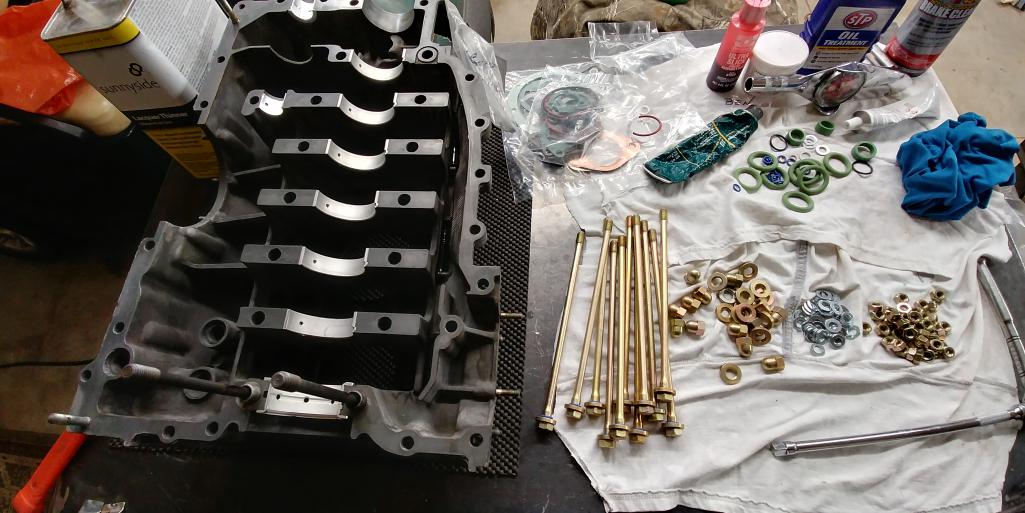
Tomorrow I will cmm the crank /rods/ bearings to ensure everything is good for assembly..
Posted by: porschetub Sep 21 2017, 05:09 PM
No hand throttle, then?
--DD
Need to do that yet.. Gotta find the parts..
Real easy to make....man of your skills
Used and old carb linkage for the ball and socket,so handy for starting and warming your engine up,really like mine.
Posted by: mb911 Sep 21 2017, 06:22 PM
Where does it connect too.? I need to see both ends so I can start planning.
Posted by: mb911 Sep 22 2017, 05:28 PM
And here is the shot of cmm checking roundness and diameter.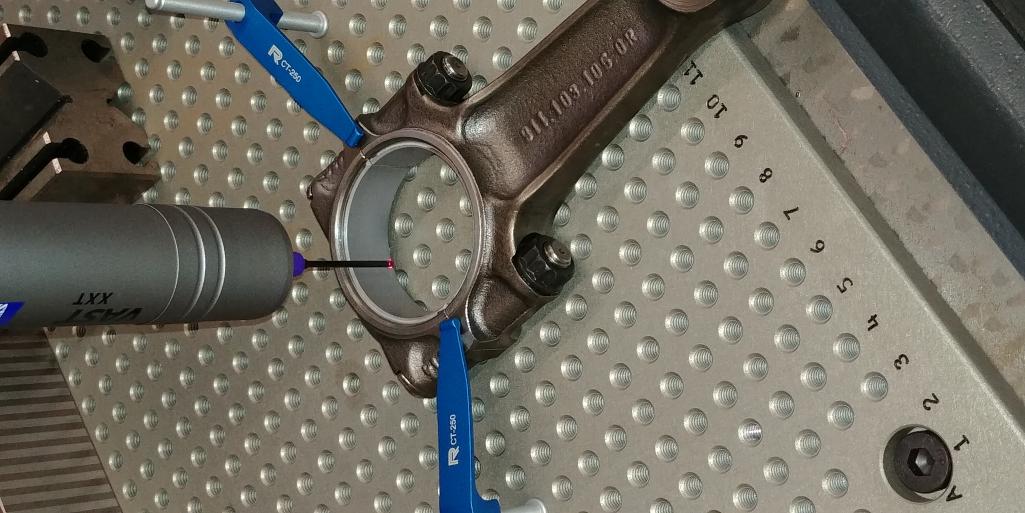
Posted by: tygaboy Sep 22 2017, 05:47 PM
And here is the shot of cmm checking roundness and diameter.
Ohhhh... Very nice!

Posted by: mb911 Sep 23 2017, 05:20 AM
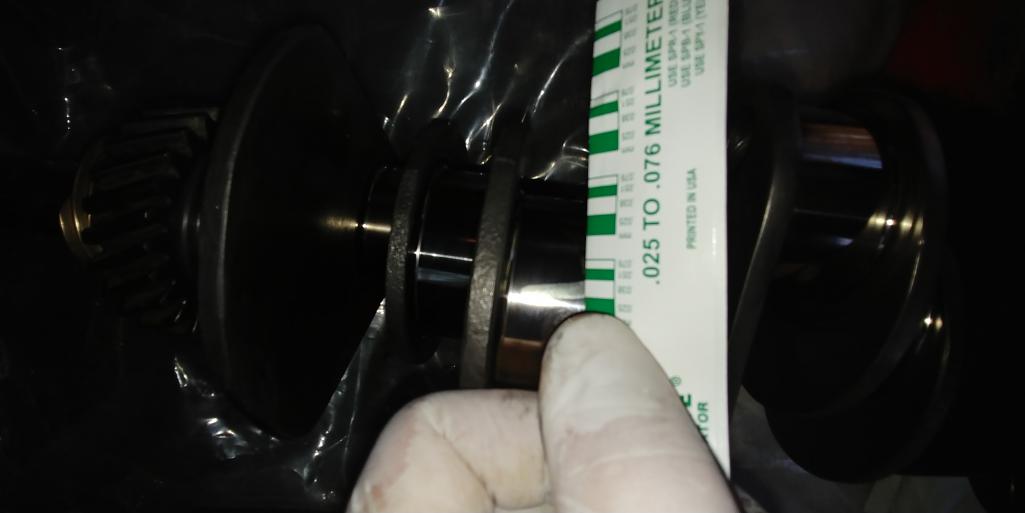
Confirmed that everything is round. Need to do plasti gauge to confirm clearance as rods were not torqued..
Posted by: mb911 Sep 23 2017, 10:24 AM
I know kind of a waste but powdercoated both sides of the muffler heat shield before installation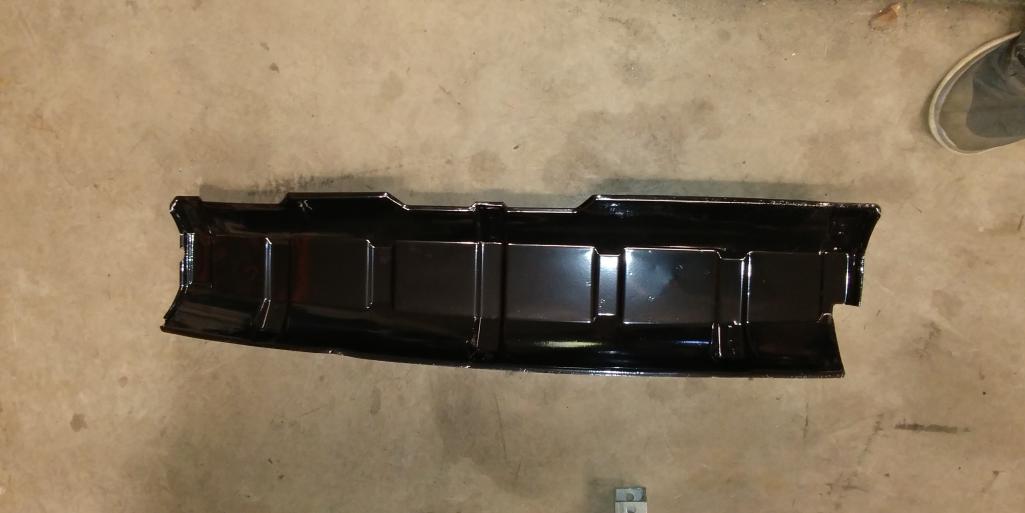
Posted by: Cairo94507 Sep 23 2017, 10:36 AM
Looks nice- not a waste in my book.
Posted by: raynekat Sep 23 2017, 10:43 AM
I agree....not a waste.
I went one step further and had mine ceramic coated.
Not sure if that will help keep the rear trunk temps down, but I thought it was worth a try.
Everything looking good.
Posted by: mb911 Sep 23 2017, 11:18 AM
Thanks everyone.. It is turning into a decent car.. Though it is a Frankenstein it will still be very nice when done years down the road..
Posted by: porschetub Sep 23 2017, 01:34 PM
Where does it connect too.? I need to see both ends so I can start planning.
Lever handle fits under the shifter in to a locating recess,handle go's up through the front of the shifter base,from memory my lever is the straight type,some are curved and maybe don't work,sorry don't know the year of my one.
Front guide piece for the rod fits in a hole that all 914's have (?),I didn't use a bush in this piece as per original and it works fine ,mines adjusted for 1500rpm.
I can measure all this up if you like as I have the assembly out of the car @ the moment
.
Posted by: mb911 Sep 23 2017, 02:10 PM
Where does it connect too.? I need to see both ends so I can start planning.
Lever handle fits under the shifter in to a locating recess,handle go's up through the front of the shifter base,from memory my lever is the straight type,some are curved and maybe don't work,sorry don't know the year of my one.
Front guide piece for the rod fits in a hole that all 914's have (?),I didn't use a bush in this piece as per original and it works fine ,mines adjusted for 1500rpm.
I can measure all this up if you like as I have the assembly out of the car @ the moment
.That would be great with a few pictures.. I would appreciate it..
Posted by: 914forme Sep 23 2017, 05:39 PM
Ben,
Goes under the shifter base at the front. Now if your using a Rennshifter you will need to modify the base. Wish J-West did this for you.
But this is what I did to my Rennshifter to make the hand throttle work for me.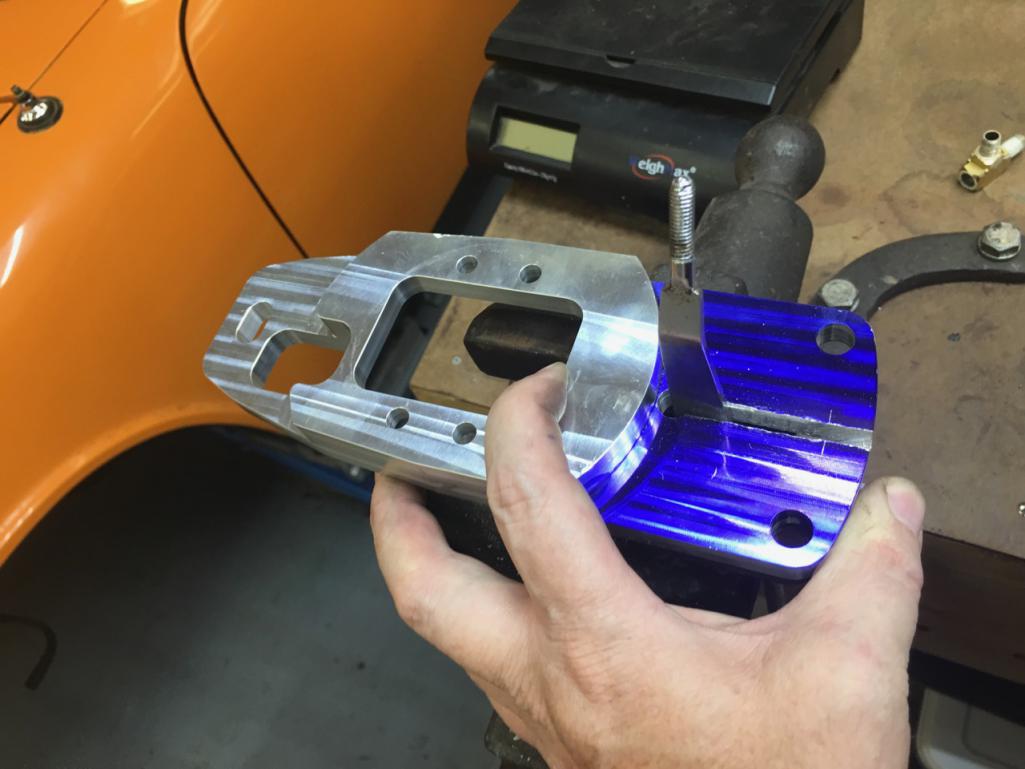
Everything else is looking great, your making nice progress
Posted by: mb911 Sep 24 2017, 10:24 AM
Ben,
Goes under the shifter base at the front. Now if your using a Rennshifter you will need to modify the base. Wish J-West did this for you.
But this is what I did to my Rennshifter to make the hand throttle work for me.
Everything else is looking great, your making nice progress
Ah I get it now... Guess need to find a lever..
Double checked crank vs rods with plasti gauge and though the picture is garbage it is perfect spec..
Posted by: cary Sep 24 2017, 10:28 AM
I know kind of a waste but powdercoated both sides of the muffler heat shield before installation
Ben, I don't think its a waste. Most I see are pretty raty and rusty.
Posted by: Larmo63 Sep 24 2017, 10:37 AM
I used an original 914-6 bracket, rod, and pedal part (with the flap.)
My lever is 911 and works great. Really handy for cold warm-ups.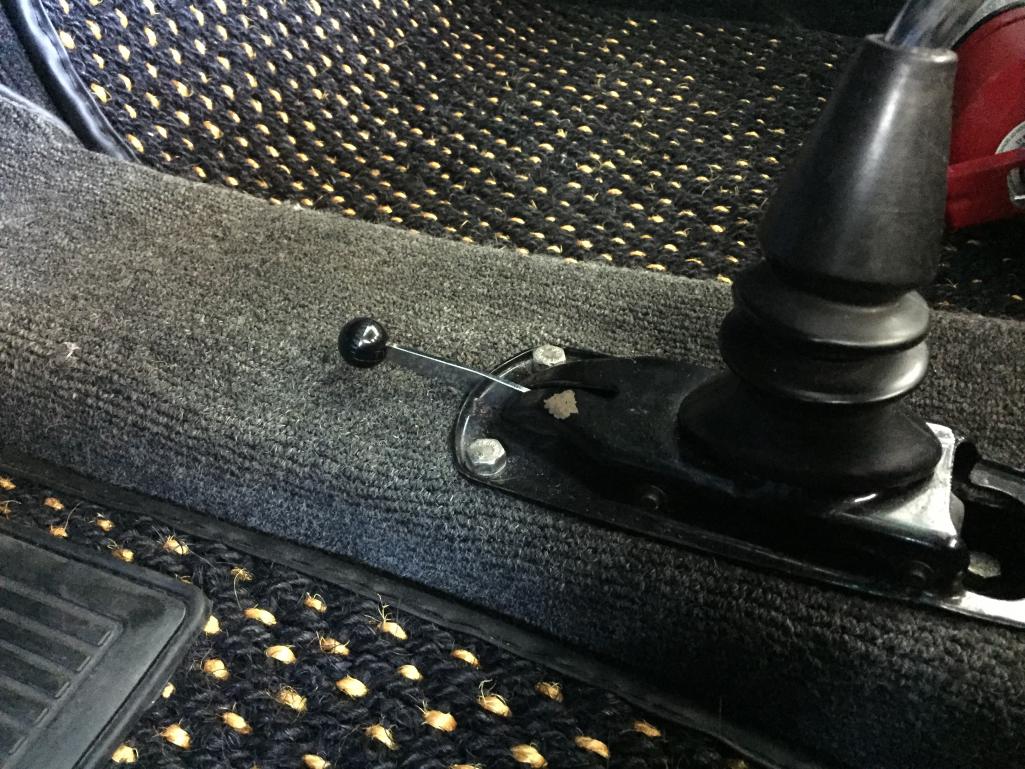
Posted by: mb911 Sep 26 2017, 06:31 PM
Spent a few minutes installing a new section of metal.. Need to fab a few pieces to complete.. Next week though gone the rest of the week
Posted by: mb911 Oct 2 2017, 08:44 PM
Spent some time finishing rear panel and installing engine mount.. 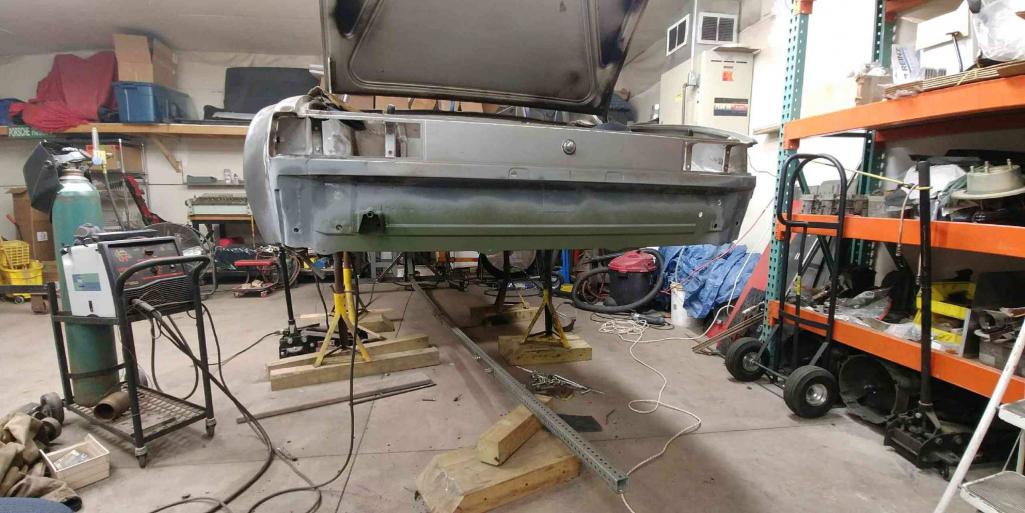
Posted by: maf914 Oct 3 2017, 08:00 AM
The discussion and photos regarding the hand throttle caught my attention. I guess I never really understood how the linkage was supposed to work, until I checked the system offered by 914Rubber.com. Here are the photos from Mark's (mikey914) site.
Attached thumbnail(s)
Attached image(s)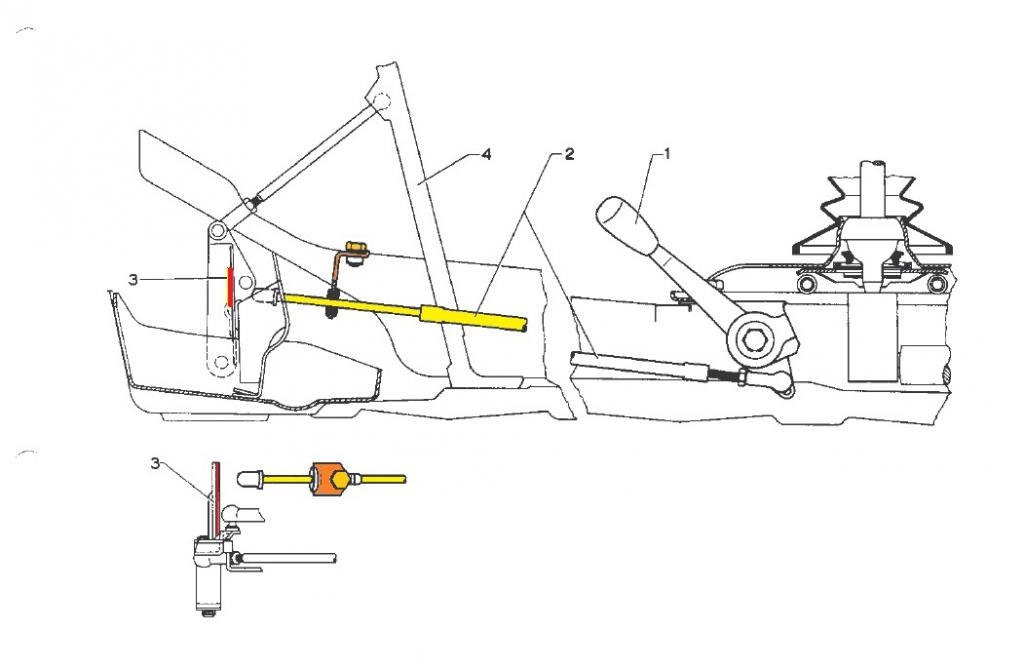
Posted by: tygaboy Oct 3 2017, 08:09 AM
Little by little, it comes together...
Engine mount looks good on that shiny new fire wall!
Posted by: mb911 Oct 3 2017, 01:24 PM
Thanks coming along.. Slow progress but as I said welding still will be done primarly in a few weeks.. I think my new plan is to rough in everything, grind so things are close then epoxy prime so that I can better manage the bare metal and where I need to hammer , fill pin holes and reprime after shaping.. I am finding that if I don't do that the project sometimes feels like its not making progress..In reality it is.. Want it capable of being a roller by spring..
Posted by: porschetub Oct 5 2017, 01:47 PM
Where does it connect too.? I need to see both ends so I can start planning.
Lever handle fits under the shifter in to a locating recess,handle go's up through the front of the shifter base,from memory my lever is the straight type,some are curved and maybe don't work,sorry don't know the year of my one.
Front guide piece for the rod fits in a hole that all 914's have (?),I didn't use a bush in this piece as per original and it works fine ,mines adjusted for 1500rpm.
I can measure all this up if you like as I have the assembly out of the car @ the moment
.That would be great with a few pictures.. I would appreciate it..
PM sent,
Posted by: mb911 Oct 5 2017, 06:21 PM
Thanks for help in the pm.. I am expecting to finish allot over the next 4 days then it will be time to work on the grinding again get it epoxy primed..
Posted by: drgouk Oct 5 2017, 06:23 PM
And here is the shot of cmm checking roundness and diameter.
They should'nt be round, A big end bearing is lensed. Oil wedge at the parting face. bearing clearence is checked at the 12 oclock position with a dial bore gauge.
Posted by: mb911 Oct 6 2017, 12:06 PM
And here is the shot of cmm checking roundness and diameter.
They should'nt be round, A big end bearing is lensed. Oil wedge at the parting face. bearing clearence is checked at the 12 oclock position with a dial bore gauge.
I was just for reference
Posted by: mb911 Oct 7 2017, 09:26 PM
My 13yo and I went and tacked on 2 flares tonight.. He was mad I didn't let him weld more.. I want to prevent extra work if possible.. 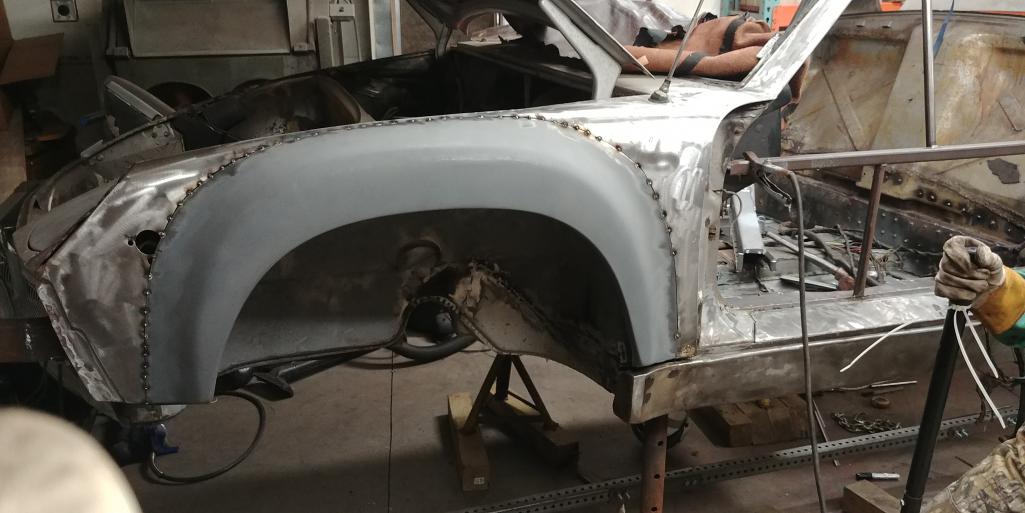
Posted by: mb911 Oct 7 2017, 09:27 PM
Posted by: defianty Oct 8 2017, 02:30 AM
Nice work, I'm at about the same point in my build now. Getting the first flare on is a great feeling as you can really start to see how the car's going to look once completed.
Great that your son is taking a keen interest - I bet my step-son couldn't even tell me what car it is.
Posted by: 914dave Oct 8 2017, 05:33 AM
Looking good! Flares are a big milestone.
Posted by: mb911 Oct 8 2017, 05:51 AM
Thanks guys it feels good to not have them flopping around or just cleeco'd on.. Next is to clean up the area I have been working in as winter is coming I actually will have more room. Plus more parts are on the car then off on shelves and leaning against the wall(sheet metal) car is back on revised rotisserie so it is movable. Time to sell the sand blaster I have that I bought to use but end up using the one at work instead.. This will give me more room allow me to epoxy prime this winter..
Also you may note I fit the rocker on and these are my steel gt rocker flares. I actually need to cut and shorten the rocker by about 3/8". The flare arch is about that much wider at both sides of the arch.. I measured I swear a dozen times..
Posted by: mb911 Oct 9 2017, 05:32 AM
Last night my son and I spent another 2 hours on it.. My helper was tasked with scraping one the last spots of tar off the original floor. 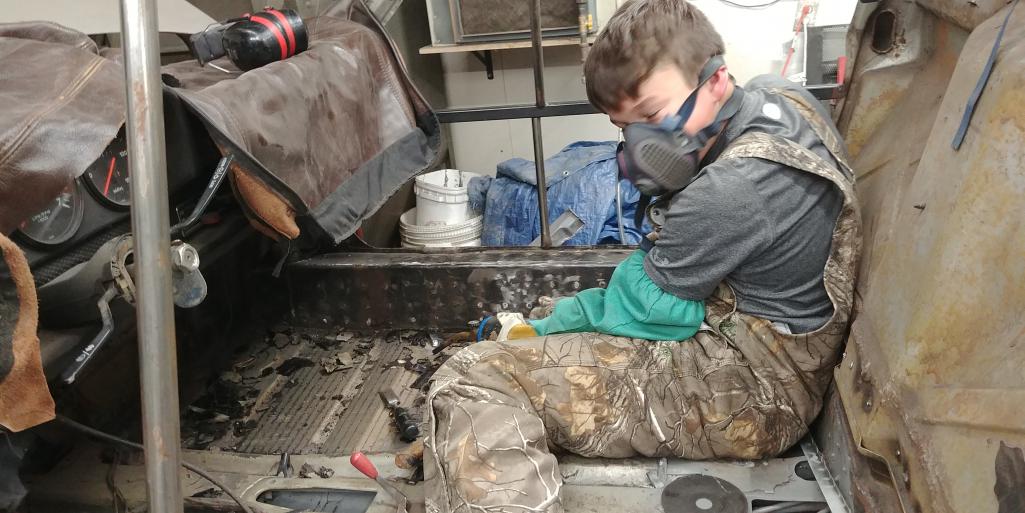
Posted by: JOEPROPER Oct 9 2017, 06:34 AM
So now we see how all this progress is being made... Nice work!
Posted by: mb911 Oct 9 2017, 07:13 AM
 when he holds parts/panels in place it goes so much faster. That said he wants to do more and I have to work to find things for him to do.
Posted by: tygaboy Oct 9 2017, 08:30 AM
when he holds parts/panels in place it goes so much faster. That said he wants to do more and I have to work to find things for him to do.Ben - Send him out here! Installing my flares is coming up on the to-do list and anyone with experience in that area would be great!
But seriously...
Thanks for sharing that pic. What a great thing: not only building a cool car but, more importantly, building the father-son bond. Just wonderful.
Posted by: mb911 Oct 9 2017, 09:21 AM
Chris happy yo share..
Regarding the flares I can share this wisdom with all of you. I had a pretty long conversation with George Hussey on these. He stated the best way to put the flares on is to clamp on to the narrow body arches a piece of steel in 3 locations and this will center the flare in the opening. I found this to be exactly the case. I also found that the gt flare arches are actually wider as I posted before. The flares really only fit on one way. I measured 11-7/8" on both rears at the same peak of the arch to the Gt chassis reinforcement. So proof in the pudding..
It took my son and I 1-1/2 hours to position and tack 2 flares on.. This was with some teaching/explanation along the way too..
Posted by: mepstein Oct 9 2017, 10:31 AM
It took my son and I 1-1/2 hours to position and tack 2 flares on.. This was with some teaching/explanation along the way too..
So once he gets good at 914’s, he can start charging $100/hour to fix 911’s.
Posted by: mb911 Oct 9 2017, 02:43 PM
Lol yup ..
So today he welded the cross brace in with allot of guidence. Turned out nice..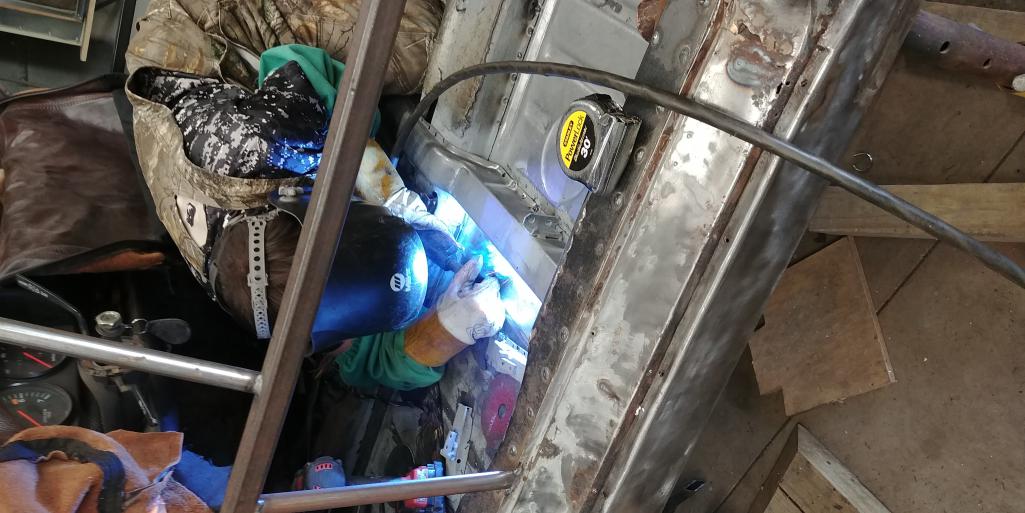
Posted by: GeorgeRud Oct 9 2017, 03:10 PM
Spending this time with him is one of the best things you can do, and teaching him such a valuable skill is wonderful.
Posted by: mb911 Oct 10 2017, 05:28 AM
We both enjoy it.. He os already talking about the carpet install.. I think he is getting ahead of himself.
Posted by: mb911 Oct 13 2017, 12:04 PM
Well after allot of thought on how to reproduce the look of the factory inner longs as I used 14 gauge that I bent up I decided to reach out to a few that have done this and I came up with a simple buck.. My plan is to plug weld these over the longs.. I know that is how allot would do it as they prefer to hammer it out in the parent material but I cnc bent the longs and they were perfect so this is my answer. Also keep in mind this car won't ever be worth what a real six is or even a rust free original car..
This will be epoxy primed and then seam sealer over that and will be undetectable once completed..
The sample that is in the picture is 1st go at it.. Next week they will be more refined.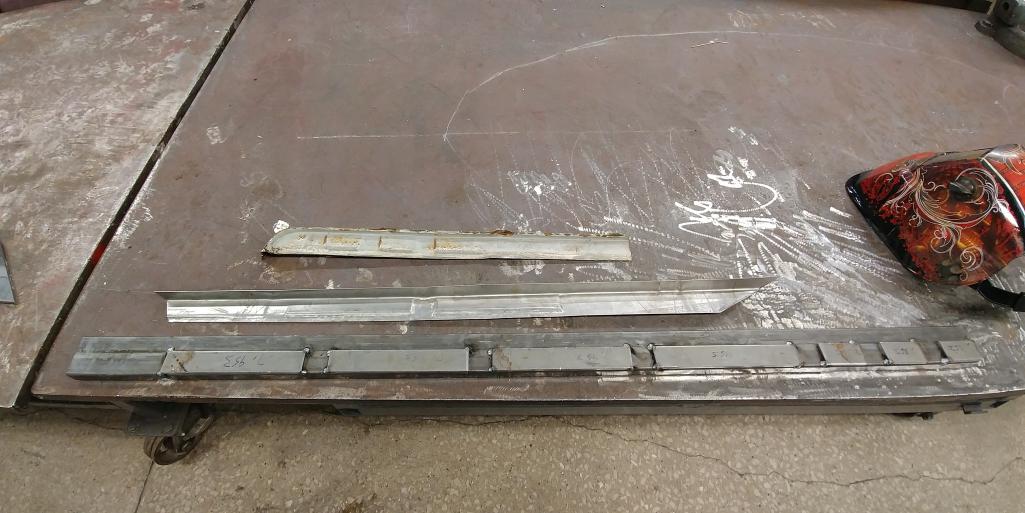
Posted by: mepstein Oct 13 2017, 01:02 PM
I’m almost done that piece of long I’ve promised you forever.
What color are you thinking.
Posted by: mb911 Oct 13 2017, 01:08 PM
Oh cool that would save time..
Still thinking black..
Posted by: mb911 Oct 14 2017, 08:25 PM
So spent about 6 hours over the last 2 days here and there with my son. He completed plug welding the tunnel repair to the floor pan and I did the hard part of butt welding the new flange to the tunnel.. We then welded the "cowl to pan" area where the cowl base meets the new floor pan area.. It is all secure now and now once again to grind the area and some cold galvanized spray.. Getting very close to being done with the inside of the car.. We also used the rapid strip wheel on the inner firewall.. My son complained about the sparks and dust but he did well .. Now my oldest is showing interest.. Probably a good bonding thing for all of us.. And thank god for grinders for taking care of beginners welding sins of youth..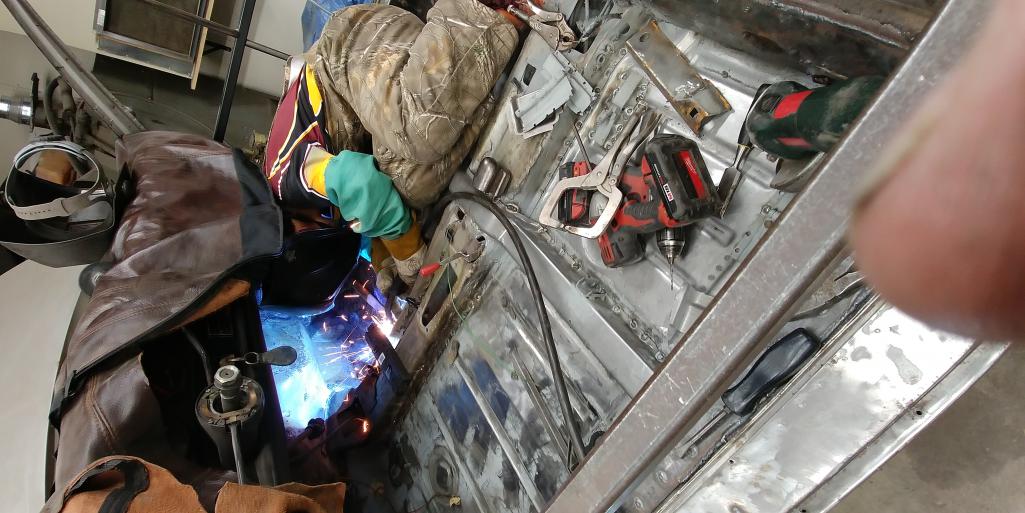
Posted by: mb911 Oct 21 2017, 07:56 AM
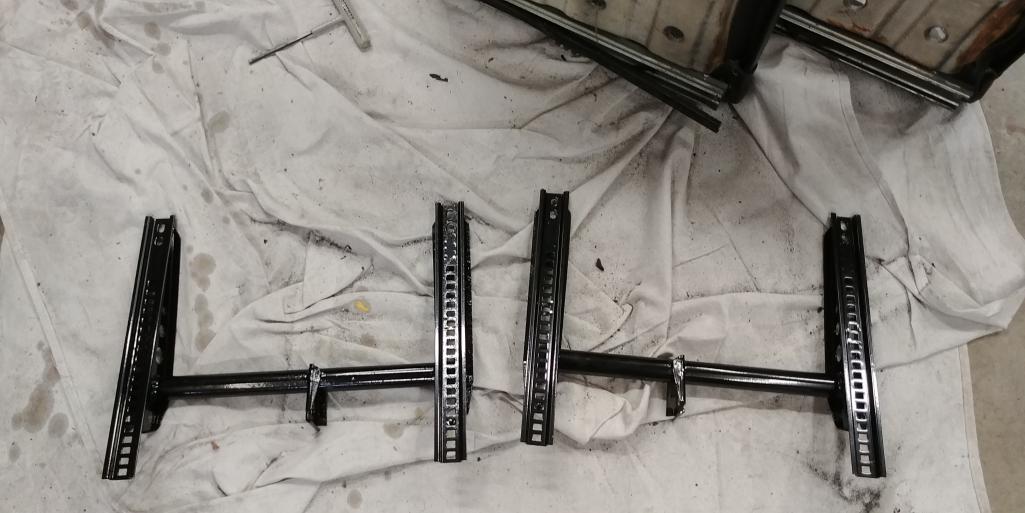
So no progress will happen this weekend but I was able to sand blast some parts this week. Thanks Mark for the suspension parts off the 911.. .. This is the last of the parts that needed to be powdercoated..yeah.. 
Posted by: mb911 Oct 21 2017, 07:57 AM
Posted by: whitetwinturbo Oct 21 2017, 09:27 AM
 farther & son
Posted by: bbrock Oct 22 2017, 02:32 PM
Well after allot of thought on how to reproduce the look of the factory inner longs as I used 14 gauge that I bent up I decided to reach out to a few that have done this and I came up with a simple buck.. My plan is to plug weld these over the longs.. I know that is how allot would do it as they prefer to hammer it out in the parent material but I cnc bent the longs and they were perfect so this is my answer. Also keep in mind this car won't ever be worth what a real six is or even a rust free original car..
This will be epoxy primed and then seam sealer over that and will be undetectable once completed..
The sample that is in the picture is 1st go at it.. Next week they will be more refined.
I somehow missed this post when it hit the forum. Probably because I was having dinner with the wife for our anniversary. I think this is a great solution. I wish I had built my bucks the way you did. 14 gauge plus these? She should be hell for stout!
Posted by: mb911 Oct 23 2017, 05:12 AM
Well after allot of thought on how to reproduce the look of the factory inner longs as I used 14 gauge that I bent up I decided to reach out to a few that have done this and I came up with a simple buck.. My plan is to plug weld these over the longs.. I know that is how allot would do it as they prefer to hammer it out in the parent material but I cnc bent the longs and they were perfect so this is my answer. Also keep in mind this car won't ever be worth what a real six is or even a rust free original car..
This will be epoxy primed and then seam sealer over that and will be undetectable once completed..
The sample that is in the picture is 1st go at it.. Next week they will be more refined.
I somehow missed this post when it hit the forum. Probably because I was having dinner with the wife for our anniversary. I think this is a great solution. I wish I had built my bucks the way you did. 14 gauge plus these? She should be hell for stout!
Yes correct.. This will be over the 14gauge that's there already.. I think its a reasonable solution..
Posted by: mb911 Oct 25 2017, 04:52 AM
A little engine assembly. Took a break from welding and grinding.. 
Posted by: mb911 Oct 25 2017, 04:52 AM
Posted by: GeorgeRud Oct 25 2017, 08:20 AM
I imagine it will be nice to take a break from bending over while doing all that welding and work with nice, new parts at workbench level!
Posted by: mb911 Oct 25 2017, 02:42 PM
I want to get the engine closed up so I can clear some shelf space.. In pieces it takes up allot of space.
Posted by: mb911 Oct 26 2017, 05:04 AM
More progress this morning..
Posted by: JOEPROPER Oct 26 2017, 10:36 AM
More progress this morning..
A lot of progress in a short time. You'll be
 it before you know it.
Posted by: mb911 Oct 26 2017, 01:53 PM
The engine will be running before the car is driving.. My current time frame is a roller by spring with the underside finished.. I keep hearing that"we should move into the city" so I need to prepare for that..
Posted by: mb911 Nov 2 2017, 05:01 AM
Waiting on piston circlips so put the fan on just to get it off the shelf.. 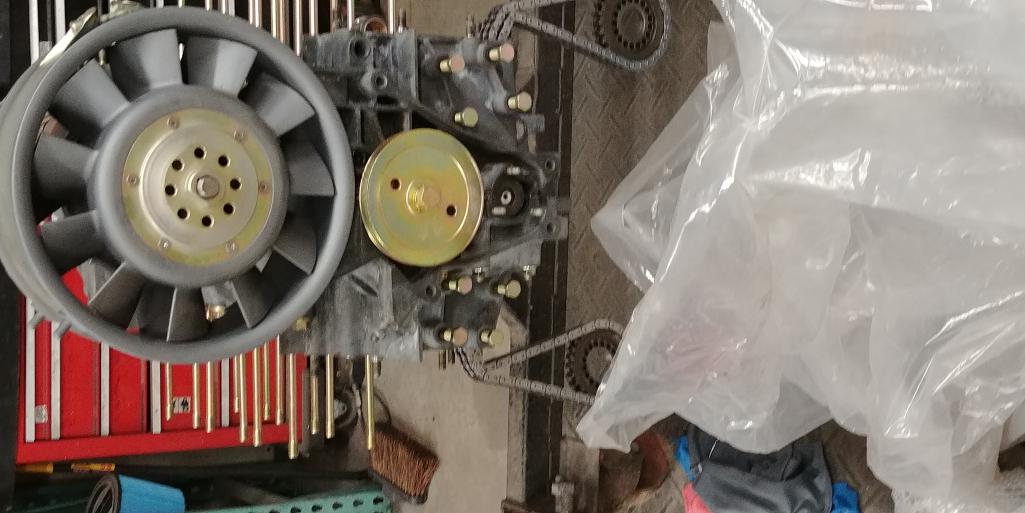
Posted by: mb911 Nov 4 2017, 07:28 AM
So a pretty slow week on progress this was hoping to have heads on but the piston circlips didn't make it to me yet.. Pretty disappointing but it is what it is.. I did button up any pin holes in the flares and weld on the driver side carpet hold downs.. Car is really coming along.. Very little welding left to do..
Posted by: mb911 Nov 9 2017, 02:36 PM
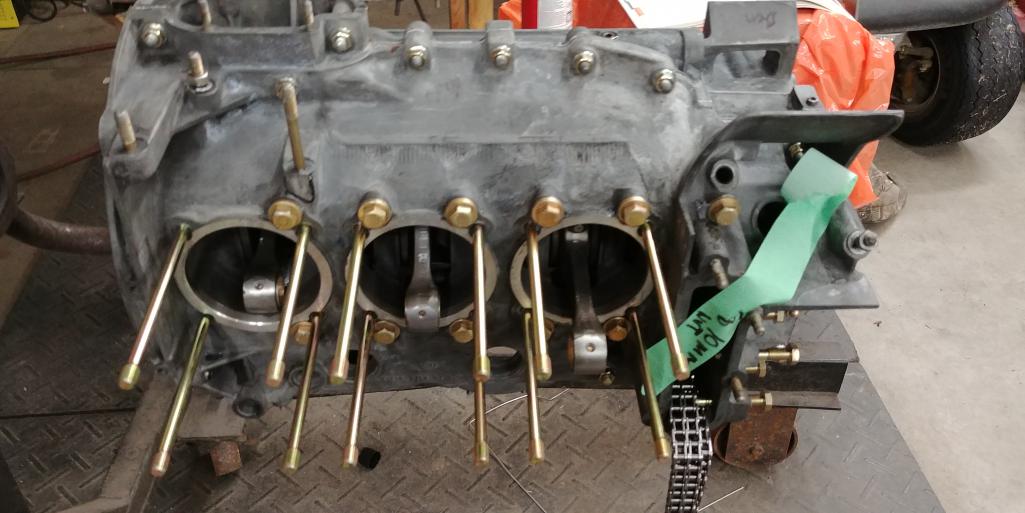
I had to redo a couple of case through bolt o rings this morning as they squeezed out.. Then had time to fit the 1st piston and cylinder before work..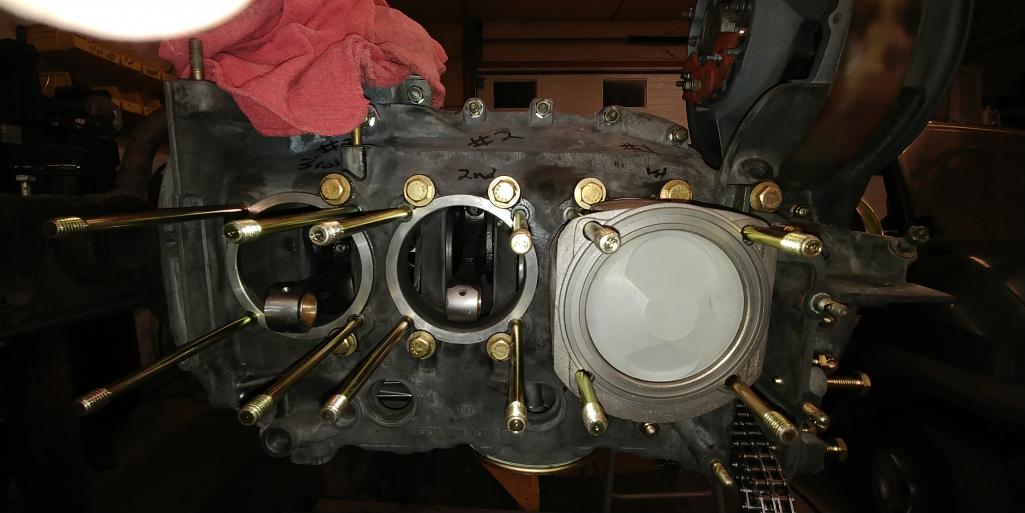
Posted by: mb911 Nov 9 2017, 06:39 PM
And a few more tonight inbetween other tasks..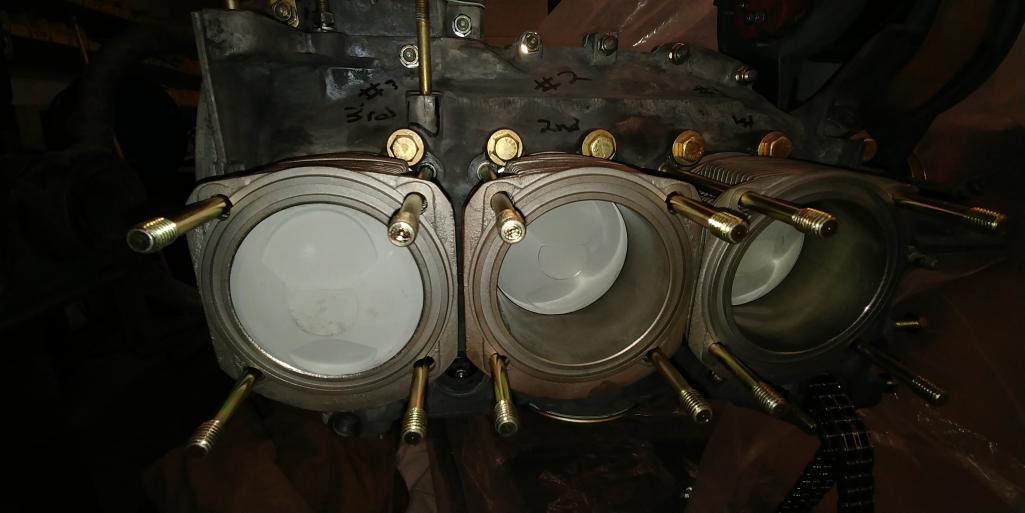
Posted by: ottox914 Nov 9 2017, 06:48 PM
That looks great. Always wanted to build a 6.
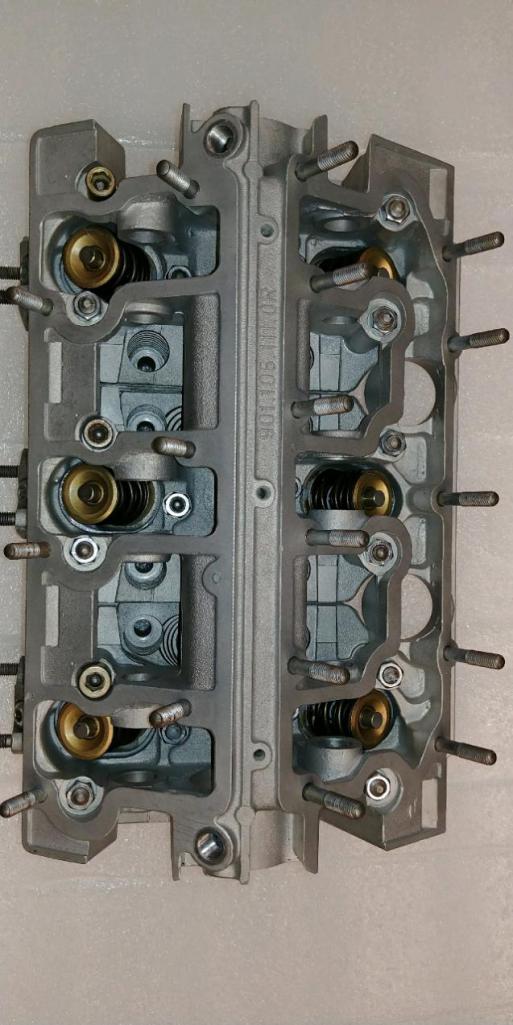
Posted by: mb911 Nov 11 2017, 04:49 PM
Did deck heights on cylinders 1,2,3 today and put heads on that bank. Waiting on shims for 4,5,6..
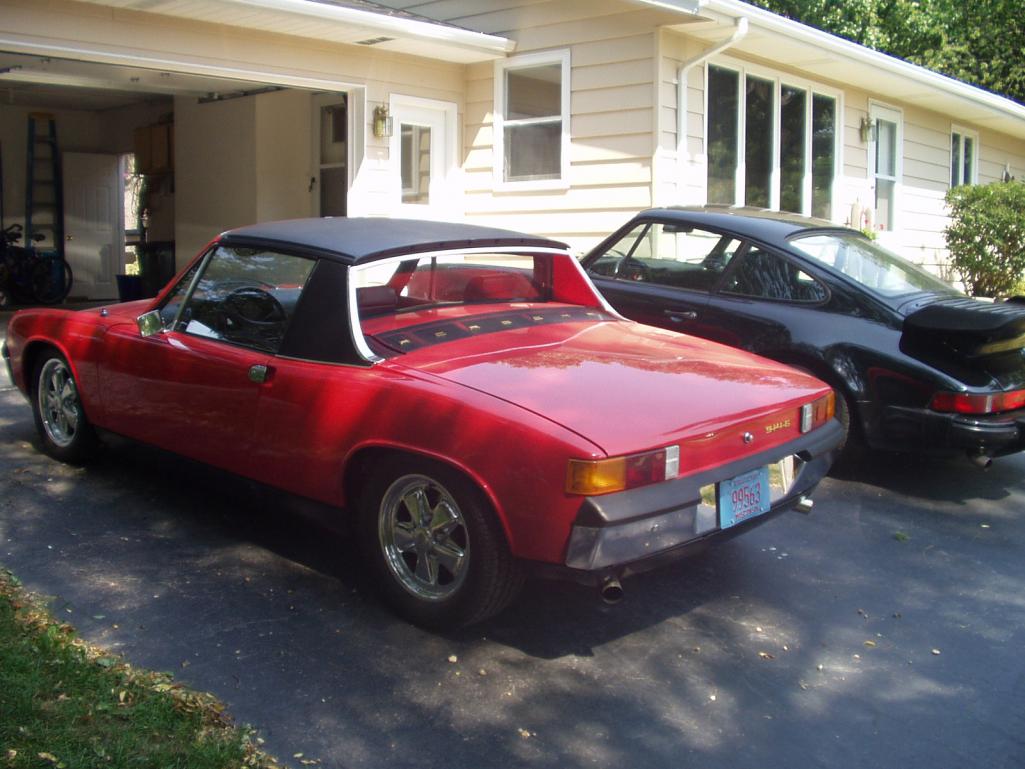
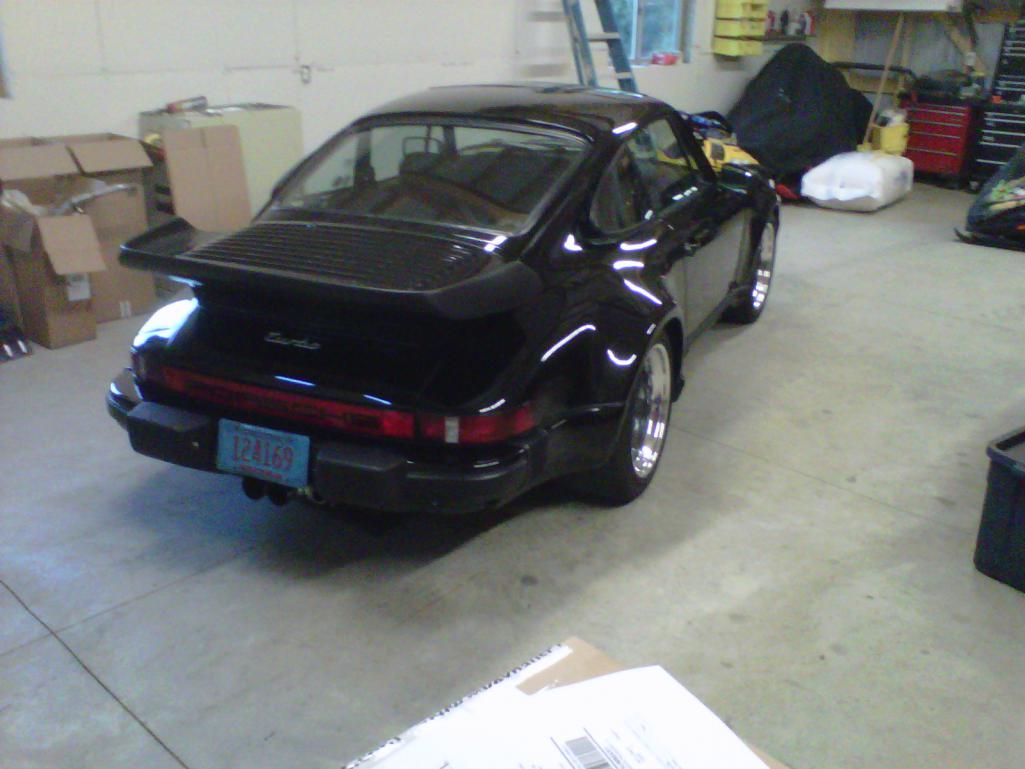
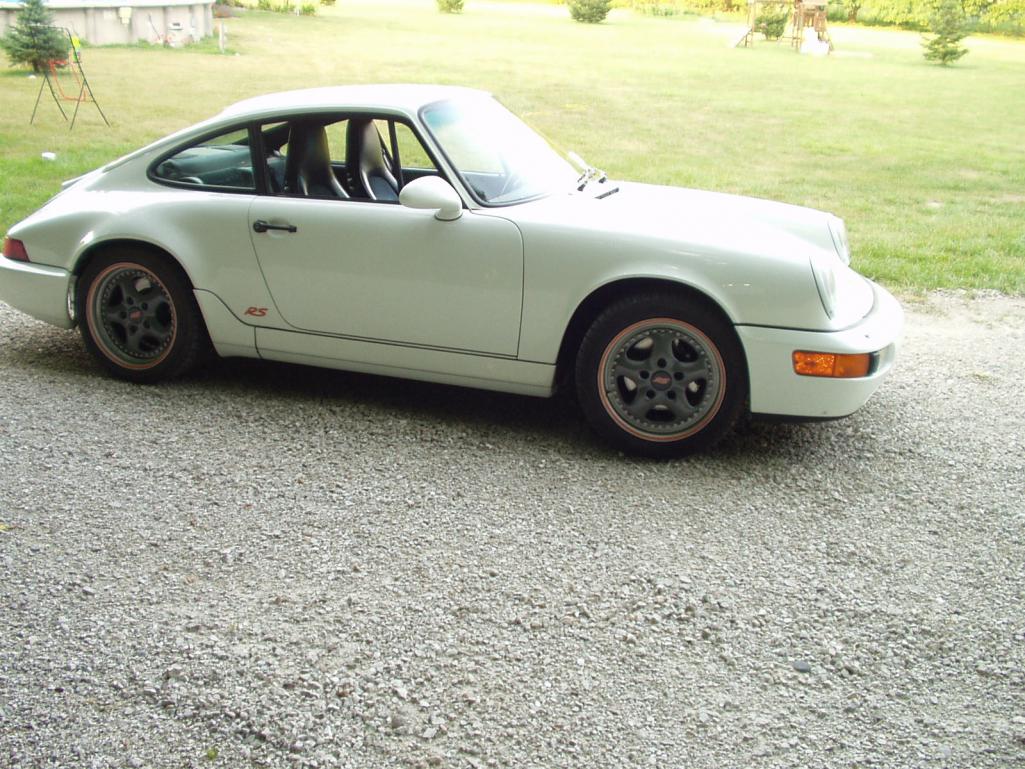
So I thought I would post pictures of my last 6. This what drives me to finish this car..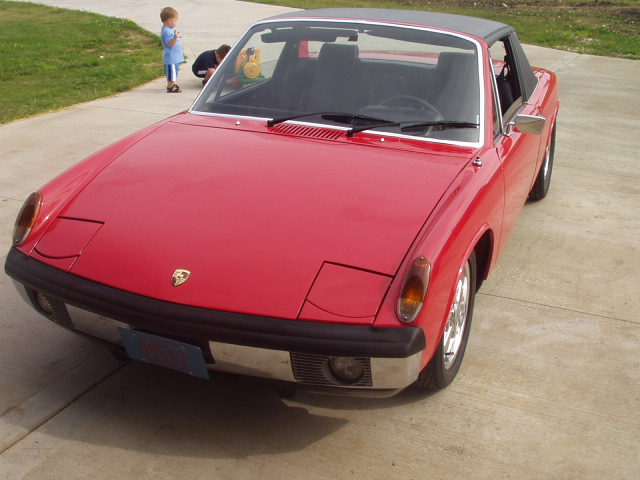


Posted by: Cairo94507 Nov 11 2017, 07:34 PM
MMMMM nice.
Posted by: mb911 Nov 12 2017, 07:25 AM
Was by far the nicest one I had seen in the Midwest ever..
Posted by: GeorgeRud Nov 12 2017, 10:24 AM
Great looking car! Converting a ‘73 or ‘74 Car is probably the best way to get a great -6 and it looks like you did it right.
Posted by: mb911 Nov 12 2017, 11:59 AM
This was a 75 chassis that was a roller from new mexico..
Posted by: mb911 Nov 16 2017, 06:31 AM
I spent an hour this morning torquing the heads/install 4,5,6 .. Installed the cam plugs(thanks Mark) and now just a few other things to tidy up as I wait for the rockers to be done.. I need to get back to grinding/some welding so that I can get this in primer..
Posted by: tygaboy Nov 16 2017, 09:04 AM
Dang it, that's pretty, Ben.
Every time I see a 6 being built, I question my decision to go with the LS...
Ah well, there's always the next project!
Keep up the great work.
Posted by: mb911 Nov 16 2017, 09:46 AM
Thanks Chris..
I also have notes written on the case as to order of pistons install and then actual cylinder locations and checks for install of circlips. This was done based off of when I have time and when I have to walk away to work on something else/family etc. I don't typically spend more than an hour at a time working on it and its hard to remember if you don't have notes..
Posted by: GeorgeRud Nov 16 2017, 08:21 PM
I’d need to have a torque marker to remind me where I stopped. It’s looking great!
Posted by: mb911 Nov 17 2017, 12:27 PM
I’d need to have a torque marker to remind me where I stopped. It’s looking great!
I take notes along with the stuff written on the case.. This weekend grinding will resume.. Probably an hour left on the engine and then bag up until spring..
Posted by: whitetwinturbo Nov 17 2017, 08:04 PM
Posted by: mb911 Nov 19 2017, 06:21 AM
Got a little bit more done. Cams are in but don't have rockers on.. No engine cooler on yet. I need to have the one I have professionally cleaned.. Now done on the engine for a while.. Grinding is now ready to start..
Posted by: mb911 Nov 29 2017, 02:43 PM
So a little update but no pictures as of right now.
Restored the rear konis I recieved from michael.
Put the powdercoated springs on I got from greg
Shocks are complete with replated and repainted everything
Put the engine in the corner on a different engine stand until I am ready for it..
Welded in patch right by the roll bar above door handle pocket on driver side
Ground all the flare welds down and started hammering out with hammer and dolly. Heated a few areas that were not coming along.
Made reinforcement for rear suspension pick up ears
Now second guessing my rear trunk panel may have to buy a new one after the holidays are done..
Reassembly of replated and powdercoated seat rails..
Took apart the steering rack , cleaned, inspected and ceramic painted. Will reassemble this week with fresh grease
Cleaned the shop.. So making progress
Posted by: Lucky9146 Nov 29 2017, 04:14 PM
So a little update but no pictures as of right now.
Restored the rear konis I recieved from michael.
Put the powdercoated springs on I got from greg
Shocks are complete with replated and repainted everything
Put the engine in the corner on a different engine stand until I am ready for it..
Welded in patch right by the roll bar above door handle pocket on driver side
Ground all the flare welds down and started hammering out with hammer and dolly. Heated a few areas that were not coming along.
Made reinforcement for rear suspension pick up ears
No second guessing my rear trunk panel may have to buy a new one after the holidays are done..
Reassembly of replated and powdercoated seat rails..
Took apart the steering rack , cleaned, inspected and ceramic painted. Will reassemble this week with fresh grease
Cleaned the shop.. So making progress
So just been sitting around eh?
 Wow! Great to hear you have done a lot there! Been following your thread keep up the momentum!
Posted by: mb911 Nov 29 2017, 06:31 PM
So a little update but no pictures as of right now.
Restored the rear konis I recieved from michael.
Put the powdercoated springs on I got from greg
Shocks are complete with replated and repainted everything
Put the engine in the corner on a different engine stand until I am ready for it..
Welded in patch right by the roll bar above door handle pocket on driver side
Ground all the flare welds down and started hammering out with hammer and dolly. Heated a few areas that were not coming along.
Made reinforcement for rear suspension pick up ears
No second guessing my rear trunk panel may have to buy a new one after the holidays are done..
Reassembly of replated and powdercoated seat rails..
Took apart the steering rack , cleaned, inspected and ceramic painted. Will reassemble this week with fresh grease
Cleaned the shop.. So making progress
So just been sitting around eh?
Wow! Great to hear you have done a lot there! Been following your thread keep up the momentum! Thanks.. Trying to get the car a roller by spring.. Fingers crossed.
Posted by: mb911 Nov 30 2017, 04:42 PM
A few little pictures.
Posted by: mb911 Nov 30 2017, 04:43 PM
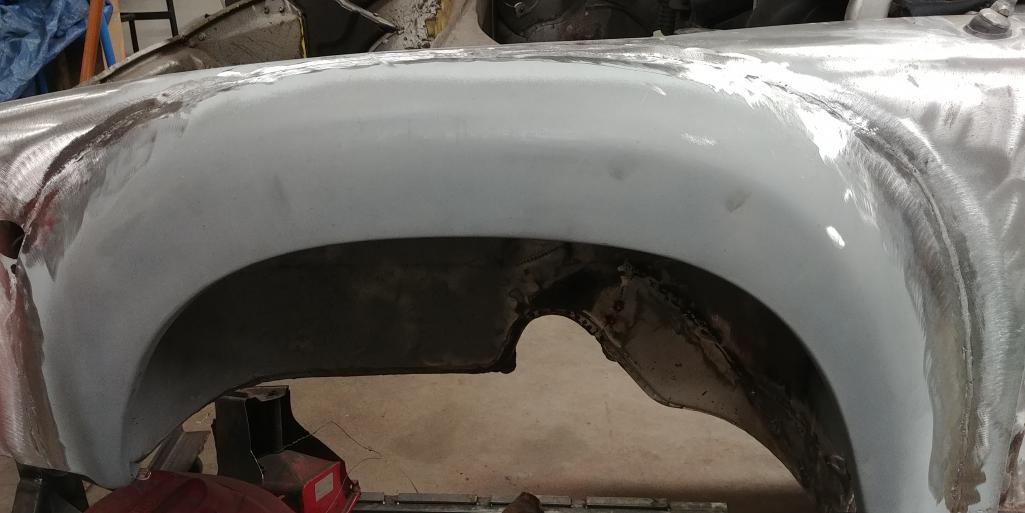
Posted by: bigkensteele Nov 30 2017, 08:42 PM
Just curious, did you rebuild the Konis when you restored them? I have a set dated 8/70 that I don't want to do anything to until I know the original style decal is still available. I haven't been able to find it anywhere, and I don't want to send these in for a rebuild if the label would be replaced with a newer one. These were made in Holland.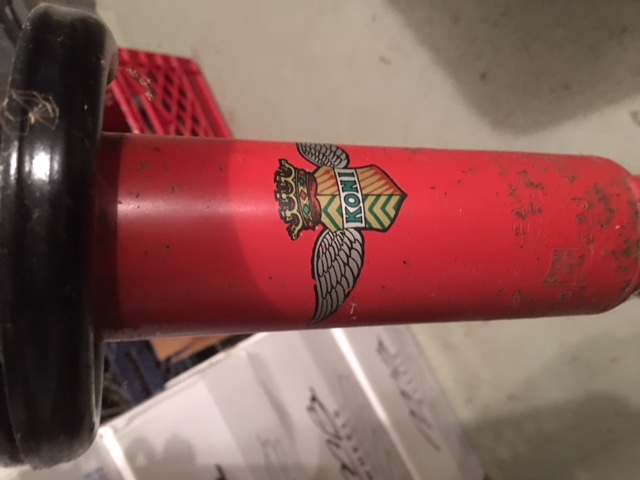
Posted by: mb911 Dec 1 2017, 06:20 AM
I was unable to find those stickers but the newer version sticker is available..
Posted by: raynekat Dec 1 2017, 07:12 AM
Carbone will replicate those for you if you can give them a good example of image and size.
Posted by: 914Sixer Dec 1 2017, 07:46 AM
I think SMC has the stickers for the Koni's.
Posted by: mb911 Dec 1 2017, 09:35 PM
Good to know..
Posted by: raynekat Dec 1 2017, 09:48 PM
I think SMC has the stickers for the Koni's.
Yep, on Sierra Madre....
http://www.sierramadrecollection.com/Koni-Decal-p16659.html

Posted by: mb911 Dec 2 2017, 05:29 PM
My oldest installed the 914 rubber seat adjuster handles onto the seats today. I machined the venturies yesterday and assembled the steering rack which I am not 100% happy with. Not as smooth as I think it should be .. Might come back apart..
Posted by: mb911 Dec 2 2017, 05:30 PM
Posted by: restore2seater Dec 2 2017, 09:07 PM
What did you do to the steering rack? Did you use replacement parts from a kit?
Posted by: mb911 Dec 3 2017, 07:21 AM
Followed all the rebuild threads out there. There really isn't much that needs to be rebuilt. There are 2 bearings in there but I didn't replace them as they were smoth. Gonna take it apart again as I don't like it yet.
Posted by: mb911 Dec 7 2017, 02:25 PM
Order some new bearings for the steering rack as I was not happy.
Received my rockers back from c gar on the bird board. Henry at supertec did most of my work but I have known Craig for years and he does great work..
Cut out 2 rust spots on the front driver side fender and welded in patches. Plugging a few more pin holes on driver side. This side is almost done both inside and out. 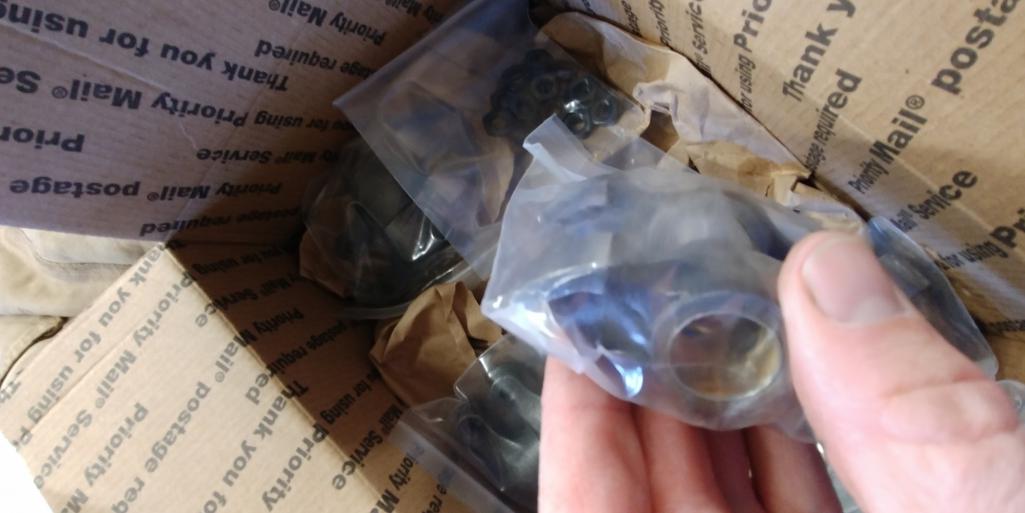
Posted by: mb911 Dec 9 2017, 08:59 PM
A little welding, 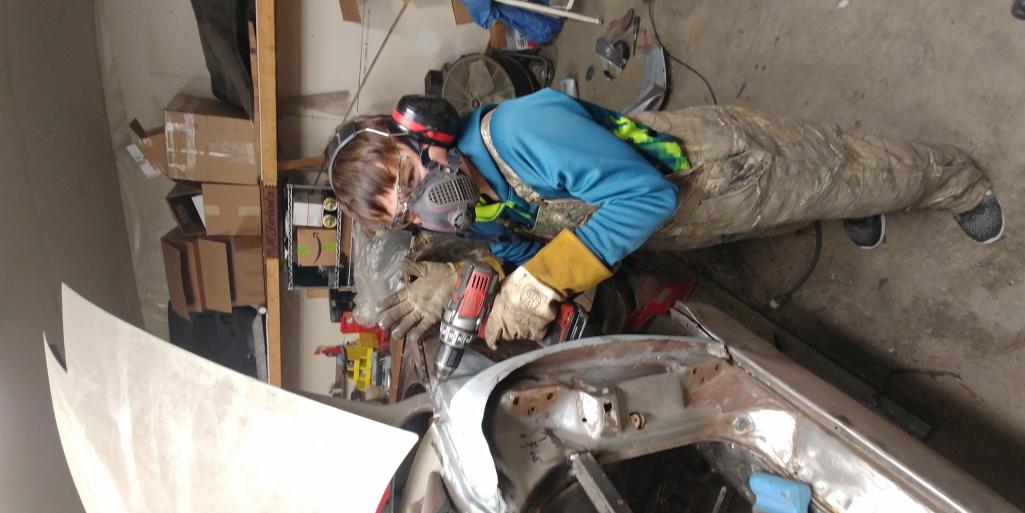 drilling and grinding with one of my boys..
Front fender almost ready to install.
Posted by: GeorgeRud Dec 10 2017, 08:06 PM
Start them young,[attachmentid=631037]
Posted by: mb911 Dec 10 2017, 08:07 PM
The plan for the week is ship all the mufflers, oil tanks, and gt rocker flares and Also finish passenger front P.O. shotty repair redo. Some of it is ok but most of it is brazed and that sucks in my opinion.. I ground most of that down and hammered and dollied the dents.. Cleaned and zinc painted the bare metal.. Gotta weld a few areas and then ready for the fender.. This will help get the car closer to becoming a roller.
Posted by: GeorgeRud Dec 10 2017, 08:09 PM
Double post - sorry.
Posted by: mb911 Dec 11 2017, 02:50 PM
Pmb Christmas delivery..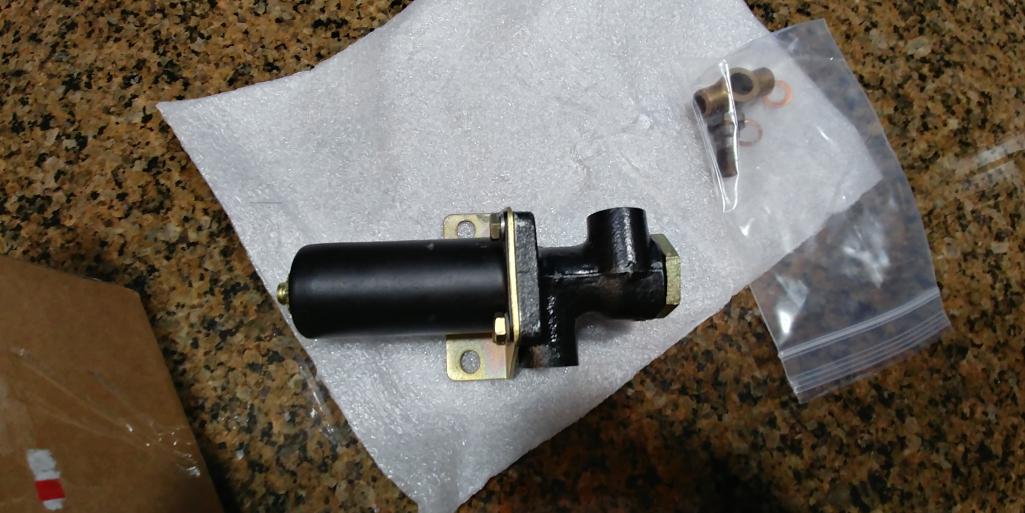
Posted by: mb911 Dec 21 2017, 04:08 PM
So been picking away on things.. Started reworking a p.o. repair in the front passenger side front wheel well. Made some patch panels. Hammered a bunch out.. Now to deal with the brazed area from that previous repair...
Also a time out to make some tanks.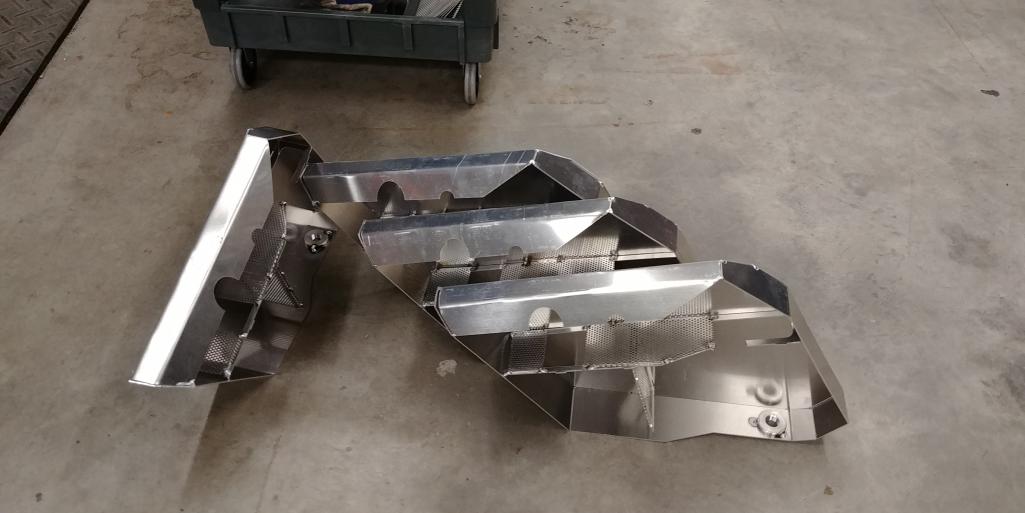
Posted by: mb911 Dec 21 2017, 06:52 PM
I know this doesn't look pretty yet.. You can see where previous owner repaired bu brazing a new section in.. I tried to make the 2 patches to the left out of 1 piece and to many compound bends.. The patches are blended pretty nice but need a bit more work.. Then hammer and dolly the brazed area.. Thought about cutting that area out and rewelding that but not conviced I can get all the brass out. 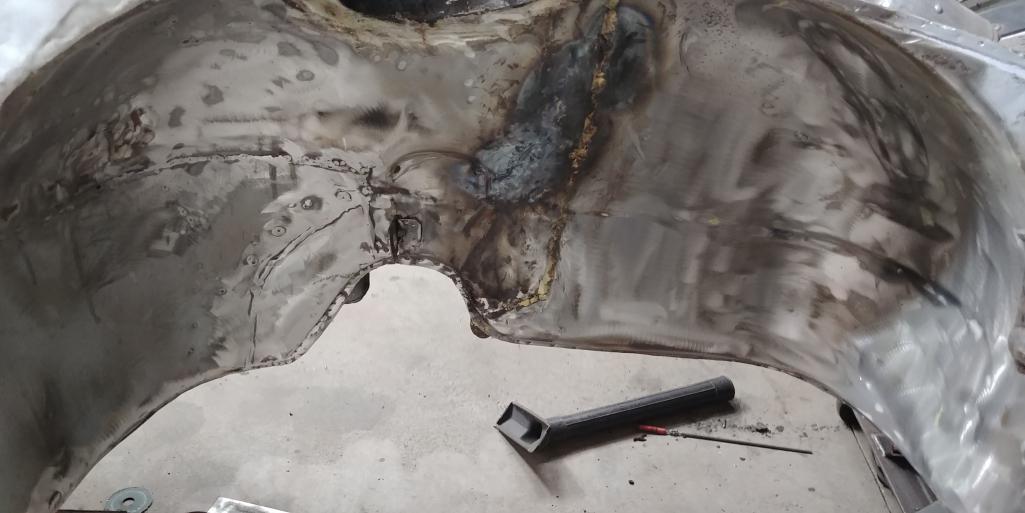
Posted by: mb911 Dec 22 2017, 09:56 AM
After allot of back and forth I have decided to order my last RD part needed for this car.. The rear trunk floor.. You may remember that I put one in out of a donor car but found some pinholes.. I ordered the 200 dollars worth of parts this morning and after the 1st of the year will get that installed.. I will have the front wheel well sorted by then.. Still thinking on the brazed section..
Posted by: GeorgeRud Dec 22 2017, 10:05 AM
What would have been the reason it was brazed instead of welded by the PO?
Posted by: mb911 Dec 22 2017, 10:58 AM
What would have been the reason it was brazed instead of welded by the PO?
My guess is it was a repair in the early 80s and this was still a semi normal repair..
Posted by: bbrock Dec 22 2017, 11:32 AM
I've got several brazed patches from a PO that I'll be repairing in the near future. Had to have been done in late 70s/early 80s. Your brazes look nice compared with mine. On mine, they just slapped sheet metal over rust holes, brazed them into place, then slathered bondo to hide the lapped edges. Needless to say, they rusted out again.
Posted by: mb911 Dec 22 2017, 11:42 AM
I've got several brazed patches from a PO that I'll be repairing in the near future. Had to have been done in late 70s/early 80s. Your brazes look nice compared with mine. On mine, they just slapped sheet metal over rust holes, brazed them into place, then slathered bondo to hide the lapped edges. Needless to say, they rusted out again.
So my thought is to use a cut off wheel to cut the brass out and will create a 1/16" square groove and then weld it up.. What do you think?
Posted by: mb911 Jan 4 2018, 05:43 AM
I was finally able to work on this last night.. I cut a square groove and then ground the brass off.. Welded it up and went well.. The inner wheel well is almost done.. I also welded on one of the 2 rear suspension ear reinforcements.. Went well as well. Plugged amd ground a few more areas.. Almost ready for epoxy..
Posted by: bbrock Jan 4 2018, 08:30 AM
I was finally able to work on this last night.. I cut a square groove and then ground the brass off.. Welded it up and went well.. The inner wheel well is almost done.. I also welded on one of the 2 rear suspension ear reinforcements.. Went well as well. Plugged amd ground a few more areas.. Almost ready for epoxy..
Did you happen to snap any pics of this? I'm not sure I have it figured out in my mind, and might want to steal this approach.
Posted by: mb911 Jan 4 2018, 06:04 PM
I was finally able to work on this last night.. I cut a square groove and then ground the brass off.. Welded it up and went well.. The inner wheel well is almost done.. I also welded on one of the 2 rear suspension ear reinforcements.. Went well as well. Plugged amd ground a few more areas.. Almost ready for epoxy..
Did you happen to snap any pics of this? I'm not sure I have it figured out in my mind, and might want to steal this approach.
I will take a picture this weekend.
Posted by: mb911 Jan 10 2018, 08:00 PM
Sorry haven't had a chance been extremely busy with work vut spent the last 2 mornings @5 am doing some welding and grinding all passenger side.. Went and bought a quart of epoxy primer, a roll of 8o grit for the da, and some kevlar reinforced filler for the weld seams. The stuff comes highly recommended as its 100% waterproof so no rust issues.. Getting very close to removing door braces..
New trunk floor is here and moving that direction next week..
Posted by: GeorgeRud Jan 10 2018, 08:04 PM
Glad that it’s moving along. Hopefully you have good heat after the weather last week.
Posted by: bbrock Jan 10 2018, 08:32 PM
and some kevlar reinforced filler for the weld seams. The stuff comes highly recommended as its 100% waterproof so no rust issues..
https://www.amazon.com/Fibreglass-Evercoat-632-Everglass-Reinforced/dp/B0000AYHHN I'll be watching this closely. Sounds like a good idea.
Posted by: mb911 Jan 11 2018, 05:13 AM
and some kevlar reinforced filler for the weld seams. The stuff comes highly recommended as its 100% waterproof so no rust issues..
https://www.amazon.com/Fibreglass-Evercoat-632-Everglass-Reinforced/dp/B0000AYHHN I'll be watching this closely. Sounds like a good idea.
This stuff
Posted by: mb911 Jan 11 2018, 08:36 AM
Completed one suspension ear reinforcements this morning.. Then off to work..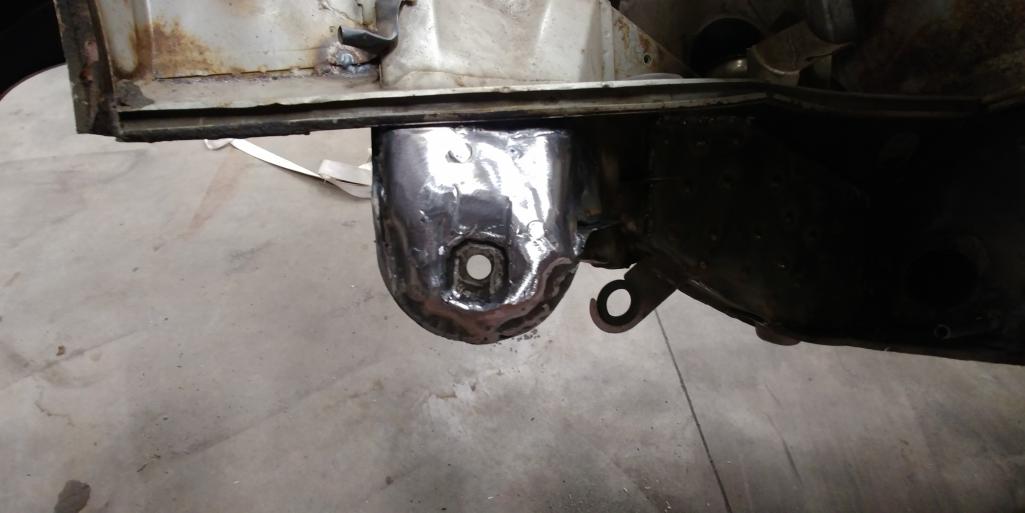
Posted by: mb911 Jan 11 2018, 08:38 AM
This is the p.o. repair area.. I cut the brazing out and welded now have to hammer it flat.. 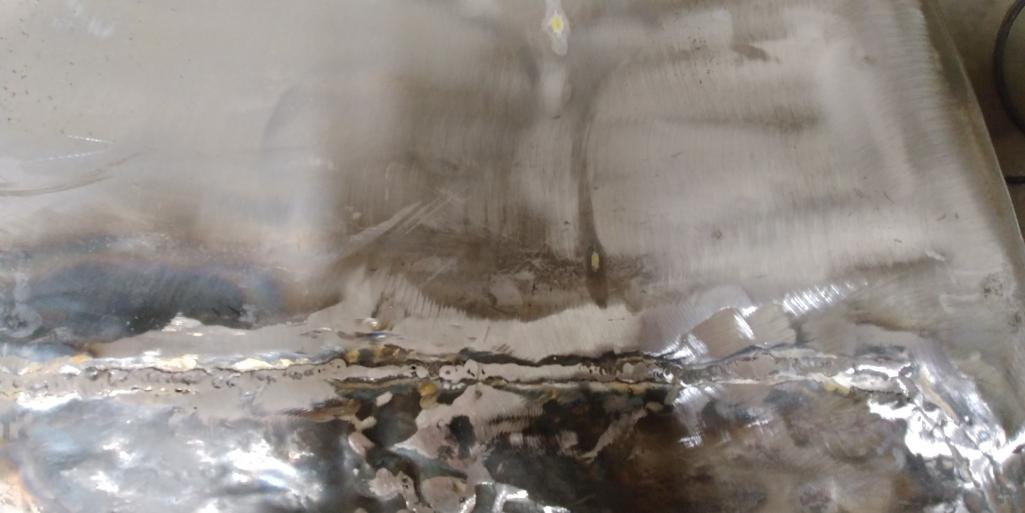
This is front wheel well passenger side..
Posted by: mb911 Jan 15 2018, 05:31 PM
So I feel like I am skipping all over but I try to get the big chunks done.. The passenger side wheel well is almost all hammered out but my shoulder and forearm are pretty sore(getting old))? So I moved to the rear trunk so I could complete 1 area.. I think I am not going use the whole RD piece as it makes for an odd weld joint.. So if you look close you will see where I cut a line.. I chose that as a good area to butt joint because its the edge and will warp less. I going to bring the RD piece to work and use the vertical band saw to cut a nice straight line then put the piece in the trunk anf scribe a line for final cutting..
I plan to get the trunk done this week and then back to the wheel well.. But will feel better once the trunk is done.. 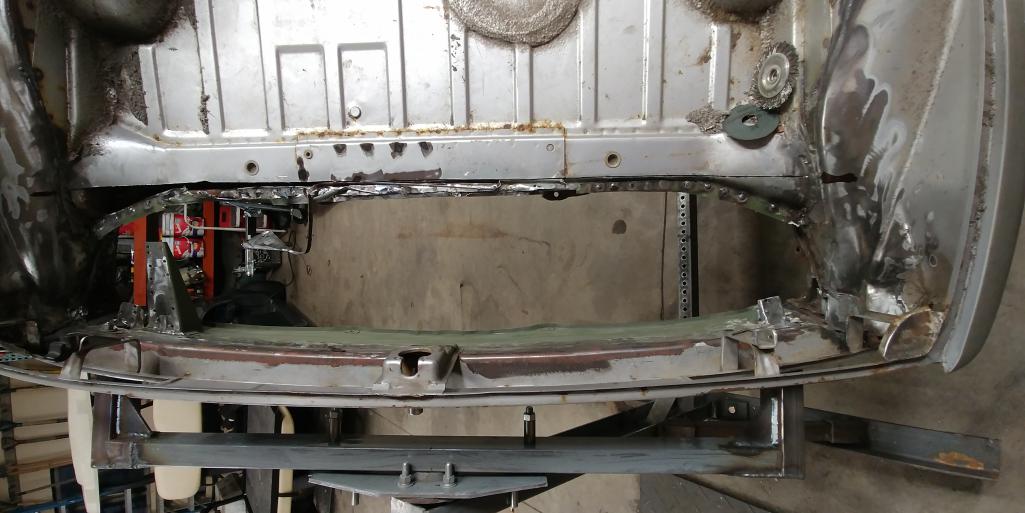
Posted by: mb911 Jan 15 2018, 05:32 PM
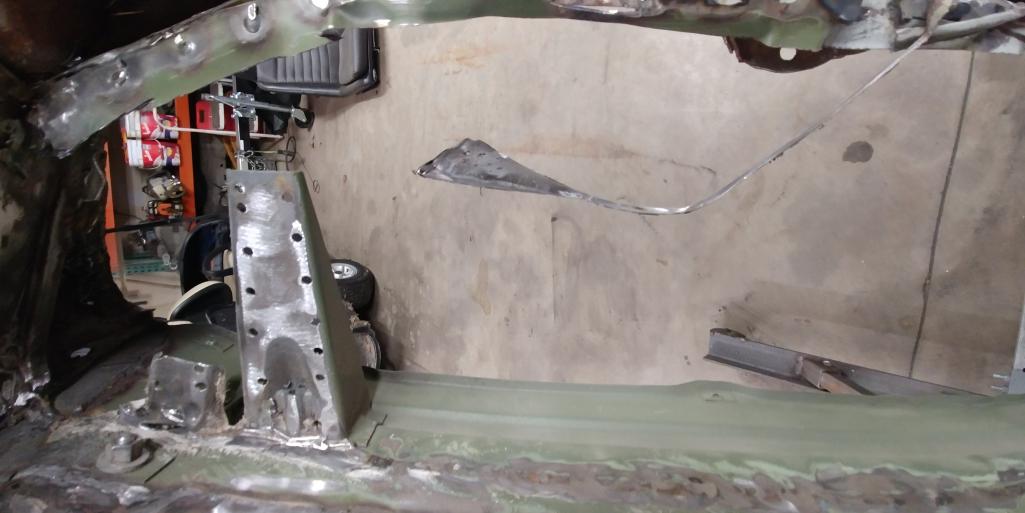
Also note this is the second trunk panel I put in.. The 1st one was from a donor car but was not acceptable to me finished
Posted by: mb911 Jan 16 2018, 02:47 PM
Just a little project that has been a year in the making.. I programmed everything today and thought you all would think its interesting.. This was done on a 130 ton brake press.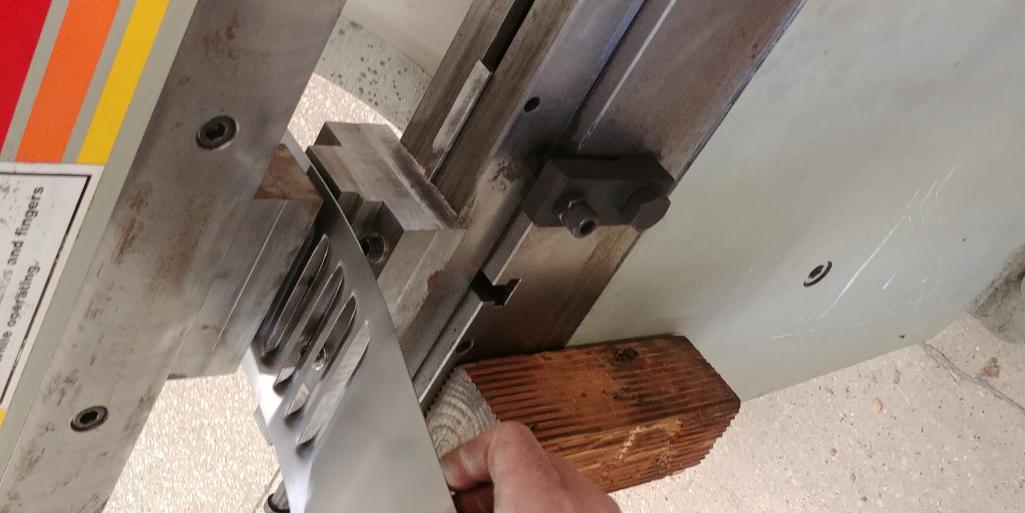
Posted by: Perry Kiehl Jan 16 2018, 03:12 PM
What would have been the reason it was brazed instead of welded by the PO?
Up until MIG welders got affordable it was the fastest and easiest way to go.
There's a few places on the car where the factory used brazed seams. A weld joint will stress crack where a brass will not. Years ago shops would braze a horseshoe shim on a dented panel to pull it out, they brazed it because done right, it won't fail.
Posted by: mepstein Jan 16 2018, 03:16 PM
Just a little project that has been a year in the making.. I programmed everything today and thought you all would think its interesting.. This was done on a 130 ton brake press.
I like this.
Posted by: bbrock Jan 16 2018, 03:19 PM
A weld joint will stress crack where a brass will not.
Hmm, this runs a little counter to the logic I used to reinforce the clutch cable tube on my project yesterday. One of the braze joints at the front cracked and I added a series of tack welds to convince everything to stay in its right place. Wondering if I need to rethink that...

Posted by: Perry Kiehl Jan 16 2018, 03:56 PM
The problem with the clutch cable is age and stress cracks. I make a plate to go over the area, but I do weld it.
Posted by: mb911 Jan 16 2018, 04:09 PM
And now for some reason all my pictures are posting sideways..
Perry.. I still nees to call you.. Been busy..
Posted by: GeorgeRud Jan 16 2018, 08:16 PM
Looks great! Will you use the louver punch to make a lower panel under the oil cooler?
Posted by: mb911 Jan 17 2018, 05:13 AM
Looks great! Will you use the louver punch to make a lower panel under the oil cooler?
That part was actually done about a year ago.. Not sure yet what I will use the die for.
Posted by: mb911 Jan 20 2018, 08:06 PM
Trunk is done.. Well less the 1 overlay.. That will be next week.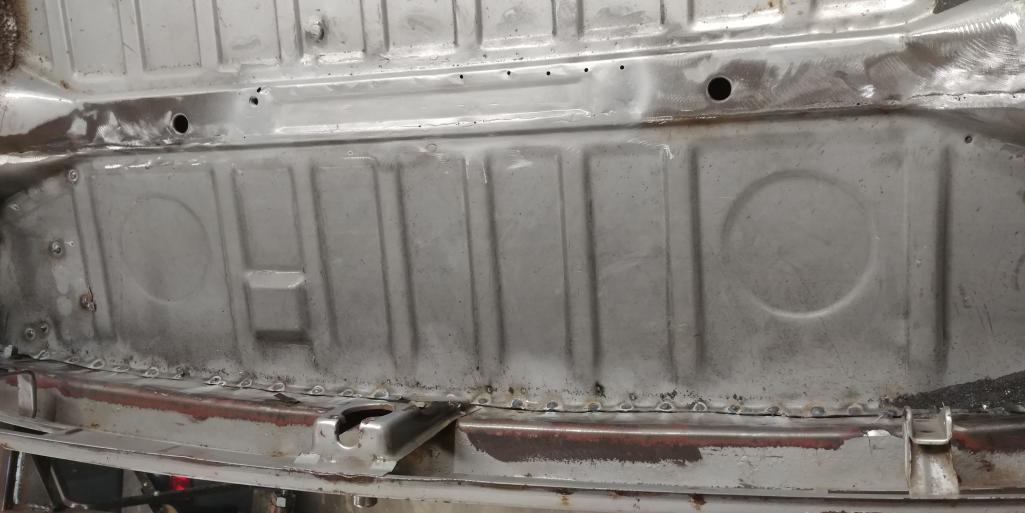
Posted by: sixnotfour Jan 21 2018, 02:36 PM
6543 louvers
Attached image(s)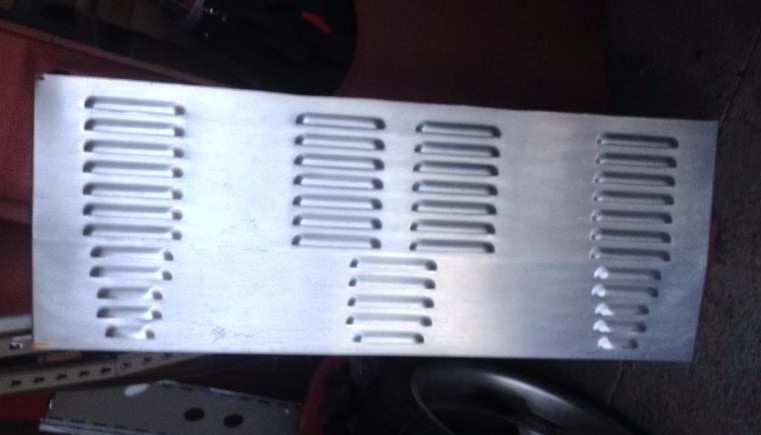
Posted by: mb911 Jan 21 2018, 03:20 PM
6543 louvers
In my fab class this week I am going to teach my class how to fab the front belly /oil cooler floor just because. Its a semi complicated part for the novice and they will think its cool that its for a porsche and they get to take it home to hang on their wall..
Posted by: Phil Plummer Jan 21 2018, 09:54 PM
Just a quick introduction. I am picking up a 74 1.8 this weekend to do a 6 conversion on. I built one about 15 years ago but then sold it and had a 964 and a 911 turbo in its absence. I have since sold everything and have not had a porsche in about 3 years.
Technology has changed since my absence and was looking for a quick list of must do's when doing a conversion..
Thanks
Hi Ive a running 914/6 with a 3.0 im trying to find engine tin. Pls let me know if you know where to find engine tin. Im told the 3.0 and 3.2 engine tin wont work at all for a 914/6
Regards Phil
Posted by: Phil Plummer Jan 21 2018, 09:56 PM
6543 louvers
In my fab class this week I am going to teach my class how to fab the front belly /oil cooler floor just because. Its a semi complicated part for the novice and they will think its cool that its for a porsche and they get to take it home to hang on their wall..
Hello: pls let me know where i can find engine tin for my 3.0 conversion,Im told the 3.0 and 3.2 tin wont work at al for a914/6
Regards Phil
Posted by: mb911 Jan 22 2018, 08:04 AM
6543 louvers
In my fab class this week I am going to teach my class how to fab the front belly /oil cooler floor just because. Its a semi complicated part for the novice and they will think its cool that its for a porsche and they get to take it home to hang on their wall..
Hello: pls let me know where i can find engine tin for my 3.0 conversion,Im told the 3.0 and 3.2 tin wont work at al for a914/6
Regards Phil
Restoration design sells the complete kit for about 900 or so and its a wonderful set that exeeds original parts in quality..mine won't be ready for a bit and mine are for the budget builders as the sheet metal is much more homemade by comparison to the RD piece..
Posted by: mb911 Jan 28 2018, 01:34 PM
Well busy times, working allot in my day job as we have a company coming into the area looking for 13k employees and have allot of people looking for training..
Then business is very busy and growing. A website is under development thanks to a member here that has been an absolute blessing.. The GT hardlines have consumed allot of time and money..
That said I gave in and bought 2 new sail panels from restoration design as while I was in there make it 100% right.. It put me behind by a couple weeks of my target but will be worth it..
I cut the passenger side off yesterday inbetween cerakoting some engine parts after repair for a customer.
Front wheel well has been a constat issue where it was brazed etc.. Almost done welding pits and grinding in that area.. Hopefully prime that area this week and mount the door on so can weld the fender on.. 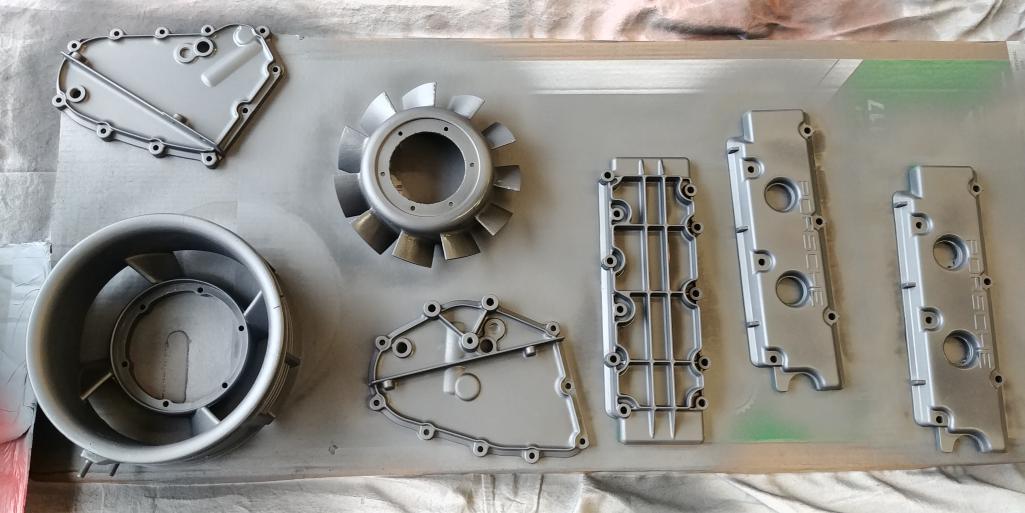
Posted by: mb911 Jan 28 2018, 01:37 PM
Oh and brace is in the trunk so that are is done.. Yeah.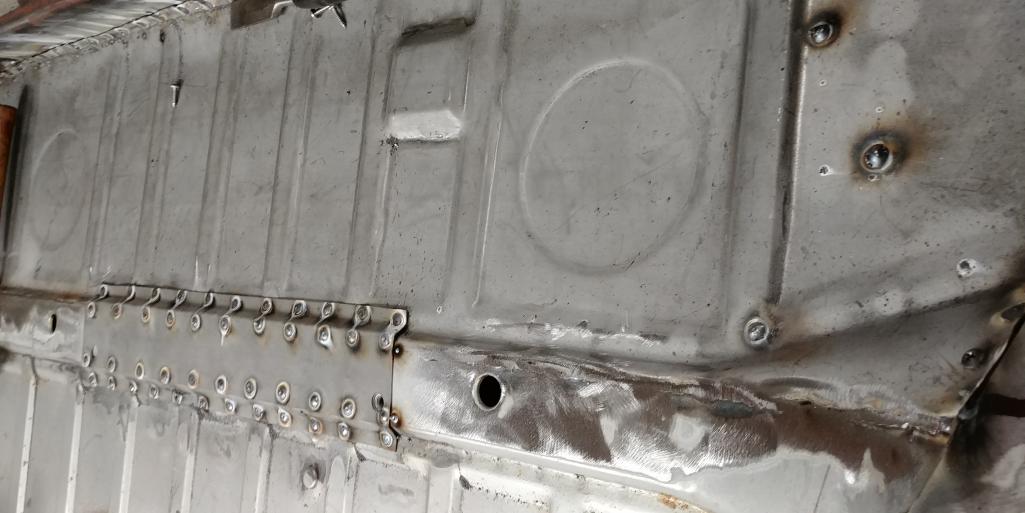
Posted by: mb911 Jan 30 2018, 07:01 AM
And this mornings progress.. Was going to make it out of one piece but lent my brake out to someone and this will blend well enough once welding is completely done.. 
Posted by: bbrock Jan 30 2018, 09:15 AM
I've got a smaller patch in that general area coming up fairly quickly. Did you treat the inside of that cavity while it was open? Haven't decided what to do with mine. Always looking for examples.
Posted by: Dion Jan 30 2018, 09:35 AM
Well busy times, working allot in my day job as we have a company coming into the area looking for 13k employees and have allot of people looking for training..
Then business is very busy and growing. A website is under development thanks to a member here that has been an absolute blessing.. The GT hardlines have consumed allot of time and money..
That said I gave in and bought 2 new sail panels from restoration design as while I was in there make it 100% right.. It put me behind by a couple weeks of my target but will be worth it..
I cut the passenger side off yesterday inbetween cerakoting some engine parts after repair for a customer.
Front wheel well has been a constat issue where it was brazed etc.. Almost done welding pits and grinding in that area.. Hopefully prime that area this week and mount the door on so can weld the fender on..
I really like the finish on those parts Ben. Looks great man.
Is Cerakote finish similar to powder coating?
I’ve only read a few things regarding its use. Mostly gun finishes.
Regards
Posted by: mb911 Jan 30 2018, 09:37 AM
I've got a smaller patch in that general area coming up fairly quickly. Did you treat the inside of that cavity while it was open? Haven't decided what to do with mine. Always looking for examples.
Yup just cold galvanized spray after wire brushing it. Then use som galvaneel cut offs from the RD parts..
Posted by: mb911 Jan 30 2018, 09:40 AM
Well busy times, working allot in my day job as we have a company coming into the area looking for 13k employees and have allot of people looking for training..
Then business is very busy and growing. A website is under development thanks to a member here that has been an absolute blessing.. The GT hardlines have consumed allot of time and money..
That said I gave in and bought 2 new sail panels from restoration design as while I was in there make it 100% right.. It put me behind by a couple weeks of my target but will be worth it..
I cut the passenger side off yesterday inbetween cerakoting some engine parts after repair for a customer.
Front wheel well has been a constat issue where it was brazed etc.. Almost done welding pits and grinding in that area.. Hopefully prime that area this week and mount the door on so can weld the fender on..
I really like the finish on those parts Ben. Looks great man.
Is Cerakote finish similar to powder coating?
I’ve only read a few things regarding its use. Mostly gun finishes.
Regards
Cerakote is a ceramic paint.. I used it on my engine build as well. Its sprayed in automotive spray guns.
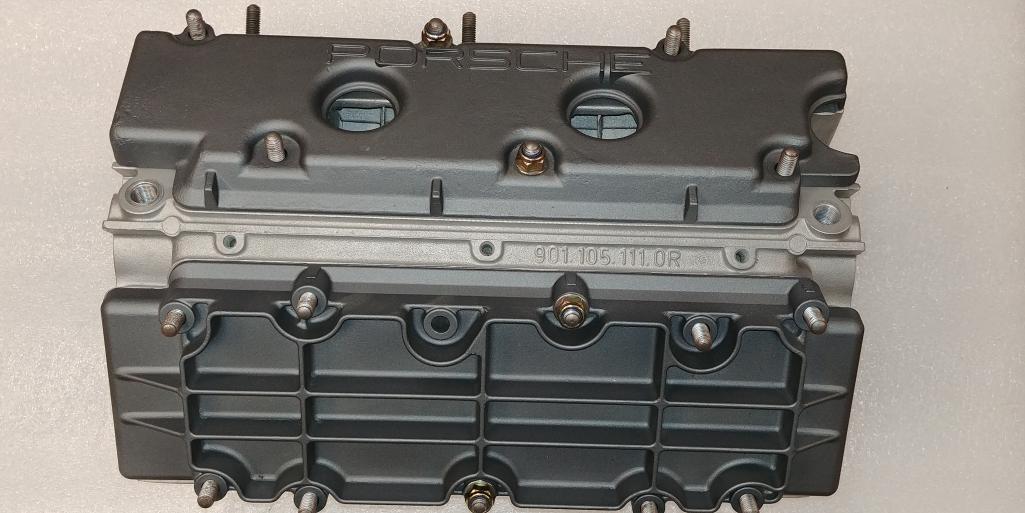
Posted by: Dion Jan 30 2018, 10:35 AM
A big step above the rattle cans then.
Thanks Ben.
Posted by: mb911 Jan 30 2018, 12:21 PM
A big step above the rattle cans then.
Thanks Ben.
Thats for sure.. it is rock hard and handles extreme heat.. does not discolor either
Posted by: jd74914 Jan 30 2018, 12:32 PM
A big step above the rattle cans then.
Thanks Ben.
Thats for sure.. it is rock hard and handles extreme heat.. does not discolor either
Those parts look great! I've also been very happy with the Cerakote in the past. Pretty easy to apply and lasts forever.
Not to hijack but...For those who just need aluminum or flat black/white colors and want/need it in an aerosol can, Superior Industries Thermal Kote is also very good. It's expensive ($90/2 pack), so nothing like cheap autopart store sprays.
The temperature rating is a bit lower (1325F vs. 1600F), but it holds up really well. I regularly use it in burners that see >1450 F (bright cherry glowing color) and haven't had any flaking problems either.
https://www.superior-industries.com/thermal_kote_product_208.html
Posted by: mb911 Jan 30 2018, 03:55 PM
A big step above the rattle cans then.
Thanks Ben.
Thats for sure.. it is rock hard and handles extreme heat.. does not discolor either
Those parts look great! I've also been very happy with the Cerakote in the past. Pretty easy to apply and lasts forever.
Not to hijack but...For those who just need aluminum or flat black/white colors and want/need it in an aerosol can, Superior Industries Thermal Kote is also very good. It's expensive ($90/2 pack), so nothing like cheap autopart store sprays.
The temperature rating is a bit lower (1325F vs. 1600F), but it holds up really well. I regularly use it in burners that see >1450 F (bright cherry glowing color) and haven't had any flaking problems either.
https://www.superior-industries.com/thermal_kote_product_208.html
Interesting stuff. never tried that
Posted by: mb911 Jan 31 2018, 06:42 AM
Finished welding the area this morning and then ground it down 90% and cleaned and sprayed zinc brite over it.. It is a perfect repair for a hidden area with all the correct contours but doesn't require the finish that an external panel requires.. 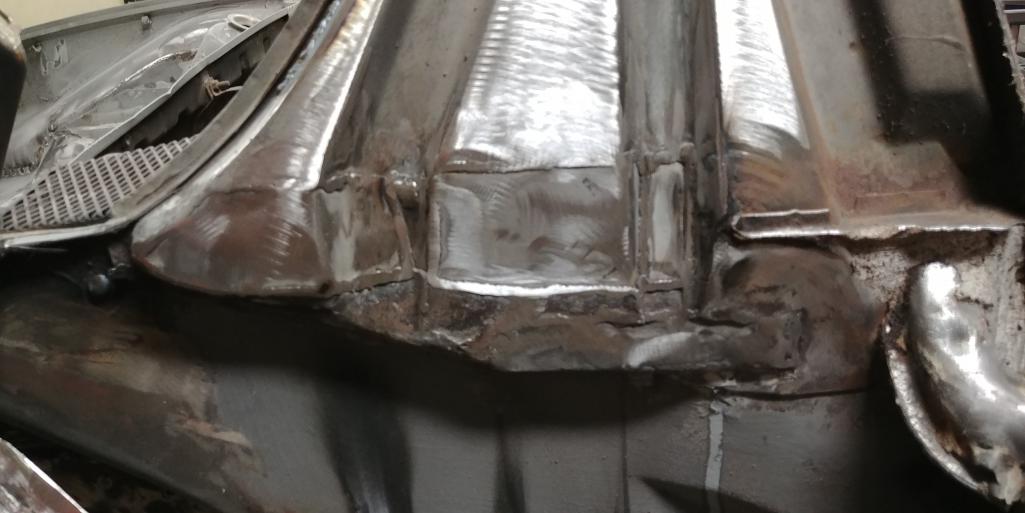
Posted by: mb911 Feb 1 2018, 06:51 AM
Woke up at 4:15 today went out and welded the sail panel on . Went well but have a bit to finish yet.. This will conclude my week of progress as busy the rest of the week but feel that I made progress. 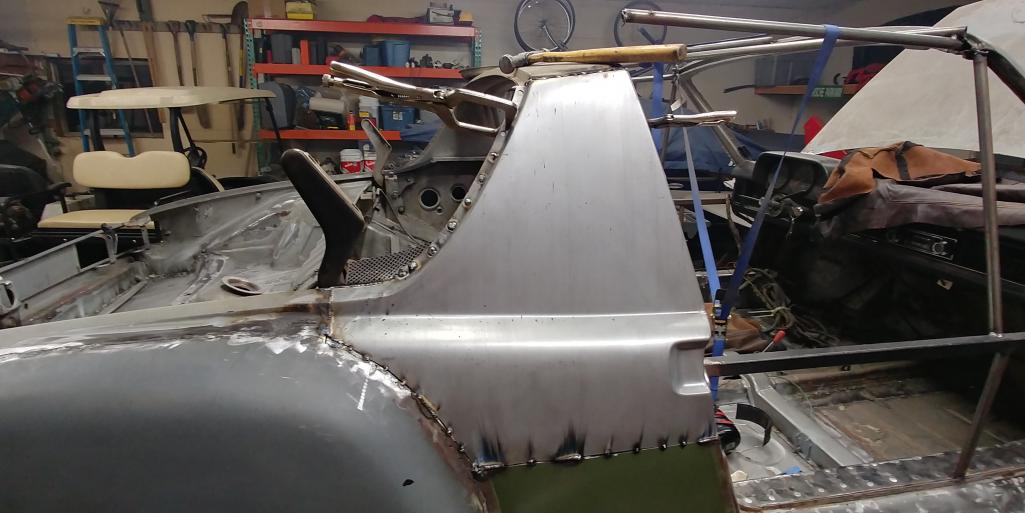
Posted by: jmitro Feb 1 2018, 06:57 AM
looking great. sometimes it seems progress is so slow, but then you look back at all the baby steps and realize you're making big gains
Posted by: mepstein Feb 1 2018, 07:29 AM
You slept in till 4:15 - slacker
Posted by: mb911 Feb 1 2018, 09:22 AM
You slept in till 4:15 - slacker
Too much on my mind I guess.
Posted by: Ecke Liebhaber Feb 1 2018, 09:30 AM
Looking good Ben.
I like the bottom brace, nice work.
Posted by: mb911 Feb 1 2018, 10:44 AM
Thanks.. Making headway..
Posted by: worn Feb 1 2018, 04:27 PM
What would have been the reason it was brazed instead of welded by the PO?
Up until MIG welders got affordable it was the fastest and easiest way to go.
There's a few places on the car where the factory used brazed seams. A weld joint will stress crack where a brass will not. Years ago shops would braze a horseshoe shim on a dented panel to pull it out, they brazed it because done right, it won't fail.
A good braze is also better than a bad weld. You wouldn’t believe how easy mig made things.
Posted by: mb911 Feb 1 2018, 05:46 PM
What would have been the reason it was brazed instead of welded by the PO?
Up until MIG welders got affordable it was the fastest and easiest way to go.
There's a few places on the car where the factory used brazed seams. A weld joint will stress crack where a brass will not. Years ago shops would braze a horseshoe shim on a dented panel to pull it out, they brazed it because done right, it won't fail.
A good braze is also better than a bad weld. You wouldn’t believe how easy mig made things.
True for sure.
So curious should the upper part of the door jamb be brazed? It was from the factory from what I see.
Posted by: mb911 Feb 5 2018, 04:24 PM
Didn't do any work this weekend. Up North at our cabin ice fishing
Posted by: mb911 Feb 5 2018, 04:25 PM
Posted by: bbrock Feb 5 2018, 04:29 PM
Nice! But how can you call that ice fishing without a 3-bedroom "hut" on the ice with TV and satellite dish? What kind of person just braves the elements like that? 
Posted by: mb911 Feb 5 2018, 05:13 PM
Nice! But how can you call that ice fishing without a 3-bedroom "hut" on the ice with TV and satellite dish? What kind of person just braves the elements like that?
We sit in the cabin and look outside for the flags to pop up..
We got skunked but found this on our hike.I think it is left overs from grandpa's farm years ago. He farmed and was the local school superintendent..

Posted by: GeorgeRud Feb 6 2018, 03:22 PM
Lots of cabins out on Lake Geneva and I don’t think any have fallen through the ice so far this year. It’s a great way to get through a Wisconsin winter (assuming you have some refreshing adult beverages to help you spend your time). Spring will eventually arrive, but it’s all about snow and cold this week!
Posted by: mepstein Feb 6 2018, 03:23 PM
Nice! But how can you call that ice fishing without a 3-bedroom "hut" on the ice with TV and satellite dish? What kind of person just braves the elements like that?
We sit in the cabin and look outside for the flags to pop up..
We got skunked but found this on our hike.I think it is left overs from grandpa's farm years ago. He farmed and was the local school superintendent..
Is that a 356 part
Posted by: mb911 Feb 6 2018, 04:01 PM
Lol I think its a an old school pulley..
Posted by: mepstein Feb 6 2018, 04:03 PM
Lol I think its a an old school pulley..
You said you buried a 912, I didn't know if it ran in the family.
Posted by: mb911 Feb 6 2018, 06:18 PM
Lol I think its a an old school pulley..
You said you buried a 912, I didn't know if it ran in the family.
Yup thats true..
Posted by: mb911 Feb 7 2018, 06:06 AM
Woke up early for some reason again today so went out and got some more done. Brace out and fits as it should.. Need to work gaps a bit..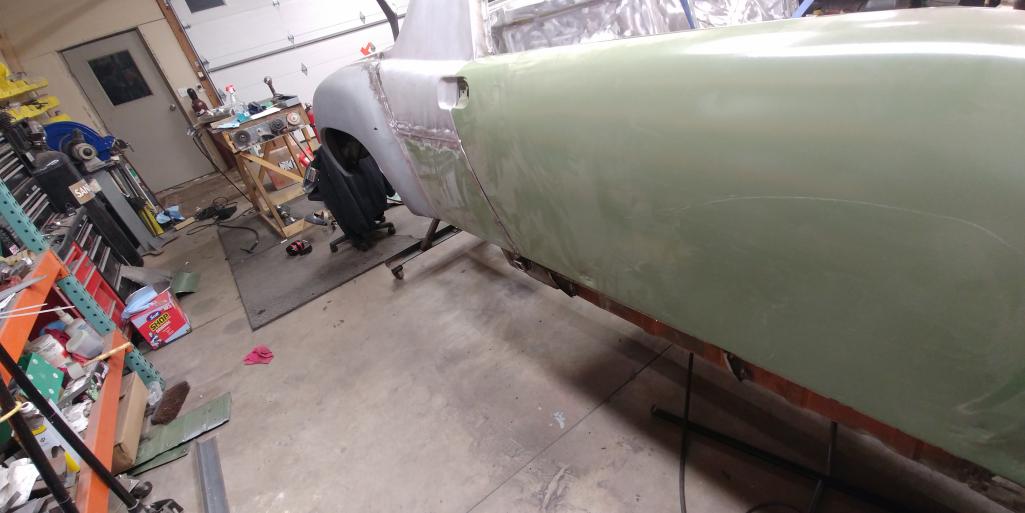
Posted by: mb911 Feb 7 2018, 06:07 AM
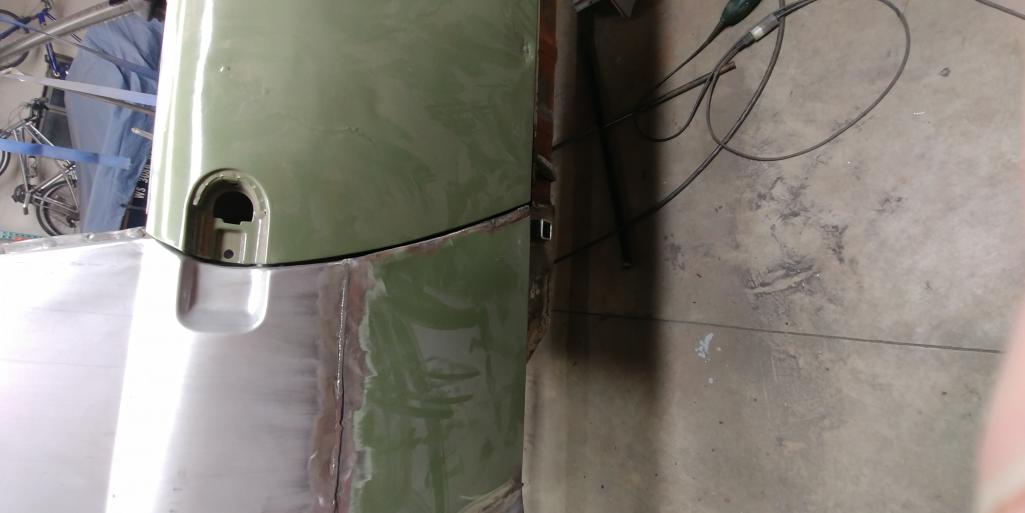
And my new GT oil lines.. Turned out great.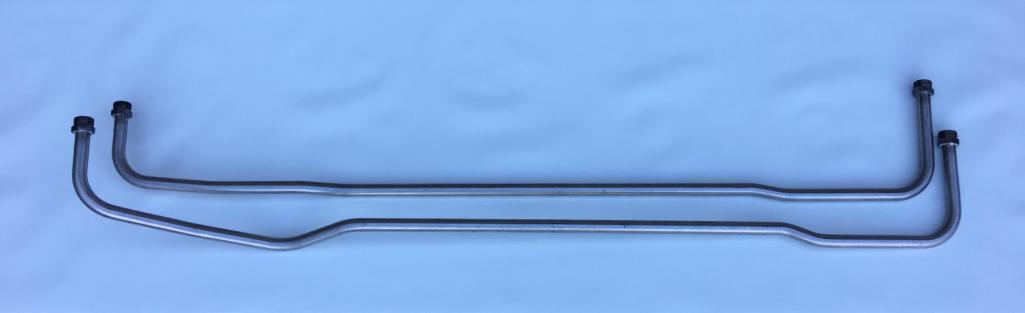
Posted by: mlindner Feb 7 2018, 07:00 AM
Your body work looks very nice Ben.....you could make a 914 Ice Shanty to drive out onto the lake. Best, Mark
PS just spent Saturday at Sebring with the Accumoto Motorsports team, great fun.
Posted by: mlindner Feb 7 2018, 07:05 AM
Ben, seeing your lower turbo valve covers. Have they been machined (modified) so removal is possible for valve adjustment with engine in car. Mark
Posted by: mb911 Feb 7 2018, 07:43 AM
Ben, seeing your lower turbo valve covers. Have they been machined (modified) so removal is possible for valve adjustment with engine in car. Mark
Mark sounds like fun.. Almost finished accumotos heat exchangers for the headers they gave me..
As to the valve covers I did not.. I don't plan to do much valve adjustments while in the car.. I figure I will run on test stand etc then adjust valves then install in the car and it will take many years before I need to adjust again.
Posted by: bbrock Feb 7 2018, 07:54 AM
Why do those butt welds look "different" to me? Any chance you are using EZ grind? I'm circling in on that same repair and hoping to poach your process to make it truly invisible. There is a spool of EZ grind sitting down at the welding shop but I haven't committed to buying it yet. Thinking I could use any little help on this one though.
Posted by: mb911 Feb 7 2018, 08:52 AM
Why do those butt welds look "different" to me? Any chance you are using EZ grind? I'm circling in on that same repair and hoping to poach your process to make it truly invisible. There is a spool of EZ grind sitting down at the welding shop but I haven't committed to buying it yet. Thinking I could use any little help on this one though.
Sorry not easy grind just ER70S-6 .030.. remember I have taught welding for 17 years and welded my whole professional life so its experience..
Posted by: bbrock Feb 7 2018, 09:32 AM
Why do those butt welds look "different" to me? Any chance you are using EZ grind? I'm circling in on that same repair and hoping to poach your process to make it truly invisible. There is a spool of EZ grind sitting down at the welding shop but I haven't committed to buying it yet. Thinking I could use any little help on this one though.
remember I have taught welding for 17 years and welded my whole professional life so its experience..
Yes, I know. But I haven't so I'm looking for anything to compensate.
That said, the weld on that skin looks like it sits up a little more proud, like maybe you turned down the welder a bit? Sorry to keep pestering you but... Posted by: mb911 Feb 7 2018, 09:52 AM
Why do those butt welds look "different" to me? Any chance you are using EZ grind? I'm circling in on that same repair and hoping to poach your process to make it truly invisible. There is a spool of EZ grind sitting down at the welding shop but I haven't committed to buying it yet. Thinking I could use any little help on this one though.
remember I have taught welding for 17 years and welded my whole professional life so its experience..
Yes, I know. But I haven't so I'm looking for anything to compensate.
That said, the weld on that skin looks like it sits up a little more proud, like maybe you turned down the welder a bit? Sorry to keep pestering you but... Your not pestering at all.. I am set at the number 2 tap on my Hobart handler with about 75 on wirespeed.. This allows the penetration side to have good fusion as it will be ground flush..
Posted by: mb911 Feb 7 2018, 02:44 PM
Let me know if I can help any further.. I would be happy to talk through the weld set up as well over the phone so feel free to call.
Posted by: bbrock Feb 7 2018, 06:54 PM
Let me know if I can help any further.. I would be happy to talk through the weld set up as well over the phone so feel free to call.
Thanks, those setting help. I've seen my welding skills improve steadily during this project but those quarters will have a long length of butt weld to make disappear. I did notice that a lot of my earlier difficulty had more to do with being too timid with the grinder than the weld. I've gone back to some of those old welds and found I had still left the weld sitting proud of the parent material. When I know those off, most of the well blends away. Still a bit of shrink lines on those, but better than I originally thought. I know I can get it close enough that a very thin skim of filler would make it vanish. But hoping for perfection here. I may have to give you a shout.
Posted by: mb911 Feb 7 2018, 07:41 PM
Let me know if I can help any further.. I would be happy to talk through the weld set up as well over the phone so feel free to call.
Thanks, those setting help. I've seen my welding skills improve steadily during this project but those quarters will have a long length of butt weld to make disappear. I did notice that a lot of my earlier difficulty had more to do with being too timid with the grinder than the weld. I've gone back to some of those old welds and found I had still left the weld sitting proud of the parent material. When I know those off, most of the well blends away. Still a bit of shrink lines on those, but better than I originally thought. I know I can get it close enough that a very thin skim of filler would make it vanish. But hoping for perfection here. I may have to give you a shout.
Sounds good.. Let me know if I can help.
Posted by: mb911 Feb 8 2018, 06:51 AM
This morning I was able to get the front fender semi mounted. I need to pull into shape yet but the hood gaps is acceptable.. 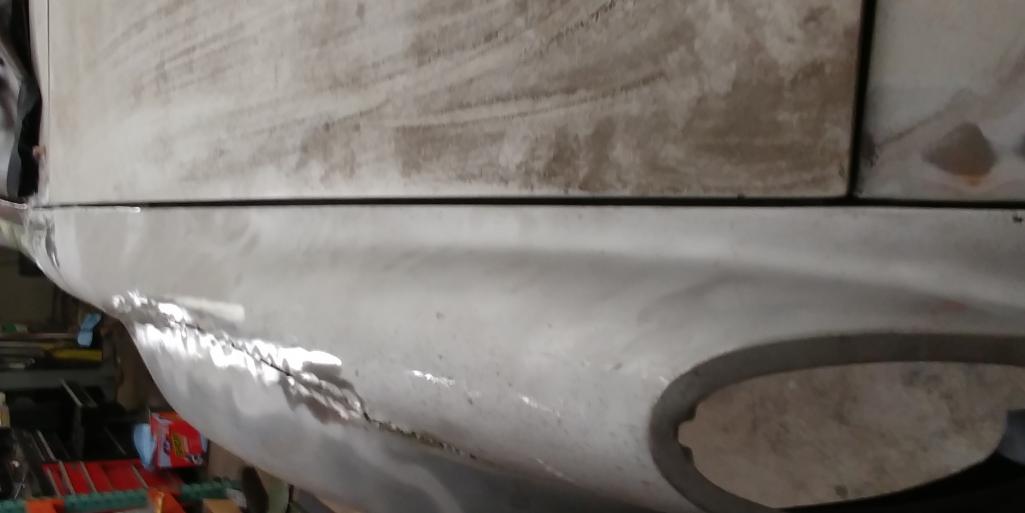
Posted by: mb911 Feb 8 2018, 03:11 PM
The fender has shrunk a bit so I imagine I will have to pull it around allot.
Posted by: mb911 Feb 17 2018, 03:09 PM
Well not much progress I was in Florida for most of the week then had to replace my DD as it was plain worn out with 207000 miles on it with a new lease.. Pretty happy with thr deal as very inexpensive.. Then Friday students made the louver panels and powdercoated them to take home.. 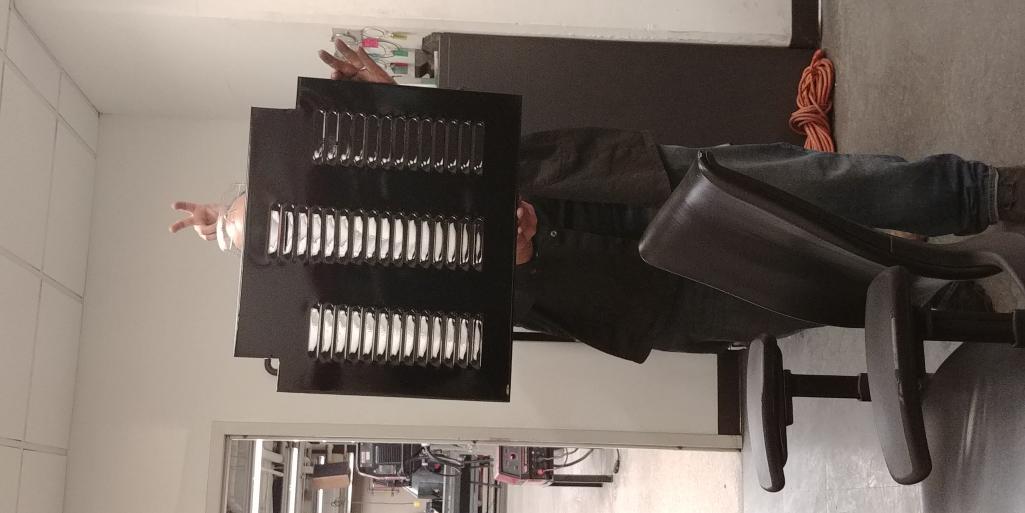
Posted by: mb911 Feb 17 2018, 03:09 PM
Posted by: mb911 Feb 17 2018, 03:10 PM
Did do a little bit of fittment on the front fender.. Got allot of work to do there yet. 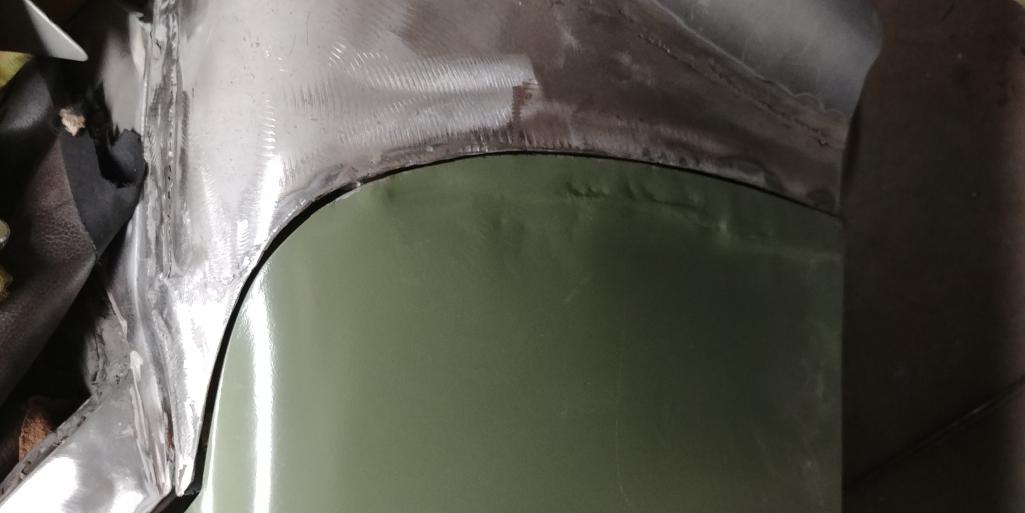
Posted by: GeorgeRud Feb 17 2018, 09:58 PM
Looks like it’s coming together slowly. It always seems like you find other areas to finish, but eventually the metalwork will be done and it’ll be off to paint.
Posted by: mb911 Feb 18 2018, 09:51 AM
Looks like it’s coming together slowly. It always seems like you find other areas to finish, but eventually the metalwork will be done and it’ll be off to paint.
Thats for sure.. I am trying to get the majore things done, welded, ground so I can epoxy prime before the humidity jumps up in spring. Then I can rework later as needed.
Posted by: mb911 Feb 19 2018, 12:40 PM
Cut the driverside sail off today.. Found a little rust.. Not sure if I should rebuild the ledge or cut it off as looks like a great spot to for water to sit. 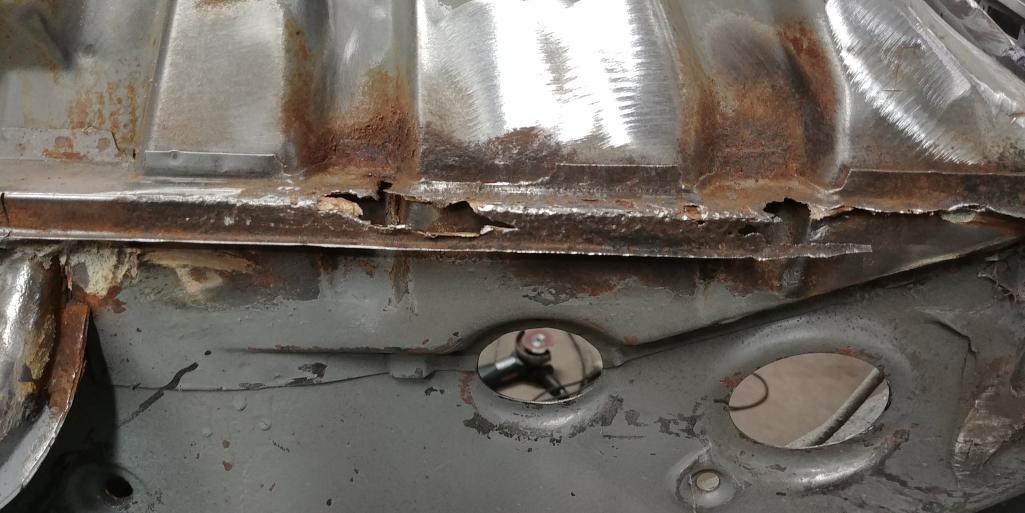
Posted by: mepstein Feb 19 2018, 12:52 PM
Cut the driverside sail off today.. Found a little rust.. Not sure if I should rebuild the ledge or cut it off as looks like a great spot to for water to sit.
Once you epoxy prime, you could probably hose it down with water every day and not have a problem. My feeling is the rust really resulted from the foam trapping moisture against the metal.
Posted by: bbrock Feb 19 2018, 12:59 PM
Worked on exactly the same thing over the weekend. I'm rebuilding mine as it looked like that shelf would provide backing for seam sealer and help prevent crap from flying up inside the sail panel. Also, where I live, that shelf looks like a necessary mouse barrier to prevent winding up with a nest inside the roll bar. If we don't pull our DD in the garage before dusk, then at least 3 mice come in with it.
I have a mystery on mine though. There was not any of the infamous foam inside my sail panels and zero evidence those panels had ever been replaced. Given the body work on the rest of the car, it's impossible to believe someone did such a perfect repair. Did that quit putting the foam in at some point?
Posted by: mb911 Feb 19 2018, 01:42 PM
Worked on exactly the same thing over the weekend. I'm rebuilding mine as it looked like that shelf would provide backing for seam sealer and help prevent crap from flying up inside the sail panel. Also, where I live, that shelf looks like a necessary mouse barrier to prevent winding up with a nest inside the roll bar. If we don't pull our DD in the garage before dusk, then at least 3 mice come in with it.
I have a mystery on mine though. There was not any of the infamous foam inside my sail panels and zero evidence those panels had ever been replaced. Given the body work on the rest of the car, it's impossible to believe someone did such a perfect repair. Did that quit putting the foam in at some point?
That is strange.. Regarding no foam for you.. My thoughts were that I going to do an oil tank in the fender along with fender liners so if it is properly painted it might work out to my benefit.. Now note that thr other side had nothing like this so was it driver side only?
Posted by: mepstein Feb 19 2018, 02:12 PM
I cut up a ‘75 that had foam so I think yours was one that got skipped.
Posted by: bbrock Feb 19 2018, 02:20 PM
That makes sense if you will be adding a tank in there. Curious about your thoughts on the purpose of those shelves. They look like the are purely intended as a filler strip to close that gap to me. On mine, the driver's side is mostly in good shape - just a bit of rust at the rear edge. The passenger side is mostly rotted off. I made a replacement piece for it but decided I didn't like it and will make another. No foam on either side of mine. Strange, but I'm not complaining.
Posted by: bbrock Feb 19 2018, 02:34 PM
Now note that thr other side had nothing like this so was it driver side only?
Here's a pic of my pass side. I'm assuming this looked the same as the driver's originally.
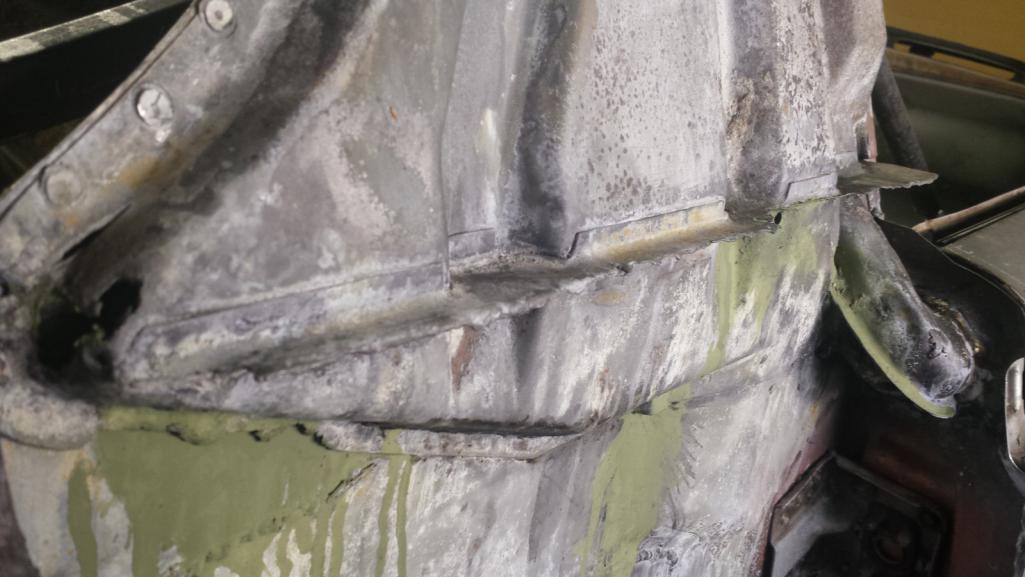
Posted by: mb911 Feb 19 2018, 04:58 PM
Now note that thr other side had nothing like this so was it driver side only?
Here's a pic of my pass side. I'm assuming this looked the same as the driver's originally.
Interesting.. My car had zero evidence of that on the passenger side.. I will sleep on it but I may omit that as it screams a bad idea..
Posted by: mb911 Feb 21 2018, 06:37 AM
I put the other sail on today. Gotta finish weld but fit was perfect.. Great parts.. 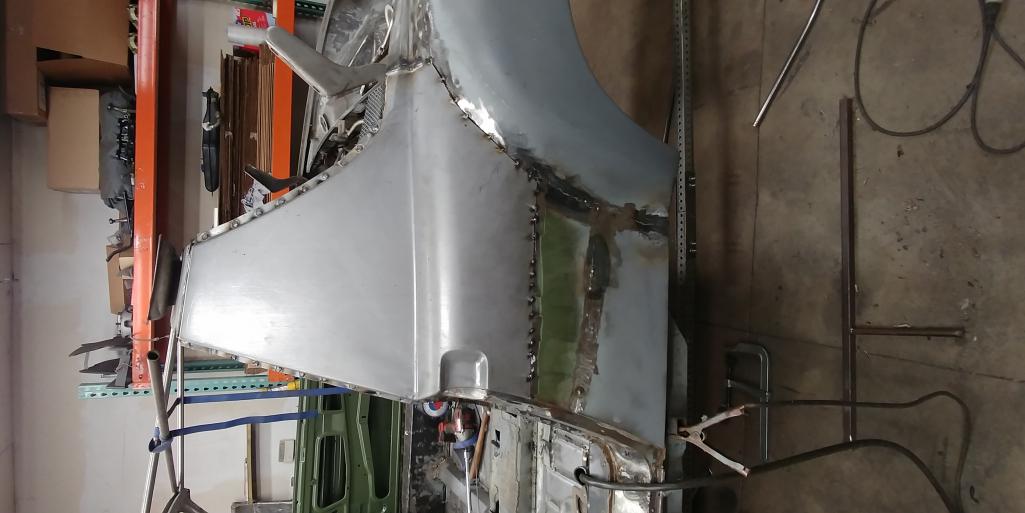
Posted by: Dion Feb 21 2018, 09:23 AM
Your not pestering at all.. I am set at the number 2 tap on my Hobart handler with about 75 on wirespeed.. This allows the penetration side to have good fusion as it will be ground flush..
[/quote]
Ben, interpreting this as “low heat” and a faster wire speed for
this gauge of metal. I’ve been playing with settings.
Sometimes it seems appropriate and some not so.
It may very well be my technique and moving too quickly.
Just taking it all in. Thanks.
Posted by: mb911 Feb 21 2018, 10:27 AM
[quote name='Dion' date='Feb 21 2018, 07:23 AM' post='2581631']
Your not pestering at all.. I am set at the number 2 tap on my Hobart handler with about 75 on wirespeed.. This allows the penetration side to have good fusion as it will be ground flush..
[/quote]
Ben, interpreting this as “low heat” and a faster wire speed for
this gauge of metal. I’ve been playing with settings.
Sometimes it seems appropriate and some not so.
It may very well be my technique and moving too quickly.
Just taking it all in. Thanks.
[/quote]
Wire speed is = to amps= heat .
Voltage is potential amps.
They work together much like a gear selection in the car.. Gas pedal is equal to the wire speed..
Hope that makes a bit more sense.
Posted by: mb911 Feb 22 2018, 06:48 AM
Was able to finish the welding on the sale today.. Now to hammer and dolly then grind flush. Also hung the door quickly. Gaps are pretty good. The front though is a bit far and from memory I remember it big so I need to address that.. 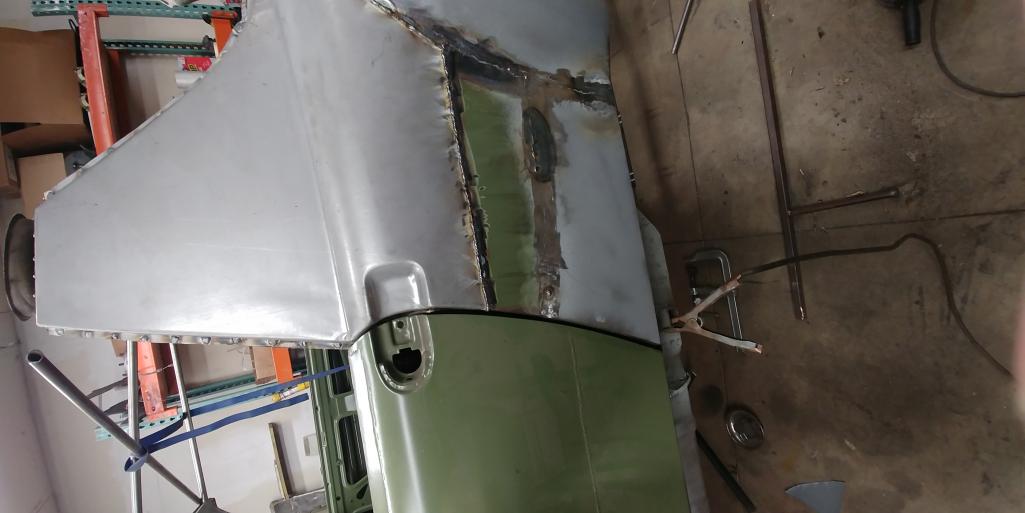
Posted by: mb911 Feb 22 2018, 06:49 AM
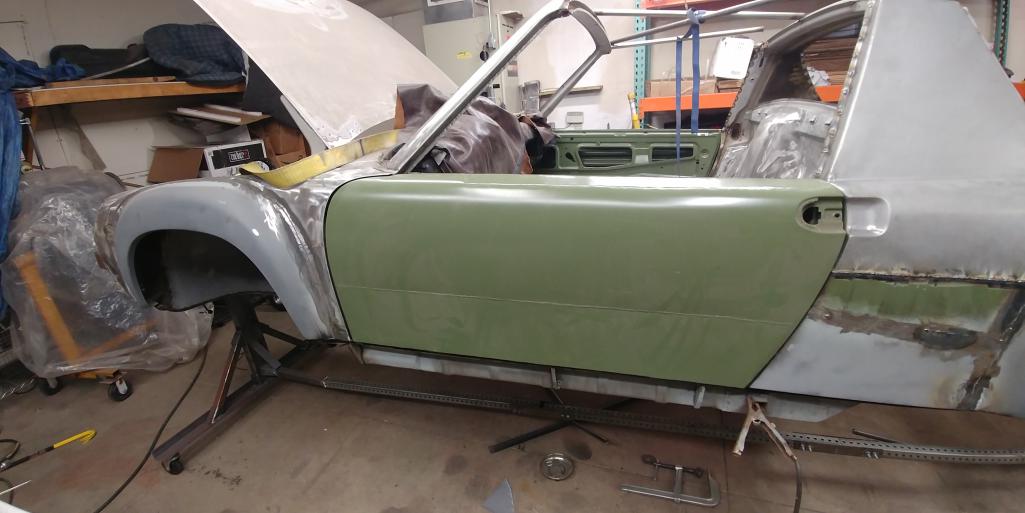
Posted by: GeorgeRud Feb 22 2018, 09:39 AM
It looks like there won’t be much original metal left when you’re done! Should be nice and solid however with good metal everywhere. Keep going!
Posted by: mb911 Feb 22 2018, 12:30 PM
It looks like there won’t be much original metal left when you’re done! Should be nice and solid however with good metal everywhere. Keep going!
That is for sure..
Posted by: mb911 Feb 25 2018, 08:57 AM
Well nothing done this weekend as at an ice fishing derby and didn't catch a thing.. The plan for this week though is to try to do some more grinding and pin hole filling.. Gotta get this thing in primer..
Posted by: Cairo94507 Feb 25 2018, 09:58 AM
Hey Ben - the angle of that photo makes it look (to me) like the door is "stretched" about 6" longer than stock. I know it is not BTW.
Posted by: mepstein Feb 25 2018, 10:38 AM
Hey Ben - the angle of that photo makes it look (to me) like the door is "stretched" about 6" longer than stock. I know it is not BTW.
Ben is building the 2+2 version.
Posted by: mb911 Feb 25 2018, 02:42 PM
Hey Ben - the angle of that photo makes it look (to me) like the door is "stretched" about 6" longer than stock. I know it is not BTW.
Lol.. Funny isn't it..
Yes 2+2
Posted by: mb911 Feb 26 2018, 05:27 PM
I spent some time today cleaning up as I was vehicle less as the spray in bedliner was going on today. Did do a little hammering on tje2 welds to reshape.. Then brazed the top of door jamb as what the factory had done on my car both sides.. Pretty easy .. Tomorrow morning schedule is grinding.. Really running out of things to weld..
Gotta do the antenna hole and a small repair on driver side fender and then back to the passenger side..
Soon I have to figure out if a small portable sand blaster will clean up a few areas that I have not figured out how to get at yet..
Anyone have experience with the small units?
Posted by: restore2seater Feb 26 2018, 06:48 PM
Anyone have experience with the small units?
Really? Your asking that question in this forum? Let the jokes begin.
Posted by: mepstein Feb 26 2018, 07:19 PM
We use the ~$80 harbour freight pressure blaster quite a bit. It’s needs a good bit of compressor behind it. You should do it outside. Use a hood and good respirator. #00 sand.
Posted by: mb911 Feb 26 2018, 08:10 PM
I have access to a small 5 gallon sized blaster.. Might try that.. I have a decent sized compressor that should work for the areas I need done..
Posted by: mb911 Feb 27 2018, 06:51 AM
This morning finished removing all of the braces and ground/blended/sanded. Still need to do more but if you see how I operate I try to do it in stages as to take my time.. I will next hammer straight the weld areas so I can further blend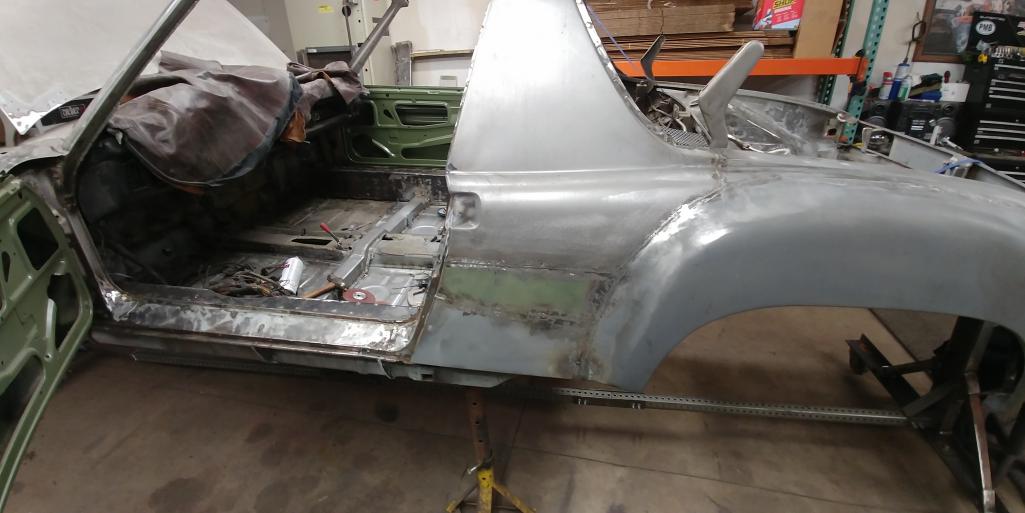
Posted by: mbseto Feb 27 2018, 08:03 AM
Can you talk more about hammering the welds? I know this is standard practice, but just guessing as to why. Sinking the metal down so that not as much needs to be ground off to make it flush?
Posted by: mb911 Feb 27 2018, 08:58 AM
Can you talk more about hammering the welds? I know this is standard practice, but just guessing as to why. Sinking the metal down so that not as much needs to be ground off to make it flush?
Basically what you are doing is stress relieving the heat affected zone allowing the parent material to be shaped as it should be then grind the high spots of the weld so a good blend can happen.. My concern always with a blend is that the parent material can get really thin very easily and possibly crack later this is why I typically don't go flush and will use a small amount of filler..
Posted by: bbrock Feb 27 2018, 09:03 AM
I have access to a small 5 gallon sized blaster.. Might try that.. I have a decent sized compressor that should work for the areas I need done..
I have the HF 40 lb. blaster and it works well. I'm using crushed glass for media. My only problem is finding a hood that doesn't cost a fortune and doesn't fog up. I just bought one on Amazon that got good reviews but I haven't tested.
Posted by: mb911 Feb 27 2018, 02:56 PM
I have access to a small 5 gallon sized blaster.. Might try that.. I have a decent sized compressor that should work for the areas I need done..
I have the HF 40 lb. blaster and it works well. I'm using crushed glass for media. My only problem is finding a hood that doesn't cost a fortune and doesn't fog up. I just bought one on Amazon that got good reviews but I haven't tested.
I wonder what kind of a mess it will make..
Posted by: mepstein Feb 27 2018, 05:42 PM
I have access to a small 5 gallon sized blaster.. Might try that.. I have a decent sized compressor that should work for the areas I need done..
I have the HF 40 lb. blaster and it works well. I'm using crushed glass for media. My only problem is finding a hood that doesn't cost a fortune and doesn't fog up. I just bought one on Amazon that got good reviews but I haven't tested.
I wonder what kind of a mess it will make..
Do it outside or you will have a mess.
Posted by: bbrock Feb 27 2018, 09:17 PM
I have access to a small 5 gallon sized blaster.. Might try that.. I have a decent sized compressor that should work for the areas I need done..
I have the HF 40 lb. blaster and it works well. I'm using crushed glass for media. My only problem is finding a hood that doesn't cost a fortune and doesn't fog up. I just bought one on Amazon that got good reviews but I haven't tested.
I wonder what kind of a mess it will make..
BIG mess. Before the snow flew, I was doing it inside an HF tent garage with a tarp laid down on the bottom. I was able to recover and filter most of the media for reuse. My last round of blasting with a tarp down on the driveway but no tent garage. I still was able to recover a lot of media. Cleaning media out of the chassis is work too.
Posted by: mepstein Feb 27 2018, 09:35 PM
I have access to a small 5 gallon sized blaster.. Might try that.. I have a decent sized compressor that should work for the areas I need done..
I have the HF 40 lb. blaster and it works well. I'm using crushed glass for media. My only problem is finding a hood that doesn't cost a fortune and doesn't fog up. I just bought one on Amazon that got good reviews but I haven't tested.
I wonder what kind of a mess it will make..
BIG mess. Before the snow flew, I was doing it inside an HF tent garage with a tarp laid down on the bottom. I was able to recover and filter most of the media for reuse. My last round of blasting with a tarp down on the driveway but no tent garage. I still was able to recover a lot of media. Cleaning media out of the chassis is work too.
Another reason to do it outside is you can turn on a fan. Even with a good respirator, it doesn't hurt to keep the dust from the sand moving away from you. We use the 100lb bags of sand. I think they are about $8 a bag.
Posted by: mb911 Feb 28 2018, 07:23 PM
Thanks for the insight.
Posted by: GeorgeRud Feb 28 2018, 10:13 PM
I wonder if that Dustless Blasting outfit that I see advertised on Velocity might be a nice way to go? Has anyone had any experience with their setup? Obviously, the operator can be good or bad depending on their experience.
Posted by: mepstein Feb 28 2018, 10:18 PM
I wonder if that Dustless Blasting outfit that I see advertised on Velocity might be a nice way to go? Has anyone had any experience with their setup? Obviously, the operator can be good or bad depending on their experience.
It's not at all like the commercial. Its a waste of time and money on our cars. Our shop bought one before I worked there. It's currently sitting in a box in the closet. If it worked as advertised, we would use it.
Posted by: mb911 Mar 6 2018, 06:59 AM
Well after a week of very little work on the car I was able to hammer out the weld area in the recently welded in driver side sail panel. Ground a bit more. Second guessed my plan to not TIG weld all the panels on (remember a TIG welder by trade) then reaffirmed my decision as when panels are fused using TIG there is a recess in thickness and once blended the parent material will be paper thin..
Anyhow. Cut out the antenna area and took a scrap piece of galvaneel and welded that in.. All pin holes need to be fixed yet but the surgery is done there now..
Posted by: mb911 Mar 6 2018, 06:59 AM
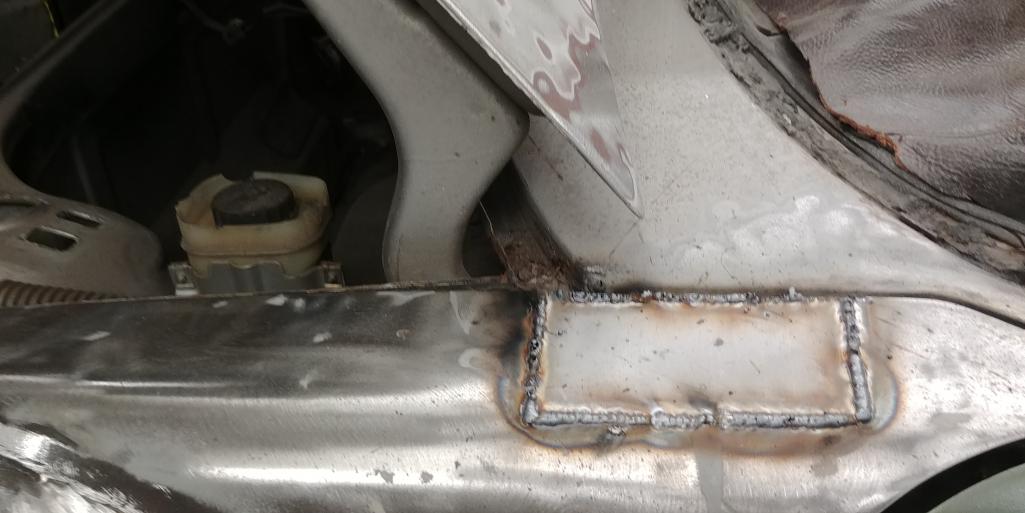
Posted by: mb911 Mar 6 2018, 07:01 AM
And now just finish off a bit more with a little hammer and dolly action..And of course fill pin holes and blend a bit more..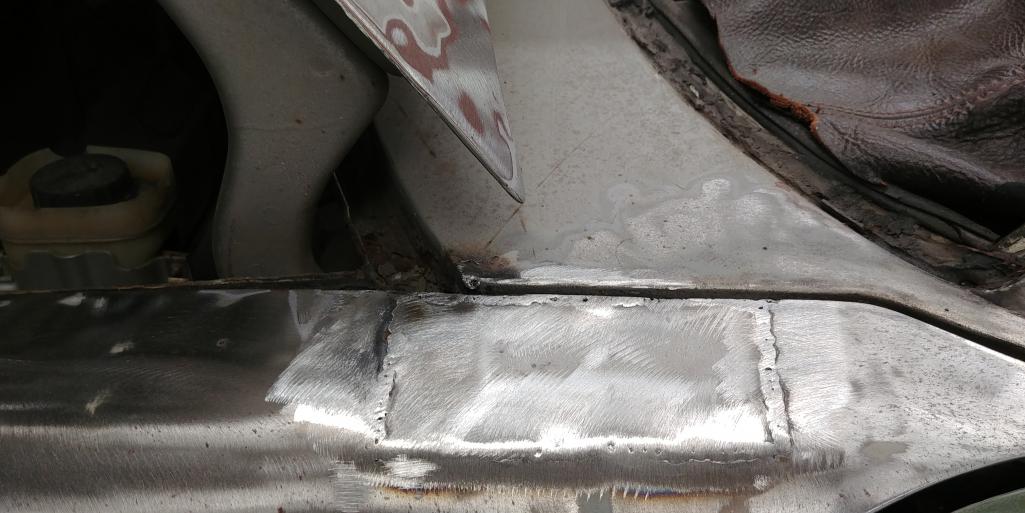
Posted by: cary Mar 6 2018, 08:51 AM
I wonder if that Dustless Blasting outfit that I see advertised on Velocity might be a nice way to go? Has anyone had any experience with their setup? Obviously, the operator can be good or bad depending on their experience.
It's not at all like the commercial. Its a waste of time and money on our cars. Our shop bought one before I worked there. It's currently sitting in a box in the closet. If it worked as advertised, we would use it.
I have a 40# HF tank with an upgraded hose. You'll need to upgrade to the HF deadman valve too. Watch the nozzle pretty close. If the tip wears down it will wear down the plate on the dead man.

Biggest issue is CFM. As soon as I got the new 27 CFM compressor all my issues went away.
Some day when I grow up I'll buy one of these.
http://www.texasblaster.com/index.php?dispatch=products.view&product_id=24
Posted by: cary Mar 6 2018, 08:56 AM
Oh yeah.
I blast with #3 glass (20/46)
http://abrasive-equipment.kleenindustrialservices.com/viewitems/specialty-abrasives-blast-media/glassblast
10% discount on 10 bags or more.
Posted by: mb911 Mar 6 2018, 09:51 AM
Cary thanks for the input.. I am still undecided on what and how I will handle the metal prep for primer..
On another note finished the bracket today for the muffler group buy guys.. Now to have laser cut.. 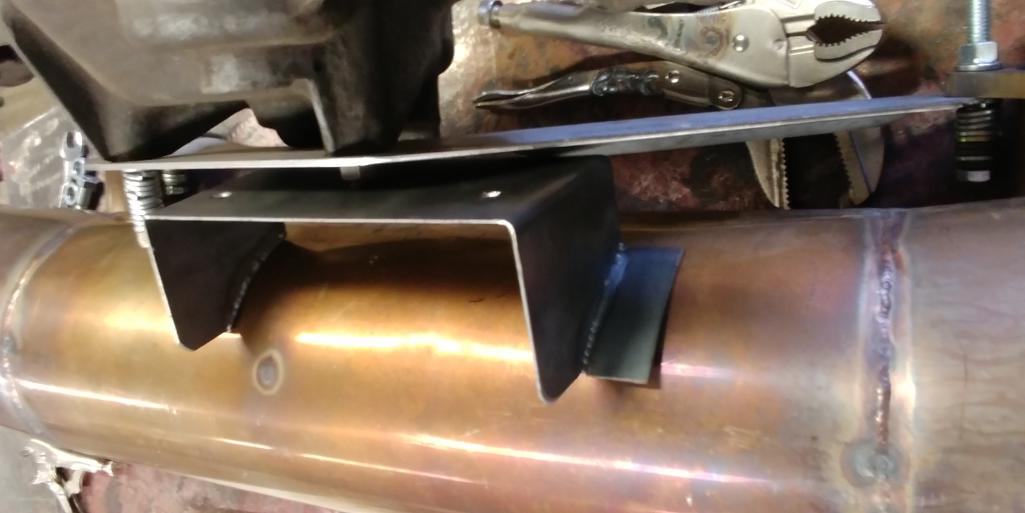
Posted by: mb911 Mar 7 2018, 06:41 AM
Nothing to take pictures of today but spent an hour this morning rough grinding some areas in the cabin knocking down welds from the inner long reinforcement, the tunnel flange rebuild , spot welds and then front trunk area, also welded pin holes in yesterday's patch and hammered that all flat and blended..
Made progress towards the goal of priming by spring..
Posted by: mb911 Mar 8 2018, 10:44 AM
Ground again this morning.. My goal is to finish the cabin area so it can be primed next week so I feel like I am accomplishing something..
Posted by: mb911 Mar 10 2018, 03:44 PM
Another way to get side tracked.. Sons 1st porsche..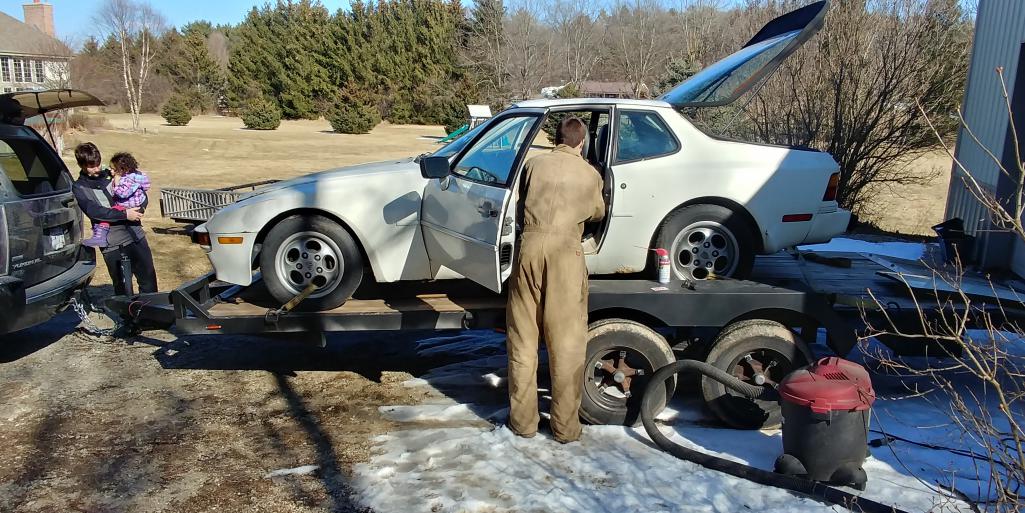
Posted by: bbrock Mar 10 2018, 10:45 PM
There was a 944 that sat in a field 3 miles down the road from here that we would pass every day going to work for several years. I had to fight myself hard not to inquire about it and see if it was for sale. But I already had one Porsche rusting away in the yard and a million things more important to spend hard earned cash on. But it's always been a car I thought would be fun to have.
Posted by: mb911 Mar 11 2018, 11:15 AM
I have known a bunch of locals that have run their 944s year round for 100s of thousands of miles. I am very hopeful this will be one of those cases. Its crazy they only made 3500 in 88 and its only worth 600? Might be the next 914 and go through the roof price wise.
Posted by: mb911 Mar 13 2018, 11:32 AM
Well ground more this morning. I have given myself 6 weeks to finish grinding and prime.. That way spring humidity won't be an issue. Worked on my fuchs today. 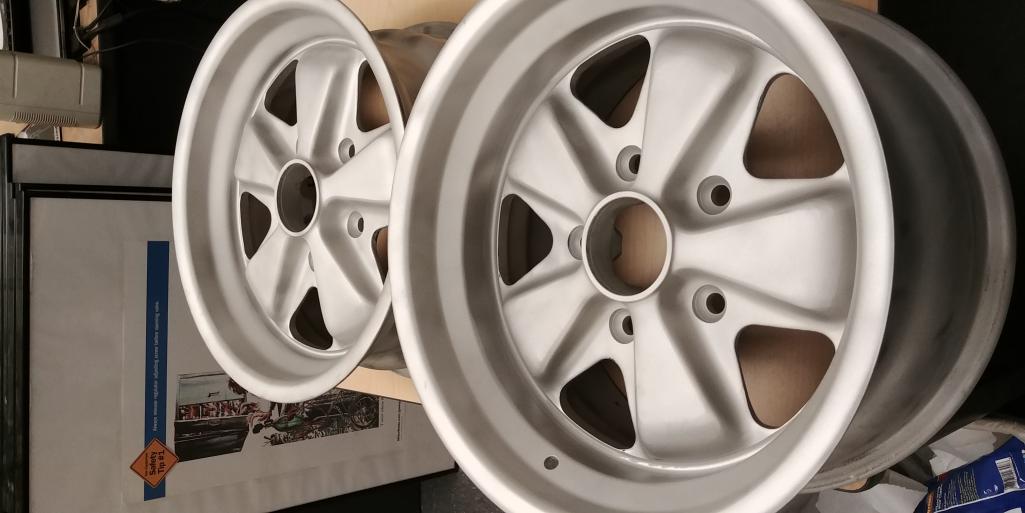
Posted by: mb911 Mar 18 2018, 07:53 AM
Well my plans to clear powdercoat the wheels just didn't meet my expectations so sand blasted again and now off the my buddies wheel manufacturing company for powder paint in flat black then I will wet paint the silver..
Plan to finish grinding cockpit and door jambs this week so I can prime all of that..
Worked on my sons 944 and have spark , compression and no fire yet..
Posted by: mb911 Mar 22 2018, 05:47 AM
This week has consistent of grinding, filling pin holes in the cabin and door jams, I hung the cable system for my spray booth so it will be much like a shower curtain.
I ordered the monstaliner from magnet paints with a good shutz gun and hope to prime the cabin this weekend and maybe shutz the foot wells where there was weld repair to make the area sealed solid.. If I get the rear trunk prepped that may get primed as well..
Wheels still at powdercoater for the satin black, ordered the cerakote for the silver lips and pedals to give the rsr look..
Posted by: mb911 Mar 23 2018, 07:48 PM
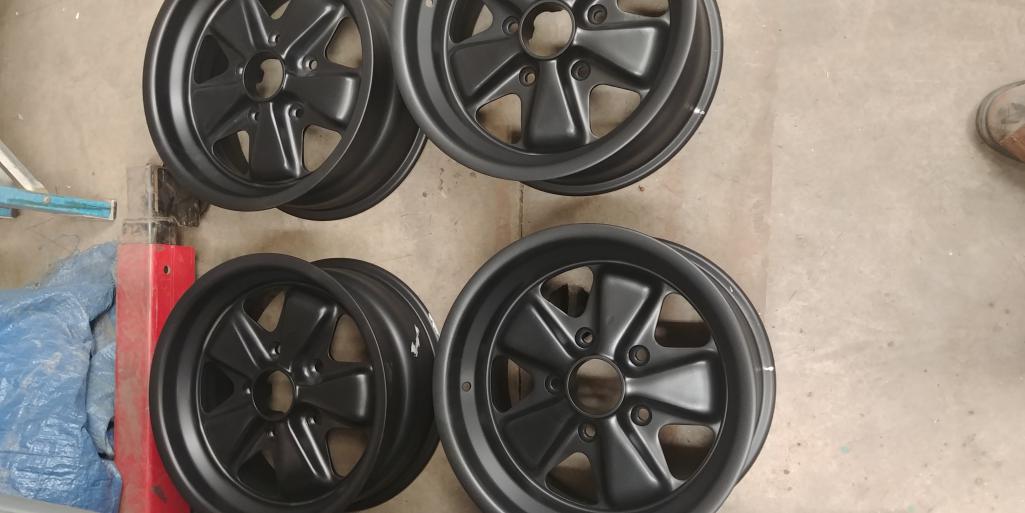
Turned out pretty nice.. Almost ready for the rsr treatment.
Posted by: GeorgeRud Mar 23 2018, 09:52 PM
Those wheels like nice with just the powder coating. Might wait on further polishing to see how they look installed?
Posted by: tygaboy Mar 24 2018, 07:38 AM
Those wheels like nice with just the powder coating. Might wait on further polishing to see how they look installed?
Was thinking the same thing. That said, you'd have to be OK with the sinister look. Not a "GT tribute" look, but...
Posted by: mb911 Mar 24 2018, 07:48 AM
I feel like at the very least the lips need to be silver?
Posted by: Krieger Mar 24 2018, 08:19 AM
I have never liked the look of all black rims. To me it looks like somebody just took the easy way out.
Posted by: bbrock Mar 24 2018, 09:05 AM
Those wheels like nice with just the powder coating. Might wait on further polishing to see how they look installed?
Was thinking the same thing. That said, you'd have to be OK with the sinister look. Not a "GT tribute" look, but... make it 3. I think those rims look pretty awesome.
Posted by: JOEPROPER Mar 24 2018, 09:08 AM
I feel like at the very least the lips need to be silver?
Posted by: mb911 Mar 24 2018, 06:32 PM
Spent sometime underneath the car tonight wirebrushing all the gunk and old paint off getting ready for primer. I have 75% of the bottom ready got sore and tired so gave up for the night . looks good though getting there. Probably another couple of hours of paint prep for the bottom and engine compartment.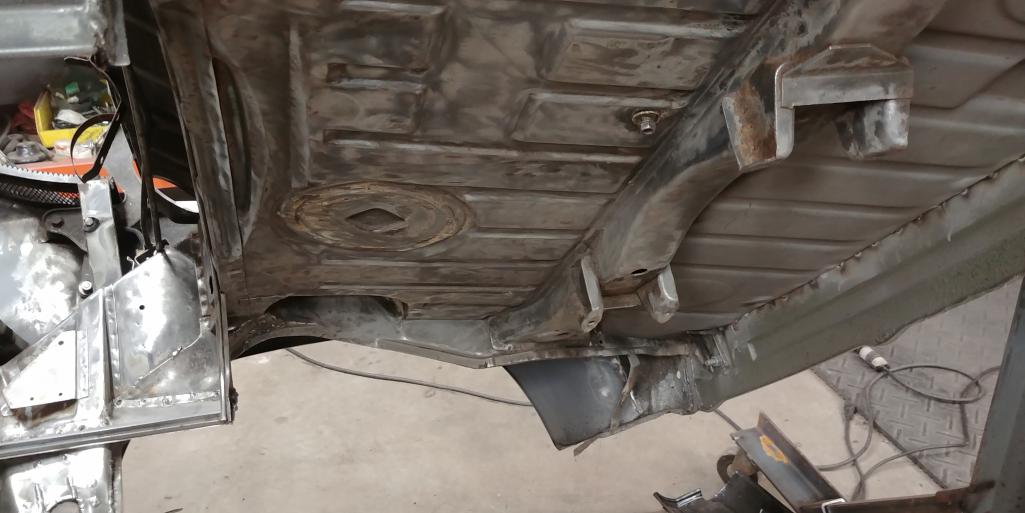
Posted by: mb911 Mar 24 2018, 06:33 PM
The fine work takes the longest..so that will be fun.
Posted by: tygaboy Mar 24 2018, 06:36 PM
Hey, I know that floor! 
Gotta say, it looks a whole lot better than when it left here. Most importantly, it has a car around it again!
Seriously Ben, it's all looking great!
Posted by: bbrock Mar 24 2018, 06:37 PM
Wow! That looks great!
Posted by: mb911 Mar 25 2018, 02:22 PM
So while son #1 was working on the 944 I sanded the trunk today so good progress.
Posted by: mb911 Mar 26 2018, 01:26 PM
Wow must be getting old or out of shape. My arms and shoulders hurt from running the grinder and DA. I put a small skim coats of the evercoat kevlar reinforced filler on the weld seams on the floor today. Will sand down tonight and then continue DAing the rest of the week. Primer this week/end I hope.. Getting closer everyday.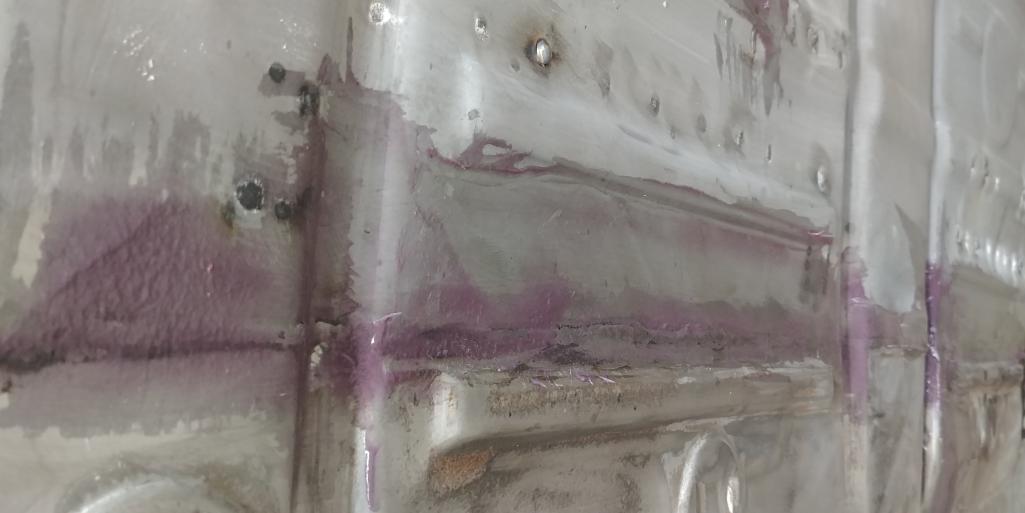
Posted by: Dion Mar 26 2018, 02:26 PM
Floor looks fantastic Ben.
Wheels look evil, but I’d have to add a silver lip to them ( hell my Fuchs are polished, go figure). Ben my compressor won’t keep an air da going. Any suggestions on a good brand for
an electric version?
Posted by: mb911 Mar 26 2018, 02:56 PM
Floor looks fantastic Ben.
Wheels look evil, but I’d have to add a silver lip to them ( hell my Fuchs are polished, go figure). Ben my compressor won’t keep an air da going. Any suggestions on a good brand for
an electric version?
I have an Ingersoll rand DA. And a cheapo sanborn 60 gallon compressor I paid 450 from Menards about 10 years ago. Its getting tired and been through 1 motor already probably will make it thru my paint job and my sons 944 but its on borrowed time..
Posted by: mb911 Mar 27 2018, 05:56 AM
Sanded this morning for a while. The floor pan seams look pretty good. My monstaliner came yesterday with the daily ups drop off so excited about that. Gonna get some more epoxy primer today.
Posted by: mb911 Mar 27 2018, 02:54 PM
Made this today on our plasma table. Thanks to chris for the baseline dxf file. We did a few tweeks but its pretty cool.
Posted by: mepstein Mar 27 2018, 02:56 PM
Made this today on our plasma table. Thanks to chris for the baseline dxf file. We did a few tweeks but its pretty cool.
Mounted on the front trunk or useful for sword play.
Posted by: bbrock Mar 27 2018, 03:37 PM
Very cool! Did you play music like this when you made it?
https://www.youtube.com/watch?v=Vu2T85LNlrQ
Posted by: mb911 Mar 27 2018, 03:41 PM
Very cool! Did you play music like this when you made it?
https://www.youtube.com/watch?v=Vu2T85LNlrQ
Lol no.. Now I have to clean and tack weld all the pieces in place. Then paint it not sure with what yet.
Posted by: tygaboy Mar 27 2018, 03:58 PM
Ben - don't mean to hijack but what are the dimensions of yours? I did a couple of 4 footers and a "little" 2 footer.
I'd be interested in what you tweaked on the file, too. I see you eliminated the "shadow" lines under the spars. Did you make other changes?
I know I found some opportunities to improve some of the shapes but haven't been back to working on the art stuff for a while.
Attached thumbnail(s)
Posted by: mb911 Mar 27 2018, 04:15 PM
Some of the lead ins and lead outs got changed, scaled it down to 16 inches .. Its very cool.. Its a great way to high light our welding program at school as we just integrated some new fab equipment this gets the students really excited..
Posted by: Luke M Mar 27 2018, 05:12 PM
Ben - don't mean to hijack but what are the dimensions of yours? I did a couple of 4 footers and a "little" 2 footer.
I'd be interested in what you tweaked on the file, too. I see you eliminated the "shadow" lines under the spars. Did you make other changes?
I know I found some opportunities to improve some of the shapes but haven't been back to working on the art stuff for a while.
That's some cool wall art..
Posted by: mb911 Mar 29 2018, 05:48 AM
Sanded 3/4 of the pan and trunk is almost done. Just have to rotate the car the other way to sand and grind the other side.. I know I keep saying primer soon and it is but prep takes along time.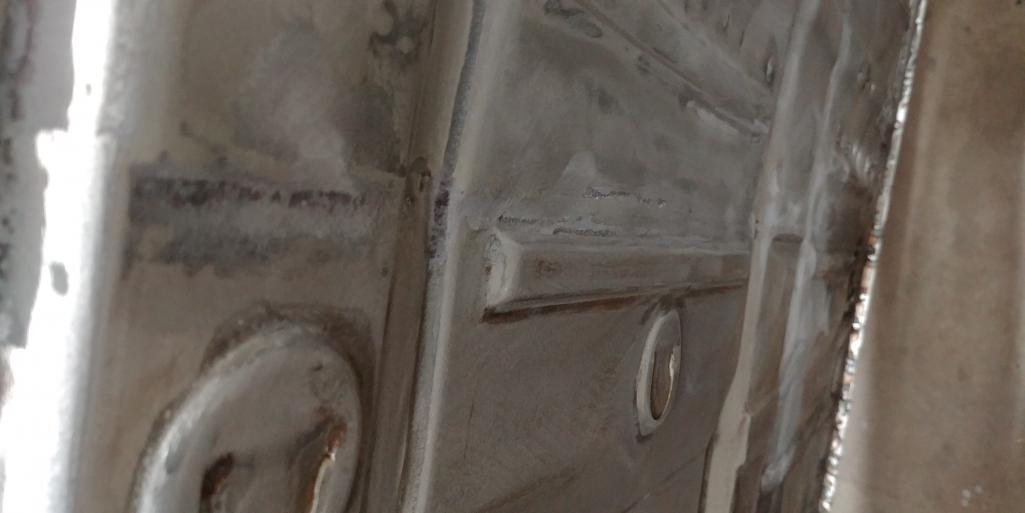
Posted by: mb911 Mar 29 2018, 05:48 AM
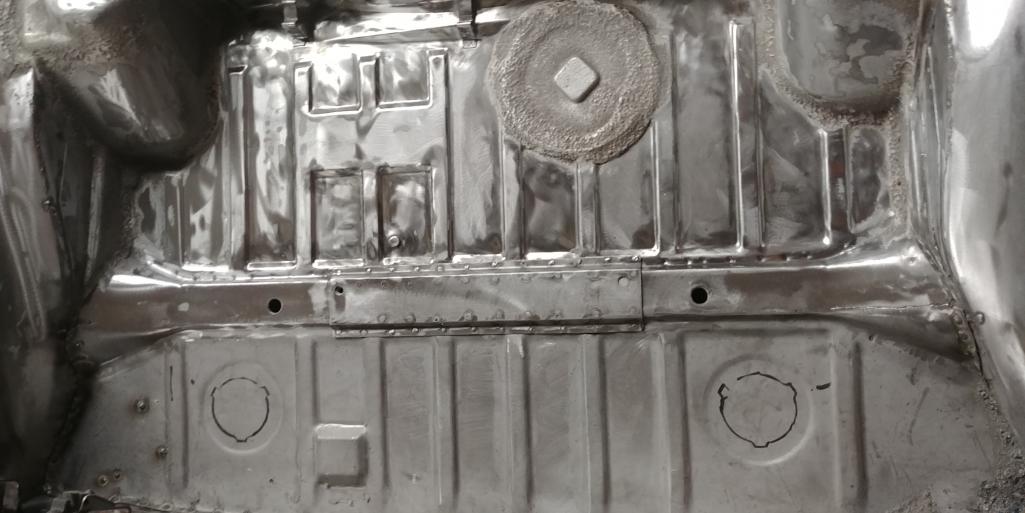
Posted by: mb911 Mar 30 2018, 08:23 PM
Spent a few minutes today drilling and fitting the plugs in the floor pan while my son was dropping the trans in the 944 for a fuel tank removal under my guidence. He says I am more of Ant and he Mike from wheeler dealer .. I laughed.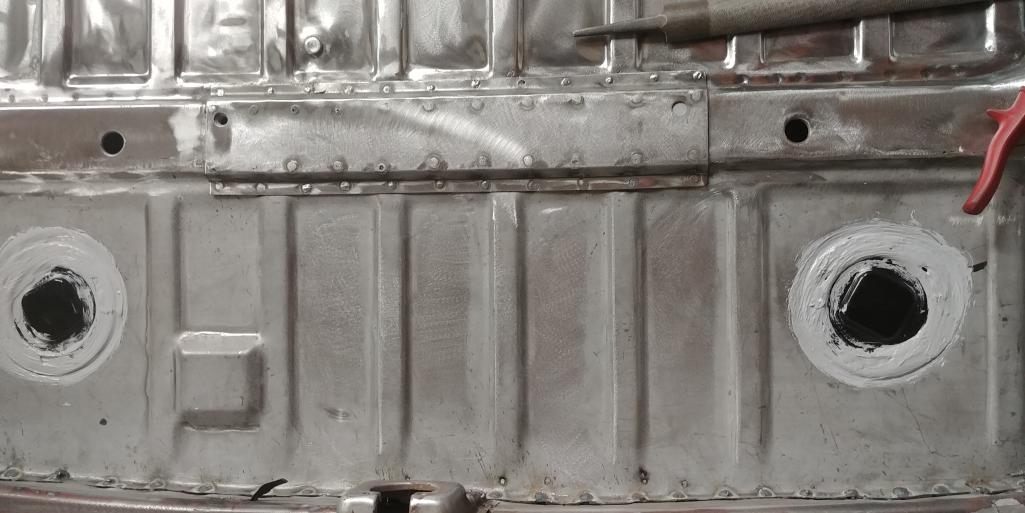
Posted by: mb911 Mar 30 2018, 08:23 PM
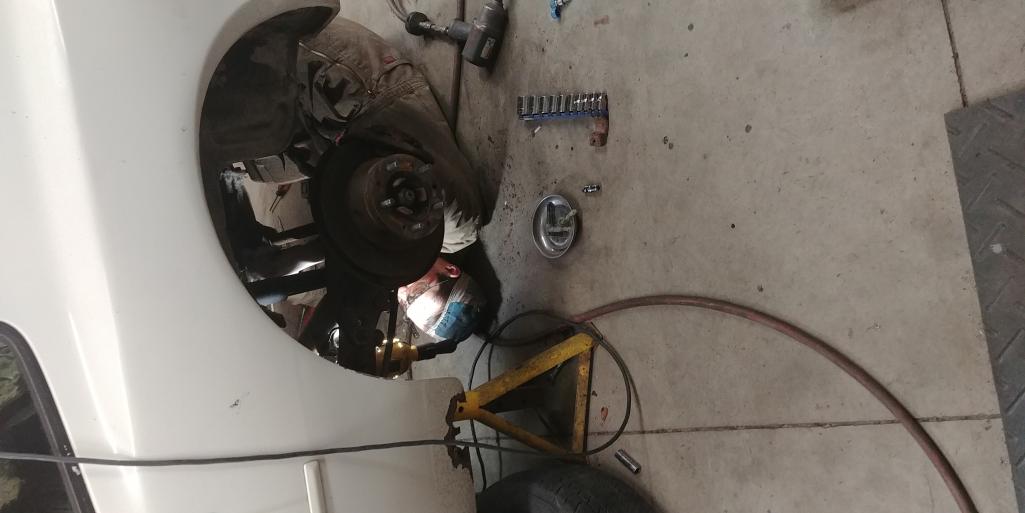
Posted by: mb911 Apr 2 2018, 09:59 AM
Spent 2 hours last night grinding and blending and removing old paint from wheel wells , and above where the rack is located. Installed 3 more of the plugs into the floor pans. I am missing 1 and need to find that one some where in my stash.
My son and I pulled the trans and gas tank on the 944 Saturday. Those cars are much easier to work on then I expected..
Sorry no primer yet but its coming. Removing all the "overburden" is always more time consuming then you expect.
Posted by: bbrock Apr 2 2018, 10:56 AM
The suspense is killing me.
What did you wind up doing to strip paint and clean? I know you said wire brush to start. It is looking really nice!
Posted by: mb911 Apr 2 2018, 11:01 AM
The suspense is killing me.What did you wind up doing to strip paint and clean? I know you said wire brush to start. It is looking really nice!
Wire brush on the 4.5" grinder and then also the. Norton rapid strip wheel on the 4.5 inch grinder. Then DA with 80 grit.
Posted by: bbrock Apr 2 2018, 11:18 AM
The suspense is killing me.What did you wind up doing to strip paint and clean? I know you said wire brush to start. It is looking really nice!
Wire brush on the 4.5" grinder and then also the. Norton rapid strip wheel on the 4.5 inch grinder. Then DA with 80 grit.
 Thought that might be the case. Those Norton discs are awesome. I bought a box (actually Black Hawk brand but I can't tell the difference) and love them. If it stops snowing long enough to put my tent up, I'll be wheeling the car out for some serious blasting and stripping.
Posted by: mb911 Apr 2 2018, 11:35 AM
Yes they work well use the wire brush for the corners.
Posted by: mb911 Apr 5 2018, 05:58 AM
Well cleaned/sanded/ ground more on the entire driver side of the floor this week and its ready for primer. Next week return to the passenger side and finish that side of the floor up.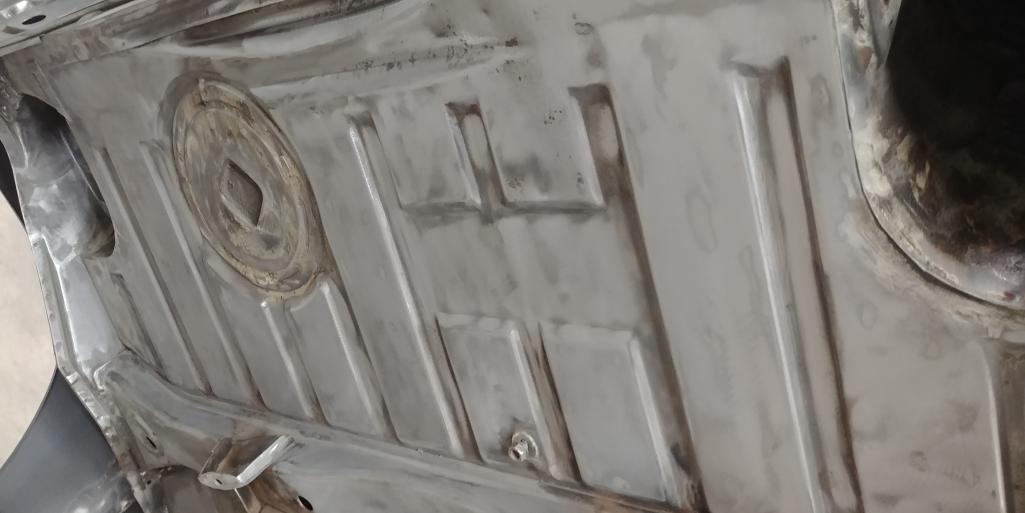
Posted by: mb911 Apr 5 2018, 05:58 AM
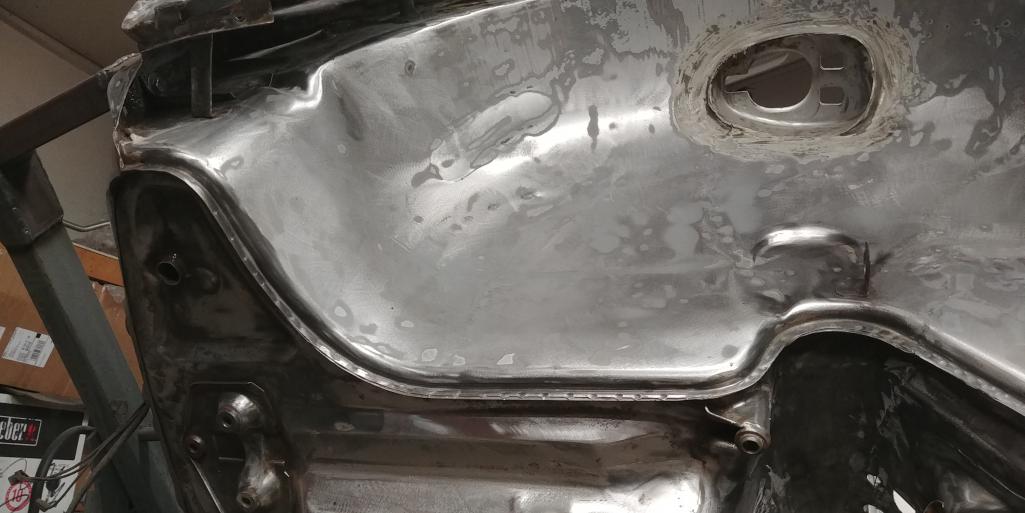
Posted by: mb911 Apr 5 2018, 05:59 AM
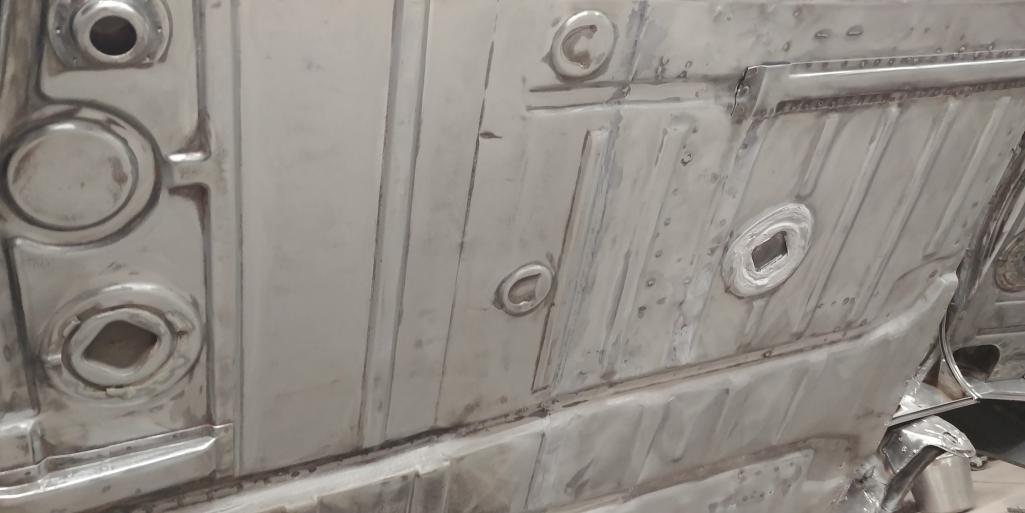
Posted by: Cairo94507 Apr 5 2018, 06:08 AM
Ben - That is looking very nice. Love seeing them nice and clean on the bottom.
Posted by: Tdskip Apr 5 2018, 08:50 AM
That is a cubic boatload of work...
Posted by: defianty Apr 5 2018, 09:16 AM
Nice and clean - good work Ben.
Posted by: mb911 Apr 5 2018, 11:19 AM
Cut this today
Posted by: mb911 Apr 6 2018, 06:03 PM
Finished the rack rebuild. Its better then previous .. I might look for a spare 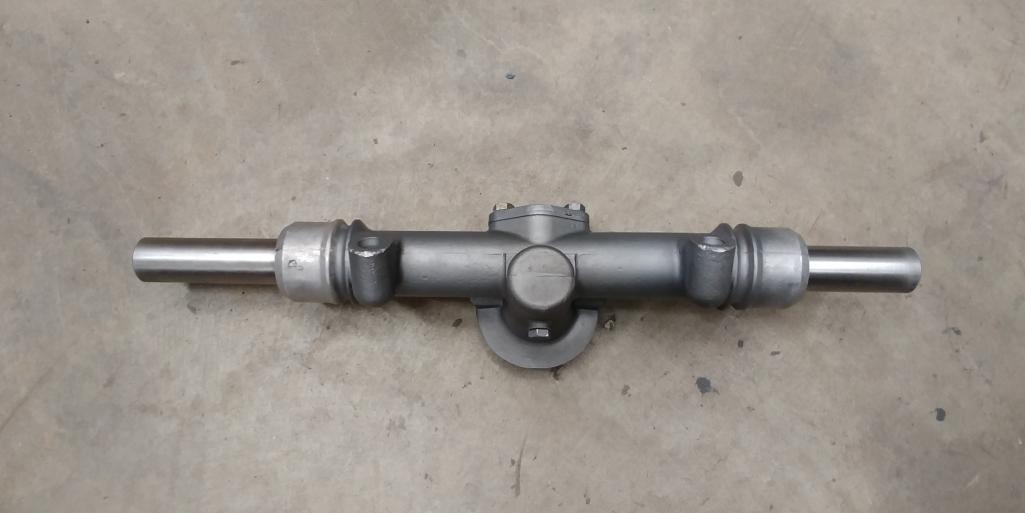
Posted by: mb911 Apr 6 2018, 06:39 PM
And for my own inspiration here is my last 6 and the 911 before a full turbo conversion 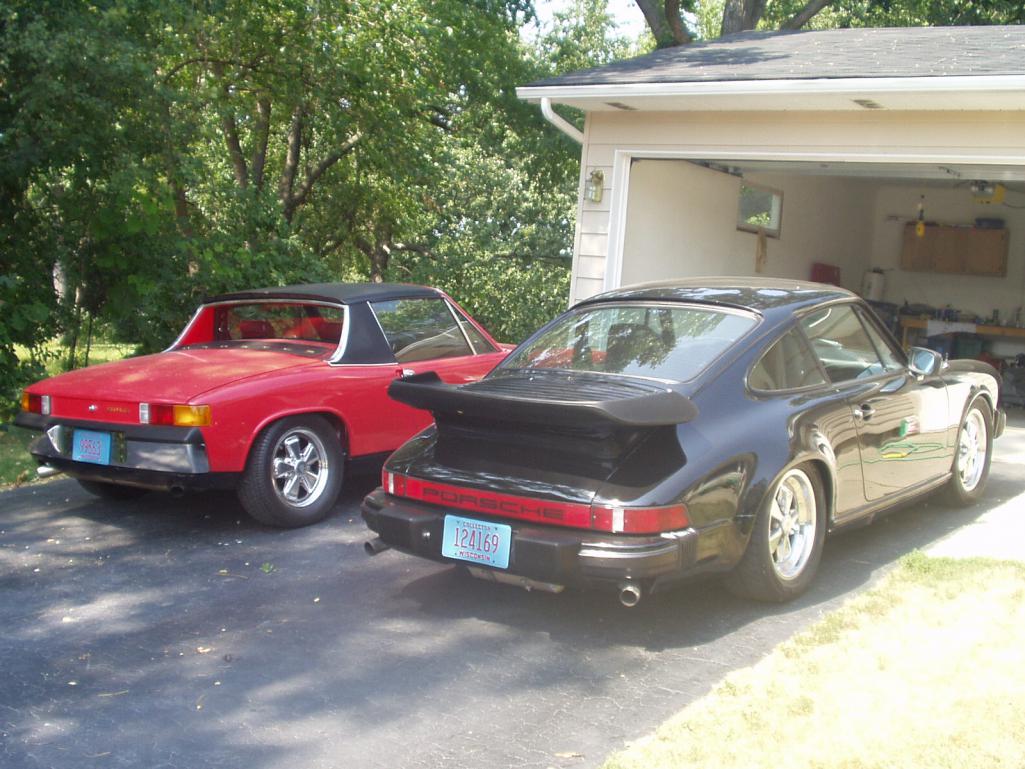
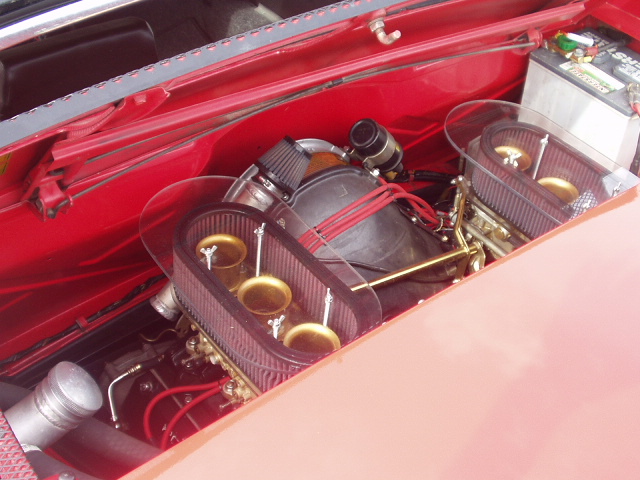

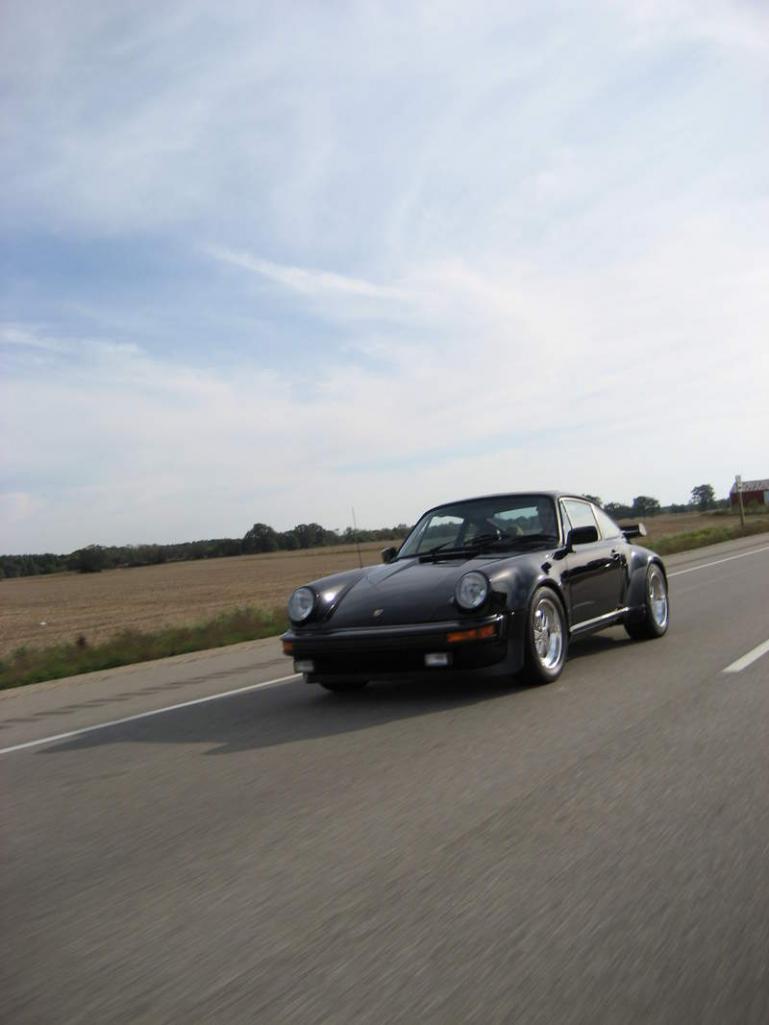 [attachmentid=645
672]
Attached image(s)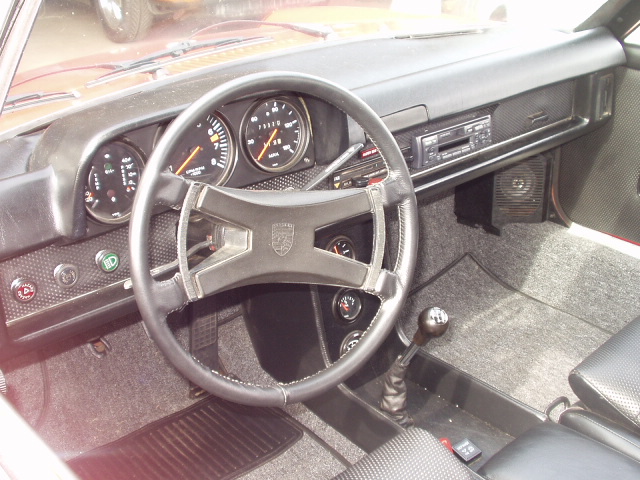
Posted by: mb911 Apr 16 2018, 01:15 PM
Slow progress lately. I did do more grinding and then removed 1 headlight. I did buy a fender from Garold that is near perfect and a factory replacement that Glenn and Garold cut off a parts car for me
To replace the Hodge podge passenger fender.. This will make it much nicer.
Bought some metal etch to apply in a few areas..
Coming along now.. 
Posted by: mb911 Apr 19 2018, 05:47 AM
Dug out the decklid as I start to head into the bodywork stages.
Also hammered out all the welds on the flares and then applied a very thin coat of the kevlar reinforced water impermeable filler about 1/16" thick on all the seems inside and out of the flares. 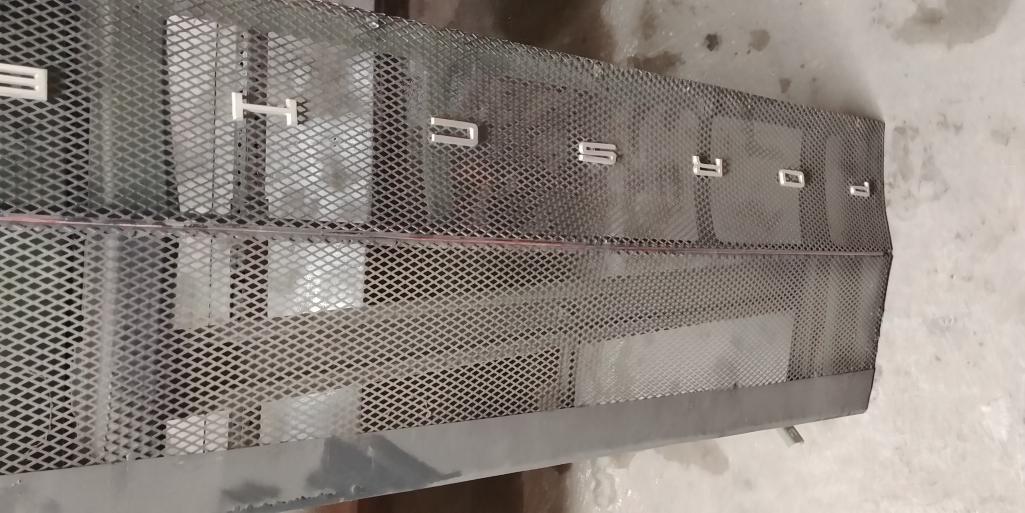
Posted by: mb911 Apr 24 2018, 06:49 PM
Super busy lately but spent some time hammering out the body as close as possible to be within max thickness of 1/16" filler. Then spread the kevlar reinforced filler to ensure no pin holes then sanded all the seams and applied some evercoat filler, cured and then I use a large bastard file to cut down the filler close. I will next sand a little bit and apply another thin coat of filler.. This is a nice way to ensure a nice straight blend..
Mark Epstein sent me some goodies including a nice porsche badge for the rear panel ala GT.
Also got my sons 944 running this weekend and making progress on all fronts..
Posted by: mb911 Apr 26 2018, 11:22 AM
A few pictures. Went wide on the band of filler to make sure it fills evenly. 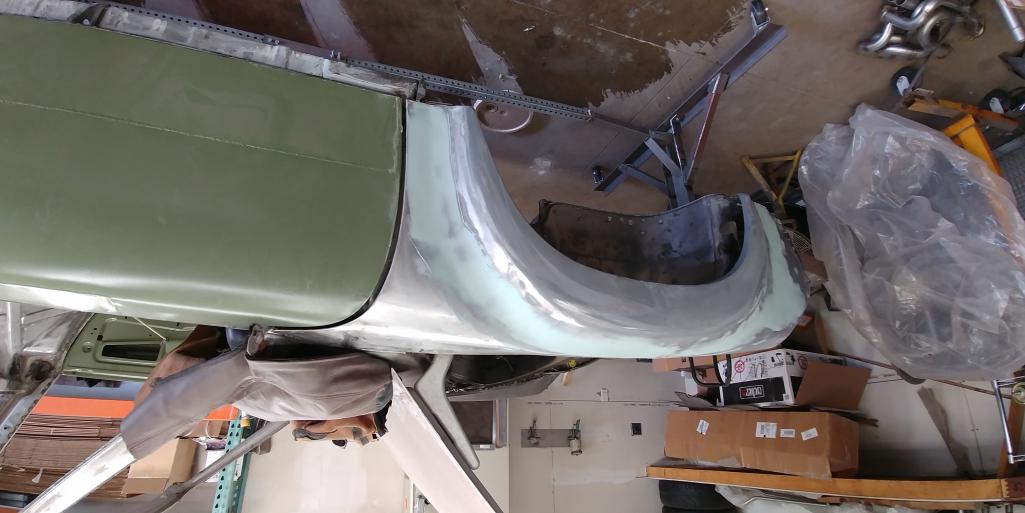
Posted by: mb911 May 1 2018, 02:04 PM
Push through the majority of the underside so I could get the primer on yesterday.. Turned out pretty good. Now it will be to get the top side done and back to bed liner underneath..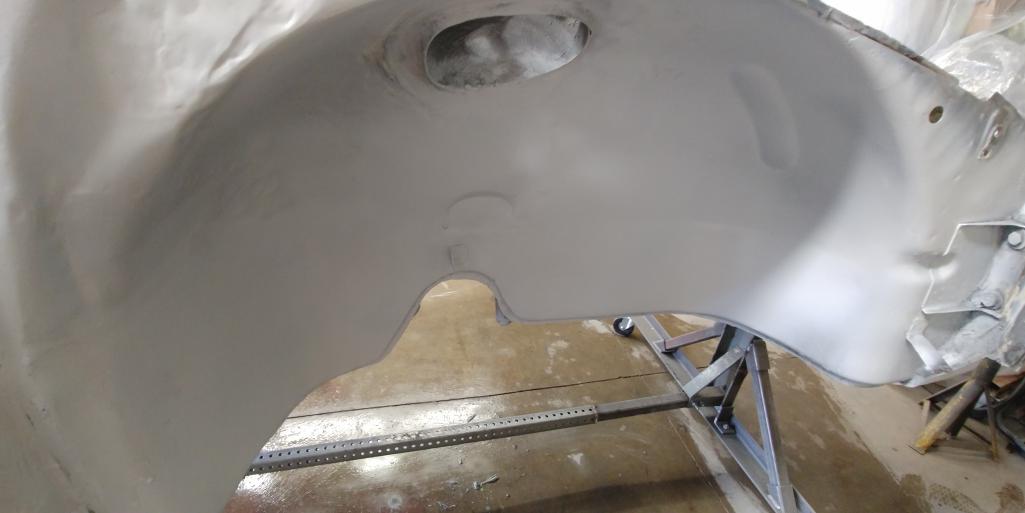
Posted by: mb911 May 1 2018, 02:04 PM

Posted by: bbrock May 1 2018, 02:36 PM
Milestone! Sweet!
Posted by: mb911 May 2 2018, 05:48 AM
Milestone! Sweet!
Yes feel good about that.. Gonna need some areas touched up but at least its protected..
Posted by: mb911 May 3 2018, 06:02 AM
Sanded and prepped the exterior .. Will prime tonight. Yes there is a skim coat of filler.. Its not 1/2" thick so don't worry. The plan is to prime and let all the body work sit for a year or so.. This will allow any shrinking to happen over that period(winters are particularly hard on that) .. Once this is all primed the work doesnt stop still have the frunk to work with. 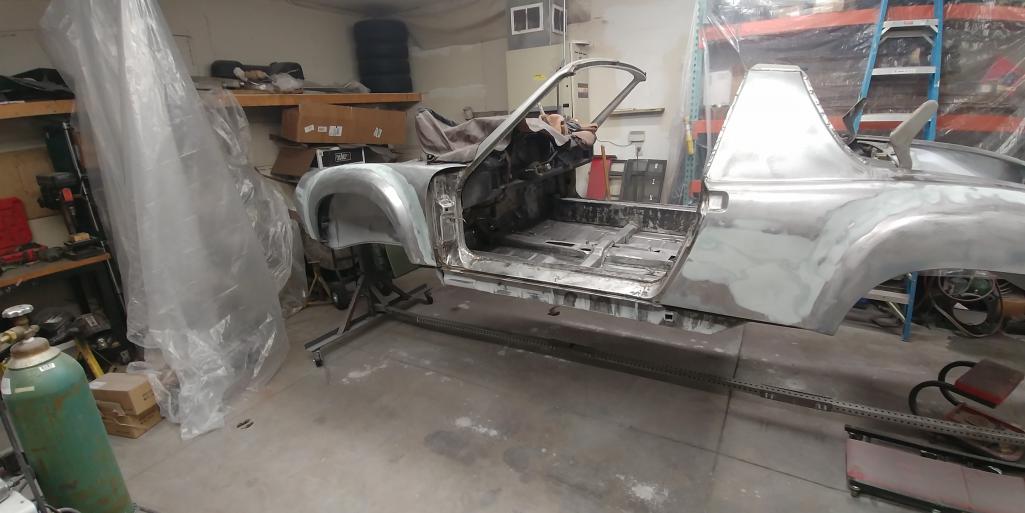
Posted by: Cairo94507 May 3 2018, 08:04 AM
Nice seeing it looking ready for primer.
Posted by: mb911 May 3 2018, 08:58 AM
About 3 years in the making to get to this point..
Posted by: bbrock May 3 2018, 11:17 AM
Are you going to spray with it on the rotisserie? I'm starting to try to envision the logistics involved when my car gets to this stage. I still have a month or so to watch yours and see how it's done.
Posted by: mb911 May 3 2018, 12:35 PM
Are you going to spray with it on the rotisserie? I'm starting to try to envision the logistics involved when my car gets to this stage. I still have a month or so to watch yours and see how it's done.
Yup gonna do the rotisserie for priming.. I still need to prep engine compartment and frunk.. Trying to prime manageable chunks..
I want it rolling this summer.. Underside is gonna get the bed liner before too long.
Posted by: PanelBilly May 3 2018, 01:54 PM
Tape off all the places that you will mount parts to before you do the bed liner. This is especially important where there’s nuts welded in for the suspension. You can cut and peal the liner off when its dry, but it’s easier to do it when its been taped off first. Are you doing the engine bay too?
Posted by: mb911 May 3 2018, 02:22 PM
Tape off all the places that you will mount parts to before you do the bed liner. This is especially important where there’s nuts welded in for the suspension. You can cut and peal the liner off when its dry, but it’s easier to do it when its been taped off first. Are you doing the engine bay too?
Thats good advice.. I will do that for sure..
Engine bay I am undecided.. It would be nice to keep it uniform.. But at the same time gloss paint makes it nice too
Posted by: mepstein May 3 2018, 02:28 PM
Tape off all the places that you will mount parts to before you do the bed liner. This is especially important where there’s nuts welded in for the suspension. You can cut and peal the liner off when its dry, but it’s easier to do it when its been taped off first. Are you doing the engine bay too?
Thats good advice.. I will do that for sure..
Engine bay I am undecided.. It would be nice to keep it uniform.. But at the same time gloss paint makes it nice too
Gloss is much easier to clean than a textured finish. I’ve read of guys using a single coat of clear to make the bed liner easier to clean.
Posted by: mb911 May 3 2018, 02:42 PM
Tape off all the places that you will mount parts to before you do the bed liner. This is especially important where there’s nuts welded in for the suspension. You can cut and peal the liner off when its dry, but it’s easier to do it when its been taped off first. Are you doing the engine bay too?
Thats good advice.. I will do that for sure..
Engine bay I am undecided.. It would be nice to keep it uniform.. But at the same time gloss paint makes it nice too
Gloss is much easier to clean than a textured finish. I’ve read of guys using a single coat of clear to make the bed liner easier to clean.
Another good idea.. Proper prep would be a must..
Posted by: raynekat May 3 2018, 06:02 PM
About 3 years in the making to get to this point..
Sometimes these projects can really leak out into the future for sure.
Posted by: mb911 May 4 2018, 05:07 AM
About 3 years in the making to get to this point..
Sometimes these projects can really leak out into the future for sure.
Its about the journey.. Primed some more last night..
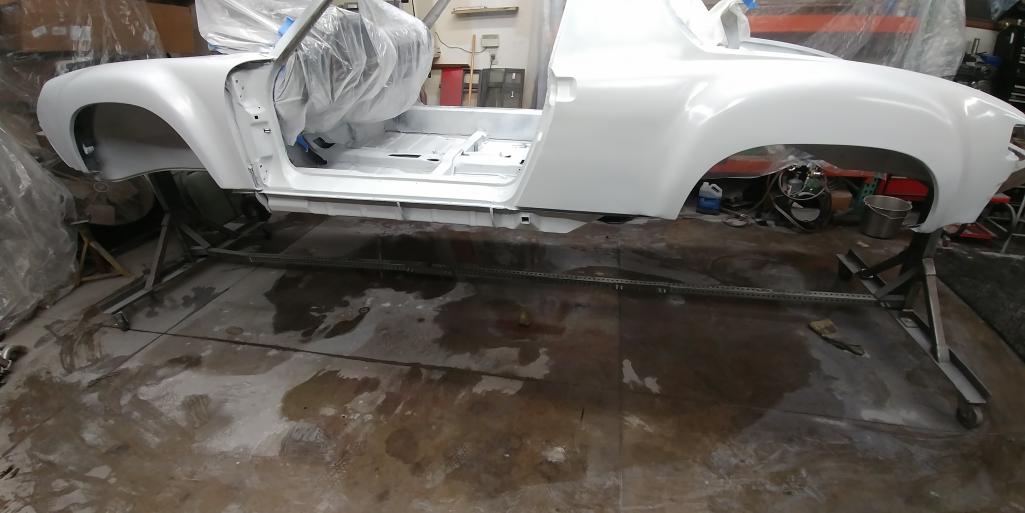
Posted by: mb911 May 4 2018, 05:08 AM
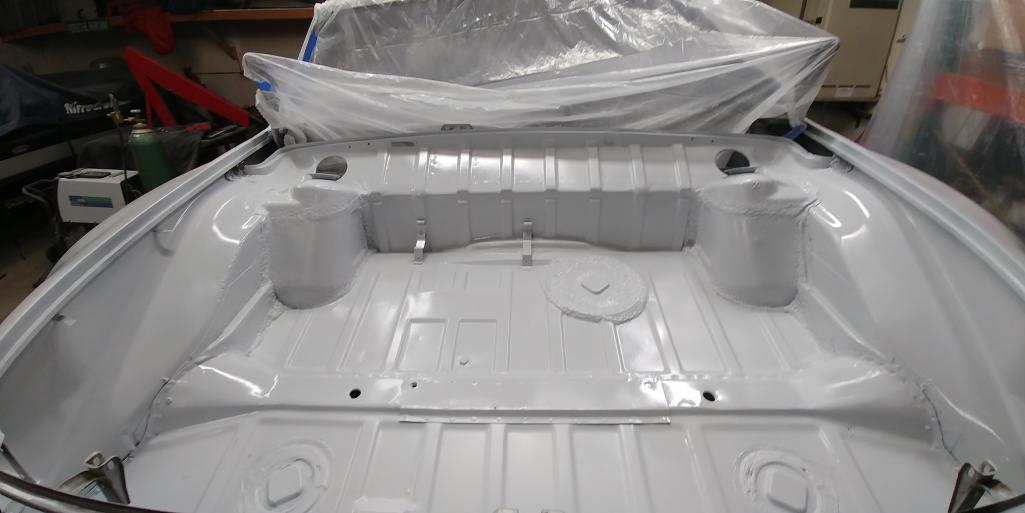
Posted by: Dion May 4 2018, 05:22 AM
Pretty. Just like a factory “body in white” ready to be customized.
Very nice indeed.
Posted by: Cairo94507 May 4 2018, 06:46 AM
Nice indeed. That just has to make you feel good.
Posted by: mb911 May 4 2018, 06:53 AM
Nice indeed. That just has to make you feel good.
It does.. Though I know where more body work needs to be done it makes me feel better that the metal is protected from the humidity
Posted by: restore2seater May 4 2018, 07:34 AM
What kind of primer are you using?
Posted by: mb911 May 4 2018, 07:44 AM
What kind of primer are you using?
Ppg epoxy..
Posted by: bbrock May 4 2018, 07:57 AM
Are you going to spray high build/surfacer before you leave it to shrink? I think PPG says you can cover it without sanding within 10, after which you have to sand. I was thinking on mine I could spray epoxy, then follow with surfacer, then relax, let it shrink, and take my time blocking. But I don't know if that really makes sense.
Posted by: mb911 May 4 2018, 08:00 AM
Are you going to spray high build/surfacer before you leave it to shrink? I think PPG says you can cover it without sanding within 10, after which you have to sand. I was thinking on mine I could spray epoxy, then follow with surfacer, then relax, let it shrink, and take my time blocking. But I don't know if that really makes sense.
Brent,
Probably hold off for now. There is still extensive body work to do with the flares, welding in pin holes, etc.
I will do the bedliner in certain areas and underneath so I can mount the suspension.. Then next winter do more body work..
Posted by: bbrock May 4 2018, 08:01 AM
Are you going to spray high build/surfacer before you leave it to shrink? I think PPG says you can cover it without sanding within 10, after which you have to sand. I was thinking on mine I could spray epoxy, then follow with surfacer, then relax, let it shrink, and take my time blocking. But I don't know if that really makes sense.
Brent,
Probably hold off for now. There is still extensive body work to do with the flares, welding in pin holes, etc.
I will do the bedliner in certain areas and underneath so I can mount the suspension.. Then next winter do more body work..
That makes sense.
Posted by: tygaboy May 4 2018, 08:09 AM
Ben - Congrats! Primer and bed liner...mmmmm.
(I can only dream about that part of my build.)
Thanks for the motivation.
Chris
Posted by: mb911 May 4 2018, 09:49 AM
Thanks guys.. I appreciate all the cheering and help over the journey.. Still would guess 2-3 more years to completion.. At the least.
Posted by: mepstein May 4 2018, 10:08 AM
Thanks guys.. I appreciate all the cheering and help over the journey.. Still would guess 2-3 more years to completion.. At the least.
Let’s not forget some parts you’ve brought to production.
Attached image(s)
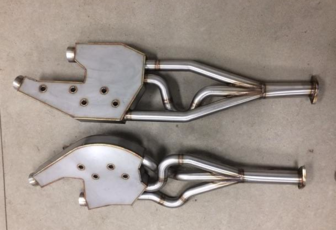
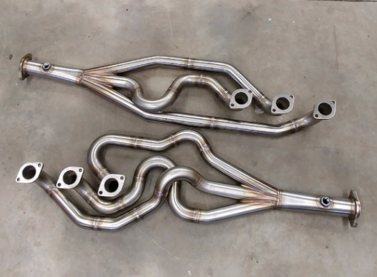
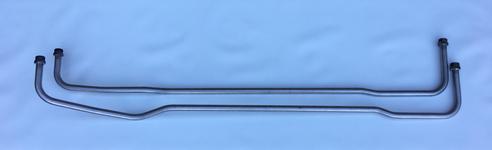
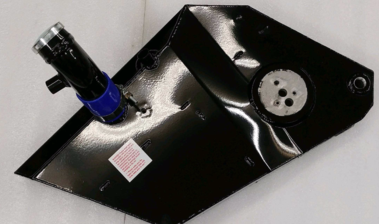
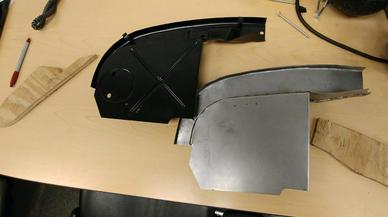
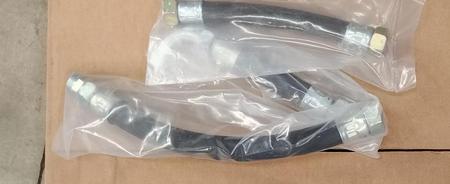

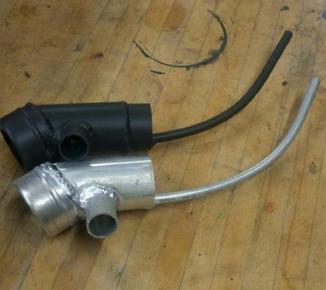
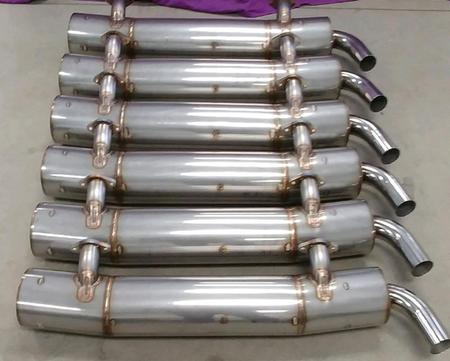
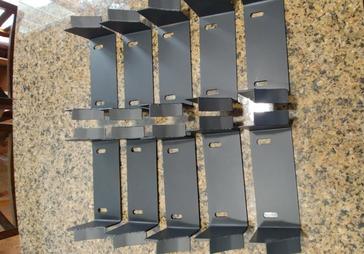
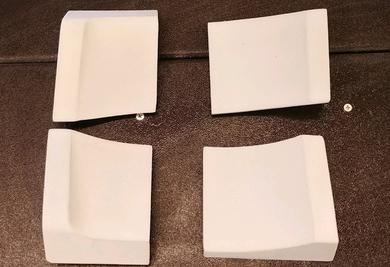
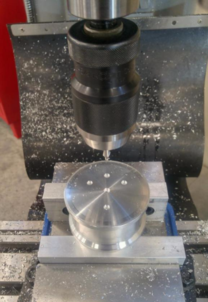
Posted by: mb911 May 4 2018, 02:03 PM
Thanks guys.. I appreciate all the cheering and help over the journey.. Still would guess 2-3 more years to completion.. At the least.
Let’s not forget some parts you’ve brought to production.
That's very true along the way allot parts side tracked me..
Posted by: David Billo May 4 2018, 02:46 PM
...Its about the journey.. Primed some more last night...
Yeah, that's great to be at that point in the project!
Ben, I'm interested to know the details of your paint setup, compressor, gun, etc. I'm contemplating doing my own paint eventually as well (probably year or two away) and trying to get a handle on what I'm going to need. It would be nice to avoid buying an insanely huge compressor just to paint one car. From what I've read, 80 gal, 5HP is recommended for non-stop spraying a typical car, but it seems easy with our cars to break it up into smaller sections and get away with a smaller compressor.
Posted by: mepstein May 4 2018, 03:09 PM
You can also rent a compressor if you're thinking its a one shot deal.
Posted by: gms May 4 2018, 03:49 PM
Getting it in primer always makes a project look closer to finished!
congrats Ben, see you soon
Posted by: mb911 May 4 2018, 04:24 PM
...Its about the journey.. Primed some more last night...
Yeah, that's great to be at that point in the project!
Ben, I'm interested to know the details of your paint setup, compressor, gun, etc. I'm contemplating doing my own paint eventually as well (probably year or two away) and trying to get a handle on what I'm going to need. It would be nice to avoid buying an insanely huge compressor just to paint one car. From what I've read, 80 gal, 5HP is recommended for non-stop spraying a typical car, but it seems easy with our cars to break it up into smaller sections and get away with a smaller compressor.
I have a 10 year old 60 gal 5hp sanborn compressor, a Sata hvlp gun along with an old binks hvlp gun. Painted 6 or 7 cars with this setup.
Works well.
Posted by: GeorgeRud May 4 2018, 08:58 PM
Ben, I don’t think you get to sleep between this project, your son’s car, your great parts, and work. I’m sure it’s great seeing the chassis finally in primer!
Posted by: mb911 May 5 2018, 06:21 AM
Ben, I don’t think you get to sleep between this project, your son’s car, your great parts, and work. I’m sure it’s great seeing the chassis finally in primer!
Yes sort of a balancing act..
As part of my full time job we have 4- 1 week dictated vacations per year and this week was one of them and you can see I made progress. Things won't happen as fast but expect bed liner within the week but have allot of other things to get done..
I really need to finish the engine and get it running on a stand.. Want to do a little muffler testing as well.
Posted by: mb911 May 6 2018, 07:30 PM
Sprayed bed liner today super easy .. Went after all the seams and repair areas 1st then a second coat on everything and then ran out.. Gotta order more.. Ugh..
Turned out way better in person... Very happy with it.. 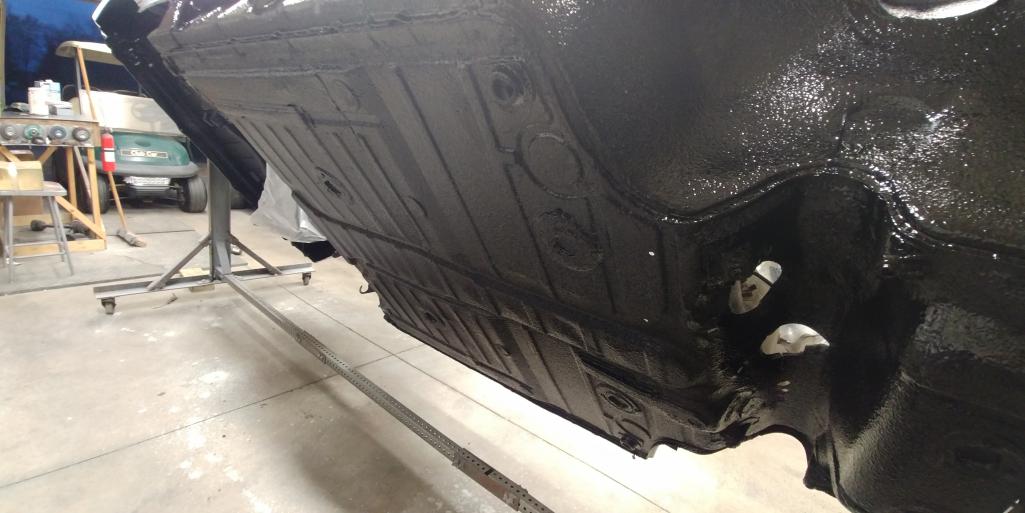
Posted by: mb911 May 6 2018, 07:30 PM
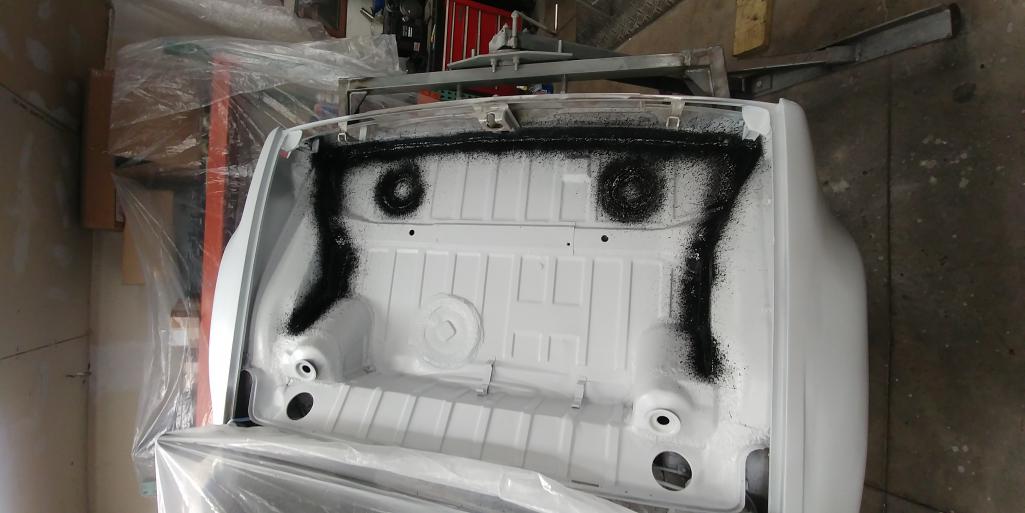
Posted by: mb911 May 6 2018, 07:31 PM
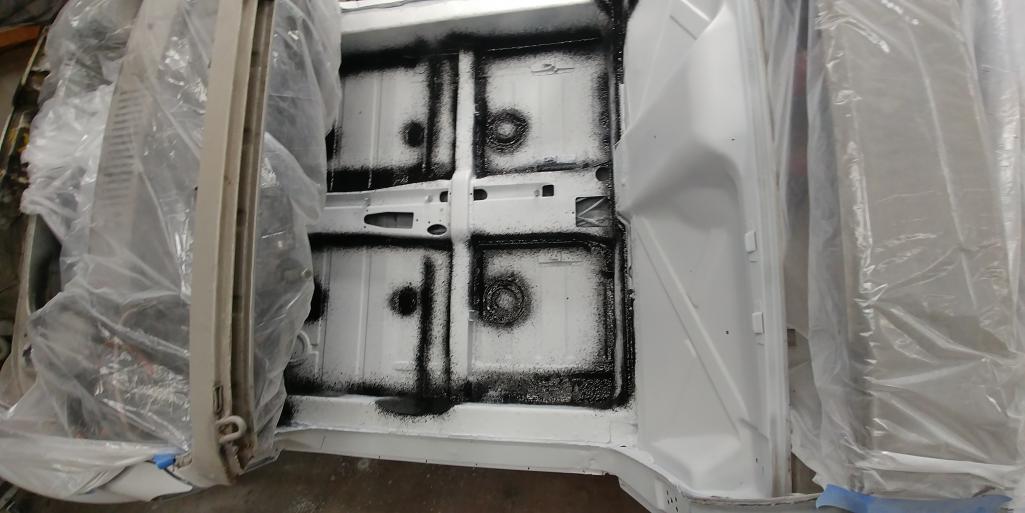
Posted by: mb911 May 6 2018, 07:31 PM
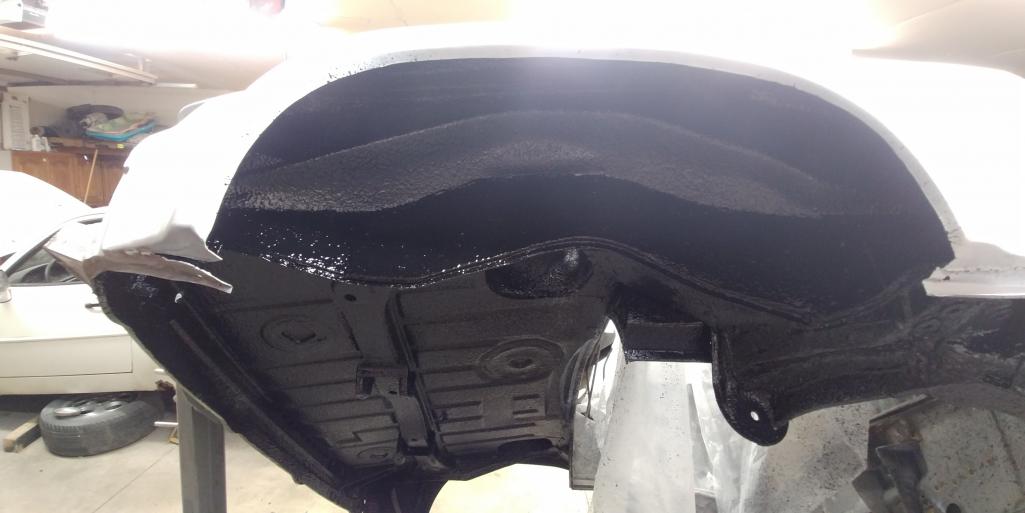
Posted by: bbrock May 6 2018, 09:59 PM
Wow! That has to feel good.
I'm assuming that is bedliner you are spraying as seam sealer. How are you liking that?
Posted by: whitetwinturbo May 6 2018, 10:02 PM
Posted by: mb911 May 7 2018, 04:56 AM
Wow! That has to feel good.
I'm assuming that is bedliner you are spraying as seam sealer. How are you liking that?
Yes.. I did put down the seam sealer from sem 1st let it cure in the regular spots then went and sprayed this over..
This stuff is stinky so it really is a summer doors open type of product..
Posted by: Cairo94507 May 7 2018, 06:30 AM
Giant step forward.
Posted by: tygaboy May 7 2018, 07:43 AM
Ben - Very excited for you! Congrats on a major milestone. As has been said before, getting any sort of even color/coat on our projects makes SUCH a difference to how it looks.
Every time I see someone take this step and then look at my build, I'm at once envious and motivated.
Great to watch your progress and thanks for the poke to get going on mine.
Posted by: mb911 May 7 2018, 01:36 PM
Thanks guys.. Still gotta wait on the quart I ordered to finish it..
This stuff still smells bad.. Wow..worse then paint IMHO.
Posted by: Dion May 7 2018, 06:41 PM
Man, that looks really nice.
Great progress, especially considering everything else you do!
Posted by: mb911 May 9 2018, 12:57 PM
Spent the morning driving down to meet Glenn to look at his collection and to pick a previously NOS replacement right front fender that he and Garold cut off a car for me.. Thanks so much guys..
The best part it I dont think I need to bare metal this fender.. 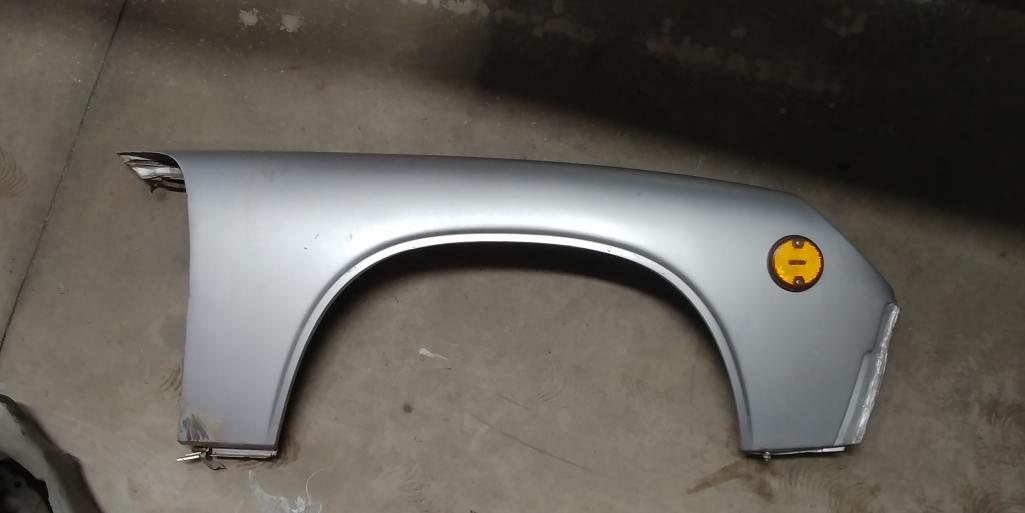
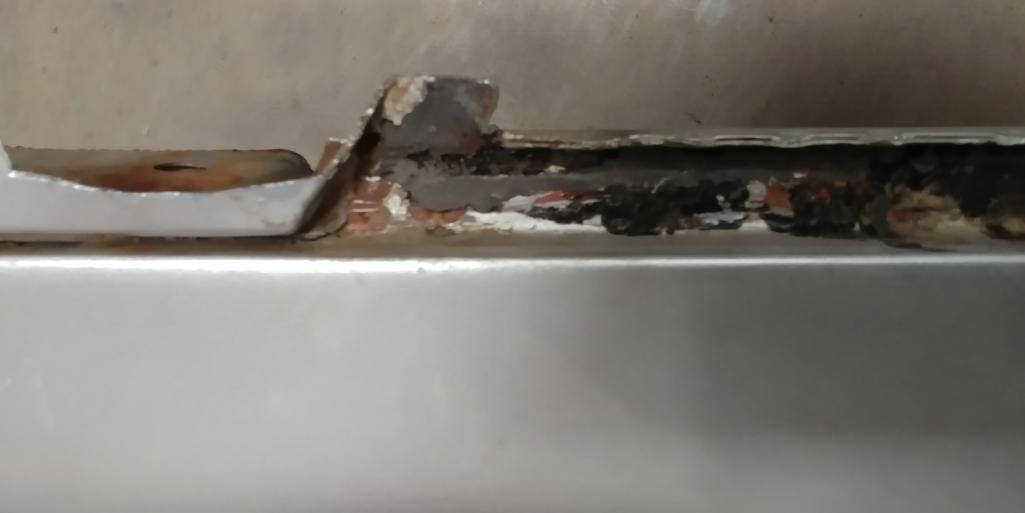
Notice the red primer.. Its not rust..
Posted by: GeorgeRud May 9 2018, 04:59 PM
Starting to look like a car! You have to be getting excited to see it coming together!
Posted by: mb911 May 12 2018, 09:46 AM
Front fender tacked on .. Door was installed for fitting.. Getting closer to ready for suspension install.. 
Posted by: mb911 May 14 2018, 03:59 PM
I TIG welded the flare on this morning.. My opinion vs MIG is that the weld bead is just smaller so easier to shape etc. If you look back several pages you will see my son MIG welding and that was the point.
Then we worked on engine sheet metal samples..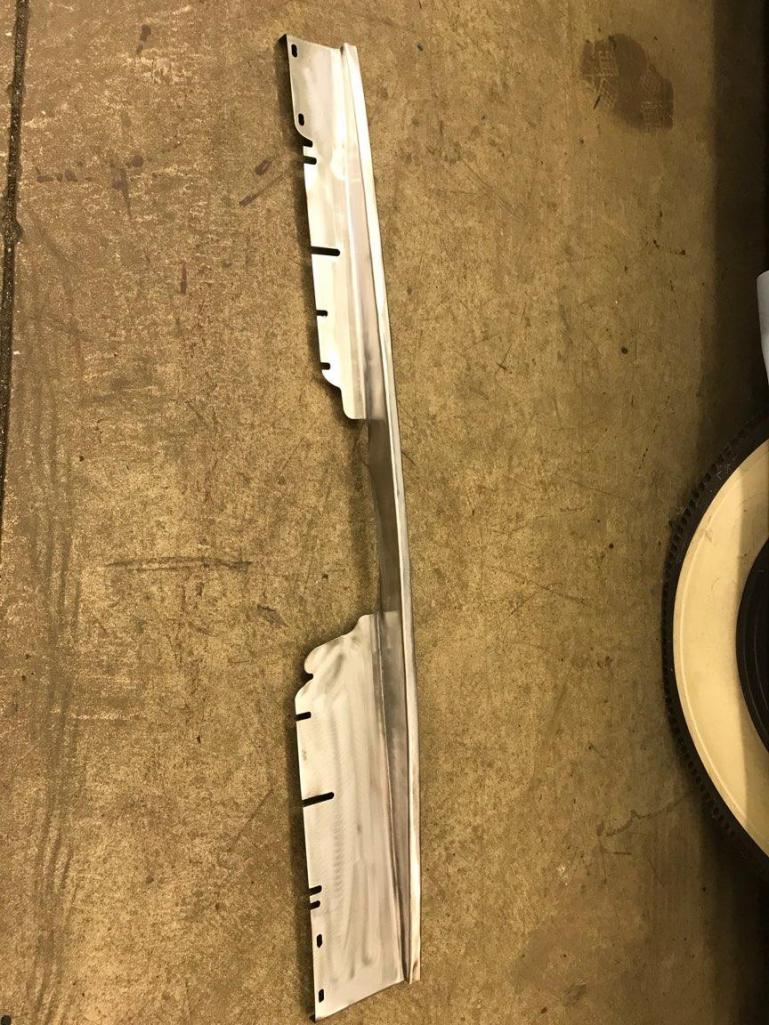

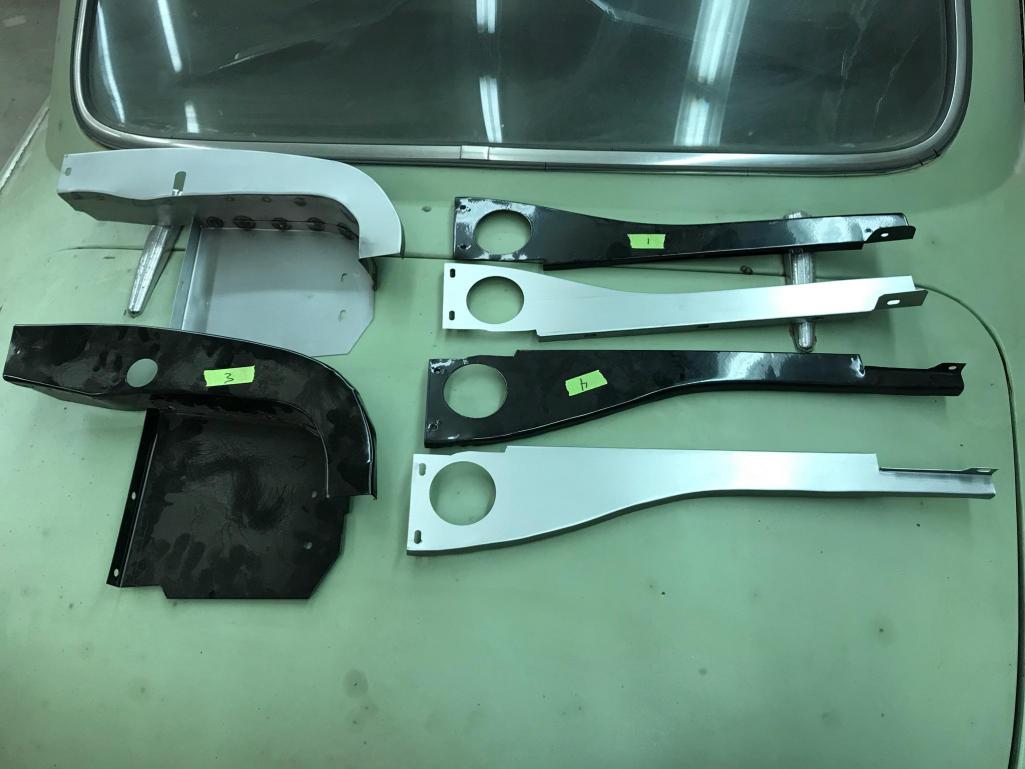
Posted by: mb911 May 15 2018, 07:47 PM
Front fender is completely ground, and now a thin coat of filler.. Seam sealed. Making head way..
Onto finishing engine. Gotta fire that yet this summer for testing.
Posted by: mb911 May 21 2018, 12:56 PM
Started prepping engine compartment for paint. A few small weld repairs to do and remove the fan stand off. Takes a ton of time in this area to prep.. 
Posted by: mepstein May 21 2018, 01:50 PM
Are you using the relay board?
Posted by: Mark Henry May 21 2018, 01:54 PM
Are you using the relay board?
I don't have the relay board so I cut those brackets off.
Also for a /6 you need to cut the heat booster fan bracket off.
Relay board is a PITA for the oil filter and the bottom tank fitting. I made my engine harness with the correct connector, so it plugs into the main harness no board.
Booster fan won't fit with a /6.
Posted by: mb911 May 21 2018, 02:05 PM
I am undecided on relay board.. The fuel pump relay is my only concern.. Any thoughts on that? Mark what did you do for a fuel pump relay set up?
Re the booster fan yes the bracket is coming off.. I called it the fan stand off in my post.
Posted by: mepstein May 21 2018, 02:11 PM
I used the PMS 3.2 conversion harness to attach the engine harness to the chassis harness. I'm pretty sure the DME controls the fuel pump. Internally regulated alternator on the 3.2. Whatever that all means.
Posted by: Tdskip May 21 2018, 03:17 PM
Ben, shouldn’t the lower lip of that reinforcement metal be welded up?
Posted by: mb911 May 21 2018, 03:47 PM
Ben, shouldn’t the lower lip of that reinforcement metal be welded up?
Where are you talking? Can you attach a picture?
Posted by: Mark Henry May 21 2018, 04:30 PM
I am undecided on relay board.. The fuel pump relay is my only concern.. Any thoughts on that? Mark what did you do for a fuel pump relay set up?
Re the booster fan yes the bracket is coming off.. I called it the fan stand off in my post.
Ben I forget what engine are you using? carbs, FI?
Posted by: mb911 May 21 2018, 06:39 PM
I am undecided on relay board.. The fuel pump relay is my only concern.. Any thoughts on that? Mark what did you do for a fuel pump relay set up?
Re the booster fan yes the bracket is coming off.. I called it the fan stand off in my post.
Ben I forget what engine are you using? carbs, FI?
2.4 s spec with carbs..
Posted by: Mark Henry May 21 2018, 07:32 PM
Right now I'm running off of the ignition, but I just bought a early 80's VW Rabbit CIS fuel pump relay. It runs off of the tach signal, if no tach signal it will turn the pump off. Starting isn't an issue as the carbs have enough fuel in the bowls to start. Only issue would be first dry bowls start, would be easy enough to install a NO push button switch.
Relay part number 321 906 059C the one I got has a 15a fuse built right into the top of the relay.
You could do a similar thing with a generic DTDP relay and run it off the oil pressure (idiot light) switch, but it won't be as fast reacting as the Rabbit switch.
There's also an inertia switch from a Ford (IIRC), but guys say it trips every time you hit a bad bump, simple to reset.
On how I made my relay board delete engine harness go to post #150 of my engine build thread. You can get the connector from member Perry Kiehl, he also makes full conversion harnesses.
Since I'm cheap I made a male connector by hacking a female connector from an old engine harness.
http://www.914world.com/bbs2/index.php?showtopic=229913&st=140
Posted by: mb911 May 22 2018, 09:16 AM
Right now I'm running off of the ignition, but I just bought a early 80's VW Rabbit CIS fuel pump relay. It runs off of the tach signal, if no tach signal it will turn the pump off. Starting isn't an issue as the carbs have enough fuel in the bowls to start. Only issue would be first dry bowls start, would be easy enough to install a NO push button switch.
Relay part number 321 906 059C the one I got has a 15a fuse built right into the top of the relay.
You could do a similar thing with a generic DTDP relay and run it off the oil pressure (idiot light) switch, but it won't be as fast reacting as the Rabbit switch.
There's also an inertia switch from a Ford (IIRC), but guys say it trips every time you hit a bad bump, simple to reset.
On how I made my relay board delete engine harness go to post #150 of my engine build thread. You can get the connector from member Perry Kiel, he also makes full conversion harnesses.
Since I'm cheap I made a male connector by hacking a female connector from an old engine harness.
http://www.914world.com/bbs2/index.php?showtopic=229913&st=140
I did the same thing as you on my last conversion. Relay for sure on this one.. It just seems safer.
I will probably delete the board as suggested and either make my own harness or buy one from perry..
Gotta figure the regulator wiring out as well then..
Posted by: Tdskip May 22 2018, 09:35 AM
Where are you talking? Can you attach a picture?
It looks like sealer is on that area now, rear suspension on the driver side the bottom of the chassis reinforcement plate.
Posted by: mb911 May 22 2018, 09:42 AM
Where are you talking? Can you attach a picture?
It looks like sealer is on that area now, rear suspension on the driver side the bottom of the chassis reinforcement plate.
Oh got you. I welded that up prior to sealer.. Just didn't take a picture of that.
Posted by: mb911 Jun 9 2018, 06:49 AM
Update
Fuel pump arrived, carb parts and distributor coming from supertec, worked on aligning sprockets on the engine, then went to time cams and discovered that the cam sprockets were a little worn so ordered new ones,
No real work on chassis as want to wrap up the engine so I can run it for some testing of products.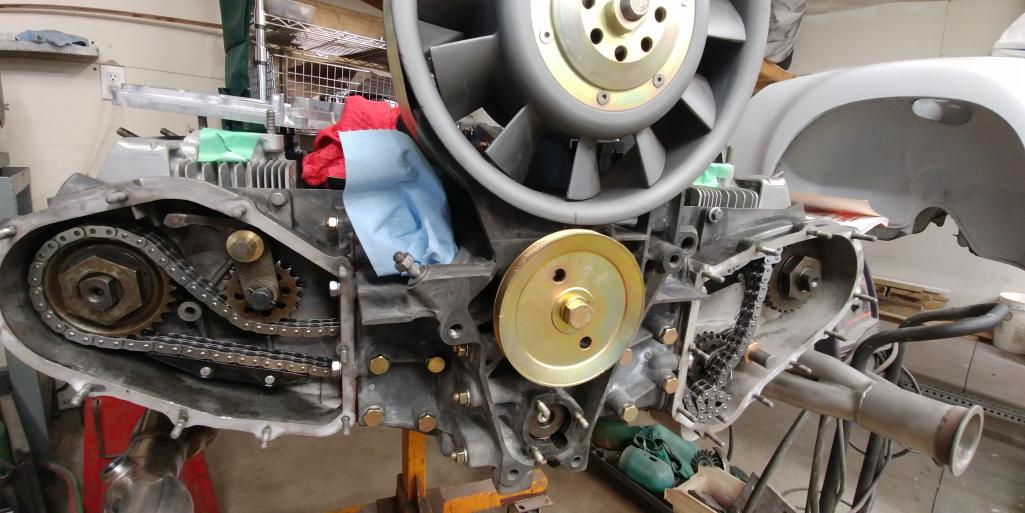
Posted by: mb911 Jun 9 2018, 06:50 AM
Test run stand in the making.. 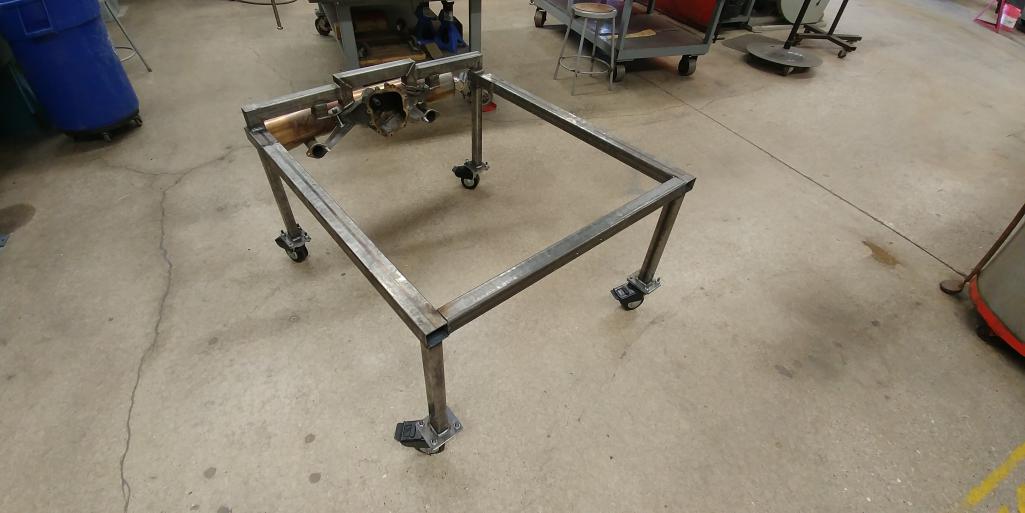
Posted by: mb911 Jun 14 2018, 05:54 AM
Cams are timed, put new sprockets on though felt the ones I had were good. It just seemed the thing to do. Then had my buddy powdercoat my sons phone dials and then I wet painted to rsr look on one of my 15x8 fuchs. This was done with water masking..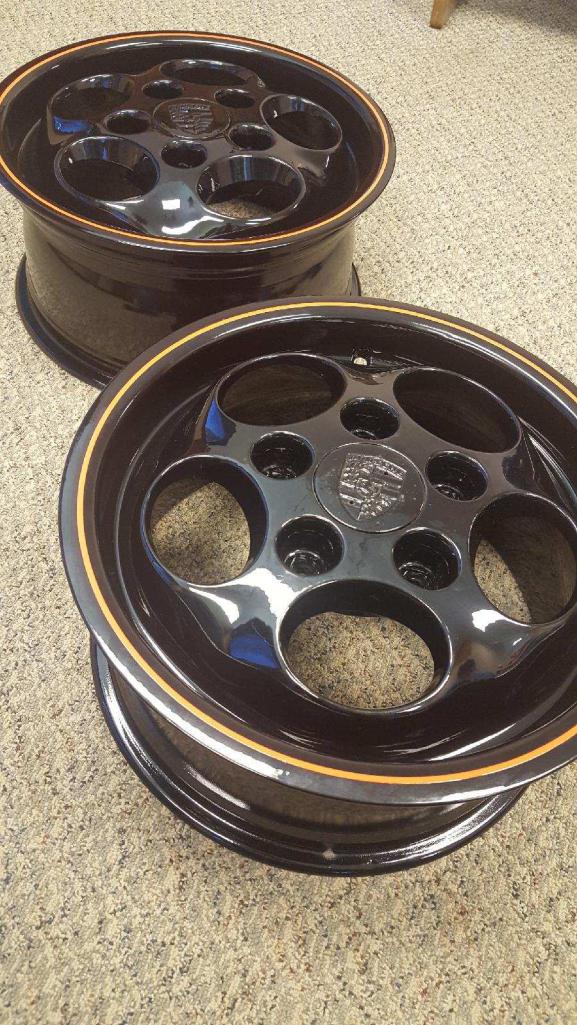
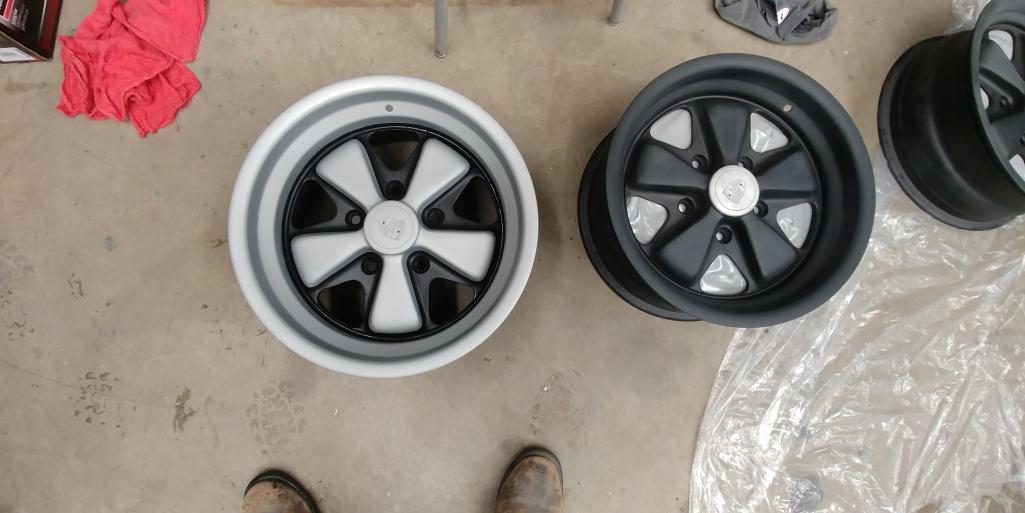
Posted by: Travis Neff Jun 14 2018, 03:29 PM
I don't normally like the all black wheels, but that matte finish with the bare aluminum center cap sure looks good!
Posted by: mb911 Jun 14 2018, 04:01 PM
I don't normally like the all black wheels, but that matte finish with the bare aluminum center cap sure looks good!
I thought about doing that as well..
The good news its all paint so doesn't matter cost much to change things.
Posted by: mb911 Jun 16 2018, 06:18 AM
Here is 1 front strut assembled and the other 3 wheels with the water mask method. 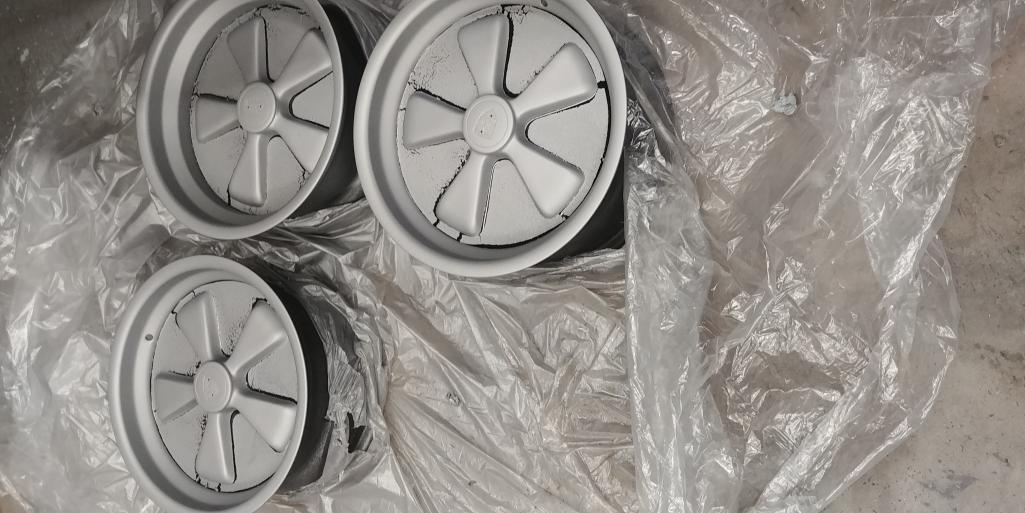
Posted by: mb911 Jun 16 2018, 06:18 AM
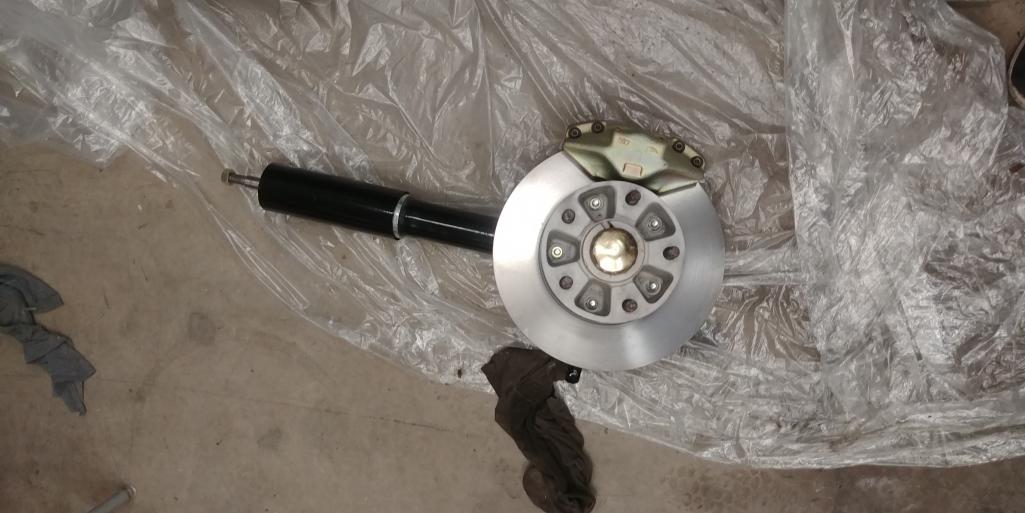
Posted by: Beach914 Jun 16 2018, 08:44 AM
Ben, what paints did you use to achieve that look?
Posted by: 914forme Jun 16 2018, 09:19 AM
Right now I'm running off of the ignition, but I just bought a early 80's VW Rabbit CIS fuel pump relay. It runs off of the tach signal, if no tach signal it will turn the pump off. Starting isn't an issue as the carbs have enough fuel in the bowls to start. Only issue would be first dry bowls start, would be easy enough to install a NO push button switch.
Relay part number 321 906 059C the one I got has a 15a fuse built right into the top of the relay.
You could do a similar thing with a generic DTDP relay and run it off the oil pressure (idiot light) switch, but it won't be as fast reacting as the Rabbit switch.
There's also an inertia switch from a Ford (IIRC), but guys say it trips every time you hit a bad bump, simple to reset.
On how I made my relay board delete engine harness go to post #150 of my engine build thread. You can get the connector from member Perry Kiel, he also makes full conversion harnesses.
Since I'm cheap I made a male connector by hacking a female connector from an old engine harness.
http://www.914world.com/bbs2/index.php?showtopic=229913&st=140
I did the same thing as you on my last conversion. Relay for sure on this one.. It just seems safer.
I will probably delete the board as suggested and either make my own harness or buy one from perry..
Gotta figure the regulator wiring out as well then..
Don't forget some of the CIS relays also have a built in rev limit function. Learned that the hard way going down the back straight of Mid-Ohio. Still below the red-line first time out. and I would drop power
 traced it back to the relays I was using. In my setup one powered the coil one powered the fuel pump.
I grabbed the relays from a my hoard of VW CIS parts from my previous Scirocco collection. Yes Ben I am back to using the term Hoard. When in Rome.
Posted by: mb911 Jun 16 2018, 10:07 AM
Ben, what paints did you use to achieve that look?
Matte black powdercoated then Cerakote silver mag ceramic paint.. Turned out pretty nice..
Posted by: mb911 Jun 16 2018, 10:07 AM
Right now I'm running off of the ignition, but I just bought a early 80's VW Rabbit CIS fuel pump relay. It runs off of the tach signal, if no tach signal it will turn the pump off. Starting isn't an issue as the carbs have enough fuel in the bowls to start. Only issue would be first dry bowls start, would be easy enough to install a NO push button switch.
Relay part number 321 906 059C the one I got has a 15a fuse built right into the top of the relay.
You could do a similar thing with a generic DTDP relay and run it off the oil pressure (idiot light) switch, but it won't be as fast reacting as the Rabbit switch.
There's also an inertia switch from a Ford (IIRC), but guys say it trips every time you hit a bad bump, simple to reset.
On how I made my relay board delete engine harness go to post #150 of my engine build thread. You can get the connector from member Perry Kiel, he also makes full conversion harnesses.
Since I'm cheap I made a male connector by hacking a female connector from an old engine harness.
http://www.914world.com/bbs2/index.php?showtopic=229913&st=140
I did the same thing as you on my last conversion. Relay for sure on this one.. It just seems safer.
I will probably delete the board as suggested and either make my own harness or buy one from perry..
Gotta figure the regulator wiring out as well then..
Don't forget some of the CIS relays also have a built in rev limit function. Learned that the hard way going down the back straight of Mid-Ohio. Still below the red-line first time out. and I would drop power
traced it back to the relays I was using. In my setup one powered the coil one powered the fuel pump.I grabbed the relays from a my hoard of VW CIS parts from my previous Scirocco collection. Yes Ben I am back to using the term Hoard. When in Rome.
Lol I get that..
Also gotta get you dad's info. He said it is clear glass..
Posted by: mb911 Jun 16 2018, 07:31 PM
Put all the rockers in today and set valve clearence.. Was about 90 here today but shop was cool..
Exciting. Just waiting on distributor and carb parts now..
Posted by: mb911 Jun 20 2018, 12:18 PM
Trans all cleaned. My extra trans will get a complete cosmetic and internal restoration later on.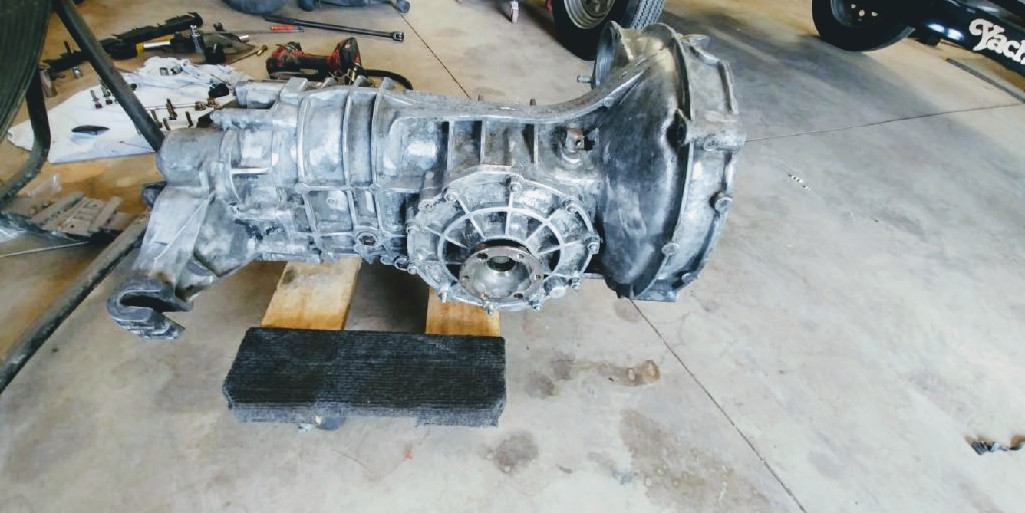
Posted by: 914forme Jun 20 2018, 06:37 PM
That is one light transmission it is actually floating to the ceiling. 
Or you guys have some odd gravity in your parts.
Looks good Ben, I would leave it alone, but if doing any sort of painting you need to prep the Mag case for it, follow what the aircraft guys do, and you will be fine.
Posted by: mb911 Jun 20 2018, 07:39 PM
So far degreased, wire brushed, powerwashed, cleaned with scotch brite and brake cleaner.
Still undecided..
Posted by: mb911 Jun 21 2018, 03:09 PM
Firehawk AS tires mounted. Rated to 118mph which is fine for me until I decide a permanent tire wheel combo.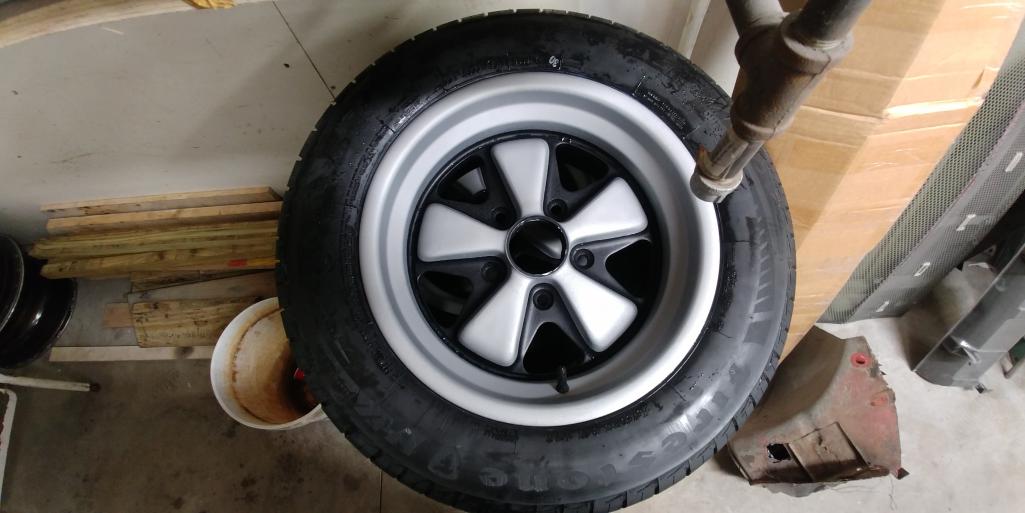
Posted by: mb911 Jun 21 2018, 03:10 PM
Posted by: Tdskip Jun 21 2018, 04:22 PM
Thanks for the updates Ben.
Exciting.
Posted by: mb911 Jun 21 2018, 04:45 PM
Thanks. I am going to finish all the bed liner underneath the car tomorrow night then suspension can go in..
Posted by: Tdskip Jun 21 2018, 04:49 PM
You are getting really-really-really close.
What a journey.
Well done.
Posted by: porschetub Jun 21 2018, 04:56 PM
Right now I'm running off of the ignition, but I just bought a early 80's VW Rabbit CIS fuel pump relay. It runs off of the tach signal, if no tach signal it will turn the pump off. Starting isn't an issue as the carbs have enough fuel in the bowls to start. Only issue would be first dry bowls start, would be easy enough to install a NO push button switch.
Relay part number 321 906 059C the one I got has a 15a fuse built right into the top of the relay.
You could do a similar thing with a generic DTDP relay and run it off the oil pressure (idiot light) switch, but it won't be as fast reacting as the Rabbit switch.
There's also an inertia switch from a Ford (IIRC), but guys say it trips every time you hit a bad bump, simple to reset.
On how I made my relay board delete engine harness go to post #150 of my engine build thread. You can get the connector from member Perry Kiel, he also makes full conversion harnesses.
Since I'm cheap I made a male connector by hacking a female connector from an old engine harness.
http://www.914world.com/bbs2/index.php?showtopic=229913&st=140
I did the same thing as you on my last conversion. Relay for sure on this one.. It just seems safer.
I will probably delete the board as suggested and either make my own harness or buy one from perry..
Gotta figure the regulator wiring out as well then..
Don't forget some of the CIS relays also have a built in rev limit function. Learned that the hard way going down the back straight of Mid-Ohio. Still below the red-line first time out. and I would drop power
traced it back to the relays I was using. In my setup one powered the coil one powered the fuel pump.I grabbed the relays from a my hoard of VW CIS parts from my previous Scirocco collection. Yes Ben I am back to using the term Hoard. When in Rome.
Would the starter cranking speed be enough to trigger that relay ?,my 87 GTI has what I think is the very similar relay and has the rev-limit built in with a plain rotor,comes in around 6400,some CIS Golfs have a different setup and use a rev-limiting rotor.
The setup in my Golf has a priming function to charge the fuel accumulator and the fuel distributor, the first time you turn the key ,after that the main and tank pump run up when cranking the engine,thinking this would fill my fuel bowls but I don't know what would cause the relay to prime in a carb application.
Been looking for sometime @ a safety solution and think this setup might be the go,if only I knew more about car electrics
 .
.Posted by: mb911 Jun 22 2018, 09:53 AM
Right now I'm running off of the ignition, but I just bought a early 80's VW Rabbit CIS fuel pump relay. It runs off of the tach signal, if no tach signal it will turn the pump off. Starting isn't an issue as the carbs have enough fuel in the bowls to start. Only issue would be first dry bowls start, would be easy enough to install a NO push button switch.
Relay part number 321 906 059C the one I got has a 15a fuse built right into the top of the relay.
You could do a similar thing with a generic DTDP relay and run it off the oil pressure (idiot light) switch, but it won't be as fast reacting as the Rabbit switch.
There's also an inertia switch from a Ford (IIRC), but guys say it trips every time you hit a bad bump, simple to reset.
On how I made my relay board delete engine harness go to post #150 of my engine build thread. You can get the connector from member Perry Kiel, he also makes full conversion harnesses.
Since I'm cheap I made a male connector by hacking a female connector from an old engine harness.
http://www.914world.com/bbs2/index.php?showtopic=229913&st=140
I did the same thing as you on my last conversion. Relay for sure on this one.. It just seems safer.
I will probably delete the board as suggested and either make my own harness or buy one from perry..
Gotta figure the regulator wiring out as well then..
Don't forget some of the CIS relays also have a built in rev limit function. Learned that the hard way going down the back straight of Mid-Ohio. Still below the red-line first time out. and I would drop power
traced it back to the relays I was using. In my setup one powered the coil one powered the fuel pump.I grabbed the relays from a my hoard of VW CIS parts from my previous Scirocco collection. Yes Ben I am back to using the term Hoard. When in Rome.
Would the starter cranking speed be enough to trigger that relay ?,my 87 GTI has what I think is the very similar relay and has the rev-limit built in with a plain rotor,comes in around 6400,some CIS Golfs have a different setup and use a rev-limiting rotor.
The setup in my Golf has a priming function to charge the fuel accumulator and the fuel distributor, the first time you turn the key ,after that the main and tank pump run up when cranking the engine,thinking this would fill my fuel bowls but I don't know what would cause the relay to prime in a carb application.
Been looking for sometime @ a safety solution and think this setup might be the go,if only I knew more about car electrics
.Yup I think I will try this..
Posted by: mb911 Jun 22 2018, 07:45 PM
Just finished up everywhere that needed touch up. And painted trans.. 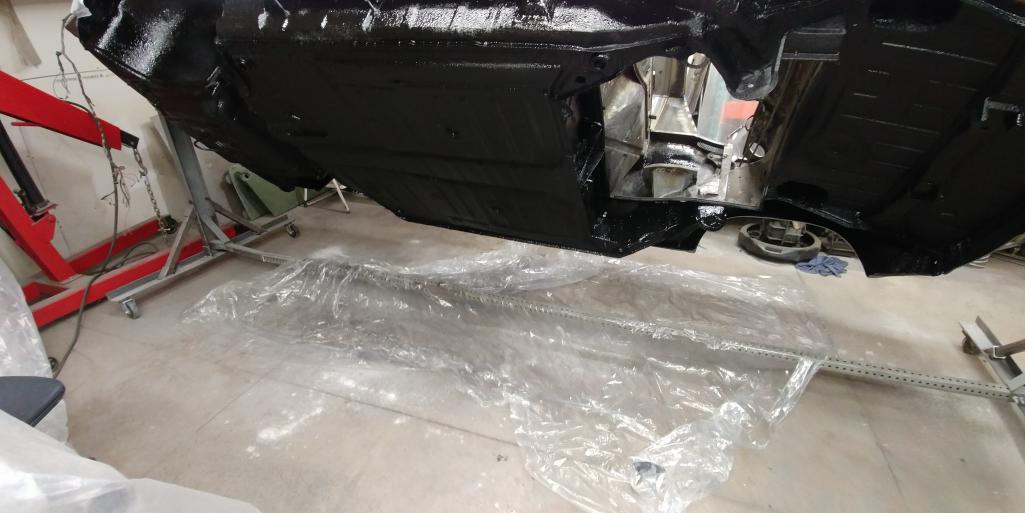
Posted by: mb911 Jun 22 2018, 07:45 PM
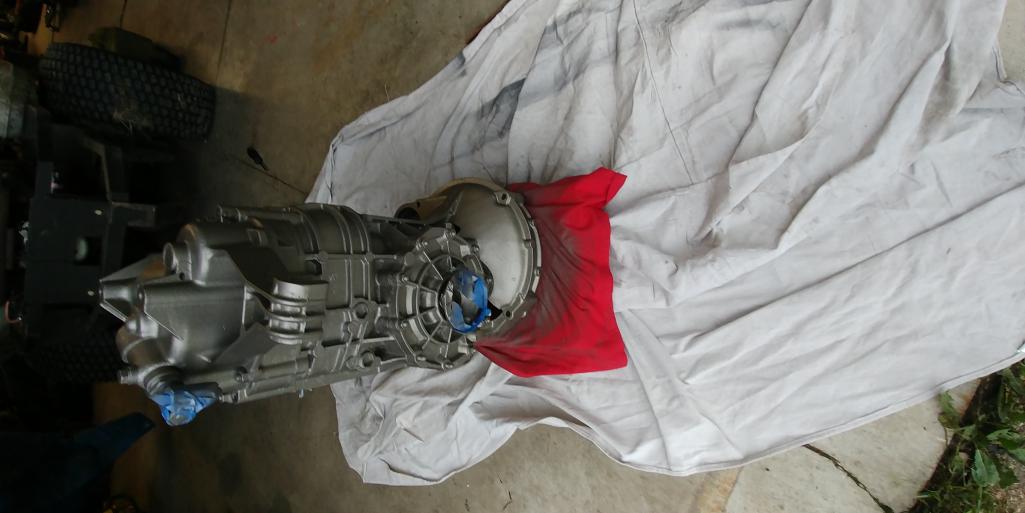
Posted by: Travis Neff Jun 22 2018, 08:17 PM
I like the color you picked for the transmission. Did you end up doing cerakote?
Posted by: mb911 Jun 22 2018, 08:29 PM
I like the color you picked for the transmission. Did you end up doing cerakote?
Thanks used cerakote titanium only because I bought a sample of the color and had some left. Its a "rebuild" in a can so to speak.
Posted by: mb911 Jun 24 2018, 01:54 PM
Off the rotisserie. 1st time in last 2 years.. Thinking I might sell the rotisserie not sure yet..
Posted by: mb911 Jun 24 2018, 01:55 PM
Can't figure out why pictures are loading upside down etc.
Posted by: mepstein Jun 24 2018, 02:04 PM
Off the rotisserie. 1st time in last 2 years.. Thinking I might sell the rotisserie not sure yet.
Dibs
Attached image(s)
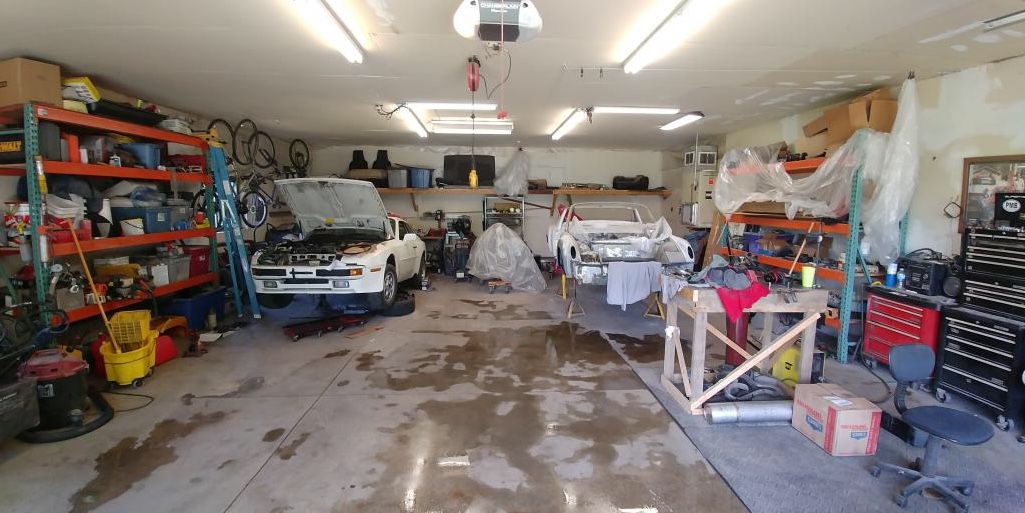
Posted by: mb911 Jun 25 2018, 10:09 AM
GT oil cooler set up has started.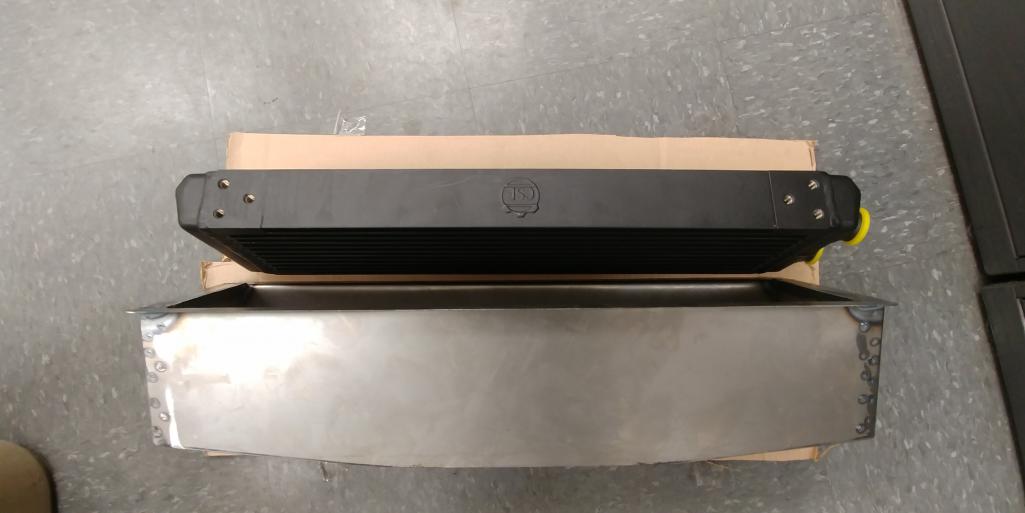
Posted by: mb911 Jun 25 2018, 10:09 AM
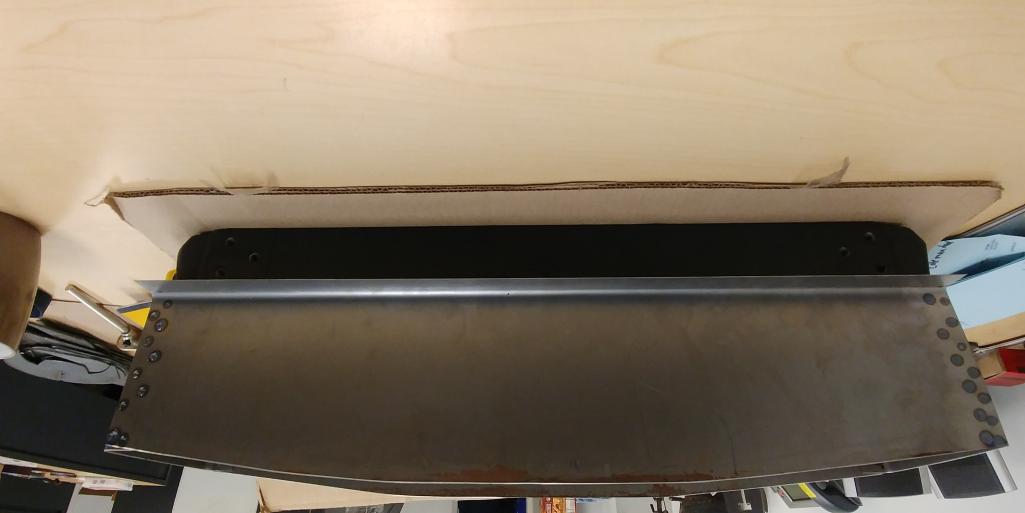
Posted by: whitetwinturbo Jun 25 2018, 09:38 PM
.............just got a pair of anti-gravity boots to help watch this coo build 
Posted by: mb911 Jun 26 2018, 10:33 AM
Here is Finished prototype for front oil cooler. It will have a foam rubber seal up front and rubber washers top to bottom.. Now to lay out trunk for cutting. 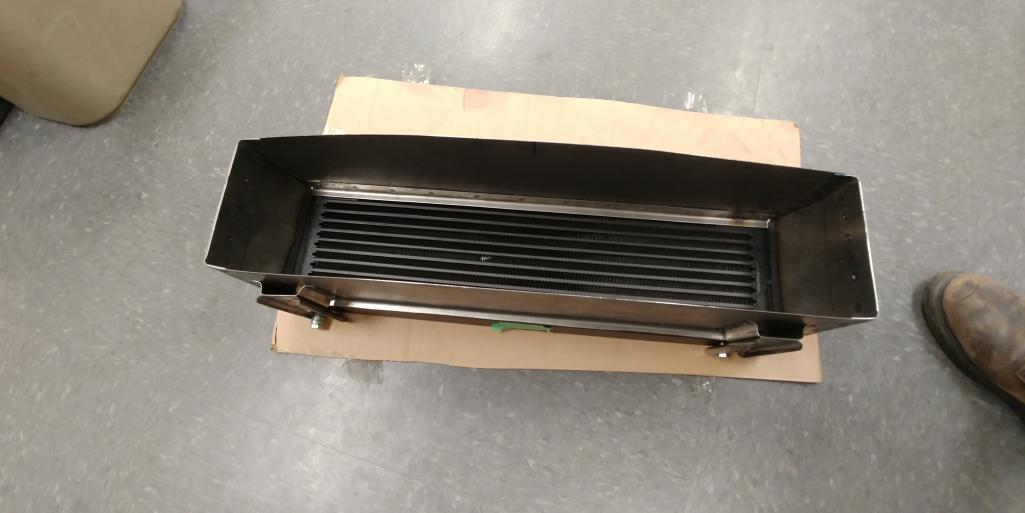
Posted by: mb911 Jun 26 2018, 10:33 AM
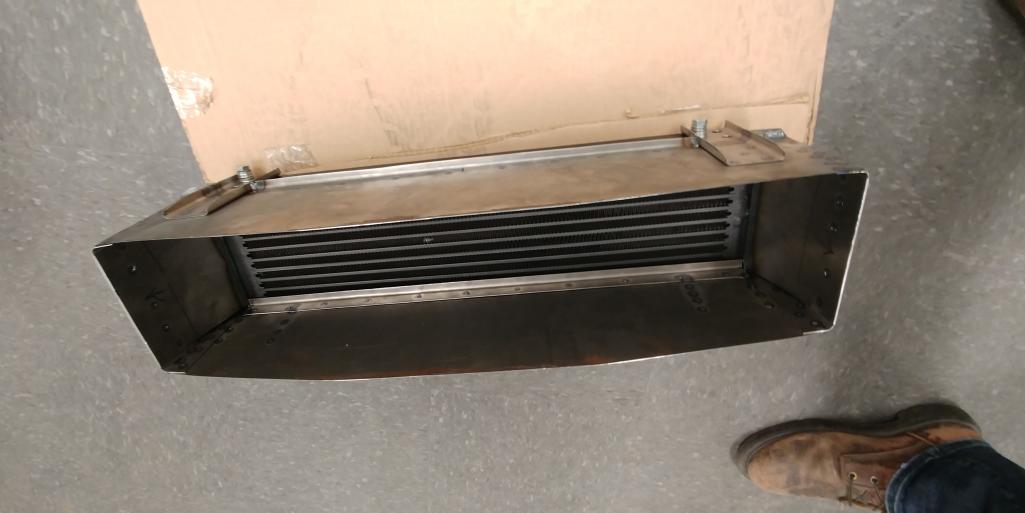
Posted by: mb911 Jun 26 2018, 10:34 AM
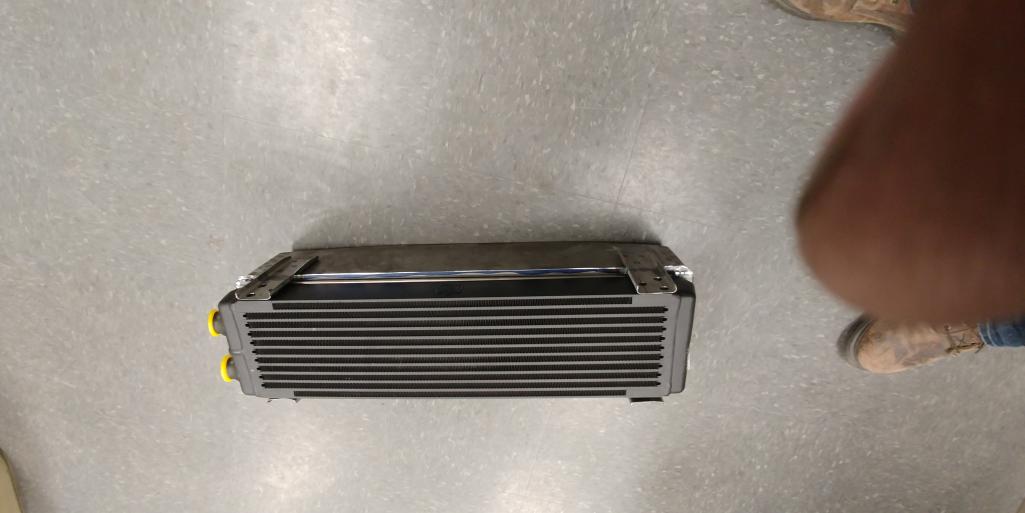
Posted by: mb911 Jun 27 2018, 11:28 AM
So I know welding is not done.. Making progress on the oil cooler though.. Happy about that.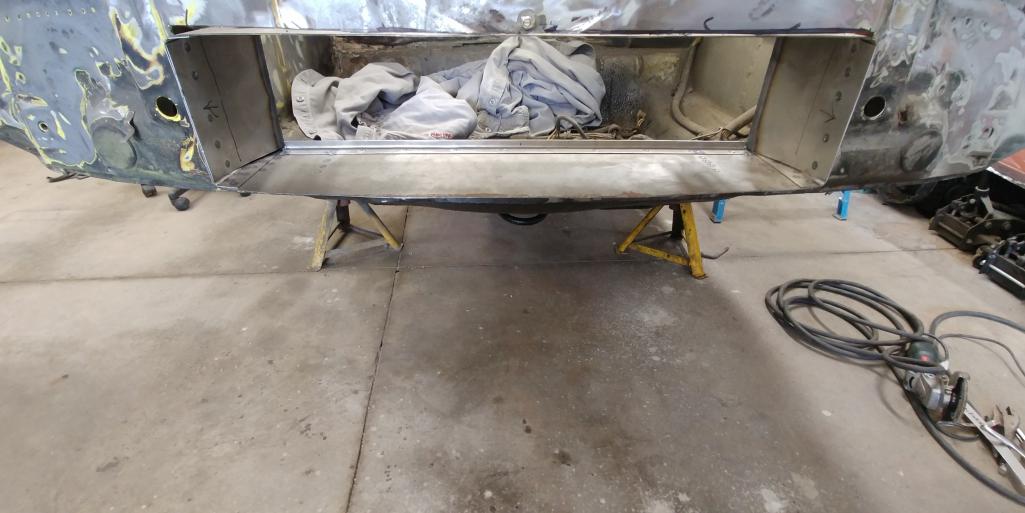
Posted by: mb911 Jun 27 2018, 11:29 AM
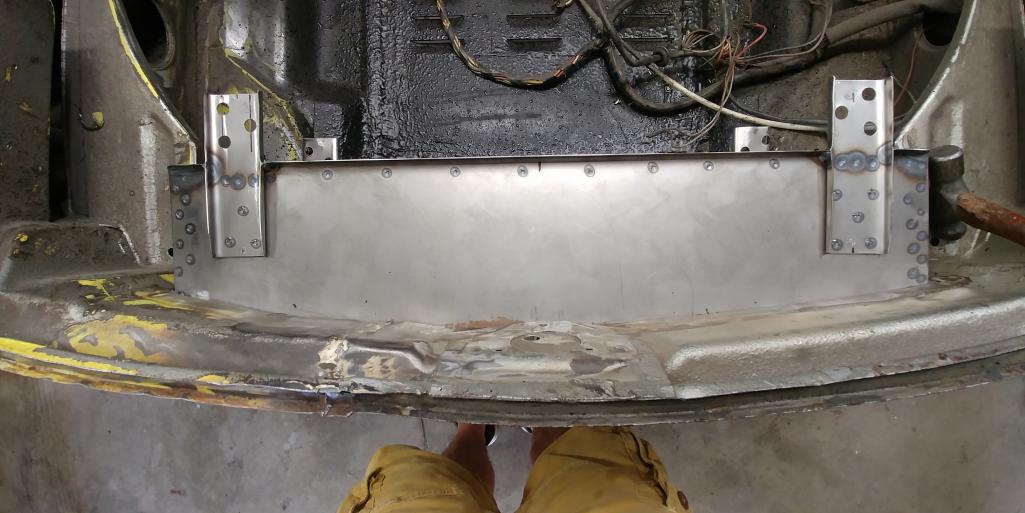
Posted by: bbrock Jun 27 2018, 11:40 AM
Wow! The fab work is fantastic but what really caught my eye are those plug welds. They are works of art. Those will look just like spot welds after paint. 
Posted by: mb911 Jun 27 2018, 11:58 AM
Wow! The fab work is fantastic but what really caught my eye are those plug welds. They are works of art. Those will look just like spot welds after paint.
Thanks.
Also note how my car was clipped on passenger side.. I know we have reviewed that but this is why I feel this is a perfect car for the build.. If I had a virgin rust free car I am not sure I could do all this cutting etc.. I also would have worried more about metal finishing.
Posted by: mb911 Jun 28 2018, 05:47 AM
Figuring out hose lengths.. Might neck down to 26mm cooler hoses. 30 is a tight fit..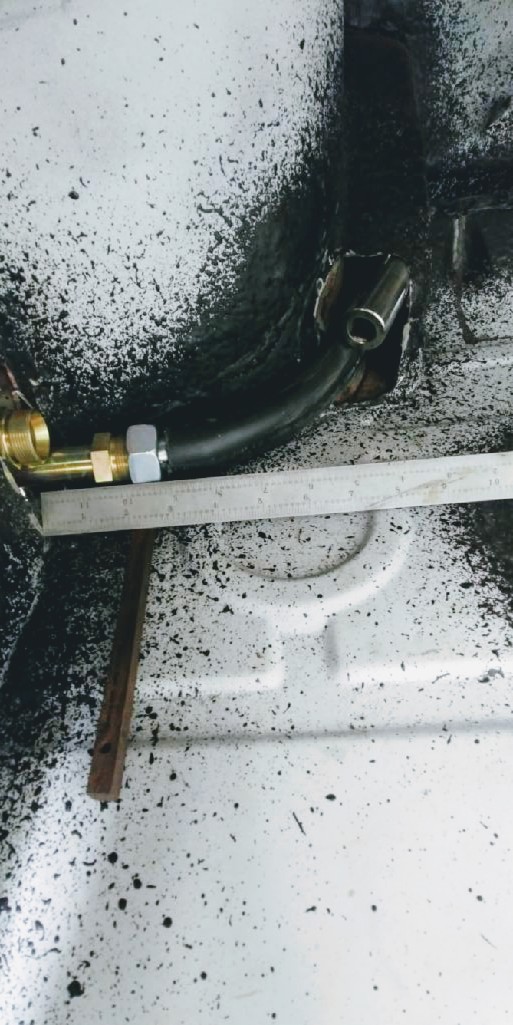
Posted by: mb911 Jul 6 2018, 12:20 PM
Just got back from vacation and had some goodies waiting for me.
Thanks Mark E, Mark H, and Brad .. These are the last bits to get the engine started. Also not pictured is the 22 to 30mm fitting and the oil pressure gauge.
And picture fixed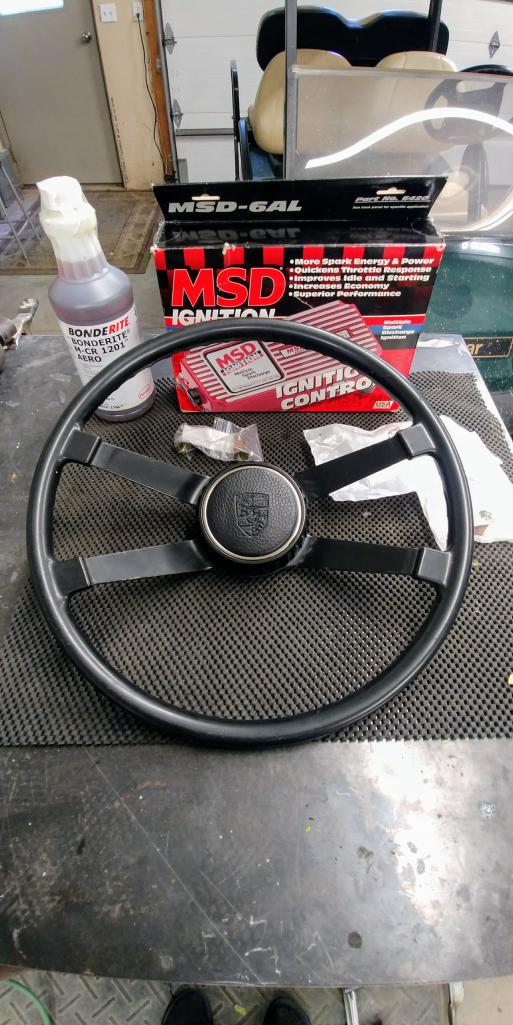
Posted by: mb911 Jul 7 2018, 11:52 AM
Distributor just came yesterday along carb gaskets etc. Yeah.. 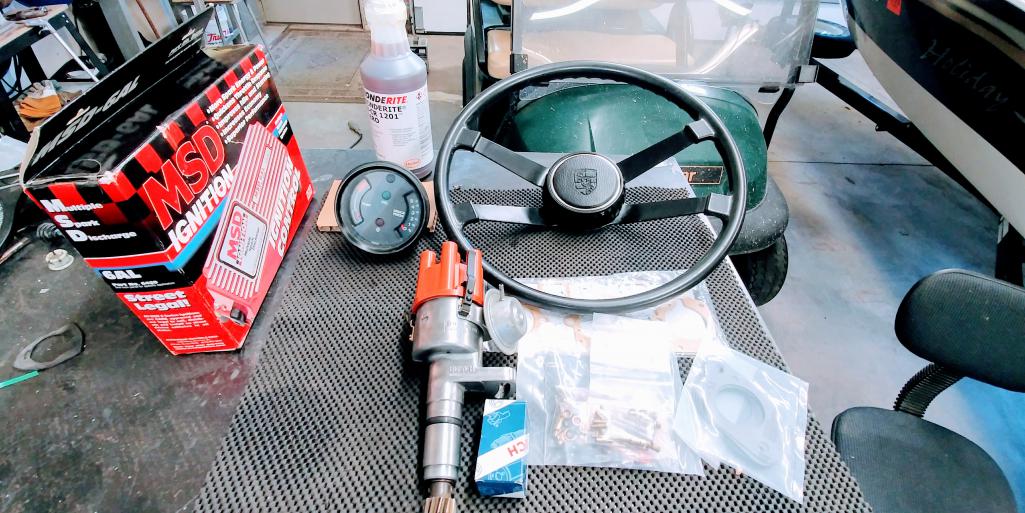
Posted by: mb911 Jul 11 2018, 09:42 AM
Carb repair.. Drilled/tapped/loctite brass bushing for the drain plug.. 
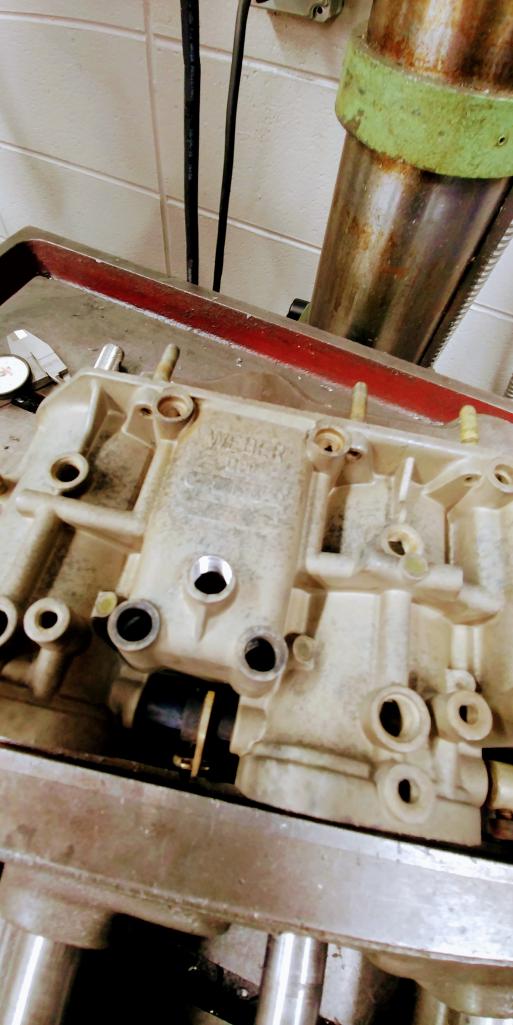
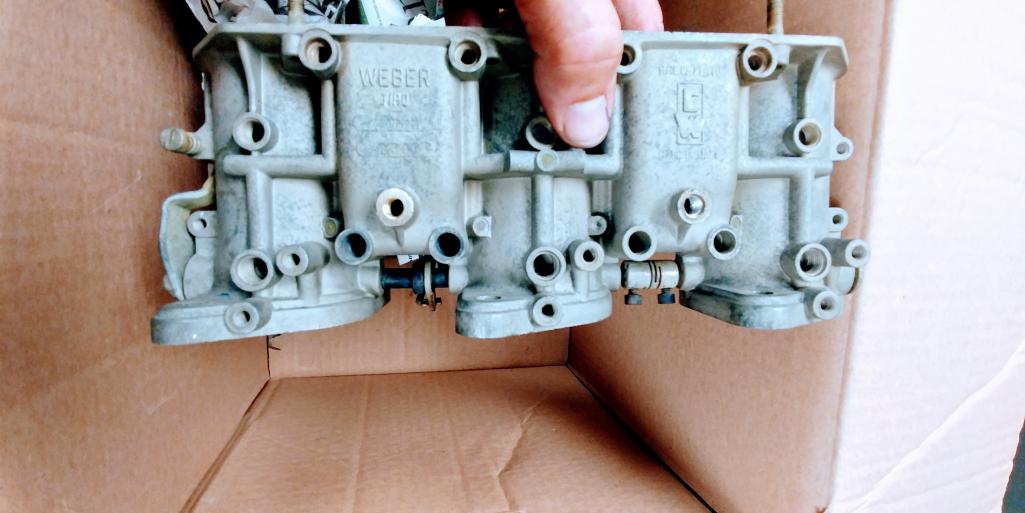
Who said welders can't be machinist 
Posted by: RektOne Jul 22 2018, 06:25 PM
I have access to a small 5 gallon sized blaster.. Might try that.. I have a decent sized compressor that should work for the areas I need done..
I have the HF 40 lb. blaster and it works well. I'm using crushed glass for media. My only problem is finding a hood that doesn't cost a fortune and doesn't fog up. I just bought one on Amazon that got good reviews but I haven't tested.
We had a HF model for a long time. We recently upgraded to this wet blast cabinet: https://www.raptorblaster.com/wet-blast-cabinets/slurry-wet-blast-cabinet-rb4836s/. Good visibility, and works great for removing powder coating.
Posted by: mb911 Aug 2 2018, 05:02 PM
Today's update.. Finally got the factory replacement fender from Garold epoxy primed, got the flywheel on along with mounting the engine trans combo into the test run stand. Decided to just place the carbs and air cleaner on.. Good progress. 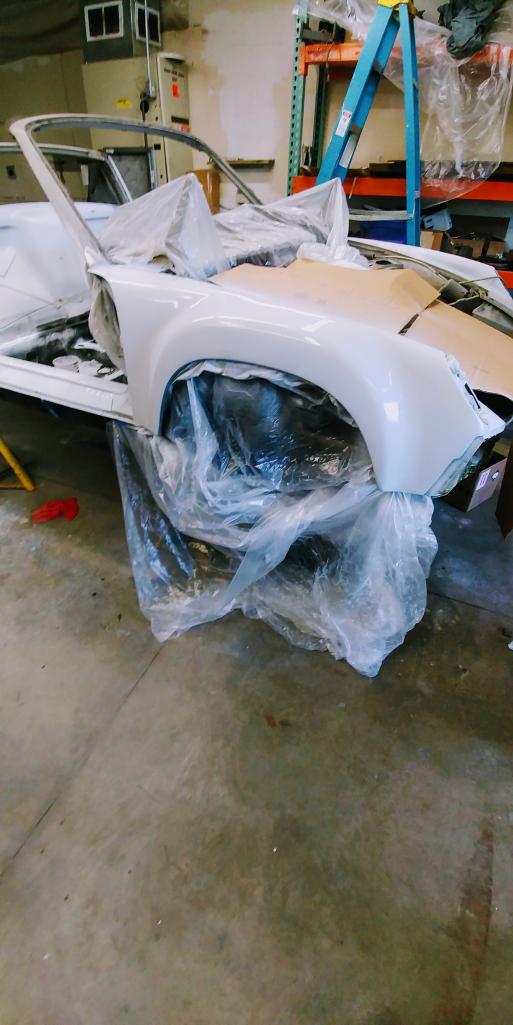
Posted by: mepstein Aug 2 2018, 06:00 PM
Today's update.. Finally got the factory replacement fender from Garold epoxy primed, got the flywheel on along with mounting the engine trans combo into the test run stand. Decided to just place the carbs and air cleaner on.. Good progress.
Drop the engine down to the floor, glass top on the metal frame, your done.
Posted by: mb911 Aug 3 2018, 06:21 AM
Today's update.. Finally got the factory replacement fender from Garold epoxy primed, got the flywheel on along with mounting the engine trans combo into the test run stand. Decided to just place the carbs and air cleaner on.. Good progress.
Drop the engine down to the floor, glass top on the metal frame, your done.
Very true.. Lol
Posted by: GeorgeRud Aug 3 2018, 09:09 AM
Just have to correct the snorkel position to the other side of the engine and it’ll be perfect! Truly would make an impressive (though expensive) table!
Posted by: toolguy Aug 3 2018, 09:31 AM
Just have to correct the snorkel position to the other side of the engine and it’ll be perfect! Truly would make an impressive (though expensive) table!
It looks like the snorkel has the 'warm air' tube for 911 applications. .
Posted by: mb911 Aug 3 2018, 10:41 AM
Just have to correct the snorkel position to the other side of the engine and it’ll be perfect! Truly would make an impressive (though expensive) table!
It looks like the snorkel has the 'warm air' tube for 911 applications. .
Yup.. Gotta grear deal on it.
Posted by: mb911 Aug 7 2018, 09:06 AM
Small project today.. Did get a great deal on some high quality semi H4 headlight housing for my eventual LED setup.. 
Posted by: Dion Aug 7 2018, 09:24 AM
Beautiful engine and prolly the cleanest e-brake handle I’ve ever seen.
Posted by: mb911 Aug 21 2018, 04:08 PM
Front oil cooler mounting is welded in. Needs a bit of finishing but another step forward.. Also note see the braze repair probably dating back to the late 70s or early 80s.. I wrestled with repairing that or leaving as is.. I may someday find a front clip or just the front panel to correct it.. I just felt for my semi race car /GT tribute it just was not worth it.. If the right parts come along that maybe something to do in the future.
Anyhow I TIG welded this in only because I was out of Argon /co2 for the MIG. 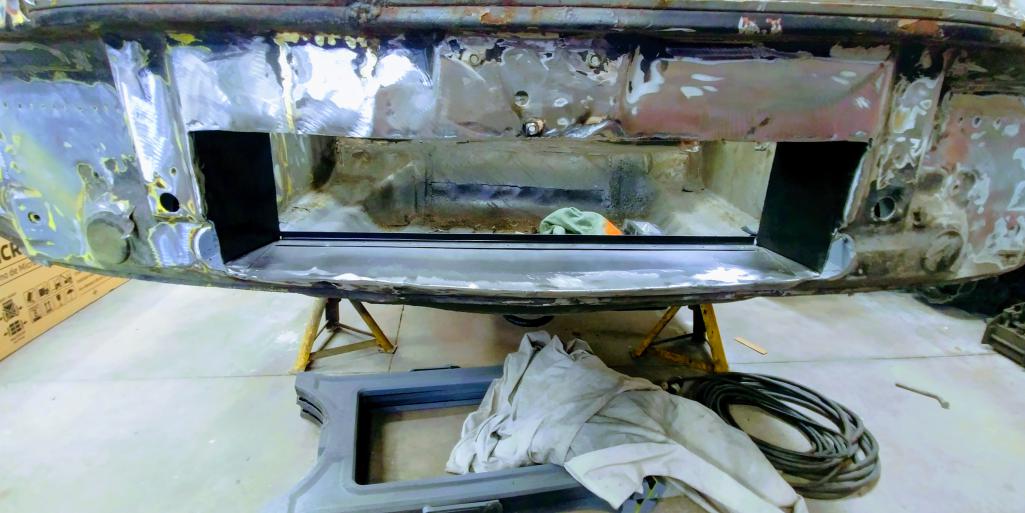
Posted by: Travis Neff Aug 21 2018, 08:52 PM
That cooler duct looks great!
Posted by: mb911 Aug 22 2018, 03:05 PM
That cooler duct looks great!
Its a pretty simple design. I made a couple of them based off of my oil cooler which I am very impressed with the quality of. Much nicer then a setrab not that there is anything wrong with setrab just the cooler I have is built to supercar quality.
Posted by: mepstein Aug 22 2018, 03:54 PM
That cooler duct looks great!
Its a pretty simple design. I made a couple of them based off of my oil cooler which I am very impressed with the quality of. Much nicer then a setrab not that there is anything wrong with setrab just the cooler I have is built to supercar quality.
Do you think the front needs reinforcement now that there are two big openings in the nose and front pan.
Posted by: mb911 Aug 22 2018, 04:04 PM
That cooler duct looks great!
Its a pretty simple design. I made a couple of them based off of my oil cooler which I am very impressed with the quality of. Much nicer then a setrab not that there is anything wrong with setrab just the cooler I have is built to supercar quality.
Do you think the front needs reinforcement now that there are two big openings in the nose and front pan.
I am not sure. With the duct welded all around along with the louvered floor welded the same I would think its pretty strong.. I think some just bolt them on the front opening and I think that is not strong enough..
Posted by: Travis Neff Aug 22 2018, 05:03 PM
That cooler duct looks great!
Its a pretty simple design. I made a couple of them based off of my oil cooler which I am very impressed with the quality of. Much nicer then a setrab not that there is anything wrong with setrab just the cooler I have is built to supercar quality.
I have the setrab unit from PMS and the replica GT ducting. Your design definately has all the air going through the cooler, while the replica setup will need a little work I think. Also has to add some strength back to the front end.
Posted by: mb911 Aug 22 2018, 05:58 PM
Yes never seen the PMS one in person. Do you know the dimensions of it (cooler opening)?
Posted by: Travis Neff Aug 22 2018, 08:25 PM
Dimensions of the cooler or the shroud? Gimme a few minutes and I will measure and take pics
Posted by: Travis Neff Aug 22 2018, 08:34 PM
Here is the cooler 21x4.5
Attached thumbnail(s)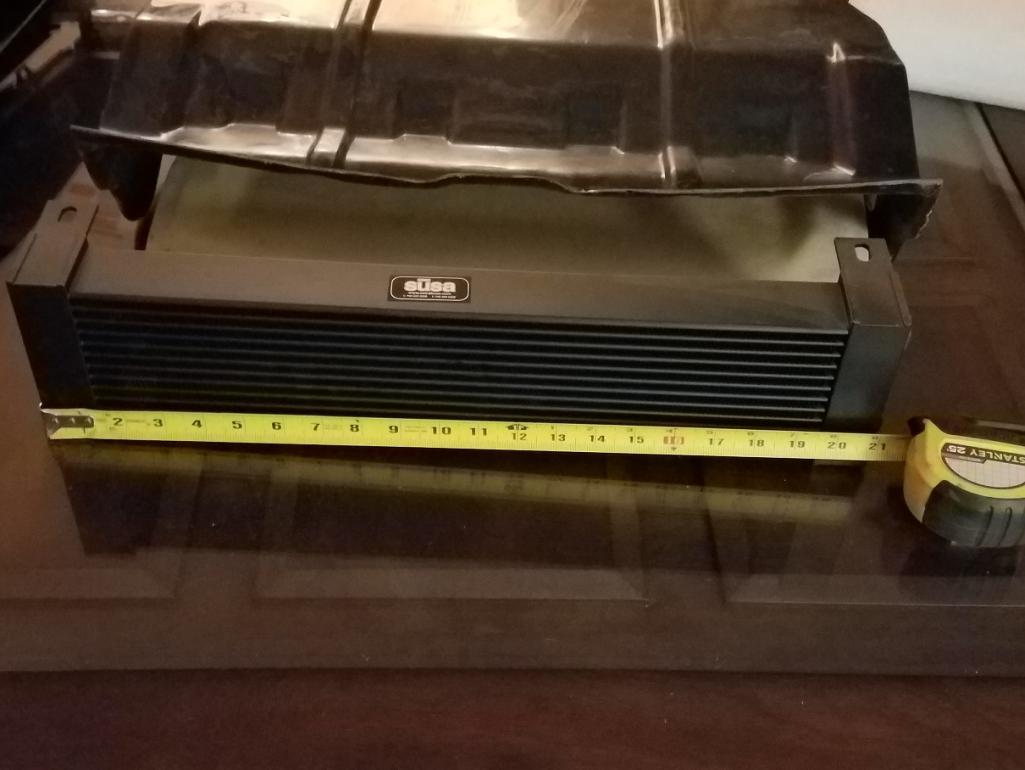
Posted by: mb911 Aug 23 2018, 05:08 AM
Thanks that is helpful to know. Mine is 24x6 so the factory style shroud wouldn't work.. I am going to make one from scratch it seems.
Posted by: mepstein Aug 23 2018, 06:14 AM
The truth is there was not just one configuration for GT's. I saw a recent Petrolicious article and it looked like a real GT with the oil cooler on the front of the bumper. As long as it works and looks good, I'm in.
Posted by: mb911 Sep 1 2018, 04:31 PM
Update:
Been doing allot of sanding and paint removal as of late both on my car and my sons 944. I stripped the hood for my car and removed all the headlights and wiring and started removing the undercoating that someone sprayed in the front trunk. Most of the nasty paint is gone. I sanded the rest.. I have a small section of the front bulkhead needs to be repaired.. The plan is to fix this area and get ready for epoxy over the next few weeks.
Mark Epstein has sent me some bumpers and I will doing GT treatment for both of us and sending out for chroming. I need to find out what size the plug was that Mark Henry did so that will be the next question I have..
Posted by: mb911 Sep 8 2018, 12:43 PM
Distractions.. 
Posted by: mb911 Sep 15 2018, 04:26 PM
Spent some time painting the cabin then the shock mounting areas so that I can actually roll the car around.. The color is saturn red which is the same color as my last conversion car.. I think I like it. Please note this is not typical order of things but nees to get the car more complete for spring. We (wife) keeps thinking of selling our country property in favor of moving to something with a smaller yard.
Posted by: mb911 Sep 15 2018, 04:27 PM
Oops and the picture. 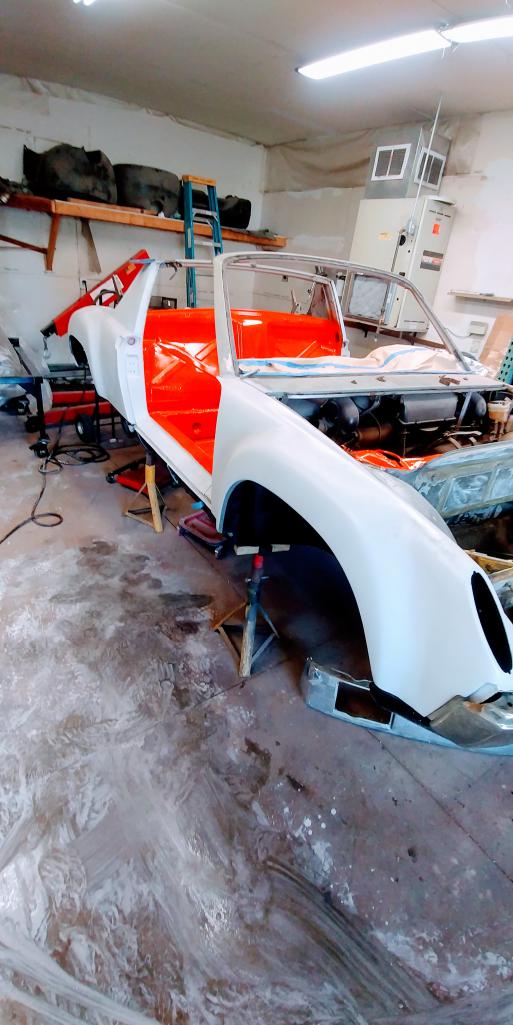
Posted by: TravisNeff Sep 15 2018, 04:34 PM
ooh! I like the color
Posted by: sixnotfour Sep 15 2018, 05:01 PM
Tangerine....
Posted by: mepstein Sep 15 2018, 05:41 PM
Tangerine....
I’m guessing Saturn red.
Congrats on the progress. Paint is certainly a milestone.
Posted by: mb911 Sep 15 2018, 06:01 PM
Tangerine....
I’m guessing Saturn red.
Congrats on the progress. Paint is certainly a milestone.
I think saturn red is very similar to tangerine.
Posted by: bbrock Sep 15 2018, 06:13 PM
You are going to need shades to work around that car! Nice! Which gun did you use?
Posted by: mb911 Sep 15 2018, 06:36 PM
You are going to need shades to work around that car! Nice! Which gun did you use?
The devilbiss starting line kit that you were looking at.. Typically I just use the Sata that I have but wanted a couple more guns so I could use 1 for primer 1 for color and 1 for clear.. I will probably rebuild my sata to be the color or clear gun before I do the exterior.
Posted by: defianty Sep 16 2018, 02:46 AM
Looking great Ben!
Posted by: mb911 Sep 16 2018, 05:50 AM
Also wanted to talk about the availabilty of the 70s porsche paints. @http://www.914world.com/bbs2/index.php?showuser=20845 had mentioned difficulty finding ppg shopline locally. This goes 1 step further. These older colors have not been converted to non leaded versions. My supplier had to call ppg directly to see if they have a "panel" that is sprayed out to do a spectrum analisyis on to come up with a modern color code.. Took some hassle but ended up with a 65 dollar qt of color versus not available or 150 dollar qt.
Posted by: mb911 Sep 20 2018, 05:45 PM
Got my noico noise insulation yesterday and starting to lay that out. Ordered the perlon back pad delete.. Plan to install interior soon then wrap it all in plastic. This is just to consolidate my parts.. Not 100% sure what seats I am going to use yet. The goal is to get it on suspension shortly..
Also worked on GT bumpers.. Out for chrome shortly.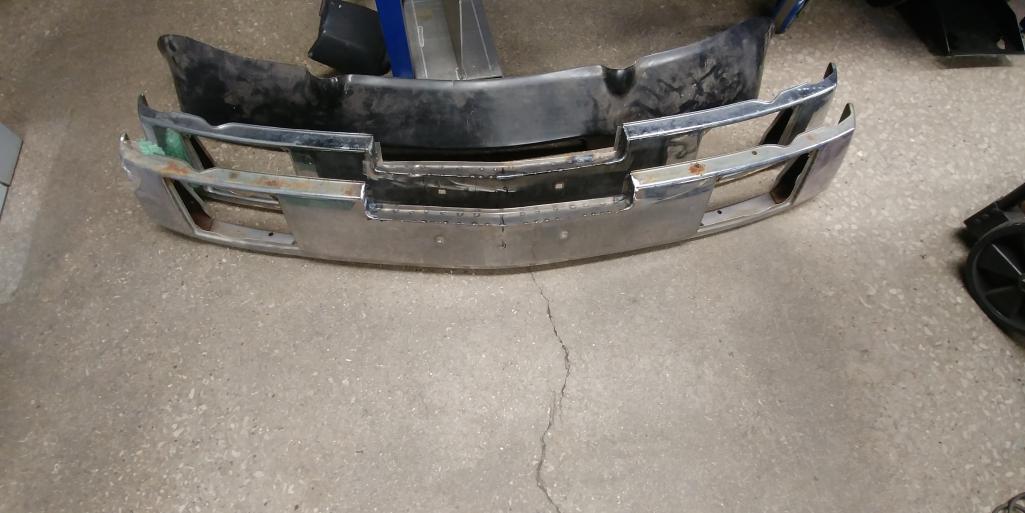
Posted by: whitetwinturbo Sep 20 2018, 10:52 PM
.............that Saturn paint just POPS
Posted by: mb911 Sep 21 2018, 02:12 PM
Sons car front half painted with new free twist wheels..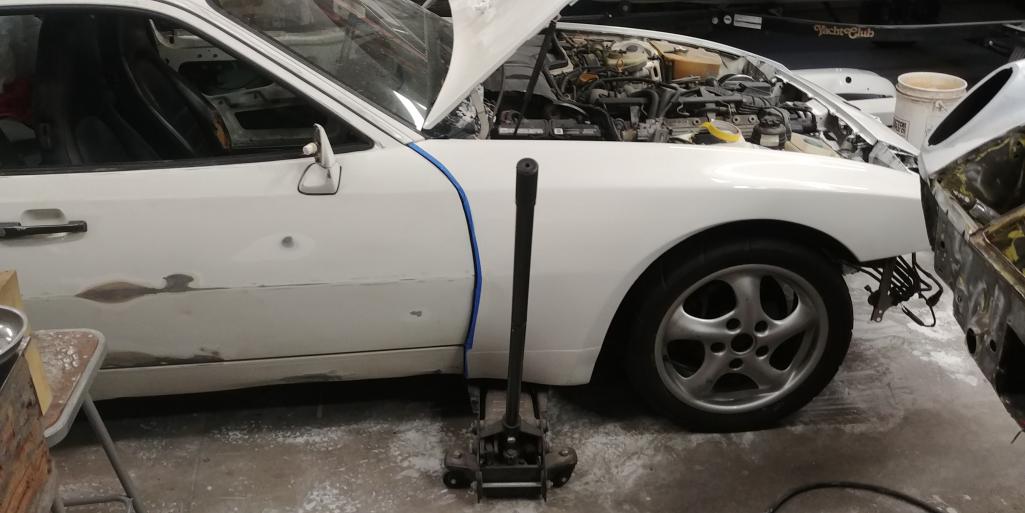
Posted by: Dion Sep 21 2018, 10:19 PM
Oops and the picture.
Colour is very rich looking. Nice progress Ben. Where did you purchase your
Noico sound reduction from? Thinking of giving it a try.
Attached thumbnail(s)
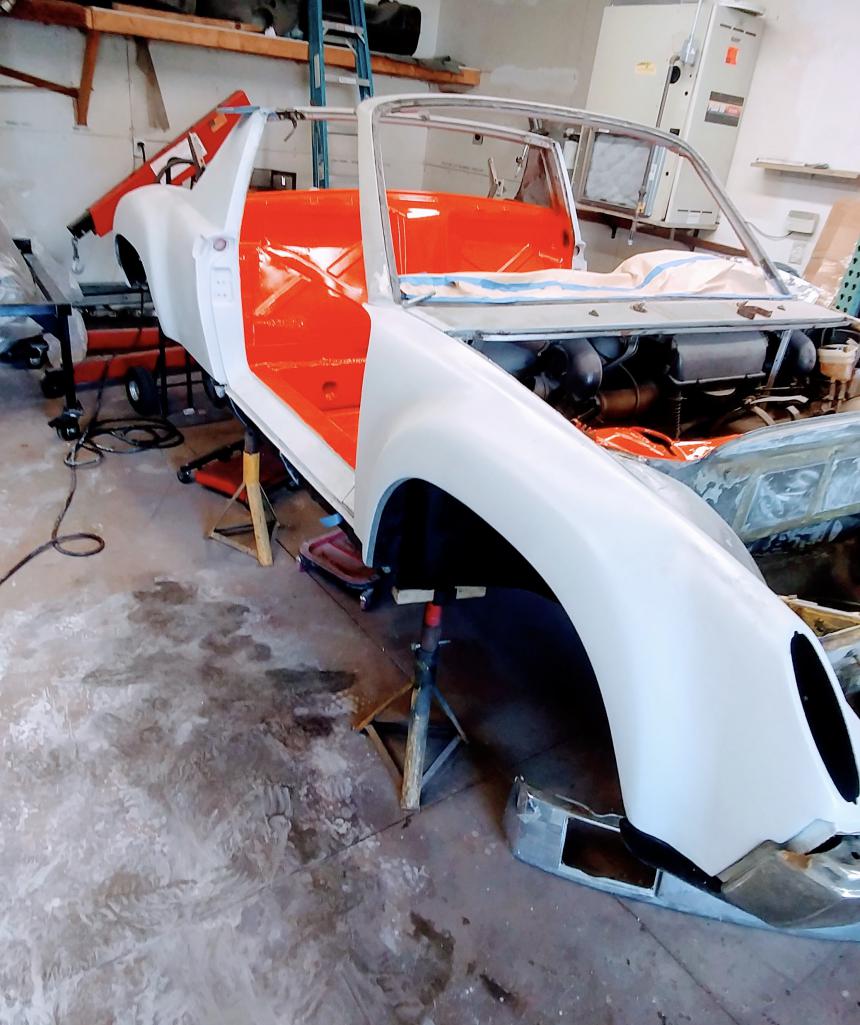
Posted by: mb911 Sep 22 2018, 05:28 AM
@http://www.914world.com/bbs2/index.php?showuser=2766 the noico was on ebay 50 sf for 60 dollars. I am nearing completion of installing it and there is more then enough to do the whole interior plus inside the doors..
Posted by: mb911 Sep 22 2018, 06:12 AM

Posted by: gereed75 Sep 22 2018, 06:16 AM
Congrats Ben. So much work to get here but all worth it I am sure. Really nice!!
Add in all the six conversion parts that you have designed and fabbed and the sons car - you are a serious machine!!
Posted by: Dion Sep 22 2018, 06:26 AM
@http://www.914world.com/bbs2/index.php?showuser=2766 the noico was on ebay 50 sf for 60 dollars. I am nearing completion of installing it and there is more then enough to do the whole interior plus inside the doors..
Thanks Ben. Appreciate the link. I’ll give this a go.
Cheers
Posted by: mb911 Sep 22 2018, 07:04 AM
@http://www.914world.com/bbs2/index.php?showuser=15674 thanks.. Its amazing how much has happened during the timeline of this project. Also that I am already eyeing the next car. I would like to buy a nice as rust free project to squirell away ..
@http://www.914world.com/bbs2/index.php?showuser=2766 your welcome.
Posted by: bbrock Sep 22 2018, 07:58 AM
@http://www.914world.com/bbs2/index.php?showuser=2766 the noico was on ebay 50 sf for 60 dollars. I am nearing completion of installing it and there is more then enough to do the whole interior plus inside the doors..
Thanks Ben. Appreciate the link. I’ll give this a go.
Cheers
FYI, what Ben showed looks to be the 50 mil stuff. I'm going to buy the 80 mil Noico on Amazon. 36 sq ft for about the same price: https://www.amazon.com/gp/product/B00URUIKAK/ref=ox_sc_act_title_3?smid=AXJ5VNOZL83GP&psc=1
Posted by: bbrock Sep 22 2018, 08:41 AM
Hey Ben, do you have any pics of your car with the masking still on? I'm trying to wrap my head around tape lines and paper placement for this kind of interior/exterior spray. It occurred to me that I may be thinking too much of my ancient experience spraying a car with an old fashioned high pressure suction feed gun where overspray winds up on the neighbors dog if he isn't covered up.
Never mind. Found good pics on @http://www.914world.com/bbs2/index.php?showuser=19557 's thread.
Posted by: mb911 Sep 22 2018, 10:54 AM
@http://www.914world.com/bbs2/index.php?showuser=2766 the noico was on ebay 50 sf for 60 dollars. I am nearing completion of installing it and there is more then enough to do the whole interior plus inside the doors..
Thanks Ben. Appreciate the link. I’ll give this a go.
Cheers
FYI, what Ben showed looks to be the 50 mil stuff. I'm going to buy the 80 mil Noico on Amazon. 36 sq ft for about the same price: https://www.amazon.com/gp/product/B00URUIKAK/ref=ox_sc_act_title_3?smid=AXJ5VNOZL83GP&psc=1
I was just concerned about all the contours etc so went thinner thinking I could double up in areas.
Posted by: bbrock Sep 22 2018, 11:45 AM
@http://www.914world.com/bbs2/index.php?showuser=2766 the noico was on ebay 50 sf for 60 dollars. I am nearing completion of installing it and there is more then enough to do the whole interior plus inside the doors..
Thanks Ben. Appreciate the link. I’ll give this a go.
Cheers
FYI, what Ben showed looks to be the 50 mil stuff. I'm going to buy the 80 mil Noico on Amazon. 36 sq ft for about the same price: https://www.amazon.com/gp/product/B00URUIKAK/ref=ox_sc_act_title_3?smid=AXJ5VNOZL83GP&psc=1
I was just concerned about all the contours etc so went thinner thinking I could double up in areas.
Good idea. I did a really rough measure and estimated about 28 sqft to cover all the floor space the factory tar covered. That's probably an over estimate but regardless, 2-layers of that stuff over most of the area should make for a quiet tub.
Posted by: mb911 Sep 22 2018, 02:58 PM
@http://www.914world.com/bbs2/index.php?showuser=2766 the noico was on ebay 50 sf for 60 dollars. I am nearing completion of installing it and there is more then enough to do the whole interior plus inside the doors..
Thanks Ben. Appreciate the link. I’ll give this a go.
Cheers
FYI, what Ben showed looks to be the 50 mil stuff. I'm going to buy the 80 mil Noico on Amazon. 36 sq ft for about the same price: https://www.amazon.com/gp/product/B00URUIKAK/ref=ox_sc_act_title_3?smid=AXJ5VNOZL83GP&psc=1
I was just concerned about all the contours etc so went thinner thinking I could double up in areas.
Good idea. I did a really rough measure and estimated about 28 sqft to cover all the floor space the factory tar covered. That's probably an over estimate but regardless, 2-layers of that stuff over most of the area should make for a quiet tub.
I am actually doing everything inside the cabin.. Thats why the 50 sf works well..
Posted by: mb911 Sep 23 2018, 09:14 AM
Just a little assembly . Again trying to make this a roller and not spens so much time on jackstands and not movable. A little PMB and 914rubber love here. Along with freshly painted and powdercoated parts. Special thanks to Mark epstein for the struts and hubs. Gonna install front a arms etc shortly. 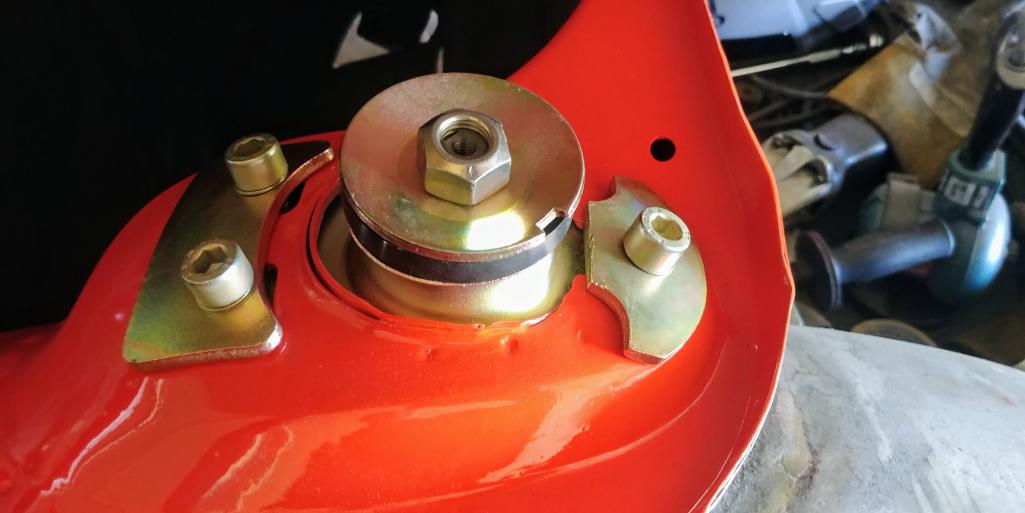
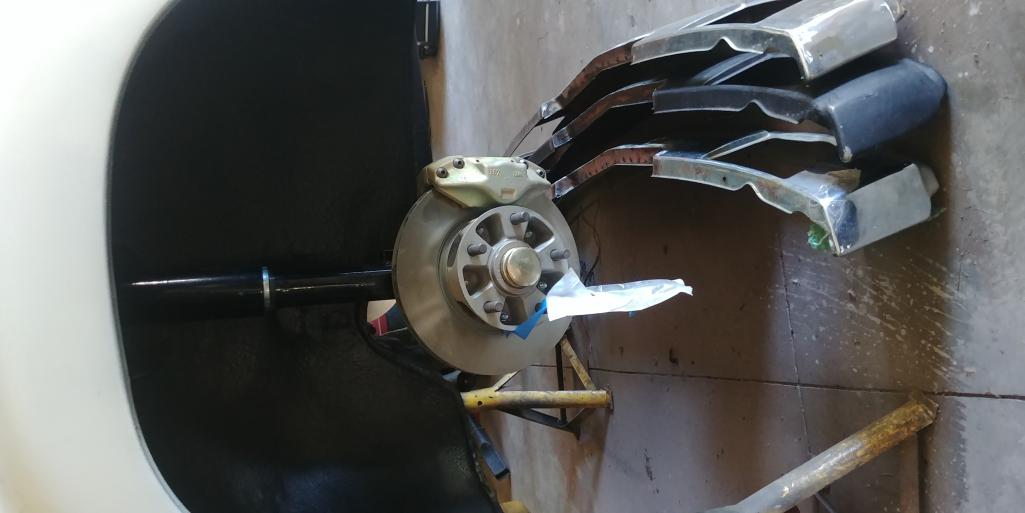
Posted by: mb911 Sep 23 2018, 01:40 PM
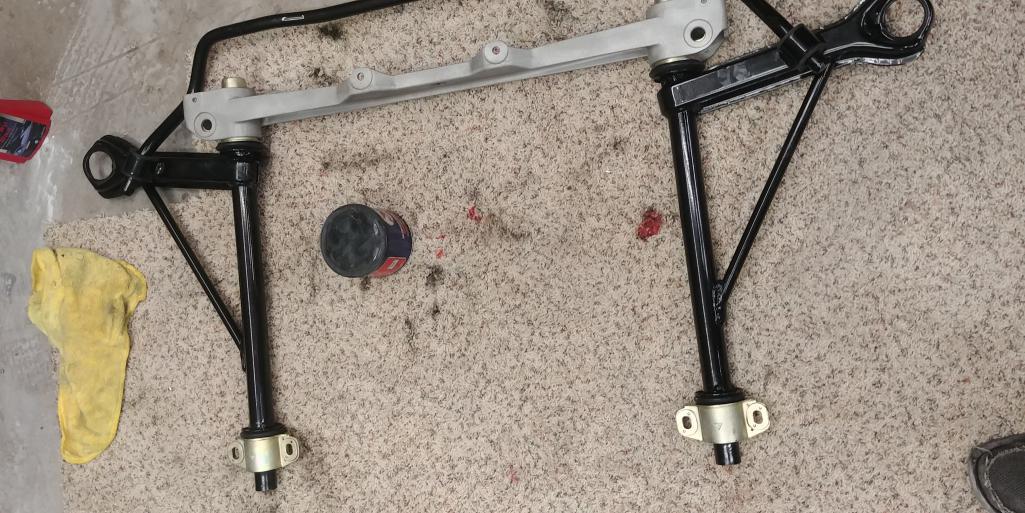
Posted by: mb911 Sep 30 2018, 06:16 AM
Almost finished noise insulation. I will go over seams with a foam rubber block to ensure tight fit then foil tape any joints. This will ensure a good seal and more finished look.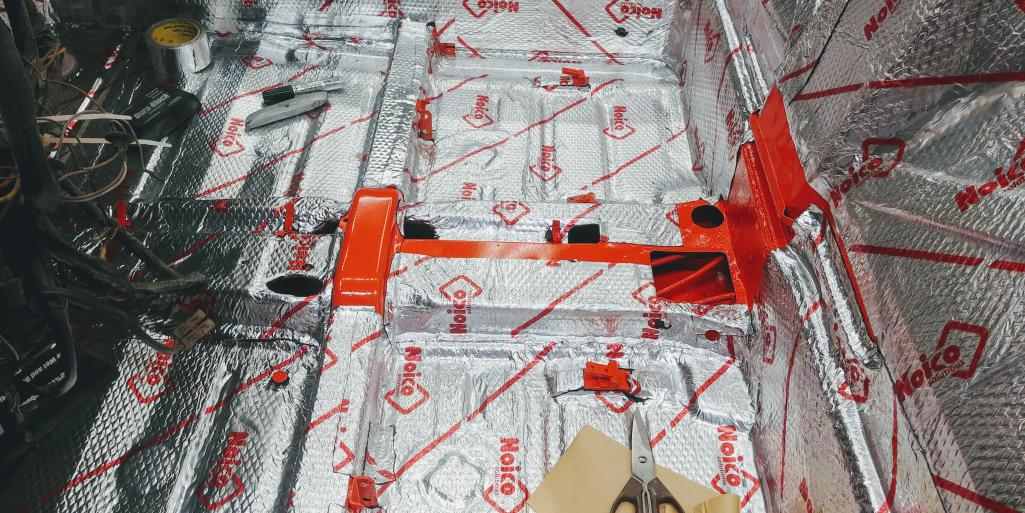
Posted by: mepstein Sep 30 2018, 08:16 AM
Looks like you got it covered.
Posted by: mb911 Sep 30 2018, 10:20 AM
Just about..
Posted by: bbrock Sep 30 2018, 06:08 PM
Sweet! Looks creepy quiet in there. I ordered mine earlier today along with a paint gun and 6 liters of Raptor. Been snowing all day and forecast has more of the same for the next week. Still hoping for enough Indian Summer to at least get the undercoat done. Probably jinxed myself by ordering paint supplies.
Posted by: bbrock Sep 30 2018, 06:08 PM
Deleted - double post. Internet has been flaky today.
Posted by: mb911 Sep 30 2018, 07:01 PM
Sweet! Looks creepy quiet in there. I ordered mine earlier today along with a paint gun and 6 liters of Raptor. Been snowing all day and forecast has more of the same for the next week. Still hoping for enough Indian Summer to at least get the undercoat done. Probably jinxed myself by ordering paint supplies.
I am hurring as well to finish sanding and grinding the cavity under the gas tank to get the front frunk area primed and possibly in color before gotta keep the doors closed for the winter..
Posted by: TravisNeff Sep 30 2018, 07:50 PM
Nice job on the application, shame to hide that pretty color!
Posted by: mb911 Oct 1 2018, 06:51 AM
Nice job on the application, shame to hide that pretty color!
Thanks.. I like the color.. I second guess myself but keep reassuring myself its the right color..
Posted by: bbrock Oct 1 2018, 05:11 PM
Also wanted to talk about the availabilty of the 70s porsche paints. @http://www.914world.com/bbs2/index.php?showuser=20845 had mentioned difficulty finding ppg shopline locally. This goes 1 step further. These older colors have not been converted to non leaded versions. My supplier had to call ppg directly to see if they have a "panel" that is sprayed out to do a spectrum analisyis on to come up with a modern color code.. Took some hassle but ended up with a 65 dollar qt of color versus not available or 150 dollar qt.
Just hit a similar snag. Went to buy a quart of DCC silver metallic. First, the computer popped up different formulas depending on whether you searched the codes for Porsche vs. VW. Neither formula is available in DCC. Both formulas can be mixed in single-stage Omni MTK. The Porsche color can be mixed in 2-stage Deltron DBC but the only 2-stage option for VW is Omni. I had the guy mix a sample of each and am going to spray out a test panel, but already I can see from the smudge dots he put on the cans that the Porsche formula has a richer metallic look. The guy said the Porsche formula uses higher quality toners and 2 metallic components vs. just one component in the VW color. Will make a decision pending spray out results but leaning toward Porsche at this point even though the VW formula is probably technically more correct.
Posted by: TravisNeff Oct 1 2018, 05:20 PM
I believe you want a 2 stage paint, that was from the factory on metallic cars. They used to do single stage metallics in the 60's and earlier. As for VW vs Porsche paint, I don't know much about that. i would assume the -4 cars got vw color and the -6 received the porsche color (but that is all a guess)
Posted by: bbrock Oct 1 2018, 05:31 PM
I believe you want a 2 stage paint, that was from the factory on metallic cars. They used to do single stage metallics in the 60's and earlier. As for VW vs Porsche paint, I don't know much about that. i would assume the -4 cars got vw color and the -6 received the porsche color (but that is all a guess)
I'm going to pull this over to my build thread because I want to follow up but don't want to hijack Ben's thread.
Posted by: mb911 Oct 1 2018, 06:27 PM
I believe you want a 2 stage paint, that was from the factory on metallic cars. They used to do single stage metallics in the 60's and earlier. As for VW vs Porsche paint, I don't know much about that. i would assume the -4 cars got vw color and the -6 received the porsche color (but that is all a guess)
I'm going to pull this over to my build thread because I want to follow up but don't want to hijack Ben's thread.
No worries its all good. I have heard that before.. I do know the porsche and VW colors of the 70s had lots of lead in them and that is why little has been converted to new paints..
Posted by: FourBlades Oct 3 2018, 06:24 AM
Wow, great build, just finished reading through the whole thing!
This will be a top quality car when you finish it.
John
Posted by: mb911 Oct 3 2018, 07:21 PM
Wow, great build, just finished reading through the whole thing!
This will be a top quality car when you finish it.
John
Thanks John. It will be a very nice driver car.. I am already thinking about what the next one will be .. I will start with a tub that is in nicer condtion next time.
I actually want to start offering conversions to clientswho want to semd me thier cars and I install all my goodies.. Well thats the plan.
Posted by: mepstein Oct 3 2018, 07:33 PM
Wow, great build, just finished reading through the whole thing!
This will be a top quality car when you finish it.
John
Thanks John. It will be a very nice driver car.. I am already thinking about what the next one will be .. I will start with a tub that is in nicer condtion next time.
I actually want to start offering conversions to clientswho want to semd me thier cars and I install all my goodies.. Well thats the plan.
I would be first in line but you probably want paying clients huh?
Posted by: mb911 Oct 4 2018, 05:55 AM
Wow, great build, just finished reading through the whole thing!
This will be a top quality car when you finish it.
John
Thanks John. It will be a very nice driver car.. I am already thinking about what the next one will be .. I will start with a tub that is in nicer condtion next time.
I actually want to start offering conversions to clientswho want to semd me thier cars and I install all my goodies.. Well thats the plan.
I would be first in line but you probably want paying clients huh?
Lol yup to a certain extent.. My wife would wonder why the cars are coming from and why..
Posted by: mb911 Oct 8 2018, 01:14 PM
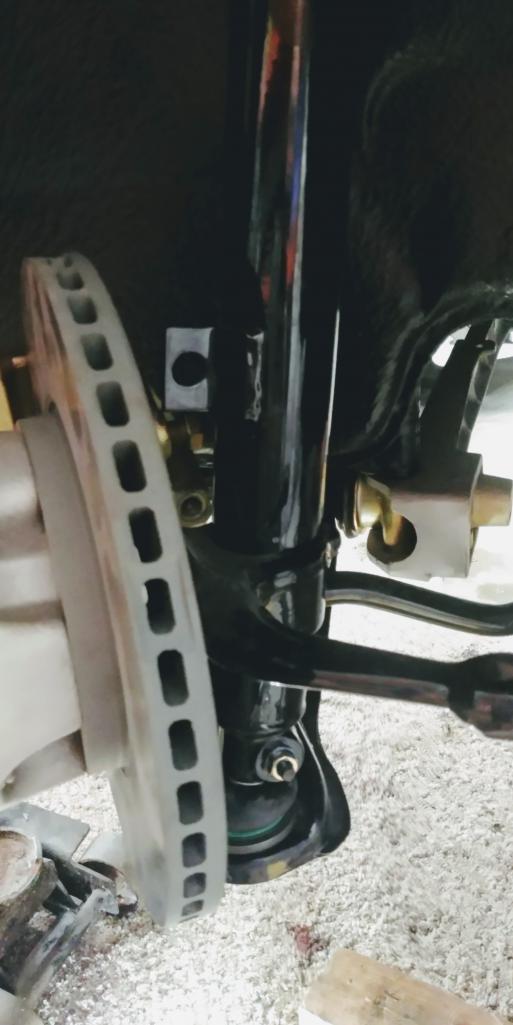
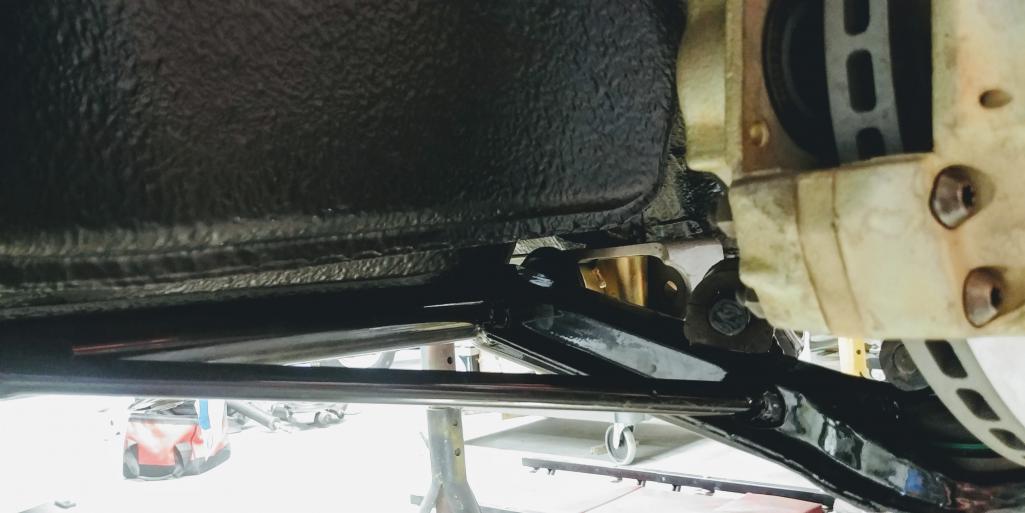
Posted by: mb911 Oct 13 2018, 11:39 AM
Just an updated picture.. Replaced rear bushings very very soon it will be rolling. 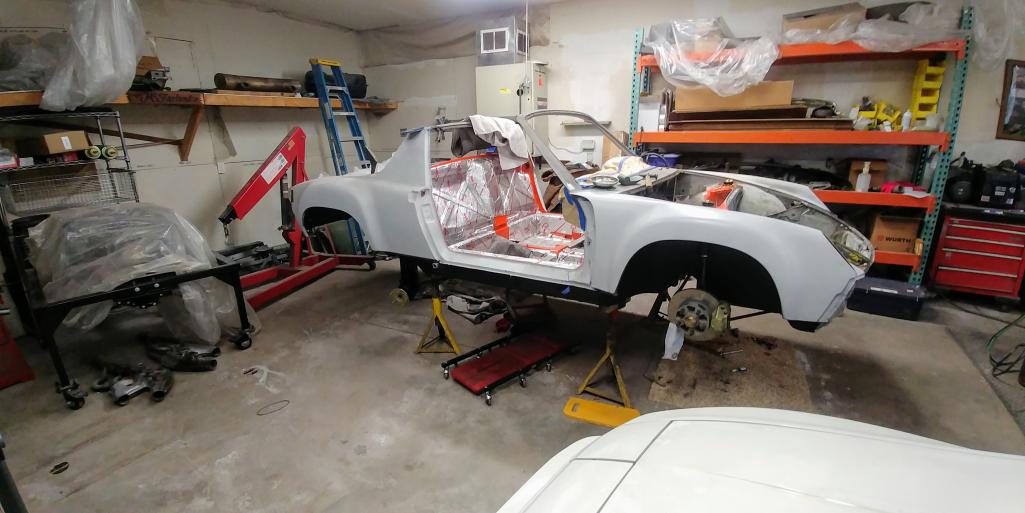
Posted by: mb911 Oct 14 2018, 03:23 PM
Made a milestone today so I feel like I am making progress.. Yeah. 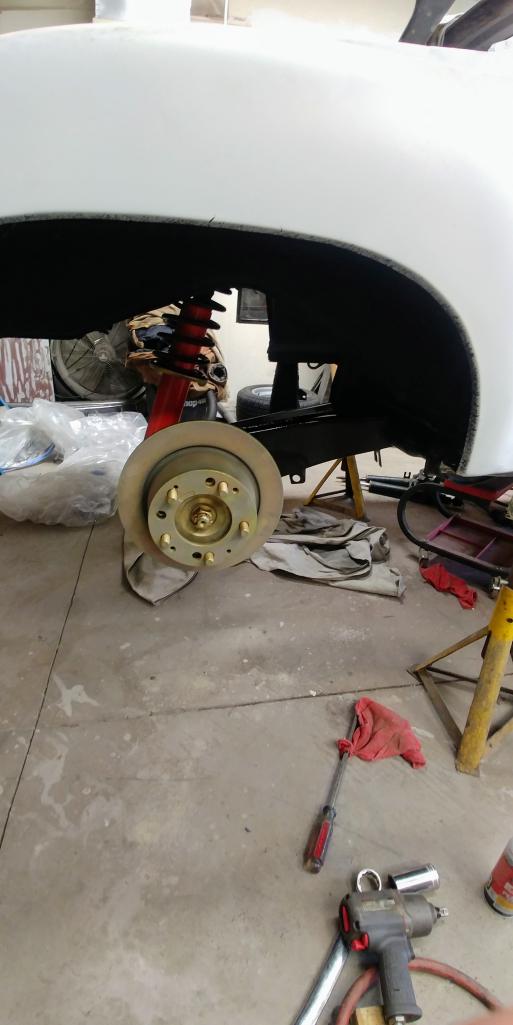
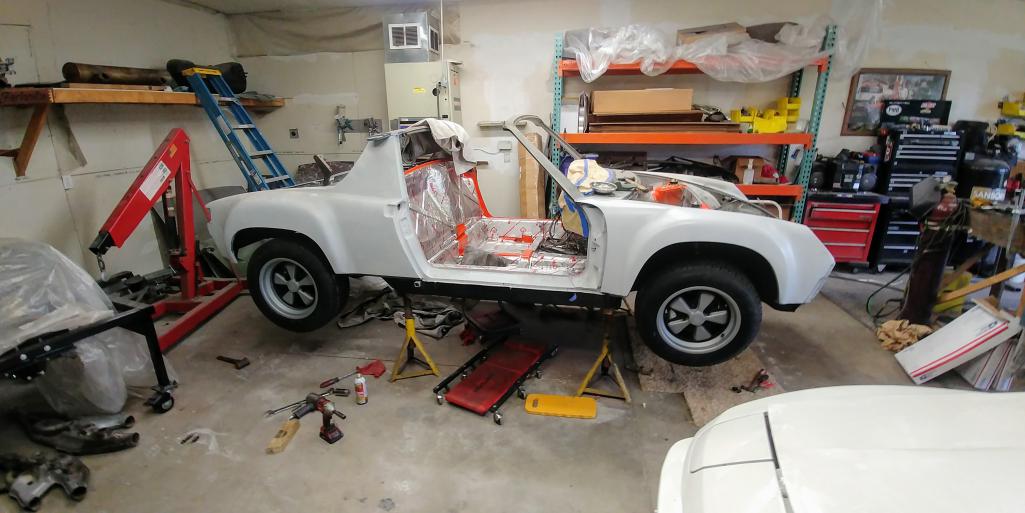
Posted by: bbrock Oct 14 2018, 08:32 PM
That looks awesome. How is it you get so much done? I'm bustin' my hump here while you are leaving me in the dust and fabricating parts for other people's cars right and left to boot.
Posted by: mb911 Oct 15 2018, 05:19 AM
That looks awesome. How is it you get so much done? I'm bustin' my hump here while you are leaving me in the dust and fabricating parts for other people's cars right and left to boot.
@http://www.914world.com/bbs2/index.php?showuser=20845 it's mostly just bolting parts on right now.. That goes fast.. I need to get back at frunk paint prep.. I still am cleaning up PO repair area .. I have made the decision that because the car was hit and repaired back in the late 70s early 80s I am just going to clean it up and not reinvent the wheel.. That will save time but ultimately this car will not be to the level of your car when completed.. I like to think of this car as a track car that just is more street setup.
Posted by: mb911 Oct 20 2018, 08:21 AM
Got some goodies in the mail this week.
914rubber m/c and 15x6 Fuchs for a spare from Mark Epstein.
Ordered o-rings for the oil filter console,filters,turbo tie rod kit even brake pads in preparation for getting brakes bled. Completed my own oil tank after 3 years of making them for others..
Still waiting on my steering rack from tru-6..
Plan is to now move to wiring /plumbing engine for a test fire..
Finished these scavange lines after a year of back and forth and talking with fluid power folks..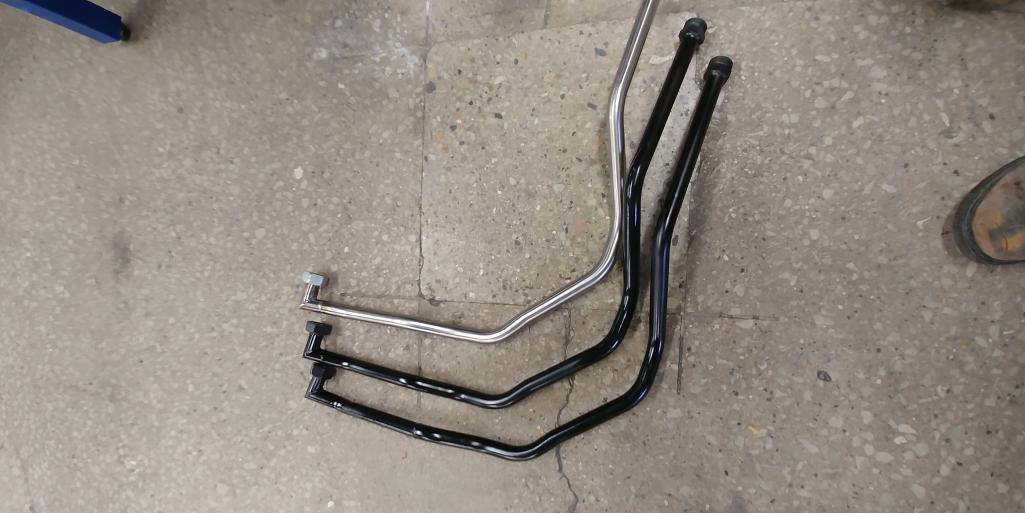
Posted by: mb911 Oct 20 2018, 08:22 AM
This is the refurb of some orginal heat exchangers. Just going to run them for testing then sell them.. 
Posted by: mb911 Oct 20 2018, 09:16 AM
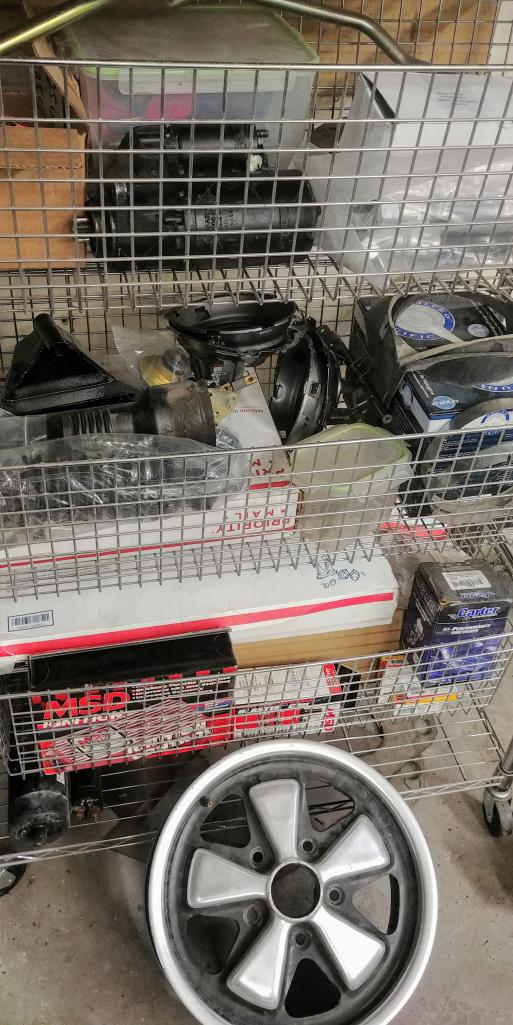
Posted by: mb911 Oct 22 2018, 03:53 PM
Well not much happened today but did gap spark plugs and installed. My youngest son went for a "ride" in the car after school today. He says he is ready to start helping again now that he can help reinstalling parts.. 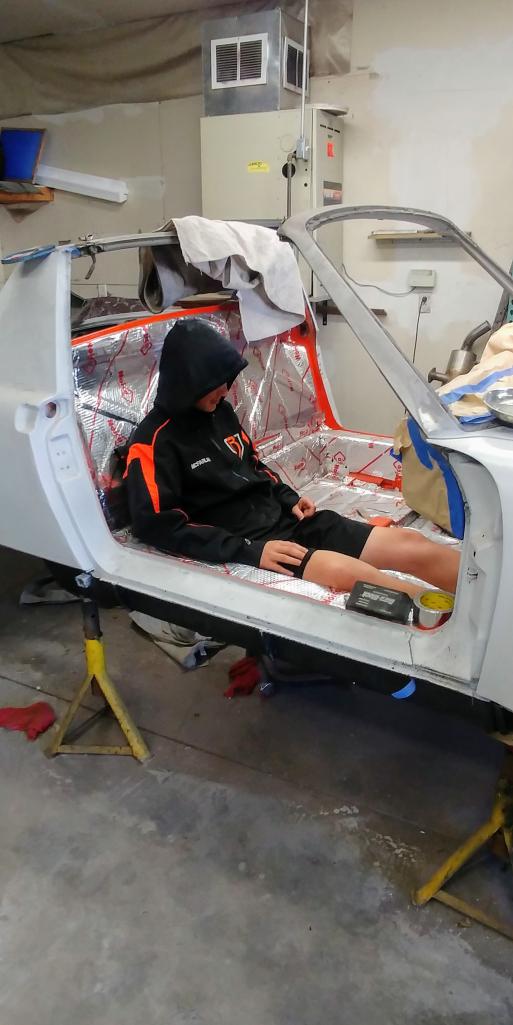
Posted by: mb911 Oct 23 2018, 10:31 AM
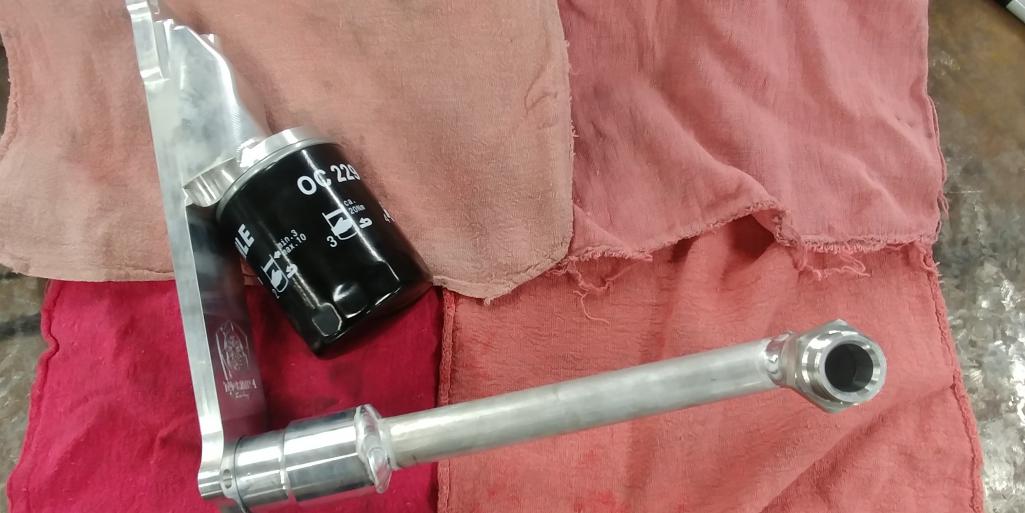
Posted by: Dave_Darling Oct 23 2018, 01:30 PM
Where does that oil filter console go?
--DD
Posted by: mb911 Oct 23 2018, 01:36 PM
Where does that oil filter console go?
--DD
I will have 2 filters one will replace the oil cooler and one still on the tank.
Posted by: GeorgeRud Oct 23 2018, 03:44 PM
Will you get enough cooling from the front cooler alone? BTW, that part looks amazing so I hope it does work well.
Posted by: mb911 Oct 23 2018, 04:09 PM
Will you get enough cooling from the front cooler alone? BTW, that part looks amazing so I hope it does work well.
I have a huge front cooler even larger then the GT Cooler. I am going to put in fans to help cooling when at idle..
Posted by: mepstein Oct 23 2018, 04:16 PM
Will you get enough cooling from the front cooler alone? BTW, that part looks amazing so I hope it does work well.
I'm doing the same thing on my 3.2 conversion. Cooling should be more than adequate. Air is outside temp, not engine compartment temp. Oil cooler is directly facing oncoming air, not relying on engine produced airflow. Cooler can be larger than engine cooler and a fan can be added to supplement airflow at low car speeds. You also get about 15% more air directed at the heads for additional cooling since the engine cooler duct is blocked off.
Porsche dropped the engine cooler and went solely to front cooling on their 3.6 engine before going watercooled. Why spend money on a front oil cooler just to use it as an axillary system when it can easily be the sole oil cooling system for the car. It also increases reliability by not using a 30-50 year old engine cooler.
I love the way Ben's mod makes it fit the stock oil lines. - smart!
Posted by: Dave_Darling Oct 24 2018, 03:27 PM
I will have 2 filters one will replace the oil cooler and one still on the tank.
Holy 993 inspiration, Batman!
--DD
Posted by: mb911 Oct 24 2018, 04:12 PM
Here is the "control panel" for the engine test stand.. The gauges are out of a carrera so psi is not listed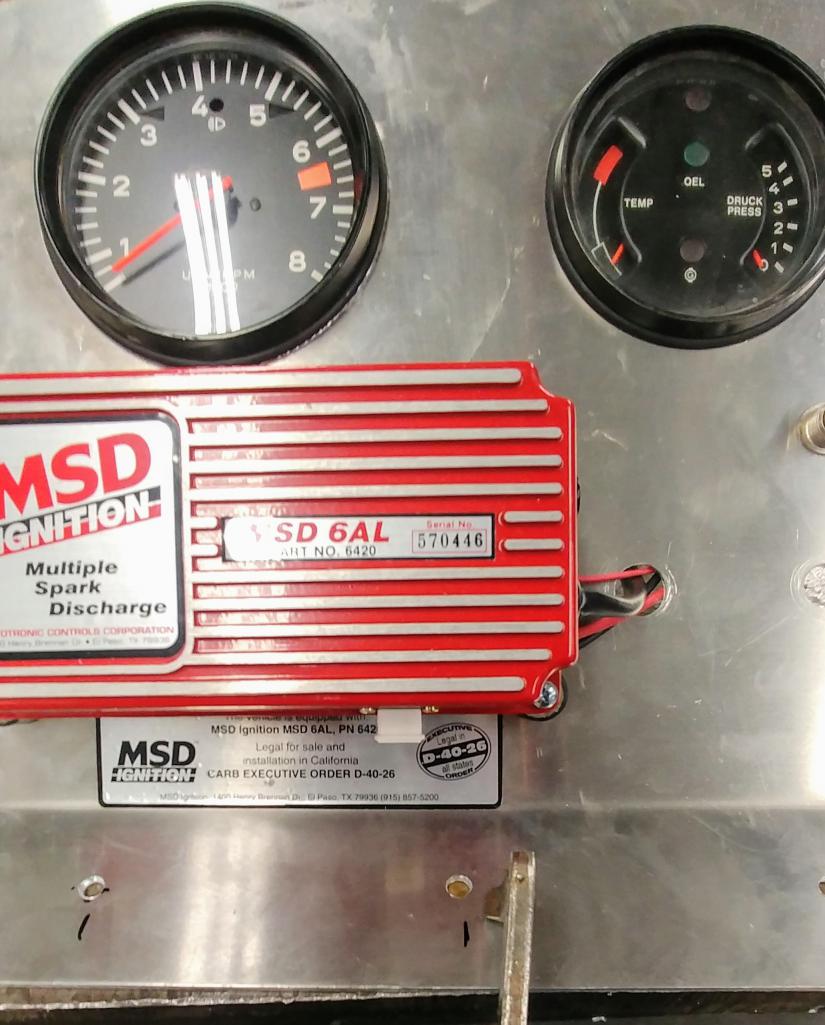
Posted by: worn Oct 24 2018, 04:21 PM
Here is the "control panel" for the engine test stand.. The gauges are out of a carrera so psi is not listed
That is some magic welding man.
What can be more straightforward than Barr? Multiply by 15 eh. For carpentry feet and inches makes more sense than meters to me. Beyond that though a degree Celsius or even Centigrade is ok.
Doesn’t the foil make it look real and making progress?
Posted by: mb911 Oct 24 2018, 04:39 PM
Here is the "control panel" for the engine test stand.. The gauges are out of a carrera so psi is not listed
That is some magic welding man.
What can be more straightforward than Barr? Multiply by 15 eh. For carpentry feet and inches makes more sense than meters to me. Beyond that though a degree Celsius or even Centigrade is ok.
Doesn’t the foil make it look real and making progress?
Yes it does thanks.. I feel much better about it.. It is gearing me up to take on conversion projects in the future for customer's.
Posted by: jmitro Oct 24 2018, 05:24 PM
looks good. front suspension photo looks really nice
Posted by: mb911 Oct 24 2018, 05:36 PM
looks good. front suspension photo looks really nice
Thanks. It's the fun part... Here is the panel installed.. Should be fine for running.
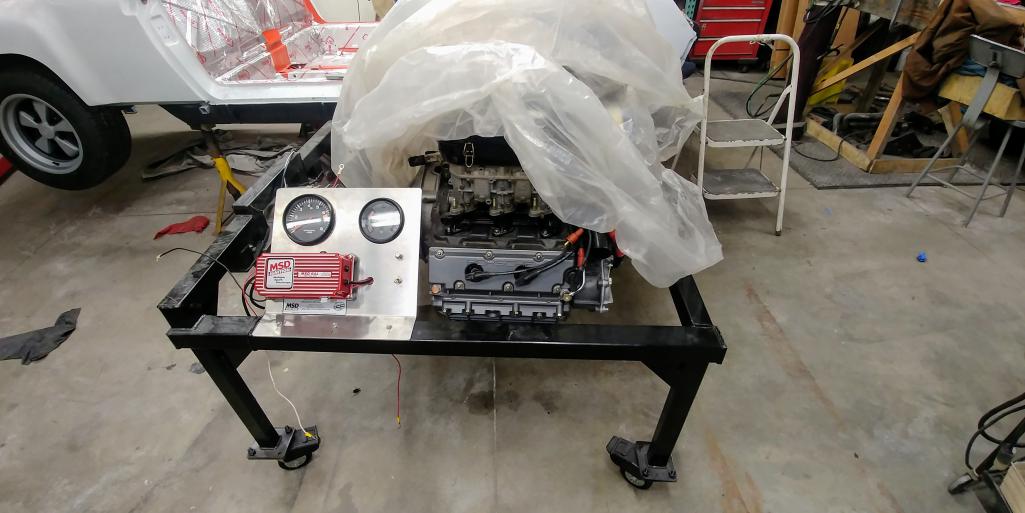
Posted by: mb911 Oct 25 2018, 07:57 PM
Throttle linkage setback . Need the correct one..the search continues. 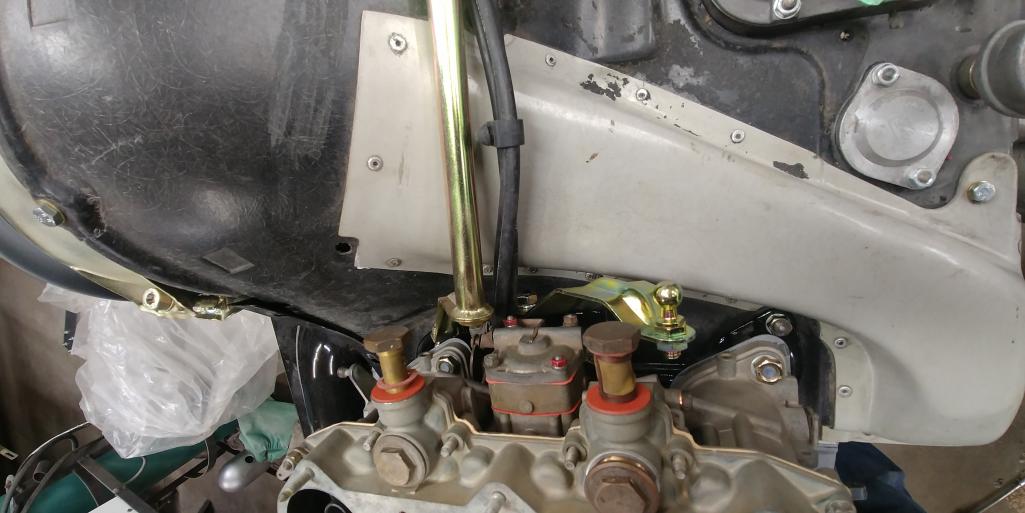
Posted by: mb911 Oct 26 2018, 10:44 AM
Well this was a positive start to the day got the collapsible spare tire mounted cost $10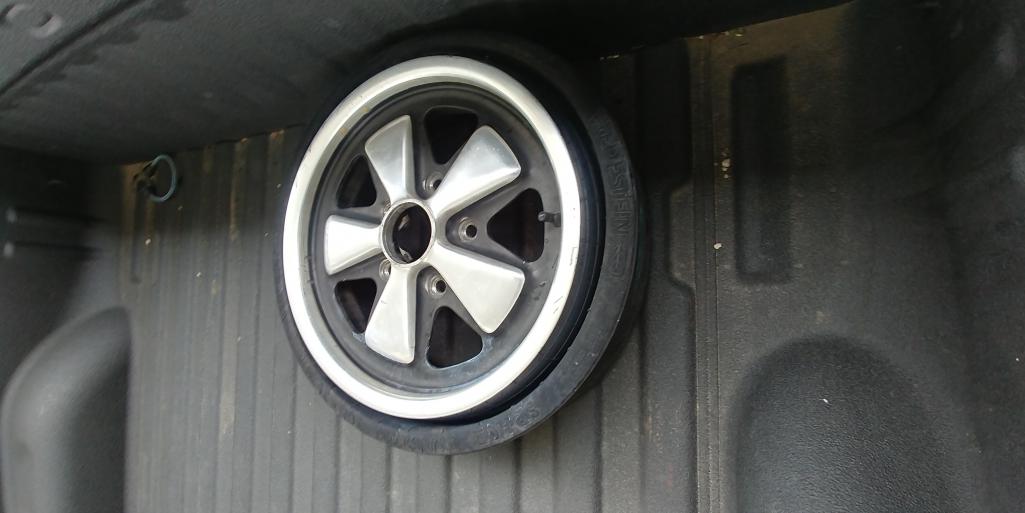
Posted by: JmuRiz Oct 26 2018, 10:52 AM
WOW, great price!!!
Posted by: Cairo94507 Oct 26 2018, 10:55 AM
Cool.
Posted by: porschetub Oct 26 2018, 01:30 PM
Will you get enough cooling from the front cooler alone? BTW, that part looks amazing so I hope it does work well.
I have a huge front cooler even larger then the GT Cooler. I am going to put in fans to help cooling when at idle..
Interesting setup ,what mods do you do to the fan shroud ? remove the cooler trunking as its no longer required ?
Posted by: mb911 Oct 26 2018, 04:07 PM
Will you get enough cooling from the front cooler alone? BTW, that part looks amazing so I hope it does work well.
I have a huge front cooler even larger then the GT Cooler. I am going to put in fans to help cooling when at idle..
Interesting setup ,what mods do you do to the fan shroud ? remove the cooler trunking as its no longer required ?
I am just going to make a block off plate for where the cooler was.. I don't want to mod the fan shroud..
Posted by: mb911 Oct 26 2018, 04:09 PM
WOW, great price!!!
Yup spent too much money at the tire shop lately.. They are giving good deals.. Now to clean the wheel up..
Posted by: mepstein Oct 26 2018, 05:06 PM
Will you get enough cooling from the front cooler alone? BTW, that part looks amazing so I hope it does work well.
I have a huge front cooler even larger then the GT Cooler. I am going to put in fans to help cooling when at idle..
Interesting setup ,what mods do you do to the fan shroud ? remove the cooler trunking as its no longer required ?
I am just going to make a block off plate for where the cooler was.. I don't want to mod the fan shroud..
It takes 2 block off plates. One at the end of the fiberglass shroud and one where the oil cooler sits - basically an addition to the engine tin.
Attached thumbnail(s)
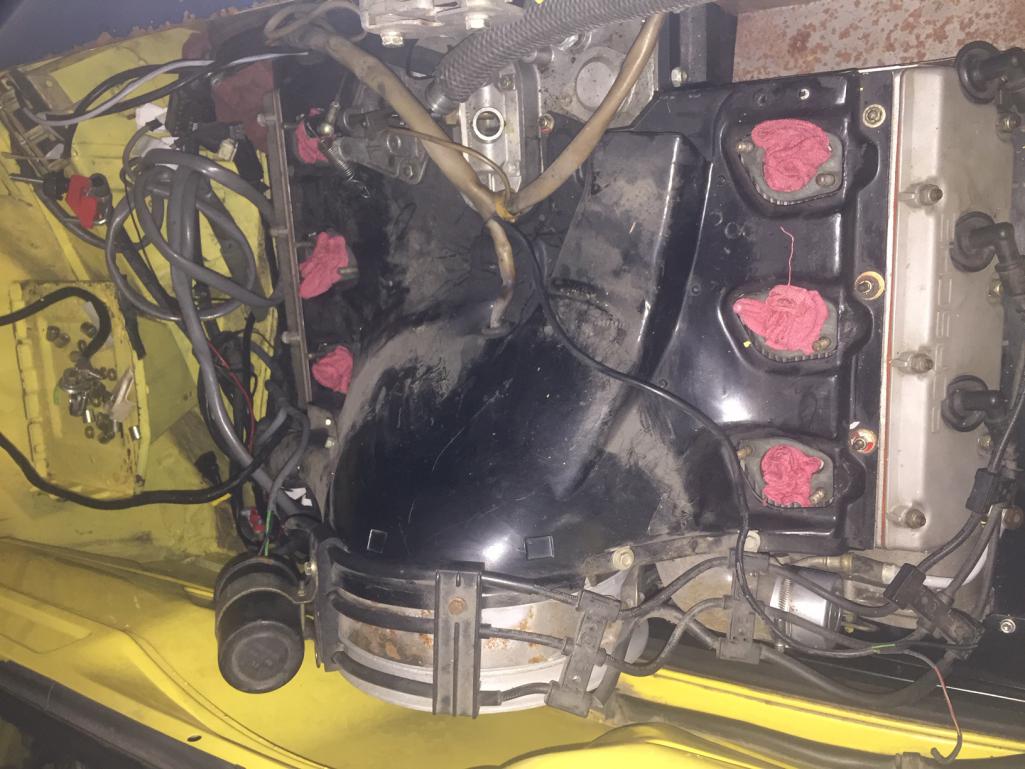
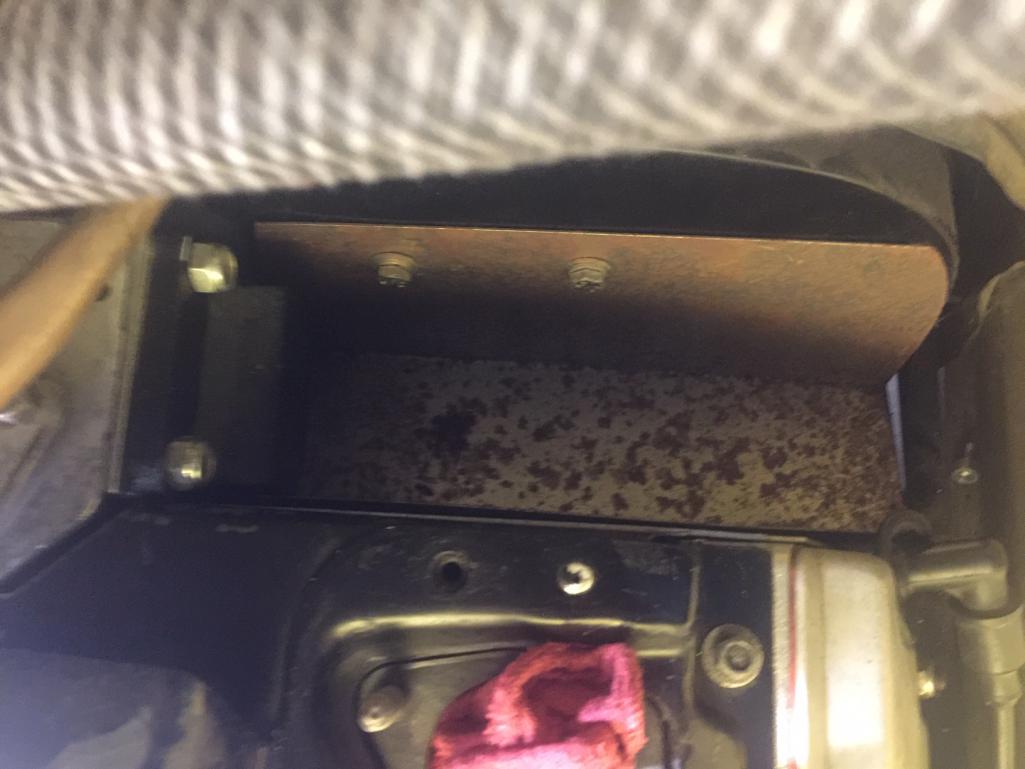
Posted by: mb911 Oct 27 2018, 06:23 AM
Mine is a rivited one for an original 911T or -6..
Posted by: mb911 Oct 27 2018, 03:26 PM
Everything is packed in for winter.. Pretty full .. Still room to work on multiple projects though. 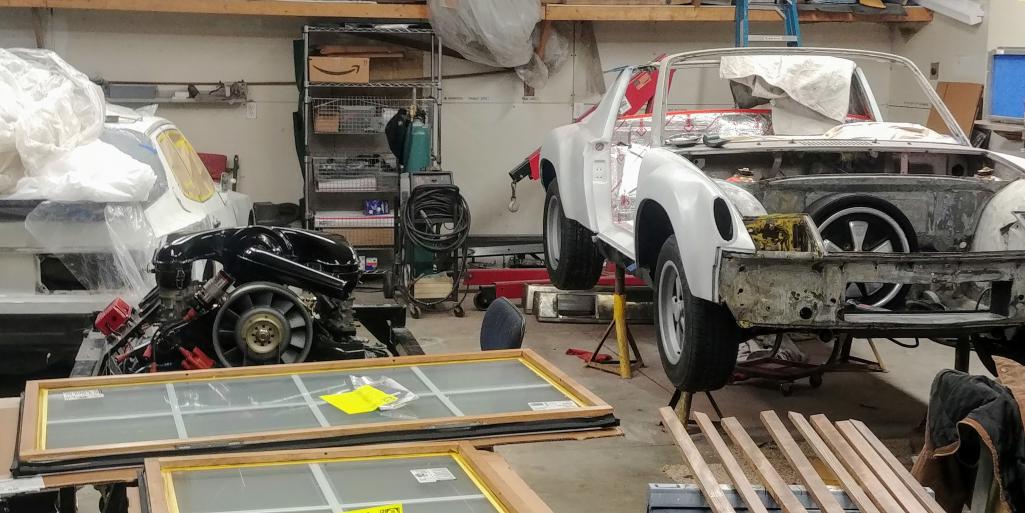
Posted by: mb911 Oct 30 2018, 08:47 AM
Made some progress yesterday . keep ordering small item's like the Harrell nuts, wire, connectors, ashlock tach adapter, etc.. Tank is an old design with incorrect locations so I modified for my own use and cleaned and powdercoated.. Drilled a hole in the gussett for the oil line and installed the heat exchangers loosely. Will be running soon.. Still waiting on my steering rack.. Starting to get irritated on that but it is what it is.. 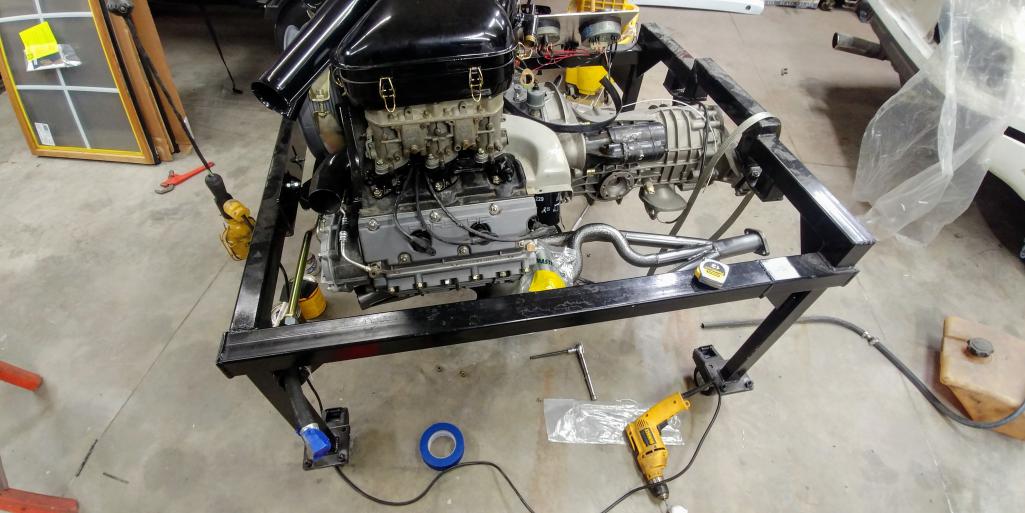
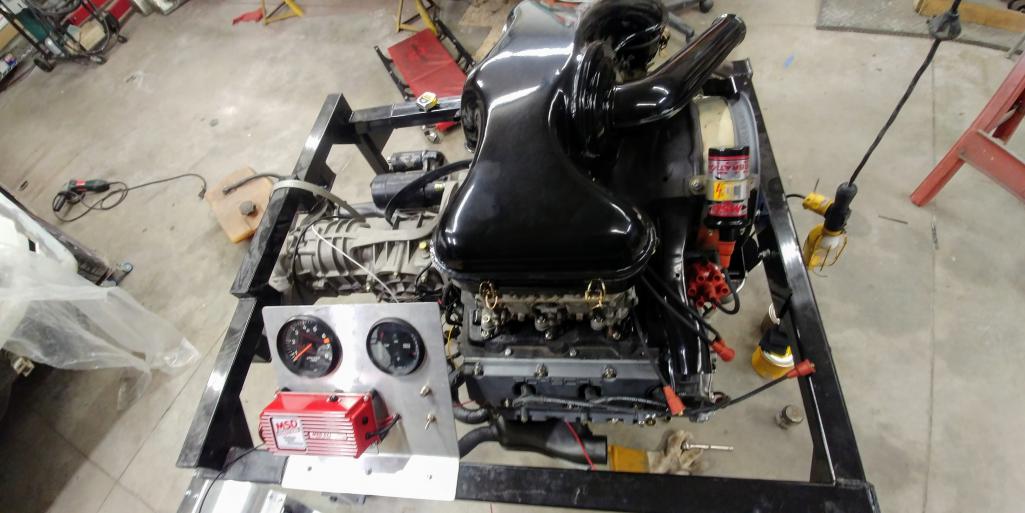
Posted by: mb911 Oct 30 2018, 08:48 AM
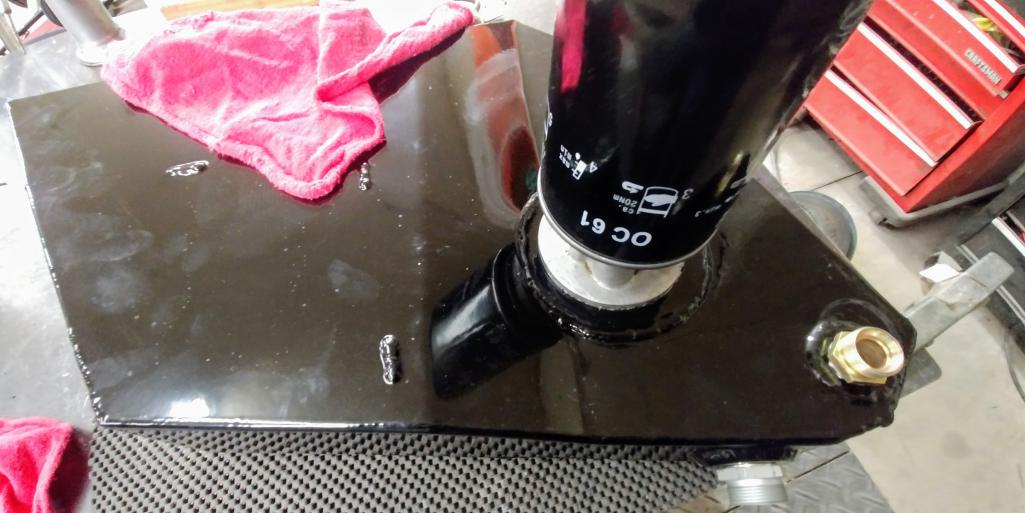
Posted by: mb911 Nov 2 2018, 07:52 PM
Turned engine over tonight with no ignition on to build oil pressure.. Exciting.. Now finish more wiring. 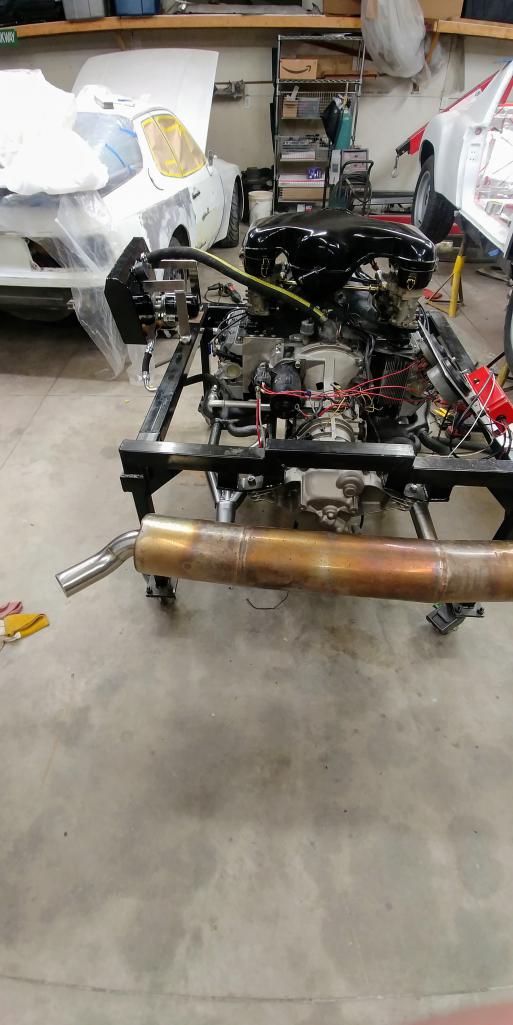
Posted by: Dion Nov 2 2018, 08:08 PM
[quote name='mb911' post='2662559' date='Nov 2 2018, 05:52 PM']
Turned engine over tonight with no ignition on to build oil pressure.. Exciting.. Now finish more wiring.
Awesome stuff going on!
Posted by: bbrock Nov 2 2018, 08:19 PM
Posted by: mb911 Nov 13 2018, 07:15 PM
Not allot to report.. Had the engine running very shortly, changed some sensors to jive with the gauges, built a small fuel tank.. Gotta make a tool to tighten the the pressure sensor and then give it another go.. 
Posted by: TravisNeff Nov 13 2018, 07:26 PM
Your little contraption there is pretty damn cool! Once you get this going we want a video, no exceptions.
Posted by: mb911 Nov 14 2018, 06:31 PM
Thanks Travis.. I think my wife refers to it as junk and not a contraption .
Today I got this beautifully restored ZF steering rack from Shaun @tru-6.. This was to replace the rack that I had previous that just would not run smoothly no matter how much I worked through it..
Shaun and I have known eachother for years and we did a little bartering on this.. It's as new.. This will get installed over Christmas break. 
Posted by: TravisNeff Nov 14 2018, 06:58 PM
Its always nice to oogle and freshly refinished parts with all the plating and such!
Posted by: mb911 Nov 15 2018, 07:39 PM
Got the engine running tonight though not well.. Great oil pressure so that's good.. Seems like I have the firing order off.. I am thinking recheck valve's, or plug wires on the wrong plug. Getting there.. Watching packers game so done for the night.. Made my fuel pump/spare tire mount.. 
Posted by: bbrock Nov 15 2018, 10:19 PM
Cool! I'm with Travis. I want video! 
Posted by: porschetub Nov 15 2018, 11:52 PM
Got the engine running tonight though not well.. Great oil pressure so that's good.. Seems like I have the firing order off.. I am thinking recheck valve's, or plug wires on the wrong plug. Getting there.. Watching packers game so done for the night.. Made my fuel pump/spare tire mount..
Hope you put in a fuel pressure regulator,even pumps sold as X amount of pressure deliver more than needed,mostly this is a real issue.
Valve clearances are rather odd IMO set mine motor out of car then checked after full rotation and they were out,reset and all great.
Plug leads are easy enough not telling you anything ,go well with your build.
Posted by: mb911 Nov 16 2018, 05:15 AM
https://m.facebook.com/groups/402029799831413?view=permalink&id=2249687078399000
This is the video..
Posted by: mb911 Nov 16 2018, 06:16 AM
Got the engine running tonight though not well.. Great oil pressure so that's good.. Seems like I have the firing order off.. I am thinking recheck valve's, or plug wires on the wrong plug. Getting there.. Watching packers game so done for the night.. Made my fuel pump/spare tire mount..
Hope you put in a fuel pressure regulator,even pumps sold as X amount of pressure deliver more than needed,mostly this is a real issue.
Valve clearances are rather odd IMO set mine motor out of car then checked after full rotation and they were out,reset and all great.
Plug leads are easy enough not telling you anything ,go well with your build.
Ordered the PMO regulator will be here today.. Fuel pressure defiantly could be the issue.. The engine just is unbalanced if you will with the way it runs but that likely is tuning..
I am just use to fuel injection.. I need to spend more time on the carbs .
Posted by: TravisNeff Nov 16 2018, 05:47 PM
Got the engine running tonight though not well.. Great oil pressure so that's good.. Seems like I have the firing order off.. I am thinking recheck valve's, or plug wires on the wrong plug. Getting there.. Watching packers game so done for the night.. Made my fuel pump/spare tire mount..
Dual function tire mount and fuel pump cover all in one? Clever!
And
on the engine vid!
Posted by: Larmo63 Nov 16 2018, 05:54 PM
Ben, please make certain that the plug wires are on in the right firing order.
Your project is looking great!!!
Posted by: mb911 Nov 16 2018, 06:16 PM
Ben, please make certain that the plug wires are on in the right firing order.
Your project is looking great!!!
I was looking at waynes book for firing order and wire orientation.. I need to verify elsewhere as I seem to remember that being incorrect..
On a side note.. Check out my bumper I had Oscar chrome it thanks
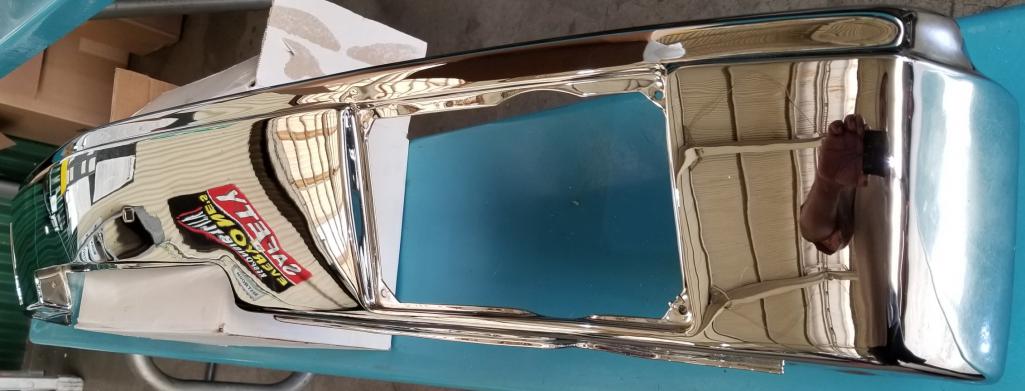
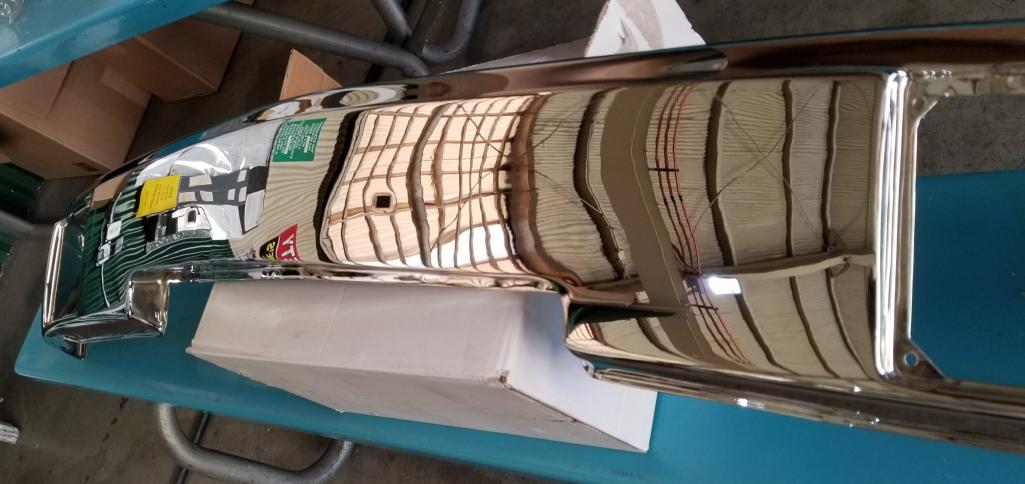
Posted by: Dion Nov 16 2018, 06:24 PM
Ben, please make certain that the plug wires are on in the right firing order.
Your project is looking great!!!
I was looking at waynes book for firing order and wire orientation.. I need to verify elsewhere as I seem to remember that being incorrect..
On a side note.. Check out my bumper I had Oscar chrome it thanks
Bumpers look fantastic.
Regarding Wayne’s book...Really?!
I was using that as my reference. Ok time to check and verify elsewhere.
Moving along nicely Ben.
Posted by: mb911 Nov 16 2018, 06:36 PM
Ben, please make certain that the plug wires are on in the right firing order.
Your project is looking great!!!
I was looking at waynes book for firing order and wire orientation.. I need to verify elsewhere as I seem to remember that being incorrect..
On a side note.. Check out my bumper I had Oscar chrome it thanks
Bumpers look fantastic.
Regarding Wayne’s book...Really?!
I was using that as my reference. Ok time to check and verify elsewhere.
Moving along nicely Ben.
Mine are exactly as waynes book says but I seem to remember it's wrong..
Posted by: mepstein Nov 16 2018, 07:02 PM
Attached image(s)
Posted by: mb911 Nov 16 2018, 07:23 PM

Posted by: Dion Nov 16 2018, 08:25 PM
Perfect ! I remember these pics, lost my bookmarks for them.
Thanks
Posted by: mb911 Nov 18 2018, 02:23 PM
Float levels have all been set for a base line(not running) I would run the fuel pump and noticed that there is gas weeping from gasket mating areas and believe that is a fuel pressure problem. Pmo fuel pressure regulator should be here today..
Posted by: mb911 Nov 19 2018, 06:11 PM
https://www.facebook.com/100025285101338/posts/298319411020893/
Runs much better.. Funny thing is the Exhaust guy(me) forgot a couple fasteners on the Exhaust studs..
Posted by: TravisNeff Nov 19 2018, 06:19 PM
The fb link no worky, your initial one loads up just fine
Posted by: mb911 Nov 19 2018, 07:06 PM
Strange..
Posted by: mb911 Nov 19 2018, 07:08 PM
Try this one..
https://m.facebook.com/groups/402029799831413?view=permalink&id=2255372777830430
Posted by: bbrock Nov 19 2018, 07:41 PM
Sweet!!!!
Posted by: TravisNeff Nov 19 2018, 09:08 PM
Awesome!! I am glad you all with projects are moving ahead even though its getting cold. Keeping me motivated!
Posted by: 914forme Nov 23 2018, 05:28 PM
That sounds really nice I can't wait for this to be on the street
Posted by: mb911 Nov 23 2018, 08:12 PM
Thanks everyone.. Now probably shelve the engine for a while and get back to front trunk..
Posted by: mb911 Nov 25 2018, 08:16 PM
Finished the corners of the trunk channel. I was going to buy the AA reproduction parts but they were $95 each side and I fabbed up the area in about 10 minutes and didn't need as much material as aim may.. Sprayed it with @http://www.914world.com/bbs2/index.php?showuser=20845 s secret rust conversion from home depot. The front trunk is now my focus for the next phase. This allows me to paint and then put steering rack in so can finally get it rolling. 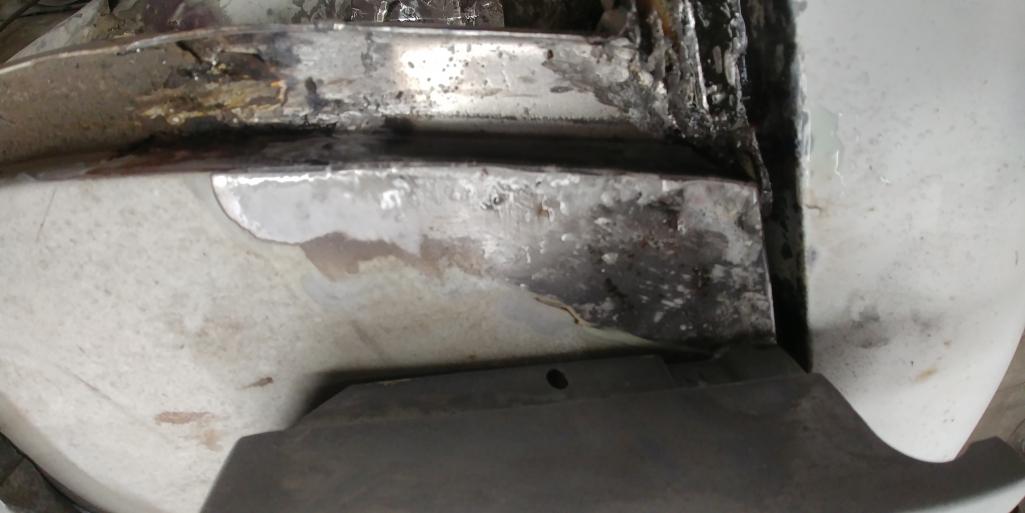
Posted by: mb911 Nov 25 2018, 08:17 PM
Picture might be a bit too close to see detail but your just seeing the conversion turning to a black liquid like crust. Also not not cleaned up.
Posted by: mb911 Nov 29 2018, 06:47 PM
Freshly powdercoated axles and spare tire mount. 
Posted by: mb911 Dec 8 2018, 03:26 PM
Finally epoxy primed frunk and windshield frame. Gonna let it cure and then prime with buildable/ sandable primer on the cowl and windshield frame.. Also gotta pick up a quart of bedliner this week to take care of some seams ala Kent and Bbrocks method. 
Posted by: Tdskip Dec 8 2018, 03:30 PM
Looks good Ben!
Posted by: TravisNeff Dec 8 2018, 03:51 PM
Fabulous.
Posted by: bbrock Dec 8 2018, 03:54 PM
Yowza! That looks purty!
Posted by: mb911 Dec 8 2018, 04:06 PM
Yowza! That looks purty!
@http://www.914world.com/bbs2/index.php?showuser=20845 quick question as you recently did this.. I read you can top coat epoxy within 5 days without scuffing. That said was thinking I might be able to spray surfacer on yet this evening. Never sprayed that quickly unless going sealer/base/clear. I don't believe it will be an issue but looking for some feedback.
Posted by: bbrock Dec 8 2018, 04:25 PM
Yowza! That looks purty!
@http://www.914world.com/bbs2/index.php?showuser=20845 quick question as you recently did this.. I read you can top coat epoxy within 5 days without scuffing. That said was thinking I might be able to spray surfacer on yet this evening. Never sprayed that quickly unless going sealer/base/clear. I don't believe it will be an issue but looking for some feedback.
I wouldn't think it would be an issue. I used PPG DPLF epoxy and the recoat time is 15 minutes and the time to topcoat is 60 minutes for 1 coat and 90 minutes for 2 coats. Unless the spec sheet on your paint says different, I'd think you would be good to go.
Posted by: mb911 Dec 8 2018, 07:25 PM
Well just sprayed buildable/sandable and sprayed out nice so we are all set.. I only sprayed on areas that will be externally seen and any spots that need attention.. Wet sanding /block will begine this week..
Posted by: rktmn247 Dec 8 2018, 08:00 PM
Looks great. You're really making progress!
Posted by: mb911 Dec 10 2018, 02:33 PM
Sprayed final coat of seam sealer. I used upol this time instead of monstaliner only becuase it was available locally. Upol/raptor is more runny then monstaliner but much more tame smell wise. I did find out that my local paint store actually rents the real deal sealer gun made by SEM. Too late though .
Now just a little sanding and then sealer and color. 
Posted by: TravisNeff Dec 10 2018, 04:12 PM
Sweet! This is looking fine Ben!
Posted by: mb911 Dec 10 2018, 04:16 PM
Sweet! This is looking fine Ben!
Thanks @http://www.914world.com/bbs2/index.php?showuser=447 allot of work to this point.. Moving towards the back of the car.. Will get steering rack in soon and then able to move the car around so I can get the engine bay done next..
Posted by: Cairo94507 Dec 10 2018, 04:32 PM
Terrific progress and work. Quite a step forward at this point on a build.
Posted by: bbrock Dec 10 2018, 04:40 PM
Looks good! Nice little trick Kent came up with there.
Posted by: mb911 Dec 10 2018, 05:21 PM
@http://www.914world.com/bbs2/index.php?showuser=9712 @http://www.914world.com/bbs2/index.php?showuser=20845 thanks so much. Both of you have amazing projects going as well. I am thankful this Frankenstein will be closer to a roller shortly
Posted by: mb911 Dec 15 2018, 08:43 PM
Spent a couple hours out there tonight.. We have some color.. Frunk and cowl are painted. Turned out pretty nice.. 
Posted by: Dion Dec 15 2018, 08:54 PM
Spent a couple hours out there tonight.. We have some color.. Frunk and cowl are painted. Turned out pretty nice..
Oooh man! Colour!
awesome Ben.That looks great. Tangerine? I wasn’t sure what colour you decided on.
Nice milestone fer sure.
Posted by: mb911 Dec 15 2018, 09:03 PM
Saturn red which I think is very close to tangerine.
Posted by: bbrock Dec 15 2018, 09:15 PM
Gorgeous! It looks fast!
Posted by: sixnotfour Dec 15 2018, 09:17 PM
Posted by: mb911 Dec 15 2018, 09:23 PM
@http://www.914world.com/bbs2/index.php?showuser=20845 in the middle of painting I thought of you and remembered to take off the masking tape from the vin so I could clear over it..
Posted by: bbrock Dec 15 2018, 09:29 PM
@http://www.914world.com/bbs2/index.php?showuser=20845 in the middle of painting I thought of you and remembered to take off the masking tape from the vin so I could clear over it..
Posted by: mb911 Dec 16 2018, 08:12 AM
I thought you would like that.. Went and did a quick inspection this morning.. I am light on color in a few spots underneath the the headlight motors.. Shouldn't be an issue though.
Posted by: Tdskip Dec 16 2018, 09:01 AM
Wow Ben!
Posted by: mb911 Dec 16 2018, 11:50 AM
Thanks.. Allot of work since the beginning.. Just to revisit the beginning. 
Posted by: burton73 Dec 16 2018, 01:34 PM
Ben,
Great color. You have come a very long way on this boy.
Bob B
Posted by: mb911 Dec 16 2018, 08:16 PM
Thanks @http://www.914world.com/bbs2/index.php?showuser=7414 it is not near as nice as the one Eric is doing for you but looks respectable..
Posted by: mepstein Dec 16 2018, 08:31 PM
Thanks @http://www.914world.com/bbs2/index.php?showuser=7414 it is not near as nice as the one Eric is doing for you but looks respectable..
It will still probably be in the top 1% of great looking 914's. Bob's will just happen to be in the top .1%.
Posted by: Cairo94507 Dec 17 2018, 08:09 AM
Congratulations Ben. That looks terrific. I would swear, from the picture, it was Tangerine too.
Posted by: David Billo Dec 18 2018, 07:41 AM
Ben, I did not pay much attention to your door braces until now, when you posted that "before" pic, and I thought maybe they were designed to allow the doors to be bolted on. Going back to the start of this thread, however, it seems you had to cut them off to put the doors on.
Posted by: mb911 Dec 18 2018, 09:35 AM
Ben, I did not pay much attention to your door braces until now, when you posted that "before" pic, and I thought maybe they were designed to allow the doors to be bolted on. Going back to the start of this thread, however, it seems you had to cut them off to put the doors on.
Yes that's correct..
Posted by: mb911 Dec 18 2018, 02:11 PM
1st time in 3 years its really on the ground.. Suspension all has to be tightened and a home alignment as well but it's on the ground and movable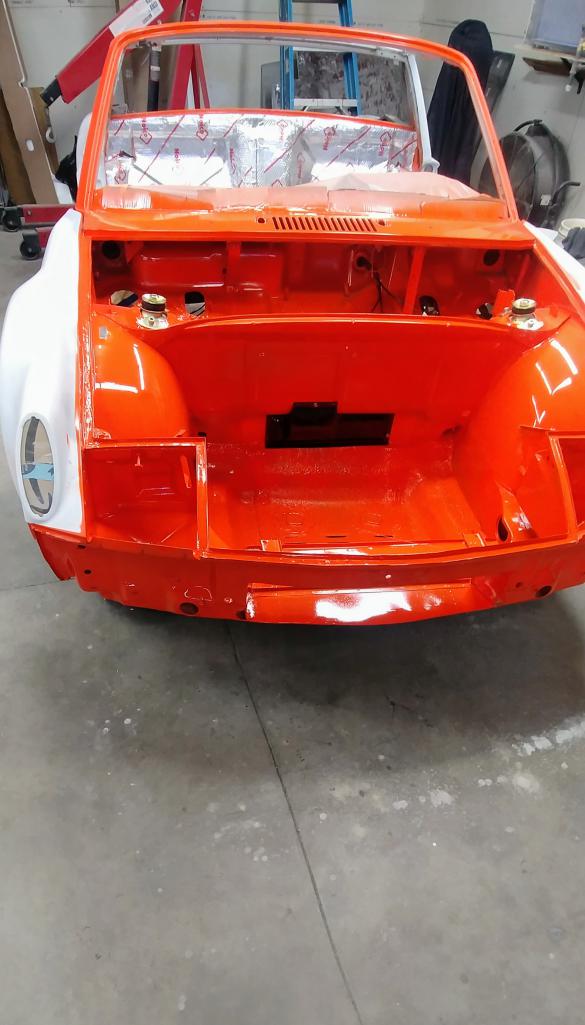
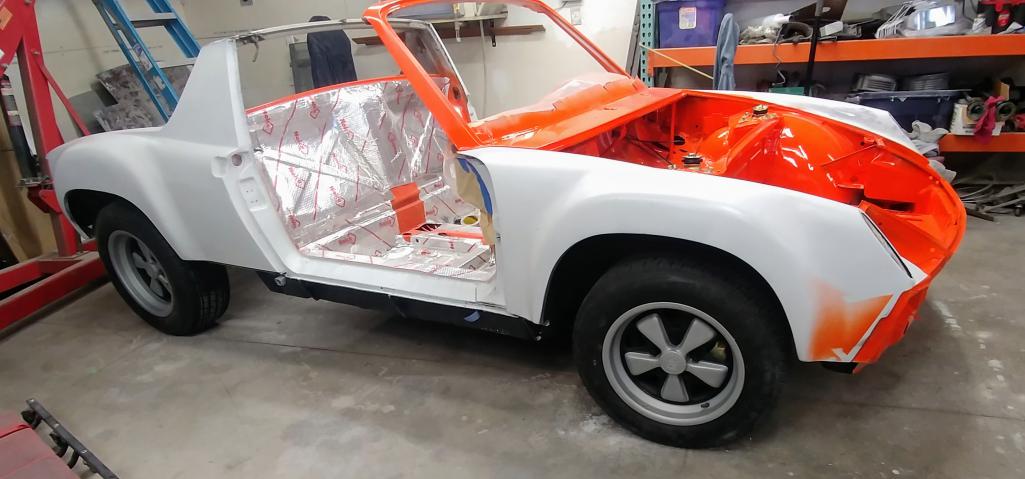
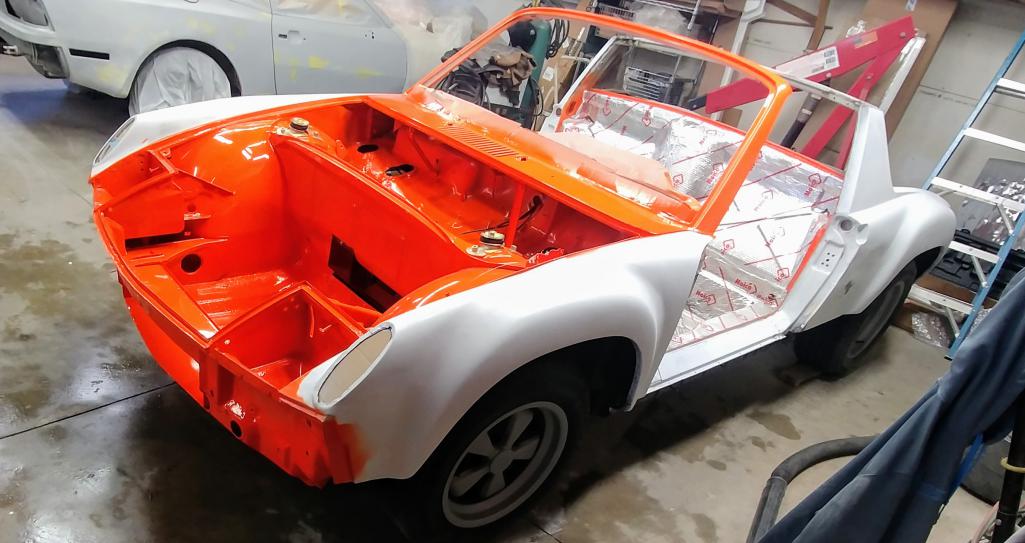
Posted by: defianty Dec 18 2018, 02:31 PM
Looking great Ben. It must feel great to have it back on its wheels.
Posted by: bbrock Dec 18 2018, 02:36 PM
Amazing how exciting this is to me, I can only imagine how thrilled you must be. What a great milestone!!! I hope to be there in 2-3 months.
Posted by: mb911 Dec 18 2018, 02:50 PM
Funny thing is everyone that I just have this urge to clean the shop.. More so then anything..
Posted by: Dion Dec 18 2018, 02:51 PM
Bravo!!! Bellissimo!!!
Attached image(s)
Posted by: mepstein Dec 18 2018, 04:14 PM
Funny thing is everyone that I just have this urge to clean the shop.. More so then anything..
Make the wife happy. I spent a good part of my day wearing a respirator, face shield and leather gloves. Much easier to do this now that it’s cool outside.
Attached thumbnail(s)
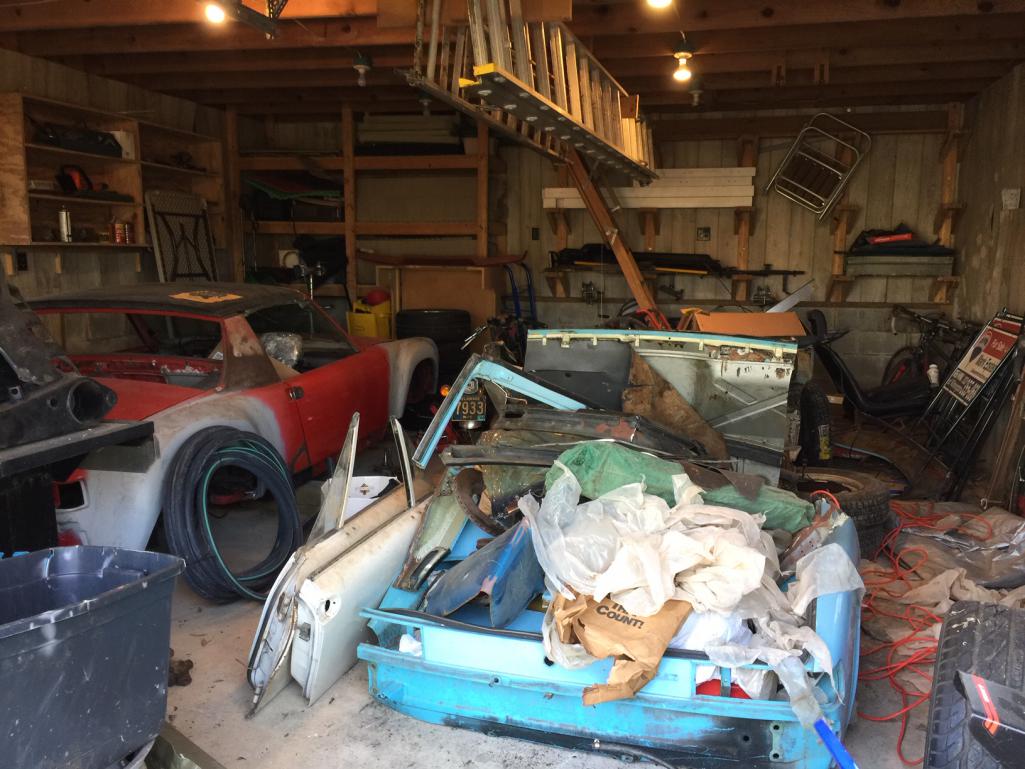
Posted by: mb911 Dec 18 2018, 04:27 PM
I hear you on that..
Posted by: TravisNeff Dec 19 2018, 08:44 AM
yes Yes YES!
Posted by: JmuRiz Dec 19 2018, 09:11 AM
Funny thing is everyone that I just have this urge to clean the shop.. More so then anything..
I would take a photo of my garage, but I don't want to give anyone a heart attack so close to X-mas.
I'll hopefully get some time to clean up over the holidays when I'm 'working from home' next week
BTW mb911, your car is looking great. I may do something similar with the sound deadening on my car, since the insides are bare metal now.
Posted by: mb911 Dec 19 2018, 01:44 PM
Anyone spot my spare tire/fuel pump mount?
Posted by: Tdskip Dec 19 2018, 05:48 PM
Funny thing is everyone that I just have this urge to clean the shop.. More so then anything..
Make the wife happy. I spent a good part of my day wearing a respirator, face shield and leather gloves. Much easier to do this now that it’s cool outside.
Do I spy with my little eye a BMW motorcycle?
Ben - this thread has been, literally, epic. In a good way.
Posted by: mb911 Dec 19 2018, 06:26 PM
Funny thing is everyone that I just have this urge to clean the shop.. More so then anything..
Make the wife happy. I spent a good part of my day wearing a respirator, face shield and leather gloves. Much easier to do this now that it’s cool outside.
Do I spy with my little eye a BMW motorcycle?
Ben - this thread has been, literally, epic. In a good way.
You might be seeing Marks in the picture he posted of his garage.
Posted by: mepstein Dec 19 2018, 06:45 PM
Funny thing is everyone that I just have this urge to clean the shop.. More so then anything..
Make the wife happy. I spent a good part of my day wearing a respirator, face shield and leather gloves. Much easier to do this now that it’s cool outside.
Do I spy with my little eye a BMW motorcycle?
Ben - this thread has been, literally, epic. In a good way.
You might be seeing Marks in the picture he posted of his garage.
Yea, it was my hyjack.
Posted by: 914forme Dec 19 2018, 06:56 PM
Yes I spied a mount, car is looking good, a project mile stone.
Posted by: Tdskip Dec 20 2018, 07:32 AM
Ben - any lessons learned to pass along based on all of the work so far?
Posted by: JmuRiz Dec 20 2018, 08:40 AM
I'm leaning towards using that sound deadener in my interior (since I stripped the floor tar to check for rust...none found!, and took out he engine bay pad).
How did you like working with the product you used? Any tips for rollers to use etc?
Posted by: bbrock Dec 20 2018, 08:51 AM
I'm leaning towards using that sound deadener in my interior (since I stripped the floor tar to check for rust...none found!, and took out he engine bay pad).
How did you like working with the product you used? Any tips for rollers to use etc?
I used the thicker version of that same Noico deadener and it is very easy to work with. You can cut it with scissors and it it is very pliable to form into all the crevices etc. You can buy a good metal roller on Amazon for about $10. Noico has their own that looks like a good design. I made the mistake of not buying one because I figured I could pick up one of those wooden wallpaper seam rollers locally. I learned that I'm old and those seam rollers are not cheap Chinese plastic. It worked but the roller edge is sharp so you have to be careful or it will cut through the foil on the deadener. They are also flimsy so I broke the first one toward the end of he install and had to buy another. Better to order a good roller when you order the deadener.
Posted by: mb911 Dec 20 2018, 09:48 AM
I'm leaning towards using that sound deadener in my interior (since I stripped the floor tar to check for rust...none found!, and took out he engine bay pad).
How did you like working with the product you used? Any tips for rollers to use etc?
I used the thicker version of that same Noico deadener and it is very easy to work with. You can cut it with scissors and it it is very pliable to form into all the crevices etc. You can buy a good metal roller on Amazon for about $10. Noico has their own that looks like a good design. I made the mistake of not buying one because I figured I could pick up one of those wooden wallpaper seam rollers locally. I learned that I'm old and those seam rollers are not cheap Chinese plastic. It worked but the roller edge is sharp so you have to be careful or it will cut through the foil on the deadener. They are also flimsy so I broke the first one toward the end of he install and had to buy another. Better to order a good roller when you order the deadener.
I actually used the rubber/foam block sanding block for mine..
And @http://www.914world.com/bbs2/index.php?showuser=21666 here are a few thoughts.
I feel that I am good with allot of different aspects of restoration of cars but by no means an expert in all areas
I can paint fairly well
Build engines as I did that in a former life
Fab and weld (my profession)
That said the car I fixed would have been scrapped by 99% of the folks on this board.. It is a frankenstein made from Mark, tygaboy,and my cars . My biggest suggestion is find a car as rust free as possible. If you find one with rust learn to weld 1st.. Now learning to weld is not a 5 minute job . it takes hours. My students take on average 90 hours of real weld time before they are ready to weld things correctly. Most body shops don't even weld correctly and the icar certs are an absolute joke so keep that in mind. Then start repair of the car. I feel very strongly that most of the cars people scrap should be saved. People like @http://www.914world.com/bbs2/index.php?showuser=419 are fully of capable of fixing these cars and we should be saving them.
Other then that take your time.. Lots of time
Keep in mind in my 3 years I also developed 12 914 specific parts so that did take time from the build..
Posted by: restore2seater Dec 20 2018, 10:05 AM
That said the car I fixed would have been scrapped by 99% of the folks on this board.. It is a frankenstein made from Mark, tygaboy,and my cars . My biggest suggestion is find a car as rust free as possible. If you find one with rust learn to weld 1st.. Now learning to weld is not a 5 minute job . it takes hours. My students take on average 90 hours of real weld time before they are ready to weld things correctly. Most body shops don't even weld correctly and the icar certs are an absolute joke so keep that in mind. Then start repair of the car. I feel very strongly that most of the cars people scrap should be saved. People like @http://www.914world.com/bbs2/index.php?showuser=419 are fully of capable of fixing these cars and we should be saving them.
Thought that might be a typo at first. Did a google search. https://www.i-car.com/
I kind of have the same feeling towards SAE certifications. Just cause you can pass a test doesn't make you a good mechanic.
Posted by: mb911 Dec 20 2018, 08:09 PM
Hung the bumper so it was safe and out of the way. Over the next 10 days we have to paint the 944 , do a head gasket on my son's civic so he can sell it. So my shop is packed. 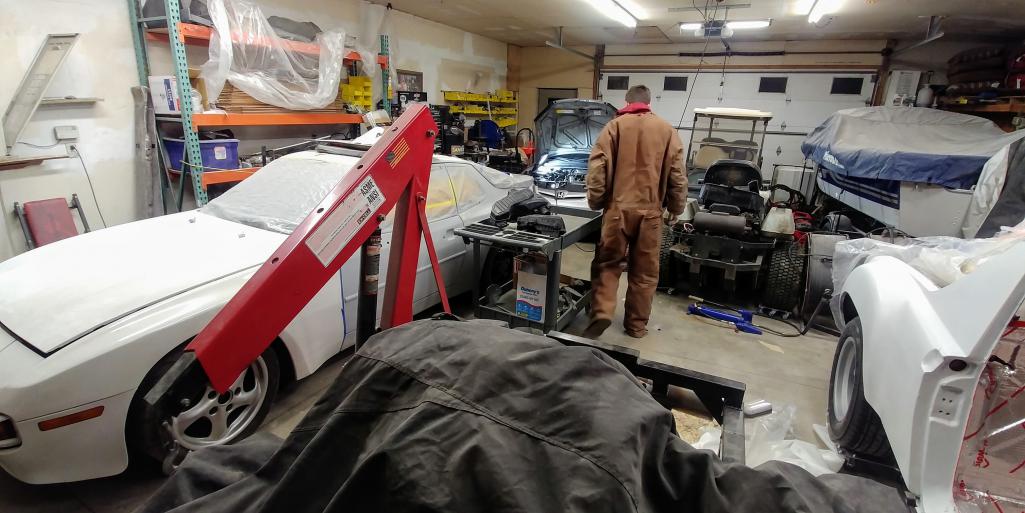
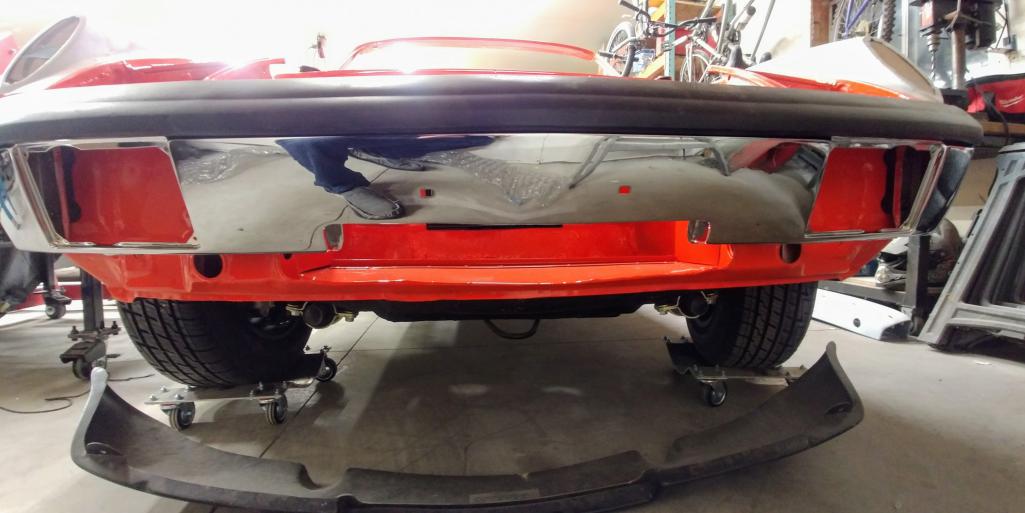
Posted by: Tdskip Dec 21 2018, 08:52 AM
I'm leaning towards using that sound deadener in my interior (since I stripped the floor tar to check for rust...none found!, and took out he engine bay pad).
How did you like working with the product you used? Any tips for rollers to use etc?
I used the thicker version of that same Noico deadener and it is very easy to work with. You can cut it with scissors and it it is very pliable to form into all the crevices etc. You can buy a good metal roller on Amazon for about $10. Noico has their own that looks like a good design. I made the mistake of not buying one because I figured I could pick up one of those wooden wallpaper seam rollers locally. I learned that I'm old and those seam rollers are not cheap Chinese plastic. It worked but the roller edge is sharp so you have to be careful or it will cut through the foil on the deadener. They are also flimsy so I broke the first one toward the end of he install and had to buy another. Better to order a good roller when you order the deadener.
I actually used the rubber/foam block sanding block for mine..
And @http://www.914world.com/bbs2/index.php?showuser=21666 here are a few thoughts.
I feel that I am good with allot of different aspects of restoration of cars but by no means an expert in all areas
I can paint fairly well
Build engines as I did that in a former life
Fab and weld (my profession)
That said the car I fixed would have been scrapped by 99% of the folks on this board.. It is a frankenstein made from Mark, tygaboy,and my cars . My biggest suggestion is find a car as rust free as possible. If you find one with rust learn to weld 1st.. Now learning to weld is not a 5 minute job . it takes hours. My students take on average 90 hours of real weld time before they are ready to weld things correctly. Most body shops don't even weld correctly and the icar certs are an absolute joke so keep that in mind. Then start repair of the car. I feel very strongly that most of the cars people scrap should be saved. People like @http://www.914world.com/bbs2/index.php?showuser=419 are fully of capable of fixing these cars and we should be saving them.
Other then that take your time.. Lots of time
Keep in mind in my 3 years I also developed 12 914 specific parts so that did take time from the build..
Thanks Ben, helpful.
Keep going and please keep us posted!
Posted by: bbrock Dec 21 2018, 10:28 AM
Hung the bumper so it was safe and out of the way.
All the better for sitting inside making vroom, vroom sounds.
Where did you buy those roller skates for the car? I think I want to get a set for when mine comes off the spit. Do they help with doing an alignment?
Posted by: mb911 Dec 22 2018, 02:19 PM
Hung the bumper so it was safe and out of the way.
All the better for sitting inside making vroom, vroom sounds.
Where did you buy those roller skates for the car? I think I want to get a set for when mine comes off the spit. Do they help with doing an alignment?
@http://www.914world.com/bbs2/index.php?showuser=20845 I made them and as far as alignment I suppose so.. When I get to that point I think it will help
Posted by: GeorgeRud Dec 22 2018, 03:22 PM
The Harbor Freight ones also work pretty well for the light 914 and do go on sale.
Posted by: raynekat Dec 22 2018, 04:20 PM
That Saturn red is looking very nice.
Posted by: 914forme Dec 22 2018, 09:36 PM
I have 2 sets of the harbor freight ones. Disassemble the wheels and grease them up. Move really well after that.
It seems I use them for everything but under a car.
Posted by: mb911 Dec 24 2018, 03:53 PM
Side tracked this weekend.. Had to finish painting my son's 944. Turned out pretty nice.. 1 spot had a little run but should be able to wet sand it out or I will spot it in.. 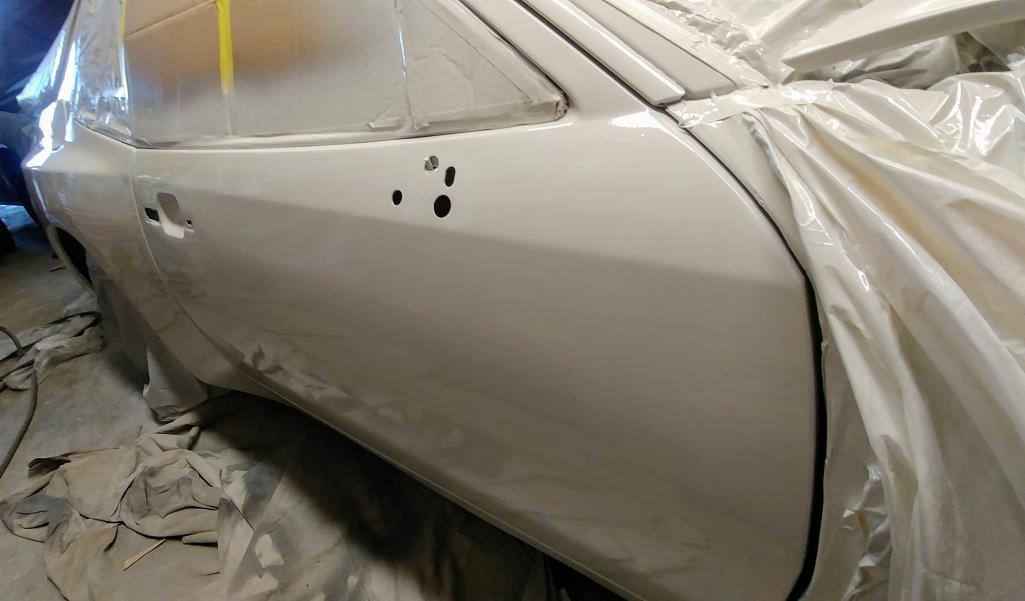
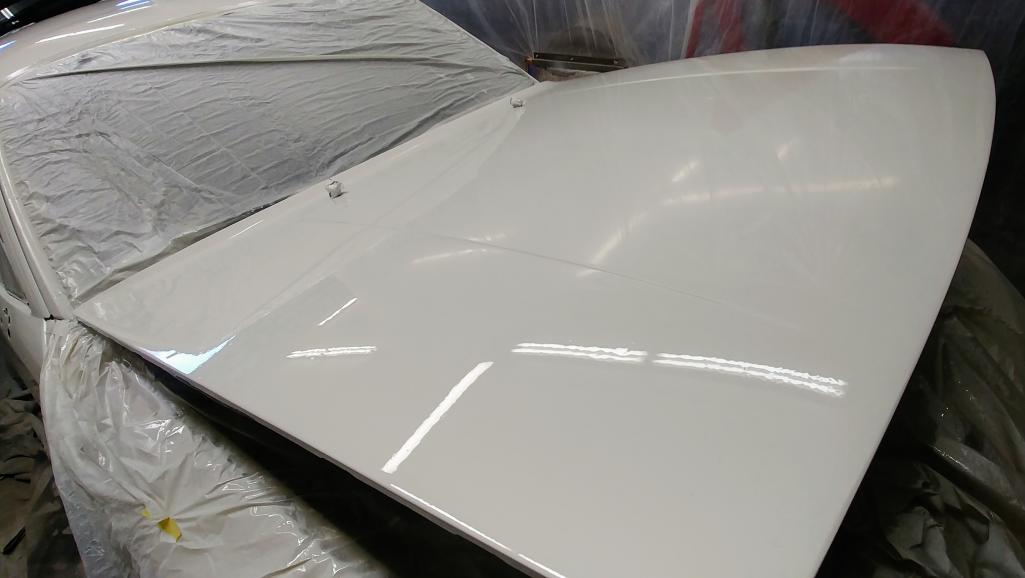
Posted by: whitetwinturbo Dec 26 2018, 11:30 PM
Nice!
Is that creme or white?
Posted by: JC 914-73 Jan 1 2019, 02:27 AM
Wow, just finished reading thru the thread, what a treat! Thank you for sharing the experience, hats off to the quality and amount of work, learned a lot just reading thru the posts. Looking forward to seeing the finished car. Awesome
Posted by: Tdskip Jan 1 2019, 07:53 AM
Side tracked this weekend.. Had to finish painting my son's 944. Turned out pretty nice.. 1 spot had a little run but should be able to wet sand it out or I will spot it in..
Looks great Ben.
Can I ask what paint and spray equipment?
Posted by: mb911 Jan 1 2019, 11:19 AM
Side tracked this weekend.. Had to finish painting my son's 944. Turned out pretty nice.. 1 spot had a little run but should be able to wet sand it out or I will spot it in..
Looks great Ben.
Can I ask what paint and spray equipment?
We used Ppg shopline for base and clear.. I use a 60 gallon sanborn air compressor and then a Sata jet for primer gun and ironically I bought the devilbiss starting line paint guns.. Use them for my base and clear guns.. They work very good.
For my car I will use the same base but a high end clear..
Posted by: mb911 Jan 7 2019, 11:19 AM
No pictures to add as we have really focused on the 944 and finishing the head gasket on the civic.. I changed the oil on the civic yesterday and took it for a test run.. It's now ready to sell. The 944 rear brake hoses were next. I changed the soft lines then had to splice a repair steel line in.. Now gotta fix the wires that run back to the hubs.. There is about 6 wires per side.. No idea why..
Then back to the 914.. I have been working on prepping the engine bay for paint. This is a monumental task as there are so many little hard to reach areas.. I have spent about 5 hours in the last 3 days with air and power tools removing paint and any surface rust.. I probably have another 3 or 4 till it's ready..
Next built some oil tanks and also my bumpers have been keeping me busy. I bought 3 cores to do the GT conversion to.. This will help with clients looking to not cut up an orginal..
Posted by: whitetwinturbo Jan 8 2019, 12:58 AM
.............you have the "patience of Job" 
Posted by: mb911 Jan 16 2019, 11:14 AM
Gas tank is done.. 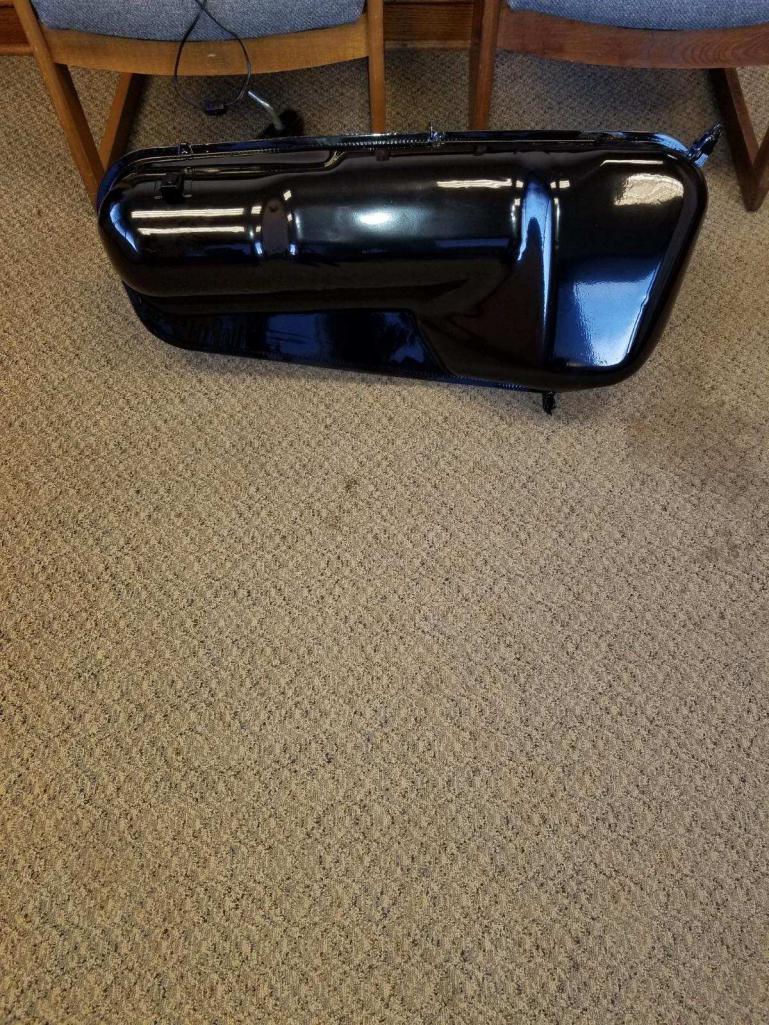
Posted by: bbrock Jan 16 2019, 11:33 AM
Gas tank is done..
Nice!
What paint did you use? Gloss or semigloss?
Posted by: mb911 Jan 16 2019, 11:56 AM
Gas tank is done..
Nice!
What paint did you use? Gloss or semigloss?Gloss powdercoat
Posted by: 914forme Jan 16 2019, 12:00 PM
Ben did you have the inside of the tank sealed or just cleaned?
Posted by: mb911 Jan 16 2019, 03:00 PM
Ben did you have the inside of the tank sealed or just cleaned?
I cleaned it that's all.
Posted by: mb911 Jan 17 2019, 04:27 PM
Exciting arrival today along with the tank dropped into the car.. 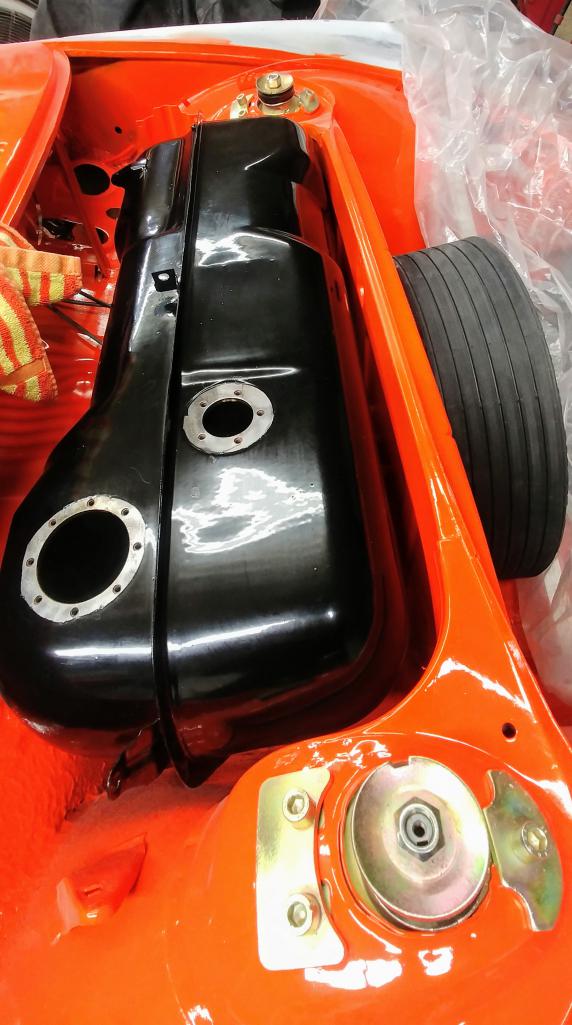
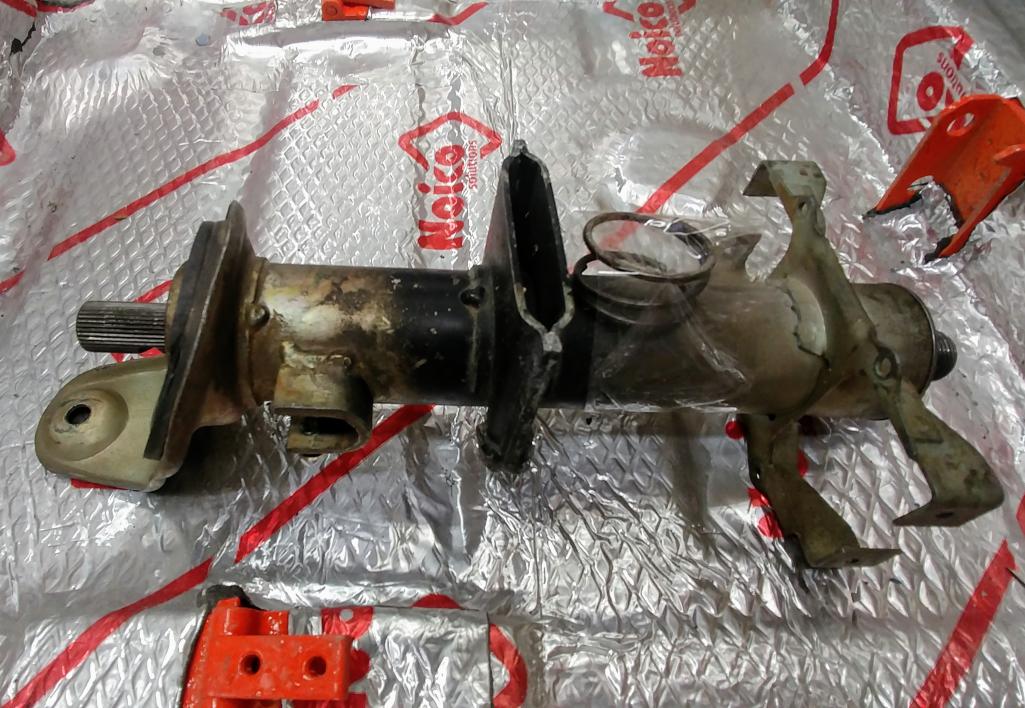
Posted by: 914forme Jan 17 2019, 07:22 PM
Can't wait to see your modifications to make this work in the 914 chassis.
Posted by: mb911 Jan 18 2019, 05:37 AM
Can't wait to see your modifications to make this work in the 914 chassis.
I need to find the front bearing that @http://www.914world.com/bbs2/index.php?showuser=419 prototyped a year or two ago.. Modification will be next week..
Posted by: mb911 Jan 21 2019, 05:19 PM
Moved the engine lid pull to a GT style.. I think it will clear everything.. I hope.. 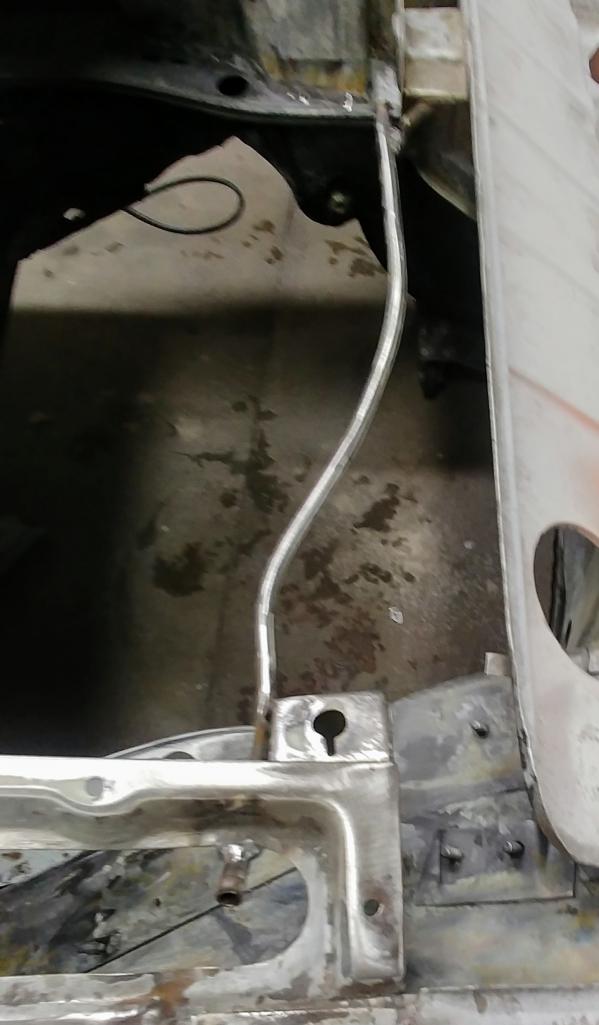
Posted by: mb911 Jan 22 2019, 11:20 AM
Steering column done.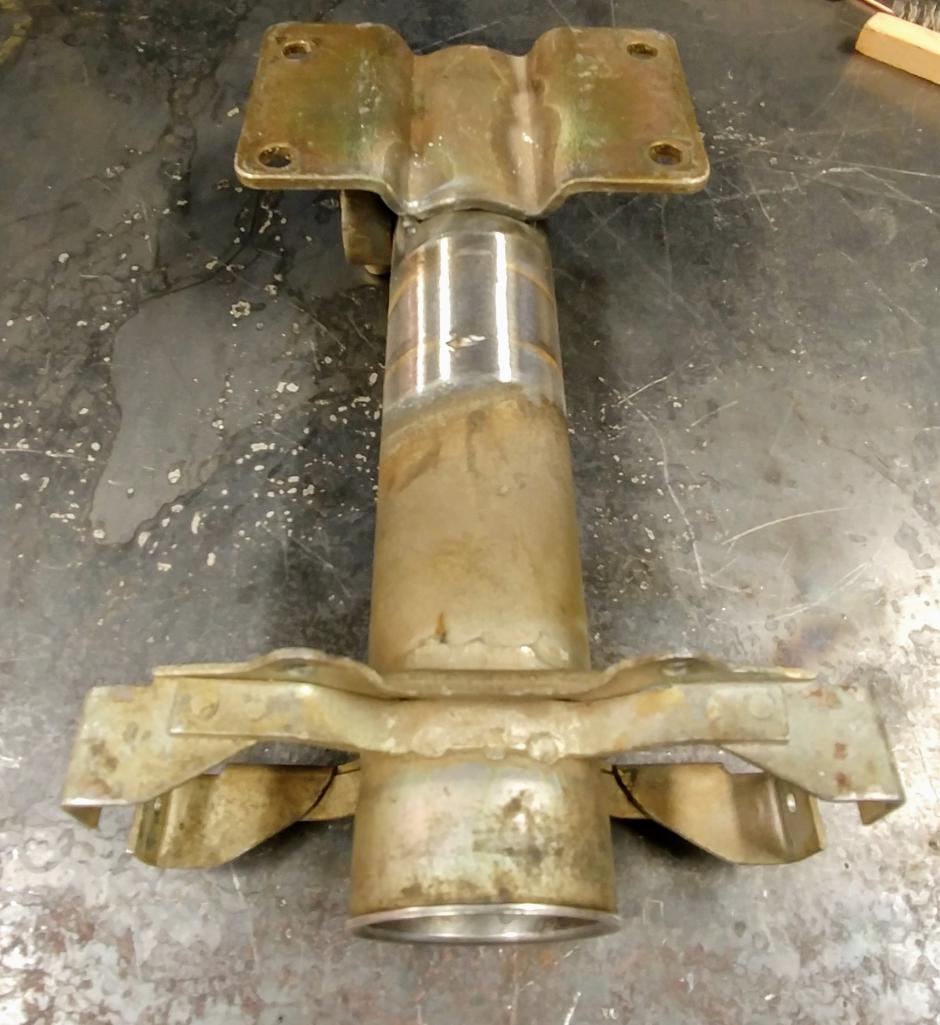
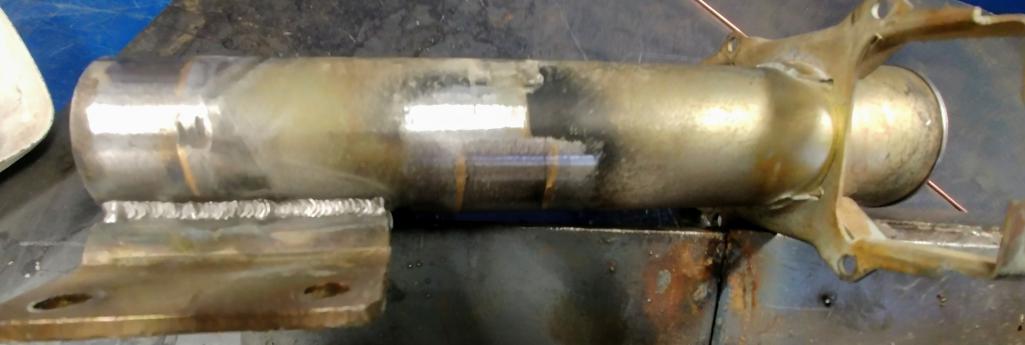
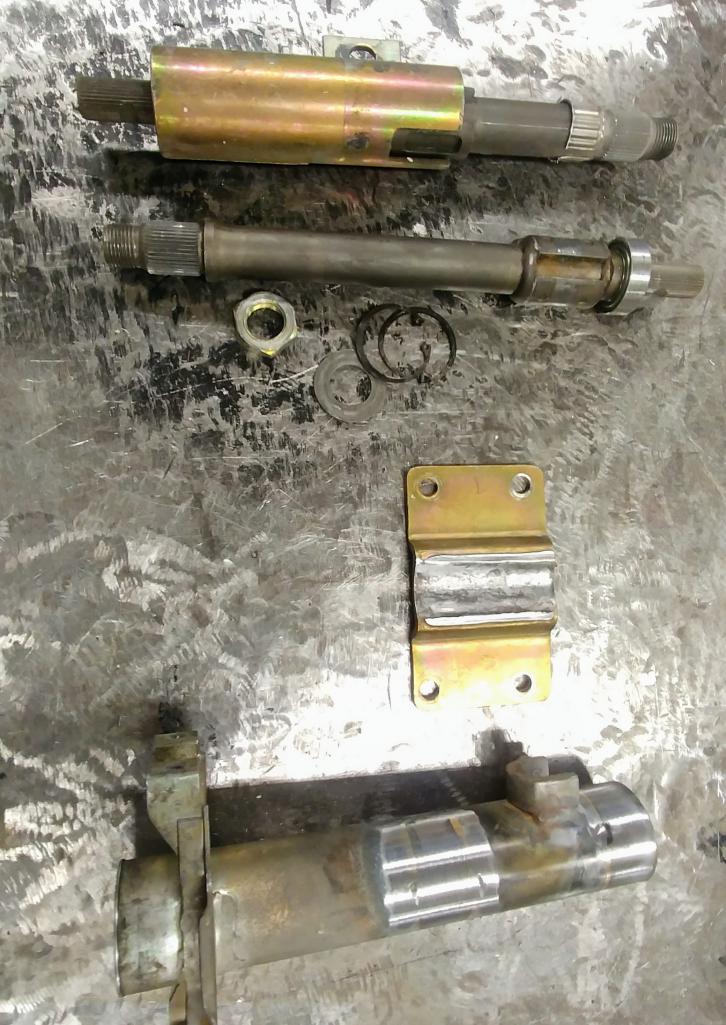
Posted by: Tdskip Jan 22 2019, 11:35 AM
Thanks for the update Ben. Go go go!
Posted by: bbrock Jan 22 2019, 12:49 PM
Steering column done.
Oh THAT's what that is. I didn't want to ask and look stupid so I opted for just looking stupid. So what's the advantage of this one?
Posted by: mb911 Jan 22 2019, 01:17 PM
Steering column done.
Oh THAT's what that is. I didn't want to ask and look stupid so I opted for just looking stupid. So what's the advantage of this one?
@http://www.914world.com/bbs2/index.php?showuser=20845 it allows me to have a left hand ignition like a real 914-6 or 911.
Posted by: mb911 Jan 30 2019, 03:49 PM
Today we are -45/-65 windchill.. I spent a little time masking /priming, raptor liner seam sealing. I got a little crazy with the last part.. Wanted to get raptor liner on the areas that water could sit.. Still like the Monstaliner better for underneath but the raptorliner is a great seam sealer.. 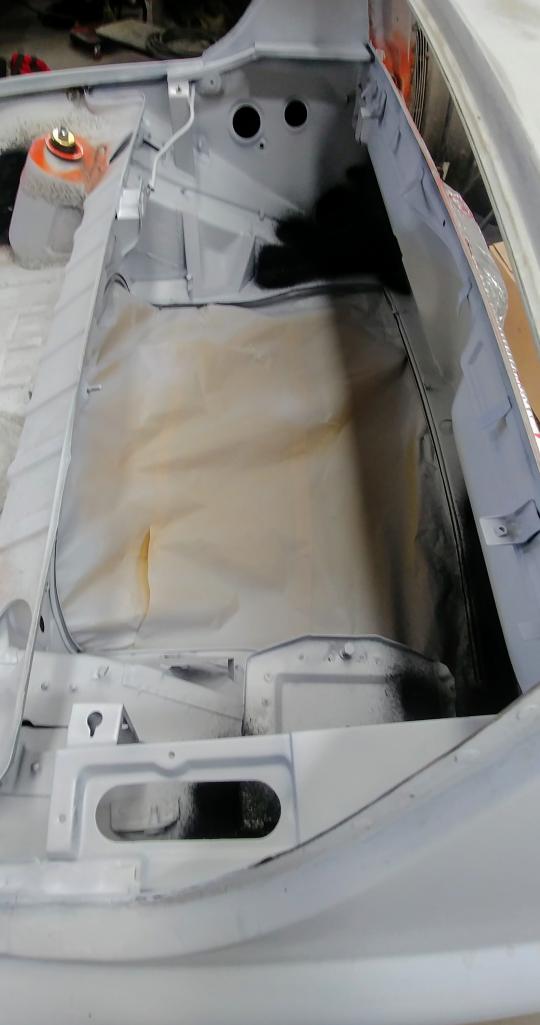
Posted by: preach Jan 30 2019, 04:40 PM
Today we are -45/-65 windchill..
Stay warm/inside Ben. It's going to be a balmy -1/-20 here in NH tonight after 7" of snow.
Build is coming together, I love it!
Posted by: mb911 Jan 30 2019, 05:08 PM
Today we are -45/-65 windchill..
Stay warm/inside Ben. It's going to be a balmy -1/-20 here in NH tonight after 7" of snow.
Build is coming together, I love it!
Dan the good news is that by Saturday we will be averaging 40 degrees for a week for sure..
Posted by: mb911 Jan 31 2019, 08:52 PM
I had to go do something with this weather.. I went out and masked and painted the rear trunk and engine compartment.. Turned out nice.. Getting close to catching up with @http://www.914world.com/bbs2/index.php?showuser=20845 .. 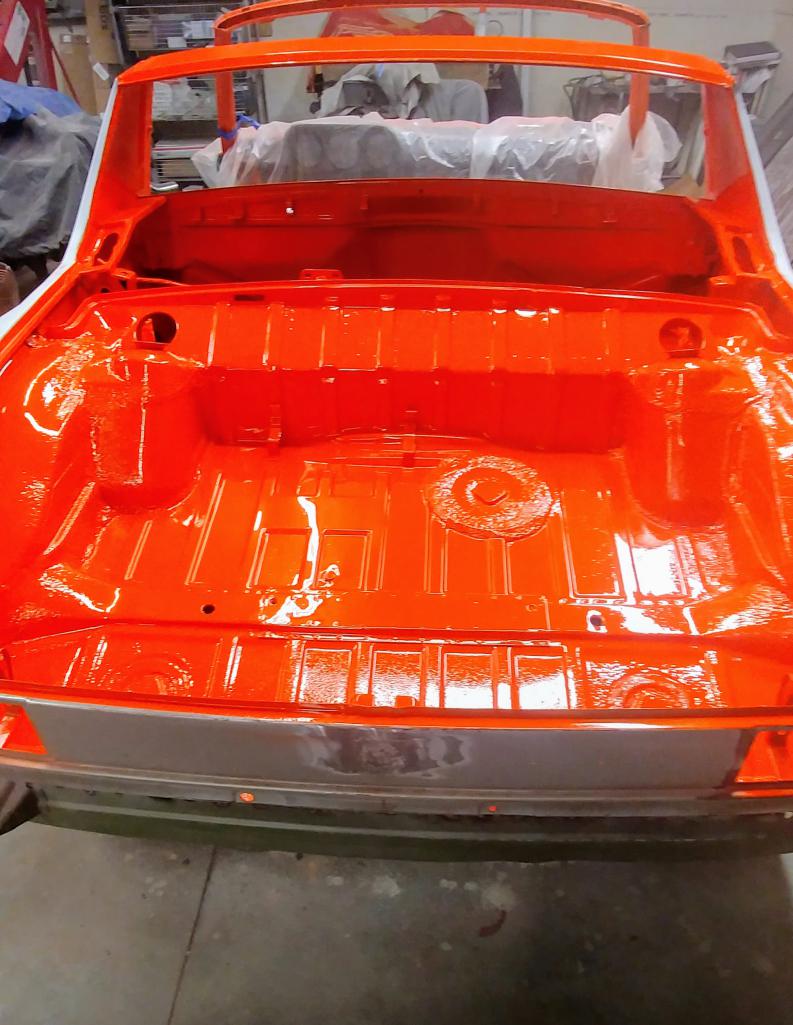
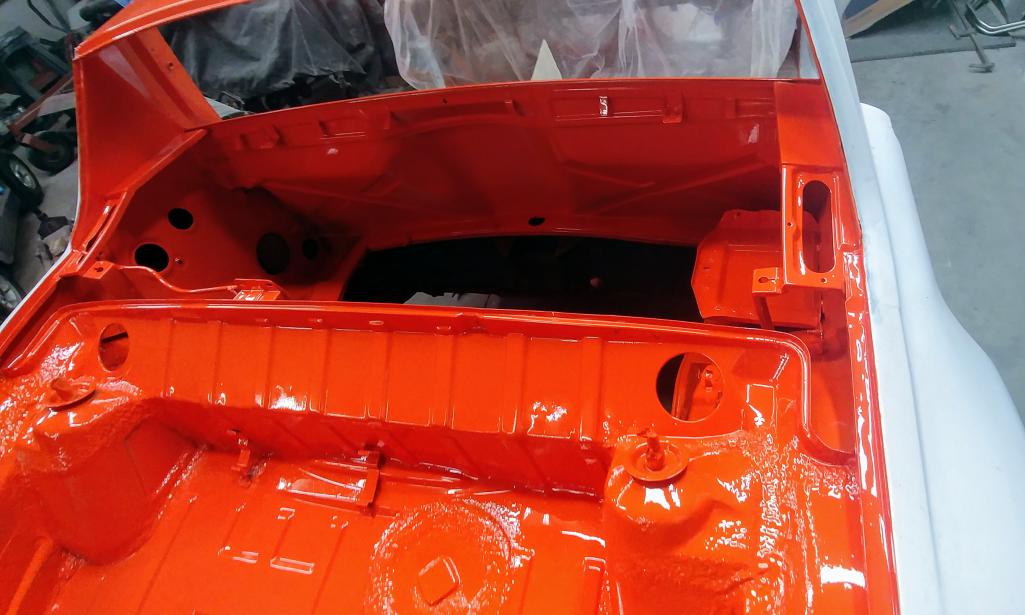
Posted by: whitetwinturbo Jan 31 2019, 09:50 PM
............. that fuel tank is purrrtee!
We got some rough weather here in Newport Beach, CA .... it rained
Posted by: bbrock Jan 31 2019, 11:37 PM
I had to go do something with this weather.. I went out and masked and painted the rear trunk and engine compartment.. Turned out nice.. Getting close to catching up with @http://www.914world.com/bbs2/index.php?showuser=20845 ..
Wow! That looks fantastic. I guess I'd better step up my game
BTW, how come whenever we get -30 temps, it doesn't make the national news?
Okay, when you hit -40, you have my attention. The warm up is coming my friend. Hang in there. Posted by: TravisNeff Feb 1 2019, 07:24 AM
Ya-es!!! Looking good Ben!
Posted by: mb911 Feb 1 2019, 04:19 PM
Thanks guys.. Now to consider what to use for a insulation pad on the firewall..
Posted by: mb911 Feb 2 2019, 06:43 PM
Starting assembly of some parts. Need to start emptying some of the shelves and boxes.. 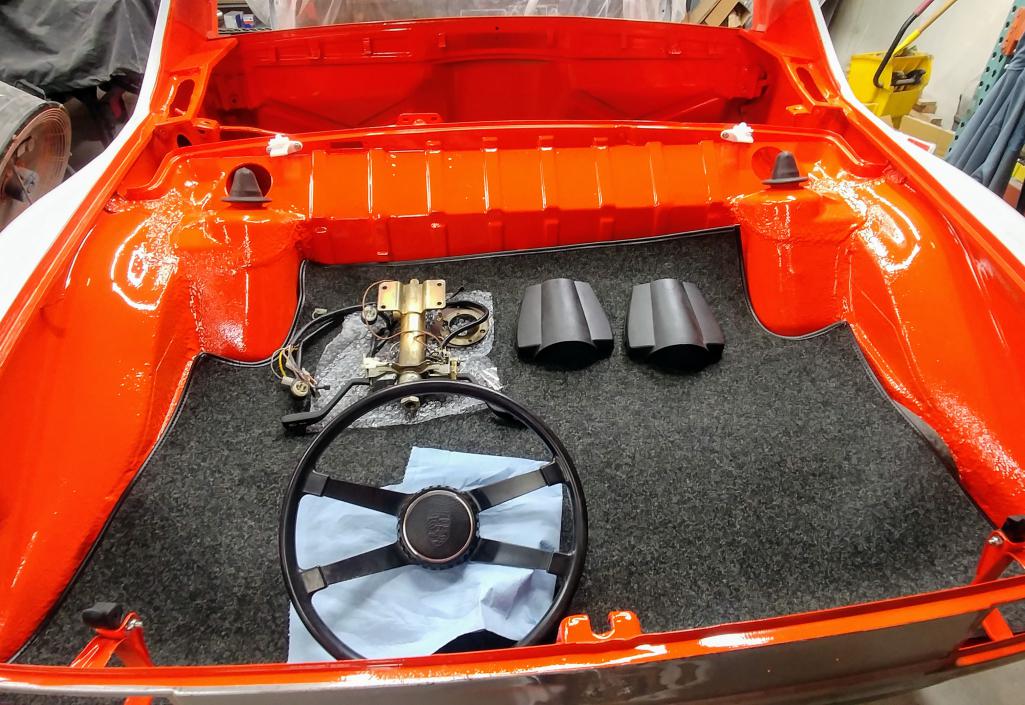
Posted by: horizontally-opposed Feb 2 2019, 07:01 PM
Sweet!!! Congrats…
Posted by: TravisNeff Feb 2 2019, 07:02 PM
Thanks guys.. Now to consider what to use for a insulation pad on the firewall..
Nuttin!
Posted by: Dion Feb 2 2019, 07:59 PM
Starting assembly of some parts. Need to start emptying some of the shelves and boxes..
Posted by: whitetwinturbo Feb 2 2019, 08:19 PM
............wow, that's a cool steering wheel
Posted by: mb911 Feb 2 2019, 09:45 PM
............wow, that's a cool steering wheel
Thanks the steering wheel was a gift from @http://www.914world.com/bbs2/index.php?showuser=10825 .. He is my biggest cheerleader on this project.
Posted by: mb911 Feb 2 2019, 11:04 PM
Thanks guys.. Now to consider what to use for a insulation pad on the firewall..
Nuttin!
Thinking about this material.. What does everyone think? @http://www.914world.com/bbs2/index.php?showuser=20845 what are your thoughts??
https://www.wagaero.com/black-sound-proofing-3-8.html
Posted by: bbrock Feb 2 2019, 11:43 PM
Thanks guys.. Now to consider what to use for a insulation pad on the firewall..
Nuttin!
Thinking about this material.. What does everyone think? @http://www.914world.com/bbs2/index.php?showuser=20845 what are your thoughts??
https://www.wagaero.com/black-sound-proofing-3-8.html
I think if I'd have known about that stuff a couple months ago, it would be on my firewall now. Price is right too. Looks like a nice find.
Your car is looking amazing.
Posted by: mb911 Feb 3 2019, 06:53 AM
Thanks guys.. Now to consider what to use for a insulation pad on the firewall..
Nuttin!
Thinking about this material.. What does everyone think? @http://www.914world.com/bbs2/index.php?showuser=20845 what are your thoughts??
https://www.wagaero.com/black-sound-proofing-3-8.html
I think if I'd have known about that stuff a couple months ago, it would be on my firewall now. Price is right too. Looks like a nice find.
Your car is looking amazing.
Best part is they are 5 minutes up the road.. Gotta decide on thickness now..
Posted by: live free & drive Feb 3 2019, 08:25 AM
You might look into this material:
https://store.secondskinaudio.com/luxury-liner-roll-half-roll-54-x-10-for-45-sqft-mass-loaded-vinyl-mlv/
It's only $0.36 more per sqft. The inital compliant mass material will do far more than just the foam from Wag Aero. Two layers of the second skin material laminated would really do a great job at 3/4" thick.
They indicate it needs to be 2" from a direct heat source.
Although it's heavy at 1lb per sqft - kind of like the original pad which was a mass/absorber sandwich
Posted by: mb911 Feb 3 2019, 12:06 PM
You might look into this material:
https://store.secondskinaudio.com/luxury-liner-roll-half-roll-54-x-10-for-45-sqft-mass-loaded-vinyl-mlv/
It's only $0.36 more per sqft. The inital compliant mass material will do far more than just the foam from Wag Aero. Two layers of the second skin material laminated would really do a great job at 3/4" thick.
They indicate it needs to be 2" from a direct heat source.
Although it's heavy at 1lb per sqft - kind of like the original pad which was a mass/absorber sandwich
That stuff looks to be really expensive. The stuff from wag aero I could do the whole firewall for 20 dollars. Though thinking I might glue this foam over my Noico inside the car to glue the carpet on top of as I am not using a back pad..
Posted by: preach Feb 3 2019, 12:12 PM
............wow, that's a cool steering wheel
Thanks the steering wheel was a gift from @http://www.914world.com/bbs2/index.php?showuser=10825 .. He is my biggest cheerleader on this project.
Very cool. That with a wood outer would be my ideal.
Posted by: mb911 Feb 4 2019, 12:02 PM
............wow, that's a cool steering wheel
Thanks the steering wheel was a gift from @http://www.914world.com/bbs2/index.php?showuser=10825 .. He is my biggest cheerleader on this project.
Very cool. That with a wood outer would be my ideal.
That would be cool as well..
So last night and this morning I was trying to inventory what I have and what I don't. It appears I have put some items in spots I would remember.. Well I don't remember at all.. Not good.. Will keep looking.
Posted by: jfort Feb 4 2019, 02:26 PM
love that color. keep it going!
Posted by: mb911 Feb 4 2019, 02:43 PM
Here are couple pictures.. 1 of the 914rubber 914-6 column housing. I see no issues with it. I remember them saying something needed tweaking but man spot on. Then the 914rubber seal for the upper rear trunk bulkhead. This was bought from someone whom gave up on their project and put the parts up for sale.. I bought it last year and put it on but didn't finish clearly it is short. Ordered a new one this weekend hopefully it is the correct length or my car is too wide lol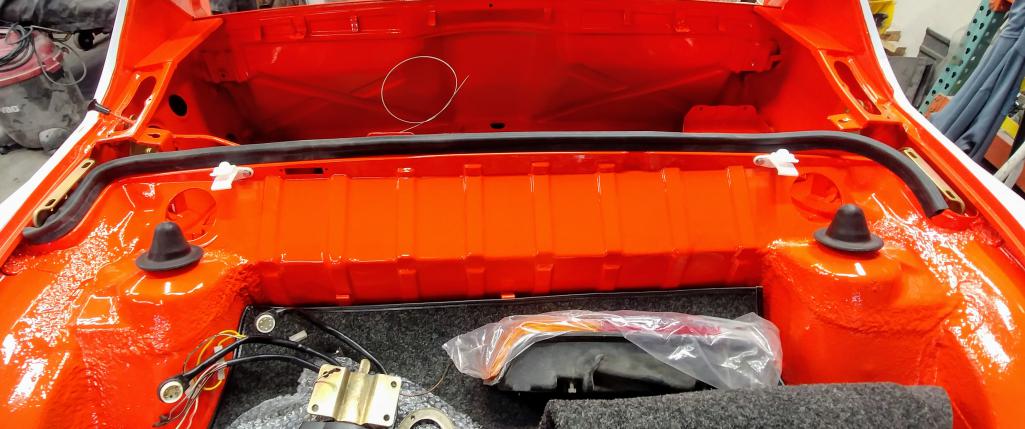
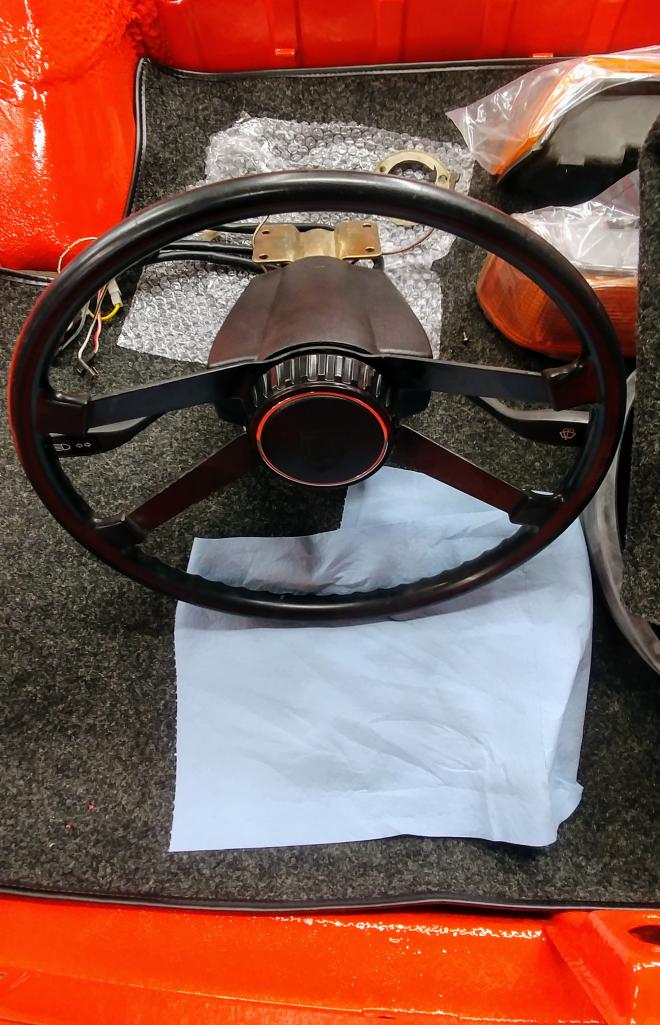
Posted by: whitetwinturbo Feb 4 2019, 09:01 PM
.........and you can fly in to WAG's headquarter [w/skis on your plane]
Posted by: mb911 Feb 5 2019, 05:24 AM
.........and you can fly in to WAG's headquarter [w/skis on your plane]
So quick story years ago I worked there while learning my craft.. We're heard a plane take off and then a loud crash.. The guy ran out of gas on take off and downed it in the trees right next to the building.. He was fine but oops..
Posted by: Freezin 914 Feb 5 2019, 07:03 AM
Your car is looking great! Very inspirational! Keep up the good work!
Posted by: mb911 Feb 7 2019, 04:57 PM
Next pet project. 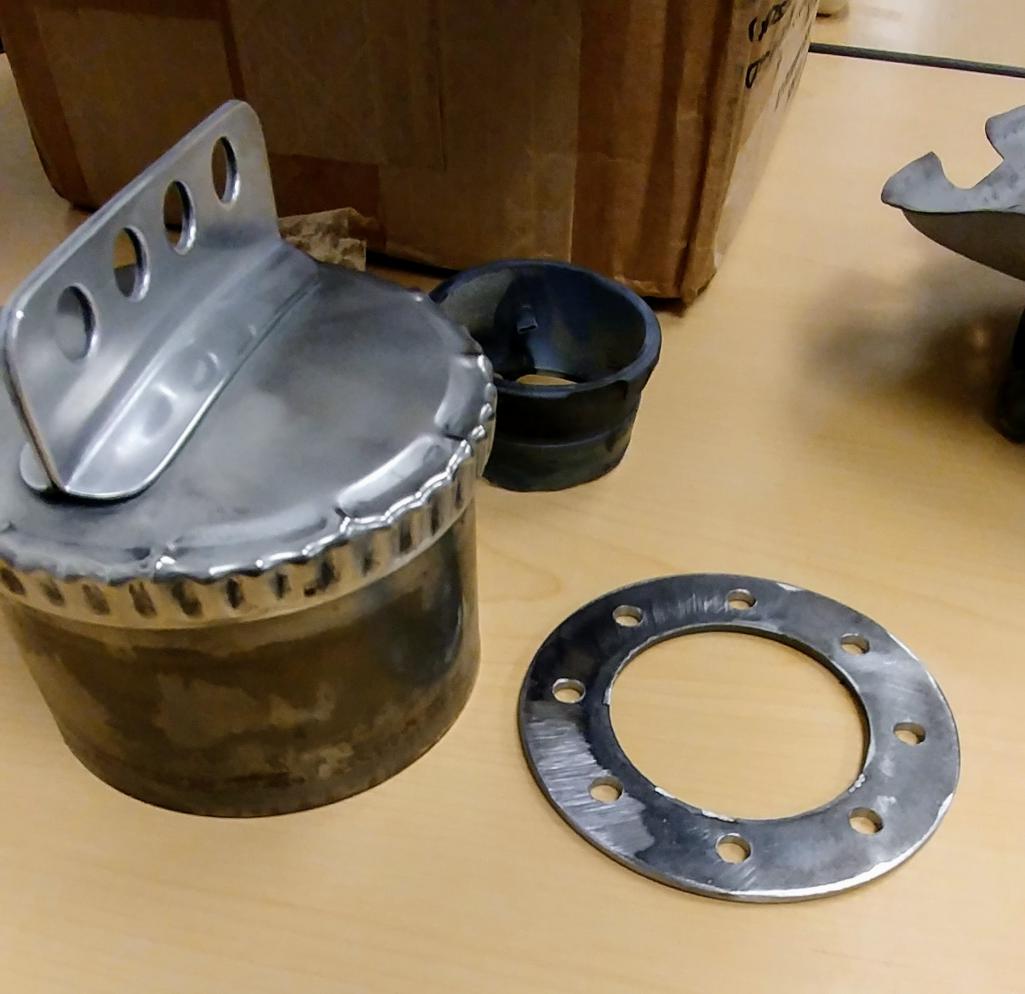
Posted by: mb911 Feb 8 2019, 05:00 PM
Bad picture but you get the idea.. I cut up the factory splash tray(no idea what it really is called ? I saved the drain and then built the rest from some cnc plasma cut washers.. 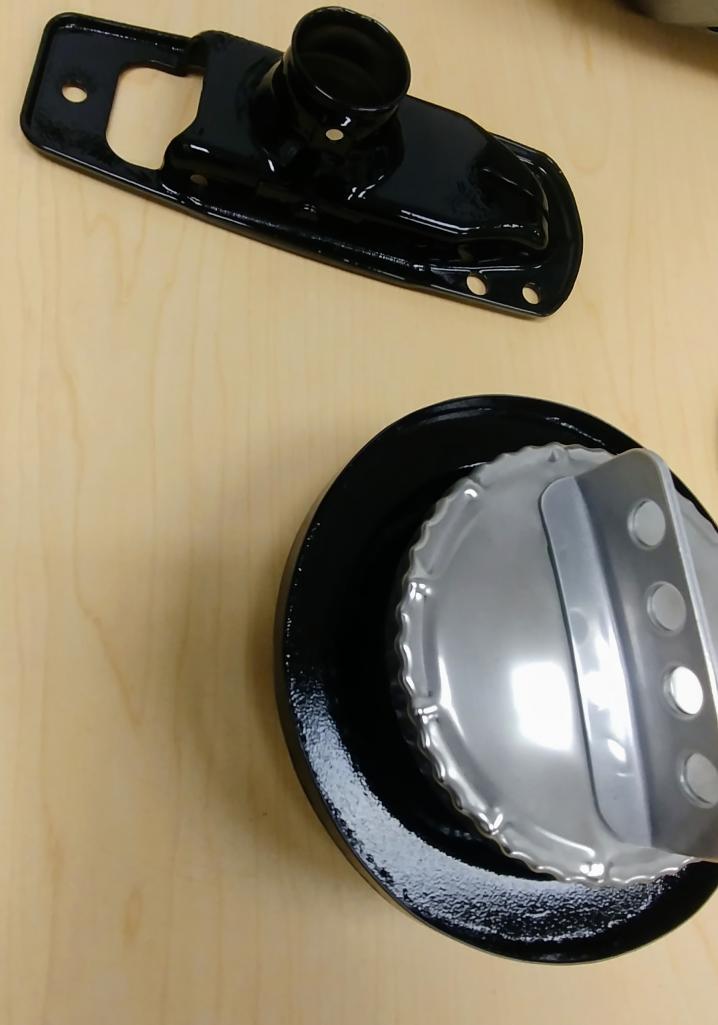
Posted by: TravisNeff Feb 8 2019, 05:51 PM
Very nice!
Posted by: mb911 Feb 8 2019, 09:11 PM
Thanks. Tonight was finishing a bit more on the 944 for my son. I bought him a Perfect unbroken sunroof for his 18 birthday.. It showed up with 2 corners broken. Rather then the scam of usps insurance I decided to fix it. Ugh. 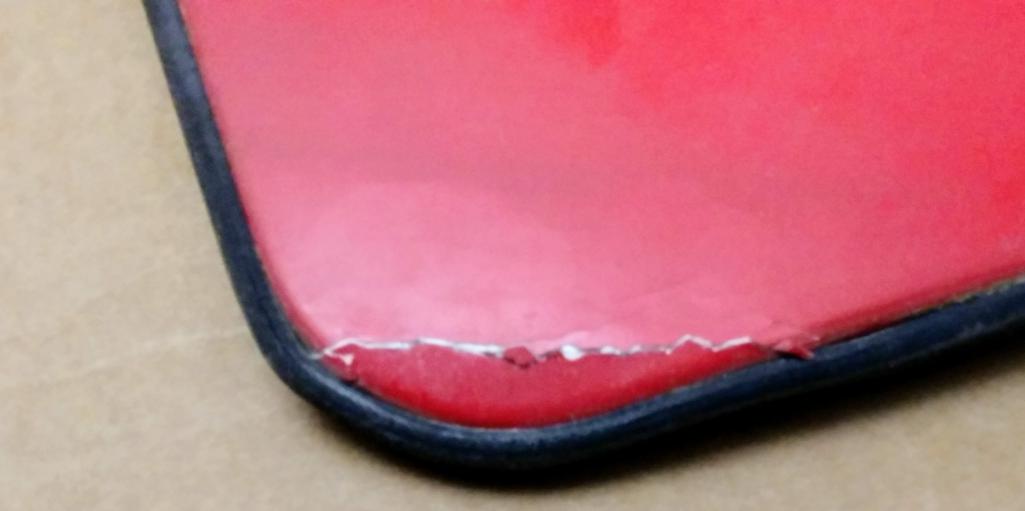
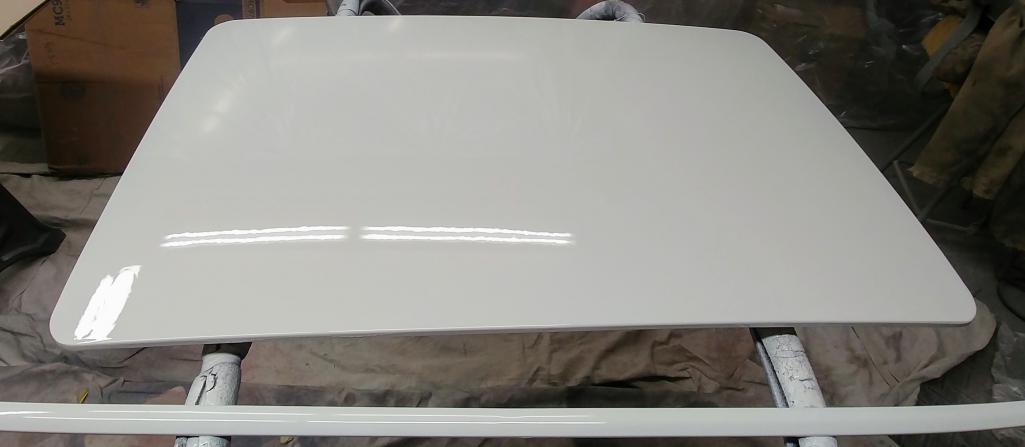
Posted by: mepstein Feb 8 2019, 09:15 PM
I tried to collect on fedex insurance on a rebuilt 911 trans. Fedex broke it into pieces when they smashed the box with a forklift. They denied my claim do to “insufficient packing”.
Posted by: mb911 Feb 8 2019, 09:34 PM
I tried to collect on fedex insurance on a rebuilt 911 trans. Fedex broke it into pieces when they smashed the box with a forklift. They denied my claim do to “insufficient packing”.
Yup USPS is the same way and ups. Your only chance of a claim is when something is lost.
Posted by: mepstein Feb 8 2019, 10:16 PM
I tried to collect on fedex insurance on a rebuilt 911 trans. Fedex broke it into pieces when they smashed the box with a forklift. They denied my claim do to “insufficient packing”.
Yup USPS is the same way and ups. Your only chance of a claim is when something is lost.
It's why I have the buyer make all the shipping arrangements for big stuff like engines, trans and larger out of country purchases. I take a picture of it going on the truck and then I'm done. Otherwise, I'm held responsible for the item making it to them in good condition when it's totally out of my control.
Posted by: whitetwinturbo Feb 9 2019, 11:33 AM
I tried to collect on fedex insurance on a rebuilt 911 trans. Fedex broke it into pieces when they smashed the box with a forklift. They denied my claim do to “insufficient packing”.
Yup USPS is the same way and ups. Your only chance of a claim is when something is lost.
It's why I have the buyer make all the shipping arrangements for big stuff like engines, trans and larger out of country purchases. I take a picture of it going on the truck and then I'm done. Otherwise, I'm held responsible for the item making it to them in good condition when it's totally out of my control.
.............always take a picture of interior packing job when sending [or receiving] to protect yourself

Posted by: mb911 Mar 2 2019, 02:06 PM
Spent a little me time last night.. Put 3/8" foam referenced earlier in this thread on the inside of the firewall then put the perlon on.. It turned out nice. Only spots that need to be sucked in are the seat belt retractor pockets. My son wanted to put the seat so did that.. 1st time since owned the car seat was actually bolted in.. 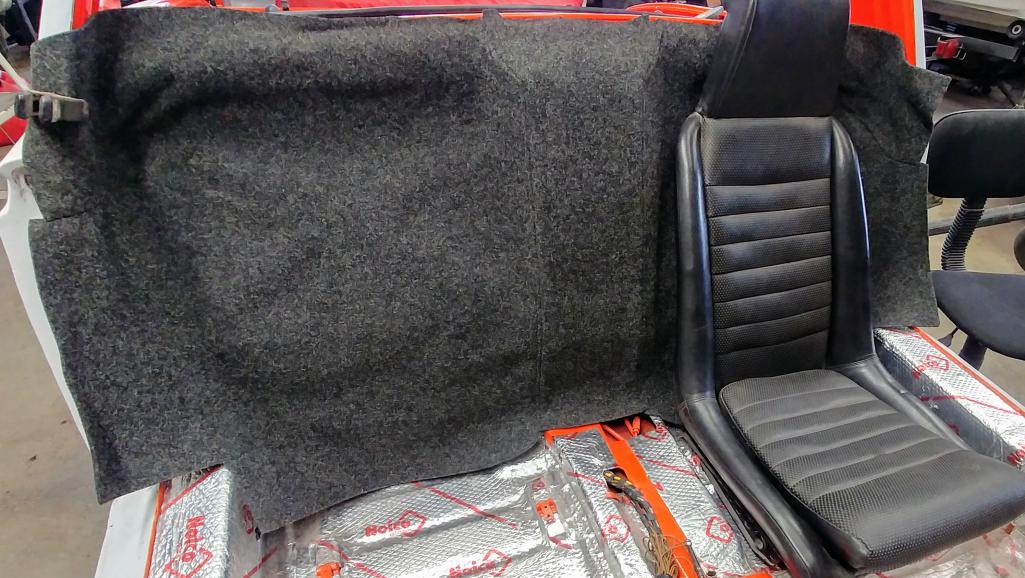
Posted by: mb911 Mar 16 2019, 07:34 PM
Been a while since I posted there is not to much progress.. I bought a lift and preparing to do a customer's 6 conversion so priority s I guess. Allot of stuff jammed into my space.. 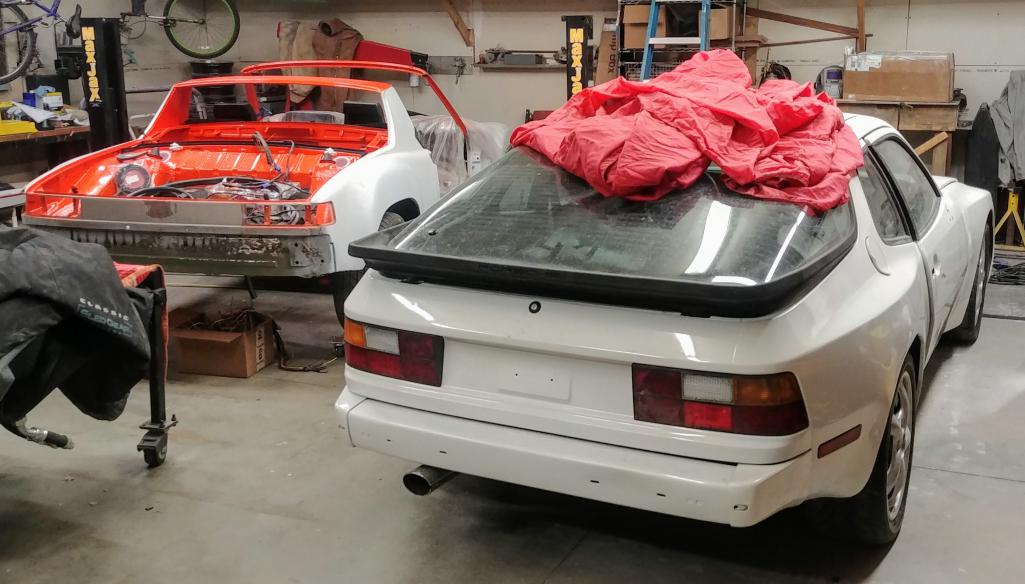
Posted by: mb911 Mar 18 2019, 07:29 PM
And the lift has landed.. It's been 10 years since I moved to this place and sold my last lift when I moved. Very happy with this for the price. Helps that I have 6 inches of concrete everywhere.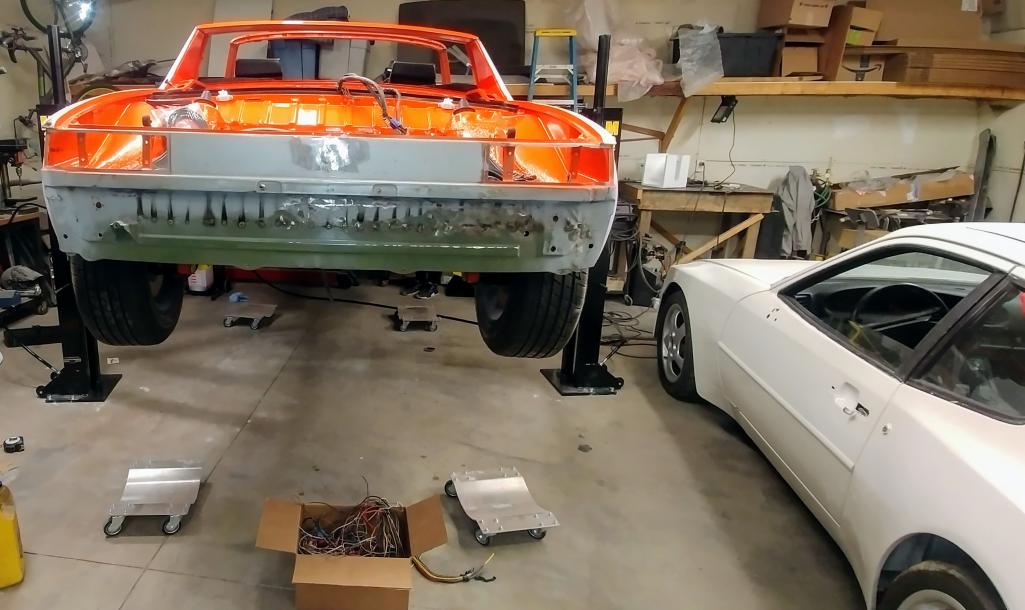
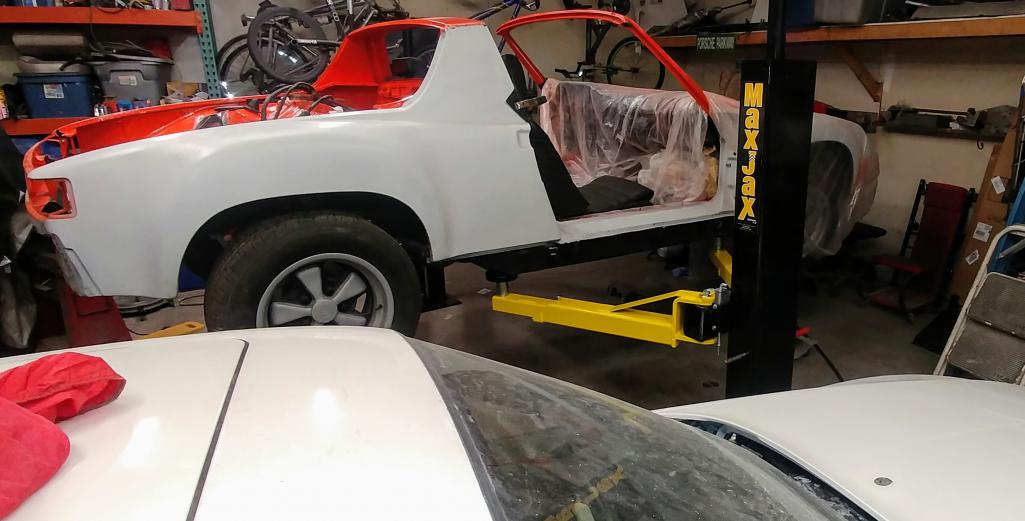
Posted by: whitetwinturbo Mar 18 2019, 10:12 PM
that jack is way sweet
Posted by: mb911 Mar 19 2019, 03:56 PM
Thanks.. I need to add more fluid to raise it all the way up.. It's really pretty nice.
Posted by: mb911 Mar 25 2019, 07:18 PM
Had 20 minutes to spare today and tried to get the wiring harness installed in the engine compartment. Well that didn't actually go as planned. I had it all ready to button up and the end that attaches to the upper engine shelf. It appears its the wrong part from 914 rubber. @http://www.914world.com/bbs2/index.php?showuser=3348 was there some incorrect ones out there?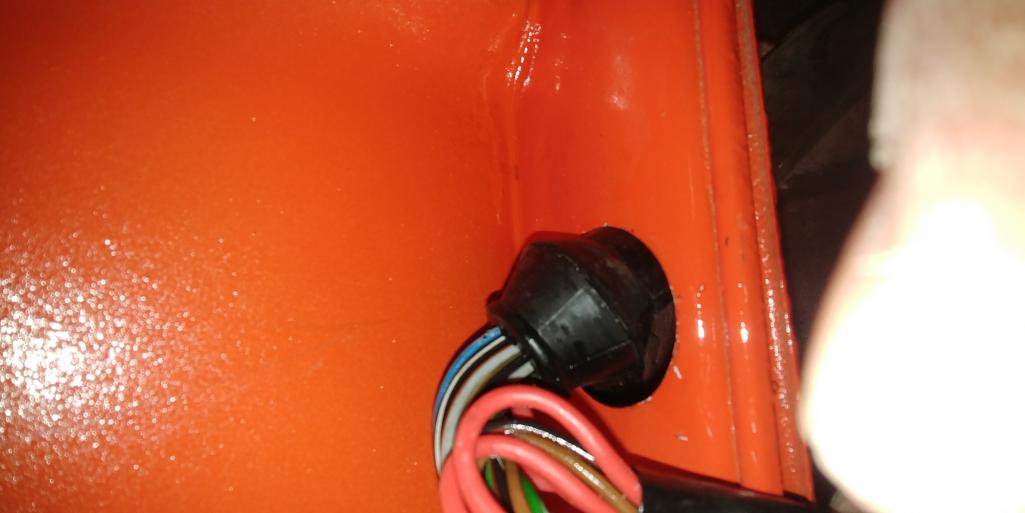
Posted by: worn Mar 25 2019, 07:40 PM
Had 20 minutes to spare today and tried to get the wiring harness installed in the engine compartment. Well that didn't actually go as planned. I had it all ready to button up and the end that attaches to the upper engine shelf. It appears its the wrong part from 914 rubber. @http://www.914world.com/bbs2/index.php?showuser=3348 was there some incorrect ones out there?
Which part is that?
Posted by: mb911 Mar 25 2019, 07:42 PM
Had 20 minutes to spare today and tried to get the wiring harness installed in the engine compartment. Well that didn't actually go as planned. I had it all ready to button up and the end that attaches to the upper engine shelf. It appears its the wrong part from 914 rubber. @http://www.914world.com/bbs2/index.php?showuser=3348 was there some incorrect ones out there?
Which part is that?
@http://www.914world.com/bbs2/index.php?showuser=13152 its the wiring snorkel.
Posted by: bbrock Mar 25 2019, 07:51 PM
That's odd. Mine fit just a tad loose but it clipped into that hole okay. Is that the original shelf piece? I had to fold mine back on itself to shorten a bit to accommodate the shorter length for a /4, but other than that, it worked.
Posted by: mb911 Mar 25 2019, 07:54 PM
That's odd. Mine fit just a tad loose but it clipped into that hole okay. Is that the original shelf piece? I had to fold mine back on itself to shorten a bit to accommodate the shorter length for a /4, but other than that, it worked.
@http://www.914world.com/bbs2/index.php?showuser=20845 yup it is original.. Strange to say the least.
Posted by: Mikey914 Mar 26 2019, 07:07 AM
We found out after that there were 2 sizes, the late with is the majority of the cars is the one we had made. I do have an idea for a solution I'll PM you.
Mark
Posted by: Mikey914 Mar 26 2019, 09:32 AM
This should do it
Attached thumbnail(s)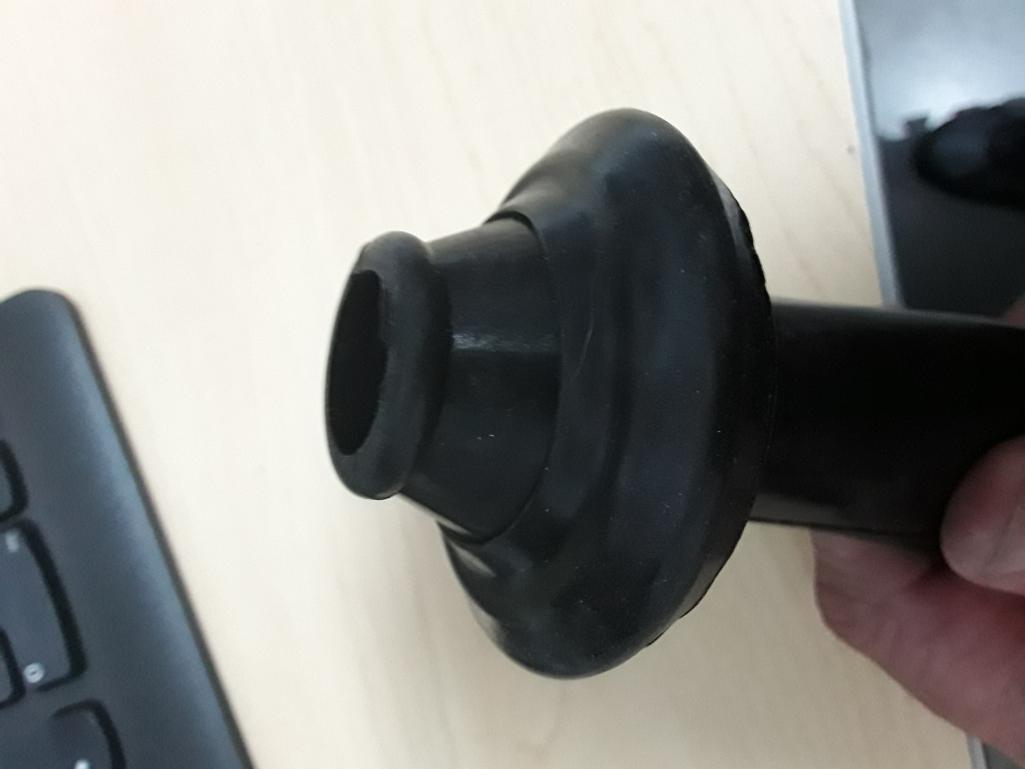
Posted by: mb911 Mar 26 2019, 01:54 PM
That would work.. I just measured mine and it is 1.710" @http://www.914world.com/bbs2/index.php?showuser=3348 also looked and it appears I tore my snorkel just as I finished.. Darn thing is kicking my ass.
Posted by: mepstein Mar 26 2019, 01:57 PM
That would work.. I just measured mine and it is 1.710" @http://www.914world.com/bbs2/index.php?showuser=3348 also looked and it appears I tore my snorkel just as I finished.. Darn thing is kicking my ass.
That sounds painful.
Posted by: mb911 Mar 26 2019, 02:34 PM
That would work.. I just measured mine and it is 1.710" @http://www.914world.com/bbs2/index.php?showuser=3348 also looked and it appears I tore my snorkel just as I finished.. Darn thing is kicking my ass.
That sounds painful.
Just placed an order for a new snorkel and the solution that Mark noted. Frustrated a bit..
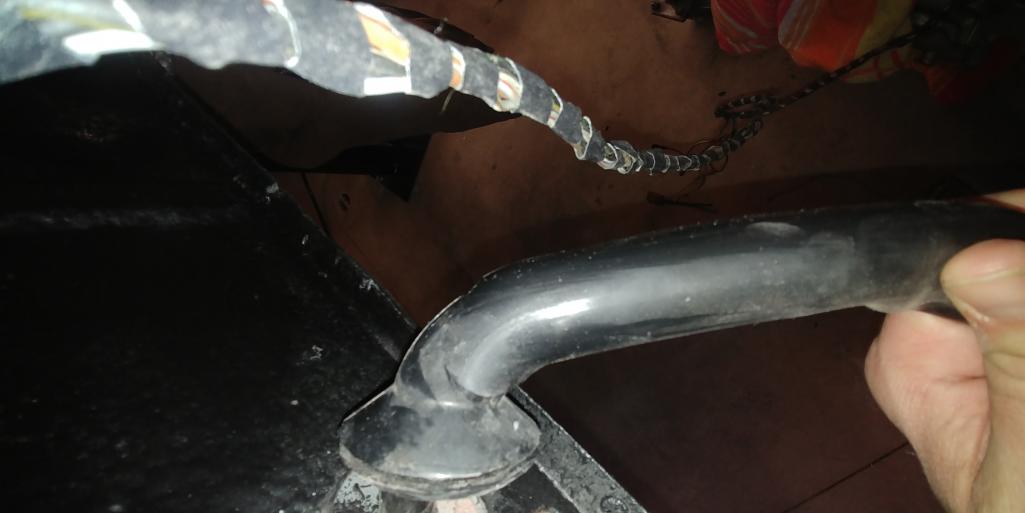
Posted by: worn Mar 26 2019, 05:12 PM
That would work.. I just measured mine and it is 1.710" @http://www.914world.com/bbs2/index.php?showuser=3348 also looked and it appears I tore my snorkel just as I finished.. Darn thing is kicking my ass.
That sounds painful.
Just placed an order for a new snorkel and the solution that Mark noted. Frustrated a bit..
Mine never fit either. But I had cut the original to rebuild the harness. Also I had added the six engine mount, so I blamed myself. The conversion was a ‘72. Seemed like the rubber was better but the snorkel too short.
Posted by: worn Mar 26 2019, 05:15 PM
Spent a little me time last night.. Put 3/8" foam referenced earlier in this thread on the inside of the firewall then put the perlon on.. It turned out nice. Only spots that need to be sucked in are the seat belt retractor pockets. My son wanted to put the seat so did that.. 1st time since owned the car seat was actually bolted in..
I like the back pad upholstery. Ice is almost gone on lake mendota so time to be driving
Posted by: mb911 Mar 26 2019, 05:34 PM
I am more disappointed that it tore and wasted another $50.. Crap..
Posted by: mb911 Mar 26 2019, 07:17 PM
Spent a couple hours working on it tonight. Putting the engine shelf seals in.. Wow so much fun is all I can say..
Posted by: mb911 Mar 27 2019, 06:15 PM
Well spent an hour finishing the engine seal install while I guided my son on Upholstery for the 944. Got the seals in and cut the old snorkel off waiting for the new one to come in. 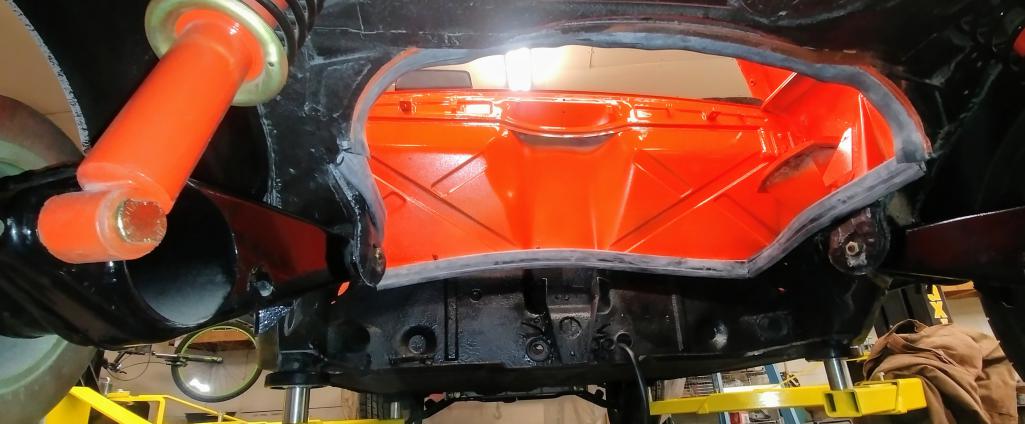
Posted by: mb911 Mar 30 2019, 08:14 PM
Made some progress.
Stainless brake lines from PMB in, braided stainless lines in, 914rubber m/c in Thanks to @http://www.914world.com/bbs2/index.php?showuser=10825 , stainless fuel lines in, wevo front engine mount in, wire harness in with the second 914 rubber snorkel that came in the mail today. Still not happy with the fit and not sure what I am going to do yet. Also note that I need to tape the wire harness yet with the gaffer tape.
Any thoughts on the snorkel fittment. ??? Anyone? @http://www.914world.com/bbs2/index.php?showuser=20845 ?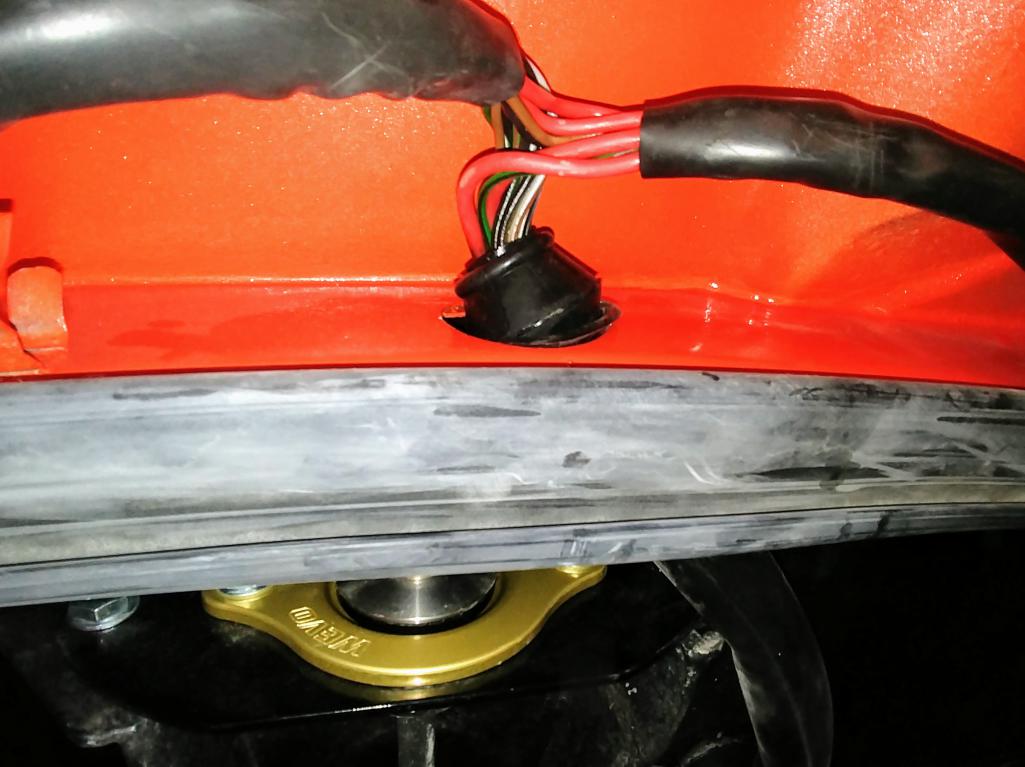
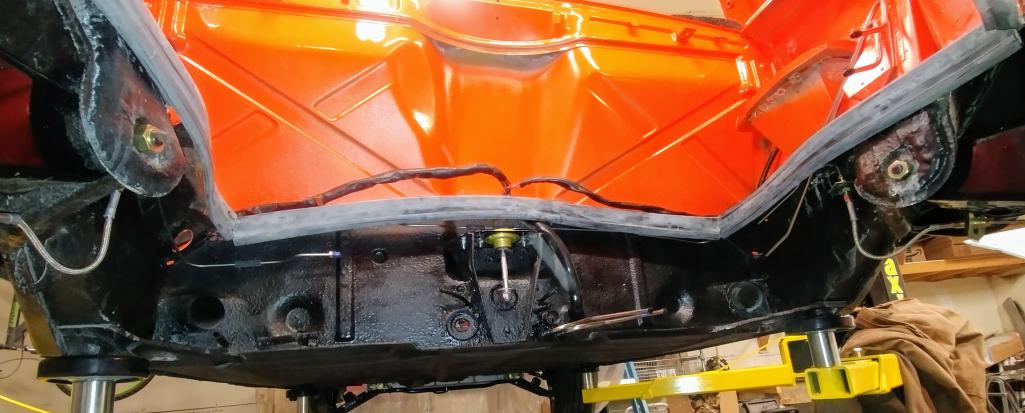
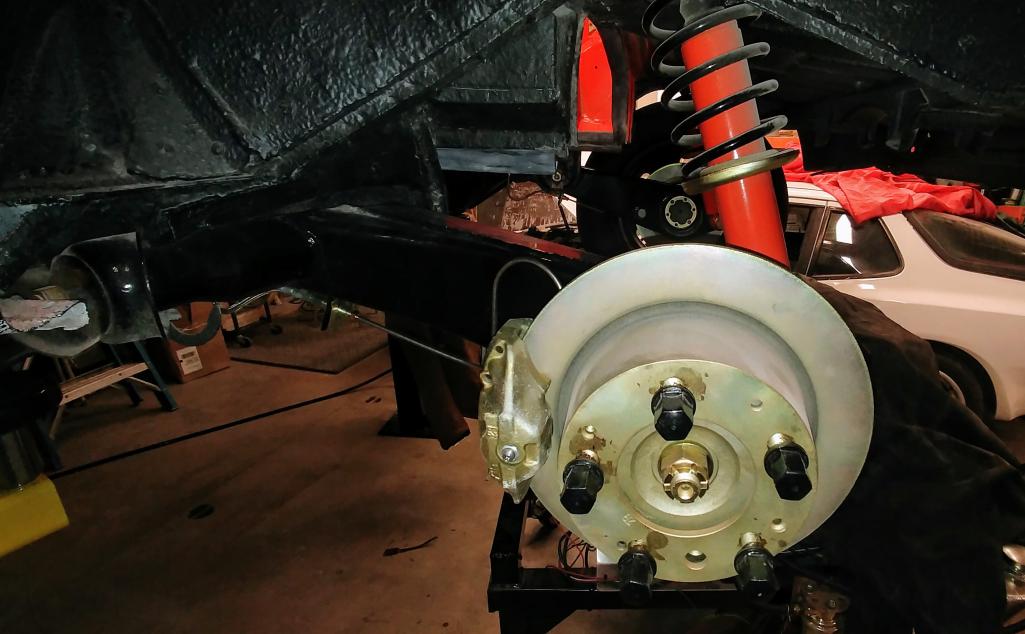
Posted by: bbrock Mar 30 2019, 08:34 PM
[quote name='mb911' date='Mar 30 2019, 08:14 PM' post='2701318']
Any thoughts on the snorkel fittment. ??? Anyone? @http://www.914world.com/bbs2/index.php?showuser=20845 ?
Am I seeing it right that the rubber adapter piece Mark made is separating from the snorkel? If so, what do you suppose would happen if you glued that piece on. Think it would have enough bite in the hole to hold everything in place? Another thought I had was making or buying a metal adapter piece to reduce the hole diameter. Something like like electrical reducing washers. Might even be able to find one the right size already made?
https://www.homedepot.com/s/reducing%2520washer?NCNI-5
Posted by: mb911 Mar 30 2019, 08:51 PM
I might cnc plasma cut something but just stinks that the snorkel is for a 31mm hole and the hole on the chassis is 34mm .
Posted by: bbrock Mar 30 2019, 11:11 PM
I might cnc plasma cut something but just stinks that the snorkel is for a 31mm hole and the hole on the chassis is 34mm .
I can't figure out why mine fits okay. Like I said, it was a little loose in the hole, but once I got it positioned, it seems pretty solid. Other than the snorkel, you're car is looking fantastic.
Posted by: mb911 Mar 31 2019, 11:29 AM
I might cnc plasma cut something but just stinks that the snorkel is for a 31mm hole and the hole on the chassis is 34mm .
I can't figure out why mine fits okay. Like I said, it was a little loose in the hole, but once I got it positioned, it seems pretty solid. Other than the snorkel, you're car is looking fantastic.
I am not sure either. I think because it fits around a stock 6 bulkhead mount so it angles it?
Posted by: Dave_Darling Mar 31 2019, 11:37 AM
I believe the real answer is that there were different size holes through the years, and the 914rubber guys didn't realize that when they first made this product...
--DD
Posted by: mepstein Mar 31 2019, 11:42 AM
I would just start wrapping the end of the rubber snorkel with black electrical tape until it fits the hole.
Posted by: mb911 Apr 7 2019, 12:18 PM
Well not much this last week or this week. Made an order with auto Atlanta (1st time in 20 years) and the transaction went flawlessly . @http://www.914world.com/bbs2/index.php?showuser=10825 sent me some of the little brass fittings etc to make the brake line connections (thanks Mark) gonna be in Cleveland all week this week certifying for SMAW.. So next weekend should be some more progress.. Other priorities like son's 944 , house work and other son's baseball will be demanding some time from me along with for some reason there is a big demand on oil tanks right now so busy. 
Posted by: mb911 Apr 7 2019, 12:21 PM
Hopefully the mulch gets done while I am gone
And a nice shot of a d1.1 cert practice. I haven't done one in 15 years as I primarly do TIG. 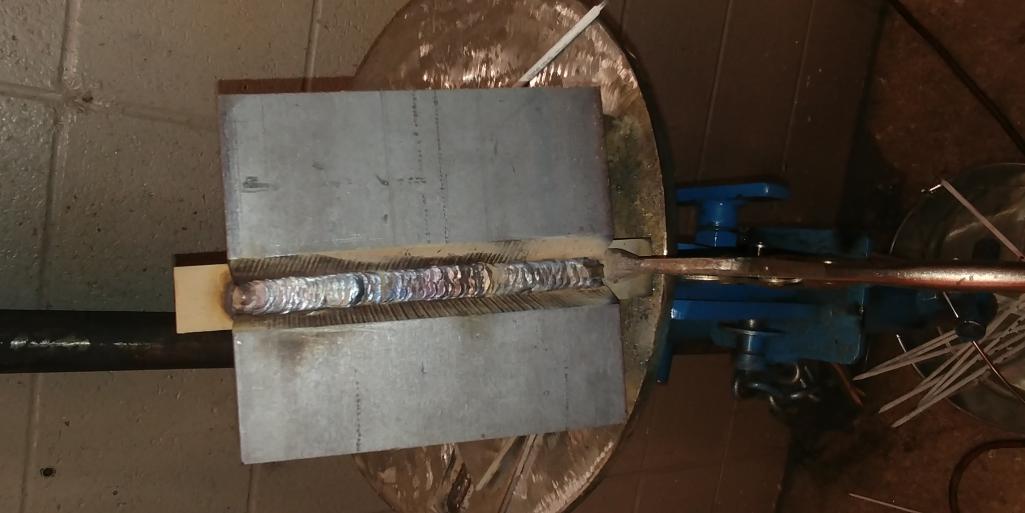
Posted by: mepstein Apr 7 2019, 12:25 PM
Reminds me I have to order up a couple yards of mulch. I've been a slacker living in the appt and house needs lots of love. Send some of your boys my way when they are done at your house.
Posted by: mb911 Apr 21 2019, 07:34 PM
Well believe it or not I have been making progress on the car but little projects like brake lines take allot of time. Today completed my test steppes 1.5-1.625 headers.. If testing goes well I will build heat exchangers around them..
Just mounted them on the run stand and my newly redone heads the one that didn't get time certed pulled the threads .. One more thing to fix.
Plan to do some rough tuning this week and likely start to prepare for the engine install. 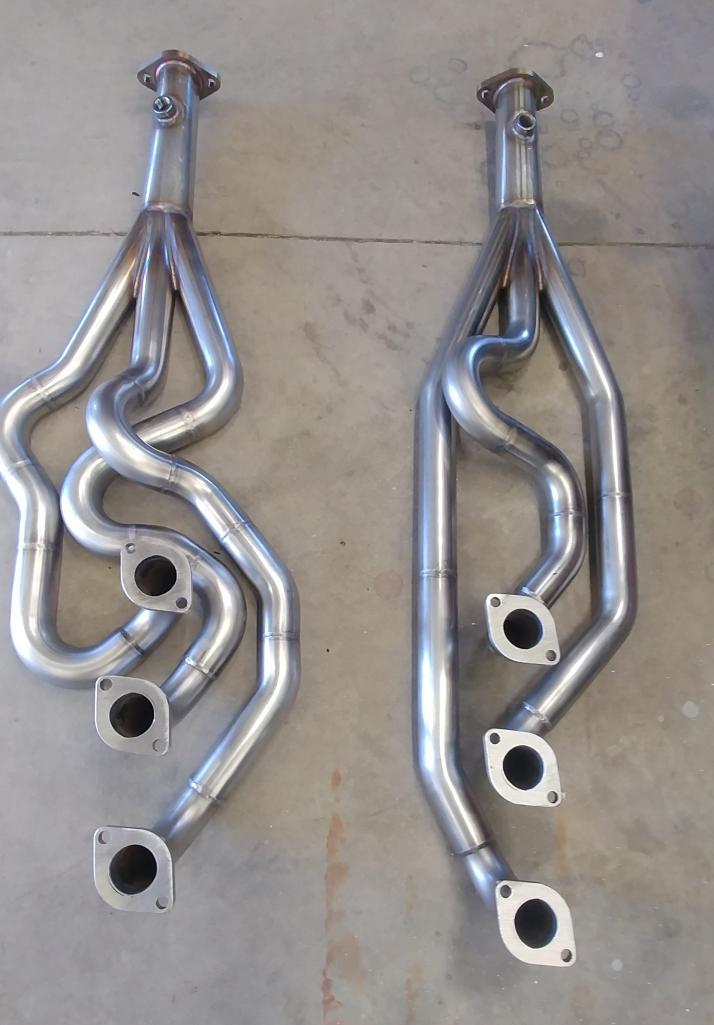
Posted by: mepstein Apr 21 2019, 09:46 PM
What do stepped headers do over regular ones.
Posted by: mb911 Apr 22 2019, 04:20 AM
What do stepped headers do over regular ones.
Improve power in all rpm ranges.
Posted by: gms Apr 22 2019, 07:29 PM
PURDY!
Posted by: mb911 Apr 28 2019, 07:37 PM
Spent an hour getting some left hand ignition love started. 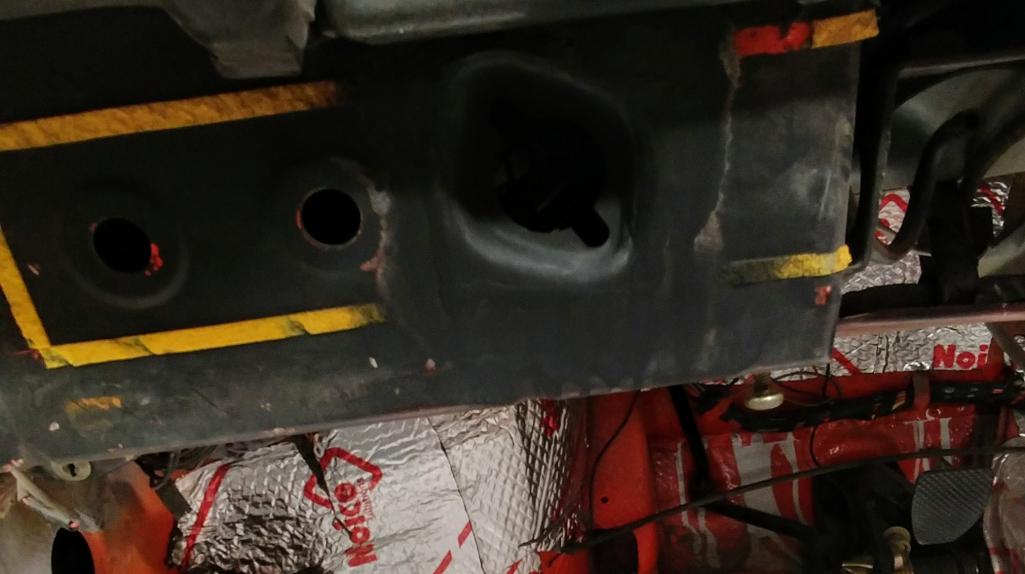
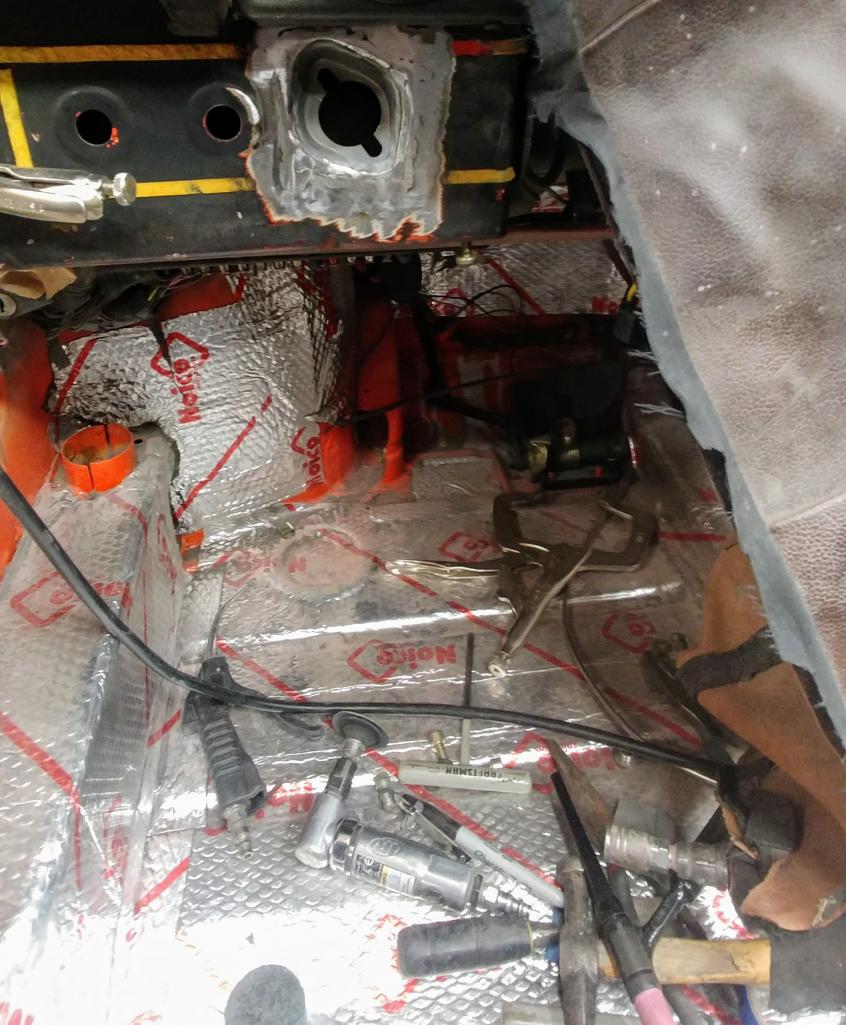
Posted by: whitetwinturbo Apr 29 2019, 10:13 AM
PURDY!
..............eye candy
Posted by: barefoot Apr 29 2019, 10:30 AM
What do stepped headers do over regular ones.
If the exhaust ports in the heads are 1.5", don't want sudden expansion right there.
Not sure what heads have what size ports ???
Posted by: mb911 May 3 2019, 08:40 AM
Trying to wrap up a few projects so I can mount parts as I am running out of space with my project, James conversion and the 944 .. Doors are likely a place holder until I find nicer ones at some point.. They are going to be straight. 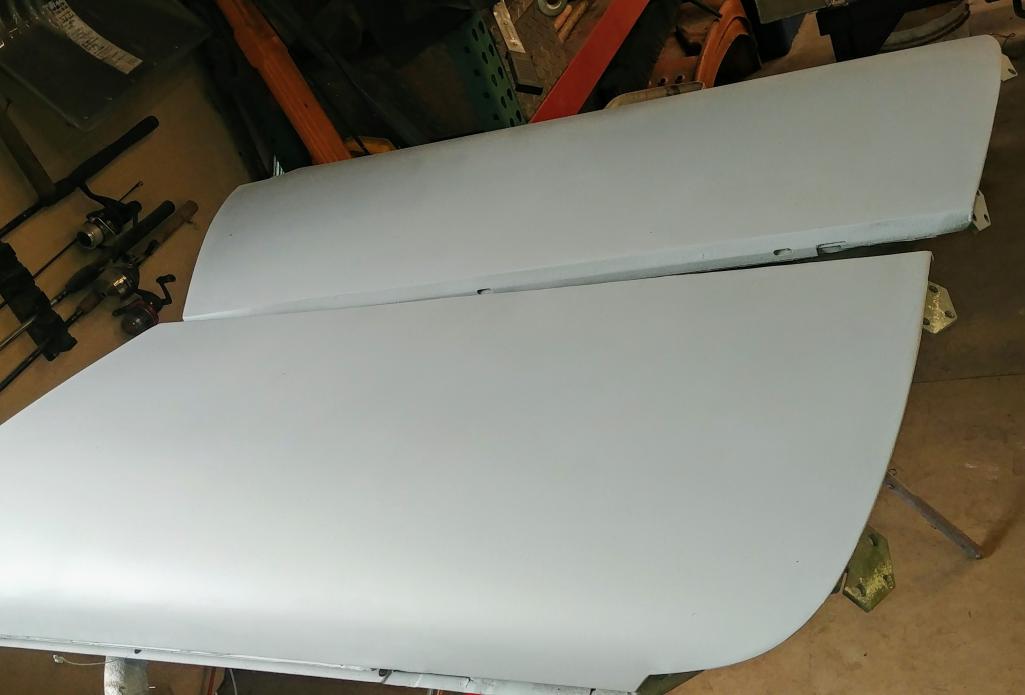
Posted by: mb911 May 8 2019, 06:52 AM
Some icing on the low spots on the door and time to block and reprime.. Steering wheel back from Dallas. Looks very nice. 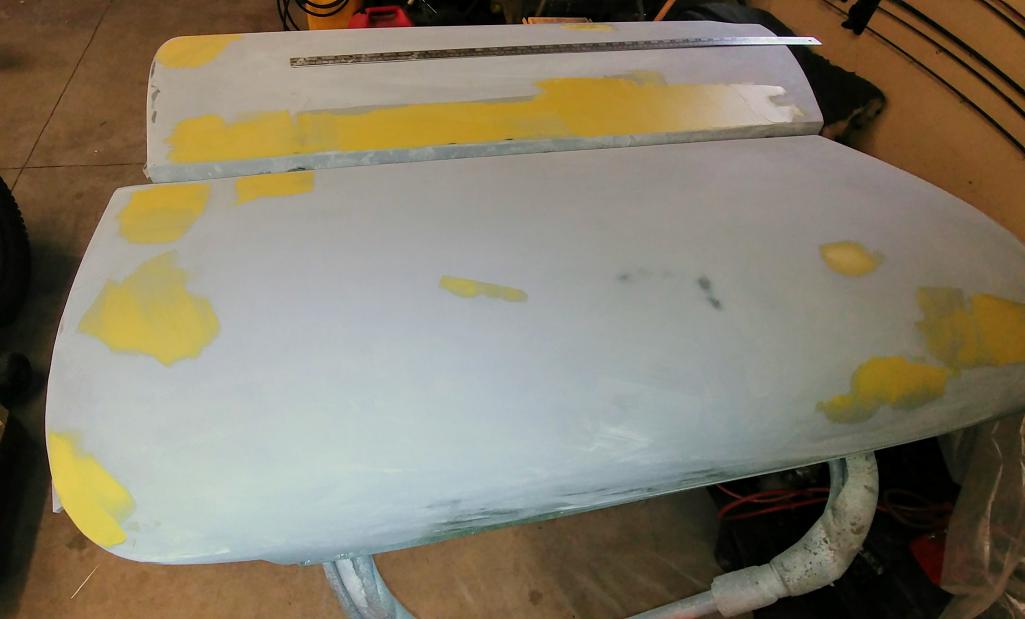
Posted by: mb911 May 11 2019, 08:29 PM
Place holder doors until I find some mint rust free and straight doors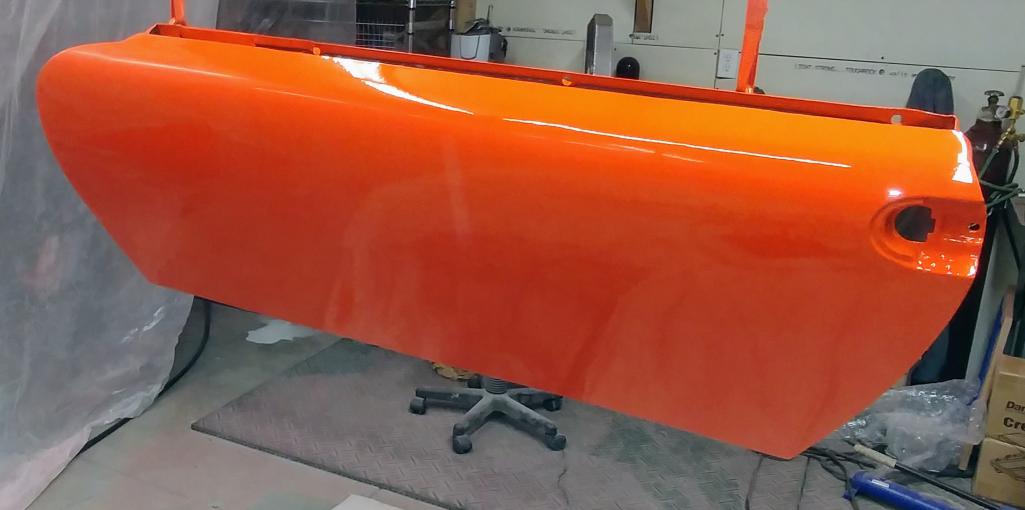
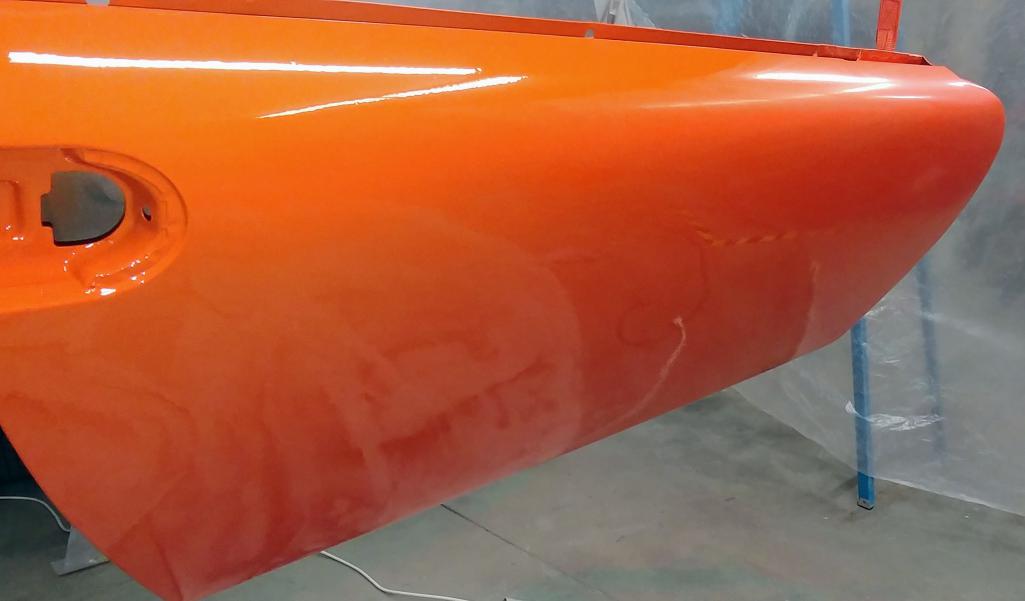
Posted by: preach May 11 2019, 08:46 PM
Coming along.
Thank steering wheel is pretty.
Posted by: mb911 May 12 2019, 04:21 PM
Its just one more piece. It was an experiment. I wanted to Jam the doors and start assembly . I will likely respray when I paint the entire car. Just a reminder of what they looked like.
Posted by: mb911 May 12 2019, 06:50 PM
Put them on so now final fitting front and back. Please keep in mind the exterior will be resprayed when I paint the whole car.. But the doors are pretty straight.. This is for inspiration/motivation for me.. 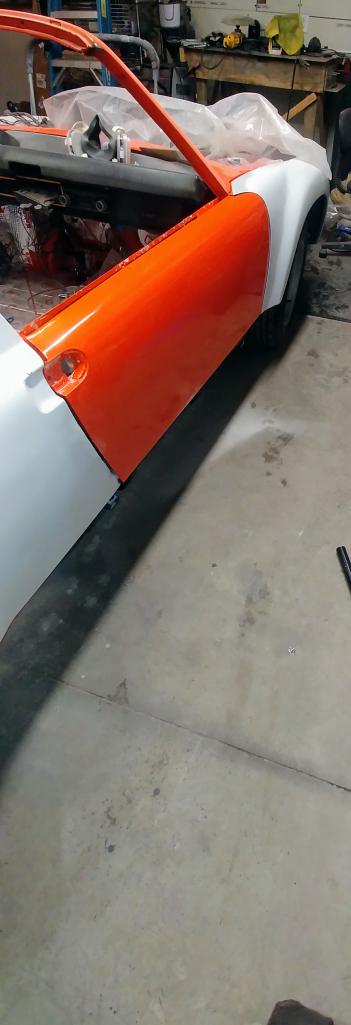
Posted by: mb911 May 20 2019, 03:15 PM
Today I ordered my throttle and clutch cables from Terry cables(hope they are good quality, final fit the stainless fuel lines in the tunnel with all the grommets, put a gallon of diesel fuel and a touch of oil in the tank to do a final clean and preservation before installation(final).
Posted by: mb911 May 29 2019, 12:36 PM
Front oil cooler installed along with the spare. 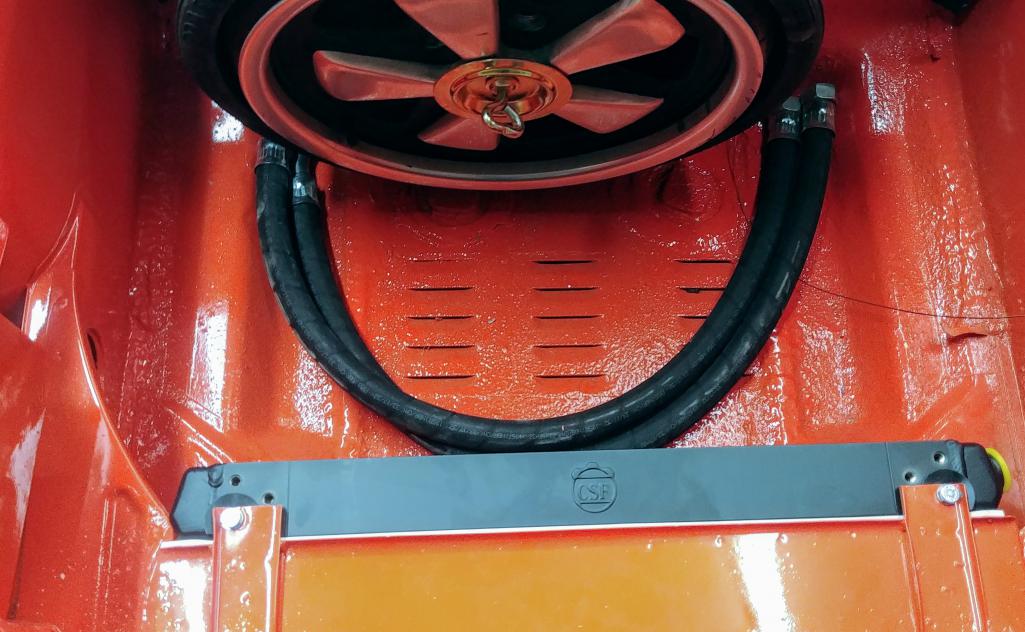
Posted by: whitetwinturbo May 30 2019, 08:55 PM
.........go, Go, GO
Posted by: Cairo94507 May 31 2019, 07:20 AM
It is nice to see them with parts being installed. Also, gets stuff off the shelves, floor, etc.
Posted by: mb911 May 31 2019, 08:52 PM
Trying to fit the tank in properly so I can cut the hole in the hood.. Notice my hinges from @http://www.914world.com/bbs2/index.php?showuser=16669 .. 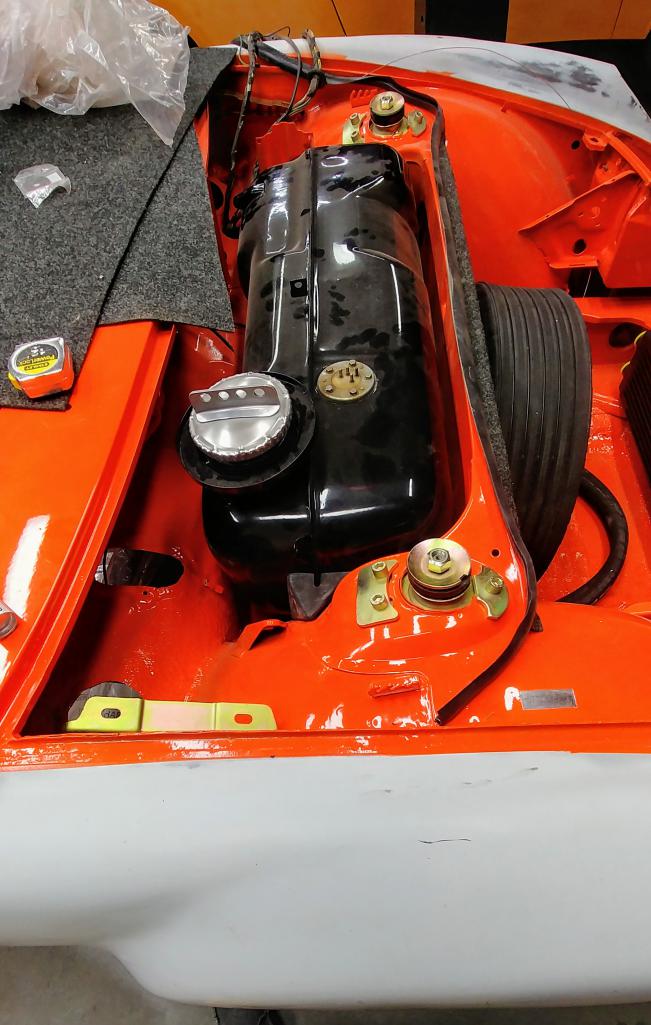
Posted by: bbrock May 31 2019, 11:09 PM
Man that is looking good!
Posted by: defianty Jun 1 2019, 02:27 AM
Very nice Ben!
Posted by: mb911 Jun 21 2019, 07:41 PM
Worked on the trunk. Cut out the infected edge of the lip and rebuilt it.. I have to take a picture of that yet.. Then I cut out the previously lap joint braze weld in the center of the trunk.. Finished pictures to follow.. 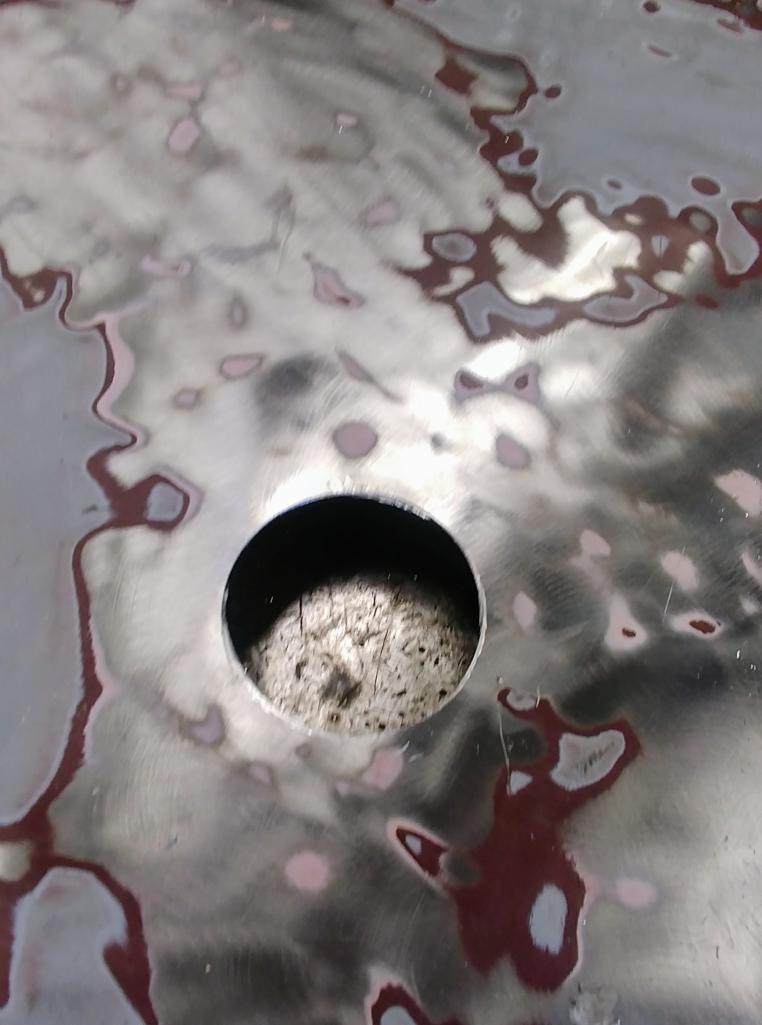
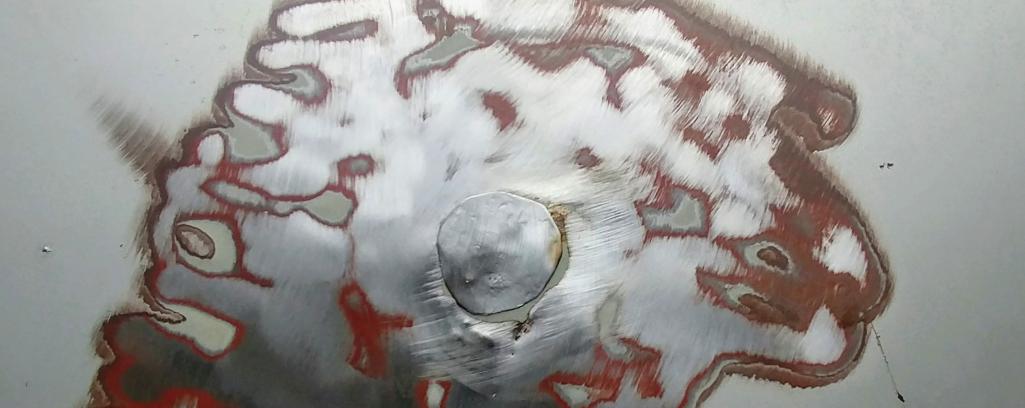
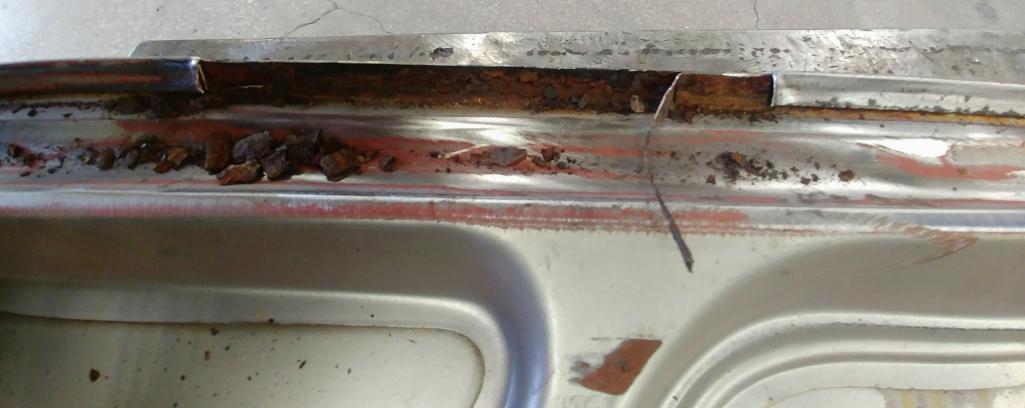
Posted by: bbrock Jun 21 2019, 11:49 PM
That repair separates the men from the boys. I am not a man. I was too chicken to attempt that and bought a rust free lid. Eager to watch the pro tackle this one.
Posted by: sixnotfour Jun 22 2019, 06:20 AM

Posted by: mb911 Jun 27 2019, 06:00 PM
Here is progress though only a bit of time spent on it. Spending all my free time on James conversion. 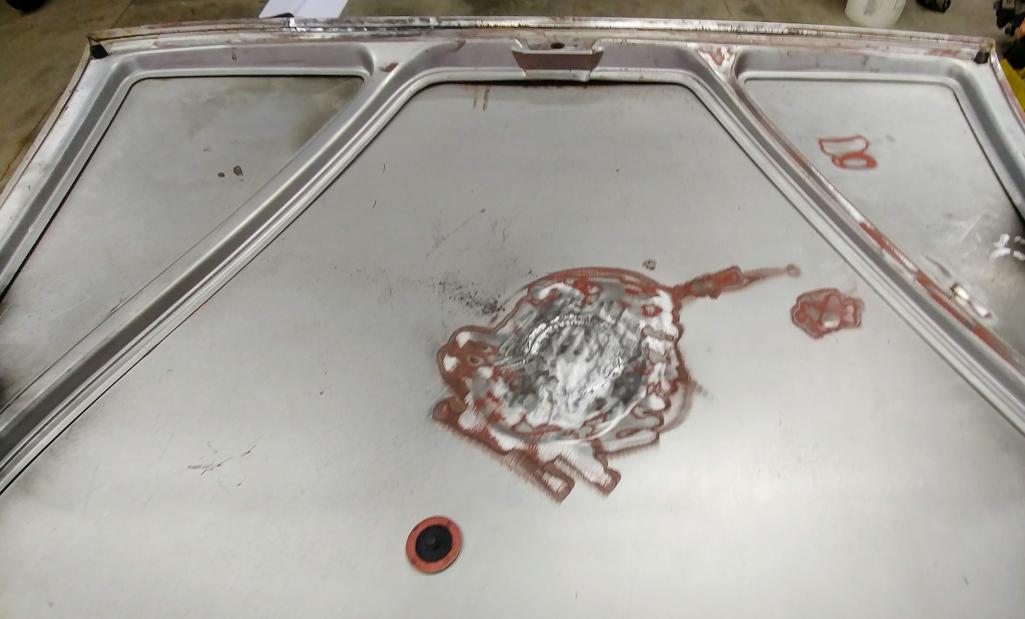
Posted by: mb911 Jun 28 2019, 09:14 AM
My adaption of the GT puke tank bracket.. This will actually be mounted on the passenger side to clear the jack area on my chassis. 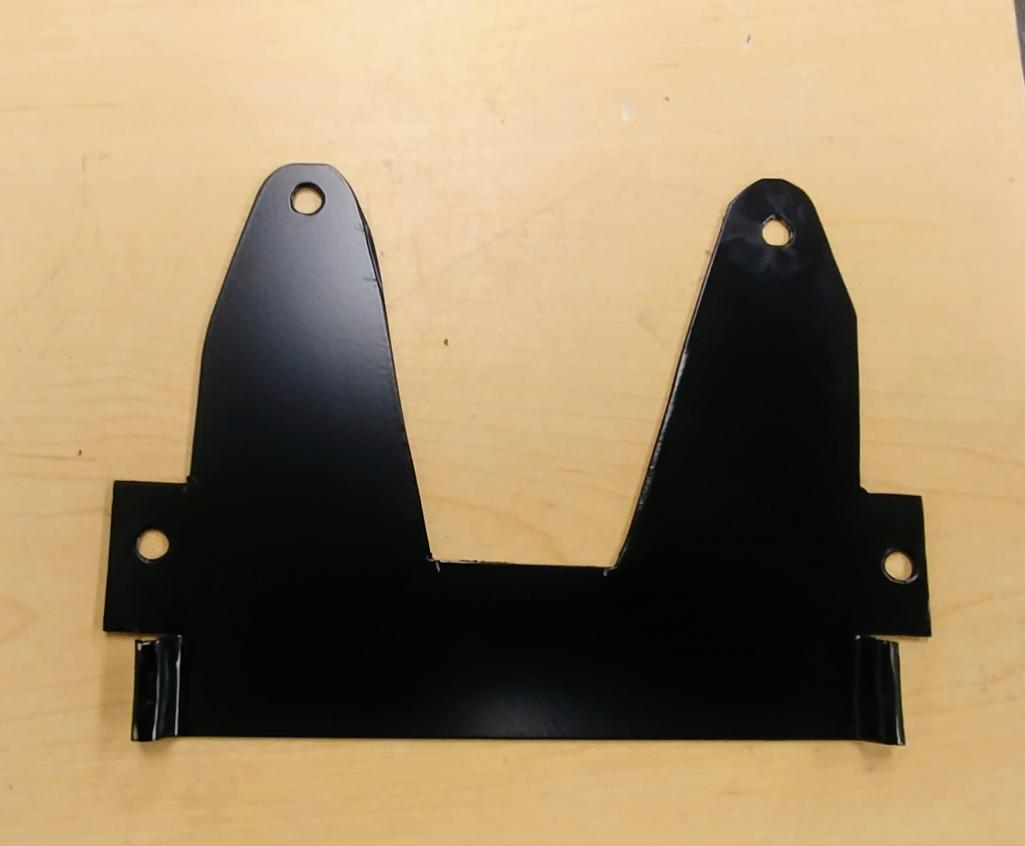
Posted by: mb911 Jul 13 2019, 09:59 AM
Welded trunk hole shut .time to drill holes for rear badge. Haven't done much else on the car but did finish driver side quarter metal finishing so that is in full body work mode.. Have to finish James car before I do much on mine.. Gonna push to get my car in one piece for spring as oldest is off to college so time to sell our big house to move into something a bit smaller= less work space. 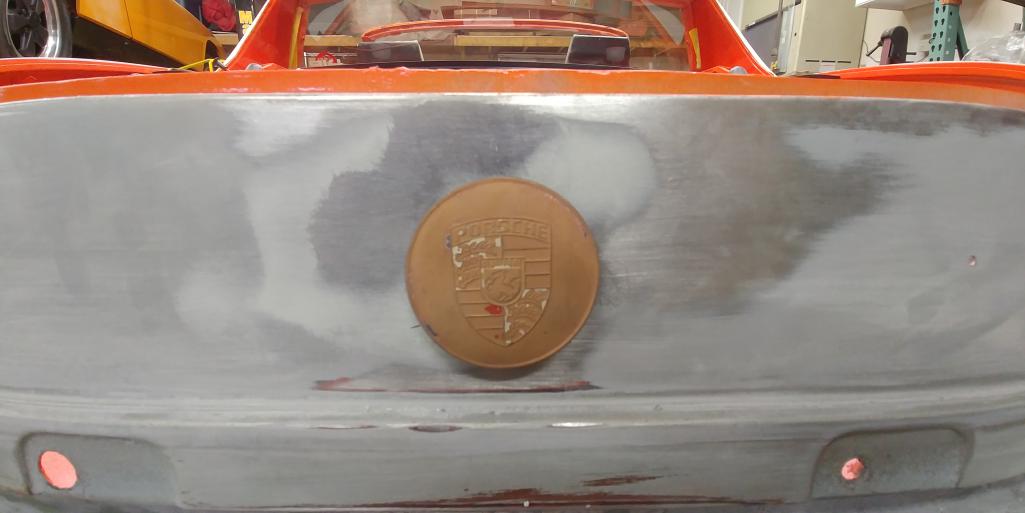
Posted by: Tdskip Jul 13 2019, 10:41 AM
Thanks for the updates Ben, and congratulations on getting one off to college.
Posted by: mb911 Aug 1 2019, 06:41 PM
I didn't take pictures but ran the engine again and then dumped the oil.. Took chain case covers off to check things out .. Everything checks out. Mounted the GT oil puke tank , painted the underside of the rear trunk lid.. Still want to do fiberglass trunk lid at some point. Also painted the GT engine lid.. Gonna mount that next week.
I did recieve a shift linkage kit from @http://www.914world.com/bbs2/index.php?showuser=10825 who is also having @http://www.914world.com/bbs2/index.php?showuser=2388 making a 10k tach for my car(lots of horse trading going on)
I need to finish @http://www.914world.com/bbs2/index.php?showuser=17736 s car then full borw on making mine 1 piece with color by spring.
I will post pictures soon..
Posted by: 914forme Aug 3 2019, 04:01 PM
The cat is out of the bag
Posted by: mb911 Aug 24 2019, 08:10 PM
In preparation for a possible move I have been working on James car and mine as much as possible. My boys helped me put the engine in tonight while I worked on @http://www.914world.com/bbs2/index.php?showuser=17736 car. Happy that is out of the way. 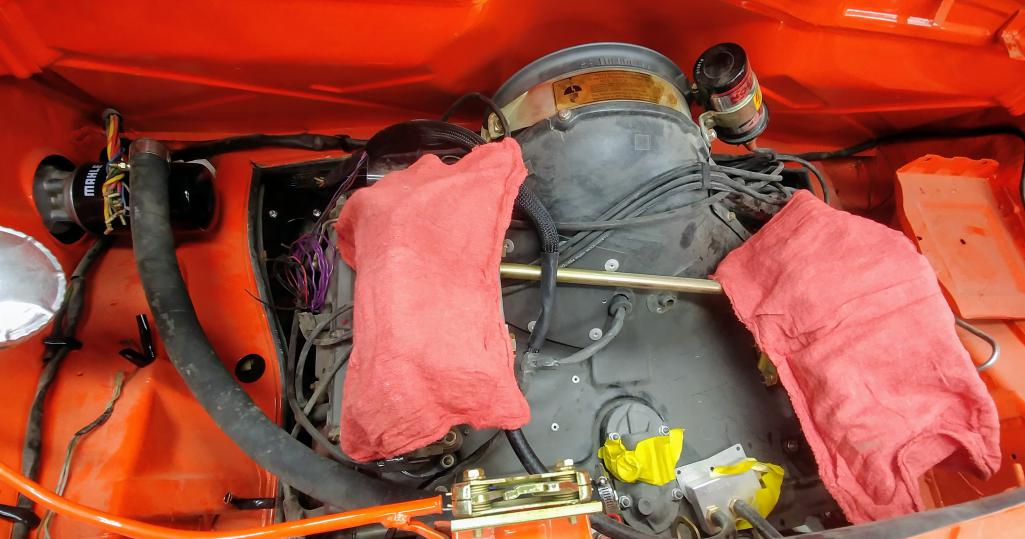
Posted by: mb911 Aug 25 2019, 07:41 PM
My freshly restored air filter doesn't fit.. Unhappy about that.. I really don't want rain hats.. I have to figure that out.. I don't want to cut but may just have to sell it to fund rain hat's.. Ugh.. Front bumper comes in tomorrow from @oscarvalez. Waiting on word on possible new house. Will lose work space but will actually gain time as I won't be doing as much yard work etc @ironhillsrestorations... So much to do so little time..
Posted by: bbrock Aug 25 2019, 07:59 PM
My freshly restored air filter doesn't fit.. Unhappy about that.. I really don't want rain hats..
That sucks. I love the look of the six air cleaners. Hopefully you can figure something out. Love that engine in there!
Posted by: mb911 Aug 25 2019, 08:05 PM
@http://www.914world.com/bbs2/index.php?showuser=20845 it's all about setbacks..
Posted by: Ed_Turbo Aug 25 2019, 08:11 PM
@http://www.914world.com/bbs2/index.php?showuser=20845 it's all about setbacks..
Welcome to the world of cars my friend
I see you use Mahle filters? Thats ok, I only use K&N Gold in my garage
Just playing keep rockin and rollin @http://www.914world.com/bbs2/index.php?showuser=9892 your topic is pretty popular here.
-Ed
Posted by: mb911 Aug 26 2019, 05:31 AM
Lol yup mahle filters.. I have heard the k&n oil filters are good..
Posted by: GeorgeRud Aug 26 2019, 04:15 PM
I had heard that the 914-6 air cleaners were shorter than those used in 911s. If you need to check them, I know where you might find an original 914-6 one to compare to yours.
Posted by: 914forme Aug 26 2019, 07:24 PM
Ben I have an extra 914-6 one, the ends are a bit misinformed due to some heat added to them at some point. Thinking a back fire, but don't know the history of it, as it is older than me.
BTW, PMOs don't fit the stock air boxes 914-6 or 911, and least not my set. I was planning on running a metal 911 box and modify it to function like the 914-6 one. Since I have both of them here, I can take measurements.
Anybody know where I can get the filters for the top of the velocity stacks. Jake Raby liked them at one point in time. I would run them with a set of 906 style hats, that is just me. I can not find the ones Jake talked about using.
Posted by: mb911 Aug 26 2019, 08:22 PM
@http://www.914world.com/bbs2/index.php?showuser=2388 . Thanks if you could. I feeling a bit rushed as we maybe moving so just not fighting the small stuff. I posted it for a ridiculous amount on the bird board. Might just buy rain hats and be done with it. Also did you get my PM .. Want to ship that stuff to you this week.
Posted by: mb911 Aug 27 2019, 07:03 PM
Glued in some of the carpet. Trying to inbox some items to minimize duplicate parts. Also caved and bought the 50 year floor mats.. Complete impulse buy. 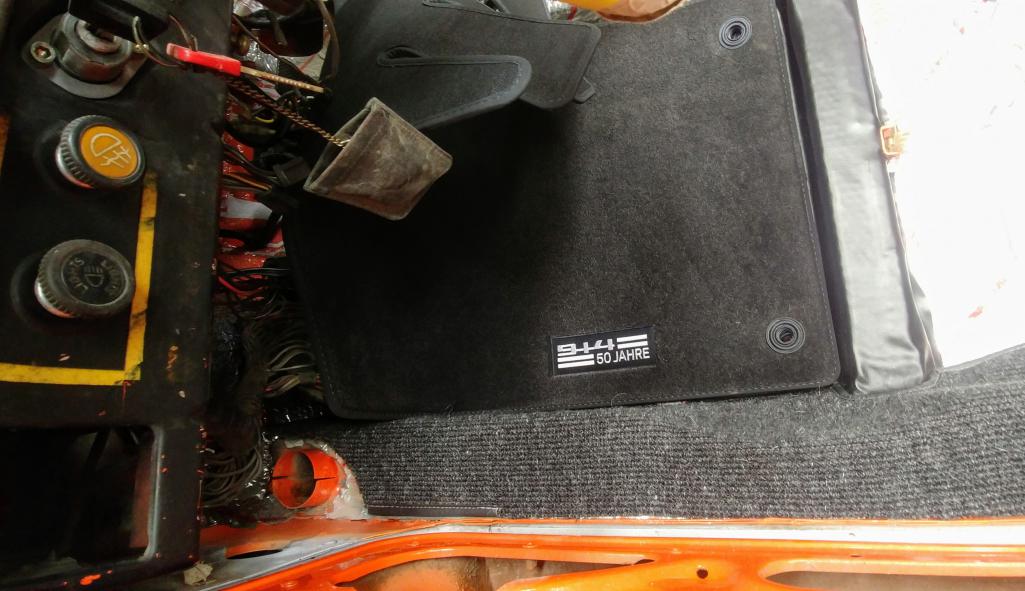
Posted by: mb911 Aug 31 2019, 10:50 AM
My 3 speed wiper project is now complete. I will install it shortly. 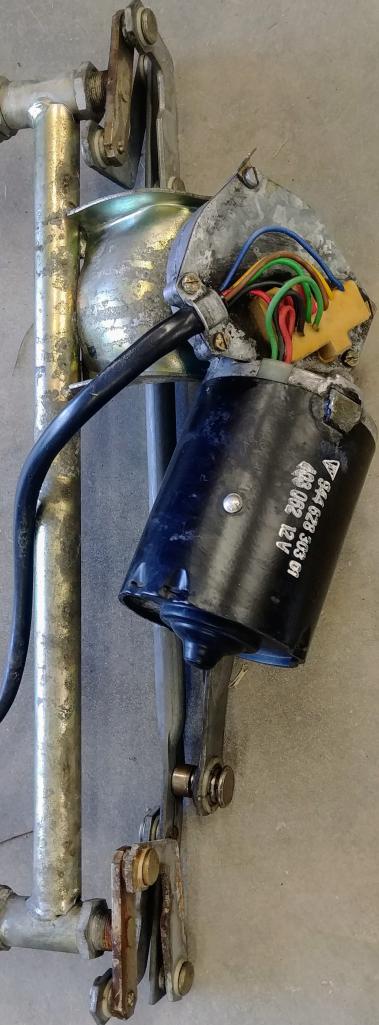
Posted by: mb911 Sep 2 2019, 06:33 PM
No pictures really but back to the drawing board. I need to cut out a damaged lower piece where the mixing box on the passenger side. It was damaged years ago and thought I hammered it back but it's just to out of shape.. To fit the mixing box. So new parts from @http://www.914world.com/bbs2/index.php?showuser=10825 and Garold and I will be set.. Some s calipers are on the way to me so I will be selling my restored A calipers from PMB.. I did however work on cleaning up more wiring. Wiper assembly needs one quick weld to tack a nut on for another location for the rubber isolator..
Posted by: mb911 Sep 6 2019, 07:26 PM
Put the air filter in place though that doesn't seem like a big deal it makes me feel like I am making progress. James car has taken 4 months of summer.. I am almost done but have to get on with some of my projects as well.. I also recieved my 911s calipers the other day. I took them apart today and found they have stainless pistons in them so that saves me some money.. Was going to send them out to PMB but think I am just going to save the money and scuff and cerakote them. I did get ready my first step in efi parts hoarding and clear cerakote on the 3.2 intake. 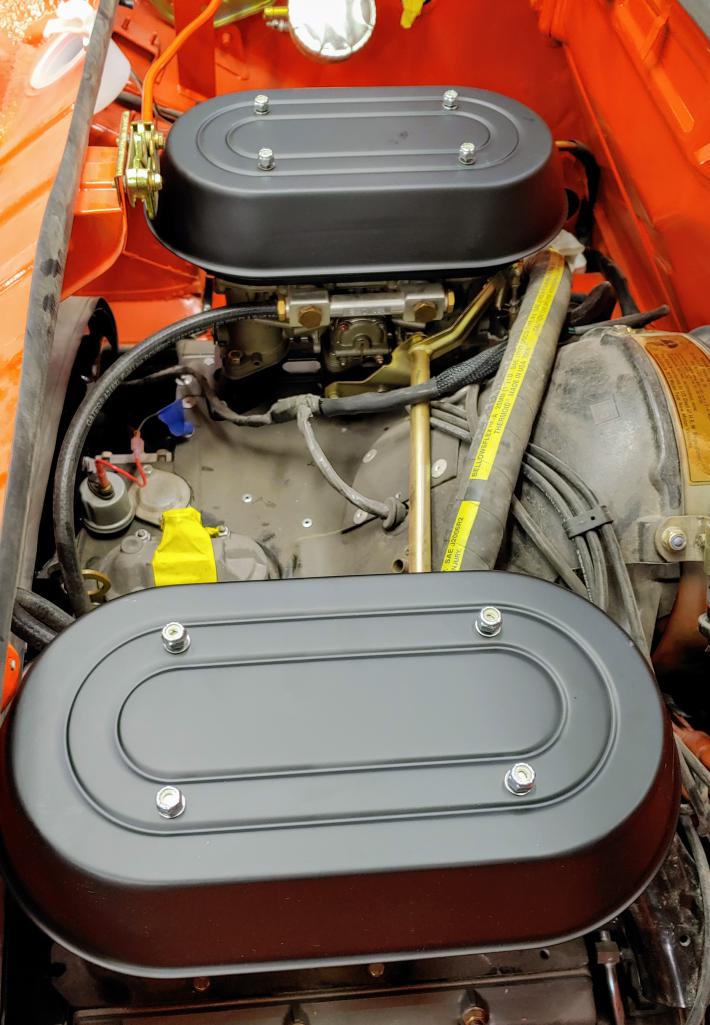
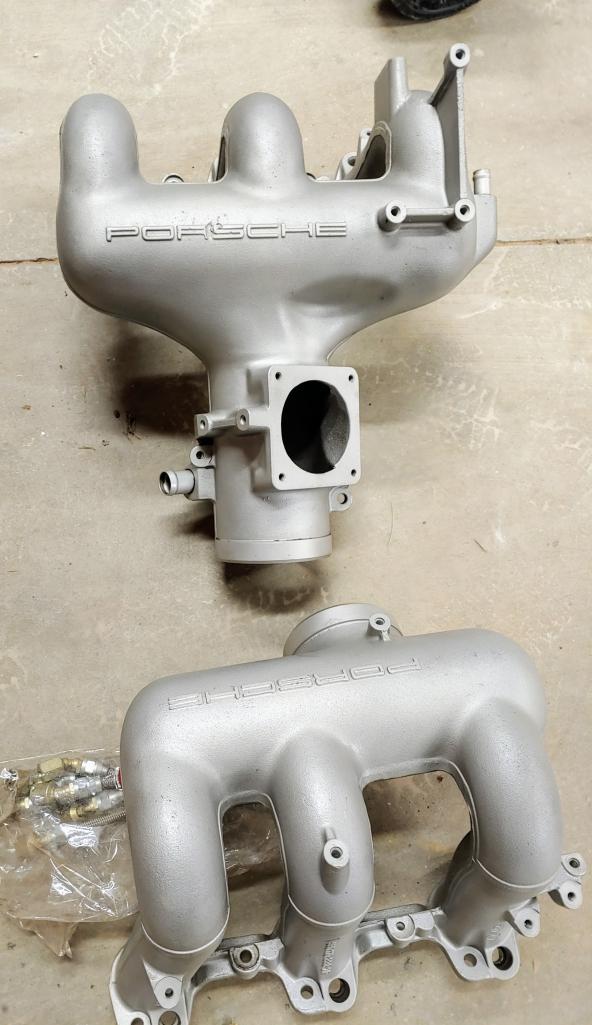
Posted by: 914forme Sep 6 2019, 07:52 PM
That is a great intake for an EFI swap, much easier with a single throttle body. And they make decent power.
Posted by: bahnzai Sep 7 2019, 08:19 AM
Hello Ben,
I may have missed it in the thread somewhere, but what are the details on your three speed wiper project?
Thanks!
Posted by: mb911 Sep 7 2019, 03:57 PM
Hello Ben,
I may have missed it in the thread somewhere, but what are the details on your three speed wiper project?
Thanks!
@http://www.914world.com/bbs2/index.php?showuser=6509 it is just a 944 motor on the stock 914 linkage so that my left side ignition setup with 911 wiper and turn signal stalks work as designed.
Posted by: bahnzai Sep 8 2019, 05:53 AM
Ah, got it. Thanks!
Posted by: mb911 Sep 12 2019, 08:12 PM
Got a replacement sheet metal part from Garold today for the Front trunk.. So back to weld a small panel in and repaint a little area.. Did spend way to much time putting cvs together then had to put them in the swing arms and had to ask for help because I was in a hurry from @http://www.914world.com/bbs2/index.php?showuser=10825 and @http://www.914world.com/bbs2/index.php?showuser=20845 ..
Posted by: bbrock Sep 12 2019, 08:30 PM
Got a replacement sheet metal part from Garold today for the Front trunk.. So back to weld a small panel in and repaint a little area.. Did spend way to much time putting cvs together then had to put them in the swing arms and had to ask for help because I was in a hurry from @http://www.914world.com/bbs2/index.php?showuser=10825 and @http://www.914world.com/bbs2/index.php?showuser=20845 ..
And I was totally worthless. Did you get them in?
Posted by: mb911 Sep 13 2019, 04:37 AM
Yes I did shock bolt removed and it worked perfectly
Posted by: mb911 Sep 17 2019, 07:13 PM
Today I bolted the trunk lid on (the bottom side is already body color), the GT engine lid and started on bolting in muffler heat shield.. Tomorrow the realtor brings the drones for pictures for MLS.. Gotta make the car as much one piece as possible.. I also installed James head light and eye brow covers on. Trying to also purge as much junk as possible.. I now have a pretty good handle on things.
S calipers get redone this weekend. Along with packera vs broncos game. 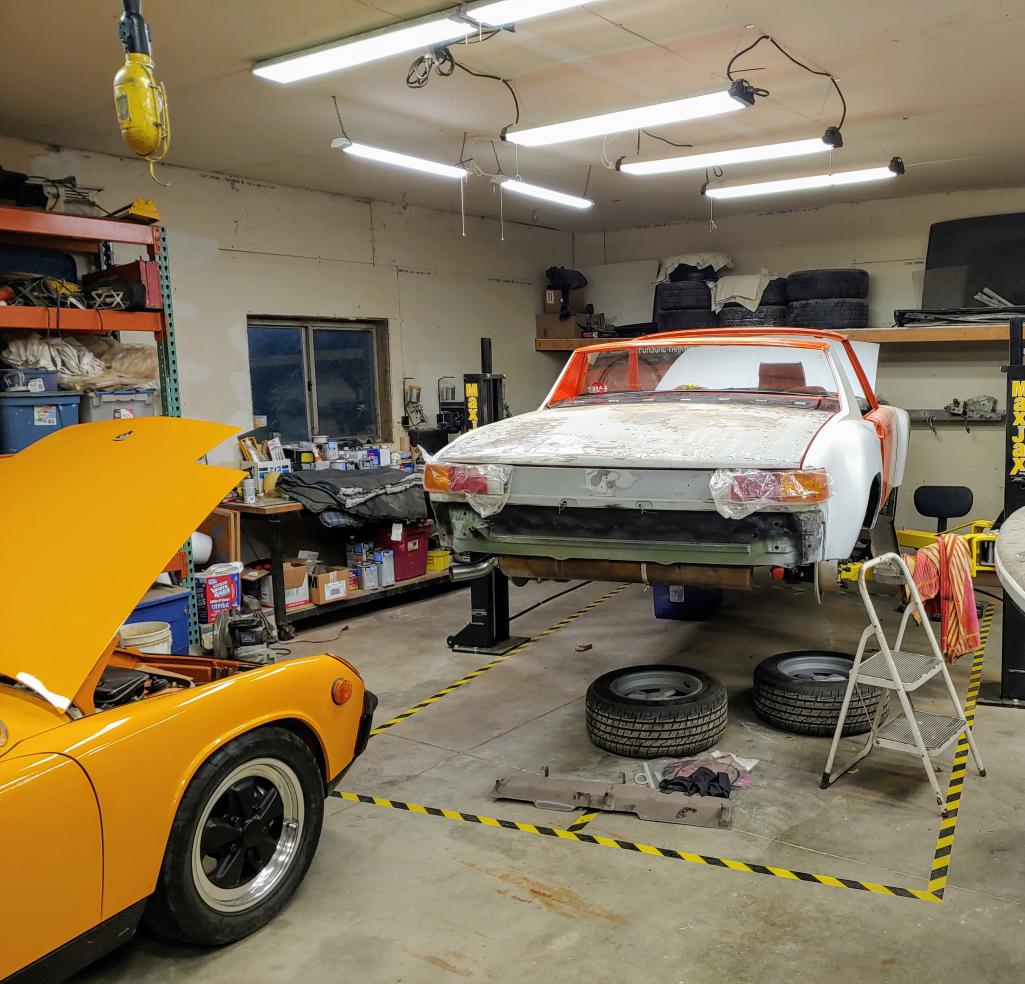
Posted by: mb911 Sep 17 2019, 07:14 PM
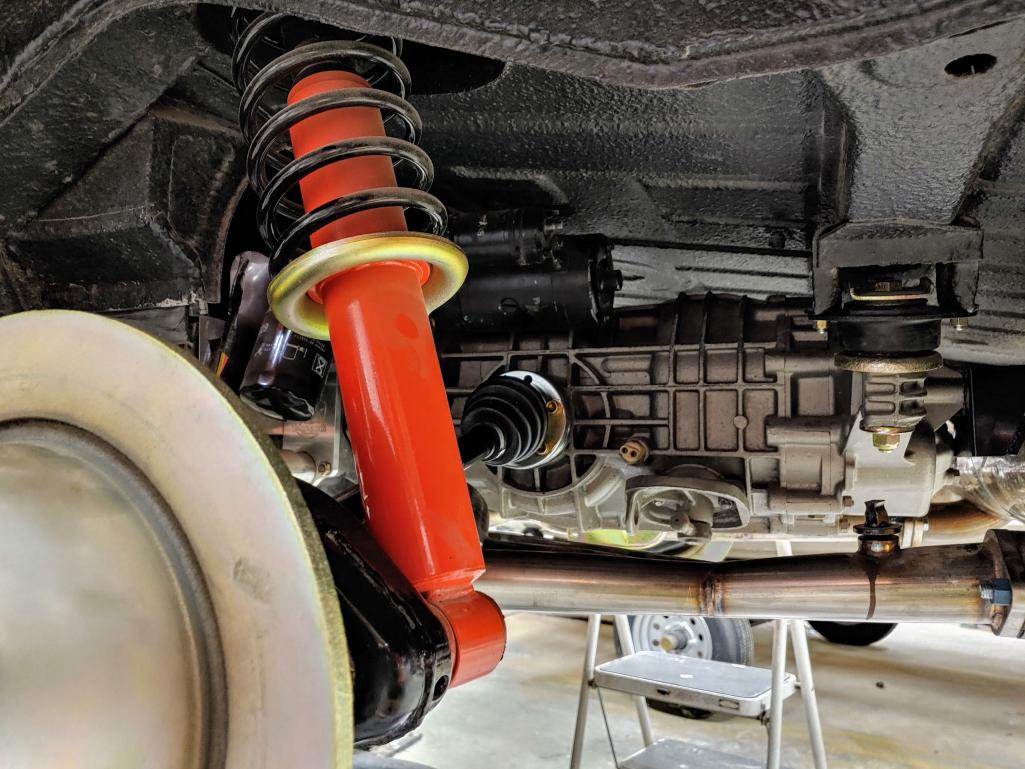
Posted by: mb911 Sep 23 2019, 04:20 PM
Spent some time working on running all the new cables, found an obstruction in the accelerator cable run and will likely have to cut a length off and then put a new length through the firewall, hooked up all the brake lines. Getting closer to having brakes.. Had 3 home showings over the last 3 days so thatbis killing my project time..
Posted by: bbrock Sep 23 2019, 08:09 PM
Spent some time working on running all the new cables, found an obstruction in the accelerator cable run and will likely have to cut a length off and then put a new length through the firewall, hooked up all the brake lines. Getting closer to having brakes.. Had 3 home showings over the last 3 days so thatbis killing my project time..
I had a couple tube plugged with gunk I was able to clean out by first cutting a piece of clothes hanger wire at an angle to make a point, then chucking it in a drill to spin it as I worked it in and out of the tubes. I bunch of rusty dirt and crap came out. I followed that up with pulling steel wire bottle brushes through (I picked up an assortment cheap at HF). And because I'm anal, I finished by dragging a small cloth soaked in Ospho through and after it was dry, repeated with a rag soaked in epoxy primer. Anywho, the clothes hanger wire is worth a try.
Posted by: mb911 Sep 24 2019, 07:57 PM
@http://www.914world.com/bbs2/index.php?showuser=20845 I drilled to clear it out but no go.. Likely have to cut and splice a new piece in. Ugh
Posted by: bbrock Sep 24 2019, 08:34 PM
Well bummer. At least you know an excellent welder. I am curious how one goes about splicing small tubing like that. I know I couldn't do it!
Posted by: mb911 Sep 25 2019, 04:38 AM
Well bummer. At least you know an excellent welder. I am curious how one goes about splicing small tubing like that. I know I couldn't do it!
Well been thinking I might sleave it and epoxy it.. No welding.. I need to find a window to do the work though.. Selling a house is terrible..
Posted by: mepstein Sep 25 2019, 06:31 AM
Well bummer. At least you know an excellent welder. I am curious how one goes about splicing small tubing like that. I know I couldn't do it!
Well been thinking I might sleave it and epoxy it.. No welding.. I need to find a window to do the work though.. Selling a house is terrible..
If you think selling is bad, try building.
My friend described it to me as putting all your money in the back seat of your car, going for a drive with the windows open and your mother in law in the passenger seat - for a year.
Posted by: mb911 Sep 28 2019, 07:35 PM
Poor man S caliper rebuild. PMB duro ano pistons, cerakote and replating the steel parts.. The seal that goes on the plate that gets bolted on was not included in the new seal kits. Gotta call Eric Monday and get those and the banjo fittings and then I will finally have an entire working brake setup. 
Posted by: 914forme Sep 28 2019, 07:56 PM
@http://www.914world.com/bbs2/index.php?showuser=9892 Ben is that oven cure or air cure? They do look very nice.
BTW, we are selling a house also, under contract, but title company waited to long and made the buyer fall out of contract. More showings this weekend. Buyer is filing for an extension, we have a second offer on the table, but I do not feel like being a dick and swapping offers due to a poor pick of title companies.
Then I am in the process of renovating a house.... More stuff goes wrong I will have no hair left... Renovation is a true money pit, almost as bad as owning a boat.
And we built several houses, I like new construction the best. You know what you're getting into, and well, you never have a hidden problem.
That is just me, but then my side of the family are all in construction, and I learned from my Grandfather who was a master plumber, electrician, and carpenter. Man was amazing, miss him everyday, would make me look like an amateur even today, and most likely still out work me.
Best of luck with the sale Ben
Posted by: mb911 Sep 28 2019, 08:04 PM
@http://www.914world.com/bbs2/index.php?showuser=9892 Ben is that oven cure or air cure? They do look very nice.
@http://www.914world.com/bbs2/index.php?showuser=2388 air cure.
Posted by: mepstein Sep 28 2019, 08:18 PM
Poor man S caliper rebuild. PMB duro ano pistons, cerakote and replating the steel parts.. The seal that goes on the plate that gets bolted on was not included in the new seal kits. Gotta call Eric Monday and get those and the banjo fittings and then I will finally have an entire working brake setup.
I have some alfa calipers that might look really good with Cerikote

Posted by: gereed75 Sep 29 2019, 10:42 AM
Ben, Too bad the excitement of your incredible work in the home stretch is being distracted by the house thing, I mean really, moving compared to finishing a six build!?!
Sorry for thread drift but anyone try Cerakote on exhausts??
Posted by: mb911 Sep 29 2019, 12:55 PM
I actually have seen a few exhaust with cerakote. I like it for mild steel fpr sure .. Not sure I would do it on stainless..
The house thing is for sure a distraction but so focussed on finishing James conversion to get it out of here for winter is taking all my time..
Posted by: raynekat Sep 29 2019, 02:06 PM
Those brake calipers look great!
Posted by: mb911 Sep 29 2019, 06:56 PM
Those brake calipers look great!
Thanks.. I was going to send them to PMB but my son just startes college so saving money when I can..
Posted by: mb911 Oct 7 2019, 03:58 PM
Sprayed some surfacer on passenger side 1/4.. This panel was worked over pretty good. Has nice door gaps so happy about that and it is smoothing out nicely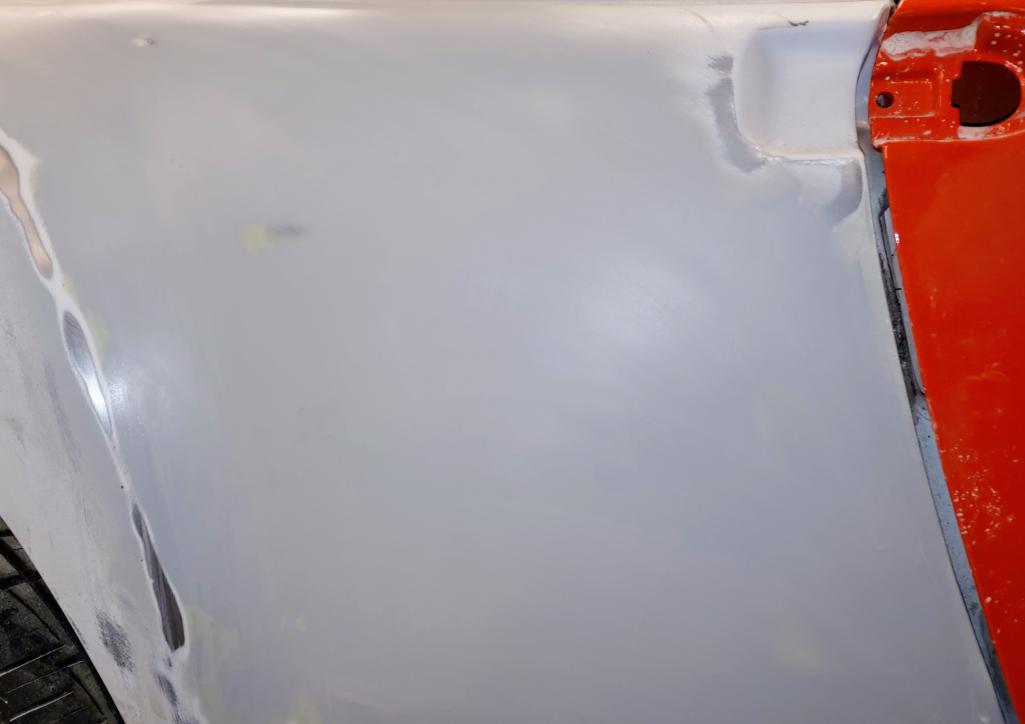
Posted by: mb911 Oct 11 2019, 07:27 PM
Windshield is in.. 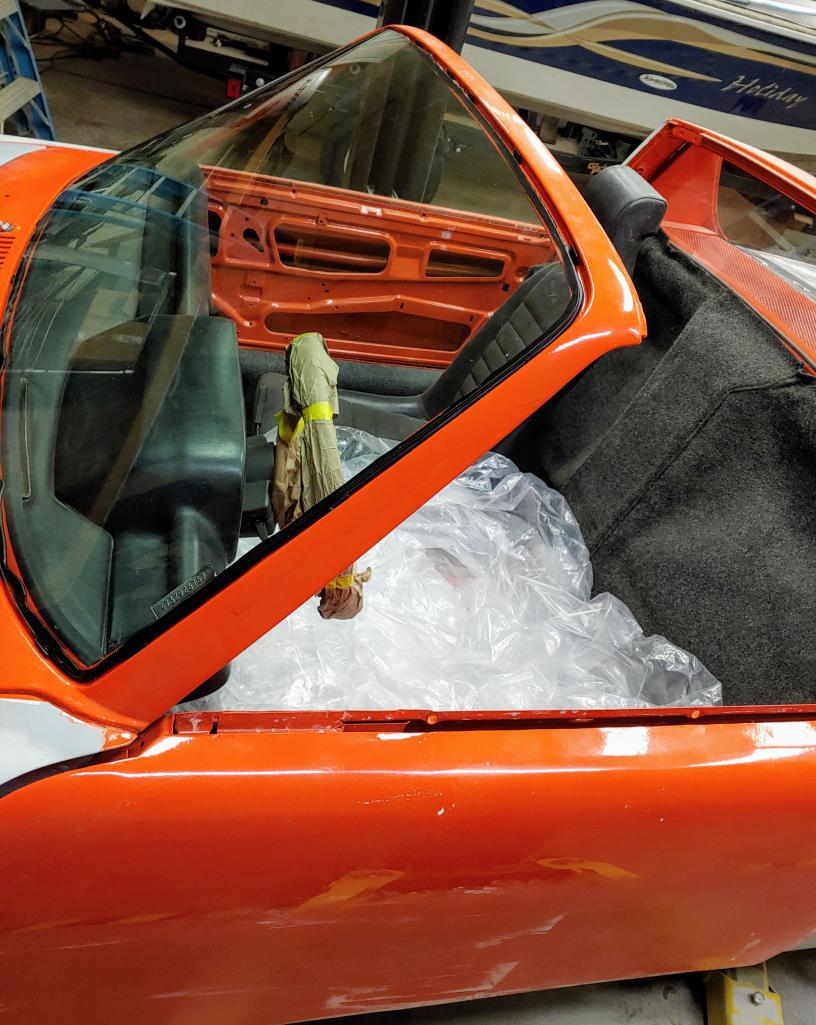
Posted by: raynekat Oct 12 2019, 05:00 PM
Poor man S caliper rebuild. PMB duro ano pistons, cerakote and replating the steel parts.. The seal that goes on the plate that gets bolted on was not included in the new seal kits. Gotta call Eric Monday and get those and the banjo fittings and then I will finally have an entire working brake setup.
Ben, do you remember what color cerakote you used on these calipers? I'd like to put that in my file for the "next project." Thx
Posted by: mb911 Oct 13 2019, 06:47 AM
Poor man S caliper rebuild. PMB duro ano pistons, cerakote and replating the steel parts.. The seal that goes on the plate that gets bolted on was not included in the new seal kits. Gotta call Eric Monday and get those and the banjo fittings and then I will finally have an entire working brake setup.
Ben, do you remember what color cerakote you used on these calipers? I'd like to put that in my file for the "next project." Thx
@http://www.914world.com/bbs2/index.php?showuser=18263
Titanium and their aluminum clear mixed together.
Posted by: raynekat Oct 13 2019, 11:15 PM
Titanium and their aluminum clear mixed together.
Great....thanks!
Posted by: mb911 Oct 18 2019, 07:41 PM
Brake reservoir is in and new supply line kit from PMB.. And rear trunk repair and skim coated. Someday I will do a fiberglass trunk lid but for now this works.. 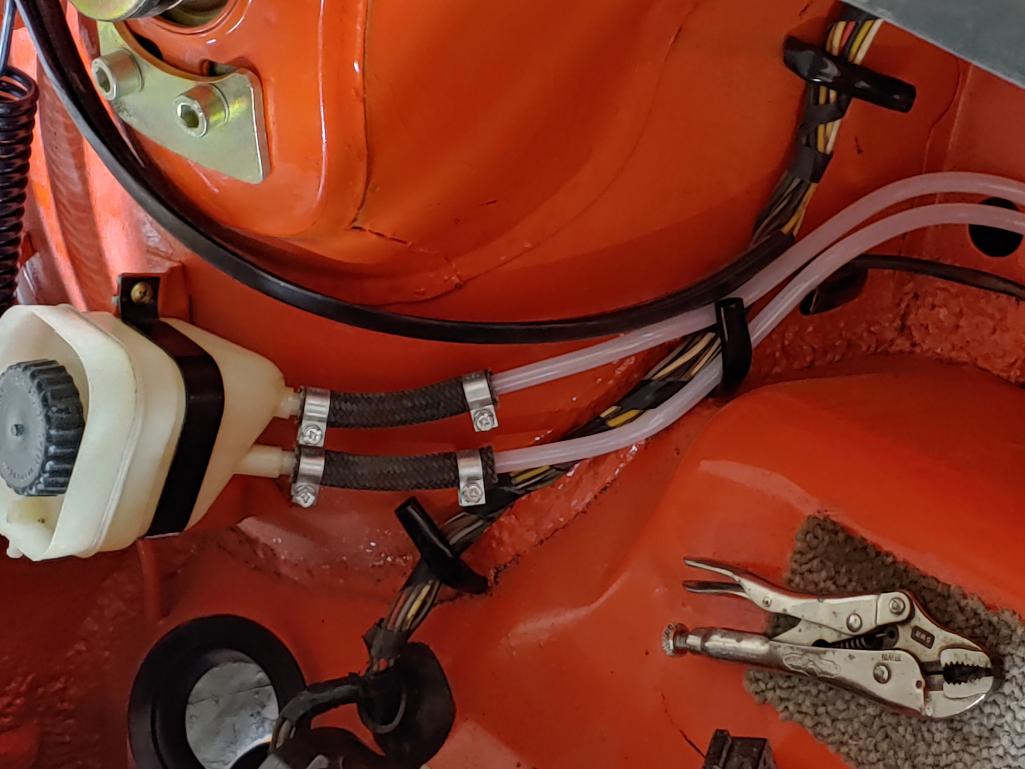
Posted by: mb911 Oct 18 2019, 07:43 PM
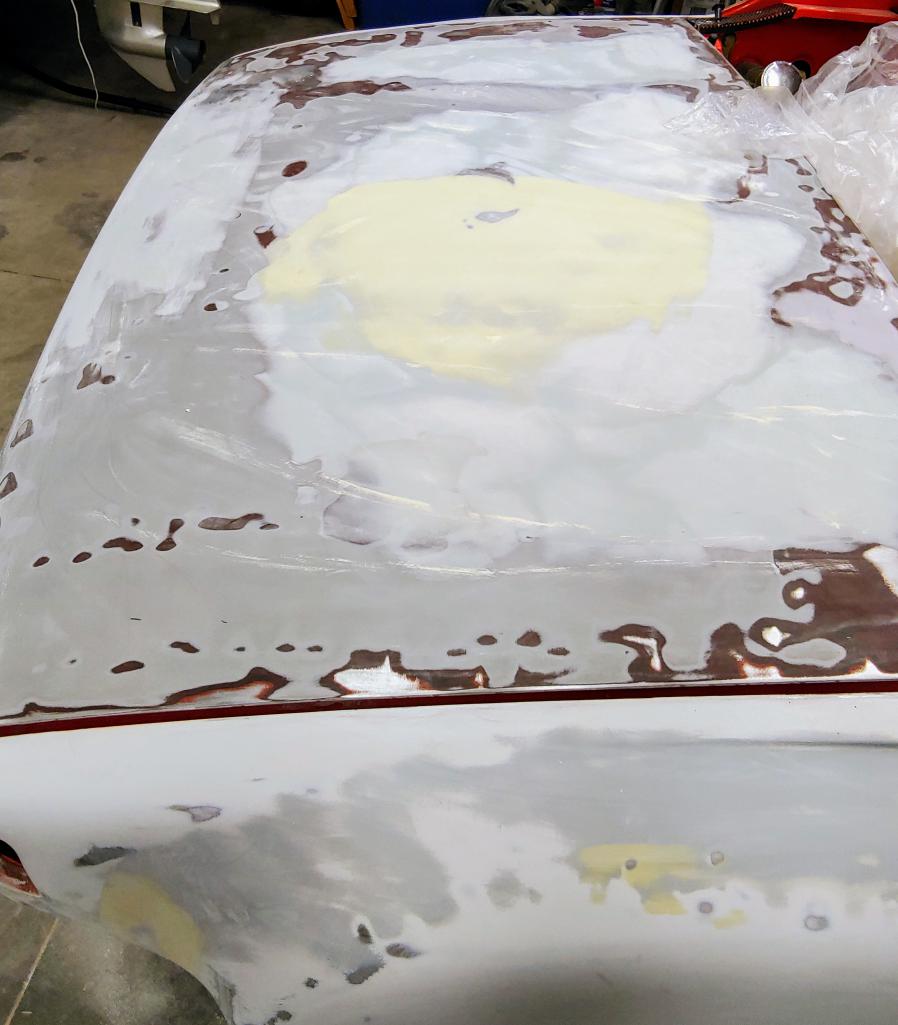
Posted by: mb911 Oct 23 2019, 04:35 PM
Primer surfacer on .. Now blocking it out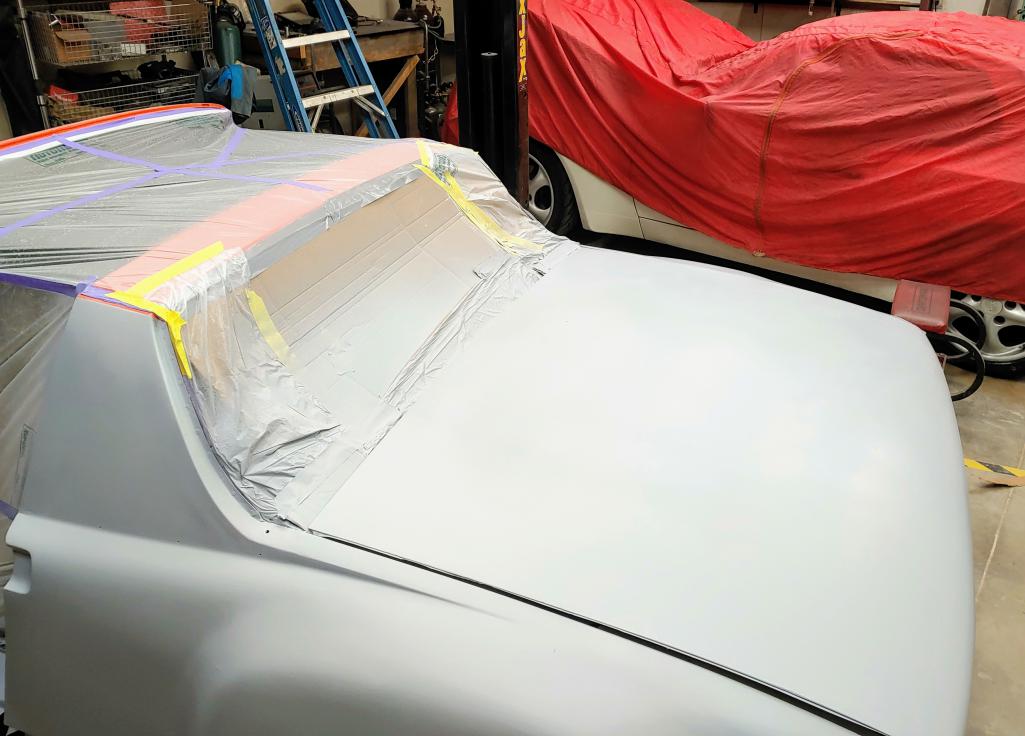
Posted by: raynekat Oct 23 2019, 05:13 PM
Go Ben go. Looking good. BTW...your larger SS HE's are working great with my 2.7 MFI engine.
Posted by: bbrock Oct 23 2019, 05:24 PM
Fun to watch. I'm doing the same. Just started my last round which is wet sand to 600 grit. So satisfying to see how straight a beat up old shell can be made.
Posted by: mb911 Oct 24 2019, 05:13 PM
Blocked @http://www.914world.com/bbs2/index.php?showuser=429 .. Now another coat of primer surfacer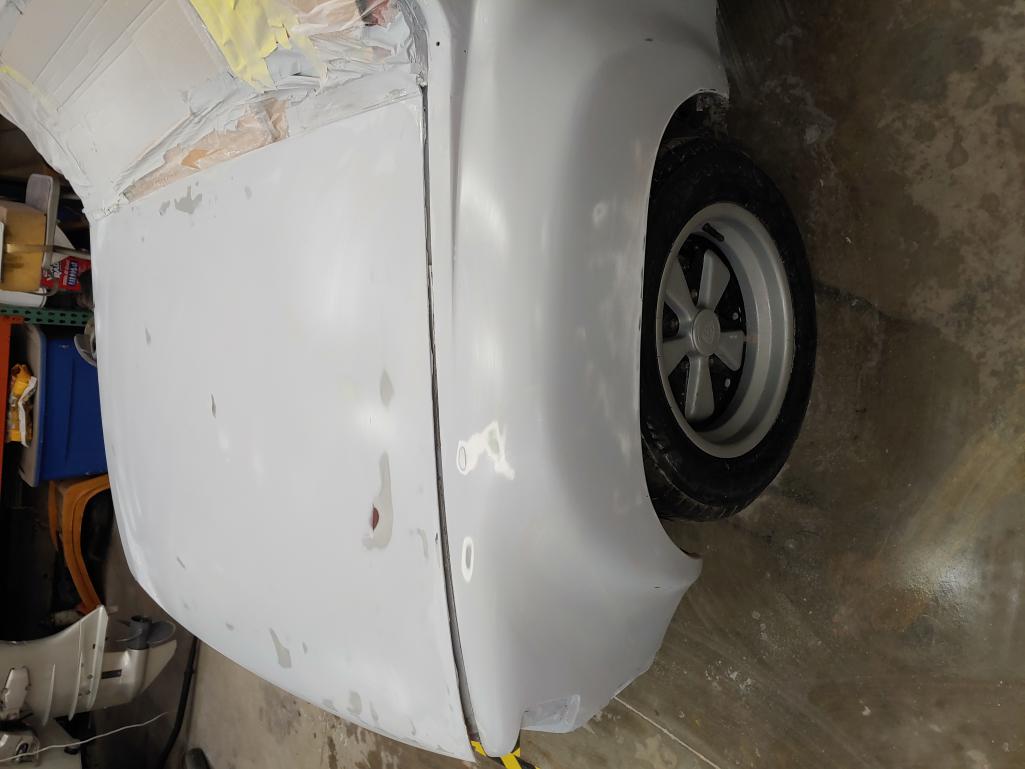
Posted by: mb911 Nov 3 2019, 09:27 PM
Painted from the cowl back. A picture of base then clear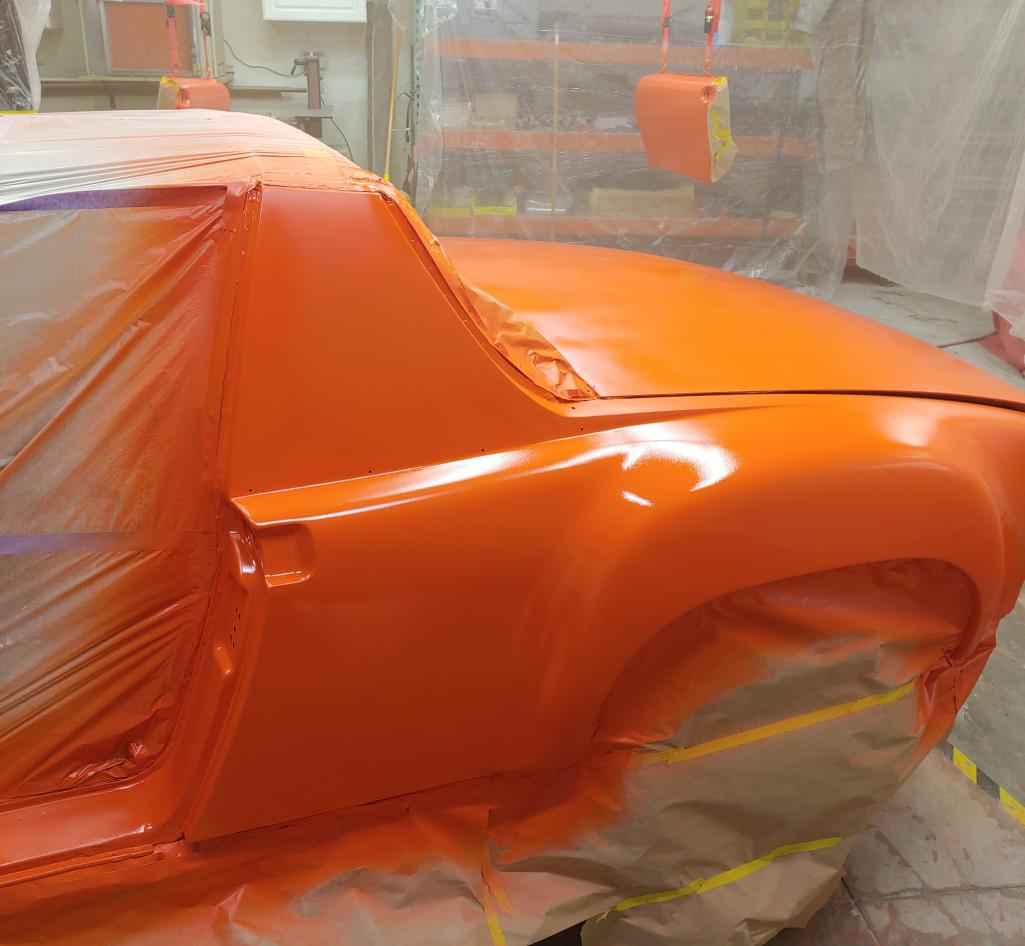
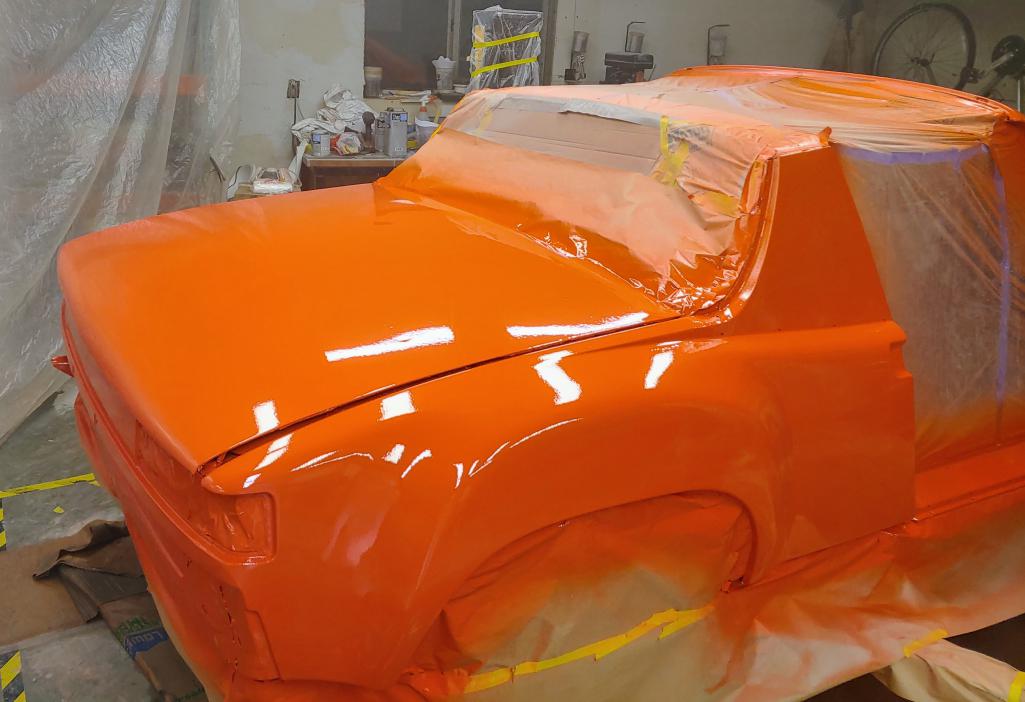
Posted by: Krieger Nov 3 2019, 11:08 PM
Looks great! I love Tangerine for flared cars!
Posted by: mb911 Nov 4 2019, 07:56 PM
914rubber windshield chrome on, taillights in badge on, bumper on but there is a setback with that as the driver side does not tuck into the 1/4 panel indent like it should.. Ugh. Well I will figure that out. 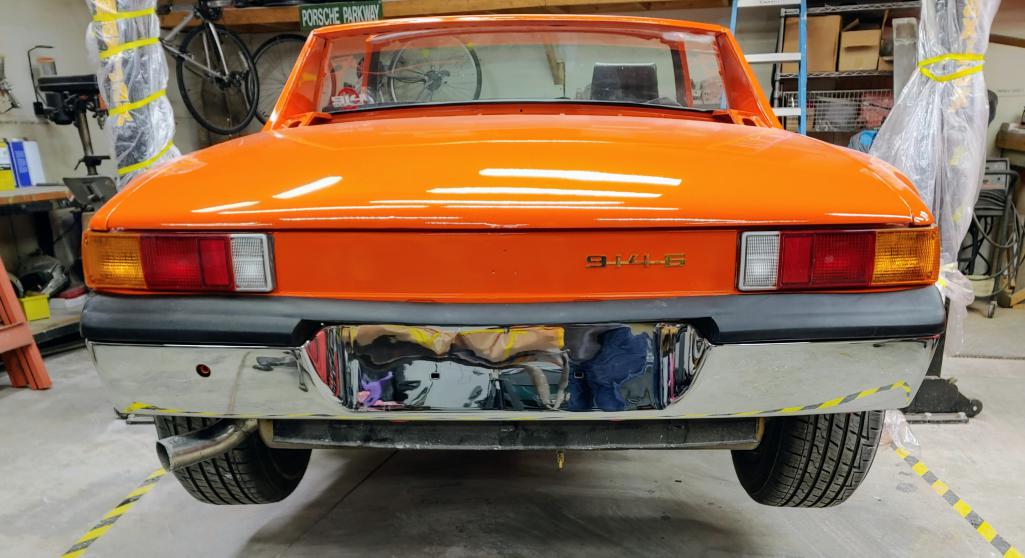
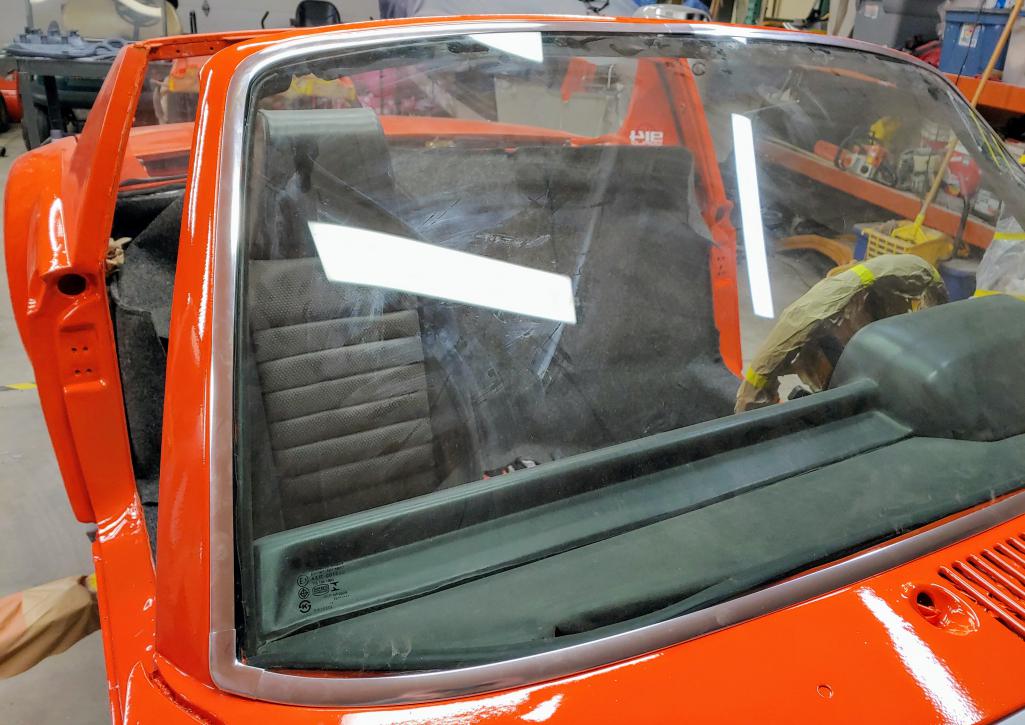
Posted by: bbrock Nov 5 2019, 01:36 PM
Looks fantastic!
Posted by: Cairo94507 Nov 5 2019, 02:03 PM
Nice to see color on the body.
Posted by: mb911 Nov 5 2019, 07:43 PM
Put the rear badge on.. Not sure I am happy with it yet.. 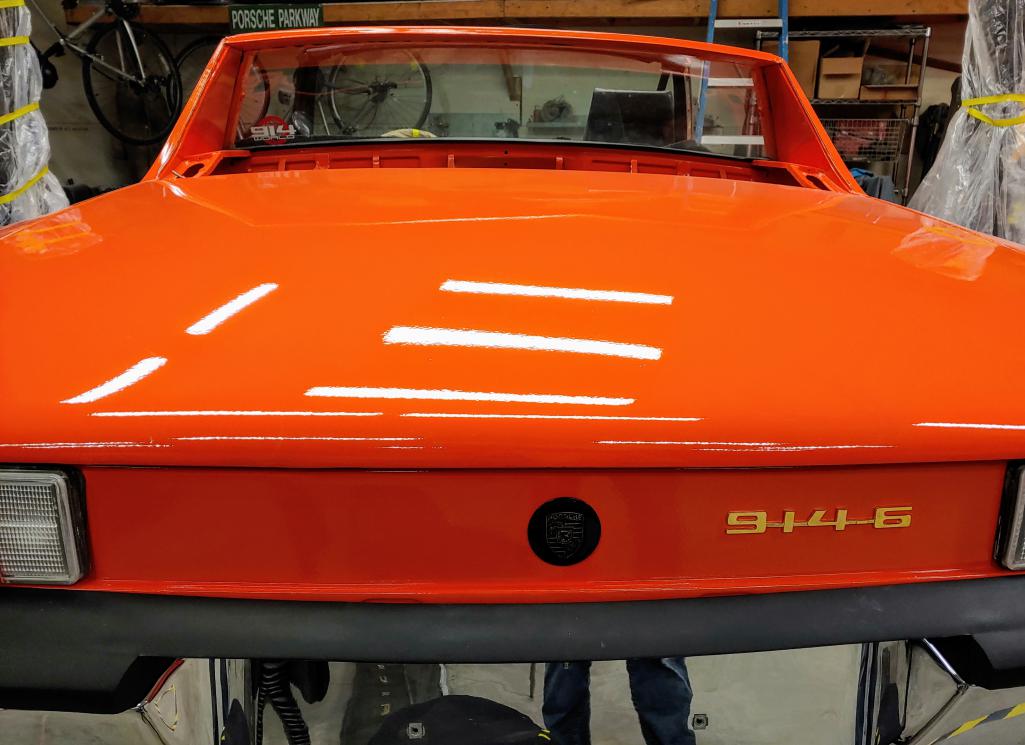
Posted by: mb911 Nov 9 2019, 11:26 AM
Wife said I had to get a new tool box for prep for moving as my old craftsman boxes are pretty tired.. Researched a ton and found the US General to be one of the best values out there.. Yes I know it is made in China.. I can tell you I worl with snap on boxes every day at work and these are built on par with them.. 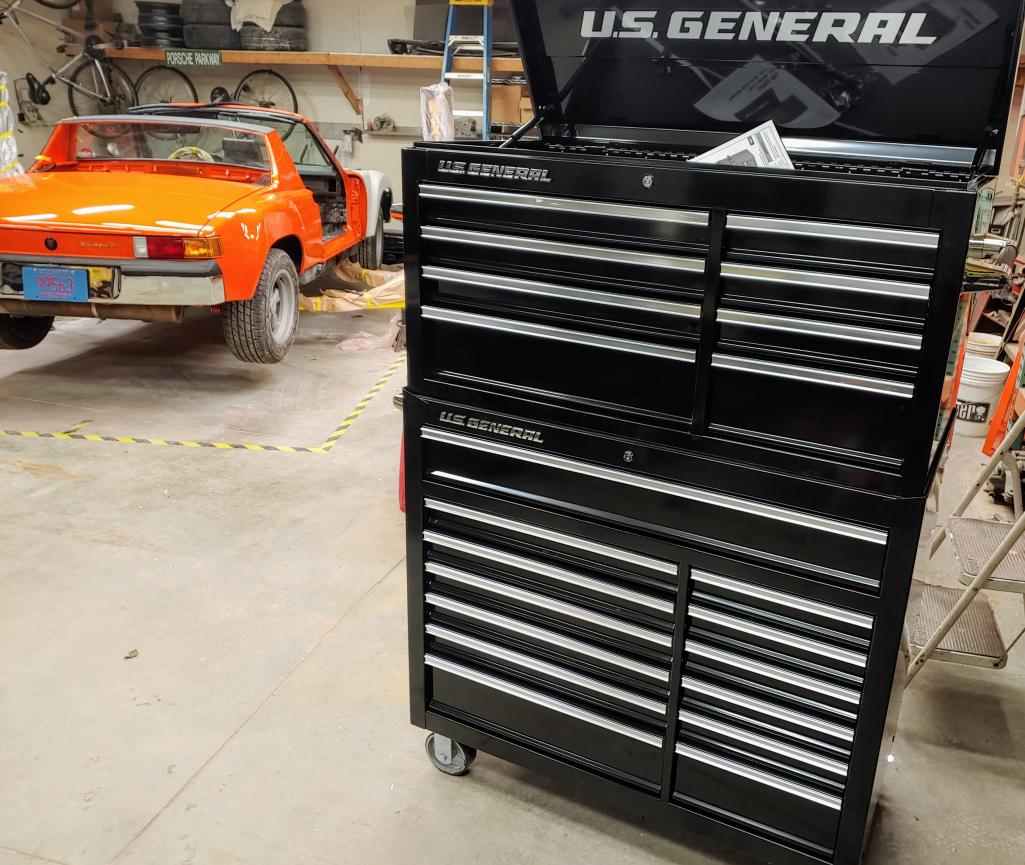
Posted by: bbrock Nov 9 2019, 05:40 PM
Wife said I had to get a new tool box for prep for moving as my old craftsman boxes are pretty tired.. Researched a ton and found the US General to be one of the best values out there.. Yes I know it is made in China.. I can tell you I worl with snap on boxes every day at work and these are built on par with them..
Good to know. I looked at those very briefly last time I was in HF and thought they looked amazingly good. I walked away pretty quickly though so I didn't wind up spending money.
Posted by: mb911 Nov 9 2019, 09:20 PM
@http://www.914world.com/bbs2/index.php?showuser=20845 they really are nice .. Black Friday the bottom box will be 399
Posted by: GeorgeRud Nov 10 2019, 10:13 AM
I’d still using the silver and red Craftsman box my dad bought me in the 60s. Nostalgia causes one to not throw old tools away, just add more to your collection!
Posted by: mb911 Nov 10 2019, 08:19 PM
A few update pictures.. Hung doors and rough alignment, put door handles and associated parts so the door can stay shut.. Bought and installed the inner door seals from 914rubber and little did I know that when you order them its for a set of doors not just one so I have a brand new set extra.. Put sound deadening in the doors and that really keeps things quiet. I will eventually find new solid and rust free doors.. These were really bad if you reread my thread you will see how bad they were.. Wet sanded a few sagging spots in the clear. 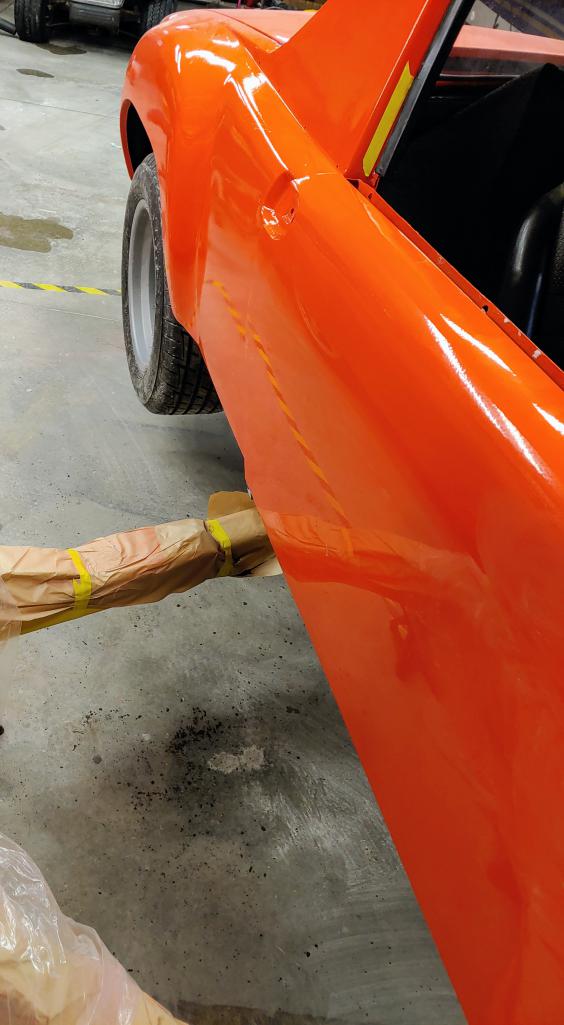
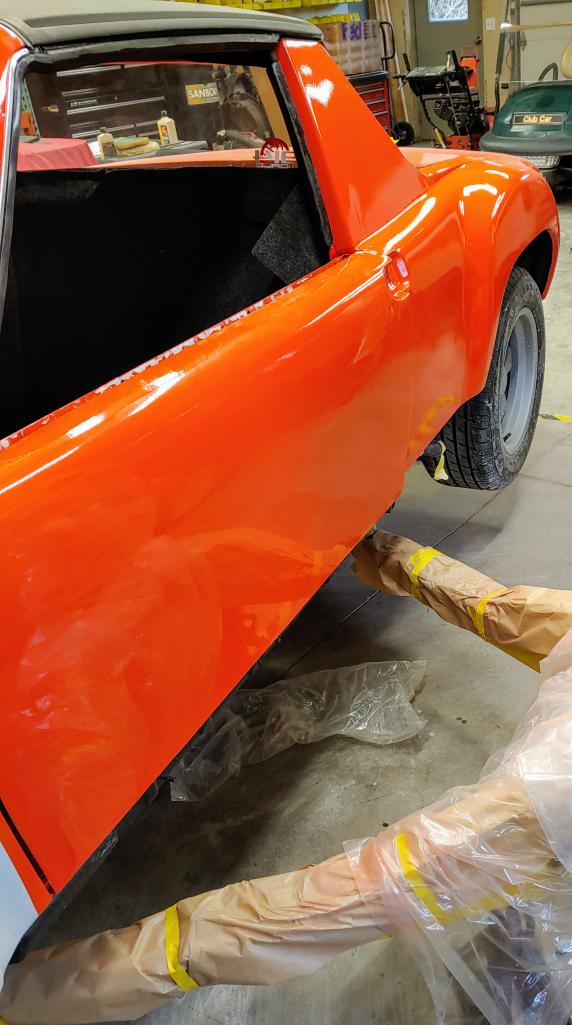
Posted by: mb911 Nov 10 2019, 08:21 PM
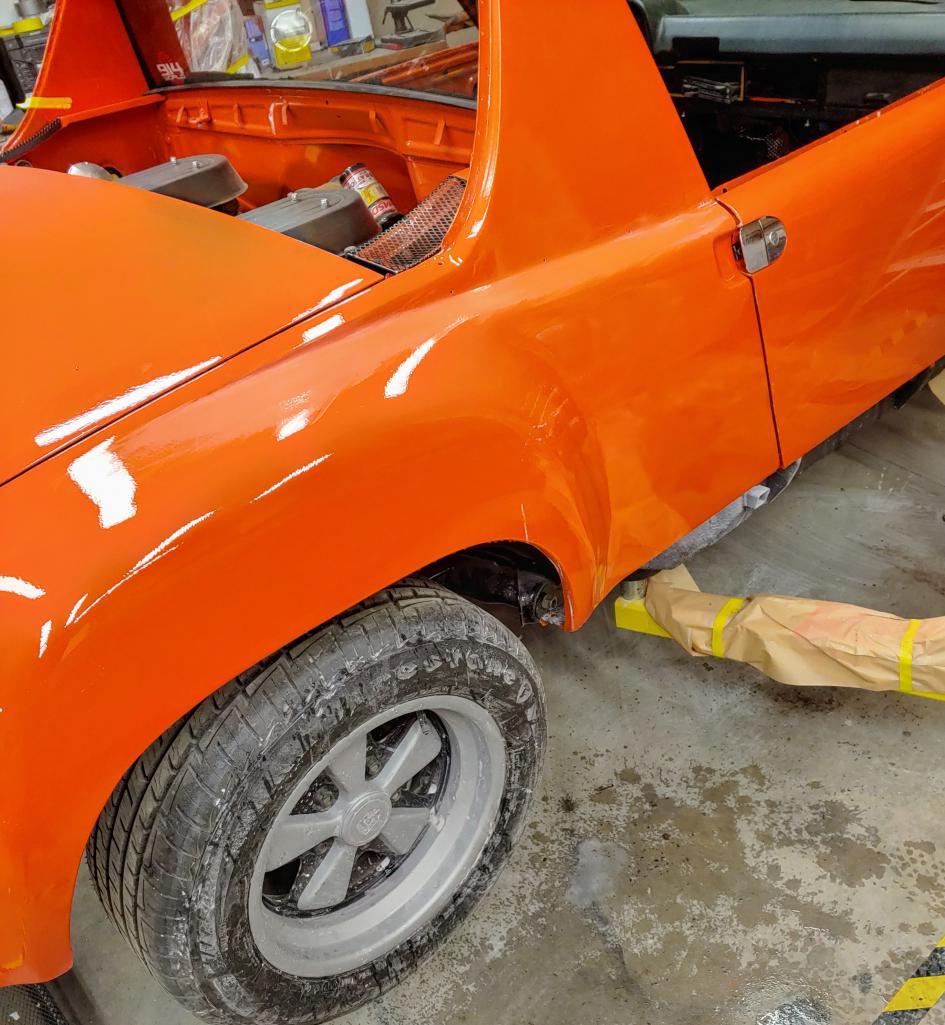
Posted by: raynekat Nov 11 2019, 07:56 PM
Ben....you're a trouble maker with those tool boxes.
I have to have a set now. Ha
Your car and especially the color looks great, killer.
Your 1-5/8" SS heat changers that I bought from you really put out impressive heat/defrost and make nice power. My 2.7 dynoed at 230hp.
Fun to watch your build and skills.
Posted by: mb911 Nov 11 2019, 08:23 PM
Ben....you're a trouble maker with those tool boxes.
I have to have a set now. Ha
Your car and especially the color looks great, killer.
Your 1-5/8" SS heat changers that I bought from you really put out impressive heat/defrost and make nice power. My 2.7 dynoed at 230hp.
Fun to watch your build and skills.
The tool boxes are impressive for the money aren't they?..
230hp is really impressive..
Posted by: Coondog Nov 11 2019, 08:34 PM
Looking good, keep 914-6 badge.
FYI...finally got cold enough to test out your header/heat exchangers. Lots of heat coming out, thank you. I called James a Patrick and told him to quit using those useless BB systems.
Posted by: mepstein Nov 11 2019, 08:50 PM
Looking good, keep 914-6 badge.
FYI...finally got cold enough to test out your header/heat exchangers. Lots of heat coming out, thank you. I called James a Patrick and told him to quit using those useless BB systems.
Ben's headers/heat exchangers are the proper length for a 911 engine. There's a reason why Porsche did all the bends. None of the other 914-6 heat exchangers are equal length or the correct length. And the heat works like factory.
Posted by: mb911 Nov 12 2019, 12:22 PM
The problem is they are so labor intensive to make that the cost a. Fortune..
Posted by: jd74914 Nov 12 2019, 12:55 PM
@http://www.914world.com/bbs2/index.php?showuser=20845 they really are nice .. Black Friday the bottom box will be 399
My buddy has two in commercial use settings and 5 years later the things still function like new. We're convinced they are the highest quality thing HF makes. Jealous!
Posted by: Coondog Nov 12 2019, 01:13 PM
The problem is they are so labor intensive to make that the cost a. Fortune..
You get what you pay for, that’s why yours are the best
Posted by: mb911 Nov 12 2019, 08:47 PM
The problem is they are so labor intensive to make that the cost a. Fortune..
You get what you pay for, that’s why yours are the best
Thanks for the kind words..
Posted by: mb911 Nov 14 2019, 09:06 PM
A little more progress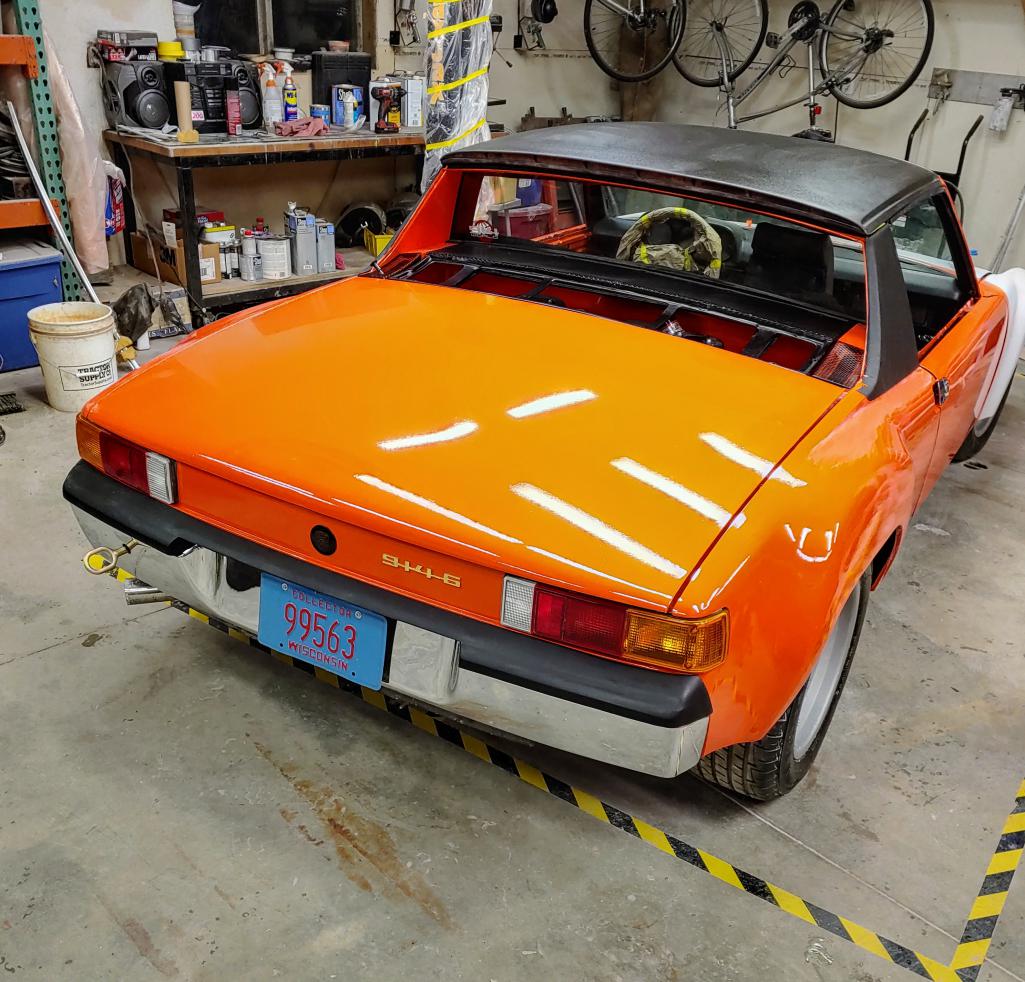
Posted by: Dion Nov 14 2019, 10:07 PM

Posted by: flyer86d Nov 15 2019, 06:58 AM
Wow Ben, very nice!
Charlie
Posted by: rgalla9146 Nov 15 2019, 07:21 AM
Beautiful.
The car looks fantastic.
Keep up the good work.
Posted by: mb911 Dec 4 2019, 04:41 PM
Look what just came in from porsche.. Got a great price on them and they say made in Germany on them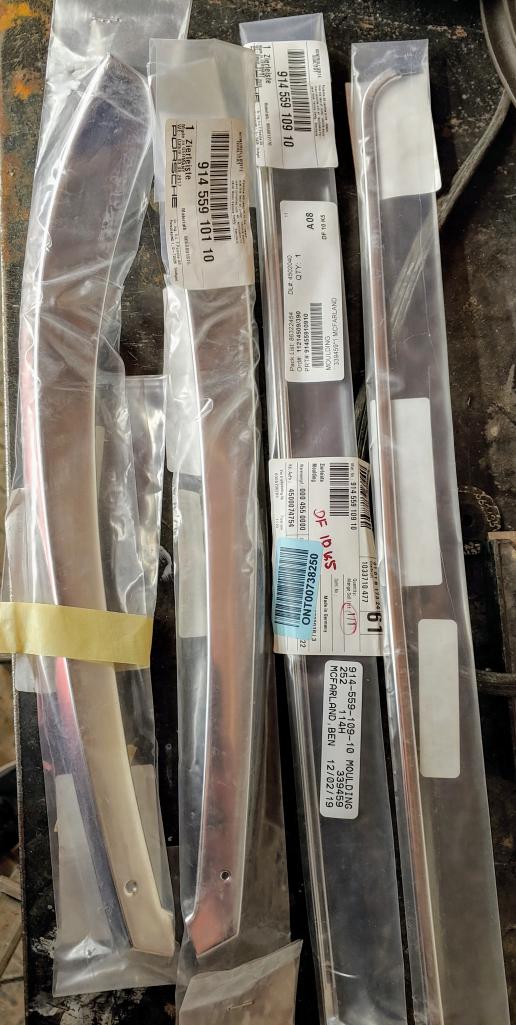
Posted by: Cairo94507 Dec 4 2019, 06:16 PM
Regardless, still not inexpensive.
Posted by: mb911 Dec 5 2019, 06:49 AM
Regardless, still not inexpensive. That is for Sure
Posted by: mb911 Dec 7 2019, 03:02 PM
Trim on.. Not real happy with the fit of it.. Some of it seems might be related to the replacement sail panels.. Either way it looks great if you don't zero in on the trim fit.. 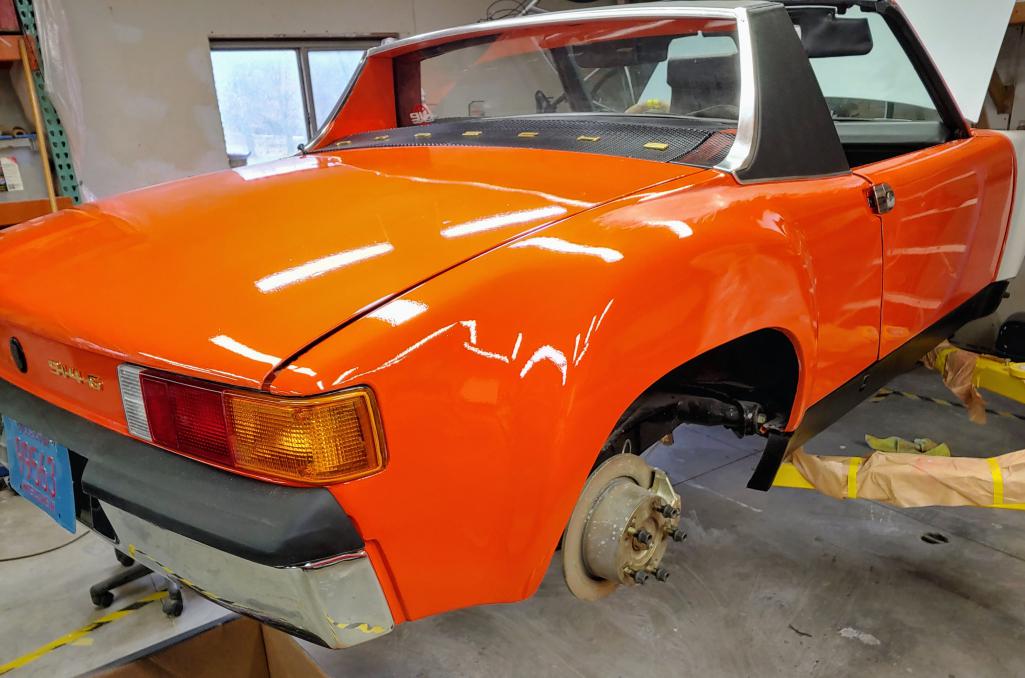
Posted by: raynekat Dec 7 2019, 10:16 PM
Looking more and more like a real car there Ben.
That color is really really nice.
Great job.
Posted by: mb911 Dec 8 2019, 10:02 AM
Thanks.. Once windows are in then move to finish body work up front and get the hood and fenders painted.. Might be one color this spring..
Posted by: mb911 Dec 9 2019, 02:07 PM
Windows in.. Realized the po owner must have run a grinder or something over the window and the anodized upright.. Mark Epstein says he likely has something to fix me up.. Its good that the car is almost enclosed now.. The house market is heating up so prepared for moving if need be.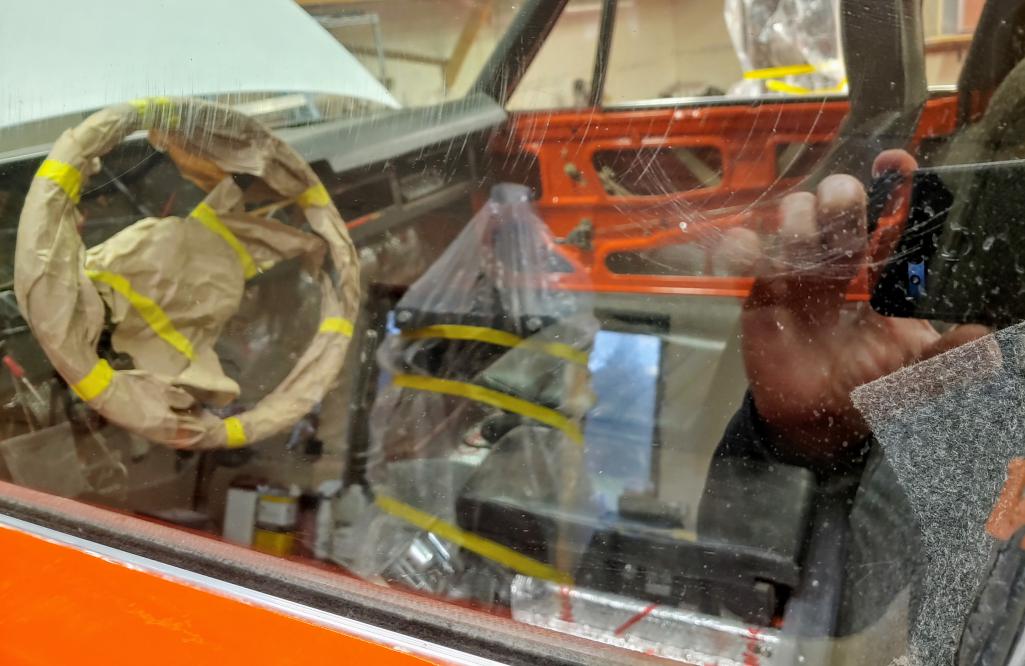
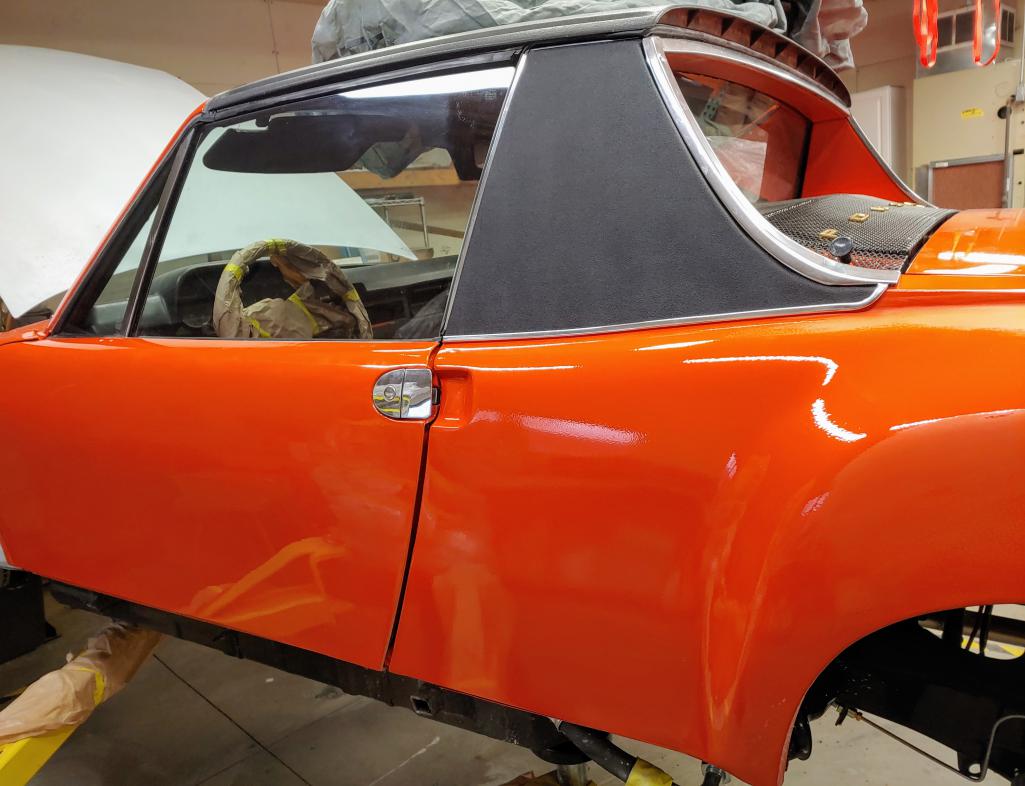
Posted by: 914forme Dec 9 2019, 02:33 PM
Ben, If Mark does not, I do, enough stuff moving between the three of us I almost lost track of what is going where, and how. it all comes out in the wash, in the end.
Posted by: mb911 Dec 9 2019, 02:49 PM
Ben, If Mark does not, I do, enough stuff moving between the three of us I almost lost track of what is going where, and how.
it all comes out in the wash, in the end.@http://www.914world.com/bbs2/index.php?showuser=2388 . Join the club.. I think you and I are square and I owe Mark an oil tank and some engine sheet metal.. Its hard to keep track but to be honest the 3 of us are lucky we dont live closer.. Our wives would hate us..
Posted by: 914forme Dec 9 2019, 02:55 PM

Posted by: mepstein Dec 9 2019, 05:51 PM
My wife hates you all
Posted by: mb911 Dec 9 2019, 08:14 PM
So thinking about trying to polish the glass and get rid of the scratches.. Any one have any luck with that?
Posted by: 914forme Dec 9 2019, 08:17 PM
depends on how deep the scratch is, works on minor stuff, pretty well.
Posted by: Tdskip Dec 10 2019, 08:16 PM
Thanks for all of the updates Ben, good luck with polishing the glass. You might get lucky if you can't snag a fingernail on it.
Posted by: rgalla9146 Dec 11 2019, 10:34 AM
So thinking about trying to polish the glass and get rid of the scratches.. Any one have any luck with that?
Windshield scratches can be polished out.
Side glass not possible.
I've had the same issue with side glass and made no progress.
Not for lack of effort.
It has something to do with the properties of the glass.
Attached thumbnail(s)

Posted by: mepstein Dec 11 2019, 11:25 AM
Ben - if you end up not using the glass, pull off the metal guides and we’ll throw them in our next batch of plated parts.
Posted by: mb911 Dec 11 2019, 11:53 AM
Sounds good guys.. Allot has been happening over the last week with our home sale so priority 1 is just making the car semi weather proof.. And 1 piece of course..
Think we have picked out our next house which is about a year old on 1/2 acre so waaaay more manageable then our 5 acres with a pond and a pool..
Good news is even though the garage is only 3.5 stalls it has 10 foot ceilings..
Anyhow back to our regularly scheduled programming
Posted by: mb911 Dec 11 2019, 07:37 PM
GT lines on after 4 years sitting on the shelf.. 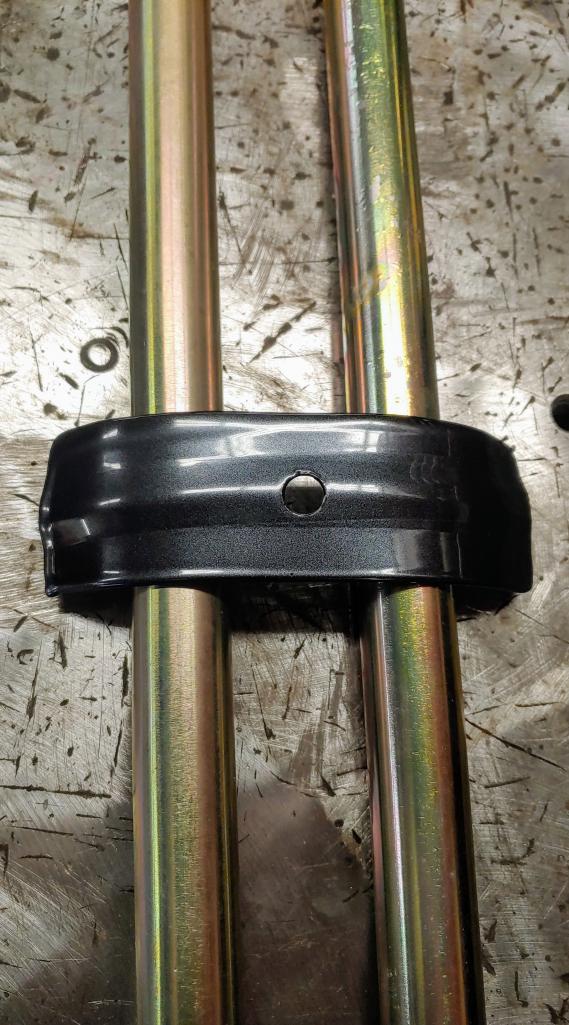
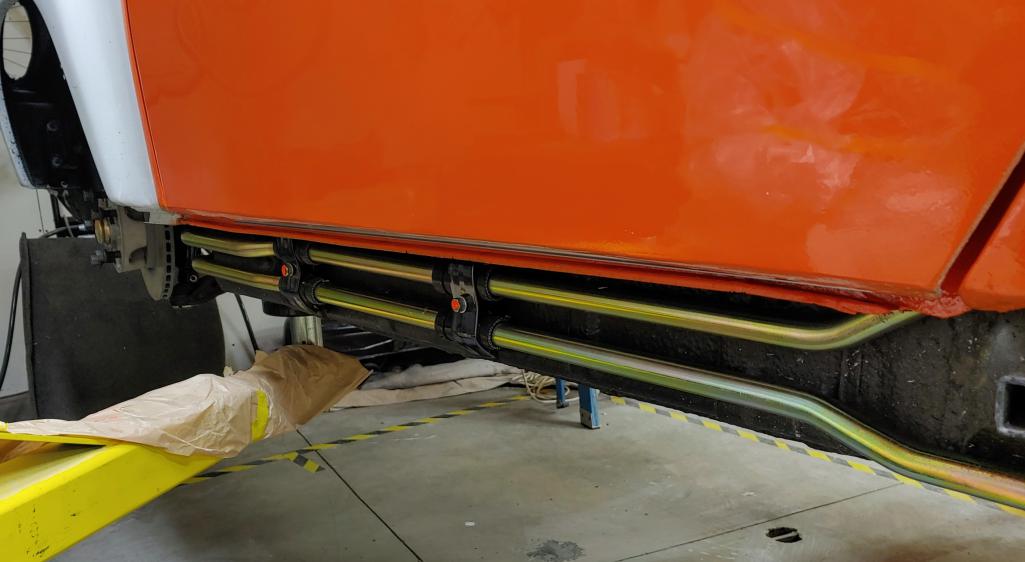
Posted by: sixnotfour Dec 11 2019, 09:20 PM
Ben; curious why you went with your spacing of the clamps ??
Attached image(s)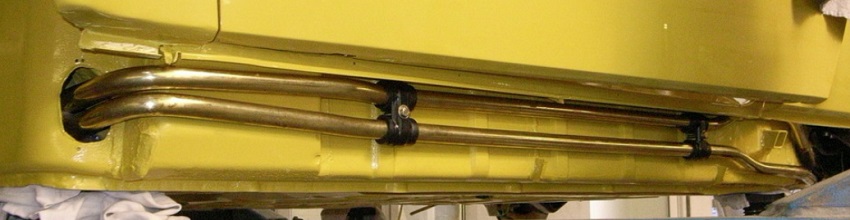
Posted by: mb911 Dec 12 2019, 05:17 AM
@http://www.914world.com/bbs2/index.php?showuser=2744 I can't remember why .. It's been quite a while since I did the mock up.. I am sure there was a reason.
Posted by: mb911 Dec 29 2019, 04:20 PM
Well moving in 3 weeks.. I did get my wheels back from fuchs restoration and dropped them off to get tires on so I can load the car over the next couple of days.. I will post pictures of the wheels tomorrow..
Getting excited for downsizing= more time to do what I want to do.. 
Posted by: Dion Dec 29 2019, 06:39 PM
Your 914 is coming along nicely Ben. Good luck with the move. Hope all goes smoothly.
Posted by: mb911 Dec 30 2019, 12:59 PM
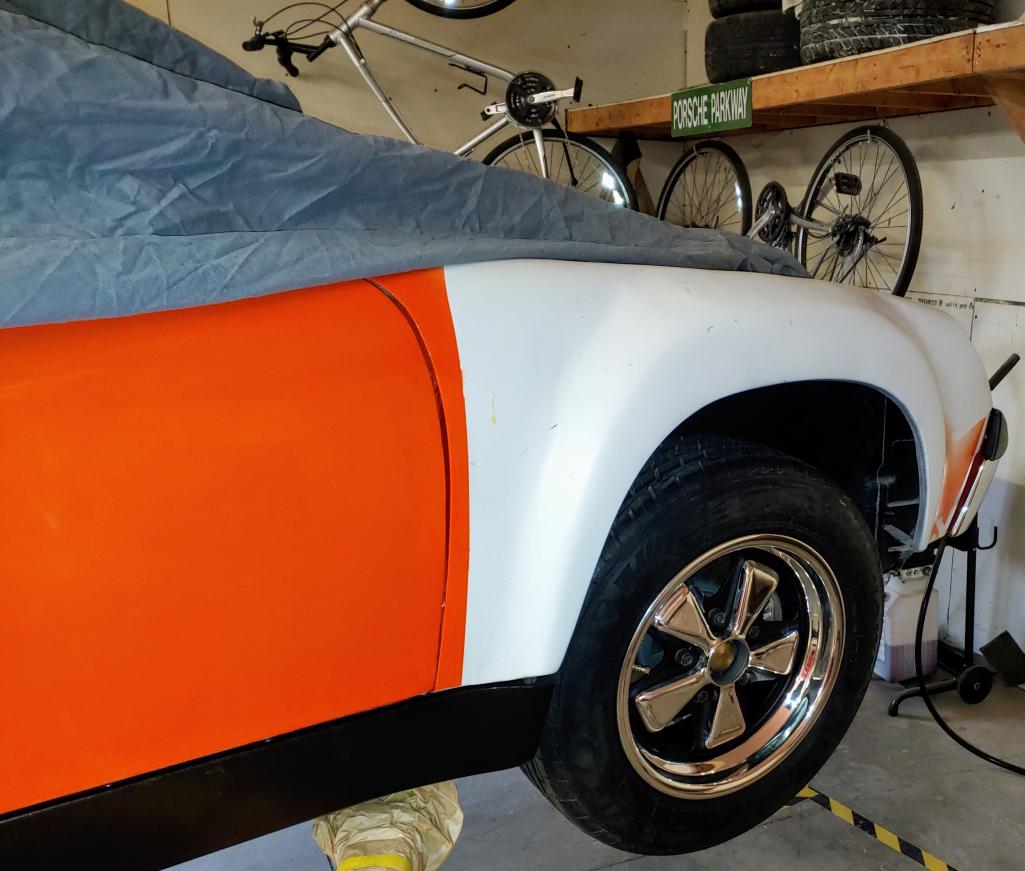
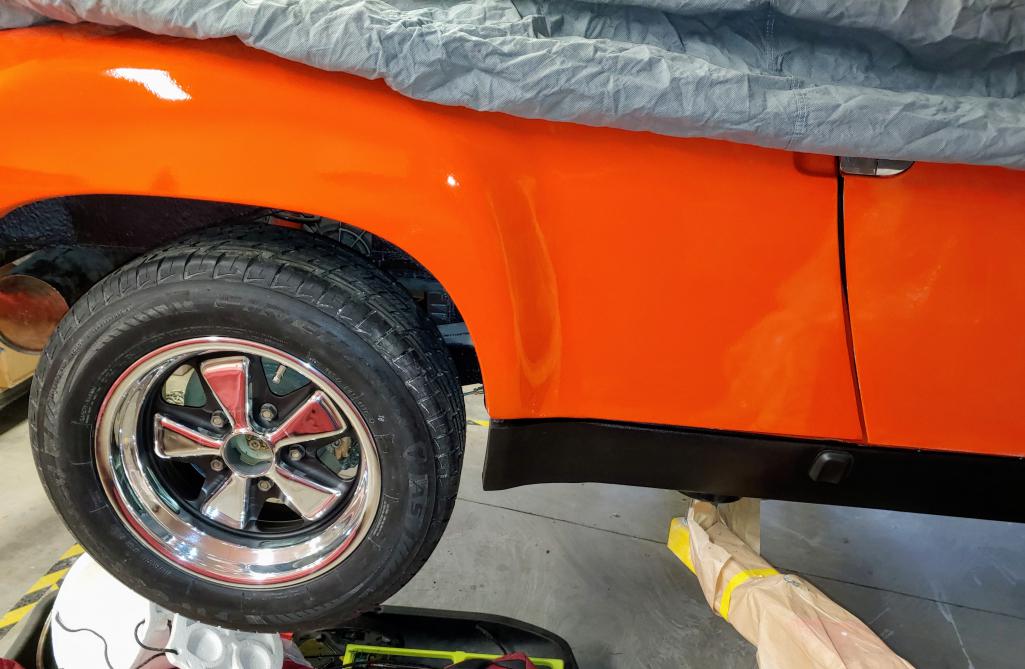
Posted by: GeorgeRud Dec 30 2019, 04:54 PM
I hope the weather holds up nicely for your move. Winter in Wisconsin can be challenging.
Posted by: TravisNeff Dec 31 2019, 08:35 AM
Wheels came out great Ben!
Posted by: mb911 Dec 31 2019, 08:38 AM
Wheels came out great Ben!
@http://www.914world.com/bbs2/index.php?showuser=447
They really turned out well and for the price you cant beat it..
Posted by: Cairo94507 Dec 31 2019, 09:42 AM
Happy New Year Ben. I hope the move goes smoothly and you have lots of help. Your car is looking good and I love the wheels.
Posted by: JmuRiz Dec 31 2019, 11:18 AM
Wheels came out great Ben!
@http://www.914world.com/bbs2/index.php?showuser=447
They really turned out well and for the price you cant beat it..
Who did the wheels, I lost track of that tidbit. Mine could use some love!
Posted by: mb911 Dec 31 2019, 11:22 AM
Wheels came out great Ben!
@http://www.914world.com/bbs2/index.php?showuser=447
They really turned out well and for the price you cant beat it..
Who did the wheels, I lost track of that tidbit. Mine could use some love!
@http://www.914world.com/bbs2/index.php?showuser=50 fuchsrestorations.com did them
185 per wheel
Posted by: JmuRiz Dec 31 2019, 12:59 PM
Nice, thanks!
Posted by: mb911 Jan 1 2020, 04:31 PM
Loaded a bit early for the move so that I dont have to do it when its 5 degrees out..
Almost everything is in there including the lift and tool boxes etc. 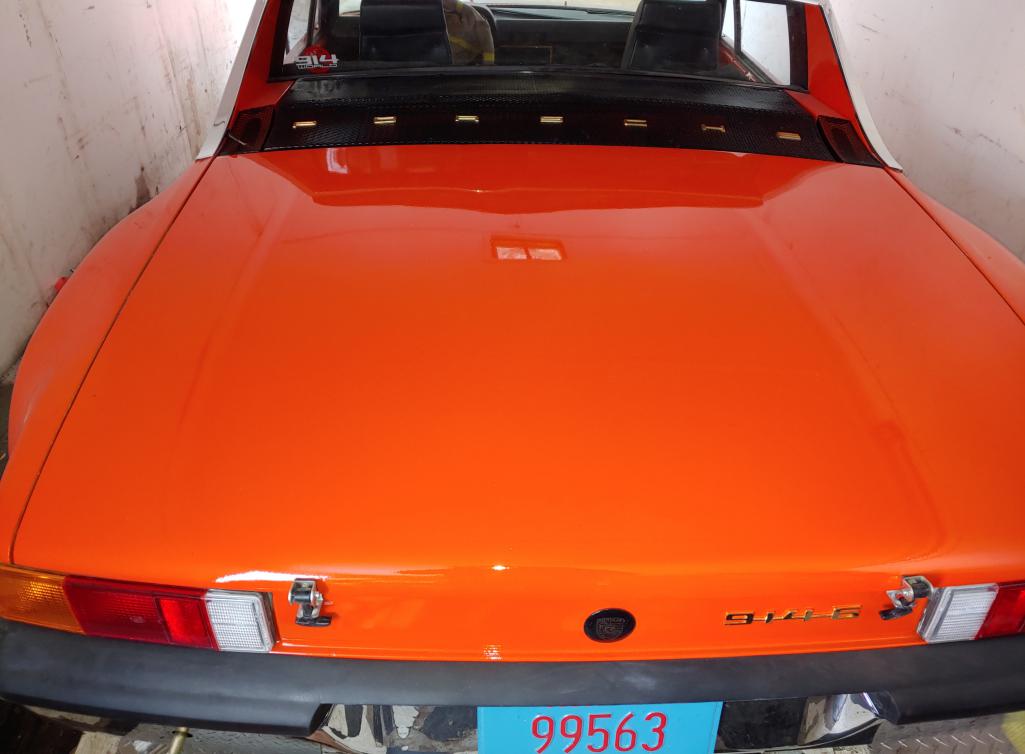
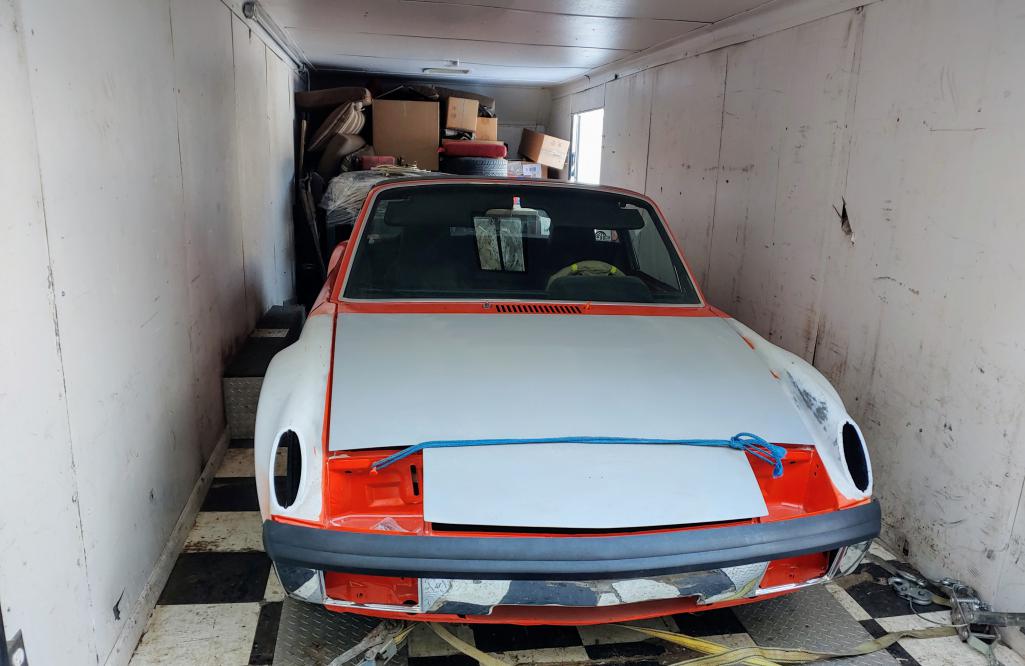
Posted by: mb911 Jan 25 2020, 06:58 AM
Old house is gone.. Car is all cozy at the new house.. Man I am tired.. Much smaller space but its a good thing. 
Posted by: mb911 Jan 25 2020, 06:59 AM
New house.
Posted by: Freezin 914 Jan 25 2020, 07:55 AM
Happy for you! Car is looking great!
Posted by: Cairo94507 Jan 25 2020, 08:03 AM
Congratulations on the move. That has to feel good to know you are in the new place and can now unpack and get organized. Moving, though a pain in the butt, is a good chance to sort everything and get rid of stuff you will never miss and find stuff you forgot you had.
Posted by: JmuRiz Jan 25 2020, 10:28 PM
3-car garage and wide driveway = me being jealous
Nice!
Posted by: mb911 Feb 1 2020, 03:30 PM
Did some organization. I have a few oil tanks to finish up and get more organized.. Then back to the car.. I go to Phoenix this week so nothing will get done.. Hope to finish up some orders then mount the lift.. I did get confirmation that the concrete is 4" thick which is the requirement for the max jax.. 
Posted by: mb911 Feb 23 2020, 07:33 PM
My life is about to get a bit easier.. For about the last 6 months I prepared to move, then move, try to balance work and then sort of neglect my business, then start to finish the basement and fix the terrible bedroom that the PO did on our new house.. The house is only 1.5 years old so they didn't mess up to much.. This week drywallers come in so this weekend I did all the HVAC, electrical, and insulation this weekend.. I have about half a day left.. But did spend a few minutes with my own project .. New lenses from 914rubber, I powdercoated the fog light I received from @http://www.914world.com/bbs2/index.php?showuser=2388 and then assembled them.. .. Oh and an HVAC duct mishap gave me a nice gash as well.. Really excited to be at this point.. Finally feeling caught up.. 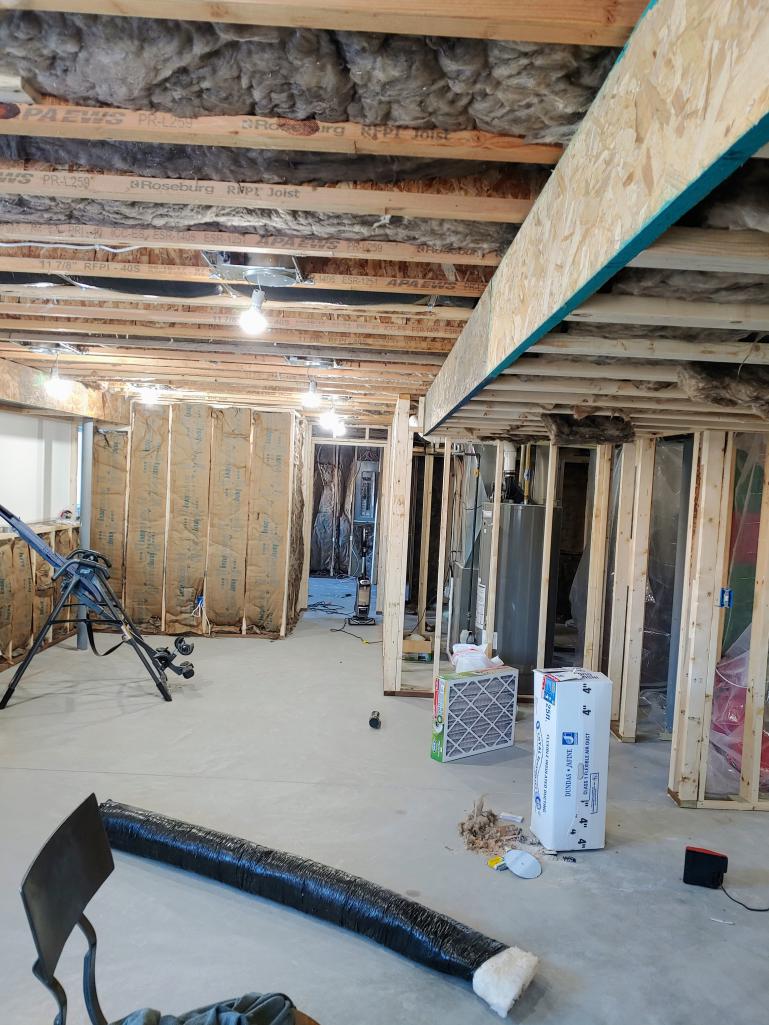
Posted by: mb911 Feb 23 2020, 07:35 PM

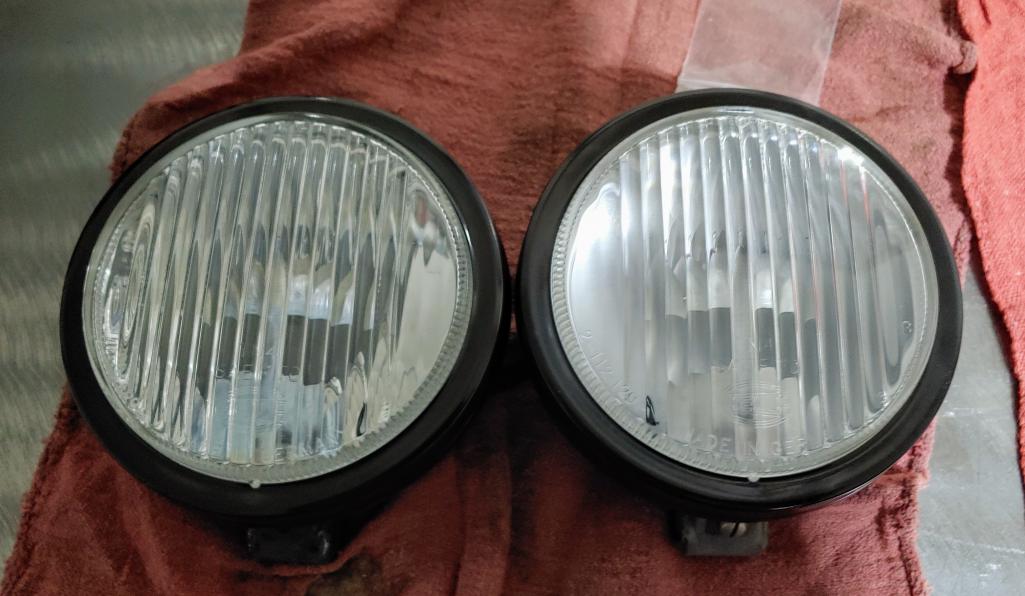
Now to figure out what those clips are supposed to look like that secure the lenses to the housing
Posted by: 914forme Feb 23 2020, 08:03 PM
@http://www.914world.com/bbs2/index.php?showuser=9892 those turned out really nice, glad you could make it work for you.
Posted by: mb911 Feb 23 2020, 08:04 PM
@http://www.914world.com/bbs2/index.php?showuser=9892 those turned out really nice, glad you could make it work for you.
Thanks.. It is small things that help move the project forward..
Posted by: mb911 Feb 25 2020, 09:06 AM
My poor mans fog light LED adapters. 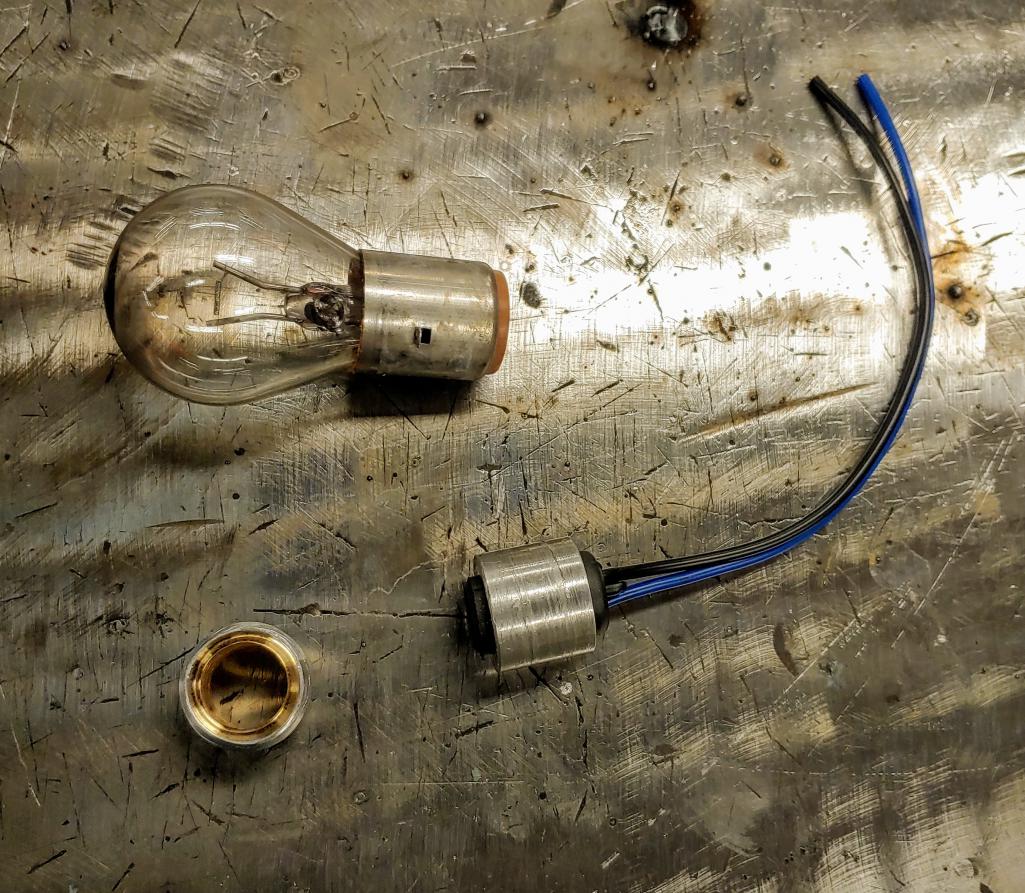
Posted by: mb911 Mar 10 2020, 07:31 AM
Working a bit on oil line solutions.. In light of recent discoveries that factory style scavenge line does not work with the naroscape or PMS engine mounts I decided to come up with a solution for others. I chose Russell pro line classic AN hose as it has a blue tracer much like the original.. I may actually get these made in proper 30mm setups for those that want one.. I used orange fire sleeve which I may take off as I will use Adel clamps to hold the hose away from the headers. Pictured is project in progress.. Its not done but spit balling at this point. 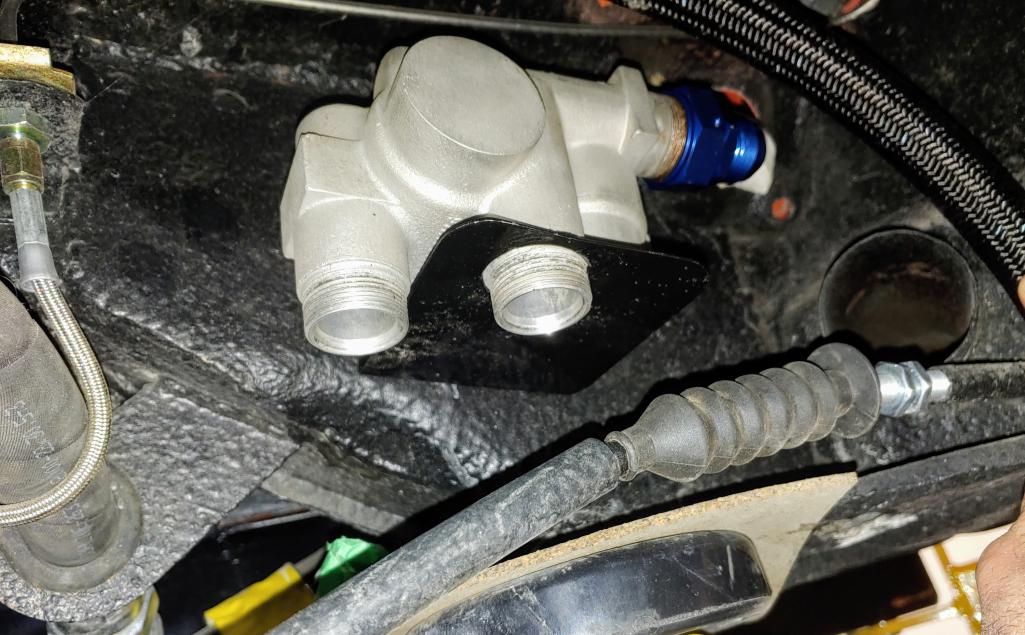
Posted by: mb911 Mar 10 2020, 07:32 AM
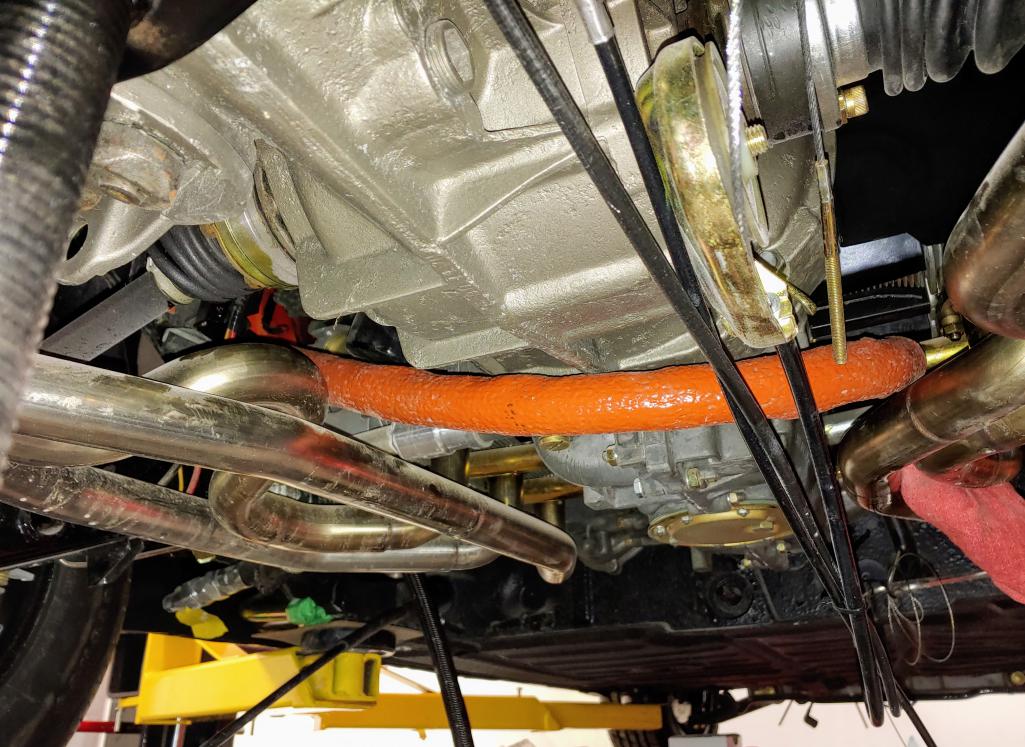
Posted by: mb911 Mar 10 2020, 07:33 AM
Waiting on another couple of fittings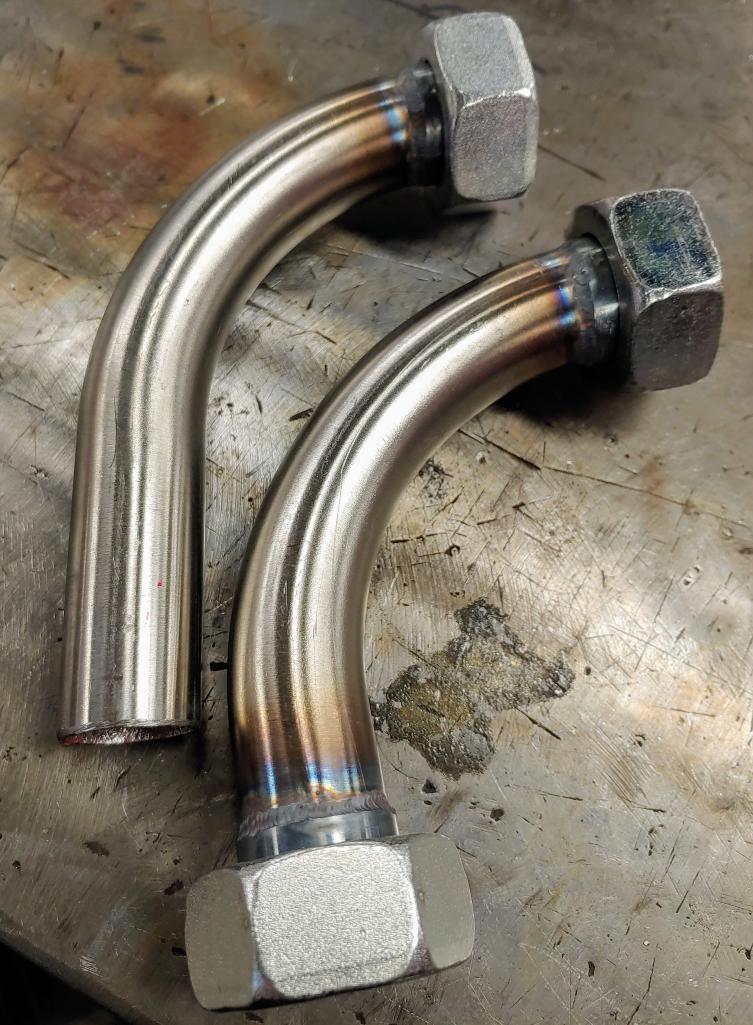
Posted by: mb911 Mar 11 2020, 08:43 AM
Routed the scavenge over the trans.. Much happier with that.. Made some brackets and now waiting on a few fittings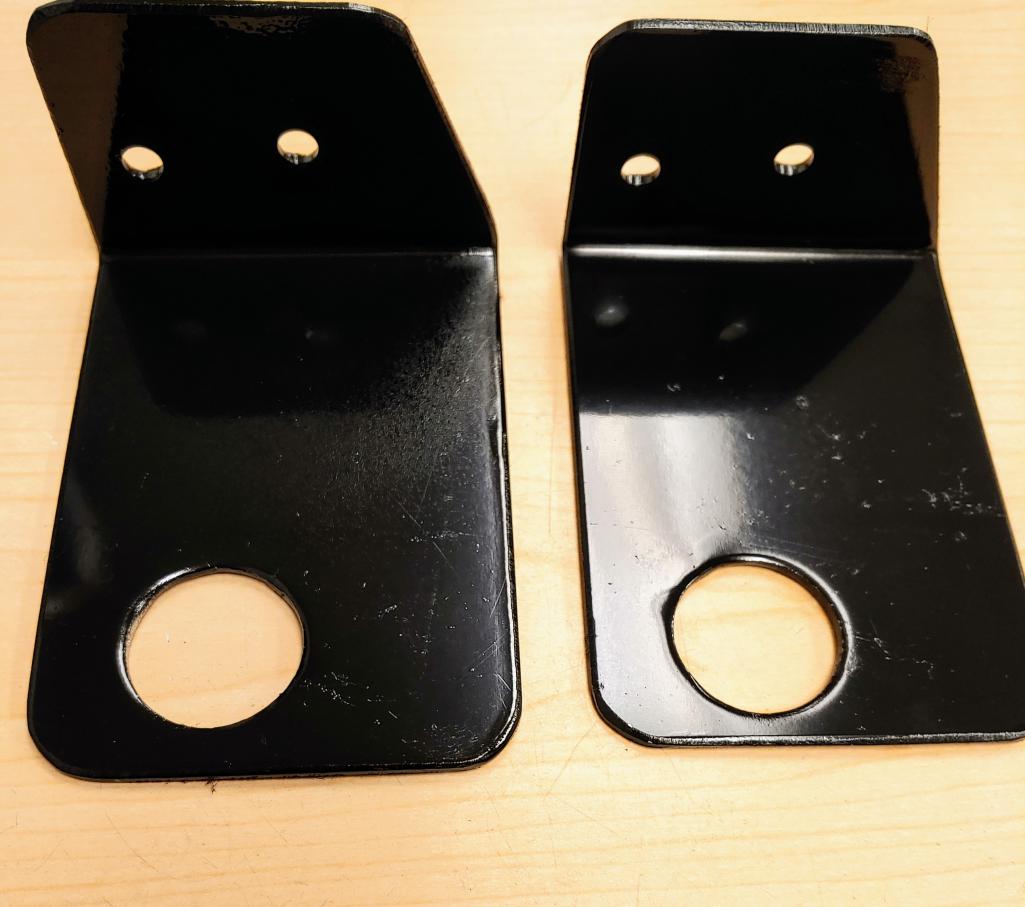
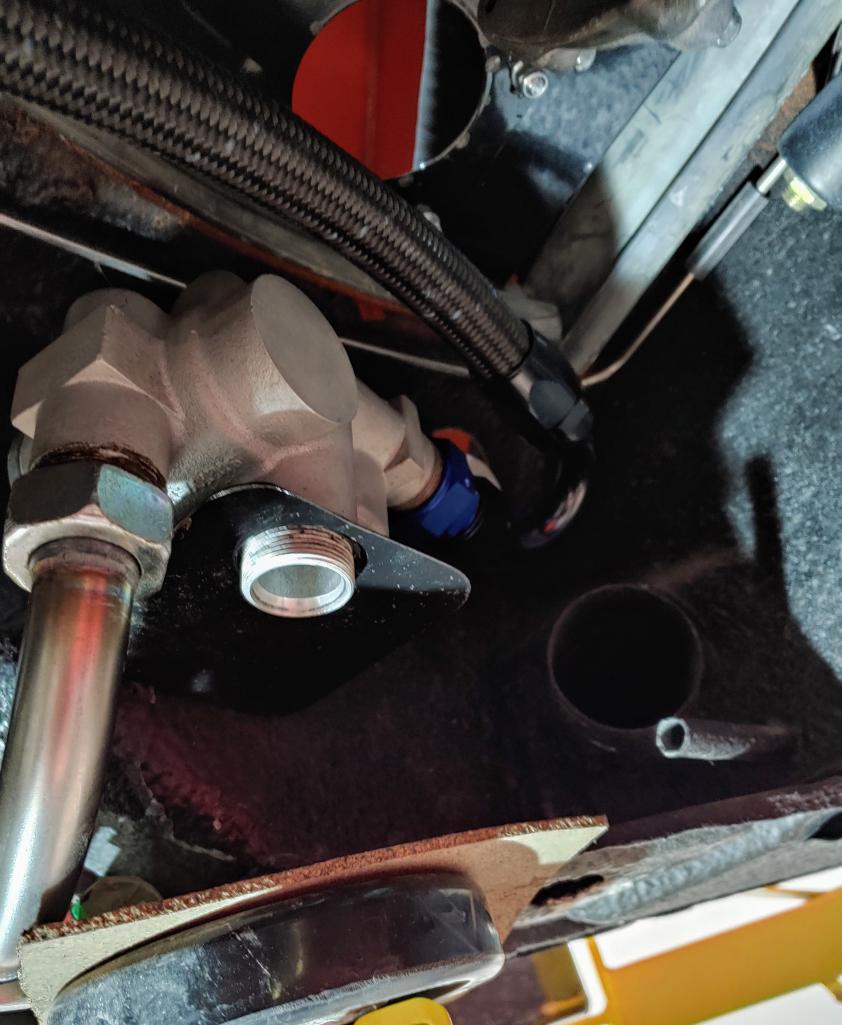
Posted by: mb911 Mar 24 2020, 11:47 AM
Well ditched the bracket.. Didn't like the constraints. Gonna do something much smaller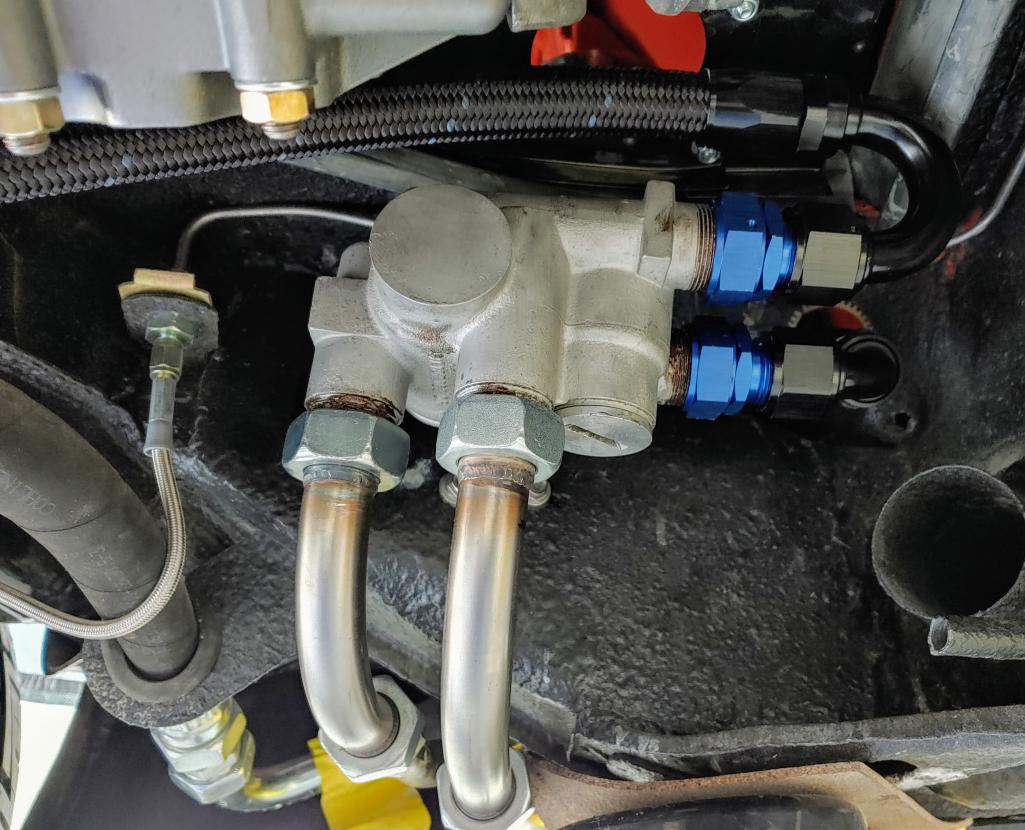
Posted by: mb911 Mar 24 2020, 11:48 AM
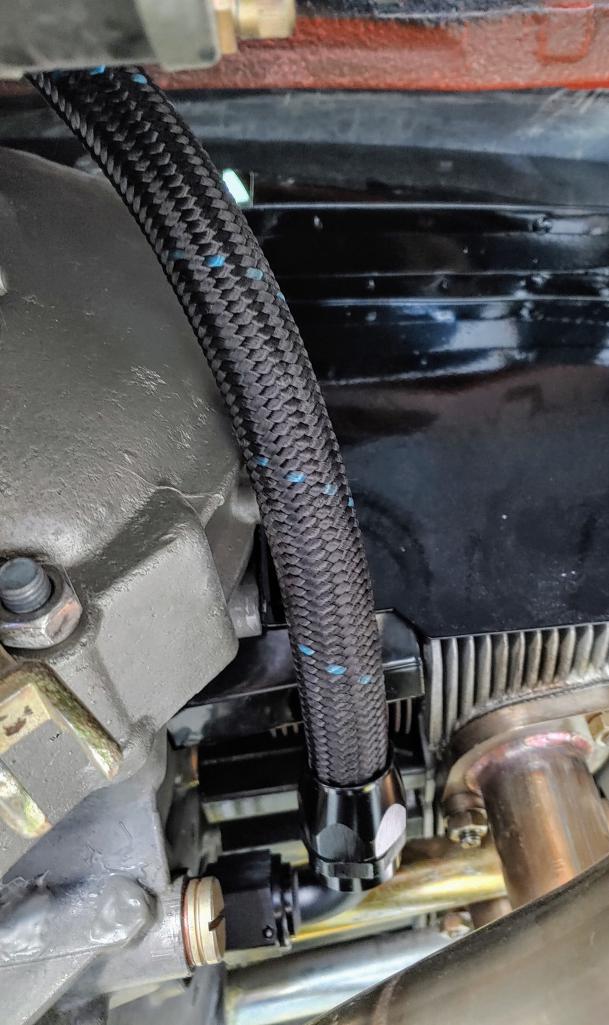
Posted by: mb911 Mar 24 2020, 11:48 AM
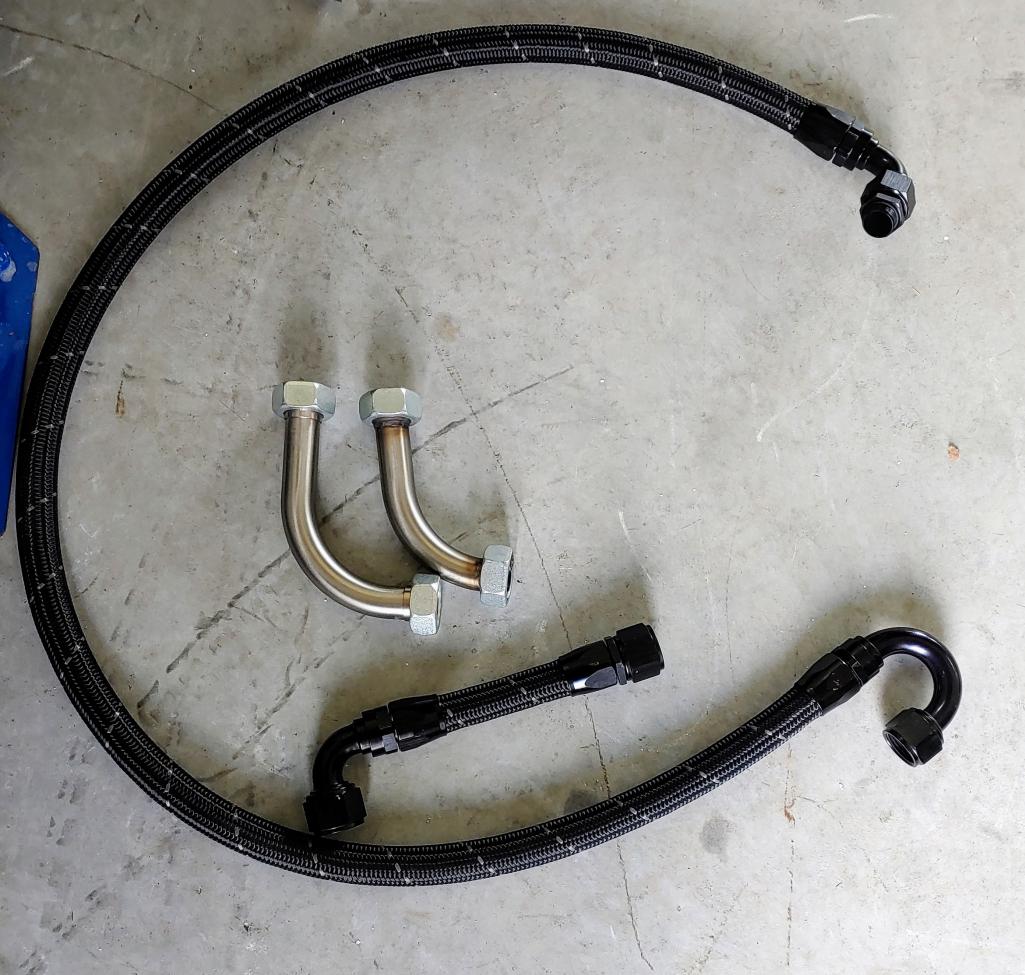
Posted by: mepstein Mar 24 2020, 12:12 PM
I like it.
Posted by: mb911 Mar 24 2020, 04:34 PM
Thanks.. I am happy with it finally..
Posted by: mb911 Mar 24 2020, 04:35 PM
Thanks.. I am happy with it finally..
I have a few extra kits if anyone is interested
Posted by: mb911 Mar 24 2020, 04:35 PM
Thanks.. I am happy with it finally..
I have a few extra kits if anyone is interested
Posted by: Retroracer Mar 24 2020, 05:26 PM
Looks good Ben!
Am also liking the Russell hose with the blue tracer (Jeg's I think stock it). Used it on the entire run to/from the oil cooler down the longs on my GT project. With appropriate black hose it ends it just looks great.
Posted by: mb911 Mar 24 2020, 06:55 PM
Yup the russell pro classic is nice.. I found a place in Florida that I buy all my fittings from and they make a similar hose with white tracer.. That's what I want to sell with my kits and what is shown in the picture on the floor
Posted by: mepstein Mar 24 2020, 07:03 PM
I'm sure you already know I want a set. Thanks!
Posted by: mb911 Mar 26 2020, 02:02 PM
Put the front suspension ties/sway bar, tightened master cylinder, then worked on feeding throttle cable.. I found an obstruction about 3/4 of the way through the tunnel.. I am not sure what that is about. @http://www.914world.com/bbs2/index.php?showuser=20845 @http://www.914world.com/bbs2/index.php?showuser=10825 any suggestions on that? Kind of sucks. I am close to wrapping things up underneath.. Gotta hook up fuel pump lines next.
Posted by: mepstein Mar 26 2020, 02:04 PM
Put the front suspension ties/sway bar, tightened master cylinder, then worked on feeding throttle cable.. I found an obstruction about 3/4 of the way through the tunnel.. I am not sure what that is about. @http://www.914world.com/bbs2/index.php?showuser=20845 @http://www.914world.com/bbs2/index.php?showuser=10825 any suggestions on that? Kind of sucks. I am close to wrapping things up underneath.. Gotta hook up fuel pump lines next.
Is it only in the throttle cable or is there an issue with some/all the cables and lines?
Posted by: mb911 Mar 26 2020, 02:05 PM
Put the front suspension ties/sway bar, tightened master cylinder, then worked on feeding throttle cable.. I found an obstruction about 3/4 of the way through the tunnel.. I am not sure what that is about. @http://www.914world.com/bbs2/index.php?showuser=20845 @http://www.914world.com/bbs2/index.php?showuser=10825 any suggestions on that? Kind of sucks. I am close to wrapping things up underneath.. Gotta hook up fuel pump lines next.
Is it only in the throttle cable or is there an issue with some/all the cables and lines?
Just throttle cable..
@http://www.914world.com/bbs2/index.php?showuser=22428 any ideas as well?
Posted by: mb911 Mar 26 2020, 02:06 PM
Posted by: Superhawk996 Mar 26 2020, 02:17 PM
@http://www.914world.com/bbs2/index.php?showuser=9892
install of the throttle cable is like pushing a rope. Only worse because corriosion on inside of the tube can hang things up.
Have you tried a thin gauge wire to thread through 1st from the pedal end and use it to pull the rope (i.e. throttle cable)? I have done this myself.
Alternatively, I wonder if a flexible rod and brass brush like a 22GA gun cleaning brush could be run though to knock down any corrosion? I have never tried this.
In the case of getting my most recent rust bucket running before I cut it up for long repairs, I actually had to cut open the tunnel and cut the throttle cable tube where the cable was hanging up. Don't suspect yours could be that bad.
Posted by: mb911 Mar 26 2020, 02:22 PM
I can get weedeater line through no problem.. I am afraid there might be some weld penetration bled through in an area.. How about those small flexible drill bits?
Posted by: Superhawk996 Mar 26 2020, 03:30 PM
I can get weedeater line through no problem.. I am afraid there might be some weld penetration bled through in an area.. How about those small flexible drill bits?
@http://www.914world.com/bbs2/index.php?showuser=9892
Your weld or OEM weld?
If it were an OEM weld then wiggling the cable should be able to get the threaded part of the throttle cable around the obstruction. If the OEM cable went in so should yours. In my case I've used thin wire and wrapped it arund the thread and then taped over it with electrical tape w/o making the OD of the threaded portion of the cable any larger. I'm not sure you can do the same with weed eater line.
If you're talking about weld bleed though from work you've done all bets are off.
Yeah, maybe one of those long flexible drills that electrical contractors use? Do they make them that small? I think that cable tube is too small, long and curved to get a look with a borescope.
What about coiled, soft annealed copper tube with OD slightly smaller than throttle cable tube ID. Can that be fed in and "forced" back and forth to clear a rust obstruction. I don't think it would work for weld penetration. Maybe would burnish any sharp weld slag?
Hmm. I'll keep thinking.
Posted by: mb911 Mar 26 2020, 03:33 PM
I can get weedeater line through no problem.. I am afraid there might be some weld penetration bled through in an area.. How about those small flexible drill bits?
Your weld or OEM weld?
If it were an OEM weld then wiggling the cable should be able to get the threaded part of the throttle cable around the obstruction. If the OEM cable went in so should yours.
If you're talking about weld bleed though from work you've done all bets are off.
Yeah, maybe one of those long flexible drills that electrical contractors use? Do they make them that small? I think that cable tube is too small, long and curved to get a look with a borescope.
What about coiled, soft annealed copper tube with OD slightly smaller than throttle cable tube. Can that be fed in and "forced" back and forth to clear a rust obstruction. I don't think it would work for weld penetration. Maybe would burnish any sharp weld slag?
Hmm. I'll keep thinking.
I can't remember if I welded on any of it or not.. Can you imagine if I have to figure out how to run a new one? Ugh..
Posted by: bbrock Mar 26 2020, 04:31 PM
Throttle is the last cable I haven't installed on the car yet so no clue. I do know that I had to run a wire bottle brush through my e-brake and clutch tubes before I could get the cables to feed nicely.
Posted by: mb911 Mar 26 2020, 04:37 PM
Throttle is the last cable I haven't installed on the car yet so no clue. I do know that I had to run a wire bottle brush through my e-brake and clutch tubes before I could get the cables to feed nicely.
@http://www.914world.com/bbs2/index.php?showuser=20845 where did you get the bottle brush?
Posted by: bbrock Mar 26 2020, 04:37 PM
If you have to bore/grind out the tube, metal electrical fish tape makes for a cheap flexible drill shaft. For boring wood, I just cut it at an angle to make a point. For something like this, I'll bet you could weld a burr, bit, or stone onto the end to work while spinning with a drill. It's a thought anyway.
I'd start with trying to pull a steel wire bottle brush through. I found brass brushes to be too soft to break up the crud but steel worked great.
Posted by: bbrock Mar 26 2020, 04:38 PM
Throttle is the last cable I haven't installed on the car yet so no clue. I do know that I had to run a wire bottle brush through my e-brake and clutch tubes before I could get the cables to feed nicely.
@http://www.914world.com/bbs2/index.php?showuser=20845 where did you get the bottle brush?
HF. I think I bought an assorted pack for a few bucks.
Posted by: rgalla9146 Mar 26 2020, 05:26 PM
So thinking about trying to polish the glass and get rid of the scratches.. Any one have any luck with that?
Windshield scratches can be polished out.
Side glass not possible.
I've had the same issue with side glass and made no progress.
Not for lack of effort.
It has something to do with the properties of the glass.
I'm afraid I must eat some crow.
There was a recent thread here that covered this issue.
It is possible to remove scratches from side glass.
Patience is required.
Posted by: mepstein Mar 26 2020, 06:26 PM
I’m happy to check my extras from my parts car and see if I can find some good side glass. I’m sure you can do it but if I have some decent ones sitting around ...
Posted by: rgalla9146 Mar 26 2020, 07:27 PM
Working a bit on oil line solutions.. In light of recent discoveries that factory style scavenge line does not work with the naroscape or PMS engine mounts I decided to come up with a solution for others. I chose Russell pro line classic AN hose as it has a blue tracer much like the original.. I may actually get these made in proper 30mm setups for those that want one.. I used orange fire sleeve which I may take off as I will use Adel clamps to hold the hose away from the headers. Pictured is project in progress.. Its not done but spit balling at this point.
Ben I used a hangar from the chassis down to one of the rigid tubes at the bottom of the thermo. It clamps onto the tube to allow some adjustability.
Additioal support and location is provided to the thermo by replacing the hose
from the tank to the scavenge line with a solid rigid tube.
Engine vibration and movement is absorbed by a hose that extends from the
thermo toward a fabricated scavenge line that extends around the front of the
engine.
Picture attached.
Attached thumbnail(s)
Posted by: bbrock Mar 26 2020, 07:32 PM
So thinking about trying to polish the glass and get rid of the scratches.. Any one have any luck with that?
Windshield scratches can be polished out.
Side glass not possible.
I've had the same issue with side glass and made no progress.
Not for lack of effort.
It has something to do with the properties of the glass.
I'm afraid I must eat some crow.
There was a recent thread here that covered this issue.
It is possible to remove scratches from side glass.
Patience is required.
Yep, that was me. Details in the last few pages of my build thread. Emphasis on the patience. It is definitely work.
Posted by: rgalla9146 Mar 26 2020, 07:37 PM
Picture showing support from chassis to lower rigid tube.
I can't believe it's been a year plus since I devised this.
Attached thumbnail(s)
Posted by: Tbrown4x4 Mar 26 2020, 07:37 PM
If you have an old speedometer cable, you can pull out the inner wire and fray the end to make a flexible "brush", and run it through the throttle tube with a drill motor. If there's more than rust in there, maybe you could feel where it's hanging up.
Posted by: mb911 Mar 26 2020, 07:38 PM
If you have an old speedometer cable, you can pull out the inner wire and fray the end to make a flexible "brush", and run it through the throttle tube with a drill motor. If there's more than rust in there, maybe you could feel where it's hanging up.
That's a good idea.. I don't but starts working towards the possible solution
Posted by: mb911 Mar 30 2020, 07:13 PM
Got the cable figured out. Yeah.. 
Posted by: bbrock Mar 30 2020, 07:44 PM
Got the cable figured out. Yeah..
Now c'mon... spill it. What was the solution?
Posted by: Tdskip Mar 30 2020, 07:47 PM
Wondering if someone created an obstruction by trying to make sure the clutch line didn’t move?
Posted by: mb911 Mar 30 2020, 07:49 PM
Got the cable figured out. Yeah..
Now c'mon... spill it. What was the solution?
It was plastic sheathing.. Happy its all good now.. The goal is tp get it running in the next few month's
Posted by: mb911 Apr 4 2020, 05:37 AM
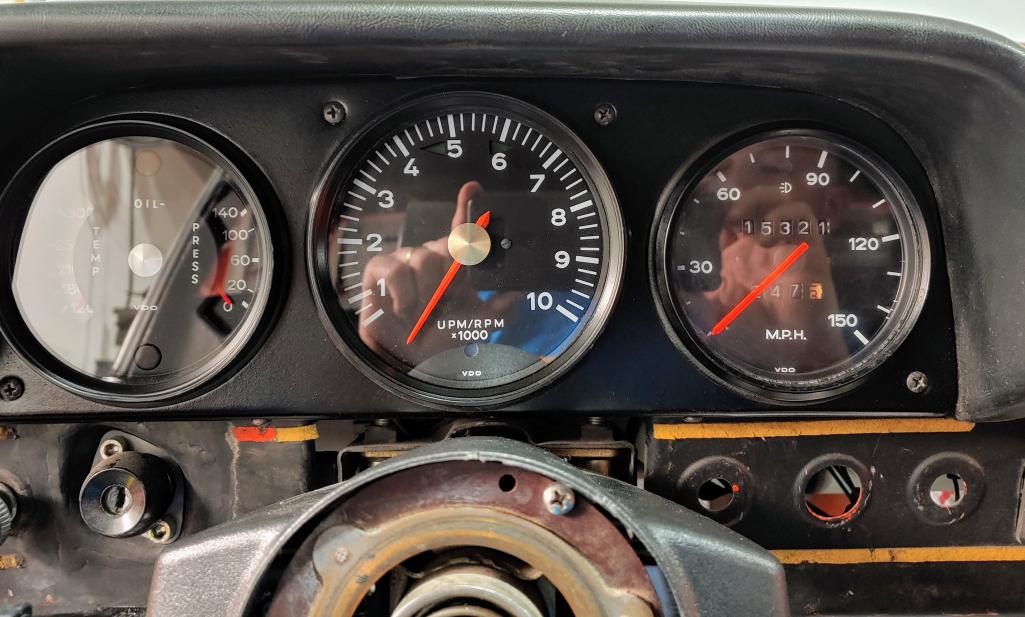
Posted by: mb911 Apr 4 2020, 05:38 AM
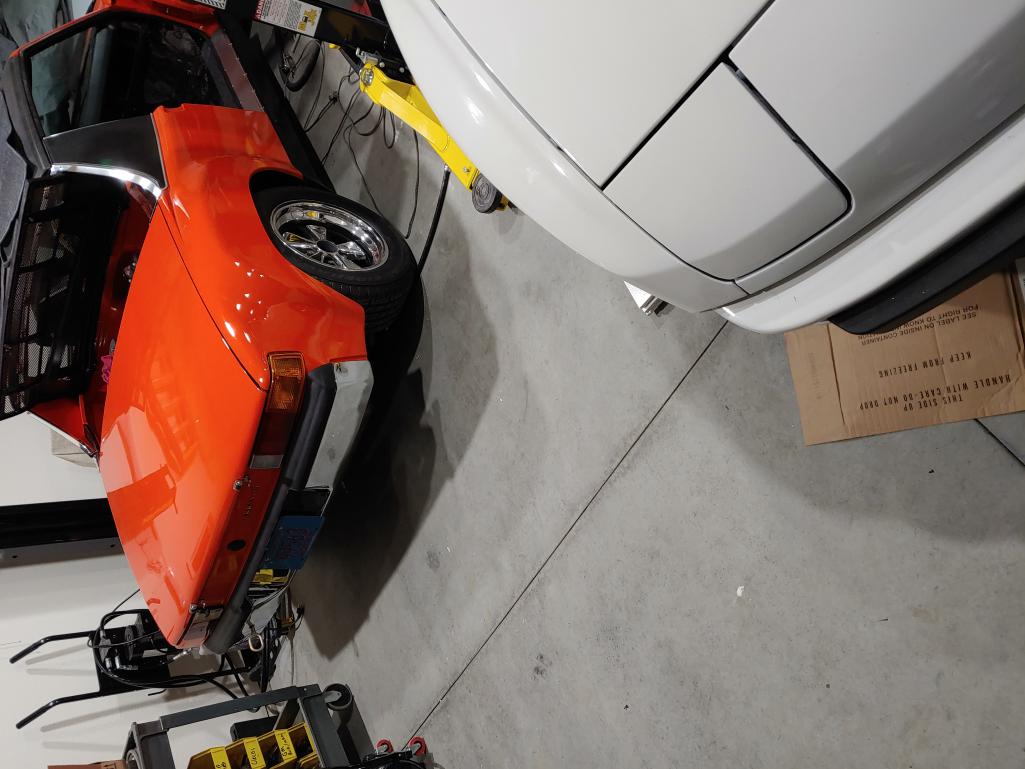
Posted by: Superhawk996 Apr 4 2020, 07:57 AM
Got the cable figured out. Yeah..
Now c'mon... spill it. What was the solution?
It was plastic sheathing.. Happy its all good now.. The goal is tp get it running in the next few month's
Not clear on what you did. Old plastic sheathing that was still in tube or that you had to trim the new cable sheath?
Plumbing and bottom of engine look nice and tidy! Well done!. Can't wait to see video of it running.
Posted by: Cairo94507 Apr 4 2020, 08:08 AM
Great progress Ben.
Posted by: mb911 Apr 4 2020, 08:15 AM
Got the cable figured out. Yeah..
Now c'mon... spill it. What was the solution?
It was plastic sheathing.. Happy its all good now.. The goal is tp get it running in the next few month's
Not clear on what you did. Old plastic sheathing that was still in tube or that you had to trim the new cable sheath?
Plumbing and bottom of engine look nice and tidy! Well done!. Can't wait to see video of it running.
@http://www.914world.com/bbs2/index.php?showuser=22428 there was some sort of lining inside the tube.. Seems maybe it was from an old cable? Not sure..
Posted by: Superhawk996 Apr 4 2020, 08:24 AM
Got the cable figured out. Yeah..
Now c'mon... spill it. What was the solution?
It was plastic sheathing.. Happy its all good now.. The goal is tp get it running in the next few month's
Not clear on what you did. Old plastic sheathing that was still in tube or that you had to trim the new cable sheath?
Plumbing and bottom of engine look nice and tidy! Well done!. Can't wait to see video of it running.
@http://www.914world.com/bbs2/index.php?showuser=22428 there was some sort of lining inside the tube.. Seems maybe it was from an old cable? Not sure..
Yeah, probably from an old cable. Terry Cable and others used to have a section of nylon sheath that extended beyond the metal wound cable housing. Sounds like an old piece of it. Nice find! Thanks for the clarifiction.
Posted by: mb911 Apr 4 2020, 04:18 PM
Mounted the MSD box.. Probably work on wiring this evening.. Put the panels on the doors just for safe keeping.. Thanks @http://www.914world.com/bbs2/index.php?showuser=10825 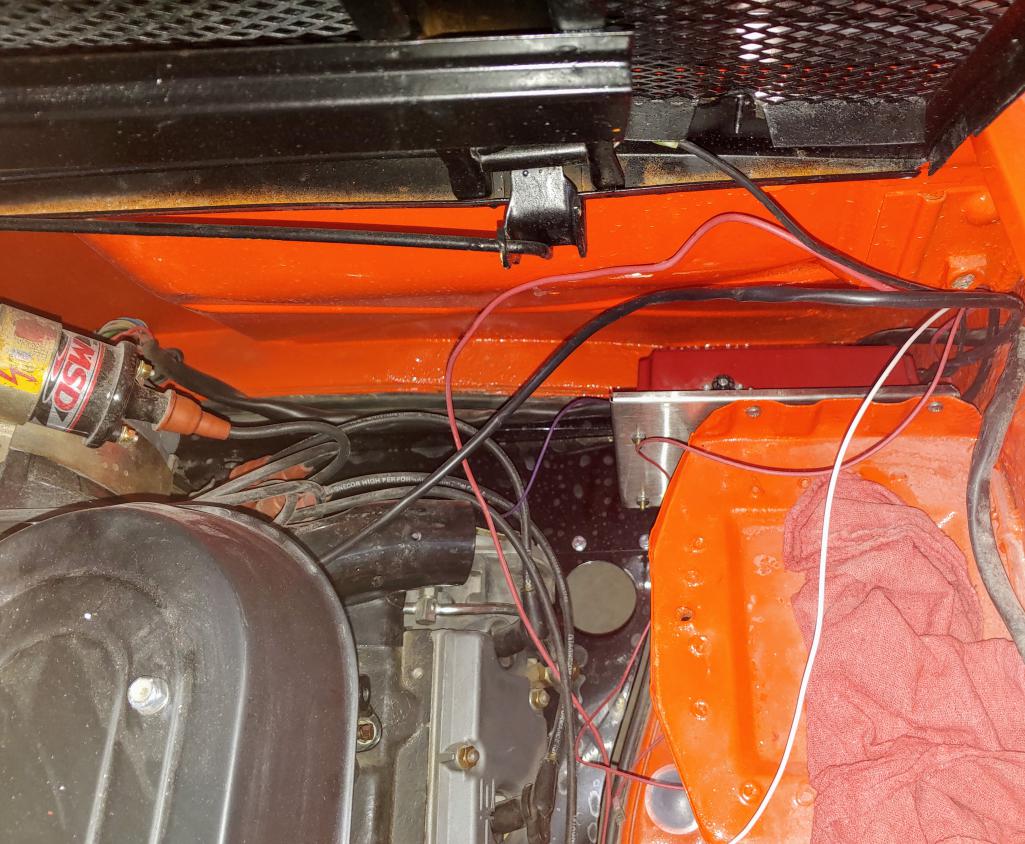
Posted by: mb911 Apr 4 2020, 04:19 PM
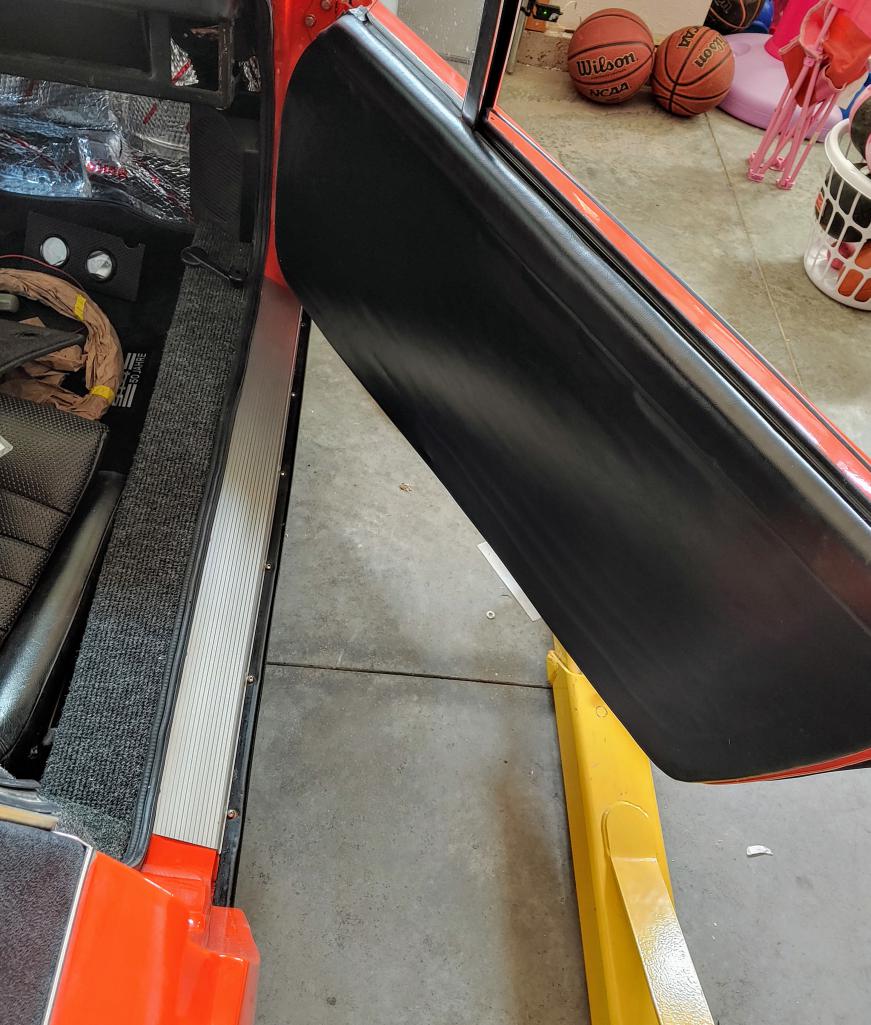
Posted by: Dion Apr 4 2020, 10:27 PM
Looking good Ben. Cool tach. Can’t wait to hear ya fire it up.
Posted by: whitetwinturbo Apr 5 2020, 07:33 PM
Posted by: mb911 Apr 9 2020, 03:32 PM
Thanks @http://www.914world.com/bbs2/index.php?showuser=10825 for the mirrors.. Gas tank is in, fresh air box is in.. Hole cut in the hood. Wiring is 90% figured out.. 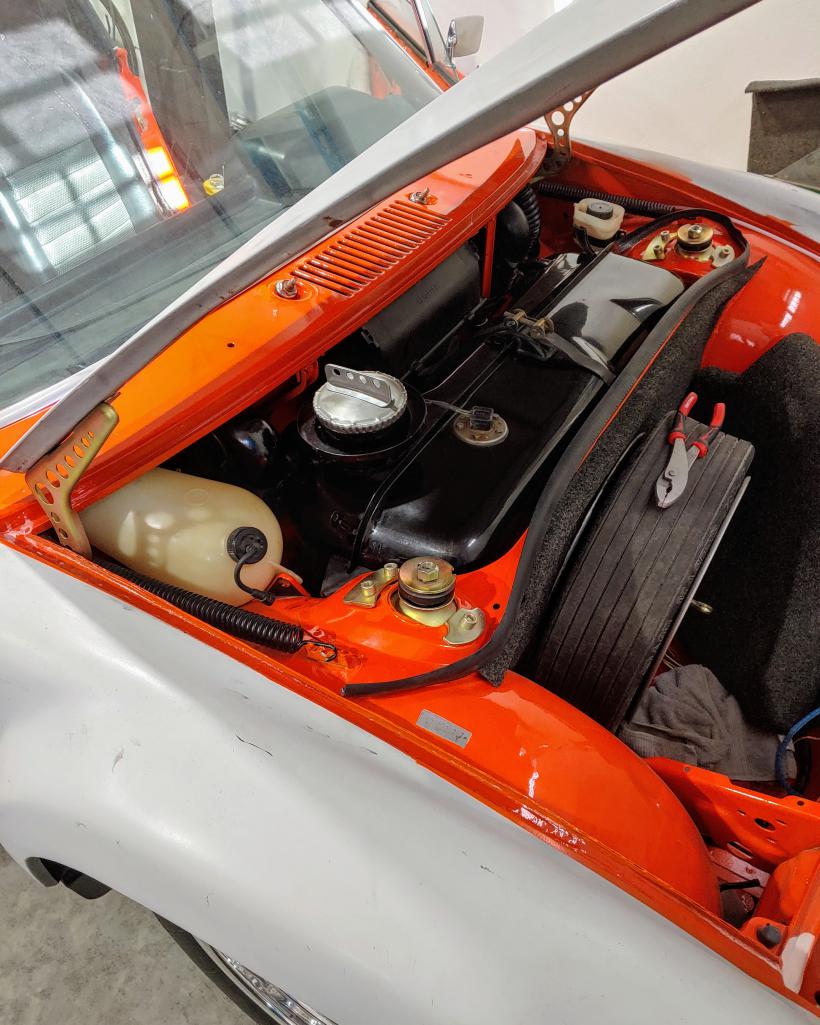
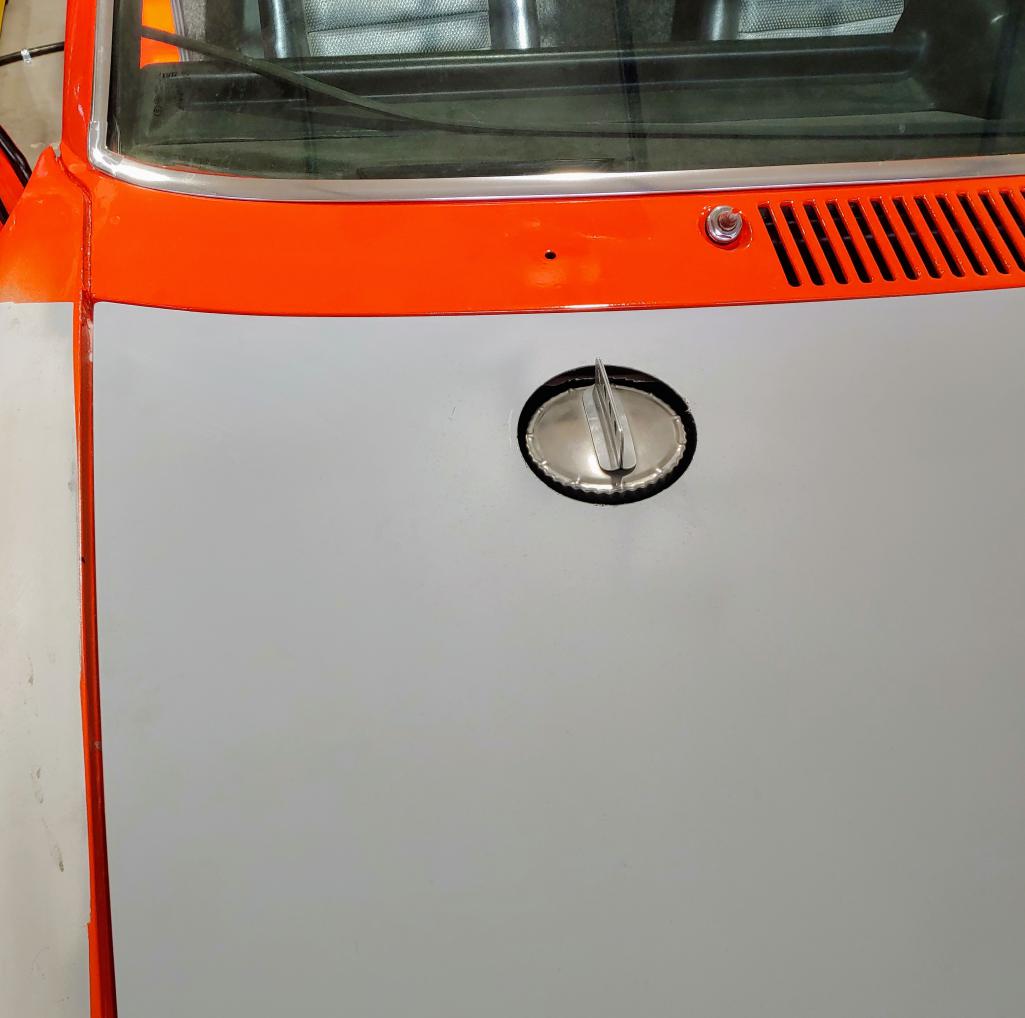
Posted by: mb911 Apr 9 2020, 03:33 PM
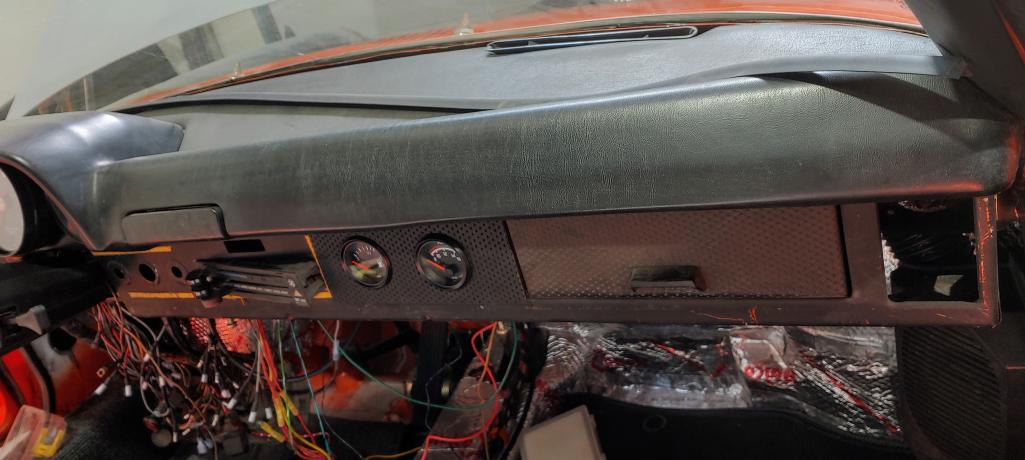

Posted by: raynekat Apr 9 2020, 04:59 PM
Coming along there nicely Ben. Looks great. Love that Orange!
Posted by: Cairo94507 Apr 10 2020, 11:14 AM
Ben, your car is going to be on the road before you know it. Great progress.
Posted by: mb911 Apr 10 2020, 11:23 AM
Thanks.. My goal is to get it running.. I likely will not insure it to drive it for a couple years.. Too many expenses with all of the kids and the corona virus has shut down my primary job.. It will be fine because I will be able to really fine tune before I get out and drive it..
Posted by: mb911 Apr 11 2020, 07:50 PM
Doesn't look like allot was accomplished but it I have passenger side all wired and I have the oil lines run to the front cooler.. Its getting there. 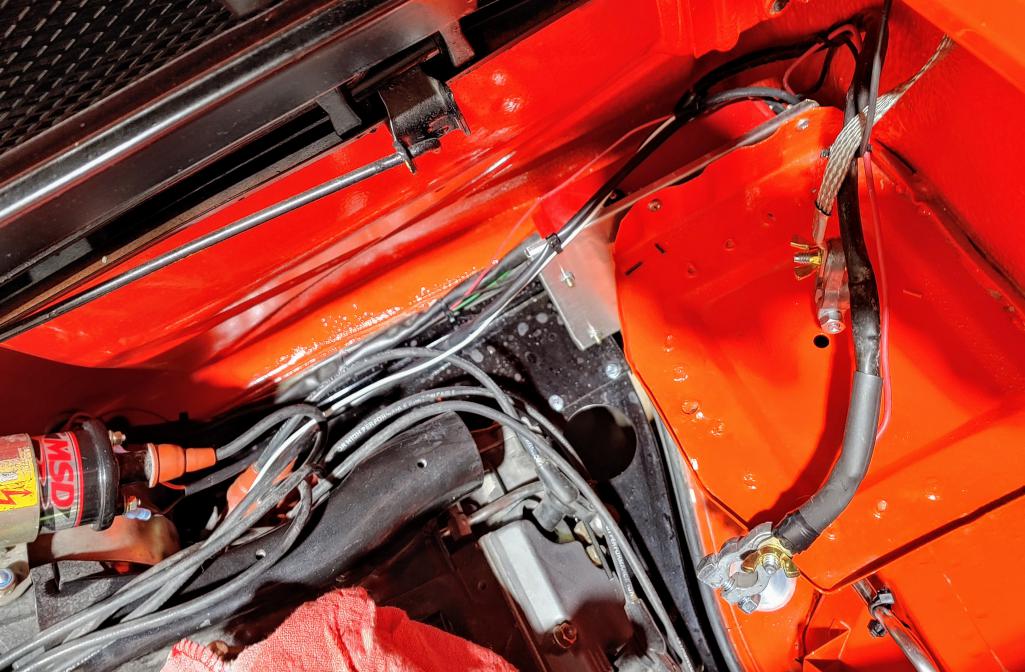
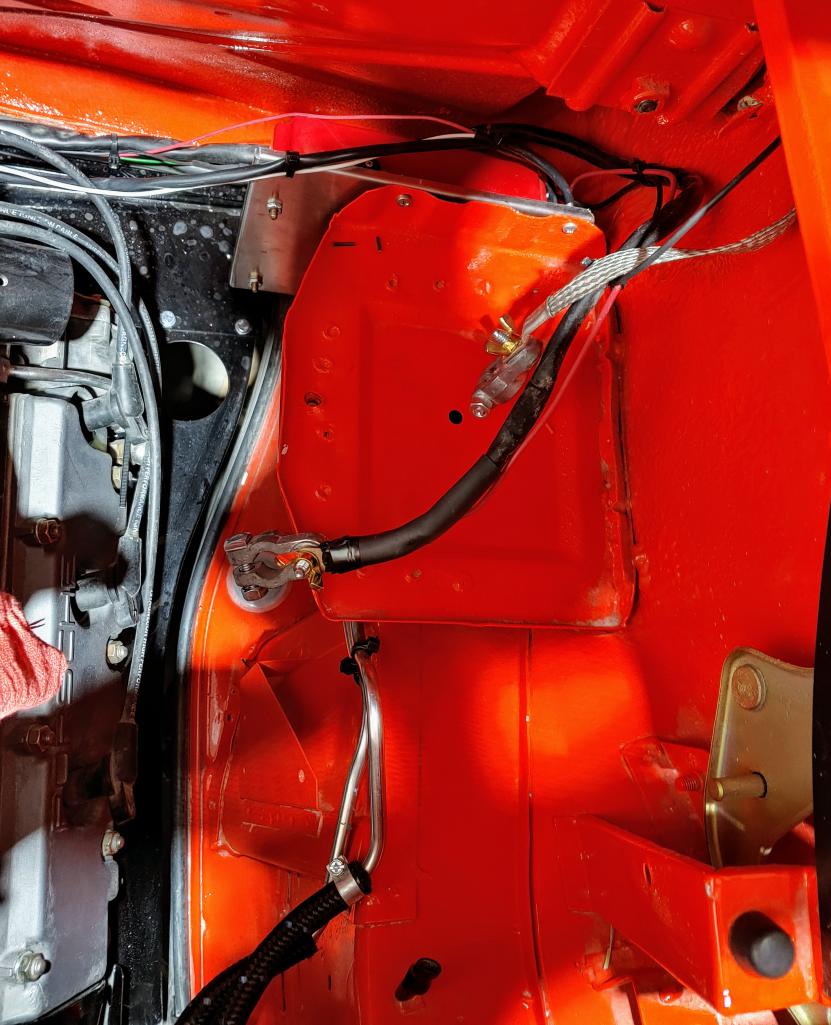
Posted by: mb911 Apr 11 2020, 07:50 PM
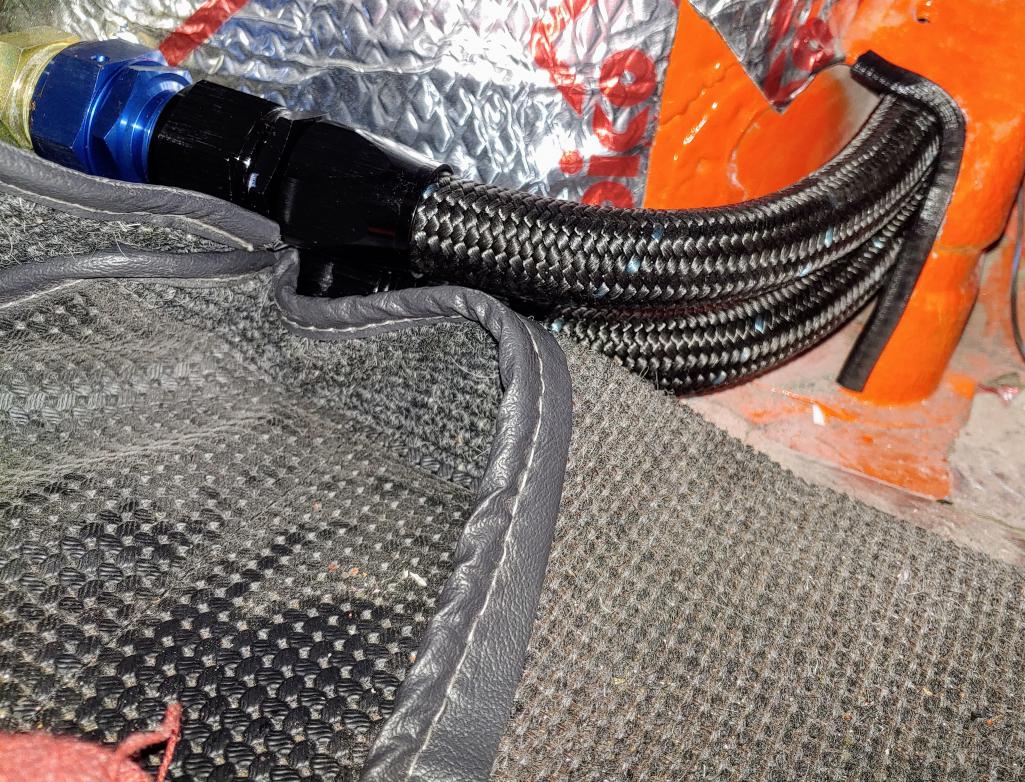
Posted by: Tdskip Apr 12 2020, 08:33 AM
@http://www.914world.com/bbs2/index.php?showuser=9892 - can I ask what gauge / sender combo did you use for oil temp?
Thanks for the updates, good progress.
Posted by: mb911 Apr 12 2020, 08:40 AM
@http://www.914world.com/bbs2/index.php?showuser=21666 it is a NOS 72 oil temp/pressure 911 gauge and new senders..
Posted by: Tdskip Apr 12 2020, 08:53 AM
@http://www.914world.com/bbs2/index.php?showuser=21666 it is a NOS 72 oil temp/pressure 911 gauge and new senders..
Thanks and Happy Easter.
I don’t want to derail your thread, let me do some searching on gauges and centers. Should be able to just reference that all by part number in PET
Posted by: mb911 Apr 12 2020, 09:02 AM
I found it on pelicanparts classified section for $150 shipped.. It was a great deal
Posted by: whitetwinturbo Apr 12 2020, 07:22 PM
................now THAT'S an orange Easter egg...Love Love Love
Posted by: raynekat Apr 12 2020, 09:44 PM
@http://www.914world.com/bbs2/index.php?showuser=9892 - can I ask what gauge / sender combo did you use for oil temp?
Thanks for the updates, good progress.
You can't beat 911 gauges.
This is from a 73 911.
They are quite plentiful on Ebay and other places.
Posted by: mb911 Apr 14 2020, 05:40 AM
I agree.. The last 6 I built had 74 911 gauges, brakes, suspension and engine in it..
Posted by: mb911 Apr 27 2020, 08:16 PM
A couple update pictures..getting close.. Hoping to power it up next week.. 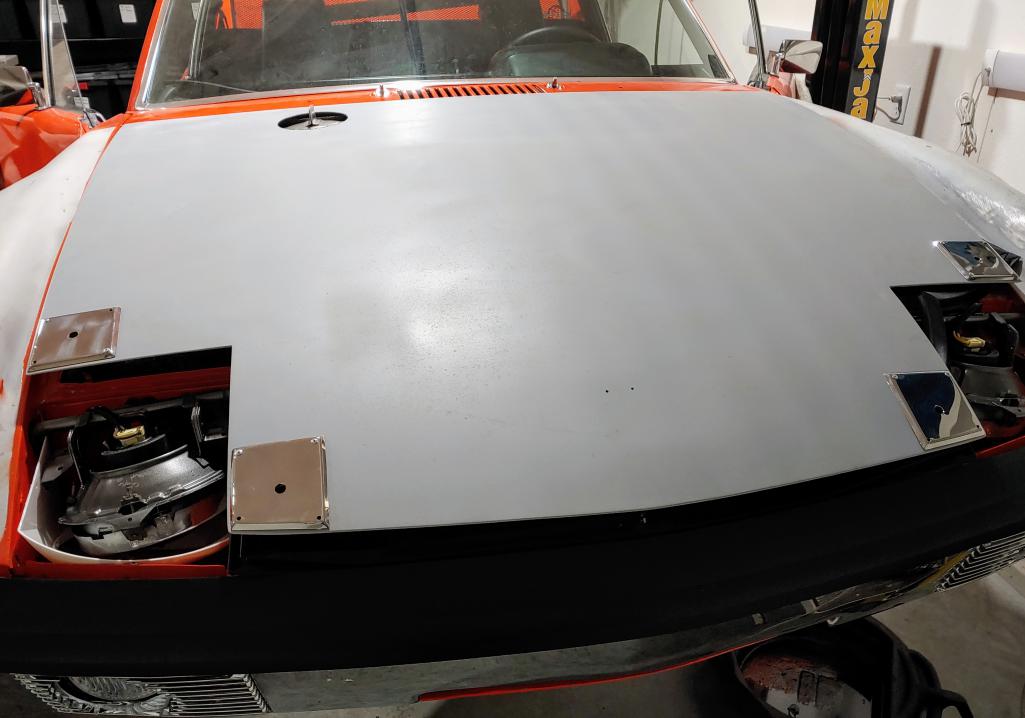
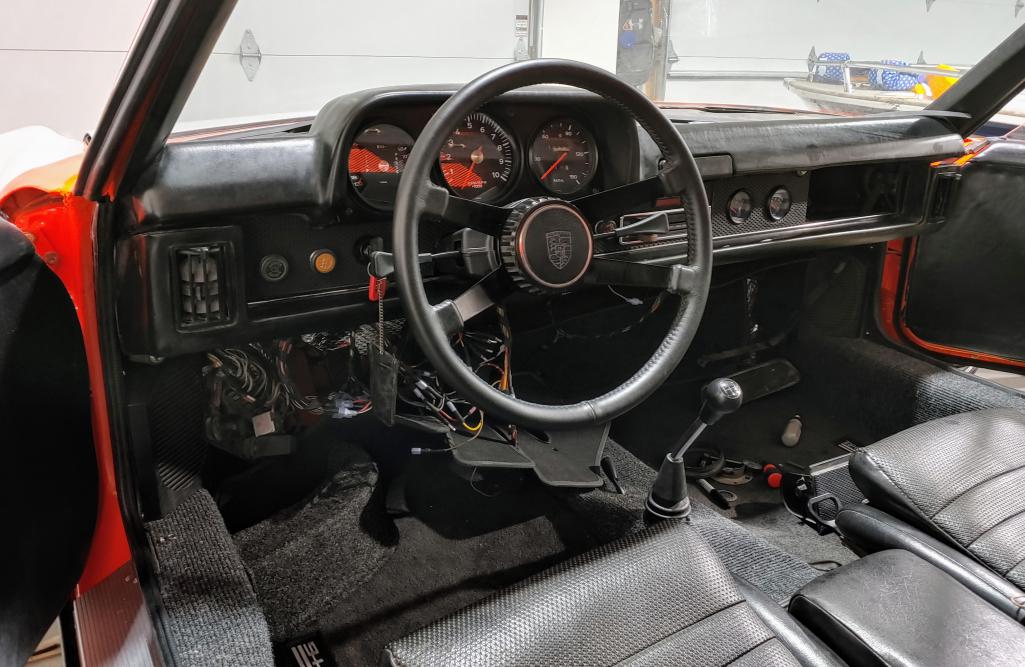
Posted by: mb911 May 4 2020, 03:40 PM
And its alive.. The wiring is still a mess as I bought this as a none runner and it has a bunch of 73/74 year wiring differences. But it runs.. This is a bit hot wired though
https://m.facebook.com/story.php?story_fbid=2562697043945341&id=2029534223928295
Posted by: bbrock May 4 2020, 03:58 PM
Way Cool!
Posted by: mb911 May 4 2020, 04:35 PM
I am excited.. But still have a ton of wiring to figure out..
Posted by: Cairo94507 May 4 2020, 04:55 PM
That is as cool as it gets when building one of these. The first time it draws breath again. Very exciting. Ben, what muffler do you have on your car?
Posted by: mb911 May 4 2020, 05:01 PM
That is as cool as it gets when building one of these. The first time it draws breath again. Very exciting. Ben, what muffler do you have on your car?
@http://www.914world.com/bbs2/index.php?showuser=9712 it is the prototype quiet muffler.. It is about perfect sounding.. Not loud .. Very happy with it.. Now I need to do a nice walk around video soon.
Posted by: Cairo94507 May 4 2020, 05:22 PM
@http://www.914world.com/bbs2/index.php?showuser=9892 - I heard your heat exchangers and quiet muffler on Coondog's ( @http://www.914world.com/bbs2/index.php?showuser=19195 ) car at the Phoenix Club show a couple months ago. My brother was with me standing at the entrance gate when Greg pulled in. We both agreed his car sounded perfect.
I caught up with Greg a little later in the morning and discovered we had identical drive trains and exhaust. 3,2 with Motronic, 964 cams and a Steve Wong chip and of course your full exhaust system. So I am very very very much looking forward to hearing my car and driving it.
Posted by: mb911 May 4 2020, 05:23 PM
Thanks.. I do think they are near perfect.. Notice how I have yet to build my heat exchangers..
Posted by: Dave_Darling May 5 2020, 12:45 AM
You might consider swapping the needle in your speedometer for an early one so the gauges match...
--DD
Posted by: mb911 May 5 2020, 04:26 AM
You might consider swapping the needle in your speedometer for an early one so the gauges match...
--DD
@http://www.914world.com/bbs2/index.php?showuser=121 i actually have the silver dot on the bench..
Posted by: JOEPROPER May 5 2020, 06:44 AM
Congratulations!!! Sounds great. Good luck with that wiring project.
Posted by: mb911 Jun 8 2020, 07:38 PM
A little more progress. Made the shroud for the RSR oil cooler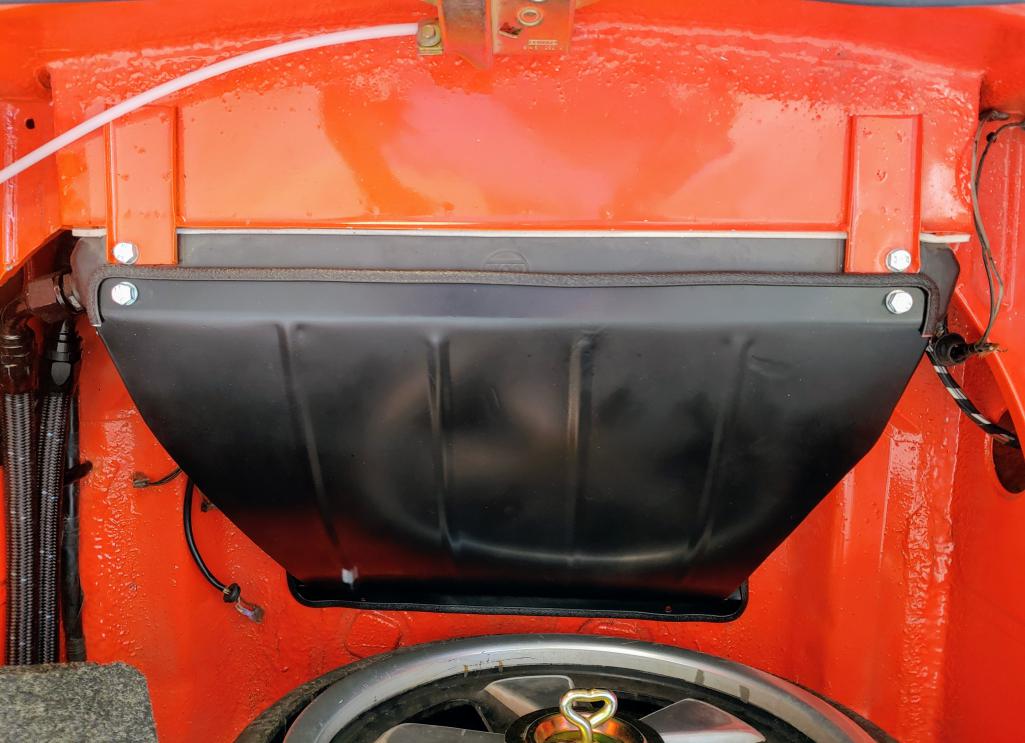
Posted by: Cairo94507 Jun 9 2020, 07:09 AM
Posted by: Root_Werks Jun 11 2020, 02:30 PM
Everything is so clean! Reminds me to NOT post close up pics of my 914.
Posted by: mb911 Jun 11 2020, 02:58 PM
Spent an hour this morning and sprayed the underside of the hood and the headlight covers.. Those will need a wetsand and buff but turned out flat for a garage. Also took it for spin around the neighborhood in 1st and Second gear. When I got back I decided I just had to get a 123 ignition for it. Just can't stand the idea of points and messing with timing old school way. I will have a brand new restored 2.4-2.7 distributor for sale shortly. 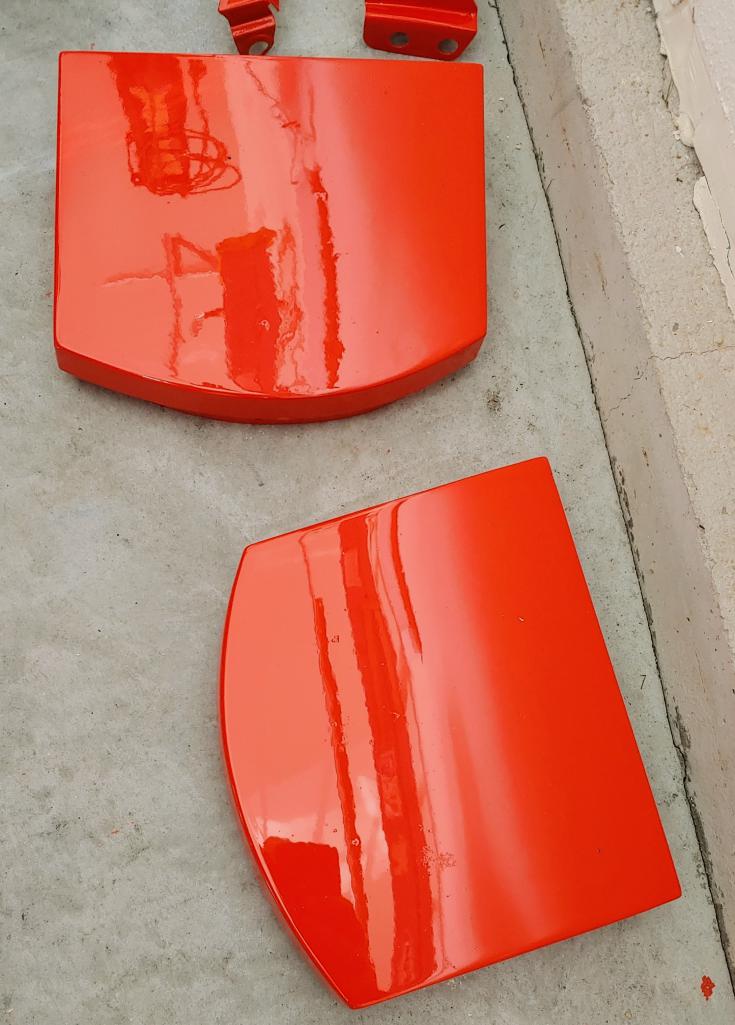
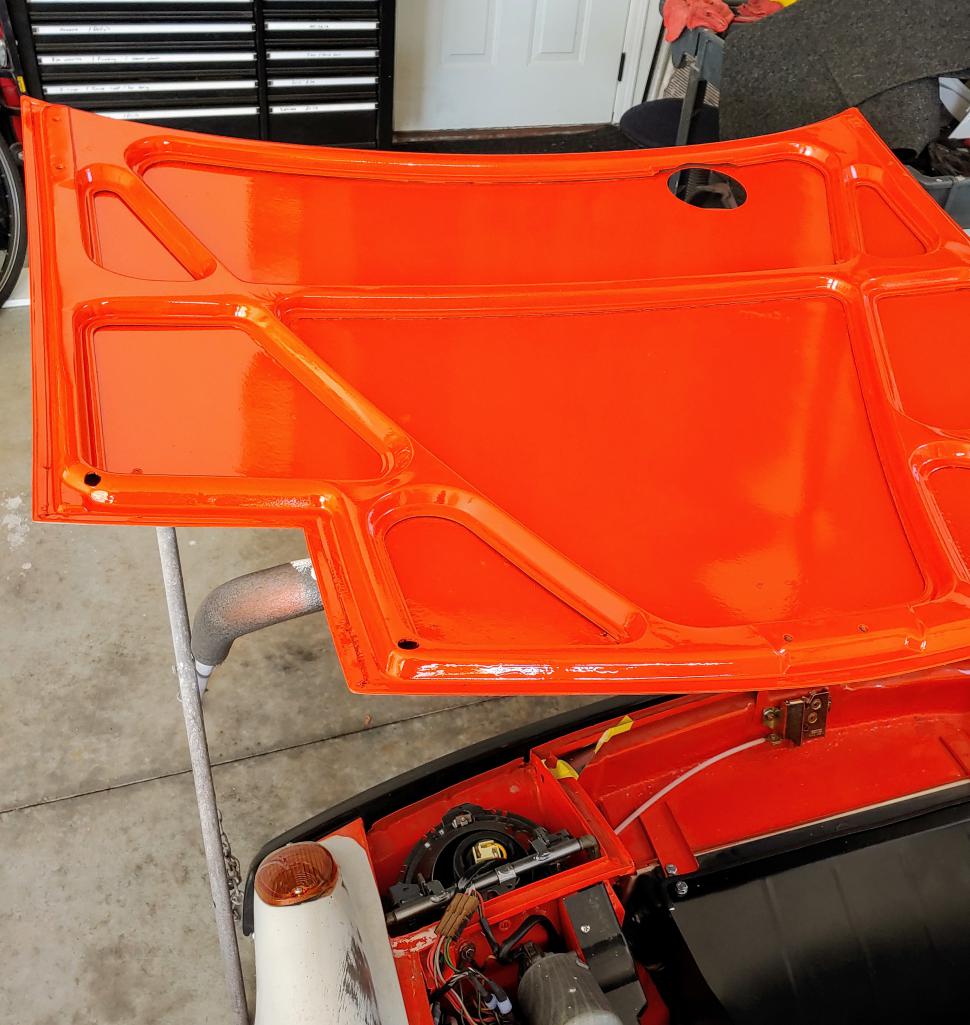
Posted by: mb911 Nov 15 2020, 04:28 PM
Sorry long time no update on the 914-6werkshop car.
I had the top side sprayed at a friends shop so I didn't have to make a mess in the attached garage.. All thats left is the front fenders and I will finish the body work this winter and spray in spring. Carbs just got back from performance oriented as I needed the carb bushings done and an IDA conversion.. 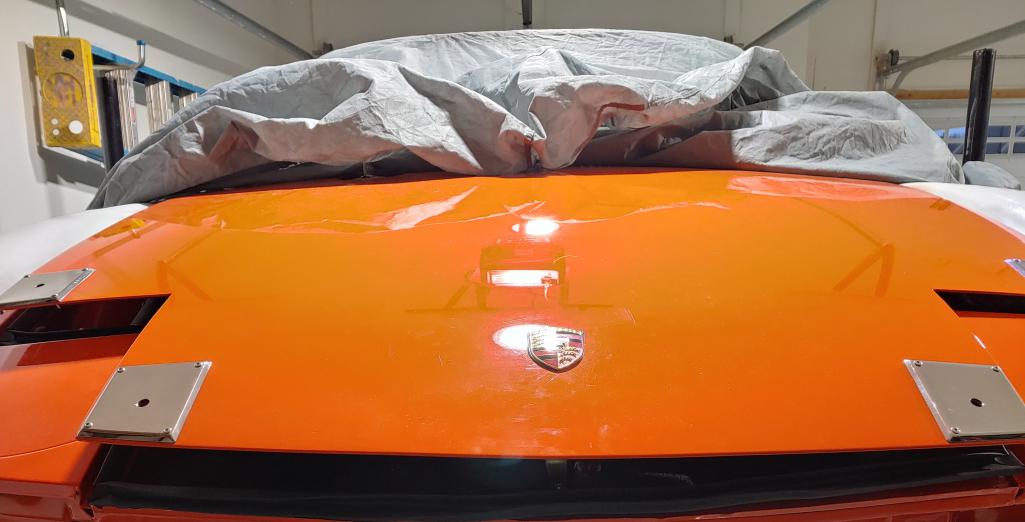
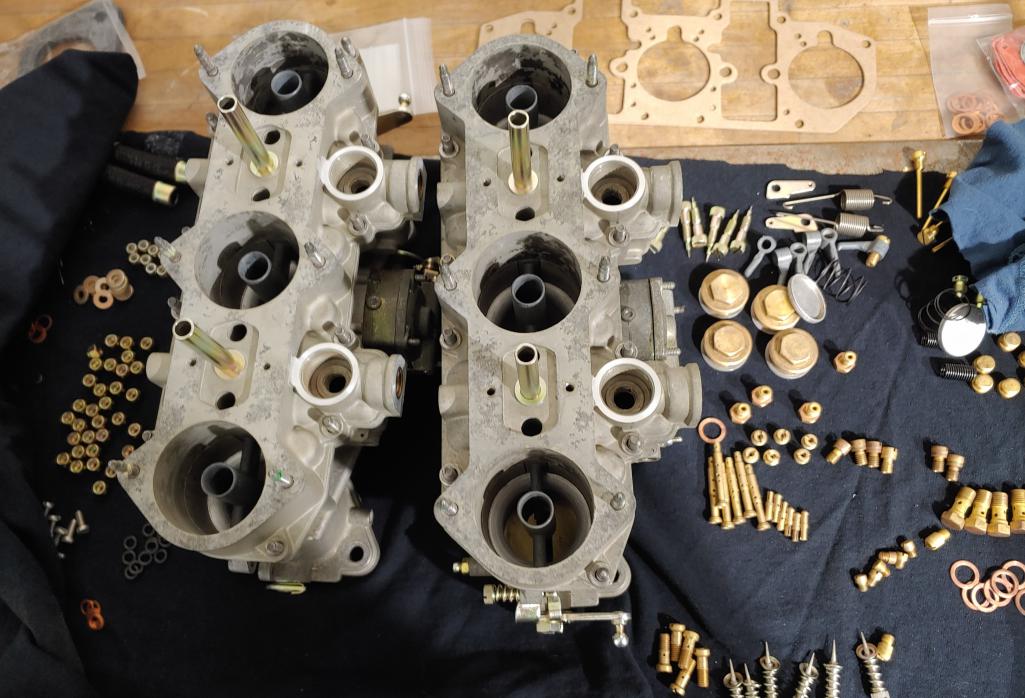
Posted by: Dion Nov 15 2020, 08:06 PM
Love that colour. Nice to see more progress.
Posted by: mb911 Nov 16 2020, 06:56 AM
Love that colour. Nice to see more progress.
Thanks.. Been a roller coaster of a year..
Posted by: blabla914 Nov 16 2020, 06:46 PM
So you are going to run 123 ignition driving the MSD? I am considering the exact same setup. I'd be interested to hear how that works for you.
Kelly
Posted by: mb911 Nov 16 2020, 08:15 PM
So you are going to run 123 ignition driving the MSD? I am considering the exact same setup. I'd be interested to hear how that works for you.
Kelly
@http://www.914world.com/bbs2/index.php?showuser=1740 that is the current set up. It runs smoother and with the carbs now at a baseline with good throttle shafts and the IDA conversion it should run really well
Posted by: blabla914 Nov 19 2020, 07:30 PM
Cool thanks. I’m going to pull the trigger on that.
I just found your thread on the bird board.
White MSD to black 123
Blue 123 to ground
Red 123 to ignition hot
Yellow 123 not used
Is that how you ended up doing it.
I also see several other people running the MSD with the blaster coil with the 123 ignition.
Posted by: horizontally-opposed Nov 19 2020, 07:55 PM
Man, this thing is looking great. Fun to see it coming together!
Posted by: mb911 Nov 20 2020, 07:18 AM
Cool thanks. I’m going to pull the trigger on that.
I just found your thread on the bird board.
White MSD to black 123
Blue 123 to ground
Red 123 to ignition hot
Yellow 123 not used
Is that how you ended up doing it.
I also see several other people running the MSD with the blaster coil with the 123 ignition.
Yes thats correct.
Posted by: blabla914 Nov 20 2020, 06:49 PM
Cool thanks. I’m going to pull the trigger on that.
I just found your thread on the bird board.
White MSD to black 123
Blue 123 to ground
Red 123 to ignition hot
Yellow 123 not used
Is that how you ended up doing it.
I also see several other people running the MSD with the blaster coil with the 123 ignition.
Yes thats correct.
Thanks Ben
Posted by: Gint Nov 21 2020, 09:47 AM
@http://www.914world.com/bbs2/index.php?showuser=9892 - performance oriented - Did you only send your carb bodies to be rebushed and converted? Is that why they are still in pieces?
Posted by: mb911 Nov 21 2020, 09:50 AM
@http://www.914world.com/bbs2/index.php?showuser=9892 - performance oriented - Did you only send your carb bodies to be rebushed and converted? Is that why they are still in pieces?
@http://www.914world.com/bbs2/index.php?showuser=20 yes.. Did the "poor mans" deal where he cleans all the passages, rebushes, and converts them to IDA with adjustable air correction jets.. This included truing up all surfaces, and replated everything..
Posted by: Gint Nov 21 2020, 09:55 AM
The price tag for a full job stopped my heart for a sec...
Posted by: mb911 Nov 21 2020, 10:02 AM
The price tag for a full job stopped my heart for a sec...
Yes.. Same here.. I am happy with what I got for the money. Basically brand new IDAs though stamped IDT for 50%
Posted by: Gint Nov 21 2020, 10:53 AM
Mine need to have the throttle shafts re-bushed. Other than that they are in good shape. The last time I looked...
Posted by: mb911 Nov 21 2020, 02:39 PM
Mine need to have the throttle shafts re-bushed. Other than that they are in good shape. The last time I looked...
I couldn't believe how smooth these are by comparison.
Posted by: GeorgeRud Nov 21 2020, 09:46 PM
Looks great! The long trip was worth it when seeing it come together.
Posted by: mb911 Nov 22 2020, 08:50 AM
After looking at the date of my original post it looks like. 5 year anniversary for my project as of this weekend. I am in the final stretch on this car.. Thinking spring wrap up.. Exciting for sure. Have to fix some oil leaks but really close.. I am sanding the front fenders and may have them in paint over the next few weeks.
Posted by: Krieger Nov 22 2020, 08:55 AM
Time goes by pretty fast with these projects. I'm guessing that an average lenght restoration. The car looks excellent!
Posted by: mb911 Nov 22 2020, 12:53 PM
Time goes by pretty fast with these projects. I'm guessing that an average lenght restoration. The car looks excellent!
Thanks @http://www.914world.com/bbs2/index.php?showuser=2104 .. I wonder as well what the average time is. @http://www.914world.com/bbs2/index.php?showuser=20845 and @http://www.914world.com/bbs2/index.php?showuser=19241 including @http://www.914world.com/bbs2/index.php?showuser=2766 are close to me length of time I am sure.
Posted by: Dion Nov 22 2020, 01:00 PM
Time goes by pretty fast with these projects. I'm guessing that an average lenght restoration. The car looks excellent!
Thanks @http://www.914world.com/bbs2/index.php?showuser=2104 .. I wonder as well what the average time is. @http://www.914world.com/bbs2/index.php?showuser=20845 and @http://www.914world.com/bbs2/index.php?showuser=19241 including @http://www.914world.com/bbs2/index.php?showuser=2766 are close to me length of time I am sure.
@http://www.914world.com/bbs2/index.php?showuser=2104
Started buying parts in ‘15, started disassembly in Aug. ‘16. Hoping for completion in ‘21.
I need a paint job like you fellas

No hijack intended
Posted by: mb911 Nov 22 2020, 01:09 PM
Time goes by pretty fast with these projects. I'm guessing that an average lenght restoration. The car looks excellent!
Thanks @http://www.914world.com/bbs2/index.php?showuser=2104 .. I wonder as well what the average time is. @http://www.914world.com/bbs2/index.php?showuser=20845 and @http://www.914world.com/bbs2/index.php?showuser=19241 including @http://www.914world.com/bbs2/index.php?showuser=2766 are close to me length of time I am sure.
@http://www.914world.com/bbs2/index.php?showuser=2104
Started buying parts in ‘15, started disassembly in Aug. ‘16. Hoping for completion in ‘21.
I need a paint job like you fellas
No hijack intended
@http://www.914world.com/bbs2/index.php?showuser=2766 I thought so.. I knew we both were tracking pretty close time wise.
Posted by: bbrock Nov 22 2020, 02:16 PM
Time goes by pretty fast with these projects. I'm guessing that an average lenght restoration. The car looks excellent!
Thanks @http://www.914world.com/bbs2/index.php?showuser=2104 .. I wonder as well what the average time is. @http://www.914world.com/bbs2/index.php?showuser=20845 and @http://www.914world.com/bbs2/index.php?showuser=19241 including @http://www.914world.com/bbs2/index.php?showuser=2766 are close to me length of time I am sure.
Oh boy that's a tricky one. I made my first post on the forum in March 2017 and have been working hard for 3 and a half years since. However, I started buying parts for the project and started work in 1989. Yes, that's right, I have been working on this project since the Berlin Wall came down. At that time, I completed much of the disassembly and rebuilt the short block of the engine. So how do we count that? Is it three and a half years or 31?
I'd say a generous estimate is that I spent 6 months on the project before it went down for a Rip Van Winkle slumber so maybe we just say I've been at it for 4 years now? Posted by: mb911 Dec 7 2020, 10:15 AM
Making progress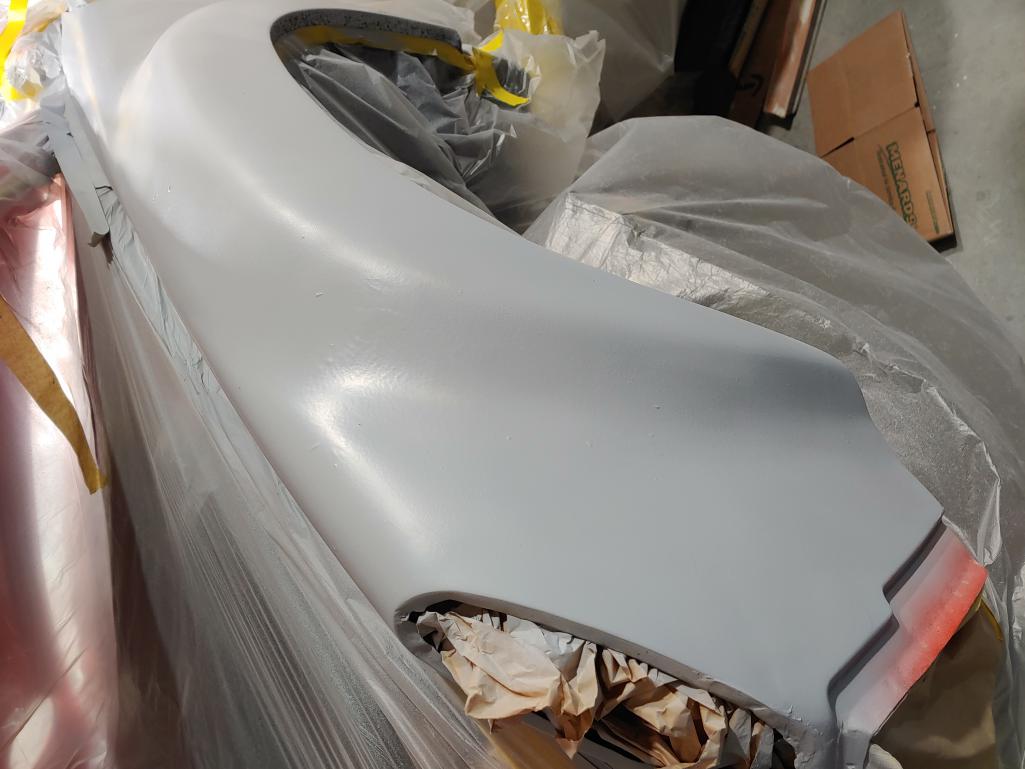
Posted by: mb911 Dec 7 2020, 10:15 AM
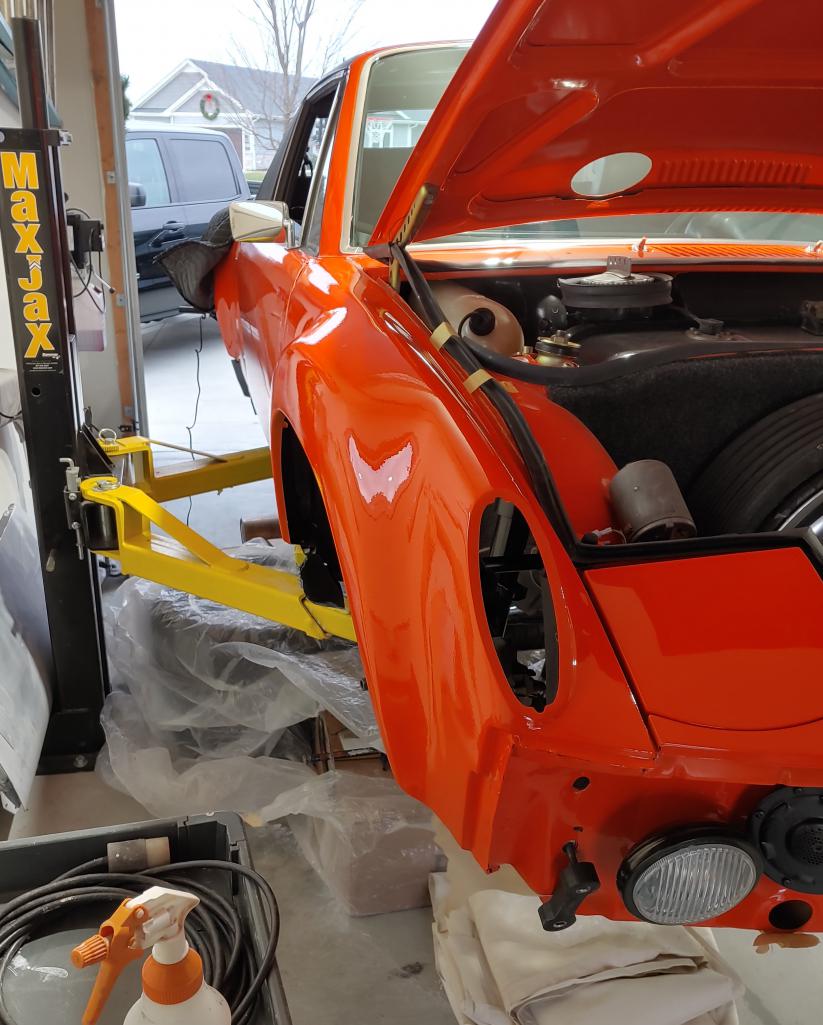

Posted by: horizontally-opposed Dec 7 2020, 10:34 AM
Ben, your car is looking really, really good. Love the color, calipers (!), trunk details (hinges, spare, etc), oil lines, etc. Wow.
One thing to look out for—if you aren't already—is a set of Euro driving lights. I don't see them often over here, but they were common on RoW cars. I'm not sure how common they are over there now, and wonder what else they were spec'd on, but they really add a lot to a GT conversion.
Other quick thought, having been where you are with the front bumper three times now: While it isn't strictly correct, I painted the bulkhead behind the bumper black the last time around—and am really glad I did. Low light always bugged me, as it picked up the red through the grilles; felt like a visual mistake on the factory's part. Very easy to do at this stage, and makes a really nice impact unless concours is a goal.
Posted by: cali914 Dec 7 2020, 10:50 AM
Ditto that car is trophy worthy ![]()
Posted by: Superhawk996 Dec 7 2020, 11:04 AM
Love the plated and lightened hood hinges.
Looks great and coming along nicely. Glad to see you're making progress and didn't sell the car!
I've also got to take a look at MaxJax requirements for floor thickness and ceiling heights - that looks like a nice rig!
Posted by: mb911 Dec 7 2020, 03:38 PM
Love the plated and lightened hood hinges.
Looks great and coming along nicely. Glad to see you're making progress and didn't sell the car!
I've also got to take a look at MaxJax requirements for floor thickness and ceiling heights - that looks like a nice rig!
Thanks and happy as well.. The maxjax has been great though they cost 1k more then what i bought mine for
Posted by: mb911 Dec 7 2020, 03:41 PM
Ditto that car is trophy worthy
Note sure about that. It's an average car .. I am happy to have it this far..
Posted by: mb911 Dec 7 2020, 03:43 PM
Ben, your car is looking really, really good.
Love the color, calipers (!), trunk details (hinges, spare, etc), oil lines, etc. Wow. One thing to look out for—if you aren't already—is a set of Euro driving lights. I don't see them often over here, but they were common on RoW cars. I'm not sure how common they are over there now, and wonder what else they were spec'd on, but they really add a lot to a GT conversion.
Other quick thought, having been where you are with the front bumper three times now: While it isn't strictly correct, I painted the bulkhead behind the bumper black the last time around—and am really glad I did. Low light always bugged me, as it picked up the red through the grilles; felt like a visual mistake on the factory's part. Very easy to do at this stage, and makes a really nice impact unless concours is a goal.
All good points.. Not sure if I will do driving lights.. Right now the focus is final fit and adjust all panels then home alignment, then fix a few oil leaks..
Posted by: mepstein Dec 7 2020, 04:31 PM
Love the plated and lightened hood hinges.
Looks great and coming along nicely. Glad to see you're making progress and didn't sell the car!
I've also got to take a look at MaxJax requirements for floor thickness and ceiling heights - that looks like a nice rig!
I talked to Ben a bit about the Maxjax and bought one on the black Friday sale. I only have an 8.5' ceiling so a mid rise two post should be good. The shop had real two post lifts and they made working on Porsche's very easy. I haven't checked my concrete yet but if it turns out to be too thin, I'll just cut it out and add more. I'm pretty sure they raise a car 45".
I like the idea of portability, not only for moving the posts out of the way but for adding a second set of mounts so I could move the lift to the center of the garage when I want a lot of room around the car but also have mounts on the side so I can keep two cars side by side if needed.
I've seen guys use them for their pick up trucks but I'll never have anything more than a Porsche on the lift so it's more than enough lift for me. The new ones have some nice improvements but do cost more.
Posted by: mb911 Dec 7 2020, 04:34 PM
Love the plated and lightened hood hinges.
Looks great and coming along nicely. Glad to see you're making progress and didn't sell the car!
I've also got to take a look at MaxJax requirements for floor thickness and ceiling heights - that looks like a nice rig!
I talked to Ben a bit about the Maxjax and bought one on the black Friday sale. I only have an 8.5' ceiling so a mid rise two post should be good. The shop had real two post lifts and they made working on Porsche's very easy. I haven't checked my concrete yet but if it turns out to be too thin, I'll just cut it out and add more.
I like the idea of portability, not only for moving the posts out of the way but for adding a second set of mounts so I could move the lift to the center of the garage when I want a lot of room around the car but also have mounts on the side so I can keep two cars side by side if needed.
I've seen guys use them for their pick up trucks but I'll never have anything more than a Porsche on the lift so it's more than enough lift for me. The new ones have some nice improvements but do cost more.
Much more adjustment with the new ones.. Mine was last year black Friday.. Just before they sold out to the new company.. Actually it was 2 years ago.. I made a bracket to mount the power pack on the wall.. That helps clears space..
Posted by: mepstein Dec 7 2020, 04:53 PM
Love the plated and lightened hood hinges.
Looks great and coming along nicely. Glad to see you're making progress and didn't sell the car!
I've also got to take a look at MaxJax requirements for floor thickness and ceiling heights - that looks like a nice rig!
I talked to Ben a bit about the Maxjax and bought one on the black Friday sale. I only have an 8.5' ceiling so a mid rise two post should be good. The shop had real two post lifts and they made working on Porsche's very easy. I haven't checked my concrete yet but if it turns out to be too thin, I'll just cut it out and add more.
I like the idea of portability, not only for moving the posts out of the way but for adding a second set of mounts so I could move the lift to the center of the garage when I want a lot of room around the car but also have mounts on the side so I can keep two cars side by side if needed.
I've seen guys use them for their pick up trucks but I'll never have anything more than a Porsche on the lift so it's more than enough lift for me. The new ones have some nice improvements but do cost more.
Much more adjustment with the new ones.. Mine was last year black Friday.. Just before they sold out to the new company.. Actually it was 2 years ago.. I made a bracket to mount the power pack on the wall.. That helps clears space..
Lots of tips on garage journal about the hoses and mounting options.
Posted by: mb911 Dec 13 2020, 07:06 AM
Well driver side door is wrapped up.. Thanks to @http://www.914world.com/bbs2/index.php?showuser=10825 and @http://www.914world.com/bbs2/index.php?showuser=16669 for the door panels and the leather door pulls. Now to get going on the new exhaust for this car. 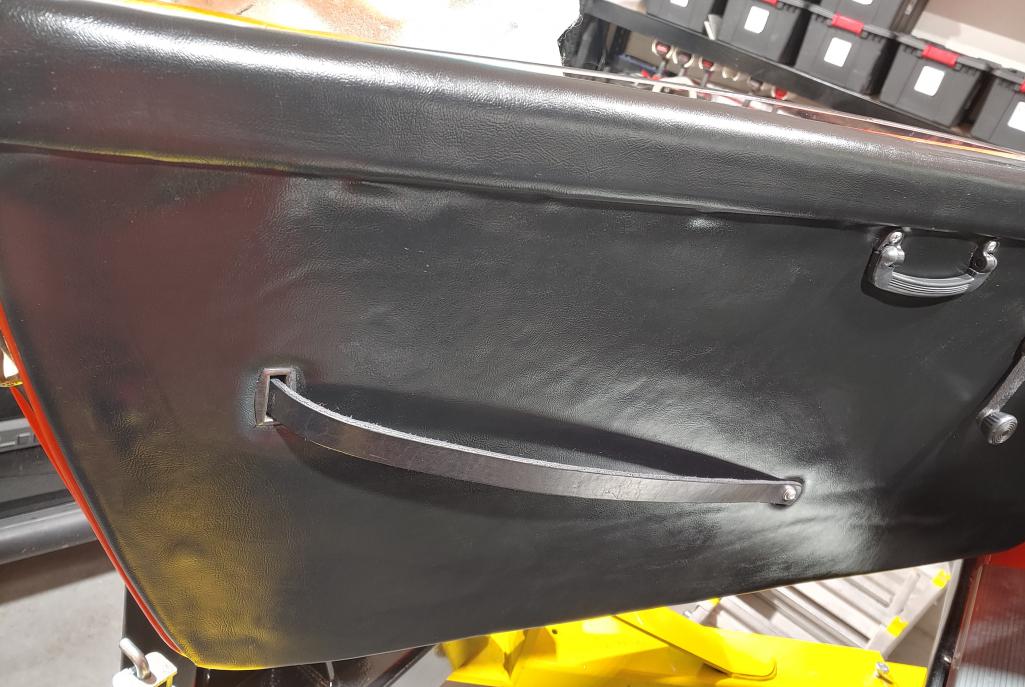
Posted by: ValcoOscar Dec 13 2020, 02:03 PM
Well driver side door is wrapped up.. Thanks to @http://www.914world.com/bbs2/index.php?showuser=10825 and @http://www.914world.com/bbs2/index.php?showuser=16669 for the door panels and the leather door pulls. Now to get going on the new exhaust for this car.
Looking great Ben
(diet pepsi)Oscar
Posted by: 914forme Dec 13 2020, 06:16 PM
@http://www.914world.com/bbs2/index.php?showuser=9892 Ben looking good
Posted by: mb911 Dec 13 2020, 06:30 PM
@http://www.914world.com/bbs2/index.php?showuser=9892 Ben looking good
Thanks @http://www.914world.com/bbs2/index.php?showuser=2388 the bumper you sent is currently getting chromed to help finish the front of the car
Posted by: whitetwinturbo Dec 16 2020, 11:22 PM
........such an EPIC journey 
Posted by: bbrock Dec 17 2020, 08:26 PM
How did I get so far behind on your thread? I'm SO happy to see it moving forward. Your work is amazing!
Posted by: mb911 Dec 18 2020, 12:50 PM
Here is an updated picture.. I have made good progress. Fixed an trans axle seal, now for RSR rocker shaft seals, finish the hood pins. Had to stop on that as my shoulder is really giving me trouble and working on oil tanks along with muffler orders has made this a pretty busy month. 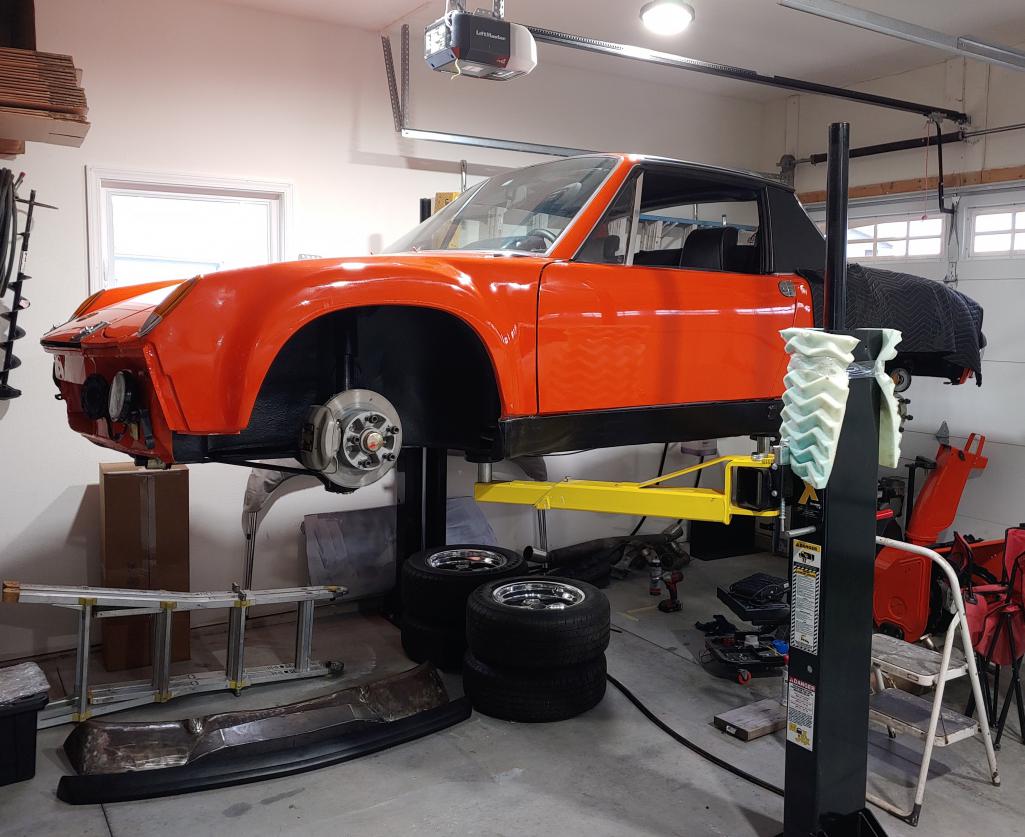
Posted by: mb911 Jan 4 2021, 02:19 PM
Spring 2021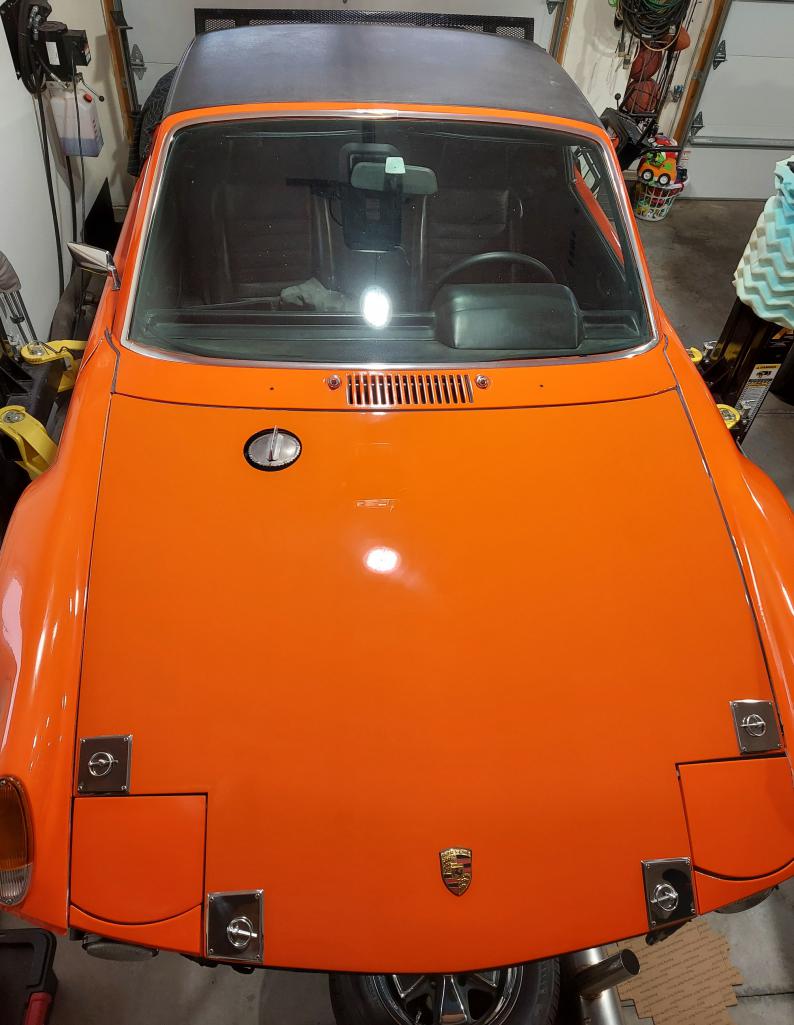
Posted by: 930cabman Jan 4 2021, 05:47 PM
Spring 2021
Lookin good, I like the toy car in the background. Just like daddy's. Will you be tearing up the road soon?
Posted by: 914e Jan 4 2021, 06:05 PM
Love the plated and lightened hood hinges.
Looks great and coming along nicely. Glad to see you're making progress and didn't sell the car!
I've also got to take a look at MaxJax requirements for floor thickness and ceiling heights - that looks like a nice rig!
I talked to Ben a bit about the Maxjax and bought one on the black Friday sale. I only have an 8.5' ceiling so a mid rise two post should be good. The shop had real two post lifts and they made working on Porsche's very easy. I haven't checked my concrete yet but if it turns out to be too thin, I'll just cut it out and add more.
I like the idea of portability, not only for moving the posts out of the way but for adding a second set of mounts so I could move the lift to the center of the garage when I want a lot of room around the car but also have mounts on the side so I can keep two cars side by side if needed.
I've seen guys use them for their pick up trucks but I'll never have anything more than a Porsche on the lift so it's more than enough lift for me. The new ones have some nice improvements but do cost more.
Much more adjustment with the new ones.. Mine was last year black Friday.. Just before they sold out to the new company.. Actually it was 2 years ago.. I made a bracket to mount the power pack on the wall.. That helps clears space..
Does the lift go high enough to fit a 914 under the lift?
Posted by: mb911 Jan 4 2021, 06:11 PM
I think it does.. its part of the next winter storage plan. 
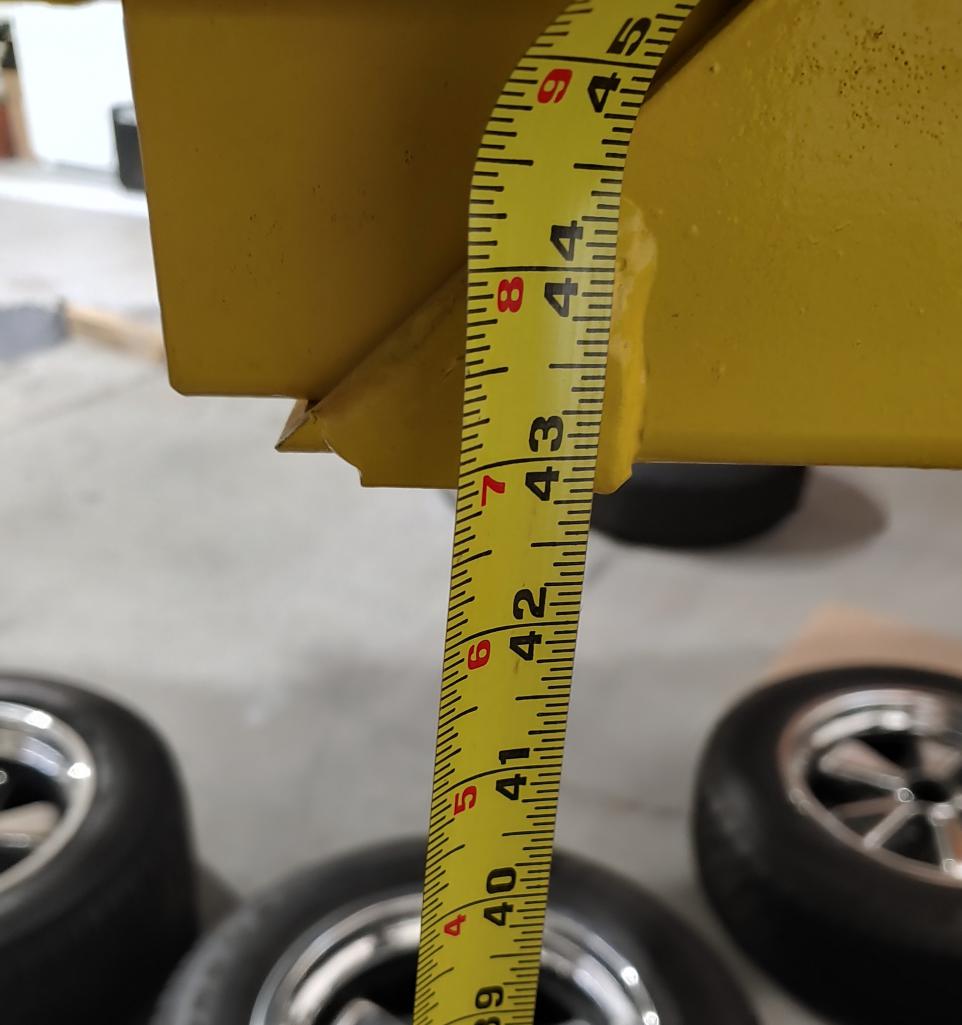
Posted by: mepstein Jan 4 2021, 06:22 PM
Love the plated and lightened hood hinges.
Looks great and coming along nicely. Glad to see you're making progress and didn't sell the car!
I've also got to take a look at MaxJax requirements for floor thickness and ceiling heights - that looks like a nice rig!
I talked to Ben a bit about the Maxjax and bought one on the black Friday sale. I only have an 8.5' ceiling so a mid rise two post should be good. The shop had real two post lifts and they made working on Porsche's very easy. I haven't checked my concrete yet but if it turns out to be too thin, I'll just cut it out and add more.
I like the idea of portability, not only for moving the posts out of the way but for adding a second set of mounts so I could move the lift to the center of the garage when I want a lot of room around the car but also have mounts on the side so I can keep two cars side by side if needed.
I've seen guys use them for their pick up trucks but I'll never have anything more than a Porsche on the lift so it's more than enough lift for me. The new ones have some nice improvements but do cost more.
Much more adjustment with the new ones.. Mine was last year black Friday.. Just before they sold out to the new company.. Actually it was 2 years ago.. I made a bracket to mount the power pack on the wall.. That helps clears space..
Does the lift go high enough to fit a 914 under the lift?
Funny, I just asked Ben the same thing yesterday. I think it will with a lowered 914.
Posted by: 914e Jan 4 2021, 08:05 PM
Love the plated and lightened hood hinges.
Looks great and coming along nicely. Glad to see you're making progress and didn't sell the car!
I've also got to take a look at MaxJax requirements for floor thickness and ceiling heights - that looks like a nice rig!
I talked to Ben a bit about the Maxjax and bought one on the black Friday sale. I only have an 8.5' ceiling so a mid rise two post should be good. The shop had real two post lifts and they made working on Porsche's very easy. I haven't checked my concrete yet but if it turns out to be too thin, I'll just cut it out and add more.
I like the idea of portability, not only for moving the posts out of the way but for adding a second set of mounts so I could move the lift to the center of the garage when I want a lot of room around the car but also have mounts on the side so I can keep two cars side by side if needed.
I've seen guys use them for their pick up trucks but I'll never have anything more than a Porsche on the lift so it's more than enough lift for me. The new ones have some nice improvements but do cost more.
Much more adjustment with the new ones.. Mine was last year black Friday.. Just before they sold out to the new company.. Actually it was 2 years ago.. I made a bracket to mount the power pack on the wall.. That helps clears space..
Does the lift go high enough to fit a 914 under the lift?
Funny, I just asked Ben the same thing yesterday. I think it will with a lowered 914.
Worst case I could have front anchor points for storage with a nose of one car under the other, and center anchor points to be able to work completely around the car.
Posted by: mb911 Jan 12 2021, 08:19 PM
Well you will notice this is the 2nd bumper on this car. I sold a bunch of parts to fund a not so fun endeavor last year. Anyway now that we are in 2021 a freshly chromed bumper from Oscar arrived. Bolted on and getting closer.
Posted by: mb911 Jan 12 2021, 08:19 PM
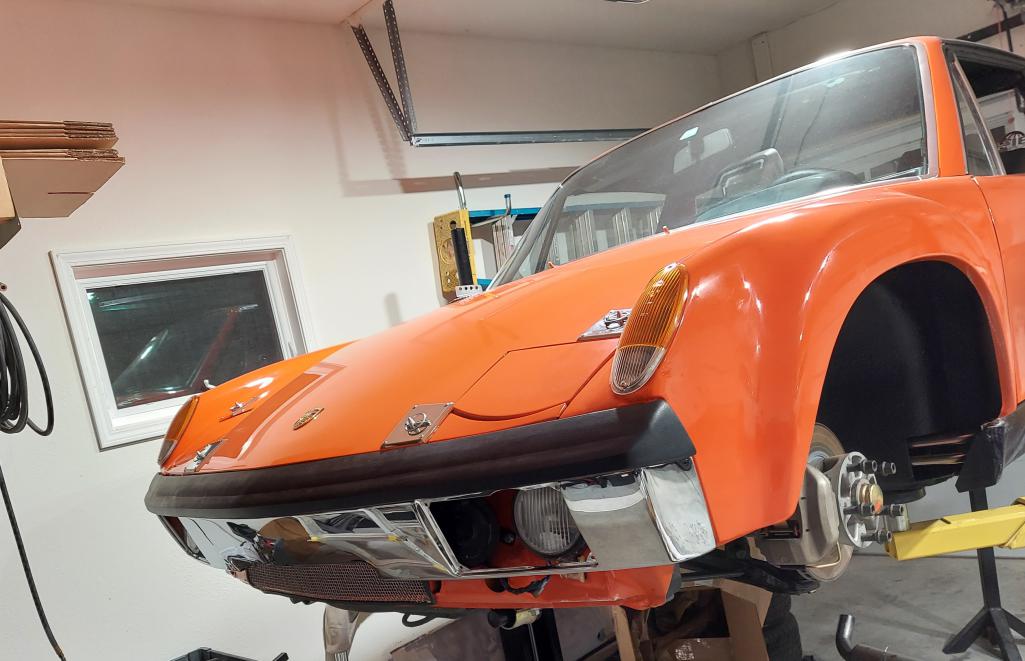
Posted by: Tdskip Jan 12 2021, 08:26 PM
Looks great Ben!
Posted by: mb911 Jan 17 2021, 06:19 PM
Here is my next distraction. 
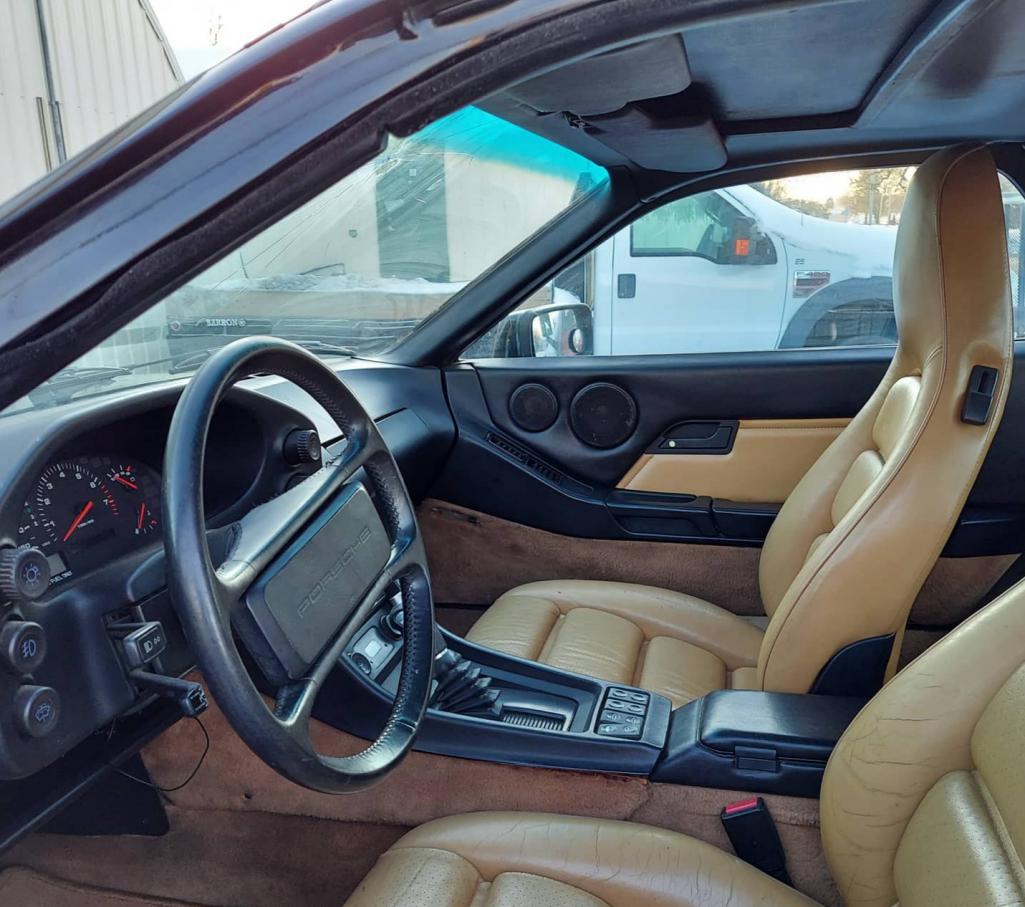
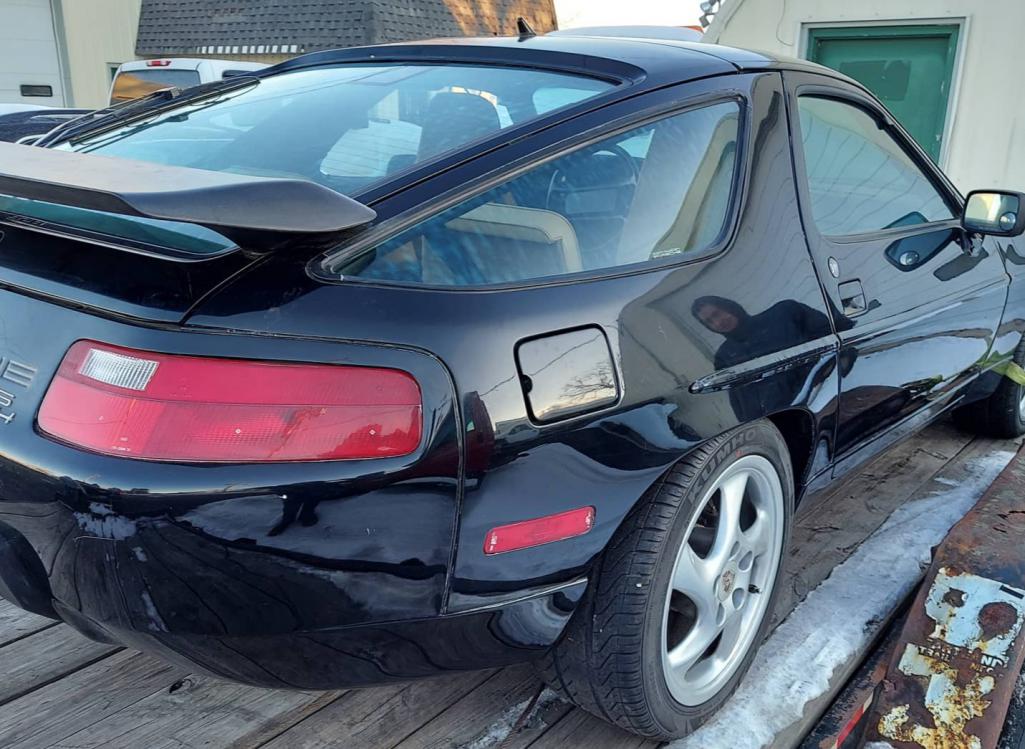
Posted by: raynekat Jan 17 2021, 09:42 PM
Nice shark there Ben.
Posted by: bbrock Jan 17 2021, 10:56 PM
Such a cool car. The hours in my college youth I spent fantasizing about owning one of these unattainable beauties... Now when I see one with a for sale sign, or even a 944, I have to talk myself down. However, when I stumble across a long in the tooth 959 at a bargain, I'll have to pull the trigger.
Posted by: mb911 Mar 19 2021, 03:24 PM
Spring here. Car is on the ground with the new header design. My buddy George hanging out today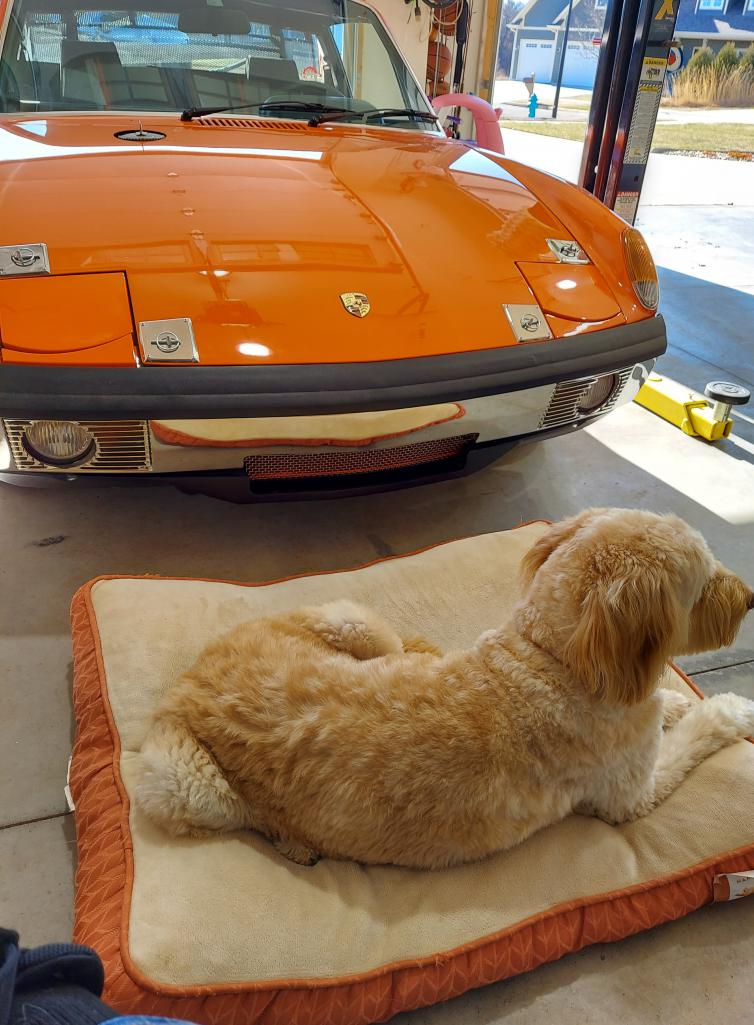
Posted by: mb911 Mar 19 2021, 03:24 PM
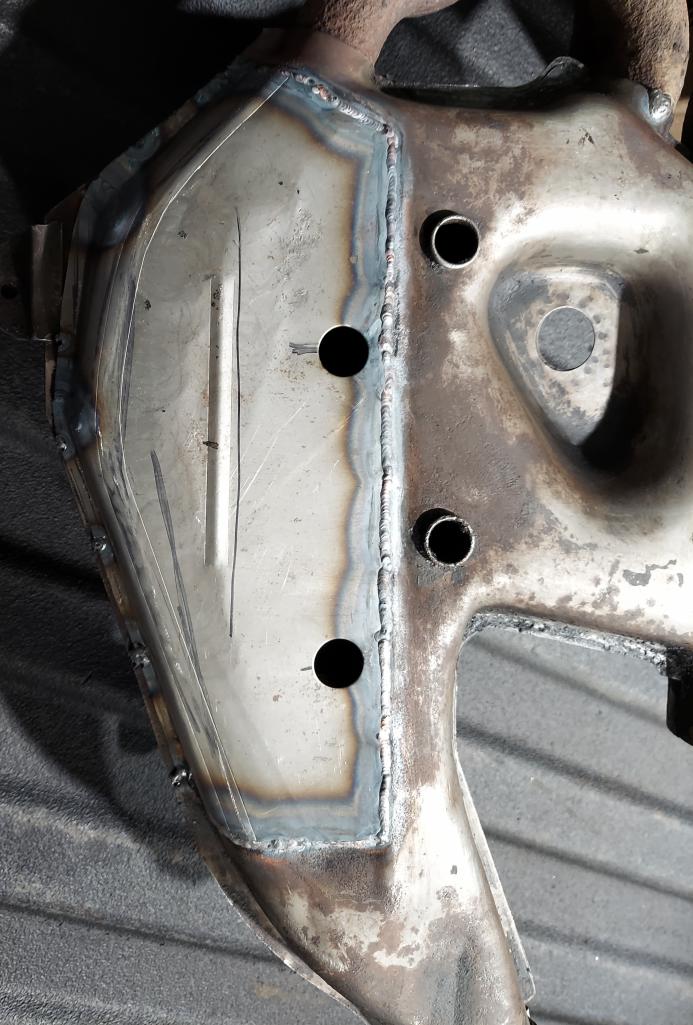
Posted by: raynekat Mar 19 2021, 08:29 PM
Those headers are beauties.
Posted by: mb911 Mar 21 2021, 08:32 AM
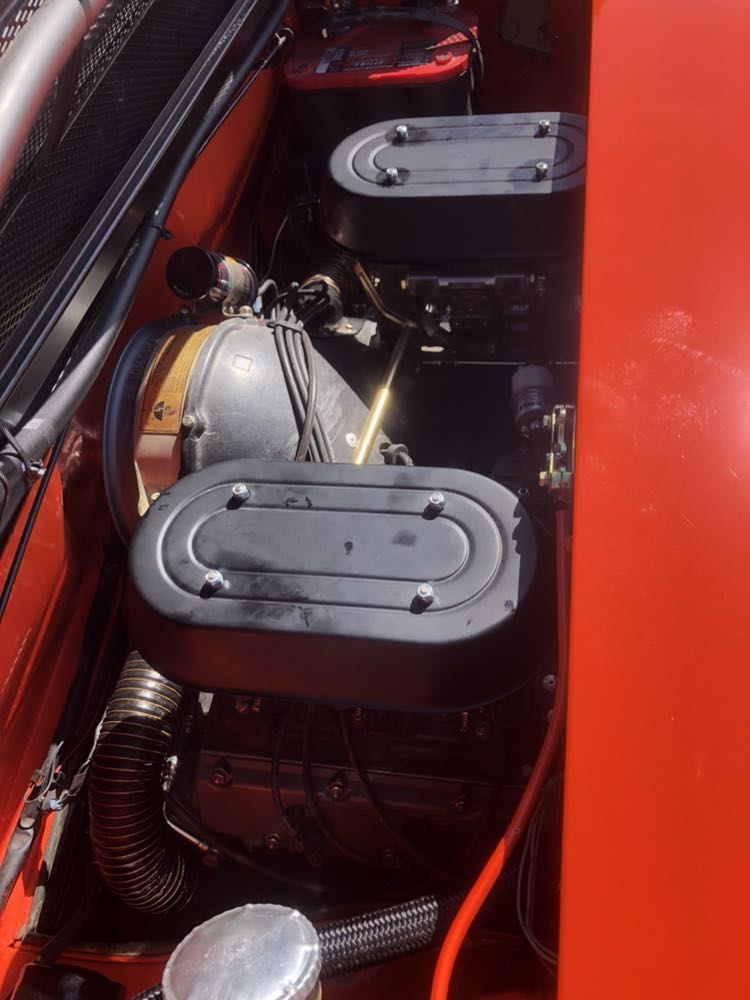
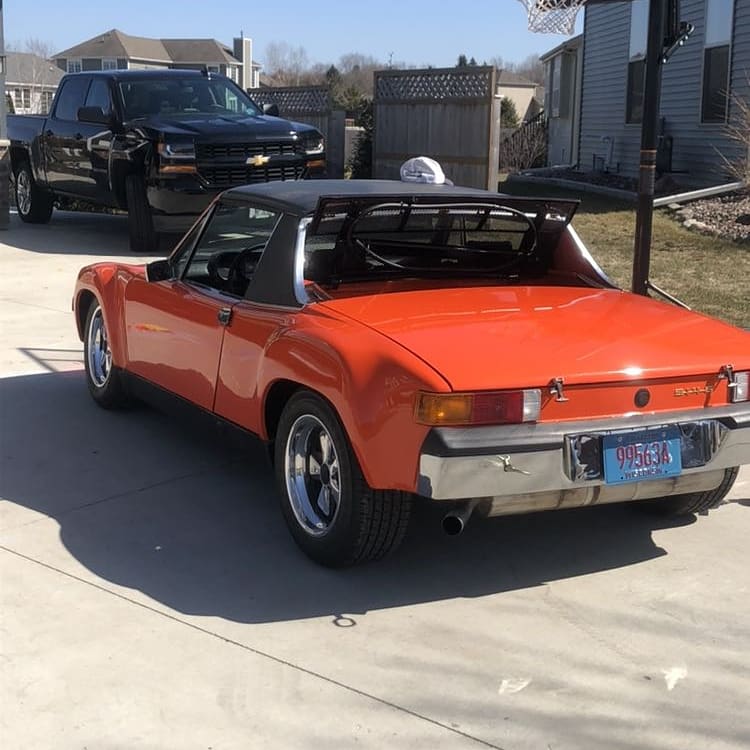
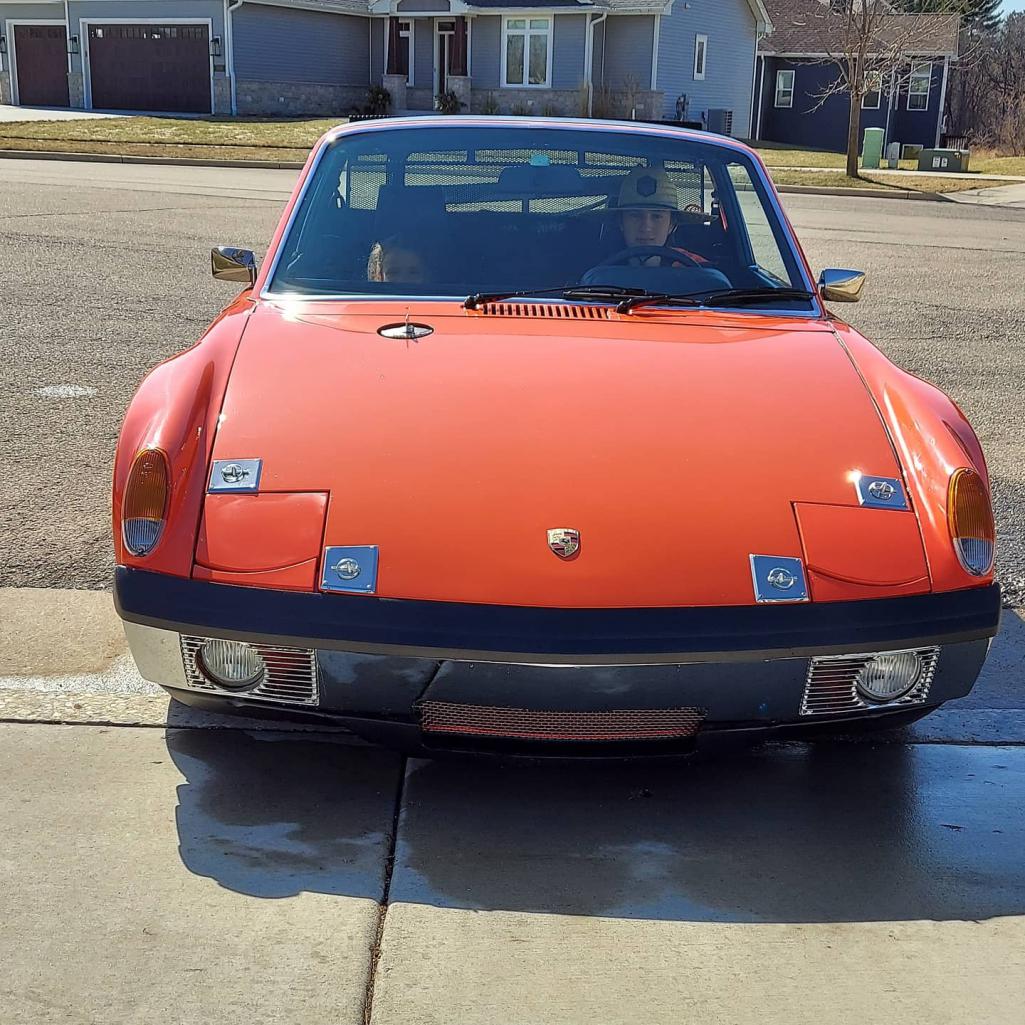
Posted by: racer914 Mar 21 2021, 10:49 AM
Very nice Ben, looks great.
Posted by: Dion Mar 21 2021, 11:09 AM
Looking awesome! Kids seem to be enjoying.
Cool shark btw.
Posted by: mb911 Mar 28 2021, 03:09 PM
Main power disconnect installed and all lights less the license plate lights, rough alignment is good. Ready to hit the road and tune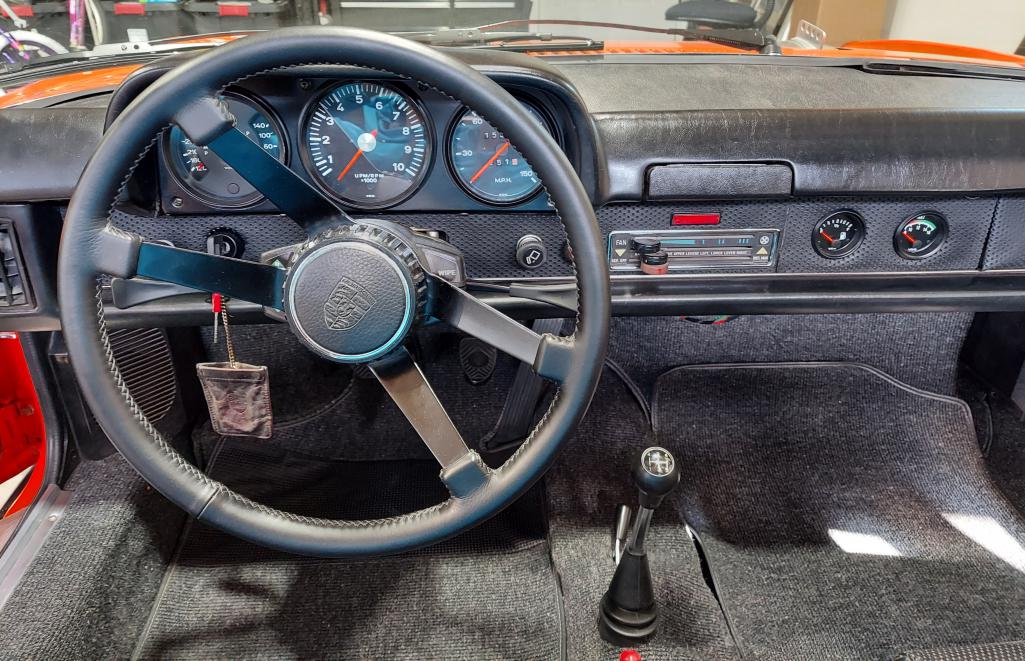
Posted by: mb911 Mar 28 2021, 03:09 PM
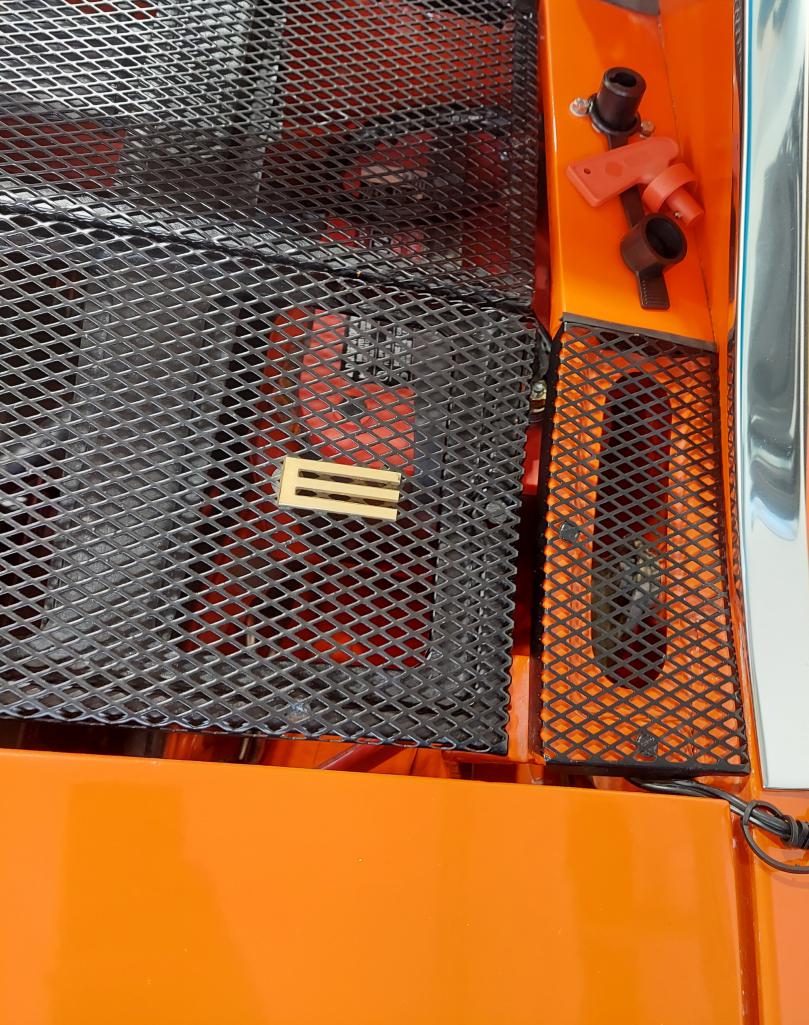
Posted by: mb911 Apr 6 2021, 03:23 PM
Here are some adventures from my 1st 150 miles or so on the car.
1.Ran out of gas bringing it to storage for 2 days while I worked on someone elses car (no longer working on others cars ever)
2. Drove the car back from sitting in storage and it ran well but seems to run out of gas up top so I need to work on that.
3. 4 the gear wanders a bit(location)
4. It seams the clutch tube must move up and down a bit when when actuatuating it and may actually come in contact with the brake line in the tunnel. Not sure need to work through that
5. Gas guage does not work. Must need a new sender
6. Had on an incline for a bit with nose down and it started right up but died after about 5-10 seconds because float bowls must have been jambed shut and no gas in the float bowls. Rolled it off the incline and all was good. Fired right up.
Now to do some tuning.. have good oil pressure so thats great. Oil temps are good. The single heat exchanger works fantastic. Had temo swings from 37-80 over the last week and it has performed perfectly. I have had the fun of all the trash from the heat tubes blowing all over the cabin. And also one loud back fire in the neighborhood.. love working out all these issues.
Posted by: Root_Werks Apr 6 2021, 04:23 PM
Be proud, that's actually a pretty short list for having just gotten back on the road!
Posted by: Cairo94507 Apr 6 2021, 08:09 PM
Enjoy every single issue because it means you are driving your car. That is a huge accomplishment and you can be proud.
Posted by: mepstein Apr 6 2021, 09:04 PM
Ben - Are you using the trans I gave you or a different one? I'm just curious if it was a good runner or something else.
Posted by: bbrock Apr 6 2021, 09:18 PM
Holy cow! How did I miss these monumental developments? Nice job! And yes, I'd be happy to have a to-do list like that
Posted by: mb911 Apr 7 2021, 05:18 AM
Ben - Are you using the trans I gave you or a different one? I'm just curious if it was a good runner or something else.
Yes I am and it works overall very good.
Posted by: mb911 Apr 7 2021, 05:19 AM
Holy cow! How did I miss these monumental developments? Nice job! And yes, I'd be happy to have a to-do list like that
Thanks. Its been a long road.
Posted by: rgalla9146 Apr 7 2021, 05:41 AM
Ben your car looks beautiful !
Great job.
Enjoy it.
Posted by: mb911 Apr 28 2021, 09:16 AM
300 mile check in. Car runs great. Had fuel pressure problem, and some oil leaks. Big thing now is the rsr seals on the rocker shaft "upgrade" I did over the winter has now caused an oil leak and now I have to drain the oil and pull the bottom valve covers. Ugh. Anyway drives very nice and great power.
Posted by: mb911 Apr 29 2021, 05:27 AM
Well #1 exhaust rocker slipped forward and caused the leak. Easier fix then planned.
Posted by: Root_Werks Apr 29 2021, 08:37 AM
Well #1 exhaust rocker slipped forward and caused the leak. Easier fix then planned.
Easy fixes don't come by often, nice!
Posted by: Dion Apr 29 2021, 10:58 AM
Damn I missed the post when it became roadworthy. Congrats!
Looks wonderful. Glad you are sorting out them bugs. I’m sure you’ll get plenty of seat time in the coming months. Glad to see it out. Nice one Ben.
Posted by: preach Apr 29 2021, 03:34 PM
Beautiful!
Posted by: Justinp71 Apr 29 2021, 04:27 PM
Looking great! Maybe a nominee for COTM!
Posted by: mb911 Apr 29 2021, 08:21 PM
Looking great! Maybe a nominee for COTM!
Thanks everyone. It really runs well now.
Posted by: mb911 Jun 11 2021, 10:08 AM
Early summer updates. The car runs pretty well. Messed with the 123 dizzy more and it helped a bunch. I really need to tune the carbs so bought a wide and AEM . Haven't done anything yet with it as first step is to put the carb insulators on. I heard the gas in the carbs boil the other day and that was enough for me to buy the kit. Waiting on that to show up.
Overall very happy with the car considering what a rust bucket it was. It needs a bunch of odds and ends done but it is road worthy and enjoy driving it on the typical 10 mile run. Spending the summer on the boat as it's hot as hell around here. 
Posted by: mb911 Sep 21 2021, 03:42 PM
End of summer at 850 miles on the car for the year. Not bad for a shake down year. Last year for summer travel baseball for my 17 yo so next year more miles. Impression for the 1st summer driving was that It ran great. Good power, good sounds, a few oil leaks on the engine so that may come out next year for a few seal replacements and a valve adjustment. Driver side 1/4 needs a respray but I just went with it for this year. Might respray in a year or so. Just enjoying it for now. Really happy with the car in general. My home alignment worked pretty good but next year I will have someone else do it. The darn clutch cable did stretch this summer so that was not fun. Might be a yearly wear item for me.
Here is a shot from the grocery store. Had so many thumbs ups and conversations with random people. Good times.. 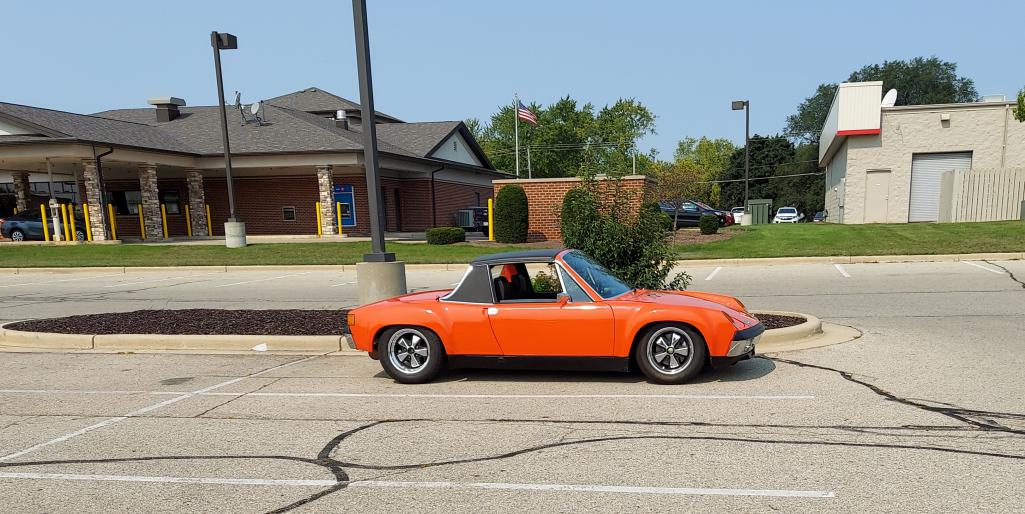
Posted by: nditiz1 Sep 21 2021, 06:34 PM
Nice work
Posted by: raynekat Sep 21 2021, 09:22 PM
Who wouldn’t give you a thumbs up. Looks great. Enjoy the heck out of it.
Posted by: mb911 Mar 19 2022, 02:58 PM
Getting ready for spring. The stainless header and heat exchanger are coming off my car and stock heat exchangers are going on. Can't wait to get it out of storage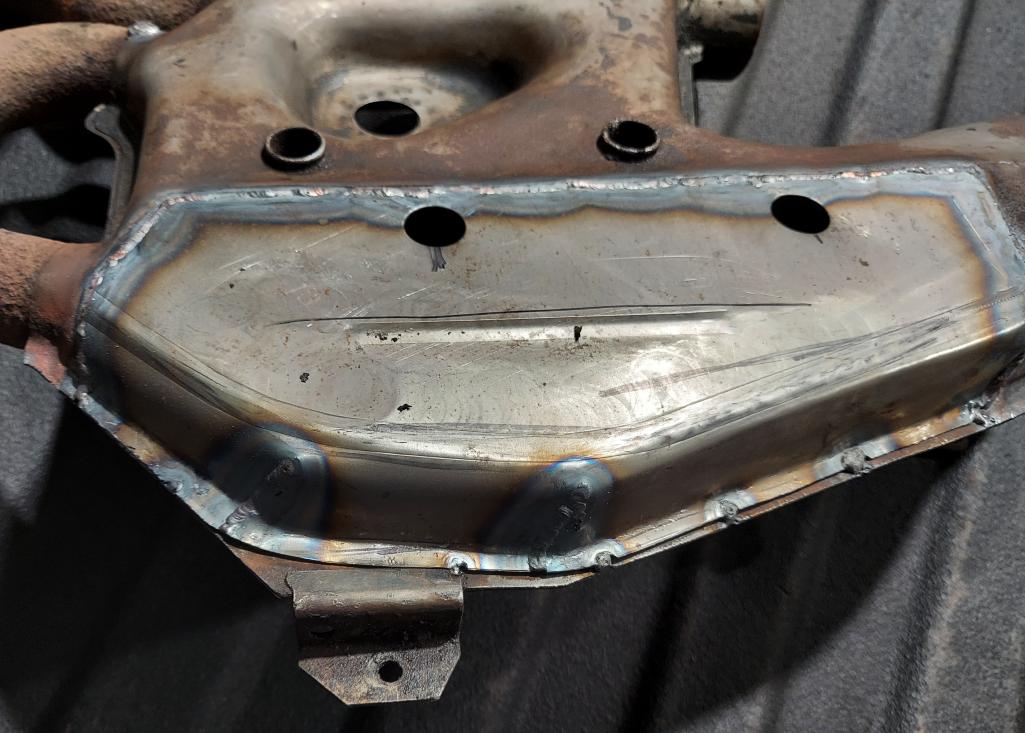
Posted by: jim dorociak Mar 20 2022, 02:52 PM
Ben - why are you changing from your stainless steel exhaust system to factory? Did you have heat? Jim
Posted by: mb911 Mar 20 2022, 03:01 PM
Ben - why are you changing from your stainless steel exhaust system to factory? Did you have heat? Jim
Long story but I also want to see how the tone changes on the car. I do have heat exchangers on the car currently.
Posted by: mb911 Apr 21 2022, 02:41 PM
Car is home. Missed it over the winter. 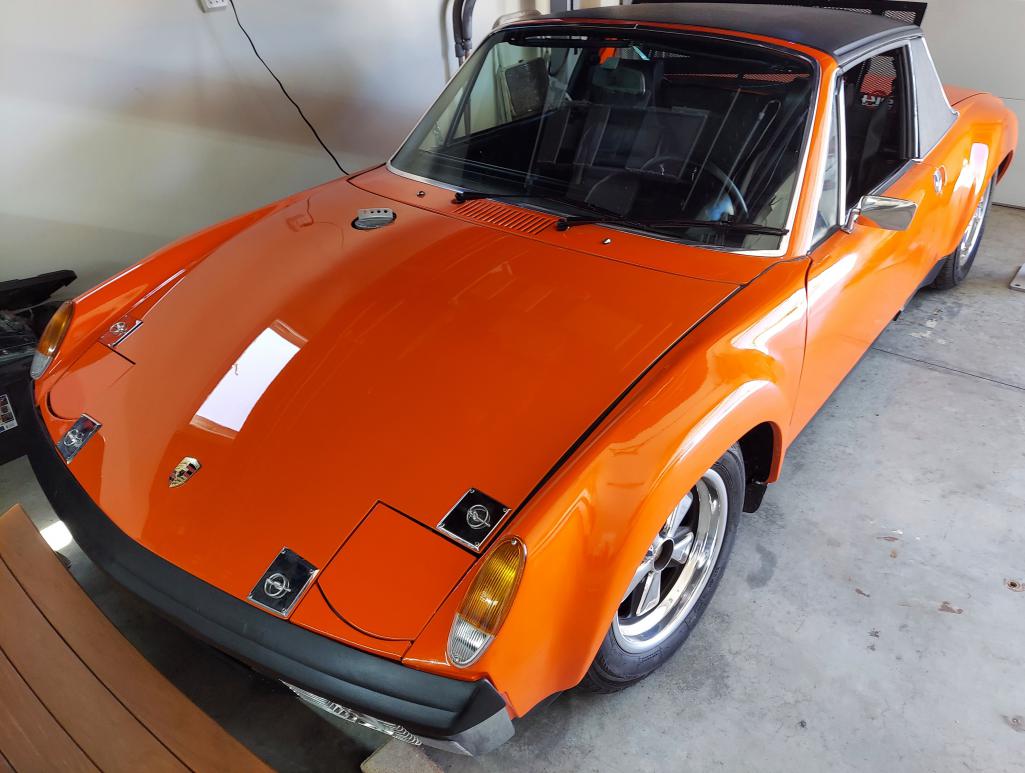
Posted by: Root_Werks Apr 21 2022, 03:49 PM
That looks like a done 914, nice!
Posted by: Cairo94507 Apr 21 2022, 03:50 PM
Ben, your car looks great. Battery tender?
Posted by: mb911 Apr 21 2022, 05:05 PM
Ben, your car looks great. Battery tender?
Yup trying to fit to much in the 3 stall garage.
Currently 1 928 getting ready for paint, 10 oil tanks in process,my 914 in need of fixing the driver side 1/4. The foam gods that I thought I defeated have reared their ugly head, my sons subaru, wife honda pilot, my daughters bikes etc.. a ton of stuff. I plan to run some wiring for the lights on the lift and clean a bunch up over the next few weeks.
The 928 will be wrapping up soon. Maybe. Thinking of getting rid of it for a 996 ironically.
Posted by: sixnotfour Apr 23 2022, 03:47 PM
Great News 928's are Special ..when they are good they are good... And Then... Kinda like a boat...
Posted by: mb911 Apr 29 2022, 01:57 PM
Well that was an exciting drive. Looks like clutch cable made it about 900 miles ugh.. further investigation is needed
Posted by: Root_Werks Apr 29 2022, 02:11 PM
Oops! Hopefully something simple. Had the plastic wheel on the trans break apart on me once. Thought the cable snapped or something.
Posted by: mb911 Apr 29 2022, 02:15 PM
Oops! Hopefully something simple. Had the plastic wheel on the trans break apart on me once. Thought the cable snapped or something.
Looks like it maybe the clevis. Oh well tomorrows project.
Posted by: mb911 Apr 30 2022, 05:25 PM
Well it was the clevis pin. Somehow it walked out. All fixed now. That was exciting.
Posted by: mb911 May 17 2022, 05:38 PM
Well exhaust is coming off. OEM stuff is going on for now. Also gonna start rear GT valance flares this week. Then start to work on some new exhaust for a fall/winter release.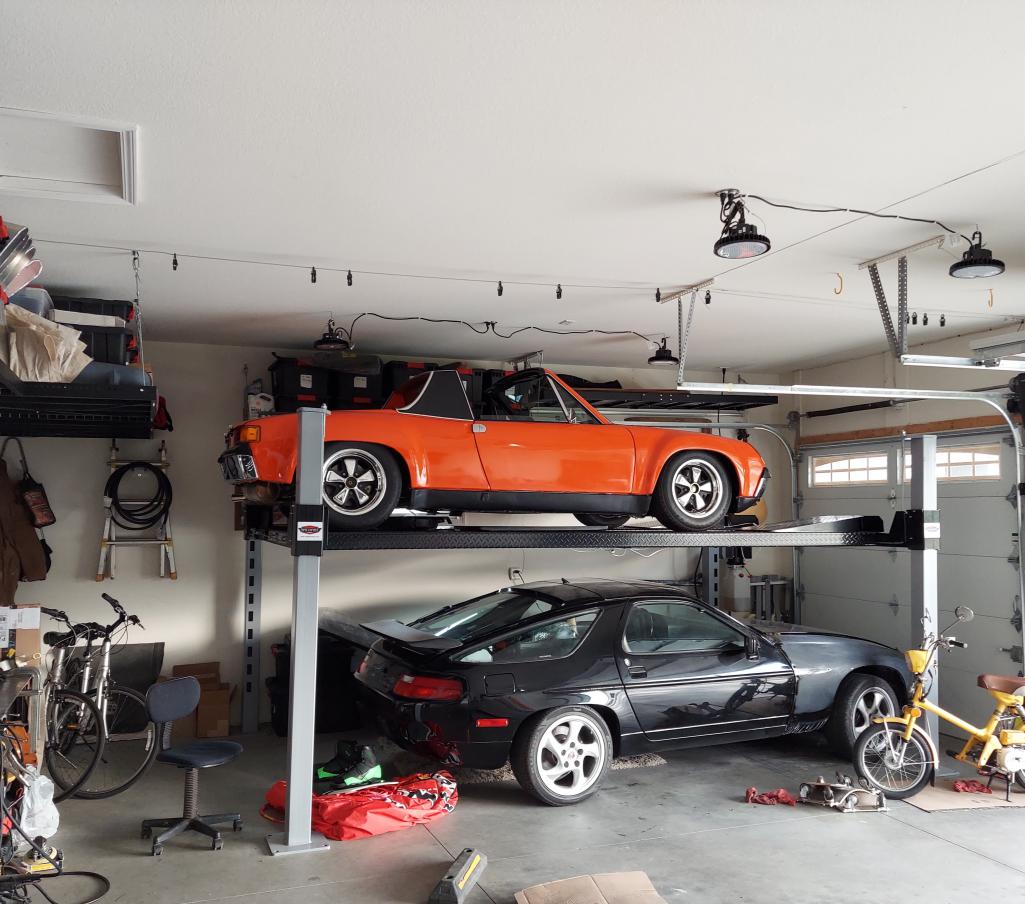
Posted by: mb911 May 22 2022, 04:32 AM
Finished a few changes.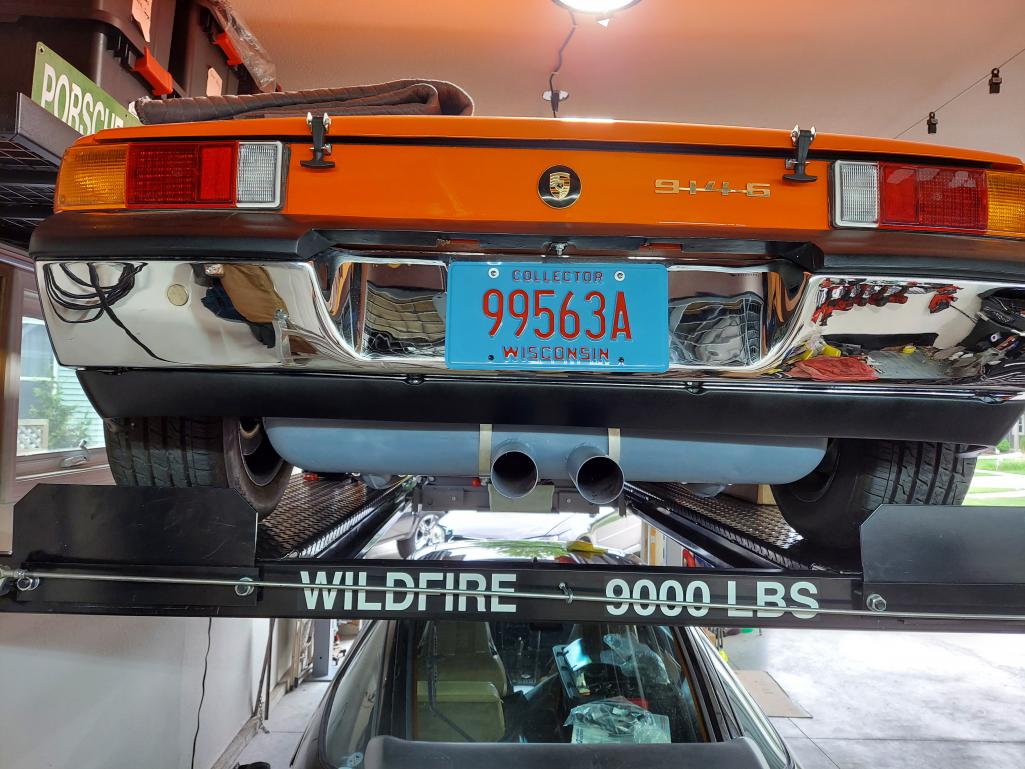
Posted by: mb911 May 22 2022, 04:33 AM
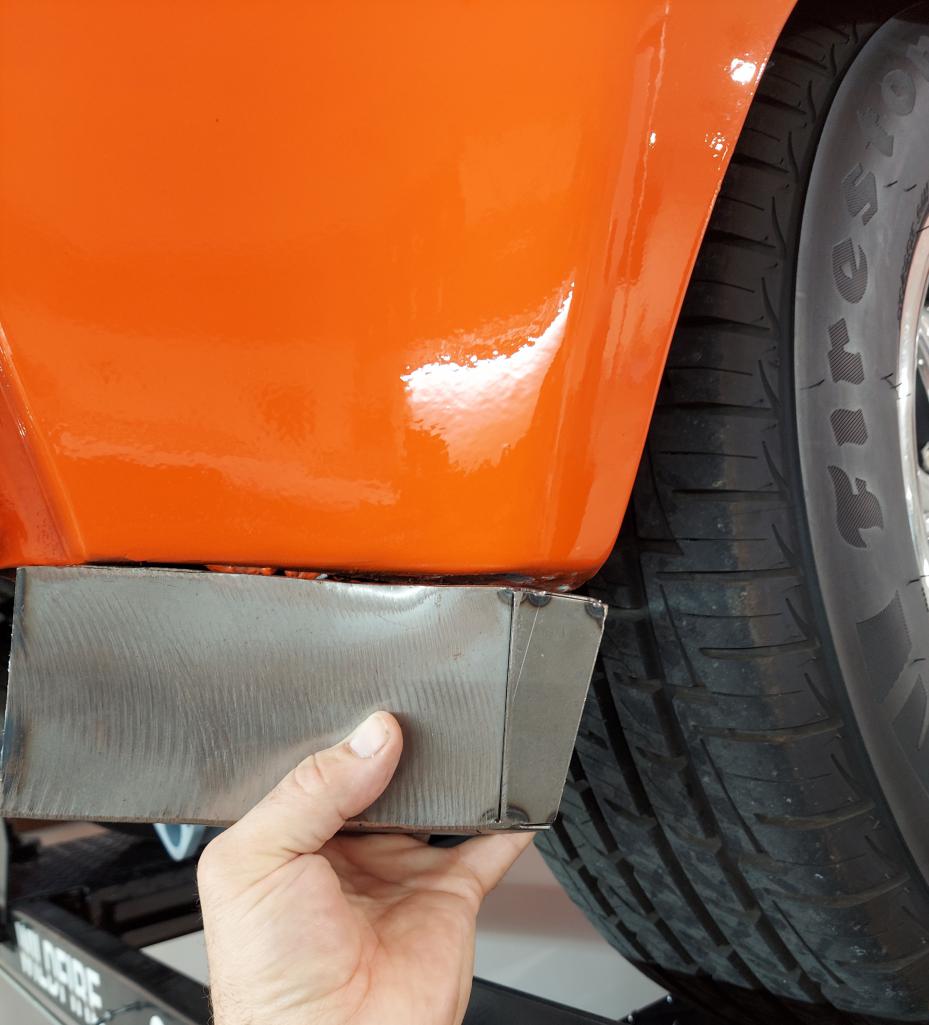
Posted by: mb911 May 22 2022, 04:33 AM
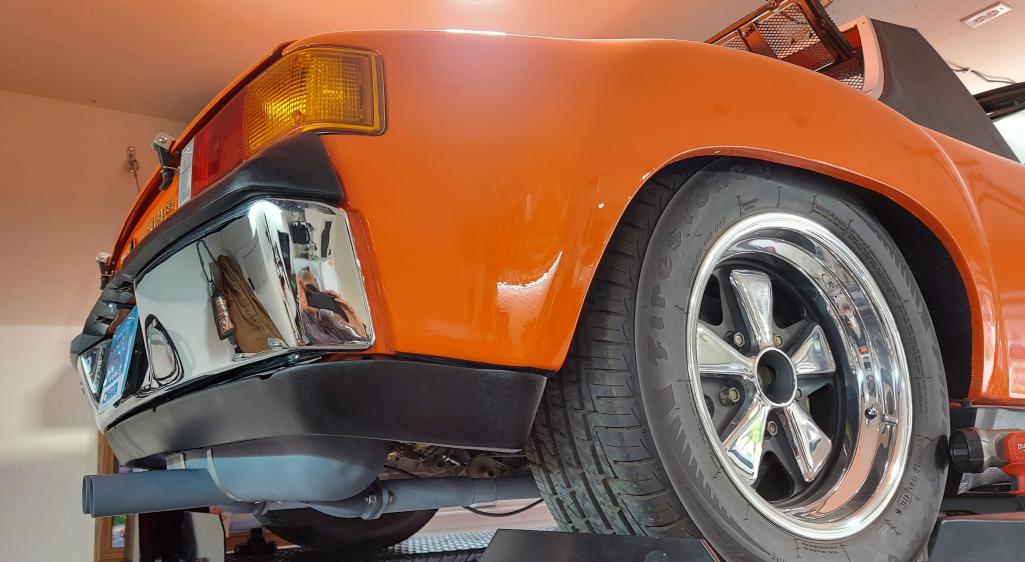
Posted by: JmuRiz May 23 2022, 11:23 AM
You running a stock style sport muffler...
Posted by: mb911 May 23 2022, 12:43 PM
You running a stock style sport muffler...
Yup very salty about what took place so I am starting fresh.
Posted by: mb911 May 31 2022, 06:52 PM
A nice shot of the car from today. I only have 1 tail pipe live and that has really made the perfect mix of air-cooled sounds. 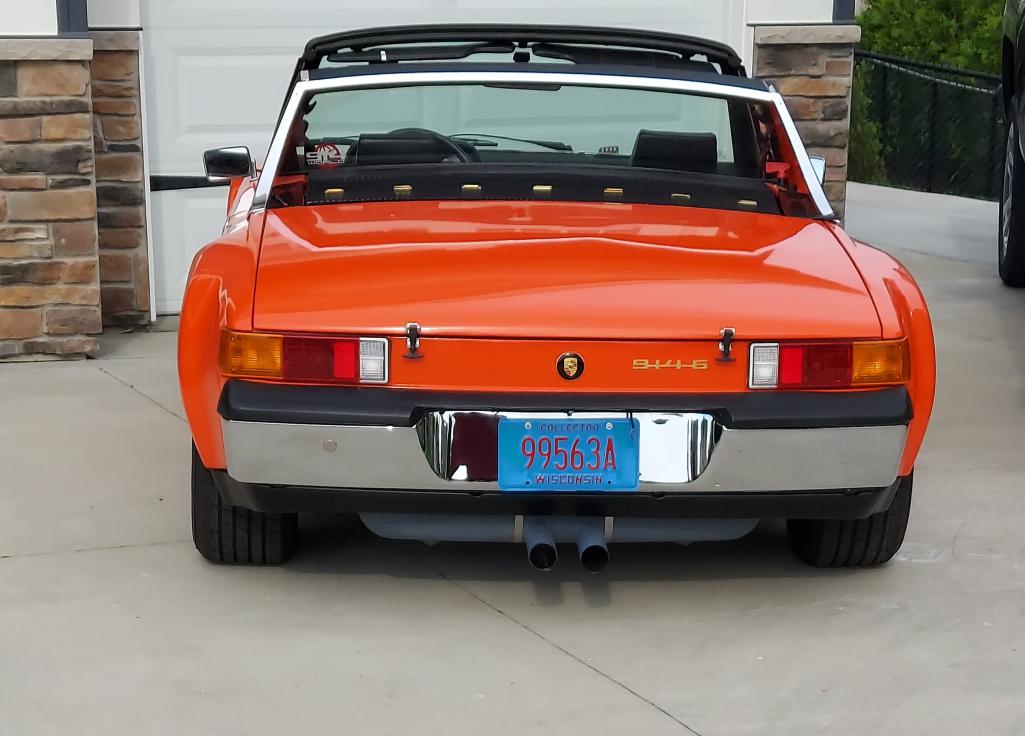
Posted by: Dion May 31 2022, 07:27 PM
That is one sweet car. Glad your pleased with the current muffler. Looks nice on there.
Posted by: JmuRiz May 31 2022, 08:30 PM
Very nice...I looked inside my passenger cabin and almost gave up. Seeing one getting the finishing touches makes me want to start finally putting stuff together.
Posted by: mb911 Jun 1 2022, 10:15 AM
That is one sweet car. Glad your pleased with the current muffler. Looks nice on there.
Just had to get rid of all the stainless on the car to make me feel better. Not that there is anything wrong with the stainless just how everything went down.
Posted by: 9146C Jun 1 2022, 10:29 AM
You have a great looking car! Enjoy!
Posted by: horizontally-opposed Jun 1 2022, 10:58 AM
This 914 is nuts, Ben.
Do not sell, brother.
Posted by: gereed75 Jun 1 2022, 11:33 AM
Ben, When you say "one tail pipe live" are you saying only one outlet, the other plugged??
Posted by: mb911 Jun 1 2022, 11:48 AM
Ben, When you say "one tail pipe live" are you saying only one outlet, the other plugged??
Yes.. works perfectly.
Posted by: mb911 Jun 1 2022, 11:50 AM
This 914 is nuts, Ben.
Do not sell, brother.
Thanks.. I like it to much unless comes cash in hand its staying. The 928 is gonna go for sure. I dislike having 2 cars at once to work on.
Posted by: horizontally-opposed Jun 1 2022, 07:38 PM
This 914 is nuts, Ben.
Do not sell, brother.
Thanks.. I like it to much unless comes cash in hand its staying. The 928 is gonna go for sure. I dislike having 2 cars at once to work on.
^ Glad to hear that.
The best way forward with a 914 (IMHO) is to simply resolve not to sell. As much as I like 928s (and that's a lot), I've come to view the 914 as something from Porsche that just keeps getting more and more attractive with time. They do so many things well, check so many boxes, and are aging better than ever.
Posted by: mb911 Jun 2 2022, 01:32 PM
A few pictures from today.. found another oil leak.. ugh such fun. 
Posted by: Root_Werks Jun 2 2022, 03:05 PM
This 914 is nuts, Ben.
Do not sell, brother.
Thanks.. I like it to much unless comes cash in hand its staying. The 928 is gonna go for sure. I dislike having 2 cars at once to work on.
To many batteries to maintain, can't drive all the toys enough, project after project. I'm down to my 914 and Bug. It's mostly doable now the 914 is 95% done.
Love the shot of your 914, looks great!
Posted by: FlacaProductions Jun 2 2022, 03:49 PM
That thing is hot sh!t. Don't ever sell it.
Posted by: mb911 Jun 2 2022, 04:27 PM
That thing is hot sh!t. Don't ever sell it.
Thanks Brian.. I tuned the carbs today and it is running great now but started leaking on passenger side valve cover.. darn it. Might have to do an engine out soon.
Posted by: mb911 Jun 2 2022, 04:30 PM
This 914 is nuts, Ben.
Do not sell, brother.
Thanks.. I like it to much unless comes cash in hand its staying. The 928 is gonna go for sure. I dislike having 2 cars at once to work on.
To many batteries to maintain, can't drive all the toys enough, project after project. I'm down to my 914 and Bug. It's mostly doable now the 914 is 95% done.
Love the shot of your 914, looks great!
To many batteries for sure.
Current count is 2 DD for my wife and I
944 (sons)
928 that is still a project but runs
914-6
Honda accord (son #2)
Honda civi (son #1)
Subaru (son #3)
914 2.0 (@ my dad's and coming here soon
Then the 99 malibu ski boat.
Lots of batteries and gets overwhelming.
Posted by: T.Rick6 Jun 3 2022, 08:39 AM
A few pictures from today.. found another oil leak.. ugh such fun.
I just spent several hours pouring over your build thread, absoutly outstanding work! ( on top of your side hussle) talk about being BUILT not bought, I can only dream of such a fine Teener; mabey one day. Next COTM for sure, congrats on a well built machine.
Todd
Posted by: mb911 Jun 3 2022, 09:09 AM
A few pictures from today.. found another oil leak.. ugh such fun.
I just spent several hours pouring over your build thread, absoutly outstanding work! ( on top of your side hussle) talk about being BUILT not bought, I can only dream of such a fine Teener; mabey one day. Next COTM for sure, congrats on a well built machine.
Todd
Thanks so much. It was a lot of work and still more to do but I enjoy the car.
Posted by: mb911 Jun 3 2022, 02:49 PM
Well turns out valve cover exhaust side gasket is not sealing. Ugh just changed to oil and now get to throw out all the vr1 I just put in there.
Posted by: mepstein Jun 3 2022, 05:51 PM
Well turns out valve cover exhaust side gasket is not sealing. Ugh just changed to oil and now get to throw out all the vr1 I just put in there.
Why do you have to throw it out?
Posted by: mb911 Jun 3 2022, 09:49 PM
Well turns out valve cover exhaust side gasket is not sealing. Ugh just changed to oil and now get to throw out all the vr1 I just put in there.
Why do you have to throw it out?
I don't want to drain into a dirty drain pan and then pour it back into the tank. Just will start fresh.
Posted by: mb911 Jun 13 2022, 04:04 PM
My sons talked me into putting center caps today. Thoughts? 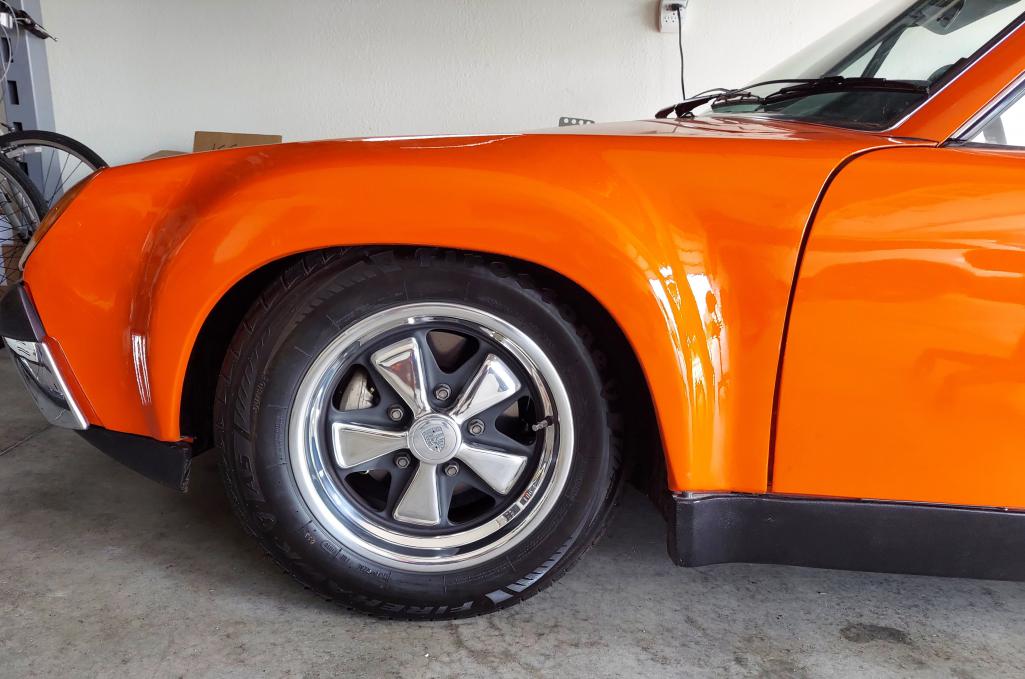
Posted by: mepstein Jun 13 2022, 04:21 PM
Most people will say you need them to look “finished”. I personally like the gt look. No caps, no rear valance, etc. but stuff like this, you can go back and forth as the mood suits you.
Posted by: Cairo94507 Jun 13 2022, 04:43 PM
One of the rare times I disagree with Mark; I like them with the caps, finishes it off.
But... don't hate me, on a GT look car like yours, I love the RSR finish on the Fuchs.
Cheers,
Michael
Posted by: 914Sixer Jun 13 2022, 04:53 PM
Yeah, have to go with the polished centers to match the paddles.
Posted by: mb911 Jun 13 2022, 04:57 PM
Thanks everyone. Also should have updated that fixed the rocker shaft by putting a new one in and torqued to 200 inch lbs. Hopefully all is well now..
Posted by: TRS63 Jun 13 2022, 10:39 PM
That is such a beautifully built 914..very inspiring!
Antoine
Posted by: mb911 Jun 14 2022, 06:28 AM
That is such a beautifully built 914..very inspiring!
Antoine
Thank you and I believe it is the same color as yours @http://www.914world.com/bbs2/index.php?showuser=24690 ?
Posted by: PanelBilly Jun 14 2022, 07:30 AM
Yes to the caps.
Posted by: mb911 Jun 15 2022, 05:44 AM
Yes to the caps.
Thanks and I think I agree. They will stay on for now..
Posted by: Freezin 914 Jun 15 2022, 06:02 AM
Yes to the caps.
The car looks great! As a few others have said, your car is inspiring!
Posted by: Freezin 914 Jun 15 2022, 06:03 AM
Yes to the caps.
The car looks great! As a few others have said, your car is inspiring!
Posted by: ClayPerrine Jun 15 2022, 07:32 AM
My sons talked me into putting center caps today. Thoughts?
The point on the bottom of the crest should point to the valve stem.
Posted by: JmuRiz Jun 15 2022, 07:42 AM
[quote name='ClayPerrine' post='3008872' date='Jun 15 2022, 05:32 AM']
[quote name='mb911' post='3008431' date='Jun 13 2022, 05:04 PM']
My sons talked me into putting center caps today. Thoughts?
The point on the bottom of the crest should point to the valve stem.
[/quote]
I was just going to post that...that's how the factory does it
What a GREAT looking car!!!
Posted by: autopro Jun 15 2022, 08:00 AM
Beautiful car and I do like the wheels more with the caps on.
Posted by: mb911 Jun 15 2022, 10:39 AM
My sons talked me into putting center caps today. Thoughts?
The point on the bottom of the crest should point to the valve stem.
Oh jeez that completely slipped my mind. I will fix that.
Posted by: mb911 Jun 19 2022, 05:41 PM
Father's day gifts. 3 color tunes so I can do 1 bank at a time and thr bad boy 220 ft lb ratchet.
Posted by: restore2seater Jun 20 2022, 09:01 AM
I have never heard of a color tune. Watched a quick YouTube. Is this only used for idle settings?
Would be interested if you would be willing to do a YouTube video on how you used it on your six.
Posted by: mb911 Jun 20 2022, 02:40 PM
I have never heard of a color tune. Watched a quick YouTube. Is this only used for idle settings?
Would be interested if you would be willing to do a YouTube video on how you used it on your six.
I first heard about it from performance oriented. That is what is suggested. Once I get around to doing it I might do a youtube.
Posted by: mb911 Jul 14 2022, 05:01 AM
Paint correction on my sons 944 and saw a nice shot. 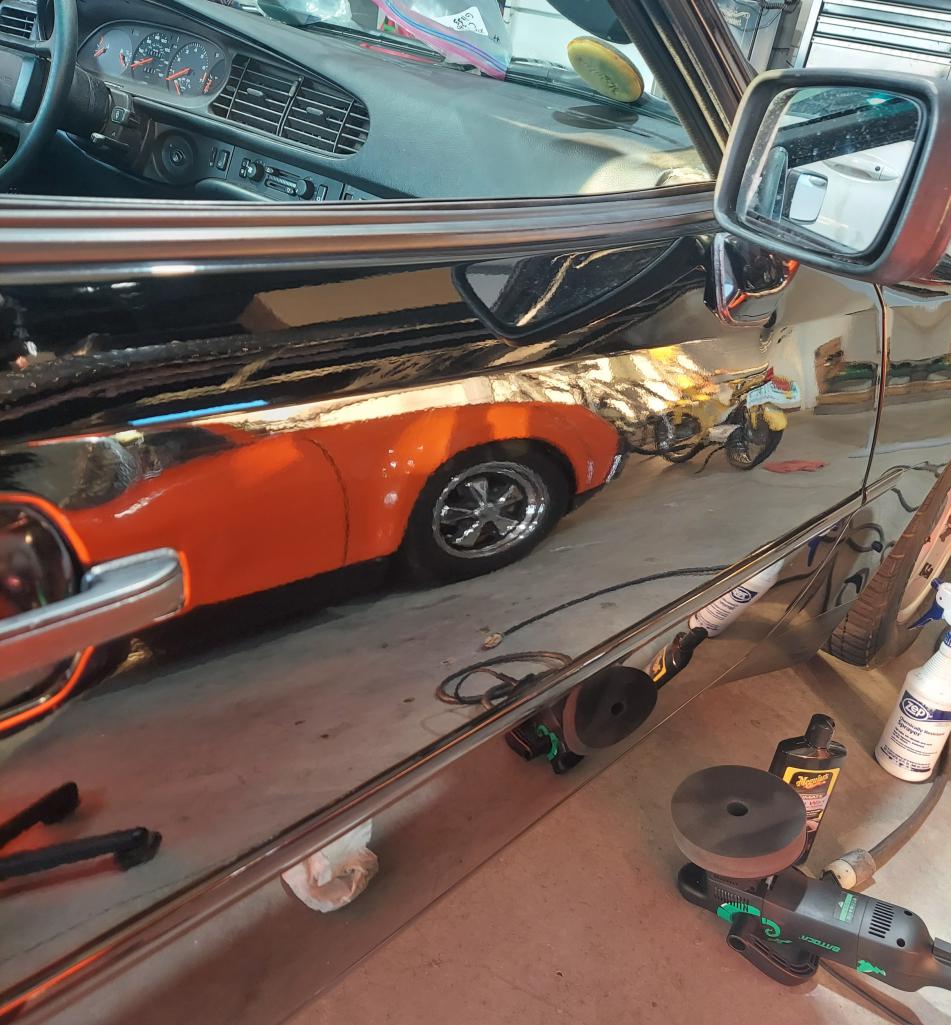
Posted by: bbrock Jul 14 2022, 08:56 PM
Nice!
Posted by: mb911 Aug 2 2022, 06:49 PM
My co worker and I had a little car show at work by chance. Cool GTO.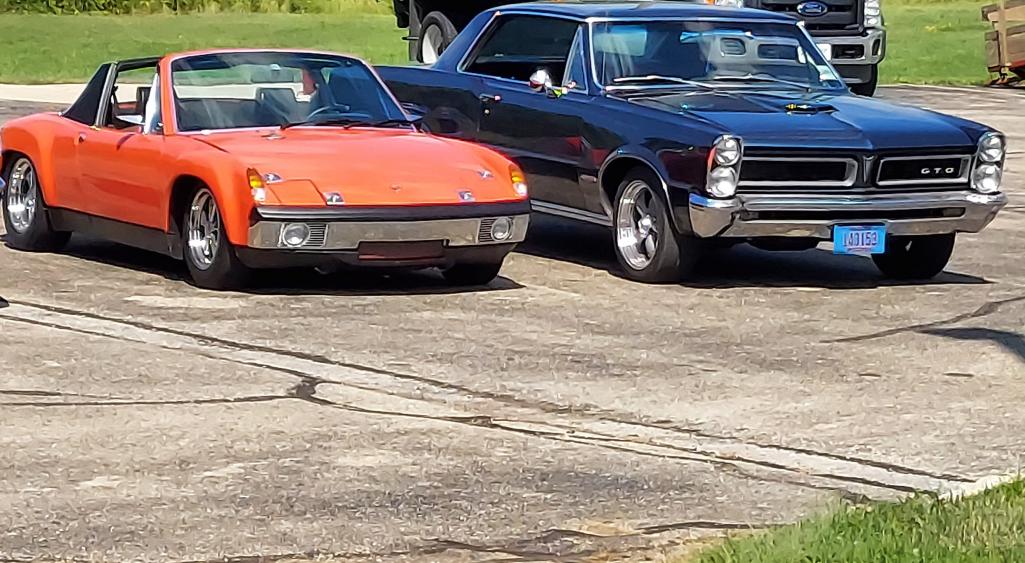
Posted by: mb911 Aug 11 2022, 05:03 PM
Well first semi big mishap. Driving down the road and I see my new windshield trim fly up in the air. Got home with it bent but able to bend back into shape and see that all the windshield clips cracked and broken now.. so now some 3m window weld in a few spots. So disappointing. Should have bought factory ones
Posted by: Cairo94507 Aug 11 2022, 05:08 PM
Fortunately you did not lose the trim. Things happen when you drive them - I know.
Posted by: bbrock Aug 11 2022, 05:27 PM
Oh man. I feel for you. That sucks. I'm glad there wasn't any collateral damage. I'm glad I threw my bag of windshield clips in the trash and bought factory, but only because I was lucky to be warmed by someone here on the World. I honestly don't even know why there is an aftermarket version of those clips. The factory ones are not expensive. Thank goodness for 3M adhesives. My trim was held on with 3M weatherstrip adhesive for years before the restoration.
Posted by: Dion Aug 11 2022, 05:55 PM
same thing happened to me Ben at the Northeast gathering.
Luckily the old man reflexes still worked and grabbed my left side trim as it passed by the drivers window! I blamed the aerowash coming off Olympic914
He saw it play out. Anyway Travis came to the rescue. He had some 3M tape in his car.
Thankfully it didn’t bend just slid out of the corner caps. Still in place. I regret now not replacing windshield and the factory clips. Another project for another day.
Posted by: mb911 Sep 20 2022, 01:42 PM
Did a quick fire extinguisher mount.. wanted to make the car a bit safer.
Posted by: mb911 Sep 20 2022, 01:44 PM
And a comparison shot of a co-workers truck and mine. 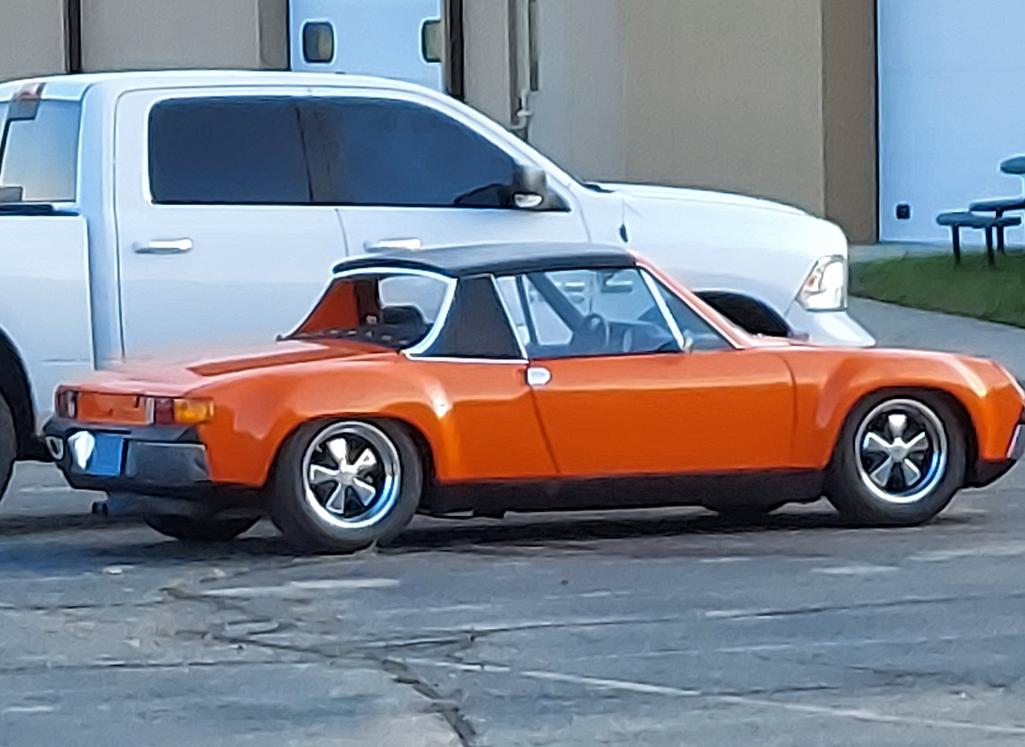
Posted by: bbrock Sep 20 2022, 02:17 PM
And a comparison shot of a co-workers truck and mine.
Ha ha! I had a similar experience one day at the eye doctor as I opening the door on my car to leave as a guy was climbing out of a lifted version of a truck about that same size next to me. His tires were about as high as my roof line. He gave me a funny look and I said, "Hey look. They are the exact same size!"
Posted by: ClayPerrine Sep 20 2022, 04:06 PM
It is disconcerting when you are driving down the freeway, look to the left and all you see are pointed cones spinning on the center of the semi truck wheel next to you.
Kinda looks like a slicer aimed directly at the side of your car!
Clay
Posted by: worn Sep 20 2022, 04:49 PM
It is disconcerting when you are driving down the freeway, look to the left and all you see are pointed cones spinning on the center of the semi truck wheel next to you.
Kinda looks like a slicer aimed directly at the side of your car!
Clay
Ah, but it is all in fun. Just not your fun…

I tend to agree because I want to make it home safe. Good to see you again and glad you made it home.
Posted by: mb911 Sep 24 2022, 07:23 PM
928 is running and driving so took a shot of the 3 porsches at the house. 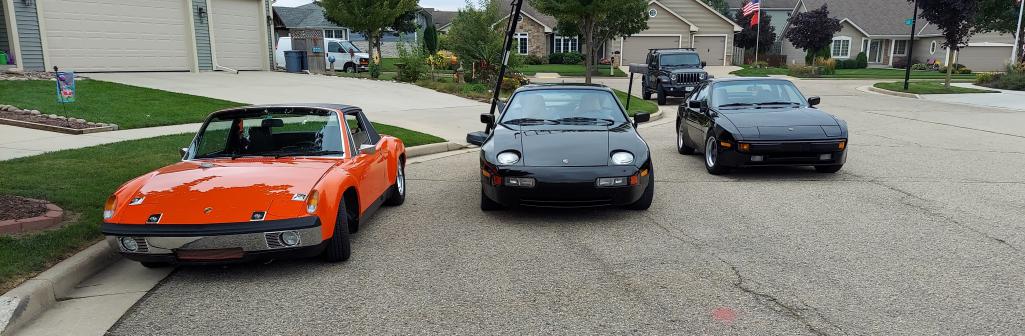
Posted by: mb911 Oct 16 2022, 04:37 PM
Well wrapped up the second year of driving. Going to touch up some spots on the driver side this winter. Figure out the heater controls, reglue the dash basket weave, possibly drop the engine for some oil leak repair. Then possibly EFI 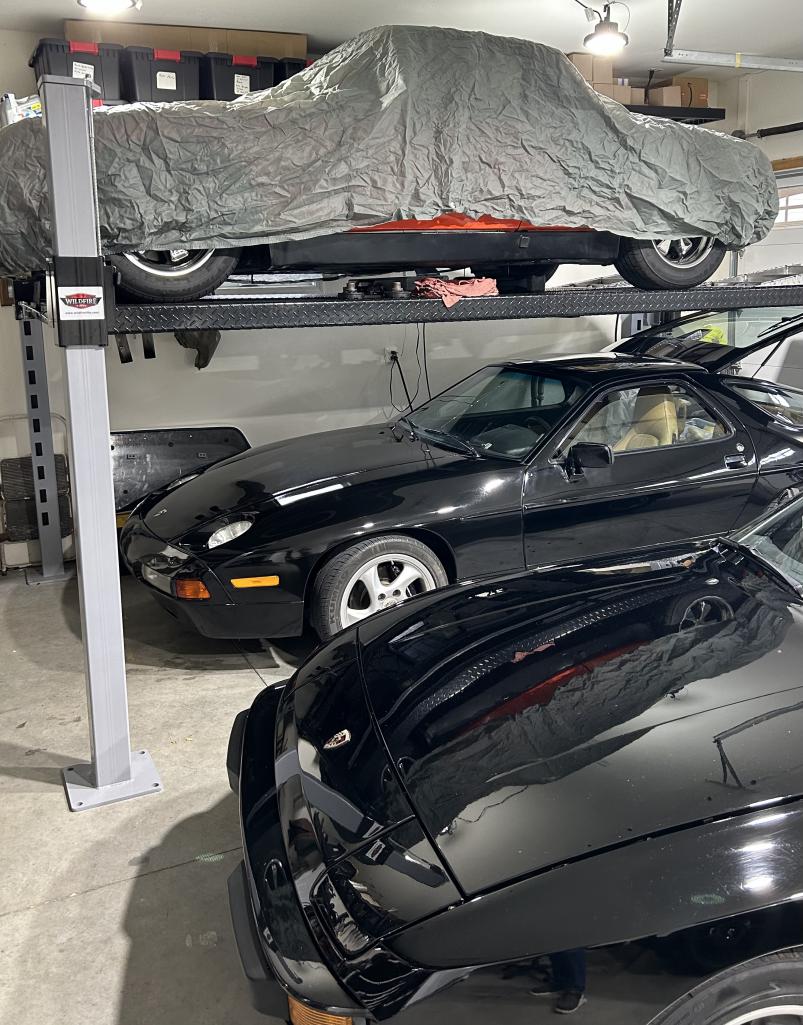
Posted by: Cairo94507 Oct 17 2022, 08:33 AM
That reminds me, I have to get the 3M trim adhesive out and re-glue some of the dash face material too.
Posted by: mb911 Oct 17 2022, 03:26 PM
That reminds me, I have to get the 3M trim adhesive out and re-glue some of the dash face material too.
I am so disappointed with the 3m spray. Weld wood is a better product
Posted by: mepstein Oct 17 2022, 04:38 PM
That reminds me, I have to get the 3M trim adhesive out and re-glue some of the dash face material too.
I am so disappointed with the 3m spray. Weld wood is a better product
Weld wood is really good stuff. Use two thin coats on the vinyl. One thin coat on the metal. Let it dry 2x as long as the instructions recommend and place it carefully because once it’s stuck, it’s really stuck. I use a disposable foam brush to spread it around.
Posted by: mb911 Oct 18 2022, 01:33 PM
That reminds me, I have to get the 3M trim adhesive out and re-glue some of the dash face material too.
I am so disappointed with the 3m spray. Weld wood is a better product
Weld wood is really good stuff. Use two thin coats on the vinyl. One thin coat on the metal. Let it dry 2x as long as the instructions recommend and place it carefully because once it’s stuck, it’s really stuck. I use a disposable foam brush to spread it around.
I will definitely try that.
Posted by: mb911 Dec 17 2022, 03:08 PM
Well about update time.
I have 2000 miles on it and am going to pull the engine this winter to address some oil leaks then adjust valves, and then put 911 rear m calipers on with 911 rear ebrakes , hubs, CVs etc. I also will be doing some hybrid EFI using the carbs as TBs and the MFI ports in the heads for the long tip E46 injectors
Posted by: mb911 Dec 17 2022, 03:10 PM
Oh and 993 heat exchangers going on.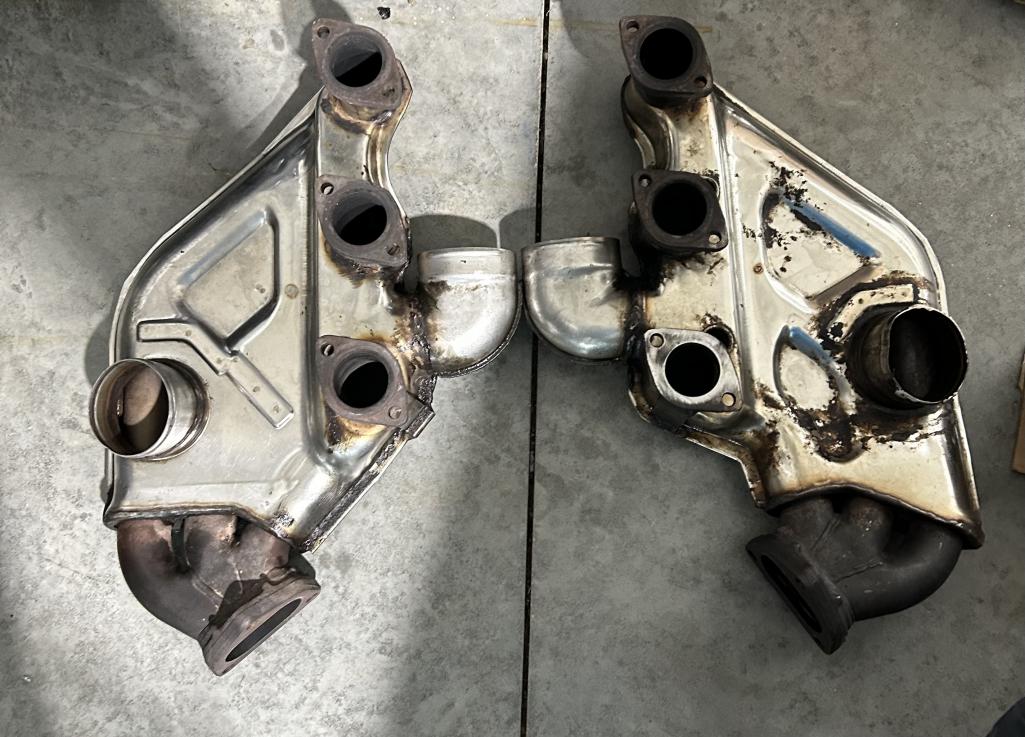
Posted by: mb911 Dec 17 2022, 03:11 PM
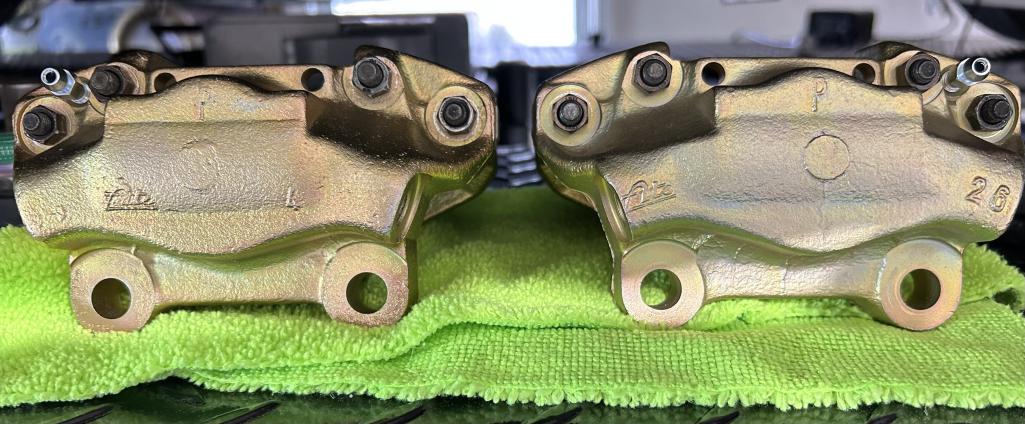 from PMB thanks Eric
Posted by: mb911 Dec 17 2022, 03:13 PM
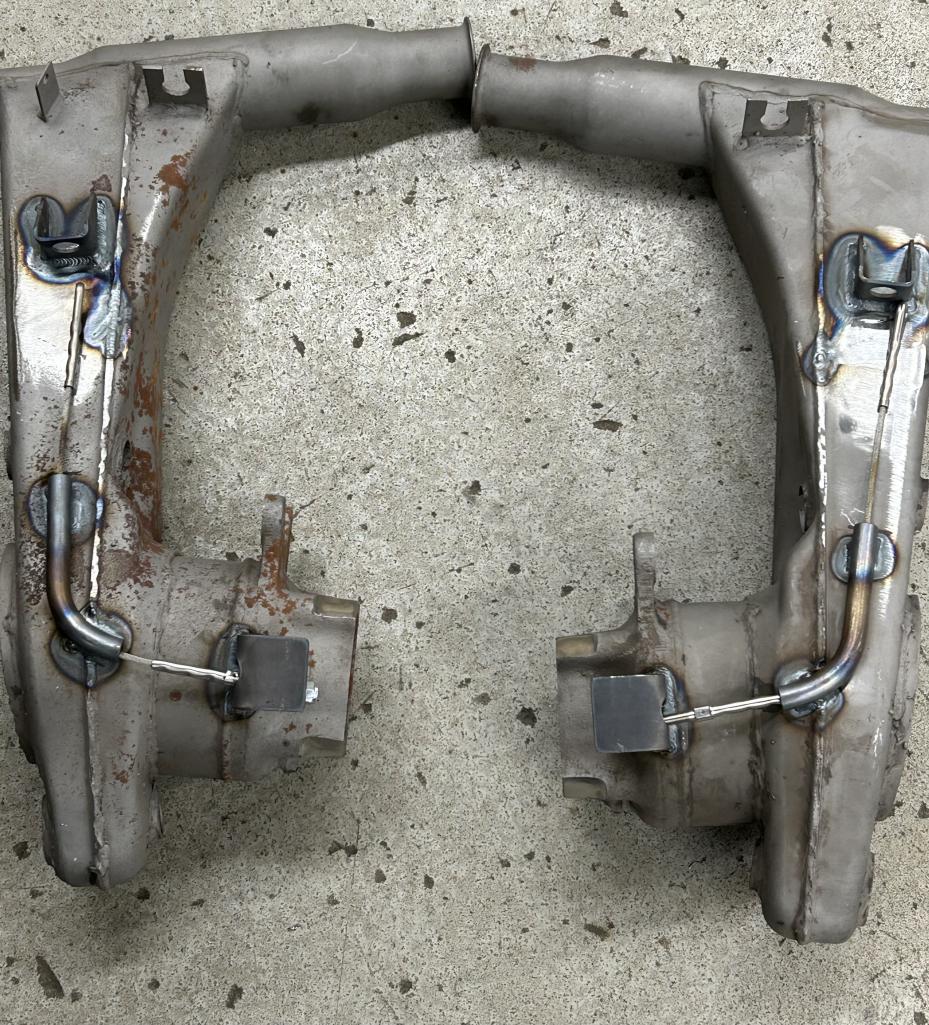
Tangerine conversion kits for the e brakes.
Posted by: troth Dec 17 2022, 03:22 PM
Oh and 993 heat exchangers going on.
Why use the 993 ones? Bigger tubing? Get more heat in the cabin? Looks like they occupy less space, so maybe help with access for maintenance?
Posted by: mb911 Dec 17 2022, 03:39 PM
Oh and 993 heat exchangers going on.
Why use the 993 ones? Bigger tubing? Get more heat in the cabin? Looks like they occupy less space, so maybe help with access for maintenance?
All of the above.
Posted by: troth Dec 17 2022, 05:22 PM
Oh and 993 heat exchangers going on.
Why use the 993 ones? Bigger tubing? Get more heat in the cabin? Looks like they occupy less space, so maybe help with access for maintenance?
All of the above.
Nice, look forward to hearing and seeing how they work out.
Posted by: mb911 Dec 20 2022, 07:21 PM
EFI project has started
Also got a care package from Uro. Pretty nice parts. Will be doing an install thread on the main seal. 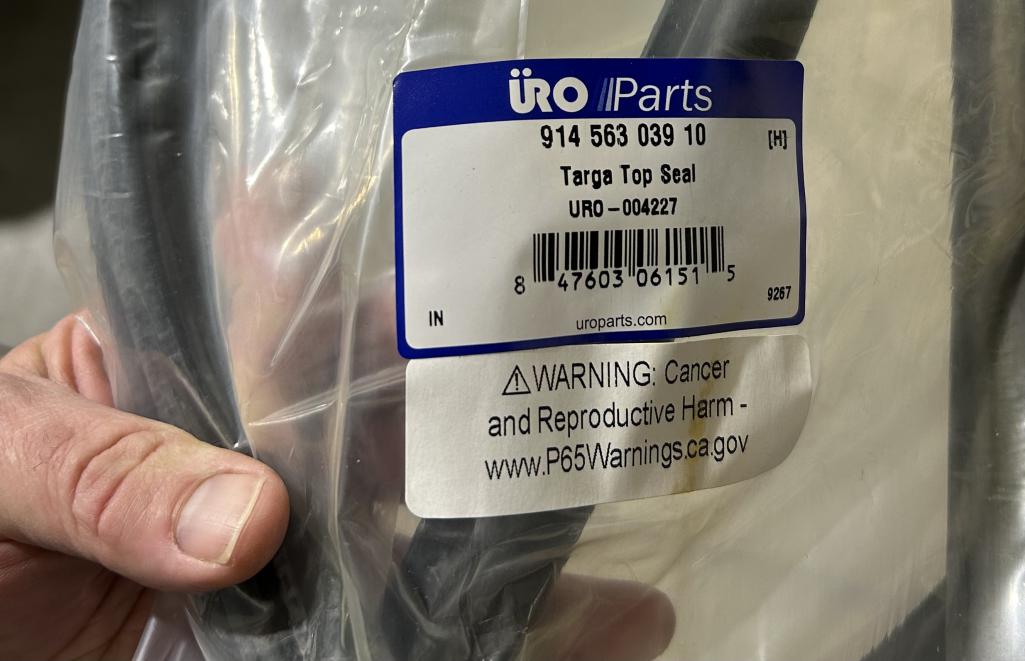
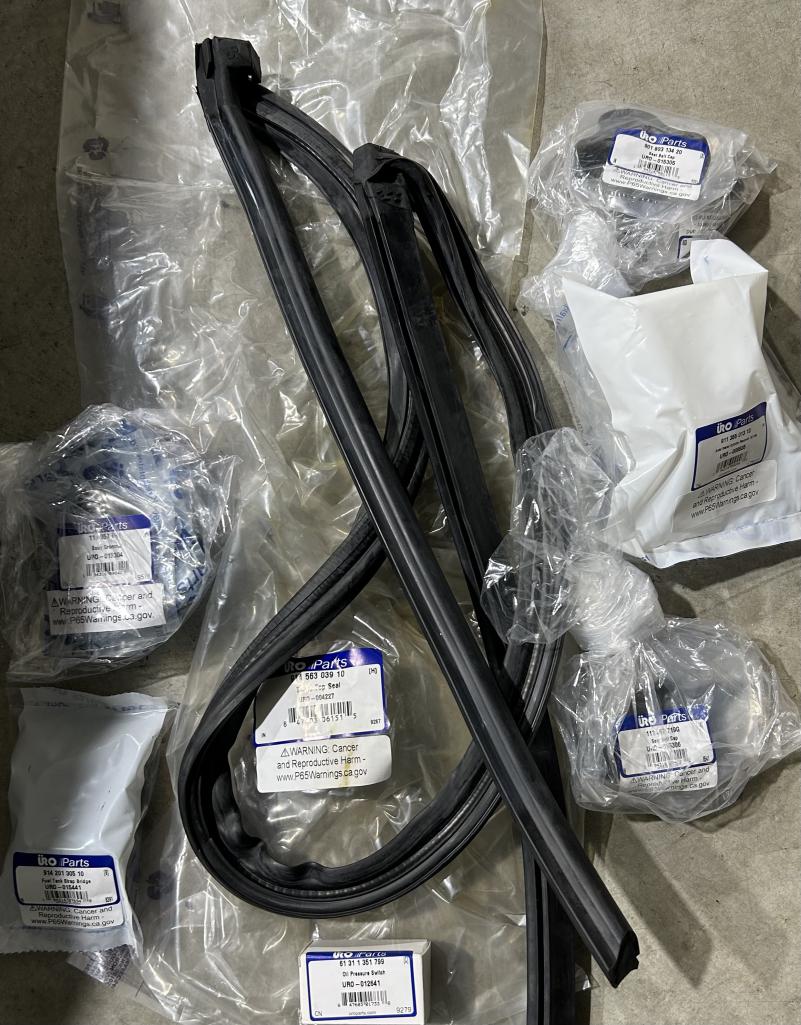
Posted by: mb911 Dec 20 2022, 07:21 PM

Posted by: mb911 Dec 20 2022, 07:22 PM
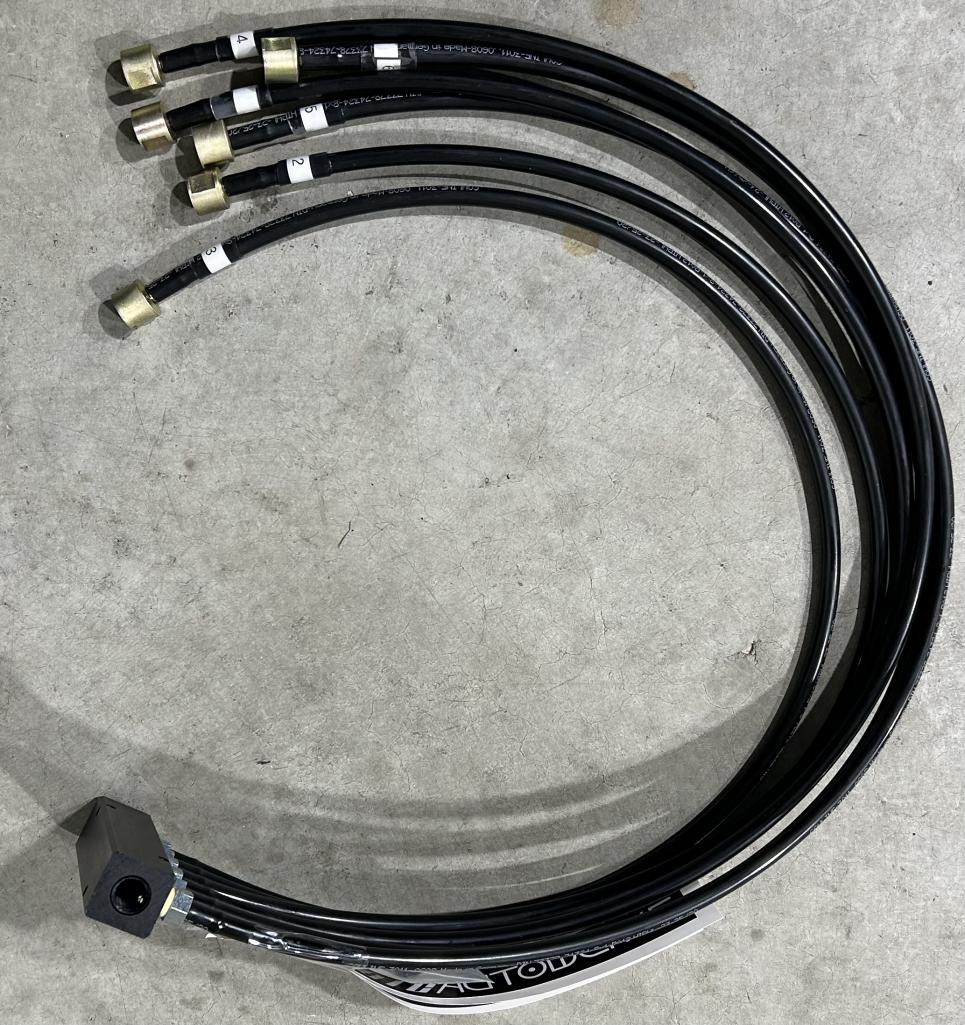
Posted by: Root_Werks Dec 21 2022, 11:51 AM
Ben,
Some pretty cool projects going on!
You'll remember my six had the 993 heater boxes. They worked very well, produced a lot of heat with really good airflow.
I'll be watching the e-brake update. PO did a homemade 911 hat conversion. It's.....okay. Not certain if I'll get the kit or just improve on his design a little.
Posted by: speed metal army Dec 21 2022, 11:59 AM
Oh and 993 heat exchangers going on.
I want pics of this! I actually have a set, it never occurred to me to try em...
Posted by: NARP74 Dec 21 2022, 12:12 PM
Oh and 993 heat exchangers going on.
I want pics of this! I actually have a set, it never occurred to me to try em...
Ditto about watching. Mine came with headers no heat and this is on my list to look at. mb911 and Root Werks, love to see pics.
Posted by: Root_Werks Dec 21 2022, 12:47 PM
Only pic I have is from PO, kinda small.
He did the 993 HE's because it was a 1975 914 and needed Cats and pass smog I guess?
I would have kept them, but found a set of stock 914-6 HE's I bought some 10+ years earlier. My 2.7 doesn't need pipes larger than stock 914-6.
Attached image(s)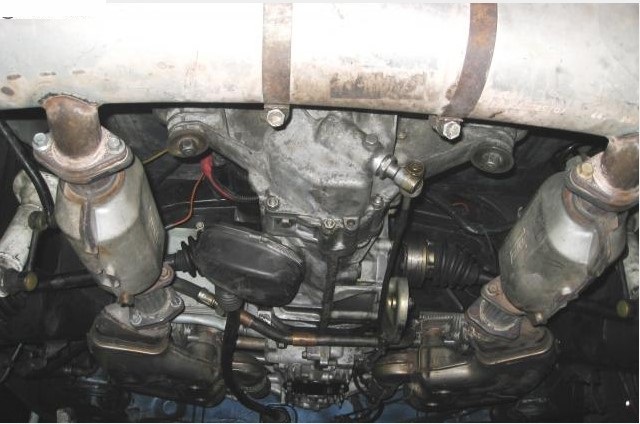
Posted by: mb911 Dec 21 2022, 01:32 PM
I need to either make some 993 flanges or make some so I can adapt to the stock muffler. I will also sleeve the 1st few inches into the heat exchanger with 1.5 tubing
Posted by: NARP74 Dec 21 2022, 01:54 PM
Only pic I have is from PO, kinda small.
He did the 993 HE's because it was a 1975 914 and needed Cats and pass smog I guess?
I would have kept them, but found a set of stock 914-6 HE's I bought some 10+ years earlier. My 2.7 doesn't need pipes larger than stock 914-6.
Love to see some more pics if you ever get it on a lift. I have a 3.2 in it. I need to do some research to see what is needed.
Posted by: mb911 Dec 24 2022, 10:39 AM
Injector bungs came in. 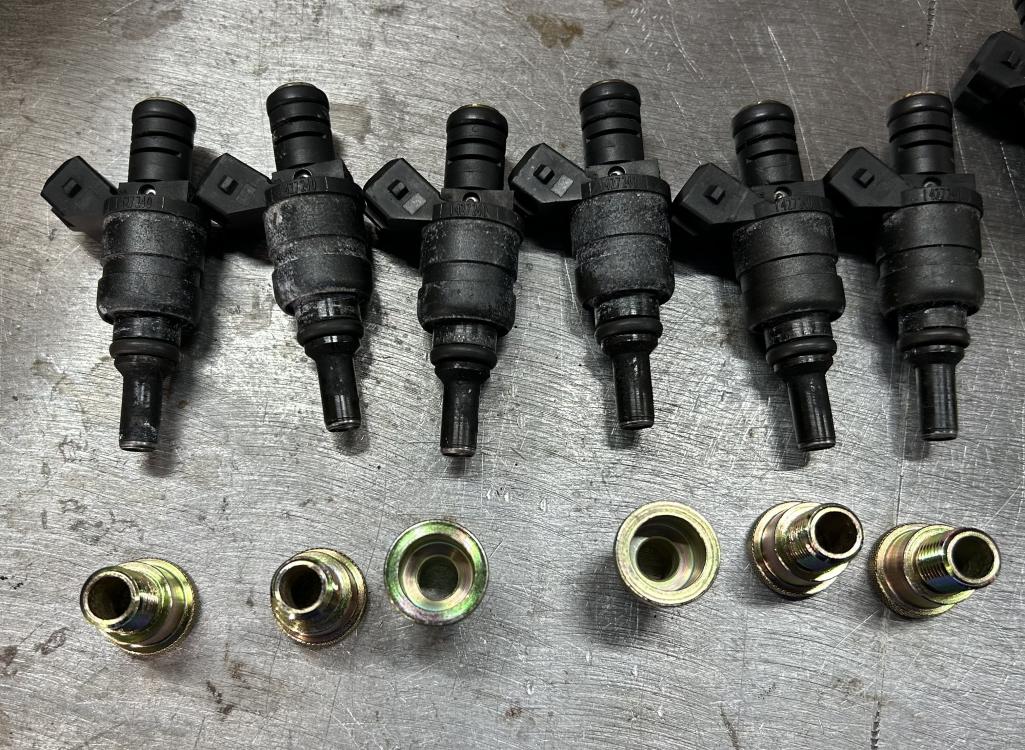
Posted by: infraredcalvin Dec 24 2022, 10:44 AM
Oh and 993 heat exchangers going on.
Watching closely!
Posted by: mb911 Dec 24 2022, 12:21 PM
Oh and 993 heat exchangers going on.
Watching closely!
They will be easy peasy
Posted by: mepstein Dec 24 2022, 12:36 PM
Putting a set aside for my next build.
Ben - I have a guy who already makes the flanges in case you need a set.
Posted by: Superhawk996 Dec 24 2022, 01:18 PM
I’ve fallen behind on this thread but don’t see the background on these when I go back to old pages. I clearly missed something.
FI rail with CIS style fuel distribution lines?
Posted by: mb911 Dec 24 2022, 01:41 PM
I’ve fallen behind on this thread but don’t see the background on these when I go back to old pages. I clearly missed something.
FI rail with CIS style fuel distribution lines?
Here is a bit of background but no not cis this is multi point EFI using the carbs as throttle bodies. http://forums.pelicanparts.com/porsche-911-technical-forum/809214-mfi-efi.html
Posted by: mb911 Dec 24 2022, 01:46 PM
Putting a set aside for my next build.
Ben - I have a guy who already makes the flanges in case you need a set.
Good to know
Posted by: Superhawk996 Dec 26 2022, 12:29 AM
I’ve fallen behind on this thread but don’t see the background on these when I go back to old pages. I clearly missed something.
FI rail with CIS style fuel distribution lines?
Here is a bit of background but no not cis this is multi point EFI using the carbs as throttle bodies. http://forums.pelicanparts.com/porsche-911-technical-forum/809214-mfi-efi.html
Very interesting. Makes me glad I didn’t weld up the CIS ports on my 2.4l heads.
I’ll be watching with envy!
Posted by: bahnzai Dec 26 2022, 07:54 AM
Tangerine conversion kits for the e brakes.
Hey Ben, were there any specific measurements you used in laying out/welding these components on? I have the same kit and need to install, so any insights are greatly appreciated !!
Thanks!

Posted by: mb911 Dec 26 2022, 08:43 AM
Tangerine conversion kits for the e brakes.
Hey Ben, were there any specific measurements you used in laying out/welding these components on? I have the same kit and need to install, so any insights are greatly appreciated !!
Thanks!
Danny,
Chris provided instructions in the kit. I will look probably still have them. Shoot me a text and I will send you them.
Posted by: mb911 Dec 26 2022, 08:45 AM
I’ve fallen behind on this thread but don’t see the background on these when I go back to old pages. I clearly missed something.
FI rail with CIS style fuel distribution lines?
Here is a bit of background but no not cis this is multi point EFI using the carbs as throttle bodies. http://forums.pelicanparts.com/porsche-911-technical-forum/809214-mfi-efi.html
Very interesting. Makes me glad I didn’t weld up the CIS ports on my 2.4l heads.
I’ll be watching with envy!
Just to clarify I have MFI heads so it is easier. I don’t think this will be super easy to tune as I have not used mega squirt in about 8 years and forgot as much as a learned. I will be leaning on the 928 while this car is down and me figuring everything out.
Posted by: troth Dec 26 2022, 11:04 AM
Hey Ben, saw your WTB on pelican for 911 CV joints. I just disassembled and cleaned a used set I found in my spares the other day. You could probably put together one good pair from the whole set. Send me a pm if you don't come up with anything on pelican.
Posted by: Superhawk996 Dec 26 2022, 11:16 AM
Just to clarify I have MFI heads so it is easier.
So do I -
73.5’ 2.4L CIS where they just stuck the CIS injector cups into the MFI heads. The only difference being the CIS cups were press fit instead of threaded like MFI. I ended up tapping the ports for plugs.
I wanted PMO throttle bodies and EFI but budget/inflation/life chaos with no shop at the moment have it on hold. This could be a really sweet way to go. I had assumed injectors right in head would get too hot, wouldn’t atomize well, and or would be hard to tune. It seems the guy on Pelican has blazed a trail.
I really dig the look of the CIS style lines. Have a set of Zenith’s. If it all works out for you this very well could be the way I go. Thanks for leading the way!
PS - who supplied the lines - I see Autowerks sticker but can’t find them online?
Posted by: mb911 Dec 26 2022, 12:11 PM
Just to clarify I have MFI heads so it is easier.
So do I -
73.5’ 2.4L CIS where they just stuck the CIS injector cups into the MFI heads. The only difference being the CIS cups were press fit instead of threaded like MFI. I ended up tapping the ports for plugs.
I wanted PMO throttle bodies and EFI but budget/inflation/life chaos with no shop at the moment have it on hold. This could be a really sweet way to go. I had assumed injectors right in head would get too hot, wouldn’t atomize well, and or would be hard to tune. It seems the guy on Pelican has blazed a trail.
I really dig the look of the CIS style lines. Have a set of Zenith’s. If it all works out for you this very well could be the way I go. Thanks for leading the way!
PS - who supplied the lines - I see Autowerks sticker but can’t find them online?
@http://www.914world.com/bbs2/index.php?showuser=10736 supplies the fittings. Email me and I will give you his information
Posted by: mb911 Dec 29 2022, 05:09 PM
Today I got to spend 4 hours on my stuff today. Really happy about that. Anyway I finally was able to get the stock steel 911 air filter on my car. Some of you may know how much I hate k&n air filters and this allows me to go back to something a little nicer and something that filters nicely 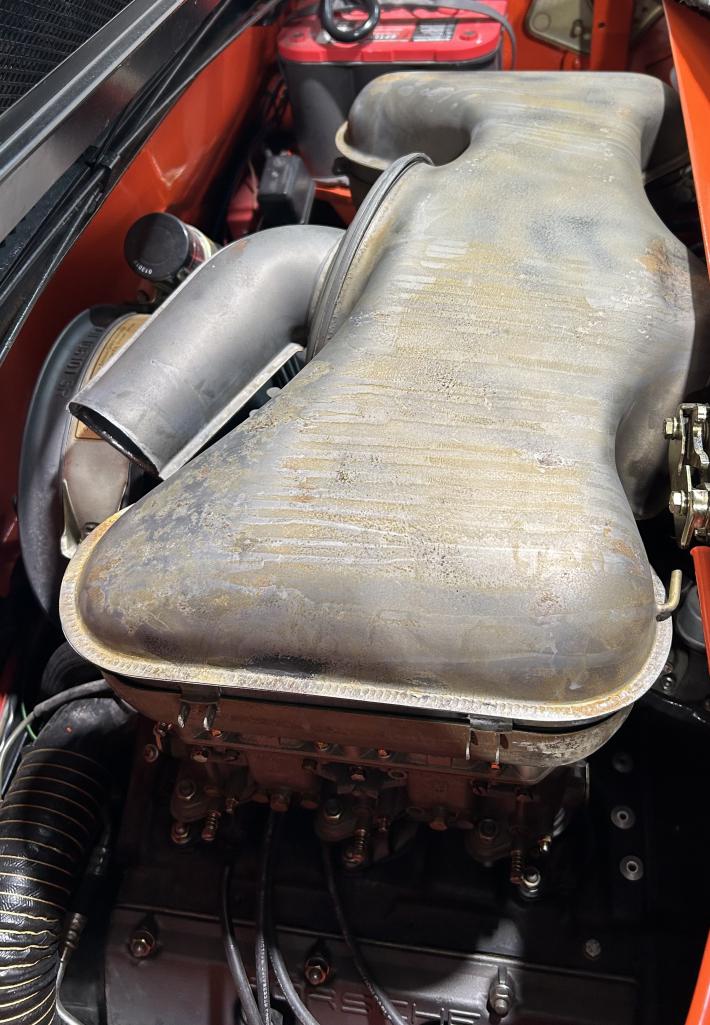
Posted by: Cairo94507 Dec 30 2022, 08:07 AM
In addition to the greatly improved filtration, the stock air cleaner housing really cuts down noise. A win-win.
Posted by: mb911 Dec 30 2022, 04:00 PM
In addition to the greatly improved filtration, the stock air cleaner housing really cuts down noise. A win-win.
That does make me happy as well
Posted by: porschetub Dec 31 2022, 12:39 PM
In addition to the greatly improved filtration, the stock air cleaner housing really cuts down noise. A win-win.
thats why I ditched my K&N's,think it was the late Bruce Anderson mentioned the stock air cleaner is very efficient.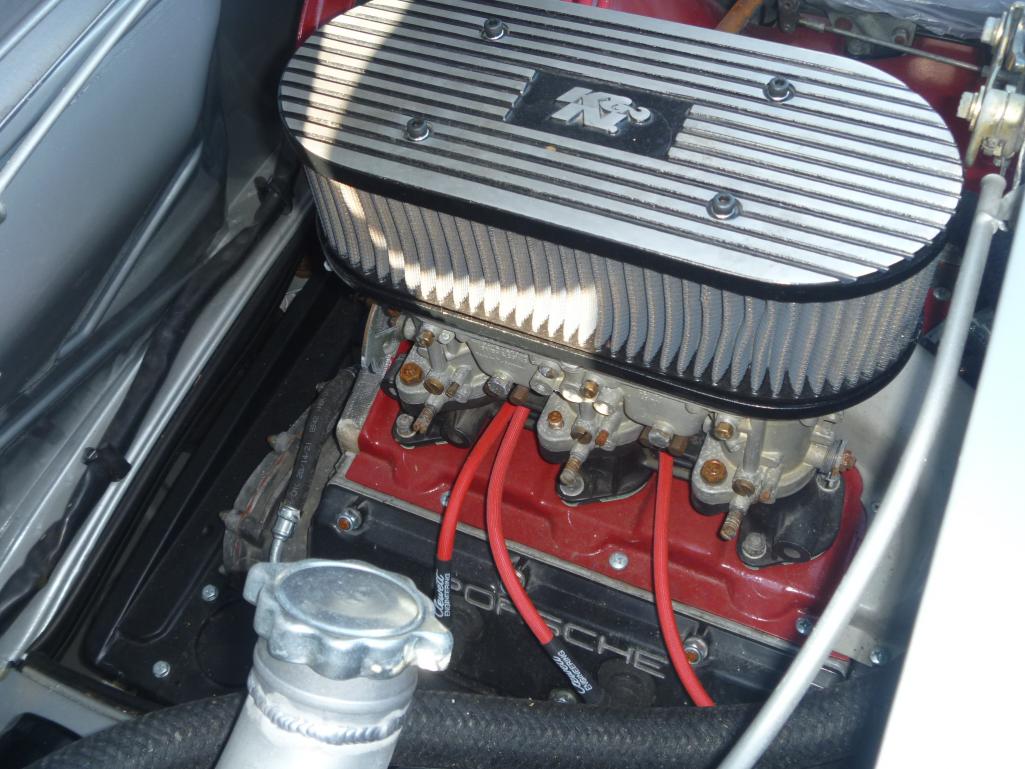 .
.
Posted by: mb911 Jan 2 2023, 07:33 PM
In addition to the greatly improved filtration, the stock air cleaner housing really cuts down noise. A win-win.
thats why I ditched my K&N's,think it was the late Bruce Anderson mentioned the stock air cleaner is very efficient..Someone mentioned they were restricting but I don’t buy it. Just like Porsche exhaust of that period was very well engineered so was the intake
Posted by: mepstein Jan 2 2023, 07:50 PM
K&N has always pushed the 15-20 horsepower bump if you use their filters. I think they still do.
Posted by: mb911 Jan 2 2023, 07:52 PM
K&N has always pushed the 15-20 horsepower bump if you use their filters. I think they still do.
Lol right. Best marketing in the world
Posted by: gereed75 Jan 2 2023, 07:58 PM
Yo Ben, where did you get the injectors for Jamie's adaptors??
Posted by: mb911 Jan 3 2023, 06:03 AM
Yo Ben, where did you get the injectors for Jamie's adaptors??
BMW e40 something. I have an extra set of you need some
Posted by: mb911 Jan 3 2023, 04:12 PM
Back from powder paint. Yea I went gloss. My car is a tribute but not hardline tribute 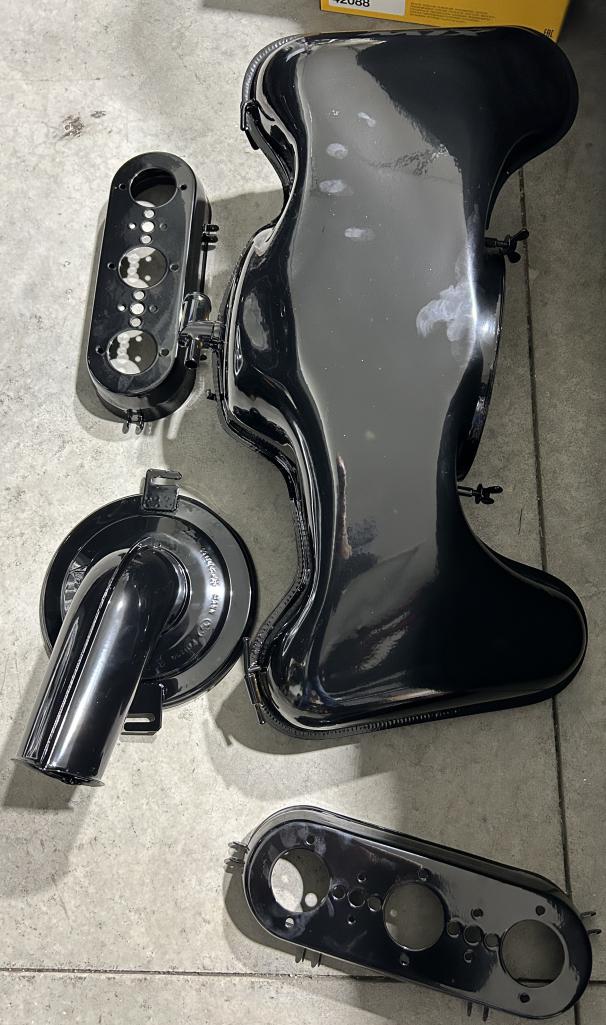
Posted by: mb911 Jan 11 2023, 08:15 PM
So EFI has started. Pictures as of tonight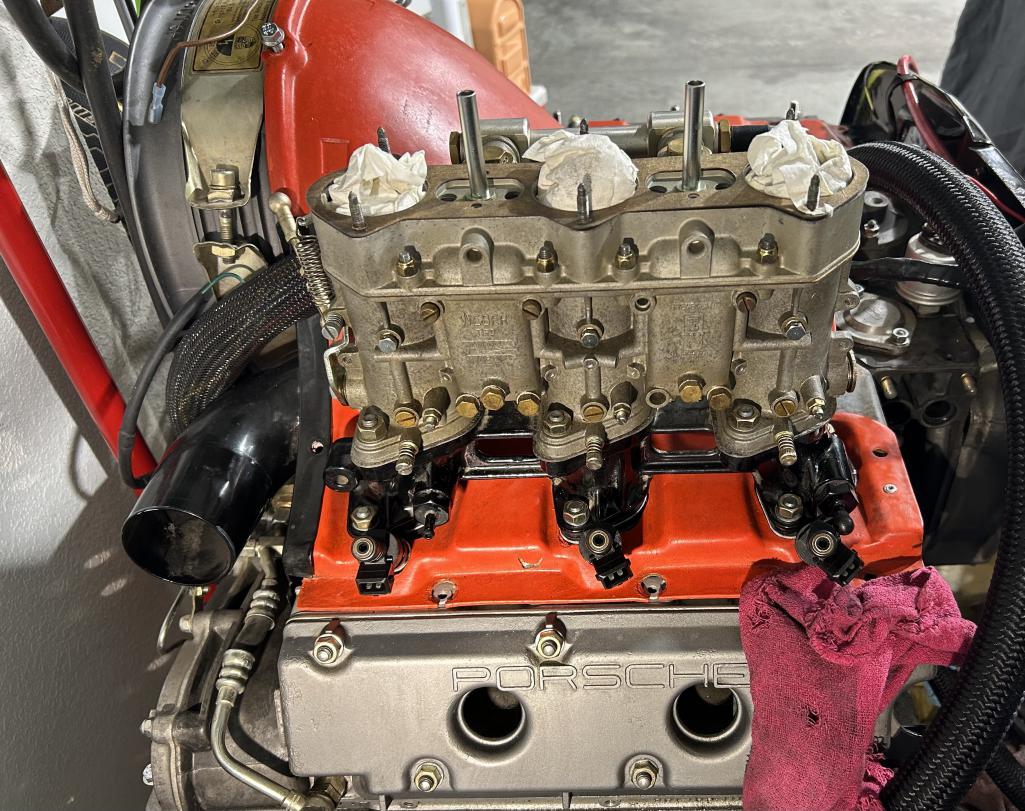
Posted by: nditiz1 Jan 11 2023, 08:52 PM
Which efi are you going with?
Posted by: mb911 Jan 11 2023, 09:00 PM
Which efi are you going with?
So if you look close you can see the injectors in the MFI ports. I will be using mega squirt per @http://www.914world.com/bbs2/index.php?showuser=10736 he is helping with this
Posted by: mb911 Jan 15 2023, 10:39 AM
New 108 CVs and full floating axles from PMB. These should not break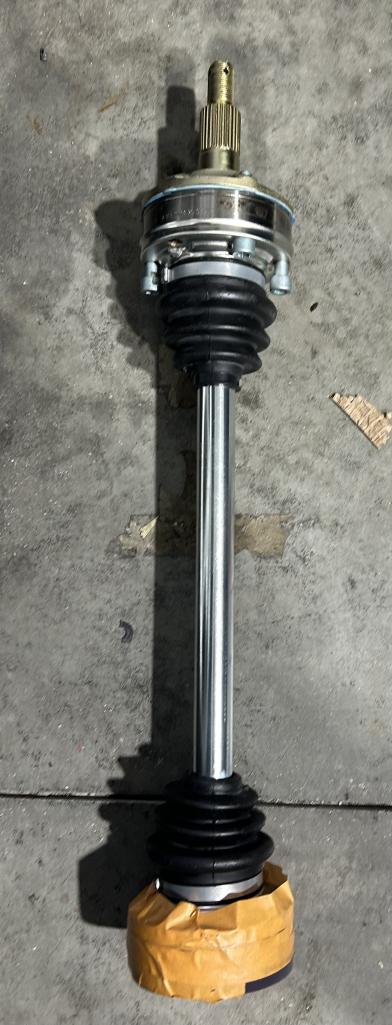
Posted by: mb911 Jan 15 2023, 10:40 AM
And more progress on the EFI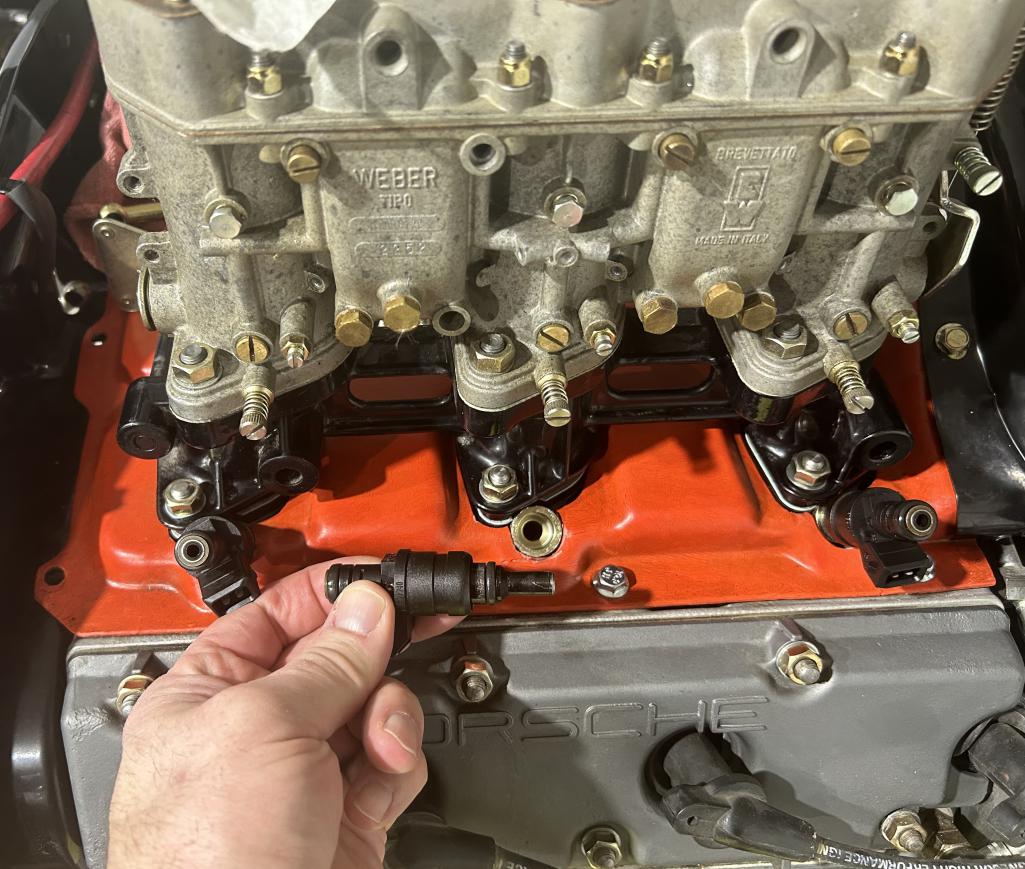
Posted by: mb911 Jan 16 2023, 04:43 PM
Went a different route on vacuum tubes. Drill .100 hole and used 3/32 brass sleeved inside 1/8 brass and used loctite 638 cylindrical bonding and pushed them in the holes and for good measure so epoxy on the outside. Then connect the 1/8 vacuum tubing only to realize that I need to run individual lines to a manifold to ensure no reversion. I did also start on the injector harness as well.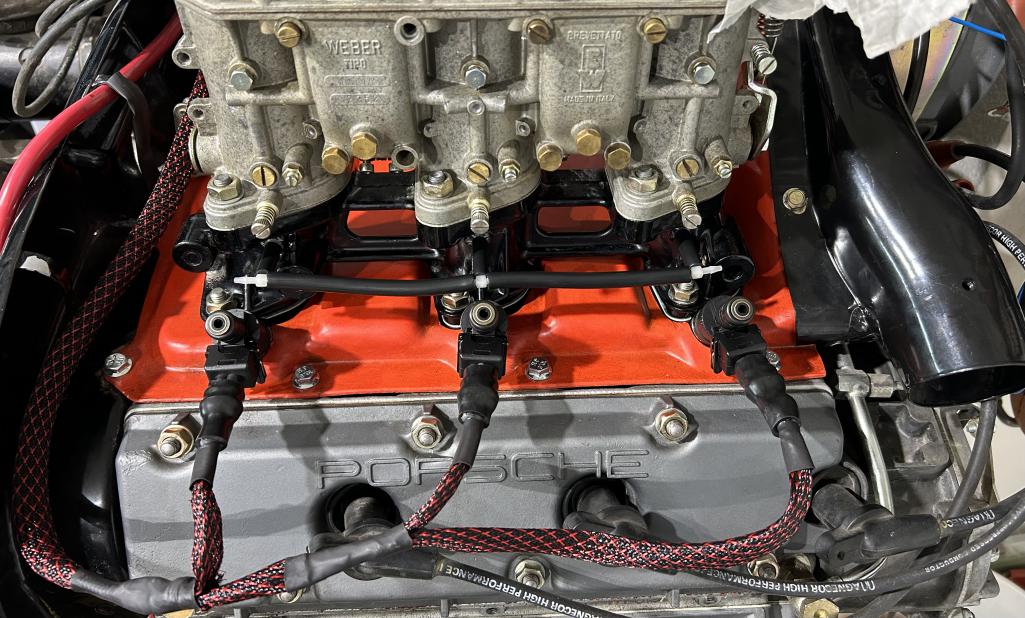
Posted by: Cairo94507 Jan 16 2023, 04:58 PM
Those are sure some nice axles Ben.
Posted by: mb911 Jan 16 2023, 06:25 PM
Those are sure some nice axles Ben.
@http://www.914world.com/bbs2/index.php?showuser=1342 shea is to thank for them
Posted by: BillJ Jan 16 2023, 10:04 PM
New 108 CVs and full floating axles from PMB. These should not break
Are these custom? Did not see them on their site....
Posted by: mb911 Jan 17 2023, 05:49 AM
New 108 CVs and full floating axles from PMB. These should not break
Are these custom? Did not see them on their site....
No not really as the are69-73 CVs and full floater axles. Just have to call
Posted by: BillJ Jan 17 2023, 07:20 AM
Thanks Ben!
Posted by: mb911 Jan 19 2023, 03:20 PM
Well there is my oil leak. Ugh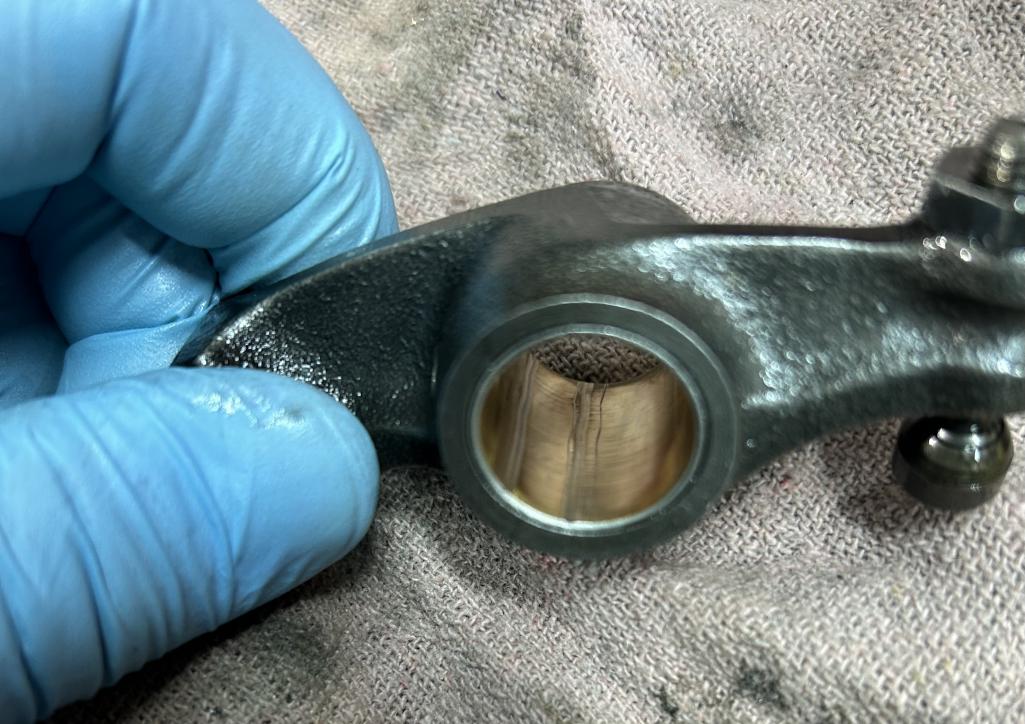
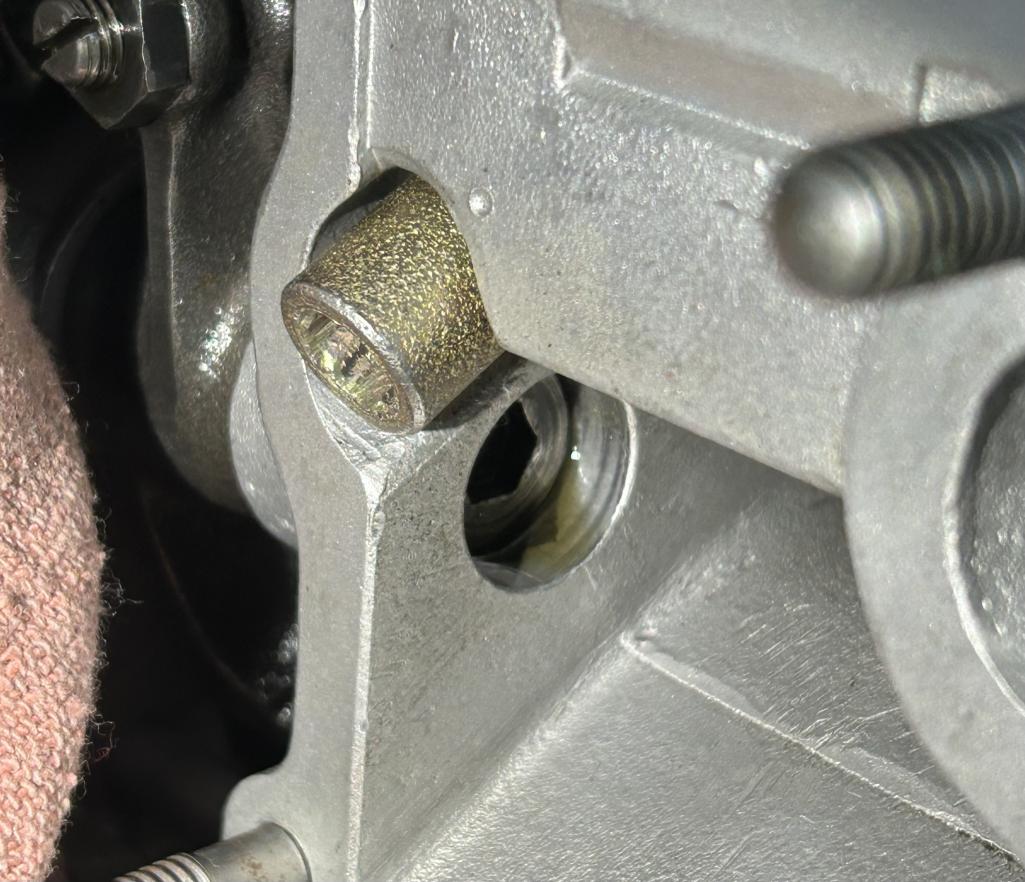
Posted by: Cairo94507 Jan 19 2023, 05:40 PM
Oh that does not look good. Glad you have identified the issue and should have no leaks once it is back together.
Posted by: mb911 Jan 19 2023, 05:45 PM
Oh that does not look good. Glad you have identified the issue and should have no leaks once it is back together.
I think it may have just been a small mistake by me. Super disappointed but it’s a 10 dollar bushing
Posted by: Justinp71 Jan 19 2023, 05:47 PM
Did you have the rsr rocker seals? Just curious...
Posted by: mb911 Jan 19 2023, 09:30 PM
Did you have the rsr rocker seals? Just curious...
Yes
Posted by: Justinp71 Jan 20 2023, 12:57 PM
Did you have the rsr rocker seals? Just curious...
Yes
Cool, thanks for sharing!
Posted by: mb911 Jan 20 2023, 08:38 PM
911 parking brake setup is worked out now. Wow that was a PIA.
Posted by: mb911 Jan 20 2023, 08:38 PM
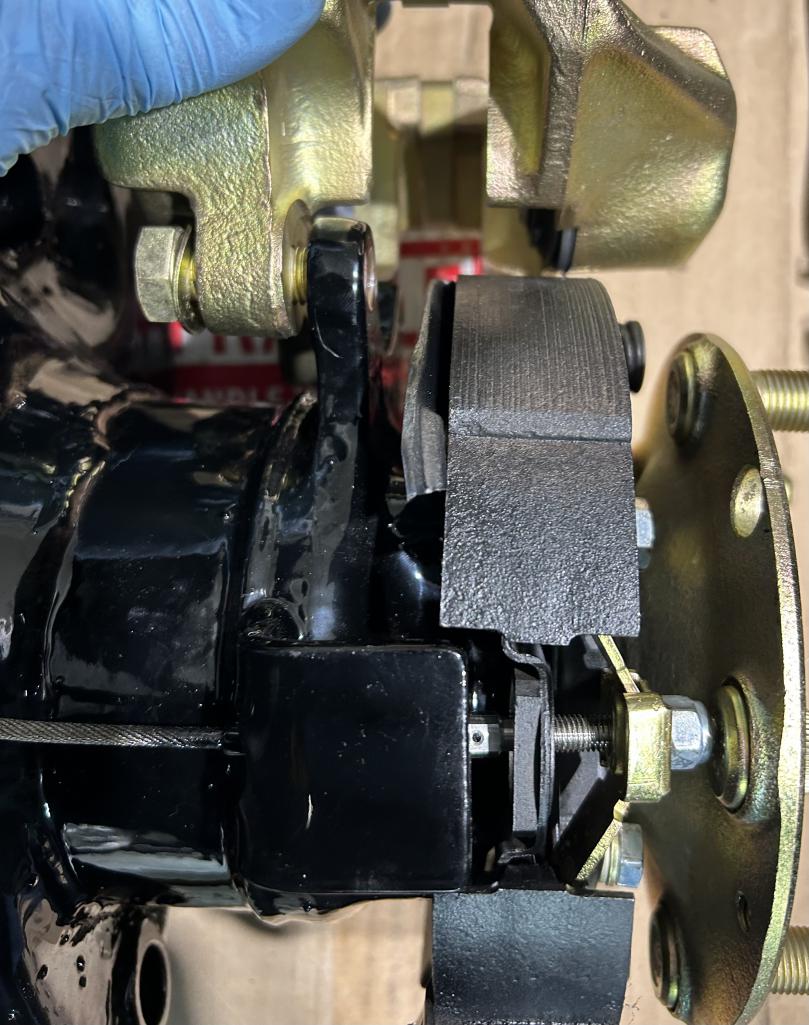
Posted by: mb911 Jan 22 2023, 12:48 PM
Installed and almost done.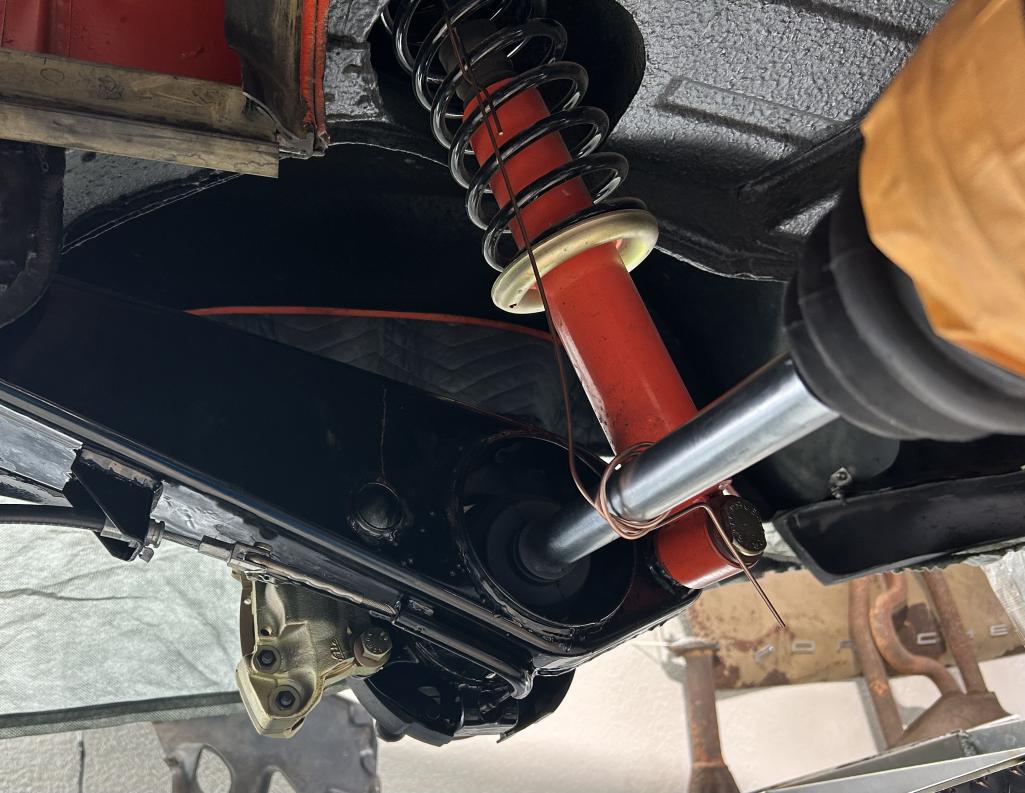
Posted by: mb911 Jan 22 2023, 12:48 PM
Posted by: mb911 Jan 22 2023, 12:49 PM
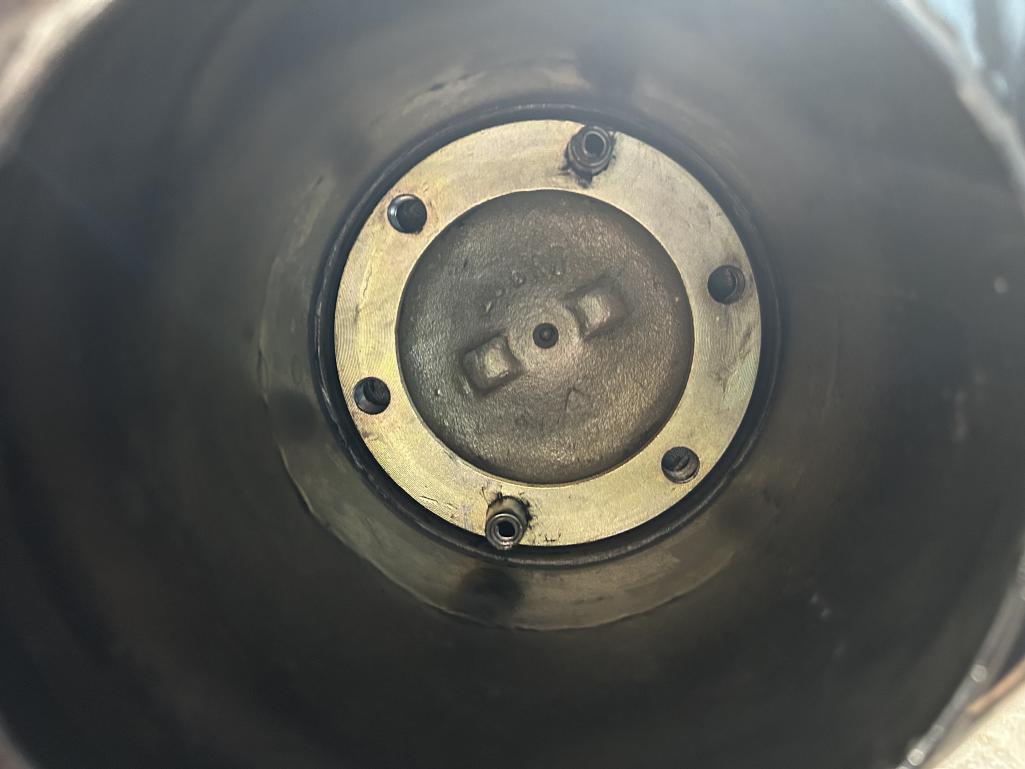
Posted by: sixnotfour Jan 22 2023, 02:05 PM
Does the Anchor block for the Shoes , Need to go past the centerline of the Shoes ?
Posted by: mb911 Jan 22 2023, 05:01 PM
Does the Anchor block for the Shoes , Need to go past the centerline of the Shoes ?
According to the instructions from tangerine no but going to add a section on as I agree with your assessment. I did see though that many just tack a bolt on the hat and that’s it. Not sure how much needs to be in there. I feel like I need to add a bit and TIG weld an extension.
Posted by: mb911 Feb 11 2023, 07:25 PM
Equal length vacuum setup for the itbs/carb setup. 
Posted by: BillJ Feb 11 2023, 07:28 PM
Looking great!!!!
Posted by: mb911 Feb 20 2023, 08:26 PM
New heat exchangers with 1.5” sleeves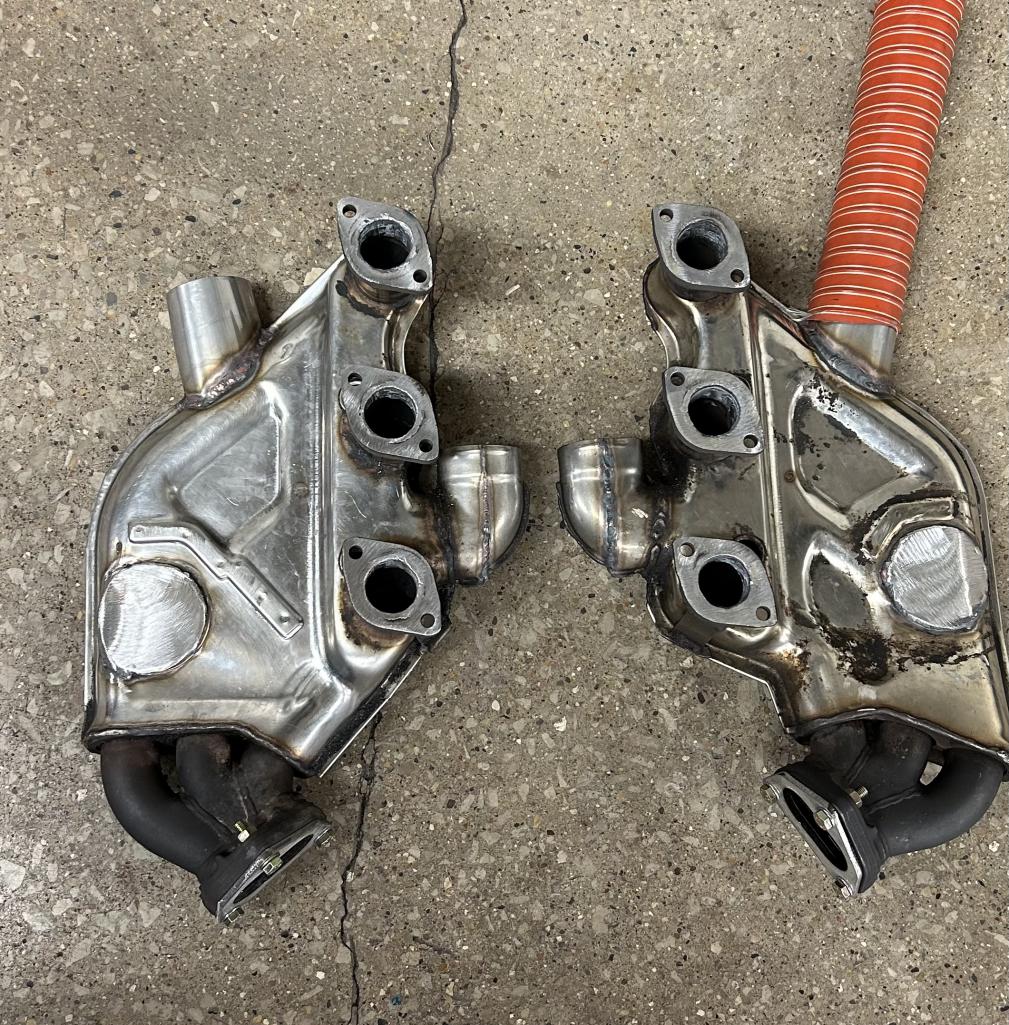
Posted by: mb911 Feb 21 2023, 08:50 AM
Here they are mounted. Ordered the elbows and flow through mufflers as well to keep things quiet. 
Posted by: mb911 Feb 21 2023, 08:51 AM
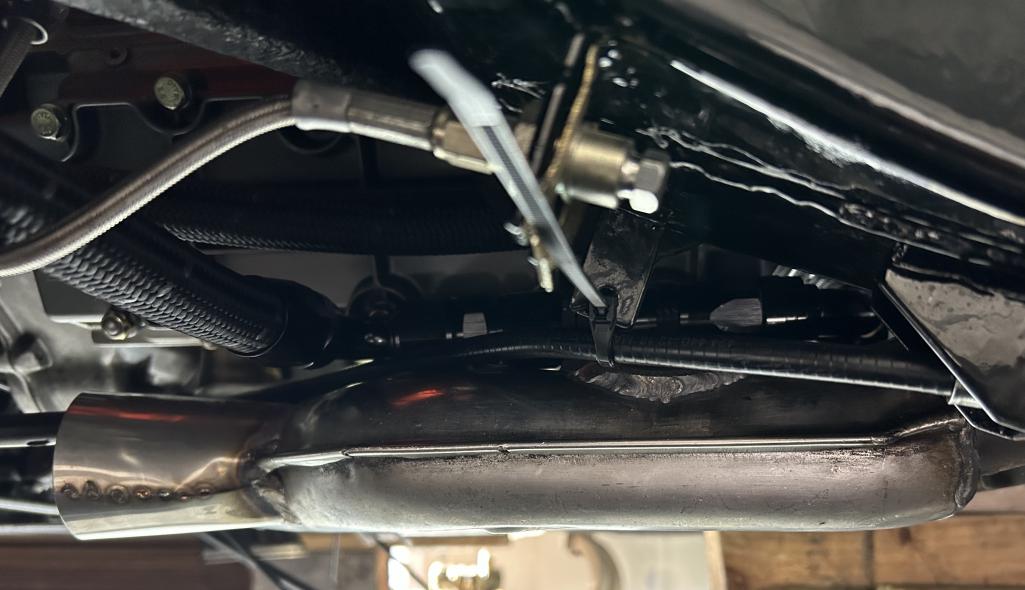
Posted by: mb911 Feb 21 2023, 08:51 AM
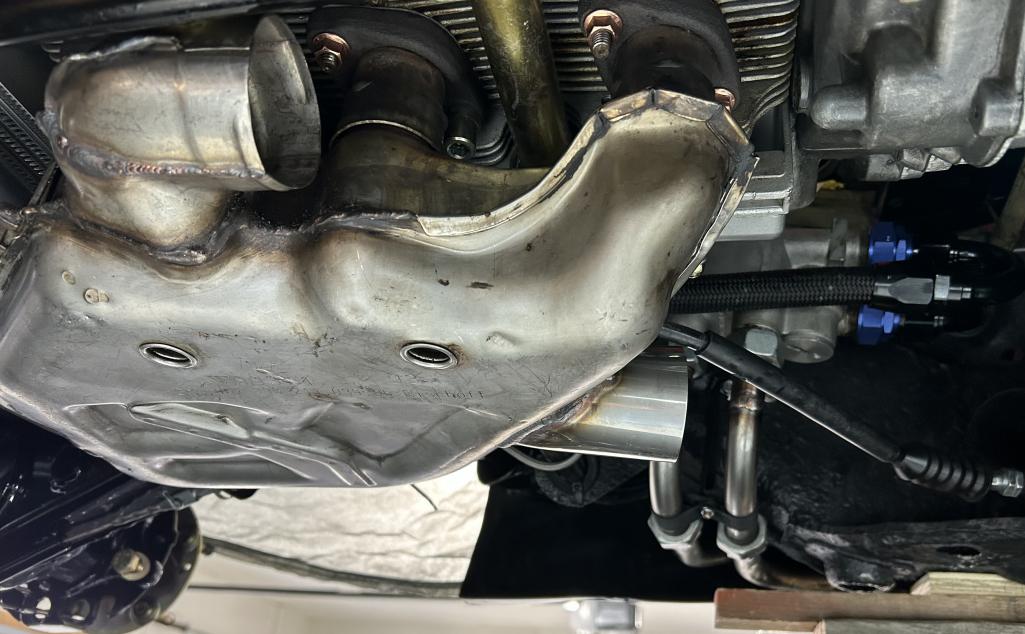
Posted by: Superhawk996 Feb 21 2023, 09:29 AM
Posted by: Cairo94507 Feb 21 2023, 10:48 AM
Interesting. Looking forward to the finished results.
Posted by: mb911 Feb 21 2023, 11:21 AM
Interesting. Looking forward to the finished results.
After what we will call the hostile take over of my former stainless line up this a great option. I wanted to add some additional muffling and this allows for it.
Posted by: mepstein Feb 21 2023, 06:43 PM
I’m setting aside a pair for when Ben is ready to set up production.
Posted by: mb911 Feb 22 2023, 06:16 AM
I’m setting aside a pair for when Ben is ready to set up production.
For sure. I would be happy to. It’s not super easy and the biggest problem is that someone else did the flange swap on the passenger side heat exchanger and for some reason it is not level. The driver side is perfectly straight and level
Posted by: ClayPerrine Feb 22 2023, 07:01 AM
I have a set of 993 heat exchangers. I am going to mod them the same way you did. Thanks for the idea.
But I am sure my welds won't be as nice as yours!
Posted by: mb911 Feb 22 2023, 08:00 AM
I have a set of 993 heat exchangers. I am going to mod them the same way you did. Thanks for the idea.
But I am sure my welds won't be as nice as yours!
So the interesting thing about these heat exchangers are that they are double walled so they weld like shit as there was some oil in between the sistered up shells. Be mindful of that. Also as I said I inherited someone else’s butcher job so unfortunately I have to live with the wrong angle on the one side. Stay tuned for the finished product though.
I would like to offer a kit for folks
Posted by: ClayPerrine Feb 22 2023, 08:35 AM
I have a set of 993 heat exchangers. I am going to mod them the same way you did. Thanks for the idea.
But I am sure my welds won't be as nice as yours!
So the interesting thing about these heat exchangers are that they are double walled so they weld like shit as there was some oil in between the sistered up shells. Be mindful of that. Also as I said I inherited someone else’s butcher job so unfortunately I have to live with the wrong angle on the one side. Stay tuned for the finished product though.
I would like to offer a kit for folks
Thanks for the info. I will have them ultrasonically cleaned to remove the oil before I do any welding.
Posted by: Dave_Darling Feb 23 2023, 01:13 AM
Hey, I could do that!
If I had the setup, and the tools. And the equipment.
And decades of practice.
.... And more than zero talent ....
Nice, work, Ben!
--DD
Posted by: mb911 Feb 23 2023, 06:09 AM
Hey, I could do that!
If I had the setup, and the tools. And the equipment.
And decades of practice.
.... And more than zero talent ....
Nice, work, Ben!
--DD
Lol well I am happy to do the conversion for anyone interested
Posted by: mb911 Mar 1 2023, 02:16 PM
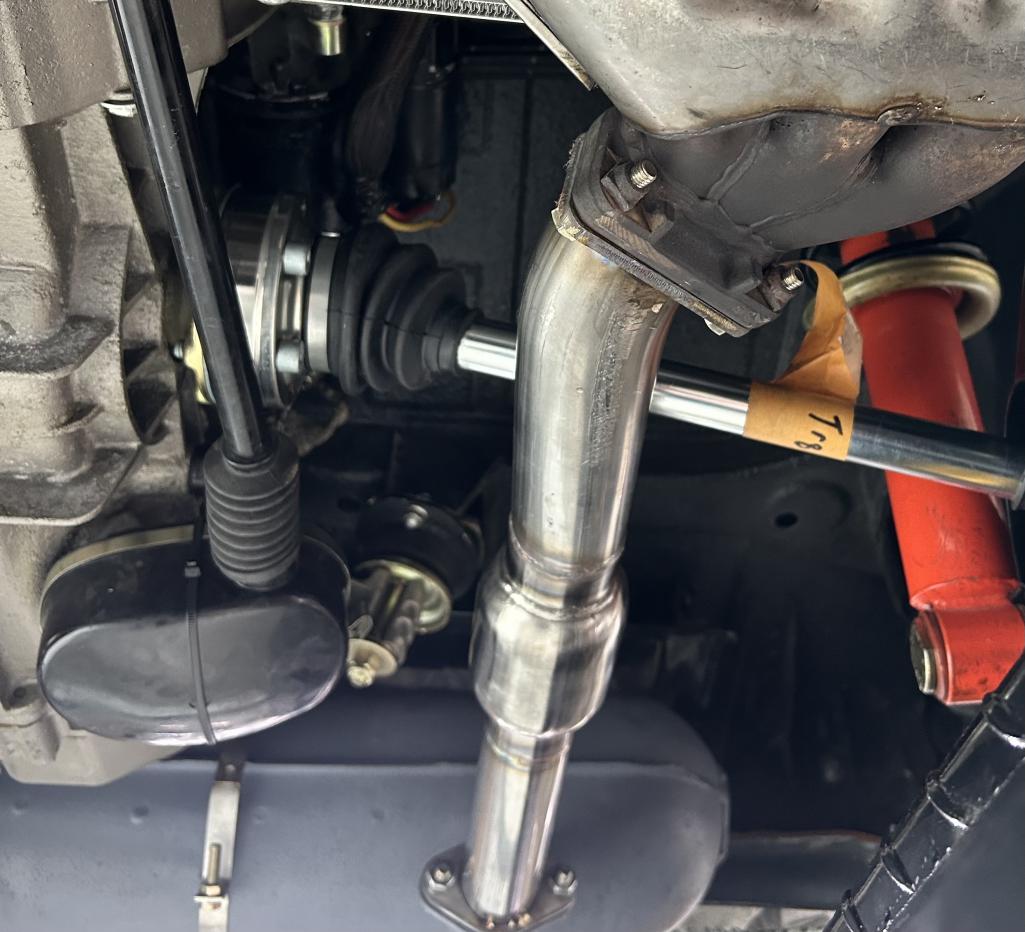
Posted by: mb911 Mar 1 2023, 02:16 PM
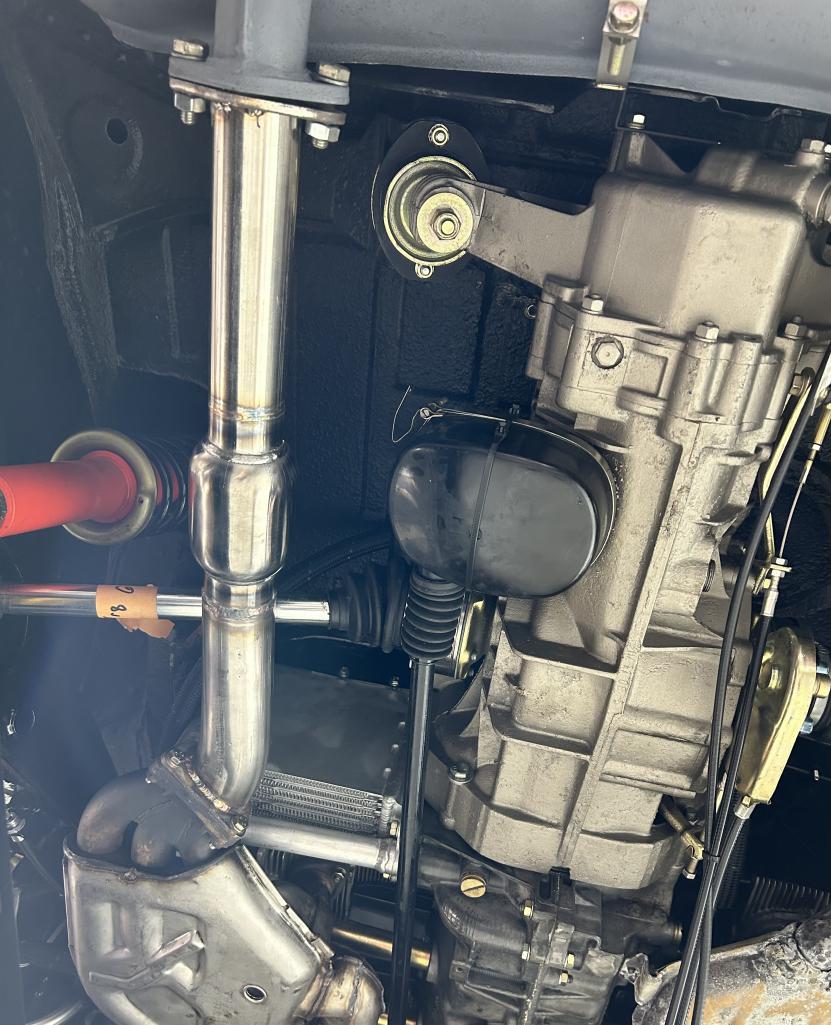
Posted by: mb911 Mar 1 2023, 02:17 PM
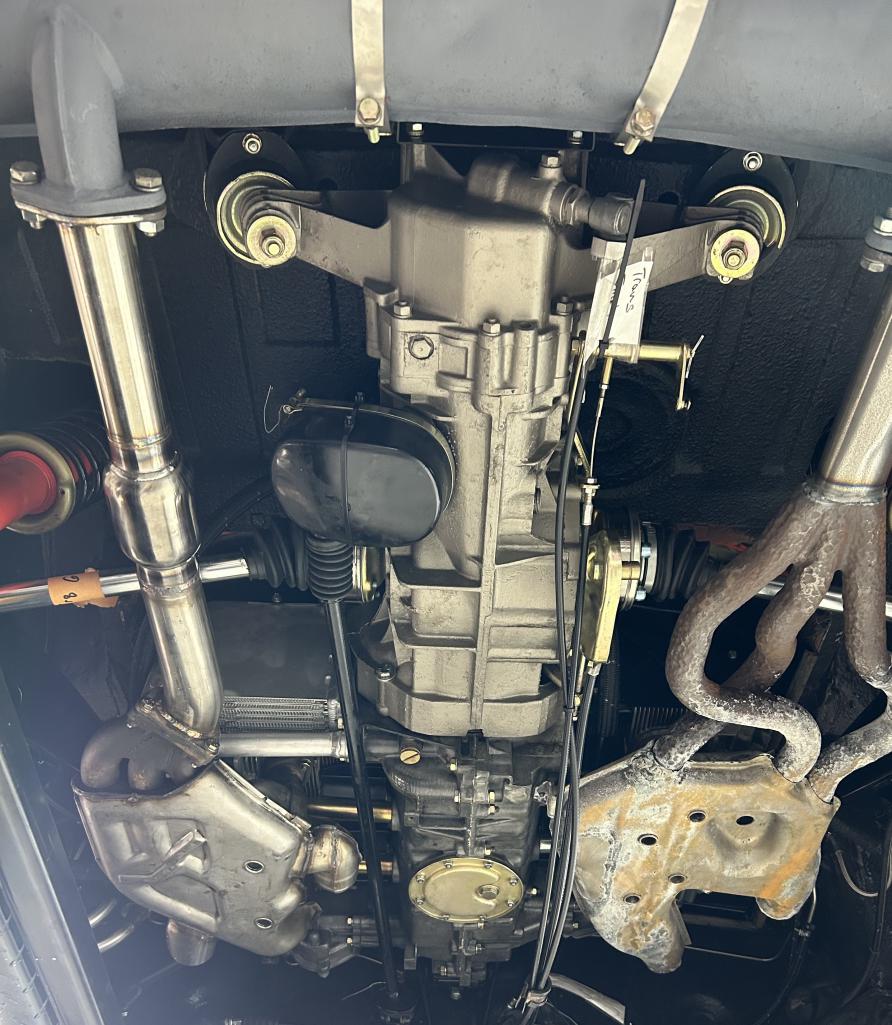
Posted by: mb911 Mar 1 2023, 02:17 PM
Made some progress
Posted by: nditiz1 Mar 1 2023, 07:34 PM
Made some progress
This is excellent! I have been wanting at least 1 heat exchanger for a year now.
Posted by: mb911 Mar 2 2023, 06:26 AM
Made some progress
This is excellent! I have been wanting at least 1 heat exchanger for a year now.
Well this would be an option for you. But you would want to run 2 of these. Currently cost on a set of these heat exchangers from what I am seeing is about 500. I got my set for $100 but that was a deal. The work to make these work is time consuming. I have quite a few hours in this but for big engines this is a great solution. For me this is a clean setup and will be nice for my EFI setup.
Posted by: mb911 Apr 23 2023, 05:43 PM
A couple weeks then back on this. New boat purchase and 928 got in the way.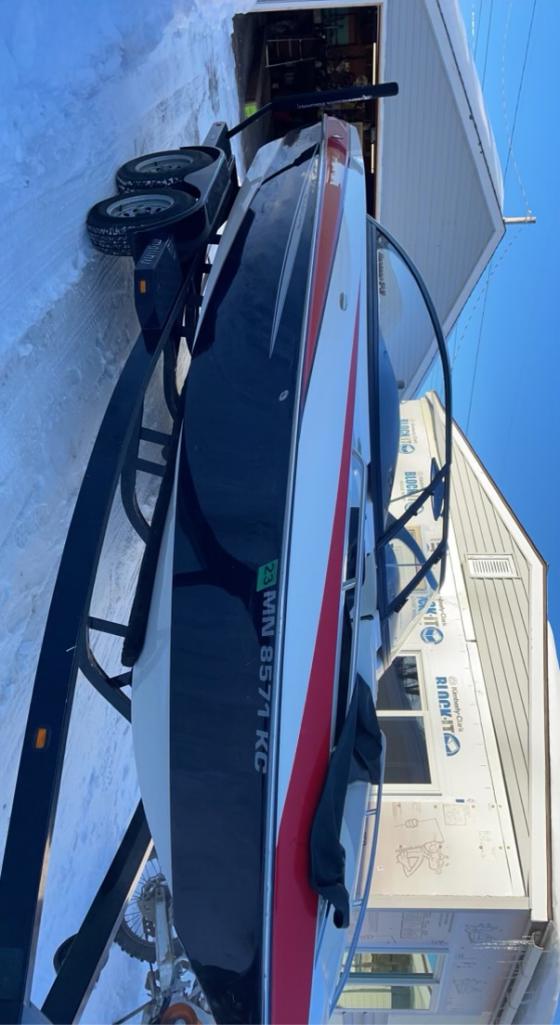
Posted by: mb911 May 8 2023, 03:26 PM
Well a bunch has happened truck got hit from behind, got the 914 started up and boat is on the water.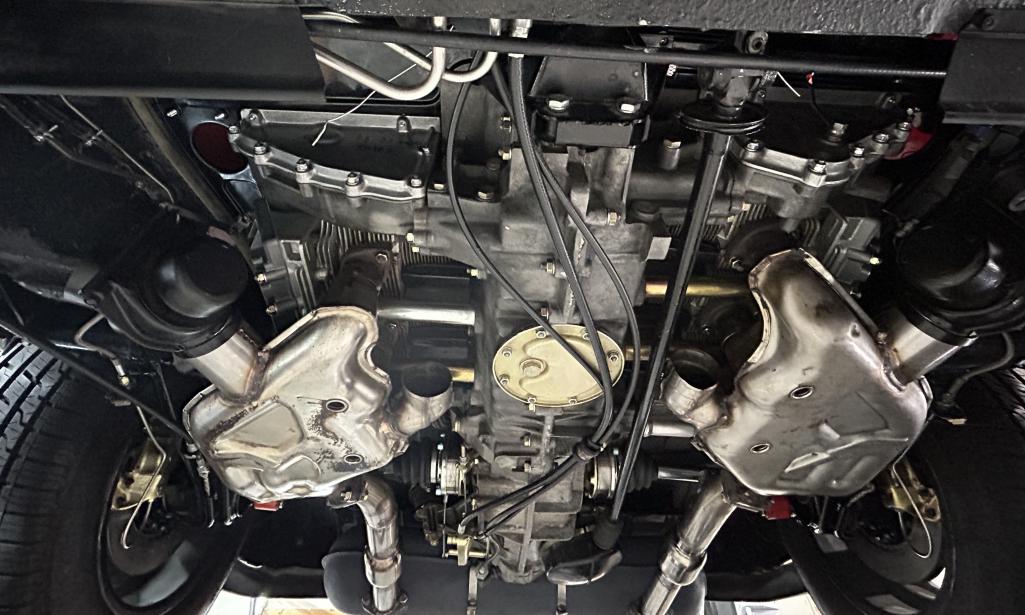
Posted by: mb911 May 8 2023, 03:27 PM
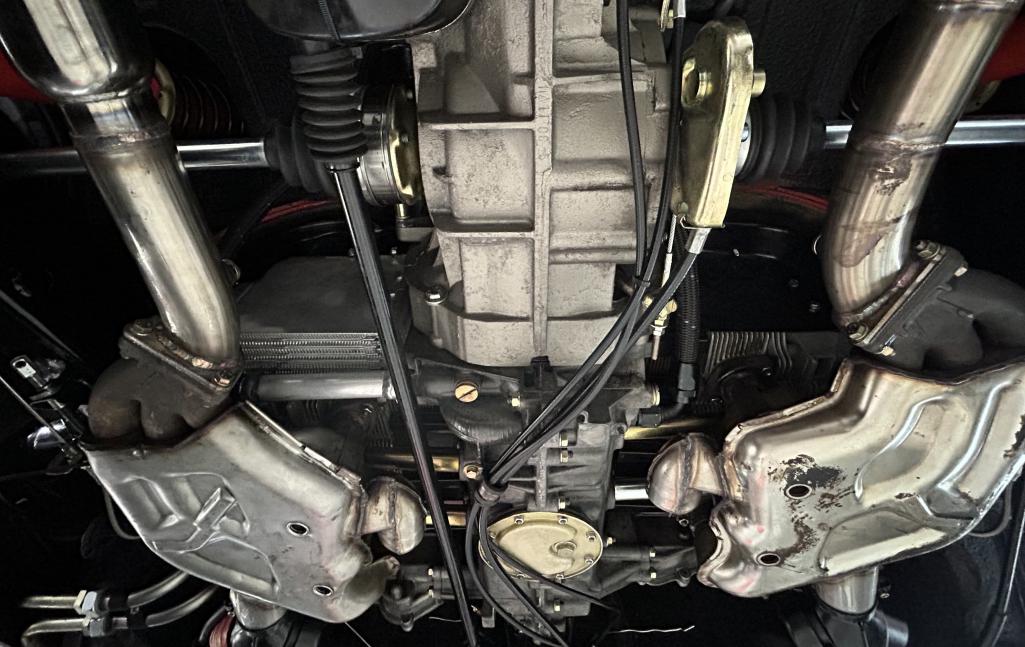
Posted by: mb911 May 8 2023, 03:27 PM
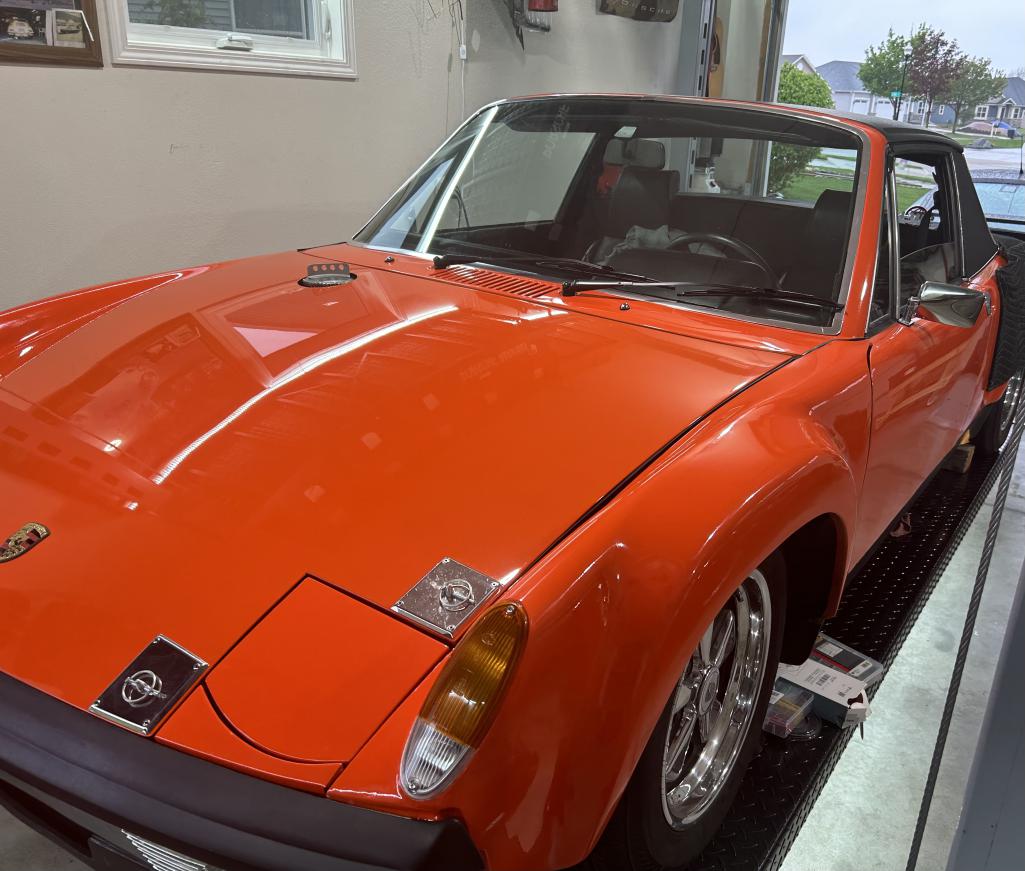
Posted by: mb911 May 8 2023, 03:28 PM
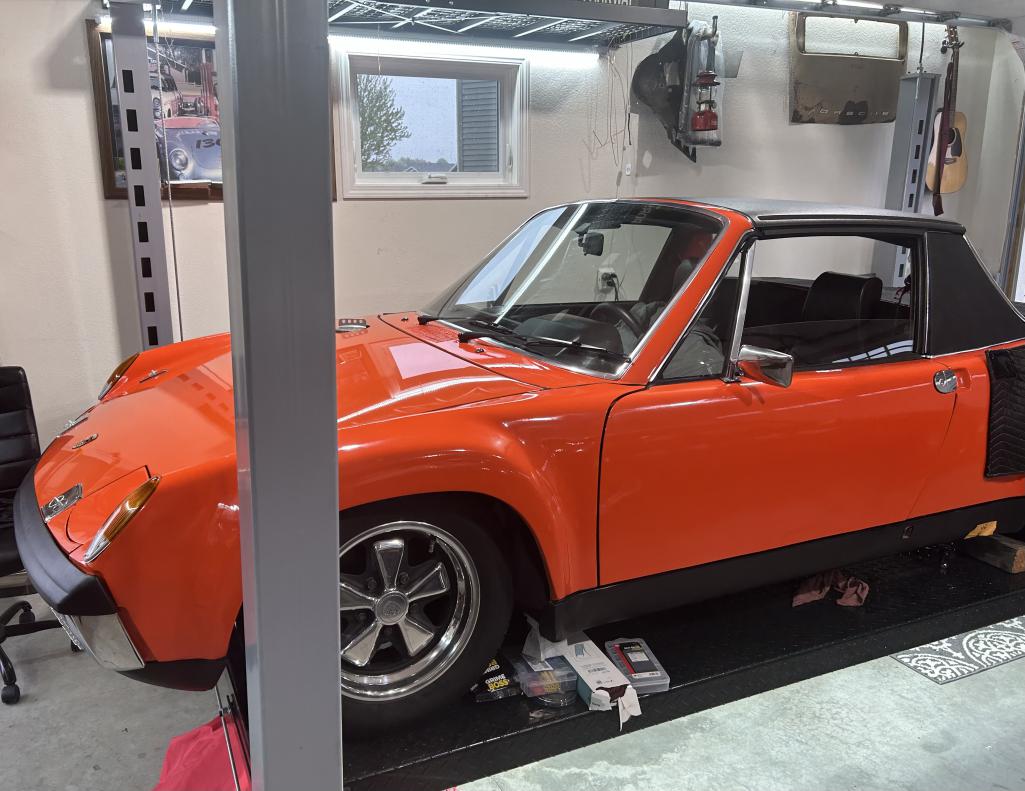
Posted by: mb911 May 8 2023, 03:28 PM
Posted by: mb911 May 8 2023, 03:29 PM

Posted by: Freezin 914 May 8 2023, 04:34 PM
The boat is very nice, but that teener is just so nice!!
Nice job on the exchangers! Looking pretty killer!
Posted by: BillJ May 8 2023, 05:20 PM
Ben your car is beautiful for sure.
That wrinkle on the truck looks nasty though.
Posted by: mb911 May 8 2023, 05:27 PM
Ben your car is beautiful for sure.
That wrinkle on the truck looks nasty though.
Thanks unfortunately the frame is bent
Posted by: porschetub May 8 2023, 05:39 PM
The boat is very nice, but that teener is just so nice!!
Nice job on the exchangers! Looking pretty killer!
pity the trucks not the same not a cheap repair,sorry to see that and hope the insurance will sort it with least hassle .Oh and must say the clean look under the car is amazing ,cheers.
Posted by: mb911 May 8 2023, 06:35 PM
The boat is very nice, but that teener is just so nice!!
Nice job on the exchangers! Looking pretty killer!
pity the trucks not the same not a cheap repair,sorry to see that and hope the insurance will sort it with least hassle .Oh and must say the clean look under the car is amazing ,cheers.
My guess is truck is toast. Thanks on the car. I try. Fixed some oil leaks. Upgraded axles, halfway through EFI conversion.
Posted by: Steve May 9 2023, 08:07 AM
Looks great! You will have to let us know how it compares to your 1 5/8" heat exchangers. Same or better heat? More power, same power?
I bought a 1995 3.6 complete engine with heat exchangers. I will hang on to them if they are better than the previous 1 5/8" heat exchangers you made for my 3.2.
Posted by: mb911 May 10 2023, 04:47 AM
Looks great! You will have to let us know how it compares to your 1 5/8" heat exchangers. Same or better heat? More power, same power?
I bought a 1995 3.6 complete engine with heat exchangers. I will hang on to them if they are better than the previous 1 5/8" heat exchangers you made for my 3.2.
I need to drive it first to determine but I think it will be great. Different sound as well which is interesting
Posted by: mb911 May 22 2023, 01:43 PM
New truck after getting rear ended so 914 has just sat. Ugh
Posted by: mb911 May 22 2023, 01:45 PM
Oops try that again
Posted by: mb911 May 22 2023, 01:45 PM
Posted by: 930cabman May 22 2023, 01:57 PM
How many toys is one man allowed?
Posted by: mb911 May 22 2023, 03:21 PM
How many toys is one man allowed?
Interesting enough the boat was my wife’s idea and I can only buy black trucks also according to my wife lol.
Posted by: mb911 Aug 26 2023, 12:52 PM
Just another summer almost completed. I drive it a couple times a week but in the back of my mind I keep thinking what if I sold it and bought an early 2000s 911? Here is the question. What is a fair price for my car? I am thinking no hassle easy sale price?
Posted by: BillJ Aug 26 2023, 02:14 PM
Isnt it already listed on your site for.a cool hondo?
Everything is so clean and nice on the car. I know it has some history that would impact the price for many i am not sure given all the work done that it makes that big a difference for whomever wants the car. 2.4 ltr is a nice mild mild upgrade and much peppier than the 2.0 liter of course. Given it is a conversion and not a real 6 i think you could list it for 65 and sell in a week tops.
Posted by: mb911 Aug 26 2023, 02:21 PM
Isnt it already listed on your site for.a cool hondo?
Everything is so clean and nice on the car. I know it has some history that would impact the price for many i am not sure given all the work done that it makes that big a difference for whomever wants the car. 2.4 ltr is a nice mild mild upgrade and much peppier than the 2.0 liter of course. Given it is a conversion and not a real 6 i think you could list it for 65 and sell in a week tops.
65 I would sell it right now. I am not sure it’s worth that much maybe? Yea is listed on my site for 100k but that is straight up fishing.
Posted by: BillJ Aug 26 2023, 02:52 PM
It is in the best color and is very tidy. I think you could get that and maybe even more on BAT. I will say the market has softened a litte though.
If you do a buy it now for 25k i am all in right now cash delivered today. Not a joke
Posted by: BillJ Aug 26 2023, 02:54 PM
Oh and pre-arrange an agreement with George to keep his opinions to himself
Posted by: mb911 Aug 26 2023, 03:41 PM
I need to really think on this. I think I want a 911 again but if I sell the 914 that’s it likely won’t have another. Our goal is to move to a lake house at some point
Posted by: targa72e Aug 26 2023, 10:29 PM
OK, I have a number of opinions: all mine:)
The market for 914's in general an 914-6 conversion seams to have softened quite a bit recently.
Look at BAT sales to get a idea of top dollar. I think 60k is high.
I own a 996 turbo and of all my cars it would be the first to go, Why.?
I think I could sell it and if regretted buy back similar car at similar price. Porsche Made a ton of this model so plenty to chose from and they are still relatively new.
two:
It has so much power and capability slogging thru city traffic sucks. Also when out of town on perfect fun road using car way below its ultimate capability is still right in the go directly to jail speed.
Along the same lines I ordered a 2021 BMW M2 Competition for my daily driver because I have had BMW's as my daily driver for years and It looked like it might be one of the last manual cars I could buy. While I liked the car I hated driving it a a daily driver. Sold it after 1 year of owning. Also was out of town having fun and going go directly to jail speeds and got pulled over, got off very easy could have been bad.
I also think the 996 car in general feel to generic to me, kind of like a 944 turbos I previously owned. Could be any German car of that generation.
On the flip side they are modern cars with AC and heat, Fuel injection and most importantly cup holders. Can use any time any place, just might not be that fun.
That said if its not to hot or cold I find myself picking the 914 to drive.
To your point the number of nice old cars is limited. Not sure if you sold your today you could buy back similar car at a later date.
Also selfishly really like having you and your products in the community.
john
john
Posted by: mb911 Aug 27 2023, 05:27 AM
OK, I have a number of opinions: all mine:)
The market for 914's in general an 914-6 conversion seams to have softened quite a bit recently.
Look at BAT sales to get a idea of top dollar. I think 60k is high.
I own a 996 turbo and of all my cars it would be the first to go, Why.?
I think I could sell it and if regretted buy back similar car at similar price. Porsche Made a ton of this model so plenty to chose from and they are still relatively new.
two:
It has so much power and capability slogging thru city traffic sucks. Also when out of town on perfect fun road using car way below its ultimate capability is still right in the go directly to jail speed.
Along the same lines I ordered a 2021 BMW M2 Competition for my daily driver because I have had BMW's as my daily driver for years and It looked like it might be one of the last manual cars I could buy. While I liked the car I hated driving it a a daily driver. Sold it after 1 year of owning. Also was out of town having fun and going go directly to jail speeds and got pulled over, got off very easy could have been bad.
I also think the 996 car in general feel to generic to me, kind of like a 944 turbos I previously owned. Could be any German car of that generation.
On the flip side they are modern cars with AC and heat, Fuel injection and most importantly cup holders. Can use any time any place, just might not be that fun.
That said if its not to hot or cold I find myself picking the 914 to drive.
To your point the number of nice old cars is limited. Not sure if you sold your today you could buy back similar car at a later date.
Also selfishly really like having you and your products in the community.
john
john
Good points. It definitely is a soul searching experience
Posted by: BillJ Aug 27 2023, 06:28 AM
You would regret selling it and if it meant you stopped sharing your awesome wares then i vote no sell. Actually not joking this time
Looking back over the last year for similar cars you might be looking more like at $50k in reality on BAT. I may have been overzealous for you. The combo you have may be the best street combo for looks and not being too crazy fast. A real sweet spot.
Posted by: Justinp71 Aug 28 2023, 03:00 PM
Just another summer almost completed. I drive it a couple times a week but in the back of my mind I keep thinking what if I sold it and bought an early 2000s 911? Here is the question. What is a fair price for my car? I am thinking no hassle easy sale price?
Why not have both? I use my 996 for driving to the office in the heat and picking up the kids from school. 914 is the fun car to work on and take to car shows... I also am hoping to do some old car rallies with it. The 914 has a lot of your blood sweat and tears in it so, it means more to you. Also the 996 is wet sump motor, so need oiling upgrades if you are doing any good driving with it.
Posted by: mb911 Aug 28 2023, 03:19 PM
Just another summer almost completed. I drive it a couple times a week but in the back of my mind I keep thinking what if I sold it and bought an early 2000s 911? Here is the question. What is a fair price for my car? I am thinking no hassle easy sale price?
Why not have both? I use my 996 for driving to the office in the heat and picking up the kids from school. 914 is the fun car to work on and take to car shows... I also am hoping to do some old car rallies with it. The 914 has a lot of your blood sweat and tears in it so, it means more to you. Also the 996 is wet sump motor, so need oiling upgrades if you are doing any good driving with it.
Single income family really limits the amount of vehicles I can have plus 5 kids though 3 are adults but doesn’t mean I don’t get to help with all kinds of things.
But I do understand exactly what your saying
Posted by: burton73 Aug 28 2023, 04:31 PM
Oh and pre-arrange an agreement with George to keep his opinions to himself
Sorry but this is very funny.
Bob B
Posted by: porschetub Aug 28 2023, 08:32 PM
You would regret selling it and if it meant you stopped sharing your awesome wares then i vote no sell. Actually not joking this time
Looking back over the last year for similar cars you might be looking more like at $50k in reality on BAT. I may have been overzealous for you. The combo you have may be the best street combo for looks and not being too crazy fast. A real sweet spot.
the level of the resto and the conversion is about the best you will find IMO ,think Bill is right about 50k as this is such a sorted car ,appears nothing needed and most buyers will like that ,very nice car and well above some conversions on sale and one of the best cars on here.GLWS Ben.
Posted by: nditiz1 Aug 28 2023, 10:47 PM
I honestly don't think 60k is out of the question here.
I sold mine earlier this year for 30k. It didn't have as nice paint. It had a hole in the frunk from the AC being in it, it had rust holes in the tear trunk. Rusty passenger side tail corner. The fiberglass flares were starting to pull away from the body. Shifty suspension console and floor pan repair. The dash was cracked. The only thing mine had going for it was a 2.4 PMO powered engine, a bunch of Ben's parts, 5 lug conversion on 15x8 Fuchs, and it was a driver.
Posted by: Justinp71 Aug 28 2023, 10:55 PM
Fyi, that blue one that just sold for $45k on BAT was in canada with no title, one sold in march for $65k and it had weird rear fenders. I think $60-70k is obtainable depending on motor specs.
Posted by: Justinp71 Aug 28 2023, 11:05 PM
Just another summer almost completed. I drive it a couple times a week but in the back of my mind I keep thinking what if I sold it and bought an early 2000s 911? Here is the question. What is a fair price for my car? I am thinking no hassle easy sale price?
Why not have both? I use my 996 for driving to the office in the heat and picking up the kids from school. 914 is the fun car to work on and take to car shows... I also am hoping to do some old car rallies with it. The 914 has a lot of your blood sweat and tears in it so, it means more to you. Also the 996 is wet sump motor, so need oiling upgrades if you are doing any good driving with it.
Single income family really limits the amount of vehicles I can have plus 5 kids though 3 are adults but doesn’t mean I don’t get to help with all kinds of things.
But I do understand exactly what your saying
Oh I see, I recently got a 996.2 C2 with upgraded suspension and the 3.2 914. The 914 is more fun to drive, better balance, but the 996 can be like a daily driver you can run your errands with it and lock it up in the walmart parking lot. I do think a 996/997 is a bucket list car to own for a year or so to get the experience. I would not sell my 914 for it though, unless you are completely ready to move on. Last car I built that I sold I regretted if for about 7 years until I found something else that I was really excited about, then you kind of move on...
Also a side note a 996 can be super needy now they are 20 years old, not sure how much you know about those cars...
Posted by: totle Aug 29 2023, 07:17 AM
Are you pleased with the 993 headers?
Any reason to choose 993 headers over the GT ones?
In the process og sourcing what headers to use
Posted by: mb911 Aug 29 2023, 02:50 PM
Just another summer almost completed. I drive it a couple times a week but in the back of my mind I keep thinking what if I sold it and bought an early 2000s 911? Here is the question. What is a fair price for my car? I am thinking no hassle easy sale price?
Why not have both? I use my 996 for driving to the office in the heat and picking up the kids from school. 914 is the fun car to work on and take to car shows... I also am hoping to do some old car rallies with it. The 914 has a lot of your blood sweat and tears in it so, it means more to you. Also the 996 is wet sump motor, so need oiling upgrades if you are doing any good driving with it.
Single income family really limits the amount of vehicles I can have plus 5 kids though 3 are adults but doesn’t mean I don’t get to help with all kinds of things.
But I do understand exactly what your saying
Oh I see, I recently got a 996.2 C2 with upgraded suspension and the 3.2 914. The 914 is more fun to drive, better balance, but the 996 can be like a daily driver you can run your errands with it and lock it up in the walmart parking lot. I do think a 996/997 is a bucket list car to own for a year or so to get the experience. I would not sell my 914 for it though, unless you are completely ready to move on. Last car I built that I sold I regretted if for about 7 years until I found something else that I was really excited about, then you kind of move on...
Also a side note a 996 can be super needy now they are 20 years old, not sure how much you know about those cars...
I know little about the 996s but willing to learn. Probably won’t do anything for now. It just becomes overwhelming with my sons having 944s and their daily drivers then the 914, a boat, and everything else.
Posted by: mb911 Aug 29 2023, 02:52 PM
Are you pleased with the 993 headers?
Any reason to choose 993 headers over the GT ones?
In the process og sourcing what headers to use
If you read through my thread you will see I have had several different setups on. The 993 heat exchangers are high quality and in expensive enough that they make a great choice.
Depending on what you’re building it’s really hard to beat the stock heat exchangers.
Posted by: worn Aug 29 2023, 06:21 PM
My son had a GMC Sierra. One day we were wondering if the bed was really supposed to be pushing at the cab. Maybe a look underneath. The truck was folding itself in half from its own weight! He spent a couple of winters driving it in Superior.
Posted by: flyer86d Aug 30 2023, 06:47 AM
Ben, keep the 914 for gods sake and find a good 986 Boxster. I had one for 12 years before selling it to my son early this year. I actually prefer them to the 996. Great car and an outstanding value for the money and plenty fast even with the base 2.5 that I had. They ride well, the handling is outstanding, and they have proper heat and AC.
Charlie
Posted by: Justinp71 Aug 30 2023, 06:06 PM
Ben, keep the 914 for gods sake and find a good 986 Boxster. I had one for 12 years before selling it to my son early this year. I actually prefer them to the 996. Great car and an outstanding value for the money and plenty fast even with the base 2.5 that I had. They ride well, the handling is outstanding, and they have proper heat and AC.
Charlie
Or help one of your kids upgrade from a 944 to a Boxster then you can drive it some? Just pick your favorite
The 911 has the looks and cab space, also comes in 4wd. The 911 and Boxster S I believe are similar in 0-60. Boxster obviously better balance, they are a really good deal.
Posted by: mb911 Aug 31 2023, 06:04 AM
Ben, keep the 914 for gods sake and find a good 986 Boxster. I had one for 12 years before selling it to my son early this year. I actually prefer them to the 996. Great car and an outstanding value for the money and plenty fast even with the base 2.5 that I had. They ride well, the handling is outstanding, and they have proper heat and AC.
Charlie
Or help one of your kids upgrade from a 944 to a Boxster then you can drive it some? Just pick your favorite
The 911 has the looks and cab space, also comes in 4wd. The 911 and Boxster S I believe are similar in 0-60. Boxster obviously better balance, they are a really good deal.
That may be an option.
I kind of miss my 964 and 911 turbo sometimes
Posted by: Gint Sep 30 2023, 11:32 AM
Beautiful build. I'd keep it. I would think this car could pull as much as $50k without too much trouble, even on BAT.
5 years ago I bought a 2000 Boxster S for $13k - Hard to beat it for the money. They are like modern 914s, but with air conditioning and cruise control. They are really good road trip cars.
LOL
Posted by: mb911 Nov 4 2023, 08:14 AM
Well to continue on with my EFI project but first to fix the foam rust problem. 
Posted by: mepstein Nov 4 2023, 10:51 AM
I hate that foam. I think I'm going to chem dip my 914 chassis and get rid of every bit of it.
Posted by: mb911 Nov 4 2023, 11:29 AM
I hate that foam. I think I'm going to chem dip my 914 chassis and get rid of every bit of it.
I would be on the same page but to far down the rabbit hole on this one.
Posted by: mb911 Nov 19 2023, 11:01 AM
Side tracked again. Wanting to get the EFI plumbing done so I can check if to ensure it’s sealed up before the bitter cold sets in and can’t have the doors open.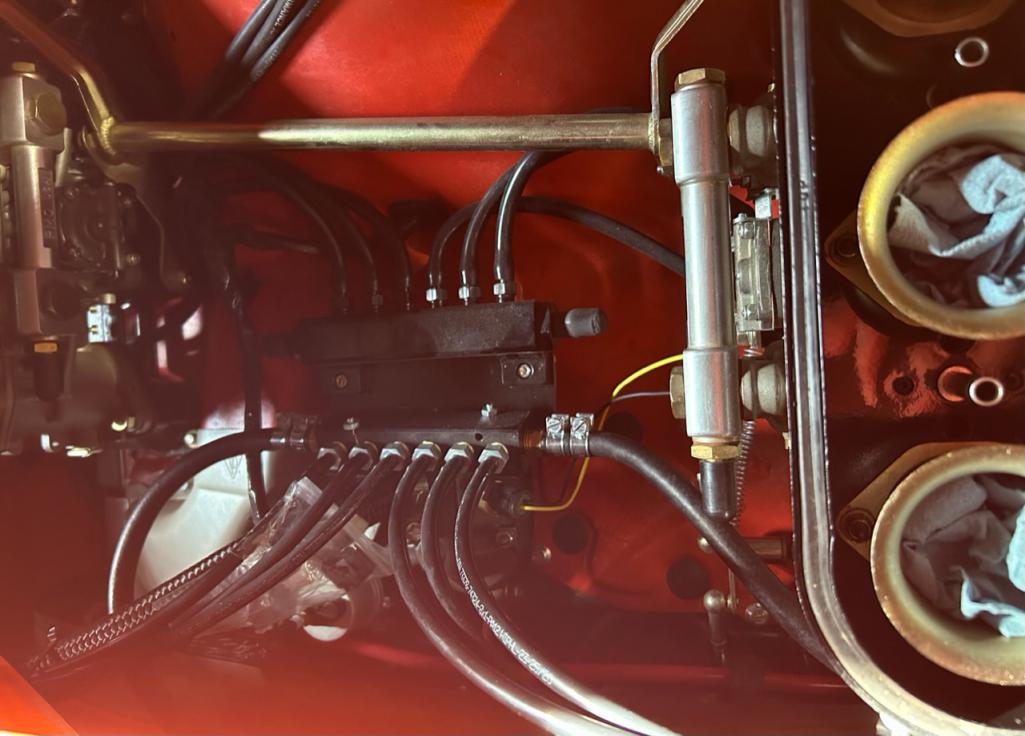
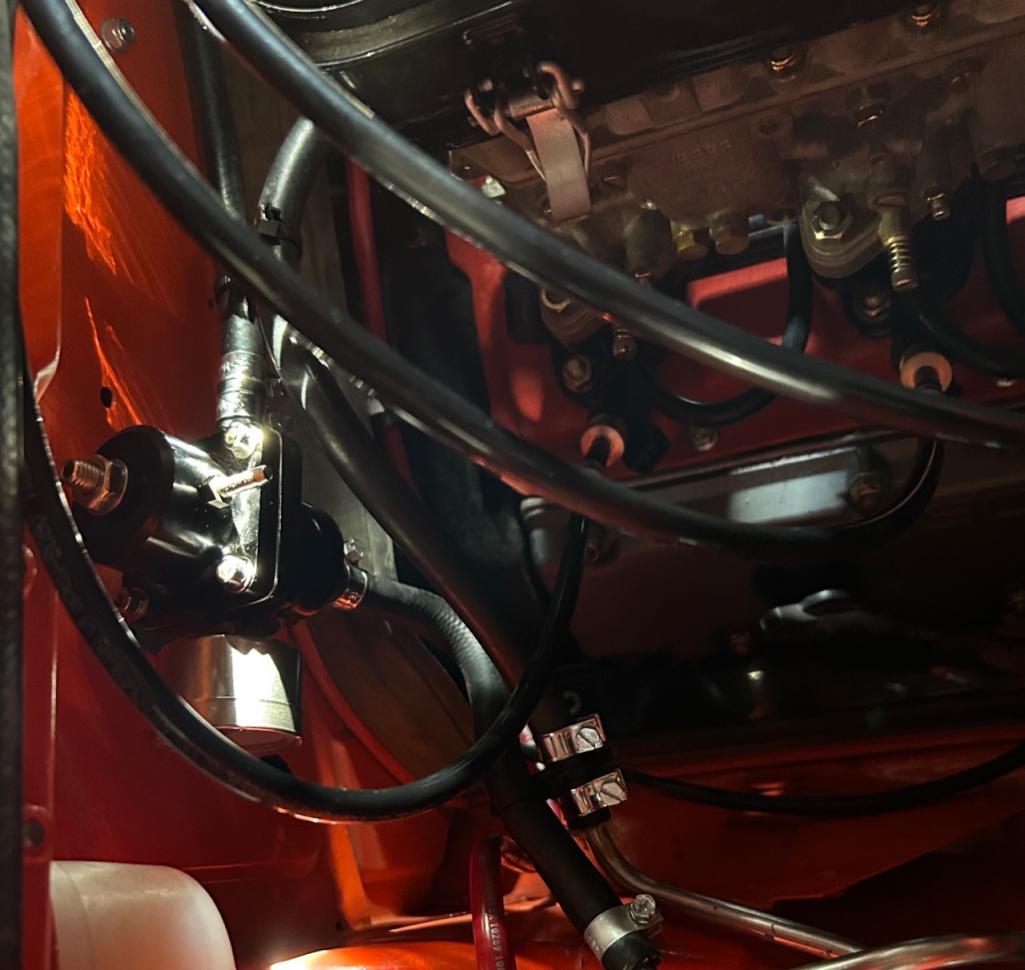
Posted by: GeorgeRud Nov 21 2023, 08:28 PM
My conversion car is now owned by a doctor with several newer 911s, and says the conversion -6 is the most fun of all. I miss it daily but couldn’t just let it sit in the garage unused. All depends how much time you have to enjoy yours.
Posted by: mb911 Nov 22 2023, 07:21 AM
I really enjoy this car. I absolutely hate carbs and the way the car runs so different with changes in temp and humidity. Fuel injection will be really nice to deal with
Posted by: mb911 Dec 3 2023, 11:35 AM
EFI wiring is done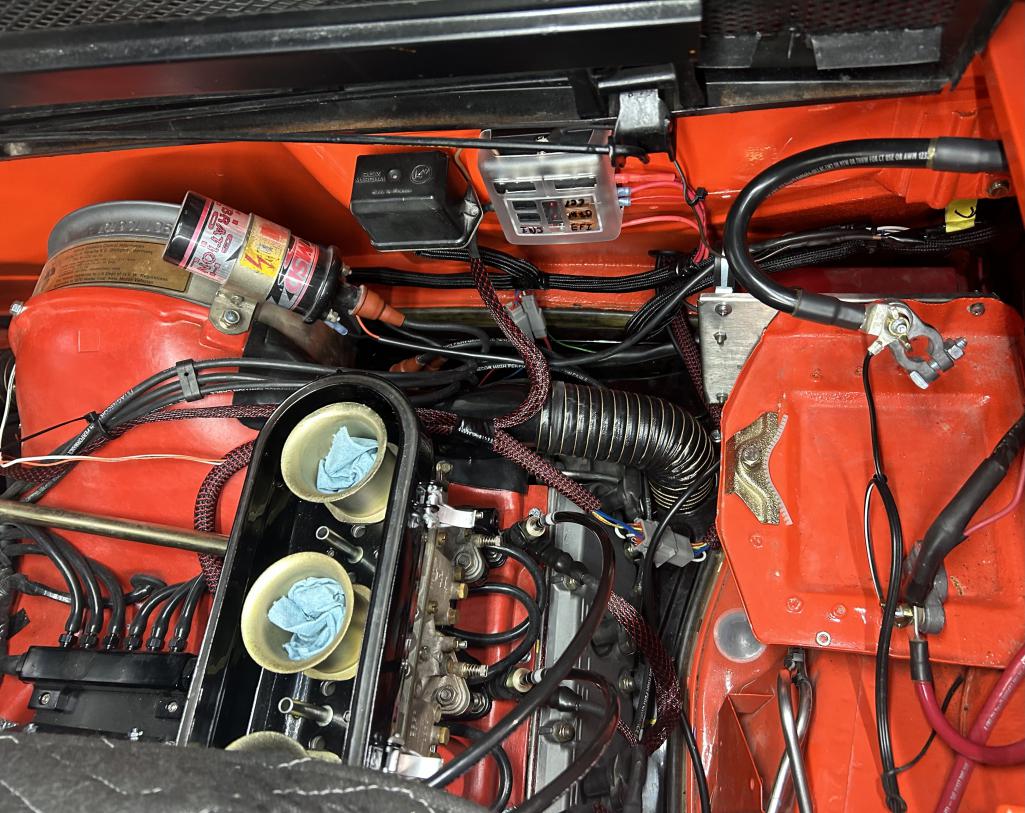
Posted by: mb911 Dec 3 2023, 01:54 PM
Some garage art
Posted by: mate914 Dec 9 2023, 08:50 AM
EFI wiring is done
@http://www.914world.com/bbs2/index.php?showuser=9892 Ben, I am inspired by your fuel injection using weber carbs. Could you please share the fuel injection parts list and custom fabricated parts. I have a good set of Zenith and want to do something similar.
Thanks, Matt
Posted by: mb911 Dec 9 2023, 11:39 AM
Matt here is a quick spreadsheet . You do need MFI heads for a similar setup to what I have or drill your heads like this
Posted by: mb911 Dec 9 2023, 11:55 AM
@http://www.914world.com/bbs2/index.php?showuser=10736 is whom you source most of the parts from over on pelican and I think here as well
Posted by: Superhawk996 Dec 9 2023, 12:52 PM
Is there any sort of retention feature to hold the injector into the MFI port adapters?
Posted by: mb911 Dec 9 2023, 03:05 PM
Is there any sort of retention feature to hold the injector into the MFI port adapters?
Just the o rings on the injector . Jamie has assured me that will work just fit. They fit in very snug
Posted by: jd74914 Dec 11 2023, 08:22 AM
That scares me a little. I said that once on a converted bike motor and had an engine fire shorty thereafter. Please keep an eye on them.
Posted by: Superhawk996 Dec 11 2023, 10:15 AM
That scares me a little. I said that once on a converted bike motor and had an engine fire shorty thereafter. Please keep an eye on them.
Scares me a lot. Done too many Design Failure Mode Analysis (DFMEA) as my day job. Although it may be snug now, seals age, shrink, and harden.
Backfire potential can put significant pressure behind them to push them out. Yeah agree that intake vacuum is normally sucking them in. Also agree you shouldn’t get backfire with EFI . . . . But real world is different
Vibration is always a concern - 6000 rpm has a way of doing funky things.
Thermal expansion of the MFI adapters when hot will lessen the snugness as will the seals themselves as they heat up and become more pliable.
I love this EFI concept; gotta be a way to do a positive retention. Maybe off carb manifold or even off valve covers?
Your car is too beautiful to lose it to an engine fire.
Posted by: mb911 Dec 13 2023, 01:47 PM
That scares me a little. I said that once on a converted bike motor and had an engine fire shorty thereafter. Please keep an eye on them.
Scares me a lot. Done too many Design Failure Mode Analysis (DFMEA) as my day job. Although it may be snug now, seals age, shrink, and harden.
Backfire potential can put significant pressure behind them to push them out. Yeah agree that intake vacuum is normally sucking them in. Also agree you shouldn’t get backfire with EFI . . . . But real world is different
Vibration is always a concern - 6000 rpm has a way of doing funky things.
Thermal expansion of the MFI adapters when hot will lessen the snugness as will the seals themselves as they heat up and become more pliable.
I love this EFI concept; gotta be a way to do a positive retention. Maybe off carb manifold or even off valve covers?
Your car is too beautiful to lose it to an engine fire.
So remember these are long tip BMW injectors that fit snug into the MFI adapters. The injectors are about 3/4” longer than the o ring interface. Also I ran these in the heads all summer while using carbs as a test if you will for exactly as you suggest.
I can look at something to retain them for sure
Posted by: mb911 Jan 1 2024, 01:44 PM
I added a relay to the system. I felt the fuse block was powering to many things to pull off of the ignition switch even though it was all 3 and 5 amp fuses. I did the best I could to keep that area clean with wiring but lots to fit in a small space. Also got a a cool new toy. 
Posted by: mb911 Jan 1 2024, 01:45 PM
Also had some stickers made for my customers.
Posted by: mb911 Jan 18 2024, 03:07 PM
New exhaust very impressed and excited to try it.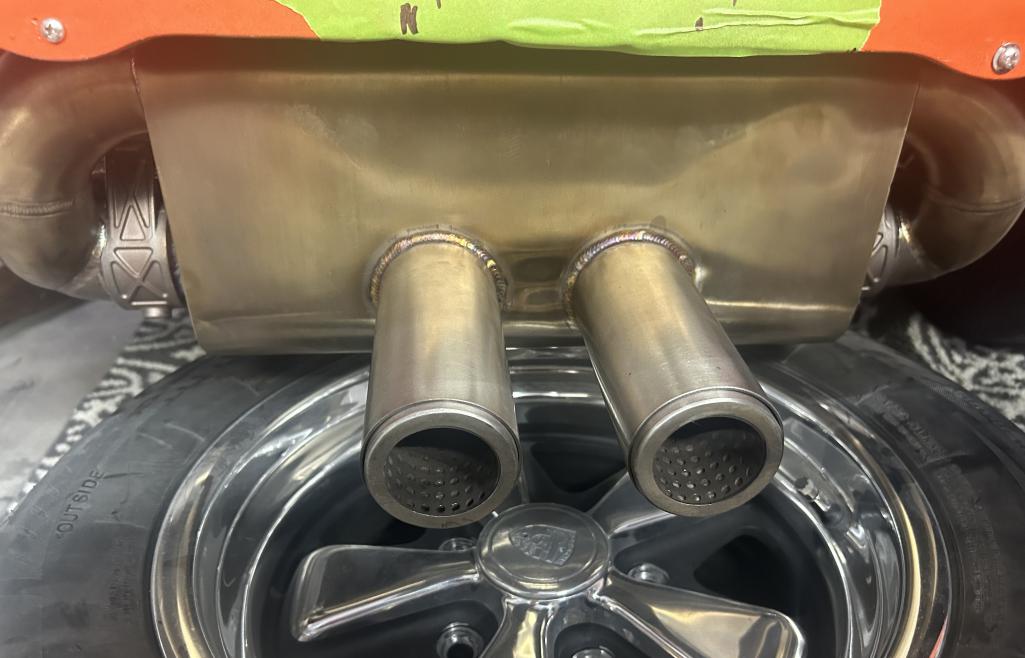
Posted by: JmuRiz Jan 18 2024, 03:31 PM
Sport/Rowdy....nice!
Posted by: mb911 Jan 18 2024, 03:42 PM
Sport/Rowdy....nice!
Yup gotta wire it up this weekend
Posted by: Justinp71 Jan 18 2024, 05:30 PM
My conversion car is now owned by a doctor with several newer 911s, and says the conversion -6 is the most fun of all. I miss it daily but couldn’t just let it sit in the garage unused. All depends how much time you have to enjoy yours.
I could see that, my 914-6 is far more fun than my 996. Even though the 996 is quite fun to drive itself.
Posted by: mb911 Mar 14 2024, 01:30 PM
Well got the dash cleaned up now. Pretty happy with the final look. Probably need to source a better knee pad soon though.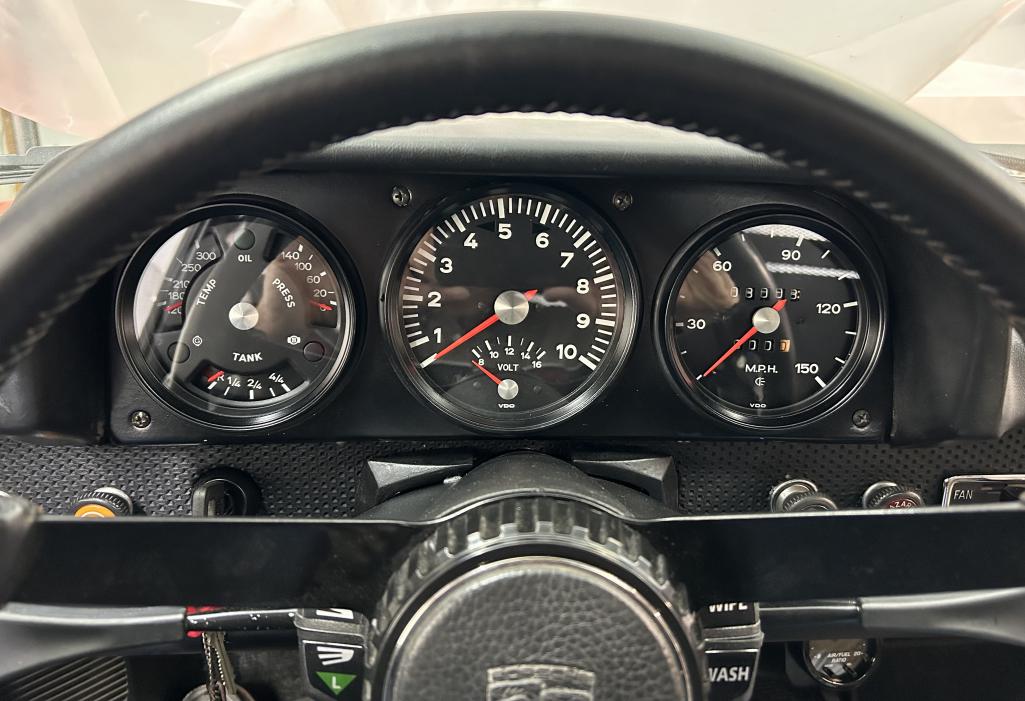
Posted by: mepstein Mar 14 2024, 01:33 PM
What’s wrong with yours? I should have a good one. I just want to make sure it’s an upgrade for you. @http://www.914world.com/bbs2/index.php?showuser=9892
Left side ignition. Back dated steering column, triple gauge & 10k dash with silver dot, thick grip wheel with hockey puck horn button - That’s a lot of GT goodness going on.
Posted by: JmuRiz Mar 14 2024, 01:36 PM
Well got the dash cleaned up now. Pretty happy with the final look. Probably need to source a better knee pad soon though.
Was there a trick to getting all those wires into the gauges? I'm looking for any tips/tricks on the hundred wires back there.
Posted by: mb911 Mar 14 2024, 02:12 PM
Well got the dash cleaned up now. Pretty happy with the final look. Probably need to source a better knee pad soon though.
Was there a trick to getting all those wires into the gauges? I'm looking for any tips/tricks on the hundred wires back there.
I did a few extensions but overall pretty straightforward
Posted by: mb911 Mar 14 2024, 02:14 PM
What’s wrong with yours? I should have a good one. I just want to make sure it’s an upgrade for you. @http://www.914world.com/bbs2/index.php?showuser=9892
Left side ignition. Back dated steering column, triple gauge & 10k dash with silver dot, thick grip wheel with hockey puck horn button - That’s a lot of GT goodness going on.
Mark, under the column it is pretty wavey. It always has been. Amazing thing is still a factory dash pad.
Posted by: mb911 Mar 14 2024, 02:14 PM
@http://www.914world.com/bbs2/index.php?showuser=10825 thanks for the tach core as well.
Posted by: mepstein Mar 14 2024, 03:01 PM
What’s wrong with yours? I should have a good one. I just want to make sure it’s an upgrade for you. @http://www.914world.com/bbs2/index.php?showuser=9892
Left side ignition. Back dated steering column, triple gauge & 10k dash with silver dot, thick grip wheel with hockey puck horn button - That’s a lot of GT goodness going on.
Mark, under the column it is pretty wavey. It always has been. Amazing thing is still a factory dash pad.
I know I have one. I’ll check it out when I get home and send it over if it looks good. I’m pretty sure it will.
I remember my first year at Hershey I couldn’t give away a nice lower dash pad, so now, 14 years later, maybe I can.
Posted by: mb911 Mar 14 2024, 06:10 PM
What’s wrong with yours? I should have a good one. I just want to make sure it’s an upgrade for you. @http://www.914world.com/bbs2/index.php?showuser=9892
Left side ignition. Back dated steering column, triple gauge & 10k dash with silver dot, thick grip wheel with hockey puck horn button - That’s a lot of GT goodness going on.
Mark, under the column it is pretty wavey. It always has been. Amazing thing is still a factory dash pad.
I know I have one. I’ll check it out when I get home and send it over if it looks good. I’m pretty sure it will.
I remember my first year at Hershey I couldn’t give away a nice lower dash pad, so now, 14 years later, maybe I can.
lol well let me know. I am missing on of the blind nuts for that as well that slides in the dash. Let me know if you have one as well
Posted by: mepstein Mar 14 2024, 06:30 PM
What’s wrong with yours? I should have a good one. I just want to make sure it’s an upgrade for you. @http://www.914world.com/bbs2/index.php?showuser=9892
Left side ignition. Back dated steering column, triple gauge & 10k dash with silver dot, thick grip wheel with hockey puck horn button - That’s a lot of GT goodness going on.
Mark, under the column it is pretty wavey. It always has been. Amazing thing is still a factory dash pad.
I know I have one. I’ll check it out when I get home and send it over if it looks good. I’m pretty sure it will.
I remember my first year at Hershey I couldn’t give away a nice lower dash pad, so now, 14 years later, maybe I can.
lol well let me know. I am missing on of the blind nuts for that as well that slides in the dash. Let me know if you have one as well
I don’t. I probably ( mistakenly) left them on a parts car I just got rid of.
Posted by: mb911 Mar 15 2024, 12:01 PM
Rory pointed out I probably have a spare one in the one spare door I have.
Posted by: Justinp71 Mar 15 2024, 03:58 PM
Well got the dash cleaned up now. Pretty happy with the final look. Probably need to source a better knee pad soon though.
Take it out like a real GT!
Problem is you need to perlon the entire dash like I did.
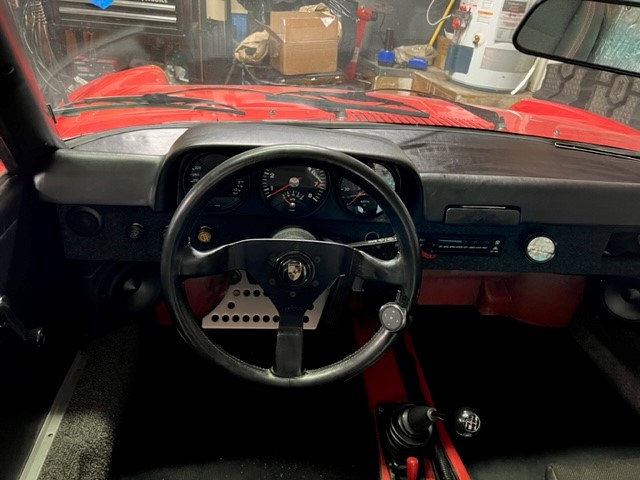
Posted by: Justinp71 Mar 15 2024, 03:59 PM
https://pbase.com/9146gt/image/113081244
Posted by: mb911 Apr 23 2024, 02:55 PM
Well back at it. Fixed a spot from a fallen wrench off the lift onto the 1/4 thank goodness it’s the same 1/4 I had to section from that pesky foam.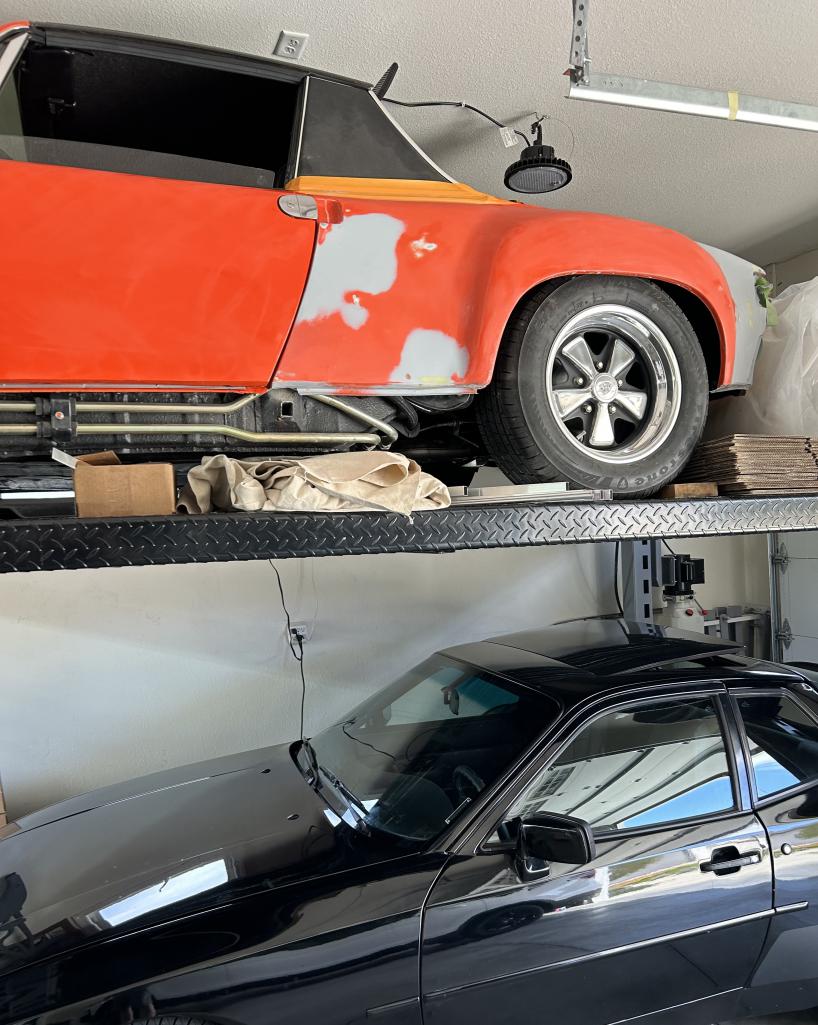
Posted by: mb911 May 9 2024, 10:06 AM
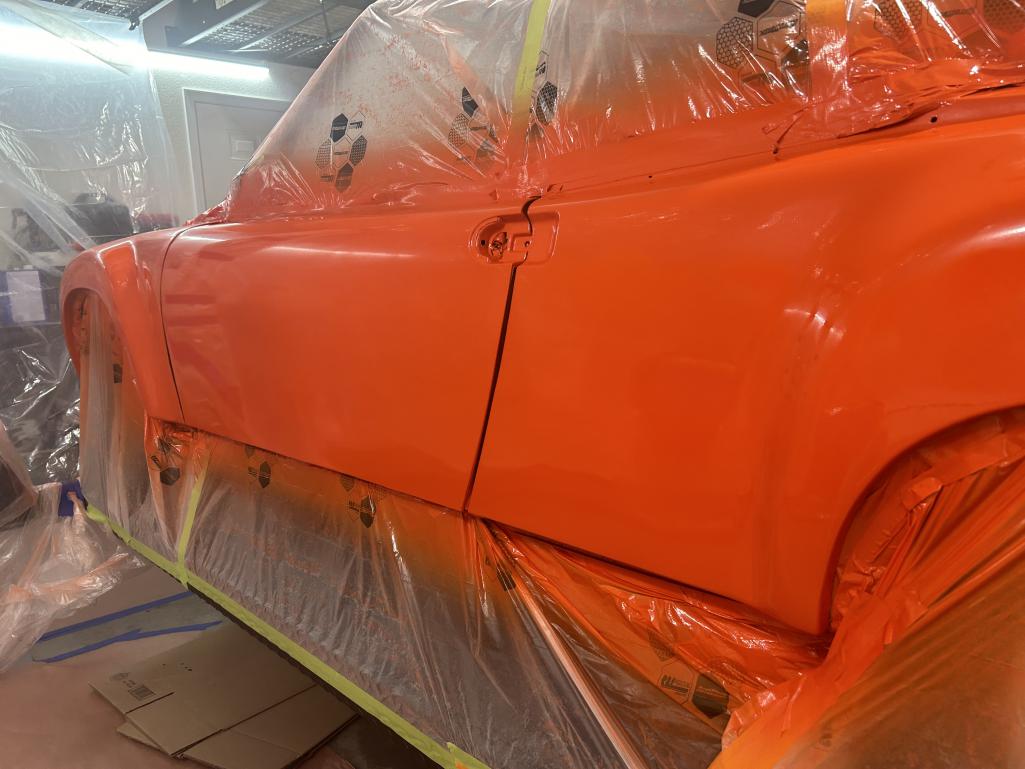
All done with the repair next is the EFI fuel leak test and upload maps
Posted by: Freezin 914 May 10 2024, 09:06 PM
I am jealous of your skill set. But excited for you to be over that hurdle. Looking good as always!
Posted by: mb911 May 12 2024, 05:42 AM
I am jealous of your skill set. But excited for you to be over that hurdle. Looking good as always!
Thanks hopefully the EFI project will go good and this will be out on the road soon. Fuel system test this week
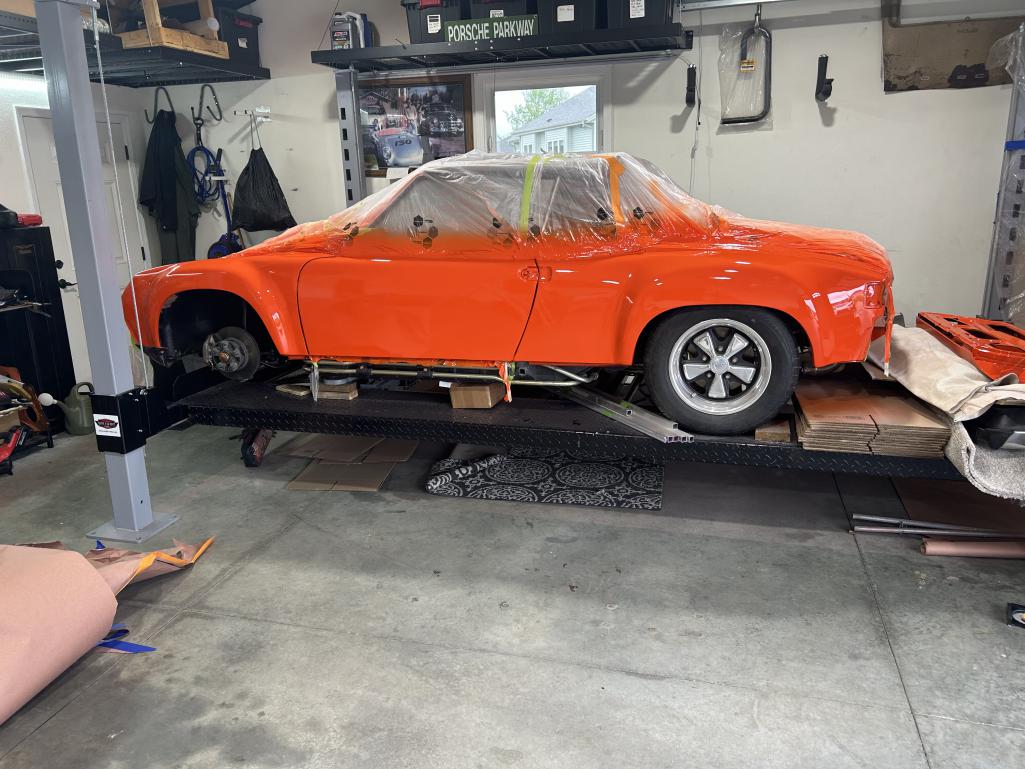
Posted by: mb911 May 31 2024, 02:04 PM
It runs on megasquirt and the carbs as throttle bodies 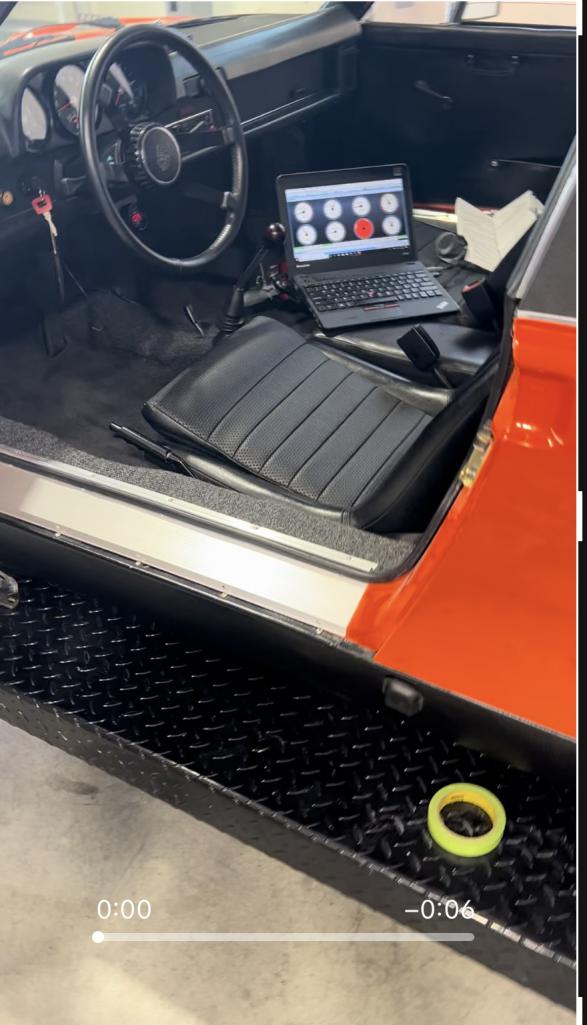
Posted by: Luke M Jun 2 2024, 12:57 PM
Finished a few changes.
Hi Ben,
Hey I'm looking into buying a wildfire exotic lift.
I see you own a wildfire. How has it been working out for you ?
Which style did you end up buying?
Thanks,
Posted by: mb911 Jun 2 2024, 05:02 PM
Finished a few changes.
Hi Ben,
Hey I'm looking into buying a wildfire exotic lift.
I see you own a wildfire. How has it been working out for you ?
Which style did you end up buying?
Thanks,
Luke,
I bought it about 2-3 years ago. It is awesome and super stable. Mine raises up to 74” under neath at full lift(pretty sure I remember that right) and 78” to the top of the deck. It’s a ws9000 with air over hydraulic jack tray which is a must if your going to work on your car as well. I use the lift for my car, boxes for shipping and shelving for my oil tanks etc.
Posted by: Luke M Jun 3 2024, 06:33 AM
Finished a few changes.
Hi Ben,
Hey I'm looking into buying a wildfire exotic lift.
I see you own a wildfire. How has it been working out for you ?
Which style did you end up buying?
Thanks,
Luke,
I bought it about 2-3 years ago. It is awesome and super stable. Mine raises up to 74” under neath at full lift(pretty sure I remember that right) and 78” to the top of the deck. It’s a ws9000 with air over hydraulic jack tray which is a must if your going to work on your car as well. I use the lift for my car, boxes for shipping and shelving for my oil tanks etc.
Hi Ben,
Thanks for the reply. The one I'm looking at is 72/78'' max rise. I'll place the order once my new garage is close to being built.
Take care.
Posted by: mb911 Jun 6 2024, 02:17 PM
Finished a few changes.
Hi Ben,
Hey I'm looking into buying a wildfire exotic lift.
I see you own a wildfire. How has it been working out for you ?
Which style did you end up buying?
Thanks,
Luke,
I bought it about 2-3 years ago. It is awesome and super stable. Mine raises up to 74” under neath at full lift(pretty sure I remember that right) and 78” to the top of the deck. It’s a ws9000 with air over hydraulic jack tray which is a must if your going to work on your car as well. I use the lift for my car, boxes for shipping and shelving for my oil tanks etc.
Hi Ben,
Thanks for the reply. The one I'm looking at is 72/78'' max rise. I'll place the order once my new garage is close to being built.
Take care.
They are hands down the best home lift from a quality standpoint. I have owned a few and this is fabricated to an extremely high standard more so than some of the mainstream names.
Posted by: mb911 Jun 6 2024, 02:19 PM
Put some “rebuilt” fuel injectors in today. Put the protective pan on under the front suspension as the fuel pump sits on the crosser member. I may have to mess with that some more. I need to find better hardware. New driver side window is the next project then some tuning next week
Posted by: mb911 Jun 15 2024, 03:32 PM
It’s getting so close to driving again. Got the wiring all figured out and all the sensors working for the ms2. So far very happy with the EFI conversion
Attached thumbnail(s)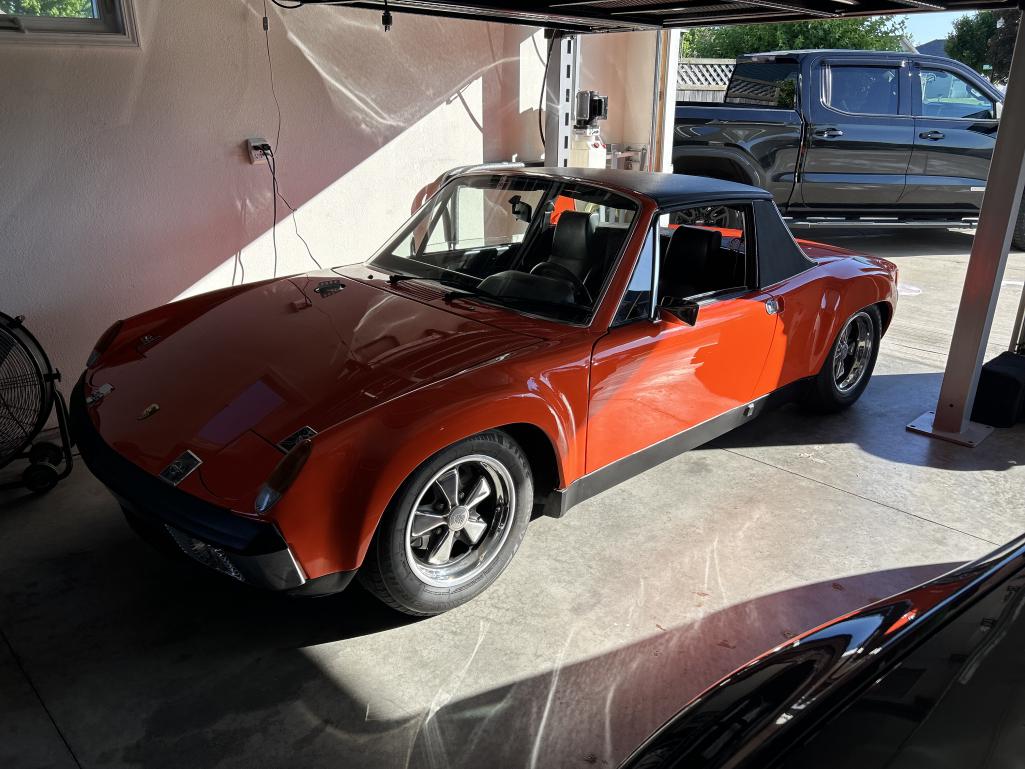
Posted by: mb911 Jun 22 2024, 12:28 PM
Well regular failed after some testing ordered a new one. I fixed the horn today which has never worked so excited about that. Ordered new springs as the rear was sagging a bit
Posted by: mb911 Jul 19 2024, 02:07 PM
Car is running well on the EFI platform and starts very easily. Even took my sons dog out for a ride today
Posted by: JmuRiz Jul 19 2024, 02:15 PM
Excellent.
BTW what's the phone mount you have?
Posted by: mb911 Jul 19 2024, 03:19 PM
Excellent.
BTW what's the phone mount you have?
I got it from a guy on facebook it’s pretty cool. Not sure if he makes them anymore
Posted by: FlacaProductions Jul 19 2024, 03:22 PM
Excellent.
BTW what's the phone mount you have?
https://www.printables.com/model/182135-porsche-914-ash-tray-phone-mount
I have the same one but did a quick vinyl wrap.
Posted by: mb911 Jul 19 2024, 03:38 PM
Excellent.
BTW what's the phone mount you have?
https://www.printables.com/model/182135-porsche-914-ash-tray-phone-mount
I have the same one but did a quick vinyl wrap.
There you go perfect. I need to get a better magnet case for my phone so it stays up there better
Posted by: worn Jul 19 2024, 06:22 PM
Excellent.
BTW what's the phone mount you have?
https://www.printables.com/model/182135-porsche-914-ash-tray-phone-mount
I have the same one but did a quick vinyl wrap.
There you go perfect. I need to get a better magnet case for my phone so it stays up there better
Kind of a highjack, for which I apologize. Several times now I have had my expensive Apple phone set up like that to give me directions. Not my style but it works. On a few occasions I have been trying to find some place during a teener event using the hey siri approach, only to get a message saying sorry I have to shut down because I am too hot. Look for your destination on your right. Somewhere. At some distance. Or it might be left. I am shutting down. The phone is sitting in the sunlight with display lit and processing. Not knowing where the heck I am in a strange place looking for something too small for the road atlas leaves me between frustrated and panicked, depending on the size and proximity of the pickup truck behind me.
Posted by: mb911 Jul 19 2024, 06:44 PM
Excellent.
BTW what's the phone mount you have?
https://www.printables.com/model/182135-porsche-914-ash-tray-phone-mount
I have the same one but did a quick vinyl wrap.
There you go perfect. I need to get a better magnet case for my phone so it stays up there better
Kind of a highjack, for which I apologize. Several times now I have had my expensive Apple phone set up like that to give me directions. Not my style but it works. On a few occasions I have been trying to find some place during a teener event using the hey siri approach, only to get a message saying sorry I have to shut down because I am too hot. Look for your destination on your right. Somewhere. At some distance. Or it might be left. I am shutting down. The phone is sitting in the sunlight with display lit and processing. Not knowing where the heck I am in a strange place looking for something too small for the road atlas leaves me between frustrated and panicked, depending on the size and proximity of the pickup truck behind me.
That’s a great point. I really just wanted this for videos of short drives etc.
Posted by: technicalninja Jul 19 2024, 06:58 PM
I'm planning a "dock" for mine.
In the console.
It will be my "head unit" for the stereo and have charging capabilities.
It will be "locked in" with positive retention on 4 sides.
One thing I LEARNED at my very first SOLO event.
If there is ANYTHING lose in the car it will end up hitting you at some point in the run...
Change can be dangerous!
Now, my mounting position won't work for camera use.
After thinking about "hot phone syndrome" it wouldn't be hard to add a little vent through the ash tray adaptor for a 1/2" AC vent.
Your car would have to have AC.
I live in HELL! 
All of my cars have AC...
Edit
Congrats to Ben for a successful "return to service" on your car.
I'm envious of the dog.
I'd want you to HAMMER it and he wouldn't...
Enjoy the hell out of it!
Posted by: mb911 Jul 19 2024, 07:27 PM
I'm planning a "dock" for mine.
In the console.
It will be my "head unit" for the stereo and have charging capabilities.
It will be "locked in" with positive retention on 4 sides.
One thing I LEARNED at my very first SOLO event.
If there is ANYTHING lose in the car it will end up hitting you at some point in the run...
Change can be dangerous!
Now, my mounting position won't work for camera use.
After thinking about "hot phone syndrome" it wouldn't be hard to add a little vent through the ash tray adaptor for a 1/2" AC vent.
Your car would have to have AC.
I live in HELL!
All of my cars have AC...
Edit
Congrats to Ben for a successful "return to service" on your car.
I'm envious of the dog.
I'd want you to HAMMER it and he wouldn't...
Enjoy the hell out of it!
I still have to do a little more auto tuning but it runs really well. Great power.
Posted by: bkrantz Jul 19 2024, 08:05 PM
I'm planning a "dock" for mine.
In the console.
It will be my "head unit" for the stereo and have charging capabilities.
It will be "locked in" with positive retention on 4 sides.
One thing I LEARNED at my very first SOLO event.
If there is ANYTHING lose in the car it will end up hitting you at some point in the run...
Change can be dangerous!
Now, my mounting position won't work for camera use.
After thinking about "hot phone syndrome" it wouldn't be hard to add a little vent through the ash tray adaptor for a 1/2" AC vent.
Your car would have to have AC.
I live in HELL!
All of my cars have AC...
Edit
Congrats to Ben for a successful "return to service" on your car.
I'm envious of the dog.
I'd want you to HAMMER it and he wouldn't...
Enjoy the hell out of it!
I still have to do a little more auto tuning but it runs really well. Great power.
Well done. Congrats!
Posted by: mb911 Jul 20 2024, 06:59 PM
I'm planning a "dock" for mine.
In the console.
It will be my "head unit" for the stereo and have charging capabilities.
It will be "locked in" with positive retention on 4 sides.
One thing I LEARNED at my very first SOLO event.
If there is ANYTHING lose in the car it will end up hitting you at some point in the run...
Change can be dangerous!
Now, my mounting position won't work for camera use.
After thinking about "hot phone syndrome" it wouldn't be hard to add a little vent through the ash tray adaptor for a 1/2" AC vent.
Your car would have to have AC.
I live in HELL!
All of my cars have AC...
Edit
Congrats to Ben for a successful "return to service" on your car.
I'm envious of the dog.
I'd want you to HAMMER it and he wouldn't...
Enjoy the hell out of it!
I still have to do a little more auto tuning but it runs really well. Great power.
Well done. Congrats!
Thanks , was doing a little tuning on the warm up enrichment table. Now it’s 13:1 enrichment versus 10.5 .
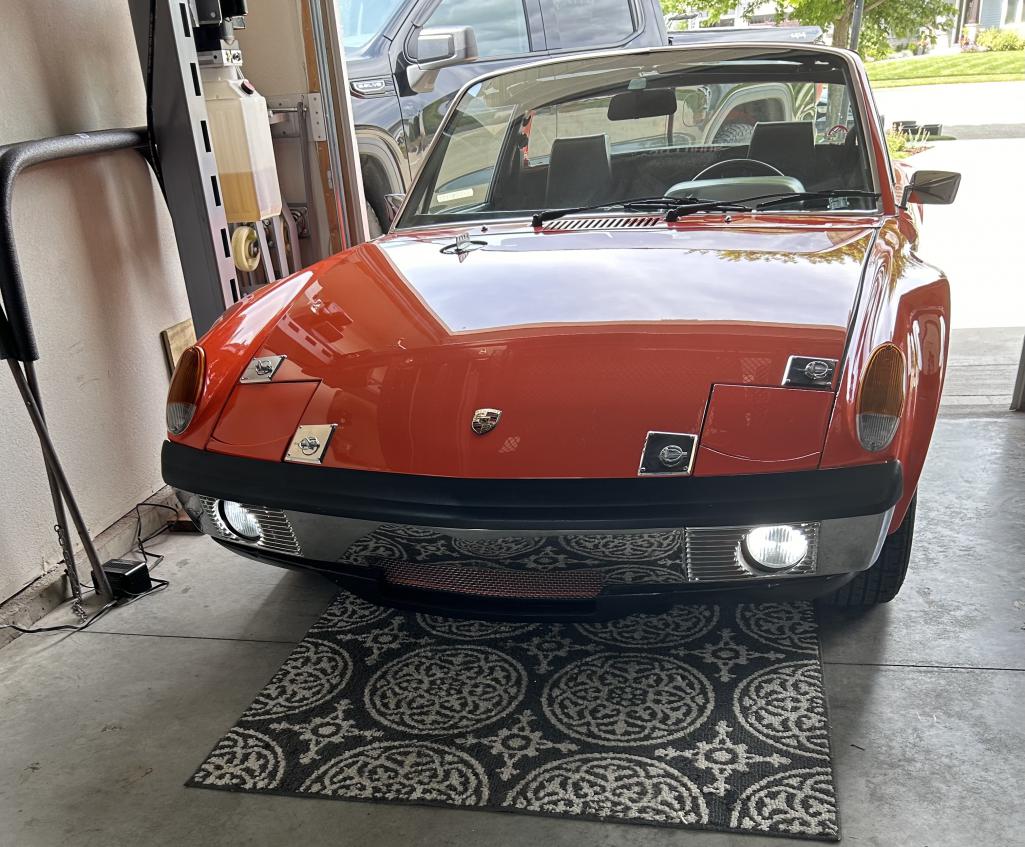
Posted by: technicalninja Jul 20 2024, 07:09 PM
I'm interested in if that will work when it's stupid cold.
I prefer to adjust "warm up" type of stuff below 50 degrees.
Even better if you're below 32 which is rare for me but won't be for you.
Is it going to be a 3 or 4 season car?
If it's going to hibernate it won't matter...
Posted by: mepstein Jul 20 2024, 07:48 PM
I think Ben puts away his 914 in the winter. WI isn’t just cold, it’s snowy.
Posted by: technicalninja Jul 20 2024, 08:06 PM
I think Ben puts away his 914 in the winter. WI isn’t just cold, it’s snowy.
More FUN that way!
Just kidding, I wouldn't take that out in crappy weather either!
Posted by: mb911 Jul 21 2024, 04:26 AM
I think Ben puts away his 914 in the winter. WI isn’t just cold, it’s snowy.
More FUN that way!
Just kidding, I wouldn't take that out in crappy weather either!
It is part of my learning factor but in fall around November we are done driving for the season. I may have to adjust it a little but in the table I will adjust for that temp. I was tuning for 72 degrees and the start up enrichment which was too rich
Posted by: technicalninja Jul 21 2024, 09:31 AM
Ha!
By November it's just getting NICE here...
I tell people the AC "season" ends on Halloween!
Now, at 32 degrees I'd expect to be running 10-1 at start up, maybe more.
By the time it hit 80 I'd expect 75% of my enrichment would be gone and 13-1 would be normal.
Is the warmup enrichment a slope on an MS2?
If so, it will be automatic, and you won't have to adjust.
Car looks great!
Posted by: mb911 Jul 21 2024, 06:04 PM
Ha!
By November it's just getting NICE here...
I tell people the AC "season" ends on Halloween!
Now, at 32 degrees I'd expect to be running 10-1 at start up, maybe more.
By the time it hit 80 I'd expect 75% of my enrichment would be gone and 13-1 would be normal.
Is the warmup enrichment a slope on an MS2?
If so, it will be automatic, and you won't have to adjust.
Car looks great!
My buddy that helped me with supplying some of the parts and helped me tune it /learn how to tune/ created the base map lives in Texas and expressed the same thing. I plan to change the transmission out this winter as Dr Evil built me one with an LSD . There is nothing wrong with my current one but LSD is badass
Posted by: technicalninja Jul 21 2024, 06:16 PM
Everyone needs a good dose of LSD... 
I prefer mine, Torsen.
Posted by: mb911 Aug 6 2024, 08:14 AM
Happy with the results for now. Clay has a setup for me that will clear without denting which makes me happy.
Attached thumbnail(s)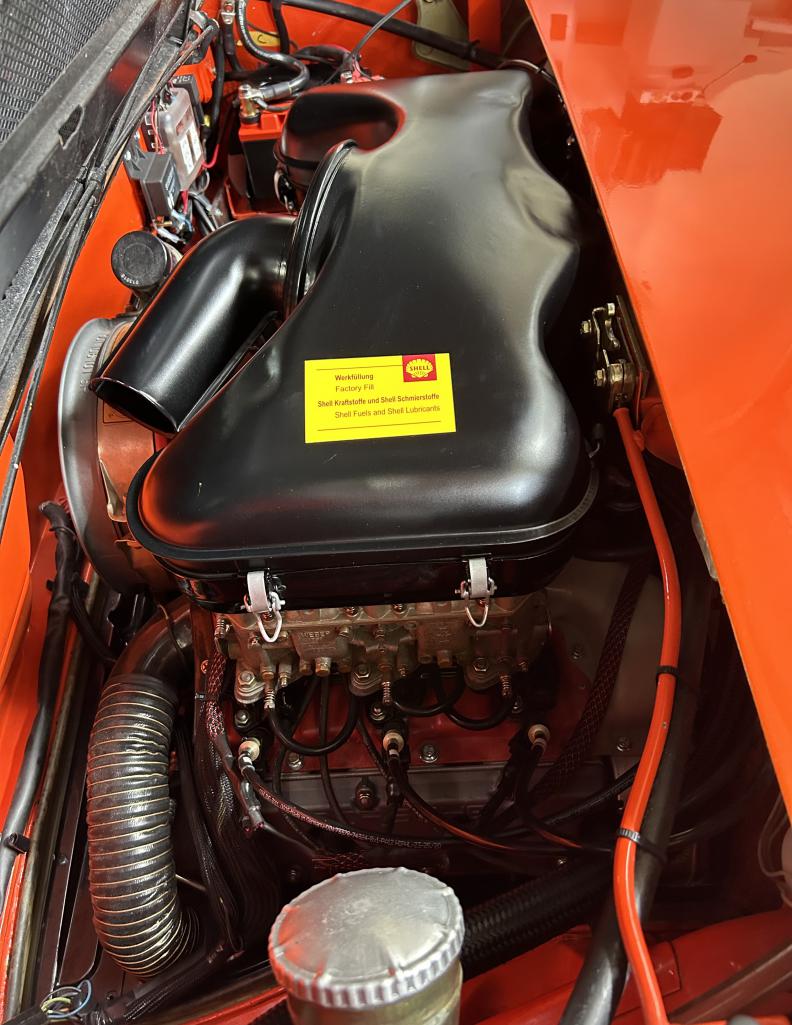
Posted by: mb911 Aug 6 2024, 08:17 AM
And plugs 4,5,6 time to change out as the I may have had it a bit rich for to long and fouled them out also because they are a pretty cold plug.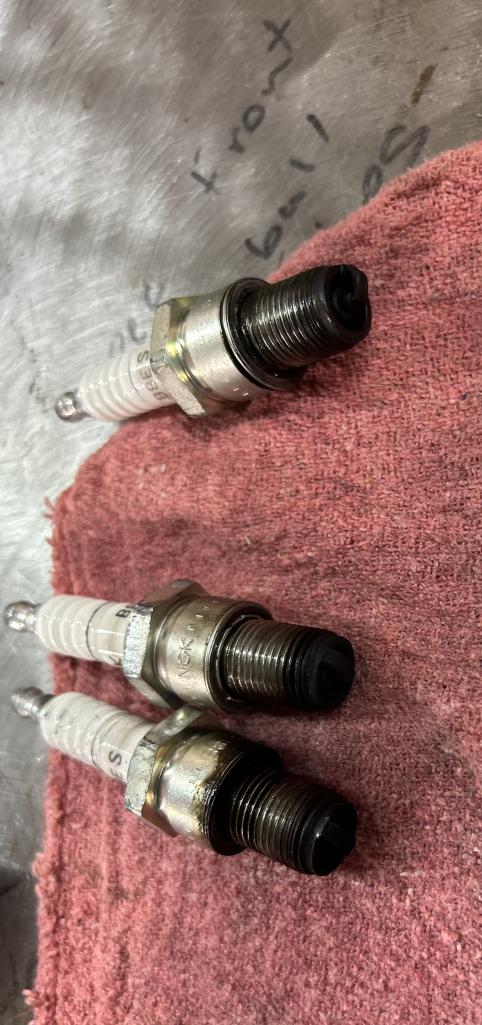 changed out for Br6es and all is good and running better AFRs now
Posted by: Cairo94507 Aug 6 2024, 08:58 AM
I really love the look of the 6 with the stock air cleaner - your ears will love it too. I also see you went with a satin finish- me like!
Posted by: mb911 Aug 6 2024, 09:16 AM
I really love the look of the 6 with the stock air cleaner - your ears will love it too. I also see you went with a satin finish- me like!
Yes wet sanded the gloss powder then spray max satin over it
Posted by: 930cabman Aug 6 2024, 02:04 PM
I really love the look of the 6 with the stock air cleaner - your ears will love it too. I also see you went with a satin finish- me like!
Yes wet sanded the gloss powder then spray max satin over it
Please share how you got it to fit? Mine interferes at cyl #3/firewall. Using Maddog OEM mount. TIA
btw: it does look great
Posted by: mb911 Aug 6 2024, 04:21 PM
I really love the look of the 6 with the stock air cleaner - your ears will love it too. I also see you went with a satin finish- me like!
Yes wet sanded the gloss powder then spray max satin over it
Please share how you got it to fit? Mine interferes at cyl #3/firewall. Using Maddog OEM mount. TIA
btw: it does look great
Share a picture of what you have
Posted by: 930cabman Aug 7 2024, 12:09 PM
I can probably get an .060 feeler between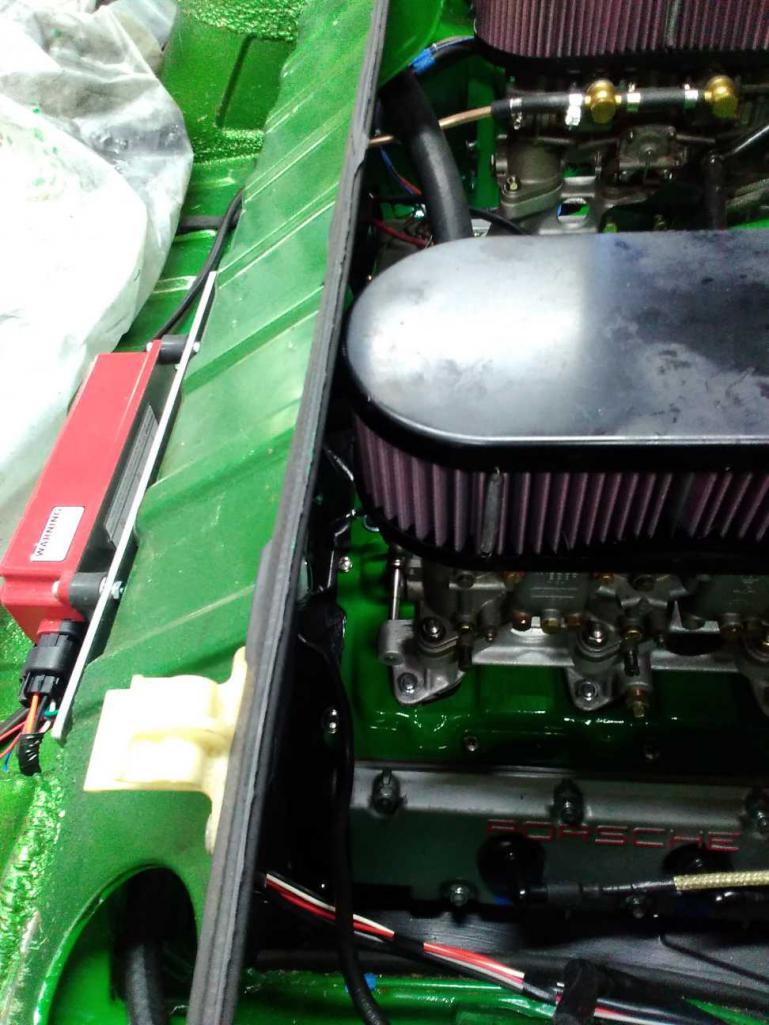
The factory air filter I have just will not fit
Posted by: Justinp71 Aug 26 2024, 04:50 PM
Car is running well on the EFI platform and starts very easily. Even took my sons dog out for a ride today
Hi Ben,
Where did you end up mounting your ECU for the EFI? I am thinking of a couple places...
Posted by: mb911 Aug 26 2024, 05:13 PM
Car is running well on the EFI platform and starts very easily. Even took my sons dog out for a ride today
Hi Ben,
Where did you end up mounting your ECU for the EFI? I am thinking of a couple places...
Right behind the passenger seat near the floor. Great spot and easy to wire
Posted by: Justinp71 Aug 26 2024, 05:39 PM
Car is running well on the EFI platform and starts very easily. Even took my sons dog out for a ride today
Hi Ben,
Where did you end up mounting your ECU for the EFI? I am thinking of a couple places...
Right behind the passenger seat near the floor. Great spot and easy to wire
Thanks I like that idea, looks like you just popped a hole at the bottom of the fire wall with an o-ring to seal it up?
Posted by: mepstein Aug 26 2024, 07:07 PM
Car is running well on the EFI platform and starts very easily. Even took my sons dog out for a ride today
Hi Ben,
Where did you end up mounting your ECU for the EFI? I am thinking of a couple places...
Right behind the passenger seat near the floor. Great spot and easy to wire
Thanks I like that idea, looks like you just popped a hole at the bottom of the fire wall with an o-ring to seal it up?
There’s a dimple in the pan. It’s where I ran my 3.2 harness.
Posted by: worn Aug 26 2024, 07:49 PM
I think Ben puts away his 914 in the winter. WI isn’t just cold, it’s snowy.
More FUN that way!
Just kidding, I wouldn't take that out in crappy weather either!
Would be if they didn’t cover every road with salt.
Posted by: mb911 Aug 27 2024, 04:43 AM
Car is running well on the EFI platform and starts very easily. Even took my sons dog out for a ride today
Hi Ben,
Where did you end up mounting your ECU for the EFI? I am thinking of a couple places...
Right behind the passenger seat near the floor. Great spot and easy to wire
Thanks I like that idea, looks like you just popped a hole at the bottom of the fire wall with an o-ring to seal it up?
Yes
Posted by: mb911 Oct 30 2024, 10:26 AM
Wrapping up driving season soon. Top is on. Enjoying the 993 heat exchangers. Unfortunately at some point the gas tank has to come out as the cables for the heat boxes are messed up. In no hurry on that I know it’s a routing issue and I will eventually get to it. Did I mention how loud the Bosch 044 fuel pump is man it almost obnoxious in volume. Need to put it on the lift and change fuel filter and decide a better rubber isolation for it or an alternative brand/ type with same specs. I learned it draws a ton of power as well. I put on 400 miles this summer so less than I wanted but worked through the tuning of the EFI , changed a band connector out, and enjoyed it. I still may have a month left we will see. Depends on salting of the roads
Posted by: ClayPerrine Oct 30 2024, 10:45 AM
Wrapping up driving season soon. Top is on. Enjoying the 993 heat exchangers. Unfortunately at some point the gas tank has to come out as the cables for the heat boxes are messed up. In no hurry on that I know it’s a routing issue and I will eventually get to it. Did I mention how loud the Bosch 044 fuel pump is man it almost obnoxious in volume. Need to put it on the lift and change fuel filter and decide a better rubber isolation for it or an alternative brand/ type with same specs. I learned it draws a ton of power as well. I put on 400 miles this summer so less than I wanted but worked through the tuning of the EFI , changed a band connector out, and enjoyed it. I still may have a month left we will see. Depends on salting of the roads
For a quieter pump, use the Aritex E-8445 or equivalent. It is small and quiet. It works with the 4.0L motor in my car, so it should have enough pressure and volume for yours.
Zims Autotechnic (www.allzim.com) makes a mounting bracket for the fuel pump that bolts on with the rack mount bolts. No cutting required. Call Aaron @http://www.914world.com/bbs2/index.php?showuser=21587 , phone number 817-267-4451 and he will hook you up.
Who did the conversion on the 993 heat exchangers? I am looking at the same thing for my car.
Clay
Posted by: mepstein Oct 30 2024, 11:31 AM
Wrapping up driving season soon. Top is on. Enjoying the 993 heat exchangers. Unfortunately at some point the gas tank has to come out as the cables for the heat boxes are messed up. In no hurry on that I know it’s a routing issue and I will eventually get to it. Did I mention how loud the Bosch 044 fuel pump is man it almost obnoxious in volume. Need to put it on the lift and change fuel filter and decide a better rubber isolation for it or an alternative brand/ type with same specs. I learned it draws a ton of power as well. I put on 400 miles this summer so less than I wanted but worked through the tuning of the EFI , changed a band connector out, and enjoyed it. I still may have a month left we will see. Depends on salting of the roads
For a quieter pump, use the Aritex E-8445 or equivalent. It is small and quiet. It works with the 4.0L motor in my car, so it should have enough pressure and volume for yours.
Zims Autotechnic (www.allzim.com) makes a mounting bracket for the fuel pump that bolts on with the rack mount bolts. No cutting required. Call Aaron @http://www.914world.com/bbs2/index.php?showuser=21587 , phone number 817-267-4451 and he will hook you up.
Who did the conversion on the 993 heat exchangers? I am looking at the same thing for my car.
Clay
Ben does the conversion. I’m in line for a set.
Posted by: jim_hoyland Oct 30 2024, 12:01 PM
ON conversions: Is the 2.7 Motor conversion the least complicated and most economical ?
Posted by: 930cabman Oct 30 2024, 01:10 PM
ON conversions: Is the 2.7 Motor conversion the least complicated and most economical ?
\
in the world of /6 conversions, I am not sure if either "least complicated and most economical" fit into the program. Mine took a couple years and more than a couple piles of $$, but she is mostly done and she rocks. It's a 2.7, went to Ollies and I had a local long time racer build the engine.
Are you considering doing a conversion? Mine would have been MUCH more difficult without all the assistance I received with all the fine folks here.
Posted by: mb911 Oct 30 2024, 01:19 PM
Wrapping up driving season soon. Top is on. Enjoying the 993 heat exchangers. Unfortunately at some point the gas tank has to come out as the cables for the heat boxes are messed up. In no hurry on that I know it’s a routing issue and I will eventually get to it. Did I mention how loud the Bosch 044 fuel pump is man it almost obnoxious in volume. Need to put it on the lift and change fuel filter and decide a better rubber isolation for it or an alternative brand/ type with same specs. I learned it draws a ton of power as well. I put on 400 miles this summer so less than I wanted but worked through the tuning of the EFI , changed a band connector out, and enjoyed it. I still may have a month left we will see. Depends on salting of the roads
For a quieter pump, use the Aritex E-8445 or equivalent. It is small and quiet. It works with the 4.0L motor in my car, so it should have enough pressure and volume for yours.
Zims Autotechnic (www.allzim.com) makes a mounting bracket for the fuel pump that bolts on with the rack mount bolts. No cutting required. Call Aaron @http://www.914world.com/bbs2/index.php?showuser=21587 , phone number 817-267-4451 and he will hook you up.
Who did the conversion on the 993 heat exchangers? I am looking at the same thing for my car.
Clay
I did and have a few folks lined up they are a PIA to make but nice when done. I will be doing them in December for 2-3 folks
Posted by: mb911 Oct 30 2024, 01:20 PM
ON conversions: Is the 2.7 Motor conversion the least complicated and most economical ?
2.2,2.4 probably the cheapest if you can find a good runner for sale but if it’s a core 2-2.7 all cost the same
Posted by: mb911 Oct 30 2024, 01:23 PM
Wrapping up driving season soon. Top is on. Enjoying the 993 heat exchangers. Unfortunately at some point the gas tank has to come out as the cables for the heat boxes are messed up. In no hurry on that I know it’s a routing issue and I will eventually get to it. Did I mention how loud the Bosch 044 fuel pump is man it almost obnoxious in volume. Need to put it on the lift and change fuel filter and decide a better rubber isolation for it or an alternative brand/ type with same specs. I learned it draws a ton of power as well. I put on 400 miles this summer so less than I wanted but worked through the tuning of the EFI , changed a band connector out, and enjoyed it. I still may have a month left we will see. Depends on salting of the roads
For a quieter pump, use the Aritex E-8445 or equivalent. It is small and quiet. It works with the 4.0L motor in my car, so it should have enough pressure and volume for yours.
Zims Autotechnic (www.allzim.com) makes a mounting bracket for the fuel pump that bolts on with the rack mount bolts. No cutting required. Call Aaron @http://www.914world.com/bbs2/index.php?showuser=21587 , phone number 817-267-4451 and he will hook you up.
Who did the conversion on the 993 heat exchangers? I am looking at the same thing for my car.
Clay
@http://www.914world.com/bbs2/index.php?showuser=1143 that’s a very inexpensive pump that should work well
Posted by: worn Oct 30 2024, 07:03 PM
I think Ben puts away his 914 in the winter. WI isn’t just cold, it’s snowy.
More FUN that way!
Just kidding, I wouldn't take that out in crappy weather either!
Not the weather, it is the road salt. On dry cold January days you can see the salt swirling in the wind. Rust.
Posted by: mb911 Oct 31 2024, 02:59 PM
I think Ben puts away his 914 in the winter. WI isn’t just cold, it’s snowy.
More FUN that way!
Just kidding, I wouldn't take that out in crappy weather either!
Not the weather, it is the road salt. On dry cold January days you can see the salt swirling in the wind. Rust.
It gets crazy
Posted by: mb911 Dec 23 2024, 02:19 PM
Wow it’s been 9 years since I started this thread. A lot happened in those 9 years from @http://www.914world.com/bbs2/index.php?showuser=10825 helping me launch a website, “finished” the car, I got 9 years older but drove the car about 4-5000 miles since, thought about selling but ultimately just enjoy driving it. I want to thank everyone whom have helped me including, Mark, Perry, Chris,Clay, Bruce, Brent, and so many others that helped support this project through ideas, parts, buying my parts, telling me I am crazy etc. here’s to the tenth year anniversary coming next year. Hope to drive a whole bunch more this coming year.
Posted by: mb911 Jan 2 2025, 11:45 AM
Started the car today. 30 degrees out but fired up pretty easily with the fuel injection and the alternator swap works perfectly thanks @http://www.914world.com/bbs2/index.php?showuser=10825 
Posted by: Root_Werks Jan 2 2025, 11:59 AM
The little volt meter is really cool.
Posted by: mb911 Jan 3 2025, 07:31 AM
The little volt meter is really cool.
Kind of boost gauge location for a 930
Posted by: mlwbob37 Jan 4 2025, 09:42 PM
I am new to 914 World and to 914's but am the proud owner of a 6 conversion I found here recently on the Classifieds. Sorting some things out but it's now a driver and some of the fine tuning needing to be done is regarding an emergency brake setup. The car has upgraded 911 suspension bits and pieces and the brakes came from a Cayman/Boxter so are 4 piston calipers. I have contacted several local (Bay Area) shops and one had a solution that was going to be 'easy' and turned out to be non existent. Does anyone have a solution for upgraded brakes to have an e brake for parking? It seems simple but I guess not so turning to you experienced experts for some advice.
Much thanks!
Posted by: technicalninja Jan 4 2025, 09:51 PM
I am new to 914 World and to 914's but am the proud owner of a 6 conversion I found here recently on the Classifieds. Sorting some things out but it's now a driver and some of the fine tuning needing to be done is regarding an emergency brake setup. The car has upgraded 911 suspension bits and pieces and the brakes came from a Cayman/Boxter so are 4 piston calipers. I have contacted several local (Bay Area) shops and one had a solution that was going to be 'easy' and turned out to be non existent. Does anyone have a solution for upgraded brakes to have an e brake for parking? It seems simple but I guess not so turning to you experienced experts for some advice.
Much thanks!
Post an introduction thread to meet the animals...
Ask your questions there.
Starting up an off-topic conversation in another's thread is poor etiquette...
Welcome to the World!

Posted by: mb911 Jan 5 2025, 12:32 PM
I am new to 914 World and to 914's but am the proud owner of a 6 conversion I found here recently on the Classifieds. Sorting some things out but it's now a driver and some of the fine tuning needing to be done is regarding an emergency brake setup. The car has upgraded 911 suspension bits and pieces and the brakes came from a Cayman/Boxter so are 4 piston calipers. I have contacted several local (Bay Area) shops and one had a solution that was going to be 'easy' and turned out to be non existent. Does anyone have a solution for upgraded brakes to have an e brake for parking? It seems simple but I guess not so turning to you experienced experts for some advice.
Much thanks!
Post an introduction thread to meet the animals...
Ask your questions there.
Starting up an off-topic conversation in another's thread is poor etiquette...
Welcome to the World!
Posted by: Superhawk996 Jan 5 2025, 02:46 PM
Put studs on it - time for some ice racing!
Gauge looks great. EFI is magical in cold weather.
Posted by: mb911 Jan 5 2025, 03:39 PM
Put studs on it - time for some ice racing!
Gauge looks great. EFI is magical in cold weather.
That would be awesome
Posted by: mb911 Jan 9 2025, 06:59 AM
Just sitting here watching the sunrise and realizing the days are getting longer. Ready for spring. Going to make a carbon filter for the fuel tank, change the fuel filter and hopefully get the mixing boxes properly hooked up before spring
Posted by: troth Jan 31 2025, 06:03 AM
Hey Ben, I saw your thread about the perlon kit for the firewall. I am curious if you came up with an elegant solution to hide the seatbelt retractors when doing this.
Posted by: Root_Werks Jan 31 2025, 12:45 PM
Just sitting here watching the sunrise and realizing the days are getting longer. Ready for spring. Going to make a carbon filter for the fuel tank, change the fuel filter and hopefully get the mixing boxes properly hooked up before spring
Similar here, although it's more about flying for us. I don't like flying in the dark during winter. Harder to see clouds which I'm not allowed to fly into.
Posted by: mb911 Jan 31 2025, 01:34 PM
Hey Ben, I saw your thread about the perlon kit for the firewall. I am curious if you came up with an elegant solution to hide the seatbelt retractors when doing this.
Nope they just sit out in the open
Posted by: mb911 Feb 1 2025, 05:22 AM
I fired the car up yesterday to circulate the oil and test the new alternator, tighten belt. If there wasn’t salt on the road it would have been the earliest drive for the year for me. One good rain away
Posted by: mb911 Jul 4 2025, 05:59 AM
Well have enjoyed the car for almost 10 years now since I started the build. Throwing this out there. I am half heartedly listing it for sale. $45 k if someone is looking. If it doesn’t sell I will just keep it but as they say everything is always for sale.
Powered by Invision Power Board (http://www.invisionboard.com)
© Invision Power Services (http://www.invisionpower.com)