Printable Version of Topic
Click here to view this topic in its original format
914World.com _ 914World Garage _ Impeller Housing Disassembly: 2 Frozen Screws
Posted by: stephestrad Dec 1 2015, 01:13 AM
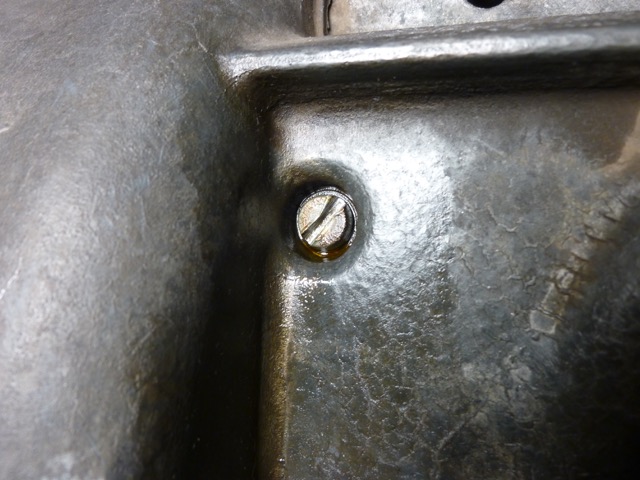
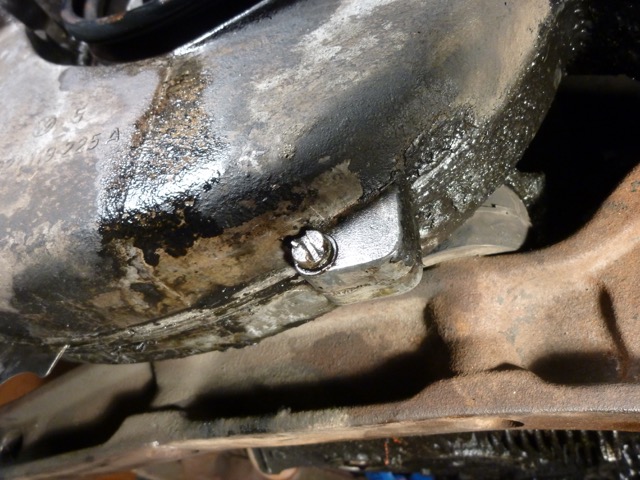
I'm attempting my first partial engine disassembly and I have run into a stumbling block: Two of the screws in the front of the impeller housing are solidly frozen. Additionally, the slots of the heads are starting to strip out.
Removal attempts so far:
1. Soaked them overnight in WD-40.
2. Several raps with a hammer. (Normal hammer, struck the screwdriver handle, not the screw directly.)
3. Heated them with a propane torch (3 or 4 times, 30-60 seconds each).
- I tried with and without squirts of water post-heating.
- Before and after the heat, sprayed with PB Blaster.
- Was the heat a bad idea, given the magnesium housing?
The screws are still stubbornly in place. For what it's worth, the engine is horizontal, so the WD-40 and BP Blaster don't have the benefit of gravity to helping pull them into the threads.
Help!!! 
Posted by: porschetub Dec 1 2015, 01:59 AM
You mean the fan housing ?,buy a large square shank screwdriver ,put in slot and hammer the handle of the screwdriver ,fit vicegrips to the square shank and turn.
If this fails centre punch the cheesehead screw and drill the head till it is gone .....no more,when you split the housing then use your vicegrips again to remove the remaining screw,good luck.
Posted by: injunmort Dec 1 2015, 06:15 AM
first, you will need to heat for much longer than 30-60 seconds with propane torch, more like 3-5 minutes each. secord, the most success I have had is using an impact driver after heating. you can get on from harbor freight for $10.00. the comination of the heat and shock of the driver, frees them up.
Posted by: The Cabinetmaker Dec 1 2015, 06:48 AM
Forget the heat. Go buy an impact screwdriver.
Porschetub, it's hard to find your text when inside the quote box.
Posted by: bdstone914 Dec 1 2015, 06:51 AM
Do you really need to split the fan housing? it is held on by fout 13mm nut that are behind the fan.
Posted by: Garold Shaffer Dec 1 2015, 07:42 AM

Do you really need to split the fan housing? it is held on by fout 13mm nut that are behind the fan.

Posted by: jd74914 Dec 1 2015, 08:26 AM
But barring that, impact screwdrivers work great! Everyone should have one. Its my go-to for the cheesehead screws Porsche likes using on engine tin.
I have this one: http://www.amazon.com/Lisle-29200-Hand-Impact-Tool/dp/B0002NYDRG/ref=sr_1_2?ie=UTF8&qid=1448979883&sr=8-2&keywords=impact+screwdriver+set and it's 1/2" brother which both work great, but there are cheaper ones out there for ~$15.
Posted by: colingreene Dec 1 2015, 12:39 PM
I split mine because it was all full of nasty crap.
Posted by: bozo914 Dec 1 2015, 01:26 PM
I've always had good luck, after the heat and penatrant, trying to tighten the fastener slightly. It seems to break the friction/crud holding the screw/bolt in place, and allows easier removal. Or it snaps off the head and you have a whole new adventure to deal with. 
Posted by: stephestrad Dec 2 2015, 01:13 AM
Y'all are the best. 
I did not know that the housing could be removed without being split. That was a revelation. I removed the impeller, spotted those four bolts, and moments later had the housing off! Ah, sweet success!
The two bolts are still lodged and I would like to remove them in order to clean the surprisingly thick build-up out of the housing. To that end, I have an impact screwdriver arriving tomorrow -- with any luck that will be the answer! I think/hope it will also be easier to apply force now that I can lay the housing flat and brace it.
I'm going to soak it overnight in PB Blaster. Tomorrow I'll heat it for much longer, add MORE Blaster, try the tighten/loosen manual method, then IMPACT away!
Thanks so much!
Posted by: Dave_Darling Dec 2 2015, 10:53 AM
It also helps if you have the correct size screwdriver. The largest one that my local Sears sold was the only one that would fit the slot heads snugly. Using smaller heads made it easier to strip the slots out.
I really hate those slot-head screws. I replaced them with Allen-head screws when I tore my engine down.
--DD
Posted by: stephestrad Dec 2 2015, 12:59 PM
It also helps if you have the correct size screwdriver. The largest one that my local Sears sold was the only one that would fit the slot heads snugly. Using smaller heads made it easier to strip the slots out.
I really hate those slot-head screws. I replaced them with Allen-head screws when I tore my engine down.
--DD
I hear you. I was using a large, long-handled flat head screwdriver that fit the slot solidly. It's just that the screw didn't want to budge and I could only apply so much force. It probably would have been better with the impact screwdriver first time around. It's a good reminder though, and I'll make sure I have a large bit before I start Operation Impact.
Switching to Allen-heads is a great idea. I'll check to see if Parts Heaven has any in stock on Saturday when I pick up my oil cooler. If not, maybe Pelican has them.
- Stephen
Posted by: jd74914 Dec 2 2015, 02:47 PM
You can also get them from McMaster Carr (cheaper than the hardware store). The only caveat is you need to figure out the size.
Posted by: barefoot Dec 3 2015, 06:44 AM
You can also get them from McMaster Carr (cheaper than the hardware store). The only caveat is you need to figure out the size.
Agree, McMaster is good source.
I bought Stainless socket hd screws for several sizes for my rebuild.
Posted by: Dave_Darling Dec 3 2015, 10:08 AM
I got mine from Mr. Metric, back when they allowed walk-ins. M6x25 is the size of most of the screws. (There's one M8 on top of the engine, and the under-cylinder tin uses smaller ones, like M5 or M4.) I just got a box of 100. They're mild steel, so they do rust. Maybe stainless or coated would have been a better idea.
--DD
Posted by: stephestrad Dec 5 2015, 10:51 PM
Victory!!! 
I ended up heating each screw for 5 minutes, soaking with PB Blaster, then inching out with the impact driver. Phew! I was stressing about that one.
Btw, turns out a size 12-14 slotted driver bit (found at Ace Hardware) fits the cheese head screws very well.
Thanks all for you help!
Posted by: injunmort Dec 6 2015, 07:58 AM
congrats, but wtf do I know
Posted by: McMark Dec 6 2015, 09:26 AM
Impact Driver:
http://www.garagejournal.com/forum/showthread.php?p=3338424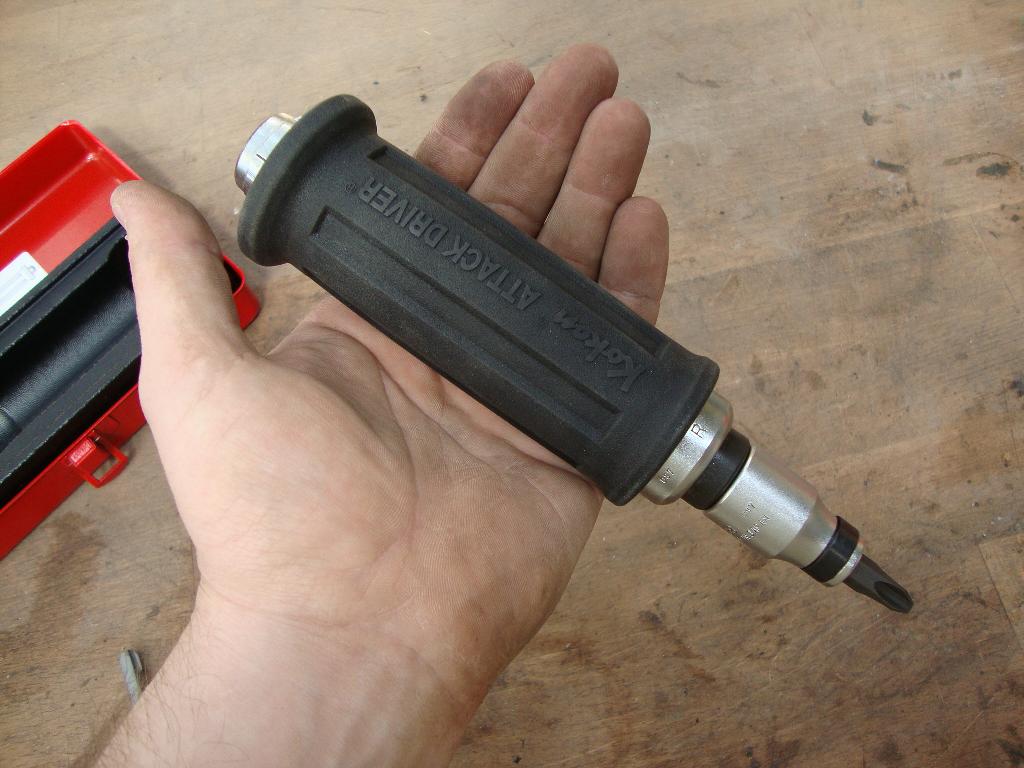
Posted by: Dave_Darling Dec 6 2015, 11:31 AM
Btw, turns out a size 12-14 slotted driver bit (found at Ace Hardware) fits the cheese head screws very well.
Awesome info! And a lot easier to get into place than that huge screwdriver.
--DD
Posted by: porsche913b_sp Dec 6 2015, 12:58 PM
good to know for future refence, never know when the information will come in handy. Great job, show us the end results when your done 
Powered by Invision Power Board (http://www.invisionboard.com)
© Invision Power Services (http://www.invisionpower.com)