Printable Version of Topic
Click here to view this topic in its original format
914World.com _ 914World Garage _ CptTripps' Real Progress Thread
Posted by: CptTripps Mar 21 2005, 07:15 AM
So I just realized that I'm about 2mos into my restoration, and don't really have a thread for the progress. I have my Floor Pan thread, but I'm done with that (for now) and need a place to put the REST of the work I'm doing.
I made up a bunch of posts, and will put them here, in this thread. I'll then keep going as I progress. Some of these pics are dupes that you have seen before in other threads, others are new.
Here's the starting point, on Jan 12th, 2004.
Posted by: CptTripps Mar 21 2005, 07:15 AM
I never liked a brown interior with a Yellow car. Let's pull it and see what we can come up with.
Posted by: CptTripps Mar 21 2005, 07:15 AM
Bad..yucky floors...not a great 'repair' job either.
Posted by: CptTripps Mar 21 2005, 07:15 AM
Found some rust behind the back-pad. Let's go poking and see what we can come up with!
Posted by: CptTripps Mar 21 2005, 07:16 AM
Drats! one poke leads to another...and before you know it, you can see the engine!
Posted by: CptTripps Mar 21 2005, 07:16 AM
So, we cut out the bad stuff, and replaced it with New stuff!
Posted by: CptTripps Mar 21 2005, 07:16 AM
Whew...At least the longs are good!
Posted by: CptTripps Mar 21 2005, 07:17 AM
But ABOVE the longs...that's a different story!
Posted by: CptTripps Mar 21 2005, 07:17 AM
Some quick work with a welder, and we're back to a solid chassis!
Posted by: CptTripps Mar 21 2005, 07:17 AM
Button the quarter back up, and on to the next chore.
(I DID go back later and make the welds all purdy.)
Posted by: CptTripps Mar 21 2005, 07:18 AM
Here's where a decision was made...Should I take the floors out, or just repair the damage?
Posted by: CptTripps Mar 21 2005, 07:18 AM
Guess that answers that question!
Posted by: CptTripps Mar 21 2005, 07:18 AM
Welding the replacements in was pretty mich a snap if you take the old ones out right.
Posted by: CptTripps Mar 21 2005, 07:18 AM
The welds on the floor go round and round...
Posted by: CptTripps Mar 21 2005, 07:19 AM
Underneath, you'll want to stitch the whole thing.
Posted by: CptTripps Mar 21 2005, 07:19 AM
There you have it folks...a new floor in an old car.
Posted by: CptTripps Mar 21 2005, 07:19 AM
Here's when Engman's kit comes in handy. It's pretty much perfect.
Posted by: CptTripps Mar 21 2005, 07:20 AM
This is a LOT more work than it looks. That is a LOT of holes!
Posted by: CptTripps Mar 21 2005, 07:20 AM
Floor is in, Kit is in, Primer is on...
Posted by: CptTripps Mar 21 2005, 07:20 AM
Got the seat brackets in...
Posted by: CptTripps Mar 21 2005, 07:21 AM
Seam sealer applied to every weld and crack.
Posted by: CptTripps Mar 21 2005, 07:21 AM
Controversial Step: Coated the whole thing with Herculiner. (Helps seal it from moisture and deadens the road-noise.)
Posted by: CptTripps Mar 21 2005, 07:22 AM
Patching the side-marker holes. (That bondo looks a little thick...hmmmm)
Posted by: CptTripps Mar 21 2005, 07:22 AM
What antenna?
Posted by: CptTripps Mar 21 2005, 07:22 AM
Installed the Short-Shift kit.
Posted by: CptTripps Mar 21 2005, 07:23 AM
Hiding the interior from all the dust I'm about to make!
Posted by: CptTripps Mar 21 2005, 07:23 AM
Let's start getting naked.
Posted by: CptTripps Mar 21 2005, 07:23 AM
And before you know it, you have a half-naked teen!
Posted by: CptTripps Mar 21 2005, 07:24 AM
In the front trunk, I decided to taking out, and replace the gutters...
Posted by: CptTripps Mar 21 2005, 07:24 AM
New piece made...
Posted by: CptTripps Mar 21 2005, 07:24 AM
...and installed
Posted by: CptTripps Mar 21 2005, 07:25 AM
I thought the rear trunk seemed kinda weak, so I decided to make a quick brace to go across the back.
Here is a REAL EASY way to add some strength back there.
Measure out a length, and then just bang a 15-degree angle into it.
Posted by: CptTripps Mar 21 2005, 07:25 AM
Get rid of any paint you have on the back of the trunk in the area your brace is going.
Posted by: CptTripps Mar 21 2005, 07:25 AM
10 or so tacks on either side is more than enough.
You can pretty much sit on the rear trunk now and not bend the metal.
Posted by: CptTripps Mar 21 2005, 07:26 AM
And here it is, with the guide-coat...ready to start blocking.
(I know, I missed the engine lid, and the back of the sail panels. I'll get em tomorrow.)
Posted by: Steve Thacker Mar 21 2005, 08:52 AM
Way to go Cpt! Stay the course, looks great. 
Posted by: rick 918-S Mar 21 2005, 09:08 AM
Trippin!
Posted by: tat2dphreak Mar 21 2005, 09:18 AM
looks great!!
should be a classic thread on what "TO" do!!
Posted by: rhodyguy Mar 21 2005, 09:51 AM
if you weren't skilled in welding, you are now!  is there some kind of hi-tech antenna that will replace the old mast style? nice work, i'll be following this thread.
k
Posted by: fiid Mar 21 2005, 09:59 AM
Wow man. Nice job.
Posted by: CptTripps Mar 21 2005, 10:02 AM
| QUOTE (rhodyguy @ Mar 21 2005, 10:51 AM) |
| is there some kind of hi-tech antenna that will replace the old mast style? |
Yeah, It's called Sirius Satelite Radio.

I'm giving up on terestrial radio all together. I've got a $2,500 tuner on my stereo at home, and I haven't used it in the 6mos since I got the $100 'Sportster'. The content is awesome, the quality is fine for the car.
The antenna is little, and will hide nicely under one of the side engine grills. Probably the one on the drivers side.
Posted by: Gint Mar 21 2005, 05:05 PM
Lookin pretty good DOug. You do nice work. Re-think that brown interior though. I always liked it a yellow teener.
Posted by: CptTripps Mar 21 2005, 06:08 PM
| QUOTE (Gint @ Mar 21 2005, 06:05 PM) |
| Lookin pretty good DOug. You do nice work. Re-think that brown interior though. I always liked it a yellow teener. |
Too late...I already have the interior, and carpet (ordered).
I'm going to have the brown interior re-apolstered for the next car. I want to do a complete ox-blood interior with silver paint.
Posted by: rhodyguy Mar 21 2005, 06:30 PM
oooh silver and red, nice!!! delete all the inside door stuff save the handles and it's a winner.
k
Posted by: CptTripps Mar 21 2005, 10:14 PM
Got some more accomplished tonight...It's nice to not be dusty when I get in the house!
Drilled the holes for my 3rd brake light...
Posted by: CptTripps Mar 21 2005, 10:15 PM
I'll get it painted up with the rest of the car...should look sweet.
Posted by: CptTripps Mar 21 2005, 10:16 PM
Now here is a question...I want to take off all the lettering, but HOW IN THE HELL do you get these little rubber things off without breaking them?
Posted by: CptTripps Mar 21 2005, 10:18 PM
I also got all the tires off, and pulled all 4 calipers, and all the lines. I'll replace everything tomorrow with rebuilt BMWs up front, and stock in the rear.
I'll need to add a T instead of the prop, and put the new 19mm master on, and make new lines for up front. But that's tomorrow's project...
Posted by: redshift Mar 21 2005, 10:41 PM
Don't worry about the retainers, get them from Pelican.
Uhh... do worry about breaking the attachments off of the letters.... retainers cheaper than dirt, letters cheaper than... uhh...
Cheaper than extremely expensive dirt?
M
Posted by: morphenspectra Mar 21 2005, 11:04 PM
James has a small air grinder and it takes like 10 seconds for him to remove all retainers. I did it wrong a couple of times with pliers and broke the posts off.
HIEDI
Posted by: CptTripps Mar 22 2005, 06:47 AM
So are they just rubber? I should slice them in half? I REALLY don't want to mess these up! 
I've searched Pelican's site...any idea what they are called? I tried 'Retainer' and got nothing that resembled what I'm looking for.
Thanks for the help.
Posted by: Gint Mar 22 2005, 08:12 AM
There's a little round metal circular dealy in there with a hole in the center and relief cuts coming off of that. Like a speed nut sorta, I don't know the terminology off the top of my head. Bu thtese are really meant to be one time use probably. They push on to the plastic and dig in. That's why they break the plastic pins off oif the letters if'n you gorilla them. If you take a grinder to them, you won't be re-using 'em and I would imagine it would take some skill or practice to even do that without breaking the letter's pins.
Posted by: 9146986 Mar 22 2005, 08:16 AM
| QUOTE (CptTripps @ Mar 21 2005, 08:14 PM) |
| Drilled the holes for my 3rd brake light... |
3rd brake light is a good idea. For a little less invasive look, I probably would have mounted it upside down on the bottom of the roll bar. Just my .02 though
Posted by: CptTripps Mar 22 2005, 09:05 AM
| QUOTE (9146986 @ Mar 22 2005, 09:16 AM) | ||
3rd brake light is a good idea. For a little less invasive look, I probably would have mounted it upside down on the bottom of the roll bar. Just my .02 though |
I tried that....it was too wide, and the way I could have made it work, would have put a lip that water could sit in. And we ALL know what happens to metal when water sits.
Posted by: E-Man Mar 22 2005, 02:17 PM
I used a Dremel (high-speed rotary tool) with a cut-off wheel to get the speed nuts off. Cut just left or right of the post all the way across so you have two pieces.
Pelicanparts.com sells new ones for 80 cents each. They call them Porsche Emblem Mounting Speed Nuts and are made of metal and rubber. -Mike
Posted by: morphenspectra Mar 22 2005, 02:53 PM
| QUOTE (CptTripps @ Mar 22 2005, 04:47 AM) |
| So are they just rubber? I should slice them in half? I REALLY don't want to mess these up! I've searched Pelican's site...any idea what they are called? I tried 'Retainer' and got nothing that resembled what I'm looking for. Thanks for the help. |
They are rubber on top with metal inside. Performance products has sets of 4 for $3.99, however the new ones are not the same as the factory ones. They are a pain to remove, I ended up damaging the retainers when I removed them anyways.
HIEDI
Posted by: CptTripps Mar 22 2005, 10:58 PM
Tonight I was WICKED productive!!!
First things first...I needed some more light in my garage.
Went to Lowes, and picked up 4 Florescent 'shop lights' for $7.68 each! So for under $50 (with bulbs) I have LOTS more light in the garage. This is a good thing!
Posted by: CptTripps Mar 22 2005, 10:59 PM
Now for 'real' work...
I started with an easy one...the guage cluster tin.
Sanded down, and primed. Ready for guages. Check it off the list!

Posted by: CptTripps Mar 22 2005, 10:59 PM
Now it was time to dig into the brakes. First, we had to get the old ones off. Here's what happens when you try to use an adapter for something like lug-nuts!
(That's what prompted the trip to Lowes in the first place)
Posted by: CptTripps Mar 22 2005, 11:00 PM
But since I had good tools now, it didn't take long to get all 4 off. Now fortunately, My car came with a set of rebuilt rear calipers, and I'd bought a pair of milled 320i calipers, so all I was really doing was cleaning everything up, and putting it on.
Posted by: CptTripps Mar 22 2005, 11:00 PM
Just because they were gross, I took out the pins, and cleaned them up by putting them in a drill and hitting them with 220grit sandpaper. Then a scotch-brite Green pad. Good as new!

Posted by: CptTripps Mar 22 2005, 11:00 PM
At the same time, I wanted to MAKE SURE that every inch of brake line was good, so I'm replacing all the rubber lines, and also the hard-lines between the rubber, and the caliper. (This is my first time trying this, so be kind!)
Posted by: CptTripps Mar 22 2005, 11:01 PM
I had this handy flange tool I KNEW i'd use at some point.
Posted by: CptTripps Mar 22 2005, 11:01 PM
Sweet! My first attempt at using my pipe-bender, and it looks good!
Posted by: CptTripps Mar 22 2005, 11:03 PM
Here's a shot of the 320i calipers installed up front. I also replaced the rubber lines there too...
I was GOING to paint the calipers Red, but I think I'll wait to see if I do a 5-lug upgrade first.
Posted by: CptTripps Mar 22 2005, 11:03 PM
And the lines I made for them.
Posted by: CptTripps Mar 22 2005, 11:04 PM
Ok...Now I REALLY feel like I got somewhere tonight. I guess it just helps to change it up a little...
I'm going to take tomorrow night off, and then work more Thurs night, and all day Friday.
My Dad is coming over to help with the body filler all day on Friday. He's a flipping artist with drywall mud, so were going to see if he's any good with Bondo! 
Posted by: Gint Mar 22 2005, 11:11 PM
Again, nice work.
Keep an eye on those brake line flares when you get fluid in them. Making flares is a little tricky you first time out. Once you get the hang of it, you golden, but until you pump fluid through them you won't know.
Posted by: jkeyzer Mar 22 2005, 11:14 PM
What kind of tubing bender did you use?
I am trying to buy one to bend 3/16" stainless (I think) lines and all of the ones I have seen are for larger tubing or have a huge bend radius.
Posted by: CptTripps Mar 22 2005, 11:17 PM
| QUOTE (Gint @ Mar 23 2005, 12:11 AM) |
| Again, nice work. Keep an eye on those brake line flares when you get fluid in them. Making flares is a little tricky you first time out. Once you get the hang of it, you golden, but until you pump fluid through them you won't know. |
That's what I figured, but I wanted to get everything installed and made first. (I'm keeping all the old lines 'just in case'. I'm waiting on my pedal cluster to come back from being rebuilt, so I can't test them out yet anyway.
I'm going to try and get the master-cylender and resivoir installed Thursday evening so I can conventrate on body work and primer this weekend.
With any luck I COULD be driving it around the block in a few weeks!
Posted by: CptTripps Mar 22 2005, 11:19 PM
| QUOTE (jkeyzer @ Mar 23 2005, 12:14 AM) |
| What kind of tubing bender did you use? I am trying to buy one to bend 3/16" stainless (I think) lines and all of the ones I have seen are for larger tubing or have a huge bend radius. |
Just the el-cheapo Harbor Freight one...It's one of those tools that turns out to be a real good deal from them. For $7, you can't beat it.

http://www.harborfreight.com/cpi/ctaf/Displayitem.taf?itemnumber=3755
Posted by: CptTripps Mar 23 2005, 12:36 PM
| QUOTE (jkeyzer @ Mar 23 2005, 12:14 AM) |
| What kind of tubing bender did you use? I am trying to buy one to bend 3/16" stainless (I think) lines and all of the ones I have seen are for larger tubing or have a huge bend radius. |
You'll also have to manually bend a few times once you get it close. Just to make sure. I also burned up a spare line 'learning'. ALWAYS buy extras! (3ft for $2.50)
Posted by: CptTripps Mar 23 2005, 04:44 PM
Gint: Thanks for calling me on the flaring tool. I got to thinking... 
I put regular flares on there. NOT the 'Bubble Flare' that they need. Off to the auto parts store for me!
I just went out there and re-did all my hard lines. (Again!) I feel loads better about it all now. Found better ways of making them too. (Practice makes Perfect!)
I'm going to hang out with some friends tonight...More work tomorrow!
Posted by: North Bay 914 Mar 24 2005, 11:08 PM
| QUOTE (CptTripps @ Mar 22 2005, 09:17 PM) |
| I'm waiting on my pedal cluster to come back from being rebuilt, so I can't test them out yet anyway. With any luck I COULD be driving it around the block in a few weeks! |
Here it is, ships tomorrow morning. Thank you for allowing me to do your re-build. I threw in a brake light switch, as the one on your cluster was broken when it arrived. Not sure if it was like that when you shipped it.
Martin Baker
NORTH BAY 914
Attached image(s)
Posted by: CptTripps Mar 24 2005, 11:14 PM
KICK ASS! You rule man! Did you happen to take any 'before' pics of it?
Posted by: North Bay 914 Mar 24 2005, 11:21 PM
Sorry no "Before Photo". I guess I should do that once, I have a couple more on the way to me. Can you e-mail me the Fed EX info, just to make sure I have it. I am glad that you are happy with it. I bought a new compressor and sand blast cabinet since the one I normally use is down at the moment. Now I never have to leave the house to do sand blasting.
Posted by: CptTripps Mar 24 2005, 11:26 PM
Sent...
I'll see if I have any 'before' pics of my own, and then some more after I re-install everything in a few weeks.
Posted by: CptTripps Mar 26 2005, 08:23 AM
Here's yesterdays progress...
Started the day with this dash...
And here is the one I got at the junk yard for $75!
Posted by: CptTripps Mar 26 2005, 08:24 AM
And now my first attempts at body filler...
Posted by: CptTripps Mar 26 2005, 08:26 AM
I removed the side lights, needs another 'coat' too, but I'll get there...
Posted by: CptTripps Mar 26 2005, 08:27 AM
I'm not sure WHAT happened, but the entire driver's side was hammered back into place. It's all at the same level too...shopping cart?
Posted by: newto914s Mar 26 2005, 11:32 AM
| QUOTE (CptTripps @ Mar 26 2005, 06:23 AM) |
| And here is the one I got at the junk yard for $75! |
A junk yard near Cleveland with good 914 parts

Dude, where?
Keep up the good work!
Samson
Posted by: CptTripps Mar 26 2005, 01:40 PM
Intercity on Northfield. They are both pretty picked through. If you need body stuff, forget it. The motors may be good, but I doubt they'd be worth the effort, and I'm SURE they'll want too much for them. (Although I'll bet we could get them to give some interesting 'associated' parts.)
PM me your info...let's get together for a coffee or a drink some time.
Posted by: CptTripps Mar 27 2005, 09:37 AM
Here is yesterdays dealio...
Started the day by visiting our friends at Harbor Freight. I needed another pair of jack stands, and the wife wanted me to pick up an ubrella for the back porch. Before I went, I decided to check and see if they had a sander for body work. GLAD I DID!
Anyone attempting to do a 'back-yard' restoration without one of these is itching for an ass kickin'.
$29 later...Say hello to my new best friend. 2.75" X 17.5" - 50 pack of 80grit paper was only $9.
Posted by: skline Mar 27 2005, 09:43 AM
Yup, the flat file is one of the best ways to make a panel straight. I have 2 of them. Keep the posts coming, I should have mine all in primer before next weekends BBQ. Not sure if I will have everything put back on or not but it will be one color and straight.
Posted by: CptTripps Mar 27 2005, 09:43 AM
Got my cluster from Martin yesterday. NICE work! I'm SO glad I had this done...I was all set to just hit it with a wire brush and put it back in.
Posted by: CptTripps Mar 27 2005, 09:45 AM
I'm going to work out a way to build a bracket that these can mount to. I picked them up at AutoZone for $19. (clutch, brake, accel) They are aluminum, and match the MOMO steering wheel I got pretty well.
Posted by: CptTripps Mar 27 2005, 09:47 AM
I'm not sure how I would have managed to get this straight and looking good with my 5" Random-Orbital. 3 attempts and it still sucked. So I tool all the bondo back off, and hit it with the new sander...I was DAMN close after my first pass. Second pass and it's perfect!
Posted by: CptTripps Mar 27 2005, 09:49 AM
I'll hit the big-nasty patch behind the door again tomorrow. There is a lot more build-up than I wanted there, but I can't hammer it any more, so I'll have to live with it like that.
Posted by: skline Mar 27 2005, 09:51 AM
I keep looking at the picture in the top post of this page and it is amazing how much yours looks exactly like mine right now. Stripped with little bondo spots everywhere. I must have removed about 30 or 40 pounds of bondo when I stripped it. Then got in there with a hammer and dolly and got it really close and now I am putting bondo back on but in very thin layers. You can tap on the side of the car right over the bondo and the sound doesnt change. The idea is for it to be no thicker than a coat or two of paint. It sure is a lot more work than I thought it would be.
Posted by: CptTripps Mar 27 2005, 09:52 AM
I'm going to walk away from it for a day. I'll work more this week in the evenings on it. I've got it all CLOSE right now, but every time I go over a panel 'one more time' I find more little nics and nacks. I can see why people say spend one week getting it good, two getting it close, and three making it perfect.
I'm only painting this thing once...time to make it count!
Posted by: CptTripps Mar 27 2005, 09:59 AM
| QUOTE (skline @ Mar 27 2005, 10:51 AM) |
| The idea is for it to be no thicker than a coat or two of paint. |
Easier said than done for me. Most of the body work I've had to do has been on the doors, just on the other side of the 'brace' inside the door. No way for me to get to the other side of it. I used a dent-puller and got it about as close as I could there. the area behind the pass-door is almost a lost cause. I've re-fabricated that area twice. It's solid as the day is long, but will never be close enough for me to use any less than 1/8" of filler.
I'm NOT skilled in the SLIGHTEST with body work. I'm decent with drywall mud, so I think that's how I'm able to do well with the filler.
Posted by: skline Mar 27 2005, 10:00 AM
One of the best investments I made was this little tool. It was about $350.00 a few years ago but I have seen them for less in recent times. Its for the areas you cannot get in behind. It works awesome. The only problem I have is with the damn slide hammer. Everytime I use it I seem to slam my hand or fingers with it. It makes nice little blood blisters. But the tool does work and very well.
Attached thumbnail(s)
Posted by: skline Mar 27 2005, 10:04 AM
This is the injury from yesterday. It really smarts.
Attached thumbnail(s)
Posted by: CptTripps Mar 29 2005, 10:49 PM
Just an update...I've done nothing for 3 days, and I feel great about it.
Sometimes you just need a break.
Posted by: xsboost90 Mar 29 2005, 10:55 PM
i feel ya there bro! I did nothing it seemed all weekend. After spending some money on stuff i needed for the re-assembly, i headed to the garage tonite for our first warm spell in months. I had to talk myself into it but i got the hood and ds door in primer and im still working on the ps quarter like you!
Attached image(s)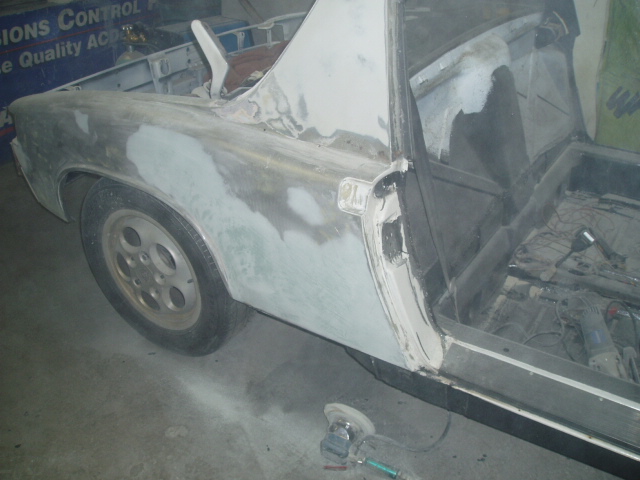
Posted by: CptTripps Mar 29 2005, 11:03 PM
That looks real good Dan. Yeah, I just ran out of steam...and I think that's a good thing sometimes. Its suppossed to be 65 tomorrow, so I think I'll play hookey and see if I can get her into primer too. I'd like to get it all sanded down and MAYBE paint early next week.
But now that I have this 73 parts-car coming, maybe I'll be playing with that for a day or so...who knows.
Posted by: michelko Mar 31 2005, 11:22 AM
Hey CptTripps,
realy good thread. Reminds me on my adventure 

 .
.
I think you are much more faster than i 
Can´t wait to drive mine again.
Go on with your restauration 
Posted by: CptTripps Apr 3 2005, 09:33 PM
Spent the whole weekend doing more body work. I wish I was one of those guys that could half-ass something and just get it done. This is taking about 5X longer than I anticipated! I guess that's good though....right?
Dad came up on Saturday, and gave some much needed assistance with the bondo application and blocking. He's awesome with drywall, and good with filler too!
There was WAY too mich filler behind the door, where I had to re-weld after a repair. I warped the panel because I was too hot on the voltage.
Posted by: CptTripps Apr 3 2005, 09:36 PM
So I marked out a larger section to cut out and replace with a piece from the donor car in the driveway.
Posted by: CptTripps Apr 3 2005, 09:37 PM
Here's the section I decided on removing.
Posted by: CptTripps Apr 3 2005, 09:39 PM
I fit the new one and braced it. I had a little lerger gaps than I wanted, but that's what happens some times...
Posted by: CptTripps Apr 3 2005, 09:39 PM
Got it all ground down, and filled in with filler.
Posted by: CptTripps Apr 3 2005, 09:42 PM
Here is my dad helping with the filler. We had to use a little more than I thought, but it's still thinner than that section we took out.
Posted by: CptTripps Apr 3 2005, 09:45 PM
Here's me grinding some welds down. It was cool to have someone else in the shop with me to take pics...
Posted by: xsboost90 Apr 3 2005, 09:46 PM
awsome job! i kinda wish i had a quarter to stick on mine, but i think ive finally got it all straightened out.
Attached image(s)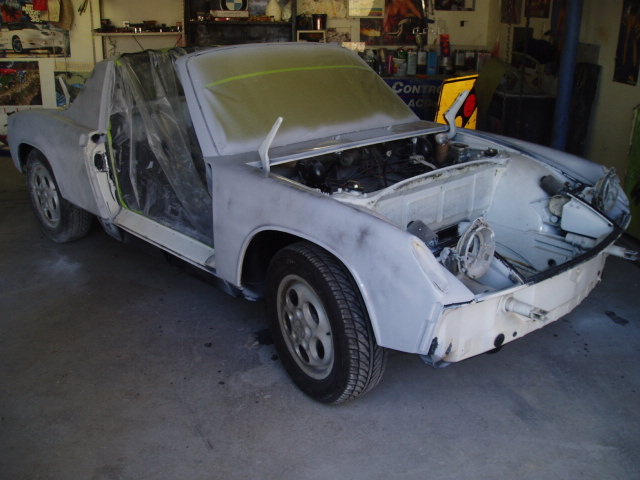
Posted by: CptTripps Apr 3 2005, 09:48 PM
I spent all day sanding and blocking...and didn't take a single pic. I'm going to wait till Wednesday when it's warmer. I'll prime the whole thing on Wednesday, and spend thurs and fri wetsanding. HOPEFULLY I'll paint it next Saturday and then I can start putting humpty back together again...
Posted by: rick 918-S Apr 3 2005, 10:19 PM
Nice work, keep going!
Posted by: Gint Apr 3 2005, 10:27 PM
Got that thing on the road yet?
Looks like a full weekend. It's cool seeing "Dad" helping you out.
Posted by: CptTripps Apr 3 2005, 10:35 PM
Tell me about it...
The frustrating part is that it LOOKS THE SAME day after day. With the floors, there was visable progress all the time. If ALL GOES WELL I'll be on the road by the end of April. If I get it painted next weekend, it could be sooner. Then all I'm really doing to putting the weather stripping and seals back on and at least I'm driveable while I do the rest of the stuff.
I donno...I'll get there.
Posted by: Lou W Apr 3 2005, 11:50 PM
Looks great, keep up the great work.
Posted by: CptTripps Apr 4 2005, 08:38 PM
Forgot to show a pic of the quarter I took off the junkster...
File this under 'You shoulda seen the OTHER guy!'
Posted by: CptTripps Apr 7 2005, 05:30 AM
So I think I'm going to chicken out of painting it my self. I just spent the better part of 6 weeks stripping and doing body work. If I mess it up, I'll be back to square one. I'm going to go look at a few body shops today and see what I can come up with...
Posted by: xsboost90 Apr 7 2005, 05:51 AM
what kind of paint are you thinking of using? If its eurathane base/clear then i MAY be able to come up one weekend and spray it for you. Here is an s2 i sprayed for a buddy last summer, won first place in a concours the first show we went to. Mine is getting closer every day to paint, still have the ps door and all of the jambs to do, and trunks. Seems like every corner i sand i find some more surface rust to POR15 or another ding, knick or something to work on. I spent the better part of last nite grinding out the place were i welded my fenders in and rewelding over everything w/ the new welder to double check that nothing was going to come back on me...  would have to be the 23-24th or 30-1st or anytime next month.
Attached image(s)
Posted by: tdgray Apr 7 2005, 06:04 AM
DAMN! 
I was going to let your car be the test case Doug, and after you figured it out you could come down and paint mine
Seriously, I have a friend that owns a body shop down here. He painted my MGA. I did the same thing you're doing. Did all the body work up to primer and then turned it over to him. He does awesome work, but he is slow as hell on the non-collision work.
Maybe we can bribe Dan into a two-fer.
Posted by: CptTripps Apr 7 2005, 07:01 AM
I got PPG Omni single-stage in Saturn Yellow. I bought all the stuff they guy said I needed. (The thinner, hardeners, filler, and everything else.)
If I can find someone local that I can drop it off, have them finish up any body work, and shoot it for $1,000ish, I'm just going to have them do it and get it over with. I'll either keep the paint till next time, or sell it to someone else that wants Saturn Yellow.
Posted by: tdgray Apr 7 2005, 08:43 AM
I'm like 99% sure that I am going to paint the car Signal Orange... was light Ivory.
I am going to do my own paint in the trunks, engine bay, interior and jambs. Probably let my buddy do the rest. Just not confident that I can lay down a paint job that I'd be proud of
Posted by: CptTripps Apr 7 2005, 09:03 AM
I think I'm going to try the primer in the trunks and see how that all goes.
Maybe I'll wait a week and see if I can convince xsboost90 to come up and help me lay it down...
Posted by: CptTripps Apr 7 2005, 06:58 PM
Ok...so here's tonights' installment. I talked to a half-dozen shops today, and the last guy told me "You've done all the hard stuff, now is the fun part. Go home, pick a quarter-panel and prime it. You'll see how easy it is..."
SO home I went to paint a quarter. Here's before...
Posted by: CptTripps Apr 7 2005, 06:58 PM
And 20min later...
Posted by: CptTripps Apr 7 2005, 06:59 PM
And 10min after that...I decided to keep going.
Posted by: CptTripps Apr 7 2005, 07:02 PM
So I'm 1000% more confident that I'll be able to paint this thing on my own. I'l DEFINATELY going to need a second coat of primer. The guy at the shop told me to use a TINY bit of filler, and a rozor to fill the little-tiny holes I end up with. Then I'm going to hit the whole thing with 500-grit, and re-prime, then 500 again, and see what kind of trouble I can get into with Paint in the gun!
Posted by: CptTripps Apr 7 2005, 07:07 PM
Last pic....here's where the side-light used to be. I NEVER thought it'd look this good....
I'M EXCITED AGAIN!
Posted by: cdmcse Apr 7 2005, 08:38 PM
Nice Work!!!
Do you have a close-up picture of how the texture turned out on your interior? I may be going that route too, but I don't want too much texture.
Posted by: xsboost90 Apr 7 2005, 08:42 PM
what kind of primer are you using? I would hit it w/ some black spray can and mist it on, then block the whole car back down to find any hidden wobbles w/ some 220-320 paper. Then reprime, fix any wobbles of couse first, and wetsand w/ some 500 and its ready for paint.
Posted by: CptTripps Apr 7 2005, 08:47 PM
It's pretty bumpy...I wouldn't want to crawl around without knee-pads on. I'm greatfull that I'm putting carpet in.
If you spray it on, it'll be less course. I'm also going to put another coat on, and was THINKING of priming/painting over it.
Posted by: CptTripps Apr 7 2005, 08:51 PM
| QUOTE (xsboost90 @ Apr 7 2005, 09:42 PM) |
| what kind of primer are you using? I would hit it w/ some black spray can and mist it on, then block the whole car back down to find any hidden wobbles w/ some 220-320 paper. Then reprime, fix any wobbles of couse first, and wetsand w/ some 500 and its ready for paint. |
PPG K36. Urathane 'high-fill' primer. I can't tell you how well it did because it's the first time I've ever sprayed anything.
Yup...that's the next step. I'm going to finish up some stuff I found on the drivers side tomorrow, and then prime the whole thing. THEN I'll do another guide coat and block it, prime it again, and start all over again.
I'm thinking I'll have 2-3 coats of primer on this thing. There are a lot of little scratches showing through.
Posted by: scotty b Apr 7 2005, 09:09 PM
| QUOTE (CptTripps @ Apr 7 2005, 05:02 PM) |
| So I'm 1000% more confident that I'll be able to paint this thing on my own. I'l DEFINATELY going to need a second coat of primer. The guy at the shop told me to use a TINY bit of filler, and a rozor to fill the little-tiny holes I end up with. Then I'm going to hit the whole thing with 500-grit, and re-prime, then 500 again, and see what kind of trouble I can get into with Paint in the gun! |
Nice job. One piece of info, if you have a lot of pinholes to top off a good glazing putty will work better than regular filler. If you decide to get a glazing putty, get a quality two part like the regular filler, not the tube you " squeeze and apply" Those one part glazing putties will pop loose and can bleed through your sealer coat. Keep up the good werk, and go have a beer on me 
Posted by: CptTripps Apr 7 2005, 09:20 PM
| QUOTE (scotty b @ Apr 7 2005, 10:09 PM) |
| Keep up the good werk, and go have a beer on me |
I don't drink, but I appreciate the offer!
I feel a lot better about the whole thing. I found it was much easier than I thought it would be. I guess I just worked myself up about the whole thing.
I have 3 guns. The smallest was VERY easy to use. It's an 8oz Gravity Feed gun. I'm really looking forward to seeing what happens when I use PAINT!
Posted by: Travis Neff Apr 7 2005, 11:27 PM
Right on Doug, you are doing great. Seeing your hard work is giving me a little confidence to get moving on the white car. It's funny that I have most all the same tools (paint guns etc.) I see in your picutres. HF, it can be a disease..
Posted by: ben1440 Apr 7 2005, 11:38 PM
i am now truly motivated
Posted by: Steve Thacker Apr 8 2005, 03:05 AM
Doug,
That looks real darn good. Stay the course, you have it licked now. That baby is going to be done before you know it. You will be able to look back on this experience and take some pride in knowing you did it yourself. I wished you were closer, I'd jump in there with you. To help you stay motivated . Goodness knows I know what it is like to work night after night to nothing but the sound of the oldies on the radio. Thinking damn this is a lot of work, I must have lost my mind in starting this....
I didn't have the nerve to tackle the bodywork, so I stuck with what I know. Keep it up bud, I see things are starting to take shape quickly. So give yourself a pat on the back.. and do like I do, nail the ice tea ( I don't drink either) and keep plugging away.
Posted by: URY914 Apr 8 2005, 05:53 AM
There is nothing that I've done to my car that made me feel better than the day I painted it myself. Talk about personel satifaction. It gives you a HUGE boost to keep going.
It looks great!
Paul
Posted by: xsboost90 Apr 8 2005, 06:07 AM
sounds like your headed in the right direction, and doing a good job too! Mine will be ready for paint, i just seem to have alot more little dings and stuff than i thought...ill need to hold you off a week or two if im gonna win this whole race thing.
Posted by: CptTripps Apr 8 2005, 06:13 AM
Thanks for the vote of confidence guys...
I've got a LOT more little waves and stuff to concor. Seems like every time I turn around, I'm mixing up more filler. I've been through an entire gallon already. Granted, I put about half of that in a spor that I ended up trashing.
The day my Dad was here, I got a TON done...goes a lot quicker when you have someone else in there with you. Maybe I'l get some people to give me a hand with a thing or two on Sunday after were done killing the junkster.
I haven't been back to the garage since I shot the primer last night. Let's go see if I mixed everything right...and dried correctly!
Posted by: michelko Apr 8 2005, 08:48 AM
i am speechless.
Your speed is incredible. Wish i am as fast as you.
Posted by: Root_Werks Apr 8 2005, 08:59 AM
| QUOTE (michelko @ Apr 8 2005, 06:48 AM) |
| i am speechless. Your speed is incredible. Wish i am as fast as you. |
 You are kicking my ass Doug!
  I thought I was donig pretty well getting my 914 done. Man! You are a work-a-holic! I can't wait to see this 914 in a finished coat.
Done a few cars myself. Remember, thin coats when you get to the color stage. Primer you can slather on. Paint you can't. Might take a third coat before the color actually covers everthing. 1st, light dusting, 2nd, you start to see the color, 3rd more color, 4th or 5th or 6th how ever far you go, the build up of the color. You can lay the 3rd and later coats on heavier than the first.
Some paint jobs I have done rocked, other sucked. Trail and error for me. It is messy though.
Posted by: 914GT Apr 8 2005, 08:59 AM
Doug, this is the first time I've had a chance to sit down and look through your progress. This is some great work, going all the way back to the beginning. Take your time on the block sanding. Get a damp sponge and good light and keep tweaking those panels until they're straight. You'll be proud of the results when you're all done. Keep up the good work!
Posted by: tat2dphreak Apr 8 2005, 09:00 AM
doing a great job man!! keep it up!!
Posted by: CptTripps Apr 11 2005, 09:02 PM
I went to go take pics, and the camera was NOWHERE to be found...o-well. Here's what I did tonight.
I put filler in every single little nick I could find.
I POR-15'd the inside of both doors.
I POR-15'd the channels in the front and rear trunks.
Now I need to find the F%$king camera! Tomorrow I finish up the bodywork and put the second coat of primer on the whole thing.
Guys...it's starting to look like a CLEAN car again! It is amazing how much better I feel having primer on it. The fact that it's at least one, light, solid color really helps with the mental aspects of working on a car.
Pics tomorrow!
Posted by: chunger Apr 11 2005, 09:32 PM
SWEET! You're pace is crazy. . .  look forward to new pics.
Posted by: Dead Air Apr 13 2005, 06:11 PM
"I went to go take pics, and the camera was NOWHERE to be found...o-well. Here's what I did tonight...."
Doug, you'd loose your dog if she weren't fenced in, or something like that...Any thoughts on your side lights?
Thanks for the tips on sanders and seat ejection, retraction. Whatever
Posted by: CptTripps Apr 13 2005, 06:15 PM
I knew where it was. Angie had it...Found my wallet too!
I don't like the side-lights. I'm half-thinking that I'll try Saab side-markers behind the front wheels. I donno though...
Seats are easy once you have done it once....I can yank mine in about 10min now.
Posted by: CptTripps Apr 14 2005, 08:58 PM
Ok..NOW were cooking with gas! Angie sent me to the garage to work on the car tonight...I'd been bitching that I felt like I had no modivation. So she did dishes while I went out to work...great wife!
Anywho...got the whole shebang in primer. THAT feels a lot better!
Here's how she sat about 2hrs ago...
Posted by: CptTripps Apr 14 2005, 09:00 PM
And here we are now...
Posted by: CptTripps Apr 14 2005, 09:01 PM
I re-built most of this fender, and I think it looks great now...still needs a little work though.
Posted by: CptTripps Apr 14 2005, 09:03 PM
In my tests, this primer sticks REAL well to the Herculiner. so we're at least going to prime it. One more layer of protection.
Posted by: CptTripps Apr 14 2005, 09:05 PM
So now I'm modivated again...I'll come home early tomorrow and start sanding everything down real nice and working out the waves. I'll prima again and again till I get it right. I MAY be able to paint her before I leave for WCC next Friday!
Posted by: vesnyder Apr 15 2005, 05:28 AM
Doug - Making great progress. Looking good! Enjoyed following the progress. Give me a call next week when you are digging in - would love to come by and get an education on what to look for! Thanks again for the PPI on the 914 in Lorain. Are you still debating on picking it up? Has some good things about it, but the structural rust scares me.
Let me know if I can help you out on anything?

Posted by: CptTripps Apr 15 2005, 06:23 AM
Yeah, if I buy that car, it'll be for the interior. That's about all that's good on it. The front-trunk floor was real nice too, but that's about it. He'll never sell that car to anyone BUT a 914 guy, and we'll never pay mare than $500 for it. For your first 914, that is NOT a good car.
Come on over any time. I'll be working on it all weekend. LOTS of body work to finish up.
Posted by: i love porsche Apr 15 2005, 01:32 PM
wow..this is awesome progress, i cant wait till i can start the body work this summer and make my car look as good as yours!!!
keep it up!
Posted by: CptTripps Apr 15 2005, 09:17 PM
Ok...We have the tub 100% primed!
Here's the ammo I used for the job. PPG K36 High-Fill primer.
Posted by: CptTripps Apr 15 2005, 09:18 PM
I've been using a turkey baster to measure everything. I just fill up to the ticks on the side of the mixing cup. The mix for this primer is 2-Catalist : 2-Reducer : 4-Primer
Posted by: CptTripps Apr 15 2005, 09:21 PM
Got the trunks and the interior vaccuumed out and wiped down with de-greaser.
Posted by: CptTripps Apr 15 2005, 09:22 PM
The primer went over the back (covered with Herculiner) real well, so I decided to do the rest of the interior...at least in primer.
Posted by: CptTripps Apr 15 2005, 09:23 PM
I had the mask on, and was painting in between that pic, and this one...Her she is with a nice thick coat.
Posted by: CptTripps Apr 15 2005, 09:24 PM
Front trunk...all covered up and cozy. The floor had been POR-15'd by the PO...I just roughed it up a bit so it'll stick well.
Posted by: CptTripps Apr 15 2005, 09:25 PM
The primer covered the Herculiner REAL well...Filled it in a bit too so it's not as rough.
Posted by: CptTripps Apr 15 2005, 09:25 PM
Rear trunk....painted and nice!
Posted by: CptTripps Apr 15 2005, 09:27 PM
I also got the inside of the doors done. I'm planning on doing the doors and lids seperate from the rest of the tub. I just don't have the room. I'll get it back on the ground, and then have the garage free to paint it...
Posted by: CptTripps Apr 16 2005, 12:14 AM
So I'm thinking after another wet-sand tomorrow, I may throw a coat of paint on...just to see how it goes. The primer was a lot easier than I thought. I'm learning that I can always sand it smooth and put another coat on. I've got to get to the paint store in the morning to get some more catalyst for the primer. I'm about out. Maybe I'll get some more advise while I'm out there...
Long day in the garage, but I feel like I got a LOT done...
Posted by: Verruckt Apr 16 2005, 06:32 AM
Awesome job man!
Can you tell me, or anyone else for that matter, how diffigult is it to get in the area below the headlight buckets??? Seems that woud be a real PITA to prime and paint
Posted by: CptTripps Apr 16 2005, 06:55 AM
I have a little gun that I stuck pack there and just went wild with. I'll post a pic of it later, but it's a little gravity feed from HF. (Purple dude) ok...I'm off to the garage for more wet-sanding!
Posted by: tat2dphreak Apr 16 2005, 07:42 AM
awesome man!! keep up the amazing progress!!
Posted by: CptTripps Apr 16 2005, 03:23 PM
Thanks Wayne...
Ok, so I went to the paint store to get more Catalyst. The lady said I should have just needed one pint for a gallon of primer...Hmmm...
Turns out, they gave me the WRONG INSTRUCTIONS! They gave me the K36 SEALER, not the K36 PRIMER. I SHOULD have been mixing at 5:1. I was mixing at 4:2:2...oops.
No worries...I sanded everything down this morning, and just shot it with the RIGHT mixture. this stuff goes on like butter when the mix is right!
Hides ALL the little scratches and scuffs...Nice stuff.
I'll offer up a better report later tonight when I wet-sand it again. I'm aiming to put the first coat of paint on in the morning!
Wish me luck!!!!!
(Why no Painting smiley? We have Cutting, and welding...)
Posted by: Verruckt Apr 16 2005, 05:17 PM
Looking forward to seeing it. May the force be with you. 
Posted by: ben1440 Apr 16 2005, 11:21 PM
as usual, everything is looking awsome. Keep it up!!!
Posted by: Dead Air Apr 17 2005, 02:51 PM
| QUOTE (CptTripps @ Apr 15 2005, 07:17 PM) |
| Ok...We have the tub 100% primed! Here's the ammo I used for the job. PPG K36 High-Fill primer. |
[QUOTE]
In the photo, the can says "primer, resurfacer", The "instructions" they gave you were for shooting on a sealer? I'm sooo confused!
Re the vice grips. Steaks...Hood...beer...door jamb...seat and good company, I'm thinking it was a pretty good trade (I never ride for free!!)

Posted by: CptTripps Apr 17 2005, 07:03 PM
There is a K36 Sealer, and a K36 Primer...they just gave me the wrong sheet.
The chemist I talked to said what others backed up. What I did was probably a GOOD thing...putting a sealer on top of bare metal. It wanded down great, and after wet-sanding, it was smooth as a baby's butt.
So what did I do today???
First Samson and I hooked up the fuel pump back up and got her started...just to knock the dust out. Turned over about 5-6 times, then Vroom!
After that was out of the way, we started masking off the trunks to prepare for paint.
Posted by: CptTripps Apr 17 2005, 07:04 PM
Here's we are in our paintin' uniforms!
Posted by: CptTripps Apr 17 2005, 07:04 PM
Here I am...mixing up a batch.
Posted by: CptTripps Apr 17 2005, 07:05 PM
Here's my first go at it. Lay the first coat on real thin-like...
Posted by: CptTripps Apr 17 2005, 07:06 PM
I decided to do the sail-panels so I didn't forget later...
Posted by: CptTripps Apr 17 2005, 07:09 PM
Here's what it looked like after we were done...looks like Close Encounters!
Posted by: CptTripps Apr 17 2005, 07:10 PM
And when the smoke clears...
Posted by: CptTripps Apr 17 2005, 07:11 PM
Here's my handywork...It's bumpy in the back because the PO POR-15d the daylights out of it.
Posted by: CptTripps Apr 17 2005, 07:12 PM
Did the interior too...
Posted by: CptTripps Apr 17 2005, 07:13 PM
And here is the front half...
Posted by: CptTripps Apr 17 2005, 07:14 PM
Well...that's it for today...I'm off to wathc DeadWood...I'll post more details later. All kinds of fun tonight!
Posted by: carreraguy Apr 17 2005, 07:34 PM
Nice job! Looks familiar; here's my Sunflower yellow:
Attached image(s)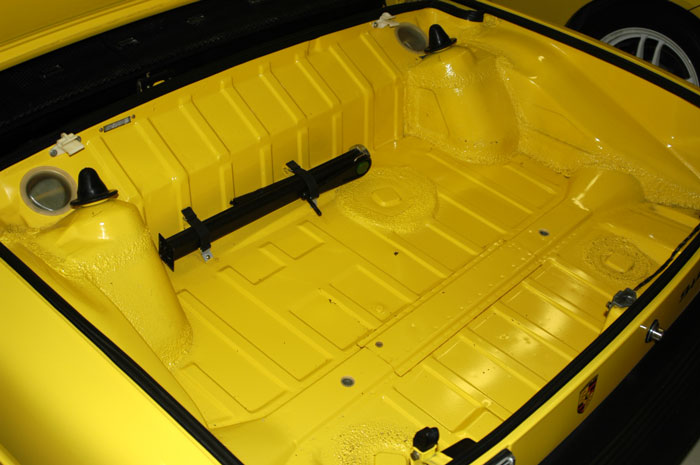
Posted by: xsboost90 Apr 17 2005, 08:06 PM
hm sounds familiar, spent the day doing some last minute touch ups and getting it ready for paint...tub/doors are ready for paint, rear trunk is painted, front trunk hasnt been touched yet except for the 944 jack brakets i welded in this morning for the spare. Body is straight though!
Posted by: newto914s Apr 17 2005, 09:23 PM
Wow, after that stuff starts to dry it really looks good. Nice work, it's crazy how fast it went too. Probably for the best though, cause I think I started to buzz in the last five or ten minutes. Even in the bio-hazard outfit.
I like how in all the pics of me in this thred I look like I should be in the special olimpics
Posted by: CptTripps Apr 17 2005, 09:42 PM
| QUOTE |
| I like how in all the pics of me in this thred I look like I should be in the special olimpics |
Yeah, after you changed clothes, Angie said "So that's what he looks like without a jump-suit of some kind on."
I just went out a few min ago...paint is pretty hard already...I'm SUPER psyched!
I'm doing another coat in the trunks tomorrow, then one on the body...
I'd reccomend ANYONE that is thinking about painting a car to try it. It's not as scarry as I thought. Actually kinda fun!
Posted by: Dead Air Apr 18 2005, 03:23 PM
Thanks Doug!!
Nan says to me: "Iwant a yellow car", "The 914 looks great in YELLOW!", "I always liked those in yellow", "remember that yellow 914 we saw on the I-290?"
If she asks you, remember to say "Yellow is a pain in the ass!" "PITA!!!"
And thanks for setting the "bar" so high!
Posted by: CptTripps Apr 18 2005, 08:40 PM
Here we go...it's Yellow Car day!!!
Prepped and waiting for a blanket of paint!
Posted by: CptTripps Apr 18 2005, 08:40 PM
And one hour later...
Posted by: CptTripps Apr 18 2005, 08:42 PM
One thin, and two more, slightly thicker....that'll get you this kinda finish.
Hi Mom!
Posted by: CptTripps Apr 18 2005, 08:43 PM
Blends in nice with the trunk I painted yesterday. Glad I didn't mess that up!
Posted by: CptTripps Apr 18 2005, 08:44 PM
Nice and creamy...
I'm going to wet-sand the whole thing tomorrow after work, and then lay another coat or two down.
Posted by: skline Apr 18 2005, 08:48 PM
Wow, that looks pretty good, now throw it all together and drive it out here, I think you can get it done before the WCC and still make it if you work all night.
Posted by: CptTripps Apr 18 2005, 09:16 PM
Part of me want's to do EXACTLY that...but I don't have the doors or hoods done yet...
...Next year.
Posted by: xsboost90 Apr 18 2005, 09:26 PM
i edged in my doors tonite but im kinda disappointed in how they turned out. I think im rushing things too much and need to step back and slow down. Got my paint and clear purchased tonite and it was making me want to paint this sucker! Looking good there cptn! Yellow is actually one of the harder colors to spray for some reason, i think it is so bright it throws you to weather it is covered completely or not, i no like de yellow. But candy for some reason no problem, go figure.
Posted by: CptTripps Apr 18 2005, 09:34 PM
| QUOTE (xsboost90 @ Apr 18 2005, 10:26 PM) |
| Yellow is actually one of the harder colors to spray for some reason, i think it is so bright it throws you to weather it is covered completely or not... |
Yeah, I ran into that a little...I'd go over an area, think I was done, and then see a spot that looked a little 'flater' than the other sections. After the 3rd coat, I got it all...
I'm looking forward to seeint it tomorrow when I can REALLY look it over. I hope it's hard enough to hit with 1000-grit tomorrow and throw another coat on. I'd like to build up so I've got 5 on there (counting tonight's 3) before I leave for WCC. Then come back and color-sand.
Posted by: i love porsche Apr 18 2005, 09:45 PM
wow..this is awesome!!!
i cant wait to do my car this summer!!!
Posted by: CptTripps Apr 19 2005, 08:23 PM
So here is tonight's update...
Went to HF after work and got a 'Central Crapmatic' Purple HVLP gun. $50, thought I'd give it a shot. The guy at the counter offered the 'extended warrenty' and I declined. Said if it works for 2 weeks, I'll be happy...he responded "You know if you only need it for 2 weeks...we have a 30-day 'no questions' return policy."
So I got home at about 5:45 and went at it...here's what we looked like at 5:45.
Posted by: CptTripps Apr 19 2005, 08:26 PM
I started using 500-grit sandpaper, but after an hour, and only getting one panel done, I remembered that I had a bunch of Green ScotchBrite pads. I wonder.....
Yup! Worked GREAT! This makes any orange-peel a non-issue. Took it down, nice and easy. After 30min, I had the whole car done, and it looked fantastic!
Posted by: CptTripps Apr 19 2005, 08:27 PM
Got the new loaded up and ready. I also got a swivel for the end. Keeps the hose out of the way!
Posted by: CptTripps Apr 19 2005, 08:29 PM
Used DX330 to de-grease the whole thing. Then used a tack-cloth to get rid of and dust.
Posted by: CptTripps Apr 19 2005, 08:32 PM
20min later....we've got a glass-like finish.
Posted by: CptTripps Apr 19 2005, 08:32 PM
I REALLY hope it stays like this.
Posted by: CptTripps Apr 19 2005, 08:37 PM
Ok, so after all that, I'm getting fresh air, and the guy in the house behind me comes over and introduces himself. He asked if I'd be 'airing that out all night, because I think were getting the brunt of it." I explained that I was JUST crawling in the garage to shut the door the rest of the way and apologized. Then I introduced myself...because I've lived here a year and 3 days and this is the first I've ever talked to him.
I REALLY hope I didn't accidentally paint anything of his 'saturn yellow'. 
Well...that's it for today. *IF* all goes well over night, I'll be color-sanding tomorrow. If not, then it's time for touch-up!
Posted by: CptTripps Apr 19 2005, 10:22 PM
I forgot to include a body shot....Oops...
I just went out and looked...it's hardening up perfectly...
Posted by: J P Stein Apr 19 2005, 10:27 PM
I thought you said you were gonna paint it yellow
Maybe it's just the light....
Posted by: xsboost90 Apr 20 2005, 06:06 AM
got mine painted- the tub and doors, last nite. Alittle tired at work this morning, up til 3:30am color sanding and clearing- started at 6p last nite. I have some pics, i'll post them after work. 
Posted by: i love porsche Apr 20 2005, 06:08 AM

that loooks awesome!!! i cant wait to do mine!
Posted by: Steve Thacker Apr 20 2005, 06:11 AM
Doug,
That frigging looks awesome!!!!!!
I'm curious to see how the color sanding comes out. If you do yours and it looks great, how much to get you down here to do mine?
Posted by: Gint Apr 20 2005, 06:16 AM
That's lookin great Doug!
Posted by: tdgray Apr 20 2005, 06:55 AM
Good Job Doug.
I'm glad you got that regulator on the gun. I think that makes all the difference in the world.
BTW - you are making me look bad, I don't have jack crap done on my car.
Maybe I'll take a couple of days off 
Posted by: CptTripps Apr 20 2005, 07:14 AM
Just went out and inspected...looks great! I'm going to do another coat tonight. I can tell it's a little thin in a few spots. Part of me just wants to start color-sanding, but a few places could use some glazing putty too...
I think I found the sweet-spot with the gun, paint, and car. One more coat, and I'm thinking I'll be ready to color-sand. THEN I gotta work on the hoods/doors. I need a bigger garage... 
Posted by: CptTripps Apr 20 2005, 09:16 AM
| QUOTE (Steve Thacker @ Apr 20 2005, 07:11 AM) |
| Doug, That frigging looks awesome!!!!!! I'm curious to see how the color sanding comes out. If you do yours and it looks great, how much to get you down here to do mine? |
You don't want me doing your car! I'm like a 14yr old that's just figuring out what PlayBoy is all about. It's hit-or-miss right now.
It's raining, so maybe now is a good time to paint it in the garage...
One more coat can't hurt...right?
Posted by: Travis Neff Apr 20 2005, 09:50 AM
[/QUOTE]You don't want me doing your car! I'm like a 14yr old that's just figuring out what PlayBoy is all about. It's hit-or-miss right now.
[QUOTE]
haHA! so you telling us your doors will stick to the car, like the pages of the magazine
Posted by: xsboost90 Apr 20 2005, 09:57 AM
yeah this body work stuff will make you tired, but painting is the fun part! I too still need to do my hood, trunk, rockers and valances. Did you say your driving that thing to the WCC? you are crazy! thats some milage..ill be lucky im making it to the michigan one.
Posted by: CptTripps Apr 20 2005, 10:07 AM
No way...I'm flying out there on Friday. I SHOULD have this one back together and on the road by the 1st week in May though. Everything I'm putting back ON the car is new, so it should all fit a lot better.
As soon as I get the tub done, I'm going to do the brakes so I can put it back on the ground, and back it out of the garage. That'll free up the room to do the rockers, bumpers, valances, hoods and doors.
NOW I'm thinking... "The bumpers aren't that bad...maybe I'll just put them back on."
I'm going to have to FORCE myself to do those. Maybe I'll go hit them with some pink spray paint or something to force the issue!
Posted by: Root_Werks Apr 20 2005, 10:16 AM
Good job Doug! The paint looks great, flat and shinny!
Posted by: Lou W Apr 20 2005, 12:31 PM
Doug, wow, very nice job.
Posted by: tdgray Apr 20 2005, 02:07 PM
Doug,
Don't do too many coats. You might start having adhesion problems. How many do you have on now, four or five? I'd stop there if it's covering.
Posted by: Dead Air Apr 20 2005, 03:38 PM
[QUOTE=CptTripps,Apr 19 2005, 06:37 PM]Ok, so after all that, I'm getting fresh air, and the guy in the house behind me comes over and introduces himself.
I REALLY hope I didn't "accidentally" paint anything of his 'saturn yellow'.
[QUOTE]
Well Doug, It sounds like you've some "great" neighbors. You've got two choices:
1) Paint without the respirator and tell them that you're actually getting the "brunt of it"! or...
2) "Test" your spray pattern in his direction and with a big smile tell him your home owners insurance will be glad to take care of any damage. 
Posted by: CptTripps Apr 27 2005, 07:09 PM
We are quickly entering the final stages of this restoration. :: Thank God ::
I just had my first 'Non Successful' night of painting. I've been lucky thus far, so I think I pressed my luck a little TOO far tonight. I got my first runs while doing the final-FINAL coat of paint. The good news is that I'll be color-sanding tomorrow, so I guess I can get rid of them. (Suggestions??)
Here's the big run...you can KIND of make it out.
Posted by: CptTripps Apr 27 2005, 07:12 PM
The GOOD news is that the interior is ready to be put back together. Everything coated up REAL nice, and it should be a breeze to get it all back in there.
Posted by: CptTripps Apr 27 2005, 07:17 PM
Everywhere else, I seem to be good. I really hope the color sanding helps get the dust specs, and runs.
Posted by: Verruckt Apr 27 2005, 07:30 PM
| QUOTE (CptTripps @ Apr 27 2005, 07:17 PM) |
| Everywhere else, I seem to be good. I really hope the color sanding helps get the dust specs, and runs. |
If the rest of your car looks like that passenger quarter pic, your going to be smiling for weeks after a bit of colorsanding. Looks great man.
Posted by: Brando Apr 27 2005, 07:43 PM
That does look awesome. Keep up the great progress! 
Posted by: IanStott Apr 27 2005, 08:03 PM
I am getting ready to do the same thing, is Engmans kit better than the clamshell offered by AutoAtlanta or did you not need the clamshell as your longs were good. Mine are not great and are going to be repaired by a competent bodyman I trust. Your thoughts appreciated.
Ian Stott
Moncton
Canada
Posted by: CptTripps Apr 27 2005, 08:15 PM
| QUOTE |
| is Engmans kit better than the clamshell offered by AutoAtlanta |
I did Engman's kit because I was doing the floor, and WASN'T going back into anything after I was finished. I *CAN* tell you that it stiffened the whole tub up real well. Before I put it in, I was seeing about 1.5" of drop if I had it on 3 jack-stands. Now, it drops about 1". I also had the car with stands at the front and rear of the floors when I put it on. This put a 'pre-load' on the chassis, so when I drop it, the gap is 'set', and has both a solid long, and Engman's kit on it.
Posted by: McMark Apr 28 2005, 02:06 AM
Doug, call my buddy Brandon tomorrow. 707-253-7246. Tell him I told you to call and ask him his technique about runs. Uses a razor blade and does a great job without any real risk of damaging the paint. Lookin' good.
Posted by: xsboost90 Apr 28 2005, 05:50 AM
man i had that same problem. I color sanded one of them out and cleared it but now you can still see the shadow of it when you look just right, im still debating on respraying the top of my ds quarter. Runs suck, you almost have to sand it back to primer there to get it to dissappear, try to wetsand it out as best you can, using a razor blade to knock off the high spots makes it quicker, but in that corner you may have to be careful.
Posted by: tdgray Apr 28 2005, 05:54 AM
There is actually a tool that body shop supply stores sell to get out runs...... I just can't remember what it's called.... maybe a nib file?
Doug, call William Wolf Supply up in your next of the woods.... they can give you some pointers on getting that out without damaging the paint.
c-ya soon....no work on the 914.... been doing a brake job from hell on the MGA, have a car show on Sunday.... let get rid of that carcass on Saturday.
Posted by: xsboost90 Apr 28 2005, 06:06 AM
yeah ive used one of those once, its like a super fine file..worked pretty good, gotta make sure the paint is dry all the way though! Keeps you from burning the paint around the run.
Posted by: CptTripps Apr 28 2005, 06:56 AM
Oh crap....I didn't think it was THAT big of a deal. Now you are all talking about "call my friend" or "sand to primer." Did I screw it up THAT bad?
"Nuclear-Pissed" is going to be the phrase if I have to sand to primer. 
I'm still in bed, but I'll go look at it on my way to the office. Report to follow...after McDonalds. 
Todd: I'll call you later. To say that we NEED to get this thing out of here is an understatement. All the scrap yards in the area close at 1:00pm on Sat, so we gotta do it early.
Posted by: tdgray Apr 28 2005, 11:29 AM
Doug,
Slammin at work today...will call ya later.
Yep early it is... Probably have to pick up the trailer Fri night.
Posted by: CptTripps Apr 30 2005, 12:34 PM
I got a nib file this morning...helped a LOT. I MAY be able to just color-sand 99% the thing and roll. There are a few spots that I had to go to primer, mostly corners and such. A little touch-up with the little spray gun, and I should be in business...
More to follow...
Posted by: CptTripps May 4 2005, 07:53 PM
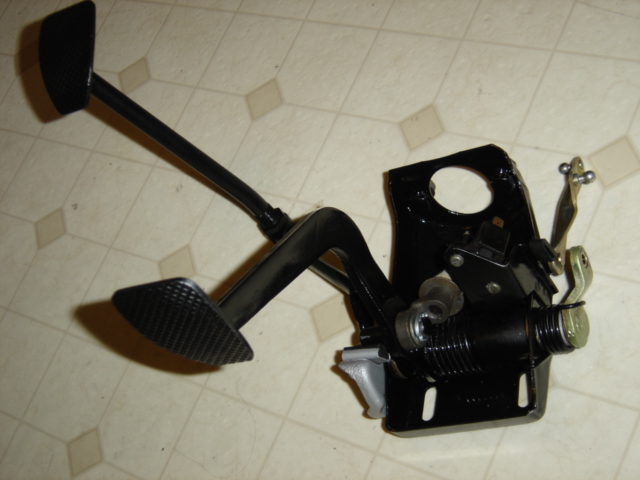
I was just about to throw in the towel on another day...no modivation anymore. Then I found the turnbuckle that I posted a 'WTB' for!
Posted by: CptTripps May 4 2005, 07:53 PM
That got me a jazzed enough to want to finish the pedal cluster. Then the brakes...and now I'm back on the ball, and making progress. 
I don't have pics of the first part of the evening, but I started by busting out the PowerBleeder. Took me about 30sec to figure out how to work it. Cool-ass invention! Spent the next hour getting the brakes all blead. I think I'll still have Angie help me when she gets home. Do it the old-fashoned way...just to make sure.
Posted by: CptTripps May 4 2005, 07:58 PM
I did a test-run on my abilities to cut and buff out a panel. Just did the top of the targa-bar...turned out awesome! Started with 320 - Then 500 - Then 1500 - Then 2000 - Then Rubbing Compound. I'm told I need a 'glazing' compound...Next trip to the paint store.
Posted by: CptTripps May 4 2005, 08:00 PM
I was sitting there pulling the ash-tray out, when I noticed how cool it is when the tup is all clean inside...can't wait to start filling it with Carpet and stuff. =)
Posted by: CptTripps May 4 2005, 08:02 PM
I decided that I needed to go over a few parts to clean up edges, and go over the spots I had to scrape down for the runs. Here's an example of a before...
Posted by: CptTripps May 4 2005, 08:03 PM
And after...
Posted by: CptTripps May 4 2005, 08:06 PM
So that's my story for the evening...I'm back and motivated again.
I think tomorrow I'll be wet-sanding the car again and seeing if I can make that the last time I have to do it. I'm debating putting a clear-coat on the whole thing. Maybe after I get the doors and hoods back on, I'll shoot it with clear....maybe I'll wait. Who knows.
Posted by: xsboost90 May 4 2005, 09:14 PM
your starting to buff w/ 320!!! 500!!! ive been starting w/ 2000 and then buffing w/ a micropolish compound and a wool pad. Then use some glazing compound w/ a foam pad that has been "moistened" w/ water -clean out between panels w/ water. With a bright color you could wetsand w/ 1500 or so.
Attached image(s)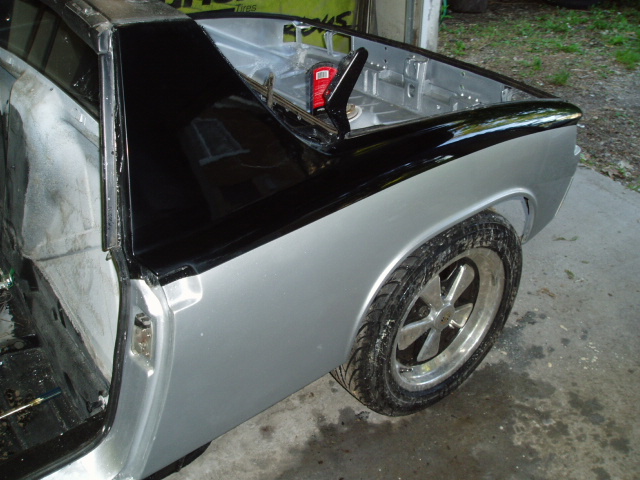
Posted by: Gint May 4 2005, 09:16 PM
You've come too far to give up now. Next time you lack motivation, let me know. I'll give ya a virtual kick in the ass.
Posted by: CptTripps May 4 2005, 09:26 PM
I used 320/500 to smooth out the spots where there were runs. Then I went back over those areas and re-painted. I'll start with 1000 after the touch-up dries.
1000:wetsand - 1500:wetsand - 2000:wetsand - Rubbing Compound - Glazing Compound
Do you use a buffer? What kind? What speed?
Tomorrow I'm going to get the wheels on, and I've gotta get this thing out of the garage so I can paint the hoods and the rest of the stuff I've got to do to get it back on the road.
Posted by: Brando May 5 2005, 12:33 AM
Holy hell Doug, that's lookin sweet!
I hear you need a power buffer? Want to 'rent' mine?
Seriously... Pay shipping and it's yours to break in for a few months. That paintjob looks very very nice as is... Urethane or lacquer based paint? Hell, might as well get it clear-coated for that deep effect (like newer, dark metallic colored cars).
Posted by: tdgray May 5 2005, 06:16 AM
I just happened to be at Dougs house last weekend, clearing the scene of the crime.
That reminds me Doug.... we never took pics of the beverly hillbilly's scrap run. 
Spencer promptly went home and told Mom that Doug is in real trouble because he painted his shoes
The car is looking great... after contemplating it Doug I think you should continue color sanding and buffing. It is quite a bit of work but so is the clear and there is the chance that you could get runs in that and thats even tougher to get out.
Whatever you are comfortable with.... lookin good...keep going
Posted by: CptTripps May 5 2005, 06:19 AM
I've got 2-3 buffers, I just don't know which one to use, and at what speed...
Should I use my orbital, or my 7" variable speed polisher/sander? I've got a big wool pad for the polisher, but I'm never sure that I'm doing it right.
Posted by: CptTripps May 5 2005, 06:31 AM
| QUOTE (tdgray @ May 5 2005, 07:16 AM) |
| I just happened to be at Dougs house last weekend, clearing the scene of the crime. That reminds me Doug.... we never took pics of the beverly hillbilly's scrap run. Spencer promptly went home and told Mom that Doug is in real trouble because he painted his shoes The car is looking great... after contemplating it Doug I think you should continue color sanding and buffing. It is quite a bit of work but so is the clear and there is the chance that you could get runs in that and thats even tougher to get out. Whatever you are comfortable with.... lookin good...keep going |
I know...I'm kicking myself for not getting pics to finish the thread...
I'm going to see how the touch-up painting went. I think to come this far and not clear would be a shame...I've also learned my lesson with runs!
I'm going to wait till I've got the hoods and doors done, and on the car. That way I can get a good EVEN clear all over. I don't need to clear inside the doorjams and such.
I'm going to pull her out of the garage tonight and get started on the hoods, and misc tins. That's really the only thing that has me stalled right now. After I'm done there, I'll be good to go for putting her back together.
I'm thinking I'll make up some cables and hang those pieces from the ceiling...Should work fine....I hope.
Posted by: tdgray May 5 2005, 09:09 AM
| QUOTE (CptTripps @ May 5 2005, 08:19 AM) |
| I've got 2-3 buffers, I just don't know which one to use, and at what speed... Should I use my orbital, or my 7" variable speed polisher/sander? I've got a big wool pad for the polisher, but I'm never sure that I'm doing it right. |
Nope... no polisher - grinder.... too fast. The best thing is a buffer. Slower speed etc = no burn through. Should be a single or two speed buffer.
If you know what RPM you polisher can go down to and it is acceptable go ahead and use that.
As for the clear. Pick a nice warm day (Saturday is looking good). You need the clear to flow very well as it is not "self leveling" like paint can be. Also make sure you have a good wipe down with clean rags (no silicone in 'em). Clear will fisheye and moddle more readily than paint.
Go for it
Posted by: xsboost90 May 5 2005, 12:27 PM
what kind of paint are you using??? Not urethane....
Posted by: CptTripps May 5 2005, 12:41 PM
| QUOTE (xsboost90 @ May 5 2005, 01:27 PM) |
| what kind of paint are you using??? Not urethane.... |
Yup...
Omni MTK Acrylic Urethane - Single stage.
Posted by: CptTripps May 5 2005, 07:47 PM
Welcome to my second wind...
I got out there tonight and decided to make some progress. Decided the first order of business would be the brakes...again. I had Angie cone lend a hand, and work the pedal while I blead the line. (There's one for the quote thread.) After that got all worked out, I started at the fuel pump.
I ran new wires through a new hole I drilled into the tunnel. I have a ton of grommets of all shapes and sizes, so this was easy, and done right. Through the tunnel, and through the front, about 8" towards the center from the brake cylendar. Added another grommet there, and we had a nice and clean install.
I'm going to re-locate the filter to the back, so I cut the line and...oops...there's still 5gal of gas in the tank! The closest thing I had was my wet-sanding bucket, so that had to hold the flow while I ran to the other end of the garage to get my portable tank. Except THAT was FULL TOO!
Off to my 'real' car to put the gas from the tank into that, then get it under to get the gas out of the tank. Thank God I left the Saab unlocked, or I'd have had to run inside, and who knows how much gas would be flowing down my drive. I made it back inder JUST in time to catch the pail before it started overflowing. Oiy...
So now we have that all working, car started, and we're getting fuel pressure. Let's see what the tires look like on it.
Posted by: CptTripps May 5 2005, 07:48 PM
So I got the tires on there and started cleaning things out...Hmm....
Posted by: CptTripps May 5 2005, 07:49 PM
Since it's on the ground....
Posted by: CptTripps May 5 2005, 07:50 PM
Let's back her out of the garage...
Posted by: CptTripps May 5 2005, 07:58 PM
So since it backed out...and stopped when I asked it to...why not take her around the block! No doors, no lids, no guages...no problem! I went up and down the street 2-3 times. Got some funny looks from the neighbors, but I'm SURE they'll be seeing me in it more often.
Couple of observations...
This thing is WAY stiffer than it was when I pulled it in the garage. New floors, re-enforced longs (Engman's kit), and new welds wherever I could made for a REAL stiff ride...I love it!
Now I see why people go to the 930 tie-rods. That'll be the first thing i install when I'm done. I've already got them...just gotta get them ON there!
I've got a second wind...I'm up for a rally this weekend to drive her next weekend....think I can do it?
Posted by: rick 918-S May 5 2005, 08:07 PM
Posted by: Travis Neff May 5 2005, 09:20 PM
right on Doug! you move faster than that mexican food that we ate going through me..
Posted by: Flat VW May 5 2005, 09:36 PM
| QUOTE (Travis Neff @ May 5 2005, 07:20 PM) |
| right on Doug! you move faster than that mexican food that we ate going through me.. |
WWWOT
A mexican pal of mine sometimes takes a rosary in with him when anticipating a long and difficult "sit down session".

J
Posted by: Gint May 5 2005, 09:46 PM

Posted by: CptTripps May 6 2005, 06:36 AM
| QUOTE (Travis Neff @ May 5 2005, 10:20 PM) |
| right on Doug! you move faster than that mexican food that we ate going through me.. |
THAT was some good food....and N-A-S-T-Y shit!

Posted by: CptTripps May 7 2005, 06:21 AM
No pics from last night yet...I took a few, but I want to get back out there and work.
Got the doors, lids, and other accessory pieces in primer last night. I'm going out to sand it down and prime again...then put my first coat of paint on all of them tonight.
If it doesn't rain too hard today, I'll pull the cover off of the tub and start buffing the rest of the car today. Tomorrow is going to be spend with Mom in the AM, but then I'd like to spend the afternoon finishing the buffing, and maybe start putting seals back on.
Now we're rollin folks! All down-hill from here.
Posted by: CptTripps May 7 2005, 10:19 AM
Here's the hoods and doors after a couple of coats of primer...
Posted by: CptTripps May 7 2005, 10:20 AM
Here's the engine-lid, headlight covers, and 3rd brake light.
Posted by: CptTripps May 7 2005, 10:21 AM
And here we are a few hours after wet-sanding...
Posted by: CptTripps May 7 2005, 10:21 AM
Doors look good...for a change...
Posted by: CptTripps May 7 2005, 10:22 AM
And the pieces-parts.
Posted by: CptTripps May 7 2005, 10:26 AM
I've got enough paint left for about 1 good, even coat. So I went and bought another quart, and am going to use it for the next coat. Then I'll cap it with what I have remaining. I didn't want to mix everythign together, as that may change it a LITTLE, and I think I'm better off going the route I'm taking this time. Later tonight is wehen the next coats go on, then tomorrow morning we'll do the final after a wet-sanding.
Look like I'll be putting all the parts back together and buffing it all out this week...I'm getting excited...this is fun!
Posted by: morphenspectra May 7 2005, 11:38 AM
finally got around to reading the thread on youre work.
awsome progress
be nice to see this project when completed
james
Posted by: CptTripps May 7 2005, 04:21 PM
So the paint isn't working out the way I thought it would.
I spent all day wet-sanding to tub. Then I spent another 2hrs using rubbing-compound. Then another 2hrs with a glazing compund. Not as shiney as I thought it'd be. Maybe it's the wrong paint...maybe it's my skill. Man...I should have handed someone $3K and said "Call me when it's done!"
I'm not happy with it at all....but the up-side is that this winter, I can hand it to someone in November with $3K and say "Call me in March when it's done!" I'm only into the paint about $700 at this point. Maybe I'll just drive it for 2 years and sell it, or get it re-painted then. After seeing some of the paint-jobs at WCC, I'm not as concerned as I originally was.
So tomorrow I'll start putting seals back on, and maybe start on the interior. I'm not going for a 10Pt car, so I don't need all the bodywork to be perfect...this is as good as I can make it. I think I'd be better at smaller things...maybe Motorcycle tanks or something...O-Well!
Posted by: MecGen May 7 2005, 04:38 PM
Dude
Good job so far...remember qualified painters are getting some huge $$$, now you know why. I think you did the best you could without experience and a shop.
Thumbs up
Later
Joe
Posted by: xsboost90 May 7 2005, 04:54 PM
how did you buff it, that makes all the difference. WEtsand the orange peel out -on a bright paint job- w/ some 1500 and buff w/ wool pad and some microfine buffing compound. THen clean w/ a wet towel. Get a foam eggcrate looking pad, soak it in water and ring out, then buff w/ some glazing compound. Then clean again. This should look gooood. If you just compound it, then itll be kinda flat. The water in the second buff keeps the swirls out.
Posted by: xsboost90 May 7 2005, 04:55 PM
oh yeah looking GOOD! i still have to paint all that stuff, thinking of getting mine running first though. Dont want painted pieces sitting around to get scratched up.
Posted by: CptTripps May 7 2005, 07:42 PM
I did the rubbing compound, and used a polisher. Same with the glazing compound. I didn't know I needed to have it wet when I did it.
Maybe that's the problem?
I'm just getting a 'less than shiney' finish. It's not dull, it's not all that glossy either.
Posted by: xsboost90 May 7 2005, 08:29 PM
you can also try applying some hand glaze (3m) to the car after your done, always works wonders.
Posted by: CptTripps May 8 2005, 06:00 PM
| QUOTE (xsboost90 @ May 7 2005, 09:29 PM) |
| you can also try applying some hand glaze (3m) to the car after your done, always works wonders. |
Now I'm thinking I'll shoot it with clear...$90 at this point isn't going to kill me, and I think it may do wonders for the thing in the 'shine' department.
Thoughts??? Am I stupid to be doing it at this point?
Posted by: xsboost90 May 8 2005, 07:43 PM
may not be a bad move, but youll have to wetsand it real good or youll have flake city. Check you local paint shop recommendations. I would say at least 1000-600 grit wetdry.
Posted by: tdgray May 9 2005, 06:24 AM
Can't hurt Doug.
Just degrease real good, wet sand, degrease... be sure to use clean unwashed rags and go for it.
Ask you paint supplier which clear will do the best on paint that has been...um.... aged
Call me if you need help.
Posted by: CptTripps May 9 2005, 07:44 AM
I think I found the way to do it...
Just went to the body shop next door, and talked to them for a bit. He said if I provided the material, they'd shoot it with another coat of paint, wet-sand it, shoot it with clear, and buff it all out for me...for $500. I think we have a plan!
It looks like my goal of driving the car to work on Monday isn't totally lost. I'll just be driving it here, to drop it off next door. 
He says I can have it back on Thursday. I think this is going to make me a LOT happier with this car long-term.
I don't think this is cheating...I think it's realizing what I am, and am not good at doing in my garage. I'll spend this week working with wood on the panels for the amps in the front trunk, covering the speaker pods with vinyl, and all the other little stuff I want to get ready.
If I get the car back on Thursday, and spend this week prepping...next week painting bumpers and stuff that needs to be black...I MAY be rolling next weekend!
Posted by: tdgray May 9 2005, 07:47 AM
A Man's got to know his limitations
I agree... I know when I'm in over my head.... usually after I get there
Posted by: Gint May 9 2005, 08:21 AM
| QUOTE (CptTripps @ May 9 2005, 07:44 AM) |
| I think I found the way to do it... Just went to the body shop next door, and talked to them for a bit. He said if I provided the material, they'd shoot it with another coat of paint, wet-sand it, shoot it with clear, and buff it all out for me...for $500. I think we have a plan! It looks like my goal of driving the car to work on Monday isn't totally lost. I'll just be driving it here, to drop it off next door. I don't think this is cheating...I think it's realizing what I am, and am not good at doing in my garage. |
Sounds like a good idea to me. A wise man recognizes his limitations and adjusts accordingly.
Posted by: xsboost90 May 9 2005, 09:53 AM
BOLDERDASH!!!! you forfeit the trophy
Posted by: CptTripps May 9 2005, 01:57 PM
Dan, you had the trophy locked WEEKS ago....I'm just trying to makeit look presentable, in a timely fashon.
I'm super-excited about this. If I'd known that I'd be doing this, I'd have done a better job on certain things...O-well. There is always next time!
Posted by: Lou W May 9 2005, 06:00 PM
| QUOTE |
| Gint Posted on May 9 2005, 06:21 AM QUOTE (CptTripps @ May 9 2005, 07:44 AM) I think I found the way to do it... Just went to the body shop next door, and talked to them for a bit. He said if I provided the material, they'd shoot it with another coat of paint, wet-sand it, shoot it with clear, and buff it all out for me...for $500. I think we have a plan! It looks like my goal of driving the car to work on Monday isn't totally lost. I'll just be driving it here, to drop it off next door. smile.gif I don't think this is cheating...I think it's realizing what I am, and am not good at doing in my garage. Sounds like a good idea to me. A wise man recognizes his limitations and adjusts accordingly. |
You may want to see if you can watch or help him prep and paint.
Posted by: CptTripps May 9 2005, 08:35 PM
I was thinking just that. I'll walk over tomorrow and talk to the guy again. He's been giving me tips, and I'm sure he'd be fine with it. The fact that they are in the building next to our offices, I can throw on a tyvek suit and a resporator and head over at a moments notice.
I put the hoods and doors back on tonight...boy am I dissapointed. The gap on the pass-side door is a little thin on the lower-back side. It's from when I replaced that portion of the quarter panel. Live and learn I guess...
I'm also REAL glad that we are putting another coat of paint on the whole car before the clear goes on. This ought to even things out a bit. I've got a little difference between the tub, and the hoods and doors that I painted this week.
Should be a goor deal...
Posted by: Dead Air May 9 2005, 09:04 PM
Oh Yeah!!!
You did all the hard work, Doug1 Always remember
"Proper preparation promises perfect paint performance!!!"
Maybe a coat of wax would've shined it up? 
When you suit up in your Tyvek, make sure Sampson is there just for effect.
Posted by: Dead Air May 10 2005, 06:06 AM
"I should have handed someone $3K and said "Call me when it's done!""
Hey Doug,
Nan says we'll give you $3000 for the car and and you won't have to worry about the paint!
Question:
You said the rear trunk floor was rough because you por-15 it. Before you primed over the POR, how did you prep it? With the "system" or just scuf it up with some fine paper?
The bottom of our pass door is tighter than the top, also. I'm thinking it's a common malady.
Posted by: CptTripps May 10 2005, 06:14 AM
| QUOTE (Dave Eddy @ May 10 2005, 07:06 AM) |
| "I should have handed someone $3K and said "Call me when it's done!"" Hey Doug, Nan says we'll give you $3000 for the car and and you won't have to worry about the paint! Question: You said the rear trunk floor was rough because you por-15 it. Before you primed over the POR, how did you prep it? With the "system" or just scuf it up with some fine paper? The bottom of our pass door is tighter than the top, also. I'm thinking it's a common malady. |
Double that, and you have a deal!
I scuffed it up with 120 and then used a hugh-build primer on it. Sticks real well.
I'm not happy with the prep job I did either. My bodywork skills leave a lot to be desired. I thought it all looked good, then after a few coats of paint, you can see high and low spots. Again...next time.
Posted by: Howard May 10 2005, 08:21 AM
Doug, great post and car. Clearcoat will solve 99% of your problems, and the added protection from the rock nasties is great. Suggest having a pro do it.
I used herculiner and green scotch brite pads on my car, too
Posted by: CptTripps May 11 2005, 09:09 AM
Here's the pics from recent progress...
First, here is the finish I was talking about. This is after a day of buffing...
Posted by: CptTripps May 11 2005, 09:10 AM
Got my new shocks installed on the front lid. I wish it went up a little higher...maybe I did it wrong???
Posted by: CptTripps May 11 2005, 09:11 AM
Now what to do about these little holes...the rubber pieces are LONG gone.
Posted by: CptTripps May 11 2005, 09:13 AM
Here is what I came up with! One Box of HF Grommets...
Posted by: CptTripps May 11 2005, 09:13 AM
Cram one in each hole...and Bob's your uncle!
Posted by: CptTripps May 11 2005, 09:16 AM
Here's what I did for the outside one. I stacked two (one pictured) on a long bolt, with a washer on either side. That did 2 things...It got the hole plugged, and it got a solid-yet mushey hold on that outside hole.
Posted by: CptTripps May 11 2005, 09:17 AM
Next I re-wrapped the wiring int he trunk. I used the black cloth-tape that they use for hockey sticks.
Posted by: CptTripps May 11 2005, 09:18 AM
Now lets close it all up and check the gaps.
Posted by: CptTripps May 11 2005, 09:19 AM
Wake up and open your eyes! Wow...it worked....first time! I also COMPLETELY forgot that the PO put Xenon bulbs in!
Posted by: tat2dphreak May 11 2005, 09:59 AM
dude, that is looking sweet!! great job! your speed is an inspiration!!
Posted by: CptTripps May 12 2005, 10:13 AM
Yesterday I concentrated on getting the doors on, and the interior latching working. Got that all put together so I can drive around with DOORS now! (What a great concept!)
I also did the rear lights so I'm a little more 'legal' than I was before.
I found a problem with the brake-light switch, so I'm going to have to spend some time with that, or order another one. Anyone have a spare???
Posted by: mikelsr May 12 2005, 10:32 AM
Just so I can ask a silly question, are you sure it's the switch?
The reason I ask is because I thought I had a switch problem (I do understand that you are much more familiar with the 914 than me) with mine when I replaced the master cylinder. It ended up being that I didn't understand where the lever was supposed to go and even worse I didn't know how to adjust it once I figured out where the lever went. I finally figured it out. I have 4 different manuals and they all suck.
Mike
Posted by: CptTripps May 12 2005, 02:56 PM
Well, the one I have is cracked so there is only one screw holding it in place. I'm PRETTY sure where the switch goes...if anyone has a pic for SURE...I'd appreciate it.
I'm going to try to glue mine tonight. That might help a bit too...
Posted by: McMark May 12 2005, 09:30 PM
I'm 90% sure I have a brake light switch for you. I'll check tomorrow.
Posted by: CptTripps May 12 2005, 09:59 PM
Thanks Mark...let me know.
Posted by: CptTripps May 12 2005, 10:12 PM
Had ALL KINDS of fun tonight...No pics yet...I'm too tired. Here's the list of what I got accomplished.
Removed old fuse panel
Installed Engman's fuse panel
Installed Seat Belts (Too WAY longer than I thought...)
Put 2 (two) seats in the car, instead of the passenger seat I had on the drivers side
Re-installed the guage cluster.
Drove her around the block in the dark, and all the lights work!
I'm going to take her to the office tomorrow. I want the paint-guys to see it and tell me what prep they want before they get it on Monday. Should be a fun drive in!
I'll be hunting for 'what wire goes where' on the front marker lights tonight, so I can install those tomorrow. I have a feeling that's what's wrong with my turn-signals. I flip one way, the arrow blinks once, then they both flash. (The correct light does flash on the back, but just the indicator lights.)
Am I right in thinking that it's because I only have the rears hooked up right now?
Posted by: xsboost90 May 12 2005, 10:19 PM
i would say yes, need all hooked up to work properly. Why are you installing marker lights if your going to paint it soon? You have the itch like i have to drive the car or something?
Posted by: CptTripps May 12 2005, 10:47 PM
| QUOTE (xsboost90 @ May 12 2005, 11:19 PM) |
| i would say yes, need all hooked up to work properly. Why are you installing marker lights if your going to paint it soon? You have the itch like i have to drive the car or something? |
I'm going to drive it to the painter...Just making sure I'm legal for the ride.
You know damn-well that the SECOND that engine fires up, and you can...you'll take it around the block a few times!
Now I need to find what wire goes where...
Posted by: McMark May 13 2005, 01:16 AM
If both turn indicators flash you have too high of resistance in the circuit. Which means bad ground wire or corroded bulbs/bulb housings. Usually, taking the rear light assemblies apart and cleaning all the electrical contacts will cure that problem.
Posted by: Dead Air May 13 2005, 05:15 AM
| QUOTE (CptTripps @ May 11 2005, 07:10 AM) |
| Got my new shocks installed on the front lid. I wish it went up a little higher...maybe I did it wrong??? |
[QUOTE]
Just a guess... Try mounting the lifts on the forward hinge bolts...?
Posted by: CptTripps May 13 2005, 06:36 AM
Nope...it's too short then. Craig, can you chime in?
Posted by: boxstr May 13 2005, 07:41 AM
Mount the bottom pivot to the back slot. It appears you are in the middle or the one further to the front?
The little rubber eyebrow plugs are available from the Porsche dealer.
CCLINHELPMEHELPME
Posted by: CptTripps May 13 2005, 12:17 PM
| QUOTE (boxstr @ May 13 2005, 08:41 AM) |
| Mount the bottom pivot to the back slot. It appears you are in the middle or the one further to the front? The little rubber eyebrow plugs are available from the Porsche dealer. CCLINHELPMEHELPME |
Thanks Craig...that's what I was looking for. That might give me the extra 4" in height I've been looking for...
Just brought my car to the office and had the painter look her over. He commented the I did a pretty nice job...and I was doing the right thing by bringing her to him to finish off. They are going to fix a few other little marks I've been fighting with. I'm super excited about this. Can hardly wait for next Monday to drop it off!
So I'm driving it here and got REAL nervous when it started to loose power. I'm going over everythign in my head...worried that I didn't have oil, that I'd blown a gasket, thrown a rod, something horrible...car stalls. SHIT...WAIT...GAS! I guess I'd hooked the wrong light up when I was putting the gauge cluster back...I had about a cup of gas in the car. One painfull phone call to the wife later, she was on her way here with a gallon from the garage. Filled her up at the corner, and we were back in business.
Posted by: shorty01 May 14 2005, 05:17 AM
how many hours are you putting into this a day?????? you are the man!!!! did you paint anythingbefore? i got to do the same rust repairs to mine too. but I got a welder and a buddy of mine has a auto shop and will paint mine for 500 if i prime it first and supply the paint. I also have to pre paint inside the doors, floors, and trunks, did you hand sand the body? wet? your post is practicly a how to guide its going to help me alot.
Posted by: CptTripps May 14 2005, 05:45 AM
| QUOTE (shorty01 @ May 14 2005, 06:17 AM) |
| how many hours are you putting into this a day?????? you are the man!!!! did you paint anythingbefore? i got to do the same rust repairs to mine too. but I got a welder and a buddy of mine has a auto shop and will paint mine for 500 if i prime it first and supply the paint. I also have to pre paint inside the doors, floors, and trunks, did you hand sand the body? wet? your post is practicly a how to guide its going to help me alot. |
I put 2-4 a day...sometimes none at all. This weekend I won't touch it much. If my wife is on call (2nd year resident) I'll go in the garage at 3:30-4:00 when I wonder home, and go to bed at 12:00 when I realize the time. For me the trick was to not burn myself out...which I've done a few times. This board offers a lot of encouragement.
This was my first experience painting, priming, and doing any body work. I'd done some bondo/spray-can work on my motorcycle tank a few years ago, but I don't think that counts. My welding experience was limited to spot-welds that I'd built my fence with. For me the things that made the biggest difference were the Gas MIG and the HVLP Paint gun. Start with good hardware, and you'll never regret it.
If you have questions, don't hesitate to ask...that's what were all here for.
I'll get to posting pics of the last few days later. I've got to find the dohickey to download the cards to iPhoto...
Posted by: shorty01 May 14 2005, 11:08 AM
what did you do to the under body. sand and por15? there was no rust in the main support that the battery was leaking into?
Posted by: CptTripps May 14 2005, 03:56 PM
| QUOTE (shorty01 @ May 14 2005, 12:08 PM) |
| what did you do to the under body. sand and por15? there was no rust in the main support that the battery was leaking into? |
I replaced the ENTIRE floor with a new one. Just put it in, seam-sealed it, and hit it with 3M Undercoating.
The longs were pretty solid, and not anything other than surface rust inside the long. I hit it with Marine-Clean, Metal Ready, and then POR-15. A little goes a long way...get the 'Starter Kit' for $25 from POR15.com. It comes with Marine-Clean, Metal Ready, and a 4oz can of POR-15. I used one 4oz can to do the insides of my doors, inside the longs and I still have a little left.
Posted by: CptTripps May 15 2005, 09:13 PM
Spent tonight wet sanding the whole thing with 600 for the painter tomorrow. I also took my two quarts, and the stuff that I had left and mixed it all together in a new pail for the painter. He's putting 2 coats on before he clears, so this ought to cover everything pretty well, and even the color out.
I'll be spending tomorrow gathering Adobe from the movers, and with my Mom (her birthday). I've got to do the bumpers when I get home. Strip them down, and get them primed. I need to paint them on Tuesday, b/c I've got Star Wars on Wed, and get the car back on Thurs, an dI need to have all the black-stuff painted and ready to go back on!
We're coming down the home streatch folks! This is getting exciting!
Posted by: xsboost90 May 15 2005, 09:16 PM
ill catch you damniT! mine will be running this week!!!! 
Posted by: Dead Air May 15 2005, 10:38 PM
go, go, go, go
Posted by: CptTripps May 16 2005, 01:47 PM
Here's where we stand today.
Wet-sanded everything last night with 600 for the painter. I packed up all the paint, clear, and associated stuff and drove it to the body shop this morning. I went over the car with the guy that's going to be painting it, and told him what I was looking for, and what to, and not to be concerned with. I'm confident that I'll get the results I'm looking for. Best of all, I'll have it back by Friday!
Here she is in the shop...

Posted by: CptTripps May 16 2005, 01:48 PM
And this is the booth that'll bring it all together...
Posted by: CptTripps May 16 2005, 01:51 PM
I'm going to pop my head in every day to take a few snap-shots of the progress. I told everyone over there that I'd be doing it, and to expect it...it's part of the deal.
They'll do body stuff today and tomorrow, and paint on Wed, clear on Thurs and buff it all out on Friday. I drive her home by 3:00 Friday!
I lucked out because Angie is on call Friday, so I get all Friday and Saturday to put it all back together...without feeling guilty about not spending time with her.
I'm gunning for you Dan!
Posted by: solex May 16 2005, 02:15 PM
Who put that screwdriver on your hood?javascript:emoticon(':o')
smilie
Posted by: CptTripps May 16 2005, 10:29 PM
That was me...forgot to take it off before I took the pic. As I was taking the pic, I'm thinking...."Someone is going to comment on this screwdriver!"
Pics tomorrow, but I got the bumpers, rockers, and valances ground down, and in primer tonight. Hope to sand them all down tomorrow and put a coat of black paint on them. I'll do a second on Wed before Star-Wars.
Posted by: shorty01 May 18 2005, 07:11 PM
what kind of tool are you using to take all of the paint off
im using one of those 3m paint and rust grinder type pads that attatch on a drill and im hitting bondo on the front fender i think its factory bondo since the layers i see are paint-primer-paint-primer dark reddishbrown primer? and then in some areas bondo then the metal
whats the red stuff
id like to know what tool your using cause the drill im using is cutting into the bondo or body filler and by doing that its going to be hart to shape the fender back to the stock look
or should i just grind all of the filler out
thanks
Attached image(s)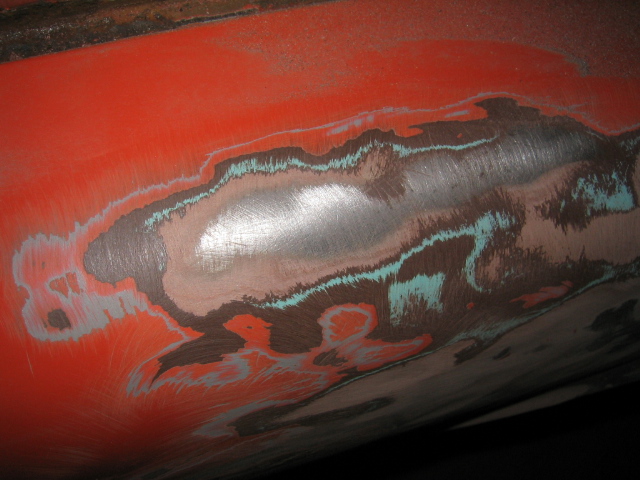
Posted by: Verruckt May 18 2005, 07:40 PM
| QUOTE (shorty01 @ May 18 2005, 07:11 PM) |
| im using one of those 3m paint and rust grinder type pads that attatch on a drill |
You're using this on a regular drill? This might take you quite a while. I would look into an angle grinder. Much more power. Also, if you don't want to completely strip the filler, maybe use a DA sander if you have a compressor.
Posted by: Dead Air May 18 2005, 07:45 PM
the pink is bondo and the green is bondo. The factory didn't use body filler. It looks like your car was painted several times. Look under a body gasket for origonal color. 120 grit on an electric random orbital sander will cut the paint without gouging the bondo.
Posted by: CptTripps May 19 2005, 01:16 AM
Shorty: Brown was a typical sealer/primer in the 70s. You probably had a re-paint at some point. I took it ALL THE WAY to metal. Used the 3M SandBlaster purple pads on an angle grinder. If I had to do it over? I'd use a chemical stripper. WAY faster/cleaner/cheaper/better on the metal.
I went and checked on my car today...they did a bunch of body work...and a lot better than I would have! It's looking great. I stopped by at the end of the day, and it was primed, and waiting for it's paint tomorrow. He said they are going to paint/clear tomorrow afternoon, and then 'bake' it for an hour. Said it'll be hard as nails after that.
I painted the bumpers this morning in my garage. I'm going to wet-sand tomorrow morning, and put another coat on. Those are all looking great too. I can hardly pait to get all this stuff back on the car. It all looks so purdy in it's new shiny paint!
Posted by: McMark May 19 2005, 02:16 AM
The factory did use bondo. Doug I didn't forget about your brake light switch. I checked my parts car and it didn't have one. I'll check my parts stash tomorrow.
Posted by: shorty01 May 19 2005, 02:46 AM
Cpttripps what kind of stripper would you use, And should i take out all of the bondo and apply new? or just bondo over the old stuff.
what paint code are you using. I'm thinking about going with a yellow shade.
did you apply anything inside the long ofer the surface rust?
oh yeah Cpt? tripps? you an officer? if so what branch
Andrew
HUA!!!
Posted by: Steve Thacker May 19 2005, 02:55 AM
I decided to poke my head in to see how your car was developing. Damn Doug you have been a busy little beaver! Looks like you are nearing, stab the gas phase in your restoration. I can't wait to see that puppy in person.
Posted by: mikelsr May 19 2005, 06:44 AM
You asked for pictures before and I know this is a bit late but here they are. Here are some pictures I took of the brake light and the collar the switch arm rides on.
Top view shows switch behind the accelerator shaft. The collar and the adjustment nut behind (above in pic).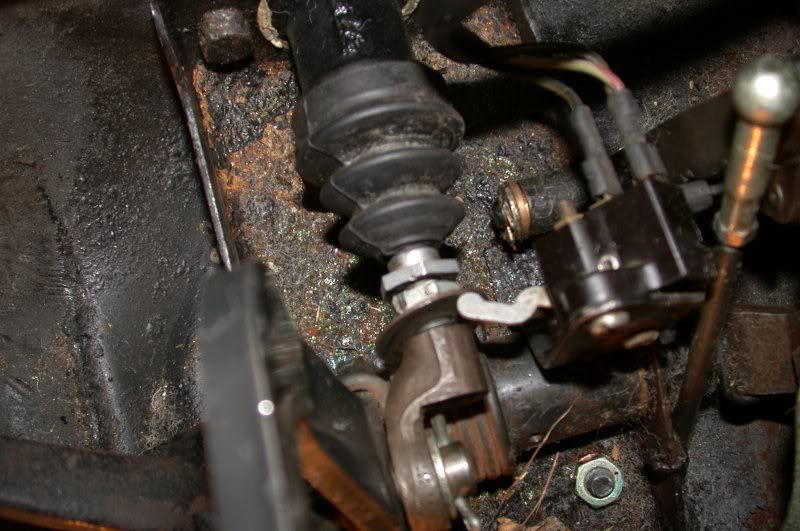
Another view showing the MC, MC adjustment mechanism.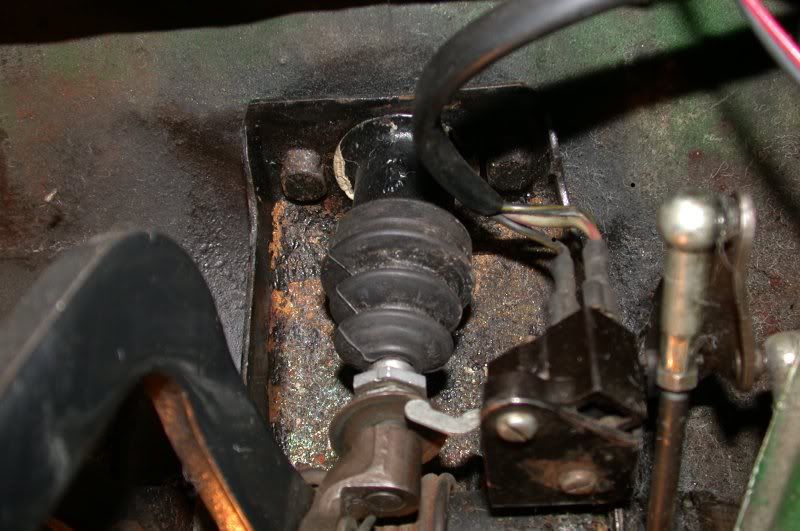
Another showing front view.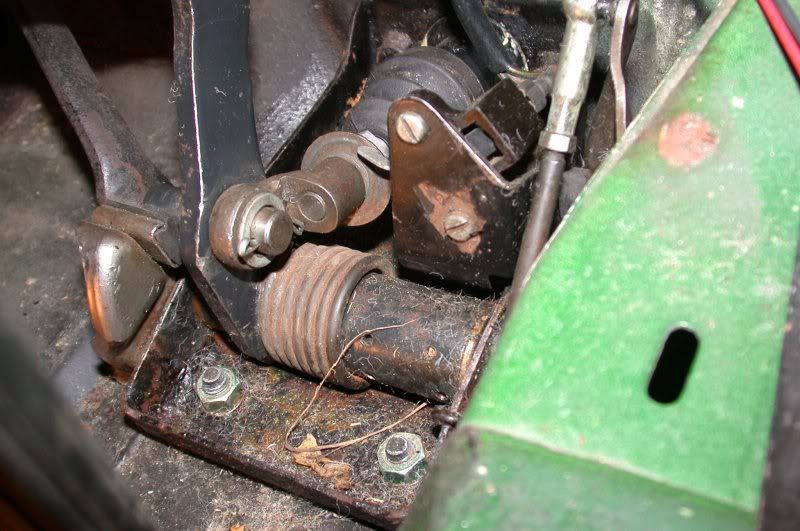
Posted by: CptTripps May 19 2005, 07:18 AM
Thanks for the pics Mike! Damn...I was doing that ALL wrong! I have it up on the front of the whole thing. That would explain a few things!
CptTripps was what they named the disease that wiped out the planet in the Steven King book "The Stand." No military affiliation.
Thanks Steve. I'll be driving her back from paint tonight, or tomorrow afternoon. If you want to come up Sat, or early Sun...I'll be putting her back together.
You all want to see the definition of a speedy restoration...watch how fast I get the seals/carpet/bumpers/rockers/interior/stereo in there. I'm a man on a mission!
Posted by: newto914s May 19 2005, 10:30 AM
Doug I'm done at school around 2:30 on Friday. I can bring a change of cloths and we can have that beast back together by Happy Hour
Posted by: CptTripps May 19 2005, 08:28 PM
Sam: It's a plan! I'll be home tomorrow 3:00ish. Depends when the body shop lets me take her home! Call my cell...I'll have it on all day.
Ok gang...lots to cover. Here we go!
Posted by: CptTripps May 19 2005, 08:32 PM
Here she sits outside of KEI Auto Body in Chagrin Falls. I'd spent the last day wet-sanding her down so she'd take another coat of paint.
Posted by: CptTripps May 19 2005, 08:34 PM
They found a few spots that needed some additional attention. (ie: places my bodywork skill REALLY shined!)
Posted by: CptTripps May 19 2005, 08:35 PM
Here's my main-man Rob. He pulled her in the booth today after sanding everything purdy.
He's wiping it down with de-greaser before he does the final tack-cloth wipe, and then paints.
Posted by: CptTripps May 19 2005, 08:36 PM
And then he digs right in!
Posted by: CptTripps May 19 2005, 08:36 PM
30min later...
(And this is BEFORE the clear-coat is applied!)
Posted by: CptTripps May 19 2005, 08:38 PM
Meanwhile....here's what I've been using my garage for this week while KEI has had my car.
I DO NOT want to be one of those guys that drives around without rockers for 6mos.
Posted by: CptTripps May 19 2005, 08:38 PM
So I got it all primed and painted up!
Posted by: CptTripps May 19 2005, 08:41 PM
Tomorrow I'm going to put the lights and the seals back in the car before I drive it back home. I don't want my nice new paint job ratteling its self full of chips. So I figured I'd spend tonight re-building the lights. What a great time to install the 'euro kit' I bought from Camp914!
Posted by: xsboost90 May 19 2005, 08:41 PM
damn! now i need to repaint mine to keep up!
Posted by: CptTripps May 19 2005, 08:42 PM
I didn't take any pics of this step, but I cracked open my AutoAtlanta 'all the seals' special tonight...that's a lot of seals for $600! I laid them all out, and spent a few min figuring out what is what. I'm going to put the seals in the doors and trunks before I leave tomorrow...hope I can figure all these out!
| QUOTE |
| damn! now i need to repaint mine to keep up! |
Dude...I repainted mine to keep up with YOU!
Posted by: Lou W May 19 2005, 10:23 PM
Looks Great, By the way, do you have a picture of the AA seal kit?
Posted by: CptTripps May 20 2005, 04:50 AM
| QUOTE (Lou W @ May 19 2005, 11:23 PM) |
| Looks Great, By the way, do you have a picture of the AA seal kit? |
I'm going to take some today, as I'm putting them back on. People knocked it when I was buying it, but let me tell you...it's pretty nice. The seals I was worried about were the main windshield seal, the front hood, and the door seals. All look great, and I think the one for the windshield is OEM.
Posted by: Thomas J Bliznik May 20 2005, 04:56 AM
Doug (CptTripps)
You are an animal!!! You get more done in one week than most of us get done in one year. Looking good, can't wait to meet you in person.
Tom
Posted by: newto914s May 20 2005, 08:42 AM
| QUOTE (CptTripps @ May 20 2005, 02:50 AM) | ||
I'm going to take some today, as I'm putting them back on. People knocked it when I was buying it, |
Me thinks people were probably knocking you more on the fact you were buying ANYTHING from AA. I'm personanly waiting for them to fold so I can buy their 916
Posted by: scott thacher May 20 2005, 08:49 AM
doug has it easy for one thing... his wife is in her residency ( sp ) to be a doctor so she is not home much and when she is she is a sleep. he does not have to hear her complain about him spending so much time in the garage.
good job so far doug maybe you will have a 914 for the wcc, with out buying it AT the wcc
Posted by: CptTripps May 20 2005, 09:05 AM
| QUOTE (scott thacher @ May 20 2005, 09:49 AM) |
| doug has it easy for one thing... his wife is in her residency ( sp ) to be a doctor so she is not home much and when she is she is a sleep. he does not have to hear her complain about him spending so much time in the garage. good job so far doug maybe you will have a 914 for the wcc, with out buying it AT the wcc |
Yeah, with her gone for 36hrs every 4 days, it's easy to get a lot done. I just time UPS/FedEX shipments so they arrive when she isn't home.
What do you mean WCC....I'm going to be done this weekend!
Posted by: tat2dphreak May 20 2005, 09:09 AM
but do YOU have a job?!?! I would have to quit my job and hire an extra person to make the kind of progress you guys make!! great job!
Posted by: CptTripps May 20 2005, 10:43 AM
| QUOTE (tat2dphreak @ May 20 2005, 10:09 AM) |
| but do YOU have a job?!?! I would have to quit my job and hire an extra person to make the kind of progress you guys make!! great job! |
I'm the Cheif Technology Officer for a venture capital firm. In the winter...I'm working like mad. In the summer, the CFO and I work 10:00 till 3:00...with an hour lunch at the local diner.
I don't have THAT much more free time than most people...I just go fast at shit like this...before my ADD kicks ina dn I'm on to the next project. Like Lumberjacking or something.

Posted by: CptTripps May 20 2005, 11:59 PM
GIANT progress today...I'll post pics tomorrow.
Got the car back from paint...looks amazing.
Installed all new seals...all of them.
Put the Valances, Bumpers and Rocker panels back on.
Installed the rear window.
Installed all the door glass.
Replaced the felt in the door for the windows.
Installed Dynamat in about 80% of the interior. DEAD quiet in there now.
More to come tomorrow!
Posted by: McMark May 21 2005, 12:09 AM
I have a brake light switch ready to go out if you need one. Nice work! Can't wait for pics.
Posted by: Dead Air May 21 2005, 06:36 AM
Two points to make:
1. Capt tripps was a blur at the sawsall party in Cleveland. Even if doing something; out of order, against better advice or just plain wrong, he was still twice as fast as everyone else.
He has no patience for down time. It's not about his wife or his job or anything...It's just the way he is!
2. Why do we have to wait for tomorrow??!!
Posted by: CptTripps May 21 2005, 06:45 AM
I THINK that was a compliemnt?
Ok...I'm up and ready to jump back you there...
Thanks Mark. I'll PM you my address. Let me know what I owe you.
Posted by: redshift May 21 2005, 06:48 AM
Awright!
Hurry.. I am going to be busy listening for bad 70 year old glue joints today, and then listening to an asshole play banjo for almost two hours..
I need good news... and pictures.
M
Posted by: Verruckt May 21 2005, 07:03 AM
| QUOTE (redshift @ May 21 2005, 06:48 AM) |
| Awright! Hurry.. I am going to be busy listening for bad 70 year old glue joints today, and then listening to an asshole play banjo for almost two hours.. I need good news... and pictures. M |
Just watch your back

Posted by: MW 914 May 21 2005, 07:15 AM
| QUOTE (CptTripps @ May 20 2005, 09:59 PM) |
| GIANT progress today...I'll post pics tomorrow. Got the car back from paint...looks amazing. Installed all new seals...all of them. Put the Valances, Bumpers and Rocker panels back on. Installed the rear window. Installed all the door glass. Replaced the felt in the door for the windows. Installed Dynamat in about 80% of the interior. DEAD quiet in there now. More to come tomorrow! |
Is it tomorrow yet?? Lets see the pics!
Posted by: Gint May 21 2005, 10:01 AM

Come one Doug! Let's see 'um. Slacker...
Posted by: Dead Air May 22 2005, 06:15 AM
I think tomorrow was yesterday
Posted by: CptTripps May 22 2005, 06:37 AM
Sorry...I got busy and didn't want to stop.
Importing pics now....
Posted by: CptTripps May 22 2005, 07:04 AM
Ok...First the stuff from Friday.
Here are the new trunk seals from the AA kit...
Posted by: CptTripps May 22 2005, 07:05 AM
And the outer door seal. I put these two in so the paint wouldn't chip on the way home.
Posted by: CptTripps May 22 2005, 07:05 AM
I made my own rubber grommets for the valances by cutting up an old hose.
Posted by: CptTripps May 22 2005, 07:06 AM
Worked real well!
Posted by: CptTripps May 22 2005, 07:07 AM
Front Bumper Installed. I'm going to adjust the hood later...I need the seal in there first.
Posted by: CptTripps May 22 2005, 07:08 AM
Back Bumper...nice and shiney.
(NAMDRAH is my last name backwards...my other car is HARDMAN)
Posted by: CptTripps May 22 2005, 07:09 AM
Here's a good body shot. This thing glistens in the sun...I'm SO pleased with the paint!
Posted by: CptTripps May 22 2005, 07:09 AM
Installing the back glass....GREAT thread here on that BTW!
Posted by: CptTripps May 22 2005, 07:10 AM
Hey! It Works!
Posted by: CptTripps May 22 2005, 07:10 AM
Put the 3rd brake light in...
Posted by: CptTripps May 22 2005, 07:11 AM
Put DynaMat in the interior...deadened the CRAP out of the panels. VERY nice...wish I had more. (I've ordered a bunch more already!)
Posted by: CptTripps May 22 2005, 07:13 AM
Re-Built the outer-inner felt bad for the windows. I need to order the inner-inner ones. Easy install with parts from Lowes. Took me an hour, and looks/works VERY well.
Posted by: CptTripps May 22 2005, 07:13 AM
Here are the outer window seals installed. This pic takes us to the end of what I did Friday...
Posted by: CptTripps May 22 2005, 07:17 AM
I started Saturday by re-covering the top-back dash. I used vynal that I got from Morphenspectra that matches the door panels I bought, and the center console. (diamond punch)
Posted by: CptTripps May 22 2005, 07:17 AM
Did the dash face too...
Posted by: CptTripps May 22 2005, 07:18 AM
Here is the rest of the interior stuff I need to cram in there...
Posted by: CptTripps May 22 2005, 07:19 AM
Next Samson (newto914s) came over and we put the dash in. Sam REALLY liked this part! ("I give up...I cant get to that screw!")
Posted by: CptTripps May 22 2005, 07:20 AM
Then we put the back-pad on. I had to re-drill a few holes after I put the chassis-stiffening kit in. Forgot about that part!
Posted by: CptTripps May 22 2005, 07:26 AM
:::: FAST FORWARD BECAUSE MY BATTERY DIED ::::
Samson got the seats built for me, while I worked on the threasholds, seals and side carpet. (As seen in the pic above.)
Then we re-blead the brakes, and THAT is when trouble started. We did all three leading up to the drivers front. We could NOT get the tire off the rim. Sounds funny, but YOU try to get that thing off of there! (Yes, we took all 4 bolts off!) So I figured I'd just bleed around it...then the bleeder valve broke off. "No Problem" I thought...I've got an easy-out! Then the Easy-Out broke off inside the broken bleeder. I have NO clue how I'm going to get THAT out of there. I got cleand up and went out to dinner with my wife.
Then I came home, and got back to work...time to see if the carpet fits.
Posted by: michelko May 22 2005, 07:26 AM
more, give me more 
Posted by: CptTripps May 22 2005, 07:28 AM
I've got a short-shift kit installed, and the center I got from Morphenspectra doesn't allow for that, so I had to mod it a bit.
First I had to raise the face up to clear the height of the riser. I also had to move the floor up to match.
Posted by: CptTripps May 22 2005, 07:29 AM
I also had to slice part of the riser. I think I may just go to the top, and bottom of this, as it's still a little too 'FAT' for under there. Maybe take it back to just outside the bolts.
Posted by: CptTripps May 22 2005, 07:31 AM
I also put the targa-door seals in last night before I went in to bed.
So there are your pics...and progress for Friday and Saturday...Time to go make some MORE...
Today I plan on finishing the interior, seals, and getting a radio in there, and driving it to see my Dad and then my Grandparents. Should be a fun day..
I'll check back in later. This part is FUN!
Posted by: Verruckt May 22 2005, 07:53 AM
It's people like you that make the rest of us look bad...
I was cutting out the last of my floorpan last night and my wife asked "how long is this going to take before you can drive it?" I said "who do you think I am? Captain Tripps?!?!?!"
She didnt know what I was talking about, and I didn't feel like explaining it. But everyone here will know what I'm talking about.
Dude you ROCK!
Posted by: Gint May 22 2005, 08:21 AM
Posted by: tdgray May 22 2005, 09:16 AM
Go Doug GO!
Ya know when you get that thing done your gonna have ta bring it down to show my wife what the hell a finished 914 looks like. She doen't believe me.
Posted by: Headrage May 22 2005, 09:30 AM
Doug,
How hard was it to replace the targa to window seals???
Posted by: MW 914 May 22 2005, 11:33 AM
Looks fantastic! Of course I like it...its looks somewhat familiar. See my blog.
I can't wait to see your car finished.
Posted by: MW 914 May 22 2005, 11:37 AM
What color yellow did you use?
Posted by: CptTripps May 22 2005, 12:40 PM
Verruckt: That's funny...my wife just rolled her eyes when I read that to her.
Gint: Thanks!
Todd: I'm headed to Akron to show my Dad tonight.
Headrage: That's the ONE seal I haven't put back on yet. I did the ones from the Targa BAR to the windshield, that one was easy.
MW 914: Saturn Yellow.
I got the radio and speakers in, as well as all the interior trim today...pics later.
Posted by: newto914s May 22 2005, 12:40 PM
Nice work Doug
Did you ever get that wheel off. I'd be over there right now, but it turns out I'm leaking fuel. never a good thing in an air-cooled car.
MW 914, he used Saturn Yellow I I believe, like his color code L 13 m
Posted by: Brando May 22 2005, 01:32 PM
Wow doug, every picture update looks better and better!
Posted by: CptTripps May 22 2005, 07:59 PM
It's important to remember tu use more butle (sp?) under the weatherstrips on the wondscreen, and the targa bar.
Posted by: CptTripps May 22 2005, 08:00 PM
Here's the Stereo and Speakers installed. This is just a temporary install, I'm going to use different speakers powered by an amp, but it gets me music.
Posted by: CptTripps May 22 2005, 08:04 PM
Here's a shot of the interior as it stands. I need to take some time to figure out the wiring for the center console. I also finished the install of the door panels, and the associated hardware there.
Posted by: CptTripps May 22 2005, 08:05 PM
I re-covered the padding in the rear trunk. I have had it in my attic for about 6mos to make SURE it's dry. Then I sealed it, and then I covered it with fusion bonding (spray adhesive) and added the carpet.
Posted by: CptTripps May 22 2005, 08:06 PM
Looks pretty sharp like this...
Posted by: CptTripps May 22 2005, 08:06 PM
This is the paint. NICE and shiney!
Posted by: CptTripps May 22 2005, 08:08 PM
Here's the shot of the test-fit of the targa top. I need to wash it up a bit. I DID put the 'sammy seal' in the back, Just arrived on Saturday...perfect timing!
Posted by: xsboost90 May 22 2005, 09:00 PM
very nice! hey drive it down saturday and if we get mine going we can go for a drive.
Posted by: CptTripps May 23 2005, 07:02 AM
| QUOTE (xsboost90 @ May 22 2005, 10:00 PM) |
| very nice! hey drive it down saturday and if we get mine going we can go for a drive. |
Dan: I'm down for it. Let me check the social calendar and see if I can park the pooches with my Dad.
Ok NOW I'm pissed...I thin this is God's way of punishing me for driving it before it's ALL THE WAY done. IT'S RAINING! MY first day to drive it to work....and it's RAINING!
Looks like it'll be rain till Wed, so I'll have a chance to do the center console, and maybe the amp Tonight. I'm still pissed...but that's life!
Posted by: CptTripps May 23 2005, 08:43 PM
Ok gang...I'm getting close. Just popped the center console in. I have to mod the way the lower 'tray' is mounted to accomidate the short-shift kit, but it'll work out JUST fine!
I spent all night chatting with Vance, and building the wiring harness for all the gauges. Not as bad as I thought it'd be...only really two wires you need to worry about...the rest is just power and ground.
I can't find the battery charger for the camera, so you'll all have to wait for pics. But it's looking like we'll be done by tomorrow night. The only thing left to do is put the wipers back on, and the fog lights. I'm just going to put them in there for now, as I don't have the switch for them yet. Maybe I'll just do that mod so they only come on when I'm 'flashing' my brights. Thoughts???
Posted by: shorty01 May 23 2005, 10:39 PM
what did you use to take the paint down to the metal
i used the 3m sanding\grinding disks but they dig into the bodyfiller and take along time what did you use links pics?
Posted by: shorty01 May 23 2005, 10:40 PM
did you ever use those 130 grit sanding pads on a drill????
Posted by: Dead Air May 24 2005, 01:14 AM
| QUOTE (Verruckt @ May 22 2005, 05:53 AM) |
| It's people like you that make the rest of us look bad... |
[QUOTE]
Ineed
Posted by: CptTripps May 24 2005, 07:11 AM
| QUOTE (shorty01 @ May 23 2005, 11:39 PM) |
| what did you use to take the paint down to the metal i used the 3m sanding\grinding disks but they dig into the bodyfiller and take along time what did you use links pics? |
Shorty01: That's exactly what I used. 3M Sandblasters on an angle grinder. That and sandpaper...if I had to do it over again, I'd use a chemical stripper. I think I said that before here...
Dave: I'm tryin!
Posted by: CptTripps May 24 2005, 09:51 AM
Here are a few pics of the interior. I'm going to re-do the face later and take the "Fasten Seat Belts" light out.
I'm real pleased with it though.
Posted by: CptTripps May 24 2005, 09:52 AM
Other side...
Posted by: tat2dphreak May 24 2005, 09:55 AM
man, that looks amazing!
Posted by: CptTripps May 24 2005, 10:03 AM
I'm going to make a new shift boot out of the diamond-punch vinyl too. The leather one is getting kinda ratty.
I've also got to make a new cover for the arm-rest. The one I had was brown, and the black one I bought is the wrong kind. I've got to wire my iPod and a CLA in there, so it'll be a bit before I need to cover anything up anyway.
Here is the list of tyhe stuff I need to finish.
Wire the Oil Pressure sensor. (Installed at both ends...just need to connect them.)
Wire the Amp, and new speakers.
Install tweeters on dash. (MAYBE in side the side air vents??)
Install iPod adaptor
Install Sirrius components
Install fog lights. (They won't work for a while...just need to fill the holes!)
Wire 3rd Brake Light
Re-paint the engine grill
Re-paint the PORSCHE letters Yellow.
Install Crane ignition and new distributor.
And that'll be it...should be done tonight!
Posted by: cdmcse May 24 2005, 10:03 AM
Great work, I love it. What diameter is your new steering wheel?
Posted by: CptTripps May 24 2005, 10:06 AM
| QUOTE (cdmcse @ May 24 2005, 11:03 AM) |
| Great work, I love it. What diameter is your new steering wheel? |
350 mm. (13.8") driving it for a couple of days, I drove a stock wheel, and it felt like a bus wheel!
I forgot to add that I need to install the Turbo Tie-Rods. I'm going to pay someone to do that though...they can allign it at the same time. Just to make sure!
Posted by: Dr. Roger May 24 2005, 10:33 AM
| QUOTE (CptTripps @ May 24 2005, 08:06 AM) | ||
350 mm. (13.8") driving it for a couple of days, I drove a stock wheel, and it felt like a bus wheel! I forgot to add that I need to install the Turbo Tie-Rods. I'm going to pay someone to do that though...they can allign it at the same time. Just to make sure! |
I hope this isn't a dumb question but I've never driven a 914 with a center console. A guy sold me one cheap and i'm looking at it thinking that it will get in the way of my right knee and the gas pedal. are you experiencing this?
Also I noticed my gauges point towards the driver a bit but yours seem set in flush. Is your center console and gauges stock or aftermarket?
Kicking some serius *ss man. Great work!
Posted by: xsboost90 May 24 2005, 10:36 AM
hey if you come down saturday i have extra arm rests IIRC in black. Man i need to have you do my dash!! Oh and that center consule, youll hate it so you should give it to me
Posted by: CptTripps May 24 2005, 10:42 AM
The stock one is flat. I've got Morphenspectras. It's identical to the stock one, only made a lot better. I also had him drill it for current gauge sizes...and I bought all new ones.
I have a size 13 shoe, and it dosen't get in my way at all...if that means anything...
Posted by: vesnyder May 24 2005, 11:21 AM
I know you told me, but where is the 3rd brake light from? Very cool!
Posted by: shorty01 May 24 2005, 11:30 AM
sorry i was using the 3m grinding \sanding pads you attach to a drill they take along time im getting a angle grinder soon could you tell me what your using? with the grinder? which pads? 3m item no.? name? you said before that you did 1 door and half a hood with 1 pad
thanks
oh i read the other post so the 3m pads you used are called "3M Sandblasters? do they only come in 1 grit?"
if you ever come down near knoxville id like to see the car, also you need to write a book how to do a total restore in 6 months... lol
Id buy it
Posted by: jim912928 May 24 2005, 05:07 PM
rogergrubb.....
the 914 consoles with the slanted gauges were put in with cars that had dealer/aftermarket installed air conditioning. You'll notice the top of the console will be notched out for an underdash vent system.
Jim
Posted by: jim912928 May 24 2005, 05:09 PM
Doug...your car looks amazing, you certainly kicked ass! Can't wait to see it at the MWC.
Jim
p.s. now you have to start thinking 6!!!!!!!
Posted by: CptTripps May 24 2005, 07:12 PM
Here's what we did tonight...
Finished mounting the center console.
Wired up the center console.
Installed the fog lights.
Painted the engine lid
Wired up 3rd brake light
Painted Engine Grills
Polished and replaced the PORSCHE on the grill.
Put the wipers on.
Drove the shit out of it!
Posted by: CptTripps May 24 2005, 07:12 PM
So people quit asking!
Posted by: CptTripps May 24 2005, 07:13 PM
And we're off!
Posted by: CptTripps May 24 2005, 07:14 PM
Check out the cool-g cup holder!
Posted by: Lou W May 24 2005, 07:23 PM
Doug, you look like you're enjoying too much.
Posted by: tat2dphreak May 24 2005, 07:28 PM
you are just gloating now! seriously great job man!!
Posted by: sixnotfour May 24 2005, 07:31 PM
On the Road Again, (Willie Nelson)
Good Job
Posted by: Travis Neff May 24 2005, 07:39 PM
Hey, what's that green stuff on the ground and in the trees?
Looks like fun
Posted by: CptTripps May 24 2005, 07:58 PM
I'll take the 'Done' pics tomorrow. I've got a few things to figure out wiring wise, but all major aspects of this build are done.
I'll put 200+ miles on it tomorrow with the meetings I've got to go to. I'm going to have the oil changed along the way. I have no idea what size filter it is, and I'd rather someone else do it initially. It's a superstision with me...long story.
Posted by: datapace May 24 2005, 08:44 PM
Congrats man! I've been following your thread since the beginning, you pace is simply stunning.
How those 320i calipers working out for you?
-bryan
Posted by: CptTripps May 24 2005, 08:48 PM
| QUOTE (datapace @ May 24 2005, 09:44 PM) |
| Congrats man! I've been following your thread since the beginning, you pace is simply stunning. How those 320i calipers working out for you? -bryan |
Actually...not that well.
Thanks for asking though!The bleeder broke off inside one of them then the easy-out broke inside! I have NO idea how to get it out of there...I may just need to buy another set.
O-well...at least it was blead first.
Posted by: xsboost90 May 24 2005, 08:52 PM
didnt you know you cant put bavarian parts on german machinery!
Posted by: Dead Air May 24 2005, 08:57 PM
CongratulationS, Doug!!!
You diserve it!!
Following your progress has been great!
Posted by: jgiroux67 May 24 2005, 09:23 PM
What did you paint the targa bar trim with?
Posted by: CptTripps May 24 2005, 09:29 PM
| QUOTE (jgiroux67 @ May 24 2005, 10:23 PM) |
| What did you paint the targa bar trim with? |
Scratched it up with a scotch-brite pad (green)
2 coats of etching primer
4 coats of black high-temp grill paint
That's the way I did all the black trim. We'll see how it holds up long-term.
Posted by: redshift May 24 2005, 09:58 PM
Yeeehaw!~ WTG!
I have nearly the same cupholder, keeps your coffee warm in the winter.
M
Posted by: shorty01 May 24 2005, 10:40 PM
I went to lowes and I didnt see anything marked 3M-Sandblasters is that the correct name for the product?
so i guess your done great pics i still cant beleive it
heres my project
heres mine it looks great but has rust, the previous owner put 4,000 dollars into it months before he sold it to mefor 3,200. from 2000 to 2003 (when i got it 03') 13,567.00 was put into since 2000. i got all the papers rebuilt engine rebuild gauges glass face, dial plus the tires on the car were new he also gave me about 1,200.00 dollars worth of extra parts and a set of 5 mahle wheels with new tires on them. I drove it for a whole year with no problems so im going to take it all apart and put
everything on this tub all it needs is hell hole to be fixed rear floor board and a little bit of the firewall and rear of the rear trunk i got a welder that will do everything i need for 150 bucks (hes a good friend) 150 isnt bad so what i need ill cut out of the blue car
i got this tub for 650 with the best targa they had the dash with 3 main gauges
plus i got a 1.7 engine with good compression for 200 and he threw in another engine for free no tax cause it was out of state and thrue them they brought everything to knoxvillt tn and my friends with a big truck i got everything to my house free
heresthe link to the orange tub
http://www.premier-autosales.com/cars/170.htm
heres the blue car sadly it looks factory fresh but will have to put it under the knife
for some this may be a repeat post
i really cant see me doing what you did in 8 months with 6 hours a day
Attached thumbnail(s)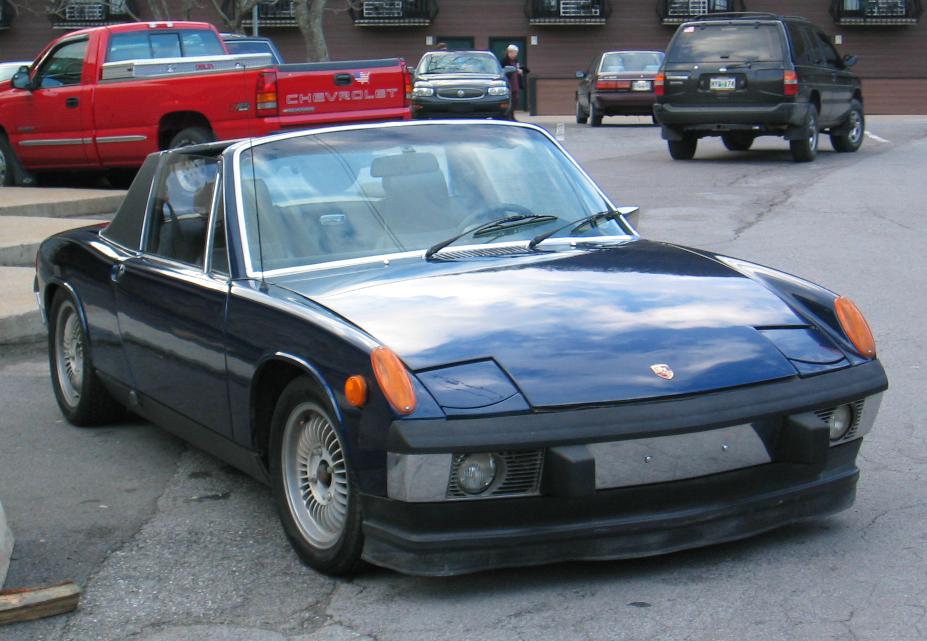
Posted by: MW 914 May 24 2005, 10:55 PM
| QUOTE (Dave Eddy @ May 24 2005, 06:57 PM) |
| CongratulationS, Doug!!! You diserve it!! Following your progress has been great! |
Horsesh!t, following his thread hasn't been great. It has been exhausting! I'll need to take some time off just to recover from watching all the work he did.
Looks great!
Posted by: morphenspectra May 24 2005, 10:59 PM
youre interior looks nice doug.can i use some of youre photos?(console) the whole car looks nice BTW good job
james
Posted by: william harris May 25 2005, 05:55 AM
Doug: Great looking restoration. I am really motivated to have my car back on the road this year. I have a question about the seal/bead at the bottom of the windshield - dash area. The seal has two lips, one side is noticeably wider than the other. I am thinking the wide lip goes in towards the car and lays over the dash when it is in place. Is this how you installed it?
Posted by: CptTripps May 25 2005, 06:02 AM
| QUOTE (morphenspectra @ May 24 2005, 11:59 PM) |
| youre interior looks nice doug.can i use some of youre photos?(console) the whole car looks nice BTW good job james |
James: I'll take better ones for you after I put the ashtray back in. I have a few suggestions too if you don't mind?
I was going to mod a radar for it, or something, but I've already got all the gauges I need...and can't think of anything else to fit in there. I thought Double CLA, but that's a little high for that.
William: That would explain a few things! I actually had that seal somewhere else, and when I looked at it, I realized that I'd found the seal I was looking for! I haven't glued it yet, so I'll look and see if it's the right way. Thanks for the tip!
Shorty01: Start a progress thread...we'll all cheer you on!
Posted by: CptTripps May 25 2005, 06:05 AM
More on the 3M disks...
This is the adapter you need. It fits any 4" angle grinder.
http://doityourself.com/store/2872901.htm
These are the disks I used...
http://doityourself.com/store/4060810.htm
Now I got all my stuff at Lowes. If you are doing an entire exterior, plan on buying 10 pads. That oughta do it for you.
SOME Lowes have a pack for $15 that had one pad and the adaptor. Like I said though... If I had to do it over again....I'd use Aircraft stripper. Get 2-gal and let it eat the paint off. Same ammount of mess, and I think it's less dangerous to the metal.
Posted by: rick 918-S May 25 2005, 07:14 AM
Doug, Great progress! Are you coming to the MWC?
Posted by: xsboost90 May 25 2005, 09:38 AM
he better be going! he's meeting some of us in the ohio caravan on the way up. W/o the yellow car we wont be able to find out way!
Posted by: Dead Air May 25 2005, 06:59 PM
Did any one notice who's NOT on line???
'Cause he's out driving his freaking car!!!
At any given time, I'd wager, there's six 914 owners on the computer to those actually in or on their cars.
What have we become!!!?? 

Posted by: tat2dphreak May 25 2005, 07:01 PM
| QUOTE (Dave Eddy @ May 25 2005, 07:59 PM) |
| Did any one notice who's NOT on line??? 'Cause he's out driving his freaking car!!! At any given time, I'd wager, there's six 914 owners on the computer to those actually in or on their cars. What have we become!!!?? |
sad people who's cars are on jackstands and we don't have the time and/or funds to get them on the road... this is nothing new though...
Posted by: CptTripps May 25 2005, 08:42 PM
You know it!
I put 400mi on her today...WELL worth the time/money/effort. Angie got a bit of stick time too!
When I got home, I put the master-cylendar brace on, and installed an electronic washer pump. I need to get a switch tomorrow at Radio-Shaft, it'll take about 30sec to hook up from there.
I also found that I need to re-install my oil-pressure sensor. I hooked it up, and it just stays PEGGED! Everyone that got a ride today pointed and said "Should it be like that???"
I think it's the ground wire. I don't think it's hooked up to a real ground.
Posted by: Gint May 25 2005, 08:50 PM
Posted by: CptTripps May 25 2005, 08:52 PM
retaliating....I get it!
I'll post them tomorrow morning...it's BED TIME! (I'm sun-burnt to hell too!)
Posted by: Grimstead May 25 2005, 09:01 PM
| QUOTE (tat2dphreak @ May 25 2005, 06:01 PM) | ||
sad people who's cars are on jackstands and we don't have the time and/or funds to get them on the road... this is nothing new though... |
What! They come OFF the jackstands
All this time I thought they were part of my car....
Posted by: Gint May 25 2005, 09:05 PM
| QUOTE (CptTripps @ May 25 2005, 08:52 PM) |
| retaliating....I get it! I'll post them tomorrow morning...it's BED TIME! (I'm sun-burnt to hell too!) |
I'll be here!
They got this stuff called sunscreen. Or you can get one of these:
Attached image(s)
Posted by: CptTripps May 26 2005, 08:39 AM
Here you go...
First, the proverbial 'All Done' pics...
Posted by: CptTripps May 26 2005, 08:39 AM
Showing off the booty...
Posted by: CptTripps May 26 2005, 08:40 AM
On the way to work yesterday...
Grommit (Lab) was happy to pose. Lego (Daschund) wasn't so sure what I was doing.
Posted by: tat2dphreak May 26 2005, 08:41 AM
gorgeous...
have I mentioned that you suck?
seriously, great job man!!
Posted by: CptTripps May 26 2005, 08:42 AM
Little dark...here's me and Angie taking a run through the Metro-Parks yesterday.
Posted by: skline May 26 2005, 08:49 AM
Hey Doug, first off, you never told us your wife was a hottie, second, if those are pics of it all done, where is your targa bar pad? How do you hold the top on without the latches? Great job on the car though, you should be proud. It motivates me to get mine done now.
Posted by: CptTripps May 26 2005, 08:49 AM
| QUOTE (tat2dphreak @ May 26 2005, 09:41 AM) |
| gorgeous... have I mentioned that you suck? seriously, great job man!! |
Thanks, I appreciate it.
Angie and I were at the Ice-Cream stand at the end of our drive tyesterday and I admitted that it turned out WAY better than I'd thought it would...and that I was in WAY over my head on several occations.
The people here got me through a lot of tough spots on this car.
I'm going to put together a list of all the stuff I did, and costs associated with it, so others can see what I did, and what it cost...on second thought...maybe that's not such a good idea?

Posted by: skline May 26 2005, 08:52 AM
No, dont do that, never add up and total up what you did. It's very discouraging and sometimes fatal.
Posted by: CptTripps May 26 2005, 08:52 AM
| QUOTE (skline @ May 26 2005, 09:49 AM) |
| Hey Doug, first off, you never told us your wife was a hottie, second, if those are pics of it all done, where is your targa bar pad? How do you hold the top on without the latches? Great job on the car though, you should be proud. It motivates me to get mine done now. |
There are pics of us in the 'What the heck do you look like' thread! I guess nobody looks at it.
I'm going to put those on tonight. I don't plan on driving it on days it is going to rain, so it hasn't been a priority. I'm not sure I'm going to put the targa-bar on either...mine is pretty trashed. Maybe just make up some little pods to conseal the latches or something...
Posted by: tat2dphreak May 26 2005, 08:53 AM
I, for one, would LOVE to see that list... but do not EVER, EVER, EVER, let your wife see it... and be sure you have a bottle of burboun handy for when you look at that "total" figure...
whatever you paid though: you got a great deal
Posted by: Gint May 26 2005, 09:19 AM
| QUOTE (CptTripps @ May 26 2005, 08:40 AM) |
| On the way to work yesterday... Grommit (Lab) was happy to pose. Lego (Daschund) wasn't so sure what I was doing. |
Grommit is obviously the star of that show!
Lookin good Doug. No sail panel vinyl?
Posted by: CptTripps May 26 2005, 09:27 AM
| QUOTE (Gint @ May 26 2005, 10:19 AM) |
| Grommit is obviously the star of that show! Lookin good Doug. No sail panel vinyl? |
Yeah...he's my driving buddy.
I was never a fan of the sail-panel vinyl. Always though of it as a place for rust to hide. If I'd have thought about it sooner, I'd have shaved the seam off of the back, and then filled the little holes on the targa bar so it didn't have that trim either. Next time.
Maybe when I do a six this winter???
Posted by: Gint May 26 2005, 09:29 AM
Just wondering since you painted the trim black. It almost looks unfinished sort of, like you still intend to put on vinyl. Are you going to leave the trim black or paint it yellow?
Posted by: CptTripps May 26 2005, 09:39 AM
| QUOTE (Gint @ May 26 2005, 10:29 AM) |
| Just wondering since you painted the trim black. It almost looks unfinished sort of, like you still intend to put on vinyl. Are you going to leave the trim black or paint it yellow? |
I painted it black. Originally, I didn't want ANY chrome on the car. I was looking at even getting the handels powder-coated flat-black. Now, I'm thinking I'll go back to polished trim. Who knows...I've got a second set of polished targa trim. I'll swap that out and see one weekend.
Posted by: skline May 26 2005, 10:39 AM
I like the trim done in black. Do take the handles down and have them powder coated black and do the side window trim as well. The no chrome look is nice on a solid colored car like yellow or red or orange. I dont know how it would look on blue or green or any other color.
Posted by: Eddie Williams May 26 2005, 09:12 PM
| QUOTE (CptTripps @ Mar 21 2005, 07:21 AM) |
| Controversial Step: Coated the whole thing with Herculiner. |
What was so contorversial about this???
... unless you got some on your hootus!!!
Posted by: CptTripps May 27 2005, 05:47 AM
| QUOTE (Eddie Williams @ May 26 2005, 10:12 PM) | ||
What was so contorversial about this??? ... unless you got some on your hootus!!! |
People were PMing me telling me that I'd be ruining my pans, I would hate it later-on, or...my favorite... "It'll add 100lbs to your car!" my standard response has been "The can only weightd 7lbs...HOW can it add 100?"
I go back and forth on if I'd do it again. I ended up putting DynaMat down b/c the sound dampening qualities weren't all that great. The up-side is that I guess it acts a lot like POR-15 with it's mechanical rust inhibitor. It's REAL rough, so when I was puttign the interior back together my knees were all scraped up. Also, every time I drop a coin or something, my hands get all scratched up under the seats.
I'm not upset that I did it, but I don't think I'd do it again.
Posted by: Gint May 27 2005, 05:55 AM
| QUOTE |
| People were PMing me telling me that I'd be ruining my pans, I would hate it later-on, or...my favorite... "It'll add 100lbs to your car!" my standard response has been "The can only weightd 7lbs...HOW can it add 100?" |
The car really does look great Doug. Has to be onw of the fastest restos I've ever seen (in real life that is; TV doesn't count).
Posted by: tdgray May 27 2005, 05:56 AM
Great Finish Doug
No get yer ass down here and help me on my car.
Posted by: CptTripps May 27 2005, 06:02 AM
| QUOTE (Gint @ May 27 2005, 06:55 AM) | ||
The car really does look great Doug. Has to be onw of the fastest restos I've ever seen (in real life that is; TV doesn't count). |
Gint: All kidding aside, that's where a lot of my inspiration came from. I'd watch American Chopper, Boyd's crew on American HotRod, the OverHaulin Guys, Pimp my Ride, and Monster Garage...I kept thinking...this stuff can't take THAT long!
Todd: Yeah, everybody is saying that now. "Cool...can you help me with the rust on my car now?"
Posted by: tat2dphreak May 27 2005, 07:00 AM
| QUOTE (CptTripps @ May 27 2005, 07:02 AM) |
| Todd: Yeah, everybody is saying that now. "Cool...can you help me with the rust on my car now?" |
yea, and everyone knows he's really coming to Big D to help me

Posted by: Dead Air May 27 2005, 07:23 AM
| QUOTE (CptTripps @ May 22 2005, 05:09 AM) |
| Here's a good body shot. This thing glistens in the sun...I'm SO pleased with the paint! |
[QUOTE]
Did you notce how your painter made your paint "nice and shiny"?
Was it the buffing, the baking? Clear coat brand?
Nun of my business...Did he stick to the $500.00 quote?
Posted by: CptTripps May 27 2005, 07:42 AM
The 'shiney' comes from a couple of things.
#1 - Painted in a booth...no dust
#2 - A decent gun...mine sucks.
#3 - 2 Coats of Clear-Coat added 10min after the final coat.
I used a single-stage paint WITH a clear-coat. Omni MTK paint and then the clear for the Omni dual-stage. The PPG rep said that's a trick to getting a real deep shine. Worked out REAL well. I wish I'd done a better job on the body work.
I had them do some other stuff, so I wen't a little over, but I have no complaints and was expecting it.
Posted by: newto914s May 27 2005, 11:32 AM
How would you feel like a drive tomorrow. I'm going to do a little work one mine, but when I'm done I'd like to try keeping up with you
The trick is going to be to find some curvey road in straight flat NE OH.
Let me know
Posted by: xsboost90 May 27 2005, 11:49 AM
you guys could cruise down here, plenty of twisty roads around here. Ever heard of devil's backbone?
Posted by: CptTripps May 27 2005, 12:17 PM
I'm up for it if Sam is...we could caravan down, and help get yours on the road. It's suppossed to rain here all day tomorrow, maybe it'll be nicer down south.
Dan: I'm still trying to get out of something tomorrow...so I can come help out.
Posted by: newto914s May 27 2005, 01:36 PM
Doug, I'm game for the caravan, but I can't tomorrow. Next weekend for sure.
Posted by: ben1440 May 29 2005, 10:14 AM
I really like your upholstery. Did you got off the net?
Posted by: CptTripps May 29 2005, 09:41 PM
| QUOTE (ben1440 @ May 29 2005, 11:14 AM) |
| I really like your upholstery. Did you got off the net? |
ben1440: Door panels, and center console are all from Morphenspectra. TOP quality stuff, and a great guy (and gal) to deal with. Having fiberglass door panels is a nice piece of mind. The wood/masonite ones are crap if you ask me.
YESTERDAY:
I built the entire stereo. Alpine head, Alpine 4ch amp, Sirius Sat, and iPod Adapter. All in a killer install I put in the front hood. I also managed to get my electric washer running.(I'll post pics later or tomorrow.)
TODAY:
Woke up and gave her a bath. It's tough to wash a car while trying not to get it wet!
I spent WAY too much time with the brakes today. More to the point, the pedal cluster. My brake light switch needed adjustment, and after an hour with it, I realizede that I'd been doing it wrong. After it broke 3hrs later, I realized I was STILL doing it wrong. Now I need another switch to replace the one I borrowed from Vance.
NOW I have that pin too far forward, and my brakes were SO HARD on the way home. I need to adjust that tomorrow morning. I hope I didn't ruin anything.
Posted by: CptTripps Jun 7 2005, 12:50 PM
Ok...let's wrap this up...shall we?
I'll cover the stereo install first, then move on to the last few other tweaks I did.
Here is how I routed the amp + and sat antenna into the cabin.
Posted by: CptTripps Jun 7 2005, 12:51 PM
I tried the antenna like this...
But I didn't get ANY reception...so I just moved it up top. Now it works fine.
Posted by: CptTripps Jun 7 2005, 12:52 PM
Here we go making a new board for the amp and AiNet stuff, as well as a new board to cover the spare.
Posted by: CptTripps Jun 7 2005, 12:54 PM
This is how I mocked them up, before I tore it apart again to cover and fit the amps.
Posted by: CptTripps Jun 7 2005, 12:56 PM
Here is me mapping everything out...
Posted by: CptTripps Jun 7 2005, 12:57 PM
an hour later...we are rockin! All on hinges, and room for a full-sized alloy rim underneath.
Posted by: CptTripps Jun 7 2005, 12:59 PM
I found this heater tube. (Actually, Vance told me where he got it for his 911.)
Neoprine/fiberglass 3" KICK-ASS tubing. It aint cheap, but it REALLY looks nice installed!
Posted by: CptTripps Jun 7 2005, 01:00 PM
Here it is installed. I have dual blowers in the back. I need to use 'real' clamps, but I couldn't find them at the time, so I just used zip-ties to hold them there...this one is too long too.
Posted by: CptTripps Jun 7 2005, 01:02 PM
Popped a 009 Distro, Crane XR700, new plugs and 8mm wires in this weekend. I had to make the wires my self. I bought a set of wires for a V8, and just make the shortest 4 the right length for me. Turned out awesome. They were yellow too!
Posted by: CptTripps Jun 7 2005, 01:04 PM
Here are the BMW fronts that I bought from Samson. I wasn't sure about the red, but it's grown on me. I'll do up a set of rears in Red too...I'll powder-coat next time though...These were already painted, and I'm thinking he didn't use the 'right' paint because it runs when the fluid hits it.
Posted by: CptTripps Jun 7 2005, 01:05 PM
I also cut off the old tip, and added a downward-pointing chrome tip. I kept getting 'spatter' on the back of the car, and this helps that a bunch!
Posted by: CptTripps Jun 7 2005, 01:06 PM
Here is a quick shot of the Wevo tranny mounts. Another great product. I don't think I have them in the right way though.
Posted by: CptTripps Jun 7 2005, 01:06 PM
And here we are in my parking spot at the office...
Posted by: CptTripps Jun 7 2005, 01:07 PM
Here we are. (Dare I say it...)
Done!
Posted by: CptTripps Jun 7 2005, 01:22 PM
Ok, well, I think it's time to put this thread to bed. Couple of last things...
Everybody here rules. I COULD NOT have done this without the constant help and encouragement of you all. Lots of people sent parts I needed here and there, More people offered encouragement.
Here are the cool-ass products you can buy HERE that I used and won't EVER do a 914 without:
Engman: http://www.914world.com/bbs2/index.php?act=ST&f=4&t=4893 - http://www.914world.com/bbs2/index.php?act=ST&f=4&t=12376 - http://www.914world.com/bbs2/index.php?act=ST&f=4&t=12306 - http://www.914world.com/bbs2/index.php?act=ST&f=4&t=9646
Morphenspectra: http://www.914world.com/bbs2/index.php?act=ST&f=4&t=7639
Travis Neff: http://www.914world.com/bbs2/index.php?act=ST&f=4&t=32748&st=0#entry424380
Sammy: http://www.914world.com/bbs2/index.php?act=ST&f=4&t=16693
Camp914: http://www.914world.com/bbs2/index.php?act=ST&f=4&t=25817 - Gas Shocks
TMorr: http://www.914world.com/bbs2/index.php?act=ST&f=4&t=28186
iforgetwhomadethis: Billet Shift Knob
Ok...well...Questions???
It's going to be strange not having to spend my nights in the garage trying get it 'done'...guess I oughta mow the lawn now.
Happy
Posted by: Travis Neff Jun 7 2005, 01:24 PM
Excellent results! Good job buddy, you did this at rocket pace for sure. What's next?
Posted by: xsboost90 Jun 7 2005, 01:46 PM
excellent job. This summer im going to hook up some sirius satellite. Maybe we'll hook up here soon and check em out!
Posted by: Gint Jun 7 2005, 02:43 PM
| QUOTE (CptTripps @ May 29 2005, 09:41 PM) |
| YESTERDAY: I built the entire stereo. Alpine head, Alpine 4ch amp, Sirius Sat, and iPod Adapter. All in a killer install I put in the front hood. I also managed to get my electric washer running.(I'll post pics later or tomorrow. |
Jey Doug,
Can you tell me more about this iPod adapter?
Car looks fantastic BTW.
Posted by: CptTripps Jun 7 2005, 03:06 PM
| QUOTE (Gint @ Jun 7 2005, 03:43 PM) | ||
Jey Doug, Can you tell me more about this iPod adapter? Car looks fantastic BTW. |
It's built by Alpine for their head units that have AiNet. (Alpine #KCA420I)
IMHO, I'd go another direction. It's cool to see the song name, but if you had just an Aux-In and the Belkin CLA adapter, you'd be in better shape. When it's connected, there is NO way to quickly scroll through songs. I'm used to the simplicity, and ease of the iPod's interface...doing it through the head unit at 1/5th the speed is a GIANT PITA! I've got a 60gig that I had connected to it with 10,000 songs or so, and I could never get past "C" on the 'Artist Search'.
Posted by: MW 914 Jun 7 2005, 03:12 PM
Looks awesome. Very clean.
Posted by: aircooledboy Jun 7 2005, 04:39 PM
Really great work Doug.
You should be very proud. Very few people ever know the satisfaction you should feel for amazing job you did resurecting that car.
Posted by: CptTripps Jun 7 2005, 05:24 PM
| QUOTE (Travis Neff @ Jun 7 2005, 02:24 PM) |
| What's next? |
Funny you should ask....
I think I'm going to do a Six this winter.
Posted by: Travis Neff Jun 7 2005, 05:40 PM
You fool!
I can't wait to see progress pics of the next project! It's cheaper for me to watch you do a conversion than to do one myself
Posted by: morphenspectra Jun 7 2005, 06:04 PM
congrats on your build. It takes a lot of hard work, $$$$, dedication, and a strange love for these little cars to do what you have done. I'm glad and proud to be of assistance in your car build.The shift knob came from Thompson MFG(ryan thompson),and again congrats.
james
appearance & performance
a six build would be cool!
Posted by: Dead Air Jun 7 2005, 09:52 PM
| QUOTE (Travis Neff @ Jun 7 2005, 03:40 PM) |
| You fool! I can't wait to see progress pics of the next project! It's cheaper for me to watch you do a conversion than to do one myself |
[QUOTE]
Posted by: CptTripps Jun 8 2005, 09:46 PM
Yeah, I'm going to find the right tub and start there. I think there is a LOT to do before I have to settle on an engine. That way I can take my time, and not rush it.
I've done one in record time, let's see what I can accomplish if I take a year on something. I like a LOT of the things joe did on the 914RS. I'll see how close to that I can get without going overboard....not that it's a BAD thing!
Posted by: xsboost90 Jun 10 2005, 06:01 AM
not gonna make it this weekend. Gotta run to louisville to paint a car for a guy, and my tranny is out.
Posted by: CptTripps Jan 3 2007, 11:34 AM

http://cgi.ebay.com/ebaymotors/ws/eBayISAPI.dll?ViewItem&item=230073781450
Posted by: dagdal1967 Jan 3 2007, 12:41 PM

http://cgi.ebay.com/ebaymotors/ws/eBayISAPI.dll?ViewItem&item=230073781450
NOOOOOOOOOOOO!!!!
Don't do it... I sold my very original '73 signal orange car that was in EXCELLENT condition for roughly the same reason you are and regretted it EVERY DAY after the event.
 And even though I have a new one now, I am still kicking myself for letting that one go!
Don't give her up!
Posted by: Vacca Rabite Jan 3 2007, 12:42 PM
Oh no!
This resto thread has been one of my biggest resources when planning and working on my car. Its too bad you feel the need to sell the car. At least you know that you can rebuild another if you ever want to.
Zach
Posted by: CptTripps Jan 3 2007, 04:24 PM
I wish I could keep it.
I'm buying the company I work for and I need all the cash I can get right now. To be honest, I'm looking forward to the day I can do another one. There are SO many things I wish I could do over again, so it doesn't hurt me as bad as you'd think.
I regret selling my first one, I'll regret selling this one, and I'll buy another some day. No worries...that's life.
Posted by: Gint Jan 3 2007, 06:21 PM
A guy's gotta do what a guy's gotta do...
Best of luck Doug. Go man!
Posted by: buzzard Jan 4 2007, 05:24 PM
I wish I could keep it.
I'm buying the company I work for and I need all the cash I can get right now. To be honest, I'm looking forward to the day I can do another one. There are SO many things I wish I could do over again, so it doesn't hurt me as bad as you'd think.
I regret selling my first one, I'll regret selling this one, and I'll buy another some day. No worries...that's life.
Doug
Spent the hour today going through your entire build ..wow ...what else can you say. Then saw with shock the ebay list and now the delist.
Decide to keep her??? After all Cleveland is only 5hrs from Toronto. You definitely had my interest peaked.
Enough mods to keep her interesting but not enough to chnage the look.
Posted by: dr914@autoatlanta.com Jan 4 2007, 05:31 PM
just a thought that all of these panels are available in rust repair variety to make for a nicer cleaner more factory result. We also like to use the floor pan tar just like the factory and then we paint it the factory match color. Again just a thought. the repair panels are cheap. We also do not cut away the quarter panel when replacing the inner wheel well.
Posted by: JPB Jan 4 2007, 07:35 PM
Nice work and worth every penny of 9K. 
Posted by: CptTripps Feb 16 2008, 10:22 AM
Just decided to pop in to see everyone.
Boy, does this thread ever bring back memories. 
Posted by: jd74914 Feb 16 2008, 01:14 PM
Hi Doug 
How's life?
Posted by: neo914-6 Feb 16 2008, 04:07 PM
your avatar looks like Javier Bardem 
Attached image(s)
Posted by: CptTripps Aug 16 2013, 11:58 AM
I'm back!
I've got the bug to do another...so I'm getting my ducks in a row to give this a whirl again.
I also just realized that all the links to my pics are down. I need to turn the web server back on for that domain to load everything back up again.
Man...it's been almost 9 years. Hard to believe...
Posted by: Chris H. Aug 16 2013, 12:38 PM
WHERE HAVE YOU BEEN MAN!????!?!?!?!
Welcome back. Can't wait for another break-neck speed build. That yellow car was very nice.
Posted by: CptTripps Aug 16 2013, 01:05 PM
Yeah, I saw one on the road last week and it got me thinking...
I've looked at 2-3 cars so far, and made a guy an offer on one last night. Just looking for a good body/chassis this time around. I'm going to do steel flares, re-paint, and a turbo subie this winter. Gotta find something for the rest of this summer though!
Posted by: jbyron Aug 16 2013, 01:25 PM
Doug - did you see this one in the classifieds?
http://www.914world.com/bbs2/index.php?showtopic=214565
Posted by: rick 918-S Aug 16 2013, 03:00 PM


Posted by: r_towle Aug 16 2013, 04:57 PM


Posted by: Vacca Rabite Aug 16 2013, 06:28 PM
Woohoo! Good to see you back!
Posted by: CptTripps Aug 16 2013, 08:26 PM
Doug - did you see this one in the classifieds?
http://www.914world.com/bbs2/index.php?showtopic=214565
I did. I'm looking for something I can drive for a few months while I stock-pile parts for the winter. Rollers are great, but driving is better. ;-)
Posted by: rick 918-S Aug 17 2013, 08:33 PM
Doug - did you see this one in the classifieds?
http://www.914world.com/bbs2/index.php?showtopic=214565
I did. I'm looking for something I can drive for a few months while I stock-pile parts for the winter. Rollers are great, but driving is better. ;-)
Something you can weld in the parking lot?

 You can always return the welder
Posted by: CptTripps Aug 19 2013, 07:14 AM
Something you can weld in the parking lot?
You can always return the welder That was seriously one of the more epic "Doug Moments" (as my wife would call them) I've had. That car ended up back here in Cleveland, and was re-sold a few months back. Vince did a great job on it. I still laugh about that every time I pass the welders at Home Depot.
Thanks for all the "welcome back" posts guys. I appreciate it.
Posted by: Chris H. Aug 19 2013, 07:18 AM
So did you but that V8 car yet? What a steal. Even if you want to make it a WRX conversion you could sell that engine/trans for a pretty penny.
Posted by: CptTripps Aug 19 2013, 07:35 AM
I'm seriously thinking about it. That may fir the bill quite well.
Waiting on pics. Anyone local to him that could take a look for me?
Posted by: bulitt Aug 19 2013, 07:48 AM
I'm back!
I've got the bug to do another...so I'm getting my ducks in a row to give this a whirl again.
I also just realized that all the links to my pics are down. I need to turn the web server back on for that domain to load everything back up again.
Man...it's been almost 9 years. Hard to believe...
Yes, please turn the pics back on!
Posted by: CptTripps Aug 19 2013, 07:52 AM
Yes, please turn the pics back on!
Just got the server back up and running. I'm re-naming all the pics now so I can get them back up and running. Should only take me another hour or so. ;-)
::: Update :::
Yeah...so re-numbering a bunch op pics is a giant PITA. I'll have to find an old drive and see if I can pull them off it. Later tonight I can tackle that.
Posted by: CptTripps Aug 19 2013, 12:31 PM
Hmm...Well that KINDA worked. They're huge and out of order, but I'm closer than I was!
I'll work on it tonight.
Posted by: Gint Sep 30 2013, 05:45 PM
I'm buying the company I work for and I need all the cash I can get right now. To be honest, I'm looking forward to the day I can do another one. There are SO many things I wish I could do over again, so it doesn't hurt me as bad as you'd think.
I regret selling my first one, I'll regret selling this one, and I'll buy another some day. No worries...that's life.
A guy's gotta do what a guy's gotta do...
Best of luck Doug. Go man!
Hi Doug!
 How'd that part of life work out?
Powered by Invision Power Board (http://www.invisionboard.com)
© Invision Power Services (http://www.invisionpower.com)