Printable Version of Topic
Click here to view this topic in its original format
914World.com _ 914World Garage _ Restoration Part Next!
Posted by: william harris Mar 21 2005, 11:55 AM
OK, here we are almost two years later, and the car is in the shop for the body and paint work. Found a guy willing to do the detail body work - metal reshaping and almost no body filler. Here's the first few shots.
Attached image(s)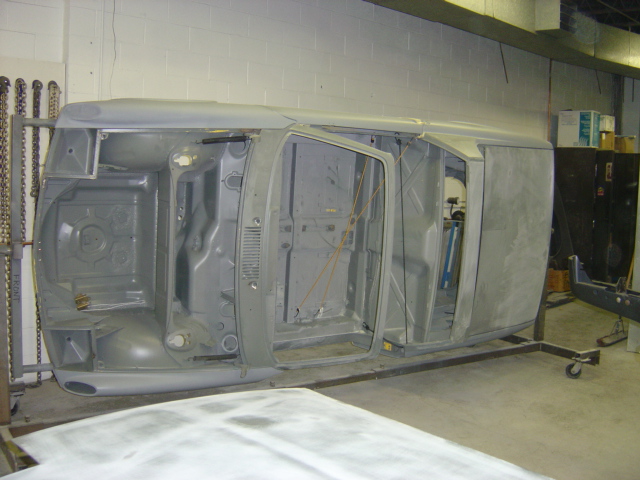
Posted by: william harris Mar 21 2005, 11:56 AM
A lot of time has been spent with the hood. It was very wavy at the leading edge and so far this is what it looks like two days later.
Attached image(s)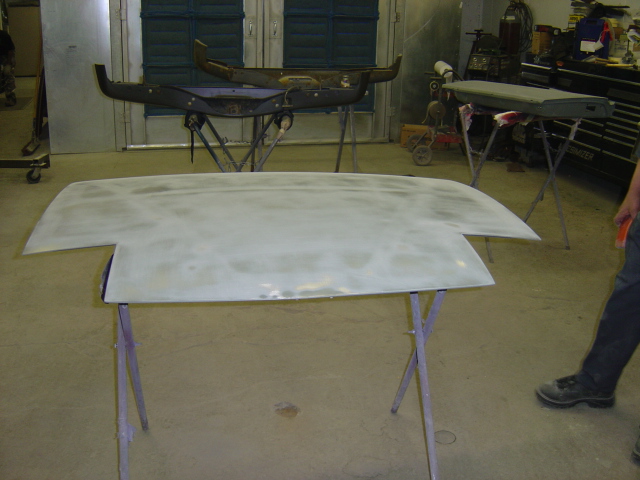
Posted by: william harris Mar 21 2005, 11:59 AM
The doors will also require a lot of work. More pictures to follow tomorrow.
Attached image(s)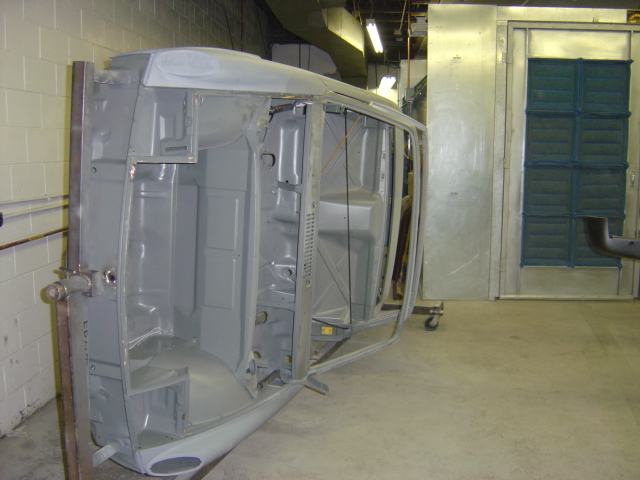
Posted by: rhodyguy Mar 21 2005, 12:23 PM
do you own the rotisserie? one would sure prove handy putting the car back together. i can't imagine doing it without one
k
Posted by: william harris Mar 21 2005, 12:39 PM
Yes, the rotissiere is another of the fine products and contributions to my efforts thanks to Chris Foley & Tangerine Racing. Once I'm done with my car it will be available to other 914 owners here in Massachusetts for their projects and then I guess I might sell it. 
Attached image(s)
Posted by: william harris Mar 21 2005, 12:41 PM
OPPS, wrong picture.
Attached image(s)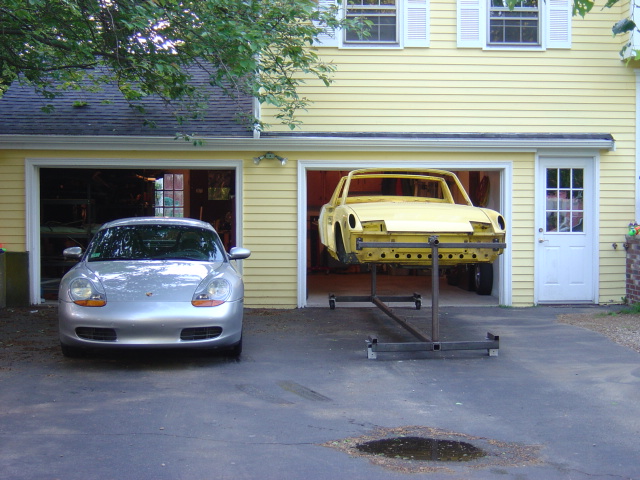
Posted by: 914GT Mar 21 2005, 01:49 PM
Car matches color of the house. You may have just given someone here on the board another idea. 
Posted by: william harris Mar 21 2005, 01:59 PM
Well, it used to match. Going to be Lapis Blue metallic when we are done. Yeah, I know - Yellow is faster, but, one, it was not the original color and two, I think 914s in dark blue look super!! 
Attached image(s)
Posted by: Pudge Mar 21 2005, 02:02 PM
Anyone have a dimensional drawing of a rotisserie?
Posted by: william harris Mar 21 2005, 02:17 PM
There are plans available on the AA  website. Sorry George!
Posted by: william harris Mar 21 2005, 02:19 PM
I just realized you are a newbie - that means Automobile Atlanta. 
Posted by: partsman Mar 21 2005, 02:53 PM
Wow..you've done me and my little 'ol macco paintjob proud.....I can't wait till we're on the road again... 
Posted by: william harris Mar 21 2005, 03:00 PM
Eric, I didn't think you would see this. Glad you did. 
Posted by: guywan914 Mar 21 2005, 07:36 PM
William, glad to see things are taking off again. Looks like everyone that has contributed their efforts on your car have done a tremendous job. Can't wait for mine to reach at least that stage. And yeah Chris is the man 
Posted by: william harris Mar 22 2005, 03:07 PM
The body guys are still working their asses off! This hood has been worked on for days!
Attached image(s)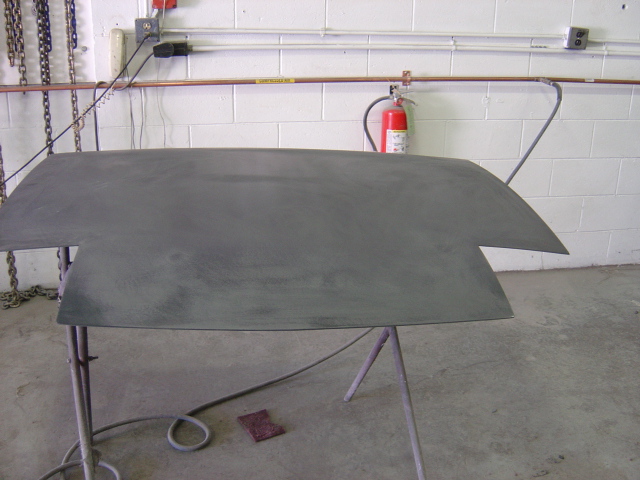
Posted by: william harris Mar 22 2005, 03:09 PM
So, I walked around the shop and took more pictures today. I really appreciate the attention to detail - like adding back in the seam sealer that I stripped off in the hunt for hidden rust.
Attached image(s)
Posted by: william harris Mar 22 2005, 03:10 PM
next
Attached image(s)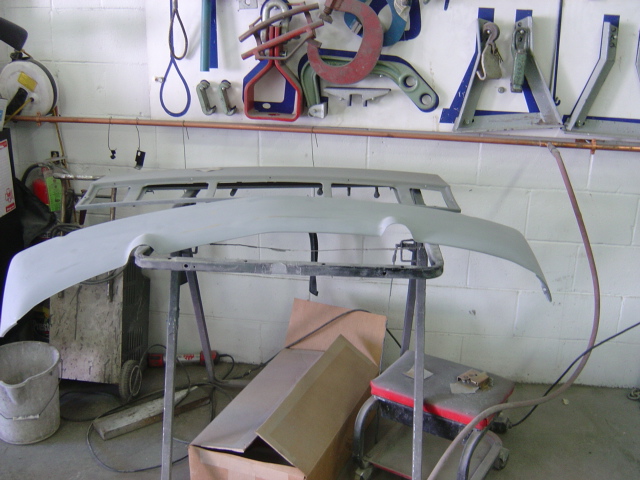
Posted by: william harris Mar 22 2005, 03:11 PM
Believe me a lot of metal work went into that front valance - it was wavy and bent up like any 30 year old piece of metal hanging down there.
Attached image(s)
Posted by: william harris Mar 22 2005, 03:12 PM
next
Attached image(s)
Posted by: william harris Mar 22 2005, 03:13 PM
The owner is a perfectionist, he wants me to bring the rear bumper over tomorrow so he can shape the back under the deck lid - yeah it was bumped. ![]()
Attached image(s)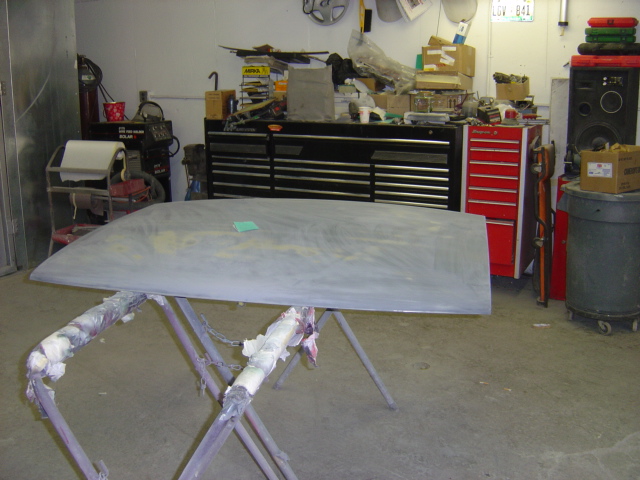
Posted by: william harris Mar 22 2005, 03:14 PM
He is welding, grinding and metal working every part of the car.
Attached image(s)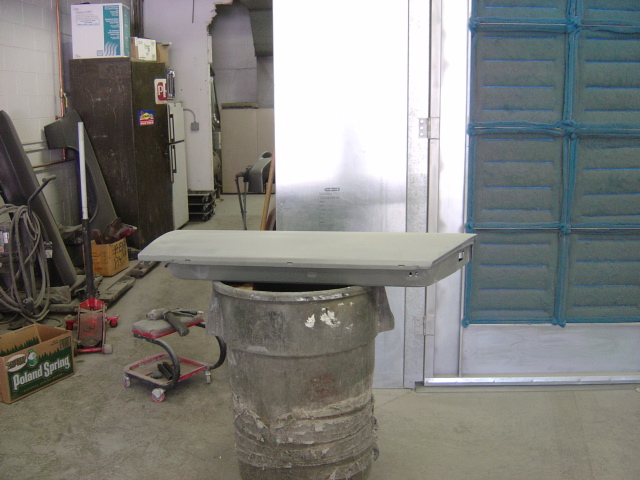
Posted by: william harris Mar 22 2005, 03:15 PM
There is hardly any part of the car that he hasn't worked and improved. Can't wait for the paint. 
Attached image(s)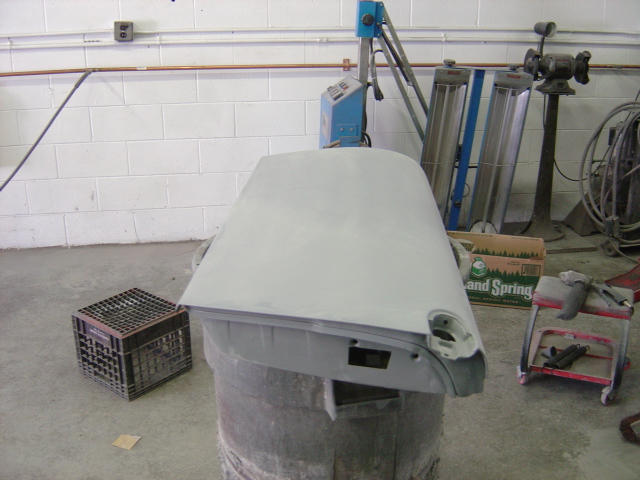
Posted by: william harris Mar 22 2005, 03:17 PM
The front of the car (hole for emergency release of front latch) had been messed up, so he welded in a patch and made it good. 
Attached image(s)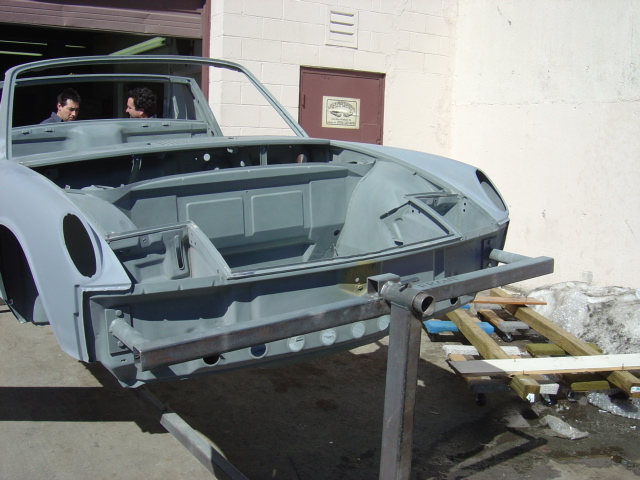
Posted by: william harris Mar 22 2005, 03:19 PM
closer shot
Attached image(s)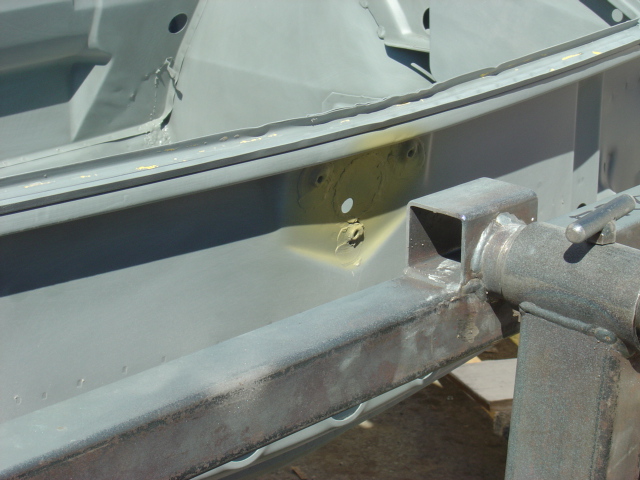
Posted by: william harris Mar 22 2005, 03:19 PM
next
Attached image(s)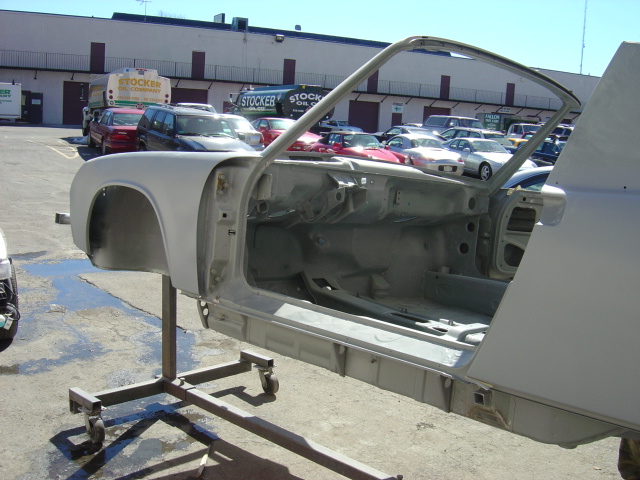
Posted by: william harris Mar 22 2005, 03:20 PM
next to last
Attached image(s)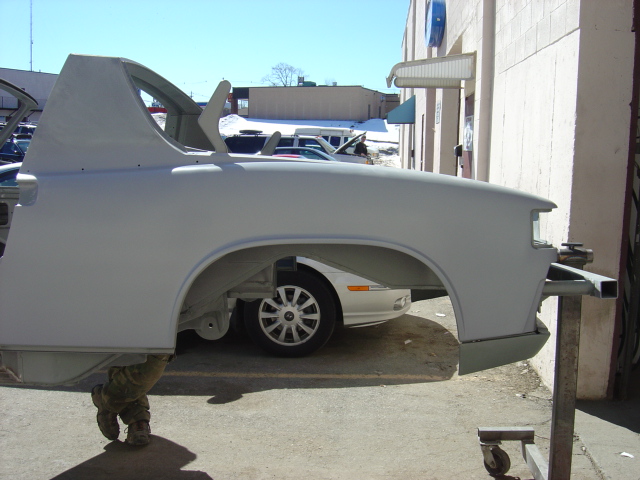
Posted by: william harris Mar 22 2005, 03:21 PM
last for today. Ain't she a beauty? 
Attached image(s)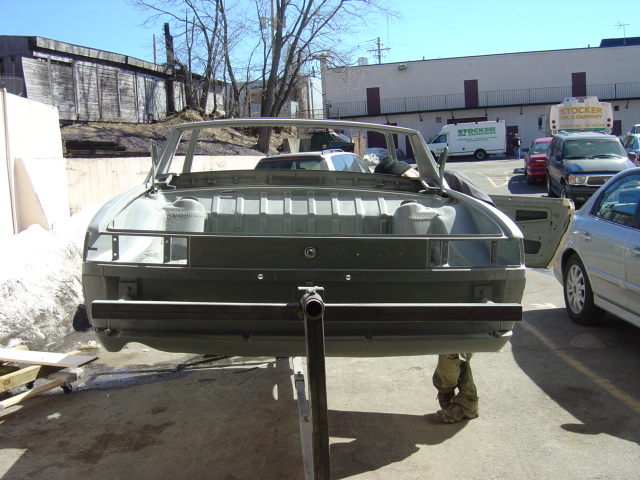
Posted by: joea9146 Mar 22 2005, 03:33 PM
Looks Good.... Are Sure u do not want to do Flares ??
Now is the Time... 

Posted by: william harris Mar 22 2005, 04:02 PM
My opinion, to do flares you need a 6 and 5 bolt Fuchs. Too much to change. Gonna look very stock and stealthy! That is until I open up that Chris Foley exhaust on the unsuspecting.
Posted by: mistro Mar 22 2005, 04:29 PM
Just to get an idea, cause the mind boggles at the amount of work done... How much is this costing? Rgds, Michael
Posted by: djm914-6 Mar 22 2005, 04:30 PM
Where's all this work taking place? the back ground looks familiar, but I can't place it.
Posted by: william harris Mar 22 2005, 05:24 PM
Hi David: you musta been to Autobahn Performance in Peabody at some time. Atech Autobody is right next door.  Michael, if I posted how much it might end up as Exhibit A in my divorce trial. I will send you a PM which you must destroy.
Posted by: MecGen Mar 22 2005, 06:03 PM
Hy Guys
I must say first, this is the mostasskicking resto !
I did my restro with the same effort but not as good results, I have a scratch, looks like it was made with the worn end of a bicycle handle. 6 inches, my bodyman straiten it, I begged him to keep going, he and the owner, my friend, assured me that continuing to pound might make more harm then good. I think I scare them, they know me and baby blue... very picky.
| QUOTE |
| if I posted how much it might end up as Exhibit A in my divorce trial. |
If someone walked in my shop with your 914 shell (before work) on rotiss, to bring it to the last pic, including finding a couple older metal pounders.....5,000$ to 10,000$, probably around 8,000$. This is with no rocker / floor work, but includes paint. How close am I ? it might be more.....amazing work. Can you pm me on how close I am please ? I will destroy the pm

And for you guys looking for an easy rotissary, I have a local "do it your selfer" toolmaker/engineer/pedler/salesman, a guy that builds and sells (out of the backof a pick-up) his own tranny jacks, engine hoists, engine stands, etc...he is well known around these parts for good/low priced shop tool. Anyway a friend of mine struck a deal with him, 2 engine hoists, but hydrolics removed and a strait bar installed, shortend main bar BUT adjustable for hieght, and all casters all around (this was pricey 8x). The longer arms/wider stans give way more stability. Kinda overkill for a 914, but I am going that route the next resto. I think he said 500$ canadain. Its an option.
Thanx for a good read
Cheers
Joe
Posted by: MecGen Mar 22 2005, 06:06 PM
Of couse the arm is shortened on the rotiss,
Joe
Posted by: djm914-6 Mar 22 2005, 06:31 PM
| QUOTE (william harris @ Mar 22 2005, 06:24 PM) |
| Hi David: you musta been to Autobahn Performance in Peabody at some time. Atech Autobody is right next door. |
Ah yes! I used to work up the road a ways in N. Andover.
Posted by: Gint Mar 22 2005, 08:09 PM
Lookin great William! Don't ya just pop a chubby whan you see your tub comin together?
Posted by: william harris Mar 22 2005, 09:42 PM
Oh yeah, and it will really go from here. As soon as the underside is in paint, and while still on the rotis, I will pop in the brake line and stainless steel fuel lines (another Chris Foley contribution) thru the tunnel. Bradholio got me new rubber bushings for where the fuel lines exit the rear fire wall. Next I will post all the suspension parts - they are coming back from the powder coater tomorrow. And we have those adjustable Konis and Springs from the HPH group buy about a year ago. The next few weeks are gonna be real fun! 
Posted by: william harris Mar 24 2005, 05:45 PM
Ok, 8 days later and the body shop guys are still preparing the body for paint. No detail is too small for these guys. I am very happy with the efforts. Also, I picked up my powder coated suspension parts today and tomorrow they start building it up. Will post suspension pictures next.
Attached image(s)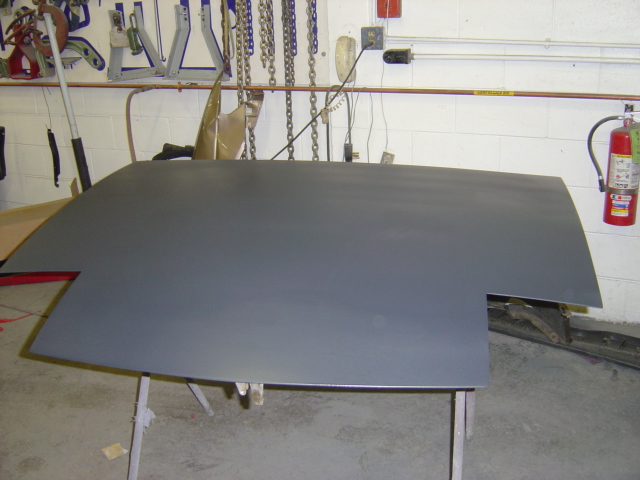
Posted by: william harris Mar 24 2005, 05:47 PM
The level of metal work that went into the hood is amazing. This is the old fashioned way, hammer and dolly and shrinking the metal.
Attached image(s)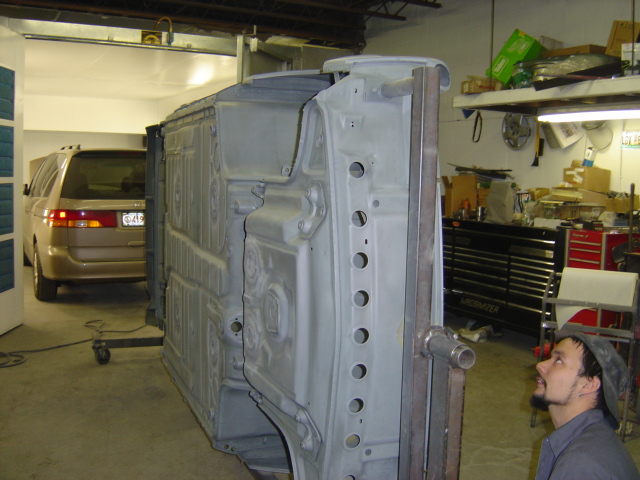
Posted by: william harris Mar 24 2005, 05:49 PM
2 or 3 guys have spent hours and hours going over every detail on the body. The shop owner has really gotten into doing the restoration. He told the Porsche shop owner next door that he was enjoying the work because somebody finally wanted to do it the right way.
Attached image(s)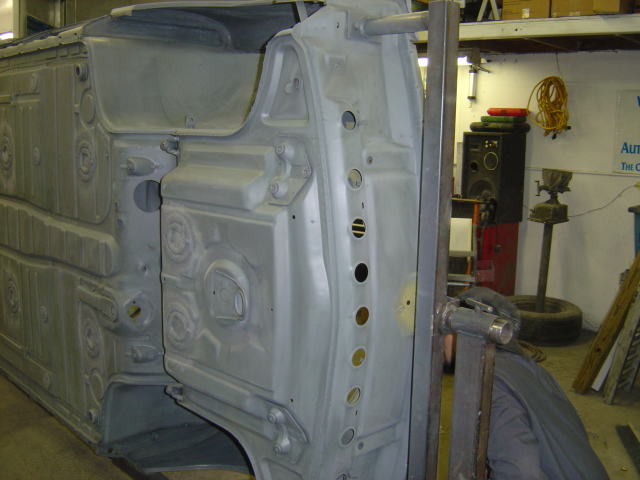
Posted by: william harris Mar 24 2005, 05:50 PM
Don't think these pictures do the job the justice it shows in person.
Attached image(s)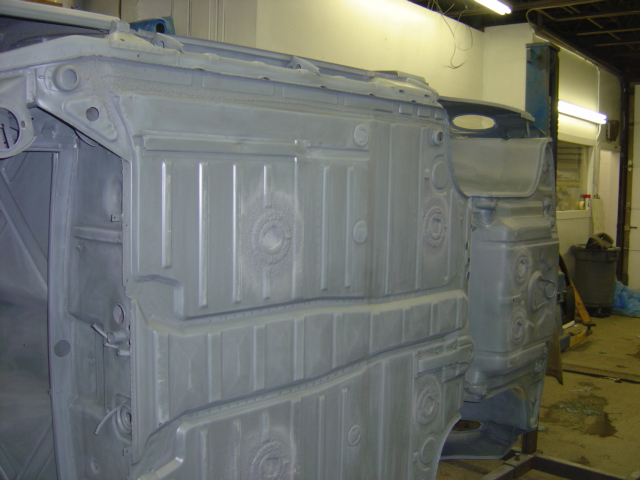
Posted by: william harris Mar 24 2005, 05:51 PM
Can't wait for the paint. 
Attached image(s)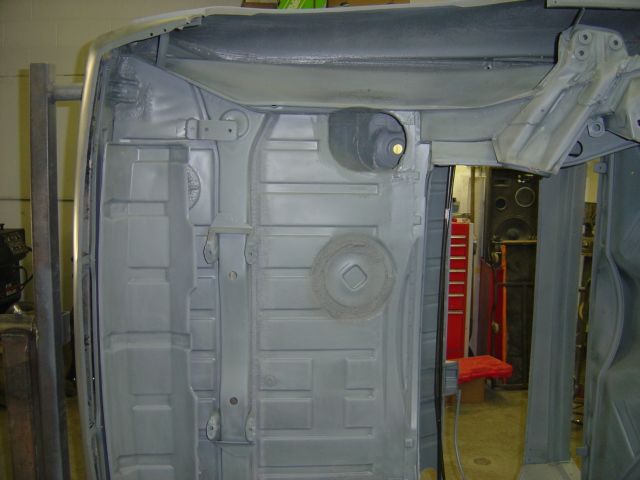
Posted by: william harris Mar 24 2005, 05:52 PM
Final view for today. Much more to come.
Attached image(s)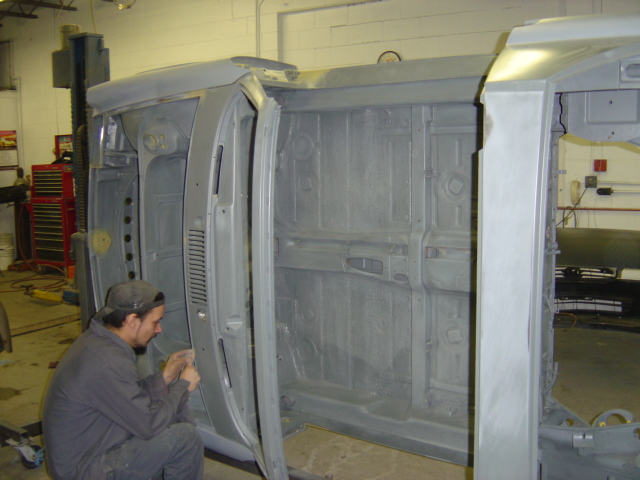
Posted by: william harris Mar 25 2005, 03:51 PM
So almost 2 weeks doing body work. Man, these guys are making me nuts waiting for the paint. 
Attached image(s)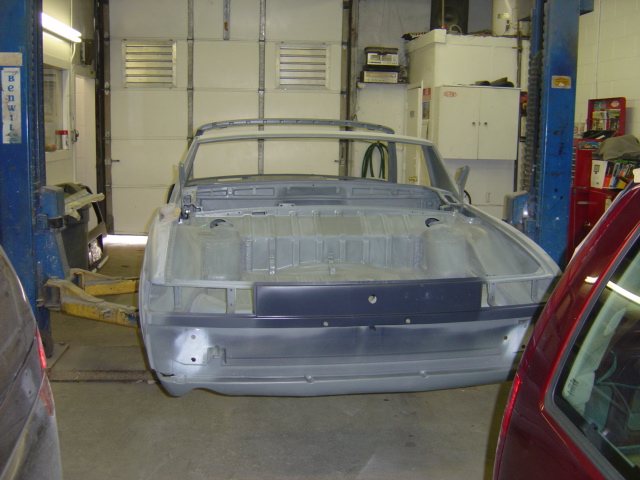
Posted by: william harris Mar 25 2005, 03:52 PM
As you can see, they have taken the car off the rotissiere to work on some panels (especially the rear panel under the lid) they couldn't do otherwise. Small bump in the back has been hammered out.
Attached image(s)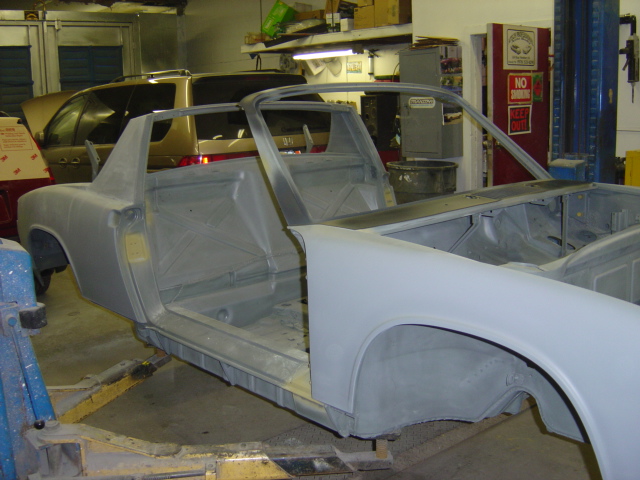
Posted by: william harris Mar 25 2005, 03:54 PM
Every time I stop by, they are sanding and shaping. Hours and hours of labor in this body. 
Attached image(s)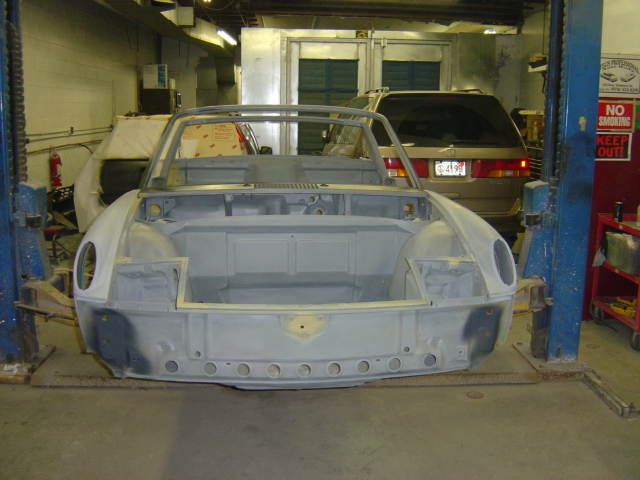
Posted by: william harris Mar 25 2005, 03:55 PM
This car will have a concours paint job. Then we have to rechrome the bumpers, wet sand and buff the trim, etc., etc.
Attached image(s)
Posted by: william harris Mar 25 2005, 03:57 PM
All the suspension parts are being assembled now. Hope to have pictures next week. 
Attached image(s)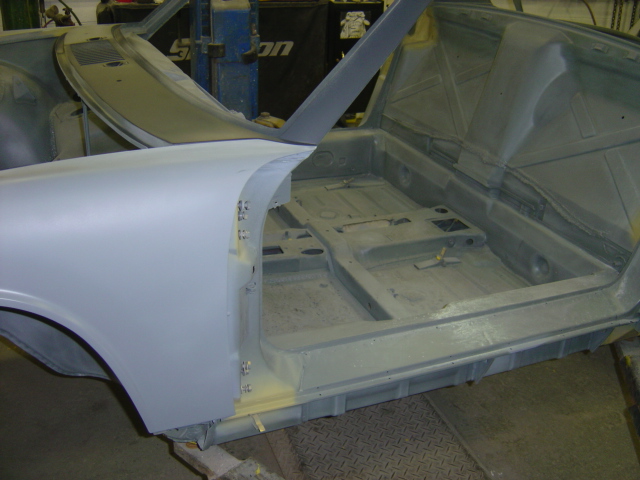
Posted by: william harris Mar 25 2005, 03:58 PM
next
Attached image(s)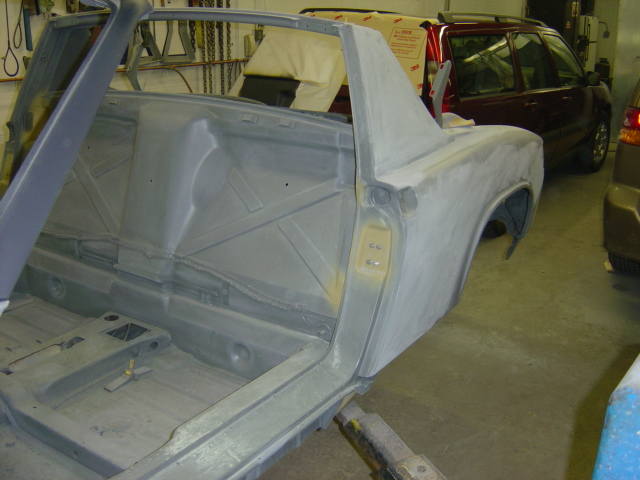
Posted by: william harris Mar 25 2005, 04:00 PM
last for today. Happy Easter everybody.
Attached image(s)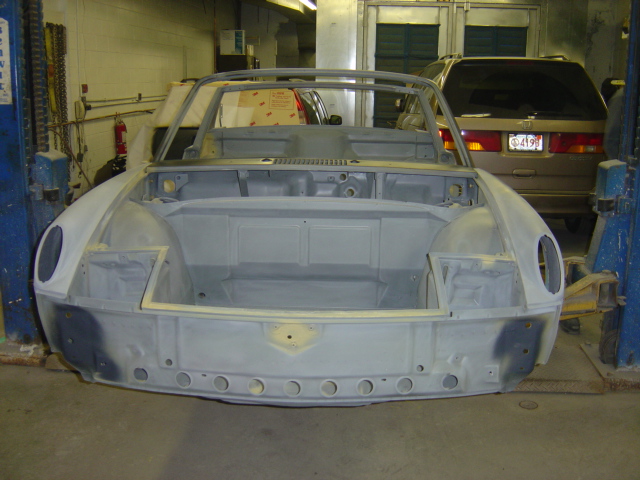
Posted by: Jeroen Mar 25 2005, 07:56 PM
awesome pics... can't help it, but I just love 'm like that
my car will be media blasted in about 6 hours
it'll never be as immaculate as yours though
Posted by: TimT Mar 25 2005, 08:07 PM
Whats the name of the shop? Dont keep it a mystery!! I can tell these guys are doing some real quality work!! give them some credit!!
Posted by: william harris Mar 26 2005, 10:32 AM
Atech Professional Auto Body in Peabody, MA. They make their money doing collision work, but take on one or two full blown restorations for "interesting" cars per year. The last car they did a ground up restoration on was a big block Shelby Mustang. I love these guys willingness to go the extra, extra mile.
Posted by: CptTripps Mar 26 2005, 11:01 AM

Wow...just wow.
Posted by: rhodyguy Mar 26 2005, 11:56 AM
it's nice to sleep easy knowing the guys are doing a first rate job! did they resmear a bit of seam sealer in the corners of the trunk seal chanel?
k
Posted by: Eric_Shea Mar 26 2005, 03:47 PM
Amazing!
Posted by: william harris Mar 26 2005, 06:36 PM
Yeah, Jim (the owner) wanted to try and replace the seam sealer that was removed in the rustoration process. Especially in the trunk, I found rust under what appeared to be good seam sealer, I would pull it out and it had allowed water to seep under and rust in a hidden process. Remember, Chris Foley tig welded up a lot of small pin holes and Jim sprayed/brushed seam sealer in the trunk (and on the floor pan) to duplicate the factory look.
Posted by: william harris Mar 30 2005, 01:53 PM
Paint work has started. They shot the bottom of the car first so we could install the powder coated suspension and then have a "roller" as they paint the top of the car. These pictures don't do the paint job justice.
Attached image(s)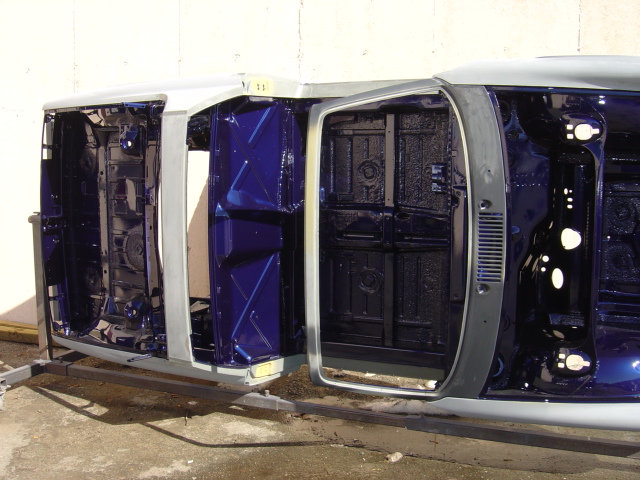
Posted by: william harris Mar 30 2005, 01:55 PM
The color is Lapis Blue metallic and in the sun light it is radiant.
Attached image(s)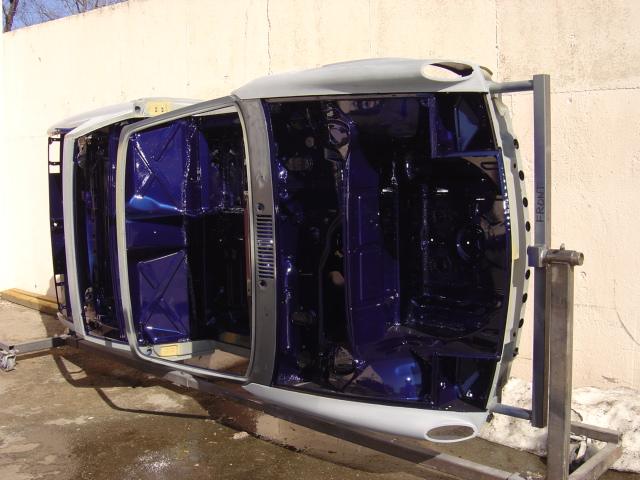
Posted by: william harris Mar 30 2005, 01:56 PM
Over the next 4 or 5 days hopefully the new suspension will go together and the car will be back on its suspension and wheels for the first time in 2 years.
Attached image(s)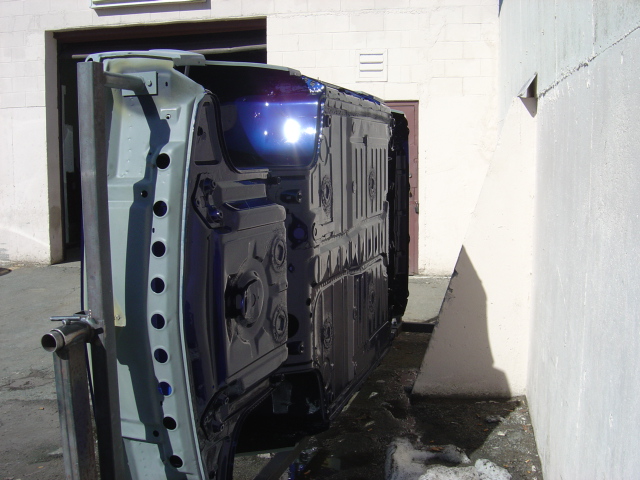
Posted by: william harris Mar 30 2005, 01:57 PM
These shots were made about 8:00 a.m. this morning. After the guys saw me taking pictures they rolled the body out for a better look.
Attached image(s)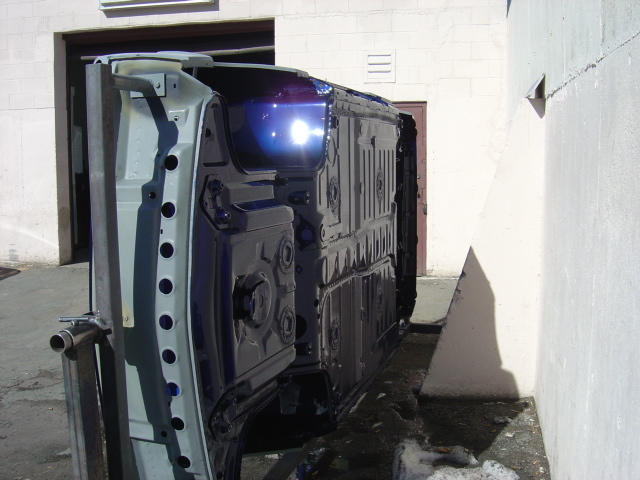
Posted by: william harris Mar 30 2005, 02:00 PM
It is really exciting to see the paint going on.
Attached image(s)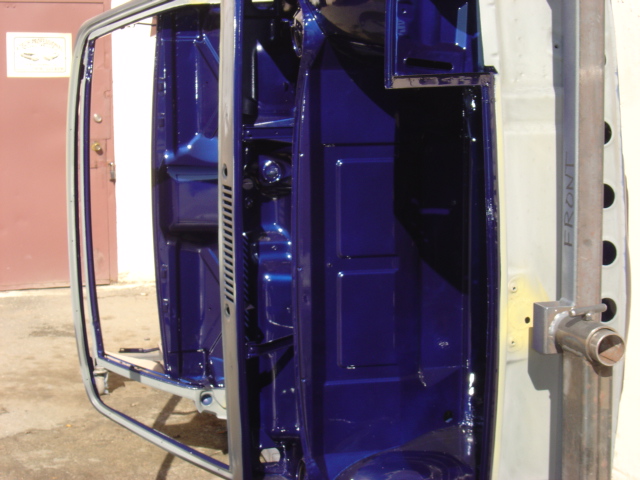
Posted by: william harris Mar 30 2005, 02:01 PM
Next.
Attached image(s)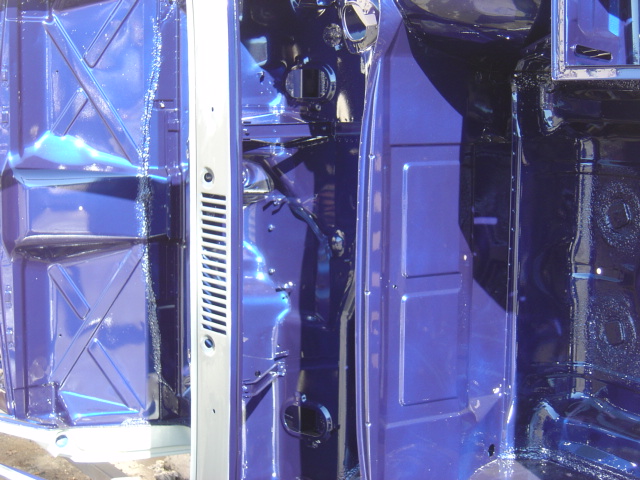
Posted by: william harris Mar 30 2005, 02:03 PM
These pictures make the color look purple - which it is not. Must be the angle and my camera. It is very rich and dark blue in person.
Attached image(s)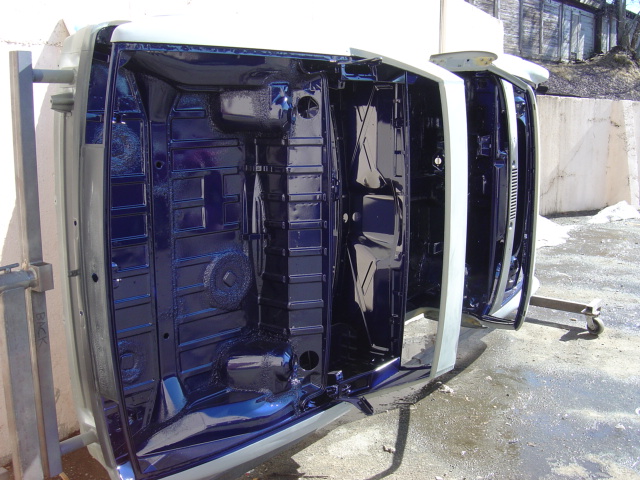
Posted by: william harris Mar 30 2005, 02:04 PM
Well, you are probably tired of seeing these pictures, so I will only post a couple more. 
Posted by: william harris Mar 30 2005, 02:04 PM
next
Attached image(s)
Posted by: william harris Mar 30 2005, 02:05 PM
next to last
Attached image(s)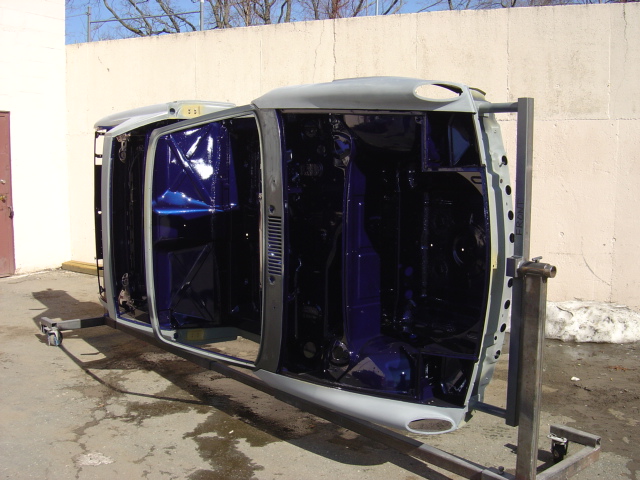
Posted by: william harris Mar 30 2005, 02:06 PM
last one: so, what do you think? 
Attached image(s)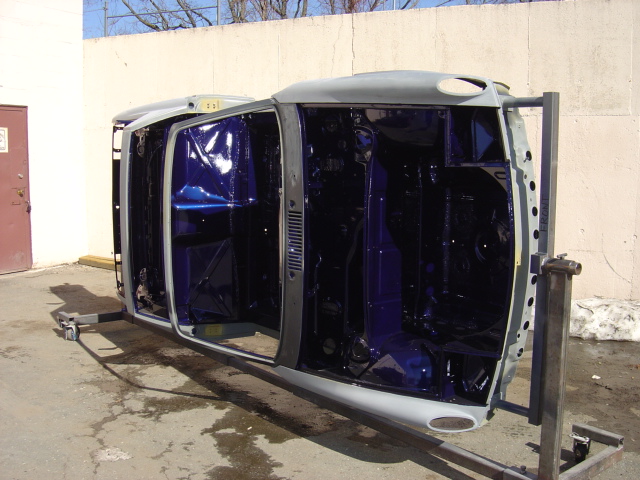
Posted by: mike_the_man Mar 30 2005, 02:11 PM
WOW!!!!!
That looks fantastic! I love the colour. I'm so jealous.
Posted by: mikerose Mar 30 2005, 02:33 PM
We have a shop in North Andover. Next time I get into town I hope to see your car WOW
Mike
www.IR100.com
Posted by: william harris Mar 30 2005, 02:53 PM
I would love to show you the car - whatever state it is in. North Andover is about 20 minutes away. My office is in Beverly, MA 978 921-2929. Hope to hear from you.
Attached image(s)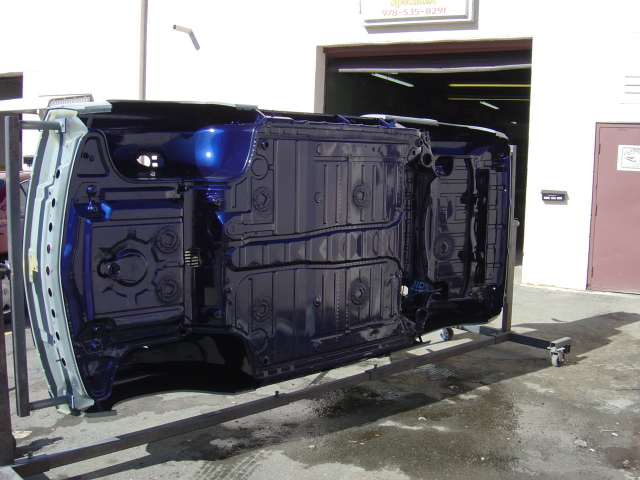
Posted by: Root_Werks Mar 30 2005, 04:10 PM
You are making fast progress! Cool! I love that color and dang.....that looks amazing!
Posted by: william harris Mar 30 2005, 04:16 PM
Fast Progress? You musta missed the part about this restoration starting two years ago. Sorta started like this in the Summer of 2003
Attached image(s)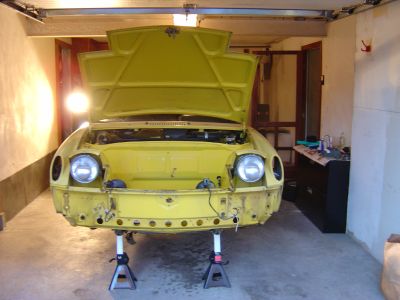
Posted by: Rand Mar 30 2005, 04:18 PM
Very nice! Makes me want to get a rotisserie and start another project from scratch! Of course, keep us posted with new pics as you go!!!
Posted by: Doug Leggins Mar 30 2005, 04:30 PM
Oh My.....
Love the color!!!
I know that seein the car in primer put a big smile on your face. How ya feelin now???
Posted by: william harris Mar 30 2005, 04:31 PM
When I am done with it, very soon I hope the rotissiere will be available to all local NE (MA, NH, CT, etc.) members to use for their projects.
Attached image(s)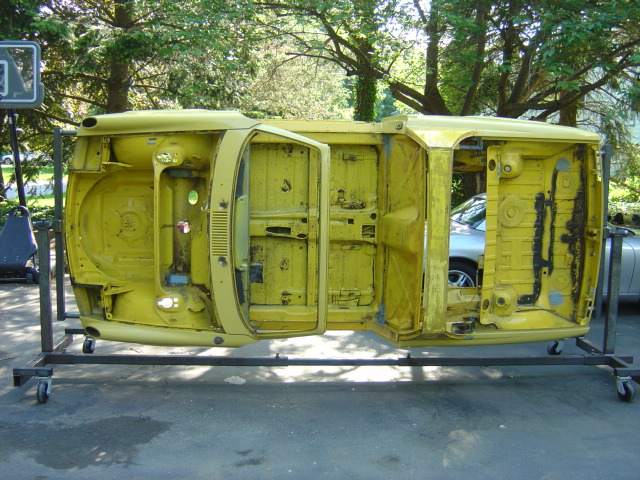
Posted by: Jeroen Mar 30 2005, 06:05 PM
that's it... I'm not gonna post any of my progress pics anymore 
I hate you and your car's an ugly POS...!
Posted by: Gint Mar 30 2005, 06:55 PM
Nice William! I love the color.
Posted by: william harris Mar 30 2005, 07:50 PM
Ya roon, remember all it takes is time and money, mostly money and the right people willing to do this sort of work. I went to five or six body shops who told me no way would they work on a car on my rotissiere and then stop mid-way for me to bolt in the suspension. Gotta find real car guys!!
Posted by: william harris Apr 1 2005, 05:02 PM
The fantastic work at A Tech Professional Auto Body continues: here we see the steel rocker panels (thanks Greg Treadway) in the paint both with the front and rear valances.
Attached image(s)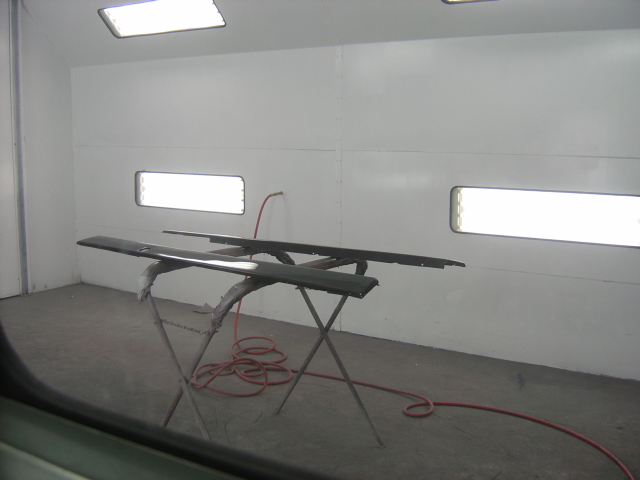
Posted by: william harris Apr 1 2005, 05:03 PM
Another shot inside the paint booth
Attached image(s)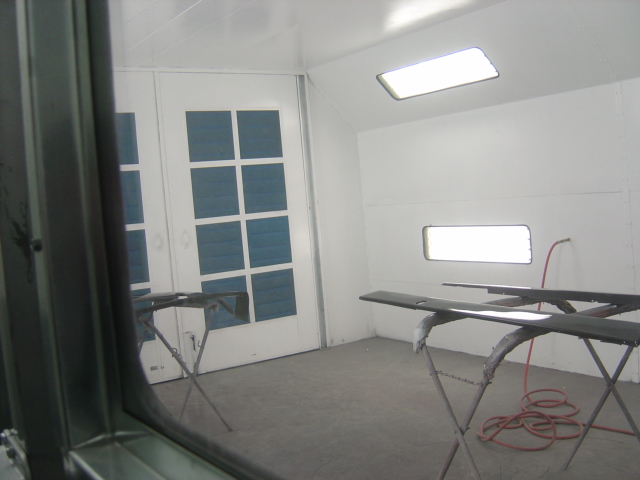
Posted by: william harris Apr 1 2005, 05:04 PM
One of the doors and the hood are stashed away beside the booth so no one with bother them 
Attached image(s)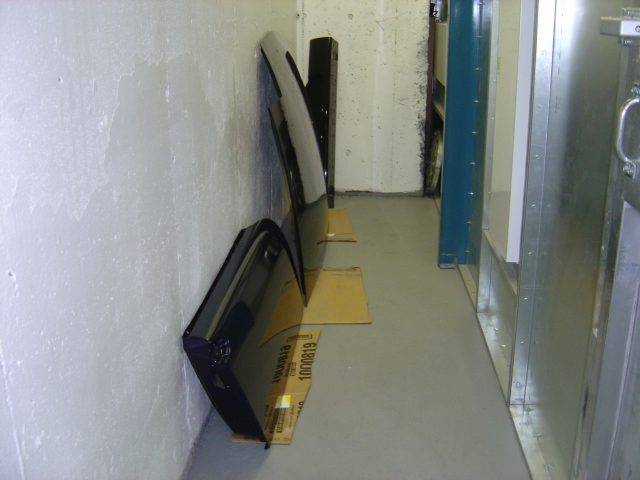
Posted by: william harris Apr 1 2005, 05:05 PM
Jim and crew continue to spend time blocking and sanding the body. The lines on this car are beautiful
Attached image(s)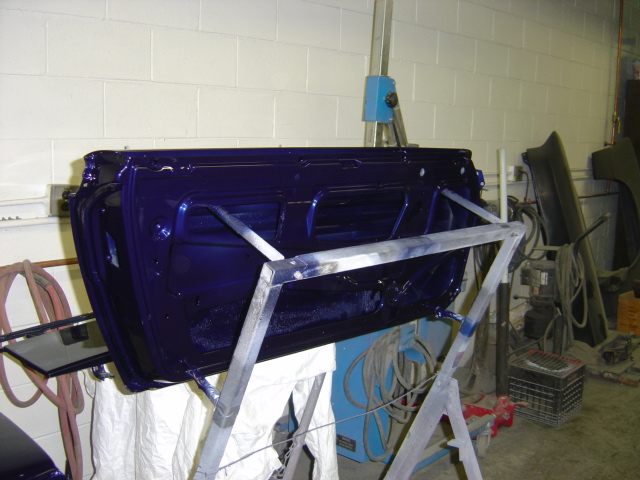
Posted by: william harris Apr 1 2005, 05:06 PM
Prior picture: I told Jim I wanted to see blue everywhere, even inside the doors!!
Posted by: william harris Apr 1 2005, 05:07 PM
More
Attached image(s)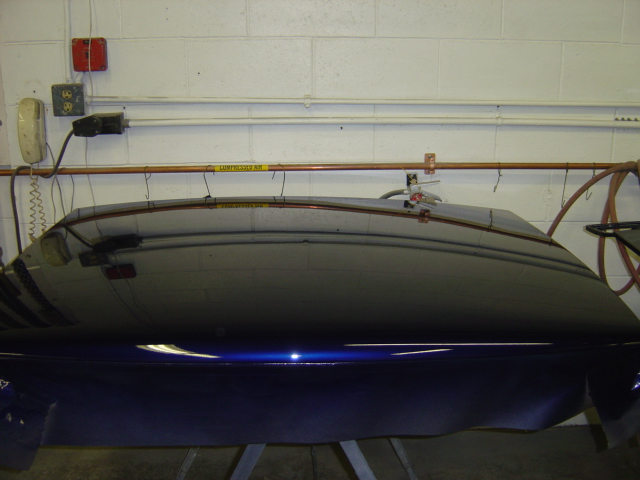
Posted by: william harris Apr 1 2005, 05:08 PM
Somewhere there are pictures of the car in here
Attached image(s)
Posted by: william harris Apr 1 2005, 05:09 PM
I think this paint job is really gonna be a knock out!!! 
Attached image(s)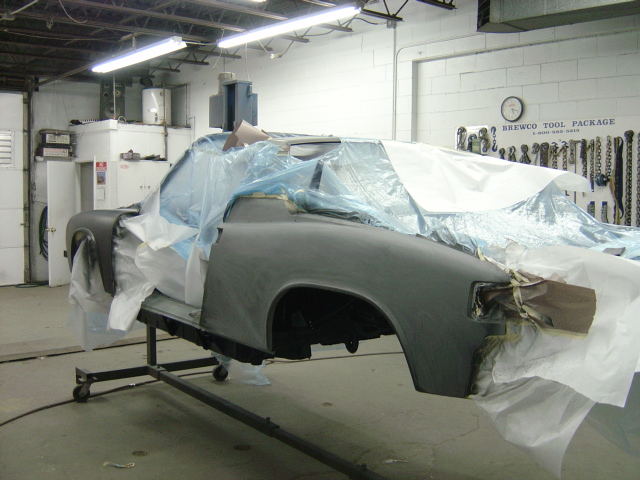
Posted by: william harris Apr 1 2005, 05:10 PM
Three weeks later and they are still working that body!
Attached image(s)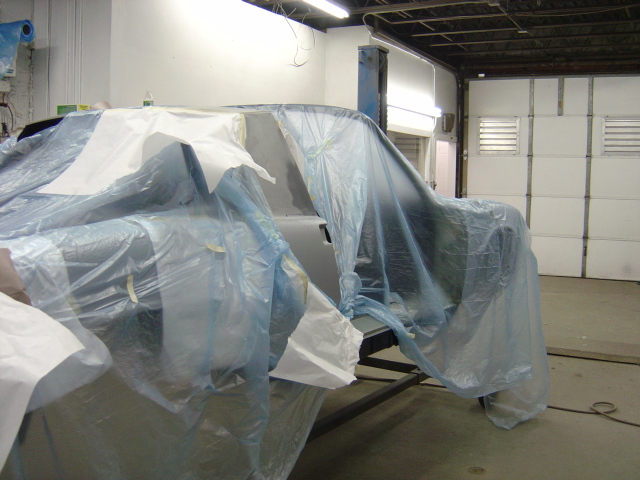
Posted by: william harris Apr 1 2005, 05:11 PM
Maybe by the middle of next week the car will be back on the suspension and wheels again. 
Attached image(s)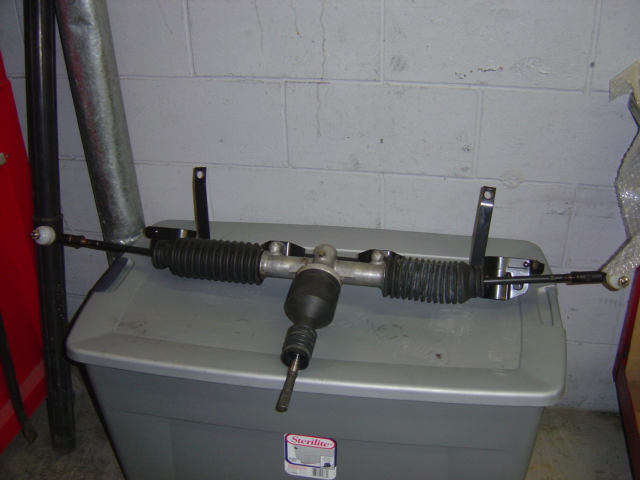
Posted by: william harris Apr 1 2005, 05:14 PM
Rick and Richard, the crew at Autobahn Performance in Peabody, MA are building up the suspension. All suspension parts have been powder coated. I am installing the Elephant Racing polybronze bearings and other goodies, new ball joints (German) and turbo tie rods, adjustable Konis, 100 lb springs and front and rear anti-sway bars (OEM). Can't wait to show more next week.
Attached image(s)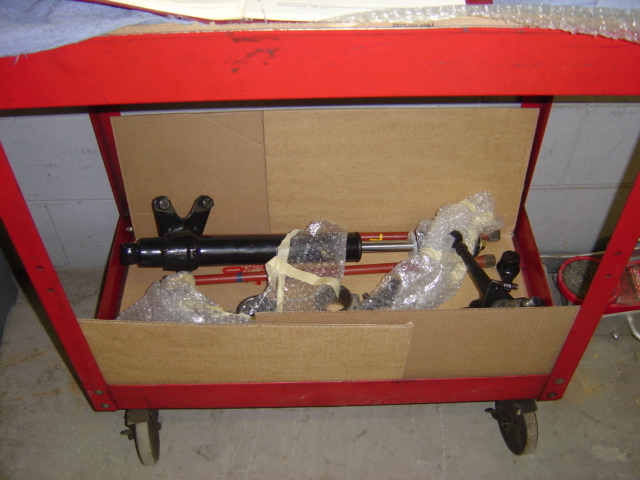
Posted by: william harris Apr 1 2005, 05:15 PM
Last one for today. Much, much more to come.
Attached image(s)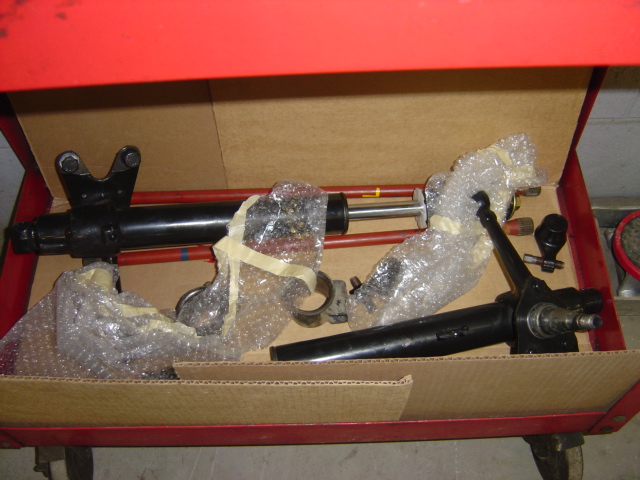
Posted by: william harris Apr 6 2005, 11:57 AM
So after tapping all the holes to remove paint, and building up the front suspension subassembly, Richard is really moving the project along. First thing, he ran the solid stainless steel fuel lines thru the tunnel (thanks Chris Foley) and out the fire wall into the new fuel line grommets (thanks Brad and HPH). Then he ran the hard line from the brakes thru both ends and hung the cleaned up brake proportioning valve. Oh, I forgot the new clips for the fuel lines (thanks again Brad and HPH). Here's what it looks like today.
Attached image(s)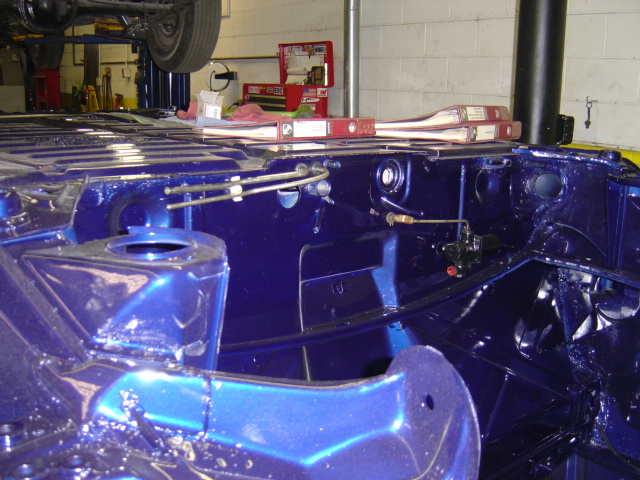
Posted by: Root_Werks Apr 6 2005, 12:00 PM
Posted by: william harris Apr 6 2005, 12:01 PM
Notice all the factory manuals on "top" of the car?  Hey, I need to get bronze bushings for the shift rod and lever for the tranny. Best source. Here's another view.
Attached image(s)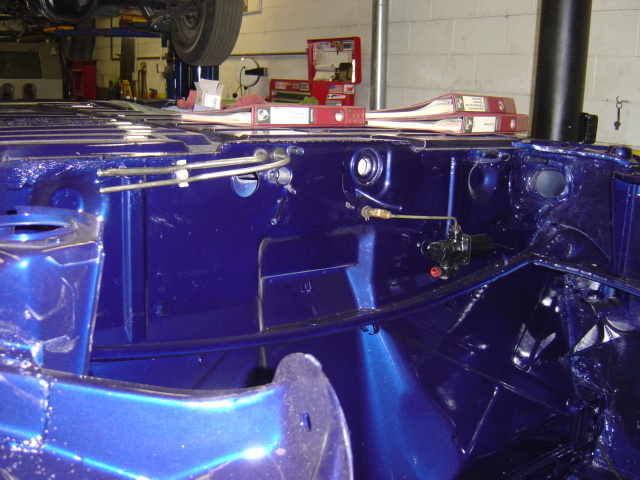
Posted by: william harris Apr 6 2005, 12:03 PM
The front suspension is basically back on the car for the first time in more than a year. All pieces powder coated, Elephant Racing poly bronze everything, turbo tie rods and coming soon, the adjustable Konis (thanks again Brad and HPH). Here's the front end as of noon today.
Attached image(s)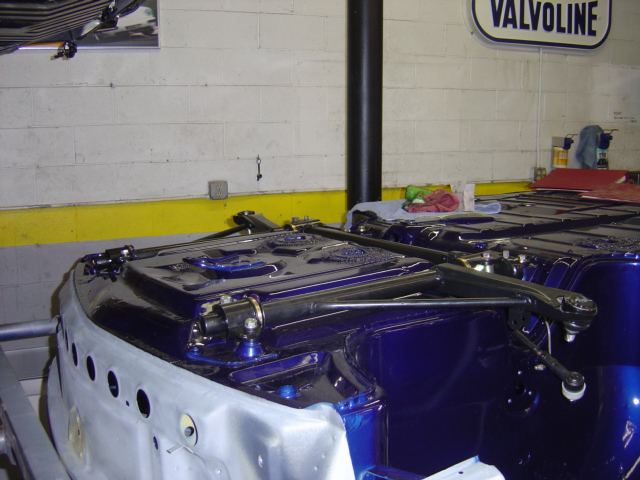
Posted by: william harris Apr 6 2005, 12:08 PM
Tommorow the rear suspension goes on and the front and rear anti-sway bars, soon it will be back on its wheels.
Attached image(s)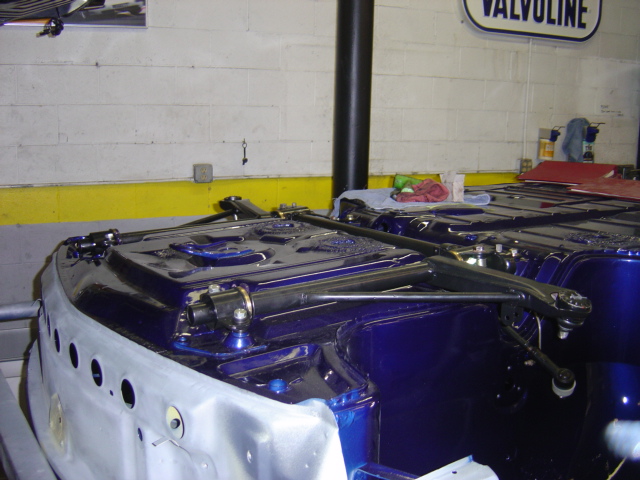
Posted by: markb Apr 6 2005, 12:19 PM
| QUOTE (Root_Werks @ Apr 6 2005, 10:00 AM) |
| |

Posted by: 7391420 Apr 6 2005, 12:45 PM
William,
That looks friggen awsome!!!!!!!!!!!!!! good work, I'm proud to know that we'll soon have a bueaty like that on the east coast! cant wait to see it!
-adam
Posted by: william harris Apr 6 2005, 01:17 PM
Thanks Adam. But there is still an awful lot of work ahead over the next couple of months. There is no wiring in the car. I have to install the refurbished main harness (thanks Jeff Bowlsby) and wire up everything. Then there is the whole interior. Alot has to be restored, subdash, new dash pad installed, all interior trim, etc. And we haven't even gotten to the engine (another Chris Foley project - thanks to three boxes of parts from Jake Raby and 2.0 head work from Len Hoffman), so my best efforts might yield a driver by July. We definitely will announce a fire it off party.
Posted by: 7391420 Apr 6 2005, 03:15 PM
Well,
when it's all done it'll be well worth it... It took me about a year of work before I had mine on the road, and 15k miles later I still love it... By the time you get that done it looks like it'll be better than new, and ready for a few long trips! if you have it done by Porsche Parade that could be a fun one...
-Adam
Posted by: Verruckt Apr 6 2005, 03:59 PM
William, how did you strip your car to metal? By hand, sandblast, or acid?
Posted by: william harris Apr 6 2005, 05:27 PM
Check out my prior restoration threads. Search for my postings. Here is where she stands at the end of today.
Attached image(s)
Posted by: william harris Apr 6 2005, 05:30 PM
The front suspension is basically finished. Richard at Autobahn Performance is doing a fantastic job.
Attached image(s)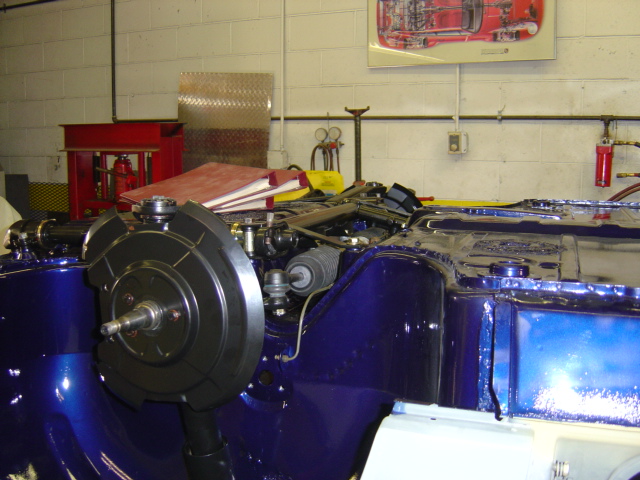
Posted by: william harris Apr 6 2005, 05:32 PM
Hard brake lines are in front and rear. Tomorrow should see most of the rear suspension in place. Maybe back on the ground by Friday. 
Attached image(s)
Posted by: william harris Apr 6 2005, 05:35 PM
People come into the shop and look at my car upside down and ask: what kind of car is that?
Attached image(s)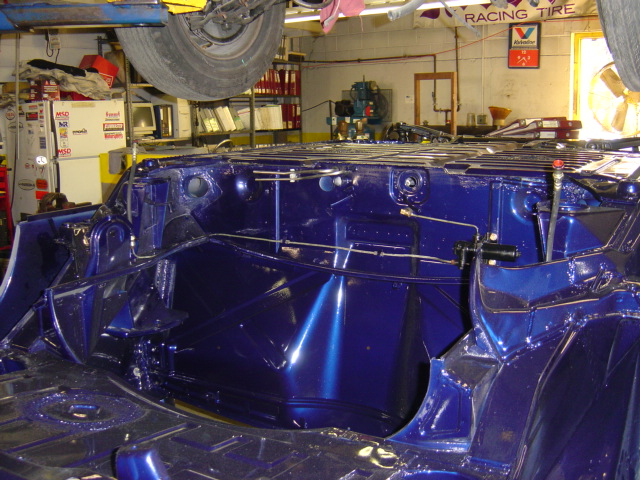
Posted by: william harris Apr 6 2005, 05:37 PM
Things are really moving along now.
Attached image(s)
Posted by: william harris Apr 6 2005, 05:39 PM
Here is the stuff being made ready for tomorrow!
Attached image(s)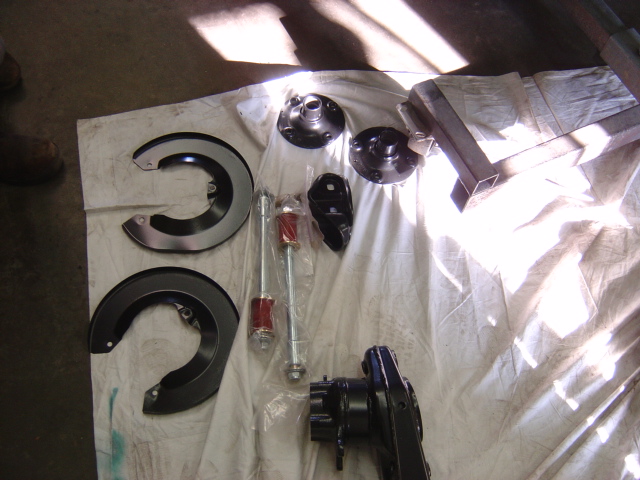
Posted by: william harris Apr 6 2005, 05:42 PM
More goodies staged for installation.
Attached image(s)
Posted by: Mueller Apr 6 2005, 05:44 PM
wow, that is going to be a nice 914....I see you went with Chucks bushings  , j/k
, j/k
Posted by: william harris Apr 6 2005, 05:44 PM
Last one for today. More to come. 
Attached image(s)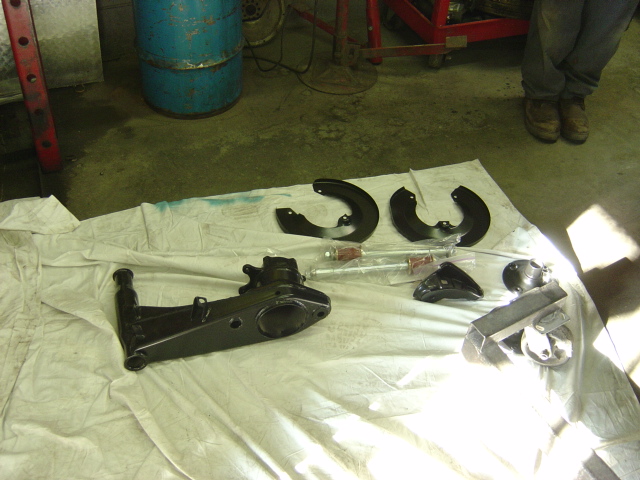
Posted by: Garland Apr 6 2005, 05:45 PM
Great project, what is the plan for the car as far as usage?
Also why have you waited to paint the rest of the body?
Again, Great looking 914.
I am working on mine, just not as far along. You are covering some of the points I have been thinking about with your posts, thanks for the help.
Posted by: william harris Apr 6 2005, 05:51 PM
Paint shop in next door. Jim at A Tech Professional Auto Body wanted the car to be a roller to paint the rest of the car. Made the painting easier for him. This way, nothing was painted that should not have been painted. My goal was to make it look like it came from the factory. Only we know better. Useage? Drive the hell out of it!!!
Posted by: vsg914 Apr 6 2005, 05:54 PM
| QUOTE (william harris @ Apr 6 2005, 05:51 PM) |
| Useage? Drive the hell out of it!!! |
Thats what they are for!!!!
Posted by: greg.treadway Apr 6 2005, 06:02 PM
Great job William. What a fantastic car you can be proud of. It is great to see such a first rate restoration.
Posted by: william harris Apr 6 2005, 07:13 PM
Thanks Greg, your steel outer rocker covers will hopefully be one of the last items buttoned up next week. I need to e-mail you, or call, about various installation kits to replace the bolts, rubber donuts, etc. for front and rear valance panels, etc. Thanks for shipping so promptly, the painted pieces were shown a few pages back.
Posted by: Garland Apr 6 2005, 07:16 PM
| QUOTE (william harris @ Apr 6 2005, 06:51 PM) |
| My goal was to make it look like it came from the factory. |
Mine to.
Posted by: greg.treadway Apr 6 2005, 07:27 PM
Glad I could assist in some small way, but you're the one who deserves the thanks for doing a real restoration. I can't wait to see the finished product.
Posted by: xsboost90 Apr 6 2005, 08:50 PM
maybe someday ill get to do that to mine, right now im making it nice enough to drive it for five or so years until i have a bigger garage and ill get a rotis and do it that way. MAN, now i cant wait to take it BACK apart..and its not even together yet. NICE work.
Posted by: CptTripps Apr 6 2005, 08:57 PM
Well done...When do you think you'll have her on the road again?
Posted by: william harris Apr 7 2005, 06:54 AM
My goal is to be driving this summer. That depends on the engine build, tranny refurb and then the interior work. I plan on completely restoring the interior, but I may put that off until the winter and just drive it as is.
Posted by: URY914 Apr 7 2005, 08:13 AM
You need to just get it back on the road asap. It will give you the high to keep going with it. Too many projects never make it back on the road and owners get 914 burnout.
IMO, Paul
Posted by: william harris Apr 7 2005, 04:00 PM
So the front end of the car is entirely done. I was there around 5:30 as Richard was bolting on the gravel shield under the steering rack. Here's what it looks like.
Attached image(s)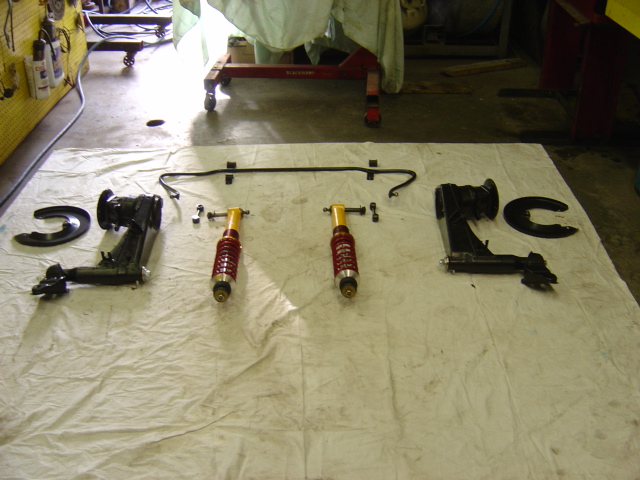
Posted by: william harris Apr 7 2005, 04:01 PM
Obviously, that picture is the rear suspension, staged and ready to go. Next.
Attached image(s)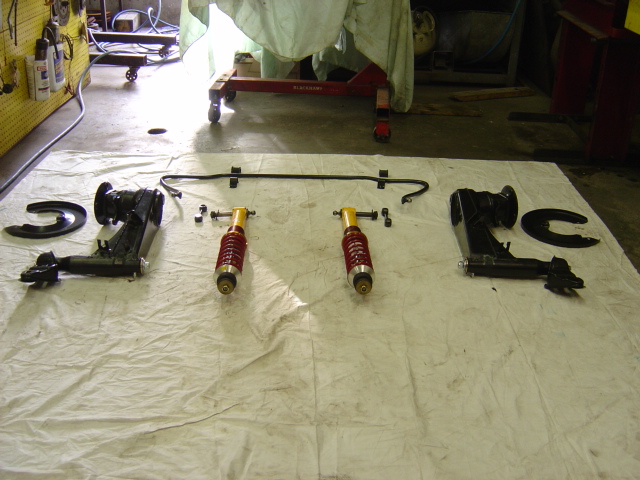
Posted by: william harris Apr 7 2005, 04:02 PM
The plan is to install the rear suspension tomorrow and bolt on the wheels and the car is a roller again.
Attached image(s)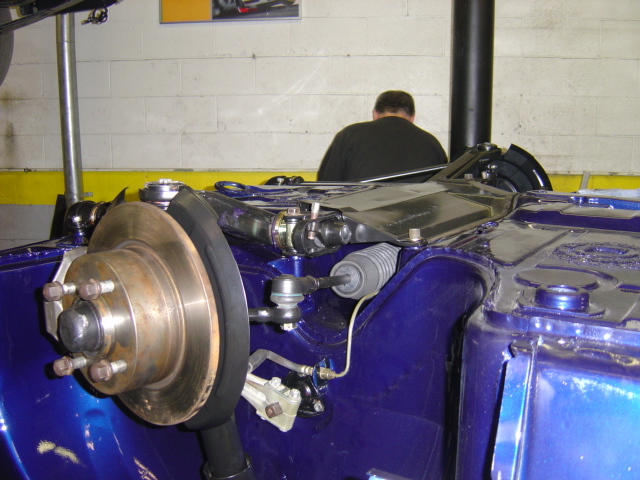
Posted by: william harris Apr 7 2005, 04:04 PM
There's the front end. Thats Richard with his back to the camera, hard at work while I annoy him taking pictures.
Attached image(s)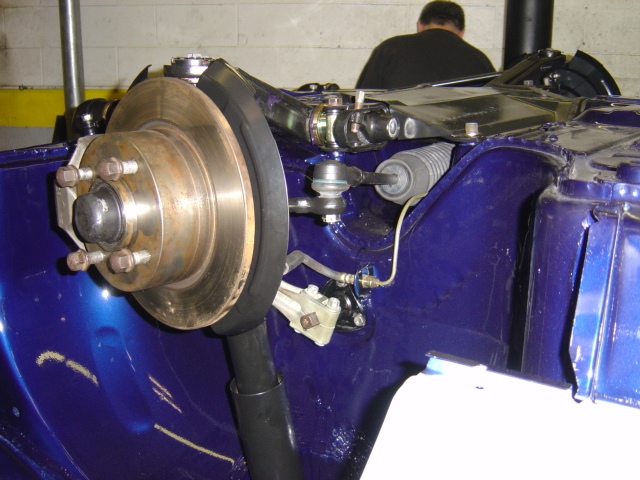
Posted by: william harris Apr 7 2005, 04:07 PM
I pointed out to him that he was using the wrong hardware for the gravel shield, he was using 17mm allen bolts (like on a 911) so he checked the factory manual, saw I was right (the old bolts were in the zip lock bag tagged "gravel shield bolts") and put new bolts in later. Hey, don't want some concours wennie taking points off for wrong hardware.
Attached image(s)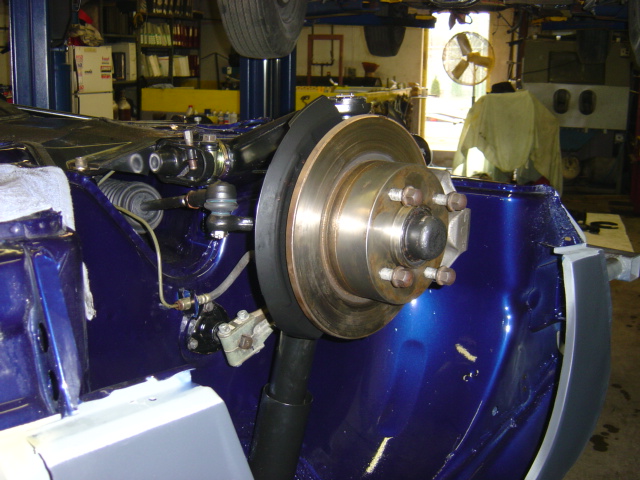
Posted by: william harris Apr 7 2005, 04:08 PM
Everyone, and I do mean everyone, who comes into the shop says "that 914 is better than new." That was the goal.
Attached image(s)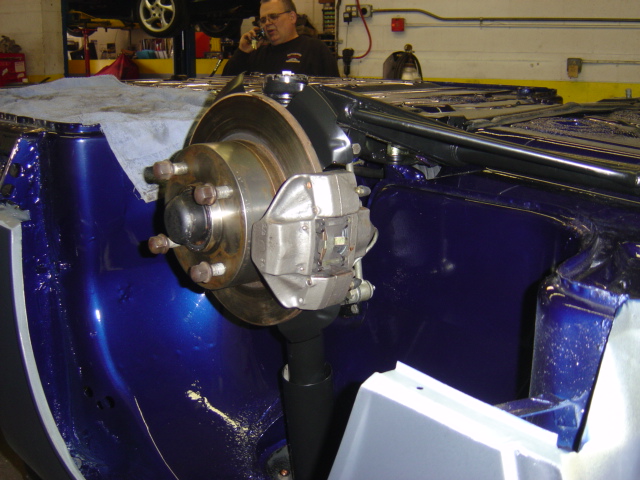
Posted by: william harris Apr 7 2005, 04:09 PM
Hey, I got Richard in that last shot, on the phone with his wife who wanted to know why he wasn't on his way home to New Hampshire yet!!!
Attached image(s)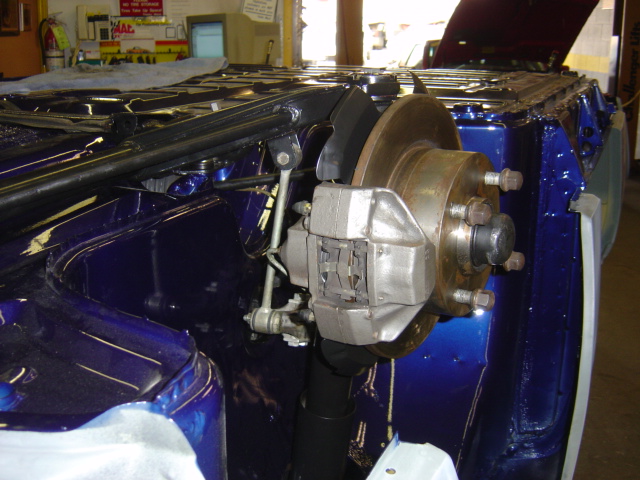
Posted by: william harris Apr 7 2005, 04:11 PM
Richard said he really enjoyed being able to assemble the suspension with the car on the rotissiere. THANKS CHRIS FOLEY!!!
Attached image(s)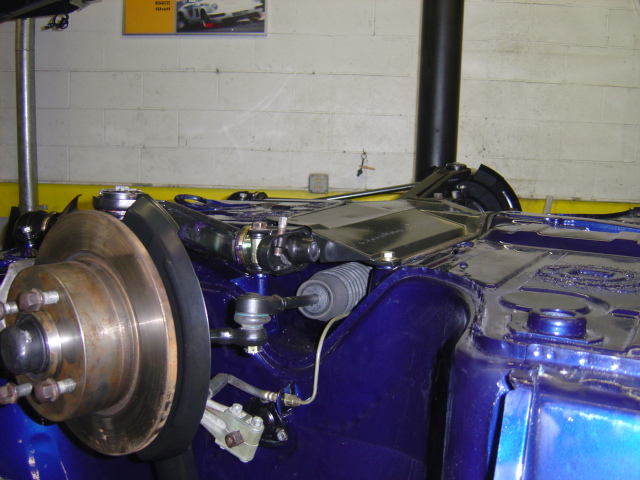
Posted by: william harris Apr 7 2005, 04:12 PM
I got Richard to pose for this last one. Tommorrow should see the Fuchs on the ground.
Attached image(s)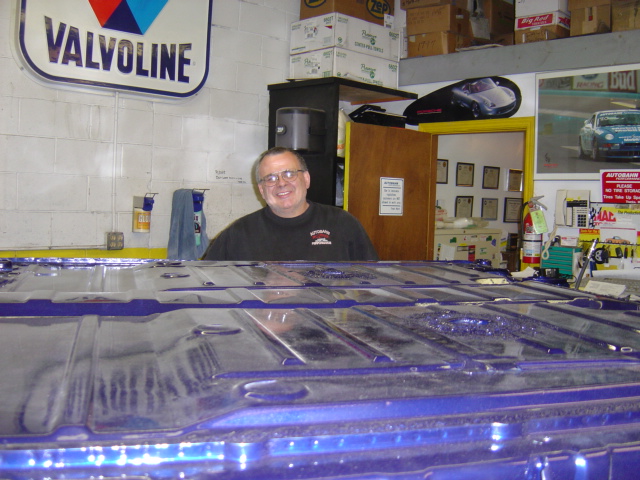
Posted by: Racer Chris Apr 7 2005, 05:22 PM
That looks real good William!
I like seeing the suspension going on with the car upside down. 
Soon, while you are installing the interior I'll be working on the engine.
Posted by: Travis Neff Apr 7 2005, 05:42 PM
William, you suck and your car is uglee too.
OK, jealousy over for the most part - that is gonna be one damn sweet ride!
Posted by: william harris Apr 7 2005, 07:46 PM
Chris: I love it when a plan comes together. Thanks for tuning in. You have played an incredibly large role in this project.
Posted by: william harris Apr 8 2005, 11:09 AM
Almost done, Richard continues to clean, detail and fine tune.
Attached image(s)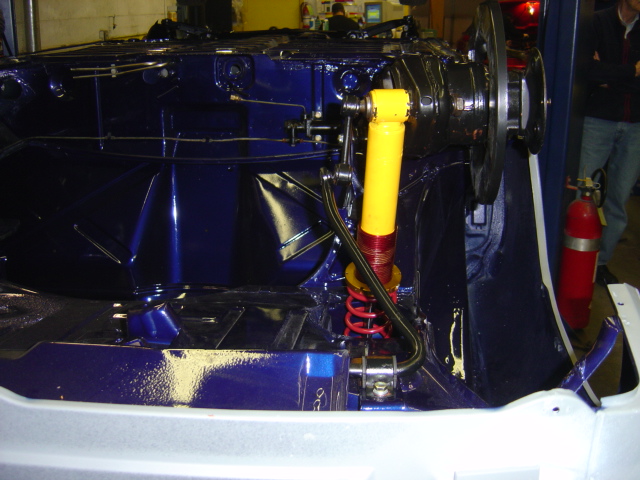
Posted by: william harris Apr 8 2005, 11:10 AM
A local 914 club member volunteered to drop off some steel wheels for the remainder of the paint job. Guess it will roll next door today.
Attached image(s)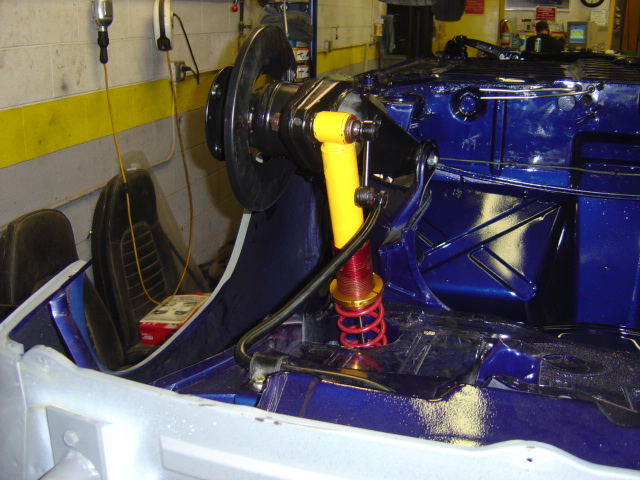
Posted by: william harris Apr 8 2005, 11:11 AM
I can't believe these suspension pieces were in my garage for 18 months, hanging on the wall.
Attached image(s)
Posted by: william harris Apr 8 2005, 11:14 AM
Richard needs to finish up rear hubs to hold the new wheel bearings in place. Notice how he has touched up and detailed everything.
Attached image(s)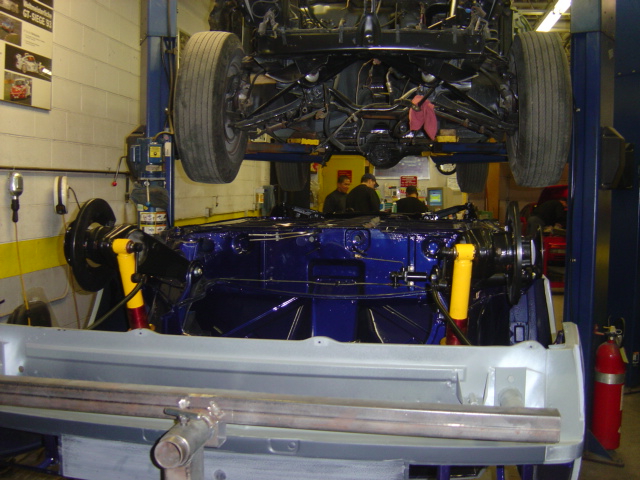
Posted by: william harris Apr 8 2005, 11:15 AM
Next.
Attached image(s)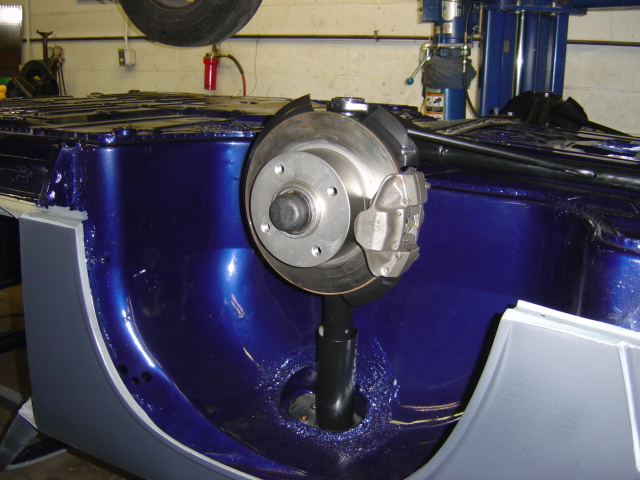
Posted by: william harris Apr 8 2005, 11:16 AM
Right after these pictures were taken, the car was flipped over.
Attached image(s)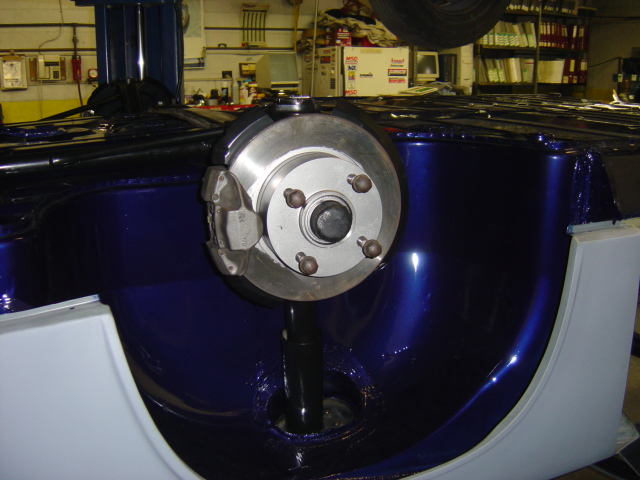
Posted by: william harris Apr 8 2005, 11:18 AM
Last picture for now.
Attached image(s)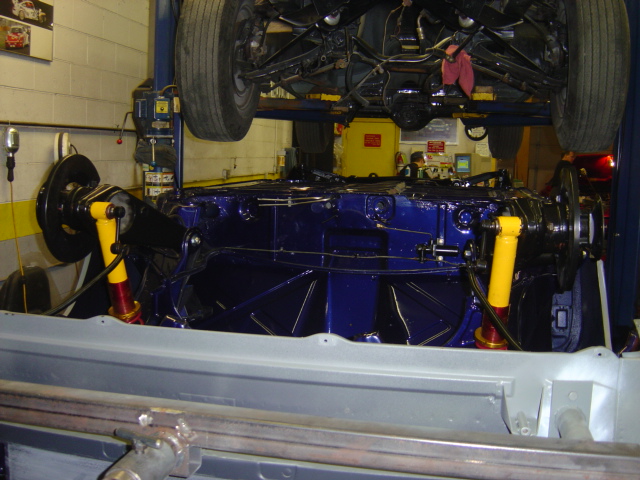
Posted by: Jeff Bowlsby Apr 8 2005, 11:42 AM
William...its too purdy to put on the ground. You will never see that underbelly again...
Ah the memories...
Posted by: william harris Apr 8 2005, 12:28 PM
Yeah, Jeff, but as soon as I get it home the main harness that you repaired for me will go back in. Any thoughts on how to protect the harness as I feed in back thru the tunnel and out the rear firewall? I'm thinking about wrapping it in plastic and then using masking tape.
Posted by: Root_Werks Apr 8 2005, 12:35 PM
Better than a new car? Hell yah!
Posted by: Jeff Bowlsby Apr 8 2005, 12:55 PM
Sounds good....can't offer any advice though, I have never put one back in. SirAndy has, maybe he has input, I will bet its a tight fit so you wouldnt be able to wrap too much thickness and still get it installed. If it gets scuffed, clean it up with SimpleGreen or any liquid soap.
Posted by: william harris Apr 8 2005, 04:33 PM
Big, big progress this week. The suspension, fuel lines, brake lines, brakes, etc. etc. are back in. The car is now a roller for the first time in a long, long time. This is what I saw when I first walked into the shop around 5:00 p.m.
Attached image(s)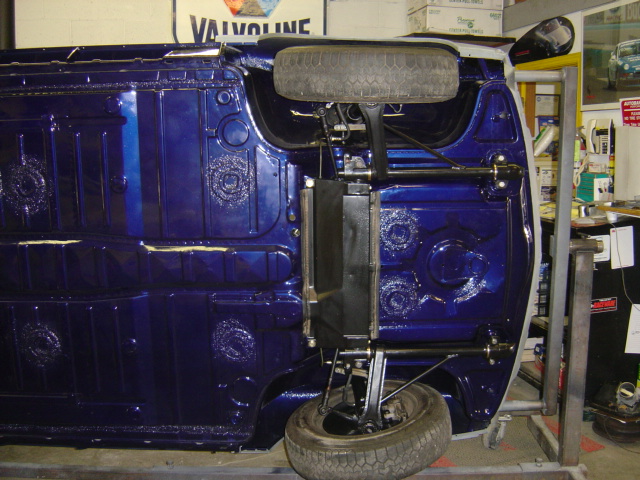
Posted by: william harris Apr 8 2005, 04:36 PM
Peter Falabella, a club member from Ipswich, MA (who I have talked to but never met) came by Autobahn Performance today and left his steel wheels so the car could continue its paint job (and leave my Fuchs safely in my garage). Thanks Peter By the way, Peter is doing an electric motor conversion on his 914 project.
Attached image(s)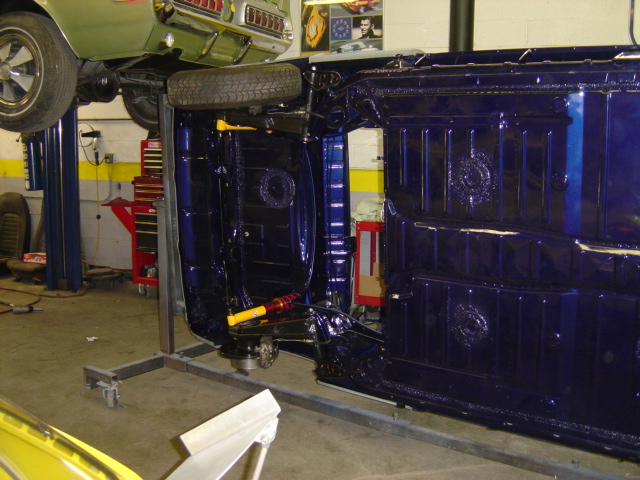
Posted by: william harris Apr 8 2005, 04:38 PM
As you can see from the last picture, you must leave one wheel off on the rear for clearance on the rotissiere. After some suspension tweeking, it was time to drop the car back on the ground.
Attached image(s)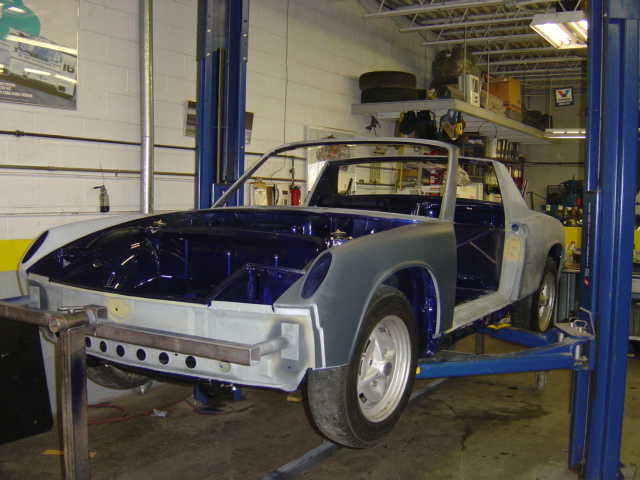
Posted by: william harris Apr 8 2005, 04:39 PM
So we unbolted the rotissere and down she came. Man, what a day.
Attached image(s)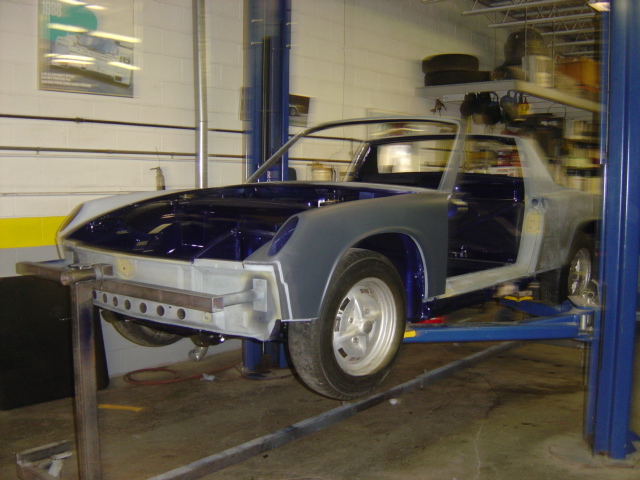
Posted by: william harris Apr 8 2005, 04:40 PM
Next week the remainder of the paint job will be done. We need a painter smilie.
Attached image(s)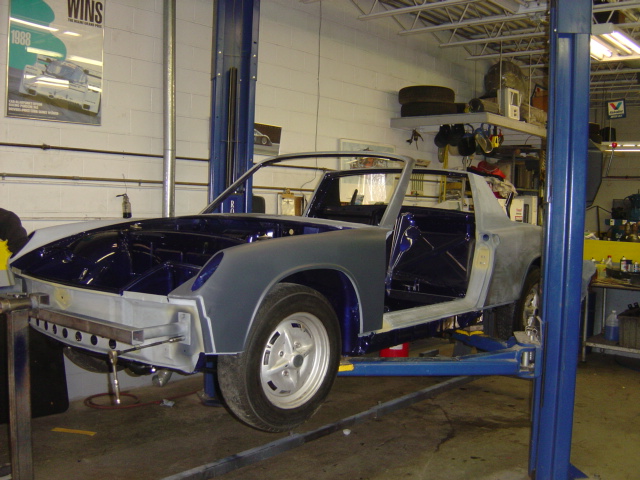
Posted by: william harris Apr 8 2005, 04:42 PM
I am already planning the process for reinstalling the interior. I'm gonna spend a small fortune for all the rubber pieces. Partsman, Partsman, calling Partsman
Attached image(s)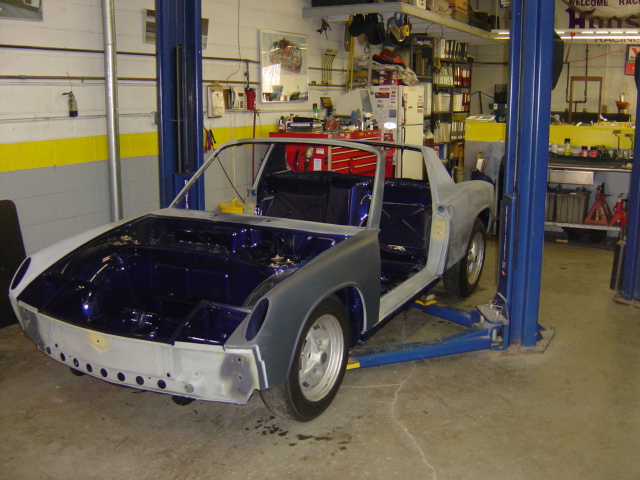
Posted by: william harris Apr 8 2005, 04:44 PM
The car looked so small once it was off the rotissere and back on the ground. I kinda forgot what it was like to be on the ground and on wheels.
Attached image(s)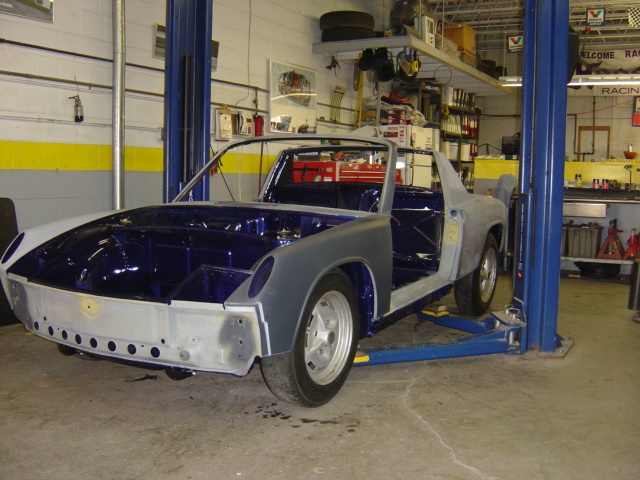
Posted by: william harris Apr 8 2005, 04:47 PM
Thanks for the interest in my continuing quest to have the "factory fresh and then some" restoration project, as Brad said, East Coast Style. Final picture, me and Richard enjoying a great moment. 
Attached image(s)
Posted by: echocanyons Apr 8 2005, 07:54 PM
Lookin damn fine
great progress
Posted by: partsman Apr 11 2005, 06:13 AM
Ah, now the fun really begins....
I can't wait to see the car, William...DId Jimmy say how long before we get it home?
Eric
Posted by: william harris Apr 11 2005, 08:42 AM
Next week. Eric, get those computers hooked into Germany.
Posted by: Jeroen Apr 11 2005, 09:45 AM
| QUOTE (william harris @ Apr 8 2005, 11:47 PM) |
| Final picture, me and Richard enjoying a great moment |
Man... that must be the weirdest overall I've ever seen in ANY shop
Posted by: Racer Chris Apr 12 2005, 07:46 PM
Here are a couple more restoration related pictures.
2.0L cylinder heads refurbished by Hoffman Automotive machine. new valves, seats, springs CrMo retainers, etc.
Attached image(s)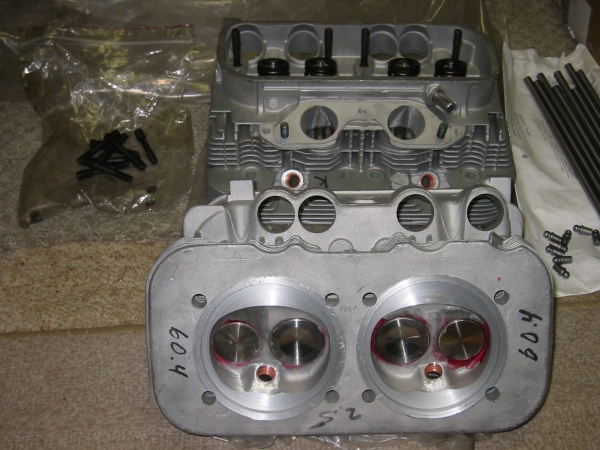
Posted by: Racer Chris Apr 12 2005, 07:49 PM
New parts from the Type 4 Store.
Flywheel kit, cam and gear, gaskets and seals, 96mm P&C set, CrMo pushrods, rocker assy with swivel adjusters and solid spacers, oil pump, etc.
Not shown is the ceramic lifter set from LN Engineering.
Attached image(s)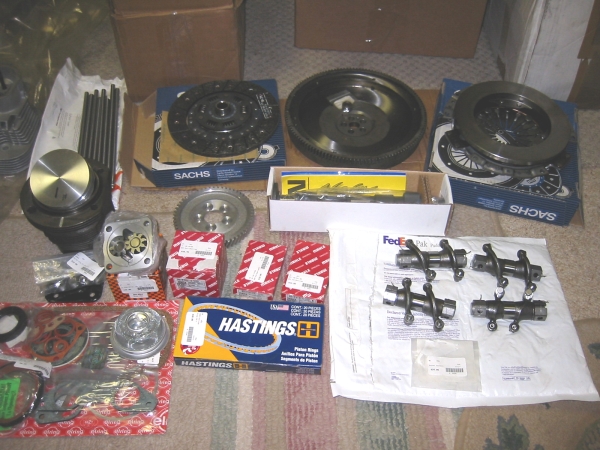
Posted by: ben1440 Apr 12 2005, 10:53 PM
more pics more pics more pics!.....i need my fix
Posted by: Jake Raby Apr 13 2005, 12:43 AM
Them sure are mighty purdy parts!! I think I might have put some fingerprints on'em...LOL
That one is done right!
Posted by: SpecialK Apr 13 2005, 03:24 AM
I need to never ever come to these threads with friggin' beautiful restores being done! 
That is going to be one fantastic example of a 914 when you get her done William!!!
Posted by: Racer Chris Apr 13 2005, 04:57 AM
| QUOTE (Jake Raby @ Apr 13 2005, 02:43 AM) |
| Them sure are mighty purdy parts!! I think I might have put some fingerprints on'em...LOL That one is done right! |
Everything was perfect when I opened up the three boxes to examine the contents. The parts were packaged as though they were being shipped by UPS or Fedex, even though I was at the Type 4 Store to pick them up and bring them back with me. No short cuts were taken.
The day I arrived I presented Jake with my shopping list that William had approved. Jake didn't even have to think about it. He knew he had all the parts and even knew what I had forgotten to include on the list to complete the engine. I couldn't find some of the part #s on his store website in advance but Jake knew the part #s off the top of his head. I had suggested to William that he purchase the "flywheel kit" from Pelican because there was no "kit" listed at The Type 4 Store. Jake had all the pieces and the price was much better than from Pelican as well. OK, the flywheel isn't new, it's reconditioned, but it looks perfect to me!
William and I got a little impatient during the week while I was at Aircooled Technology. Jake had the list. How come it wasn't being taken care of? Well, good work takes time, and as it turned out, the transaction was completed and the parts ready for shipping before I was ready to leave!
Sometimes it pays to shut up and wait, and let the right people do their thing.
A similar impatience took a hold of us regarding the cylinder heads. We thought Len Hoffman told us the heads were ready. I was going to pick them up while I was in Georgia. That didn't happen because Len got sick and couldn't work for several days. He ended up shipping the heads to me and I got them on Monday. Why were we impatient, I don't know. It's not like we were ready for them yet. Even though these heads needed some crack repairs Len told me he thought they were some of the best 2 liter heads he had worked on. They look perfect! The work cost a bit more than William or I anticipated but, you know, when you are dealing with special work, you get what you pay for!
Now the burden is on me. I have to do an expert job of assembling this collection of pieces so William can enjoy driving his new 914 for years to come. I only hope I can live up to the standard already set by our suppliers. I'd better wear gloves so I don't smudge Jake and Len's fingerprints.
Posted by: MJHanna Apr 13 2005, 06:01 AM
Thanks for posting all the progress it’s really exciting to see all the hard work and Dollars going in to your car.
I’m a sucker for blue cars and Lapis is one of my favorites. I can’t wait to see how the topside will look with paint.
Posted by: william harris Apr 13 2005, 06:12 AM
Chris and Jake Thank you for posting those pictures Chris. I will call you late Friday to make final details to come to CT on Saturday with the rest of the parts. Hot Damn this thing is looking good!
Posted by: Eric_Shea Apr 13 2005, 07:50 AM
Paint it already!
We're Jones'n DAMNIT
Posted by: william harris Apr 13 2005, 01:13 PM
Hey Eric: will probably post progress pictures tomorrow. A Tech Professional Auto Body got busy while the suspension work was being done, so they finally pushed it into their shop today. By the way, my core pedal assembly is headed your way.
Posted by: william harris Apr 15 2005, 10:12 AM
Well it is painted.
Attached image(s)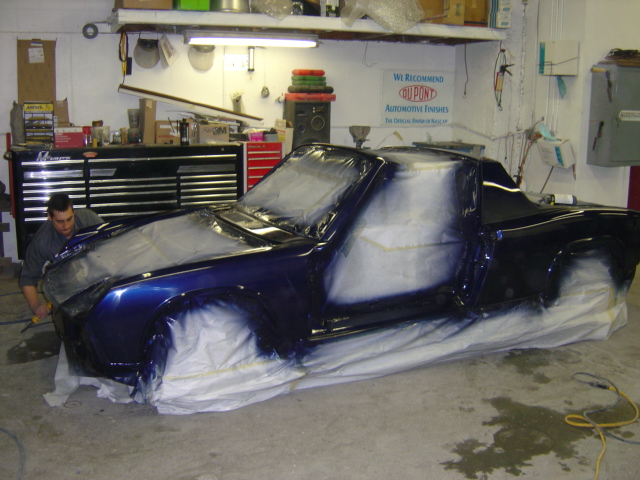
Posted by: william harris Apr 15 2005, 10:13 AM
Attached image(s)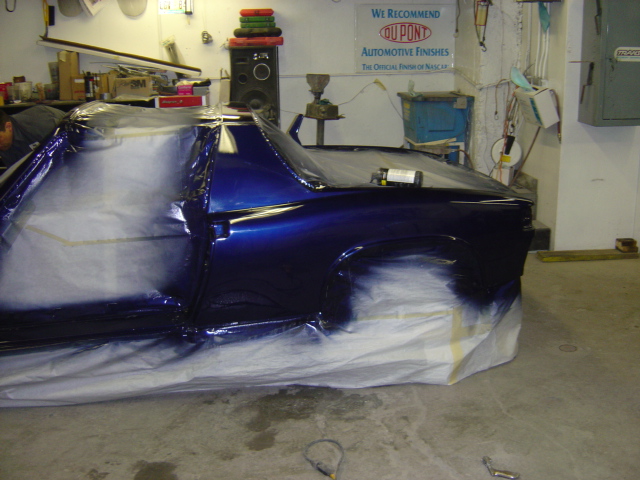
Posted by: william harris Apr 15 2005, 10:13 AM
Attached image(s)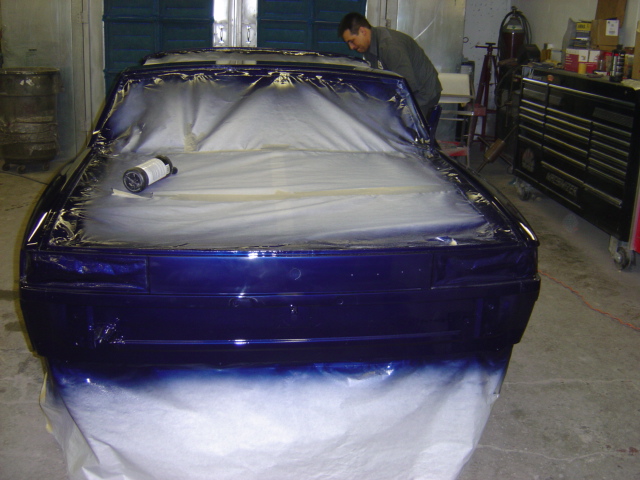
Posted by: william harris Apr 15 2005, 10:14 AM
Can't wait to take pictures in the sun light.
Attached image(s)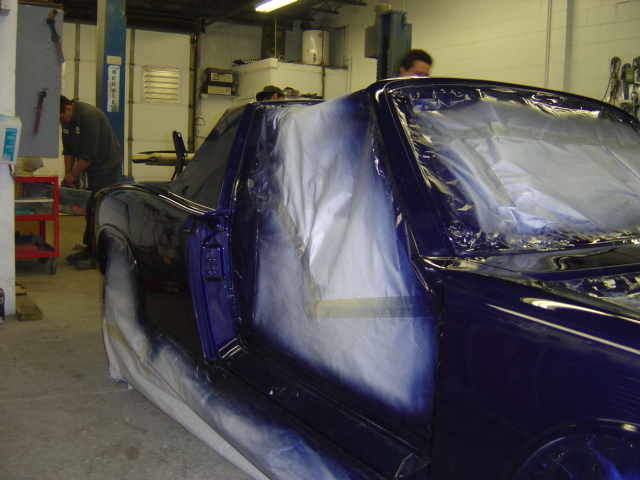
Posted by: william harris Apr 15 2005, 10:15 AM
Next.
Attached image(s)
Posted by: william harris Apr 15 2005, 10:16 AM
The guys at A Tech Professional Auto Body in Peabody, MA did an outstanding job.
Attached image(s)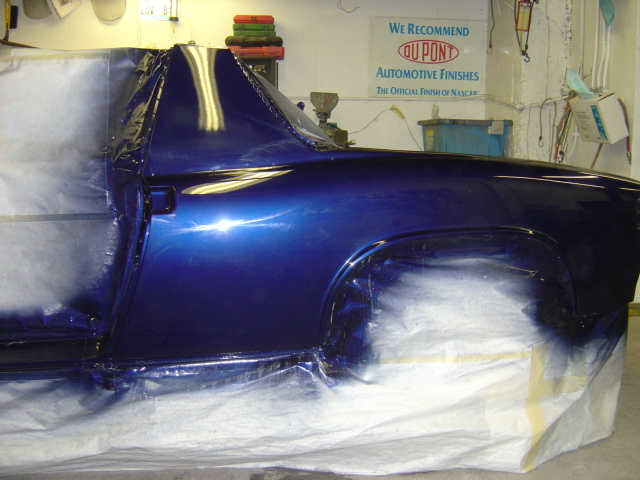
Posted by: william harris Apr 15 2005, 10:18 AM
Got to go do a deposition now. Will pick the car up (on flat bed) today and post more pictures this evening. Tomorrow I meet with Chris Foley to start the next installment.
Attached image(s)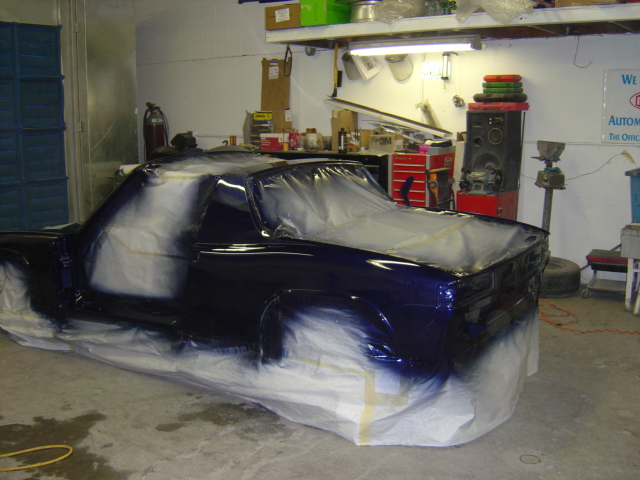
Posted by: Travis Neff Apr 15 2005, 10:32 AM
FUNTASTIC!
Posted by: Eric_Shea Apr 15 2005, 10:50 AM
Whew...
Excellent.
Posted by: ben1440 Apr 15 2005, 10:54 AM
that is an awsome color, cant wait to see it in the light
Posted by: Korijo Apr 15 2005, 12:55 PM
is that 99 Saab blue?
i ask b/c my bug is...
Attached image(s)
Posted by: maf914 Apr 15 2005, 01:26 PM
William, It's looking very good! After seeing yellow and orange projects (not that there's anything wrong with that!), it's strange to see a metallic blue. I can't wait to see it all together.
Posted by: william harris Apr 15 2005, 02:13 PM
Paint is Porsche color: Lapis Blue Metallic!!! A Tech sprayed 5 coats of color and then 3 coats of clear. It is fantastic!!!
Posted by: watsonrx13 Apr 15 2005, 02:32 PM
| QUOTE (william harris @ Apr 15 2005, 11:16 AM) |
| The guys at A Tech Professional Auto Body in Peabody, MA did an outstanding job. |
Wow, that is a fantastic paint job.
BTW, how the hell did they get the paper taped on the car, did someone get inside and underneath the car?
Posted by: william harris Apr 15 2005, 04:56 PM
OK, I just delivered my baby home. Man, I can't wait to dive into the interior restoration and motor build.
Attached image(s)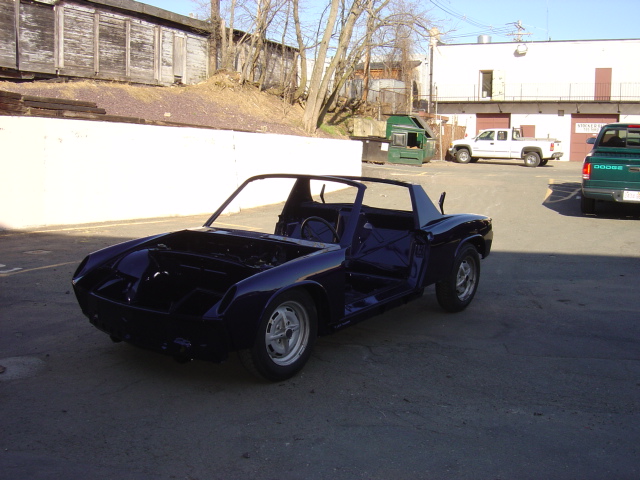
Posted by: william harris Apr 15 2005, 04:57 PM
I didn't hang the door or put the lids on because I am waiting for new seals to be installed and they aren't here yet. Oh, Partsman, Partsman!!!
Posted by: william harris Apr 15 2005, 04:58 PM
Next.
Attached image(s)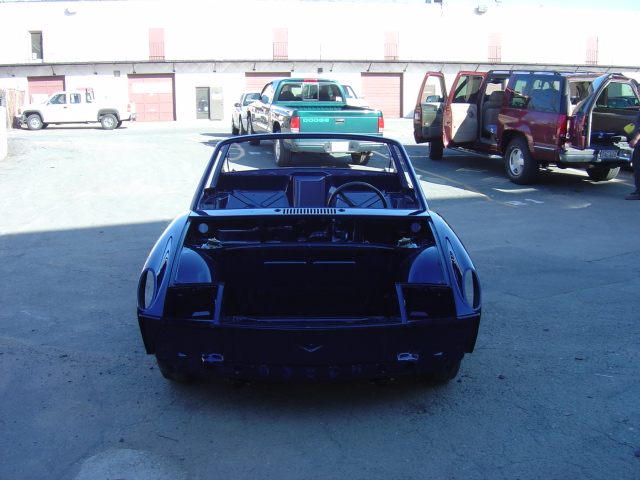
Posted by: william harris Apr 15 2005, 04:59 PM
These pictures in the shade don't do this paint justice. Tommorrow when the sun is up
Attached image(s)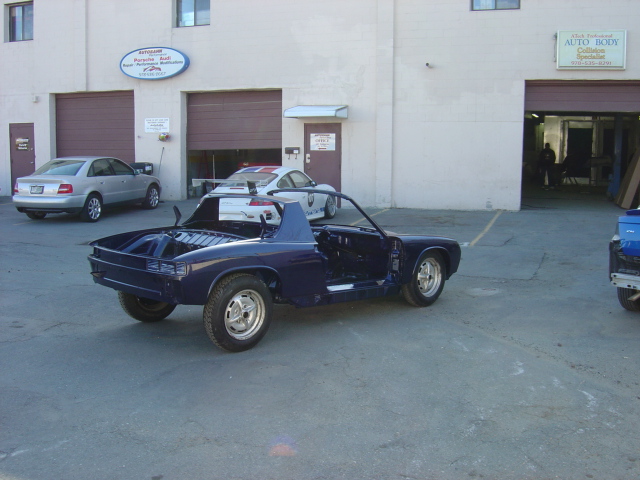
Posted by: william harris Apr 15 2005, 05:00 PM
Sorta better pictures with a little of the fading sun.
Attached image(s)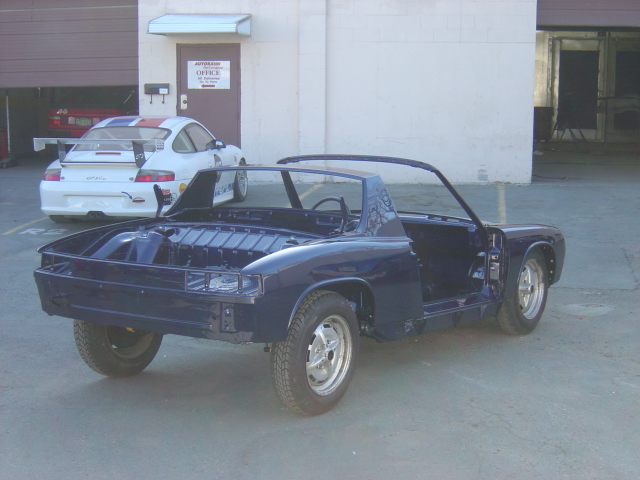
Posted by: william harris Apr 15 2005, 05:01 PM
This one is better.
Attached image(s)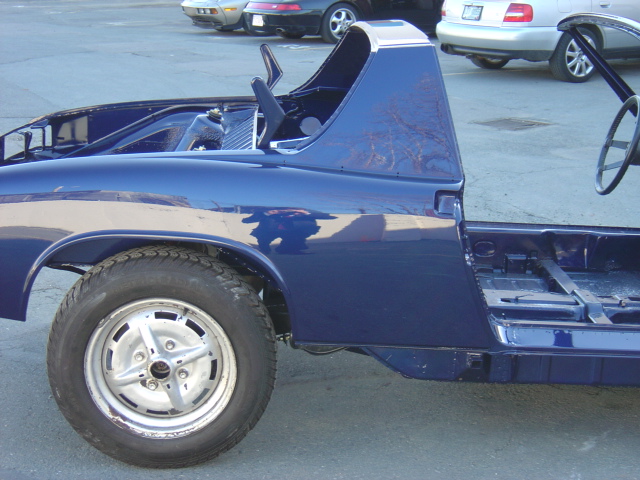
Posted by: william harris Apr 15 2005, 05:03 PM
Wow!!! Check out those reflections. Here are my two main men: Richard from AutoBahn Performance who did miracles with the suspension, etc. and Jimmy from A Tech Professional Auto Body. Gentlemen, I salute you.
Attached image(s)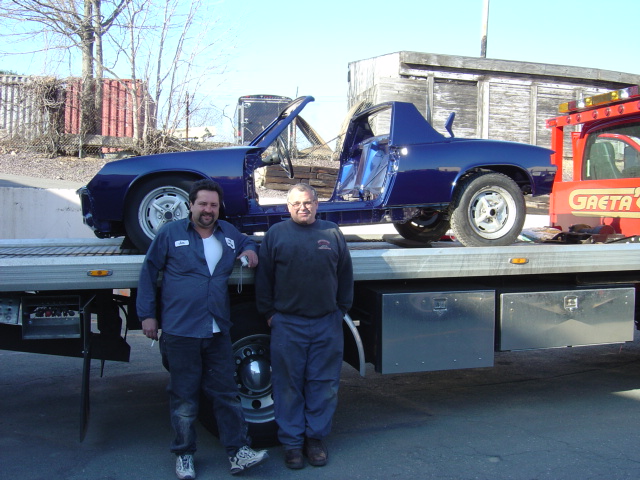
Posted by: william harris Apr 15 2005, 05:03 PM
Away she goes for the ride home.
Attached image(s)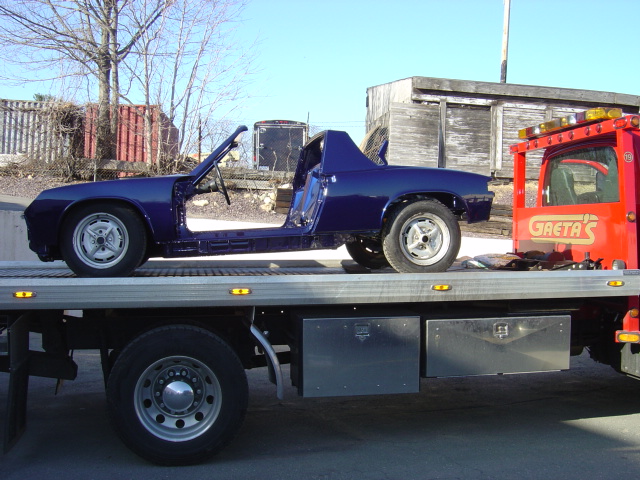
Posted by: william harris Apr 15 2005, 05:05 PM
Back to the 914 lair. Damn it is good to have her back.
Attached image(s)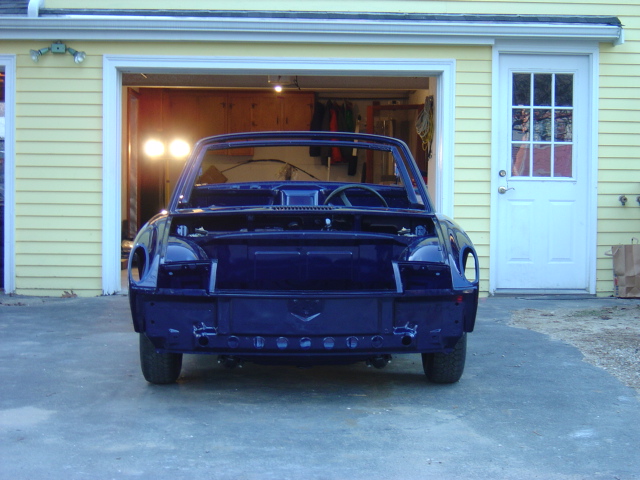
Posted by: CptTripps Apr 15 2005, 05:07 PM
Stuning...wow.
I hope my paint comes out 1/2 as nice as that...
Great work...er...check writing.
Posted by: william harris Apr 17 2005, 11:27 AM
Now that I got her back home, the real fun is just beginning. Today I took the main wiring harness out (Thanks Jeff Bowlsby) and began to reinstall. Everything from the fuse box forward is now in place. These pictures taken in the sun may show the paint better.
Attached image(s)
Posted by: william harris Apr 17 2005, 11:29 AM
If you have never removed the entire wiring harness, all I can say is that you must take your time. Reinstalling just the front section (by far the easiest) has taken about two hours. Figure at least 12 hours to get everything thru the tunnel, the two branches to each side under the seats and up the back pad, and then the real bitch, into the engine compartment.
Attached image(s)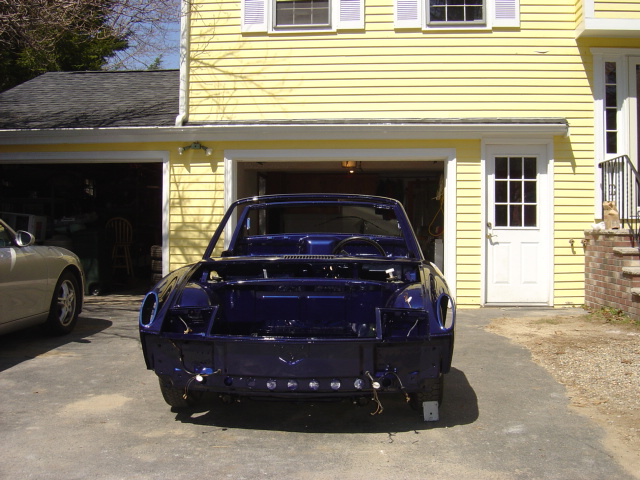
Posted by: william harris Apr 17 2005, 11:31 AM
One of my special areas is to remove all the wires from the relay under the passenger seat and then get them all back in the right place. Remember, if you screw this up the car won't start.
Attached image(s)
Posted by: william harris Apr 17 2005, 11:32 AM
The Lapis Blue Metallic really glows in the sun!
Attached image(s)
Posted by: william harris Apr 17 2005, 11:33 AM
I have to do the wiring work in small increments, otherwise you get very frustrated and make mistakes from fatigue.
Attached image(s)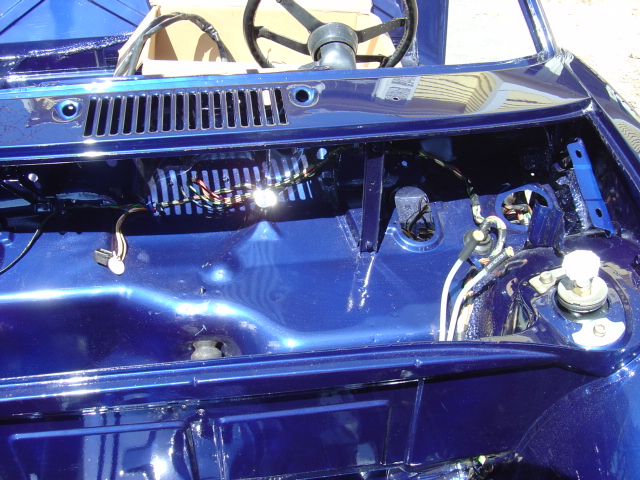
Posted by: william harris Apr 17 2005, 11:35 AM
I have ofter wondered if I was quite mad to remove the main harness. I am sure I will curse the bastard who did this so I gotta fix it!!!
Attached image(s)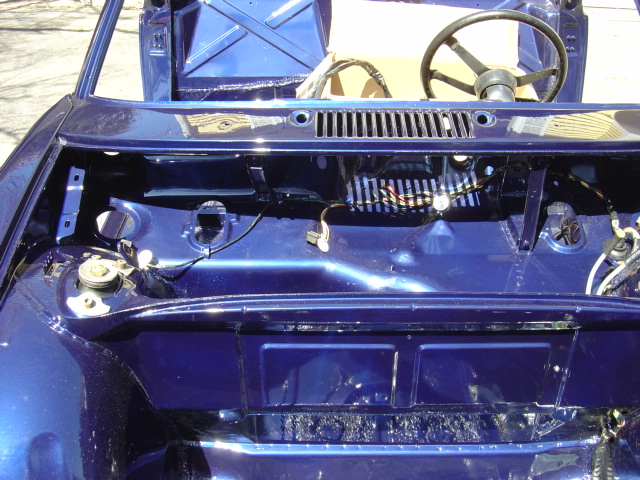
Posted by: william harris Apr 17 2005, 11:37 AM
In the next day I will find the driving lights and horns and reinstall them. At least the parts collection seems to be shrinking.
Attached image(s)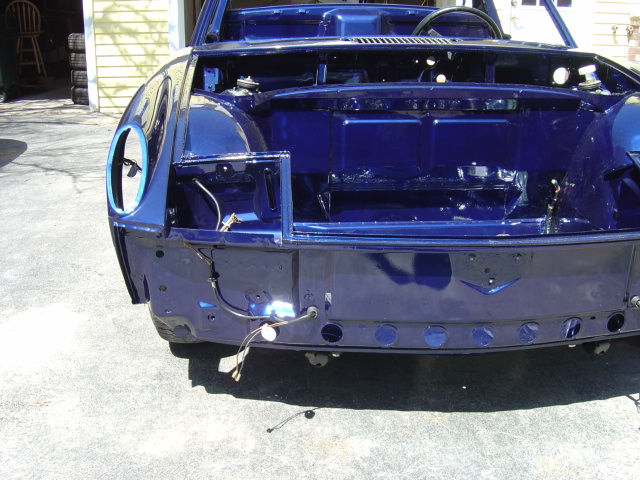
Posted by: william harris Apr 17 2005, 11:39 AM
Everyone who has seen the Lapis Blue Metallic loves it. I am very happy with the color and it has really moved me along in wanting to finish the project.
Attached image(s)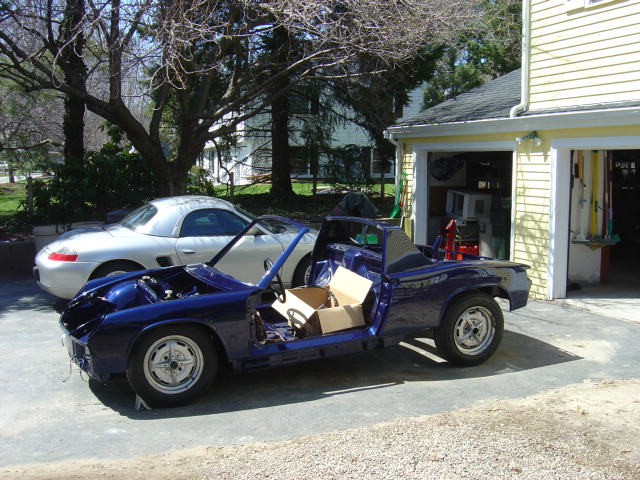
Posted by: william harris Apr 17 2005, 11:40 AM
Here's my helper today.
Attached image(s)
Posted by: william harris Apr 17 2005, 11:41 AM
I'm gonna take a break now and take the kids mini-golfing and out to eat. May post more later today.
Attached image(s)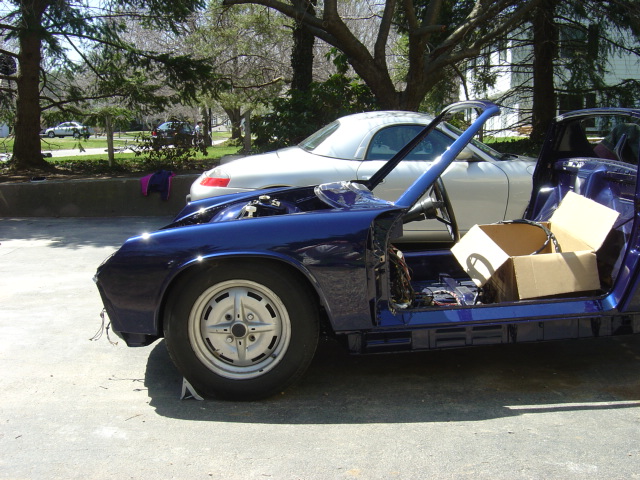
Posted by: william harris Apr 17 2005, 11:42 AM
Suzie and I are gonna go roll the car back into the garage now.
Attached image(s)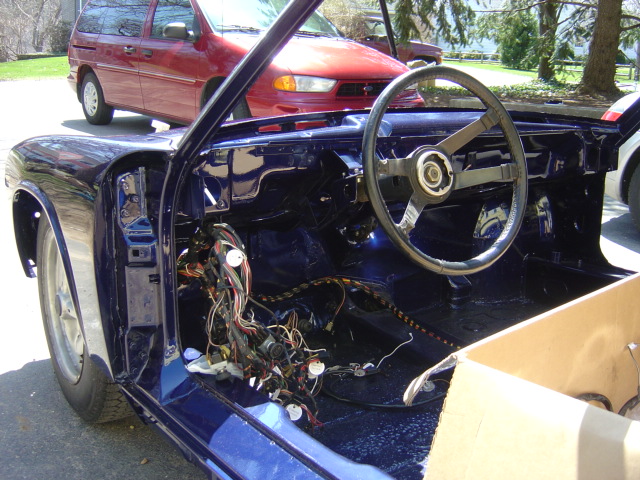
Posted by: william harris Apr 17 2005, 11:43 AM
Last one for now.
Attached image(s)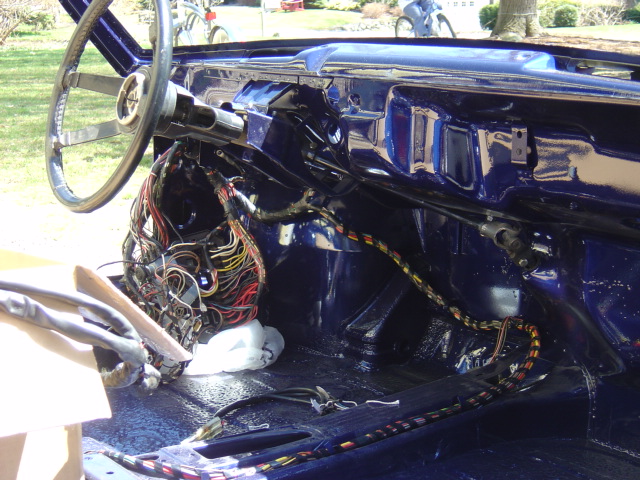
Posted by: william harris Apr 17 2005, 09:19 PM
Now I'm working on this relay. The big push & pull into the engine compartment comes next.
Attached image(s)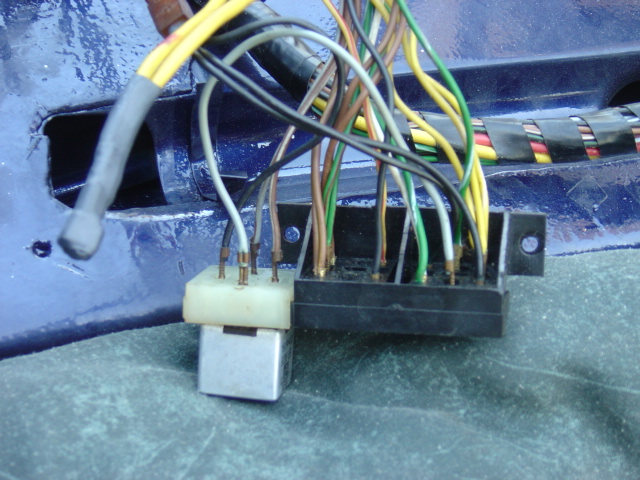
Posted by: william harris Apr 18 2005, 04:14 PM
It's probably news to the rest of the world, but today is a state holiday in Massachusetts - Patriot's Day!! So, Nick and I got busy pulling the main wiring harness into the engine compartment. I learned the hard way that the branches must go in a precise pattern so that everything can be pulled thru - the logic relay panel wires must go in last. Here's Nick very proud of helping me today. I was in the engine compartment, I would feed a wire thru to Nick, he would attach the wire with a wire tie to the wire branch and feed it in. Took about 1 hour to do.
Attached image(s)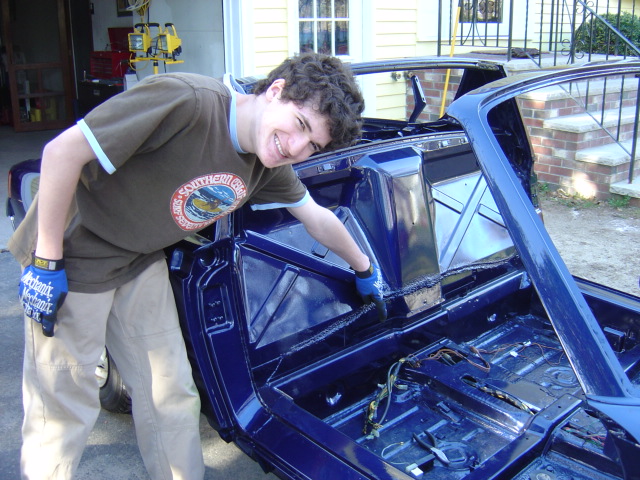
Posted by: william harris Apr 18 2005, 04:16 PM
I bundled all the wires together and then used electric tape to tape everything together tight and secure to pull thru the tunnel and out the engine fire wall.
Attached image(s)
Posted by: william harris Apr 18 2005, 04:19 PM
I took a break from rewiring the logic relay panel under the passenger seat to post these pictures. That will be finished today. Learned you must be careful pushing in the small clips to remove, cause you gotta push them back out (very damn small they are) to reattach! Bowlsby, your work on the harness is spectacular. You repaired several bad areas around the logic relay panel (and removed the seat belt interrupt starter circuit!!). Man, it is finally almost entirely back into the car.
Attached image(s)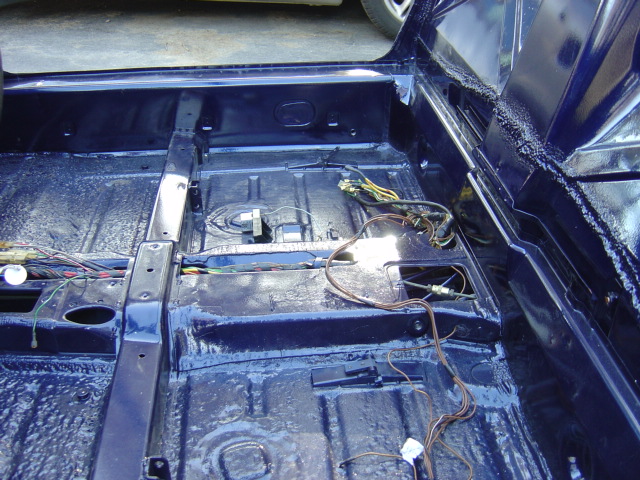
Posted by: william harris Apr 18 2005, 04:21 PM
My oldest son wanted to get into the picture as he left to go back to college today. Now he wants to know when the 914 will be back together.
Attached image(s)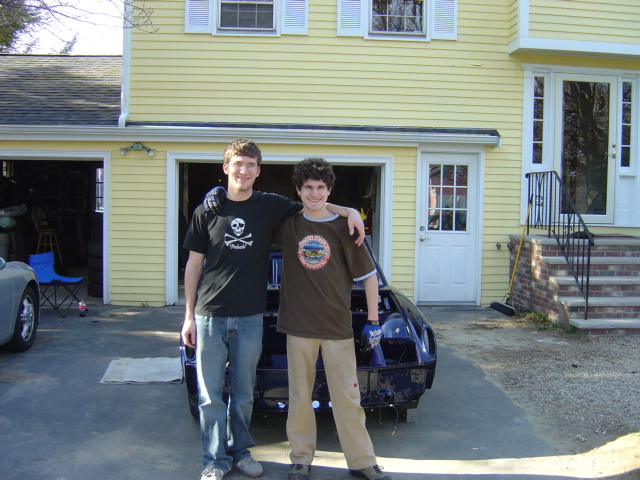
Posted by: william harris Apr 18 2005, 04:23 PM
So I pulled everything thru and put the bundle in the trunk for today. Next into the engine compartment.
Attached image(s)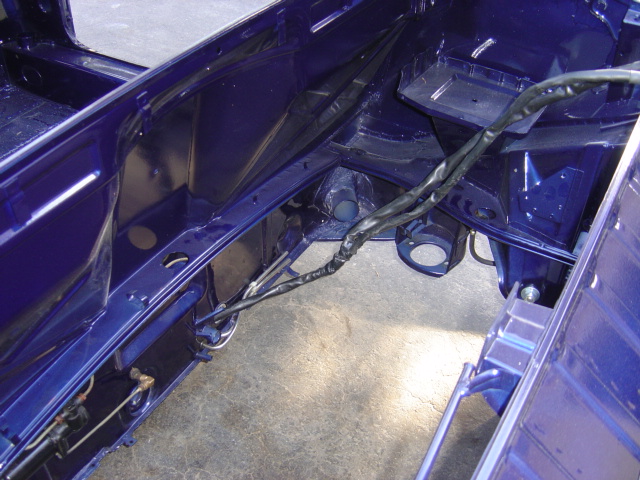
Posted by: william harris Apr 18 2005, 04:24 PM
Here is where I stopped for the day. More to come.
Attached image(s)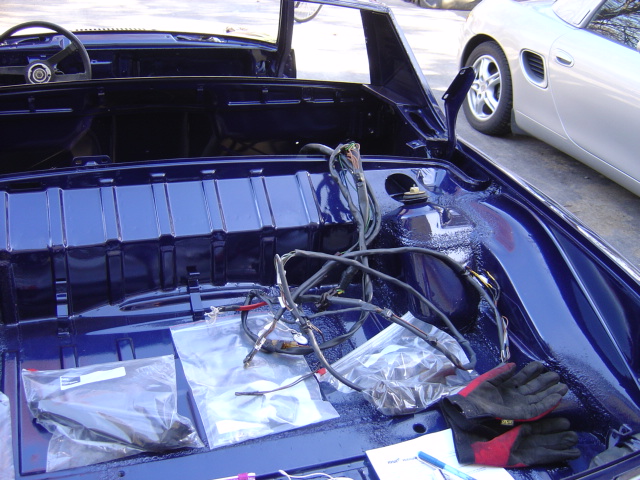
Posted by: Kargeek Apr 18 2005, 04:34 PM
Patriot's Day..I called my client back in Boston and they had the day off. If I have known Iwould have taking off the day too.
Gteat job! Takes me back to 20 years ago when I did mine. Keep up the pictorials!
Cut some black vinyl tubing and place over the hold down tabs for the wireing harness- as the factory did.
DH
Posted by: william harris Apr 18 2005, 06:24 PM
Thanks Karqeek, I have a bag somewhere in my garage with all the hold down tabs I removed. Some can be reused. A lot will have to be replaced because they were painted with previous repaints without removing anything.
Posted by: kenpolives May 22 2005, 04:23 PM
Isn't it time for more pics????????????????
Posted by: william harris May 22 2005, 07:18 PM
Well, we have continued to try to make small progress. Eric (Partsman here) Sanders hooked me up with all new factory seals. Here is where things stand.
Attached image(s)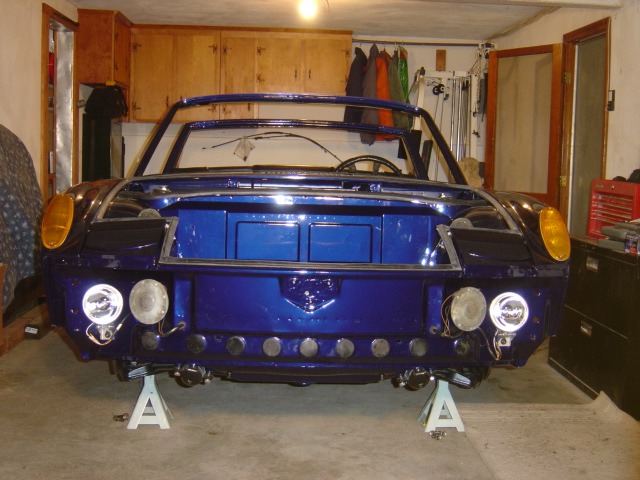
Posted by: william harris May 22 2005, 07:20 PM
New hood seal is place (OK Eric don't tell anyone I installed it upside down), new bulkhead seal, new dash/Windshield seal, wired in Pilot lights, and lights are now in and waiting only for screws for chrome surrounds. Working on the trunk is almost complete.
Attached image(s)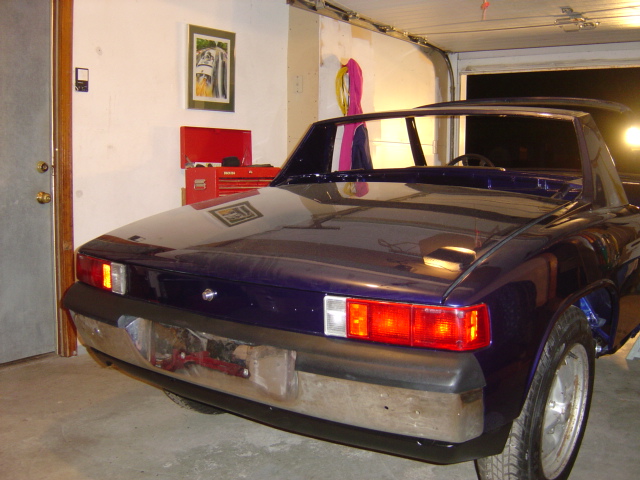
Posted by: william harris May 22 2005, 07:22 PM
Inside, all new seals for the trunk. Also, you can't see the new dog bones used to mount the bumper. Inside the trunk are small hard parts to mount the sub-dash, it should be ready to go in this week.
Attached image(s)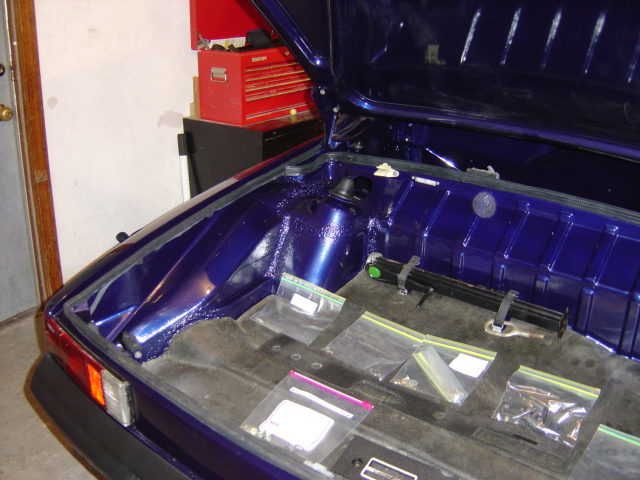
Posted by: william harris May 22 2005, 07:24 PM
Let me tell you pushing those factory seals in place takes a lot of muscle power - the rubber has a metal band inside and you really got to push, push, push. A couple of the pieces are about an inch longer than needed and will have to be trimmed.
Attached image(s)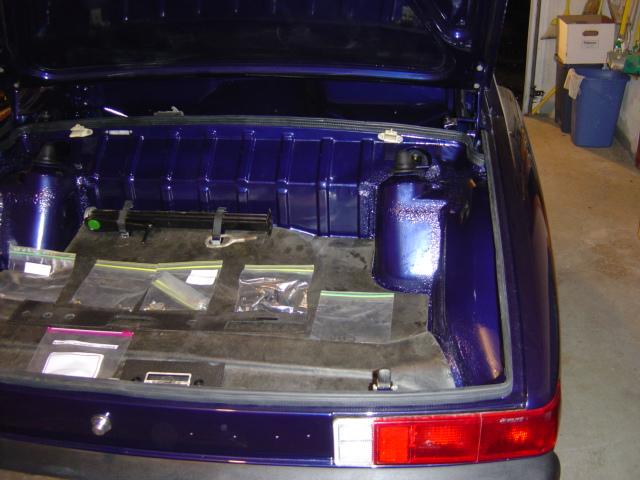
Posted by: william harris May 22 2005, 07:25 PM
I am starting on the engine lid tonight and setting up a work bench to build up the door. All the hardware, seals, channels, etc. will be replaced or renewed.
Attached image(s)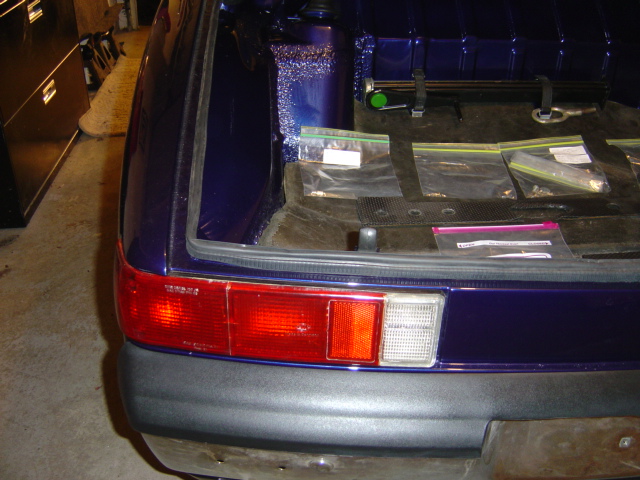
Posted by: william harris May 22 2005, 07:27 PM
My plan is to build a small work bench that will support each door on a couple of inches of foam padding and then add the window and door hardware, glass, etc. and then hang the door after they are completely assembled. Will let you know how that works.
Attached image(s)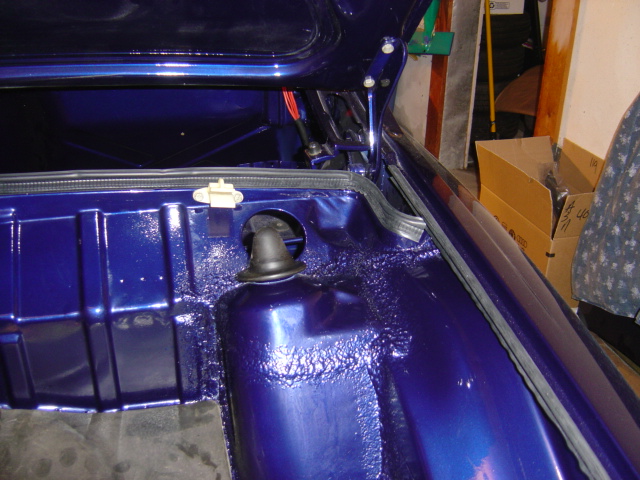
Posted by: william harris May 22 2005, 07:29 PM
Also put in these new seals on the body for the doors. These (like almost every other seal) were missing from my car when I got it three years ago.
Attached image(s)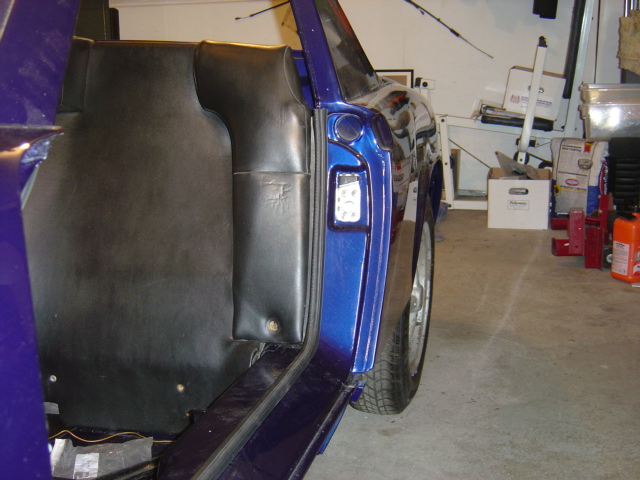
Posted by: william harris May 22 2005, 07:32 PM
Put these in just to see how they fit. They will come out later as the whole assembly goes in.
Attached image(s)
Posted by: william harris May 22 2005, 07:34 PM
I had saved the old "hoses" and just bent these to the same shape. Putting this stuff in under the cowl is definitely a two person job and will have to wait for a weekend when Eric can come over to help me.
Attached image(s)
Posted by: william harris May 22 2005, 07:35 PM
So does your wife get pissed when you bring car stuff in the house and put it on the dinner table?
Attached image(s)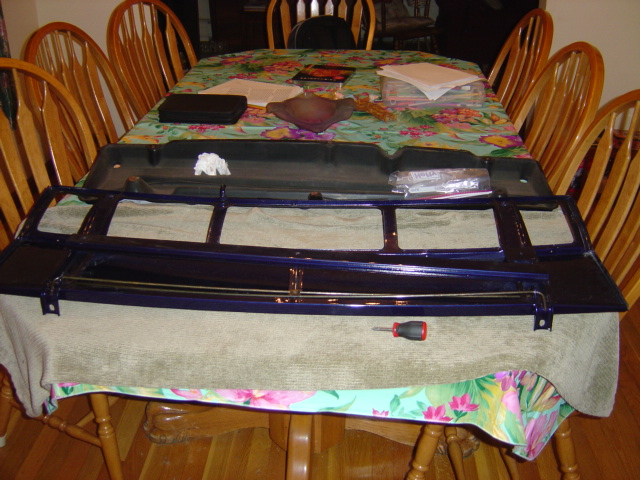
Posted by: william harris May 22 2005, 07:36 PM
Next week my goal is to have the dash back in the car and start on the interior.
Attached image(s)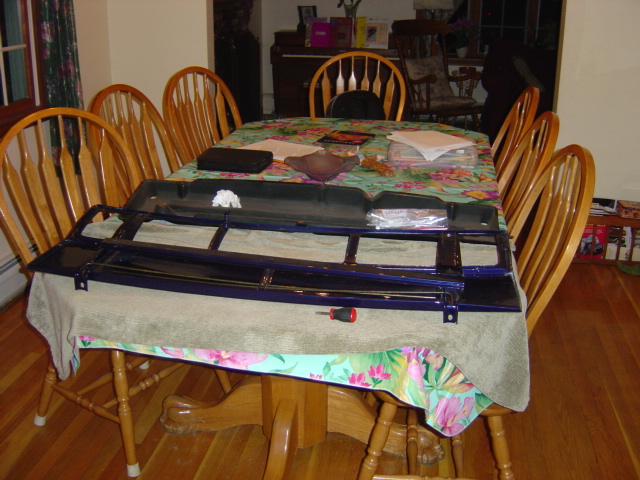
Posted by: CptTripps May 22 2005, 08:36 PM
I spent the last 2 days replacing all the seals too. The one I hated was the windscreen. I thought the trunk was fairly easy...THAT one is a BITCH!
Looking great man!
Posted by: william harris May 22 2005, 08:42 PM
Yeah, haven't gotten to the windshield yet. Got to find all the chrome guide pieces and fire up the silicon can!
Posted by: CptTripps May 22 2005, 08:46 PM
| QUOTE (william harris @ May 22 2005, 09:42 PM) |
| Yeah, haven't gotten to the windshield yet. Got to find all the chrome guide pieces and fire up the silicon can! |
I used Butle tape between the car and the chrome strips. Then I used White Lithium (sp?) grease on the seal, and it slid RIGHT in! Makes it ***A LOT*** easier than just silicone.
Posted by: william harris May 22 2005, 09:27 PM
Thanks for the advice. Now I know what I will be doing next weekend. Any issues with clean up with the grease?
Posted by: Doug Leggins May 22 2005, 10:02 PM
Looks like its going together very well! And your moving at a quick pace -good job!!
| QUOTE |
| Let me tell you pushing those factory seals in place takes a lot of muscle power - the rubber has a metal band inside and you really got to push, push, push. |
Those seals really suprised me too on how difficult they can be to install. The one that goes on the bulkhead between the rear trunk and engine bay is the one that made my thumbs hurt for 2 days. Lots of push required to get that one on!
Keep up the great work, the car is looking fantastic!
Posted by: redshift May 22 2005, 10:06 PM
Sure is a nice looking job there.. I like the color!
Wow.. I need to wash my car.
M
Posted by: MW 914 May 22 2005, 10:21 PM
That car is sick! It is gonna be awesome when you are done. Hell...it is awesome now!
Posted by: MecGen May 23 2005, 05:15 AM
This is a cool thred
I just had a flood of memories when I finally got mine back together, rubber, trim...cool eh ?
GOOD TIMES
later
Joe
Posted by: william harris May 23 2005, 06:02 AM
Thanks for all the kind words. This site keeps me inspired and moving in the right direction. My goal is to be ready to drive to WCC3.
Posted by: partsman May 23 2005, 06:36 AM
| QUOTE |
| Those seals really suprised me too on how difficult they can be to install. The one that goes on the bulkhead between the rear trunk and engine bay is the one that made my thumbs hurt for 2 days. Lots of push required to get that one on! |
Ah, now I know why William had me do that seal...I couldn't get the divets out of my thumbs for quite a while...
I've seen this car in person, and it is almost undescribeable....it's like watching the factory thirty years later...what a rush!!
Eric
Posted by: CptTripps May 23 2005, 07:08 AM
I've been using a rubber mallet to 'cooerse' those seals into place. Light tapping did the trick.
No issues at all with the grease. It sprays on with a tube, and I use a rag to get a grip on the seal.
Another trick with the Windscreen seal was to use some of that Wurth adhesive, and after you get it on, latch the FRONT of the targa in place. That REALLY get's it on there good. Leave it on there overnight, and it'll be sealed up great.
Posted by: william harris May 28 2005, 06:02 PM
So today I decided to try to finish off the front end, at least with the parts as they stand today. The driving light/horn grills must be replaced, as well as the clips and screws. Also, this winter I intend to pull the bumpers off and rechrome them. But for now, they are good to go. I am very happy with the way the Pilot lights look and can't wait to fire them up.
Attached image(s)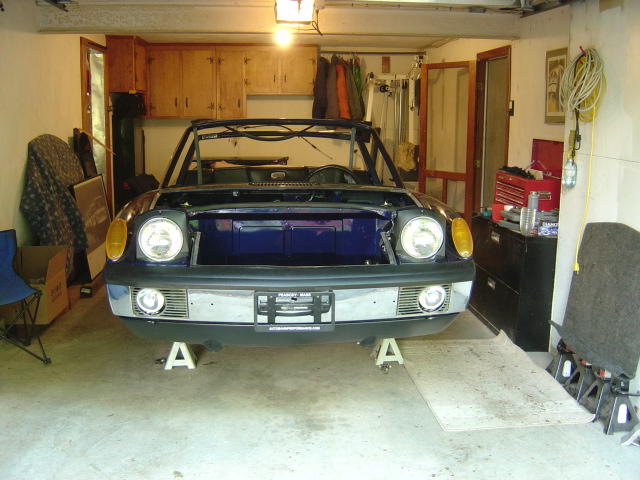
Posted by: redshift May 28 2005, 06:04 PM
Thanks Mr. Bill, your thread has inspired me to wash my car.
M
Posted by: william harris May 28 2005, 06:05 PM
Chrome on the bumper is very good, but some idiot prior owner drilled three large holes thru the bumper (duh?, rather than remove the bumper - hey that takes four bolts and five minutes ) to open the front lid when the cable broke. Well, when I rechrome the bumper I will have them weld the holes up before the new chrome goes on. Another view.
Attached image(s)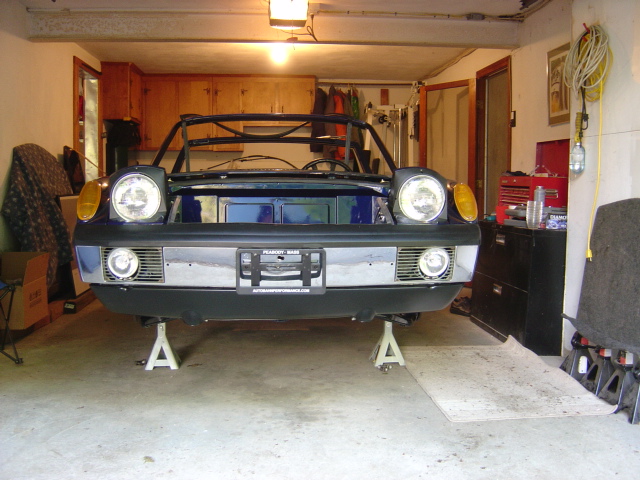
Posted by: william harris May 28 2005, 06:07 PM
Friday, Partsman (Eric Sanders) got me the six screws that go in the chrome surround around each headlight. The old screws were completely rusted into the buckets. I drilled them out and then had to tap out the holes to get the new screws in. Close up. Spent alot of time with the steel wool to clean up the chrome stuff.
Attached image(s)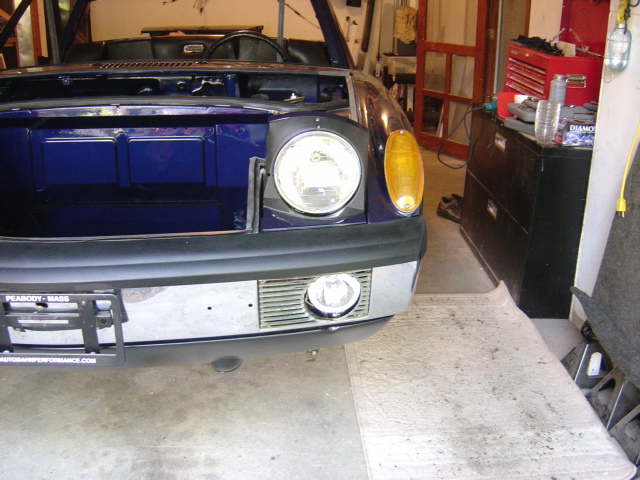
Posted by: william harris May 28 2005, 06:12 PM
Also started on the doors, window channels, winder mechanism, etc. Clean and redo everything before it goes back in.
Attached image(s)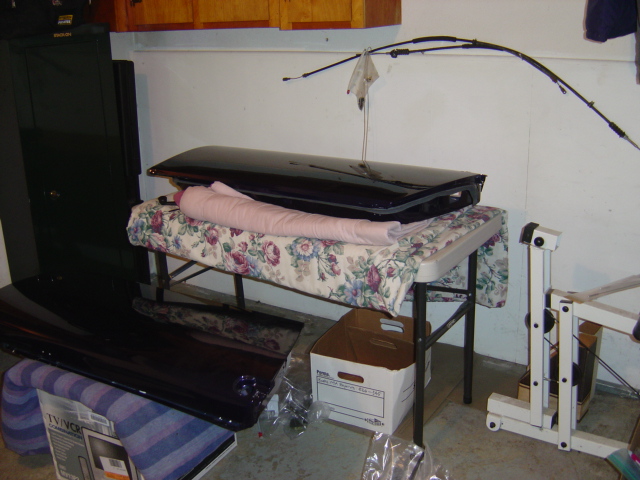
Posted by: william harris May 28 2005, 06:13 PM
Another view up front. Miles, show us that clean car.
Attached image(s)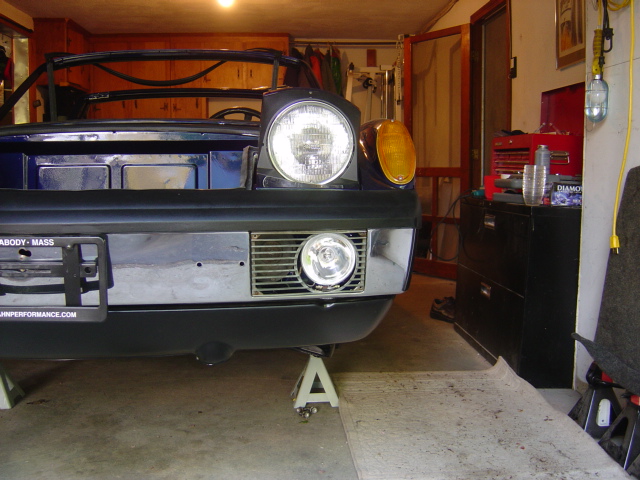
Posted by: william harris May 28 2005, 06:15 PM
Stuff waiting for my attention. Every part was painted by the previous crappy paint job, so a lot of time will be spent removing the overspray and paint where it don't belong.  Thanks to everyone for their encouragement.
Attached image(s)
Posted by: lybones May 28 2005, 06:24 PM
You rock! Too bad Discovery Channel isn't doing 914 shows.
Posted by: william harris Jun 2 2005, 07:20 PM
OK, so two weeks spent on one door. Holy crap, the damn inside wipe (the PITA piece that slides into the aluminum guide) beat my ass today, got it about half in with liquid soap and decided to call it a day. Hope to finish it tomorrow. Any how, decided to go ahead and assemble the rest of the door just to see how everything goes. Here's where I left it today.
Attached image(s)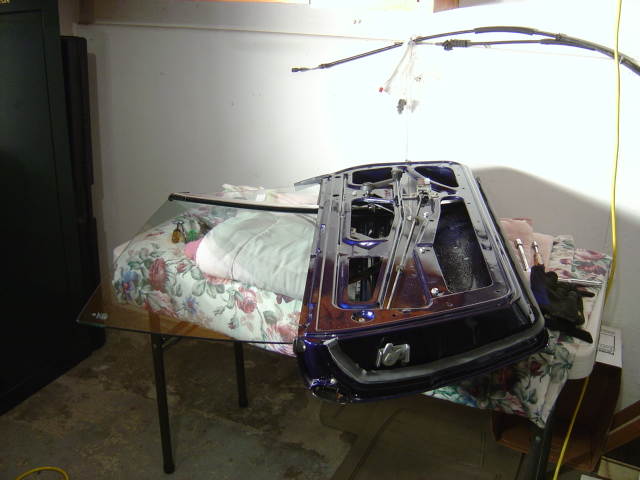
Posted by: william harris Jun 2 2005, 07:22 PM
Remember now every piece was oversprayed yellow when the prior crappy paint job was done. So everything was cleaned (heavy duty degreaser works wonders), polished with steel wool and wire brushes, detailed, disassembled and reassembled and cleaned, lubed, etc. All new seals, the window lift mechanism was wire wheeled and painted, etc. I am damn happy with the way this is gonna turn out.
Attached image(s)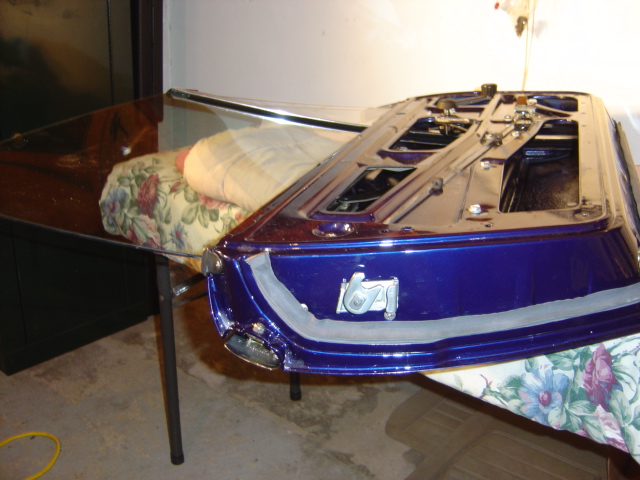
Posted by: william harris Jun 2 2005, 07:24 PM
You know it is a special form of insanity when you spend hours cleaning and painting stuff inside the door that nobody will ever see. Still, I know it is there and better than new.
Attached image(s)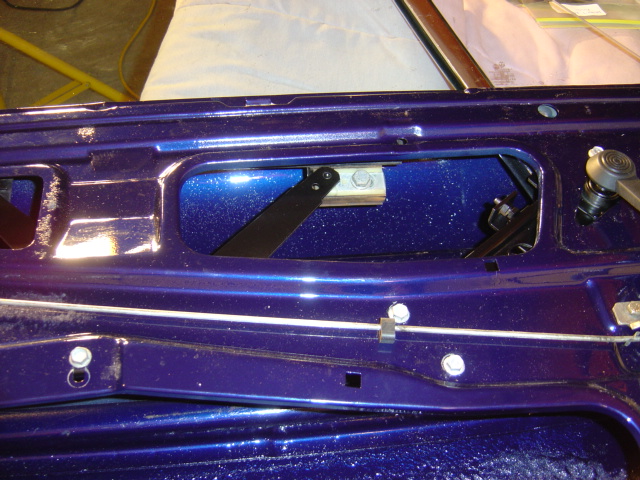
Posted by: william harris Jun 2 2005, 07:28 PM
The funny thing is I'm gonna take the whole door apart again before the "final" assembly. The vent glass is just sitting in place, no glue or sealer - guess I will put something in there. Same for the felt channels for the glass. Anyway, I gotta put that PITA piece in tomorrow. Then I will start on the passenger side door. Crazy stuff no longer available - like the cap at the top of the back window channel for the driver's door - passenger side is available from Porsche - but no driver's sides??? Are they different? Also the brace under the vent window is different from 73 to 74 piece (I had both), the 73 piece has a big tab that goes into the seal under the vent window and offers a lot more support.
Attached image(s)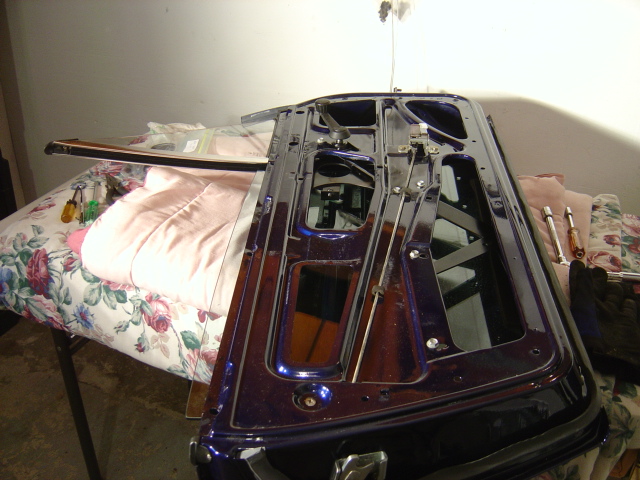
Posted by: william harris Jun 2 2005, 07:30 PM
I know some guys won't get excited by the door details, but I like the detailed stuff to finish off the car. By the way, what was used to attach the vapor seal (plastic liner) to the metal door before the door panels go back on?
Attached image(s)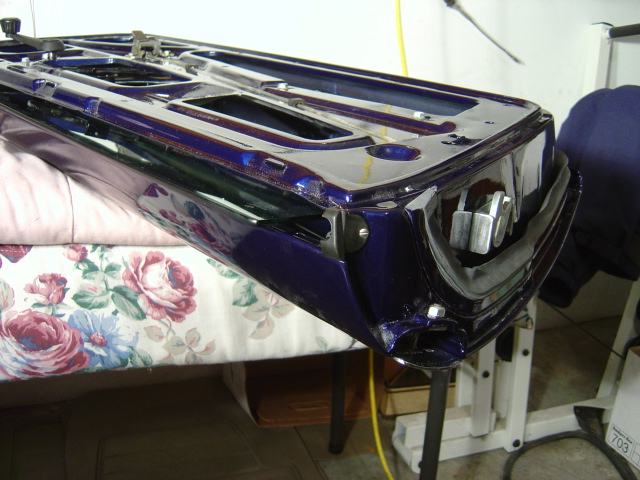
Posted by: william harris Jun 2 2005, 07:32 PM
Anyhow, for the concours wiennies, the glass is the same glass that came out of the car, hell for all I know it has a date code somewhere. Tomorrow hope to post pictures of the damn PITA thing all done and ready to go in.
Attached image(s)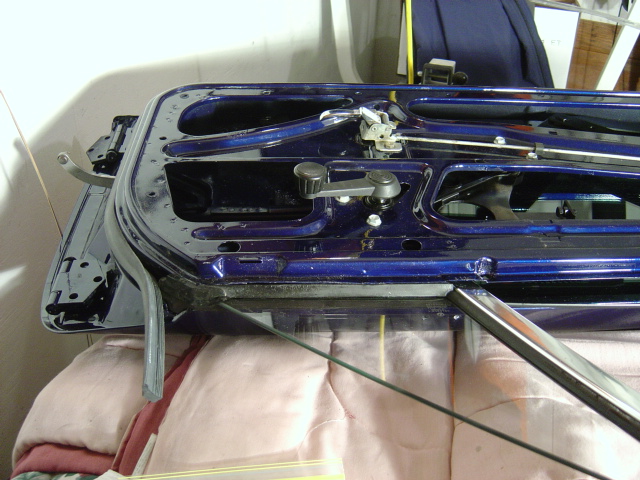
Posted by: william harris Jun 4 2005, 05:24 PM
Today was the first day this year it was over 80 degrees in Massachusetts. So, I felt the need to put the wheels back on the car and give her the first bath since the new paint. Man, this was fun.
Attached image(s)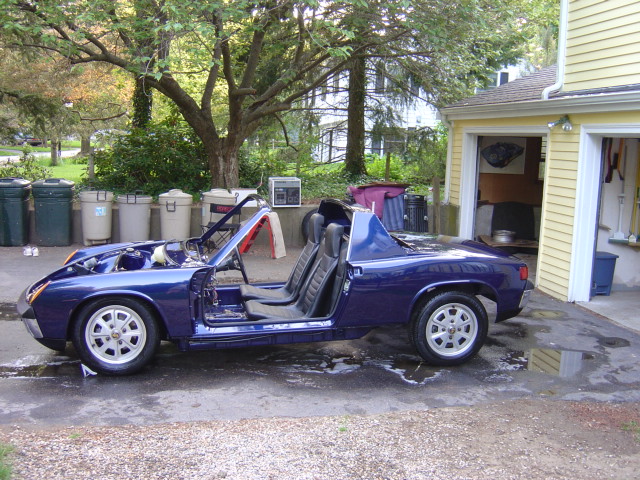
Posted by: william harris Jun 4 2005, 05:25 PM
My neighbors must think I'm nuts. Guess they never saw anybody wash a car with no doors, etc.
Attached image(s)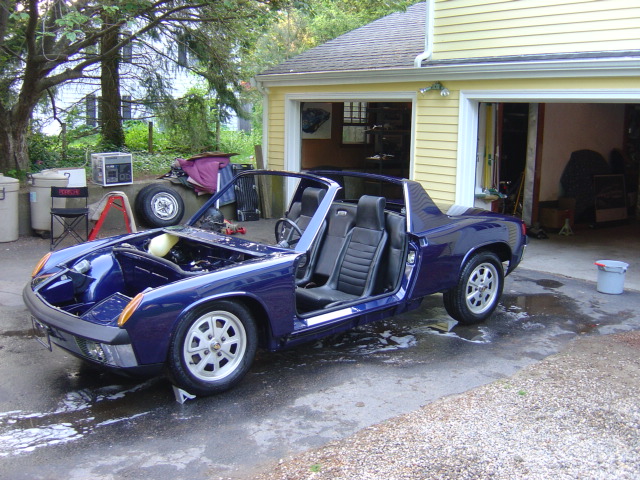
Posted by: william harris Jun 4 2005, 05:27 PM
Over the last six weeks the car had gotten incredibly dusty in the garage. Waiting on Eric Shea pedal assembly for the next week project.
Attached image(s)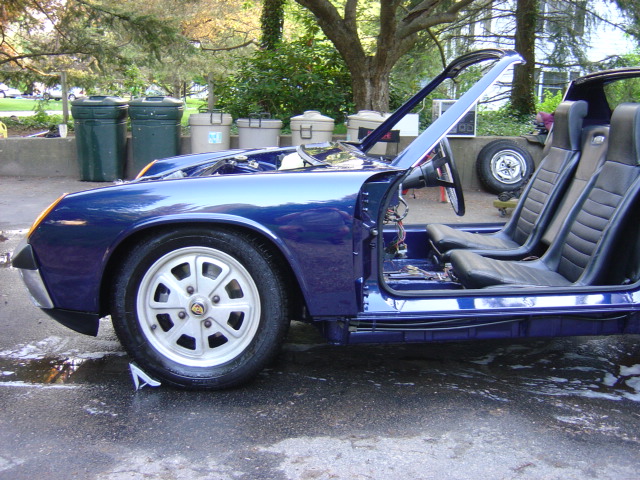
Posted by: william harris Jun 4 2005, 05:28 PM
I really love the Lapis Blue Metallic. Every small job keeps getting me closer to a running car!!!
Attached image(s)
Posted by: william harris Jun 4 2005, 05:29 PM
Hey Racer Chris: how about posting some pictures of the engine build when you get a chance.
Attached image(s)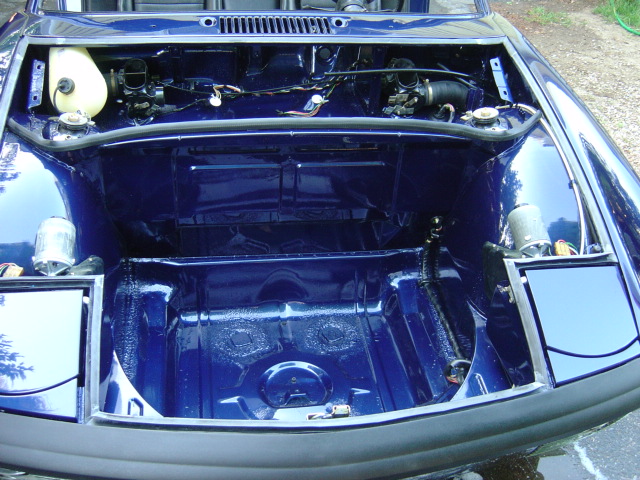
Posted by: william harris Jun 4 2005, 05:30 PM
Even my wife is impressed with the looks of the car as it comes back together.
Attached image(s)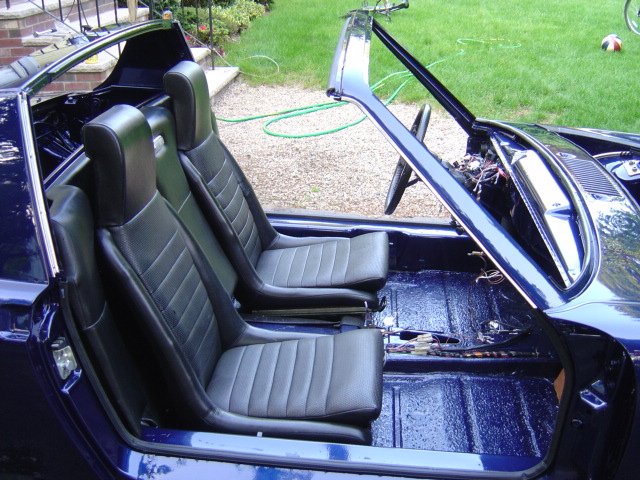
Posted by: Eric_Shea Jun 4 2005, 05:31 PM
It's on the way!
Car looks great. Wanna see your pedals? Check the thread
http://www.914world.com/bbs2/index.php?act=ST&f=2&t=32578
Posted by: william harris Jun 4 2005, 05:32 PM
Within the next few days the doors will be finished and back on the car. Next comes the engine lid. I'm gonna replace the silver PORSCHE script with gold, think it will look better with the blue.
Attached image(s)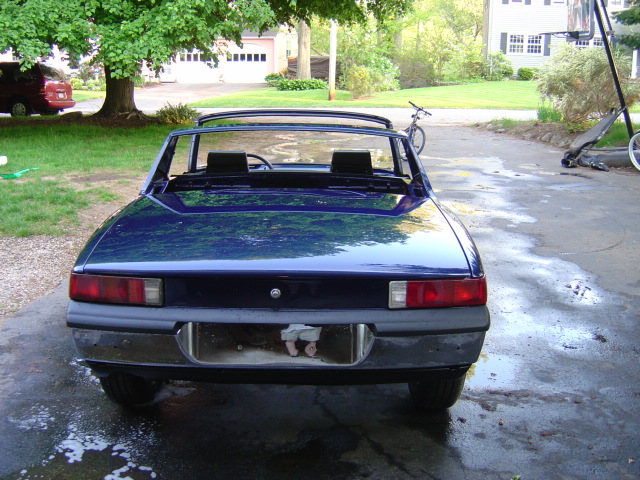
Posted by: william harris Jun 4 2005, 05:33 PM
Gotta get up to Ipswich and return the steel wheels used for the paint work.
Attached image(s)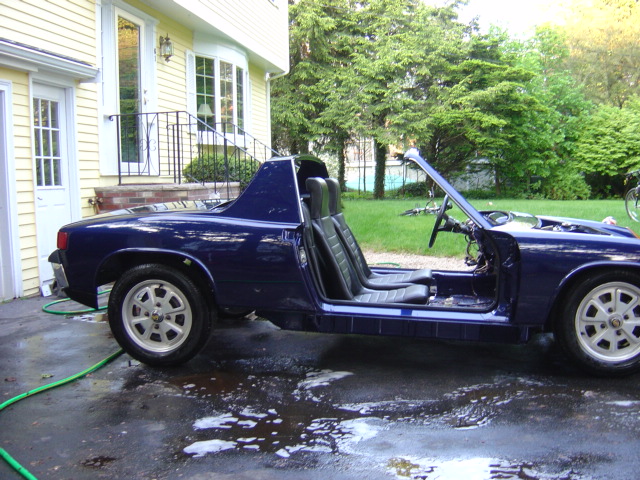
Posted by: william harris Jun 4 2005, 05:36 PM
Eric, what a great post, this is what the 914 community is about for me!!! Can't wait to put that beautiful pedal assembly back in the car. I pulled out the master clinder so I could put the grommets for the plastic lines to the reservoir and grommet for wire to master clinder in yesterday. That hard line on the top of the master clinder is a real bitch to get to working under the car.
Attached image(s)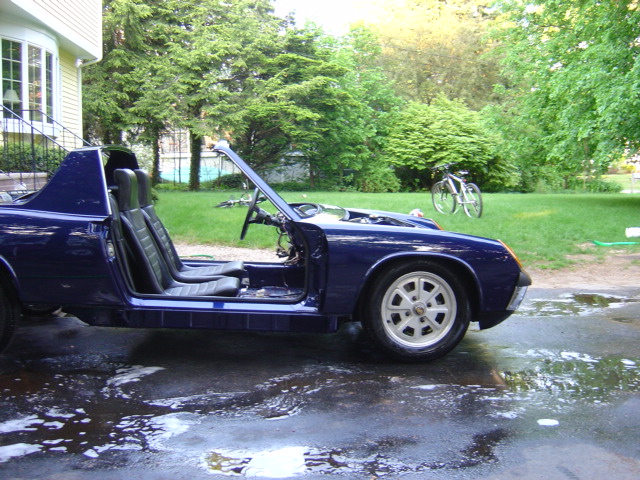
Posted by: william harris Jun 4 2005, 05:38 PM
As the sun sets on a great Saturday, I feel like the 914 community is working with me to finish this project and get back on the road. Eric: that assembly was a real mess because the old master clinder was leaking fluid into the pedal assembly. What a mess. The rebuild is outstanding.
Attached image(s)
Posted by: Eric_Shea Jun 4 2005, 05:39 PM
| QUOTE |
| That hard line on the top of the master clinder is a real bitch to get to working under the car. |
Ya think? I guarantee you; tomorrow, you'll have neck muscles you didn't know you had.
Thanks for your business!
Posted by: william harris Jun 4 2005, 05:41 PM
Haven't put the hood on because I gotta get Eric Sanders (Partsman) over here to put the crap in under the hood - then drop the gas tank and associated parts in. Well guess I better go outside and push the car back into the garage.
Attached image(s)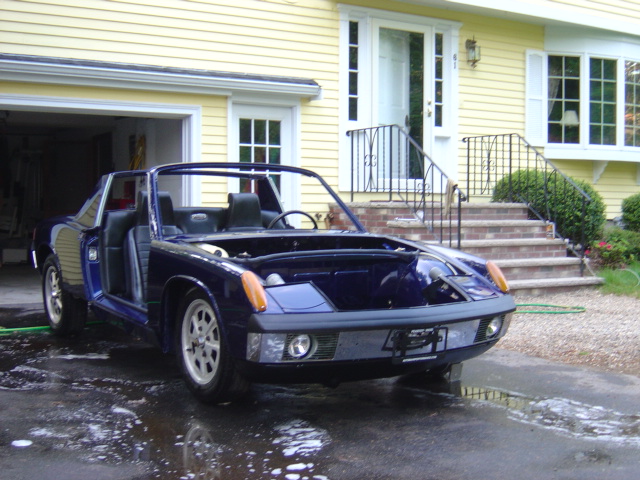
Posted by: Headrage Jun 4 2005, 05:42 PM
| QUOTE (william harris @ Jun 4 2005, 04:25 PM) |
| My neighbors must think I'm nuts. Guess they never saw anybody wash a car with no doors, etc. |
I've never seen anyone wash a car with no doors.....
Yours looks incredible though. Love that blue (Normally hate the color).
As far as painting and fixing things that nobody see's, I'm with you; YOU know it's there....................
Posted by: william harris Jun 10 2005, 06:45 PM
Small steps towards completion. Goal to keep moving every day. Every day put in at least one hour on project. Driver door completed.
Attached image(s)
Posted by: william harris Jun 10 2005, 06:46 PM
I know its a small step, but this car has not had doors on the body for about 2 years. Kinda like the looks as the car comes along.
Attached image(s)
Posted by: william harris Jun 10 2005, 06:47 PM
My wife said, hey that's starting to look like a car again. Then she got closer and said: where's the motor?
Attached image(s)
Posted by: william harris Jun 10 2005, 06:49 PM
So tomorrow's goal is to finish the passenger door, hang it and move on to the seal around the inside of the door and across the top of the windshield.
Attached image(s)
Posted by: william harris Jun 10 2005, 06:49 PM
Next:
Attached image(s)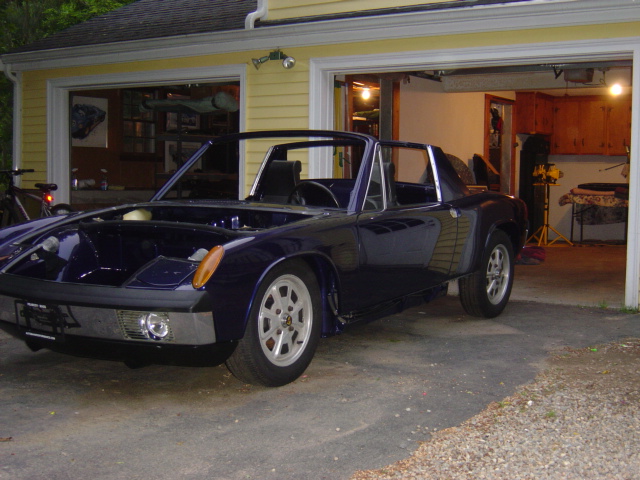
Posted by: william harris Jun 10 2005, 06:50 PM
Another, Eric are you looking at these?
Attached image(s)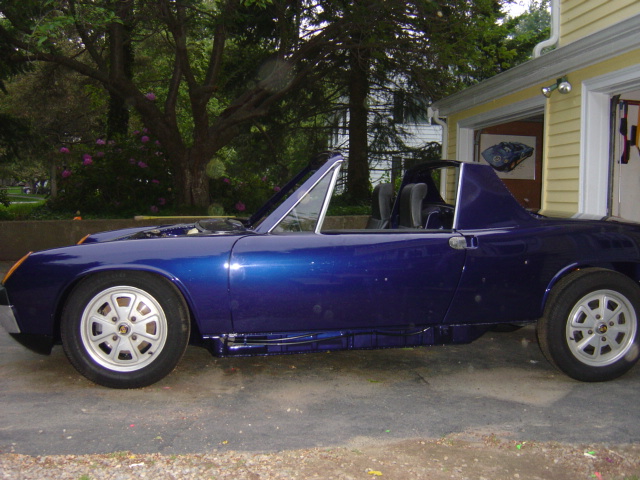
Posted by: Eric_Shea Jun 10 2005, 06:56 PM
Yeah... different Eric though. Where's those damn pedals?
Posted by: william harris Jun 10 2005, 07:02 PM
Oh Yeah!!! I got them, wanted to save the pictures for the sun tomorrow because the pedal assembly glows like gold. Tomorrow I may just have to put the pedal assembly in. Damn, I kinda hate screwing with that master cylinder again, had to take it out last week to put the grommets in place for the plastic lines going up to the reservoir. That damn line on top that runs to the passenger side front brake, makes my neck hurt just thinking about it.
Posted by: Eric_Shea Jun 10 2005, 07:11 PM
| QUOTE |
| makes my neck hurt just thinking about it. |
Told ya!

Posted by: william harris Jun 10 2005, 07:18 PM
Why is it there is always some part that no human hand or tool can reach? Who built these cars, elves?
Posted by: Dead Air Jun 11 2005, 06:48 AM
I've run out of adjectives...
Excellent and wonderful seem kind of weak...
I am not worthy...
Where is the "spooge" smiley when you need it?
Posted by: william harris Jun 12 2005, 01:52 PM
So this weekend, which was a real heat wave and very humid here in Massachusetts, I managed to finish up the passenger door and hang it on. So, decided to wash the doors and here is the finished product. Got go take the kids to Star Wars now.
Attached image(s)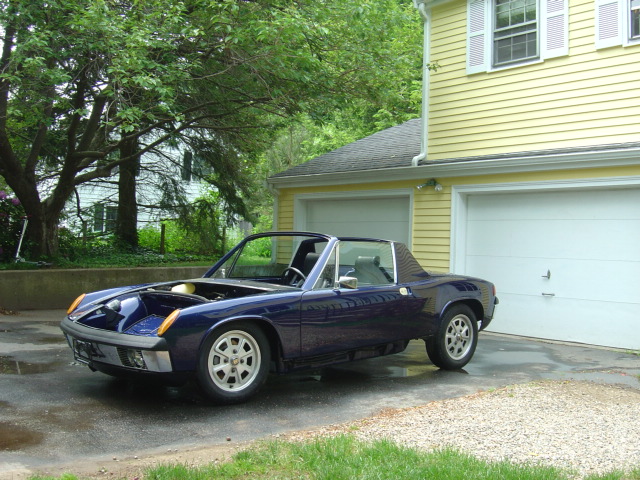
Posted by: william harris Jun 12 2005, 01:56 PM
Doors turned out to be quiet a project. New felts in both channels, new felt in the outside window wipe (man what a project that was - my method for install turned out to be get one side of the piece completely in the channel and then flex, bend and tuck the other side in), new rubber wipe on the outside, everything thing inside the door degreased, polished with steel wool and lubed before going back in, had the lift mechanism blasted and painted, new seal for vent window, cleaned the glass, etc. Gotta work on the door panels and vapor seals next.
Attached image(s)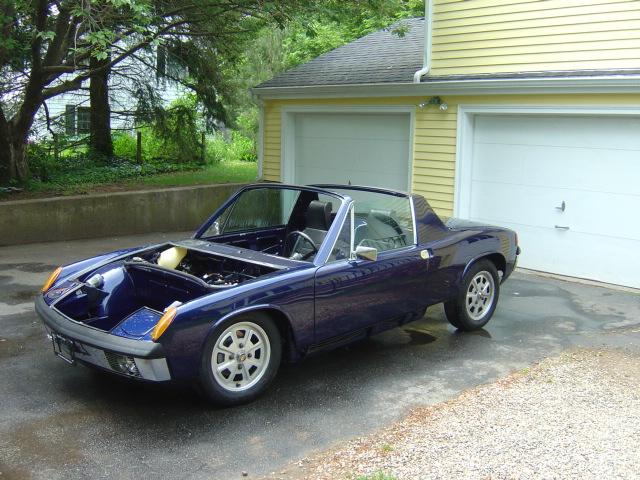
Posted by: william harris Jun 12 2005, 01:58 PM
Yeah, almost forgot, put mirrors on each door. The passenger door did not have a mirror (like everybody) so I drilled the holes and taped them for a mirror on that side. Great idea and simple job.
Attached image(s)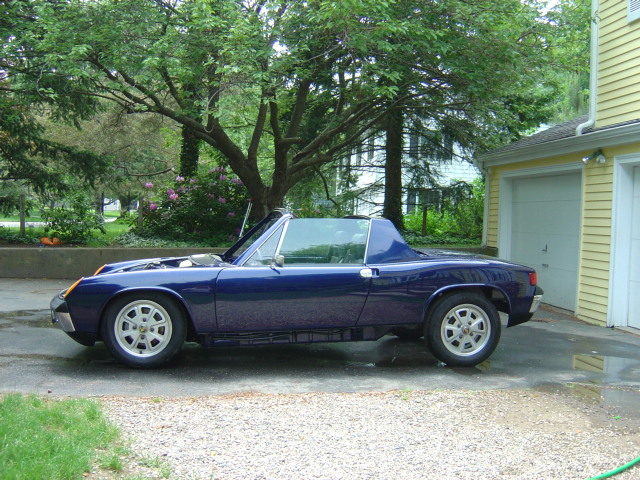
Posted by: william harris Jun 12 2005, 02:01 PM
Wanted to post some pictures before it is back in the garage and back up on jack stands. Got that Eric Shea pedal assembly to put in. Since I had to put the grommets in for the plastic lines to the reservoir, the master cylinder is already out and will go back in and then the gravel shield and hopefully that will be it for under the car for a time.
Attached image(s)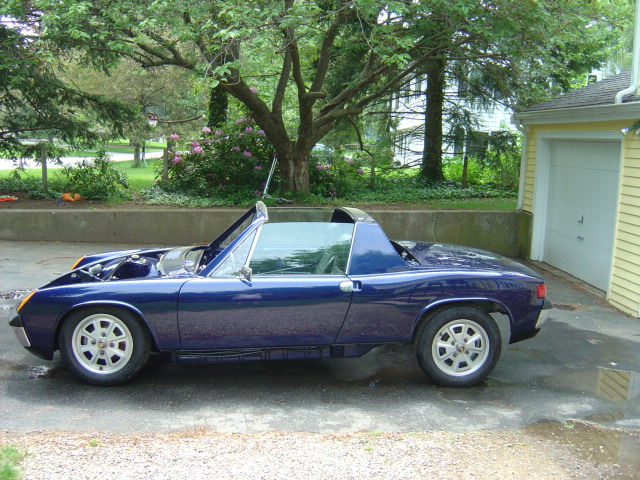
Posted by: william harris Jun 12 2005, 02:02 PM
Here's a pictures of the door, probably can't catch all the details, but everything (and I do mean everything) has been replaced, renewed and detailed.
Attached image(s)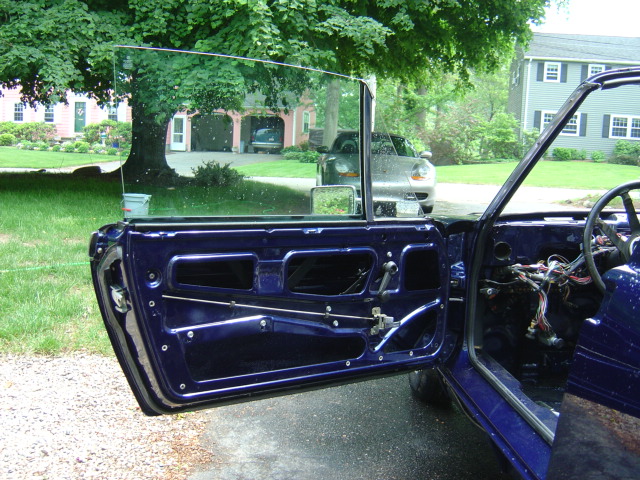
Posted by: william harris Jun 12 2005, 02:04 PM
After the pedal assembly, the seal around the window pillars and across the top comes next, then the sub dash and dash pad, and then the instruments.
Attached image(s)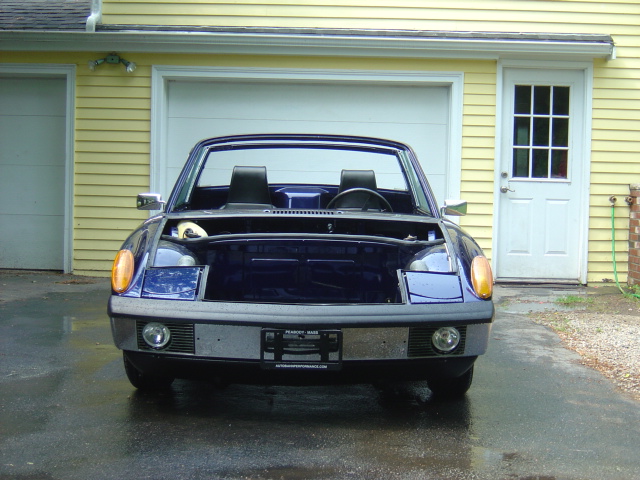
Posted by: william harris Jun 12 2005, 02:05 PM
Can't wait to get under the cowl, get the wiper motor and fresh air blower motor and vents in place, then drop in the gas tank, etc. and drop the hood back on the car.
Attached image(s)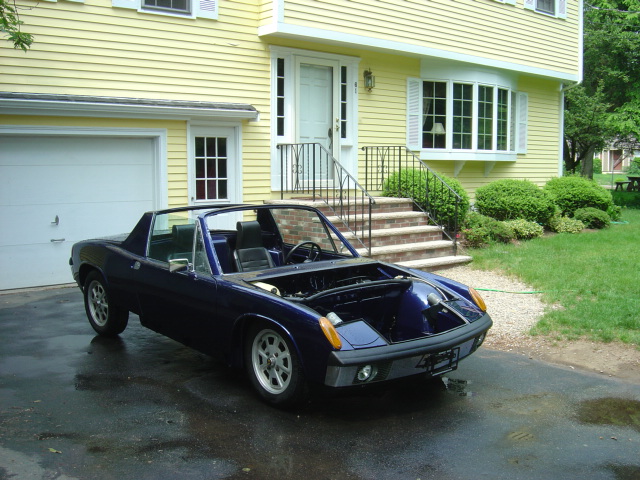
Posted by: william harris Jun 12 2005, 02:07 PM
For some reason, the doors seem to make the car seem much more complete. Here's the next PITA project - the prior crappy paint job guys actually painted the door panels yellow to match their masterpiece of painting every other damn part that wasn't moving.
Attached image(s)
Posted by: william harris Jun 12 2005, 02:08 PM
Other side, you might notice the seal inside the car calling out for my attention.
Attached image(s)
Posted by: william harris Jun 12 2005, 02:09 PM
Next.
Attached image(s)
Posted by: william harris Jun 12 2005, 02:11 PM
Let me tell you, putting the safety straps in the door can be a real PITA, especially the little cotter pin.
Attached image(s)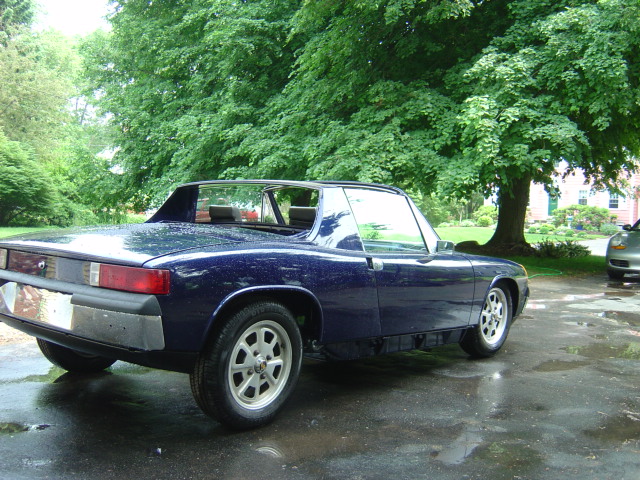
Posted by: william harris Jun 12 2005, 02:12 PM
Last one for today. My plan remains the same, keep pushing and find some project to start, move along, finish and keep the momentum rolling along. Thanks for your interest.
Attached image(s)
Posted by: william harris Jun 16 2005, 06:55 PM
Well, back to why we are really here. My good friend Eric Sanders came over one night this week and together we got the big seal up the windshield pillars and over the top. This was definitely best done by two guys, although honestly Eric had the technique to get the seal in place. Ever notice how two friends working together get so much more accomplished? Thanks Eric.
Attached image(s)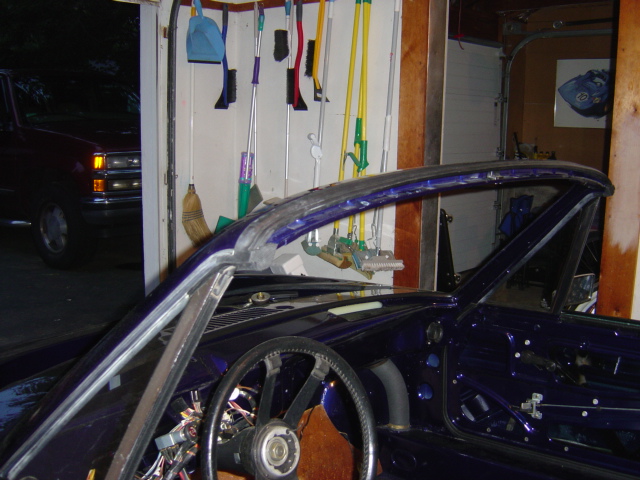
Posted by: william harris Jun 16 2005, 06:57 PM
I also put in the seals on the front of the targa bar and I'm basically finished with the seals and really pushing hard to finish up the interior. Will try to get the doors completed this weekend. Here's the door glass seals on the targa bar.
Attached image(s)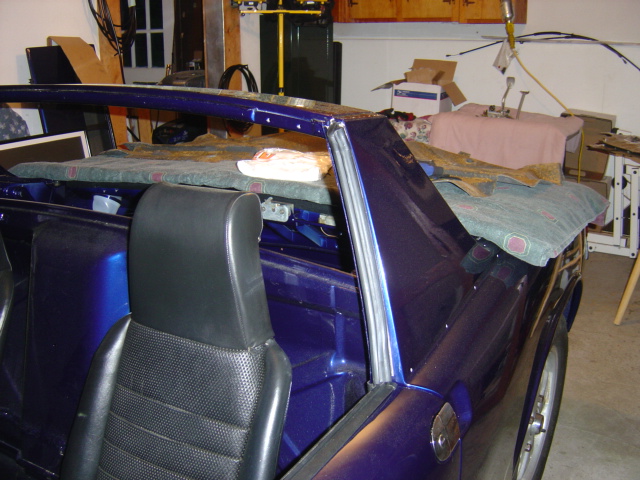
Posted by: william harris Jun 16 2005, 06:59 PM
So here is the next project for the weekend - what a real work of art. The guys at Autobahn Performance couldn't believe how nice the pedal assembly is. They said next time rather than do a rebuild themselves they will just send them to Eric Shea.
Attached image(s)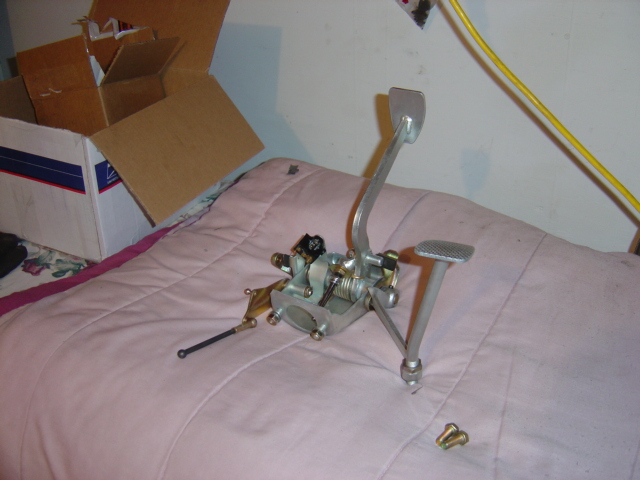
Posted by: william harris Jun 16 2005, 07:00 PM
Another view - Eric your workmanship is whatever is beyond First Rate.
Attached image(s)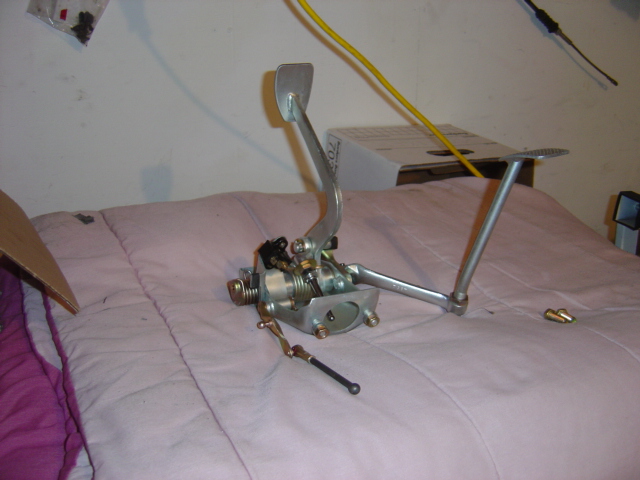
Posted by: partsman Jun 17 2005, 10:55 AM
Hey, aren't we going to put the roll bar vinyl on?? we should've done that before you put the targa seals on... Remember how good it looked on my car?
Posted by: mihai914 Jun 17 2005, 11:13 AM
Nice going and very nice color choice BTW. If you don't mind, could you take a picture of the door gaps since the engine is out, please.
Posted by: william harris Jun 17 2005, 11:16 AM
Do you mean the gaps when the doors are closed? Are you looking for something in particular? Let me know and I will be happy to post all the pictures you want.
Posted by: Root_Werks Jun 17 2005, 11:25 AM
Posted by: URY914 Jun 17 2005, 11:29 AM
That is soooooooooooooo sweet! 
Damn I want a street car
Paul
Posted by: mihai914 Jun 17 2005, 01:28 PM
| QUOTE (william harris @ Jun 17 2005, 01:16 PM) |
| Do you mean the gaps when the doors are closed? Are you looking for something in particular? Let me know and I will be happy to post all the pictures you want. |
Yes with the doors closed, and I think you don't have an engine in yet. What I'm looking for is to see if the gaps are slightly bigger without the powertrain. Thanks
Posted by: william harris Jun 17 2005, 01:53 PM
OK, I got you, check in later today. You are right, no engine or tranny yet.
Posted by: Grimstead Jun 17 2005, 02:19 PM
| QUOTE (partsman @ Jun 17 2005, 09:55 AM) |
| Hey, aren't we going to put the roll bar vinyl on?? we should've done that before you put the targa seals on... Remember how good it looked on my car? |
You have made my car look like crude next to your's, such a great job
At least my rims still look nicer (untill you get your's done I'm sure)
Time for you to move out to Sunny S. Cal and help with mine.
Posted by: tat2dphreak Jun 17 2005, 02:28 PM
great job man!!
Posted by: william harris Jun 17 2005, 02:46 PM
Thanks guys, I had a vision in mind. This will probably make some guys flinch - I wanted a better than factory fresh restoration and then I want to flog and drive the wheels off the car. Yeah, that's right, rain, crud, bugs, what have you - I would like to put 200,000 miles on this car before I pass it on to the next generation.
Posted by: partsman Jun 17 2005, 02:52 PM
Hey William, remember how you said I was always like a son to you......When do I get the car??
Your long lost son, and part time slave laboror.
Eric
Posted by: Eric_Shea Jun 17 2005, 04:05 PM
Thanks for the plug-a-roo
When do we go for a ride? I've always wondered what a teener felt like the day you drive it off the lot. 30 some years later and you'll accomplish that. Should be fun.
Posted by: william harris Jun 17 2005, 04:26 PM
Eric Shea- I'll pick you up on the way to WCC 03 (2006). Pictures of install hopefully this weekend.
Posted by: Gint Jun 17 2005, 06:26 PM
| QUOTE (william harris @ Jun 17 2005, 02:46 PM) |
| Thanks guys, I had a vision in mind. This will probably make some guys flinch - I wanted a better than factory fresh restoration and then I want to flog and drive the wheels off the car. Yeah, that's right, rain, crud, bugs, what have you - I would like to put 200,000 miles on this car before I pass it on to the next generation. |
That's my plan as well. GO!
Posted by: Doug Leggins Jun 17 2005, 07:45 PM
| QUOTE |
| QUOTE (william harris @ Jun 17 2005, 02:46 PM) Thanks guys, I had a vision in mind. This will probably make some guys flinch - I wanted a better than factory fresh restoration and then I want to flog and drive the wheels off the car. Yeah, that's right, rain, crud, bugs, what have you - I would like to put 200,000 miles on this car before I pass it on to the next generation. That's my plan as well. GO! |
That is was is was is ... my plan too. It is getting harder to stick with "is"
Go Men Go!
Posted by: kenpolives Jun 18 2005, 04:06 AM
Great work so far Mr H, sometime I need to drive over there and get Eric and your help installing the windshield/targa seal. Last time mine ripped and you know how expensive they are. Did eric get you your seal?
I also got my car back from CFR welding a while ago. He does do great work.
Don
Posted by: william harris Jun 18 2005, 08:13 AM
Hell yeah, Eric is partsman. I give Eric all the credit, he just knows how to put the damn thing in, that and the lithium grease. Glad to hear Chris fixed another one - and Racer Chris does outstanding work!!! Eric and I volunteer to put your next seal in - notice I'm volunteering Eric, I'm just the helper.
Posted by: rhodyguy Jun 18 2005, 09:25 AM
refreshX4, 30 minutes, and nothing but red x filled boxes . i'm sure it looks swell william. if you haven't got to it, 3M double sided scotch tape works very well for securing the vapor barriers to the doors.
k
Posted by: william harris Jun 18 2005, 03:39 PM
OK, here are those door gap pictures I promised.
Attached image(s)
Posted by: william harris Jun 18 2005, 03:42 PM
Next. Guess what I found when I went to put the door panels on? On the drivers side the arm rest/storage box is held in place up top by two bolts/phillips head that go into two "captive nuts" housed in the door. I noticed when I took the arm rest off a couple of years ago there was no bolt in the front hole. You know why? The captive nut is not in the door. Gotta get one.
Attached image(s)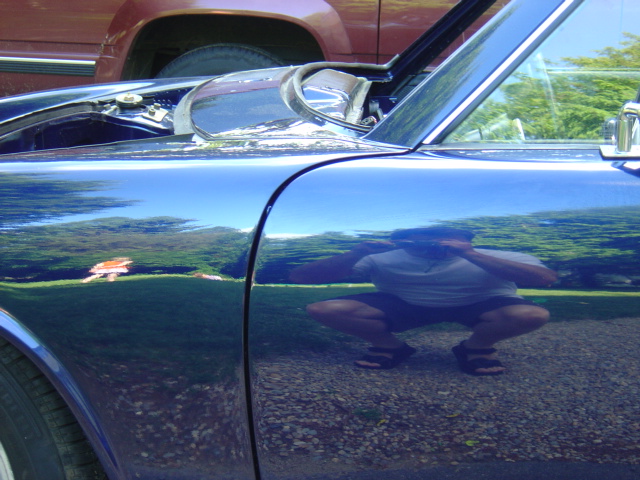
Posted by: william harris Jun 18 2005, 03:44 PM
Last one for now. Gotta go make some new door vapor barriers. Using the one olds for a pattern, but they are pretty torn up. Will post some pictures of the door panels in a little while.
Attached image(s)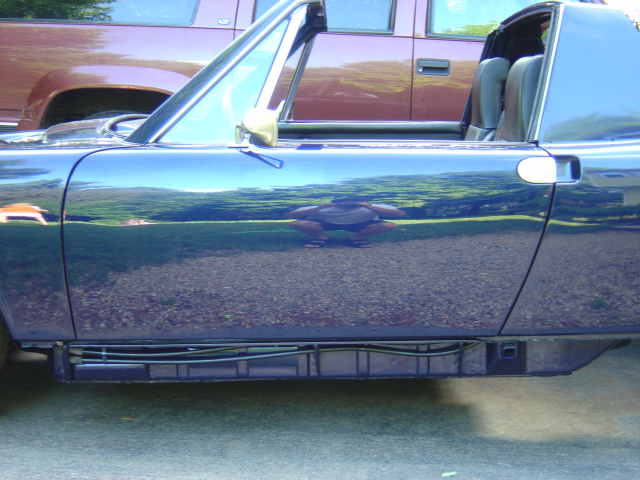
Posted by: william harris Jun 18 2005, 06:32 PM
Here are the door panels back in place. The original door panels.
Attached image(s)
Posted by: william harris Jun 18 2005, 06:33 PM
Glue the backing for the back panel back in place and slapped the back panel in the hold it in place for the adhesive to set up.
Attached image(s)
Posted by: william harris Jun 18 2005, 06:34 PM
Passenger door. This panel was really nice.
Attached image(s)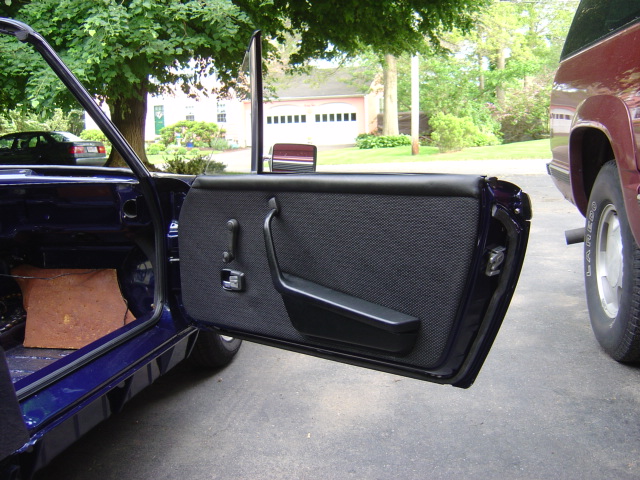
Posted by: william harris Jun 18 2005, 06:35 PM
Hard to believe this is all the original stuff. Not too shabby.
Attached image(s)
Posted by: william harris Jun 18 2005, 06:36 PM
Last project for the day was to run the cable and pull for the engine lid release. In and working.
Attached image(s)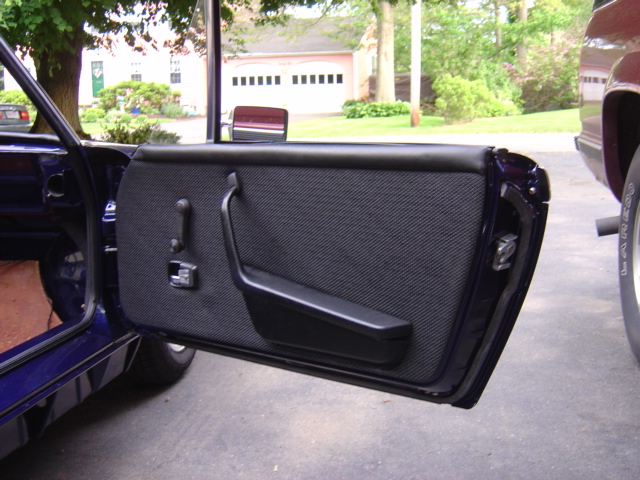
Posted by: william harris Jun 18 2005, 06:36 PM
Other side view. Gotta put the seats back in.
Attached image(s)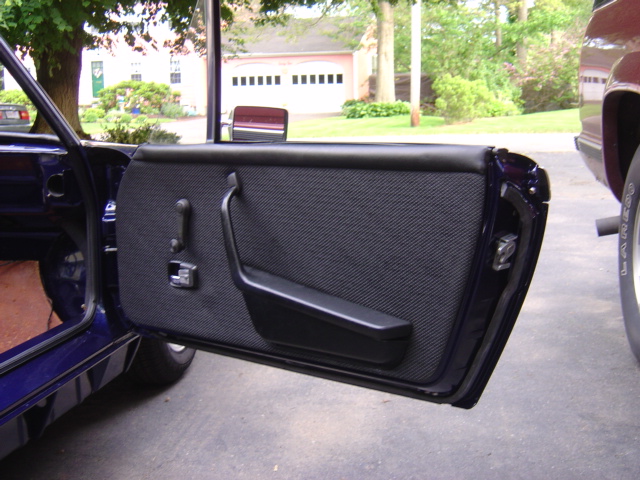
Posted by: william harris Jun 18 2005, 06:37 PM
What the hell, the same photo. Must be time to crash.
Attached image(s)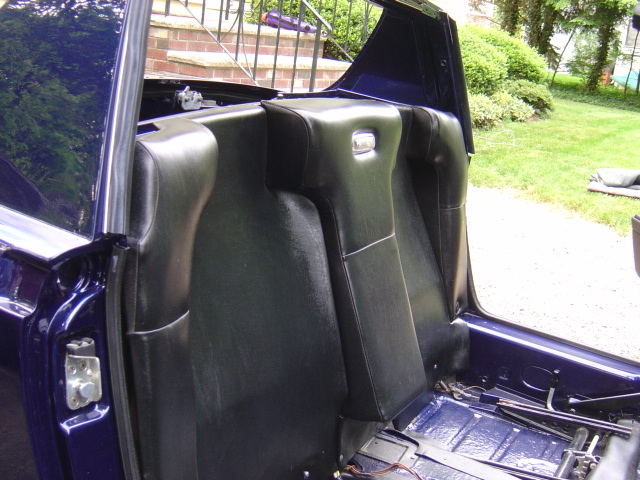
Posted by: william harris Jun 21 2005, 06:46 PM
Today I started the project to install the dash. Got a late start so didn't get too much done today. Hope to have the dash completely installed over the next few days. Starting to look much more like a car again
Attached image(s)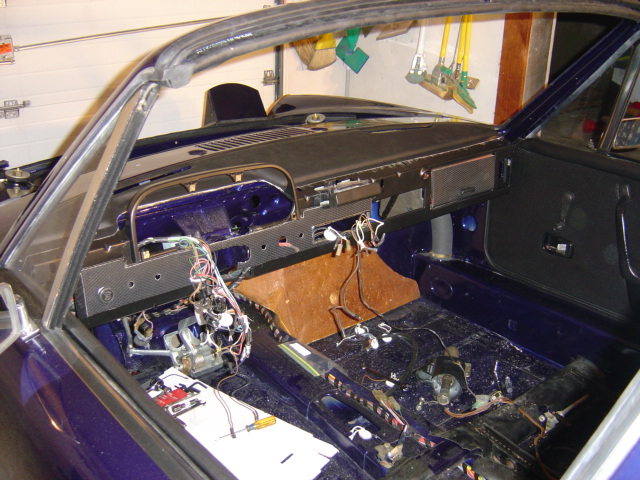
Posted by: william harris Jun 21 2005, 06:47 PM
I need the tool to install the front of the light switches, using the needle nose pliers in a real PITA. Got one from the local Porsche shop but it is too big - must be for 911 switches
Attached image(s)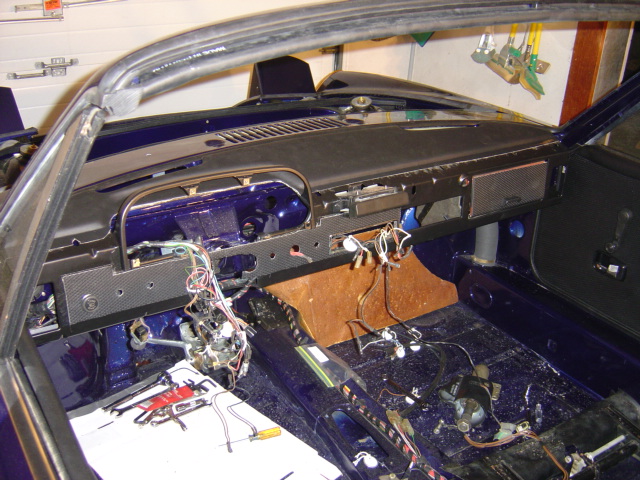
Posted by: william harris Jun 21 2005, 06:49 PM
Been meaning to post a picture of Eric Shea's master piece. Everyone needs one of these.
Attached image(s)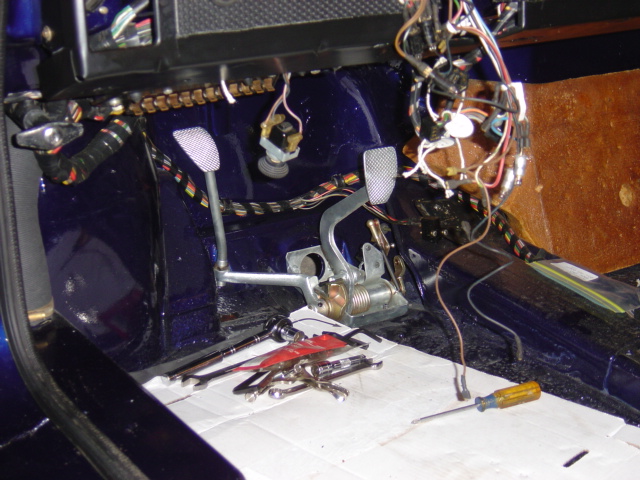
Posted by: william harris Jun 21 2005, 06:50 PM
Replaced the dash face material on top and the basket weave on the face. Gonna look mighty good when it is all back together.
Attached image(s)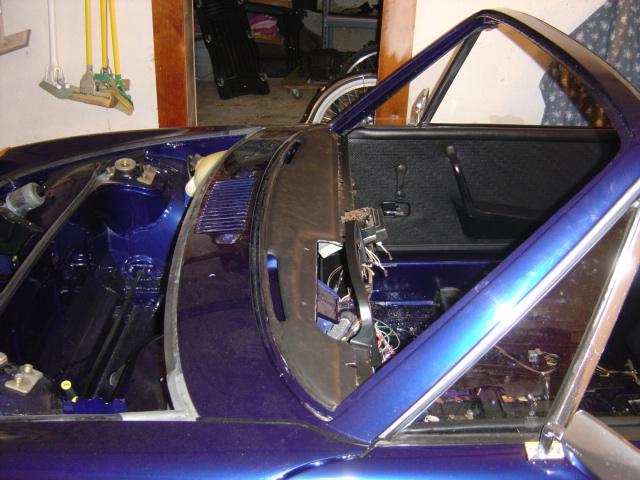
Posted by: william harris Jun 21 2005, 06:51 PM
Well here is how it sits today. More to come.
Attached image(s)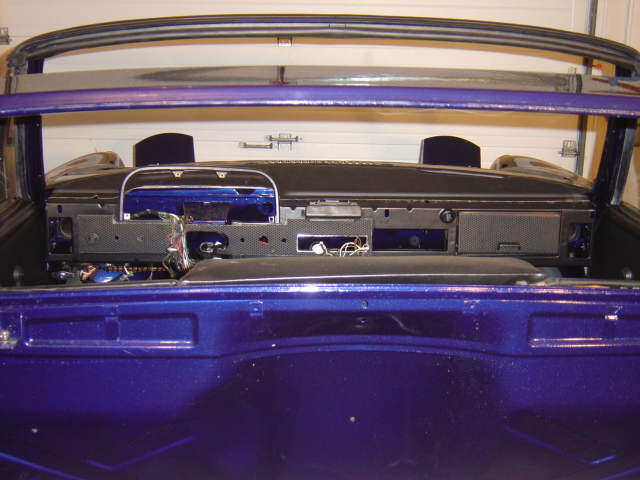
Posted by: william harris Jul 3 2005, 03:05 PM
So after the last post I figured out that the upholstery shop gave the dash face a couple of holes I didn't need - like on both sides of the cigarette lighter!!! So I ripped that off to redo it myself. So in keeping with my plan to always keep moving the job along, today I did a couple of chores. Reinstalling the outer rocker covers came next.
Attached image(s)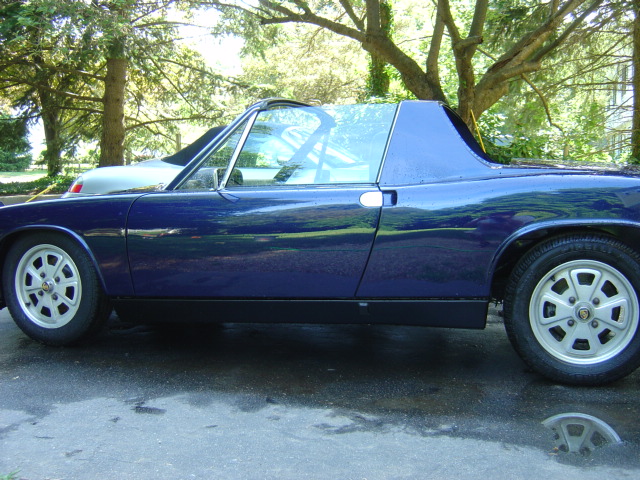
Posted by: william harris Jul 3 2005, 03:08 PM
I thought this would be a simple bolt on procedure. No such luck, the damn rocker covers must really be pushed on and then you have the problem of trying to align the holes for the three bolts along the bottom and the two bolts - one on each end that go thru the rubber donut and into the clip on the car. This job had me wishing for a lift.
Attached image(s)
Posted by: william harris Jul 3 2005, 03:10 PM
You probably can't notice, but I also added the windshield washer nozzles on the cowl. And, I borrowed Eric Sander's (Partsman) rivet gun to add a few pieces back on to the car. Plate on passenger side headlight box.
Attached image(s)
Posted by: william harris Jul 3 2005, 03:11 PM
Here's the plate back in place. Also riveted the VIN tag back to the A pillar.
Attached image(s)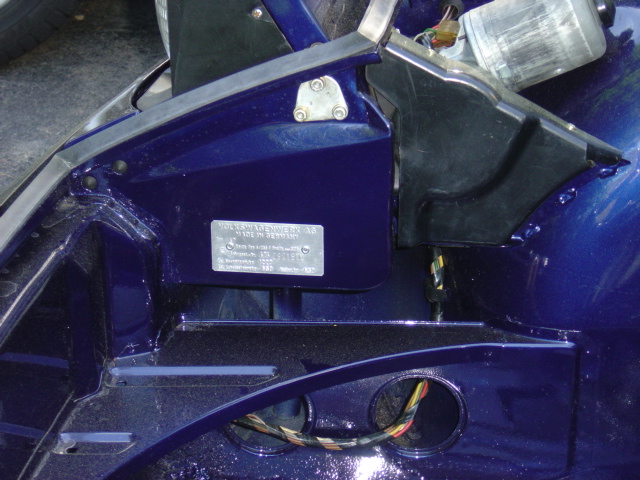
Posted by: william harris Jul 3 2005, 03:12 PM
Must be a picture of the VIN plate here somewhere. Well you can kinda see it here.
Attached image(s)
Posted by: william harris Jul 3 2005, 03:13 PM
Trying to get ready to put all the glass back in real soon. Couple of views of the car.
Attached image(s)
Posted by: william harris Jul 3 2005, 03:16 PM
So the next big push will be to finish the interior of the car. Chris Foley helped out by sending me a barrel nut needed to mount the driver side arm rest and a clip for the dash/instrument cluster. Chris - how about some pictures of the engine build? Trying to get it ready to join back up with the engine real soon.
Attached image(s)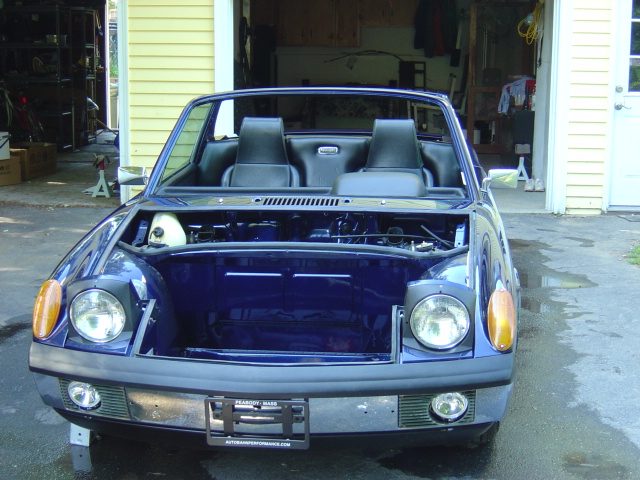
Posted by: william harris Jul 3 2005, 03:18 PM
When it gets too hot, I cool off in the pool for a couple of hours and then do a little more.
Attached image(s)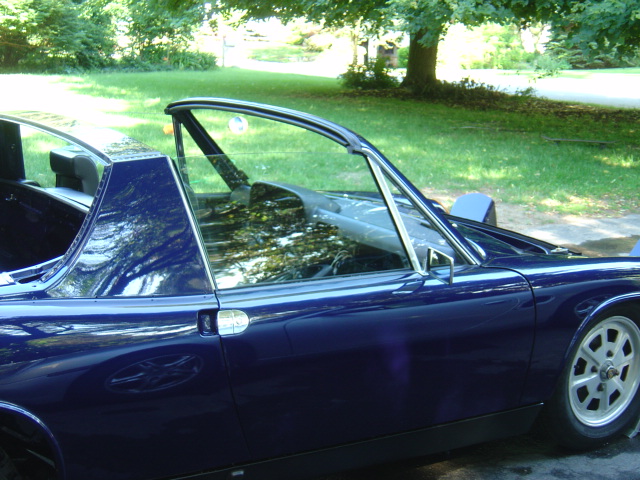
Posted by: william harris Jul 3 2005, 03:19 PM
Here's the little brother of # 1970.
Attached image(s)
Posted by: william harris Jul 3 2005, 03:20 PM
Happy Fourth of July everybody. 
Attached image(s)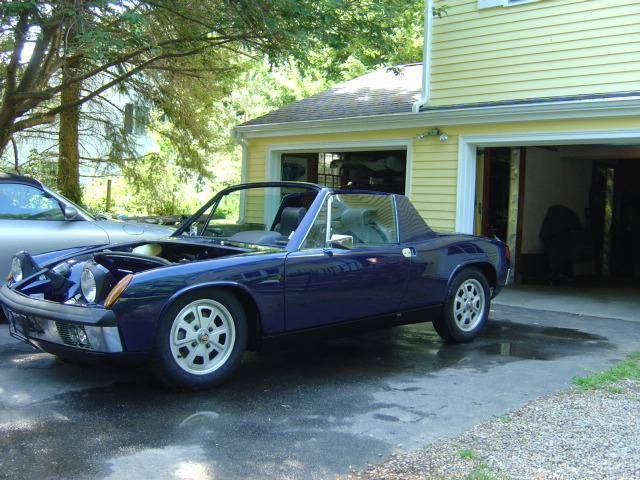
Posted by: Rleog Jul 3 2005, 05:49 PM
Gotta love that deep blue......one sharp 914, Wm.
Posted by: william harris Jul 3 2005, 08:14 PM
Thanks Bob. Chris told me he was working on your car this week.
Posted by: hargray2 Jul 4 2005, 11:36 AM
Quote:
From your other thread....
"This will not be a concours queen"
Now look whatcha done gone and did!
Posted by: Eric_Shea Jul 4 2005, 01:38 PM
Do you wash that thing every time you take it out?
You're gonna rub the paint off of it!
WCC06... driving through SLC right?
Posted by: william harris Jul 4 2005, 04:01 PM
There is so much dust and pine tree pollen on the car I can't resist washing it off when I roll it out of the garage. Working on the interior today.
Powered by Invision Power Board (http://www.invisionboard.com)
© Invision Power Services (http://www.invisionpower.com)