Printable Version of Topic
Click here to view this topic in its original format
914World.com _ 914World Garage _ 914 Bodywork
Posted by: Classic Petrolheads Feb 19 2016, 03:52 AM
Hi everyone and very pleased to meet you. I am doing a ground up resto on a 1975 2lt 4 cylinder beauty and am getting close to replacing sections of the floor pan. I see that the original panel has these apertures in four places, around 4 or 5" dia., plugged with metal caps with a square protrusion in the middle. I've noticed that all the reproduction panels do not have these holes although most do have the recesses stamped in. Could anyone please shed some light on a) how important are these holes with their caps and b) why were they put there in the first place? My mate recons they're there to drain any water should the car fall in a lake or such. Gave me a good laugh that did  .
.
Thanks for any help on this.
Posted by: BeatNavy Feb 19 2016, 05:01 AM
I seem to recall from previous discussions that those are there simply to aid in the original assembly / manufacture process at the factory. They don't serve any real purpose after leaving the factory (IIRC). So if you're wondering if you need to duplicate them as part of your repairs, I believe the answer is "no." Others can confirm this (or not).
I'm in the process of replacing an entire floor pan now. Drilling out spot welds is my new favorite thing. 
And to the Czech Republic, 
Posted by: xperu Feb 19 2016, 06:39 AM

Hi everyone and very pleased to meet you. I am doing a ground up resto on a 1975 2lt 4 cylinder beauty and am getting close to replacing sections of the floor pan. I see that the original panel has these apertures in four places, around 4 or 5" dia., plugged with metal caps with a square protrusion in the middle. I've noticed that all the reproduction panels do not have these holes although most do have the recesses stamped in. Could anyone please shed some light on a) how important are these holes with their caps and b) why were they put there in the first place? My mate recons they're there to drain any water should the car fall in a lake or such. Gave me a good laugh that did
.Thanks for any help on this.
For factory assembly only. Mike
Posted by: bulitt Feb 19 2016, 07:04 AM
The robot welders would pop through the holes to perform welds. 
Posted by: 76-914 Feb 19 2016, 09:22 AM
 and
and
Posted by: Steve Feb 19 2016, 09:27 AM
I thought they were used for a spot welding machine at the factory. Not needed now since most people use a mig welder
Posted by: mgphoto Feb 19 2016, 10:19 AM
Those plugs were used to drain the excess primer and paint from the bodies as they went through the build process.
Since you would be dipping the body into a vat of paint no need to drain.
Mike
ps: I believe all of the 914 body shells were spot welded by hand, 1969 was a little early for welding robots.
Posted by: PanelBilly Feb 19 2016, 10:49 AM
Welcome and send some photos of your work so we can comment on all the fun you're having
Posted by: Tom_T Feb 19 2016, 11:49 AM
I thought they were used for a spot welding machine at the factory. Not needed now since most people use a mig welder
Yup - spot welder access holes used at the Karman plant during uni-body assembly, then closed off with those round covers - as xperu, bullit, 76-914 & Steve etc. are saying.
 .... although I suppose you could pop them out to drain water out after driving into a lake, as your mate says!

Cheers!

Tom
///////
Posted by: whitetwinturbo Feb 19 2016, 12:13 PM
 ....it won't float
Posted by: mb911 Feb 19 2016, 04:56 PM
So my question is to make it right shouldn't you put the plugs back in? I know I plan to
Posted by: ntmatter Feb 21 2016, 05:52 PM
No, the replacement plan doesn't need to have the plugs re-created, if you were restoring a historical vintage Ferrari then maybe, but there's no point in trying to replicate these in a 914.
Posted by: Classic Petrolheads Feb 23 2016, 12:43 AM
I seem to recall from previous discussions that those are there simply to aid in the original assembly / manufacture process at the factory. They don't serve any real purpose after leaving the factory (IIRC). So if you're wondering if you need to duplicate them as part of your repairs, I believe the answer is "no." Others can confirm this (or not).
I'm in the process of replacing an entire floor pan now. Drilling out spot welds is my new favorite thing.
And to the Czech Republic,
Thanks for that mate, relieved to know I don't have to put then back in. Would yopu have any suggestions for where to get a replacement floor pan?
Posted by: Classic Petrolheads Feb 23 2016, 12:44 AM
Thanks for that Mike
Posted by: Classic Petrolheads Feb 23 2016, 12:48 AM
Thanks for that mate
Posted by: Classic Petrolheads Feb 23 2016, 01:33 AM
I would just like to say that as welcomes go, this one is hard to beat. Thanks fellas for all your replies, You've won me a beer that I hope to share with you one day. Thanks again
About the car: Bought her on ebay in England based on the pics and description. She was a US import (I'll be looking to source the European bumpers to replace the US ones, thereby halfing the overall tonnage of the car!) We were reasonably lucky with the car as its panels are surprisingly solid but the floor area... oh boy! Some real cowboy was let loose on it and the botch up was shocking. The section under the driver's seat was hanging off the car by about 30% so two brackets bolted on the inner sill and the solid section of the pan did the job!?!?! On the passenger side even worse. A square piece of metal just siliconed in to cover various rot holes. In the spare wheel well the artisan was at his best. Cut out the entire bottom section and put in another piece of galvanised metal with eight tack welds and eight tubes of silicone. Initially I thought I might repair the floor panel but there are too many rot areas and no matter what, it would still look like a patchwork quilt. So, replacement once I can find the new floor pan. So far so good. Car is about to go to the sand blaster's and then the real fun begins. Will keep you posted with some pics.
Posted by: BeatNavy Feb 23 2016, 04:58 AM
That's excellent. We like members and reports from "all over," so good luck with the project. You've come to the right place.
Complete floor pans are available from http://www.restoration-design.com/ - pretty much the go-to for all structural replacement. Can't say enough good about them. They sell a couple of variations of replacement "kits," and I'm into pretty much replacing all of it right now.
I finally got my floor pan out this weekend, and here's a couple of picks: http://www.914world.com/bbs2/index.php?s=&showtopic=159774&view=findpost&p=2305612 of what that looks like.
When you get a chance, throw some pictures up here for us so we can cheer you on.
Posted by: veekry9 Feb 23 2016, 07:26 AM
Holes,he said,in a 914? 
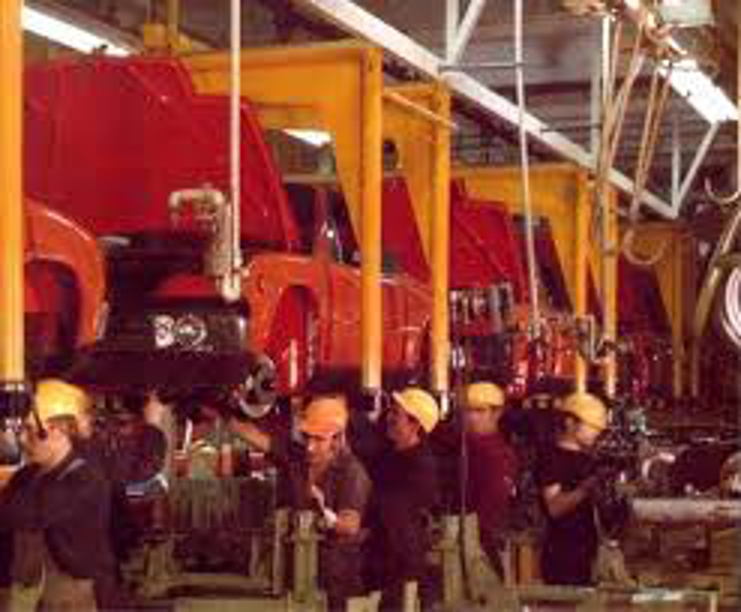
Part of the process of stamping and resistance welding of a unibody chassis.
The thin flat sheet is die bumped a few times to produce stiffening topography which needs'stretch'areas,avoiding tearing.
The sheet is punched with holes initally to accommodate the high stretch areas and to register in the secondary or subsequent dies.
Each high cycle die is a capital expenditure,so to minimize the number of operations,functions like piercing and trimming are combined.
The mapping out of the discrete panels is a lot like origami in metal,fully cadcam for the last 40+ yrs.
Karmann GmbH likely subcontracted the diesets to the best bidder locally,using the then new nc machine tools from mill builders.
From 1965,the steady improvements in the use of the new automation developments meant that jigging and fixturing were improved,reducing build tolerances.
Filling the holes with a rib stiffened panel would make it better.It is ugly,it appears,the fiend FeO disappearing the nether regions of the chassis.
Speaking of better,here are your floorpan panels to make repairs and replacement.
http://www.restoration-design.com/store/category/914
https://www.google.ca/webhp?sourceid=chrome-instant&ion=1&espv=2&ie=UTF-8#q=karmann+gmbh
https://www.google.ca/search?q=automotive+metal+stamping+dies&espv=2&biw=960&bih=480&source=lnms&tbm=isch&sa=X&ved=0ahUKEwiQ9s3J4o3LAhXjvIMKHeuTAjIQ_AUIBigB
Some engine talk that may interest you,the collection and exporting of the desirable V8's of Tatra,of twenty and more years ago.
A guy could make a buck,selling for a good markup,the demand here in North America significant.
A boxful of engines,would turn a neat profit,exploiting the abundance of spares stashed away.
Financing of major repairs to the 914 could thus be effected,at reasonable cost.
Heck,if you find the 2L timed out,why the 2.5L+ V8 may be a viable selection,the repair costs similar.
A Tatra engined 914 would be unique in the world,and fitting too.A simple adapter plate to marry it to the 914 tx.
I've spent considerable time studying the proposition,the aircooled 603/613/700 a good fit.
http://www.914world.com/bbs2/index.php?showtopic=222522&st=91
/
Posted by: peteyd Feb 23 2016, 08:41 PM
I would just like to say that as welcomes go, this one is hard to beat. Thanks fellas for all your replies, You've won me a beer that I hope to share with you one day. Thanks again
About the car: Bought her on ebay in England based on the pics and description. She was a US import (I'll be looking to source the European bumpers to replace the US ones, thereby halfing the overall tonnage of the car!) We were reasonably lucky with the car as its panels are surprisingly solid but the floor area... oh boy! Some real cowboy was let loose on it and the botch up was shocking. The section under the driver's seat was hanging off the car by about 30% so two brackets bolted on the inner sill and the solid section of the pan did the job!?!?! On the passenger side even worse. A square piece of metal just siliconed in to cover various rot holes. In the spare wheel well the artisan was at his best. Cut out the entire bottom section and put in another piece of galvanised metal with eight tack welds and eight tubes of silicone. Initially I thought I might repair the floor panel but there are too many rot areas and no matter what, it would still look like a patchwork quilt. So, replacement once I can find the new floor pan. So far so good. Car is about to go to the sand blaster's and then the real fun begins. Will keep you posted with some pics.
You can purchase our product from our European distributor.
www.restoration-design.eu
Pete
Posted by: Classic Petrolheads Feb 24 2016, 01:58 AM
I would just like to say that as welcomes go, this one is hard to beat. Thanks fellas for all your replies, You've won me a beer that I hope to share with you one day. Thanks again
About the car: Bought her on ebay in England based on the pics and description. She was a US import (I'll be looking to source the European bumpers to replace the US ones, thereby halfing the overall tonnage of the car!) We were reasonably lucky with the car as its panels are surprisingly solid but the floor area... oh boy! Some real cowboy was let loose on it and the botch up was shocking. The section under the driver's seat was hanging off the car by about 30% so two brackets bolted on the inner sill and the solid section of the pan did the job!?!?! On the passenger side even worse. A square piece of metal just siliconed in to cover various rot holes. In the spare wheel well the artisan was at his best. Cut out the entire bottom section and put in another piece of galvanised metal with eight tack welds and eight tubes of silicone. Initially I thought I might repair the floor panel but there are too many rot areas and no matter what, it would still look like a patchwork quilt. So, replacement once I can find the new floor pan. So far so good. Car is about to go to the sand blaster's and then the real fun begins. Will keep you posted with some pics.
You can purchase our product from our European distributor.
www.restoration-design.eu
Pete
Thanks very much for this Pete.
Powered by Invision Power Board (http://www.invisionboard.com)
© Invision Power Services (http://www.invisionpower.com)