Printable Version of Topic
Click here to view this topic in its original format
914World.com _ 914World Garage _ Mark's (914Rubber) Project Car
Posted by: cary Feb 24 2016, 01:57 AM
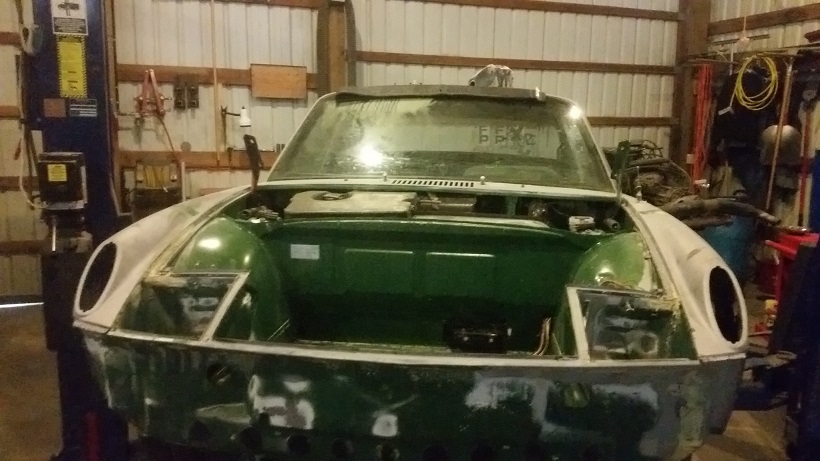
I've been asked by Mark to do some sheet metal/body work on his 75 2.0 Liter project car. The car arrived last Monday. But I needed to finish up a couple things on my project car and in my shop first. But I dove in this afternoon.
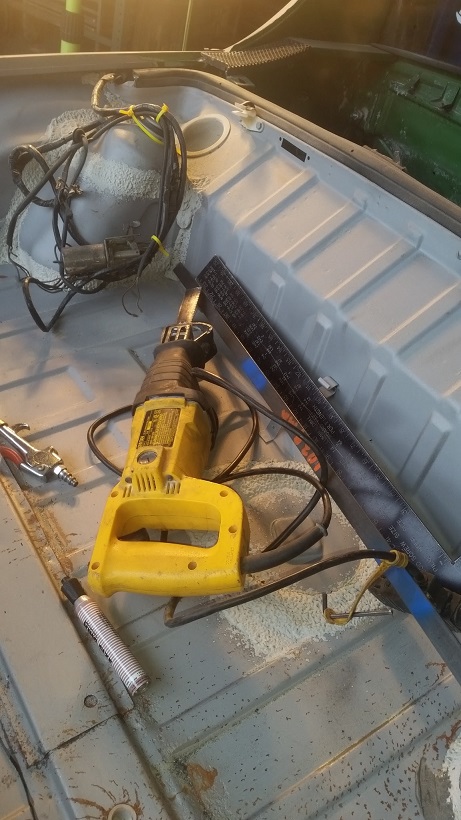
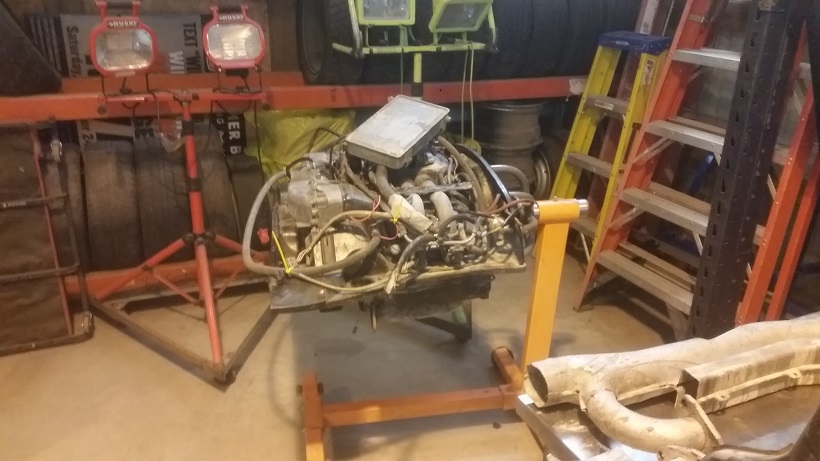
First task is to tidy things up after the paint stripping. Which included dropping the engine in order remove any residual media in the nooks and crannies. I was concerned with the rust prevention product that Dustless Blaster mixes with the glass media being left on and in the electrical connections. I'm a firm believer of an ounce of prevention is worth a pound of cure. I dribbled some OSPHO on a couple connectors in my white car. Not good. It ate the crap out the plating.
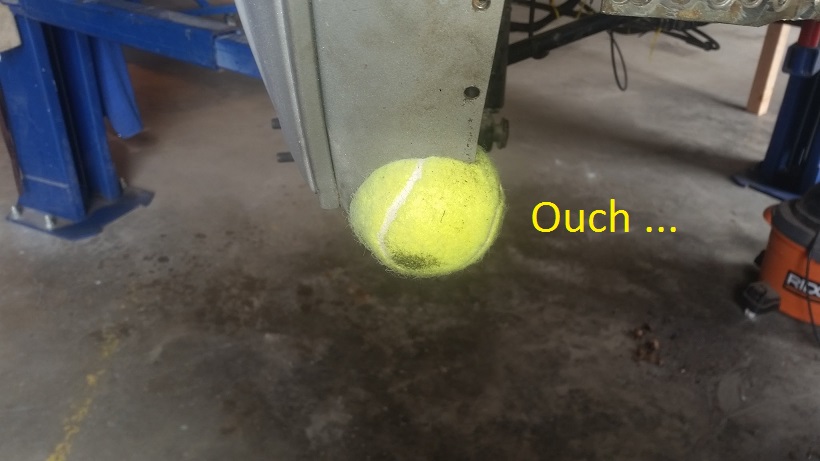
Here's Super In Law working on loosening up the media in order to blow it off. It will need to be steam cleaned.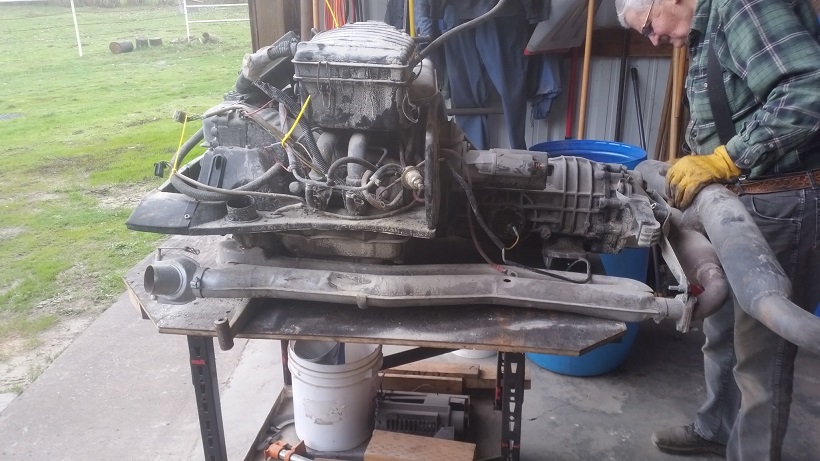
Project List : So Far
Replace rear panel
Replace rear trunk floor pan
Replace back half of floor pan ............... Mark I'll send you pictures
Misc. hammer and dolly work
A few misc. patch panels
R&R both jack points and posts
This is like a new car compared to my project ...............
Observations :
Suspension Consoles look great and seem to be virgin.
Same with the motor mounts
Battery tray was changed at some time in its life
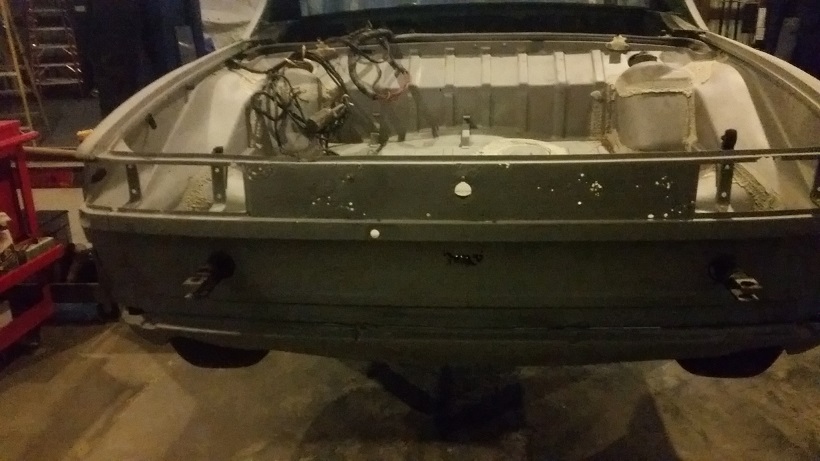
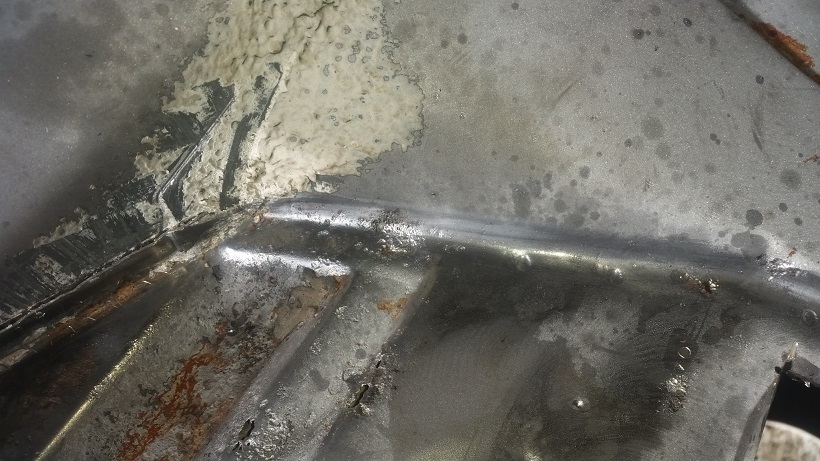
Back engine tray is bent to hell .............pushed up
Hell hole is filled with caked in blast media. Stopping at Sears on the way home for a new filter for my vacuum. I'll look closely for prior repairs.
Both the lower longs look great at first glance
Needing more research :
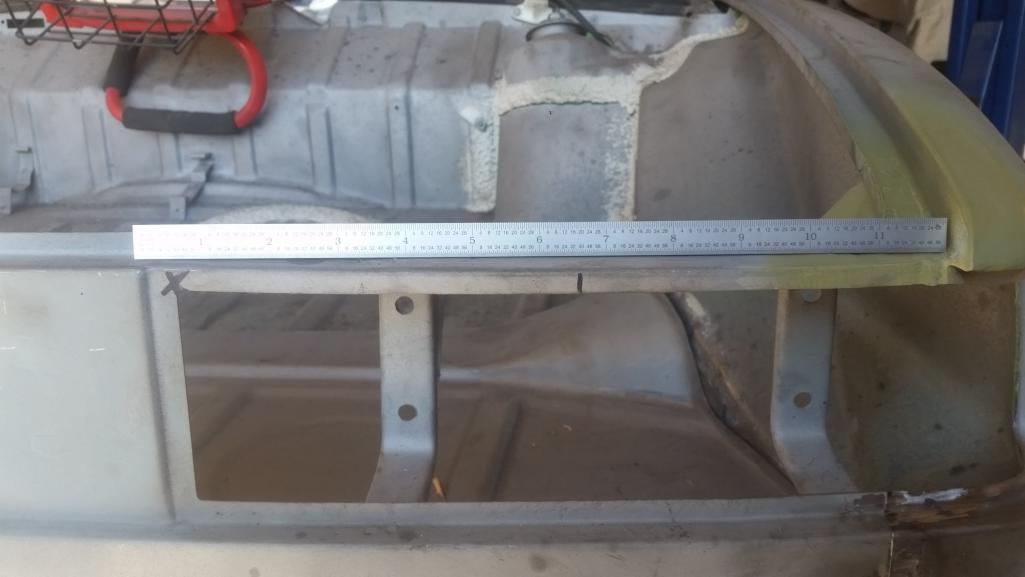
A few rust pits on the upper right outer wheelhouse long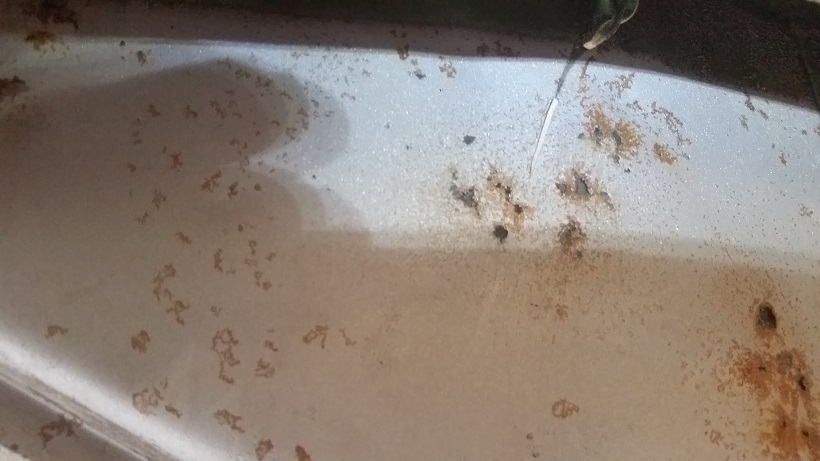
But we also a have fairly good sized rust spot a little further up the upper long. Right next to the suspension console.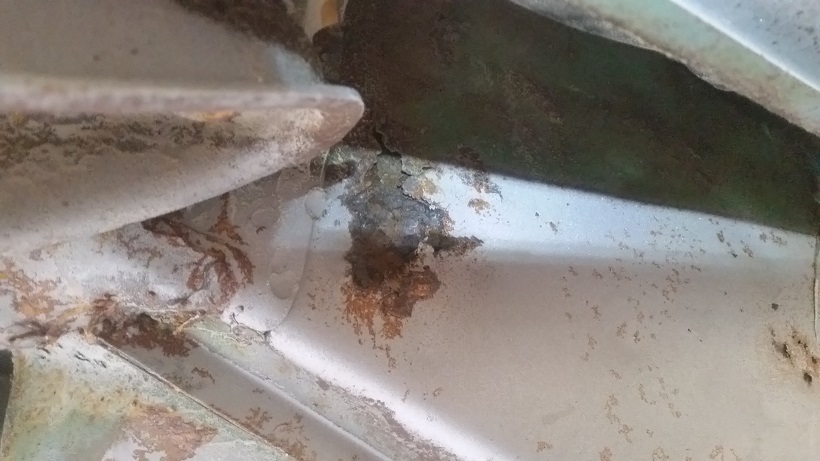
These are both in the double walled section of the upper long.
Posted by: RobW Feb 24 2016, 07:22 AM
Good luck with your rust exploration! There always seems to be more.....
Posted by: RobW Feb 24 2016, 07:22 AM
Not a bad idea to add CFRs dog ears. I added them to my street car for added security....
Posted by: sb914 Feb 24 2016, 07:52 AM
I have a good source for the rubber!
Posted by: cary Feb 25 2016, 10:51 AM
Got a late start, had to stop and set up an appointment for the kids Audi. The REVO chip needs to be reflashed. Check Sum Error. I love driving that car. It's like driving a monster V8, but no wheel spin.
Super In Law was doing the AARP tax prep thing today.
Started with another 3 hours of cleaning out blasting media. By no means am I getting it all. Just enough so that I can examine all the surfaces, seams and welds.
I have to keep my eye on the ball, this is a body work and paint job project. Not a restoration.
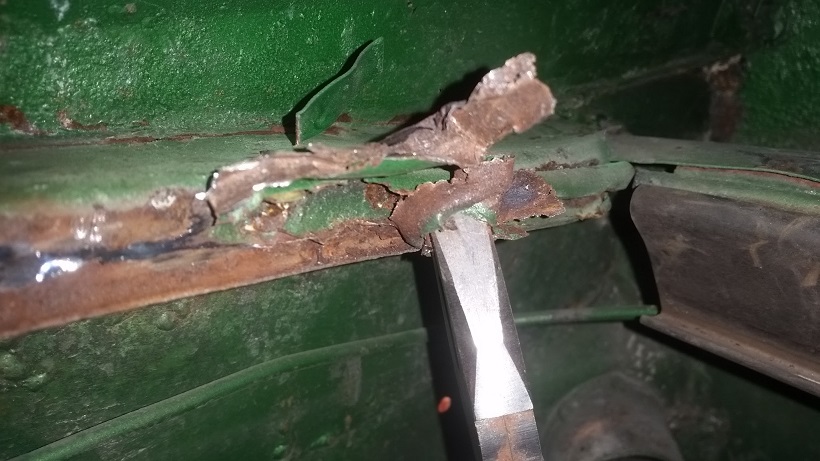
As long as I'm in the engine compartment I decided that I'll start with rear portion of the engine tray. Don't know exactly how it got that way. Someone must have set the car down on the engine somehow.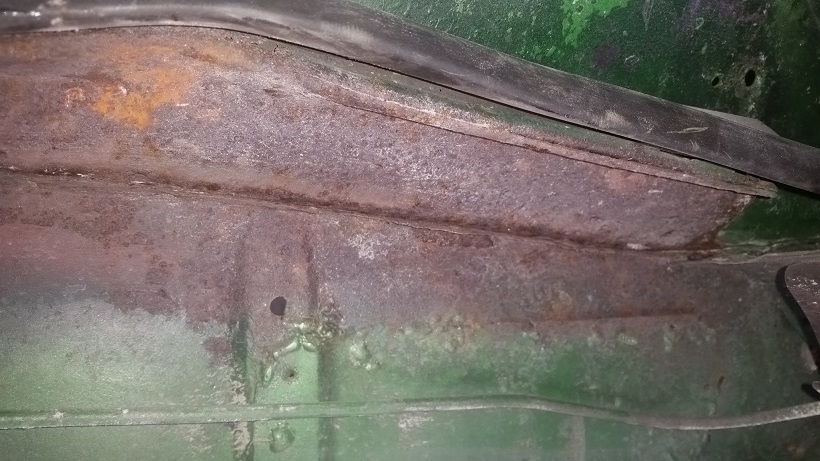
This piece is something that needs to be treated with kids gloves. The three cars I've worked on have a lot of metal degradation on the bottom. I used multiple weapons in order to bend it back into place. But primarily I used a wooden block and a hammer.
After bending it back into place I see that combination of the water sitting in the crease and me bending it back into place tore a hall in the fire wall. 
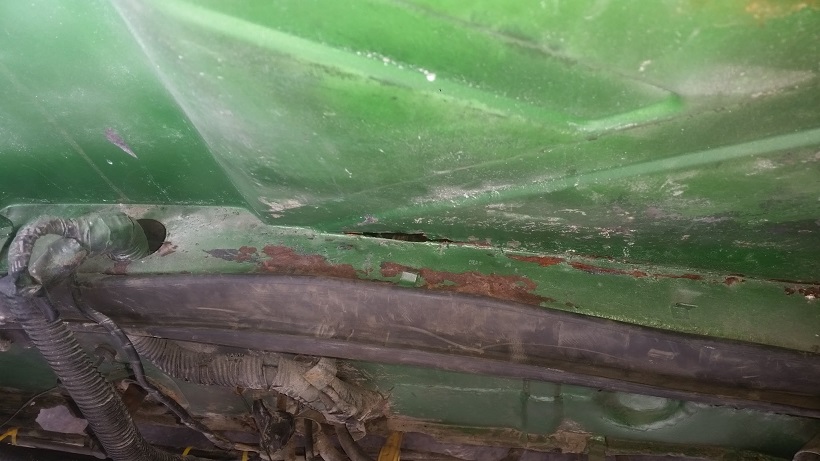
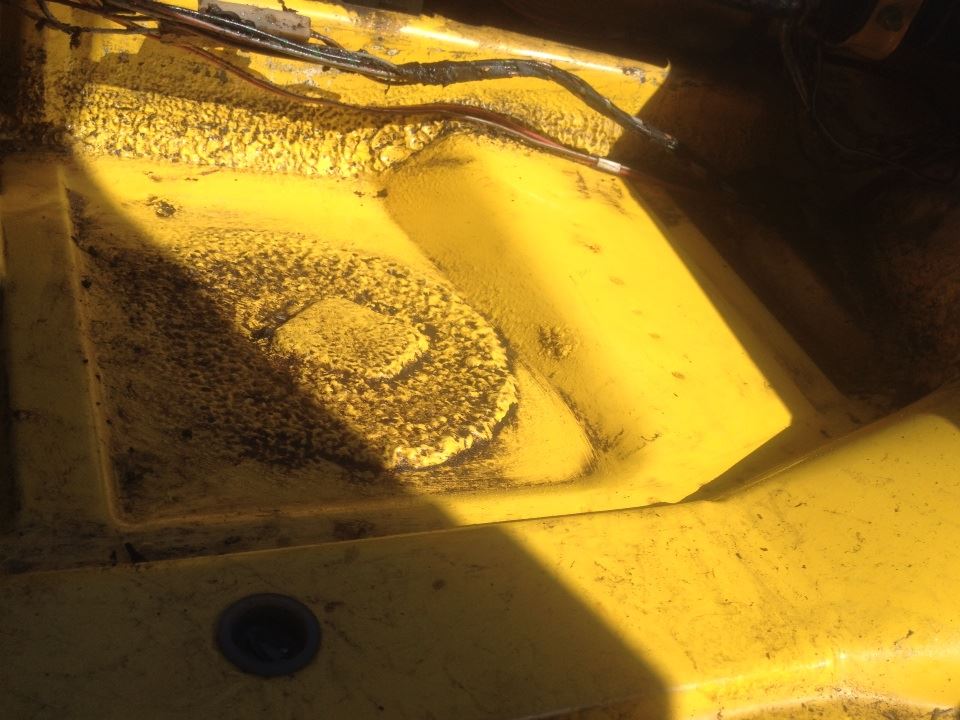
So a patch is in order. Bigger is better. Make it big enough so that your welding on thicker metal. I'd like to say good metal, but thats not always a possibility.
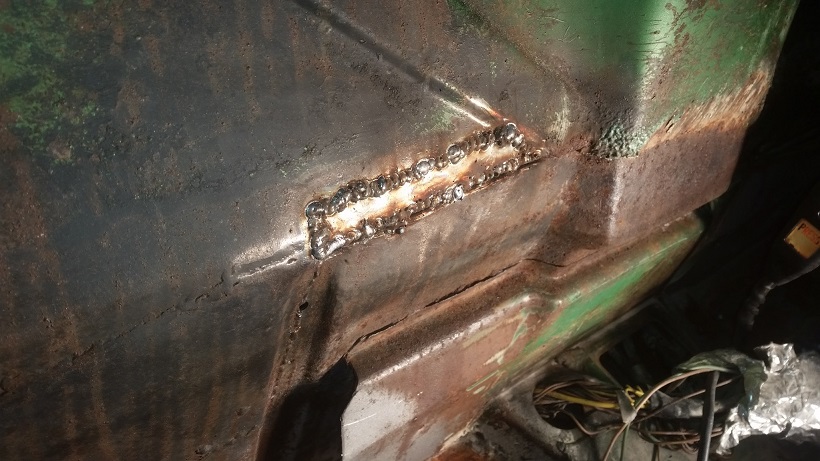
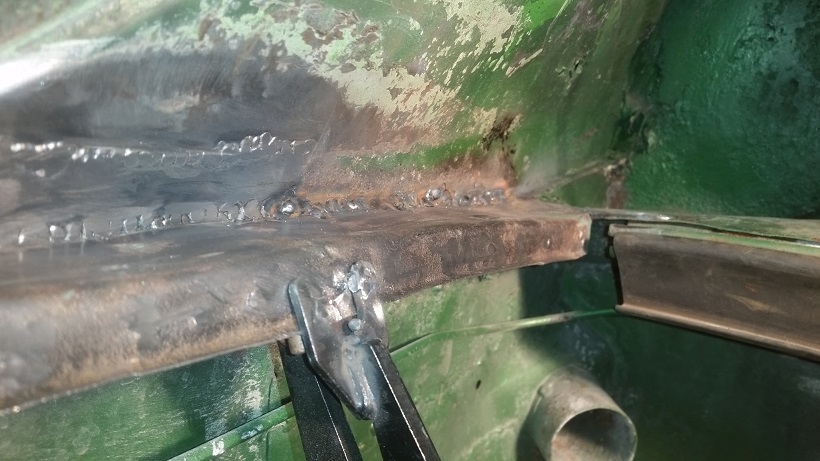
Welds are a little proud (tall) but I'm giving it just enough heat to get a good weld. Anymore and we're looking at the engine compartment.
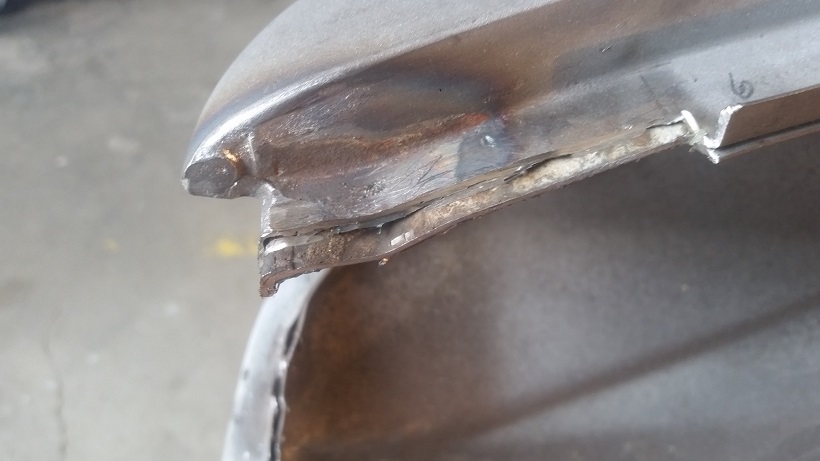
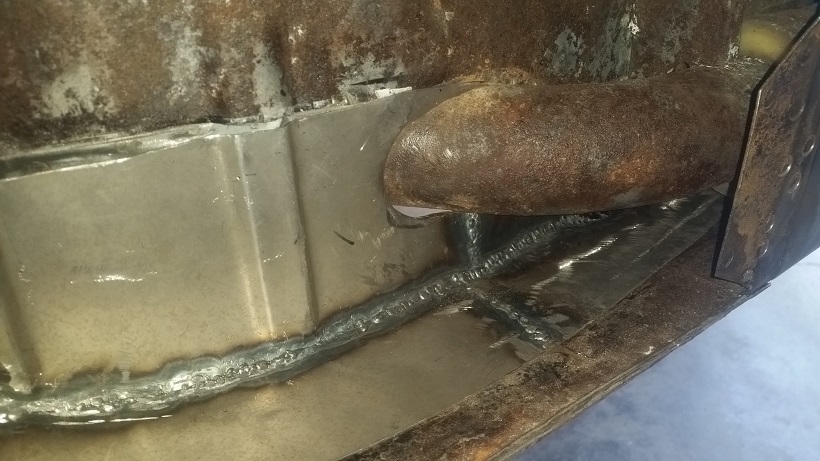
Backside was a little tough to clean up. The shelf is just long enough that you have a tough time getting a grinder in there. Even with my vast assortment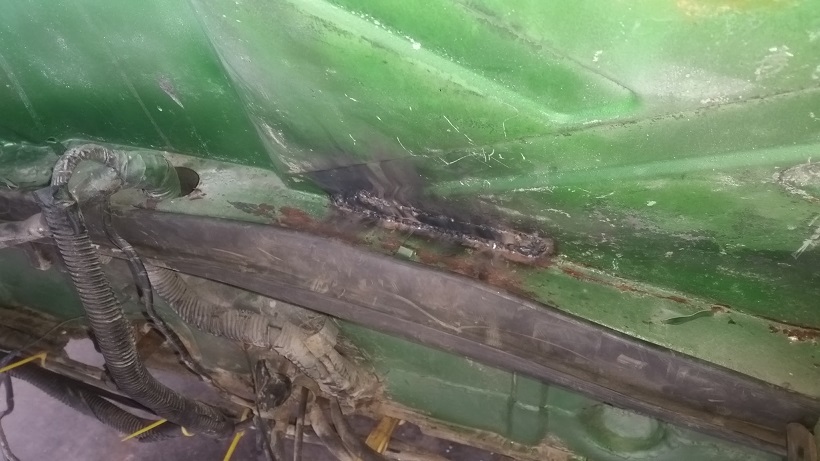
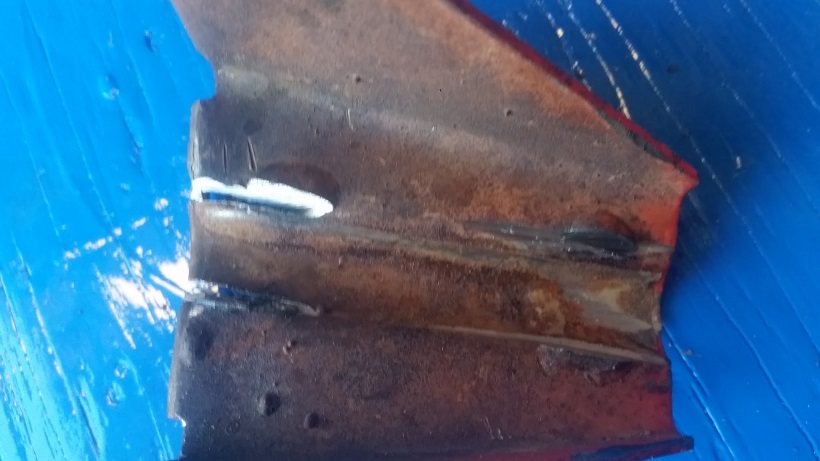
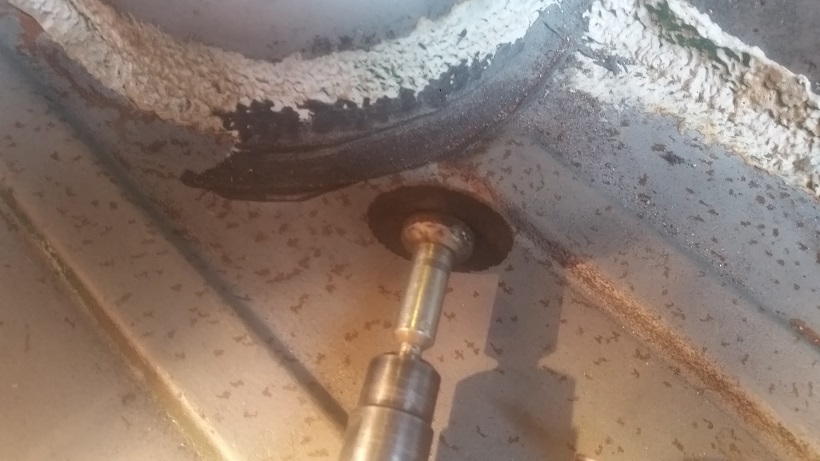
I decide the engine seal needs to come off so I can get to the bottom weld and clean up the tray for a shot of primer. Surprise, surprise I find that the seal channel is bent to hell and all rusted up.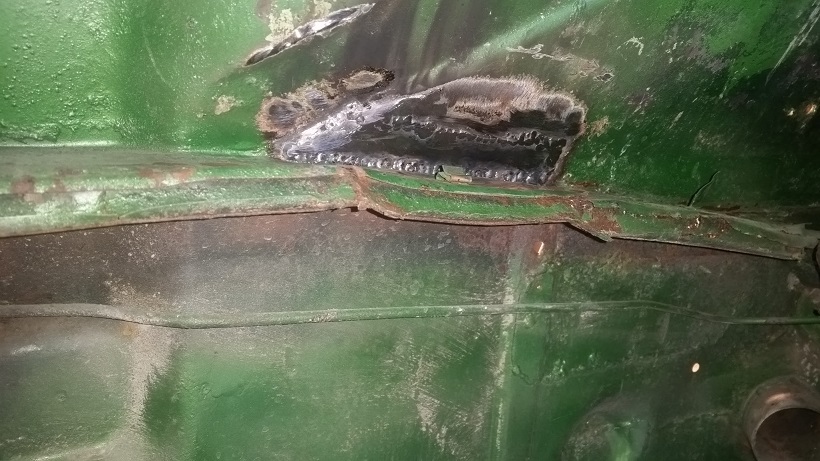
Sorry the shot had poor definition of the channel
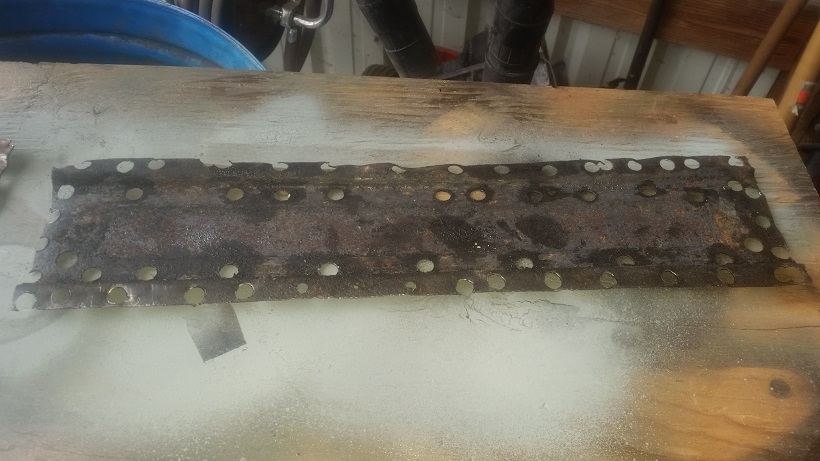
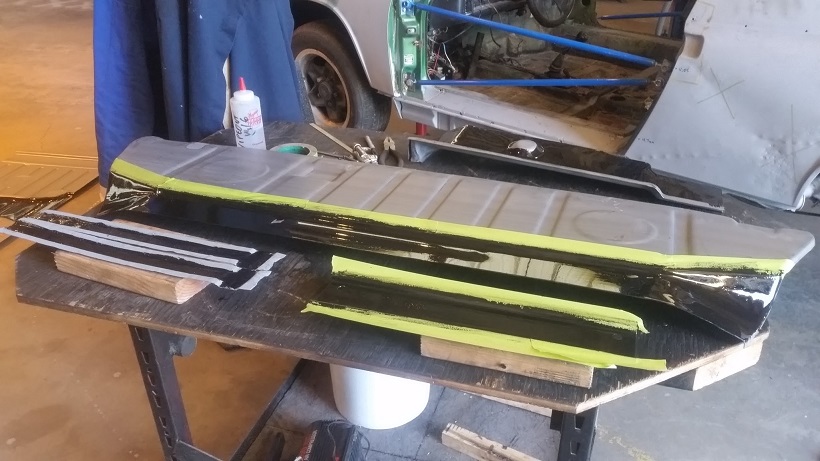
So thats going to have to be replaced. If I don't have enough left over in the scap pile. I'll cut it off the parts car. Knowing how soft the shelf is I decided to used Rick's screwdriver method on the spot welds. Basically you thin the top surface with the grinder and pop the weld off.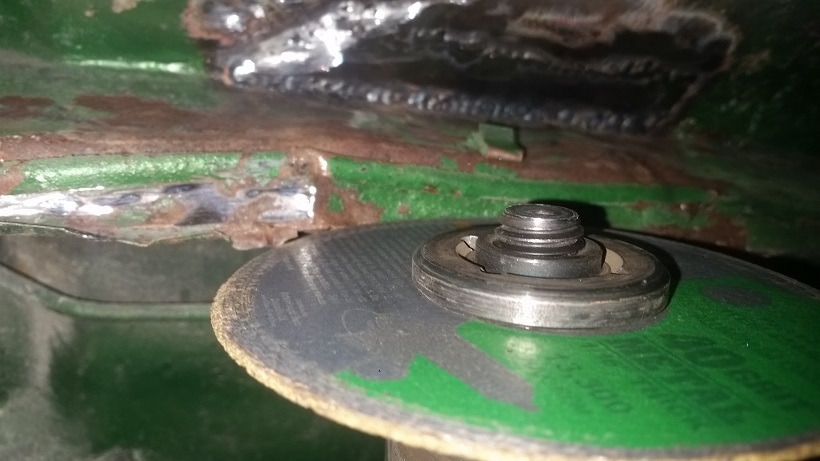
Peeled it off like using a p38 can opener. Used lineman's pliers as the roller.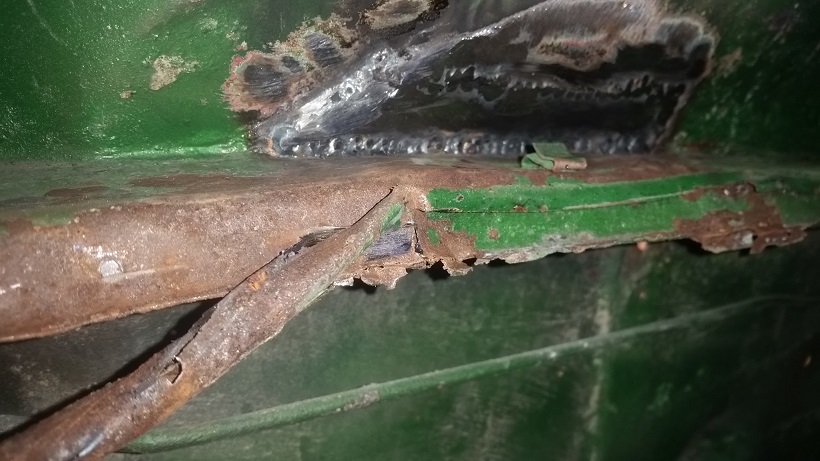
It's 5:10 and I decide to roll the dice and weld the remainder of the seam over to the top of the hell hole. I'm thinking, am I getting to cocky? Its pretty rusty.
Took about 20 minutes but I got it with out much fuss. A couple spots kicked up a bit, but all in all went ok.
Posted by: cary Feb 25 2016, 10:53 AM
I'll add the hell hole, wheelhouse rust research tonight.
I'm burning daylight ..............
Posted by: Mikey914 Feb 25 2016, 10:23 PM
Just let me know what you need Cary. I'm back in town Saturday morning. This is why I took this to you. It would still be sitting in my garage. I suspected there may be a few issues to address, and wanted it in capable hands.
Posted by: cary Feb 25 2016, 10:49 PM
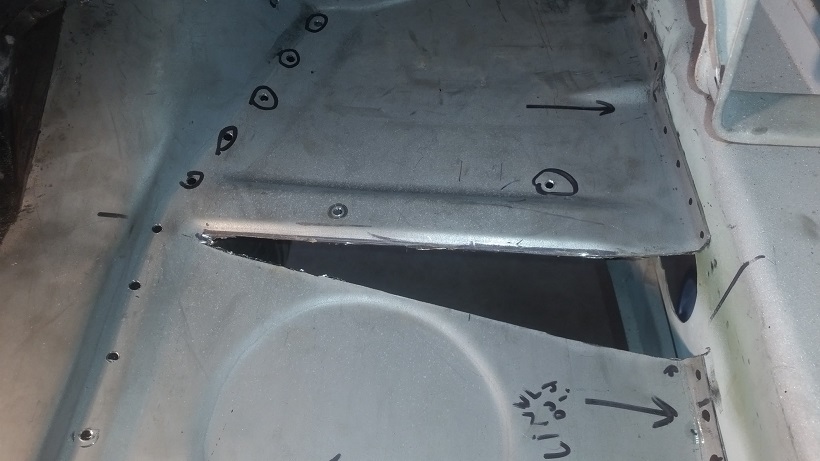
Hell Hole research .............
Ok here's what I see ............
New battery tray and support ... install is over welded  removing it would be kind of messy.
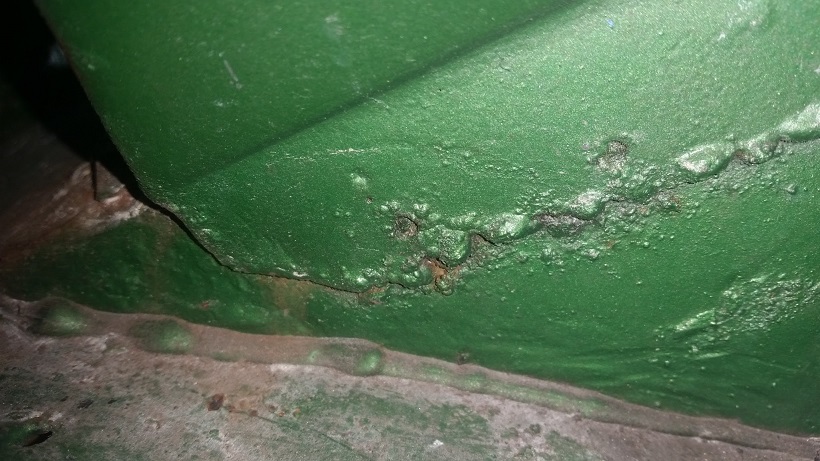
New right engine shelf .......... used silicone as the seam sealer 
Upper long (hell hole) looks solid. Hell hole end panel (firewall) needs a patch.
Engine shelf welds didn't get ground down. 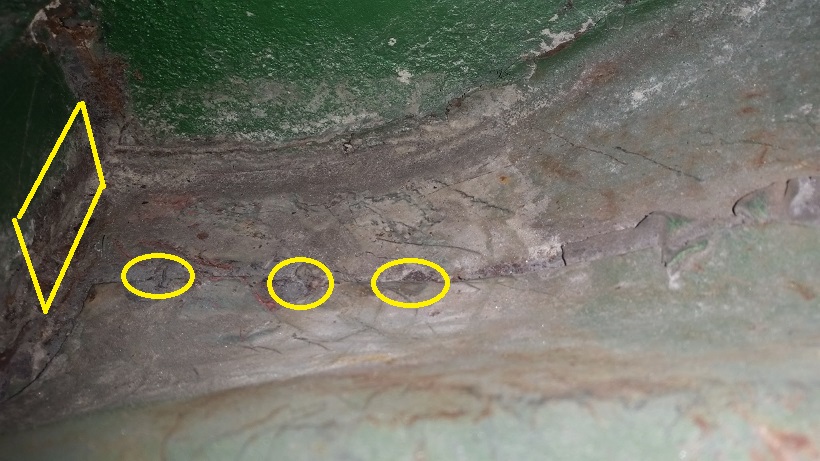
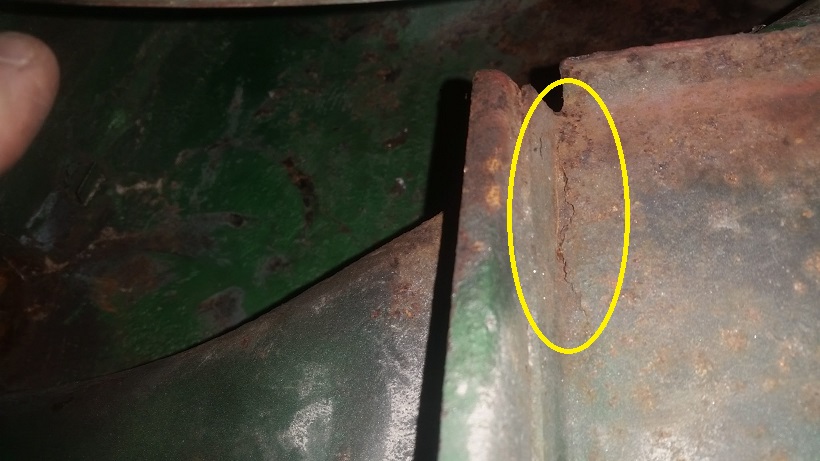
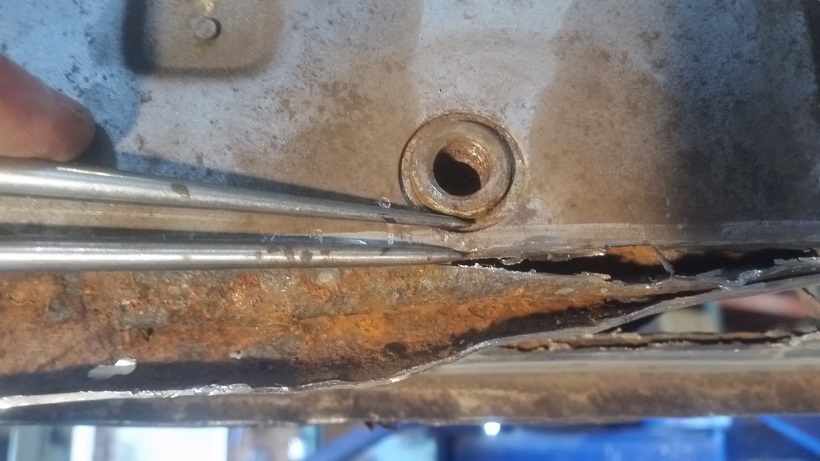
Here's what I see created the outer long rust issue. The flange/seam from the upper long to the wheel house has let go.  Which allows moisture and or battery acid to slide down between the two layers.
Tomorrow (Friday) I plan to carefully peel off the outer layer of the outside upper long to investigate further. I wish I could figure out a way to get my camera down in there to get a better look.
Posted by: cary Feb 25 2016, 11:04 PM
Mark will need to make the call on the floor pan. I think it could be patched. But to make it look sanitary I'd need to buy a seam roller and learn how to use it to create the troughs in the floor pan.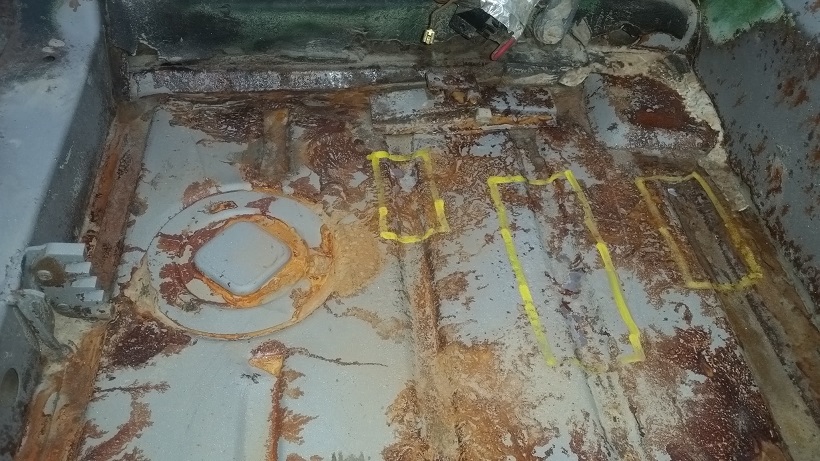
Posted by: cary Feb 25 2016, 11:08 PM
I forgot one thing on the original list.
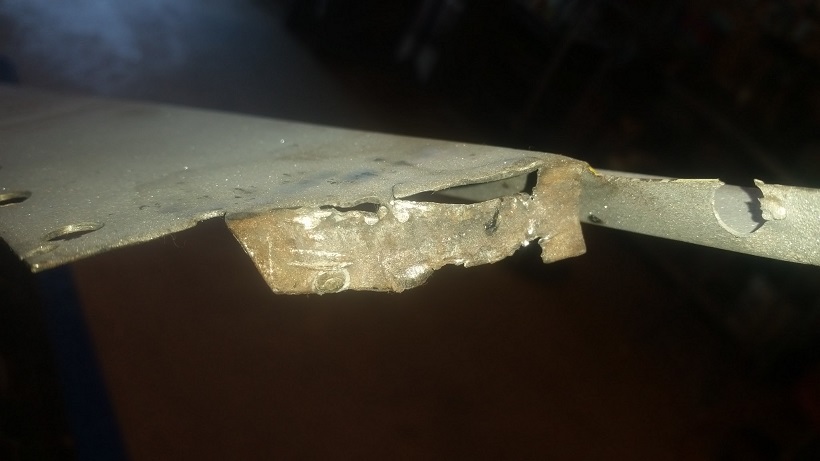
Right inner lower firewall will need to replaced. It has a big hole in it.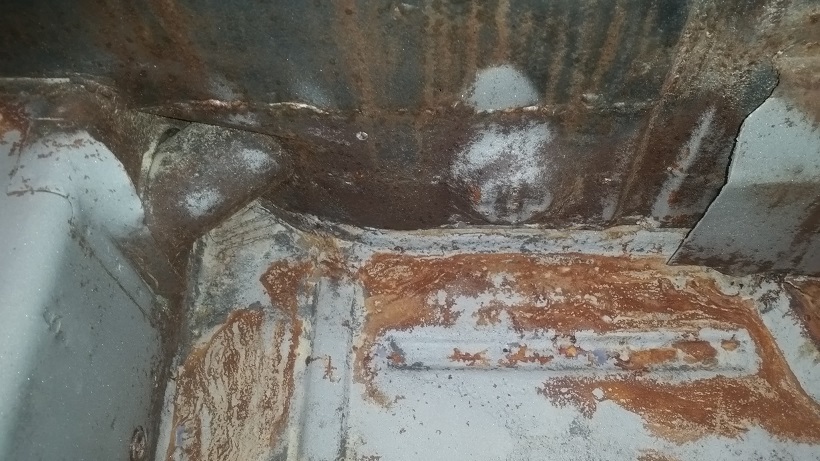
Posted by: cary Feb 25 2016, 11:33 PM
Today the team was back together.
Super In Law went after the big dimple in the left rear corner next to the tail light.
He spent quite a bit of time with the slide hammer to it get it pulled out.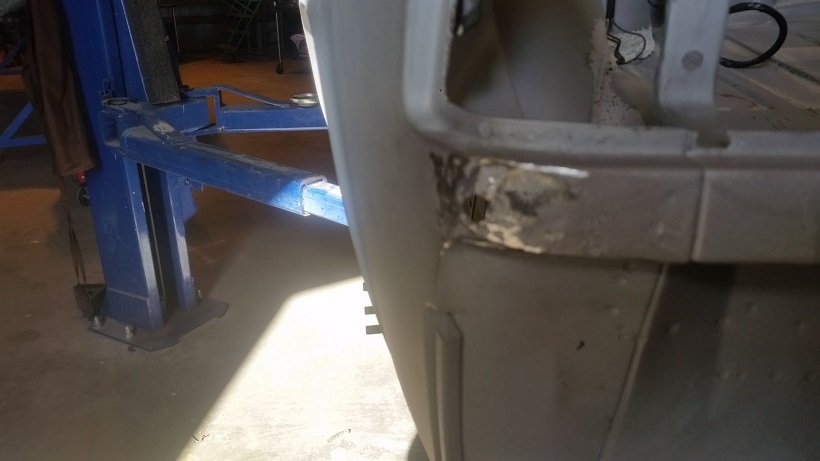
I used a formed plate to plug weld it.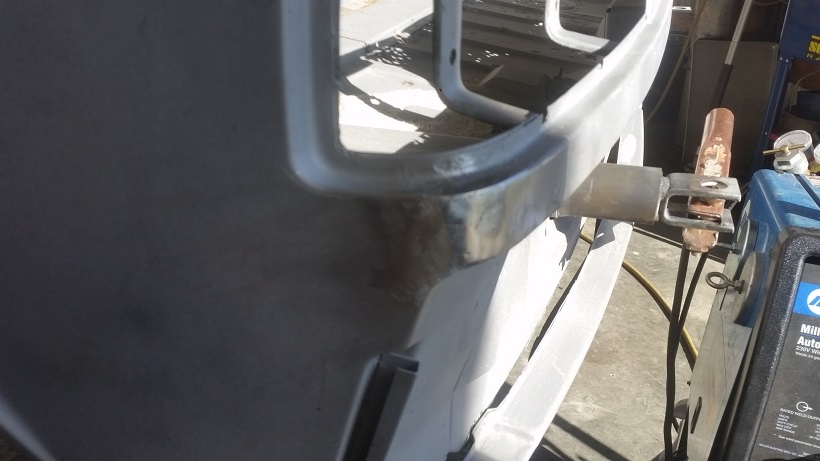
It will take a smidgen of All Metal to make it perfect. But I didn't want to over work it.
Filler will be applied after the car gets epoxy primered.
Posted by: cary Feb 26 2016, 12:00 AM
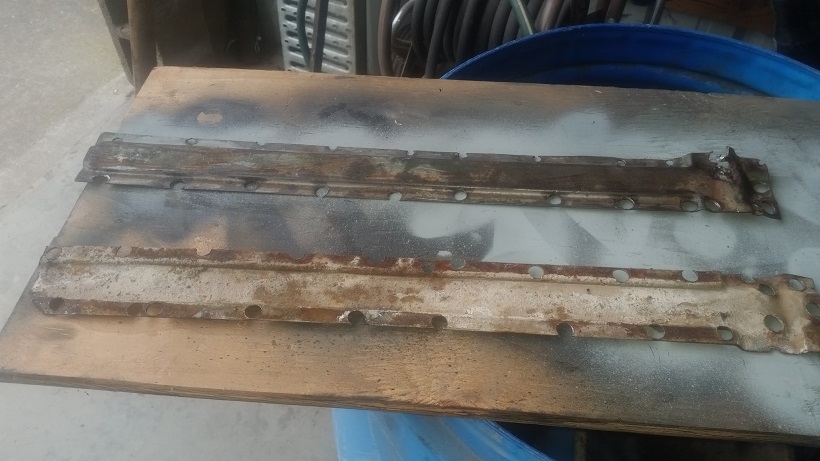
I start the day digging thru my stash looking for some engine seal channel. No such luck.
So me move over to the parts car. It's amazing how nice some of the sections are. Then some others ...........not so much.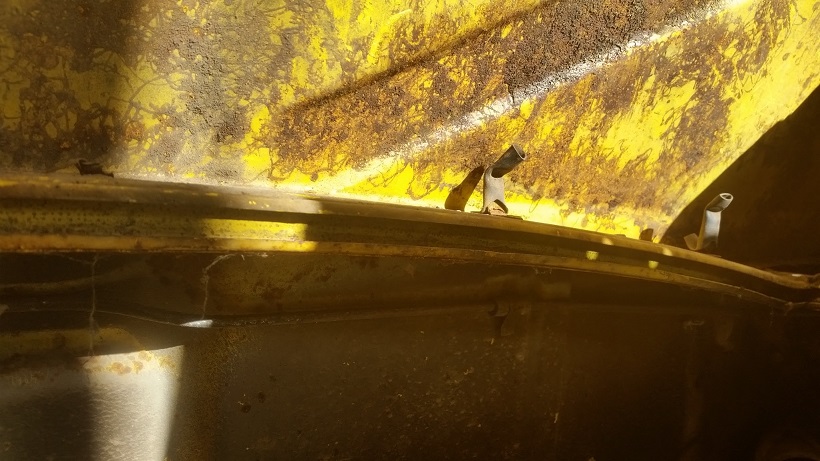
I'm using Rick's spot weld removal technique again. But this time I can drill all the way thru to make it easier.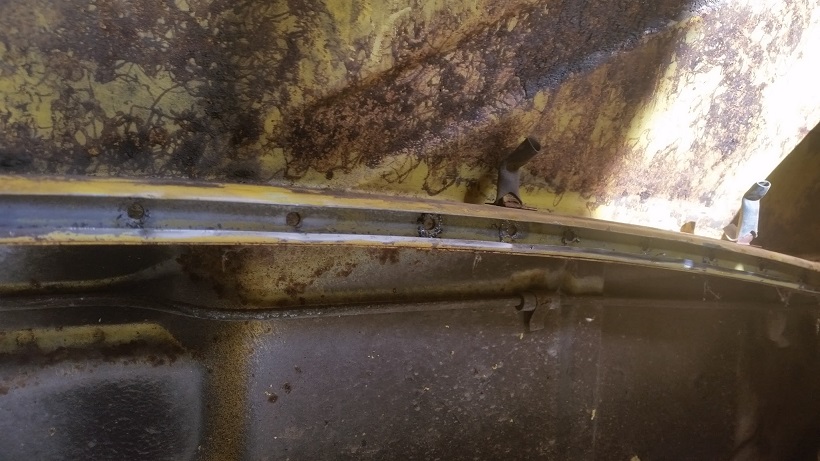
Popped it off with an old chisel.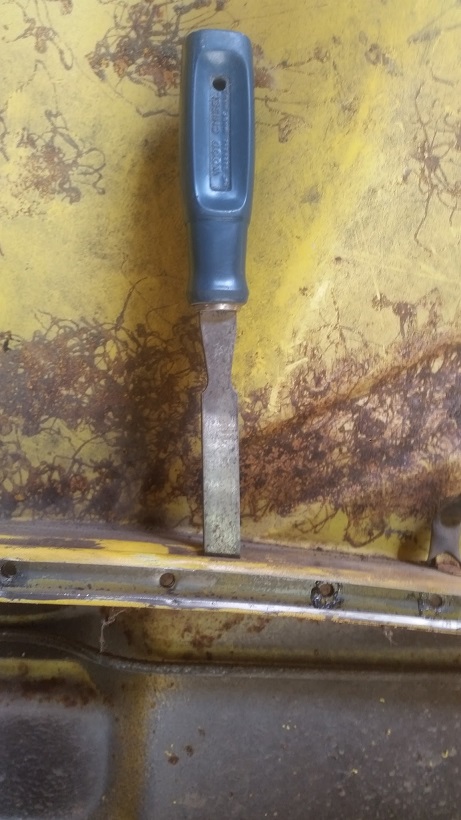
Ran the piece of channel thru the bead blaster.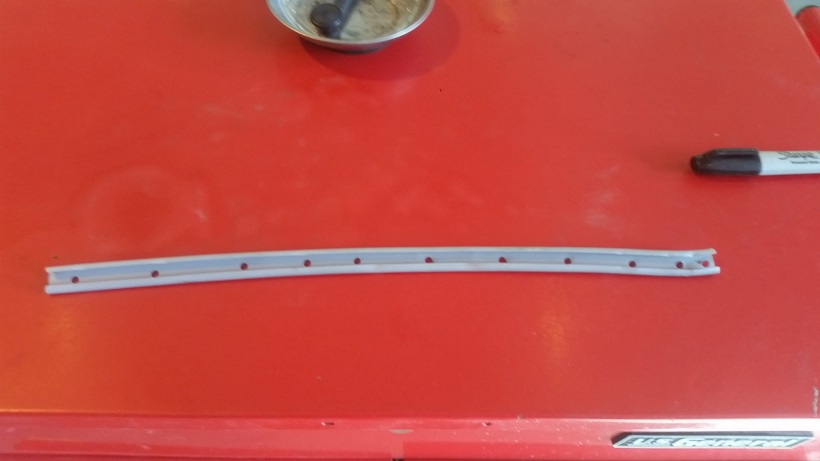
Posted by: cary Feb 26 2016, 12:19 AM
Next I need to close up some of these holes on the engine side of the firewall.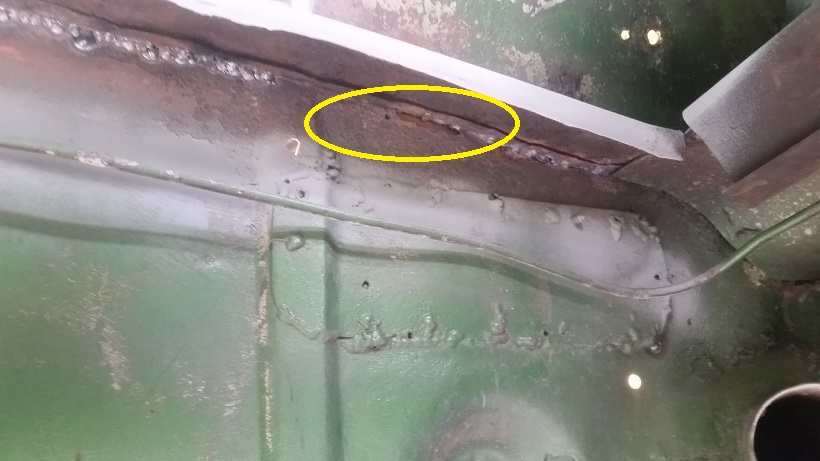
This hole was patched over from the inside. Not good.
Because it is double walled I cut back all the rotten stuff.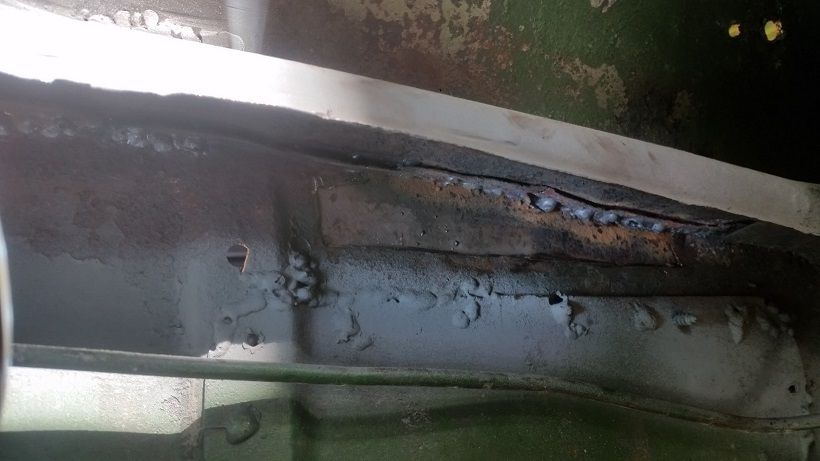
Welded the top seam of the other hillbilly patch also.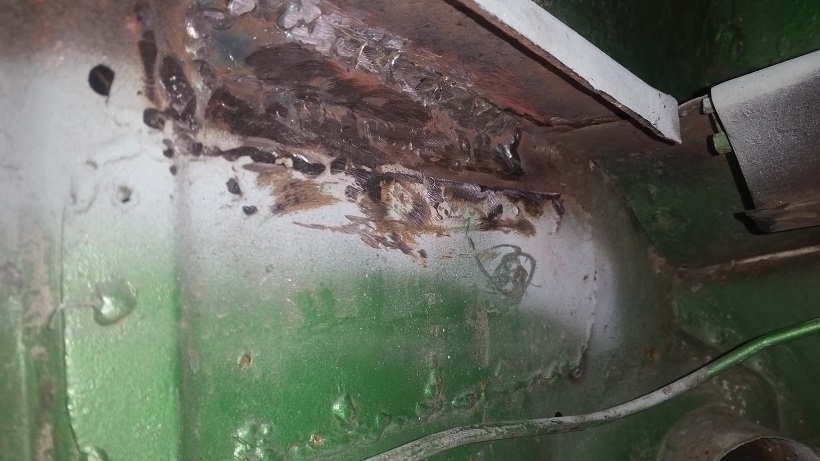
Installed the new piece of engine seal channel and gave her a coat of self etching primer.
Here's a shot of the inside.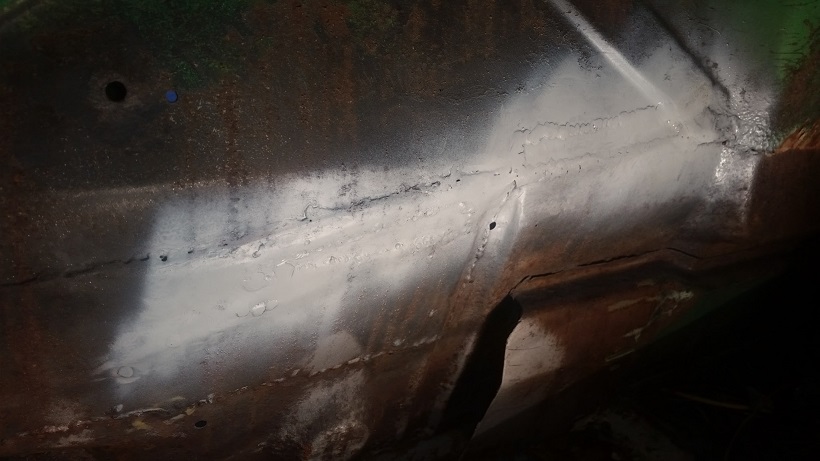
Posted by: raynekat Feb 26 2016, 04:46 AM
Dang Cary. You might just have to give up that grocery mgr idea, and start doing this for your day job.
I'll just load my 71 up on a trailer when I get back from Thailand and you can start digging into that one as well.

I need your tools and motivation to self tackle my chassis issues.
Posted by: cary Feb 26 2016, 11:57 PM
We'll talk when you get back. I don't remember any big issues when I saw it.
This car of Mark's is really nice. I kind of wish I'd bought it when I had the chance.
Posted by: raynekat Feb 27 2016, 12:26 AM

We'll talk when you get back. I don't remember any big issues when I saw it.
This car of Mark's is really nice. I kind of wish I'd bought it when I had the chance.
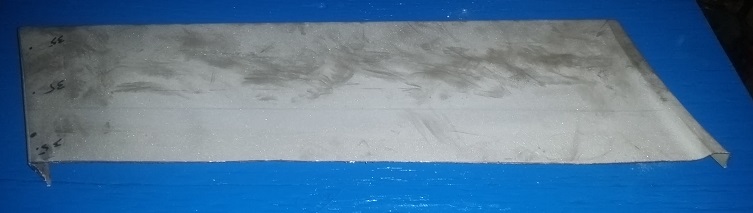
Rear panel with the tail light openings needs replacing (have replacment piece in hand), rear 1/3 of trunk floor that butts up to rear panel needs replacing, one of the rear trunk lid hinge supports needs replacing, inside I'll need at least both sides of the rear portion of the floor replaced, hell hole looks funny (prior repair), longs are good I think, lots of holes around the windshield base where water leaked under the windshield trim....
That's just getting started.
The car has the usual stuff I'm afraid.
Forge ahead my friend.
Will catch up with you later this Spring when I'm back in town.
Posted by: cary Feb 27 2016, 12:32 AM
Short day. Had to drop off and pick up the A6 from Hillside Imports.
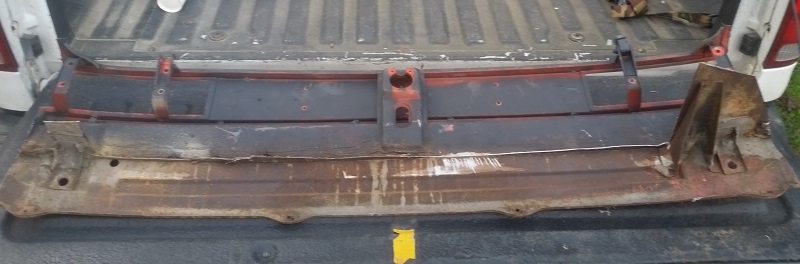
Decided to jump into removing the rear panel. This is the first 5 mph bumper that I've worked on. I had no idea that the rear trunk panel was different. The corners are different, they have a hump over the bumper mount. The bumper mount is tied into the transmission mount. But its still spot welded to the trunk floor pan.
Here's a shot of the bottom side of my 73.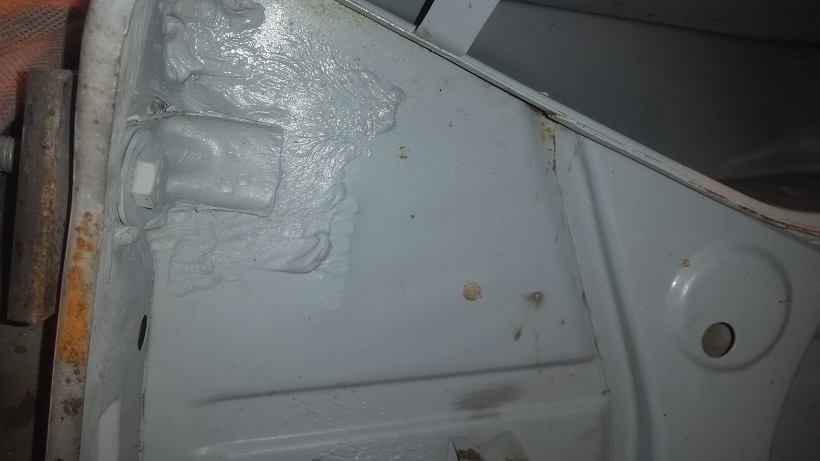
Here's a shot of the 75.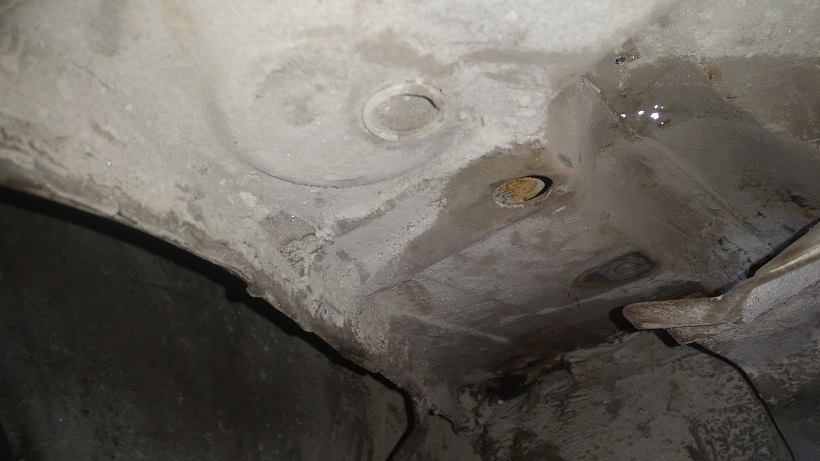
Step one was to figure out what I was going to replace on the trunk pan. Plan A is to remove up the transmission mount hump like must folks are doing. Sketched out the cut lines. Opened up some slots for the sawsall blade and went to work.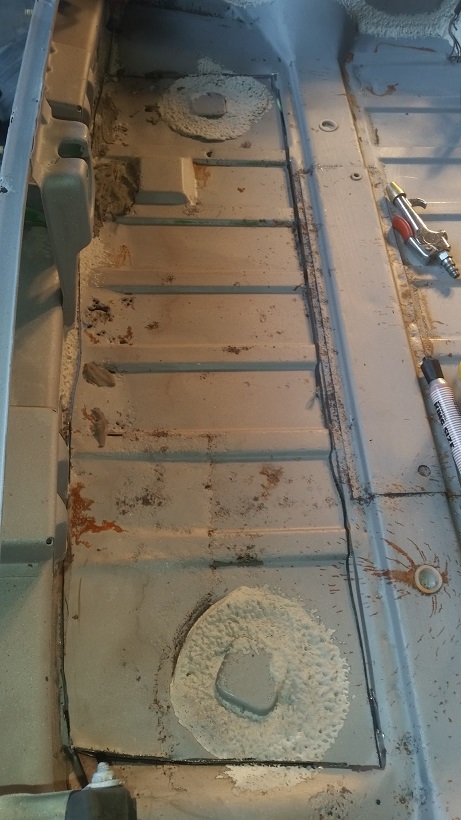
The pan comes out first. That will eliminate drilling out all spot welds across the middle of the rear panel. Both saving time and spot cutter bits.
While I started this project, Super In Law set about tearing down one of the 901 tail shifter gear boxes sitting on the shelf. I going to let one of my AX buddies use it, and a starter to bench test a new engine he just finished up.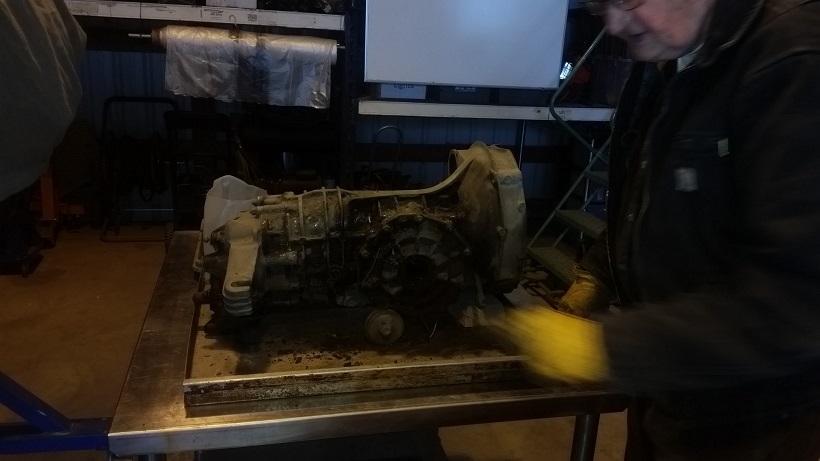
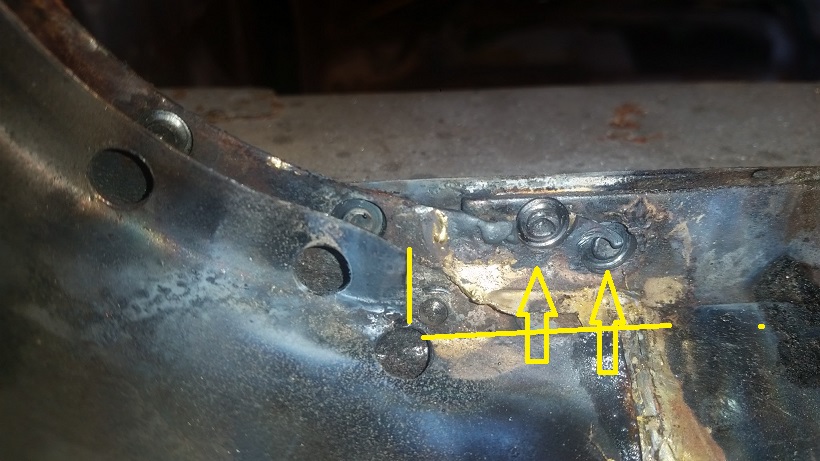
Posted by: cary Feb 27 2016, 12:49 AM
BEFORE :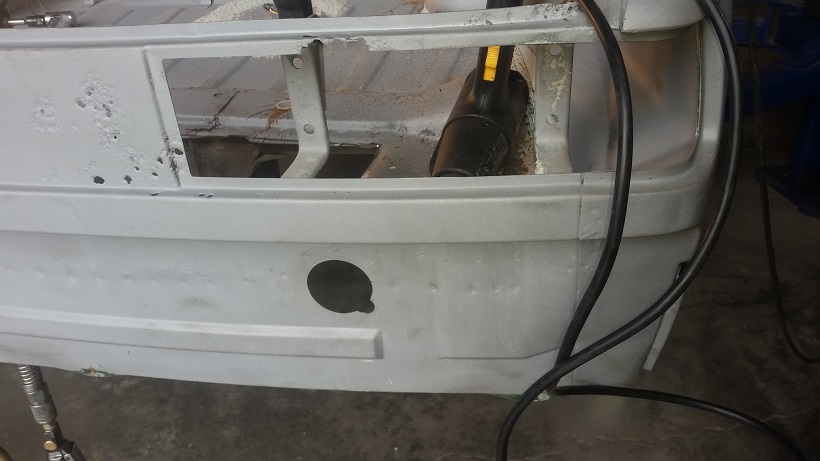
AFTER :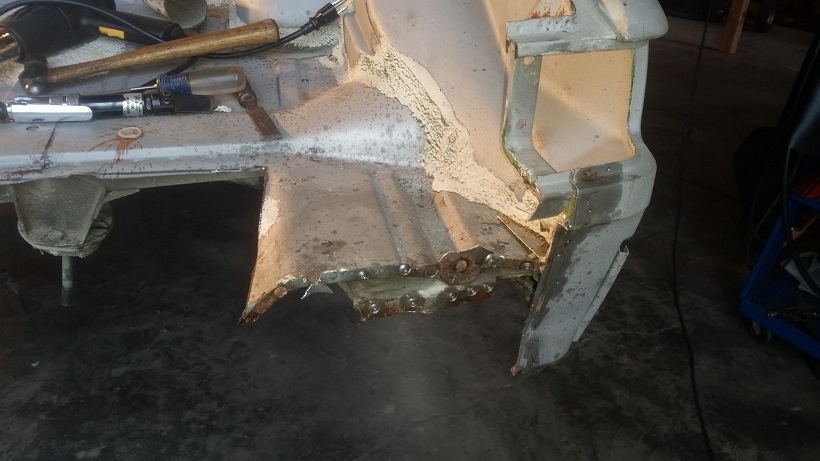
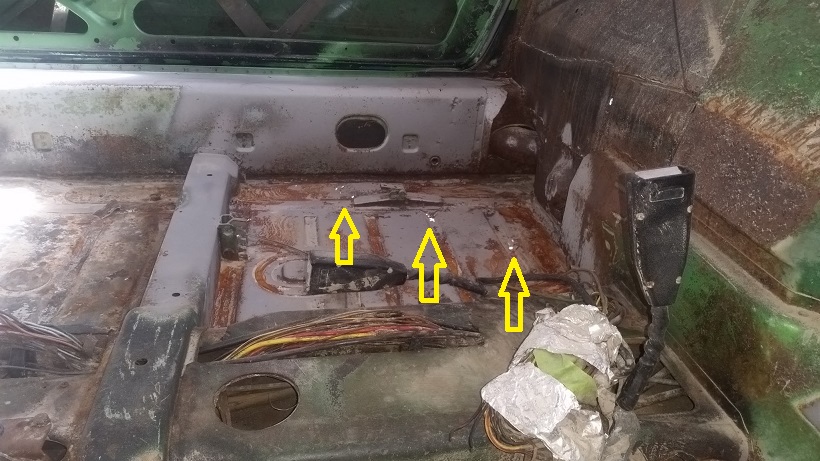
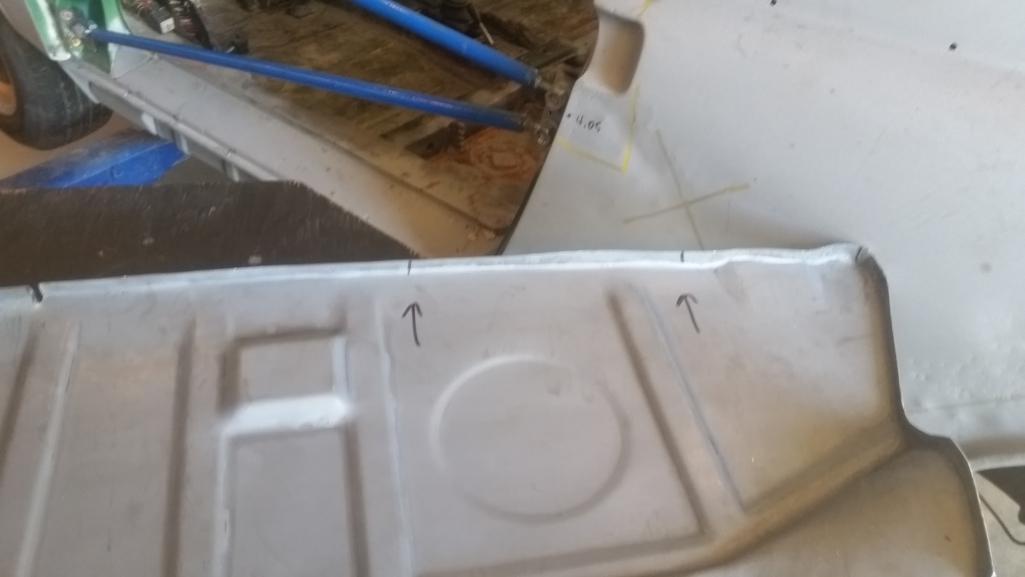
Here's where I ended the day. For one I didn't leave myself much of a tail to pull the remaining rear panel portion out with.  Two, something is hanging up where I have the two yellow arrows. It will take some more detailed seam sealer removal on the back side for starters. Then take a closer look for another spot weld.
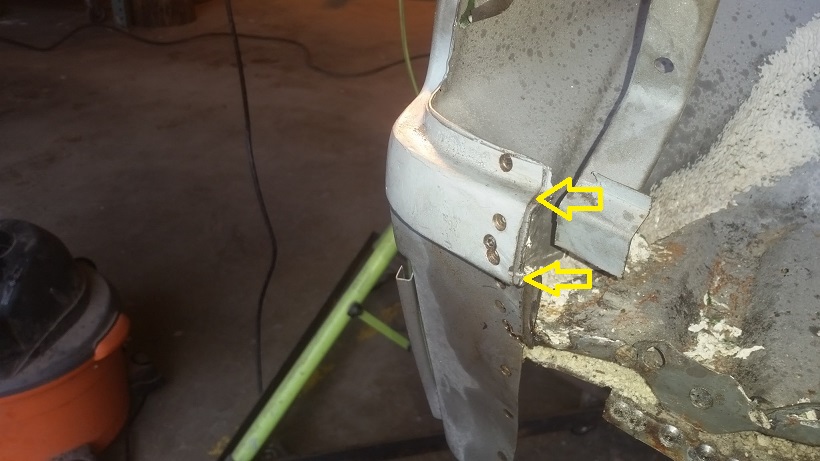
Heading home. Saturday AM is an autocross tech session. Followed by a lunch meeting. Then an afternoon meeting with Mark.
Posted by: cary Feb 28 2016, 10:47 AM
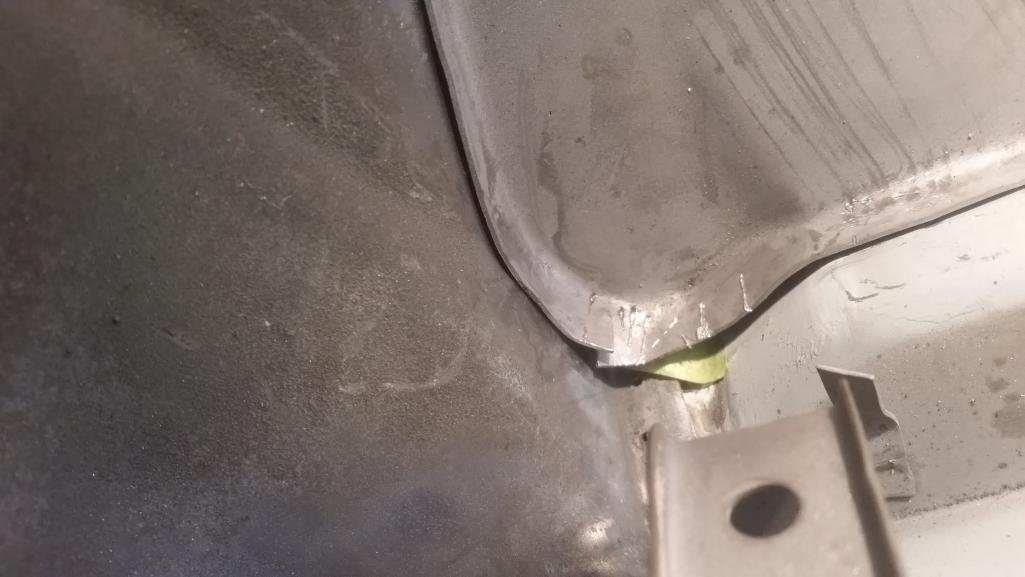
Snuck in a hour before Mark showed up on Saturday. I continued with the trunk floor dissection. Went after that piece sandwiched in between the qtr. panel corner. Started on the left side. After carefully prying around with screwdrivers and chisels I found the mystery spot weld. It was actually on the rear panel itself. Which was spot welded to the inner piece. Top yellow arrow calls it out. Sorry for the blurry picture. It couldn't be seen from the outside. The back side is pretty tough duty. It's plastered with spray on seam sealer. I'll do some more cleaning back there to prep for new spray on seam sealer after epoxy is sprayed on. I'll add a shot of the back if I find anything useful.
I drilled thru the outside and the remaining rear panel piece to get it disconnected.
The bottom arrow was a smidgen of one of the other spot welds left on the lip.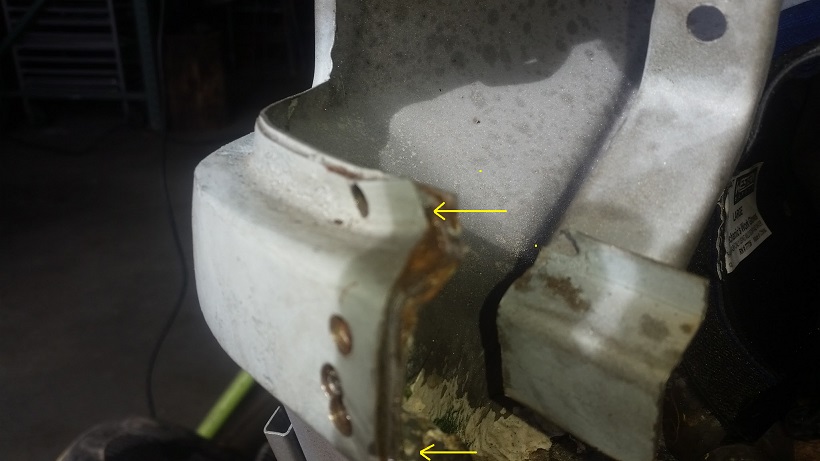
Here's a couple shots of the other spot weld locations that needed to be drilled out.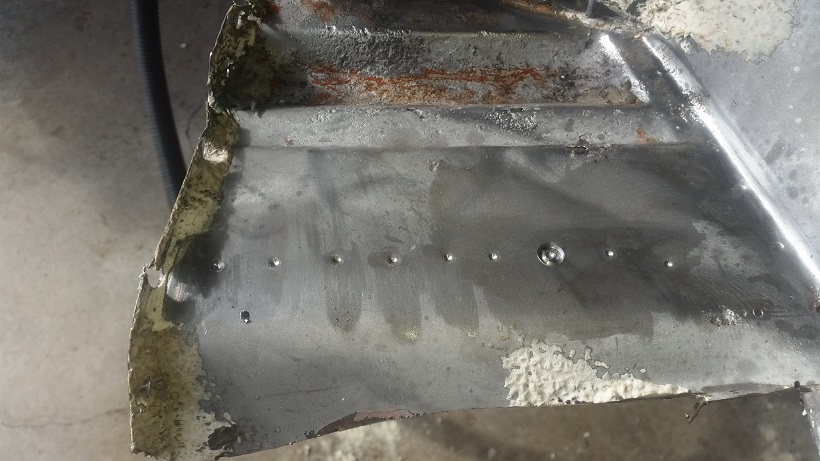
The next trouble area was caused by the rust degradation in the valleys pressed into the floor pan. By drilling out the higher area first, I could lift it up it so it would show me the area that was still attached. Once I got the area thinned down I popped it off with the chisel.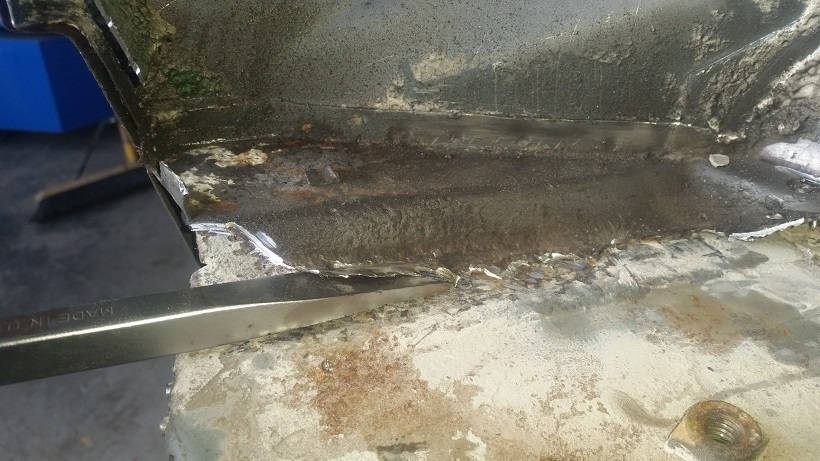
Just got it finished up when Mark and Mike (Warpig) showed up.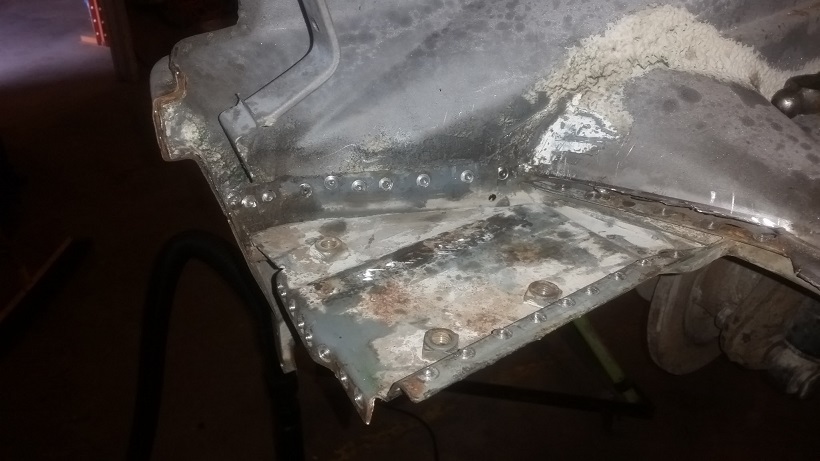
Posted by: cary Feb 28 2016, 11:00 AM
Dang Cary. You might just have to give up that grocery mgr idea, and start doing this for your day job.
I'll just load my 71 up on a trailer when I get back from Thailand and you can start digging into that one as well.
I need your tools and motivation to self tackle my chassis issues.
This is the skill level I'd like to attain. Jon has set the bar pretty high. Shot from one of The Metal Surgeons projects
Posted by: JRust Feb 28 2016, 11:17 AM
Your moving right along Cary! You don't waste much time getting that bad metal out. Great to see that car getting fixed right. Watching this one closely 
Posted by: Mikey914 Feb 28 2016, 11:19 AM
Yes, He's making great progress. I have to get some sheet metal from design restoration but looks like we are underway.
Mark
Posted by: cary Mar 1 2016, 07:35 AM
Your moving right along Cary! You don't waste much time getting that bad metal out. Great to see that car getting fixed right. Watching this one closely
Woulda, Coulda, Shoulda .......... Oh well
Posted by: cary Mar 1 2016, 07:48 AM
Back to work ...............
Super In Law got the extra tail shifter all broke down. Guts are going into a tote.
Case will be cut down for an engine test stand at a later date.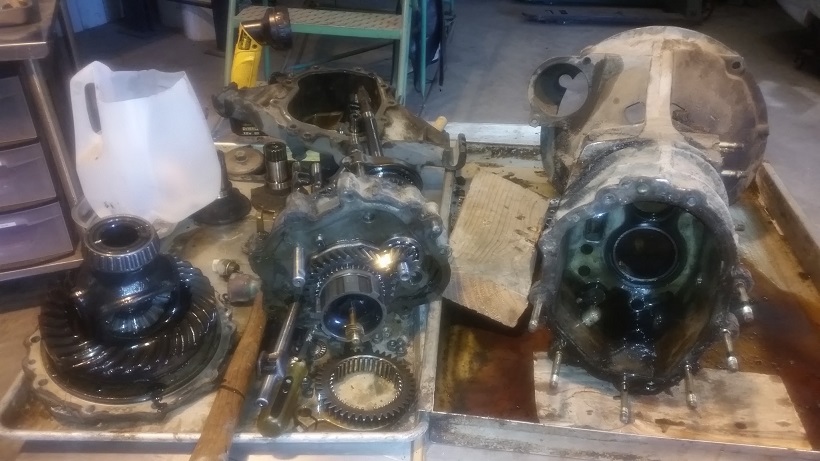
Thems are some shiny parts..............
He'll move on to pulling the heat exchangers off Mark's engine.
Mark, it looks like the 75-76 used the same heat exchangers on both 1.8 and the 2.0.
Triangle flange and gasket.
http://www.pelicanparts.com/cgi-bin/smart/more_info.cgi?pn=BX1433&catalog_description=&Bursch%2520Exhaust%2520Note%253A%2520Requires%2520the%2520use%2520of%2520the%2520original%2520catalytic%2520converter%2520or%2520bypass%2520pipe
Posted by: cary Mar 1 2016, 07:58 AM
After Mark's and Mike's visit we're going to remove the battery tray so I can repair the wheel house flange. I think the support will get tore up coming out so they'll be replaced. Mark has another tray and support that I'll use.
Mark wants to change out the fuel lines. He'll get those coming
There will be a little bit of work on the front trunk rails.
I'll run over to Mike's (Warpig) house and cut the rear panel out of his parts car. Probably on Friday, Mike's off.
Posted by: cary Mar 1 2016, 08:34 AM
Now on to the task at hand ............ continuing with the rear trunk removal.
I start the day with removing the rear trunk reinforcement.
http://www.restoration-design.com/store/product/PP335A
I was thinking we'd be able to reuse that part. Look at how nice and shiny it is on the topside.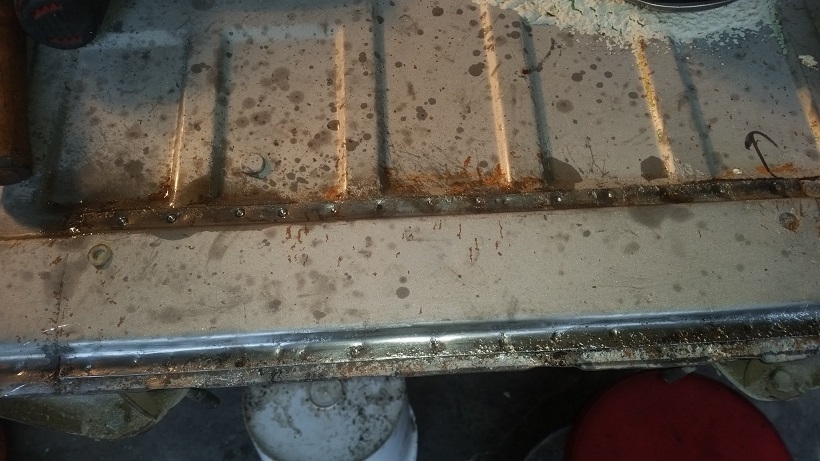

After removal. Not So Much ............... for $25 it's not worth the risk. Even with OSPHO and POR15, not worth the chance.
After removing that part I decided that we'll move to plan B and replace the entire trunk piece. Lesson Learned : Remove plate 1st to do your assessment. No time lost, because of the 75-76 bumper support I'd remove it the same way, in pieces.
Removing the remaining material off the back of the transmission support was pretty simple. I once again rolled it like a tin can. What I did learn. The floor pan is only spot welded in a couple spots UNDER the reinforcement. Then the top spot welds go thru all three pieces. So you just roll the material until you hit the next spot weld. Then give the already drilled out spot weld a just a little and roll on to the next one.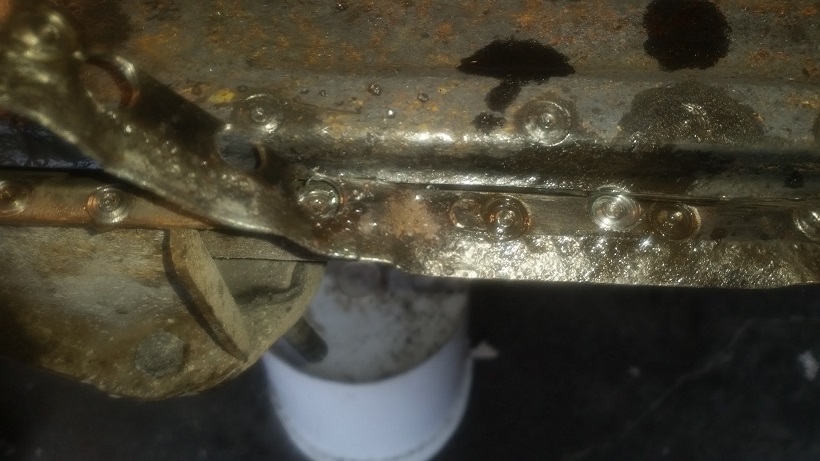
Tomorrow (today) I'll finish the right bumper support area. Probably no new pictures unless something exciting happens. I'll not cut out the remaining portion over the transmission support until I have the new part in my hand.
Rob (Beatnavy), I'm still on the same 3/8 Rotacut spot weld cutter head. Using a lot of cutting oil. Which is making a mess, but cleans right up with House of Color Wipe Out wax and grease remover.
Posted by: cary Mar 1 2016, 08:48 AM
Now on to those pesky qtr.panel / rear panel corner pieces. Don't know exactly how I'll install/replace the rear panel to get the best fit & finish so I'll be careful with the corners.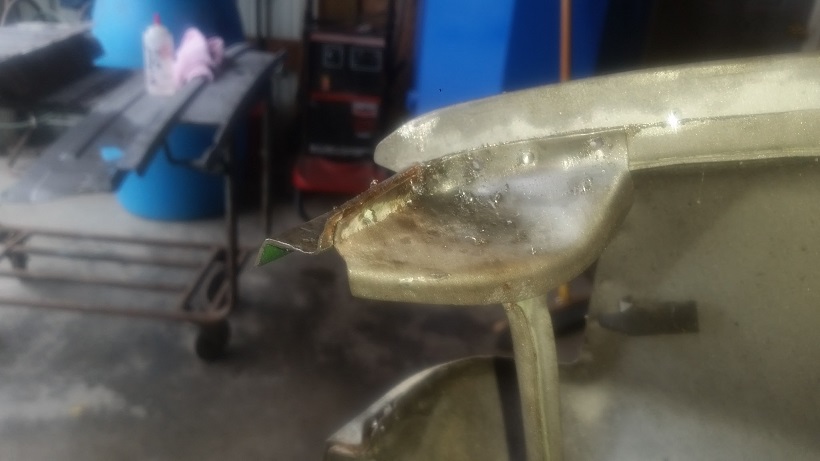
Drilled thru the spot welds with a 5/64 bit. Maybe 3/16 would have been better. Split the seam using the small thin wood chisel.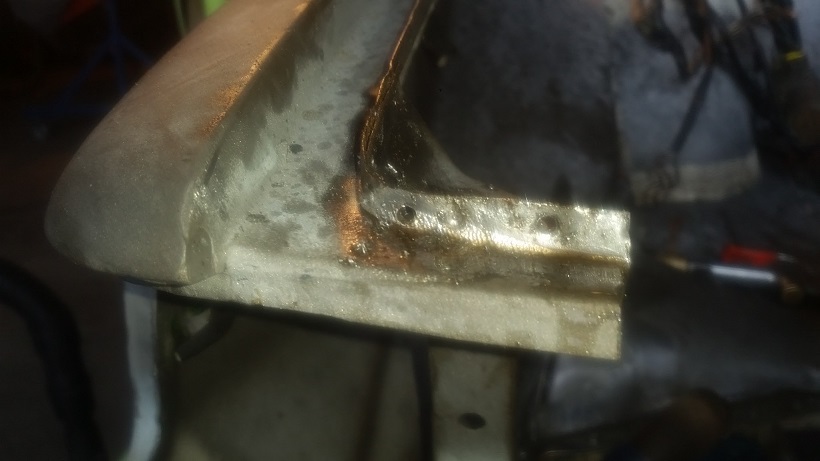
After the spot welds were drilled out I needed to remove the tacks in the corner. Ground off the top one, which you can see. Drilled a hole thru the bottom one, which you'd see looking from the bottom. It attaches the corner to the brace.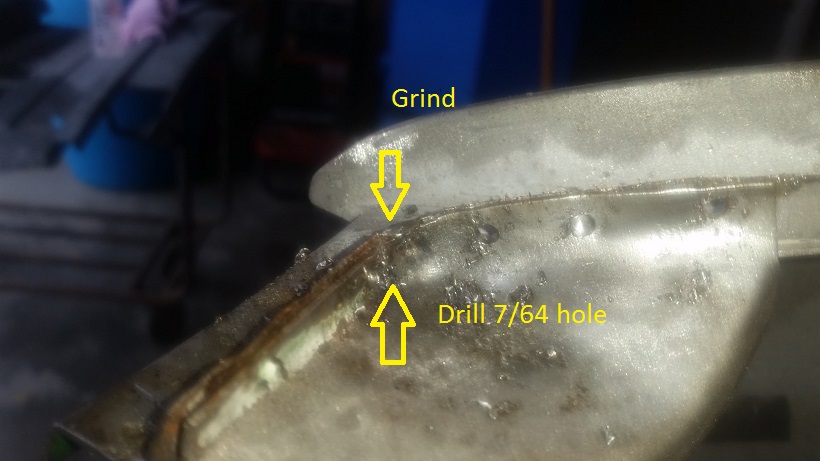
All done .............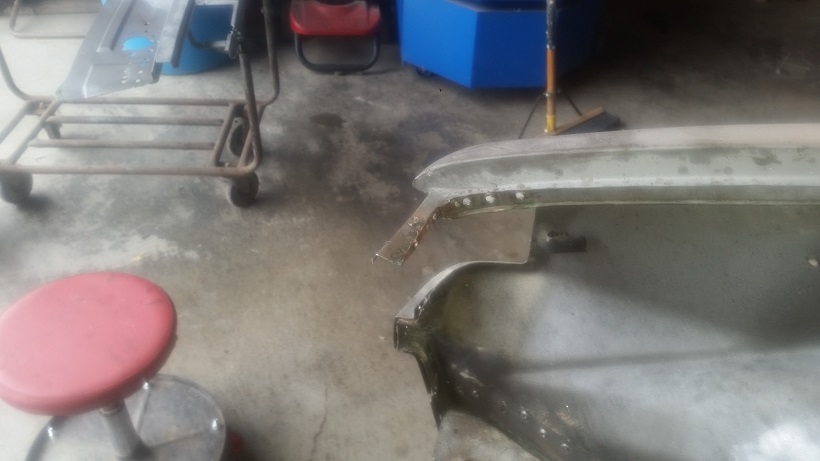
Posted by: 76-914 Mar 1 2016, 09:01 AM
You are having entirely too much fun.
Posted by: cary Mar 1 2016, 09:08 AM
Next, removing the seat hardware from the floor pan.
I start with the seat reinforcements on the bottom. I'm going to cut out the hinges with the cutting wheel so I can work on them in a vice.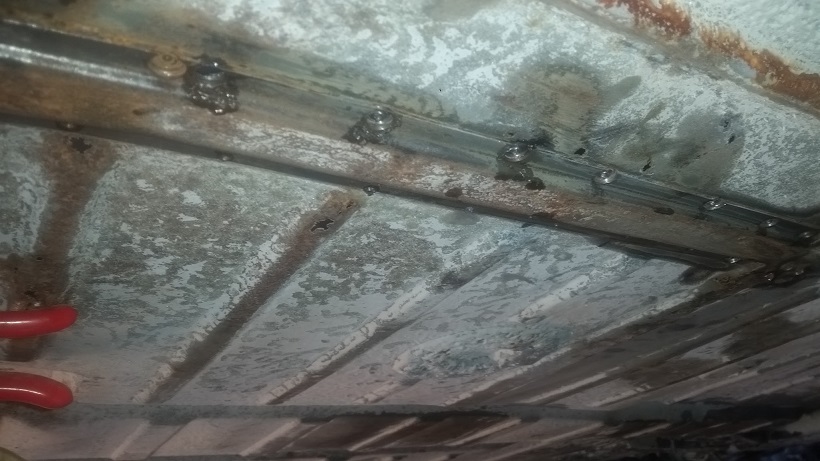
After a run thru the blaster. I'll refill the holes and repunch smaller ones for the reinstall.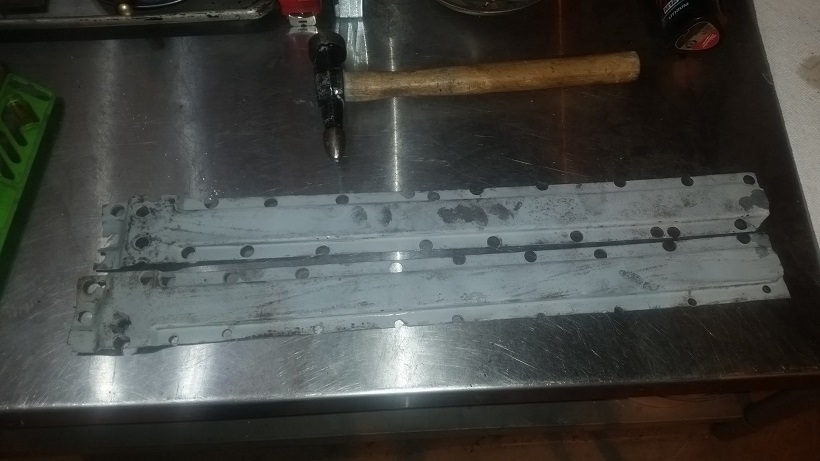
Out came the seat brackets and hinges .............. 4 1/2" cutting wheel from the top.
Much easier working on them in the vise.
After a trip thru the blaster. Sitting over night with an application of OSPHO. One hinge needs a couple new welds.
Removed the original trunk cut out from the heat shield. Spot welds were a little tough to find with all the metal degradation.
Reference Photo : Location on ground under right seat.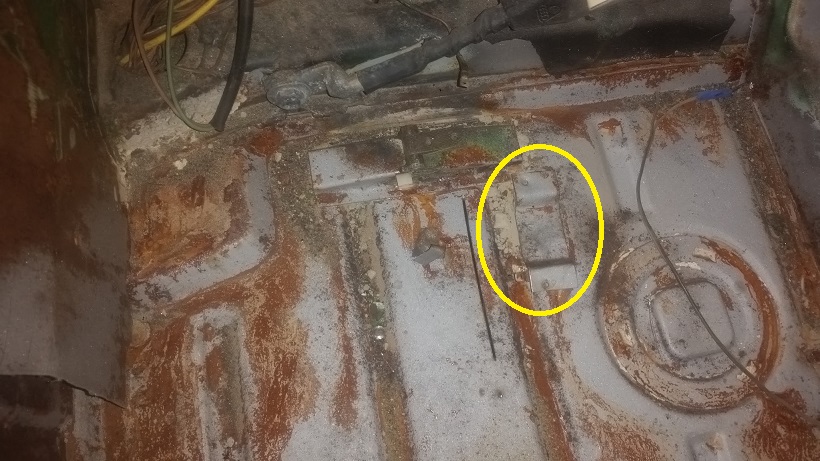
Posted by: cary Mar 1 2016, 09:00 PM
Tuesday 3/1/16
Forgot to remove the e-brake cable guide.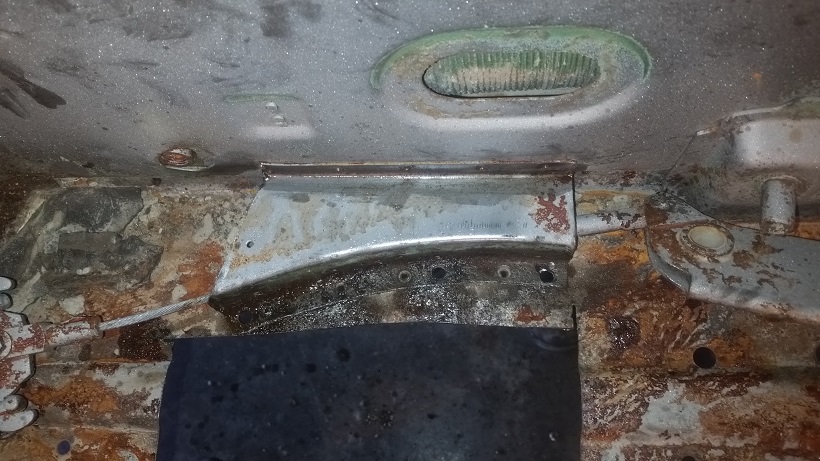
Super In Law (Jack) worked on filling the spot weld cutter holes in the seat reinforcements.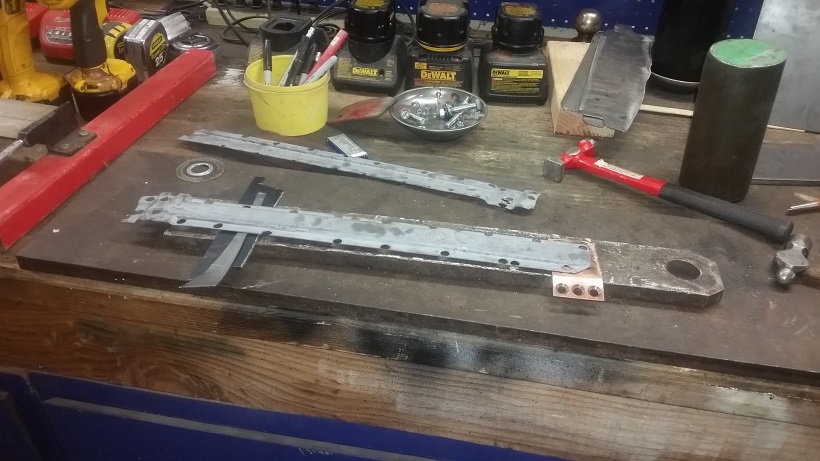
Back end all tidied up and waiting for parts.
Next on to fixing the right jack post. Looks like it's a virgin too, top is still welded. 
Posted by: cary Mar 1 2016, 09:14 PM
You are having entirely too much fun.
Fun just came to a screeching halt ...............
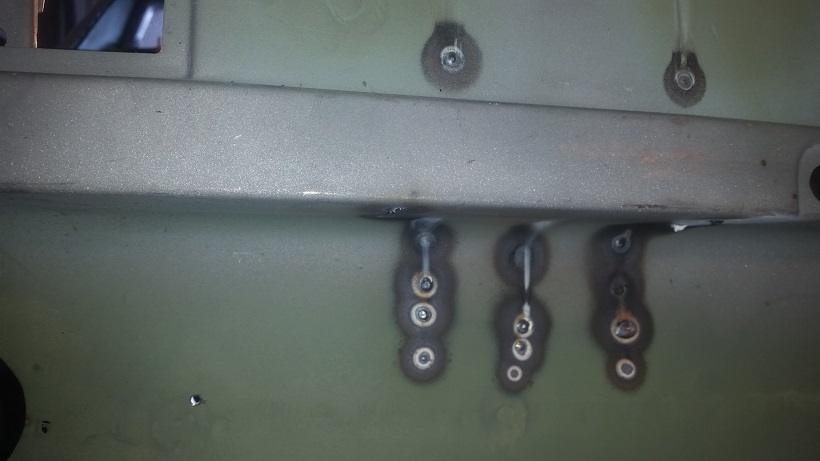
What you can't see is the HUGE mouse nest inside the wheelhouse ...............
This probably the best example I've ever seen of these cars rusting from the inside out.
These kind of took the wind out of my sails. Time for dinner and a beer.
Oh yeah .............. it's a shame someone buggered up the jack post. The metal under the jack post cover is just surface rust.
Posted by: BeatNavy Mar 2 2016, 04:41 AM
Rob (Beatnavy), I'm still on the same 3/8 Rotacut spot weld cutter head.
Using a lot of cutting oil. Which is making a mess, but cleans right up with House of Color Wipe Out wax and grease remover.I'm glad you're having good luck with it too! Getting spot welds out is "fun" enough that you don't need to deal with a lousy cutter that keeps breaking. I'm working a on a driver's side long now...
Fun just came to a screeching halt ...............
What you can't see is the HUGE mouse nest inside the wheelhouse ...............
This probably the best example I've ever seen of these cars rusting from the inside out.
These kind of took the wind out of my sails.
Uh-oh.
Yes, I know that feeling...Posted by: cary Mar 2 2016, 10:14 AM
After a good nights sleep its time to go into rust attack mode.
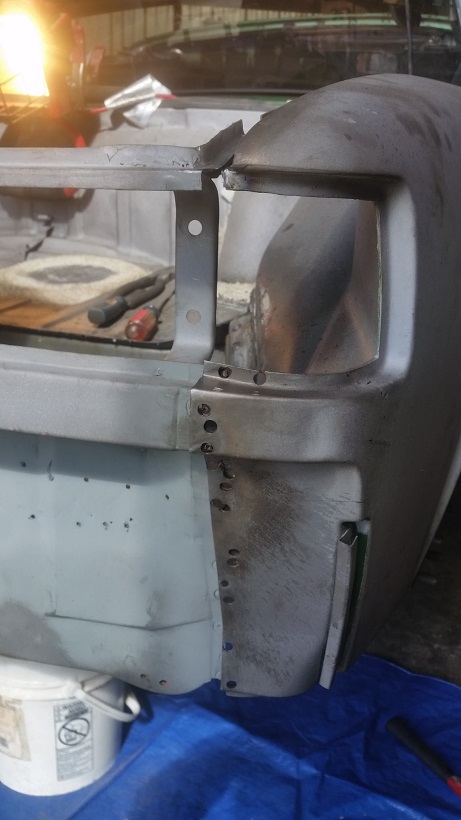
I was hoping to only have to cut the door jam to remove and replace the jack point like Rick does. But think I'll need to remove the lower portion of the fender to get up into the wheelhouse. 
But here's where I'll start this am. Originally I was only going to cut back the top rail about an inch and half and replace the flange. Now we'll open it up to survey the damage. And remove the mouse nest.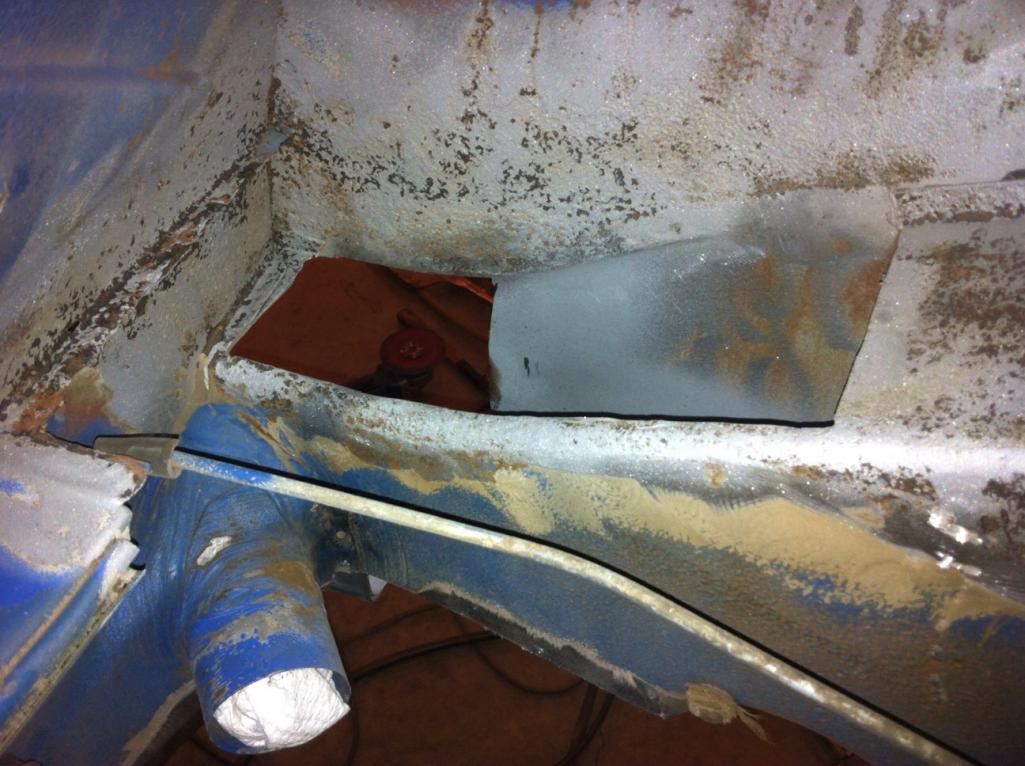
The battery tray will have to be removed first. But that was already planned with the flange/seam repair.
It got some 914World inspiration this morning after reading up on Rick's work on Vintage914Racer's car. I was about to say the the rust on Mark's car isn't quite that extensive. It just goes the other direction up into the wheelhouse. But I'll refrain from that proclamation for a couple hours.
http://www.914world.com/bbs2/index.php?showtopic=226585&hl=
Posted by: Mikey914 Mar 2 2016, 10:57 AM
Thanks Cary,
Looks like you are going to town on this one. I never would have had the time.
Mark
Posted by: mbseto Mar 2 2016, 04:09 PM
What you can't see is the HUGE mouse nest inside the wheelhouse ...............
2nd pic:
http://www.914world.com/bbs2/index.php?s=&showtopic=262220&view=findpost&p=2224731
Haven't gotten back there yet, but still thinking his little skeleton will still be in there...
Posted by: cary Mar 2 2016, 08:28 PM
Battery tray and its support hit the floor first. Because it was seam welded it came out in pieces. 
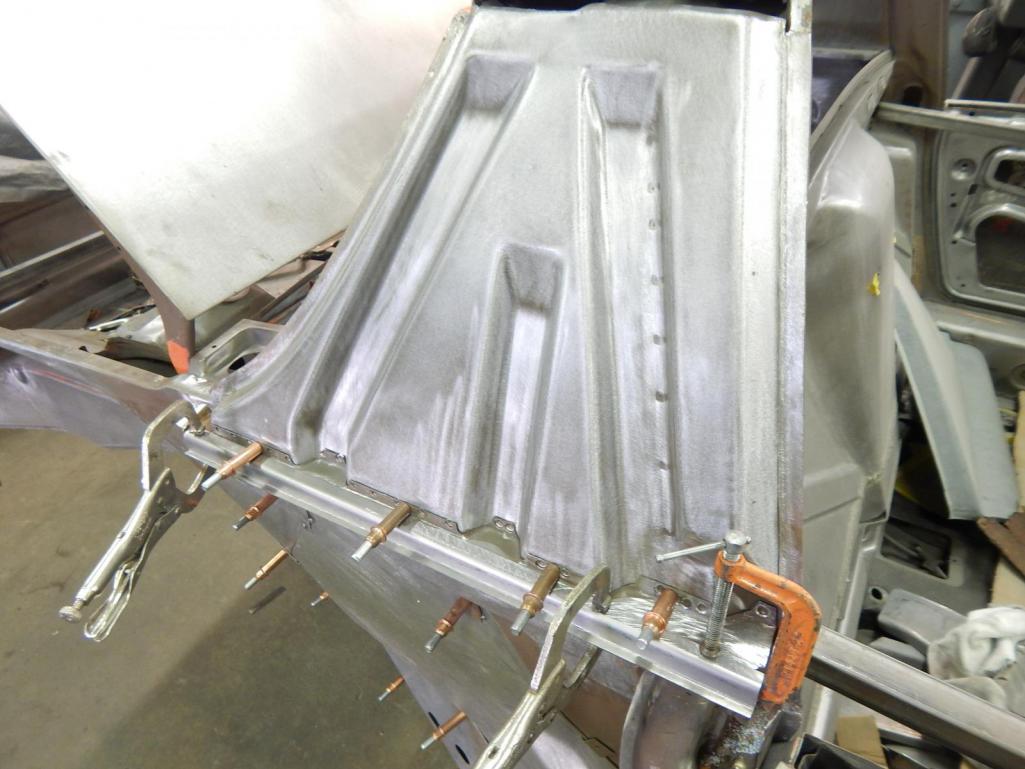
Next came the engine shelf. Needs to come out to open up the top rail. It's reusable.
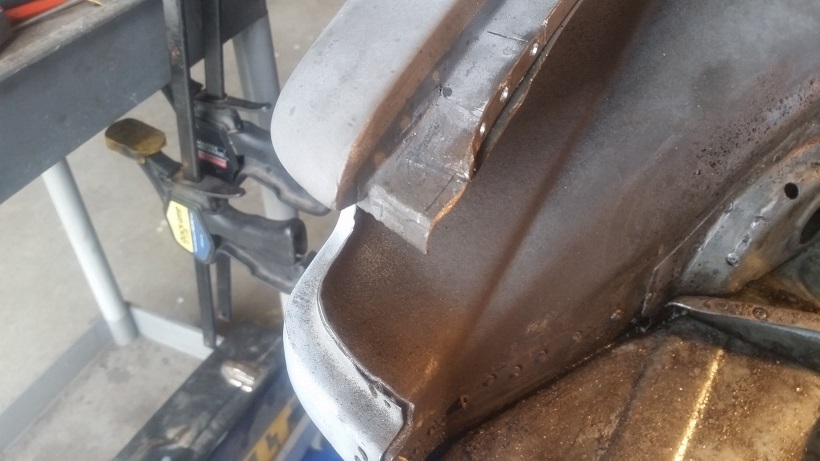
Once again a hillbilly double layered patch comes to light. That's the vertical firewall above the hell hole.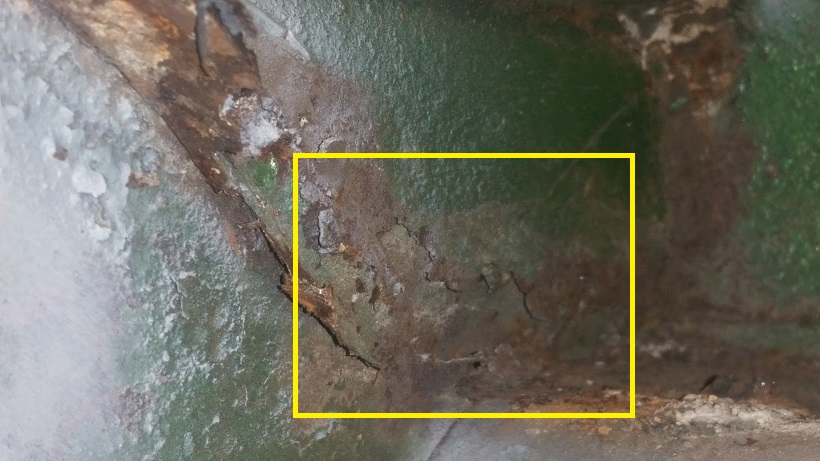
Now I peel off the top layer only on the top rail. Basically delicately cut a slot with the cut off wheel. Then peel it back with screwdriver and or small wood chisel.
As I hit spot welds I cut them down from the top side with the mandrel mounted cutting wheel.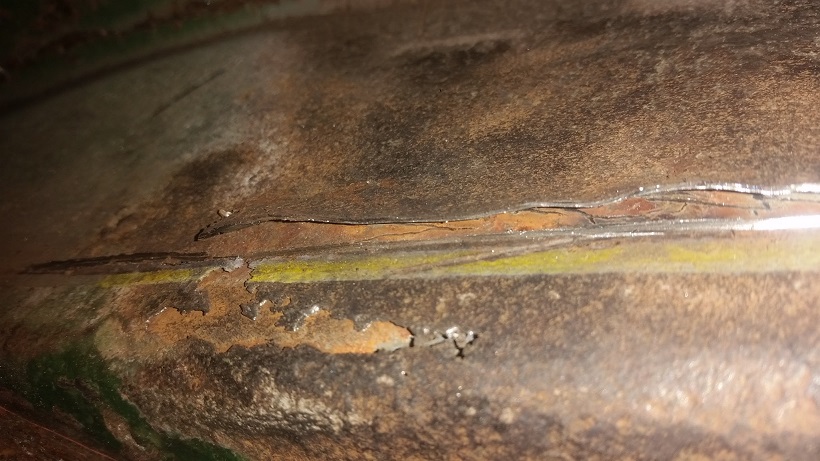
Arsenal of cutting wheels ................
Here's a top side view of what remains of the mouse nest.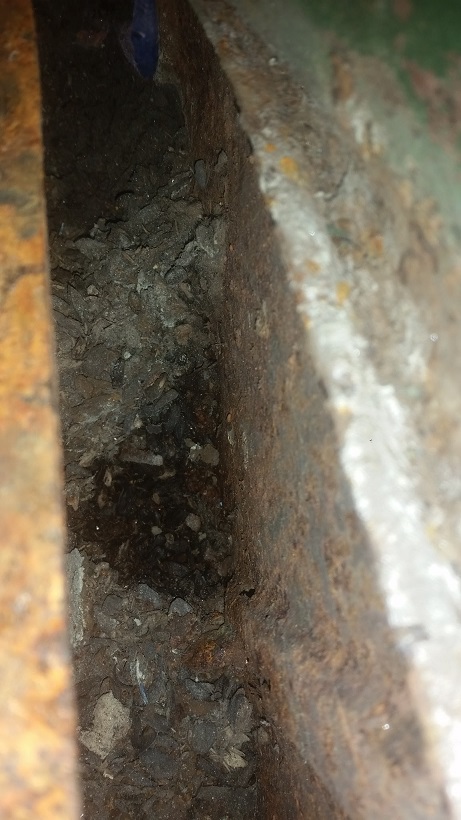
Inside shot of the original large hole I created with the screwdriver.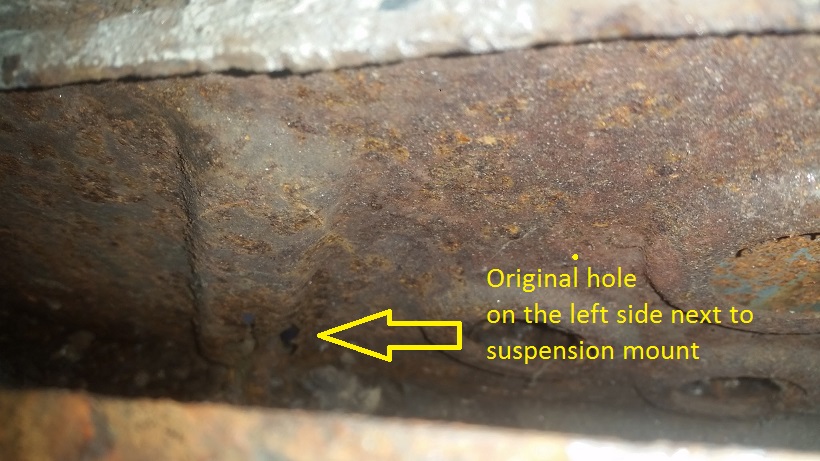
Mission Complete ................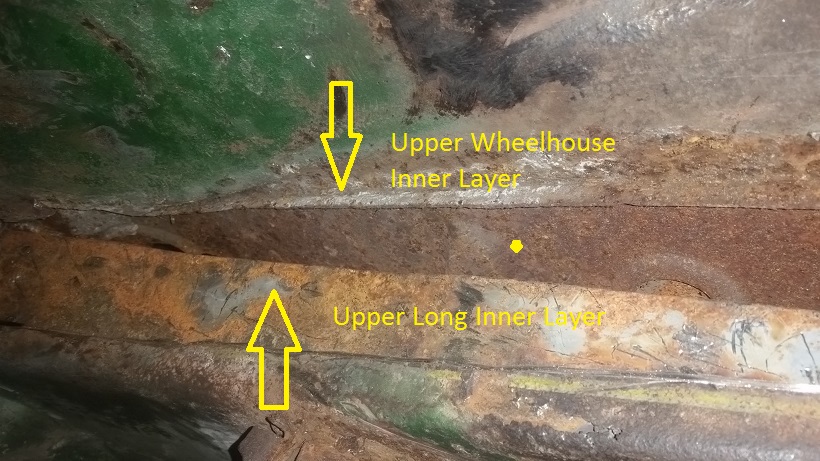
Posted by: cary Mar 2 2016, 09:11 PM
Opened up the wheelhouse so I could continue to vacuum out the mouse nest. Got most of it. But I'll need to dig deeper down the inner long.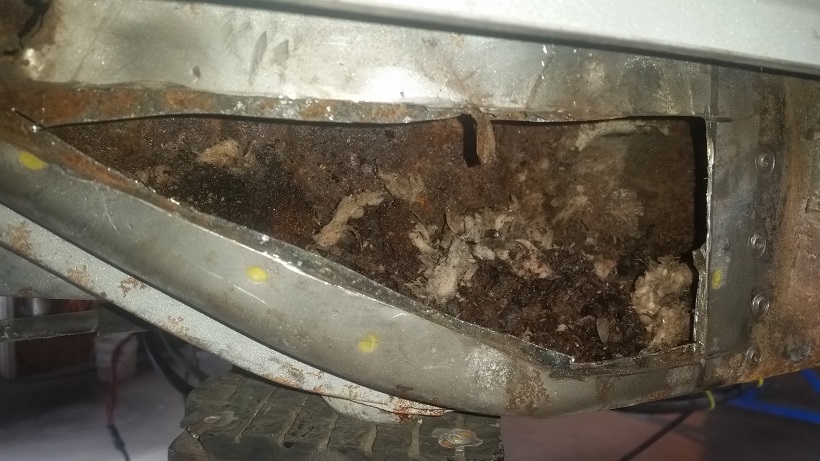
This is a far as I can take it without installing the door braces. Pulled the braces out of my rustoration. Gave them a coat of blue paint and they're drying overnight.
I added the wheelhouse to Mark's RD order.The big question will be whether I remove the outer suspension mount or not.
Posted by: cary Mar 2 2016, 09:15 PM
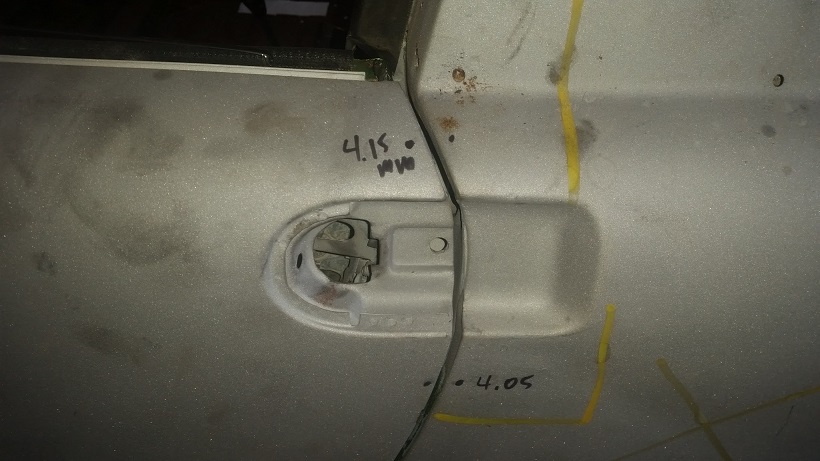
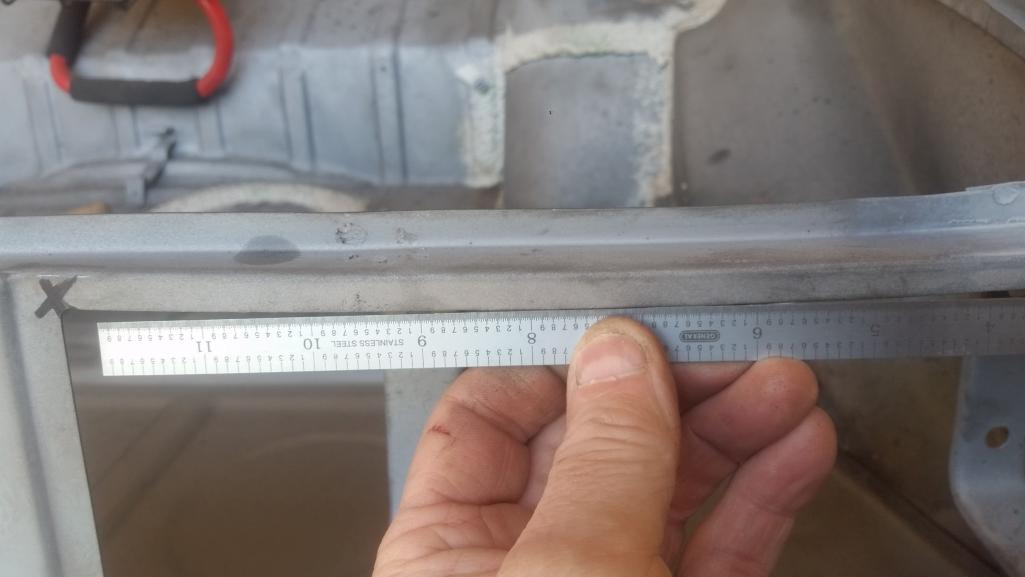
I make multiple measurements before I remove the doors for the door brace install.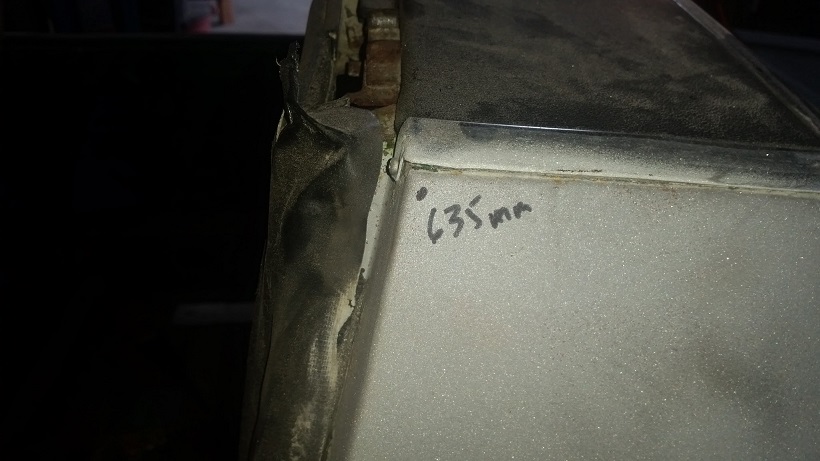
Posted by: cary Mar 2 2016, 09:19 PM
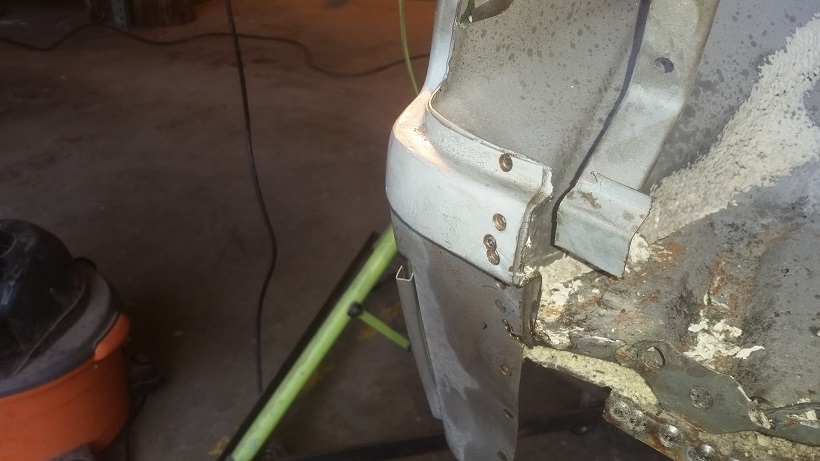
Beings that I'll be doing some work to the wheelhouse, off comes the fender. I know Rick is shaking his head. But I need room for my tools and lots of light.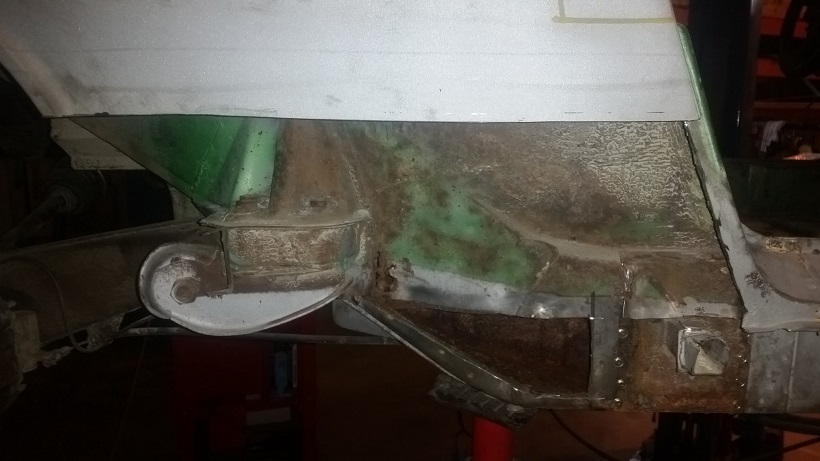
Posted by: cary Mar 2 2016, 10:18 PM
Things that make you go Hmmmmmmmmmmm.
Can I cut off the front and slide the inner layer behind the outer suspension mount ?
If could figure it out. How would I clamp/press the new inner layer tight so I could weld it.
Looks like RD might not be selling the wrinkled AA piece anymore ?
Or the RD guys decided to shear off the crappy part.
http://www.autoatlanta.com/Porsche-Lower-And-Upper-Wheelhouse-one-Piece-Right-914-1970-76-Parts-PN-B91450194420C.html
Posted by: McMark Mar 3 2016, 10:10 AM
Why fill these? Rosette welds to the car.
Posted by: jmitro Mar 3 2016, 10:29 AM
Why fill these? Rosette welds to the car.

way too much work spent filling those holes; only to drill new holes again???
Posted by: cary Mar 3 2016, 08:49 PM
Why fill these? Rosette welds to the car.
way too much work spent filling those holes; only to drill new holes again???
Primarily filling the 3/8" cutter holes. They create a 1/2" rosette weld.
Which would be almost impossible to remove in 40 years when the car is restored again. LOL.I have been told that I'm a little anal. And I think too far ahead.
Plus I'm not keeping track of Super In Laws time. I figure we're ALL paying his wages. He was a 30 year federal employee. Which this year will be 31 years retired.
So he's a bonus.
Posted by: dangerranger01 Mar 3 2016, 09:32 PM
I really like your work Cary and all the pictures/details you put in. Gonna really enjoy this thread.
Maybe when you're done with Mark's car you can do mine...and hey i've already bought a good amount from RD already, just need to cut and glue it into the car! haha
Posted by: cary Mar 3 2016, 11:29 PM
I really like your work Cary and all the pictures/details you put in. Gonna really enjoy this thread.
Maybe when you're done with Mark's car you can do mine...and hey i've already bought a good amount from RD already, just need to cut and glue it into the car! haha
I'll take these projects on one at a time. Your neighbor Doug has already asked to next in line, sorry. But I'd like to see where your at with your project.
This one is turning out to be more than I expected.

Posted by: dangerranger01 Mar 3 2016, 11:35 PM
I'll take these projects on one at a time. Your neighbor Doug has already asked to next in line, sorry. But I'd like to see where your at with your project.
This one is turning out to be more than I expected.
Yea that is what I picked up. Still haven't met up wiht Doug yet even though he lives about 1mi from. I work out of town so i'm only back every few weeks. We still need to plan the 'Boring Teeners Unite' meeting haha an exclusive club
I dig into the car when i'm home. Haven't done anything major yet besides see where i'm at and discovering more work with each time (but that is to be expect!).
Got my stainless fuel lines from Tangerine months ago, and just now got a slight leak, so I guess that means i'm doing the fuel lines when i'm home! I should probably stop and figure out how to address cleaning/sealing the tank so I am only diggin into the fuel system once. You ever have to do this before? Need to do more research.
Posted by: cary Mar 3 2016, 11:54 PM
Start the day with primering the refurbished pieces that were OSPHOed overnight.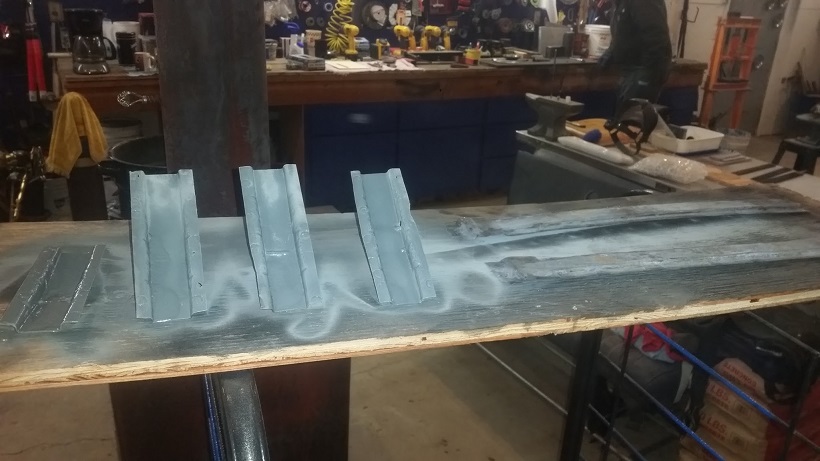
After that I'm back to the wheelhouse.
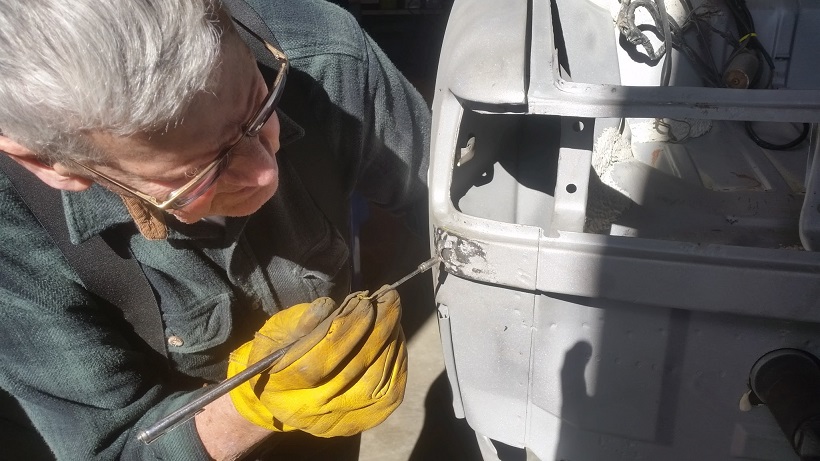
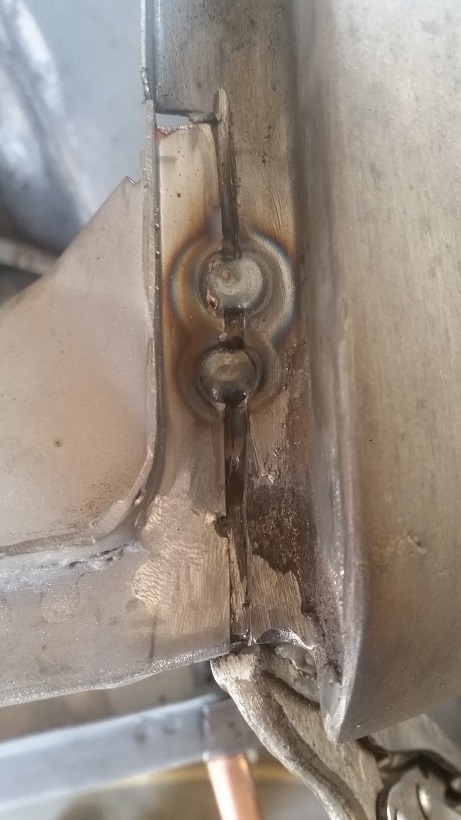
Step #1, remove a portion of the door jam. Thick line is were I cut. Probably should have gone up a bit more. Couldn't get the spot weld drill in the right place to drill out the top of the jack point.
This shot is after the jam is detached. The yellow arrows are spot welds that don't need to be drilled out. The lines are where the brazing comes loose.
Step #2
Here's a couple shots of the top of the jack point. 6 spot welds. The bent corners is my fibile attempt to pop off the jack point with a chisel yesterday.
Words of wisdom : A chisel is not something that you want use too much around 18 gauge metal, only directly on welds. 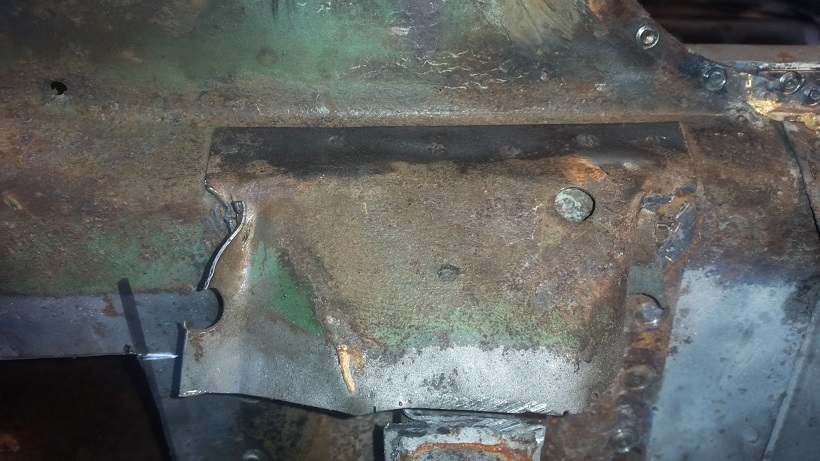
So I used the Rick grind and pop method to get the jack point off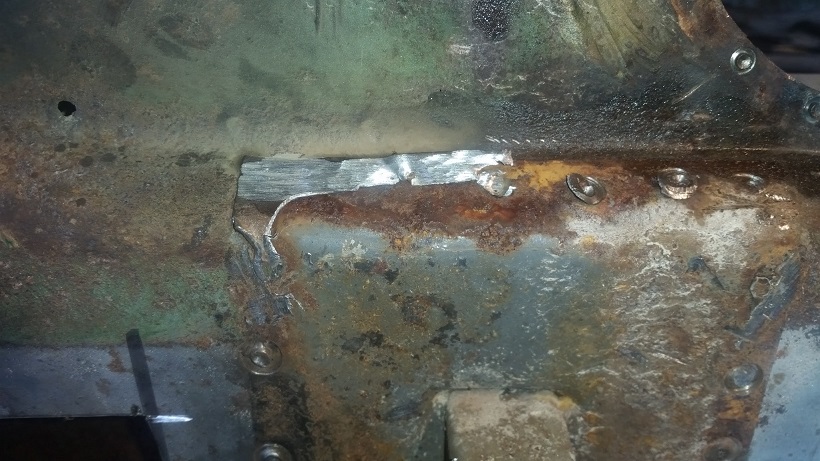
Step #3
Remove a portion of the sill so the wheelhouse to long joint can be drilled out.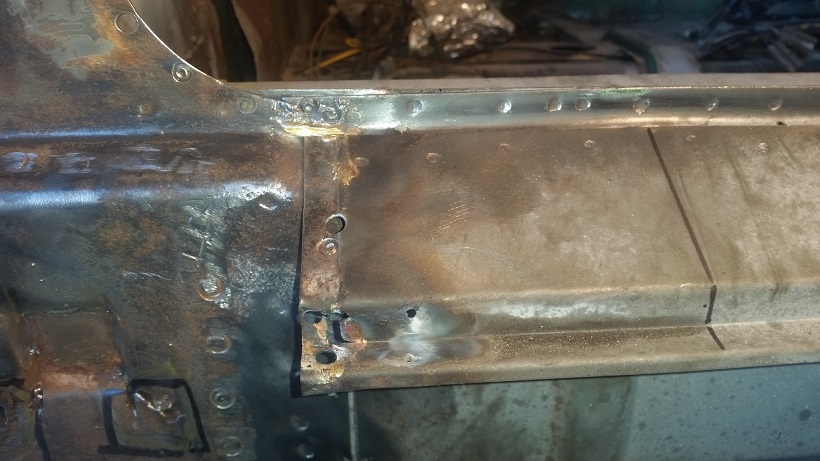
That corner will be sent to the Super In Law refurbish workbench. Brazed over the top of a spot weld.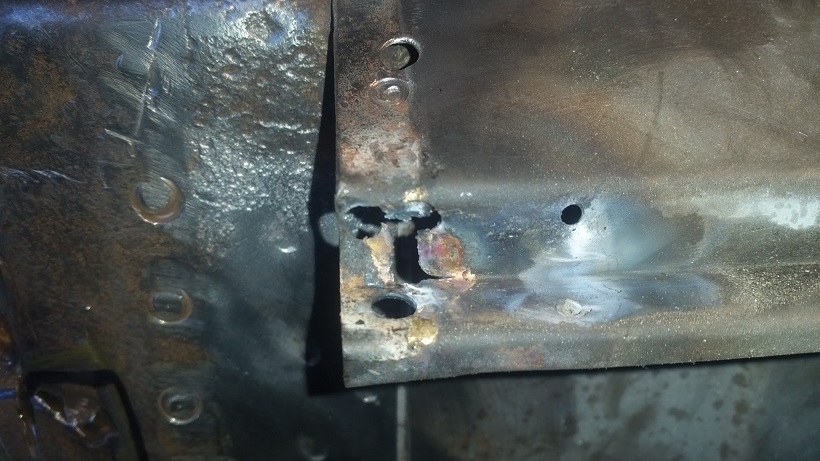
Posted by: cary Mar 4 2016, 12:09 AM
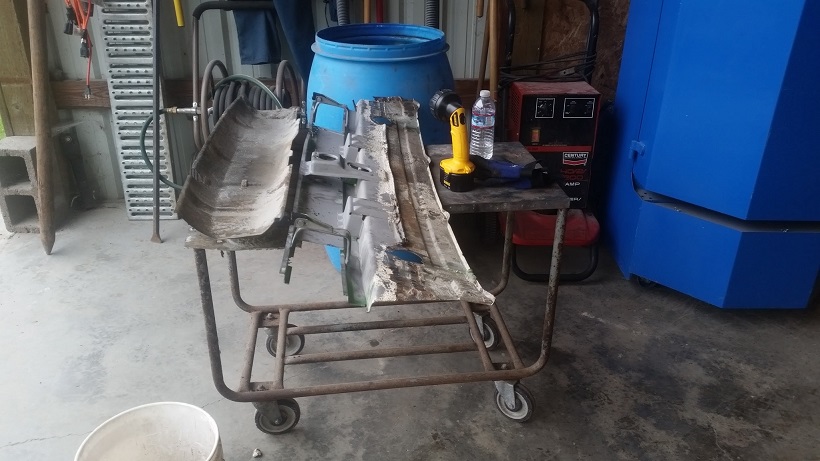
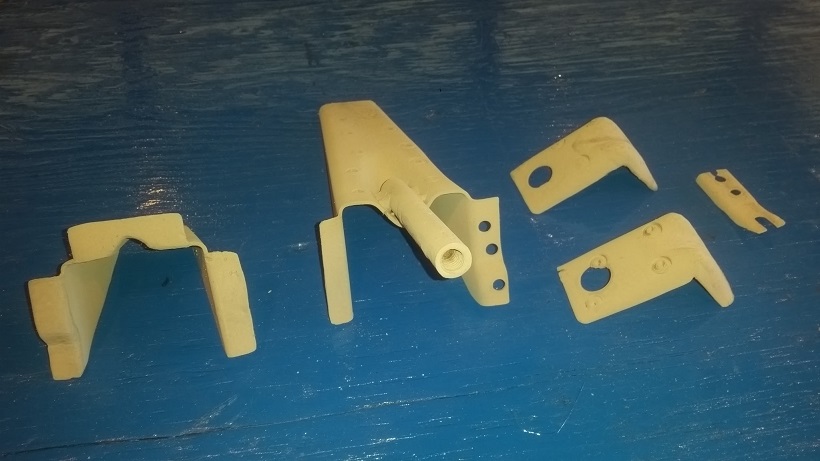
Today's items sent to the refurbish workbench.
Yellows circles are areas that will be refurbished.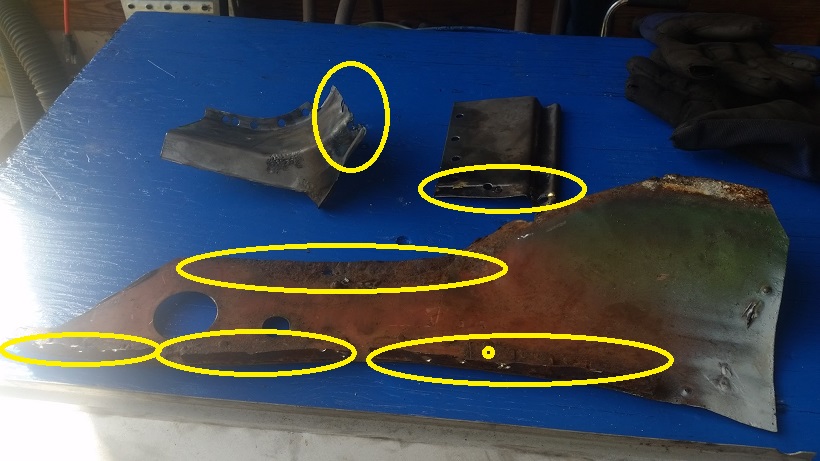
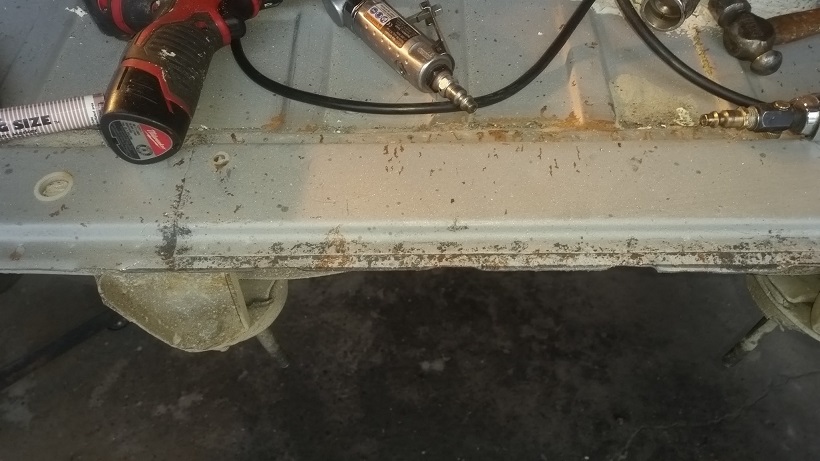
This is the bottom of the right engine shelf. The rusted portion is the flange that the molding channel gets welded to. I missed the bottom on my parts review before I sent the parts list to Mark. I caught taking off the molding channel. Oh well, saved Mark $180. We 'll cut and patch the shitty part. And recreate the flange. With Super In Laws high wage ($0) it will work out. If it was a regular shop deal. Recycle bin item.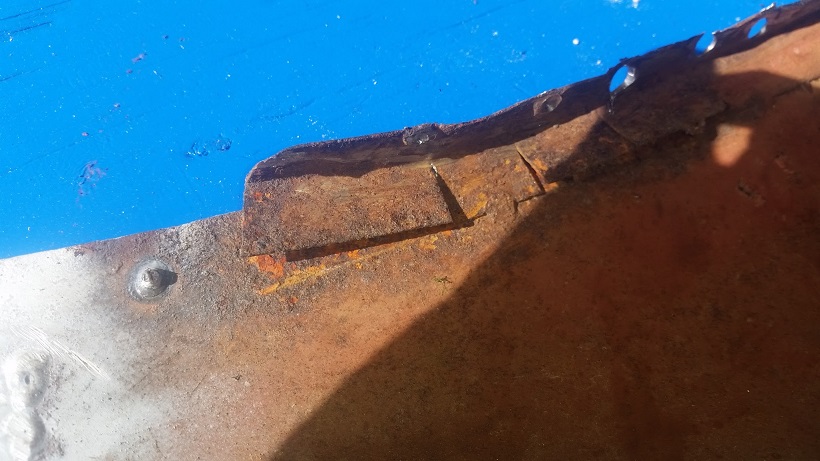
Posted by: cary Mar 4 2016, 12:42 AM
Here's a better shot of the wheelhouse with the fender and door jam removed. Lined out areas are rusted thru.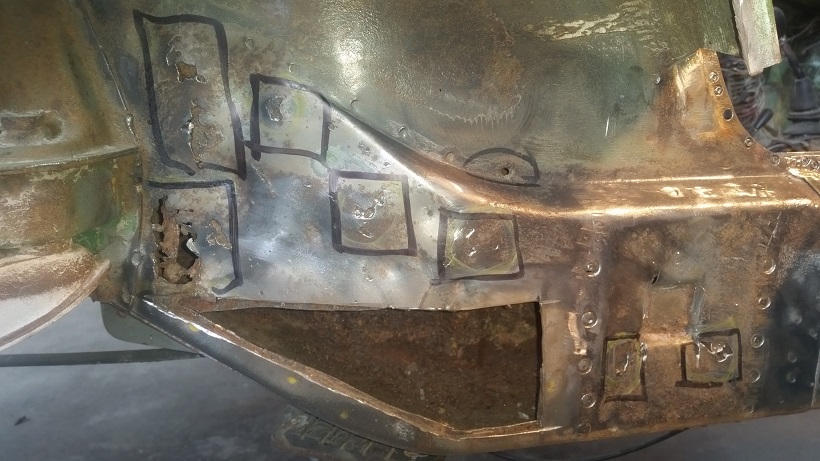
It' a shame this happened. Here's a shot of the wheel house above the suspension mount. Virgin. I still contend this was caused by the seam sealer on the top rail being removed and not replaced. 
I'd still like to try sliding the inner layer behind the suspension mount. It would be some tricking welding. Might have to buy some special arc welding rod to tack it in. Would have to build some turnbuckle gadgets to push it up tight so it could be welded. But I like a challenge. That's how I roll.
But the anal part of my brain says the weld will be too close and too big next to the suspension mount. So the mount and its dreaded tie will have to be removed so it can be patched correctly. Plus it we give a better view of the condition of the upper inner long.
This will entail building a fixture for aligning the mount when we reinstall it.
This as far as we go without having the new part in my hand for measurements ................
Posted by: cary Mar 4 2016, 12:51 AM
Here's another area that will get close scrutiny after we remove the back half of the floor pan.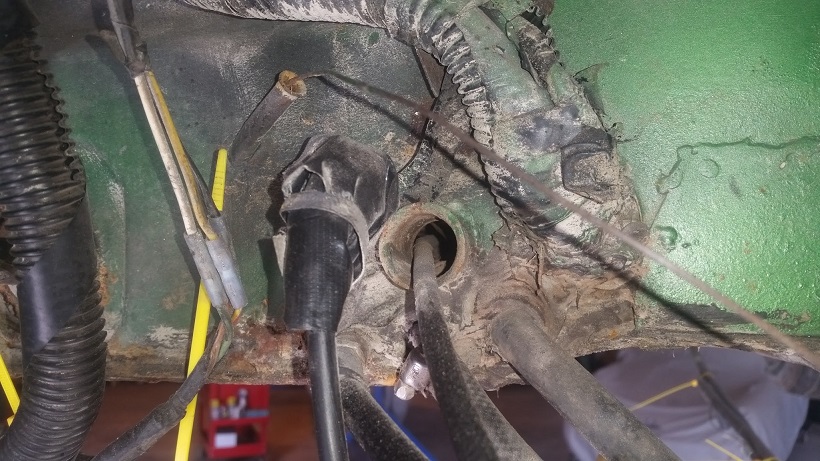
Will probably cut it out of the parts car.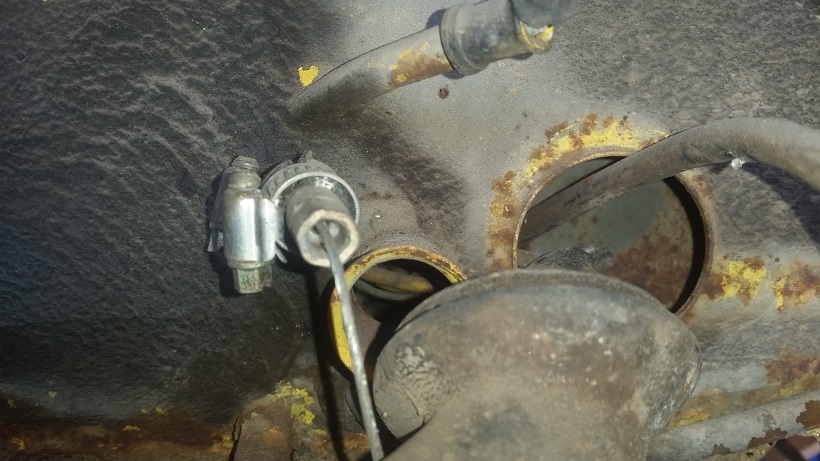
Posted by: cary Mar 4 2016, 10:01 AM
I'll take these projects on one at a time. Your neighbor Doug has already asked to next in line, sorry. But I'd like to see where your at with your project.
This one is turning out to be more than I expected.
Yea that is what I picked up. Still haven't met up wiht Doug yet even though he lives about 1mi from. I work out of town so i'm only back every few weeks. We still need to plan the 'Boring Teeners Unite' meeting haha an exclusive club
I dig into the car when i'm home. Haven't done anything major yet besides see where i'm at and discovering more work with each time (but that is to be expect!).
Got my stainless fuel lines from Tangerine months ago, and just now got a slight leak, so I guess that means i'm doing the fuel lines when i'm home! I should probably stop and figure out how to address cleaning/sealing the tank so I am only diggin into the fuel system once. You ever have to do this before? Need to do more research.
First I should say thank you for the compliments ...................
Feels like I'm about to be reeled in. LOL.
Yes on the fuel lines. Did a set on my 911. A set on both the 914's. Look's like I'll be doing a set on Mark's car.
http://www.914world.com/bbs2/index.php?showtopic=159774&st=4920&p=2100898&#entry2100898
Starts page #124
http://www.914world.com/bbs2/index.php?showtopic=242254&st=0&p=2096850&#entry2096850
http://www.914world.com/bbs2/index.php?showtopic=242542&hl=fuel+tank
Are you smelling fuel ? Is any hitting the ground ?
Posted by: dangerranger01 Mar 4 2016, 11:06 AM
First I should say thank you for the compliments ...................
Feels like I'm about to be reeled in. LOL.
Yes on the fuel lines. Did a set on my 911. A set on both the 914's. Look's like I'll be doing a set on Mark's car.
http://www.914world.com/bbs2/index.php?showtopic=159774&st=4920&p=2100898&#entry2100898
Starts page #124
http://www.914world.com/bbs2/index.php?showtopic=242254&st=0&p=2096850&#entry2096850
http://www.914world.com/bbs2/index.php?showtopic=242542&hl=fuel+tank
Are you smelling fuel ? Is any hitting the ground ?
Thanks for the links. I'll read up more once i'm done running around this morning. And yes, i smell fuel and it's hitting the ground. Looks like where the lines come out of the tunnel and go up into the engine bay is a significant leak (plastic to rubber area)....not good.
I think i'll pull the tank today and see what condition its in. Not sure if any shops local to me that clean/pressure test but I haven't searched...
Posted by: cary Mar 4 2016, 08:03 PM
Thanks for the links. I'll read up more once i'm done running around this morning. And yes, i smell fuel and it's hitting the ground. Looks like where the lines come out of the tunnel and go up into the engine bay is a significant leak (plastic to rubber area)....not good.
I think i'll pull the tank today and see what condition its in. Not sure if any shops local to me that clean/pressure test but I haven't searched...
Good Luck. I couldn't find anyone on the West side.
Posted by: cary Mar 4 2016, 08:40 PM
Started the day installing the door braces.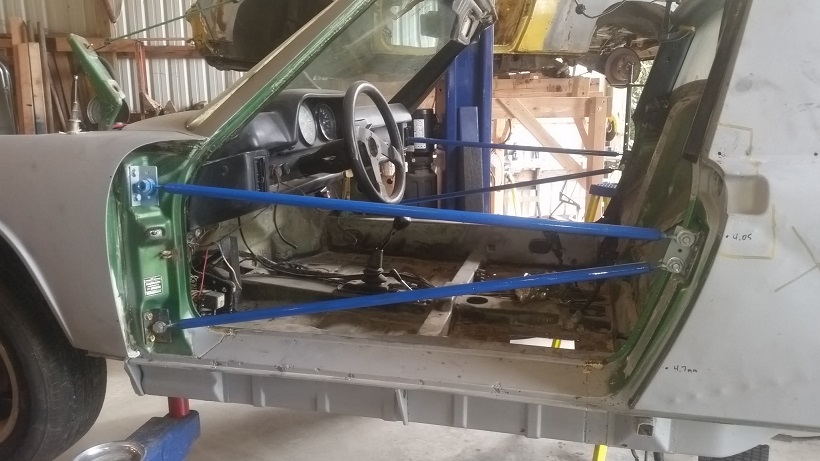
I found another piece that will probably need to changed. Motor Mount.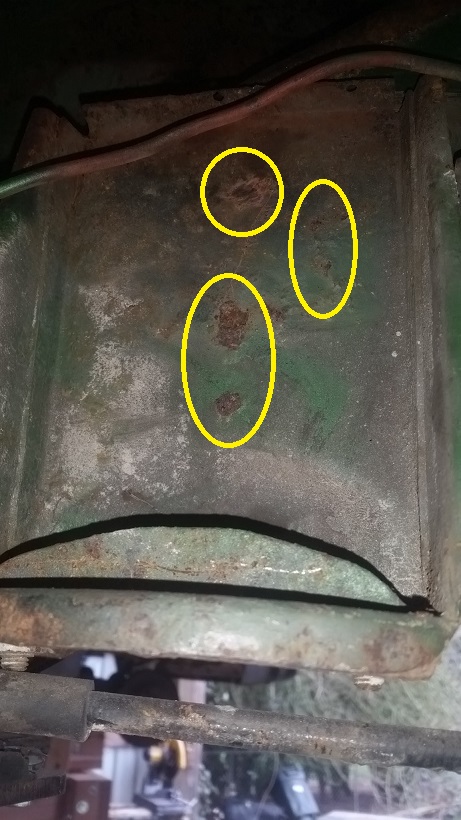
I think I have 2 or 3 in my stash. Plus the parts car has a couple good ones on it.
In order to give the firewall a good examination I need to remove the fuel lines and cables. So out came the fuel tank.
This is the scariest splice I've ever seen. This was inside the cockpit. This is why it had the hillbilly tared in mess.
After everything is cleared out of the way.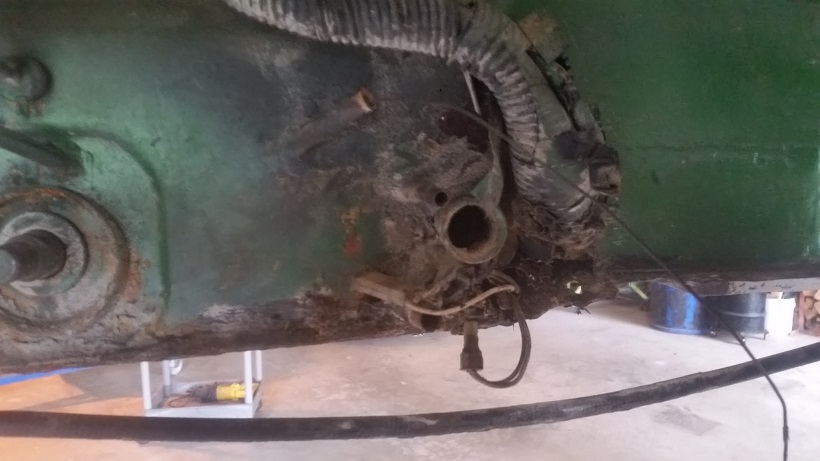
Aftermath ................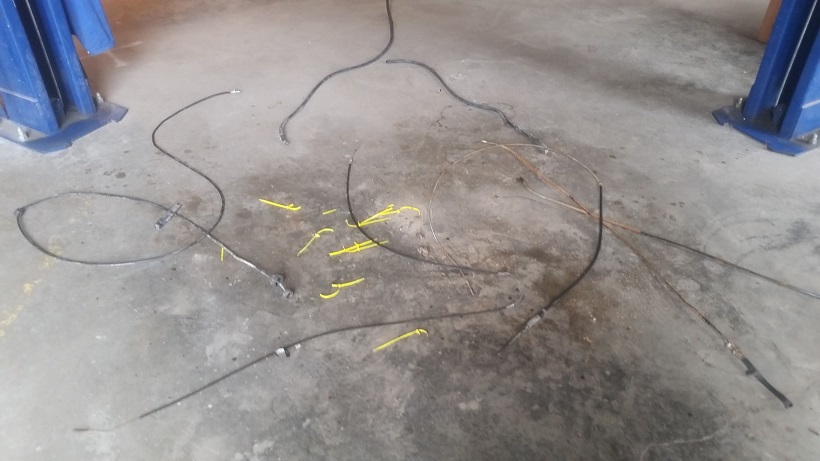
Speedometer cable looks good. Clutch cable looks good. Accelerator cable, not so much. Bowden tube separated.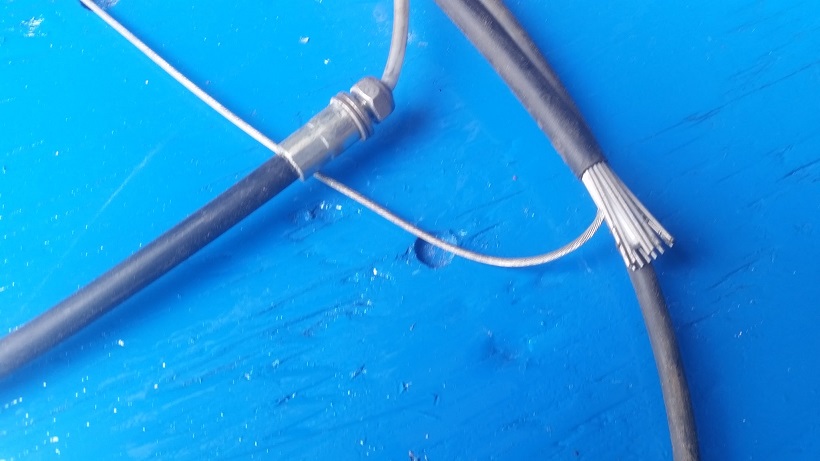
Posted by: cary Mar 4 2016, 09:22 PM
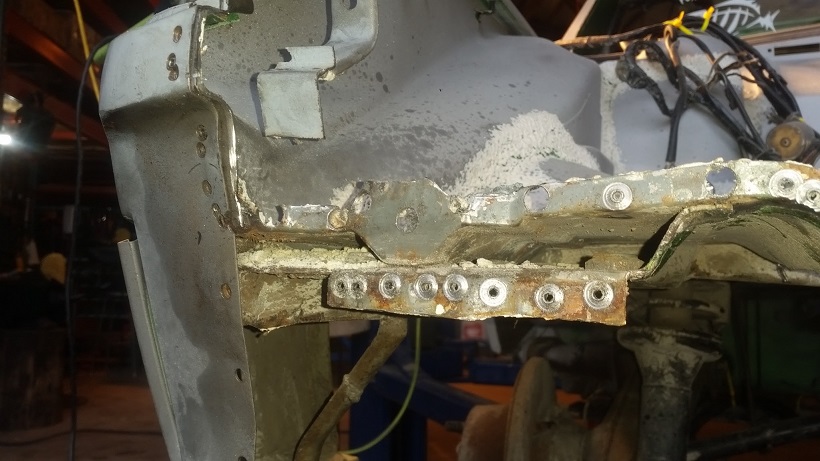
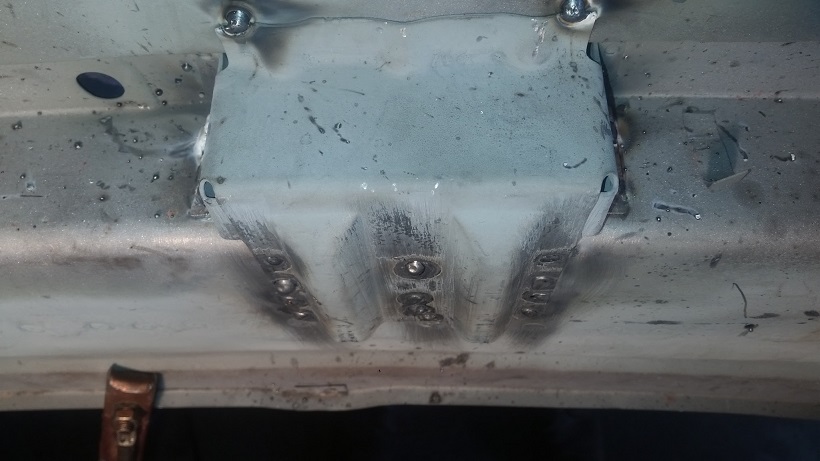
Here's Super In Law's work on the right engine shelf. He's created a new flange for the molding channel to be welded to.
Posted by: cary Mar 4 2016, 10:03 PM
After lunch we went to Mike's (warpig) house to cut the rear panel out of his parts car.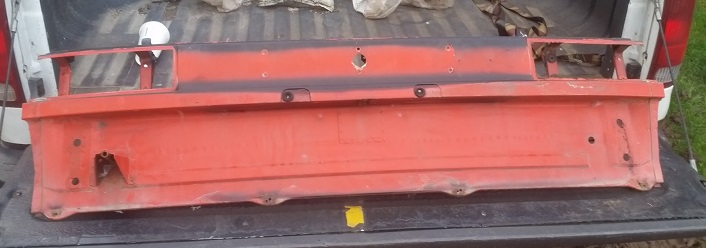
Tomorrow is Annual AX Tech at Speedsports.
Sunday is instructor at Tire Rack Street Survival
Posted by: bigkensteele Mar 5 2016, 02:06 PM
After lunch we went to Mike's (warpig) house to cut the rear panel out of his parts car.
Tomorrow is Annual AX Tech at Speedsports.
Sunday is instructor at Tire Rack Street Survival
Is Mark going to stick with the late bumpers? If so, I might be in the market for the tow-hook parts that you will be removing.
Fantastic work, BTW! Wish I had a Super In-Law!
Posted by: cary Mar 5 2016, 04:51 PM
Mark's staying with the 75-76 bumpers. So we should be able to accommodate your request. If not this car, there should be one on my parts car.
The took hook receiver only ? Or do you need the braces too ?
Posted by: raynekat Mar 6 2016, 03:38 AM
I really like your work Cary and all the pictures/details you put in. Gonna really enjoy this thread.
Maybe when you're done with Mark's car you can do mine...and hey i've already bought a good amount from RD already, just need to cut and glue it into the car! haha
I'll take these projects on one at a time. Your neighbor Doug has already asked to next in line, sorry. But I'd like to see where your at with your project.
This one is turning out to be more than I expected.
I cede my position in line. Not sure when I'll have the funds and/or time to really dig into my project. Got a battle royal with my ex investment company planned for this summer.
I'll definitely be dropping in occasionally to see what Cary's up to no doubt.
Posted by: cary Mar 7 2016, 09:51 PM
Mark's staying with the 75-76 bumpers. So we should be able to accommodate your request. If not this car, there should be one on my parts car.
The took hook receiver only ? Or do you need the braces too ?
Ok. Tow hook is not meant to be removed and replaced. The tube had to be cut to get the tow hook off the pre 75 rear panel. You can't get the cutting wheel down into the locations were they welded in the tube.
If you can come up with a tube with 10mm threads you could put the two halves to good use. I can refurbish the two halves if your still interested. Fill in spot cutter holes. bead blast and prime.
Posted by: cary Mar 7 2016, 10:39 PM
Now's it time to create a 75-76 rear panel from a pre 74 rear panel.
First ........... remove the tow hook. Not an easy task when trying not to damage the sheet metal underneath.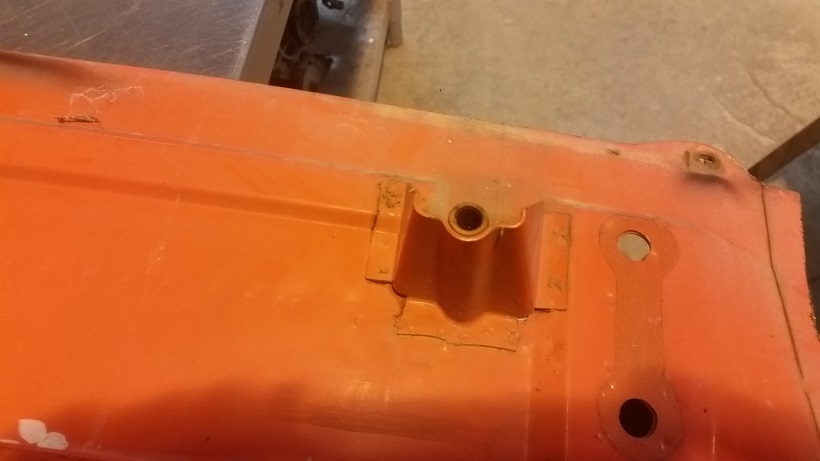
See post above for removed pieces
Next remove the spot welded flange of the rear trunk floor pan. Probably 50 spot welds.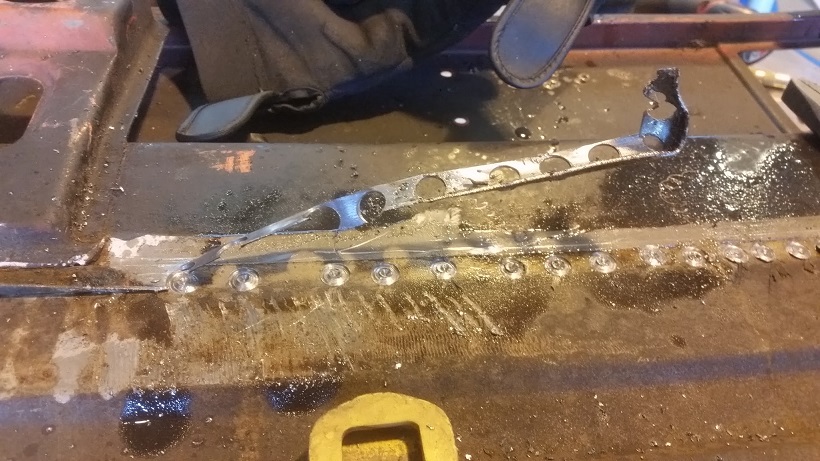
Next peel back the flange of the qtr. panel where it ties to the rear panel. Delicate work.
Used the Rick's method. Ground it down with die grinder them peeled it back with the small wood chisel.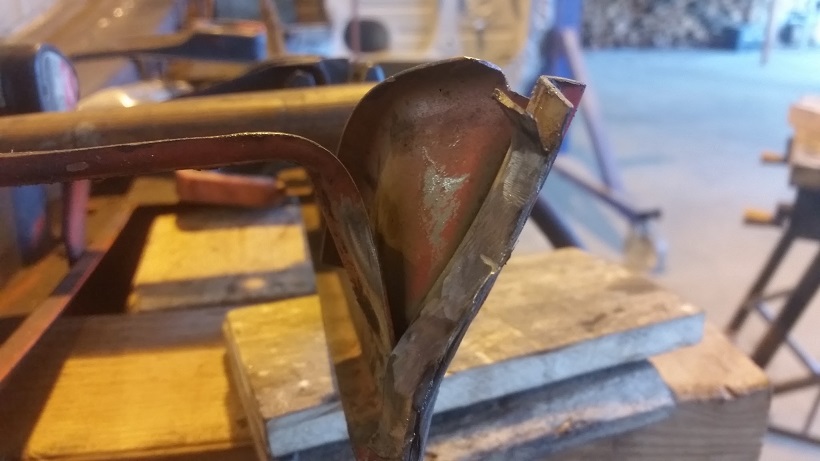
Tow hook removed (yellow) and qtr. panel (blue) that came with the cut out removed.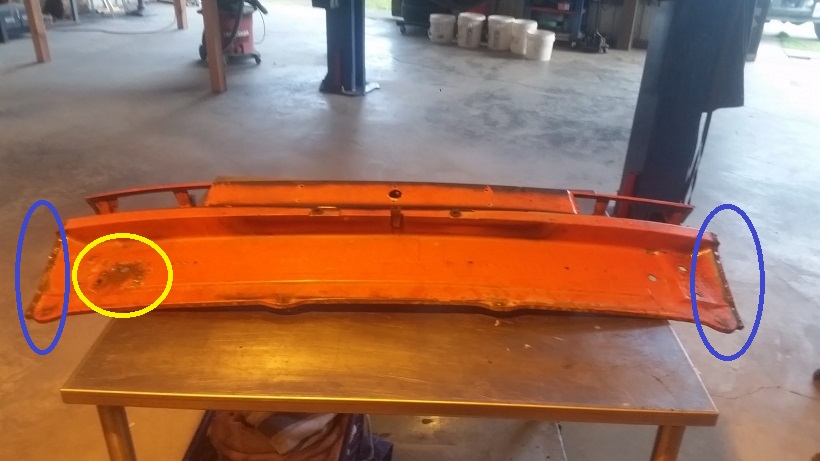
Braces will still need to be removed.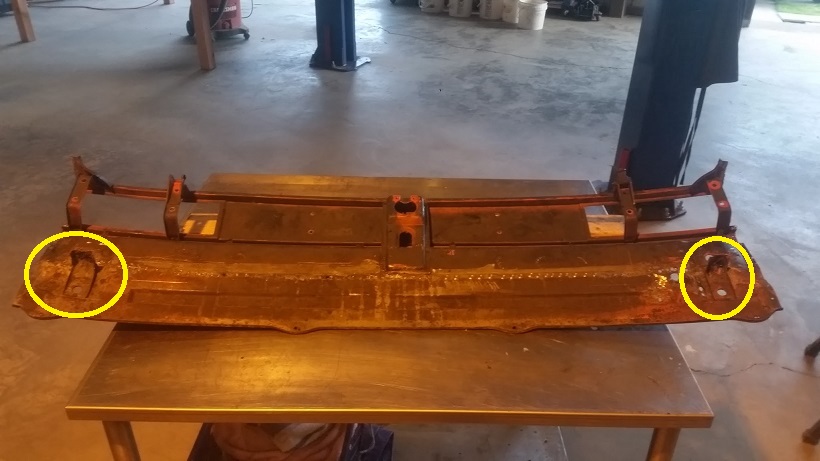
And these braces will need to be transferred from the old rear panel.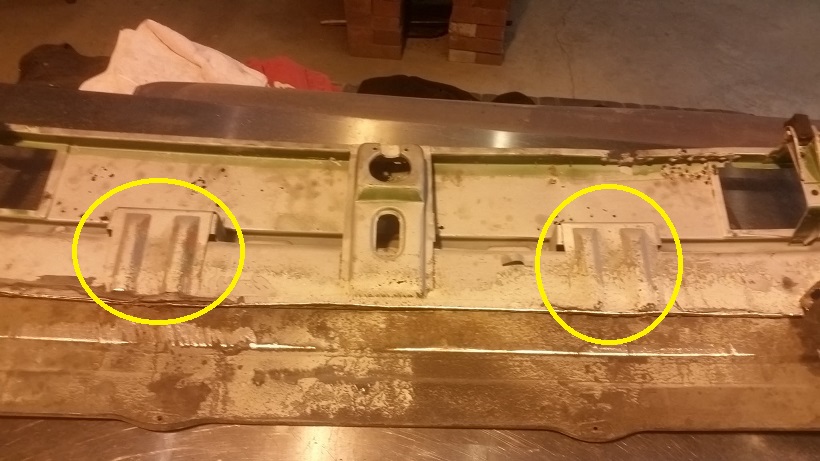
Posted by: cary Mar 7 2016, 10:40 PM
Super In Law finished up the engine shelf.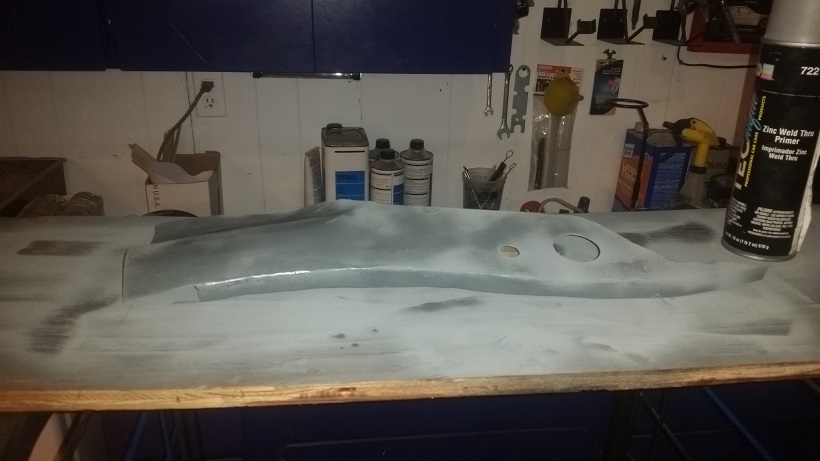
Posted by: Mikey914 Mar 8 2016, 01:06 AM
WOW Cary,
I was not around for a few days and you really kept the project moving. Saw Peter at Design Restoration this weekend and we should have some metal on the way tomorrow. I just need to drop them another call tomorrow.
If Ken needs anything we are not using he can have it. Just let me know and I'll get it out next week for him.
Posted by: Mikey914 Mar 8 2016, 01:11 AM
Looks like I'm in the market for some ss fuel lines now too. I did start the rubber for the firewall on these.
Attached image(s)
Posted by: cary Mar 8 2016, 11:26 PM
Start the day with a break in the rain so I make an attempt to bead blast the rear panel.
Only got the outside completed before the rain came and stayed all day. 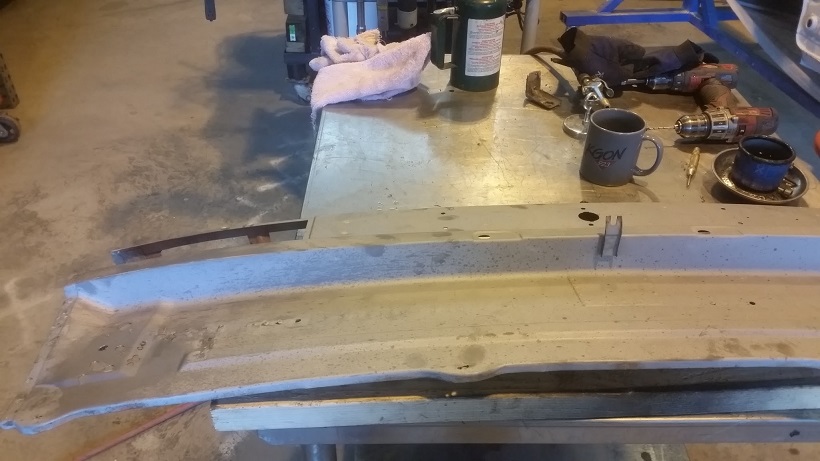
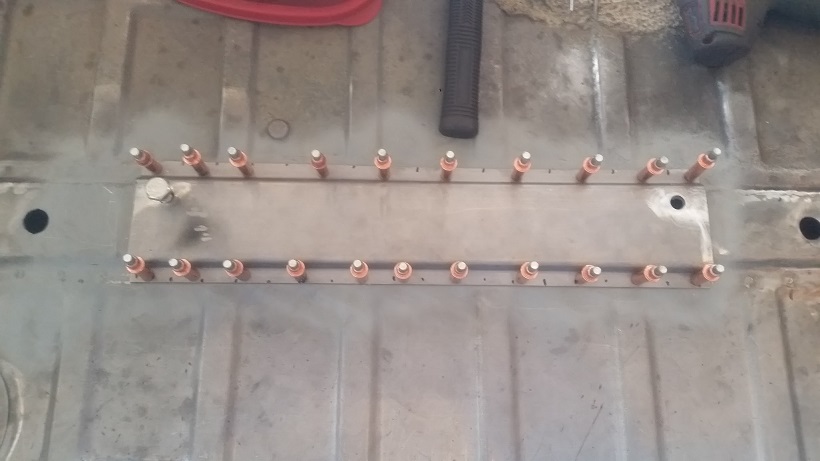
Get my six shooters ready for spot weld drilling ..............
Off comes the braces.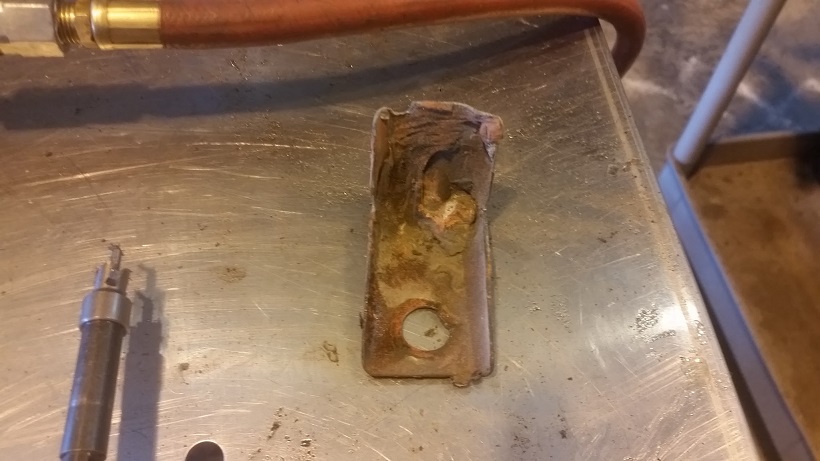
Then I cut the larger braces off the old 75-76 rear panel.
They have to be cut out because you can't get a pry tool into the area called out with the yellow arrow.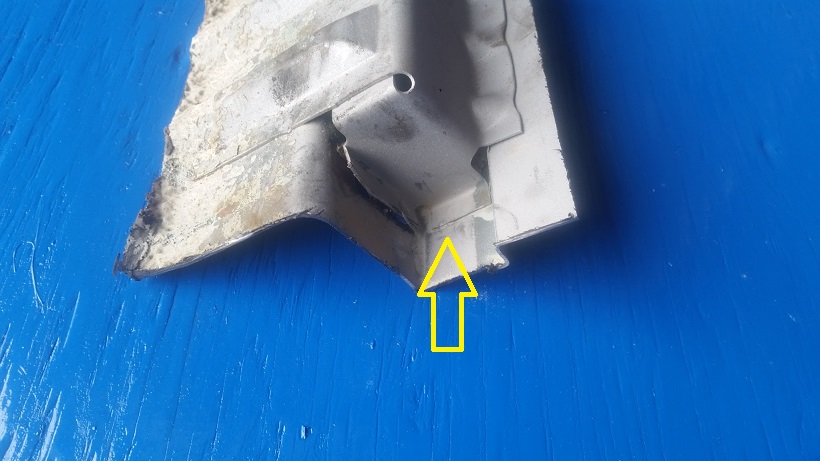
Now you can get at all the flanges when it's in the vice.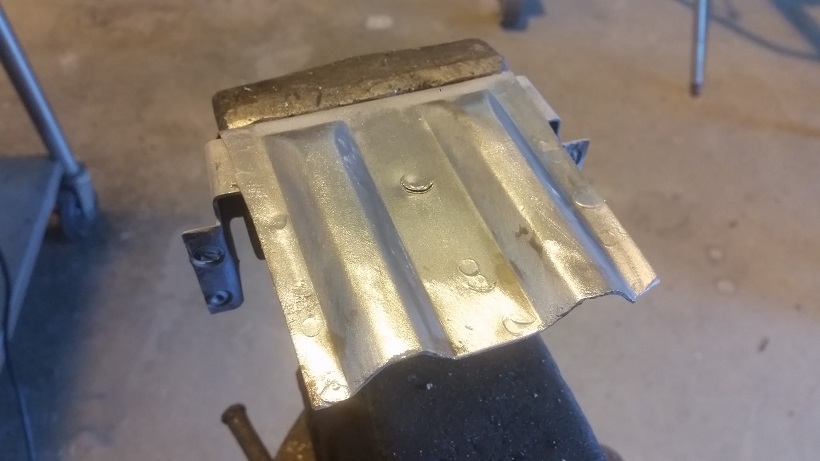
Now all prepped with rosette holes and ready for installation. But it will get a spray down with OSPHO and dry over night.
Posted by: cary Mar 8 2016, 11:37 PM
Now on to filling the holes on the early rear panel we're converting to a 75-76 rear panel.
Dog bone and brace holes filled and ground down.
After bead blasting I find that this rear panel has had a rear PORSCHE refelector at one time. It had quite a bit of filler.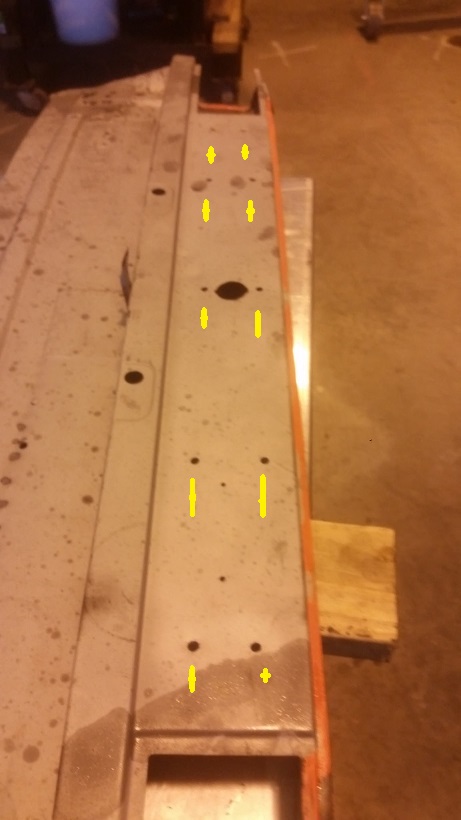
Early bumper hanger has to be removed.
On to filling the left side. Dog bone, brace and toe hook.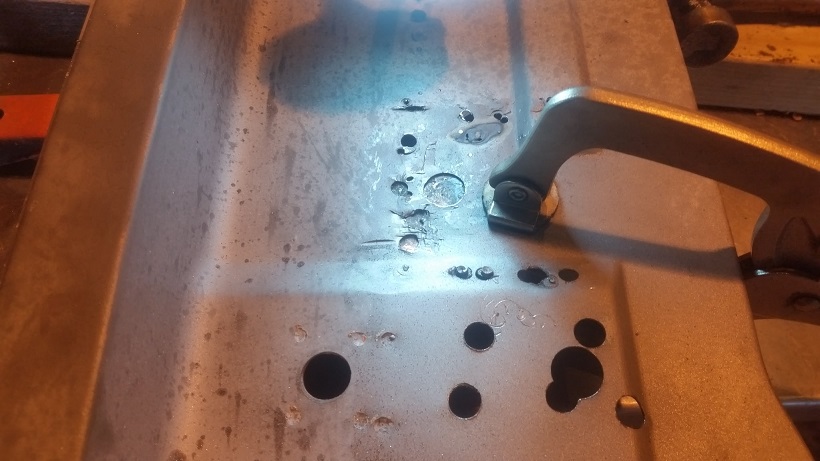
Posted by: Mikey914 Mar 9 2016, 12:11 AM
I'm not a big fan of the rear lenst due to the issues with holes as you can see here.
Attached image(s)
Posted by: Mikey914 Mar 9 2016, 12:12 AM
One of the reasons it looked like this
Attached image(s)
Posted by: cary Mar 10 2016, 08:47 AM
Work continues on the rear panel. Cut up the old to use as patterns for the 75-76 brace hole and rosette holes. They'll be saved for future use. Continued working on the left side of the rear panel. A little tougher work with all those extra holes. I still might cut it out and put in a patch. The metal gets kind of goofy with all those different welds.
This is no charge research time.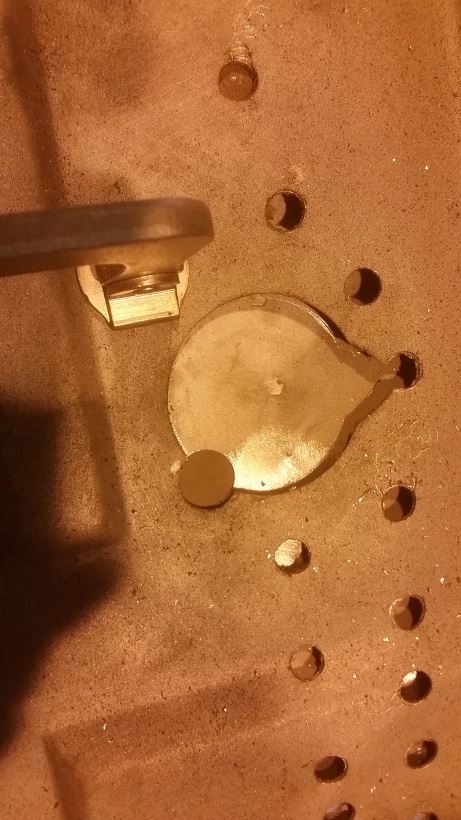
Used the larger hole cutter in the Rotacut kit to make the smaller hole.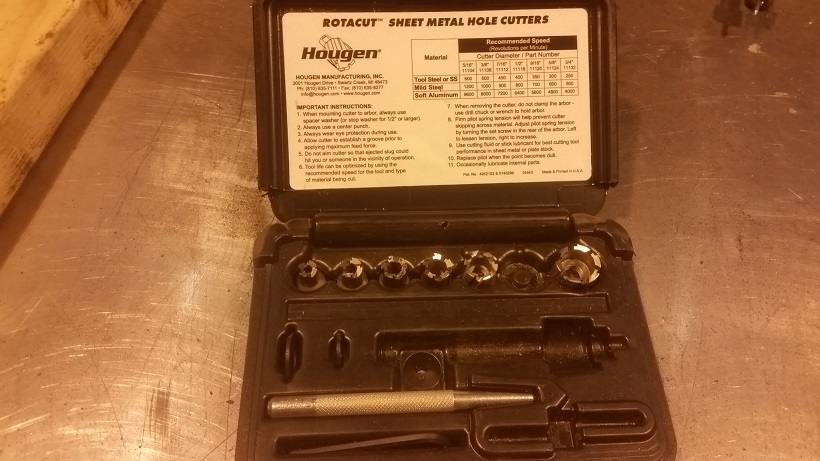
More on Mark's comment. I'm going to fill that cavity with OSPHO and let it do it's thing.
Nothing new till Monday night. A couple job interviews today. Monthly Pelican Burgers and Beer at the Taproom tonight starting around 4:30. Autocross prep and 2 day auto cross this weekend. Weather forecast Saturday 90% chance of rain, Sunday 100%.
Might be time for me to get TTOD. LOL.
Posted by: cary Mar 14 2016, 10:07 PM
Started the day with more liquid sunshine.
So I needed to set up the pop up to shoot some more glass beads. I still needed to get the back side blasted. 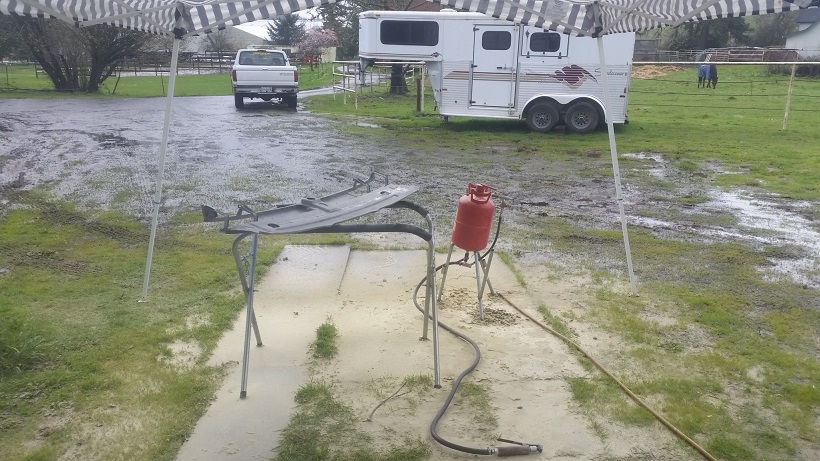
Then I decided to cut out the left side holes I filled. Too many holes, waste of time. It would have taken to much All Metal to get smoothed out.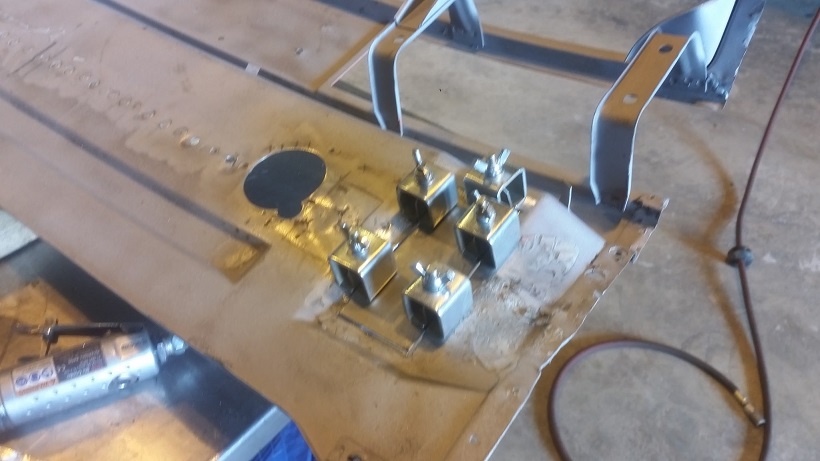
Sorry, a little blurry.
Front side and back side.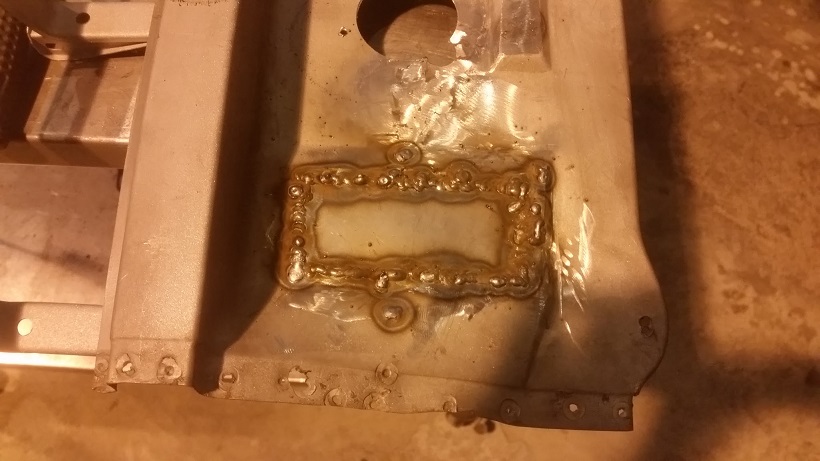
The smoky spot is me hitting seam sealer.
Tomorrows cut out ..............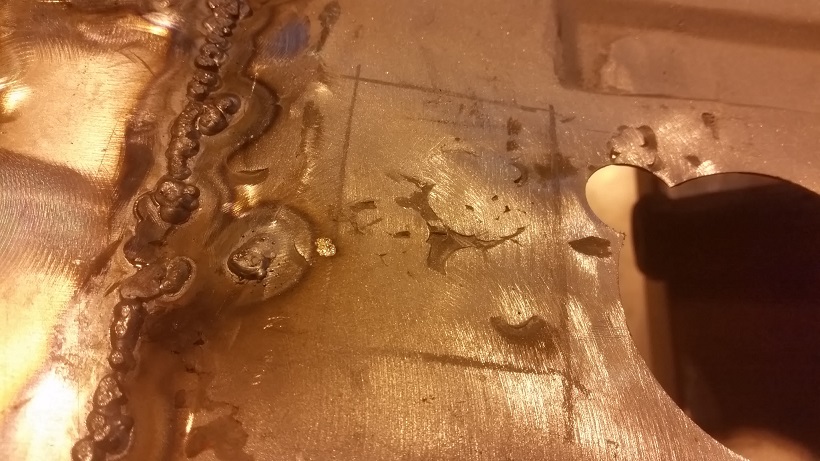
Mark stopped by to drop off the RD order. Then we started to jabber ......
Then it was time to head home for the Trailblazer game. 5pm start.
Posted by: cary Mar 15 2016, 10:32 PM
The RD stuff ...............
I love new metal ....................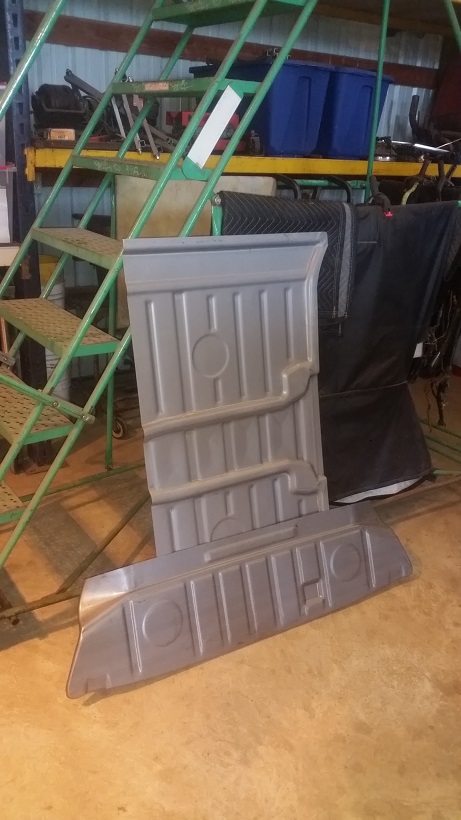
I'll add in a left over door sill left over from the long I bought from Perry. And a battery tray support that I have that I over ordered.
Looks like we'll need an e-brake pivot too. I'll look at the one on my parts car tomorrow. But I have my doubts its any better than one I already have.
Posted by: cary Mar 15 2016, 10:42 PM
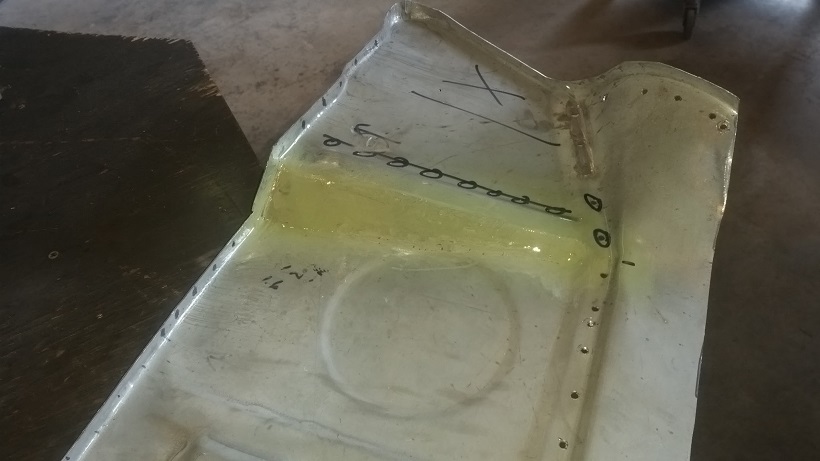
Finally finished up creating the 75-76 rear panel this morning. I'll finish up the final hammer and dolly work after its attached.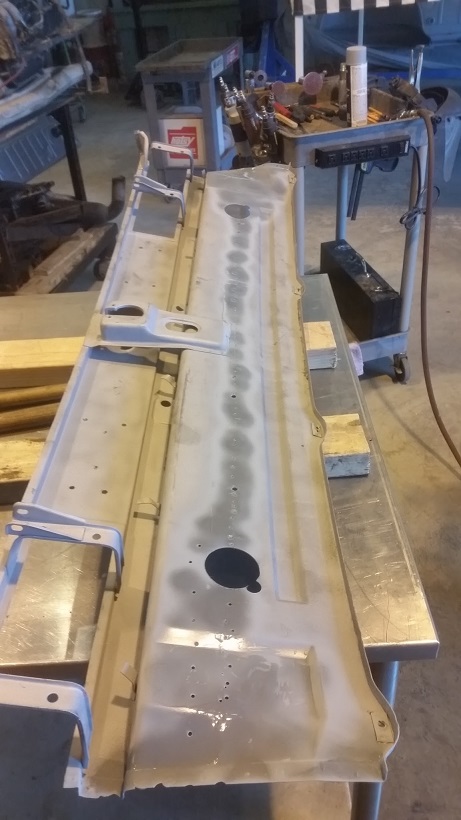
Filled in the old PORSCHE reflector holes.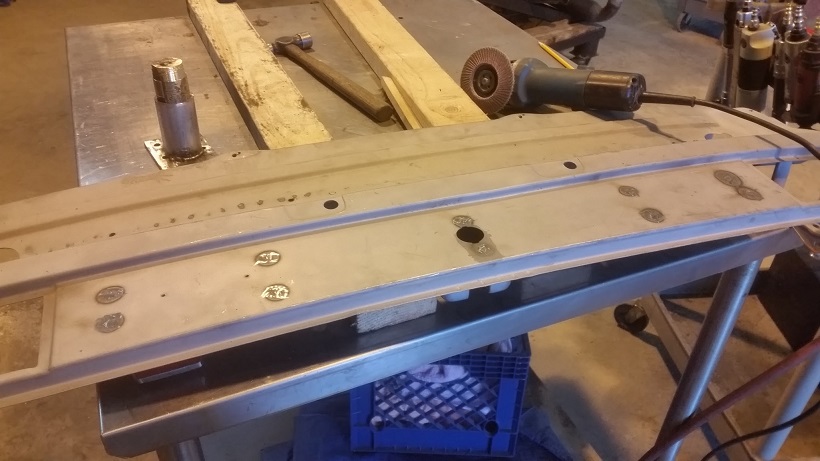
Now in lies the $1,000,000 question. How does one get that bitch in without cutting off the flanges? Hmmmm.
With the quarter panels firmly welded in there isn't any slack to slide the rear panel flanges into the quarter panel sandwich.
Posted by: cary Mar 15 2016, 11:13 PM
Now that I have some new replacement panels we'll start with cutting out the remainder of the trunk. 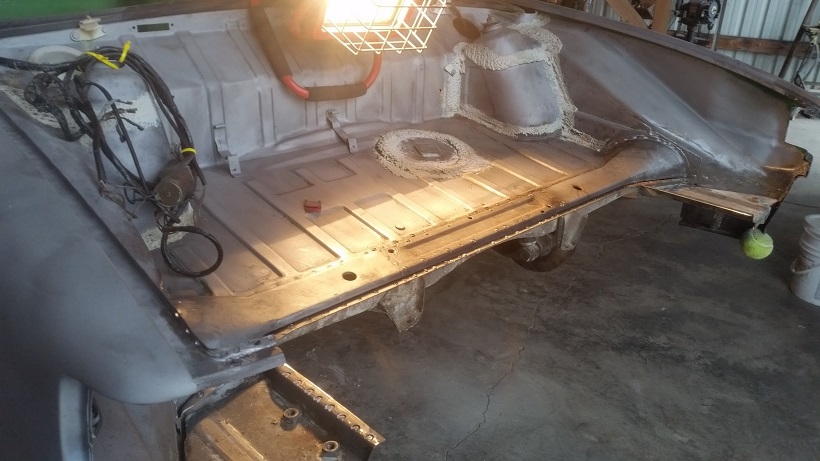
New part laid in for tracing it out.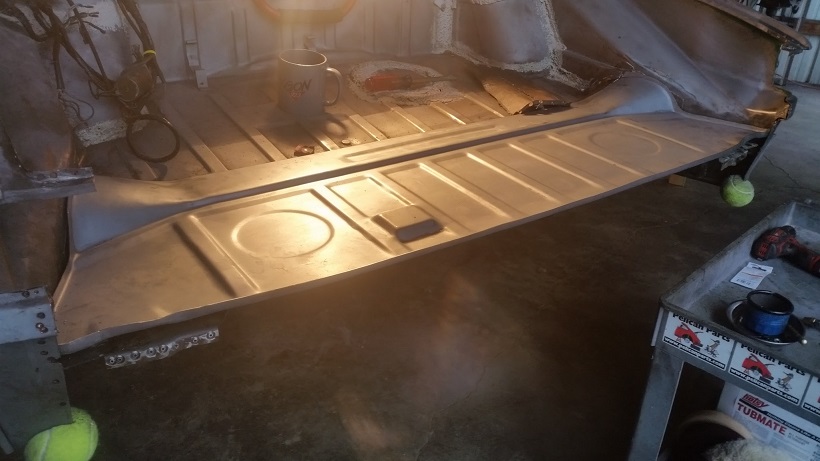
The replacement piece only goes a portion of the way up the rounded support portion.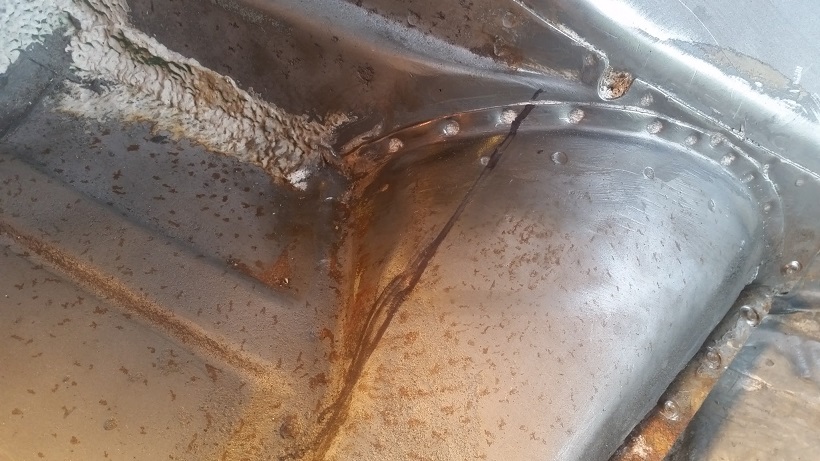
It is a pretty tight cut up against the trunk side panel. So I always keep a few stubby discs for just this occasion.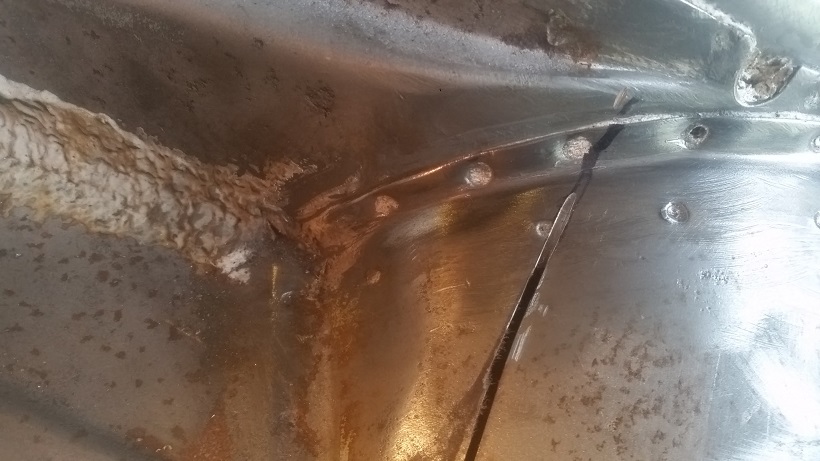
Whoa-law ................. Presently surprised that there was little to no rust inside the transmission support. Just a smidgen of surface rust on the right side.
Not feeling the love on the 75-76 modification to the floor pan, looks to be pretty different. Won't really won't know until it lines up with the rear panel. The sides and the bumper mount pans look Ok. But will the spot weld holes line up?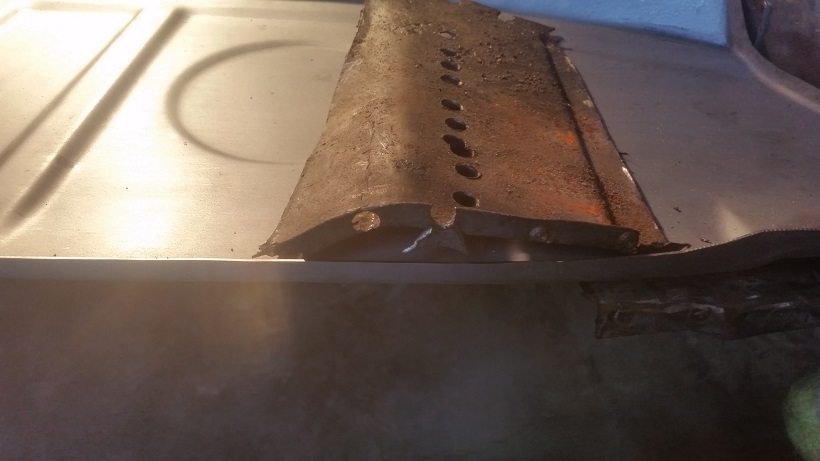
All cleaned out and ready for it's overnight application of OSPHO. The inside will get an application of POR15. I have 4 cans that I haven't been using, but this is great spot for it.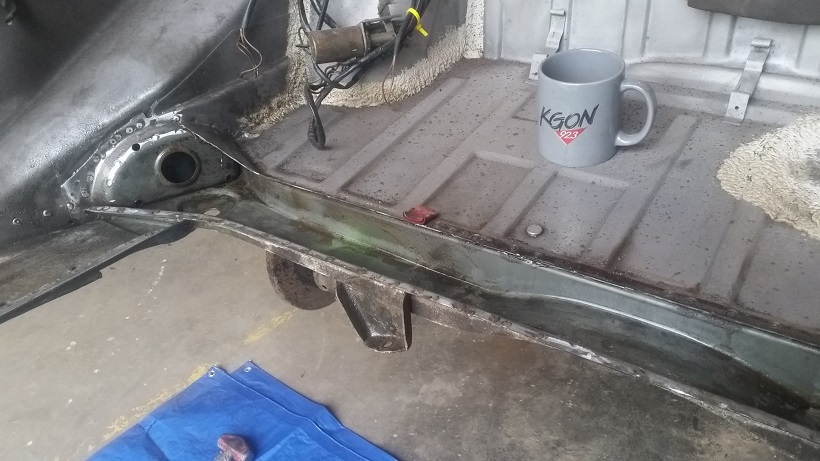
Posted by: cary Mar 15 2016, 11:18 PM
I wish the replacement panel was just a bit longer so I could have replaced this too.
I'll see if I can do some grinding and wire cup work make it look more presentable and last another 40 years.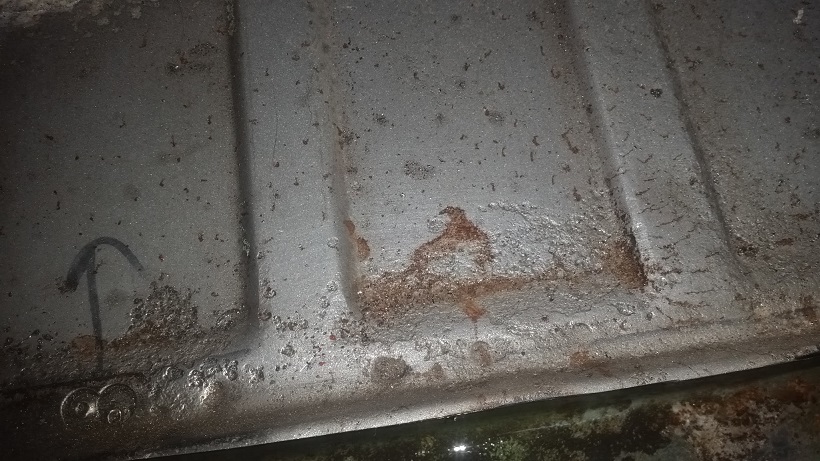
Posted by: cary Mar 17 2016, 09:49 AM
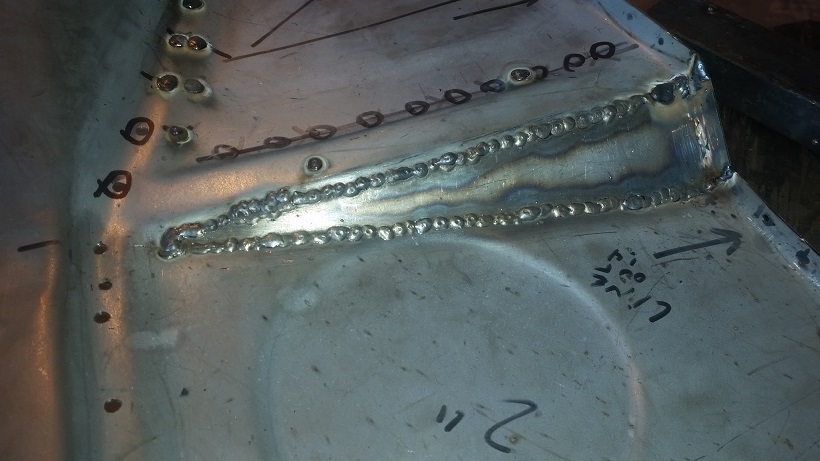
Rear Taillight Panel Install
Ready to go .............
So we start with trimming both the qtr. panels and the refurbished taillight panel. I've kind of been dreading this. The bottom and the middle are easy. The top channel is pretty small and thin. I've determined that I'll split the double layer inside the trunk channel for my welding points. Top layer is the qtr. panel. Bottom is the tub.
Cut#1 is removing the tail left on the taillight panel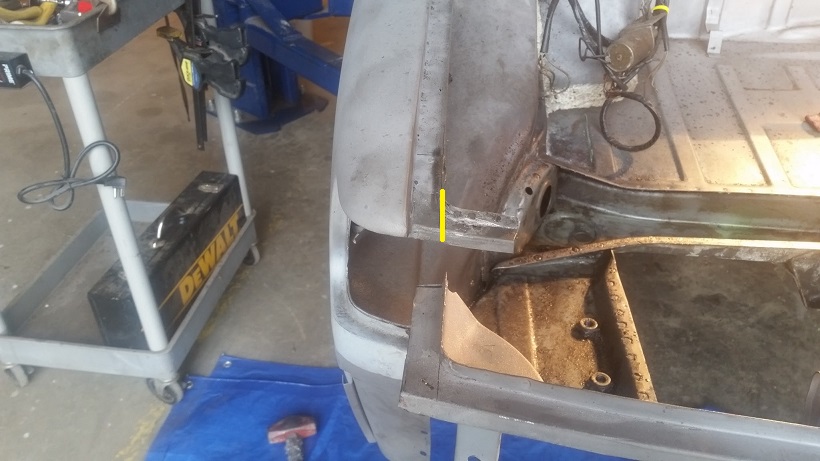
Cut#2 - Removing the channel flange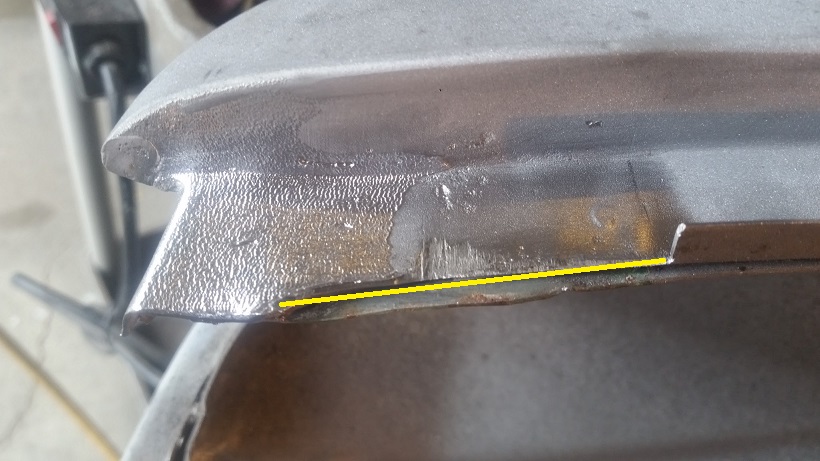
Next task is To Get The Lead Out ............
Super In Law handles it .......... Old School torch it and pull it out with a wire brush.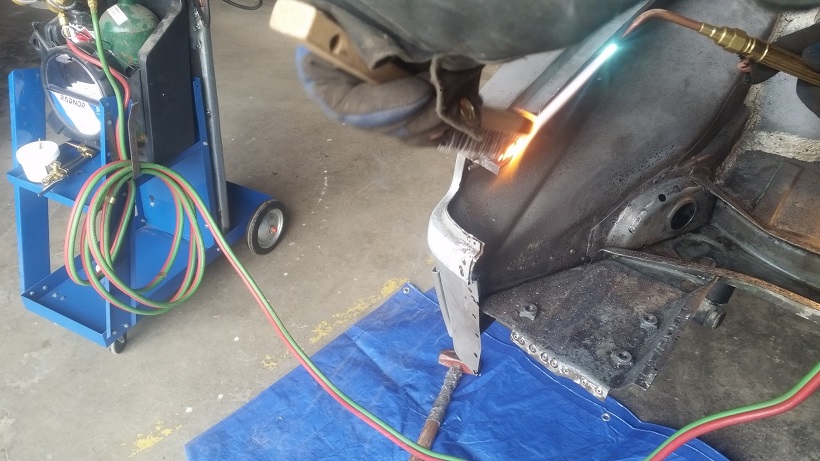
This what you see under the pretty lead finish. I'm thinking I'll get the new fake lead kit from Eastwood and try to replicate it. Leaving it would create a low spot for water to collect under the seal.
Then I went about cleaning (the best I could) the insides of the panel sandwich with the air saw. Pulled out lots of seam sealer. I didn't get it all, had some come thru on my welding and contaminant the weld (pin holes).
With both qtr. panels trimmed up I could now lay the taillight panel into it's new home and take measurements for the cut out of the channel. Prior to the test fit I had cut the channel portion in half with the cut off wheel.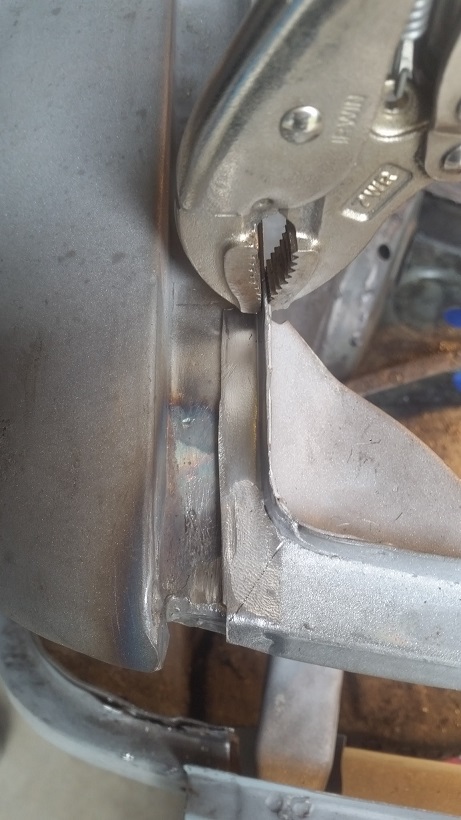
The pencil line is were the factory spliced them together under the lead. So they would have torch welded in the diagonal cut, then spot welded in the support corner. If they had been a little more precise with the spot welder, removing the support corner would have been a better route. But because these were hand built cars, they on occasion lay one spot weld on top of another. Which makes a big frikking ass mess trying to drill out the spot welds. Leaving you with just about nothing when your done.
Here's a couple shots of the channel cut out. Just lightly make the cut on the scribed line. Then peel if back with the wood chisel or small screw driver.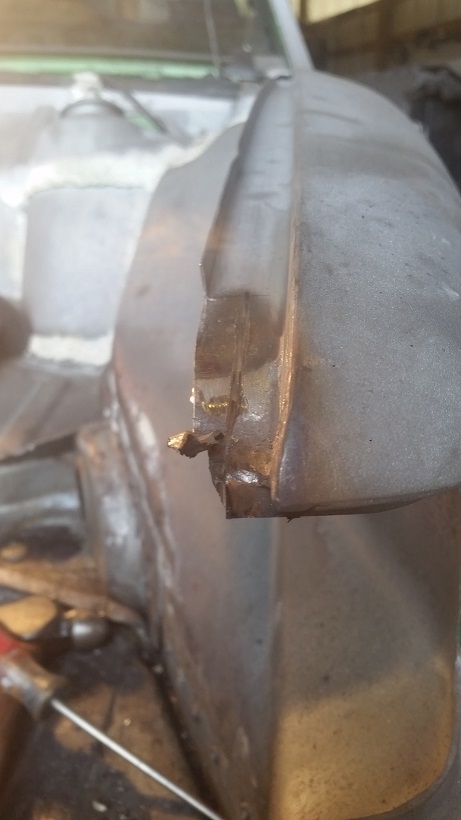
Once again being of the IE mind set. I have multiple die grinders all with different size wheels. So I can jump to different sizes as I'm cutting up against different angles.
Posted by: cary Mar 17 2016, 08:19 PM
Ok, now back to documenting Wednesday's work.
Now we move to positioning the rear panel .............
1st., I opt to spread open the middle channel on the left side. No particular reason.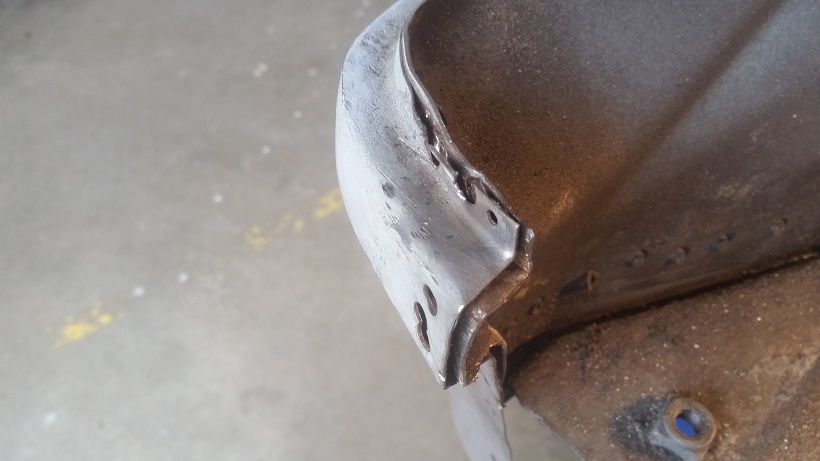
After a test fit I decide I'll need to trim a bit off the right side. 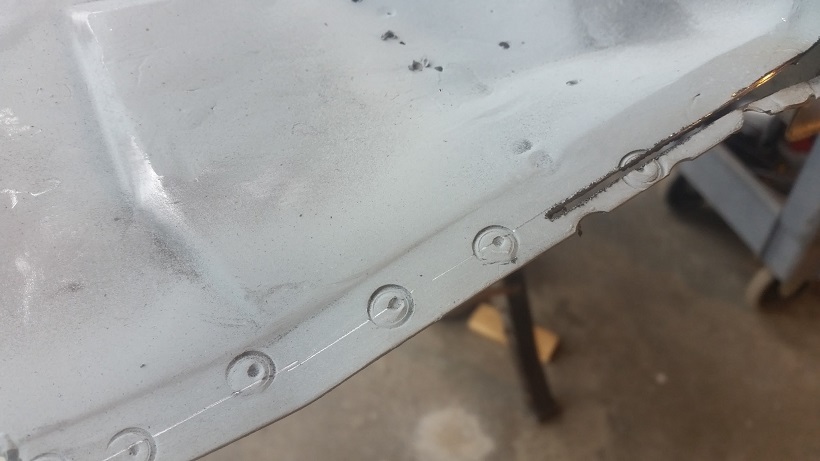
I proceed to slide the left side in as much as I could.
I did need to trim a bit of the excess off the tub flange under the trunk seal channel. This allowed me additional movement to the left.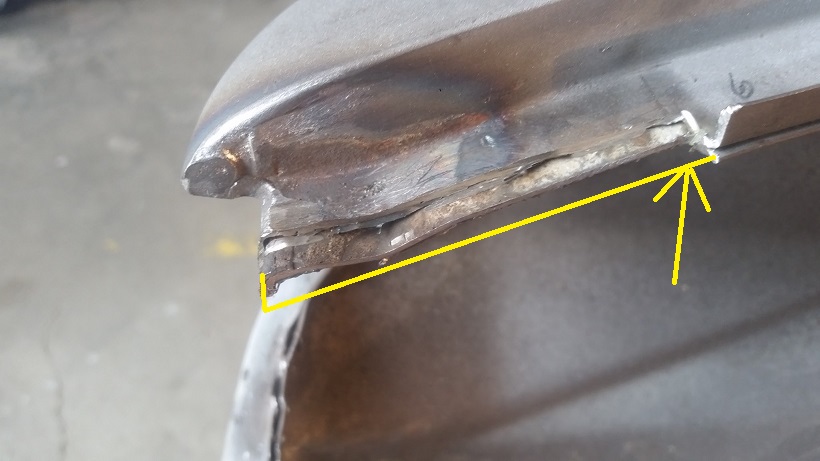
There she is. A little persuasion with a wood block against the latch support and she slid into place. 
Here's a shot of the right side channel. Looks like I cut on the wrong side of the line. 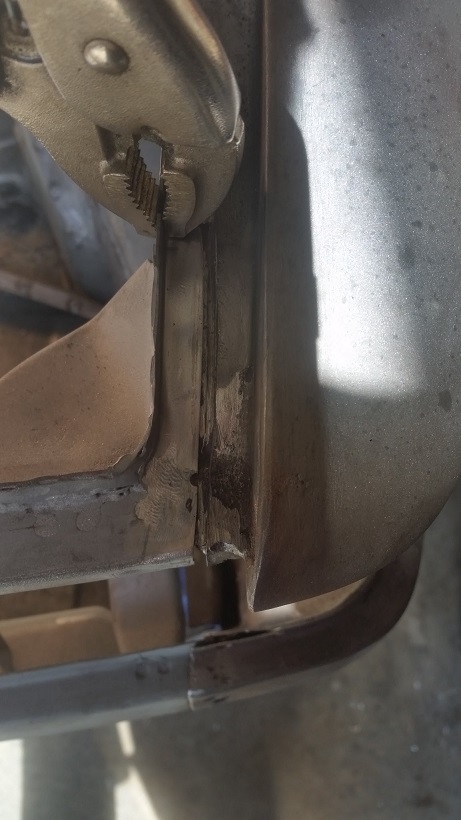
All Clecoed in and ready to start welding.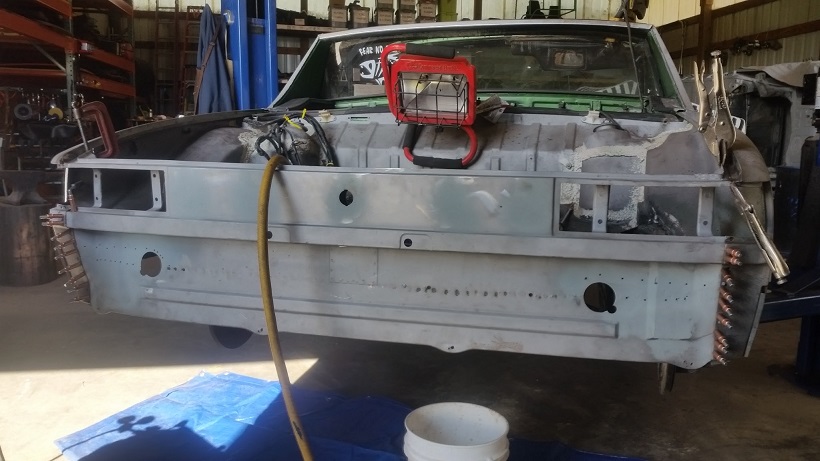
Posted by: Cairo94507 Mar 17 2016, 09:01 PM
Wow, that is some really nice work. 
Posted by: cary Mar 17 2016, 09:05 PM
Wow, that is some really nice work.
Thank You ................
Posted by: cary Mar 17 2016, 09:21 PM
Now its time to fire up the electric glue gun ................
Right and Left side trunk channel tack in welds.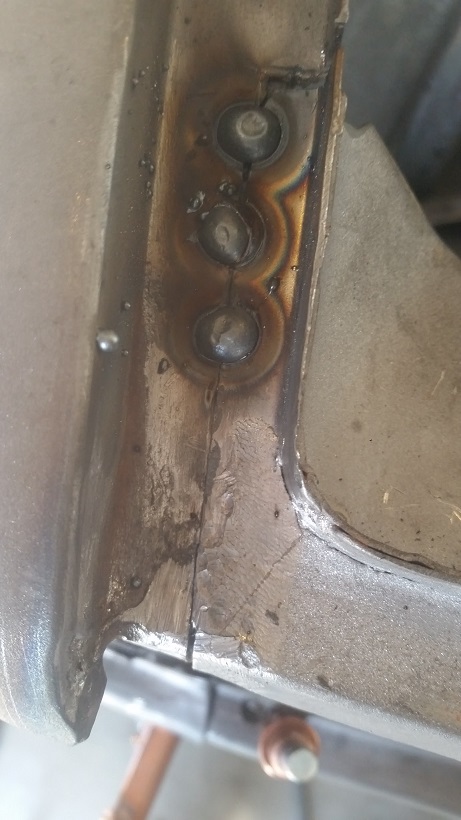
We did have to fire up the torch to remove that lead still on the tail light panel.
Blip, blip, blip ..........
Trunk channels all ground down and ready for leading .........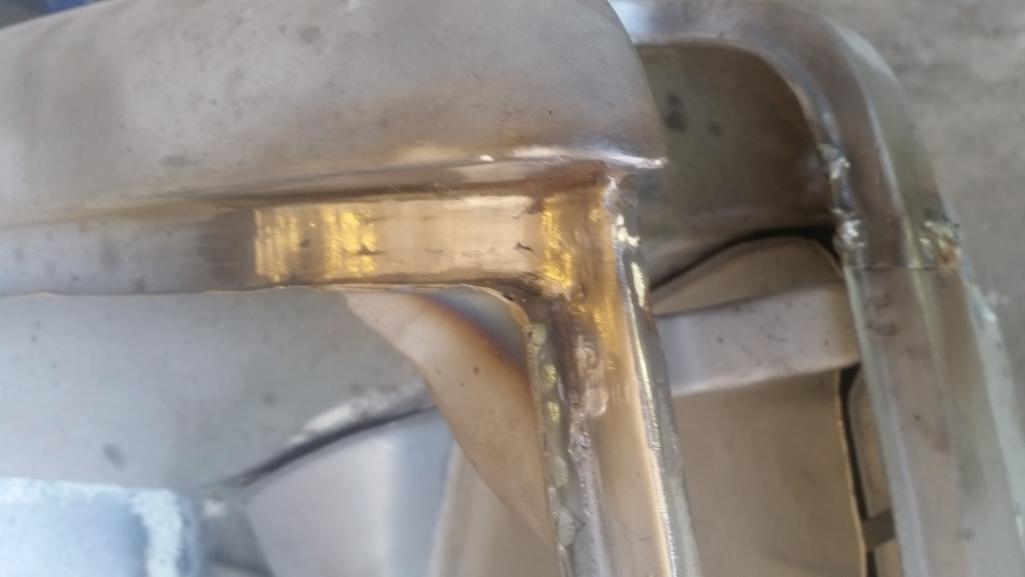
Here's a shot of one of the welds that has a little contamination from the seam sealer.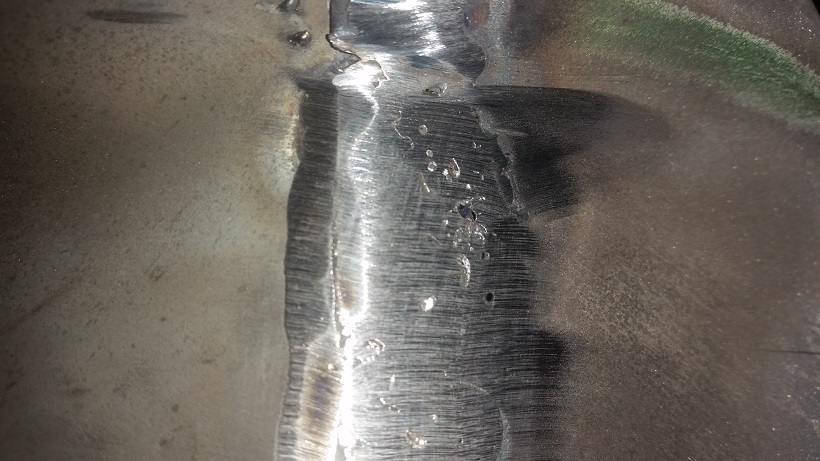
I'll come back and add a beauty shot. All finished ................
Posted by: cary Mar 17 2016, 09:32 PM
While welding I find another problem. The right side tail light frame is bent. 
Left side ..............
After a little Tool Whore adjustment ............
Posted by: cary Mar 17 2016, 09:55 PM
Now on to fitting the rear trunk panel. Looks like using the RD PP335 in a 75-76 will take some extensive fitting. I think that's how Adam from RD describes it.
First observation. With the impact bumper supports in play, the new trunk panel will be located quite a bit higher than either the pre 74 or the 75-76 position.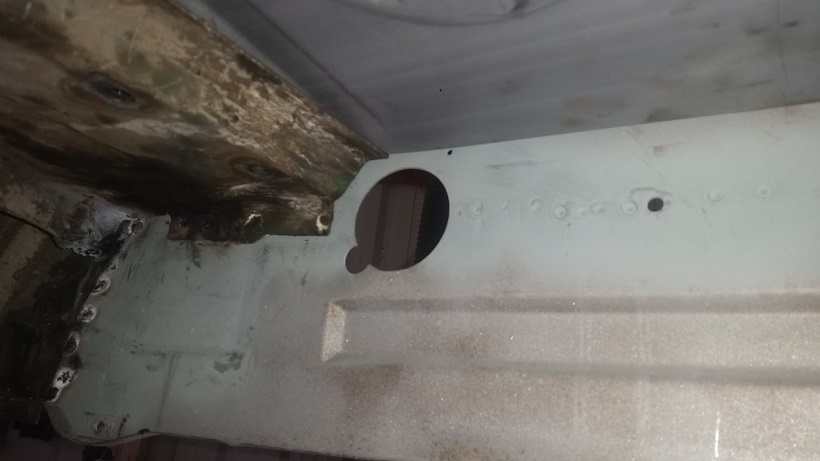
I'll needed to trim around the latch support and create a new flange.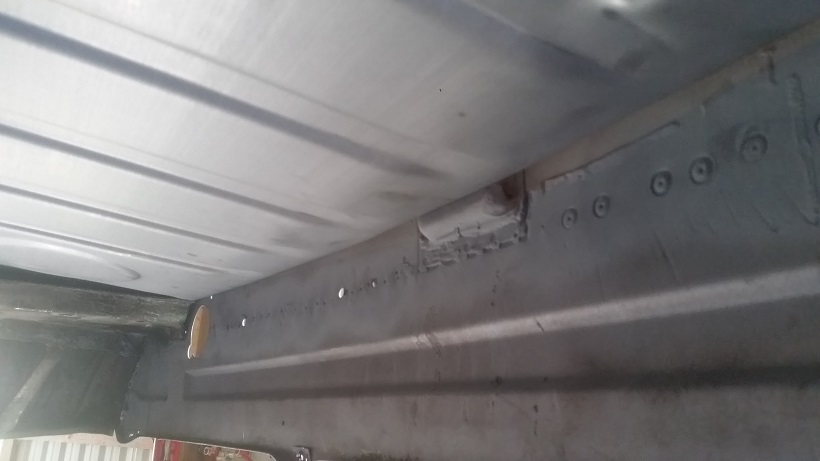
Shot from above.
Back flange needs a little fitting.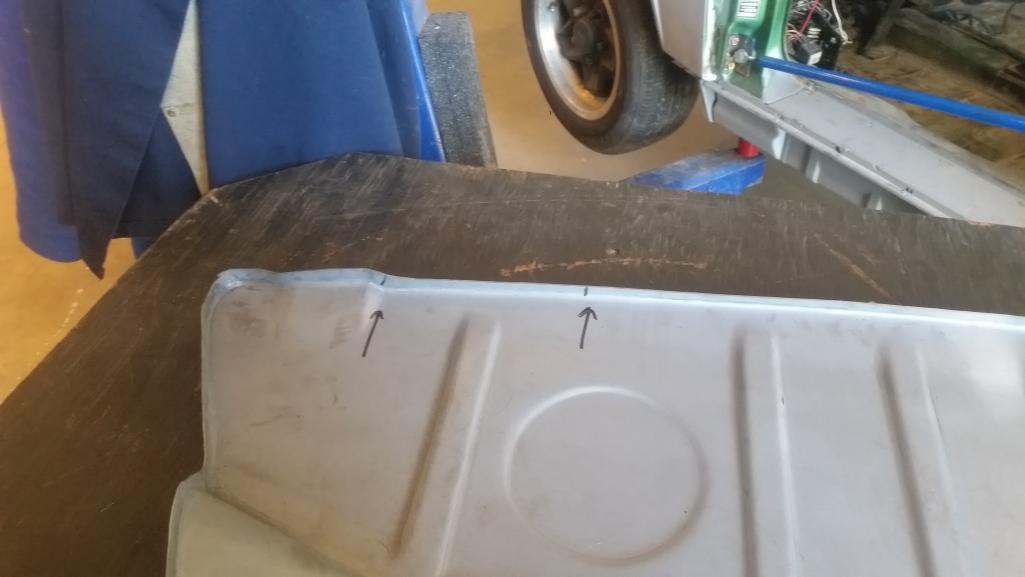
This is what I would call extensive. The question is can I fold down the flanges to fill the void. Or will I need create a couple of new corners.
Posted by: cary Mar 17 2016, 10:02 PM
Before I head out the door I POR15 the transmission mount and impact bumper supports. As not to waste the POR15 I use the remaining POR15 to coat the inside of a few other pieces.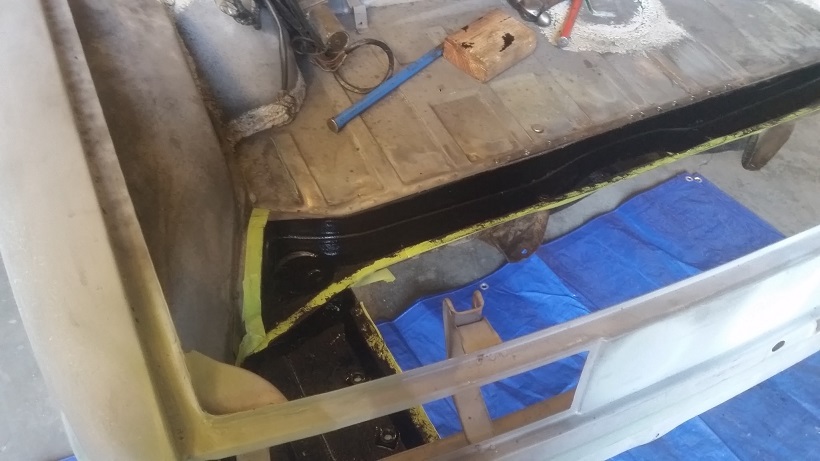

Posted by: cary Mar 17 2016, 10:15 PM
As I was doing my thing, Super In Law broke down Mark's drive train.
It will get steam cleaned and new fuel and vacuum lines before it is mounted back into the car.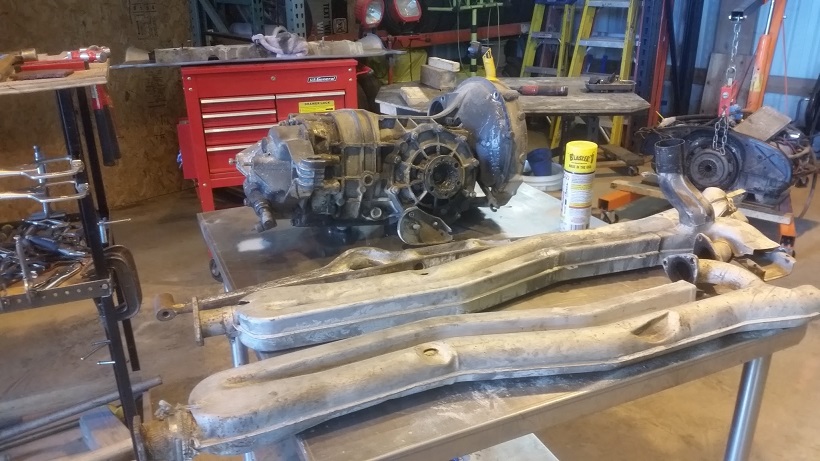
Mark I'll need a new pair of engine mounts. One was cooked, long stud spun inside the rubber mount. Other is looks original too.
I'll start another thread to ask some questions about the 75-76 HE's.
Posted by: cary Mar 17 2016, 10:55 PM
I really like your work Cary and all the pictures/details you put in. Gonna really enjoy this thread.
Maybe when you're done with Mark's car you can do mine...and hey i've already bought a good amount from RD already, just need to cut and glue it into the car! haha
PM Sent
Posted by: raynekat Mar 17 2016, 11:39 PM
Looking good Cary.
That rear end repair you are doing on Mark's car is exactly what my car will be needing one day as well.
Well done.
Appears like a lot of painstaking work....
Posted by: Mikey914 Mar 18 2016, 01:45 AM
Thanks Cary,
I really appreciate your attention to detail, and what other "shop" would be posting progressive pictures as the work is done.
Just build the shopping list and I'll begetting you more stuff.
Mark
Posted by: BeatNavy Mar 18 2016, 03:53 AM
Awesome job, Cary. I love seeing the progress in detail. I'm really hoping I don't have to tear into my trunk on my project car (or my DD for that matter) like you're doing, but if I do this helps a lot.
Posted by: sixnotfour Mar 18 2016, 05:36 AM
Cary, Great job , I think the rear trunk floor is gonna be an aesthetic regret...
check the photo of the OG floor it has a transition down to the proper trunk floor height... If you make a cut front to back ( like you previously did ) and push down the floor then fab some filler pieces it will be like it should for a BUB 914... Carry On
Attached image(s)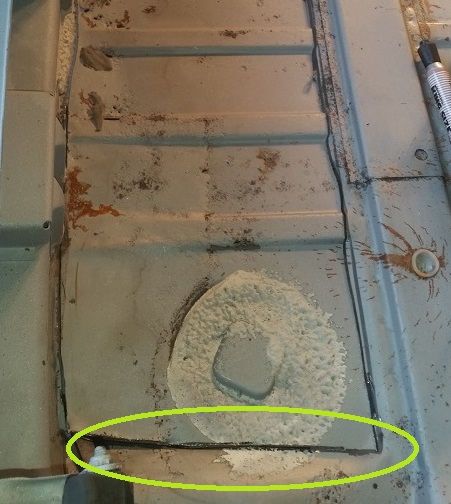
Posted by: 914werke Mar 18 2016, 07:31 AM
BTDT on the R. trunk floor repair for the late BUB equipped car.
After looking at how to alter a new repop panel intended for the early chassis
determined it was PITA & punted. Found a good R. clip to scab instead.
As the cars continue to go up in popularity (& value) perhaps the R trunk pan for the late car is another item Pete (RD) can consider reproducing
Posted by: cary Mar 18 2016, 07:44 AM
Cary, Great job , I think the rear trunk floor is gonna be an aesthetic regret...
check the photo of the OG floor it has a transition down to the proper trunk floor height... If you make a cut front to back ( like you previously did ) and push down the floor then fab some filler pieces it will be like it should for a BUB 914... Carry On
Hmmmmm ................
I'll pull up the pad in my 73 and take a look.
Posted by: sixnotfour Mar 18 2016, 12:28 PM
Cary,your 73 should look like the RD panel..75-76 BUB 914's trunk panel is unique..
here is somepics ofa 76 trunk and the transition I mentioned
drivers side
Attached image(s)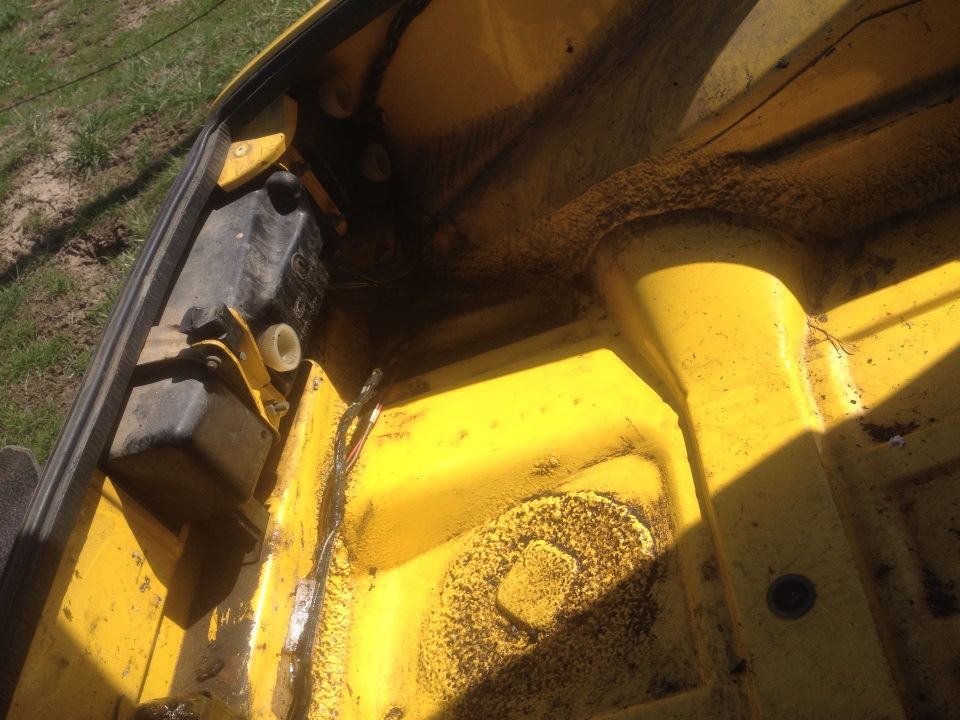
Posted by: 914_teener Mar 18 2016, 01:33 PM
Wow....that IS different.
Nice work Cary.
Posted by: cary Mar 18 2016, 02:09 PM
You guys are making more work for me ... LOL
It has to be modified. You'd have to cut around and flange the big bumper braces too.
Today was supposed to be shop clean up and resupply day.
But nooooooo I dug out the drop down pieces from the scrap
barrel and I'm making up some sketchs. Once I locate the front and
back points. It should be pretty simple.
Posted by: sixnotfour Mar 18 2016, 02:35 PM


You wouldn't Mark to send you a leaky rubber now would you ??
Posted by: cary Mar 18 2016, 06:40 PM
Here's the shot I forgot last night.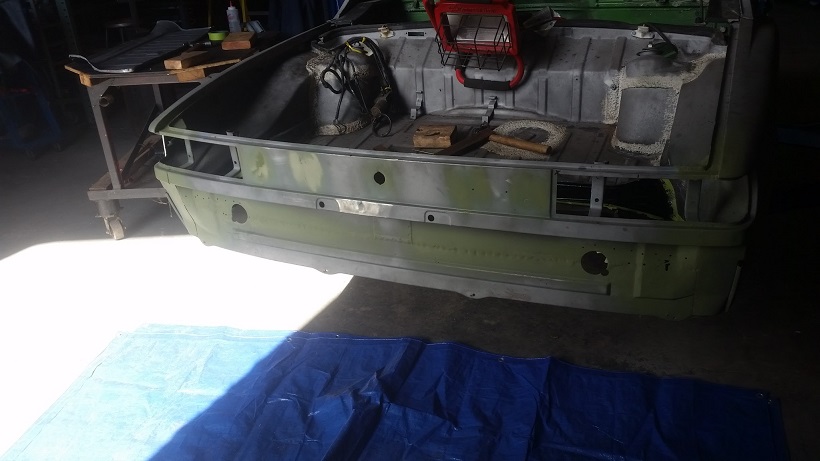
Posted by: cary Mar 18 2016, 07:19 PM
Modifying RD PP335 to replicate the 75-76 rear trunk :
After this mornings input we have a plan to replicate the 75-76 trunk the best we can. Thanks, sixnotfour.
I don't think it will be that tough.
First issue is locating and welding in the 75-76 tail light panel braces. I forgot about them until I was scrolling thru my picture file this am. They were in the back of one of the trays on my parts rack.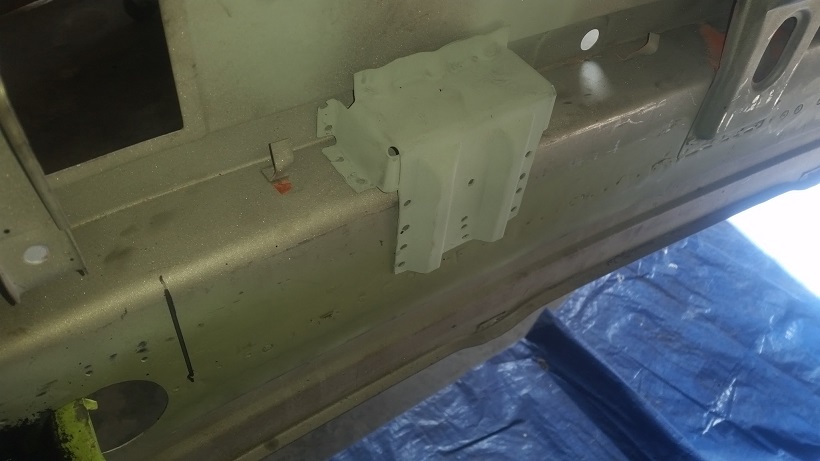
Now for creating the drop down portion of the trunk. I decided to clean up the 75-76 portions that I cut out during the cut out of the old trunk. I decided that anything I keep for patterns and fitting will be painted my signature Ford blue.
#1. I'll make a cut at the base of the rib. Not exactly the right location compared to the samples. But it will look real sanitary. Down the black line, plus thru the flange.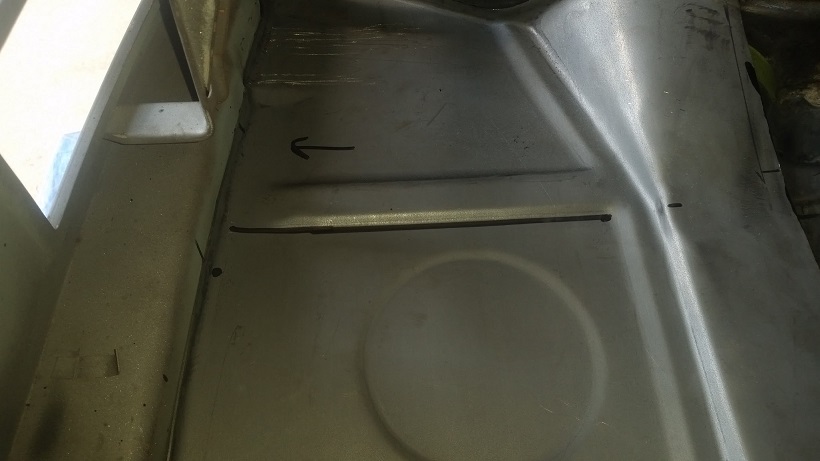
After making both these cuts I'll be able to bend the panel down into the correct location. There's about 100  spot welds to use as for alignment.
#2. Once I have the panel in position I think I'll end up with the area in the triangle to cut out. This piece will be fabricated to replicate the 75-76 sloped area.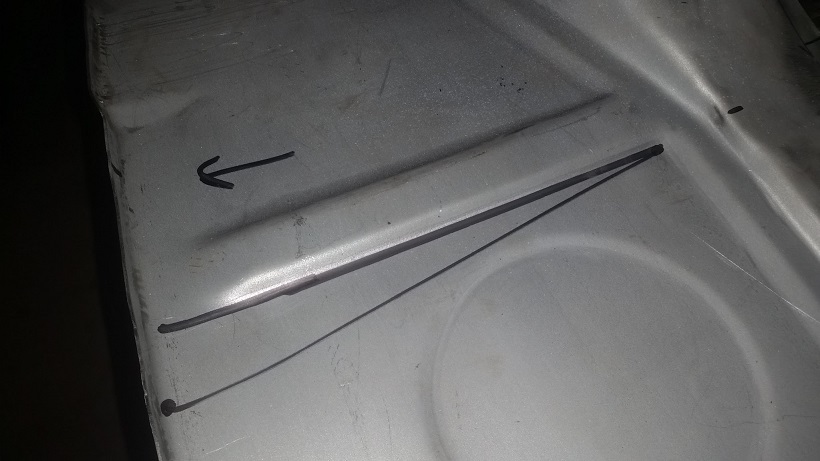
Looking at sixnotfour's picture I may run the other long line right against the hole plug area.
Posted by: bigkensteele Mar 18 2016, 07:38 PM
Mark's staying with the 75-76 bumpers. So we should be able to accommodate your request. If not this car, there should be one on my parts car.
The took hook receiver only ? Or do you need the braces too ?
Sorry - haven't been on in a while. I would probably need the braces as well to make it a functional tow-hook. I back-dated my '75. Could use the middle bumper brace as well if it is still intact. Thanks!
If you can come up with a tube with 10mm threads you could put the two halves to good use. I can refurbish the two halves if your still interested. Fill in spot cutter holes. bead blast and prime.
Yes, I would be interested in having them refurbished, and I would gladly pay you to do so. However, I am in absolutely no hurry for these parts, and I would not want to take you off task. So, whenever you get around to it is fine. If you really don't think it is worth the effort, that is fine as well.
If Ken needs anything we are not using he can have it. Just let me know and I'll get it out next week for him.
Thanks, Mark!
Posted by: cary Mar 19 2016, 08:39 AM
Mark's staying with the 75-76 bumpers. So we should be able to accommodate your request. If not this car, there should be one on my parts car.
The took hook receiver only ? Or do you need the braces too ?
Sorry - haven't been on in a while. I would probably need the braces as well to make it a functional tow-hook. I back-dated my '75. Could use the middle bumper brace as well if it is still intact. Thanks!
If you can come up with a tube with 10mm threads you could put the two halves to good use. I can refurbish the two halves if your still interested. Fill in spot cutter holes. bead blast and prime.
Yes, I would be interested in having them refurbished, and I would gladly pay you to do so. However, I am in absolutely no hurry for these parts, and I would not want to take you off task. So, whenever you get around to it is fine. If you really don't think it is worth the effort, that is fine as well.
If Ken needs anything we are not using he can have it. Just let me know and I'll get it out next week for him.
Thanks, Mark!
I think the little centering support is at the bottom of the scrap can. But I'll look in one spot that I might have set it aside. I don't throw too much away.
I'll do some digging into finding a tube with 10mm threads. Without the tube we can't create you the tow hook.
Posted by: trojanhorsepower Mar 19 2016, 07:38 PM
Great work Cary!
Posted by: cary Mar 19 2016, 08:49 PM
Great work Cary!
Thanks ..............
Ken looks like we can create you a tow hook by using the back (with tube
attached) from my parts car. And the front side from Mark's new tail light panel.
I used the plasma cutter to cut it out of the parts car.
It's your lucky day ............ the hanger tab was still under the 75-76 bumper that was hanging on the parts car.
Posted by: nihil44 Mar 20 2016, 03:12 AM
I am a little lost.
I have a '76 which I am proceeding to 'restore'. I will be buying the P335 from RD and I wouldn't have noticed the small qualification on the website "and with modification 1975-76" without following your thread.
I am appreciative of your high lighting this little nuance but am not quite sure where the difference lies and how to remedy it.
It should be the responsibility of RD to guide its customers on how to manage this problem but would appreciate some guidance.
Hope some help will be forthcoming from the community.
I appreciate the 'all for one and one for all' ethic of this community
Posted by: cary Mar 20 2016, 07:49 AM
This project is exacerbated by the fact that we're replacing the rear tail light panel too.
But after a little R&D on Friday I don't think it will too tough to replicate. In the essence of time I won't be able to completely replicate the rolled corner. The circled area.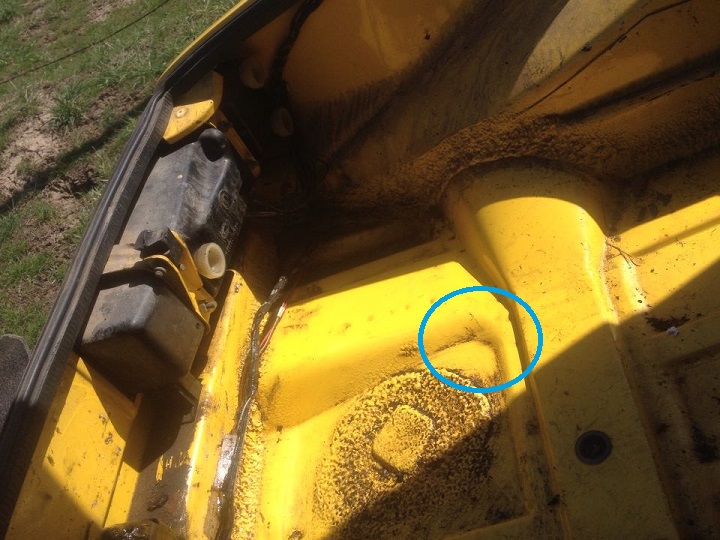
I'm going to focus on these two measurements when I create the triangle piece.
I think I'll contact RD and see if they can chime in and give us there thoughts on the 75-76 modification.
Posted by: sixnotfour Mar 20 2016, 01:50 PM
They will say ...yes that what you need to do....
Posted by: nihil44 Mar 20 2016, 04:31 PM
Cary,
Just took a pic of my '74 floor which has been repaired with the RD panel. The difference is quite marked.
Thanks for spotting the difference. I bet I would not have noticed
David
Attached thumbnail(s)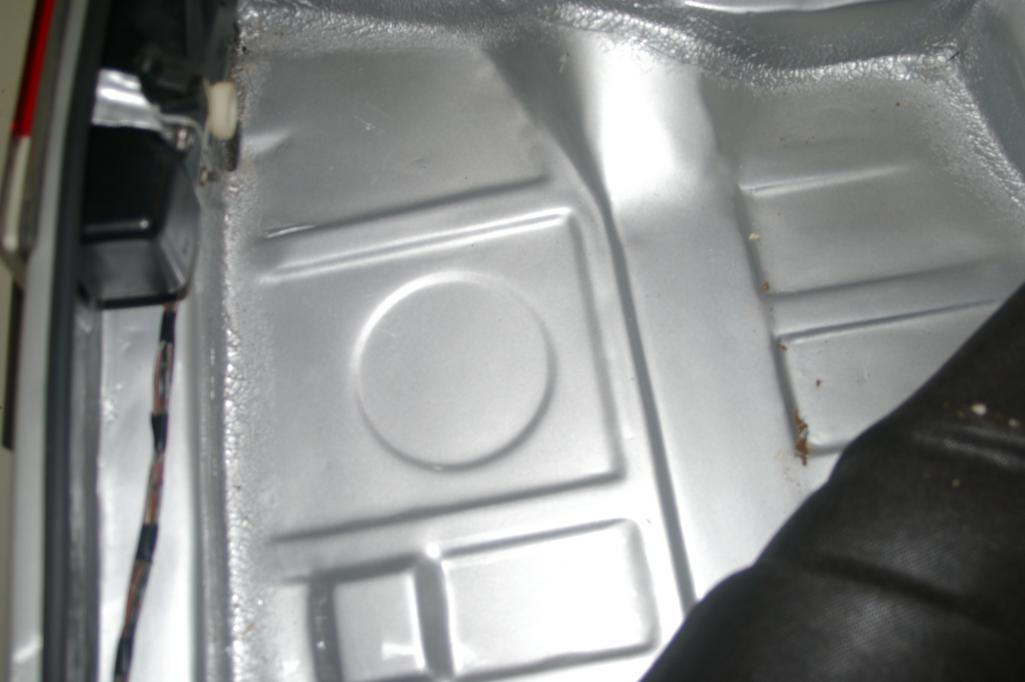
Posted by: cary Mar 21 2016, 11:22 PM
Modifying RD PP335 to replicate the 75-76 rear trunk : Part #2
I start the day with measuring the portion to be cut out. It's kind of a two step process.
First I need to temporarily install the tail light panel supports. This will dictate the finished level of the sloping trunk.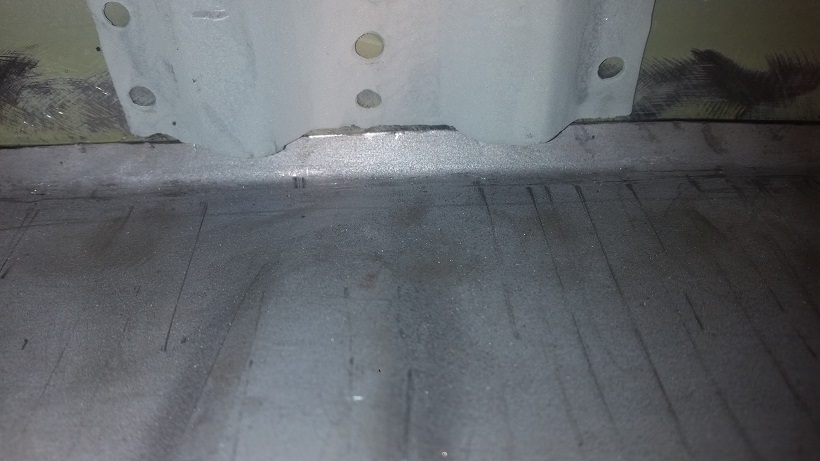
When we slope the trunk we have another geometric problem. The panel then becomes a smidgen short. I'll elaborate on Part #3 tomorrow. Here's a shot for a teaser.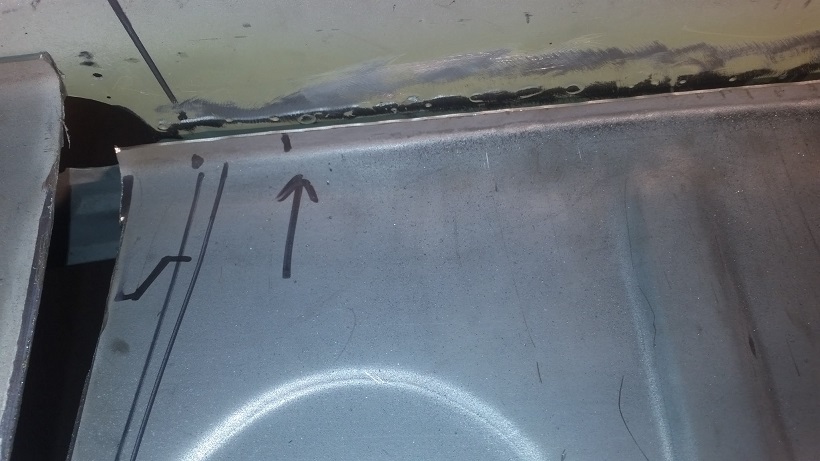
The given is the 2" that is the end width of the triangle patch. 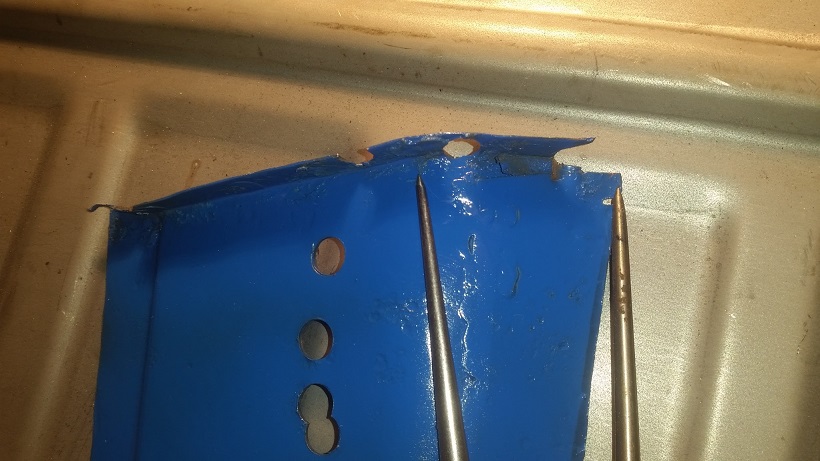
Now on to trimming the panel to go over the side humps. These are a tight fit against the wall.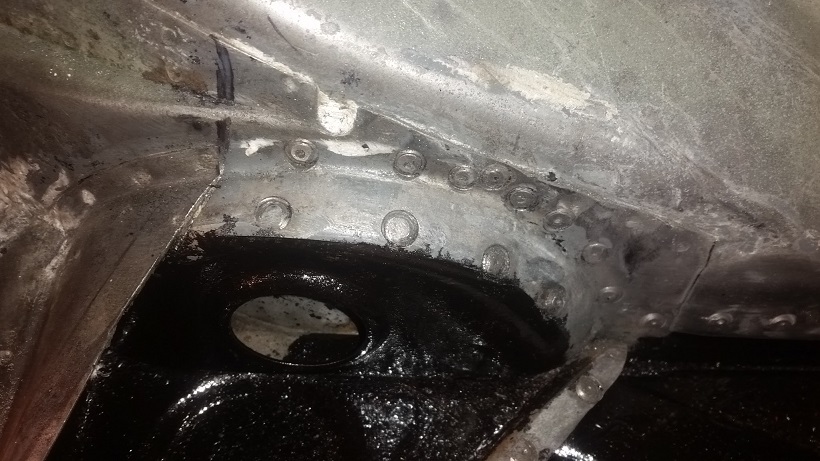
I decided to cut out the two humps first. Then make the money cut last.
Right side measurement.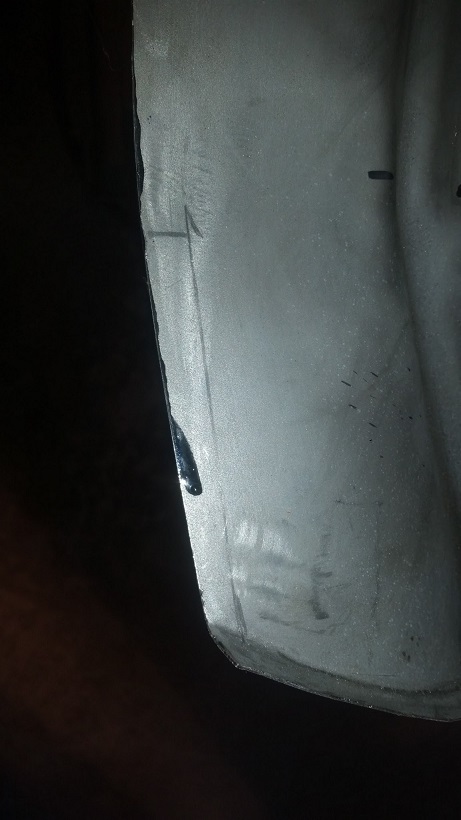
Left side cut out and lined up.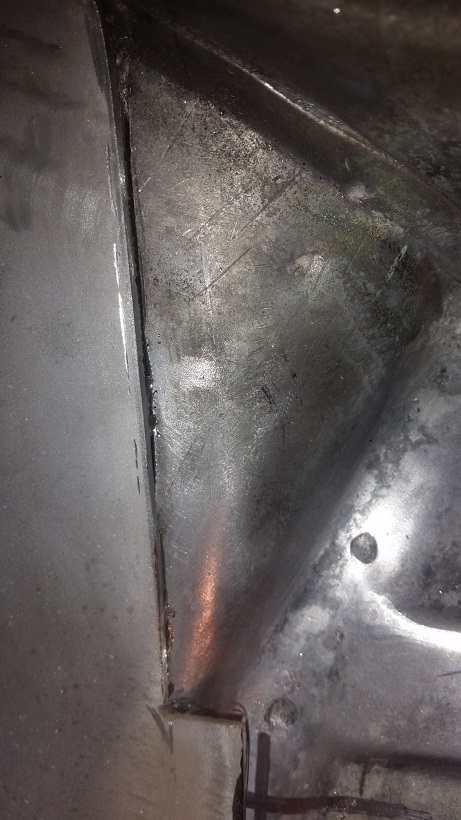
Then I set about making the money cut. This is the long cut along the open section of the transmission mount support. I did it wallpaper hanging style, making a double cut.
I held it in place with self tapping screws. I started with the die grinder on the mandrel. I didn't like it, I couldn't feel the lower layer. So I used the air hacksaw, worked great.
I'll hand the trunk panel off to Super In Law to create the sloped triangles and fabricate the corner extensions/modifications.
Posted by: cary Mar 21 2016, 11:43 PM
I moved on to starting the rear half of the floor pan removal.
It starts with removing the rear floor jack points.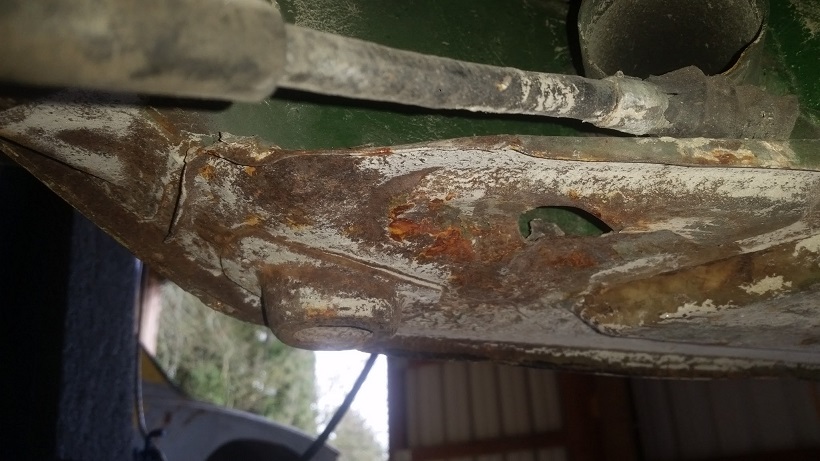
Pleasantly surprised with the condition under the jack points. They'll get OSPHO'd and primered.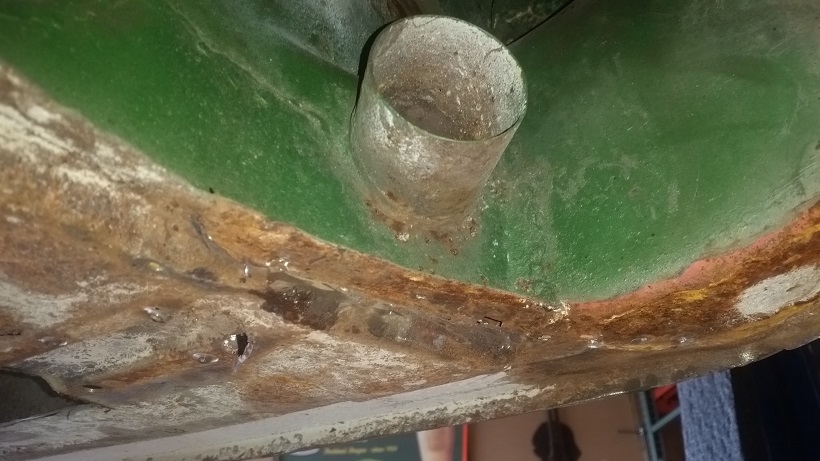
Mark stopped by and brought several boxes new hardware. We decided that we'll need to order 2 new rear floor jack points. I could work them back to presentable. But the metal would be quite fatigued.
On a sad note note I did find a double layer hillbilly patch on the right rear of the floor pan. Which is ok to do for a quick cover. But DON'T seam weld over the floor pan spot welds. I'll show some detail on how I'll work around it tomorrow.
Punch some new rosette holes and weld them in.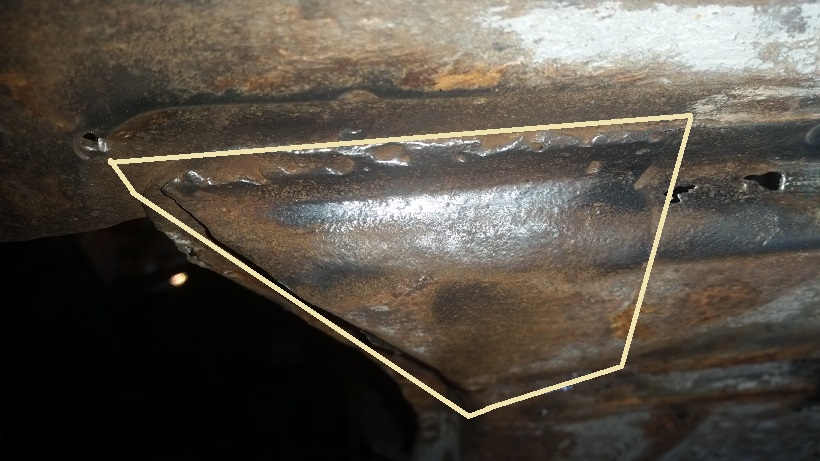
Posted by: raynekat Mar 22 2016, 11:30 AM
Cary....you're cruising.
Well done.
I'll be back in the States in late April.
Hope to see you and catch up with all you've been doing.
Posted by: Chris H. Mar 22 2016, 11:37 AM
....double layer hillbilly patch....
 phrase of the week!
 Great work Cary!
Posted by: malcolm2 Mar 22 2016, 01:31 PM
I did not see the heat shield that attaches to the btm of the trunk panel. It seems that it would be easy to weld while the trunk panel is on the bench vs upside down when installed.
Posted by: cary Mar 22 2016, 01:35 PM
We're going to install blind nuts on the heat shield and
run domed allen screws in the trunk under the
mat.
Mark's heat shield is in a cart ready to be blasted when I get set up outside again.
The shield has the stand offs still on it. So I would do a 3/16 rosette weld from the trunk if it was to be welded in.
Stand offs will be welded to the trunk floor. Heat shield will bolt to the stand offs.
edited 4/5/16
Posted by: cary Mar 22 2016, 07:58 PM
Measure ten times then cut .............. fairly simple pattern. Only issue was the flange against the tail light panel.
It's always nice to weld new 18 gauge to 18 gauge. 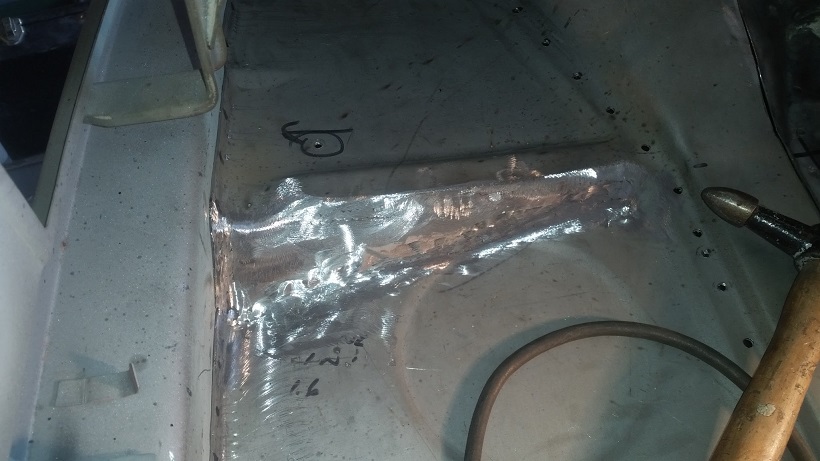
Posted by: cary Mar 22 2016, 08:20 PM
I learned we have a few more issues when converting to the 75-76 trunk panel.
Here's corner shot of the factory 75-76 trunk panel. You can see the dipped section in the corner.
Here's the PP335.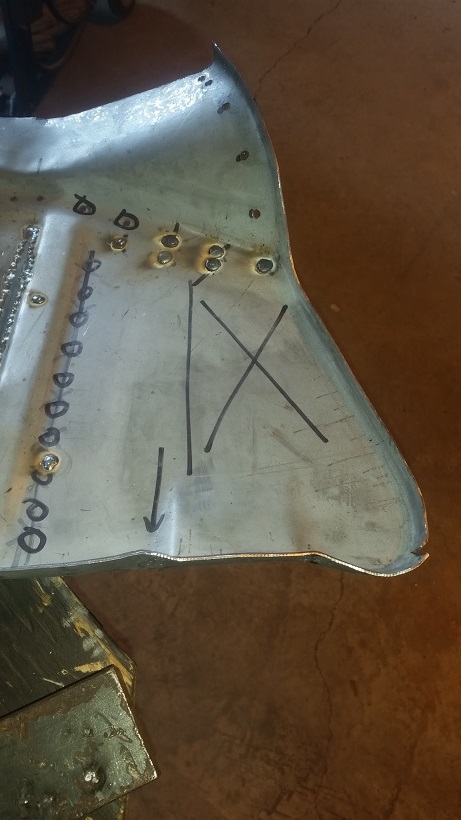
The X is where the dipped section is. The new one is flat.
The problem I ran into is I can't make contact with the transmission support in the corner.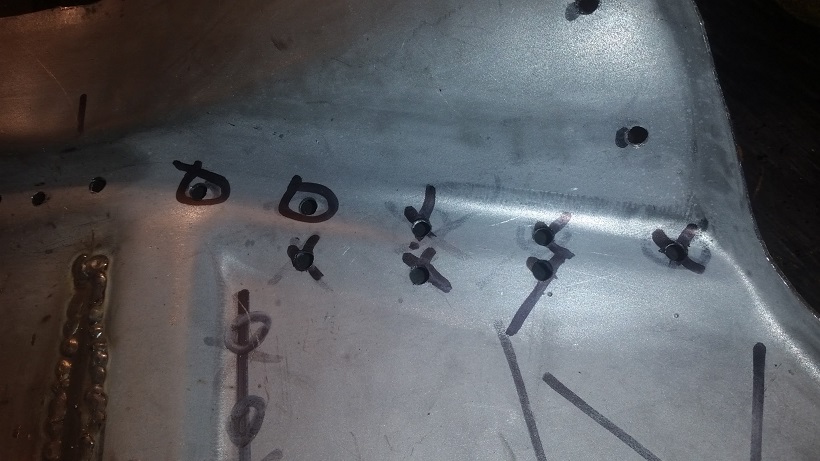
Don't drill the holes I have marked with X's. They had to be refilled.
I may try it one time after everything is completely welded down.
The level is dictated by the hump and the bumper support. I need 1/8 to 3/16 ths.
Posted by: cary Mar 22 2016, 08:44 PM
On Mark's visit he added another item to my list . LOL.
He wants me to transfer the hole plugs from the old trunk panel.
I'll give the seam sealer a good soaking with brake cleaner in the am. Then we'll get after it with multiple scrapers.
Should be a fun challenge ..................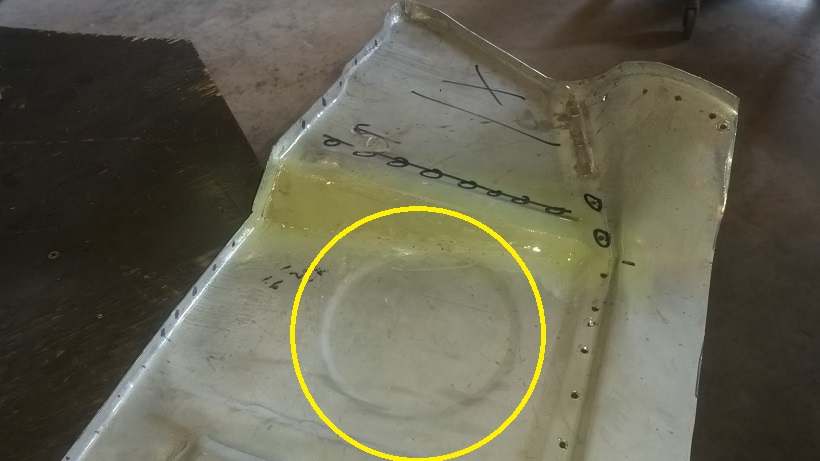

Posted by: sixnotfour Mar 22 2016, 08:46 PM
Great Job...did not want you to do more work , Butt the end result will be Way Better...weld on...Jeff
Posted by: sixnotfour Mar 22 2016, 08:47 PM
Posted by: cary Mar 23 2016, 09:28 PM
When we slope the trunk we have another geometric problem. The panel then becomes a smidgen short.
From Post #105
When we slope the floor it pulls the base of the spot weld flange out from the tail light panel. Which will not allow me to rosette that portion of the flange without making an ugly mess. So those portions in the middle will be tacked on the top of the flange. Which won't be seen. They'll be finished with sprayed on seam sealer.
The dark line is the gap.
Posted by: cary Mar 23 2016, 09:43 PM
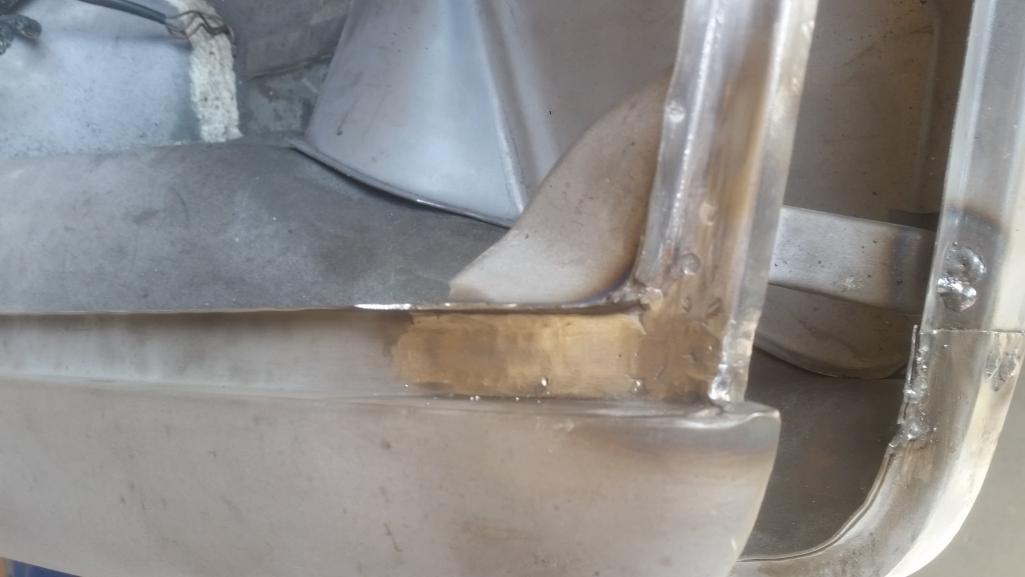
While I move on to removing the rear portion of the floor pan. Super In Law will be recreating both corners of the trunk. They too have big gaps on the sides and in the corner. So we're going to cut them off and create a new corner.
BEFORE
AFTER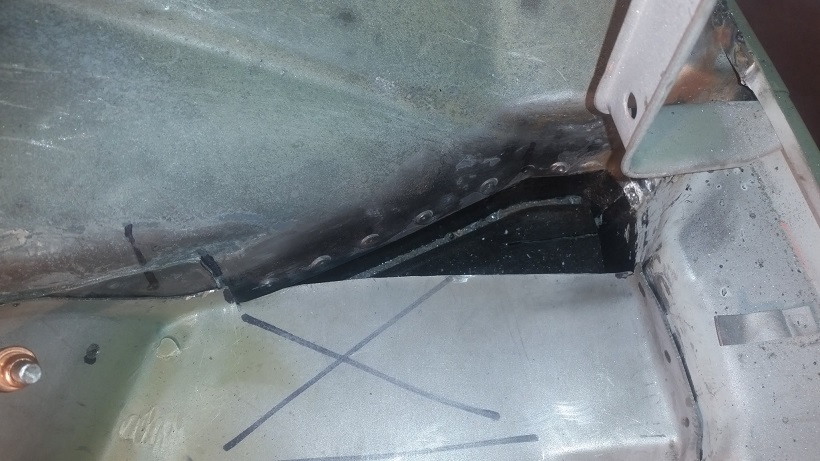
The right side was trimmed and ready to be tacked it.
Posted by: cary Mar 23 2016, 10:20 PM
Onto removing the floor. I like to remove the sides and the middle. Then make two middle cuts leaving me 2-3 inches to work with when removing the welds on the center support and the rear fire walls. I'm all about preserving as much of the floor pan flanges that you can.
I don't need to add any floor pan removal pictures. They've been done many times. Ill only elaborate on the tricky parts.
First tricky spot. For some reason they run a couple seam welds right under the inside seat belt bolts on both sides.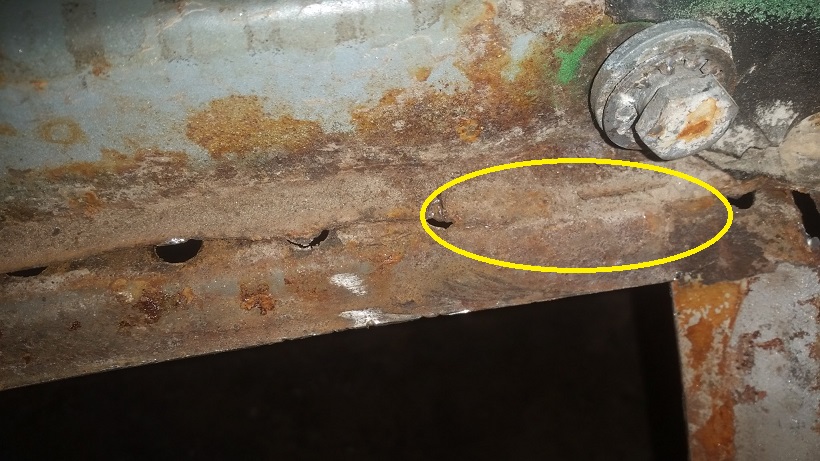
So I cut around the seam welds so I can come back and surgically remove them.
Time for lunch ................
Next tricky spot is the seam welds under the seat adjusters.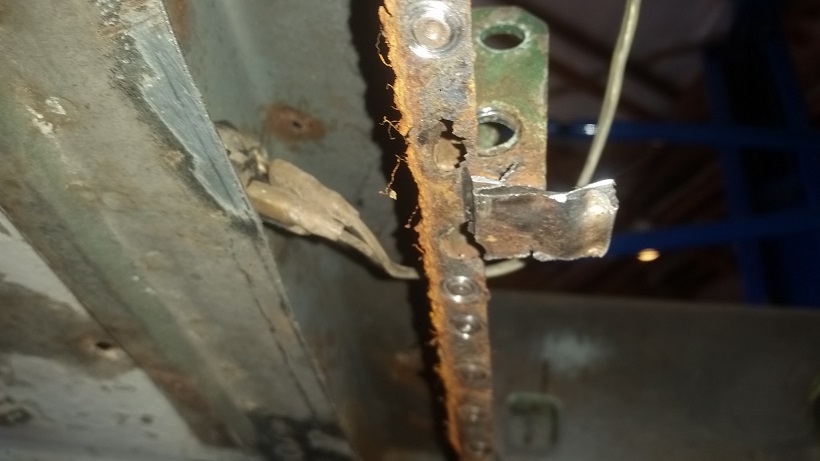
Same program, leave the seam welded portion so it can be surgically removed.
Then I remove the e-brake pivot. Pivot pin was bent. Drew alignment marks above to help with installing the replacement.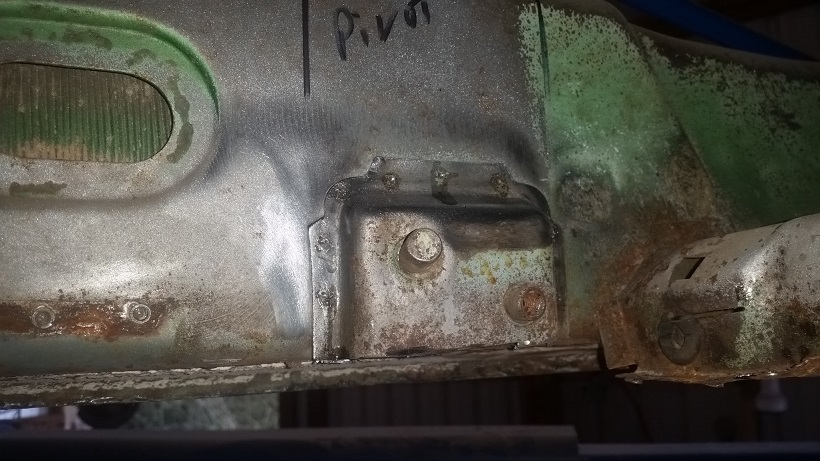
I did find some more rust. The bottom of the left inner firewall has been nibbled on by the worm. 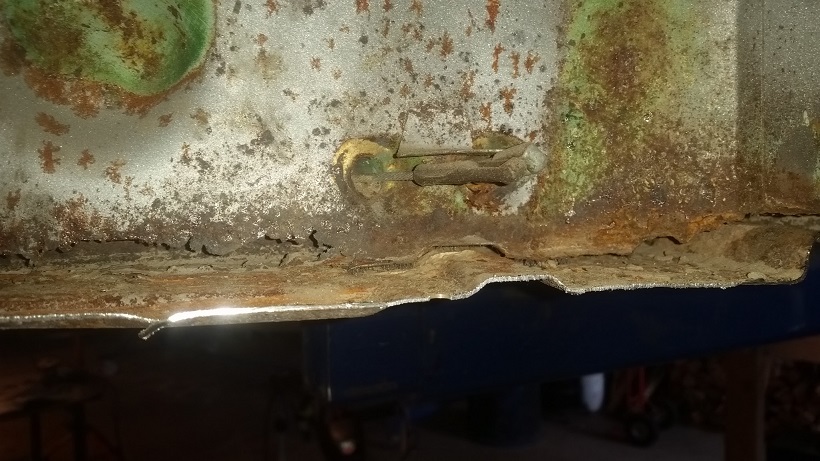
We should be able to patch that bottom portion and flange.
Today's scrap pile ............
Tomorrow, the remaining portion of the floor under the rear firewall. Could be tricky with the patch that is on the engine side. Long seam weld 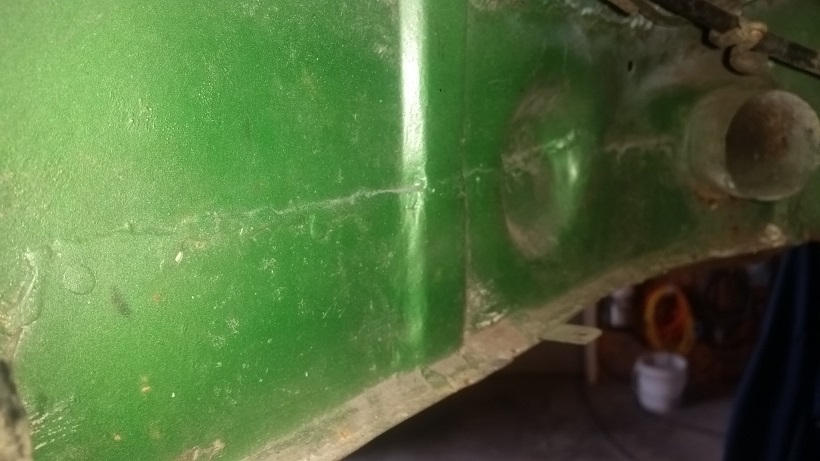
Posted by: cary Mar 24 2016, 09:44 PM
Onto to finishing up the trunk panel. Here's a shot of one of the new corners we created.
Now we're nice and tight on all sides. We should be able to do rosette welds in all but the corner. Corner has too many seams coming together to get a tight enough fit. That's why its always overfilled with seam sealer.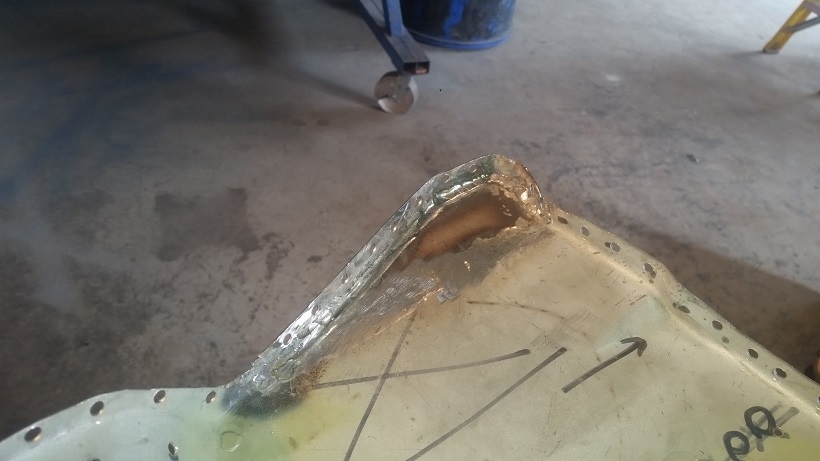
Then on to installing the 75-76 tail light panel support.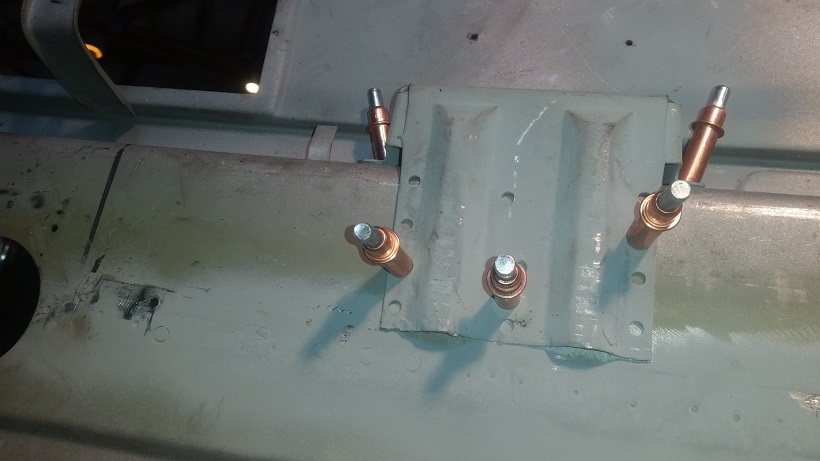
Decided to fulfill Mark's request while we still had the trunk panel on the table.
We removed the plugs from the old trunk panel. Chisels, brake cleaner and the heat gun. Then tidied it up with the wire cup brush.
I decided to cut up the panel itself and use the old hole as a guide for my air hacksaw.
Pictures tell it all ...............
Topside
Bottom
Posted by: cary Mar 24 2016, 10:01 PM
I start with welding in the poor fitting flange to the tail light panel.
Best I could measure when we lowered the trunk floor we added 3/8" to the needed panel length.
This shot is from under the car. The yellow line should be tight against the bottom panel.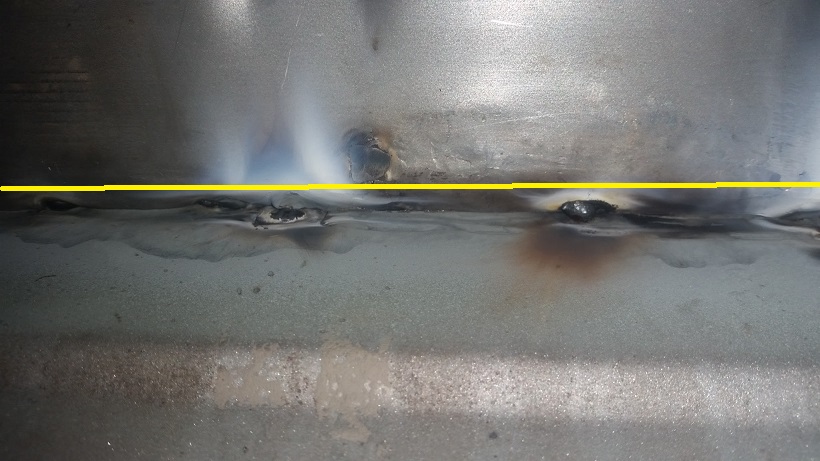
Like I mentioned earlier the back panel would be tack welded. Do not do any aggressive hammer work on the back panel of the trunk. It will make a mess of the tail light panel on the back.
I wish I'd bought 3 or 4 of these to hold the flange tight.
https://www.zoro.com/irwin-vise-grip-locking-c-clamp-fixed-pads24-in-275/i/G0317466/
With the 45 degree angle I don't know if they would have worked. Those are the pivot foot model.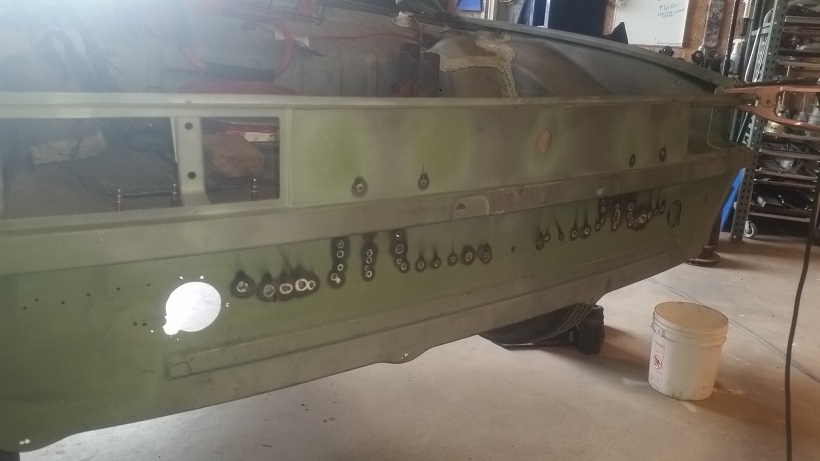
At the end of the day. The inside of the trunk gets seam sealed. And that portion of the tail light panel is under the bumper.
Posted by: cary Mar 24 2016, 10:02 PM
Mark's pile of stuff ..................
Attached image(s)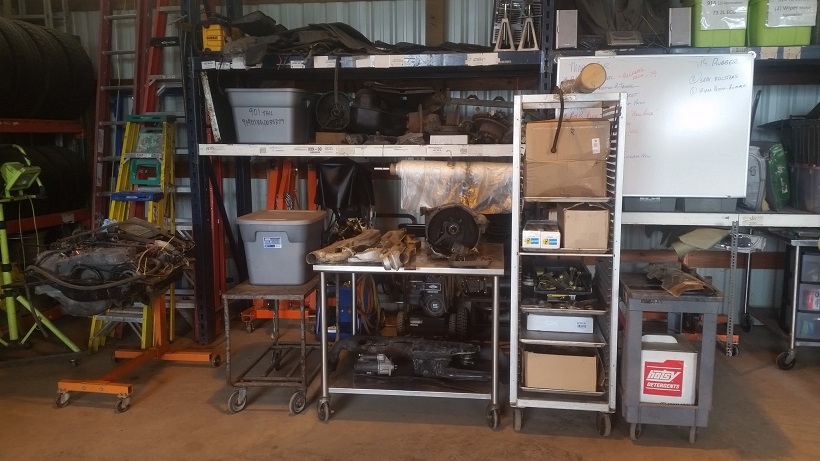
Posted by: Mikey914 Mar 25 2016, 11:10 AM
Wow Cary,
Really making progress.
I love that when I'm out of town for 5 days I can come back and see the progress.
As far as the plugs in the trunk, I didn't expect you to actually cut the hole in the new metal and attach the plugs. I thought you would just glue the old ones onto the panel, but you went the extra mile to do it right. Thanks!
Mark
Posted by: cary Mar 25 2016, 09:30 PM
I decided if we were going to return the hole plugs into the trunk. We should cut the holes into the transmission support cover. And weld the spare tire hold down nut back in.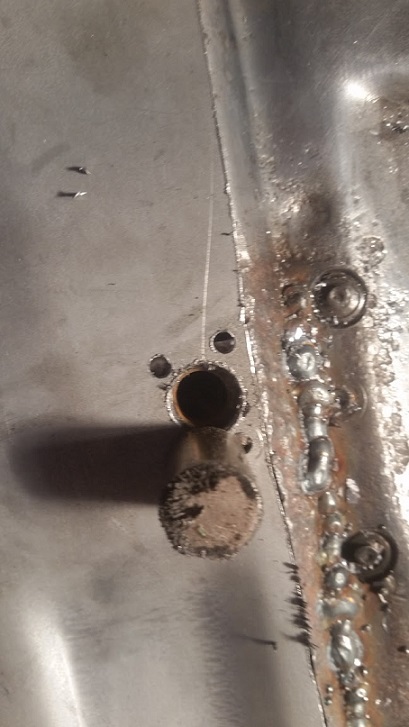
All dressed up and ready to go ................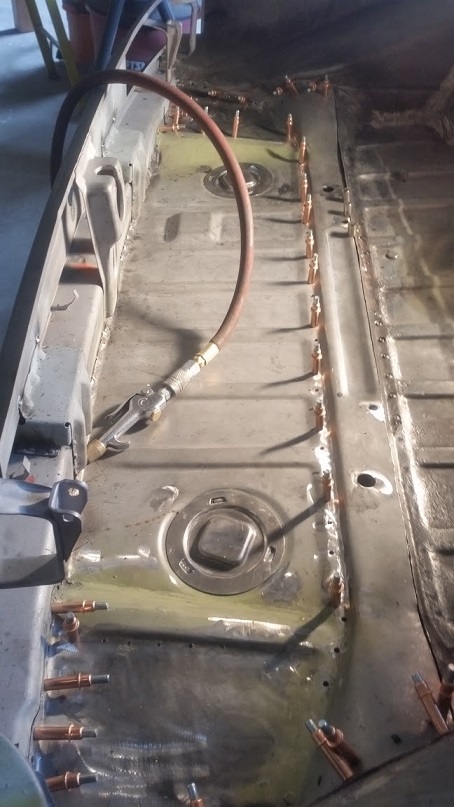
Whoa-la ...............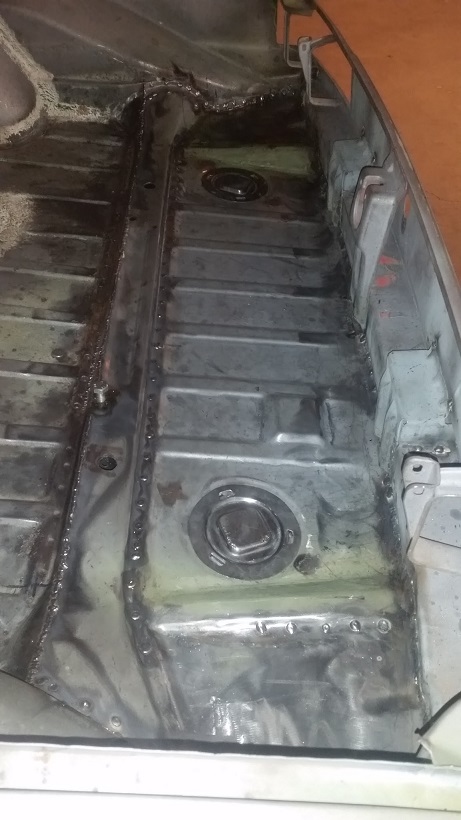
From there I went to the back panel and tidied up some of the pre drilled holes that didn't get reused or filled in because it was tack welded instead of rosette welded. When I got home my order from Zoro had arrived. I'd ordered some high quality belts for my 13" belt sander. Hopefully these will work on the tack welds on the back of the trunk.
Posted by: cary Mar 26 2016, 08:48 AM
Short Episode of Tool Whore :
As I weld in replacement panels and create tools. There is a need for magnets. Most everything I have and used are a POS. Until Now.
These bitches work. How long they'll last will be the long term question. $29.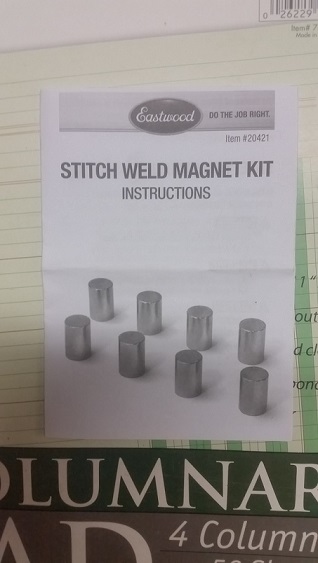
Posted by: cary Mar 26 2016, 08:11 PM
Got the trunk support prepped and ready to be welded in.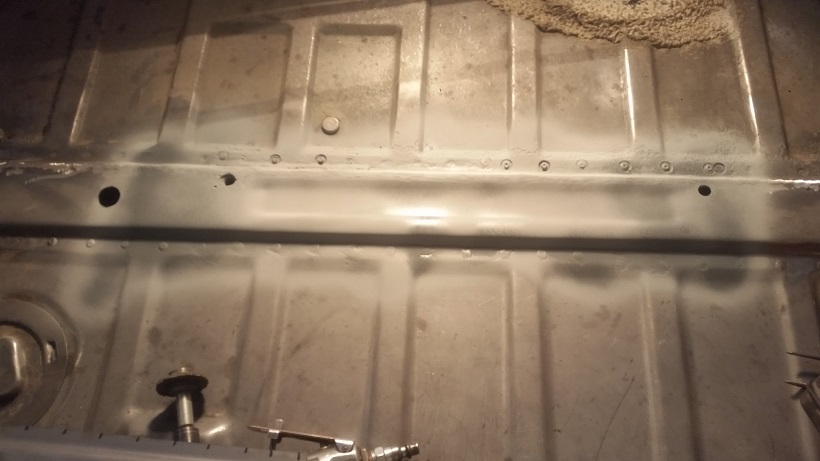
Posted by: cary Mar 26 2016, 08:22 PM
Stuff :
Mark the 17mm MC is ready for pick up.
Ken the toe hook items are just about ready to go. I'll refurbish and paint them with weld thru primer.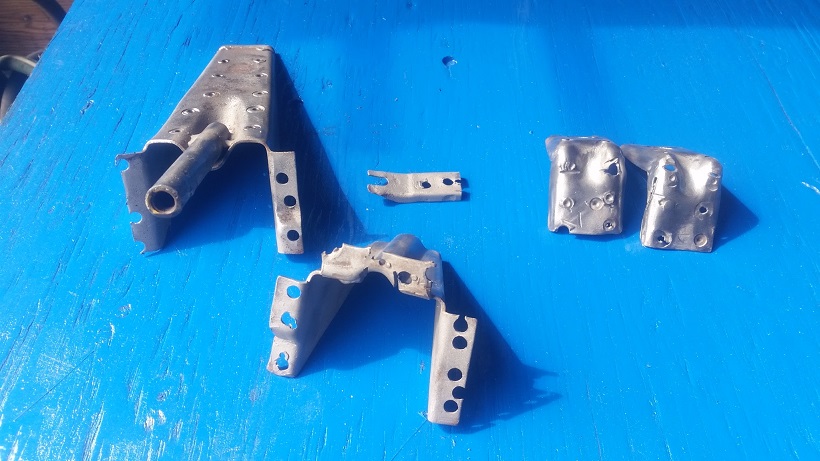
Kind of hillbilly. But a quick trip thru the wood stove removed the seam sealer in quick fashion.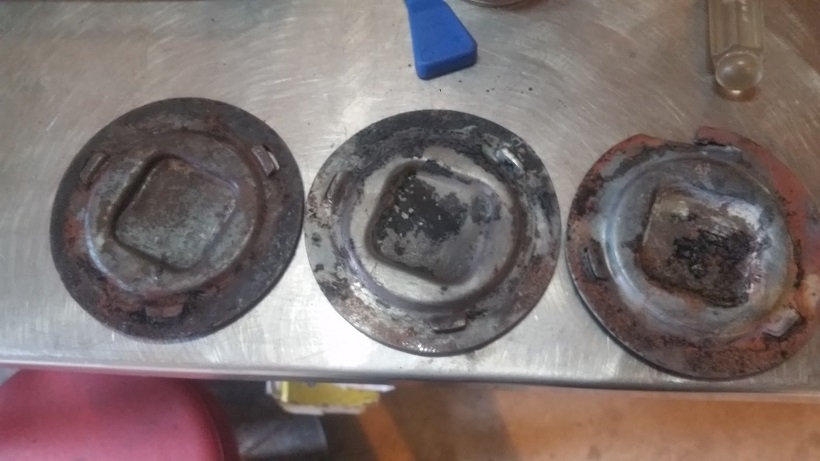
Super In Law pulled these out of the scraps in the scrap barrel.
Posted by: cary Mar 28 2016, 08:43 PM
Trunk support welded in ..................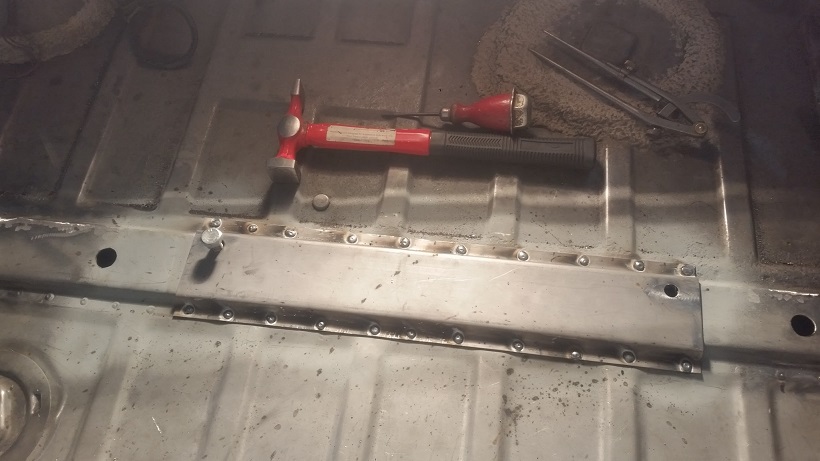
Trunk all finished up ..................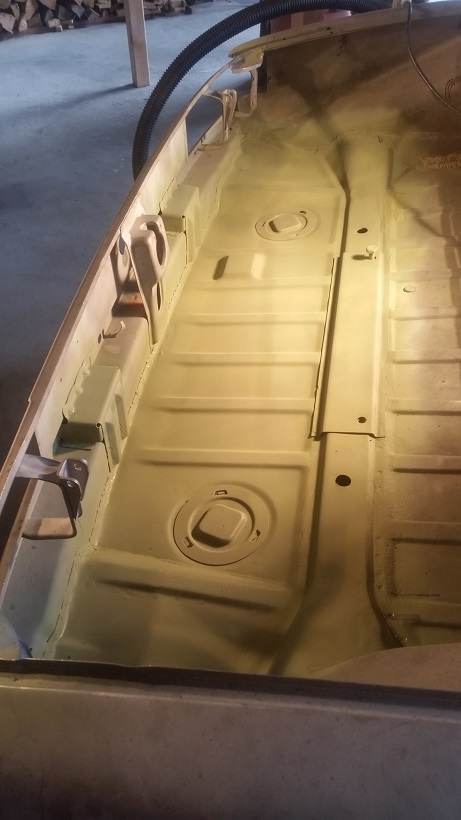
Came back from lunch and went on a pin hole hunt in the upper trunk and back panel. Using a flash light to back light, its amazing what you'll find.
I'm real happy with the belts that I bought from Zoro for my 13" air belt sander.
Here's a shot of the finish I'm getting.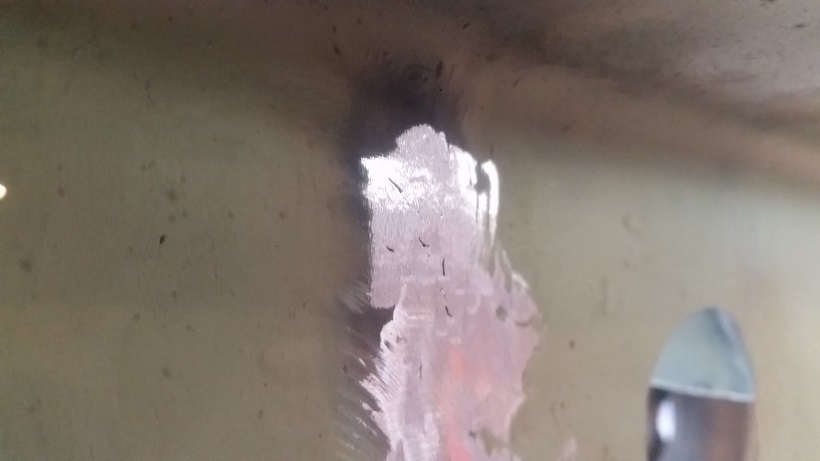
Every thing was going ok until I went after a pin hole the area that I called out in
Post# &4.
Dammit ............ blew a hole to start with. Then went underneath a did some work with a wire brush. Just started to disintegrate. 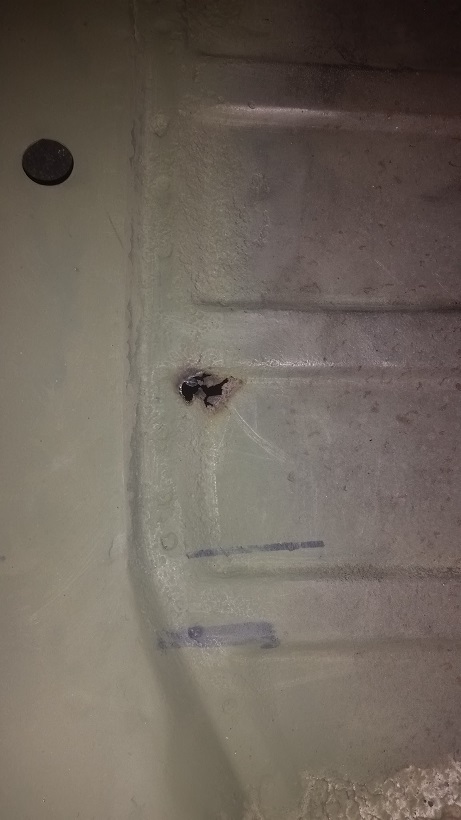
Haven't bought a seam roller yet. So I can't recreate a large area.
Took a gander into trunk of the parts car. Might be usable. I'll cut the section out and see what I have ............
Super In Law refurbished the toe hook pieces that we're getting ready for Ken. Then he tidied up the stand offs on the exhaust heat shield. It's all ready to get bead blasted tomorrow.
Posted by: bigkensteele Mar 28 2016, 09:34 PM
Ken the toe hook items are just about ready to go. I'll refurbish and paint them with weld thru primer.
Thanks Cary! That kit will be exactly what I need if I ever do track time and need to have the car safely towed! Please PM me with what I owe you for your efforts, and we can work out shipping with Mark.Beautiful work!!!
Posted by: cary Mar 29 2016, 08:15 PM
Ken the toe hook items are just about ready to go. I'll refurbish and paint them with weld thru primer.
Thanks Cary! That kit will be exactly what I need if I ever do track time and need to have the car safely towed! Please PM me with what I owe you for your efforts, and we can work out shipping with Mark.Beautiful work!!!
Ready to go ................ I'll send you a PM. Not really yellow. Lights
Posted by: cary Mar 29 2016, 08:23 PM
Started the day pulling out the plasma cutter.
Cut this section out of the parts car.
PLAN A :
Went with smaller section.
PLAN B :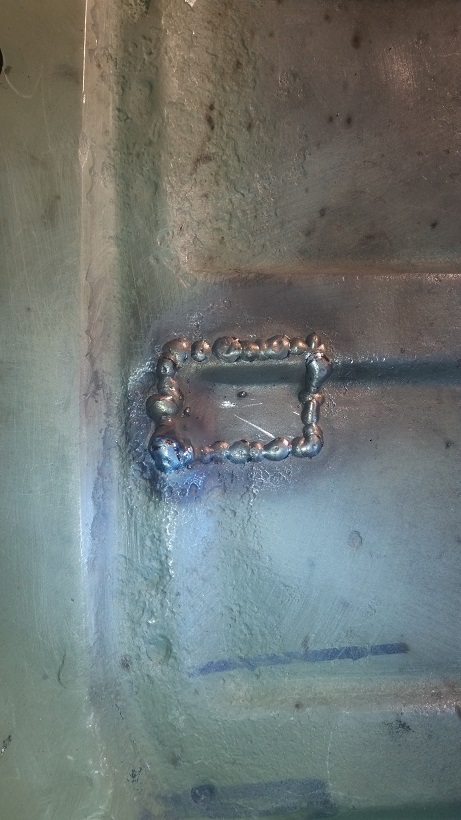
Saved PLAN A for the future.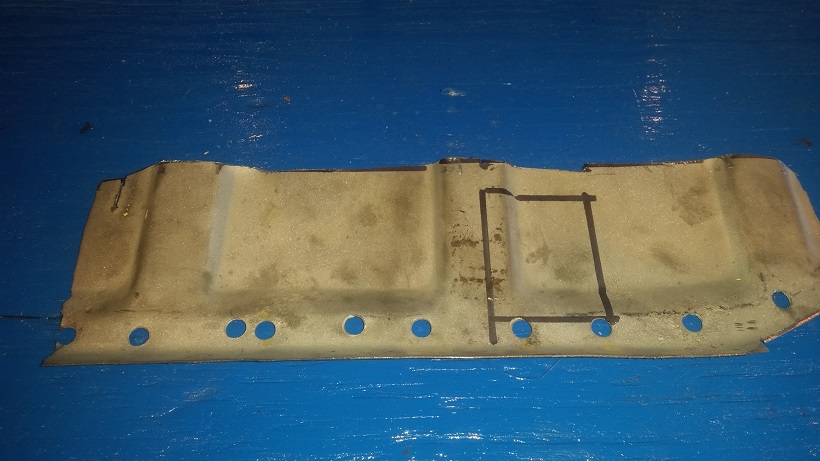
Posted by: cary Mar 29 2016, 09:38 PM
We have a break in the weather here in PDX so we pulled out the refurbished HF blaster tank. Tore the whole thing apart and cleaned out all the hoses and valves. Then bought a new 5ft longer commercial grade hose. She ran like dream.
Blasted the exhaust shield and the left door sill I pulled out of my stash.
Posted by: cary Mar 29 2016, 10:30 PM
Then onto finishing the removal of the floor pan under the firewall.
I start with those seam welds under the seat belt bolts. No real issues. Just cut them out with cut off wheel on the mandrel. Then peeled the remaining pan off with Rick's screwdriver spot weld removal method. Rolling the removed material with a pair of lineman's pliers like an old style sardine can.
While systematically removing the hillbilly patch. I pulled out a couple holes in the long while locating and removing spot welds under the long seam welded patch.
Area is nice and solid so a patch should be an easy deal.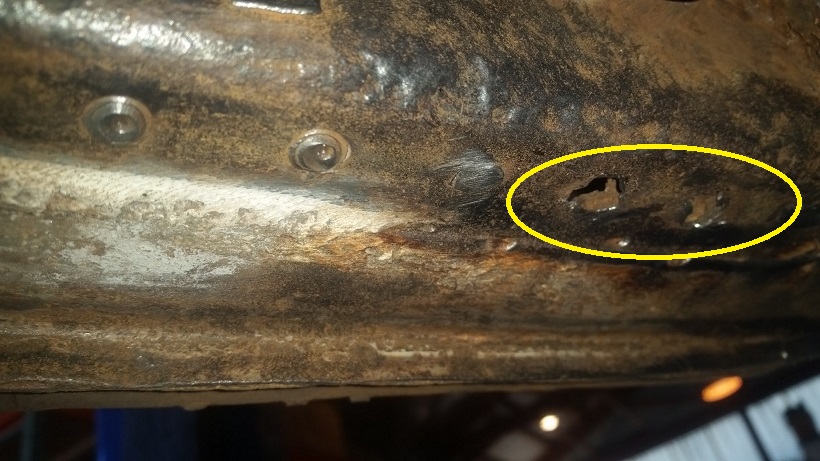
But I did find a rust degradation hole right on the bottom rolled edge of the long.
We'll see if we can recreate that radius and make a long patch so we can remove most of the degradation.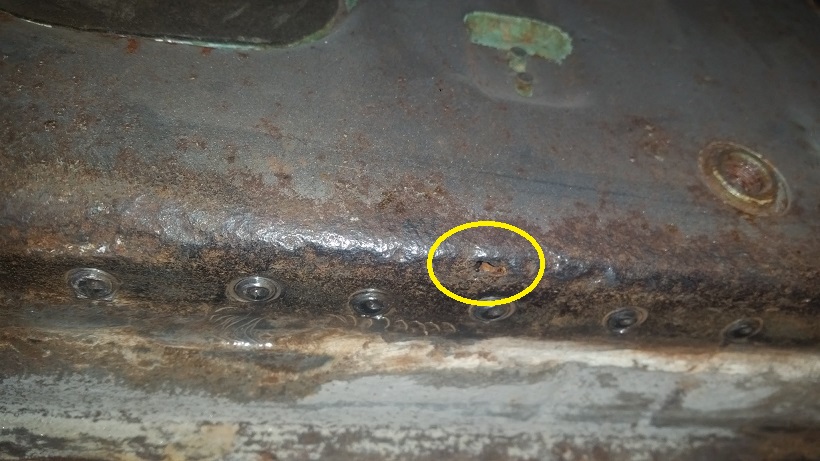
Here's a couple shots of other issues that I'll need to deal with.
1. About 1/2 the bottom edge is gone.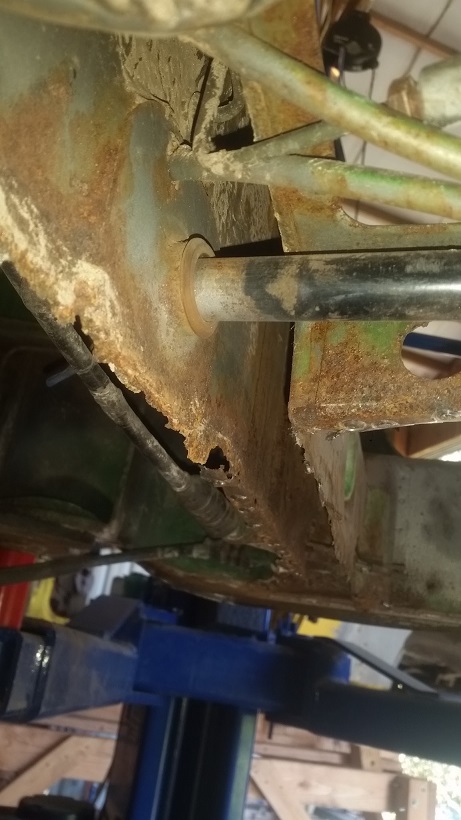
2. I don't get it. Just like the end of the hell hole. They left the old rusty portion of the lower firewall behind the patch.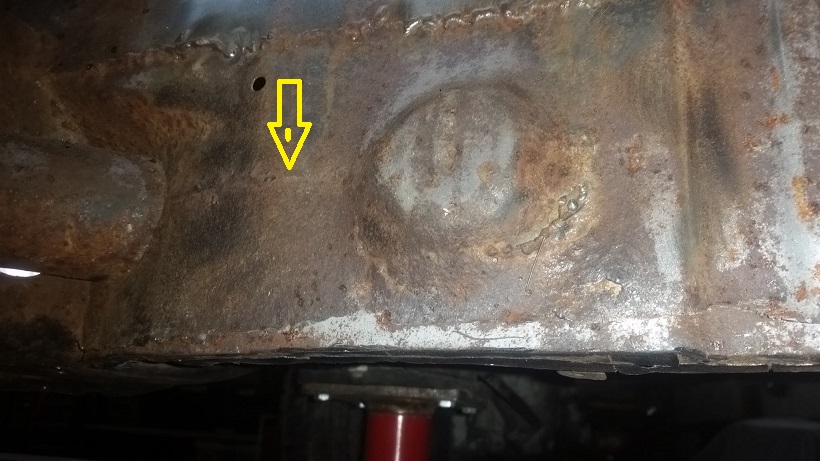
The yellow arrow indicates where they seamed the patch in two pieces. I might be able to peel back the rusty portion up to the seam
Posted by: cary Mar 29 2016, 10:38 PM
We'll be taking a couple day break so we can paint the frame bench I bought in January.
I'll add that update on my rustoration thread
Then I'll dive into the wheelhouse rust.
Posted by: Mikey914 Mar 30 2016, 03:05 PM
Thanks Cary,
I'll be back in late Sunday and will come out to see you.
Thanks for everything!
Posted by: Steve Mar 31 2016, 08:35 AM
Bump
Posted by: cary Apr 4 2016, 10:19 PM
Back to the task at hand ..................
After giving the wheelhouse a complete inspection you'll see the the white lines I drew out. These are the cut lines ..................
Always keep in mind, less is more. Only remove what you absolutely have to.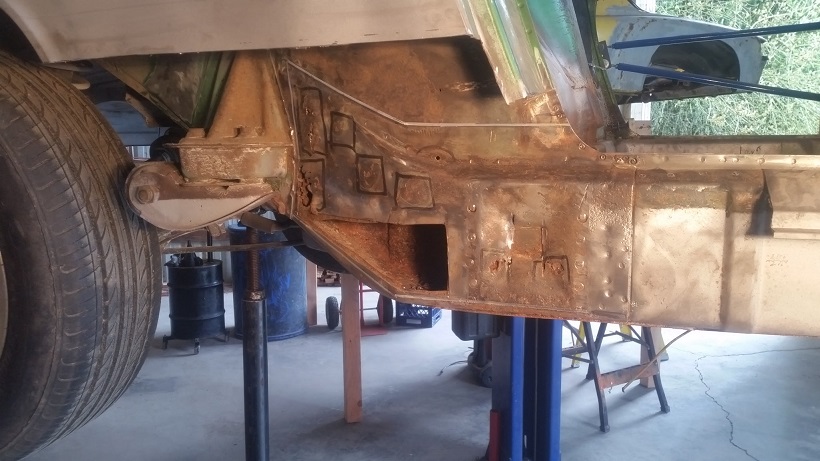
All cut away other than the double layer that sandwiches the tail end of the outer long.
Interestingly when you look down into the long you can see clean steel. It seems the rust was caused by the moisture retained in the mouse nest.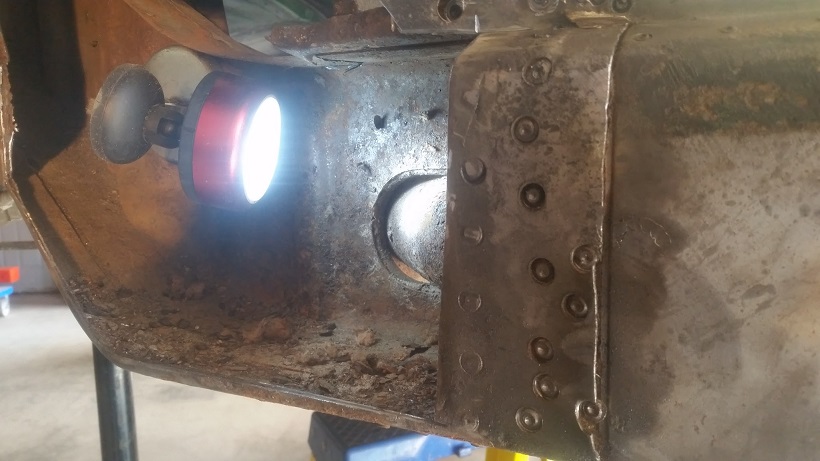
Off comes the outer layer.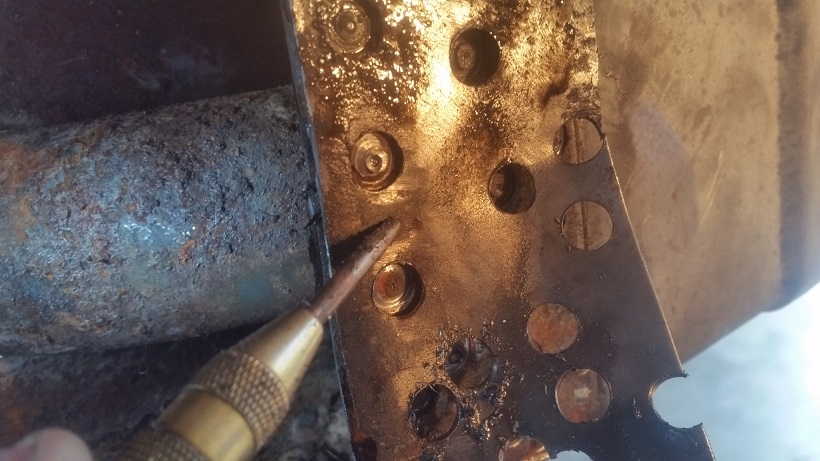
Then the inner box.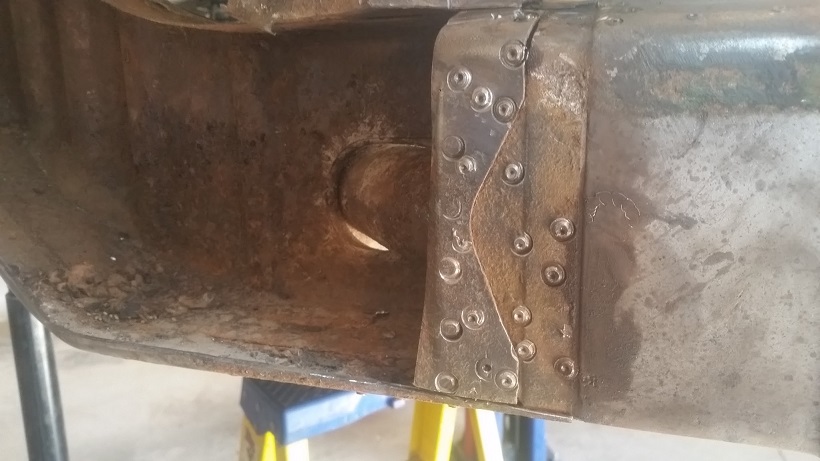
Here's the same area on the backside of the new piece. The long tucks into the rounded section and gets spot welded together.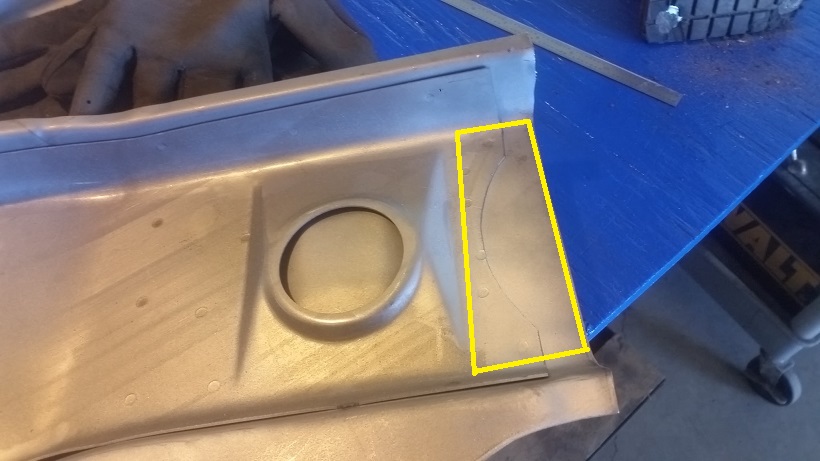
Posted by: cary Apr 5 2016, 07:00 AM
I did not see the heat shield that attaches to the btm of the trunk panel. It seems that it would be easy to weld while the trunk panel is on the bench vs upside down when installed.
I stand corrected on my original statement. What I needed to do was remove the stand offs from Mark's shield and mount them to the floor pan. I was too focused on the floor pan recreation. All I could think about was it being in the way every time I took the pan out for fitting. And making sure it wasn't in the way of getting a good shot epoxy at a later date. Yes, this would have been easier on the bench.
I think I'll have Super In Law create 6 new stand offs, just a smidgen bigger to accommodate the blind nuts. I'll create a template for the stand offs off my car.
Posted by: cary Apr 5 2016, 07:56 AM
Now where was I ? I fell asleep with the computer on my lap.
With the wheelhouse opened up I have a better picture of the damage to the long. Not going crazy like I did on my car. LOL.
The outside will need a bottom patch. Looks like I can keep it inside the floor pan seat.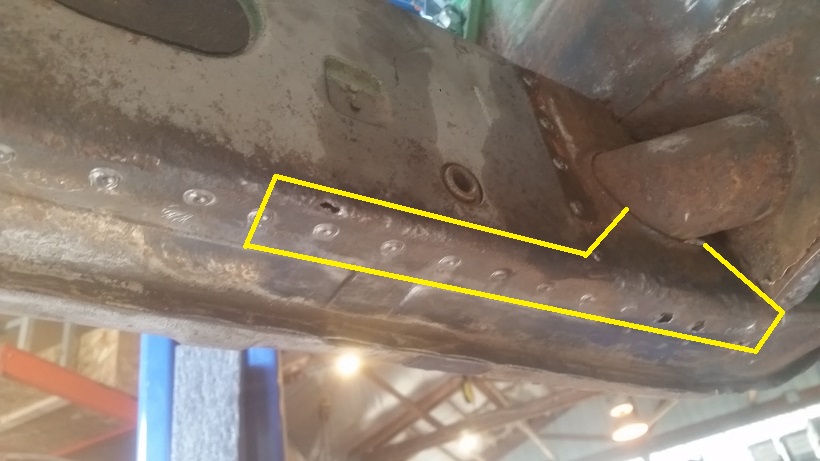
I'm cutting up to the heater tube because experience says I won't be able to weld the pitted metal. It's thick enough, but you cant get enough of the rust out of pits for a good weld.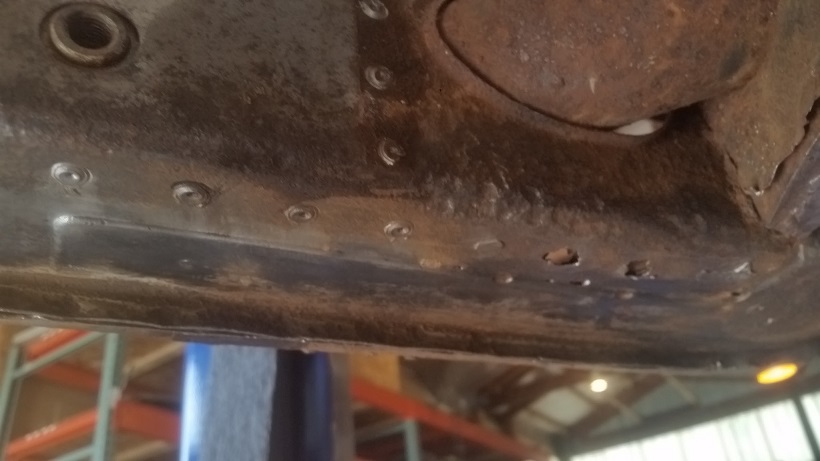
Now on to the inner box where all the damage started. This will take some delicate surgery to remove the inner box without damaging the outer long. I think this will take my entire pile of die grinders, cut off wheels and the Dremel to get the job done.
This piece will have to built in two three pieces and welded. The issue is, can we create the ribs without a seam roller. MacGyver (Super In Law) says he can. Hmmm.
I'm thinking Tool Whore will have to dip into the saving account and order a bead roller. Looking at Woodward Fab at Summit and Eastwood. Leaning towards the Woodward. You can order the additional dies as you need them.
The rear suspension was removed for better access for the wheelhouse repair. I was going ask for Rick's guidance on doing a trick repair of the wheelhouse. Trimming the outside off the new wheelhouse and sliding it behind the suspension mount. Just not confident I could get the welds that I'd be happy him. So the mount will be coming off.
Suspension added to the cart. Mark stopped by to drop of a couple additional RD pieces and pick up Ken's toe hook. He added prepping his cars for WCR to the work list. One oil leak, one D-Jet tune up.
Posted by: cary Apr 6 2016, 07:15 AM
Prepping for surgery................... Make pot of coffee
Step one, remove outer layer of long. Peeling off only the outer layer didn't work. Either too much rust or too much coffee. Measure the seat belt plate to best determine where the bottom edge might be.
Like my dad used to say, Do As I Say, Not As I Do............
I cut first. Ran into the bottom edge of the plate............. Dah
I wonder why. Two beer lunch ............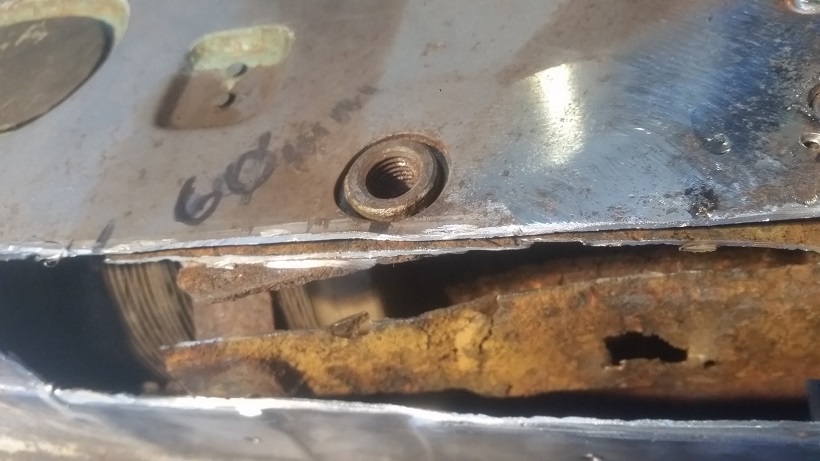
Here's where I ended up on the outer cuts.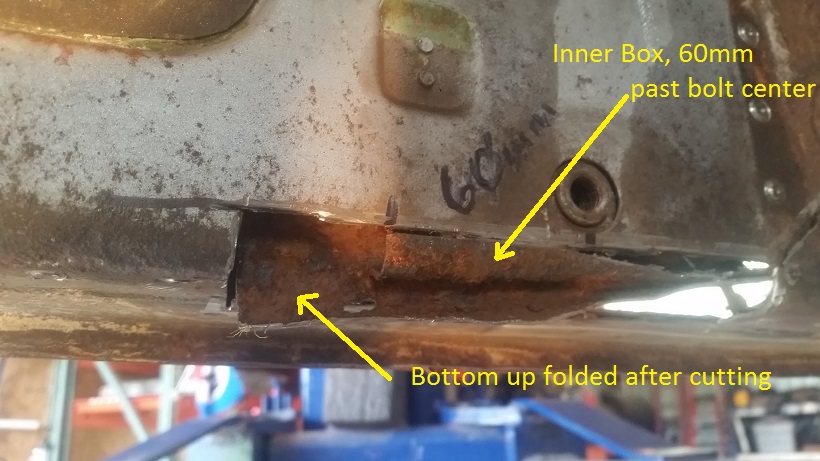
Inner box ends 60mm from center of seat belt bolt.
I'll edit tonight and add a shot of after I cut the upper edge 3/4" higher as to not have the stacked seams.
Posted by: cary Apr 6 2016, 07:28 AM
Onto to the inside.
This is a bit more difficult because of the metal degradation, tough to find the spot welds. Just slow work with chisels. Peel up with chisel until you run into a spot weld. Grind down the weld from the top until it will pop free.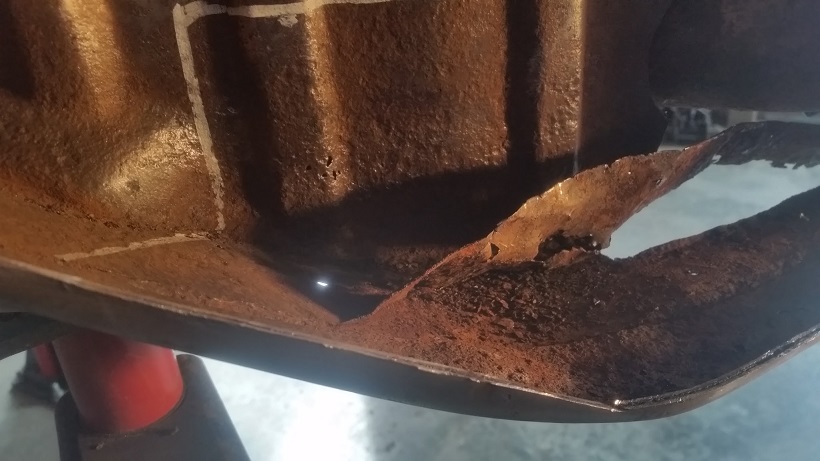
I took it out if two pieces. Bottom, then the wall. As you can see the outer long is in great condition. I went into the engine and ran an 1/8 bit thru the spot welds that were easy to locate on the shiny side. Then ran the Rotacut thru the inner box to weaken them enough to pop free.
At the end of the day I gave it a good soaking of OSPHO to dry overnight.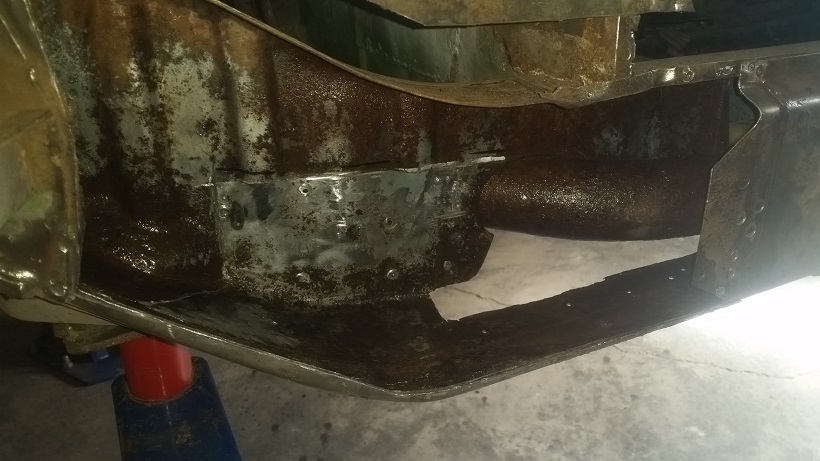
Posted by: cary Apr 6 2016, 07:38 AM
I moved out of the way so Super In Law could finish the work on his patch patterns.
I moved on to removing the left door sill. Nothing to much to document. You do need a torch to loosen and remove the brazing.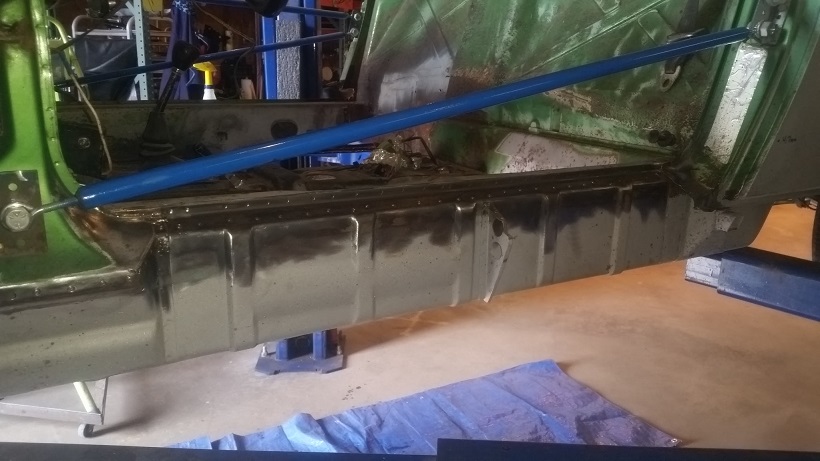
Only additional work I picked up on the sill removal was the rust between the sill flange and the door post brace/box. 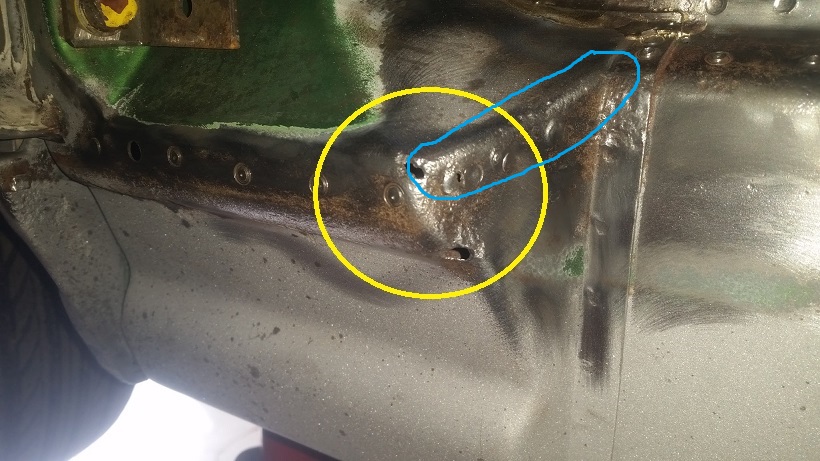
This is a tricky area to work on. On the couple I've worked on the metal has thinned and is pretty soft. Don't let this be the place you try out your new welder. You'll be in tears and your welder will be For Sale on Craigslist.
Posted by: cary Apr 6 2016, 07:42 AM
While I was working on the car MacGyver was working on his rib fabrication tooling.
First one was too big. Version #2 looks to be a nice fit.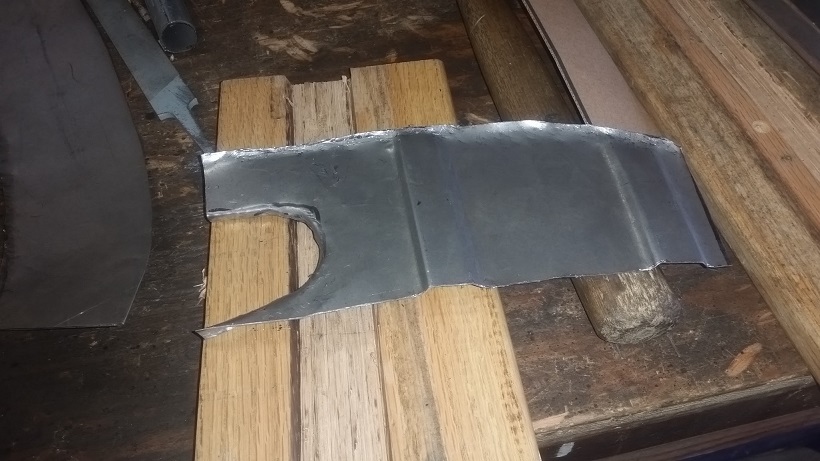
Basically he chiseled out a channel in a piece of oak from the scrap pile for the form. Then found a piece of solid stainless steel for the press.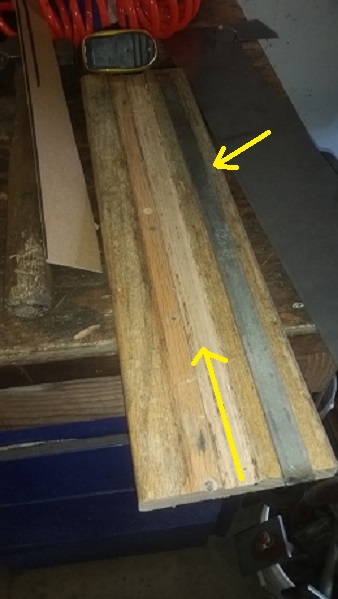
Then he squished them in the press. He says he can create about six inches with each pressing. No Bead Roller Yet .............
This tooling will be used many times in the future.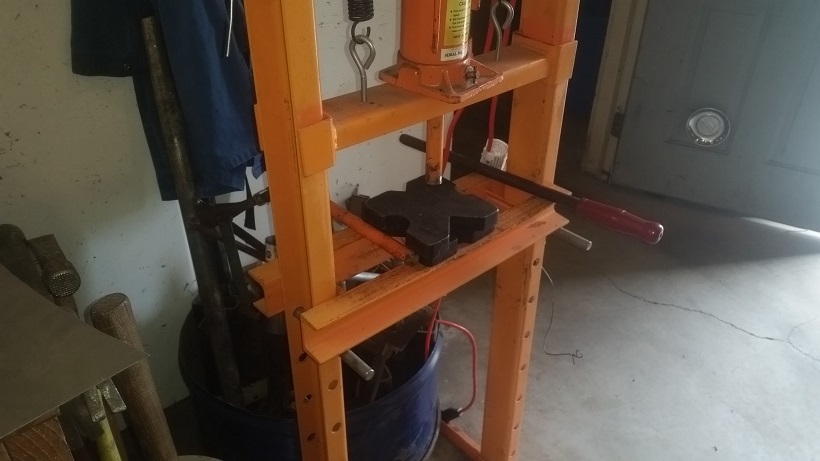
Piece one and piece two being aligned. This is where we ended the day. We'll start today with the third piece and welding it together.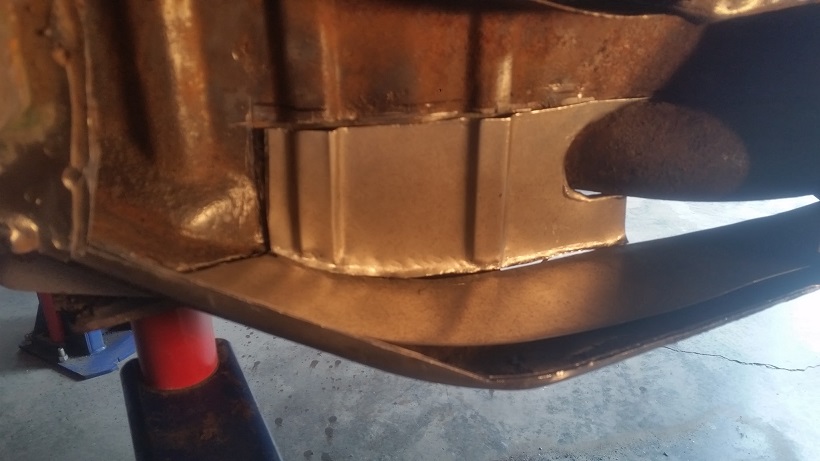
Posted by: cary Apr 6 2016, 09:53 PM
Super In Law spent the day fitting, welding, trimming and grinding the inner box.
At the end of the day it's just about ready to go.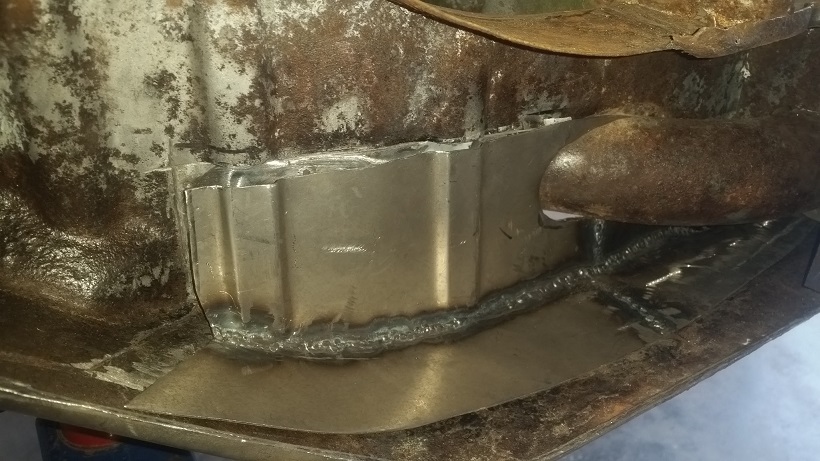
Looks like we'll be bringing the old 90 amp Craftsmen MIG from home. At times we need two welders. It will work fine on new metal to new metal. Not enough adjust-ability for the new to old welding.
Posted by: cary Apr 6 2016, 10:03 PM
Need to do a little refurbishing on the sill I pulled out of my stash.
New magnets are almost to strong for welding ......... sitting on the solid u-channel, the MIG would studder when I got too close to the magnets.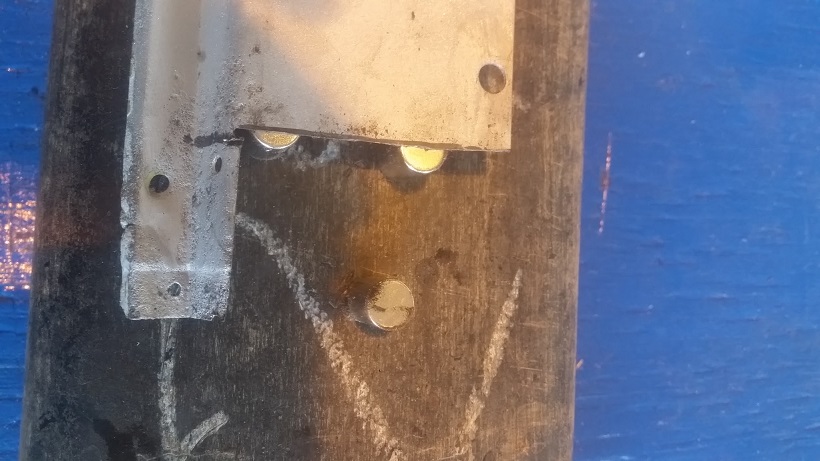
Yes I did refill the rosette holes. Once again it would have created gigantic rosettes.
Posted by: cary Apr 6 2016, 10:21 PM
Then I moved on to the holes in the door post support.
It must have been my lucky day. 
All three holes welded up without any issues. Being paranoid I did back off to only two blips, instead of my usual three.
Along the way I did find one more little rust pin hole.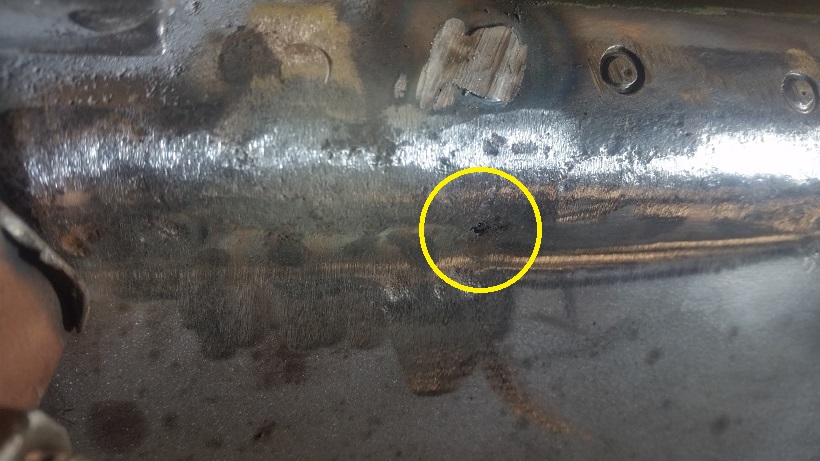
After some fiddling and fitting shes already to go .................
Left tail needs a little more polish. A couple spots could use a little more welding to level out. I'll get that finished up in am. Then I'll get out the torch and braze in the joints.
Attached image(s)
Posted by: 914_teener Apr 6 2016, 10:31 PM
I love this thread.
Nice work Cary.
Super in Law.......that is great soft tooling for the ribbing work. Lost art along with steel rule die making.
Posted by: KELTY360 Apr 6 2016, 10:31 PM
Quit your day job.
Posted by: Rand Apr 6 2016, 10:55 PM
At the risk of being the asshole... Dude, more heat, less wire. You seem to like grinding. Had to poke fun, but wouldn't if I didn't have huge respect for what you are doing. Seriously amazing project.
Posted by: cary Apr 7 2016, 05:35 AM
At the risk of being the asshole...
Dude, more heat, less wire. You seem to like grinding.
Had to poke fun but yet serious... Way too much bead!!!!
No harm, no foul. All input is good. I've had better luck the last couple years using the Millermatic mode. So the wire is on autofeed. I have a lot less blow thrus. So in order to go hotter. I need to weld faster. Less time in the same spot.
I'll tinker with a little more of a 90 degree angle and a little more heat. But I forgot to mention that I'm always concerned about distortion that is caused by more heat. Especially if I'm trying to weld good metal to old metal that is a bit pitted. Like the above shot of the tail of the door sill.
Posted by: rhodyguy Apr 7 2016, 08:10 PM
Super work!
Posted by: cary Apr 7 2016, 09:45 PM
April in Oregon .............
Damn it's hot ........
Posted by: cary Apr 7 2016, 09:47 PM
Finished up the door sill.
Brazed the joints.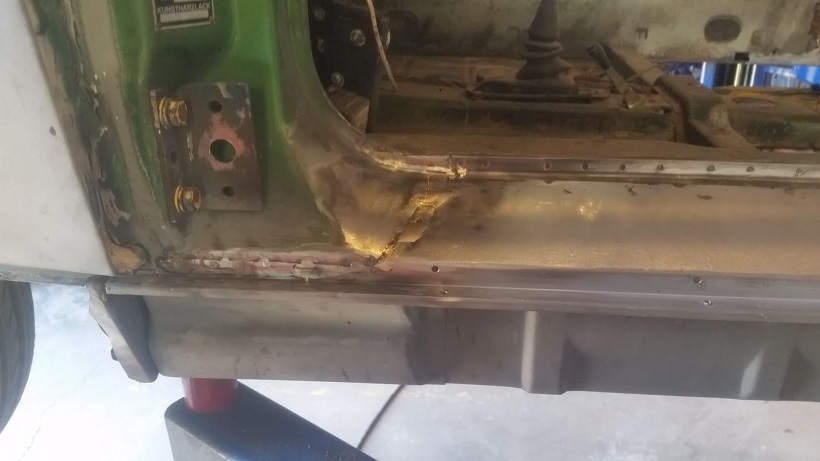
Gave it a covering of SE primer.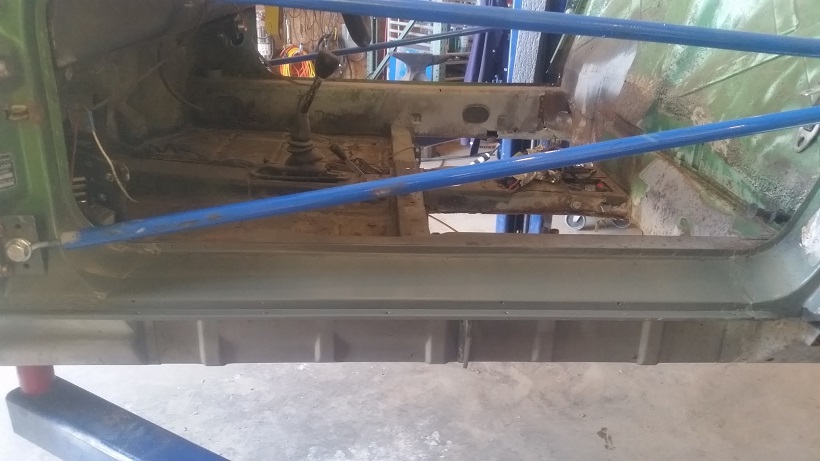
Posted by: cary Apr 7 2016, 10:21 PM
Then on to the inner box patch.
Lots of fitting and hammer work. Used a ball-peen hammer with a blunt chisel and a squared off piece of r-bar to get things nice and tight. Using the Clecos I drill and 1/8 hole to install the pin. I then drill a 3/16 hole on then side I'm going do the rosette weld on.
Tool Whore input: I've switched to Norsemen Made in the USA drill bits. Best I've ever used. A 1/8 pilot bit can last 3-4 days. HF, 3-4 minutes.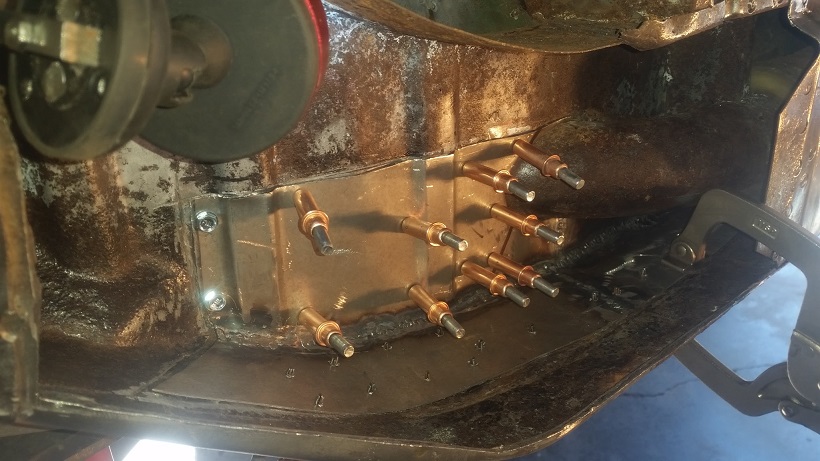
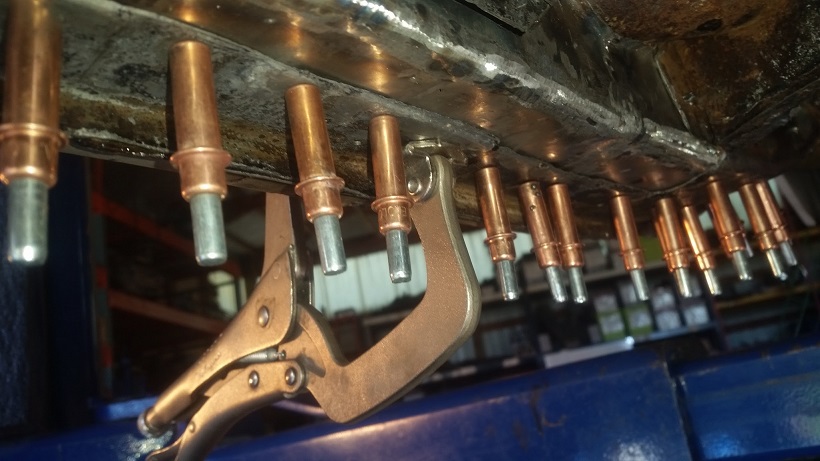
Pinned it into place, then got after my favorite welds, directly overhead. 
In actuality they went pretty well.
That one on the edge got away from me. As soon I touched it, it popped up.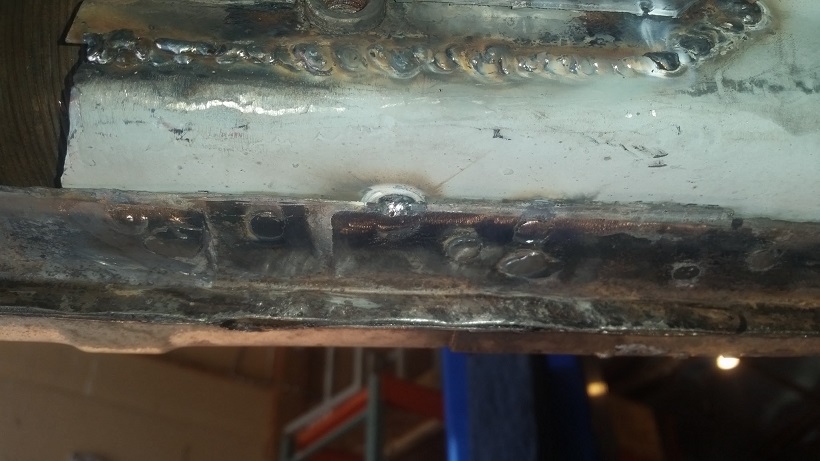
After everything got tidied up.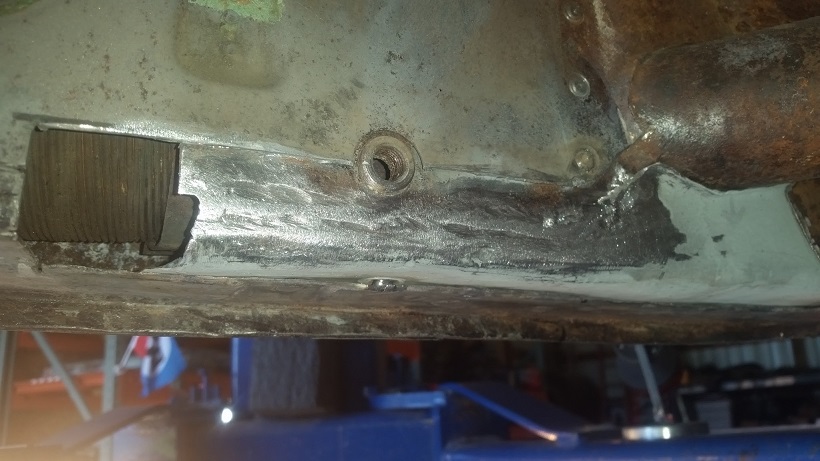
Then into the long and begin the slow and patient plug welding routine. I did turn up the heat a bit and let off the trigger a little sooner. Seemed to help. This shot is before any grinding on the plug welds.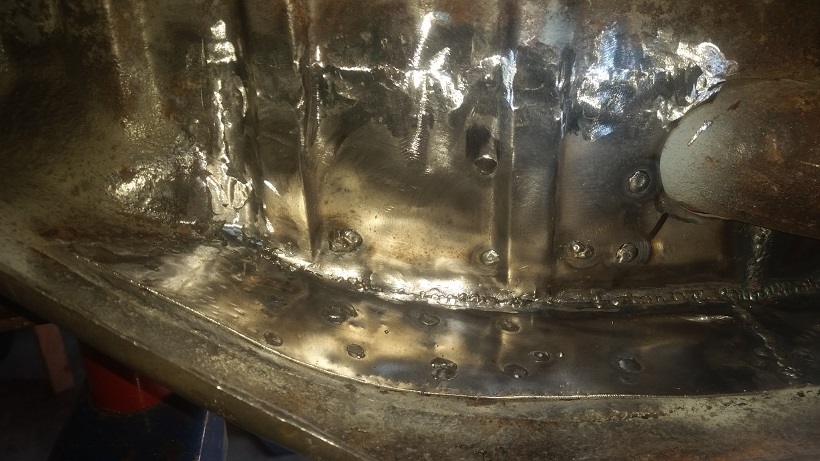
Outside patch is just about ready to go. Just a little trimming.
Posted by: cary Apr 8 2016, 08:29 AM
I'm switching cameras today. I'm not digging the camera on the phone, bringing my point and shoot. Better close ups and hopefully better with the back light coming in from outside.
Matt (Mark's brother) from 914 Rubber brought a 1.7 D-Jet system over for me to bench test the components. I'll start with the MPS and see what he has.
Might be calling Chris for a volume discount on MPS stop screws and diaphragm kits.
Posted by: raynekat Apr 8 2016, 12:44 PM
April in Oregon .............
Damn it's hot ........
Dude....I can't believe it's so hot.
84 in April.
Really?
Soon will be back in about 50-60's and lots of rain.
See you soon,
Posted by: cary Apr 8 2016, 02:19 PM
I'll drink a beer in your honor Thursday night.

Posted by: cary Apr 8 2016, 10:05 PM
Finished up the outer long patch before lunch. I'm trying the hotter faster plug welds. It seems to be working. Only thing to add, make sure you get the hole completely filled on the first shot. Coming back to fill them in leads to a pile up.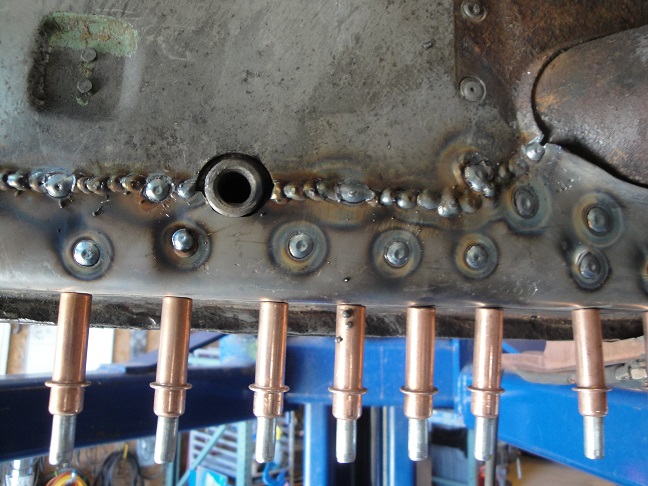
All finished up. Pushed it a little on the heat a couple times. One must remember, slow down the go fast. If you let the heat build up you blow nice big holes. 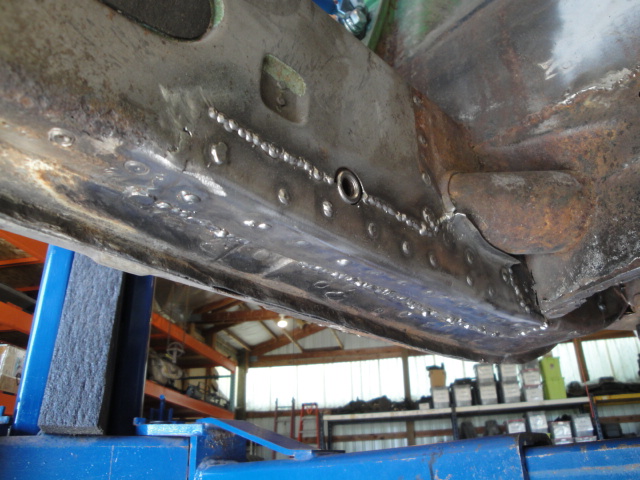
Ground down and brushed up .............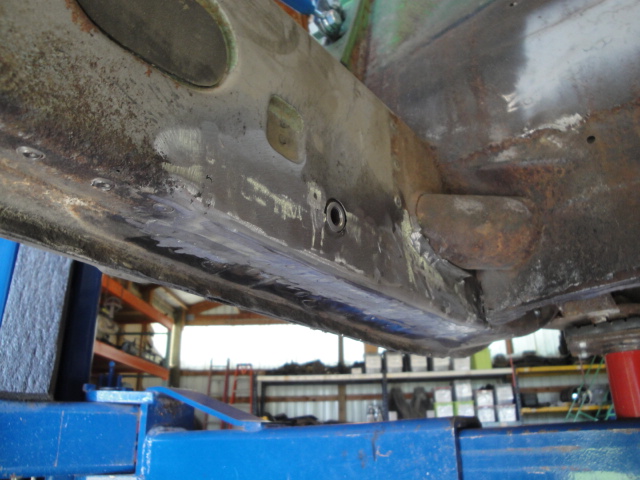
Paint job. SE Primer.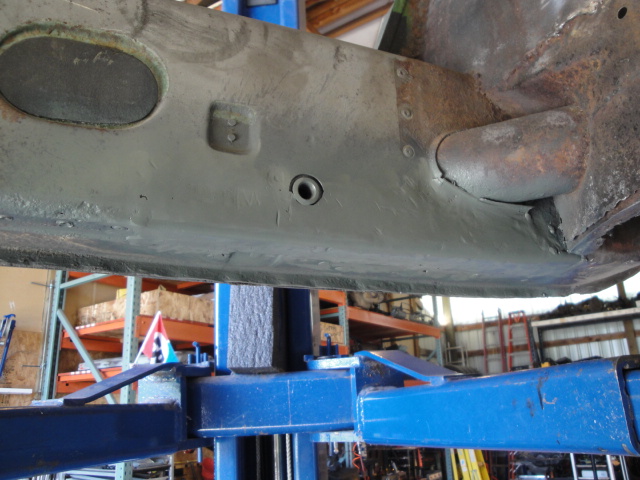
Note: right corner next to firewall not completely finished. That portion of the firewall might be coming off.
Attached image(s)
Posted by: cary Apr 8 2016, 10:26 PM
Spent the afternoon putting Mark's car on the frame bench. Primarily so I can work on my 73 DD. But we're thinking we'll take a break and build some fixtures.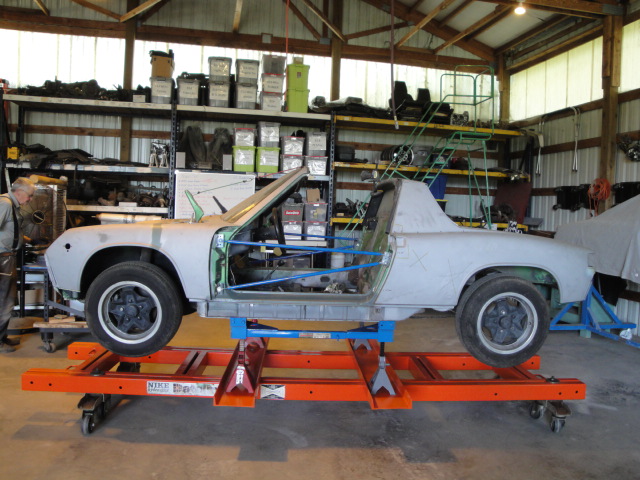
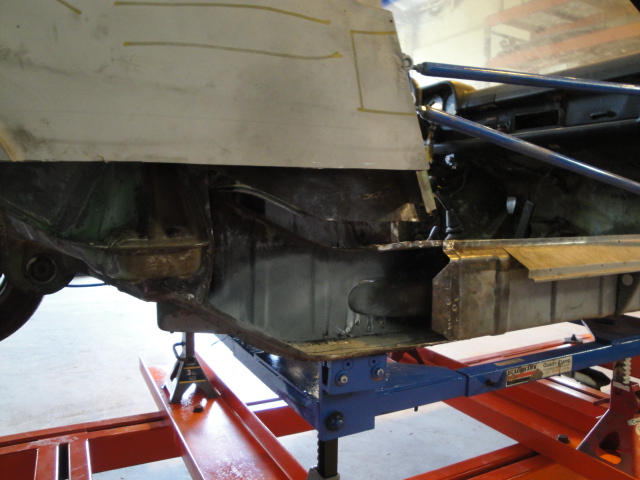
Primarily I'm thinking a pair for the transmission mounts. A left side 3/4 for the rear suspension. Mine won't need to be anywhere near as stout as the Celette. I'm not going to be doing any frame pulling. Just R & R rusty panels.
But I want to start with four of these to replace the jack stands and pinch weld frame.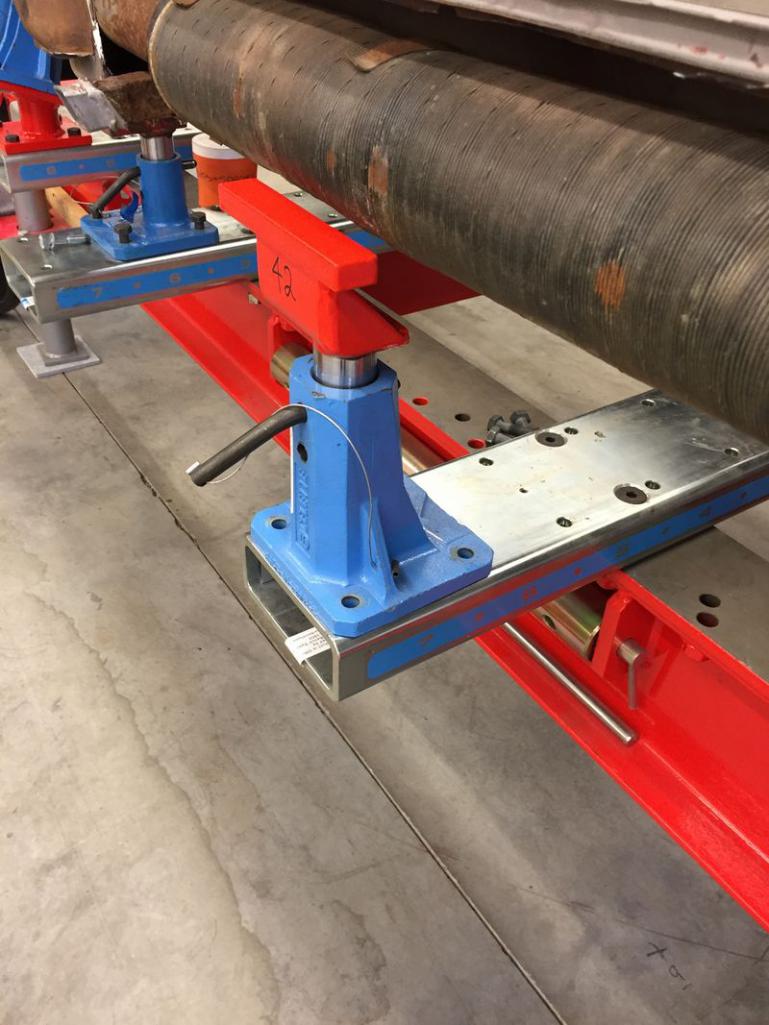
The fixture building will be documented on my rustoration thread.
http://www.914world.com/bbs2/index.php?showtopic=187546&st=720
Posted by: mb911 Apr 9 2016, 05:01 AM
You guys are doing great work. One question regarding all your plug welds.. Are you making your patches to overlay the damaged/rusted area and then plug welding to that area or are you butt welding. I just noticed all of rosettes and was wandering if those are overlays?
I am doing my rusteration similar in quantity to you and doing all butt welds to avoid the potential for rust in the future. I am just curious..keep up the great work.. It keeps me motivated.
Posted by: cary Apr 9 2016, 05:22 AM
Patch panels are all butt/seam welded around the edges. The plug welds are for strength. Everything that is to be covered is painted with weld thru primer. Hopefully that will prevent future rust. Time will tell. These had nothing before. Just raw steel.
Posted by: cary Apr 9 2016, 09:31 AM
Quit your day job.
I've given it some thought. But is there enough work out there to keep me busy?
Mark thinks so ............
Biggest thing is the additional tools/equipment that I'd like to have to make myself more efficient. And how many folks want to bring the car to a shop that doesn't paint?
I do plan to make arrangements to spray the project with epoxy primer before they head home.
Plus I'll have the ability to pick up and deliver. Open and enclosed trailer.
* 22 cfm compressor (replacement) $2500, must have
* additional air drying system components $1000
* additional lift $3000, multiple projects, plus Dad's garage has 24 HR service
*
* Texas blaster $800, step up from the Harbor Freight unit
* TIG welder $1500
* Additional 140 amp Miller welder $1000
* 48" powder coating oven $3500, for suspension pieces
* pallet stacker, for heavy lifting
I'm having discussions this week with a couple different folks about Porsche restoration work. But both of these shops are way beyond the scope $$ of doing DD 914 work.
I'm also looking at another job that could become a 3 1/2 day a week commission sales job. It feels like my sabbatical might be coming to an end.
Posted by: cary Apr 9 2016, 05:28 PM
While I was working on my DD I thought I'd prep the right door sill portion for reattachment.
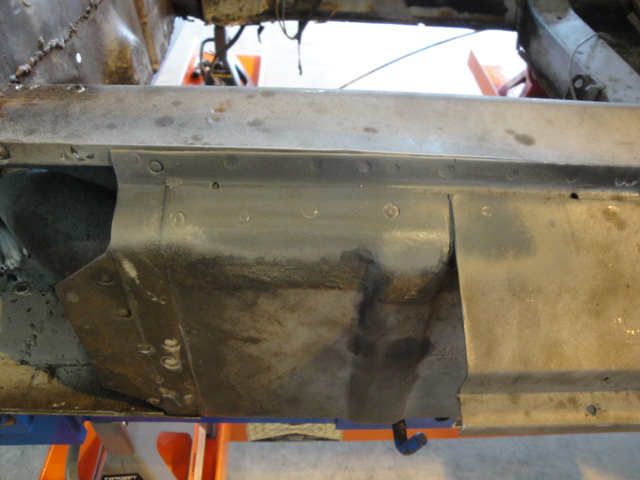
Posted by: cary Apr 11 2016, 09:29 PM
Mark dropped his blue 2.0L off for a little TLC before WCR.
It's sitting under the yellow parts car
I'll add a couple shots tomorrow.
It kind of looks like a 914 workshop.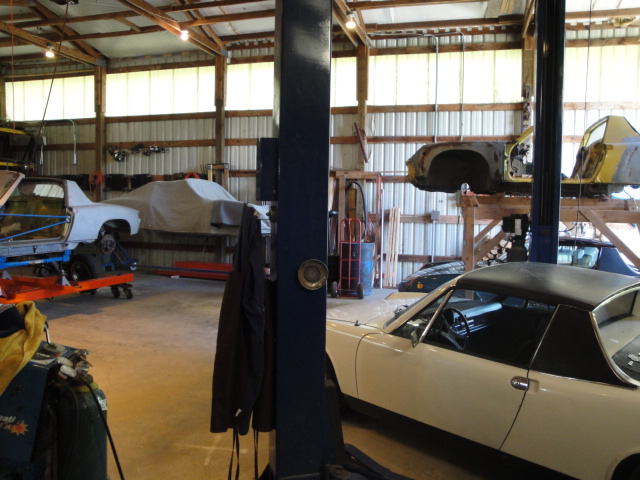
Posted by: cary Apr 11 2016, 09:57 PM
Here's the original work-list.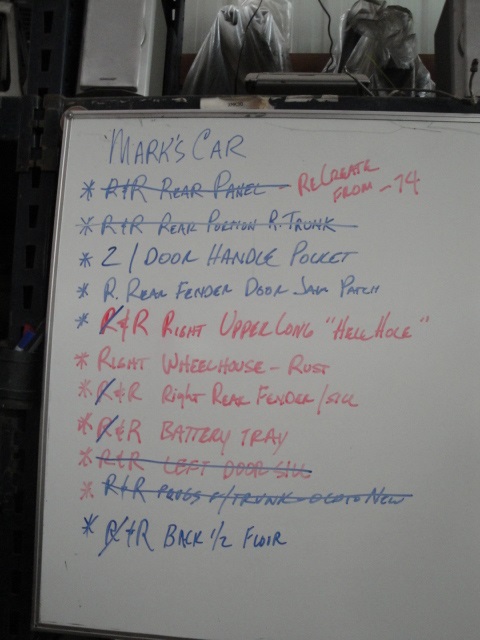
Posted by: cary Apr 17 2016, 07:25 AM
I've given it some thought. But is there enough work out there to keep me busy?
Mark thinks so ............
I'm having discussions this week with a couple different folks about Porsche restoration work. But both of these shops are way beyond the scope $$ of doing DD 914 work.
Both conversations went well. Then I go to my own shop and the 914's.
I really want to help keep/put as many of these cars on the road that I can.
I thinking I'll see if three 10 hour days is an option at either one of these shops.
That would leave me 2-3 for 914 Restoration.
PM me if you might have some work that needs to be done.
It will be a bit before I take on any more projects. Lock down business name, incorporate, insurance, etc.............
Posted by: cary Apr 17 2016, 08:11 AM
As work/design continues on the frame bench fixtures.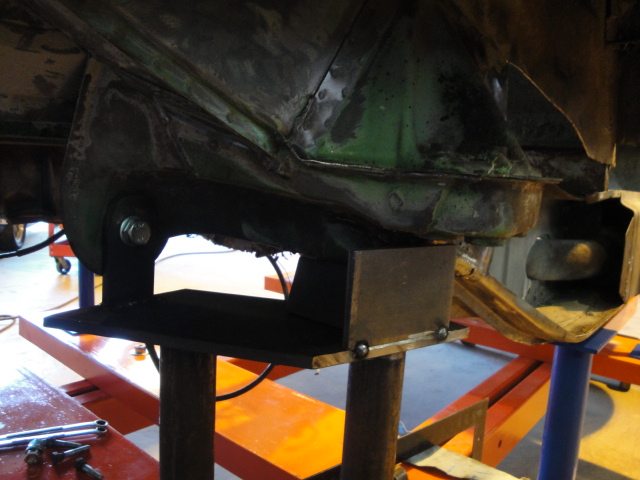
This is where we ended Saturday evening. I'll call this Version 1. Bought the longest 10mm bolts Ace had. But still an inch short of what would have been needed to build in the longer box end version, like Celette.
I decided that I'd pull the outer suspension mount off of the remainder of the driver's long that I bought from Perry. 1. Remind myself where all the spots welds are. Tough duty when everything gets covered and welded over with the tie plates. I'll shoot pictures of the spot weld drill outs for future reference. 2. How to cut out/off the wheelhouse with the least amount of carnage.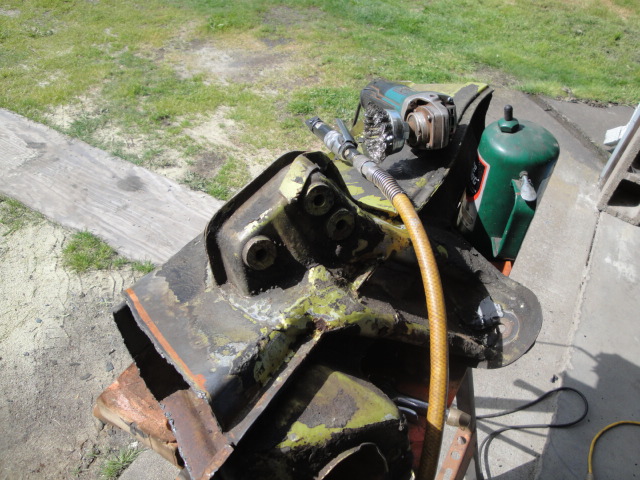
Lots of delicate cutting disk work to remove the ties without damaging the mount.
Used both the 4 1/2" electric and the die grinder on the mandrel. You can see the mount under the cut out tie. 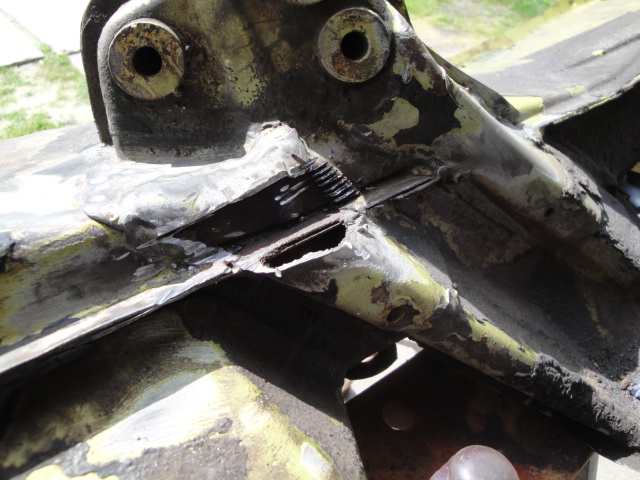
Here's the money cut on this job. Basically make a plunge cut to get the sawsall access. When going thru the ties. Let the tool do the work. Don't push too hard. All it will do is wear out the blade. Do as I say, not as I do. LOL.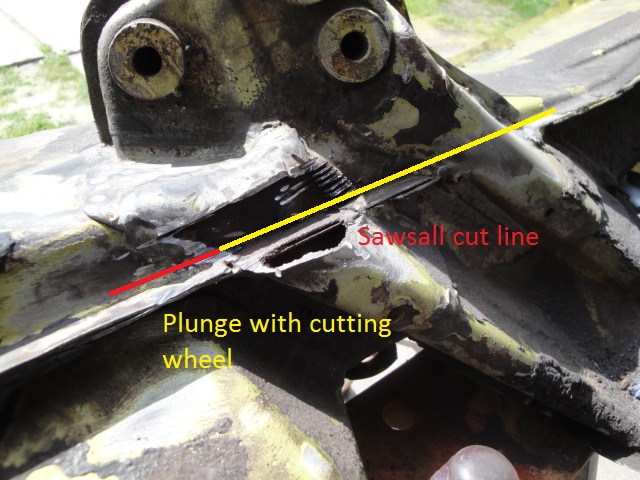
After a couple hours in the vice.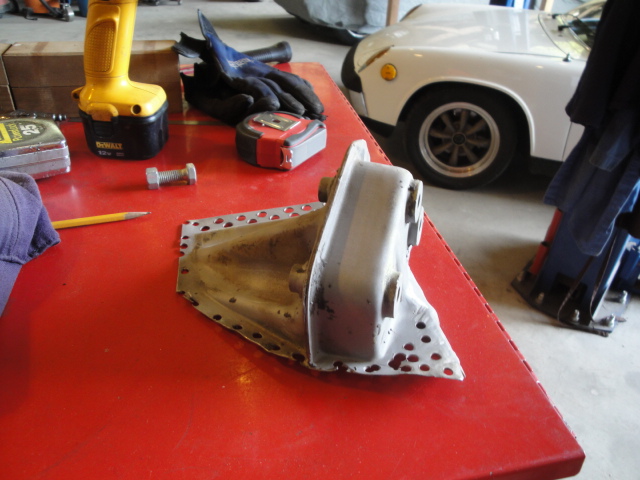
Posted by: cary Apr 18 2016, 09:52 PM
So back to work ..................
Installed the trimmed portion of the right sill that needed to be removed to get the wheelhouse cut out.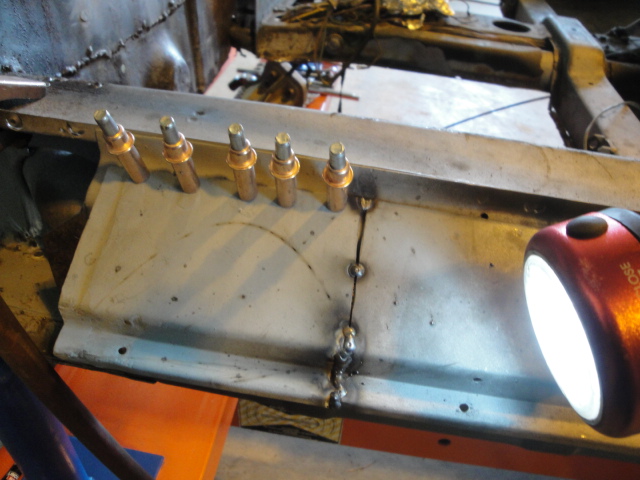
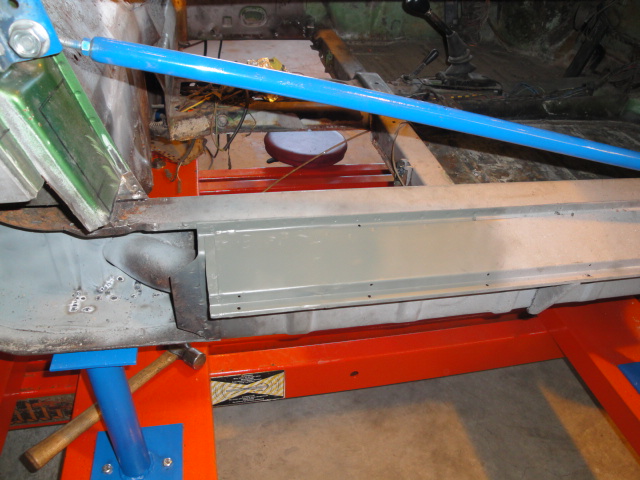
Then on to working on the crater under the right door handle. I looks like they pounded it in with a hammer. 
Couldn't move it much with a hammer and dolly. It's tied into the firm edge of the door handle pocket. Broke out the stud weld gun. But it wouldn't work ............
Headed home ................... 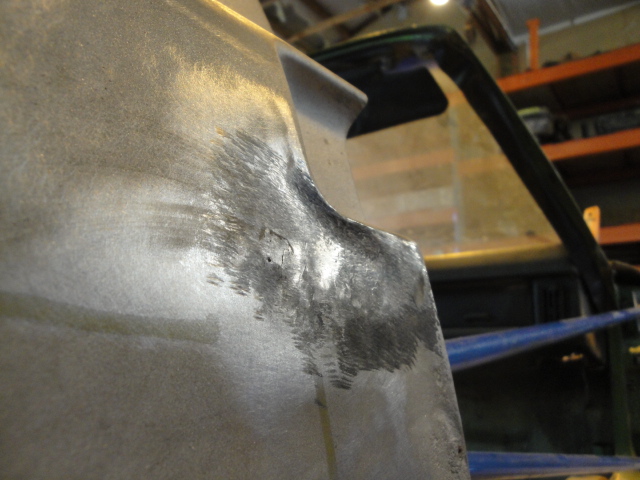
Posted by: cary Apr 19 2016, 11:05 PM
So we stopped at HF and picked up a new stud welder. Took the extended warranty for $13.
Got right to work. This might become my new favorite tool.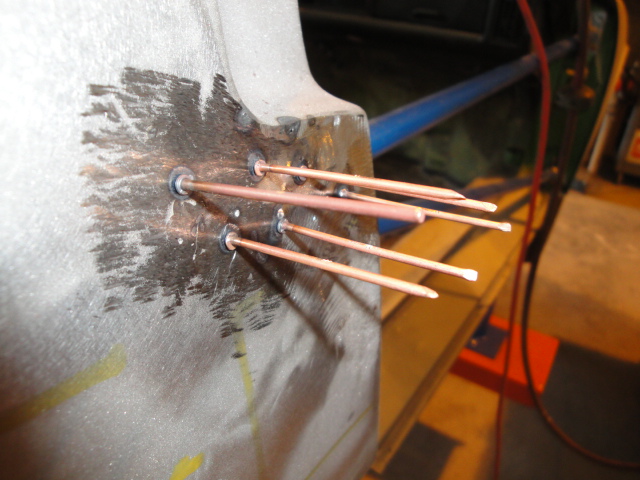
Went to the tail panel and pulled the little dent behind the latch brace that I couldn't
get to with a hammer and dolly.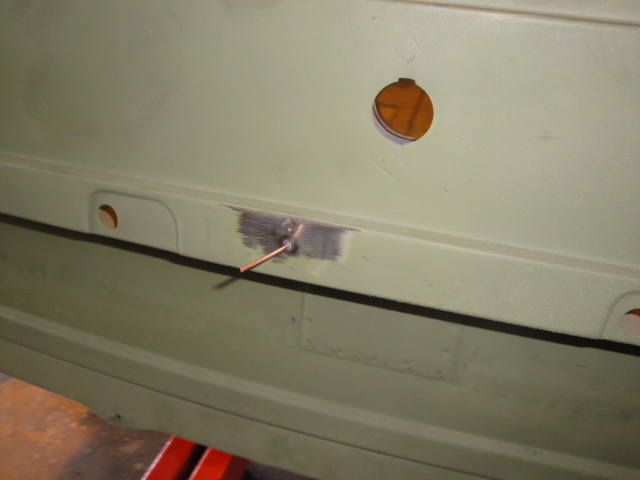
While I'm doing this on the project car. The blue car is running on the lift to warm/heat up and check for oil leaks.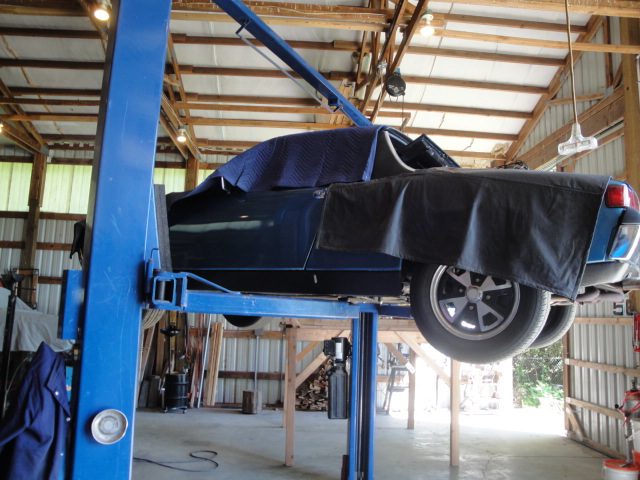
Posted by: cary Apr 19 2016, 11:08 PM
Got the majority of the door handle crater pulled out. Then I moved on to the rotten section under the door handle.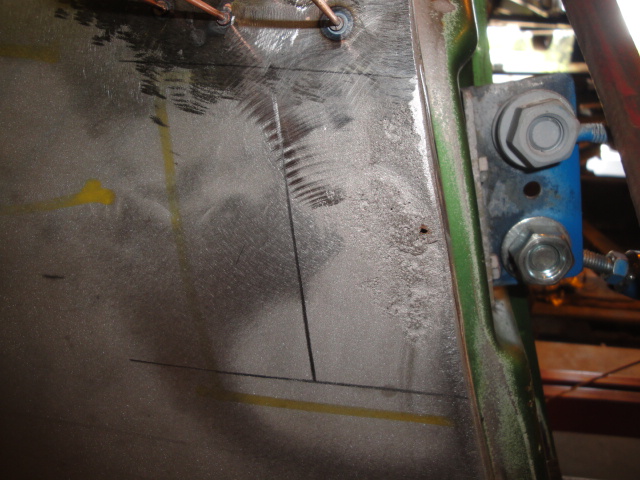

Here's what I found after I cut out the rotten section.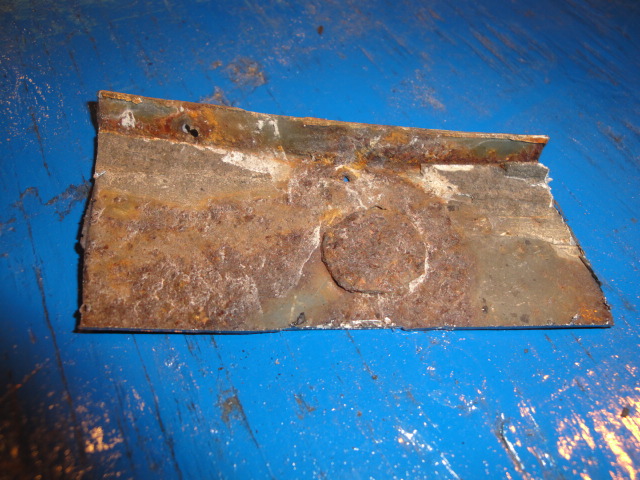
Posted by: cary Apr 19 2016, 11:36 PM
Fitting the new piece ...............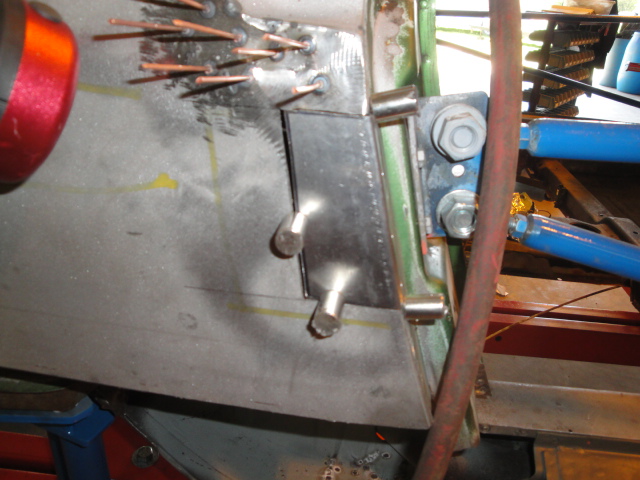
Then the fun began. Not only is the door jam arced/bowed. The qtr. panel has a bow/crown in it also. Both about this shape.
Here's the bow in the panel fitting to the needle gauge.
That was crudely done with the beater bag. I once asked myself why would I ever need an English wheel. Today was the day.
In she goes ...............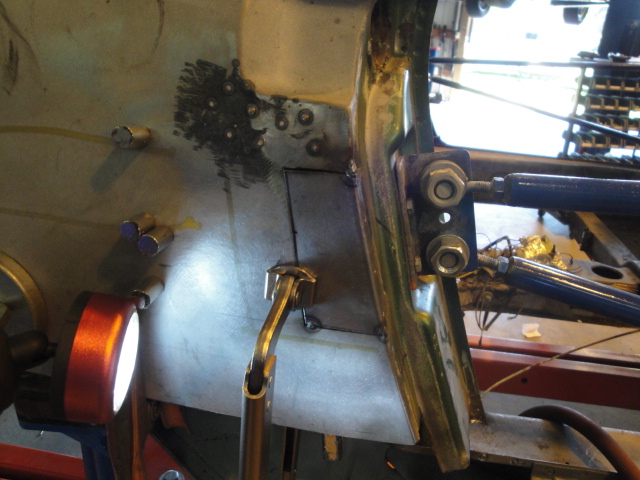
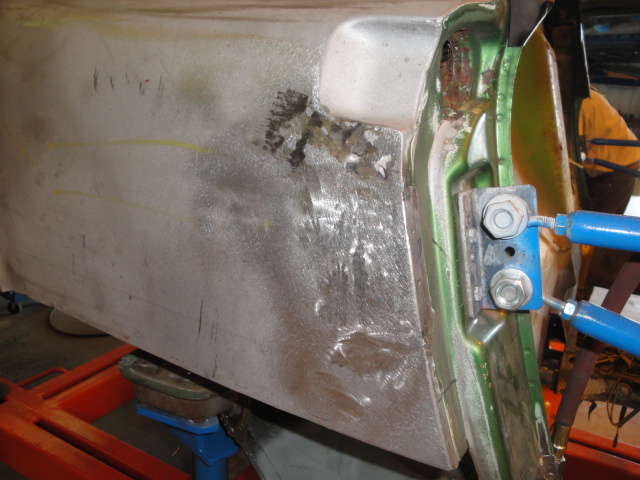
Door jam isn't welded in yet. Need to hammer in a little bit more bow. And there is a lot of metal yet to be moved on the qtr. panel.
Tomorrow I'll be dropping the engine in the blue car and continue the research on the oil leaks.
1. Crank seal
2. Flywheel seal
3. Galley Plugs, hope not.
4. Push rod tube, one of #4's needs new seals.
5. Oil Cooler seals. I doubt it. But it is missing the side bolt that keeps it in place.
I can see oil coming out between the halves of the fan housing. Not a lot. In two hours of idling on the rack nothing hit the ground.
Posted by: cary Apr 21 2016, 08:52 AM
When we returned to the shop I did have an oil spot under the engine/transmission union. So out she came.
Diagnosis :
1. No O-ring flywheel seal
2. Top of oil pressure switch leaking
3. Seal under oil filler/vent box
So the question is, do we replace the crank seal behind the flywheel while we're in there? Looks to be Elring. I have a Sabo coming from GPR.
The rear trunk will come off today. Right hinge bracket has come loose. We'll see if it can be reused. Engine lid needs some tension attention.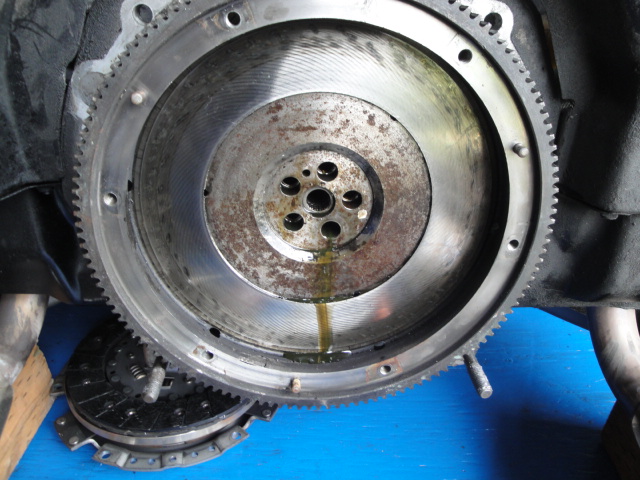
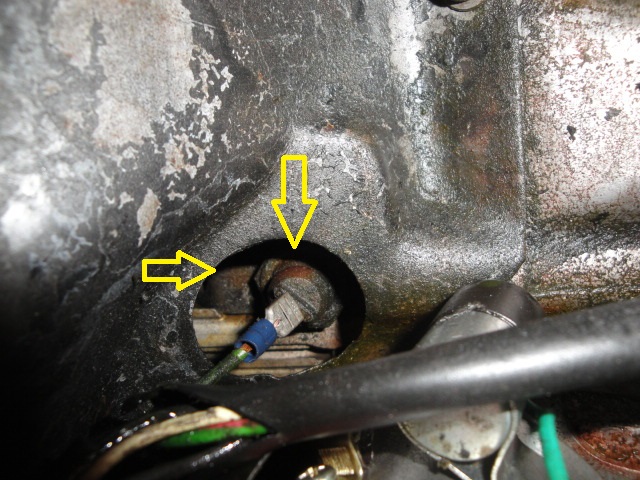
Arrows indicate the location of the oil dye.
Flywheel is on its last turning. Shaved bolts. But clutch looks to be in good order. No sign of oil saturation.
I'll put Super In Law on the clicking drivers door hinge. Everything in the door strap looks to be new. Hole on door side pin holder is wallered out.
Our usual course of action is using the biggest bolt the new strap will take. And some mini bushing from something we dig up out of the little drawers at ACE hardware. I've yet to see a right angle adapter small enough that would let you weld in the holes and re-drill them. But its been a long time since I've looked.
Posted by: Mikey914 Apr 21 2016, 09:19 AM
Looks like I may have to make some pins for the door straps? One more part I haven't made yet.
Posted by: cary Apr 21 2016, 09:32 AM
We need is someone with a NOS door hinge post to give us the original ID on the hole?
Or in MacGyver fashion. Because you've made the door strap so reasonably priced. You measure the hole. Make multiple sizes of the pins. Then re-drill the strap to fit the hole you have. Not CW, but it would get rid of the clicking.
PET says Cotter Pin 1, 5 * 10.
Posted by: cary Apr 21 2016, 09:52 PM
We need is someone with a NOS door hinge post to give us the original ID on the hole?
Or in MacGyver fashion. Because you've made the door strap so reasonably priced. You measure the hole. Make multiple sizes of the pins. Then re-drill the strap to fit the hole you have. Not CW, but it would get rid of the clicking.
PET says Cotter Pin 1, 5 * 10.
I used a new 6mm bolt and it's better. But I'll stop and ACE and get a 7mm and it will be perfect.
Posted by: cary Apr 21 2016, 10:06 PM
Decided the engine needed a bath before it gets its valve adjustment.
Steam cleaner came back to life without any issues after its long winters nap.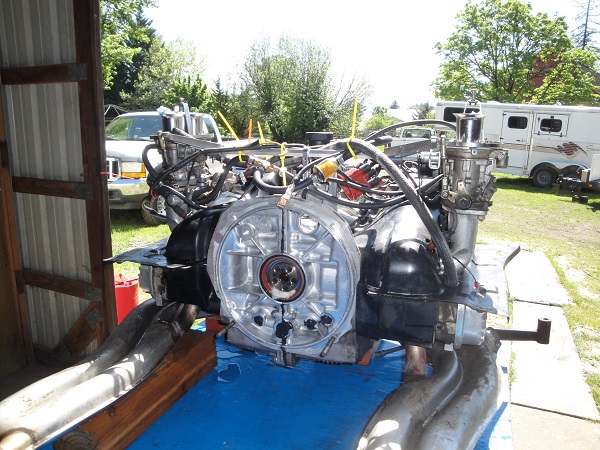
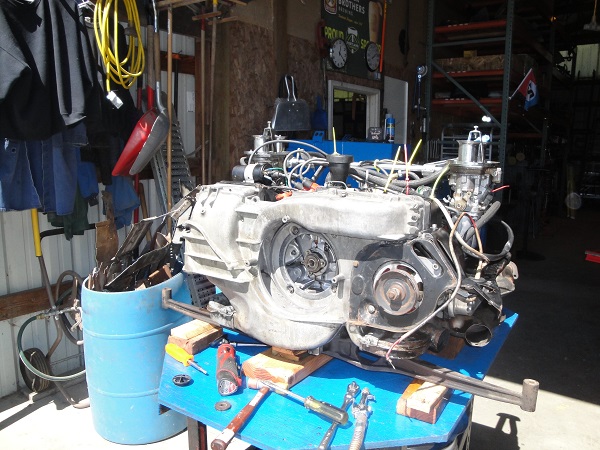
Having never worked on a carbed 914. I have a question about the plug wires.
I'm not digging the way the plug wires line up with throttle linkage. Do they make a 914 plug wire set with an angled connector?
Back in my youth I help build and maintain SCCA Pro Rally cars. This looks like a recipe for disaster. I'm firm believer of, whatever can go wrong, will go wrong.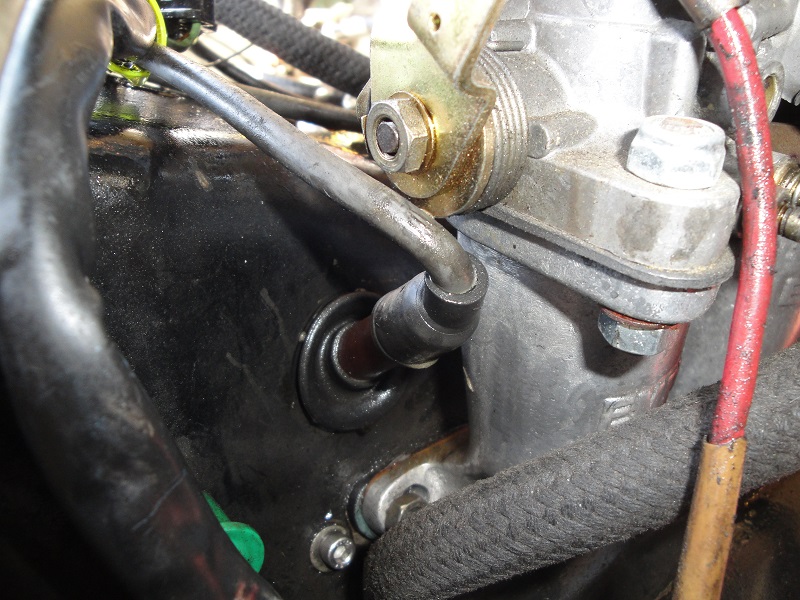
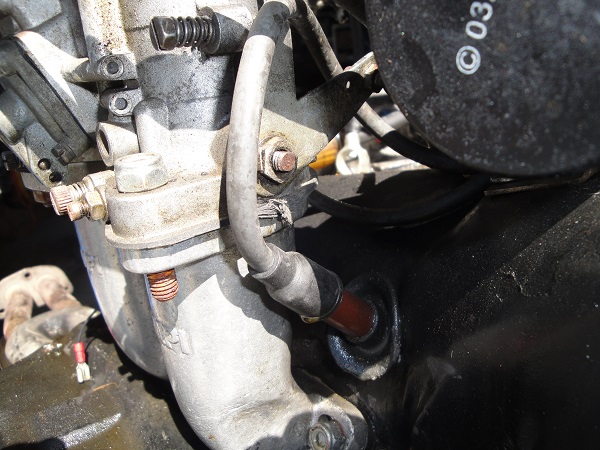
Posted by: cary Apr 21 2016, 10:29 PM
Then on to the trunk hinge.
Not good. Needless to say, not reusable.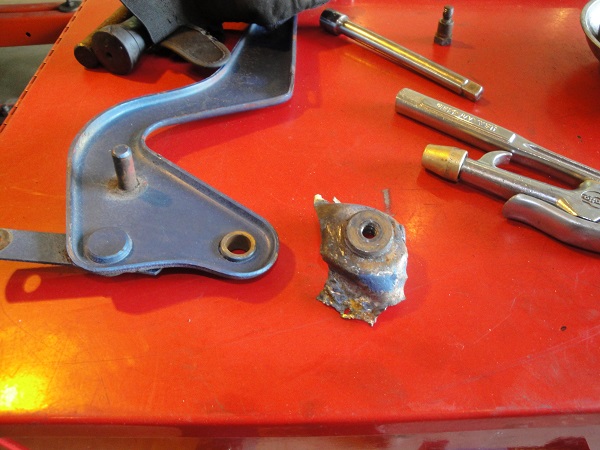
Based on what I see. This will be hinge #3.
Old welds removed. But after the grinding was done I did a little poking around.
Marked area will receive a patch on Monday.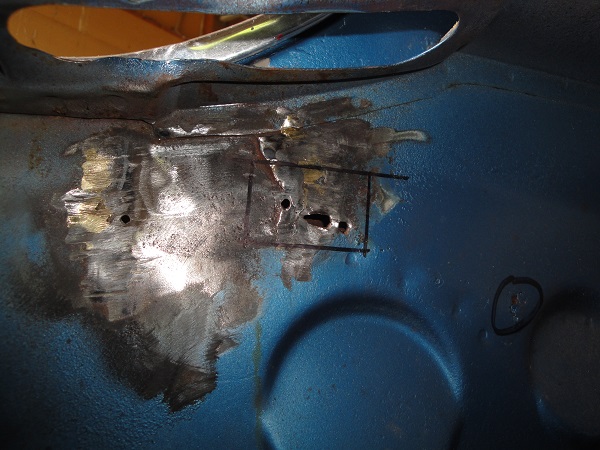
I was thinking with no visible rust under the sail panel vinyl it seems odd I would be rusting out here. So I decided to remove the tire and look up into the fender well. Looks like the end of the inner sail panel support got ate by the rust worm.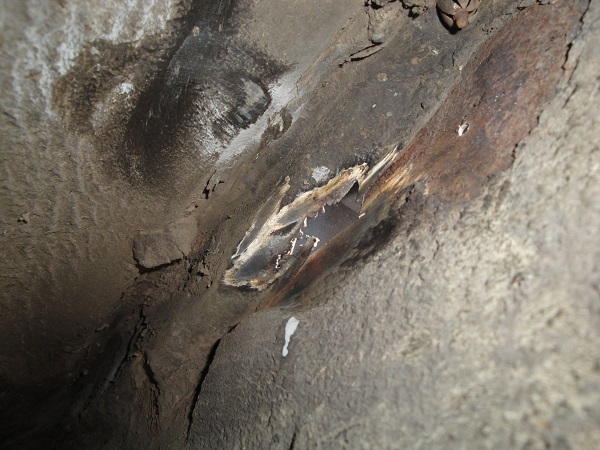
Not exactly part of the scope of work on this car. I'll patch the inner hole and aggressively seam seal the rotten section to keep water and debris out.
Then Mark can install some of his fender liners for added protection.
Edited : 4/21/16
I think its the tail end of the circled area. I'll flip over my rustoration to confirm.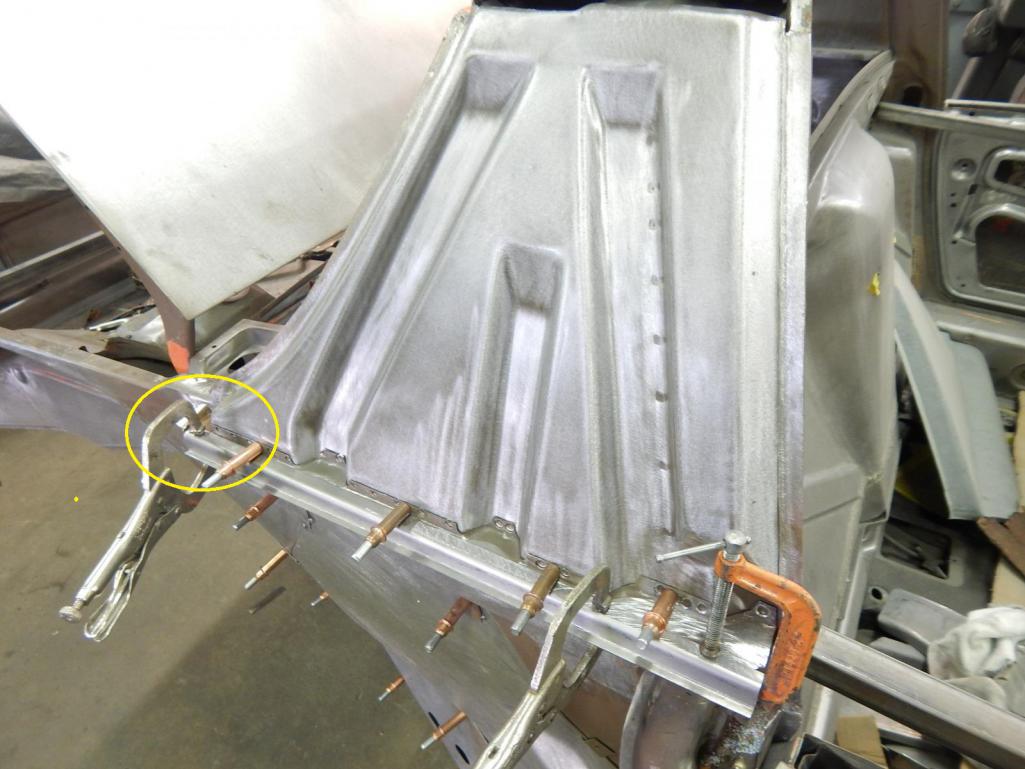
I love this picture. The craftsmanship is stunning. Hope to get close some day. The Metal Surgeon
Lights out and heading home. Spending the weekend in The Dalles to watch the Oregon Trail Rally. I'll be driving my white 73 if anyone else is going.
Posted by: 76-914 Apr 22 2016, 08:48 AM
We need is someone with a NOS door hinge post to give us the original ID on the hole?
Or in MacGyver fashion. Because you've made the door strap so reasonably priced. You measure the hole. Make multiple sizes of the pins. Then re-drill the strap to fit the hole you have. Not CW, but it would get rid of the clicking.
PET says Cotter Pin 1, 5 * 10.
I used a new 6mm bolt and it's better. But I'll stop and ACE and get a 7mm and it will be perfect.
I'd like to see some pic's of this repair if you have them.
Kent
Posted by: cary Apr 22 2016, 09:31 AM
I'll shoot a picture on Monday.
Nothing fancy. Just a 6mm * 20 bolt and a Nylock nut. With the door frame wallered out to 7mm I'll drill out the strap to match. Tension the nut just enough that it doesn't bind up. This will keep it from jumping up.
Posted by: cary Apr 22 2016, 02:29 PM
Forgot, I have bolts and nuts on both sides in my white car.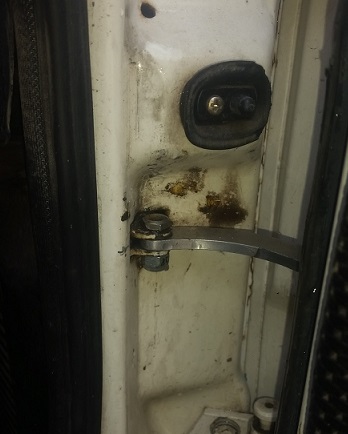
Not CW, but they look pretty sanitary.
Posted by: injunmort Apr 22 2016, 02:59 PM
i got a set of beru plug wires from parts geek that have short caps that don't interfere with the carbs. they were pretty cheap too, i think like $25.00.
Posted by: cary Apr 22 2016, 03:02 PM
I see Mark's on right now. I'll let him take look and make a decision.
Posted by: cary Apr 22 2016, 03:18 PM
Nice catch ........... Those look great.
Gets rid of the two long/tall ones.
KUDO's to Brian at GPR. Box with seals and oil filter just showed up.
Ordered on Wednesday, arrived Friday.
Posted by: 76-914 Apr 22 2016, 03:27 PM
Forgot, I have bolts and nuts on both sides in my white car.
Not CW, but they look pretty sanitary.
I got it. Wasn't paying enough attention. I thought you were talking about the door hinge pin where the door hangs from. They get wallered out too. BTW, your not going to like going back to an 8 to 5 after working on cars a couple of months. And that garage of yours; oy vey! It is sitting on a million dollars worth of real estate if it were in SoCal.
 "Cary on".
Posted by: cary Apr 22 2016, 03:53 PM
Nice thing about the door is they can be totally removed. So we (Super In Law) could build a jig to hold the door under the drill press. So we could weld and re-drill.
Kent I'm only holding out for one 8-5 job. If it doesn't come to fruition in the next two weeks I'll be pursuing Porsche restoration as a career change.
Posted by: cary Apr 25 2016, 09:42 PM
Super In Law is working on the front end of the blue car.
1. Installed new trunk cable
2. Realigned hood
3. Reworked both headlights
4. Stopped at Ace on the way in and got the 4mm bolts for the trunk light
Waiting for some eyebrow rubber before we shoot any pictures.
Back to the green car while I'm waiting for parts. So I open up the sawzall and get to work.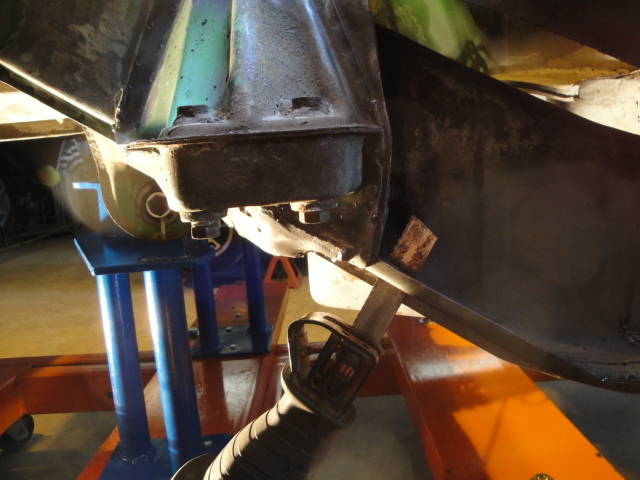
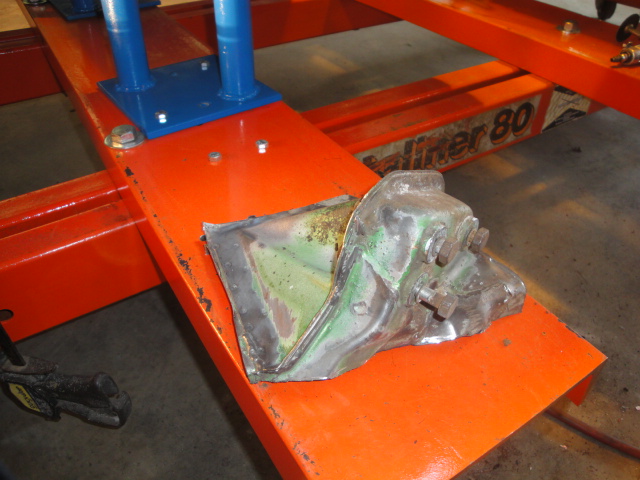
Wont go into detail on removing the suspension mount, covered that last week.
But on a sour note I did find some rust worm work under the smaller tie. It will get a multiple piece patch. Another example of our cars rusting from the inside out.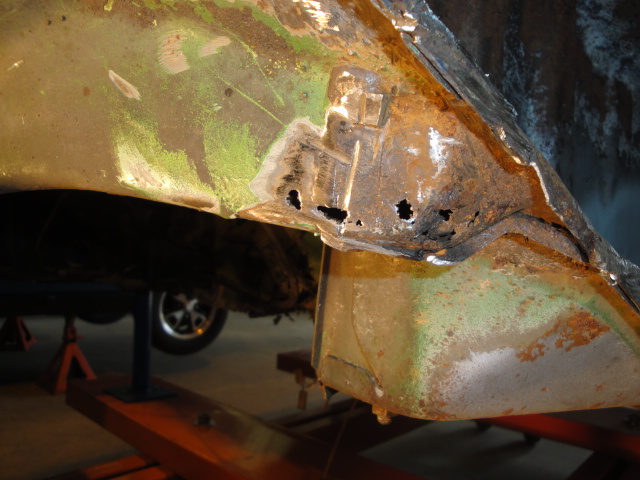
Getting ready for an application of OSPHO before we head home.
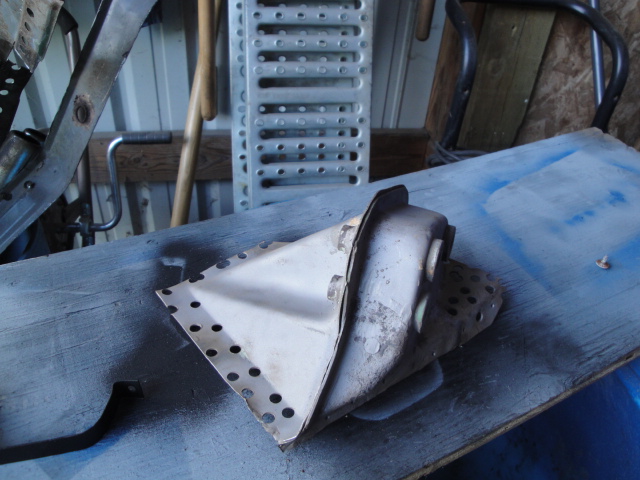
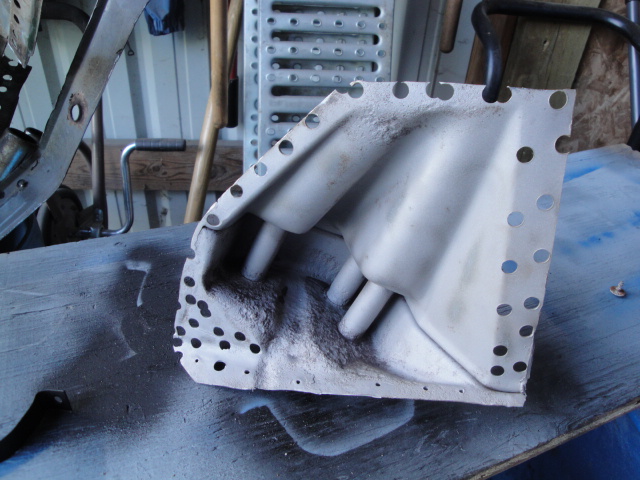
Posted by: cary Apr 26 2016, 09:34 PM
Start the day with chemically prepping the wheelhouse/upper inner long for enclosure.
Step #1, application of cold galvanizing spray. No picture, just another picture of the area sprayed in gray. Let it dry 3 hours with shop lights keeping it nice an toasty.
Step #2, application of Eastwood HD Anti Rust.
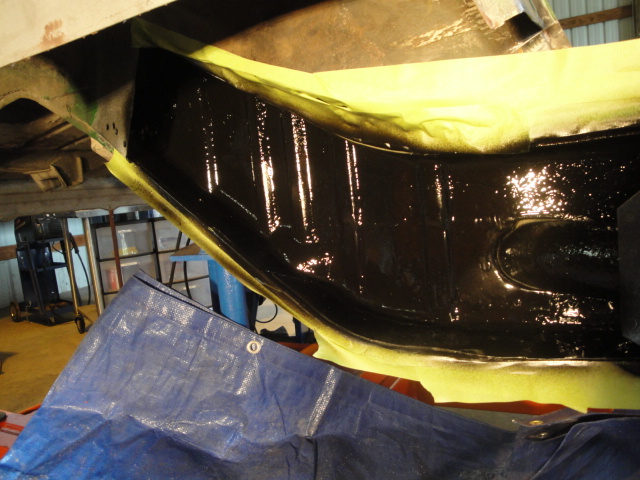
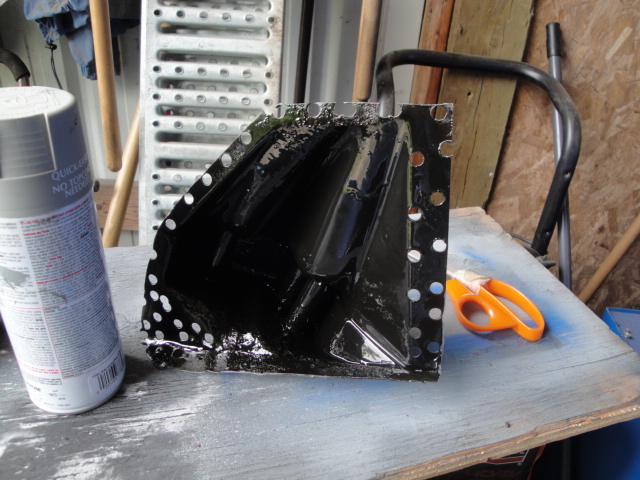
Long left baking with the stoplights over night.
Posted by: rick 918-S Apr 26 2016, 09:39 PM
Looking good Cary. ![popcorn[1].gif](style_emoticons/default/popcorn[1].gif)
Posted by: cary Apr 26 2016, 10:10 PM
While the chemicals are drying I decide to tackle the removable exhaust shield project.
I changed my mind on the direction I was going to go. Blind nuts on the floor of the trunk. I decided to go with only the pan being removable. That way you go could work on paint and or undercoating under the pan.
Took a while but turned out real nice. FROM 25,000 ft. Punched two 1/8 holes in each of the stand offs. Aligned the pan using the parts car as a reference. Held it in place using vice grips thru the mold release hole that I opened up earlier. Then used my long handle 90 degree pick to scratch the hole locations. Then drilled the matching 1/8" holes in the trunk floor pan. Held everything in pace with Cleco's. Removed the pan. Then removed two stand offs off the pan. Kitty corner from each other. Each stand off has three spot welds. From the backside, using the Rotacut spot weld cutter drilled the center one clear thru. It will be used for nut/bolt hole. Then drilled thru the pan layer on the other two spot welds to pop the stand off free. Then applied weld thru primer to the to be welded on surface with the two 1/8" holes. While that was drying I welded back in the two extra holes in the pan created with the Rotacut. Then welded a 6mm nut to the middle hole of the stand off. I did this two by two as to not get too far ahead and out of alignment.
Note : I did enlarge the hole in the trunk floor to 3/16 ths for ease of alignment and weld penetration.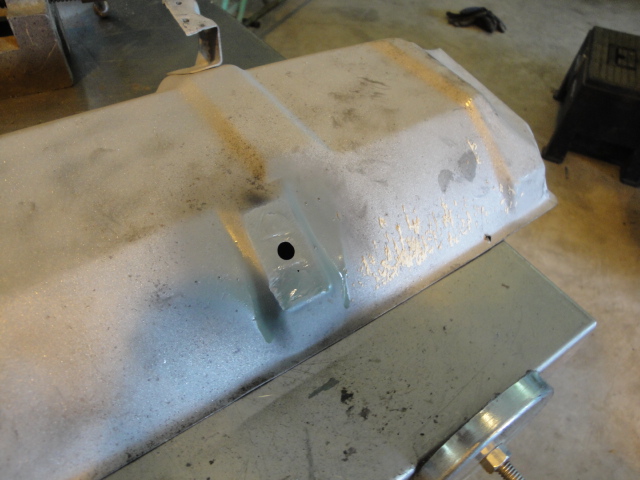
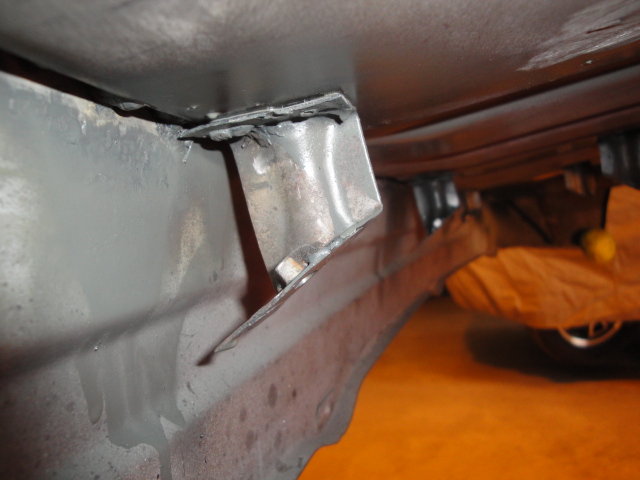
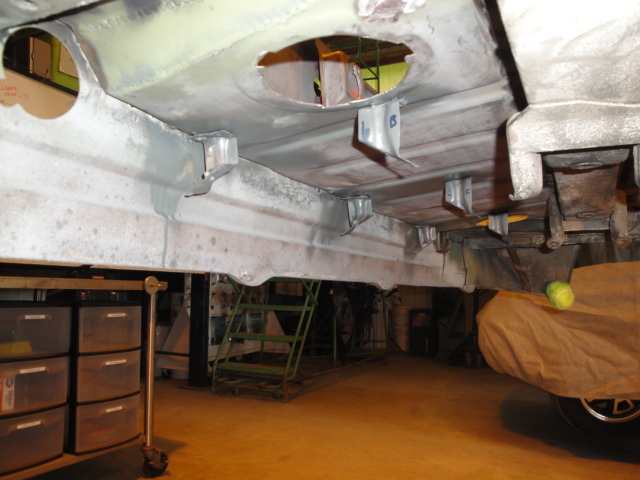
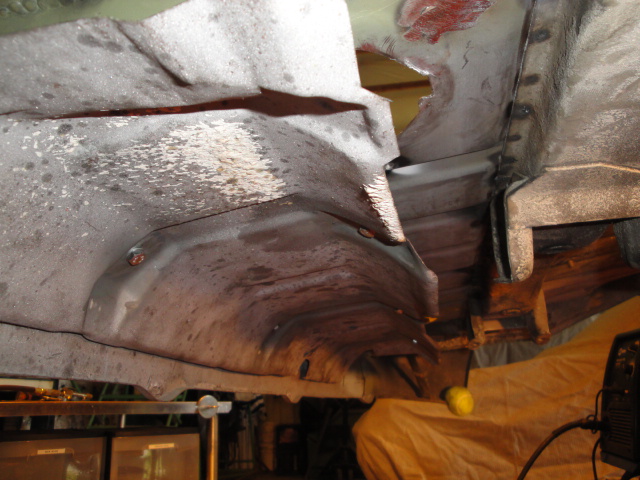
Nut tucks nicely out of the way ..........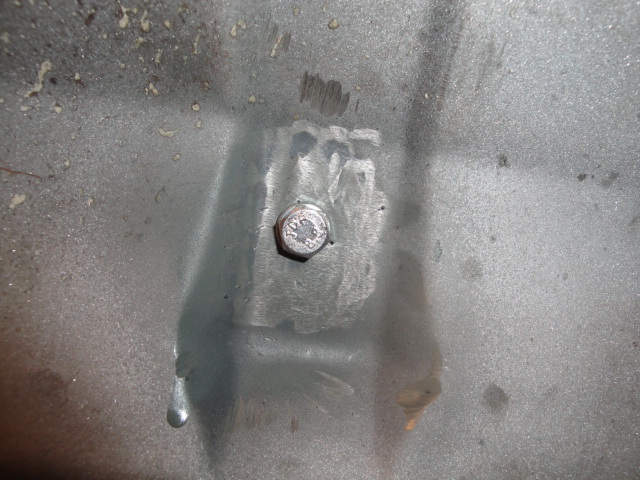
Posted by: djway Apr 27 2016, 02:21 AM
When I was learning to tear apart panels and spot welds I found a couple of things that made it easier to find and separate the welds. First I bought a bunch of 1/4in drill bits. I also picked up a cheap paint scraper (like a really hard metal putty knife) at Harbor Freight. After the initial knock down of crud I would spray the area with a cheap black paint. I would then hit the area with a block sander and look for the spot weld low spots. I would drill through the first layer of metal with the bit. I would then wedge in the paint scraper, which is very thin, and start tapping it in between the metal sheets. It usually cuts right through the remaining portion of the spot weld. You can also tap the scraper between the metal to find the next spot weld as it will stop right at the edge of the weld. These scrapers are super tough and very cheap. I have done a TON of spot weld removal and still have not worn out a scraper. I hope this helps speed along the process for anyone out there trying to learn this skill. Great work
Posted by: cary Apr 27 2016, 09:06 PM
Super In Law starts on the patch for the end of the suspension ear.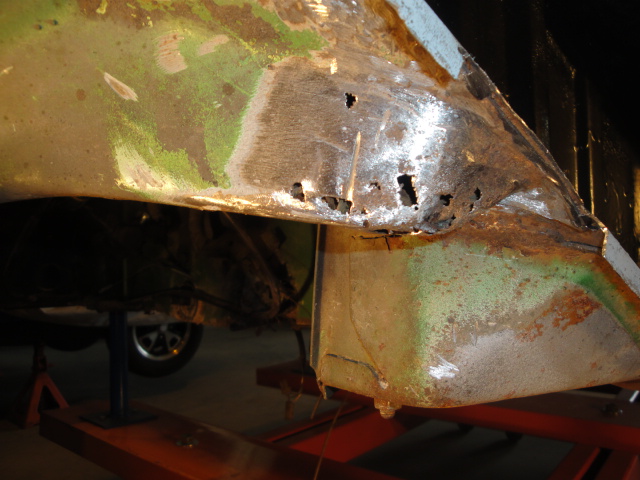
He built it in one piece. We should have brought over the forge. We'll use the forge when we fabricate the next set of tie plates.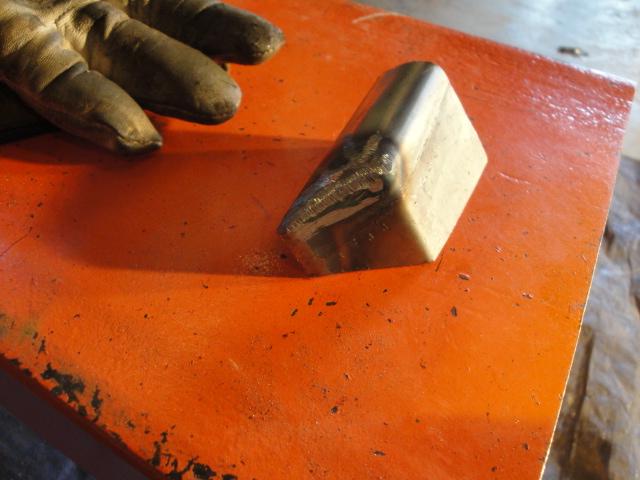
Tacked in. Forgot the shot of the backside all tidied up. Front side in the valley I just couldn't get a good angle with my welding helmet on. I'll finish it up when we put the car back on the lift.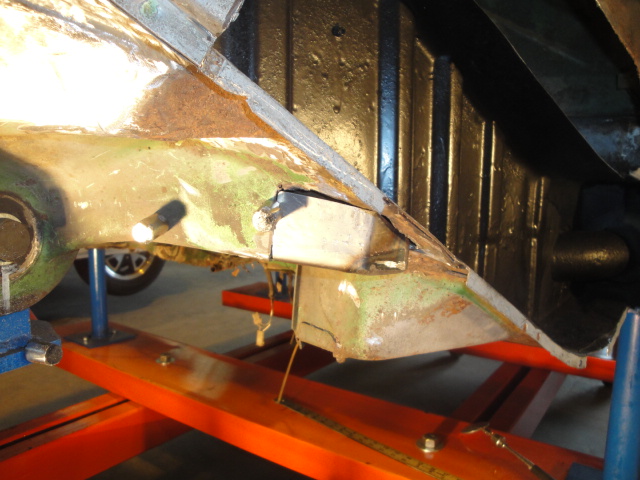
Posted by: cary Apr 27 2016, 09:20 PM
I got after trimming the wheelhouse panel.
Started with marking the opening from inside the engine compartment. Then gave myself an additional inch for good measure.
Used the HF power shears. They do a marvelous job. Even thru the wavy stuff.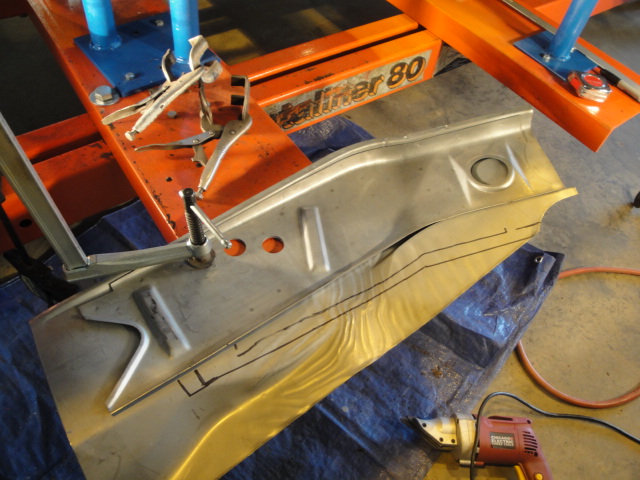
Trimmed off the excess and fitted it again.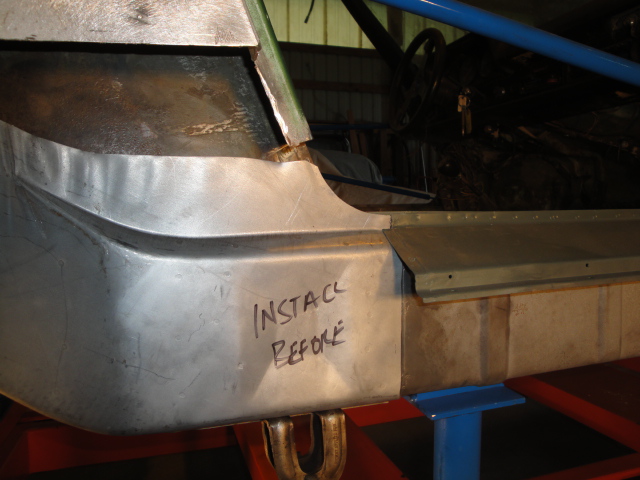
Then I trimmed off the portion over the remainder of the inner box. It will be rosette welded to the old wheelhouse outer wall.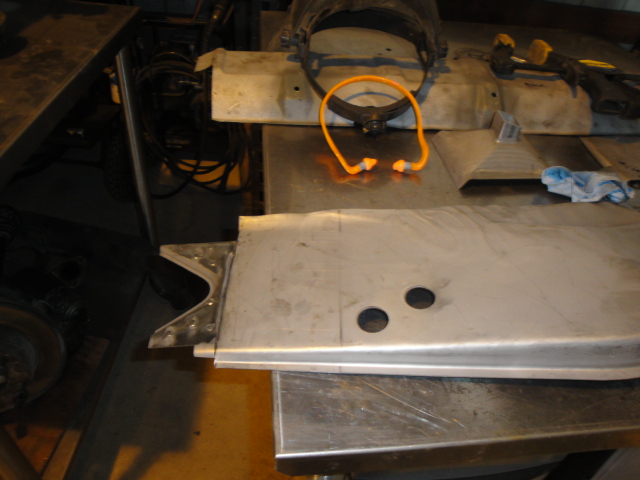
All trimmed up and ready to go.
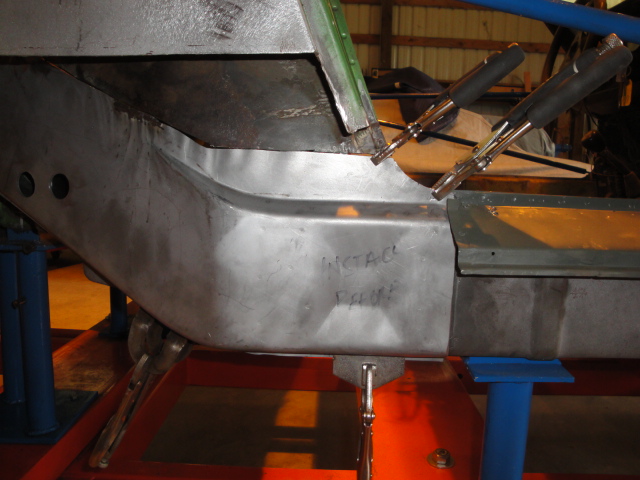
Posted by: cary Apr 28 2016, 10:16 PM
Super In Law spent the day tinkering with the headlight covers and the eyebrows.
Alignment and leveling.
Next we're going to get after getting the driving lights fired up.
Found the white/yellow 75 additional headlamp wires. Now I just need to look up the wiring diagram for the Pilot 30 amp headlamp relay.
The rosette portion of welding in the wheelhouse went great. Welds look great.
The butt weld across the top is giving me fits. The old metal is shit.
Should have made the cut a couple inches higher. Constantly blowing thru. Then welding in a big pile to fill the hole. Then over grinding to make it look nice. Grind thru. Then we start the process over again.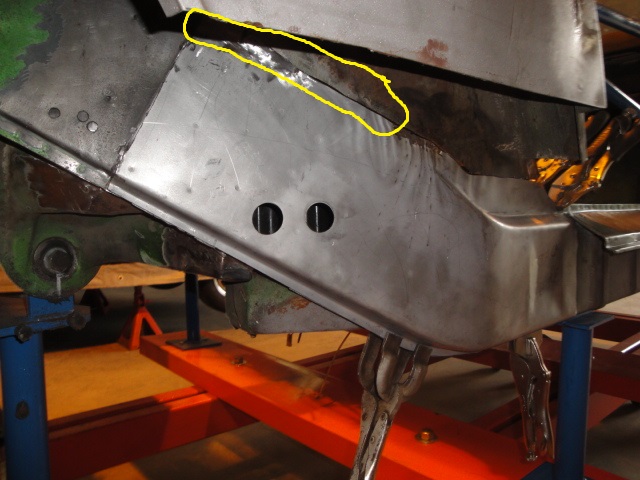
Posted by: Mikey914 Apr 29 2016, 01:33 AM
Thanks guys,
This will be the 1st time in 4 years that I will have a fully functioning 914 !
I've been meaning to hook up the fog lights for 3 years now.
Honestly, In our area there are few guys that can do what Cary is doing. He's been seriously looking into do this on a regular basis, I would think that he would make an excellent resource for our community. If you have any 914 work to get done I would recommend you contact him. I suspect he will become quite busy based on the quality of work I have seen.
Again, a potential vendor I would highly recommend .
Posted by: cary Apr 29 2016, 07:44 PM
Took a bit of unraveling. The blue car is a backdated 75. But the wires to the J12 Additional Headlights Relay didn't match. The wires matched the 74 USA schematic.
Hmmmmmmmmmmmm. The 85 leg (ground) should have been a brown wire looped to the fresh air blower relay right next to it. But no, it was a gray/red running up behind the dash switches. Hmmmmmmmmmm.
Work around. Cut the gray/red about 2 inches from the relay socket. Labeled the wire coming down from the dash as 74 fog light switch. Added a brown wire and a wire connector to the 2" wire from the relay socket and added to the dash ground stud.
Then there was issue with the power lead the Pilot headlamp relay. Made about 10 attempts on the fused side of the J West panel. Every time I pulled the headlight switch the headlight motor/dimmer switch blew its fuse. Damn ...........
Finally used my retractable wiring lead and ran it from the battery. Viola ......
Finally wired it to the incoming side of of fuse #12. Working like champ.
Runs like a 75-76, driving lights are on when ever the headlights are on. But we could wire it with a switch if desired.
Posted by: cary Apr 30 2016, 08:54 AM
After yesterday I think I'm going to draft a checklist, kind of like a PPI. So when some one brings me a car and asks me to make it road worthy I just go down the list and check them off.
From on my knees at the drivers door on the blue car.
1. No horn
2. No fresh air blower
3. Ignition key didn't go into the front trunk lock
Heat and keys will have to wait for its next visit. We'll get a horn going before Mark picks up the car. It will be interesting to see which which schematic matches up. LOL.
Posted by: DirtyCossack May 1 2016, 06:30 PM
I had the same problem welding in my upper wheelhouse patch today, that area is a total pita...
I also decided that I am totally going to steal your removable heat shield idea.
Posted by: cary May 2 2016, 09:59 PM
Super In Law is tearing into the front trunk seal channel. Not super bad, but every corner will need some work.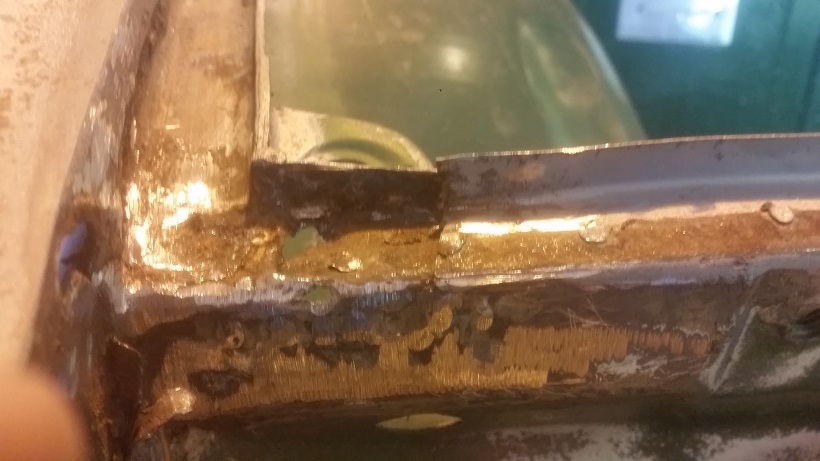
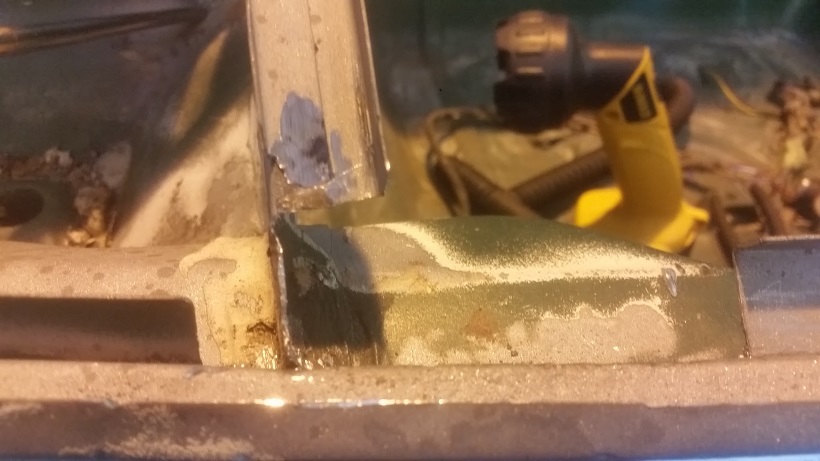
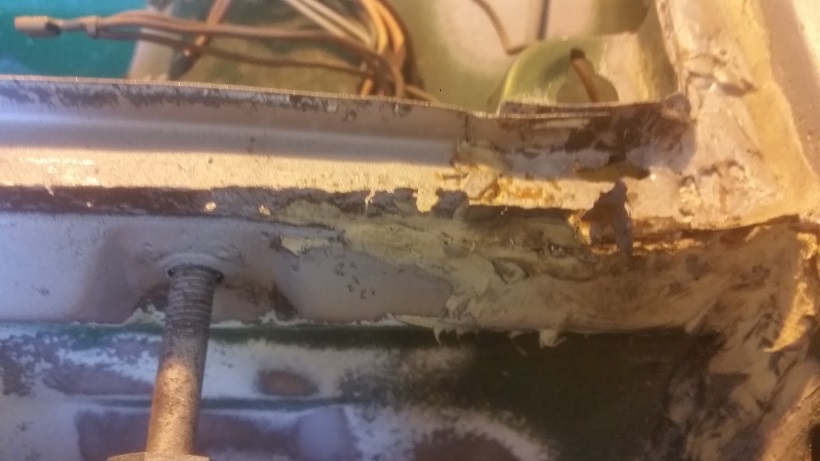
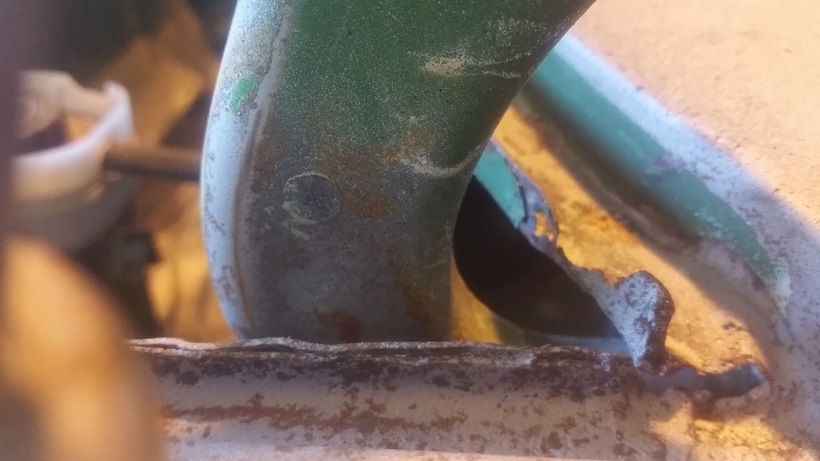
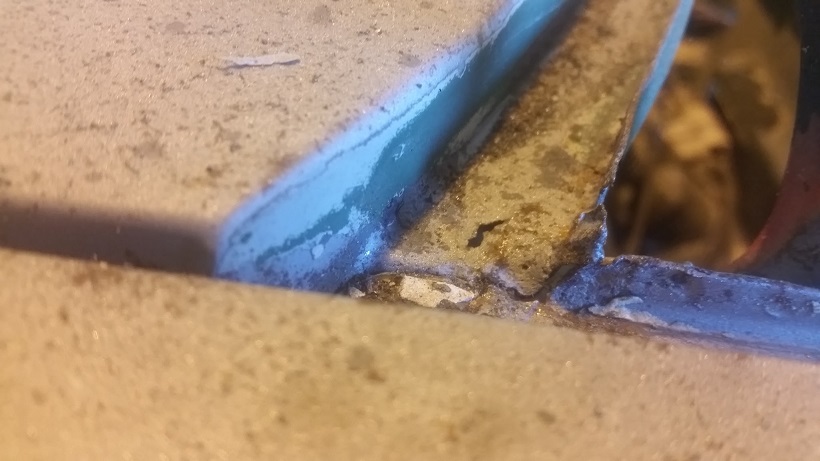
Looks like the front fender has been replaced. I"ll try and do some creative work with the brush on seam sealer to close up the gap.
Posted by: cary May 2 2016, 10:14 PM
Getting the wheelhouse all locked down for the welding to begin ...........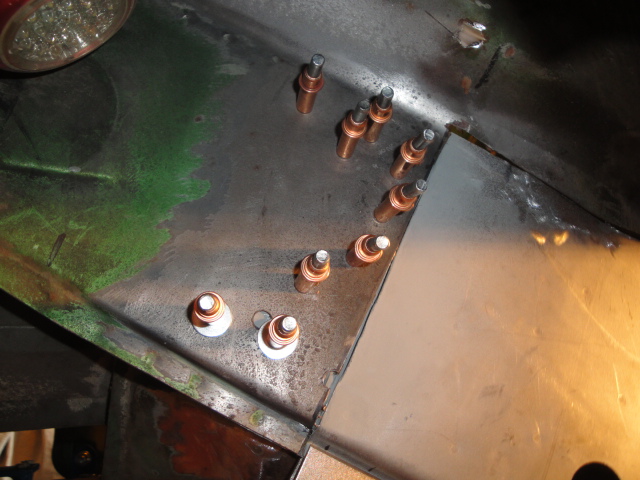
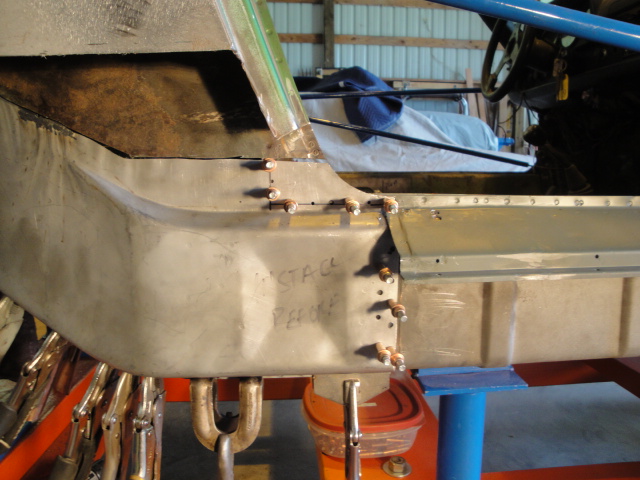
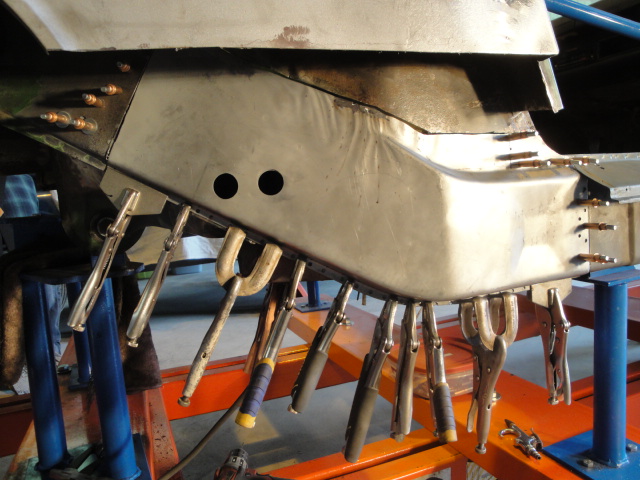
Finally got the wheelhouse completely welded in.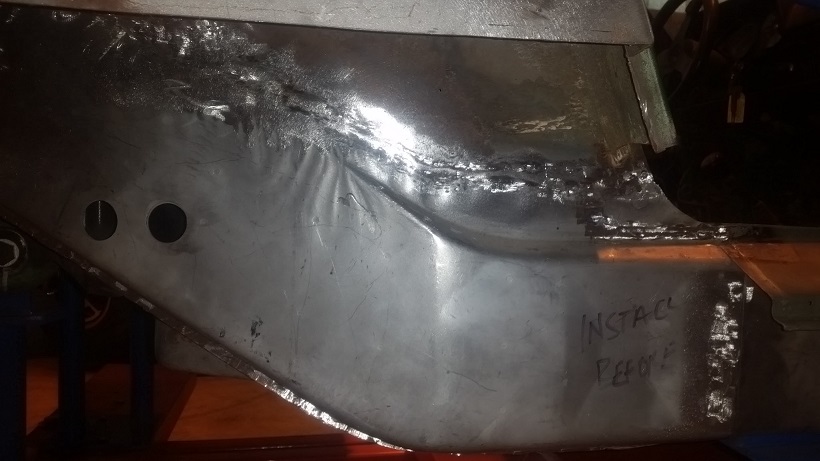
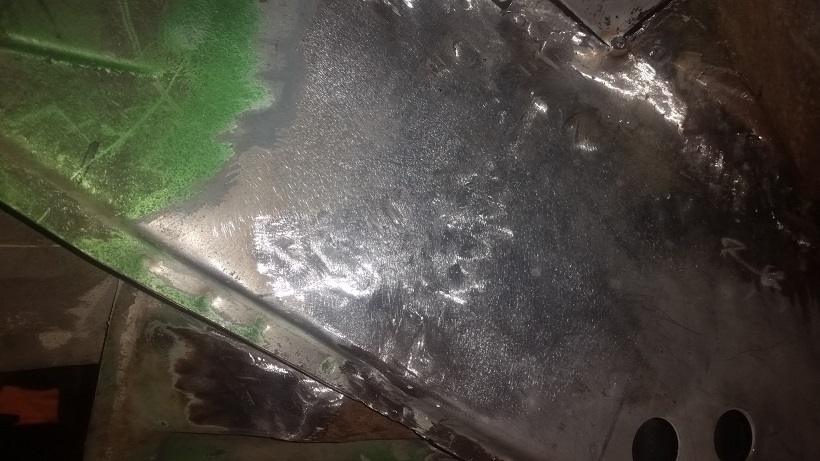
Then I find a big chunk of bondo right above where I was seam welding ...........
So I cut it out. 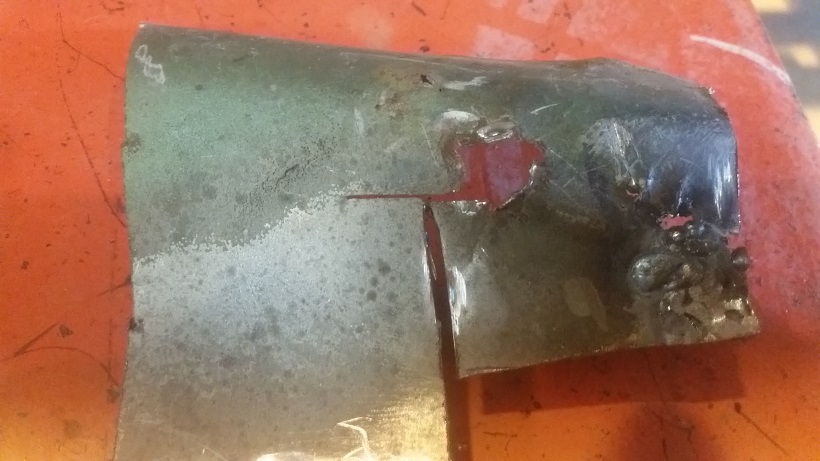
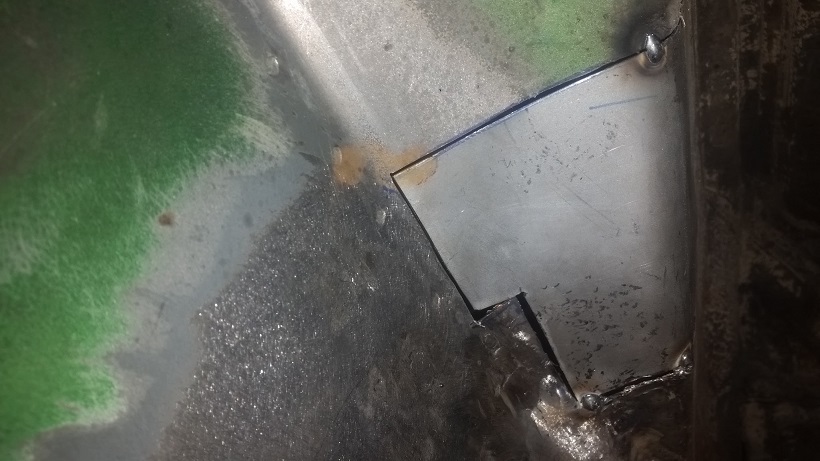
Posted by: Garland May 2 2016, 10:38 PM
Reference 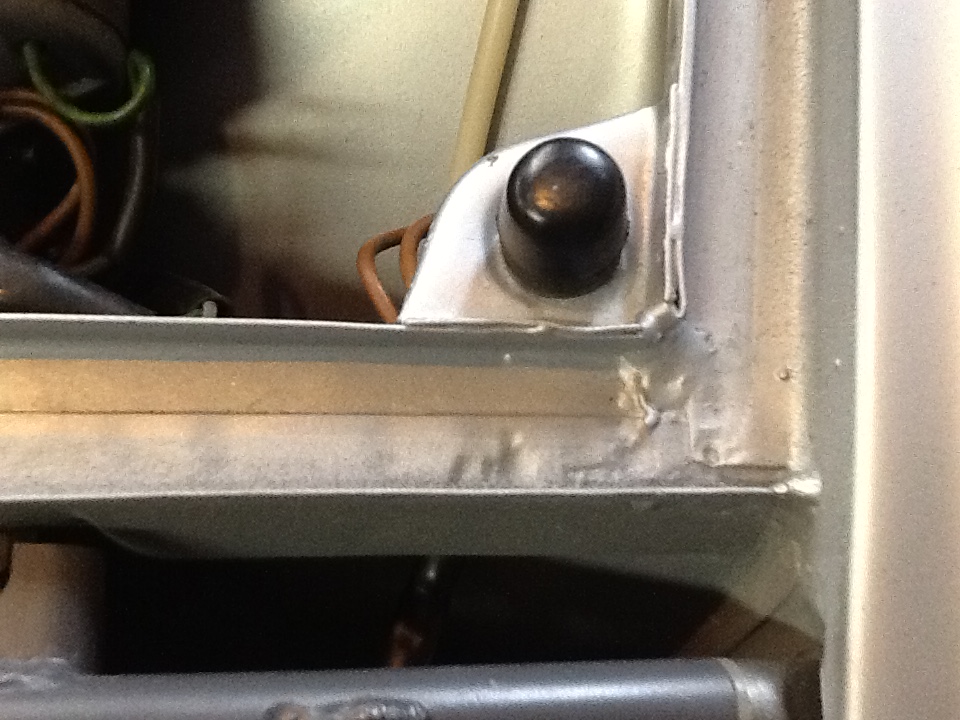
Posted by: cary May 2 2016, 11:05 PM
Thank you for the reference photo. That's where we ended the day. I want to remove the bumper support so he can recreate the metal pieces. So we got out the torch to remove the brazing. But the little spot in the corner of the support is a weld not a braze. That's the only place I've seen gas welding on these cars. I found the same thing on the bumper support on the rear panel replacement.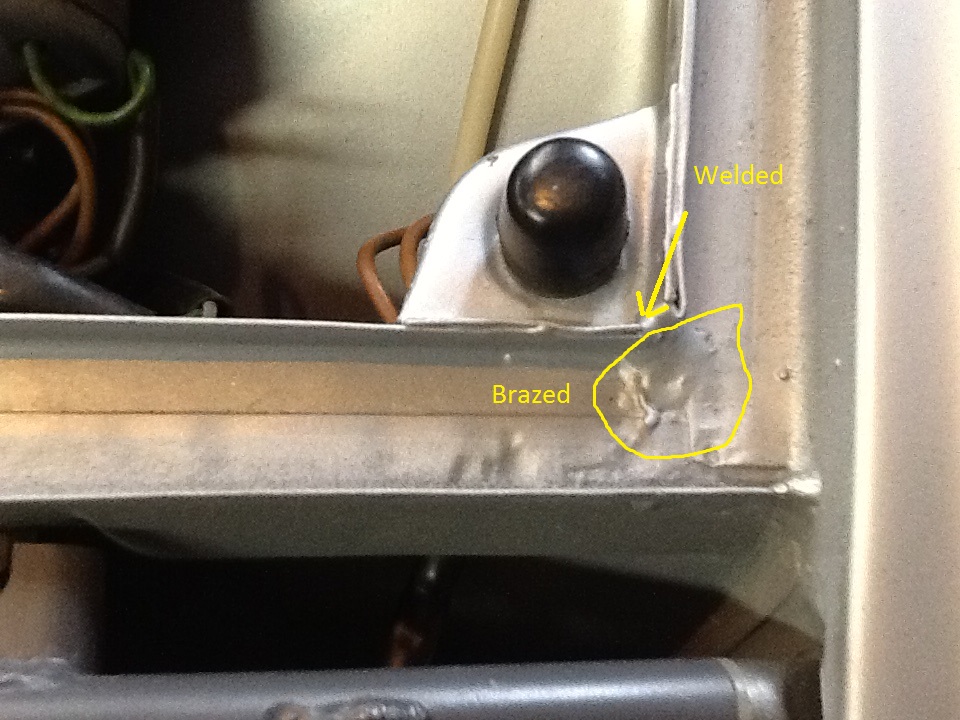
Posted by: Mikey914 May 2 2016, 11:25 PM
Thanks for the pics.
Again, I'm blown away with the detail of work being done. It's a much larger project than planned, but I'm glad that I have Cary doing the work. 
Posted by: cary May 4 2016, 09:34 AM
Got the horn functioning again on the blue car. Broken wire to the horn ring and a dead horn. Beep Beep.
Super In Law continues with the front trunk channel.
I spent the remainder of the day getting the engine ready to reinstall.
Siliconed up the new oil pressure sender. Did this when I walked in the door so it could dry while I was working on the blue car horn.
Zip tying harness up nice and tidy
Heat shrinking and tightening all open spade connectors
Installed new oil pressure sender
Torqued down impeller
Install flywheel, new seals & bearing
Install clutch and pressure plate
Install transmission and starter
Cut down the over length exhaust hanging studs on the back of the transmission mounts. Digging hole in muffler. Not completely thru, so I was pondering doing a small weld. But after hearing a little rust rattling around inside of the muffler I decided against it.
Mark showed up about quitting time with the new/shorter plug wires and some heat components. Between what he brought and what I have we'll get some heat flowing to the passenger compartment.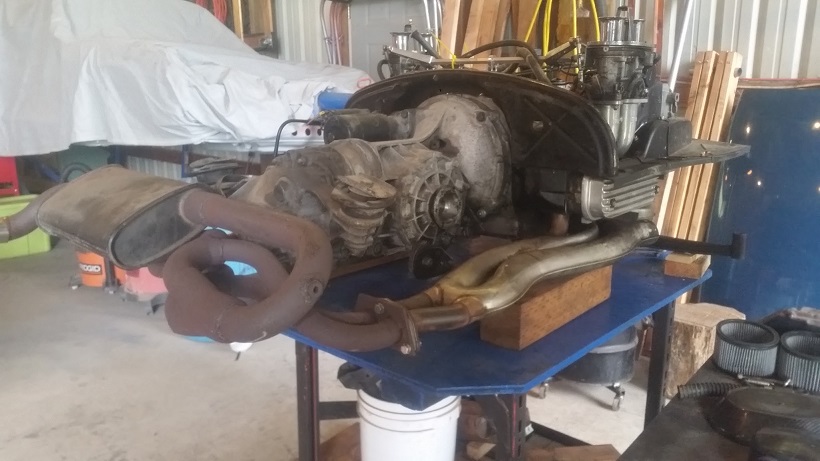
Start today with checking the plugs and installing the new BERU plug wires.
Then the car goes back on the lift to install the new Bilsteins all the way around.
I'll do the small patch under the pivot mount location.
Then we wait for the trunk pivot from RD.
Posted by: cary May 4 2016, 10:20 PM
Putting the hammer down to get the blue car back to Mark first thing Monday am.
We start with applying 3m black snot to the top corners of the front trunk seal.
We'll let them set up 24 hours before we open the hood again.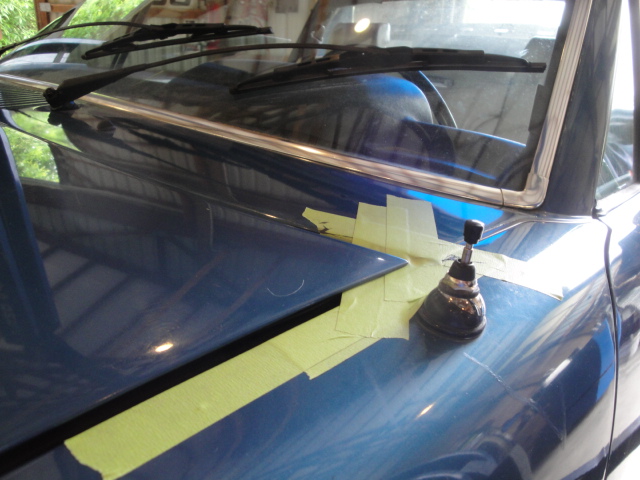
So while we wait for info and ETA on the rear trunk pivot I'll start welding in the patch pieces of the front trunk seal on the green car.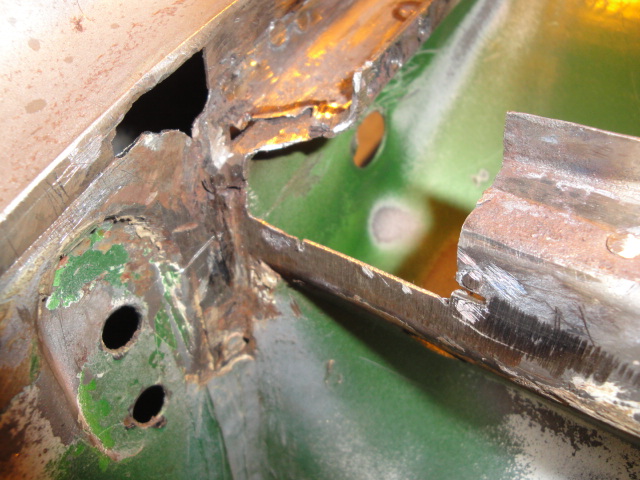
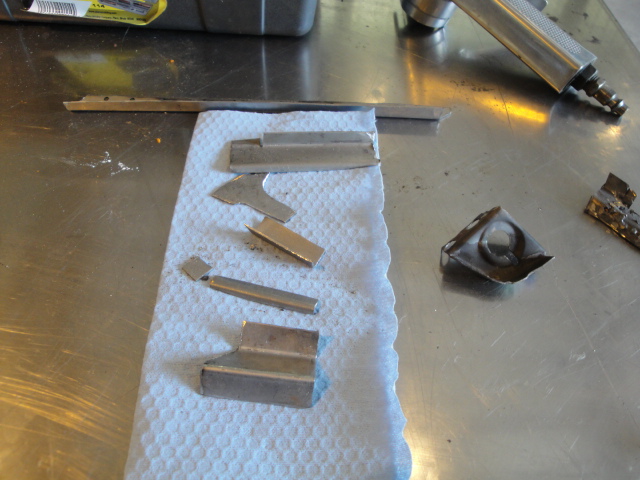
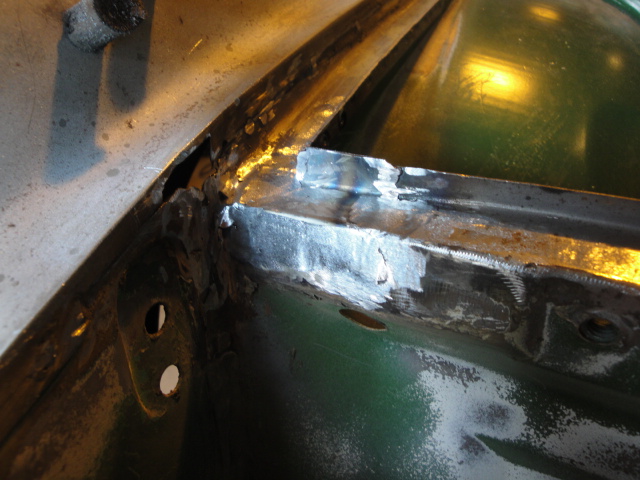
Then around 11:15 I get a weird phone message. I'm trying make a delivery and I don't know if I'm in the right place. I thought it was for a package at home. No, Mark sent the pivot and the blower tube via courier. 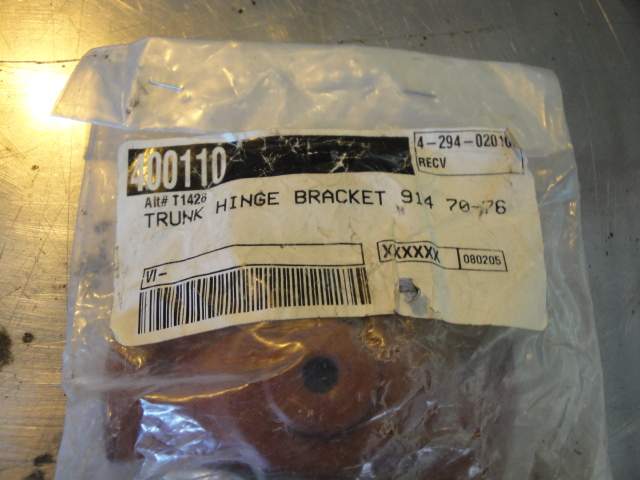
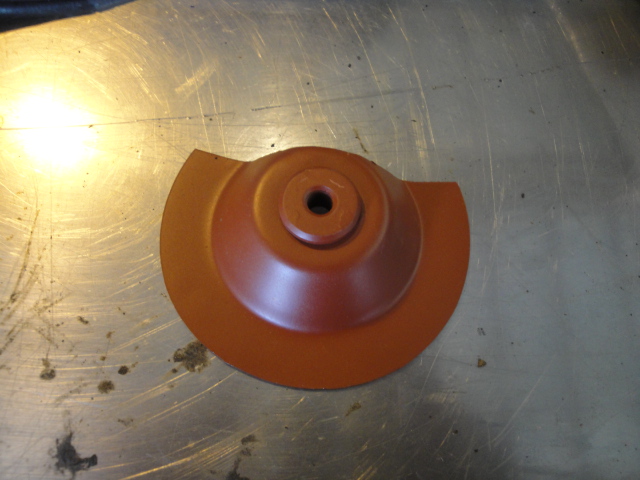
Whose part is this ?
So the blue car gets put back on the lift .........
I start making the patch for the hole in the pivot area. I use the tape pattern technique that Ed from Wheeler Dealers uses.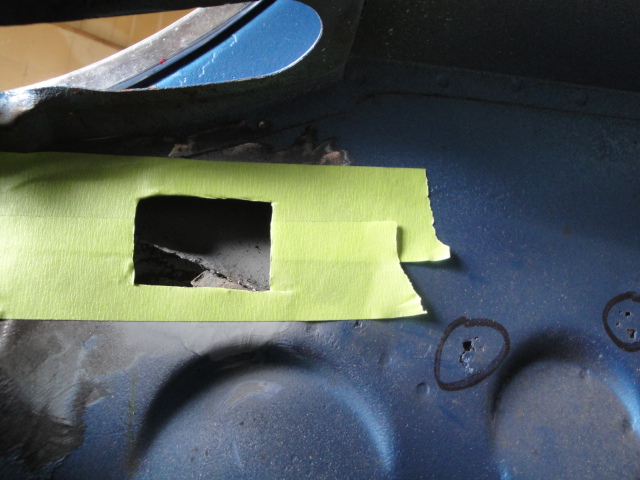
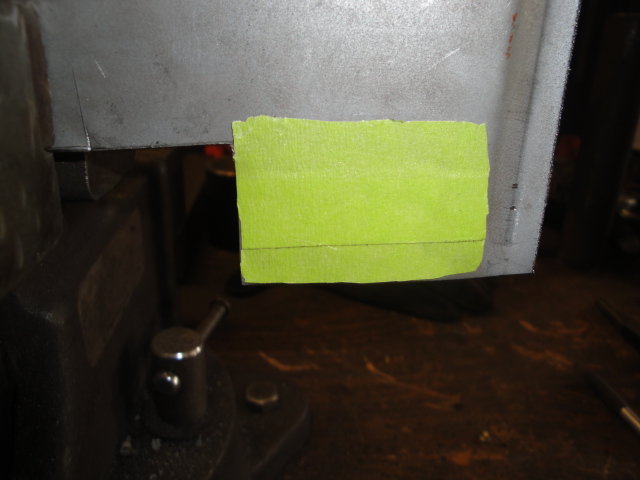

Posted by: cary May 4 2016, 10:37 PM
Other than using way toooooooooooo much cold galvanizing spray. Which caused weld striking issues and tall ugly welds. Things were pretty uneventful.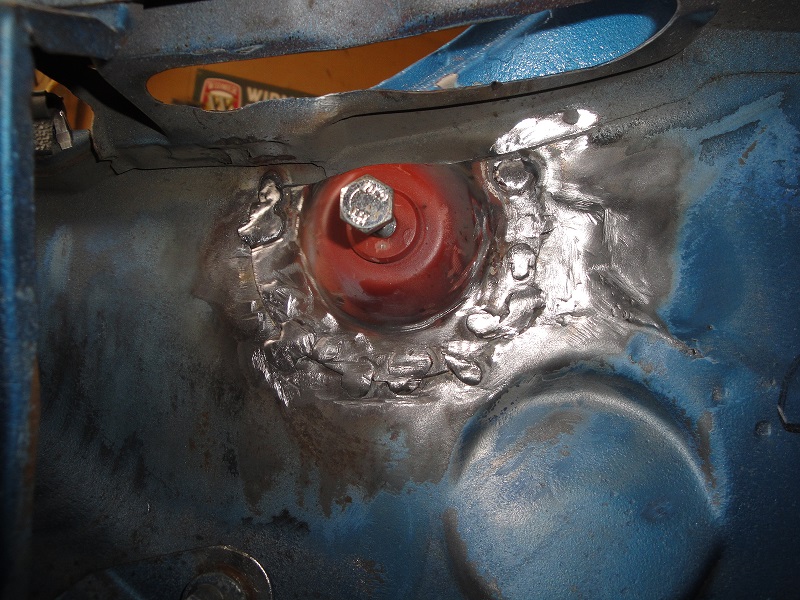
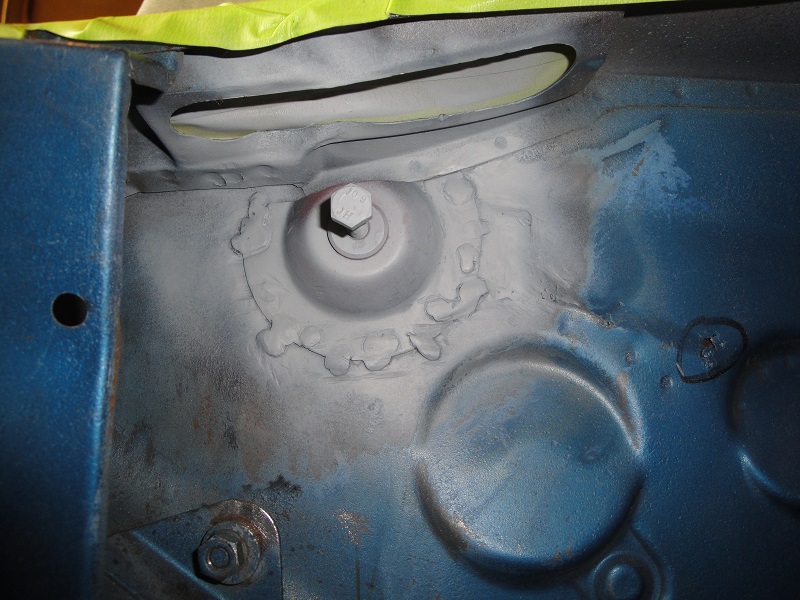
Then on to changing out the spark plug wires and getting them dressed out in a sanitary fashion. I'll do the same with the fuel line when we get everything all hooked up.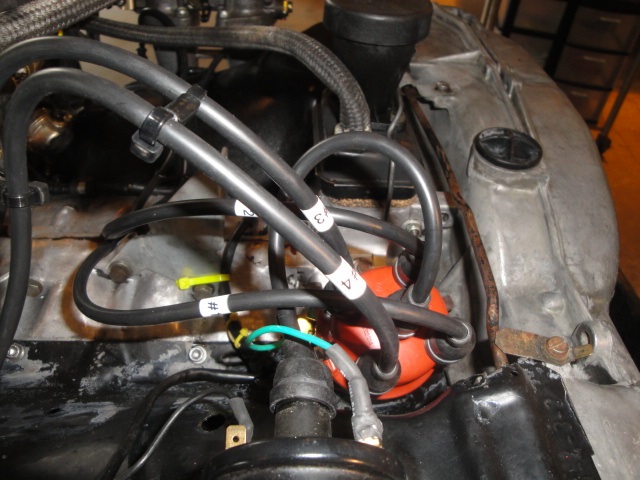
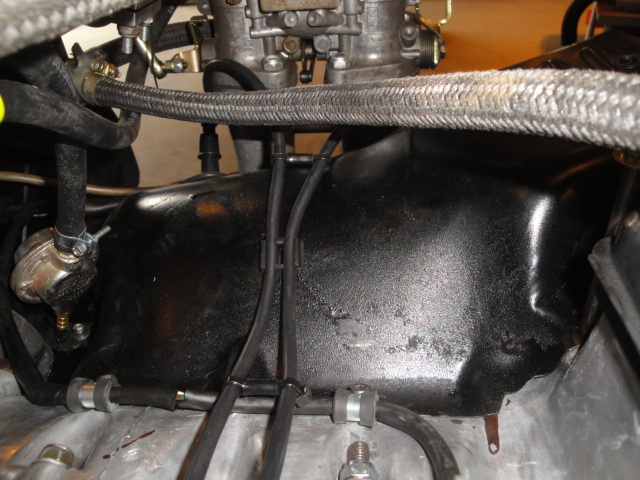
I'm a dyed in the wool fuel injection fan. But the carbs do make for a nice and tidy wiring and fuel line dress out.
Rear shocks are out and ready for change out before engine reinstall.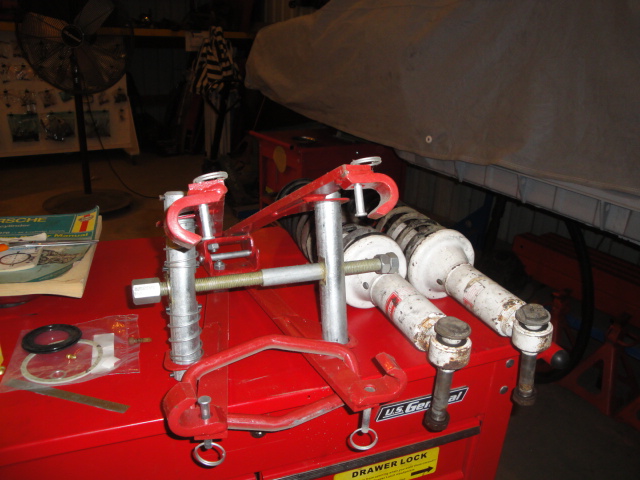
Posted by: 76-914 May 5 2016, 07:38 AM
Cary, is that one of Marks' NEW front trunk seals? If so, is there a problem with how it lays or fits? Hope not as I have one on order.
Posted by: cary May 5 2016, 07:54 AM
Yes its one of the new ones. It fits nice enough that we're not going to use any adhesive other than the top corners. Tape job is kind of over kill. Mostly for paint protection laying in the snot. Then I laid those three crosswise to make sure the corner stayed down.
The problem some will run into is PO work inside the channel. Most have globed up farmer welds when an attempt was made to repair rust out. The blue car has a little on the right side channel.
Posted by: sixnotfour May 5 2016, 02:15 PM
Some food for thought for you and the in-law...
once you get through the brit's drivel..
really cool frame bench/rotisserie;
https://www.youtube.com/watch?v=NMT9Ykmneiw
Posted by: cary May 6 2016, 08:16 AM
That's pretty cool.
Posted by: cary May 6 2016, 08:48 AM
Too tired last night to post .........
Started the day with another episode of Hillbillies Doing Shxx. Here's shot of the right pivot. 1. Front threads that would hold in the pivot bolt are gone. 2. So they retap it for a 3/8" bolt. Which after testing holds torque. 3. Then they go ahead a put an aluminum bushing in the hinge arm. Need less to say its gone. Hmm. I want to get this car back to Mark on Monday so he can add so trim pieces before he leaves for WCR.
I don't have another pivot in my hand. If I get to do this for a living, pivots and rear trunk pans will be an inventoried item.
So we move to Hillbilly version #2. I head to Ace to find a bronze bushing for the 3/8" bolt. Not a perfect fix, but will last quite a long time. I find one, but its a smidgen too big. So Super In Law turns it down on the lathe. Too pissed to take pictures.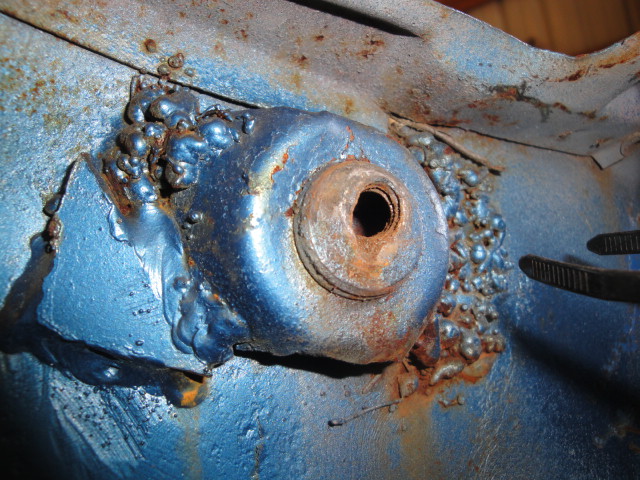
He spent some time polishing up all the moving pieces. Lubed every thing down with the Locktite anti-seize stick. We had the usual tag team confrontation with the spring bars. I'm going to to come up with a better way. Too much time touching the paint. Too much time spent taping every thing up.
But the hood went in nice and flat. Might be off a mm or two left to right. Too much memory pressed into the hood under the hinge mount. With Mark's new paint I didn't want to grind it flat. Something to remember for future projects.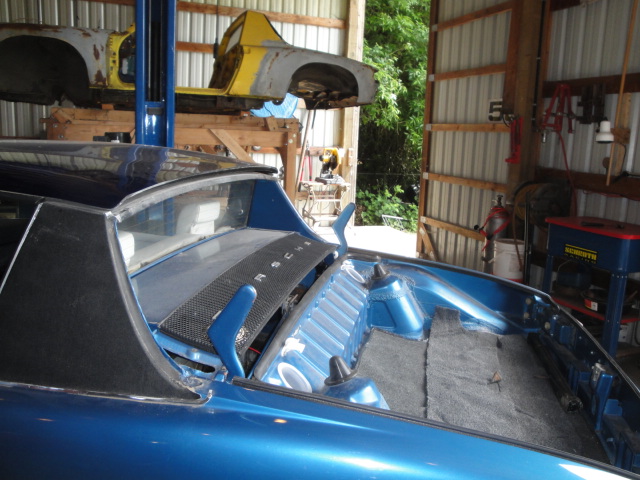
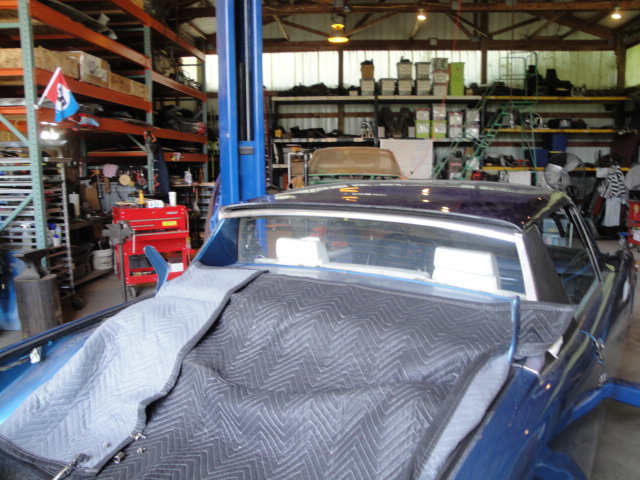
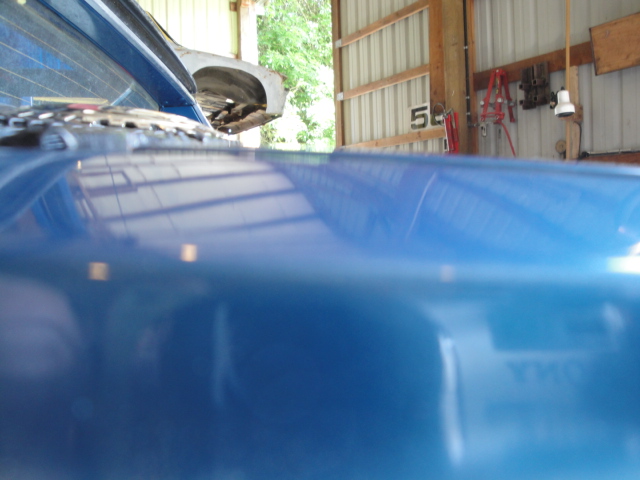

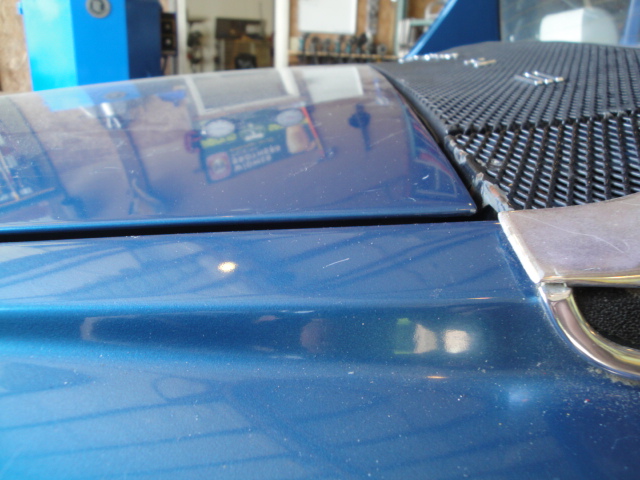
Then we had a little trim issue to tidy up. Some one one only used one clip to hold it on. Probably not going to work.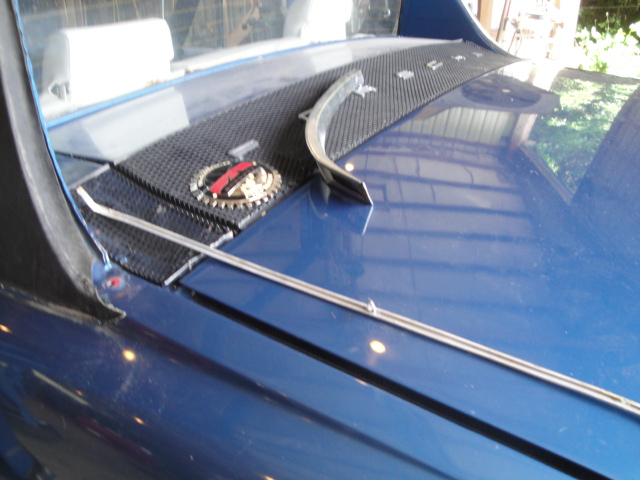
Taped off the area and laid down a little trim adhesive.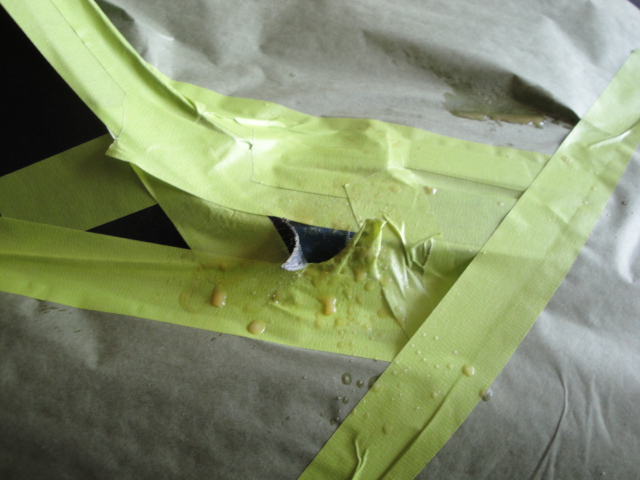
Nice and tight n tidy.
Posted by: cary May 6 2016, 08:54 AM
Don't ask ..................
While I was in the rear trunk I used Mark's new harness tape to tidy up the rear tail light harness.
Installed the new rear Bilsteins.
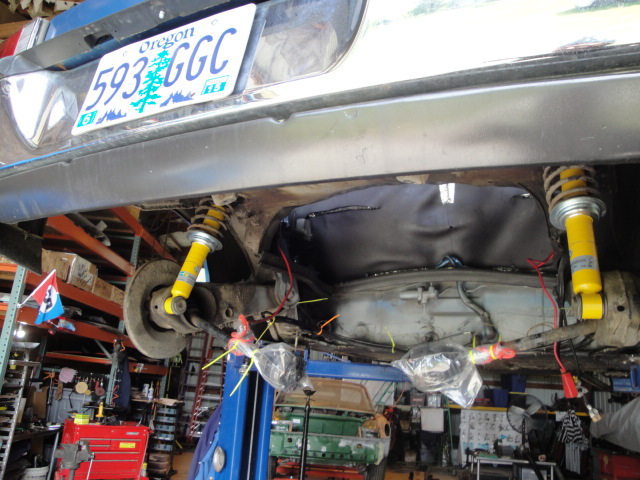
The day starts with a stop at Ace for some 1/4 by 1/4 barbed fittings. Pressure side of the fuel pressure regulator was hanging on with one barb. Not leaving that way .........
Need to add a fuel filter (Mark I have a couple in stock) and fresh fuel hoses.
Then on to the front struts. But the front calipers need to be rebuilt. Pistons are hanging up. Hmmmmmmmmm.
Posted by: 914fahrer May 6 2016, 10:20 AM
Very nice Job Cary ,but I think you you have made a mistake with the Bilstein .The
big washer is up side down .Or this picture is wrong . 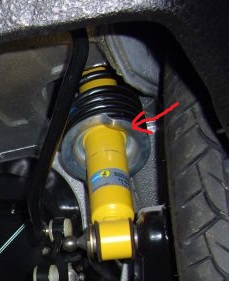
Ralf
Posted by: Mikey914 May 6 2016, 11:04 AM
I have the hoses in stock so let me know what I need. My last trip wound up getting pretty screwed up and as most of it was through LA and the southern part of our system got a few extra days off as they subbed out another crew for us. I'm in town and will get a hold of you.
Thanks
Posted by: cary May 6 2016, 09:44 PM
Very nice Job Cary ,but I think you you have made a mistake with the Bilstein .The
big washer is up side down .Or this picture is wrong .
Ralf
Ralf, here's what I went with.
Factory service manual
Haynes
Bilstein inserts that came with shocks.
The shocks on my DD are assembled the same way. Though be it, my DD is quite a bit lower. I set these at the same level as the KYB's that came off it.
We'll know were I'm at when its back on the ground.
Posted by: cary May 6 2016, 10:14 PM
The first order of business was getting those barbs inserted in to the old plastic fuel lines.
Plan A was to heat up the plastic line in a cup of hot water. That did nothing. Same result that I originally saw. Barely getting one barb inserted. Well that just isn't going to work.
Plan B. So lets heat up the barb. Hot water did absolutely nothing. Barely one barb. Hmm.
Plan C. How the hell did Porsche do it back in the day? Then it came to me. More heat.
So I fired up the Mapp torch. First attempt was too much. Melted the plastic pipe.
Then I slowly passed the barb 10 times thru the blue flame tip of the Mapp torch. Here is the result.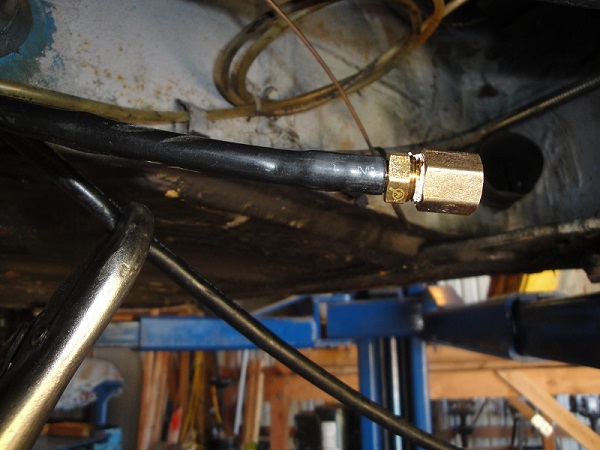
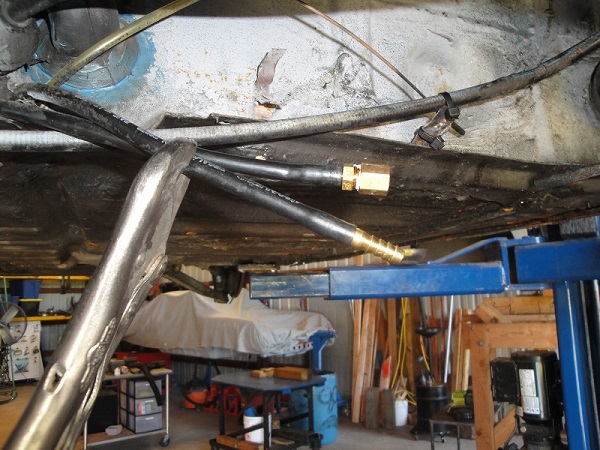
Yet to be pressure tested. But they are nice and tight and don't turn.
We'll see tomorrow.
Tool Whore Note:
The vice grip fuel line clamp is the only tool that would cut off the fuel flow on the plastic fuel lines.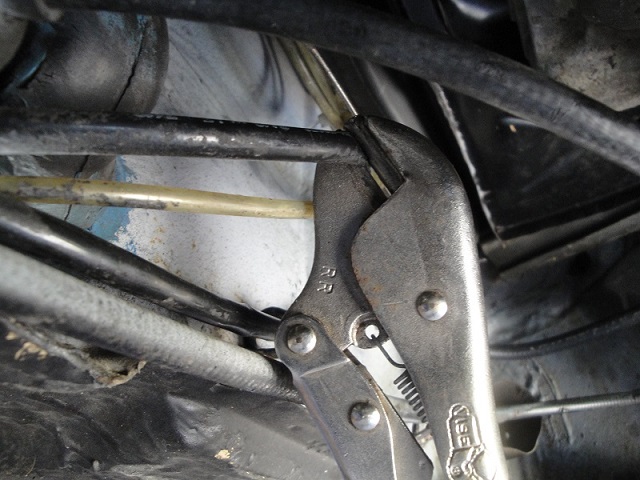
Posted by: cary May 6 2016, 10:24 PM
While I was working on the fuel lines on the engine. Super In Law got after adding heat to the car. First task was to test the blower motor.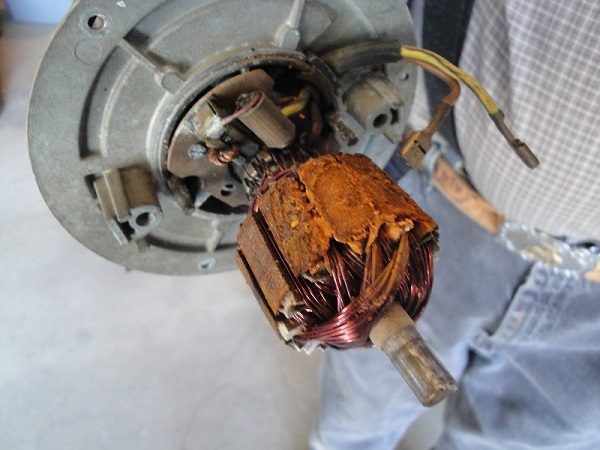
Looks like the blower motor had been submerged in water. Super In Law did his electric motor magic and had it up and running in about an hour.
Then we blasted and painted the missing tubes.
Then I started putting the pieces in.
Posted by: cary May 6 2016, 10:34 PM
Then Mark stopped by with more stuff.
Front brake caliper rebuild kits.
Two sets of front wheel bearing.
A couple more clutch cable nuts.
And he dropped off the fender liners that we'll install on Monday.
Posted by: falcor75 May 7 2016, 01:00 AM
Whats the spec on the orange heater hose? I had some silicone hose laying around that I used but its way too stiff.
Posted by: cary May 7 2016, 07:43 AM
Mats, I'll let Mark comment on the specs. But it is very easy to use and install. Just the right ID.
Posted by: 914fahrer May 7 2016, 09:20 AM
Very nice Job Cary ,but I think you you have made a mistake with the Bilstein .The
big washer is up side down .Or this picture is wrong .
Ralf
Ralf, here's what I went with.
Factory service manual
Haynes
Bilstein inserts that came with shocks.
The shocks on my DD are assembled the same way. Though be it, my DD is quite a bit lower. I set these at the same level as the KYB's that came off it.
We'll know were I'm at when its back on the ground.
Hello Cary ,
yes Koni and Boge look different. The manuel shows Boge .
Please read this thread about Bilstein
http://www.914world.com/bbs2/index.php?showtopic=217914&st=0
Ralf
Posted by: Mikey914 May 7 2016, 09:23 AM
Whats the spec on the orange heater hose? I had some silicone hose laying around that I used but its way too stiff.
The hose is actually a little easier to install than the OEM.
http://shop.914rubber.com/914-High-temp-Heater-hose-914-HHH.htm?categoryId=-1
Posted by: cary May 7 2016, 12:28 PM
Hmm.
Mine have been the other way 15 years.
I'll flip these over when I get it back on the ground. Only takes a few minutes.
Thanks for the heads up ....
Posted by: rhodyguy May 7 2016, 06:43 PM
Turn the engine mount bolts so the threaded portion is up.
Posted by: cary May 7 2016, 08:21 PM
Thanks, rhodyguy
Saw that this am. I knew something thing didn't look right when I got done. I was focused on the transmission mount. This was the first time I'd taken out the engine with the four small bolts on the tranny, rather than the two big ones.
Just mentioned it to Super In Law. He said, you'd think after doing 20-30 914 engine R & R's we would have caught that. Or not done that.
Posted by: cary May 7 2016, 09:54 PM
First order of business was the fuel line pressure test. Passed with flying colors.
The heater blower failed its power up test. Everything tested out at the relay socket except a signal coming from the switch. Wonder why .............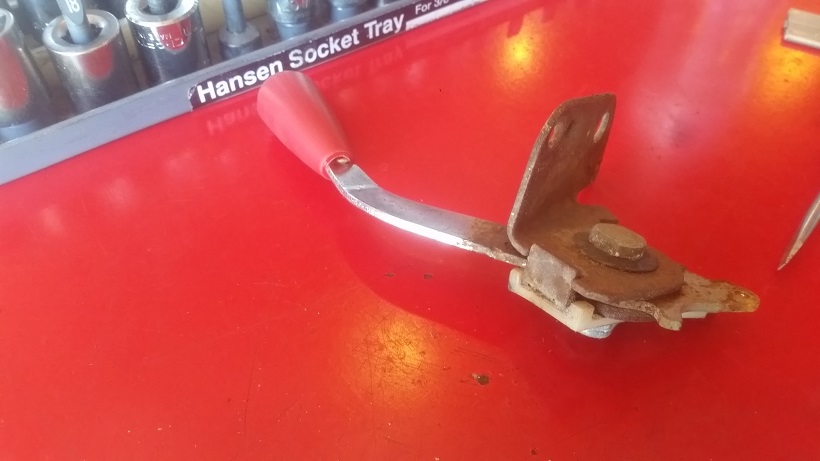
Wire from the switch to the socket ohm'd out.
Then I installed Mark's J pipe grommets. That was followed with installing Marks black heater tubes.
Installing the new accelerator cable had issues. The bowden portion isn't long enough for dual carbs. To get the 90 degree turn needed to line up with the carb bar. It comes out of the tube coming out of the firewall. Which then allows water to enter the tunnel. I ran into a big chunk of rust about 3 inches into the tube. Cleared it with a short awl. The bowden needs another 3-4 inches to get a nice arc.
Back from lunch and I went after the front end. Switch out the struts, new wheel bearings and rebuild the calipers. Started with the right side. Strut pin came out without much trouble. Getting the strut off the a-arm that was another story. I just couldn't get the last 1/4 inch. But it finally popped loose.
Strut went back in lickety-split.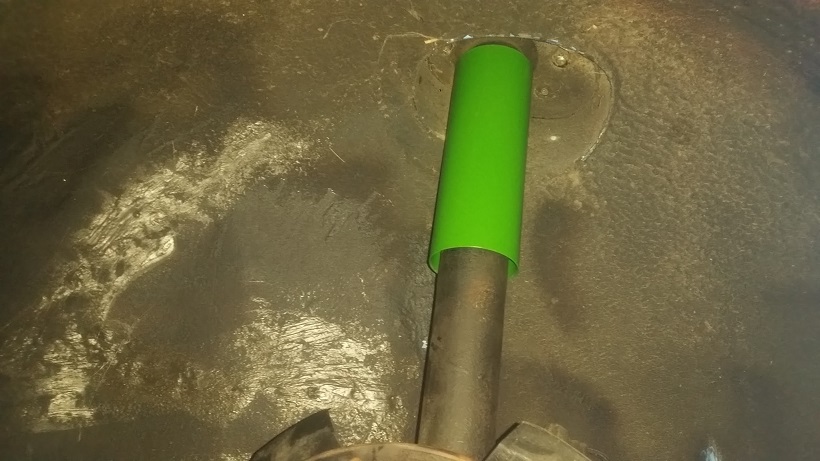
Wheel bearings were SOP.
Then on to the calipers. After getting it in my hand, the rust that I expected was right there. 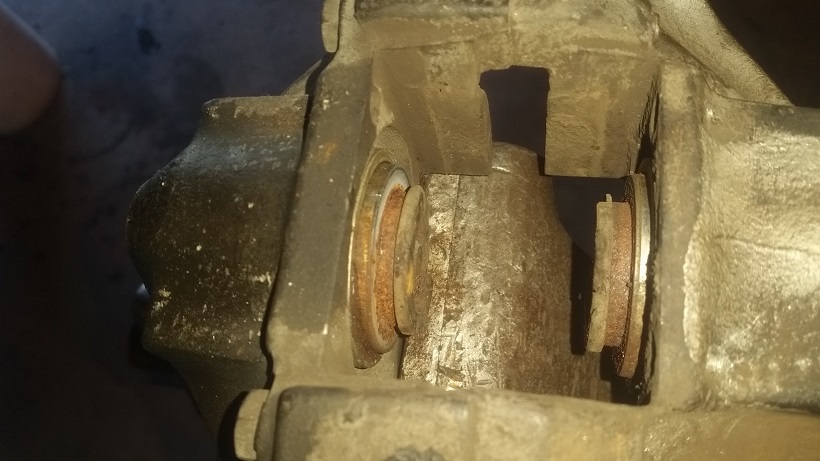
When extracting the pistons with air. The inside came out pretty easy. But I had to put a c-clamp to hold the inside one in place. Then laid on the air to pop out the outer one. It finally popped out.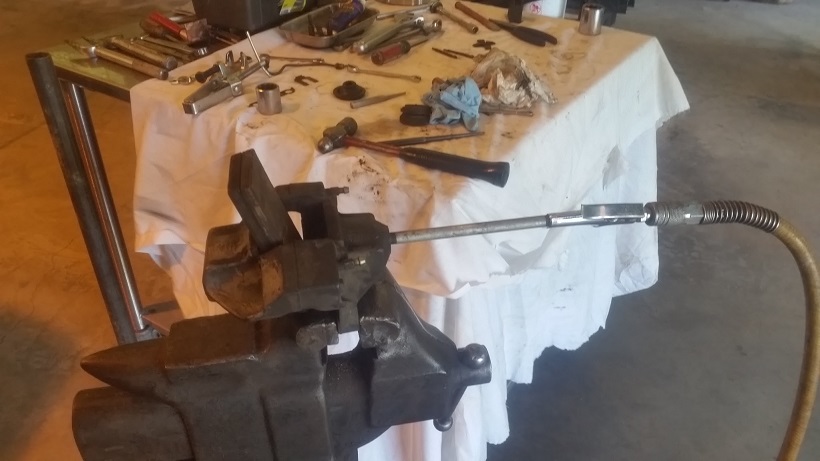
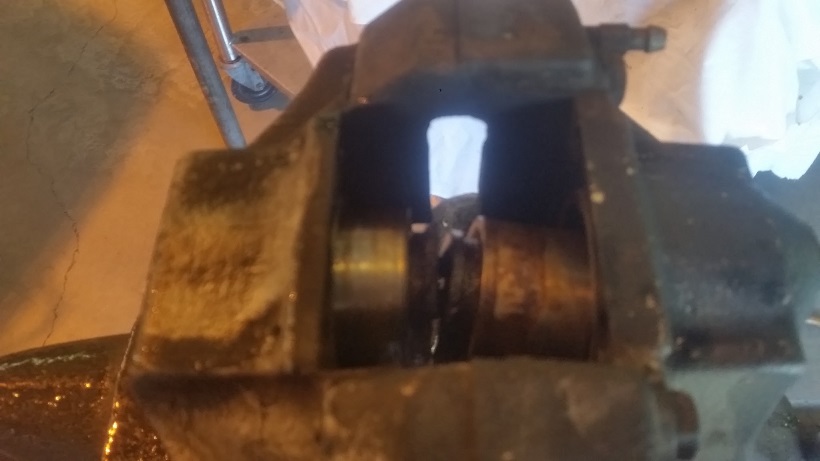
Posted by: cary May 8 2016, 07:48 AM
To prep the pistons. I tape the outer bore and run the top thru the blaster. Then I clean off the rust/dirt build up with a Ro-Loc green conditioning pad. Then take to the buffer to polish up. Then a little brake cleaner to tidy things up.
Posted by: cary May 8 2016, 09:33 AM
Big family brunch for mom at noon. Then back to the grindstone.
Car is to be delivered at 10am tomorrow morning.
Coming from 30 years of grocery store management. No such thing as OT or 40 hour work week. I'm big on thru put.
If the right strut comes off. Should go pretty fast. I only had 3 hours on the other side. Even with the stubborn strut.
Popped the right pin and gave it a good bath of PB Blaster before I headed home to watch the Blazers beat the Warriors.
That will only leave bleeding the brakes (flush till clear on all 4 calipers) and bolting up the CV joints before 10am.
Posted by: JRust May 8 2016, 11:13 AM
Nice Cary! Can't wait to see all this work in person. Talk about under the gun. Sure hope you have your car ready for WCR . Are you bringing the super in law with you to WCR?
Posted by: cary May 8 2016, 11:13 PM
My car is good to go. Just needs a good cleaning. I've been driving it everyday.
Had brunch.
Then went back to work. Finished the left front.
Then went after the right side. Struts, wheel bearings and calipers. Nothing to exciting.
Refurbished the pistons and sprayed down the hardware with cold galvanizing.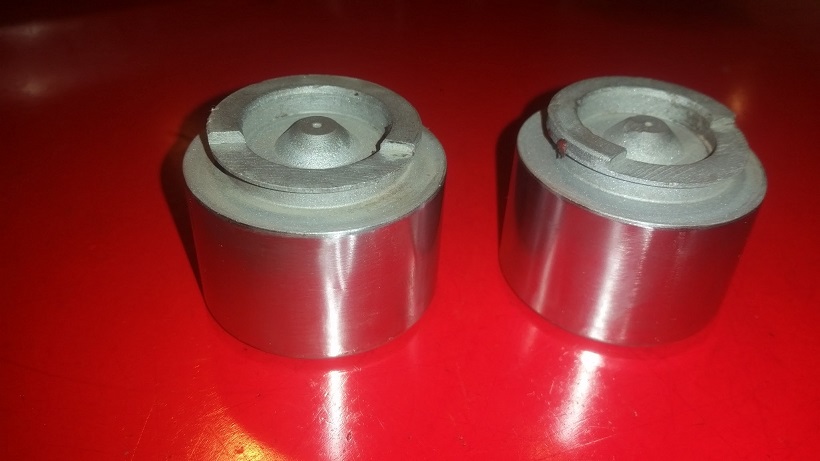
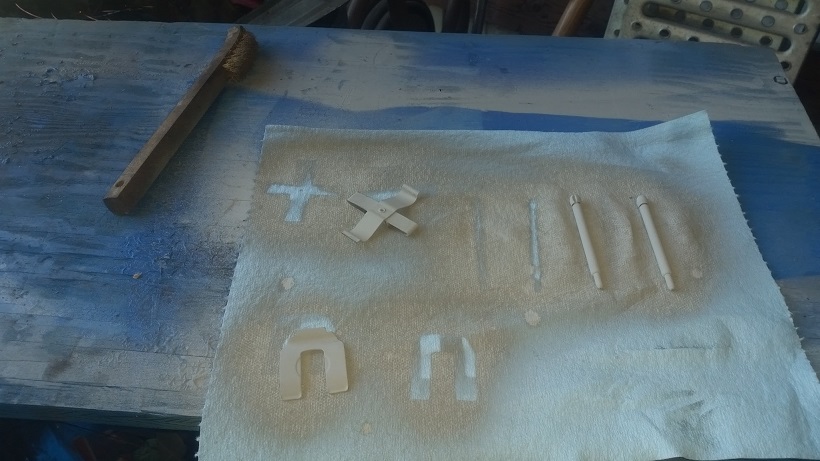
Didn't have too much trouble with the right strut coming loose which sped up the process. All that remains is bleeding the brakes and mounting the CV joints. Took some doing, but right on schedule.
Posted by: Mikey914 May 8 2016, 11:56 PM
Cary, Again, I thank you. There is no way I would be ready for WCR in time. I wound up getting called out and will be out of town til Late Friday night, but I'll get ahold of you tomorrow.
I think that if you "officially" open your shop you will have no problem getting work. The work that has been done is as I would have, if I had all the skills you and super in law have. I literally could not have done a better job, and your willingness to put the hours in..... you will not find ANYWHERE else. I would not expect that you would continue to work all the hours you are, but again....THANK YOU
Posted by: cary May 9 2016, 06:54 AM
Hmmmm.
Well then that changes the plan. That will give us time to make sure the heater fan switch is functioning 100%.
Posted by: cary May 9 2016, 08:23 AM
The primary plan is to get Mark a functioning and dependable car.
We did find the blue car will need a back half floor pan this winter. I've been 100% focused on the mechanical issues. So I haven't really looked at the sheet metal.
I know that Mark had already spent a bunch of money on the repaint and interior.
That's why I didn't do the quick & dirty change out on the front struts. That's the way we did them at the rally service stops if one blew up. But too much of a chance for scratches and dents.
So with my time extension I'll wire wheel off the floor pan and look for issues. It has multiple patches and we found one hole that will need a patch and seam sealer.
Now for the $1,00,000 question. How much am I charging per hour ?
Mark is getting the first paying customer, good guy deal. $30 per hour for two people.
I only log in and log out my time. Easy to keep track of. But other than this week end Super In Law is with me every day.
Next five projects will be $38 per hour for two of us.
Then we'll move to $44 per hour for a while.
Everyone told me to start at $50 per hour. But the cars just aren't worth that much yet. Because of the nature and the age of these cars they'll all have issues. And my primary mission is to get cars back on the road. Be it complete projects like Mark's green car. Or get a project started by doing the initial heavy lifting. Or get someone through a tough spot they don't have enough weapons for.
Posted by: cary May 9 2016, 02:12 PM
Refurbishing the fan/heater switch brought the fan to life.
Heater wire was ate by the rust worm. The one green car isn't any better.
75 and later cable is NOL.
For the heater wire. We'll pull the wire out of the green car and
experiment with soldering and or brazing.
Posted by: cary May 9 2016, 09:39 PM
Just for an FYI. We couldn't get the heater cable to solder together, but we did get it brazed. I cut it back 4" inches so the joint is well inside the tube. So there wouldn't be any interference issues.


* Reworked accelerator cable
* Bleed brakes - twice
* Adjusted brake pedal free-play
* Reinstalled CV joints
* Removed drivers side seat and carpet for floor patch welding
* Trimmed and fitted floor patch
* Reset rear shock spring plates
Mark - you need clutch pedal stop for pedal board
Posted by: Mikey914 May 9 2016, 10:10 PM
Got pleanty in stock, thanks for the reminder
Posted by: cary May 10 2016, 12:09 AM
Nice Cary! Can't wait to see all this work in person. Talk about under the gun. Sure hope you have your car ready for WCR
. Are you bringing the super in law with you to WCR?No on Super In Laws attendance. Company coming to town for the U of O Law School graduation on Saturday.
I told him he'd be the star of the show. Sill no go ..................
Posted by: sixnotfour May 10 2016, 01:02 AM
silver solder/braze would be perfect for the heater cable ..higher heat than solder lower than brazing ..
https://weldingsupply.com/cgi-bin/einstein.pl?Next::1:::::PF5
Posted by: cary May 10 2016, 07:17 AM
I felt that there should be something that would need less heat than the brass.
Torch or soldering iron?
They're fine enough I felt like I should have been able to tin them and solder them together. I tried all the different solder rolls in my plumbing repair stuff. Wouldnt begin to adhere.
Posted by: cary May 10 2016, 07:20 AM
Note: we did hand file down the brazing to make them as smooth and streamline as possible. But not so much that it would reduce the bond.
Posted by: 76-914 May 10 2016, 07:32 AM
Cary (or Mark) I've got the heater switch and pull wires left over from my conversion to a wasser pumper. Yours for shipping cost. LMK. Kent
Posted by: cary May 10 2016, 07:52 AM
We'll need wires for the green car. I'll let Mark chime in on the arrangements.
Save the switch for someonelses project.
Thanks, Kent.
Posted by: Mikey914 May 10 2016, 10:53 AM
Yes please. PM me with payment specifics.
Posted by: raynekat May 10 2016, 07:05 PM
The primary plan is to get Mark a functioning and dependable car.
We did find the blue car will need a back half floor pan this winter. I've been 100% focused on the mechanical issues. So I haven't really looked at the sheet metal.
I know that Mark had already spent a bunch of money on the repaint and interior.
That's why I didn't do the quick & dirty change out on the front struts. That's the way we did them at the rally service stops if one blew up. But too much of a chance for scratches and dents.
So with my time extension I'll wire wheel off the floor pan and look for issues. It has multiple patches and we found one hole that will need a patch and seam sealer.
Now for the $1,00,000 question. How much am I charging per hour ?
Mark is getting the first paying customer, good guy deal. $30 per hour for two people.
I only log in and log out my time. Easy to keep track of. But other than this week end Super In Law is with me every day.
Next five projects will be $38 per hour for two of us.
Then we'll move to $44 per hour for a while.
Everyone told me to start at $50 per hour. But the cars just aren't worth that much yet. Because of the nature and the age of these cars they'll all have issues. And my primary mission is to get cars back on the road. Be it complete projects like Mark's green car. Or get a project started by doing the initial heavy lifting. Or get someone through a tough spot they don't have enough weapons for.
Ok....better sign me up as your next client.
You'll have a lot of work to do on mine.
I'll be at Burgers and Beer this Thurs if you want to talk more.
You're looking good on Mark's car.
Posted by: cary May 10 2016, 07:51 PM
I'll be there, hopefully we'll have a chance to chat ........... sounds like it will be a big group. If not maybe I'll make a house call.
It would be an honor to help you with your project.
I have Matt's (Mark's brother, 914 Rubber staff member) car coming shortly. Not exactly sure what I'm getting into. I know I will convert it back to FI and rebuild the front end.
Posted by: 76-914 May 10 2016, 08:03 PM
We'll need wires for the green car. I'll let Mark chime in on the arrangements.
Save the switch for someonelses project.
Thanks, Kent.
pm me your address.
Posted by: cary May 11 2016, 08:56 PM
Road rest ................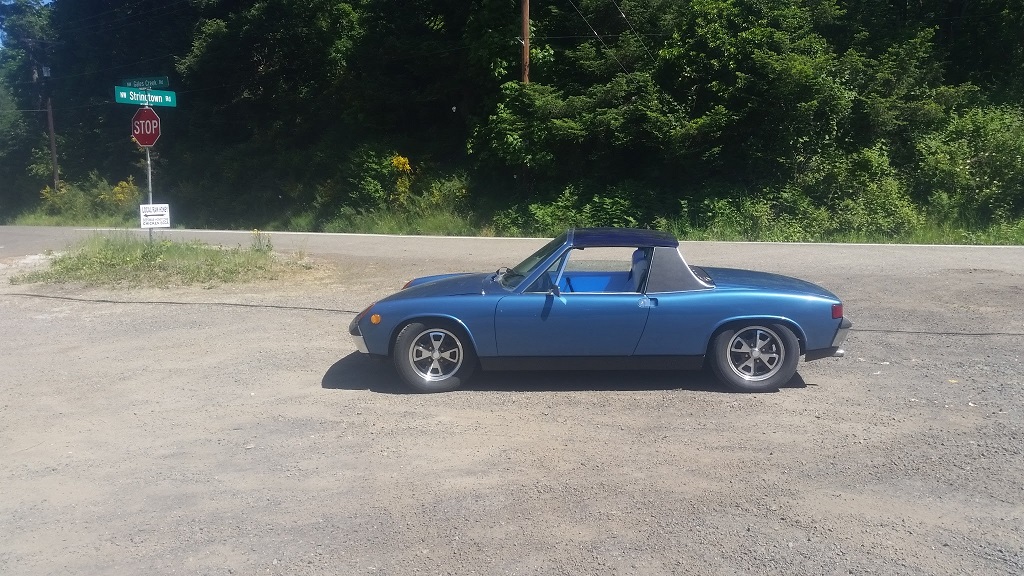
After the no choke warm up. It idles and runs pretty nice. Hiccuped a little leaving the shop. Might actually need to cut back the accelerator spring a bit. A little soft.
Posted by: cary May 11 2016, 09:13 PM
Now back where we started ...............
After the road test went back to the front trunk seal channel R & R on the green car. Didn't want to loose the little pieces.
Reference number: Channel is .78 -82" wide ID.
I'm welding on the right. Super In Law is measuring, cutting and fabricating on the left.
New lip welded in ..........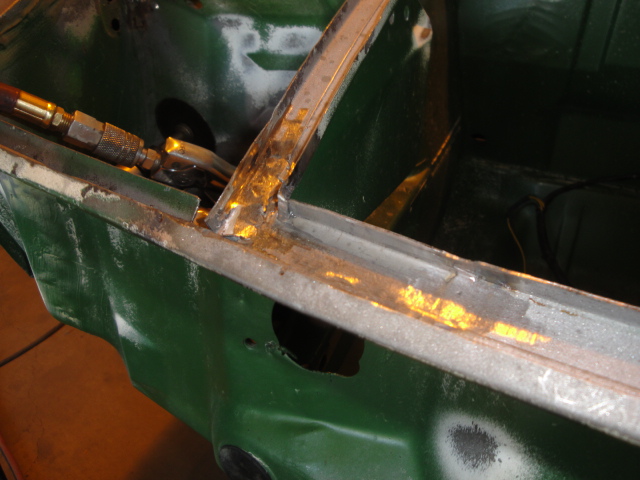
Up to the front edge. Can't do it CW without removing the front panel. 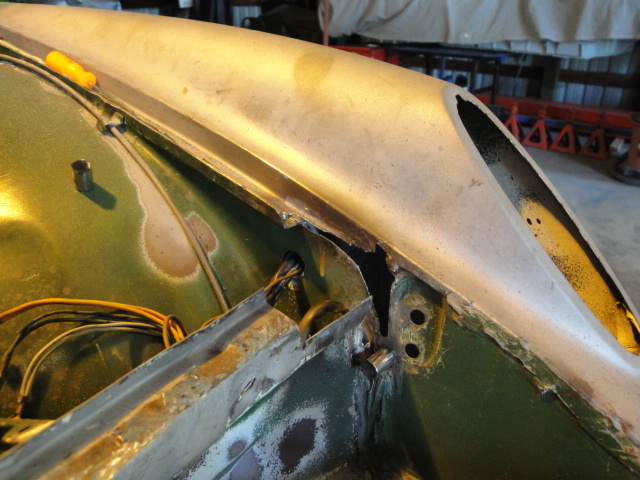
Here's Super In Laws work area .....................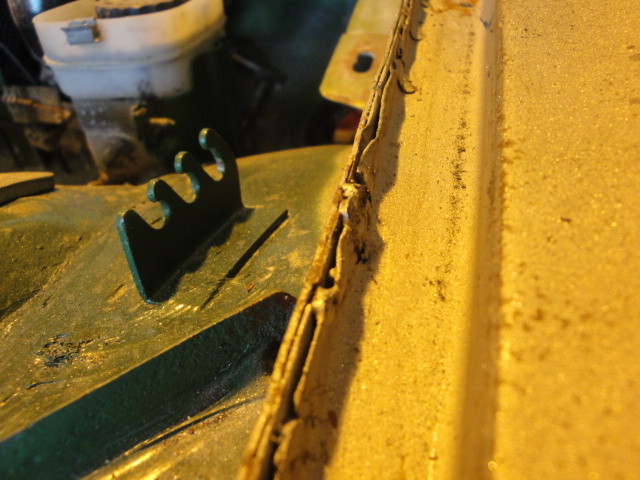
His work is exasperated by the fact that during the last repair the inside flange on the left fender wasn't completely removed.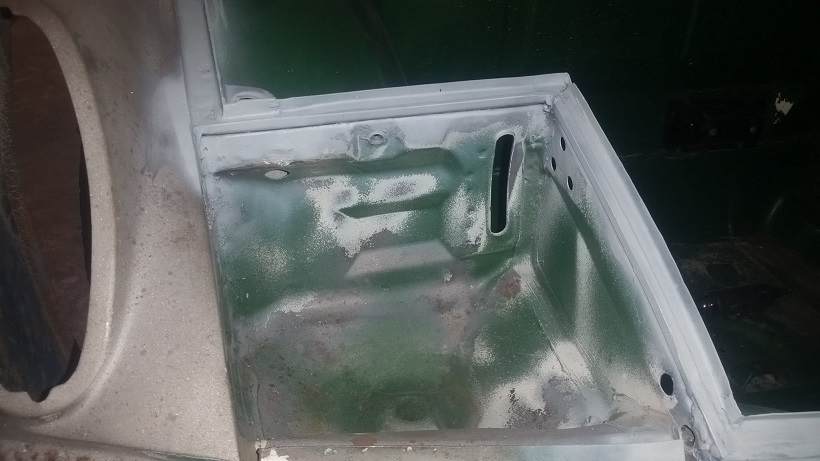
Right front all tidied up ..........
Posted by: cary May 11 2016, 09:21 PM
Super In Law is still working on the left front so I return to the bondo patch in the wheelhouse.
Posted by: effutuo101 May 11 2016, 09:45 PM
Looking good
Posted by: BeatNavy May 12 2016, 05:04 AM
Cary - what are you using as replacement metal for the channel and/or how are you forming it? I predict a similar effort is in my future...
Posted by: cary May 12 2016, 09:30 AM
The two arrowed here are 18 gauge. We just cut out small strips and bend them with my floor mounted HF brake. Kind of time consuming, but for now it gets me there.
I talked to Jeff at Rothsport a couple months back he mentioned a small fabrication shop that might be able to make me up some 4 foot lengths. I think I look into it.
The other side will be 20 gauge. After putting it (right) in and tidying it up. It looked a little thicker than the good portion that remained on the front frame part. When delayering welds I call it the tub. I measured it, it was somewhere between 20 and 21 gauge. I'll cut it down the right side with the mini belt sander. Visually it will look like 20 gauge.
Hard part to repair correctly (CW & $$$) would be the outer lip on the front cross panel. At times you'd almost need to R & R the front panel to cut out and repair the rust in the corners and along the front edge. Primarily so you don't weld the two flanges/panels together like I did here. Maybe if we'd cut out a bigger patch we could have done it without welding them together. But I don't think so.
This car and my project are what Mark and I call keepers. So we're not real concerned with CW. Function and durability is what we're try to achieve.
Posted by: BeatNavy May 12 2016, 11:16 AM
Cool, thanks Cary. I should have purchased a brake months ago - would have helped me several times. If you find a shop that fabs it, please let us know. Awesome work, as always
Posted by: Mikey914 May 12 2016, 11:21 AM
I've got a guy that can set up and do this in quantity. Worth probably stocking.
Posted by: BeatNavy May 12 2016, 11:22 AM
I've got a guy that can set up and do this in quantity. Worth probably stocking.

Posted by: cary May 12 2016, 01:23 PM
I've got a guy that can set up and do this in quantity. Worth probably stocking.
Mark and I will do some measuring on Saturday. The issue is, it's so small/narrow.
Posted by: mb911 May 12 2016, 01:33 PM
I could do it as well.. If you get me measurements I will bend up some samples for all of you
Posted by: mb911 May 12 2016, 02:19 PM
It's made with a goose neck punch and a small 1/4" die. I could make up a ton of them this coming week if you want?
Posted by: DirtyCossack May 12 2016, 03:13 PM
Everybody talking about making samples, I will gladly beta test your product and write a thorough review... 

Posted by: BillC May 12 2016, 03:27 PM
... CW ...
What is "CW"? It's been mentioned a couple of times, but without any breakout of the acronym.
Posted by: cary May 12 2016, 03:43 PM
Concours Weenie ............. those that want their car to be as it was delivered from the factory.
Some do it competitively. Some for future resale .........
Right now most restoration projects are being over restored anyway. So its kind of a moot point.
Posted by: BillC May 12 2016, 03:46 PM
Concours Weenie ............. those that want their car to be as it was delivered from the factory.
Thanks! That's what I suspected, but just wasn't sure.
Posted by: 76-914 May 13 2016, 07:22 AM
Now back where we started ...............
After the road test went back to the front trunk seal channel R & R on the green car. Didn't want to loose the little pieces.
Reference number: Channel is .78 -82" wide ID.
I'm welding on the right. Super In Law is measuring, cutting and fabricating on the left.
New lip welded in ..........
Up to the front edge. Can't do it CW without removing the front panel.
Here's Super In Laws work area .....................
His work is exasperated by the fact that during the last repair the inside flange on the left fender wasn't completely removed.
Right front all tidied up ..........
Cary, the next to last pic shows 3 layers of metal. What is the center layer? Looks like my left fender was scabbed on as well.
Posted by: cary May 13 2016, 07:37 AM
Yep ............... Dandy
Posted by: cary May 15 2016, 07:29 PM
Mark stopped by yesterday and installed a set of his new, thicker version of the fender liners. I have a set of the original version on my white DD.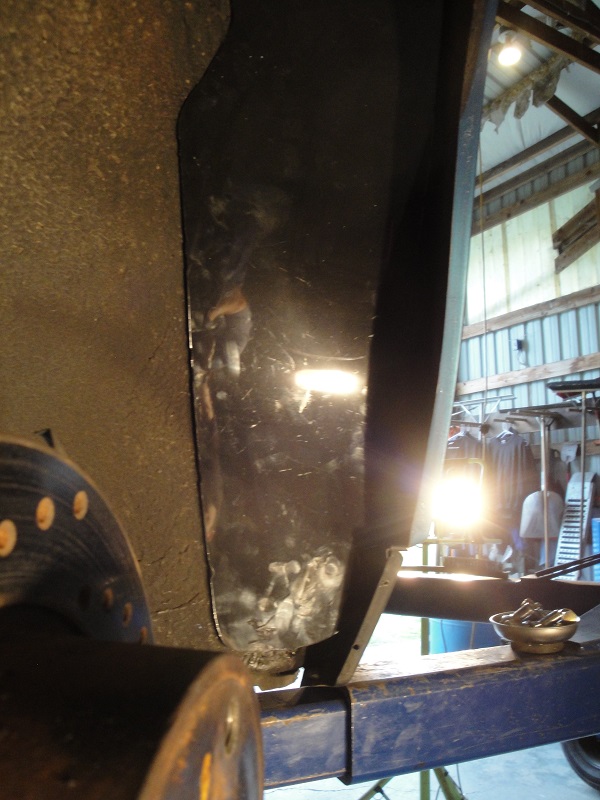
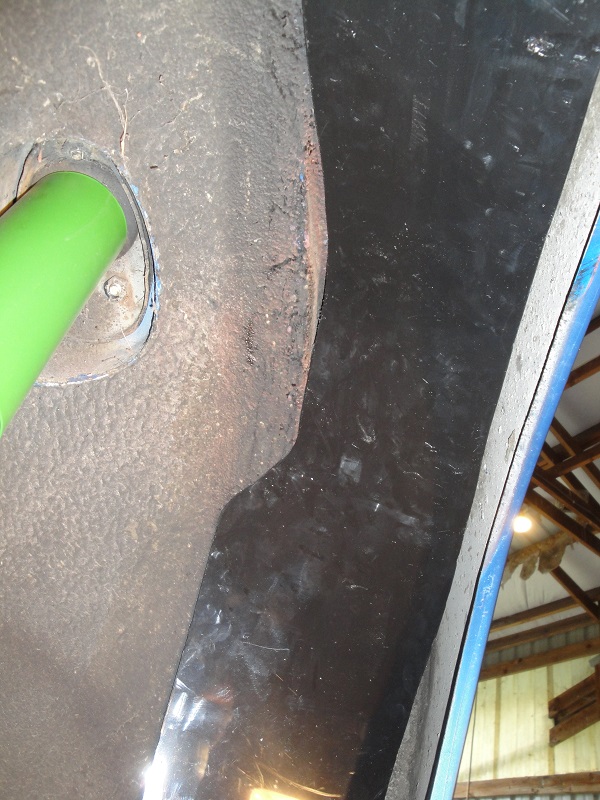
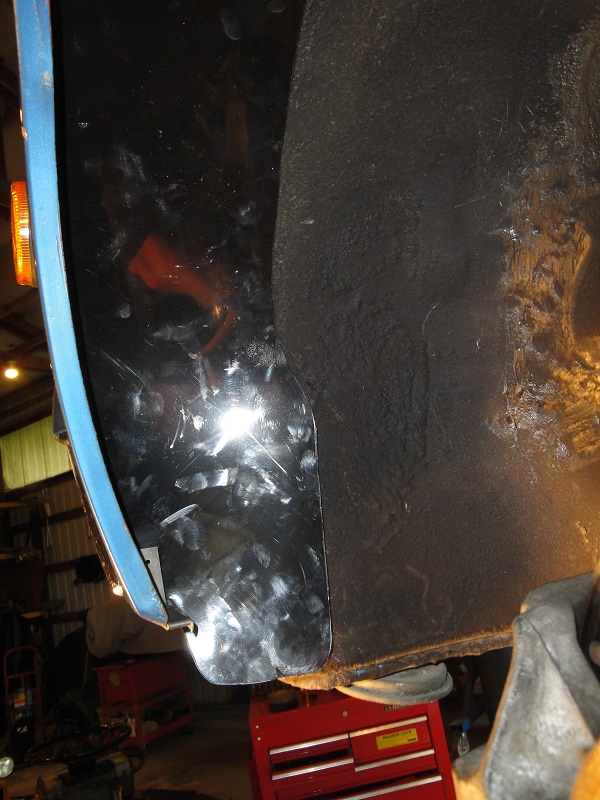
Why everyone doesn't have these are their cars is beyond me. Held in place by the flex of the material and two brackets. The brackets reuse the existing hardware on the rocker and the rear valance. No modifications to the car.
What would the 914 World be like if we'd had these in the beginning?
Mark will be creating a nice DIY set of instructions.
Posted by: cary May 15 2016, 07:41 PM
I've been pulling my hair out with a wiring issue.
http://www.914world.com/bbs2/index.php?showtopic=285065
Needed some input so I started another thread.
Once again, the car is ready for Mark to pick up and tidy up for the trip to Medford/WCR.
Ended the day installing the rear bumper top support. After the fact installation.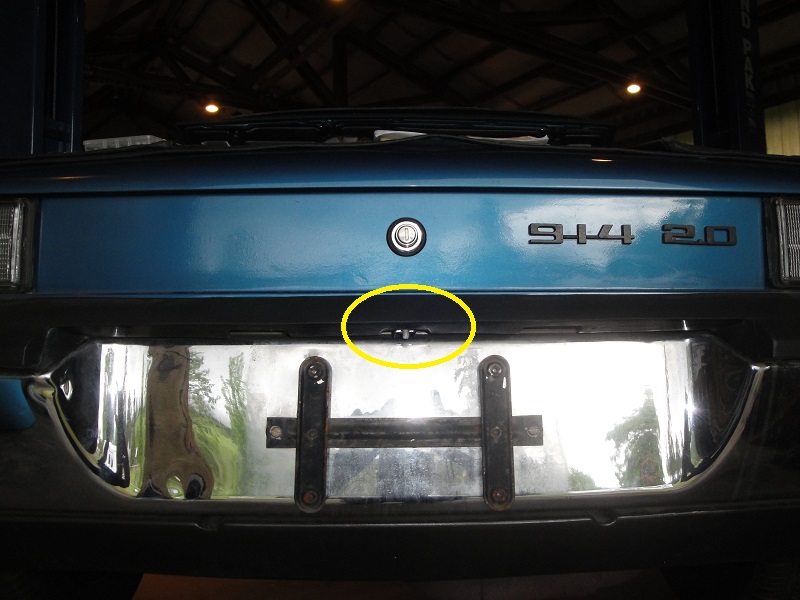
Used a self tapping truss screw after pre-drilling the support with a 3/16" hole.
After I unload the stuff off the top of the trunk I'll seam seal the screw from the inside.
Posted by: AfricanHijinx May 15 2016, 08:21 PM
I am sad that I didn't meet up with Cary when I lived in Sherwood not to far from him...I could use some of his knowledge right about now.
Posted by: cary May 15 2016, 10:23 PM
Thanks ............
Mark, in case I forget. (Blue Car)
1. Fresh air blower works on the middle setting
2. Selection of fuses in glove box (hopefully they won't be needed)
3. I changed the instrument lamp fuse to 5 amp. (I hate and don't trust them SOBs)
Posted by: cary May 17 2016, 11:10 PM
While I'm working on the blue car getting it ready for WCR. Super In Law is rebuilding a good portion of the left front headlight bucket.
While I was digging thru the totes of the parts for my project car I find my black headlight surrounds. Scrubbed one up and slipped it on to Mark's car.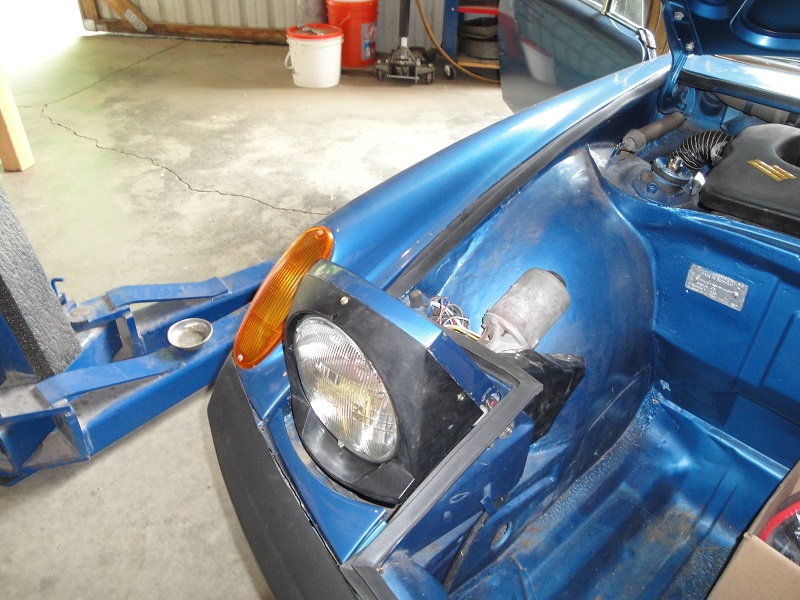
Posted by: cary May 18 2016, 08:59 PM
Wiring all wrapped up and reinstalled. Everything checks out.
All the twisting and turning needed to reinstall the fuse panel made me little nervous.
Knee pad reinstalled. Missing one cage nut, last right bottom, The rest of them worked fine. Tow bar hardware installed.
We spent a little more time making the headlight covers look a little better.
Car dropped off at Les Schwab at 3:30, its in your name. (phone number).
I told them it needed to be done by 10am.
Posted by: cary May 18 2016, 09:06 PM
Thanks ............
Mark, in case I forget. (Blue Car)
1. Fresh air blower works on the middle setting
2. Selection of fuses in glove box (hopefully they won't be needed)
3. I changed the instrument lamp fuse to 5 amp. (I hate and don't trust them SOBs)
4. Didn't check the brake lights. We'll do that tomorrow night.
5. Fuse #11 is touchy. Did a quick bang bang on the driving light flash. Popped the fuse. New turn signal switch should cure it, but keep an eye on it. For whatever reason most the relays run thru that fuse.
Posted by: cary May 23 2016, 08:54 PM
Back to work. Super In Law has been off 5 days and is hot to trot ...........
He jumped right back on the left head light bucket and pivot.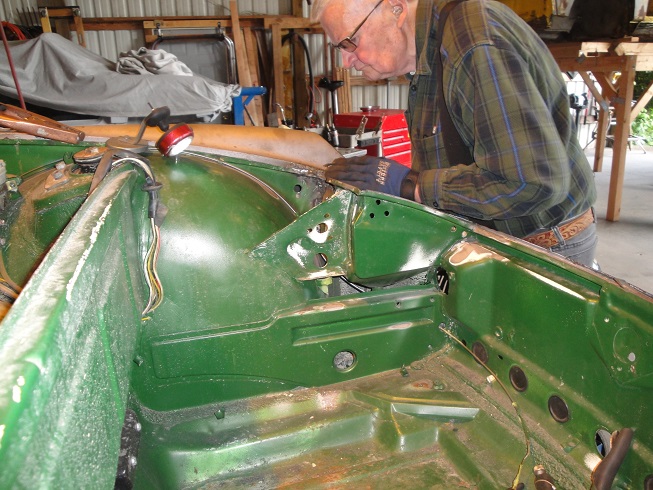
On the way home we discussed building a jig for rebuilding and aligning the fenders,hood and headlight buckets. Something along the lines of the door and windshield frames that Porsche and body shops used to have. Maybe pull the skin off a front hood and use the support bracing for a start ..................
I jumped back on the bondo patch in the wheelhouse. The patch welded in fairly easy. The portion right to the front of it. Not so much .............
Got tired of welding and grinding. Cut out the bad spot.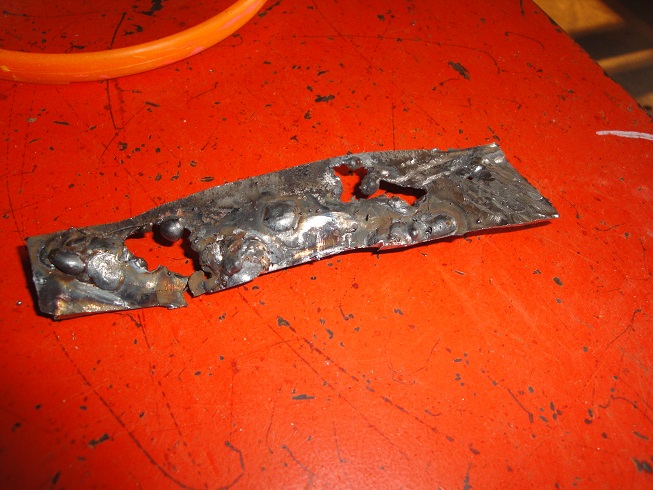
Bondo patch from the outside.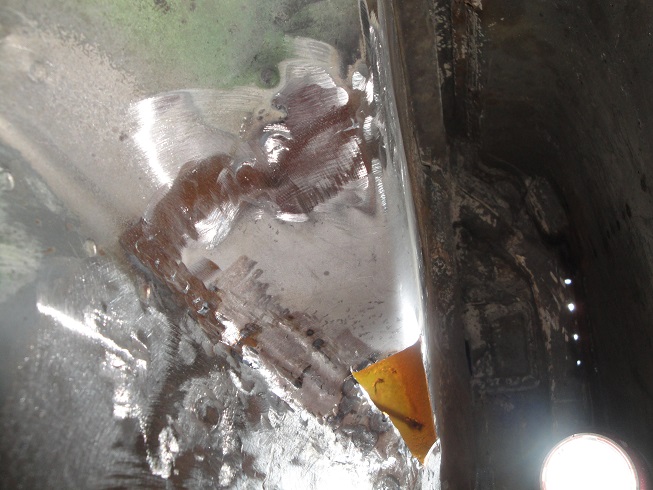
Inside with crappy metal removed.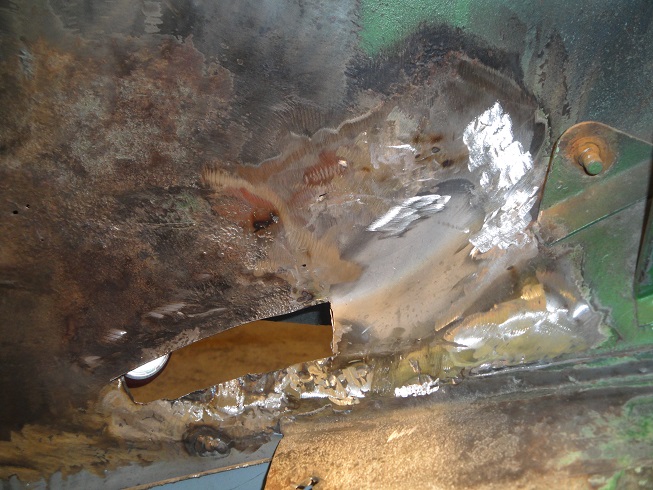
Found some more holes that need patching ...................
Posted by: cary May 23 2016, 09:09 PM
While I was waiting for my turn with the welder. I went to work on the oil can dent on the right quarter panel.
Went after it with the shrinking disk and soapy water.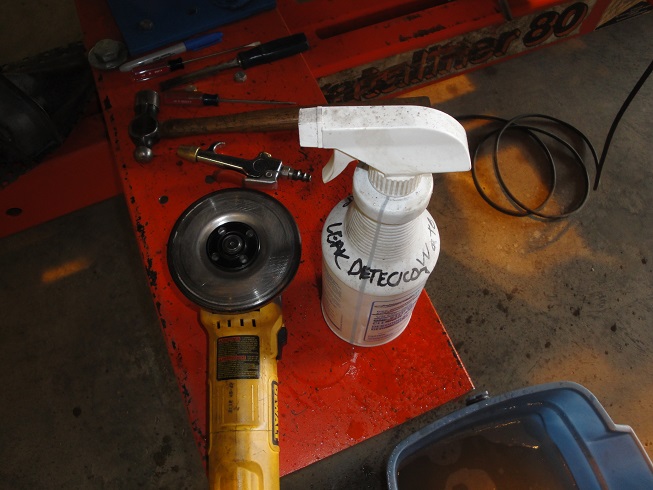
Got the oil can dent out. But we have some serious fender contour issues. Pulled the contour off my project car.
We'd been discussing changing out the left rear quarter panel because of some really poor patches. But it has a relatively good contour.
Here's the left.
Here's the right. 
The panel has a long crease from the door handle pocket to the fender arch.
It will get pulled out after the fender gets reattached.
Posted by: Mikey914 May 24 2016, 01:51 PM
Cary I have a new fender if it's easier than dealing with the mess. As long as everything else is straight is should be easier to weld on a new one. I'm back tomorrow.
Posted by: cary May 24 2016, 10:57 PM
Mark, I don't plan on being at the shop tomorrow. I have an appointment to survey Doug's (raynekat) project. We'll be out there on Thursday and Friday.
The new patch went in without much fan fare. 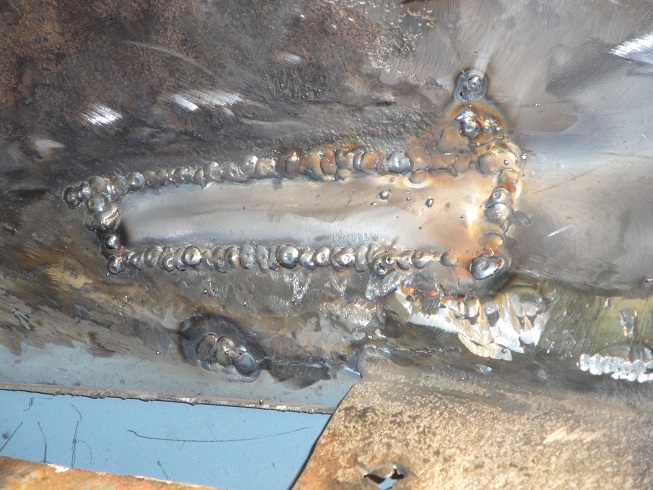
Then I repositioned the bench fixtures to allow me to weld the outer suspension mount to the new wheelhouse.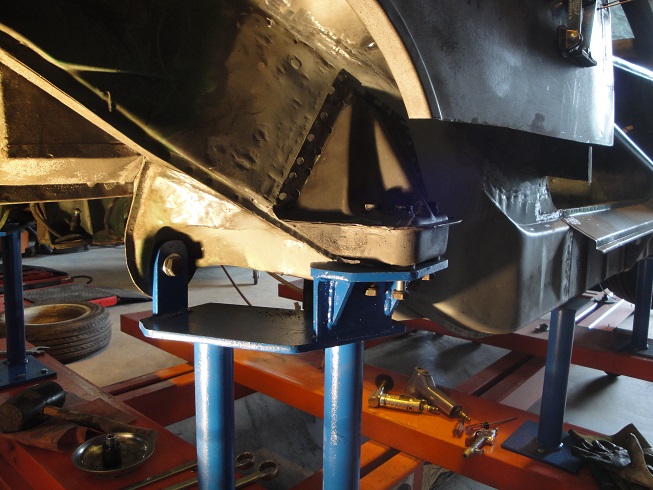
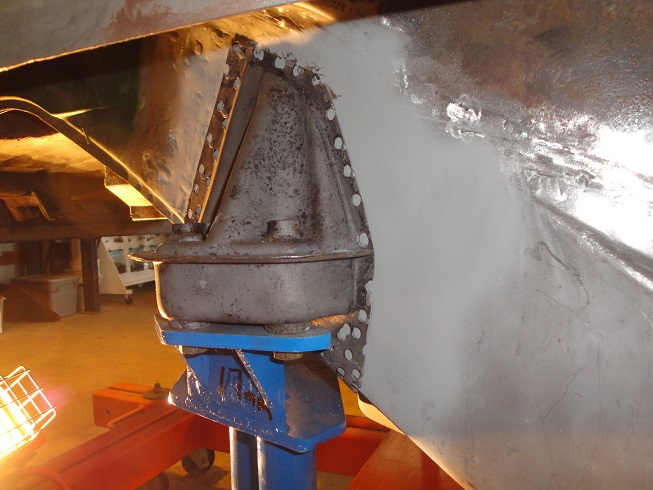
Had to fiddle with the bottom of the mount just a bit to get it to slide into place.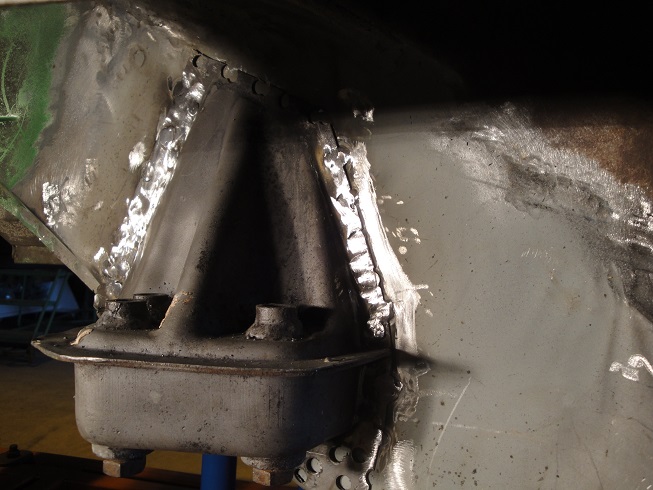
Added 5/26/16 7:30 PST
Leaving the top and bottom until I'm working standing up.
Posted by: cary May 24 2016, 11:21 PM
Then I moved on to installing the new jack point.
Put them together and positioned it on the long.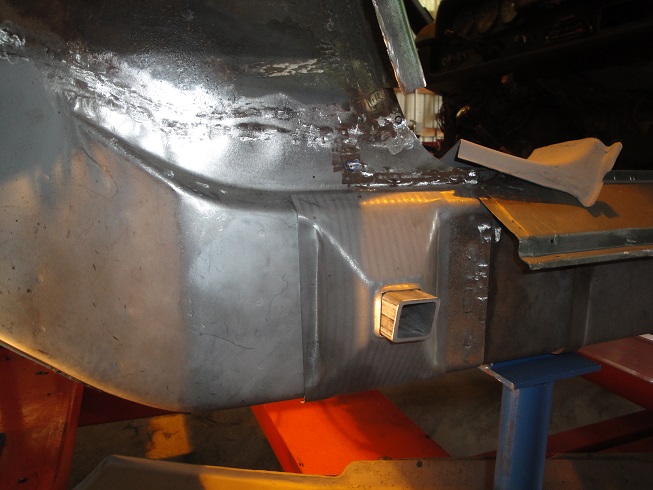
Note : I did need to square up the tube. The cut wasn't quite square.
Then I used Mark's old metal and my fiberglass outer rocker to correctly locate it into position.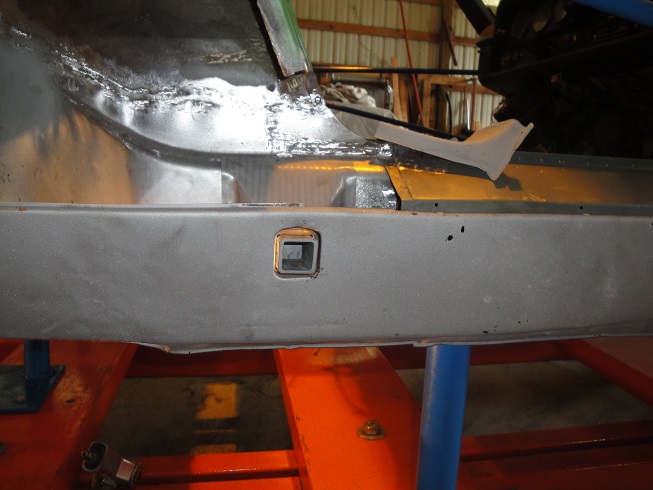
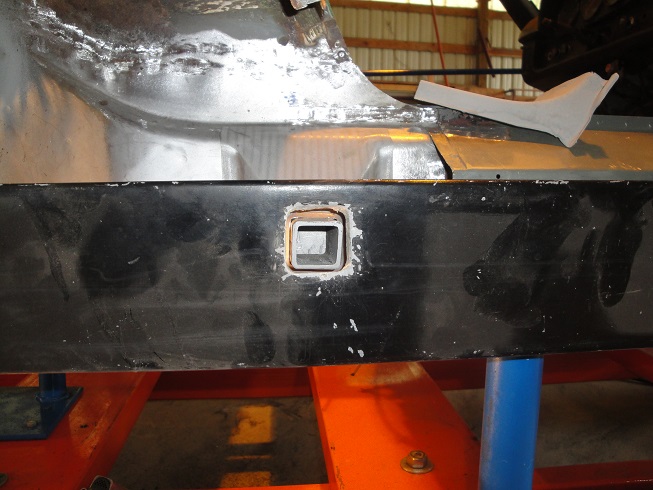
Then I mark the inside of the positioned tube with a pencil. That way I can remove the cover without losing the correct position. Held in place with my monster magnets.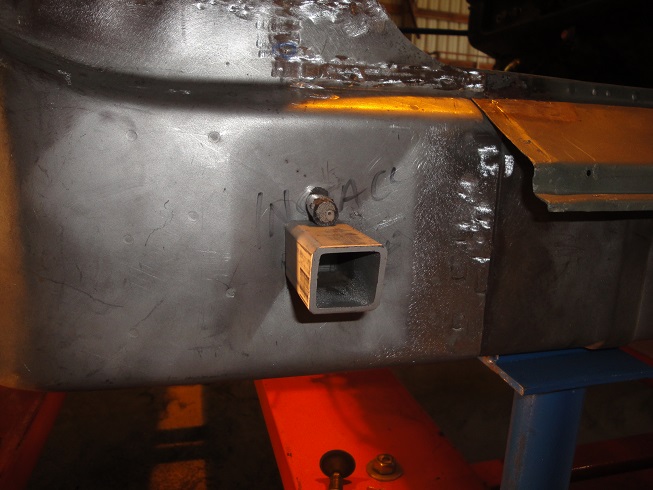
Welded into place. Used between the 1/8 and 3/16 setting on my Millermatic 180. That tube is pretty thick. 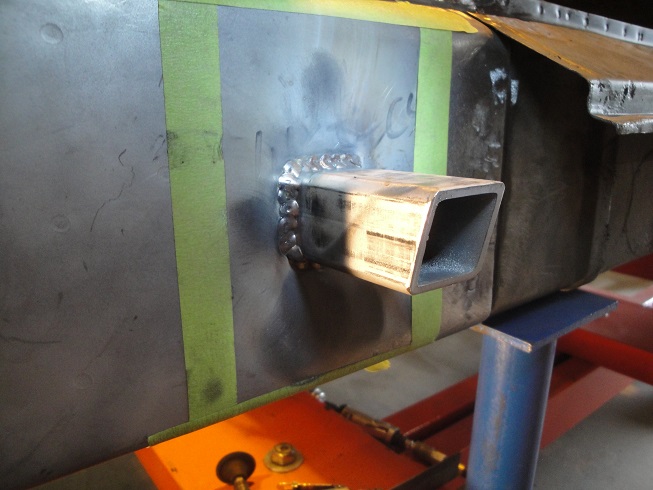
Prepped the inside of the cover with 2 coats of Rustoleum. Prepped the long with Rustoleum Cold Galvanizing. Both had the rosette areas taped off for brush on weld thru primer.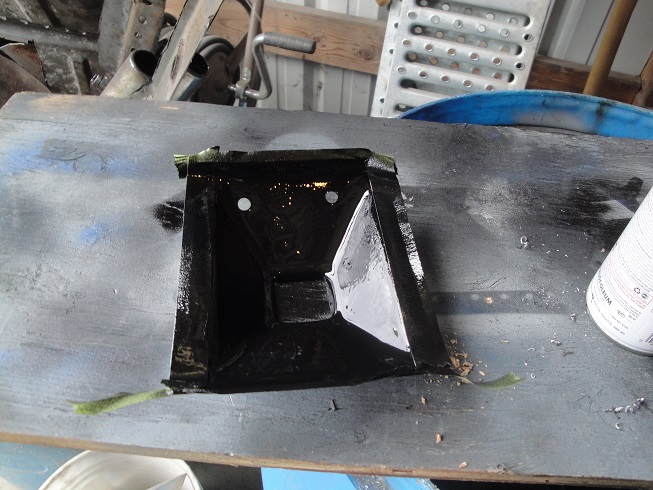
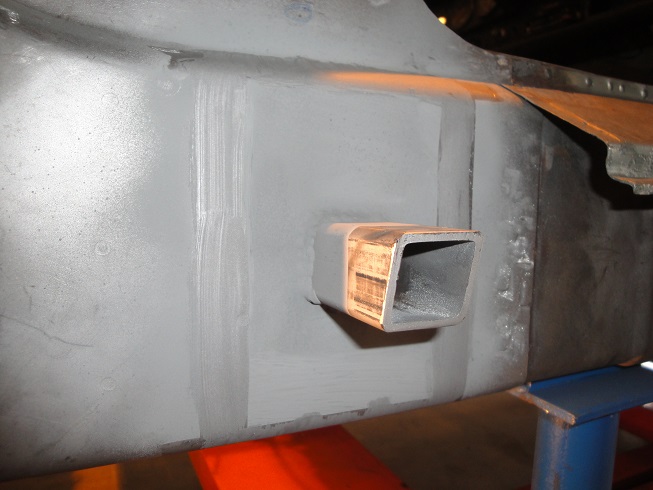
Letting the paint dry. Ready for welding in on Thursday am.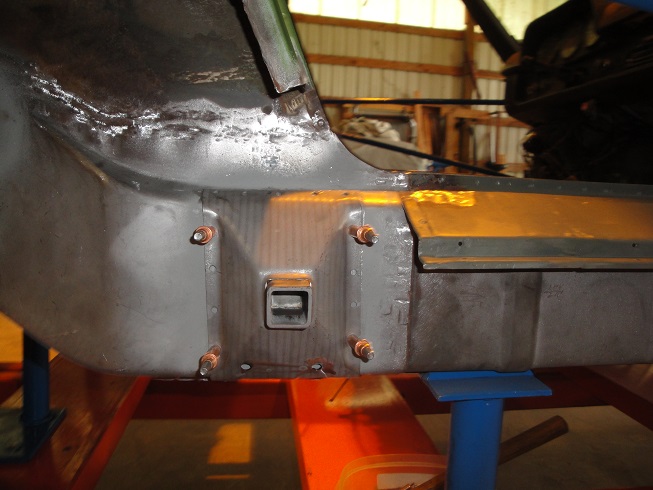
Posted by: cary May 26 2016, 08:41 PM
Welds are a little too proud. Too much weld thru primer. 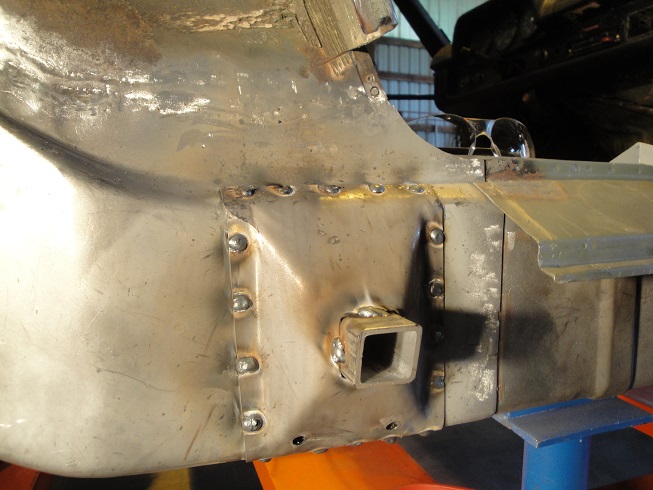
Two coats of cold galvanizing compound. After it dried, two coats of Evercoat brush on seam sealer. Then another coat of cold galvanizing.
Tube was taped off again so it can be painted with body color paint.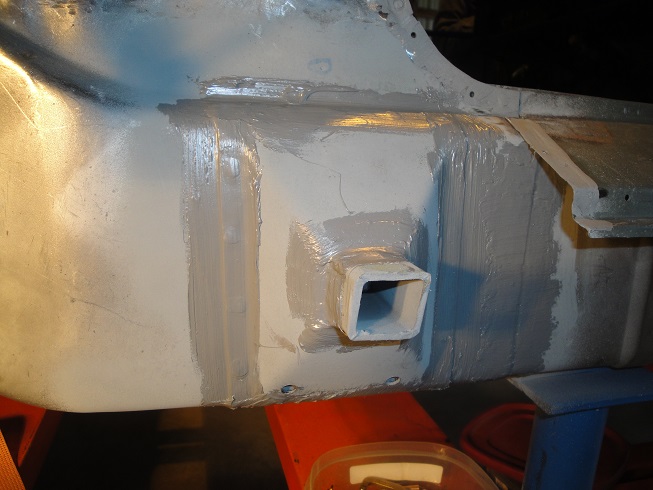
Posted by: cary May 26 2016, 08:45 PM
Then I went after reinstalling the door jam that was cut out for removing the jack pint.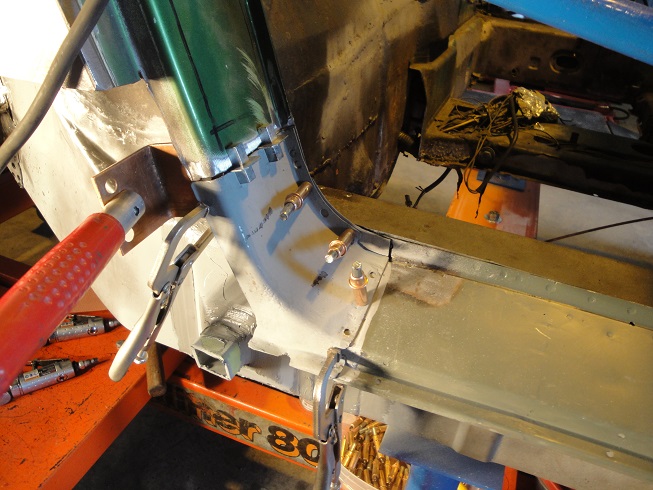
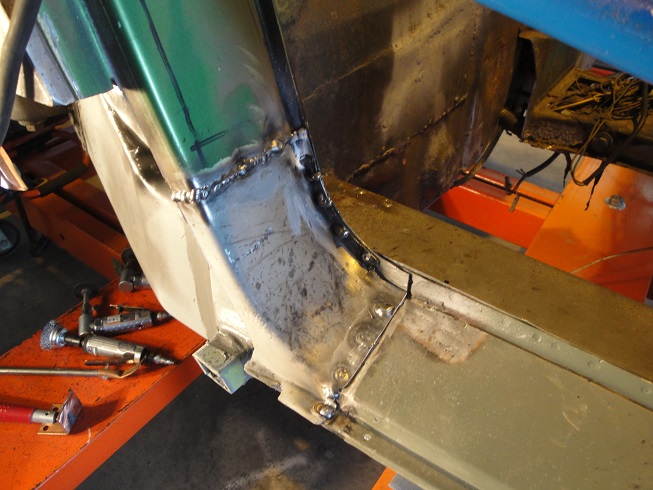
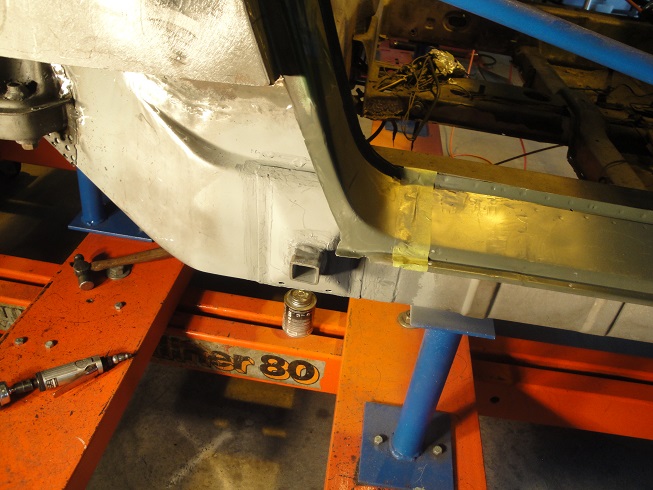
Posted by: cary May 26 2016, 08:54 PM
Here's where Super In Law left off yesterday.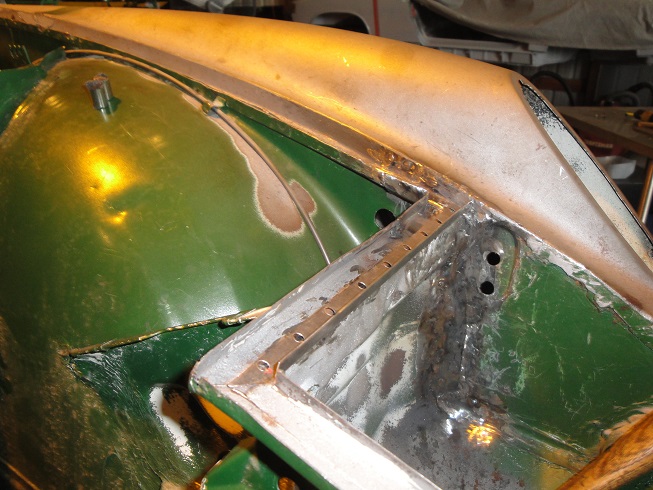
Cut and pasted the upper corners. Not real tough. A little thin in some places on the left.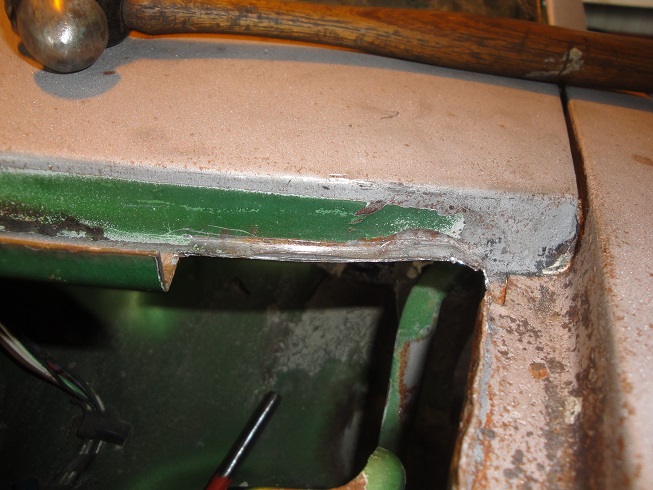
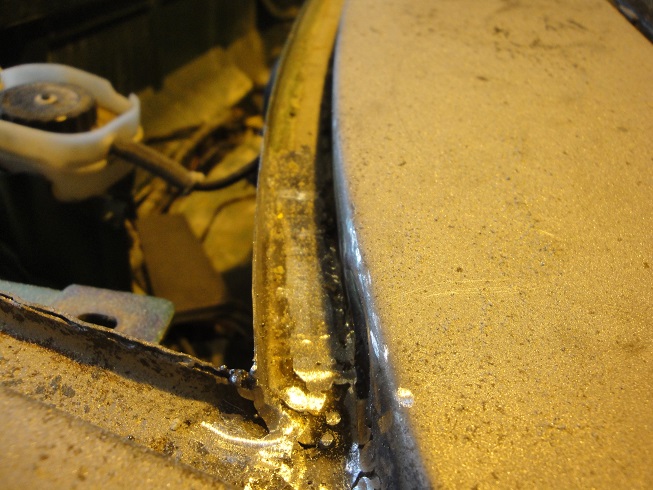
Then I brushed on seam sealer into channels. All sealed except for the left.
I gave it a good dose of OSPHO.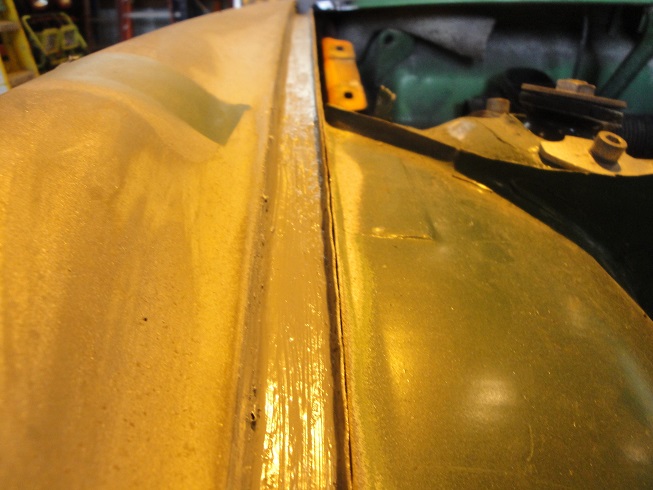

Posted by: cary May 26 2016, 09:14 PM
While Super In Law was working on the channels I decided to prep the front hood. I will be using it tomorrow to analyze the hood verses head light bucket alignment. Both left to right and up and down.
Decided to go to NAPA and get studs They will replace the 8mm bolts for ease of installation, alignment and removal. Temporary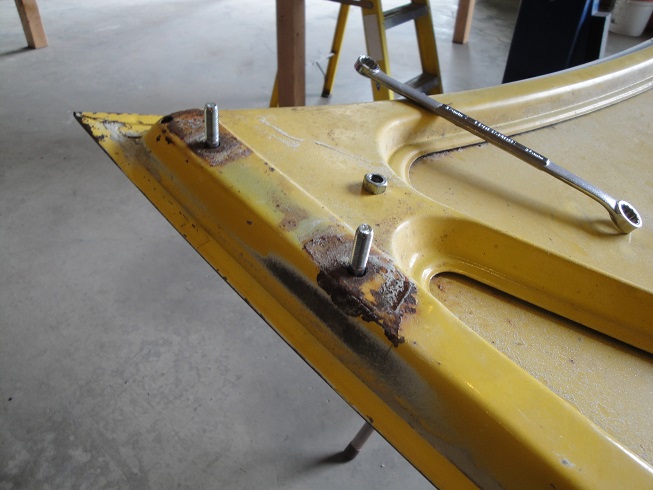
Quite a bit of surface rust in numerous places. But nothing bubbling thru the paint on the top side.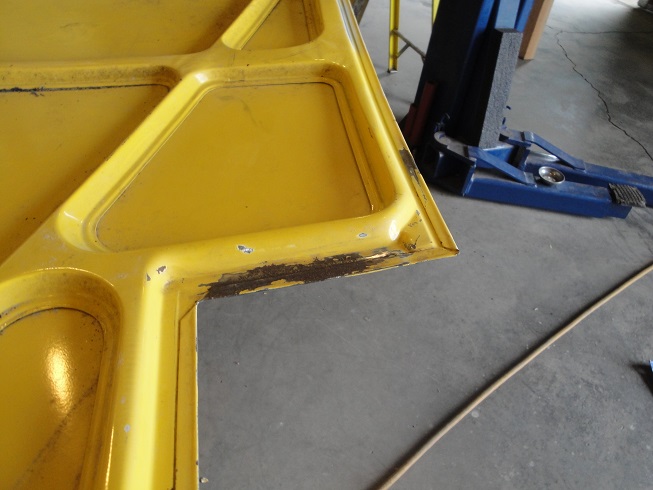

All of these were liberally sprayed down with OSPHO. Did find a pretty big pocket of rust under the front lip.
I filled the front lip with OSPHO and tilted up for an overnight application.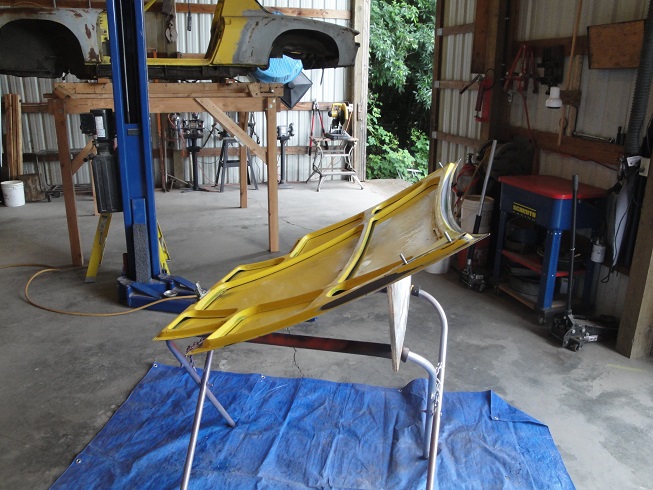
Posted by: rhodyguy May 27 2016, 08:28 AM
You might want to check the platform leg to the left of the hoist, front end of car, with your level. Might be an optical illusion but it looks way out of plumb.
Posted by: cary May 27 2016, 08:28 AM
We measured all 5 cars that are here and everyone of them has a different measurement in the arrowed location. Hmmmm. Hand Built.
So we'll carry on the hand built legacy and adjust the channels until we get the perfect fit.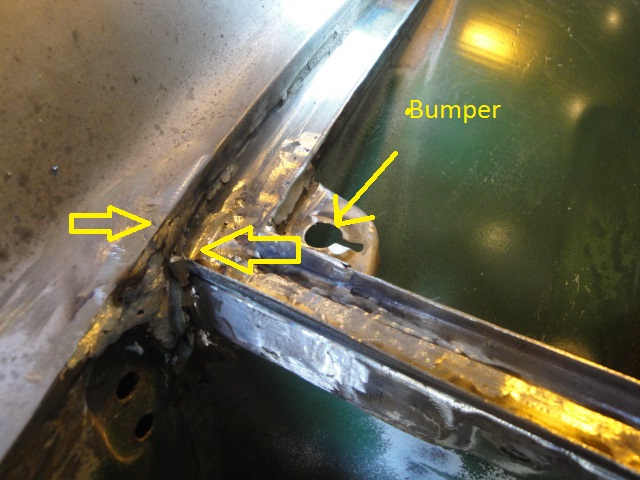
Waiting for Mark to get home and bring us a new trunk seal. But in the mean time we'll use the old one out of my project car.
Waiting on the battery tray attachment area until it's back on the lift and I can work standing up. The more I look, the iffier the metal looks. The last couple weeks I've been thinking of making the battery tray removable. Maybe blind or welded on nuts. But first things first. Lets put in some metal that can be worked with.
Posted by: cary May 27 2016, 08:35 AM
You might want to check the platform leg to the left of the hoist, front end of car, with your level. Might be an optical illusion but it looks way out of plumb.
I'll look at it this am. Hopefully that will get replaced with another 2 post this summer.
Posted by: cary May 27 2016, 09:35 PM
Now to see if all of our channel work will fit the hood.
Old rubber seal laid into place. All corners are now nice and tight.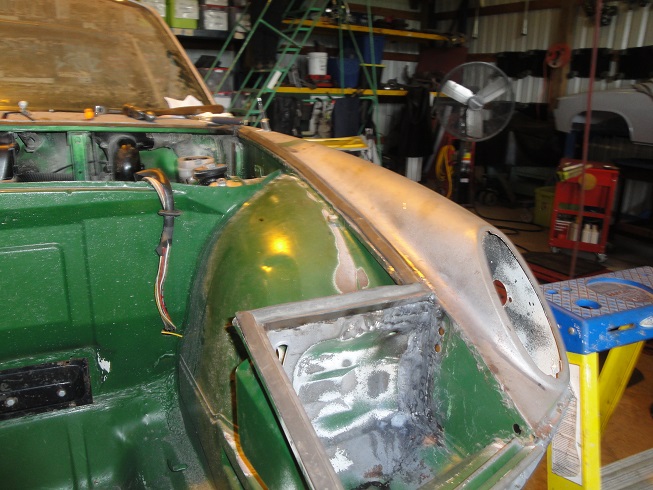
But we ran into trouble with the front trunk release cable. One of the allen screws was all rounded out. Dandy .........
Once we took off the hinge we could insert the allen driver and seat it with a couple taps with the hammer. Magic ....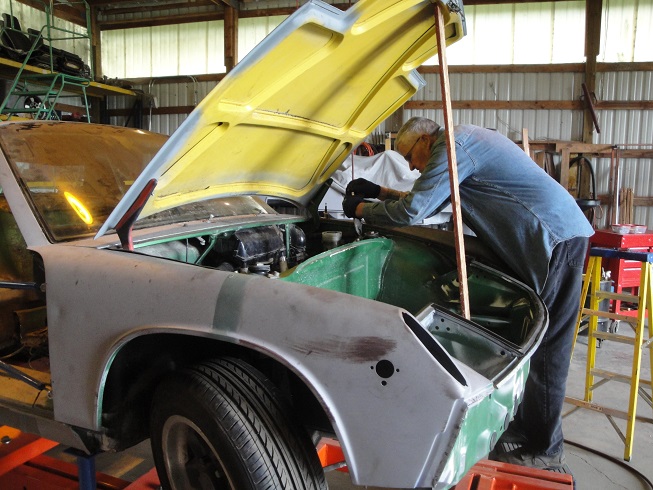
We found a big kink in the cable which added to the troubles.
Then we had to hunt for a front trunk latch. Car came to us without a latch. We had to go thru everything twice, but we finally found the one from my project car.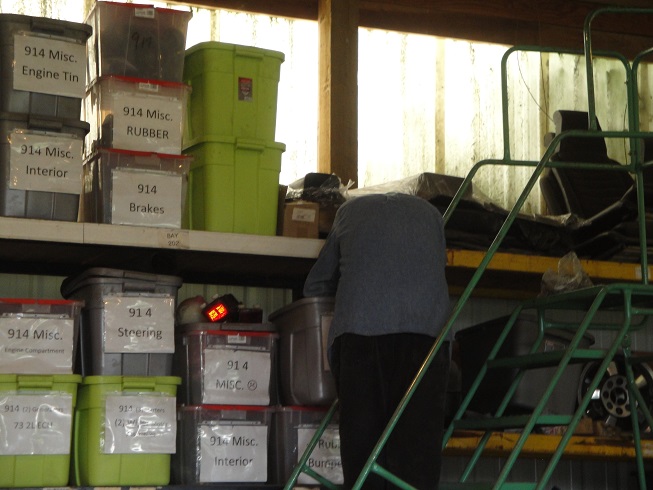
Final result .............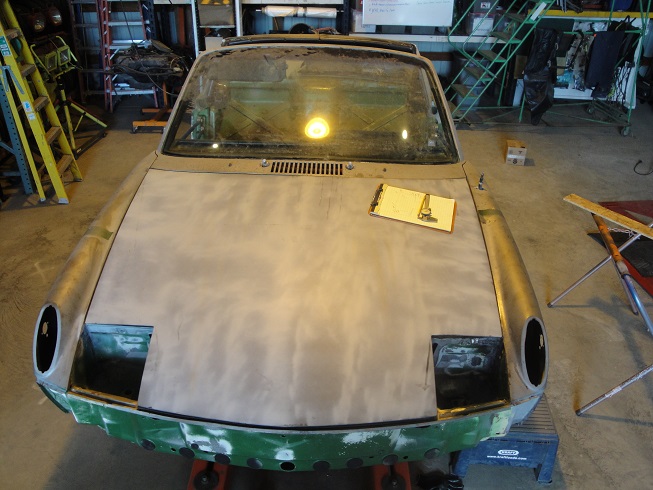
It still needs a 1.5mm clockwise rotation. I may or may not be involved in the final Assembly after paint. But I needed to be sure everything fit and lined up perfectly.
After looking over all the well restored cars at WCR I know that the front hood and eye lids need to be dead on.
Posted by: Mikey914 May 27 2016, 10:46 PM
Looks like I need to get you a cable and guide tube.
Posted by: cary May 30 2016, 10:28 PM
Spent the morning doing some housekeeping and tool sorting. Starting to assemble, purchase and fill a new toolbox for my new job.
Seam sealed the front trunk channel and head light buckets for a second time.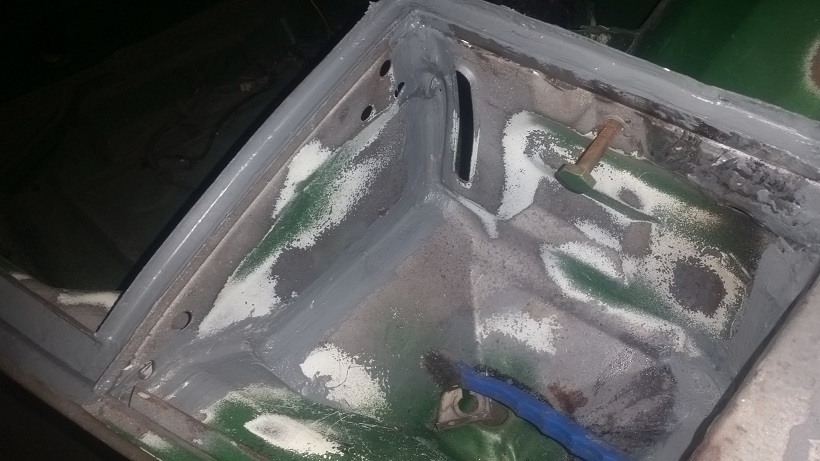
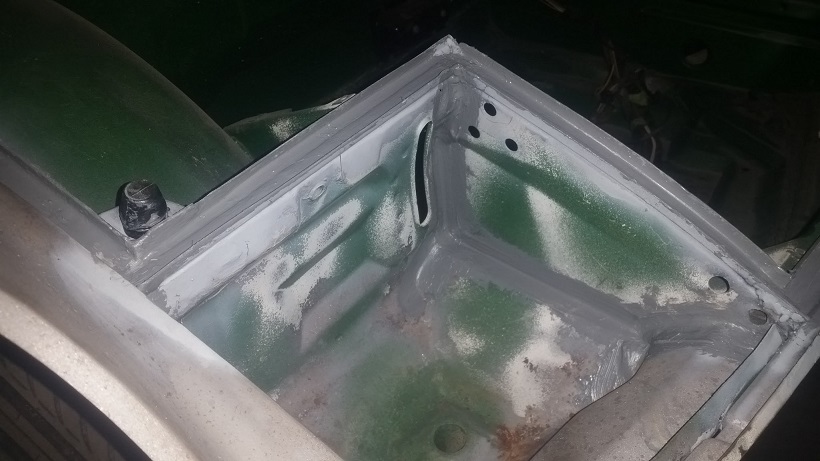
Then set about lifting the car off the frame bench. It got a little complex do to the need to work on the engine compartment firewall, right suspension ear and the back half of the floor.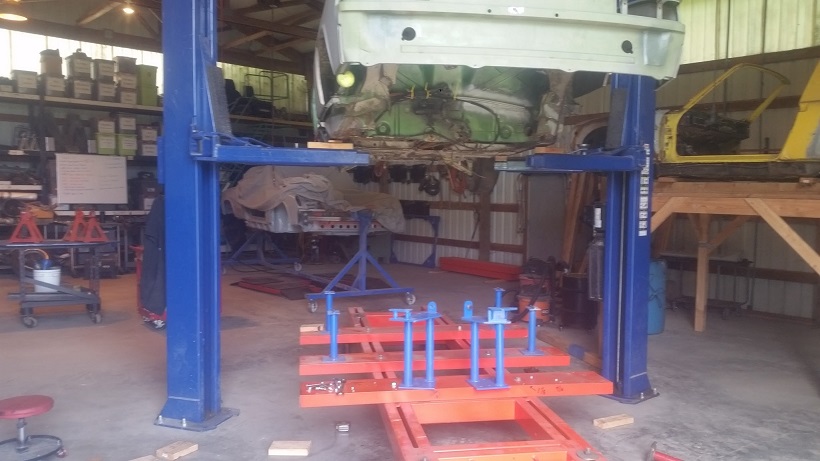
Then spent some research time figuring out my plan of attack.
It does look like we'll need to come up with a good right T4 motor mount.
We should be be able to get one from Doug.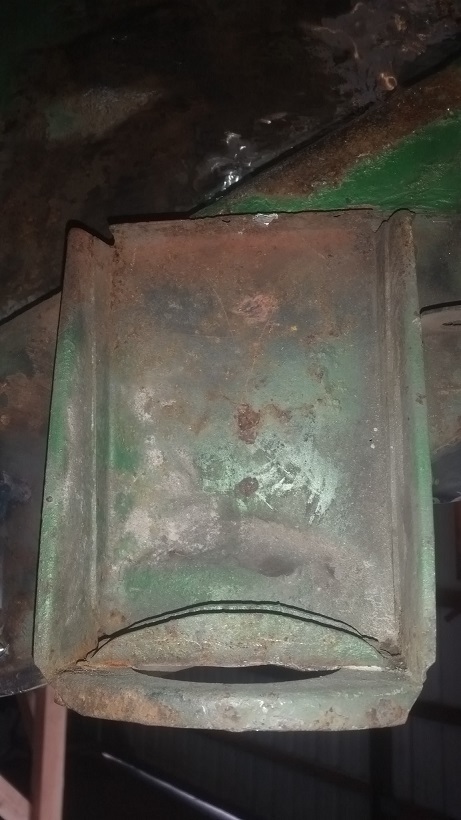
Posted by: raynekat May 31 2016, 10:03 PM
Then spent some research time figuring out my plan of attack.
It does look like we'll need to come up with a good right T4 motor mount.
We should be be able to get one from Doug.
I will have a left and right pair of those available.....
Posted by: cary May 31 2016, 11:12 PM
After lunch I finish the welds on the outer console. Sprayed it down with Cold Galvanizing. Then worked on the nicks and cuts on the inner console left from cutting off the tie ins.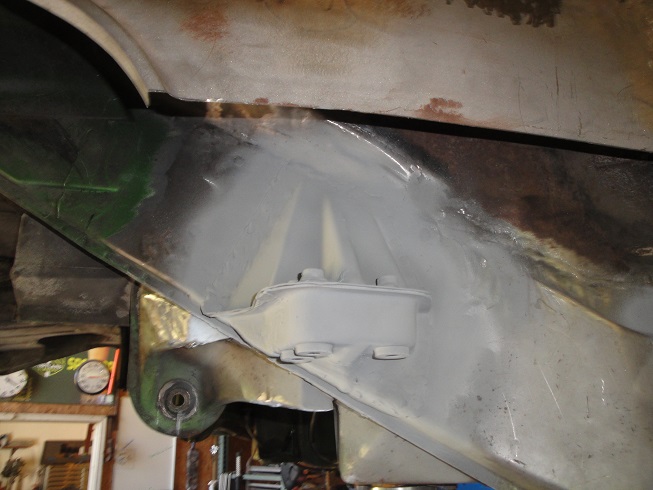
Super In Law starts on the fabricating the tie in plates. This time I dug out the suspension point cuts that I bought last year. This will aid him with reworking our patterns.
http://www.914world.com/bbs2/index.php?showtopic=247894&hl=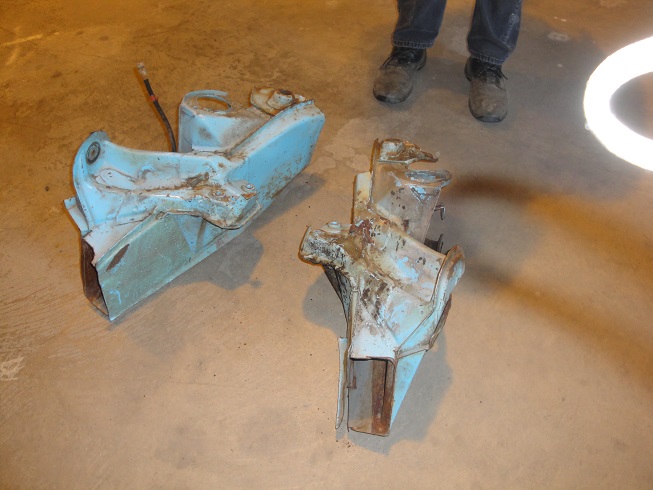
Puts it into the vise for ease of pattern measurements.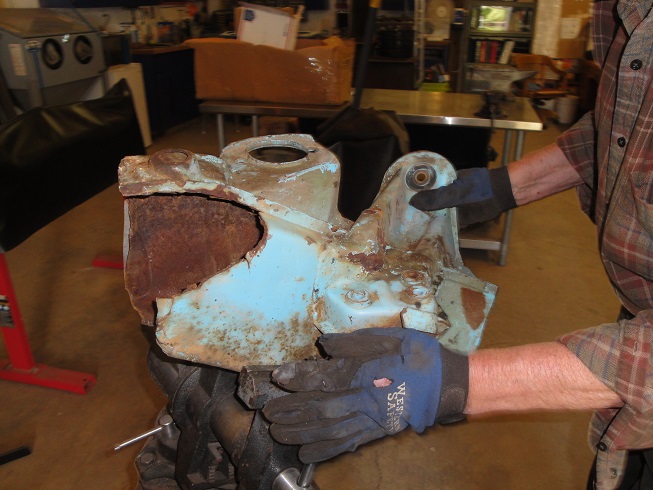
Once we perfect the patterns we'll make them available.
Posted by: DirtyCossack Jun 1 2016, 07:21 PM
I'd love a pattern!!!
Posted by: BeatNavy Jun 1 2016, 07:38 PM
I'd love a pattern!!!
I could definitely use that as well, Cary. Thanks for any and all help!
Posted by: cary Jun 1 2016, 08:24 PM
He took the day off to attend a funeral. He'll be back at it tomorrow.
Picked up some more work when I was making a deal on a new Snap On tool box. One of the mid seventies vehicles that just might be rustier than ours.
Toyota Land Cruiser. Simple. Just a cut out and patch. So he say's. LOL.
Posted by: Eric_Shea Jun 1 2016, 08:41 PM
Keep melt'n metal Cary. Looking good.
Reading through... The tow eye hook should be M9x1.5 not M10. It wasn't clear if you were making those up for sale but, a stock tow eye is M9. It shocked me when I found that out last week. I thought it was M10 as well. 
Posted by: cary Jun 1 2016, 10:55 PM
Decided I'd install the left front trunk bumper bracket to start the day. Filled in the larger spot welder cutter holes first. 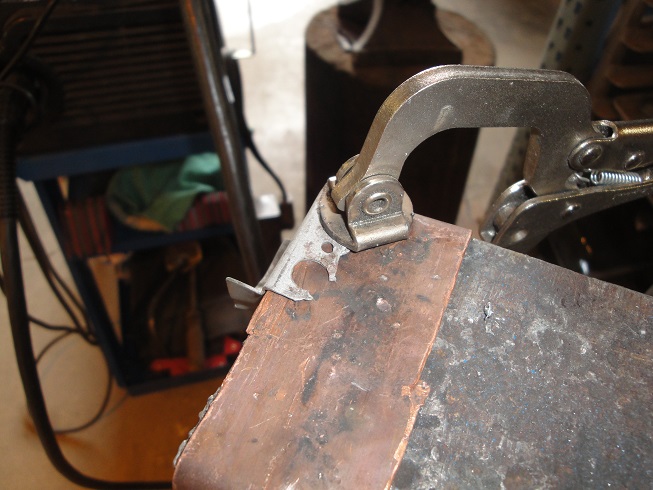
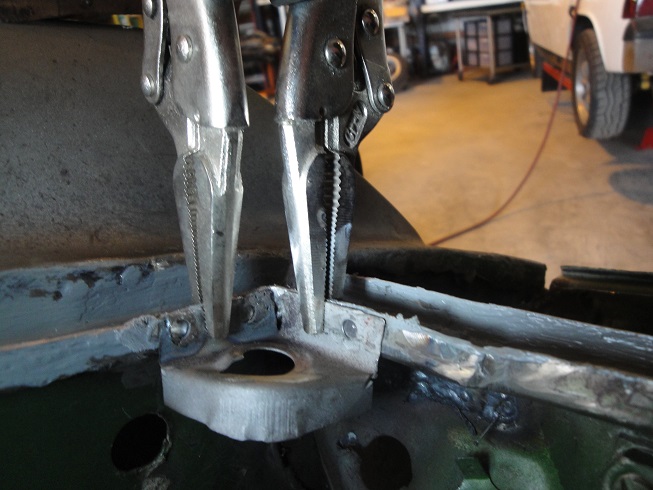
Then got back to tidying up the nicks and cuts on the inner console.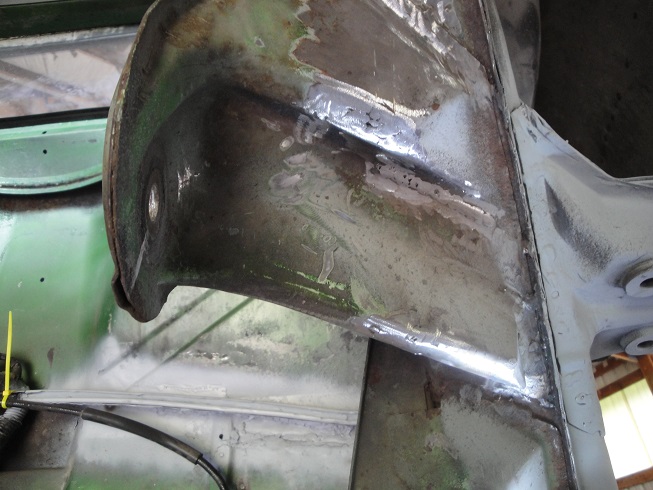
Then I brought out the spot blaster to tidy up the console and the wheelhouse.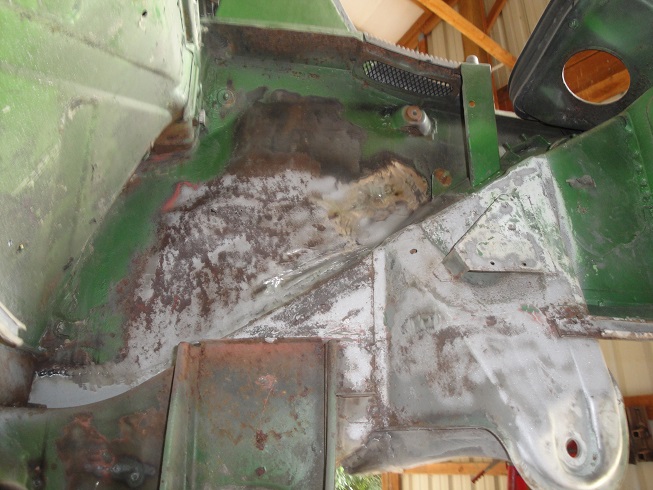
Drew out the patch cut.
Long is ready for Eastwood HD Rustproofing.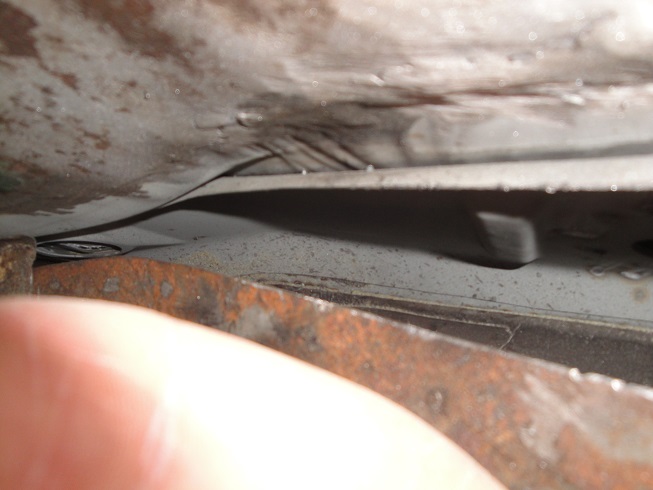
Posted by: cary Jun 2 2016, 07:51 AM
Let's finish yesterday. Fell asleep after Timbers game
Pulled the wiring harness thru the firewall. A couple shots of removing the rear trunk opening motor.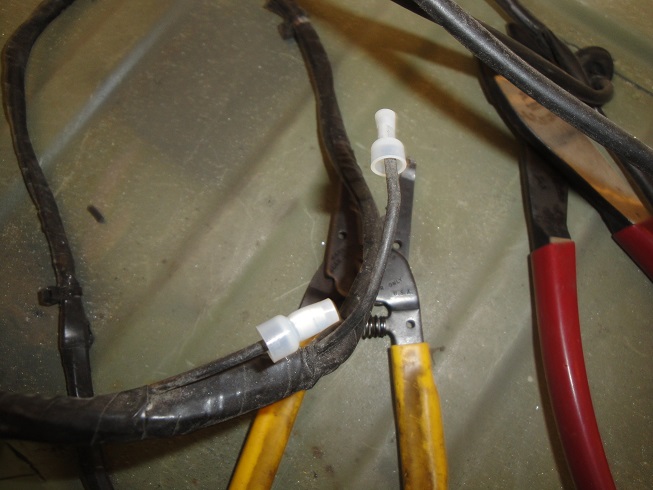
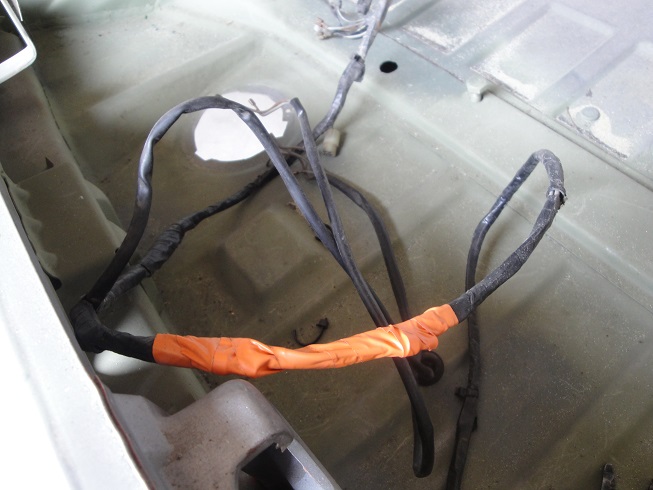
For reference in the future, the motor wire ends are under the orange tape.
Rats nest .............. but its now laying in the right front floor pan.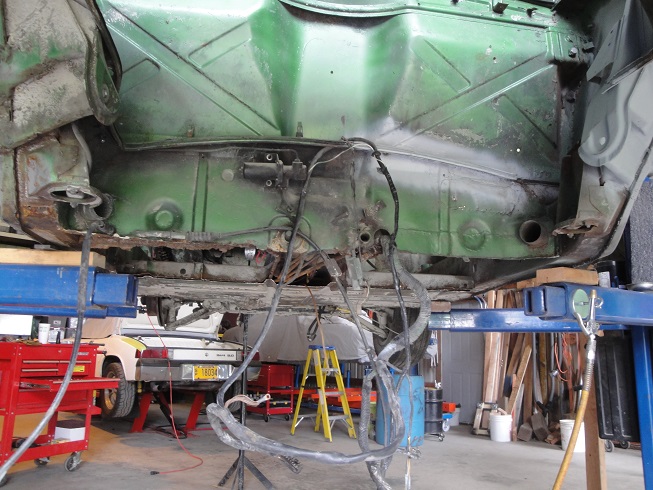
Onto to the engine bay firewall removal surgery.
Starts with removal of the brake bias valve mounting plate. It will get transferred to the new firewall. Looks like once again the 75 is different than the earlier cars. Photo #1 is Marks car. #2 is the 73 parts car.
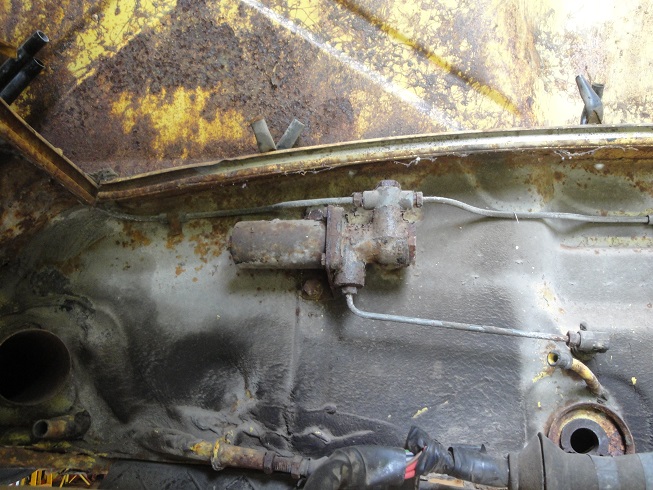
I started with the hillbillied corner (right side). I had serious concerns about getting the heater tube out of the old firewall without damage. But patience was my friend and she came out good as new.
Forgot the shot of half the firewall gone. I'll add that tonight with an edit.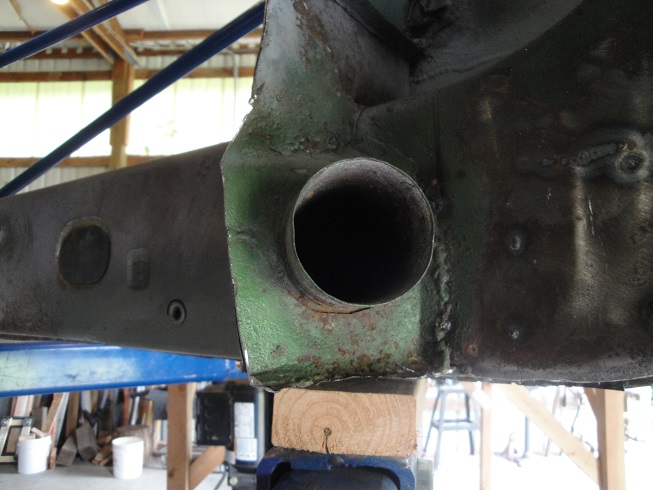
I deleted a shot of how the factory welded in the heater tube. I needs to be here for those that haven't been here before. I'll shoot a shot of the other side and elaborate tonight.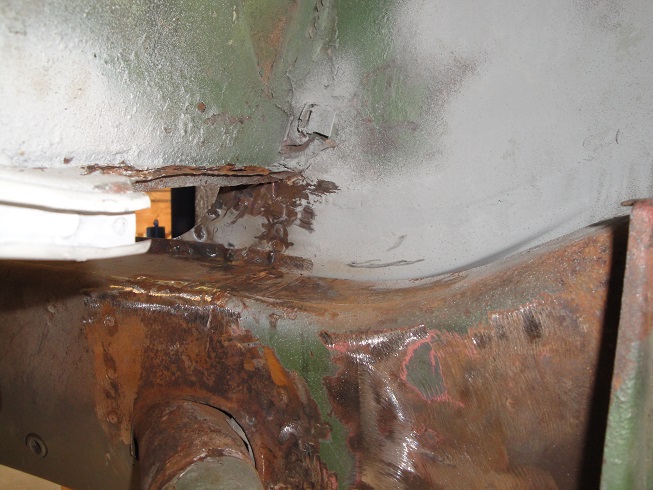
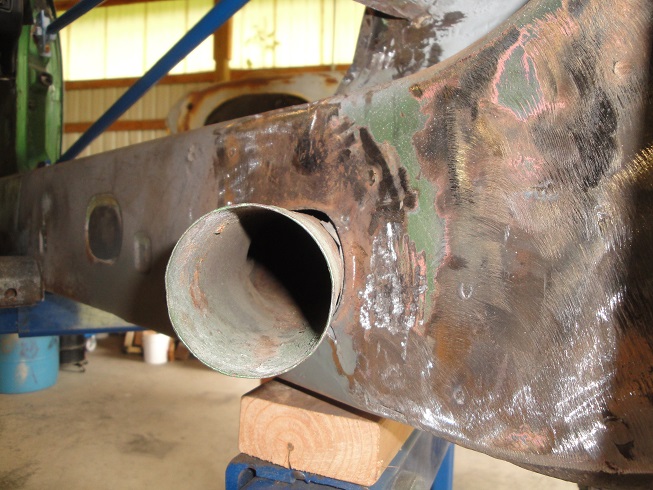
A little more housekeeping then a bath of OSPHO. Then I'll apply the HD rust proofing to the inside of the long. That side should be about ready to go back together. I'll have Super In Law start with the hell hole cover plate this am.
Once again lots of work with the 13" air belt sander.
Posted by: cary Jun 3 2016, 07:26 AM
I'd love a pattern!!!
I could definitely use that as well, Cary. Thanks for any and all help!Mark stopped by to bring me a couple things. But I took him into the other shop where Super In Law was working. Showed him the work on making the tie together plates.
Once we get one created and fitting perfectly he'll took at having them produced.
I'll still have the patterns for those that want to try there hand at blacksmithing. LOL.
Posted by: cary Jun 3 2016, 07:40 AM
Heater tube shot. Basically under the slathering of seam sealer are two acetylene tack welds. Not always in the same place. Probably the difference between a left or right and assembler.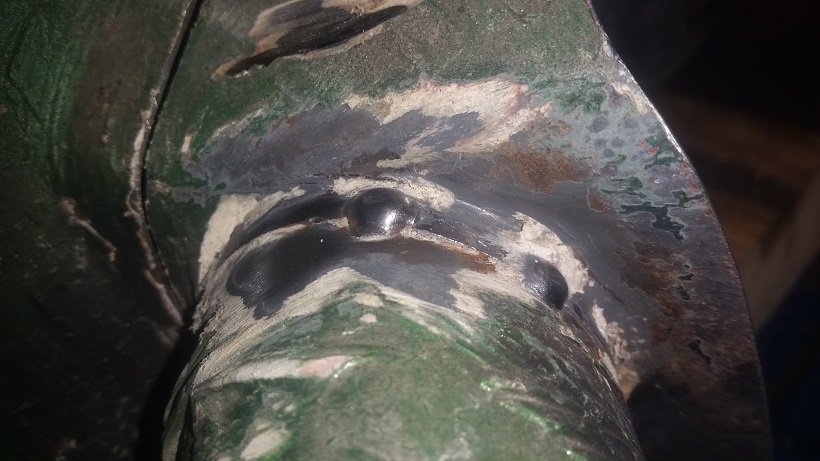
Removal: Cut the weld down with a 3' disk on a mandrel. Them pull off the surrounding tin.
Another future info shot: Jumper wire on the seat belt lock out. Had to remove it to pull the harness thru the center tube.
Posted by: cary Jun 3 2016, 07:46 AM
I was going to start a new post of Super In Law building the tie in plates. But I think I'll start a new thread this weekend. Easier for searching in the future. And with the advent of Mark's perhaps producing them in the future it would be better served.
Teaser shot : Beginning cut out.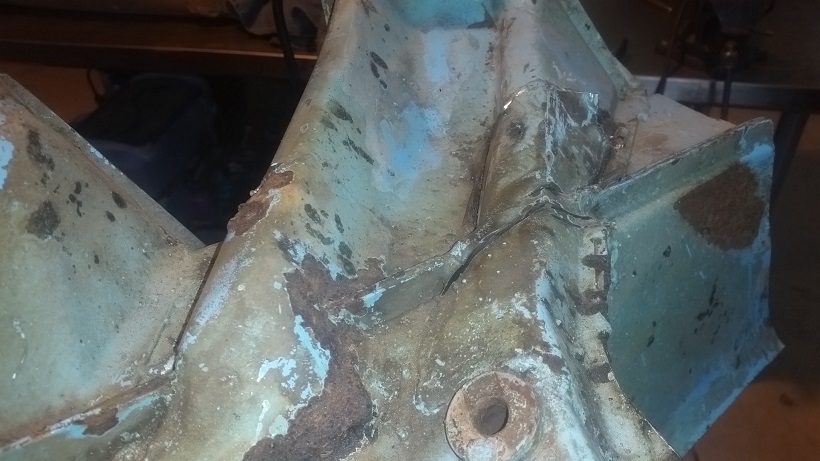
Posted by: cary Jun 3 2016, 08:26 AM
Thursday's a short day. Going to pick up my new tool box.
Here's were I left off.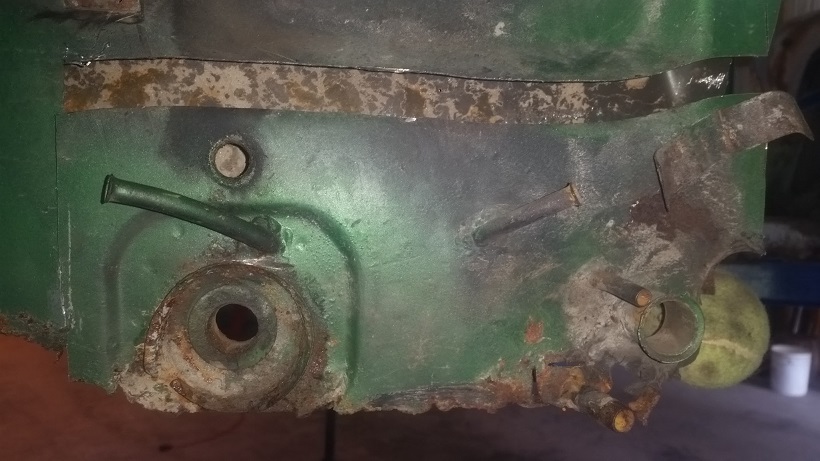
Cut them down to size so I could turn them as I torch them out.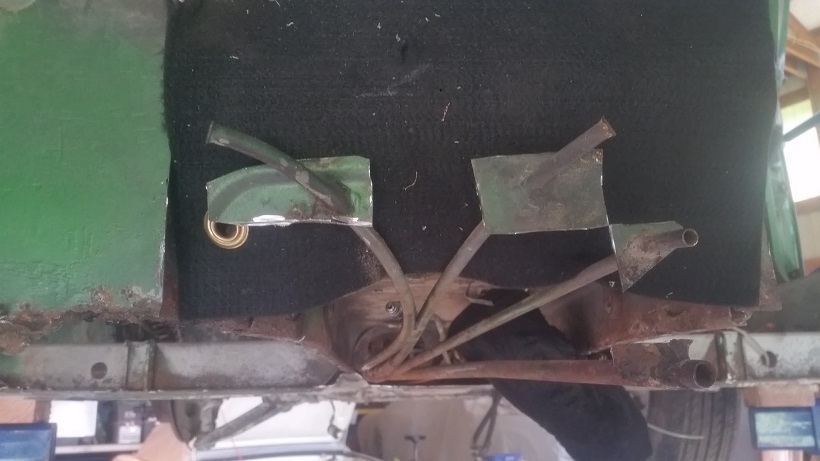
All done.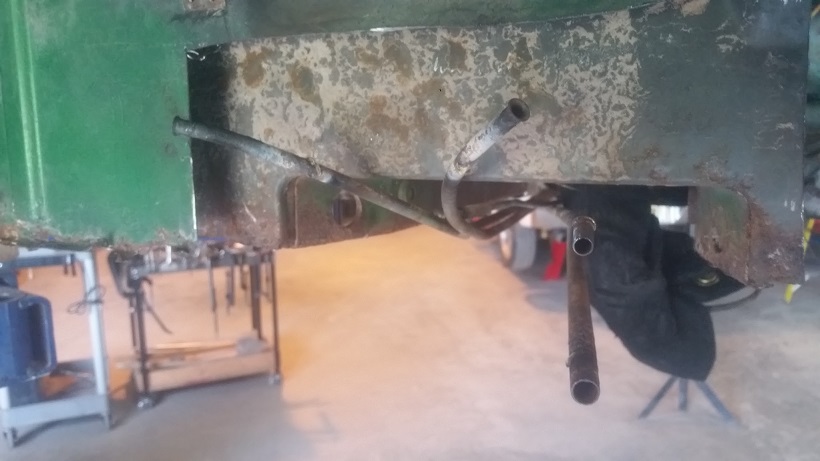
Mark stopped by and we fitted in the new front trunk seal. A beautiful thing.
Then we decided that we'll probably replace a major portion of both rear quarter panels. One, to correct previous damage. Two, to look at the rust on the inner sail panel support.
I would call this long term ownership investment.
This is where I'll do a plug for 914 Rubber. I think everyone should install his fender liners. Just the way that the sail panel support is exposed inside the fender gives way to future issues.
Posted by: cary Jun 3 2016, 09:10 AM
During Mark's visit we decided we'll replace the left inner firewall too. Bottom edge is pretty rotten. Another one of the time vs. dollars decisions. So away I went cutting out the firewall.
Started with unhooking the left heater tube. Start by cutting and removed the e-brake tubes from the engine side. But first one must get rid of the seam sealer. 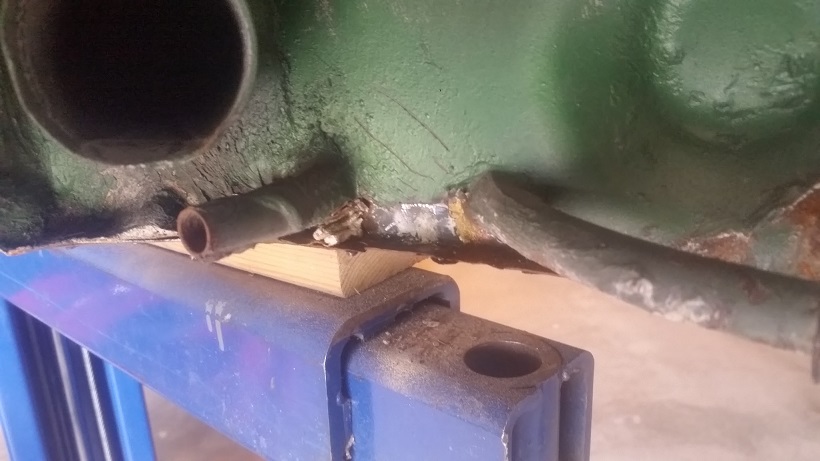
Then away I went. Not too many pictures. Just assholes and elbows.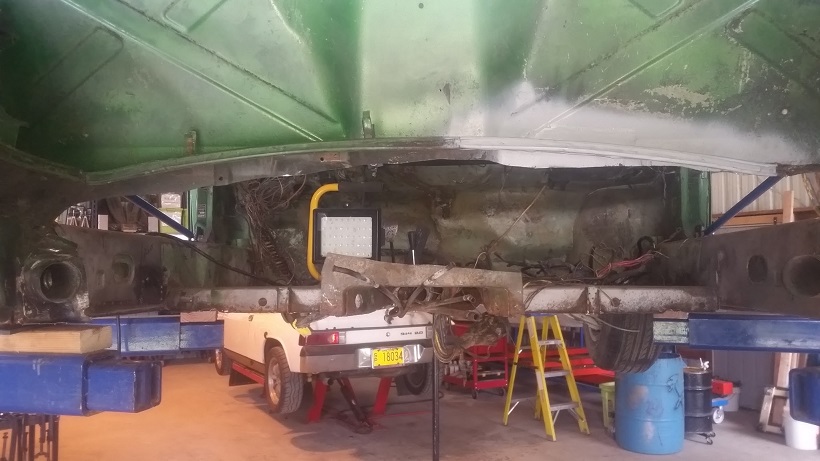
Carnage at the end of the day.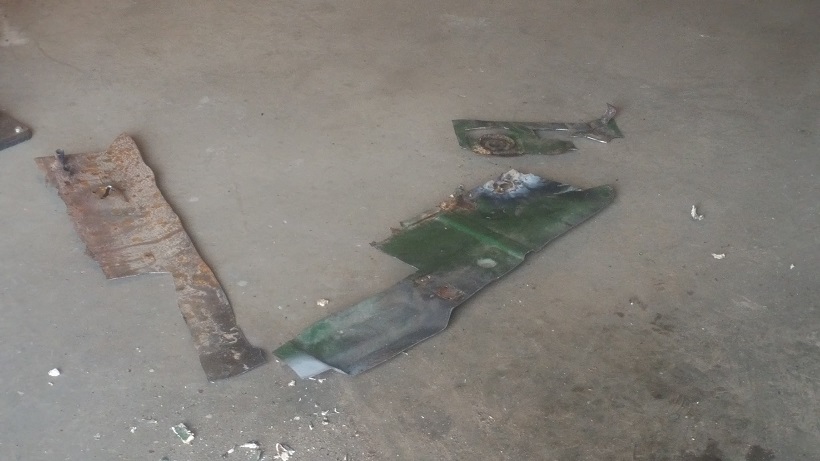
I cut out the center section to allow me better access to the spot welds. Angle of the drill. If not perfectly square you snap off the teeth. $7-$9 , cha ching. To speed things up I cut out the left inner firewall right with it.
I am going to like removing the inner firewall to tunnel welds from the inside much better. Pretty messy from the outside. From the outside you have the cutter on the portion that you keep. Big holes. Preferred method is cutter portion on the portion that is going into the recycling can.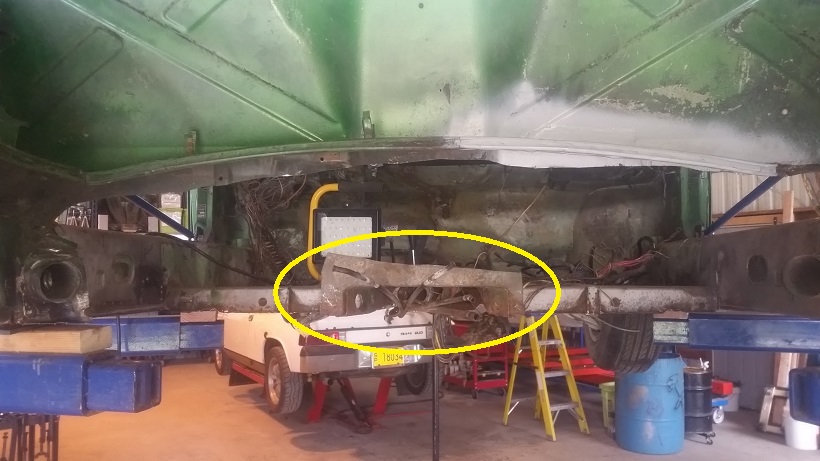
Posted by: cary Jun 4 2016, 07:59 AM
Friday 6.3.16
Start with freeing up the left heater tube. 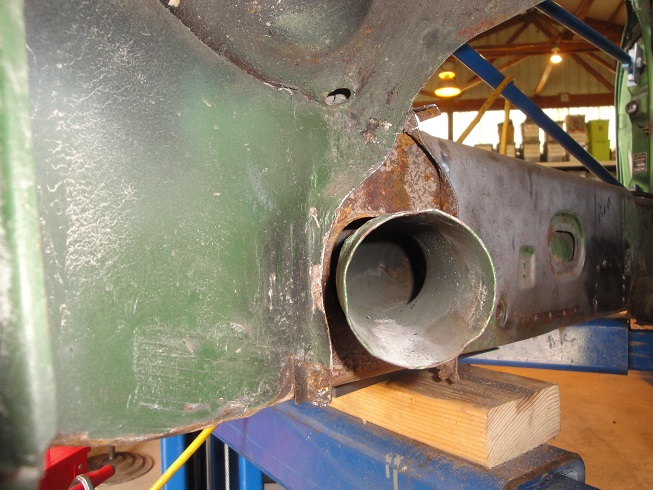
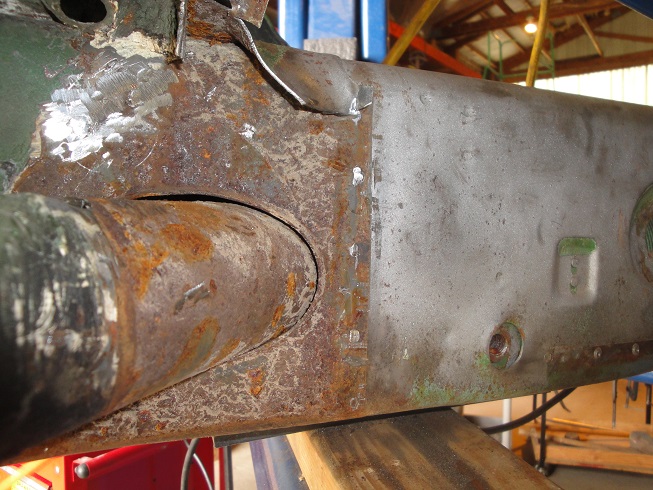
Looks about par for the course. Cup brush, OSPHO then cold galvanizing at a later date.
Then on to the tedious task of removing the top flange of the firewall. Left side factory spot welds. Right side hillbilly seam welded.
Left side I cut around the corner that contains the engine lid cable. Did one torch out yesterday without goggles, Bad Boy. Letting my eyes rest.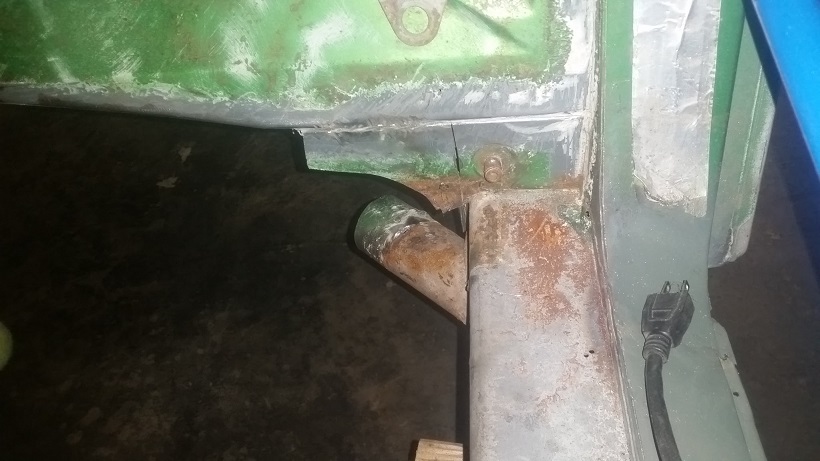
I did all today's work without a spot cutter. Getting tired of the damage it does to the portion that gets reused. Using the HF/Steck version of the Dynabrade system.
Basically using the end of the 13" belt sander I grind down the spot weld and pop it off with either the Steck spot weld splitter (2 versions in the picture) or wood chisel. AKA, a new twist on Rick's method.
No hole. No teeth marks.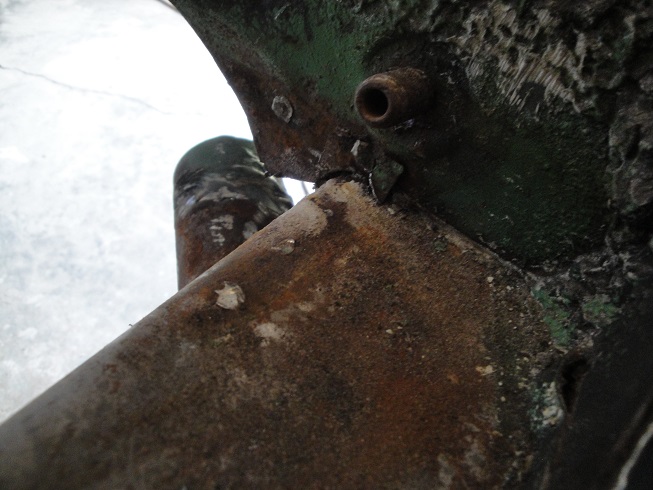
Basically I cut it out in 2 to 3 inch sections. Made a starter cut with the cut off wheel. Then sawed up to the top making sure I went all the way thru the flange. Most came off with a couple bends back back and forth. A couple had to be ground down.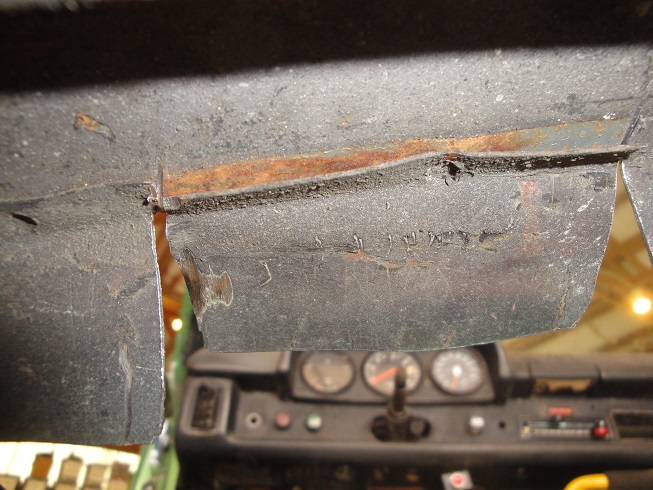
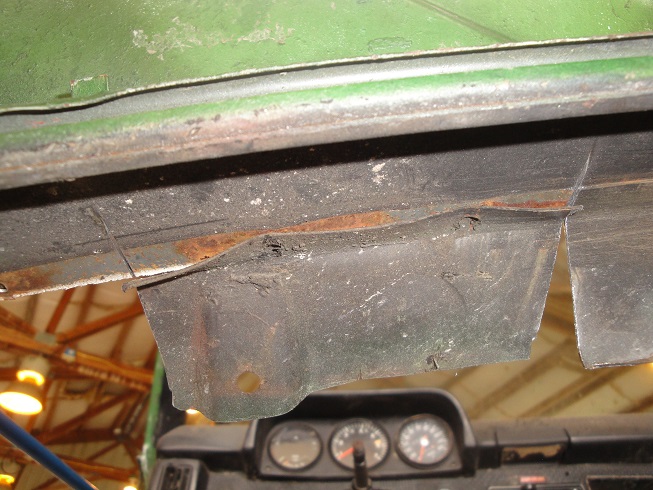
Posted by: cary Jun 4 2016, 08:25 AM
Now on to the right side. It had been seam welded do to repairing rust of created by a soggy engine sound deadening pad. Not much you can do. The firewall has a hole. And usually theres damage to the rear engine shelf. We'll need to put the rear shelf on Pete's at RD list.
Here's what it should look like after scraping off the seam sealer.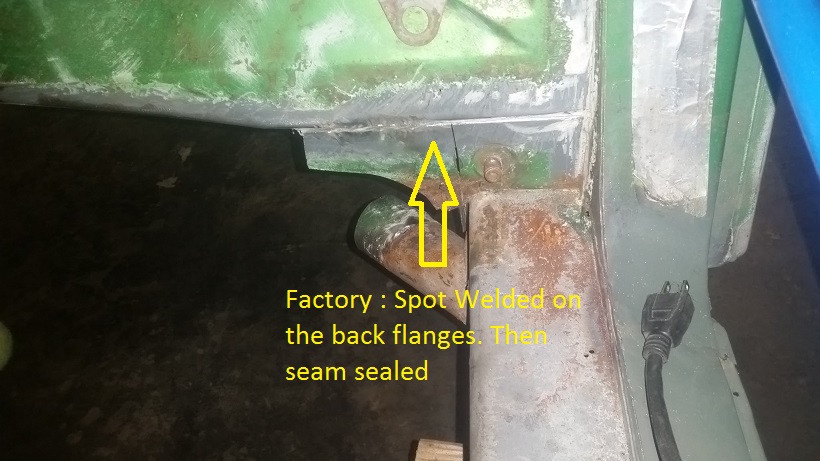
Now here's what I need to get thru.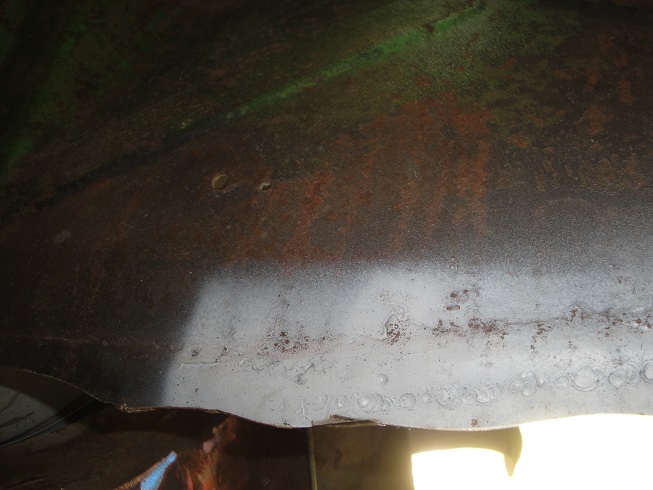
Could do the usual DAPO rant. But it is, what it is. My only wish would be that one wouldn't go quite so overboard. Some day it might need to come apart again.
Not a whole lot of detail. Once again, 2 to 3 inch sections. Eyeballed it and it cut out with the die grinder on the mandrel. Have to be careful of the slope. Only had one nick in engine shelf. Right where it transitions back to horizontal.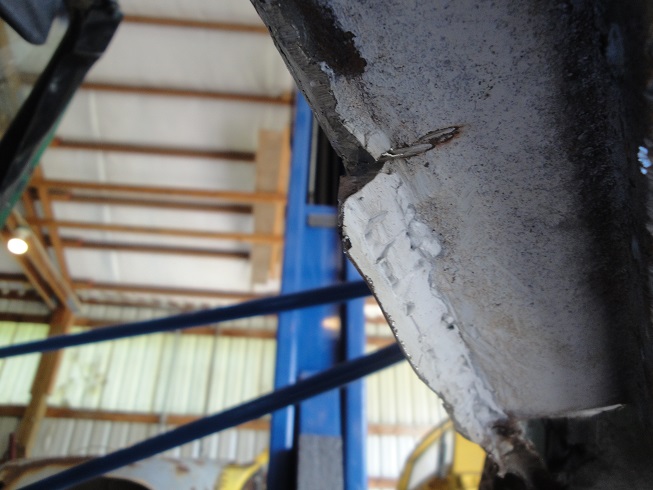
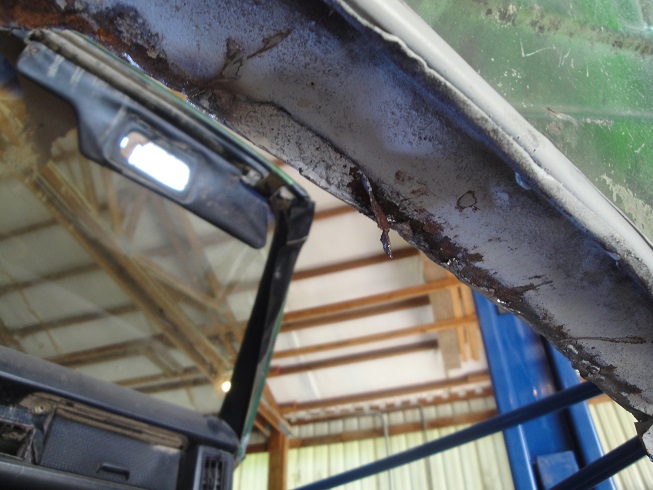
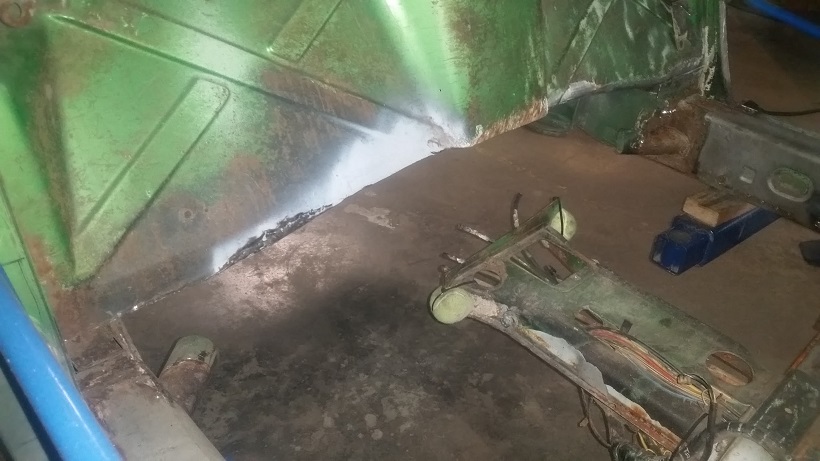
Posted by: Luke M Jun 4 2016, 08:31 AM
Hi Cary,
The work looks good on this. If you plan on using the RD firewall you'll need a few parts off the old firewall so hang on to it until you install the new one. My brother installed one on his car and it was a pretty easy install once we got it all setup.
The hardest part we found was making sure the lower half of the firewall measurements where dead on. Keep up the great work.
One more note... if you have a spot welder use it to mate the upper to lower sections. I found that plug welding it in was ok but the spot welder would be a cleaner install. We bought a spot welder after the fact but I'll go back to hit a few spots.
Posted by: cary Jun 4 2016, 08:43 AM
Now on to the nasty part. Mark and I decided that we'd change out the right motor mount too. No saving any of the that mount so I cut it out is sections so we would do the least amount of damage to the upper long.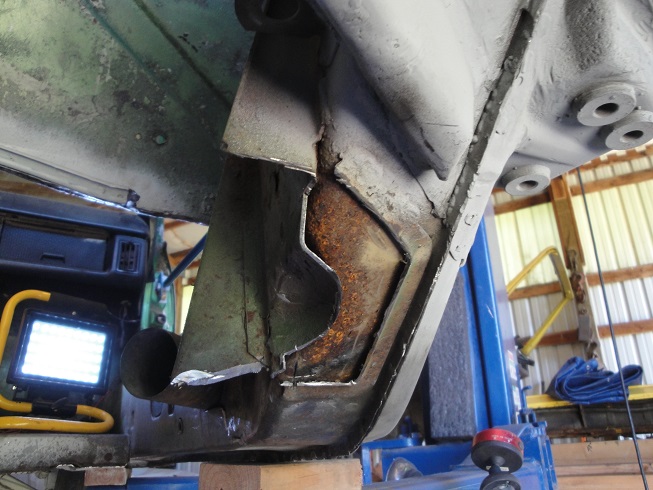
Once again using the grinder and Steck tool to remove the spot welds. Sliced between every spot weld and worked them one at a time.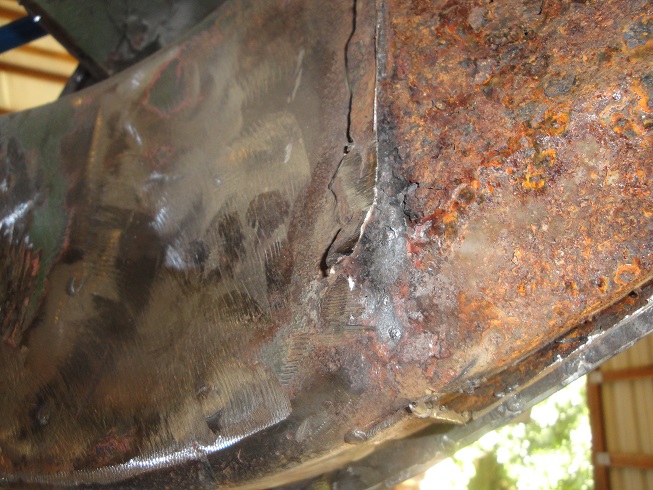
Close Your Eyes if You Have a Weak Stomach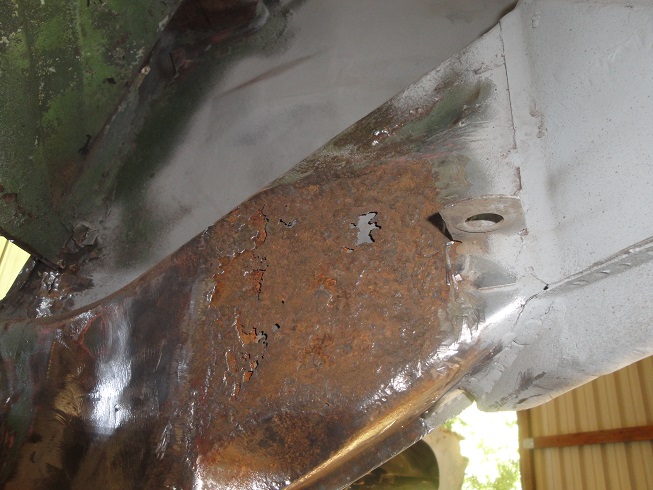
I know the inside of the long is solid. The long is open and I can see and touch it.
Here's the patch I'll make. With a radius going over the top.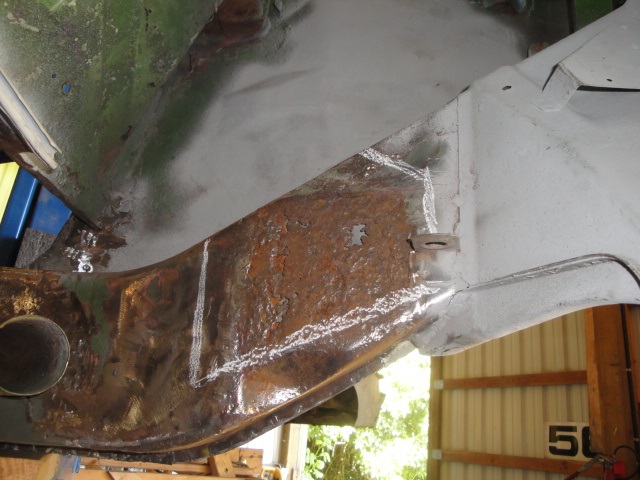
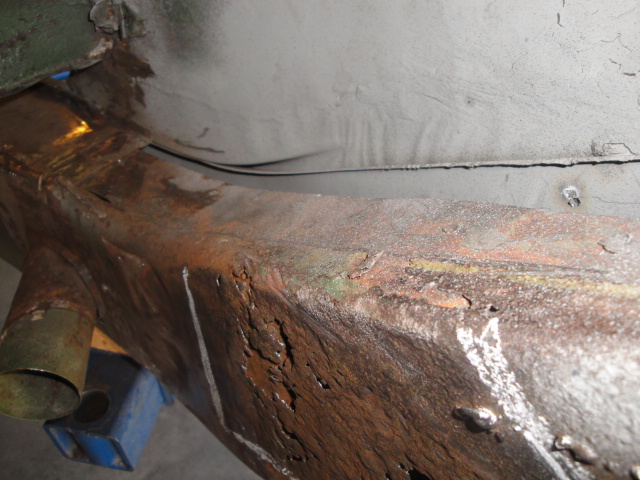
Very productive 4 hour day. Seems like everything just kind of fell into place.
Posted by: cary Jun 4 2016, 08:49 AM
One more note... if you have a spot welder use it to mate the upper to lower sections. I found that plug welding it in was ok but the spot welder would be a cleaner install. We bought a spot welder after the fact but I'll go back to hit a few spots.
We do have a Lenco panel spotter. Haven't used it on the car yet. We'll see if it will fit up in there.
I think I have everything cut out and saved. If not the big pieces are setting on the table.
Posted by: jmitro Jun 4 2016, 10:24 AM
nice work. cutting out the bad pieces like that is such a tedious job, but worth it in the end
Posted by: BeatNavy Jun 4 2016, 04:54 PM
If you plan on using the RD firewall you'll need a few parts off the old firewall so hang on to it until you install the new one.
I'm there right now. You need as a minimum the speedometer cable outlet from the firewall and the shifter bushing reinforcing plate (or whatever it's called). Picture below after I removed it from the old firewall and cleaned it up.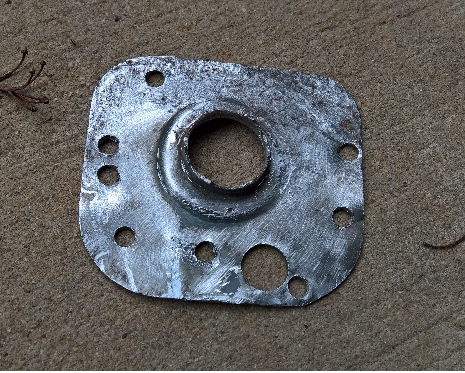
I'm going to weld this piece on tomorrow. I'm going to put the Tangerine Racing Shift Bushing on this, and this is what it's mounted to.
Keep up the great work, Cary!
Posted by: cary Jun 4 2016, 05:56 PM
I've removed the brake bias bracket and the speedo cable tube so far.
Haven't looked at the shift bushing that closely yet.
Posted by: cary Jun 6 2016, 10:24 PM
After Rob's friendly reminder I pulled all of the pieces that need to be swapped onto the new firewall.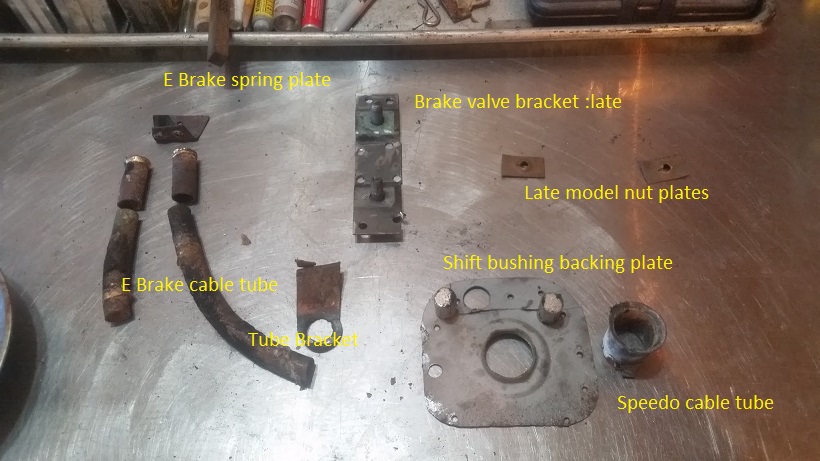
Notes for the location of the nut plates for the left inner firewall that has yet to arrive.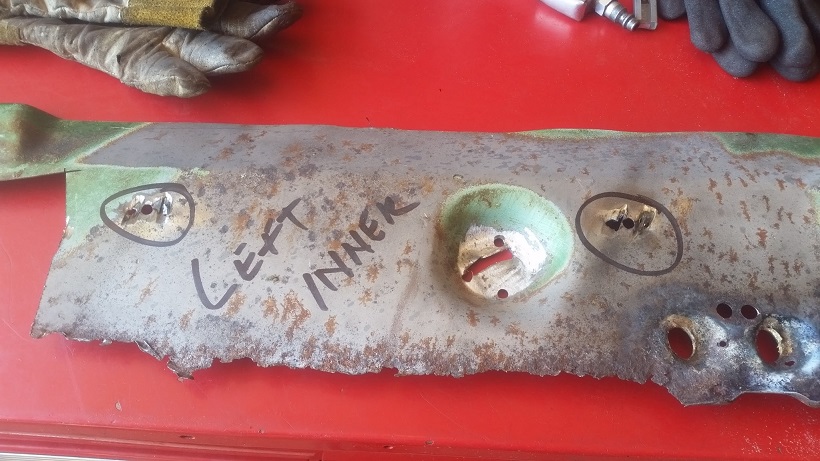
Then onto the removal of the outer skin of the inner long behind the motor mount.
For the most part, the inner portion is in good shape. Nothing that a little OSPHO and cold galvanizing wont take care of.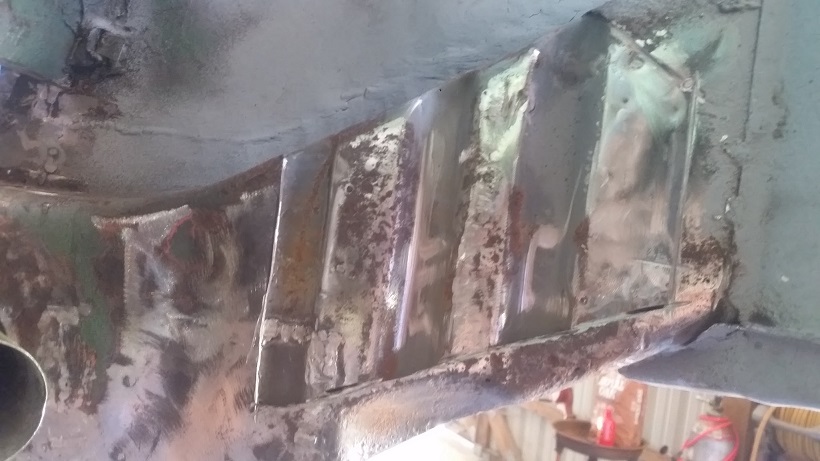
While I was letting the OSPHO dry I got after the remaining portion of the inner firewall attached to the tunnel.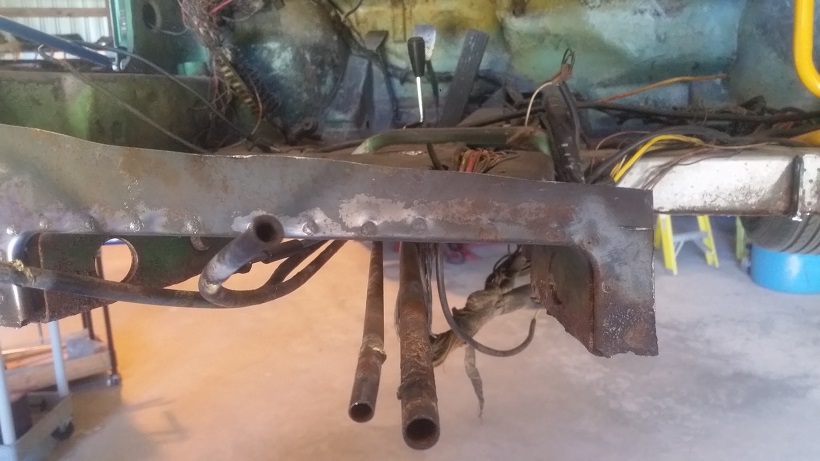
This time I used the spot weld cutter because I could cut from the inside.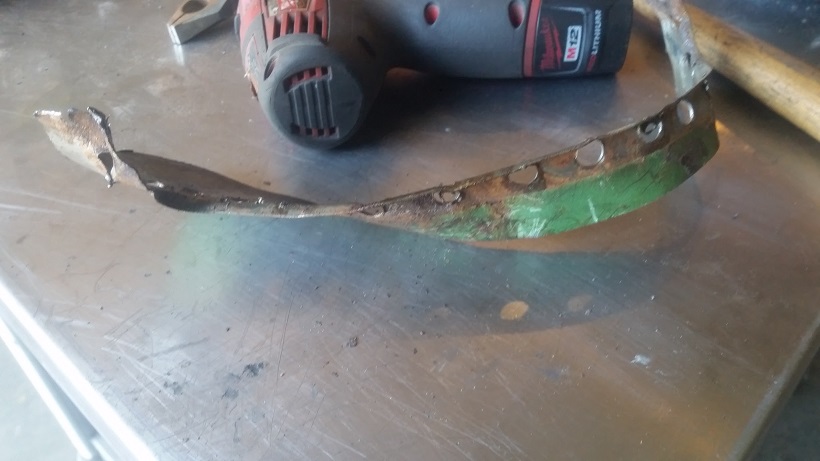
Much better than the last one cut from the outside.
One blow thru .............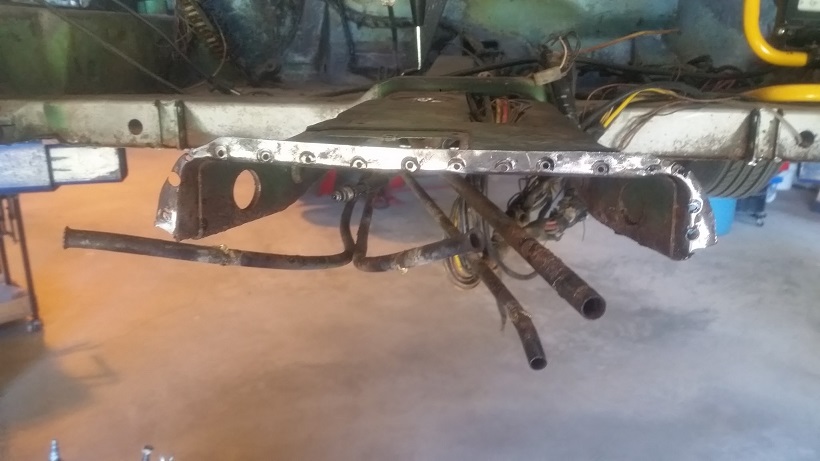
Posted by: cary Jun 16 2016, 09:54 PM
Stopped off at 914 Rubber and picked up a couple more pieces from RD and two rear qtr. panels.
Posted by: cary Jun 24 2016, 10:13 PM
After spending the first half of the week in the land of tail draggers. It's kind of nice to be back with the little cars.
I'm working outside doing my cutting, grinding and welding thing.
Patching up the rotten spot on the upper long.
Start with creating a patch pattern.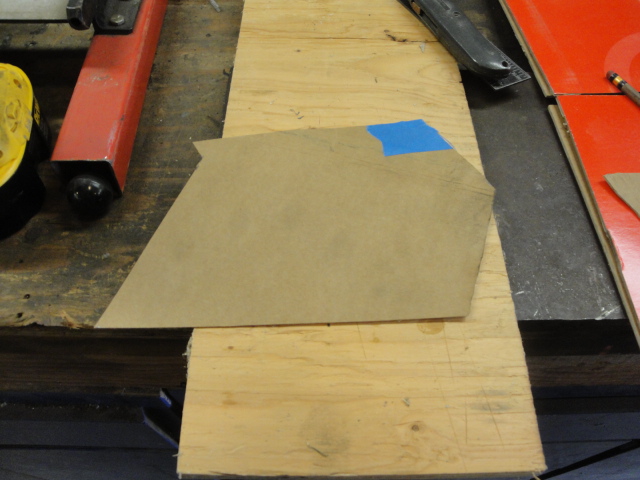
Fitted and screwed down and ready for welding.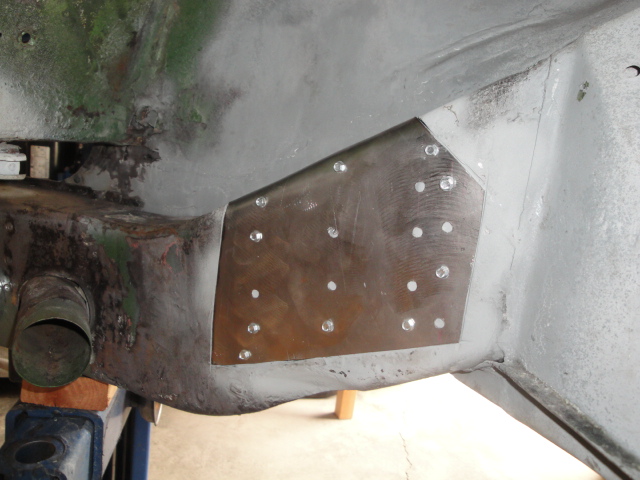
Welded into place. Leaving the top until I create the hell panel.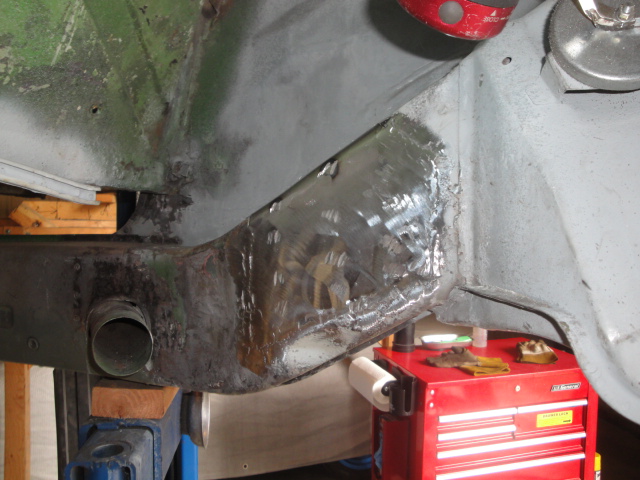
Posted by: cary Jun 30 2016, 08:28 PM
Back to work .............
First order of business was filling in a few pin holes after the grinding was done. Then I refurbished and installed the brake hose bracket.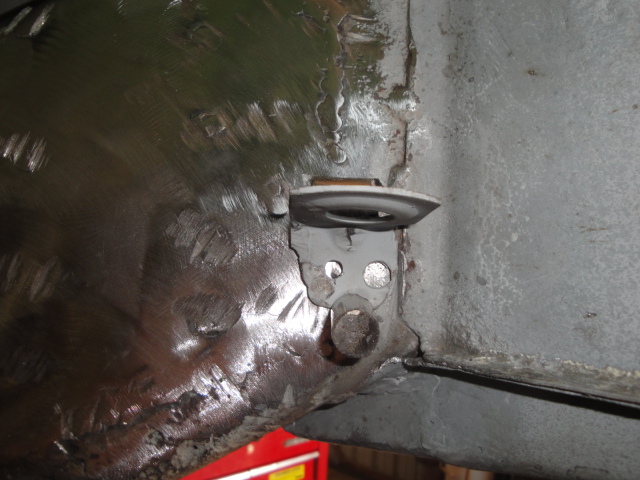
Gave her a shot of self etching primer after everything was tidied up.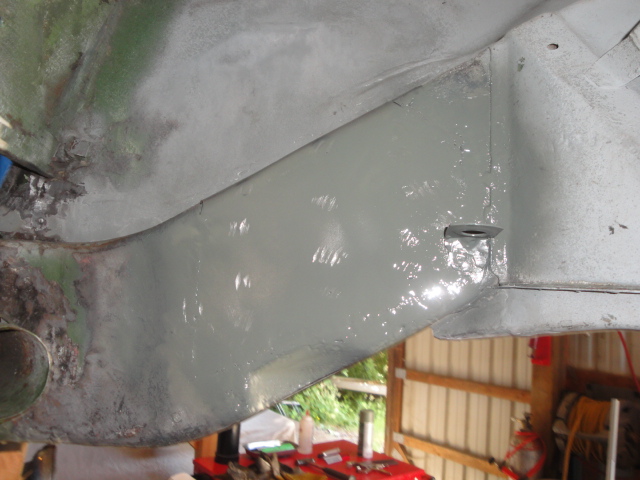
Super In Law finished the suspension tie plates.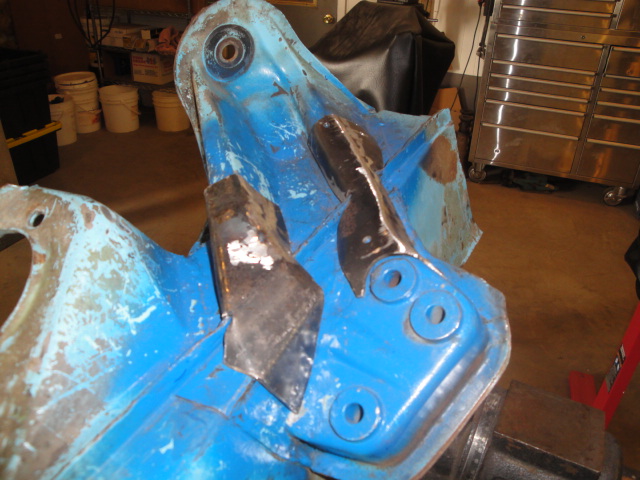
He was tidying up the patterns so we can hand them off to one of our friends that does CNC work. If they can be done responsibly, we'll punch out 10 sets.
I moved on to the left engine shelf/firewall rust worm issues.
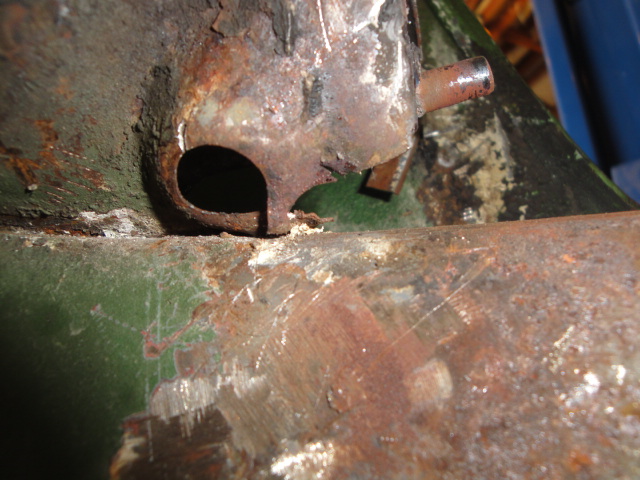
Started with some pattern making. 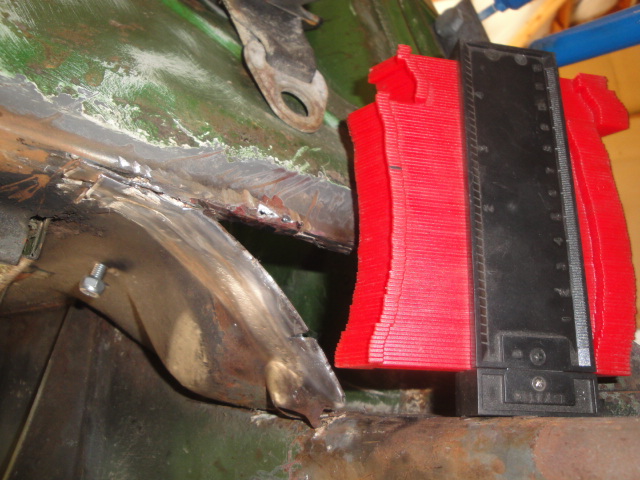
Then created the little patch next to the drain hole. Slow and steady wins the race.
Once again only two stitches. Then cool to the touch.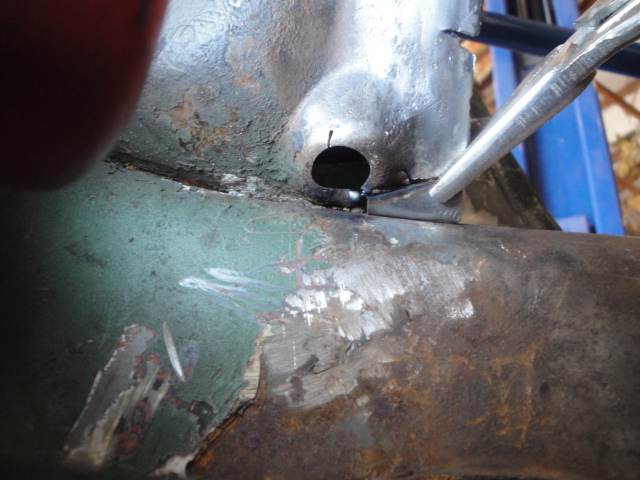
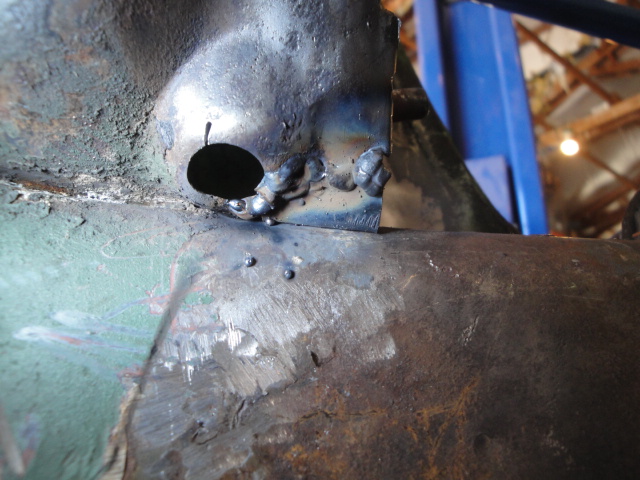
Flange added back in ............ 7/2/16
Posted by: cary Jun 30 2016, 09:01 PM
Next on to the firewall itself. With combination of the heater tubes and all the copper tubing in-place I'm pretty certain it will need to be installed in two pieces. 
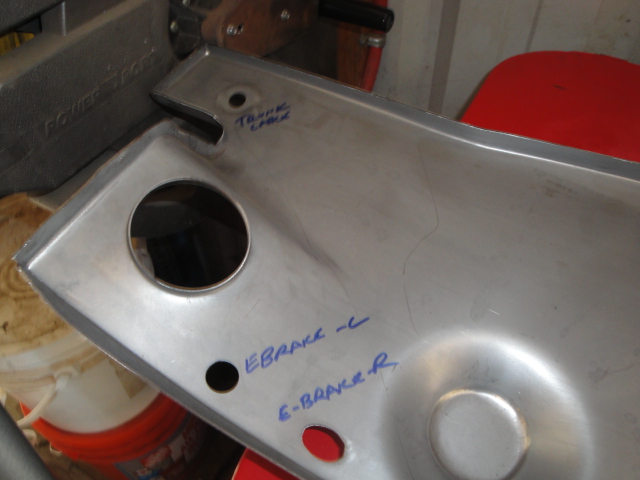
Posted by: BeatNavy Jul 1 2016, 04:05 AM
Next on to the firewall itself. With combination of the heater tubes and all the copper tubing in-place I'm pretty certain it will need to be installed in two pieces.
That's the way I had to do it, Cary. I had only one heater tube on, but I couldn't make it work with everything else going on, so I sliced it up the middle and put it back together again. Sucks doing that to a beautiful new piece of metal, but it actually came out pretty well.
If you're making a handful of suspension ties and have any available, please put me down as interested. Thanks, Cary!
Posted by: cary Jul 1 2016, 08:05 AM
Now that we've perfected the patterns we'll be able to go forward. Hopefully we'll be able to get the parts cut out with a CNC run.
Right now I think he would take about 6 hours to hand make a set. Which would make them about $260 per side.
When the patterns are perfect we'll make a couple PDF files for those that want to DIY.
After Super In Law hangs my 55" computer monitor he'll start on the second set.
Posted by: cary Jul 2 2016, 01:05 PM
Half Day on Friday .
Started with stretching the heater tube holes a bit. A little too tight. 
Used a left over portion of an exhaust pipe from another customers Toyota All Trac exhaust repair.
Needs to be able to swivel to get the correct angle of the dangle
Jeff Hail said there would be blood. Wrap the center tunnel first. Do as I say, not as I do.
Cut my ear and put about 3 cuts on my head. Like a dumbass I took off my welding cap.
Lots of fiddling to get it too fit. 
Once again these cars were hand built. +/- 3mm. Fit both halfs before you start fiddling. On Mark's car the firewall is little smaller than the opening.
Here's the left and right shot.
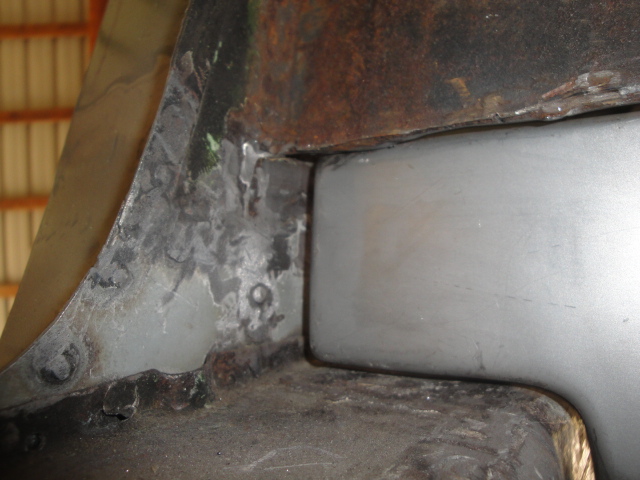
I would have liked to have put it in there in one piece. But it would meant removing all the tubes. So we sawed it in half with the band saw.
Worked the left side first.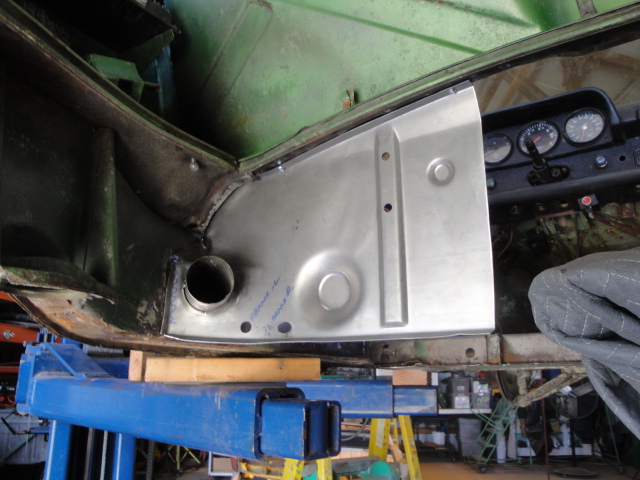
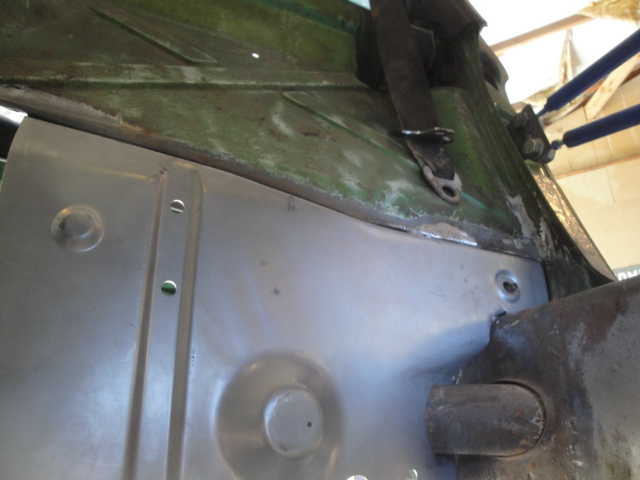
Right before leaving I slid the right side into place to see where we're at.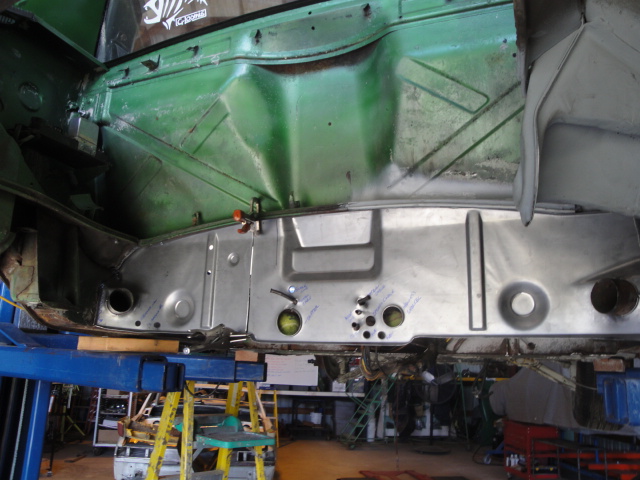
Plan is to slowly and patiently seam weld the two halves back together to make the seam invisible. Two tacks, then cool to the touch.
Then use the spot welder and weld in the top flange. Leaving the sides loose until we install the floor and passenger fire walls.
Today is a Dad's Garage day. Back to work on the Audi. Trying a little Liquid Steel on some broken plastic hangers for the transmission cooler loop. Then fill it up and test the new Fan Control Module.
Pulled the drivers front window frame last Sunday to replace the broken glass mount.
Easy deal. Well designed door frame. Repaired was built into the design.
Posted by: BeatNavy Jul 2 2016, 01:44 PM
Started with stretching the heater tube holes a bit. A little too tight.
I had the same problem Cary. The ID of the heater tube opening was way too small on mine. I contacted RD and they told me to try sanding/grinding lightly. So I did. It took a good bit of time to increase it so I could get it over the tubes, and yes, it still takes a lot of finagling. I should have warned you on this one, but maybe I assumed it was only my issue.
Nice work!
Posted by: cary Jul 4 2016, 10:38 PM
Fiddled with the right side a bit so I could get a nice butt weld in the center.
After getting the gap I was looking for I pulled both sides out and punched the rosette holes.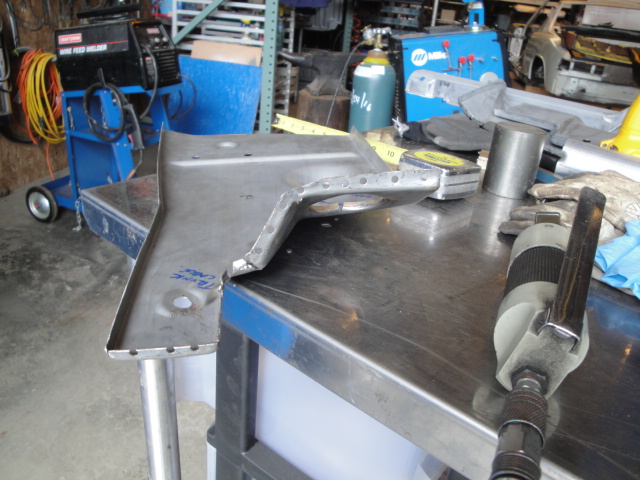
Then I decided it would best if I welded in the new hell hole sheet metal before I installed the firewall. It gives me a little more working room.
Step #1. Coat the inside with Eastwood HD Anti Rust.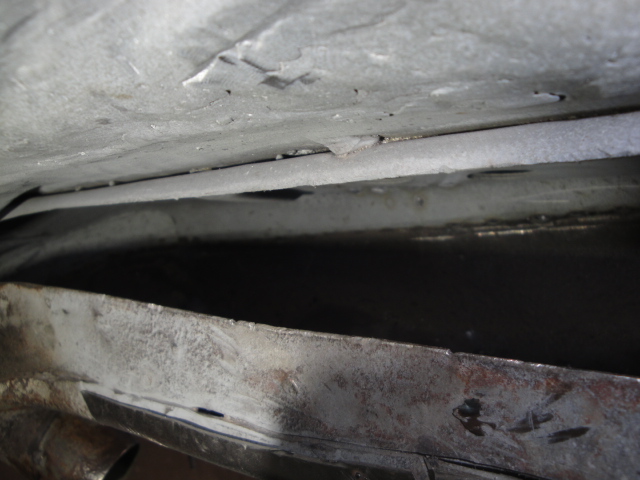
Then proceed to create the patch panel. After getting it cut out, trimmed, fitted and rosette holes punched. I applied the weld thru primer. Finally on to the good stuff. U-Pol #2 Zinc Rich weld thru primer.
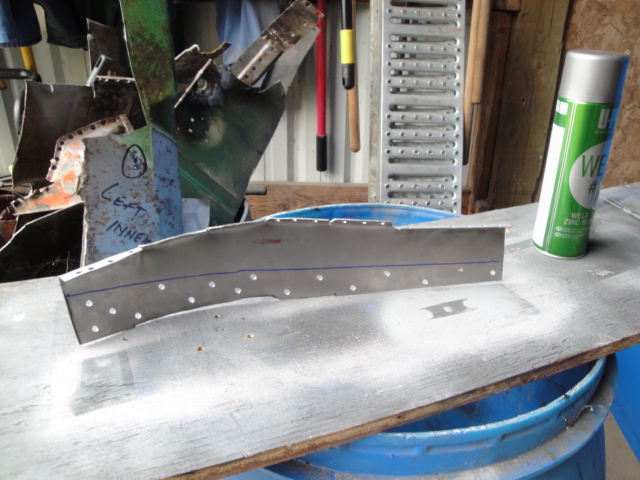
Rosette holes welded in. Slow and steady wins the race.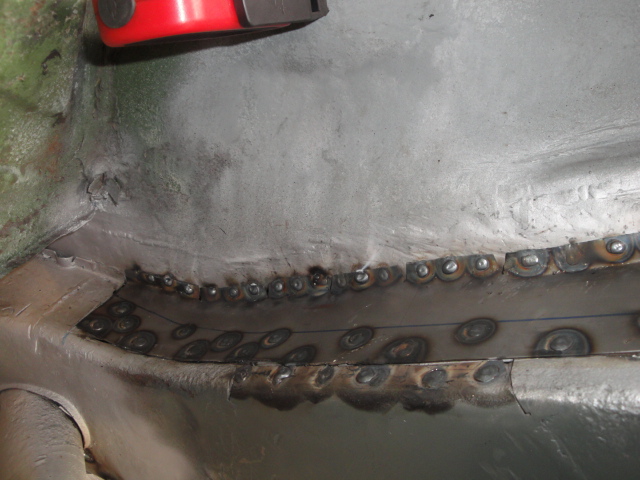
Welded in and all tidied up.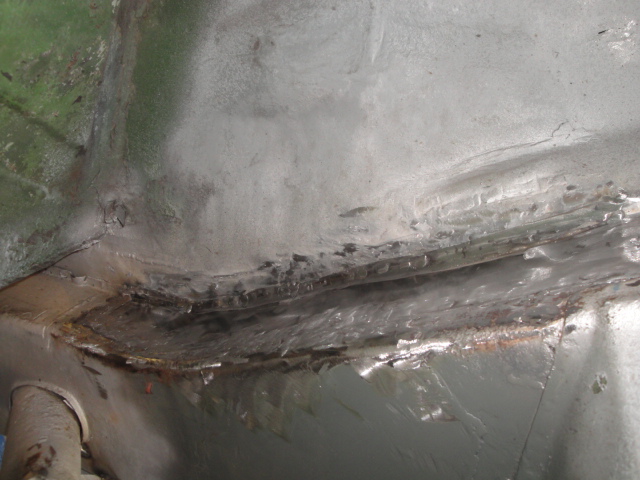
Posted by: cary Jul 4 2016, 10:42 PM
While I was working on the hell hole Super In Law was dialing in the Panel Spotter. I want to use it on the upper flange on the fire wall.
He was working with new to new. And new to old.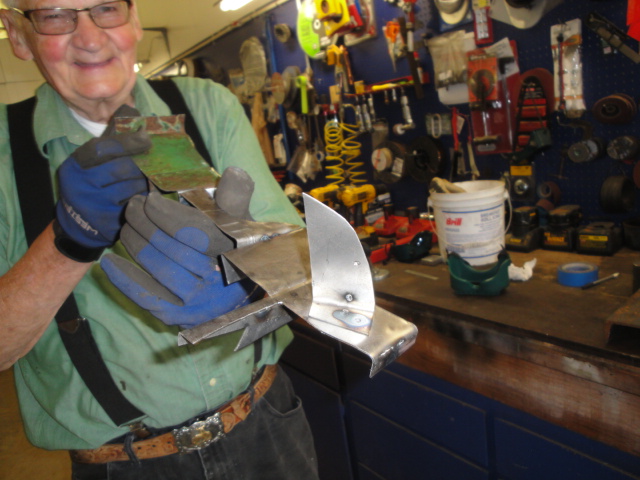
Now he thinks he's a metal sculpture.
Posted by: tygaboy Jul 5 2016, 12:01 PM
Once again these cars were hand built. +/- 3mm. Fit both halfs before you start fiddling. On Mark's car the firewall is little smaller than the opening.
Here's the left and right shot.
Cary - Thanks for posting this. I'm in the process of fitting my new firewall and have the exact same gap on each side. (I guess Mark and I both got 914 'wide bodies"!)

I plan to cut off each "ear" and splice in a piece on each side to make it fit. That what you have planned or are you solving it some other way?
Thanks again and keep posting - I refer to your pics and documentation all the time!
Chris
Posted by: tygaboy Jul 5 2016, 12:22 PM
While I was working on the hell hole Super In Law was dialing in the Panel Spotter. I want to use it on the upper flange on the fire wall.
He was working with new to new. And new to old.
Now he thinks he's a metal sculpture.
I know I can't be the only one who'd be up to purchase a "Super In Law" t shirt!
Cary - you need to get a pic of him to one of our t-shirt making members and we should have a contest for the caption. Winner gets a first run t-shirt for free.
Super In Law says "Give it here, young man... I'll have that fixed in no time."
OK, so I won't win but I want a t-shirt!!
Posted by: cary Jul 5 2016, 10:46 PM
Once again these cars were hand built. +/- 3mm. Fit both halfs before you start fiddling. On Mark's car the firewall is little smaller than the opening.
Here's the left and right shot.
Cary - Thanks for posting this. I'm in the process of fitting my new firewall and have the exact same gap on each side. (I guess Mark and I both got 914 'wide bodies"!)
I plan to cut off each "ear" and splice in a piece on each side to make it fit. That what you have planned or are you solving it some other way?
Thanks again and keep posting - I refer to your pics and documentation all the time!
Chris
I'm thinking thats probably about how the original piece fit. But because they smothered it in seam sealer we really can't tell. My plan is to center it and see how much gap I have on each end. Just finished up the seam weld right before I left tonight.
As for the T-shirts. I don't know what he'd think. I told him he would have been a celebrity at WCR if he could have made it.
Posted by: cary Jul 5 2016, 10:59 PM
Didn't start on Mark's car till after lunch. Pulled the bumpers off my RS to get them freshened up before the Forest Grove Concours.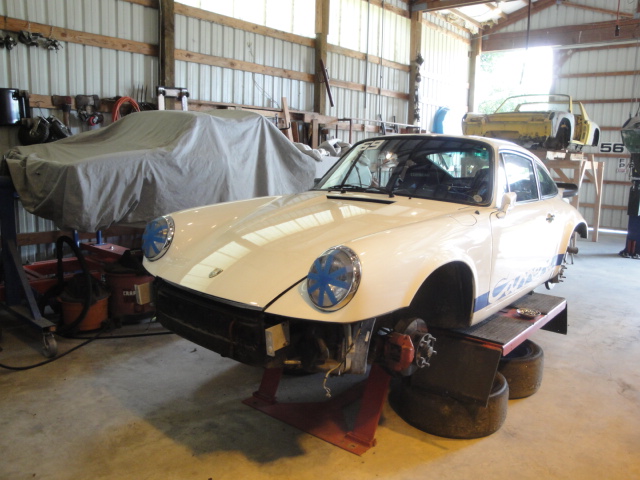
Started with the most important function. Seam sealing the gap between the upper long and the wheelhouse. The lack there of caused most of Mark's wheelhouse rust issues.
Two coats of Evercoat brush on. Then an application of Fusor in the am.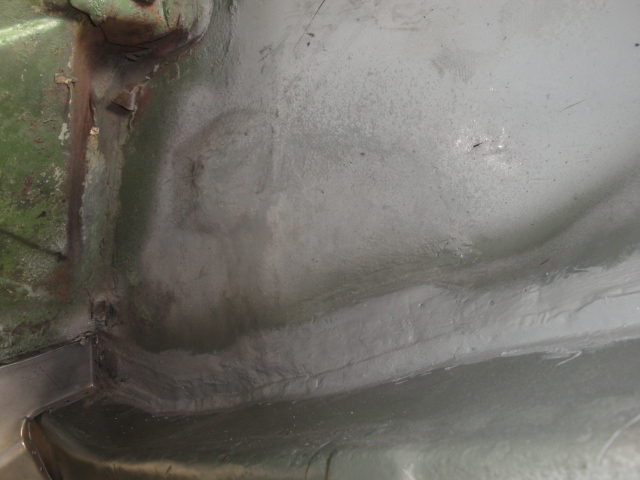
Then on to welding the firewall back together.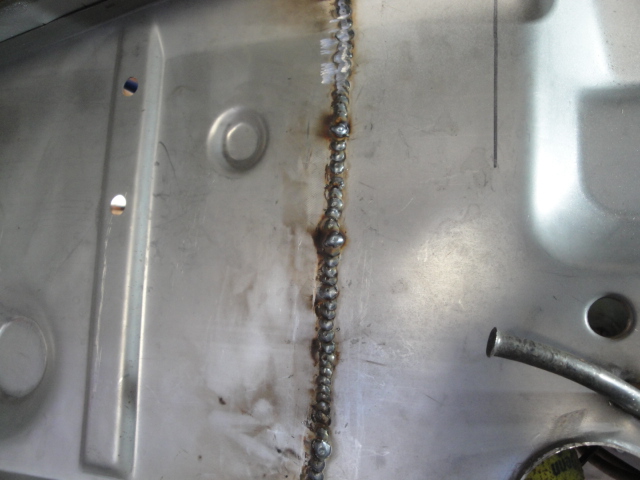
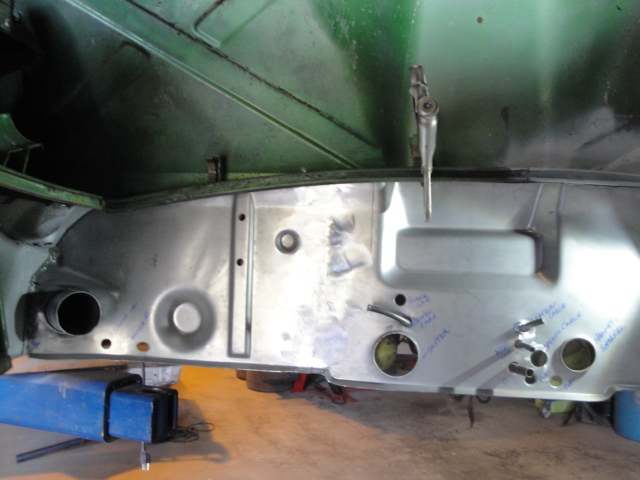
I don't know what caused that gray spot. Must be polished different and it did not like flash.
Posted by: mbseto Jul 6 2016, 01:13 PM
I know I can't be the only one who'd be up to purchase a "Super In Law" t shirt!
Cary - you need to get a pic of him to one of our t-shirt making members and we should have a contest for the caption. Winner gets a first run t-shirt for free.
Super In Law says "Give it here, young man... I'll have that fixed in no time."
OK, so I won't win but I want a t-shirt!!

"And here, of course, is the new weapon you ordered."
Posted by: Andyrew Jul 6 2016, 01:40 PM
Top notch work there Cary!
Posted by: cary Jul 29 2016, 08:59 PM
Mark's car on the new car dolly. This car is going on the back burner for a bit. Mark has another car moving ahead of it.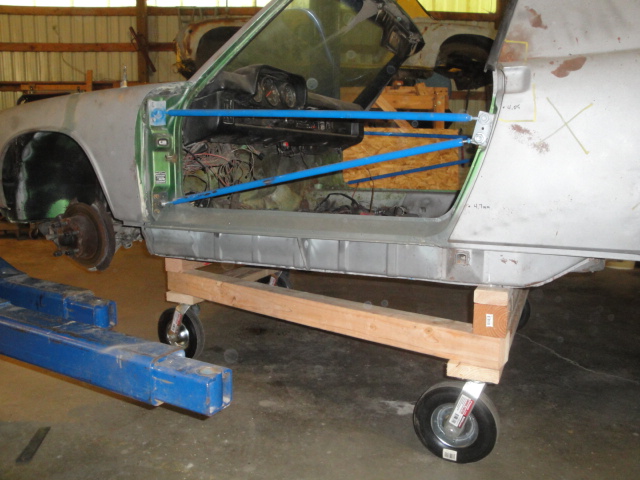
Posted by: cary Aug 4 2016, 11:50 PM
Mark stopped by this afternoon with some hoses for the engine swap I'm going to be doing for him starting next week.
While I was organizing my new to me tool box (Cary (Tool Whore) play day). He and Super In Law dropped the old engine out of the new project car. They did a marvelous job. No blood, no bad words and they didn't even get too dirty.
Posted by: cary Aug 6 2016, 10:09 AM
I brought the engine from Mark's primary project car home. That will allow me work on it a bit at night after everyone else goes to bed. Beats watching TV ...............
Nothing major. Tune up. New hoses and clamps . Paint the tins and pipes. Inspect and clean up FI harness. Brighten up FI ground lug.
While the engine is out of the way Mark will give the engine bay a fresh coat of paint.
The engine bay and fender wells will get a good steam cleaning first.
Posted by: cary Aug 18 2016, 09:20 PM
Here's the before and after shot of tearing down the engine.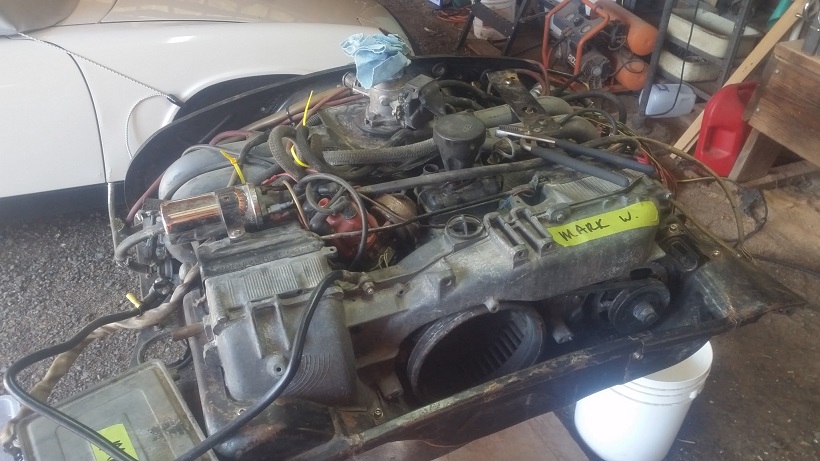
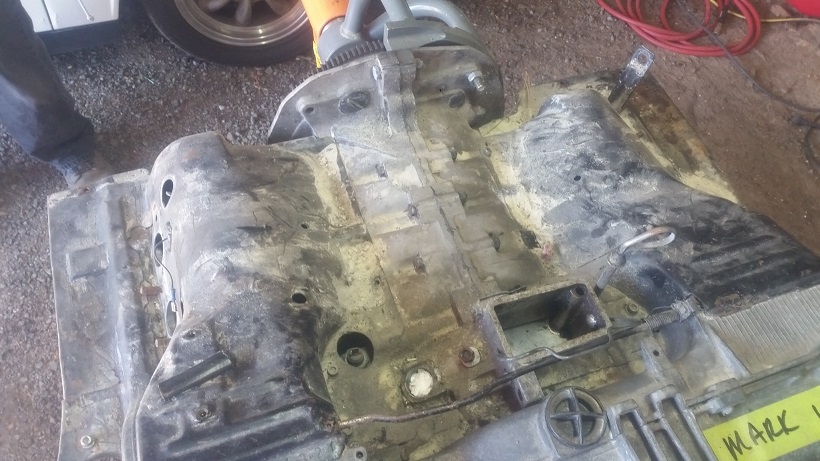
Quite a bit of Dustless Blaster residue under the engine tin.
After some very detailed blasting in the cabinet. Everything gets a good spray down with OSPHO and left outside to dry overnight.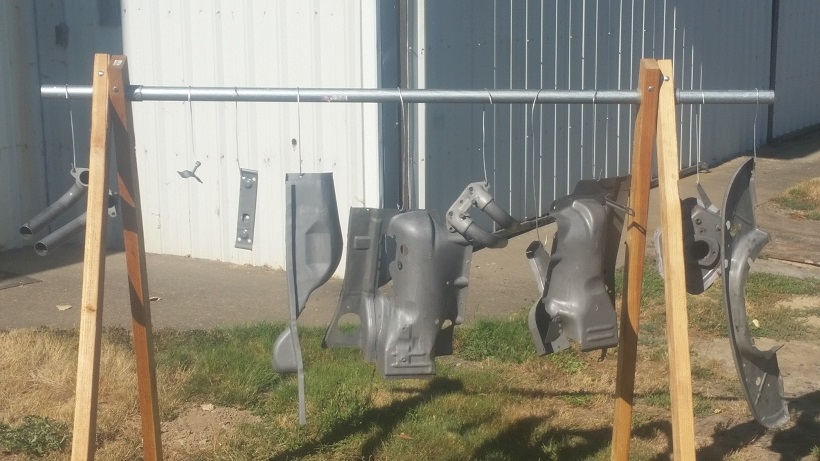
Left the shop at 4:45. Inside temp 98 degrees with doors closed and no lights.
Damn hot . Tomorrow will be worse. Over 100.
Posted by: cary Aug 30 2016, 08:29 AM
Temps have dropped. Time to get back to work ................
Left Super In Law at home so he could lay low before his doctor appointment tomorrow.
Pulled out the hot washer pressure washer and cleaned up the engine compartment in the car Mark will be putting for sale. Two green 75 cars. One I call the Project Car. The other is the For Sale Car. Mark's going to do some touch up paint work in the engine compartment of the For Sale Car.
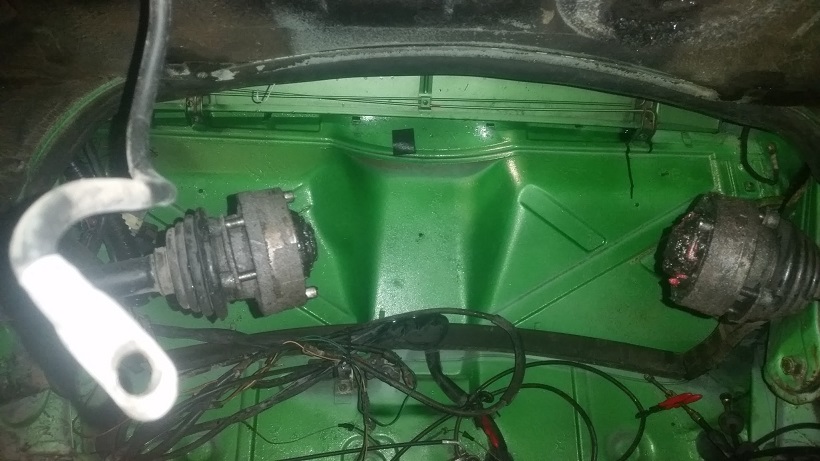
Pressure washing on the lift is kind of messy. But the only way to get a complete job.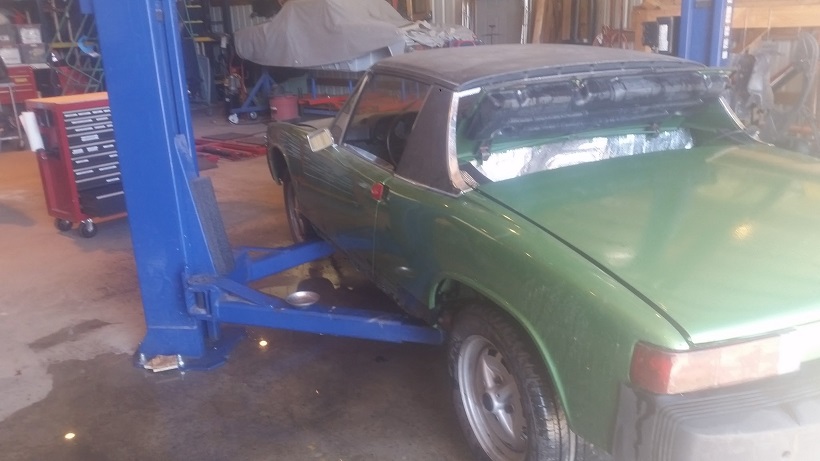
After that I scrubbed down the all OSPHO'd tin with a red scotchbrite. The priming and painting has begun. Started with the intake tubes. Mark provided the factory gray paint. Left the castings raw/natural.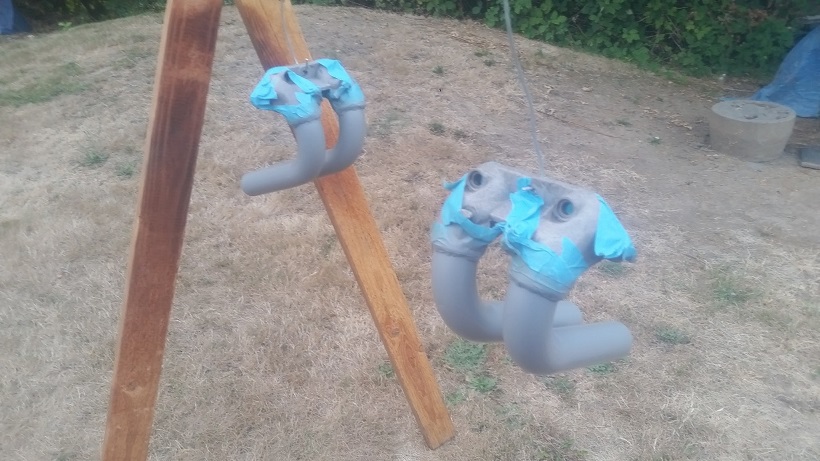
Posted by: cary Aug 31 2016, 10:29 PM
First coat of semi-gloss black applied.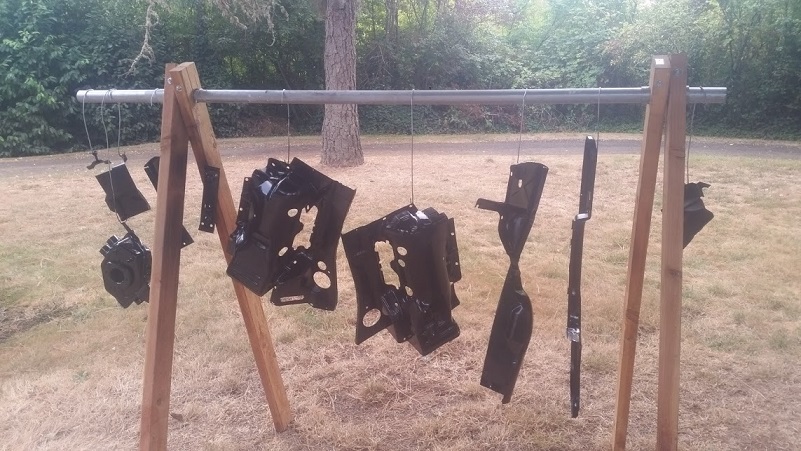
Posted by: cary Sep 2 2016, 07:27 AM
Up early .................. Super In Law is chomping at the bit to get back to work.
Plan to day is to totally examine the For Sale car and create the work list.
Then I'll move on to replacing the left jack point. It will probably involve cutting an access hole in the door jam. Which is even more tricky with the birthday/serial number sticker on that door jam.
A little set back on the engine tin. If you don't paint wet on wet after a 1/2 hour, it's a 48 hour cure window. . I thought it was 24 hours. Rustoleum Semi Gloss. So that portion of the project gets moved to Sunday or Monday.
Posted by: Mikey914 Sep 3 2016, 12:34 AM
Thanks Cary,
I need to catch up with you this next week.
Mark
Posted by: cary Sep 3 2016, 08:09 AM
We'll be out there today (Sat. 3rd.)
Next weeks schedule, Monday and Friday. Doing the Hood River Fly In on Saturday with some tail draggers.
Posted by: cary Sep 3 2016, 09:32 AM
Friday's work ...................
Doing the jack point replacement going in from the cut out door jam.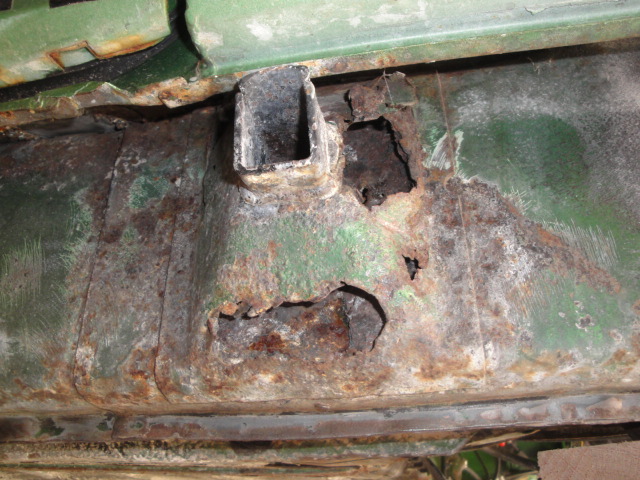
Covered up the birthdate/vin sticker for protection.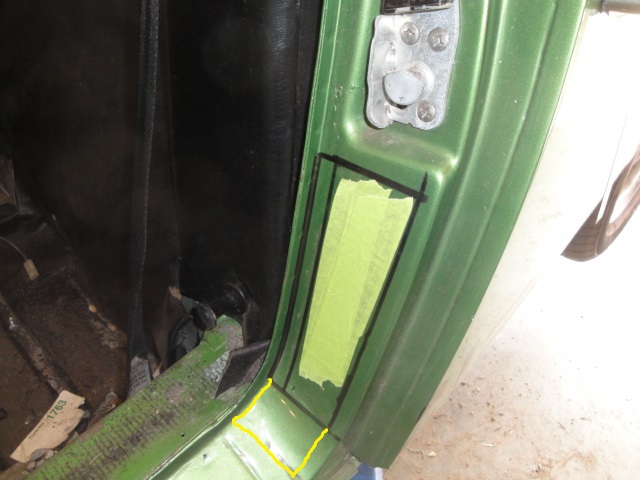
Should have cut down another inch for better access. But it worked. Needed extension marked in yellow.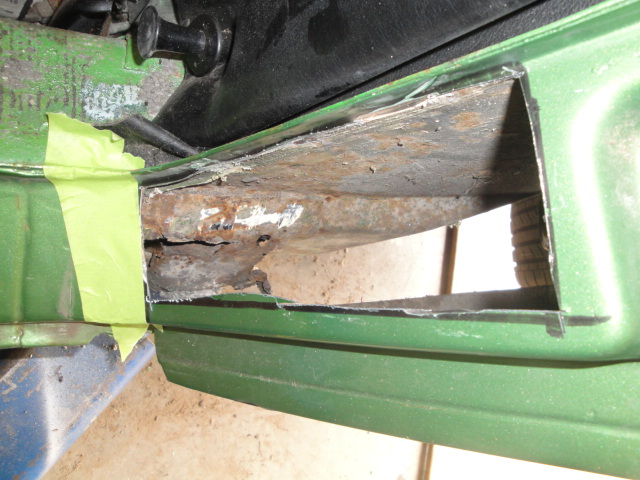
This is what you get if you don't remove your rocker panels and remove the road debris. 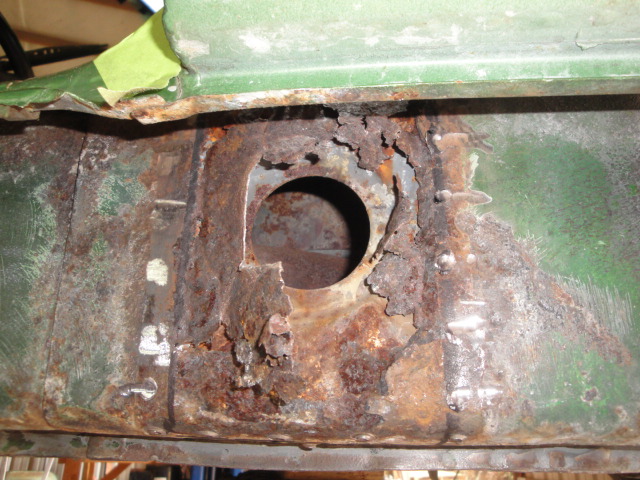
Inner layer of the long seems ok. I didn't shoot a picture at the end of the day. But the rusty portion is cut back and ready for a patch. A little more tinkering and she'll get a hose down with OSPHO. Then onto to cutting and dimpling the patch for the post.
Posted by: Mikey914 Sep 3 2016, 10:09 PM
Thanks Cary
Posted by: cary Sep 3 2016, 11:19 PM
Saturday's work.
Cut out the remaining rusty portions behind the jack point.
After that I soaked it down with OSPHO to let dry for a couple days.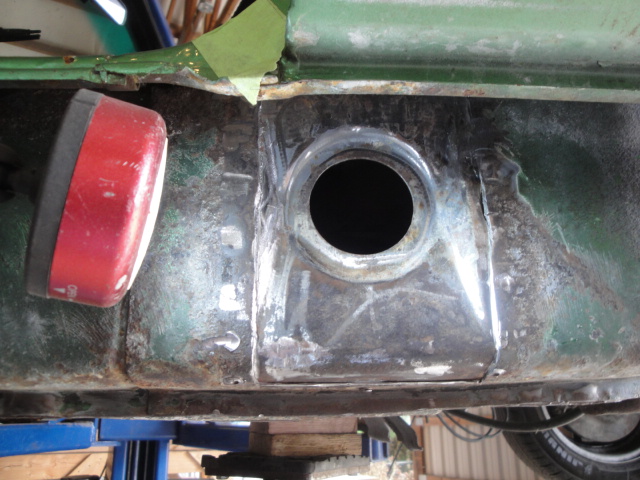
While I was doing the surgery. Super In Law was creating the patch piece.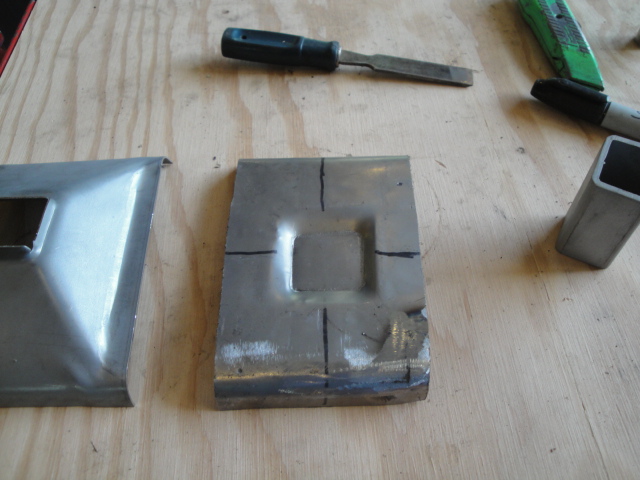
Mark stopped by after lunch to catch up on the progress and go over the plan.
After that we dug into the issues with the rear trunk. At the end of the day its all about the fit and finish. Well, we found a bent/crushed in pivot on the left. Which turns the hood clockwise. Then the right has some sort of hardware store sleeve in place of the threaded pivot bushing. Which makes it an 1/8" too wide.
So we ended the day by cutting a pivot out of my parts car. A little rusty so we're letting it soak till Monday. Then the mad scientists will light the PB Blaster on fire with the torch. That will break it loose.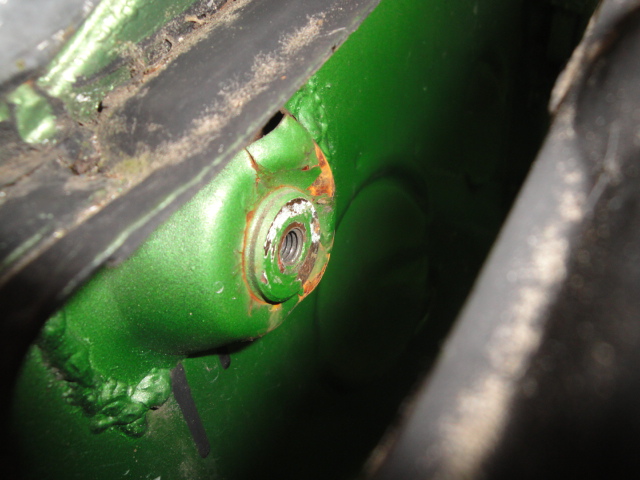
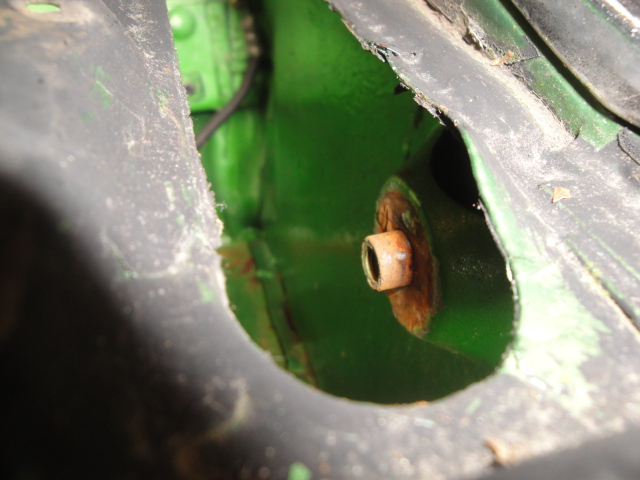
Taking a good portion of tomorrow off. Church and lunch with the wife and Super In Law. Then the wife and I will head downtown to look at work shoes.
After returning home I'll do a little sanding and touch up on the engine tin.
I'll be back on Monday night .............
Posted by: RobW Sep 4 2016, 07:27 AM
You can thank God for your skills. Nice work!
Posted by: cary Sep 5 2016, 09:37 PM
Start the day with installing the patch plate. This is a picture of the patch plate matching up to the radius of the long.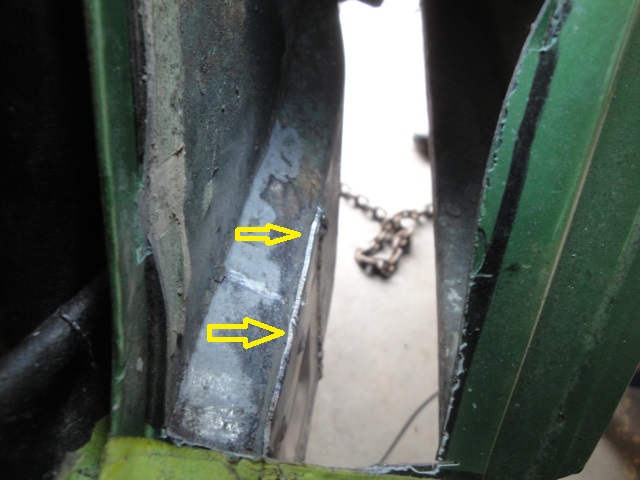
Then onto locating the jack tube. I hold it in place with one of my Eastwood earth magnets. Then locate it with the outer rocker panel.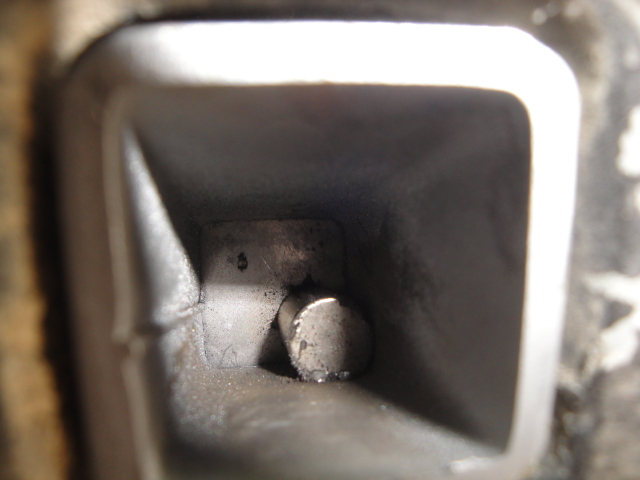
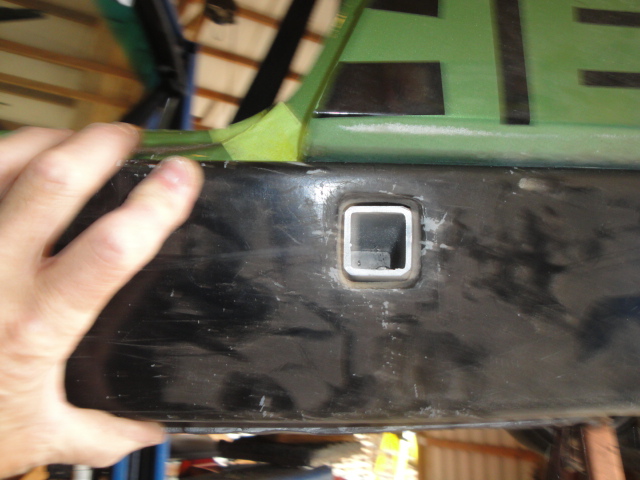
The patch and my weld in was off just a smidgen. But it gets covered up when welded in.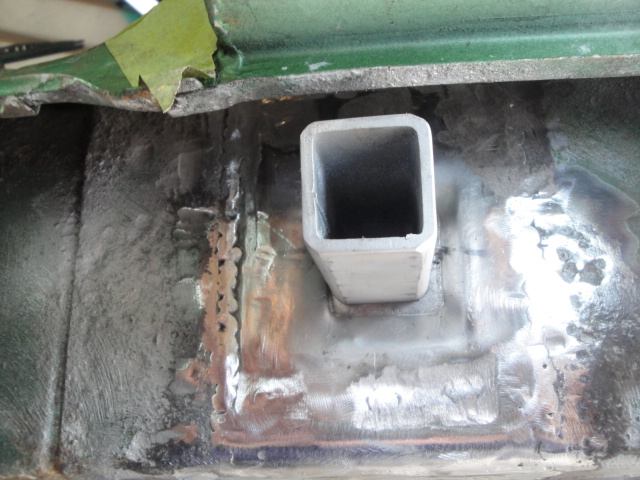
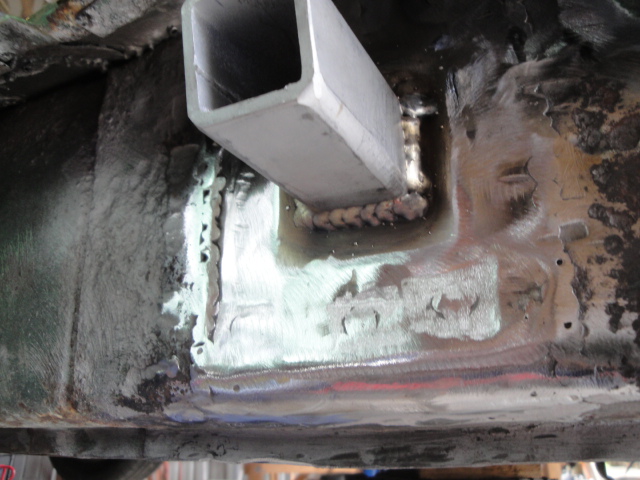
Then I weld on the jack plate cover.
Hold it tight and in place with self tapping screws.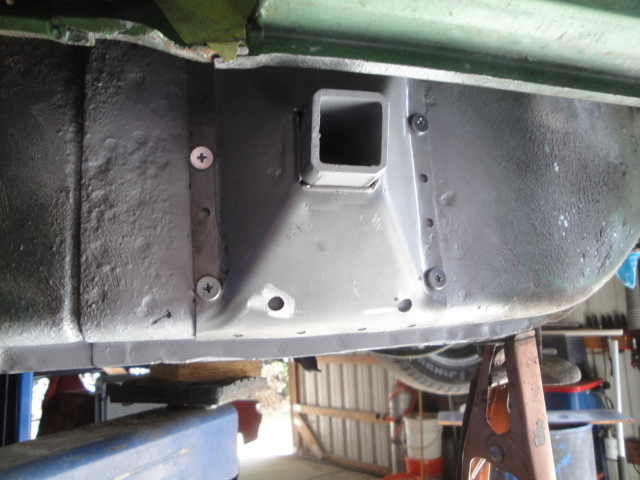
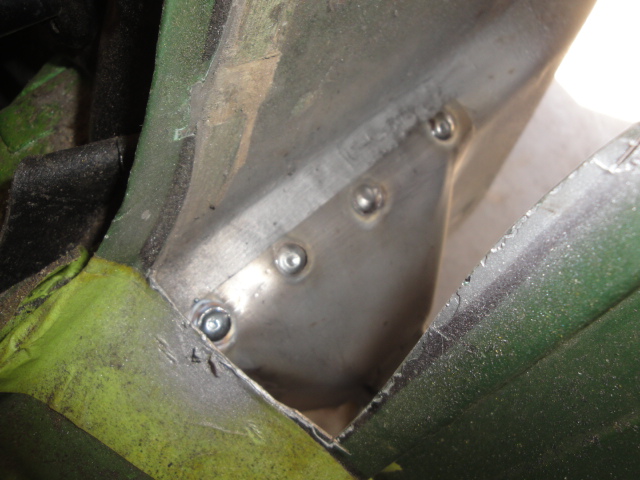
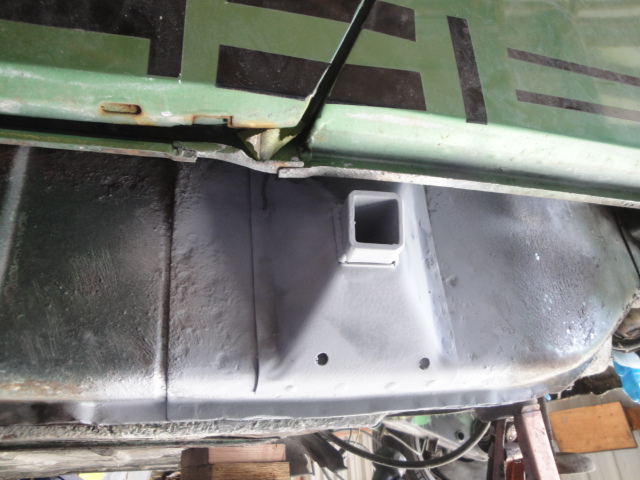
We do add a couple drain holes in the cover to allow for drainage.
Then on to analyzing the issues with the rear trunk. We start with the bent left pivot. Then the correction of the right pivot. It was installed backwards. We'll make a few modifications and add a few shims to make it look correct.
Took a bit, but we found 4 hinge rod brackets to strip, primer and paint to match the car.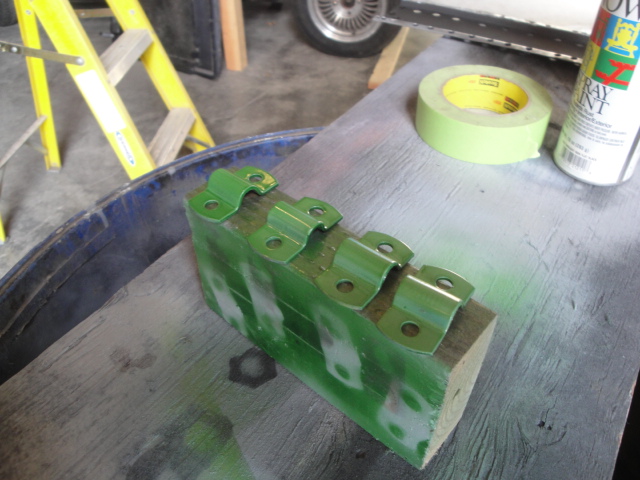
Posted by: cary Sep 9 2016, 08:54 AM
Three days at Rothsport. Now back to work at our place. Super In Law is chomping at the bit.
Time for a little show and tell. I asked Jeff if we had any 10*50 mm bolts or Allen heads with a 1.0 pitch to plug some air pump ports on a 75 2.0L cylinder head, showing him the pipe cap arrangement that was on the car. He said that 10mm by 1.0 pitch is almost the same at 1/8" pipe so they use a 1/8" pipe plug when they need to plug the ports on air pump heads. 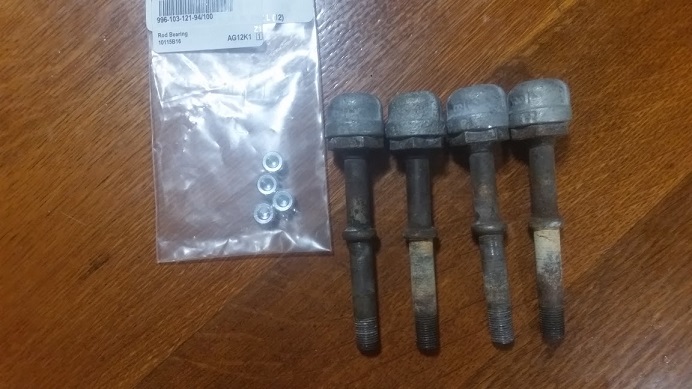
We'll go back to work on the rear trunk alignment and hinges this am.
I'll go do some measurements on the couple 74's that are in the other building that haven't been touched in 15-20 years. Both of these have rear trunk lids on them.
Posted by: cary Sep 11 2016, 10:32 AM
Getting the rear trunk hood installed to my liking will take some creativity.
Taillight panel bowed out. Left qtr. panel bowed in. Be it not much, enough to bug the crap out of me.
Qtr panel bowed in : something for the next owner. 1/8 "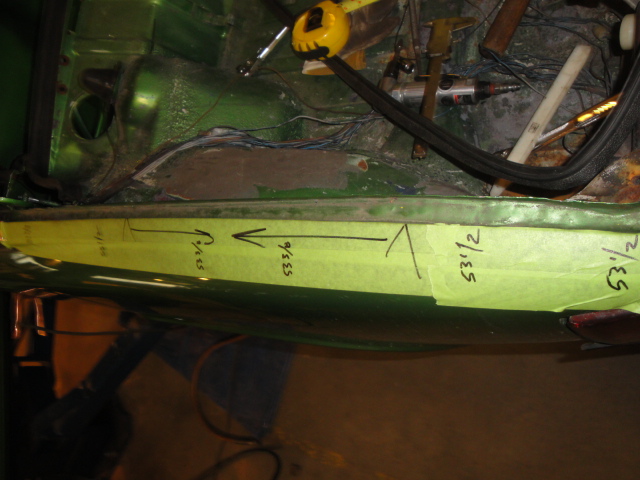
Dug out our hood spring tools to install the springs.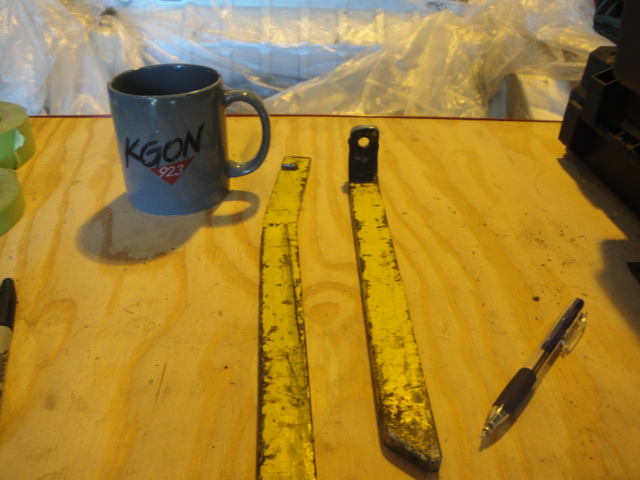
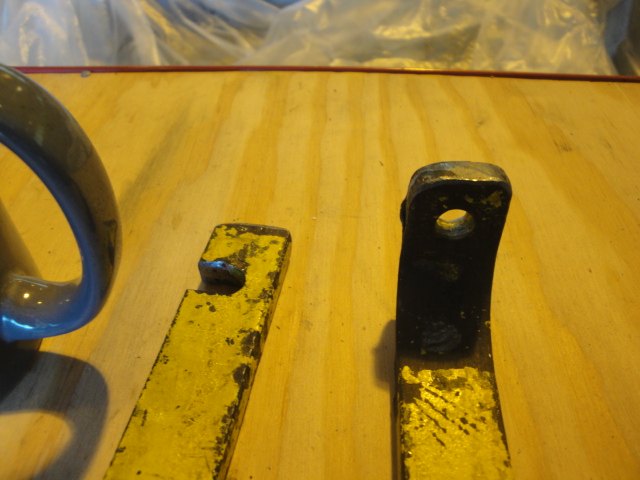
I'll go into latch catch support on the next episode. I'll take measurements off my DD this afternoon. Paying close attention to the depth of the closed hood.
Posted by: cary Sep 12 2016, 08:04 AM
Had a couple minutes before bedtime so I drilled out the broken off wire in the CHT.
Took a little persuasion with the 15 amp soldering iron to get the wire soldered in, but I got it. I have continuity from the tip of the wire to the base of the sensor.
I'll have to read the manual to figure how to measure the resistance. Getting 6.6 or something like that. Doesn't look right.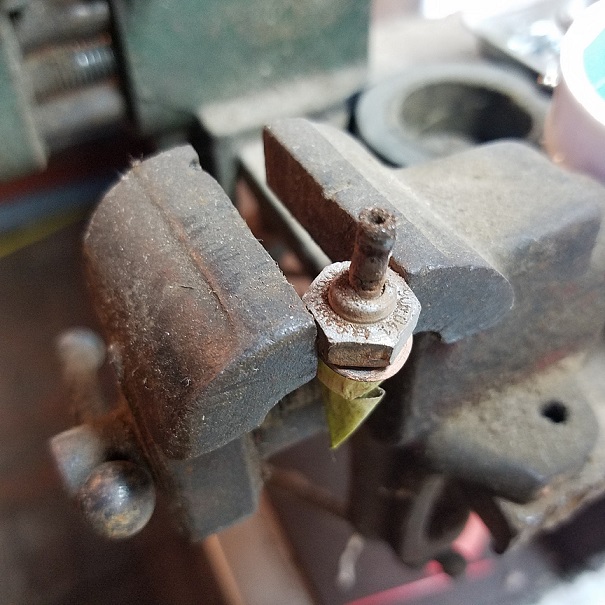
Got a new phone yesterday. Much more better.
Posted by: Mikey914 Sep 12 2016, 11:16 AM
Thanks Cary,
Seems like every time I bring you a car, I find a bigger project. At least I'm getting this all dealt with!
Posted by: Dave_Darling Sep 12 2016, 08:02 PM
If that's a stock CHT sensor, just put one probe on the end of the wire and the other on the threaded part to measure resistance. Leave it on the 0-20K ohms range and see what it says. Should be in the 2-3 range (2000-3000 ohms) at room temperature.
--DD
Posted by: cary Sep 13 2016, 07:35 AM
Thanks Cary,
Seems like every time I bring you a car, I find a bigger project. At least I'm getting this all dealt with!
I do get the feeling that sometimes I'm the Bearer Of Bad News.
Posted by: cary Sep 13 2016, 07:39 AM
If that's a stock CHT sensor, just put one probe on the end of the wire and the other on the threaded part to measure resistance. Leave it on the 0-20K ohms range and see what it says. Should be in the 2-3 range (2000-3000 ohms) at room temperature.
--DD
, goes straight to 00.00. More Bad News, it's an 012. I'll have to dig thru my stash on Thursday.
Posted by: cary Sep 16 2016, 08:21 AM
We start the day with a stop at 914 Rubber to pick up some stuff for Mark's car.
Taillight seals & gaskets, trunk bumper, speed nuts & engine lid edge seal.
First task. Seam seal the top of the jack point.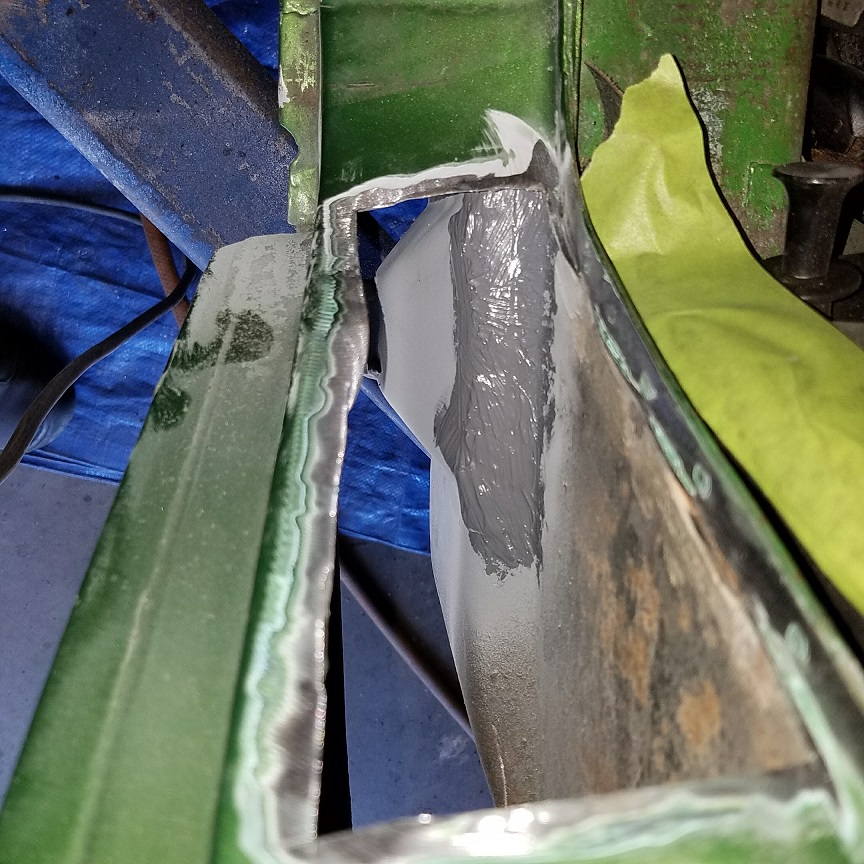
Then on to the tedious task of aligning the trunk. After quite a bit of trial and error we finally get it within 2mm. The back and side bow do create quite the challenge.
All the time knowing you need the correct panel overhang to keep the water out of the trunk. After looking at quite a few cars I'm using the lens lamination line inside the taillights.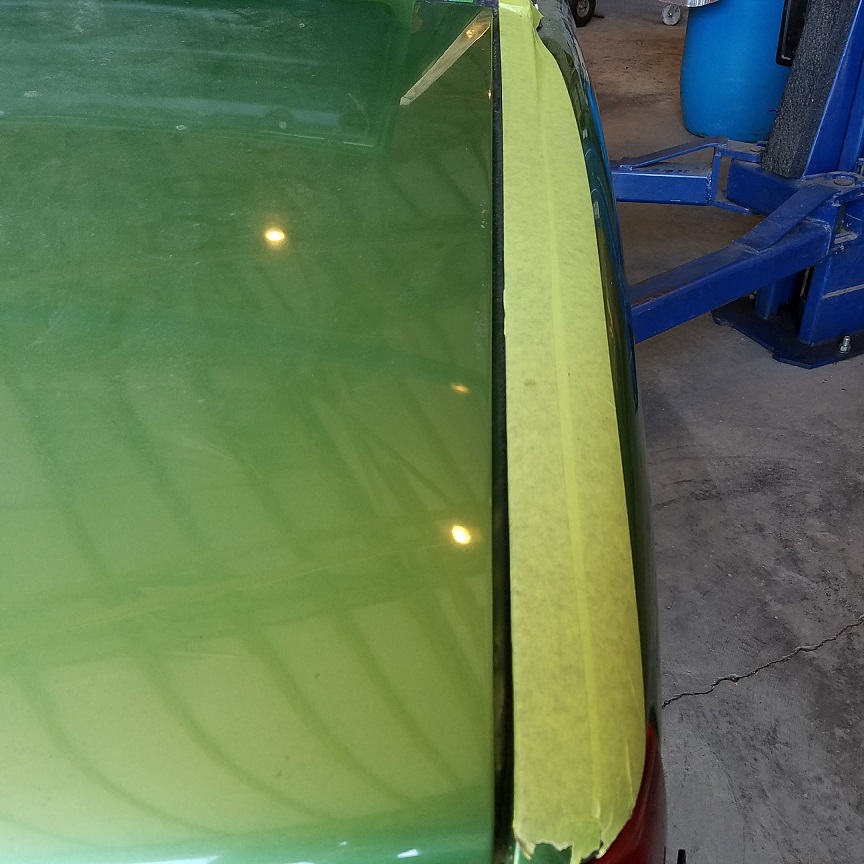
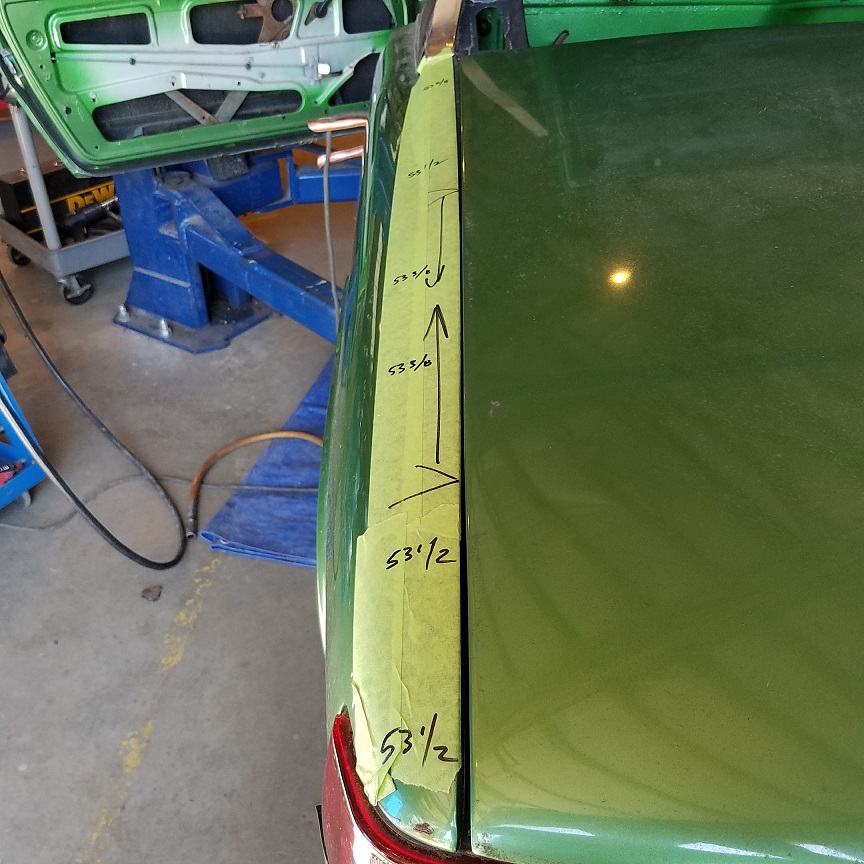
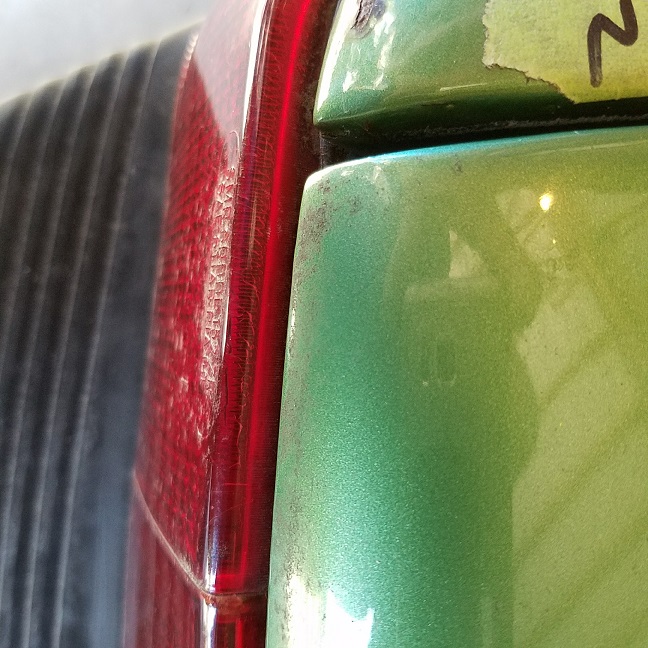
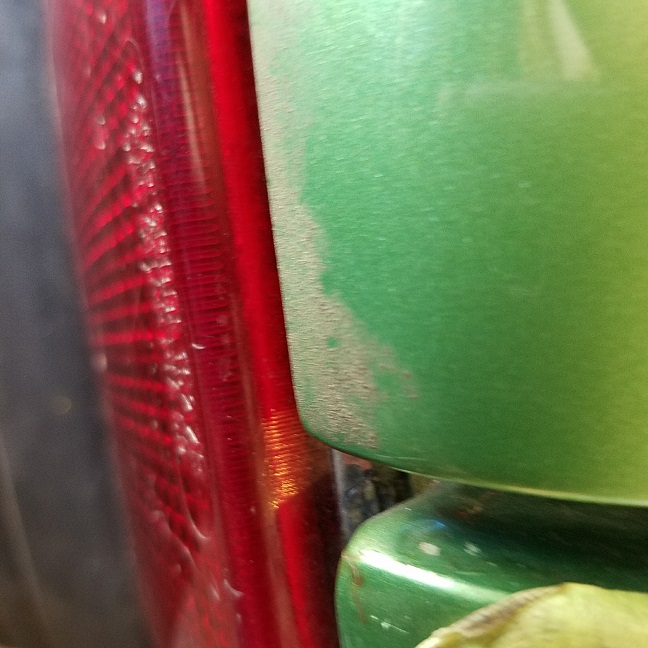
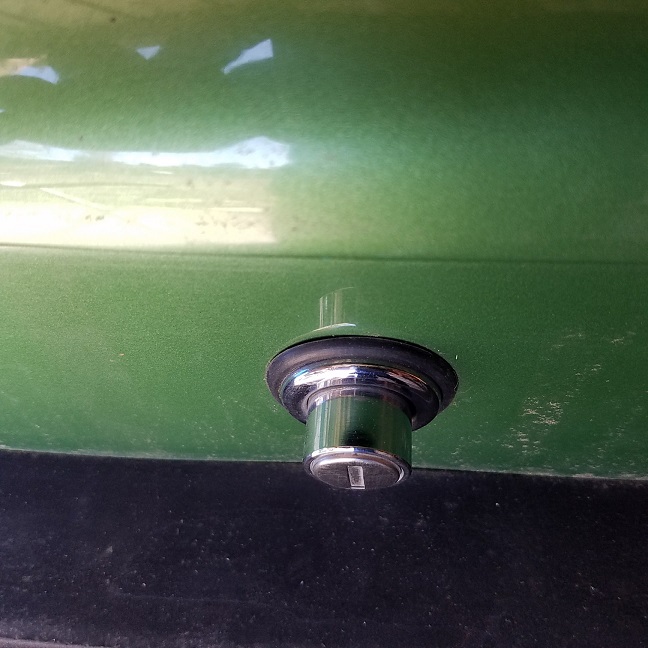
Then on to wrapping up the taillight harness with Mark's harness tape. I love this stuff.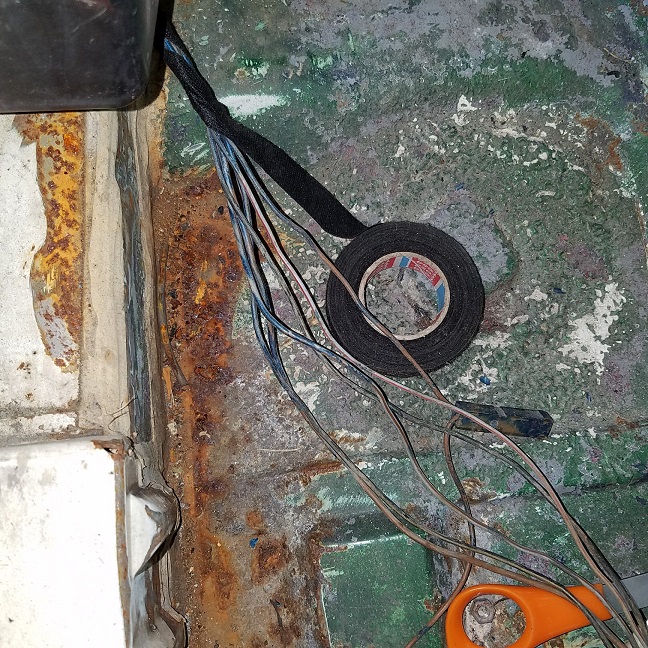
Then welding back in the jack point repair access hole.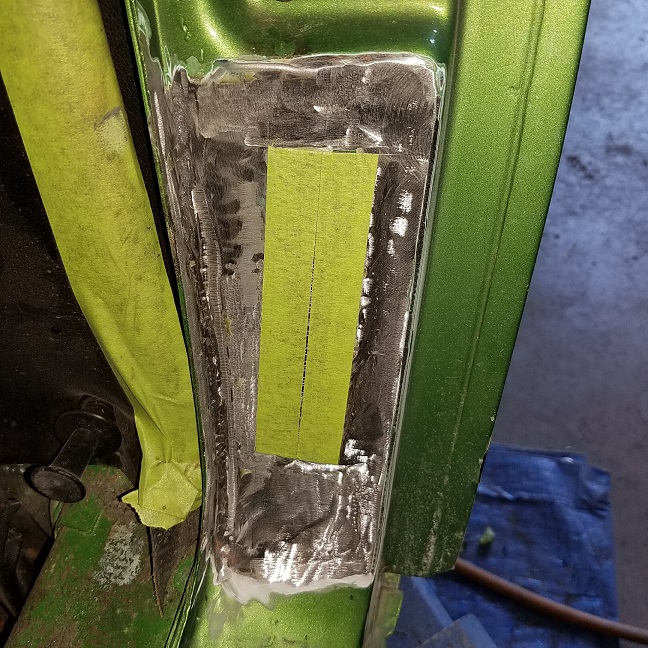
Forgot to shoot a picture at the ed of the day. Filled and primered.
Posted by: cary Sep 17 2016, 08:09 AM
Painted the access hole patch. Mixed to paint code. It's quite a bit darker laid right on top. Can sputtered a couple times and gave me an even darker blob that ran.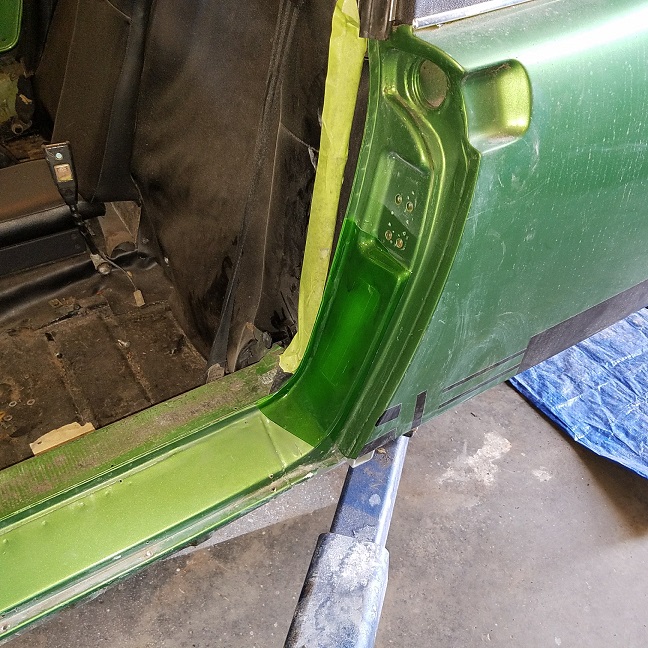
I'll probably wet sand it and repaint the entire piece. Rim in front of vent to the sill seam. Won't be perfect, but a little more sanitary.
Trunk finally fitted to my liking ............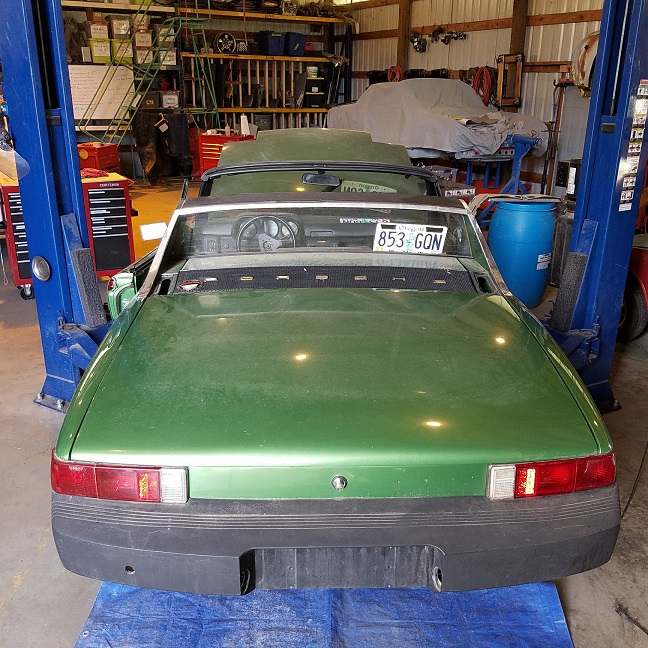
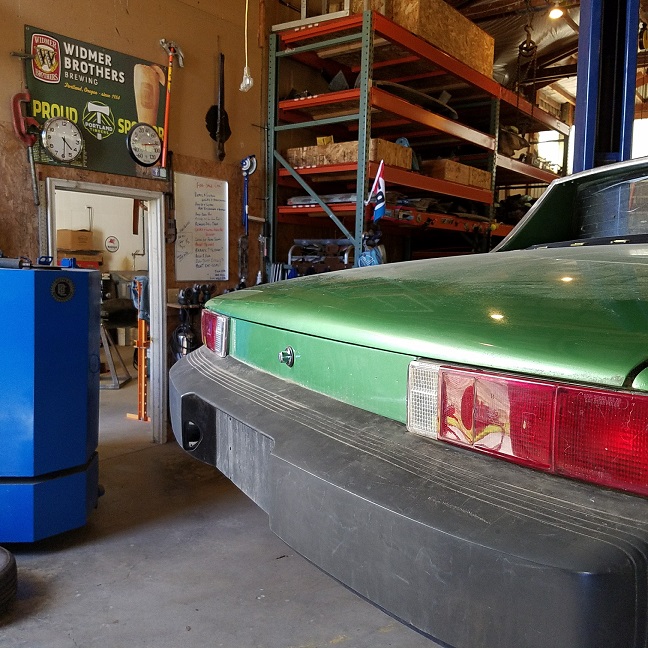
Gave the trunk a once over with the cup brush and hosed the back half down with OSPHO.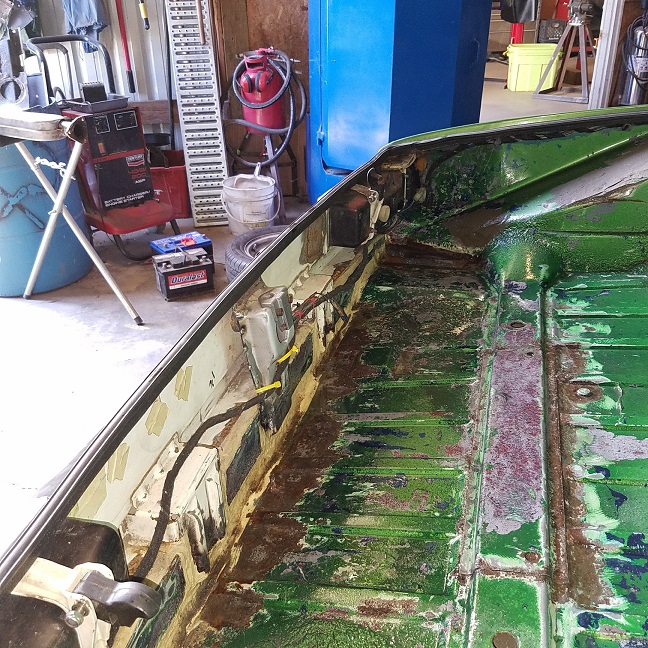
Posted by: cary Sep 17 2016, 08:33 AM
Then on to the late model heat exchangers.
They were originally built with only two welds holding on the heater boxes. Hmmm.
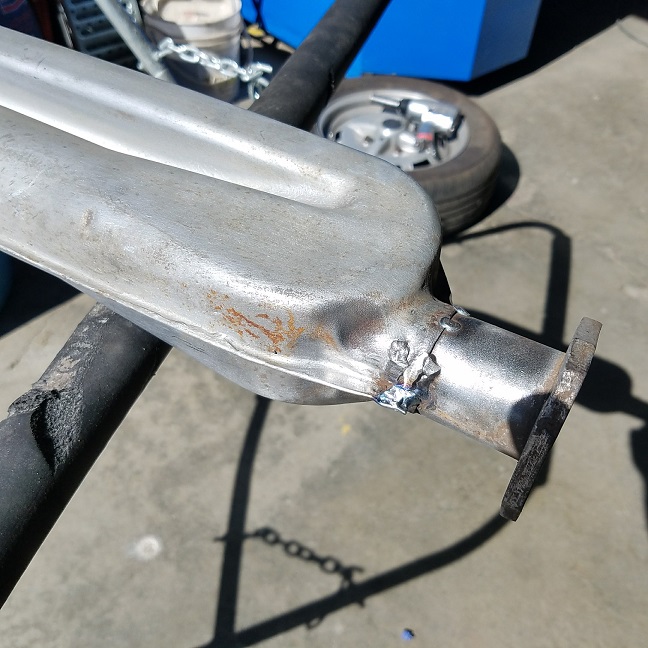
Then after looking at what needs to be done with the right side I determine that the blower feed is missing.  So I dig thru Mark's box of heater tin. Low and behold theres a new lower portion. Just did a once over thru the exhaust page at The Bus Depot. Where did that part come from ?
And a donor top portion from the right side.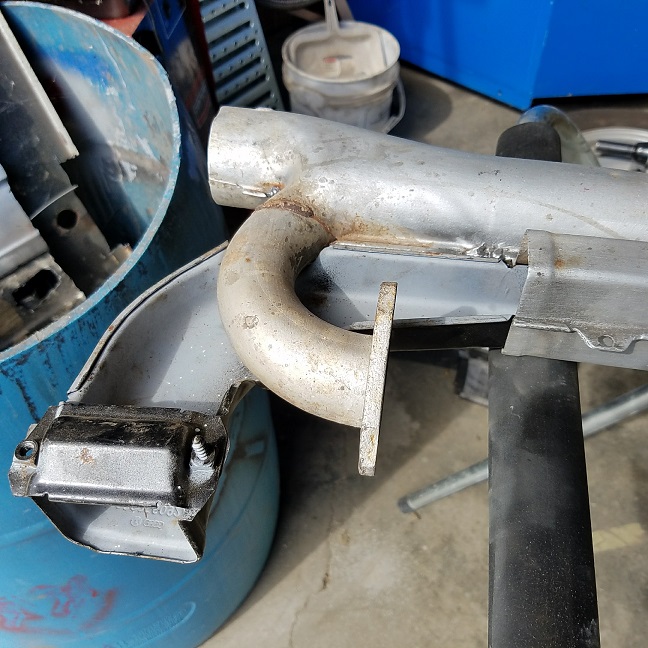

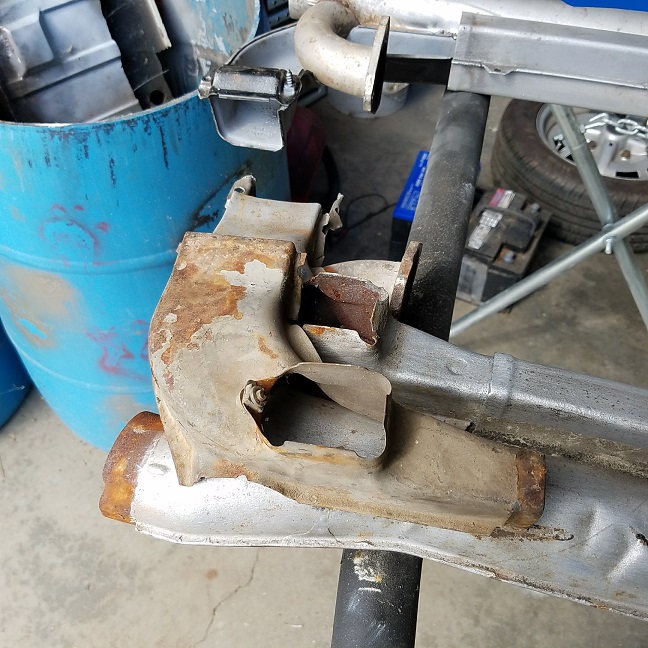
If all else fails we'll create a new left with portions of the right donor.
Posted by: rhodyguy Sep 17 2016, 08:41 AM
Cary, I have a few late late he parts similar to the ones pictured That I have no use for. Send me an address and I'll mail them out.
Posted by: cary Sep 17 2016, 08:46 AM
PM on the way ...............
Posted by: cary Sep 19 2016, 08:43 PM
Cary, I have a few late late he parts similar to the ones pictured That I have no use for. Send me an address and I'll mail them out.
Thanks Kevin ............parts arrived safe and sound.
Like you said, you had the piece we needed.
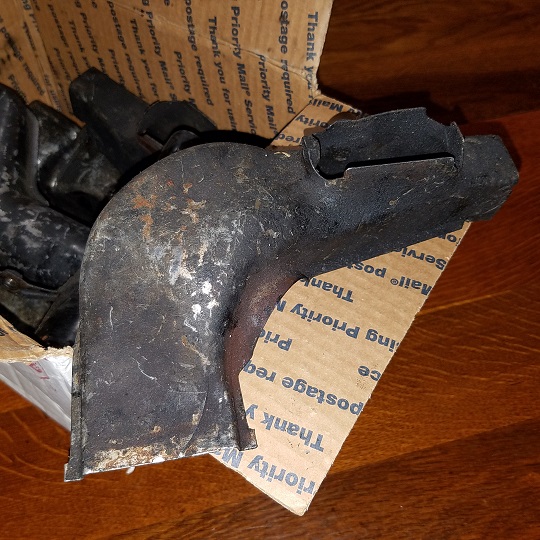
Check for the postage is on the way.
Posted by: Mikey914 Sep 20 2016, 12:44 AM
Thanks Kevin!!
Posted by: cary Sep 22 2016, 09:30 PM
Once again, Thanks Kevin.
Went thru the box of exhaust tidbits sent by Kevin and selected the needed pieces.
Gave them a good soaking and scrub down in the parts cleaner. Then a trip thru the bead blaster.
Then it was time to put them back to work.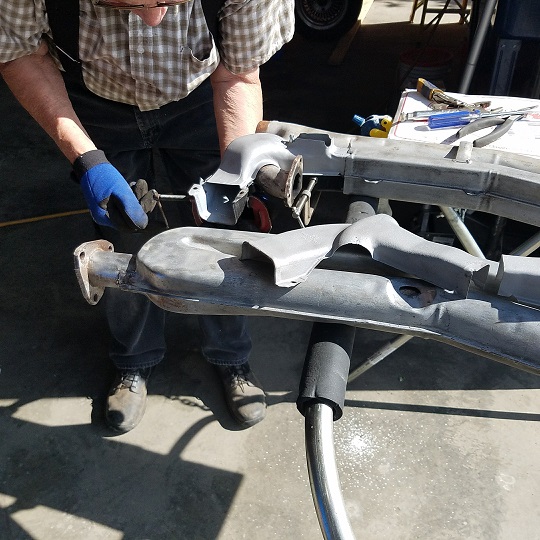
A thing of beauty .......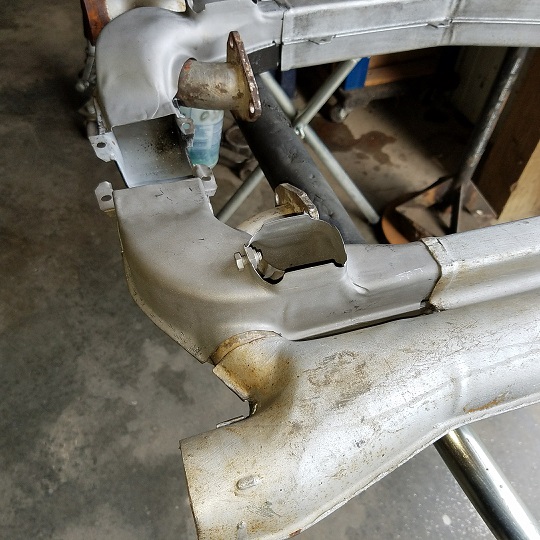
I so want to weld this thing up tight. But I know it needs to remain flexible to allow for fitting to the fan housing.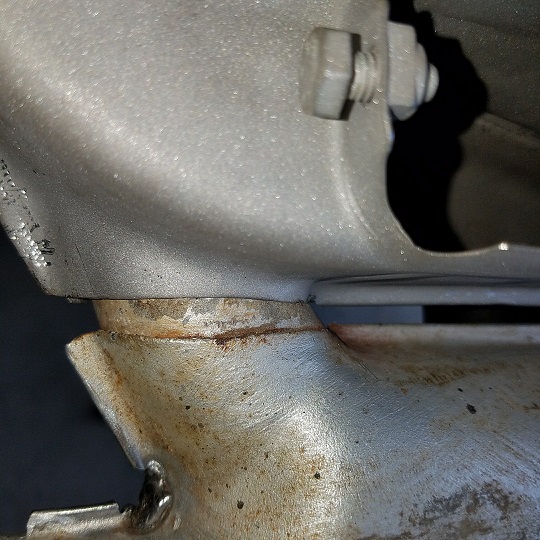
Tomorrow I will finish welding up the cracks.
Posted by: rhodyguy Sep 23 2016, 09:13 AM
I thought the squarish pieces that pass for late model j-tubes looked pretty good too. Glad you could make the parts work. Enjoy....
Posted by: cary Sep 23 2016, 09:25 PM
Not much progress to report today.
Didn't get out there till 2pm.
Then changed out the O2 sensor in the landlords truck.
After that we moved the For Sale Car from the 2 post lift to the low rise.
Super In Law is working on a small patch for the lower inner firewall.
I drained the fuel tank and ran the old gas over to Waste Management.
I'm getting it ready to remove the fuel tank so we can install a fresh air blower.
The blower in Mark's parts stash works on all three speeds, but the hose ends on the outer case are broken off. But on a positive note all three donor/parts cars we have right now have fresh air blowers in them.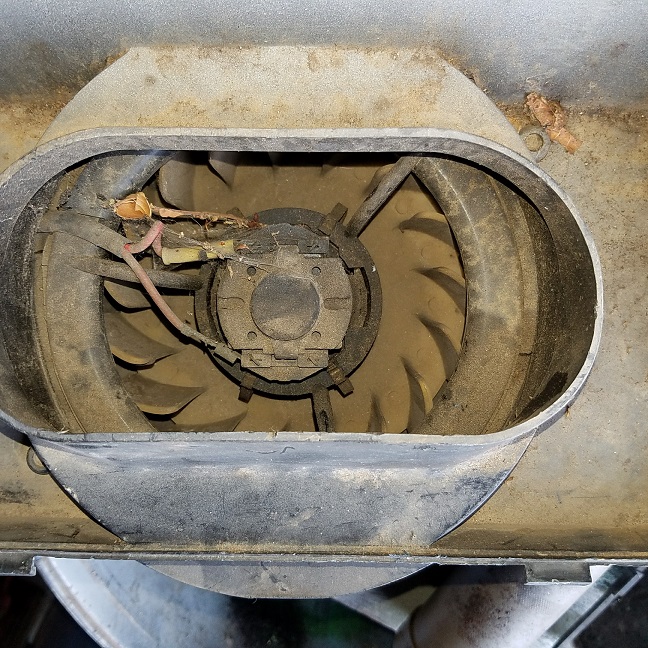
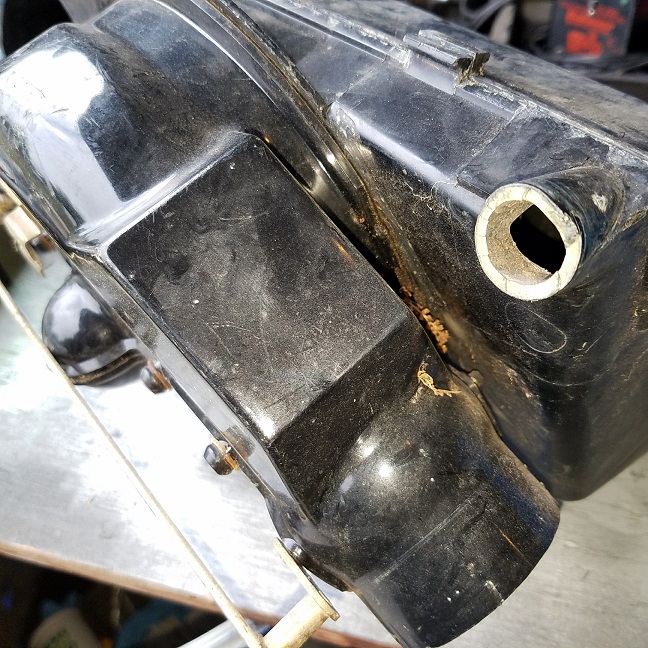
Getting down to the end of the work list. Fresh air blower, complete the engine freshening and brakes. Engine is kind of on hold waiting for an 012 CHT. But if need be I might steal the one off my 74 2L up on the shelf. I'm thinking that engine might become the first Rothsport Motec 2056. Need to save up my lunch money.
Posted by: Mikey914 Sep 24 2016, 12:23 AM
Thanks Cary,
I've got the CHT project initiated, and will be working on it this next week when I'm back in town.
MArk
Posted by: cary Oct 1 2016, 10:19 PM
Moving on to bringing the engine back to life. Start the day with freshening up the distributor. I also cleaned the trigger points and lubed the shaft.
Compared the dizzy part numbers with Brad's parts chart and it looks like this is 73 distributor. Looks like I'll need to verify that all the d-jet parts are compatible.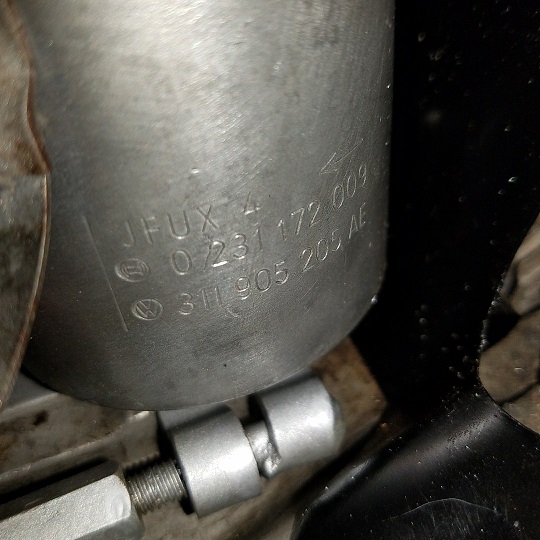
Next I spent some time doing a static timing set up. Which included setting up the TDC marks on both the flywheel and the impeller fan. Marking the dizzy cap. 1,4.3.2.
This will make future tune ups a snap ...................
I had marked the engine tin nuts that wouldn't make torque. Looks like the 4 threads that the cheese heads use were stripped out. So I used a little longer standard M6 bolts to tighten them up. 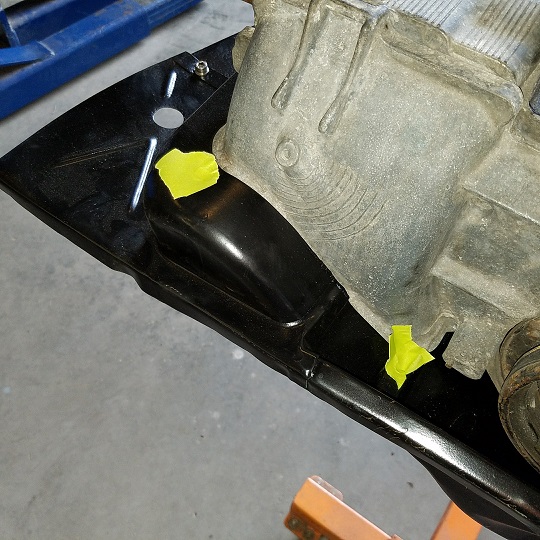
Posted by: cary Oct 7 2016, 09:59 PM
Short day yesterday. We couldn't get the gear box off our new to us 1.7.
This is the first time I've had a problem. Took us 2 hours of twisting, turning and prying. It finally popped loose. Clutch frozen on to the splines.
After that I got the new brakes installed. All done but the bleeding.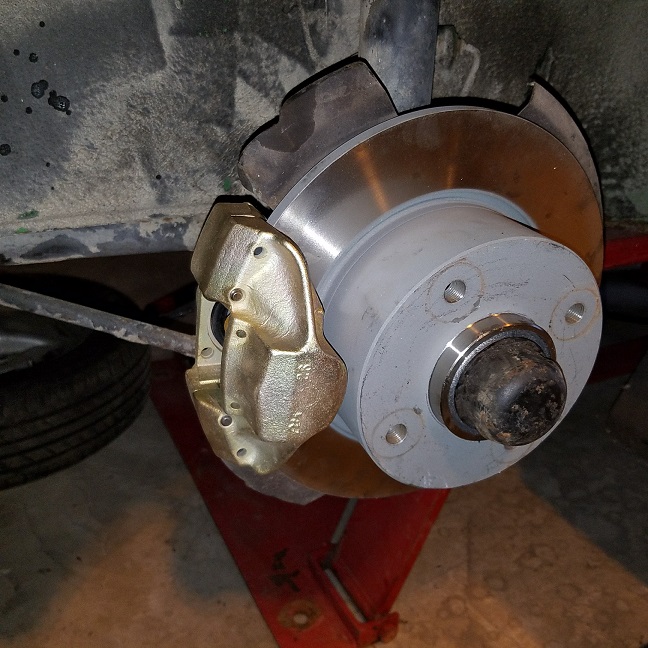
Today was all about putting the fuel injection, ignition and wiring back on the short block. Along the way I'm making sure every component is correct and in spec. So far, so good. Rusty parts are bead blasted and clear coated. Black painted parts are cleaned and or blasted. Then painted with 2-3 coats of Rustoluem.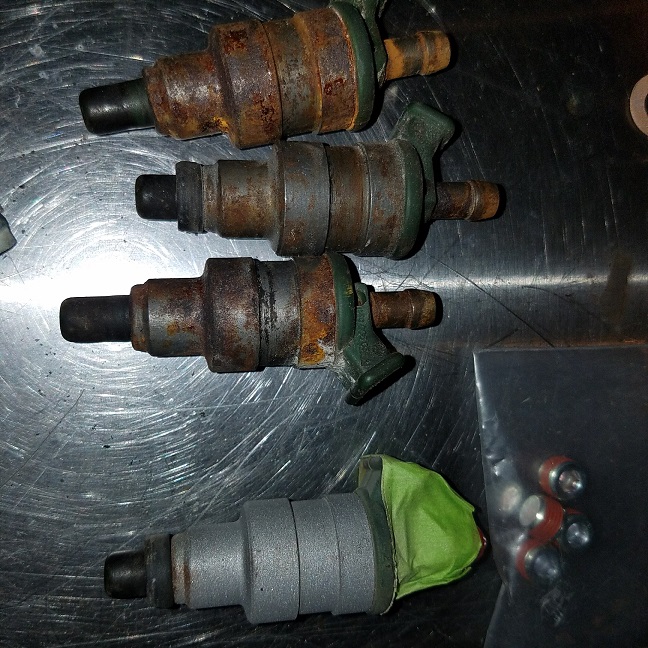
There was a cap on the injector when in was in the blast cabinet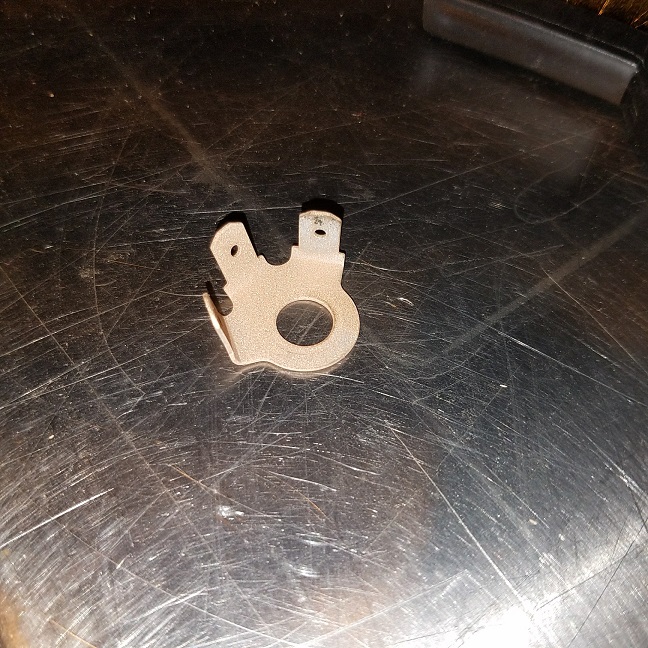
Surgery table ..............
Paint shop open for business ..............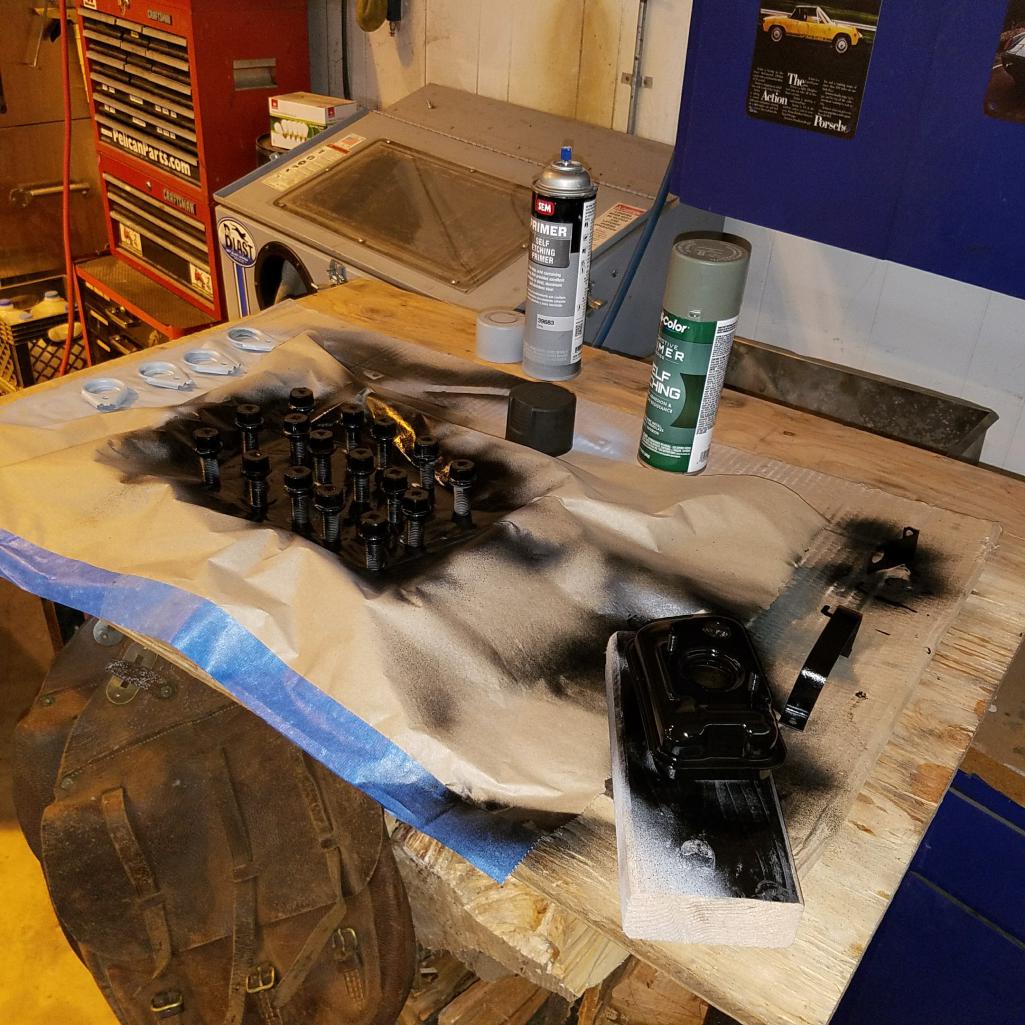
This is the way to adjust the valves. Next time I'm in the same spot I'll see if there's an interest in doing a Saturday afternoon party.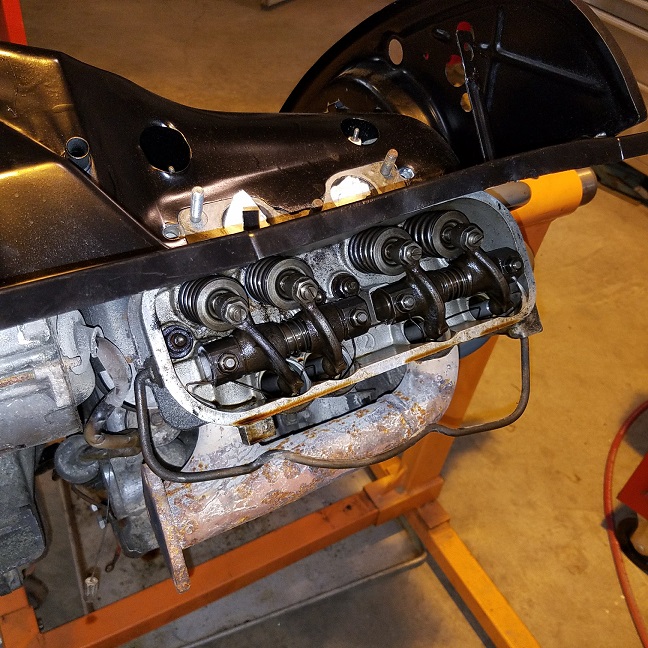
Heading home ................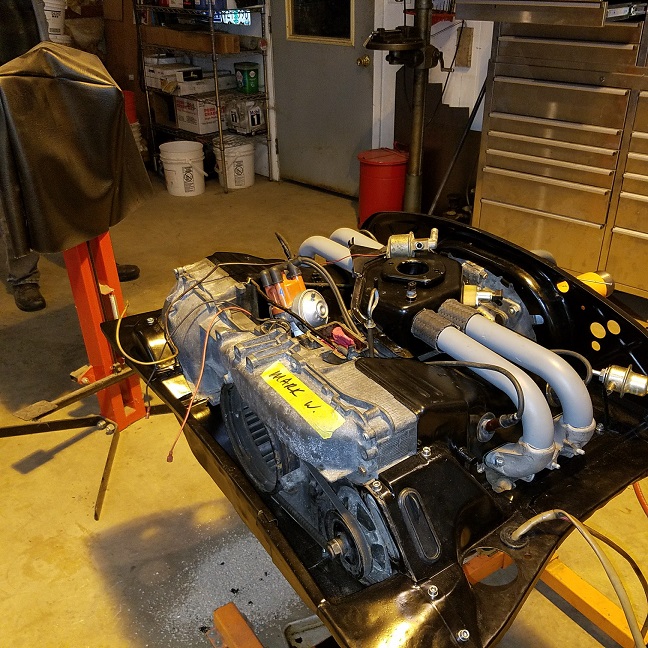
Posted by: BeatNavy Oct 8 2016, 06:25 AM
As always, it's great to read your progress, Cary. I enjoy seeing the detail you put into this.
Did you ever get around to making a template for the suspension tie pieces? I know you have other fish to fry, but I'm going to have to deal with this sooner or later. No worries/no pressure, just curious.
Posted by: cary Oct 8 2016, 07:41 AM
Yes. After the shop TV install I'll have Super In Law go back over them.
PM your address and I'll mail you a tracing.
I didn't have any takers on my $200+ price tag. LOL. I can't imagine cutting and fitting laying on your back. I think if I got 4-5 commits we could get them down to under $100.
I think Mark can have them cut out with a CNC, which would speed up the process. Hand cutting them out takes a bit of time, 12 ga. Saw blades are $25, you have to let the tool cut at its own speed.
Posted by: BeatNavy Oct 8 2016, 07:44 AM
Yes. After the shop TV install I'll have Super In Law go back over them.
PM your address and I'll mail you a tracing.
I didn't have any takers on my $200+ price tag. LOL. I can't imagine cutting and fitting laying on your back. I think if I got 4-5 commits we could get them down to under $100.
I think Mark can have them cut out with a CNC, which would speed up the process. Hand cutting them out takes a bit of time, 12 ga. Saw blades are $25, you have to let the tool cut at its own speed.
Awesome, thanks, Cary. These would definitely be a good thing to have professionally fabricated and available for sale at some point. Maybe this will be my excuse to buy a plasma cutter. Or maybe I'll try to see if Root wouldn't mind cutting a few of these....
PM on the way.
Posted by: Mikey914 Oct 9 2016, 01:05 AM
We can easily fabricate these. Just needed to work out the details with Cary .
Posted by: cary Oct 9 2016, 06:50 AM
We can easily fabricate these. Just needed to work out the details with Cary .
See, what did I tell you. IIRC the patterns work for both sides. You'll just fold it inside out for the left side.
Posted by: cary Oct 9 2016, 07:28 AM
Not much to add for Saturday. Installed the painted brake reservoir strap. Then we proceeded to bleed the brakes. Only to find once we pressurized the system the back calipers freeze up and don't release. And it needs new rotors too.
Emailed Mark
Installed the valve cover gaskets and covers. Then on to cleaning the bottom of the engine. Used wire brushes, brake cleaner and air. It was primarily left over blasting media stuck to the oil. Then changed the filter and refilled with Brad Penn 15-40.
While I was there I removed the thermostat and bagged it up for Mark. Bent up
Then back into office/clean room. I was really starting to struggle. The spark plug wires just wouldn't dress out the way I like. Did I have it set up right ? So I turn the engine 45 degrees on the stand and take off the valve cover and watch the #1 combustion cycle again. TDC, exhaust, both tight, intake then TDC again. Everything is dead on. At the end of the day it looks like someone re indexed the distributor, its off 90 degrees. Which is exacerbated by the fact this distributor has the #1 mark cut where we usually have #3. 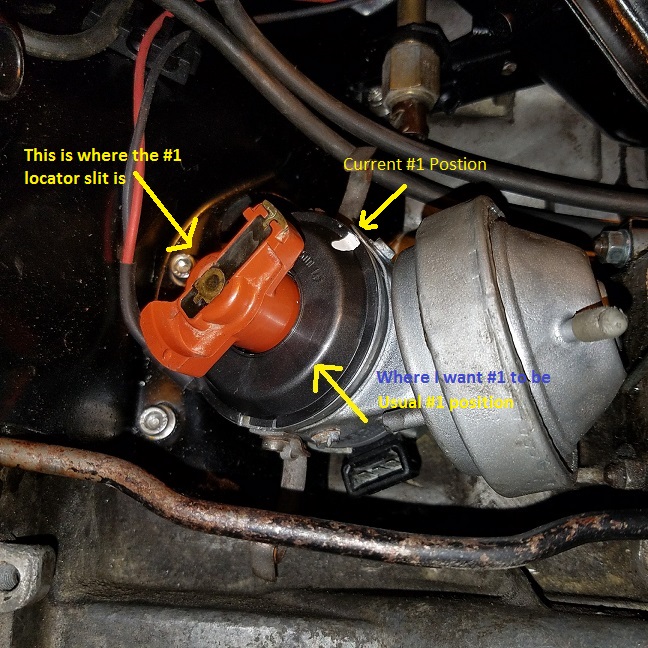
Off to my twice yearly Tire Rack Street Survival instructor duties. 914 World member Gary Chapmen will be there also. He does the inside teaching portion.
Posted by: cary Oct 9 2016, 10:14 PM
Couldn't let the dizzy issue go ................
Headed back out to Forest Grove after the TRSS.
Doubled checked that every thing was at #1 TDC. Then set out to remove the distributor.
Then tried pulling out the dizzy gear drive with one of my multiple magnets. No Go.
Went to the Haynes manual and it suggested snap ring pliers. Grabbed them out of the special tool cabinet and went to work. Easy Deal .............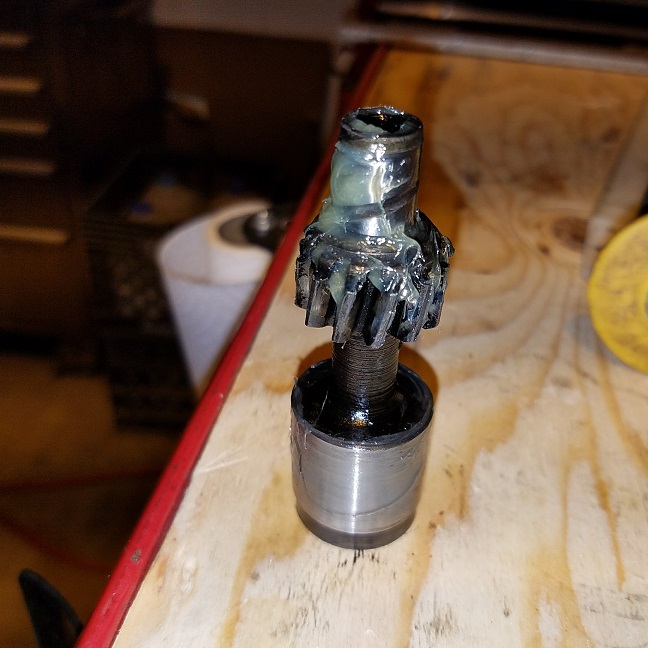
DANGER : After you pull the dizzy. The special oiling washer is just sitting on the dizzy boss. If left alone it could get knocked into the bottom of the engine. Please dont get distracted and retrieve it with a magnet.
Used the sticky grease to hold the washer in place when I dropped the drive back into the hole. Had to do it twice to get the alignment I wanted.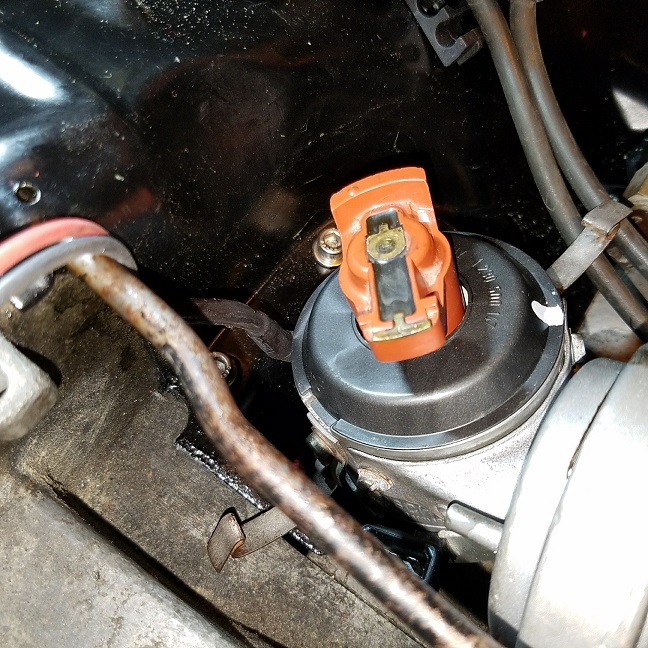
Took two attempts but I have number 1 back where I want it. Now it points right at the vacuum advance hose tube.
Now I can dress the spark plug wires to my liking ...............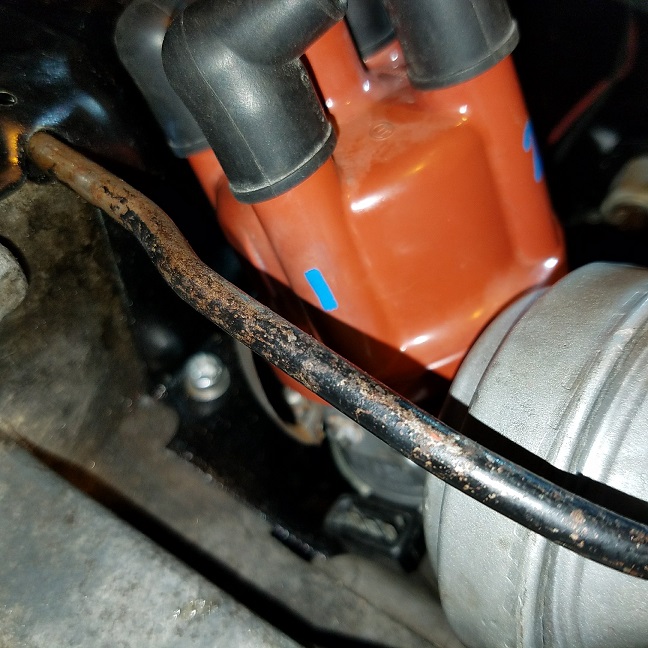
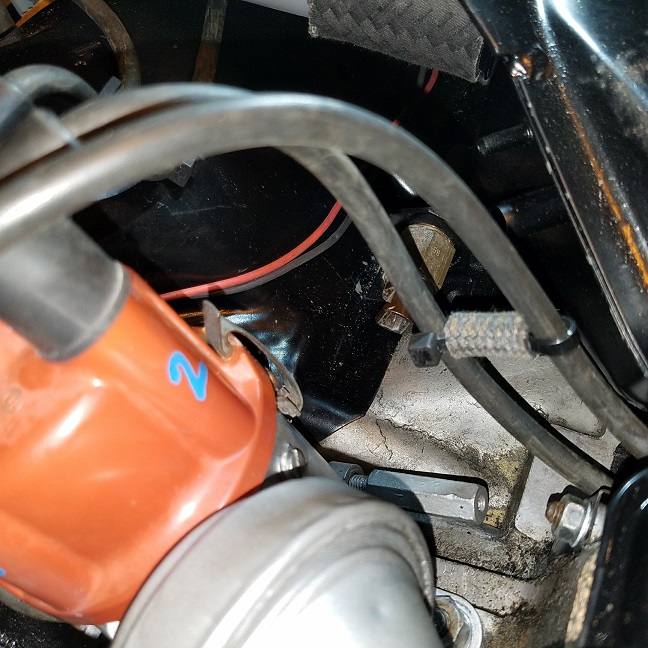
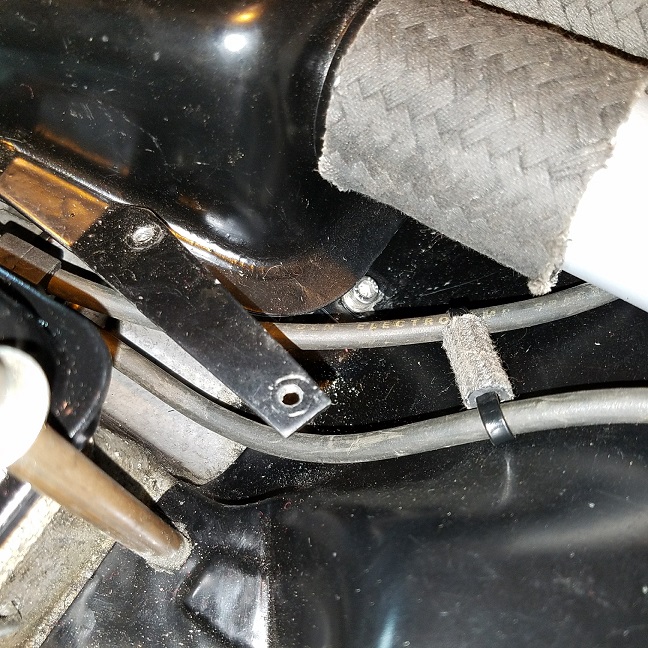
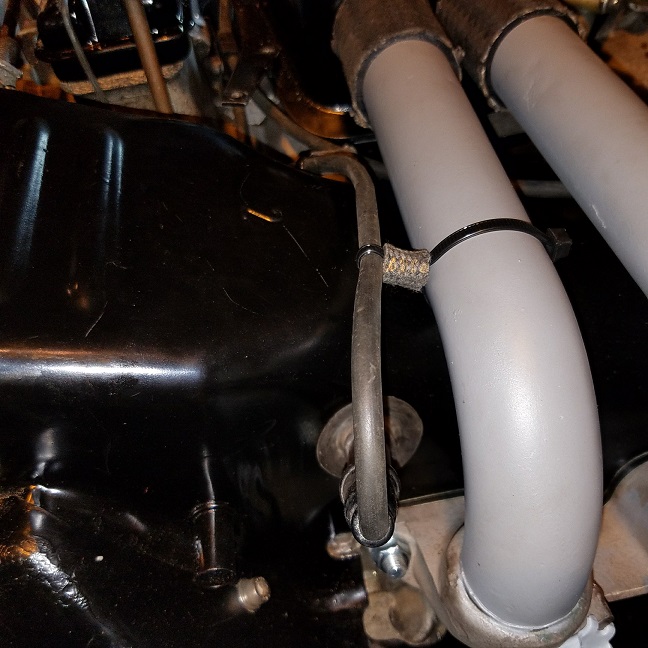
Posted by: Cairo94507 Oct 10 2016, 07:40 AM
Very nice way to tidy up the spark plug wires.
Posted by: cary Oct 15 2016, 08:54 AM
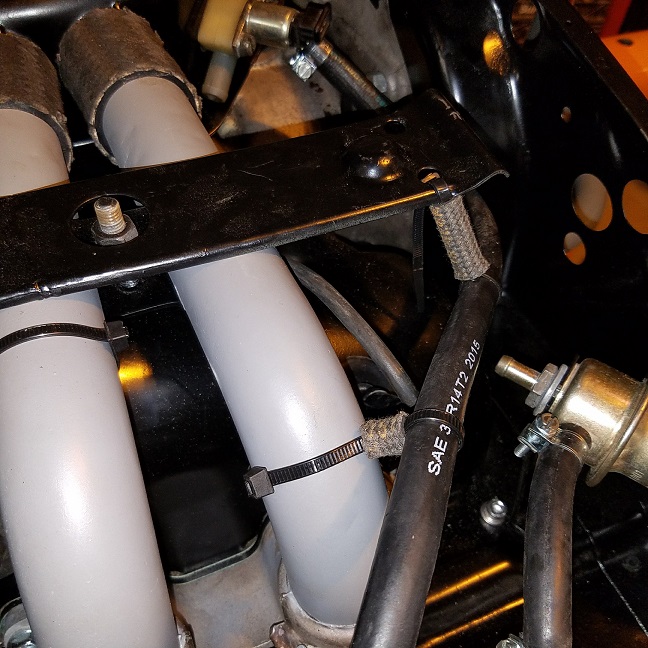
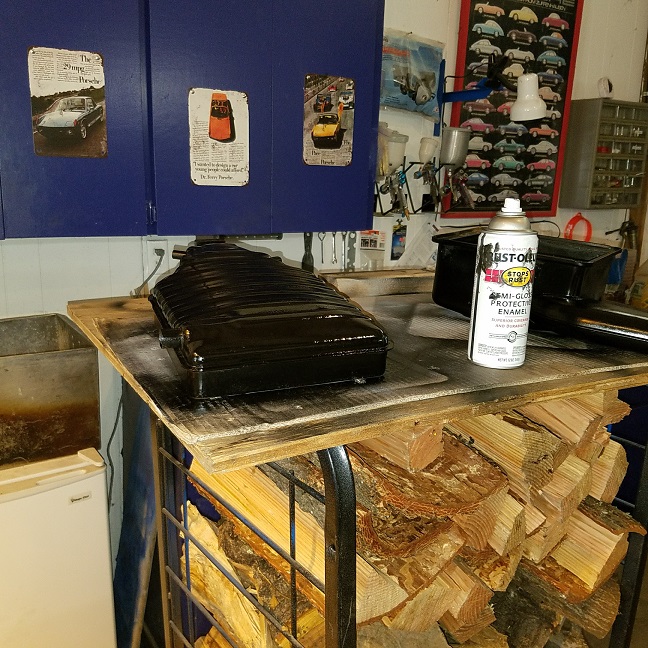
Found my used pins from the rewiring of the 3.2 conversion on my 911.
Posted by: cary Oct 15 2016, 09:37 PM
Finished up the return line with a new twist (non CW). Added a couple zip tie holders to the rear engine tin. Keeps it all tidy. I'm also going to have Super In Law fabricate a brace to hold the rear engine tin place. I get tired of it laying over.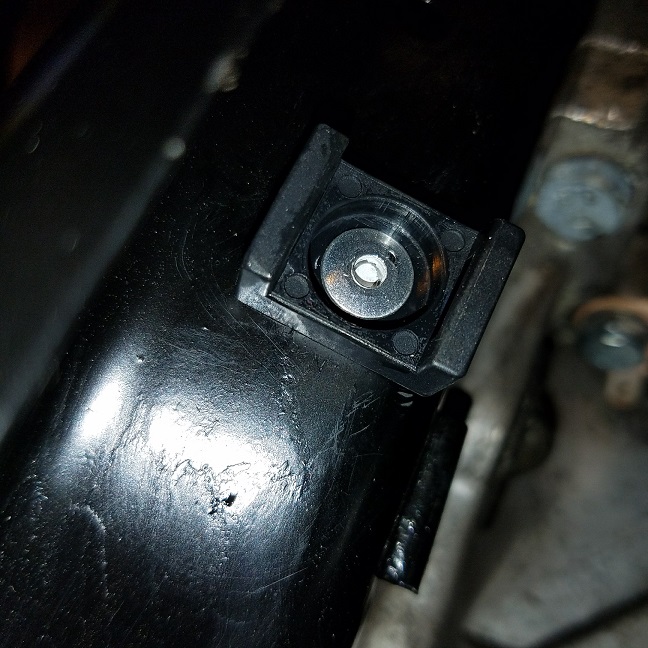
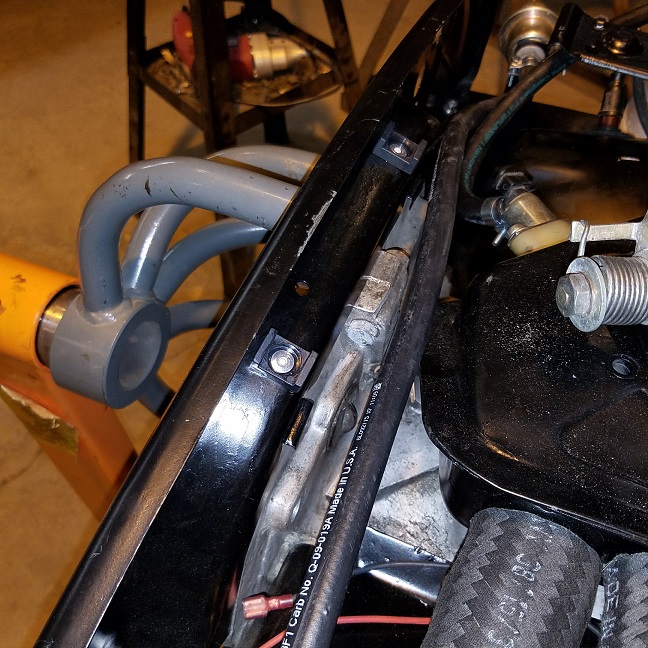
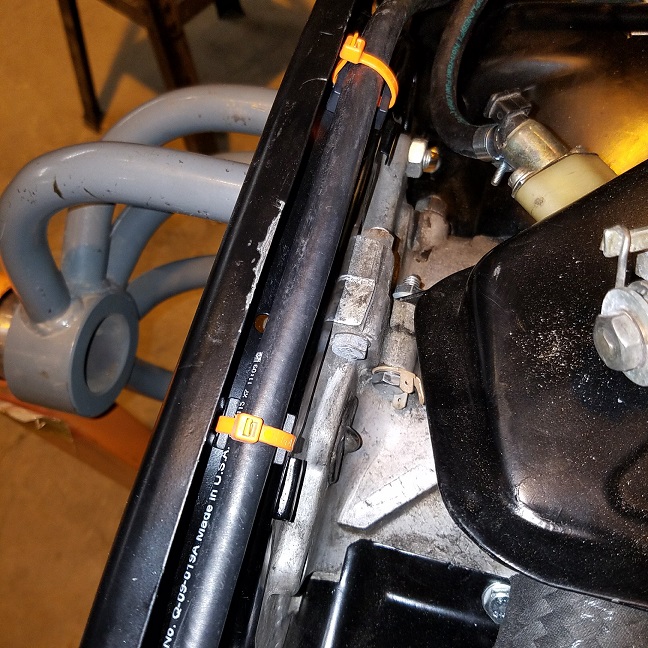
We'll see if I like the location after its back in the car. If not I'll hang it from the outer slot.
Posted by: cary Oct 16 2016, 06:20 AM
One little rust repair behind the drivers seat. Usual spot ..................
Cancer cut out. And entire area sprayed with cold galvanizing.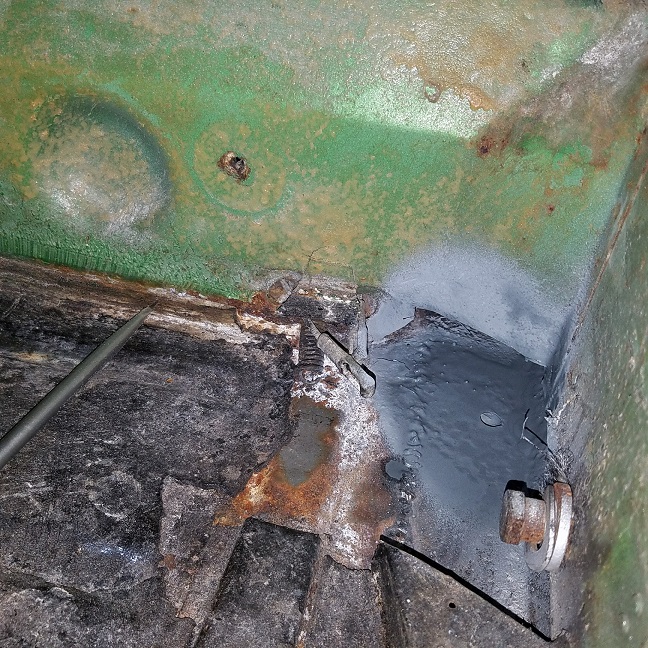
Patch welded in. Tough duty for a right hander. Upside down and backwards.
Super In Law made the patch piece. But after closer inspection I'll need a little extension right under the e brake tubes.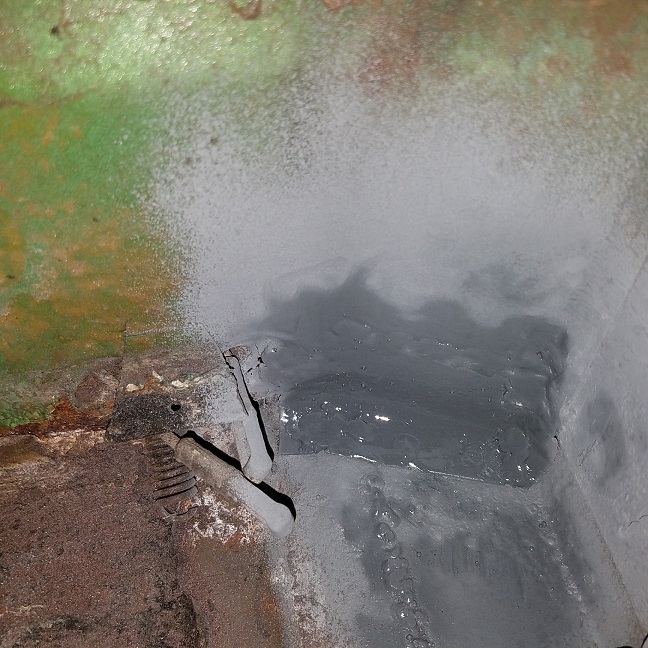
Went thru a few sanding belts to smooth down the weld. Not exactly my prettiest work.
A little metal degradation on the upper portion and brazing on the left.
Posted by: cary Oct 16 2016, 08:49 AM
I'd love a pattern!!!
I could definitely use that as well, Cary. Thanks for any and all help!For those that would like a copy of the suspension tie patterns PM me with your mailing address. I have Rich and Rob's already. But I need to go to Staples and get some thicker paper first.
Posted by: cary Oct 18 2016, 08:02 AM
Rich and Rob patterns going out in the mail today.
Posted by: BeatNavy Oct 18 2016, 02:23 PM
Thanks, Cary. You are the man (and so is Super-In-Law) 
Posted by: mbseto Oct 19 2016, 12:15 PM
For those that would like a copy of the suspension tie patterns PM me with your mailing address. I have Rich and Rob's already. But I need to go to Staples and get some thicker paper first.
I could use a pattern, but wouldn't it be easier for you to scan them and just email a scan?
Posted by: cary Oct 20 2016, 08:44 AM
Send me your email and I'll try it tonight ..........
Posted by: cary Oct 23 2016, 02:08 PM
For those that would like a copy of the suspension tie patterns PM me with your mailing address. I have Rich and Rob's already. But I need to go to Staples and get some thicker paper first.
I could use a pattern, but wouldn't it be easier for you to scan them and just email a scan?
For those that want a PDF. I have the PDF scaled 100% dead on.
Send me your email.
Posted by: DirtyCossack Oct 24 2016, 08:41 AM
For those that would like a copy of the suspension tie patterns PM me with your mailing address. I have Rich and Rob's already. But I need to go to Staples and get some thicker paper first.
I could use a pattern, but wouldn't it be easier for you to scan them and just email a scan?
Reading this, I remembered that I was supposed to scan in and send you my template...sorry. But on the bright side, I'm 100% sure Cary's will be better than mine.
Posted by: cary Oct 28 2016, 09:26 AM
Mark stopped by yesterday to drop off the first batch of steering rack cases (?) to be washed in the jet washer.
He also picked up the templates for the suspension ties to see about having them cut out with a CNC or plasma table.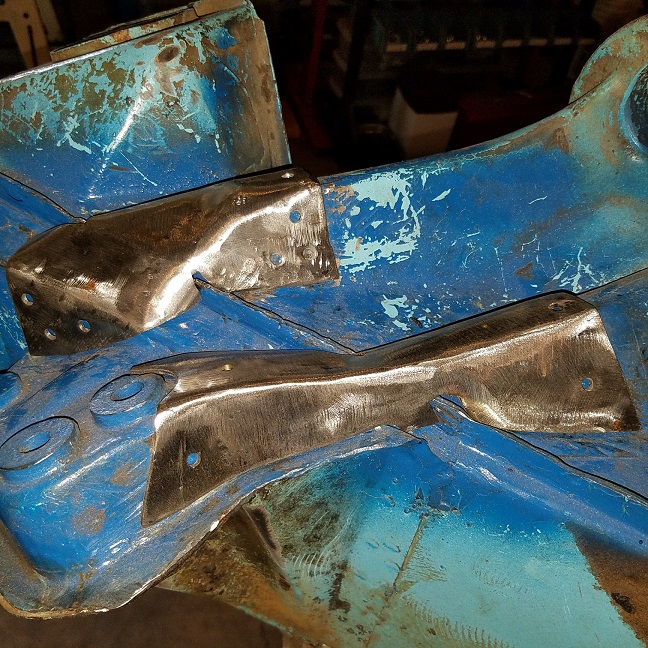
Posted by: BeatNavy Oct 28 2016, 09:58 AM
Cary - thanks again for sending these out. You, sir, are an upstanding 914World citizen. Having said that, if Mark does make these and sell them reasonably priced, I will gladly go that route rather than attempt to make myself.
Posted by: cary May 4 2017, 08:02 AM
Mark stopped by yesterday and did a project review on the For Sale Car. It's been a while.
Work List ..................
* Inspect the fuel tank and lines
* Finish the rebuilding of the brake system (rears & bleeding)
* Finish engine/FI refreshment and install
Then it will return to 914 Rubber for the interior and trunk painting.
Posted by: cary May 13 2017, 07:57 PM
As always, it's great to read your progress, Cary. I enjoy seeing the detail you put into this.
Did you ever get around to making a template for the suspension tie pieces? I know you have other fish to fry, but I'm going to have to deal with this sooner or later. No worries/no pressure, just curious.
Look what Matt dropped off this afternoon. Don't know the pricing .................
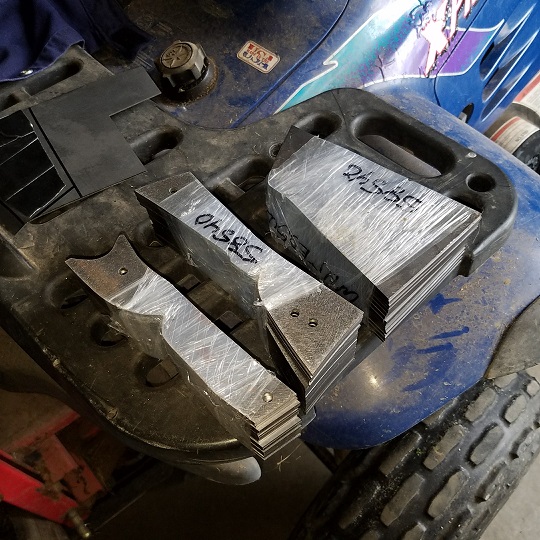
Posted by: rhodyguy May 13 2017, 09:06 PM
Nice trick with the zip ties and piece of hose on the wires.
Posted by: cary May 29 2017, 09:05 PM
As Super In Law is finishing up the engine tray patch on Doug's car. I jumped over and installed the new rotors and calipers on Mark's for sale car.
I did also crack the hose connections right below the engine tray on both sides. No issues. I removed the hard and soft lines on Saturday after pulling the calipers and rotors.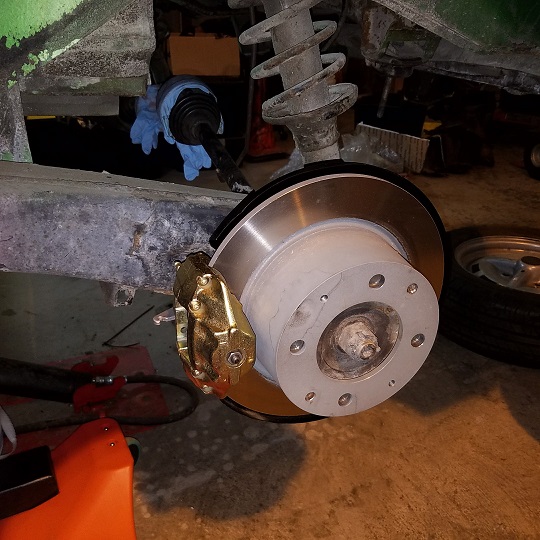
Posted by: Mikey914 May 30 2017, 01:59 AM
Thanks Cary.
Posted by: BeatNavy May 30 2017, 06:09 AM
As always, it's great to read your progress, Cary. I enjoy seeing the detail you put into this.
Did you ever get around to making a template for the suspension tie pieces? I know you have other fish to fry, but I'm going to have to deal with this sooner or later. No worries/no pressure, just curious.
Look what Matt dropped off this afternoon. Don't know the pricing .................
Hey Cary! Sorry, I haven't checked out this thread in a while. Did Mark stamp or cut out some suspension ties?
Mark - are these for sale yet?
Posted by: cary May 30 2017, 07:57 AM
Yes. And I haven't heard of the price. They're sitting on the bench at my shop.
I think the thought was to do a set of instruction / video of Super In Law doing the welding and bending.
Posted by: Mikey914 May 30 2017, 10:45 AM
I can sell you the full set at $30 all 3 pcs. I don't have on the website, but yes PM me with the email and you address for shipping thinking these should ship for less than $6 domestic depending on how they ship.
Mark
Posted by: BeatNavy May 30 2017, 11:12 AM
I can sell you the full set at $30 all 3 pcs. I don't have on the website, but yes PM me with the email and you address for shipping thinking these should ship for less than $6 domestic depending on how they ship.
Mark
PM sent (two actually).
I know there's more I need on your site, and I'll probably remember what those are after these ship...
Thanks Mark (and Cary, and Super-In-Law)!
Posted by: cary May 30 2017, 07:50 PM
I'll have Super In Law draw the bend lines on all the larger pieces before Mark picks them up.
Powered by Invision Power Board (http://www.invisionboard.com)
© Invision Power Services (http://www.invisionpower.com)