Printable Version of Topic
Click here to view this topic in its original format
914World.com _ 914World Garage _ Optimusglen's build off challenge
Posted by: Optimusglen Feb 26 2016, 09:35 AM
Hello everyone, it was recommended I come here by a member on another forum I'm a part of. I'm new to the 914 world, well... the Porsche world really. This will be my first life-size Porsche.
A tiny bit about me: I'm a mechanical designer at a major Medical Device company, I've owned roughly 30 cars in the 15 years I've been driving, the majority of which were VW, Audi, BMW, and Volvo. I am a major DIYer, I do paint, welding, bodywork, upholstery, glass, mechanicals etc. Only had a few carbeurated cars though, and one motorcycle. I'm also an artist and create high quality vector based and 3D rendered car illustrations as a hobby and to help pay for other hobbies. I wrote an article a few years back for a contest sponsored by Porsche and won a 2-day driving school trip to the Porsche Sport Driving School in Birmingham Alabama, this further cemented my goals of owning a Porsche.
Most notable cars/projects: I've had a few MK1 VW Rabbit's, two were major builds including engine swaps. Just recently sold a 2001 Audi S8 that was wonderful.
Current stable: 1998 Jeep Cherokee DD/tow/winter truck, 1974 BMW R90/6 cafe racer, my wife drives a 2014 VW Jetta (manual too!) and tonight I will be picking up my newest project and the reason I joined here, a '71 914.
On to the meat and potatoes.
I had been missing having a project car, something old that I could work on and drive in the summer. That lead me to selling the S8 and buying a DD plus a project. I was interested in 914's, 924's, and 944's and even had a few 944's lined up that fell through only days before I found this 914.
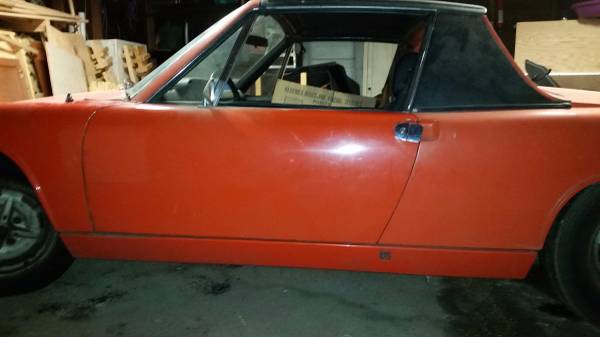
On the morning of the 25th I saw a message from a friend in my inbox, with a link to a 914 that had been posted locally around midnight. Price was very low, and details put the car right in my comfort zone. It's a project for sure, but not too much of a project a'la a past Locost build. I emailed them immediately, toothbrush dangling from my mouth. Explained I have cash ready, would like to see it at their earliest convenience, etc. I imagine at that moment several others were doing the same, they got a lot of interest.
The way I bought it the car's fuel injection had been removed in favor of dual-webers and a more aggressive distributor. It also has a stroke/bore kit on it that took the standard 1.7L up to a 2.0L. This was a fairly common mod to these back then. I still have both the fuel injection+input manifolds and the original distributor.
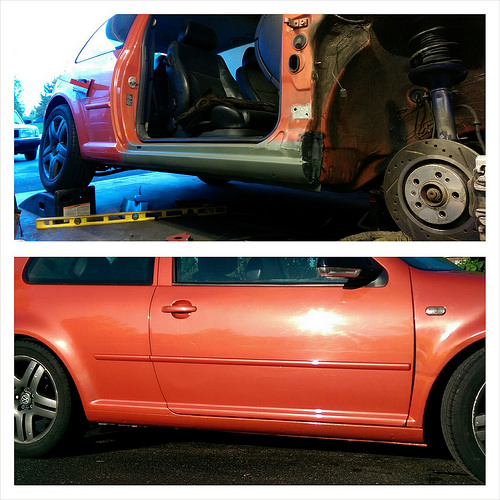
My brother got it in a fender-bender that last year that I drove it, and the driver-side fender needs replacing or some serious TLC. The interior is pretty old/dried/cracked. The exterior needs a new coat of paint.
I parked it in the winter of 95/96 planning to do my normal thing of starting it monthly all winter long. (I never "put it away" entirely, opting to go this route instead.) However, life intervened and pretty soon I'd let it sit several years without starting or anything...so at this point it's safe to assume that it'll need some TLC to get it running again.
This car really deserves to have someone bring it back to life, one of the most fun cars I've ever driven! I've had to face facts that it's just not going to be me.
Don't pass up this great deal!
The sellers wife replied later during the day, said that I could come see it around 6:15 if I wanted, but warned that there was a lot of interest. I expressed my interest as best as I could, I was super excited about it and was in love with the prospect. I went against all of my conventional car buying wisdom and offered to send a deposit immediately to lock it down for me and save them from having to schedule a bunch of showings. My thought was that if it was structurally too far gone, that I could probably weld it up enough to drive, put GT flares on it, and make it a rat. Or part it out, or sell it again. It was a risk I was willing to take at that price.
They agreed to the deposit, and were very happy that I was so enthusiastic about it. That evening my wife and I drove down, I got to meet the sellers and look over the car. If you've ever played the Forza Horizon video games where they have these "barn find" cars, there's a cut scene where some character comes and opens the garage or whatever it is to see this dirty faded car with a few dents. It was exactly like that, to a tee. I got to check the car over, could have dug deeper but honestly didn't feel the need. We went inside and exchanged money for the title, and arranged for me to return tonight (Friday) to pick it up and tow it home.
In all there were about 2 dozen inquiries on the car, and after they accepted my deposit there were 4-5 offers with several hundred above asking price. They were great people though, and were true to their word. They knew the car was worth much more than their asking price, but were just happy that it was going to someone who was ecstatic about it.
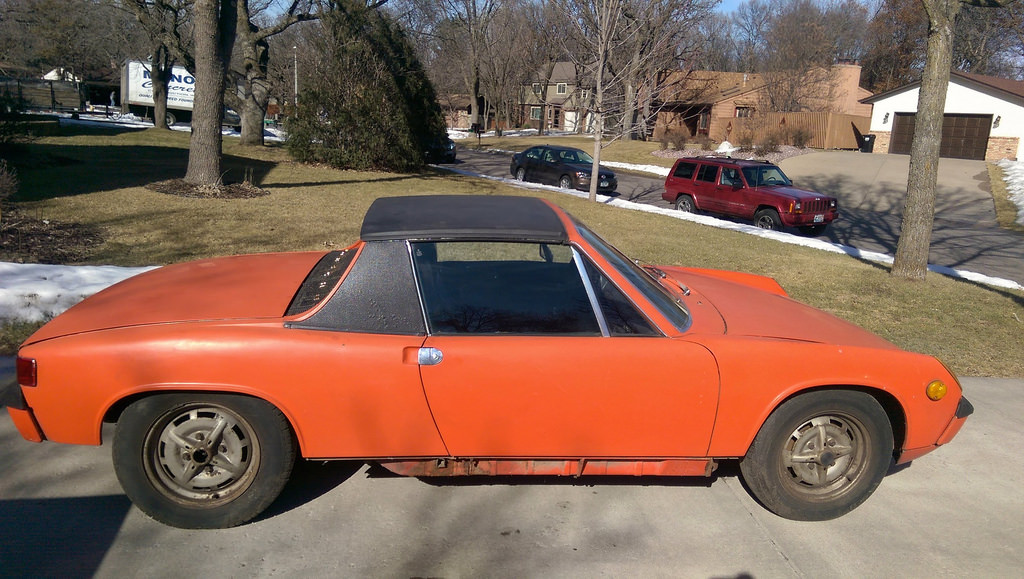
For now I only have the pictures from the ad, but once I get her home I'll snap some better ones.
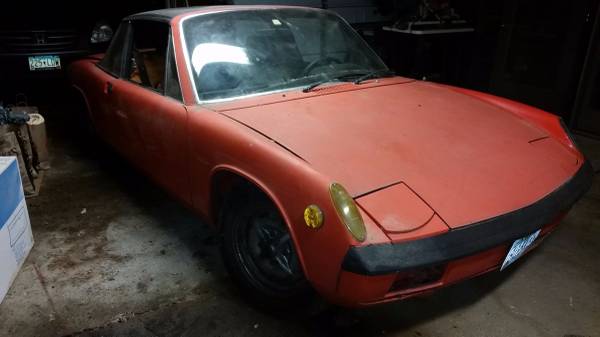

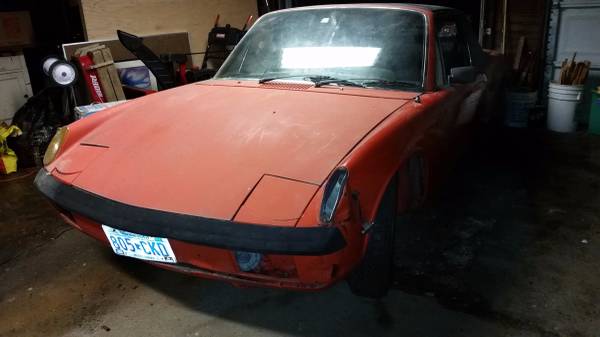
The ad claimed it was a '70 but upon inspection of the title it looks to be a '71. Not a big deal, there weren't any major changes between those years as far as I can tell.
Plans depend a lot on how much rust is hiding in there. If it's stuff that I'm comfortable welding up or replacing sheetmetal to stock, then I'll lean more towards restoration. I'll do wheels for sure, but otherwise focus on replacing old seals and rubber bits, see if I can get someone to bring the luster out in the paint again but if that fails I would paint it and keep the original color. It will be a driver, but aiming for a clean, OEM driver. Very unlikely it'll get GT flares at this point, don't want to bastardize it if it's a good example.
The 914 was $1,100
Yes, eleven hundred.
Ok, that's it for now. Looking forward to spending a month looking through old threads trying to learn as much as I can.

Posted by: 76-914 Feb 26 2016, 09:38 AM

Posted by: LowBridge Feb 26 2016, 09:47 AM
nice to see a new teen owner, welcome to the community
Posted by: Optimusglen Feb 26 2016, 09:49 AM
 nice to see a new teen owner, welcome to the community
Haha, I'm 33. Thanks though!
Or by teen owner do you mean 914 owner? I'm new to the slang too, if you couldn't tell.
Posted by: stevegm Feb 26 2016, 09:49 AM
Welcome! I think you will find a lot of useful info here. And the members are a great group. You might consider coming down to Hershey in April for the Porsche-only swap meet and Mid-Engine Invasion. But from Minneapolis it might be a bit of a drive.
Posted by: Jeff Bowlsby Feb 26 2016, 09:50 AM
1970-Early 1971 were the same. Some wiring changes happened late 1971.
Posted by: Chris Pincetich Feb 26 2016, 10:01 AM
Great to hear there are still some good deals out there! 
I'm having a ton of fun in my 1.7. With headers and extreme "lightening" of the car, my "cafe racer" 914 has beaten plenty of 2.0s at autocross events.
Good luck
Posted by: iwanta914-6 Feb 26 2016, 10:02 AM
Welcome!
There was a little discussion the other day about this car. Also being from MN, I also saw it hit craigslist early in the morning and I knew it wouldn't last long at that price. If I had the time and money to work on a project I would have jumped on it myself.
I still don't have a 914 myself (yet) but I enjoy living vicariously through all of the members here on the world.
Posted by: maddog Feb 26 2016, 10:20 AM
tons of info here
Posted by: Optimusglen Feb 26 2016, 10:26 AM
Welcome!
There was a little discussion the other day about this car. Also being from MN, I also saw it hit craigslist early in the morning and I knew it wouldn't last long at that price. If I had the time and money to work on a project I would have jumped on it myself.
I still don't have a 914 myself (yet) but I enjoy living vicariously through all of the members here on the world.
Thank you! Yes, I was a bit shocked if the condition was as the seller described. I've yet to dig into it deeply, but I'm excited to do so. The downside is I feel like everyone else that contacted them are also online in all the groups I'm in, and they all despise me. eek.
Posted by: napasteve Feb 26 2016, 10:38 AM
Optimusglen, your 914 looks like a great deal and it sounds like you have all the needed skills to get it on the road. You were the first to show up with cash so I wouldn't spend too much time thinking about the other potential buyers. It's also nice to read about the sellers being true to their word.
What is the color code for your car? Orange is a great color.
Posted by: PanelBilly Feb 26 2016, 10:50 AM
I was looking at that ad and thinking that the car might be a diamond in the rough. For your sake, I hope it is. Like your attitude that even if the car turns out to be a dog, it will be a good parts car. It never hurts to have an extra car in the garage. Teener a seem to enjoy company.
Welcome to the madness
Posted by: Optimusglen Feb 26 2016, 10:54 AM
Thanks guys!
I've tackled a fair share of rust repair. I feel like I can bring it back unless it's really really bad. We will see.
I did a rocker on my wifes old GTI.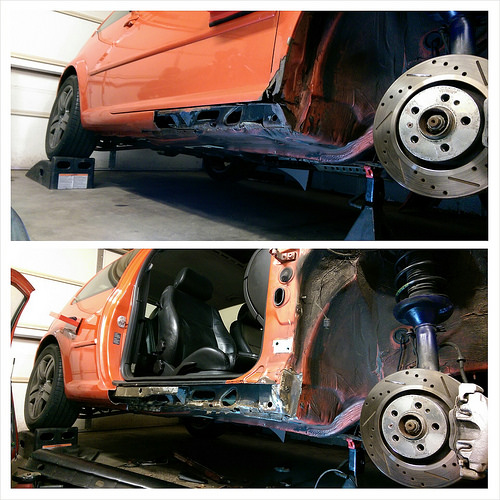
This wasn't too hard, and it was on a car I didn't really care too much about.
Posted by: falcor75 Feb 26 2016, 11:37 AM
Nice find and I hope it turns out to be a gem.
Remember that nothing pleases us like plenty of pictures. 
Posted by: DCJosh Feb 26 2016, 11:40 AM
That ad caused quite a stir amongst us MN locals. Post pics soon!
Posted by: aharder Feb 26 2016, 11:41 AM
Posted by: iwanta914-6 Feb 26 2016, 11:42 AM
The downside is I feel like everyone else that contacted them are also online in all the groups I'm in, and they all despise me. eek.
Don't worry about anyone that might be jealous. I am a little, but I knew I couldn't tackle a project right now. I am happy that someone like yourself ended up with it. You have a great attitude and obviously the skills to get another 914 back on the road. That's all we as 914 fanatics want, is to see as many saved as possible.
Posted by: Shadowfax Feb 26 2016, 12:04 PM
Looks like it's in good hands. Congrats!
Posted by: rick 918-S Feb 26 2016, 12:21 PM
Duluth 
Posted by: Big Len Feb 26 2016, 12:32 PM
awesome find...best of luck!!
Posted by: Larmo63 Feb 26 2016, 12:36 PM
I saw that ad and knew it wouldn't last long. These cars are being gobbled up lately, but they can still be found with a little sleuthing.
You have skills obviously, so you'll be fine. We can't wait to see this one come out into the light of day. Hurry up and get it home and get some pics up!!
Posted by: Coondog Feb 26 2016, 03:56 PM
Great price....congrats
Posted by: Tom_T Feb 26 2016, 05:47 PM
Oddly enough, ever since they were new, 914s tended to appeal to engineers, designers & architects a lot - even more than the 911/912s back in the day.
Cheers!
Tom
///////
Posted by: Optimusglen Feb 27 2016, 12:16 AM
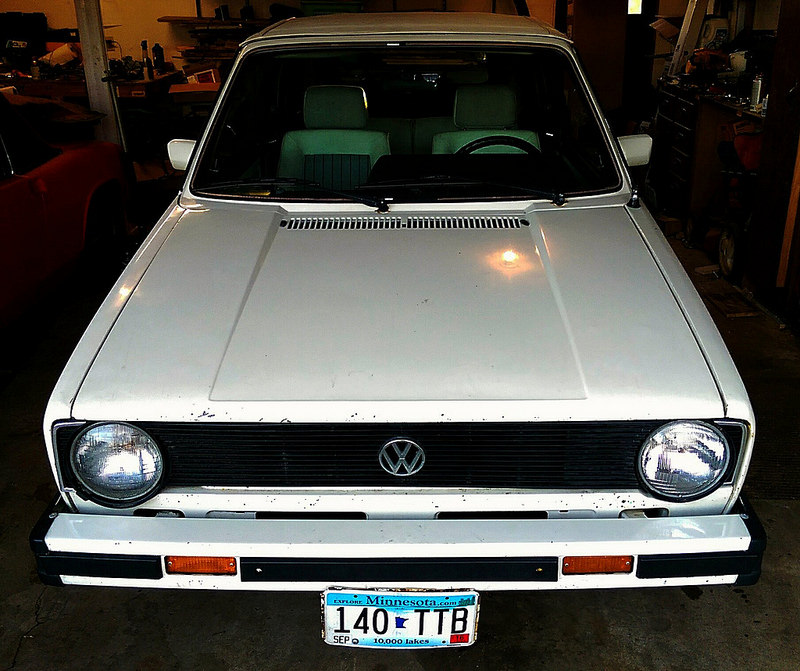
Hi guys, got it home and dug into it a little. Grabbed a few pictures while I was at it.
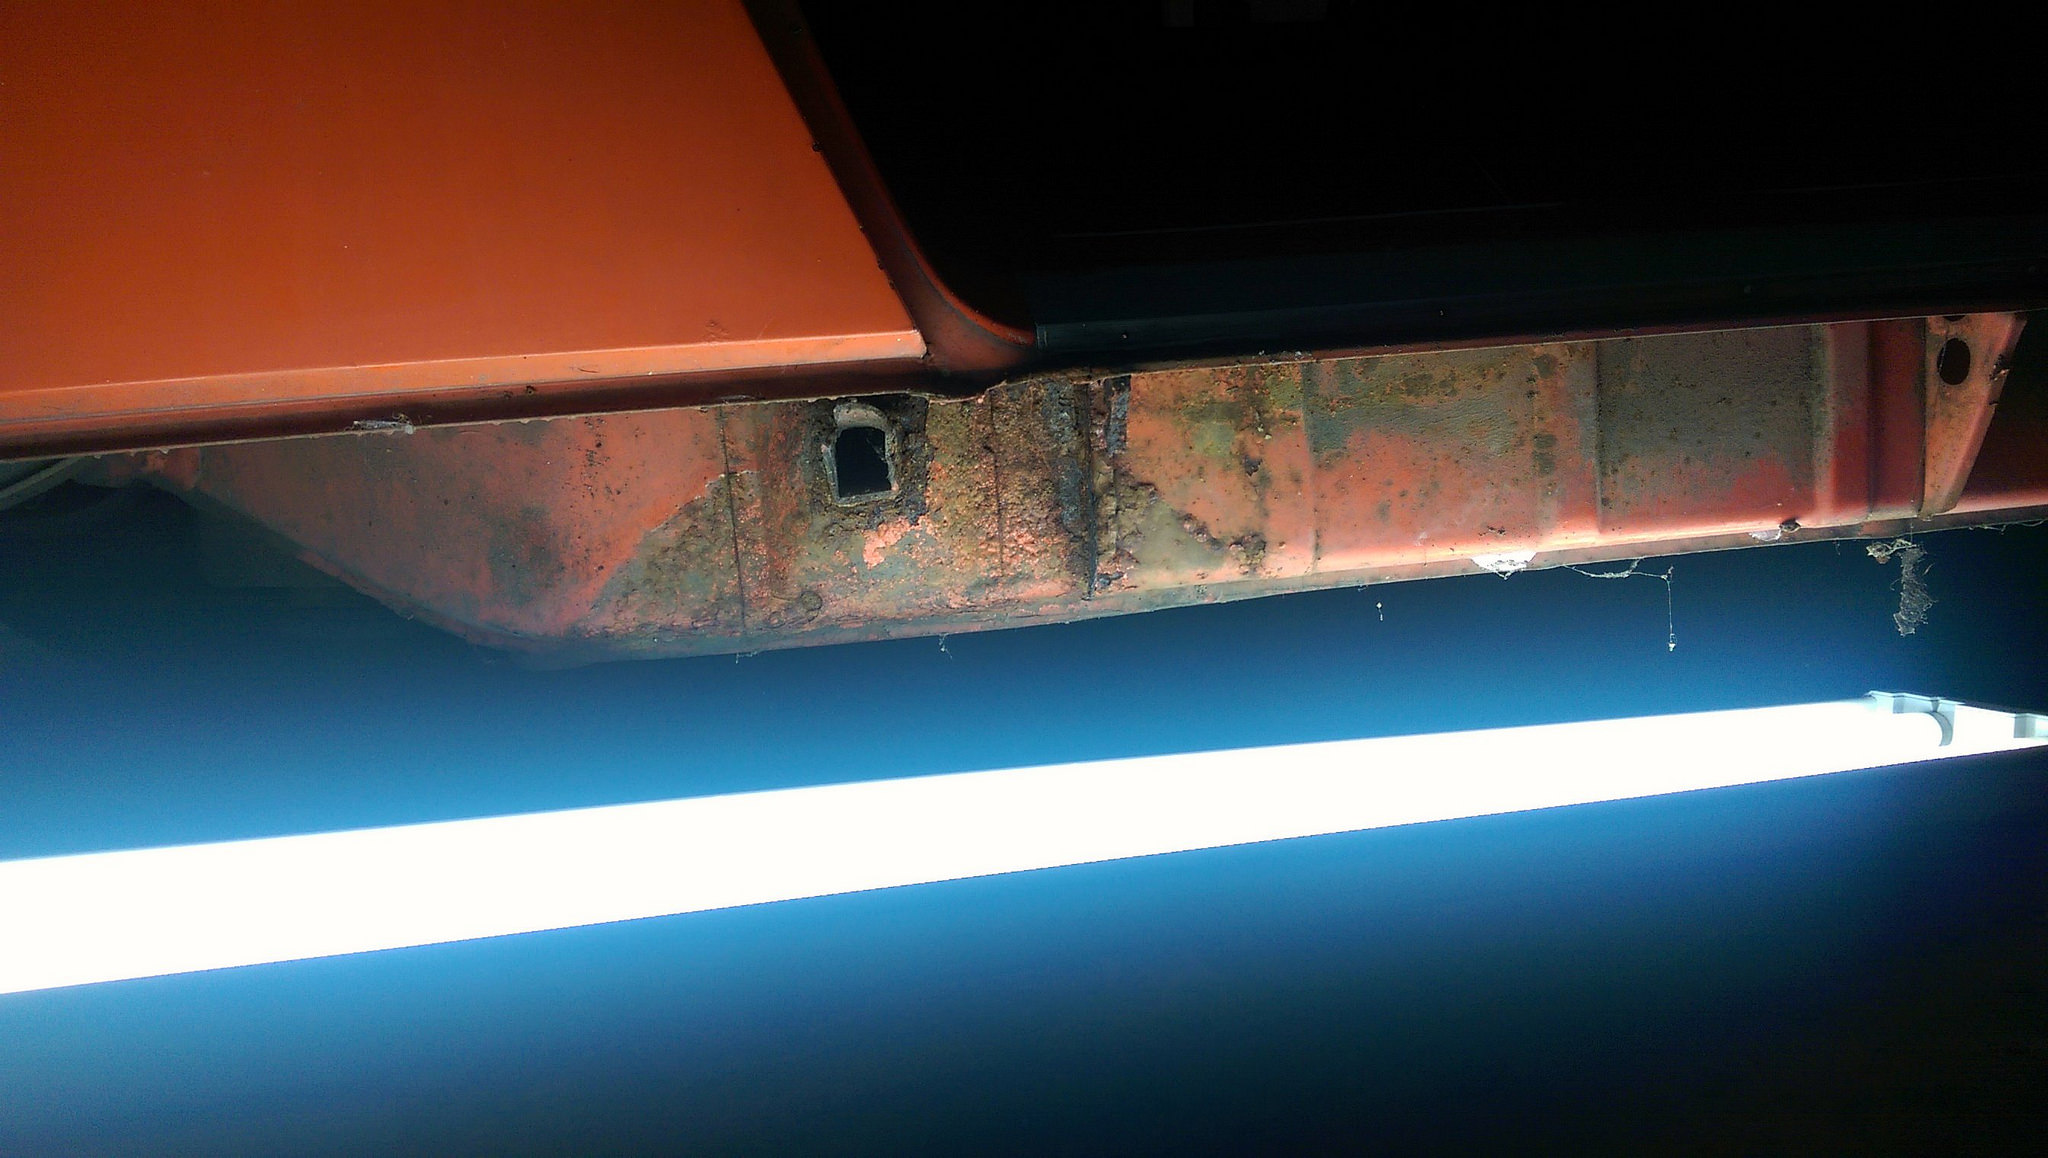
I think it'll clean up pretty well, but here you can see some rust hiding under the paint on the rocker.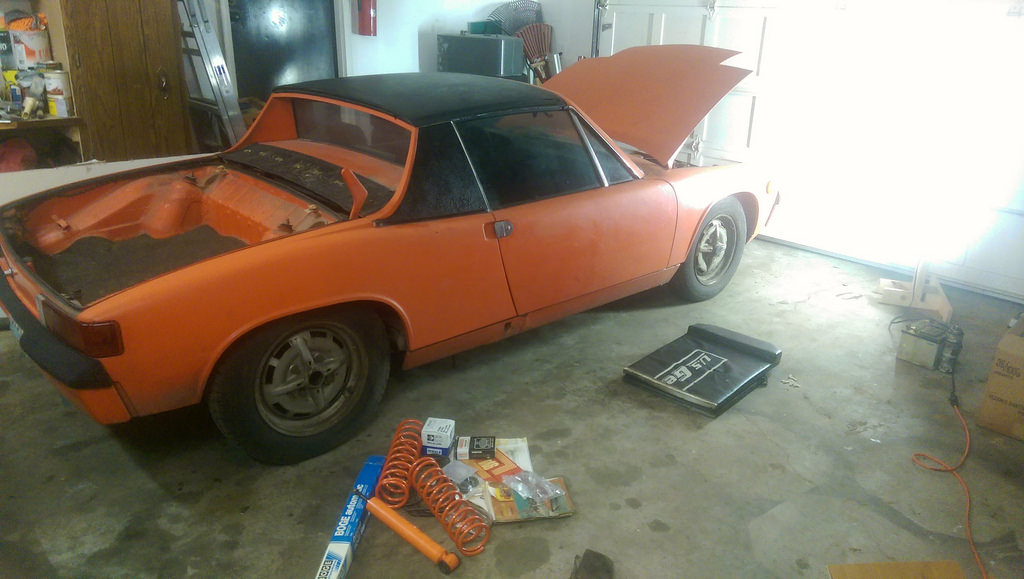
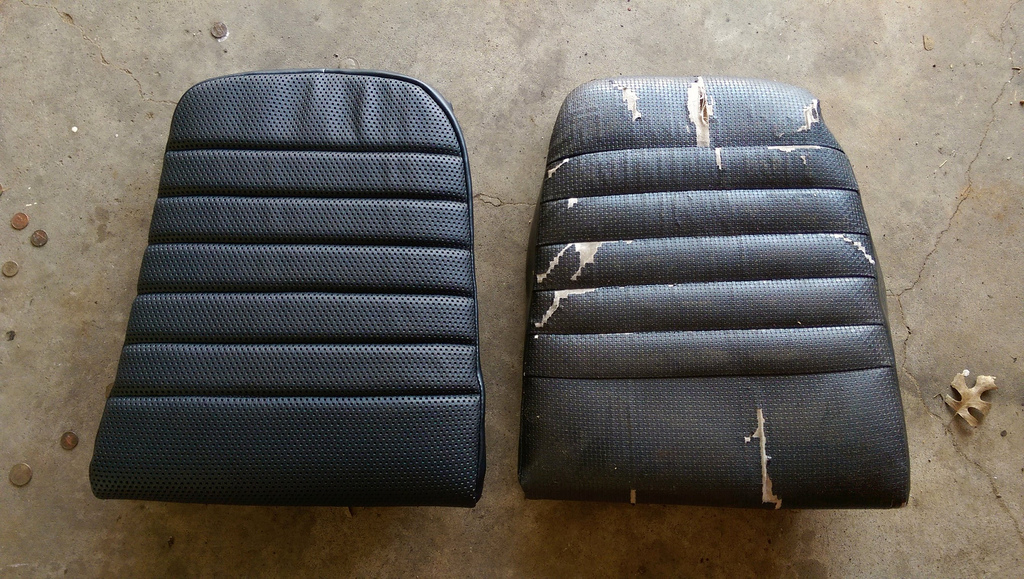
The interior is rough. I can upholster, but the foam is trashed too. Wondering what it takes to swap, and what the benefits would be.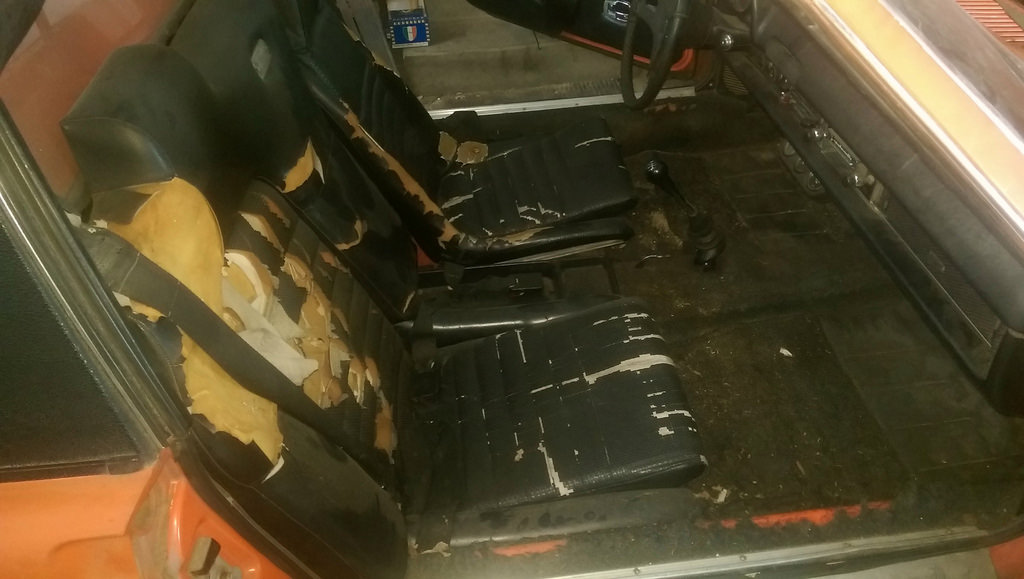
Got a bunch of goodies, and a few receipts. One of which was the clutch.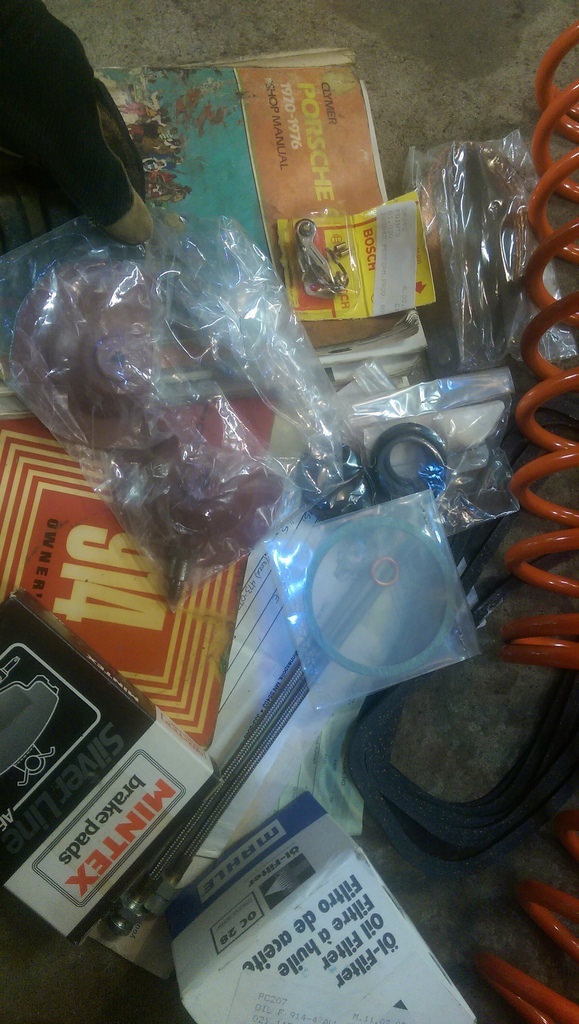
What many of you were wondering about, the hell hole.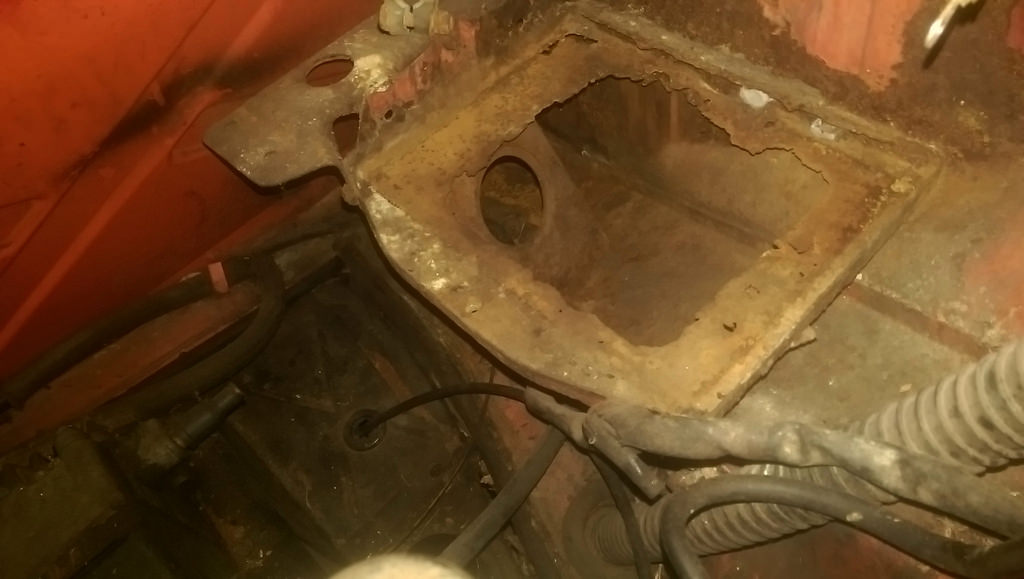
And under the hell hole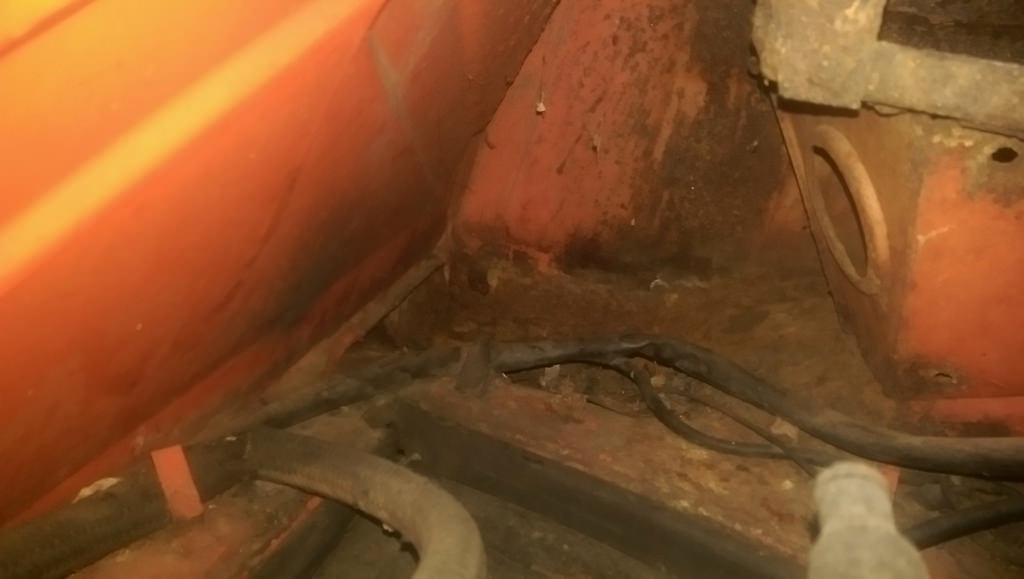
I laid a long ruler across the top with the top removed, measured before and after I climbed in and stood in the middle. No noticeable flex.
I'm happy!
Posted by: Cuda911 Feb 27 2016, 01:02 AM
Congrats on the purchase! Sounds like you are the right guy for this car, to save it from the scrap heap.
Posted by: rick 918-S Feb 27 2016, 07:39 AM
Looks good so far. Pull the rocker covers and let's see!
Posted by: The Cabinetmaker Feb 27 2016, 08:29 AM
Nice find, and welcome!
The "teen" reference was indeed directed at the car. There are some that refer to them as "teeners". A moniker which I personally hate!
Good luck with the resto. Post pics of your progress and you will get tons of advice from the most knowledgeable 914 owners on the www.
Posted by: Optimusglen Feb 27 2016, 09:01 AM
Looks good so far. Pull the rocker covers and let's see!
This morning I pulled the passenger side cover. It was the worst looking from the outside, I assume the hell hole is the reason why this side is worse?
Anyway, take a look and let me know what you think. I haven't been around any 914s to know what is typical, good, or terrible.
Posted by: RobW Feb 27 2016, 09:08 AM
Looks good so far.....
Posted by: Optimusglen Feb 27 2016, 09:14 AM
Quick one for you guys, to swap in adjustable seats from a later model, do I just need a new cabin back and passenger seat?
Posted by: napasteve Feb 27 2016, 09:17 AM
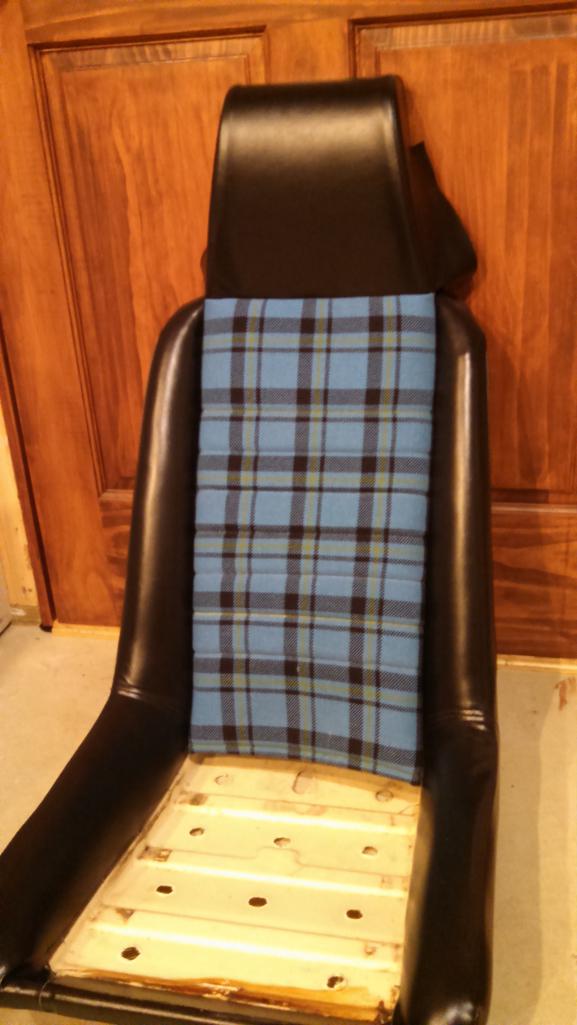
By the look of your passenger seat in post #24, I'd say you need a new seat!
What is the color code????
Posted by: KELTY360 Feb 27 2016, 09:29 AM
What many of you were wondering about, the hell hole.
And under the hell hole
I laid a long ruler across the top with the top removed, measured before and after I climbed in and stood in the middle. No noticeable flex.
I'm happy!
What you called the hell hole is actually just the battery tray, and yup, it's toast. What you labeled as 'under the hell hole' is the hell hole....you'll have to poke around down there to see if you've got solid metal.
From the looks of the long near the jack post you may be in pretty good shape.
Posted by: PlantMan Feb 27 2016, 09:33 AM
Welcome!!!
Nice find!
Have a great time with it!
Posted by: Optimusglen Feb 27 2016, 09:40 AM
Color code is L-21E Tangerine
There's a full seat set with back on eBay right now that I could upholster, wondering if I can use them.
Posted by: green914 Feb 27 2016, 09:44 AM
Posted by: rick 918-S Feb 27 2016, 11:03 AM
May have a nice set of black cordaroy seats if you area interested. I need to Check.
Posted by: Optimusglen Feb 27 2016, 02:23 PM
May have a nice set of black cordaroy seats if you area interested. I need to Check.
VERY interested. Bonus points if they need upholstery work.
Pulled it outside and cleaned it up a bit.
Posted by: Larmo63 Feb 27 2016, 03:00 PM
Tangerine is a great color. The passenger long doesn't look too bad either, congrats.
Posted by: bigkensteele Feb 27 2016, 06:11 PM
I think that you have made the buy of the year (so far).
To answer your question, yes, you can bolt in later seats, but you will need to source a late back pad as well. However, one thing that makes the early cars cool is the fixed passenger seat (at least to me). If you post a WTB ad in the classified, somebody might have what you need. Looks like critters got to yours at some point - same thing happened to mine.
Or, I have a complete nearly perfect tan interior from a '74 that I am looking to sell. (shameless plug).
Posted by: Optimusglen Feb 27 2016, 08:19 PM
The fixed passenger seat is really unique and cool. It's a comfortable seating position I feel, so maybe I'll look for a new pad and upholster it.
Posted by: gunn1 Feb 27 2016, 08:39 PM
Great find, great color...
Don't be worried about getting to the car first, someone had to.
Looks like it got a good home, and a great owner.
I look forward to seeing the Car progress through the restoration process.
The pictures have been great!
Thank you!
Posted by: Larmo63 Feb 27 2016, 08:50 PM
It is nice to be able to have a separate passenger seat, but the bench seat is cool too.
It's your call, google pictures, you can do it either way.
Posted by: iwanta914-6 Feb 27 2016, 08:55 PM
Local late back pad!
http://minneapolis.craigslist.org/csw/pts/5459408543.html
Posted by: bigkensteele Feb 27 2016, 09:21 PM
Local late back pad!
http://minneapolis.craigslist.org/csw/pts/5459408543.html
The bottom fiberboard looks completely trashed. Will need fiberglass work to get it back in shape. I would want to see a picture from the rear.
Posted by: bigkensteele Feb 27 2016, 10:07 PM
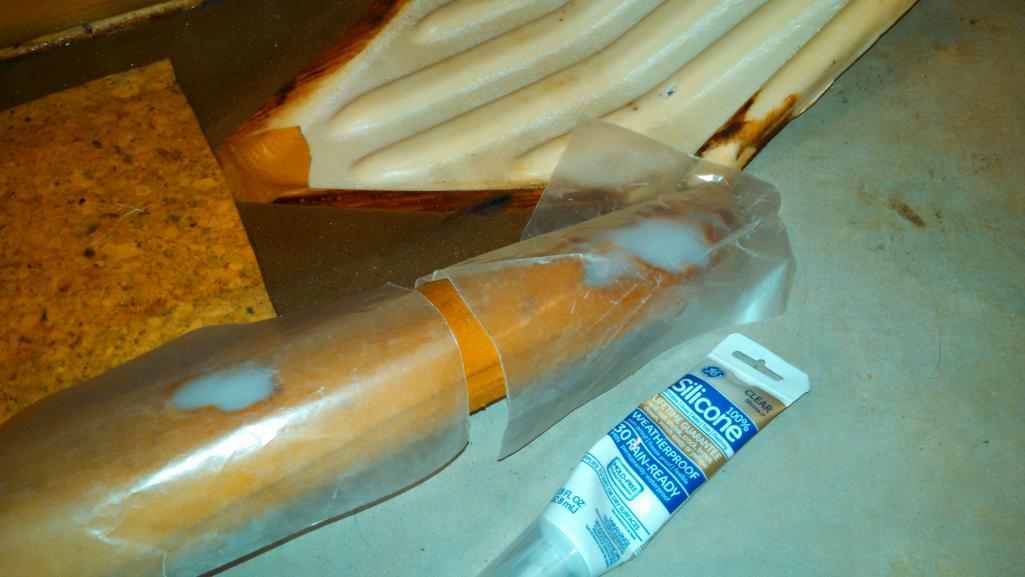
Hard to tell from the pictures just how badly your foam is gouged, but I was able to fill in some rather large divots with silicone. It has a similar "sponginess", so once covered, it really doesn't show. I filled the missing holes with silicone and then used wax paper to blend the contour. Let the silicone set and peel off the wax paper, and it made very nice repairs.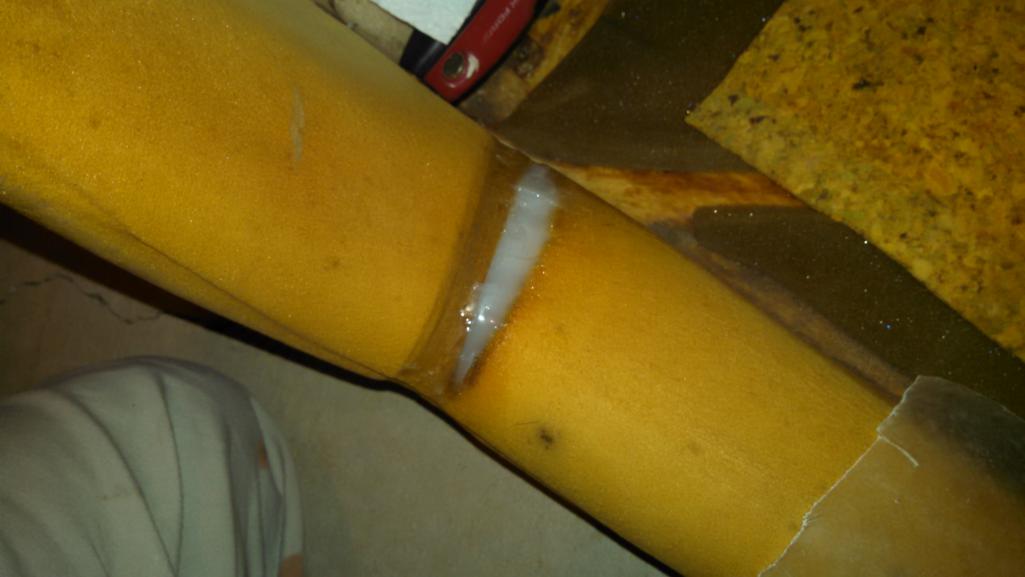
Posted by: vintage914racer Feb 27 2016, 11:48 PM
Congrats on the Craigslist score. I too saw the ad and was tempted to act on it. Good to see it went to someone who will fix it up and get it on the road. I replied on the Eurowerks Facebook thread as well. Once you get the at back on the road it would be fun to plan a local 914 drive. There's a handful that I know of around town.
Rick in Duluth (rick918-s), amongst many others on this forum, are great resources particularly on The rust repair front. Rick made my 914-6 100% structurally sound a few winters ago. You can see photos of some of the usual problem areas and rust repairs on the thread here: http://www.914world.com/bbs2/index.php?showtopic=226585
Posted by: Optimusglen Feb 28 2016, 04:57 PM
Thanks guys!
Did some more prodding in the hell hole area. Took a wire brush down there and sucked out anything loose with a shop vac. Then grabbed a long pry bar and started feeling for soft spots. It all feels super firm.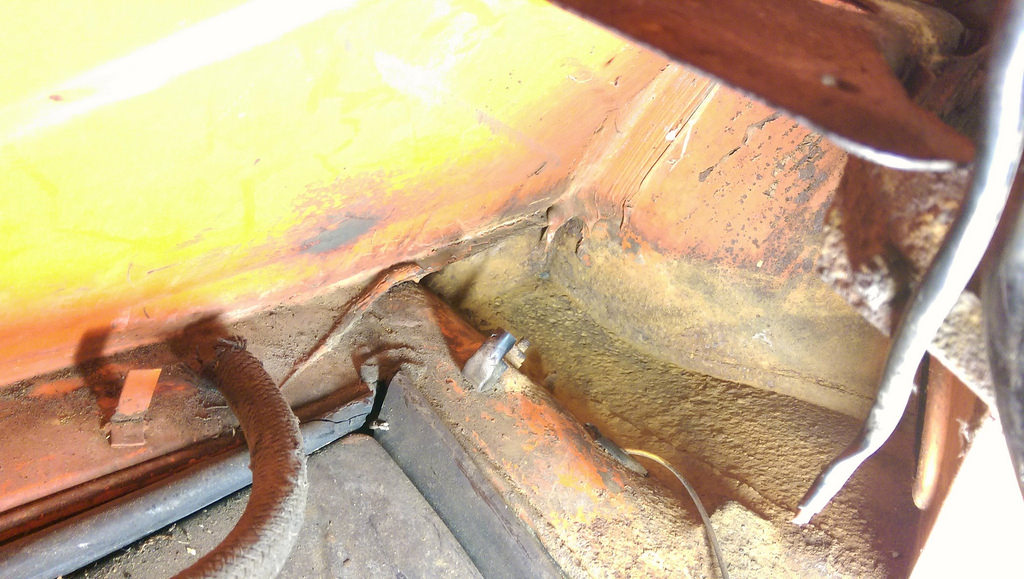
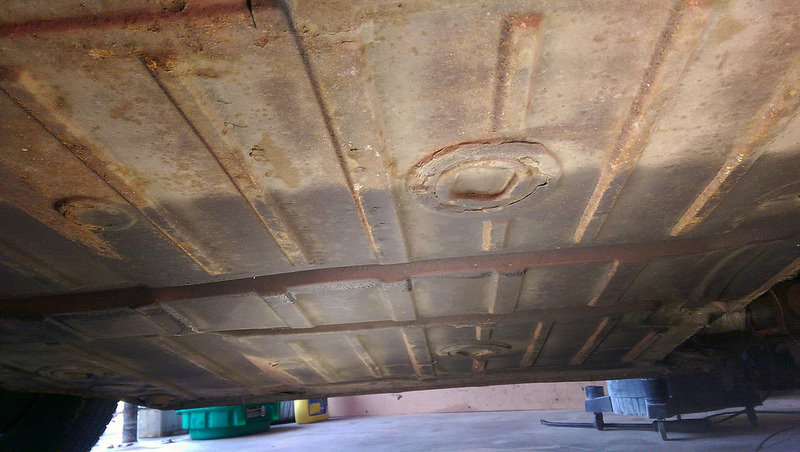
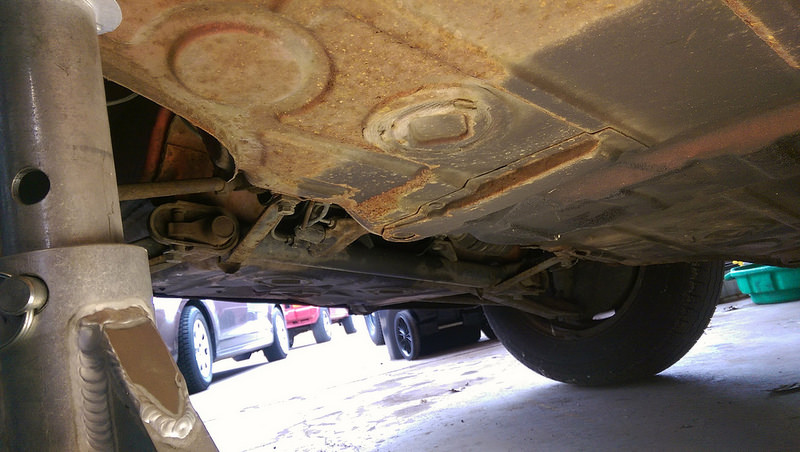
Also pulled off the wheels to have a look. Everything is pretty awesome. Some surface rust on the floors.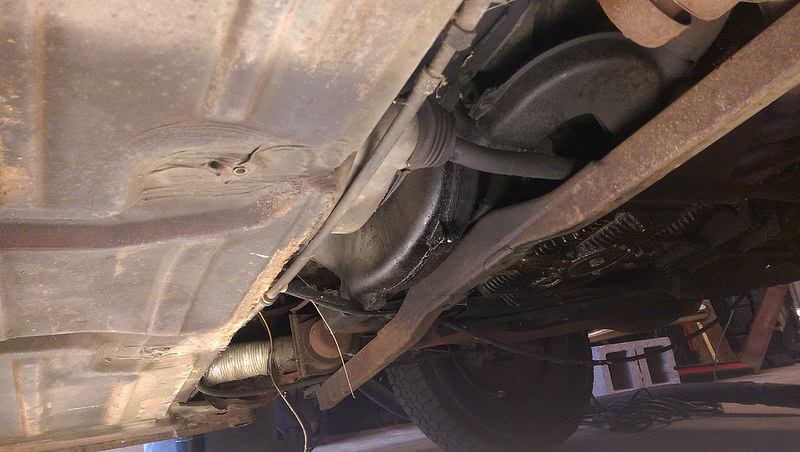
Braided stainless lines up front installed, rears are rubber. Good thing there were two braided lines in the box of goodies!
So the last year it was driven, 1995 if you go by the tabs, the owners brother wrecked it and dented up the drivers front fender. I think I found out why.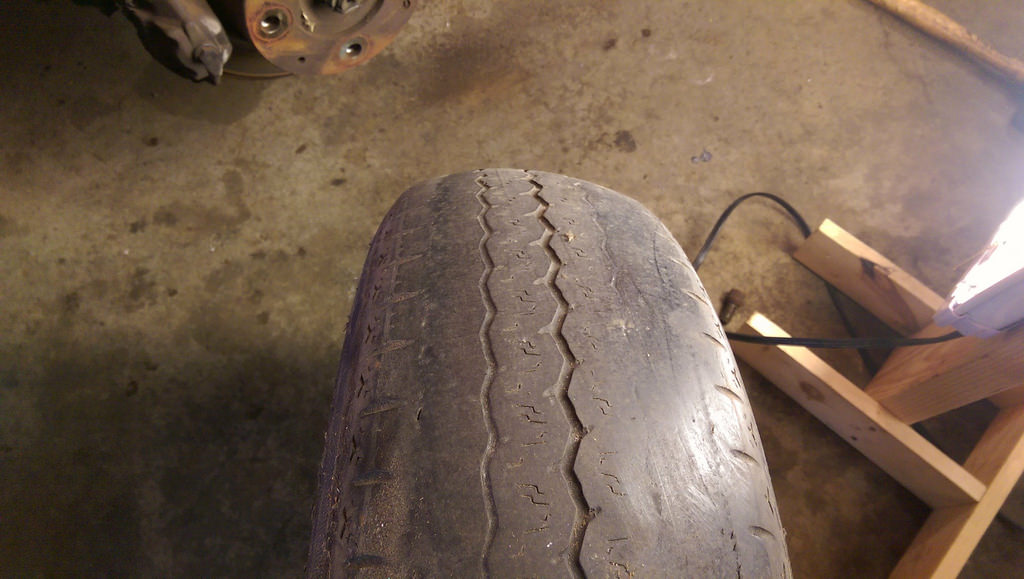
Also, can anyone tell me anything about my distributor?
http://c2.staticflickr.com/2/1591/24989804069_30e4d85383_b.jpg
http://c2.staticflickr.com/2/1488/25331264876_59dd363e95_b.jpg
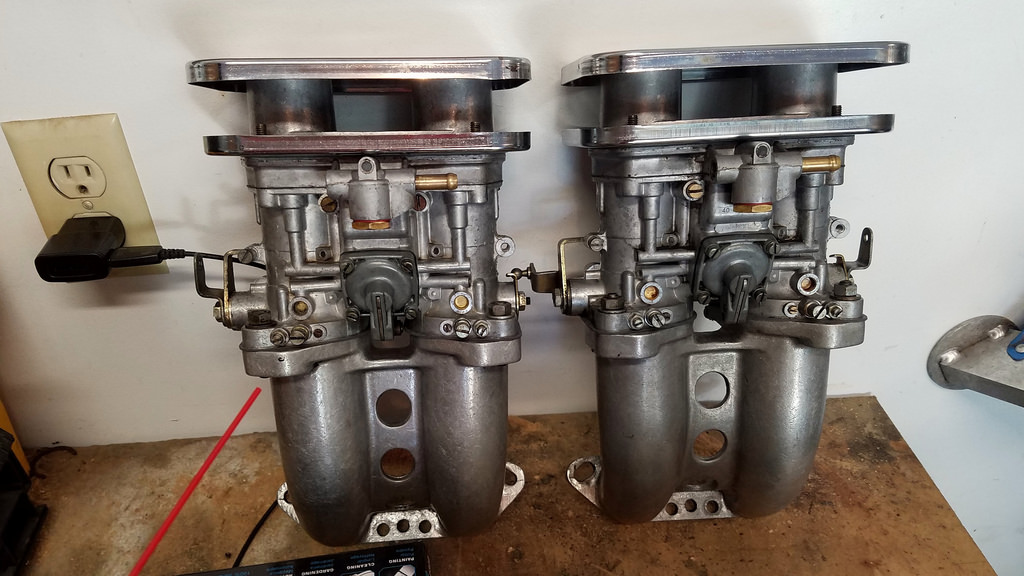
And from what others have said, I have Weber IDF 40's Though I haven't seen a stamping indicating 36-40-44. Here's a pic
http://c2.staticflickr.com/2/1477/24730743723_8f03a885d6_b.jpg
Thanks guys!
Posted by: JmuRiz Feb 28 2016, 09:05 PM
Welcome to the club, great to see a Vortex TCL make the move
Posted by: rudedude Feb 28 2016, 09:34 PM
Nice find! You beat me to it. I've parted a few and may have most things you might need out in Chaska. PM me if in need.
Posted by: iwanta914-6 Feb 28 2016, 09:37 PM
Nice find! You beat me to it. I've parted a few and may have most things you might need out in Chaska. PM me if in need.
He beat many folks to it. To think there's more competition around here than I assumed is going to make my quest much more difficult than I thought.
Posted by: Optimusglen Mar 5 2016, 07:23 PM
Big thanks to Rudedude. Met up today and got to see his great collection, then bought a set of seats, went home, and pulled out all of my interior.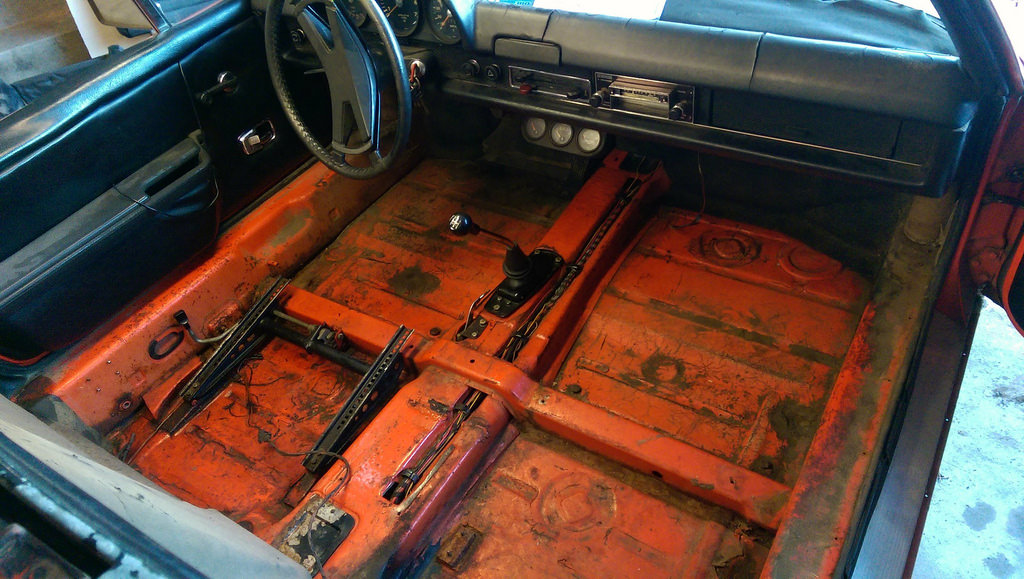
The new seats after I cleaned them up and conditioned. Will be recovering where needed but these are great.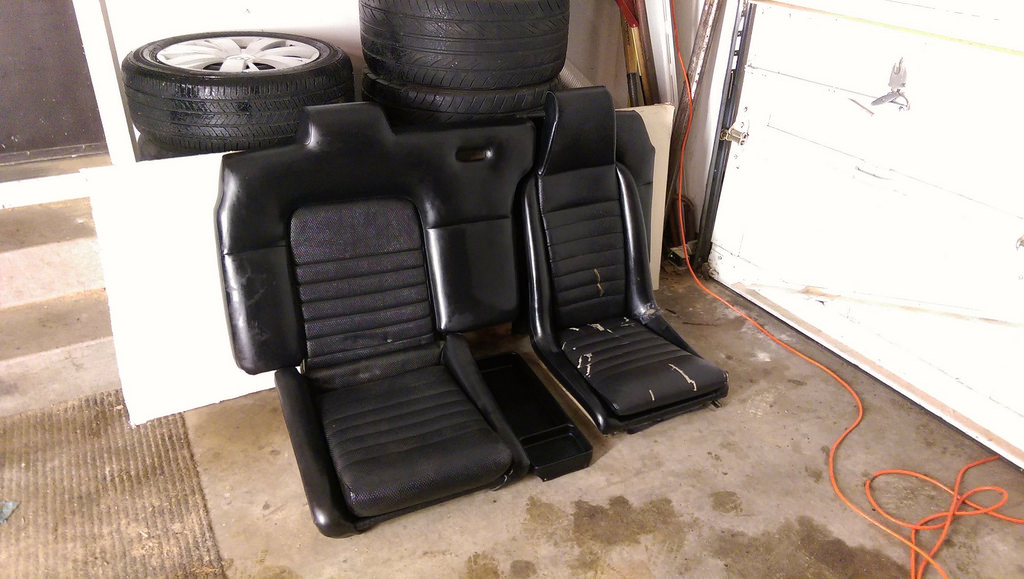
Posted by: rick 918-S Mar 5 2016, 09:57 PM
I may have a kit for the driver seat laying around. Not real sure where I put it. If your ever in Duluth and want to help me hunt for it I'll make you a deal on it. Otherwise 914 rubber has what you need.
Posted by: Optimusglen Mar 5 2016, 10:11 PM
I may have a kit for the driver seat laying around. Mine now sure where I put it. If your ever in Duluth and want to help me hunt for it I'll make you a deal on it. Otherwise 914 rubber has what you need.
Awesome! I'll keep you in mind if I ever get up that way. I have a seat bottom from 914rubber on the way.
Currently hunting for a front bumper, and horn grills. Not in a hurry though, I'll still need to pull the engine out to refresh everything and get on top of the rust.
Current plan is to get it presentable and running. Drive it a bit over the summer, then tear into it more next winter to really get rid of all the rust.
Posted by: Cracker Mar 6 2016, 07:05 AM
welcome to the World...good score and will be looking forward to hearing and seeing the project come together. From the limited pictures so far it appears to be in WAY above condition for an $1,100 car. You appear to have scored. Good for you.
Tony "Uncle" Cracker
Posted by: Puebloswatcop Mar 6 2016, 07:46 AM
Great find...and heck you got almost $1100 in parts, okay maybe not quite that much...but what a buy. Your skills will take you far and 914's are fun and addictive.
Welcome to 914 World. The people here are great, helpful and honest. Have fun with your new 914.
Posted by: Optimusglen Mar 7 2016, 08:24 AM
Thanks for the warm welcome guys, everyone said to come to 914world and that the members formed a great community. From reading through old threads and the welcome you've given me, I can see this to be true.
Work continued Sunday morning, I pulled the tank and inspected. Sheet metal under the tank all looked good, just dirty. The tank had about a gallon of old old gas in it, and a lot of sludge. Fortunately the tank itself looked solid but I wont know the current state of the inside until I clean out all the sludge.
Currently debating sending it in, or using the POR15 gas tank kit. Only concern is figuring out where to legally get rid of all of the chemicals after I treat the inside.
The car will get all new lines and a new pump specifically for the carbs, so I might as well make the tank as clean as possible to ensure I don't have issues with the fuel system.
I have a friend that does paintless dent repair and he will be coming out to check out the dent in the drivers fender. From pictures he said he could definitely make an improvement.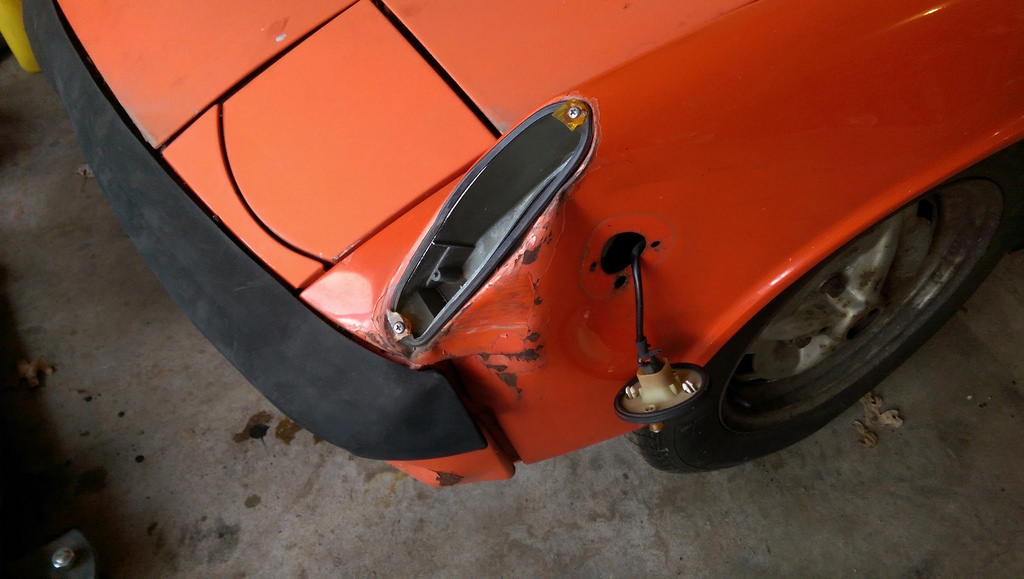
I hope so, but I'm skeptical. Would be great if I didn't have to drill out all those spot welds and source a new fender anyway.
The garage is filling up with parts that I've been taking off. I will try to finish up the fuel system and get any rust repair done inside before the new carpet gets in, then once the interior and front are all together I'll pull the engine and trans. Current plan is to clean out anything that's accumulated, rebuild the carbs, make sure everything else is functioning, and slap it back in there. Would like to have it running at some point this summer, then tear back into it over next winter.
Also just saw the build off challenge thread. Would be cool if I could join in on the fun even though I have such a late entry. We will see.
Posted by: jd74914 Mar 7 2016, 08:36 AM
Currently debating sending it in, or using the POR15 gas tank kit. Only concern is figuring out where to legally get rid of all of the chemicals after I treat the inside.
Can't help with the chemicals (though I usually just let the solvents evaporate), but I would highly recommend using the Caswell Plating epoxy gas tank coating kit. Based on my experiences, it is far better than the POR or Kreem kits.
http://www.caswellplating.com/epoxy-gas-tank-sealer.html
BTW:
Posted by: Optimusglen Mar 7 2016, 08:59 AM
Thanks! I'll give them a look.
Also decided to pull out the 8-track player. I'll put a filler plate in there and replace the audio with this.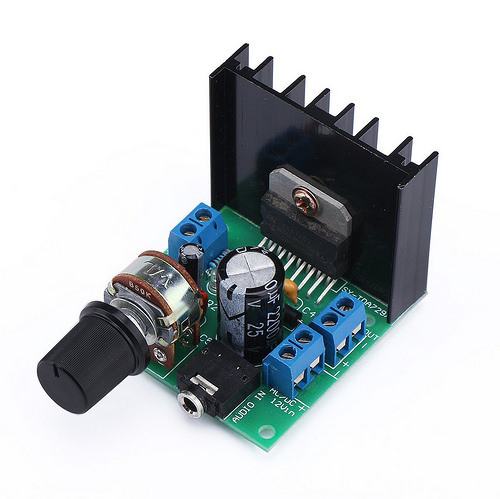
AUX-in with a volume knob. Feed it power and run speaker wires and it'll be set. Minimalist, and it'll save some weight. And at the same time allow me to play whatever music I want from my phone and be somewhat future proof.
Posted by: Optimusglen Mar 8 2016, 06:48 AM
Also grabbed this wheel off the bay. Leather is in good enough shape that I can cut it down with some emery cloth, treat it, then restitch it. Oddball bolt pattern to boot!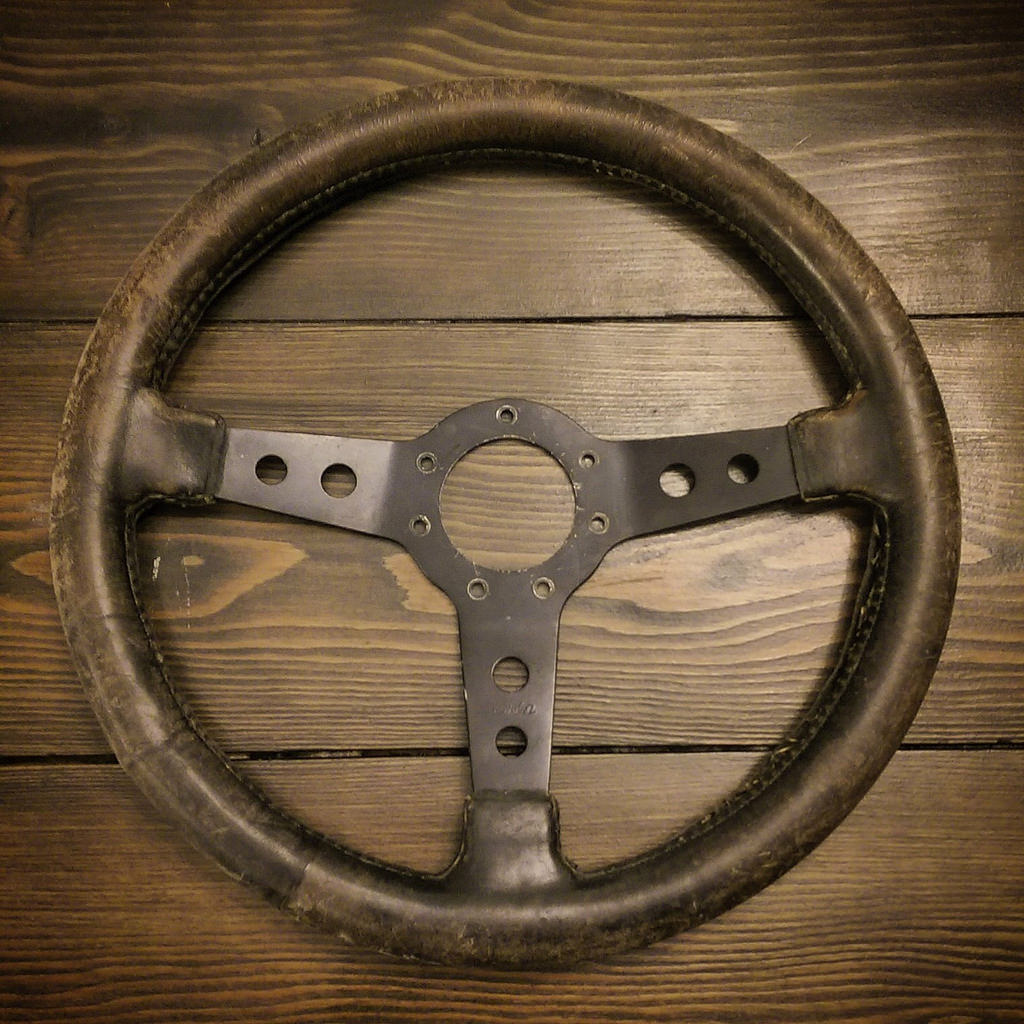
Posted by: rick 918-S Mar 8 2016, 07:20 AM
I used the washing soda and battery charger method. Tank was like new when I finished. No need to use a gas tank coating if you get it clean and it's not rusted through.
Posted by: Optimusglen Mar 8 2016, 10:05 AM
Hmm, good to hear. I'll have to do some more research I think.
Question for you guys, does 914rubber send tracking info when an order ships? Figured I'd just ask here, didn't want to call them because it's really not that big of deal.
Posted by: mbseto Mar 8 2016, 10:56 AM
Electrolysis method worked really well for me too. Gas tank was sludgy and after emptying and drying I dumped out about a 1/2 gallon of rust flakes. Figured the tank was a goner. Ran a few sessions with the battery charger and here's the before and after:
http://www.914world.com/bbs2/index.php?s=&showtopic=262220&view=findpost&p=2312315
Posted by: Optimusglen Mar 10 2016, 08:16 AM
hile I'm waiting for parts I thought I would start on the steering wheel. It's a vintage Cisa wheel I got off eBay. Leather was faded and stitches torn.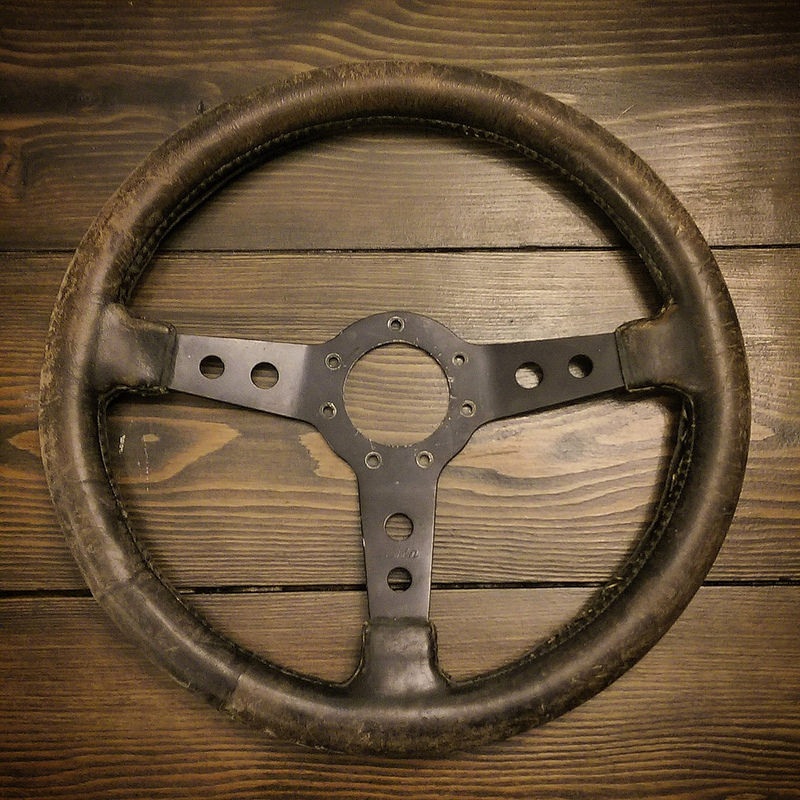
Started out by pulling the leather off, removing all the bits of thread, and sanding down the leather to give the dye something to hold onto.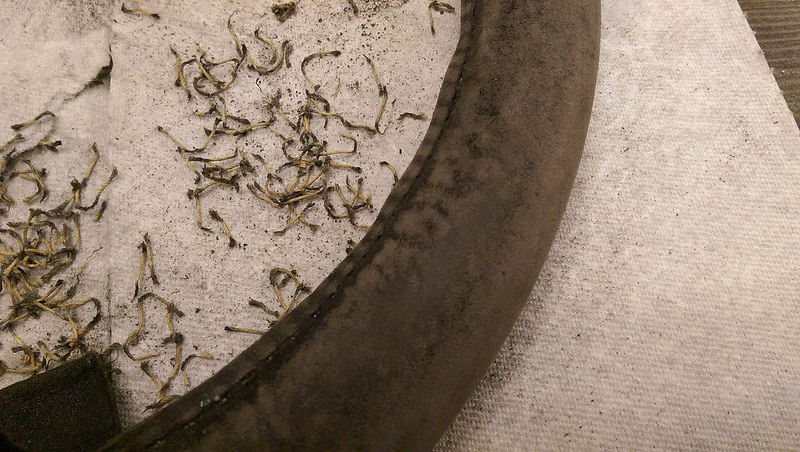
Next I dyed the leather using Kiwi black. Worked well I think.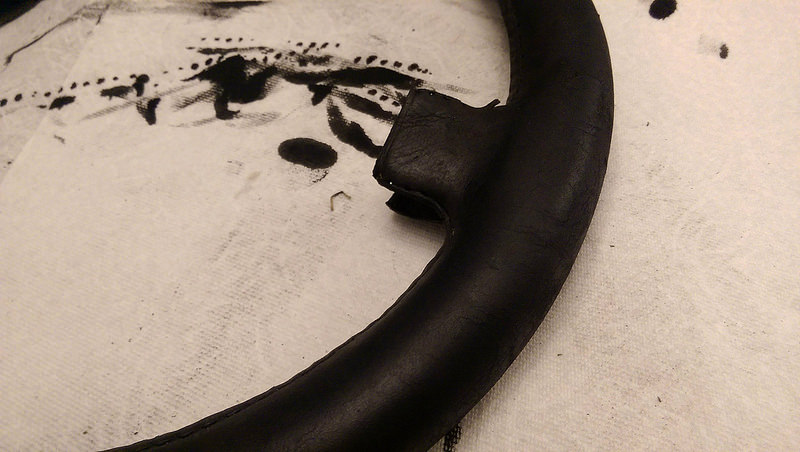
Fired up the sewing machine. The adjustments on my machine wouldn't give me a long enough stitch, so I had to manually run the stitches through all of the existing holes. Very time consuming and required a bit of focus. I'm using a heavy duty outdoor thread.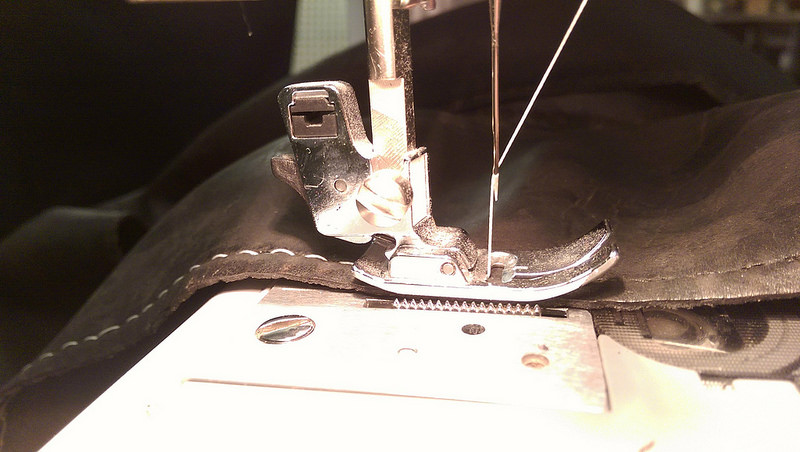
Once all 6 stitches were run, I went to work on the lacing. I stopped after the first stretch because it was late. 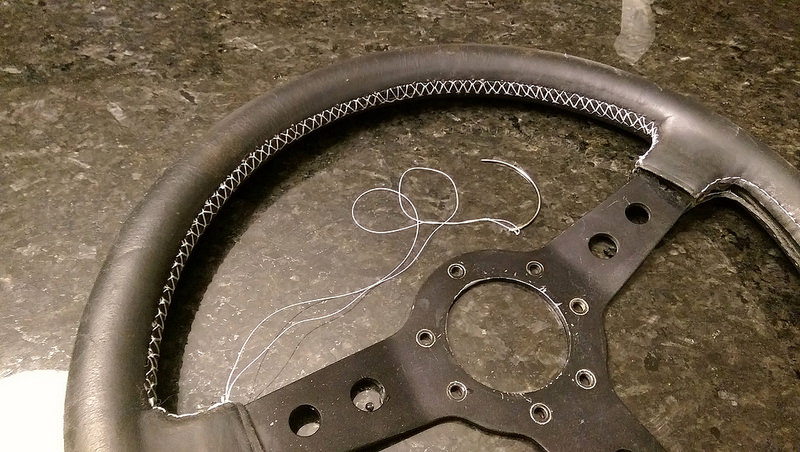
This morning I finished it off. Turned out just like I wanted. Still worn and not perfect, but useable and has some character.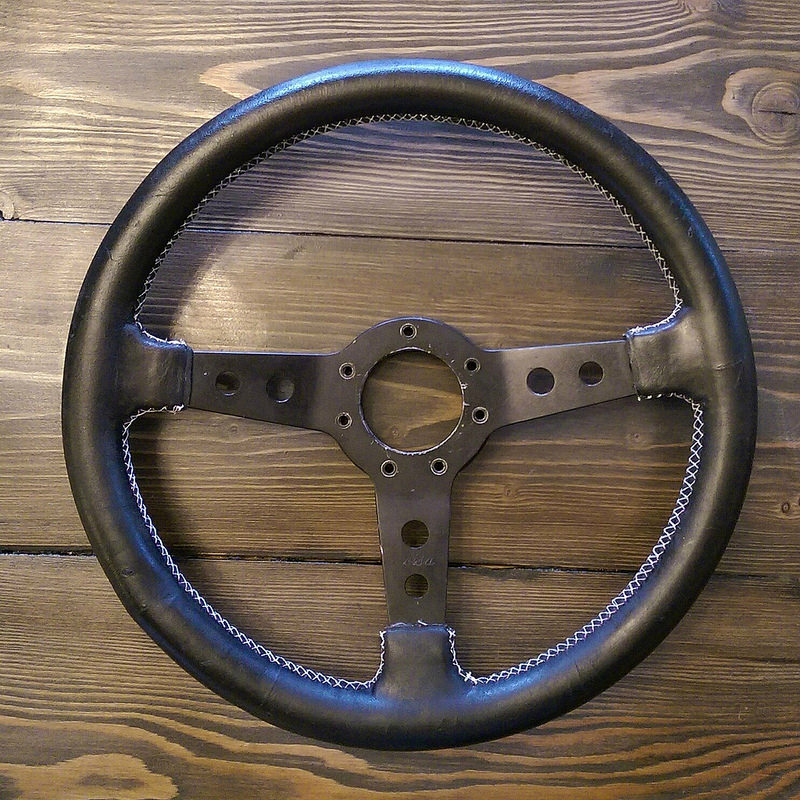
Posted by: JmuRiz Mar 10 2016, 11:31 AM
I wish I knew how to do upholstery work....good stuff you did on that wheel!
I have some cool ideas for interior on my car, just don't know how to do them myself and they'd be $$ to pay someone else to do.
Are you planning on painting the spokes or keeping that retro-rough? Just curious.
Posted by: Optimusglen Mar 10 2016, 11:40 AM
I plan on keeping them kinda rustic and used, won't be painting them. A bit of wear gives it some character I think.
Posted by: Optimusglen Mar 15 2016, 07:45 AM
Some good and some bad news for the project.
Good news. Heard back from the previous owner about the cam and distributor. Turns out the car did get a cam and distributor change when the 2.0 bore/stroke kit was installed with the carburetors. The exact details of what was installed will have to wait until I tear it down, but that's a good sign.
The bad news. Tearing the interior down further, found some rust under the tar. Solid metal underneath the rust fortunately. Used a rust converter for now but may revisit it next winter. Also found a rusted through hole on the drivers side sill under the aluminum sill plate. Which means the rockers under that spot are probably no good too. Plan there is to see exactly how bad it is, then patch that hole. Again, I'll dig further into it next winter
Started cleaning up the gas tank and it's coming along nicely, the copper (or brass?) filter sock came free of the fitting.
Also pictures of all of the FI stuff that came off the car. 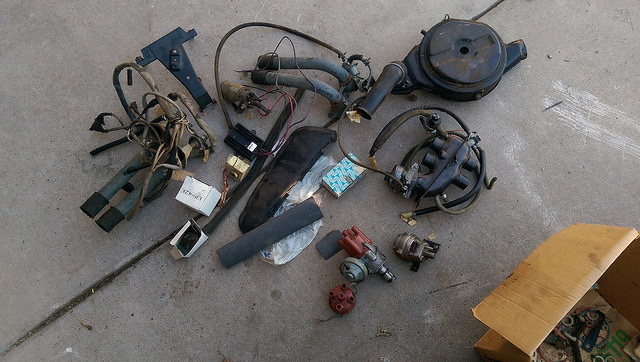
High res http://c2.staticflickr.com/2/1647/25809659835_fc14cf39db_o.jpg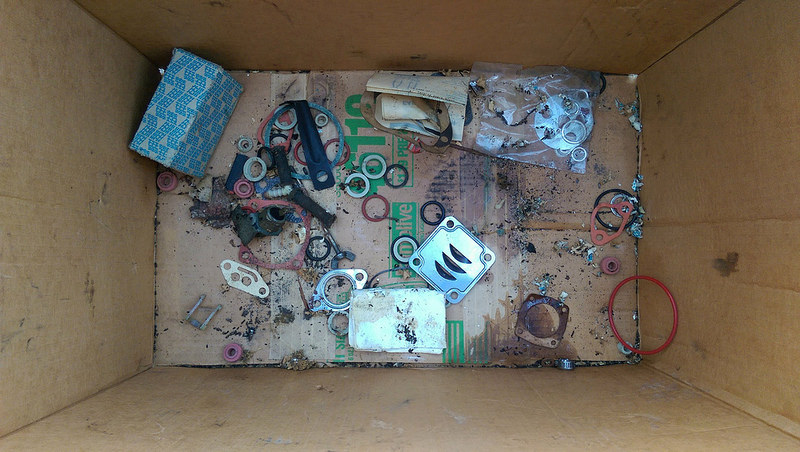
High Res: http://c2.staticflickr.com/2/1674/25809662615_80f079025e_o.jpg
Recieved my new carpet set, I got the plush black 10-piece from the place on eBay. Very pleased with the quality, but of course haven't had a chance to put it in.
Also ordered the Coverall black dash cap. Reviews and pictures seem to all be positive.
Posted by: iwanta914-6 Mar 15 2016, 08:18 AM
Also found a rusted through hole on the drivers side sill under the aluminum sill plate. Which means the rockers under that spot are probably no good too. Plan there is to see exactly how bad it is, then patch that hole. Again, I'll dig further into it next winter
Obviously it depends on the extent of the rust. Have you pulled the rockers off yet to get a look at the longs? If there is significant rust, you're better off fixing that now than later no matter how badly you want to get it on the road for the spring/summer.
Posted by: Optimusglen Mar 15 2016, 09:28 AM
Obviously it depends on the extent of the rust. Have you pulled the rockers off yet to get a look at the longs? If there is significant rust, you're better off fixing that now than later no matter how badly you want to get it on the road for the spring/summer.
I pulled the passenger side already because it looked the worst from the outside. Pictures are further back in my thread. Haven't had a chance to pul lthe drivers side yet but it'll be happening.
Based of the results of the functional test I gave it, I'm pretty confident that a temporary patch will be fine to drive on a bit over the summer. I know that once I start cutting metal to replace stuff, it'll snowball. And once it snowballs it might be a year or two (or more) before I can actually drive it again. If I don't have some sort of reference point for the driving/handling/experience of the car it'll drive me nuts. Never even driven a 914 yet, the closest thing I've driven is a '78 VW Rabbit and I'm sure that's in another ballpark.
Posted by: malcolm2 Mar 15 2016, 09:45 AM
The fixed passenger seat is really unique and cool. It's a comfortable seating position I feel, so maybe I'll look for a new pad and upholster it.
You won't sit over there much anyway....
Neither seat has moved in my 75 since I put it all back together. Kinda wish they had left the early passenger seat design for us late model owners.Since the seat did not move, Porsche included a box in the footwell to help the passenger get their legs comfy. See if you can find or make a box. It had a strap and some snaps I believe.
Great car, have fun.

Posted by: malcolm2 Mar 15 2016, 09:57 AM
If I don't have some sort of reference point for the driving/handling/experience of the car it'll drive me nuts. Never even driven a 914 yet, the closest thing I've driven is a '78 VW Rabbit and I'm sure that's in another ballpark.
I know what you mean. I bought mine in 2011 and did not drive 'til late 2013. In the mean time, I watched craigslist and found 3 that I could drive. So I pretended to be a buyer and went to test drive them.
Another difference on early vs. late is the tranny shift console. Being a mid engine turned backwards from the VW bus, the shift rod had to go to the rear. Lots of adjustments. Not sure when but Porsche designed a console in the middle of the tranny and that works great with less adjusting. Some folks upgrade, some just deal with it.
I drove one early car that the shifting was very sloppy.
Posted by: malcolm2 Mar 15 2016, 10:05 AM
Hmm, good to hear. I'll have to do some more research I think.
Question for you guys, does 914rubber send tracking info when an order ships? Figured I'd just ask here, didn't want to call them because it's really not that big of deal.
Two brothers run the business. I believe both have "real" jobs. So sometimes you get tracking sometimes you don't. I have always gotten my stuff. If there has ever been a product issue, they have always helped me out. Just be patient, they will take care of you.
Posted by: Mikey914 Mar 15 2016, 10:19 AM
More than happy to check on your order. The website is supposed to automatically send tracking when processed. A known issue is that its a Hotmail account and the automatic response is from Godaddy servers so your internet provider may filter it out as spam. Anything that we have in stock usually ships in a day or two depending on what time the order comes in. Drop me a PM with your name and I'm more that willing to look it up.
Thanks,
Mark
Posted by: Optimusglen Mar 15 2016, 10:22 AM
Thanks! I should have updated the thread, the day I posted about 914Rubber I received an email. Most of my order was already shipped and arrived already (really pleased with the parts) The other part of the order, a drivers seat bottom cover, is back ordered but it sounds like you should be able to ship one out to me later this week.
Posted by: Optimusglen Mar 29 2016, 02:21 PM
Did some more work on peeling off the old floor tar on the drivers side. Cleaned up a little rust there too but overall it's solid.
New carpet kit is in, new drivers seat bottom upholstery from 914rubber was delivered today, I have a new strip of the basketweve material for the dash face, and the dash cap I got has been staring at me for a week or so. I really need more time to work on this right now, I'm itching to get the interior back together. Once the interior and gas tank are ready to go I'll drop the engine and start on my favorite part of car building.
I met a member, Ben, from here who had some miscellaneous 914 parts that he was looking to get rid of. Scooped those up because you never know what a new project is going to need. Thanks Ben!
Today I was able to jump on a chrome front bumper for my car, bought it off eBay then saw that the seller was literally 10 minutes from me. Drove there over lunch and picked it up, as well as a rubber bumper trim top piece (is that the official name?) Overall price was around $100, so it was an awesome deal. Phil if you're on here, thanks again!
In somewhat unrelated news, I surprised my wife with another car on Easter.
Rewind a bit for a backstory. Before we were married, my wife bought a 1991 Volkswagen Cabriolet in an effort to "woo" me because I was a VW guy. She learned to drive a manual in it. She was dedicated. Later we were married but didn't have a lot of money. We had her Cabriolet, a $900 Lincoln Towncar, and a VW Rabbit project that wasn't running/driving. She drove the Lincoln because it was more comfortable, didn't leak water all over your arm, and had working heat. I drove the Cabby that had none of those things. She loved the car though, especially in the summer with the top down. Eventually we were able to get better daily driving cars but it meant having to sell the Cabriolet.
She often talks about missing that car.
Ok, back to the present day. On Easter day she was inside relaxing, I scheduled a few people to come look at a pickup that I'm selling. She had no idea I also scheduled the seller of the Cabriolet to come drop it off in our driveway. Then I went in and got her, made her come outside, and she was absolutely speechless.
It needs a little work, but nothing crazy. I'll replace the top, and the seats, and fiddle with the fueling to get it running but otherwise it's solid. Just in time for the beautiful Minnesota spring too.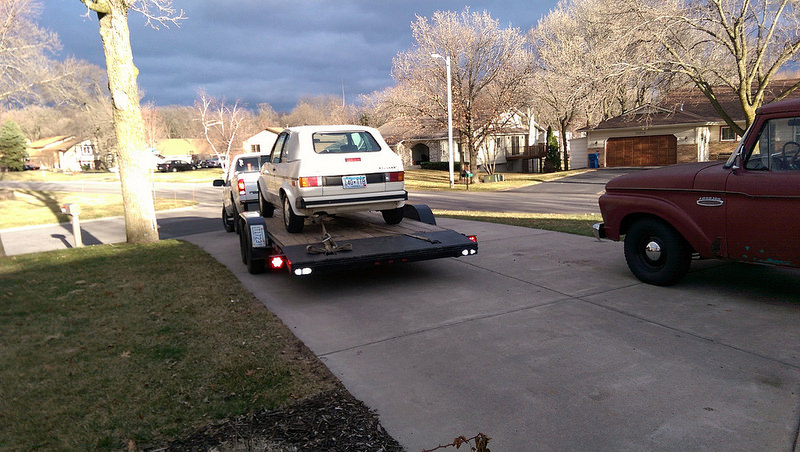
She walked out to the garage 3-4 times over the course of the evening to just look at it. And joked about how our cars were having conversations in German while we weren't in there.
So currently we're up to 5 cars, but the 1965 F100 sold on eBay yesterday, and the buyer will be picking it up at the end of the week (which means more 914 goodies)
Posted by: Optimusglen Mar 29 2016, 06:38 PM
Got the new seat cover in and on.
Posted by: JmuRiz Mar 29 2016, 06:42 PM
Wow, you work FAST...I wish I had that drive and confidence/skill to do all that quickly.
Great price on the bumper!
Even greater story on the cabrio!!
Posted by: 7TPorsh Mar 31 2016, 09:50 AM
![]()
Posted by: Alapone Mar 31 2016, 10:11 AM
off topic but in your first post you mention an r90 café bike you put together. I have a 73 r75 would love to see a pic of yours. Good luck with your car!
Posted by: Optimusglen Mar 31 2016, 10:42 AM
For sure, here's the motorcycle.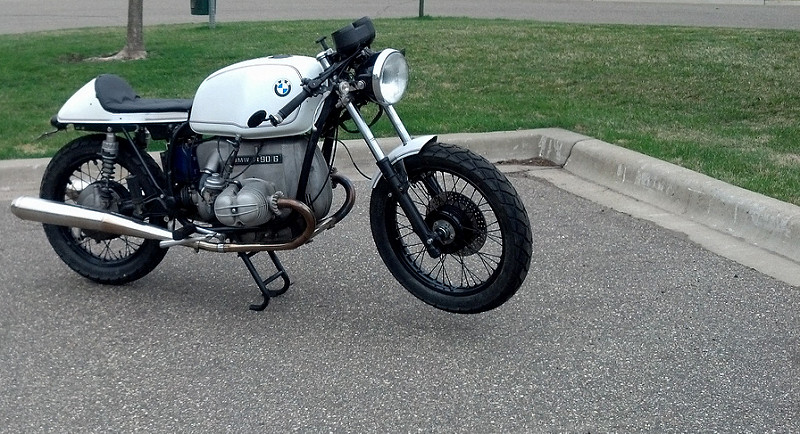
And a shot of the motorcycle with the 914. Also have my 2-up seat on the motorcycle here, for when my wife wants to come along.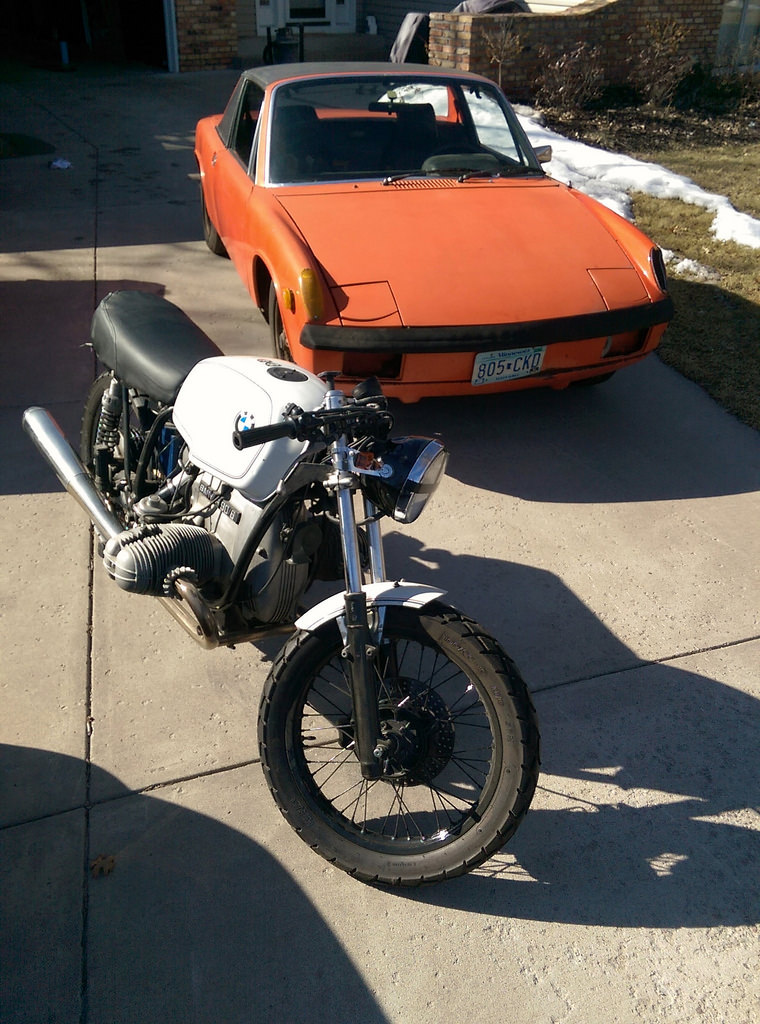
With these two together, I have a flat 6.
Posted by: Optimusglen Apr 4 2016, 10:10 AM
Started looking at the wiring over the weekend, the harness shown below had some rodent chew marks and I wanted to see how far it went.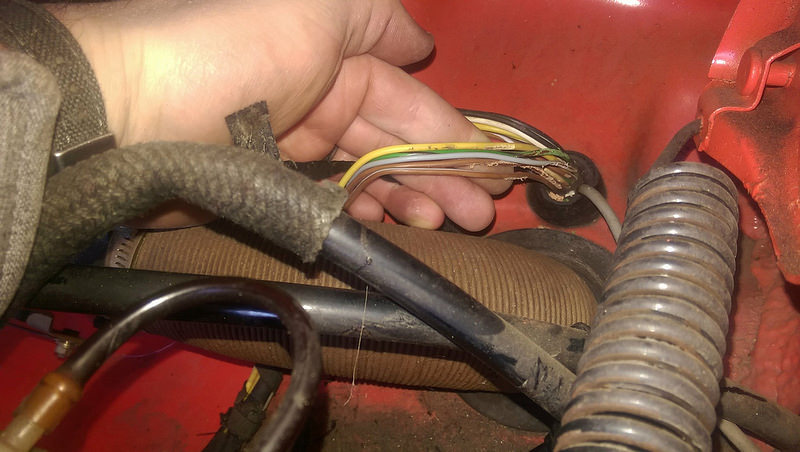
High res: http://c2.staticflickr.com/2/1718/25573849753_bcc689af11_k.jpg
Eyeballed all of the wires in that spot and followed the harness all over everything forward of the engine firewall and it looks like those 5 wires are all that's chewed. Since it's only those 5 I think I'll solder in new sections and shrinkwrap instead of replacing the whole harness.
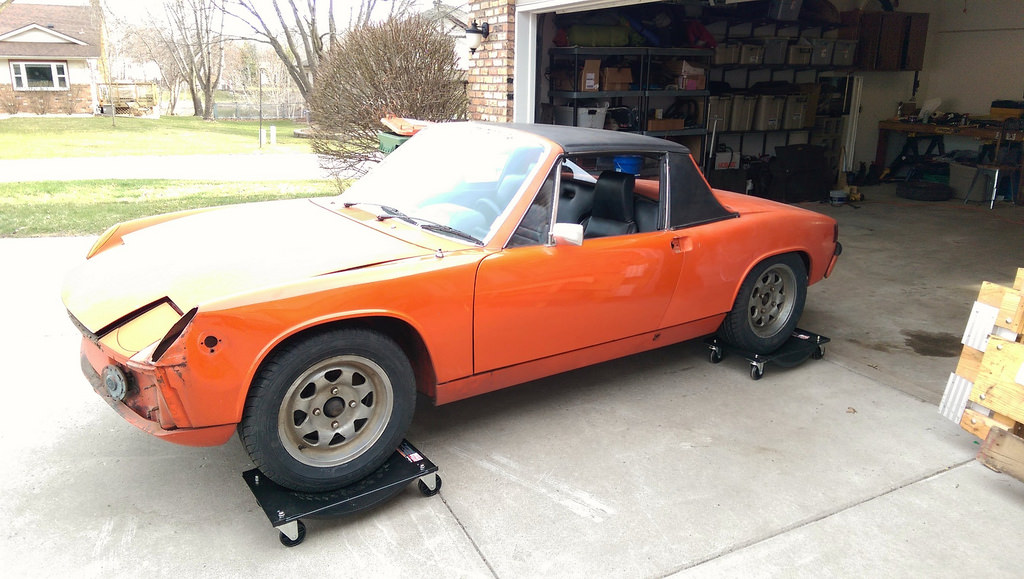
Also picked up a set of 4 of these to ease moving the car around the garage. 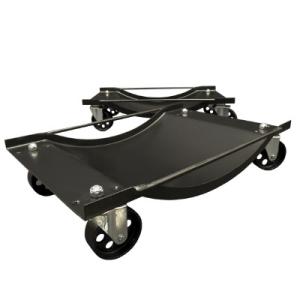
Posted by: Alphaogre Apr 4 2016, 01:15 PM
For sure, here's the motorcycle.
And a shot of the motorcycle with the 914. Also have my 2-up seat on the motorcycle here, for when my wife wants to come along.
With these two together, I have a flat 6.
I have been looking to buy an R 90 or 100 for a while now! great looking bike..!
Posted by: Optimusglen Apr 5 2016, 02:57 PM
Thanks! It's been fun, had it for about 6 years now. Owned the bike longer than any other vehicle I've ever had, and I've had a lot of cars over the years.
Posted by: Optimusglen Apr 9 2016, 05:31 PM
Got the new wheels some new rubber. Went with 205/60-15. Fit is great, I'll be rolling the rear fender lips for more clearance.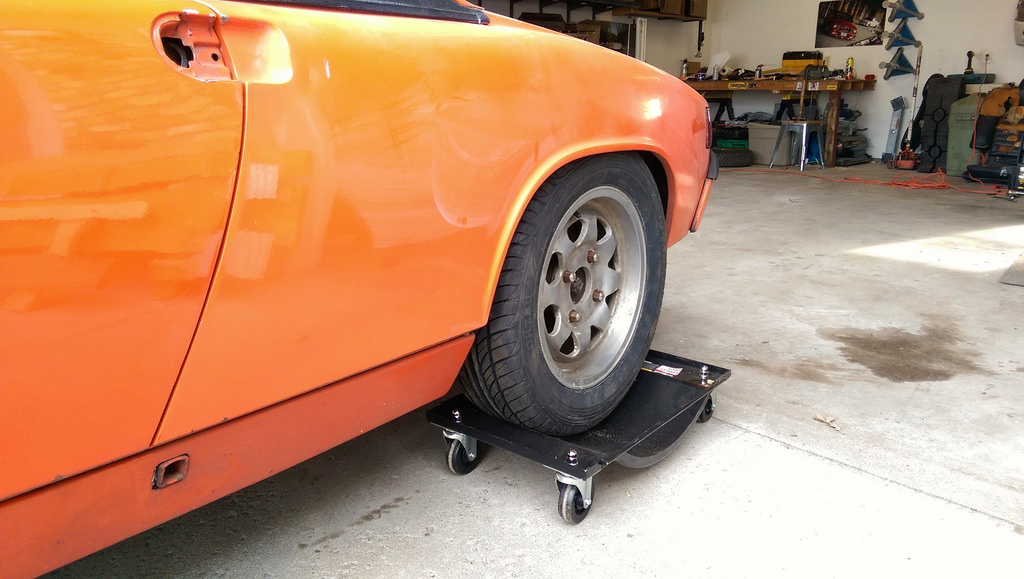
Posted by: Optimusglen Apr 11 2016, 06:58 AM
On a side note, those car dollies work great on such a light car!
Posted by: Optimusglen Apr 15 2016, 08:23 AM
Sent in another 914rubber.com order today, this time for the door card material and the drivers seat adjuster handle. The guys at 914Rubber are rad, lots of great quality parts for fair prices, I love that I can buy just the material from them and do it myself.
I'll be making my door cards like this.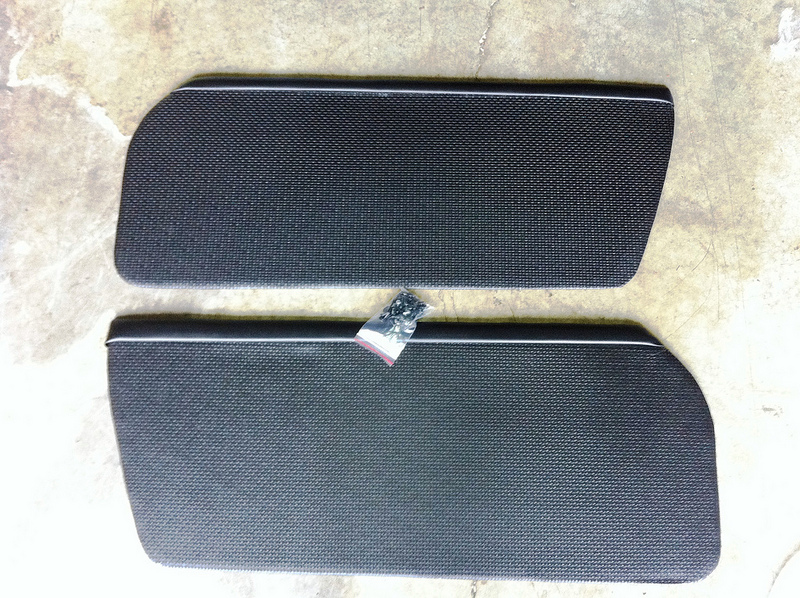
My drivers armrest was crumbling and just looked ratty, so I think I'll be leaving it off and just have a flat panel with the door latch handle and a pull handle. The passenger side I'll probably install, to give my wife something to hold onto. 
Then if I ever come across a solid drivers armrest I can always add it later, or leave it off permanently if I decide.
Posted by: tomrev Apr 15 2016, 08:57 AM
Got the new wheels some new rubber. Went with 205/60-15. Fit is great, I'll be rolling the rear fender lips for more clearance.
Always liked those wheels! Great progress.
Posted by: Optimusglen Apr 15 2016, 01:00 PM
Thanks!
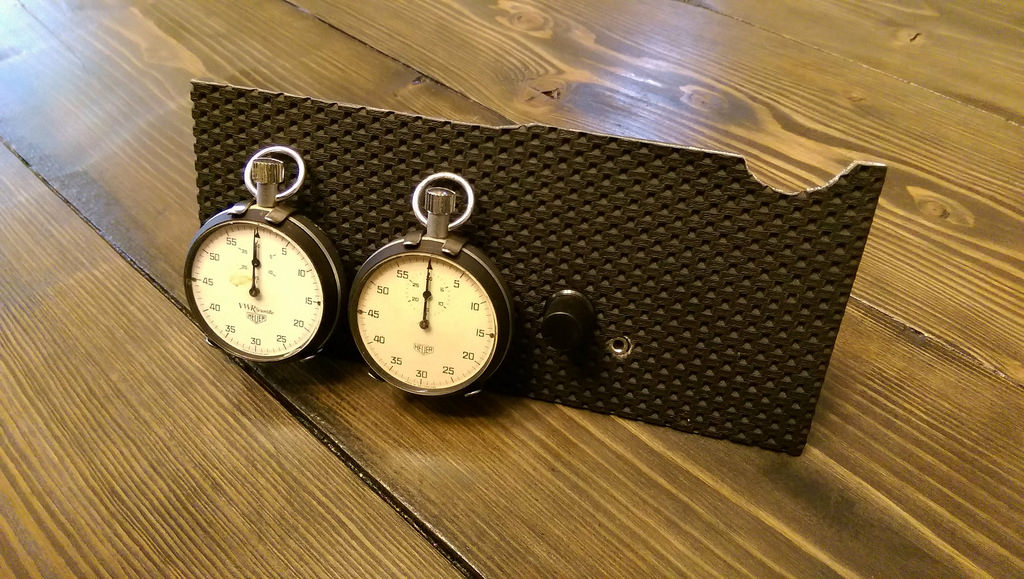
Today I made a completely random purchase. Picked up a pair of Heuer stopwatches like this one. I'll get them serviced and get a mounting plaque machined up. I'll be the first to say that it'll be purely aesthetic, since I don't do any timed racing, but I think they will suit the dash nicely.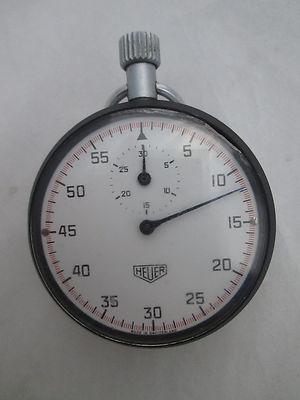
These use the Heuer 7700 movement, all mechanical for the uninitiated. Nothing special really, you can usually find one or two on eBay for pretty cheap if you're ok with some wear.
Since I wont have a radio, I'll mount them there. I will have the small AUX-IN port and a volume knob, but those don't take up much space.
Posted by: Optimusglen Apr 19 2016, 07:58 AM
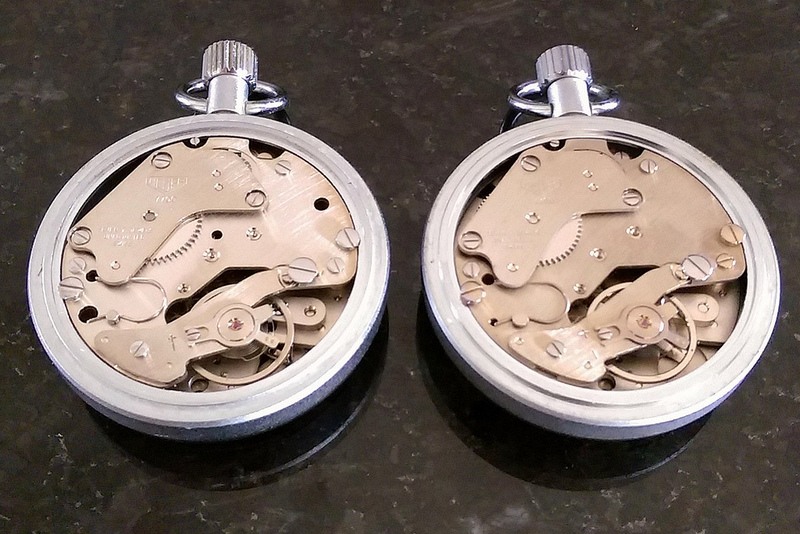
Rear suspension bushings came in yesterday, along with a slide hammer and the two stopwatches.
The face of one looks yellow, but I believe it's just the crystal. Both work, but really need a teardown and cleaning/oiling. I've dabbled in mechanical watch disassembly before, so I can handle it especially since it's manual wind and doesn't have a lot of functions, but waiting to hear back on a few quotes before I do anything. Most likely the charge to have one serviced will be several times more than what these sell for, so this may become a DIY later on.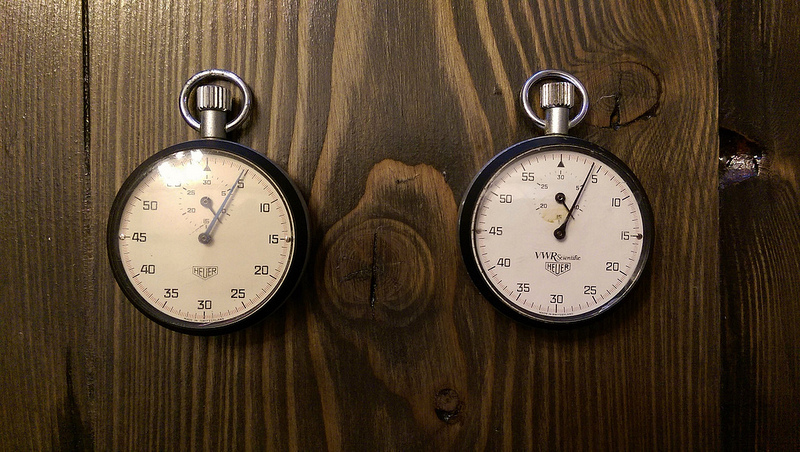
As you all remember, the front drivers side fender was bashed in a bit.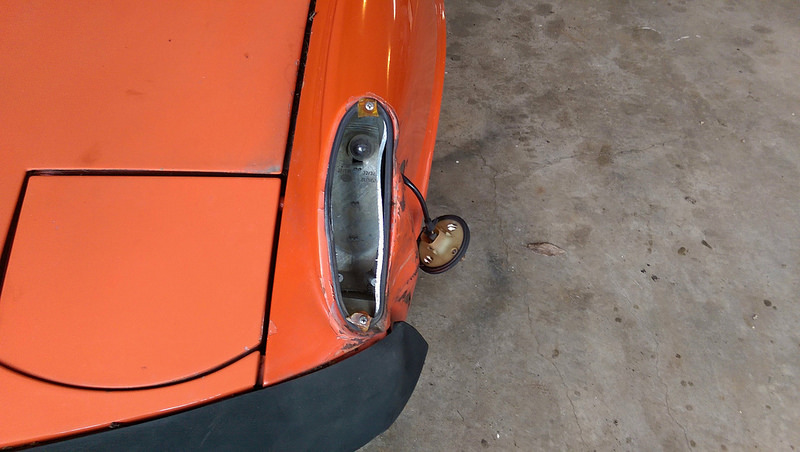
This will get fixed properly once I reach the bodywork phase of the project, for now I wanted to be able to mount a bumper and a new turn signal, so I ordered a slide hammer with a various selection of hooks to get this part of the fender a bit more in-line. Far from perfect, but for now it's functional. As a reminder, I am hoping to have this running and driving at some point this summer, possibly fall. And then next winter I'll replace some metal and do any other body work that's needed.
You can also see the newer bumper. This one has some smaller dents I'll need to smooth out, but overall it's in great shape. One item that I'm debating about now is bumper finish/color. Both front and rear bumpers were factory painted on this car. The rear bumper is in good shape. So what I'm debating:
A: Buy another rear bumper, but get a chrome one to match.
B: Sand/prime/paint the front bumper orange, to mimic the original.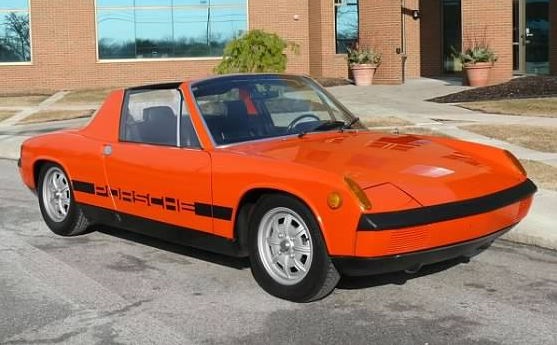
C: Sand/prime/paint both bumpers satin black.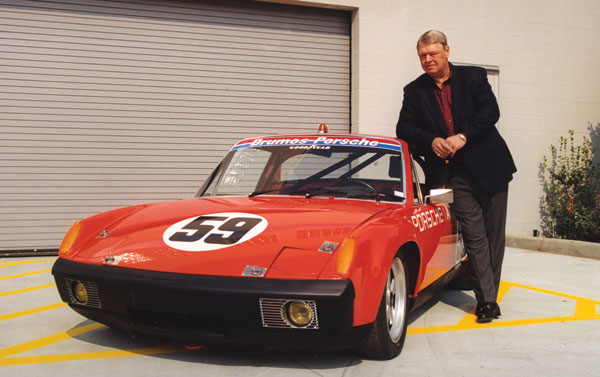
(I'll update with a pic of a standard 914 with black bumpers as soon as I can find one)
Leaning towards B, because it's unique and original to the car. I like the look as well.
"A" would be cool, and safe because just about all 914's you see are chrome bumpered and they pull it off well. This means spending a lot of cash though, and re-chroming the rear would make it stand out against the patina of the front chrome.
C is an option I was considering, but the more I look at it the more I think it makes the car look like the later models with the big rubber bumpers, and I don't like that look. A good example could sway my mind though.
In other news, I pulled out the fresh air box and blower, emptied it of all of it's leaves and mouse stuff, and just deep cleaned the whole area. It was like a mouse diarrhea factory on the sheet metal around the airbox. They must have had an external food source because further rubber/wire examination found no chew marks.
Posted by: KELTY360 Apr 19 2016, 08:11 AM
I'd vote for "B". Body colored bumpers look great and are true to the minimalist spirit of the 914. You can get some clear 3M covering that will prevent rock chips and be invisible.
Posted by: Optimusglen Apr 24 2016, 12:11 PM
Radio delete panel complete
. 
Posted by: Optimusglen Apr 28 2016, 05:58 AM
Great news! I got the title in the mail.
On my last project, a 1965 Ford F100 that I bought for $1000, 2 months after i transferred the title I received a letter from the state saying that they thought it should have been worth $9,600. They said I needed to pay sales tax on $9600, or submit an estimate from a legitimate repair shop showing that the truck needed repairs that would offset that price. It was a huge pain, but I put together a parts list with prices and retailers on a spreadsheet, found a shop that would actually do an estimate even though there was zero chance I would be having them do any work, and submitted it all with some pictures of the purchased state. There was about 11-12k worth of parts/labor quoted. 2 months after that I finally received the title in the mail, I guess it was sufficient proof for them.
With the Porsche I was sure it would happen again since the price was so low but I guess $1100 seemed fair to them. haha
Posted by: Alapone Apr 28 2016, 08:55 AM
Great news! I got the title in the mail.
On my last project, a 1965 Ford F100 that I bought for $1000, 2 months after i transferred the title I received a letter from the state saying that they thought it should have been worth $9,600. They said I needed to pay sales tax on $9600, or submit an estimate from a legitimate repair shop showing that the truck needed repairs that would offset that price. It was a huge pain, but I put together a parts list with prices and retailers on a spreadsheet, found a shop that would actually do an estimate even though there was zero chance I would be having them do any work, and submitted it all with some pictures of the purchased state. There was about 11-12k worth of parts/labor quoted. 2 months after that I finally received the title in the mail, I guess it was sufficient proof for them.
With the Porsche I was sure it would happen again since the price was so low but I guess $1100 seemed fair to them. haha
Nice bike! How did you find those clips for the stopwatches I have been looking for a while. Separately, I bought a radio delete panel like that to attach them to but I can install. Could you give some pics when you install?
Posted by: Optimusglen Apr 28 2016, 09:13 AM
Nice bike! How did you find those clips for the stopwatches I have been looking for a while. Separately, I bought a radio delete panel like that to attach them to but I can install. Could you give some pics when you install?
Thanks! The clips are from http://xks.com/
Once I get the interior together I'll post some pics.
Posted by: iwanta914-6 Apr 28 2016, 09:16 AM
Nice bike! How did you find those clips for the stopwatches I have been looking for a while. Separately, I bought a radio delete panel like that to attach them to but I can install. Could you give some pics when you install?
Thanks! The clips are from http://xks.com/
Once I get the interior together I'll post some pics.
I was curious so I looked it up on the xks site, here's the direct link to the clips.
http://xks.com/i-10072333-17-7500-clock-holder-stopwatch-and-clock-dash-holder.html
Posted by: Alapone Apr 28 2016, 10:29 AM
Nice bike! How did you find those clips for the stopwatches I have been looking for a while. Separately, I bought a radio delete panel like that to attach them to but I can install. Could you give some pics when you install?
Thanks! The clips are from http://xks.com/
Once I get the interior together I'll post some pics.
I was curious so I looked it up on the xks site, here's the direct link to the clips.
http://xks.com/i-10072333-17-7500-clock-holder-stopwatch-and-clock-dash-holder.html
just bought two thanks
Posted by: Optimusglen Apr 28 2016, 01:46 PM
Good deal, thanks iwanta914-6.
Posted by: Optimusglen May 5 2016, 03:48 PM
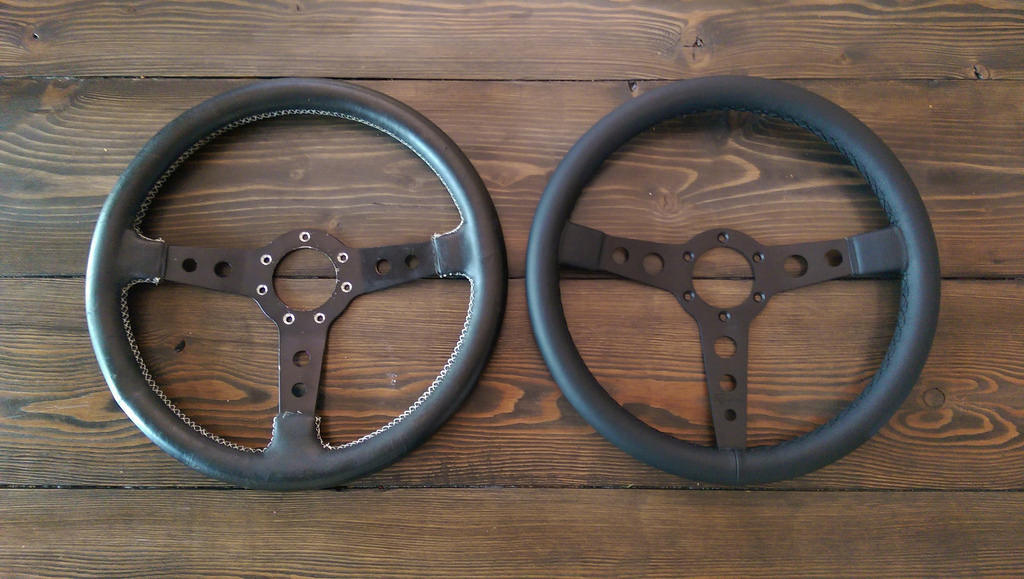
I did some work for Scott over at RenownUSA and scored a killer deal on a new wheel. This is the Monaco Dark, super nice quality.
The Cisa wheel I refurbished is nice, a hair bigger in both diameter and grip girth (snicker) but I thought since the rest of the interior will be essentially brand new, the patina of the Cisa might look a bit out of place. At any rate, I have both, and the Momo hub I have is drilled for both, so I can swap if I ever want to.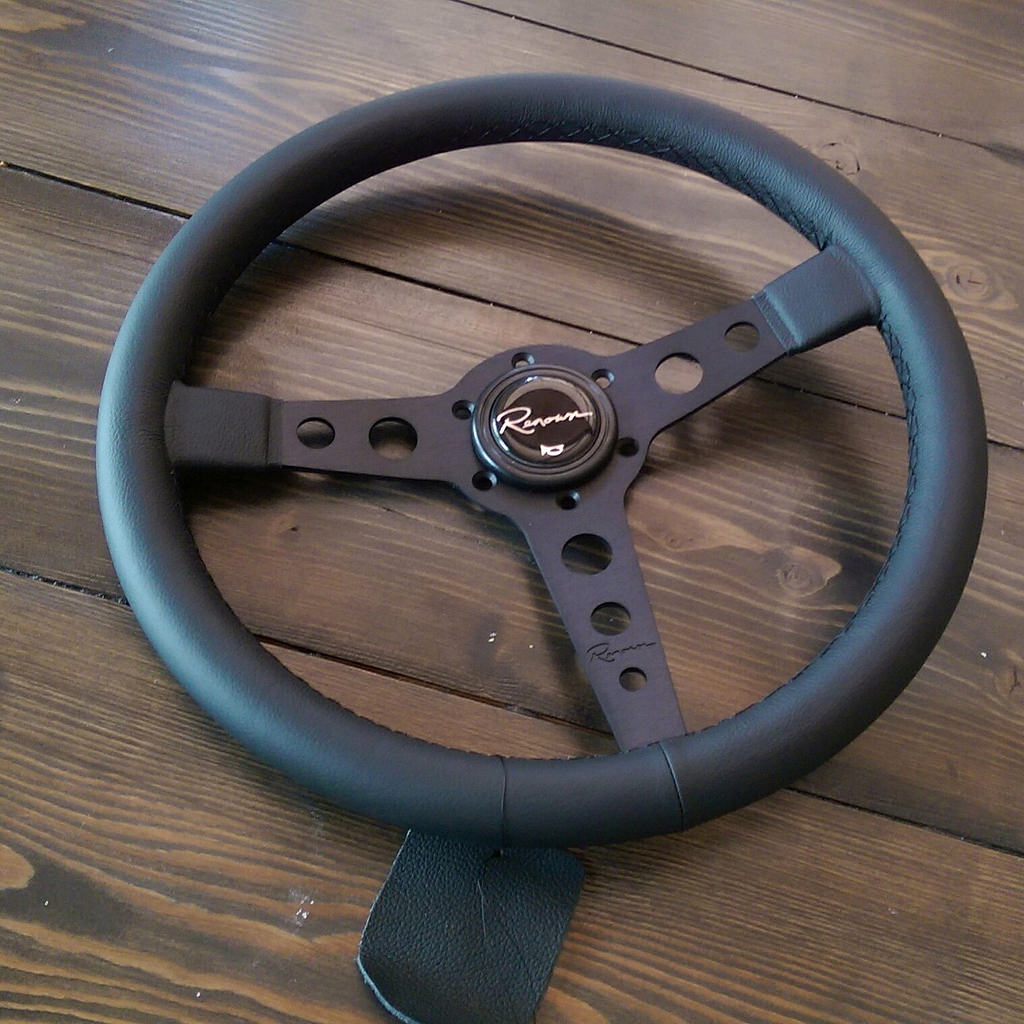
Posted by: Larmo63 May 5 2016, 07:24 PM
Chrome bumpers look best.
Posted by: Optimusglen May 7 2016, 04:00 PM
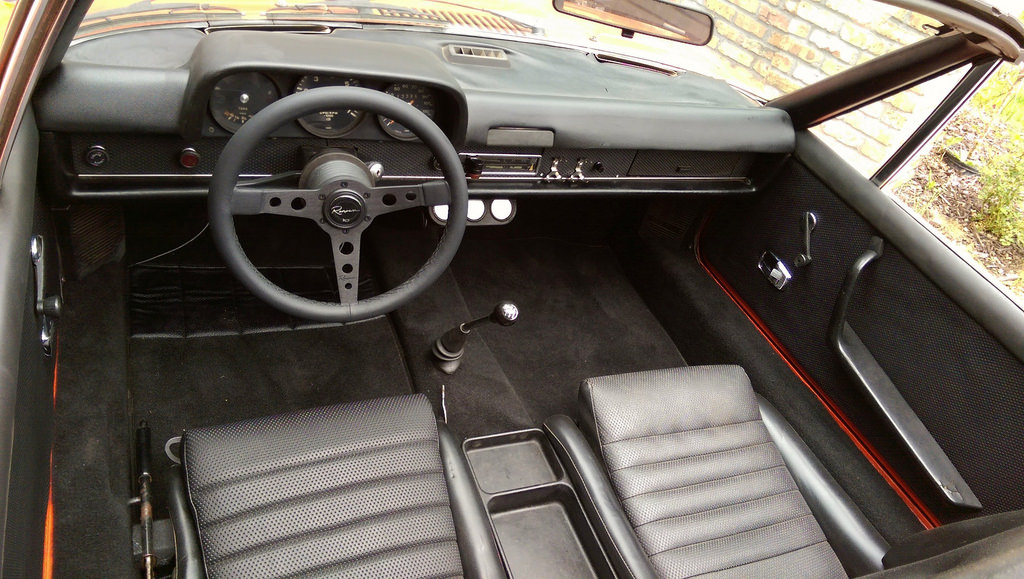
Decided to skip C&C with the motorcycle and instead stay home and work on the 914 interior. Installed the carpets, seats, dash cap, and new dash face material. Put my audio/timing panel in place. And cleaned it up a little to take some pics. Really happy how this is coming together.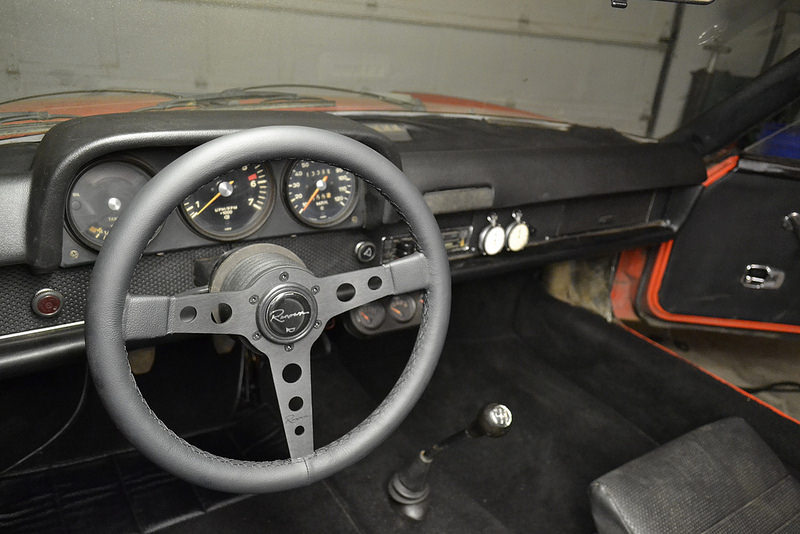
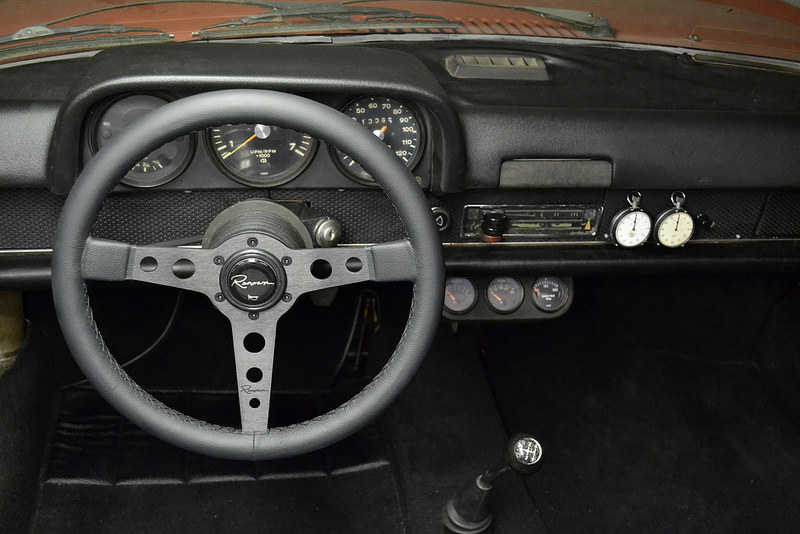

Door cards still need a lot of love. A while back I did the large sections but tried to reuse the foam, bad move... all the indentations from the arm rests show through. Then I messed up the seam between the upper sections and the lower sections so it just doesn't look good. So those will be torn apart again and redone properly.
Posted by: Optimusglen Jun 6 2016, 07:18 AM
Little update time.
Went to the MN C&C this past weekend. Lots of great cars but this 914-6 really stood out. Pretty sure this one belongs to the guy I got a lot of parts from, but couldn't find him anywhere.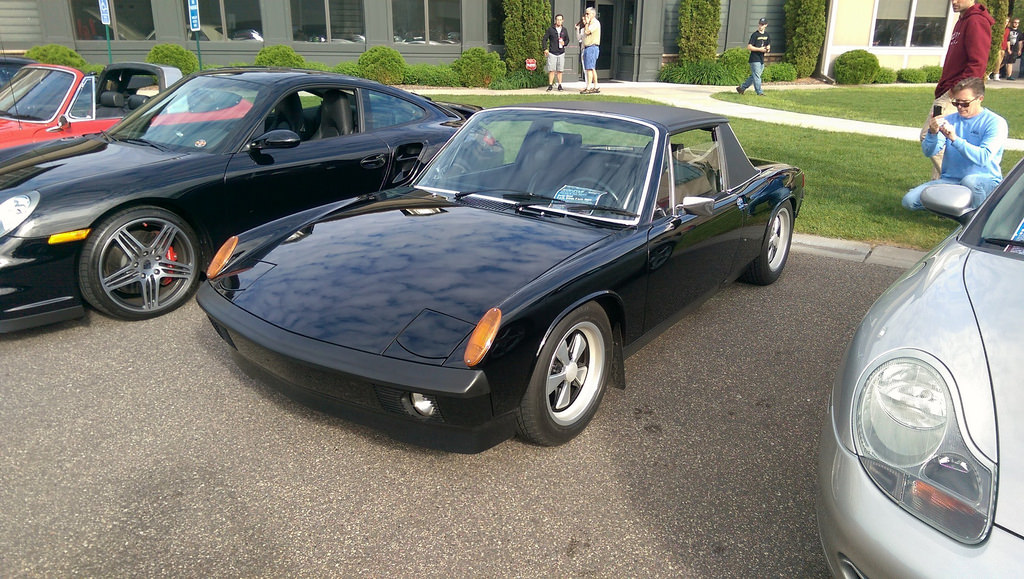
Seeing it (and another 914 with a 930 swap) made me want to work on mine, so I went home and started on the door cards again. Previously I had covered them with the materials kit from 914rubber. The kit was missing the foam, i found out later. I was doing it in a dim garage and I was a bit rushed, that paired with trying to re-use the old foam made it so they didn't turn out well. Anyway, I bought some thin padding to go under the material, purchased new material for the upper (smooth) portion, and tore into them.
Final product.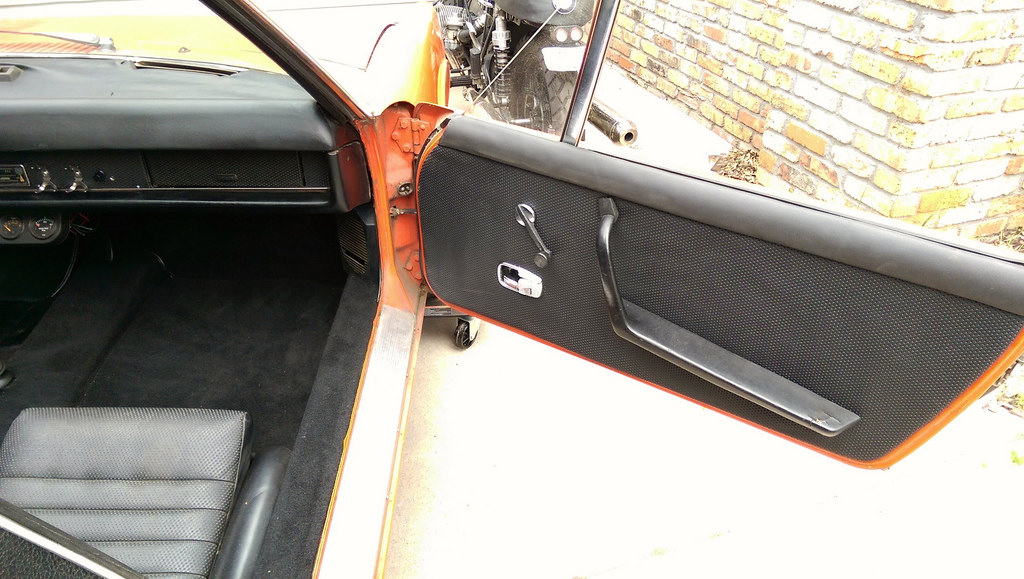
Something was flying through the scene as I snapped the pic, that little dash above the window winder isn't on the door card.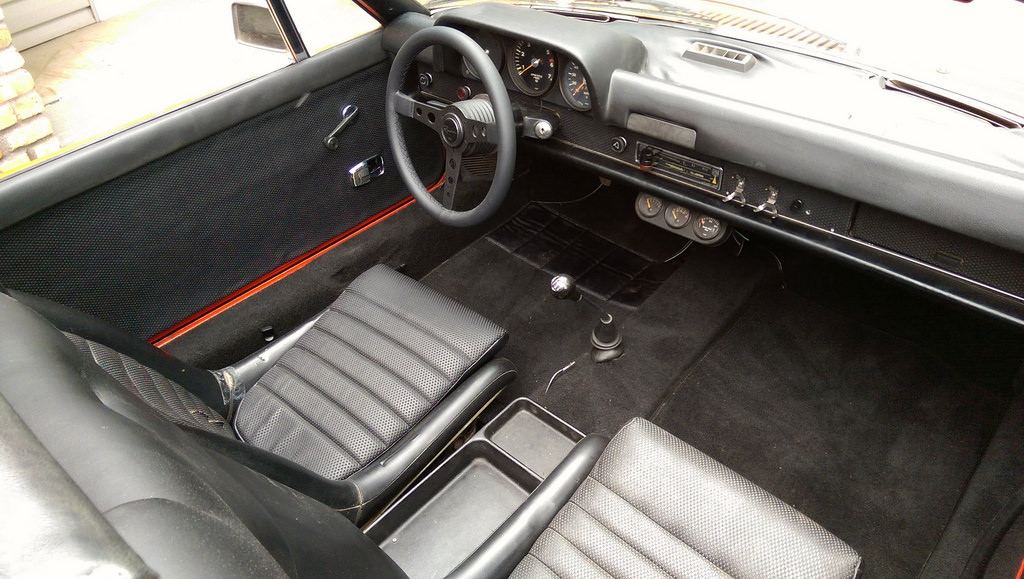
Eventually I think I'd like to start over completely, with the new materials kit, or even just buy new cards from 914Rubber. But for now these will work fine.
I also ordered a set of the Heuer stickers, these are 2/3rds the size of the previous ones. Old ones were too big, but I thought the suggestion of 1/3 or 1/2 size would be too small.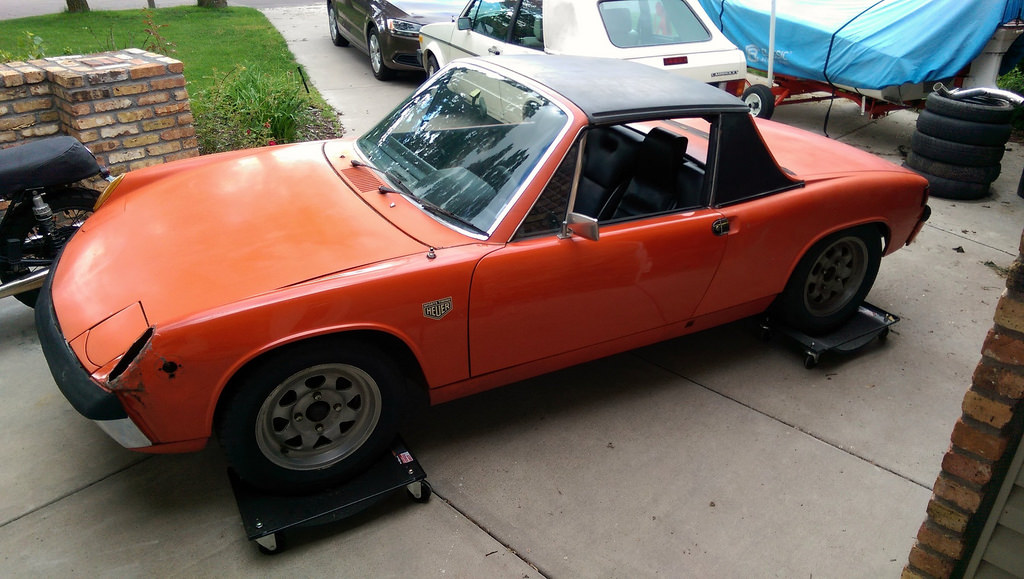
You can also see the crude dent banging, I used a big slide hammer with various hooks to get the rough shape, I'd still like to pick up a nice set of hammers and dollies to fine tune it a bit more.
Last but not least, I've decided to bite the bullet and just bring the gastank in. I cleaned it enough that it would probably be fine, just have to keep a spare fuel filter or 3, but since the entire rest of the fuel system will be brand new, I thought it best to get the tank as good as absolutely possible. A friend of mine had good results from a place about 45min away, so I'll be dropping it off there later today.
Posted by: 914time Jun 6 2016, 07:25 AM
Great work! Good call on bringing the gas tank in for cleaning, too. My dad ran out to C & C on Saturday for a few minutes to pass out All Porsche Show flyers. He thought he saw about 4-6 914s there...pretty impressive as you would have maybe seen 1 a few years back.
He's feverishly trying to get his 74LE back together in time for the All Porsche Show Sunday, June 26th at Central Park in Roseville, MN (shameless plug). All you MN, ND, SD, WI, IA (and beyond) guys NEED to bring your 914s. It is a no pressure show with 150+ Porsches on hand. It is a great time and the largest Porsche event around.
Posted by: Optimusglen Jun 6 2016, 07:27 AM
For sure! If mine was anywhere near ready to drive I'd push to get it ready, but I still have to drop the engine and rebuild some things. 
I'll be there though!
Posted by: Optimusglen Jun 14 2016, 02:28 PM
I picked up the tank from getting refurbed. I went to Gas Tank Renu USA to have it done, they patched a couple holes that were hidden, cleaned/blasted the inside, and coated it inside and out. Nationwide lifetime warranty too. In the end it was $275, and it'll be great to know the entire fuel system will be new or as new.
Picture using my potato phone, but you get the idea. It's clean inside 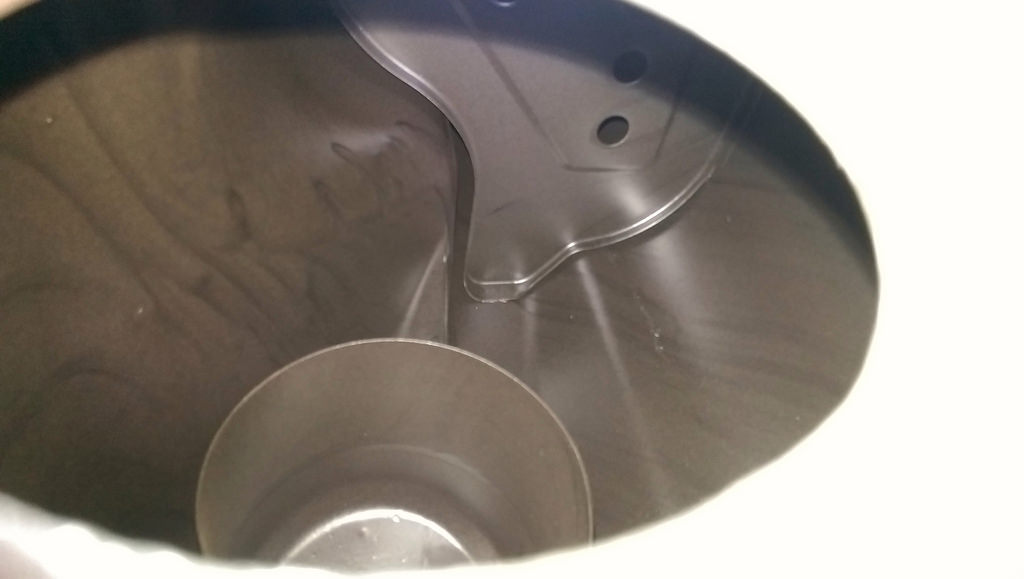
Posted by: mbseto Jun 15 2016, 08:34 AM
Radio delete panel complete
.
This is awesome. Nice touch.
Posted by: RickS Jun 15 2016, 09:02 AM
To have your ash tray match your dash, buy Forever Black. It is a black dye product with a foam tipped applicator. Used it on mine and looks great. I also use it on any other rubber or plastic trim parts which I want to restore back to black. Think Amazon has it.
Great thread and great skills.
Posted by: Optimusglen Jun 15 2016, 09:16 AM
To have your ash tray match your dash, buy Forever Black. It is a black dye product with a foam tipped applicator. Used it on mine and looks great. I also use it on any other rubber or plastic trim parts which I want to restore back to black. Think Amazon has it.
Great thread and great skills.
Thank you, I'll have to give that a try.
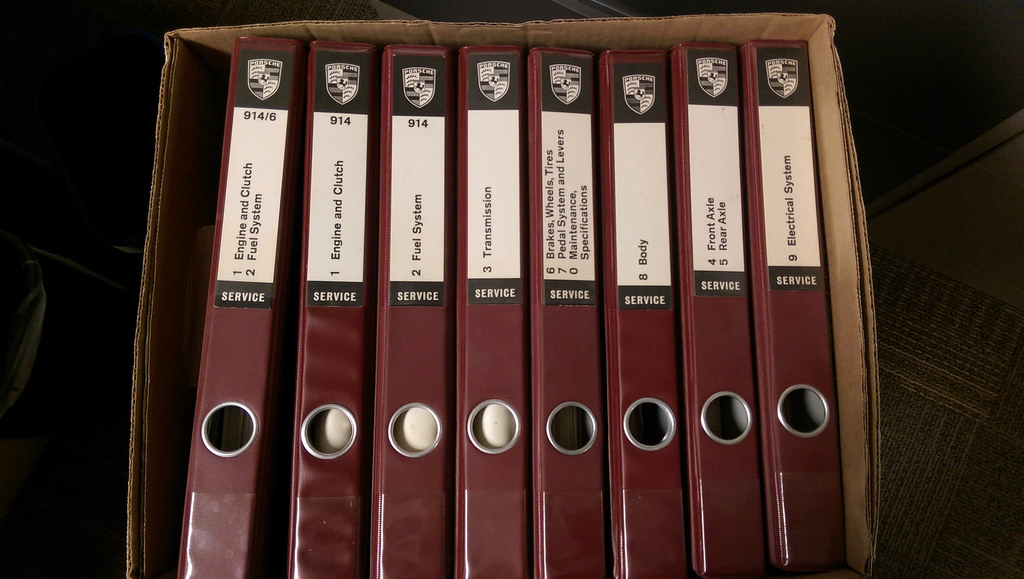
I had this in a seperate thread on here, but since it has to do with my project I'll put it here too. A co-worker of mine found out I had a 914 project and mentioned to me that he had a 914 several years ago. He went on to say that he still had a manual for it and had been trying to find a good use for it. If I wanted it I could have it for free. Of course I accepted and the next day came into work and to my surprise this was on my chair...
Posted by: 914-300Hemi Jun 15 2016, 10:27 PM
To have your ash tray match your dash, buy Forever Black. It is a black dye product with a foam tipped applicator. Used it on mine and looks great. I also use it on any other rubber or plastic trim parts which I want to restore back to black. Think Amazon has it.
Great thread and great skills.
Thank you, I'll have to give that a try.
I had this in a seperate thread on here, but since it has to do with my project I'll put it here too. A co-worker of mine found out I had a 914 project and mentioned to me that he had a 914 several years ago. He went on to say that he still had a manual for it and had been trying to find a good use for it. If I wanted it I could have it for free. Of course I accepted and the next day came into work and to my surprise this was on my chair...
Very cool gift.
Posted by: Optimusglen Jul 19 2016, 06:49 PM
Big day today, i have most of the week off so i decided to dig in.
Dropped the engine, removed the heat exchangers and exhaust, separated the trans, and got the engine on the stand.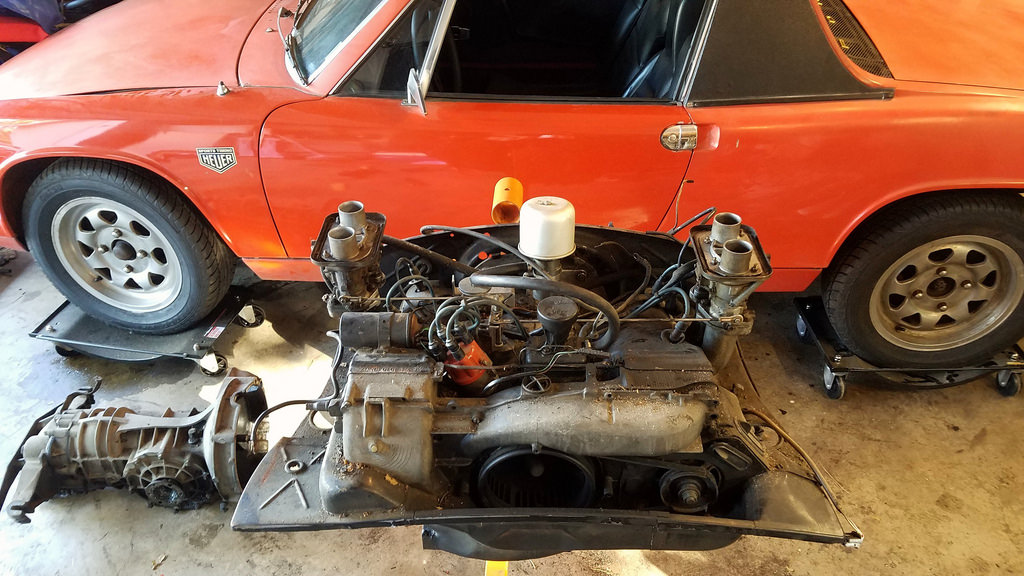
Posted by: 914time Jul 20 2016, 09:50 AM
Awesome! Keep the updates and progress coming
Posted by: Optimusglen Jul 24 2016, 06:04 PM
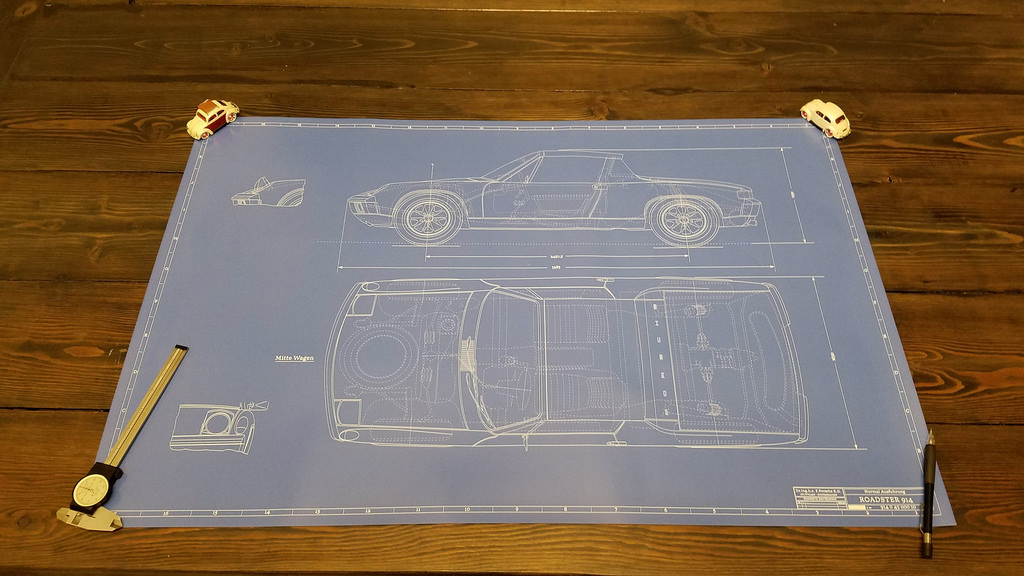
I finished up a drawing of the end product for this stage anyway.
If anyone is interested in seeing my other car art, or if you want a print of yours, check out my post in the member vendors section.
http://www.914world.com/bbs2/index.php?showtopic=281607
Posted by: Optimusglen Aug 2 2016, 07:43 AM
Small update.
I finished where the rust left off with the heat exchangers. I'll be running the exhaust as budget headers. 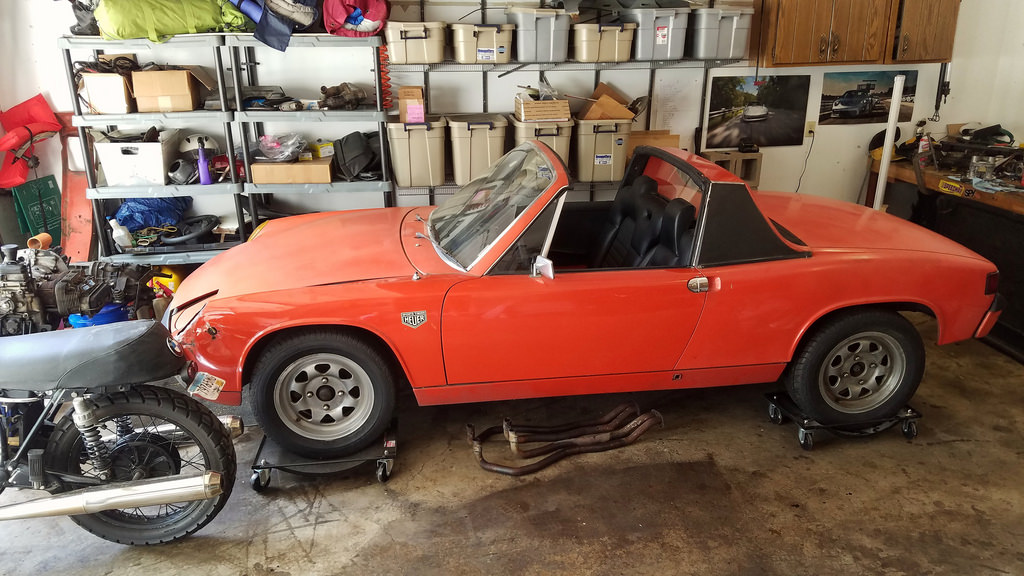
Engine is down to the long block. This week I'll be pulling the jugs off and doing a lot of cleaning and inspecting. Gasket kit is in but it only has the head gaskets for the 1.7, I'll need to measure and get new ones.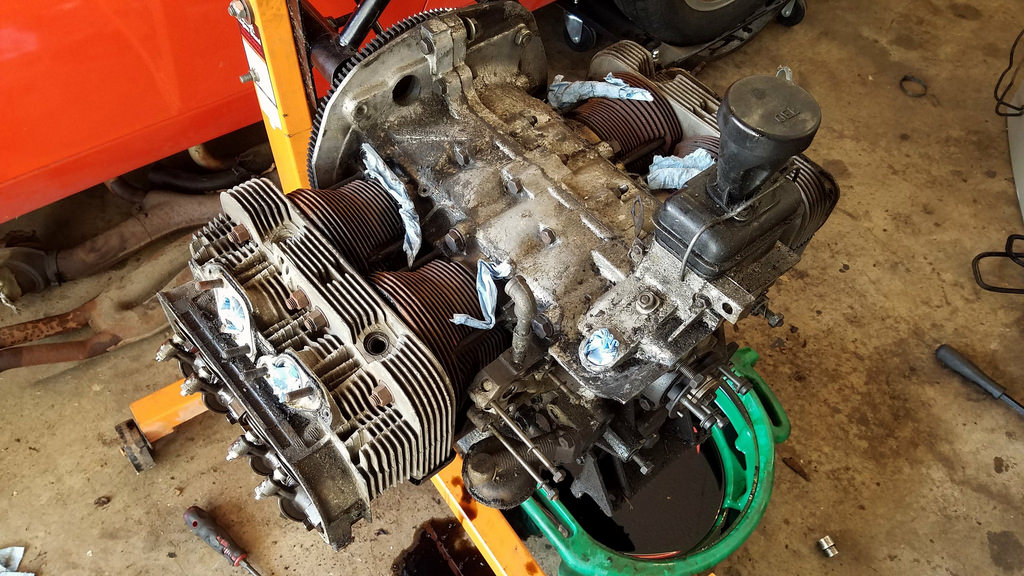
I got sick of the amount of clutter in my garage, so I purchased a new roller cart for my tool box. Getting things more organized always helps with the morale of working in the garage.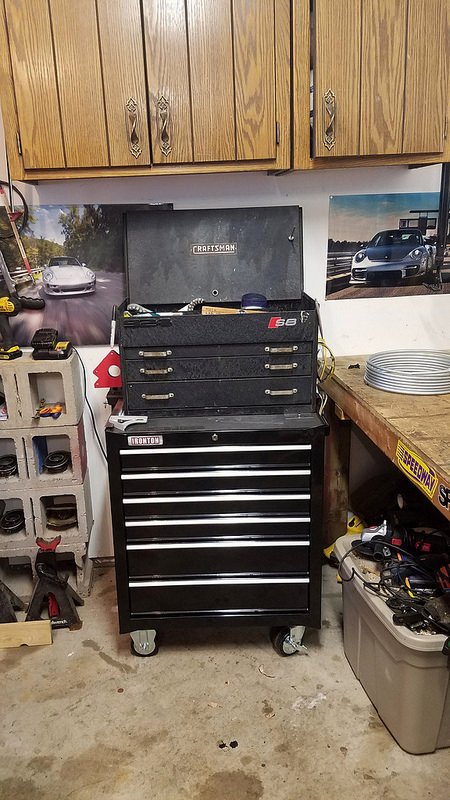
I know it still looks like a rats nest compared to many of you, but at least I know where everything is now.
Bonus, you can see one of the pictures from my trip to Birmingham for the Porsche Sport Driving School that I won, some of you might remember that post from a few years back.
Last but not least, a member here was selling a drilled 5-lug swap with (Compomotive) Fuchs. It all needs to be cleaned up and refinished, but everything else on this project is the same way apart from the steering wheel. So I jumped on it and it should all be headed my way soon.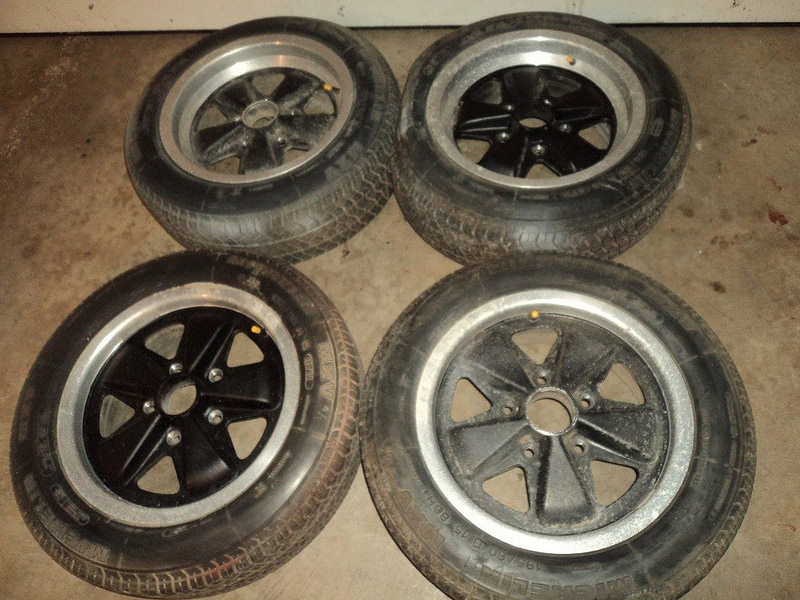
The wheels are 15x6 and 15x7 staggered. It'll be tight in the back, but I was going to have to roll the fenders anyway so I'm not worried. They aren't real/original Fuchs, so they're not ideal, but it will be easier to upgrade later on now that I'll actually be running 5x130.
Fortunately enough, even though they are not original they don't suffer from the replica issues where a company will use an original forged wheel to make their tool, but then cast the wheels instead of forging, which makes a replica much weaker. These are designed to be cast. The only thing that bugs me is the pedal shape, it's much narrower where it meets the center. I think it'll be fine if I do all black centers, but if I try to finish these as an RSR style wheel, they might look odd... We'll see.
OH, one other bit of news. I discovered that my brother in-law that lives 5 minutes away from me owns a sand blasting cabinet. #winning
Posted by: rudedude Aug 2 2016, 07:58 AM
Looking good Glen!
Posted by: Optimusglen Aug 3 2016, 07:21 AM
Engine is mostly apart, have not cracked the case open, and clutch/flywheel are still in place.
Everything went smoothly. Lots of dirt and oil but nothing scary.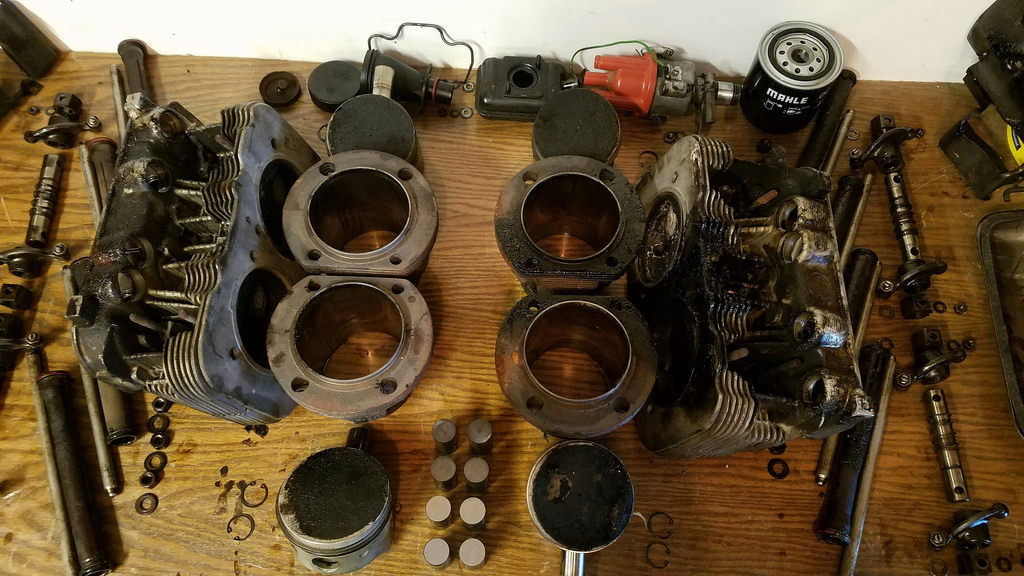
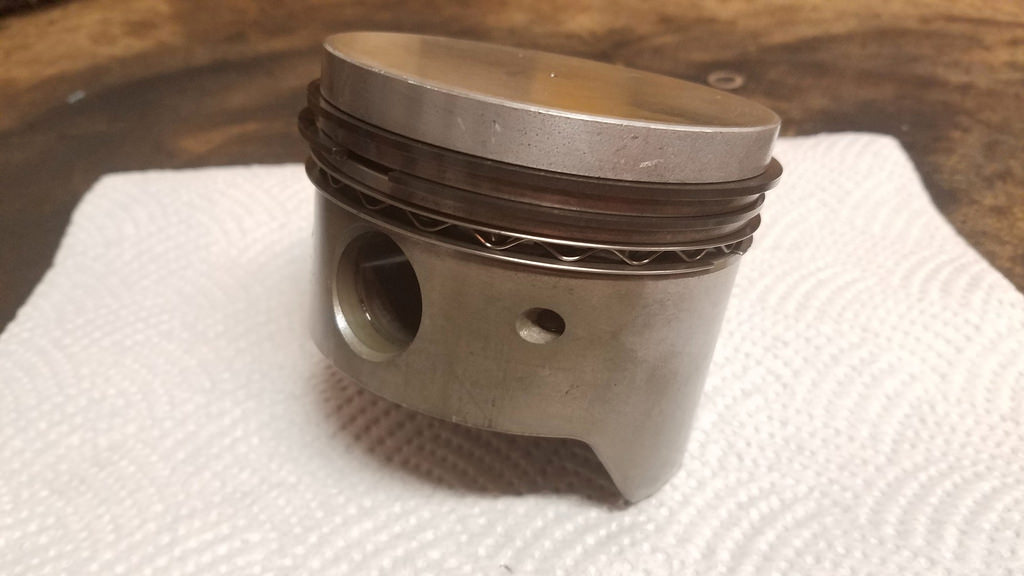
Cleaned up one piston so far, didn't take a whole lot of effort.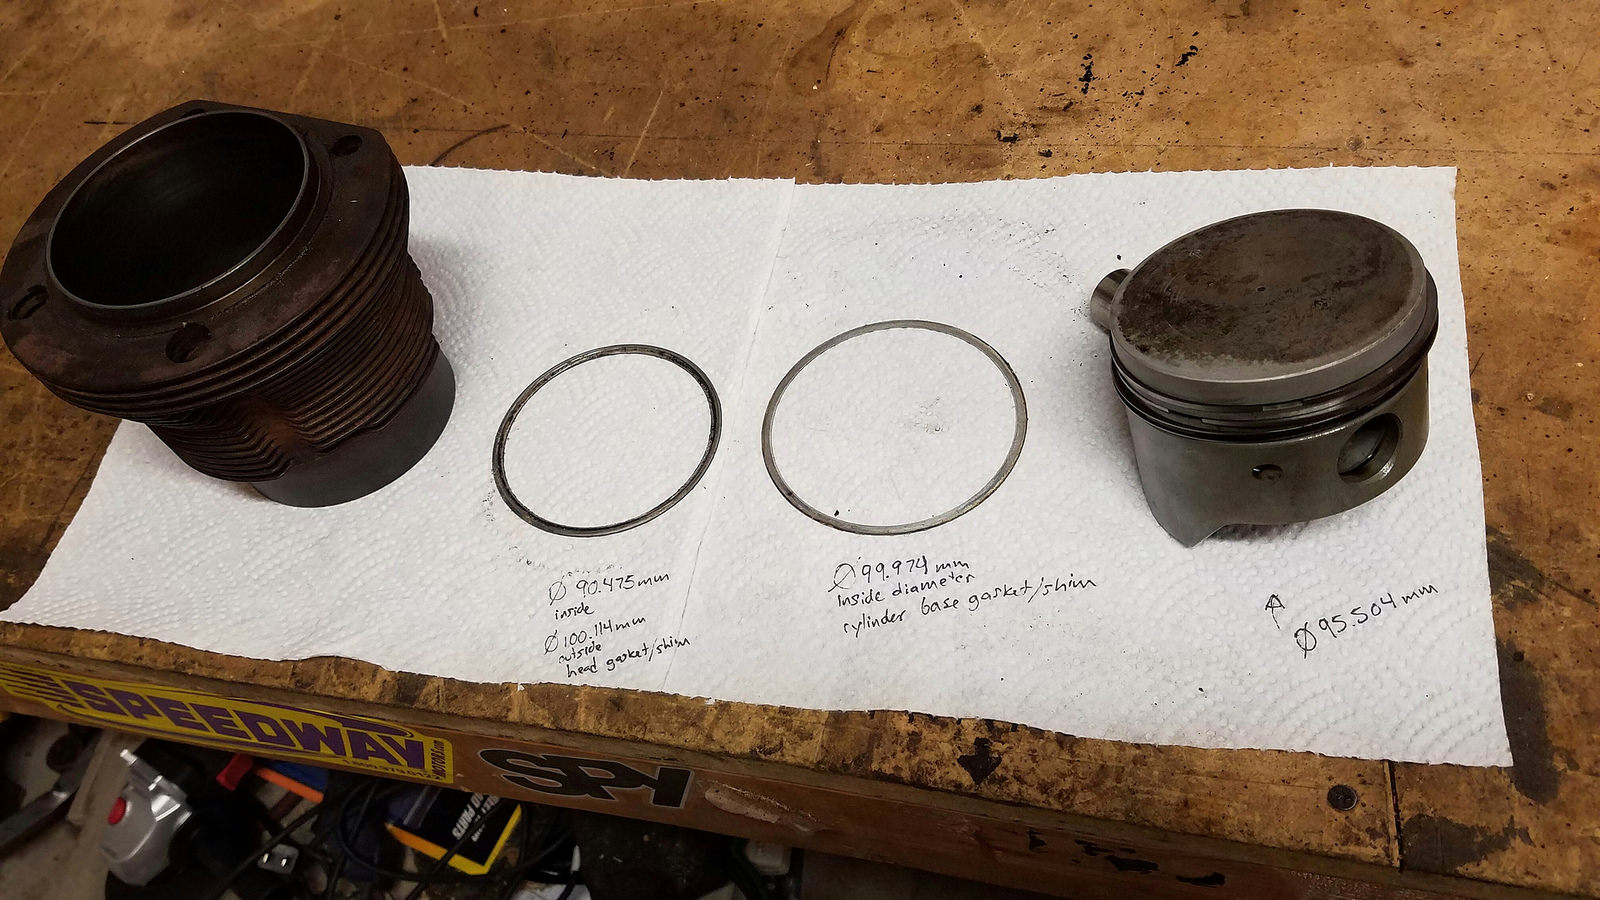
I forgot to write it down on that napkin, but the cylinder bore is 95.872mm. All measurements are approximate, taken with a standard caliper. So I think it's safe to assume they are 96mm cylinders.
Lifters look wonderful, no pitting or scoring.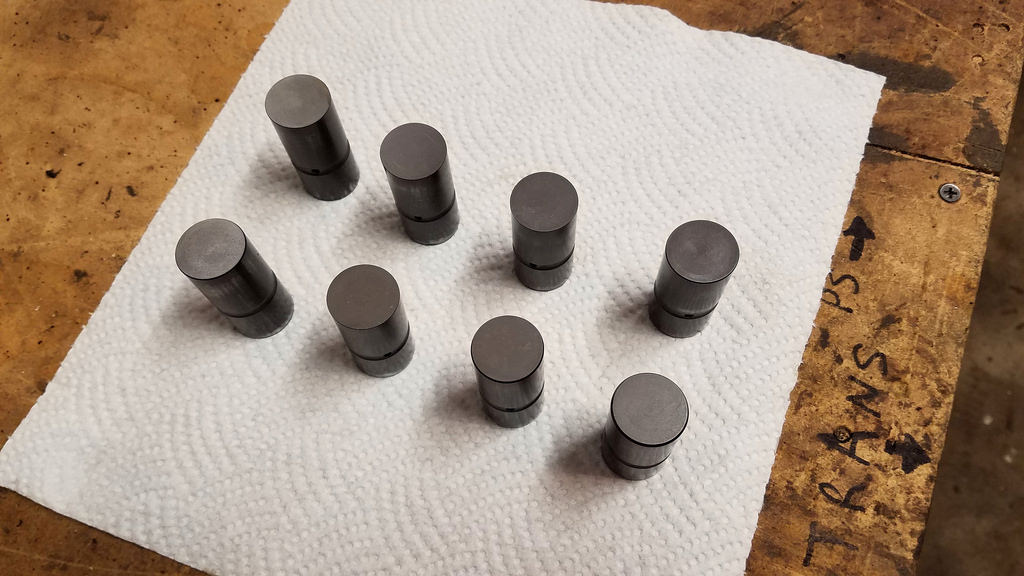
Cam looks pretty good too!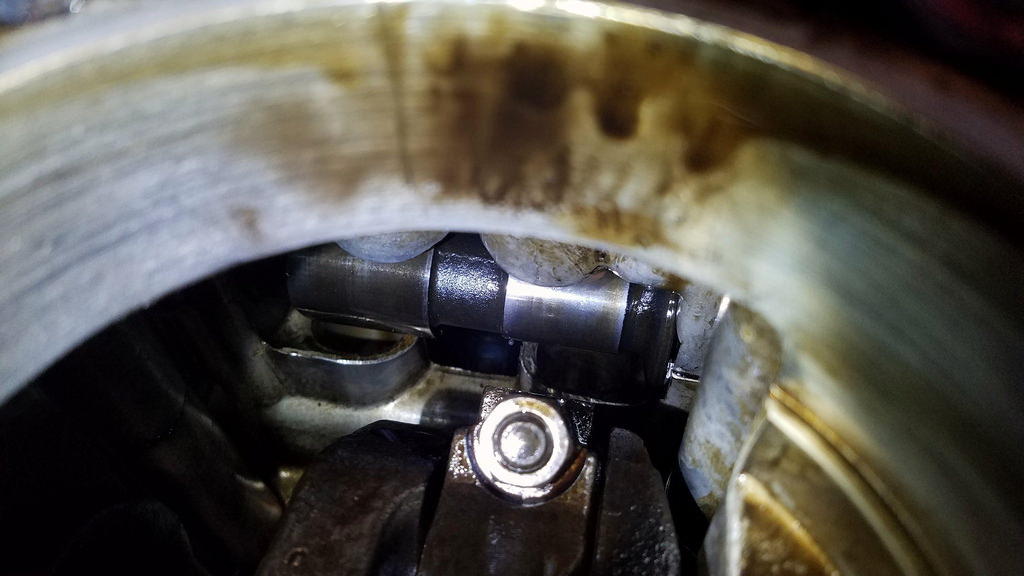
Some oil staining on this lobe, but no pitting and it's very smooth, by touch you cannot tell it's there.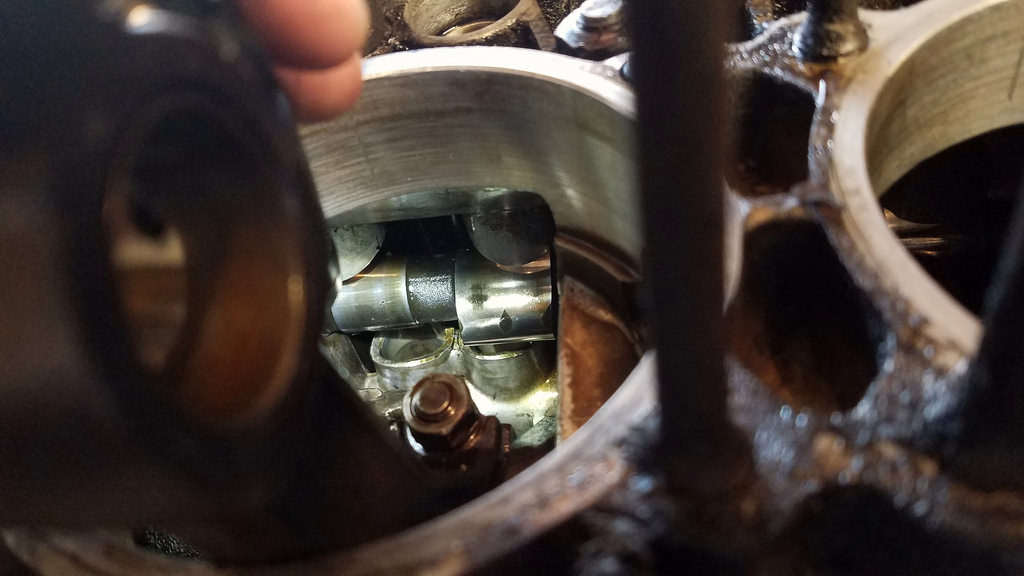
Cylinder bores are clean, I can't see the cross hatching though.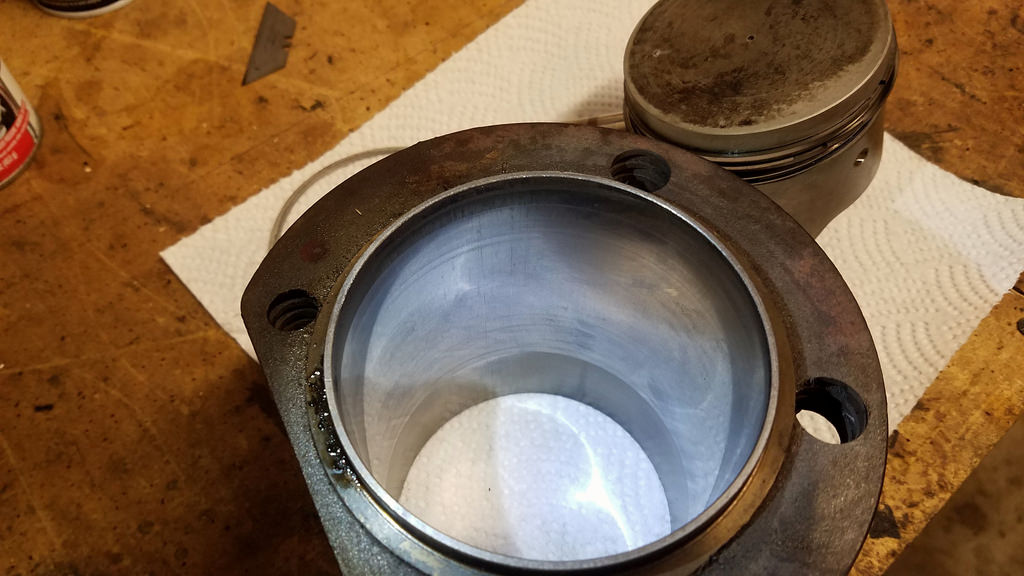
Is this something I need to have bored?
Questions:
-I seem to remember a bulletin from Porsche or VW effectively saying not to use the cylinder base metal gaskets. Can anyone confirm?
-Do I need to have any work done on the cylinders to replace the cross hatching, or is that only if I replace rings?
Posted by: Tbrown4x4 Aug 3 2016, 07:29 AM
No head gaskets. You still need to seal the cylinders to the case. Use sealer. You may need spacers, depending on what you need for CR. Not sure if you stack spacers AND gaskets. I assume sealer trumps any gasket.
Posted by: Optimusglen Aug 3 2016, 07:50 AM
No head gaskets. You still need to seal the cylinders to the case. Use sealer. You may need spacers, depending on what you need for CR. Not sure if you stack spacers AND gaskets. I assume sealer trumps any gasket.
Thanks!
Since the engine was running fine before, I'll skip the spacers at the base. The ring that was in there was paper thin and had zero sealant. I think I'll leave that ring out, and use a sealant instead.
Posted by: Optimusglen Aug 5 2016, 04:59 PM
Got a few things in the mail today.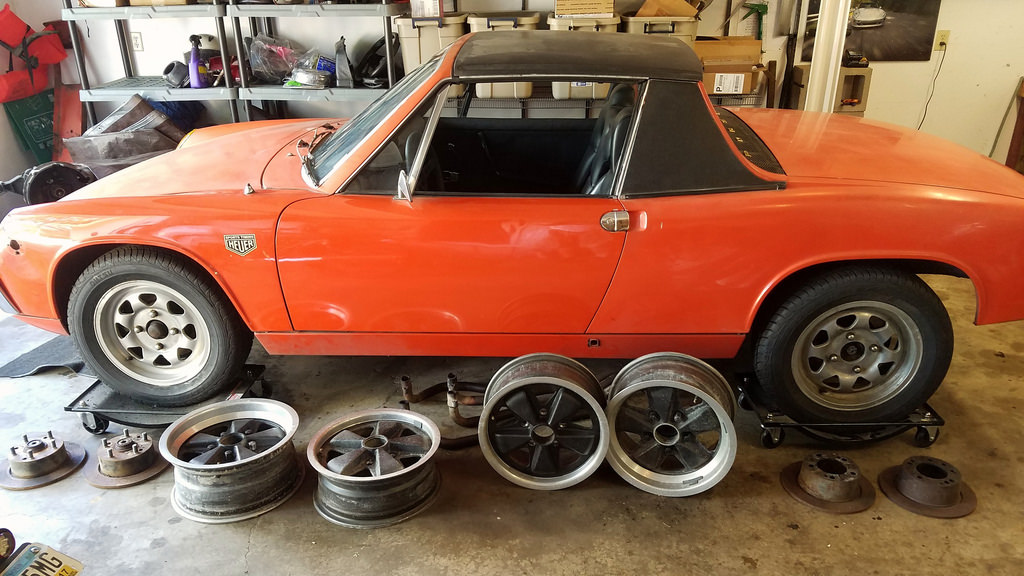
Posted by: Optimusglen Aug 6 2016, 03:12 PM
Lots of cleaning today. Since the case is open to the elements via the cylinder holes I can't really use more conventional cleaning methods.
So i have to do it the hard way, with paper towells and a small brush.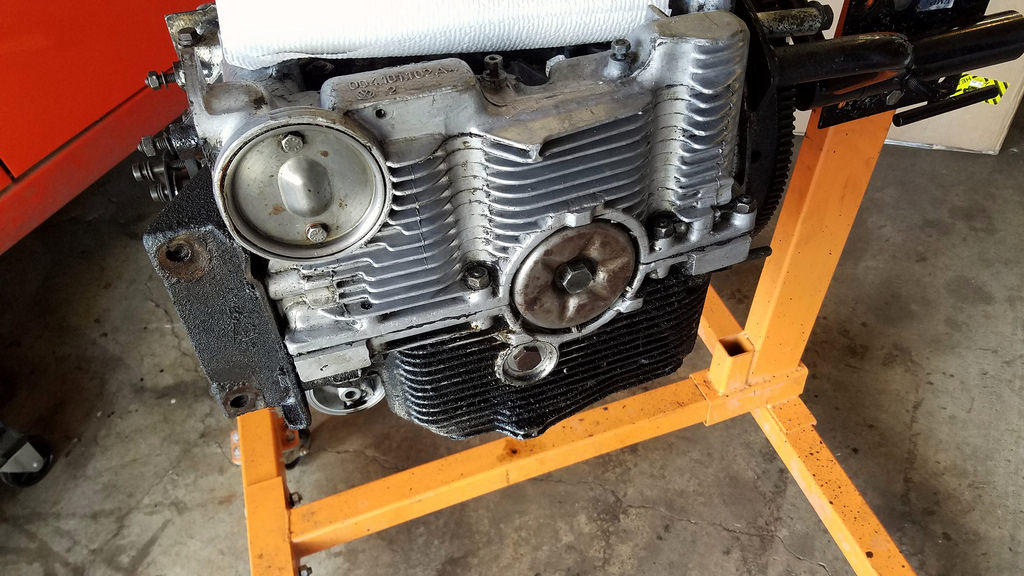
Started cleaning and stripping the wheels, but I'm thinking they were powdercoated. Two full installments of stripper but only a little black has come off each time.
Posted by: Optimusglen Aug 7 2016, 03:43 PM
More progress today. Finished rebuilding one of the carbs.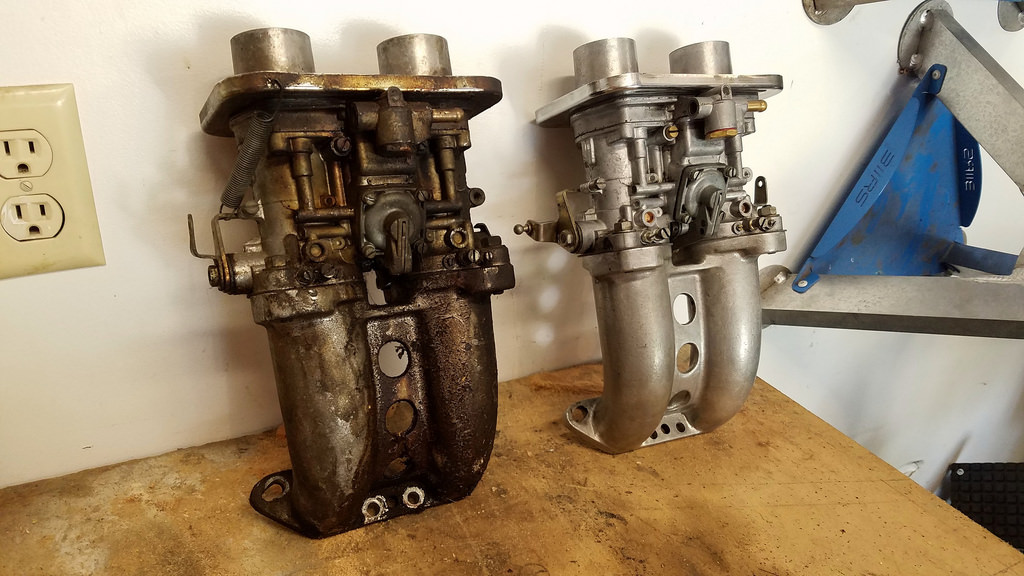
Posted by: injunmort Aug 7 2016, 06:58 PM
great job on cleaning. i used the aluminum sealing rings in the head/cylinder interface, no sealant. car runs fine. i did not pull cylinders because i did not want to upset ring land. if it were mine, the bores look good, i would re-ring it and reassemble. only because you pulled the cylinders.
Posted by: Optimusglen Aug 9 2016, 07:00 AM
So I did a test wheel in the RSR paint scheme just to see if it would look weird because of the petal shape. Turned out better than expected so I will be doing all 4.
Stripped the paint off the wheels. Maybe it was powdercoat, it took 4 passes with paint stripper and on the final pass I had to use a brass brush as well. But, I got it all off. Cleanup using fine "0" 3M steel wool and to get that brushed look on the lips. The insides were textured from the factory and it looked nice so I left them.
There is a method for painting just the inside of the Fuchs that works well. You seal off the back side with tape (packing tape, or something with a good solid bond, i.e. not painters tape) place the wheel over a bucket that will fit snugly inside the wheel, then carefully fill each of the 5 valleys until paint reaches the desired level. Finally, you puncture the tape with a blade and let the paint drain out into the bucket.
I didn't use this method. Mostly because I didn't have pour-able paint, but also because I didn't have a bucket that would fit well that wasn't currently being used to store used engine oil. What I did have is a roll of painters tape, a spray can of ceramic semi-gloss high temp black, and more patience than your average bear.
Masking.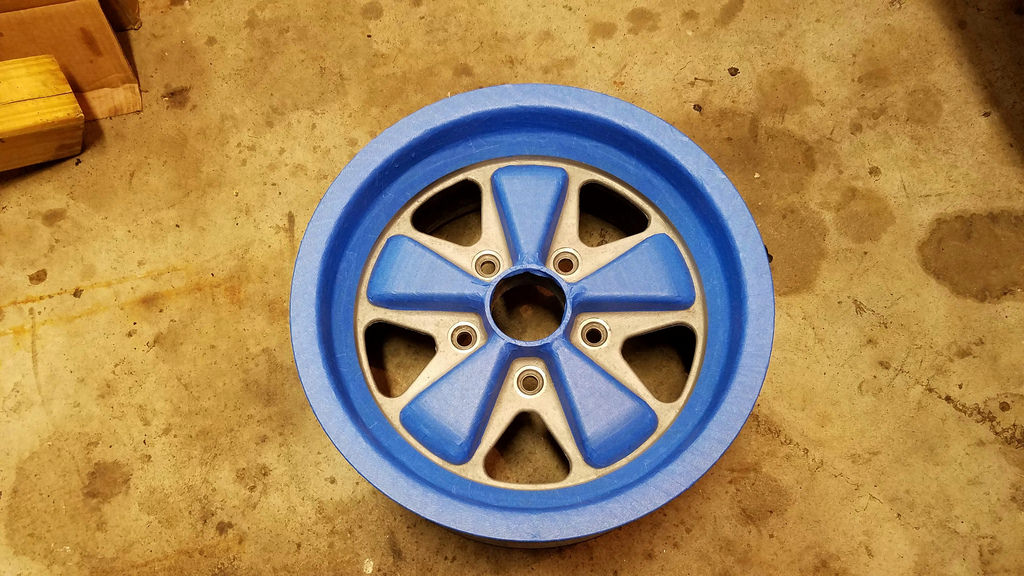
And done!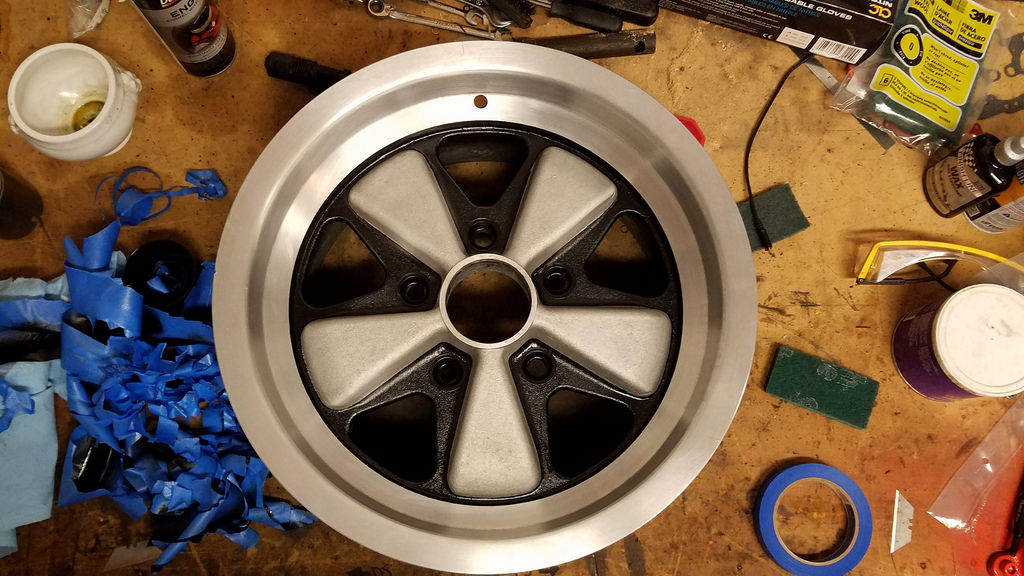
Posted by: ConeDodger Aug 9 2016, 08:27 AM
Radio delete panel complete
.
Growing up in Minnesota and being a Met Council of Sports Car Club member, one thing I remember is that there were some rally FREAKS in SCCA. You show up with those sexy stop watches and you're going to make some friends pretty quickly...
Posted by: Optimusglen Aug 11 2016, 07:31 PM
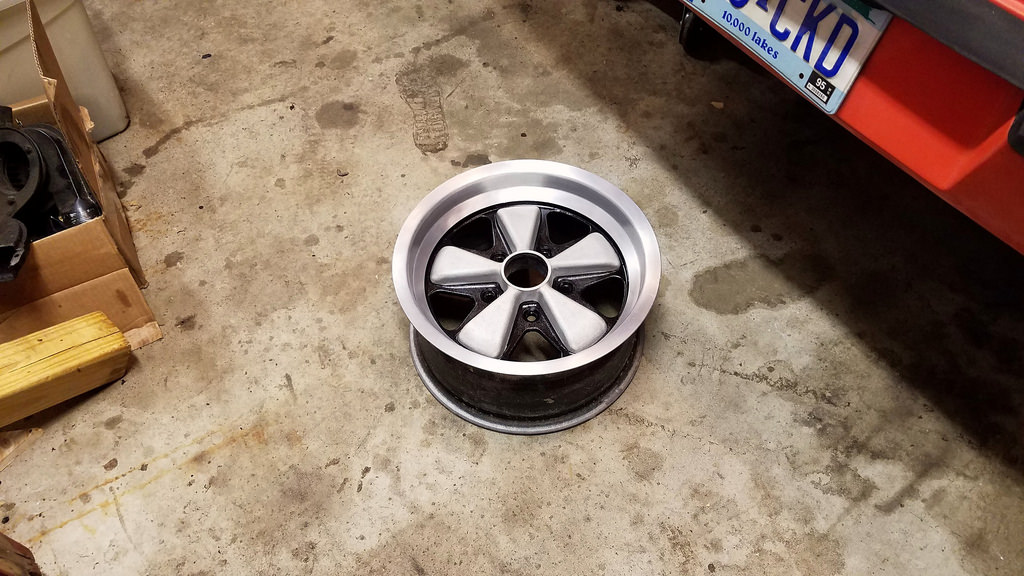
Two done, two to go.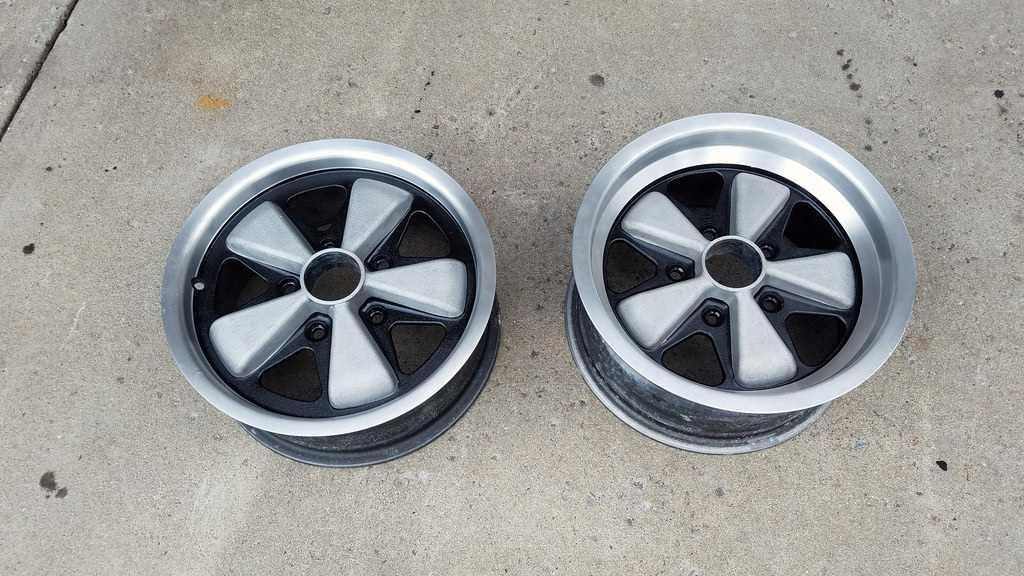
Posted by: Optimusglen Aug 28 2016, 02:09 PM
All 4 wheels are now finished. Waiting on me to install the 5-lug swap and change the tires over.
More cleaning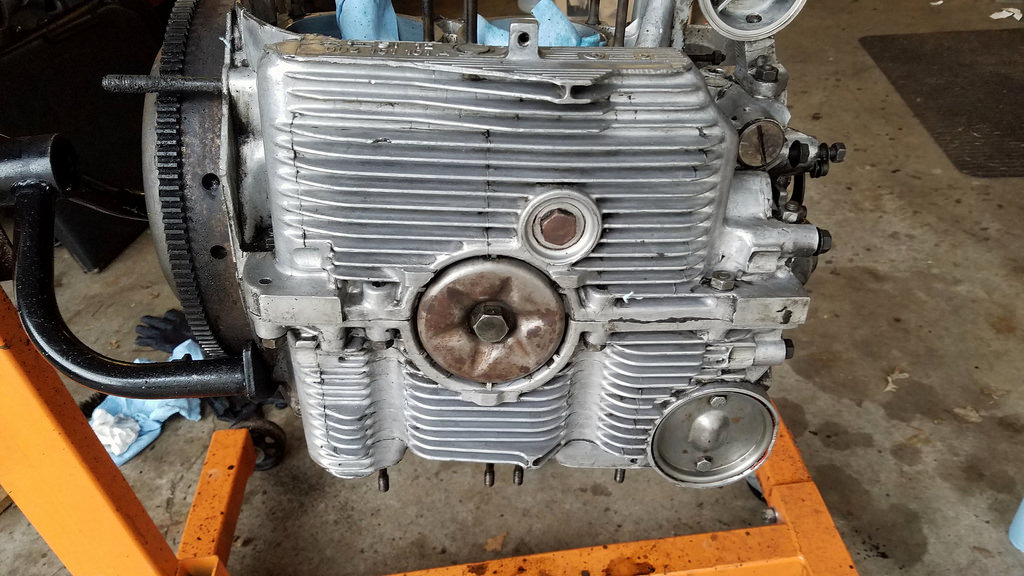
Pulled the oil pump. Looks good and no contact between the cam rivets and pump.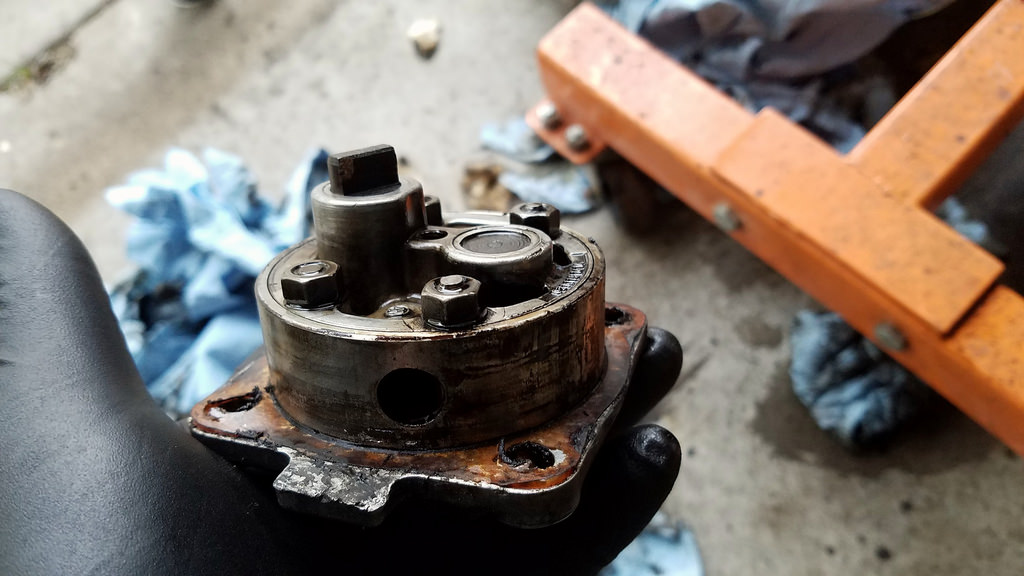
Camshaft, wish I could tell what is is. I was told it was swapped out with the carb install, but based on other things below it is possible that's not the case.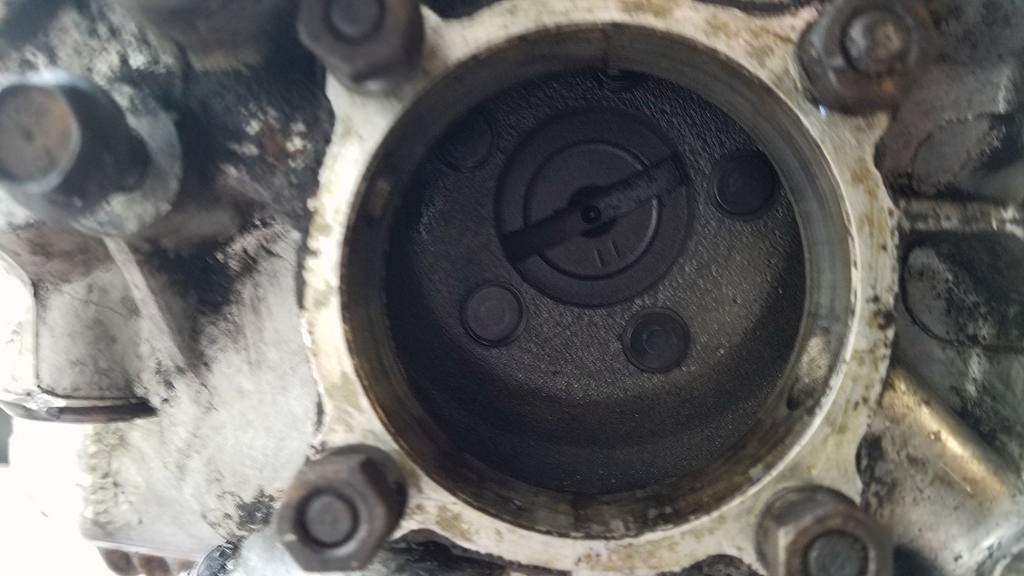
Now for the biggest part. I tore down one of the heads and started cleaning. Put a ton of elbow grease into it. There were some marks where something bad had happened in one of the combustion chambers, but I thought that since it had been running in this state, I would just clean, reassemble, and go from there. The pic makes them look worse than they are, they're just filled with carbon still. (Bottom head in the pic below)
Then I put it all back together and started in on the second head. I spent a good 3 minutes just pulling the valves out and a light scraping and found that the passenger side head was in far worse shape. One combustion chamber looks like a 14 year old boys face, huge gouges, something was bangin around in there something fierce!
Strange part is that for both heads, the damage is on the cyl closest to the trans. Wonder what caused this...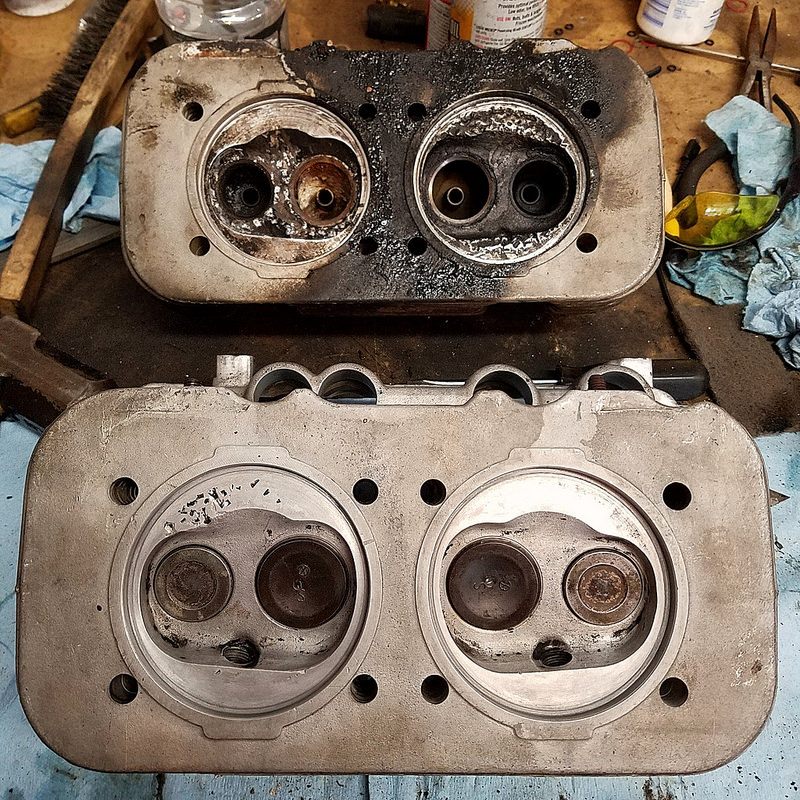
At any rate, I wasn't going to put a ton of time into cleaning this one up, looks toasted. So I messaged the local 914 guy that I've picked up a bunch of parts from and turned out that he had exactly what I need. Drove down to his place and picked these up.
New heads are super clean. He was unsure of the exact history, but he had gone through it and it looks like everything was done to them. There is one exhaust stud hole that I will need to fix some threads on, but otherwise they're cherry. I'll probably pull the valves and inspect it all to be on the safe side but these are great.
Further inspection of what I have shows that I have the stock crank (66mm stroke) and that paired with the 96mm pistons means the engine is actually a 1.9 and not a 2.0. This is also what makes me fear that the factory cam is still in there... Follow my line of thought...
At some point in the cars history there was some sort of catastrophic event that caused the head damage. The event also caused significant piston and cylinder damage. The owner probably brought it to a shop and they swapped the 96mm pistons and cylinders in. The 1.7 heads still have 100mm registers for the cylinders, so they got the 96mm cylinder necked-down kits that were used back then that meant not having to machine the 1.7 heads for larger cylinders. They must have been on a budget. That's why they may not have swapped the cam. Either that or they dumped all their money in the cam, carbs, P's and C's and didn't have enough for new heads, or headwork... Who knows. If they were really on a budget I feel like they would have just done a stock set of P's and C's. For the cam, I cam probably measure the lift, may not be able to get an accurate duration measurement with the cam still in there.
So next on the project list:
-pull valves on new heads and inspect and fix exhaust stud
-reassemble new heads
-clean up block some more
-pull a rod and inspect bearing surfaces
-clean some more
Also, I'm going to try and duplicate the engine lift plate shown in the factory manuals.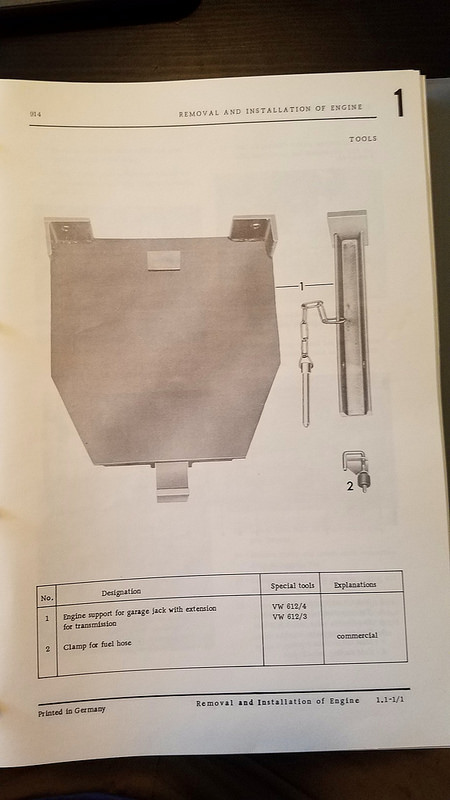
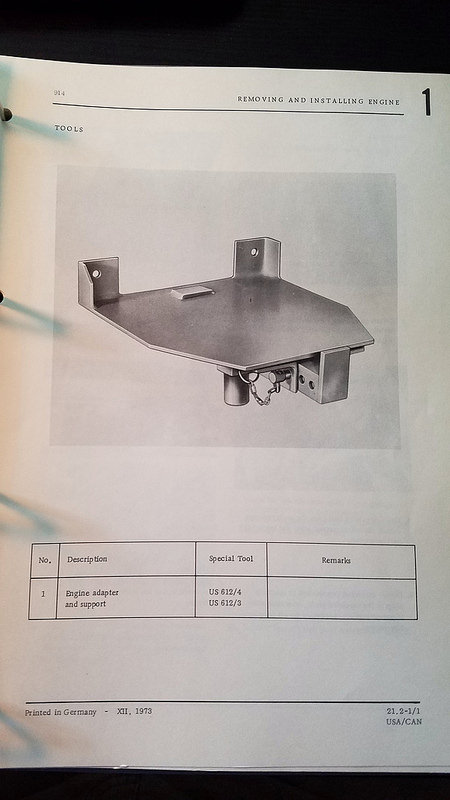
I am aware that Tangerine sells something similar for just north of $100, but I like the idea of fabbing one myself. I'll probably take measurements off the block for the important parts, just wish someone I knew had one of the actual VW tools.
Posted by: porschetub Aug 28 2016, 07:39 PM
Glenn that damage in the head was most likely caused by a broken piston ring @ some stage.
Those replacement heads look clean but ask the seller if the exhaust valves are new or used,IMO put down some cash on new ones if not you will be walking on thin ice .good luck 
Posted by: Optimusglen Aug 29 2016, 07:29 AM
Glenn that damage in the head was most likely caused by a broken piston ring @ some stage.
Those replacement heads look clean but ask the seller if the exhaust valves are new or used,IMO put down some cash on new ones if not you will be walking on thin ice .good luck
Is there something inheretly wrong with exhaust valves on these engines? I had heard bad things about failing valve seats, but this is the first I've heard of valves having issues. Care to elaborate?
I did figure that it was either piston ring bits, or maybe an exploded plug. I just can't figure out why it would happen to both of the cylinders on that end of the engine.
The carbs are ready to roll. New filters arrive today.
And I picked up a set of Hella fogs with stone guards.

I like the road rally style. I'll use regular horn grills and fab a bracket that comes out to mount the fogs. Easilly reversable if/when I decide not to run them anymore.

Posted by: 914time Aug 29 2016, 08:07 AM
Great work, Glenn. I appreciate your regular updates!
Posted by: Optimusglen Aug 29 2016, 08:19 AM
Thanks!
Posted by: mbseto Aug 29 2016, 09:38 AM
Always good to make sure the carbs have a full charge before you put them in...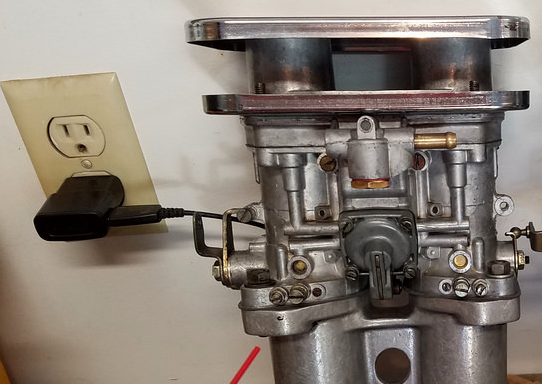
Posted by: wndsrfr Aug 29 2016, 11:05 AM
Always good to make sure the carbs have a full charge before you put them in...

Posted by: Optimusglen Aug 31 2016, 08:37 AM
Lookin pretty good!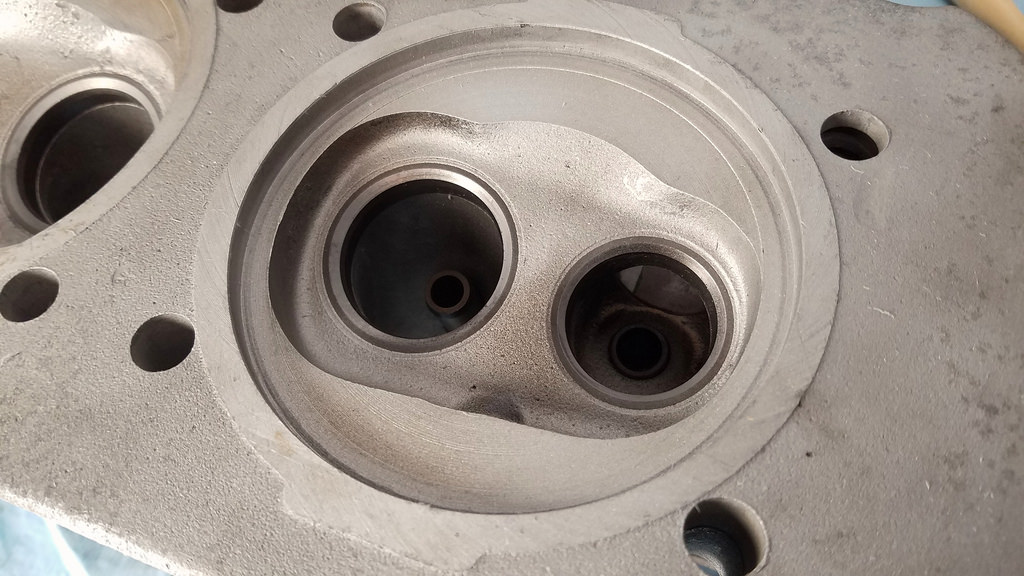
Last night I pulled the heads apart to inspect. If these were run at all, they were cleaned up really well after. I did a quick lap of the valves and reassembled. Lapped the cylinders into the heads too.
All the heads need now is for one of the exhaust studs to be repaired. Will probably do a stepped stud.
I looked the exhaust valves over, based on your comments.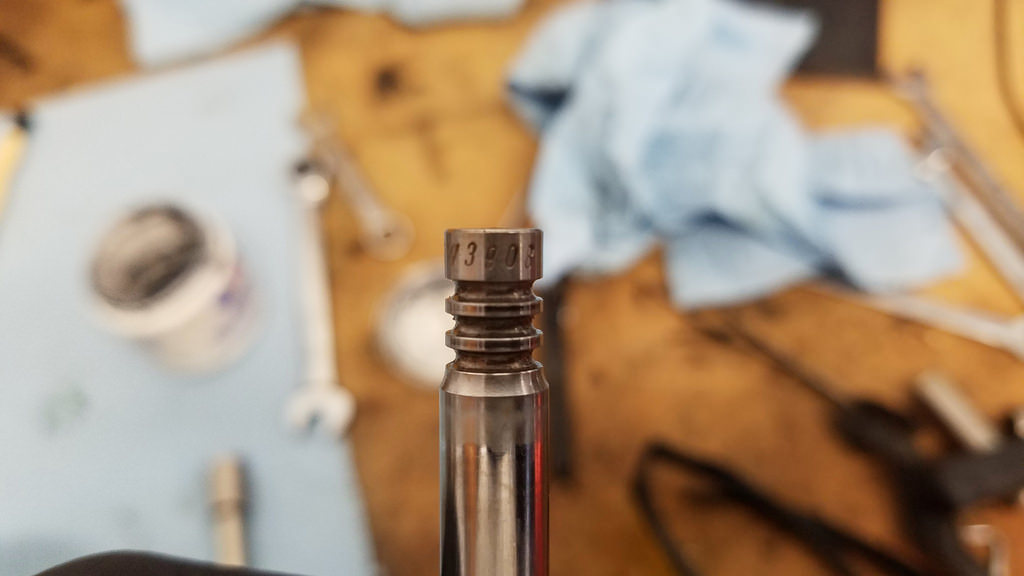
stamped with "T-TRW 3908" P.O. didn't remeber their history, so if anyone here can shed some light on if these are stock or not, I'd appreciate it.
Tonight I might hone the cylinders and then scrub them down. Getting close to reassembly!
Posted by: Claus Graf Aug 31 2016, 08:35 PM
Great job! Save the Porsche!
Sincerely
Claus Graf
Posted by: barefoot Sep 1 2016, 04:58 AM
[quote name='Optimusglen' date='Aug 29 2016, 09:29 AM' post='2391588']
[quote name='porschetub' post='2391409' date='Aug 28 2016, 08:39 PM']
Glenn that damage in the head was most likely caused by a broken piston ring @ some stage.
Those replacement heads look clean but ask the seller if the exhaust valves are new or used,IMO put down some cash on new ones if not you will be walking on thin ice .good luck
[/quote]
Is there something inheretly wrong with exhaust valves on these engines? I had heard bad things about failing valve seats, but this is the first I've heard of valves having issues. Care to elaborate?
I did figure that it was either piston ring bits, or maybe an exploded plug. I just can't figure out why it would happen to both of the cylinders on that end of the engine.
Not sure if all years used sodium filled exhaust valves, but my 2L had them. When I was getting ready to dis-assemble the valves, zI gave a light rap to the stems with a brass hammer to check to see if any valves were stuck, one did this:
NEVER NEVER re-use 40 year old sodium filled exhaust valves !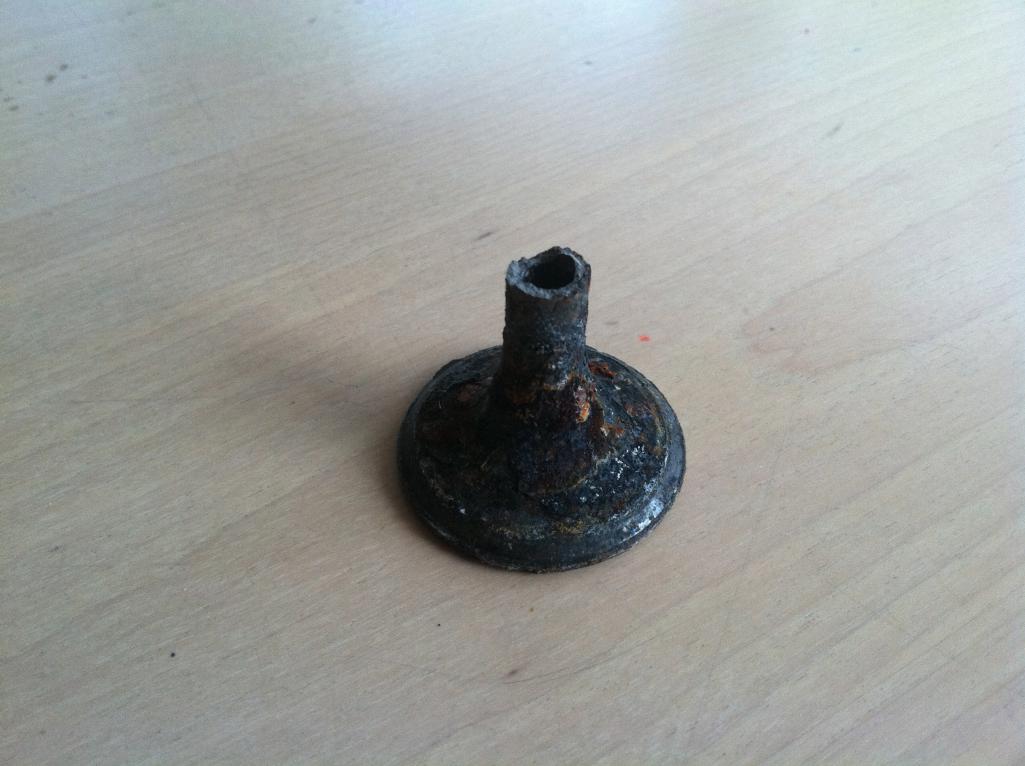
Posted by: Optimusglen Sep 1 2016, 07:27 AM
Ah, yeah that looks bad!
The exhaust valves in the new heads looked to be brand new, and I don't believe they are original valves because of the TRW stamping (unless TRW supplied OEMs back then) So I will run what I have.
Posted by: porschetub Sep 2 2016, 02:00 AM
Ah, yeah that looks bad!
The exhaust valves in the new heads looked to be brand new, and I don't believe they are original valves because of the TRW stamping (unless TRW supplied OEMs back then) So I will run what I have.
TRW are replacements, great I like them,fairly unlikely you will have original sodium ones.
Valve guide wear has a lot to do with exhaust valve breakage in VW engines,if the guide is badly worn there is poor heat transfer into the head casting ,the heat stays in the valve and repeat excessive heat cycling causes it to break.
The seats come loose as a result of the above issues and overheating that's why many won't rebuilt old heads anymore.
My machine shop won't touch them anymore but they still do type 1 heads,they don't do welding on any of them after having issues.
Over the years (many of them) I have seen my share of exhaust valve and seat issues with the type 4's.
Posted by: Optimusglen Sep 2 2016, 05:41 AM
Ah, yeah that looks bad!
The exhaust valves in the new heads looked to be brand new, and I don't believe they are original valves because of the TRW stamping (unless TRW supplied OEMs back then) So I will run what I have.
TRW are replacements, great I like them,fairly unlikely you will have original sodium ones.
Valve guide wear has a lot to do with exhaust valve breakage in VW engines,if the guide is badly worn there is poor heat transfer into the head casting ,the heat stays in the valve and repeat excessive heat cycling causes it to break.
The seats come loose as a result of the above issues and overheating that's why many won't rebuilt old heads anymore.
My machine shop won't touch them anymore but they still do type 1 heads,they don't do welding on any of them after having issues.
Over the years (many of them) I have seen my share of exhaust valve and seat issues with the type 4's.
Great info! The valve guides in the new heads are all awesome, no slop but still allow the free movement of the valves.
Last night i honed the cyclinders. Plateau hone with 260 and then finished with 600 and an intense cleaning. Then i gapped all the rings for their specific cylinders and installed them on the pistons. Piston grooves are well within spec as well. This thing is shaping up pretty well.
Posted by: Optimusglen Sep 3 2016, 06:04 PM
More work today. Waiting on stuff for the engine so I started on getting the 5 lug hubs swapped in. First, I needed to put it in the air. 2 feet of air. It's no lift, but these jackstands are awesome.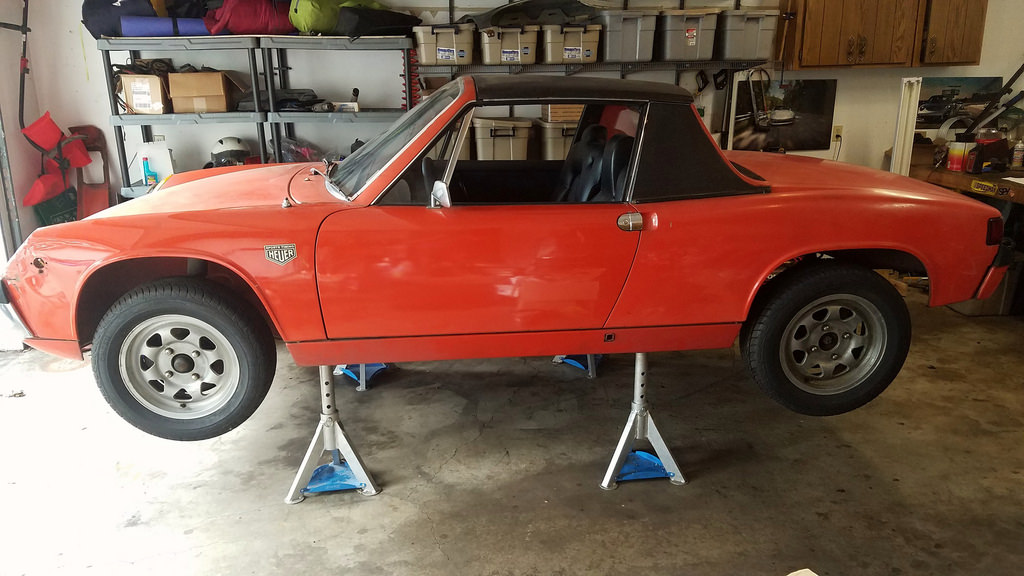
Started on the rear. Pulled the control arm and everything related to it. Greased a new wheel bearing and installed, new bushings of course, and put it all back together. Test fit one of my new wheels then called up my tire guy to set up a day next week to swap my tires to the new wheels.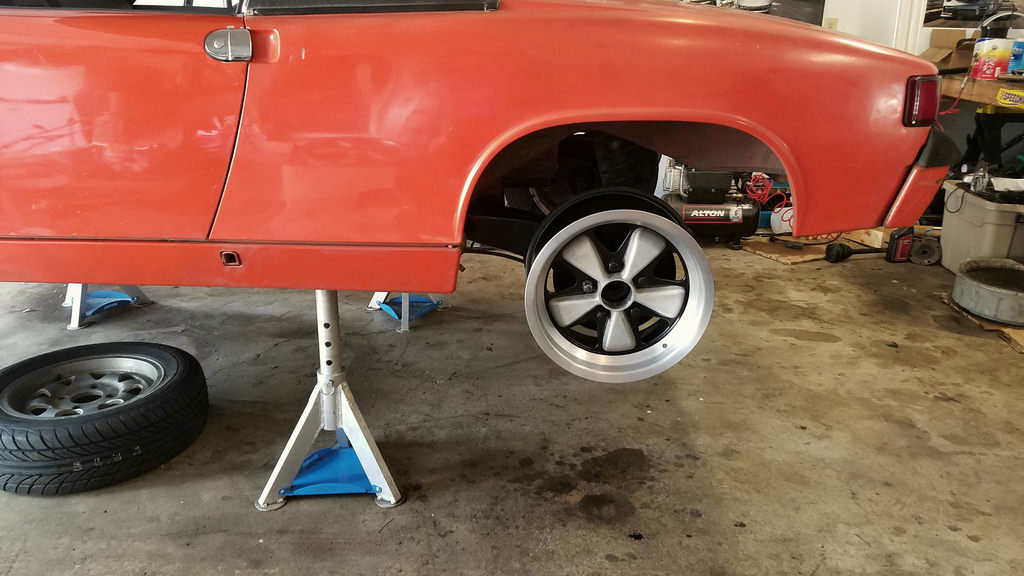
Posted by: Optimusglen Sep 8 2016, 07:31 AM
Got the tires swapped over.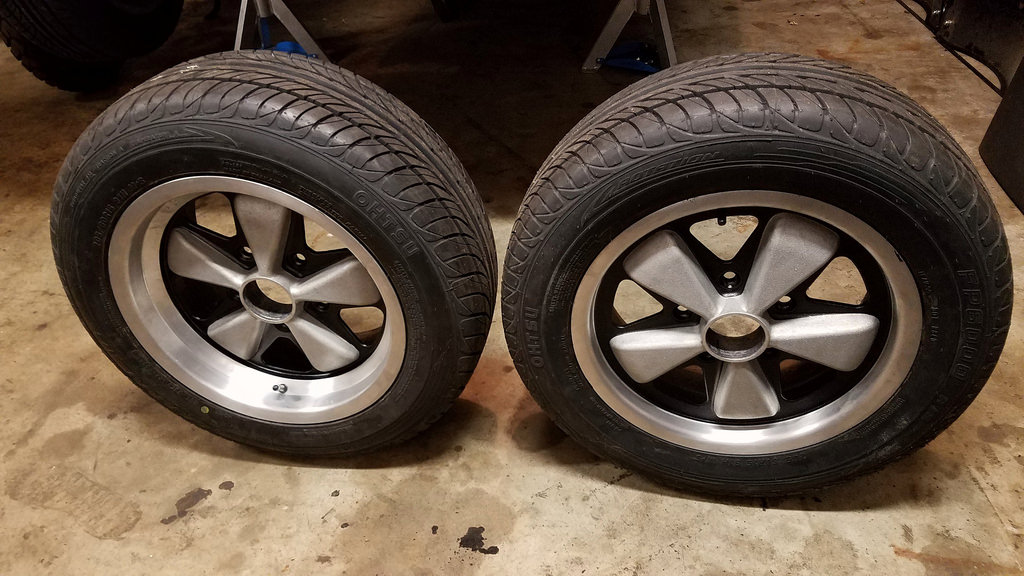
Tires are the same size front/rear. Probably the widest tire I can fit in the rear, as it sits I will need to roll the inner fender lip out back. Since the wheels are staggered, the rears have a slight stretch. Overall I don't think it detracts from the looks noticably, and performance differences are negligable, so they'll work. If I was buying new tires for these I would probably do staggered sizes, but alas, that's not in the cards right now.
Posted by: Optimusglen Sep 9 2016, 07:43 AM
More progress last night. No pictures, but i fixed the exhaust stud. Drilled and threaded it up to 10mm then used a stepped stud.
Then I started in on swapping one of the front rotors, quickly discovered that the new 5 lug rotors were made from the late model 914 so I cannot use them.
Well, I can use them enough to get this picture, but thats it.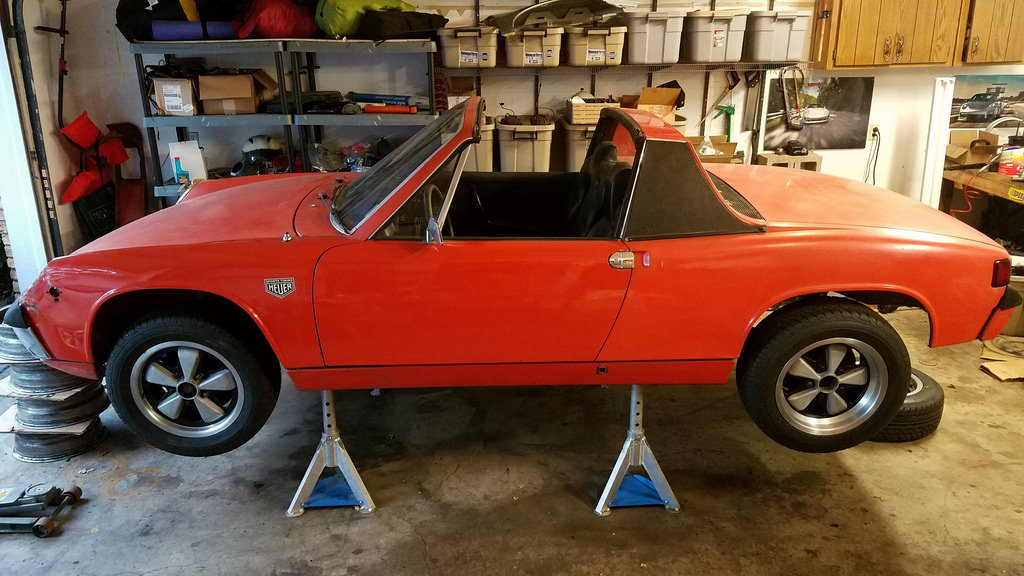
Difference is offset. To use these rotors I need late 914 spindles, calipers, ball joint, and I believe control arms. So now I'll be looking into getting my old rotors drilled.
Next I will be measuring deck height and figuring out which spacers I will need under the cylinders.
Posted by: gms Sep 9 2016, 09:11 AM
The car is coming along nicely!
Posted by: Optimusglen Sep 9 2016, 09:19 AM
The car is coming along nicely!
Thank you!!
Posted by: Optimusglen Sep 20 2016, 01:51 PM
Update time!
Since I can't use the new 5-lug front rotors/hubs I looked into and found a machine shop that can accurately drill out my existing 4-lug fronts. Figured I'd have them turn the rotors at the same time and looked up the spec to make sure they'd still be useable. No dice. Minimum is 10mm after turning, with a minimum worn state of 9.5mm. So I'll need to buy new front rotors and then have them drilled. This has been the biggest hang-up in the last couple weeks. I'll be able to order new rotors this Friday when my car fund is replentished a bit. New front bearings and seals are already ordered.
I measured the deck height and I'm getting .055" (averaged from 16 measurements in 8 places) From what I've read, I'l actually be able to run these cylinders without any spacer at the base. I will not be running a headgasket based off of Jake Rabys recommendation. Does this all sound right to you guys?
Of course, now I'll need to get the pushrods set up. The previous builder kept the stock pushrods I believe, and he spaced the rocker arm sub-assembly away from the head slightly with shims. Theoretically, I could keep the pushrods as they are and assemble the whole setup in the same way as it was before...
In other news, I was working in the garage last week trying to get the passenger side rear swingarm swapped. Trying to get the pivot rod out of the old arm, rubber bushings were really holding on. Seemed to be a bit tougher than the drivers side that I had done previously. Anyway, I managed to bash my hand with a 4lb sledge hammer. It didn't feel the greatest. Swelled up a little but it was manageable. Now I have a bump, maybe broke something? I dunno.
Finally, update posts are worthless without pictures, so here's a new illustration I had been working on.
Tweaked the color and sent some to print, if anyone wants one let me know. Prices and sizes are in my Member Vendors thread in my signature.
Posted by: raynekat Sep 20 2016, 08:50 PM
Curious what the offsets (ET) or backspacing (measuring from the flange face to the inside rim) are for your 15x7 wheels?
I'm looking at getting a reproduction 15x7 R wheel that I hope is more offset to the inside of the car.
Thanks....
Posted by: Optimusglen Sep 26 2016, 08:24 AM
I measured the combustion chamber volumes again and got the same results on all 4 pots. Same with deck height. Pistons, cylinders, and heads are bolted on. After I took the pic I also cleaned and assembled the oil pump. 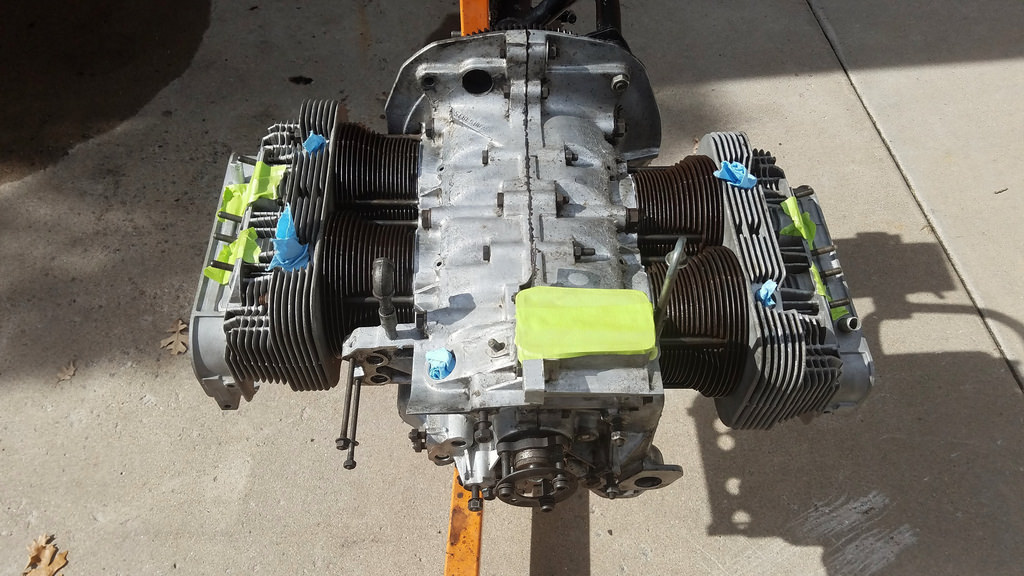
As far as the wheels go, I'll check that next time I'm in the garage.
Posted by: Optimusglen Oct 3 2016, 07:24 AM
More work. I was able to use the existing push rods with small shims under the rocker arm assemblies. Yes I remembered the tins that get installed before the push rods.
Seen lots of talk about what to use to seal the pushrod tubes. My bores for the tubes were incredibly clean so I just used some assembly lube on the o-rings. It's easy enough to take them out and try something else if those leak.
Carbs are just bolted on because I couldn't help myself.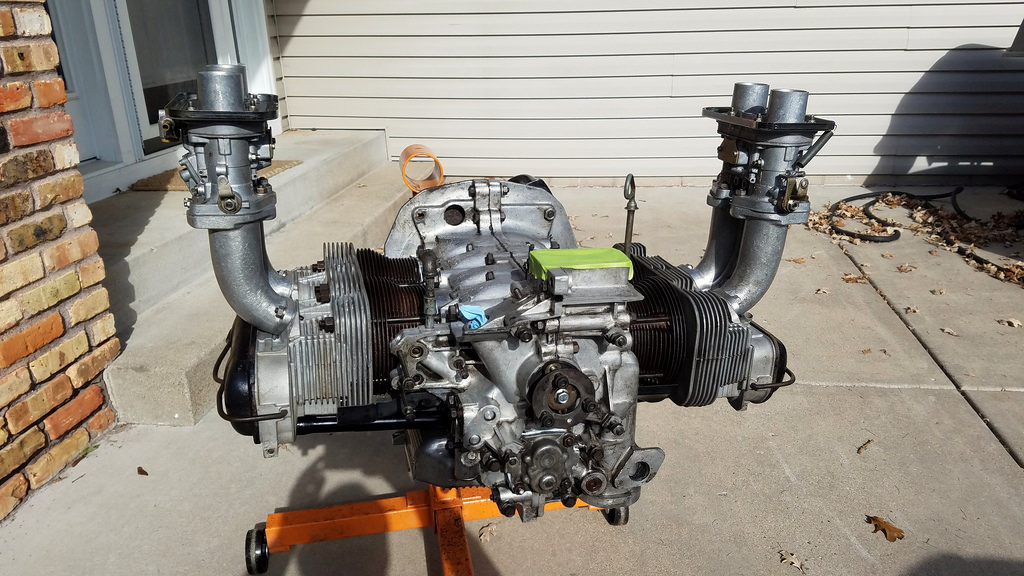
Posted by: Optimusglen Oct 13 2016, 07:26 AM
New front rotors arrived, got them machined yesterday for 5 lug studs and then pressed the new bearing races in and installed them. The unthreaded portion of the stud protrudes up from the contact surface between the wheel and rotor, and that unthreaded diameter doesn't fit with clearance in the wheel holes. So now I need to replace the studs, or open up the wheel holes a few thou.
Also rebuilt the master cylinder last night. Before you freak out, the bore was perfect so it was really just installing new ATE rubber seals.
I removed the pedal cluster to rebuild it and discovered that someone had already swapped bronze bushings into it to replace the plastic. Everything moved freely and sprung the right direction, so I just cleaned it up a little. I probably would have swapped in the new parts I have but the pin that needs to be pressed out was a real bugger. Worked on it for a bit and decided that it wasn't broken so why fix it.
Posted by: Optimusglen Oct 24 2016, 08:11 AM
Progress since the last post:
-ordered a new oil cooler, received it, and installed it.
-started organizing the tins for cleaning, didn't clean them
-purchased new wheels studs, pounded old ones out, pounded new ones in, front wheels mount up cleanly
I started in on the brakes. I had removed the master cylinder and calipers before I had read to break the pistons free using the brake pressure. I guess I had just assumed the old air pressure trick would work.
It didn't.
So I had to use the messy method, a grease gun which happened to have the same threads as the caliper pipe input. It all came apart smoothly.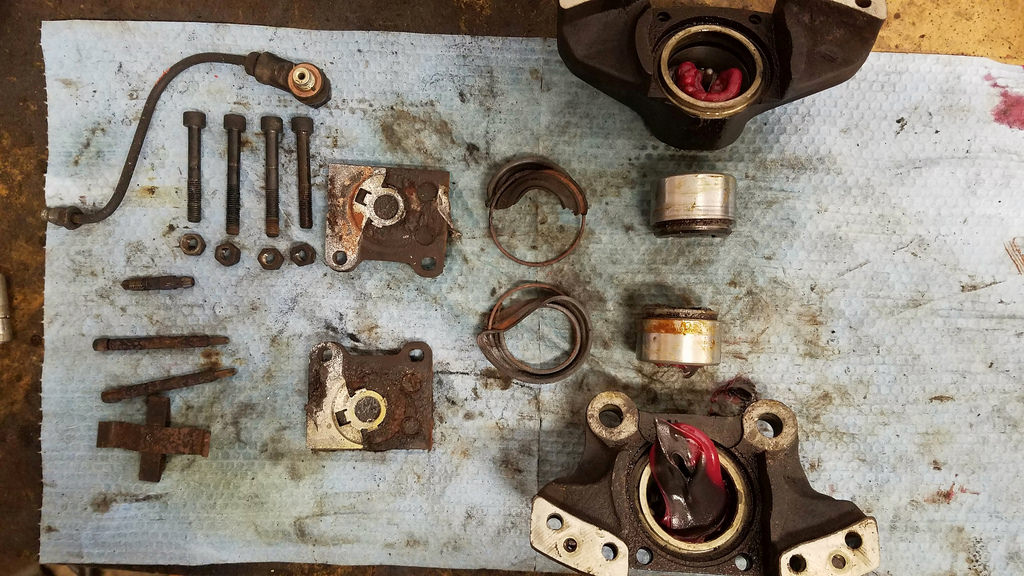
3 more to do. I put a feeler out for budget friendly yellow cad plating, but I'm not holding my breath. Since I no longer have hundreds of dollars to pour into this project I may have to find an alternative in the paint isle. It'll be clean though, i.e. black, silver, or if I can find something that looks similar to yellow CAD.
Now that the 5-lug swap is complete I can roll the fenders. The Eastwood fender roller "universal" bolt pattern doesn't extend all the way out to 130mm BC, which is why I couldn't roll the fenders when it was 4x130 using this tool. The local club that lends this out to members had an adapter made to bolt up to a Porsche 5x130 hub so now I'm all set. Except I'm not. Upon test fitment it looks as if my lug nuts (the long alloy style) are too long and protrude past the mounting surface for the tool. Today I'll buy 5 lug nuts that are lower profile and THEN I should be ready to roll.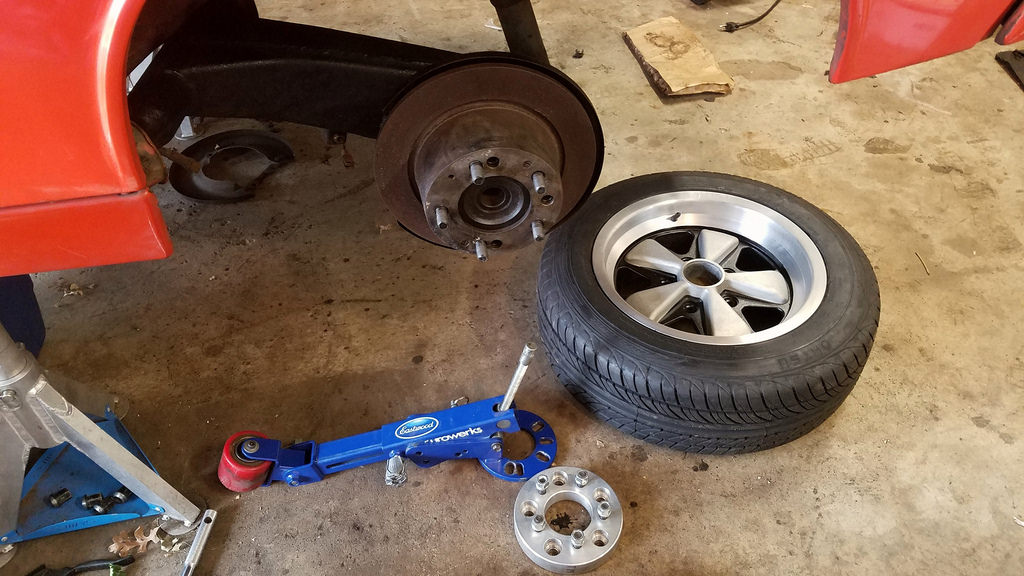
Posted by: Mr.Nobody Oct 24 2016, 08:55 PM
Car looks killer.
Not sure how I missed this thread. You used to be on the Vortex didn't you?
Posted by: Optimusglen Oct 25 2016, 06:52 AM
Car looks killer.
Not sure how I missed this thread. You used to be on the Vortex didn't you?
Thanks! And yes, still on Vortex/TCL actually.
Posted by: Mr.Nobody Oct 25 2016, 08:31 PM
I thought so. Recognized your name and MKIV you did the welding on. I still peruse TCL occasionally. Lots of good info there. Actually the Vortex archives are phenomenal.
Nice looking 914 you got. I've had mine about a year and a half and love it. Really fun car.
Posted by: Optimusglen Oct 28 2016, 09:27 AM
Thanks!
Ended up going with just a standard cast-aluminum type finish, from a rattle can. It is high heat paint at least. Color looks a little yellowish, but that's just from the lighting.
Opted not to remove the e-brake lever arms, but otherwise they're all disassembled. Bores had light corrosion that I was able to get off with some super fine steel wool, pistons the same. Calipers are all painted and ready for reassembly.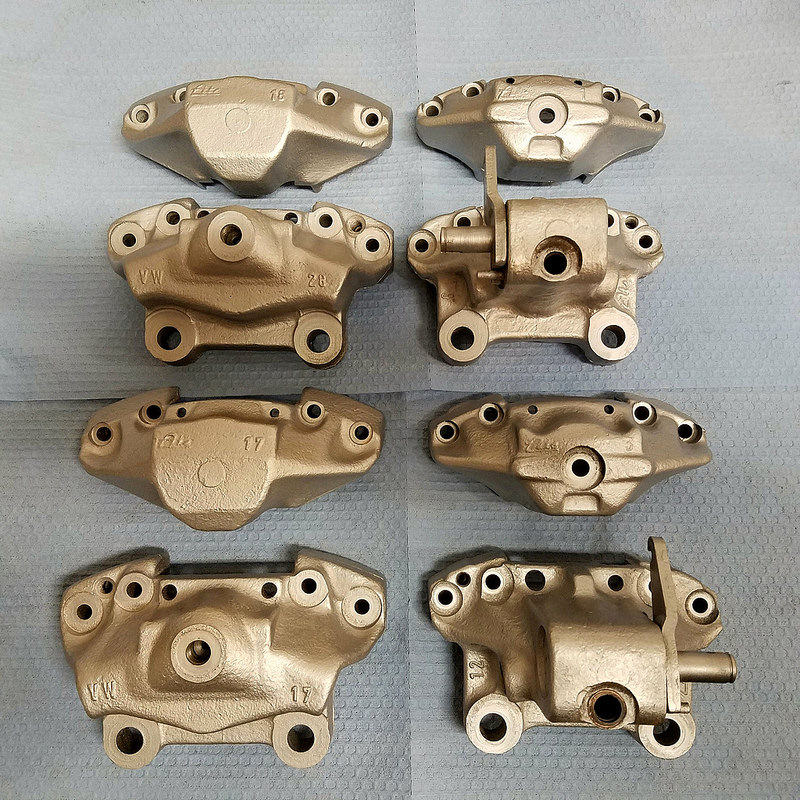
Ideally I would have stripped these down completely and had them re-plated, but time and money are no longer my friends.
On the bright side, the pistons all came out remarkably easy for having sat for so long.
Posted by: mb911 Oct 28 2016, 11:47 AM
Just an fyi your bumper is shipping today
Posted by: Optimusglen Oct 28 2016, 04:24 PM
Just an fyi your bumper is shipping today
Great! Let me know the tracking number when you can.
Posted by: Optimusglen Dec 5 2016, 10:23 AM
Progress.
Finally got myself to pressure wash the tins the other day. Then hit them with a quick coat of paint.
Today I mounted most of them.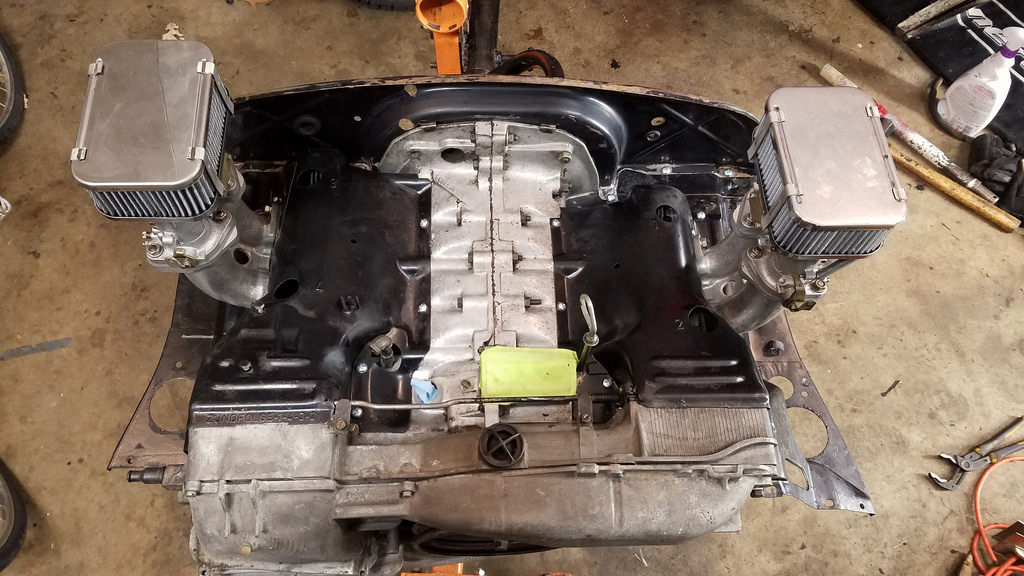
Then I spent most of the day cross legged in the engine bay with a bottle of purple degreaser, a small brush, and two rolls of shop towels.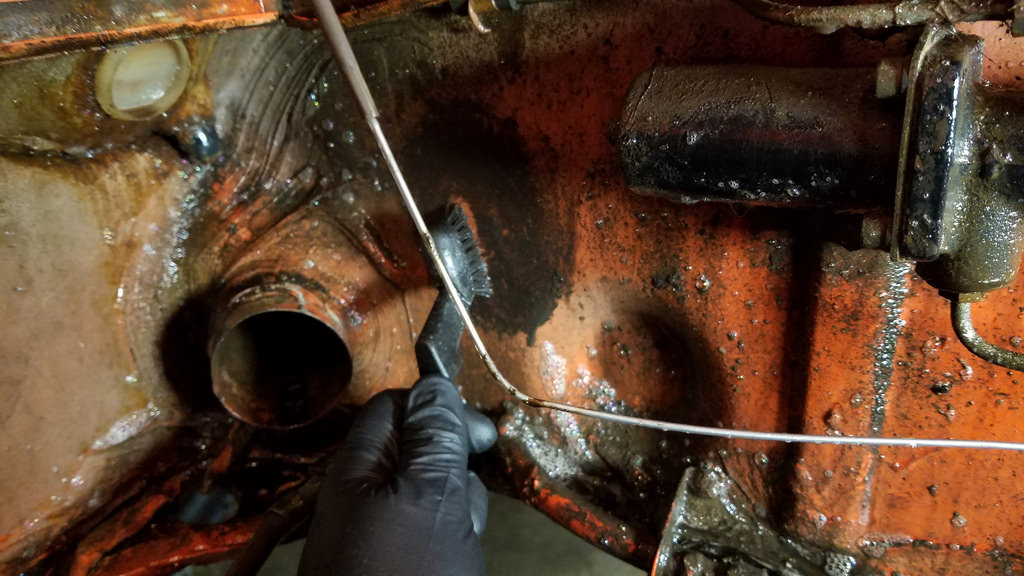
After that I was able to install the new engine bay seals.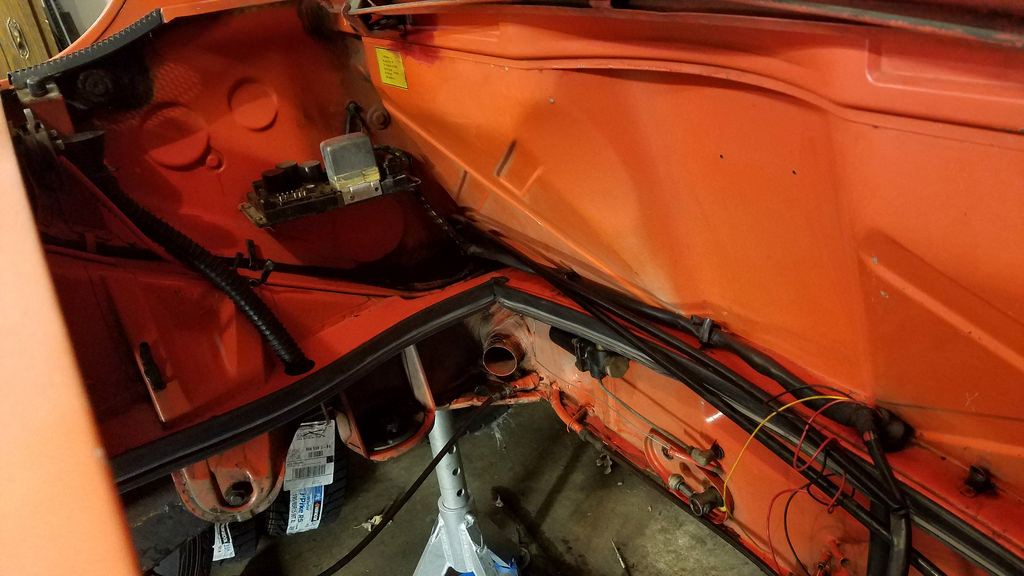
So much better.
Also ordered a new alternator, pretty soon the engine will be ready to go in!
Posted by: Cairo94507 Dec 5 2016, 11:09 AM
Terrific work. The engine will love living in that bay.
Posted by: Frankvw Dec 5 2016, 02:12 PM
Wow, your engine bay cleaned up very nice. That must have cost some hours of dirty work !
Posted by: Optimusglen Dec 5 2016, 02:26 PM
Definitely.
I sprayed it down with degreaser a couple days before to let it soak a bit, then just sat in there with a spray bottle, a small brush, and rolls of shop towels. It was dirty, and gross, and I had to wear a respirator so the fumes didn't kill me, but I knew I'd be thanking myself later.
Also inspected the "repair" done by someone in the past. 
Fortunately the other side broke it's welds off clean. This side will be ground off with a cutoff wheel. I have access to an endmill and lathe after hours at work, so I will probably design and build my own hinges in the spirit of the J West hinges.
Posted by: Optimusglen Dec 8 2016, 09:24 AM
Getting closer. Oil tower installed, rest of the tins installed, alternator and belt installed. Throttle linkage installed but not entirely set up yet. I want to dig back through the archives and find a thread I saw at one point talking about this style linkage. 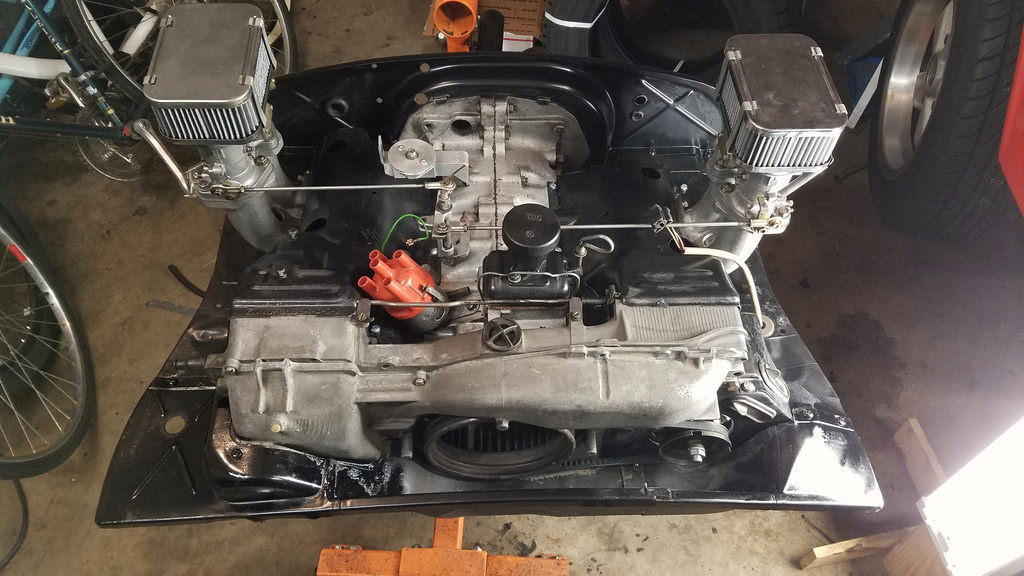
As much as I would love to purchase new linkage that's more accurate, with a baby on the way the time frame and cash flow for this project are greatly diminished.
My wife convinced me to buy a new alternator instead of rebuilding mine, probably more to save time, but she's pretty awesome anyway. Just a shame it's hidden away.
I do wish I could have spent more time on the tins, sandblasting and powder coating, but I just can't do it. I need to get this in the car as soon as possible and since this will be a driver and not a trailer queen it's not a huge deal.
Also I cleaned up the thermostat a bit, looks like someone had spray painted or something.
I was going to look into rebuilding it following this article.
http://www.ratwell.com/technical/Thermostats.html
But upon looking at my pic and the pics in the article, I think mine may be acceptable. I will measure it and test it to be sure.
Tonight I'll be installing the fuel hardline down the tunnel and then setting up the mixture of hard and soft lines getting it up to the carbs.
Posted by: raynekat Dec 8 2016, 08:54 PM
Everything is looking super.
Especially that engine compartment.
Well done!
Posted by: FourBlades Dec 10 2016, 08:42 PM
Great job on the project so far! 
John
Posted by: Optimusglen Dec 11 2016, 06:33 AM
Thanks guys!
Yesterday was productive. Finished the fuel system. Hard and soft lines. And getting the power up to the front for the fuel pump. Chopped out the remains of the battery tray and the seized trunk hinge. There were some booger welds on the other side from where the other hinge broke off so had to grind those off too. Replaced both and decided to bolt the cups in and remove the tension springs. I will add gas struts later. Then I finished the pedal cluster and installed, and installed my master cyclinder, didn't have time to bleed the brakes though. New clear tubing down to the master, installed the feed pipes and tubing with new seals first, then fed them up through the holes.
I think next time I'm in the garage I will be sorting the engine mounts and installing the engine and transmission!
Posted by: whitetwinturbo Dec 11 2016, 11:12 AM


Posted by: rudedude Dec 11 2016, 11:27 AM
Are you going to leave as a tail shift? I believe that is what you have isn't it?
Might have all the parts you need gathering dust for side shift.
Jule
Posted by: Optimusglen Dec 11 2016, 12:52 PM
It is a tail shift. For now at least I'll need to keep it, the limits on time and money are wuickly approaching. I'd love a side shift, but it's not in the cards.
Posted by: Optimusglen Dec 30 2016, 04:55 PM
Yes, I have one of them on order.
Another day in the garage, I built a positive pressure bleeder to keep the reservoir full and pressurized to about 3psi. I have speed-bleeders on all 4 corners so it was pretty simple to crack the bleeder, pump the pedal several times to move fluid through, then close the bleeder. Bled them in the correct order (RR, LR, RF, LF) and adjusted the rear brake pad clearance before and after. Got all corners bled and ran out of fluid, I'll let it rest and then bleed the whole set again once I pick up some more fluid.
I didn't have a chance to fully rebuild the axles, it'll need to wait until later. I absolutely needed to get the car on the ground and moved over today, so that meant not hooking up all the cables just yet and just getting the axles in. In my VW days I know that if you rolled a MK1/2/3 VW Rabbit/Golf/Jetta without the axles in place, you'd ruin the bearings. Not sure if that's the case with the 914's, but better safe than sorry.
Once the brakes were done and the axles in, it was time to mount the wheels again and lower the car. It's been a mystery exactly what the "stance" would look like so I was very excited to see what I had. I knew that I would probably want to space the fronts out a bit, and that the rears would be close to the fender even after I rolled the lip.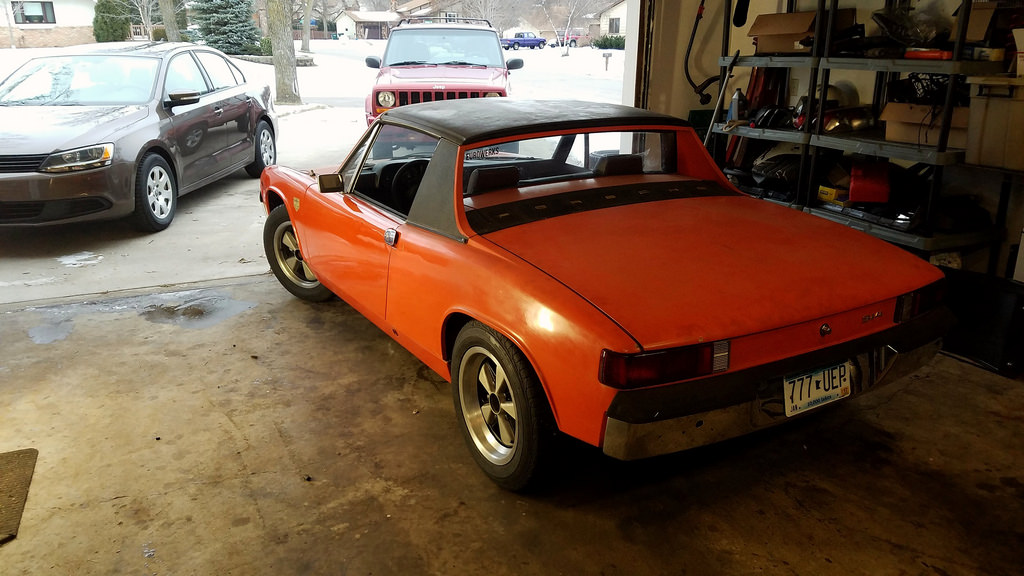
Happy to report that the rears are about perfect. On full compression they tuck inside with almost a centimeter of room. The fronts DO need to be spaced out, I'll start with 20mm and go from there.
I rolled it outside in the daylight.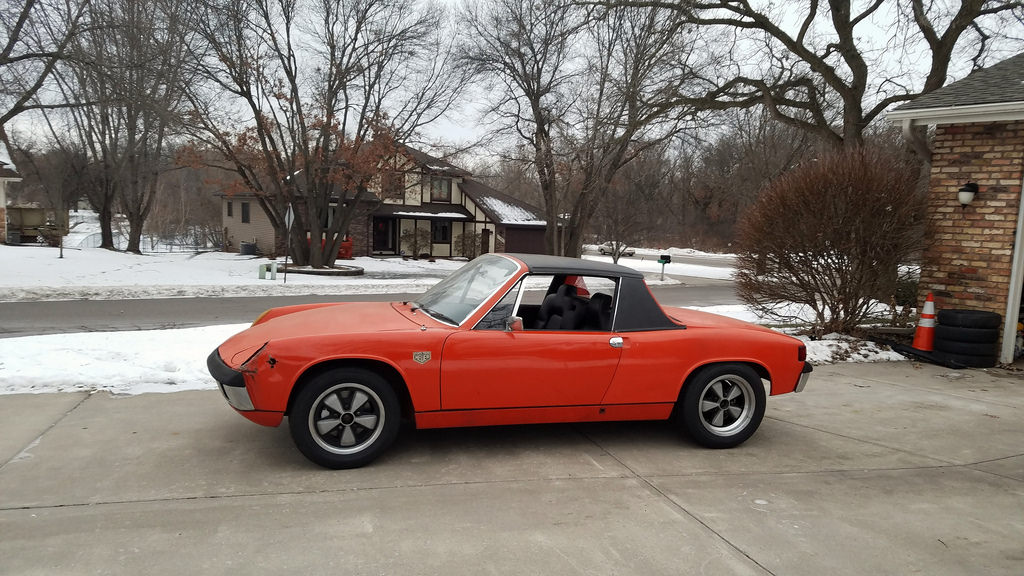
Never before has the orange rocker covers and front lower panel looked so odd. Can't wait until it's warmer and I can paint those...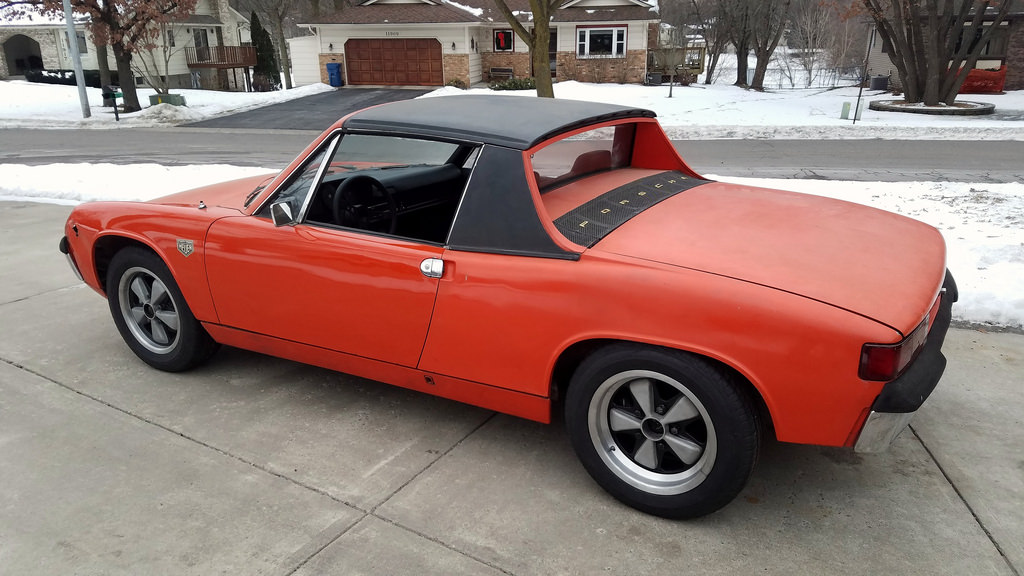
So now that the car is on the ground and my wife can park inside again I'll be hitting small things here and there on the weekends, the goal is still February for running/driving.
Posted by: PanelBilly Dec 30 2016, 05:35 PM
Looks like the front is sitting high. It's not much work to lower it a bit.
Posted by: Optimusglen Dec 30 2016, 10:59 PM
Yes, that's on the list too.
Posted by: Optimusglen Mar 20 2017, 02:26 PM
More un-progress.
I decided to put the Compomotive Fuchs up for sale with the tires and get something else. After a bunch of forum reading I settled on Euromeister Fuchs in 16x7 all around. These will get the same RSR treatment as the previous wheels, or something close.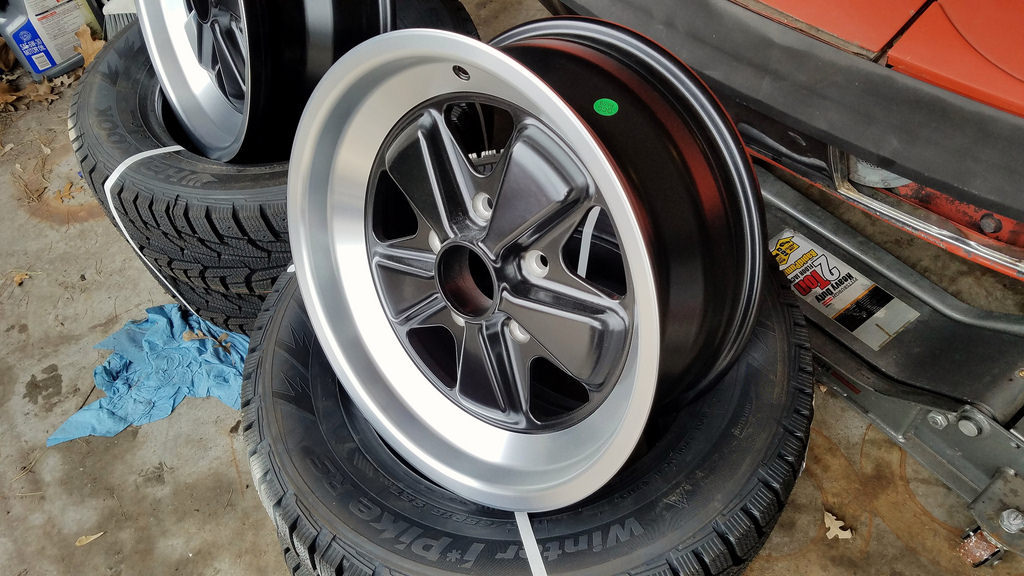
Here's someone elses car with the same wheels/size/offset. Stole it from Facebook. If this is you, sorry, and thanks. 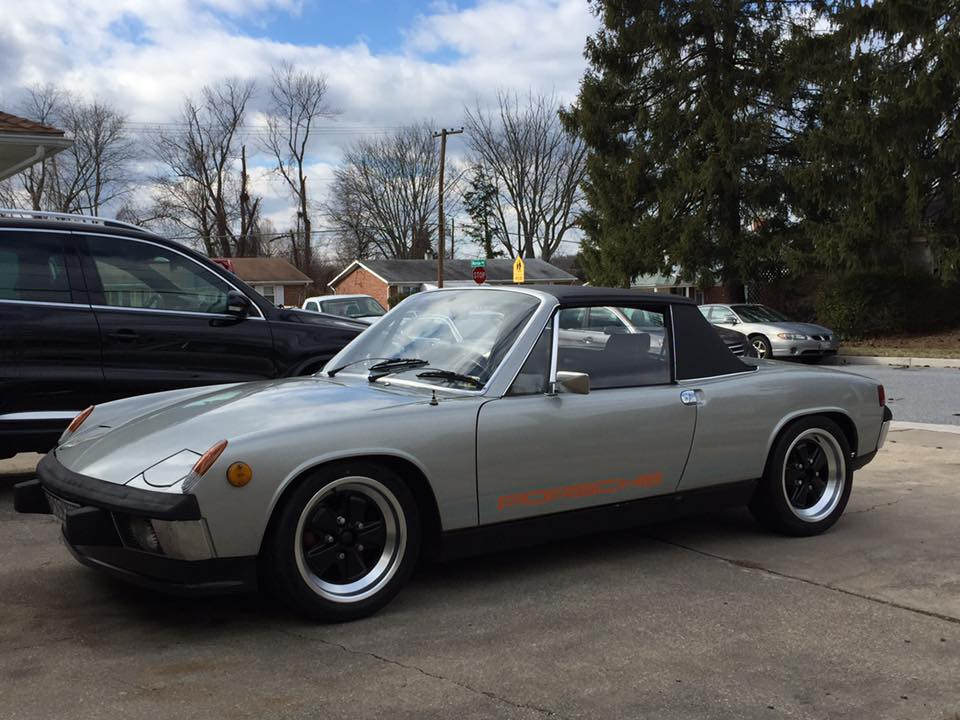
Since my last update I also got the headers blasted and ready for paint or powdercoat. Been working on some projects for Eric at PMB and in return got a new pair of rear rotors to finish out my brakes. Picked up a new speedo cable, but have not installed. Started assembling the shift linkage but have not adjusted.
Work in the garage is delayed even more though, we had a pretty big scare late last week. TL;DR at the bottom
Last Wednesday my wife went into the clinic because her leg started swelling up. She had some lower back and hip pain on that side for a few days prior. They did an ultrasound and discovered a massive clot (DVT) from her ankle all the way up into her hip. Any amount of googling will tell you this is a very serious thing.
We transported her over to the hospital where they got her on some blood thinners and kept her overnight Wednesday. She started on pill blood thinners and also shots to get it started while the pills built up. Thursday they did another ultrasound and saw that the clot was extending all the way up into her abdomen. Later on Thursday they prepped her and did a procedure. First they went in through her neck to place a safety screen/mesh in her chest. This would catch any rogue blood clot bits and potentially save her life. Next they put a special catheter in at her knee and fed it up into her abdomen. This catheter has several holes that slowly soak the clot with a breakup drug. The catheter also has a wire inside emitting an ultrasound pulse that helps to break up clots. They left all this in place overnight and moved her into the ICU for the night. Surrounded by machines buzzing and beeping.
Friday they did a follow up procedure and were less than impressed. They went in with different tools to pull out as much of the clot as they could. Got her on an IV drip instead of the shots. We spent the day in the ICU and that evening were moved into a regular room. Friday night and Saturday morning we had to resume the shots.
She saw a physical therapist and did some practice walking and stairs, then were discharged Saturday night.
With blood clots, the big fear is some breaking loose and traveling to the heart, lungs, or brain causing paralysis, stroke, cardiac events, and/or death. Another fear is needing the limb amputated due to internal damage, or cronic swelling and cronic pain. We're blessed that she is recovering and that the pain is going down. She will be on the blood thinning pills for months, and I will be administering shots every 12 hours for several days. It is quite possible that she will have cronic swelling and the pain that comes with it for the rest of her life.
In her current state she can't really take care of baby Wren. She can hold her and feed her, but cannot pick her up and walk with her, she can only walk with the use of a walker. It's saddening seeing your 29 year old wife struggling to walk to the bathroom with a walker.  So dad duty is at 100%, while also working from home whenever possible because I ran out of vacation days to use, and I am pulling nurse duty too since she cannot give herself the injections that are needed every 12 hours. We have friends and family that are helping out but it is still very hard.
Needless to say, work on the car has halted and will resume at a later date. Maybe when it's warm enough that I can have baby out in the garage with me.
TL;DR
-wife almost died - massive leg blood clot
-working through helping her, being a new dad, and the day job
-progress on the car has stopped for now, will resume later on
Posted by: 914time Mar 20 2017, 02:32 PM
Glen, I'm very sorry to hear this for you and your family...how scary! Thank you for sharing with your 914World family.
Stay strong for your wife and Wren and your friends and family will be strong for you.
Thoughts and good wishes to you guys.
Posted by: raynekat Mar 20 2017, 05:01 PM
Glen...that's an incredible and scary story. Hits home as my wife is just over 30 weeks pregnant now. I send you all my warm wishes and hopes to you and your family. You've definitely got your plate full. Best of luck with everything and hope it all works out for the best.
Posted by: simonjb Mar 20 2017, 05:43 PM
God Speed to recovery
Posted by: bretth Mar 20 2017, 10:18 PM
Best wishes for the speedy return to good health.
Brett
Posted by: RickS Mar 20 2017, 10:50 PM
May her recovery be swift and complete. Unbelievable that this happened to a 29 YO.
Posted by: matthepcat Mar 21 2017, 01:16 AM
Scary. May her recovery be speedy and you guys take this time to recognize you are blessed with each other.
Posted by: pete-stevers Mar 21 2017, 01:49 PM
Great progress thread!! Keep us updated on how you are all doing! All the best to you and your family!!!
Posted by: Optimusglen Mar 29 2017, 07:05 AM
Thanks guys.
Wife is getting better, swelling and pain are decreasing. She can carry baby now so that's awesome. Continuing recovery.
Started refinishing the Euromeisters. Did a faux RSR because I didn't want to get them anodized. Lip is the stock machined/polished, inner width of the lip and the pedals are dull aluminum, and background is flat black. Pic was taken when they were still a bit wet so it looks glossy. 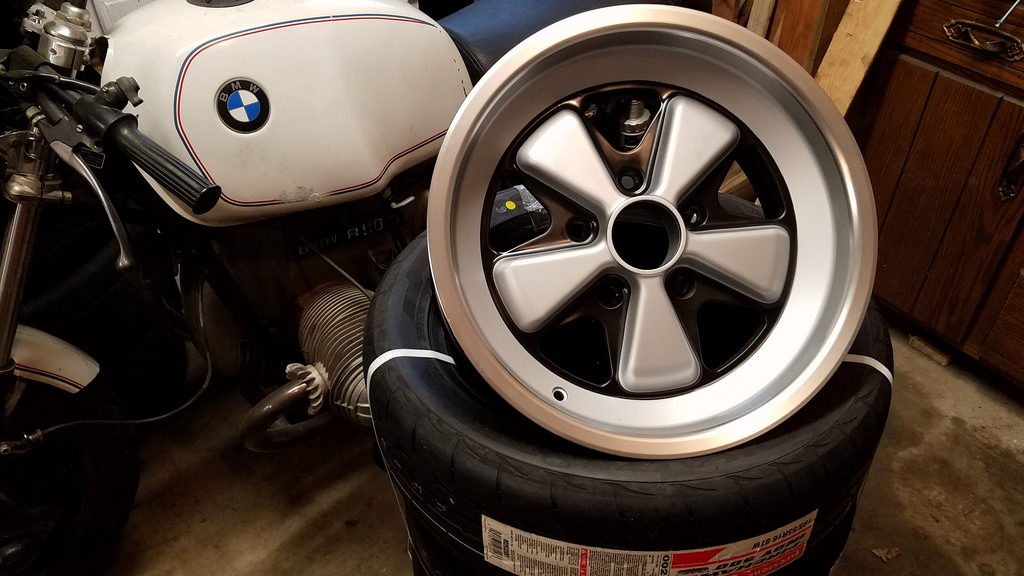
Loving how the first one came out.
Tires are Firestone Firehawk Indy-500 in 195/55-R16 because I wanted easy fitment.
Posted by: raynekat Mar 29 2017, 11:47 AM
Wheels look super.
That tire size should work out real well too.
Glad to hear the wife is improving.
Posted by: rudedude Mar 29 2017, 12:55 PM
Glen,
So sorry to read all of this. Hope everything continues to improve. If you need anything let me know. I'd also like to come see someday now that the weather is improving.
Jule
Posted by: JustinMeier Mar 29 2017, 02:26 PM
Yikes!!!! and 29 even 
Good thing medicine is what it is today or it sounds like it would have been a lot worse.
Posted by: Optimusglen Apr 1 2017, 02:16 PM
Agreed.
She's making a quick recovery so far, swelling is down a lot, and pain is down too. No longer needs the walker to get around and can drive her car again (she drives a manual) All great stuff.
Couple more pics of the project. I finally had enough of the orange rocker covers. The bodywork/paint part of the project will be a few years down the line probably, and I wasn't about to wait that long to fix the rockers, so I just sprayed them quick.
Also mounted the wheels and rolled it out into the sunlight.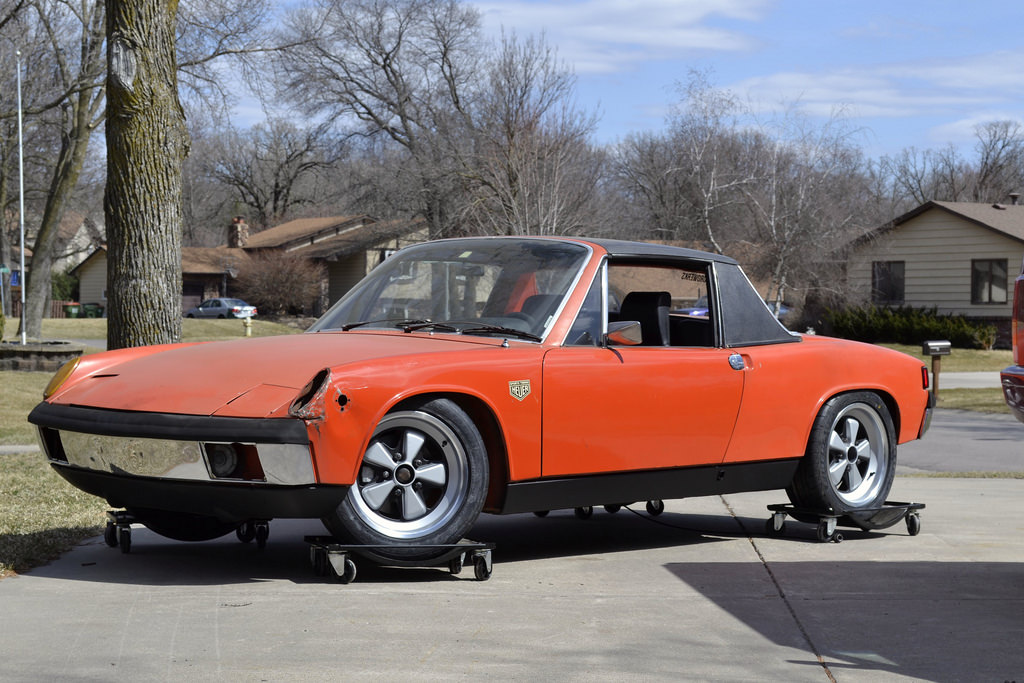
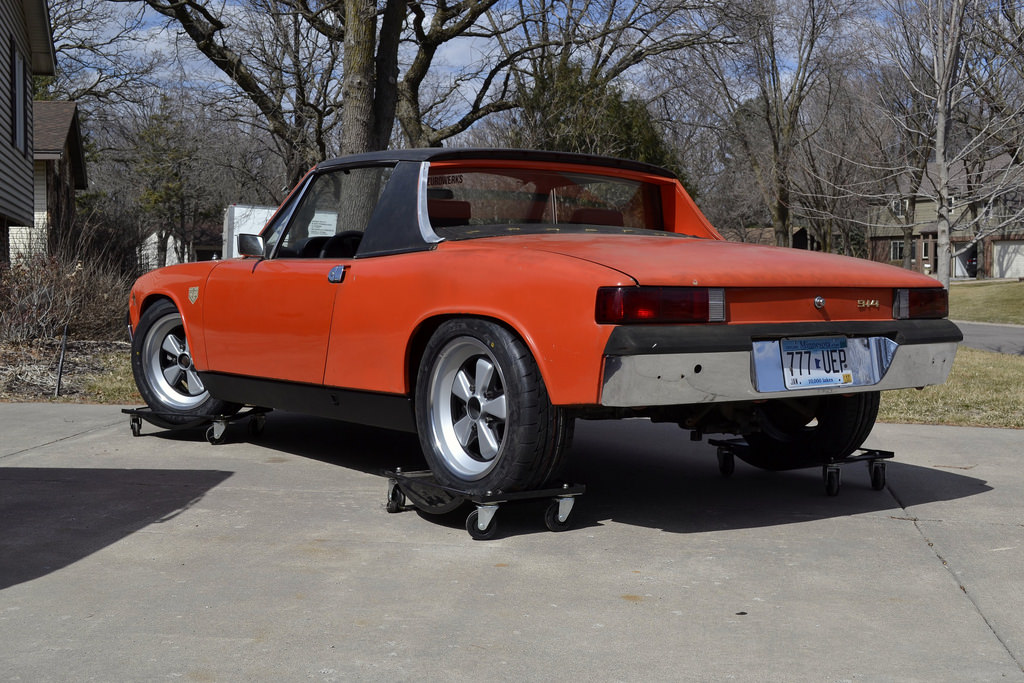
I want to drive this so bad. I might get a whole Saturday next week that I can tackle some more on it. Every time I put a list together of everything I still have to do the lsit gets longer and longer.
Posted by: Cairo94507 Apr 1 2017, 03:43 PM
Glen - God speed for a full and complete recovery for your wife. When stuff like that happens, the world stops in all other ways.
Oh, love the RSR finished wheels too. Are you going to off the front half of the left front fender and replace or try to straighten that?
Posted by: Optimusglen Apr 1 2017, 05:54 PM
Glen - God speed for a full and complete recovery for your wife. When stuff like that happens, the world stops in all other ways.
Oh, love the RSR finished wheels too. Are you going to off the front half of the left front fender and replace or try to straighten that?
Thank You!
I am planning to chop the front half of the fender off and weld a new panel in. Already have the replacement but bodywork won't be for a few years I think. I pounded it out enough that I can put a turn signal bucket in there to drive.
Posted by: Optimusglen Apr 4 2017, 07:19 AM
Glen,
So sorry to read all of this. Hope everything continues to improve. If you need anything let me know. I'd also like to come see someday now that the weather is improving.
Jule
Sounds good Jule! My garage is a mess compared to yours, but you're welcome any time. Hopefully the car will be driving in a few weeks and I can make it down that way for a C&C.
Project update:
Last night I got the distributor in and hooked up. All plugs and wires are in but the boots don't make a good seal with the tins. I have another set of boots I will try.
I verified the engine timing and got a baseline for the ignition timing, then I adjusted all of the valves and installed the new speedo cable.
The angle drive was a bit wobbly, I took it out and looked it over. Looked as if one of the previous owners stripped out part of it, then instead of replacing it they drilled a hole and pinned it together. I enlarged the drilled hole a bit then put a small self tapping screw in to hold it all together for the time being, will replace later on.
Then started looking at my passenger suspension console. The rear right wheel has a noticeable amount of camber and upon searching here it sounds like a common cause is a rusty console on that side.
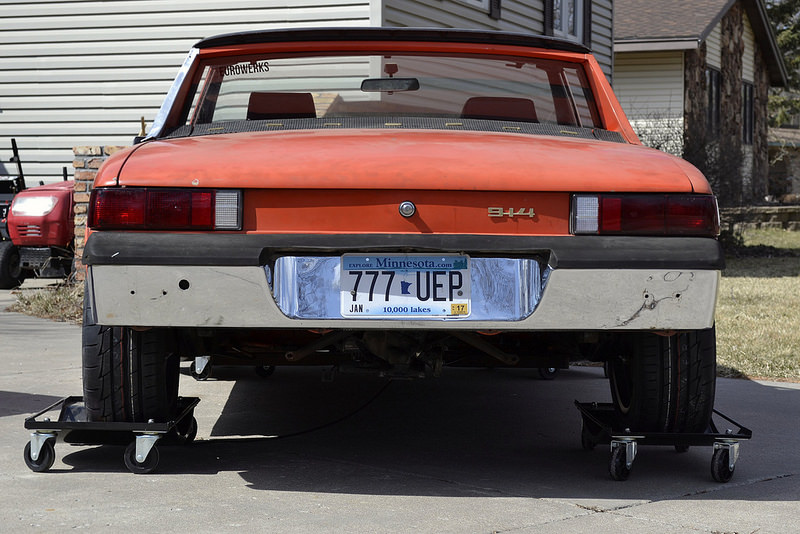
good news (maybe) is that the console is all rock solid, not even surface rust, just dirt. The plan is to remove that arm and see if the hole in the inner ear is ovaled out, and then just put it back together with shims. If I remember correctly, there are no shims in that side currently, the other side has a couple.
Got the shift bar in that goes from the firewall to the rear. So... much... slop... even with new bushings. Going to start looking into doing something with that.
Posted by: Optimusglen May 12 2017, 06:45 AM
Big update!
There were no shims on the passenger side, which didn't help the excessive negative camber over there. Inspection of the structural components showed nothing but solid metal, no rusty spots or cracks. So I ordered up some shims from Tangerine Racing, and 3 longer bolts to be safe. It's now sitting nicely at -0.8 degrees of camber in the rear.
Early last week I got a good day in the garage
-new throttle cable installed
-fuel pump got it's final mounting sorted out and wired in
-stock shift linkage was installed and set roughly, the cable shift project will come later on
-installed a new trans-chassis grounding strap
-finished up the PCV system
-installed the headers and then the rear section of the exhaust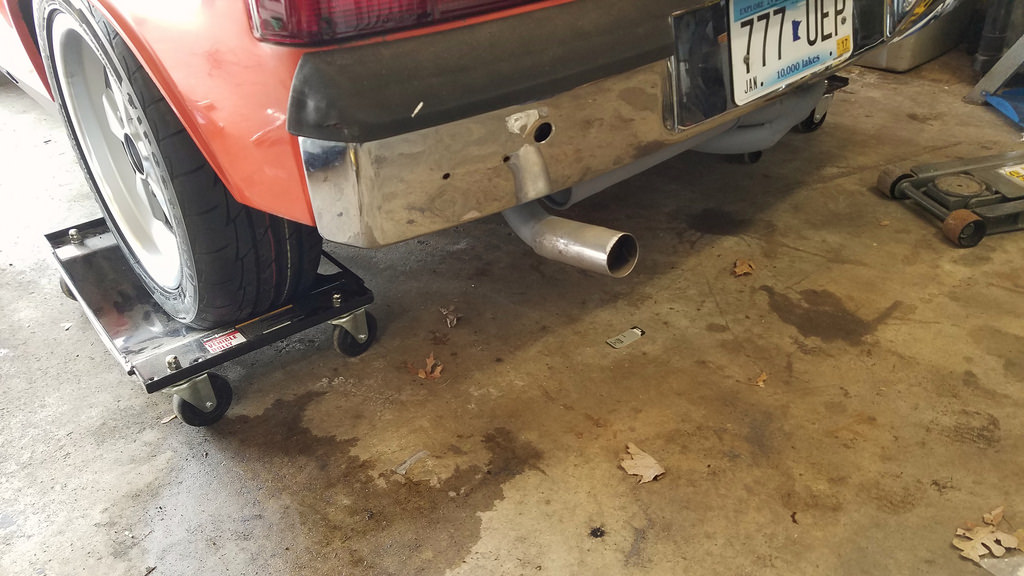
Exhaust doesn't look like much, but I like that about it.
The previous owner had this relay setup for the starter, kinda hacked in there. This pic is pre-teardown.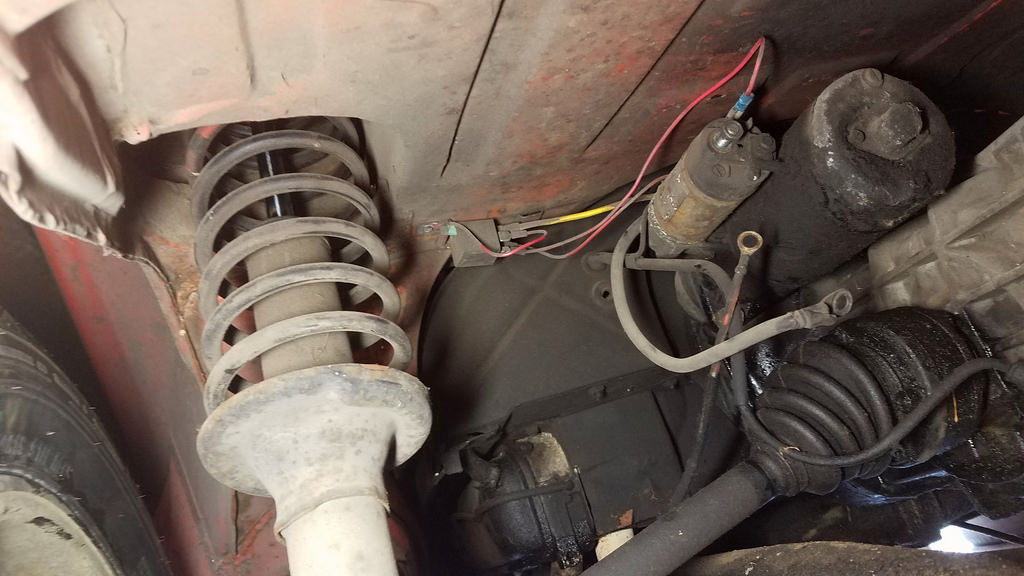
I'll be doing a hot start relay as well, but not like this. I'll be following Mark Henry's guide on this.
These rear springs came with the car, couldn't find much info on them.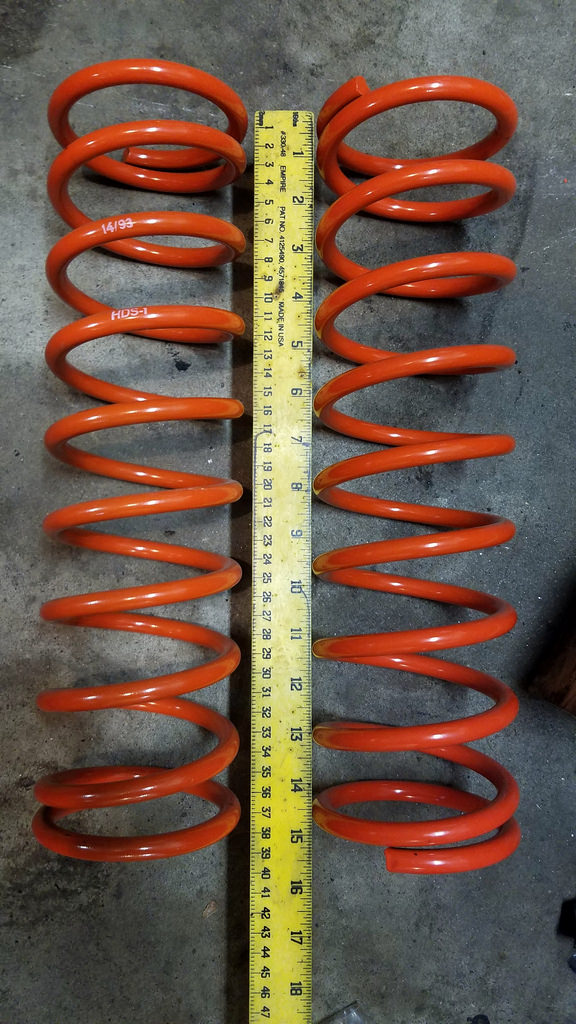
Marked "HDS-1" and "14/93" <~~(I assume this is a spring rate marking, but no idea how this translates)
Did a bit of search but couldn't find out what the spring rate is, anyone here able to enlighten me?
Spring dimensions:
-15" long
-4.125" outside spring diameter
-.425 wire diameter
Using a spring rate calculator, I get approx 115 lb/in which I believe is very slightly higher than stock.
Late last week I got another good day in
-installed the fuel filler neck/cap
-tried to rebuild the fuel level sender, saw that it was badly corroded and beyond repair, chopped off the bottom and bolted the top to the tank to keep debris out for now
-installed the new fusebox
-installed the remaining wiring harness and starter cables, didn't do the hotstart relay yet, for now it went back to stock
-installed the new thermostat and cable
-installed an oil filter and filled it with oil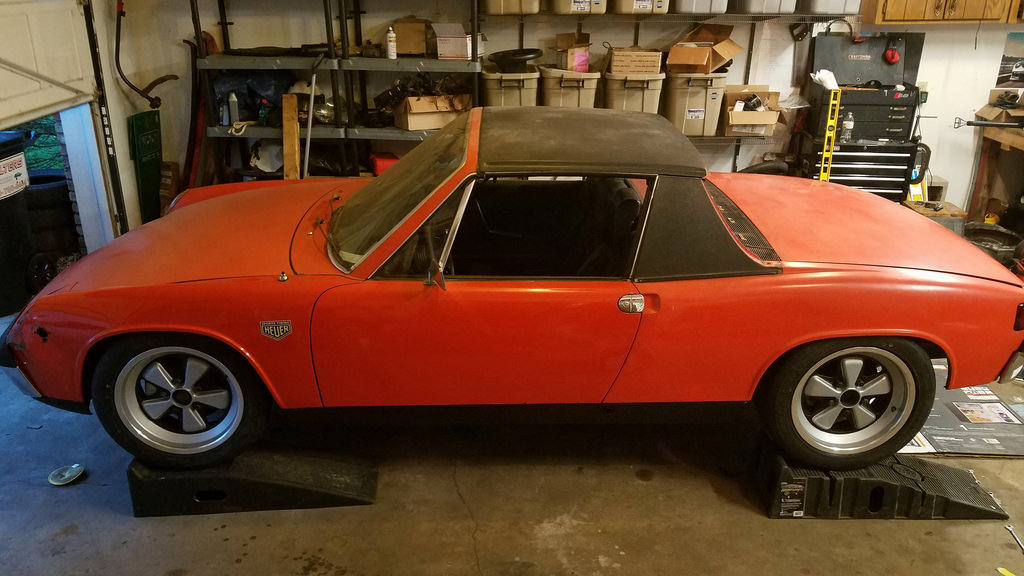
On Saturday I got out and tinkered with it a bit more. Primed the engine, tested the lights and ignition, everything works. Tested the fuel pump and that works too. Swapped the new rear brake rotors on.
Then last night I got out again. Got the front shocks in
Here are the fronts, old vs new. New ones are larger but they're also lighter. All the valving is in the upper section so it reduces unsprung weight even more.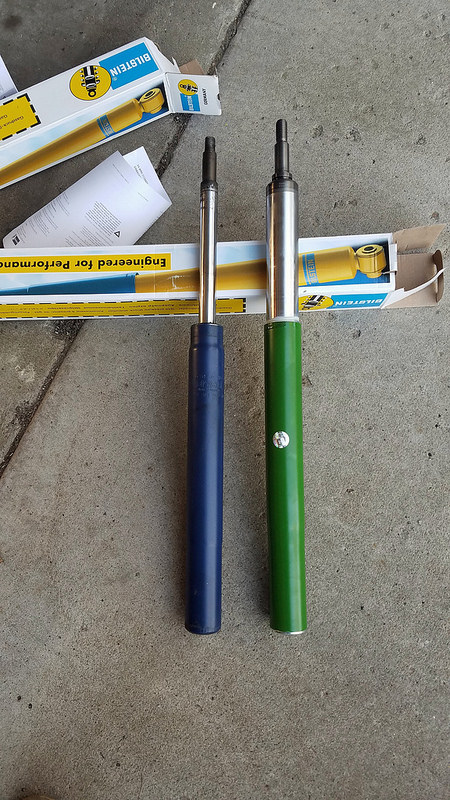
Front's installed with new balljoints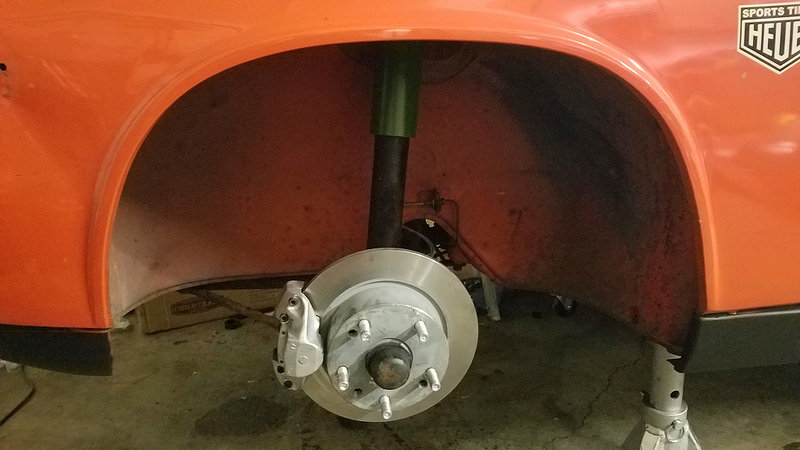
rears I did a few days ago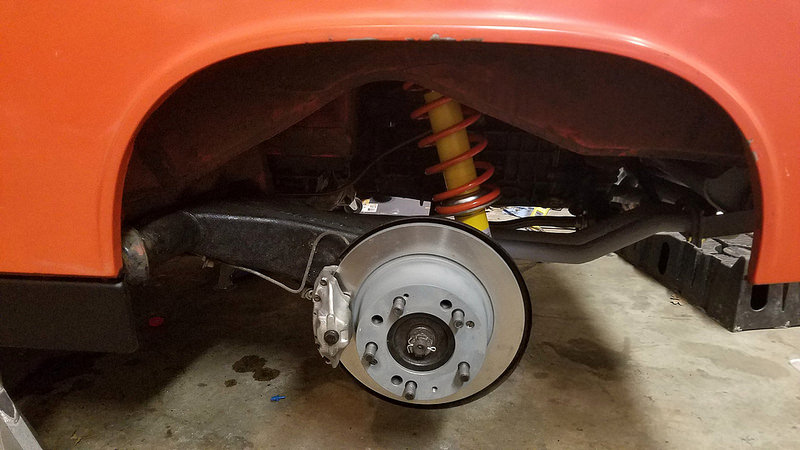
Everything is back together but the car is up in the air with the wheels off. I had to disconnect the brake calipers up front. I was planning on bleeding them again anyway but this cements it in. Might try to sneak home early to do that today.
Also, rookie mistake... I knew the drivers outer tie rod was bad but the passenger side was solid still, I had ordered just the one side. As I got it all apart it became evident that the passenger side wasn't far behind, torn boot that was hidden. I put it all back together anyway and I'll order a new passenger side today.
Wife and baby update:
My wife is hanging in there, it's been hard on her. Last week her leg started to swell back up a little. Went in and the doc put her back on shots every 12 hours, just for the weekend. They did a CT scan because she felt funny, looking for clots in her lungs. Good news is that her lungs were clear, bad news was that they found something in one of her breasts.
A day of freaking out and then we went back for a detailed scan of it, turned out to be only a cyst so we're in the clear there. INR levels back up so she's off shots thankfully. Had another appointment with the blood doctor with the genetic results from a test she took several weeks ago, turns out she has two blood abnormalities that can both contribute to clotting, so she will be on blood thinners for life.
In the last 3 months we've spent about $160k of the insurance companies money.
Baby Wren is doing wonderful, happy and healthy. Started sleeping 8 hours about a week ago.
Posted by: barefoot May 12 2017, 06:59 AM
Please read other posts about not pre-filling oil filter cartridge.
Posted by: Optimusglen May 12 2017, 07:03 AM
Please read other posts about not pre-filling oil filter cartridge.
Don't worry, I didn't. I had already read that. When I said "filled with oil" I meant the engine, not the filter.
Engine was primed. Used an oil squirter to inject oil into a hole of the oil filter mount, effectively filling the oil pump. Installed the dry filter and filled the engine with oil. Cranked the engine only a few times until the oil pressure light went out.
Posted by: 914time May 12 2017, 08:04 AM
Glen, thank you for the update about you, your wife and Wren! I've been wondering about you guys. Sounds like most of it is going in the right direction.
Car looks great btw! Keep it up.
Posted by: Optimusglen May 14 2017, 09:09 AM
It runs!
[VIDEO]http://www.youtube.com/watch?v=_LRd1X6T3Ws&t=1s[/VIDEO]
http://www.youtube.com/watch?v=_LRd1X6T3Ws&t=1s
Tomorrow I'll be towing it down to Further to get tuned.
Happy Mothers day everyone!
Posted by: Optimusglen May 16 2017, 07:39 AM
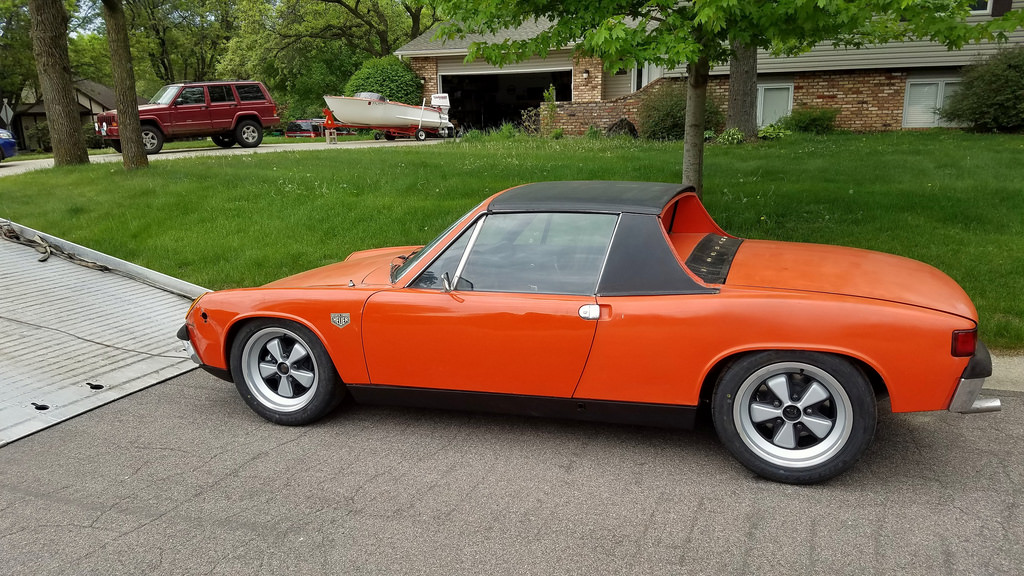
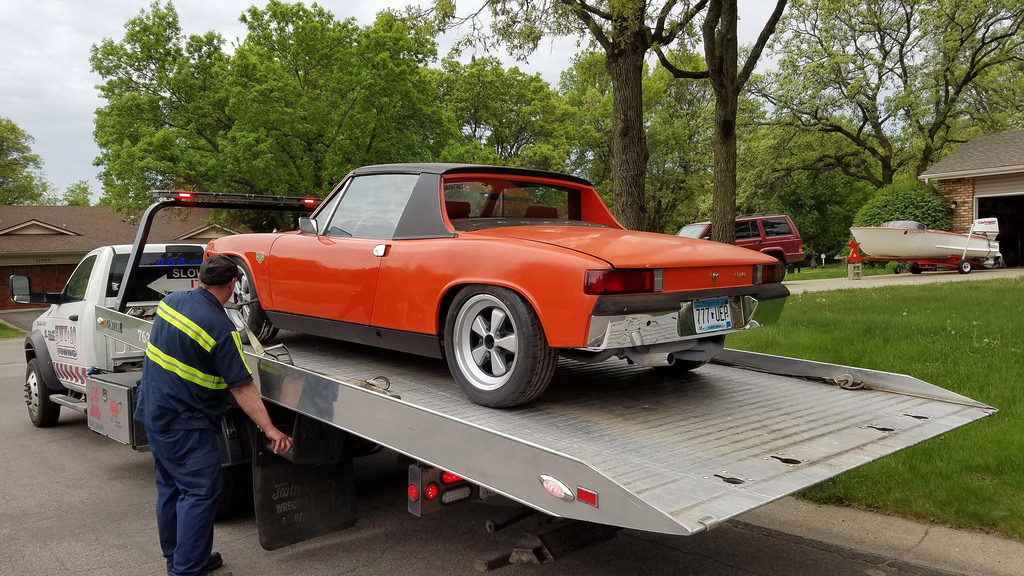
Heard back from Tristan same day. So far it's looking really good. The base settings for the carb and ignition timing were plenty to get it running if you applied a bit of throttle. He did some tuning and it's pretty smooth but will be replacing the idle jets, moving from 50 to 55. He had to order the 55's which will be here Thursday. He had 60's that he tried but that went too far the other way. The carbs synced up really well, he had a couple minor suggestions regarding the carb linkage, mainly replacing the ball ends because of a tiny bit of slop, likewise with the central pivot.
I hadn't gotten a chance to install the clutch cable. I had a new one but wasn't sure if I needed it or not. They will be installing and adjusting that this week as well.
He noted a slight leak on the tail shifter. To be honest I hadn't really touched the transmission, never quite knew if I would be going to a side shifter or not so I didn't want to waste any time on it. Now that it's running I will probably revisit that, I did replace every bushing in the linkage and the metal to metal area at the rear has minimal wear, so for now I'll stick with it and address the leak.
I did a home alignment using the string method and accurate measuring to within 1/32" It should be plenty to be able to drive it and not destroy my tires, but I will be getting a professional alignment to make sure it's good.
So it's looking like next weekend I'll be ripping around in this thing!
Once I get it back I'll start making it look a bit more presentable, installing the missing chrome trim, grills, seatbelts, etc. I'll be re-keying all of the locks, and will probably get some audio wired in. Ya know, little stuff.
Posted by: JmuRiz May 16 2017, 08:16 AM
Ahhhh, that sound brings back memories
A tune and tweeks to everything (shifter etc) will do wonders....will bring a smile to your face for sure.
Posted by: Optimusglen May 24 2017, 09:25 AM
Update on the car:
55s were money, runs great I hear.
It was having an issue with fueling, apparently the fuel pump was getting power, just not enough amps to build the full 3.5 psi. they swapped a couple of the relays and now it's getting the juice, so I will be ordering new ones to be safe.
They will be doing the clutch cable this week then driving it to see if any other adjustments are needed.
Posted by: Optimusglen May 31 2017, 10:04 AM
Update:
Baby: 4 month regression is real. Just hit it and we're feeling the pain. We have a sleep plan though so there is hope. otherwise baby is awesome, she keeps getting cuter. Loosing some of her birth hair but I read that it's pretty normal.
Wife: Unfortunately there's some regression here too, she was clotting back up through the blood thinners. When they went to put the stent in they couldn't get through. Started back up on shots every 12 hours to bring her back in range. Did some tests to make sure that Warfarin was actually doing something. Found out it was so they upped her dose and took her off the shots. Went back in a week later (yesterday) and her numbers were low again, so we're back on shots until Friday and they upped her dosage again. Frustrating that they can't get her levels in check, but we're moving forward. Once she has been in a good range for a month or so they will try again for the stent.
Me: battling a cold that I picked up from baby, wreaking havoc on my throat, blah.
Car: I picked up the car from the shop yesterday! They put the new clutch cable in just because I didn't get a chance to before I brought it down to them. Carbs are tuned well, runs great. The home alignment I did is great, tracks straight. Drove it into work today, going to try to make it to a local European car gathering this evening, and then C&C this weekend. Still lots to do for trim and bodywork, but it drives like an adult sized go-kart.
She was in good company at the shop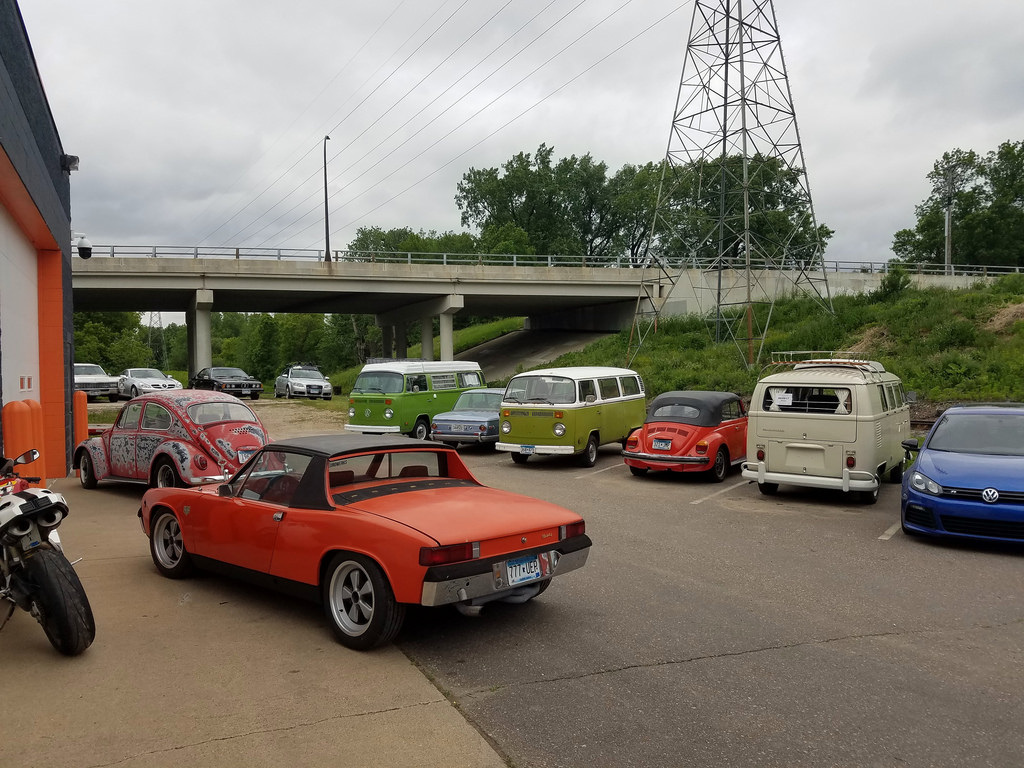
tristan from Further Performance is great, top notch work and very reasonably priced. I'm super pleased.
And today at work
Posted by: Optimusglen Jun 4 2017, 02:39 AM
Made it to C&C this weekend, car is a blast!
Little photo shoot on my way home.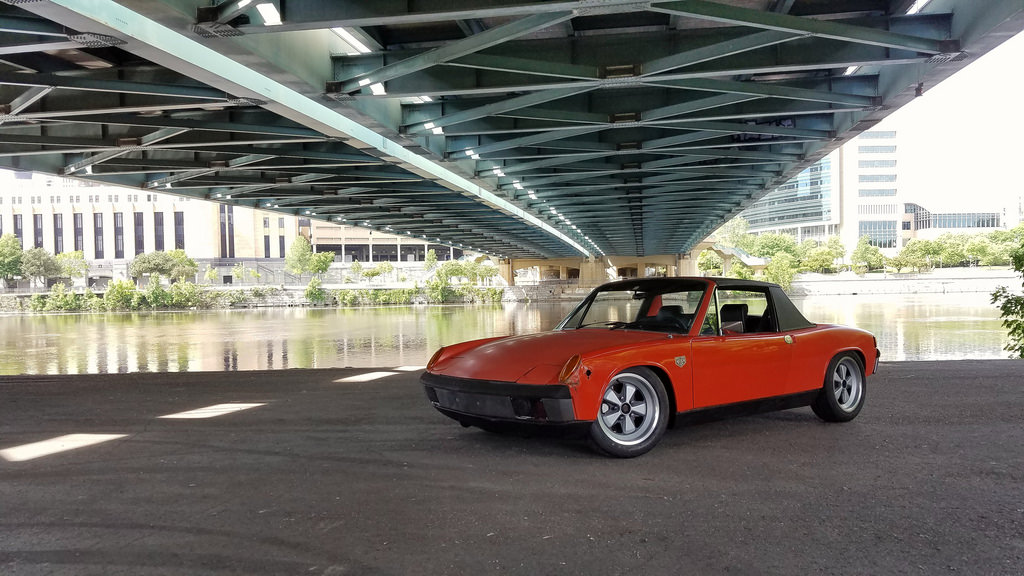
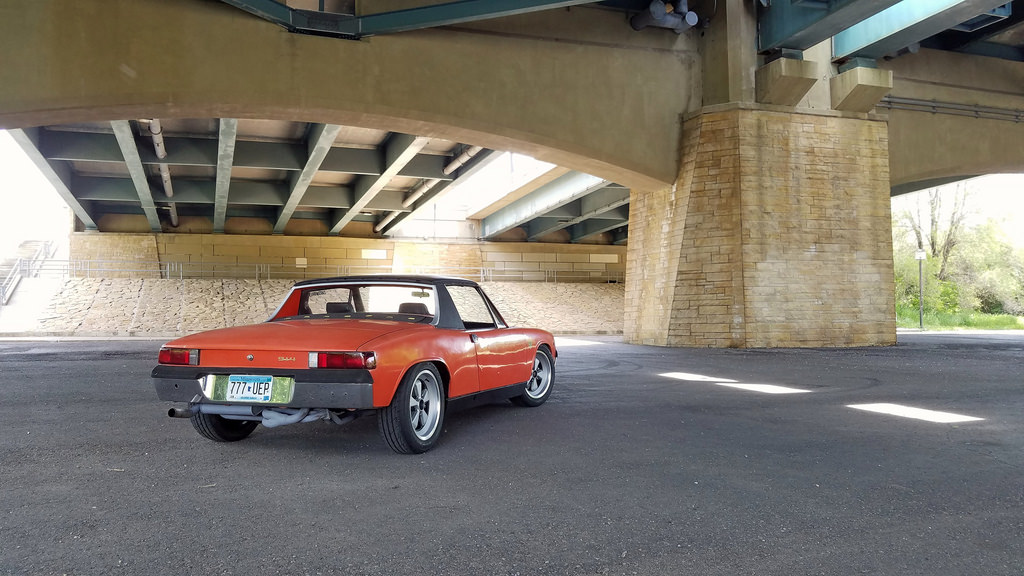
Posted by: Optimusglen May 17 2019, 08:46 AM
It's been a long while so I figured I'd update this thread.
Family: Wife and baby are doing great. The blood clot is chronic but it's in a good place and her active lifestyle means that her leg is rebuilding pathways for blood-flow so swelling and danger are way way down. She'll be on blood thinners the rest of her life, Warfarin wasn't working for her so she is on Xarelto which does. Baby Wren is so wonderful ,smart, super cute, a ray of light.
(we don't put pictures of her face on the internet or social media, so this is the best you'll get)
The 2.2T 911 engine rebuild stalled out, not sure of it's future. The case is really good but it does need a line bore back to standard and so far a bunch of other things have consumed my "fun" budget. Initial estimates for the work are between 2-3k.
For now the 914 is great, I drive it whenever I can.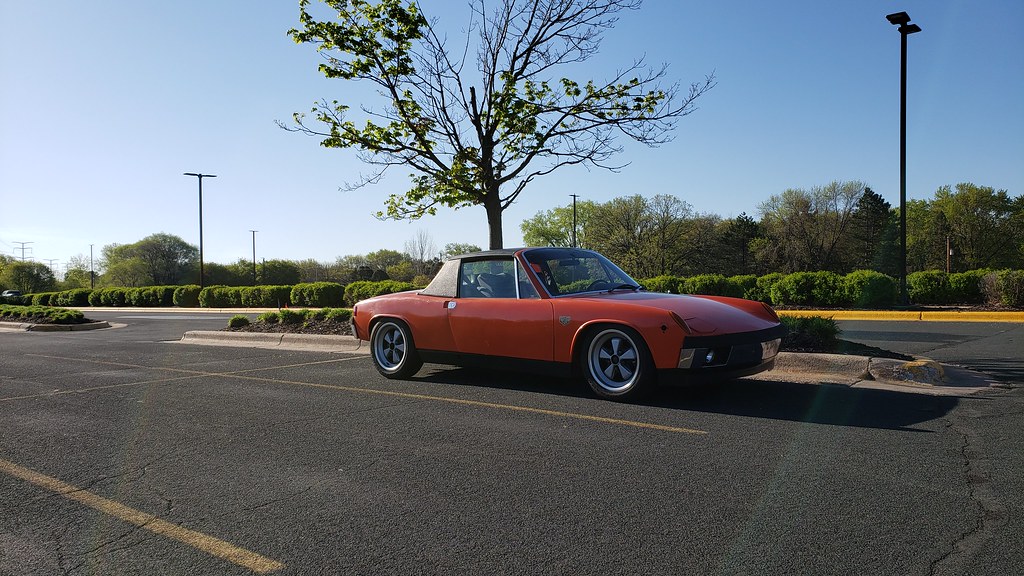
I did the side-shift trans swap last season thanks to Jule. Shifts great now, all things considered. Also did a L.E. airdam up front, and had a period with the car where I had roundels/meatballs/number circles on the sides and then pulled them off a short time later.
New muffler from Ben is on and it sounds great. I'll be getting some good audio/video but it's going to wait until after I can fix this rattle coming from the front end. Sounds like it may be the alternator, but another option I haven't checked yet is an exhaust leak.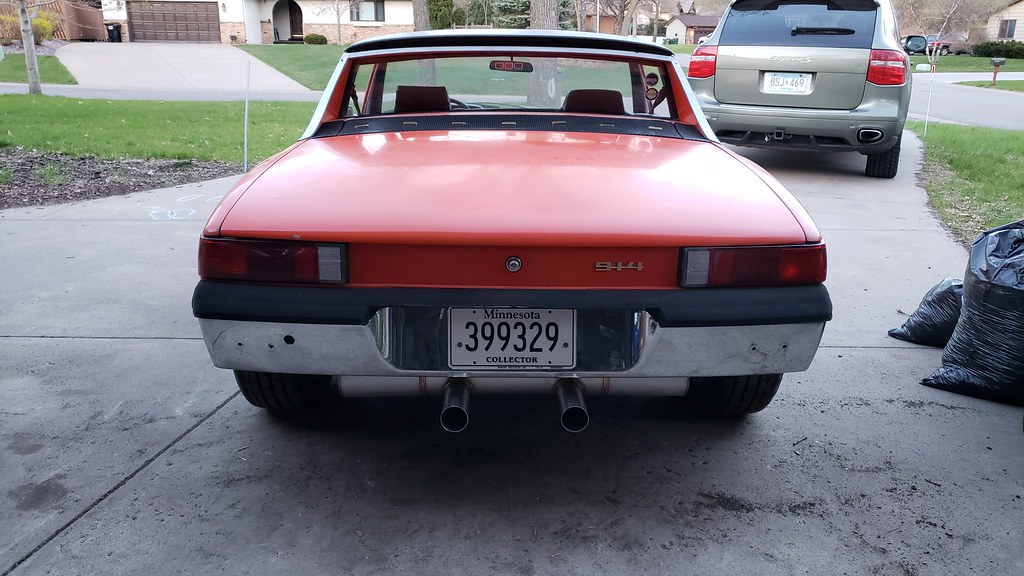
Some new shoes are in the works, going back to 15's with an RSR finish sans polished lip. I'll be going with 205/60 to really fill out the wheel wells.
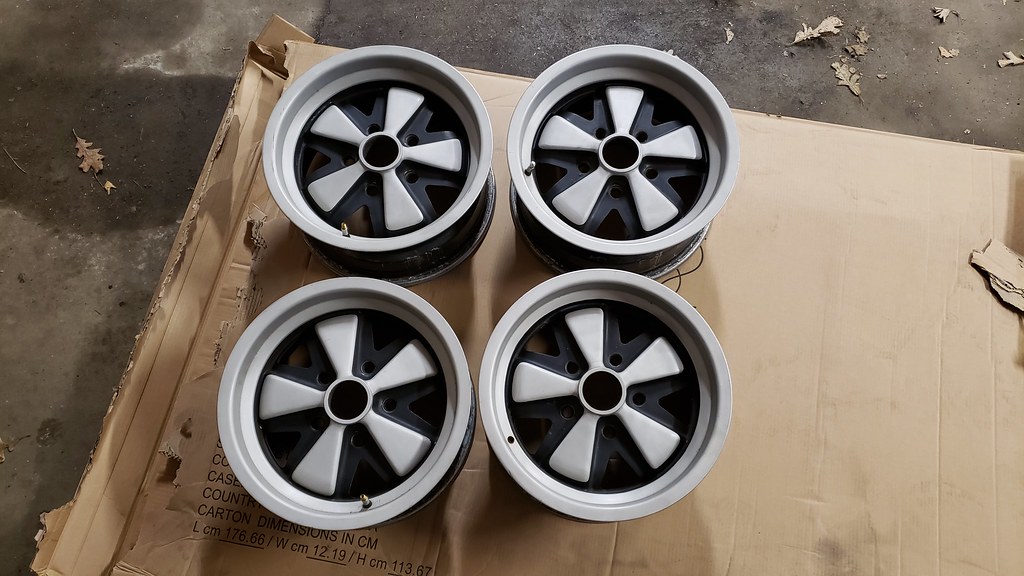
I don't think any non-Porsche people would even notice, but I think it'll be a good move. They're reps, purchased from one of you guys who got them from another one of you guys, haha. Fine for what I do, casual summer driving.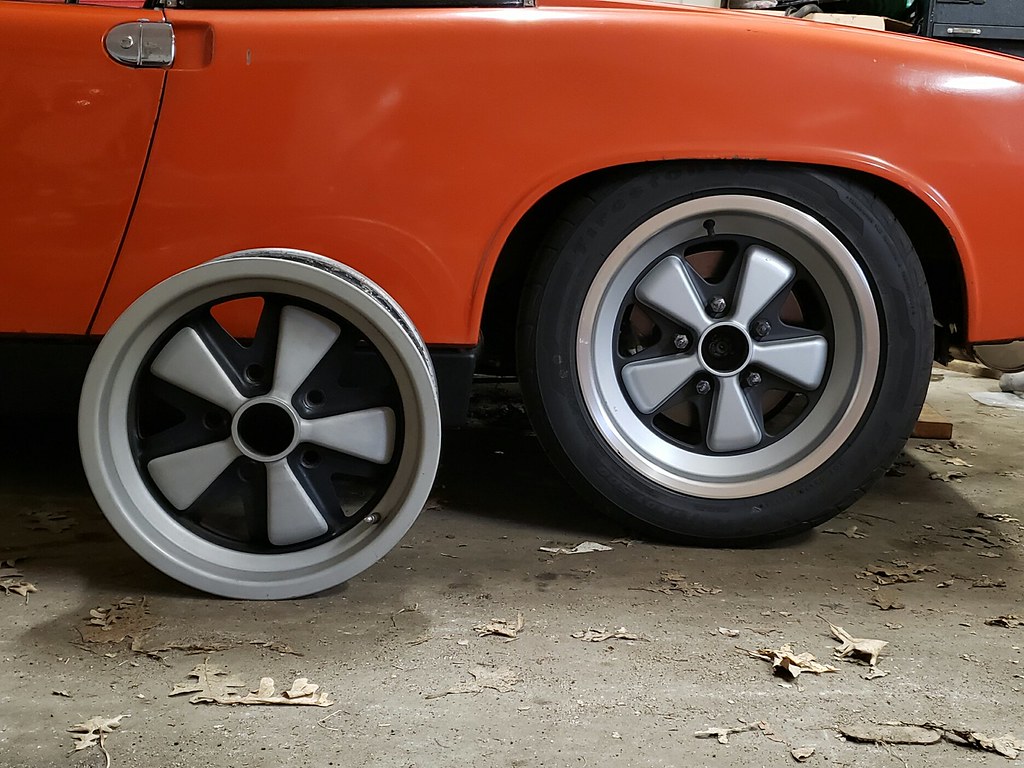
I went back to the factory 4-spoke steering wheel, the diameter just feels so much better than the smaller aftermarket wheel I had before. It's in the middle of being modified a little. I trimmed the foam where the spokes meet the rim and will be re-wrapping it myself. This will be the 5th wheel I've done, (last was post #63 of this thread) so I've gotten the hang of it I think. I'll be designing a 3D printable hockey-puck style horn button that'll use the stock hardware to mount, intention to be wrapped in leather and a Porsche shield fitted. Once the project gets further along I'll post some pictures...
Things I'd like to do this season:
-rebuild doors, I'd like to be able to easily roll up the windows with the winder alone
-replace targa vinyl and trim, I have everything to do the job just haven't made time for it
-wire in fog/driving lights and fix the horn and turn signals
-fix/replace/rebuild my speedometer. I put a new cable in but it bounced the speedo around all over the place and then eventually the speedo just stopped responding.
-maybe even weld in the new patch for the front drivers corner, kinda waiting on that until I do flares though, so it'll probably spend this season in full patina again.
Long term goals:
-get the 6 built and installed
-flares (I've gone back and fourth on wanting to keep it narrow and wanting flares) I think I'm set on flares though, at least on this car since it has some metal issues that I'll want to take care of and because it's not a particularly rare or sought-after model. After seeing some great cars and luft 6 this year it sold me on flares even more.
edit: I had originally split the 6-cylinder aspect of this project into another thread. Now I'm thinking it should have stuck around in here to keep the continuity. If you're reading through this for the first time, swing into this thread to get up to date on the state of the engine then come back here for further details.
http://www.914world.com/bbs2/index.php?showtopic=311714
Posted by: ndfrigi May 17 2019, 10:14 AM
thanks for the update on your project. An encouraging build thread!
Posted by: FlacaProductions May 17 2019, 11:50 AM
I just read this thread in one sitting and it's fascinating to see the progress in both the 914 and life. Nice work on both fronts!
Posted by: 914time May 17 2019, 03:44 PM
Very good to hear you and your family are doing well, OGlen!
Thank you for the update and your car looks amazing!
Posted by: Cairo94507 May 17 2019, 05:19 PM
Thanks for the update on the family and the car.
Posted by: Freezin 914 May 17 2019, 10:02 PM
As always, car looks good! Glad to hear things are good. Please keep us posted on the progress on your car... I know I am one of many who will be patiently waiting for updates. Cheers.
P.S. I am sure have some parts for your doors if you need any.
Posted by: Optimusglen Nov 1 2019, 09:15 AM
A little build update I suppose, it's been awhile.
In my last update I had a list of things I wanted to do this season. Sadly, I worked on one of those items (the speedo) and am back at the drawing board on it, haha. That's not to say I didn't do anything to the car this season though.
I did get those 15" Fuchs reps mounted, overall I liked them.
I stumbled upon a set of Revolutions on here. These are a style of wheel I've loved, going back to my VW days. Pretty good price and they were NOS, so I bought them.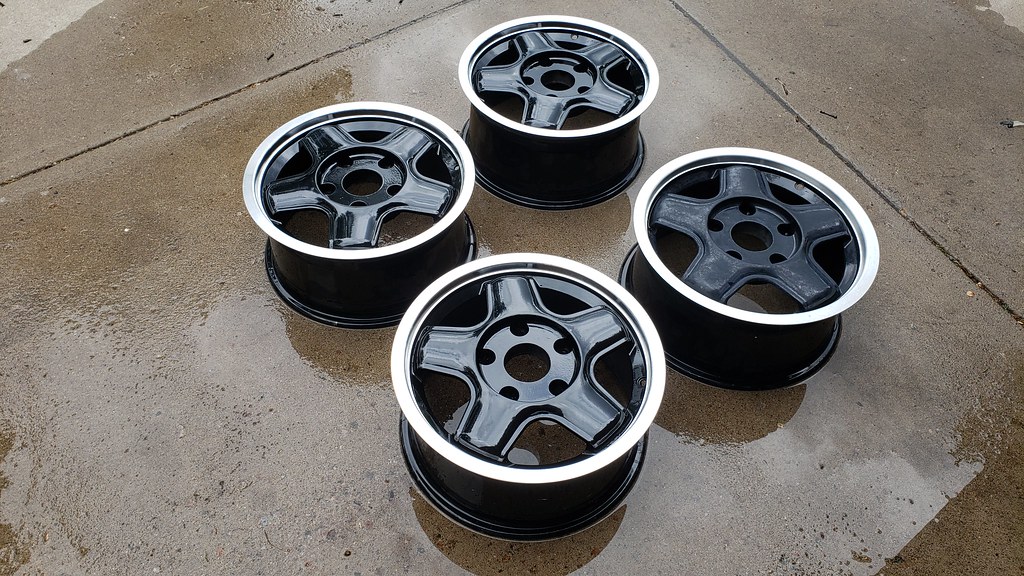
I was not, however, fond of the black centers. So I had them blasted and I painted them silver. 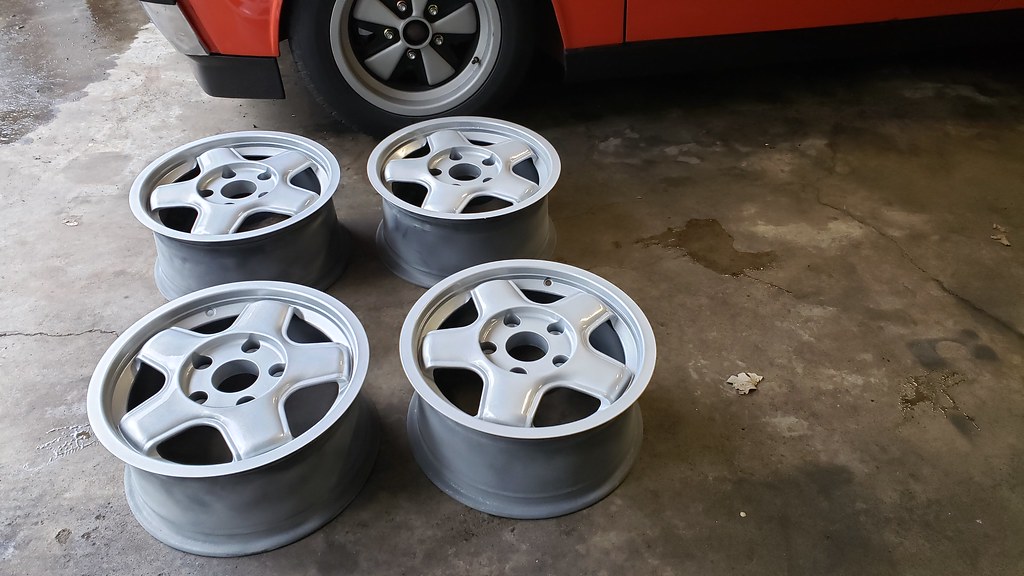
Shot comparing the Revolutions, the 15" rep Fuchs, and the 16" rep Fuchs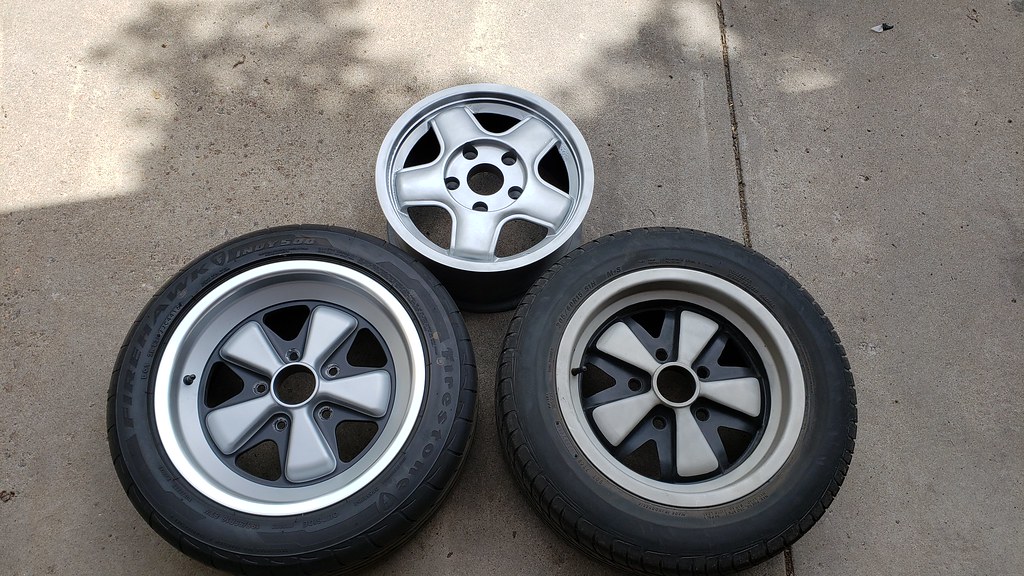
Anyway, I installed the revolutions, rolled it out into the driveway.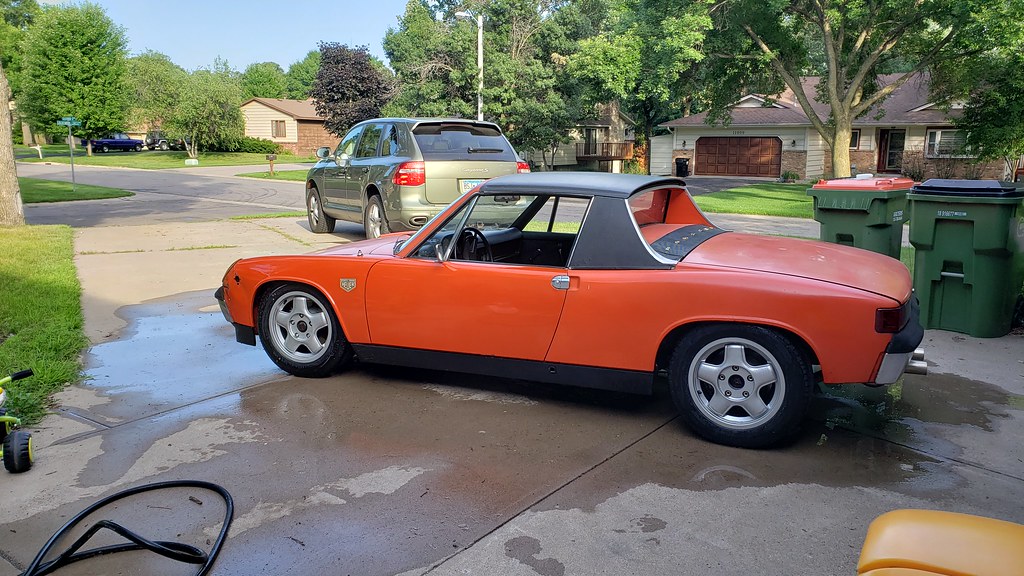
Immediately decided I didn't like them and started refinishing the 15" Fuchs right then and there. I already had the paint stripper and supplies etc.
So, I stripped the old paint off of the 15" Fuchs. Taped up the holes, leveled them out.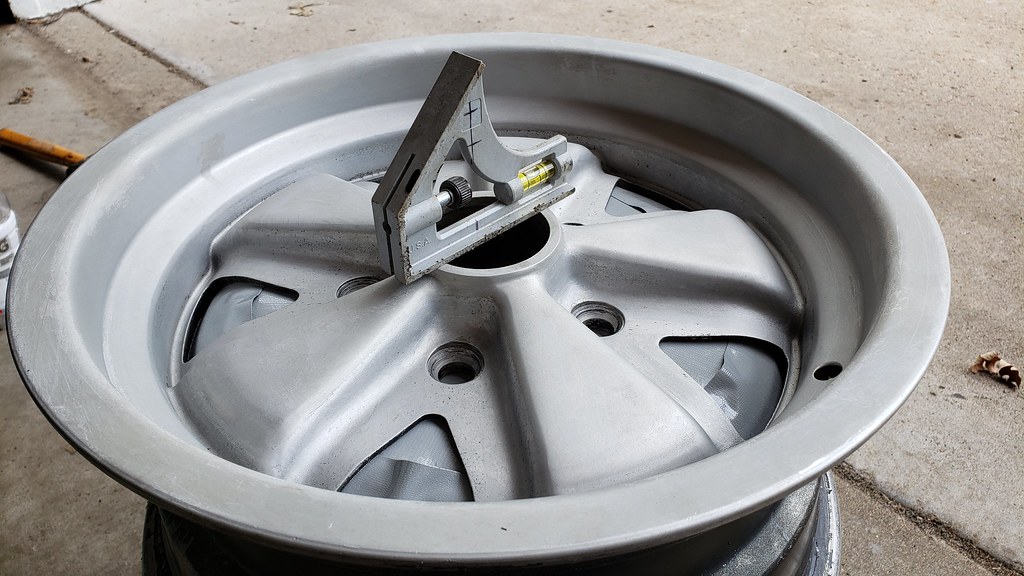
I used the bucket method this time instead of masking.
after filling all 5 areas and connecting the shallow strips.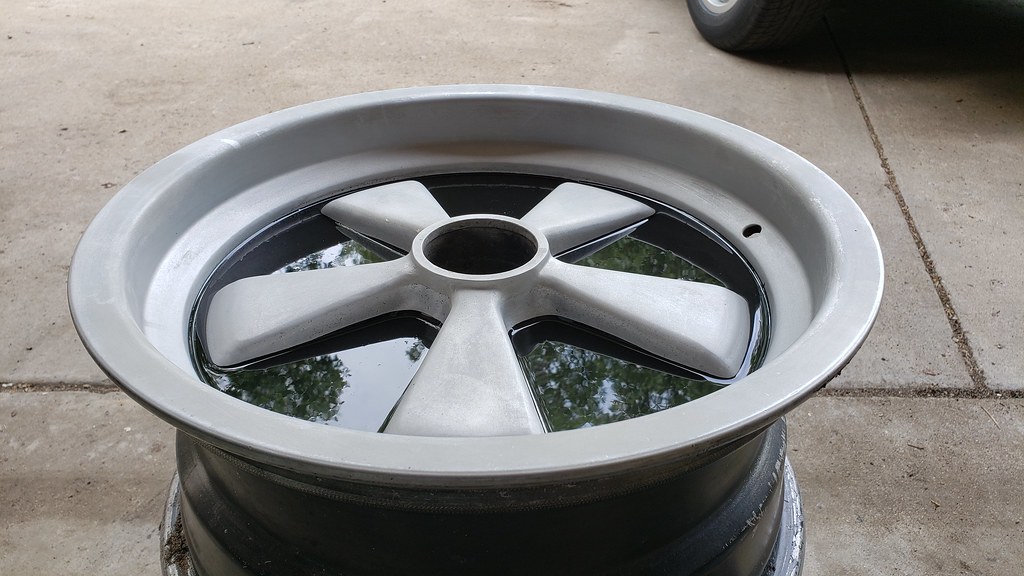
This is a shot showing the areas (red border) that were painted previously. That was the thing that threw me with them, the mask line wasn't right.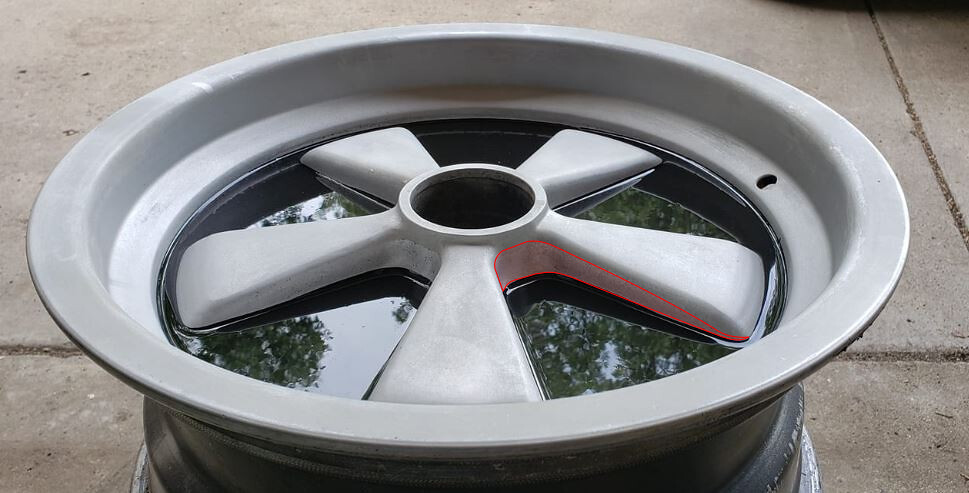
Once they were all done, I think the mask line is better, but now maybe a little low.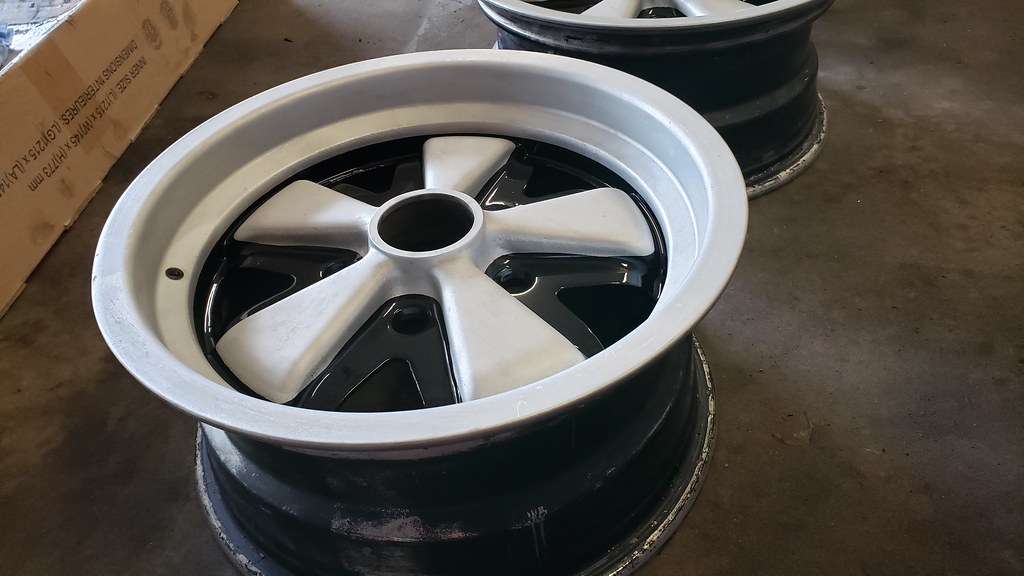
I think I'll re-do them again, maybe in the spring.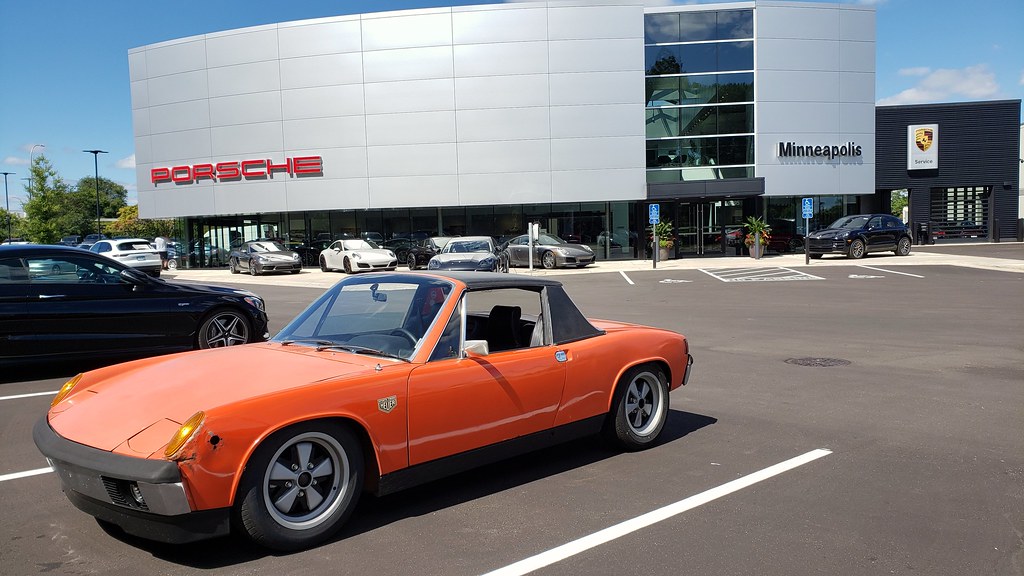
Next, I replaced the crystals in all of my Heuer timers. I have two pair that I interchange, these two got double-dome sapphire crystals and it really makes them look nice. The other two got flat sapphire with chamfered edges. The originals had plastic.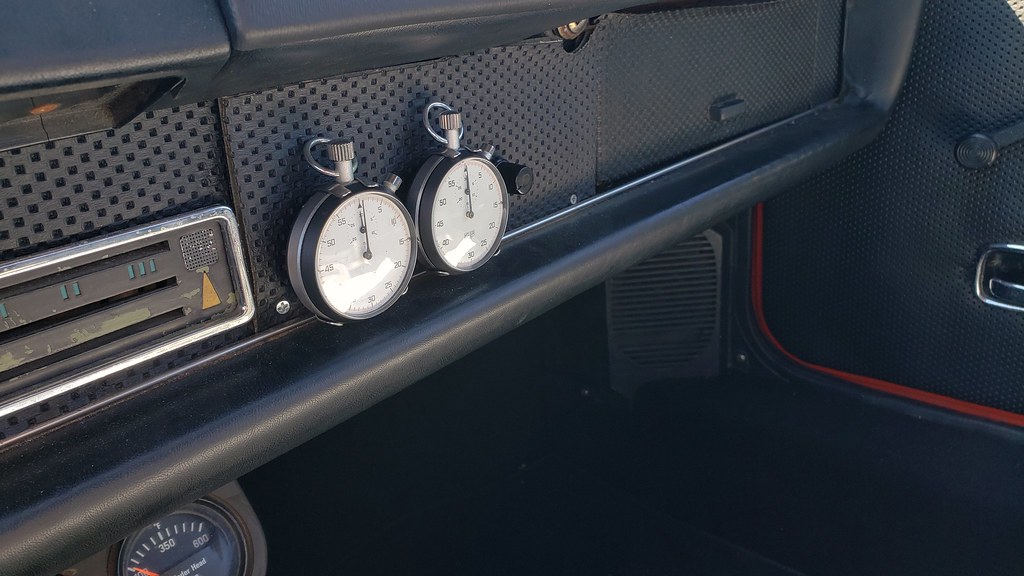
I swapped the factory steering wheel back on, I like the diameter more than the smaller 3-spoke I had. Both in terms of driving control and also gauge visibility. I re-wrapped my wheel in leather, and got a hockey puck horn button.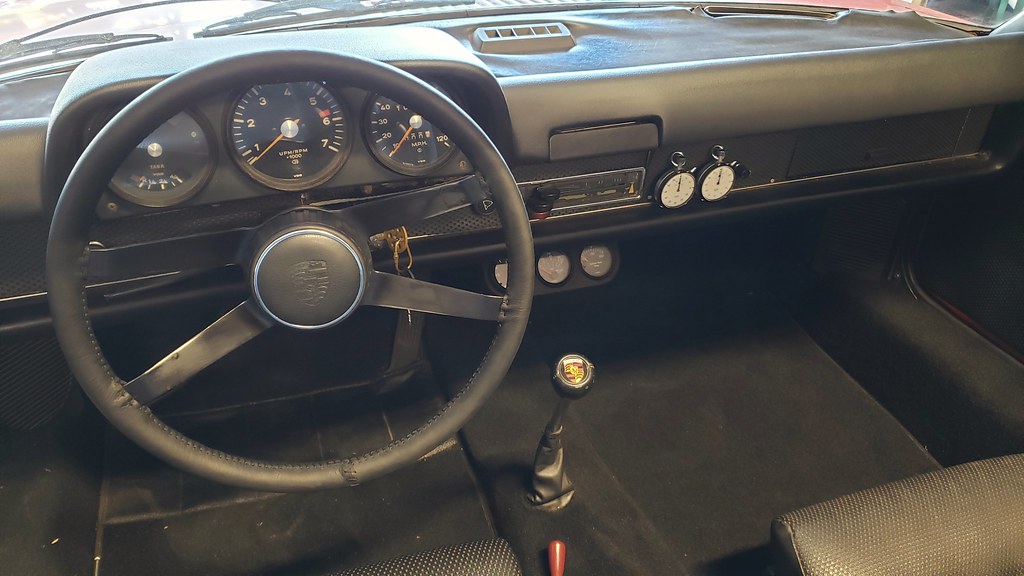
I was most of the way through stitching when I realized I made the joining stitch in the incorrect method. So this too will likely be re-done this winter.
I was going to go on a fall rally put on by the Overcrest podcast. A nice podcast put on by a couple friends, both with 911's. I helped out with a bunch of the graphic design for them and had been looking forward to it for several months.
The early morning drive down to the start point, left the house at 4:30.
I was one of the first to sign in so I got my pick of the numbers, chose the year of my 914 because why not?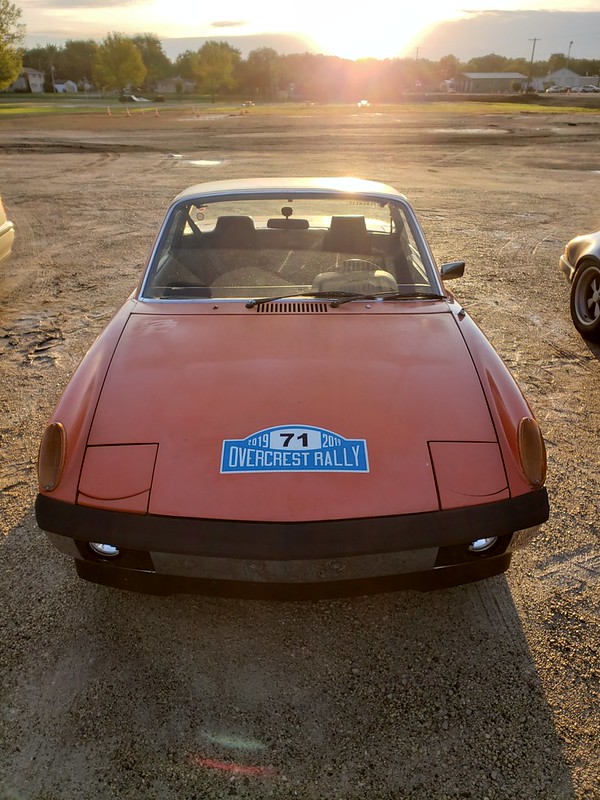
I've been on dozens of drives and rallys, many using the same roads we were driving on this day, so it was nothing new. The setup of the rally was quite different though. It wasn't a lead-follow rally. We knew from past experiences that it turns into a mess with tail cars rushing to keep up with lead cars, then everyone coming to a halt once they catch up etc. The accordion effect, or rubber banding. However you describe it it's not fun. So they scouted 3 full different routes, all with some gravel/dirt shortcuts mixed in. Each car was given a large map with the routes, and a guide book with turn by turn directions to follow the routes (this was the part I helped on) that resembled rally pace notes. Intended for a co-driver to dictate.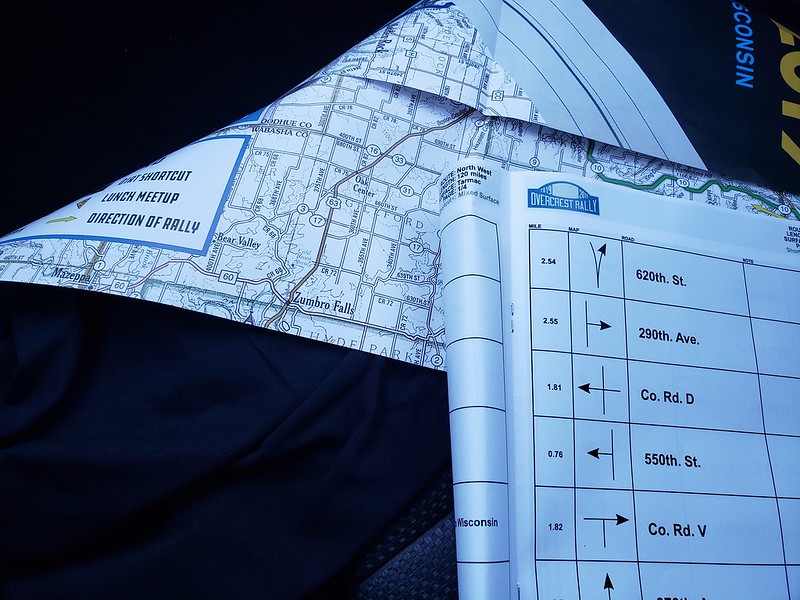
It was off to a great start. We let most of the people go first so it wasn't a big crowd all hitting the roads at once. I took off with about 3 cars behind me. A guy from the video crew was in my car so I had to go off of memory for several of the turns.
We came up to one turn and that's when things started to go south. I've been reliving this moment since it happened about a month ago. I had massive brake fade/loss and had to rely on the corning ability of the car to take a corner at far faster than I wanted. We did make it around the majority but near the exit of the corner I was on the far outside. Once the tires hit the grassy off-camber outside of the bend it was a slow-slide down the ditch, over several mossy logs, and perched on top of a culvert.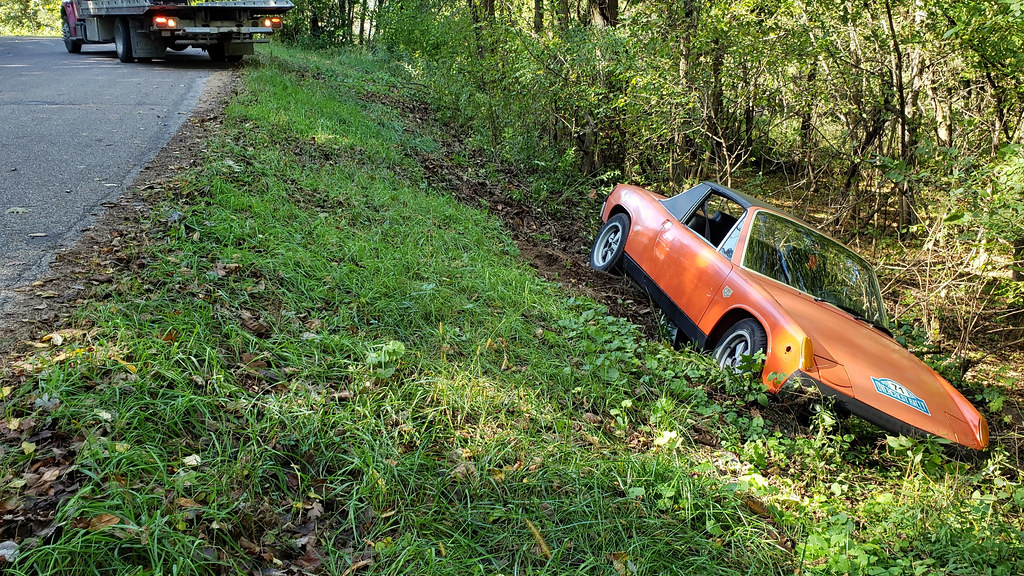
It's easy to want to point fingers at what was at fault. The pads I had weren't the best (Mintex redbox). But in reality it was my fault. I was just going too fast and shouldn't have been pushing the car as hard. A mistake I was lucky to have learned with the only outcome being a bruised ego and a broken fiberglass valance. I will for sure be bleeding the brakes and replacing the pads with the ones Eric recommends, as well as keeping it cool on the streets.
I called AAA and got it pulled back onto the road. Checked the car out and it was only the valance and some dirt. I drove it to the meetup for lunch and then had a pretty uneventful 2 hour drive home. Valance in the frunk.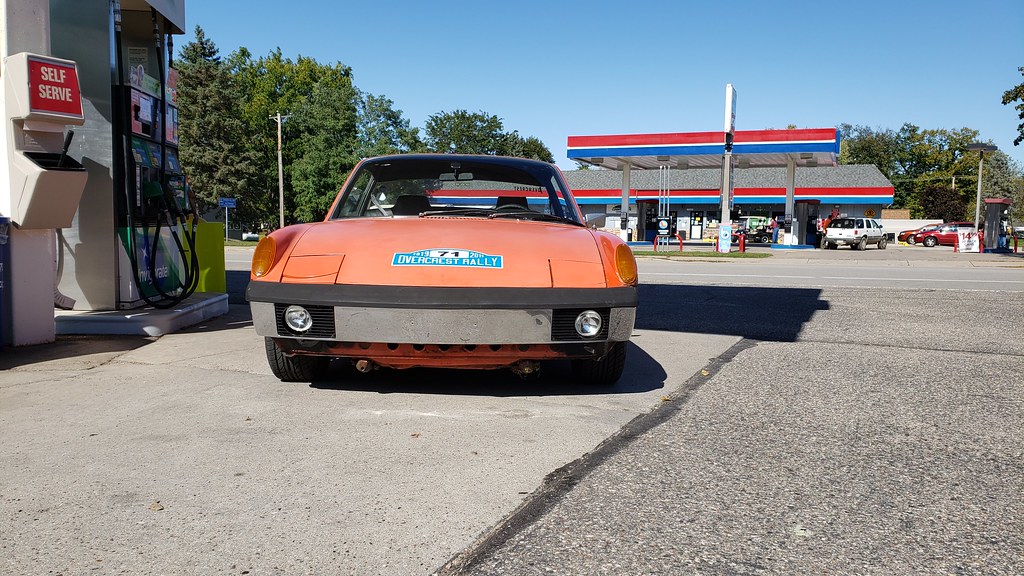
Now, back to the project.
I ordered a seat on August 1st. I was hoping to have it by the drive (early October) but didn't actually end up getting it until the end of October. I had originally gotten a quote through GTSClassics and the price was just way too high. Then I saw that Pelican offered the seat at a lower price so I ordered through them. It turns out that Stephan/Pelican just hadn't updated their catalog. It was listed as including the headrest and free shipping, items that would normally add a couple hundred to the bill IIRC.
I received the seat sans headrest. Initially a bit perturbed I contacted Pelican about the missing headrest (with no clear way to mount a headrest either) and they contacted Stephan. Found that indeed their listing should not have said that the headrest was included, but he is sending me a headrest with grommets anyway because of the mixup. So it was a positive outcome with two companies, both Pelican and GTSClassics.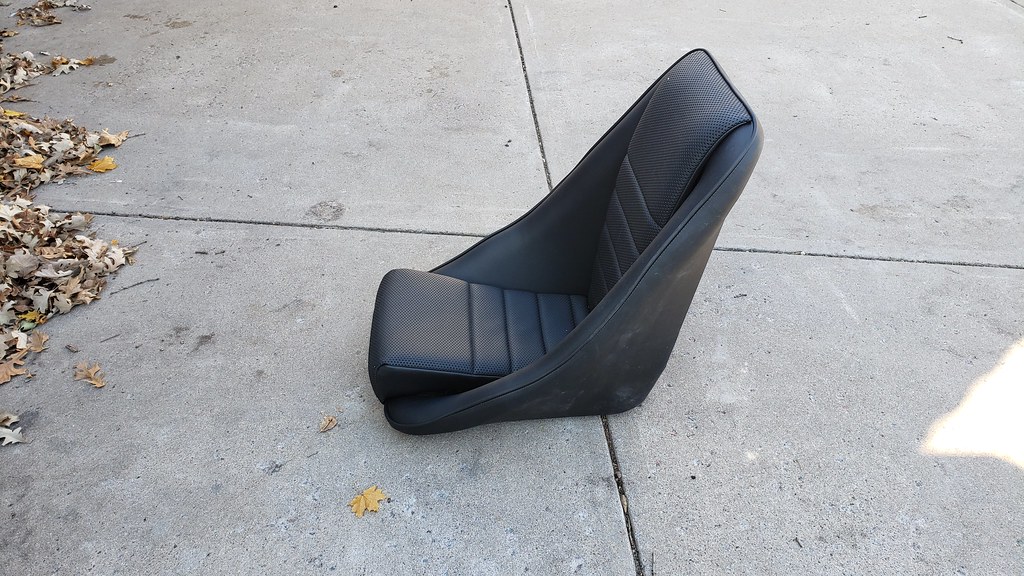
That brings it up to date, the car may make another appearance on the roads this season but with snow due soon it's a big maybe. I would really like to get the seat in and at least take it for a short drive.
Posted by: sb914 Nov 1 2019, 09:43 AM
Glad you didn’t hurt yourself and your car is semi fine !
Posted by: mepstein Nov 1 2019, 10:00 AM
Glad you didn’t hurt yourself and your car is semi fine !
Yes, Wow. Dodged a bullet. Usually there is a lone tree or big boulder in the spot you go off.
Posted by: Optimusglen Feb 3 2020, 11:13 AM
I had originally started a new thread for my 911T engine build, now I'm thinking it's better off that I link it back into this.
Cliff notes: I bought a 1971 911T core engine for a decent price. Turned over freely, but no history. Stripped it apart and was pleasantly surprised with just about everything. Case inserts already in place, everything measures out nicely except for the case bore which is off just enough that I need to get machine work. I had the heads all rebuilt and they have been waiting patiently on a shelf in my office. The case work stalled out while I diverted my "fun" budget to other things. 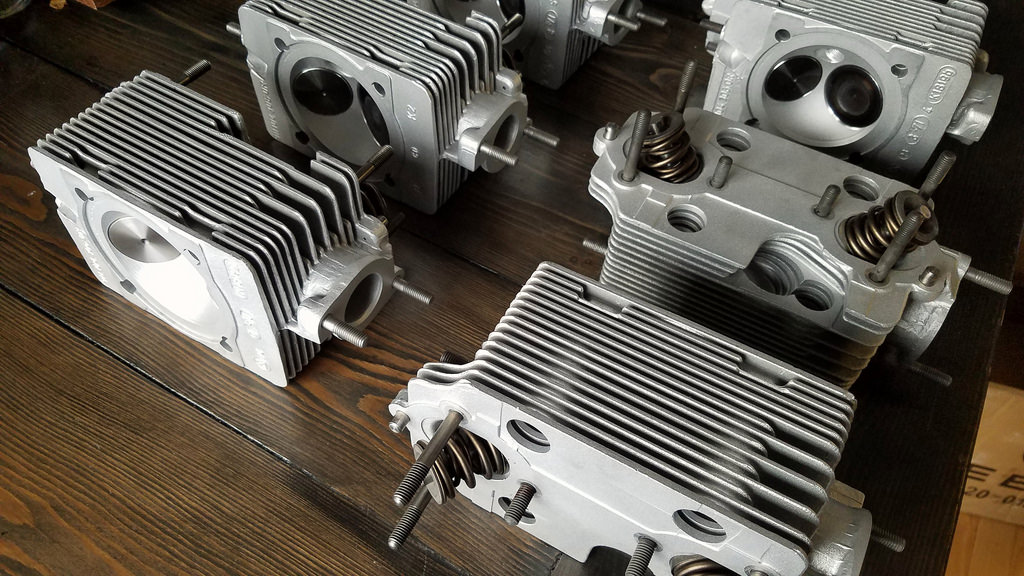
Ok, now you're up to speed. I finally decided it's time to get serious about this engine. I will be sending the case out to Ollie's in the coming week or two and to do that I needed to pull the studs.
I've read all sorts of stories about stud removal and decided to get one of these since I wasn't going to be re-using the studs.
Stud extractor by Ares tool
This thing made life so much easier, it took about 20 min to pull these 12. The rest I am going to do tonight then package it all up.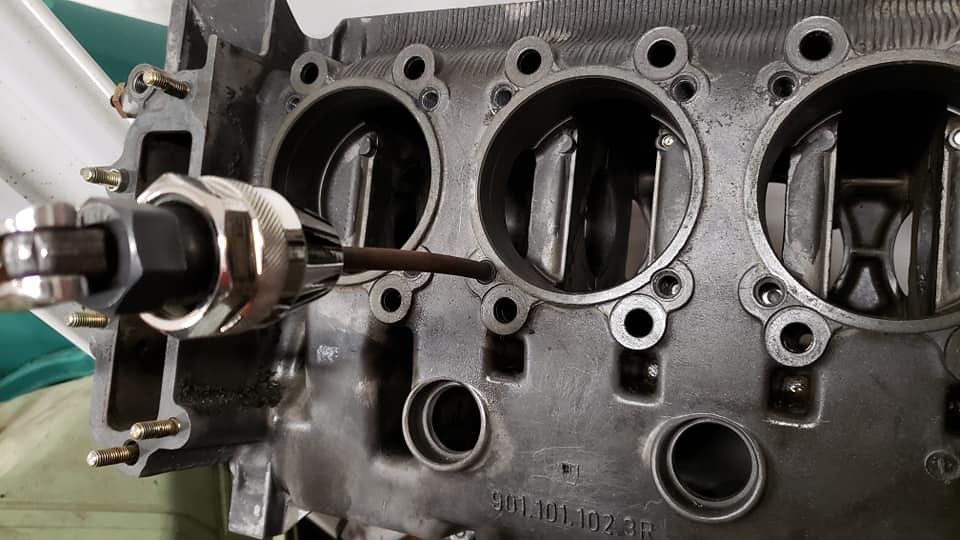
Over the past year or two I did sell off a few items to fund some software I needed for my art/rendering. I will be replacing these things once the case is done and the fund replenishes.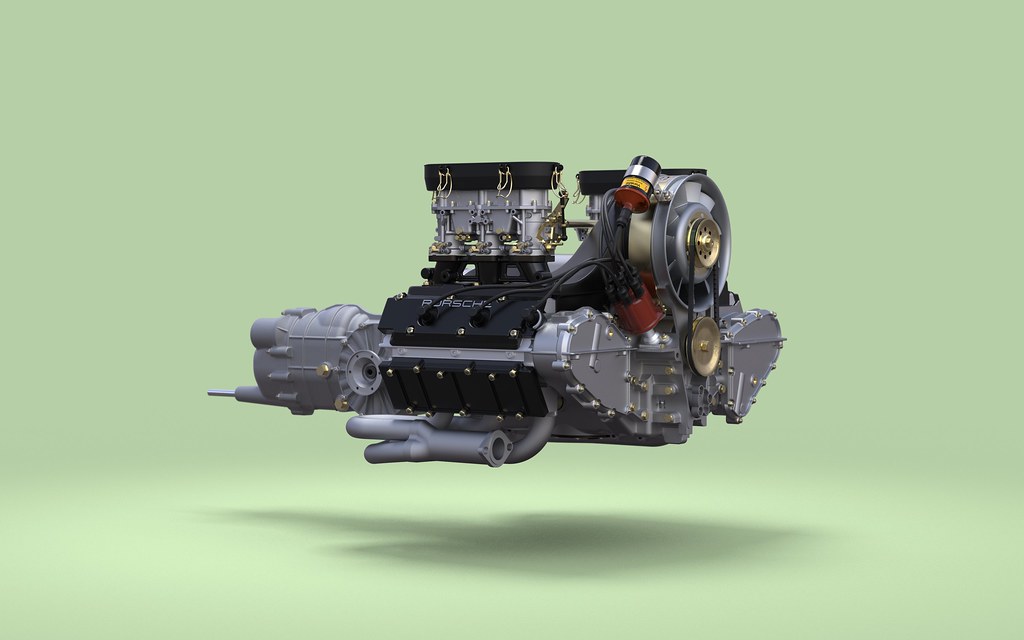
Onto the car!
Last fall when the temps were dropping I was trying to get the car out for one last romp, test the seat, fill it with fuel and then winterize it. It was a bit too cold and I couldn't get it going, and in the process I think I fried my old starter. It was the original item from when I bought the car so I knew the day would come eventually. So that means a new starter is on the agenda for this season. Ordered one from Eric at PMBPerformance.
If you have been following the thread you know that I have a front valance issue from my little "off". I was going to replace the LE style replica with another LE style replica, but am now considering going back to the factory panel as I still have it and it's in good shape. I do like the meaty look with no panel too, but would want to paint the visible bits black if I left it as-is. I also need new pads, the old/current Mintex pads (these were NOS, in the trunk of the car when I bought it) were a large contributing factor to that "off" so with some research I decided to go with what Eric at PMB recommends, the Porterfield pads front and rear.
I DID get the new seat from GTSClassics installed, I'm pleased with the fit and finish. I was going to take my maiden voyage with the new seat when I couldn't get it started. So the jury is still out in that regard. Install was straightforward though.
One final item is that I have a set of H4 headlights. I want to relay them when I install though so it wont be a simple plug and play.
Posted by: sb914 Feb 3 2020, 11:43 AM
Are those heads real ?  They look like one of you awesome renderings!
Posted by: Optimusglen Feb 3 2020, 11:53 AM
Are those heads real ?
They look like one of you awesome renderings! They are real indeed! I brought them to the best local guy, he has a lot of experience with Porsche heads. Thankfully these were virgin, never touched by anyone other than the factory. New valves, guides, seals. I did buy a set of used springs. He tested them all they they were within spec and perfectly suitable for a stock 2.2T rebuild.
Posted by: rudedude Feb 3 2020, 01:32 PM
Glen,
I put led headlights in Jasons car and you can't believe the light he has, much better than mine with relayed lights. Might want to think of using led's rather than putting in wiring and relays.
Jule
Posted by: Optimusglen Feb 3 2020, 02:07 PM
Glen,
I put led headlights in Jasons car and you can't believe the light he has, much better than mine with relayed lights. Might want to think of using led's rather than putting in wiring and relays.
Jule
Do you relay the LED headlights too, or keep the factory wiring?
Posted by: mepstein Feb 3 2020, 02:38 PM
Glen,
I put led headlights in Jasons car and you can't believe the light he has, much better than mine with relayed lights. Might want to think of using led's rather than putting in wiring and relays.
Jule
Do you relay the LED headlights too, or keep the factory wiring?
I used factory wiring with mine. LED's draw less amps so should be easier on the wires than stock.
Posted by: Optimusglen Feb 4 2020, 11:07 PM
Found a local guy selling a 4 rib pump for my build. I'll be having the oil bypass mod done when it's at the machine shop. It has also been recommended to send out the pump to get rebuild/modded for flow by a good friend who has built several high end 911's. 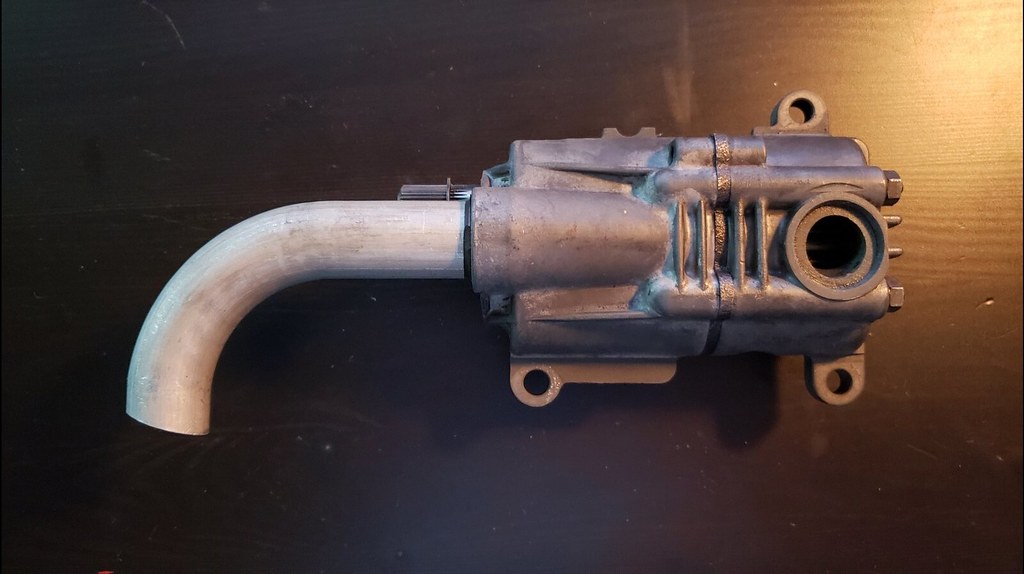
Posted by: Optimusglen Apr 27 2020, 07:06 PM
Project update:
-the 911 2.2T case is at Ollie's getting the work done. It did have head stud inserts, but we're opting to have those removed and they are going to do their case savers. Price was a bit higher than I was expecting after looking at their online price list, but the timeframe is also pretty long so it is giving me time to build the fun stuff budget up a bit before completely draining it, haha. Might be able to start engine assembly later this summer, and install it in the fall or winter.
-I purchased a tuna can from 914werke, I wish I had done it sooner. Maiden voyage after the install saw no decrease in oil pressure on back-to-back cloverleafs. I'm certainly very happy with it.
-I decided to take Jules (and others) advice and get the LED headlights from 914Rubber. I had purchased a set of H4 housings last year. At least I thought they were H4 at the time, turns out they were not (used, Craigsist deal from a Jeep guy I think) Discovered that when going for the install and just put all the stock parts back in until I can get the right housings.
-Haven't had a chance to install the Porterfield brake pads yet, but I did pick up some fluid so I can bleed the system at the same time.
-Pulled my old stock lower front valance out of deep garage storage, cleaned it up a little and plan on putting it back on for now. No use making it look perfect if the rest of the car is well patina'd.
-I picked up a laminated wood shift knob from TRE Motorsports. So far I like it.
Current short term plans:
-replace the dash face material again, this time yanking out the heater controls. I'd also like to recover the top dash. And I'm going to go with 3 Heuer timers for a bit, my daughter loves to play with them while we're driving (she's 3)
-recover the steering wheel again. I learned a lot of lessons when I did this one last year and I'd like to incorporate them into a new wrap.
For now, here are a few interior shots of how it is currently. 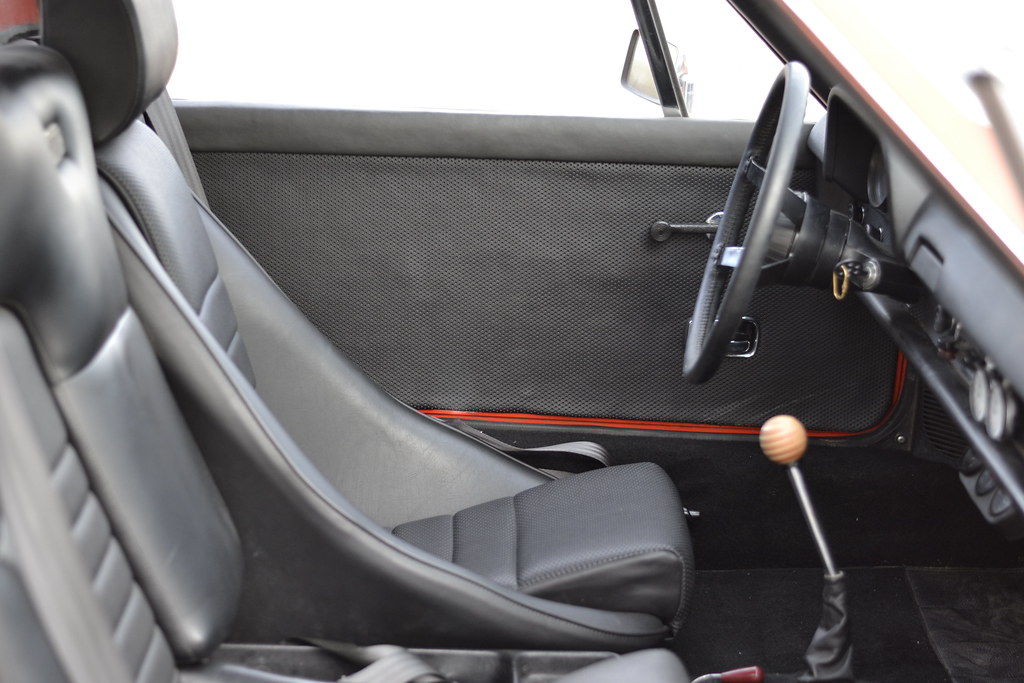
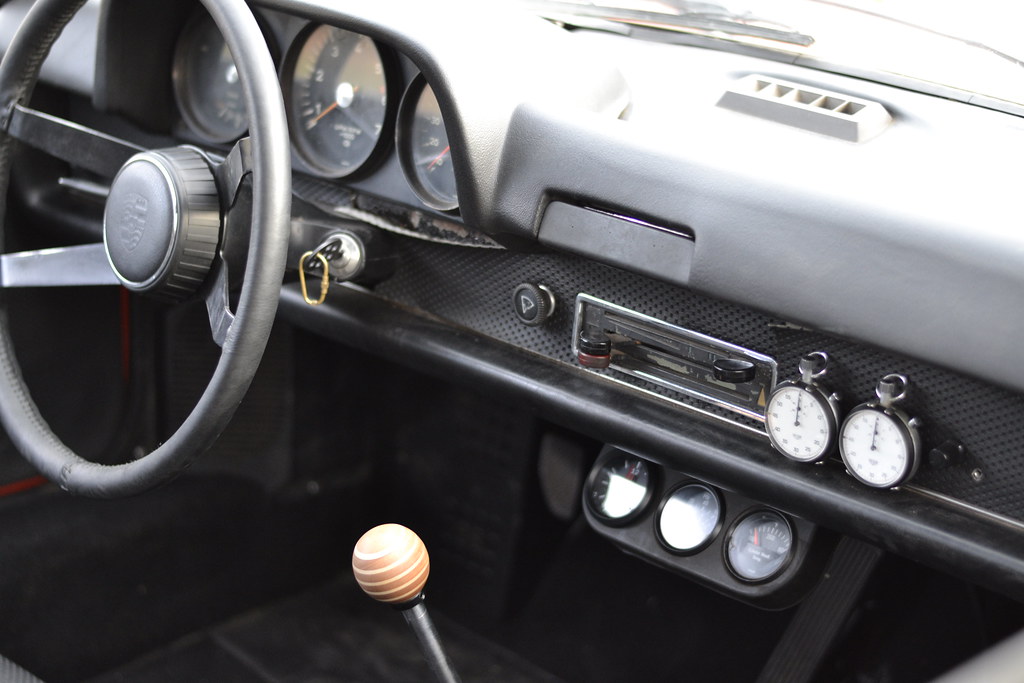
On the down side, yesterday while driving I ran into an issue with it. As a reminder it's a 1.9 built from a 1.7 running dual Weber IDF40's. I got on it a little from a light and after that the problem arose. The car idles way high, like 3k rising to 4k, I shut it down before it went higher. The strange thing is that the throttle pedal and cable are fine, and the throttles themselves on the carbs are closed. Any thoughts or insight is appreciated. I'm going to chew on it a few days before asking officially for help but I'm guessing I'm going to have to yank the carbs and figure it out.
Posted by: Optimusglen Jun 19 2020, 02:32 PM
On the down side, yesterday while driving I ran into an issue with it. As a reminder it's a 1.9 built from a 1.7 running dual Weber IDF40's. I got on it a little from a light and after that the problem arose. The car idles way high, like 3k rising to 4k, I shut it down before it went higher. The strange thing is that the throttle pedal and cable are fine, and the throttles themselves on the carbs are closed. Any thoughts or insight is appreciated. I'm going to chew on it a few days before asking officially for help but I'm guessing I'm going to have to yank the carbs and figure it out.
Well, good news/bad news.
I purchased rebuild kits for the carbs, but then just didn't have any time to dig into it. Work is very busy right now. So I had it towed down to Further performance, they did the initial tuning on these carbs when I built it. They diagnosed the carb issue as a broken return spring really pretty quick, but when they started it is when they heard the issue.
I guess it had the terrible clack-clack that only comes from bad rod bearings. It was able to run but there was no telling how long it would be until the rods exercised themselves from the case a'la the Alien.
Now, since I have the 6 cylinder case at Ollie's due to be finished up in early July, it just doesn't make sense to put any effort whatsoever into the 4-cyl. This shop specializes in old aircooled VW's and Porsches and they said they could use it as a core, so they pulled it and stuck it on their shelf and I towed the car home sans-engine. They will put the value towards the tuning on the 6 once it's in the car.
The good news in all this is that it kindof forces my hand towards the swap. I had been working towards it but since the 4 had been running fine and it was still a blast to drive, I wasn't going hard after getting all the pieces in place.
The bad news is that it ends my driving season way early, in Minnesota the good driving months are few as it is already. Happy I got a couple good drives in at least.
I put together an updated list of the major things I still need to buy or do for the swap, and it's a bit daunting...
-clutch,pressure plate, throwout bearing if needed
-oil tank and lines
-modification to be case mounted oil cooler for 914 fitment. plus cleaning and testing
-headers and modification of my muffler that I bought from Ben McFarland
-new alternator
-alternator fan shroud/duct (the inner air guide piece)
-clean/inspect/hone my cylinders and pistons, replace if necessary
-piston rings
-spark plugs,wires,distributor cap and rotor
-air filters and hats for the Zeniths
-throttle linkage
-engine tins
-get my oil pump rebuilt
-weld in my engine mount
-PUT IT ALL TOGETHER
...and on and on it goes.
Posted by: Optimusglen Jul 13 2020, 11:38 AM
the 12 week mark has come and gone. I messaged Ollies and they said another 2-3 weeks. So we're looking at the end of July.
A friend locally (Aaron from FlatSix) is checking out my pistons and cylinders to gauge if I can reuse them with cleanup.
Tins from Ben McFarland arrived a day or two ago. look awesome and I cant wait to fit them.
Otherwise it's just been sitting in the garage slowly getting covered with dust.
Posted by: mepstein Jul 13 2020, 11:40 AM
Make sure to measure everything you get back from Ollie’s. They’ve been having quality control issues for a while now.
Posted by: mepstein Jul 13 2020, 11:45 AM
If you need an alternator for a rebuild, let me know. I have a core or two that I’ll send for the cost of shipping. I can have it rebuilt for you at my cost, usually $75-125.
Posted by: Optimusglen Jul 13 2020, 12:54 PM
Make sure to measure everything you get back from Ollie’s. They’ve been having quality control issues for a while now.
Oh no, first I've heard of that. Isn't Ollie's the go-to for case work?
I don't have the tools to accurately measure bores, any suggestions on how to check it out?
And I don't have an alternator yet but I will need one at some point. I also don't know of anywhere to rebuild so I might have to take you up on that at some point if it's available in the future. Currently not enough car budget funds to go around to all the different things I need for this.
Posted by: mepstein Jul 13 2020, 01:30 PM
Make sure to measure everything you get back from Ollie’s. They’ve been having quality control issues for a while now.
Oh no, first I've heard of that. Isn't Ollie's the go-to for case work?
I don't have the tools to accurately measure bores, any suggestions on how to check it out?
And I don't have an alternator yet but I will need one at some point. I also don't know of anywhere to rebuild so I might have to take you up on that at some point if it's available in the future. Currently not enough car budget funds to go around to all the different things I need for this.
The offer is available to you as long as I have the proper core for you. There's no money in selling cores so they sit in storage. Many places have alternator and starter rebuilding services. Ours is located at a large battery seller.
I've heard it from two well respected engine builders who got parts back from Ollie's that where well out of spec. The feeling is when the kids took over from the original owner, quality control has been low. They aren't measuring after machining so things are slipping through the cracks.
I'm no engine builder but I believe many builders will assemble the short block and torque the bolts as a dry run before sealant. I guess short of measuring you want to make sure everything spins smoothly. But any good machine shop should be able to give you written post machining measurements. But you probably have to request and not just assume.
"Neil Harvey" -
Can I assume you did not check the case or crank before reassembly?
Here are few things that need to be checked.
Main housing alignment and size.
Crank straightness. They never are.
Bearing ID fitted to the case and torqued.
Crankshaft journal diameter.
From these you can calculate the clearances.
You probably have other case issues you may not be aware of as well. The case should be thoroughly cleaned, the galley plugs removed, piston oiling valves checked, by pass checked if done, all perimeter studs removed and the case parting faces lapped before measuring main housing bore, all threaded bores checked and repaired, just to name a few.
This all adds up so don't be surprised at the final cost.
We line bore cases oversize only. We do not deck and bore back to std. We are probably a little more expensive than the other main players but we typically turn cases around in 1-2 weeks, which includes all the work listed above. We do this work in house for all of our engine customers and occasionally do outside work. We deliberately keep it this way so the turnaround time is days not months.
The more you do your self the less the total will be. Clean the case well, and remove the 8.00mm studs. This saves a lot of time and $$."
I would search pelicans engine building forum and read everything Neil Harvey has written. He talks a lot about what to do before you build.
Posted by: Optimusglen Aug 4 2020, 11:53 AM
The 3 week mark has come and gone. I emailed Ollie's and it sounds like they're finishing it up soon. they say 2-3 days.
The 4-rib oil pump is freshly rebuilt and on a UPS truck right now.
Front 911 struts and hubs are ready to rock, getting a pair of Brembo calipers via Eric at PMB. Will need a new MC I think since I still have the 17mm unit in place.
I'm on Ben's list for an oil tank/filler, he will also be doing the 911 oil cooler modification for me, and we're going to work out all AN lines. No front cooler since it's a stock 2.2T
New clutch, pressure plate, throwout bearing, pilot bearing, and all related bushings/washers/felt thing etc are ready to roll.
MSDS headers on order, silver ceramic coated. Man I can't wait to see those. Should be shipping soon.
123Ignition distributor is here along with an MSD StreetFire, new coil, and a converter for the tach.
I have just about everything either ordered or I have it already. Just need to get my case back and start putting things together.
Posted by: Optimusglen Aug 11 2020, 10:53 PM
Parts are arriving.
Ceramic coated 1.5" headers from Marty at MSDS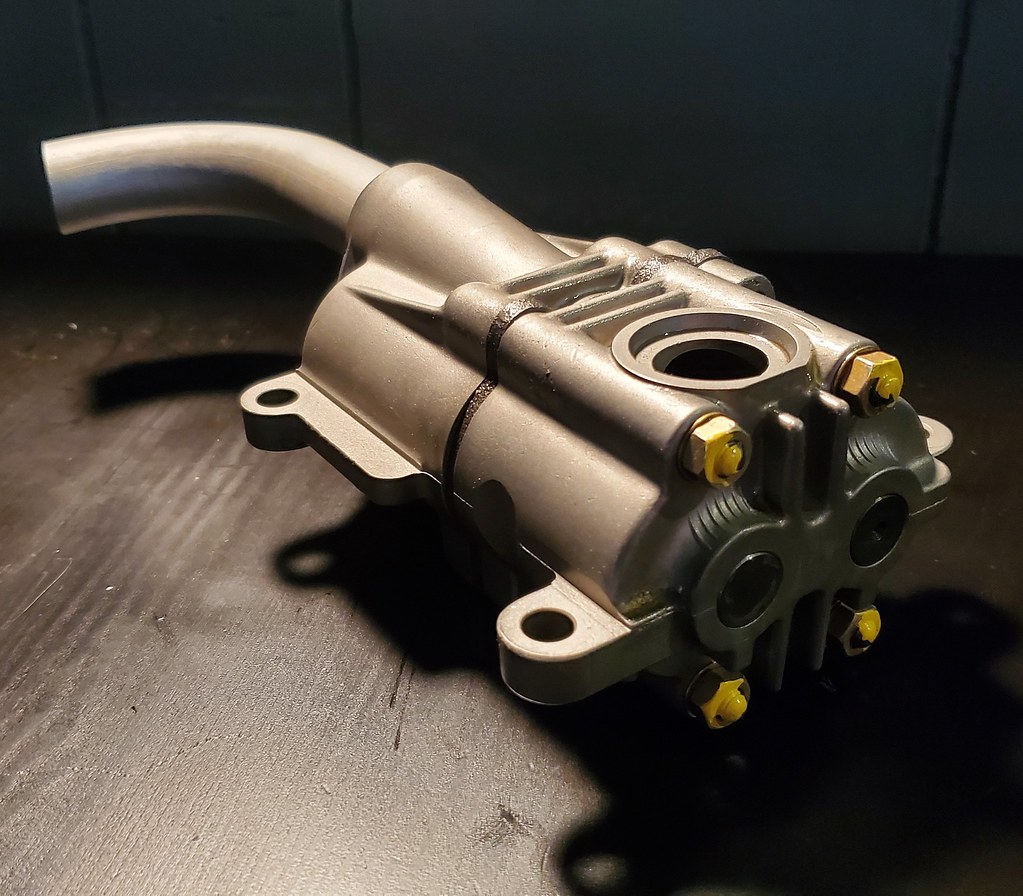
my 4 rib oil pump rebuilt by Henry at Supertech Performance 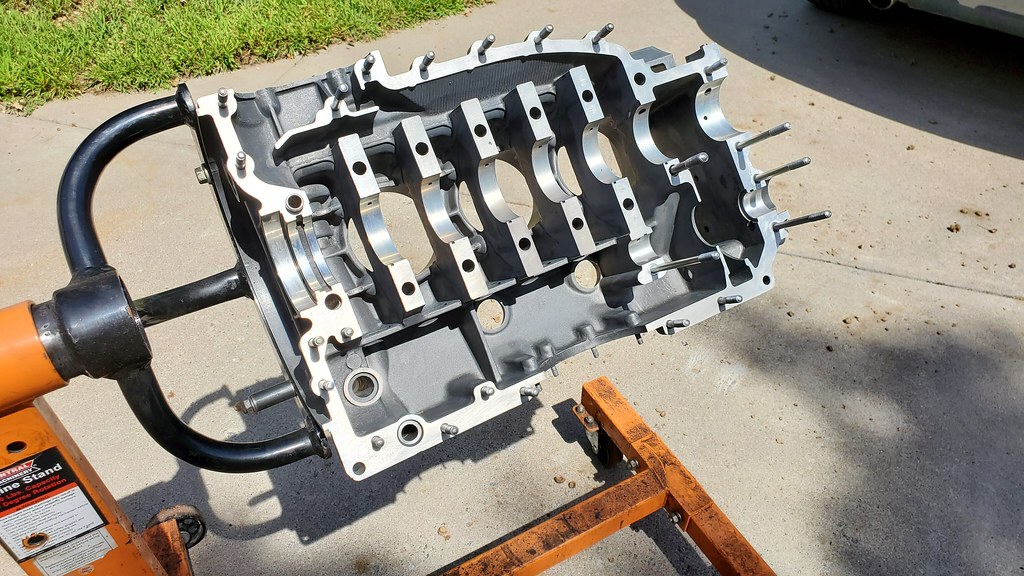
Case is back from Ollie's (don't worry, they sent the other half too)
Vents and jets are on their way for the Zeniths
Excited to finally start assembly!
Posted by: porschetub Aug 11 2020, 11:28 PM
Parts are arriving.
Ceramic coated 1.5" headers from Marty at MSDS
my 4 rib oil pump rebuilt by Henry at Supertech Performance
Case is back from Ollie's (don't worry, they sent the other half too)
Vents and jets are on there way for the Zeniths
Excited to finally start assembly!
Glen ,case looks great and those headers
 .
.What are your plans for the Zeniths?,cheers.
Posted by: Optimusglen Aug 12 2020, 04:42 AM
Glen ,case looks great and those headers
.What are your plans for the Zeniths?,cheers.
30mm venturis, 55 idle jets and 130mm main jets. As a starting point. From there I'll have a bud of mine fine tune, or swap out jets as necessary. He runs a shop that specializes in these and old VWs and did my Type4 when I was getting my 914 going.
Posted by: horizontally-opposed Aug 12 2020, 07:15 AM
So fired up for you, Glen!
The six conversion is something so many of us -4 owners have thought or dreamed about, and for all the anticipation and "I know" factor, even after riding in or driving someone else's, there is nothing like the first drive—and then all of the subsequent drives. It completely changes the character of your 914, and that transformation is maybe the coolest part. I miss the handling "flickability," but that's about it. The noises it makes, the power, and the specialness of having Porsche's most iconic engine in its lightest, best balanced production road-car chassis are impossible to overstate.
As you'll soon see…
Posted by: Optimusglen Aug 25 2020, 12:05 PM
So fired up for you, Glen!
The six conversion is something so many of us -4 owners have thought or dreamed about, and for all the anticipation and "I know" factor, even after riding in or driving someone else's, there is nothing like the first drive—and then all of the subsequent drives. It completely changes the character of your 914, and that transformation is maybe the coolest part. I miss the handling "flickability," but that's about it. The noises it makes, the power, and the specialness of having Porsche's most iconic engine in its lightest, best balanced production road-car chassis are impossible to overstate.
As you'll soon see…
@http://www.914world.com/bbs2/index.php?showuser=2058 Thank you!
Kris and I were just talking about it the other night when he asked if I wanted to give his 911 with the new PMO's a drive. I declined, not because I didn't like the setup (how could you not like a '72 911 with that motor) I declined because the experience is never the same as when it's your own baby. That and all I can see are dollar signs on his tachometer.
Besides, after driving his car at one point in the past it only managed to cement the preference of the seating position and feel of a 914. Yep, I'm a lifer.
In project news, I spent a day cleaning, gauging and installing my rods last week. Somehow I think I only ordered 8 rod bolts way back when, so I had to order up a few more. The crank is now assembled with all of the rods but then I decided to order new chains instead of reusing my old ones. Old ones looked fine, I guess, but it's fairly cheap peace of mind.
I also ordered up a few misc items that I hadn't purchased yet, i.e. chain guides, locking tab washers for the oil pump, etc etc. So assembly of the engine will resume next week at some point when I can slip the crank, oil pump, and all related pieces into the case then button it all up.
In the handling arena there's some news as well.
I've always thought the stance wasn't quite right on my car. A touch too much rake. I have Bilsteins on the back but no adjustment other than the slots to reposition the base ring. I decided to jump into some Ground Control adjustable sleeves and higher spring rate springs (140#). Both for the adjustability and to handle the extra weight of the 6-cyl.
Up front I'll be sticking with the -4 control arms and 911 3" struts. But now a set of Brembo AM calipers from PMB Performance and a 19mm master cylinder from 914Rubber will be handling the braking.
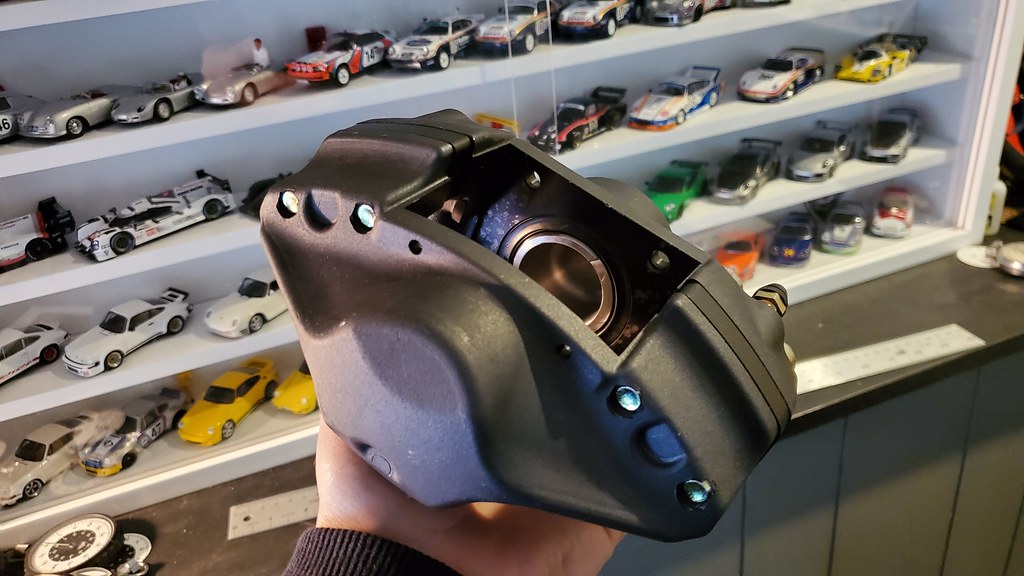
I snagged a 22mm front sway bar on here a while back, sans hardware. In all likelihood that'll sit on the shelf until all of the big stuff is done or until I have to remove the tank for some reason.
Posted by: Optimusglen Sep 17 2020, 09:29 AM
The engine build progresses.
The case is together with the important bits inside. Studs are installed. I went to start fitting my rings and discovered that I had the wrong rings. I had a set from Goetze purchased from FCPEuro that were supposed to be correct for the 911/07 but turns out the rings required for the KS pistons are different. So, returning the rings and purchased some others. I asked and looked all over, the only options were Deves and Total Seal custom rings. I took the advice of a very professional Porsche engine builder and friend and went with Deves because I have cast iron cylinders. I also used Deves in my 1911 and everything went smoothly there (until it didn't)
My bud Mikey over at this place called 914Rubber hooked me up. The air horns on my Zenith carbs were all kinds of crusty and he zapped them with his polisher and they're super fine now. Waiting on my inner venturis to get back to me to finish buttoning up the carbs then I'll snag some pics.
And the oil tank and filler neck arrived from Ben at 914-6werkshop.com It looks great and something that totally makes sense but I didn't think about until I opened the box was how much LIGHTER this new tank from Ben is when compared to the old Vellios tank I was going to build. If you've read further back, early on in the project I purchased two raw halves of a Vellios tank, I was going to make a project of it and have a local friend weld it up. Then I was going to have Ben do all of the tank. And then it just made sense to buy one of Bens tanks and sell the Vellios off. Glad I did!
Posted by: horizontally-opposed Sep 17 2020, 10:46 AM
^ Never thought about the weight of Ben's tank. Curious how much different than the Vellios, and the stock tank for that matter.
Missed your post above, and 140# springs seem to be a sweet spot for street-driven 914s, fours and (small) sixes alike. They were always great in my car when it was a four, and I wondered about moving up to 160s when I put the six in but have not felt any need to do so. Maybe if I go to 215s in the rear at time point. We'll see.
I think you're going to like those Brembos, and I dig your chosen finish. Very tactical…
Posted by: Mark Henry Sep 17 2020, 04:38 PM
^ Never thought about the weight of Ben's tank. Curious how much different than the Vellios, and the stock tank for that matter.
Missed your post above, and 140# springs seem to be a sweet spot for street-driven 914s, fours and (small) sixes alike. They were always great in my car when it was a four, and I wondered about moving up to 160s when I put the six in but have not felt any need to do so. Maybe if I go to 215s in the rear at time point. We'll see.
I think you're going to like those Brembos, and I dig your chosen finish. Very tactical…
The weight difference would be negligible, I imagine less than 10#, the big difference (advantage) would be Ben's tank holds more oil.
Only way you'll fit 215 tires is by rolling/pulling the fenders. I have 205 and barely have a 1/4" space on stock '74 rear fenders. This is for both the 205/60-15 and 205/55, using both 6' Fuchs and cookies. Also 215 is an oddball size, if you think 205/60 is hard to find in a good summer tire compound the 215 may be next to impossible.
I have 160# springs, Bilstein's all round, Alfa Brembo's, full motion bushings (actually they're bearings) PMB V-calipers (stock with spacers, vented rears), stock rear sways and a 22mm Tarrett hollow sway bar. It's a real good set-up, if anything a little stiff for a street car, but totally acceptable. Only thing I'm going to do this winter is weld in an inner long kit.
IMHO your 140# springs will be fine.
Posted by: Optimusglen Sep 18 2020, 10:26 AM
The weight difference would be negligible, I imagine less than 10#, the big difference (advantage) would be Ben's tank holds more oil.
Admittedly, I sold the Vellios parts before I thought to weigh them but I would guess-timate that it was right around the 10lb mark. It just felt significant to me. In the grand scheme of things that doesn't matter much especially since it's fairly centered front/rear, but weight is weight, and every little bit helps if you're trying to cut it out.
Speaking of which, I should probably cut dessert for a few weeks...
Posted by: Optimusglen May 13 2021, 04:01 PM
Update time!
I've been making some good progress now that the weather has warmed up a bit.
Current status of the engine:
-got my hardware back from PMB with fresh clean plating
-the P's and C's are back on after some deck height adjustments
-Cylinder air guides are modified/cut to match the later style as described in Waynes book. Cleaned, painted with high temp black, and installed.
-a new-used fan shroud, new strap and alternator have been fitted
-today I finished going through the carbs and fitting the new jets and vents
-a couple weeks ago I tore apart the front end to prepare for the new 911 struts/brakes/hubs. Also installed new bushings
-spent an evening doing an initial cleaning on the cam housings. they're clean enough that I can work with them now (removing plugs, cleaning oil tube, etc)
Some pics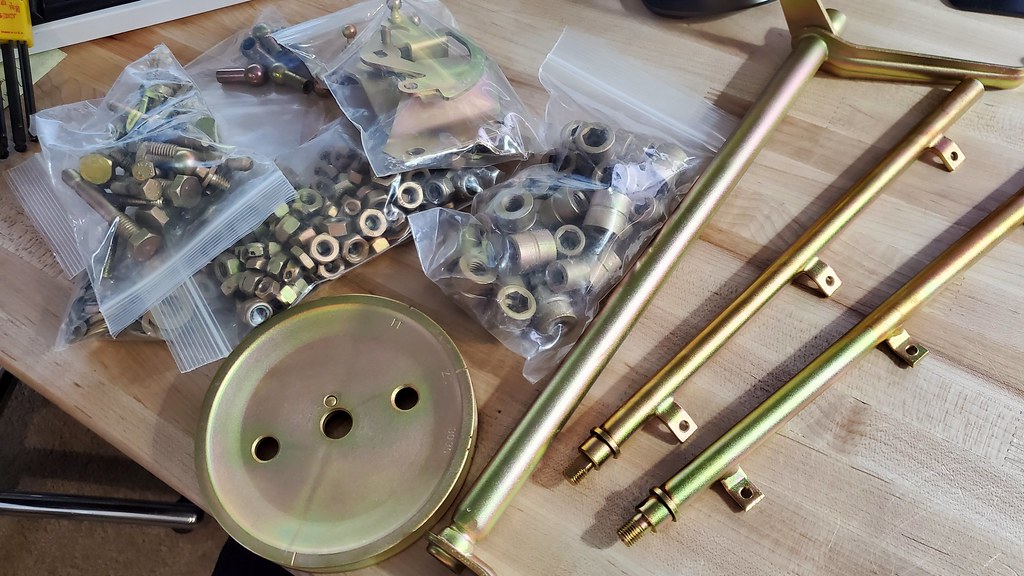
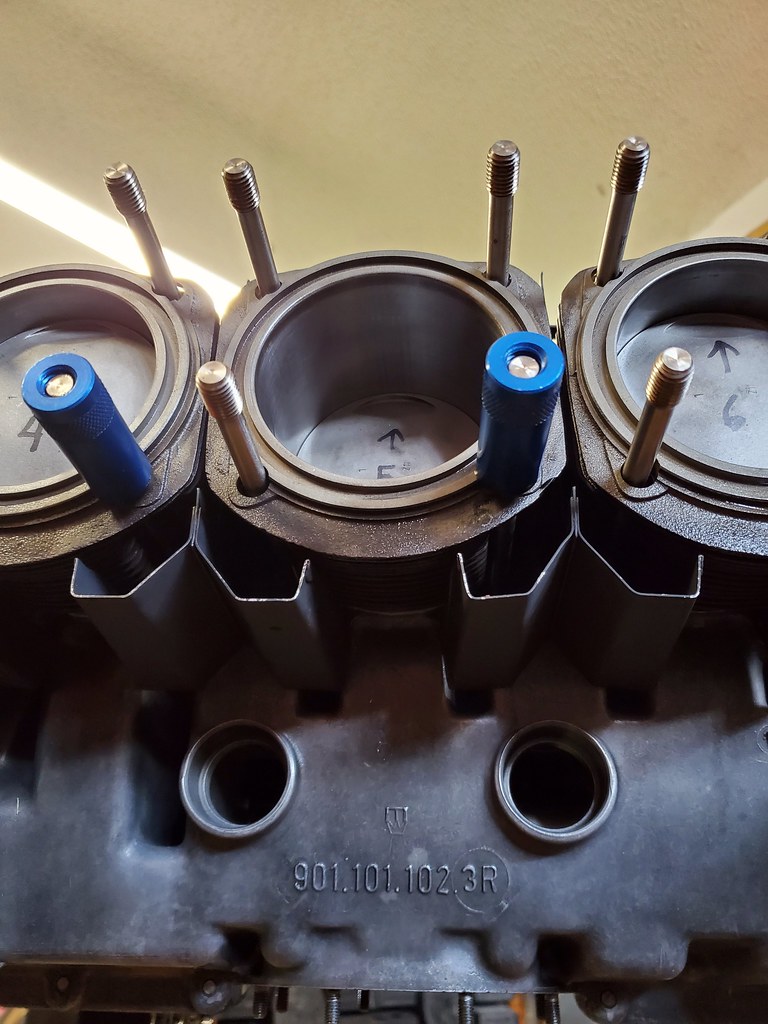
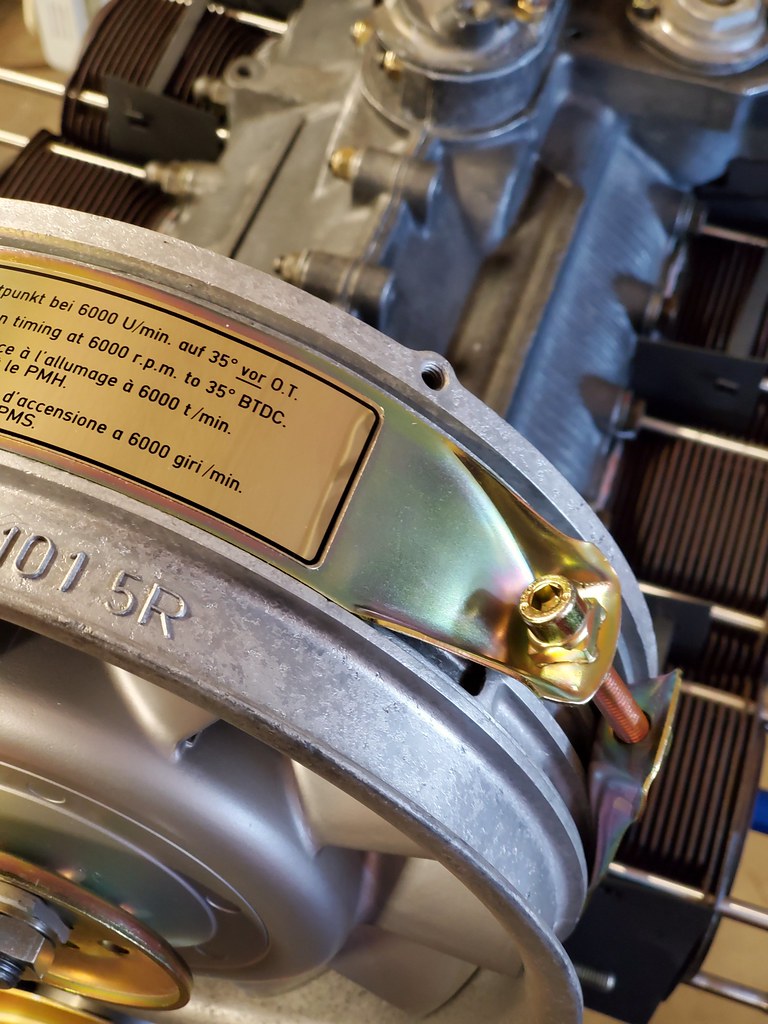
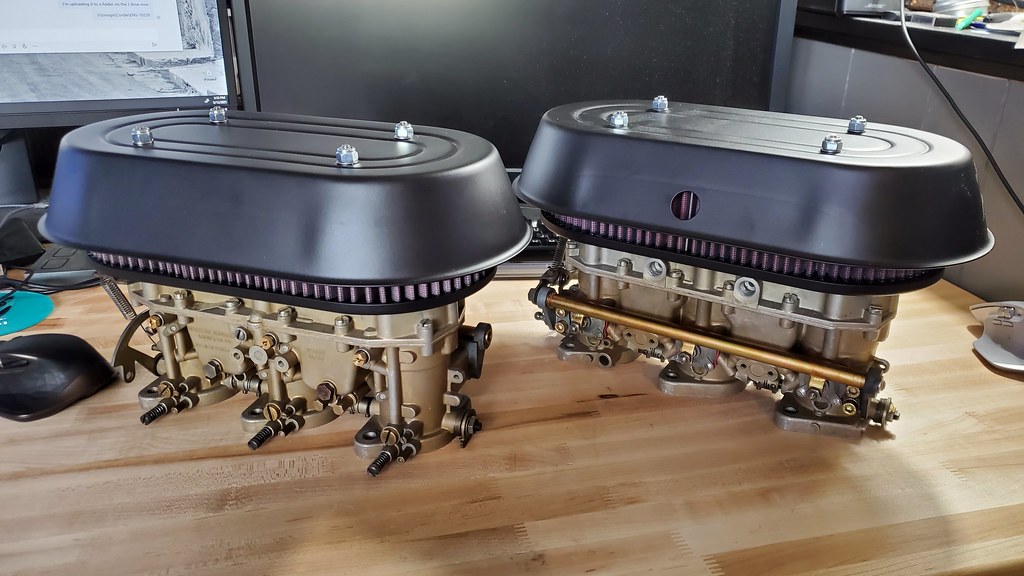
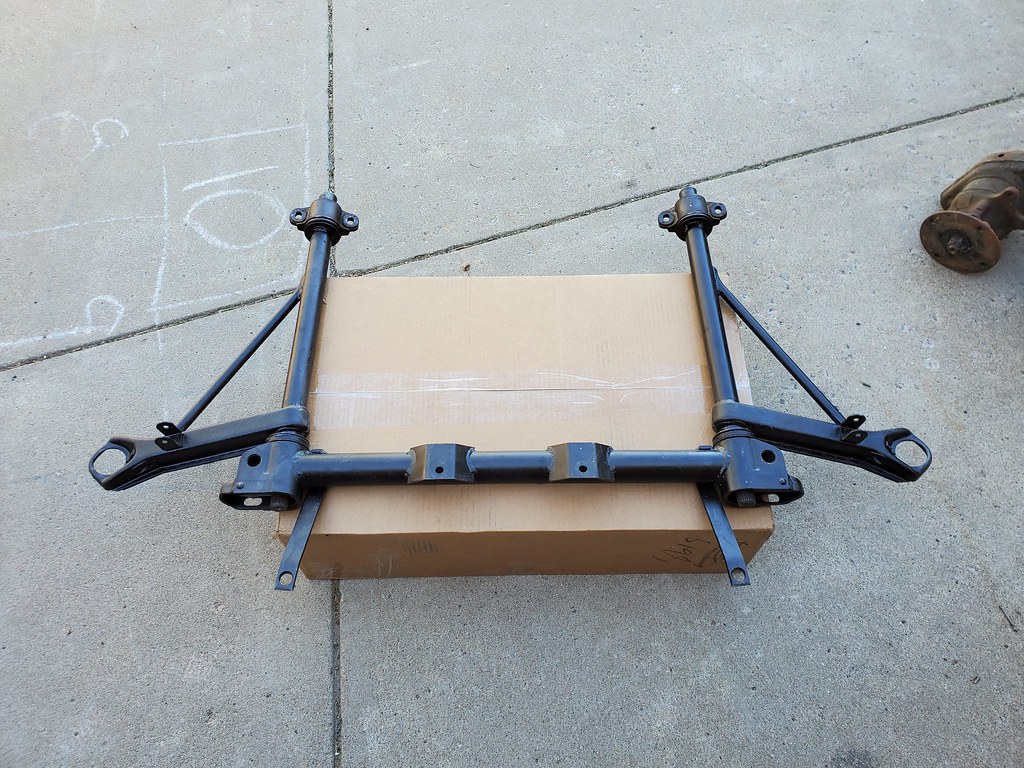
The bushings were a bit of a debacle. I ordered the 914Rubber bushing set that comes with the tools to install. I watched a few videos and read some DIYs. The fronts were straightforward and I got them on without too much hassle, when I got to the rears I hit a roadblock though.
It seems my '71 has a different suspension setup than every video and DIY I've seen. On those, the rear bushing cup is a separate part from the cross member. On mine, as you can see, it's integrated into the cross member and fully welded. Additionally, the torsion bar hole is smaller, meaning there's no way to use the "cone" tool that is supplied.
It was easy to install the rear bushing over the male portion of the control arm first, but when pressing into the cup it would swell out.
Alternatively, if you assembled it into the cup first it was also very easy, but then when pressing the control arm in it would mush the whole bushing down into the cup. On top of that, if you tried to use the cone it may press in, but there's no exit for the tool so the bushing couldn't go fully in.
We then tried going half/half and pressing together, but it would always slide up the control arm first and then swell out instead of go into the cup.
In the end, I ordered a set of polyurethane bushings. I fit them in the rear only by installing them into the cups first, then gradually removing a small amount of material from the ID until I had a good fit with the control arm. I assembled with the required lube and everything is nice and snug and smooth. I'm sure I'll be doing full 911 control arms and cross member at some point, so I'm not too concerned about the poly bushings.
Posted by: Optimusglen Jun 14 2021, 08:07 PM
The build progresses. I have up to the cam towers finished currently, hoping to have the timing set by the end of the week and then button everything up.
It was a relief when I slid the cams into place and they turned freely. I had the case done by Ollies so I wasn't worried about that, but I didn't have the cylinders surfaced or anything, so there was a chance I'd have to pull it apart. I did have them inspected by a friend who has built several 911 motors for a living, but I'm not sure of the extent that he checked them, just that he gave them his seal of approval.
I rebuilt the original chain tensioners and plan to use those in conjunction with the safety collars.
I'm planning on driving the Overcrest Rally this September. The drive itself is in Utah, and I don't plan to trailer this out there. So it's going to have to be ready to spend several days on the road.
Not pictured, but I picked up a pair of Renegade Hybrids axels. My -4 axels were acceptable for tooting around town, but for a long trip I wanted the piece of mind.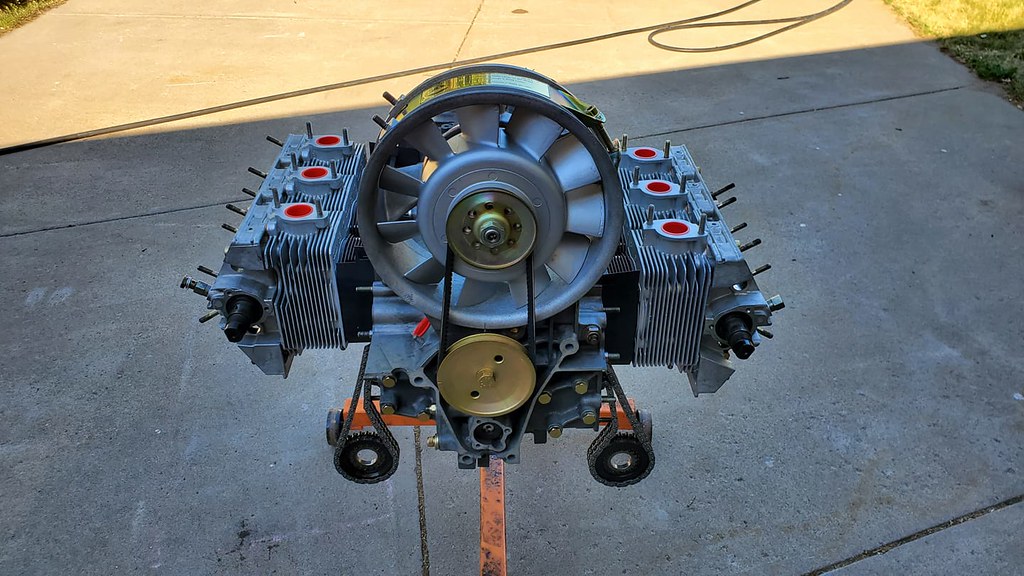
I also finished installing the front suspension, 911 struts, Brembo AM calipers, and 19mm master cylinder. Bled the brakes (just the front so far) and dropped it down of the jack stands. Next up for the chassis is to install the new rear pads and push some fresh fluid through. Then the Ground Control springs and adjustable spring sleeves.
I brought my Zeniths to another friend (Dave Cheney, who also has a 914(faux 6) that's beautiful) who has a little business rebuilding carbs. I had assembled them, and felt pretty ok about them, but thought it wouldn't hurt to have someone check them out who knows more about what they're doing, hah! He's ultrasonically cleaning them and I hope to have them back soon.
Posted by: Optimusglen Jun 16 2021, 08:40 PM
No pictures this time, but chain housings are on and cam gear alignment is complete, next up is cam timing!
I might try to sneak that in tomorrow, but I also have to wrap up a transmission service for my Land Rover, so we'll see how I'm doing after that.
Posted by: Optimusglen Jun 17 2021, 08:29 PM
Big step, the cams are timed and the tensioners I rebuilt are in.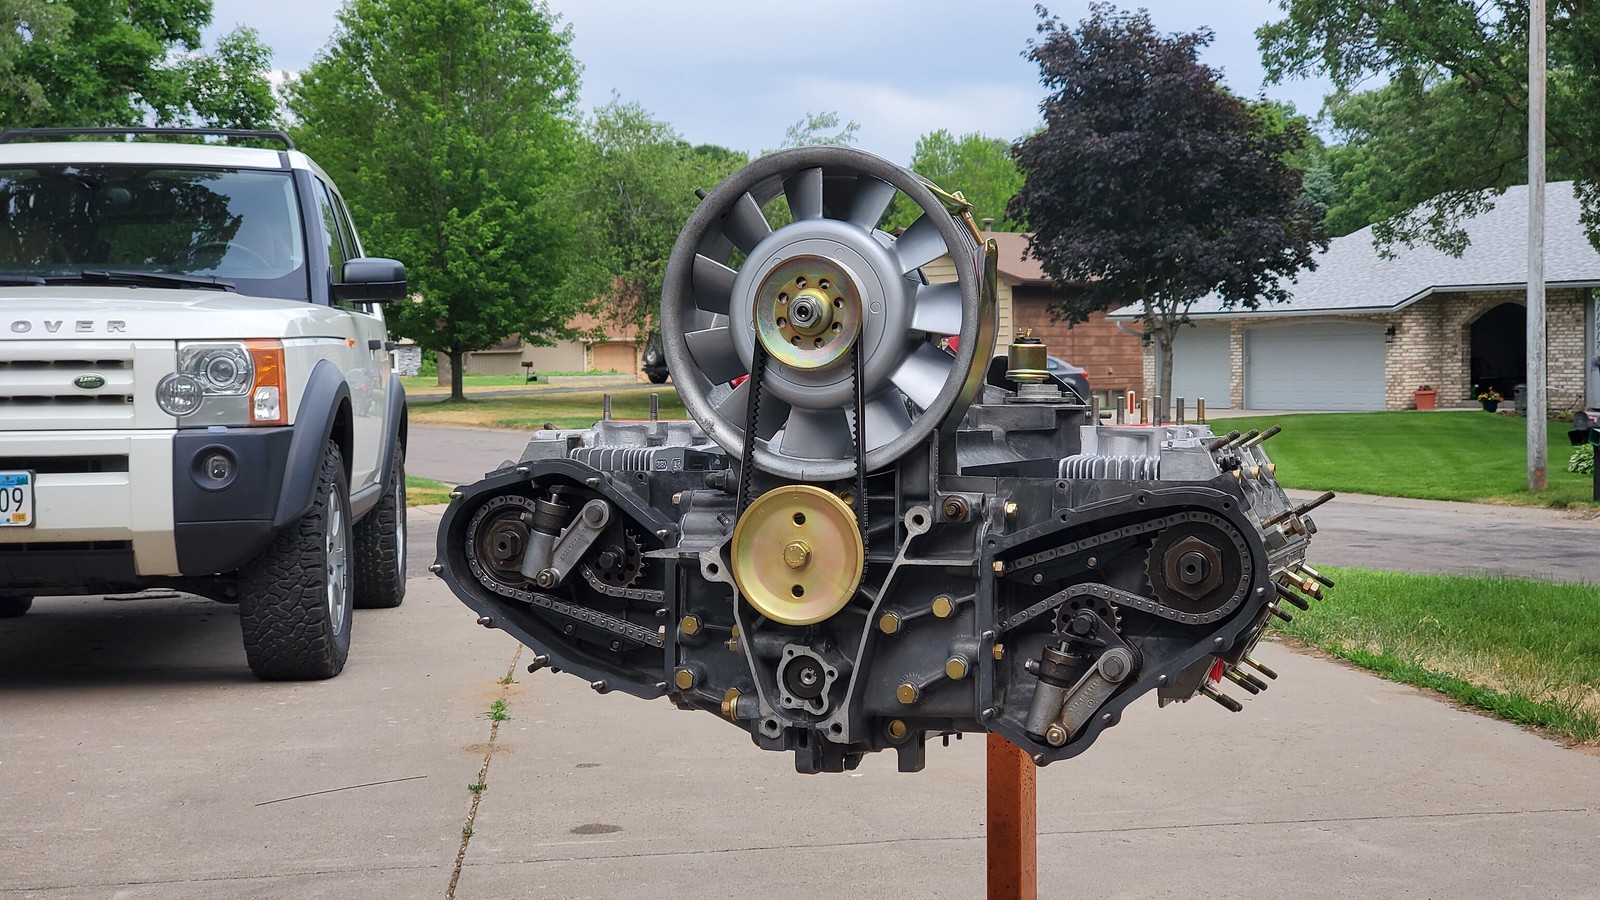
Posted by: mepstein Jun 17 2021, 08:34 PM
Awesome
Posted by: Cairo94507 Jun 18 2021, 07:24 AM
Looking amazing. I like that you plan to drive it in September on a long trip. Driving these cars makes them better and better.
Posted by: Optimusglen Jul 21 2021, 02:28 PM
Getting down to crunch time, I really need to be able to put a few thousand miles on this locally before the big drive.
The motor is really very very close to going in. A few small outstanding things and it's ready.
The biggest tasks left are mounting the oil tank and the engine mount.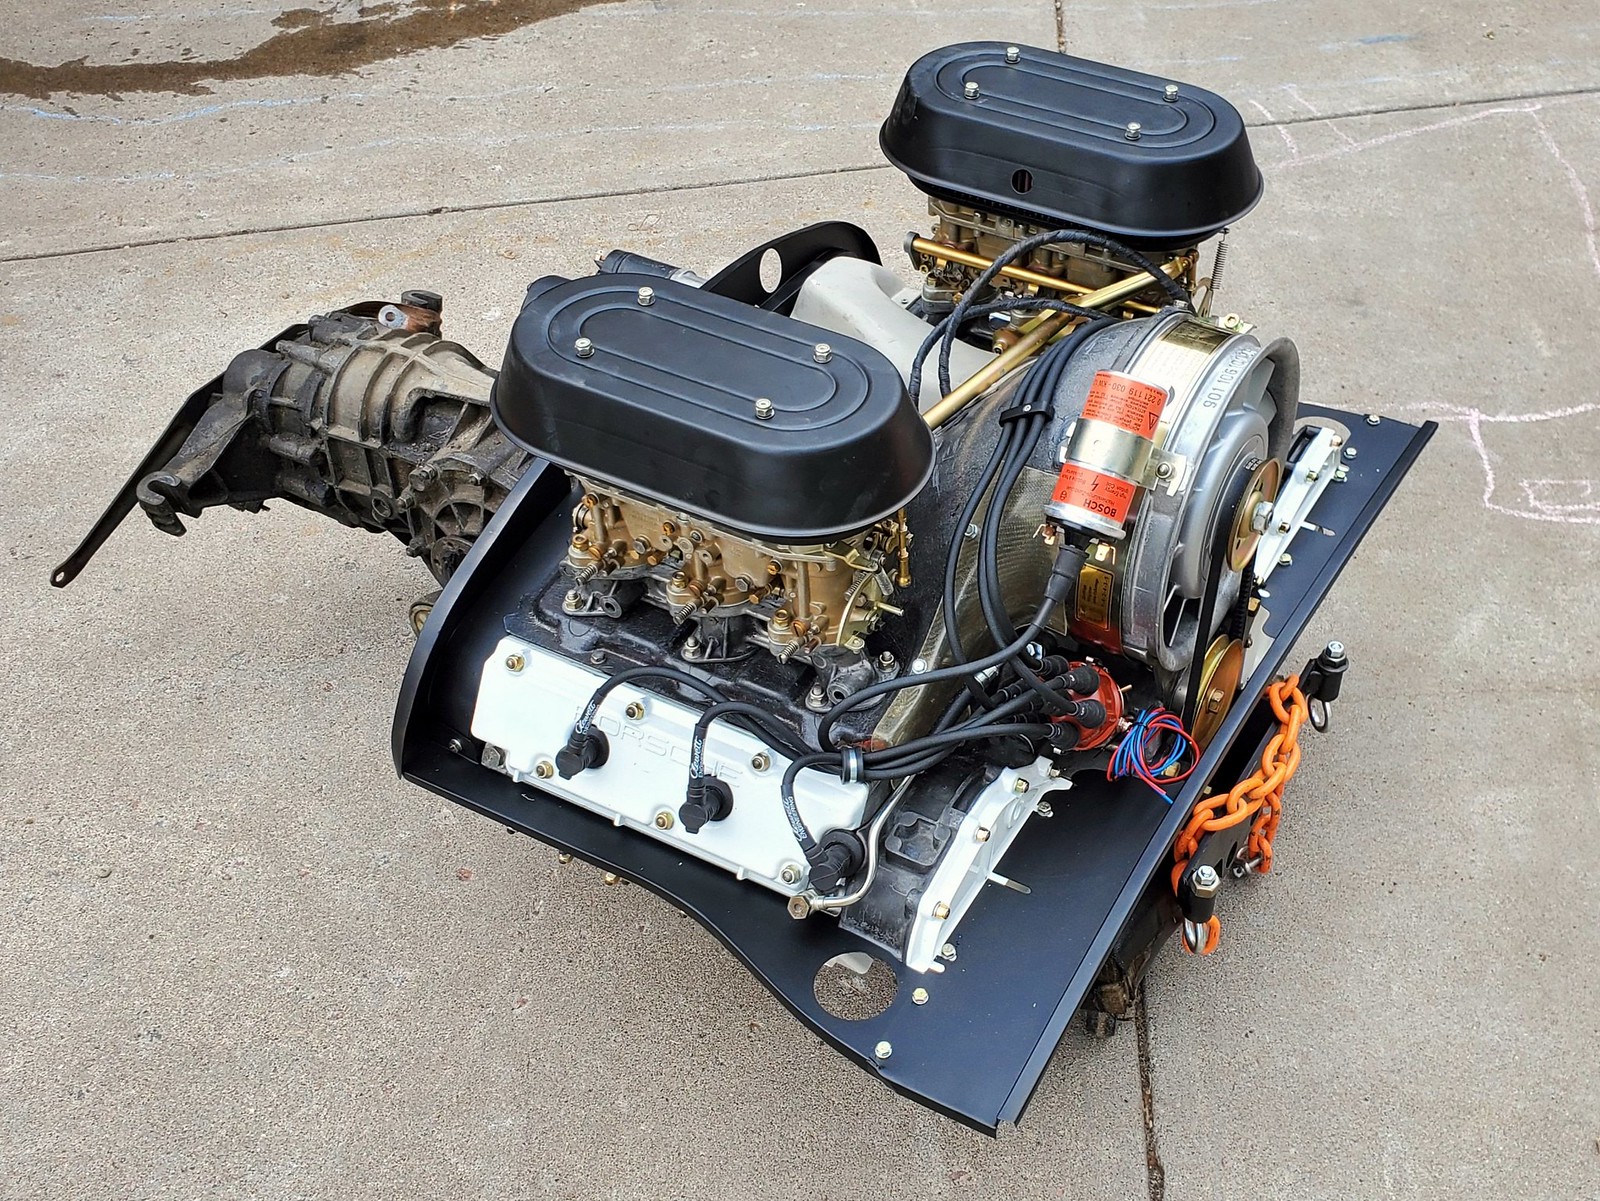
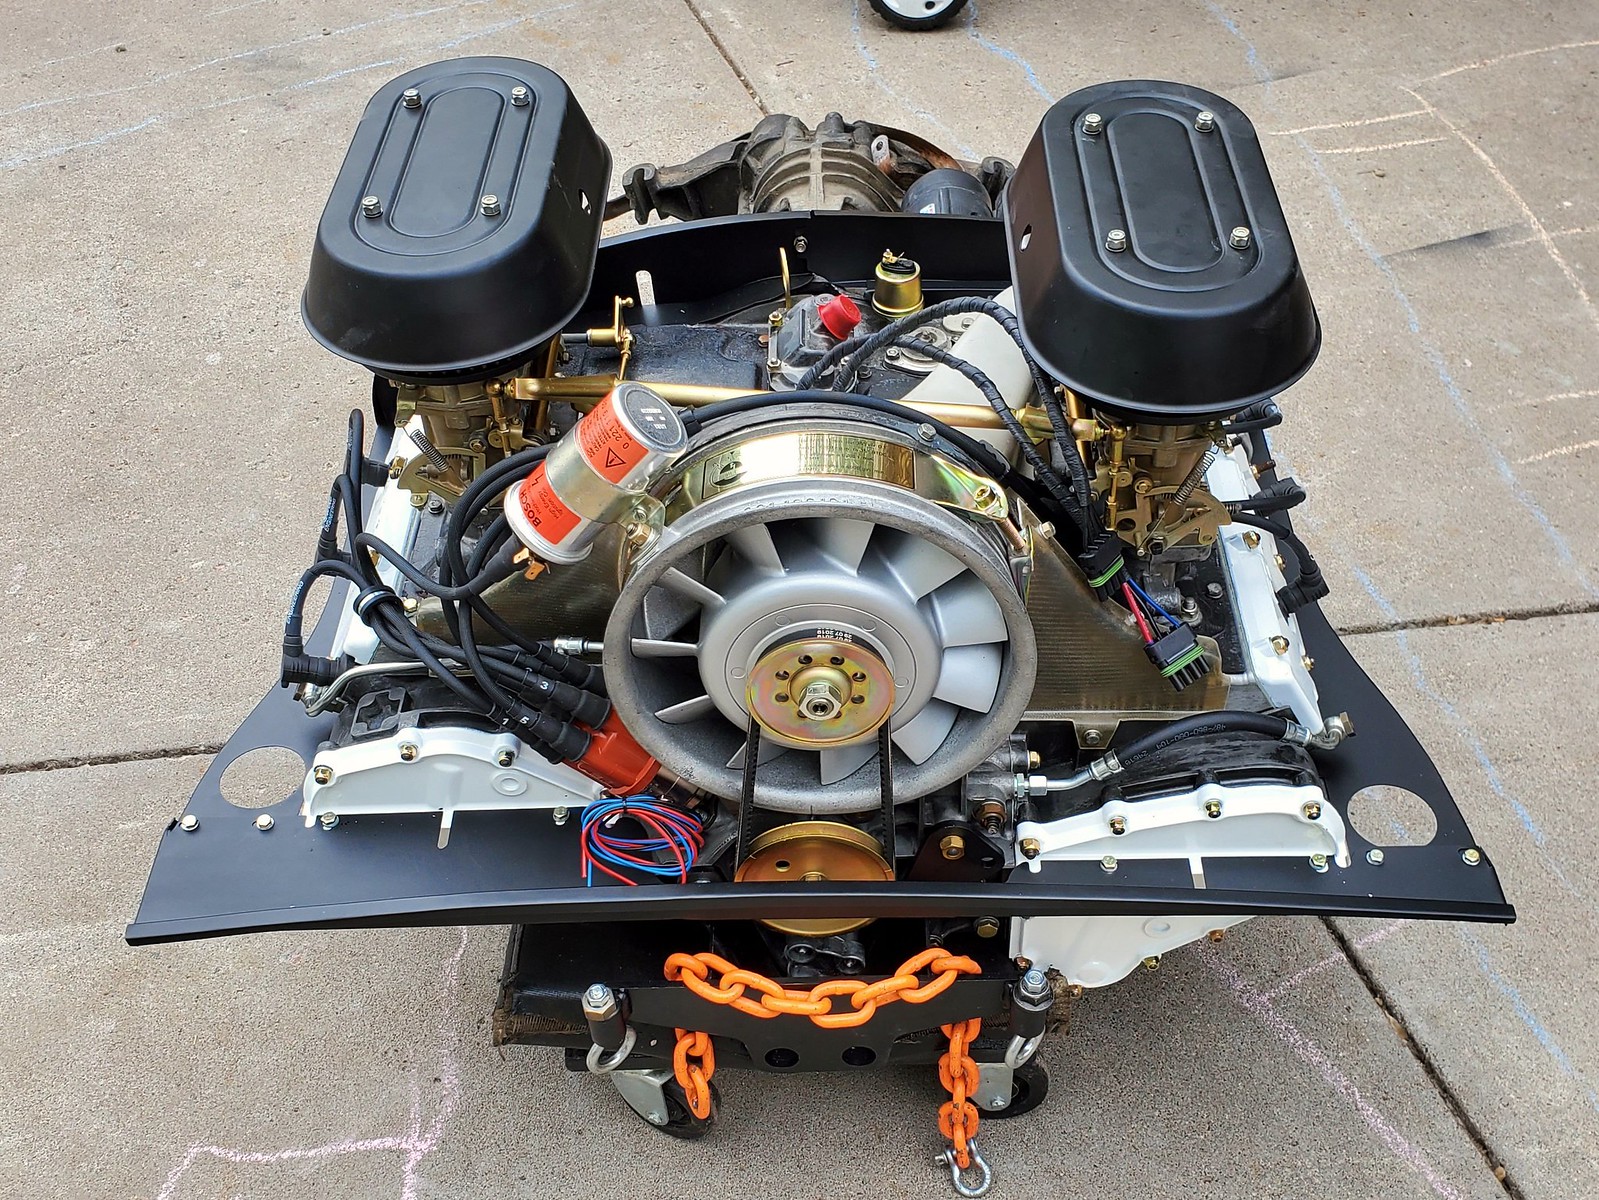
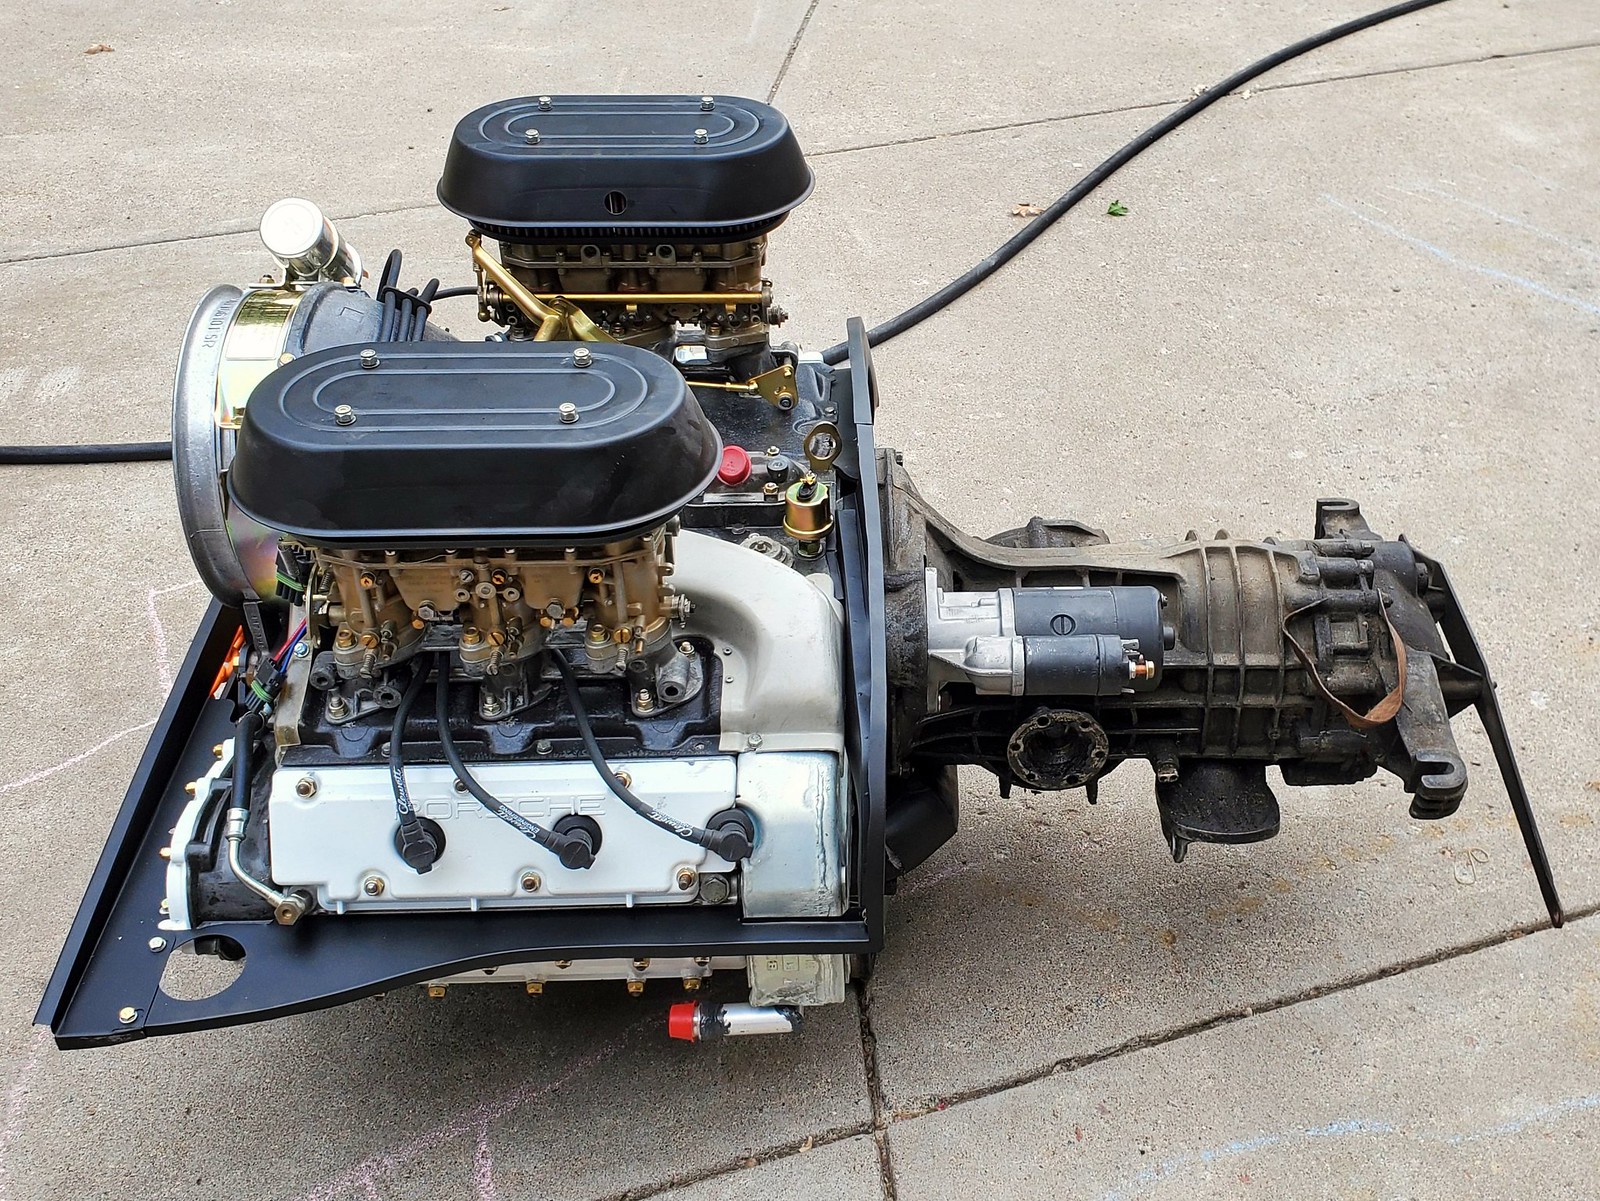
My friend runs DymePSI, a custom fluid line outfit. I'm hoping I can get the oil lines between the engine and tank expedited... Fortunately, I won't be running a front cooler. It's just a stockish 2.2T so everything I've read says I'm fine with the engine-mounted oil cooler.
Posted by: Retroracer Jul 21 2021, 05:32 PM
Are you running the phenolic spacers under the manifolds? They make a big difference and are worthwhile sourcing. Some of the build guides don't mention them, but from experience, watching clouds of evaporating fuel inches behind your head when stuck in traffic on a hot day CAN be a little disconcerting.....! The spacers stop the heat transfer to the carbs - a huge difference.
Very clean build Glen!
- Tony
Posted by: mb911 Jul 21 2021, 07:47 PM
Are you running the phenolic spacers under the manifolds? They make a big difference and are worthwhile sourcing. Some of the build guides don't mention them, but from experience, watching clouds of evaporating fuel inches behind your head when stuck in traffic on a hot day CAN be a little disconcerting.....! The spacers stop the heat transfer to the carbs - a huge difference.
Very clean build Glen!
- Tony

Posted by: Optimusglen Jul 21 2021, 10:13 PM
The '71 911T Zeniths had a factory version of that spacer and yes, I am running them. Or I should say I will be, I ordered them a week ago from the bird and they are hung up on some other item on the order so I ordered a second set from Sierra and they should be here tomorrow.
Posted by: porschetub Jul 22 2021, 01:53 PM
The '71 911T Zeniths had a factory version of that spacer and yes, I am running them. Or I should say I will be, I ordered them a week ago from the bird and they are hung up on some other item on the order so I ordered a second set from Sierra and they should be here tomorrow.
Yep make sure you fit them,even with them on my carbs (same as yours ) they are low in the fuels bowls which I put down to heat soak and evaporation anyway,I just run the my fuel pump longer before starting so no issue if the car has been sitting for a while.
Posted by: Optimusglen Jul 22 2021, 03:22 PM
I started preparing the car for the new motor. I was fearing the hole saws, having read that the task is somewhat of a bear, but it went really smoothly and all the holes were cut within an hour or so.
Lots I can/will clean up in here, but the big stuff will have to wait for the next phase of the project, bodywork. And that won't be happening before the drive this September. So I will deburr and dress the sheetmetal edges, but I won't be stripping any of the rust that has been starting or respraying anything.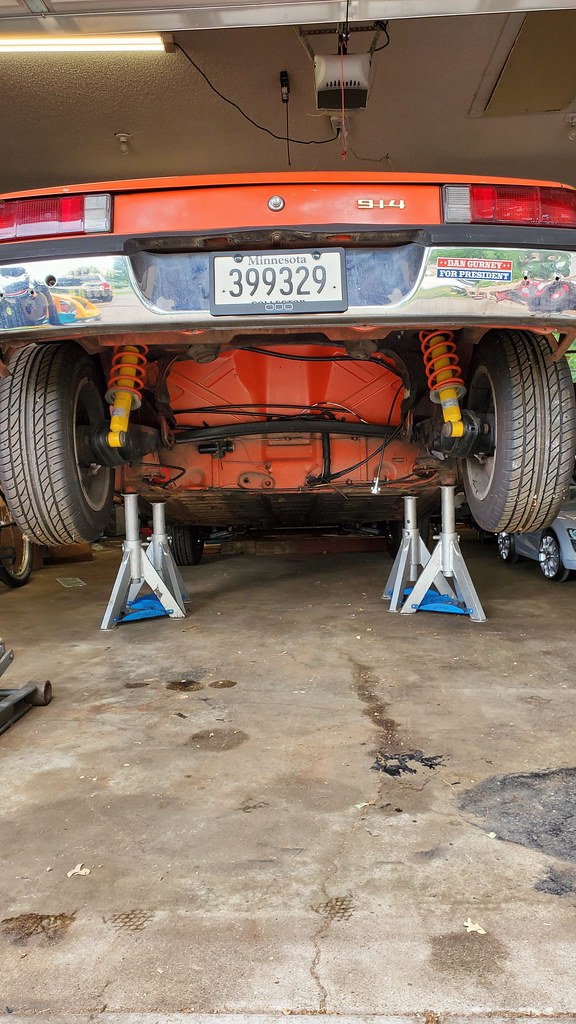
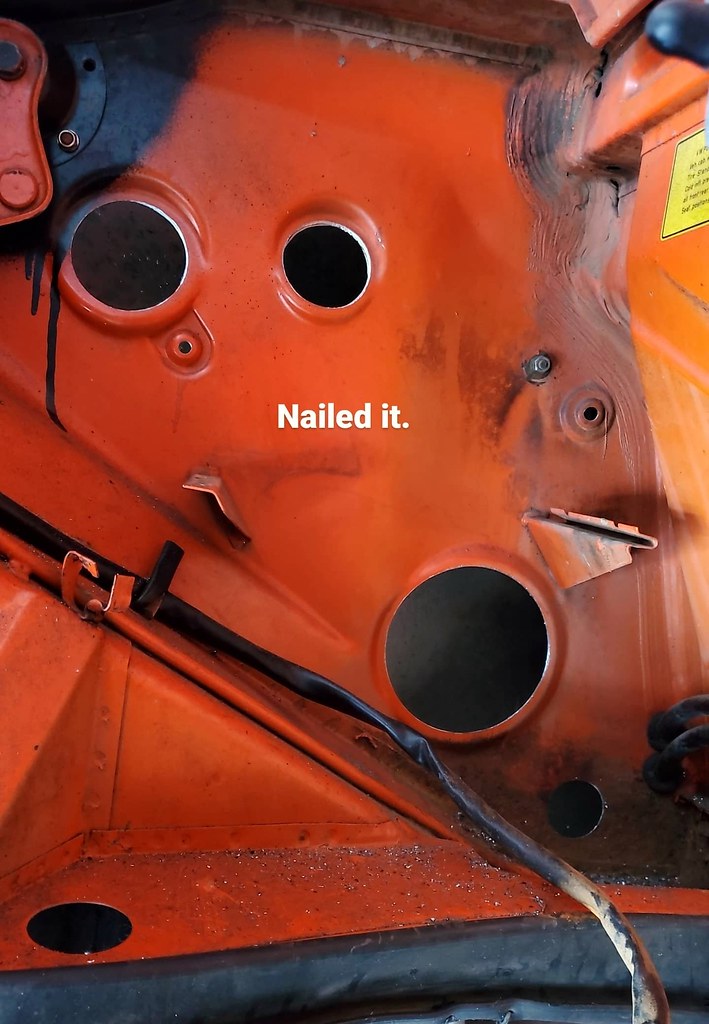
Before I toot my own horn too much I should probably test fit the tank...
edit: I wanted to update this in case future readers find it in a search. When using the hole saws I found it easiest to drill the pilot hole with a stepped bit first, to make sure it's located right on center. Then I rested the pilot bit of the hole saw in that hole and before making contact between the hole saw and the sheetmetal I ran the drill up as fast as it went. Then just very light pressure so that the hole saw doesn't grab and rip out of your hands. Light and fast. Works like a charm and had all holes cut in 30 min without much trouble.
Posted by: Cairo94507 Jul 22 2021, 03:35 PM
Nicely done. Definitely test fit the tank, but it should slip right in.
Posted by: raynekat Jul 22 2021, 04:47 PM
Nicely done. Definitely test fit the tank, but it should slip right in.
Yes, can sometimes be a bear to install (six oil tank). It's tight in there.
Make sure you tighten up the oil line that comes out of the bottom of the tank before you install the tank.
Next to impossible to tighten it up when the tank is already in the chassis.
Posted by: Retroracer Jul 22 2021, 07:49 PM
Also, FYI: I found this site really useful for prelim / static set up of carbs before first start after rebuild:
http://www.suggate.co.uk/zenith/new_site/articles/article3.htm
..if you have seen it already. It was also good for understanding the balancing procedure once you're running. No affiliation,
- Tony
Posted by: Optimusglen Jul 23 2021, 09:08 AM
When I finished with my carbs a friend of mine was actually starting up a side business of carb rebuilds, he had just finished running through another friend's PMO's so I sent the Zeniths to him.
He tore them down and ultrasonic cleaned everything, then replaced all the throttle bushings and reamed to fit the shafts. There were a couple of small parts that I hadn't re-plated that he did too. Then set them up to factory specs and sent me a form on setting them up in the car.
He is CheneyDave on Instagram, he's probably on here too because he has a 914 that he swapped a 6 into and did the GT flares etc.
Elsewhere on the build, McMaster came through with a clean solution for plugging the heater holes in the engine tin.
Part# 9750K35 and it's $13 for a pack of 50 hahaha so, if anyone is local and wants a pair, let me know. I might list some in pairs but I'm not really a fan of a bunch of $2 or $3 transactions and trips to the post office.
Last night I started locating the engine mount. Was kind of alarmed at how much of a zig-zag the harness/snorkel has to do to get through the channel. Going to have to do something with that before I weld the mount in. Talked with Eric at PMB and he ghave some very good advice on how they do it.
OH, and I test fit the oil tank and all looks good there. I had all the openings taped up so it was a little hard to see the two threaded holes through the drilled holes, but the big stuff all lined up great.
Posted by: Maltese Falcon Jul 23 2021, 06:14 PM
Nicely done. Definitely test fit the tank, but it should slip right in.
Yes, can sometimes be a bear to install (six oil tank). It's tight in there.
Make sure you tighten up the oil line that comes out of the bottom of the tank before you install the tank.
Next to impossible to tighten it up when the tank is already in the chassis.
I had a small bit of oil sweating from that lower Impossible-to-tighten fitting.
I found this odd wrench over at Earl's Supply , back when they had actual aircraft surplus in their store...then modified it in the bandsaw to fit the metric nut. I can get a slight bit of torque on the fitting , with the rocker just loosened and hanging in place.
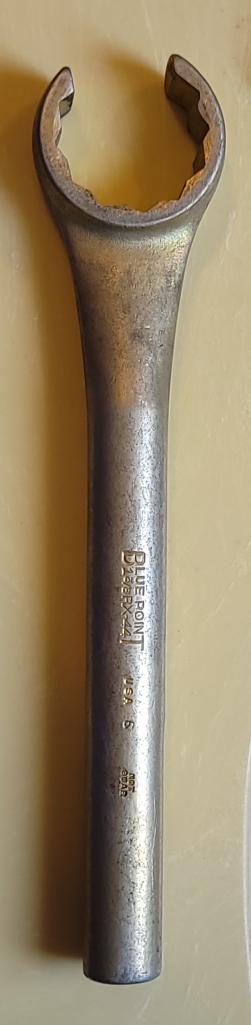
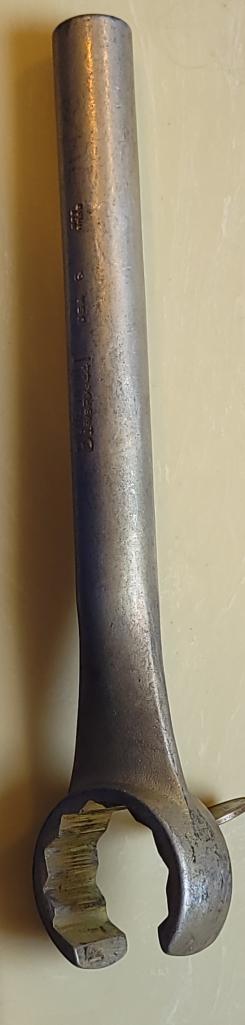
Posted by: Optimusglen Jul 24 2021, 08:03 AM
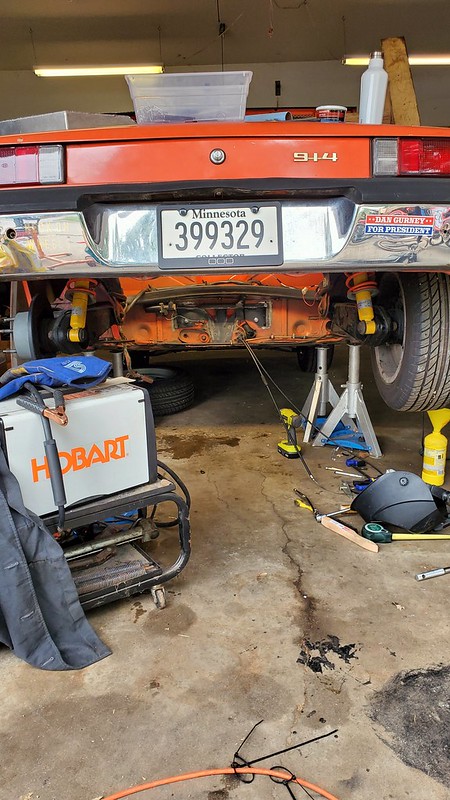
Next week the motor goes in I think!
Posted by: Optimusglen Aug 3 2021, 09:10 AM
I've been waiting for parts so I can continue forward. I had to order a new crank pulley to match my fan pulley, and new longer belts. I could have picked up a non-standard belt a little shorter than the 710, but then it would be under-driving the alternator. The new crank pulley is due tomorrow, I got the "935-style" billet piece.
I cut out the -4 engine mounts. etch primes the bare metal and then rattle-canned over that.
I've also installed the rear coilover sleeves and new springs. Then installed the new rear brake pads. Left the adjustments loose because I don't have the new axels in and torqued yet (waiting for the engine to be in for that)
I've also started thinking about the wiring, historically it's been my biggest challenge for non-factory builds. heck, even with stock stuff I have been confused numerous times. With some help from Perry (a.k.a. @http://www.914world.com/bbs2/index.php?showuser=439 ) and a few other sources, I've managed to map it out I think.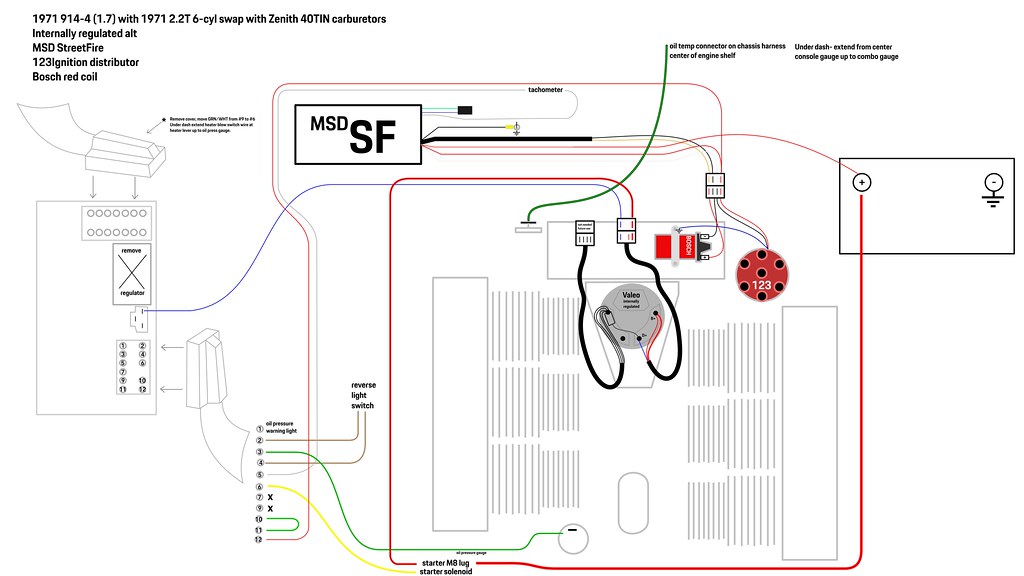
Huge size here
[url=https://live.staticflickr.com/65535/51355588973_3fbe7ade9d_5k.jpg[/url]
I had wired in short harnesses on the back of the alternator out to the outside of the air shroud. The schematic I was following for that had a lot more wires than I actually need, specifically the 4 wires on the left (shown black, but should be brown) and the single thinner red wire on the right. I'm considering pulling the carbs and air shroud off again and revising this... but maybe it'll be future proofing... if I wanted to change things later maybe I'd want them?
The only thing remaining is my tach. I still have the 4-cyl tach in there currently. I do have a tach adapter, but the wires on the unit don't match any of the samples I have from Perry or the other gentlemen who have sent their wiring schematics to me.
I also have an aftermarket tach that I was going to swap the guts into a dead 911 tach I have. Started collecting those parts years ago, so I'm not sure if I want to go that route again.
Or I could try to buy a 911 tach, but that's the most expensive option and one I'm not entirely fond of for that reason.
Posted by: Optimusglen Aug 3 2021, 04:42 PM
Just finished re-installing the fan/housing. I removed the short harness that's not needed and added a beefy ground from the alternator to the case. I had one cable before, but it was a 12g wire. The new one is a proper battery cable ground.
Next I need to dig out an old harness I have to pull the 12pin plug from. Or maybe I'll buy a new one...
Posted by: mb911 Aug 3 2021, 06:31 PM
Well I do have a 911 tach if you need one for a reasonable decent price.
Posted by: Optimusglen Aug 5 2021, 10:19 AM
Going to try to avoid throwing money at the problem for now.
Yesterday was a BIG DAY!
The new crank pulley came in, and a pair of belts from elsewhere, so I was able to wrap up the front of the engine.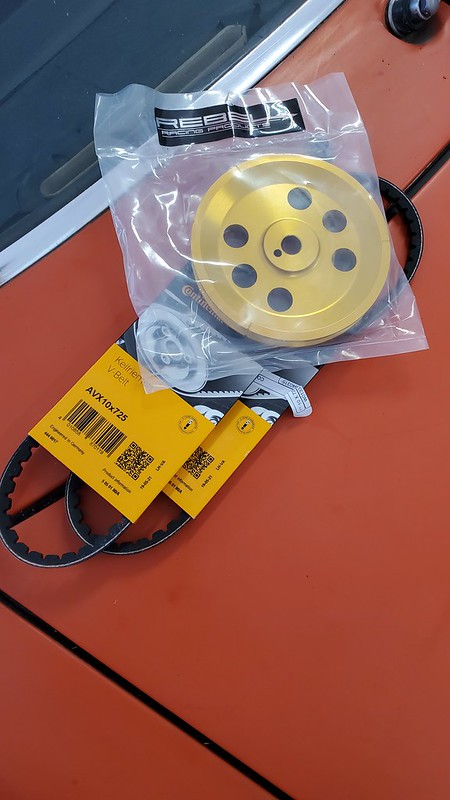
Fit great and tensioned well with 3 shims in and 3 out.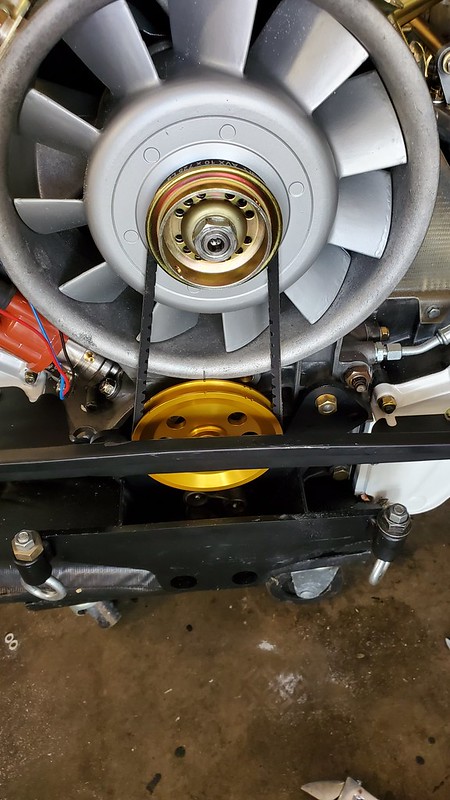
At which point there wasn't much holding me back from getting the motor and trans set up to go in.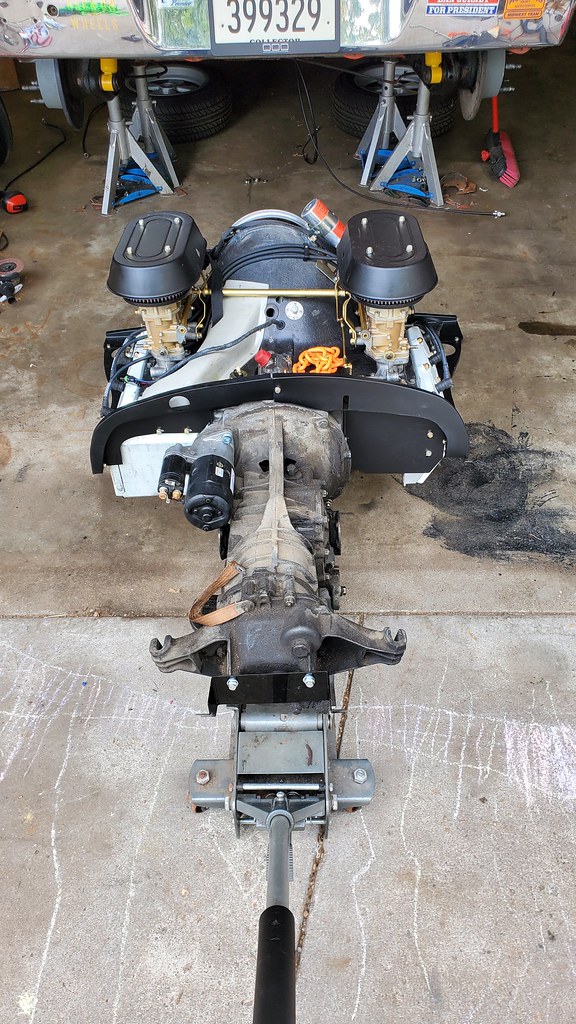
At this point, I was regretting not spending some time cleaning the gearbox...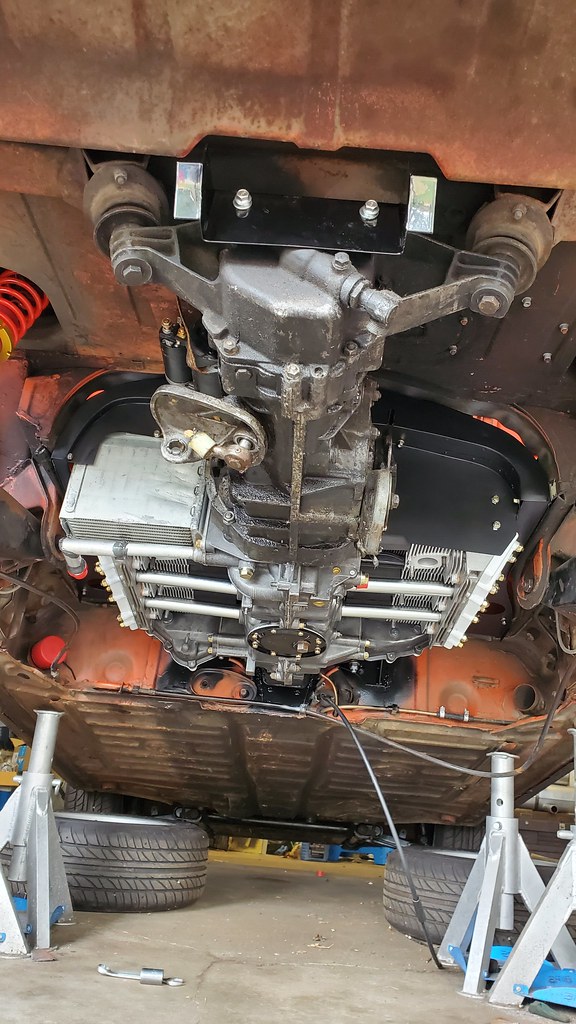
The Renegade Hybrid axles in first, then I couldn't help myself and installed the MSDS headers.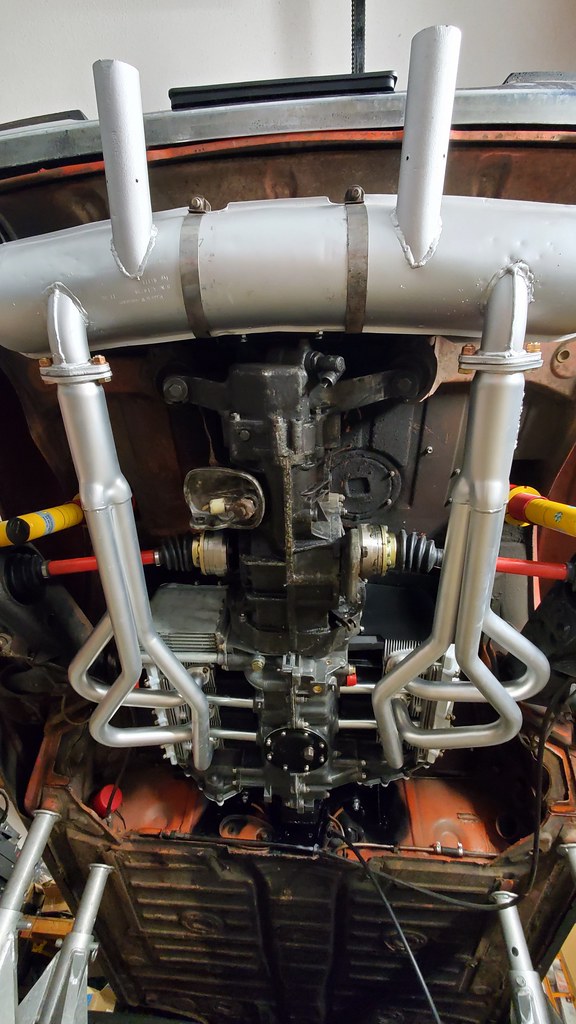
First I installed my muffler from Ben (914-6werkshop) but I mistakenly had the headers snugged down already. This required me to ratchet strap them together a bit to mate with the muffler flanges. Then I had trouble fitting the muffler straps, interfering with the exit pipes, so I pulled it off and slapped on this other muffler I had. It lined up well and works with Bens muffler bracket.
I emailed Ben and found out that I errored in tightening the headers first, and he also gave me some tips on making the muffler bracket work. I'll check that out at some point because his muffler is substantially lighter than this home-brew sport muffler. And it looks a bit meaner too.
For now though, this isn't a bad sight.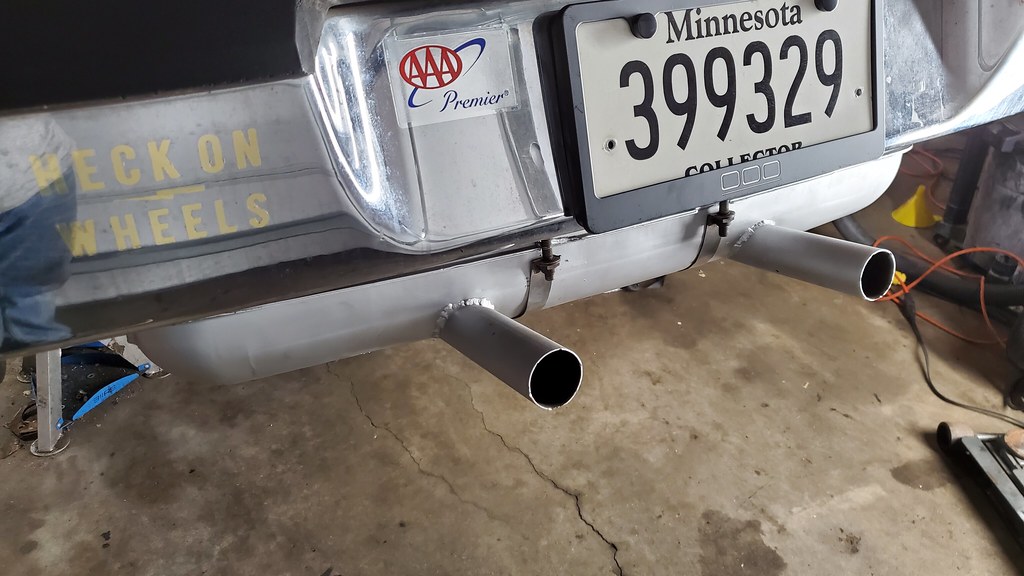
Posted by: Cairo94507 Aug 5 2021, 10:27 AM
Giant step forward. Yeah, definitely swapping to Ben's muffler will lighten the load and look perfect too.
Posted by: Optimusglen Aug 11 2021, 10:32 AM
Work continues,
Patrick Motorsport shift rod is in. I had to space the mounts on the MadDog bulkhead mount up about .35 inch in order to clear the shift bar.
The axle bolts are torqued to 150 (spec is 250, but I'll need to wait until it's on the ground and I have a bigger torque wrench for that)
The rear pads are adjusted. Erics guide said to ensure axle nuts are torqued, hopefully 150 is enough for that.
Started removing the forward remnants of the old throttle and clutch cable, found that the clevis pin on the clutch cable was seized. In fact, the pin had worn through an old brass (bronze?) aftermarket bushing at the pedal cluster. What a cluster-f getting that out. So the whole cluster is out now waiting on The Bird to deliver some new parts.
I did install the rear portion of the Patrick Motorsports throttle cable. I chose this route over the factory-style linkage for ease of install/setup and I believe it was cheaper too. The forward end of course will need to wait for the pedal cluster to go back in.
I started in on the wiring, MSD is mostly wired in. Weatherpak connectors with pins crimped and soldered. I still need to test all the connections.
I mounted the MSD on the passenger side of the firewall inside the engine compartment. (my battery is already relocated to the rear trunk, fuel pump is in the front)
So, working towards the left I decided I should have probably fished around for the Oil Temperature wire before I installed the engine. A little research showed that on my '71 I wouldn't have the oil temp wire on the forward engine shelf as I was lead to believe. This brought me further down the rabbit hole of wiring and now I have revised my wiring diagram.
As many of you know, but some of you probably don't, the relay boards and their wiring are not identical for all 914's. For the 70/71 I am able to run the oil pressure and oil temp through the 12pin connector.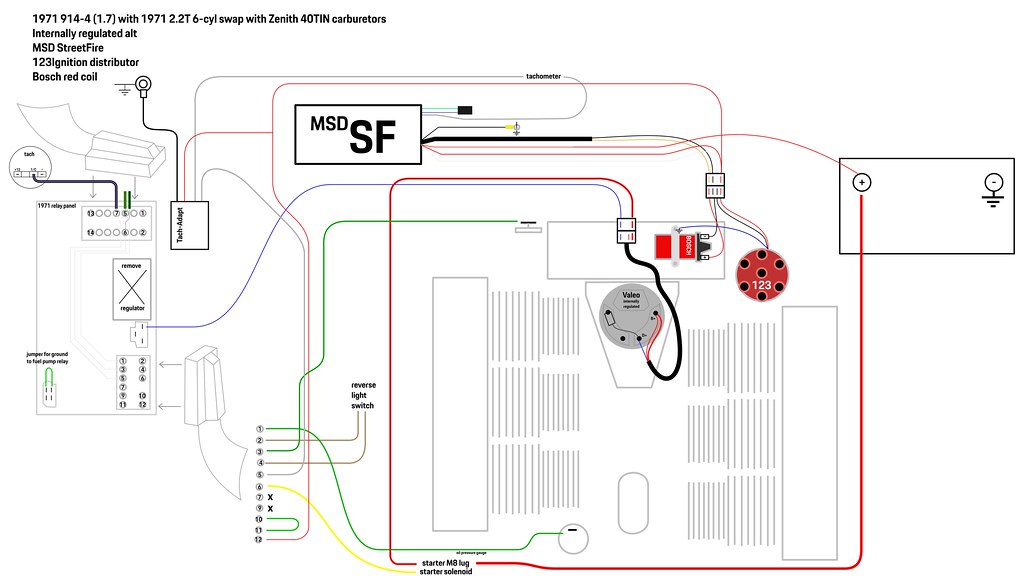
Huge size here
http://live.staticflickr.com/65535/51370949827_66efcfc1cd_5k.jpg
And because pictures are the lifeblood of any build thread, here are a few other small additions.
Copper plated exhaust nuts came in and installed.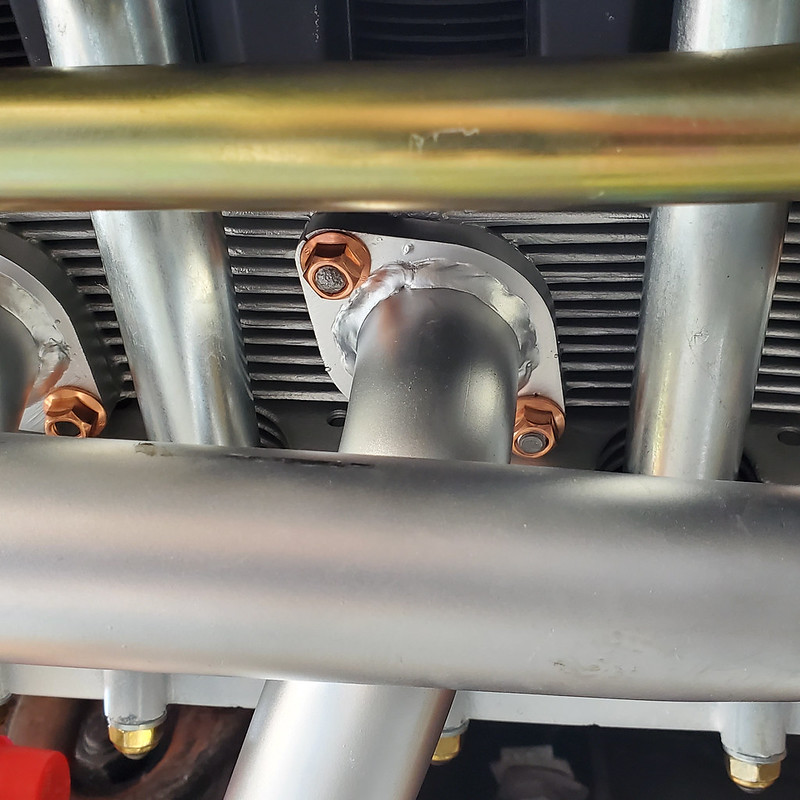
As you can see some of the studs reach all the way to the outside surface of the bolts, while others are inset a bit. Anyone with experience here? Do I need to pull those studs or back them out?
And I replaced the drain plug. The old one was fine but just looked out of place with the brand new sump cover, totally refreshed case, and new hardware elsewhere.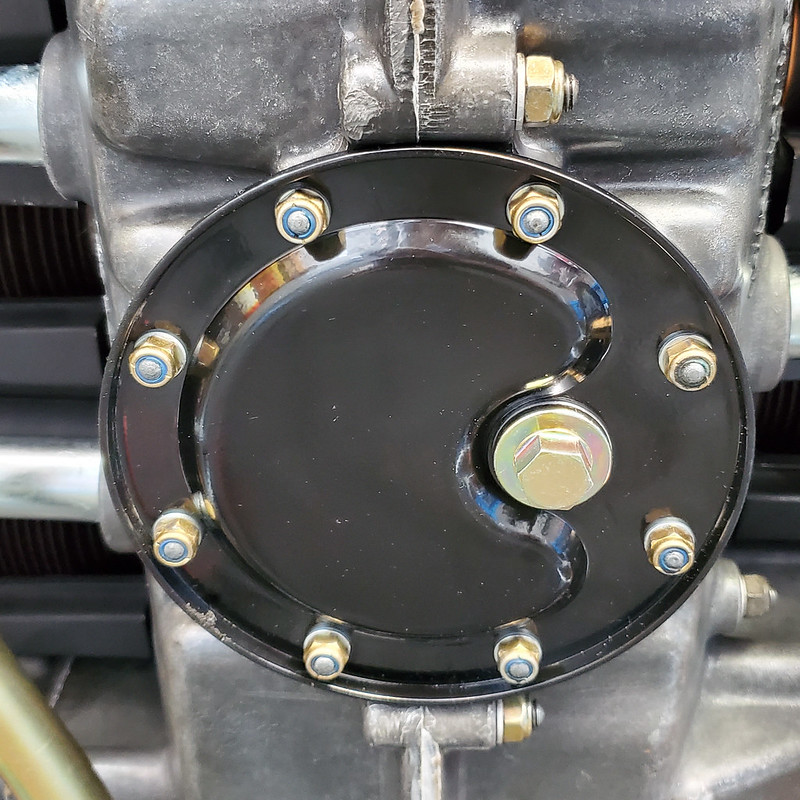
Posted by: mb911 Aug 11 2021, 10:53 AM
Those studs will be just fine.. looks good.
Posted by: Cairo94507 Aug 11 2021, 11:36 AM
That engine really looks nice. Are going to clean up the transaxle a bit when you get a chance?
Posted by: Optimusglen Aug 11 2021, 12:11 PM
That engine really looks nice. Are going to clean up the transaxle a bit when you get a chance?
Yeah, not likely before the install and the big road trip in September, but maybe over the winter, or if I can find someplace local that does the dry ice blasting. The under-side of the rear trunk area (above the trans) is pretty filthy too, so it might work best to have the whole area blasted at once.
Posted by: nditiz1 Aug 11 2021, 12:52 PM
Glen I'm a little bit behind you and making a big push right now to get where you are. Sent you a PM with contact info if you wouldn't mind giving me a call. Thanks and great progress.
Posted by: Retroracer Aug 11 2021, 06:47 PM
Glen - exciting times!! Engine looks great; am eager to see how the Streetfire / 123 combination works out. I run a Streetfire on my 2.2, but with a stock disty. I looked in to 123 a while ago, but at the time the documentation gave the impression that it would not play nice with a CDI box (seemed to want to drive coils directly?). Things change of course, so am keen to see how your installation performs - that ease of setting advance is attractive on the 123
BTW: Post start up video or I'll just assume its all CGI....!
- Tony
Posted by: Optimusglen Aug 12 2021, 11:44 PM
More progress today. My box from Pelican arrived early so I was able to get the pedal cluster back together and hook up the throttle and clutch cables.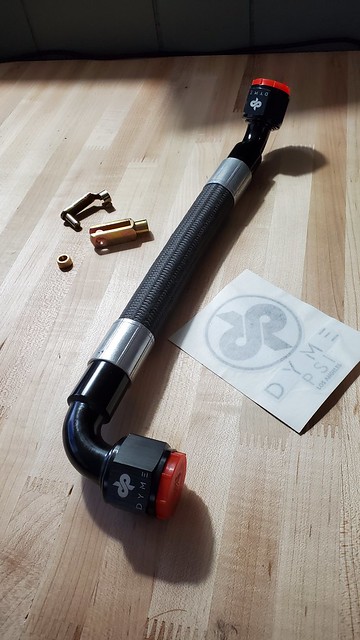
I went with the Patrick Motorsports cable, heard nothing but good thoughts on it. Installation went well but it's just too long. Both ends are adjusted to be as short as possible, likewise with the sheath end that's bolted to the bellhousing. I couldn't figure anything out so I just tied a knot near the end to take up some length.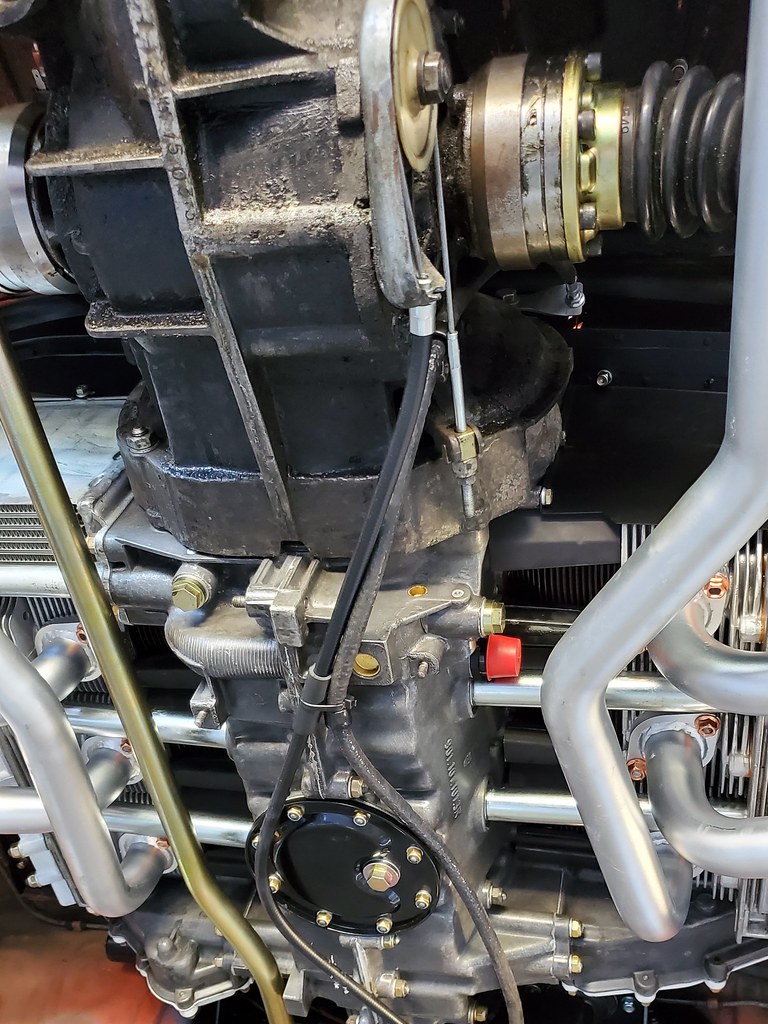
Oil tank is in now that one of my new hoses came in. Really nice piece but a bit too long. I think it'll be fine as I have a decent mounting concept.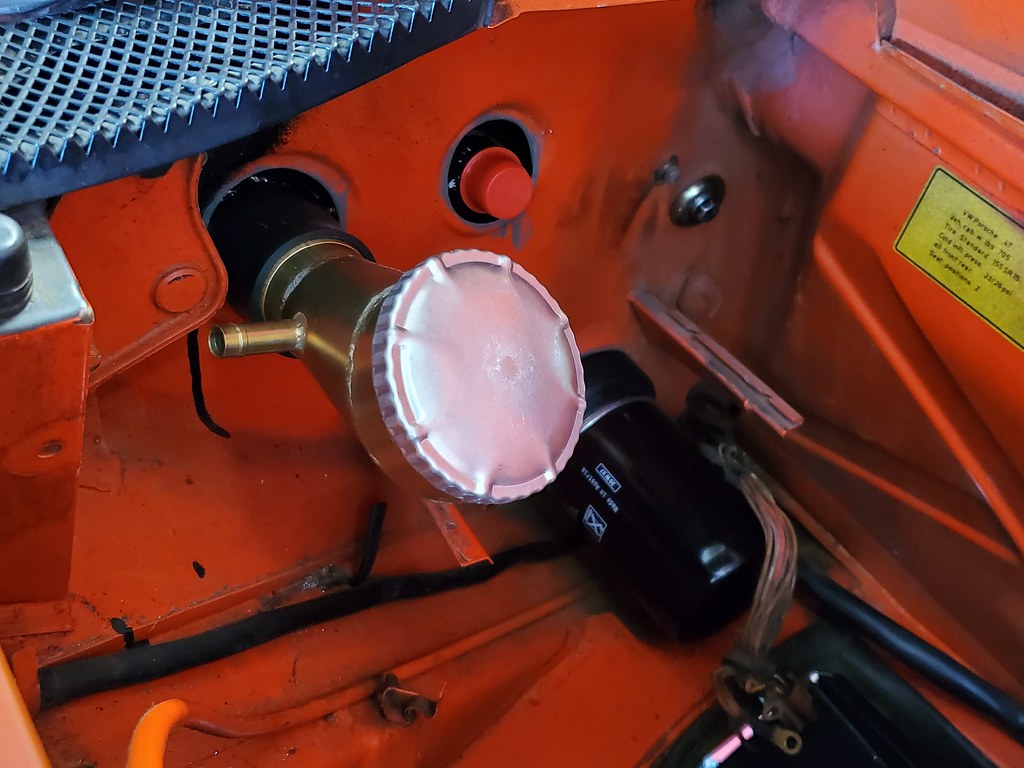
I also finished the dash wiring. I'm using a 911 oil pressure/temp combo gauge. Thankful I have a '71 and already had the green/black wire for the pressure sender. It was just bundled into the harness behind the left gauge. The green/brown (or green/ reddish) that used to trigger the oil pressure panic light will now feed the oil temp. Both wires will be fed through the new 12 pin connector
I extended the wires for the fuel gauge down to a new 2" gauge. And while I was in there I finally wired in my 2" clock.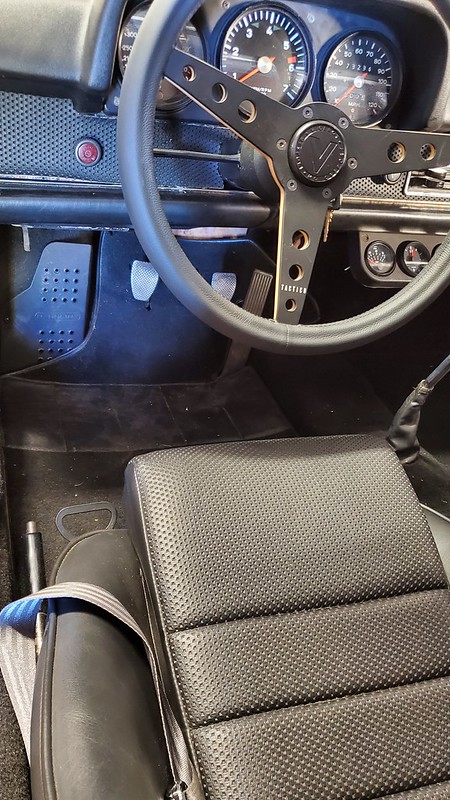
Posted by: raynekat Aug 13 2021, 01:14 AM
Oooh that steering wheel. Need a better pic from the side to really get the whole effect.
Posted by: Optimusglen Aug 13 2021, 11:09 PM
Yeah I need some new pictures in the car!
Another productive day, a bunch of supplies from Jegs arrived. Originally I was going to measure and have Dyme make my other 2 hoses, but I've always wanted to try out making AN hoses, and it was much cheaper as a DIY.
For the hose coming off the case, I took the advice of Ben and did a 90 going back, then looping up and over the bell-housing. I like this method because dangling oil hoses looks bad, and also I'd be terrified of some piece of road debris really ruining my day.
I have one rubber coated bracket off the top starter bolt that keeps the hose in place. The pictures make it look close to the axel but it's got plenty of clearance. I'll probably put something else at the corner by the oil cooler to keep it off the engine tin edges though.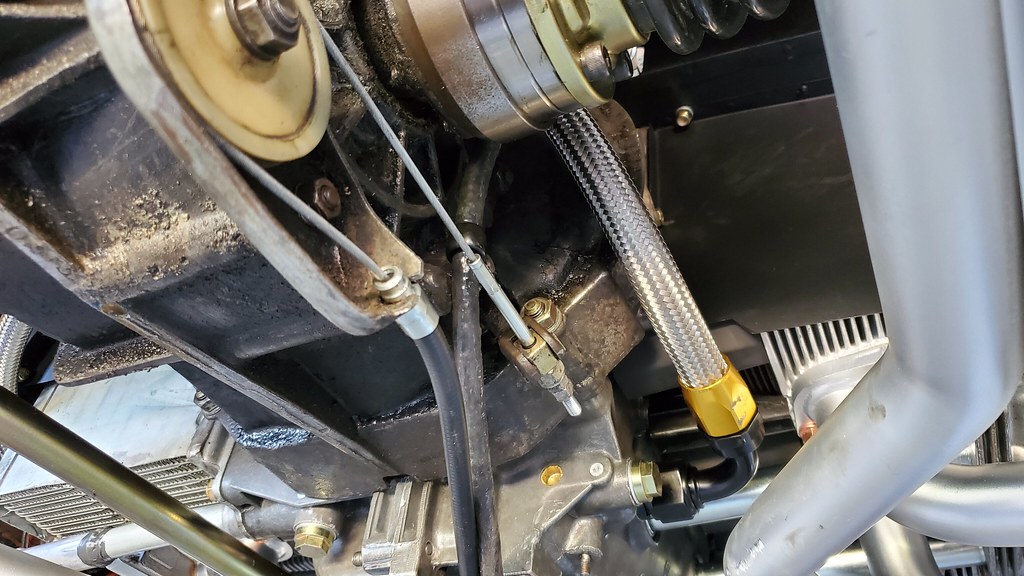
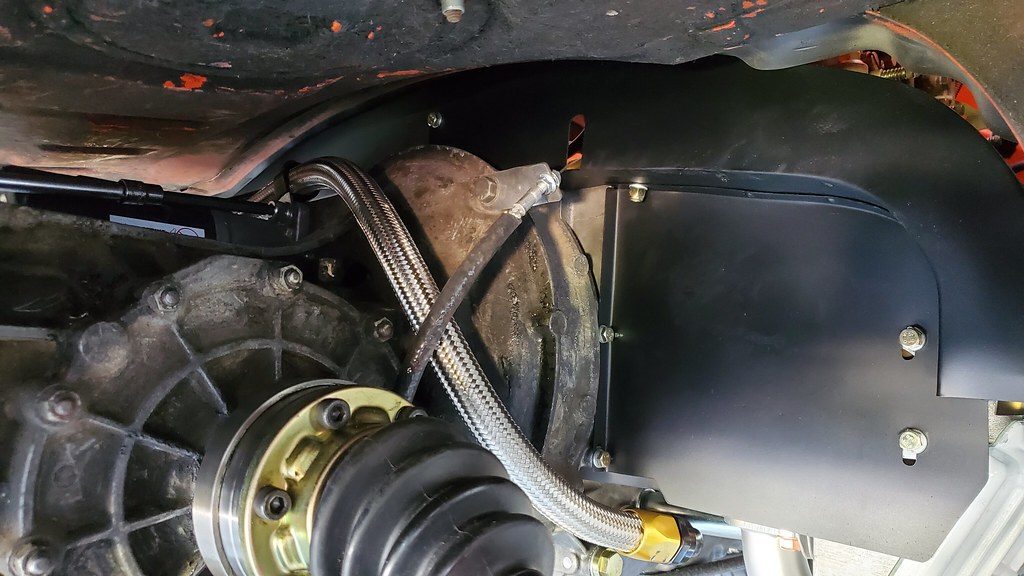
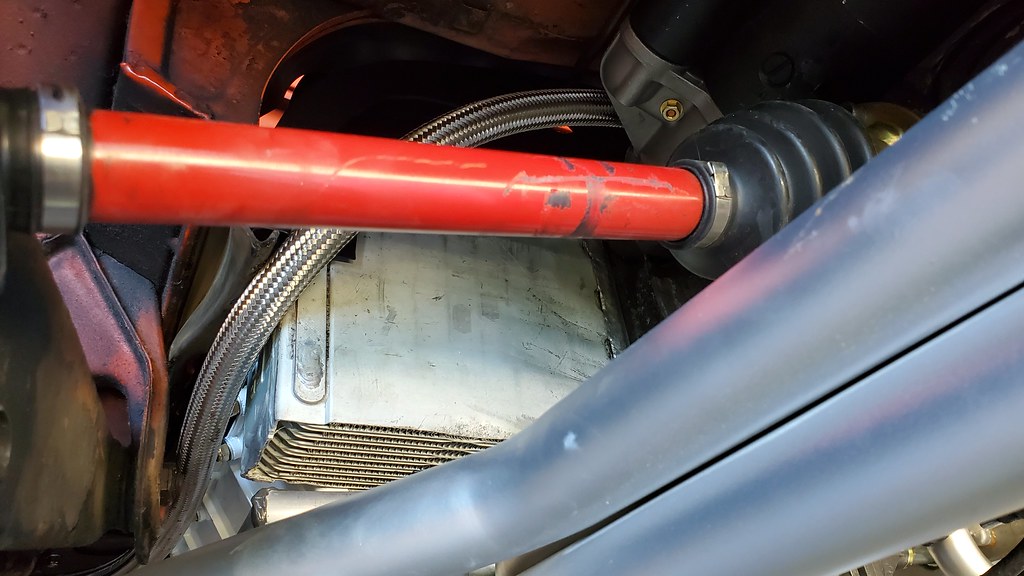
I also found a clean way to cap the heater tubes in the engine bay. Another product from McMaster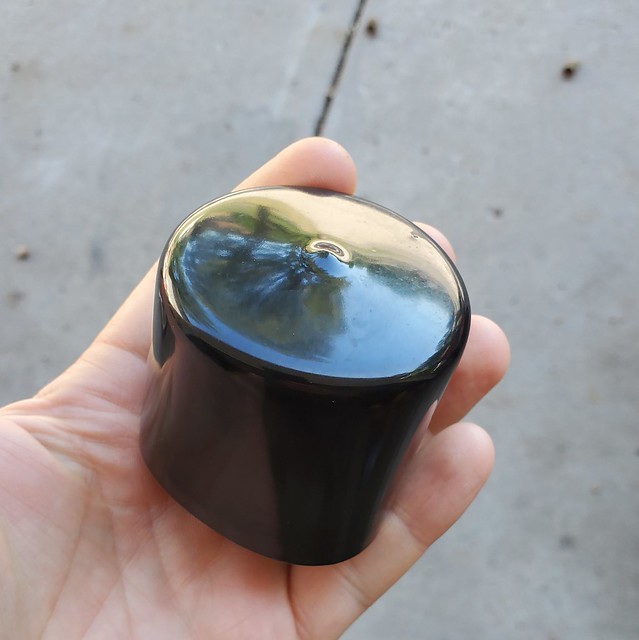
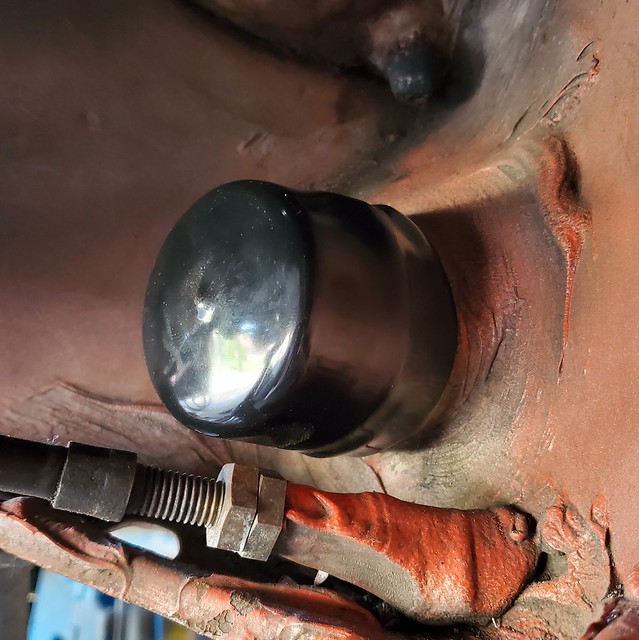
Flexible cap stretches over the tube. Could probably add a tie or two for extra hold, but I think it feels pretty good. Better than zip-tied spray paint caps anyway.
https://www.mcmaster.com/catalog/40005K57
Posted by: mb911 Aug 14 2021, 05:46 AM
Glen what are using for a throttle cable?
Posted by: Optimusglen Aug 14 2021, 06:13 AM
Glen what are using for a throttle cable?
The Patrick Motorsports one
Posted by: mb911 Aug 14 2021, 08:37 AM
Cool.. I may try one of those in the future. I have the factory setup and it works but not as free as I would like.
Posted by: Optimusglen Aug 14 2021, 08:56 AM
Cool.. I may try one of those in the future. I have the factory setup and it works but not as free as I would like.
I dunno... mine was too long even with all adjustments maxed. And the feel isn't as smooth as I was expecting. Maybe you're not supposed to run the pivot at the back of the carb with it? But then it seems way short...
Posted by: mb911 Aug 14 2021, 09:30 AM
Cool.. I may try one of those in the future. I have the factory setup and it works but not as free as I would like.
I dunno... mine was too long even with all adjustments maxed. And the feel isn't as smooth as I was expecting. Maybe you're not supposed to run the pivot at the back of the carb with it? But then it seems way short...
Just answered your other thread but the car I speak of had incredible smooth throttle. It did not use the pivot.
Posted by: Optimusglen Aug 16 2021, 12:30 PM
I pulled the cable and tried a few different setups, I tried it without the bell-crank pivot and it was WAY too short. Eventually landed on an old SAE long socket placed over the cable tube as it exits the firewall, this acting as a spacer. Only then was I able to get it to line up.
I bled the brakes again since I had the line apart at the bulkhead. Once I wrapped that up I did a few other small housekeeping things on the underside and then put the wheels back on and lowered it down.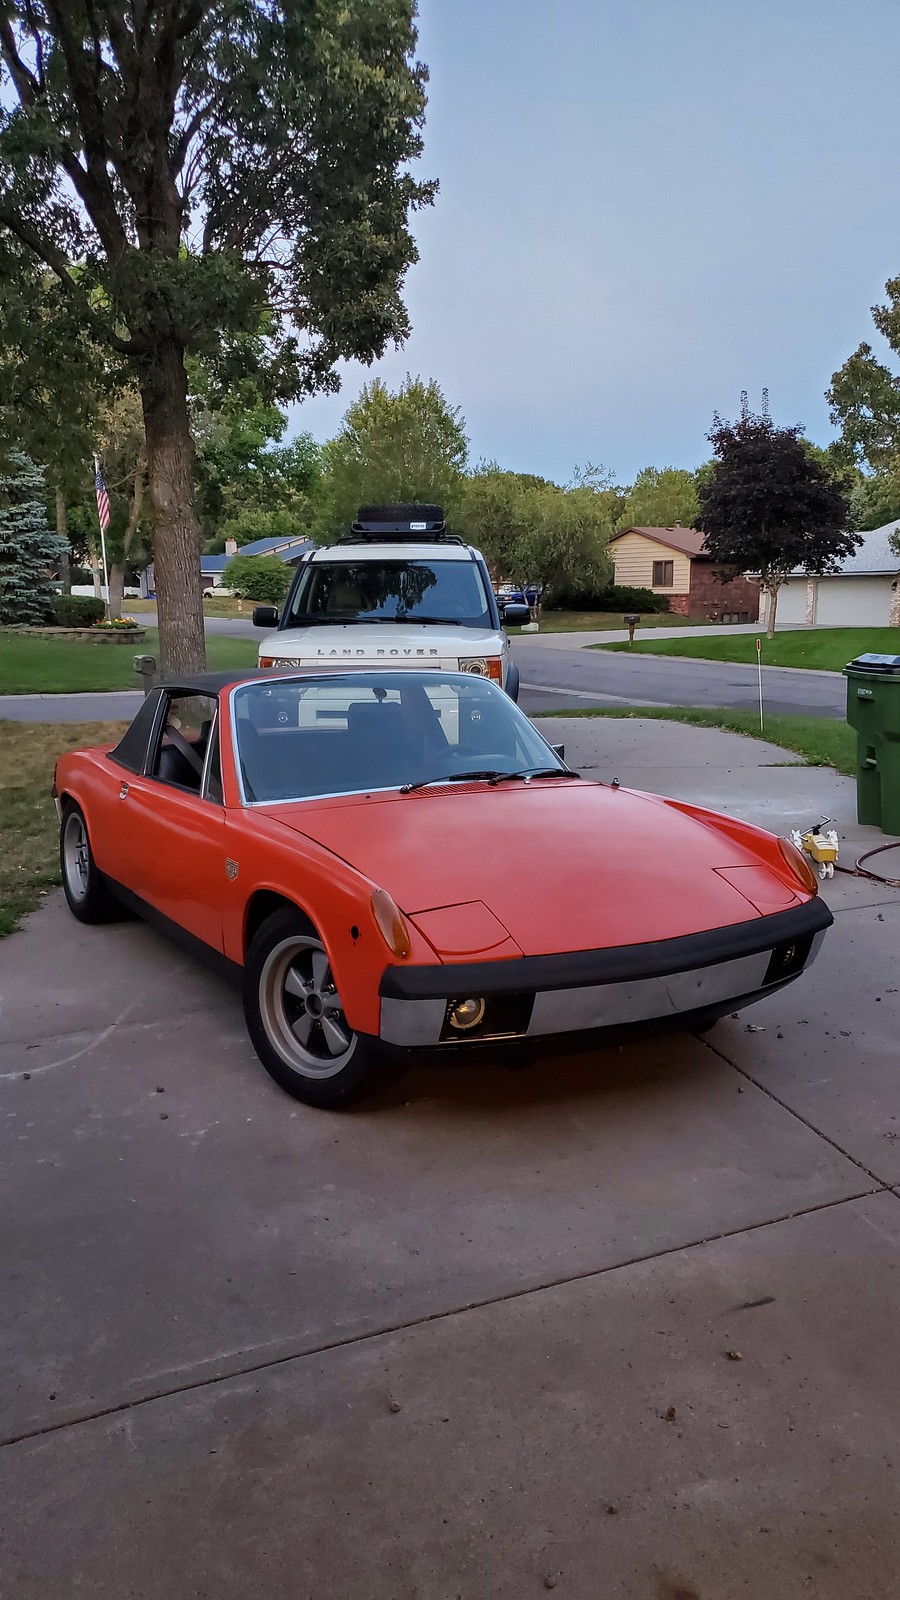
Then I rolled it back inside and adjusted the ride heights at each corner.
Still some wiring to do, and a handful of other things.
I'm a bit paranoid, so I'm going to disconnect the oil feed hose and try to flush it out to make sure there's no little bit of anything inside.
Posted by: mb911 Aug 16 2021, 01:35 PM
I pulled the cable and tried a few different setups, I tried it without the bell-crank pivot and it was WAY too short. Eventually landed on an old SAE long socket placed over the cable tube as it exits the firewall, this acting as a spacer. Only then was I able to get it to line up.
I bled the brakes again since I had the line apart at the bulkhead. Once I wrapped that up I did a few other small housekeeping things on the underside and then put the wheels back on and lowered it down.
Then I rolled it back inside and adjusted the ride heights at each corner.
Still some wiring to do, and a handful of other things.
I'm a bit paranoid, so I'm going to disconnect the oil feed hose and try to flush it out to make sure there's no little bit of anything inside.
me as well. My car starts at such a low rpm it takes a split second to build oil pressure and that drives me nuts. But always want to be careful.
Posted by: Optimusglen Aug 18 2021, 04:17 PM
I didn't want to keep worrying about it, so I pulled both ends off and ran a new plastic-coated steel cable with a piece of oil-soaked microfiber through the whole length of it, to pick up any loose bits that may have found their way in there. I was pleased with it and buttoned everything back up.
then I finished soldering the pins on the 12pin connector, and any other wiring that I had to do. Wiring is now DONE (excluding a 12v outlet that I may or may not add...)
I then filled the gearbox with oil and filled the oil tank/engine as well with my initial oil fill.
It's SO close now.
Tonight I'll get the alignment set (I can get it about 98% of the way there at home) and then maybe hook up the battery and start getting the distributor set up.
I also need to mark the flywheel with the TDC (and other marks) while it's all clean. Wish I did that before I installed the motor...
Posted by: mb911 Aug 18 2021, 04:51 PM
Oh very cool . I will be MIA for the next 4 days in Nashville but can't way to hear updates.
Posted by: Optimusglen Aug 20 2021, 07:26 AM
I was going to start the alignment, then couldn't find my string, and spent 3 hours cleaning my garage. Eventually accepting defeat and went to bed.
Yesterday I used my $30 Amazon boroscope and made new marks on the flywheel, duplicating all the marks from the crank pulley. I'm using an early 911 flywheel so no conflicting marks to deal with.
I should have done this before I put the engine in...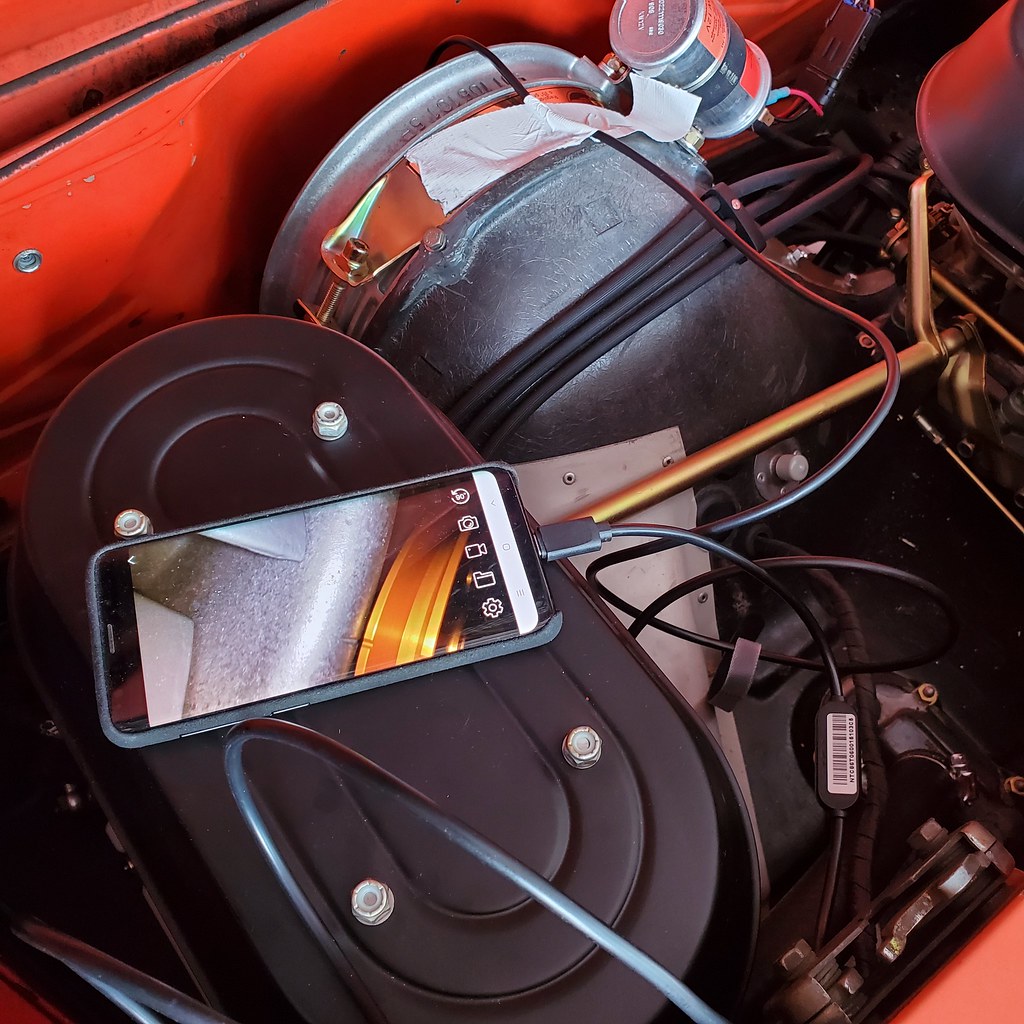
Once that was done I went out and picked up a new battery and put it in. Rolled the car out on the driveway and hooked up the leads. No smoke or sparks so that was a good sign.
Turned the key and both oil temp and oil pressure gauges were pegged (without turning over) After some digging I discovered that I had the sender wires flipped, temp to pressure gauge etc. I straightened that out then both needles would sit at 0 just off the needle with the ignition on.
Cranked it over with the fuel disconnected and plugs out, turns smoothly. I did 4-5 30-second pulses, about 3 minutes apart. So far pressure gauge isn't moving. Then I discovered a small oil leak at the intermediate shaft cap area
Posted by: Retroracer Aug 20 2021, 08:33 AM
Glen - that was a cliffhanger last post!!
Did the green oil light go out? re: gauge not moving, could it be the gauge not working or sender connection not making contact? If you ground the sender wire on the engine case, does the gauge flick to full scale?
How big was the oil leak - enough to stop pressure building up? How much oil did you put in the tank as initial fill?
- Tony
Posted by: Shivers Aug 20 2021, 08:44 AM
Hahaha, it was a cliffhanger. Good Car-ma to you
Posted by: Optimusglen Aug 20 2021, 09:15 AM
Glen - that was a cliffhanger last post!!
Did the green oil light go out? re: gauge not moving, could it be the gauge not working or sender connection not making contact? If you ground the sender wire on the engine case, does the gauge flick to full scale?
How big was the oil leak - enough to stop pressure building up? How much oil did you put in the tank as initial fill?
- Tony
I only have an oil pressure gauge and an oil temp gauge, no idiot light.
I'll check the wire/grounding next. I pinged a couple of Porsche engine builders I know and they both said it sometimes takes a while when only turning over with the starter.
The oil leak wasn't huge, but more than I'd like (which is zero oil leaks!)
The initial fill was 9qt.
I should note, I have an appointment at Further Performance for next Tuesday. They're the guys that tuned the Type-4 when I installed it, and they pulled the Type-4 out when it was done for. I enlisted their help for the first start and tune on the 6-cyl to have some experienced eyes and ears on it, and make sure the carbs are set and adjusted nicely.
I'll be climbing all over the car between now and then to make sure it's at a good starting point. Regarding the oil leak, I don't think it's big enough to warrant me pulling the motor right now, but when I drop the motor for the first valve adjustment I will definitely pull the intermediate shaft cover off, flatten the surface and re-install.
Posted by: Optimusglen Aug 20 2021, 11:50 AM
Glen - that was a cliffhanger last post!!
Did the green oil light go out? re: gauge not moving, could it be the gauge not working or sender connection not making contact? If you ground the sender wire on the engine case, does the gauge flick to full scale?
How big was the oil leak - enough to stop pressure building up? How much oil did you put in the tank as initial fill?
- Tony
@http://www.914world.com/bbs2/index.php?showuser=16100 when I disconnect the sender wire from the sender it peggs without even touching the wire to ground.
I ran a standalone wire from the sender through the window and to the gauge and had the same result. I then tested the continuity from one end of the sender wire at the sender to the other end behind the gauge (both ends disconnected) and it was good.
Then I tested continuity between the disconnected sender wire at the sender, and the ground post in the engine bay, there was a connection there. This was with the sender wire attached to the gauge. I tried it again with the sender wire disconnected from the gauge and did not have a connection to ground.
My assumption then is that the oil pressure gauge is bad. Does anyone agree?
Posted by: nditiz1 Aug 20 2021, 12:33 PM
When you ground out the sender wire to the case does it peg? If so then the sender is bad.
Posted by: Retroracer Aug 20 2021, 04:52 PM
re: "when I disconnect the sender wire from the sender it peggs without even touching the wire to ground."
So that sounds like you may have the wrong sender / gauge combo; NOT necessarily a bad unit. The stock 911T (press / temp) combo gauge and sender works as follows: If the sender is disconnected, the pressure reads zero; if you short the sender wire to GND the gauge should "peg" at full scale. The action of the sender is high resistance for zero/low oil pressure, lower resistance as pressure increases.
I'd suggest double checking the gauge <> sender match and wiring to the gauge before drawing conclusions. Adding the idiot light (if you have the dual terminal 911 pressure sender) is worthwhile as a sanity check; plus "eye catching" if you get a low oil pressure situation when driving.
- Tony
PS. feel free to PM me if you want to talk through debug
Posted by: Optimusglen Aug 20 2021, 05:45 PM
I did verify that the sender and the gauge are both correct for a '71 911T
And that was my understanding on how it functions, which is why I thought there was a short to ground inside the gauge itself?
Also, I found the old pressure sender that came on the motor and tested that as well, with the same result as the new URO sender I was using at first.
I have another gauge from a friend I'll pick up tomorrow and see.
Posted by: targa72e Aug 20 2021, 06:59 PM
good test for oil is to crack loose the cam oil lines at cam tower. You can then crank until you see oil seeping and know things are getting lubed as this is the last locations with easy access to get oil.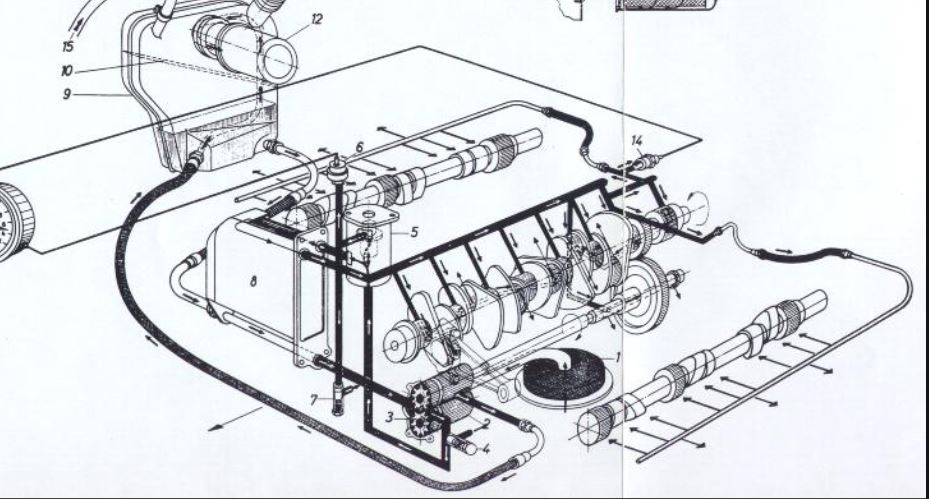
Some times takes longer cranking than you would think.
john
Posted by: Optimusglen Aug 20 2021, 11:41 PM
good test for oil is to crack loose the cam oil lines at cam tower. You can then crank until you see oil seeping and know things are getting lubed as this is the last locations with easy access to get oil.
Some times takes longer cranking than you would think.
john
@http://www.914world.com/bbs2/index.php?showuser=20392 I had a mild freak out when I looked at the diagram you posted, the 914 tank is plumbed differently.
I cracked the banjo on the 4-5-6 side cam tower and flicked the starter, lots of oil came out. So that's a good sign. I'm guessing my starter just doesn't turn the motor fast enough to register oil pressure on the gauge yet, at least for the stretches I gave it.
Posted by: rgalla9146 Aug 21 2021, 05:39 AM
good test for oil is to crack loose the cam oil lines at cam tower. You can then crank until you see oil seeping and know things are getting lubed as this is the last locations with easy access to get oil.
Some times takes longer cranking than you would think.
john
@http://www.914world.com/bbs2/index.php?showuser=20392 I had a mild freak out when I looked at the diagram you posted, the 914 tank is plumbed differently.
I cracked the banjo on the 4-5-6 side cam tower and flicked the starter, lots of oil came out. So that's a good sign. I'm guessing my starter just doesn't turn the motor fast enough to register oil pressure on the gauge yet, at least for the stretches I gave it.
Glen I had the exact same reaction !
The bottom nipples are in opposite positions 911 vs. 914 6 tanks.....!!!!!
I've been around both for many years and never noticed.
Now I've got to go back to settle my nerves about my 911 thermo/ 914 6 GT cooler
plumbing.
Posted by: Retroracer Aug 21 2021, 10:52 AM
I did verify that the sender and the gauge are both correct for a '71 911T
And that was my understanding on how it functions, which is why I thought there was a short to ground inside the gauge itself?
Also, I found the old pressure sender that came on the motor and tested that as well, with the same result as the new URO sender I was using at first.
One final thing is to check the connections to the gauge and make sure B+ and G (sender) are not swapped. Also that there is a case GND/chassis connected.
Good luck - you must be itching to get that thing running!
- Tony
Posted by: Optimusglen Aug 22 2021, 11:37 AM
I checked using a known good gauge and had the same result, on top of that I still had an oil leak near the intermediate shaft cap, so this morning I dropped the motor again.
I'm going to pull the cap and resurface, check everything over up there and try to get it back in today.
My theory is that the oil leak is releasing any pressure that my little starter is able to build.
I did check and recheck wiring connections, and checked the sender wire itself for continuity and shorts.
Gotta get it back together today, I'm working tomorrow and my appointment to get it running is Tuesday!
Posted by: mb911 Aug 22 2021, 01:55 PM
My guess Is that you will not be able to read oil pressure with the starter. Only be able to see it with the idiot light. This is from many many 911 engine builds worth of experience.
Posted by: Optimusglen Aug 23 2021, 10:08 AM
That's good to know @http://www.914world.com/bbs2/index.php?showuser=9892 , thanks!
When I dropped the motor I found that there was MUCH more oil in the sump than what came out of the line/tank. Maybe a side effect of all the engine cranking I did? Does anyone care to speculate?
I surfaced the intermediate shaft cap and reinstalled the engine, then got it back up and in. The car is back in one piece and ready for tomorrow. Although now I'm really worried about oil pump seals. I was very careful when getting the case halves together, but you know how the mind works when nearing the end of an engine build and finding something you didn't expect...
I've had the appointment set for about a month. When I made it I wasn't sure if I would be ready, but it was a date that was available. Heck, I wasn't even sure if I would have them do it or if I would end up doing it all myself. Right now though, I'm pretty burned out on working on it and I'm glad I have it.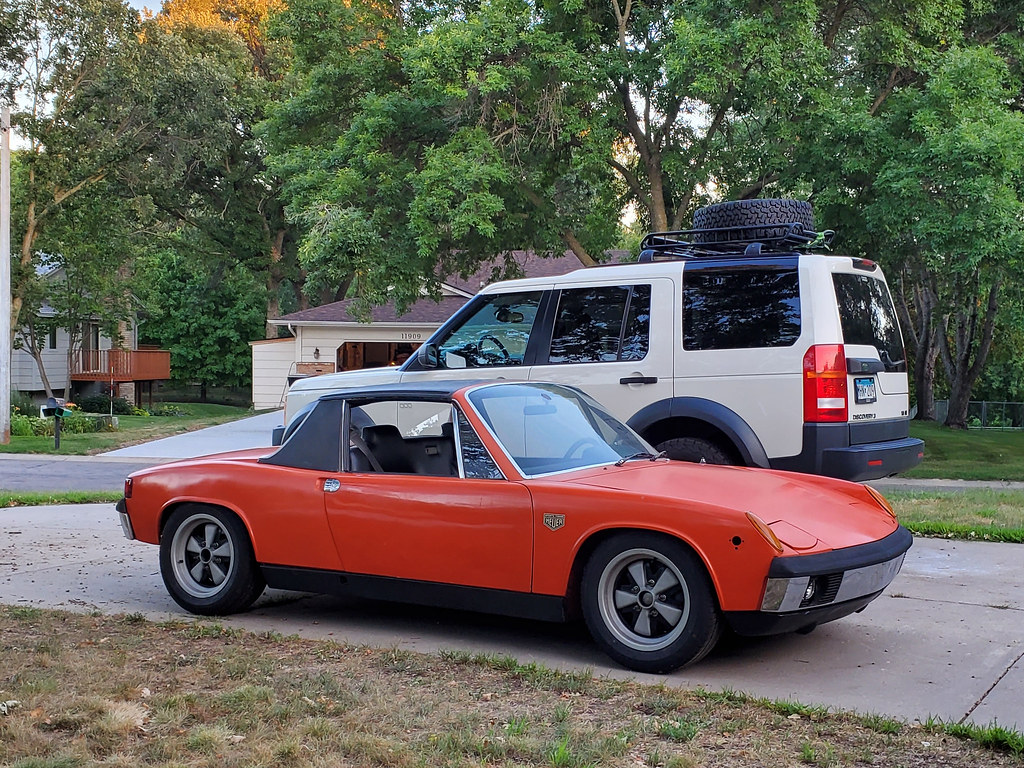
So, lets hope the next project update I post here is me driving the car.
Posted by: mb911 Aug 23 2021, 11:35 AM
That's good to know @http://www.914world.com/bbs2/index.php?showuser=9892 , thanks!
When I dropped the motor I found that there was MUCH more oil in the sump than what came out of the line/tank. Maybe a side effect of all the engine cranking I did? Does anyone care to speculate?
I surfaced the intermediate shaft cap and reinstalled the engine, then got it back up and in. The car is back in one piece and ready for tomorrow. Although now I'm really worried about oil pump seals. I was very careful when getting the case halves together, but you know how the mind works when nearing the end of an engine build and finding something you didn't expect...
I've had the appointment set for about a month. When I made it I wasn't sure if I would be ready, but it was a date that was available. Heck, I wasn't even sure if I would have them do it or if I would end up doing it all myself. Right now though, I'm pretty burned out on working on it and I'm glad I have it.
So, lets hope the next project update I post here is me driving the car.
You will have a good amount of oil in the case until its running. Also did you rebuild your pump or replace or just clean. It's really hard to get those seals out of place so I think you will be just fine. The biggest issue I see on these conversions is lack of understanding of the oil flow path and clocking the oil filter console correctly which is just sometimes over looked. I suspect you are all good to go so just be patient.
Posted by: Optimusglen Aug 23 2021, 11:53 AM
Yes, a 4-rib oil pump was purchased and rebuilt by Henry at Supertech. I believe a 4 rib is the minimum requirement for the oil bypass case mod to work.
Thanks again for your input!
Posted by: mb911 Aug 23 2021, 12:02 PM
Yes, a 4-rib oil pump was purchased and rebuilt by Henry at Supertech. I believe a 4 rib is the minimum requirement for the oil bypass case mod to work.
Thanks again for your input!
Same guy that did mine. Works great in my car with very little drain back to the case and very little smoke on start up.
Posted by: targa72e Aug 23 2021, 03:26 PM
The engine will always fill with oil from the tank when sitting. The oil pump has clearances and the oil will go right thru. When the oil level in tank is higher than the engine it drains out of tank until level. The scavenge side of the pump (which returns oil to tank) is much larger than pressure side. When the engine is running there is more oil volume being pumped to the tank so the tank is full. This is why you have to check the oil level with engine running.
On the GT3's the scavenge side of the pump is large enough that it pulls a vacuum in the engine. GT3's have valving to maintain this vaccuum which reduces windage. I believe on some GT3's the rear main seal is installed the reverse of normal to aid in vacuum retention.
On the 2.4 in my -6 conversion I do not get enough pressure for the gauge or oil light to go out when just cranking. Once started light and gauge move off zero.
john
Posted by: Optimusglen Aug 23 2021, 04:34 PM
Thanks guys, from talking me back from the proverbial ledge. I can't wait for tomorrow!
Now, do I hitch a ride with the tow driver down to the shop, Uber down, or take my daily and go back for it at a later date? Decisions decisions.
Posted by: Optimusglen Aug 24 2021, 09:53 AM
We have the car at the shop now, I'll be doing live updates throughout the day on my Instagram
@glen_in_the_garage
So far, we weren't getting power at the fuel pump. My best guess is the wiring that I spliced in, it's right at the snorkel and buried under the firewall engine mount. For now we're jumping it and I'll dig into that at home.
Then the passenger side carb was a geyser, maybe a stuck float? Currently pulling it apart to see.
We did some more cranking earlier on, before fuel, and I did see the pressure gauge move a bit, so that's nice.
Posted by: Optimusglen Aug 24 2021, 12:04 PM
It's running!
Currently doing the 20 min run and the guys are monitoring it closely.
Posted by: Maltese Falcon Aug 24 2021, 12:26 PM
Cheers !¡!


Marty
Posted by: rgalla9146 Aug 24 2021, 12:42 PM
The four rib is the ultimate.
On early cars the oil light can be on at idle when at elevated temp (engine & ambient)
and not be a big cause for concern.
Cranking speed with plugs out will usually turn OP light off.
Can take some time and cranking sound changes noticably when OP comes up.
Great milestone Glen! Congratulations !
Rory
Posted by: Optimusglen Aug 24 2021, 06:06 PM
Well it's running and I drove it home. A few things I need to address:
-brake light switch at pedal is stuck on
-oil pressure gauge worked when initially cranking this morning, currently not. Need to dig back into that
-need a real alignment, I got it pretty close but it needs some love
-fuel pump power is cut somewhere, probably right where I spliced the wire in all those years ago, which is basically where the snorkel is buried under the mount. We got it going with a wire routed outside of the car and a toggle to turn it off/on.
It sounds good, but will be better with Ben's muffler in place.
And I need to figure out why the tach isn't going.
Posted by: Cairo94507 Aug 24 2021, 06:08 PM
Yay! ![popcorn[1].gif](style_emoticons/default/popcorn[1].gif)
Posted by: horizontally-opposed Aug 24 2021, 08:11 PM

Congrats, Glen!!
Posted by: nditiz1 Aug 24 2021, 08:35 PM
Awesome!
Posted by: Jett Aug 24 2021, 08:49 PM
Great story !
Posted by: Retroracer Aug 24 2021, 10:54 PM
Result!! Nice job Glen.
- Tony
Posted by: raynekat Aug 24 2021, 11:21 PM


That's some great news there.
Bask in your glory...you deserve it.
Posted by: autopro Aug 25 2021, 09:25 PM
Congrats, well deserved!
Posted by: tygaboy Aug 25 2021, 11:41 PM
VROOM! Isn't it the greatest when you drive it for the first time?
BIG congrats! 
Posted by: Optimusglen Aug 26 2021, 10:45 AM
I figured out what the issue was with the fuel pump wiring, but a bit late.
When I originally moved the pump to the front I followed this guide
http://www.914world.com/specs/SirAndyCarbFuelPumpRelay.php
One item that I failed to remember when putting this all back together was the wire added to ground to replace the FI brain. So we couldn't get the fuel pump to go and I didn't knoiw why. We rigged it to get me home.
Last night I was digging into it, and I was following a guide that tested the relay boar traces, and everything seemed exactly right but I still wasn't getting power through the fuel pump relay (tested the relay, swapped known-good relays, had +12 at pin 30 on the relay, etc)
Eventually, I pulled +12 switched power from the 4-pin FI plug, ran it to the front with an inline 10A fuse near the fuel pump, and was hoping that would be acceptable.
Lo and behold today I re-discover the walkthrough that SirAndy posted, the link above, and it all came flooding back from all thos eyears ago. To my amusement, the solution I had found was also described in his post as a "last resort" 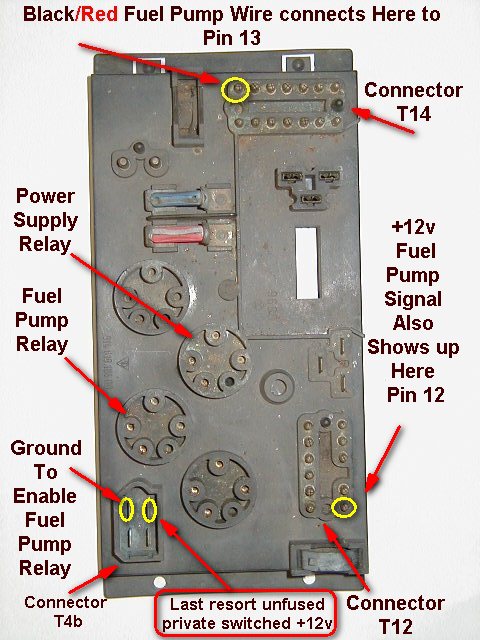
I'm a bit upset that my wiring isn't as original and clean as it could be, but I'm glad I have a working solutuion at least and I know what the problem was.
Posted by: Dion Aug 26 2021, 09:23 PM
Nice to hear ya have it fired up Glen. Not a bad punch list. Car looks sweet. Good
Luck with all. Looking forward to more…..
Posted by: Optimusglen Sep 1 2021, 07:51 PM
update time
I've had several wrinkles to iron out, but I'm happy to say that the oil temp, oil pressure, and tach are all working as they should now. I got a real alignment done and it drives straight, and had the wheels balanced so it drives smooth. I also swapped Bens muffler on.
I'm still struggling with the carb tune, I had it over to Dave Cheney the other day and he got it pretty good but questioned the timing.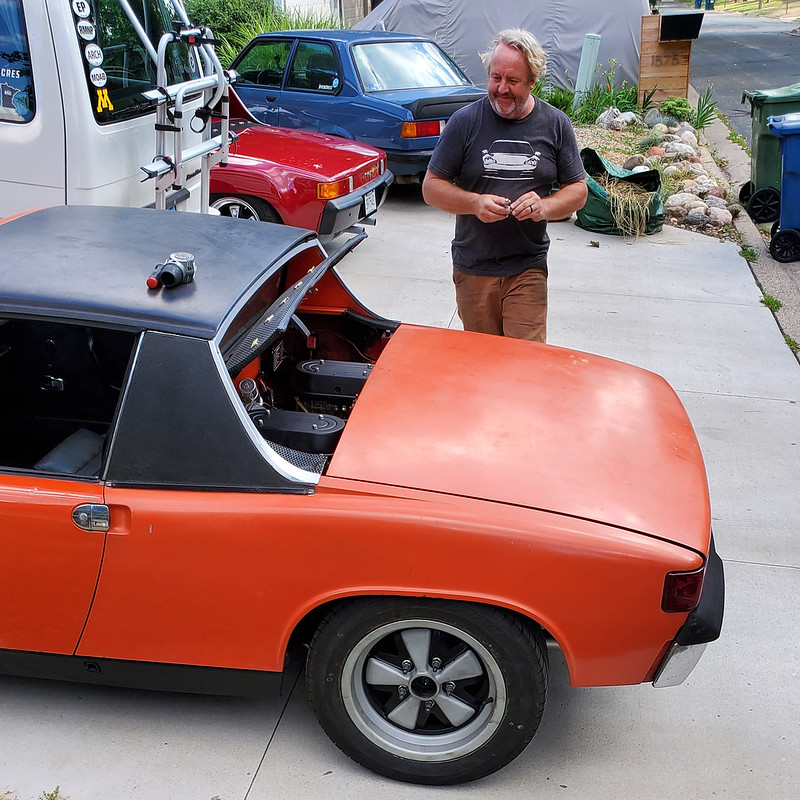
Today I found that when the shop did the static timing with the 123Ignition distributor I think they referenced the TDC mark I made on the flywheel from a slightly different angle than when I made it, resulting in static timing being off. When I reset the static timing using the pulley marks it was noticeably easier to start and I was feeling really good about it.
Then I thought that maybe that was the cause of the tuning trouble of the carbs, so I reset them to baseline and began trying to do the tune myself. After watching a couple of guys do it I felt like I might be able to get it close now that the timing was good.
Well, I was wrong. I'm following the factory manual on Zeniths and I get to the point where you synchronize the throats. Cyl 4 is much lower than the rest. When the air screw is backed all the way out it's hovering around 3.5-4. Cyl 5, for comparison, is the baseline with air screw all the way in and is sucking 7. All the rest I can get pretty close to 7, but 4 is way off.
I also tried my hand at the mixture adjustment using the leans-best method and I just can't identify when it's time to turn it back.
So all in all I'm feeling pretty defeated on the carbs. The next step is to check compression on #4 and 1-2 other cyls for reference. If compression is good I'll pull the carb and Dave will look into it.
I'm now terrified that the compression is bad, or I managed to screw the pooch on the cam timing, or some other rookie mistake.
Posted by: rgalla9146 Sep 2 2021, 05:23 AM
I recently heard of a similar case that turned out to be a poorly installed butterfly.
I can't recall if 40 TINs have a split shaft like Webers. If so it could be rotated compared to cyls. 5&6
Easy first step is to remove that carb for a look.
Posted by: jcambo7 Sep 2 2021, 07:18 AM
update time
I've had several wrinkles to iron out, but I'm happy to say that the oil temp, oil pressure, and tach are all working as they should now. I got a real alignment done and it drives straight, and had the wheels balanced so it drives smooth. I also swapped Bens muffler on.
I'm still struggling with the carb tune, I had it over to Dave Cheney the other day and he got it pretty good but questioned the timing.
Today I found that when the shop did the static timing with the 123Ignition distributor I think they referenced the TDC mark I made on the flywheel from a slightly different angle than when I made it, resulting in static timing being off. When I reset the static timing using the pulley marks it was noticeably easier to start and I was feeling really good about it.
Then I thought that maybe that was the cause of the tuning trouble of the carbs, so I reset them to baseline and began trying to do the tune myself. After watching a couple of guys do it I felt like I might be able to get it close now that the timing was good.
Well, I was wrong. I'm following the factory manual on Zeniths and I get to the point where you synchronize the throats. Cyl 4 is much lower than the rest. When the air screw is backed all the way out it's hovering around 3.5-4. Cyl 5, for comparison, is the baseline with air screw all the way in and is sucking 7. All the rest I can get pretty close to 7, but 4 is way off.
I also tried my hand at the mixture adjustment using the leans-best method and I just can't identify when it's time to turn it back.
So all in all I'm feeling pretty defeated on the carbs. The next step is to check compression on #4 and 1-2 other cyls for reference. If compression is good I'll pull the carb and Dave will look into it.
I'm now terrified that the compression is bad, or I managed to screw the pooch on the cam timing, or some other rookie mistake.
I know how you feel about the carbs. I spent a few years really tweaking my zeniths and trying to understand the manual and how carbs work. I had never worked with carbs before. Eventually I got a pretty decent understanding of how mine work and its become much easier to tune them. They may not be tuned to perfection but my car runs great now compared to when I first started. Just wondering though, what manual are you using?
Posted by: Optimusglen Sep 2 2021, 03:47 PM
I did a compression test today and all cylinders are between 140-150, so we're good there. Then I removed that carb and brought it over to Dave. Turns out that one was off a tiny amount. He adjusted and sent me on my way.
When I got home I measured too, I've got a very nice micrometer. I'm not sure what the tolerance is but there's still a variation of about 0.09mm between those three. Should I try to get it closer or should that be ok?
Posted by: mb911 Sep 2 2021, 06:23 PM
Sorry no insight on the throttle shaft.. I again don't love carbs but they work Ok and sound great.
Posted by: targa72e Sep 2 2021, 10:59 PM
I had similar issue with one throat on my Zenith being low and had to adjust shaft connector. I did my synchronizing with engine on a test stand and only way I could tell idle changed while adjusting was to look at the tach. No doubt carbs are fiddly.
john
Posted by: porschetub Sep 3 2021, 02:28 PM
I had similar issue with one throat on my Zenith being low and had to adjust shaft connector. I did my synchronizing with engine on a test stand and only way I could tell idle changed while adjusting was to look at the tach. No doubt carbs are fiddly.
john
Had the similar issue due to PO applying gorilla torque to many of the fastenings on my Zenith carbs,one of the throttle shaft couplers was damaged ,removed the throttle shaft and found that was also the same way.
Spent a long time trying to sort it but the damage was done so ordered replacement coupler, throttle shaft and butterfly screws.
I found this while rebuilding my carbs so was kinda lucky in that respect,all put back together I was able to set that throat closed even to the others and much improved movement, I was pretty sure the coupler was twisted and the throttle shaft could have been bent ever so slightly.
Keep up the good work Glen
.
Posted by: Optimusglen Sep 3 2021, 11:29 PM
Well today was a good day. I installed the carb without any further butterfly adjustments. Off the bat I was able to get all cylinders balanced pretty well. Then I started again at mixtures, 1/4 turn at a time, waiting 10 seconds between adjustments. I couldn't make anything work and when I was done it was popping out both ends and nearly undriveable. One pmug definitely fouled. Once again threw in the towel and messaged Dave to see if he would be willing to help again.
Fortunately he was planning on going to a hangout a few of my friends do on Friday nights, so I limped it down there for him to check out and swapped in New plugs when I arrived.
On the highway cruising at 3200 it was ok, get on or off the throttle and it was kinda bad.
Spent some time messing with it and decided to give the advance curve some attention. He found a good curve online and I replicated it in the 123Ignition app. A bit more tuning and it's now running better than it ever has.
I still get some lean popcorn through the carbs occasionally. Typically if I've been on the throttle, then completely off, and then very lightly on it'll pop through the throats.
Very happy driving it now. Still terrified and nervous, but happy.
Posted by: mb911 Sep 4 2021, 06:46 AM
Well today was a good day. I installed the carb without any further butterfly adjustments. Off the bat I was able to get all cylinders balanced pretty well. Then I started again at mixtures, 1/4 turn at a time, waiting 10 seconds between adjustments. I couldn't make anything work and when I was done it was popping out both ends and nearly undriveable. One pmug definitely fouled. Once again threw in the towel and messaged Dave to see if he would be willing to help again.
Fortunately he was planning on going to a hangout a few of my friends do on Friday nights, so I limped it down there for him to check out and swapped in New plugs when I arrived.
On the highway cruising at 3200 it was ok, get on or off the throttle and it was kinda bad.
Spent some time messing with it and decided to give the advance curve some attention. He found a good curve online and I replicated it in the 123Ignition app. A bit more tuning and it's now running better than it ever has.
I still get some lean popcorn through the carbs occasionally. Typically if I've been on the throttle, then completely off, and then very lightly on it'll pop through the throats.
Very happy driving it now. Still terrified and nervous, but happy.
What curve are you using? Mine is pretty sweet for my setup and took a while to get right
Posted by: Optimusglen Sep 4 2021, 02:02 PM
This is what I'm running now. 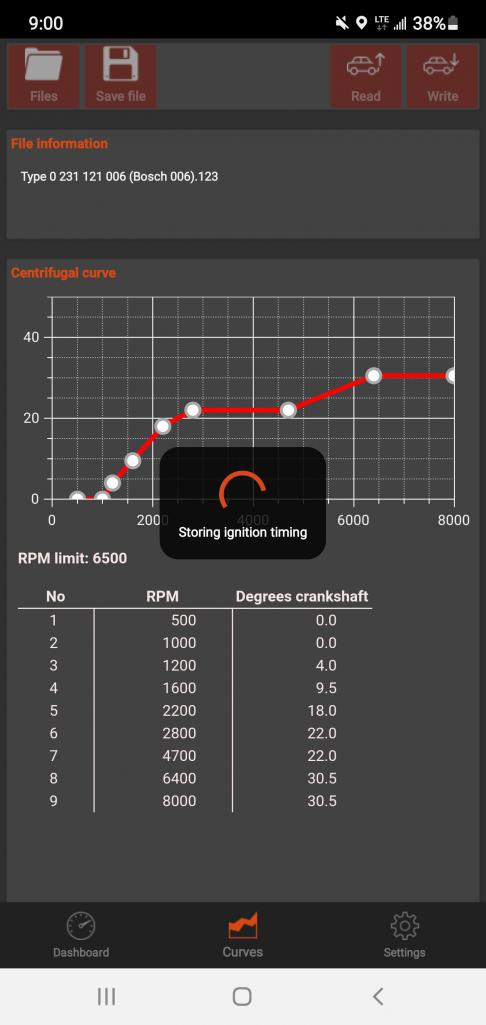
I'd like to try this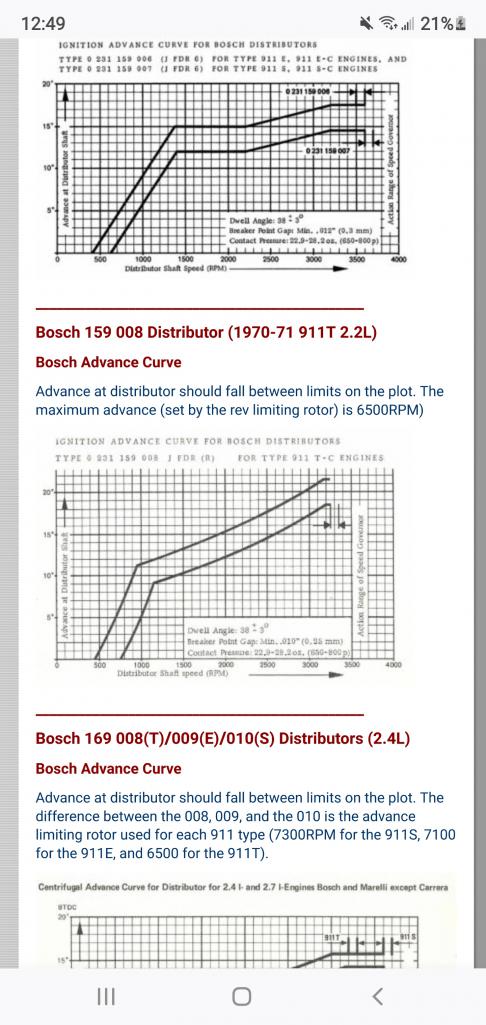
Posted by: Optimusglen Sep 14 2021, 11:18 AM
Figured I would update here too.
I've had the car on a couple longer drives so far and found myself dealing with a dragging caliper which heats up and gradually locks up the brakes. I dove into the rear pad adjusters again and noted an issue. tried to recify it with my tools (no air tools) but I can't get one of the adjusters to un-bind.
I rebuilt my rear calipers a few years back when I was first getting this on the road. With them being the only not-new parts in my brake system I felt more comfortable replacing them with fresh rears than trying to correct these ones.
I also ordered all new soft lines since I was going to be bleeding the whole system again. My soft lines were new back when I rebuilt the calipers, but hey, while you're in there right?
The new calipers and lines are both scheduled to be delivered today.
Last night I went through the axle/CV bolts. Removed each of them (all 40) cleaned and placed a new Schnorr lock washer under each one. There are 40 because I have the upgraded Renegade axles. So 4 bolts under each adapter, and 6 on each CV.
I also replaced the passenger door handle, the old one snapped off last week.
REALLY getting down to the line, I'm scheduled to hit the road for Utah in 6 days. Still need to put some more miles on then do an oil change, valve adjustment, and check rocker shaft torques.
On the topic of checking the rocker shafts... I have a small torque wrench that was recommended for fitting in the cam towers. Has anyone been successful at doing this without dropping the motor? That would save some time...
And because pictures are the lifeblood of project threads, here's a snap from the 100mile drive I did. I swung by to see a bud before he headed out for Luft the next day. Tangerine '70 911T 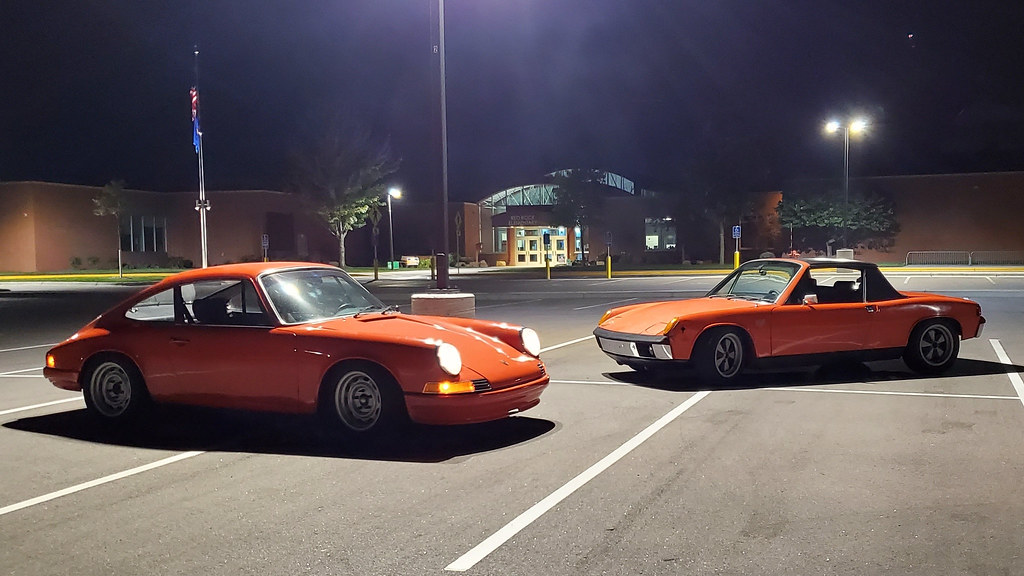
Posted by: nditiz1 Sep 14 2021, 11:23 AM
I have been able to torque them in the 911 with a thin torque wrench. I imagine it would be just as much access in the 914. I also cut a 8mm allen down for the large side. Lastly, I used a set of tiny allen sockets for more space (you need a 5mm). wrench was a 1/4in
Posted by: Optimusglen Sep 14 2021, 02:19 PM
My car has always been a bit of a rat when I've had it, which is why I don't feel bad about this cobbled-together 9146 badge.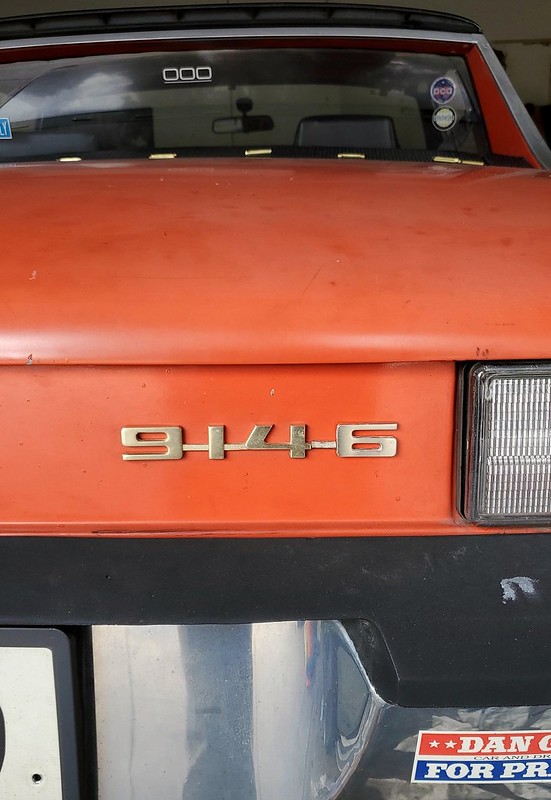
Calipers and lines have arrived, I also went out to pick up some brake fluid. Might get all this installed tonight.
Posted by: mb911 Sep 14 2021, 03:20 PM
What axles are you using? I need/want to upgrade my cvs
Posted by: Optimusglen Sep 14 2021, 03:28 PM
What axles are you using? I need/want to upgrade my cvs
I have the Renegade Hybrids axels, rated at something like 500hp?
It's really just a CNC adapter at each end and a standard heavy duty axel that was originally intended for something else (what, I don't know)
way way overkill for my current build, but pretty future proof
Posted by: mb911 Sep 14 2021, 05:55 PM
What axles are you using? I need/want to upgrade my cvs
I have the Renegade Hybrids axels, rated at something like 500hp?
It's really just a CNC adapter at each end and a standard heavy duty axel that was originally intended for something else (what, I don't know)
way way overkill for my current build, but pretty future proof
Do they have a link? Interested to learn more
Posted by: Optimusglen Sep 14 2021, 07:17 PM
Do they have a link? Interested to learn more
http://renegadehybrids.com/
Listed under the 914 drop down in any of their packages as optional extras. $700 for the pair but they don't list much else about them. Picked mine up from a guy who sold off his project before installation.
Posted by: Optimusglen Sep 15 2021, 02:24 PM
I stayed up late last night to get the brakes dialed in. 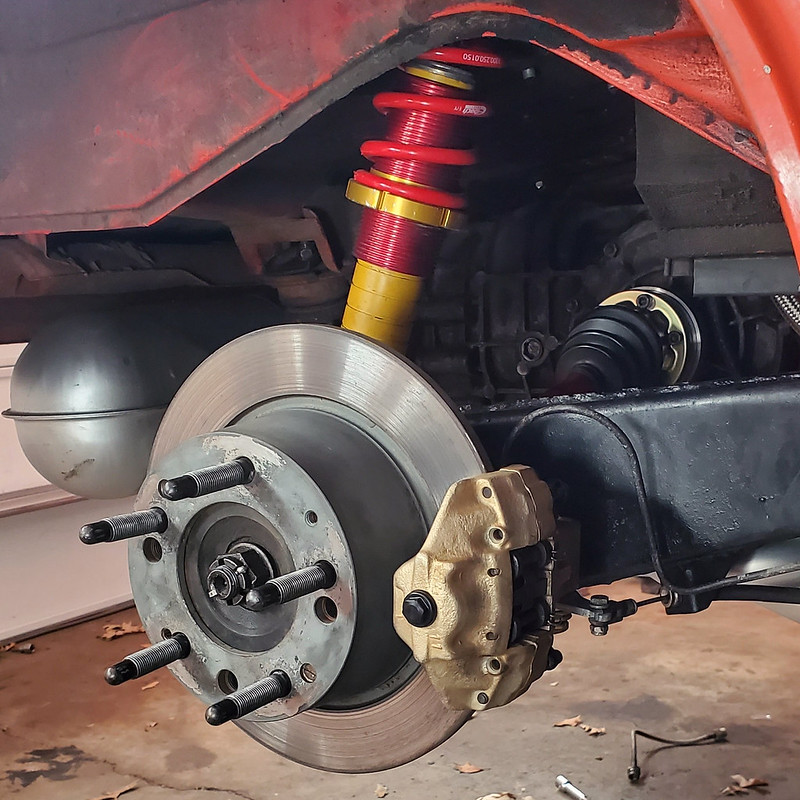
Everything went smoothly and the new calipers are great. I had a little trouble, again, with the passenger side inner adjuster. The same one I was dealing with on the originals... eventually, I did get it close enough that it wouldn't rub the caliper and the venting distance was acceptable. Buttoned everything up and stabbed the brakes for good measure, then the rears were dragging slightly again. Frustrated, I called it for the night and went to bed.
This morning both calipers had returned to "home" and were no longer rubbing. It was a very slight rub, so I took it from a trusted source that it would be fine. I'll bed the brakes in and re-bleed then bed again and report back.
With that done I took it for another drive. This time NO BINDING! but... pedal feel isn't as good. My guess is that the additional bleed and pad bedding will help it. If not, I can live with it for now.
Found a little spot for some photos...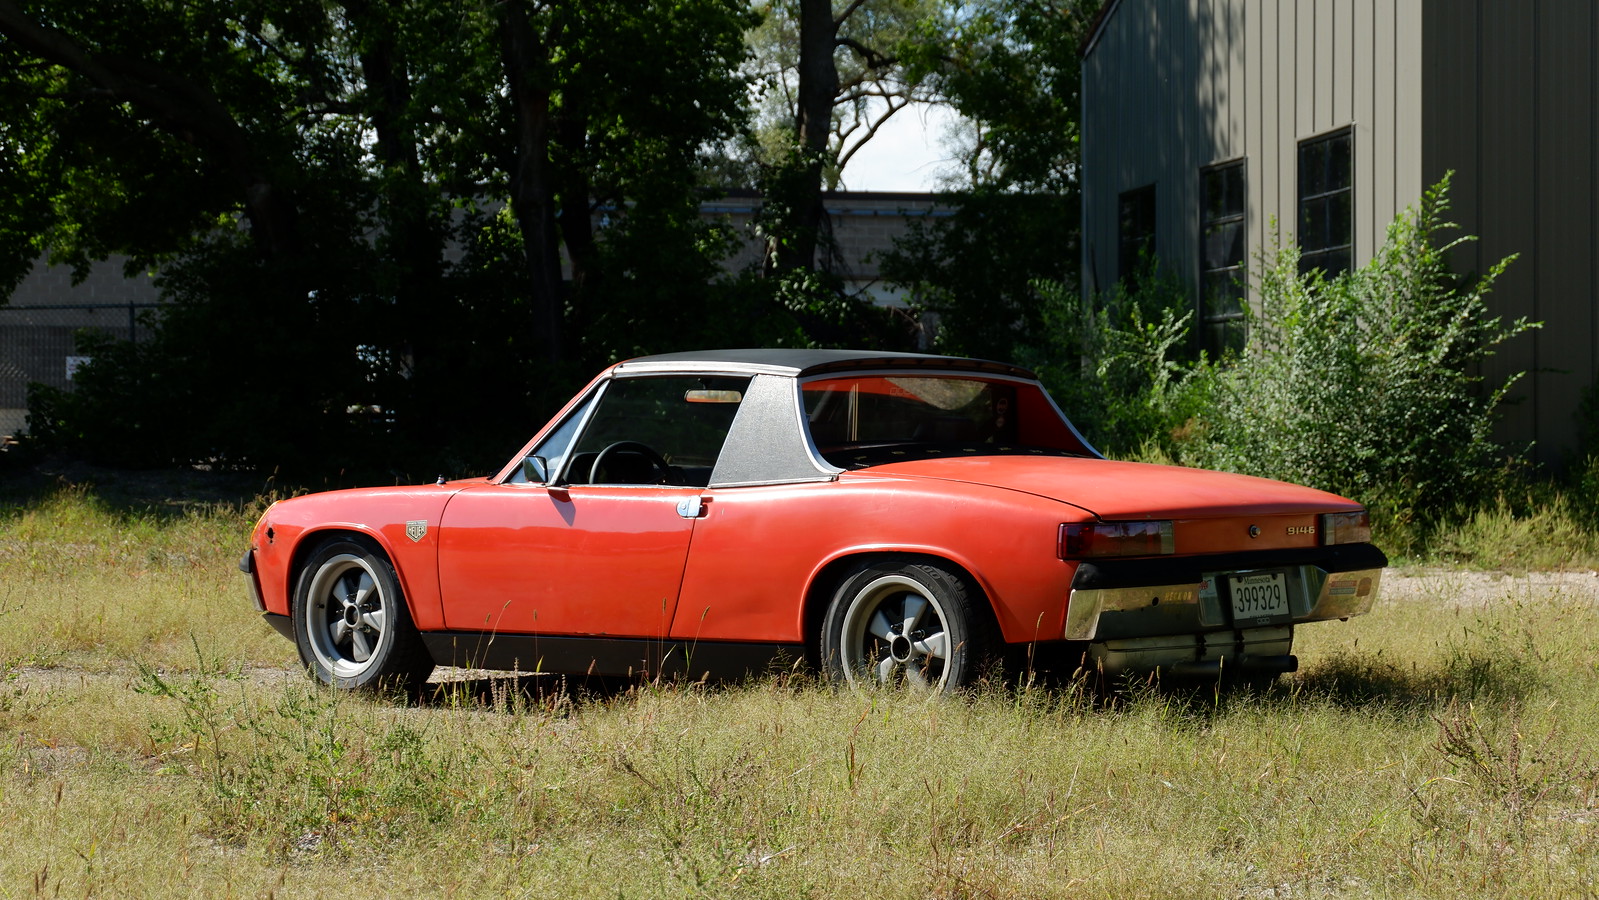
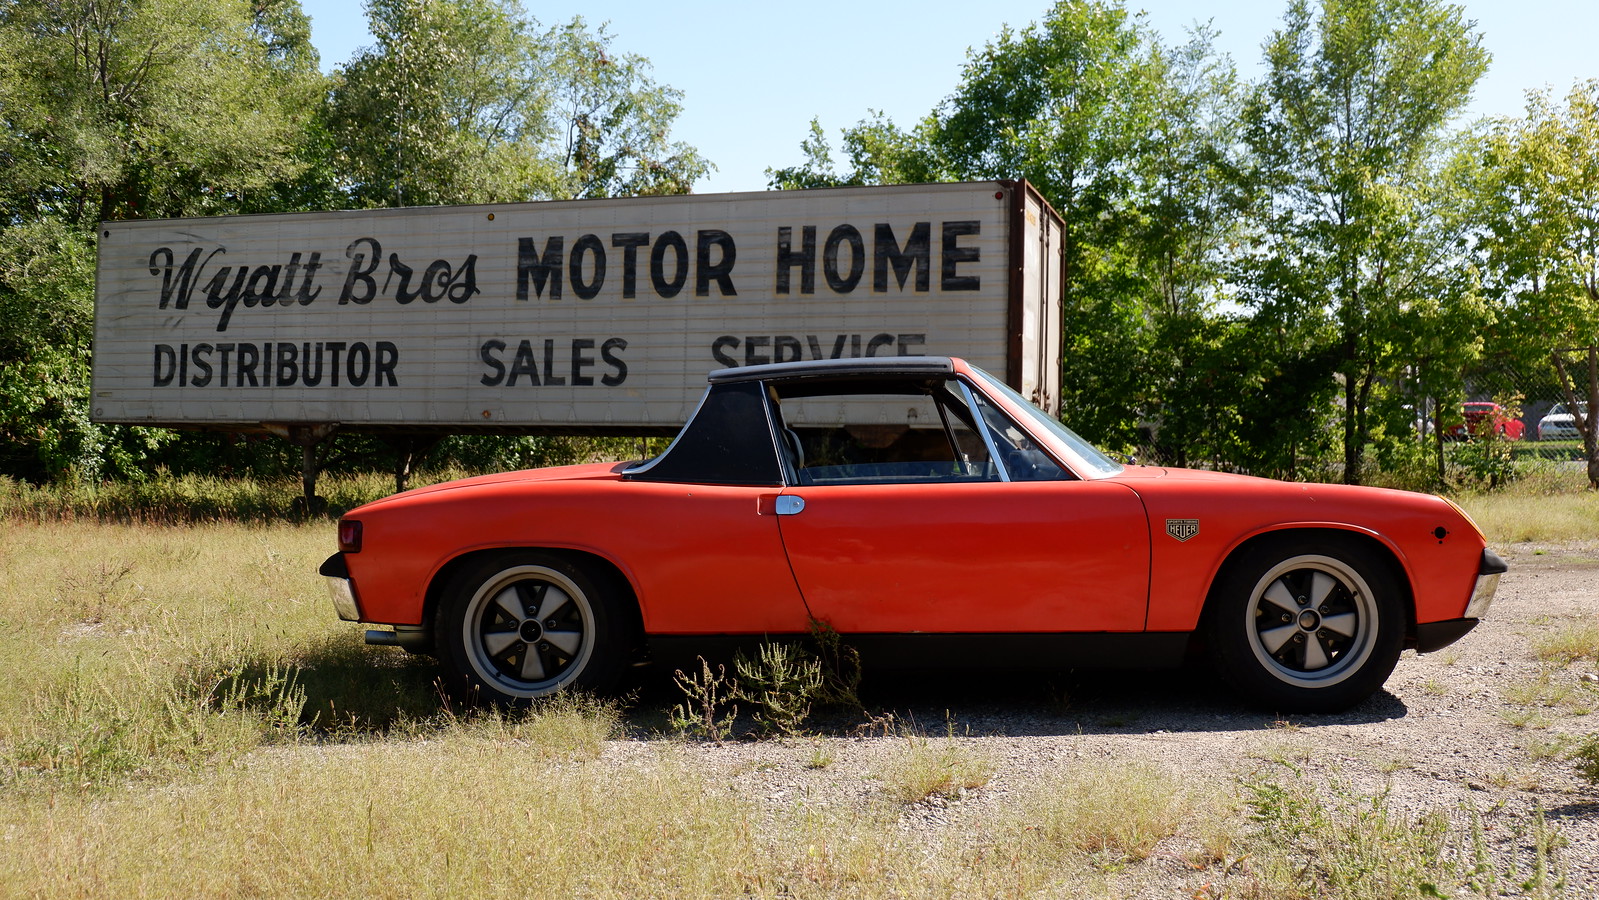
I'm not entirely pleased with this muffler. I wish I could run Bens for the trip because it looks and sounds WAY better, but just a little loud for extended highway action.
I'm not going to lie, I have considered bringing the other muffler along and swapping it out once I get there. I do have another 2 sets of muffler gaskets...
I'm also not happy with how crooked the muffler is. I'm not sure if it's the headers or if my rear transmission mounts are sagging to different extents...
Posted by: horizontally-opposed Sep 15 2021, 11:10 PM
Looking good, Glen!
Re: the muffler you love vs the muffler you think you'll be able to deal with…I've kept one of those blister packs full of ear plugs in the car ever since switching to a six—and that's for a fairly mild sport muffler.
Only time I've used ear plugs, really, was back and forth to LA. 
Posted by: Optimusglen Sep 19 2021, 09:21 AM
Oil change done, valve adjustment done, all rocker shafts still have full torque. Brakes bled again, pedal feels good.
I just need to pack my bags and I'm ready for the trip tomorrow!
Leg 1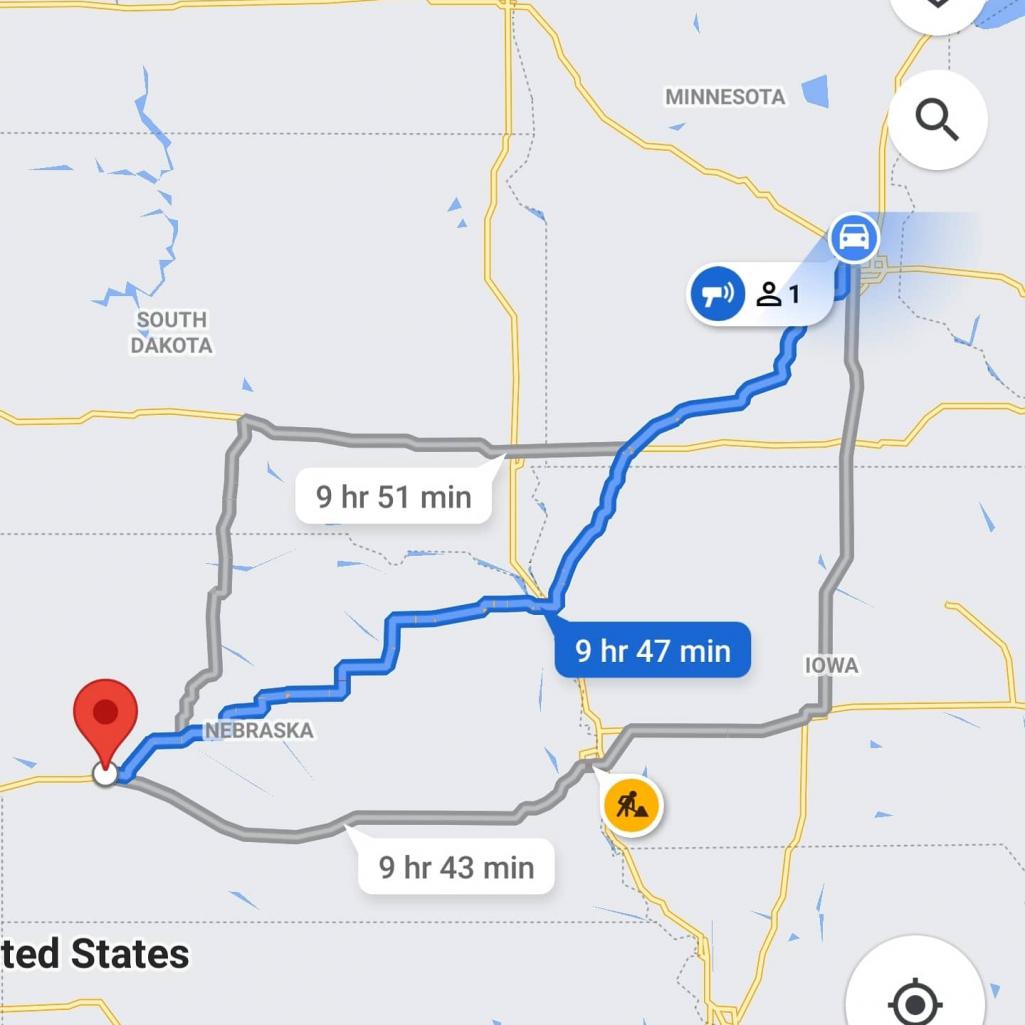
Posted by: Optimusglen Sep 20 2021, 08:54 PM
another 600 miles on the 914 today, with the first leg of the rally to the rally complete.
The car is running well and it seems to be going great. cruises well at about 75mph. Getting 25 mpg
Driver window is misaligned and doesn't want to roll up all the way. It also rained a good part of the morning. So there's that.
Tonight I sleep in Hershey, NE and head for Denver, CO tomorrow.
Posted by: Cairo94507 Sep 20 2021, 09:04 PM
Thanks for the update and enjoy that ride. Glad it is running great.
Posted by: pete-stevers Sep 20 2021, 09:09 PM
Great looking car!
Posted by: Optimusglen Sep 23 2021, 06:35 AM
Edit: I realized I missed an update.
The day before last we made it through Denver where I made a pit stop to visit my sister, and then southwest on 285 all the way to Salida, CO. About 600 miles that day.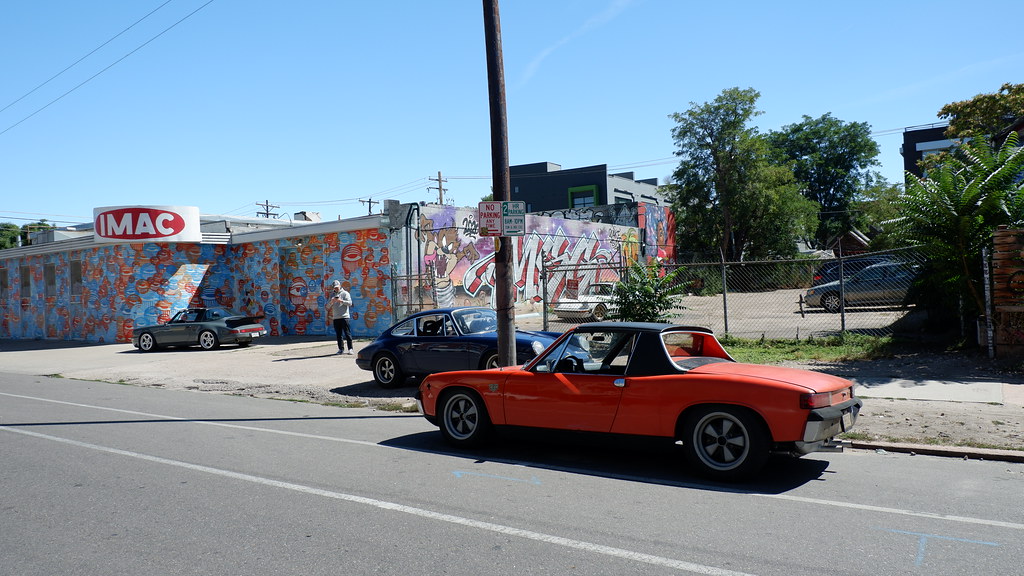
It made it out to Mexican Hat Utah, the start of the rally. Another 370 miles yesterday.
Not much data service, and the wifi is slow, so you're stuck with a low res pic for now.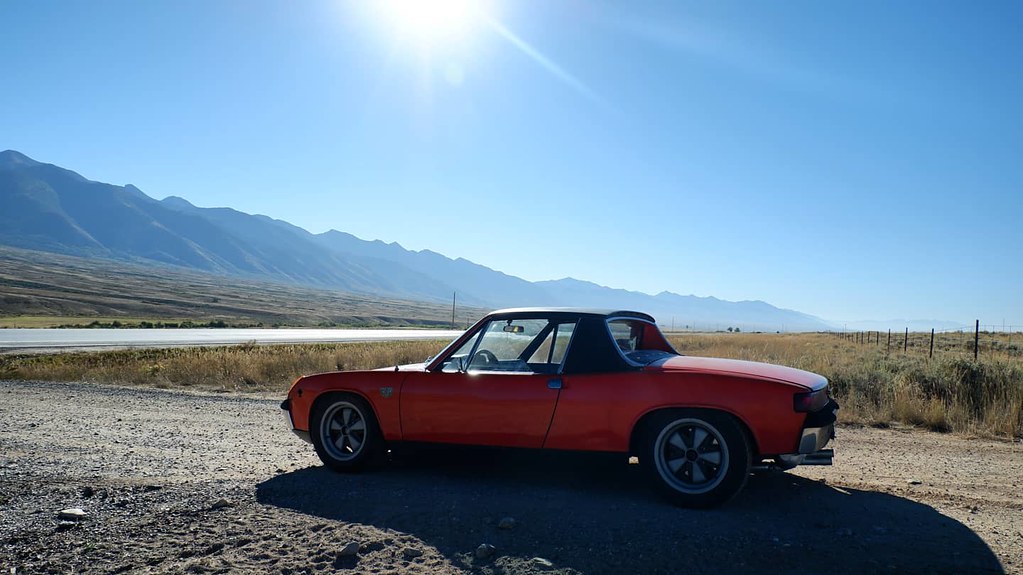
Posted by: Cairo94507 Sep 23 2021, 06:40 AM
Posted by: Optimusglen Sep 24 2021, 03:51 AM
I had a full day in Mexican Hat before the rally and I went over the car. I did have to add some oil, but trans and brake fluid were both good. I also adjusted the throttle linkage a little. Should be set for the start of the rally today. 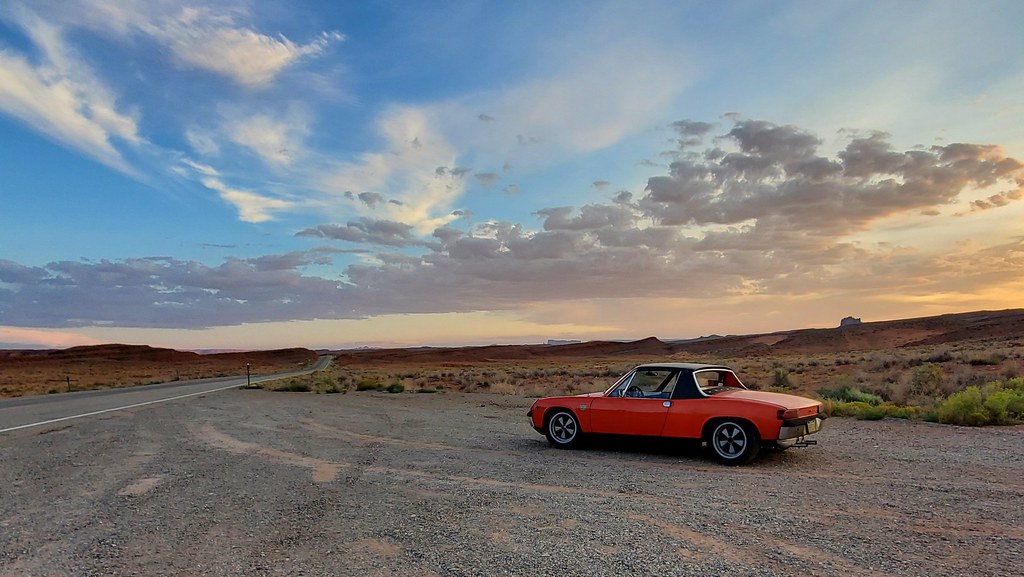
Posted by: TRS63 Sep 24 2021, 04:10 AM
Wonderful car and happy to see you enjoying a big trip in it!
Antoine
Posted by: Mayne Sep 24 2021, 05:29 AM
I had a full day in Mexican Hat before the rally and I went over the car. I did have to add some oil, but trans and brake fluid were both good. I also adjusted the throttle linkage a little. Should be set for the start of the rally today.
Nice shot! The car looks purposeful and beautiful.
Posted by: Optimusglen Jul 20 2022, 09:48 AM
Edit: I realized I hadn't updated since mid-trip last year. Here is a run-down of the Overcrest Rally. This was about 3400 miles on a fresh engine.
http://www.914world.com/bbs2/index.php?showtopic=355998&hl=
Finally, I mean FINALLY I have the car out of winter hibernation. After last season there were a handful of things I wanted to do, and a backlog of other projects prevented me from using the 914 at all during the spring and half of the summer.
The main tasks:
-drop the motor
-install safety collars on chain tensioners, after I rebuilt them and the motor there wasn't sufficient space to install them, had to break the motor in a bit.
-add a section to my oil line. The one coming out of the tank near the oil filter. I have this routed down the frame, up and over the transmission, and then forward into the case. Disconnecting the fitting on the tank every time I dropped the motor was no fun, it was the worst part of the experience. So now I added a small section from the tank to just outside the sheet metal on the underside, I can disconnect it there very easily.
-install turbo lower valve covers, and remove paint from upper valve covers and chain covers. Of course, resealing these as well. I brought the new lower valve covers in to mill out the section required. I used a photo that someone posted here as a reference. Turns out it was wrong and I milled off the wrong corner.  Will be corrected next time I drop the motor (likely for my next valve adjustment...)
-reseal the intermediate shaft cap. This was the source of my oil leak. NO MORE LEAKS!!
-install all new brake hardlines and disassemble/clean the brake pressure relief valve. At the end of last season I had another bout of brake seizing. Something keeps pressure on the rears enough to make slight contact with the rotors, the heating (I believe) swelled the pads slightly, enough to make more pressure, and more heat, etc, until the rears were just locked up. After doing the pad adjustments over and over, and replacing calipers and soft lines and checking everything else, it came down to the possibility that the hard lines were in poor shape, or gunk in the pressure relief valve.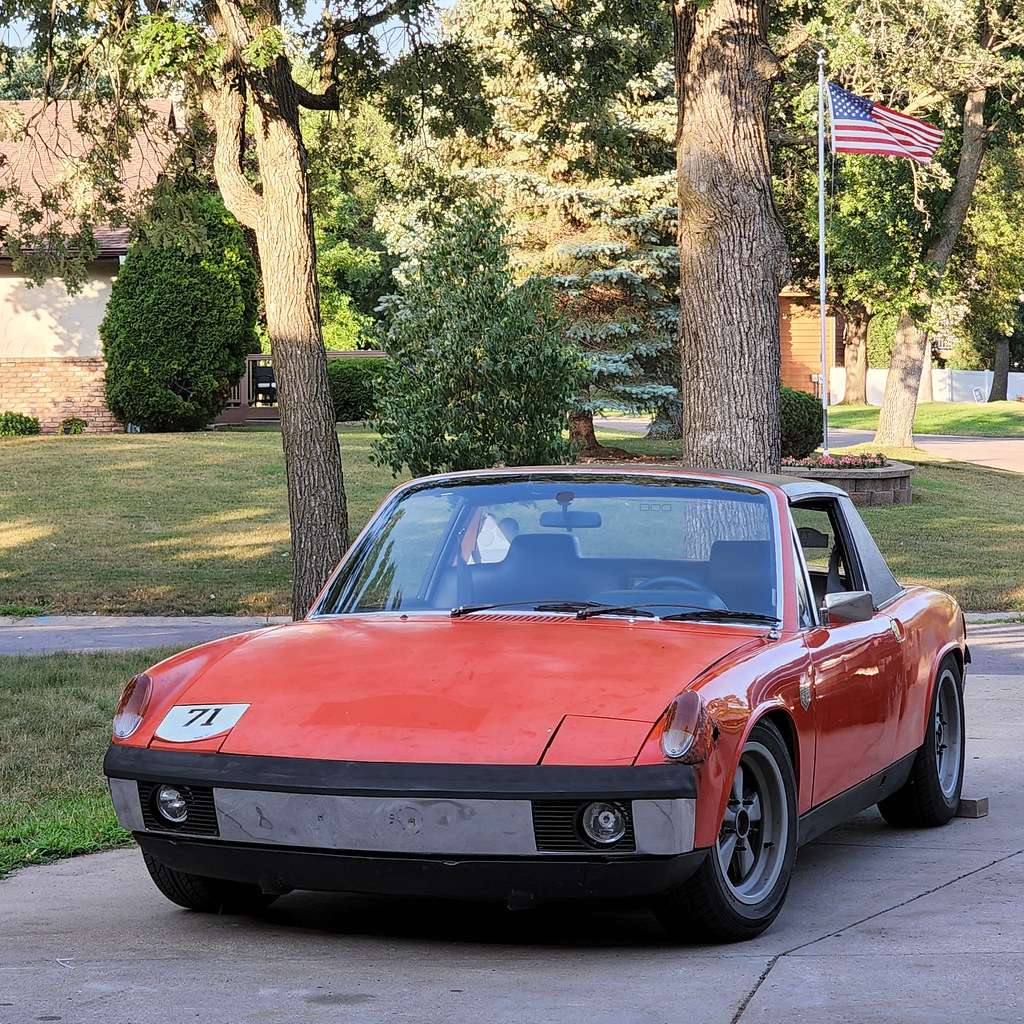
Happy to report that I've completed all of the above and started it up for the first time this season. I still need to do another round or two of brake bleeding, and adjust the shift rods, but otherwise it's running like a champ and absolutely purring.
Did I mention, NO OIL LEAKS!!?!?!
Now that it's running, there are a few other items I'll want to get to. New door cards from 914Rubber are in, and a set of visors are due in Friday. I also want to wire in an outlet inside to charge phones etc. Likely USB.
On the back burner is audio. I'd like to do a Bluetooth amp hidden somewhere and a speaker or two, but that might be a project for another season. The audio track that came with the 6-cyl swap has been pretty riteous
All this in preparation for the next Overcrest Rally. This year we're heading to the Sawtooth Mountains in Idaho in early September. This will again be about 3000-4000 miles round trip. They used my car for one of the promotional art pieces this year, wooo!
https://www.instagram.com/p/CeTl13Vrc9t/
Posted by: Optimusglen Jul 25 2022, 11:59 AM
I installed the doorcards, the new clips didn't work very well in my experience.
On the drivers side I added a leather strap for a door pull. Previous to this I just grabbed the top of the door. The armrest that came with the car was trashed and I liked the bare look.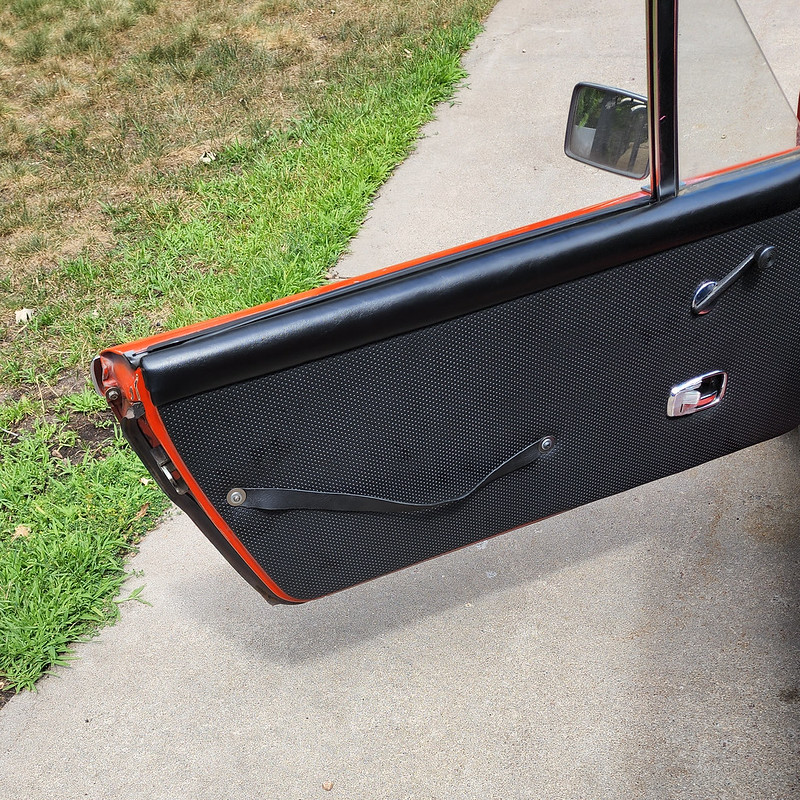
The passenger side got the armrest, but not the lower section. 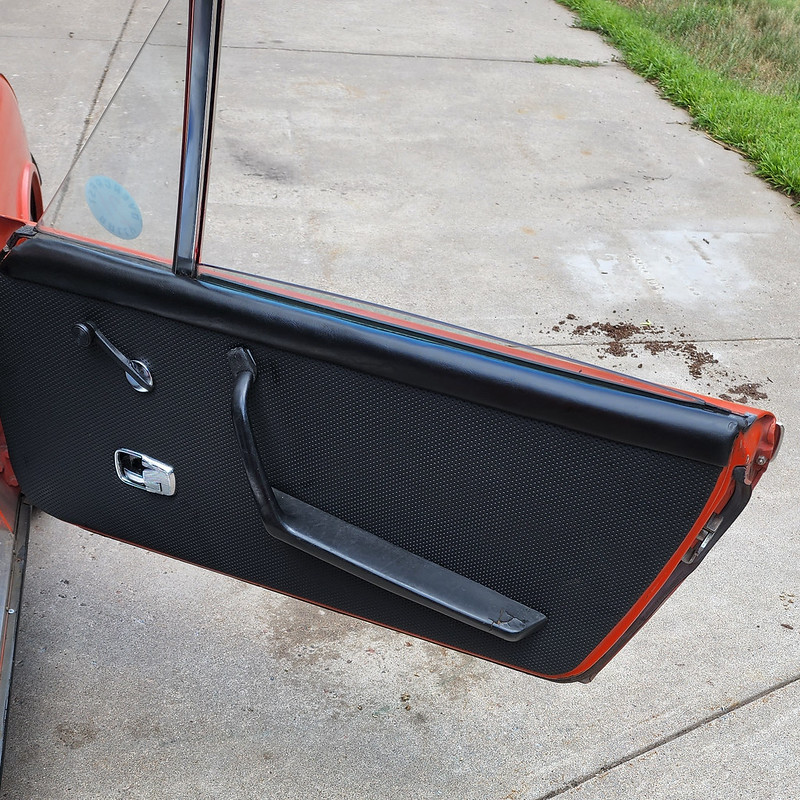
Always loved old-school painted liveries, and I liked the look of the decal "71" I had on my passenger side light cover. So I grabbed a spare light cover from my parts bin and rattle-can painted it a light cream then hand painted a 70's-ish groovy "71" 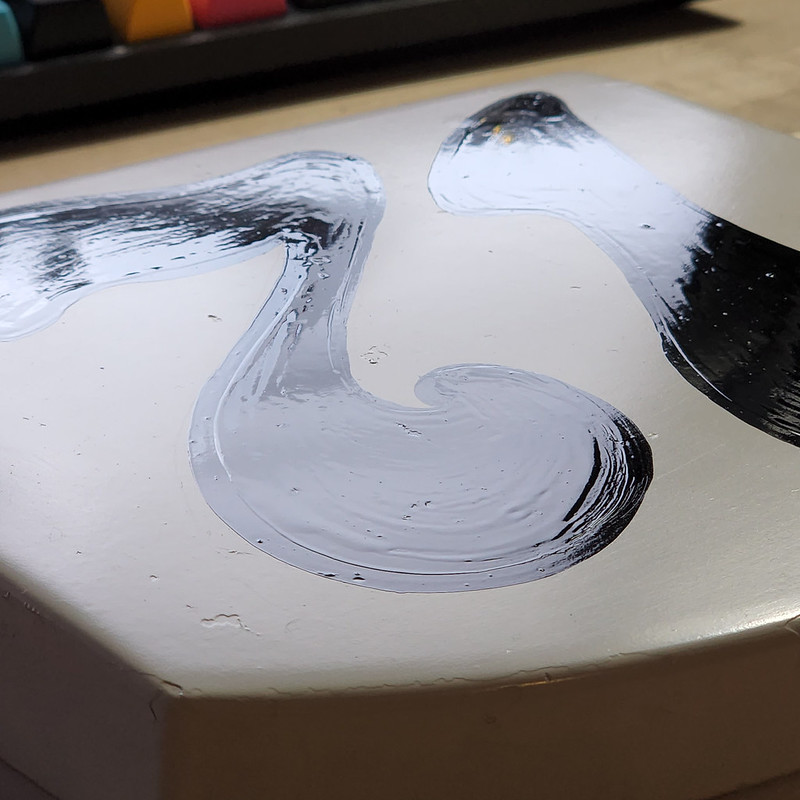
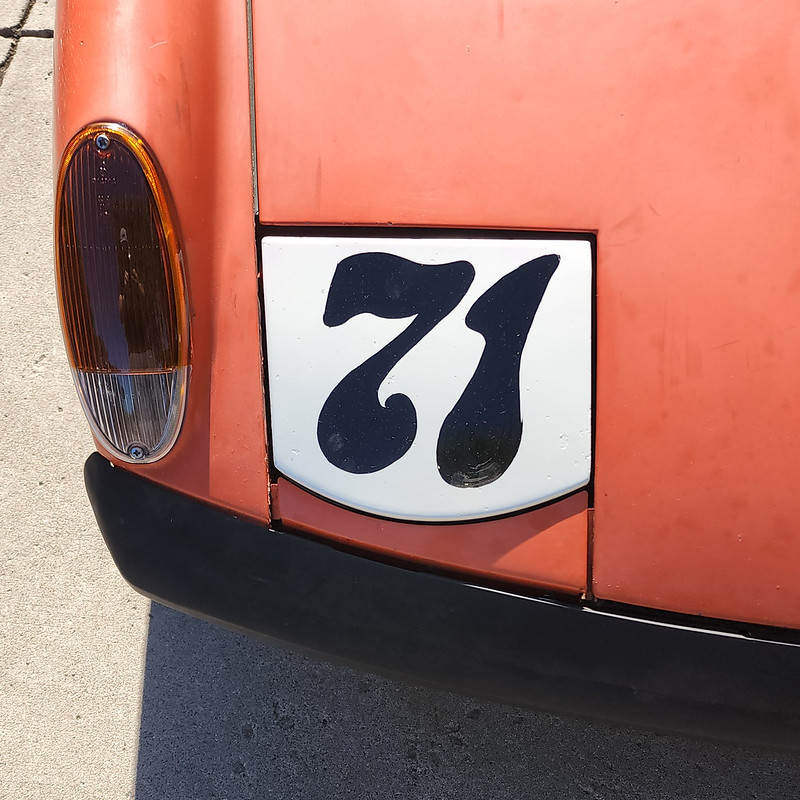
I think it fits the "beat but neat" feel of the car.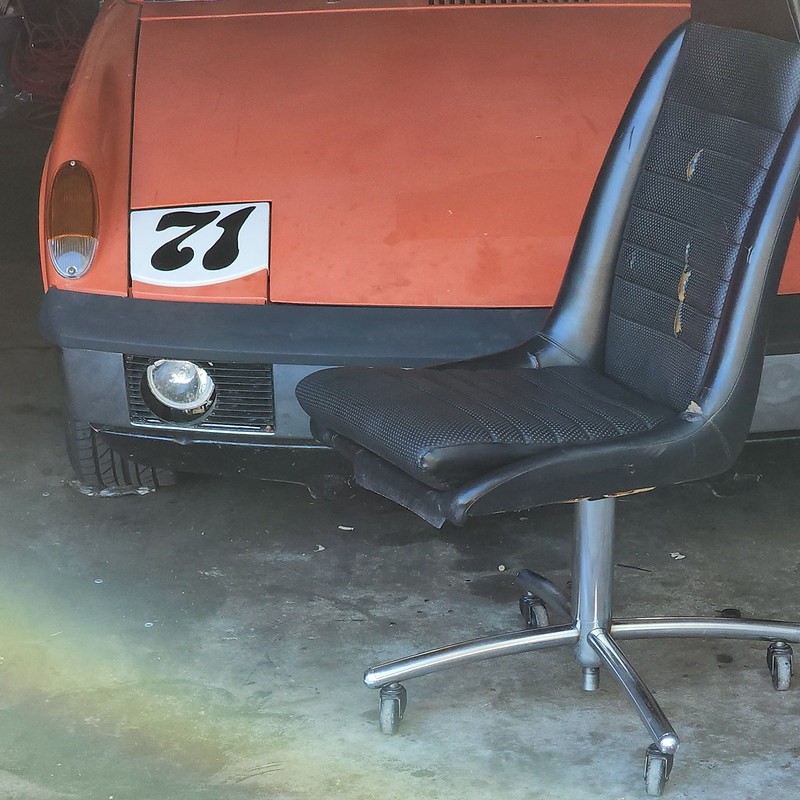
I also painted the inner headlight surround the same light cream color, drivers side stayed black. I'm not as sold on that though, so I'm not sure how long it'll last.
ordered up speedometer stuff, the 914Rubber drive gear guide and a new VDO angle gear. I'm hoping that with these it'll stop a mild gear oil leak and enable the speedometer to work properly. I also need to order a speedo cable I think. I took my old one out when my old speedo was jumping all over the place. the GPS speedo in the 123Ignition app has been great, but I'd like to be able to track mileage better than doing math in my head and approximate calculations.
ALSO on the list is to tack weld in the rear wheel studs, I noticed this last time that more are coming loose a bit.
Posted by: bahnzai Jul 26 2022, 05:09 AM
Glen,
Thanks for the update and Congrats on the Overcrest artwork. It was great to re-read the build thread. You have certainly overcome many, many challenges.
The car has such a great look and stance. I kept going through the pictures trying to pick what it is that sets it apart, makes it look cool and purposeful. There is not one “single” thing you have done, I guess it is the overall vision, like you said "beat but neat". It is always evolving and interesting to see what comes next.
Definitely inspiring!
Danny
Posted by: Freezin 914 Jul 26 2022, 05:40 AM
Glen,
Thanks for the update and Congrats on the Overcrest artwork. It was great to re-read the build thread. You have certainly overcome many, many challenges.
The car has such a great look and stance. I kept going through the pictures trying to pick what it is that sets it apart, makes it look cool and purposeful. There is not one “single” thing you have done, I guess it is the overall vision, like you said "beat but neat". It is always evolving and interesting to see what comes next.
Definitely inspiring!
Danny
I love every single 914, every build. But this car is truly one of my favorites, and it helps that Glen takes the time to share his cars story!
Posted by: Optimusglen Jul 26 2022, 02:19 PM
Thanks guys, it's certainly been a journey!
Posted by: Optimusglen Aug 24 2022, 12:21 PM
More updates! Sorry for the wall of text.
I've been wanting to do a hidden audio system in the car since the beginning, now it's finally done. I got the amp and speakers installed, Soundsstream ST4.1000DB that claims 1000w max. Amp is small enough to bolt to the back side of the glove box, inside of course. 10g cable from the battery forward, with a 30a fuse (there's also a 30a fuse on the amp itself). Same 10g cable grounding to chassis. Speakers are Kicker 47KSC4604 KS series low profile 4x6.
For anyone who uses this amp, some of them have the remote-in and remote-out wires flipped in the factory-supplied harness. Mine was, and I was scratching my head wondering why my unit wouldn't power on even though I checked with a multimeter and I was getting the right power to the right wires.
Currently, audio is supplied via Bluetooth from a phone/tablet. I have options to add an input if I ever want to, but for now I like that it's completely stealth, even using the stock beat-up speaker grills.
Overall, the sound is much better than I expected out of two 4x6s. Amp and speaker tech have come a long way I think. Still some room under the dash so I might try to squeeze in a downward-facing center channel.
I swapped mufflers AGAIN. I did a few more highway drives and Ben's muffler sounds solid around town, but on long highway stretches it just kind of drones. My guess is that it has a lot to do with how small the motor is.
My buddy Dave (the rad guy who built my carbs, and tuned them) had a DIY sport muffler that he had on his car last year and let me have it. My hope was that it was a little louder than the DIY sport muffler I had previously but quieter than Bens. Happily that is the case, though it's still very close to the other sport muffler. It's going to work. Later this week the car is going back to Dave to make some tuning tweaks now that the car is fully broken in.
And also, I got a new Patrick Motorsports 6-conversion throttle cable. The first one I had maybe was a QC miss, it was just a bit too long. When trying to find a solution to the length last year I tried tieing a knot in the cable itself between the exit of the jacket and before the throttle linkage. This was shortly before I was set to leave so ordering another would have been off the table at the time.... ANYWAY... I did end up untieing the knot and instead putting a spacer at the jacket/firewall junction. The knot had induced some warpage of the cable, so there was some pre-load and spongy-ness that a NEW cable corrected. Comparing lengths, the new cable is slightly shorter and works much better, though I did keep the spaceer in place at the firewall.
Next up, installing a check valve at the gas tank vent tube so that I don't get fuel seeping out under hard left turns. I don't have any of the stuff on top of the tank that comes from factory, for fumes etc.
Posted by: mb911 Aug 25 2022, 06:47 AM
Glen,
I ended up changing my entire exhaust out but agree with the stock muffler with the sport mod. I actually capped the driver side as there is plenty of flow and doesn't drone in anyway now. 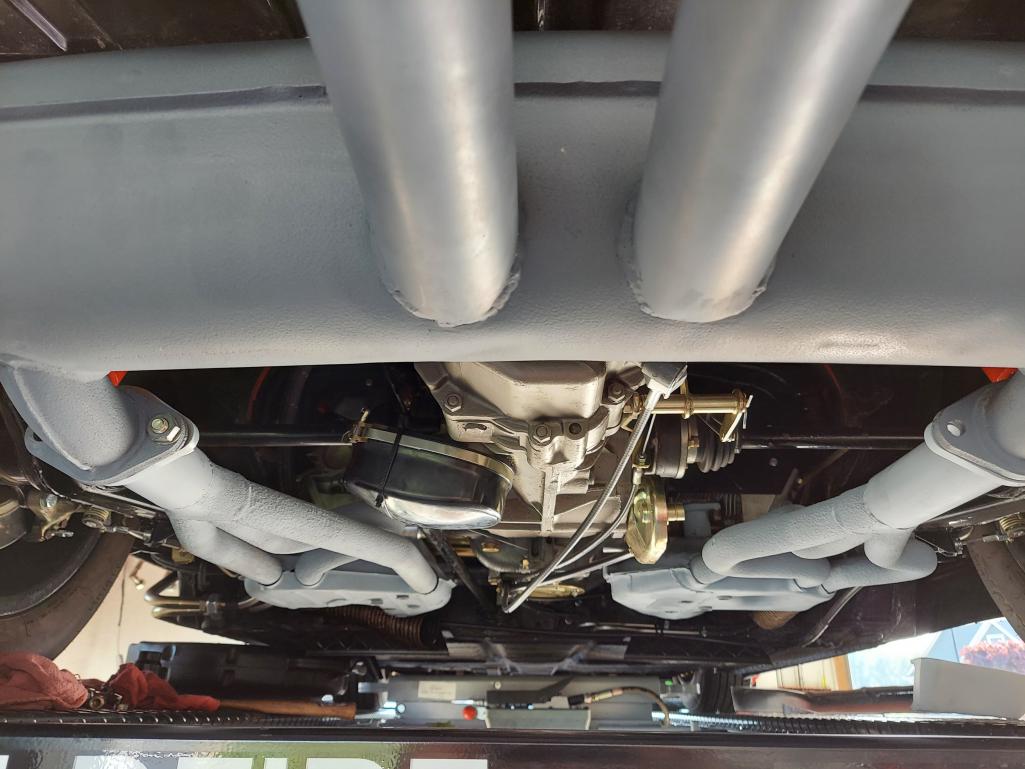
Posted by: Optimusglen Sep 6 2022, 09:31 AM
As an update to my last post, I installed a check valve for the fuel tank vent and cured that problem, wish I had done it sooner. Definitely a derp moment.
I dropped the car off with Dave Cheney, he ended up pulling the Zeniths off and going through them again, found a clogged idle circuit and generally freshened them up then retuned. They're in a good place now and running pretty well. Dave said I could advance the timing 5 degrees and then lean the mixture out slightly to further dial the tune.
I have the car all packed up and ready to roll for the Overcrest Rally. I'll be doing social media stuff in real-time through the trip, but also a trip report here, similar to last year.
The route heading out to the start will be 3 days, er... 2 and a half.
I will be leaving home today early-evening, then 4-5 hours up into North Dakota. My daughter is off to her first day of Kindegarten, and today I'll get her off the bus, hear all about her first day, and then hit the road. Leaving is always sad.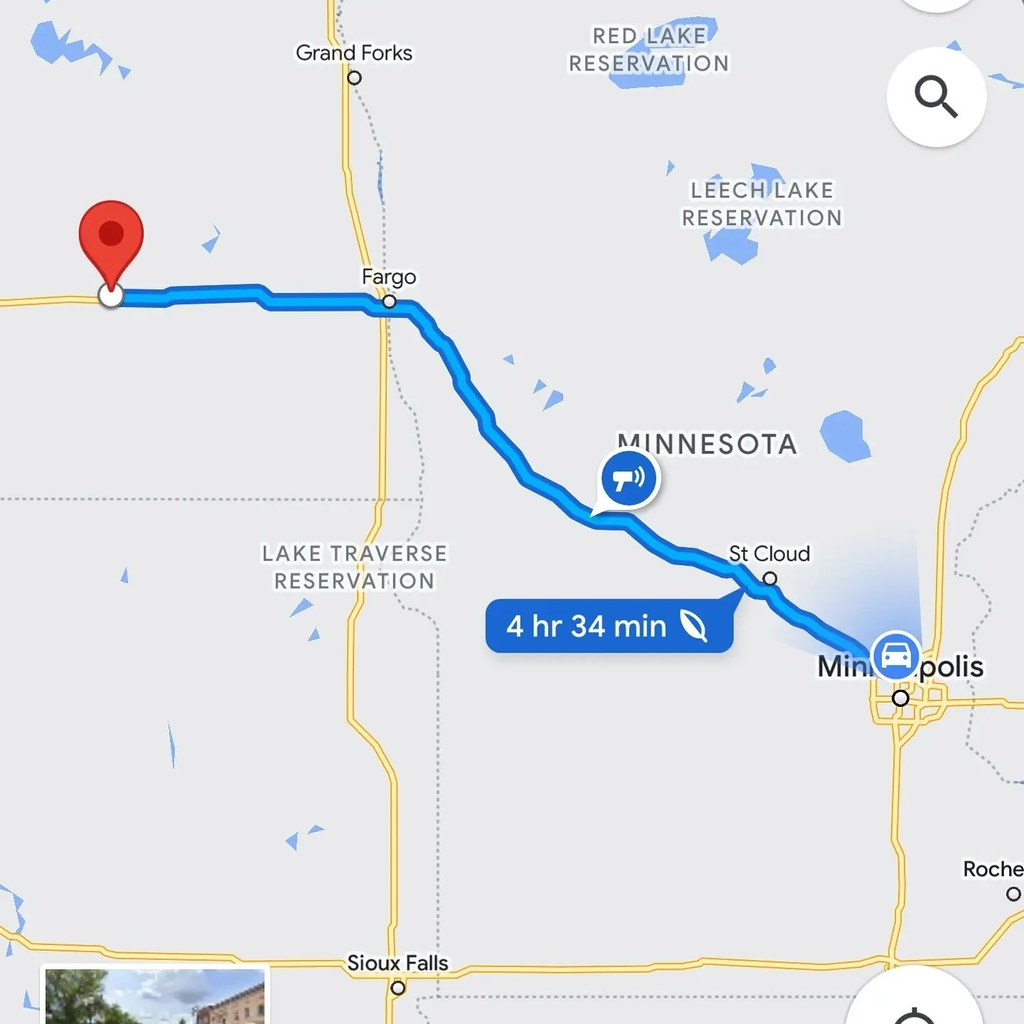
Day 2 will take me across North Dakota and into Montanna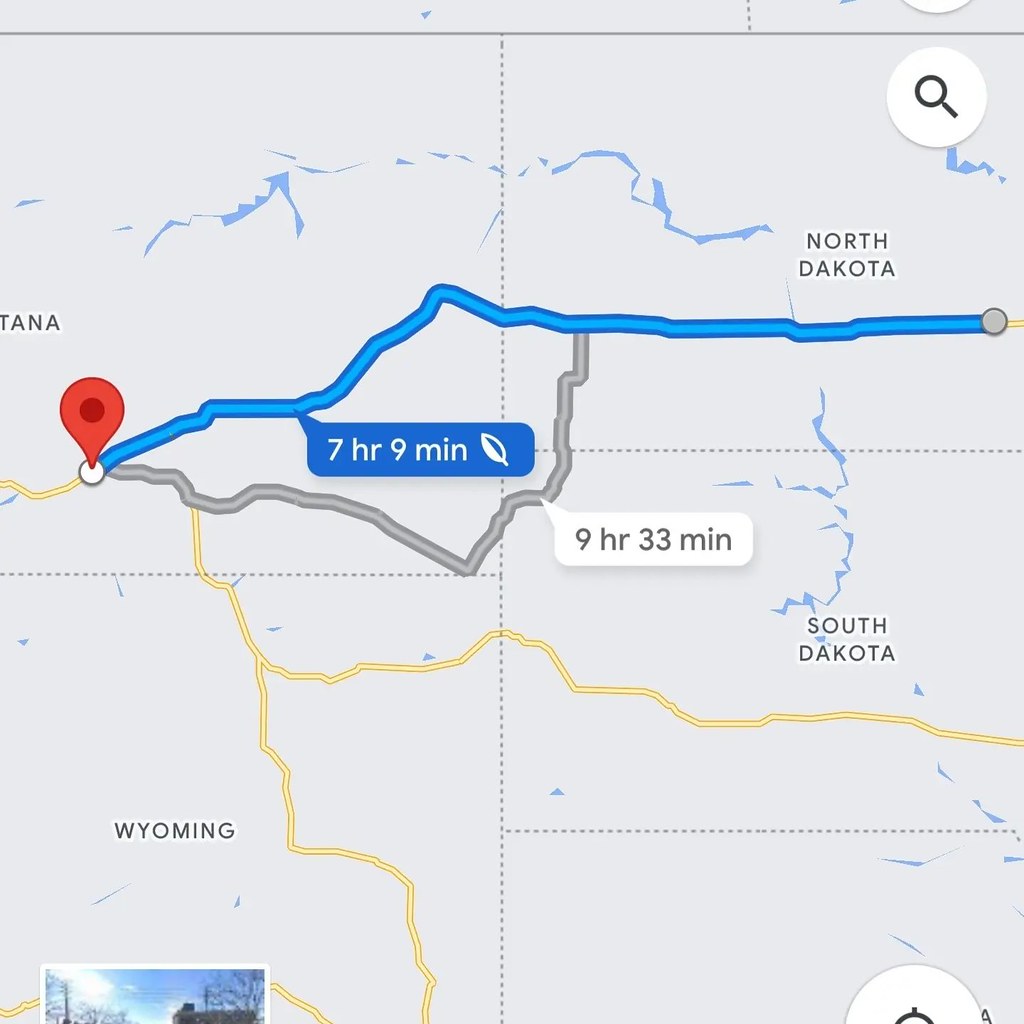
Then Day 3 will bring me into Challis Idaho for the start of the Rally.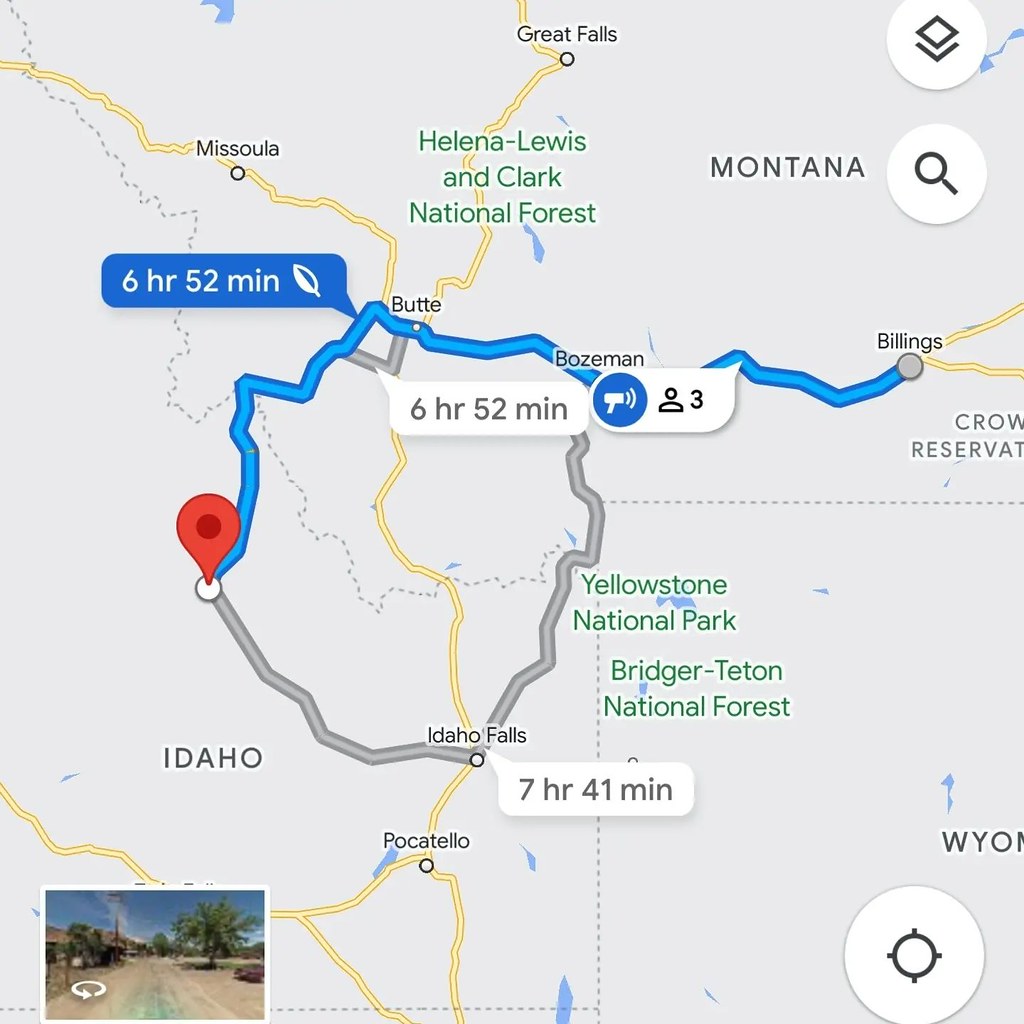
Posts, stories, maybe even a live-stream or two via https://www.instagram.com/glen_in_the_garage/
Most of the posts will also be mirrored to my art/rendering page, but I'm not sure I can do video stories simultaneously through the two.
https://www.instagram.com/glen.cordle/
Posted by: Root_Werks Sep 6 2022, 12:47 PM
Really love that you are putting miles on your 914! The stories of your travels inspire me to get out and drive mine more.
Posted by: Optimusglen Sep 19 2022, 11:27 PM
Overcrest Rally 2022 has come and gone, trip report http://www.914world.com/bbs2/index.php?showtopic=361693&hl=
The car was great, no major issues. A flat tire and a broken window is all.
It's had me thinking again about the future of the car, and I might enjoy a little more ground clearance... So far this is the concept I'm thinking about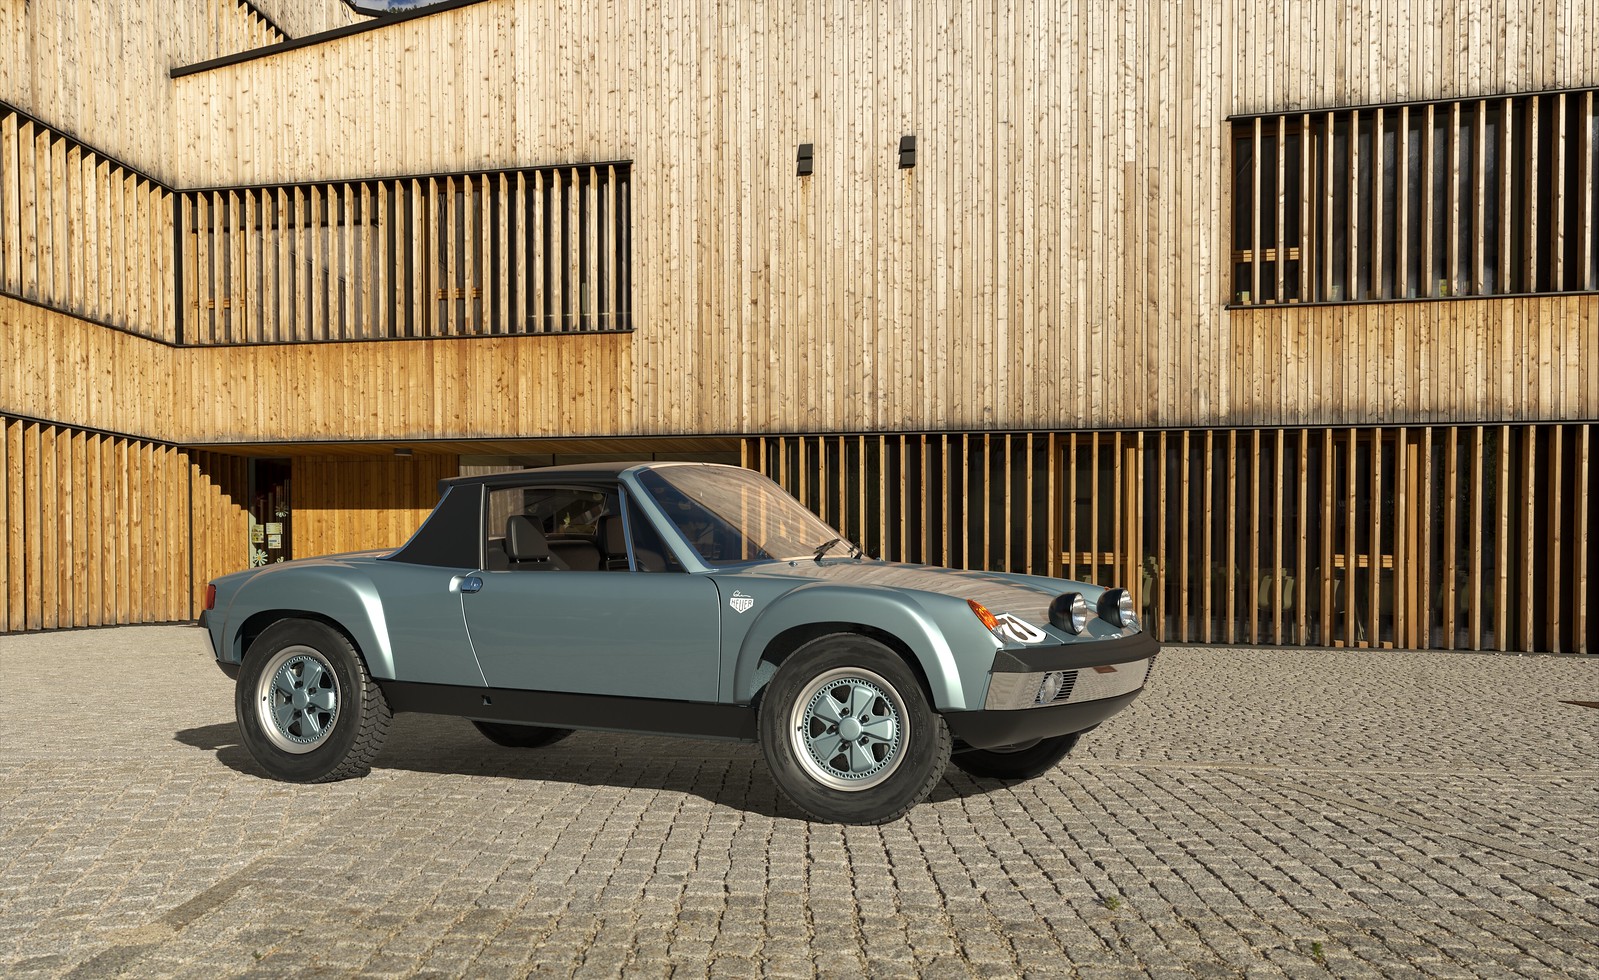
a rendering, of course.
Been reading through Erics ORV build once again, and thinking about which items I'll try to implement in my car.
The molds for the fender flares shown here are on their way, they should be here this week. Then I get to learn all about fiberglass.
Also, I have one test tire due in soon. I was tempted to get the same size the Keen Safari 911's run, but then found some that were a little narrower. I'll mount it on one of my spare wheels and use it to gauge height, suspension, steering, flares, and all that.
I've started collecting parts to do 911 rear brakes, and I have a rear valance that will take some massaging to get mounted (fiberglass)
Oh, and still need a drivers door window for a '71...
Posted by: Optimusglen Aug 22 2023, 01:49 PM
It's been awhile so I thought I'd update.
From the previous posts:
-new door glass was installed with new bits and bobs to keep it in place.
-offroad tire came in, and I mounted it on one of my spare wheels. Looks rad, but will certainly need fender mods to fit.
A week or two ago I decided to finally dig into fitting the fiberglass rear valance. Thankfully I just needed to do some cutting and squeezing to make it fit. It's not perfect, but on my car, it would be out of place if it was.
I must say though, once upon a time I preferred all 914s without a rear valance, especially when running a dual exhaust tip muffler. I was talking with @http://www.914world.com/bbs2/index.php?showuser=2058 and he mentioned he preferred them on narrow-body cars, but without on flared GTs. Months or years later I came around, I really do like the look of a valance on mine now. 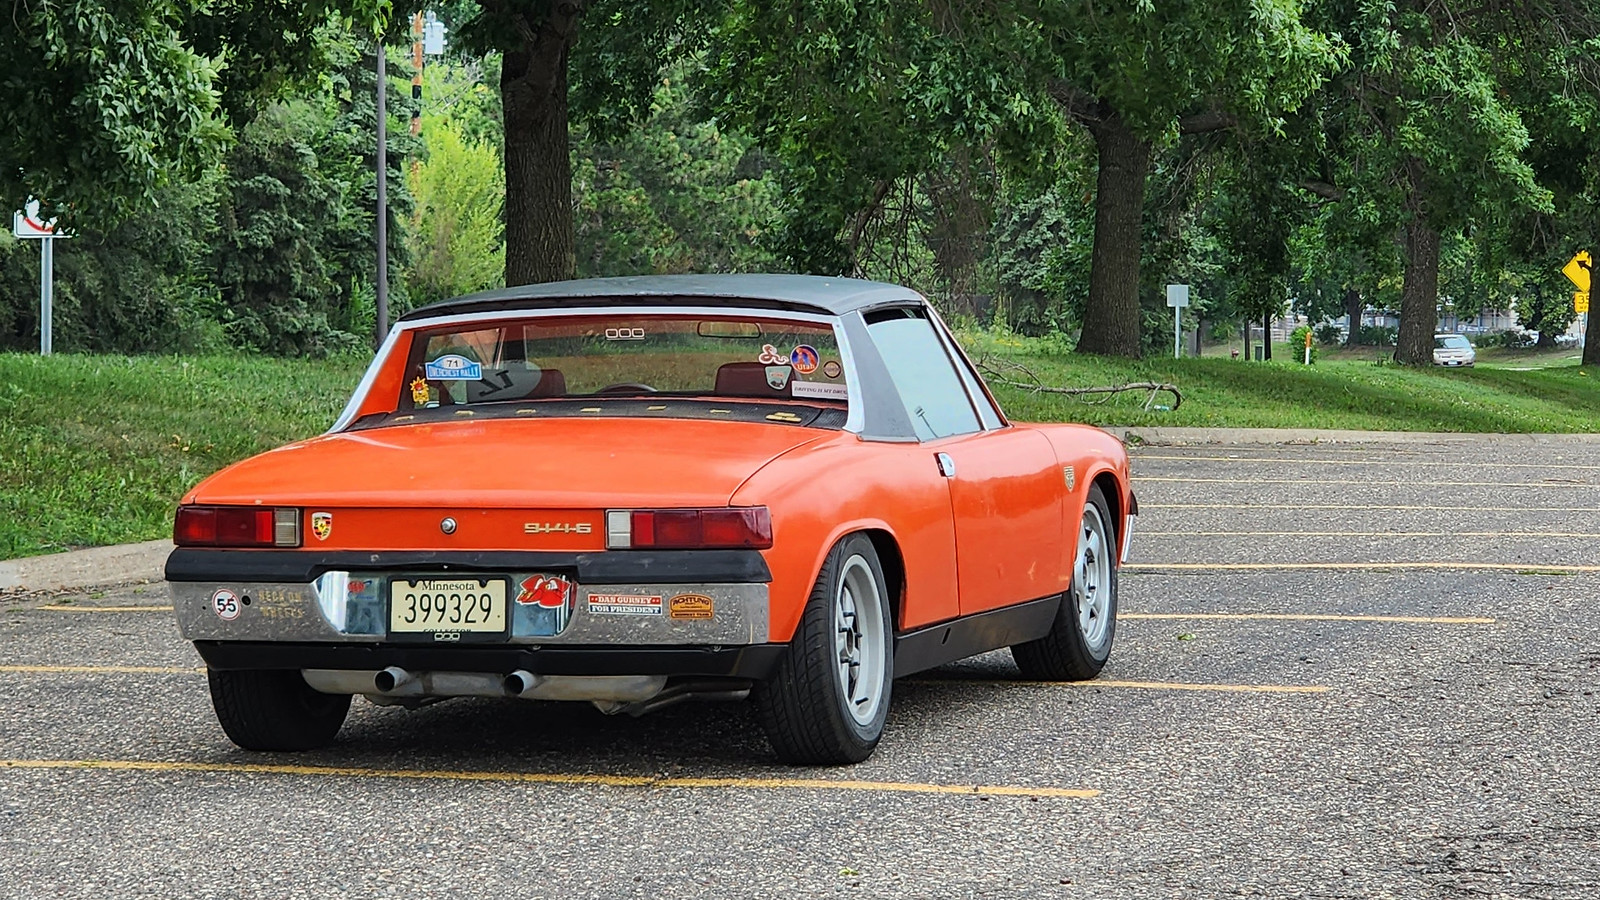
Now, this summer I had some big plans for the 914. I was going to flat tow it out to Maine for a family vacation, and then I was going to flat tow it out to Oregon for the Overcrest Rally. Hit BOTH COASTS in a year! Well... things changed as sometimes they do. My tow rig (2009 Range Rover) has some intermittent air-con issues, and I didn't want to submit my wife and kid to 6 days in a hot car. So we ended up flying out instead.
Then I decided I didn't want to drive through the mountains for the OCRally in October, and was going to do a solo trip down to Tennessee and explore that region... buuttttt then I decided to scrap that too and just do Rennsport Reunion.
TL;DR - no big road trips this year
Now, to bring the project up to date.
In preparation for the trips I wont take, I installed a flat-tow bracket, LE-style front valance, and while I was in there did 911SC front control arms and subframe to be able to mount an under-body sway bar. This bumped by torsion bars to 19mm from 17mm, a change I haven't really noticed.
I went down a rabbit hole of trying to mount retractable seatbelts in an early car. Purchased the AA ones, they're bad, hot garbage. Took them out and found some from an old Beetle that had an extension bracket. Those almost worked, but my car needed to be on at least a little of a decline or the belts would lock up, so I took those out and put my fixed belts back in.
I noticed that the car was flexing a bit more than it used to, and the drivers door is harder to latch. That long stretch of bumpy dirt road on last years Overcrest Rally did me dirty in more ways than one I fear. Climbing underneath it, there are some spots of increasing concern. So, next year may be a year of bodywork for this old gal. My current plan is to cut and replace any bad metal, clean up anything that can be saved, and re-evaluate once I'm in. If it isn't too terrible I'll do inner long stiffening as well as the metal patchwork. And then since I'll be doing metal work I'll get the flares made and installed, and paint...
So, all in all kind of a bummer of a year for my 914.
Posted by: Cairo94507 Aug 22 2023, 01:58 PM
I really like the inner-long stiffening kit. Just have to aware of all the mounting holes for everything and be sure the stiffening kit fits right against the factory sheetmetal. Of course, only weld a couple spots at a time and allow too cool. I would brace the chassis first just in case.
Looking forward to seeing the progress; love that you drive your car a lot.
Posted by: Optimusglen Oct 5 2023, 09:26 AM
Back from Rennsport Reunion 7, pretty amazing trip!
While out there I used Turo to rent a 2020 Audi TT. part of this was an ulterior motive... been kinda bummed about my 914 and dreading the downtime, not being able to drive the car (for a season at least, hopefully not more) And for a while at least I was considering exiting the game. So, part of the reason for the rental was to see if I would like to have a newer sporty-ish car instead.
As soon as I got home I ordered the inner long stiffening pieces, so that should tell you what you need to know. You guys are stuck with me.
I know I'll need to do part of the floor too, but I need to wait until I get into it to see the extent, or what other sections may need to be replaced.
Posted by: Gint Oct 5 2023, 01:13 PM
That's why you need more than one!
Powered by Invision Power Board (http://www.invisionboard.com)
© Invision Power Services (http://www.invisionpower.com)