Printable Version of Topic
Click here to view this topic in its original format
914World.com _ 914World Garage _ AAR Electrical lead
Posted by: turk22 Mar 10 2016, 04:50 PM
I found that my AAR appears to stuck closed, very poor cold idle, and then idles fine after warm up. I plan to PB blaster the crap out of the AAR and bench test it to make sure it can open and close correctly.
This may be a stupid question, but how is this lead disconnected, is it simply pulled off, or ??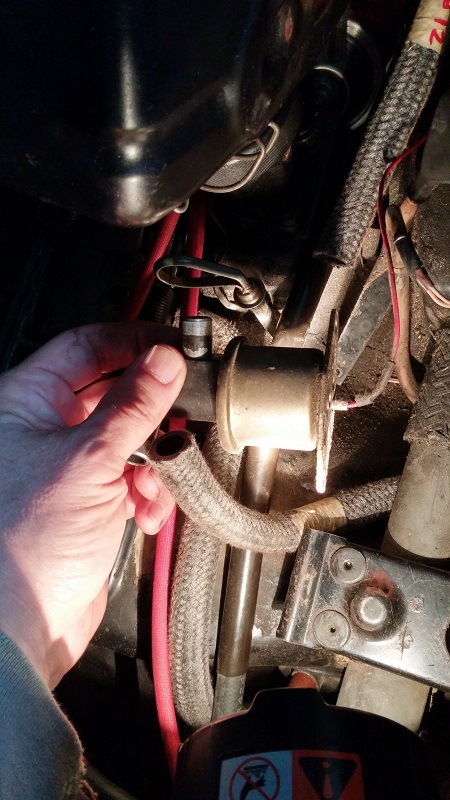
thanks,
Turk
Posted by: porsche913b_sp Mar 10 2016, 05:20 PM
You don't want to take the wire off it is soldered to the other leg of the internal heating wire. Just leave it alone and be sure to place that heat shrink or additional tubing to prevent that wire from bending too much and shorting out. From my experience soaking it with PB didn't help for me. If you are capable of uncrimping the top portion and then soak it and manually turn it until it's free. It's not that hard, it won't look too pretty afterwards but it will work very smoothly. Good luck
Posted by: Jeff Bowlsby Mar 10 2016, 05:36 PM
Just disconnect the other end of that red wire where it connects to the ignition harness.
Posted by: era vulgaris Mar 10 2016, 05:37 PM
Been a while now since I had my djet car, but IIRC there is a plastic connector somewhere in the vicinity of the underside of the plenum. But maybe I'm thinking of something else. I can't recall right now how I removed mine, it's been a couple years. It's possible I cut it and re-soldered it together. Trace the wire to where it meets the loom and see if you find a connector somewhere along the way.
BTW, I soaked mine in a bath of WD40 for a couple days. After that it worked perfectly.
Posted by: pilothyer Mar 10 2016, 05:38 PM
I have found that in addition to the PB Blaster soak, you need to let it cool down and open, insert a small screw driver while it is open, then heat it up and it will try to close..........use the screwdriver to open it to maximum and then remove the screwdriver in such a way as to make the valve "Slam Shut" after a few cycles the carbon will be broken up and the valve will fully close as it should as it heats up.
Posted by: turk22 Mar 10 2016, 05:47 PM
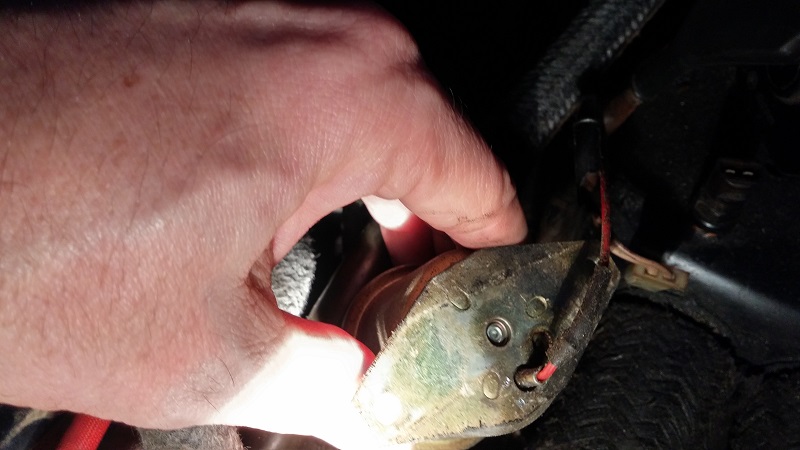
ok, I see the connection on the other end. I'm guessing this is covering a spade connection? I don't see an obvious way to open this up, but the little bit of blue I see, looks like a simple crimp connection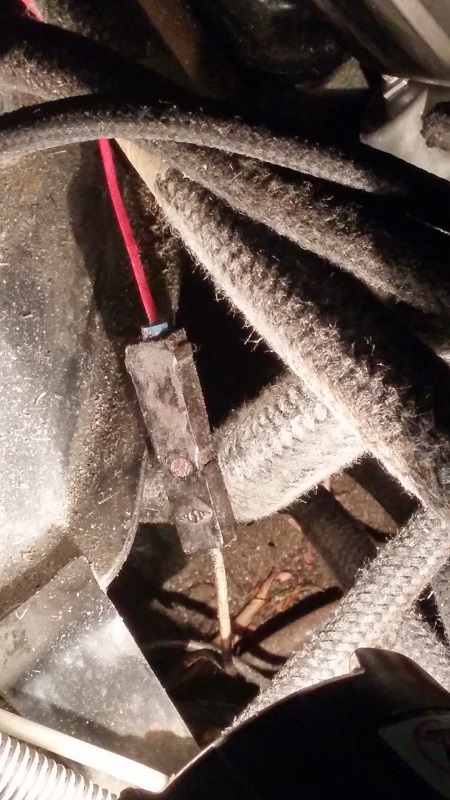
Posted by: Dave_Darling Mar 10 2016, 06:18 PM
Correct, it's just a spade connection.
--DD
Posted by: PlantMan Mar 10 2016, 06:56 PM
I just rebuilt my AAR as it was stuck open too. I PB soaked it too, several times, but ultimately had to crack it open and clean it out that way. After I opened it I realized that it was really rusted open. After some work it broke free.
Yours may come to that too but the whole process can be done in a couple hours. the hardest part is getting the thing open.
Enjoy!
Posted by: rgalla9146 Mar 10 2016, 07:33 PM
That blue collar is a crimp-on replacement connector.
It might not survive removal.
Solder a replacement on there.
Posted by: turk22 Mar 10 2016, 08:04 PM
can I use a battery tender to apply the 12v needed to bench test the AAR, or even a 12v Cordless drill battery?
Posted by: SLITS Mar 10 2016, 08:21 PM
Any 12 VDC source will do, but it has to have enough amperage. I use a battery charger. Red is positive ....... the shell of the AAR is ground.
It get constant 12 VDC as long as the key is on. The red wire on the AAR connects to the white wire in the engine harness.
Posted by: turk22 Mar 10 2016, 09:06 PM
thanks I'll test it that way
Posted by: jack20 Mar 11 2016, 12:17 AM
I had the same problem with mine. I soaked it in wd40 for two days and then hooked it up to a spare motorcycle battery. It worked. I tried a battery tender before hand and it wasn't up to the task. Give it some time to soak and flush well before tearing into it.
Posted by: turk22 Mar 12 2016, 06:01 PM
very successful clean and test of the AAR, after flushing it out multiple times, and letting ist soak, and cycling from the freezer to the bench hooked up to the battery charger, I could watch it go from full open to full closed and back. When closed I verified that it would not pass any air.
Once I re-installed it, I had a much higher cold idle, which is what I was really lacking.
I also had to chase the warm idle a bit, by adjusting the bleed screw, and making sure one of the vacuum lines was tightly sealed.
Chasing idle issues is a blast! If I keep telling myself that, I"ll start to believe it. 
Powered by Invision Power Board (http://www.invisionboard.com)
© Invision Power Services (http://www.invisionpower.com)