Printable Version of Topic
Click here to view this topic in its original format
914World.com _ 914World Garage _ My slow-paced, mundane progress thread
Posted by: RoadGlue Mar 16 2016, 05:23 PM
Welcome to my scattered 1974 1.8 Chrome Yellow project thread.
I purchased the car back in '05'sh. One of the POs had converted it to a well sorted 2.0 D-Jet autocross/street car. It was complete but a bit ratty with a tired motor. Great Koni Sport suspension with a fat solid sway bar and adjustable drop links. Otherwise bone stock.
Built a fresh 2.0 with a 9550 Raby Cam and kept it D-Jet. Ran a DE Event at Thunderhill, a few auto-x's at the Sonoma County airport and otherwise used the car as my DD. During this time, around 2007, early 2008 I picked up a very clean Marathon Blue '74 2.0 from Doug Wright. I ended up putting the new motor from the yellow 914 in the Blue car in 2008 and it's sat in my garage since.
Here it was as of a few weekends ago: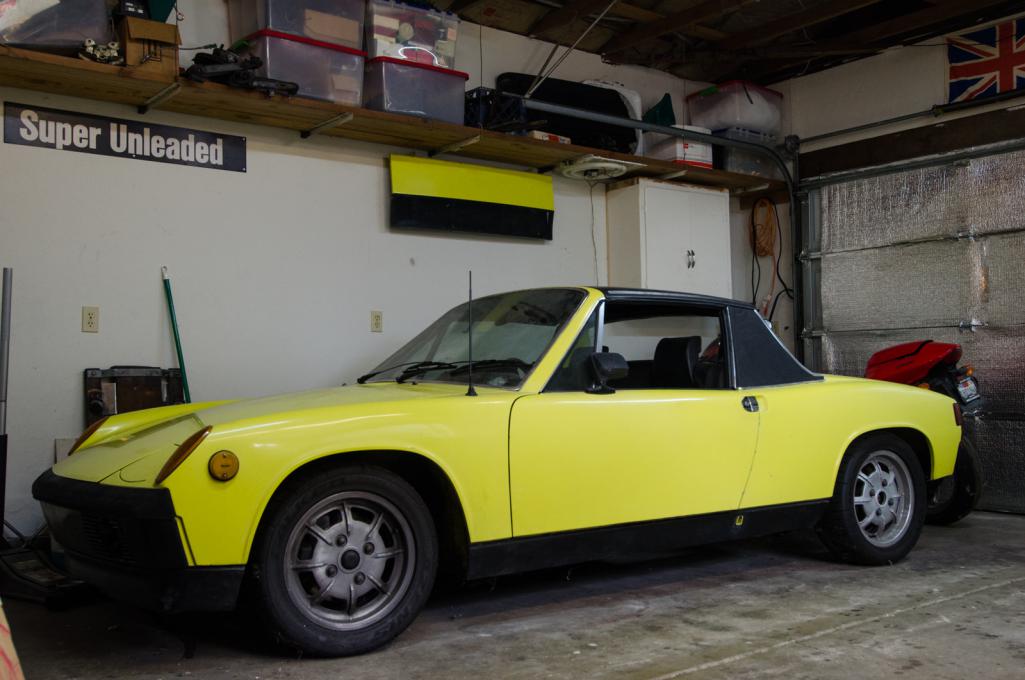
So what's happening?
My friend and machinist is currently building a 1911 from the ground up. Opened up 1.8 heads, rebuilt dual 40 IDFs (thanks George, @thepaintedman here on the World), Elgin cam, etc. I'll post motor specs in a different post.
Purchased Chris's SS tunnel fuel line replacement kit w/ pump. Need install that in the next few weeks.
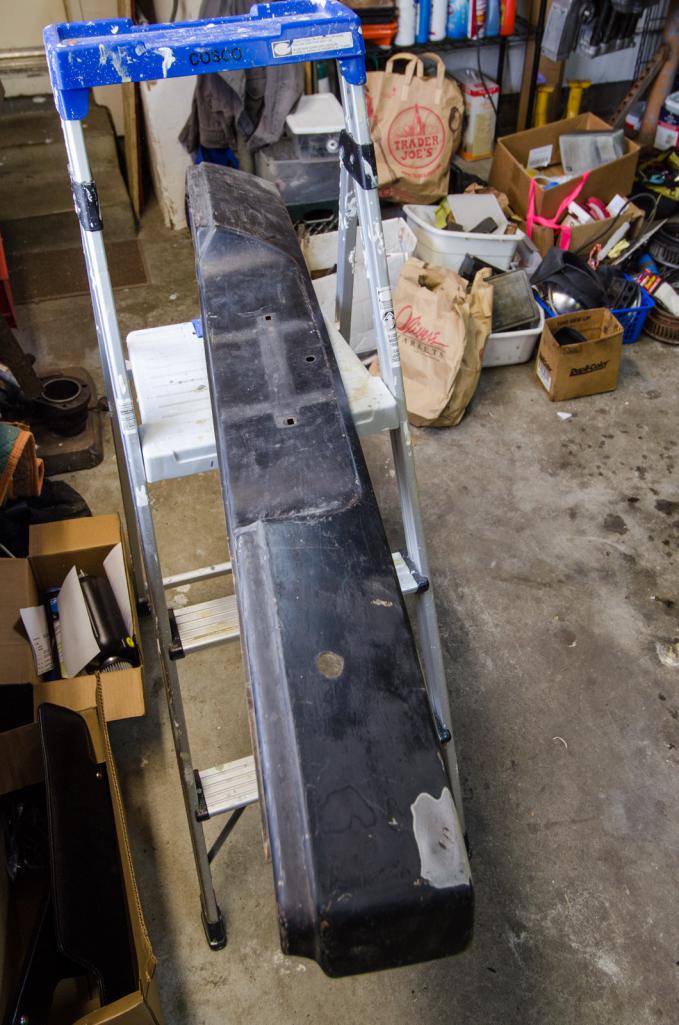
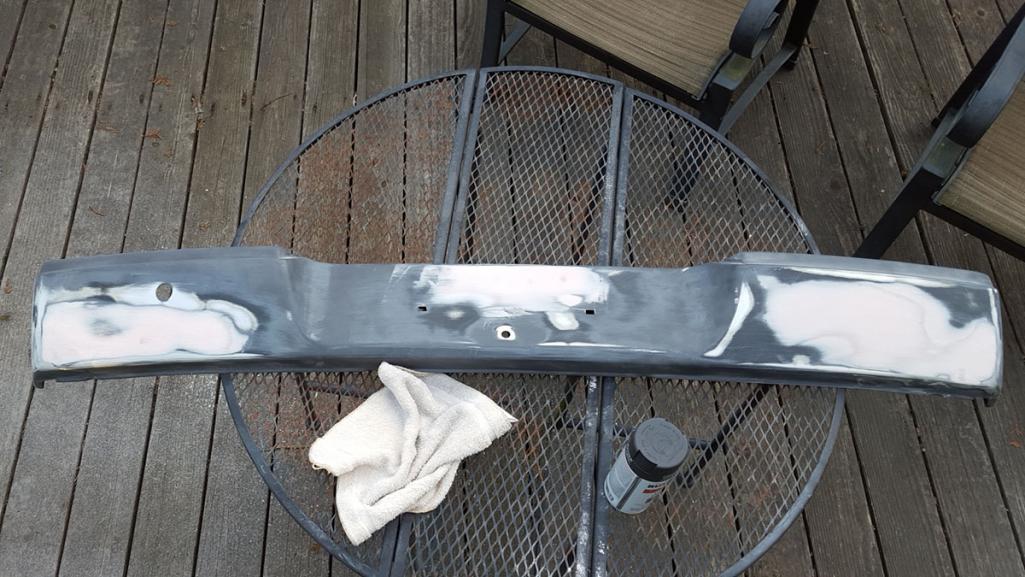
Sourced a rear bumper from GMS and am currently repairing some issues it has and then move onto the front bumper and rocker panels.
I need to go through the brakes.
Should probably check the tank closely for rust issues.
Need to replace the heater pull cables.
Need Mark D's modified speedo drive with the extra o-ring, or source a nosecone that doesn't have a worn out drive hole.
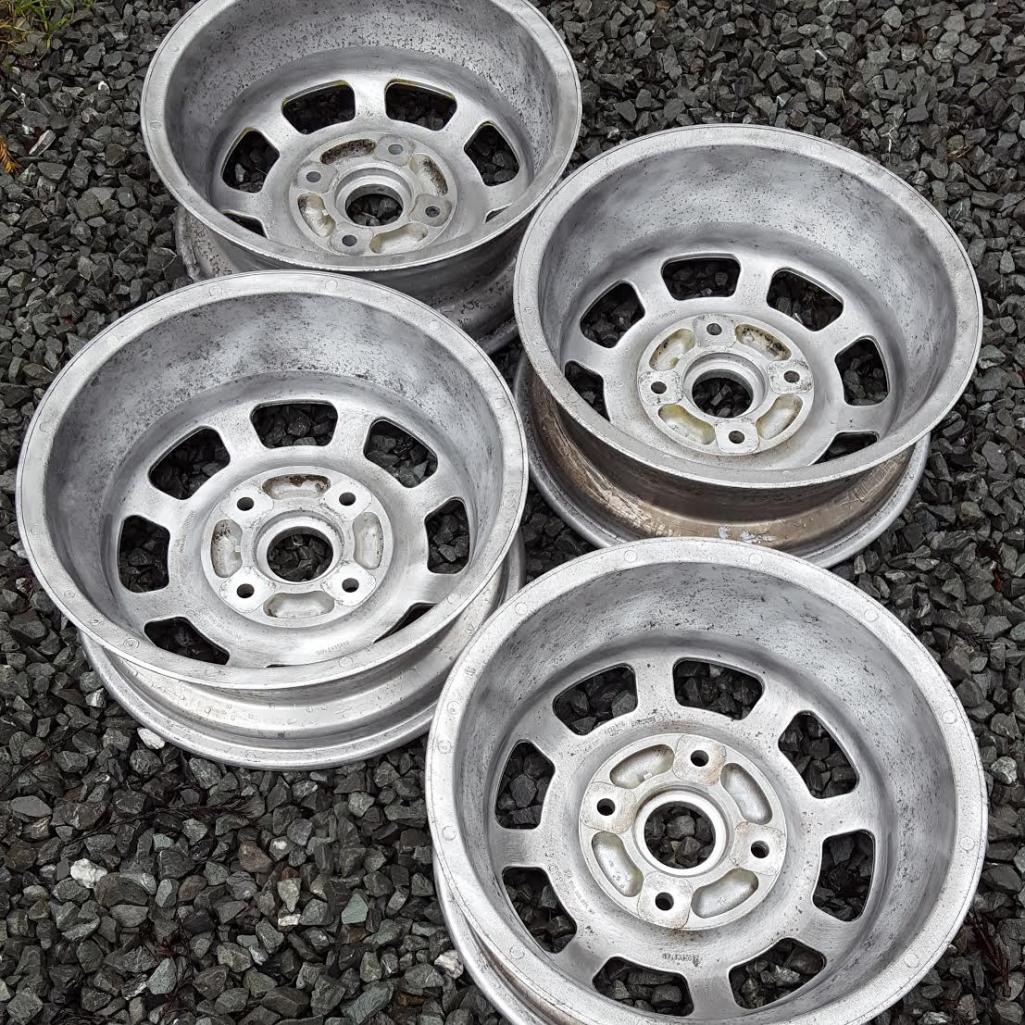
Already purchased rain caps for the carb's as I also purchased Sergio's GT lid clone. Need to strip and paint the Mahles unless I source different wheels.
I have a mostly complete 5-lug setup (including rear hubs and s-calipers), but I'm saving that project for later.
Still reading? I'm sorry.
Anyways, plenty of photos coming and I'll keep this thread updated as I make progress.
Cheers,
Posted by: RoadGlue Mar 16 2016, 05:26 PM
Parts including the tank, HE's, Triad Exhaust, 901, etc etc. 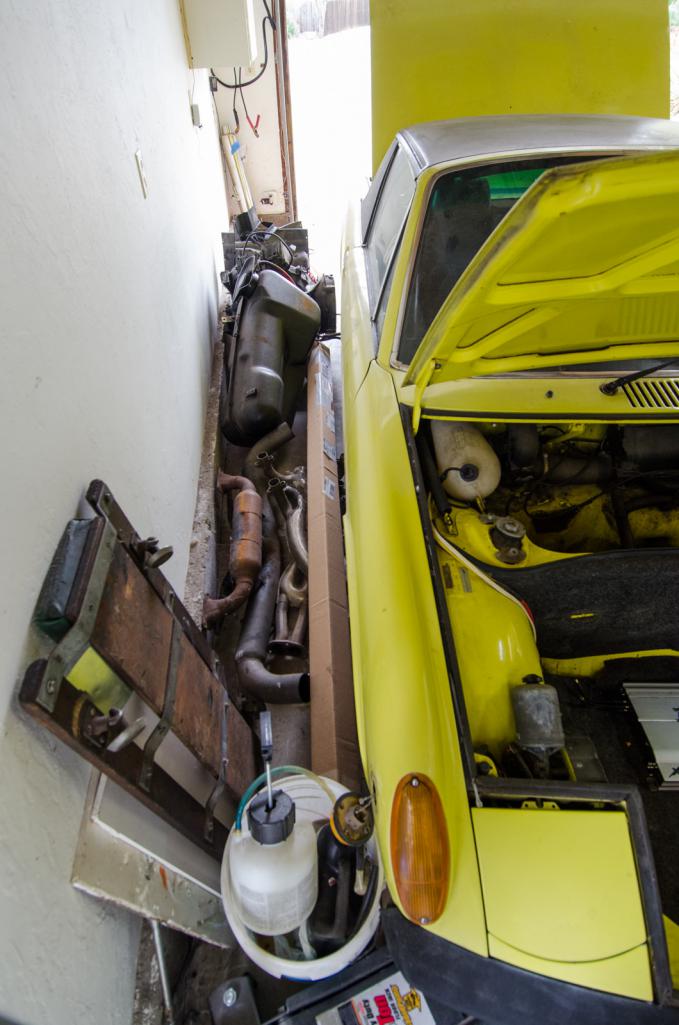
Posted by: RoadGlue Mar 16 2016, 05:27 PM
Already have the clip's from Mark @ 914 rubber to fix that sorry looking side marker light. :-)
Posted by: Coondog Mar 16 2016, 05:29 PM
Looks like a good plan....... 
Posted by: RoadGlue Mar 16 2016, 05:31 PM
Here's the interior. I have a nearly perfect seat that I'll put in place of the driver's seat. I'll swap rails and move the driver's set to the passenger side. 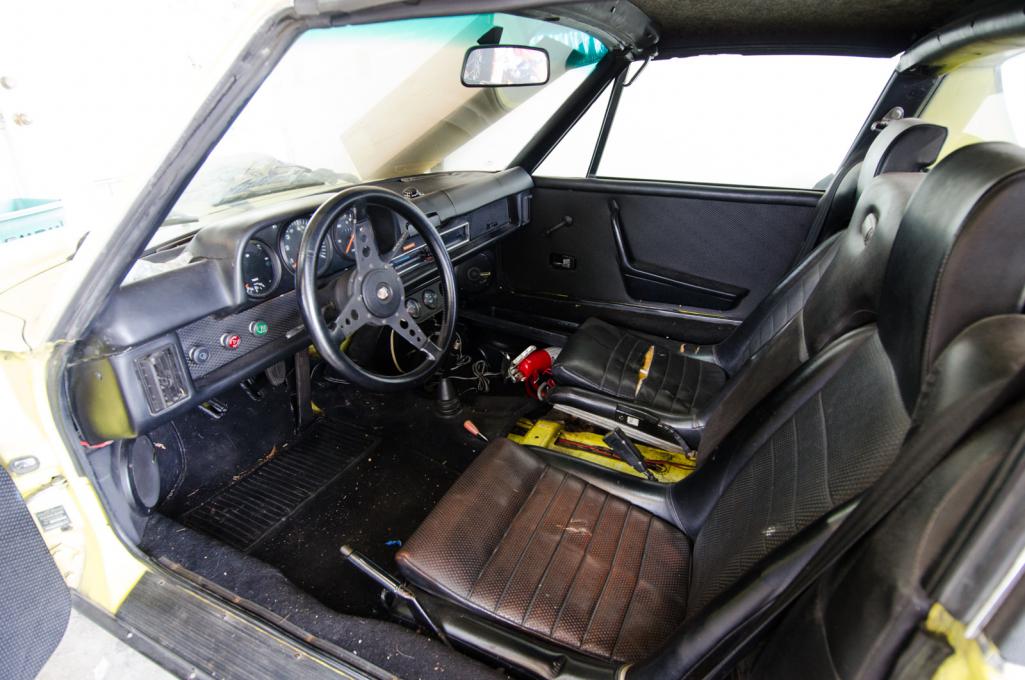
Carpet will be replaced with German weave from Mark @ 914 rubber. Already have his newly rebuilt visors from the group buy.
Posted by: RoadGlue Mar 16 2016, 05:34 PM
Question: What color carpet would look good? I never did care for black. Gray perhaps? I'm interested in your feedback. I'm colorblind and have a hard time making these types of choices.
Posted by: RoadGlue Mar 16 2016, 05:34 PM

Looks like a good plan.......
Now I just need to execute!
Posted by: RoadGlue Mar 16 2016, 05:44 PM
1911 as of a few days ago. My machinist got bronchitis so the motor project stalled for a few weeks. 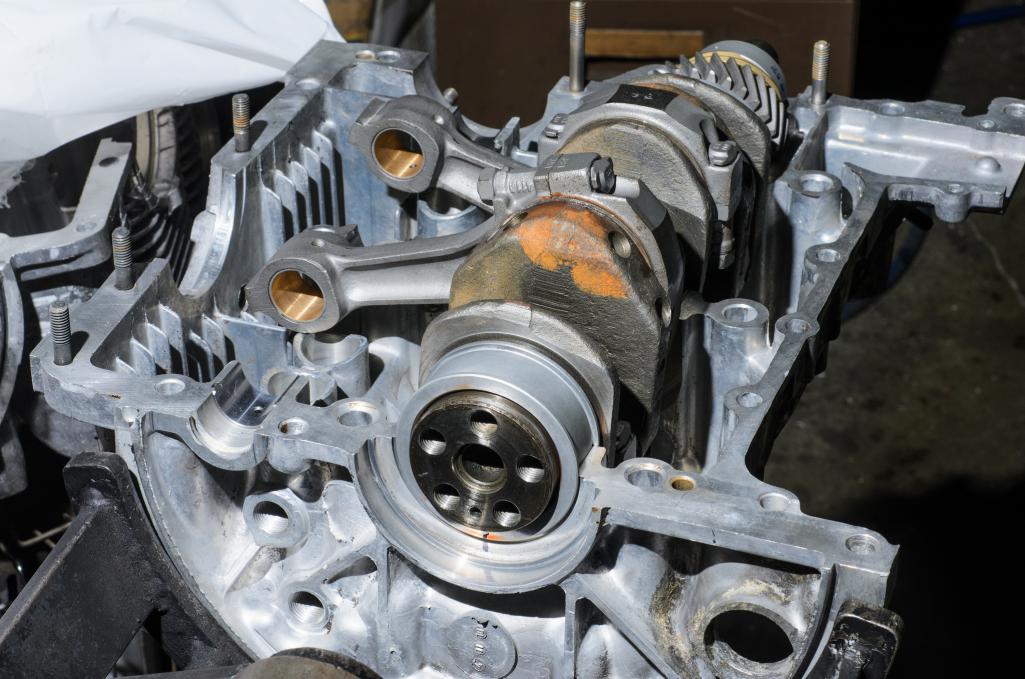
280D/332L/180deg Elgin Cam: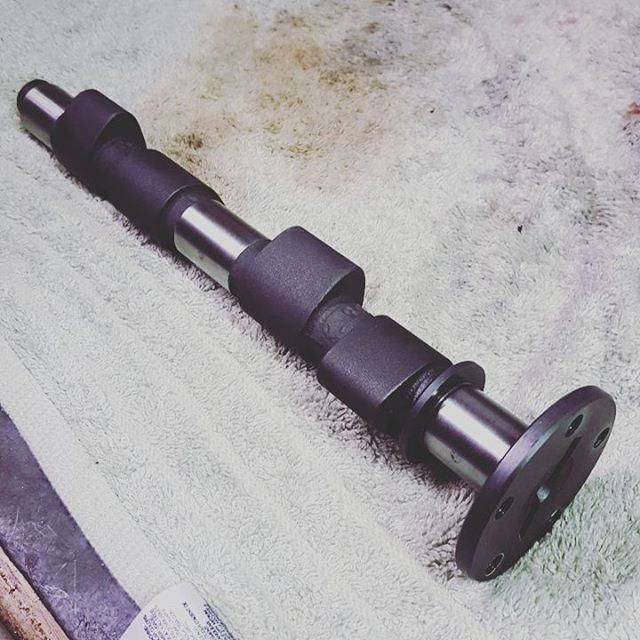
Posted by: r_towle Mar 16 2016, 05:47 PM
so it has sat for 8 years?
I dont feel as bad now....I think you take the lead.
rich
Posted by: RoadGlue Mar 16 2016, 05:48 PM
Rear bumper sourced from IL and it must have come from a rust bucket as two of the rear bolts were snapped in place and poorly drilled out. Thankfully they coaxed out and tapping proved to do the trick. 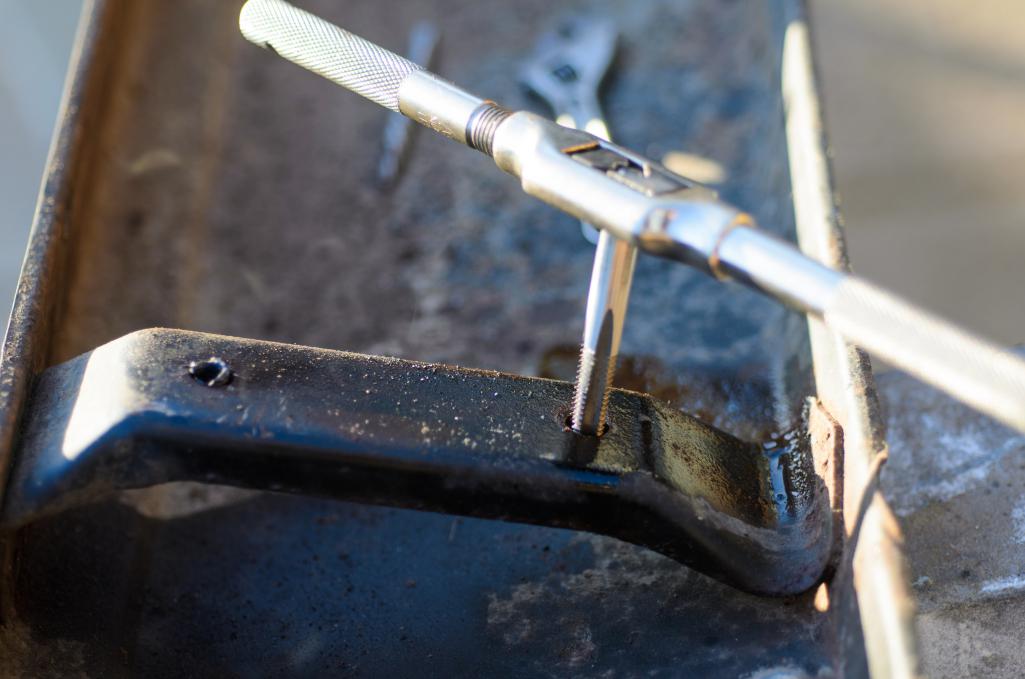

Posted by: RoadGlue Mar 16 2016, 05:49 PM
so it has sat for 8 years?
I dont feel as bad now....I think you take the lead.
rich
Yeah, but I was DD'ing another 914 while it sat up until two or three years ago when I sold that car. ;-)
It took me a while to get the bug again. Now I'm dreaming about the car almost nightly. Really bizarre.
You just have to get out there and start on something. See where that leads.
Good luck!
Posted by: r_towle Mar 16 2016, 05:53 PM
I am driving a 911 cab...that is what makes me do something else.
HoneyDoo list...
Boat....
lay on the couch...
Rich
Posted by: RoadGlue Mar 16 2016, 05:55 PM
One annoyance... I can't find the f'ing ignition key so the wheel is locked. The wheels are turned so I can push/pull the car in/out of the garage, but that's not going to work for long. I have what I need to replace the ign switch and key, but I really would prefer to just find the key. I feel like I've looked everywhere, but it didn't just walk off.
Posted by: RoadGlue Mar 16 2016, 05:58 PM
I am driving a 911 cab...that is what makes me do something else.
HoneyDoo list...
Boat....
lay on the couch...
Rich
Yeah! I do hear 'ya. For me it's been photography, HoneyDoo as we got married just three years ago, motorcycle, video games, work, home projects, petting the cats, eating, sleeping... Prioritizing is a hard thing to do.
While I felt a certain about of inner guilt about the 914 sitting around I also knew I'd know when the timing was right. I think that time simply doesn't happen for a lot of people.
Posted by: RoadGlue Mar 22 2016, 02:40 PM
My friend and machinist is back from the dead after getting bronchitis and is back to work on the motor. Cam's in: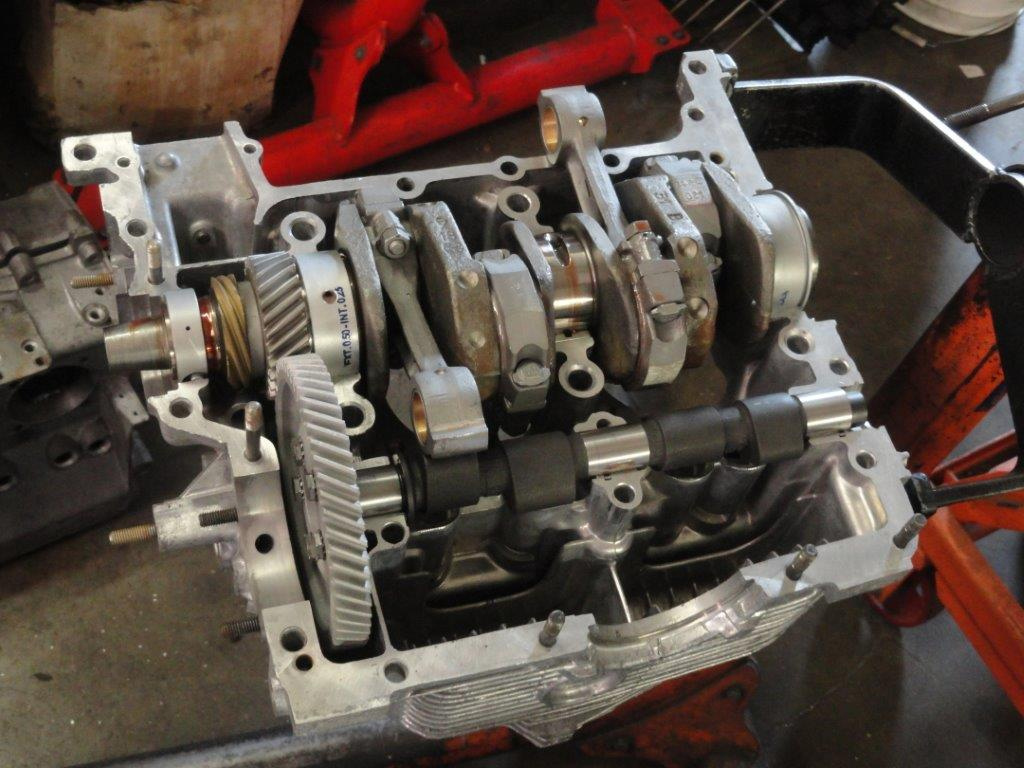
Posted by: RoadGlue Mar 22 2016, 02:50 PM
One more: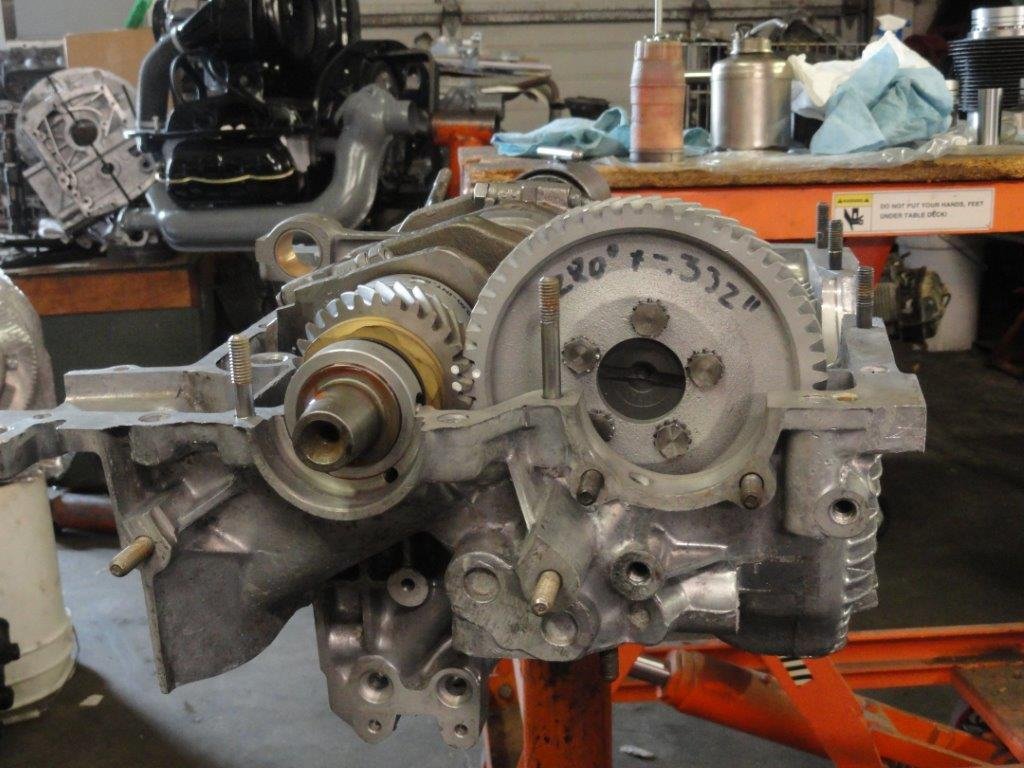
Posted by: r_towle Mar 22 2016, 02:57 PM
there is a guy who shows up at Hershey and makes keys for Porsches.
He has all th eight blanks.
I bet he knows how to make you a key that will work based upon some number, possibly the vin, or something else.
Hopefully one of the guys who remembers his name will chime in, and you can give him a call.
Did you look under the seat, glove box, trunk, under center console?
After my last fiasco of loosing a key, which I did eventually find, I went out and had spares of everything made, and I put ALL of them in a special place....and use the daily keys...
Now I know I have q backup.
Posted by: RoadGlue Mar 22 2016, 04:16 PM
there is a guy who shows up at Hershey and makes keys for Porsches.
He has all th eight blanks.
I bet he knows how to make you a key that will work based upon some number, possibly the vin, or something else.
Hopefully one of the guys who remembers his name will chime in, and you can give him a call.
Did you look under the seat, glove box, trunk, under center console?
After my last fiasco of loosing a key, which I did eventually find, I went out and had spares of everything made, and I put ALL of them in a special place....and use the daily keys...
Now I know I have q backup.
The key had been changed to a VW beetle setup sometime ago, so I don't think there's an easy solution.
I'm pretty sure I have/had a spare too. Sigh. I'm not the most organized person.
I'll keep digging. It's probably in my office/studio.
Posted by: r_towle Mar 22 2016, 04:21 PM
If you have a dent puller you can insert a deep threaded sheet metal screw into the lack cylinder and rip it out.....not pretty but it does work.
Obviously you will need to redo everything once that is completed.
Posted by: rhodyguy Mar 23 2016, 07:32 AM
Look into a mobile locksmith. They use softer metal blank, wiggle it in the ignition which leaves indentations that allow the correct key to be cut. Then you can at least unlock the wheel. I had to have this done when my car was boosted from the garage and recovered with no key. Expect the process to run a C-note.
Posted by: Mueller Mar 23 2016, 08:12 AM
Hi Randy, great to see you working on the 914 again, hopefully this summer we can both be driving 914s again for a Roadglue meet!
Posted by: RoadGlue Mar 23 2016, 09:38 AM
Look into a mobile locksmith. They use softer metal blank, wiggle it in the ignition which leaves indentations that allow the correct key to be cut. Then you can at least unlock the wheel. I had to have this done when my car was boosted from the garage and recovered with no key. Expect the process to run a C-note.
Thanks! Hopefully I can find the key, but this is great to know as it may come down to having to do something like this.
Posted by: RoadGlue Mar 23 2016, 09:39 AM
Hi Randy, great to see you working on the 914 again, hopefully this summer we can both be driving 914s again for a Roadglue meet!
I'd like nothing more Mike! Just like old times, except that we're older. :-)
Posted by: RoadGlue Mar 23 2016, 09:41 AM
Listed two cams for sale in the classifieds this morning as I was dicking around with other ideas before I settled on the current Elgin cam. Hurry and get yours before they're sold out!
Posted by: ThePaintedMan Mar 23 2016, 09:56 AM
 So happy for you Randy! This car is gonna be a ton of fun when you're done.
Posted by: RoadGlue Mar 23 2016, 09:57 AM
Thanks George! Can't wait. It's been much too long.
Posted by: RoadGlue Mar 28 2016, 12:27 PM
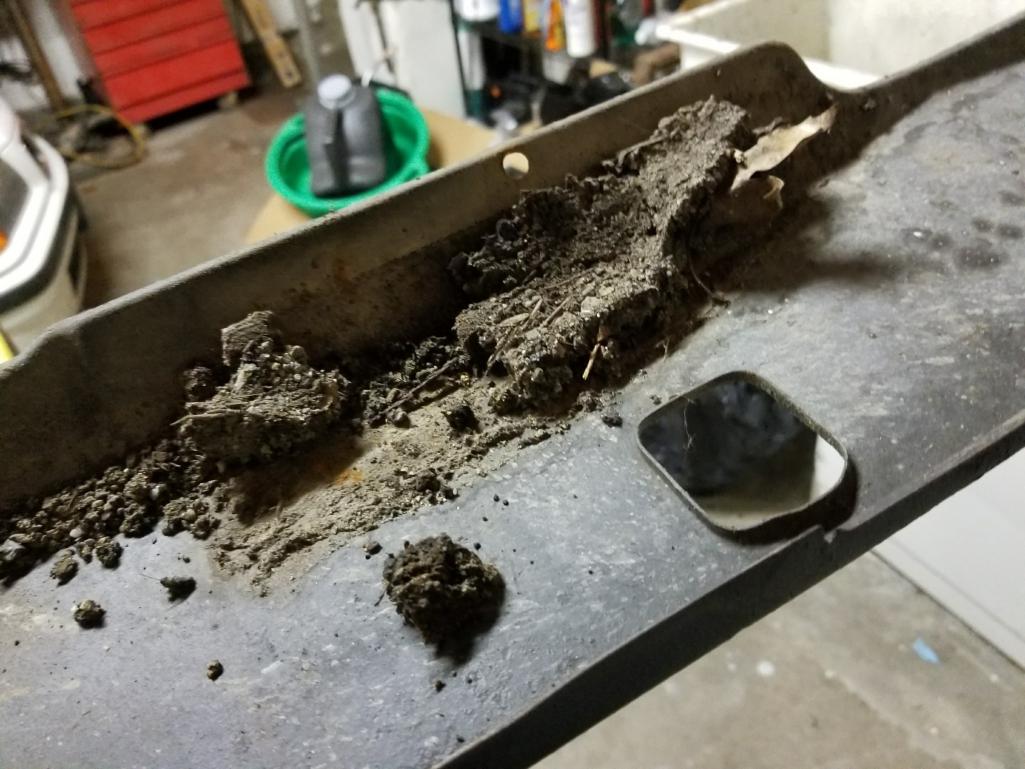
Spent a portion of Easter Sunday in the garage cleaning the fuel tank area and installing CFR's SS fuel line.
Dirty!
Suck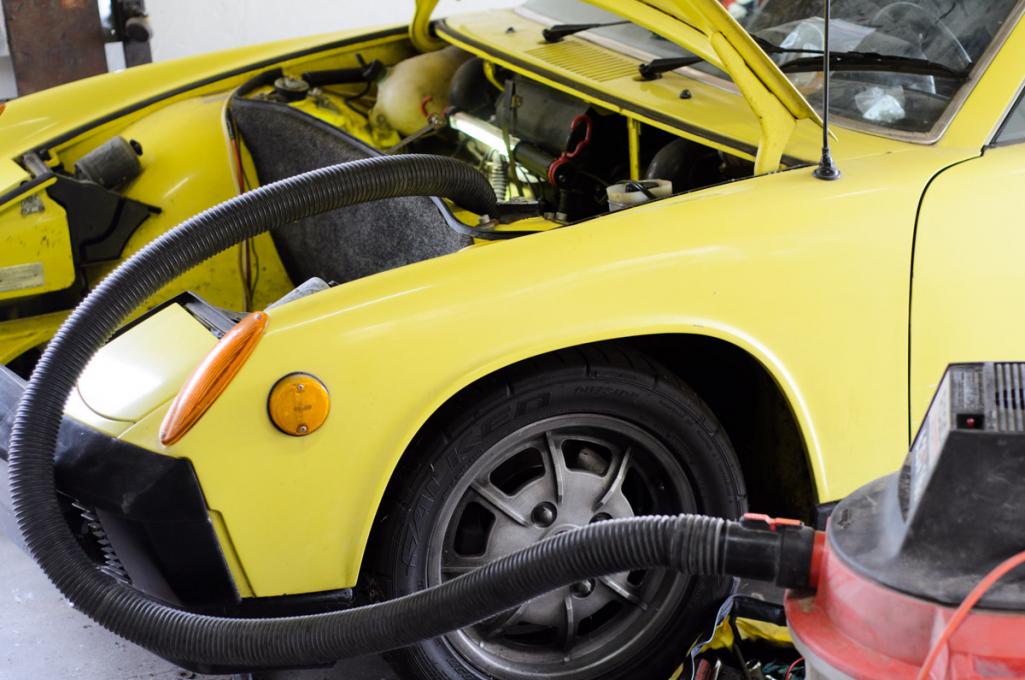
Clean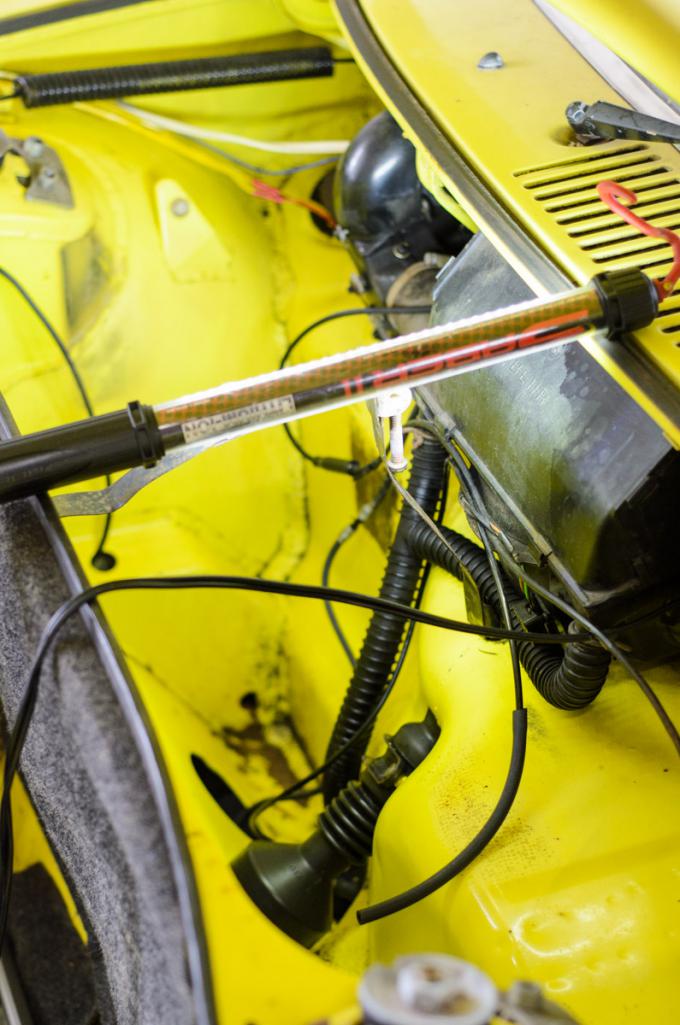
Kit: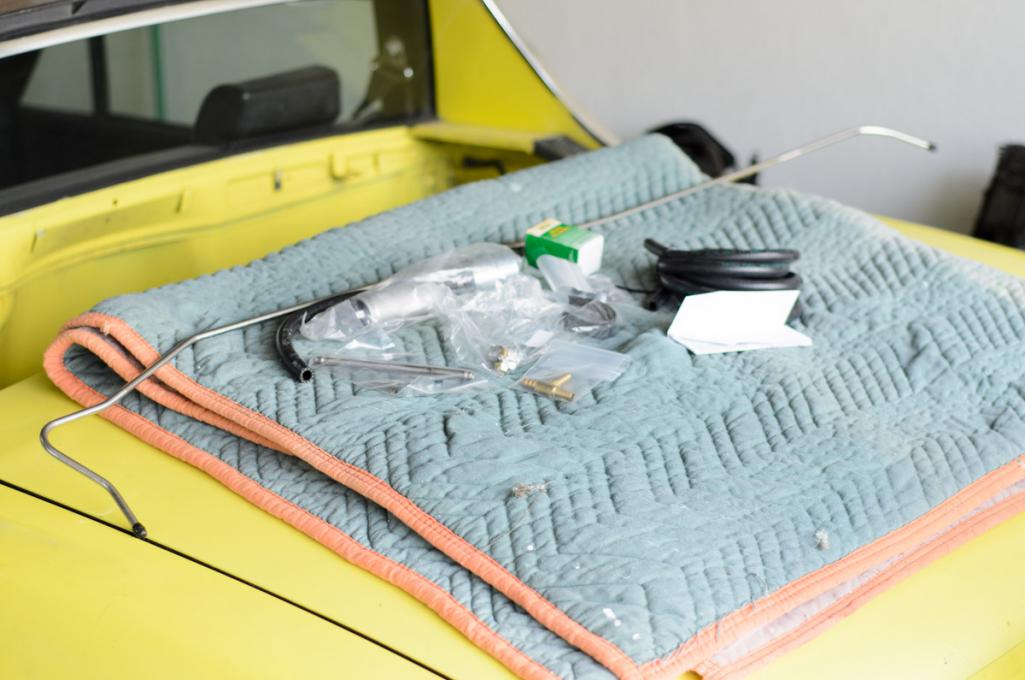
Progress: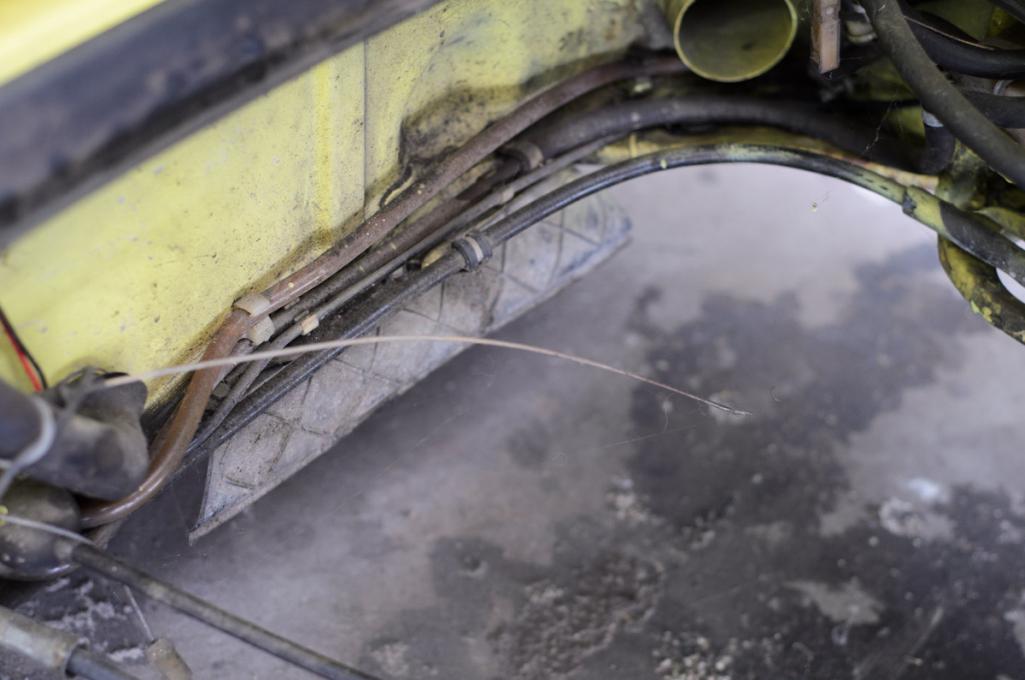
Posted by: RoadGlue Mar 28 2016, 12:29 PM
Not pleased with the amount of rust I've found in the center tunnel. Is there anyway I can treat this now so that it doesn't worsen without having to pull the wiring harness?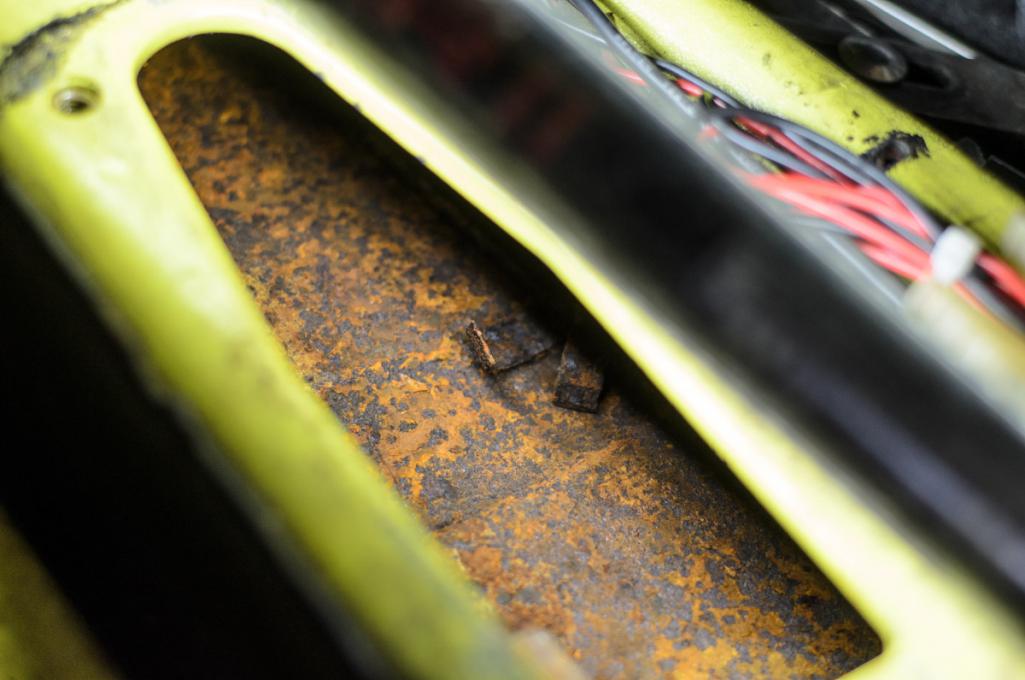
Posted by: McMark Mar 28 2016, 02:31 PM
Keep water out. Without moisture, the rust will stay just like that.
Posted by: r_towle Mar 28 2016, 02:39 PM
go to Eastwood and get the rust conversion stuff, with the spray wand (long one)
Then you can spray in the converter, let that sit for a while.
Once that is done, I would personally spray in a top coat of whatever you want...
Rich
Posted by: RoadGlue Mar 28 2016, 03:03 PM
Keep water out. Without moisture, the rust will stay just like that.
Wondering how water got in originally. Maybe have been a DPO thing. Car's been in the garage almost the entire time I've had it. Hmmm..
Thanks!
Posted by: RoadGlue Mar 28 2016, 03:05 PM
go to Eastwood and get the rust conversion stuff, with the spray wand (long one)
Then you can spray in the converter, let that sit for a while.
Once that is done, I would personally spray in a top coat of whatever you want...
Rich
Good idea. Have no idea how I'd get a topcoat on though. Wonder if the conversion products would be hard on the wiring as it's going to come into contact with whatever I try to spray in there.

Posted by: RoadGlue Mar 28 2016, 03:41 PM
This looks like it might work for the center tunnel:
http://www.eastwood.com/internal-frame-coating-w-spray-nozzle.html
Posted by: r_towle Mar 28 2016, 08:27 PM
Use a similar spray want to blow paint in there.
I hav never seen a tunnel that was not rusted.
Posted by: RoadGlue Mar 29 2016, 09:39 AM
Use a similar spray want to blow paint in there.
I hav never seen a tunnel that was not rusted.
Thanks for your help Rich.
I'll order that product. I think I'll wrap/protect the exposed areas of the harness the best I can and all will be fine. I'm thinking glow in the dark paint for a top coat! :-) Ok, maybe just bright white.

Posted by: RoadGlue Mar 29 2016, 12:23 PM
It's here, and it's beautiful. 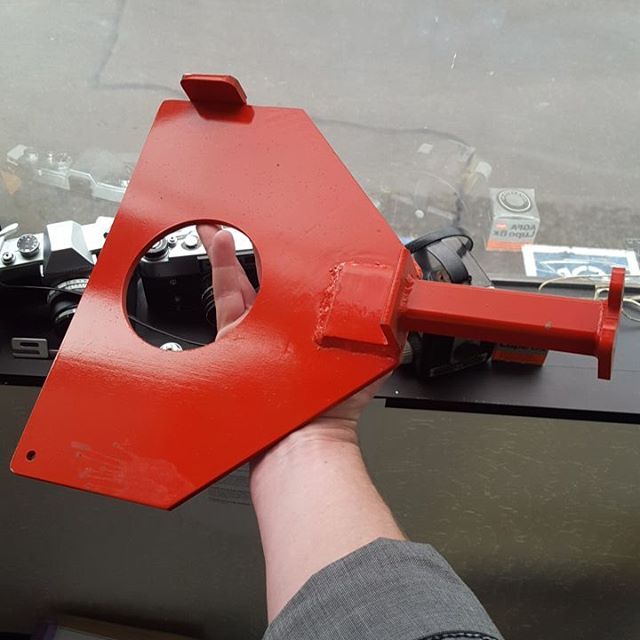
Posted by: RoadGlue Apr 4 2016, 12:13 PM
Question:
What's a good inline fuel pressure gauge that I can mount in the engine compartment? 0-10 lbs range or thereabouts for a dual 40 IDF system.
In other news, spent many hours degressing engine tin, cooling shroud, body work on bumpers, killing rust, painting engine bits.
Stuff's coming together. Feels great!
Posted by: rhodyguy Apr 4 2016, 01:21 PM
If you use Mar-Hyde to convert, no top coat required or needed.
Posted by: RoadGlue Apr 4 2016, 01:22 PM
If you use Mar-Hyde to convert, no top coat required or needed.
Thanks, but I've already purchased the Eastwood product. ;-)
Posted by: gms Apr 4 2016, 04:07 PM
so it has sat for 8 years?
I dont feel as bad now....I think you take the lead.
rich
Yeah, but I was DD'ing another 914 while it sat up until two or three years ago when I sold that car. ;-)
It took me a while to get the bug again. Now I'm dreaming about the car almost nightly. Really bizarre.
You just have to get out there and start on something. See where that leads.
Good luck!
Is that when we did the paint job in the engine compartment
wow that is 8 years ago now already isn't it
Posted by: RoadGlue Apr 4 2016, 04:17 PM
Is that when we did the paint job in the engine compartment
wow that is 8 years ago now already isn't it
Yeah, our handy work lives on! I half thought about repainting the engine bay, but it's good enough for now. I really need to have the sheet metal replaced behind the passenger seat as it has a few holes still (they were there eight years ago) from the the firewall pad.
Learning to do my own body work too, but no immediate plans to paint the car.
You'll have to come back out and not almost crash it again on the freeway in the middle of the night. :-) (It wasn't your fault!)
Posted by: RoadGlue Apr 5 2016, 02:26 PM
Selling my Triad exhaust or looking for a trade (plus maybe a few bucks) for a used Bursch 2.0 exhaust. I'd like to chop the stock Bursch muffler and have an exhaust shop attach something a bit rasper.
Ad is here:
http://www.914world.com/bbs2/index.php?act=ST&f=18&t=281711&st=0#entry2326385
Posted by: RoadGlue Apr 8 2016, 01:19 PM
Just a quick update.
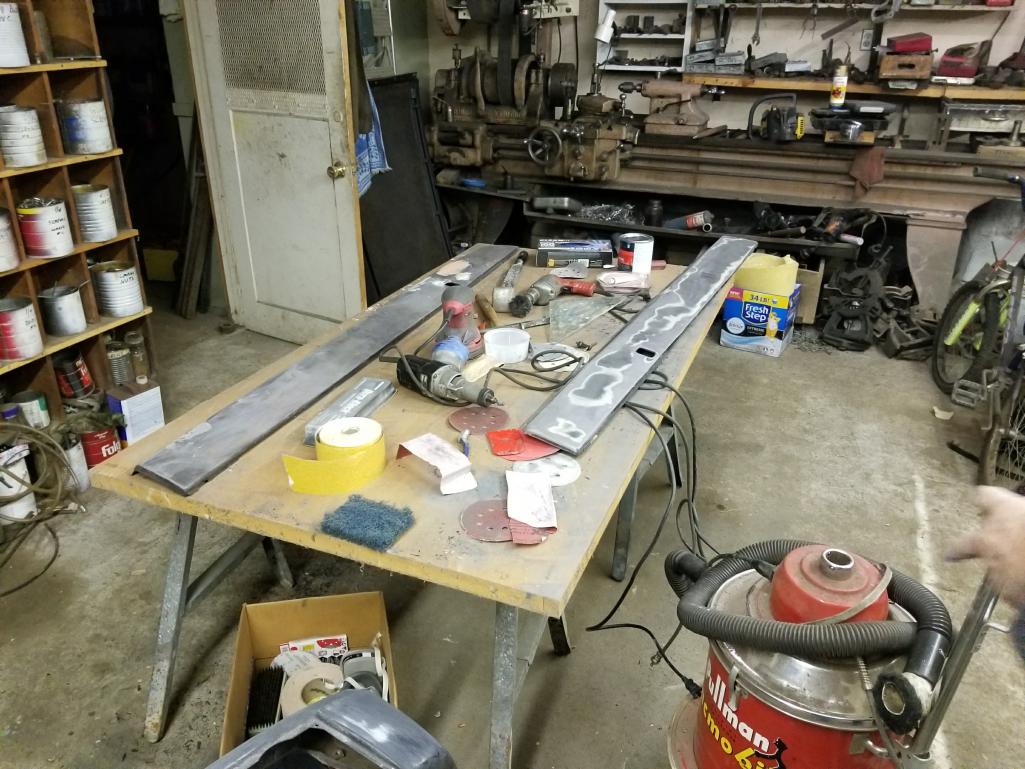
Lots of blasting yesterday (not everything is pictured).
Still working on the bumpers, but they're further along than what's pictured now. ;-)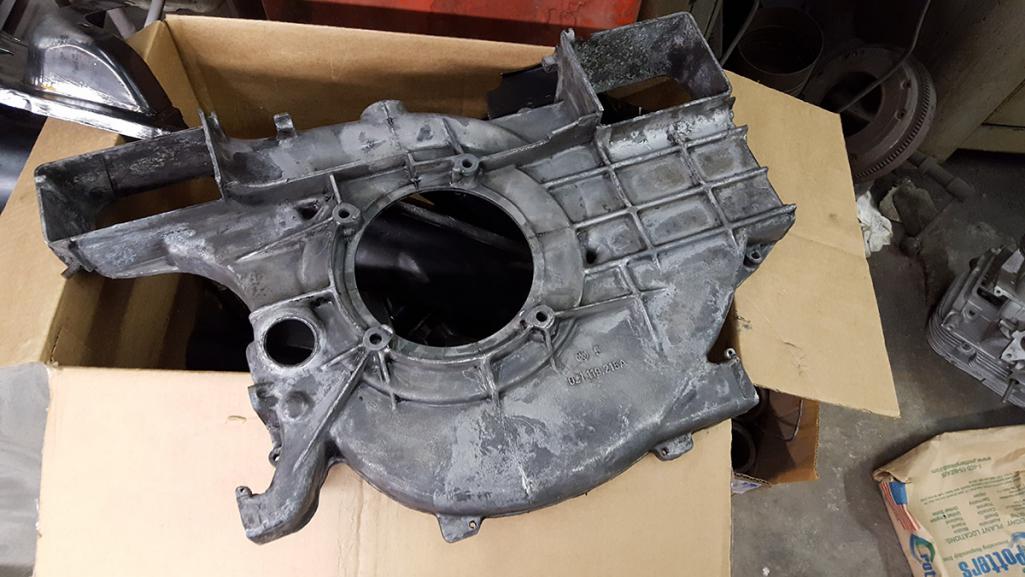
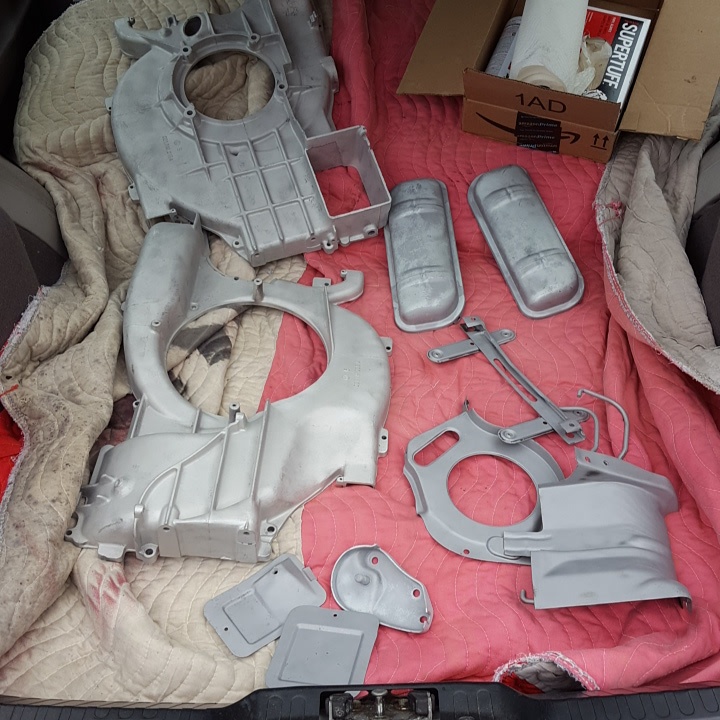
Posted by: RoadGlue Apr 8 2016, 01:20 PM
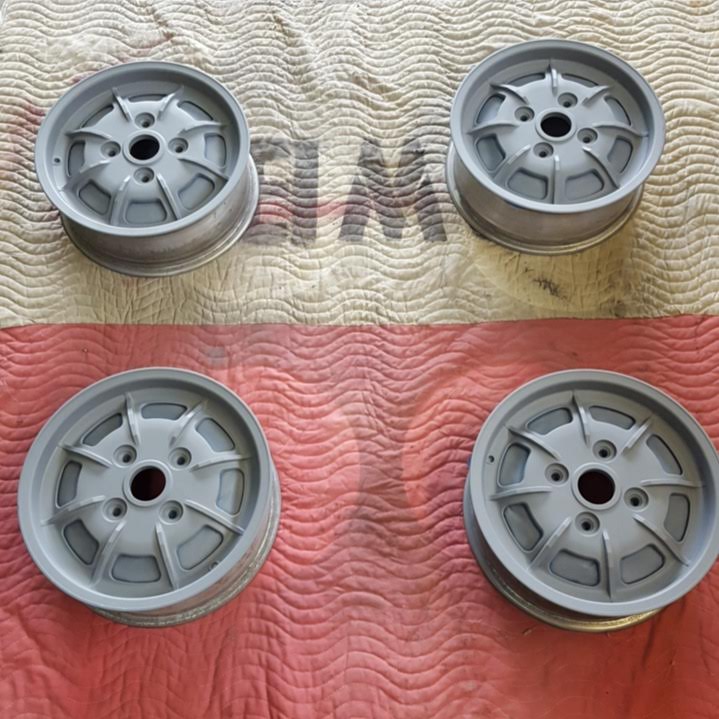
Have zinc phosphate primer w/ silver wheel paint for the cooling shroud. Should be a-okay. All the sheet metal will be headed out for PC soon.
Posted by: RoadGlue Apr 11 2016, 01:12 PM
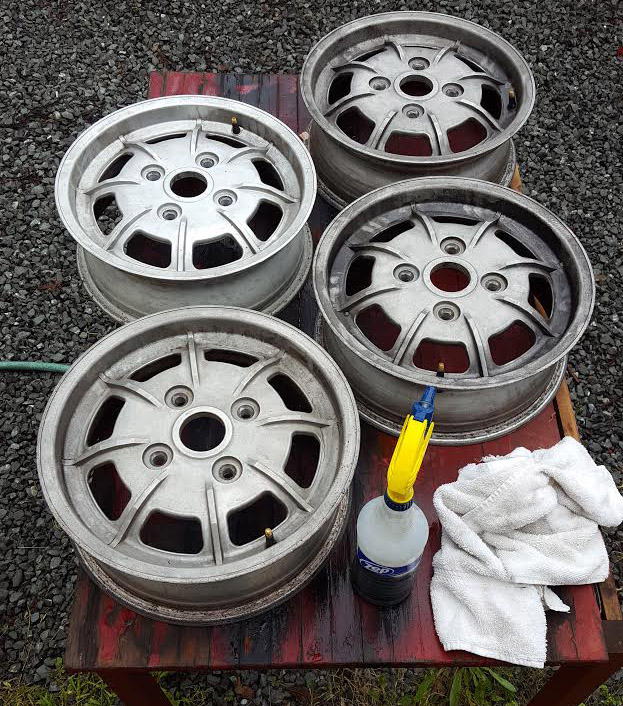
Cleaned up and refinished the 4-Lug Mahles this weekend. I need to take a better final shot. Turned out pretty good though I didn't take care of any of the scratches. They'll look great from a few feet back, which is all I'm going for.
I need to take a conical wire brush on a drill and strip the paint carefully away from the lug holes. I blanked on taping them. 

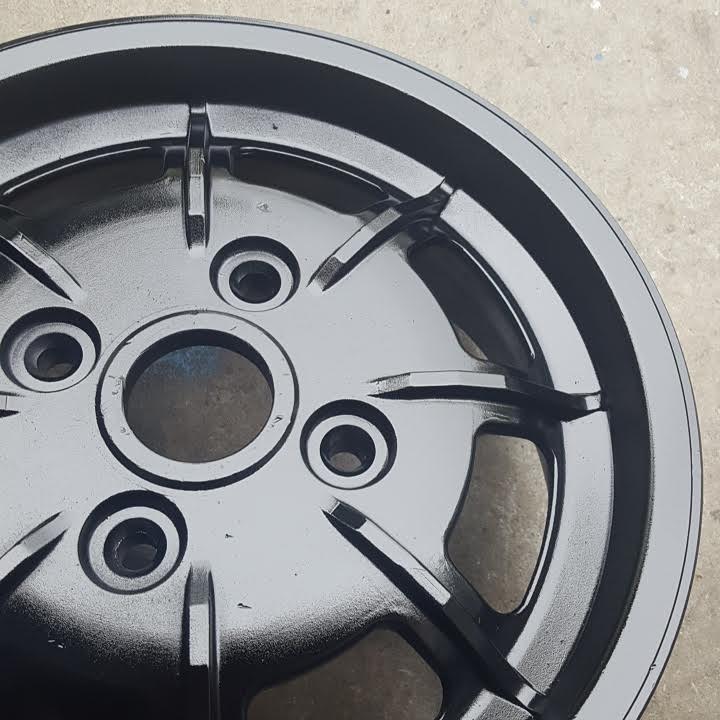
Posted by: ThePaintedMan Apr 11 2016, 06:41 PM
Bless you Randy for stripping those wheels. I HATE using aircraft stripper, especially on the nooks and crannies of wheels.
Looking good dood!
Posted by: r_towle Apr 11 2016, 06:42 PM
How does your back feel?
Lots of stripping, nice job.
Posted by: Krieger Apr 11 2016, 07:51 PM
Looking good! 
Posted by: RoadGlue Apr 11 2016, 10:34 PM
Bless you Randy for stripping those wheels. I HATE using aircraft stripper, especially on the nooks and crannies of wheels.
Looking good dood!
Luckily only one wheel was painted. Nasty stuff! Took three applications to get it loose enough to scrape/blast off.
The Mahles are pretty straight forward though and I didn't do any masking on the face. :-)
Posted by: RoadGlue Apr 11 2016, 10:36 PM
How does your back feel?
Lots of stripping, nice job.
I sit in front of a computer waaaay too much. So... Es ist die gute Art von Schmerzen!
Posted by: RoadGlue Apr 11 2016, 10:39 PM
Looking good!
Hey Andy!
We should get the locals together for a beer soon. There's four of us that are in the Santa Rosa / RP / Windsor areas.
It's not looking good compared to your cars, but thanks! Just trying to spiff it up a little until I have the means to properly paint it. Getting it mechanically sound and undoing some of my previous shortcuts is top priority.
Hoping Soren will have the motor done soon. Maybe in a few weeks?
Posted by: RoadGlue Apr 11 2016, 10:43 PM
Shout out to Mark Whitesell (914rubber.com) for making parts so many of us need.
To Garold Shaffer too for being my go-to guy for used parts that I'm missing.
What a great community. You guys make me sappy.
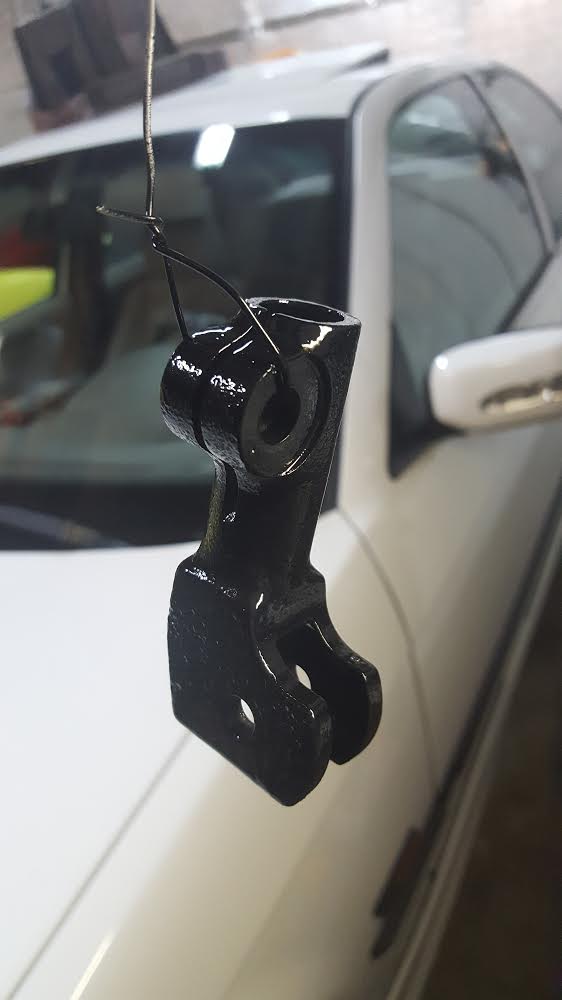
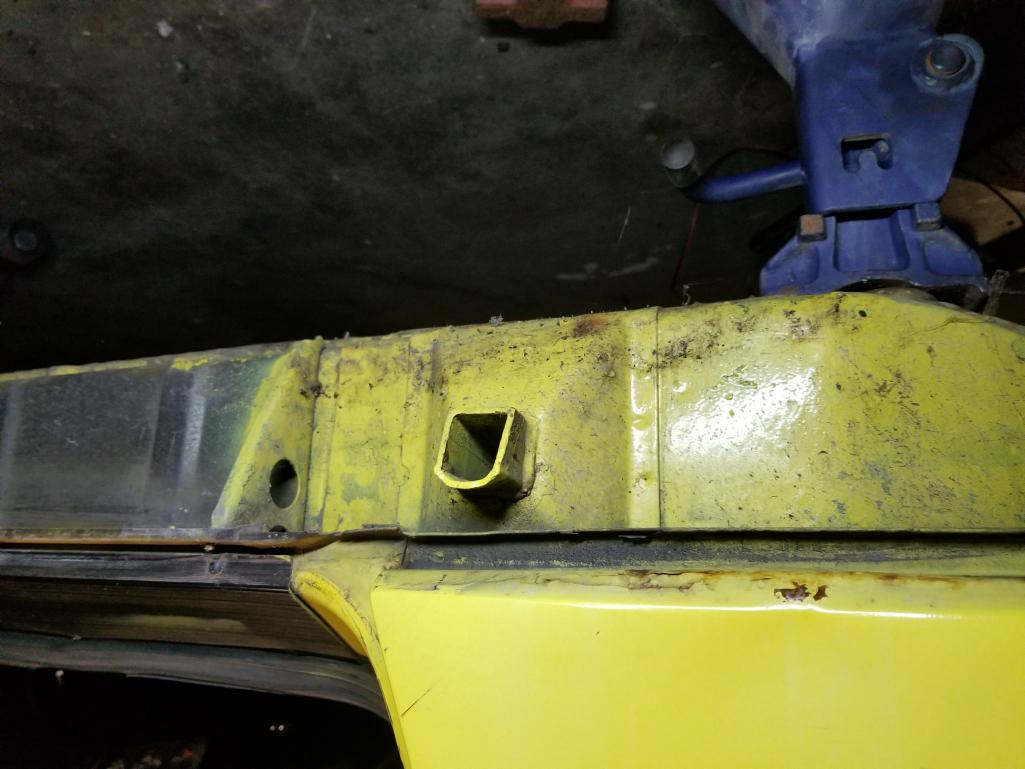
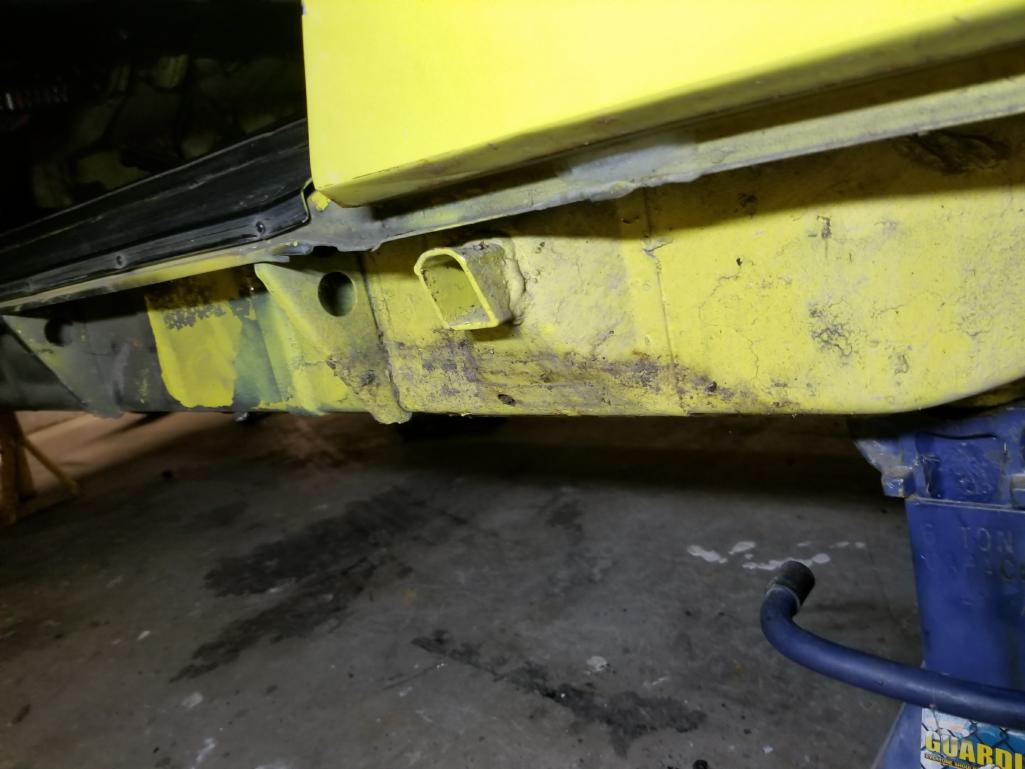
Posted by: RoadGlue Apr 12 2016, 11:56 AM
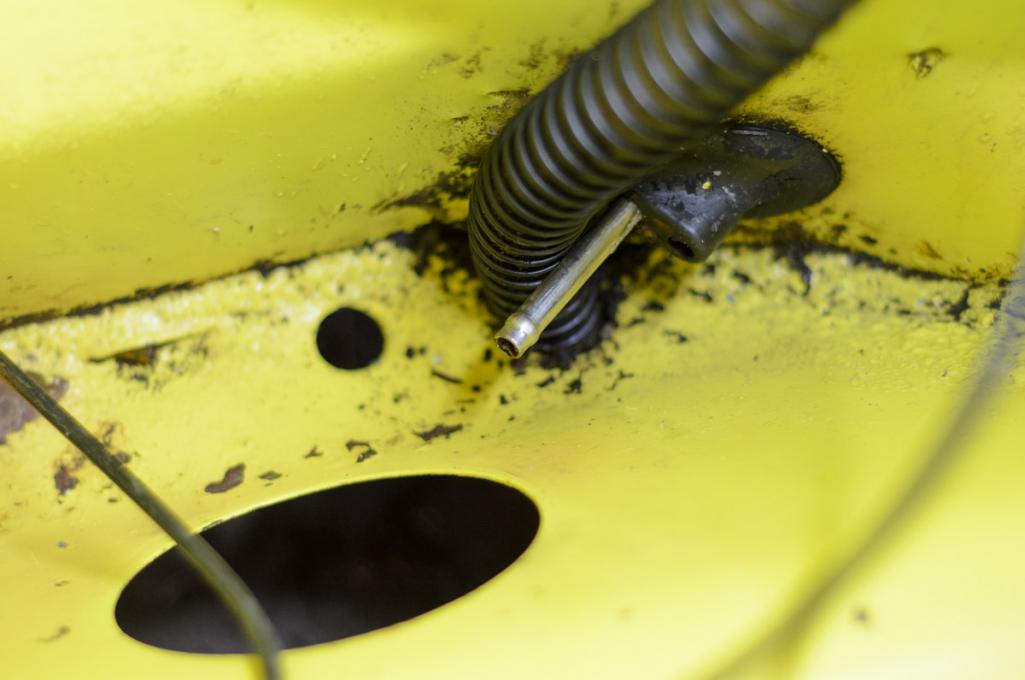
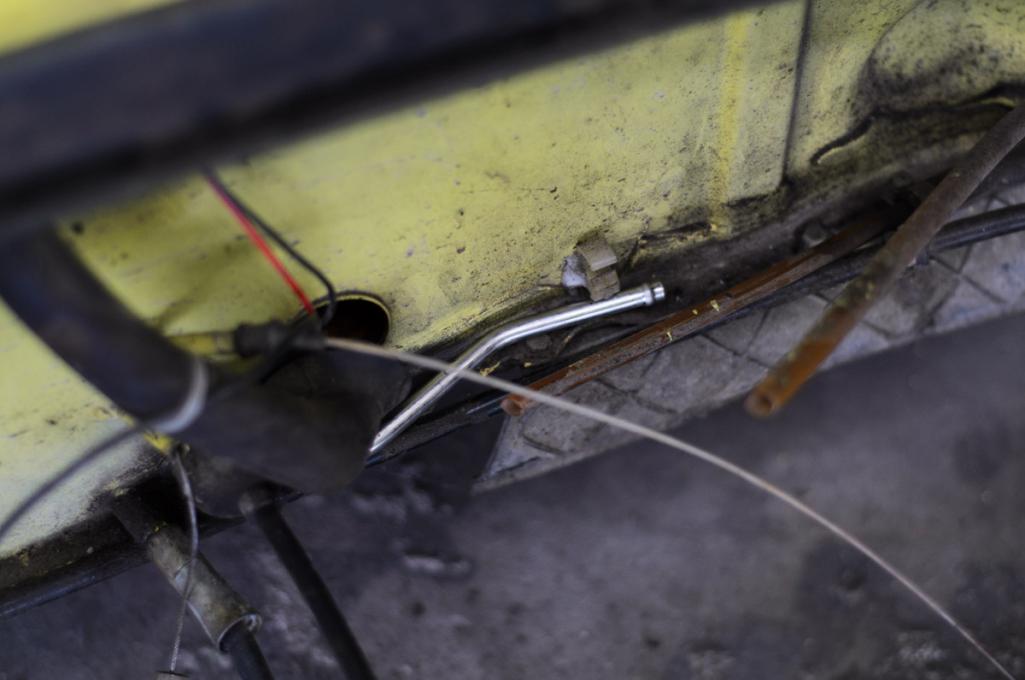
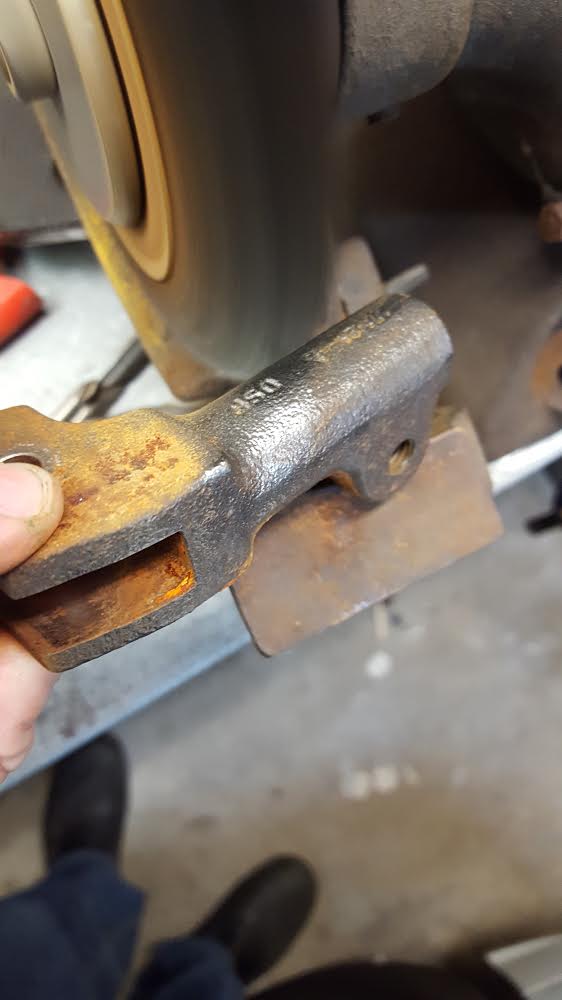
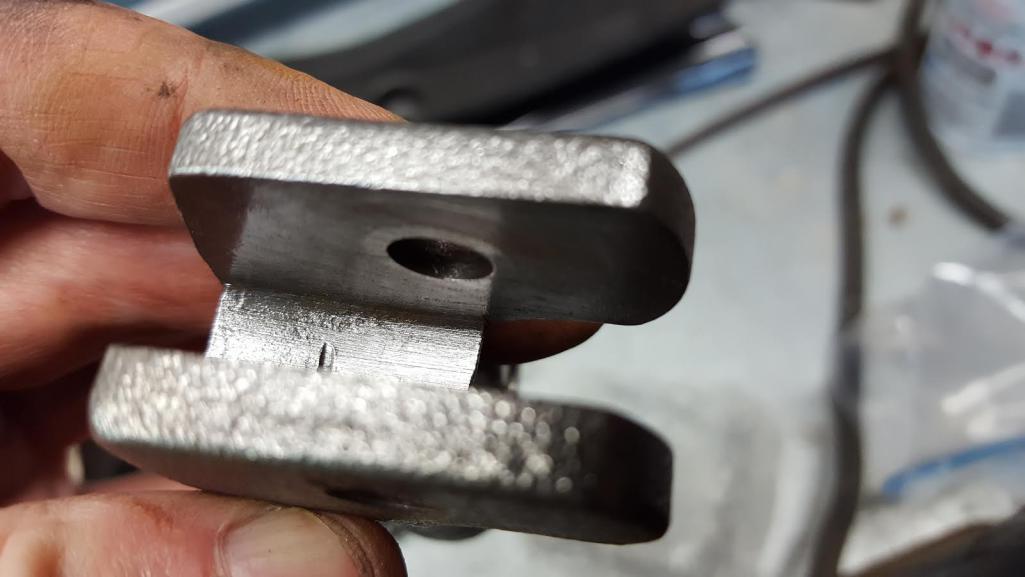
I'm going to have the taste of ground up rust in my mouth through the majority of this project.
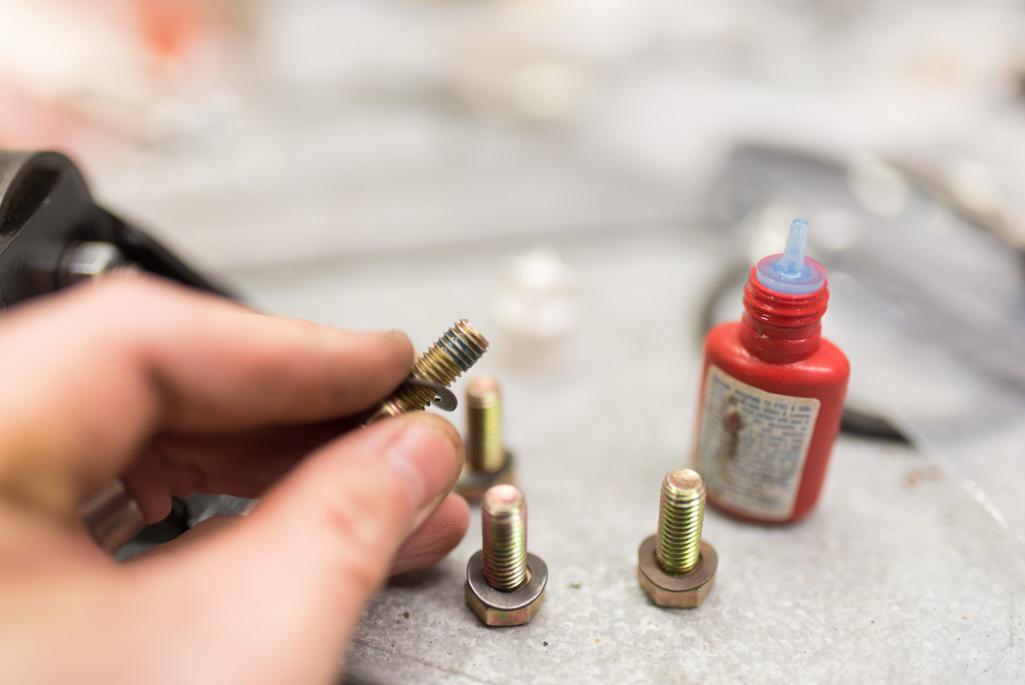
Just a little clean up project last night. Used Metal Prep before sleeping and then primed and put a top coat on before work this AM.
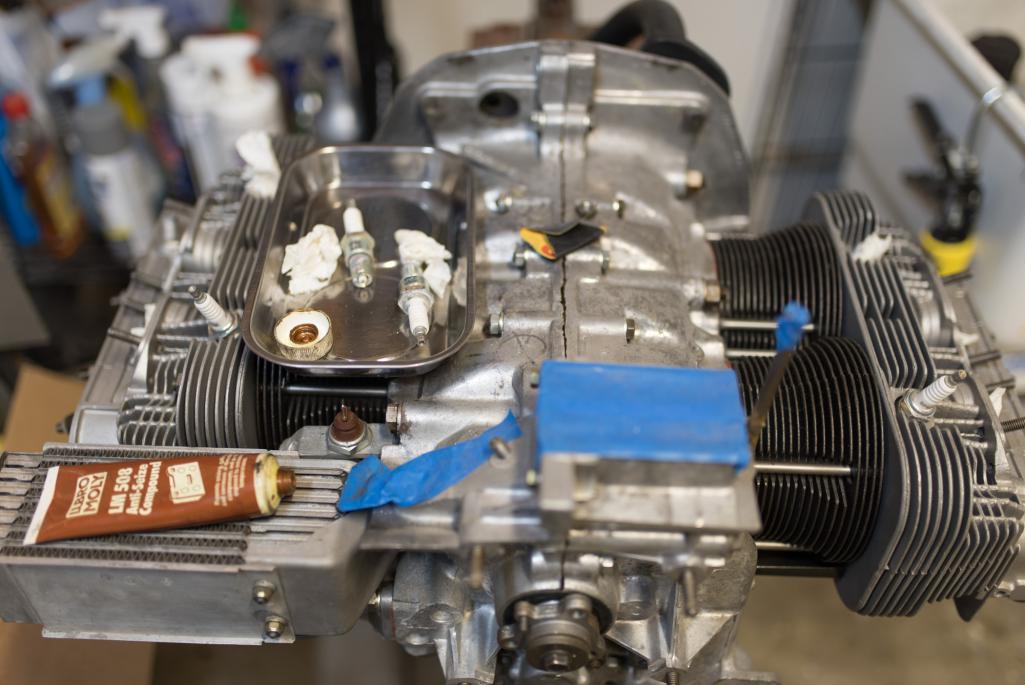
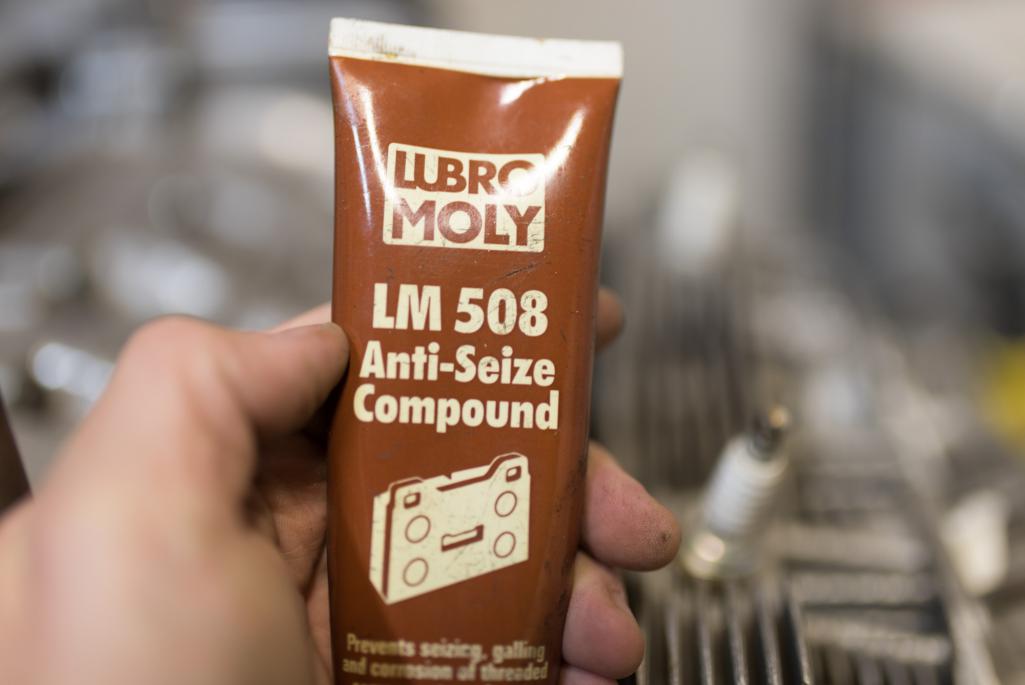
I'll probably used white lithium grease on the swivel and then a little anti seize in the tube portion as I left that mostly bare metal. 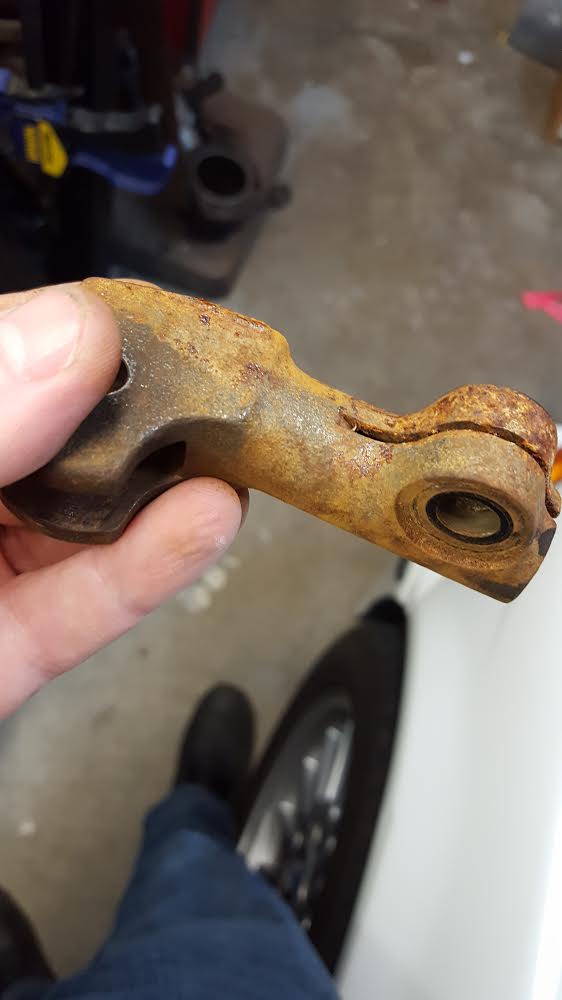
Posted by: RoadGlue Apr 15 2016, 10:39 AM
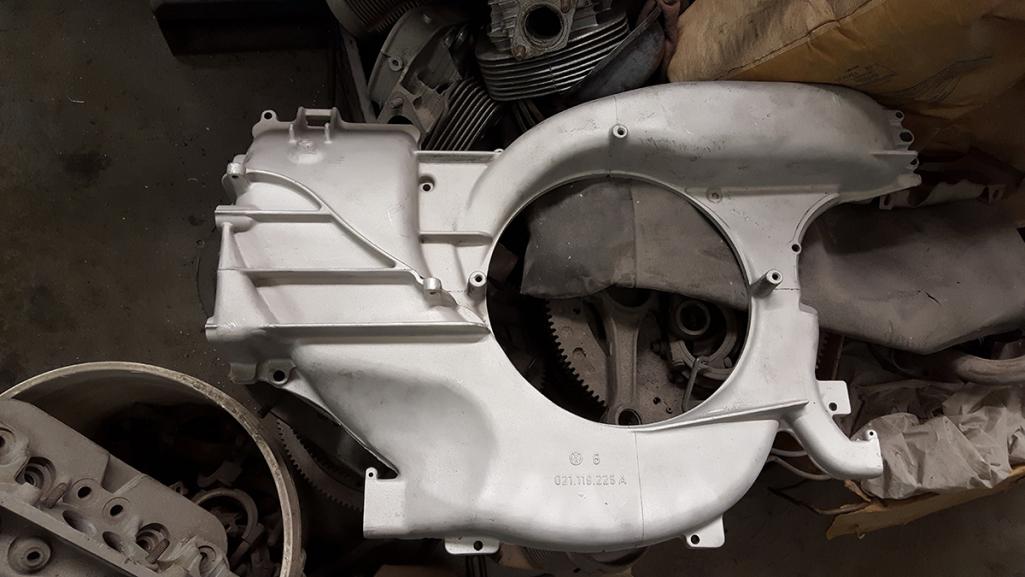
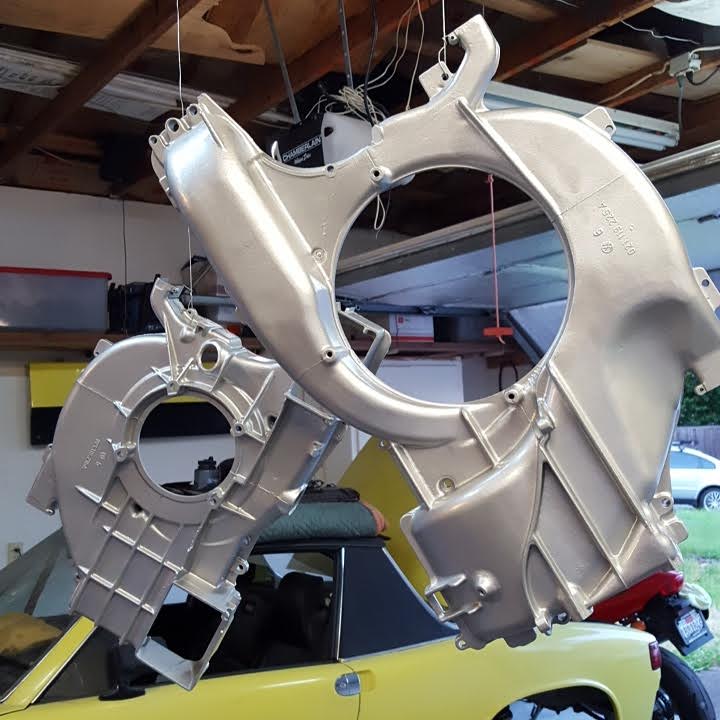
Just a bit more painting last night.
Had blasted the cooling shroud last week. Used a VHT zinc primer and wheel paint to make it shiny. Hope it holds up long term.
Primed and painted both sides. 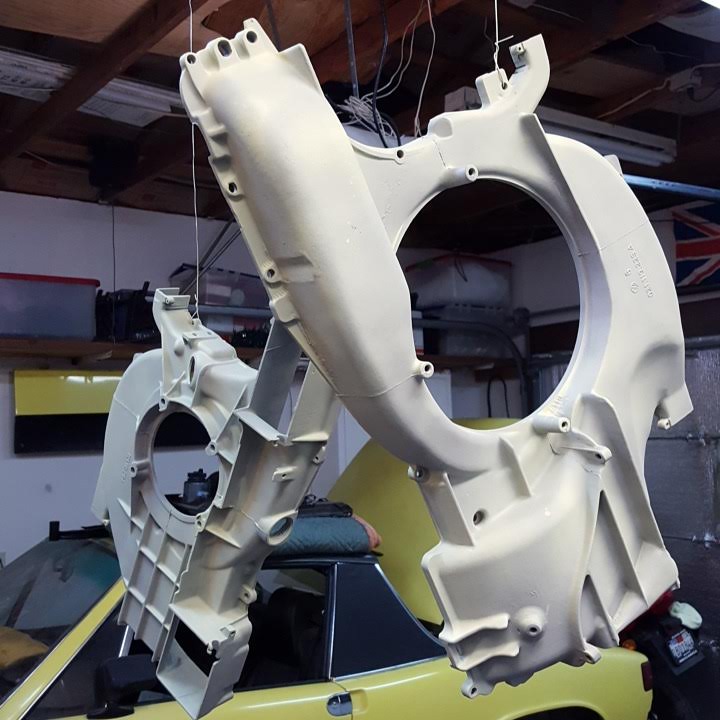
Posted by: RoadGlue Nov 3 2017, 10:27 AM
Starting this project back up again.
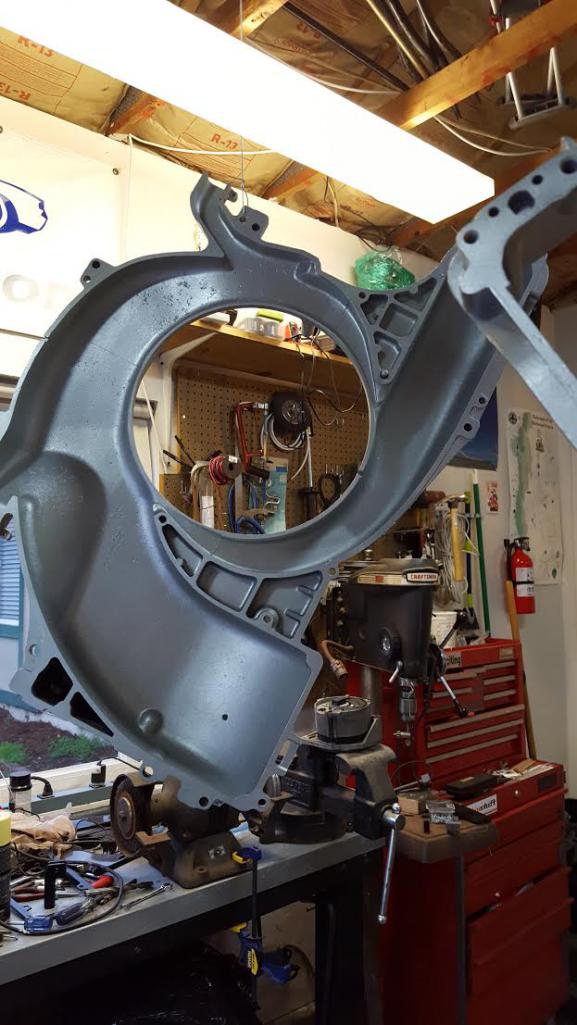
Test fitted the engine tin the other night. Dropped that off along with a bunch of other misc parts for powder coating yesterday.
Inching closer.
Finally found the ignition key hanging on my garage peg board behind some other tools (seriously, don't ask). It's been missing for years. Just happy that I can turn the steering wheel again.
I should mount the fuel pump up front this weekend. Really haven't seen any clear photos of exactly where it should go in relation to the steering rack, but I'm sure I can make that work.
Posted by: RoadGlue Nov 3 2017, 10:30 AM
It's going to look a whole lot better in a few weeks. 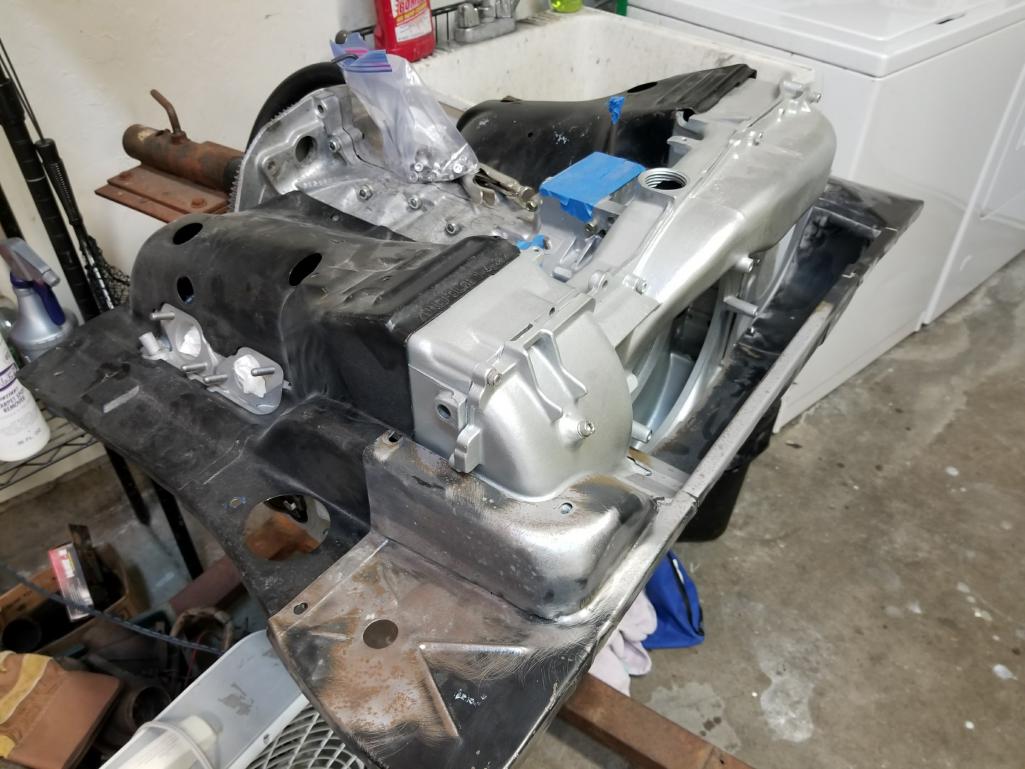
Posted by: Krieger Nov 3 2017, 09:58 PM
Looking good Randy! Glad to see you back at it.
Posted by: RoadGlue Nov 3 2017, 11:48 PM
Looking good Randy! Glad to see you back at it.
Thanks Andy!
Been digging deep into my parts stash to try and anticipate what else I'll need to buy so I can get the motor back in the car. Trying to do this right too so I won't be chasing gremlins around once it's up and running. Only using new hardware, which is a big improvement from how I kept my cars running when I was in my late teens/20s.
Wish I had the means to make the car look better as it does have a little body damage on the passenger side, small rust bubbles, marginal paint. Maybe in the next few years I can prep and at least get the exterior painting. Sorta all depends on what the house needs first.
I want all the bugs ironed out before this time next year as I'd like to drive the car down to the Rennsport Reunion. That should be somewhat smooth sailing from here on out, but I've been saying that for the past five years too. Wish me luck!
Posted by: Krieger Nov 4 2017, 07:16 AM
Good luck brother! Let me know if I could help. I may also have a part or two laying around.
Posted by: RoadGlue Nov 12 2017, 12:30 AM
Just sorting parts. Still waiting for my sheet metal to arrive back from the powder coater. Planning on installing the motor next weekend as long as I get my tin back this week. Looking positive. 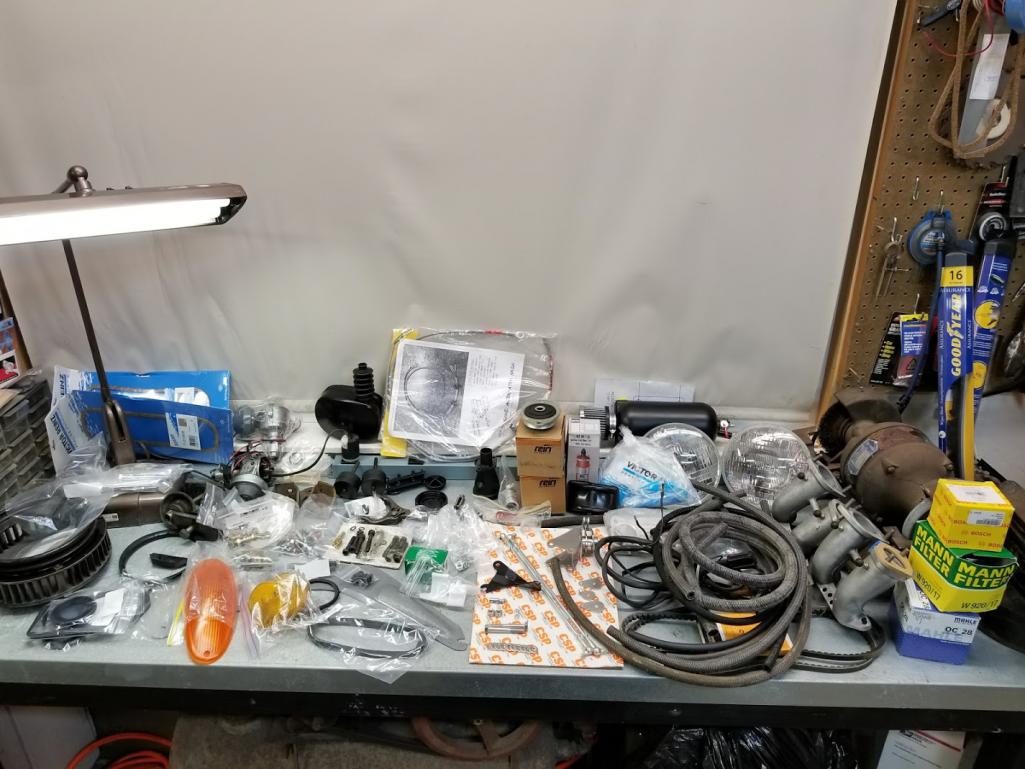
Posted by: McMark Nov 12 2017, 07:35 AM
Posted by: gms Nov 12 2017, 10:02 AM
Get that car finished so you can drive it down to Monterey and meet us in September!
Posted by: RoadGlue Nov 12 2017, 04:36 PM
Get that car finished so you can drive it down to Monterey and meet us in September!

Should be on the road in a month or less now. I'd like to send a set of calipers off to Eric for rebuilding before Monterey, but at this point I think we're golden.
Are you planning on bringing your car out this way?
Posted by: gms Nov 12 2017, 05:26 PM
I am hoping to bring two IMSA 914s, going to be a busy winter!
Posted by: ThePaintedMan Nov 13 2017, 08:37 AM
Really happy for you Randy! You've been at it for some time, and the reward will be awesome.
Posted by: RoadGlue Nov 13 2017, 10:51 AM
Really happy for you Randy! You've been at it for some time, and the reward will be awesome.
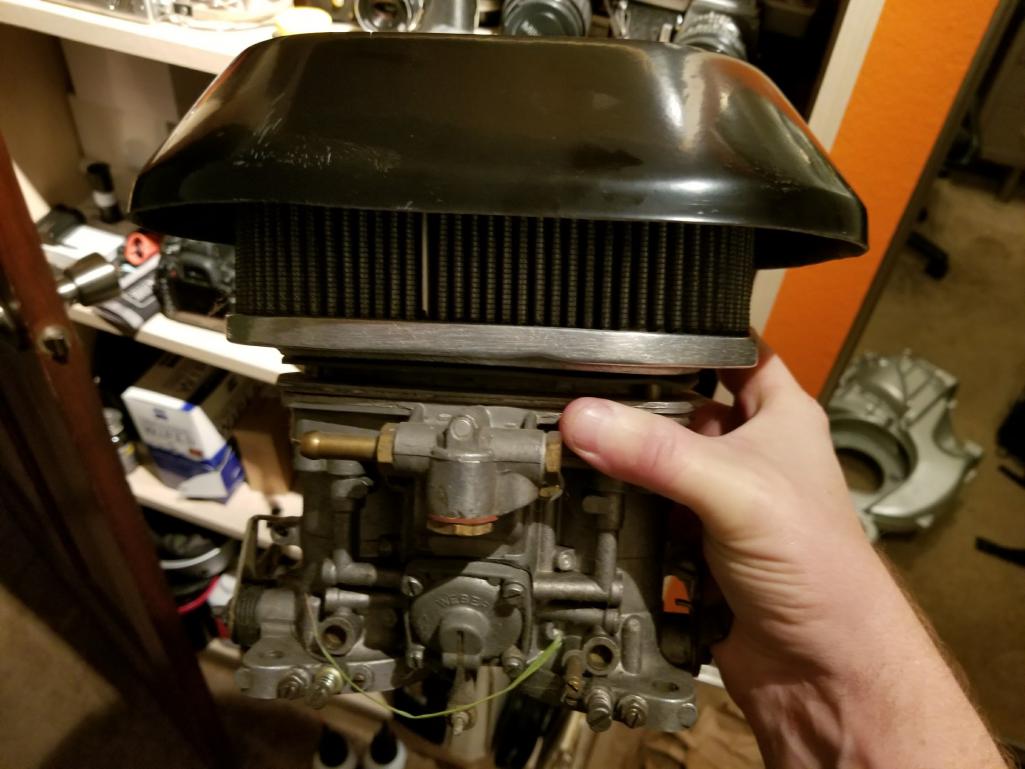
Thanks! I've been wanting to be at this point for over a year now, but we had a few big house projects that needed all our time and $$ that we're just wrapping up.
Fitted the rain hats on the carbs you rebuilt the other evening. Can't wait to hear some air moving through them soon!
Attached thumbnail(s)
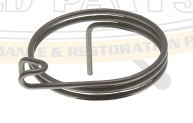
Posted by: RoadGlue Nov 13 2017, 02:48 PM
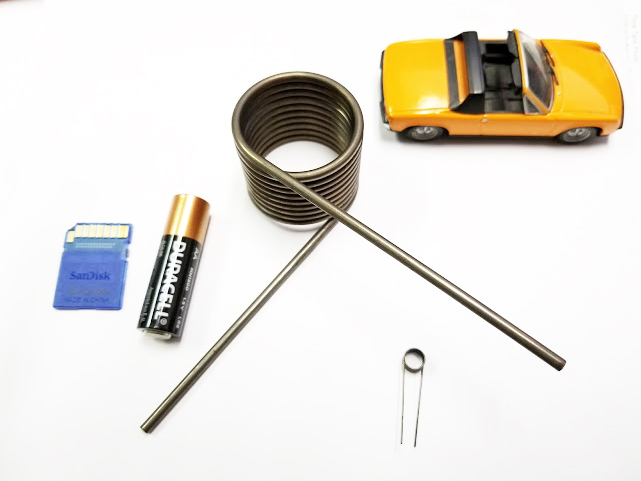
Did we ever determine is this is the correct return spring for the CSP linkage?
https://www.csp-shop.com/en/engine/return-spring-for-csp-bellcrank-linkages-129-881-100-20650a.html
I looked through a ton of CSP related threads but didn't see anything confirming that this is the part to get.
Thanks!
Posted by: McMark Nov 13 2017, 04:18 PM
Did we ever determine is this is the correct return spring for the CSP linkage?
https://www.csp-shop.com/en/engine/return-spring-for-csp-bellcrank-linkages-129-881-100-20650a.html
I looked through a ton of CSP related threads but didn't see anything confirming that this is the part to get.
Thanks!
Both versions of that spring (129 881 100 & 129 881 100A) both appear to twist the wrong direction. They're for rear engine applications where the cable approaches from the transmission side.
I haven't bought or hear of anyone buying either, so this is just my 'read' on the pictures. CSP said they were working on a spring way back during the group buy, but I never heard anything.
Attached image(s)
Posted by: McMark Nov 13 2017, 04:22 PM
I would try McMaster 9271K131 and see if that might be made to work.
Posted by: RoadGlue Nov 13 2017, 04:23 PM
Both versions of that spring (129 881 100 & 129 881 100A) both appear to twist the wrong direction. They're for rear engine applications where the cable approaches from the transmission side.
I haven't bought or hear of anyone buying either, so this is just my 'read' on the pictures. CSP said they were working on a spring way back during the group buy, but I never heard anything.
Ah, got it. Okay, so you're saying that I should hold my breath as even though it's been years, they're probably _this_close_ to having that spring ready, right?

Okay, I'll make something work. Thanks Mark!
Posted by: RoadGlue Nov 13 2017, 04:24 PM
I would try McMaster 9271K131 and see if that might be made to work.
Ah, missed this.
Thanks!
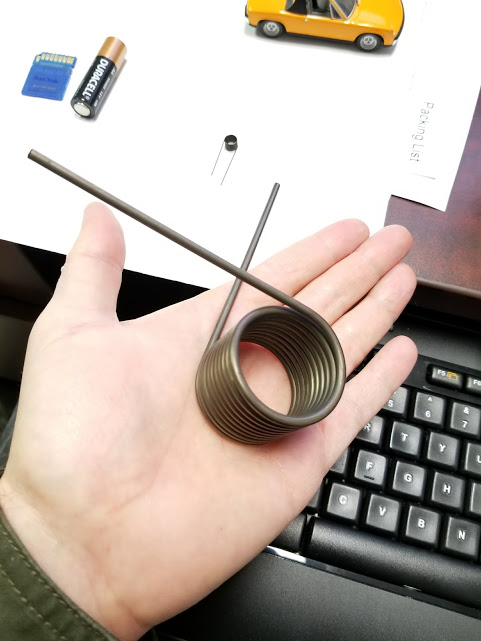
Posted by: RoadGlue Nov 13 2017, 04:29 PM
Ordered the pack of springs from McMaster-Carr. I'll let you know if they can be made to work.
Mark, I'll have some extras too if you'd like me to mail you four of them. LMK.
Posted by: McMark Nov 13 2017, 04:47 PM
How'd you get a pack of 5? 
Attached image(s)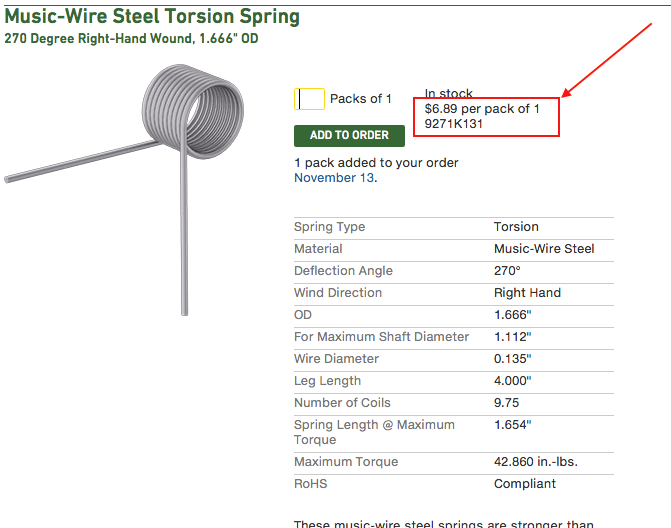
Posted by: RoadGlue Nov 13 2017, 04:54 PM
This wording is weird, eh? I had planned on keeping two for myself. 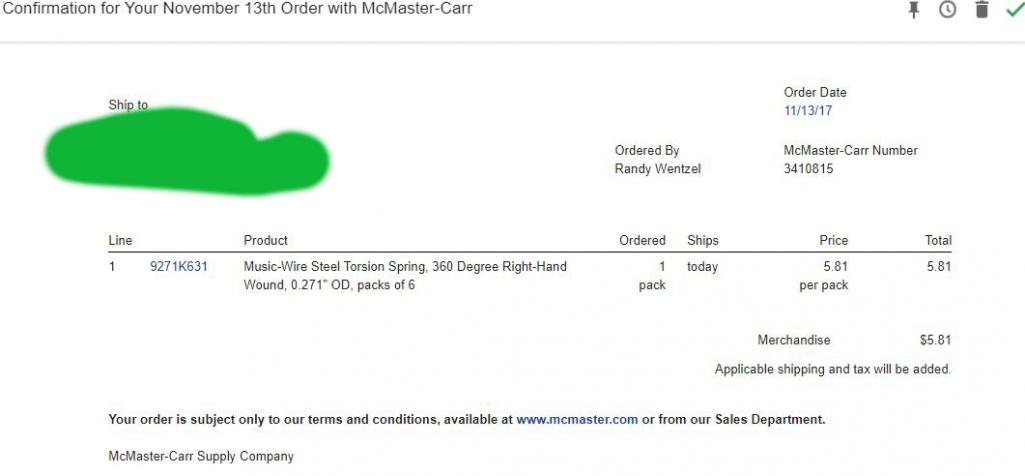
Posted by: Mueller Nov 13 2017, 04:57 PM
Just sorting parts. Still waiting for my sheet metal to arrive back from the powder coater. Planning on installing the motor next weekend as long as I get my tin back this week. Looking positive.
Nice collection of parts...must feel great putting the car back together!
Posted by: RoadGlue Nov 13 2017, 05:01 PM
Nice collection of parts...must feel great putting the car back together!
Where's the "obsessed" emoji? Yeah Mike, it feels great! Can't wait to be back in the driver's seat again soon.
You're getting close-ish with your project too, right?
Posted by: McMark Nov 13 2017, 05:07 PM
Check your part number, yo. 
Posted by: RoadGlue Nov 13 2017, 05:48 PM
Check your part number, yo.
Oh sheesh. Thanks! One look at the OD and I would have caught that. This is what happens when you try to multitask too many things at once kiddos.
Posted by: RoadGlue Nov 13 2017, 06:15 PM
I immediately wrote McMaster-Carr after seeing your post Mark and here's what they replied with -
"Hi Randy,
We've already shipped this out, but we'll credit it back to you. You don't need to return it.
Mike"
Talk about awesome customer service!
I ordered the correct spring as well and will advise as soon as I'm at that point.
Posted by: Mueller Nov 13 2017, 06:20 PM
Nice collection of parts...must feel great putting the car back together!
Where's the "obsessed" emoji? Yeah Mike, it feels great! Can't wait to be back in the driver's seat again soon.
You're getting close-ish with your project too, right?
The wife has told me to put the 914 as priority number 1 as far as my projects go. She even admits that she sees no major projects on the home front so I am good until she sees a home improvement that "needs" to be done.
Posted by: RoadGlue Nov 13 2017, 06:31 PM
The wife has told me to put the 914 as priority number 1 as far as my projects go. She even admits that she sees no major projects on the home front so I am good until she sees a home improvement that "needs" to be done.
Posted by: RoadGlue Nov 14 2017, 11:17 AM
More progress. Should have the motor back in the car this Sunday.
I would have had some of the parts shown plated vs. powder coated if I had planned this project out better, but I'm happy how everything turned out.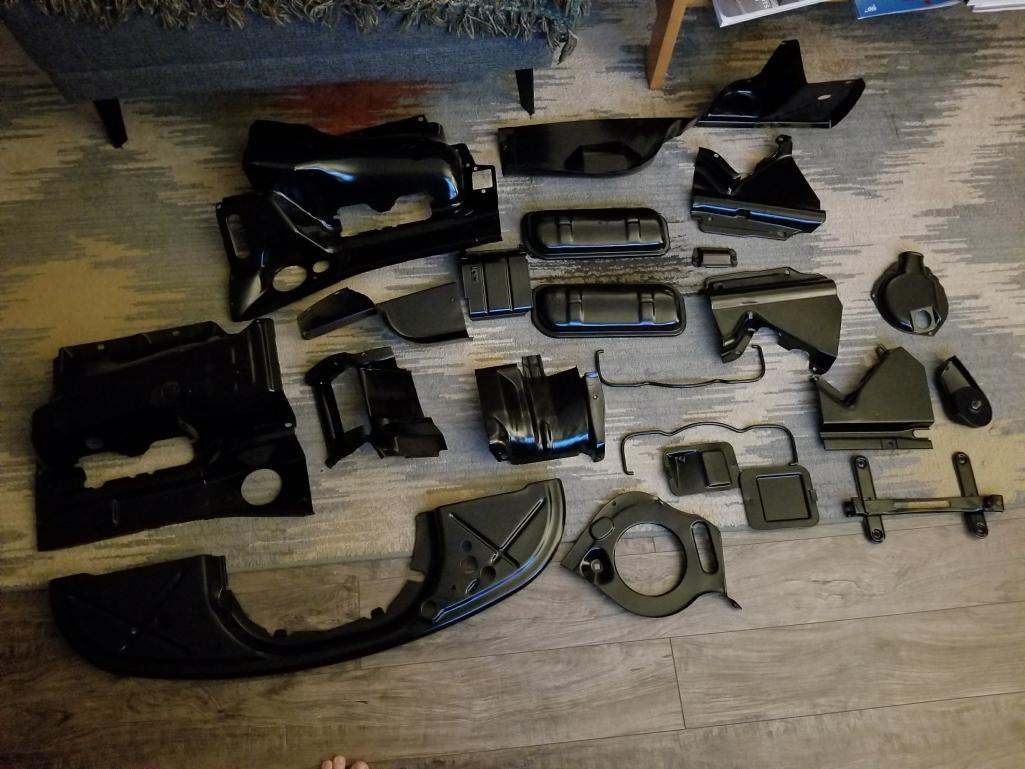
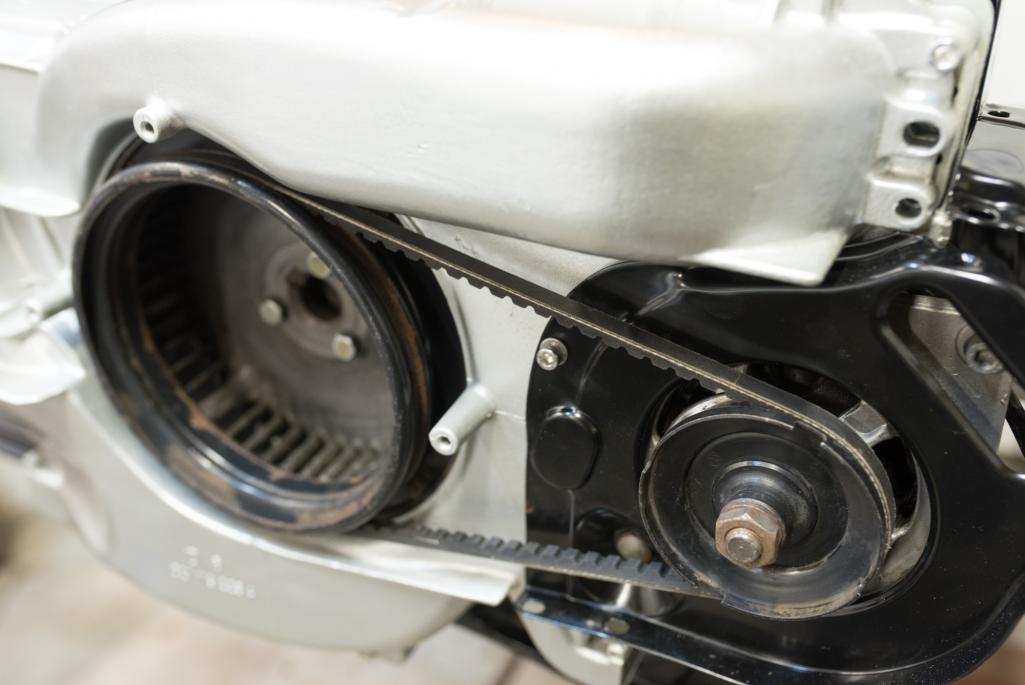
914rubber.com's pulley wheel (er, back focused):
Wiring up the alternator with a new Bowlsby harness: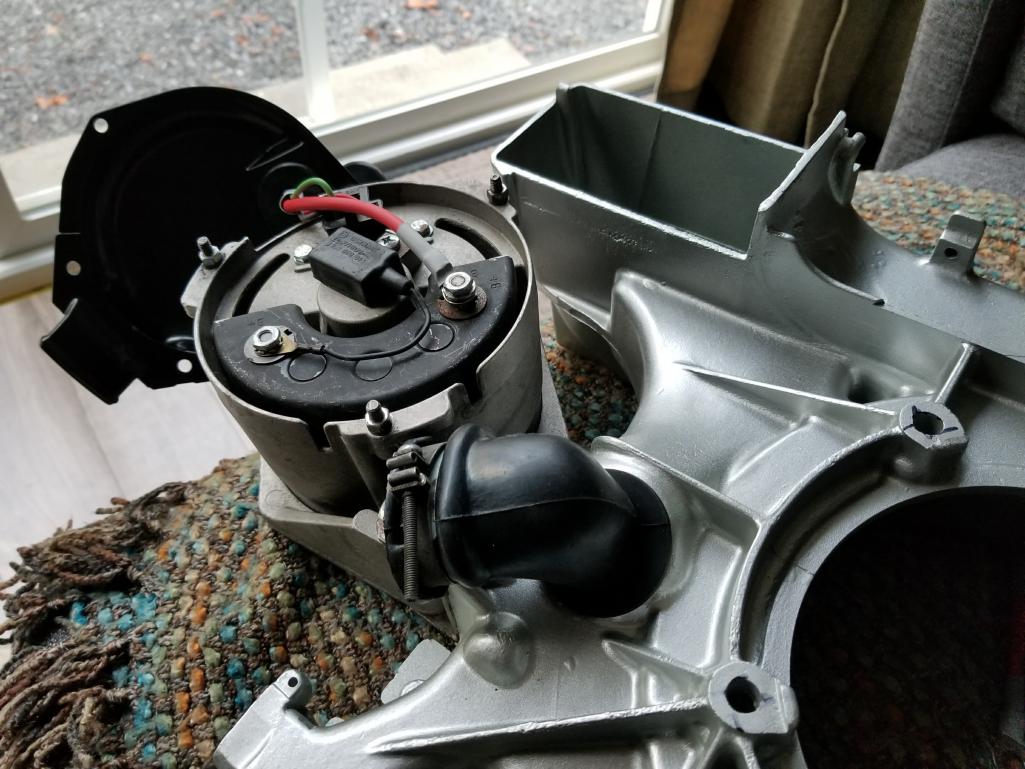
Posted by: RoadGlue Nov 14 2017, 11:20 AM
IIRC, the factory put thin foam gaskets between the overlapping areas on the tin. Do people bother replacing it?
Posted by: Mueller Nov 14 2017, 11:44 AM
Those powder coated parts came out great.
Maybe I misunderstood the post, did you plate some of the powder coated parts 1st?
Posted by: RoadGlue Nov 14 2017, 11:57 AM
Those powder coated parts came out great.
Maybe I misunderstood the post, did you plate some of the powder coated parts 1st?
Ah, no, I just would have rather had some of these parts plated vs. coated, but it's really a non-issue at this point.
There's supposed to be a good plater in Sac if you're looking for one. Let me know and I'll dig up their contact info.
Posted by: RoadGlue Nov 14 2017, 03:31 PM
Also looking at getting a wide band O2 AF gauge and sensor kit. A friend recommended SpeedHut, but I'm not sure this is the best bang for the buck.
https://www.speedhut.com/gauge/GR-AFWB-09/1/Standalone-Air-Fuel-Wideband-O2-gauge-8-5-18-(w--warning)
I'm more than happy to buy the O2 sensor and cable separately too for the right gauge. I'd prefer a black bezel too, but that's secondary to a reliable, consistent gauge.
Would really appreciate recommendations.
Posted by: jd74914 Nov 14 2017, 04:31 PM
I've been very impressed with everything I've gotten from 14Point7. At $175 it's not significantly less than the SpeedHut set, but it's still a decent savings.
Gauge: https://www.14point7.com/products/solid-afr-gauge
O2 Sensor + Controller: https://www.14point7.com/products/spartan-lambda-controller-2
Posted by: RoadGlue Nov 14 2017, 05:36 PM
I've been very impressed with everything I've gotten from 14Point7. At $175 it's not significantly less than the SpeedHut set, but it's still a decent savings.
Gauge: https://www.14point7.com/products/solid-afr-gauge
O2 Sensor + Controller: https://www.14point7.com/products/spartan-lambda-controller-2
Thanks! I might make a post in the main Garage and see if I can get more input too.
Posted by: jd74914 Nov 14 2017, 08:35 PM
Innovate is also pretty popular, though I've never been very impressed with the quality of their controllers. They seem to have weird faulting problems and aren't very tolerant of poor grounding. Just some more options.
http://www.innovatemotorsports.com/xcart/product.php?productid=16235&cat=262&page=1
Posted by: RoadGlue Nov 15 2017, 01:05 AM
Innovate is also pretty popular, though I've never been very impressed with the quality of their controllers. They seem to have weird faulting problems and aren't very tolerant of poor grounding. Just some more options.
http://www.innovatemotorsports.com/xcart/product.php?productid=16235&cat=262&page=1
I'll take a look, thanks!
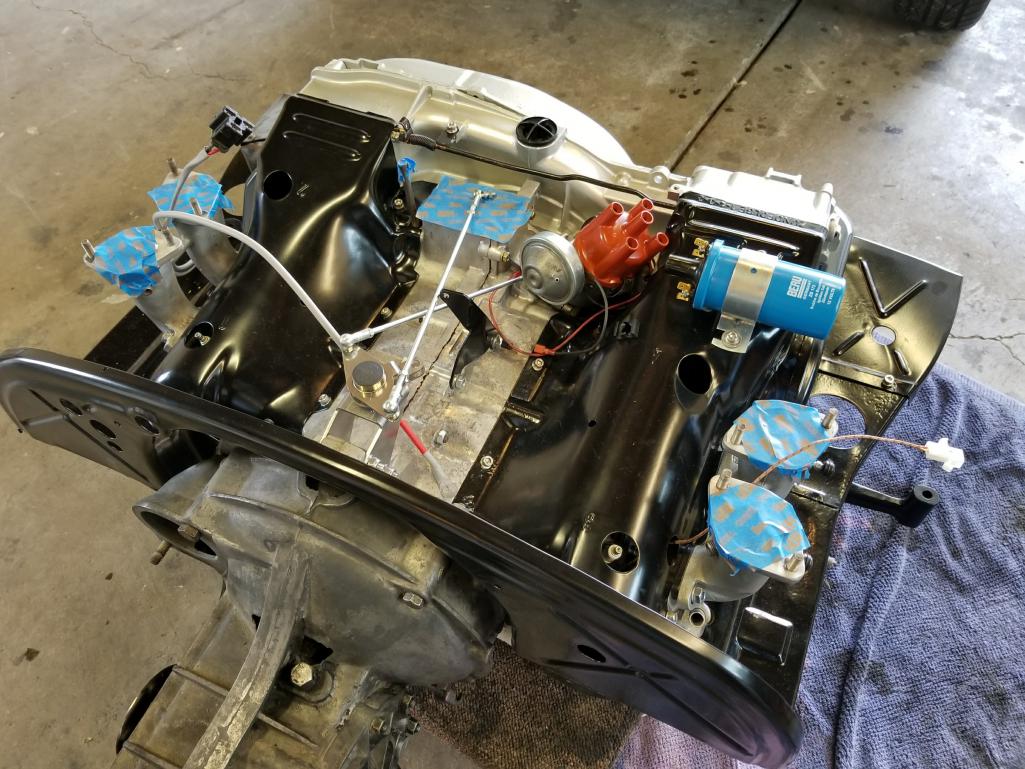
Posted by: RoadGlue Nov 15 2017, 01:10 AM
More progress tonight - 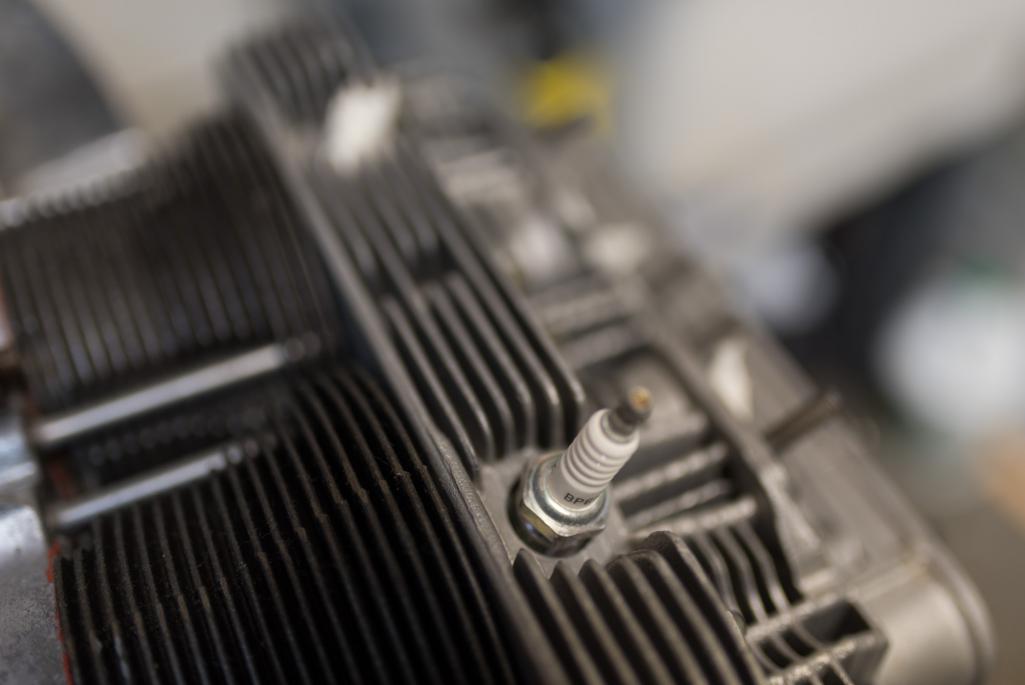
Attached thumbnail(s)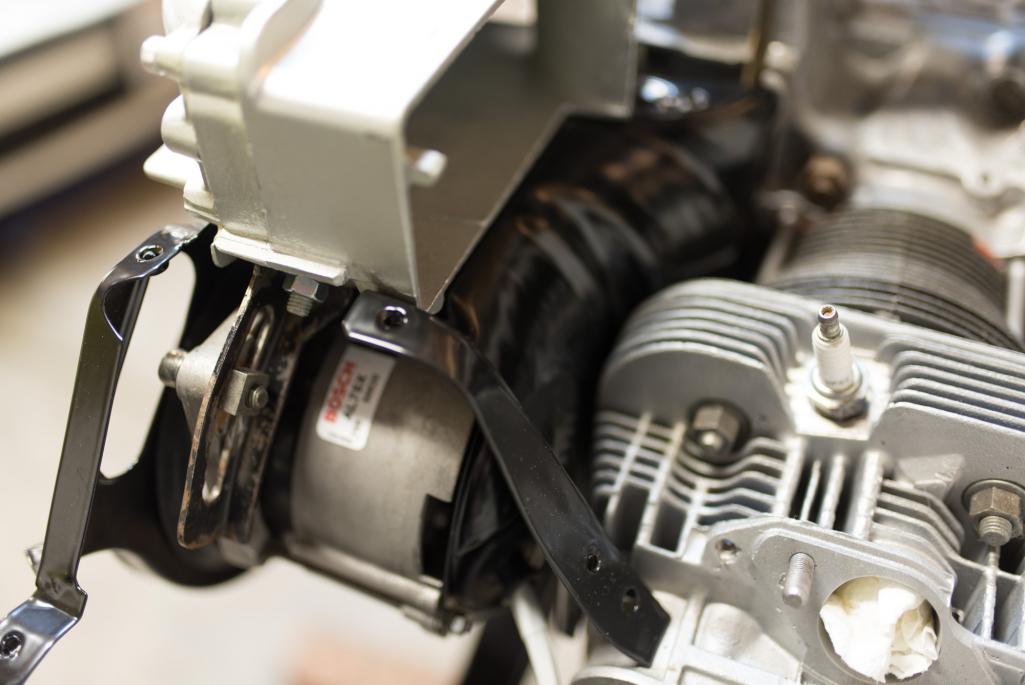
Posted by: RoadGlue Nov 15 2017, 01:12 AM
A few more -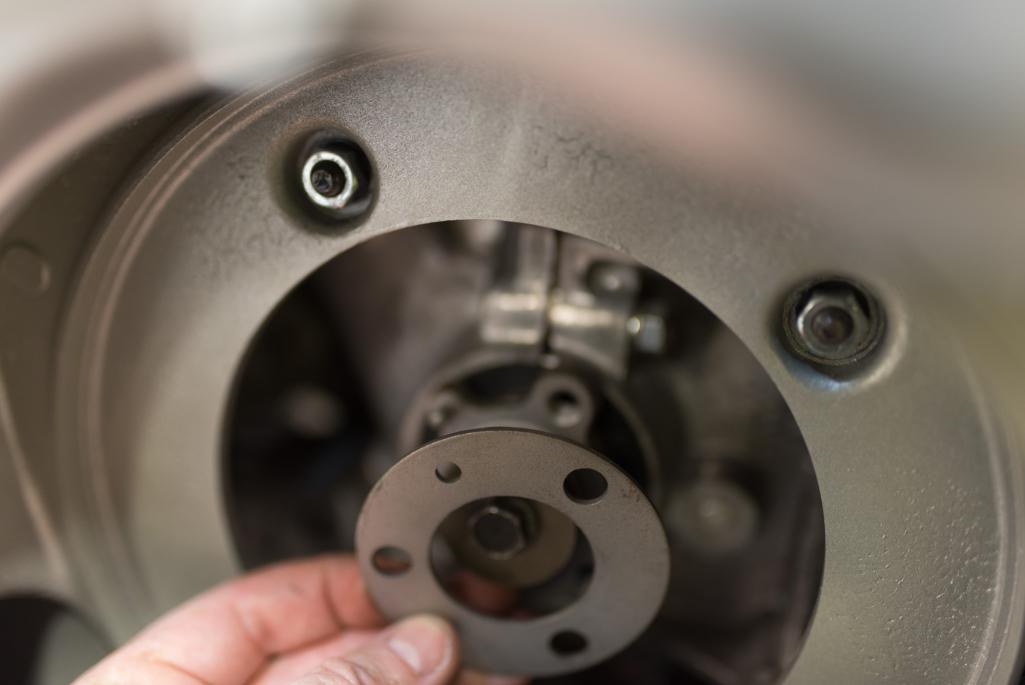
Posted by: falcor75 Nov 15 2017, 01:59 AM
That looks great
Posted by: bbrock Nov 15 2017, 01:21 PM
This is looking fantastic!  Exactly the way my engine looks.... in my dreams!
IIRC, the factory put thin foam gaskets between the overlapping areas on the tin. Do people bother replacing it?
Now that you mention this, I remember scraping remnants of foam off the joints. I'm hoping someone chimes in on this because it would be easy to add when I install my tins.
Posted by: RoadGlue Nov 16 2017, 12:10 AM
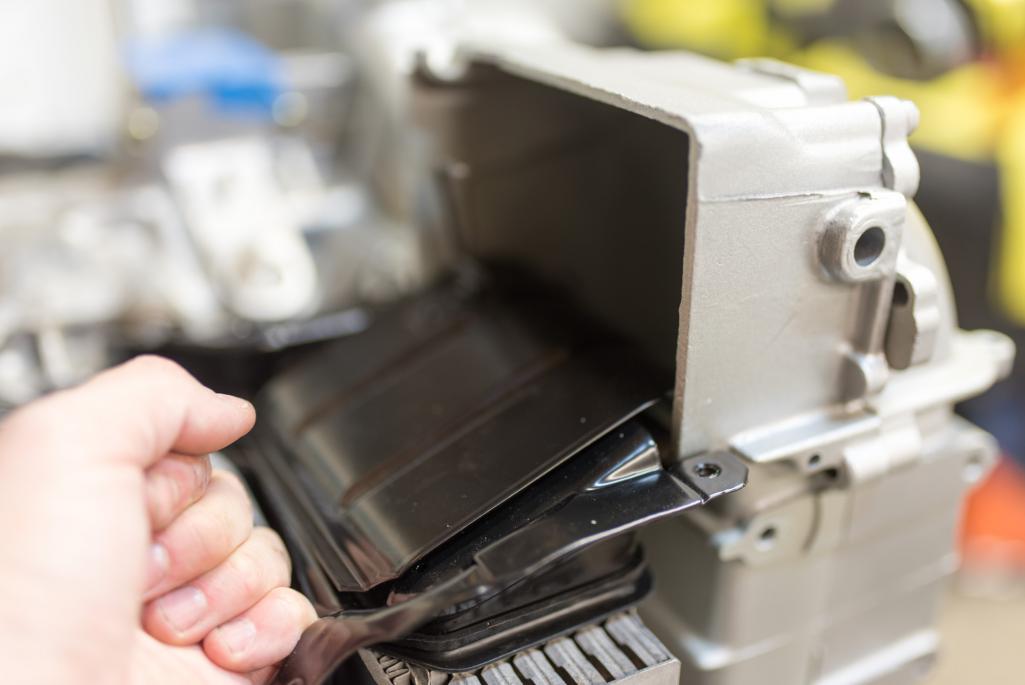
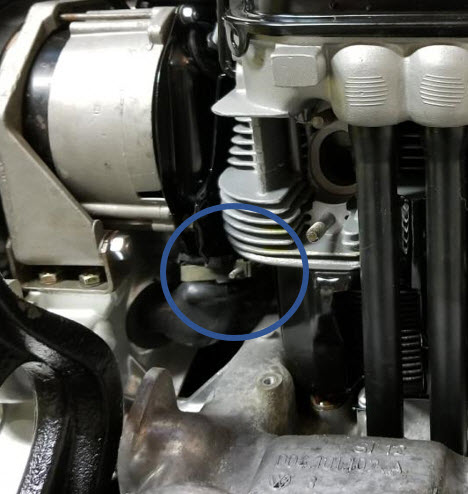
Have a cold, so I didn't get a ton done this evening. Realized I'd left off the flapper bar, so I had pull off some tin and sort that out. Missing the spring tab. Looks like something I can probably fabricate pretty easily if I can't find one in my stash.
I'm also missing the oil cooler support bracket. Lame. Hopefully my machinist here in town has a spare, or else my plans on installing the motor this weekend will be stalled until I can buy one from Garold (you listening buddy?)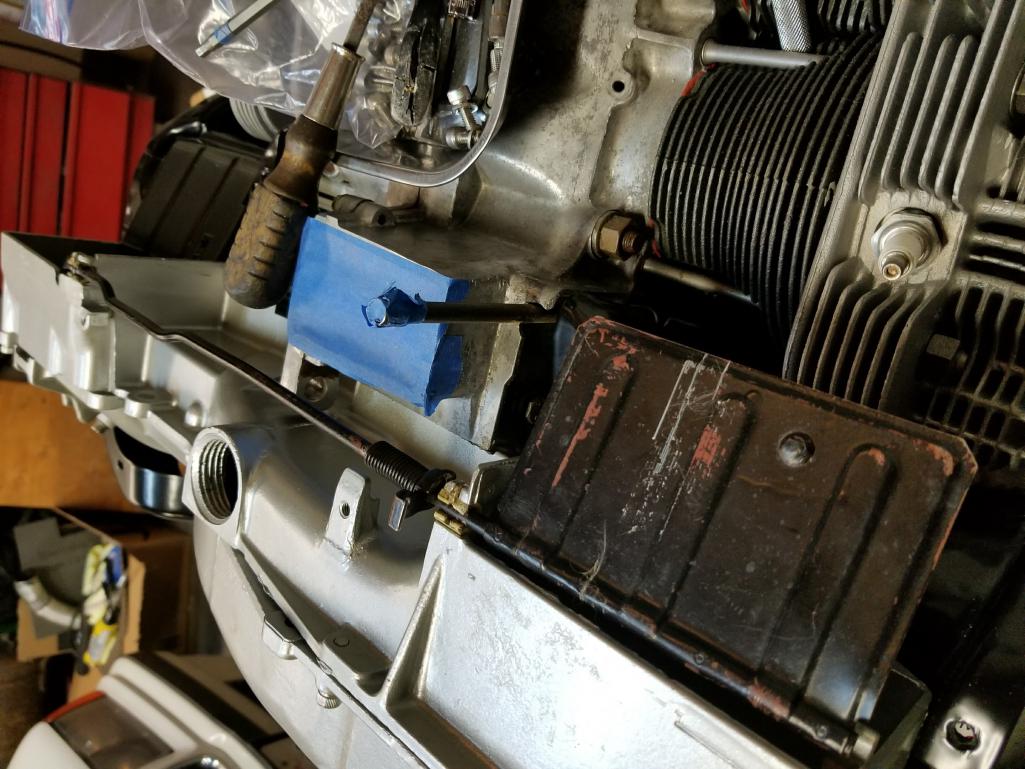
Just an upskirt shot. Maybe I'll invest in a bellows kit. IDK, I've never had one working on any 914 I've owned. 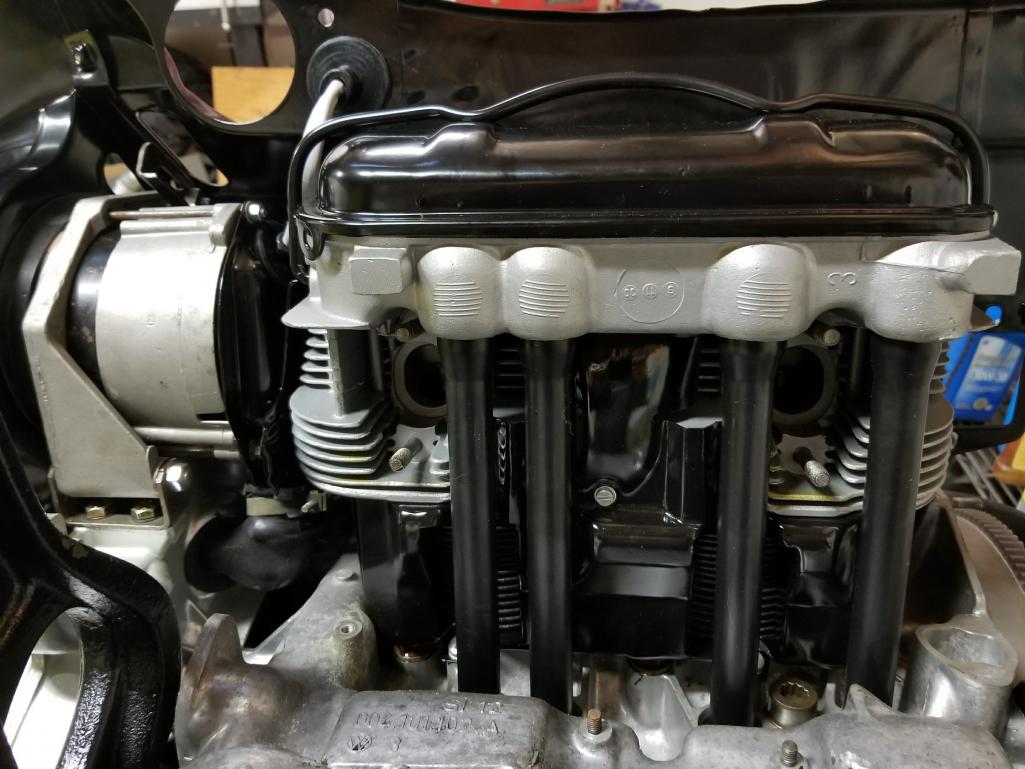
Posted by: Mikedrevguy Nov 16 2017, 08:13 AM
Nice work!!!! Thanks for sharing.
Did you have the push rod tubes powder coated? Or did you purchase them black? Paint? Inquiring minds want to know.
Hope you make the Sunday deadline for motor install. Will car be ‘finished’ with that? Or more still to do?
Posted by: McMark Nov 16 2017, 08:56 AM
Also check with Gary at Sonoma Volkswagen (707) 996-1354. He may have the cooler clamp.
Posted by: RoadGlue Nov 16 2017, 11:22 AM
Nice work!!!! Thanks for sharing.
Did you have the push rod tubes powder coated? Or did you purchase them black? Paint? Inquiring minds want to know.
Hope you make the Sunday deadline for motor install. Will car be ‘finished’ with that? Or more still to do?
Thanks!
My machinist/motor building spray painted both the push rod tubs and the tin that's directly above them.
I don't see why you couldn't powder coat them. The thicker coating shouldn't interfere with the o-rings AFAIK.
Short list of to-dos once the motor is in -
- Install carbs
- Install headlights
- Add fuel pump jumper wire at relay board
- Oh, install relay board
- Install muffler and Ox sensor/gauge
- Install starter (still can't decide which starter to run)
- Install battery
- Check brakes
- Break-in cam/tune carbs, etc.
- Finish assembling rear bumper and paint
Not too bad. Hoping to have it on the road before Christmas, though likely sooner.
Posted by: RoadGlue Nov 16 2017, 11:22 AM
Also check with Gary at Sonoma Volkswagen (707) 996-1354. He may have the cooler clamp.
Good call!
Though I'm 99% sure Soren will have the parts. I'll probably run by his shop this evening to check.
Posted by: RoadGlue Nov 16 2017, 11:42 AM
Mark, I think the happy medium is somewhere in the middle. The wire gauge is gargantuan! 
Posted by: RoadGlue Nov 17 2017, 01:58 PM
Good news, my local buddy had the oil support bracket and two pcs of tin I was missing. Sunday is still a go for motor installation.
The new 19mm MC from 914rubber.com arrived today too with the easy install option.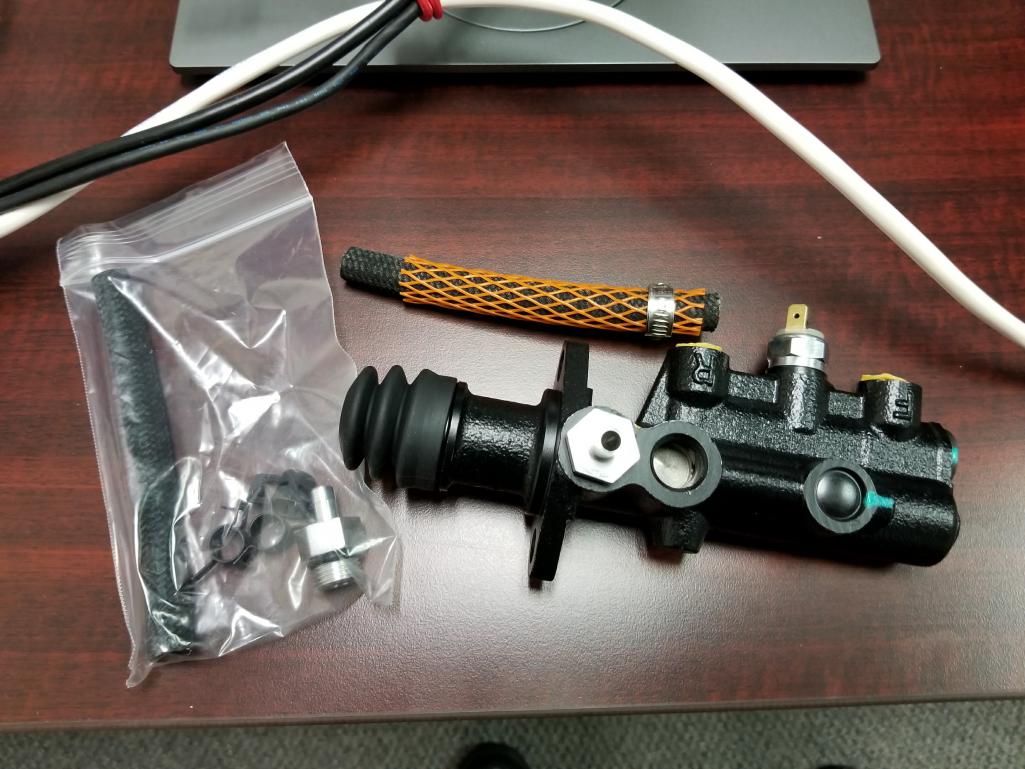
Posted by: RoadGlue Nov 17 2017, 02:02 PM
Last night I installed the CSP linkage bracket. Guessing that the six extra washers are to be used as spacers. KINDA janky if you ask me, but washers work. 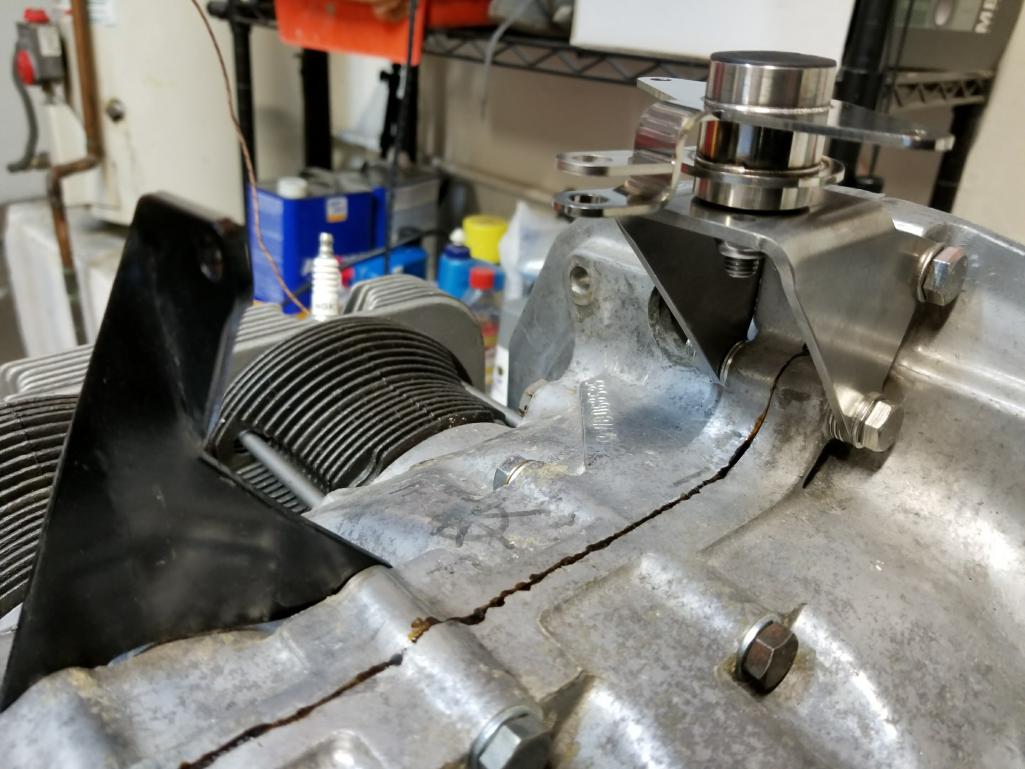
I'm not sure I'm cool with the through-bolts not eating up more thread than that with the throttle cable support bracket installed. I'll probably need replace those two for piece of mind. 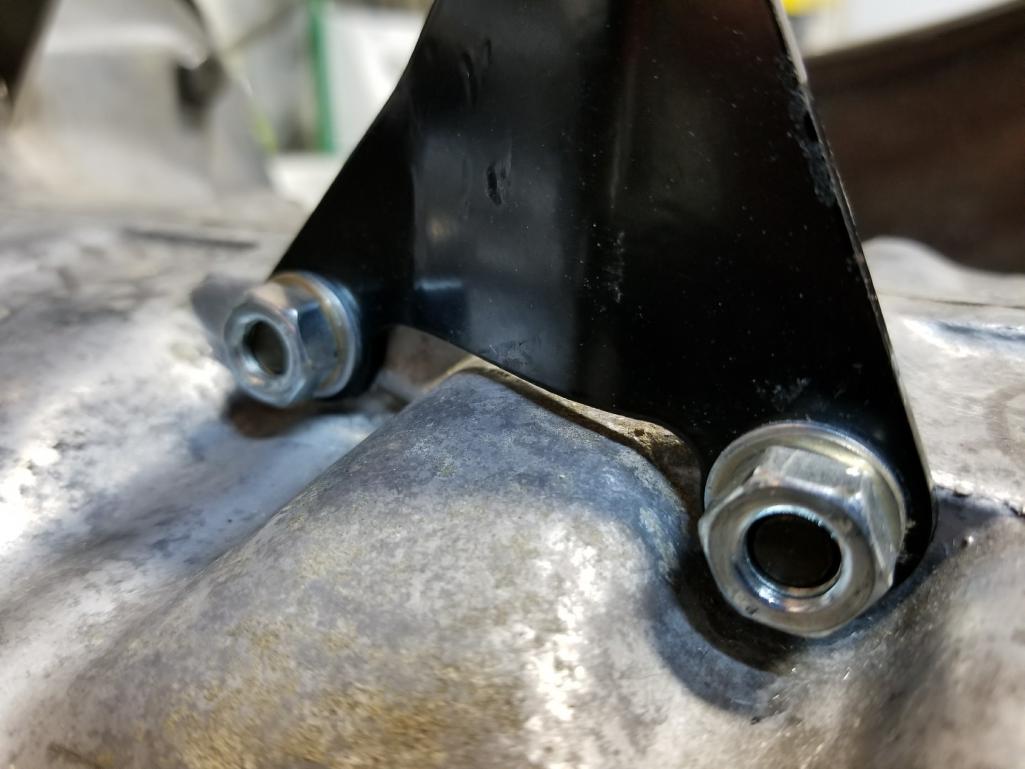
Posted by: SirAndy Nov 17 2017, 03:08 PM
If you don't install the bellows make sure to put a bolt in the mounting hole since it goes through the case and if left open will result in some pretty major oil leakage.

Posted by: RoadGlue Nov 17 2017, 03:10 PM
If you don't install the bellows make sure to put a bolt in the mounting hole since it goes through the case and if left open will result in some pretty major oil leakage.
Thanks Andy!
Posted by: RoadGlue Nov 17 2017, 04:07 PM
Just ordered a 911 starter, though I'm missing my main power lead for the starter.
Any advice on the wire gauge I should use? Thinking 4 would be fine.
Posted by: Marty Yeoman Nov 17 2017, 05:18 PM
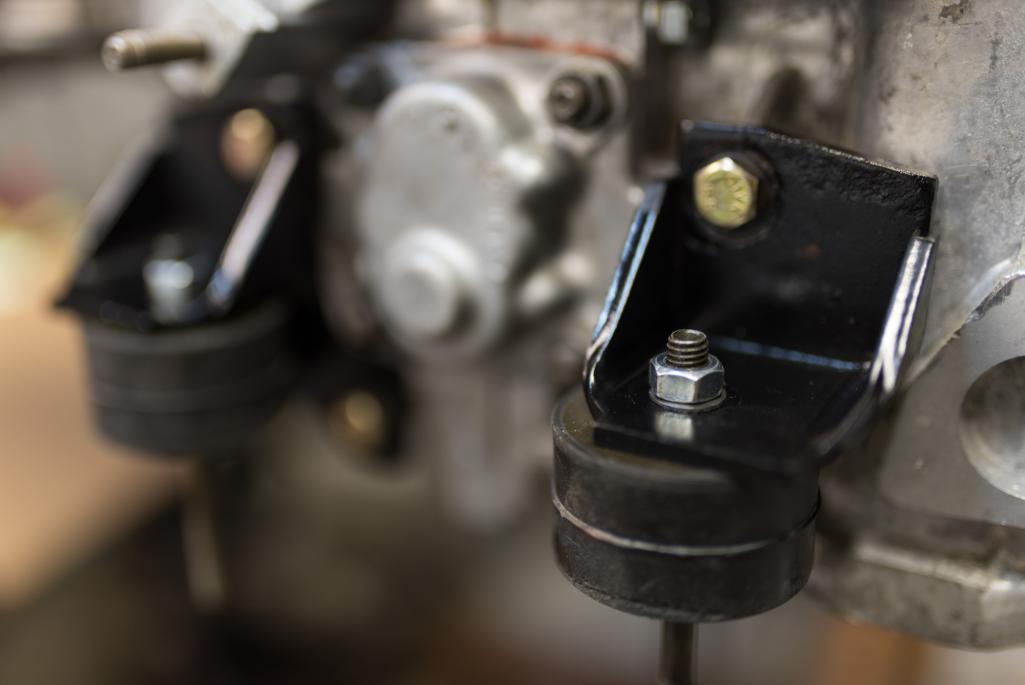
Randy,
I'm not sure how you tightened this band with the screw installed backwards. When turned around it's easier to access from below, especially if you ever need to replace the alternator later with the engine in the car.
Attached image(s)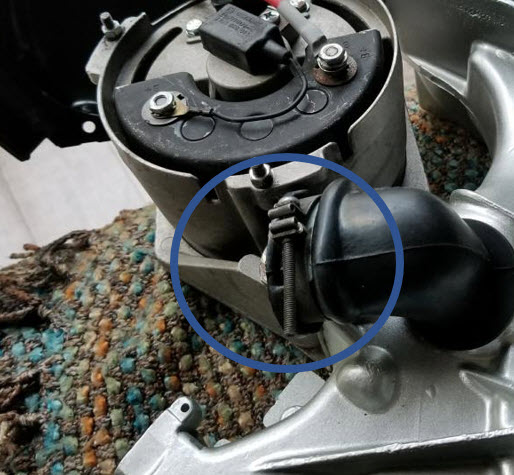
Posted by: RoadGlue Nov 17 2017, 05:20 PM
Randy,
I'm not sure how you tightened this band with the screw installed backwards. When turned around it's easier to access from below.
Hey Marty! Long time...
Ah! The top photo's angle is deceptive. I tightened that before installing the back alternator plate. You're right though, that's going to be a pain in the butt to take off if I have the motor in the car. Knock on wood, but I haven't had to swap alternators with the motor installed yet. Hmm, I'll look at that this evening. Thanks for the sharp eye!
Posted by: Marty Yeoman Nov 17 2017, 05:25 PM
I've had to R&R an alternator a couple of times and believe me you don't need any extra drama when changing one out. It's a crappy job already.
Posted by: RoadGlue Nov 17 2017, 05:27 PM
I've had to R&R an alternator a couple of times and believe me you don't need any extra drama when changing one out. It's a crappy job already.
It's supposed to be a total PIA.

Hopefully I can turn that around without too much cussing.
Posted by: bbrock Nov 17 2017, 06:09 PM
Hopefully I can turn that around without too much cussing.
 Every time I tell my wife I'm having fun working on my car, she says, "Really? Then what's all the cussing?" I tell her that's just part of the charm.
Posted by: RoadGlue Nov 17 2017, 06:16 PM
Hopefully I can turn that around without too much cussing.
Every time I tell my wife I'm having fun working on my car, she says, "Really? Then what's all the cussing?" I tell her that's just part of the charm. 10-4 on that!
Posted by: RoadGlue Nov 19 2017, 09:17 PM
Started back on the motor assembly Friday. Installed the oil cooler support and plugged up that the bellows pulley hole (Thanks SirAndy!). 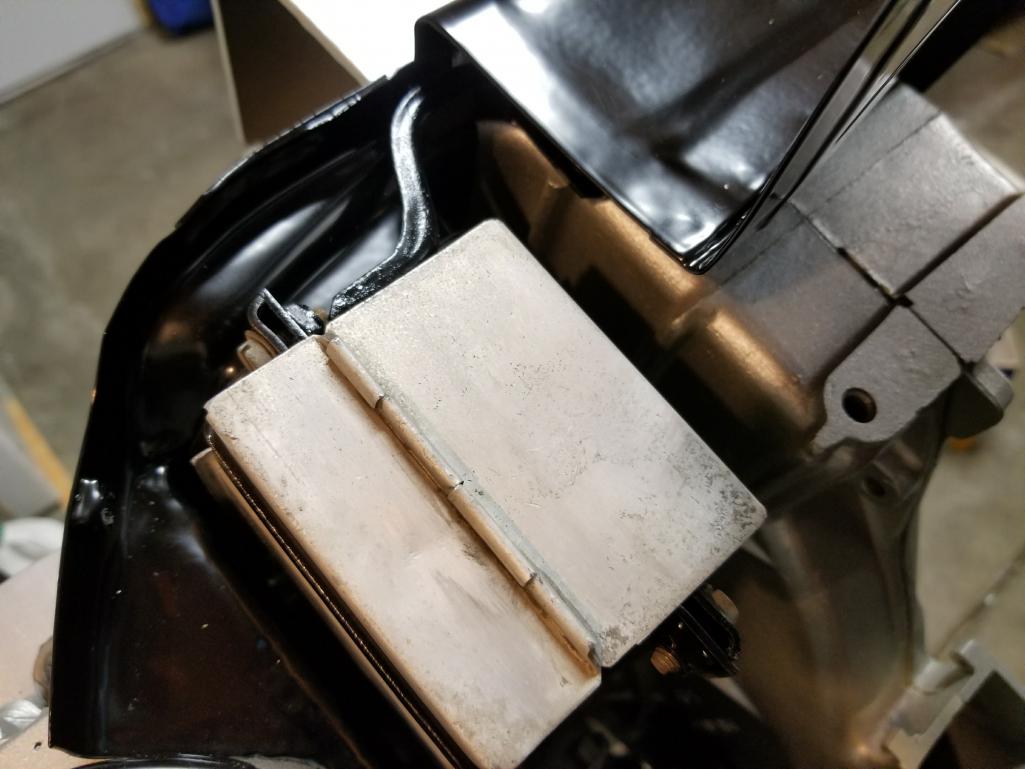
I used some Form-A-Gasket in hopes too keep it from seeping oil. 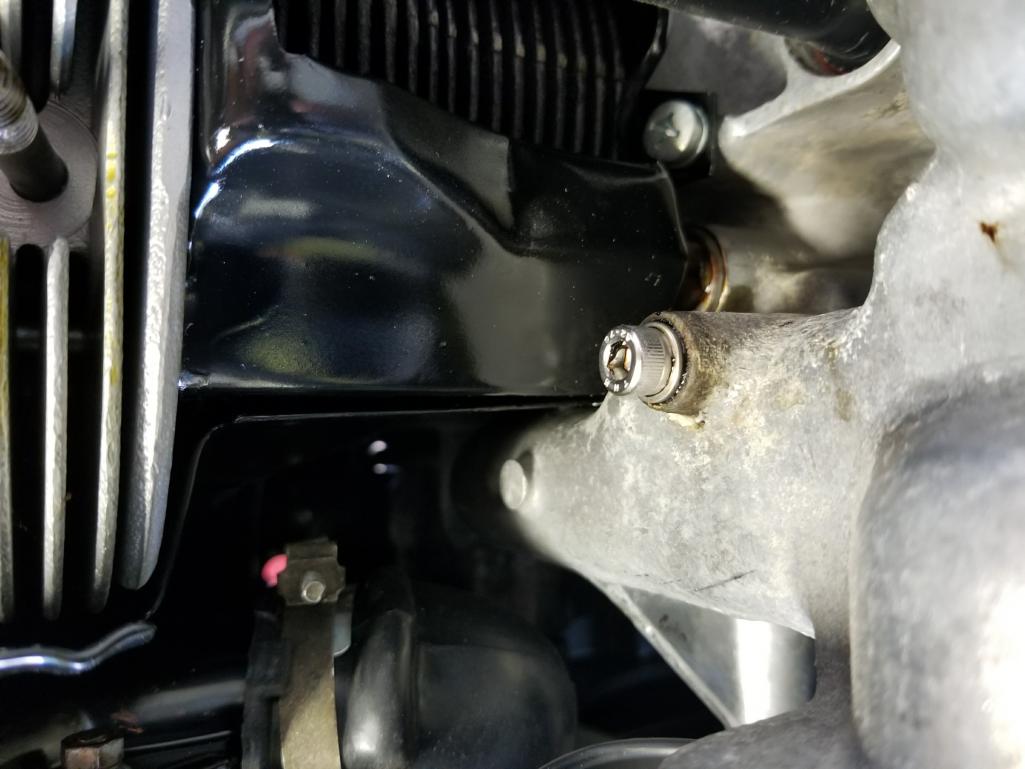
Posted by: RoadGlue Nov 19 2017, 09:21 PM
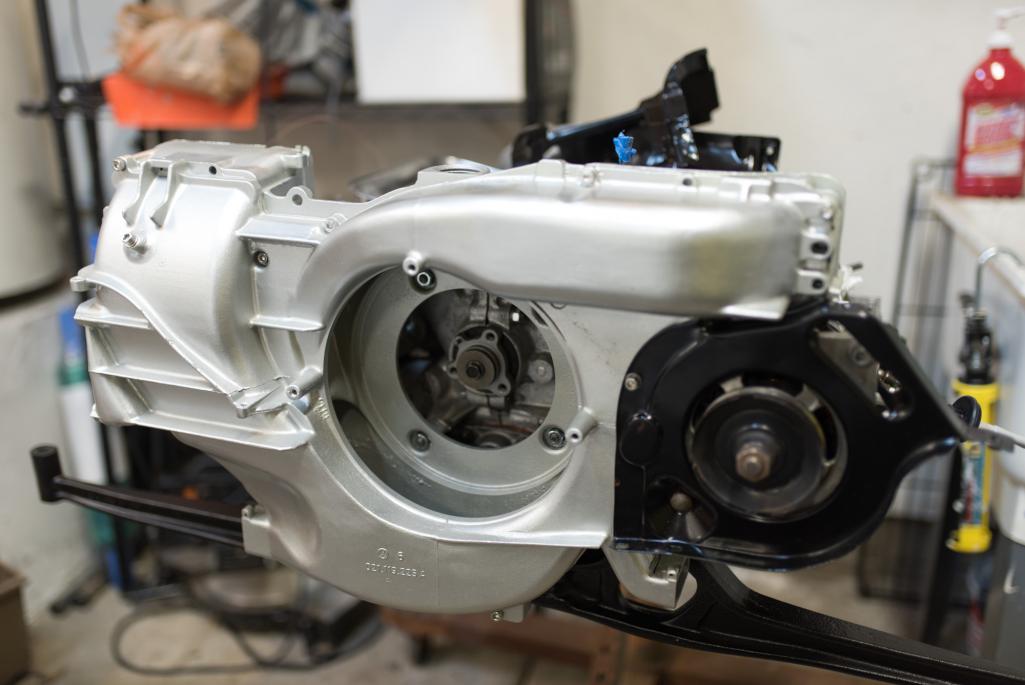
Looking almost ready for installation at this point. 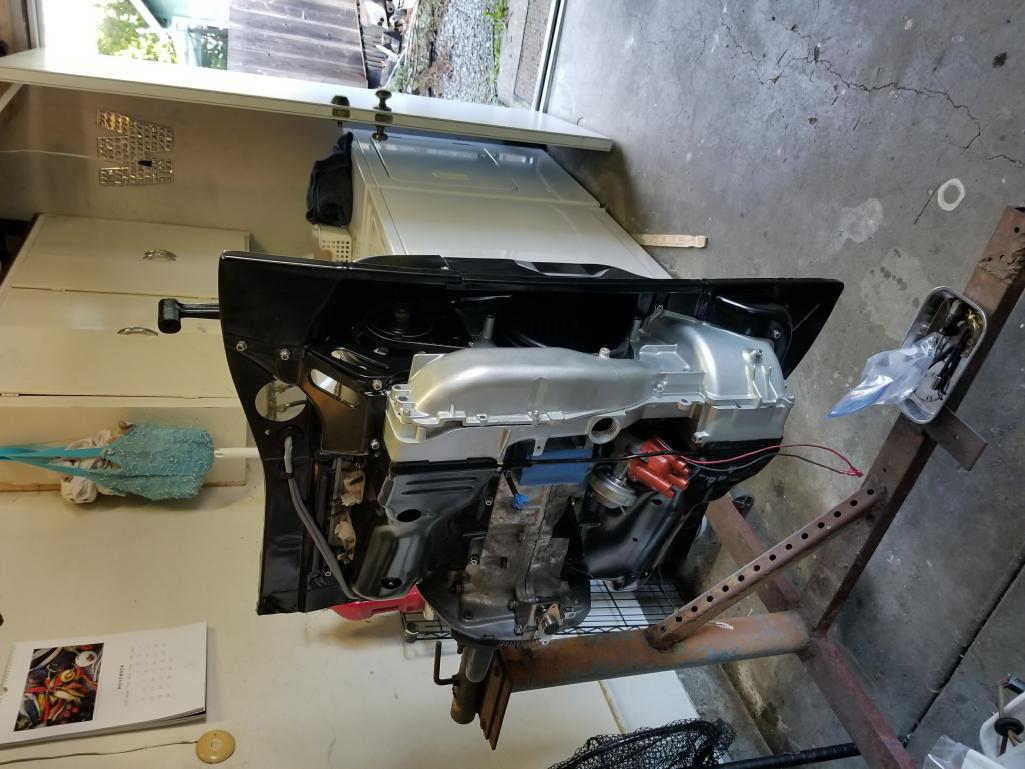
Installed the old sealed-beam lights. I'll likely pick up the 914rubber LED kit soon. 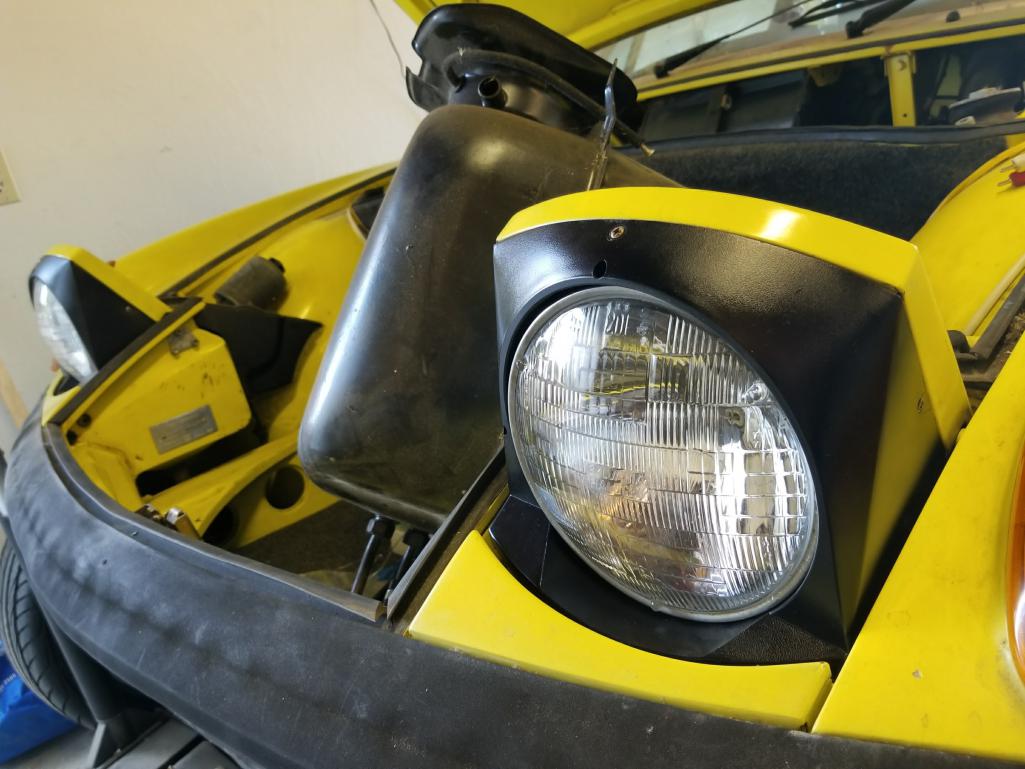
Posted by: RoadGlue Nov 19 2017, 09:24 PM
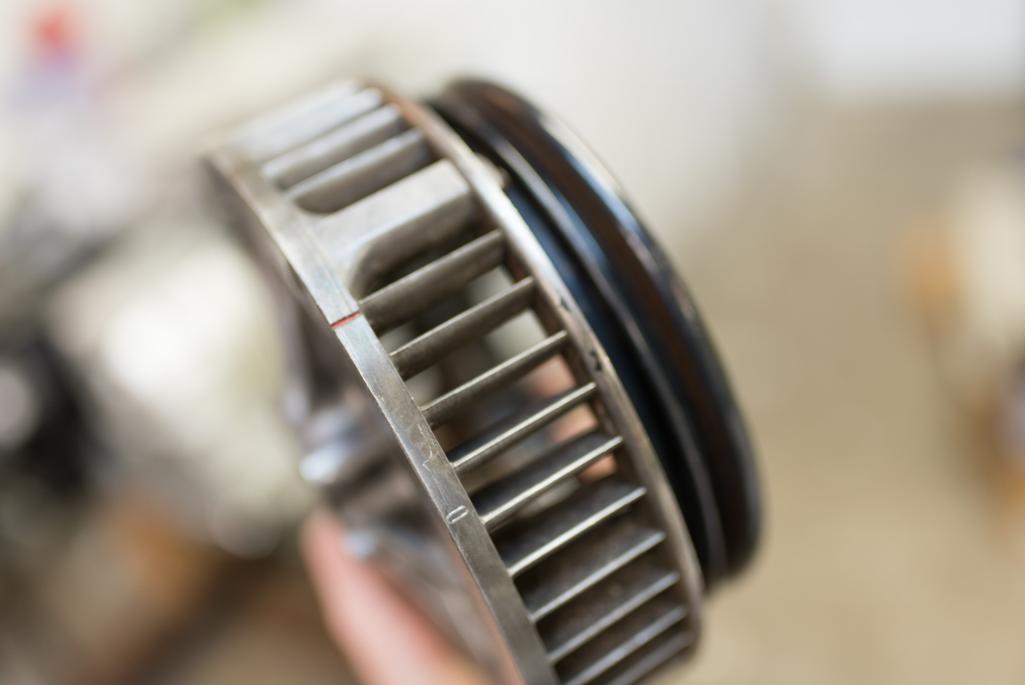
The old 901 is looking pretty dirty after sitting for so many years. Took it outback and scraped at it for about an hour with amble amounts of Simple Green. Here's the before pic. 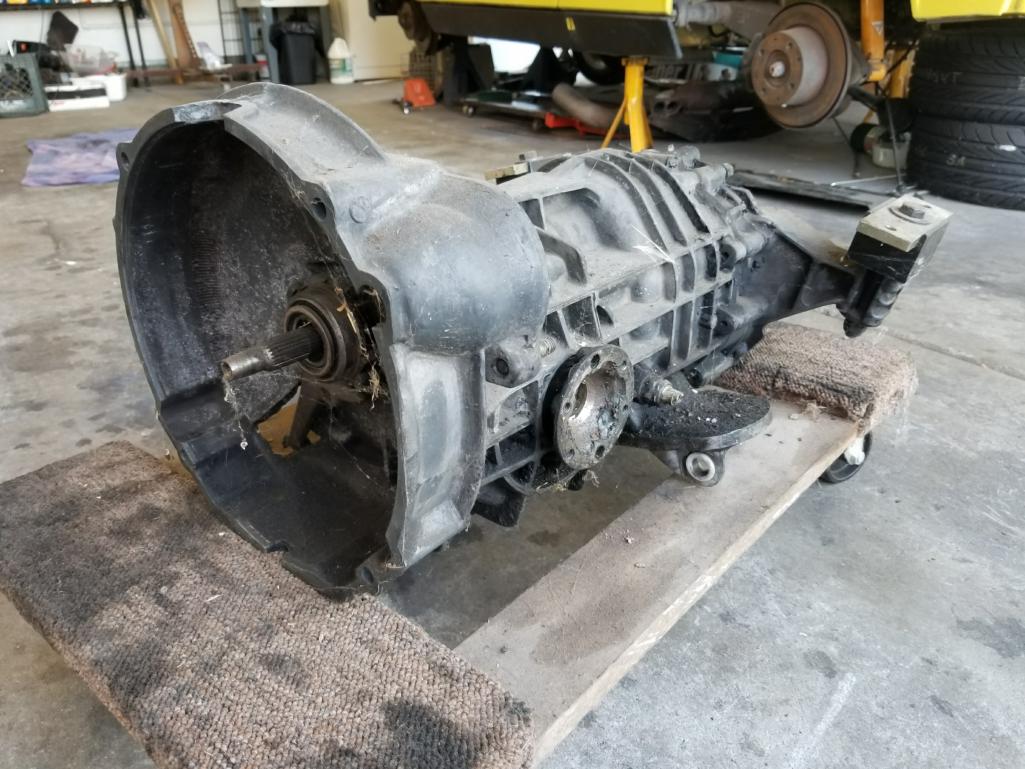
Installed new cup bushing, side bushings, throwout bearing. 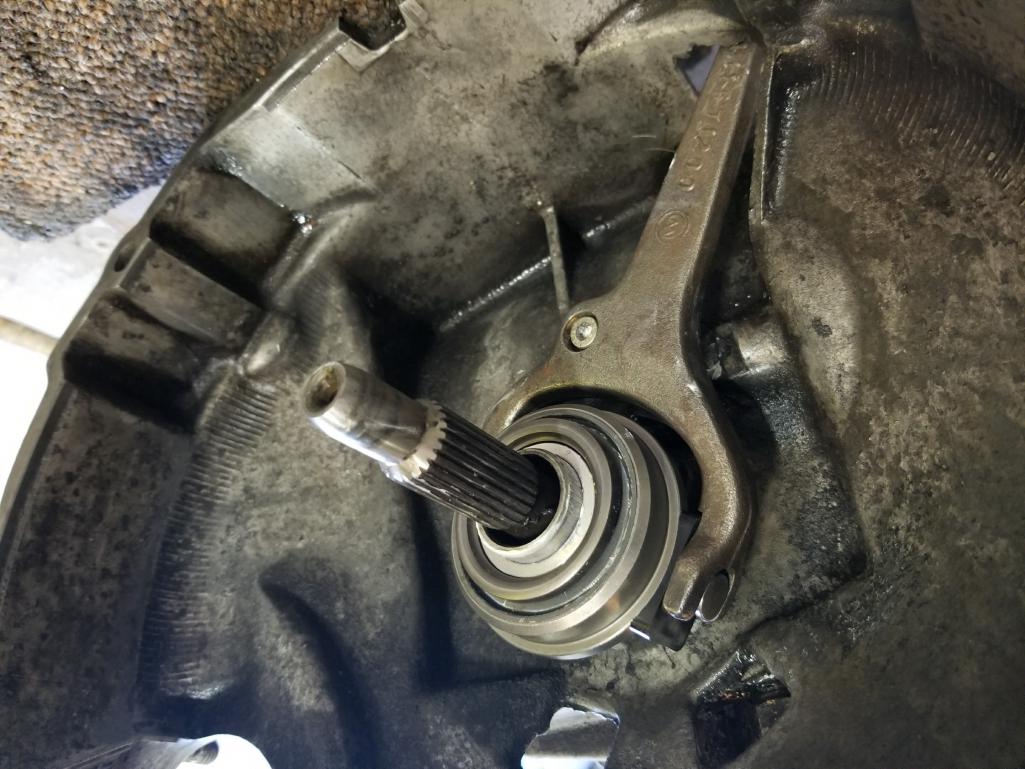
Posted by: RoadGlue Nov 19 2017, 09:25 PM
Cell phone shots are coming in at whatever orientation the phone was in when I took the shot. Hmmm, not worth opening and closing in PhotoShop to fix (yet).
Posted by: RoadGlue Nov 19 2017, 09:29 PM
Test fitted the carbs and setup the linkage. Switched the orientation of the fuel inlet nipple on one of the carbs. Oh yeah, also installed longer 40mm intake manifold studs to accommodate the fiber gaskets + thicker cast intake manifolds. 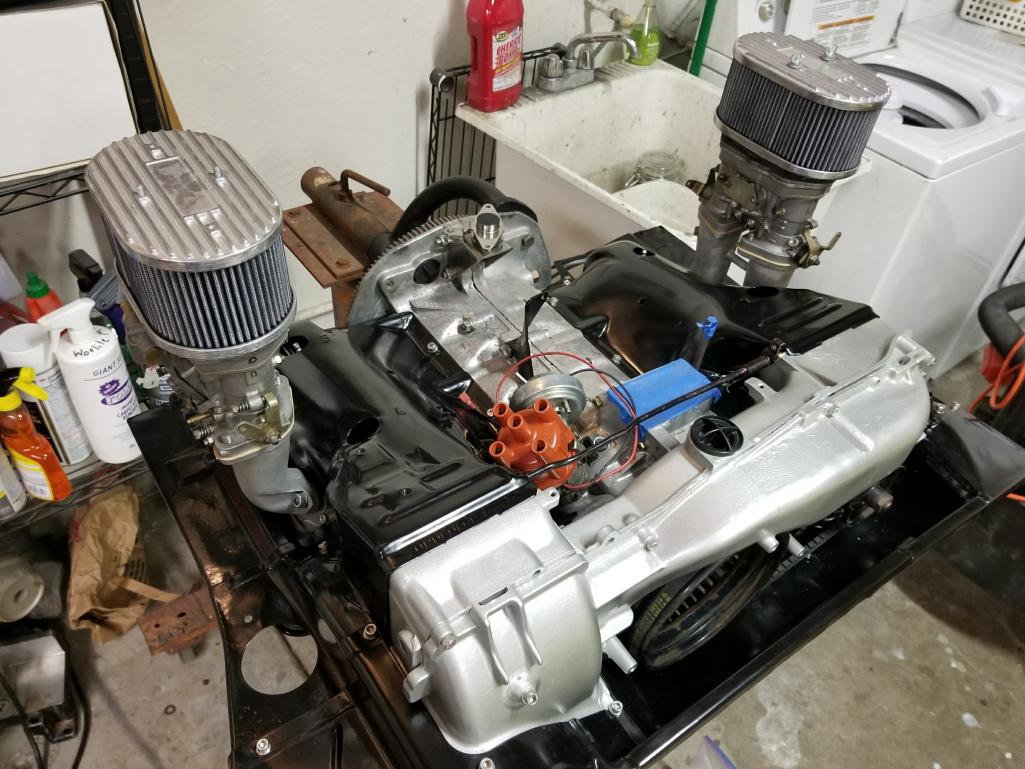
Posted by: RoadGlue Nov 19 2017, 09:38 PM
Is there any reason I can't use this part? Think it's off a bus and it doesn't have the PCV valve. I've got a single head vent that's going to be sent to a my catch can. Otherwise I need to hunt down the 914 part. 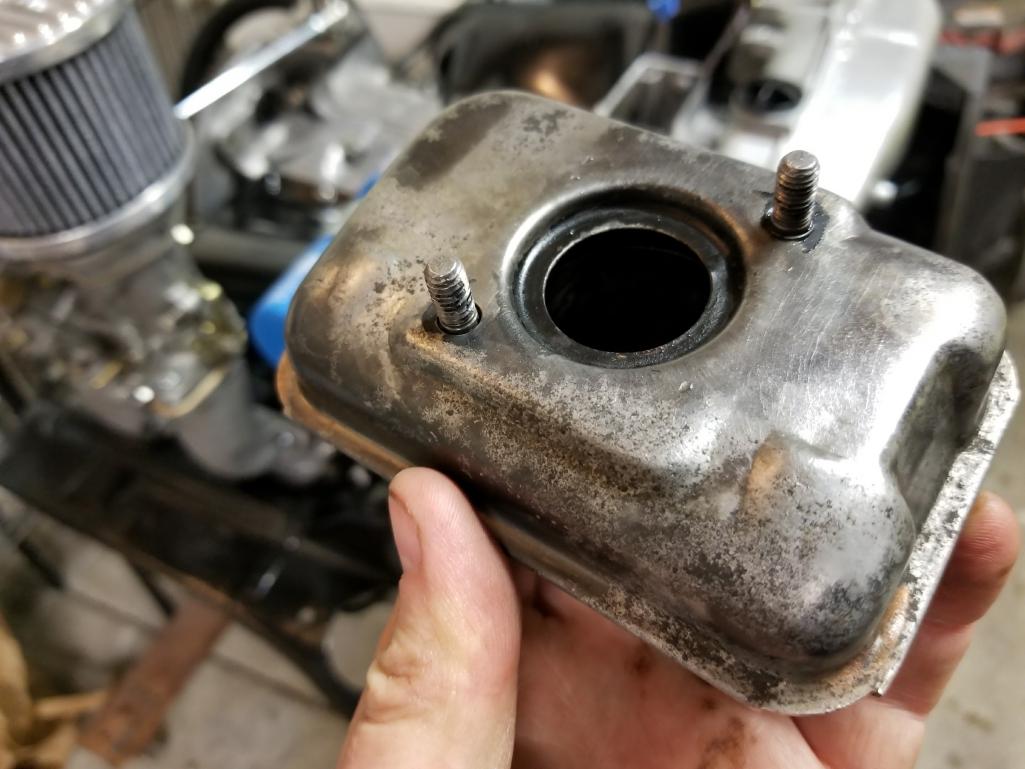
Posted by: RoadGlue Nov 19 2017, 09:42 PM
Is this the Brad Penn oil that's recommended?
"Brad Penn Penn Grade 1 20W50 Partially Synthetic"
https://www.amazon.com/BPEN-20W50-12-Brad-Penn-Partially-Synthetic/dp/B004WKH0VQ
Posted by: RoadGlue Nov 19 2017, 09:47 PM
She's only been outside twice in the past eight years. Bath time!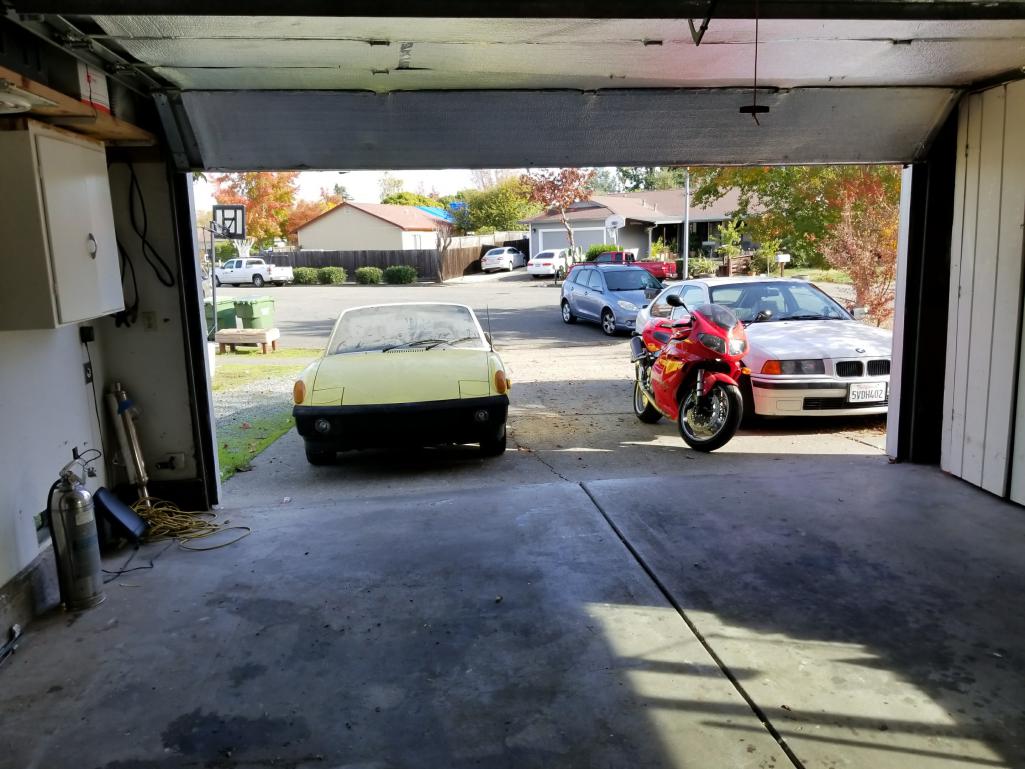
Posted by: RoadGlue Nov 19 2017, 09:49 PM
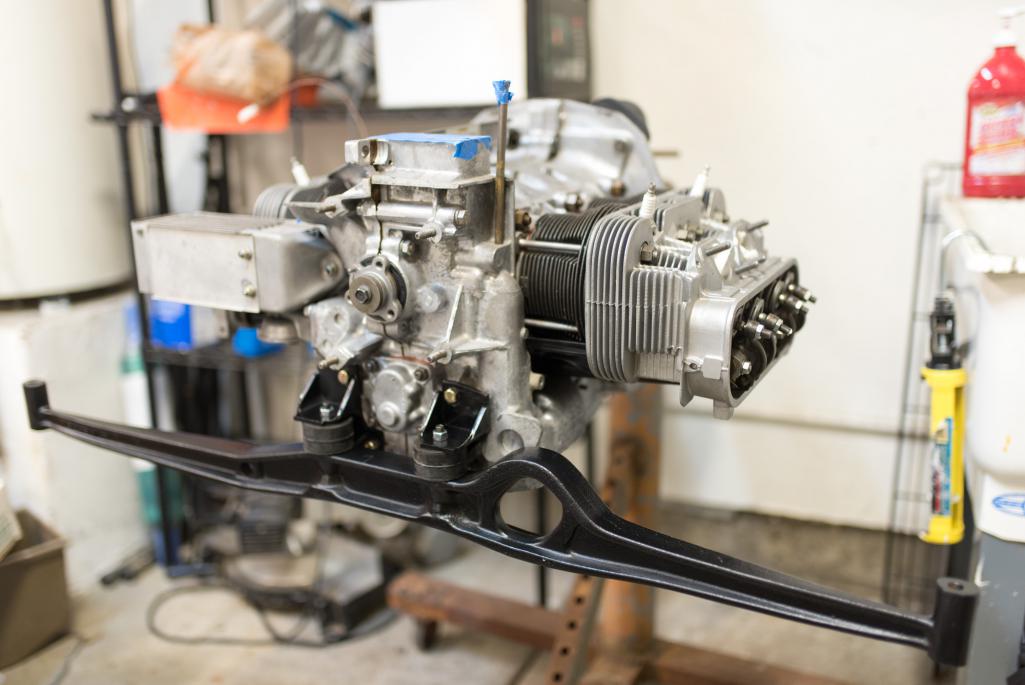
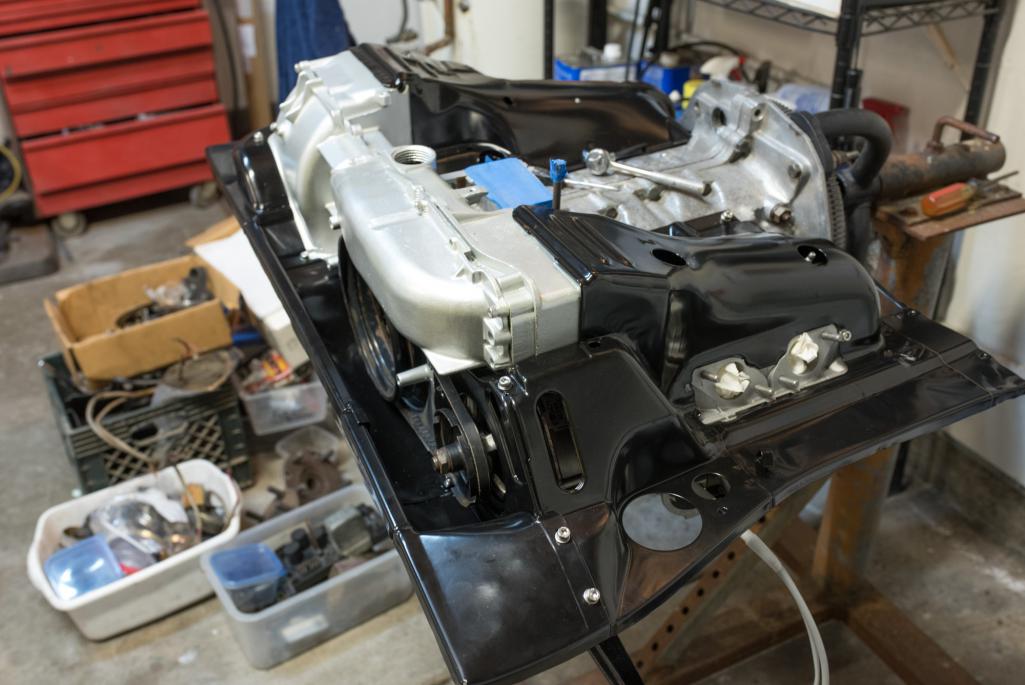
My friend Jon came by for the day. First order of business was to get the motor off the stand and onto a dolly. Torqued the flyweel bolts and put on the last few pieces of tin. 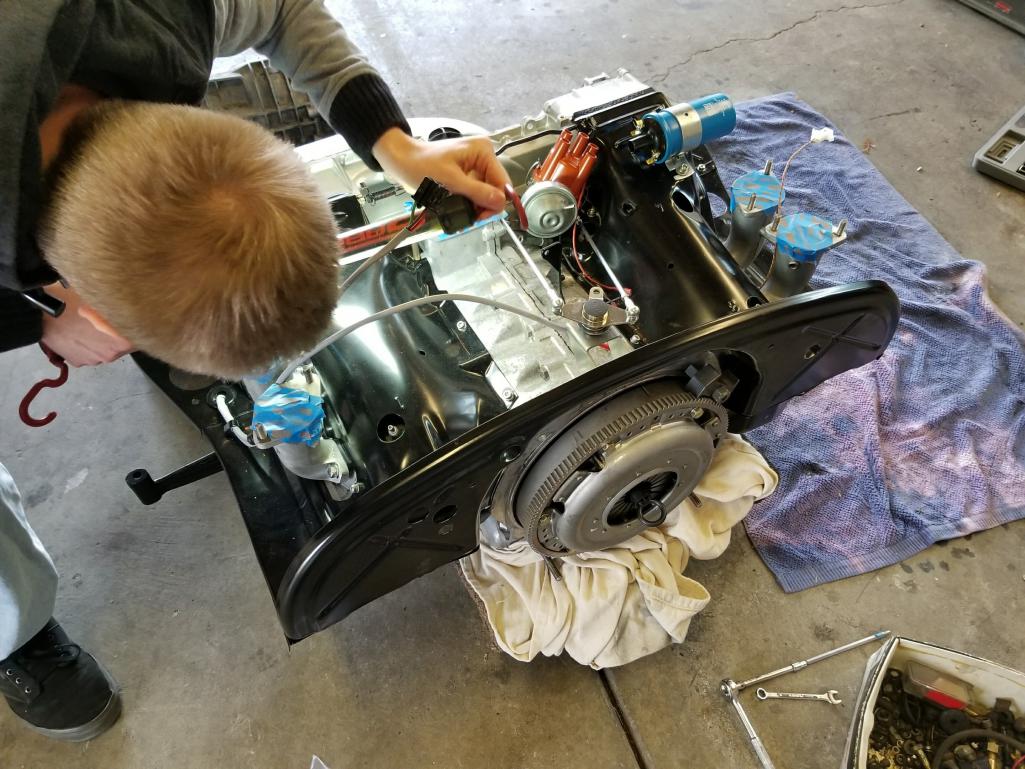
Posted by: RoadGlue Nov 19 2017, 09:51 PM
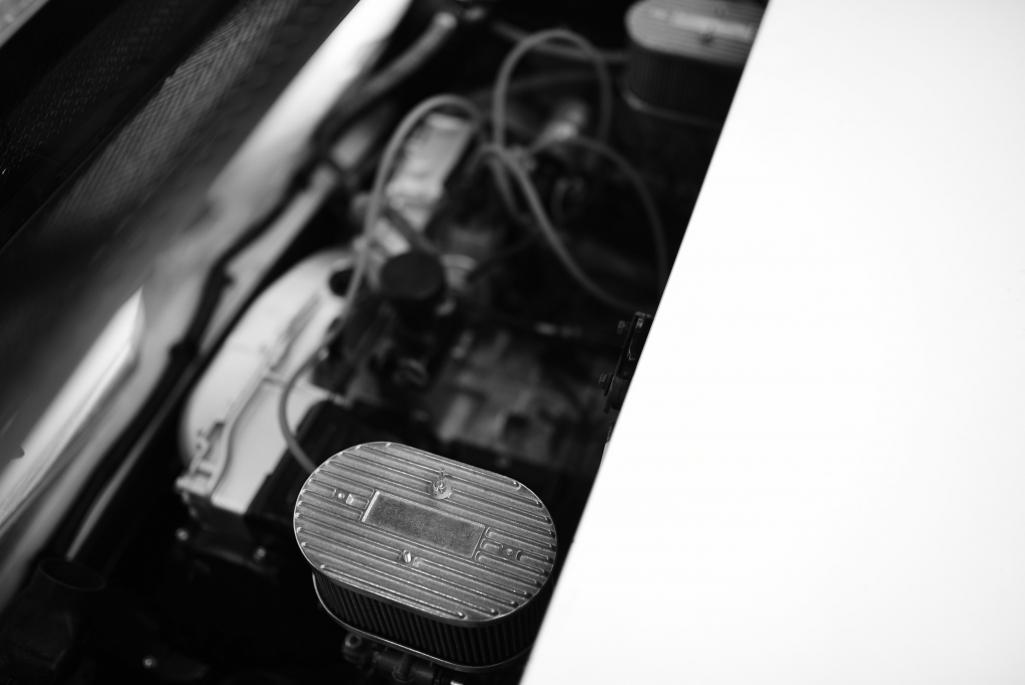
Engine and transaxle together at last, and a 914 in waiting.
A nice gash in the door and pillar from a nasty parking lot accident about ten years ago. Neighbor dragged her SUV alongside my car. I took the insurance money and bought another 914. 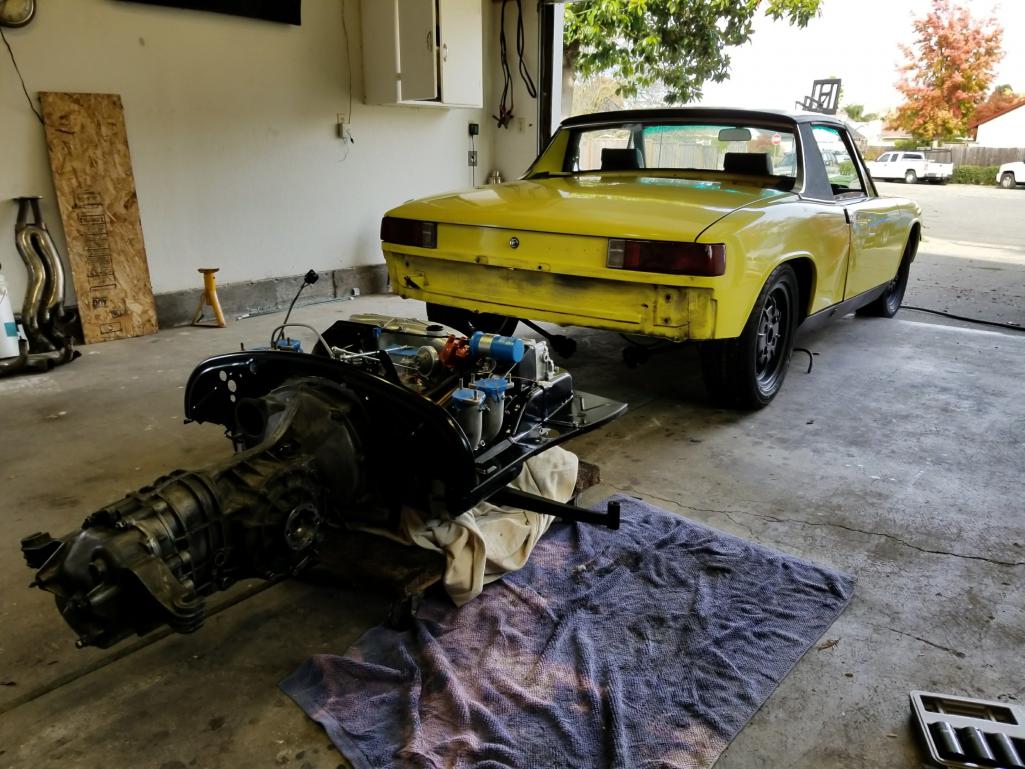
Posted by: RoadGlue Nov 19 2017, 09:56 PM
I didn't realize until Friday that my Tangerine Racing jack plate wouldn't fit my jack without an adapter, so we made an adapter-matic ®. Chris approved?
Highly recommend his jack plate though. Made balancing the motor a one-handed job. 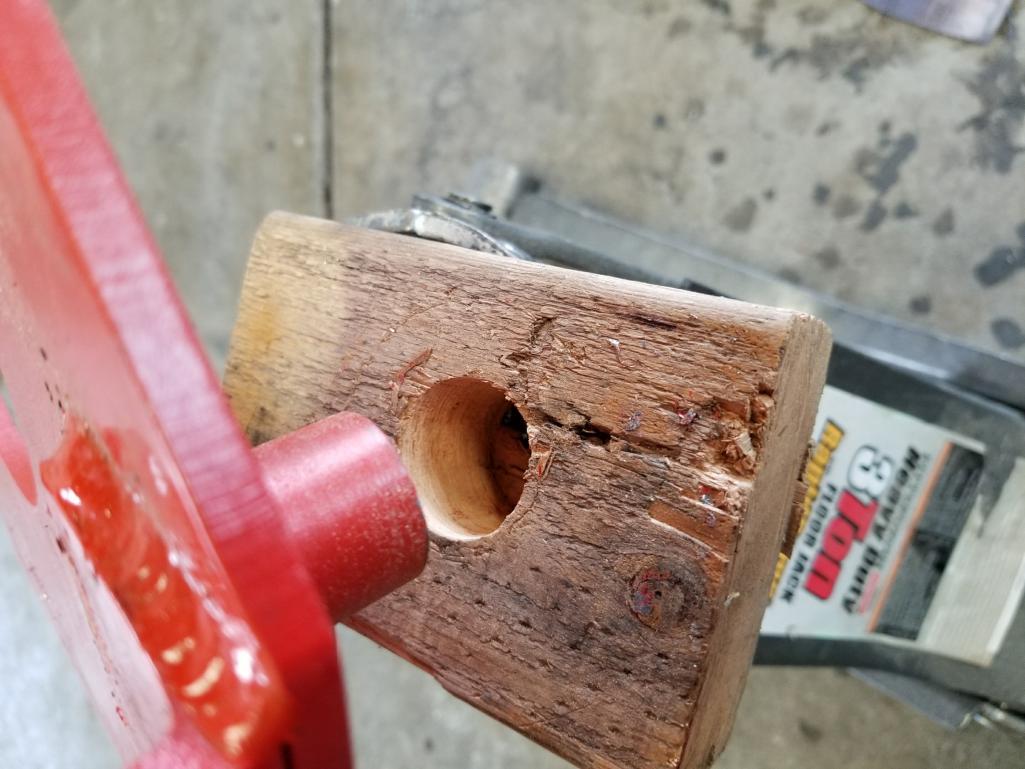
Posted by: RoadGlue Nov 19 2017, 09:59 PM
New speedo drive with the extra o-ring. Oh f&ck though - I'm missing the right-angle bit. I need to purchase one, so I guess I'm hitting the classifieds here later. 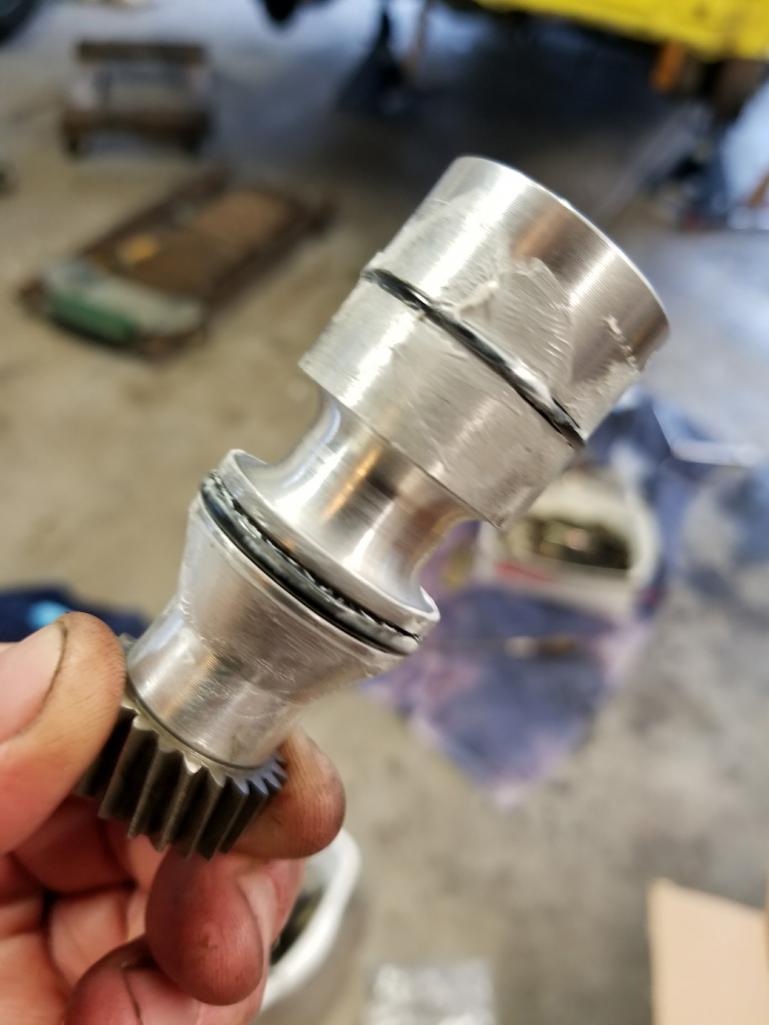
Posted by: RoadGlue Nov 19 2017, 10:02 PM
911 mounts and I elongated the holes as they're a bit too close together for the 914 mounting bracket. 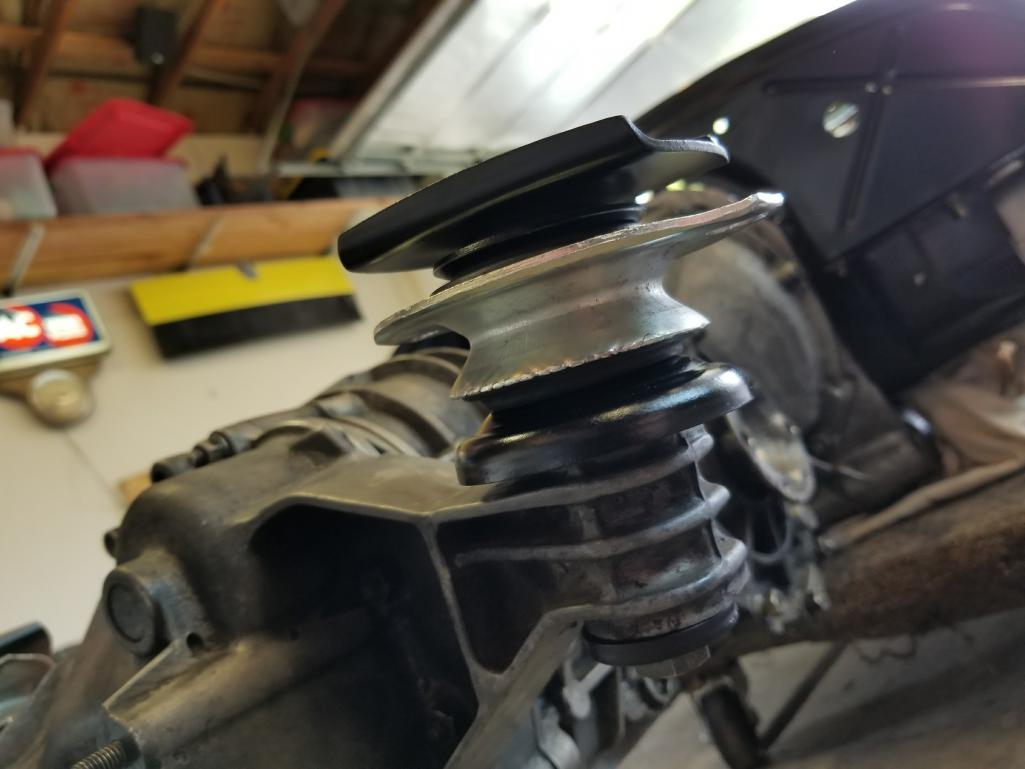
Success! She's in. Wish my car looked as good as the powertrain. 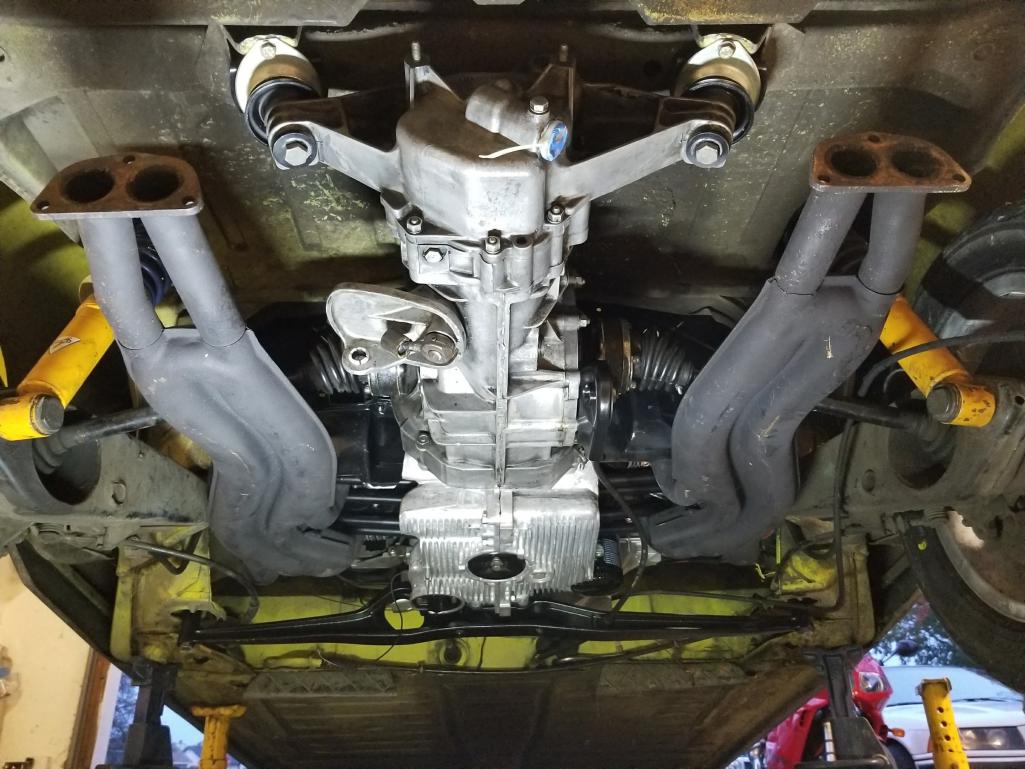
Posted by: RoadGlue Nov 19 2017, 10:05 PM
Starting to fit the carbs.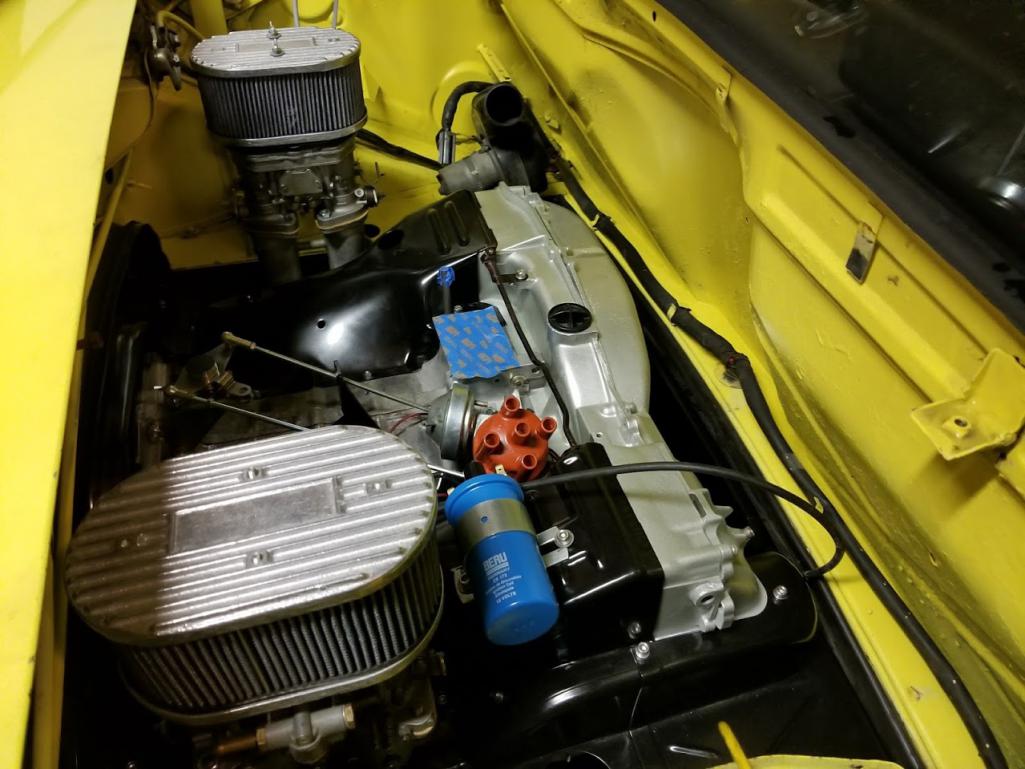
As she rests tonight. Pointing the right direction and ready to get back on the road again!
Posted by: RoadGlue Nov 19 2017, 10:07 PM
Lots to do still, but I'm stoked to have gotten this far this weekend. Small chance we'll be firing it up next weekend. Starter, spark plug wires and the shift linkage bushings are showing up this week. I'll just need a battery, some break-in oil and a bunch of time to wrap up all the other little things. We'll see!

Posted by: RoadGlue Nov 20 2017, 12:31 AM
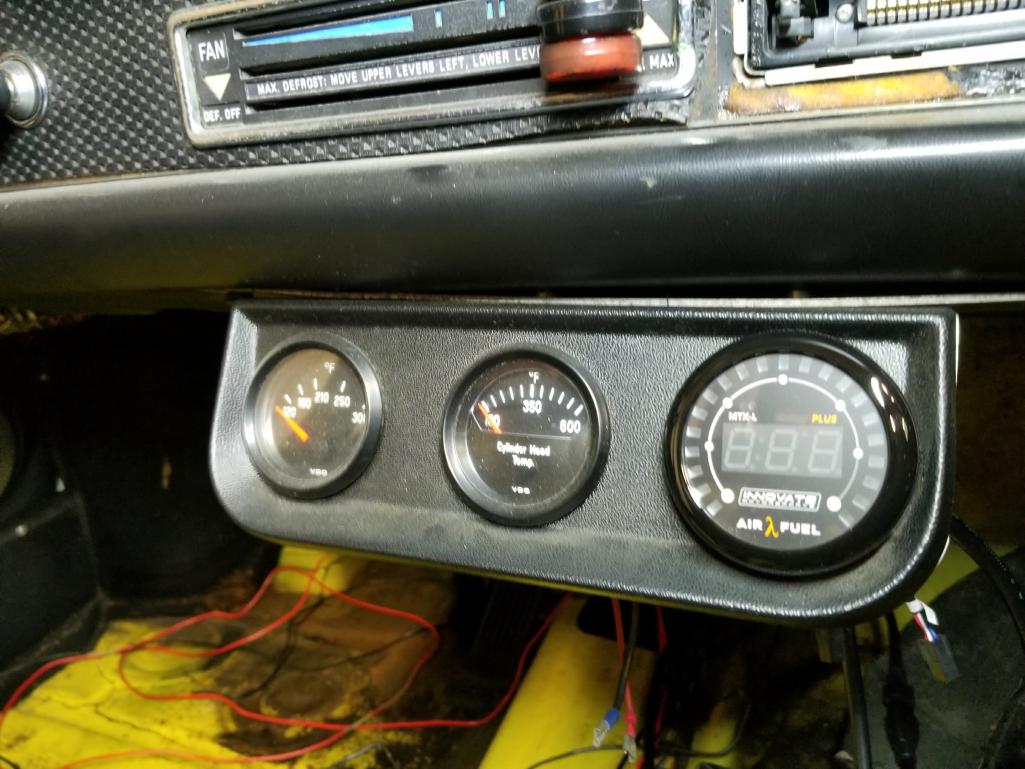
I ended up ordering the Innovative Motor Sports MTX-L PLUS: Digital Wideband Air/Fuel Ratio Gauge Kit (8 Ft.) with an 8' extension. Thanks for the recommendation Dug! I might have gotten by with a 3' extension, but I measured it out to needing 14'. The gauge includes a 2' lead as well, but that still gets me to just 13'. Oh well, I'll know soon.
http://innovatemotorsports.com/products/mtxl_plus.php
It's a got a party trick. You can get solid data logging out of their system when used in conjunction with their MTX-D: Vacuum / Boost & Shift Light gauge (for sending RPM data) and their PL-1: Pocket Logger, Innovate MTS Datalogger.
I'm holding off on the secondary pcs of kit until I make sure I have a running car.
Here's the gauge face. 
Doug pointed out that the only $hitty part is that the needle LED is just a single LED and doesn't show a fully lit progression on all the LEDS leading up to the value LED.
I'll report back and write a review when I've had a chance to play with it.
Posted by: McMark Nov 20 2017, 07:01 AM
Mark, I think the happy medium is somewhere in the middle. The wire gauge is gargantuan!
Okay, that's not the one. 
Posted by: RoadGlue Nov 22 2017, 11:14 AM
Still trudging forward.
Damn, I love new parts! 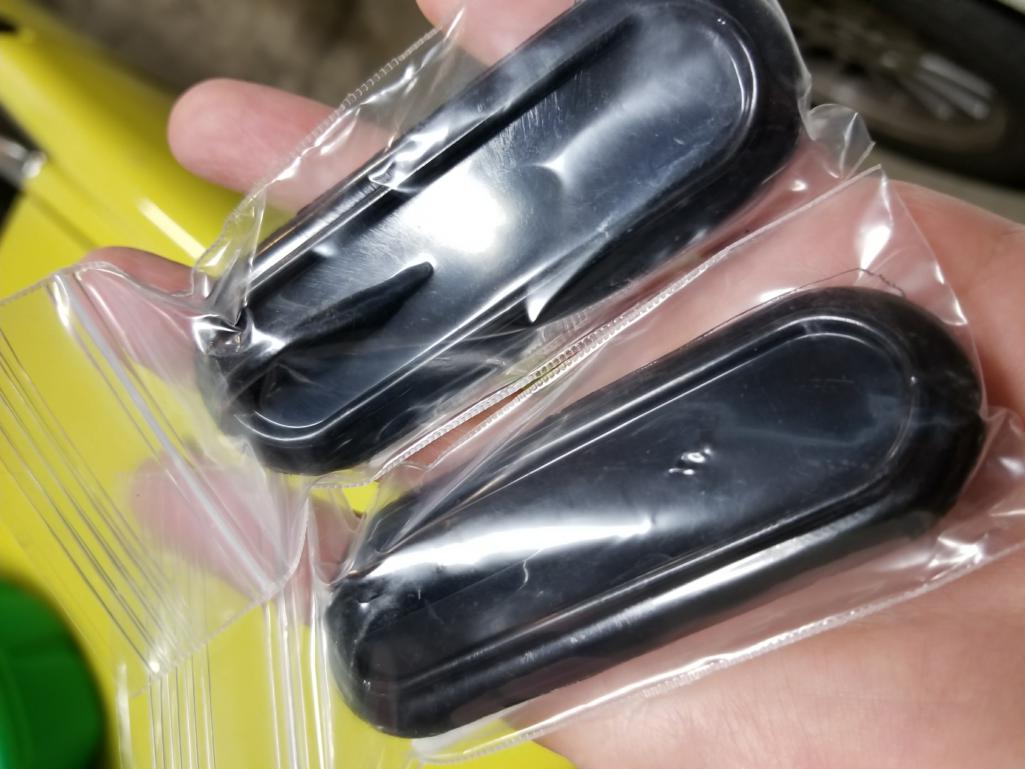
Painting a shift rod -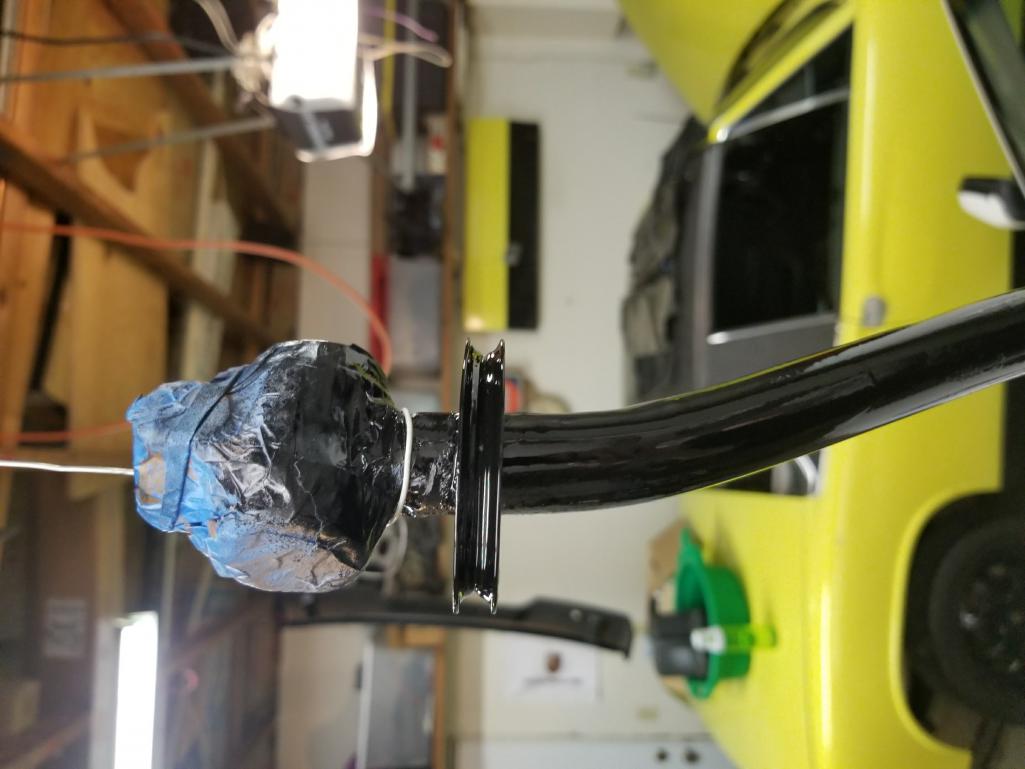
Here's how I cut the tubing for the wire clamps -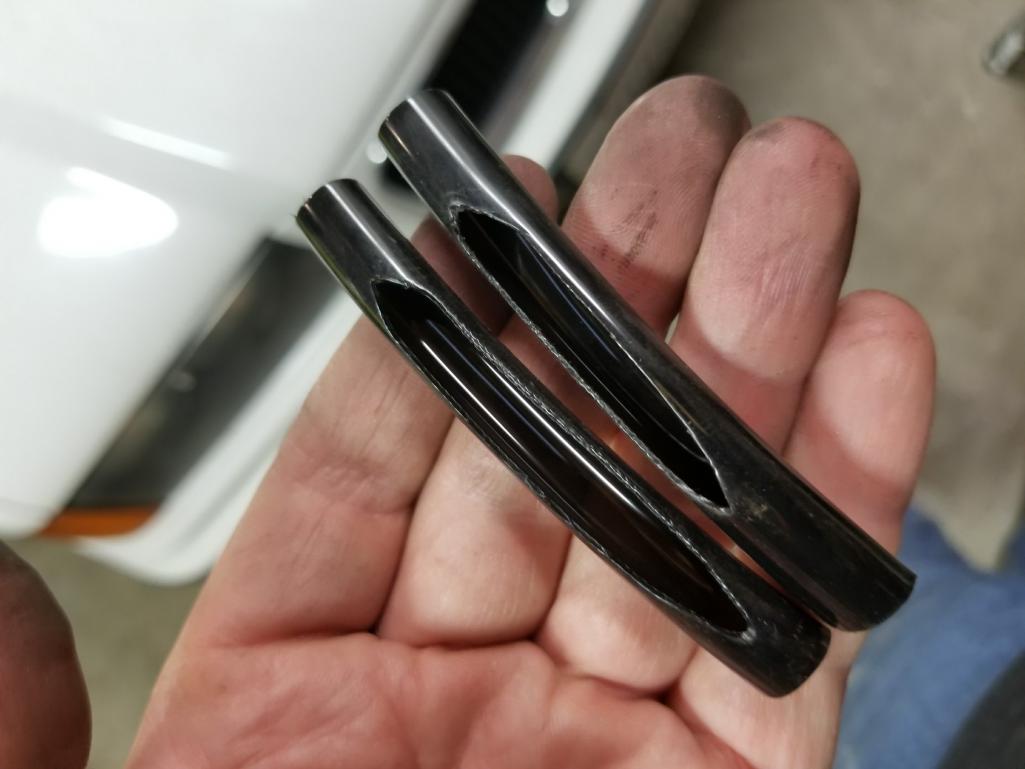
That looks better! I was missing all of them in the engine compartment. 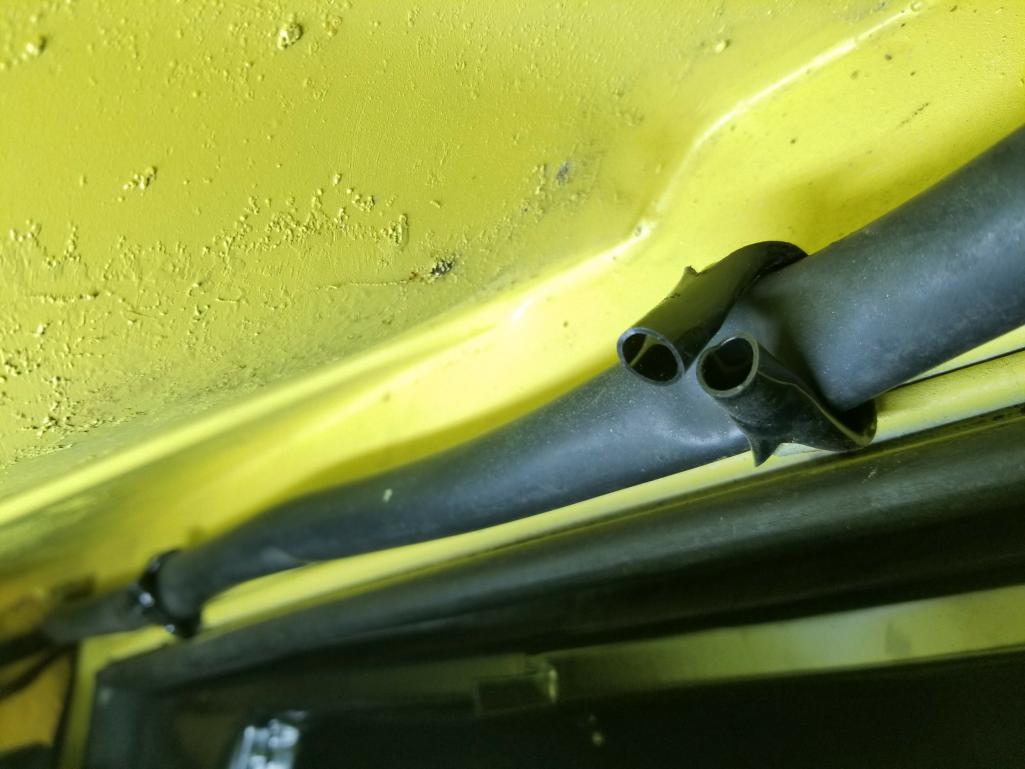
Installed the relay board and started laying out the engine harness. 
Should be getting a new batch of goodies in the mail today. Might have time to wrap up the shift linkage this evening too. Just LOATHING the thought of attaching the linkage boot at the firewall. What a pain in the ass.
Posted by: gms Nov 22 2017, 11:46 AM

It is really happening!
text me if you still need the angle drive
Posted by: RoadGlue Nov 22 2017, 11:50 AM
It is really happening!
text me if you still need the angle drive
No stopping this train now! We'ze on a roll, yo!
Garold hooked me up with a few parts I needed, including the angle drive. Thanks!
Posted by: RoadGlue Nov 26 2017, 11:09 PM
Haven't updated the post in a few days, but I've been working my butt off getting the car ready the past week.
Wrapped up the shift linkage. Adjusted it today too. Think it feels right, but we'll find out for sure when she's running. 
Posted by: RoadGlue Nov 26 2017, 11:13 PM
This Triad muffler is kinda jacked. Sits way too close to the body on the driver's side and is firmly planted on the passenger side. The center glass pack was opened up at some point too and gutted. The O2 bung is also in a really lousy spot. IIRC, this was a bit loud for my tastes when I ran it on my other car.
That being said I've had a lead on another muffler which with a little luck will be here later this week. 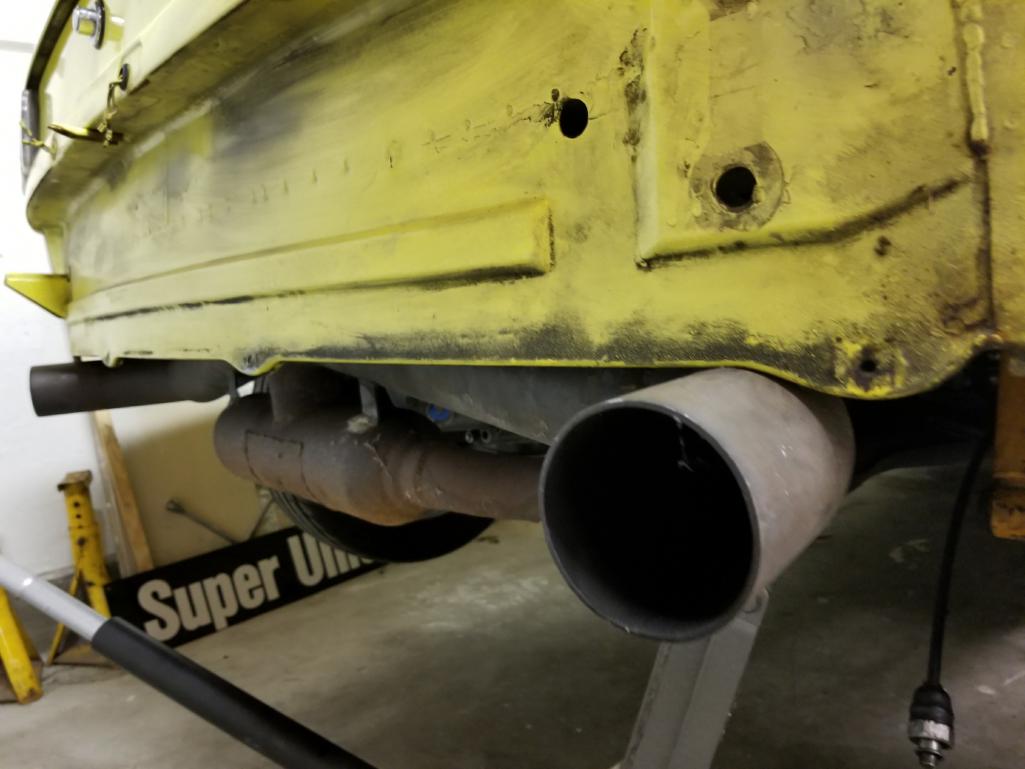
Posted by: RoadGlue Nov 26 2017, 11:17 PM
Didn't get any photos of a lot of work I did on Saturday, but had a buddy come over and we ran the fuel pump wiring from the frunk to the stock FI pump location in the engine bay. Also rerouted the CHT gauge and oil temp gauge wiring. Lastly, got my O2 harness in place, but I'm wiring for a 3' extension before I can wrap that up.
Also finished plumbing the fuel hoses at the tank. Replaced the carpet (sponges) that the tank sits on with high density closed cell foam that won't hold water. 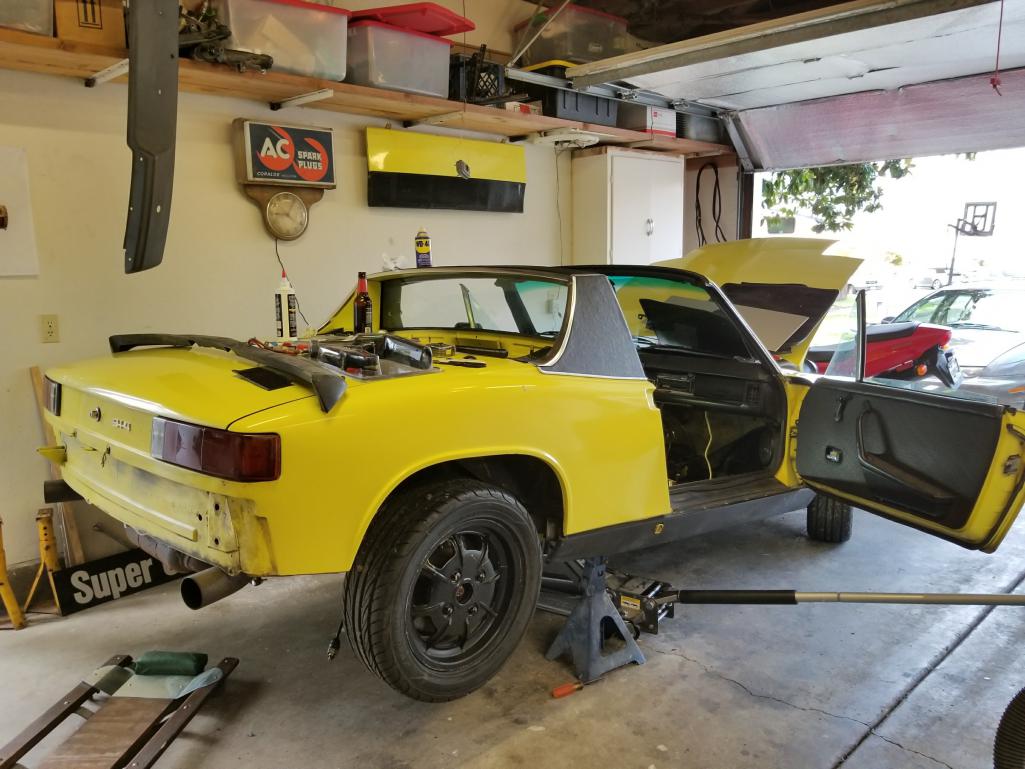
Looks like I didn't clean that yet... 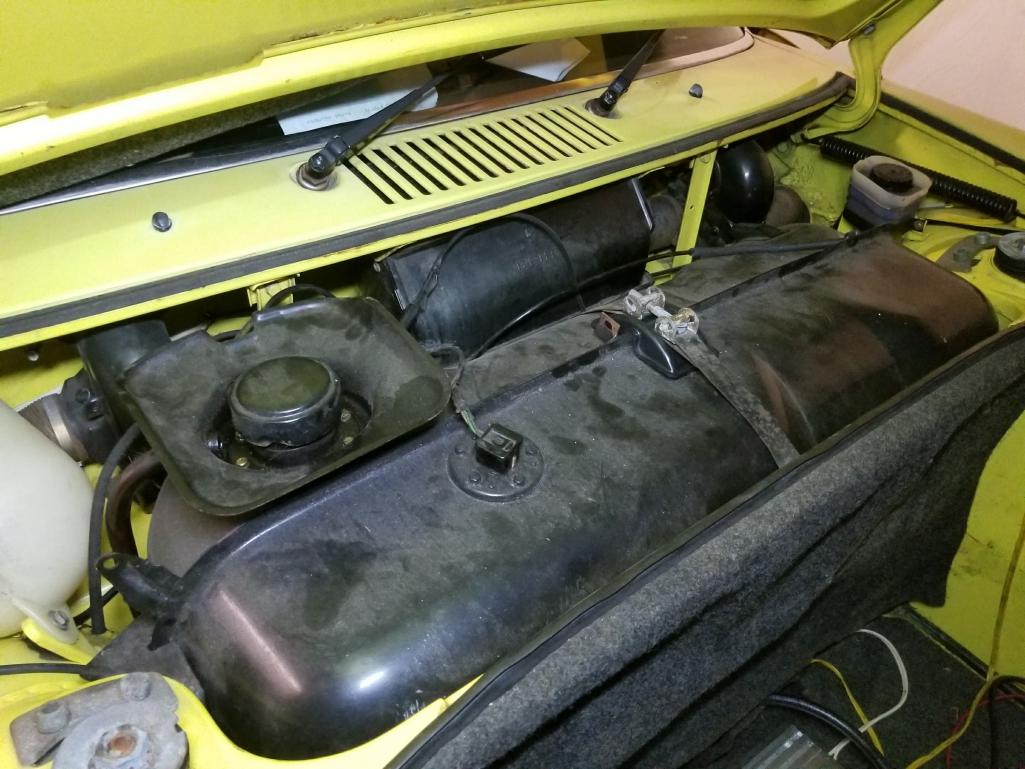
Posted by: RoadGlue Nov 26 2017, 11:19 PM
She's not much to look at, but I'm chipping away at the cosmetic issues.
Posted by: RoadGlue Nov 26 2017, 11:21 PM
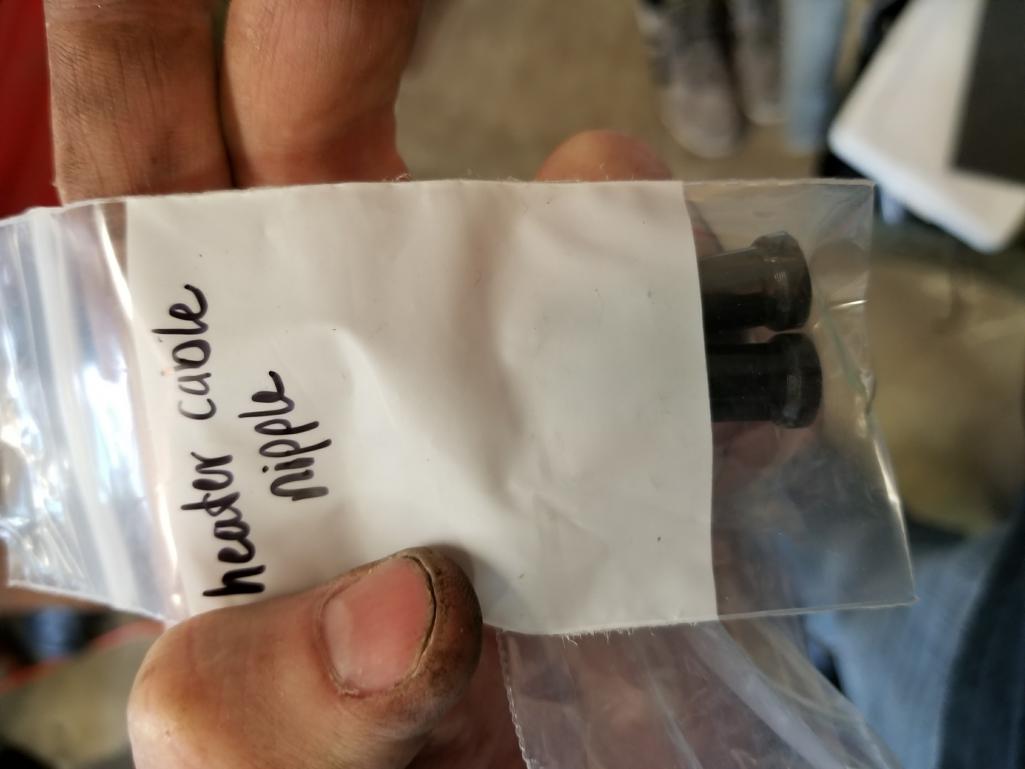
New heater pull cable and nipples. That cable has been hanging in my garage for at least a decade. Glad to put it to use. 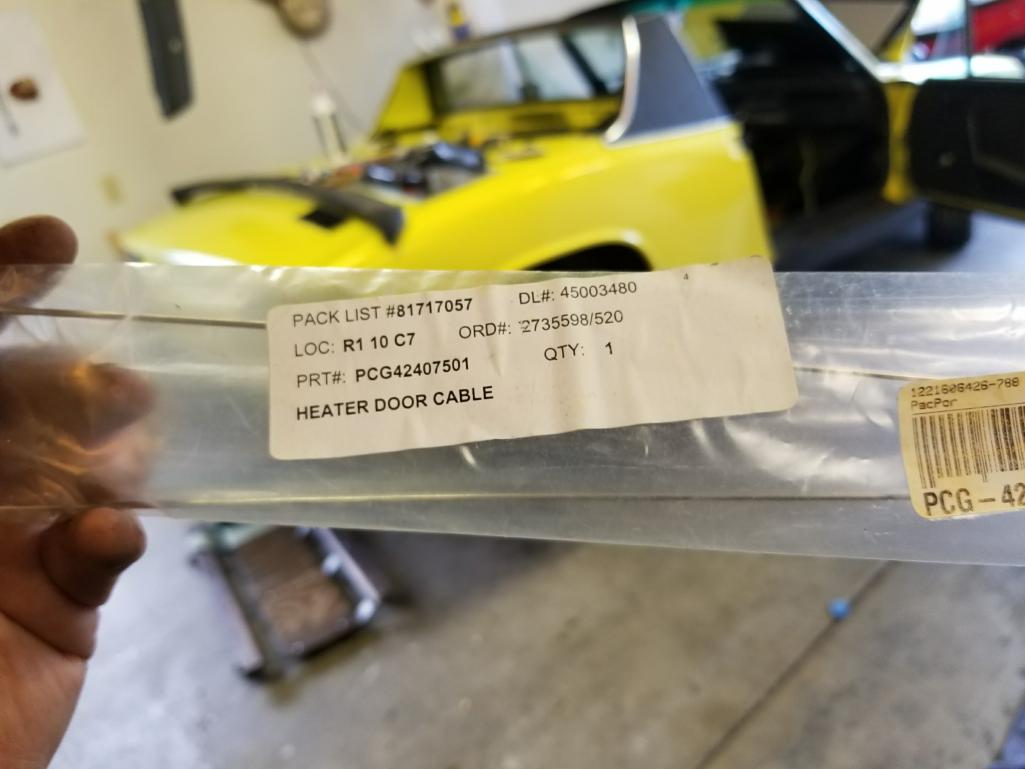
Posted by: RoadGlue Nov 26 2017, 11:24 PM
Wiring and interior fun. Installed new seat adjustment handles too.
Also ordered Gray German Loop carpet today. The Black Friday sale at 914world has made this an expensive weekend. Please don't tell my better half, k? 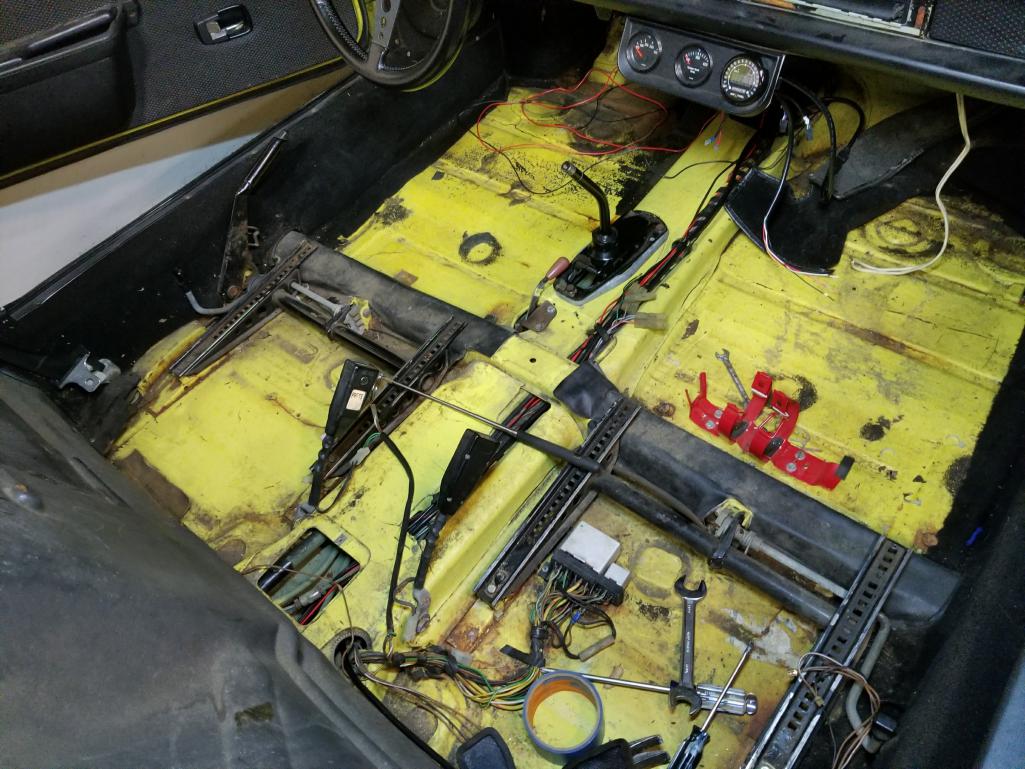

Posted by: RoadGlue Nov 26 2017, 11:26 PM
Cleaned off the dust, glued the dash fave vinyl around the stereo. Replaced one of the seat cushions.
The German Loop carpet can't get here soon enough!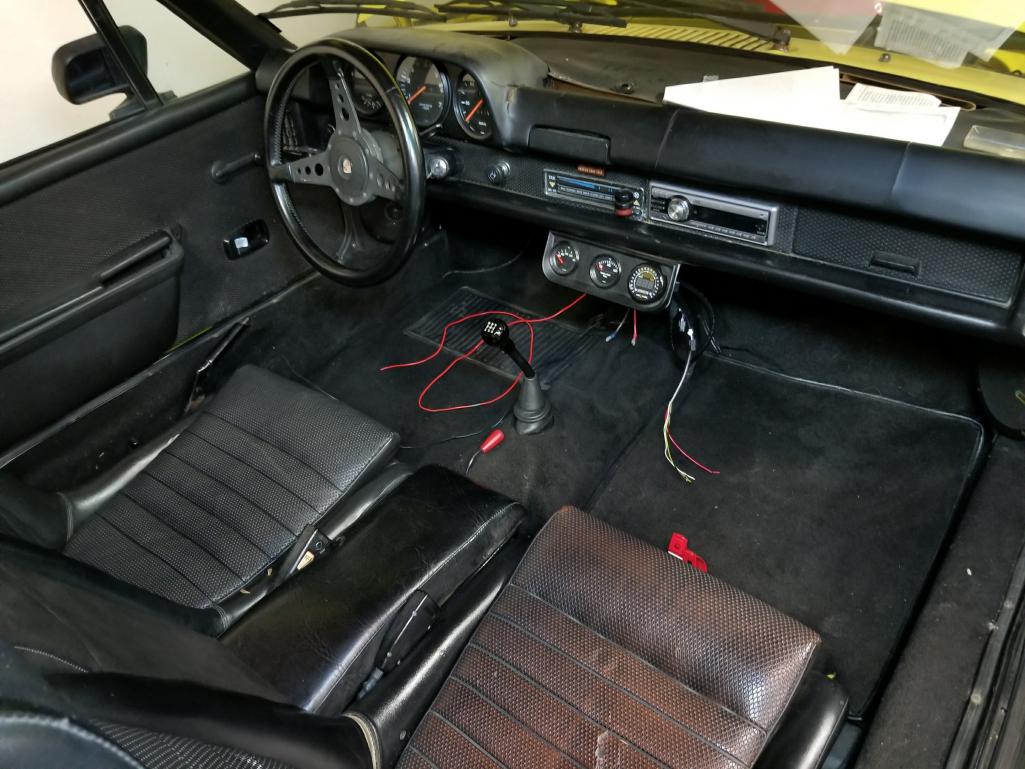
Posted by: RoadGlue Nov 26 2017, 11:27 PM
Oh, also installed a new reproduction center tray from Stoddard. It required a lot of trimming and in the end still didn't fit great. Can't say I recommend it.
Posted by: RoadGlue Nov 26 2017, 11:35 PM
Catch can installed, but waiting for my oil filler tower before I vent the case to the can. 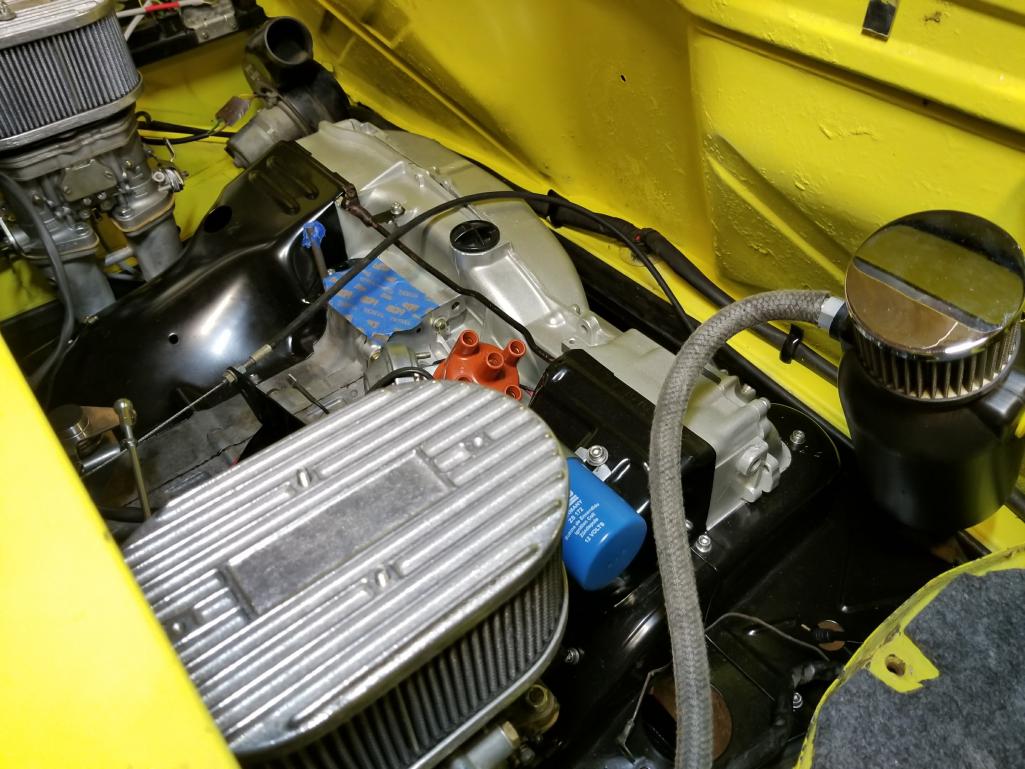
Posted by: RoadGlue Nov 26 2017, 11:40 PM
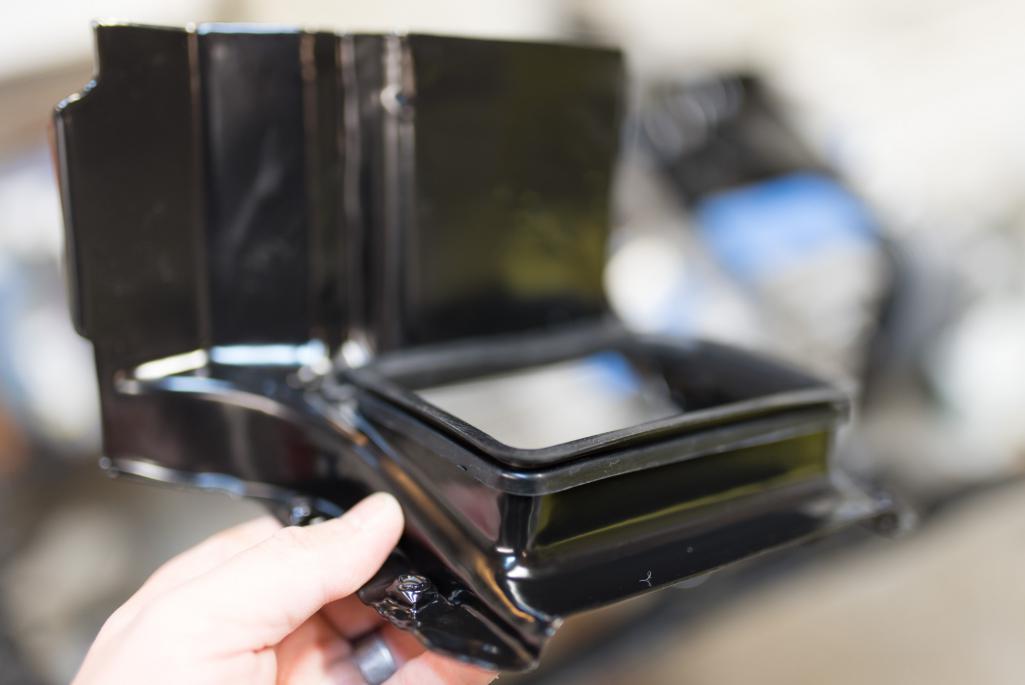
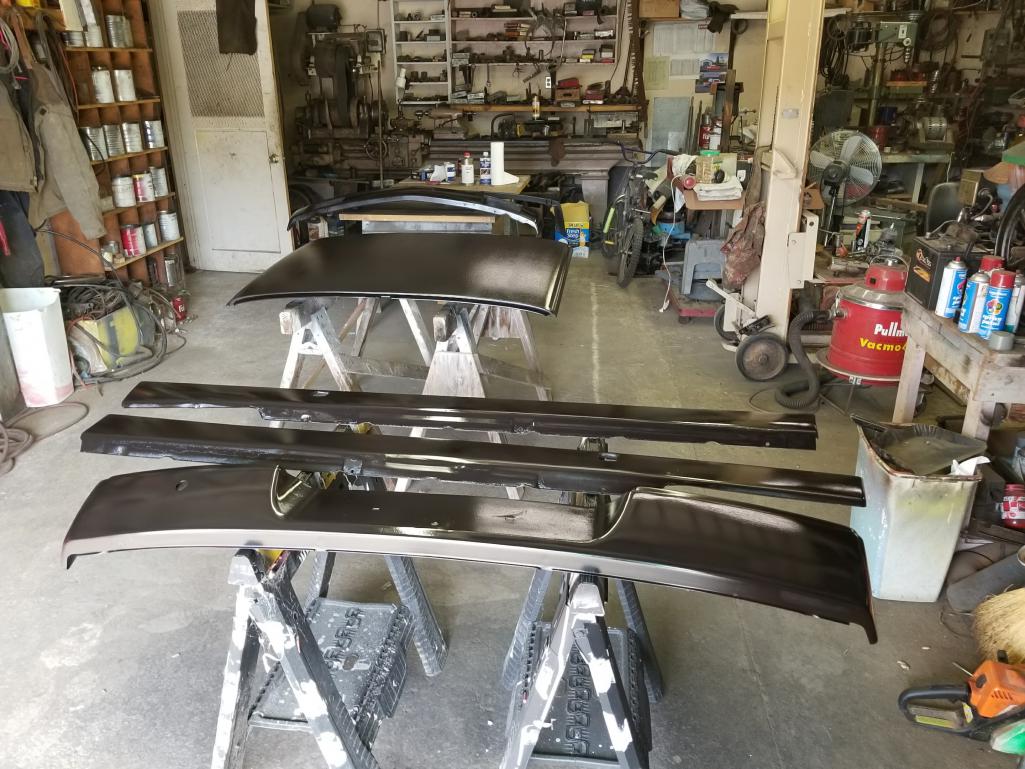
On to rebuilding the targa top. Spraying the front and rear bumpers, rocker panels and top this week. Seals and perlon have been ordered. 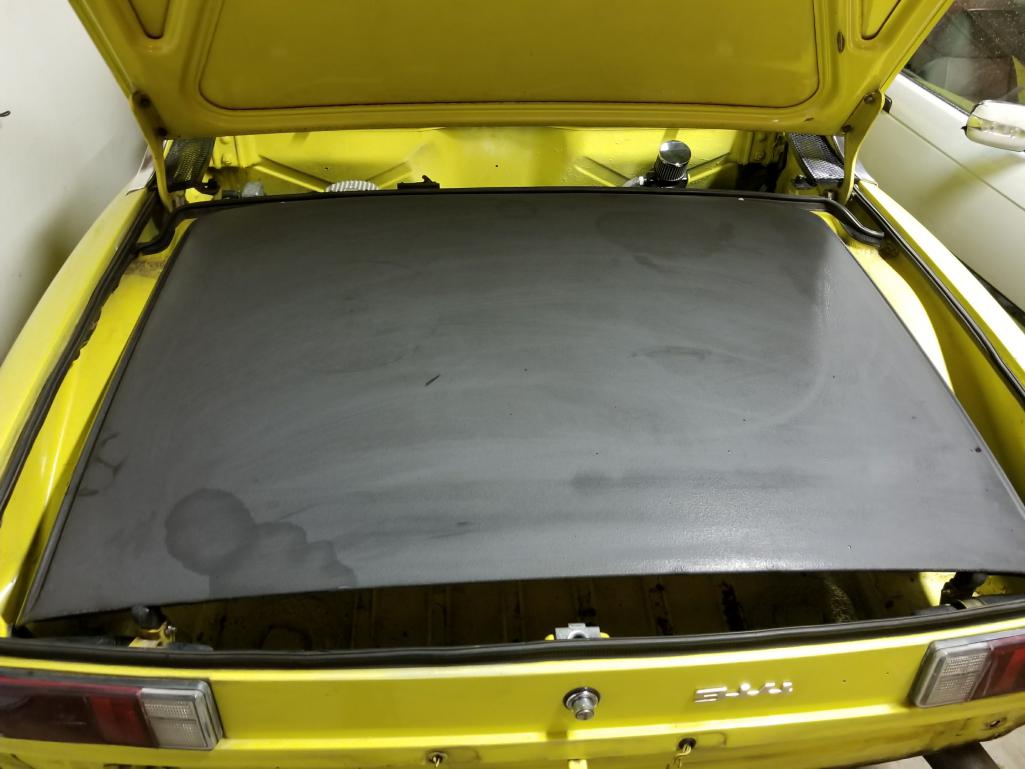

Posted by: Krieger Nov 27 2017, 12:28 AM
Go Randy go! Looks great!
Posted by: Matty900 Nov 27 2017, 12:46 AM
After this weekend, you're going to be set for parts! Great Work Randy!
Posted by: RoadGlue Dec 1 2017, 11:02 AM
While I know the body needs work (and it does!), I still thought I'd go ahead and paint the black bits as I had to repaint the rear bumper as it came in needing a bunch of work.
I always hold my breath when pulling rocker panels, but thankfully they look the same as they did when I had them off ten or so years ago. 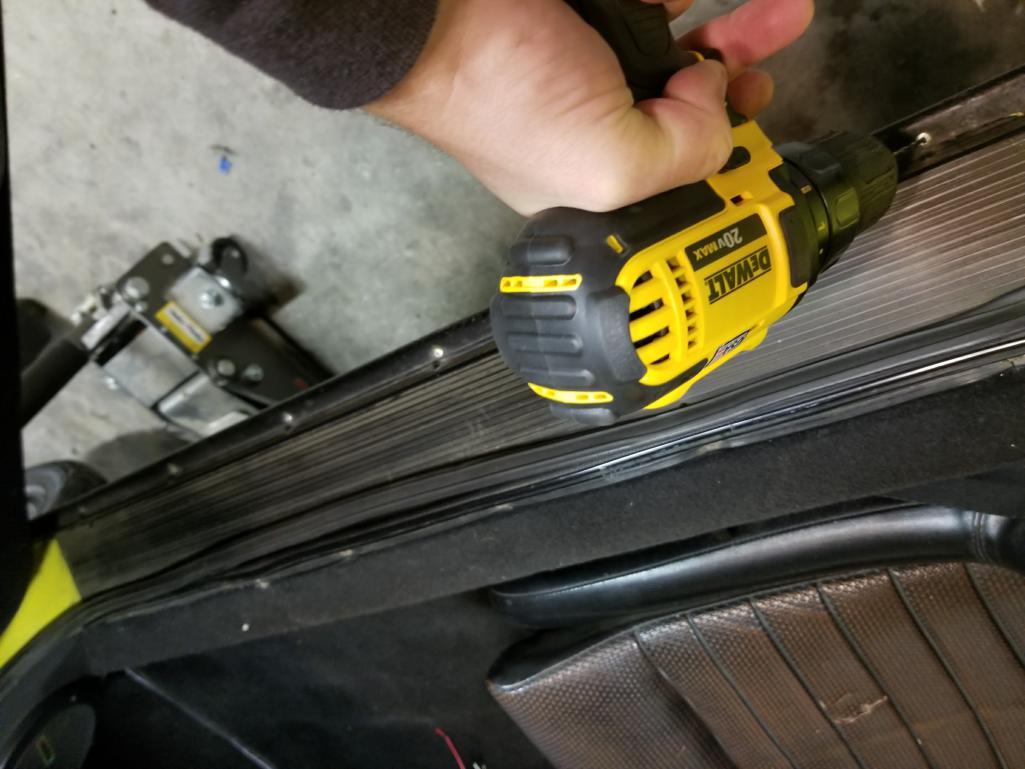
Posted by: RoadGlue Dec 1 2017, 11:03 AM
As you can see, I have my entire garage and gravity on a rotisserie.
Posted by: RoadGlue Dec 1 2017, 11:04 AM
Spent a number at my pop's place the other night starting the body work.
I'll be back out there this afternoon and hopefully we'll be able to shoot everything either today or tomorrow. 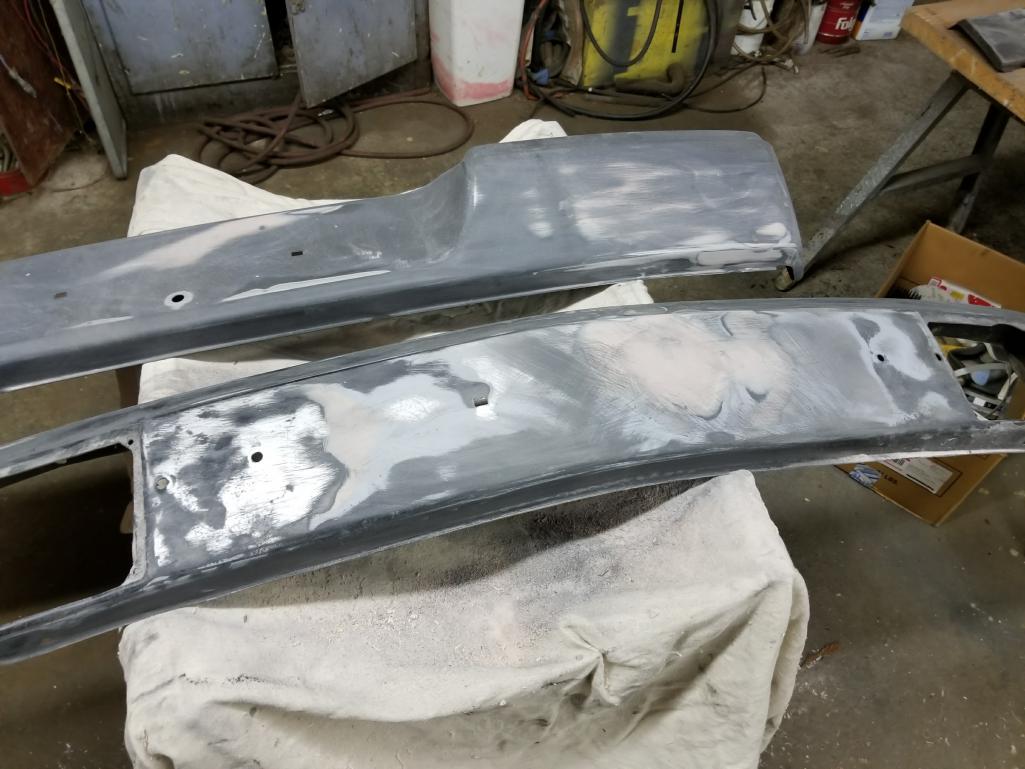
Posted by: RoadGlue Dec 1 2017, 11:07 AM
Found a high quality 4 gauge battery cable that's the right length -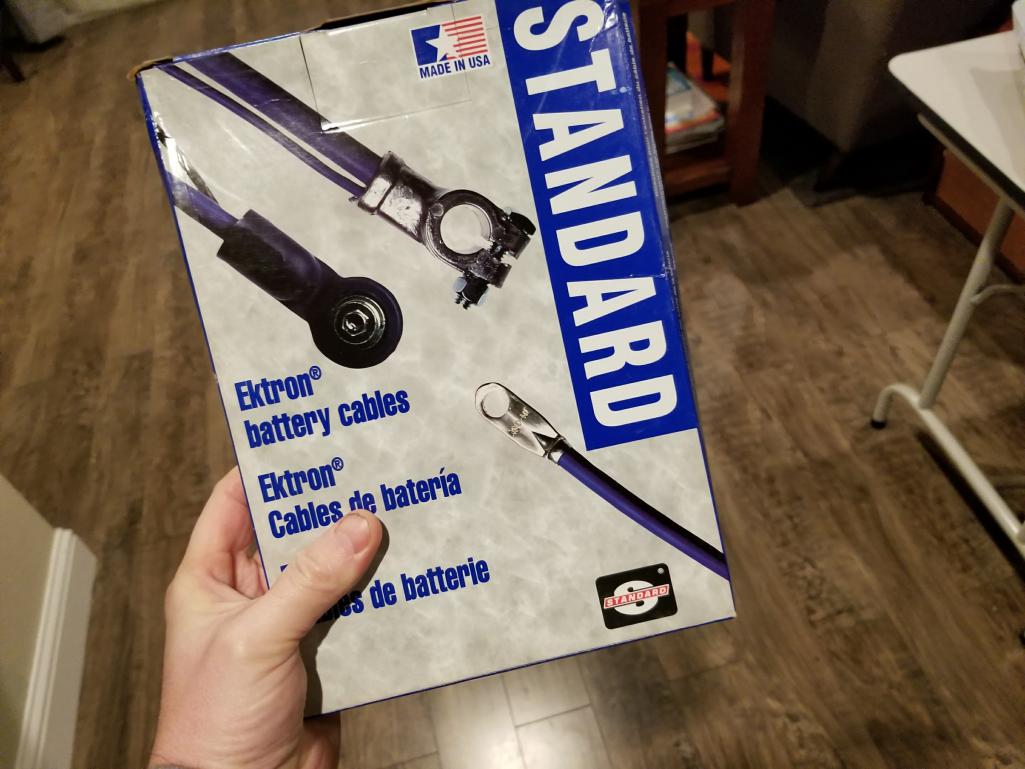
Re-manufactured 911 in. Appears to be both a new solenoid and motor. Was prepared to keep sending them back until I got a good one, but this looks like it's going to be fine. 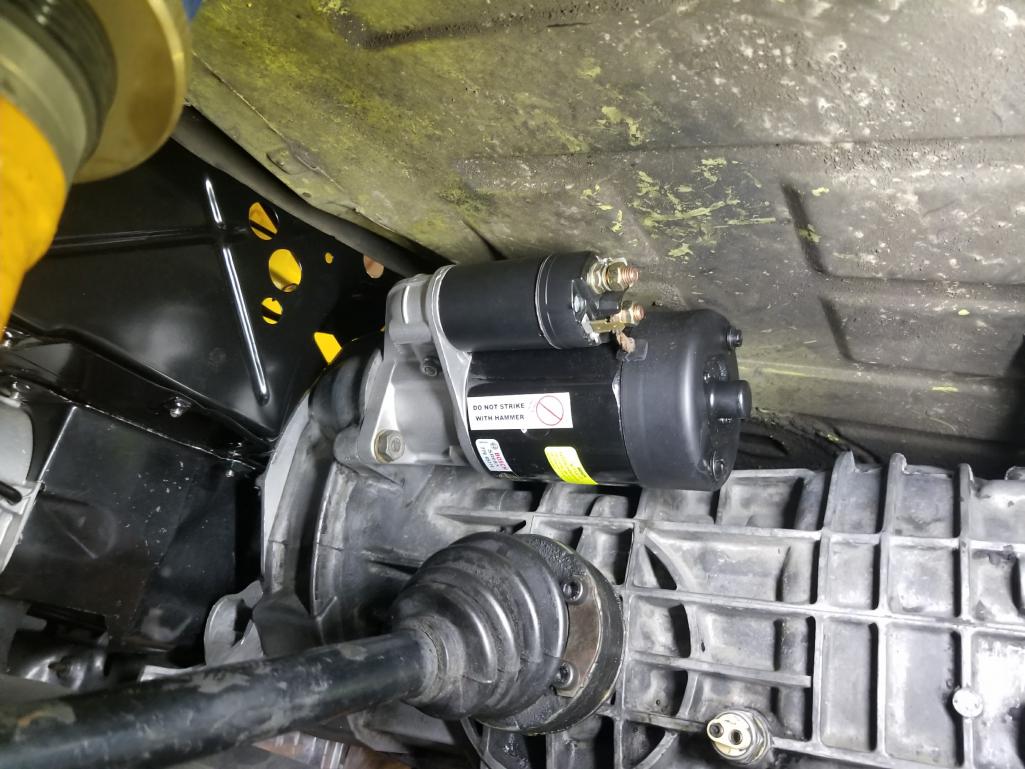
Posted by: RoadGlue Dec 1 2017, 11:11 AM
Pulled off the ill-fitting Triad (or Triad-clone?) and compared it to the size of the Bursch. The Bursch must be half the weight. I'm not a big fan of the sound, so I plan on swapping the muffler part out with a Magnaflow and slightly larger out pipe, you know, for street cred! 
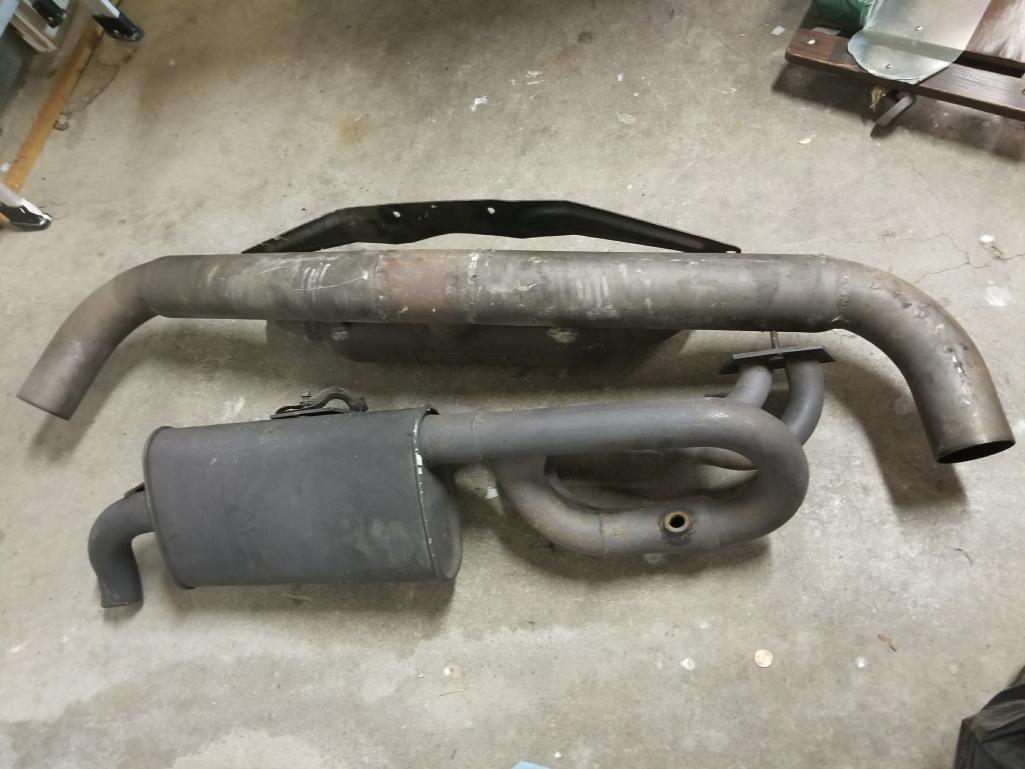
Posted by: RoadGlue Dec 1 2017, 11:12 AM
Found my rear valance in my rafters too last night. Now that I've ditched the Triad I can actually use it, so I'll be taking that to my pop's for paint today as well.
Posted by: RoadGlue Dec 1 2017, 11:14 AM
Everything lined up perfectly, which is waaaay better than what was going on with the Triad. I was worried my HE's might be bent, but no issues here now. I just need some more 8mm washers before I can wrap up the install. 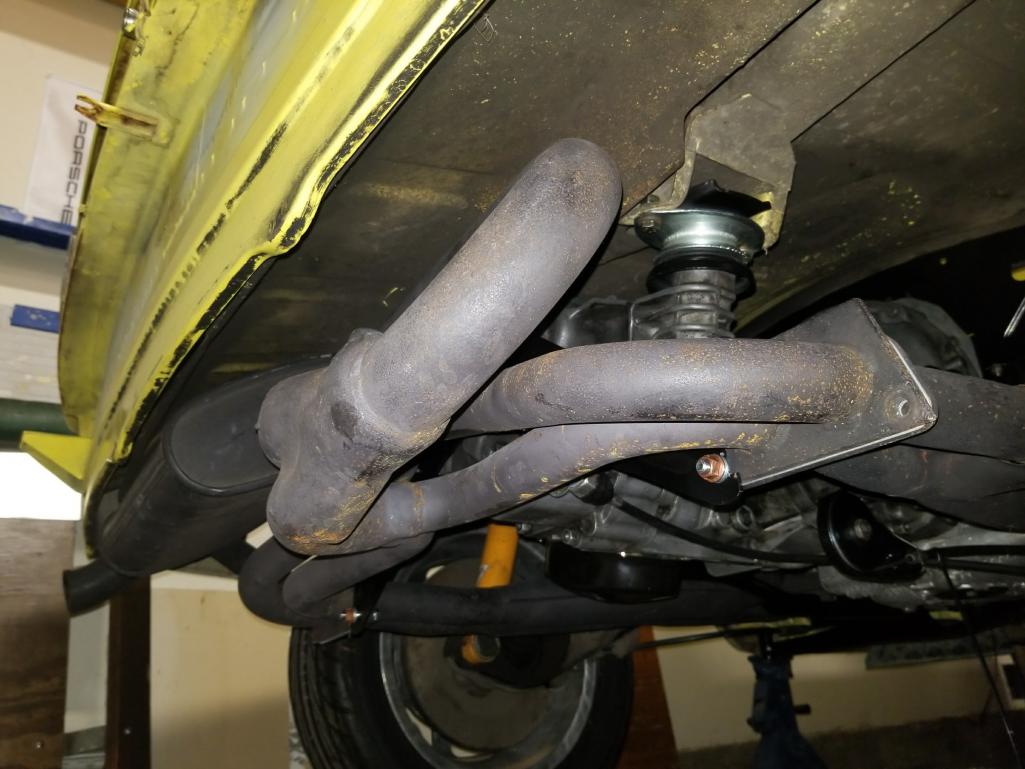
Garold came through with my right-angle drive. Thanks buddy!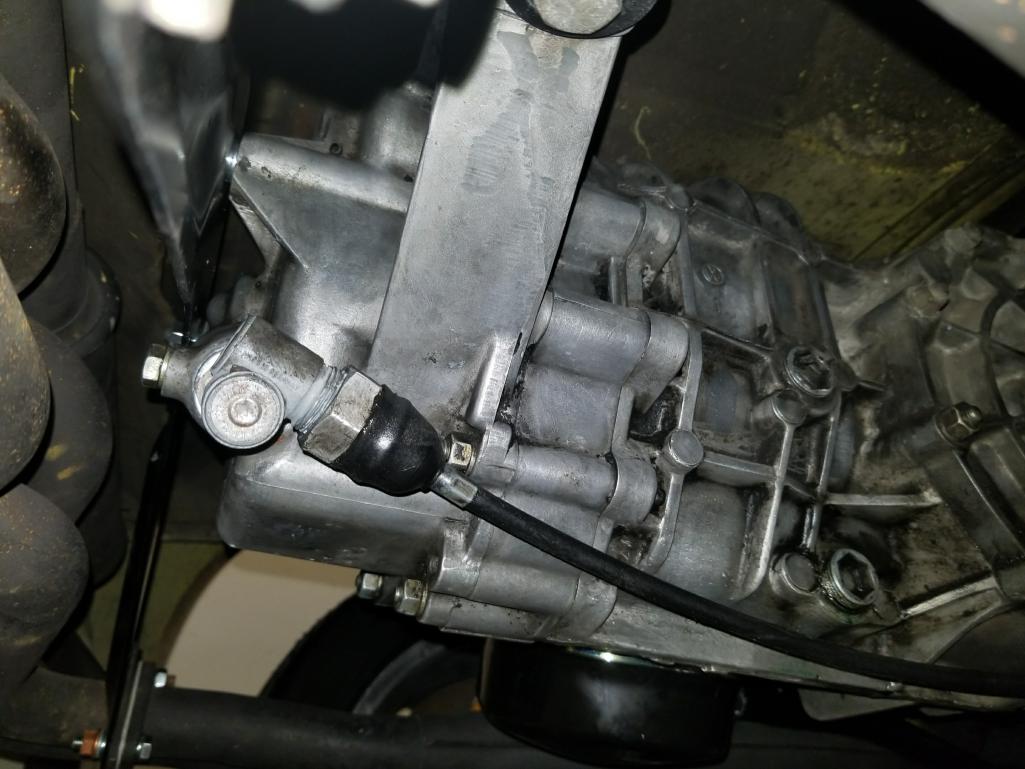
Posted by: RoadGlue Dec 4 2017, 03:22 PM
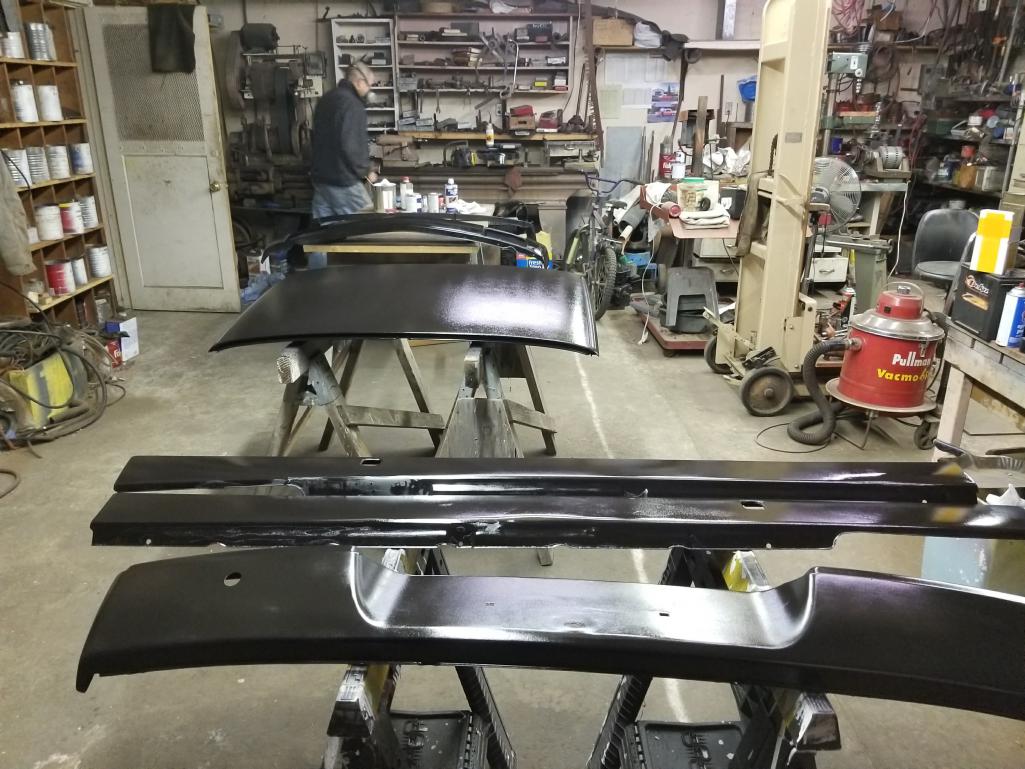
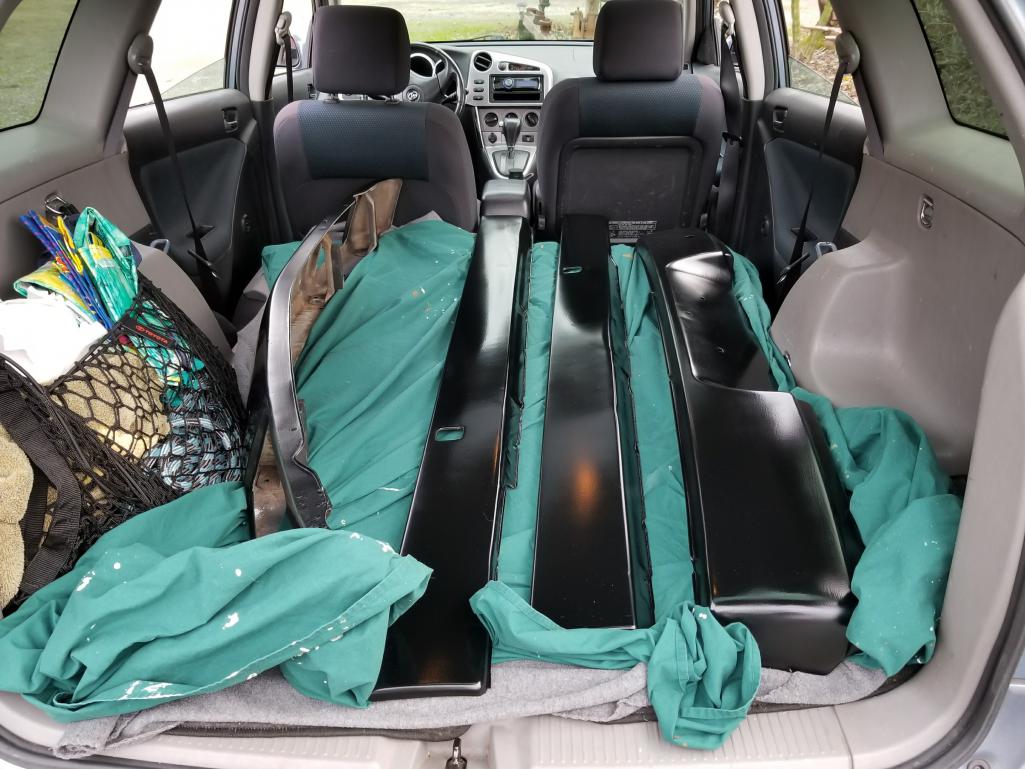
Left work early on Friday and continued on with paint prep. Was able to get the bumpers, rockers, rear valance and other misc bits sprayed.
Used Eastwood's epoxy primer and their single stage urethane topcoat in satin black. My dad's garage is a dirty, dusty mess, but I'm happy with how everything turned out. Not show quality, but it's a huge bump up from where the parts were at. My rockers were pretty bent, so when I paint the car I may opt to get a new set from RD. 
Posted by: RoadGlue Dec 4 2017, 03:23 PM
I really don't see myself having the patience to do the bodywork on my whole car. Just doesn't seem like something I'd enjoy. Prefer working with the mechanical bits.
Posted by: RoadGlue Dec 4 2017, 03:28 PM
Spent the entire day Sunday wrenching on the car in hopes of firing her up in the afternoon. My trusty friend Jon came back and helped me knock down my checklist.
However when it came time to fire her up I ended up fighting with my ignition switch. Only getting intermittent signal to the starter solenoid and it appears the switch has gone bad again. Replaced it about ten years ago after Glenn Stazak (GMS) and I had it fail on us while bopping around Mendocino.
New switch ordered along with a new Pertronix III as I let the smoke out of mine in a big way. My old ignition harness from Bowlsby unfortunately has had the stripes wear off enough to where I mixed them up and appear to have nuked my old sensor.
Sigh.
Also noticed that my p-side 40 IDF didn't seem to be spitting nearly as much fuel down the barrels as my d-side carb. Need to investigate that as well.
Posted by: RoadGlue Dec 5 2017, 12:27 PM
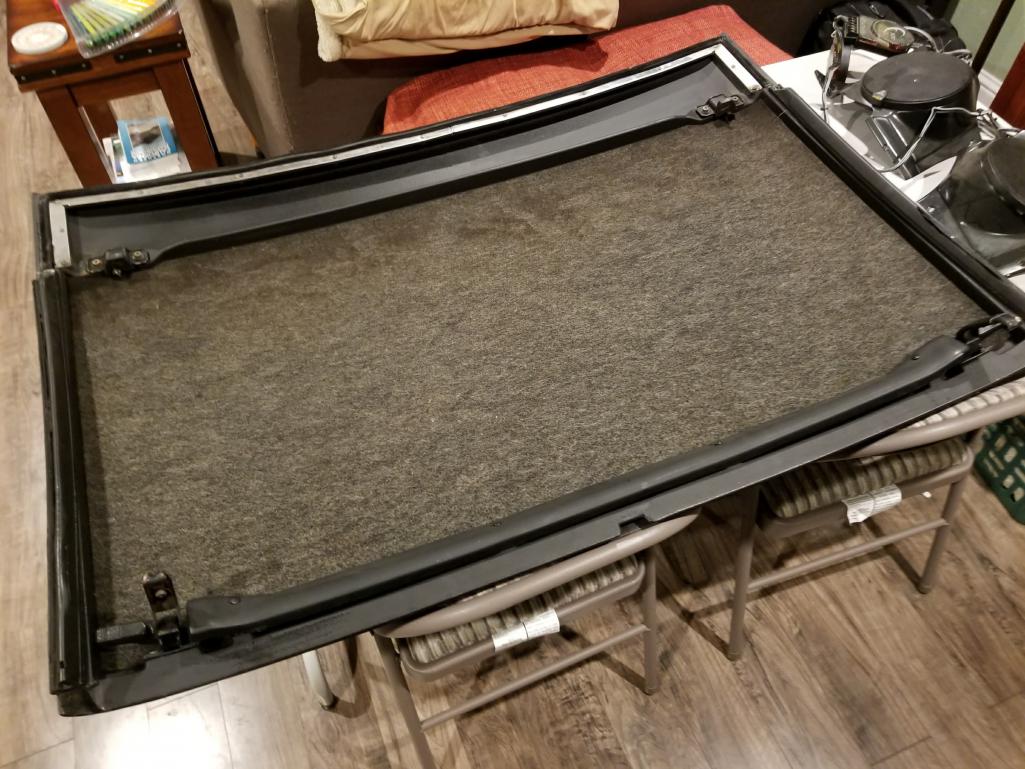
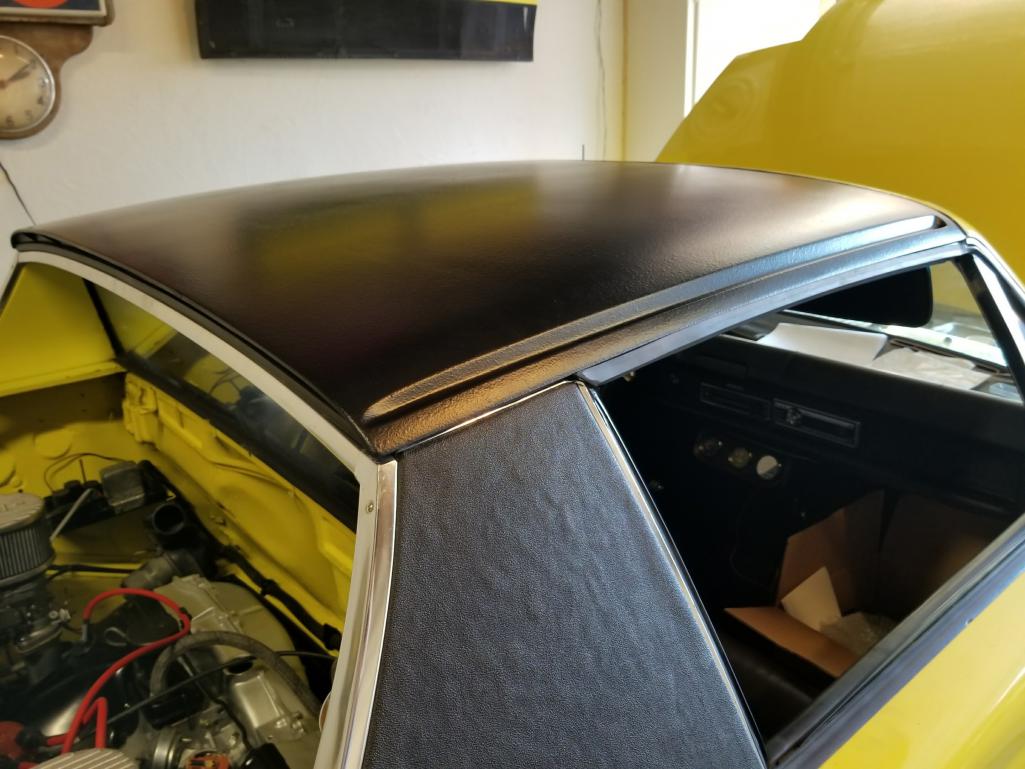
Waiting on an ignition switch and a few other bits before I can get back to the meaty stuff. So last night I had a few glasses of wine and reassembled the targa top, sans the perlon which should be here from 914rubber soon. Might have to give them a call today.
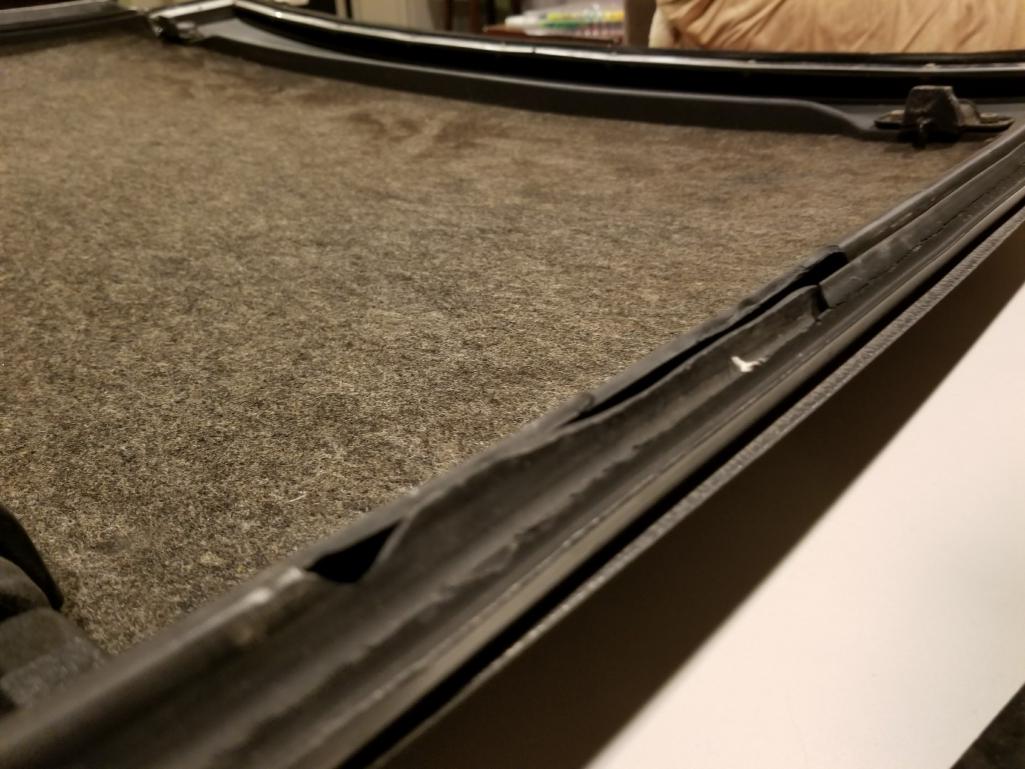
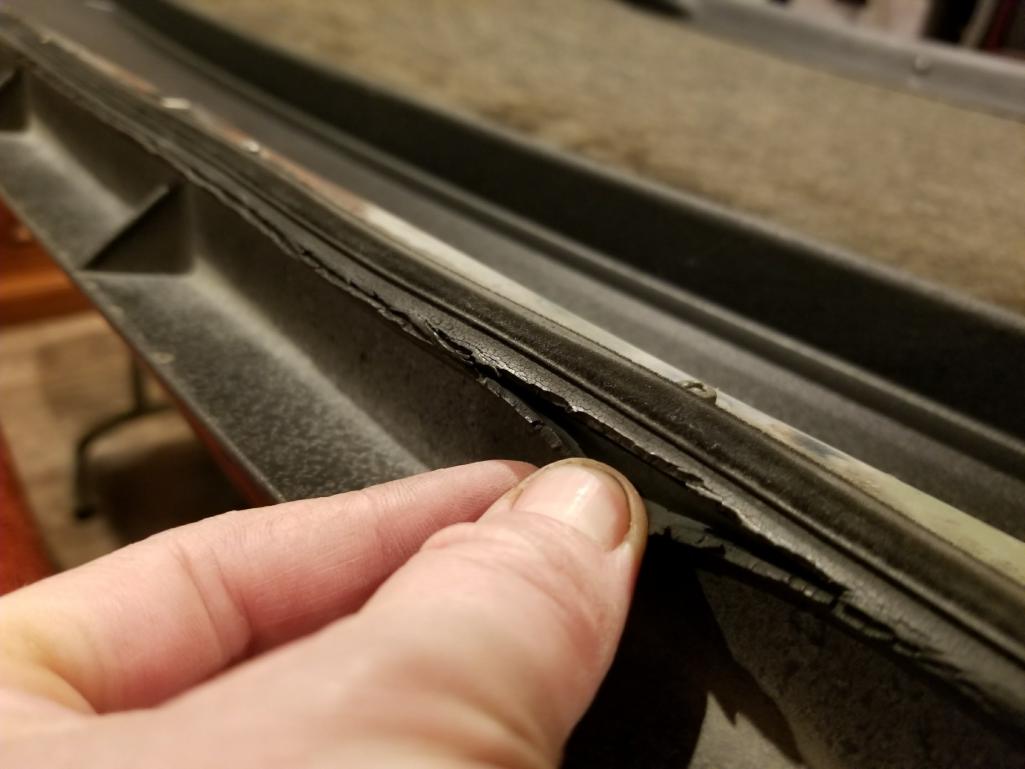
Glad I found an old forum post detailing how to install the top window seals. Tried sliding them into the rails for a while and that was a big no-go. Have to slide the other channel into the groove and then work the inner part in carefully with a screw driver. The rear seal was a total breeze. Once the seals were fitting, I roughly trimmed off the excess material from the top side windows seals and then trimmed to fit with the top nearly in place.
You can really see how screwed up the side sail panel vinyl looks now. Think I might paint/dye it to hold it over until I paint the car. I plan on deleting the sail panel vinyl at that time, so really don't want to go through the hassle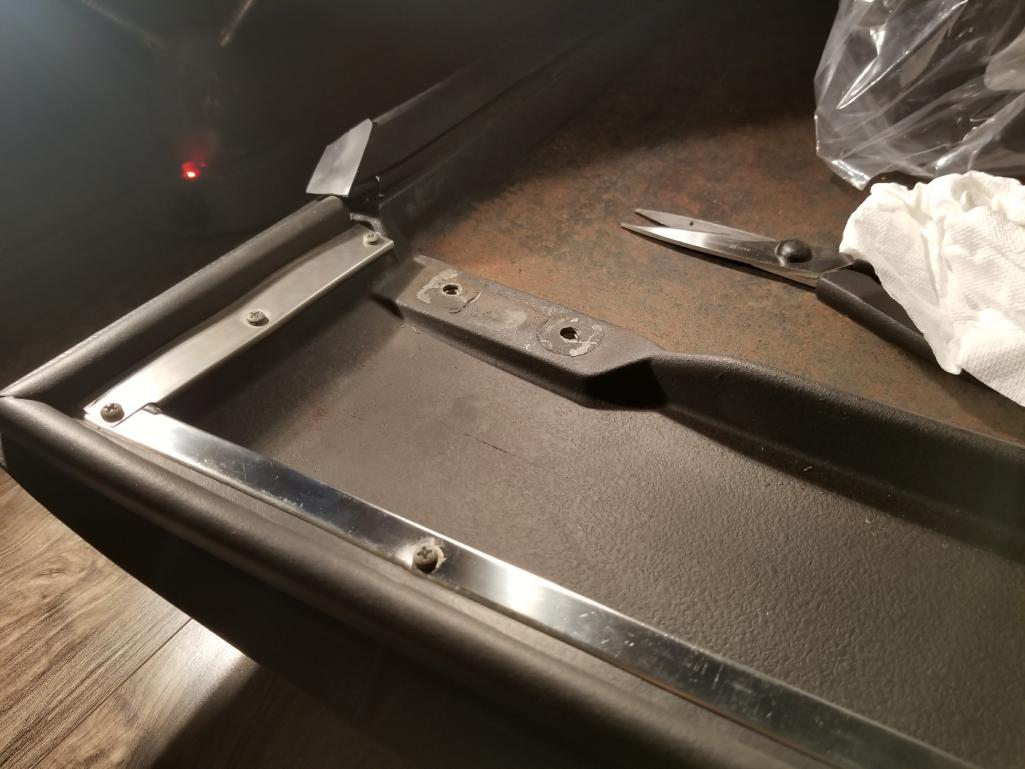
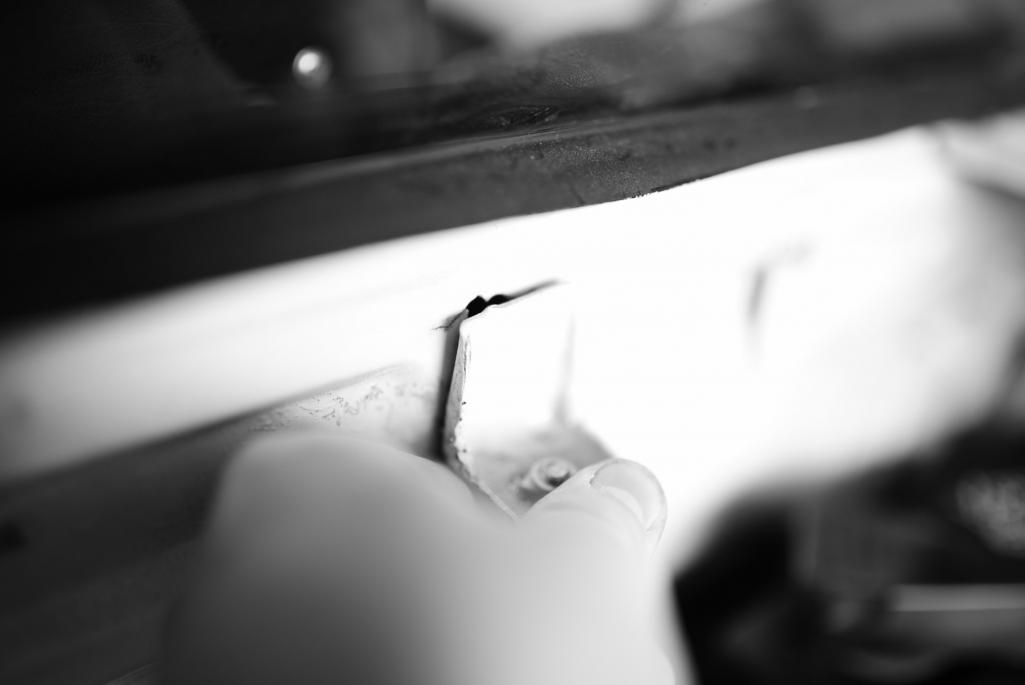
Posted by: RoadGlue Dec 7 2017, 12:03 AM
New Meistersatz ignition switch came in this afternoon, so I tore into my steering column to find out if the old switch was cracked. Sure acted like it when we tried to start the car on Sunday.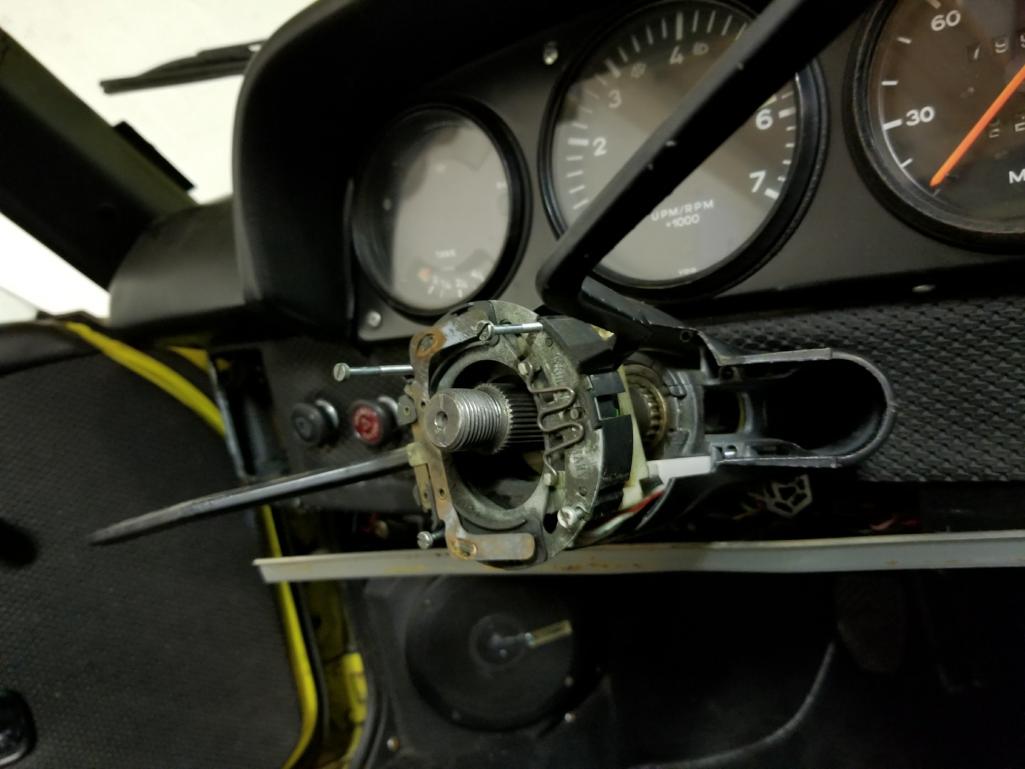
Posted by: RoadGlue Dec 7 2017, 12:06 AM
Wow, taking off the knee pad first, per PP's guides, was worlds better than trying to get to the harness connectors with the pad in place. I didn't realize how easy it came out and feel like a dufus for struggling so badly the last time. 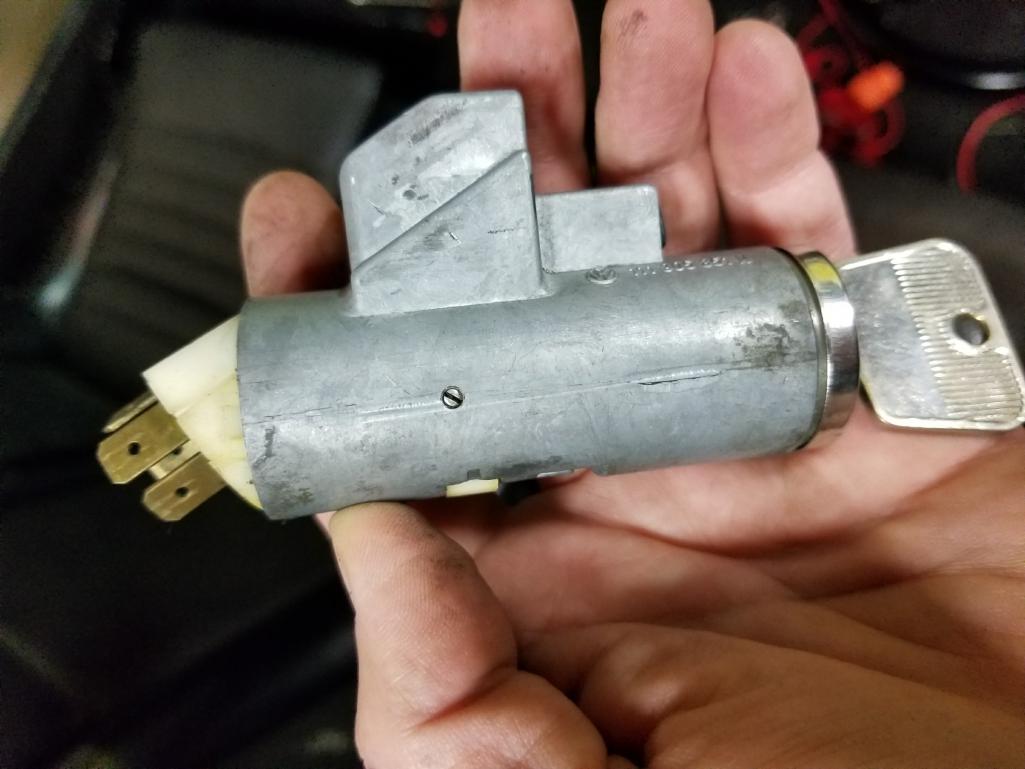
Ah ha, it's cracked (by my thumb in the photo) ... again! I had one fail only a year or so before I stopped driving the car and I don't remember the new switch giving me problems when I parked it in 2012'sh. Thinking it was the lousy brand and it just got brittle with age. 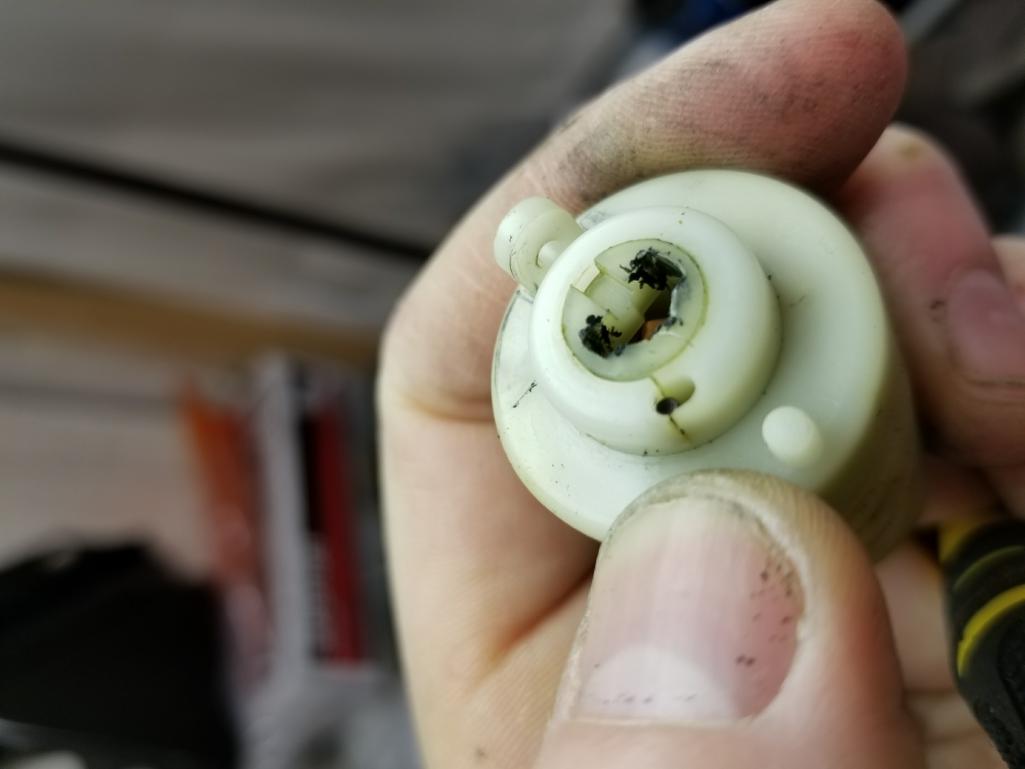
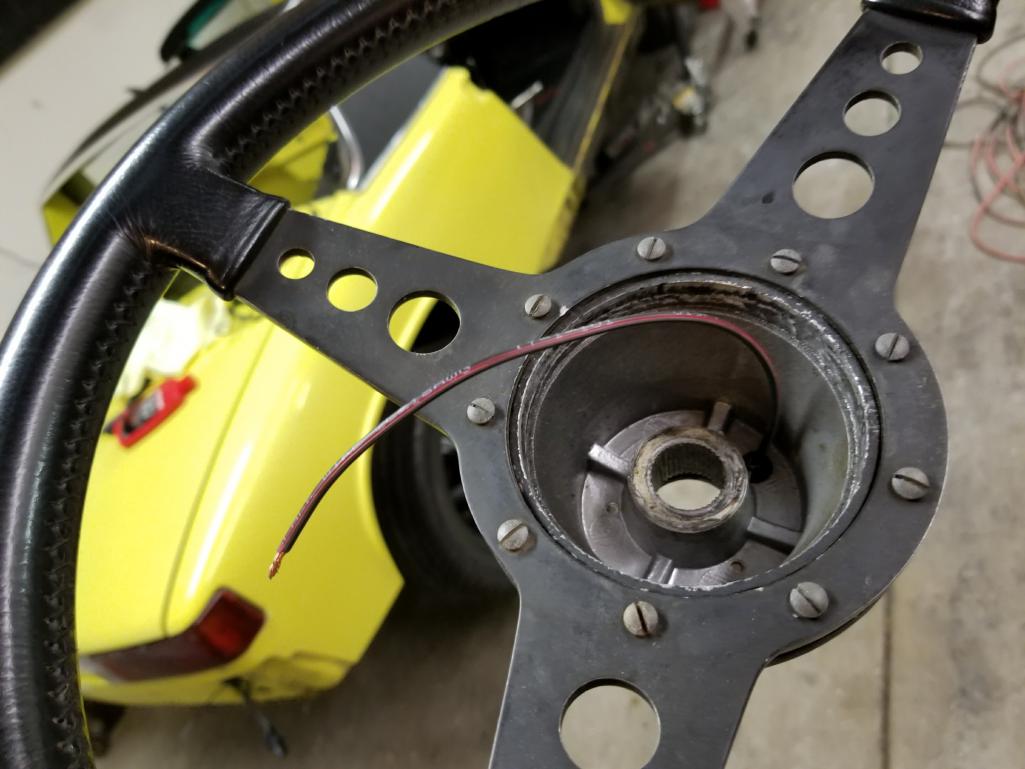
Posted by: RoadGlue Dec 7 2017, 12:16 AM
The dash went back together quickly so I decided to fix a nasty wire before my fingers froze. It's getting down into the 30s and my garage is in the 50s at night, maybe lower. 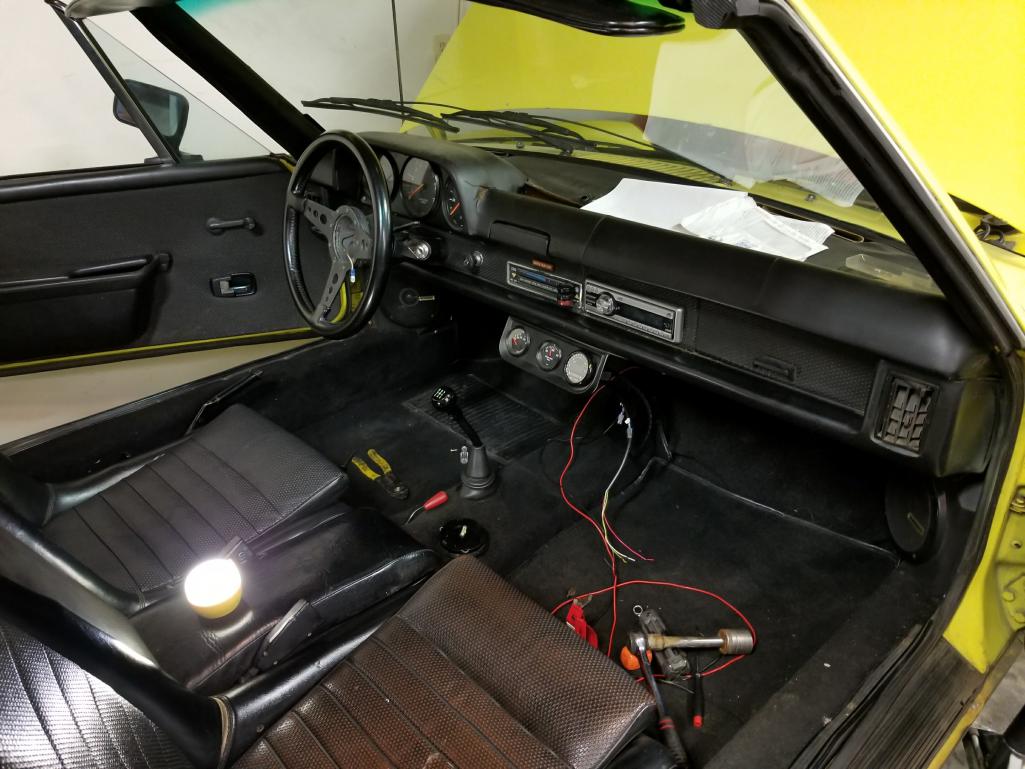
Ah yeah, so what da fuch is this? The wire is super short and hacked together. Hmm, wonder if I did that when I was in my late 20s. I sure hope not. 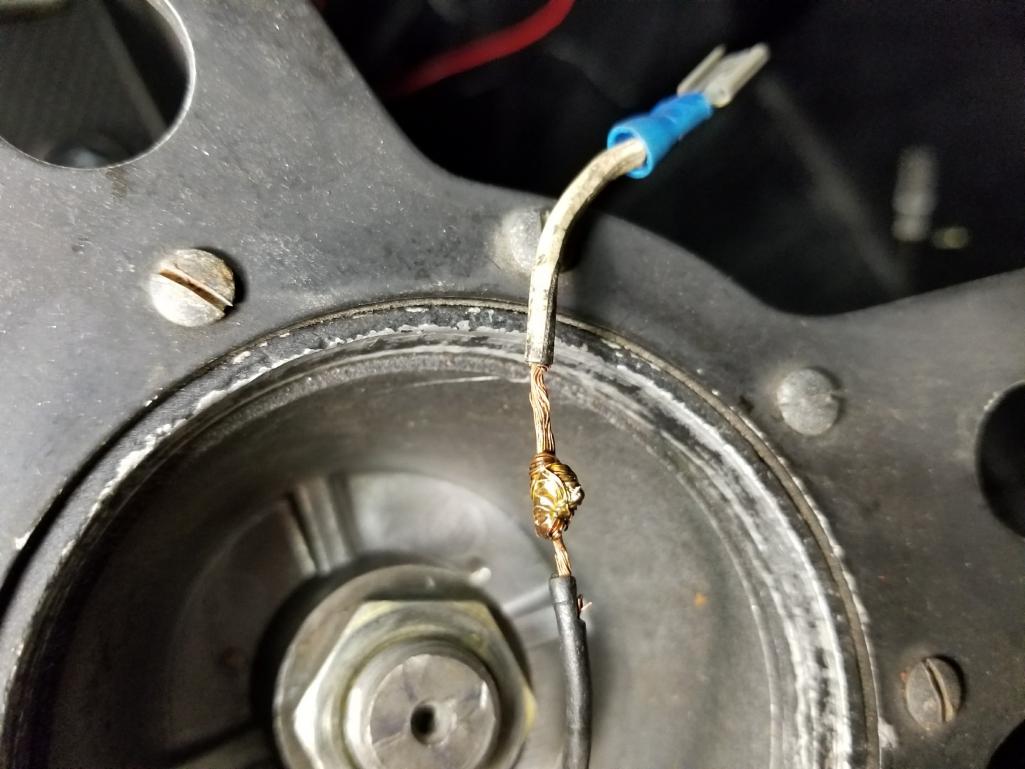
So I pulled off the wheel again and removed the copper contact ring by bending tabs on that attached it to the horn ring. The stress relief crimp section was cracked so I decide to solder the new wire into the contact ring to keep it from pulling out easily.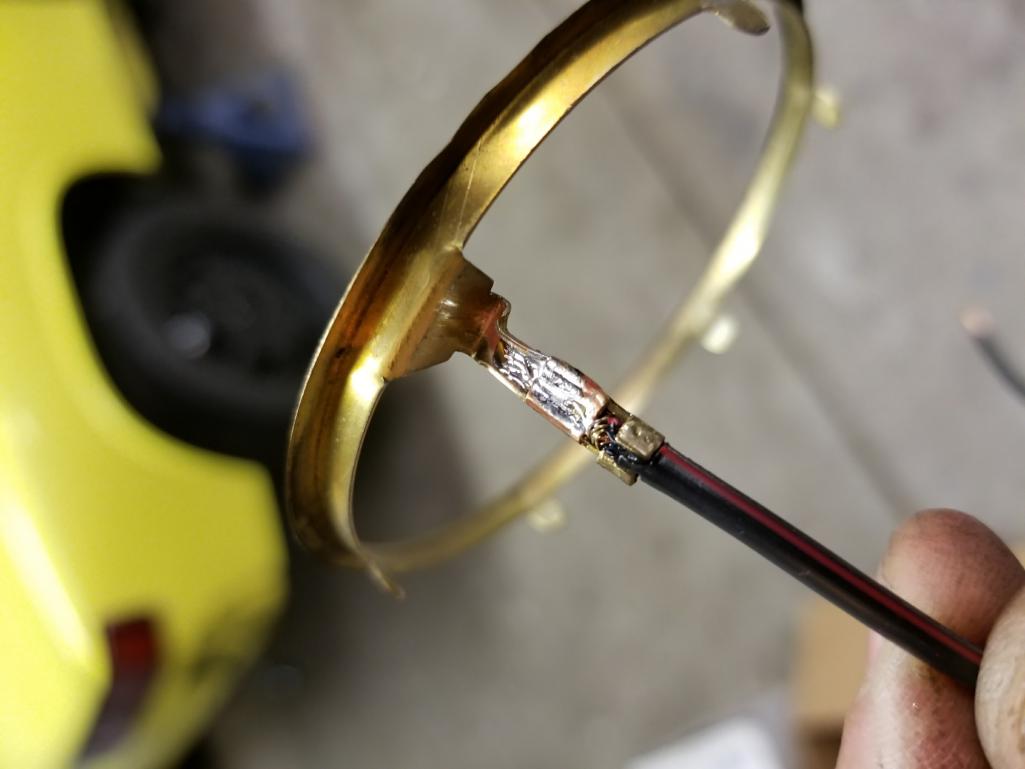
Much better!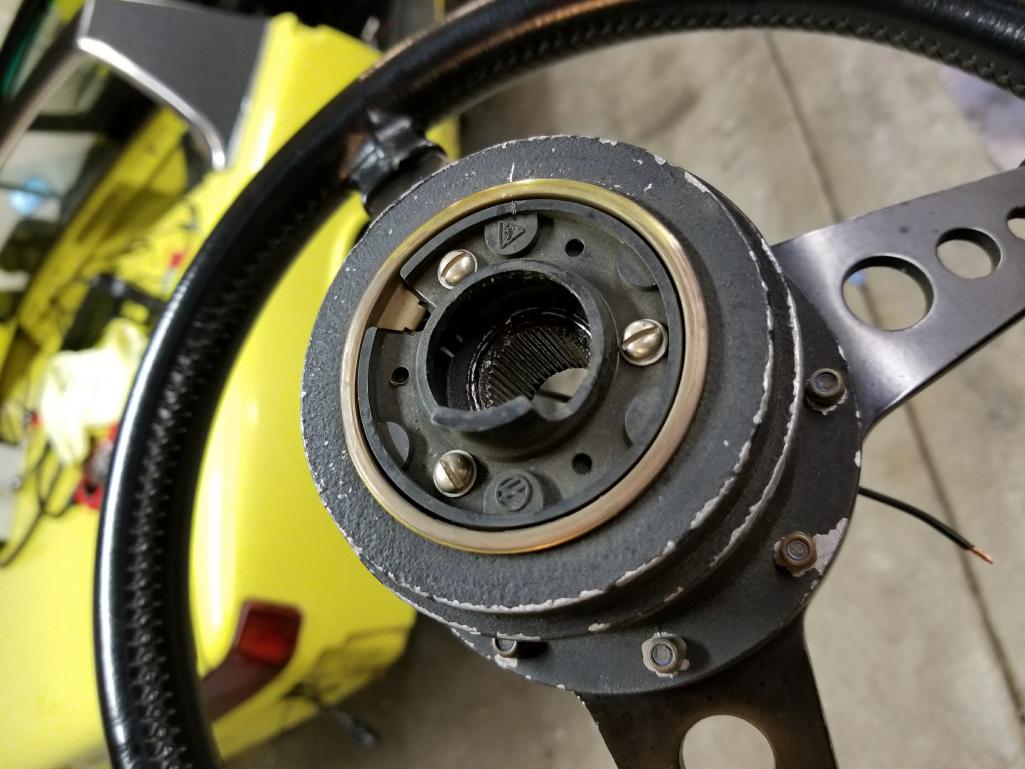
Posted by: krazykonrad Dec 7 2017, 11:19 AM
What paint did you use for the valance, rockers, etc.? It looks great.
Konrad
Posted by: RoadGlue Dec 7 2017, 11:32 AM
What paint did you use for the valance, rockers, etc.? It looks great.
Konrad
Thanks! They'd look even better if I'd spent another day prepping, but I don't really have that type of patience at my skill level. Also found out after I bought the product that you have to wait days before you can sand epoxy primers.
Here's the paint:
http://www.eastwood.com/eastwood-rat-rod-satin-black-paint.html
Primer:
http://www.eastwood.com/eastwood-black-epoxy-primers.html
Posted by: jmitro Dec 7 2017, 06:23 PM
nice work.
funny, I have the exact same paint in my garage, just waiting for me to finally prep the same parts and paint them.
Posted by: RoadGlue Dec 7 2017, 06:26 PM
nice work.
funny, I have the exact same paint in my garage, just waiting for me to finally prep the same parts and paint them.
I thought it was a good product to work with, but I'd be curious to see what you think after you've used it.
I sprayed the primer in cold weather too. Somewhere in the low 40s, and didn't have any issues. It _might_ have been in the 50s when I sprayed the urethane. Again, no issues whatsoever.
Good luck!
Posted by: RoadGlue Dec 18 2017, 05:16 PM
Been a week or so since I last posted an update.
Tried starting the car last weekend. However my new battery acted like it was dead, though it tested fine. Almost my new ign. switch stopped working after a few tries. WTF? Turns out I hadn't tightened the ground strap to the gearbox. From what I can tell I only fried the start position on the ign switch and cooked my CHT gauge. Thankfully I have another NIB gauge and my replacement switch just arrived today.
Used a momentary switch to make a starter-switch in the engine bay just for getting her going. Once the grounding issues was resolved I found that I was only getting back fires when trying to start it up. Checked and double-checked that the rotor was pointing where it needed to be at TDC, wire order, etc. Eventually had to call it quits until Tuesday. Had my friend and the person who built the motor come by to check my work and found that he had installed the distributor drive gear 180 deg out.
Once that was sorted she fired right up, but I had some terrible exhaust leaks so we shut her down.
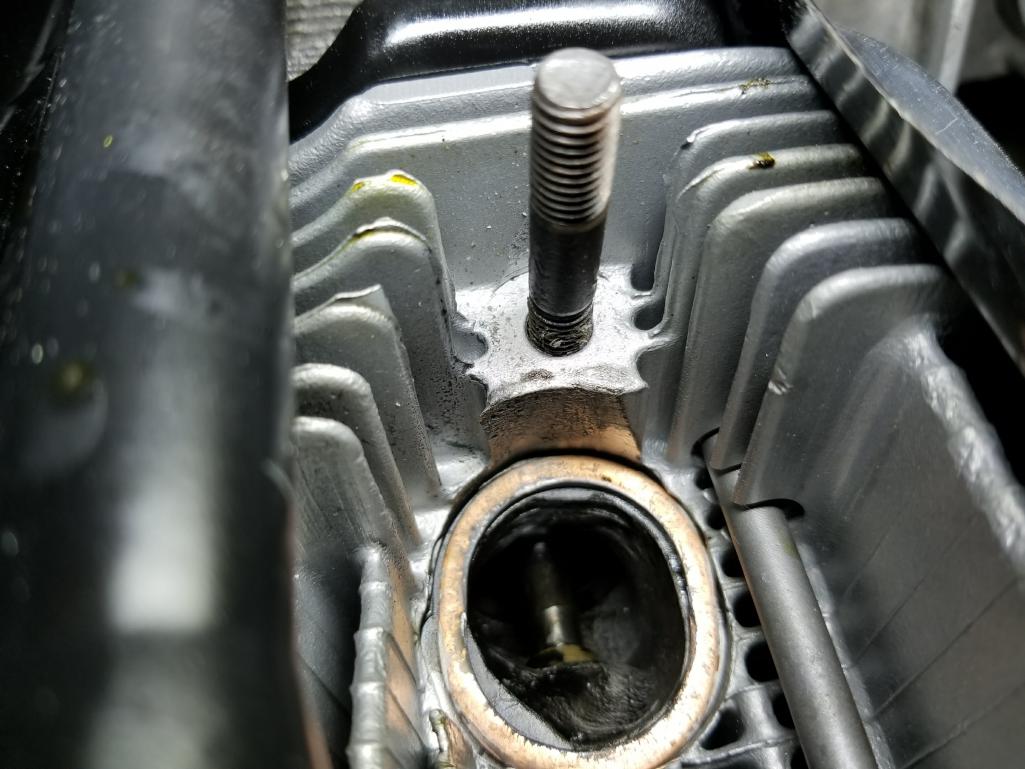
Pro Tip - Always fit the exhaust on the stand. I didn't because I didn't see an easy way to get the motor off the stand with it upside down or sideways.
I paid the price for that. While tightening the exhaust I pulled a stud and broke another. I take full responsibility for the snapped stud, but the once that pulled never got close to being torqued.
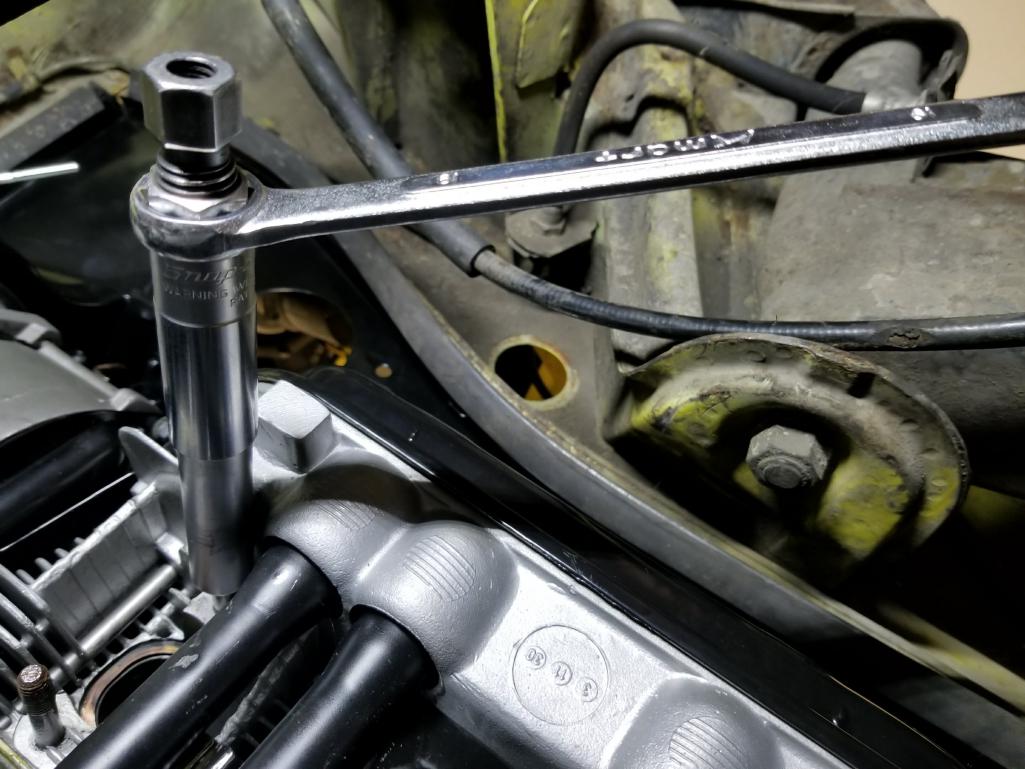
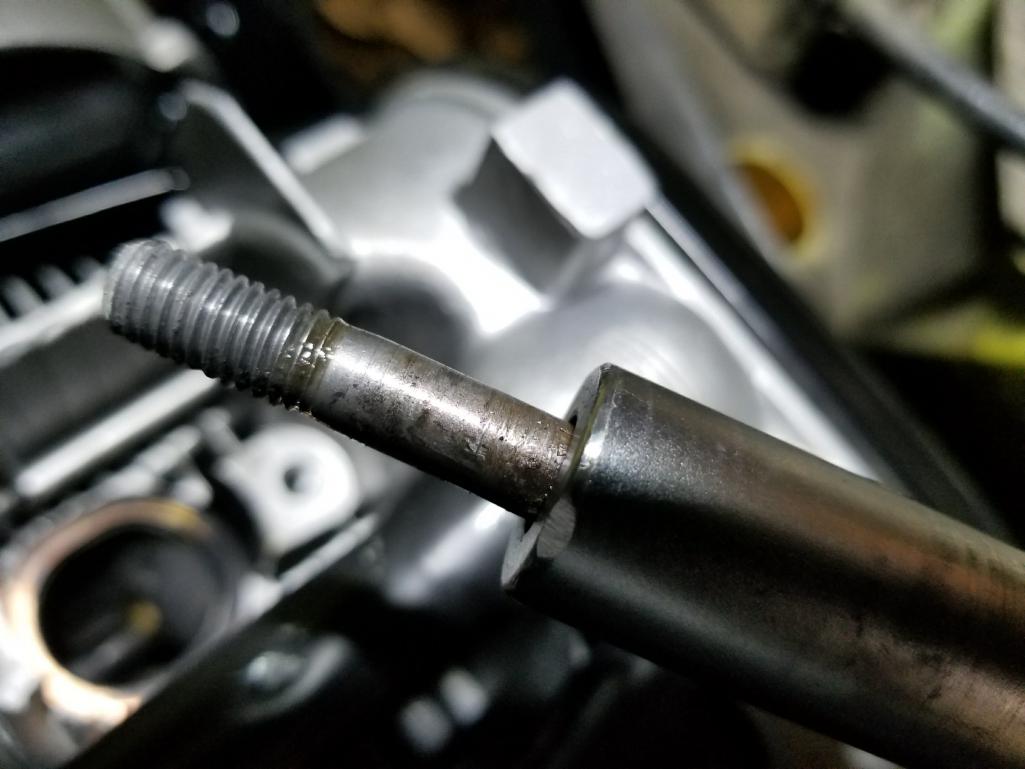
Long story short, I was able to to get the stud out using a Snap On CJ700-1 stud extractor. Really dodged a bullet there. Just barely had enough thread left and clearance to make that work.
Fixing the pulled stud with a helicoil this week and hopefully we'll be in better shape to actually drive the car by next weekend. 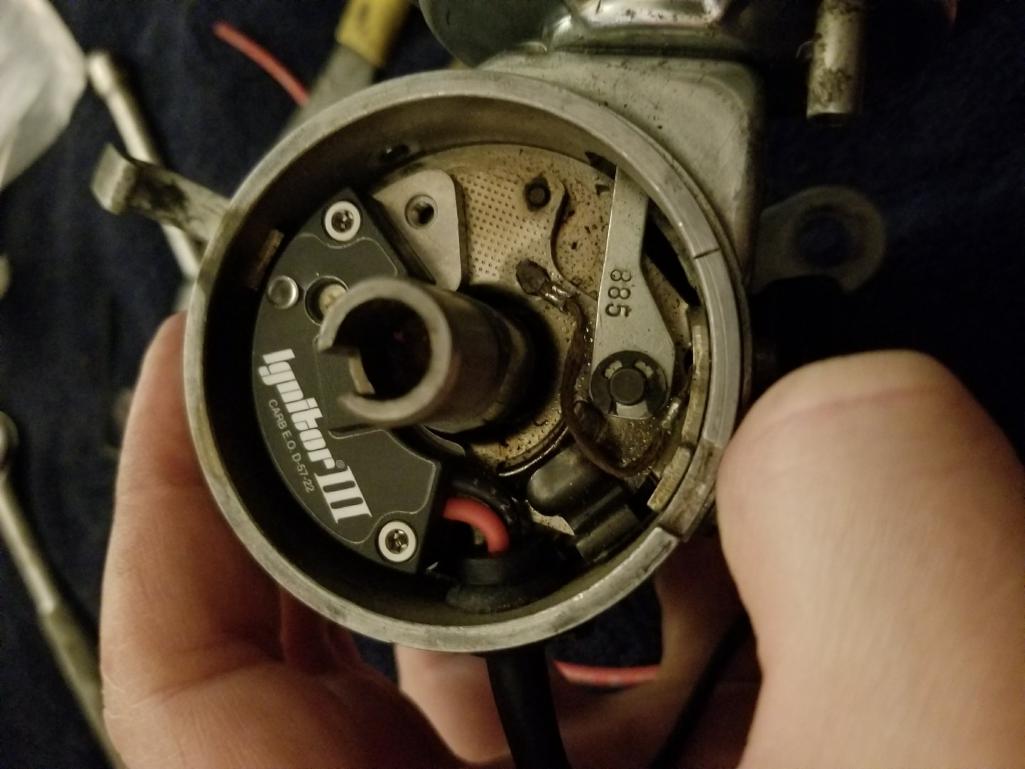
New Ignighter III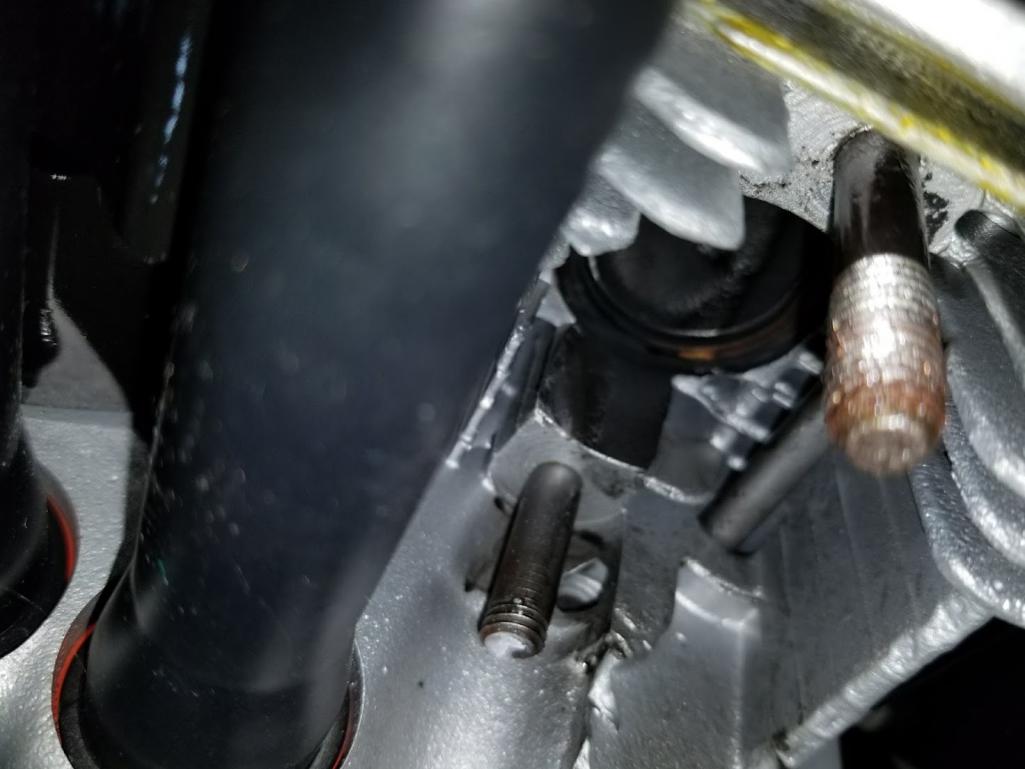
Posted by: McMark Dec 18 2017, 10:22 PM

Looks like you're making great progress. It's the ol' 90/10 rule. But keep after it. You're almost there.
BTW, I really don't think that was a Triad. At the very least the actual tailpipes are huge, and I don't remember a Triad being like that.
Posted by: RoadGlue Dec 19 2017, 10:58 AM
Looks like you're making great progress. It's the ol' 90/10 rule. But keep after it. You're almost there.
BTW, I really don't think that was a Triad. At the very least the actual tailpipes are huge, and I don't remember a Triad being like that.
Hey, I'm a proud Californian wuss. :-)
You know how large my garage is. It's pretty well insulated too. Any ideas for a relatively economical way to heat it up?
I'm inclined to agree that it's a a Triad copy.
Posted by: SirAndy Dec 19 2017, 11:27 AM
If it's well insulated you can get one of them electric oil-filled radiators and set it to 65ish. Once it gets there it won't take much energy to keep it at that level.
Posted by: RoadGlue Dec 19 2017, 11:51 AM
If it's well insulated you can get one of them electric oil-filled radiators and set it to 65ish. Once it gets there it won't take much energy to keep it at that level.
I can try! I actually have one already, but didn't feel it would have enough oomph to do the job.
I'm usually only out there in spurts and often right after work. I wouldn't want to leave it on while I'm away, so having something that could be more "on demand" would be helpful.
Good idea though and it could turn out to be useful during the upcoming holiday break.
Thanks!
Posted by: McMark Dec 19 2017, 11:54 AM
Propane heaters work well. I had one at my dads place and it was nice. I'm looking into the small Reznor hanging shop heaters for my garage at home. They're available used all the time for ~$100.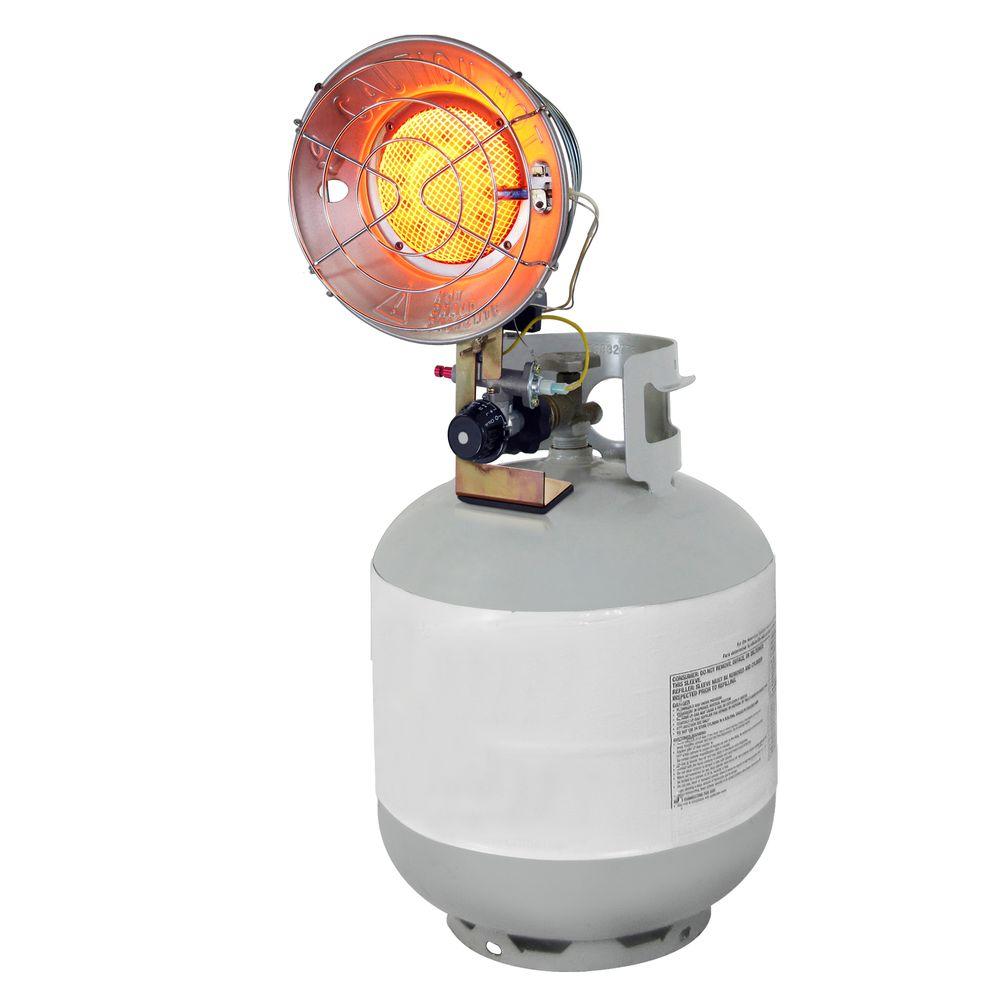
Posted by: RoadGlue Dec 26 2017, 12:20 PM
That oil-filled radiator style heater worked great in the garage. Took the edge off and if I was close to it I'd find myself pushing it out of the way.
Fixed both exhaust studs on Thurs evening and then drove around the neighborhood for the first time in seven or so years Saturday. Happy Christmas to me!
Still have an exhaust leak I haven't been able to totally adjust out. This set of HE's I have might not me totally true/straight. IDK... Think I'll heat cycle it a few more times and carefully try to add a bit more torque. If that doesn't work I'll pull them and put a straight edge on it and see how it looks. Might need a new set though. These are pretty ratty anyways.
Also installed another ign switch. Think I can swap it out and put it all back together in about 25 min now, while sleeping. Anyways, didn't fix the START position problem. Pulled the fuse block, fixed a few little issues, cleaned up the main ground lug. Still no dice.
Pulled the passenger seat. Put the switch into START and wiggled the sea tbelt interlock wires and BOOM, it wanted to turn over. Didn't have chance to investigate further, but at least I know where the issue is.
Tonight I'm having my neighbor come over to TIG weld the engine lid hinge mounts. I installed Sergio's GT lid and the springs appear to have a lot more tension. Both hinge mounts ripped on the first close. DOH.
Posted by: RoadGlue Dec 26 2017, 12:23 PM
Also mounted the front LE Dam and bumper, rear valance and bumper and the two rocker panels. 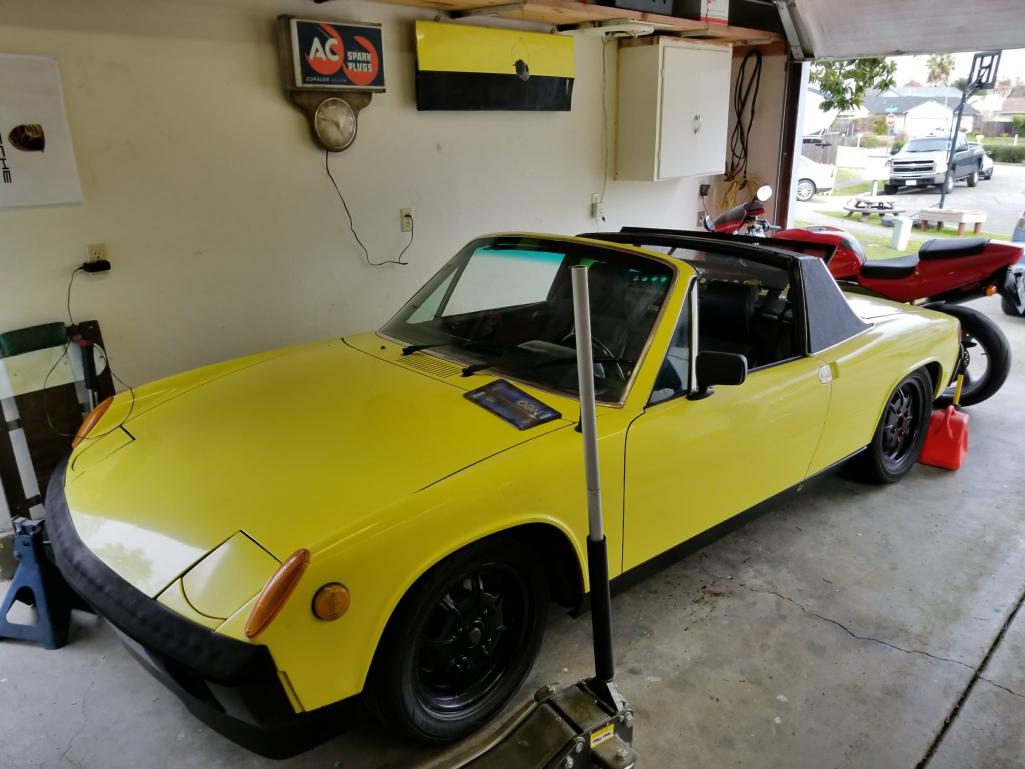
Posted by: RoadGlue Dec 26 2017, 12:26 PM
In other news, my buddy Dug snagged a set of 15 x 7 ATS 4-lug wheels that were listed on the classifieds here for me this past week - Probably won't have them here in Santa Rosa for at least a few weeks, but I'm so stocked. Always loved the ATS wheels.


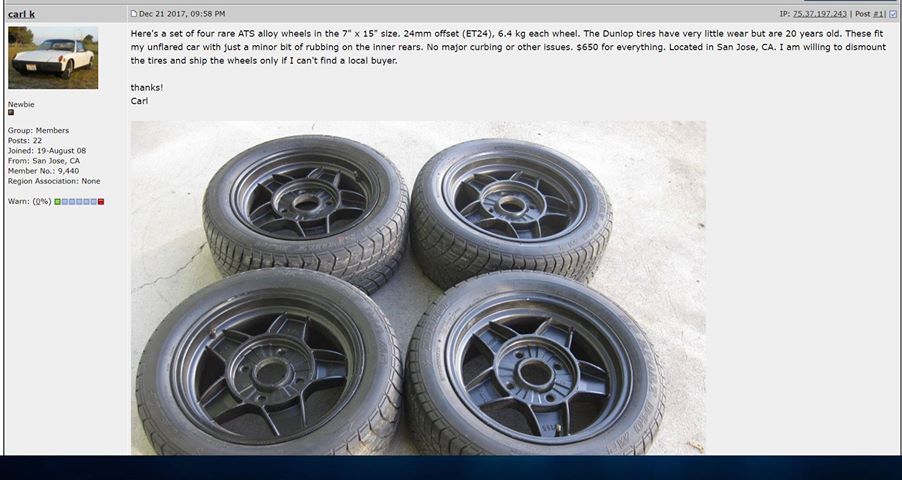
Posted by: RoadGlue Dec 26 2017, 12:38 PM
Question -
My car was originally a '74 1.8 and I wonder if the relay board cover was different for L-Jet cars as I can't for the life of me get my relay board cover to fit.
Anyone care to chime in?
Posted by: Krieger Dec 26 2017, 02:32 PM
Looking good Randy! I am so glad you got those wheels!
Posted by: RoadGlue Dec 26 2017, 02:37 PM
Looking good Randy! I am so glad you got those wheels!
Thanks buddy!
Posted by: RoadGlue Jan 5 2018, 02:46 PM
So last weekend she officially roared to life, sans exhaust leaks. The HE I picked up from a fellow member years ago, for whatever reason, wouldn't quiet down. Pulled it again, put a straight edge across both surfaces and couldn't see any problems. I had one spare in my stash, but it's a SS and has a slightly larger ID. I either need to pick a new HE that matches one or the other. 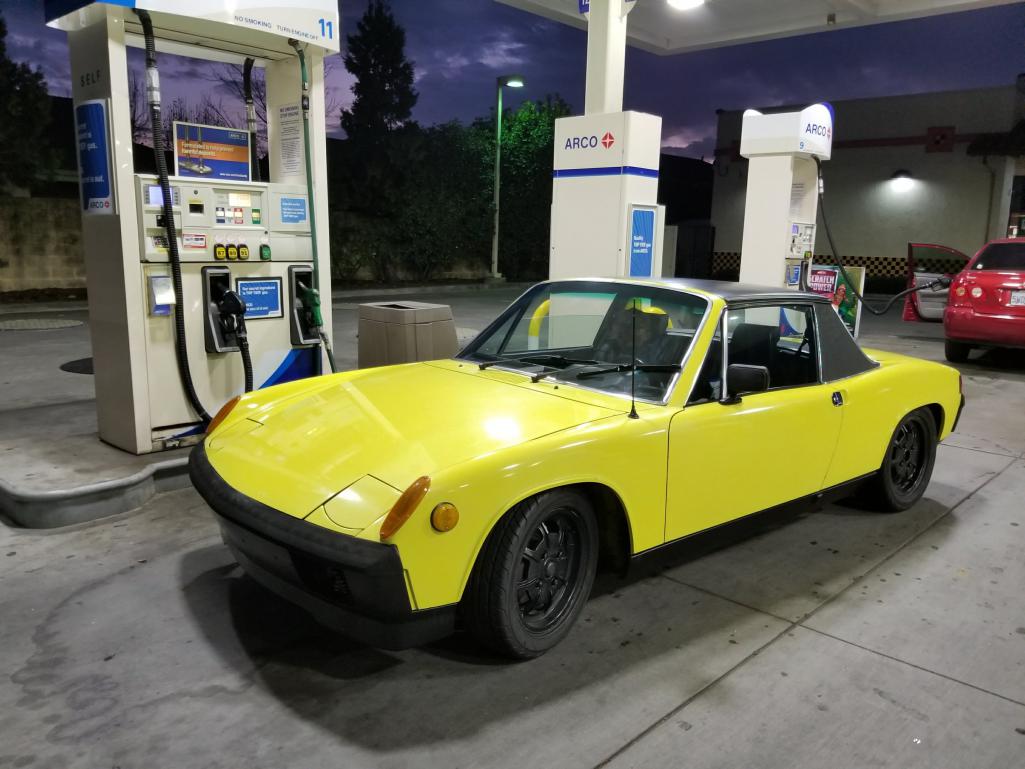
Posted by: RoadGlue Jan 5 2018, 02:46 PM
So last weekend she officially roared to life, sans exhaust leaks. The HE I picked up from a fellow member years ago, for whatever reason, wouldn't quiet down. Pulled it again, put a straight edge across both surfaces and couldn't see any problems. I had one spare in my stash, but it's a SS and has a slightly larger ID. I either need to pick a new HE that matches one or the other.
Posted by: RoadGlue Jan 5 2018, 02:48 PM
Really wasn't happy with Mark's throttle cable support being on the passenger side of the case (sorry Mark!) as it meant that the linkage rods weren't parallel to one another. After some heavy tweaking in the vise I got it to fit on the other side of the case - 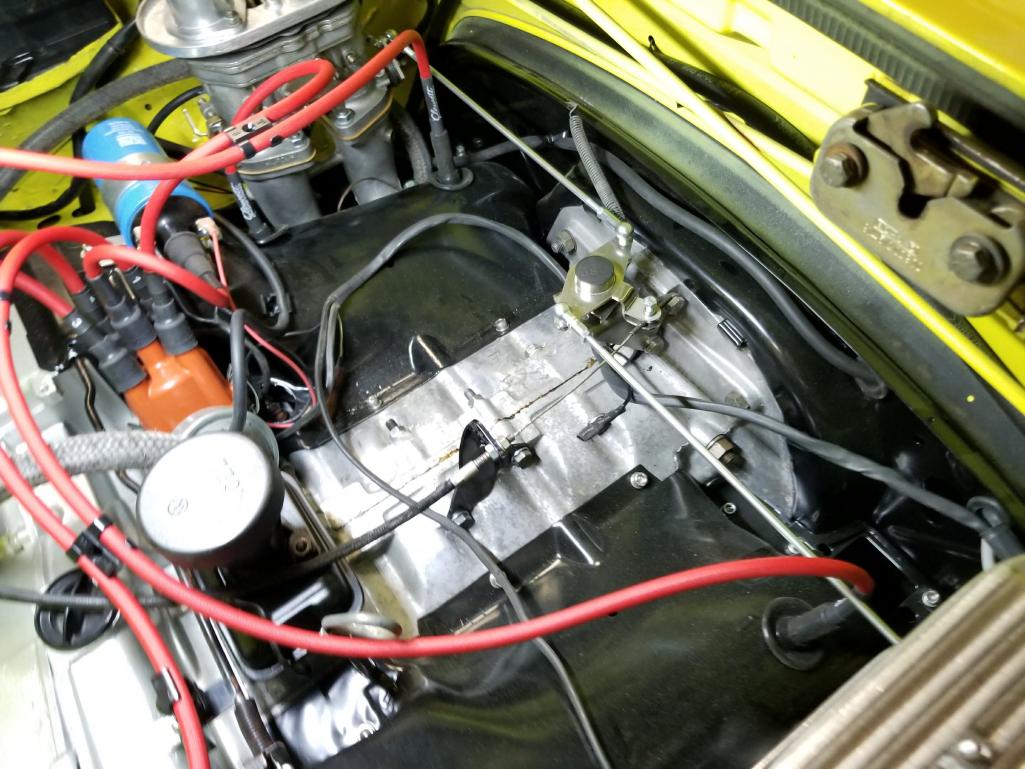
Posted by: gms Jan 5 2018, 02:52 PM
Nice work!
Posted by: RoadGlue Jan 5 2018, 02:53 PM
Still fiddling with gauges. Fuel gauge isn't working, though the reserve light does operate. Hmmm.
Really digging the A/F ratio gauge. More on that later though.
Installing and oil pressure gauge this weekend. 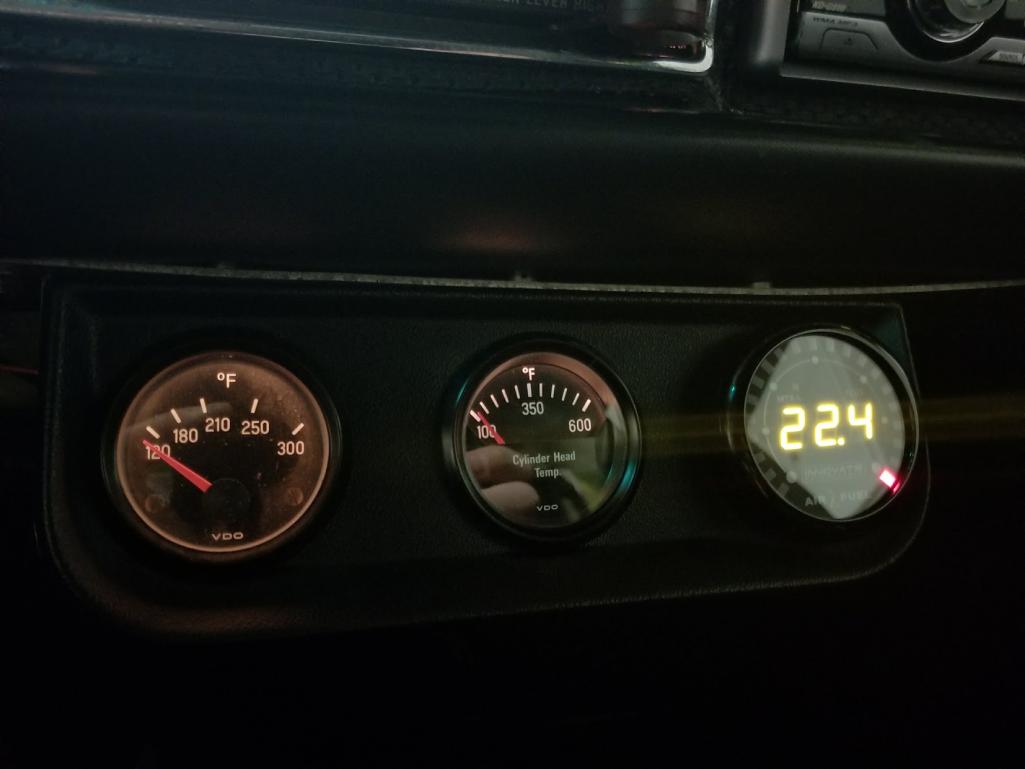
Posted by: RoadGlue Jan 5 2018, 02:54 PM
Nice work!
Thanks Glenn! Think I beat my Sept '18 deadline. Just gotta be sure not to break it before then.
Posted by: RoadGlue Jan 5 2018, 02:57 PM
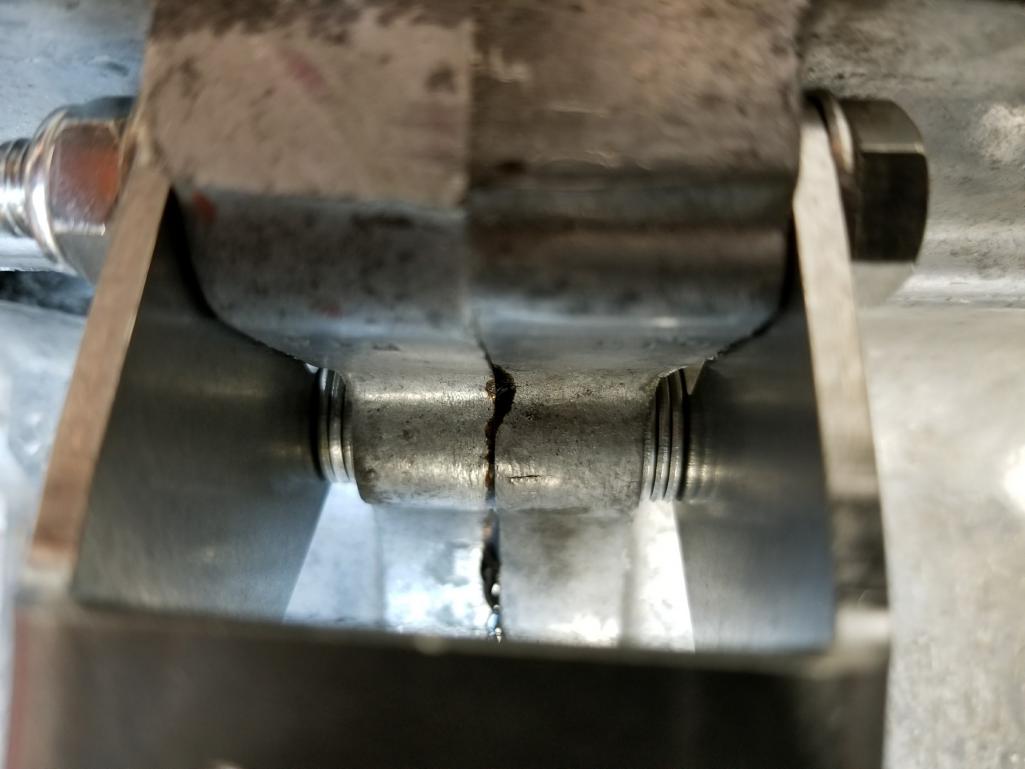
Awesome neighbor came by and TIG welded both of the cracking/separating engine lid hinges - 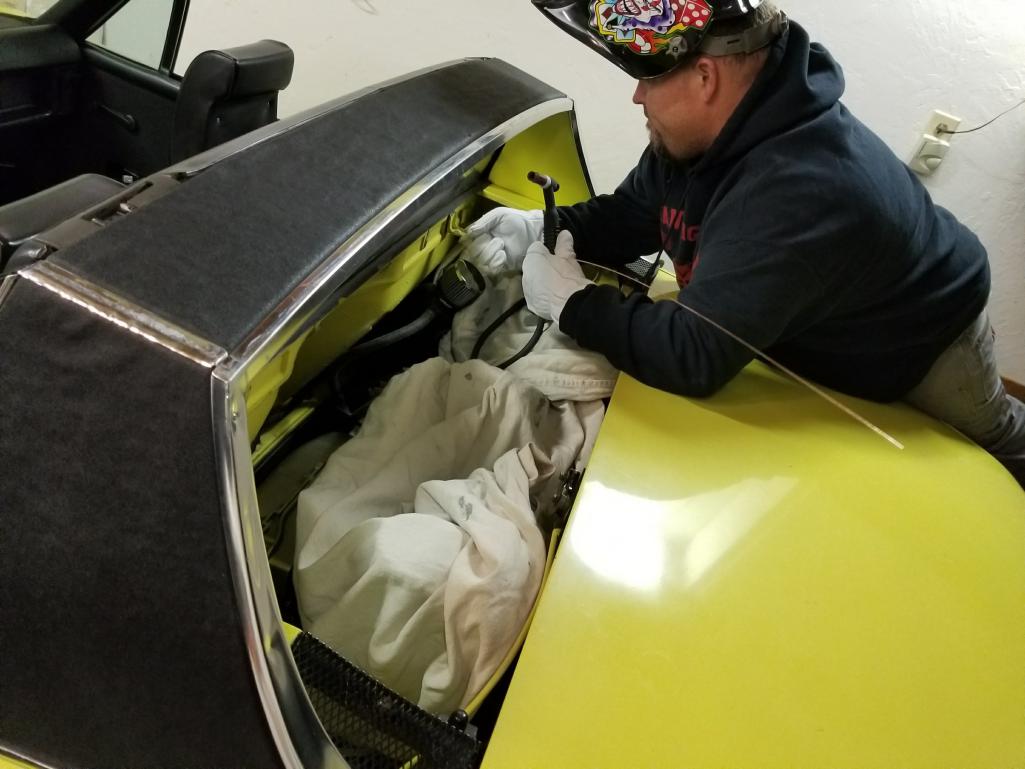
Posted by: RoadGlue Jan 5 2018, 02:59 PM
Sergio's GT lid is a thing of beauty. Did require some bending to get it to sit straight. 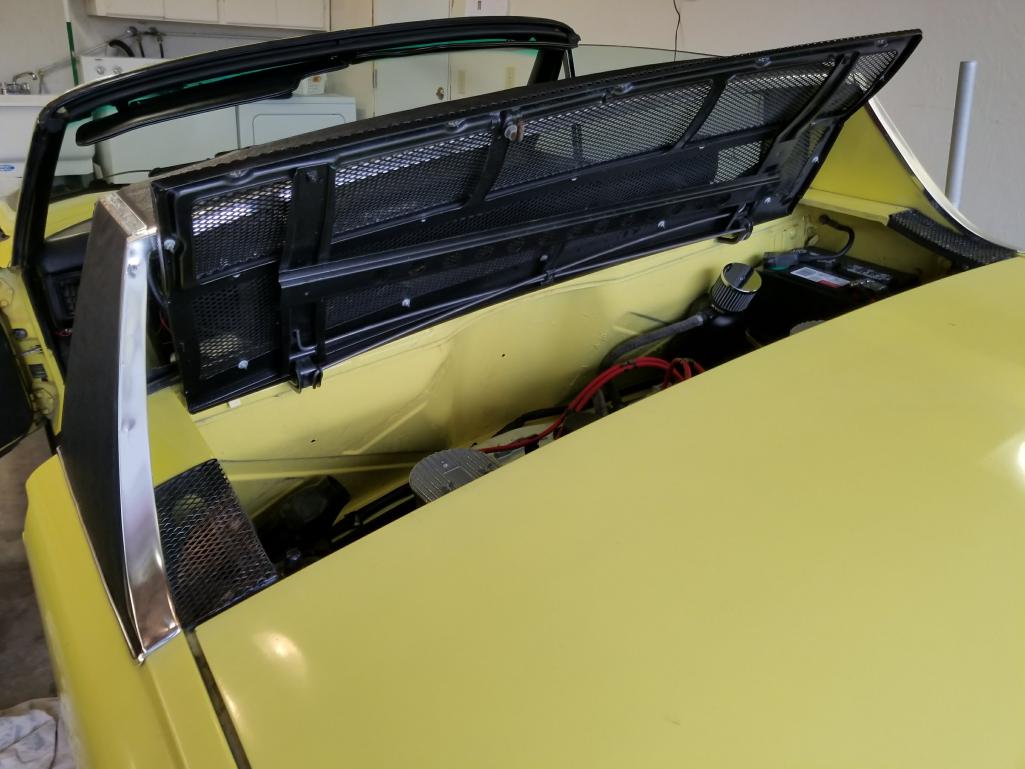
Posted by: RoadGlue Jan 5 2018, 03:01 PM
I had planned on using the AP carb rain hats, but they interfere with the deck lid springs. Wish I had known before purchasing them.
No mention of them having interference issues on 914rubber site -
http://shop.914rubber.com/Rain-Hats-for-carbs-914RH.htm
I'll send Mark a message about that.
Powered by Invision Power Board (http://www.invisionboard.com)
© Invision Power Services (http://www.invisionpower.com)