Printable Version of Topic
Click here to view this topic in its original format
914World.com _ 914World Garage _ Going Inside The Long
Posted by: McMark Mar 29 2005, 08:27 PM
I hacked into my parts car to gain an even clearer view of the world inside the long. I'm here to share my pictures. 
Here's how I hacked in. I wouldn't recommend this tactic on a real project, but I just wanted to get inside without losing the shape and perspective of things. I just took a hack saw and cut into the top of the long and then drilled out all the spot welds along the top.
Attached image(s)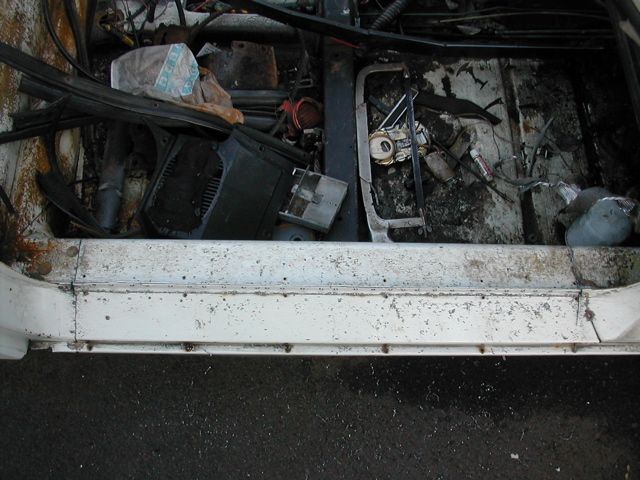
Posted by: McMark Mar 29 2005, 08:28 PM
Opened up. You would never be able to get the metal straight again on a real project once you bent it like this.
Attached image(s)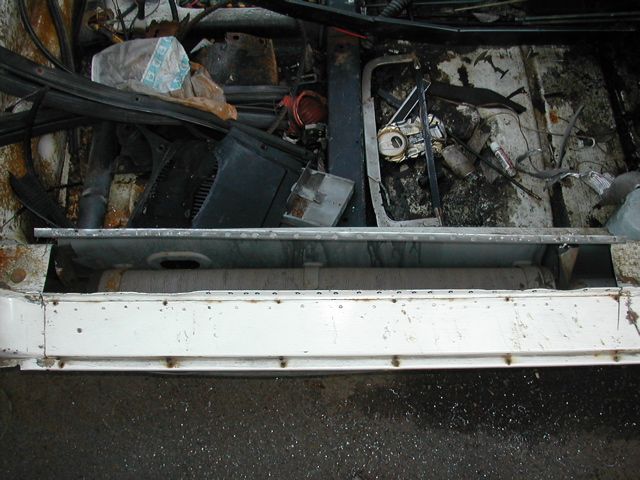
Posted by: McMark Mar 29 2005, 08:31 PM
Here's the paper, plastic, fiberglass, and aluminum tubes connecting the rear heater tubes to the front heater tubes. These are supposed to muffle the sound so when the heater is on it doesn't get noisier in the car. Effectiveness is questionable, IMHO.
Attached image(s)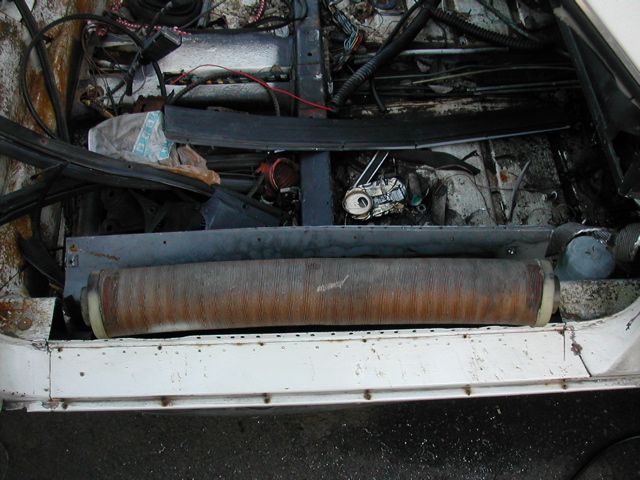
Posted by: McMark Mar 29 2005, 08:34 PM
Here's the long without the tube. Notice how little rust there is. What little rust there is in the bottom was caused by the hell hole letting water in. This is proof that a well maintained car will not rust. In other words, breaking into your longs to paint/POR-15/zinc coat the surface is not necessary.
Attached image(s)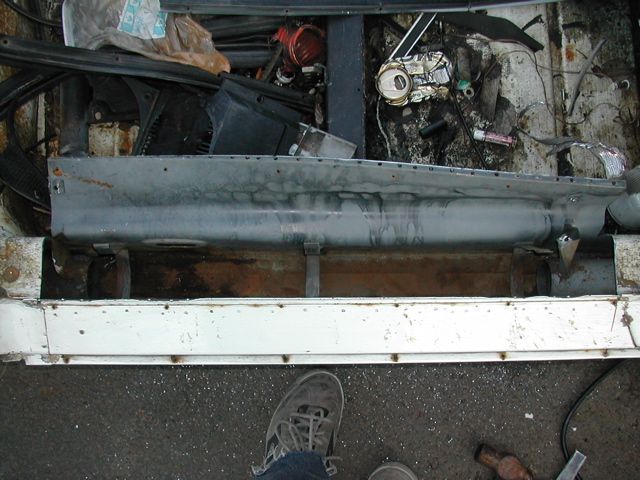
Posted by: McMark Mar 29 2005, 08:37 PM
Here's a detail shot of the rear of the opening. Showing the rear heater tube, seat belt reinforcement, and 1 of three C straps that hold the tube in place. The C strap in this picture was bent taking the tube out.
Attached image(s)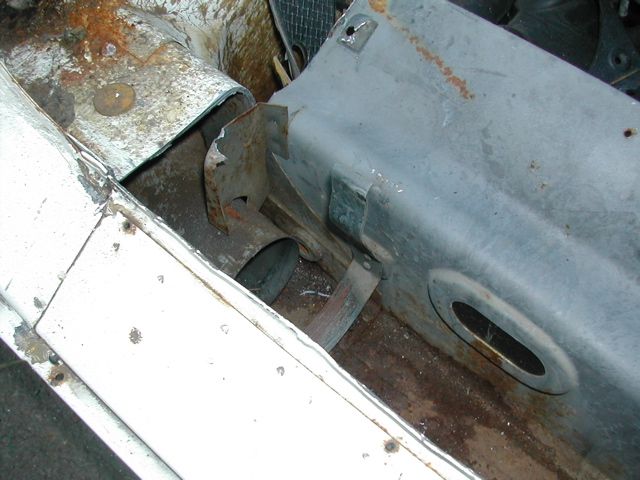
Posted by: McMark Mar 29 2005, 08:39 PM
Here's the front of the opening showing the front heater tube, and the tube stabilizer bracket (there's one in the last picture too). Also shows another C strap, bent as well.
Attached image(s)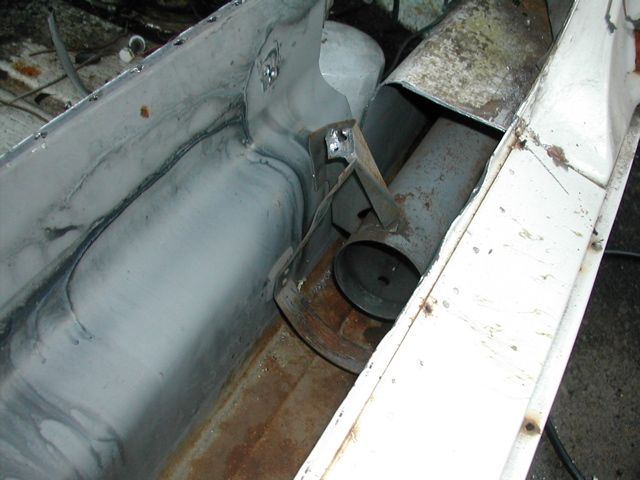
Posted by: McMark Mar 29 2005, 08:41 PM
View towards the rear of the long. Here you can see the bottom of the C strap which is not deformed. The top should be a mirror image.
Attached image(s)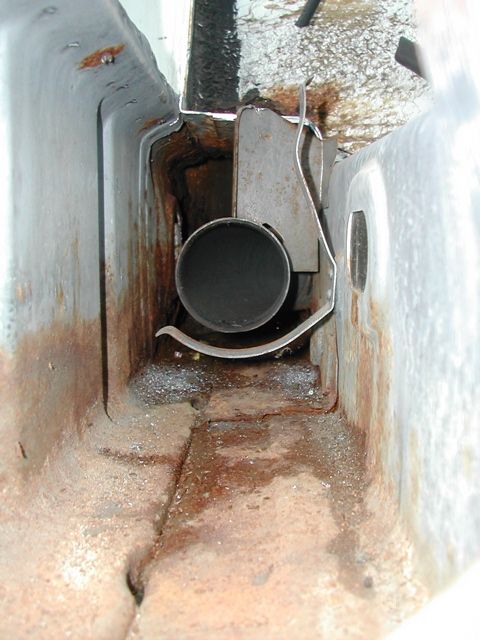
Posted by: McMark Mar 29 2005, 08:42 PM
Here's the view towards the front of the long.
Attached image(s)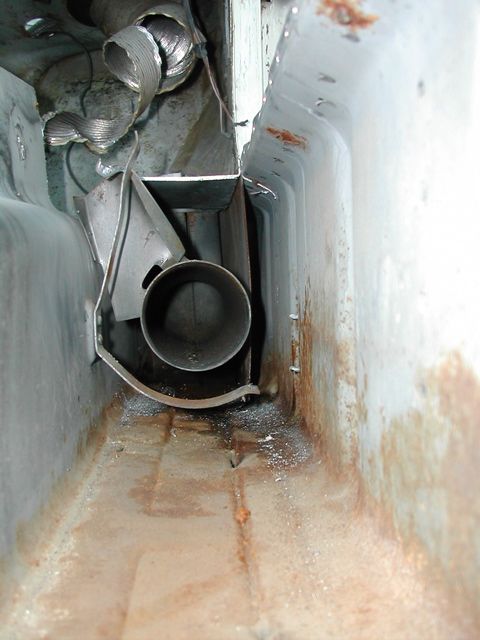
Posted by: McMark Mar 29 2005, 08:45 PM
Here's a view to the rear, past the heater tube. This is the area directly below the hell hole. You can see the rust damage caused by neglect.
Attached image(s)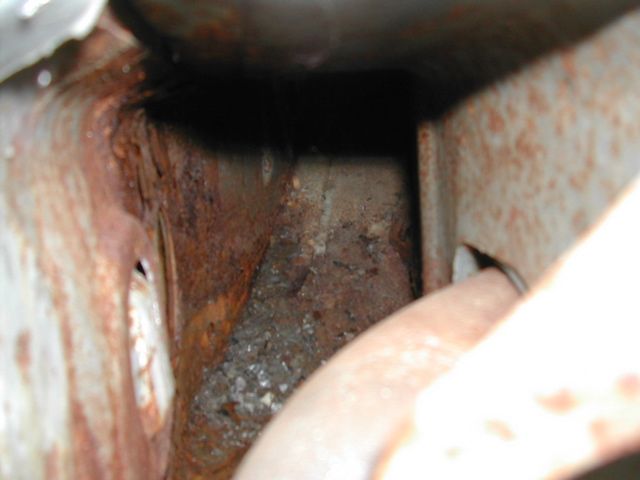
Posted by: McMark Mar 29 2005, 08:47 PM
Another detail show of the seat belt reinforcements. Notice how close the plate comes to the C strap. Remember this for later.
Attached image(s)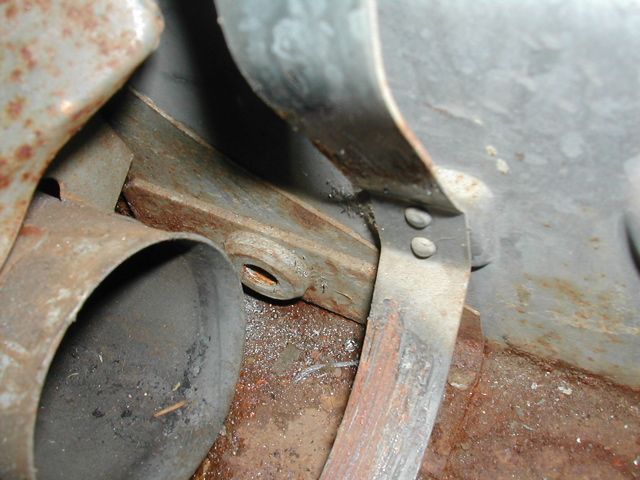
Posted by: McMark Mar 29 2005, 08:51 PM
Here's one possible way to remove the tube in preparation for acid dipping. Cut along the Sharpie line. Near the seat belt hole you have to cut close to the C strap mounting pad. Remember the plate from the last picture?  If you cut along this line and drill out the spot welds you'll remove the tube and clamps as one unit. Make sure to cut carefully and not very deep because there is lots of stuff just behind the metal.
Do not cut on your long without reinforcing the body to avoid bending your car in half.
Attached image(s)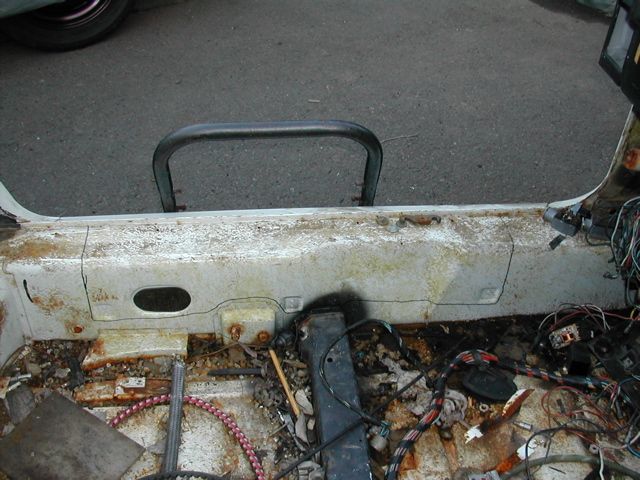
Posted by: McMark Mar 29 2005, 08:53 PM
Finally, a shot down the paper tube, showing the aluminum lining. There is fiberglass in between the paper outside and the aluminum lining.
Attached image(s)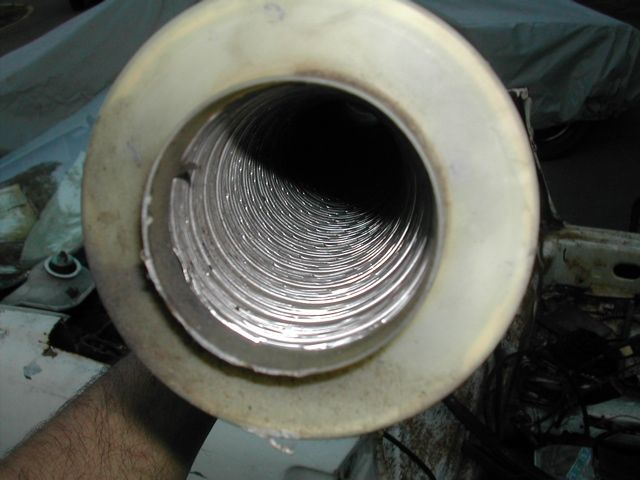
Posted by: lapuwali Mar 29 2005, 09:00 PM
Thanks, excellent, Mark. Thanks much.
Classic thread!
Posted by: CptTripps Mar 29 2005, 10:31 PM
What a great perspective on how things look in there.
Fantastic stuff...thanks to you, and your poor parts car for sacrificing it's long. (Which looks better than anything in the midwest BTW)
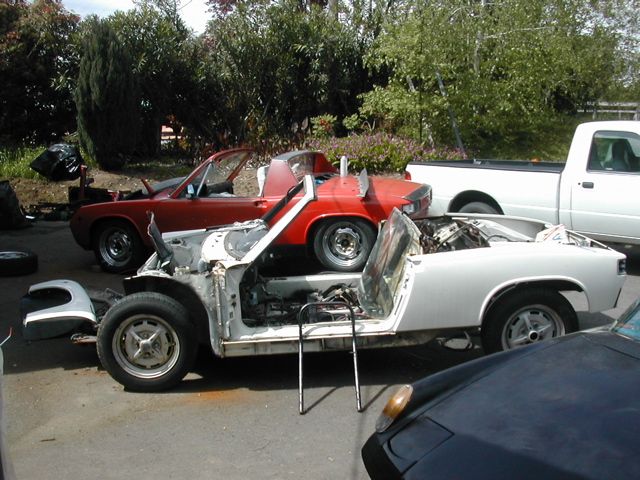
Posted by: McMark Mar 29 2005, 11:52 PM
Yeah, I had some remorse. But the rest of the car is so trashed it's only good for a race car body. So oh well. It's headed for the scrap heap.
Posted by: Hammy Mar 30 2005, 12:41 AM
Why parts? From those pics, that car looks in better condition than mine
Posted by: redshift Mar 30 2005, 01:03 AM
Thanks Mark, that was a fun read, and looksee..
M
Posted by: McMark Mar 30 2005, 01:24 AM
| QUOTE (Hammy @ Mar 29 2005, 10:41 PM) |
| Why parts? From those pics, that car looks in better condition than mine |
How about now?
Attached image(s)
Posted by: dralf Mar 30 2005, 07:16 AM

What a wonderful Autopsy ! Would love to have a teener like that on which to perform exploritoy surgery ( practice my sawall and welding work ).
Tanks
Posted by: Teknon Mar 30 2005, 08:23 AM
Uninsulated!!!! Yuck. I'm gunna drill some holes and fill it with foam. Need all the heat I can get. Cool pics. 
Posted by: CptTripps Mar 30 2005, 08:28 AM
| QUOTE (Teknon @ Mar 30 2005, 09:23 AM) |
| Uninsulated!!!! Yuck. I'm gunna drill some holes and fill it with foam. Need all the heat I can get. Cool pics. |
Yeah, I love 'Great Stuff' for things like that. 3 little holes, and you are covered...and air/water tight! I had to stop myself and remember to do it AFTER I put Engman's kit on.
Posted by: CptTripps Mar 30 2005, 08:30 AM
| QUOTE (McMark @ Mar 29 2005, 09:51 PM) |
| Here's one possible way to remove the tube in preparation for acid dipping. Cut along the Sharpie line. Near the seat belt hole you have to cut close to the C strap mounting pad. Remember the plate from the last picture? If you cut along this line and drill out the spot welds you'll remove the tube and clamps as one unit. Do not cut on your long without reinforcing the body to avoid bending your car in half. |
So then would you put 5-6 stitch-welds back in before you sent it off for dipping? Why not just wait till after you have it dipped, and then replace with new materials? that way you are only opening it up once.
Great thread...lots of help!
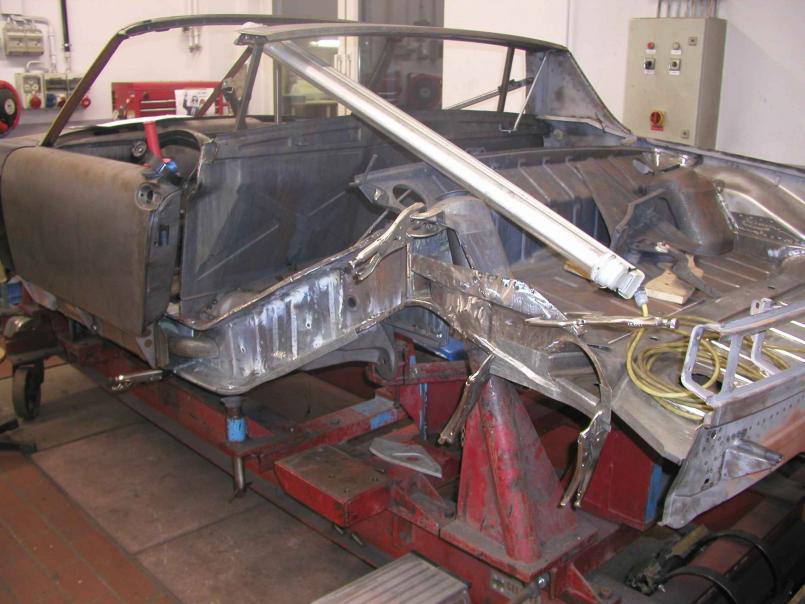
Posted by: McMark Mar 30 2005, 01:09 PM
No leave it out while dipping and weld a bar from the dash to the back pad wall at each door. Keeps the car together when they're pulling it out of the acid bath.
Attached image(s)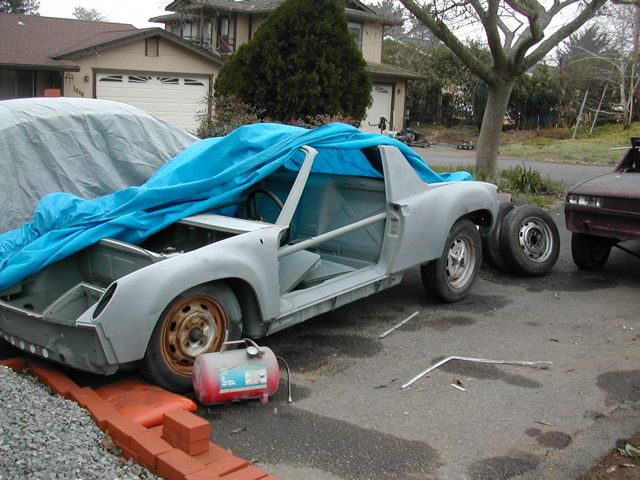
Posted by: abearauto Feb 19 2006, 06:11 PM
nice work will make me think about other methods, by looking at the photos looks prety clean inside, my 6 is not that rusty the hell holes are in realy good shape, mayby gonna ust the por 15 whith a wand and go down inspection holes to treat any exsisting corroision thanks for all the pics, steve
Posted by: Chris914n6 Feb 19 2006, 06:55 PM
nice pics. turned out alot better than mine did.
i think my hose ends are steel not plastic, 1975 chassis.
Posted by: 9146986 Feb 19 2006, 08:51 PM
McMark,
You need to get out of CA to see what rust is!
Posted by: McMark Feb 19 2006, 09:25 PM
Let's not go there again. 
Posted by: McMark May 28 2007, 05:21 PM
![]() for obscurity
for obscurity
Posted by: r_towle May 28 2007, 05:31 PM
I agree, why the hell you bothered to cut a long that good!!! WTF...
When I need to take out the tube, I can just reach up from underneath and pull, by the time I care...there is nothing left of the long.
Rich
Posted by: McMark May 28 2007, 05:35 PM

Nothing I hate more than the "You cut up THAT car?!" comments. Everything looks great over the internet. 
Powered by Invision Power Board (http://www.invisionboard.com)
© Invision Power Services (http://www.invisionpower.com)