Printable Version of Topic
Click here to view this topic in its original format
914World.com _ 914World Garage _ Uhh-Ohh….
Posted by: Larmo63 Apr 16 2016, 07:09 PM
I think a main bearing took a shit. Dammit.
Posted by: Cairo94507 Apr 16 2016, 08:01 PM
I hope not.
Posted by: 914_teener Apr 16 2016, 08:04 PM
Oh no.....
Unmistakable sound Larwrence.
Posted by: 76-914 Apr 16 2016, 08:27 PM
What are the symptoms, Toodlum's?
Posted by: Larmo63 Apr 16 2016, 09:38 PM
I thought it sounded like a valve issue, but I checked them, and drained the oil.
Definitely a main or rod bearing. Metal in the drain pan.
Bummer. So, do I build another /4 2.2 or my 2.3 /6?
My budget dictates that I do the /4 for now with the /6 in the pipeline, I suppose.
Pulling the motor Wednesday. Crap.
Posted by: 396 Apr 16 2016, 09:38 PM
Sorry to hear..... I guess now is the time to pull that 3.8 I hear you have stashed away.
Good luck with your diagnoses.
Posted by: Cuda911 Apr 16 2016, 10:52 PM
Awww, crap, sorry to hear that, Lawrence.
Posted by: euro911 Apr 17 2016, 12:13 AM

Posted by: Coondog Apr 17 2016, 05:55 AM
Now that would piss me off. I guess the bright side is other then throwing $$$ at a unexpected repair you will have a stronger motor behind you.
Posted by: PlantMan Apr 17 2016, 08:27 AM

I think a main bearing took a shit. Dammit.
This must have just happened?
I saw your car yesterday at Cars and Coffee?
Posted by: RobW Apr 17 2016, 09:35 PM
What a bummer... sorry to hear... 
Posted by: JmuRiz Apr 18 2016, 07:31 AM
Ouch, it's what we all fear with an old car.
Time to change your avatar?
Posted by: McMark Apr 18 2016, 08:34 AM
I don't have any complete motors laying around to send you. But you can swap the main bearings in about 10 hours. 
Much faster if it's a rod bearing.
Posted by: forrestkhaag Apr 18 2016, 09:51 AM
That  is an idea worth doing. I will donate time in your garage to that effort prior to my Seattle trip on Thursday if you can get the parts defined in time.
Posted by: Larmo63 Sep 19 2016, 09:49 PM
I have been through a lot since this occurrence, but a rebuilt 2.7 is on the way. This will be my install thread. (I guess)
Posted by: Mikey914 Sep 20 2016, 12:42 AM
Way to steer into the skid !
You know sometime things happen for a reason, now you have the excuse to do the 2.7.
Can't wait to see you at WCR with it!
Posted by: Whitney Mic Sep 20 2016, 02:03 AM
I have been through a lot since this occurrence, but a rebuilt 2.7 is on the way. This will be my install thread. (I guess)
oof!

Sorry the engine wore out on you. Sounds like you have your plan set for the new power plant, good luck with the new install!!
Hope you can get back on the road soon, I will be watching your thread and cheering from the sidelines!
-- Whit
Posted by: euro911 Sep 20 2016, 03:14 AM
You know sometime things happen for a reason, now you have the excuse to do the 2.7.
Can't wait to see you at WCR with it!


Posted by: 76-914 Sep 20 2016, 08:25 AM
I have been through a lot since this occurrence,
Your not alone. All 914 owners will be "put to the test" at one time or another. Some walk away while others put there best foot forward. This is congruent with your signature.
 "S" cams?
Posted by: The Cabinetmaker Sep 20 2016, 03:29 PM
I don't understand why this would piss anyone off. Its a mechanical device. It will wear out. It will break. Not if, but when. Its part of owning and driving a car. If I blew up an engine cause I did something stupid like ignoring low oil on the dipstick, or exceeding 7000 rpm, now that would piss me off. Losing a bearing on a worn out engine is to be expected
Posted by: mark04usa Sep 20 2016, 03:34 PM
I don't understand why this would piss anyone off. Its a mechanical device. It will wear out. It will break. Not if, but when. Its part of owning and driving a car. If I blew up an engine cause I did something stupid like ignoring low oil on the dipstick, or exceeding 7000 rpm, now that would piss me off. Losing a bearing on a worn out engine is to be expected
I think Lawrence is referring to a combination of events, including a shop that gained his confidence and then massively disappointed. I can sure empathize
Posted by: The Cabinetmaker Sep 20 2016, 04:03 PM
Statement was not directed at lawrence or anyone in particular. He seems to be taking it in stride. Just a general statement
Posted by: forrestkhaag Sep 20 2016, 04:05 PM
don't mention low oil.......
Posted by: Larmo63 Sep 20 2016, 10:52 PM
The oil in my now defunct 2.0 /4 was NOT LOW.
I'm moving on and learning from my experience with the asshole in Oceanside.
The 2.7 is en route, it shipped and I'm thinking it gets here Friday.
Posted by: mark04usa Sep 21 2016, 12:11 AM
As my boss Marvin Foster at Continental Cars in Austin back in the 70's would say.... "Press On"
Here's to old Marvin
Posted by: colingreene Sep 21 2016, 12:21 AM
Motors just don't trash a bearing randomly, They do when they have no oil though.
Posted by: JustinMeier Sep 21 2016, 07:55 PM
Welcome to the 2.7 club
Posted by: Larmo63 Sep 25 2016, 11:20 PM
When you drain four quarts out of an engine, it seems that it wasn't low on oil.
I still have the oil from that engine, and I am pressing on. It will work out fine.
Stay tuned.
Posted by: Larmo63 Sep 26 2016, 10:11 PM
This arrived safe and sound today. Now, all I have to do is everything else to get it installed and running.
This should be challenging and fun.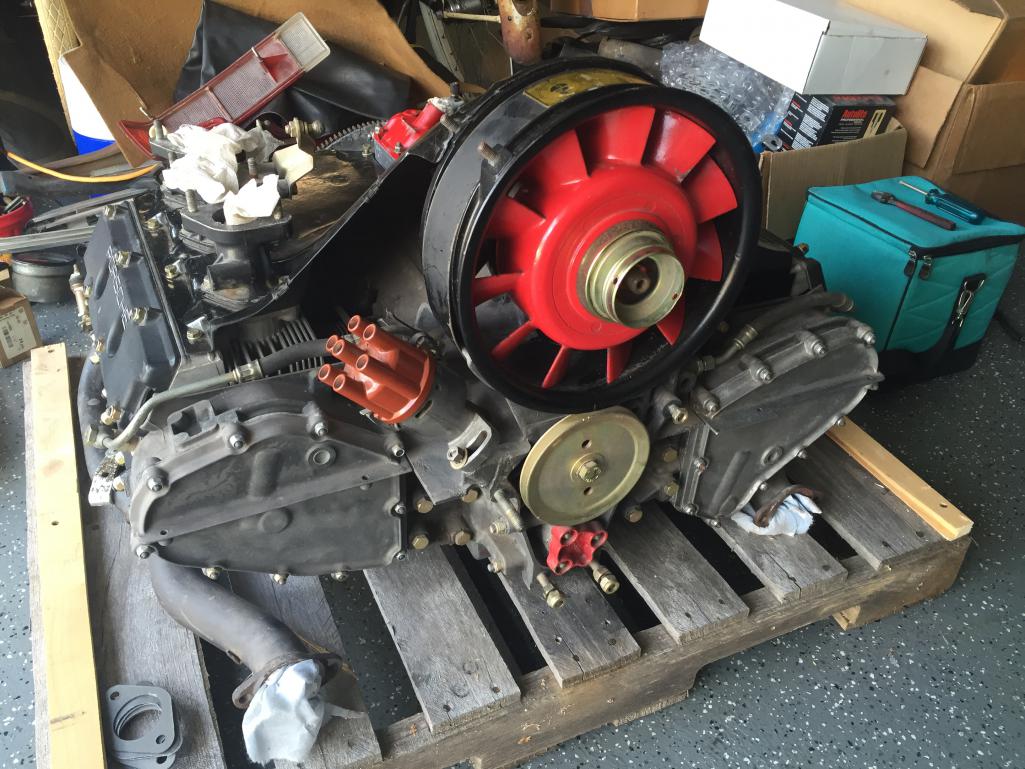
Posted by: Larmo63 Sep 26 2016, 10:14 PM
Posted by: BigFour1973 Sep 26 2016, 10:17 PM
This arrived safe and sound today. Now, all I have to do is everything else to get it installed and running.
This should be challenging and fun.
That's weird, your headers are pointing the wrong way. Looking forward to you getting
GLW
Posted by: Krieger Sep 26 2016, 10:19 PM
Lawrence, that is going to be a blast! Enjoy the sweet sounds.
Posted by: euro911 Sep 26 2016, 10:54 PM
I still have the oil from that engine, and I am pressing on. It will work out fine.
Stay tuned.
Posted by: Chris H. Sep 27 2016, 08:21 AM
"oil starvation". Not your fault. New engine looks way more better .
Posted by: Larmo63 Sep 29 2016, 09:07 PM
I sold the white car this morning and now I am concentrating on the /6 conversion at hand. Two nice little packages arrived today from Phoenix.
Posted by: Larmo63 Sep 29 2016, 09:12 PM
Too pretty to be hidden up inside a dirty fender…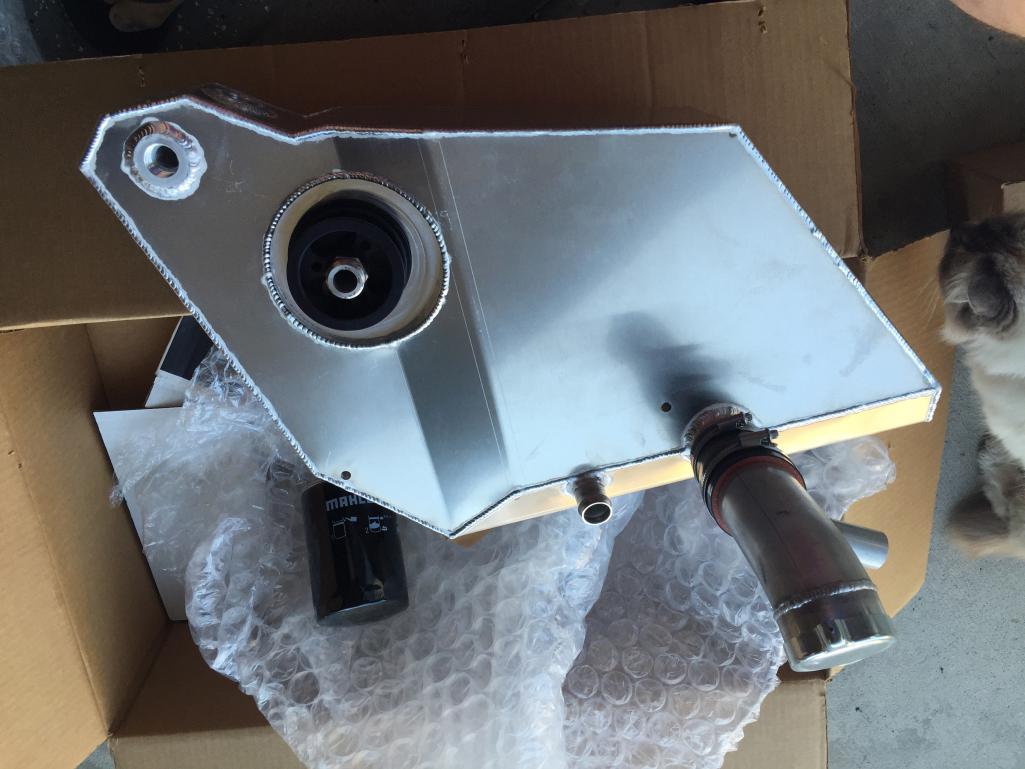
Posted by: Larmo63 Sep 29 2016, 09:13 PM
Motor mount…..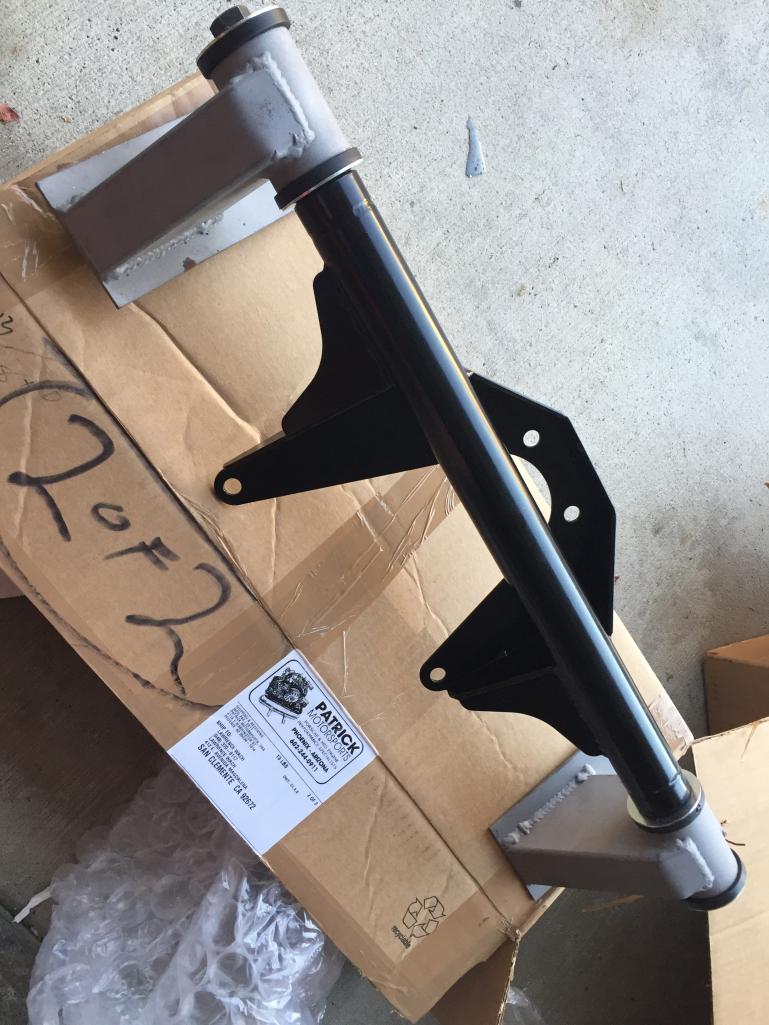
Posted by: PlantMan Sep 29 2016, 10:31 PM
I sold the white car this morning and now I am concentrating on the /6 conversion at hand. Two nice little packages arrived today from Phoenix.
Lawrence, did you get close to what you were asking for the white car?
I saw it posted on CL. Congrats!
Posted by: Steve Sep 29 2016, 10:51 PM
This arrived safe and sound today. Now, all I have to do is everything else to get it installed and running.
This should be challenging and fun.
That's weird, your headers are pointing the wrong way. Looking forward to you getting
GLW
I loved my 2.7, but it did run hotter than my 3.2 and needed an external oil cooler.
2.7 with webers sound was amazing. It was like your own personal lemans movie with Steve McQueen. I still remember driving back and forth through the alameda tunnel just to listen to the motor.
Posted by: Larmo63 Sep 29 2016, 11:15 PM
Going with the front oil cooler for sure……
It's on my list, as are PMO carbs, Clewett ignition system, and the chain oiling system.
This stuff is expensive.
Posted by: Mblizzard Sep 30 2016, 07:25 AM
Following this closely as I am considering this conversion as well.
Only thing stopping me is time, money, and a long list of other things that have to be done.
Posted by: gms Sep 30 2016, 01:43 PM
Going with the front oil cooler for sure……
It's on my list, as is PMO carbs, Clewett ignition system, and the chain oiling system.
This stuff is expensive.
sound like you are getting all the upgrades that I would
I have a new unused set of PMO 40mm on the shelf if you are interested, just would want what I paid for them.
Posted by: Larmo63 Oct 3 2016, 10:53 PM
I figure, if I do at least a little every day, I might reach my goal.
I did start today cleaning up the engine bay.
I tore out all of the old dried up rubber engine tin seals.
Black is a good color to work with here.
I drilled a single big hole in each of the Patrick mounts, I'm going to bolt it into the firewall first with steel backing plates, then weld it.
"Suspenders and a belt"
Posted by: mb911 Oct 4 2016, 02:49 PM
Going with the front oil cooler for sure……
It's on my list, as is PMO carbs, Clewett ignition system, and the chain oiling system.
This stuff is expensive.
sound like you are getting all the upgrades that I would
I have a new unused set of PMO 40mm on the shelf if you are interested, just would want what I paid for them.
I remember seeing those on your shelf.. They are very nice..
Posted by: mb911 Oct 4 2016, 02:53 PM
Yup for sure expensive.. But it's all about the sounds and smells and the whuuur sound of the fan and valve train.
Posted by: Chris H. Oct 4 2016, 08:31 PM
Nice progress Lawrence! Down to one car, just a few more wallet-fulls away from a kick ass 6 conversion.
Ben those heat exchanger pipes are a work of art man. Almost hate to see that covered up!
Posted by: Larmo63 Oct 4 2016, 11:03 PM
I have a question about extracting the front engine mount studs out of my mag case. I notice Ben's doesn't have anything there.
I'm buying the extraction kit, but do I just crank them out, or use heat? I'd rather go with bolts right into the case. (I think?)
Posted by: euro911 Oct 5 2016, 01:04 AM
Not sure why you want to change from studs to bolts, but make sure you get the correct length bolts, so you don't bottom-out.
The studs should unscrew fairly easy - I typically just double-nut to remove them. You can spray a penetrating agent on them a day or two ahead of time too.
I'd definitely shy away from torching a magnesium case
Posted by: 76-914 Oct 5 2016, 08:20 AM
Not sure why you want to change from studs to bolts, but make sure you get the correct length bolts, so you don't bottom-out.
The studs should unscrew fairly easy - I typically just double-nut to remove them. You can spray a penetrating agent on them a day or two ahead of time too.
I'd definitely shy away from torching a magnesium case
Not sure about the P6. It is advised on Subaru's head gasket repairs as you can increase the torque #'s considerably. I'm sure that theory carries across the board but I'd get an opinion from someone that knows P6's.
Posted by: Catorse Oct 5 2016, 10:55 AM
No heat required, they just spin right out with the right collet tool. You would NOT replace these with bolts, use bolts only for affixing the case to the yoke, then toss them and put the studs back.
Studs are ALWAYS stronger than bolts in this application which is why Porsche made it like that.
Posted by: mb911 Oct 5 2016, 12:17 PM
No heat required, they just spin right out with the right collet tool. You would NOT replace these with bolts, use bolts only for affixing the case to the yoke, then toss them and put the studs back.
Studs are ALWAYS stronger than bolts in this application which is why Porsche made it like that.
And the fact that bolts are meant to be removed thus potential for stripping threads etc. For some reason when I got this engine it didn't have studs.. I would like studs but I am using a factory engine mount so I need to search for the correct length.
You can use some heat if needed though it wont hurt anything.. I weld mangnesium at least once a week as I have a pile of fans and housings I am repairing for people.. It can be done safely
Posted by: Larmo63 Oct 5 2016, 03:31 PM
As far as the long studs on the fan side, I think I'll take out the two lower ones and the upper left side one. The right side can stay. (I'm using the Patrick mount, and it mounts flush.)
I love how when you download a newer version OS to your phone, you have to learn everything over again. For some reason, now I can't upload photos from my phone to my computer so I'm stuck explaining things in words.
Posted by: forrestkhaag Oct 5 2016, 04:40 PM
I did the same thing / downloaded new software and my phone lost all data. Restored from the clown (D) and half of my photos are cloudless.  Apple Sucks but they own the world and work and keep profits off shore to it.
Anyway, Larmo: Your parts look great ( 914-6 conversion parts Blue 6 ..not his parts)
My engine stand is awaiting your arrival for pickup if still needed as my motor is now in reassembly staging in LA with the Vasek Polak mechanic in charge. This is fun stuff and the cost is incidental compared to the living life part.
I like the PMS mount you invested in but will go with the Rich Johnson piece as it is in use on Steve's 3.6 and works fine.
A point is made as to weather or not one would ever take off all of the linkages cables, exhaust or headers and other tidbits just to lower the tranny to access the valves. I did enough valve tuning on my previous 911's to know the motor can stay where it is and accomplish the V-tune.
In the meantime my lowly 2.2L 4 has had a change in life moment for the past two +weeks. The character that built the motor in Dallas put on the build sheet "Weber/Empi" Carbs) for the intake and I didn't know enough at the time to know the word- "scam"..... So the EMIP 40 HPMX carbs (Not Weber) have died yet again / ran great thru rain and driving snow (can you say Flagstaff ramble 2016) for 362 fine days and since then have been a nightmare to keep in tune.. One day perfect. The next. DayOdd.
And to compound the dead (pronounced DayOdd) 914, one of my 2 ML's has a fried framasetter and is need a dealer infused ensquinchment ERG wobbler to correct the problems. 2500 hundred bucks later, my SUV works fine but the 914 still has EMPI carbs. To correct the problems I offered 2500 hundred bucks to the MBZ oraginazition and for that, my SUV works but the 914 still has EMPI carbs.
To get the 914 on the road again, I dropped a half grand on two brand shiny new REAL Webers for the 4 / this investment made, as I will not enthusiastically drive a Mercedes ML with all of the comforts of home while I sort out the 6 conversion..... which could go on for a while.....
Some call it crazy,... I call it ... romantic. (line from K-Pax)
Sidebar: Its like Christmas. You buy a bunch of cool toys for the kids and a really classy yacht for the wife...but you secretly buy a 911 motor for yourself - and get a present that keeps on giving.. 
Posted by: 76-914 Oct 5 2016, 04:57 PM
I like the PMS mount you invested in but will go with the Rich Johnson piece
Damn it all, Lawrence. Now your mount has PMS! You truly are experiencing some bad times.
 Surely it's not Karma
Posted by: euro911 Oct 5 2016, 05:31 PM
I heard those PMS mounts:
1. Are extremely difficult to get into the right position to actually mount without liberal massaging
2. Produce a lot of whining and creaking noises the entire time you even attempt to mount it
Posted by: Steve Oct 5 2016, 05:44 PM
I heard those PMS mounts:
1. Are extremely difficult to get into the right position to actually mount without liberal massaging
2. Produce a lot of whining and creaking noises the entire time you even attempt to mount it
Those young whipper snappers always have to try something new. LOL
I have Rich Johnson's mount, boxster brake adapters and throttle cable kit. If he sold socks and underwear, I would buy that too!!
I do have a PMS oil cooler, 915 clutch adapter, 911 oil return line and 914-6 throttle cables from him, so i am an equal opportunity purchaser.
Posted by: Larmo63 Oct 5 2016, 07:59 PM
If Patrick uses their mount on all of the beautiful 914s they build, I think I can too. I like the PM mount as it spreads the weight distribution evenly. We shall see how difficult it is to get the motor in and if it makes any noise. Thanks for the buzzkill.
I have my hands full now with installing the PM oil tank, and detailing the engine compartment.
I can't wait to start grinding in there. Not.


Posted by: euro911 Oct 5 2016, 08:17 PM
Yes ... grinding comes before mounting
Posted by: 914_teener Oct 5 2016, 08:22 PM
No heat required, they just spin right out with the right collet tool. You would NOT replace these with bolts, use bolts only for affixing the case to the yoke, then toss them and put the studs back.
Studs are ALWAYS stronger than bolts in this application which is why Porsche made it like that.
And the fact that bolts are meant to be removed thus potential for stripping threads etc. For some reason when I got this engine it didn't have studs.. I would like studs but I am using a factory engine mount so I need to search for the correct length.
You can use some heat if needed though it wont hurt anything.. I weld mangnesium at least once a week as I have a pile of fans and housings I am repairing for people.. It can be done safely
You are welding it with TIG right?
Posted by: Steve Oct 5 2016, 09:59 PM
The PMS mount wasn't available when I replaced my MSDS cross bar motor mount with the Rich Johnson mount 16 years ago. Otherwise I would of looked into it. I used to live in Chandler, AZ and visit Jims shop a lot and druel over all the projects. I wish I had the money to let him build me a ground up restoration dream machine. I ran the MSDS motor mount from 1986 to 2000 and only swapped it out because it didn't support heat exchangers. It only worked with headers.
Posted by: Steve Pratel Oct 6 2016, 12:17 AM
Sorry to hear Lawrence....
It looks like the situation is well in hand and you have a great new project.
Can you share any history on the motor that crapped out? Was it a main bearing or something else? How many miles and did you know what brand main bearing?
Good look on the new project, will follow with interest.
Thanks!
Posted by: Larmo63 Oct 6 2016, 09:08 PM
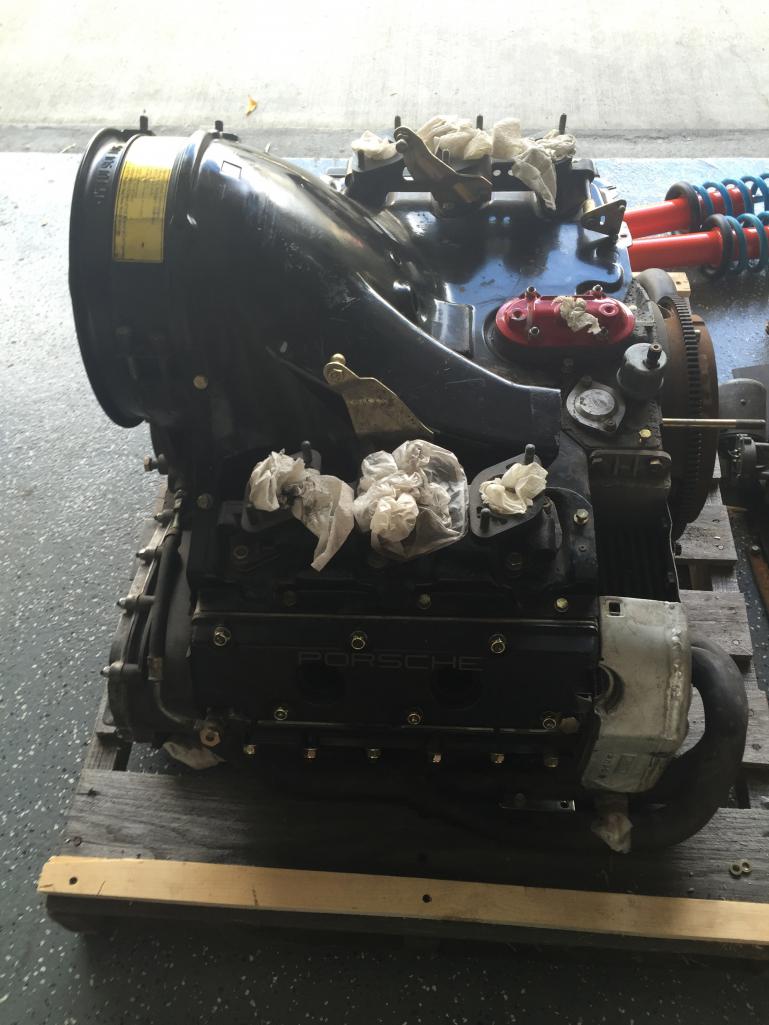
My engine is now properly on an engine stand. I took the 911 headers off and intend to drop the bottom plate. A little proctology with my new boroscope.
It should be a bit interesting to inspect the inside as there is not one thing I've seen in this engine that isn't shiny and brand new.
I did well on this purchase.
Posted by: Steve Oct 6 2016, 09:58 PM
Can't wait to hear it!!
Posted by: euro911 Oct 6 2016, 10:07 PM
It should be a bit interesting to inspect the inside as there is not one thing I've seen in this engine that isn't shiny and brand new.
I did well on this purchase.

Posted by: Larmo63 Oct 7 2016, 09:47 PM
Apple Store Genius bar tomorrow…….
…..will report back
Posted by: Larmo63 Oct 8 2016, 09:20 PM
I spent a good deal of the morning at Apple, new hard drive to be installed in my laptop. 3-5 days until I get it back.
So, I soldier on....It's amazing how much I depend on my computer.
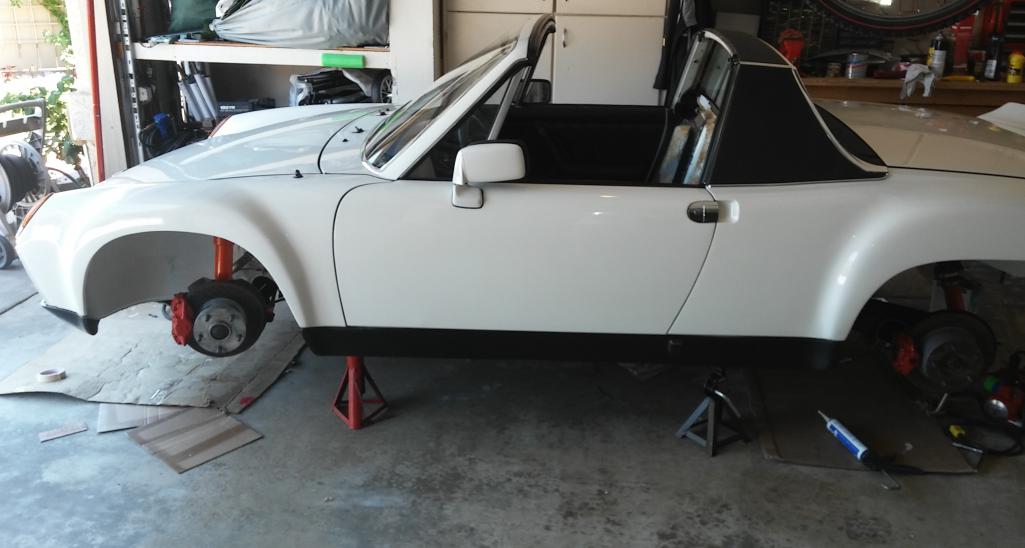
I took out the back pad and got the car on the really nice Esco jack stands that there was a thread on here. I'm working on getting the engine compartment in order, engine mount going in, drilling out the oil tank ports, usual stuff.
Still no photos..., sorry.
Posted by: altitude411 Oct 8 2016, 09:23 PM
Still no photos..., sorry.
...huff

![popcorn[1].gif](style_emoticons/default/popcorn[1].gif)
Posted by: Larmo63 Oct 9 2016, 11:14 PM
So frustrated with Apple. Their new "photos" app yields no photos. I have tried everything. I can't get it to work.

Posted by: 76-914 Oct 10 2016, 07:29 AM
Are you sure it's the computer? It took me about 15 tries before I figured out how to post pics off the Mac Book pro. It's intimidating if you just came off a PC. iPhone 6 or 7? One other thing. We tried everything to update my wife's 9 yo Mac. She spent hours on the phone with them and time at the Genius bar also before I broke down and bought her the latest model.
Posted by: Larmo63 Oct 10 2016, 08:36 AM
The new OS works differently. I've always loved how the Apple system works. I've never owned a PC, always Apple.
It's not an old machine either, just a new hard drive and OS.
Posted by: Larmo63 Oct 10 2016, 08:41 AM
I think I fingered it out. This is the PM motor mount bolted in, I'll grind off the paint to prep for welding it in. Then the weld through primer.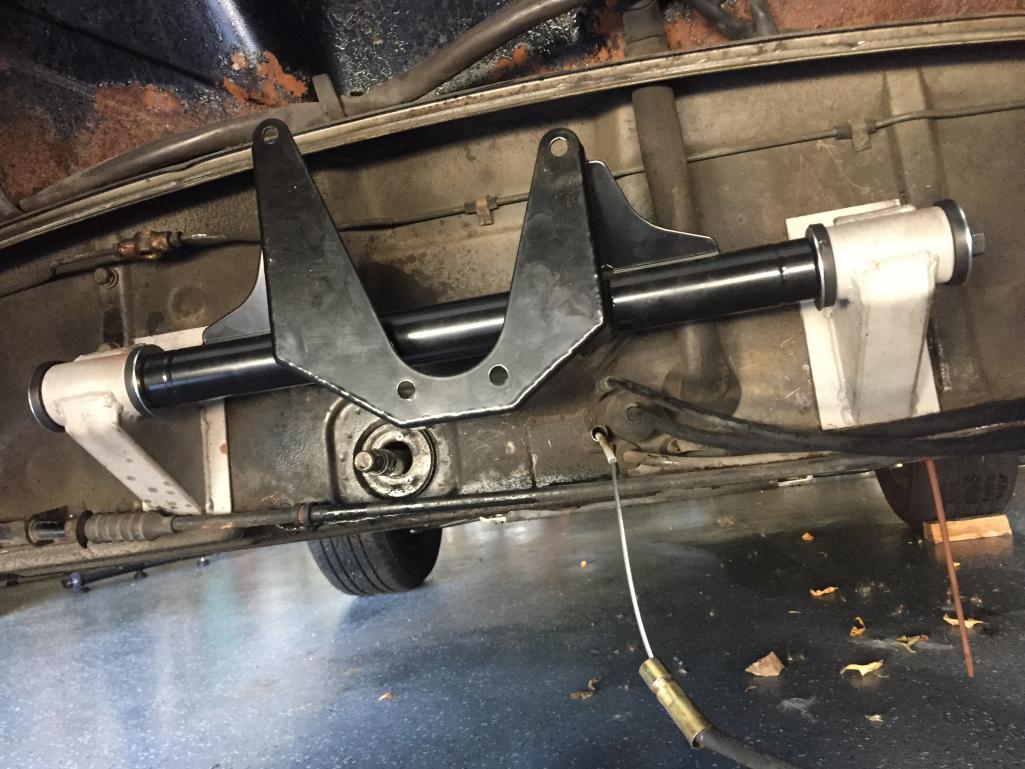
Posted by: altitude411 Oct 10 2016, 08:51 AM

it's like the power going on after a three day blackout.
Posted by: euro911 Oct 10 2016, 10:53 AM
You need to take care of that rust above the engine shelf, Goob.
Posted by: Larmo63 Oct 10 2016, 12:47 PM
No shit, Sherlock.
And, it's surface rust Goob.
Posted by: boogie_man Oct 10 2016, 01:06 PM
You bastardo !! Efffing hate you Lamo......
Posted by: PlantMan Oct 10 2016, 01:11 PM
I have to live vicariously through your efforts Lawrence.
With 4 kids, all my spending cash is going to private school!
No 6 for me anytime soon!
Posted by: Larmo63 Oct 10 2016, 04:57 PM
Boring holes in your car isn't boring......in fact, you really need to be on your game and not fuch up.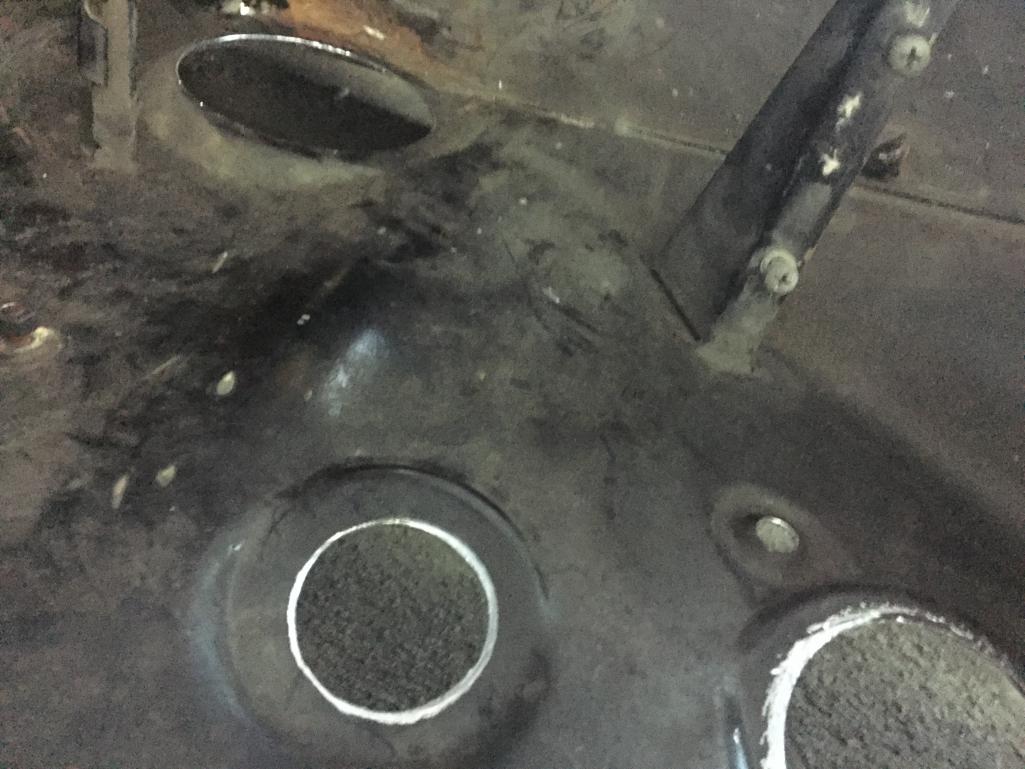
Posted by: Larmo63 Oct 10 2016, 05:00 PM
Kind of hard to see, but here's a rough draft. This is the first fit, things lined up well. I love the crawling in and out from under the car a thousand times! You think you have everything you will need, but there is always that one thing you forgot that is over on the workbench.....
Hanging out in my engine compartment is interesting. I may sleep there tonight. And, like I said before, black paint is your friend.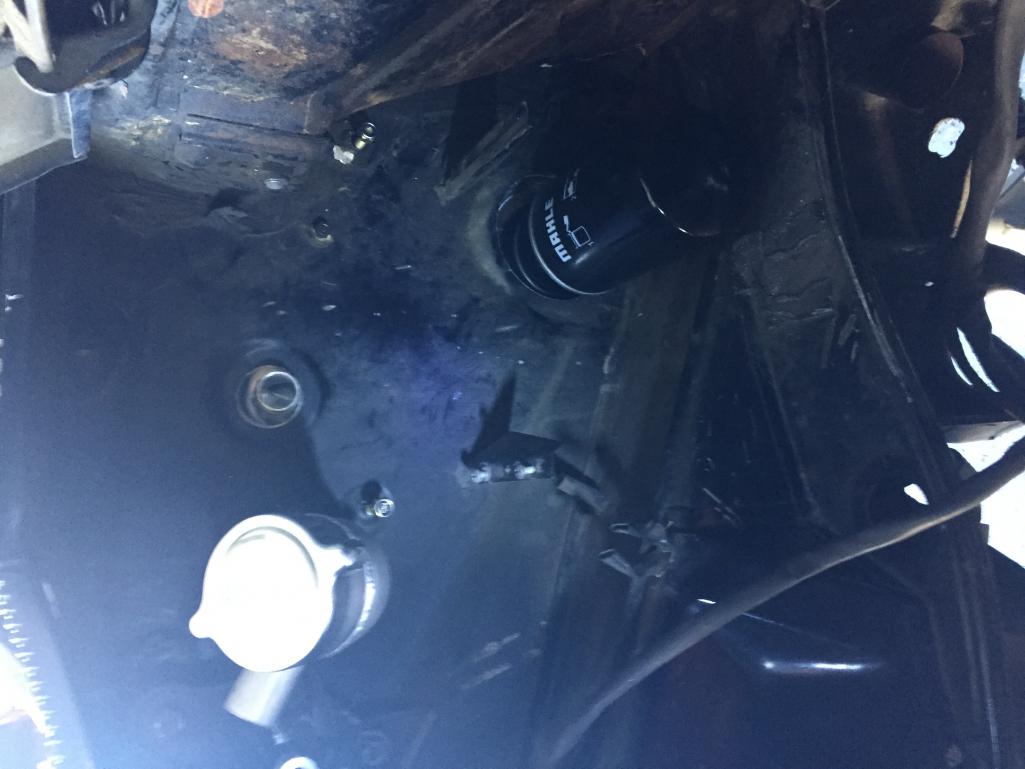
Posted by: Larmo63 Oct 10 2016, 05:37 PM
This is the goal....
Posted by: euro911 Oct 10 2016, 07:21 PM
And, it's surface rust Goob.
https://www.youtube.com/watch?v=/V7Nci-GVuHE
Posted by: Larmo63 Oct 10 2016, 07:40 PM
I'm doing all the construction stuff first, then the pretty.....
Posted by: Steve Pratel Oct 11 2016, 10:40 AM
There's likely a few thrash cans filled with empty Bud Light and Keystone cans behind this sign........... classic.
I'm doing all the construction stuff first, then the pretty.....
Posted by: Larmo63 Oct 15 2016, 05:39 PM
What do you do with the relay board when doing a conversion?
Move it? Remove it? Keep it?? 
Posted by: ClayPerrine Oct 15 2016, 05:54 PM
What do you do with the relay board when doing a conversion?
Move it? Remove it? Keep it??
I leave it in and use it to hold the voltage regulator. If you run an internally regulated alternator, you can remove it. If you are running an early 911 engine, you will need to find some place to put a tach amplifier. Without one, the tach won't work. The factory used the 914-6 relay board for that, but you could put it in behind the tach.
Posted by: Steve Oct 15 2016, 06:00 PM
What do you do with the relay board when doing a conversion?
Move it? Remove it? Keep it??
I dumped it 30 years ago. Never missed it.
Posted by: Larmo63 Oct 15 2016, 06:04 PM
I'm going to use the Clewett Engineering ignition set-up which I think has its' own wire to the tach.
http://www.clewett.com/index.php?main_page=product_info&cPath=1_13_14_18&products_id=2
Posted by: Steve Oct 15 2016, 07:21 PM
I would check with Clewett for recommendations. Otherwise 30 years ago I bought a 914 and 911 Haynes manuels and did a stare and compare. Both the 911 and 914 tach have a black and purple wire that goes from the tach to pin 1 on the coil. All I did was replace the tach with a 911 tach and trace the wires with an volt ohm meter. Pretty simple.
Posted by: Larmo63 Oct 15 2016, 09:51 PM
I'm running these gauges, all vintage 914-6, notice the KPM speedo.....
Posted by: Steve Oct 15 2016, 10:24 PM
Nice!!! The real sixes had the relay board. I liked the extra room, so I dumped it. I used a 928 connector to connect to the plug that plugs into the relay board. I made my own harness. Patrick sells the same thing. A carbureted engine is very simple.
Posted by: Larmo63 Oct 16 2016, 12:08 AM
I'm just planning out how all of this goes together and I'd rather not have the board in there if I can help it. I'd like to grind the holders out now, before I detail, weld, and paint the engine compartment.
Thank you for all the help and suggestions!
Posted by: Steve Oct 16 2016, 07:44 AM
I'm just planning out how all of this goes together and I'd rather not have the board win there if I can help it. I'd like to grind the holders out now, before I detail, weld, and paint the engine compartment.
Thank you for all the help and suggestions!
Just make sure your alternator has a built in regulator. Mine did.
I still have receipt somewhere for the plug to build a harness.
Pretty simple.
Posted by: Larmo63 Oct 16 2016, 06:48 PM
I was going to have Kroon do my harness.
Posted by: porschetub Oct 17 2016, 03:20 AM
I was going to have Kroon do my harness.
Why? Perry did mine and real happy,uses standard relay board and it all works,great workmanship,he can custom build also.
Posted by: mepstein Oct 17 2016, 05:10 AM
I was going to have Kroon do my harness.
Why? Perry did mine and real happy,uses standard relay board and it all works,great workmanship,he can custom build also.
save the overseas shipping and long turn around. Perry's your man.
Posted by: Catorse Oct 17 2016, 08:14 AM
Harness? Come on Lawrence there's like 5 wires there!
Posted by: Larmo63 Oct 24 2016, 08:27 PM
I drained all remaining gas out of the car, pulled the tank and had my handy-dandy machinist friend make this custom aluminum tank plug for the return line inlet in the tank that I will not be using. It is made to be press fit, and with a bit of gas Permatex, it should do the trick.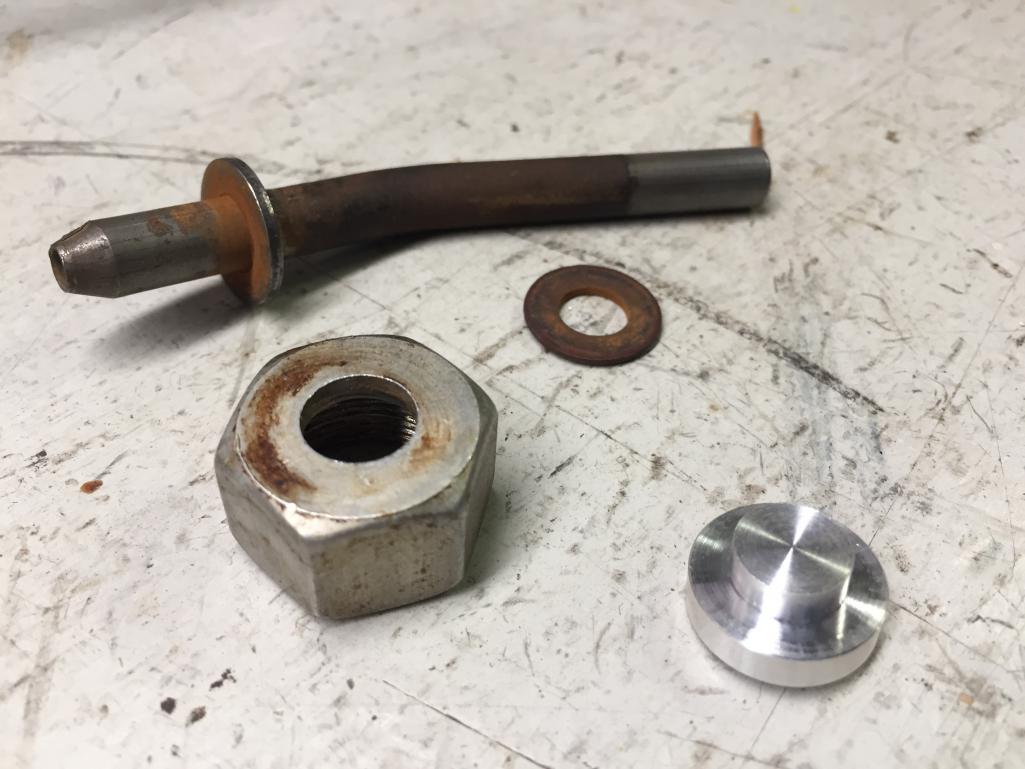
Posted by: McMark Oct 25 2016, 11:13 AM
Smart!
Posted by: euro911 Oct 25 2016, 11:34 AM
Cool idea, but can't we find a cap nut to do the same thing? Anybody know what size and TPI is that bung is?
Posted by: Catorse Oct 25 2016, 12:03 PM
A cap nut would not seal as well. When you torque this down, you have a press fit on the tit that sticks out, which plugs the hole. THEN, the aluminum on the top side crushes against the nipple on the gas tank, like a crush washer. So it won't leak for sure.
That's the idea behind it. A cap nut would rely 100% on the threads to seal it which is sketchy for gas.
Posted by: euro911 Oct 25 2016, 02:16 PM
Not if a fibrous washer or an impervious rubber gasket were used in the cap nut.
Posted by: Catorse Oct 25 2016, 02:22 PM
By all means try and find a cap nut that will work - post a link, let us know what you find. Saves me lathe time.
Posted by: euro911 Oct 25 2016, 03:07 PM
Hoping someone already has a tank out so they can measure the bung and post the size for us
Posted by: Larmo63 Oct 25 2016, 10:43 PM
It's actually a fine little piece of art.
Posted by: Larmo63 Oct 29 2016, 09:33 PM
A few things are happening, I finally took a look at the driver's side long and this is what I found. Looks solid!
Posted by: Larmo63 Oct 29 2016, 09:34 PM
Fun little dirt and sand collection....the bottom of the jack plate looks worse than it really is...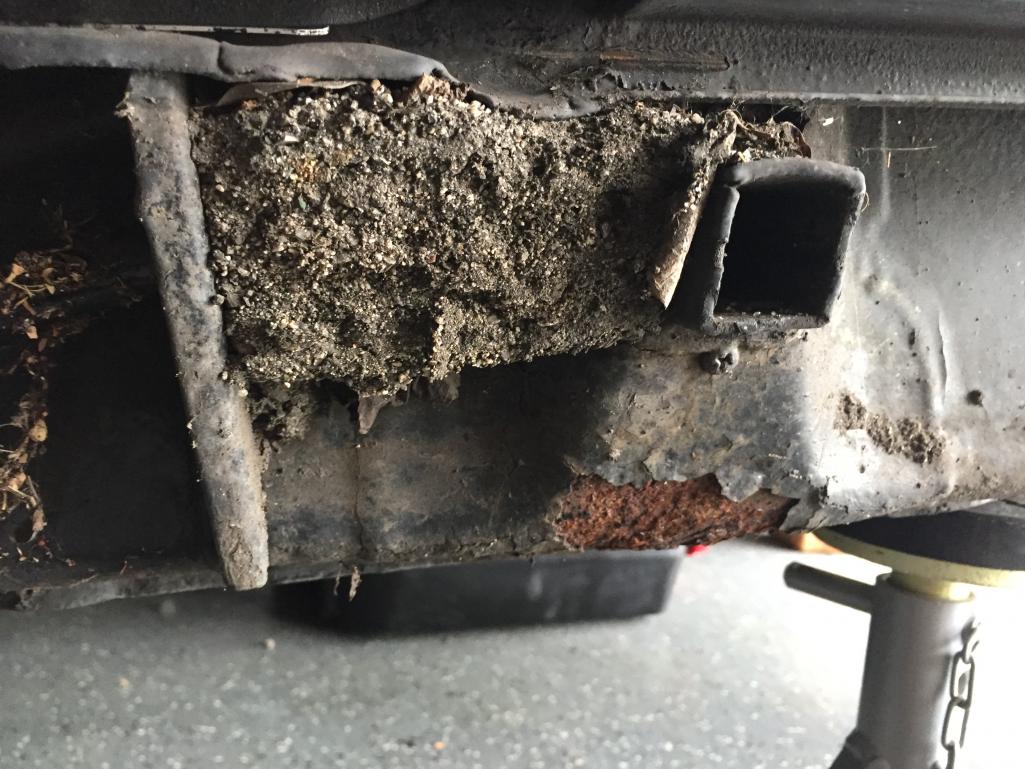
Posted by: Larmo63 Oct 29 2016, 09:37 PM
AN -12 lines fit through the stock hole openings in the triangle gussets along the longitudinal. Yay.
I'm trying to simplify this.
Posted by: Larmo63 Oct 29 2016, 09:43 PM
I did a simple GT mod by installing the hood opener on the grille.
Some people may not like it but I do.
Attached thumbnail(s)
Posted by: barefoot Oct 30 2016, 05:00 AM
I drained all remaining gas out of the car, pulled the tank and had my handy-dandy machinist friend make this custom aluminum tank plug for the return line inlet in the tank that I will not be using. It is made to be press fit, and with a bit of gas Permatex, it should do the trick.
You inspired me, my return fitting was in poorer condition than yours, so I made an aluminum plug similar to yours, here's the dimensions:
3 diameters,
top one that goes into the tank fitting is .45"dia by 0.3" long
mid part that fits into nut is .66" dia by .1 long, and bottom one that protrudes out bottom of nut is .37" dia by 0.3 long.
I use Viton O-ring size 2-015 is's an .070 section ring with ID of about.48"
Posted by: 76-914 Oct 30 2016, 08:34 AM
A few things are happening, I finally took a look at the driver's side long and this is what I found. Looks solid!
Damn, one would think that might be 1st on your list. Oh well, your a lucky man and good on ya.
Now get back to work so you can make Rt 66 in your 914. Kent
Posted by: gereed75 Oct 30 2016, 08:45 AM
I drained all remaining gas out of the car, pulled the tank and had my handy-dandy machinist friend make this custom aluminum tank plug for the return line inlet in the tank that I will not be using. It is made to be press fit, and with a bit of gas Permatex, it should do the trick.
You inspired me, my return fitting was in poorer condition than yours, so I made an aluminum plug similar to yours, here's the dimensions:
3 diameters,
top one that goes into the tank fitting is .45"dia by 0.3" long
mid part that fits into nut is .66" dia by .1 long, and bottom one that protrudes out bottom of nut is .37" dia by 0.3 long.
I use Viton O-ring size 2-015 is's an .070 section ring with ID of about.48"
Have not done this personally, but found this pixture in Patssle's engine swap thread

Posted by: Larmo63 Oct 30 2016, 11:40 AM
Damn, one would think that might be 1st on your list. Oh well, your a lucky man and good on ya. poke.gif Now get back to work so you can make Rt 66 in your 914. beerchug.gif Kent
I know, but I was busy driving the heck out of the car. I just never got around to it.
Posted by: Larmo63 Oct 30 2016, 03:53 PM
I wasn't sure -12 would fit through these gussets. It does. Duh.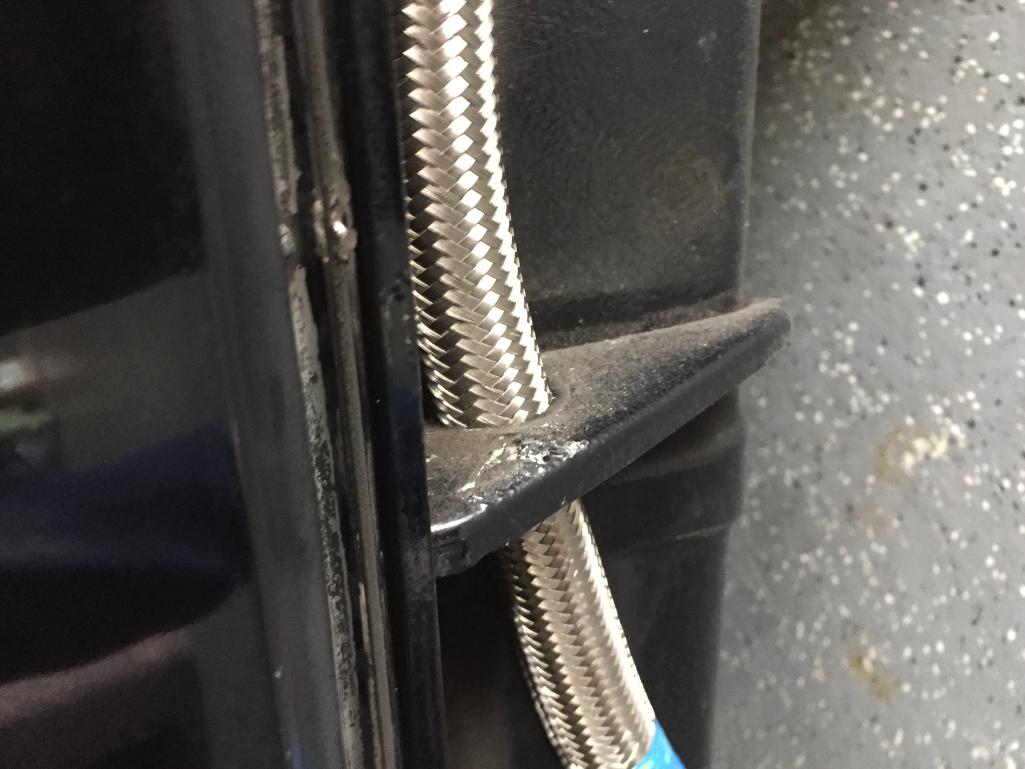
Posted by: Krieger Oct 30 2016, 05:12 PM
Your going to put some sort of grommet in there right?
Posted by: mepstein Oct 30 2016, 05:40 PM
You know, on mine I don't have any grommets. If I see it start to fray I'll do something about it but our race car mechanic said not to bother.
Posted by: Larmo63 Oct 30 2016, 07:10 PM
No grommets needed if you have both ends clamped to the body. no lateral movement. This hose is very tough and it's a tight fit. The holes are not sharp or jagged, I think it will be fine.
Posted by: Larmo63 Oct 30 2016, 07:16 PM
I've got a call in to Jesus, er, ah, um, I mean James Patrick to pick his brain a little bit on the design/layout of the oil cooling system I'm installing.
Posted by: 76-914 Oct 30 2016, 09:14 PM
No grommets needed if you have both ends clamped to the body. no lateral movement. This hose is very tough and it's a tight fit. The holes are not sharp or jagged, I think it will be fine.
You think. Those are usually the things that bite you in the ass. As Chris H. said, "Everything I did half assed I'm re-doing now".
Why not do it to perfection. It's cheap. Order some of these http://www.aircraftspruce.com/catalog/hapages/snapbushings.php then stop by and borrow some of my hole punches. You'll just need an crescent wrench to use them.
Posted by: Chris H. Oct 30 2016, 11:12 PM
As Chris H. said, "Everything I did half assed I'm re-doing now".
That is 100% true. Can't wait to weld up the holes I made in the trunk that I didn't need
.
Posted by: Larmo63 Oct 31 2016, 06:21 PM
I'm actually trying to avoid drilling any holes that aren't necessary. This is taking me a while because I have to think it all out and do it how I see doing it.
Posted by: Larmo63 Dec 30 2016, 07:29 PM
Nothing like reading the Route 66 thread and WCR in Mammoth to get the /6 conversion juices flowing again. I'm fucking sick of seeing this beautiful car up on jack stands in my garage.
I'm back at it with new vim and vigor. Little by little, I might just get this running in time for Temecula.
Posted by: 76-914 Dec 31 2016, 04:52 PM
That's the Spirit. BTW, it's not abnormal to have a 914 on jack stands.
Posted by: euro911 Dec 31 2016, 04:58 PM
I'll concur
Posted by: mb911 Dec 31 2016, 05:49 PM
That's the Spirit. BTW, it's not abnormal to have a 914 on jack stands.
Yup that's for sure. I am actually considering building an engine stand so I can run my engine to do db testing on mufflers because my car won't be ready..
Posted by: Steve Jan 1 2017, 05:47 PM
The older you get, the longer they stay on jackstands.
Posted by: forrestkhaag Jan 1 2017, 06:46 PM
I recently gave away all of my jack stands just so my car couldn't end up on them... Now its on a lift...... 
Attached thumbnail(s)
Posted by: euro911 Jan 1 2017, 11:38 PM
One doesn't need jack stands or a lift to still have a disabled car
... plus, it's too damn cold to be crawling around on the cold concrete right now ... brrrr
Posted by: Larmo63 Jan 22 2017, 07:30 PM
I have my welding guy coming to do the motor mounts, and some small repairs on the firewall behind the driver's seat. Water got down in behind the jute pad in the engine compartment and it rusted through in a few places. Also, a new battery tray and stand. We'll get to the front trunk soon, too, to do the oil cooler install. Little by little. I have beautiful Webers on the way also. Did I mention that this shit is expensive? (Thanks for not warning me)
http://www.early911sregistry.org/forums/showthread.php?127276-FS-40-Webers
Anybody have a spare set of turbo lower valve covers?
Posted by: mepstein Jan 22 2017, 08:02 PM
Good price for good carbs.
Posted by: larryM Jan 22 2017, 08:08 PM
10 hrs ?????- only in our dreams
it takes almost that long to get the -6 engine out, accessories removed, & long block onto a stand
flat rate to disassemble & reassemble -6 with a case separation is at least 40 hrs - not counting cleanup & parts acquisition, nor machine work that WILL be required
http://forums.pelicanparts.com/porsche-911-technical-forum/902753-engine-rebuild-labor-cost.html
as i recall it's about 35 hrs for a -4
But you can swap the main bearings in about 10 hours.
Posted by: Larmo63 Jan 22 2017, 08:17 PM
I'm happy that this set of carbs came along because I was thinking PMOs, and that would have been $4500.
Posted by: Larmo63 Jan 30 2017, 10:43 PM
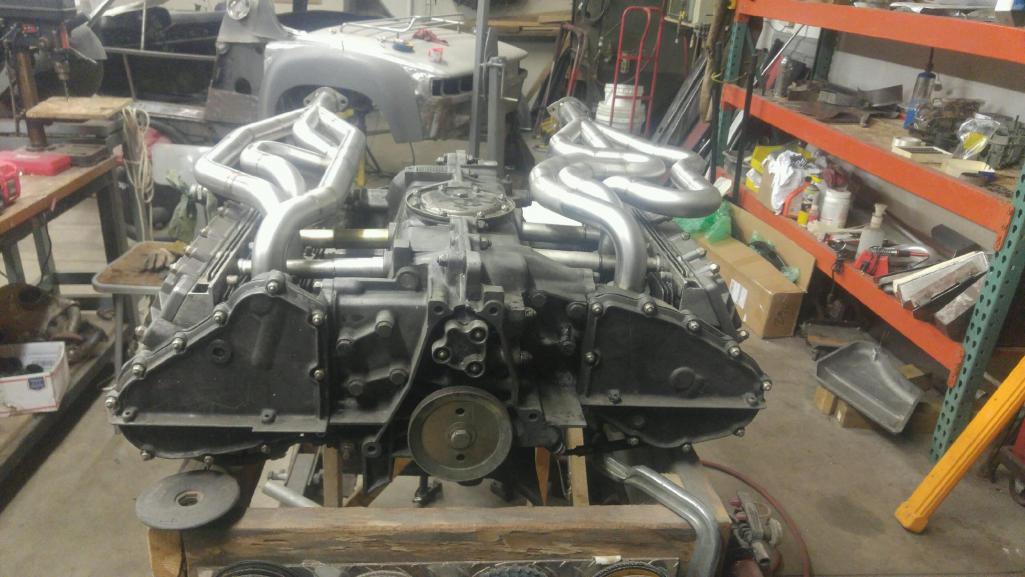
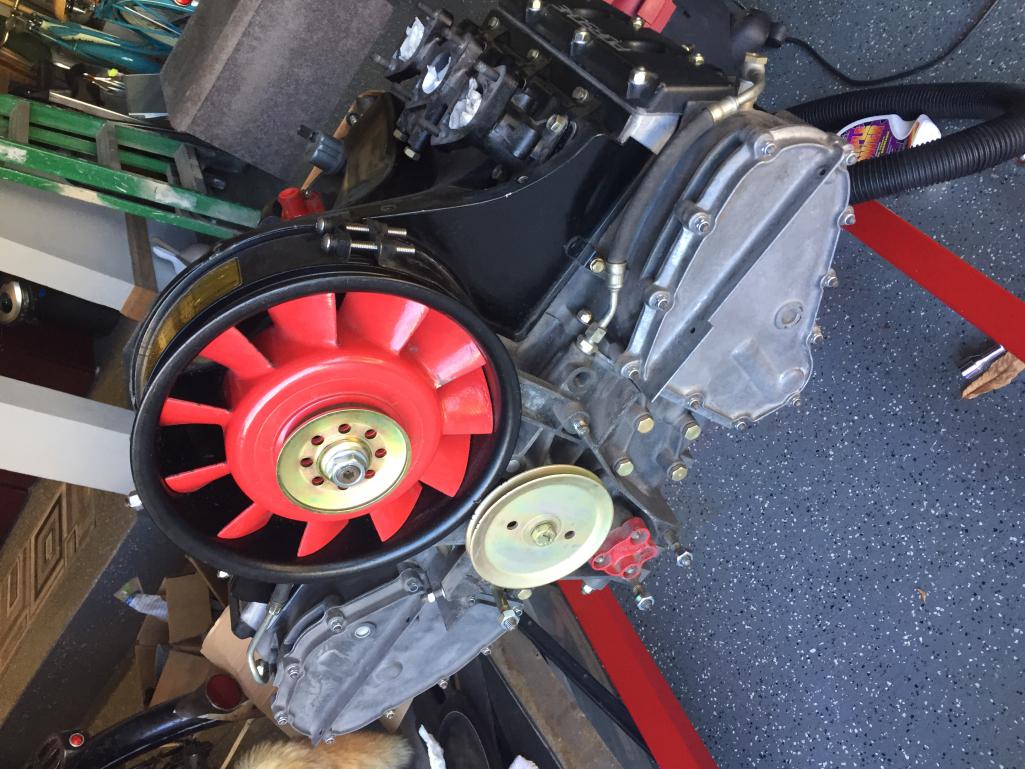
Today was a momentous day. The set of Weber Carbs arrived and I'm very pleased. Welded in the motor mount and fixed the battery tray. A few more things to repair and weld tomorrow. Engine tin is here, too. Wow, I may make it to WCR yet.
They go here, right?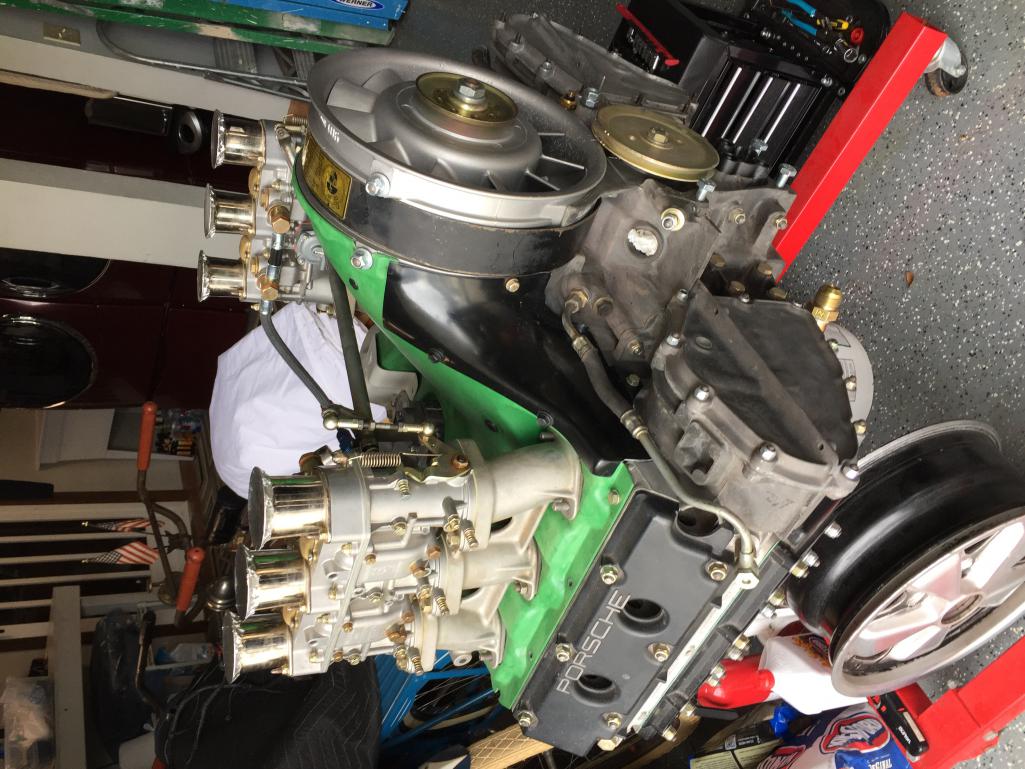
Posted by: Steve Jan 30 2017, 11:57 PM
That motor is art!!
Posted by: Krieger Jan 30 2017, 11:58 PM
That looks great! You know how good that is going to sound right? 
Posted by: sb914 Jan 31 2017, 07:01 AM
Today was a momentous day. The set of Weber Carbs arrived and I'm very pleased. Welded in the motor mount and fixed the battery tray. A few more things to repair and weld tomorrow. Engine tin is here, too. Wow, I may make it to WCR yet.
They go here, right?
[attachmentid=591328]
Looking sweet Lawrence! Better keep that garage door closed.
I might do a drive by and grab that beast.
Posted by: horizontally-opposed Jan 31 2017, 11:04 AM
Way to go, Lawrence! I remember the feeling of "welding day," "carburetor day," and others like them. Mileposts on your way to "key day." And when it starts up with six cylinders for the first time, your 914 will be forever changed...into something more exotic, more sophisticated. Maybe a bit less "toss-able"...but oh my, the elastic powerband and the noises. Did I mention the noises? Just you wait.
Enjoy the ride!
Posted by: Larmo63 Jan 31 2017, 08:43 PM
I added (welded in) a pair of console-to-firewall support bars today compliments of Elyut.
This thing just might make it to a 914 event this calendar year?
Posted by: Larmo63 Feb 1 2017, 08:27 PM
A little "while you're in there" repair on the firewall. Hard to get perspective, but this is behind the driver's seat. Water got behind the sound pad and rusted a couple holes. It's just tacked/started, we'll finish it tomorrow. We ran out of light.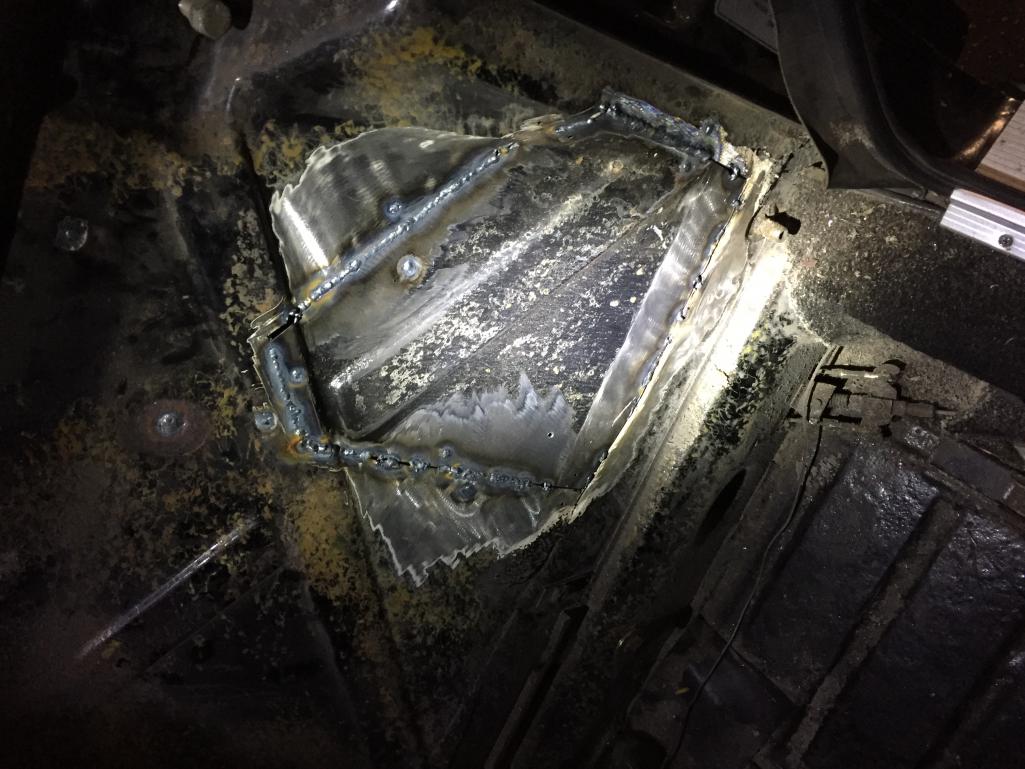
Posted by: forrestkhaag Feb 1 2017, 11:06 PM
Went by Larmo's place to pick up a few parts and to take a look at my engine stand with his motor on it.... and met his welder guy / first rate/ the whole way. Methodical and filing the profile on his wire prior to welding. First rate.
Posted by: Larmo63 Feb 2 2017, 11:21 PM
I get to dive into the engine compartment now that the rear welding is done, for a roto-rooter sesh, clean-up, prime and paint.
How fun.
Posted by: Larmo63 Feb 4 2017, 08:34 PM
Anyone want to chime in with tips on working in the engine compartment? I have a wire wheel head on the end of a cordless drill.
This seems like it is going to take forever.
Posted by: jmill Feb 4 2017, 09:15 PM
What are you trying to do? If you're trying to mechanically remove paint and gunk, there are way better tools including media blasting.
Posted by: 914_teener Feb 4 2017, 09:18 PM
What are you trying to do? If you're trying to mechanically remove paint and gunk, there are way better tools including media blasting.
Posted by: Larmo63 Feb 4 2017, 11:42 PM
I can't really media blast in my garage. This is a complete car, I don't want to take it all apart just to media blast the engine bay.
Posted by: 914_teener Feb 5 2017, 12:24 AM
Ok....I thought easy is what you said. Not sure what "easy" means.
From the looks of the surfaces in the thread looks like you may of had some petroleum type undercoating sprayed on? Not sure what work you are doing inside the engine compartment, so I'll assume you are trying to look for any bad rust spots and to do that you need to get down to the base metal to fix or add strengthening components given the motor you are installing....... so..................with that said:
Plain old gas works well to get that off or grease off. Have to really soak it and it will smell a lot. You can use a stronger solvent like acetone or brake cleaner but for that I recommend good resistant glove and a good NIOSH type mask. Solvent are not good for you or other living things.
After that my best results are a good amperage high RPM drill with a good quality brass cone wire wheel first and lots of elbow grease. Not easy. Follow up with a good quality stainless cone wire wheel on a angle air grinder ( these are not cheap) and the best ones I have found are from McMaster Carr and can hold up past 7K rpm's. The ones from Home Depot will last about five minutes and cost you about 7 bucks each.....so not worth it and not easy.
Others like Cary or Rick may chime in but from my chair those things work okay.
Easy to me is something that is done or I pay somebody else to do.
Posted by: mlindner Feb 5 2017, 06:51 AM
Larmo 63, I was in the same boat two years ago, but needed to do the entire car. Tried a lot, solvents, fein tool, all kinds of wheels, scrapers.....The answer is the long arm angle grinder from HF. reaches in to all the corners. Worked so well I did the whole bottom of my car in four hours. Got into all the tight inner fender area's, just great and fast. Only problem, it has a bolt type fixture on the end, so you need to take the wire wheel remove post and drill 1/4" hole. Not hard, one wheel did entire car. Hope this make sense, I keep looking for a photo of it. Best, Mark
Posted by: mlindner Feb 5 2017, 07:02 AM
Found it. Love your carbs, I'm still looking. Have fun. Mark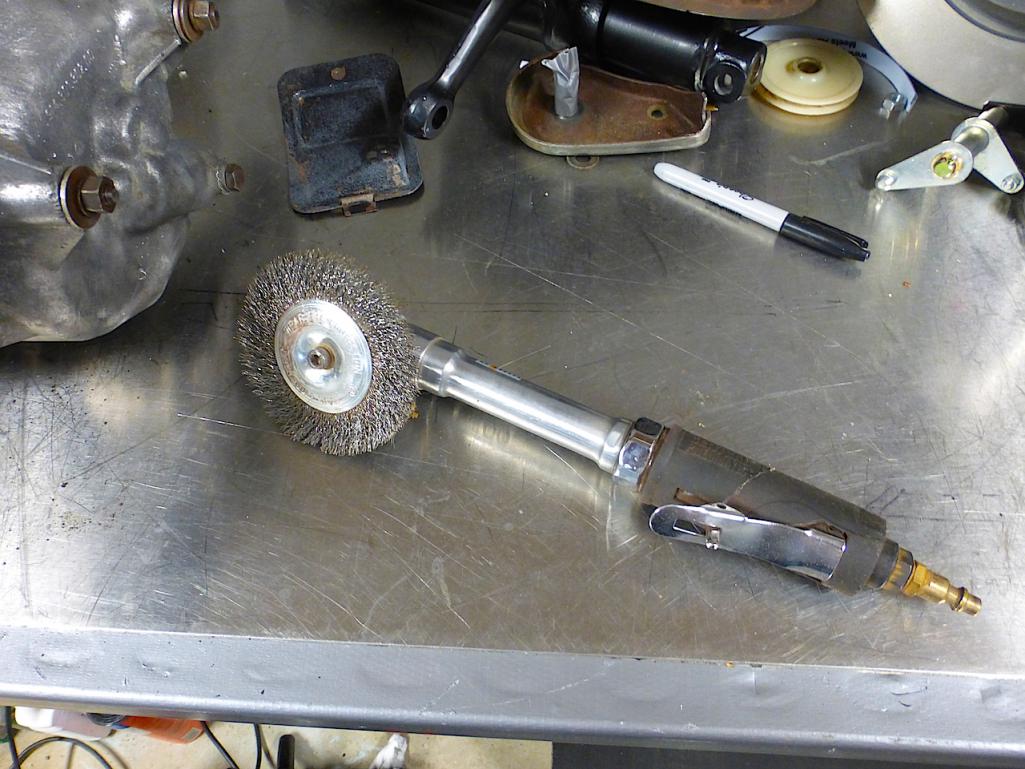
Posted by: mb911 Feb 5 2017, 07:32 AM
The other thing I have found is a wheel for a grinder brand name is Norton rapid strip wheel. About 8 bucks online. I removed everything to bare metal on my front wheel well and gender in 15 minutes on a standard 4.5 inch grinder.
Posted by: barefoot Feb 5 2017, 07:44 AM
If you don't have lots of air compressor capacity, a cheap harbor freight 4.5" angle grinder with cone type wire brushes do a great job of getting into most confined areas.
I've had mine for several years and keeps on ticking.
Posted by: Larmo63 Feb 5 2017, 11:32 AM
Thanks guys, I just need to get back in there and git 'r done. It's a dirty area, and the crap they used to keep the sound pad on is very difficult to remove.
Back at it today.
We usually watch the "game" for the commercials, but lately, even those have sucked.
Posted by: 76-914 Feb 5 2017, 02:35 PM
The other thing I have found is a wheel for a grinder brand name is Norton rapid strip wheel. About 8 bucks online. I removed everything to bare metal on my front wheel well and gender in 15 minutes on a standard 4.5 inch grinder.
If that Norton Rapid strip wheel one that looks like a Sponge on Steroids then
. Those things are vicious and they leave the metal alone while producing very little heat. They last forever, too!
Posted by: mb911 Feb 5 2017, 03:31 PM
The other thing I have found is a wheel for a grinder brand name is Norton rapid strip wheel. About 8 bucks online. I removed everything to bare metal on my front wheel well and gender in 15 minutes on a standard 4.5 inch grinder.
If that Norton Rapid strip wheel one that looks like a Sponge on Steroids then
. Those things are vicious and they leave the metal alone while producing very little heat. They last forever, too! Yup that's the one..
Posted by: euro911 Feb 5 2017, 08:14 PM
. Those things are vicious and they leave the metal alone while producing very little heat. They last forever, too! they do the trick ... but they definitely don't last forever. I keep a couple spares in the tool chest.Posted by: Larmo63 Feb 6 2017, 04:31 PM
I'm now whittling down my list of more hard purchases I need to make. Did I mention that this is an expensive little project? Keeping my eye on the prize.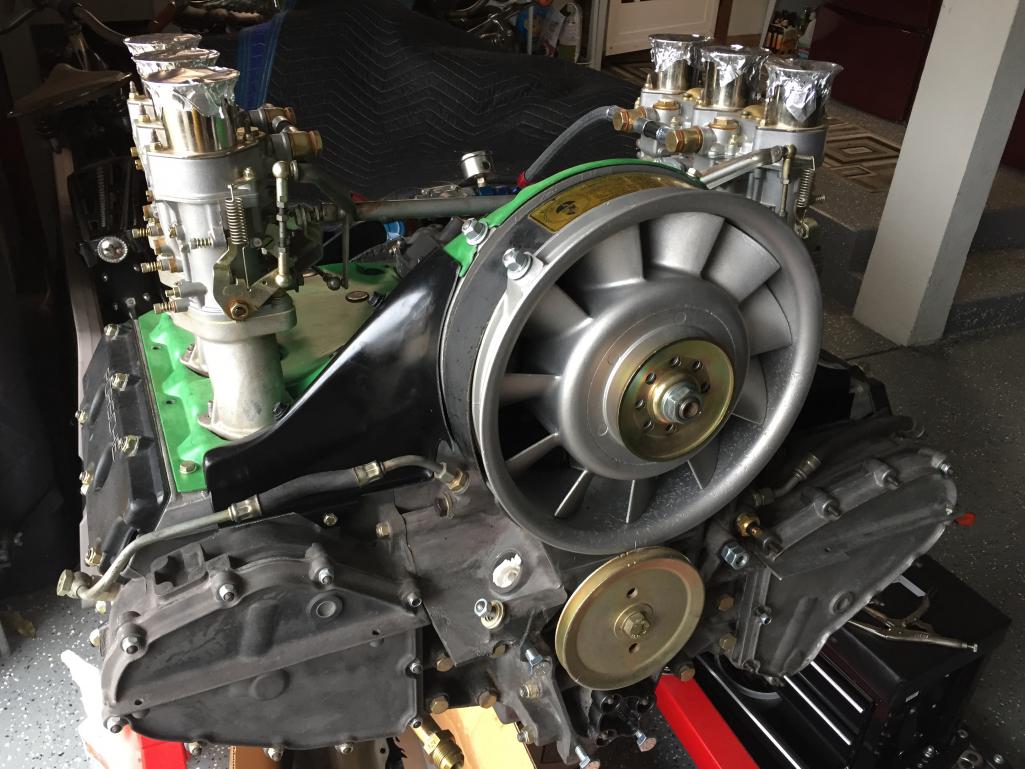
Posted by: mb911 Feb 6 2017, 04:34 PM
What did you use for tensioners? Old school with safetys?
And yes expensive just sent my case out today ugh
Posted by: Larmo63 Feb 6 2017, 05:31 PM
Carrera set coming soon. You can see the right hand chain box nuts are off. It has new 930 tensioners with safety collars, but....
I'll be selling them.
Posted by: mb911 Feb 6 2017, 05:37 PM
Carrera set coming soon. You can see the right hand chain box nuts are off. It has new 930 tensioners with safety collars, but....
I'll be selling them.
Safety collars are the way to go. Carrera tensioners are waaay to expensive and don't offer and advantage over collars. My engine is all apart right now for crank, rods, case, pistons etc and I won't use carrera again.
Posted by: euro911 Feb 6 2017, 07:29 PM
I agree ... I like the safety collars too.
Posted by: Larmo63 Feb 6 2017, 08:09 PM
Well, there are two schools of thought here. I'd rather not shell out the $$$ for them, but some swear by the oilers. I see tons of engines without them. This is what I have: 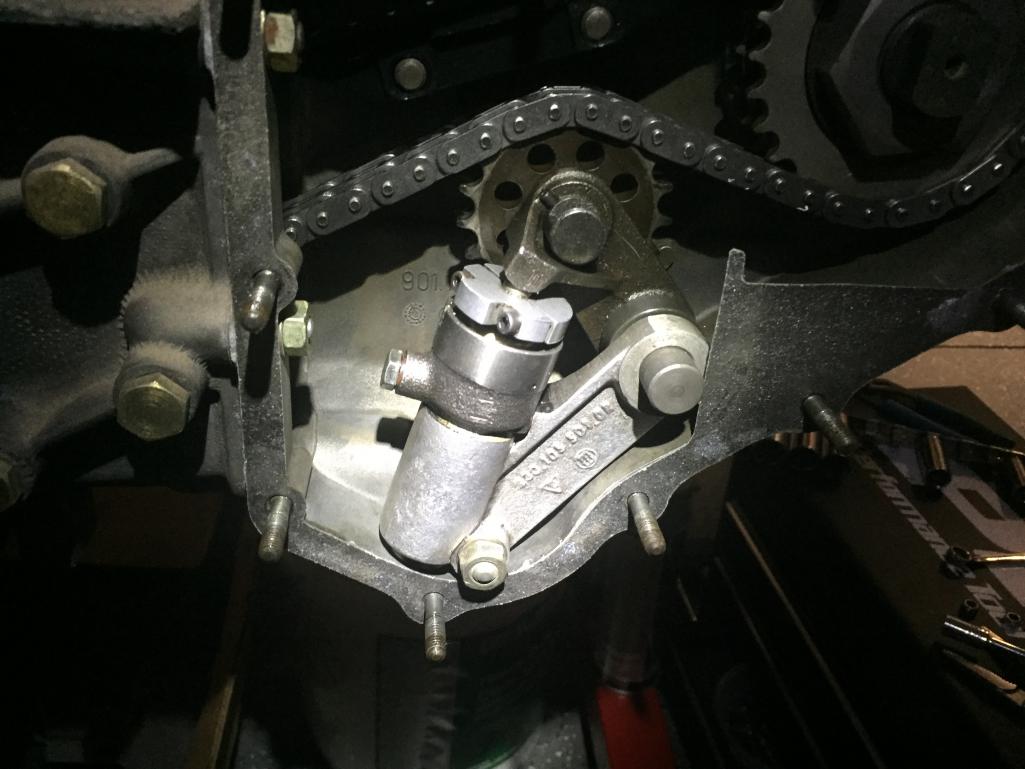
Posted by: 76-914 Feb 6 2017, 08:35 PM
Carrera set coming soon. You can see the right hand chain box nuts are off. It has new 930 tensioners with safety collars, but....
I'll be selling them.
Are those banks marked L&R? That is definitely the right bank when sitting in a 911. I wonder if the 2 liter 914 OEM 6cyl is the same? Or opposite because of how it sits in the 914?

Posted by: Larmo63 Feb 6 2017, 08:37 PM
I know, Kent. I had to think if that is the left, or the right.
I'm drinking wine now and I don't really care.

Posted by: mb911 Feb 7 2017, 06:41 AM
Well, there are two schools of thought here. I'd rather not shell out the $$$ for them, but some swear by the oilers. I see tons of engines without them. This is what I have:
Use them..
I have had 4 911s over the years and the carrera tensioners are fine but not worth the money if you have collars.
Posted by: Larmo63 Feb 8 2017, 09:53 PM
I have two transmissions and I need to make a decision as to which one I'm going to use. The clean one was out of a car that was a 914 racer. I don't know anything about it, but it could have an LSD in it for all I know. It could be completely rebuilt (it looks nice) and have bitchin gears in it. I know nothing about 901 trannies.
I guess I'm about to learn.
The dirtier one is my original that seemed to work well that was in the car when I bought it. Greasy mess.
Will you guys walk me through the scary part of pulling the gear set out to look at it?
Posted by: Perry Kiehl Feb 8 2017, 10:17 PM
Unbolt the flange on the side with the cover, and take the cover off and see what kind of diff it's got.
Posted by: Steve Feb 9 2017, 12:31 AM
Easy to tell if it's got an LSD. Turn the flange and see if the other side spins at the same time. An LSD comes in handy for a high HP narrow bodied car. Helps eliminate throttle induced over steer.
Posted by: euro911 Feb 9 2017, 02:16 AM
Posted by: 76-914 Feb 9 2017, 09:12 AM
Lowrance, buy Dr. Evils video. All of your questions will be answered. I have all of the 901 tools you'll need.
Posted by: mlindner Feb 9 2017, 09:47 AM
+1 Dr. Evils videos, just great. Watch it about three times then dig in. Just got done with mine, flipped 3rd and 5th and new 4th, new first gear slider and all new syhros and dog teeth. Out side all cleaned up ready for a light coat of paint. Lots of fun...... Best, Mark
Posted by: Dave_Darling Feb 9 2017, 10:37 AM
Checking the diff is done with the input shaft held stationary [EDIT--] AND WITH THE TRANSMISSION IN GEAR. If you have an old clutch disk hanging around, you can slide it on the input shaft splines and stick a clamp or a vise-grip on it to keep it from rotating. If you don't have an old clutch disk, you can probably rig up something else to hold the input shaft still. Doesn't have to hold up to a lot of torque.
Grab one output flange, and turn it one direction. If the other flange turns the opposite direction, you have an open diff. If it turns the same direction, you have a limited-slip of some kind. If it doesn't turn at all, check that the input shaft is being kept from spinning.
--DD
Posted by: forrestkhaag Feb 9 2017, 02:55 PM
Larmo / I think I have Dr, Evil's set from an earlier purchase along the way.. You can borrow
Posted by: euro911 Feb 9 2017, 04:45 PM
A set? ... I only have a single DVD - is there more than one disc  ?
?
Posted by: mlindner Feb 9 2017, 04:53 PM
Yes two, first take it apart, second disc put back together. Both side shift and tale...little on 911 901. Mark
Posted by: euro911 Feb 9 2017, 09:07 PM
I just got mine back ... I loaned it to another member here a couple of years ago.
EDIT: I checked and indeed, there are two discs in the case
Posted by: Larmo63 Feb 26 2017, 05:22 PM
I finished up painting the engine compartment, it's not great, but I'm not building a show car. This car will be driven. I installed the excellent Tangerine Racing firewall shift rod bushing, struts from firewall to consoles, complete oil tank is in, and a few other odds & ends.
I wish my photos wouldn't auto rotate. If I could get them straight. I'd post pictures.
Don't tell me to rotate them, I tried everything. Maybe tell me HOW to rotate them?
Posted by: Larmo63 Feb 26 2017, 07:32 PM
Posted by: Larmo63 Feb 26 2017, 07:33 PM

Posted by: Larmo63 Feb 26 2017, 07:38 PM
One more thing; how do you thread the SS fuel line in through the tunnel?
I had to quit, because I was getting too frustrated. It seems impossible.
I know it can be done.
Posted by: euro911 Feb 26 2017, 08:45 PM
Really? ... one is easier than two, but I had someone help with the installation of the TWO we installed in the 'BB'
Get Forrest Hump to give you a hand with it
Posted by: Larmo63 Feb 28 2017, 11:52 PM

Will the taller PMO manifolds be an issue in fitment?
Posted by: colingreene Mar 1 2017, 01:46 AM
Wont really know till you actually stick it in there will you....
Posted by: porschetub Mar 1 2017, 04:00 AM
Did he mention what aircleaners to be used in his has build??? not sure.
Posted by: Larmo63 Mar 1 2017, 09:18 AM
These carbs were in a 911, so I assumed they were going to fit in my 914. I'll wait until the engine is in to decide which air cleaners will fit.
Or, some one with a /6 conversion can let me know how close their filters are.
I think they will work, only an inch or too difference on these manifolds.
Posted by: '73-914kid Mar 1 2017, 09:36 AM
Stock 911 airbox won't fit. (Crashes into engine lid) Hell, the stock airbox is close with the factory length intake manifolds on my car, and I've gone back and lowered the front of the engine by 1/4 inch... If you run the PMO K&N watershield combination, you will probably have to trim the passenger side rain hat away from the aft engine bay bulkhead. That extra 1.5 inches or so makes a pretty big difference.
In all likelihood, standard K&N filters without rain shields will probably fit not problem.
Are those the PMO "tall" manifolds?
Posted by: Larmo63 Mar 3 2017, 09:06 PM
They are taller than stock. 100mm is what they look like they measure out to.
I started on cleaning up the extra trans I have, It looks rebuilt, the fluid is perfectly clean, so I'm going with that one, keeping the original one for the car as a back up.
So far, so good....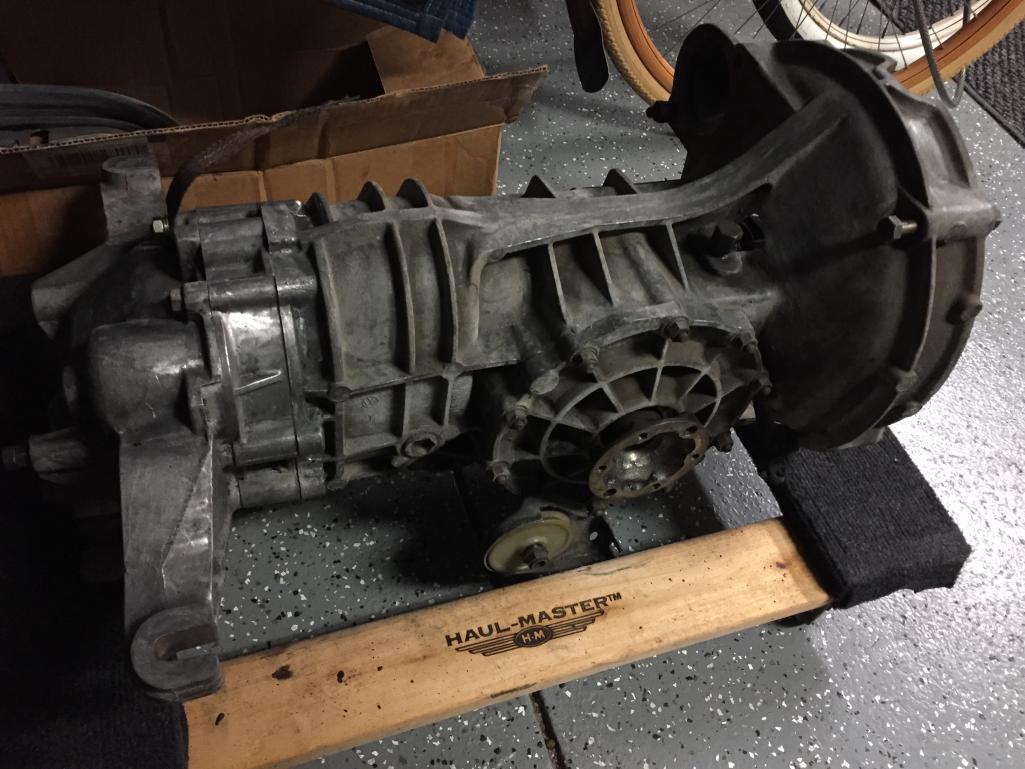
Posted by: Larmo63 Mar 4 2017, 06:39 PM
I installed the engine tin seals, on the rear one, which side goes up? The wider skirt, or the narrow?
I forgot.
Posted by: Larmo63 Mar 16 2017, 05:42 PM
I bought a set of engine tin from Bruce, it's off to be powder coated and picked up the RSR deep sixes today.
Posted by: GeorgeRud Mar 16 2017, 07:58 PM
Though they're not ideal, the K&N air filters with the Weathershield air cleaner housings are a reasonable way to solve the clearance issues.
Posted by: Steve Mar 16 2017, 09:37 PM
Though they're not ideal, the K&N air filters with the Weathershield air cleaner housings are a reasonable way to solve the clearance issues.
That's what I ran, never had any issues with them.
Posted by: t collins Mar 17 2017, 08:46 AM
These carbs were in a 911, so I assumed they were going to fit in my 914. I'll wait until the engine is in to decide which air cleaners will fit.
Or, some one with a /6 conversion can let me know how close their filters are.
I think they will work, only an inch or too difference on these manifolds.
As best as I can measure in the car , my PMO intakes are 85mm tall and with the K&N filters and rain hats they just barely clear the rear bulkhead.
Posted by: porschetub Mar 17 2017, 01:39 PM
My K&Ns fitted without weathershields just the top cast alloy piece on ,I very much doubt the weathershields would clear in my situation,I didn't have a lot off space from the bulkhead ,you need to allow for a small amount of engine movement also.
With the stock manifolds I have room to fit the original plastic air filter and the lid will close but I had to cut off and reposition one of the spring clips so I could latch it up.
I have noticed the stock air cleaner is a fair amount quieter than the K&Ns but takes up a lot more room .
There isn't a lot wrong with the original not when you compare aftermarket ones ,they all seem to have drawbacks of some kind or another .
Posted by: Larmo63 Mar 18 2017, 10:30 PM
I finally took the plunge and cut an access hole in the firewall. I'm actually surprised at how easy it was. I had a spare firewall piece, and I made a great hatch for it. It fits tight, and appears to be completely fireproof.
Posted by: Krieger Mar 18 2017, 10:58 PM
You will be so happy you did that. A friend of mine convinced me to do it.
Posted by: Larmo63 Apr 3 2017, 07:32 PM
I'm pretty frustrated now. Things going slow.
Posted by: Travis Neff Apr 3 2017, 07:51 PM
Have a completion party and invite some folks over to help get it done. It looks like you are down to just installing the engine and a couple little things? You are almost there.
Posted by: horizontally-opposed Apr 3 2017, 07:55 PM
I'm pretty much at the point where I'm going to list the whole project for sale. I'm over it. Too much disappointment and frustration.
I don't think I can finish this thing, maybe someone else wants to take a shot? I'll probably part this mess out.
This is the moment you most need to carry on. Been there, done that. Felt the same way.
If you sell it now, someone reaps all the reward with only a sliver of the input. It will be worth it...if you doubt that, come by for a lunchtime drive.
Posted by: euro911 Apr 3 2017, 07:56 PM
Oh gimme a break, will ya? :violin:
On second thought - How Much?
Posted by: wndsnd Apr 3 2017, 08:10 PM
Lawrence, stick with it. When you drive it all your hardships will turn into big smiles of satisfaction.
I'm still fussing over details, and have to stop myself to just go out and drive.
Keep the faith dude.
Posted by: 76-914 Apr 3 2017, 08:33 PM
I can't remember the number of times I issued that edict during my Subaru conversion. Considering the number of folks that had done Suby 6's support was marginal at best. If I hit a brick wall, I moved onto something that I could do. By moving back n forth thru tasks it eventually happened. You just need a beer or 3. Kent
Posted by: SO.O.C914er Apr 3 2017, 08:38 PM
Are you serious Lawrence I can't see you throwing in the towel at this point. Take a break and enjoy a good drink
Posted by: Larmo63 Apr 3 2017, 09:09 PM
<----just so fucking frustrated
Posted by: '73-914kid Apr 3 2017, 09:12 PM
<----just so fucking frustrated
Been there, done that with this type of conversion. Let me know if you want a hand over the weekends getting over the "hump"
One drive in a 914-6, and all the stress will become worth it.
Pm me for my cell number if you want it.. happy to help
Posted by: rhodyguy Apr 3 2017, 09:24 PM
Don't do anything rash with the car when you're frustrated. Step back for a while. As long as it takes.
Posted by: Mark Henry Apr 3 2017, 10:27 PM
Lawrence if you need tech support PM me and I can call you on weekends when my long distance is free.
Patience my good man.
Posted by: mb911 Apr 4 2017, 05:59 AM
Just walk away for a bit couple of days or weeks or whatever and come back and tackle 1 thing then keep rolling at that point..
People make fun of my project as lots of rust repair but I fix one spot at a time and get a huge sense of pride and move to the next. I just had some parts powdercoated and search out more parts etc. It's really the search and project that does it for me..
Posted by: mepstein Apr 4 2017, 06:30 AM
Just walk away for a bit couple of days or weeks or whatever and come back and tackle 1 thing then keep rolling at that point..
People make fun of my project as lots of rust repair but I fix one spot at a time and get a huge sense of pride and move to the next. I just had some parts powdercoated and search out more parts etc. It's really the search and project that does it for me..
Then come to my house Ben, come to my house.
Posted by: Chris H. Apr 4 2017, 07:17 AM
I'm pretty much at the point where I'm going to list the whole project for sale. I'm over it. Too much disappointment and frustration.
I don't think I can finish this thing, maybe someone else wants to take a shot? I'll probably part this mess out.
This is the moment you most need to carry on. Been there, done that. Felt the same way.
If you sell it now, someone reaps all the reward with only a sliver of the input. It will be worth it...if you doubt that, come by for a lunchtime drive.
Yes...step away...come back in a few days and carry on. Wait till you read about how I "fixed" the wiring for my EG33. Dozens of hours wasted. Probably 50 hours. 2 full days.
Posted by: Coondog Apr 4 2017, 07:51 AM
Go surfing, clear your head and get back at it.
Posted by: Steve Apr 4 2017, 07:55 AM
Check out Forrest's car. It's almost ready to run.
Posted by: 76-914 Apr 4 2017, 08:10 AM
<----just so fucking frustrated
I'm with Ethan. You have my number. I'm booked this weekend, 4/22-23, 6/3-4 and one, yet to be determined, weekend to help my BiL move. Otherwise I'm free. Give me a holler.
Kent
Posted by: Beach914 Apr 4 2017, 08:16 AM
Just do like me and never get started. Just buy another project.
Seriously, do not give up you are going to have a great car and the "looking back" will be awesome.
Take a break and come join Steve, Keith, and I at C&C AV on Saturday !
Posted by: forrestkhaag Apr 4 2017, 08:50 AM
Contrary to other advice, I suggest you give up. Cut your losses while you can. You have not gone too far to receive 12 to 25 cents on each dollar invested.
Not all things are for the weak of heart and mind. Listen to your friend here. those other people are obviously 
I can speak from personal experience on this one. Simply sell off all parts, tools, and related literature to anyone within pick-up distance.
Sidebar: I will take the following (less the handling charge of course.....):
powder coated tin
wiring harness
left side ignition setup w/keys
your tranny
your engine and intake (to be sold to others on the boards here who smell blood in the waters...)
your chassis with PMS engine mount installed
your wheels recently refinished
your gromet collection
all manuals and tech books (including my Weber manual you have been hoarding)
Moral of the story: Keep your friends close, and your close friends closer...... 

Posted by: siverson Apr 4 2017, 09:38 AM
I'll help if I can... What exactly is left to do? Do you have all the parts?
Probably can't finish everything in a short work day, but could probably get a lot done and some good momentum rebuilt...
-Steve
Posted by: forrestkhaag Apr 4 2017, 10:03 AM
Larmo. Man. Don't do it!
Don't listen to these positive thinking successful guys with past experience doing all of the things you have yet to do.
They have obviously lost all memory of skinned knuckles - now healed, S-1's, 2's and upper neck issues fading into the past - now replaced with the joy of driving a 911 powered siren-song-914. They are over binge drinking after a day of lying on one's back while eating grinder crumbs and melted metal dribbling off off of an impossible weld while upside down under the motor mount. They can fondly reminisce of drives with their fellow 6-buddies with the 4 crowd trailing somewhere behind - all smelling the glorious scents of rubber, fuel, and,... well, the other aromas that go along with a well sorted 914-6 conversion.
That lot is a club, better left to the non-faint of heart.
Bring (...er,..tow) your car over to my shop and we can pluck a few parts off of it for a project still being forged out of determination, mental focus, and an unrelenting willingness to unleash tons of money to accomplish what, for some, seems impossible.
Your friend, Forrestkhaag...
Attached image(s)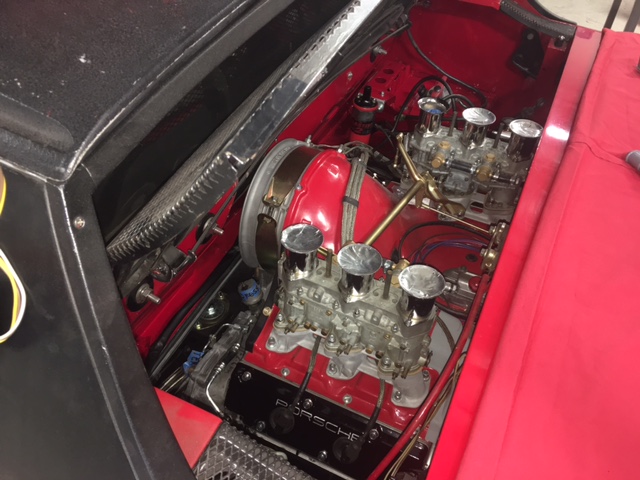
Posted by: mepstein Apr 4 2017, 11:03 AM
<----just so fucking frustrated
That's why buying one just doesn't give you the same satisfaction as building one.
You'll get over the hump or humps and be fine.
Posted by: Perry Kiehl Apr 4 2017, 11:31 AM
You'll get it. I can't tell you how many guys I've worked with over the years who are right where your at.
The frustration you are feeling will only add to the feeling of accomplishment when you finish it.
Step back, take some time off. Some close intense fellowship of the feminine variety is always helpful. Get some counsel from guys who've been there.
Posted by: moparrob Apr 4 2017, 01:07 PM
Lawrence, I understand your frustration. I spent 3 1/2 years trying to complete my 914-6 conversion and was at about the stage where you are when I decided to sell it. I ended up buying a completely finished 911 wide-body instead.
The good news is that the 914 has gone on to a good home where I believe it will be finished in a very high-quality fashion and I have struck up a friendship with the buyer.
The bad news is I now miss the car tremendously and wish I had never sold it. In fact, I have asked the buyer that if he ever gives up on the project I would like to buy it back from him.
My suggestion to you is to ask one of the members to get a ride in a well sorted 914-6. I believe that will help you get stimulated as to the true potential of what you are building and will also give you a sense of the exhilaration you will experience once your own project is finished. That might spur you on to complete the project.
If you truly decide to sell the car I would appreciate if you would send me a PM and advise me as to what price you would want because, as I said, I still wish I had my car.
Good luck with your decision.
Posted by: Lucky9146 Apr 4 2017, 02:17 PM
Lawrence, I understand your frustration. I spent 3 1/2 years trying to complete my 914-6 conversion and was at about the stage where you are when I decided to sell it. I ended up buying a completely finished 911 wide-body instead.
The good news is that the 914 has gone on to a good home where I believe it will be finished in a very high-quality fashion and I have struck up a friendship with the buyer.
The bad news is I now miss the car tremendously and wish I had never sold it. In fact, I have asked the buyer that if he ever gives up on the project I would like to buy it back from him.
My suggestion to you is to ask one of the members to get a ride in a well sorted 914-6. I believe that will help you get stimulated as to the true potential of what you are building and will also give you a sense of the exhilaration you will experience once your own project is finished. That might spur you on to complete the project.
If you truly decide to sell the car I would appreciate if you would send me a PM and advise me as to what price you would want because, as I said, I still wish I had my car.
Good luck with your decision.
You are going to love this! I am the buyer of the above mentioned car from Moparrob. I can attest to the fact that he wanted it back and deeply regrets selling it to me because he has offered several times to buy it back.
I agree with Rob get a ride and if possible get a drive in a 914-6 and you will be completely committed to finishing it! The first time I drove a 6 I was on a mission for 2 years to get one. I was fortunate to find his in the state it was. Unfortunately I had to postpone starting it for almost a year then worked solid on it for about 8 months and had to shelve it again. Fortunately I should be back to it in a month or two.
Don't give up. You have done a lot and there is always a problem. Always! By the way I am a little north San Diego not that far from you so if you want to get together PM me and we can compare notes. And if you want to check out my thread here ya go. http://www.914world.com/bbs2/index.php?showtopic=261197&hl=
Let me know if you check the link and it doesn't work.
Jim
Posted by: porschetub Apr 4 2017, 02:39 PM
Reached the same point myself,IMO once the engine is in the car you really feel like moving on ,first startup was an epic day for me.
When ever I got bogged down I just moved to something as different as possible,these conversions aren't as simply as often stated,it can be the little details that with your head.
DON'T give up Lawrence ok.
Posted by: euro911 Apr 4 2017, 03:11 PM
Dude - I've only been able to drive a 914 to what? ... three RT-66 events and one WCR in over ten years I've been on this forum. That didn't stop me from attending those events or from eventually having a decent running car (albeit not at the moment)
Don't let the fact that your car might not be ready in time for a specific event kill your dreams. You're still a [relatively] young man and will have the opportunity to attend many more fun-filled 914 events in the future.
It's just a hiccup ...
Posted by: ndfrigi Apr 4 2017, 04:29 PM
Hi sir Lawrence! I don't think that is you who easily give up! If you're worry not finishing it for Route 66. There will be more events that I'm sure you can attend like WCR. Anyway, it will be a 6 and surelly it will be nice for a very long trips! You have come along way with your conversion and you're less than half way to finish.
Posted by: Scott S Apr 4 2017, 05:11 PM
I'm pretty much at the point where I'm going to list the whole project for sale. I'm over it. Too much disappointment and frustration.
I don't think I can finish this thing, maybe someone else wants to take a shot? I'll probably part this mess out.
Man - do I get where you are coming from.
I spent 2 years converting a really well running 4 to a 6. Biggest mistake I ever made. I owned that car for 22 years. Got it up and running and found I had linkage issues with using the original (and very good shifting) tail shift trans - it hit the headers. Worked on it for another month and realized I now hated even looking at the car. Put it up for sale without even finishing it.
I really miss having a 914. I have thought of selling the 911 that replaced the 914 and buying another. But if I do, it will be a good running and driving car. I will never build one up again.
I have always struggled with getting bored and changing something unnecessarily simply for the sake of change. This experience went a long way in curing me of that.
Hope it works out for you whichever way you decide to go.
Posted by: forrestkhaag Apr 4 2017, 07:51 PM
As I opined in a recent text to you.. one month in the Urban Workshop in Costa Mesa and we will have it up and running. I am crossmixed on the best way to counsel you on this delicate topic as I am a buyer for bits and pieces of your salvage if you bail as some would like to do now and then,.... but, assuming you can come to your senses and you realize how far you have come (past the point of no return when you welded in the PMS motor mount) and the value created, you will forge forward.
Posted by: Steve Apr 6 2017, 10:09 AM
I installed the engine tin seals, on the rear one, which Sid goes up? The wider skirt, or the narrow?
I forgot.
Narrow. Google images is your friend.
https://www.google.com/search?q=porsche+914+engine+compartment+seals&source=lnms&tbm=isch&sa=X&ved=0ahUKEwi3wP-OmpDTAhVHNhoKHYJtB5EQ_AUICCgB&biw=1920&bih=916#tbm=isch&q=porsche+914+engine+compartment+rear+seal&imgrc=Fknkay6xxEYZ1M:
Posted by: mb911 Apr 6 2017, 10:27 AM
Guys,
I think he is in the walk away for a bit phase as he seems to MIA for a couple days.
Posted by: Coondog Apr 6 2017, 09:18 PM
Guys,
I think he is in the walk away for a bit phase as he seems to MIA for a couple days.
Hopefully he is catching some good waves at lower trestles....
Posted by: GeorgeRud Apr 6 2017, 09:35 PM
Many of us have been where you are now. Just take a break, read what others have done to solve any problems, then come back to your project. You're getting close to finishing and the pride you'll have when it's drivable is immeasurable. I've found that you're never 'done' with such a project as there's always something else you can do to make it better. I didn't really need the carbon fiber dash face, but........
Posted by: Larmo63 Apr 7 2017, 06:36 PM
Many of us have been where you are now. Just take a break, read what others have done to solve any problems, then come back to your project. You're getting close to finishing and the pride you'll have when it's drivable is immeasurable. I've found that you're never 'done' with such a project as there's always something else you can do to make it better. I didn't really need the carbon fiber dash face, but........
I'm still kicking my project around, and I didn't push it off of the San Clemente Pier as rumored. I had to take a step back as some of you suggested. I had started to fabricate the oil cooler shroud last weekend only to figure out that the cooler Patrick Motorsports sent me was not going to be adequate. They are backordered on the one I want, so I have to either wait till mid-May or look around for something else. I crashed and burned. I got pissed. It's frustrating, but not insurmountable. I have a tendency to want to "throw the baby out with the bathwater" sometimes.
I do like driving and working on my car, but I can't stand having the engine on an engine stand begging to be installed. It sits about 15' away from the car, but in my mind it seems like it's on the other side of the earth.
Posted by: Larmo63 Apr 8 2017, 07:26 PM
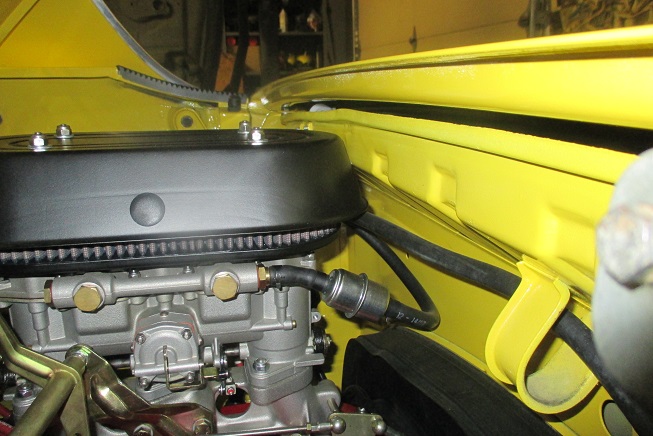
Last year on April 8th and right before the Route 66 event, I spun a bearing in the 2.0 /4. This is a picture of it right before I left my friend's shop where we had spent the afternoon corner balancing the car. It hasn't run in a year now, but I made some headway today running my oil lines up to the front oil cooler. I wish I knew why these photos rotate now.
Posted by: Maltese Falcon Apr 8 2017, 09:12 PM
Here you go
Posted by: Coondog Apr 8 2017, 10:15 PM
Glad your back in the Game...... 
Posted by: Blue6 Apr 8 2017, 11:26 PM
Larmo, I was bringing my truck to G&R tomorrow to buy your engine, trans, and other large parts cheaply. Make up your damn mind
Posted by: 76-914 Apr 9 2017, 08:57 AM
So does this mean you are throwing your hat back into the Rt66 Ring?
Posted by: 914_teener Apr 9 2017, 10:52 AM
Susan's 350Z is up for sale........trade for your project would work?
I'll bring it to the R66?
Cricket's............ ![]()
Posted by: mepstein Apr 9 2017, 12:00 PM
Here you go
It sure looks nice.
Posted by: Larmo63 Apr 30 2017, 09:09 PM
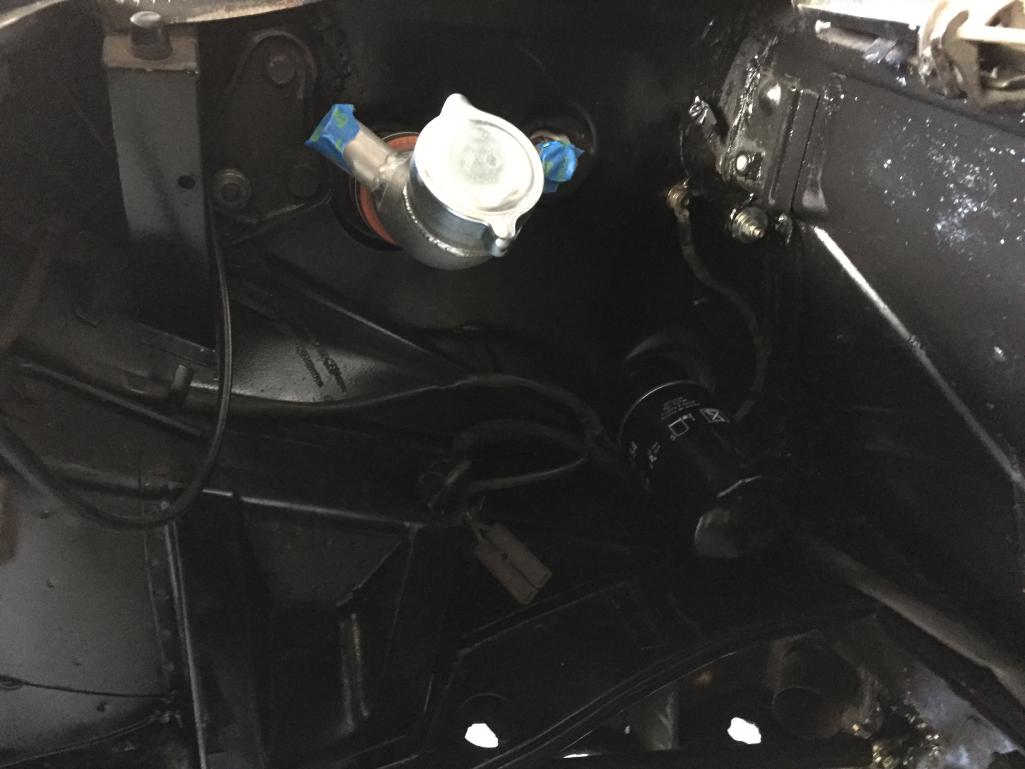
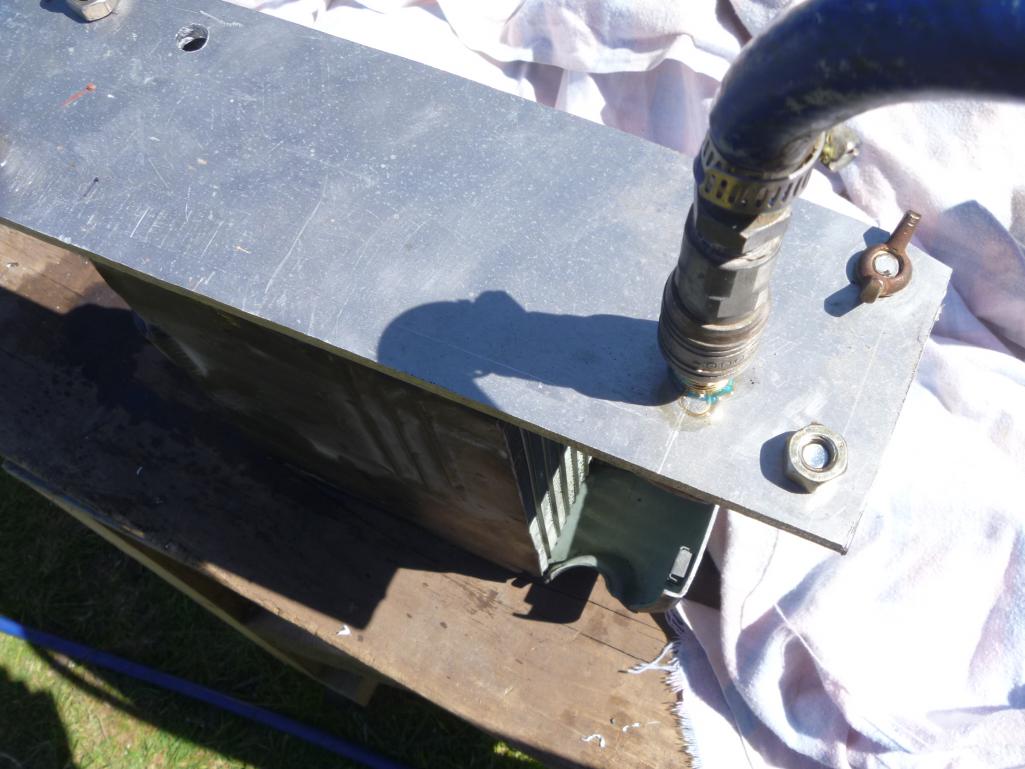
Oil cooler mounts will be welded in this week along with lower louver front pan. I've drilled the body for oil cooler AN lines, so there is some progress. Thermostat is installed, and the fuel pump showed up too.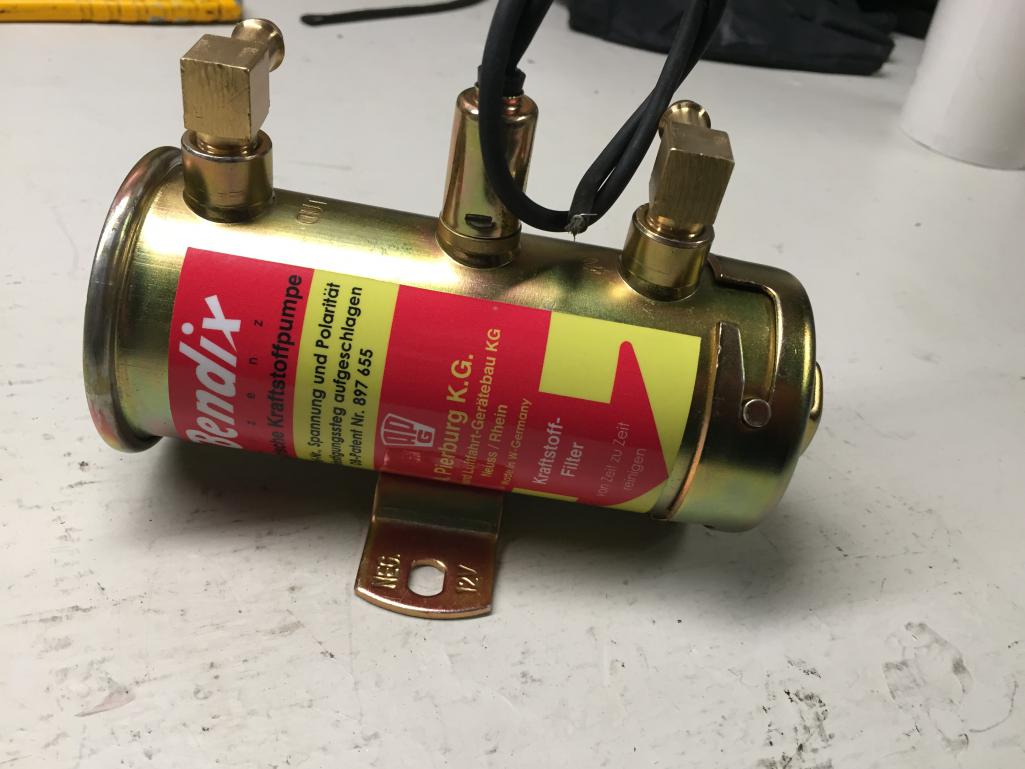
What is the trick to tightening that lower AN-16 nut on the oil tank under the rocker cover? Damn, that's in a bad location.
Posted by: euro911 Apr 30 2017, 10:09 PM
Crows-foot
Posted by: Steve Apr 30 2017, 11:52 PM
I made a special tool. It's a grinded down crows foot. Mine is a factory tank with metric fittings. I know Forrest had to make a special tool also. I think he also has a factory tank metric fitting. I can post a picture tomorrow of my tool.
Posted by: gereed75 May 1 2017, 05:53 AM
I believe there is thread on that somewhere....with pictures and arrows.
The alternative is to tighten it be fore putting the tank in. IIRC the line is angled very slightly back towards the centerline of the car
Posted by: Steve May 1 2017, 07:59 AM
I copied this guys tool from an old thread.
I could only get a 1/4 of a turn out of it, before having to flip it over to get another 1/4 of a turn.
Worked great though!!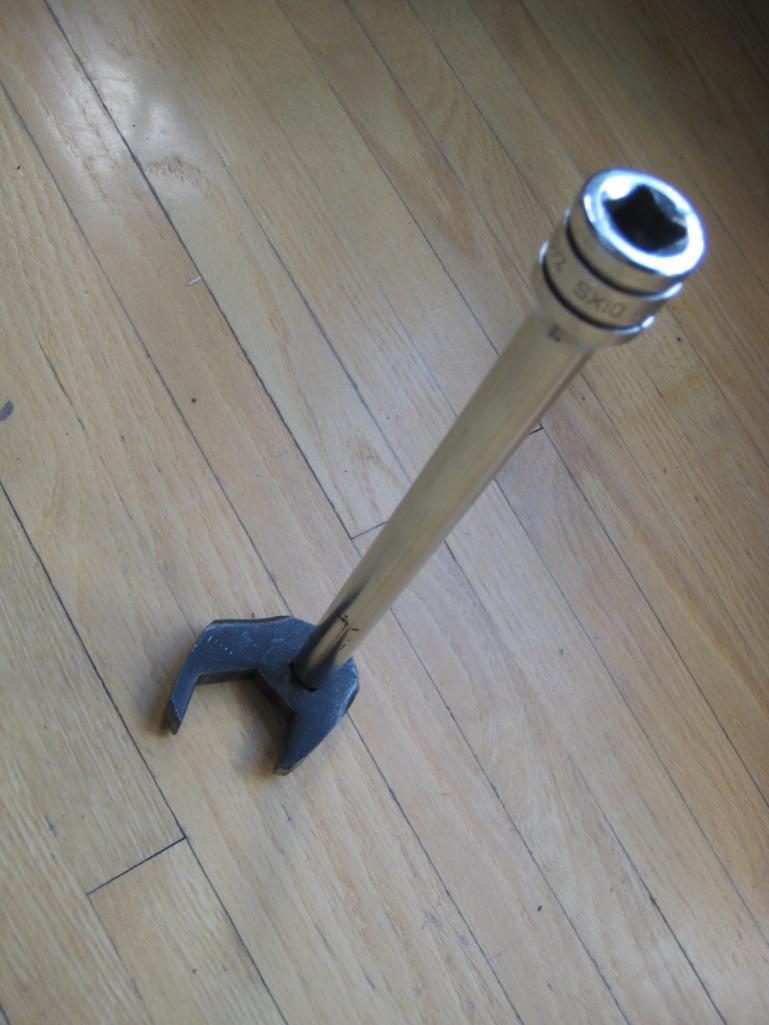
Posted by: Larmo63 May 1 2017, 09:30 AM
I took the tank out and hooked up the hose, tightened it and went to re-install it.
No Go. I won't fit back in like that. I borrowed the wrench forrest made, but it doesn't fit an AN-16 nut.
Maybe there is a plumbing tool I can buy?
Posted by: 914_teener May 1 2017, 10:50 AM
Basin wrench.
Posted by: 914_teener May 1 2017, 10:51 AM
https://m.lowes.com/pd/BrassCraft-10-in-to-16-in-Basin-Wrench/999903643#
Posted by: euro911 May 1 2017, 11:01 AM
Posted by: forrestkhaag May 1 2017, 11:09 AM
Steve's tool is much prettier than mine......... but then again, my tool works fine and is recently proven to do quite a satisfactory job with no leakage or complaints. I lent it to larmo after confirming that the fitting on my factory tank was one of the few that didnt leak on initial startup...
Those leaks have all been chased down. NOT including the one on the inner core of my Pelican Parts FS purchased on-engine cooler.
But to be clear, the guy that sold me the 3.0 core did not include the on-engine cooler / so I am still good with the 1K price tag on an engine that is now rebuilt top to bottom for less than 5K........... unless I have to buy a new cooler
Does anyone know if that can be fixed with some stop-leak type of product or am I ed and now have to go to a new one for 1600 +?
Attached thumbnail(s)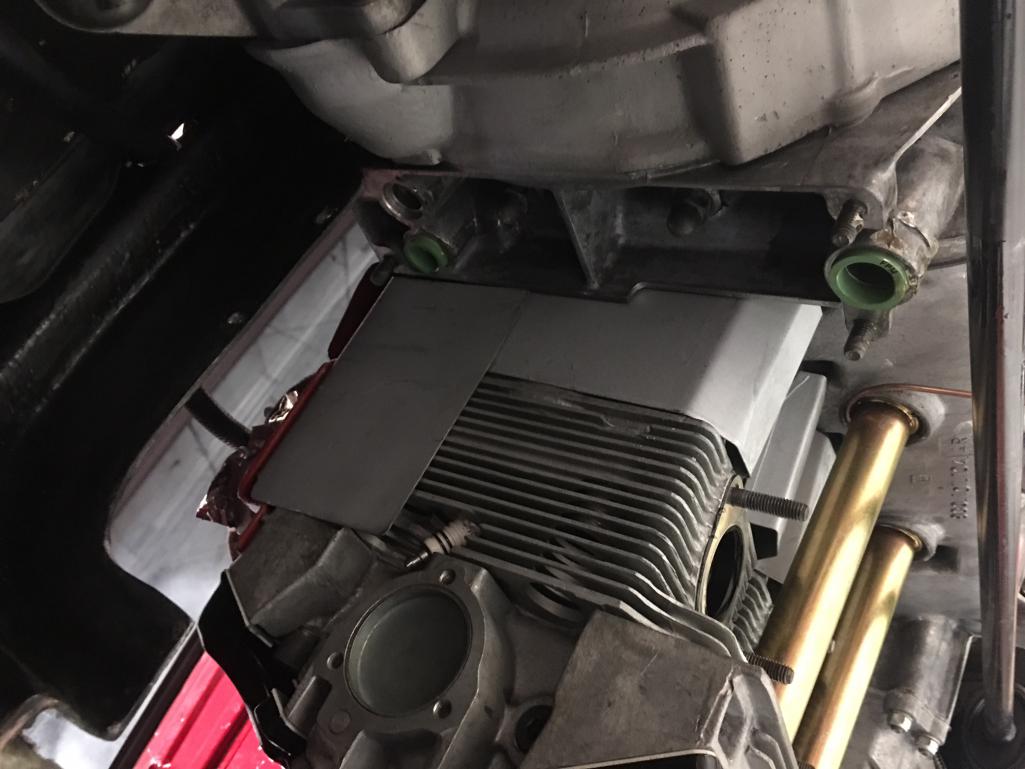
Attached image(s)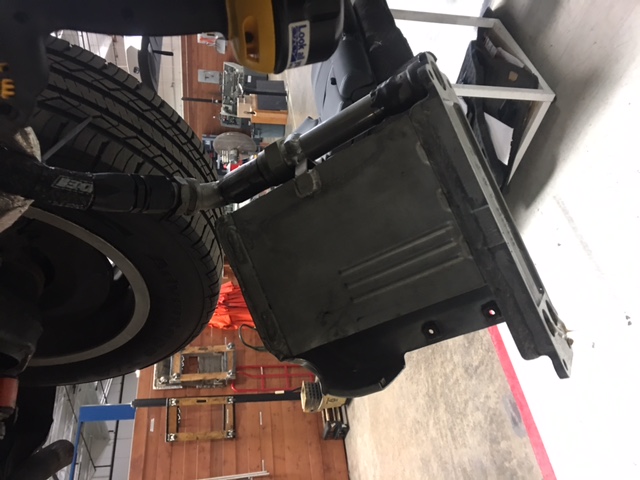
Posted by: Dave_Darling May 1 2017, 12:02 PM
Does anyone know if that can be fixed with some stop-leak type of product or am I
ed and now have to go to a new one for 1600 +?You want to put something in your oil system that is designed to block small holes. Like oil passages.
Think about that for a minute.
Then dig out your wallet and spend a couple of minutes crying....
(There are places that may be able to clean and repair the cooler, which could be a cheaper option. Not sure what kind of guarantees they offer, though.)
--DD
Posted by: mepstein May 1 2017, 12:10 PM
If you want to be sure, buy new. The old ones are 30+ years old. You will get a better response if you start your own thread vs. posting this on larmo63's thread. The
Posted by: mb911 May 1 2017, 02:05 PM
Steve's tool is much prettier than mine......... but then again, my tool works fine and is recently proven to do quite a satisfactory job with no leakage or complaints. I lent it to larmo after confirming that the fitting on my factory tank was one of the few that didnt leak on initial startup...
Those leaks have all been chased down. NOT including the one on the inner core of my Pelican Parts FS purchased on-engine cooler.
But to be clear, the guy that sold me the 3.0 core did not include the on-engine cooler / so I am still good with the 1K price tag on an engine that is now rebuilt top to bottom for less than 5K........... unless I have to buy a new cooler
Does anyone know if that can be fixed with some stop-leak type of product or am I
ed and now have to go to a new one for 1600 +?I have seriously considered just going with a front oil cooler and no engine cooler like what Mark has done on his build.. It also requires less thermostats..
Posted by: porschetub May 1 2017, 02:11 PM
Steve's tool is much prettier than mine......... but then again, my tool works fine and is recently proven to do quite a satisfactory job with no leakage or complaints. I lent it to larmo after confirming that the fitting on my factory tank was one of the few that didnt leak on initial startup...
Those leaks have all been chased down. NOT including the one on the inner core of my Pelican Parts FS purchased on-engine cooler.
But to be clear, the guy that sold me the 3.0 core did not include the on-engine cooler / so I am still good with the 1K price tag on an engine that is now rebuilt top to bottom for less than 5K........... unless I have to buy a new cooler
Does anyone know if that can be fixed with some stop-leak type of product or am I
ed and now have to go to a new one for 1600 +?Bad luck on the cooler forrest
,happened to me and I was forced to pay $600nzd locally for a replacement then there was the cost of modifying the inlet pipe,they come up often enough for sale,but consider any untested cooler as a gamble,better to pay more for a tested one,I strongly recommend you get an ultrasonic clean on the replacement also,they do trap a lot of crap over time.Easy enough to make a pressure test plate up as below,my old one pissed oil out @ 20psi
.
I don't for the life of me see how you could repair one,not the way they are constructed....then would you trust it ?
My suction hose has a weep @ the tank fitting I can't seem to beat driving me nuts,my tank was fitted with the hose on but its a real struggle,going to make a spanner of some sort to try and tighten the nut more but that will require something special.
Posted by: porschetub May 1 2017, 02:26 PM
https://m.lowes.com/pd/BrassCraft-10-in-to-16-in-Basin-Wrench/999903643#
No way that will fit in there,it needs to be what Steve has shown.
Posted by: Mark Henry May 1 2017, 03:22 PM
You will get a better response if you start your own thread vs. posting this on larmo63's thread.
hijacking someone else thread is not cool...start you own please.
Posted by: forrestkhaag May 1 2017, 04:00 PM
Lighten up fellas. Is this no longer a forum for the exchange of ideas based on experience and useful bad experience, as some would opine?
I buzz Larmo and others that I personally / and know can handle the chatter. These are not focused papers meant for publication in scientific journals and if so, in this case, there would not be a huge readership.
My previous hijack in this thread still stands (as a hijack?) / and I almost had him right where I wanted him........ but then instead of offering moral support, I lent him oil tank tools and gave him AN 12 SS braided line and fittings to use on his project.. earlier however, the hijackery went this way....
Contrary to other advice, I suggest you give up Larmo. Cut your losses while you can. You have not gone too far to receive 12 to 25 cents on each dollar invested.
Not all things are for the weak of heart and mind. Listen to your friend here. those other people are obviously screwy.gif
I can speak from personal experience on this one. Simply sell off all parts, tools, and related literature to anyone within pick-up distance.
Sidebar: I will take the following (less the handling charge of course.....):
powder coated tin
wiring harness
left side ignition setup w/keys
your tranny
your engine and intake (to be sold to others on the boards here who smell blood in the waters...)
your chassis with PMS engine mount installed
your wheels recently refinished
your gromet collection
all manuals and tech books (including my Weber manual you have been hoarding)
Moral of the story: Keep your friends close, and your close friends closer...... sheeplove.gif
Posted by: 914_teener May 1 2017, 04:29 PM
....ok...I get it now.
This forum is a forum for you Forrest to personally jibe and rib your friends.
Got it.
Think it was Stalin who said keep your friends close but your enemies closer.
In the future I.ll stay off your threads so as not to Hijack them as a courtesy to you Forrest.
Posted by: forrestkhaag May 1 2017, 05:03 PM
Again, your honor,... leading.
Teener is correct in his view.
I offer my clear and unabridged apologies to Larmo and all others that I have replied to over the years and particularly for the unabashed hijack of this thread. I should be ashamed.
I am woefully remiss in wasting the valuable time of Monday afternoon World surfers in offering humor, experience and opinion interspersed in my musings on a site that should only be used for singular pointed and focused comment directly addressing the original opening topic of that thread.
was I thinking?
Last post. (....as the British say when facing a potential defeat)
Posted by: porschetub May 1 2017, 05:21 PM
Again, your honor,... leading.
Teener is correct in his view.
I offer my clear and unabridged apologies to Larmo and all others that I have replied to over the years and particularly for the unabashed hijack of this thread. I should be ashamed.
I am woefully remiss in wasting the valuable time of Monday afternoon World surfers in offering humor, experience and opinion interspersed in my musings on a site that should only be used for singular pointed and focused comment directly addressing the original opening topic of that thread.
was I thinking?Last post. (....as the British say when facing a potential defeat)
Yes you are a bad person....really ???,I personally don't give a FF about what people decide is a hijack with exception,if you had asked why your window didn't go up and down I would call that a hijack because its not related,lets not get to the level that Pelican gets to @ times,forrest you should go to the naughty corner
 even though I think you are entertaining mostly .
Posted by: euro911 May 1 2017, 06:52 PM
Seems like some folks are just getting irritated over piddly shit these days - must be something in the air
Like I mentioned earlier, the crow's foot - I'm almost 100% sure that Steve will let you borrow his
Posted by: wndsnd May 1 2017, 07:05 PM
Or,
I put a cover in my Fender using quarter turn fasteners. Now I can get to that nut whenever I want with a proper wrench.
I gave up trying to get something in there ...
But then again, it's a conversion and I am not a concours type .......
Nor, much of a fabricator 
Posted by: euro911 May 1 2017, 07:34 PM

Function over fashion
Posted by: wndsrfr May 1 2017, 08:58 PM
I copied this guys tool from an old thread.
I could only get a 1/4 of a turn out of it, before having to flip it over to get another 1/4 of a turn.
Worked great though!!
Made one from a cheap box end wrench...f
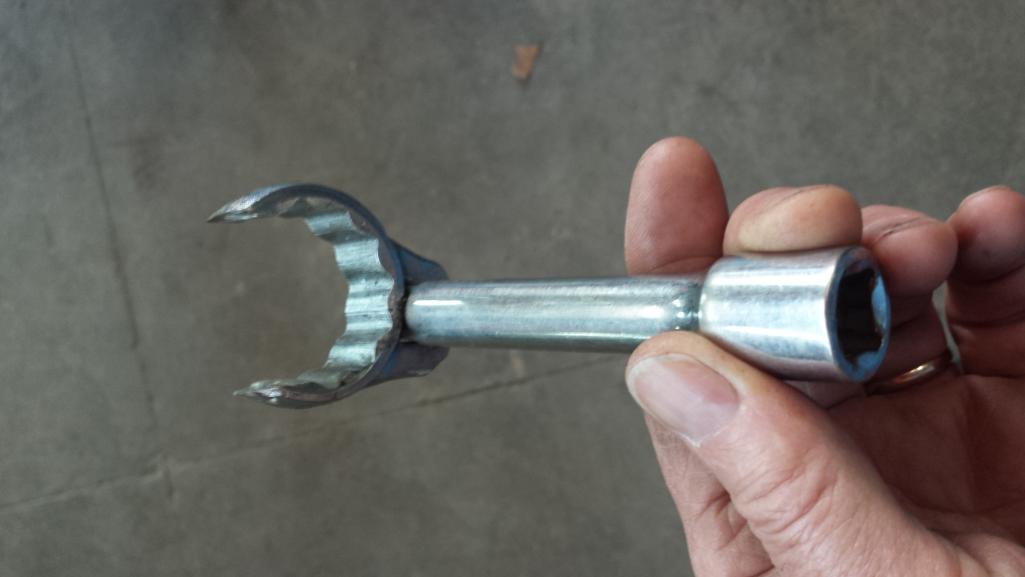
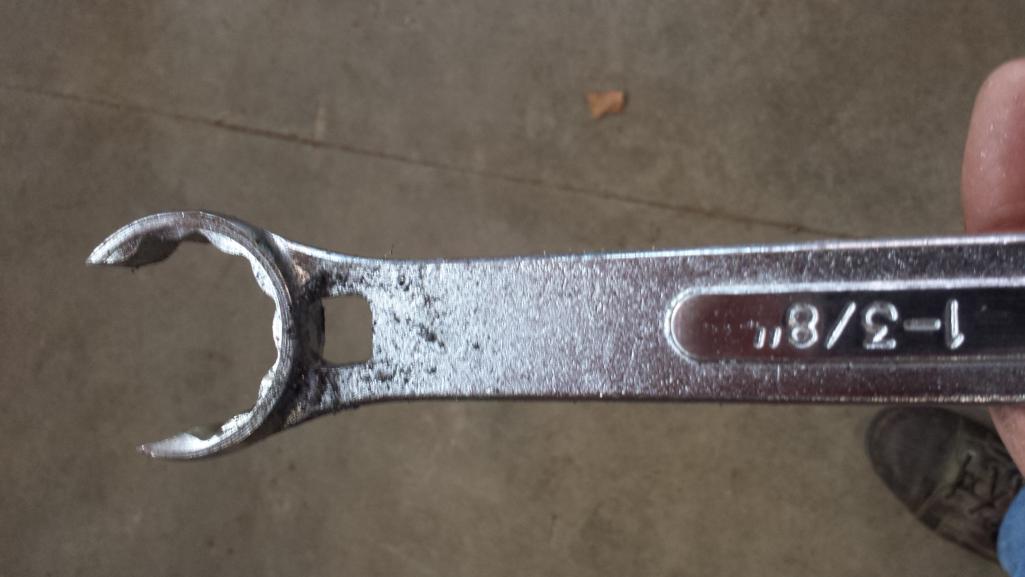
Posted by: Steve May 1 2017, 09:10 PM
Seems like some folks are just getting irritated over piddly shit these days - must be something in the air
Like I mentioned earlier, the crow's foot - I'm almost 100% sure that Steve will let you borrow his
My tool is also metric. Not that hard to make one. Just get an AN-16 equivalent crows foot and grind it down until it fits. Harbor freight has crow feet or worse case buy there open end wrench set, cut off the handle and put a square hole in it for the extension. That's what I did, but I used a metric open end wrench, cut off the handle, drilled a hole, grinded out the sides to make it square and then ground down the sides until it fit the opening. Same thing as the previous post, but i used the other end of the wrench.
Posted by: Larmo63 May 1 2017, 09:50 PM
My engine oil cooler went to Rich Johnson for evaluation and remedial circumcision, reconfigured to fit a 914-6.
The unit I sent him was a leaker, so he provided a known good, solid (expensive) replacement. Now I know that part of my build is reliable. I'd hate to install my engine and have to try to remove that back off of the engine while it's installed.
The leaker got sold off to Sweden. The Swedish are clever, but maybe not THAT clever.
Forrest: Tortoise and Hare, once again.
Posted by: McMark May 2 2017, 06:16 AM
Oh man, I love 914World drama so much. 
Posted by: Steve May 2 2017, 07:05 AM
Oh man, I love 914World drama so much.
We are all disfunctional friends down here in the Orange Curtain of So Cal. So it looks like thread hikacking, but it's actually harassment on who can get there six conversion running first.
Posted by: sb914 May 2 2017, 07:07 AM
Oh man, I love 914World drama so much.
We are all disfunctional friends down here in the Orange Curtain of So Cal, so it looks like thread hikacking, but it's actually harassment on who can get there six conversion running first.


Posted by: Larmo63 May 2 2017, 10:02 AM
My conversion will be done when it is done. I'm in no race or hurry. That seems like a recipe for disaster to me.
I never dreamed it would take this long, but due to finances, parts, and construction, it still seems a ways off.
I am getting ready to tear the heads off to do a little porting work. So it goes.
Posted by: McMark May 2 2017, 10:19 AM
You're going backwards.
Posted by: AZBanks May 2 2017, 10:32 AM
You should be ashamed. Send me your car and $5000 and all will be forgiven.
Then, don't do it again. This is a serious place where we talk about serious topics with serious people, seriously. Frivolity is not to be tolerated.
Again, your honor,... leading.
Teener is correct in his view.
I offer my clear and unabridged apologies to Larmo and all others that I have replied to over the years and particularly for the unabashed hijack of this thread. I should be ashamed.
I am woefully remiss in wasting the valuable time of Monday afternoon World surfers in offering humor, experience and opinion interspersed in my musings on a site that should only be used for singular pointed and focused comment directly addressing the original opening topic of that thread.
was I thinking?Last post. (....as the British say when facing a potential defeat)
Posted by: Steve May 2 2017, 01:06 PM
My conversion will be done when it is done. I'm in no race or hurry. That seems like a recipe for disaster to me.
I never dreamed it would take this long, but due to finances, parts, and construction, it still seems a ways off.
I am getting ready to tear the heads off to do a little porting work. So it goes.
Good!! Take your time and do it right. They are never done. At some point they are just driveable.
Posted by: euro911 May 2 2017, 01:35 PM
WHEN ???
Posted by: Larmo63 May 2 2017, 06:56 PM
I've been talking to a well respected 911 guy who thinks that 32mm intake ports on my heads are akin to NASCAR restrictor plates.
Is it worth the time and money to open up the heads to 36mm and flow my manifolds? (now shorter ones)
Posted by: euro911 May 2 2017, 11:16 PM
Depends.
How much $ will this cost you?
What's the benefit in HP and torque?
Will you be racing the car in NASCAR events?
Posted by: falcor75 May 3 2017, 12:29 AM
Flow might be important for engines that live at WOT most of the time...like Nascar engines... I think your engine will be more helped with higher airspeed in the inlet ports, helping response and low rpm driveability...
Dont fall into the "Airflow is everything"-hole...
Posted by: McMark May 3 2017, 05:45 AM
Why don't you install the engine, get it running, and then decide if it doesn't have enough power. You've already got a list of work to do, why add more on speculation? If you wanna try it again later you can pull the motor in an afternoon.
Pros: A Bit More Power
Cons: Spend more money. Spend more time. Risk losing motivation. Risk a neverending cascade of "while you're in there" (twin spark, cam swap, etc)
In my book, port work sounds like an adventure for another day.
Posted by: TVRLOTUSTR3 May 3 2017, 06:06 AM
Depends on cams T & E cams like small ports early S & Solex like large ports.
Posted by: Steve May 3 2017, 06:50 AM
I ran a stock US 2.7 S motor with Weber's and 1 5/8" headers and was very happy with it. Even the factory RS 2.7 only put out 220 hp and that was with mechanical injection.
If you can change the cams, I would install solex cams. They work the best with carbs. If the motor needed a valve job, then I would look into improving the heads "while your in there". Otherwise the motor stock should run fine and will be a huge difference over stock four.
Posted by: Beach914 May 3 2017, 07:33 AM
Oh man, I love 914World drama so much.
We are all disfunctional friends down here in the Orange Curtain of So Cal. So it looks like thread hikacking, but it's actually harassment on who can get there six conversion running first.
Anyone that beats on Lawrence needs to come and talk to me. I think he exorcised his demons on to me as I now have two sixer projects going. He's making great progress and gets plenty of fun harassment from his OC 914 friends. We all want him to succeed and get to driving his car again.
Posted by: Steve May 3 2017, 08:10 AM
I've been talking to a well respected 911 guy who thinks that 32mm intake ports on my heads are akin to NASCAR restrictor plates.
Is it worth the time and money to open up the heads to 36mm and flow my manifolds? (now shorter ones)
Larmo,
I consulted the Porsche 911 Engine God "Bruce Anderson" RIP. According to his bible, (1st,2nd and 3rd edition). He recommends 40 IDA 3C webers, 911 E cams, European Carrera RS pistons and cylinders and increase the ports to 36mm in diameter. Straight 911 2.7 has 32mm ports. Interesting that he says the 911S and Carrera motors had 35mm heads. My motor was a US Carrera motor, so who knows... but it was a fun motor until it started pulling head studs after 150k miles of abuse in my younger years.
Since I have the first, second and third book, your welcome to borrow the 1st or 2nd revision. The performance section of the book is all the same info for 2.7 motors, between the 3 revisions. Great info and every six person should have the book. Bruce is a legend and taught rebuild classes for most of his adult life.
I agree with Mark's comments though. If it's a lot of money and time, I would try the motor the way it is. Not that hard to remove the motor later for improvements or a bigger motor.....
Posted by: GeorgeRud May 3 2017, 08:40 AM
My 2.7 in the conversion car was put together per Bruce Anderson's book, but eventually pulled a head stud (even though we had used Timeserts in the case). When I had Henry Schmidt at Supertec rebuild the long block with Casesavers and his head studs, he used a S cam profile and his other magic tweaks. 199.5 horsepower at the rear wheels with 40 IDA Webers and stock heat exchangers is an awful lot of fun in a 914-6.
Bruce's recommendations make a great reliable engine, but I think Henry is the man these days!
Posted by: mepstein May 3 2017, 08:56 AM
My 2.7 in the conversion car was put together per Bruce Anderson's book, but eventually pulled a head stud (even though we had used Timeserts in the case). When I had Henry Schmidt at Supertec rebuild the long block with Casesavers and his head studs, he used a S cam profile and his other magic tweaks. 199.5 horsepower at the rear wheels with 40 IDA Webers and stock heat exchangers is an awful lot of fun in a 914-6.
Bruce's recommendations make a great reliable engine, but I think Henry is the man these days!
I would lust to have one of Henry's hot rod engines.
Posted by: Larmo63 May 3 2017, 09:35 PM
I have that Bruce Anderson book.
I can't read, but I do look at the pictures quite a bit.
Posted by: Dave_Darling May 3 2017, 11:13 PM
Why don't you install the engine, get it running, and then decide if it doesn't have enough power. You've already got a list of work to do, why add more on speculation?
Because that way he can join Mueller in the "boy is it gonna be a great motor when it finally runs" club?

--DD
Posted by: Larmo63 May 3 2017, 11:31 PM
Actually, I'm trying to take an intelligent approach to the task I've taken on.
I am in agreement with McMark's comment.
Also, it may be time to just let this thread die.
Posted by: porschetub May 4 2017, 12:19 AM
I have that Bruce Anderson book.
I can't read, but I do look at the pictures quite a bit.
Lawrence don't get into that work,just get the lump in there ,Nascar is nascar ,Porsche design logic is up there ,you need to maintain power in your normally driving range RPM otherwise it won't be easy to drive,mods are great but you have to read up and find an equal balance of drivability against top end power...enough of my rant.
Good luck man
Posted by: ljubodraz May 4 2017, 06:03 AM
Actually, I'm trying to take an intelligent approach to the task I've taken on.
I am in agreement with McMark's comment.
Also, it may be time to just let this thread die.
Please don't let your thread die.
I wish you the best in completing your goals in one way or another. If it were easy... insert wise quote here.
Posted by: get off my lawn May 4 2017, 04:29 PM
I know a guy who has been building a show quality muscle car for a long, long time.
When i say building, I mean he writes checks and breaks out the credit card.
About two years into the project I told him that he would never ever finish that car and that would be intentional, by design.
he said I was FOS but I went on to explain that he was in love with the dream, the fantasy.
If he ever finished the car he would have to accept that it is not absolutely perfect in every way and that it didn't live up to his dreams.
That scares him so he'll never finish the car because he doesn't want to.
Again he said I was FOS.
Fast forward 13 years later the car was ALMOST done, but he decided it needed a color change.
And it now needs an automatic transmission instead of the $3500 manual he had installed.
He has at least $70k into it already but he will never drive that car.
Some folks dream of finishing a project, for some the project IS the dream.
In summary, PUT THE DARN CAR TOGETHER! Please.
Posted by: 76-914 May 4 2017, 04:44 PM
Perfection ain't Lar's problem. He's a slop artist like most of us. He just does this for the attention.
Posted by: Larmo63 May 6 2017, 06:25 PM
Question about mounting the fuel pump.....
Hard mount, or rubber bushings? I know it needs to be grounded too.
Posted by: porschetub May 6 2017, 08:58 PM
Interesting choice of pumps,appears NOS ,I have a nice shiny NOS Hardi and never used it,where do you plan to mount it ?.
Seem to remember them rubber mounted,if you need mounts I think the early BMW 3 and 5 series AFM/airbox ones work if your mounting holes are 6mm.
No pressure regulator required for the pump you have which is a bonus.
Posted by: Larmo63 May 6 2017, 09:30 PM
I sourced it from Australia, I'm mounting it up front....
You'll see.
Posted by: Steve May 7 2017, 08:07 AM
Question about mounting the fuel pump.....
Hard mount, or rubber bushings? I know it needs to be grounded too.
I used rubber bushings on all my pumps. That way they don't transfer vibration to the body.
Posted by: McMark May 7 2017, 08:12 AM
Hard mounting will transfer more noise to the chassis.
https://www.mcmaster.com/#9217k33/=17itoht
Posted by: Larmo63 May 15 2017, 06:50 PM
Some more welding to be done tomorrow, bottom front trunk metal with louvers, and oil cooler. Once that is done and painted, the oil cooler, oil cooler lines, thermostat, fuel pump, and fuel tank & lines all go in.
***I'm putting the spare receiver on the front bulkhead, anybody got a 15" space saver tire that they can measure for me?***
Diameter needed. Thank you.
I'm excited to move to the back of the car now, I think that is near where the motor is going to go. 
Posted by: '73-914kid May 15 2017, 11:06 PM
Some more welding to be done tomorrow, bottom front trunk metal with louvers, and oil cooler. Once that is done and painted, the oil cooler, oil cooler lines, thermostat, fuel pump, and fuel tank & lines all go in.
***I'm putting the spare receiver on the front bulkhead, anybody got a 15" space saver tire that they can measure for me?***
Diameter needed. Thank you.
I'm excited to move to the back of the car now, I think that is near where the motor is going to go.
I can get you a diameter tomorrow evening after work. Or, you can drive down to Vista tomorrow evening, grab some tacos, and borrow mine, so you know it's in the right place?
Posted by: Larmo63 May 15 2017, 11:29 PM
Found it.....20.25" for either the 15" or the 16".....
Thanks!!
Posted by: JmuRiz May 16 2017, 08:14 AM
My 15" 951 space saver is only 19.75" in diameter, and CRAZY light to boot.
(I plan to use them on the other car, should save me 10-15lb per corner!)
Posted by: Larmo63 May 16 2017, 09:15 PM
Progress......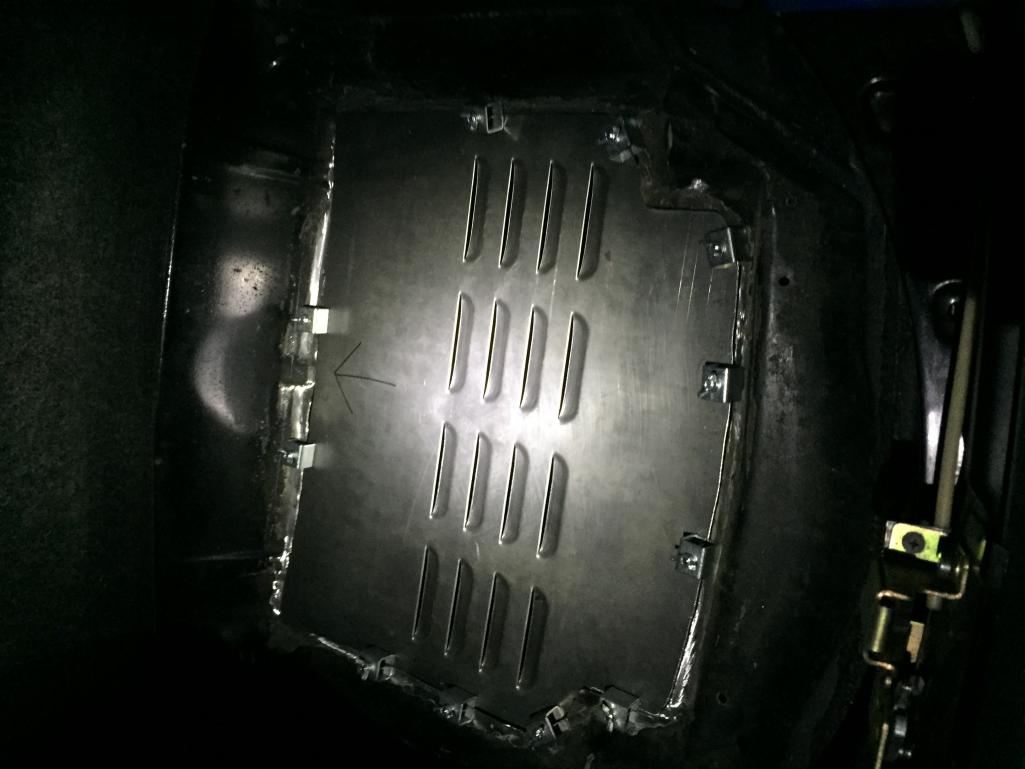
Posted by: euro911 May 17 2017, 12:04 AM
A bolt-on, eh?
Posted by: mb911 May 17 2017, 05:53 AM
No those look like the butt weld clamps. They work great.
Posted by: 76-914 May 17 2017, 07:40 AM
Yup. I just discovered there a 2 different grades of butt weld clamps.
Posted by: Larmo63 May 17 2017, 08:34 AM
We ground down the middle squares to make them as thin as possible.
They work great for this application.
Posted by: Larmo63 May 21 2017, 08:46 PM
Sunday welding day....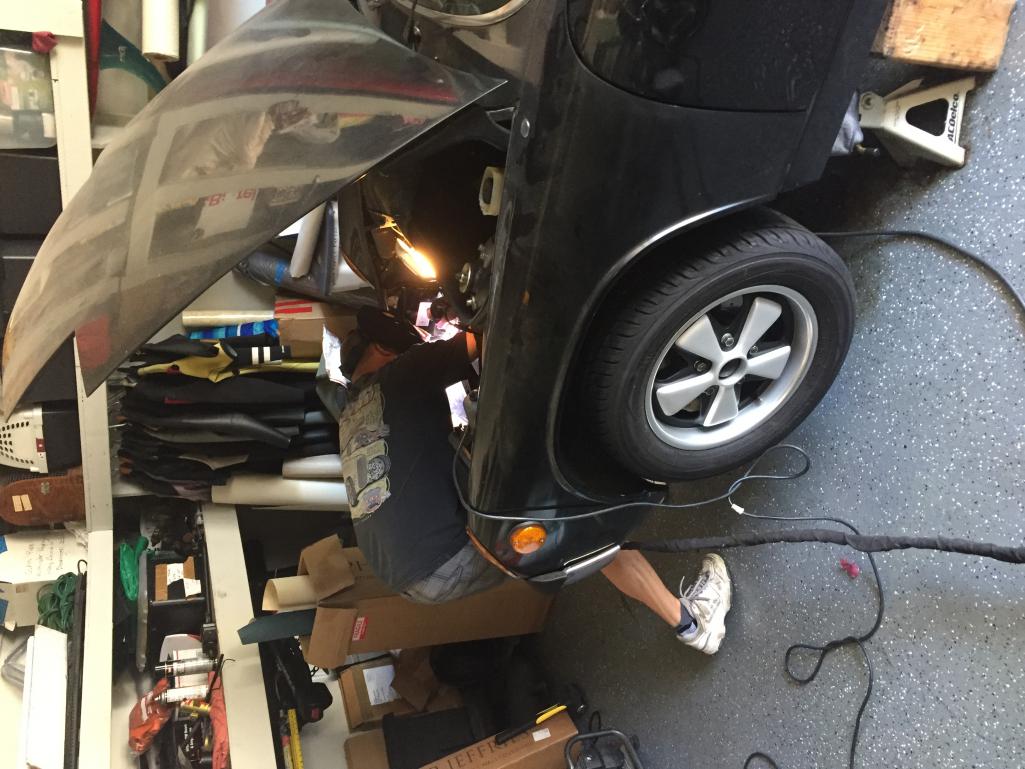
Posted by: Larmo63 May 21 2017, 08:48 PM
Welding guy is somewhat finished, so I decided to start building.....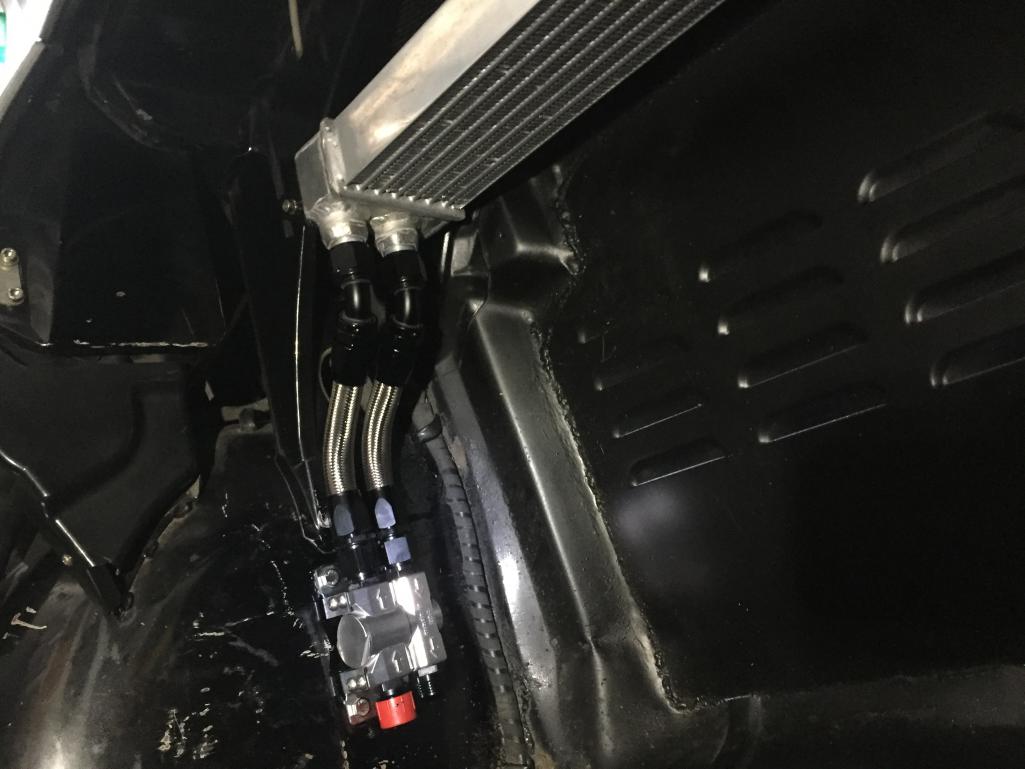
Posted by: Larmo63 May 21 2017, 08:49 PM
And.....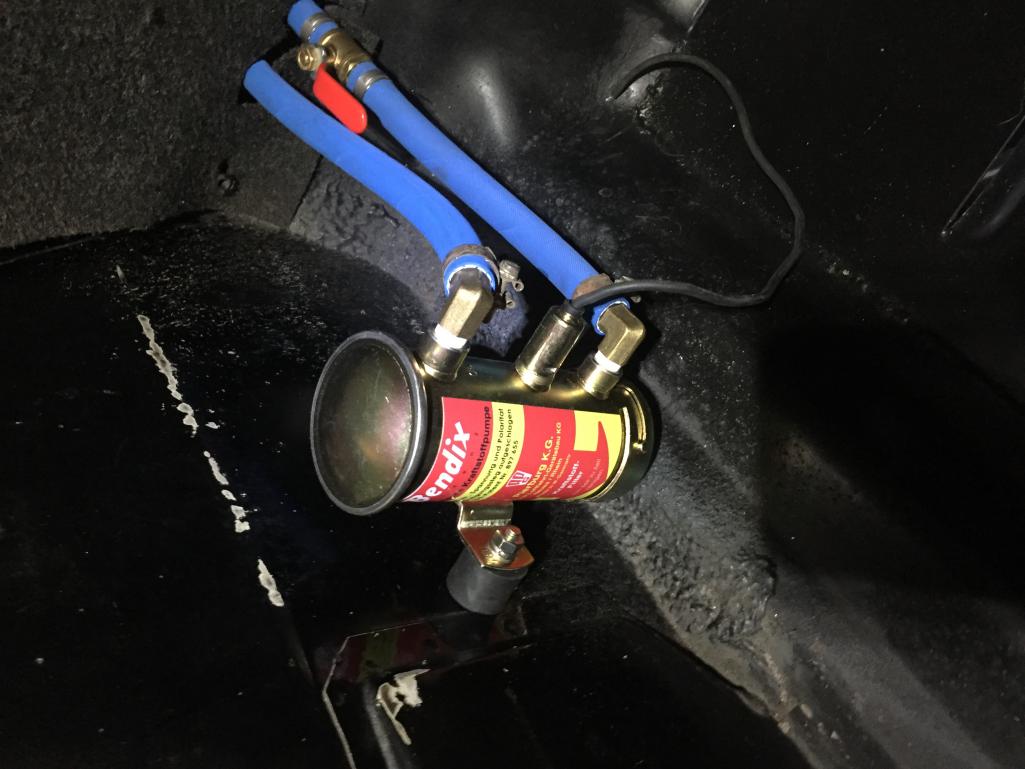
Posted by: Justinp71 May 22 2017, 09:39 AM
Looks like your making good progress. Is that a Fuel Pump?
Posted by: Dave_Darling May 22 2017, 11:08 AM
Has to be a fuel pump.
You do have grommets for those holes, right?
--DD
Posted by: Larmo63 May 22 2017, 06:26 PM
Yes, the fuel lines are tightly grommeted at the bulkhead.
Posted by: 76-914 May 22 2017, 06:29 PM
I pulled a grommet out of place when tugging on a fuel line Saturday. Gonna be a bitch getting it back in with the hose in place. See ya in Mammoth!
Posted by: Larmo63 May 22 2017, 09:21 PM
I'm not pulling on those hoses for that very reason.
It's Eaton Aeroquip hose, and it's pretty tough.
Posted by: Larmo63 May 23 2017, 09:43 PM
Which starter should I buy? The best is what I want, but what are the choices/prices?
(uhhhh, what battery too?) 
Posted by: porschetub May 23 2017, 11:50 PM
Presume you are talking Eaton pushlok if so great choice,will never give issues,stock starter in good condition is fine,battery well there are so many options I won't comment.
good luck mate.
Posted by: Steve May 24 2017, 07:01 AM
I ran a stock starter with my 2.7. No problems. After going to a 3.2, I sold the car and Otto's installed some beafy starter in it. I have all the receipts. I will find out what he installed.
I'm running an optima battery. I jury rigged a battery maintainer for it through the cigarette lighter. I heard the odyssey? batteries are better. Lots of threads on this if you do a search.
Posted by: '73-914kid May 24 2017, 07:25 AM
Just get the bosch SR68X starter. It will turn your engine over no problem.
Posted by: Justinp71 May 24 2017, 10:03 AM
Flat six soon to be started! Warning- Big grins from ear to ear are in your near future! I've driven lots of cars, but not much compares to a 914-6 (so far).
Posted by: Real6 Jun 14 2017, 07:11 PM
Dude, rotate your pictures!!!!!
Posted by: Larmo63 Jun 14 2017, 10:59 PM
I'm still plugging along, Marty will have my headers done in about a week, starter is here, small stuff like clutch and speedo cable on the way.....I'm so proud that my car is transitioning, it's so fashionable these days......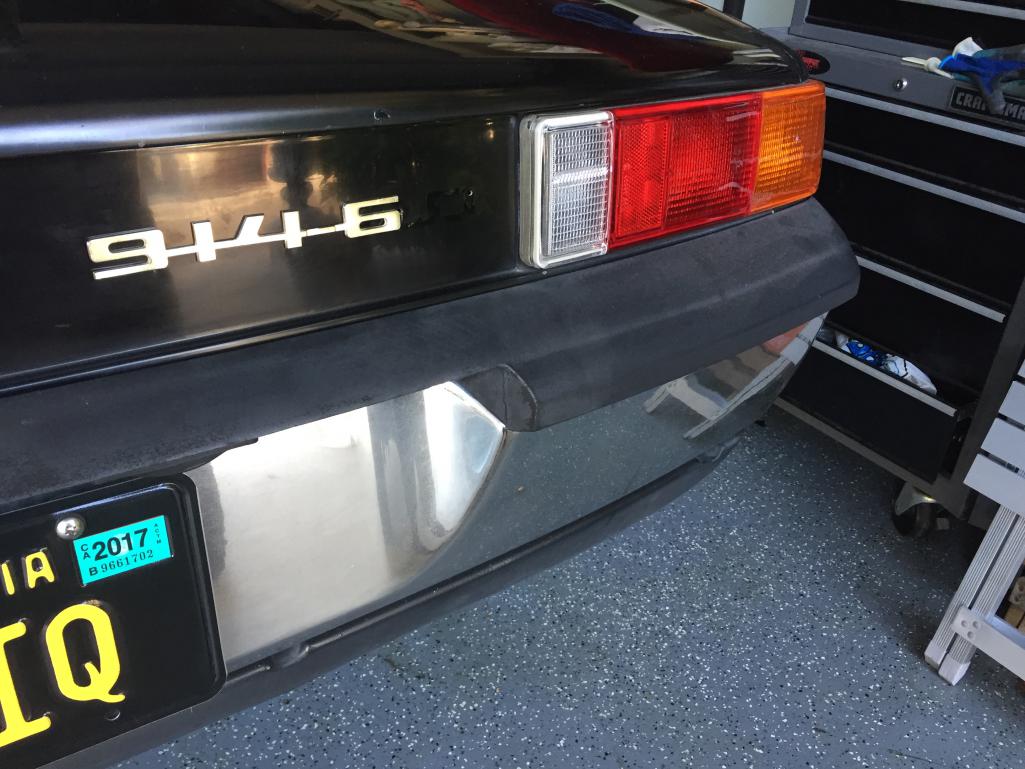
Posted by: wndsrfr Jun 15 2017, 05:24 AM
Just get the bosch SR68X starter. It will turn your engine over no problem.
That beefy Bosch SR68X also won't eat your flywheel ring gear....I scored one from Amazon with no core required!!!
Posted by: forrestkhaag Jun 15 2017, 09:17 AM
Larmo's pictures are properly aligned from his point of view lying on the floor of his garage with a tool in his right hand.......
Attached image(s)
Posted by: Mblizzard Jun 15 2017, 09:44 AM
I'm still plugging along, Marty will have my headers done in about a week, starter is here, small stuff like clutch and speedo cable on the way.....I'm so proud that my car is transitioning, it's so fashionable these days......
I am looking at a set of headers from Marty. Nice stuff!
Posted by: Larmo63 Jun 19 2017, 07:42 PM
More parts filtering in.....228mm clutch parts, guy sent a five hole flywheel because he was told it was for a 914.....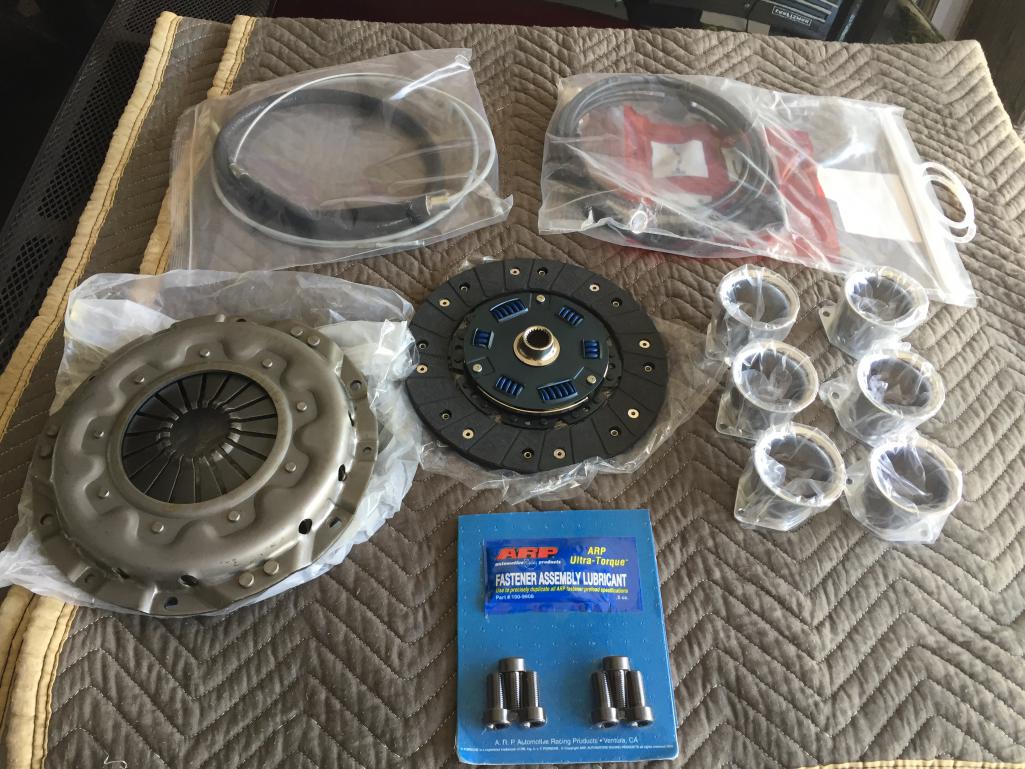
Posted by: Larmo63 Jun 30 2017, 07:14 PM
Some MSDS bling that goes underneath the car....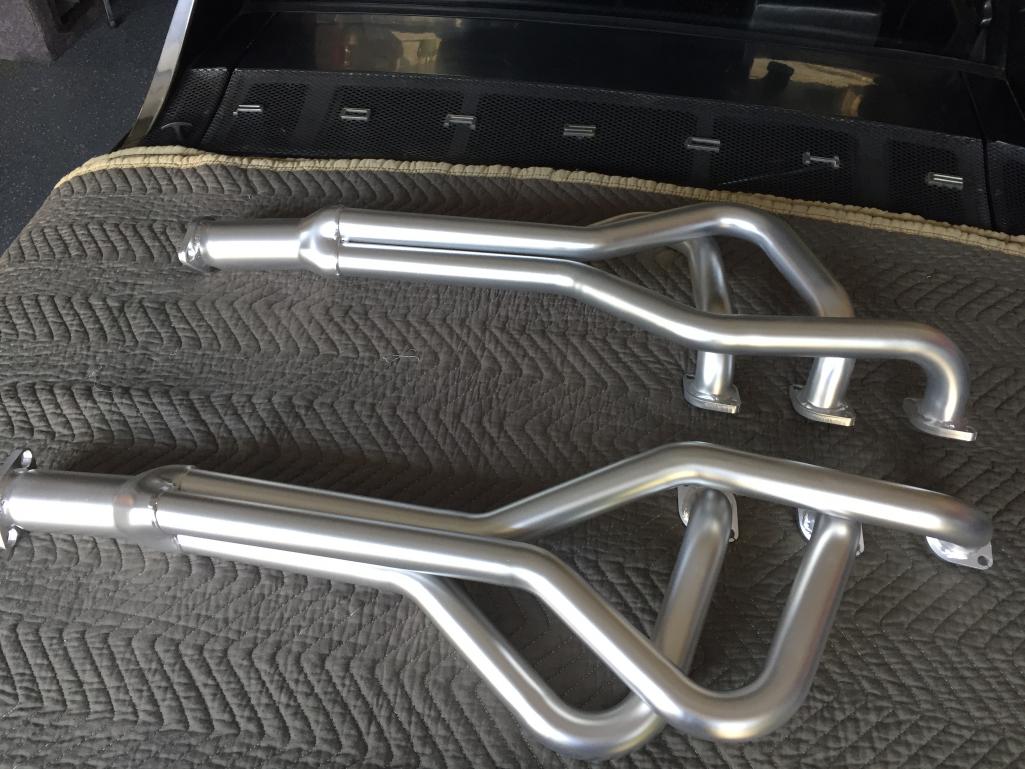
Posted by: JRust Jun 30 2017, 08:14 PM
Looking good Lawrence
Posted by: ConeDodger Jun 30 2017, 09:02 PM
I'm pretty much at the point where I'm going to list the whole project for sale. I'm over it. Too much disappointment and frustration.
I don't think I can finish this thing, maybe someone else wants to take a shot? I'll probably part this mess out.
You needed to come ride with me at WCR. Or, put on one of those wet suits I see hanging in your garage and go surf it out. Heck, I'd have let you drive it. Once you've driven a six, you are spoiled for anything else. (apologies to the Type IV guys, you don't know what you're missing). Fly on up to Reno and you can stay at my place. We'll go drive mine around Lake Tahoe. If you still feel like giving up after that, you probably should...
Posted by: Larmo63 Jun 30 2017, 10:19 PM
That was April 3rd, this is now. I rode with Mike D. and Don6 up in Mammoth.
I'm sold on the whole program, it just took more time than I anticipated.
I may take you up on the offer though, thanks!!
Posted by: ConeDodger Jun 30 2017, 10:33 PM
That was April 3rd, this is now. I rode with Mike D. and Don6 up in Mammoth.
I'm sold on the whole program, it just took more time than I anticipated.
I may take you up on the offer though, thanks!!
It's serious. I'm only home every other weekend though...
Posted by: Larmo63 Jul 2 2017, 12:30 PM
I'm still on the fence as to whether I should port the heads on this 2.7 from 32mm to 36mm. Doing this will definitely delay engine install. I am waiting on a wiring harness from Perry, and the ignition system is coming next weekend. Only a few more loose ends are keeping me from assembling the transmission to the engine and installing it. Doing the porting will take an additional 4-6 weeks, but a potential HP gain is tempting.
Almost all of the small things that would impede construction and installation have been gathered and accounted for. The devil is in the details.....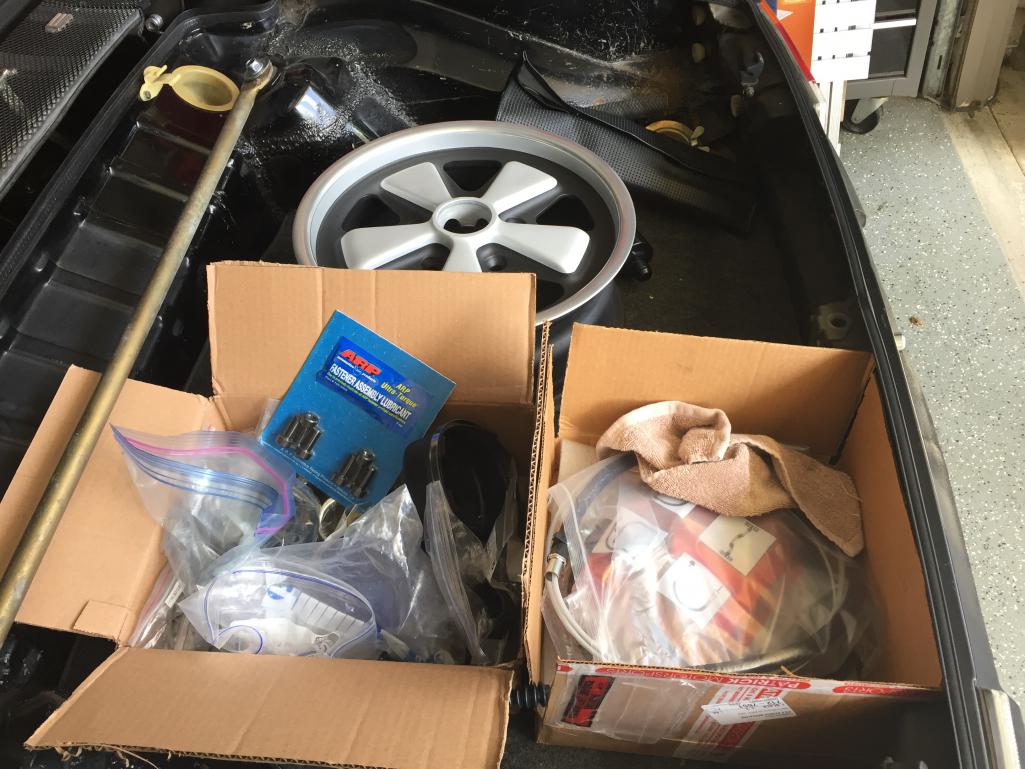
Posted by: 76-914 Jul 2 2017, 02:06 PM
You won't ever need that additional HP unless you want to drag race it. How much is enough HP? Your already going to feel a kick in the pants coming from a 4. A weak one at that! I see 6-7 weeks of valuable driving time kaput. And for what? Someone like Andy with a 3.6 or Clay with his 4.0 is going to blow you off the road. Button it up and drive it before you go off the deep end; again! Hell, you'll probably be almost as fast as me anyway.
Posted by: flyer86d Jul 2 2017, 03:22 PM
What cams are you using? I think that you will pick up some power over 5K RPM with the bigger ports. However, the small port motor is making lower end power while the big port motor is trying to come up on its cams. While the 5K rush is great fun, you probably will find the small port Motor more fun and easier to drive on the street. Example, why were the 2.4E's so quick? Mild cams and small ports. With mine I gave little away to 2.7 RS's.
Charlie
Posted by: Larmo63 Jul 2 2017, 04:13 PM
Cams are DC 30, between E and S profile.....
Posted by: flyer86d Jul 2 2017, 04:23 PM
Stick it in and enjoy it. That will be a torquey fun motor.
Charlie
Posted by: flyer86d Jul 2 2017, 04:26 PM
With an open enough exhaust, it'll pull to 7300 like an S.
Charlie
Posted by: Larmo63 Jul 2 2017, 04:32 PM
MSDS 1 5/8" OD headers actual 1 1/2" ID and a Dansk sport two pipe muffler....
Posted by: McMark Jul 3 2017, 05:49 AM
with those guys. You're not making more horsepower, you taking it from the <2500rpm range and reusing it in the >4500rpm range. For a street car I'd absolutely keep the power down low. That's why I love my small turbo setup so much -- lots of power for acceleration.
Not to mention the very very very important fact, that the motor can always come back out. It's harder to get it installed and running, than it would be to pull it back out later. The way I see it, install the motor and drive it, if you're not wiling to pull the motor again to chase after some horsepower then you didn't really want it anyway.
Posted by: mepstein Jul 3 2017, 07:19 AM
get it on the road and enjoy. Play with it more later.
There's always some sorting and mods you will want to do after you drive it for a while.
Posted by: Dave_Darling Jul 3 2017, 09:17 AM
Or you could be like Mueller, forever chasing down the "perfect" motor to put in your 914, and never actually having a motor in your 914...
--DD
Posted by: SixerJ Jul 4 2017, 12:57 AM
Most recent comments have nailed it, McMark especially. Get it installed and enjoy for the rest of the summer.
My 2.4S at some point in its life ended up with E cams (due to rusty oil tank judging by the file). I could never understand people's comments about S having little power down low, mine did? When the car was restored and the engine rebuilt the cams were replaced with S
The S rush is fabulous on the right roads and without traffic but those are thin on the ground. Being honest I preferred the car as it was...much more fun for 80% of the road conditions
DC30 grind sounds like a great combo for a 2.7 which naturally has more grunt than the 2.4
You will not be disappointed with the set up you have
Posted by: Larmo63 Jul 8 2017, 10:18 AM
I talked to John Dougherty about his cams in the engine, and he recommended the 36mm ports, so here goes nothing....
Posted by: Larmo63 Jul 8 2017, 10:19 AM
I am going to install this engine in this car.
SWEAR!! 
Posted by: Krieger Jul 8 2017, 10:32 AM
I am going to install this engine in this car.
SWEAR!!
I dare you to!
Posted by: Larmo63 Jul 8 2017, 12:46 PM
Nice rebuilt heads, new valves....This is what we found when we took the heads off....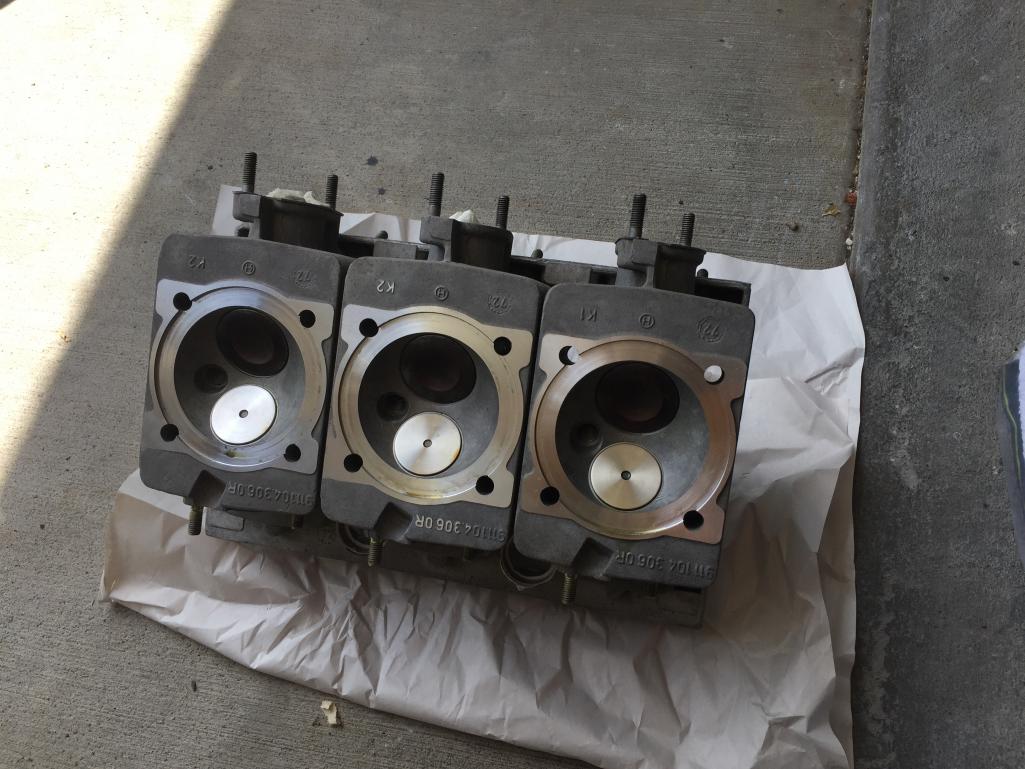
Posted by: Larmo63 Jul 8 2017, 12:47 PM
A few hours later, the dead carcass....
Posted by: euro911 Jul 8 2017, 01:53 PM
Posted by: Larmo63 Jul 8 2017, 08:02 PM
They are going bye-bye. It's going to take about two weeks to do the porting work, and I do have a few other odds and ends to accomplish in the meantime.
My list is getting much, much shorter. I'm still ordering more parts, as if I haven't had enough Pelican, Patrick, and eBay shit showing up at the front door.
Stay tuned....
Posted by: 76-914 Jul 9 2017, 08:38 AM
Go for it. Hopefully you won't have another list to sort out once it is "finished"! If it gives you any problems we can always throw a Subaru power plant in that thing.
Posted by: Coondog Jul 10 2017, 06:02 AM
They are going bye-bye. It's going to take about two weeks to do the porting work, and I do have a few other odds and ends to accomplish in the meantime.
My list is getting much, much shorter. I'm still ordering more parts, as if I haven't had enough Pelican, Patrick, and eBay shit showing up at the front door.
Stay tuned....

Posted by: Larmo63 Jul 10 2017, 12:28 PM
Lol.....
Posted by: Larmo63 Jul 14 2017, 07:58 PM
When you want an engine harness done correctly for your /6 conversion, I would HIGHLY recommend Perry Kiehl for the work.
Dang, the guy is the DaVinci of DaWiring....!!!!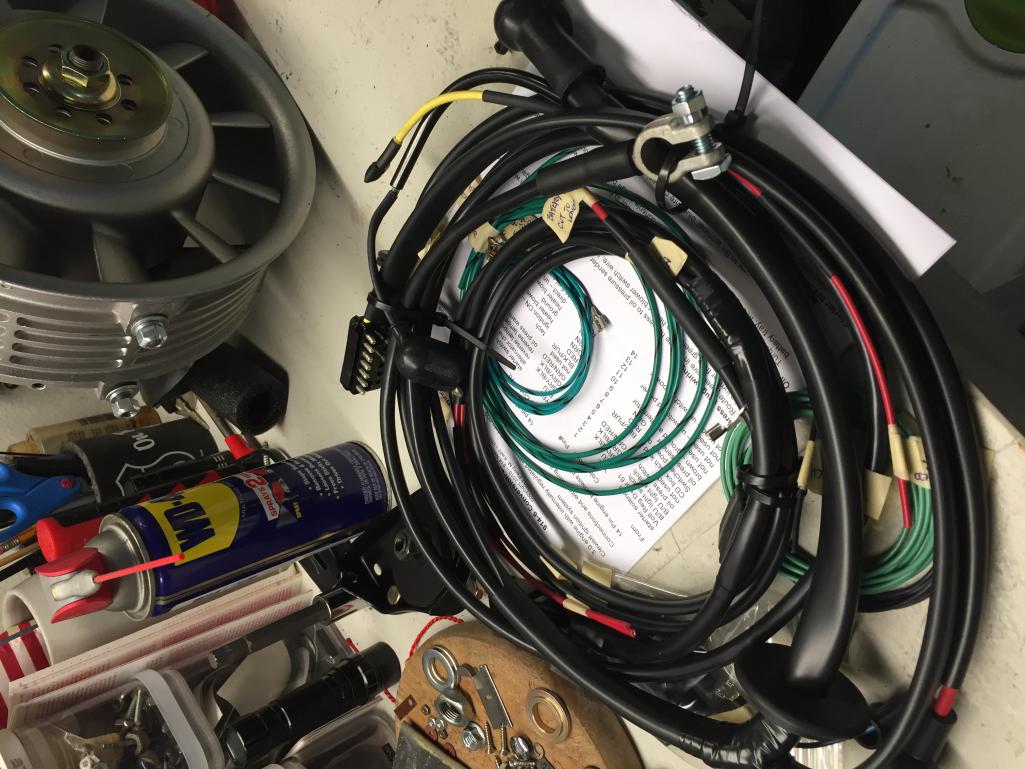
Posted by: Larmo63 Jul 14 2017, 07:59 PM
Oh, and......,I found a '66 911 garage find very close to my house that I'm negotiating on buying.
Complete survivor.
Posted by: mepstein Jul 14 2017, 08:23 PM
Oh, and......,I found a '66 911 garage find very close to my house that I'm negotiating on buying.
Complete survivor.
awesome!
I need a '66. My birth year.
Posted by: Larmo63 Jul 17 2017, 06:17 PM
I installed one of Chris/Tangerine's cool 90 degree turn clutch wheel brackets along with a Patrick Motorsports delrin wheel. I used the "pulled back holes so I won't need spacers on the clutch clevis cable end.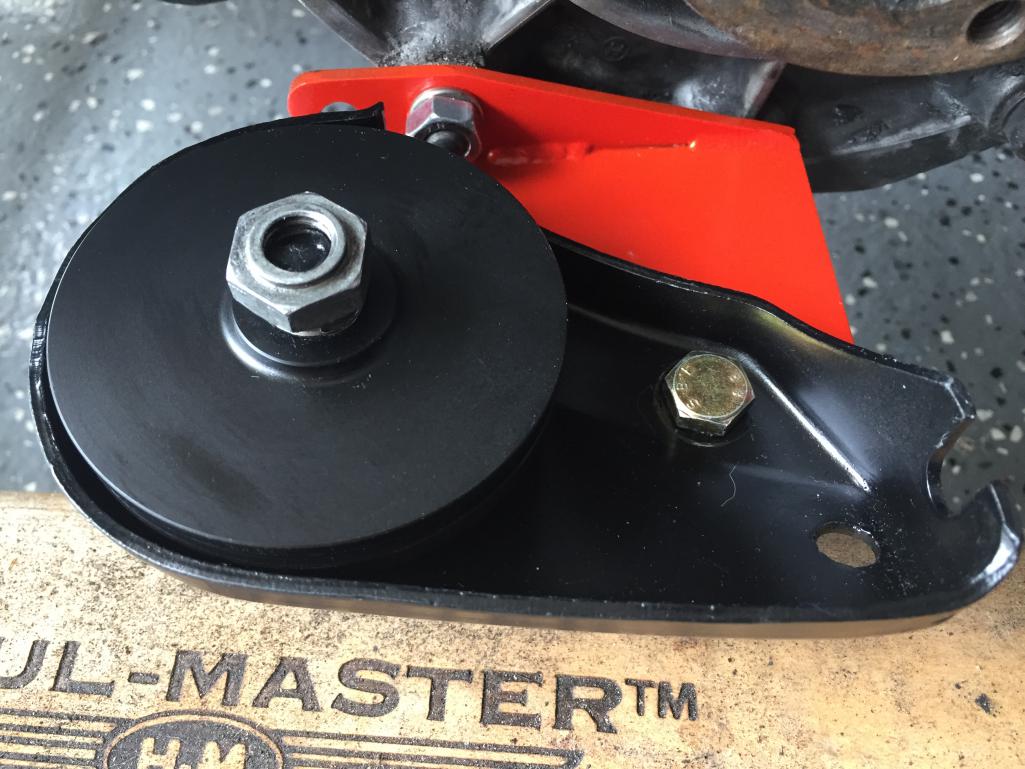
Posted by: wndsnd Jul 17 2017, 06:27 PM
Twill be a masterpiece!
Posted by: Larmo63 Jul 19 2017, 04:59 PM
One of my biggest financial hurdles was to buy the Clewett Engineering ignition system and wires.
It's here now, waiting for my heads to be done and I also scored some lower turbo covers.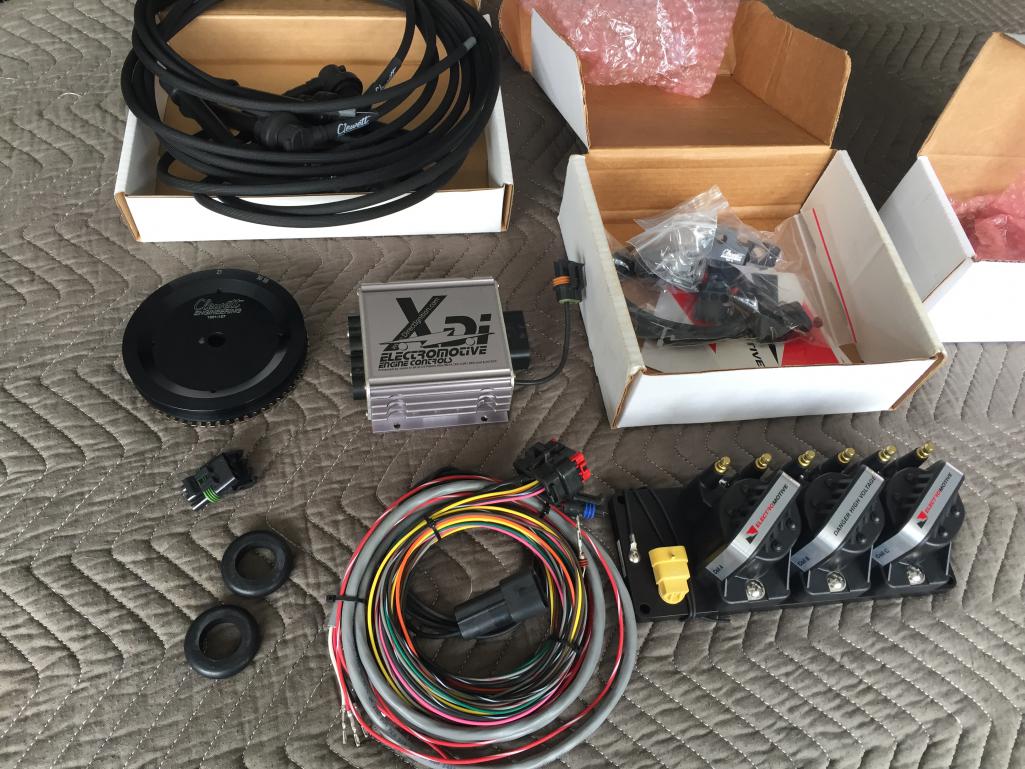
Richard is a very nice guy too, btw!
Posted by: Larmo63 Jul 19 2017, 05:04 PM
Installs similar to this....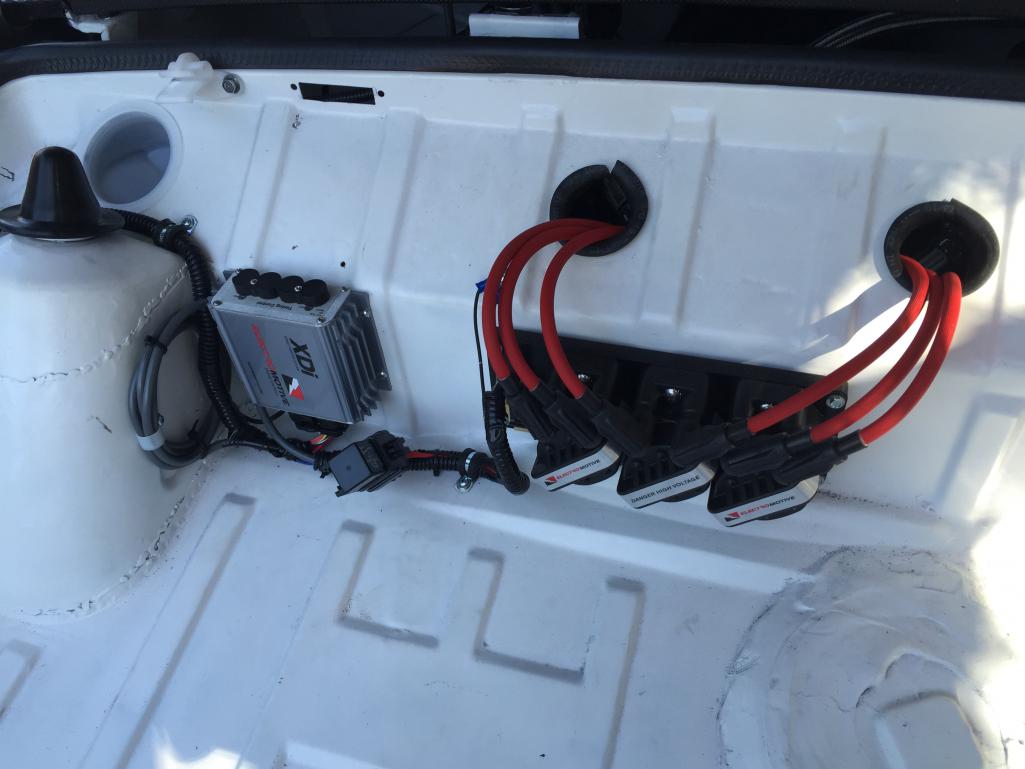
Posted by: Steve Jul 19 2017, 08:30 PM
I ran the aftermarket Permatune Capacitive Discharge ignition and stock distributor rotor rev limiter with a pertronix points replacement. Never had a problem with it. Curious if this system provides any more horsepower?
Does look expensive and a lot more work to implement, however I did my 2.7 six conversion back in 86 and a lot has changed since then.
Posted by: Larmo63 Jul 19 2017, 09:22 PM
It's actually plug n' play. Just the fact that there is no distributor to turn and power has to be a bonus power-wise.
Perry Kiehl made me the engine harnesses and called Richard Clewett multiple times to get it right.
Perry is a GREAT GUY to deal with too, btw!!!!!!
Posted by: GeorgeRud Jul 19 2017, 10:02 PM
It is the folks like Richard Clewitt, Perry Kiehl, Eric Shea, Richard Paar, Harry Schmidt, Brad Mayeur, Racer Chris, and many more (apologies to those not named directly)that make this hobby so wonderful. Their advice and willingness to share their knowledge is without equal and what allow us to still in joy these cars when many of their contemporaries have long gone to the crusher.
Posted by: bigkensteele Jul 19 2017, 10:23 PM
One of my biggest financial hurdles was to buy the Clewett Engineering ignition system and wires.
It's here now, waiting for my heads to be done and I also scored some lower turbo covers.
Richard is a very nice guy too, btw!
Why?
Posted by: Larmo63 Jul 19 2017, 11:07 PM
It is the folks like Richard Clewitt, Perry Kiehl, Eric Shea, Richard Paar, Harry Schmidt, Brad Mayeur, Racer Chris, and many more (apologies to those not named directly)that make this hobby so wonderful. Their advice and willingness to share their knowledge is without equal and what allow us to still in joy these cars when many of their contemporaries have long gone to the crusher.
Amen, brother, add in Mark & Matt at 914 Rubber, and Bruce Stone too!!!!
Posted by: euro911 Jul 20 2017, 01:27 AM
It is the folks like Richard Clewitt, Perry Kiehl, Eric Shea, Richard Paar, Harry Schmidt, Brad Mayeur, Racer Chris, and many more (apologies to those not named directly)that make this hobby so wonderful. Their advice and willingness to share their knowledge is without equal and what allow us to still in joy these cars when many of their contemporaries have long gone to the crusher.
EDIT: Lawrence beat me to it. Add Bruce to the list too
Posted by: jor Jul 20 2017, 10:09 AM
Oh, and......,I found a '66 911 garage find very close to my house that I'm negotiating on buying.
Complete survivor.
When it rains, it pours; now that things are going well again, the good news can't stop! Even without the '66, though, your project is looking great.
Posted by: forrestkhaag Jul 20 2017, 11:50 AM
Keep up the progress photos and in the meantime, drop in on C&C just blocks from your 914 (on jack's stand)....
and Perry did my harness in similar shiny perfection and helped with tech info in the install to the tach adapter etc... Works perfectly
Posted by: Larmo63 Jul 20 2017, 03:20 PM
I installed one of Chris/Tangerine's cool 90 degree turn clutch wheel brackets along with a Patrick Motorsports delrin wheel. I used the "pulled back holes so I won't need spacers on the clutch clevis cable end.
Posted by: euro911 Jul 20 2017, 04:17 PM
Other way. The step shoulders up against the bushing
Posted by: KELTY360 Jul 20 2017, 04:18 PM
It is the folks like Richard Clewitt, Perry Kiehl, Eric Shea, Richard Paar, Harry Schmidt, Brad Mayeur, Racer Chris, and many more (apologies to those not named directly)that make this hobby so wonderful. Their advice and willingness to share their knowledge is without equal and what allow us to still in joy these cars when many of their contemporaries have long gone to the crusher.
Amen, brother, add in Mark & Matt at 914 Rubber, and Bruce Stone too!!!!
Don't forget McMark as the credits roll.
Posted by: euro911 Jul 20 2017, 04:35 PM
We're gonna be here a while listing all the good guys
Eric Shea, Rick Ollah, Garold Shaffer ... and the list goes on
Posted by: KELTY360 Jul 20 2017, 04:59 PM
We're gonna be here a while listing all the good guys
Eric Shea, Rick Ollah, Garold Shaffer ... and the list goes on
So, what? You've got somewhere else to be?
Posted by: euro911 Jul 20 2017, 05:21 PM
Eric Shea, Rick Ollah, Garold Shaffer ... and the list goes on
(Mark with a 'C' ... is that pronounced "Marcie"? ) .... / ._ / .... / ._
... Posted by: KELTY360 Jul 20 2017, 05:35 PM
Eric Shea, Rick Ollah, Garold Shaffer ... and the list goes on
(Mark with a 'C' ... is that pronounced "Marcie"? ) .... / ._ / .... / ._
... You can call me Marcus......
Posted by: Larmo63 Jul 21 2017, 07:33 PM
Other way. The step shoulders up against the bushing
That's what I thought....
Posted by: Larmo63 Jul 28 2017, 04:32 PM
Before:
Posted by: Larmo63 Jul 28 2017, 04:32 PM
After: Solid bronze bushing/spacer permanently bushed into idler arm.....
Posted by: porschetub Jul 28 2017, 11:15 PM
Good points made, Perry was slow to get my loom done but came in with a top quality product ..was very happy with the end product,Clewit leads are another great product which I used in my build,talked with Bob @ ashlocktech and got my ignition 100% and for a carbed engine really can't believe how well it starts and runs.
Running Pertronix II with Marelli dizzy ,Permatune blue unit from 75 MY 911 ,but I found from Bob my coil was wrong,Perry had mentioned this also so I ordered Permatune transformer coil and all was good.
End result is truly worth the work.
Would love crank fire but haven't looked into it and not really too educated in that area.
Good luck Lawrence .
Posted by: Larmo63 Jul 28 2017, 11:20 PM
I'll be using Bob's TachAdapt in this build......
Posted by: Krieger Jul 28 2017, 11:24 PM
After: Solid bronze bushing/spacer permanently bushed into idler arm.....
Lawrence are those from Henry Schmidt? There on my short list.
Posted by: Larmo63 Jul 29 2017, 09:48 AM
The guy who ported my heads did these.
Posted by: mb911 Jul 29 2017, 10:59 AM
The guy who ported my heads did these.
Anyway you could get me some dimension s on the bushing upgrade? I could make up a set for me
Posted by: Larmo63 Jul 29 2017, 03:27 PM
Yes, I get them back next week. These prevent wear and "walking." The stock aluminum spacers will be elliminated.
These will never wear out.
Posted by: Lucky9146 Aug 1 2017, 04:32 PM
Been following your thread and I am almost in the same exact place as you are on my 3.0. Got my idler arms done by Henry Schmidt through Ken at 911 Vintage in Fallbrook CA. I think that this is one of the best design improvements you can do to improve the chain tensioners for sure. Before and after Pic.
I got to get my thread going again!
Good luck with your build! See you at the 914 Fun Day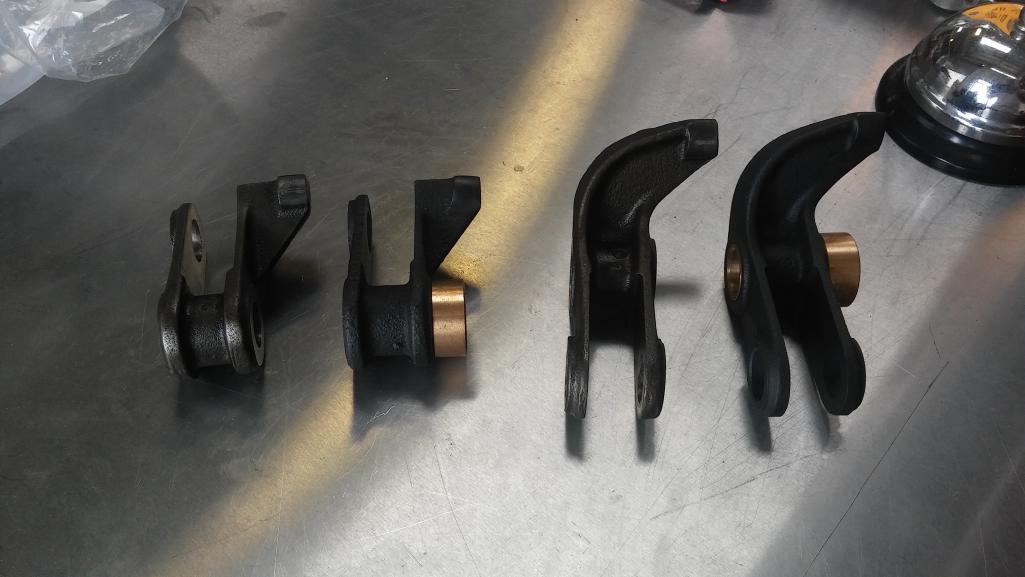
Posted by: Larmo63 Aug 7 2017, 02:22 PM
Thumb planted firmly up ass, ready for all of the "I told you so" comments......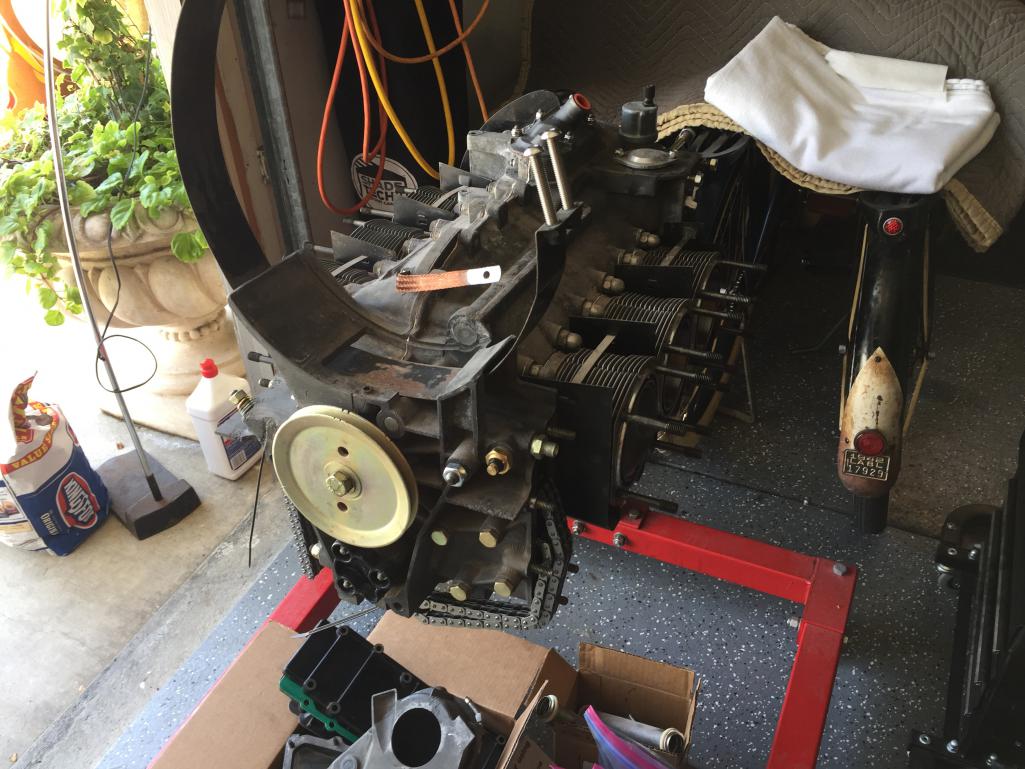
I'm bitter, disappointed, and frustrated at this point. (again)
Posted by: 76-914 Aug 7 2017, 03:00 PM
Alright, I told you so .There, I said it. Now what was it that I warned you about?
Posted by: Larmo63 Aug 7 2017, 03:12 PM
This cost me six weeks. I know the /6 Porsche engine will be insane and fun, but if I had this to do all over again, I wouldn't have done it.
Posted by: Porschef Aug 7 2017, 03:25 PM
Is that a Rudge under the blanket?
Posted by: mepstein Aug 7 2017, 04:13 PM
This cost me six weeks. I know the /6 Porsche engine will be insane and fun, but if I had this to do all over again, I wouldn't have done it.
You need to look at the build as part of the fun.
Posted by: Larmo63 Aug 7 2017, 04:40 PM
[/quote]
You need to look at the build as part of the fun.
[/quote]
This is "fun" when my guy gets here to put this lump back together, and we start with the serious stuff.
Supposed to be this week "sometime." Uhgg.
I did make a pretty big offer on the '66 911, she is thinking about it.
Posted by: Lucky9146 Aug 7 2017, 04:44 PM
This cost me six weeks. I know the /6 Porsche engine will be insane and fun, but if I had this to do all over again, I wouldn't have done it.
I have been at my engine for about 3 months now so I feel for ya but remember one important thing and that is you are doing it yourself so it WILL take longer. The ugly alternative is pay someone. Nope! I have been held up several times for various things and suffered some set backs but like you said it "will be insane and fun". Difference is I would do it again.
Keep at it it will be worth it. Got the timing set over a week ago then had family in for 10 days. Timing was a big hurdle for me and now the real fun begins finishing it up.
Hopefully this pic will provide some inspiration. I was where you are just a couple weeks ago.
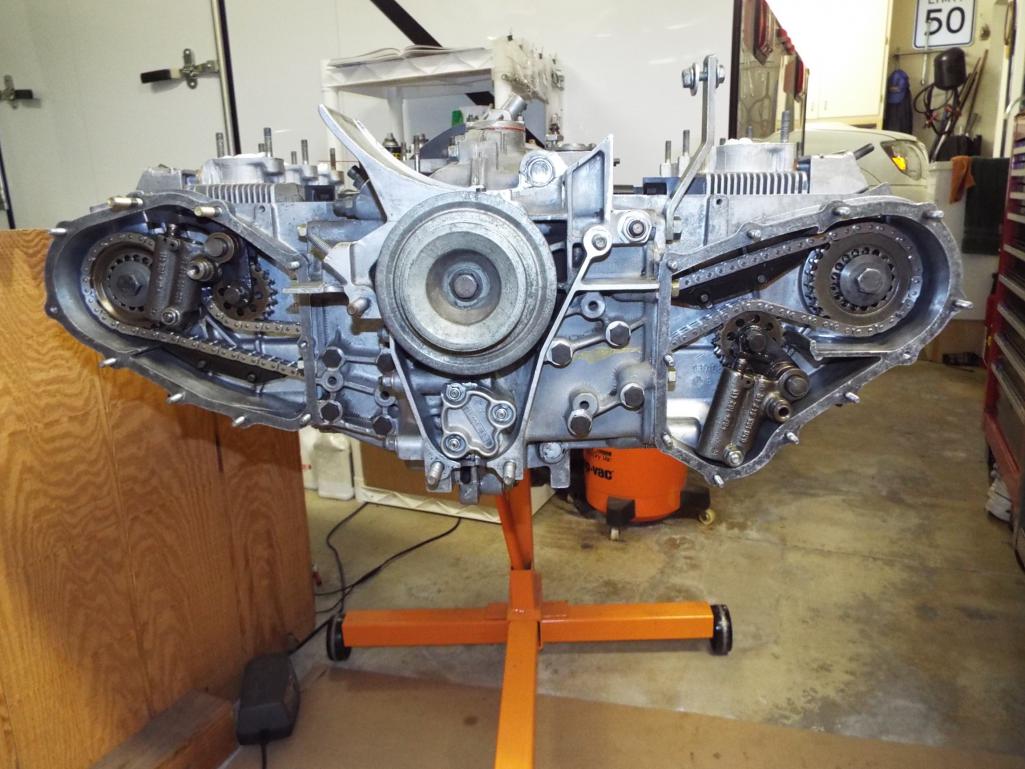
Posted by: horizontally-opposed Aug 7 2017, 05:11 PM
This cost me six weeks. I know the /6 Porsche engine will be insane and fun, but if I had this to do all over again, I wouldn't have done it.
I feel you on that. When I think back to how long my car was off the road, how I felt in the midst of the conversion, and how I've felt as I sort it, I think I should have kept it a four.
Then, last Saturday, while I was driving the car from Emeryville to Berkeley, and listening to that overhead-cammed flax six behind me rumble, then sing through PM's Dansk sport muffler, I was soooooooooooooo glad I did it. The car feels, yes, insanely special in a way it never did as a four. And it sounds absolutely sublime—right up there with the best sounding Porsche's I've ever heard.
Posted by: euro911 Aug 7 2017, 05:16 PM
... Please get a heavy-duty 4-wheel engine stand and a P-201 type yoke attachment ... wouldn't like to hear your 'luck' ran out.
Posted by: mepstein Aug 7 2017, 05:28 PM
You need to look at the build as part of the fun.
This is "fun" when my guy gets here to put this lump back together, and we start with the serious stuff.
Supposed to be this week "sometime." Uhgg.
I did make a pretty big offer on the '66 911, she is thinking about it.
Good luck.
I can't afford a 66 911 and send my kids to college but I'm trying to get the 66 912
Sort of funny that one of my kids roommates has parents that are (not exaggerating) billionaires.
Posted by: Larmo63 Aug 11 2017, 02:52 PM
Are /4 steering shafts longer than /6 shafts? This is a "future project" that I have been messing with whilst waiting for my engine to come to life....The four shaft seems way too short.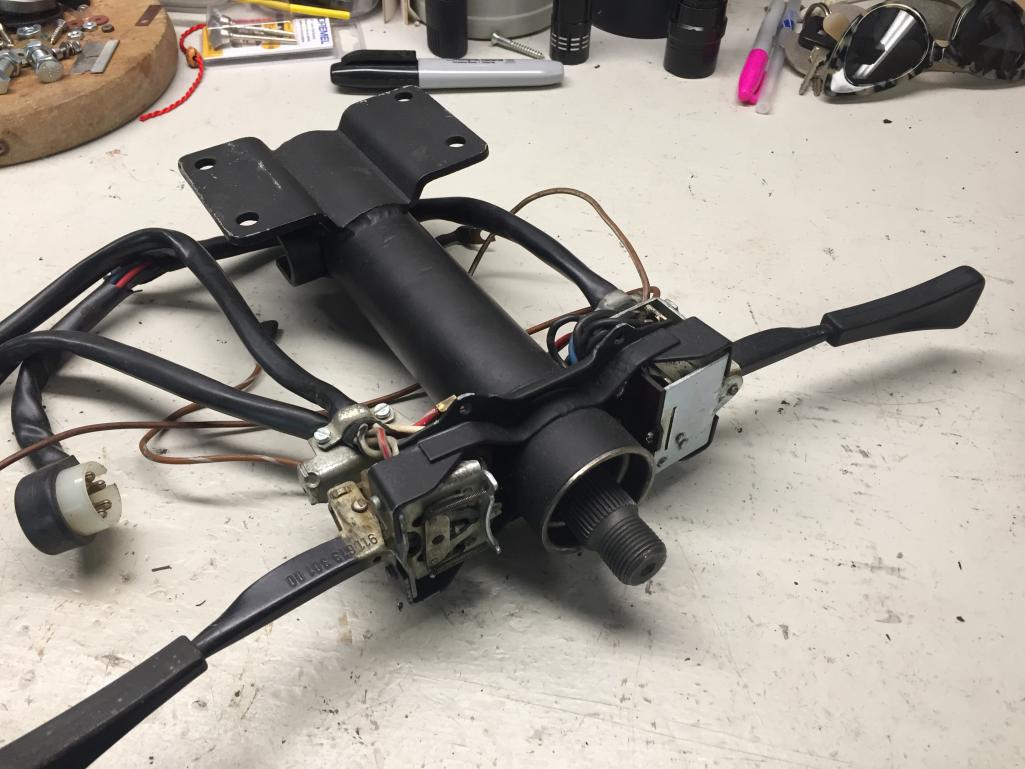
Posted by: Larmo63 Aug 11 2017, 02:57 PM
The heads and manifolds are back, too. Build day is supposedly tomorrow. I'm not holding my breath.
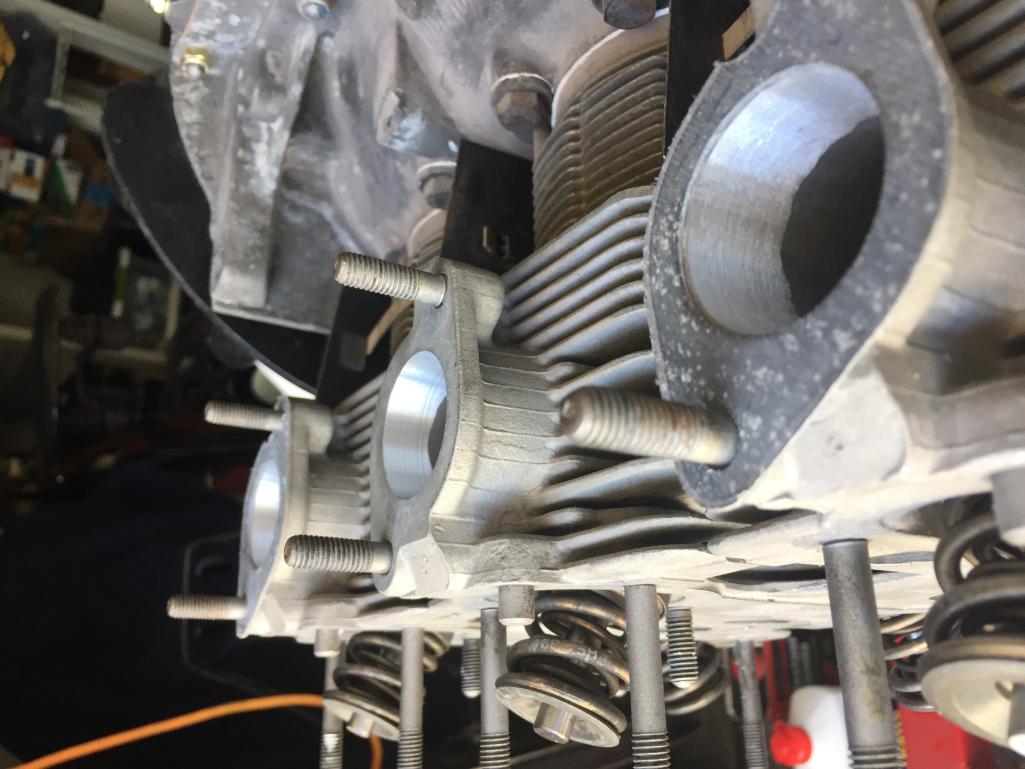
Posted by: euro911 Aug 11 2017, 03:45 PM
Posted by: mepstein Aug 11 2017, 03:48 PM
Are /4 steering shafts longer than /6 shafts? This is a "future project" that I have been messing with whilst waiting for my engine to come to life....The four shaft seems way too short.
What year? I think the early ones work for the conversion 70-71 but not the later years 72-76. But there is a recent thread or 2 about the conversion as well as sir andys thread
Posted by: SixerJ Aug 12 2017, 01:24 AM
Here you go, snapshot from PET. Late would appear to work
Posted by: Larmo63 Aug 12 2017, 07:35 PM
Put the engine back together today and clearanced the case a bit to install the Clewett crank fire system pulley...It was very satisfying to make some progress.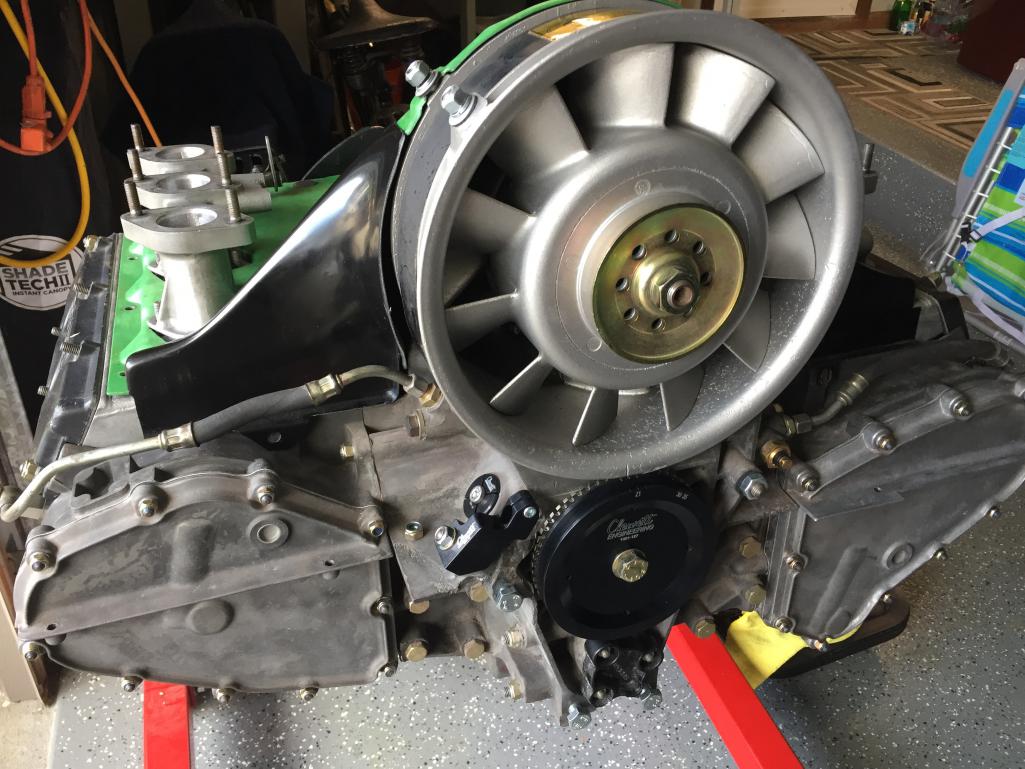
Posted by: sb914 Aug 12 2017, 10:12 PM
Posted by: porschetub Aug 12 2017, 10:44 PM
Nice ,what are the main benefits of crankfire as opposed to all the old tech or even pointless setup,just asking cause TBO I don't really know.
Lawrence your head guy came in fast,did you go to bigger valves with the porting? see the inlet manifolds opened up,nice.
Posted by: Larmo63 Aug 12 2017, 10:58 PM
Valves were fine, we opened up the ports to 36mm to fit my cam profile a bit better. We did a few other small "tricks" too.
The Clewett system is easy, (very) hot spark, and "set it & forget it" timing.
Posted by: Dave_Darling Aug 13 2017, 11:26 AM
Nice ,what are the main benefits of crankfire as opposed to all the old tech...
Precision. Distributors have some slop in them; the moving parts cannot move without a little bit of it, and they will wear so the slop gets worse. With no moving parts, a crank-fire system will always give you the spark at the point where you call for it.
Wear. A reluctance sensor pretty much does not wear. Distributor points wear, changing dwell and timing. Even if a pointless setup is used, the distributor parts still wear, leading to more slop as above.
Flexibility. Basic distributors only "know about" RPM. So you get the same ignition timing at a given engine speed, no matter what. More advanced ones can be hooked to manifold vacuum, and possibly to a ported vacuum signal, giving the distributor some information about what is happening to the throttle. A crank-fire system is computer controlled, and it can read every sensor in the car if need be. It can alter the timing based on RPM, throttle position, manifold pressure, engine temperature, and even on recent history. If you know what you're doing, that can help get the most from the engine. (If you don't know what you're doing, it's more ways to get things wrong.)
--DD
Posted by: Larmo63 Aug 14 2017, 10:57 PM
I have the longblock assembled, and today I set the fan/alternator on for the final time. Hooked up Perry Kiehl's EXCELLENT main wiring harness, and installed the fan shroud. Manifolds are on, this thing is real close to going in. It's been a long road, I've learned a lot, and it feels good knowing that this is the final assembly.
One issue I did encounter is with the fan belt installation, it seems too small. 10 x 710....
Anybody know the correct size I need?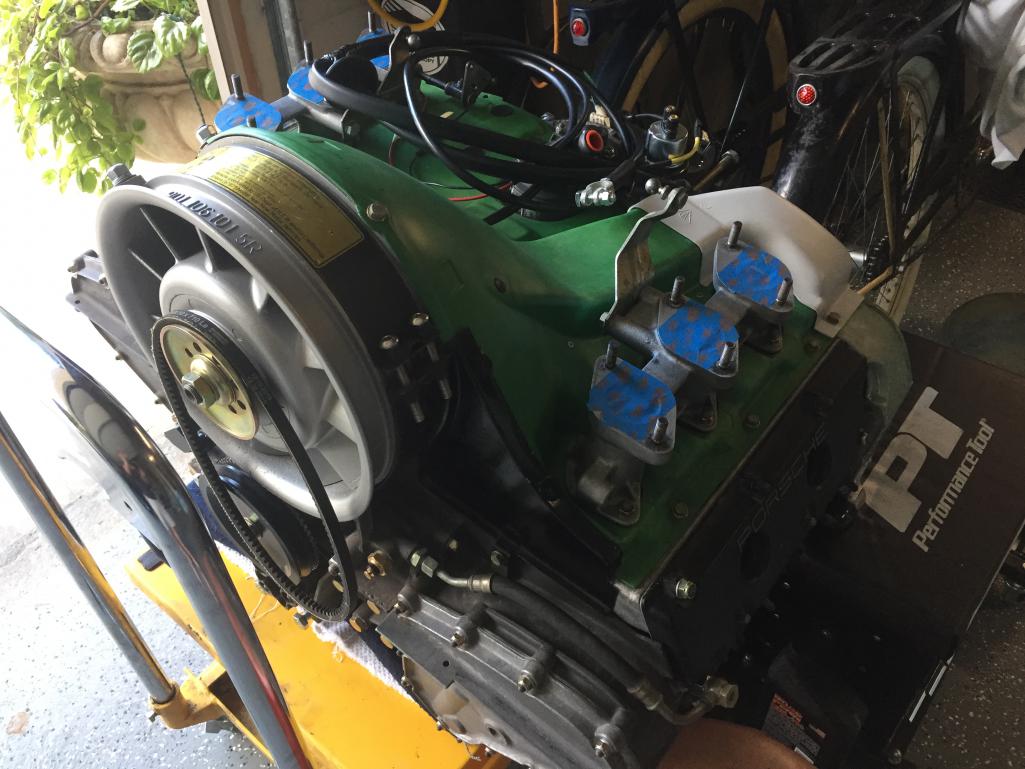
Posted by: euro911 Aug 14 2017, 11:41 PM
9.5x710 or 10x710 should be correct. Did you move any shims between the pulley halves yet?
Posted by: mb911 Aug 15 2017, 06:05 AM
9.5x710 or 10x710 should be correct. Did you move any shims between the pulley halves yet?
Posted by: Larmo63 Aug 15 2017, 07:04 PM
My outer pulley half is a 96mm part. I have scoured to inter webs to figure out what larger size fan belt works with this set up. Why is this so tricky? I like the pulley I have, why isn't there an easy way to figure which larger belt fits?
On another note, I bought three cases of oil today along with two bottles of Lucas zinc additive. 20w 50 oil.
I'm getting serious now.
Posted by: euro911 Aug 15 2017, 07:47 PM
Figuring it out is easy as Pi 
Posted by: porschetub Aug 15 2017, 11:42 PM
Check with Clewitt about the crankfire pulley,hopefully it isn't different,I used the 10 x 710 and no issues for a short time till it started making noise,not slipping just a PITA noise turned out I had worn pulley faces,ordered a new outer and hope that fixes it otherwise I will get my fan hub machined.
Be careful to set the belt tension right as the bearings in these altenators are fairly small and you don't want to strain the magnesium outer housing as I did and the fan blades rubbed.
Getting close Lawrence .
Posted by: SixerJ Aug 15 2017, 11:58 PM
9.5x710 or 10x710 should be correct. Did you move any shims between the pulley halves yet?
Great progress! Fairly sure my 2.4 engine has or rather had 3 or 4 shims (have to admit I haven't done the last 2 services / alternator had to be replaced in that time frame)
I do clearly remember the 1st time I did the belt, and it's amazing how much of a difference even adding or removing a single shim makes. I had to go out and buy some more the 1st time I did this job and also keep some in a packet tucked into the tool kit
Posted by: McMark Aug 16 2017, 11:10 AM
Just run a tape measure around the pulleys. 710 is 710mm is 28". The PET specifies 725 for 76-79 911. That might be your target. But I'd just measure it and round down since the belt sits down in the upper pulley, you're measurement would be the MAX size, not the ideal size.
Posted by: Larmo63 Aug 16 2017, 11:13 AM
Or, I look for a 82mm pulley half.....?
Posted by: mepstein Aug 16 2017, 11:23 AM
9.5x710 or 10x710 should be correct. Did you move any shims between the pulley halves yet?
Great progress! Fairly sure my 2.4 engine has or rather had 3 or 4 shims (have to admit I haven't done the last 2 services / alternator had to be replaced in that time frame)
I do clearly remember the 1st time I did the belt, and it's amazing how much of a difference even adding or removing a single shim makes. I had to go out and buy some more the 1st time I did this job and also keep some in a packet tucked into the tool kit
The pulley should have 6 shims. Adjustment is just moving the shims in front or between the pulley halves but never removing them completely.
Posted by: Larmo63 Aug 16 2017, 11:28 AM
Yes, all shims are present and accounted for.
Posted by: McMark Aug 16 2017, 11:28 AM
Or, I look for a 82mm pulley half.....?
Sure... but you can head down to your FLAPS and get a belt today.
There is something about pulley sizes, ratios, and rotational speed. But I don't feel like looking all that up.

Posted by: Larmo63 Aug 16 2017, 11:38 AM
I believe that a larger pulley turns slower.....?
Posted by: euro911 Aug 16 2017, 01:15 PM
Which did you change (go larger with)? ... Crank pulley or alternator pulley?
Posted by: Larmo63 Aug 16 2017, 07:30 PM
10 x 725 belt fits perfect......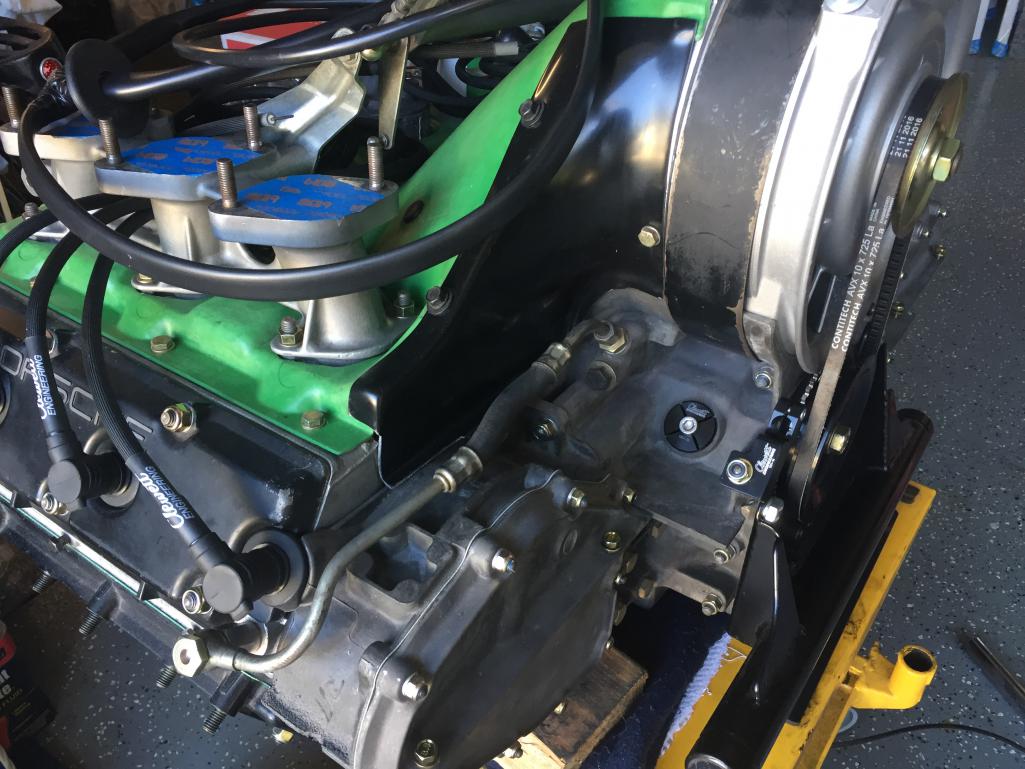
Posted by: euro911 Aug 16 2017, 08:20 PM
... then you'll have it up and running this w/e?
Posted by: porschetub Aug 16 2017, 08:30 PM
9.5x710 or 10x710 should be correct. Did you move any shims between the pulley halves yet?
Great progress! Fairly sure my 2.4 engine has or rather had 3 or 4 shims (have to admit I haven't done the last 2 services / alternator had to be replaced in that time frame)
I do clearly remember the 1st time I did the belt, and it's amazing how much of a difference even adding or removing a single shim makes. I had to go out and buy some more the 1st time I did this job and also keep some in a packet tucked into the tool kit
The pulley should have 6 shims. Adjustment is just moving the shims in front or between the pulley halves but never removing them completely.
Six shims,not for the early motors 2 to 3 as far as I know but this a later motor so that may explain it?
Posted by: porschetub Aug 16 2017, 08:40 PM
10 x 725 belt fits perfect......
Not sure, looks very low in the top pulley,perhaps a few less shims,the belt should be level with the top of the pulley halves or there abouts,try that.
It needs to sit as your crank pulley or a little under.allowing for initial belt stretch.
When its right you will have a really small deflection,around 10-12mm cause its a short belt,otherwise you may need something slightly longer if it appears too tight.
Posted by: McMark Aug 17 2017, 11:10 AM
It needs to sit like your crank pulley.
If it's tensioned correctly, why would you care how low it sits in the upper pulley?
The whole shim-based tensioning scheme pretty much guarantees the belt won't sit like the bottom pulley. If they wanted it to sit at the top every time the shim setup is a bad choice and a std pulley with tensioner would more effectively accomplish that.
And... the higher the belt sits in the fan pulley, the longer the belt is. The belt sitting at the very top means that's the longest belt possible. And that means that if the belt stretches a bit over time, you have no more room for adjustment.
I think the right, or better, answer to 'Where should be belt ride?' is... Anywhere, as long as:
1. The belt is tensioned correctly.
2. The belt sides are fully contacting the pulley walls.
Posted by: porschetub Aug 17 2017, 08:46 PM
Way I was taught,have edited my reply ok Mark.
Posted by: Larmo63 Aug 17 2017, 10:12 PM
The belt deflection is close to 10mm in this set up.
I'm happy with it.
Engine goes in tomorrow.
Posted by: Larmo63 Aug 17 2017, 10:23 PM
The belt has room to break in and stretch + the shims can come out.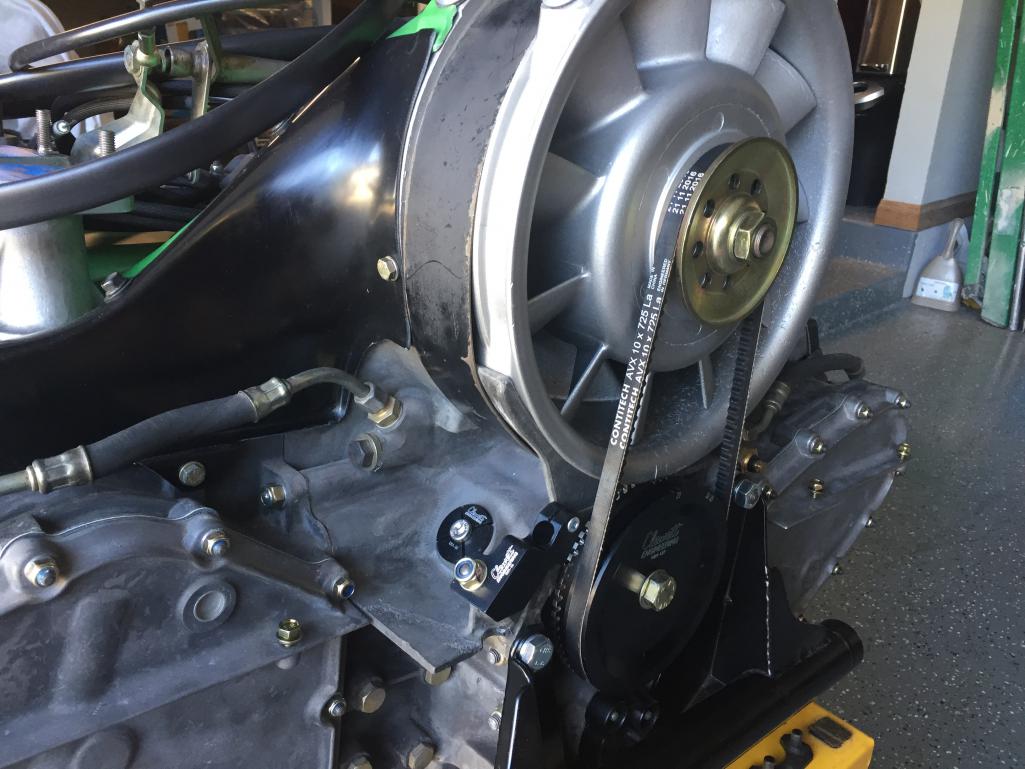
Posted by: Larmo63 Aug 17 2017, 10:28 PM
By the way, when we had the heads off, we measured the pistons and they are 84mm. That means this engine is really a 2.4. We think the cams will give us milder "S" type performance numbers, along with the porting work we just did.
Oh, and also by the way, I was told the engine was built to a 2.7 spec and I bought it as such................ Oh well.
I think it will be a fun car, nonetheless.
Posted by: Krieger Aug 17 2017, 10:59 PM
Dude, your almost there!
Posted by: porschetub Aug 18 2017, 12:42 AM
By the way, when we had the heads off, we measured the pistons and they are 84mm. That means this engine is really a 2.4. We think the cams will give us milder "S" type performance numbers, along with the porting work we just did.
Oh, and also by the way, I was told the engine was built to a 2.7 spec and I bought it as such................ Oh well.
I think it will be a fun car, nonetheless.
What the hell ,it will still go really well with that combo,nothing wrong with what you have,you should make 160-180hp easy
.Posted by: mepstein Aug 18 2017, 05:52 AM
9.5x710 or 10x710 should be correct. Did you move any shims between the pulley halves yet?
Great progress! Fairly sure my 2.4 engine has or rather had 3 or 4 shims (have to admit I haven't done the last 2 services / alternator had to be replaced in that time frame)
I do clearly remember the 1st time I did the belt, and it's amazing how much of a difference even adding or removing a single shim makes. I had to go out and buy some more the 1st time I did this job and also keep some in a packet tucked into the tool kit
The pulley should have 6 shims. Adjustment is just moving the shims in front or between the pulley halves but never removing them completely.
Six shims,not for the early motors 2 to 3 as far as I know but this a later motor so that may explain it?
Even 3.2's use 6 shims.
Posted by: 76-914 Aug 18 2017, 08:32 AM
Engine goes in tomorrow.
Your halfway there.

Posted by: Larmo63 Aug 18 2017, 03:23 PM
Get ready for it.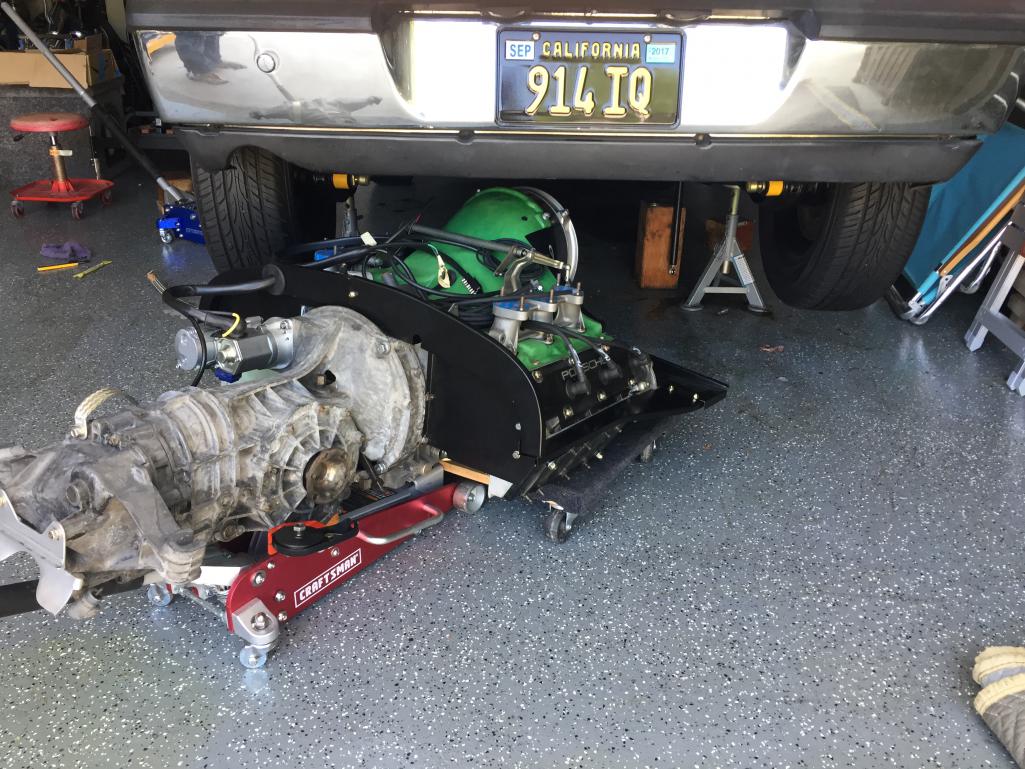
Posted by: Larmo63 Aug 18 2017, 03:24 PM
And we have a winner!
B I N G O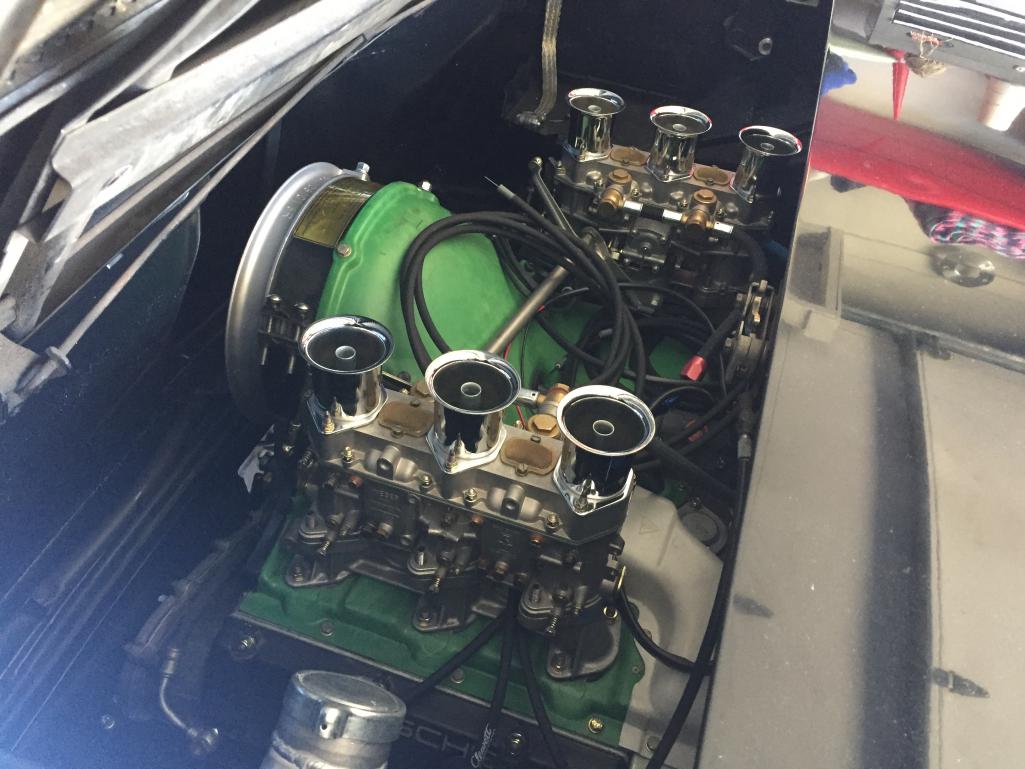
Posted by: euro911 Aug 18 2017, 03:24 PM
Posted by: Larmo63 Aug 18 2017, 03:30 PM
Still a few things to order and a lot to hook up and check, double check, & triple check.
Posted by: drem914 Aug 18 2017, 03:35 PM
Looks great. Like the engine color. Glad you kept going.
Posted by: 914 7T3 Aug 18 2017, 03:43 PM
And we have a winner!
[attachmentid=616630]
Outrageous!!!

Posted by: Coondog Aug 18 2017, 04:04 PM
And we have a winner!
[attachmentid=616630]
Crap yours is going to be done before mine......
Posted by: ndfrigi Aug 18 2017, 04:23 PM
And we have a winner!
[attachmentid=616630]
Congratulations sir Lawrence! now ur car will be at the Temecula Fun Day!
Posted by: Steve Aug 18 2017, 04:28 PM

Posted by: Dave_Darling Aug 18 2017, 04:42 PM
All right! The first 90% is done!
Now on to the second 90%, and after that you'll only have 90% to go...
--DD
Posted by: 914dave Aug 18 2017, 05:06 PM
Congratulations! Now get that thing sorted.
Posted by: bigkensteele Aug 18 2017, 06:07 PM
By the way, when we had the heads off, we measured the pistons and they are 84mm. That means this engine is really a 2.4. We think the cams will give us milder "S" type performance numbers, along with the porting work we just did.
Oh, and also by the way, I was told the engine was built to a 2.7 spec and I bought it as such................ Oh well.
I think it will be a fun car, nonetheless.
Are your carbs setup for a 2.4 or 2.7? Looks like your main jets might need to be changed out.
https://members.rennlist.com/webercarbs/Weber_Jet_Settings.htm
Posted by: Larmo63 Aug 18 2017, 06:24 PM
Yes, set up for 2.4 S spec.....!
Posted by: Larmo63 Aug 18 2017, 06:34 PM
I remembered that the day the /4 blew up, we did a nice corner balance/stance on the car and I drove it home in a somewhat "spirited" way.
I can't believe how low it is now, it's been a long time since I've seen it with a motor in it (it's been on jack stands).
The stance is pretty solid. 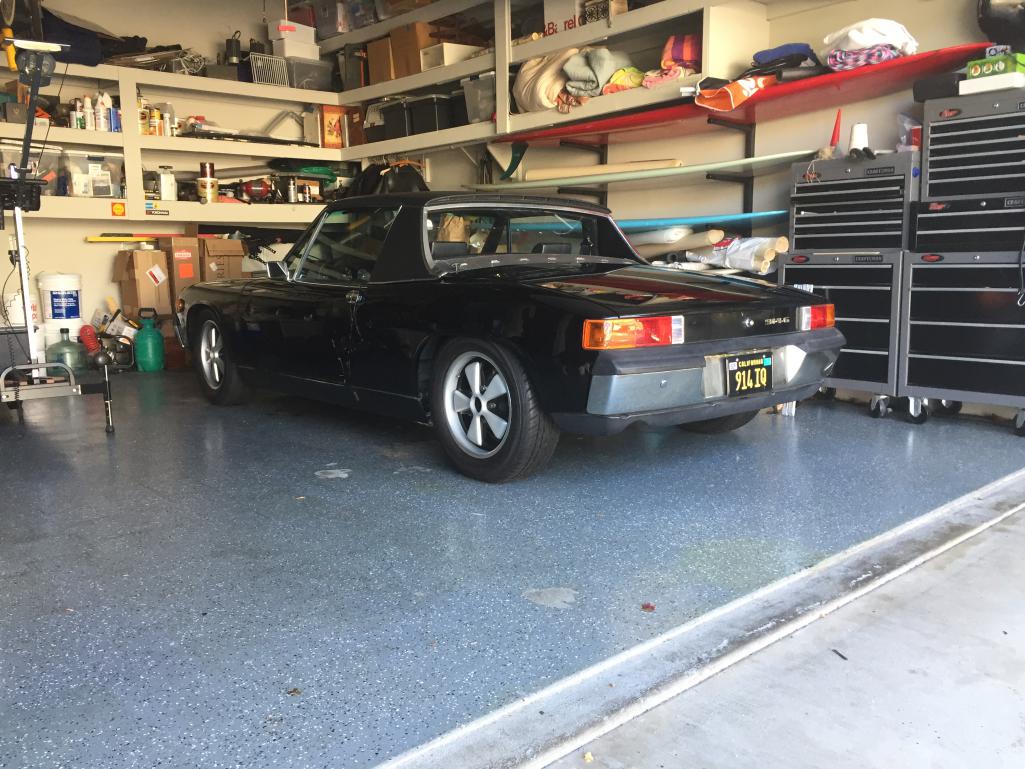
Posted by: Lucky9146 Aug 18 2017, 07:11 PM
I remembered that the day the /4 blew up, we did the corner balance and stance on the car. I can't believe how low it is, it's been a long time since I've seen it with a motor in it (or that it's been on jack stands).
The stance is pretty solid.
If it is any consolation I have never seen mine with a motor in it. Bought it that way.
Yours is looking really good with motor in place and your making great progress.
 Hope to catch up!
Posted by: bigkensteele Aug 18 2017, 07:14 PM
I remembered that the day the /4 blew up, we did the corner balance and stance on the car. I can't believe how low it is, it's been a long time since I've seen it with a motor in it (or that it's been on jack stands).
The stance is pretty solid.
That does look bad-ass...
Posted by: 76-914 Aug 18 2017, 09:14 PM
I remembered that the day the /4 blew up, we did a nice corner balance/stance on the car and drove it home in a "spirited" way.
I can't believe how low it is, it's been a long time since I've seen it with a motor in it (or that it's been on jack stands).
The stance is pretty solid.
Anyone with Tool Box's that large should have finished 9 mo's ago.
Posted by: euro911 Aug 18 2017, 09:55 PM
Those are just gardening tools
Looking good 'Goob'
Posted by: Larmo63 Aug 18 2017, 10:33 PM
Funny, those are Trudy's "tools." She has all of her art shtuff, colored pencils, paint pens, stencil crap.
Why is it that my "stuff" is my stuff, and her "shit" is her shit?
My tools are over by my workbench.
Posted by: euro911 Aug 18 2017, 10:51 PM
Oh, OK. I thought I saw the bailing wire, plumber's tape, duct tape, a hammer and a crowbar in there
Posted by: Larmo63 Aug 19 2017, 10:49 AM
Just to let those who wondered about the Patrick Motorsports engine mount; we found it very easy to install and align the engine. Probably took us about 45 minutes to bolt the engine/trans lump, all in.
Putting on the aftermarket engine tin actually proved to be more of a challenge!
Posted by: Larmo63 Aug 19 2017, 06:28 PM
I spent the day installing stuff. Clutch cable, accelerator cable set up, and speedo cable.
Tightening up all oil lines, check, double check. It's easy to miss something. I am familiarizing myself with this ignition system, Clewett wires need to be shortened and finished on the coil(s) end.
Still lots to do and, a few things to order.
Posted by: horizontally-opposed Aug 19 2017, 06:41 PM
Way to go! Car looks GREAT, and is gunna drive even better.
Posted by: forrestkhaag Aug 19 2017, 06:56 PM
Tortoise and Hare? Jesus Christ Almighty. I grind out a solution to a problem every half hour on this conversion thing and when it hits the boards it's hand wringing time on your beautiful ride -not riding........... .
As my lovely wife said so many year ago,..... Git a Job Sir. ( Big Laboskie ((SP)) )
Your car needs to sprout legs and preamble.
You are surrounded by guys ready to assist. Time is up. Over.
Sidebar: With friends like me,........... ........ ...?
Hope to see your ride at Temecula..............
Posted by: 76-914 Aug 20 2017, 08:53 AM
Tortoise and Hare? Jesus Christ Almighty. I grind out a solution to a problem every half hour on this conversion thing and when it hits the boards it's hand wringing time on your beautiful ride -not riding........... .
As my lovely wife said so many year ago,..... Git a Job Sir. ( Big Laboskie ((SP)) )
Your car needs to sprout legs and preamble.
You are surrounded by guys ready to assist. Time is up. Over.
Sidebar: With friends like me,...........
........ ...?Hope to see your ride at Temecula..............
Dang Forrest, you didn't post a bunch of your car's pic's his thread! Are you mad at Lawrence?

Posted by: Larmo63 Aug 22 2017, 10:51 PM
More instruction reading, hooking up stuff, and wiring going on.....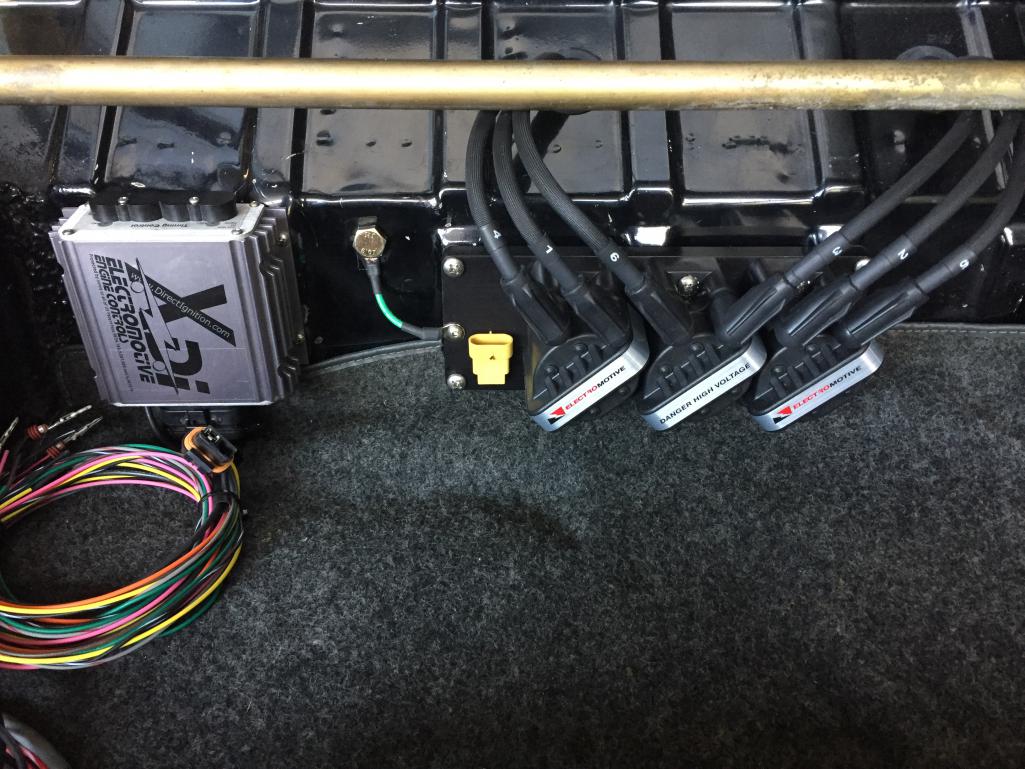
Posted by: Matty900 Aug 22 2017, 11:43 PM
Car is looking awesome!!!  keep up the good work.
Posted by: porschetub Aug 23 2017, 01:09 AM
stop pissing around get the bugger going OK .
Posted by: Larmo63 Aug 23 2017, 10:21 AM
Right now, my issue isn't getting it done, it's HOW to do the wiring. I'm not quite clear on what I'm doing with the ignition system.
I think it will be a miracle if it actually starts. I think I need an electrical genius to wire this stuff.
That's what is holding me up.
Posted by: McMark Aug 23 2017, 03:38 PM
Post pictures of the documentation you have and I'll see if I can lend a hand. I could probably look it up on The Google™ but I'm sooooooo lazy. 

Posted by: Larmo63 Aug 23 2017, 07:39 PM
Three calls to Richard Clewett, and one to Perry Kiehl, I'm golden.
.....until I turn the key?
I just kept at it, one wire and/or bunch of wires at a time. I actually think I got it. Next up is wiring the gauges. Automobile electrical work isn't my strong suit.
Posted by: Larmo63 Aug 23 2017, 07:43 PM
My little world I've been living in......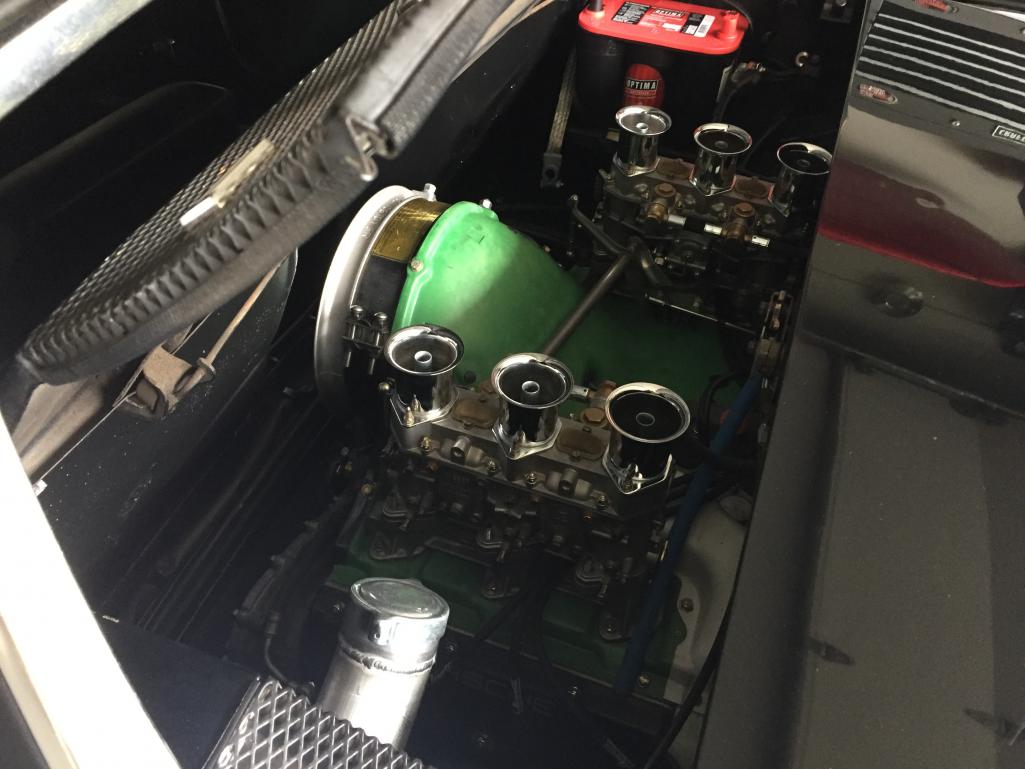
Posted by: Larmo63 Aug 23 2017, 07:44 PM
Final product in the trunk.....
(First I have to whine about it, then I go and just do it)
Posted by: sb914 Aug 23 2017, 08:25 PM
Met Richard a couple weeks ago in seal beach.nice guy and very knowledgeable!
Moter Looks sweet in there Larry!
Posted by: porschetub Aug 23 2017, 09:15 PM
Perry was a real help to me and pointed out issues and he was spot on with his comments....just saying.
Posted by: Larmo63 Aug 23 2017, 09:19 PM
Perry has to be one of the nicest guys in our hobby!!!
I am so happy with the harnesses he made for my conversion.
Posted by: Larmo63 Aug 23 2017, 09:36 PM
Once I got my pea brain wrapped around the wiring today, I kind of got in a mode. When I was done I had a great feeling of satisfaction, but wanted to keep going. It's addicting.
I still have fuel lines to hook up, fuel pump to wire, some gauge work, headers, muffler, new rear shift linkage rod is coming tomorrow from PMS, and then install carbs permanently. Oh, I need air cleaners and breather hose.
That's about it, I think?
I did a direct cable accelerator set up, I'm not sure how thats going to work out. We'll see.

Posted by: Krieger Aug 23 2017, 10:11 PM
Looking good! How did you hook up the accelerator cable ?
Posted by: Larmo63 Aug 23 2017, 11:30 PM
It's a heavy duty marine/boat accelerator cable.
Posted by: Larmo63 Aug 24 2017, 07:37 PM
More Patrick Motorsports goodness arrived by the front door today. The "last" thing I needed to buy. (are they ever done?)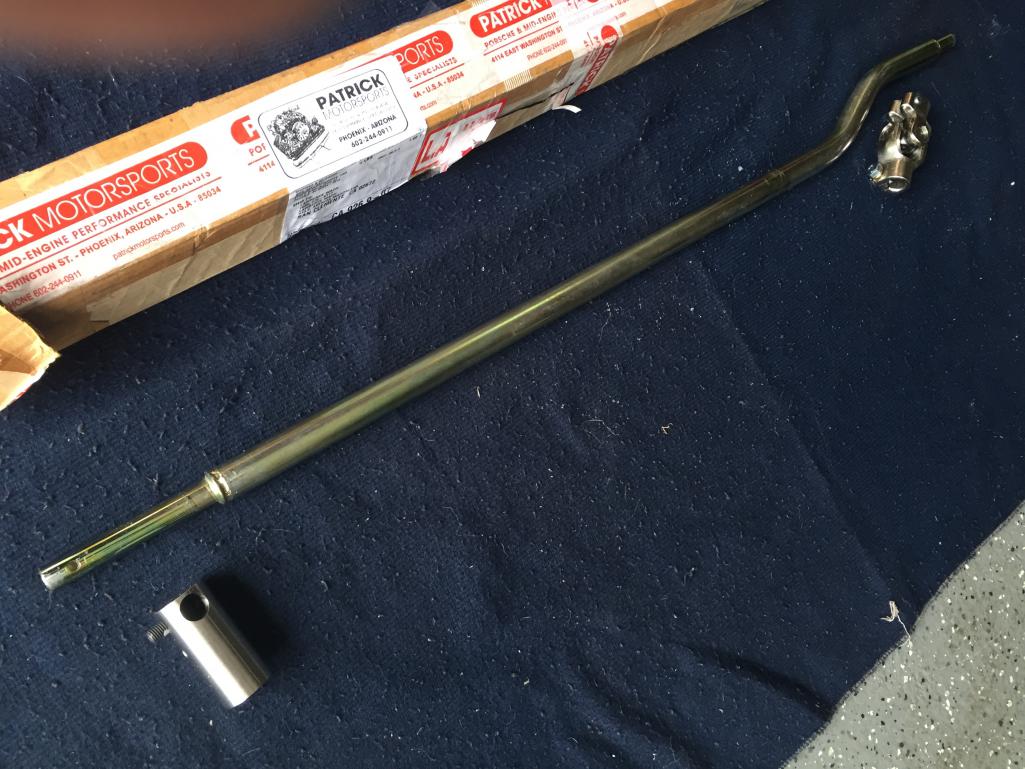
Posted by: Larmo63 Aug 24 2017, 07:40 PM
MSDS Headers went on, I need to cut a couple "mouse holes" for the two pipes in the GT muffler.
I wonder if that style muffler is worth cutting up a perfectly good valance?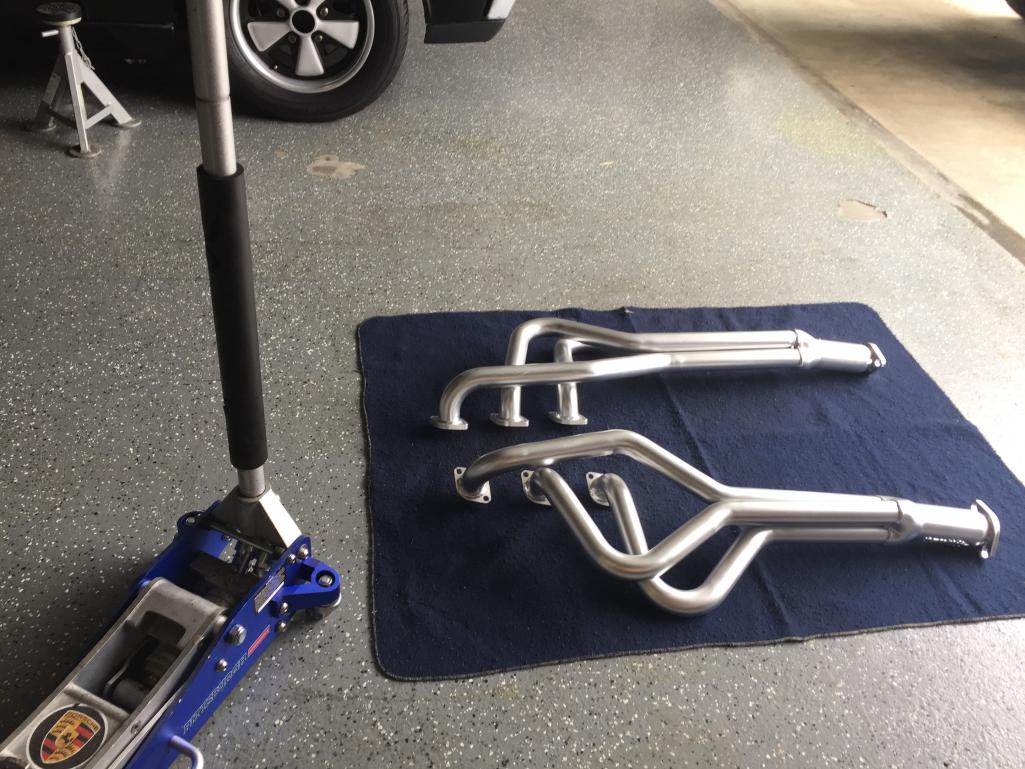
Posted by: Larmo63 Aug 24 2017, 07:41 PM
Getting it done.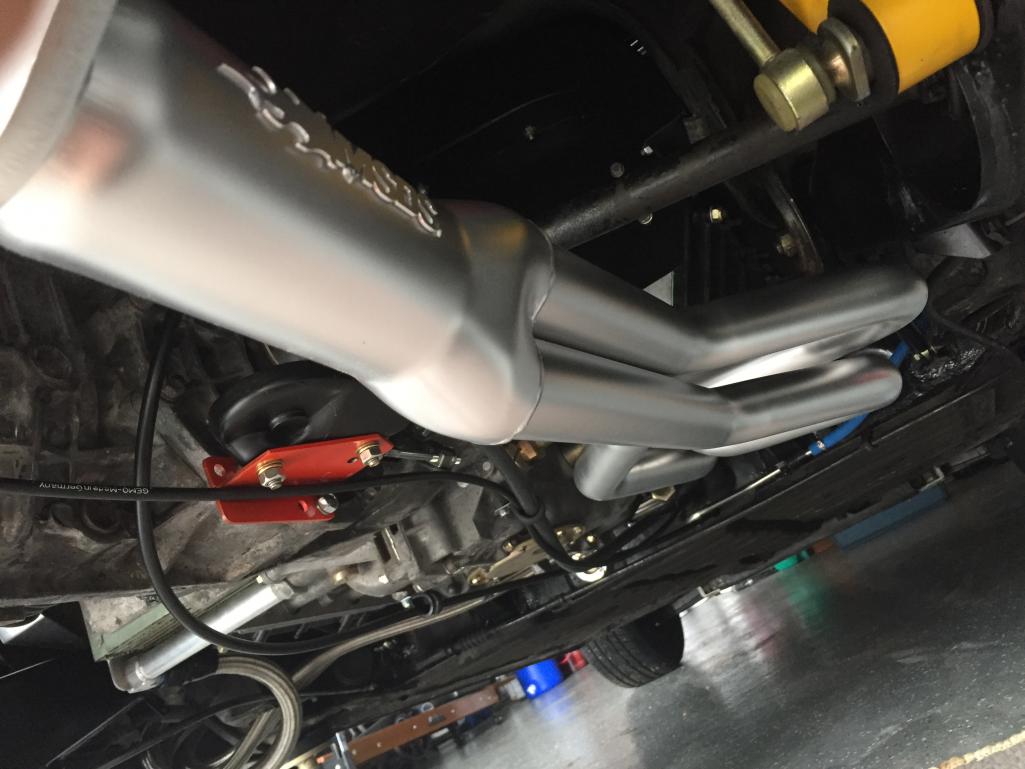
Posted by: Steve Aug 24 2017, 11:05 PM
MSDS Headers went on, I need to cut a couple "mouse holes" for the two pipes in the GT muffler.
I wonder if that style muffler is worth cutting up a perfectly good valance?
I would buy a fiberglas replica and cut that instead.
Maybe AIR or Getty
Posted by: Larmo63 Aug 25 2017, 07:52 AM
The PMS shift linkage bar is a beefy & well built piece, but the cup and rod needed a little persuasion to fit together. Wifey went to bed, so of course I'm out underneath the car working underneath it until 11:00 at night. I got it all buttoned up, but the shifter is terrible inside the car. I had the shifter out earlier in the build and the front tunnel rod is out of adjustment (I think?)
This is going to be fun.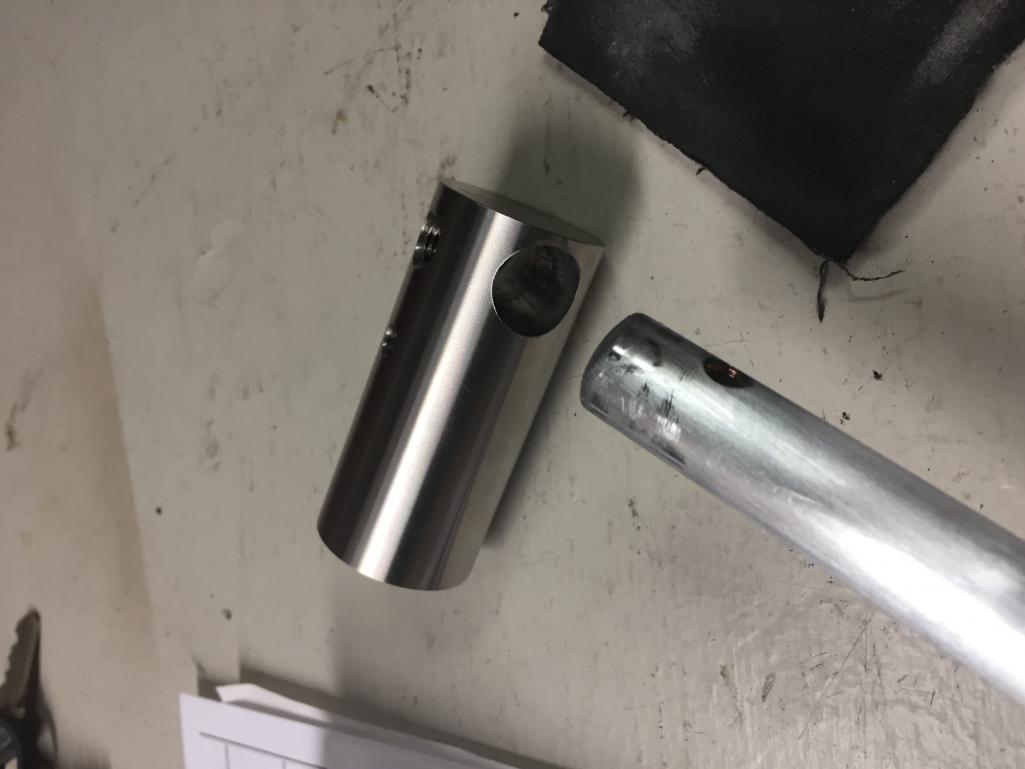
Posted by: Steve Aug 25 2017, 08:00 AM
Download Dr. Evils trans supplement at this link. It has information on how to adjust all the shifters.
http://www.914world.com/bbs2/index.php?showtopic=257269
Posted by: Larmo63 Aug 25 2017, 09:29 AM
Thanks Steve. I read it and will make an attempt to adjust the shifter per his instructions today. It's a combination of new clutch cable, linkage, and in/out of the shifter.
All of those moving parts.
Posted by: Steve Aug 25 2017, 09:53 AM
Thanks Steve. I read it and will make an attempt to adjust the shifter per his instructions today. It's a combination of new clutch cable, linkage, and in/out of the shifter.
All of those moving parts.
Clutch part is easy. Push clutch pedal to floor. Then grab the clutch pedal and pull up and down. Adjust the cable til you have 1/2" free play, pulling the pedal towards you and away from you. Adjusting the stop on the pedal board requires typically two people. One to push the pedal to the floor and the other person to let you know that the throw out bearing arm is not moving anymore. The stop is to prevent the cable from getting stretched and wear and tear on clutch tube, etc.
Posted by: Perry Kiehl Aug 25 2017, 02:52 PM
Thanks Steve. I read it and will make an attempt to adjust the shifter per his instructions today. It's a combination of new clutch cable, linkage, and in/out of the shifter.
All of those moving parts.
Clutch part is easy. Push clutch pedal to floor. Then grab the clutch pedal and pull up and down. Adjust the cable til you have 1/2" free play, pulling the pedal towards you and away from you. Adjusting the stop on the pedal board requires typically two people. One to push the pedal to the floor and the other person to let you know that the throw out bearing arm is not moving anymore. The stop is to prevent the cable from getting stretched and wear and tear on clutch tube, etc.
It's also to prevent over centering the clutch. It needs to disengage the disc enough, but not so much to stress the spring
Posted by: Larmo63 Aug 25 2017, 05:24 PM
What fuse should I use for switched power for the fuel pump?
Which side of the fuse block?
Oh, and when are you coming by to help me adjust my clutch (and shifter,) Steve?
Posted by: Maltese Falcon Aug 25 2017, 06:07 PM
Getting it done.
Your 9146 build is looking good Lawrence , appreciate your choice in exhaust headers ¡
Posted by: 76-914 Aug 25 2017, 07:12 PM
What fuse should I use for switched power for the fuel pump?
Which side of the fuse block?
Oh, and when are you coming by to help me adjust my clutch (and shifter,) Steve?
IIRC,any but the last 3. Drop the fuse panel and look behind at the wires. There are some open spades you can attach to. I wouldn't share a fuse. Just add an in-line fuse off one of those spades.
Posted by: euro911 Aug 25 2017, 07:27 PM
Maybe this will help ?
Posted by: Larmo63 Aug 25 2017, 09:01 PM
Getting it done.
Your 9146 build is looking good Lawrence , appreciate your choice in exhaust headers ¡
I got a little plug in there for your company!!!!
Posted by: porschetub Aug 25 2017, 10:11 PM
[quote name='Larmo63' date='Aug 26 2017, 11:24 AM' post='2520821']
What fuse should I use for switched power for the fuel pump?
Which side of the fuse block?
No the relay board mod as per Andy's tech article,but I suspect you may have gone relay board delete ??
Call Perry if you have done relay board delete,gez I don't remember the colours sorry......getting close for you.
EDIT....
Sorry forgot you went to front fuel pump if you still have a relay board you can run a power feed down the fuel return to the original plug in the engine bay,not easy to do but worked for me.
If no relayboard you will need to find a supply and wire a relay in there and supporting fuse (7.5 amp),you would then link to the 12 pin plug,however happy to be proved wrong ?.
Posted by: Steve Aug 26 2017, 10:40 AM
Oh, and when are you coming by to help me adjust my clutch (and shifter,) Steve?
I have time next weekend. This weekend I will be in Sun City for my Moms bday.
Posted by: rhodyguy Aug 26 2017, 10:46 AM
Have you switched over to powering the pump using the jumper wire from the engine compartment relay board (classic thread forum) and the stock FP harness?
Posted by: Larmo63 Aug 26 2017, 10:53 AM
I wired it to a dash switch, then I'll go fused to switched power.
I have the option of turning on the ignition without the fuel pump running.
Theft deterrent?
Posted by: Larmo63 Aug 26 2017, 07:09 PM
Wiring gauges and working under the dash of a 914 is NOT fun. Poor Trudy, she had to put up with my moans, groans, swearing, growling, sighing, grumbling, cursing, stomping, cajoling, barking, grunting, cursing, figuring, fussing, working, and finishing.
It will (still) be a miracle if this all works.
I'm pretty confident it will. Although, I will be Amazed.
I did the tach adapt box, fuel pump power, oil pressure gauge, and oil temperature gauge.
On to other adventures tomorrow. My list grows shorter.
Posted by: Perry Kiehl Aug 27 2017, 06:20 AM
It helps to be of smaller stature like me Lawrence, but I remember it was a lot easier 25 years ago. Taking out the seats helps,
Posted by: Larmo63 Aug 27 2017, 08:18 AM
I took the driver's seat and the steering wheel out. Packing blankets on the floor of the garage and inside floor of the car help.
Still, the wiring under a 914 dash is hard to get to. I'd like to think that I got it all in one fell swoop.
I still need to pick up a dash light jumper for the oil pressure gauge. I think that is the only thing left to do in the dash area. I may say it is a pain in the ass to do, but once I get into "wiring mode," I actually enjoy the challenge of point to point wiring. The German side of my brain comes into play. All of the routing I did is tidy, zip tied, up and out of the way.
Posted by: Steve Aug 27 2017, 09:03 AM
I remove the lower dash pad. It's just a screw on each end and several big ones underneath. After that just slide it back towards the rear of the car
Posted by: 76-914 Aug 27 2017, 09:13 AM
Don't get any wires near the steering u-joint. Ask me how I know. Try this: take a piece of 3/4" plywood ~17.5" x 13.5". When you remove the seat lay this piece on the seat track. I drove 2 nails thru the plywood that pass thru the square holes so it won't slide around. Just be sure to round off the end of the nails. Then put a cushion over the plywood. Quite comfortable! 
Posted by: Larmo63 Aug 27 2017, 11:09 AM
I used some thick black plastic wire guard above the U-joint. I had some old 914 wiring harnesses from my parts pile that I pilfered wires from.
I like that board idea, Kent. Why don't you market that? 
I have had the kneepad out, Steve, but I didn't really need it out for this wiring. 
Posted by: Larmo63 Aug 27 2017, 11:11 AM
Dave Darling said it the best: "You're 90% done with 90% more to go."
That's where I'm at.
Posted by: Matty900 Aug 27 2017, 01:00 PM
Wiring gauges and working under the dash of a 914 is NOT fun. Poor Trudy, she had to put up with my moans, groans, swearing, growling, sighing, grumbling, cursing, stomping, cajoling, barking, grunting, cursing, figuring, fussing, working, and finishing.
It will (still) be a miracle if this all works.
I'm pretty confident it will. Although, I will be Amazed.
I did the tach adapt box, fuel pump power, oil pressure gauge, and oil temperature gauge.
On to other adventures tomorrow. My list grows shorter.
Your not making me look forward to doing this in my car this week. How long did it take you?
Posted by: euro911 Aug 27 2017, 01:23 PM
Neat idea on the seat board, Kent
... I still have the driver's seat out of the 'BB'Posted by: Larmo63 Aug 27 2017, 06:42 PM
Good thing your are a smaller guy too, Matt!!!
A couple afternoons. I'm making it sound worse than it really was. It almost gets addictive.
Wiring gauges and working under the dash of a 914 is NOT fun. Poor Trudy, she had to put up with my moans, groans, swearing, growling, sighing, grumbling, cursing, stomping, cajoling, barking, grunting, cursing, figuring, fussing, working, and finishing.
It will (still) be a miracle if this all works.
I'm pretty confident it will. Although, I will be Amazed.
I did the tach adapt box, fuel pump power, oil pressure gauge, and oil temperature gauge.
On to other adventures tomorrow. My list grows shorter.
Your not making me look forward to doing this in my car this week. How long did it take you?
Posted by: Larmo63 Aug 27 2017, 06:44 PM
I hooked up the battery today and all systems seem to be good. Everything works.
Now, If I can get my carb guy back with my parts, I can pour oil and gas in.
Posted by: Larmo63 Aug 28 2017, 10:57 PM
I'm waiting on our carb guy to get my stuff back.
The wait is killing me.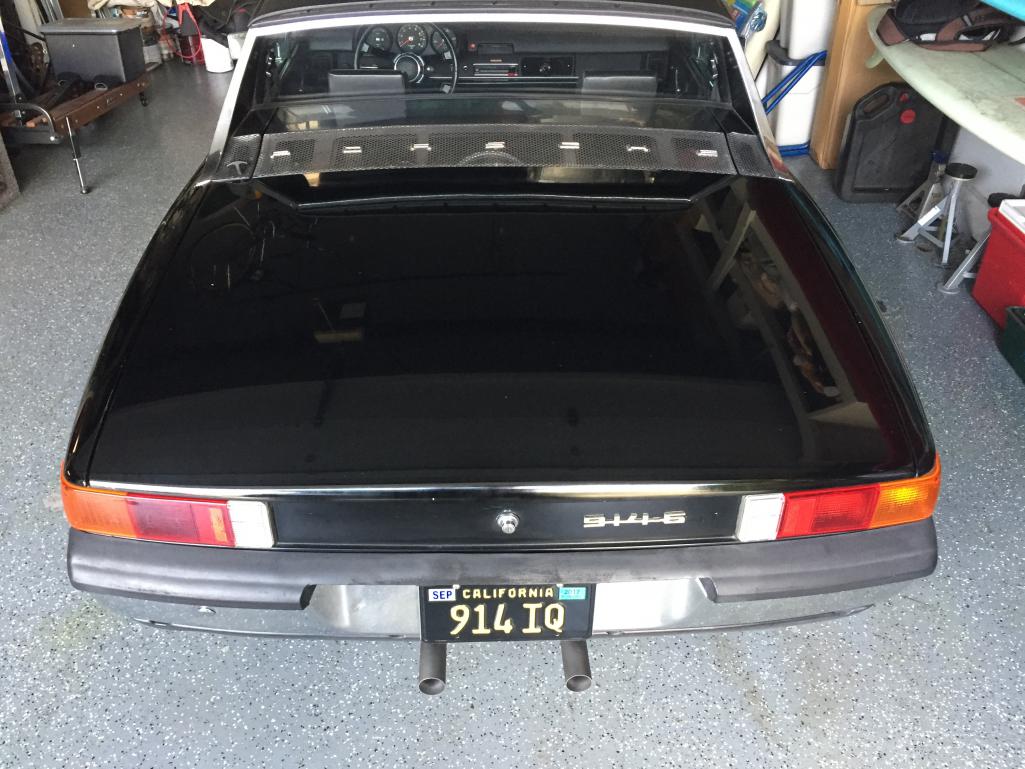
Posted by: porschetub Aug 28 2017, 11:38 PM
If your fuel pressure is right,and the carbs setup on a basic bench setup,it will run...turn the bloody key ok .
Get those vw beetle style tail pipes sorted too when your carb parts have been sorted ok .
Posted by: Larmo63 Aug 29 2017, 07:11 PM
GT banana style muffler..........
Posted by: 914 7T3 Aug 29 2017, 07:31 PM
GT banana style muffler..........
Mine Too!
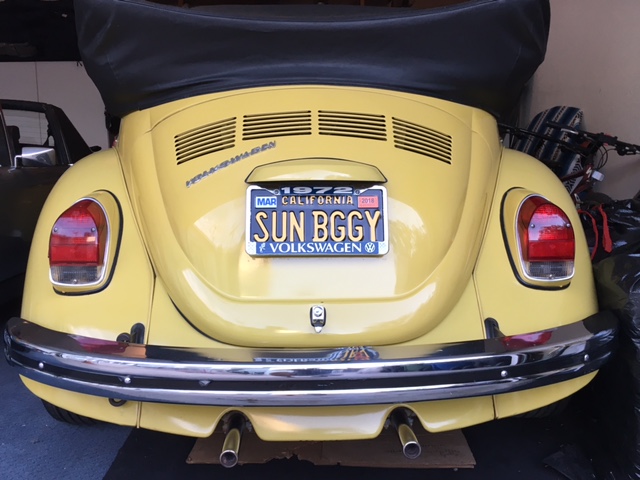
Posted by: porschetub Aug 29 2017, 09:59 PM
GT banana style muffler..........
Was joking no offence ok?
.Posted by: Larmo63 Aug 29 2017, 10:03 PM
The only offense is if it doesn't sound great!!!!
Posted by: Larmo63 Aug 29 2017, 10:53 PM
Fuel lines hooked to fuel regulator up this afternoon. I'm this close. If I can get our carb guy to respond, I think we will start it by the weekend. He has a few crucial parts of mine that I need to get from him. I may have depended and trusted that I would get these parts back sooner. I don't want to say too much, but his communication skills are.....never mind.
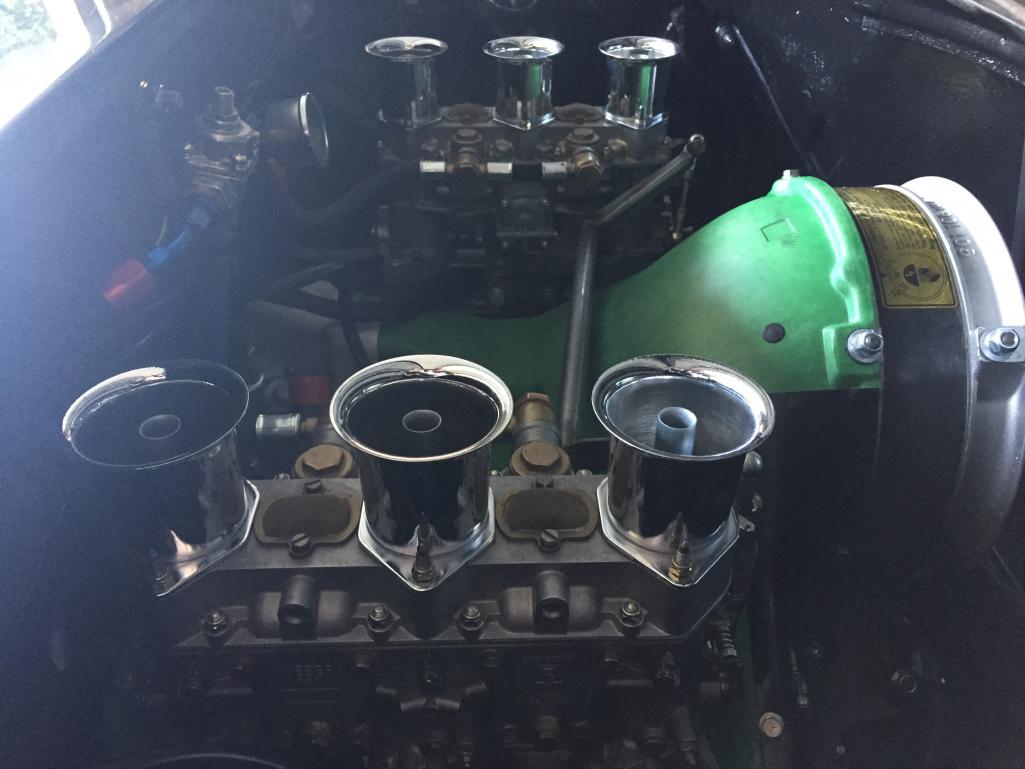
Posted by: Blue6 Aug 29 2017, 11:02 PM
GT banana style muffler..........
I removed mine for a triad. It was just toooo quiet...
Posted by: '73-914kid Aug 29 2017, 11:28 PM
Lawrence, what kind of carb parts are you missing? I have a decent collection of 3BBL IDA parts in a box at home. might help you get the ball rolling quicker.
Posted by: 914_teener Aug 29 2017, 11:40 PM
GT banana style muffler..........
I removed mine for a triad. It was just toooo quiet...
Posted by: horizontally-opposed Aug 29 2017, 11:41 PM
I'm waiting on our carb guy to get my stuff back.
The wait is killing me.
Lawrence, your car is looking KILLER. Can't wait to hear what you think of it after you get to take your first drive in it.
Posted by: Larmo63 Aug 30 2017, 08:32 AM
Ethan, he has my turbo covers that he volunteered to mill a few weeks ago. He goes AWOL and is hard to get a hold of at times.
This is driving me mad, but I'm trying to stay calm.
Posted by: 76-914 Aug 30 2017, 08:32 AM
I'm waiting on our carb guy to get my stuff back.
The wait is killing me.
Is it the angle of the pics or does your exhaust stick way out?
Posted by: Larmo63 Aug 30 2017, 08:34 AM
I cut the pipes down to 6". I measured Andy's tail pipes at Jim Geer's (Banananose) house the other day, and I thought his looked about right.
I'll start with this muffler, but I may end up with something different. Stainless steel mufflers seems to sound pretty good.
I'd rather just use what I have.
Posted by: 76-914 Aug 30 2017, 08:43 AM
You can always trim it later. It IS all about the sound. Looking good, kiddo. You should be driving this weekend. Just don't get down and out if you have a new set of problems to sort out once it runs. It is ALWAYS worth it for a SIX.
Posted by: horizontally-opposed Aug 30 2017, 10:37 AM
Lawrence, was gonna mention this to you, but you seemed "fragile" at the time.
I bought this muffler as a placeholder on my way to one of the stainless mufflers (was hemming and hawing over which one, and bored to death of the stock muffler), and now the only thing I need to do is figure out what ceramic coating will get me close to a very light gray factory finish. This muffler made my 2.2 sound like a 3.0 down low, but it's still a screamer up top. Also, and I don't know what Dansk or Patrick Motorsports did, but it has none of the drone and other offenses usually associated with these sport mufflers—it goes away nicely on the freeway in fifth, and can be driven "quiet" on the street in second and third if you don't want to offend others. But, off the intersection, it sounds glorious, and on full throttle... Everyone who has been in the car emerges wide-eyed at the sound. A certain ex-962/RSR driver remarked that it was the best-sounding 914-6 he'd ever been in, and a friend with expensive tastes (Ferrari F12, etc) wouldn't give the car back, mainly due to the sound. (I think he also has a sweet spot for 914s.)
Oh yes, and the price is right. Only bummer with the purchase was being offered a PCA discount (didn't ask for one) of 10 or 15% and then never getting it...wasn't so impressed with the salesperson, but we all make mistakes, and that includes me. And this may be the best $650 I've ever spent on my 914. YMMV.
Muffler is here:
http://www.patrickmotorsports.com/part/sport-muffler-exhaust-silencer-911rs-914-6/
And, how it looks on the car:
Attached thumbnail(s)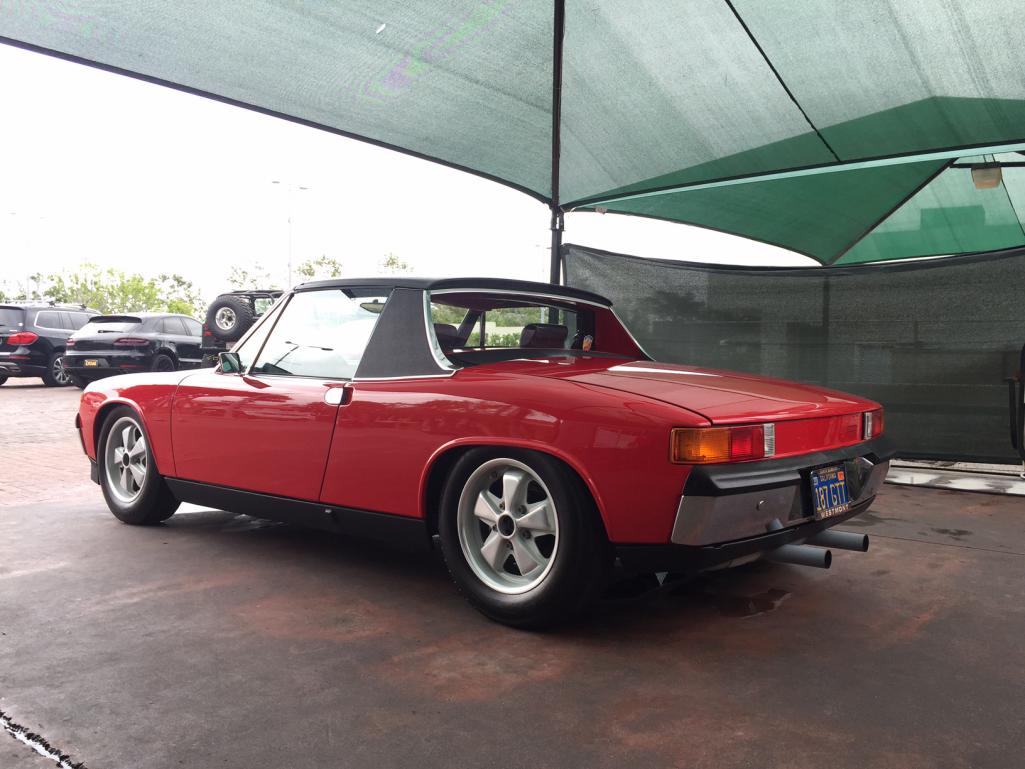
Posted by: mb911 Aug 30 2017, 02:09 PM
Lawrence, was gonna mention this to you, but you seemed "fragile" at the time.
I bought this muffler as a placeholder on my way to one of the stainless mufflers (was hemming and hawing over which one, and bored to death of the stock muffler), and now the only thing I need to do is figure out what ceramic coating will get me close to a very light gray factory finish. This muffler made my 2.2 sound like a 3.0 down low, but it's still a screamer up top. Also, and I don't know what Dansk or Patrick Motorsports did, but it has none of the drone and other offenses usually associated with these sport mufflers—it goes away nicely on the freeway in fifth, and can be driven "quiet" on the street in second and third if you don't want to offend others. But, off the intersection, it sounds glorious, and on full throttle...
Everyone who has been in the car emerges wide-eyed at the sound. A certain ex-962/RSR driver remarked that it was the best-sounding 914-6 he'd ever been in, and a friend with expensive tastes (Ferrari F12, etc) wouldn't give the car back, mainly due to the sound. (I think he also has a sweet spot for 914s.) Oh yes, and the price is right. Only bummer with the purchase was being offered a PCA discount (didn't ask for one) of 10 or 15% and then never getting it...wasn't so impressed with the salesperson, but we all make mistakes, and that includes me. And this may be the best $650 I've ever spent on my 914. YMMV.
Muffler is here:
http://www.patrickmotorsports.com/part/sport-muffler-exhaust-silencer-911rs-914-6/
And, how it looks on the car:
The dansk along with my new to the market muffler are just as factory but with the factory guide are made into the sport muffler amd experience no drone.
Posted by: Larmo63 Aug 30 2017, 07:48 PM
I'm sticking with it until otherwise convinced that there is something better. My pipes are 6" and the ones on the Patrick part look longer.
I think I'll be fine.
Posted by: Steve Aug 30 2017, 09:07 PM
6" is average. There is nothing to be ashamed of. I also have muffler envy and have compared mine to Andy and PMS.
Posted by: Larmo63 Aug 30 2017, 09:14 PM
By the way, my car has "officially" been christened......UNDERDOG.
That's the name, I can't argue.
Posted by: euro911 Aug 31 2017, 01:21 AM
Posted by: Larmo63 Sep 1 2017, 09:32 AM
My carb guy came by last night around 7:30 to drop off parts. I have the turbo covers we had milled, and other small things I needed like the 38mm crow's-foot to tighten the lower oil tank hose.
Carb linkage gets here today from Rich Johnson.
I still don't have air cleaners, but I can fire it this weekend. Maybe after cars and coffee tomorrow?
Posted by: sb914 Sep 1 2017, 09:43 AM
My carb guy came by last night around 7:30 to drop off parts. I have the turbo covers we had milled, and other small things I needed like the 38mm crow's-foot to tighten the lower oil tank hose.
Carb linkage gets here today from Rich Johnson.
I still don't have air cleaners, but I can fire it this weekend. Maybe after cars and coffee tomorrow?
Great news Larry ! I'm stoked for you.
Posted by: ndfrigi Sep 1 2017, 09:49 AM
My carb guy came by last night around 7:30 to drop off parts. I have the turbo covers we had milled, and other small things I needed like the 38mm crow's-foot to tighten the lower oil tank hose.
Carb linkage gets here today from Rich Johnson.
I still don't have air cleaners, but I can fire it this weekend. Maybe after cars and coffee tomorrow?
Sir Lawrence, Can't wait to see a video of the 1st start and hear the sound!
Posted by: Mblizzard Sep 1 2017, 09:50 AM
My carb guy came by last night around 7:30 to drop off parts. I have the turbo covers we had milled, and other small things I needed like the 38mm crow's-foot to tighten the lower oil tank hose.
Carb linkage gets here today from Rich Johnson.
I still don't have air cleaners, but I can fire it this weekend. Maybe after cars and coffee tomorrow?
After watching this with awe for so long, don't use the word "fire" in relation to the build!
Wishing you luck!
Posted by: porschetub Sep 1 2017, 04:10 PM
My carb guy came by last night around 7:30 to drop off parts. I have the turbo covers we had milled, and other small things I needed like the 38mm crow's-foot to tighten the lower oil tank hose.
Carb linkage gets here today from Rich Johnson.
I still don't have air cleaners, but I can fire it this weekend. Maybe after cars and coffee tomorrow?
Getting close...wow,to speed things up you can fit the oil tank suction hose first,I simply had to ,no way in the world I could get any type of spanner in there
,it tales a couple of attempts to get it in the right spot but it worked for me,maybe it depends on what tank you are using and how the hose end comes off the tank suction.I spent a fair amount of time fitting the hoses in a "relaxed" positions to remove any stress on the oil cooler and case return for instance,I think this is important.
BTW sent you a PM
.Posted by: porschetub Sep 1 2017, 04:15 PM
My carb guy came by last night around 7:30 to drop off parts. I have the turbo covers we had milled, and other small things I needed like the 38mm crow's-foot to tighten the lower oil tank hose.
Carb linkage gets here today from Rich Johnson.
I still don't have air cleaners, but I can fire it this weekend. Maybe after cars and coffee tomorrow?
Sir Lawrence, Can't wait to see a video of the 1st start and hear the sound!
Me too Noel,one of the best days for me when my six coughed ,farted, smoked then cleared and settled to a nice idle....priceless
Posted by: forrestkhaag Sep 1 2017, 07:06 PM
Yes. A nice idle is worth its weight in gas at California prices.
Perry has given me some great advice on the effect of crap in the gas even with four filters in line. Keith and i did a little fine tuning on my carbs and shift linkage for the wonderful early drive to C&C in San Somewhere South of here tomorrow am / then on to Larmo's for some final (HA!) tweaks / then oil in, smoke out, and cheers all around.
The Tortoise is finally coming around the bend and we are beating the backside of that chassis until she crosses the 3/4 pole. The rest in in the winning.
By the way / Keith is the new Weber 40 Guru on tuning. One can wait forever for sage advice from the Guru that has experience / experience that never shows up to help / but repeated trial and retrial has solved most all of my carb issues described in earlier ravings.......... Methodical careful adjustments / correct jetting / correct and balanced linkage / all play a part
We could have a cool barbecue somewhere where we could have maybe 6 or 8 Weber festooned cars to discuss and demo tuning tricks for things like the hidden passage blockages, linkage demons, venting on one's venturi's, and getting jetting.
Of course red meat will be on the barbi.......
Attached image(s)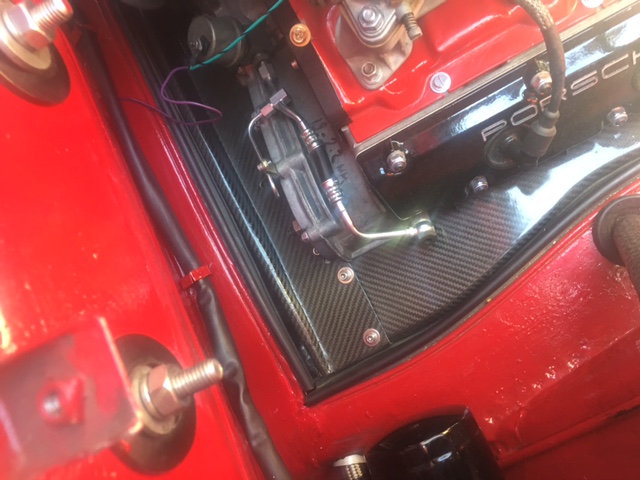
Posted by: Maltese Falcon Sep 2 2017, 02:58 PM
I'm sticking with it until otherwise convinced that there is something better. My pipes are 6" and the ones on the Patrick part look longer.
I think I'll be fine.
Nobody into " 3 is a crowd " ?
Posted by: Larmo63 Sep 2 2017, 05:38 PM
Steve, Keith, and Forrest arrived this morning to check up on the build and to help me adjust the transmission, shifter, and clutch. Much kudos for the help!Oil tank is full, tomorrow is gasoline day and fire up. Keith will be here to help me adjust the carbs and linkage. Steve lent me the tools to tighten up the bugger oil hose up underneath the oil tank. Adam/Catorse also contributed to the build with a few linkage parts.
Forrest arrived with his sly sense of humor and typical banter.
I can't thank these guys enough.
Posted by: euro911 Sep 2 2017, 07:49 PM
Geez, I guess I'm gonna have to buy a house in OC to get any help
When are you going to turn the key?
Posted by: Larmo63 Sep 3 2017, 10:20 AM
Today is engine start day. Hopefully I can drive the car around a bit, too.
Stay tuned.
Posted by: Larmo63 Sep 3 2017, 08:21 PM
Carbs and linkage work, gasoline, and BINGO!!!
The GT Dansk sounds growly and real 911. I couldn't be happier. There are a few things to rearrange and re wire, but I drove it, and to those who told me "wait until you drive one," OMG, lots of power, I got wood, and.....
This was all worth it.
Posted by: horizontally-opposed Sep 3 2017, 08:31 PM
Posted by: Steve Sep 3 2017, 08:47 PM
Congrats!!!!
Posted by: Lucky9146 Sep 3 2017, 08:51 PM
Saw your post this morning that today was the day and have been waiting and checking all day for the good news.
Congrats!
And really good to hear you say it was worth it!
Posted by: Coondog Sep 3 2017, 09:16 PM
Congrats
Posted by: ndfrigi Sep 3 2017, 09:59 PM
Congratulation sir Lawrence and I'm sure worth the wait and for long patience!
Any video of the 1st drive?
Posted by: Maltese Falcon Sep 3 2017, 10:27 PM
Congrats Lawrence... and many smiles per gallon 

Marty
Posted by: Socalandy Sep 3 2017, 10:33 PM
Congrats Man Big day!!!
Posted by: Blue6 Sep 3 2017, 10:33 PM
Congrats Lawrence, and doing most of it yourself should make you very proud.....
Posted by: Krieger Sep 3 2017, 10:43 PM
Awesome! Way to hang in there and make it happen!
Posted by: Larmo63 Sep 3 2017, 11:01 PM
I'll try to get some video up tomorrow. The car idles nicely and sounds really good.
I still have a few things to work out, but I got over a huge hump today.
Posted by: porschetub Sep 4 2017, 12:09 AM
,wow been waiting and watching ...excellent you must be stoked.
Now the real work begins all the little tidy up jobs,mind you hopefully you won't be as slow as me .
Posted by: banananose914 Sep 4 2017, 12:36 AM
Hey Lawrence. Ya done good! It appears you have also found a way to siphon large amounts of money to feed your project.
Posted by: AZ914 Sep 4 2017, 02:18 AM
Posted by: flyer86d Sep 4 2017, 04:29 AM
Great news! Congrats!
Charlie
Posted by: sb914 Sep 4 2017, 06:45 AM
Way to go Larry!
Posted by: 914 7T3 Sep 4 2017, 10:30 AM
Even with your VW exhaust set-up, the car looks pretty awesome! Hope to see it out in Temecula. 


Posted by: Perry Kiehl Sep 4 2017, 10:33 AM
Huzzah! Huzzah!
Posted by: Larmo63 Sep 4 2017, 10:50 AM
The GT Porsche muffler sounds like no VW I know of!!!!!
Posted by: sixnotfour Sep 4 2017, 12:39 PM
The GT Porsche muffler sounds like no VW I know of!!!!!
Right...
Congrats,
Posted by: Larmo63 Sep 4 2017, 09:48 PM
https://www.icloud.com/attachment/?u=https%3A%2F%2Fcvws.icloud-content.com%2FB%2FAUzFWTSbk1VtqE_xyBfZyftdU_5WAQx6y4YhGtg8KXVSj6W1P2wtTLde%2F%24%7Bf%7D%3Fo%3DAsLUR-HP9OdhIHyoPMfJf8RCh3SofimQZ28xJFM9adsf%26v%3D1%26x%3D3%26a%3DBblViOw0hxhYA79FPgEA_wHIAP88Zd3D%26e%3D1507169172%26k%3D%24%7Buk%7D%26fl%3D%26r%3D50D35A09-2990-4A63-B83D-D907AE4B7510-1%26ckc%3Dcom.apple.largeattachment%26ckz%3D5299E969-F80C-467A-9EEC-905C0EB73F91%26p%3D54%26s%3DFYc8XyZhjg6q_W5ZVWVhWXJW-GY&uk=iGdhLXBdXolMKRpiOJXXQQ&f=IMG_6019.MOV&sz=49407303
Posted by: ndfrigi Sep 4 2017, 10:10 PM
https://www.icloud.com/attachment/?u=https%3A%2F%2Fcvws.icloud-content.com%2FB%2FAUzFWTSbk1VtqE_xyBfZyftdU_5WAQx6y4YhGtg8KXVSj6W1P2wtTLde%2F%24%7Bf%7D%3Fo%3DAsLUR-HP9OdhIHyoPMfJf8RCh3SofimQZ28xJFM9adsf%26v%3D1%26x%3D3%26a%3DBblViOw0hxhYA79FPgEA_wHIAP88Zd3D%26e%3D1507169172%26k%3D%24%7Buk%7D%26fl%3D%26r%3D50D35A09-2990-4A63-B83D-D907AE4B7510-1%26ckc%3Dcom.apple.largeattachment%26ckz%3D5299E969-F80C-467A-9EEC-905C0EB73F91%26p%3D54%26s%3DFYc8XyZhjg6q_W5ZVWVhWXJW-GY&uk=iGdhLXBdXolMKRpiOJXXQQ&f=IMG_6019.MOV&sz=49407303
Again congratulation sir Lawrence! Thanks for the video. Sounds is great! A real six sound!
Posted by: 914 7T3 Sep 4 2017, 10:18 PM
The GT Porsche muffler sounds like no VW I know of!!!!!
You're right on that one, sounds nothing like my 1,600 cc. It's pretty bad ass!

Posted by: euro911 Sep 4 2017, 10:21 PM
Awesome, Goob.
Posted by: Steve Sep 4 2017, 10:29 PM
Sounds awesome!! Do your neighbors hate you yet?
Posted by: Larmo63 Sep 4 2017, 10:33 PM
Joey across the street said "I didn't know you got a Harley."
(that was before the air cleaners went on)
Posted by: horizontally-opposed Sep 4 2017, 11:04 PM
Dude. That thing sounds GRRRRRRRREAT.
(and kinda familiar)
Looks great, too. Love the black and the deep sixes in rough finish. Your car has really come together. Just wait til you start driving that mid-engined symphony around..
Congratulations, again, Lawrence.
Posted by: SixerJ Sep 5 2017, 12:10 AM
Congratulations, massive achievement and officially on the down hill from here on in. Enjoy
Oh and BTW a little bit of you will forever be in England - thanks!
Posted by: sb914 Sep 5 2017, 05:54 AM
Link don't work for me ?
Posted by: danschy Sep 5 2017, 07:03 AM
Link no longer works. Error message about too many downloads.
Posted by: Larmo63 Sep 5 2017, 08:30 AM
That link type was the only way thing Icould get it to work.
I'll try again.
Posted by: Steve Sep 5 2017, 08:33 AM
That link type was the only way thing Icould get it to work.
I'll try again.
Upload to youtube.com
Posted by: porschetub Sep 5 2017, 03:17 PM
Joey across the street said "I didn't know you got a Harley."
(that was before the air cleaners went on)
Time to educate Joey.....really he is not even close.....
.Great sound,crisp and cammy,whats the sound like @ driving RPM?.
I found even my stock (2in 1out) is fairly loud @ higher RPM,my neighbor up the road confirms that luckily he's are car guy
.Have you run your cams in yet?
Posted by: LowBridge Sep 5 2017, 04:41 PM
seems like it sounds great but link has reached it's max download so no joy for me
Posted by: porschetub Sep 5 2017, 06:36 PM
seems like it sounds great but link has reached it's max download so no joy for me
Its good but short
.Posted by: Larmo63 Sep 7 2017, 09:45 PM
I gassed up the car, drove over to Catorse's house (Adam) and really put the car through it's paces.
It needs a bit of carburetor attention, but still, does it ever accelerate!!!
I'm really happy with where I'm at with it, even if it's off a bit. It gives me something to tinker with. I just hope I can get it reigned in for the fun day thing in Temecula next - next weekend.
I already have tuning plans for this weekend........
Posted by: Maltese Falcon Sep 8 2017, 03:15 PM
I gassed up the car, drove over to Catorse's house (Adam) and really put the car through it's paces.
It needs a bit of carburetor attention, but still, does it ever accelerate!!!
I'm really happy with where I'm at with it, even if it's off a bit. It gives me something to tinker with. I just hope I can get it reigned in for the fun day thing in Temecula next - next weekend.
I already have tuning plans for this weekend........
Best regards to Adam !....MSDS equipped Gen-2 928 racing headers on his rare 928 racer
Marty
Posted by: Larmo63 Sep 8 2017, 11:12 PM
Adam has some cool cars. That 928 is going to be a monster.....
Posted by: Larmo63 Sep 10 2017, 10:23 PM
The car is up and running, just not running perfectly. The devil is in the details. I may chance it and drive it to Temecula.
Issues:
Most of my gauges are not working at all or not working right, and I hate working under that dash
Carbs are farty and still a bit off, we played with them yesterday
Linkage is shit - hate it
I can't seem to find affordable air cleaners for the Webers
Kind of disappointed in a few things, but I'm moving forward. The tire shop really fuched up two of my beautiful wheels Saturday. It's going to cost her $500 to fix them.
When I'm driving the car and the engine is singing behind me, I'm okay.
Posted by: ConeDodger Sep 10 2017, 10:24 PM
Excellent Lawrence! 
Posted by: porschetub Sep 10 2017, 11:12 PM
The car is up and running, just not running perfectly. The devil is in the details. I may chance it and drive it to Temecula.
Issues:
Most of my gauges are not working at all or not working right, and I hate working under that dash
Carbs are farty and still a bit off, we played with them yesterday
Linkage is shit - hate it
I can't seem to find affordable air cleaners for the Webers
Kind of disappointed in a few things, but I'm moving forward. The tire shop really fuched up two of my beautiful wheels Saturday. It's going to cost her $500 to fix them.
When I'm driving the car and the engine is singing behind me, I'm okay.
Singing behind you ...yep thats what its all about,carbs don't tune in a hurry ...ask me how I know
,if you have no spit back after the engine is warmed you are generally close,any popping @ the exhaust try screwing in the mixture screws slightly if your idle jets are right you will have a good result.Post what jetting/vent size you have someone may chime in ...just don't run it too rich,again ask me how I know.
Do you have one of these;
And get yourself a PMO float bowl gauge real hand also;
Sure Keith will get on to it ,I'am on my 3rd carb tune and feel I'am closer to that sweet spot,good luck.
Posted by: Larmo63 Sep 11 2017, 12:23 AM
On the idle jets, we tried 60s and 55s, went back to 60s.
Float bowl levels are perfect, I will list tomorrow.
Posted by: gereed75 Sep 11 2017, 06:37 AM
I have a 2.4 with 9.5, ported heads to 36mm and DC30 cams.
I put in a fair amount of work on the carb tuning using a wide band O2 sensor. Carbs completely rebuilt and blue printed. Car runs pretty consistently in the 12 to 13 AFR range pretty much everywhere. Can't remember the exact set up but includes 60 idles ,32 venturis, f26 tubes. Will look back at my records later today for the rest.
It still pops farts and snorts. Might be the nature of the beast with these cams and set up.
By the way, love it and it makes plenty of grunt. Smooth and clean down low, surprisingly torquey, with a good surge above 5000 rpm right up to 7200 redline. Nice!
Don't obsess so much - run it!
Oh yea, Not sure if your talking about the carb or shift lineage but I got a Weltmiester short shifter and Chris's shift kit with the extra rear console bearing - shifts pretty nicely once you are in the H. First to second still funky and just needs to be done slowly and deliberately, but no biggie. You know the drill. but I would say that Chris's setup is about as good as it gets.
Have fun man!
Posted by: Larmo63 Sep 11 2017, 11:04 AM
Paul Abbott recommends:-----------------------------------I have:
34 chokes-----------------------------------------------------34 chokes
145 mains-----------------------------------------------------135 mains
F3 emulsion---------------------------------------------------F26 emulsion
180 air correctors---------------------------------------------180 air correctors
55 idle jets-----------------------------------------------------55 and 60 idle jets (a set of each)
I have Webers, DC-30 cams, and 36mm intake bores......
Posted by: Steve Sep 11 2017, 11:26 AM
Paul Abbott recommends:-----------------------------------I have:
34 chokes-----------------------------------------------------34 chokes
145 mains-----------------------------------------------------135 mains
F3 emulsion---------------------------------------------------F26 emulsion
180 air correctors---------------------------------------------180 air correctors
55 idle jets-----------------------------------------------------55 and 60 idle jets (a set of each)
I have Webers, DC-30 cams, and 36mm intake bores......
Interesting... Bruce's book recommends the same thing except it recommends 145 air jets. And all the above was for a 2.7, not a 2.4.
Posted by: '73-914kid Sep 11 2017, 12:16 PM
34mm vents are probably a little too big with the DC-30's for street driving.. like ly not enough port velocity at low RPM, especally with the enlarged intake port. I wold go down to a 32, and mimic Bruce's jetting recommendations for a 2.4L with S cams.
Posted by: mb911 Sep 11 2017, 12:40 PM
Are Dc 30s s cams? Just curious
Posted by: JmuRiz Sep 11 2017, 02:06 PM
DC-30 = Mod Solex
DC-40 = Mod S
So basically it's a bit improved over a Solex cam...great for the street!
Posted by: Lucky9146 Sep 11 2017, 02:28 PM
DC-30 = Mod Solex
DC-40 = Mod S
So basically it's a bit improved over a Solex cam...great for the street!
Can't wait to hear my 3.0 with DC40's and 40 Solex's run. Hoping for a month!
And hearing Larmo63 engine at Temecula for inspiration!
Posted by: Larmo63 Sep 11 2017, 05:31 PM
I just took out the idle jets to downsize to 55s, but discovered that I had 5 55s and one 60. So I stayed with the 60s for now. I fiddled some with the linkage, and what I did made a huge improvement in performance and the initial flat spot. I didn't have the linkage set up quite right per Rich Johnson's instructions. I fixed that today. I drove the car and it really REALLY is improving.
One note, I let the clutch cable out (loosened) a few turns, it seems like it clutches closer to the floor.
Was I supposed to tighten the cable? It goes against my thought process....
Posted by: Steve Sep 11 2017, 08:33 PM
Tightening the cable reduces the freeplay which makes it engage and disengage closer to you versus the floor. I adjust for 1/2" freeplay
Posted by: Perry Kiehl Sep 11 2017, 09:12 PM
If you have the venturis and jets, I'd probably try 32's with 145 mains, 180 air, and 60 idle, and stick with the F3's. You'll give up a smidgen on the top end, but improve transition between idles and mains. Emulsion tubes can make more of a difference than a lot of guys realize, F26 or F11's could make a difference. Of course getting a bunch of jets, venturi, and e-tubes gets spendy. One tip here: change only 1 thing at a time or you'll have a difficult time dialing it in.
You don't want your clutch cable too loose, or you'll smoke the friction disc. Steve is on the money, get it down to 1/2 of free play, then you adjust the stop on the pedal board so when you stop, clutch, and shift to R it doesn't grind. It's kind of a PITA but you should only have to do it once.
If you want you can give me a call tomorrow Lawrence, I might be able to help a bit.
Posted by: Catorse Sep 12 2017, 09:58 AM
I gassed up the car, drove over to Catorse's house (Adam) and really put the car through it's paces.
It needs a bit of carburetor attention, but still, does it ever accelerate!!!
I'm really happy with where I'm at with it, even if it's off a bit. It gives me something to tinker with. I just hope I can get it reigned in for the fun day thing in Temecula next - next weekend.
I already have tuning plans for this weekend........
Best regards to Adam !....MSDS equipped Gen-2 928 racing headers on his rare 928 racer
Marty
Back at you buddy!
Posted by: forrestkhaag Sep 12 2017, 10:14 AM
I will see you at keiths place this afternoon / I will pick up spare Venturi's if you want to try them out.,.
Posted by: Larmo63 Sep 13 2017, 10:16 AM
We had the carbs off of the car and were taking them apart when Forrest showed up with the "do you want the good news or the bad news first?" comment. He brought 30 chokes, so we will try to source some 32s today. I put 55 idles in, car ran lousy on the way home. I'll put the 60s back in. Cause and effect.
Forrest and Keith
Posted by: gereed75 Sep 13 2017, 10:55 AM
Sorry I forgot to check my carb specs. I do know the 55 idles just do not work. Tried that.
Definitely have 60's, 32, F26 in mine and I think 145 mains and 180 airs. Getting the 32 venturi's might be key to get the right velocities so all the jets/secondaries work right.
Getting the carbs right is like building a building - foundation must be sound or you are wasting your time. Start with good linkages (blueprinted), then right fuel pressure (3 psi), Then the right throttle plate height (once you get this do not change it!), then right float levels (blue printed floats). Then accel pump output, Then idles and venturis.
If you get all that then you tune using airs, mains and tubes. .....and then if you get all that right..... flat six nirvana!!
If you don't....... crap! It can be a serious PITA. Be patient and thorough. Performance Oriented tech docs are really good!!
Posted by: Steve Sep 13 2017, 10:58 AM
Have you seen this jet page?
https://members.rennlist.com/webercarbs/Weber_Jet_Settings.htm
Posted by: euro911 Sep 13 2017, 11:18 AM
Thanks for linking the jet chart, Steve. Those #s will come in handy for re-jetting some carbs for the 912 (1.7L big-bore) motors
Lawrence, do you have an AF meter there? I can bring a LM-2 kit yo the Temecula gig (if I can remember where I put it) ...
Maybe you should have subscribed to JET magazine
Posted by: porschetub Sep 13 2017, 02:51 PM
Sorry I forgot to check my carb specs. I do know the 55 idles just do not work. Tried that.
Definitely have 60's, 32, F26 in mine and I think 145 mains and 180 airs. Getting the 32 venturi's might be key to get the right velocities so all the jets/secondaries work right.
Getting the carbs right is like building a building - foundation must be sound or you are wasting your time. Start with good linkages (blueprinted), then right fuel pressure (3 psi), Then the right throttle plate height (once you get this do not change it!), then right float levels (blue printed floats). Then accel pump output, Then idles and venturis.
If you get all that then you tune using airs, mains and tubes. .....and then if you get all that right..... flat six nirvana!!
If you don't....... crap! It can be a serious PITA. Be patient and thorough. Performance Oriented tech docs are really good!!
,good points made,I would add a good functioning ignition system and correct timing to that list.So would it be safe to assume if the vents are changed to 32mm some of the low speed vacuum lost by the cams would be improved in this case ?,or are they simply just too large.
Perry pointed out this will decrease power @ the top end which makes perfect sense but that would be of benefit to the lower range you always drive in.
Correct throttle opening @ idle are hard to get right,I have found to achieve correct idle speed (950) I get ''run on'' and the engine takes a while to settle after the throttle is closed.
It is a saga to get all this right for sure
.Posted by: Larmo63 Sep 13 2017, 11:12 PM
The carbs just seem to idle really well no matter what we do. Idle has never been an issue.
On another note, I checked my speedo cable with a drill motor and flat bit, it worked fine. Culprit was a wonky angle drive. I had a good one on another transmission, so I cleaned it up and installed it. Works fine. Also, the wires on my oil pressure sender were reversed, so I now have a green oil pressure light. Small steps, but easy fixes. My tach and Tach-Adapt need some looking into now.
Posted by: gereed75 Sep 14 2017, 05:27 PM
Had a chance to look back at my notes and confirm - 60 idles, 140 mains 32 venturis 180 airs 110 idle air bleeds. I worked a good bit with Paul Abbott when I was setting this up and he had just worked with another customer on a 2.4 Solex crammed motor with this same carb setup that made 195 HP on Jerry Woods Dino.
I agree with the idle thing, always seems pretty happy and I could not consistently get the expected lean best idle indications on all cylinders. Whatever. The AFR,s are really solid and it runs great, no hesitation or flat spots.
Have fun!
Posted by: porschetub Sep 14 2017, 06:18 PM
Larmo great you have a good idle,you must be close to the sweet spot ,your transition from idle jets to main should improve with the smaller vents with little loss of top end power,you may find you can go back to 55's but 60's seem to be the norm,slightly rich is always better with our engines besides.
I have a strange jet combination but less displacement,stock cams and Zeniths so you can get weird running condition cause they tune different than the Webers.
I have been faced with a constant rich condition on idle jets,going smaller has made my engine run like  ,know I will get there .
I have enjoyed this input as this isn't generally covered on here a lot,we have a few "6" builds going on so it will help others.
Lawrence what tach are you running ? there are two types and they run on different voltage input,the earlier tach's require jumper removed from the adaptor,the later tach retains the jumper, contact Bob @ Ashlocktech...super helpful guy.
Posted by: Larmo63 Sep 14 2017, 09:14 PM
Keith914 is a trooper. He went to Aase Bros. in Anaheim and sourced a set of 32 chokes for my carburetors on his own volition to make my car run right.
We took the carbs off and apart (again,) installed the smaller chokes, then 60 idles, some tuning, and it runs a lot better. This is a pretty involved process, but I think it is good to be pretty intimately involved with your carburetors. You know, you lay awake at night contemplating your jetting and tweaks that you think of, right?
I overfilled the oil tank a bit and had a little flood of oil that we won't talk about.
All is good now. Car seems a lot more drivable and right.
Posted by: Larmo63 Sep 17 2017, 01:00 PM
I was told on the drives yesterday that my brake lights don't work. I'm trying to fix them; floor switch looks new (Bruce Stone did the pedal set) and there are two wires down there. One wasn't hooked up, I hooked it up and still no lights. I know this is a ground then off type switch, but does it matter which wire is hooked up to which spade on the brake light (by the pedal) switch? I have no idea how the wire was off the spade....
Help?
Posted by: Steve Sep 17 2017, 02:23 PM
Might also be an adjustment. There is a goofy lever, washer, etc. that actuate the switch. Put an ohm meter on the switch to make sure it's good. It is most likely an adjustment since you replaced the pedals. I had the same problem with my rebuilt set from Bruce.
I bet we could fix it at the next cars and coffee in the parking lot. Let us know if you don't get it working by next Saturday and we will bring some tools.
Posted by: Larmo63 Sep 17 2017, 02:32 PM
No power to the switch with a test light and key on. Good fuse, everything else on the fuse works.
hmmmm
Posted by: ConeDodger Sep 17 2017, 02:43 PM
Lawrence,
Glad to hear your running and driving it. The rest is just punch list details. Enjoy!
Posted by: Larmo63 Sep 17 2017, 03:13 PM
The little beast did pretty well yesterday on the drives. I probably shouldn't have pushed the engine as hard as I did, but you only live once.
The punch list is shorter and shorter.....
Posted by: 76-914 Sep 17 2017, 03:56 PM
That's just a switched ground wire. Was the ignition on when you tested for 12v? I would just test for continuity across the switch when activated to confirm the switch is good/bad. You can also install the switch incorrectly and it won't ever work. Ask me how I know. Eyeball it when you press on the pedal to see if it is opening and closing.
Posted by: euro911 Sep 17 2017, 05:17 PM
The diagram I have is for '70/'71 (four-bangers). One wire at the brake switch has constant 12 volt power from fuse #8, the other wire travels to the driver's side rear brake light socket, then daisy-chains to the passenger side socket. The brown wire(s) in the wiring socket go to a ground buss.
Posted by: Larmo63 Sep 17 2017, 06:06 PM
With the key on, no power at either wire that goes to the floor brake pedal switch. The #8 fuse is good and powered.
Posted by: euro911 Sep 17 2017, 08:39 PM
Check all your fuses to see iffin you got a blown one ...
If they're all OK, follow the wiring to see where it goes and if it's been disconnected 
Does either one of the wires have continuity to ground? (if so, that one would more than likely be the wire going back to the brake light socket).
Posted by: forrestkhaag Sep 18 2017, 02:55 PM
FYI. On the drive home in the fuel stop your brake light flicked on when your machine backfired. The again on second backfire. Bulb? Connection in light housing maybe. Cheers
Posted by: Larmo63 Sep 19 2017, 10:26 AM
After fiddling with my brake lights for a couple days, Perry just informed me that they only work with the key on.
My bad. One wire WAS disconnected from the pedal switch. I fixed it Sunday, but I guess I never tested it with the key on. (I thought I did)
Now, onto the Tach issue. With my immense automotive skillset, I should have it figured out in less than a week.
Posted by: Larmo63 Sep 24 2017, 06:15 PM
Drove the car to Temecula without a hitch, and drove it today up to Newport, getting a lot of thumbs ups.
Carbs are fairly dialed in now, Ethan is going to drive the car and tune them a bit also. I drove into the garage with a big shit-eatin' grin.
Such a great sound emanating from this engine!!!!!! Pete Stout was right!!!!
Posted by: mepstein Sep 24 2017, 07:42 PM
Posted by: porschetub Sep 24 2017, 08:01 PM
a lot of thumbs ups.
I drove into the garage with a big shit-eatin' grin.
Such a great sound emanating from this engine!!!!!! Pete Stout was right!!!!
Lots told u that ,it is always a wonderful sound...few motors like it really,the power to weight is the key point in these small (light) cars.
Every drive I have it's the same ,
eating grin and then you fix a bit more stuff and it just gets better eh.Well done Lawrence have a wine on me
Posted by: horizontally-opposed Sep 25 2017, 02:47 PM
Small-bore flat six with a sport muffler = one of the best Porsche sounds, period—and even better when the engine is closer to your ears than the muffler.
The only better-sounding 914 I've driven was a 2.2 w/MFI and a sport muffler. I immediately started pricing MFI...until I saw the price to acquire and set up a system.
Posted by: Larmo63 Sep 25 2017, 04:46 PM
MFI prices are downright scary. People are usually selling parts and pieces of various year systems separately. It seems like a monkey puzzle to go back and try to put a whole system together unless you luck into it. Plus, the whole pulley and belt on the back of the cam business....
Posted by: horizontally-opposed Sep 26 2017, 09:53 AM
MFI prices are downright scary. People are usually selling parts and pieces of various year systems separately. It seems like a monkey puzzle to go back and try to put a whole system together unless you luck into it. Plus, the whole pulley and belt on the back of the cam business....
Looked like MFI was gonna cost me what I had in the whole conversion, or at least a good chunk of the way there. And, as you note, there's the hassle of piecing a system together. Unless I luck into one somehow, I think I'll be running Webers for some time to come—or convert to Motec, Link, Rasant, etc.
Curious: Is your now-carbureted 914 super smelly compared to its old fuel-injected four-cylinder self? Mine is. My better half doesn't like it when the car stays in the home garage overnight, and I have to admit it is indeed smelly when I go out into the garage. Reminds me of my childhood garage, with two carbureted, air-cooled VWs in the garage. The world has come a long way since then in terms of auto emissions...
Posted by: mb911 Sep 26 2017, 01:47 PM
Pete that is what my experience is with it. I kept my mfi heads so I can go fuel injection at some Point as there are folks who make injector adapters for the mfi ports.. I have thought about just using my carbs as throttle body's then..
Posted by: Larmo63 Sep 26 2017, 02:48 PM
My car does smell a bit, a cross between oil & gasoline, although not really in the interior. I don't have issues when driving either, but it smells like a race shop in my garage and I have a tidy garage.
I'm getting used to it.
I'm not so sure what it holds more of; gasoline, or oil.....!
Posted by: Perry Kiehl Sep 26 2017, 02:51 PM
MFI prices are downright scary. People are usually selling parts and pieces of various year systems separately. It seems like a monkey puzzle to go back and try to put a whole system together unless you luck into it. Plus, the whole pulley and belt on the back of the cam business....
Looked like MFI was gonna cost me what I had in the whole conversion, or at least a good chunk of the way there. And, as you note, there's the hassle of piecing a system together. Unless I luck into one somehow, I think I'll be running Webers for some time to come—or convert to Motec, Link, Rasant, etc.
Curious: Is your now-carbureted 914 super smelly compared to its old fuel-injected four-cylinder self? Mine is. My better half doesn't like it when the car stays in the home garage overnight, and I have to admit it is indeed smelly when I go out into the garage. Reminds me of my childhood garage, with two carbureted, air-cooled VWs in the garage. The world has come a long way since then in terms of auto emissions...
Sometime in the next few weeks I'm going to look at a 2.7 with MFI throttle bodies and air cleaner, but with modern FI and coil on plug ignition. I'll take lots of pics
Posted by: porschetub Sep 26 2017, 02:57 PM
My car smells of gasoline, although not really in the interior. I don't have issues when driving either, but it smells like a race shop in my garage and I have a tidy garage.
I'm getting used to it.
I noticed a reduction in smell when I went back to the stock aircleaner from the K&N's,seems the fumes don't get out as much.maybe they just hang over the top of the carbs
.Lawrence you can tell us the results when you get your aircleaner ?
Posted by: horizontally-opposed Sep 26 2017, 03:05 PM
My car does smell a bit, a cross between oil & gasoline, although not really in the interior. I don't have issues when driving either, but it smells like a race shop in my garage and I have a tidy garage.
I'm getting used to it.
I'm not so sure what it holds more of; gasoline, or oil.....!
Yep. PRECISELY what I've experienced. So I guess it's part of old carbureted cars, which really were dirty in more ways than one, and one more reason I like fuel injection. Then again, carbs sure sound gud.
Posted by: horizontally-opposed Sep 26 2017, 03:08 PM
Sometime in the next few weeks I'm going to look at a 2.7 with MFI throttle bodies and air cleaner, but with modern FI and coil on plug ignition. I'll take lots of pics
Please do!
Curious about a potential induction change down the road. I like the 2.2 a LOT, and it makes great power with—to my complete surprise—really nice torque low down. So the engine is pretty efficient. But the carbs are smelly, and my sense is they are to blame for pretty awful fuel economy. A teener shouldn't be in the teens when it comes to MPG.
Posted by: GeorgeRud Sep 26 2017, 03:17 PM
With today's fuels, I think carb's lives are coming to an end. Even the venerable Quadrajets are being replaced with simple bolt-on, self tuning, electronic fuel injection systems.
However, fewer things sound as good as Weber sucking down air right behind your head in a 914-6!
Posted by: Lucky9146 Sep 26 2017, 03:34 PM
My car smells of gasoline, although not really in the interior. I don't have issues when driving either, but it smells like a race shop in my garage and I have a tidy garage.
I'm getting used to it.
I noticed a reduction in smell when I went back to the stock aircleaner from the K&N's,seems the fumes don't get out as much.maybe they just hang over the top of the carbs
.Lawrence you can tell us the results when you get your aircleaner ?
Makes sense with the K&N as I believe the carb float bowl is vented to atmosphere.
Posted by: flyer86d Sep 26 2017, 04:02 PM
I really never noticed the gas smell from my 3.2 short stroke 911sc track car except when it running because it was rich on the bottom to smoothly get thru the transition to the mains.
I bought a couple of 2.4 MFI systems when all of my friends were ripping off the MFI to replace it with Webers back in the 1980s. How far we have come. I used the the 2.4E system on our 73 911T when I upgraded the original engine to E spec. I always loved the way that engine ran. Great power but very driveable. I still have a complete 2.4S system that I was planning to use but I would rather trade it for a complete running 3.0 SC engine or a complete 3.2 engine.
Charlie
Posted by: Larmo63 Sep 29 2017, 10:08 AM
I ordered these new from Partsklassik and in the meantime the stock airbox popped up in the classifieds here. I can now give Ethan's K & Ns back to him (and get him to put a little tune on my carbs?) soon.
I know that the different air cleaners/airboxes have differing effects on the torque curve on these engines. I can't wait to try the big stock box on my engine.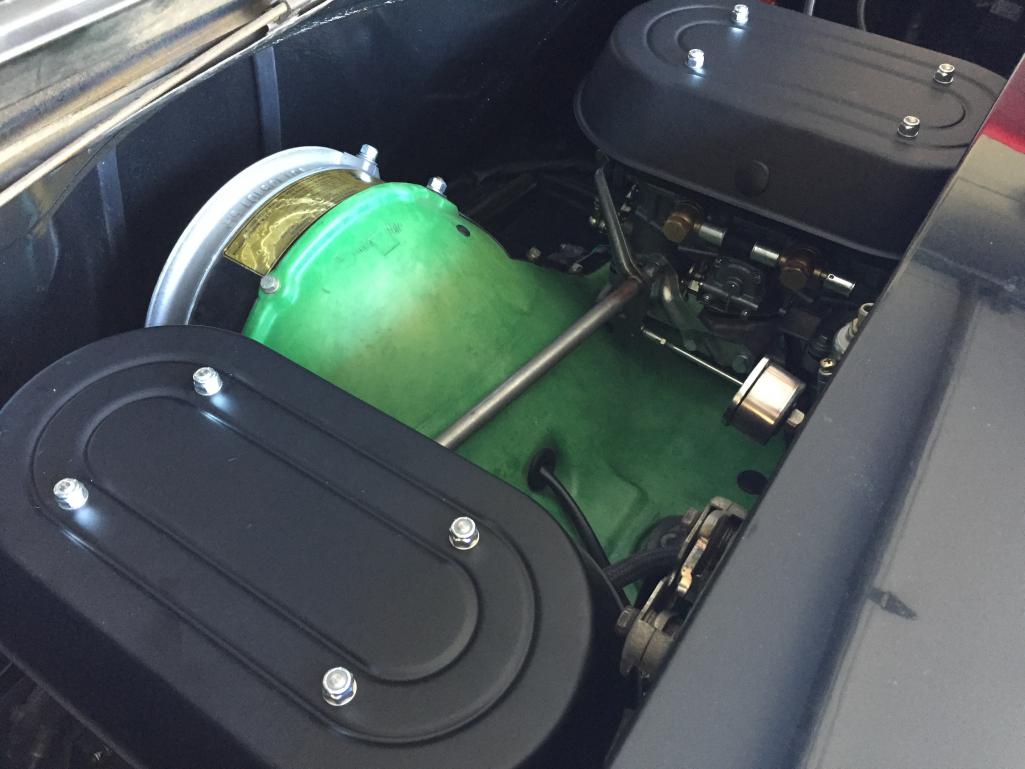
Posted by: Larmo63 Sep 29 2017, 10:12 AM
I'm driving the car regularly, and I can now say it was all worth it. The pissing, moaning, head scratching, and complaining.
It's already a pretty good little driver, all in all.
I may do a little body work next, but I'm enjoying it immensely, it's a bit surreal that it really works.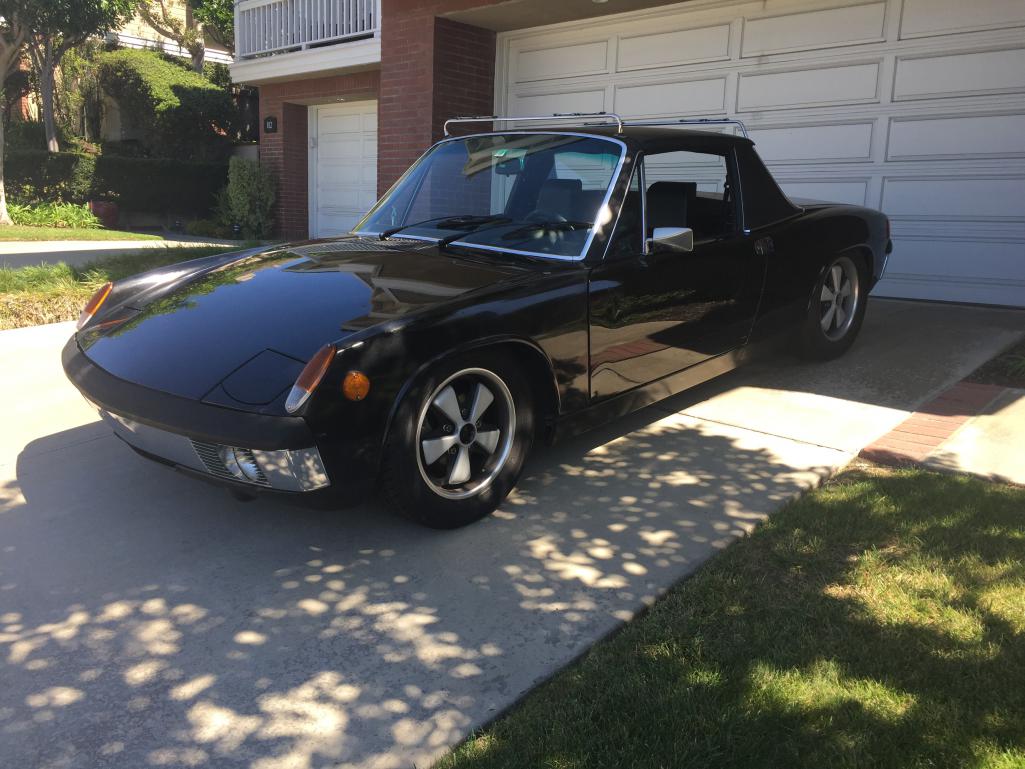
Posted by: Lucky9146 Sep 29 2017, 10:25 AM
I'm driving the car regularly, and I can now say it was all worth it. The pissing, moaning, head scratching, and complaining.
It's already a pretty good little driver, all in all.
I may do a little body work next, but I'm enjoying it immensely, it's a bit surreal that it really works.
It's got to be a real sense of accomplishment
I was fortunate to see the car in person it came out great! Jealous of the seats!
Posted by: ndfrigi Sep 29 2017, 10:32 AM
Good to hear ur enjoying the conversion after that long patience! Last Temecula Fun day I thought ur just moving the car but I noticed you, Keith and Forrest living the place. Didn’t get the chance to drive ur car!!! hehehe
Posted by: wndsrfr Sep 29 2017, 11:01 AM
I ordered these new from Partsklassik and in the meantime the stock airbox popped up in the classifieds here. I can now give Ethan's K & Ns back to him (and get him to put a little tune on my carbs?) soon.
I know that the different air cleaners/airboxes have differing effects on the torque curve on these engines. I can't wait to try the big stock box on my engine.
I found that the rain hats were only about 3/4 inches above the velocity stacks with the "stock" standoffs....suspect they were shrouding the airflow & so went to ITG's. Can you get dyno runs with these and then the big stock airbox? Would sure be nice to see....
Posted by: Perry Kiehl Sep 29 2017, 11:20 AM
ITG's are good, as long as your car will never sit parked in the rain. 914-6 have been known to hydro-lock.
The stock air filter housing flows amazingly well. Of course it was designed by Porsche after all.
Posted by: Coondog Sep 29 2017, 11:52 AM
Glad it all worked out. Hopefully we can meet up and cruise PCH together.
Posted by: boogie_man Sep 29 2017, 12:52 PM
Congrats dude as you have to be beyond happy about now Can't wait to hear it in person
Posted by: Larmo63 Oct 5 2017, 08:39 PM
I'm doing euro front lenses with a switch to turn these on independently. The warts will be getting removed.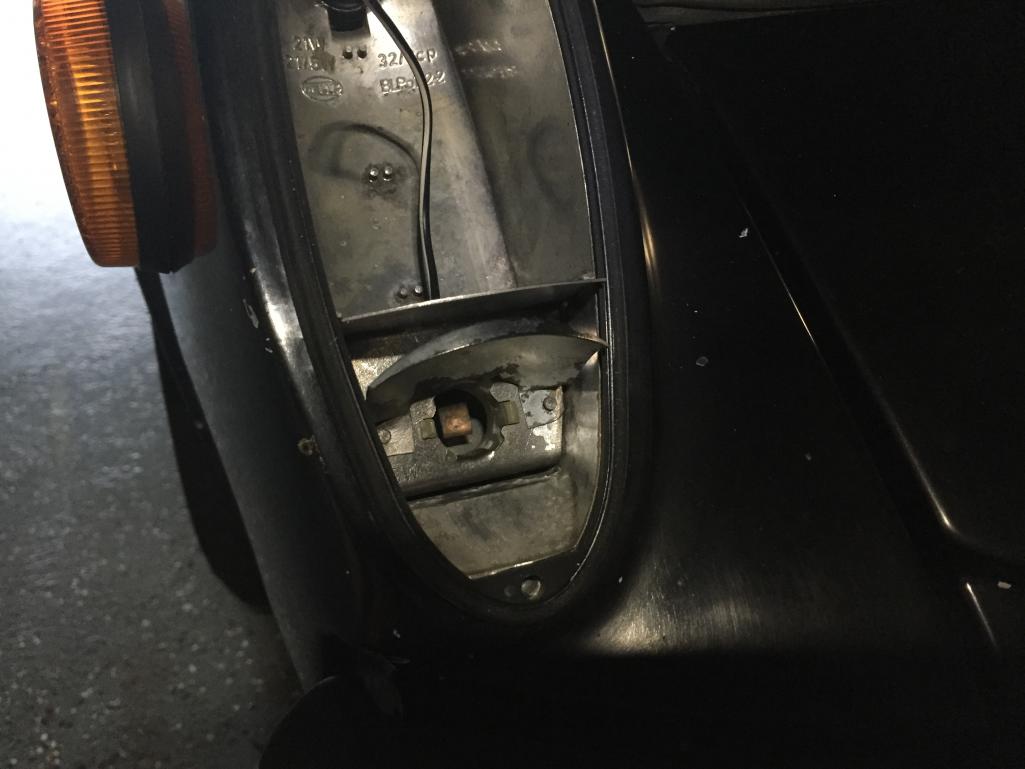
Posted by: wndsnd Oct 5 2017, 10:02 PM
Well, you know I have been following your build off and on, and not regularly enough, and now I see you are driving. CONGRATULATIONS!
These are wonderful cars with the six as you suspected, and now you will realize just how wonderful they are and you will be paid in spaids for all your hard work.
Hats off to you my friend. I wish you were closer so we could enjoy a beer but now you Get even more enjoyment as you tweak performance and break her in. First time you hit 7000 rpm you will be unnerved, but realize these engines are ready for it so let her scream.
Have fun!
John
Posted by: 76-914 Oct 6 2017, 07:11 PM
I'm doing euro front lenses with a switch to turn these on independently. The warts will be getting removed.
Did you consider Spokes LED board. There Ace's but more importantly since you've dropped a
load of money into that car they increase your presence, greatly!
Posted by: Larmo63 Oct 12 2017, 10:39 PM
Will it fit under the crossbar on a stock '73 engine lid? I'm pretty sure the snorkel won't clear the firewall....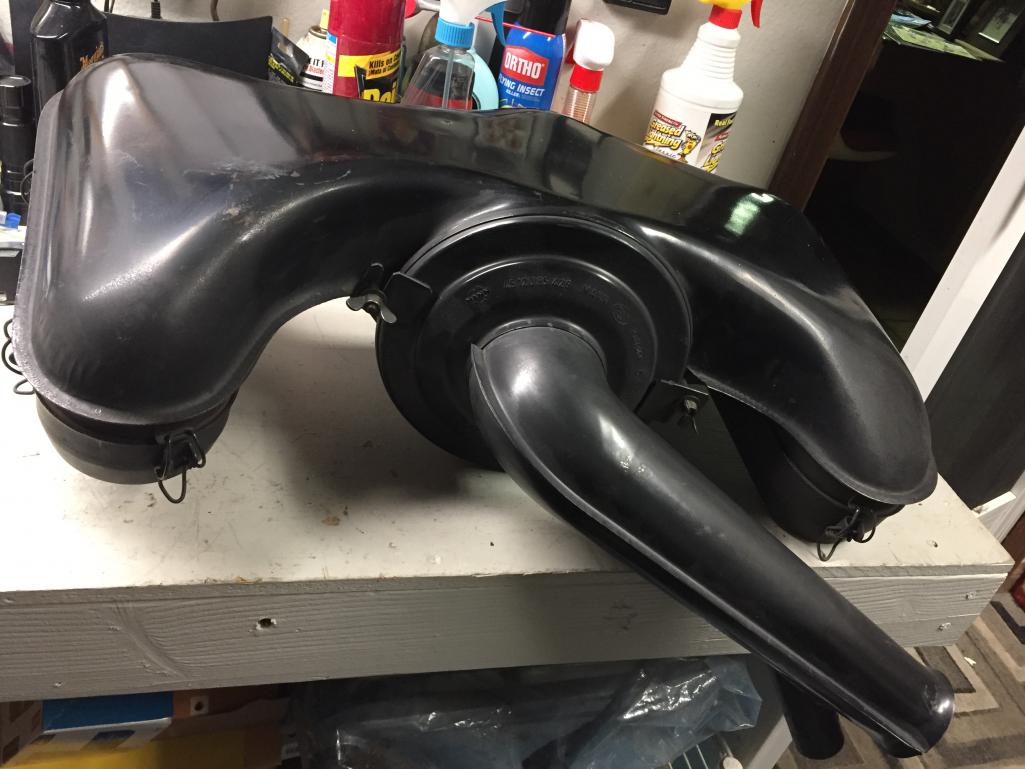
Posted by: porschetub Oct 13 2017, 12:12 AM
Depends on your manifolds Lawrence,mine is tight in there,but more about the rear bulkhead than height as I have stock 71 manifolds.
I notice the crossbar support could be an issue if you have taller manifolds that's the high point of the aircleaner as far as I can see or near enough.
This is the area where the snorkel fits on to the main housing,the snorkel can be cut but as it is a steel one it has a lot of value with the early 911 folks,get the plastic one and cut away as you need like the MFI ones...all good.
Posted by: Larmo63 Oct 13 2017, 06:29 PM
I think it will fit, but it runs into my fuel pressure gauge set up. I'm not sure if I want to re-engineer it all.
Hmmmm.....
Posted by: porschetub Oct 13 2017, 07:18 PM
I think it will fit, but it runs into my fuel pressure gauge set up. I'm not sure if I want to re-engineer it all.
Hmmmm.....
I found the same ,ok with the K&N's,luckily I was able to tweak the pressure regulator mounting bracket towards the rear bulkhead, this give me clearance (just) and I was able to read my pressure gauge better.
Good luck.
Posted by: gereed75 Oct 13 2017, 07:52 PM
I have two plastic boxes. I like the look but am running K&N’s with rain hats. With all of the spitting that my car does through the carbs I am concerned about melting the plastic.
Anyone have recent experience ??
Posted by: bigkensteele Oct 13 2017, 08:07 PM
I think it will fit, but it runs into my fuel pressure gauge set up. I'm not sure if I want to re-engineer it all.
Hmmmm.....
Please PM me if you decide to sell it or the K&N setup. I just need filtration at this point in my conversion parts accumulation.
Posted by: porschetub Oct 13 2017, 09:46 PM
I have two plastic boxes. I like the look but am running K&N’s with rain hats. With all of the spitting that my car does through the carbs I am concerned about melting the plastic.
Anyone have recent experience ??
My engine had really screwed up carbs to start with ,2 blocked enrichment noozles,broken air bleed screw ,spitback melted the RH of the stock plastic air cleaner,careful work with a heatgun sorted it,so far my indications are you will have spitback when the engine is cold that's normal common sense dictates you warm it up (hand throttle ) ,if jetting/balance/timing and other factors are right you won't melt anything once up to temp if all is correct.
These air cleaners are very well designed as Perry suggested,I went back remembering what the late great Bruce Anderson said,no gain on the K&N's ,they dyno tested and the K&N's and lost 1hp,he then went on to say he was worried about filtration and recommended the paper filter ,I'am using one.
Posted by: Perry Kiehl Oct 14 2017, 06:55 AM
Nice airbox. If you can find a spare snorkle, there's a vintage mod where you cut off some of the snorkle.
The 914-6 snorkle points the opposite way of a 911
Posted by: mb911 Oct 14 2017, 02:42 PM
Nice airbox. If you can find a spare snorkle, there's a vintage mod where you cut off some of the snorkle.
The 914-6 snorkle points the opposite way of a 911
Do you know why it pointed opposite direction? Does it interrupt with anything in particular?? I bought a steel one and everything is already powdercoated..
Posted by: Keith914 Oct 14 2017, 02:49 PM
Nice airbox. If you can find a spare snorkle, there's a vintage mod where you cut off some of the snorkle.
The 914-6 snorkle points the opposite way of a 911
Do you know why it pointed opposite direction? Does it interrupt with anything in particular?? I bought a steel one and everything is already powdercoated..
The snorkel base is not perpendicular to the long axis of the car, you will see when you mount it the snorkel fits pointing to the passenger side .
Posted by: Larmo63 Oct 19 2017, 09:26 PM
It's really crazy how close that 911 engine really is.....It looks like a little monster hiding in there....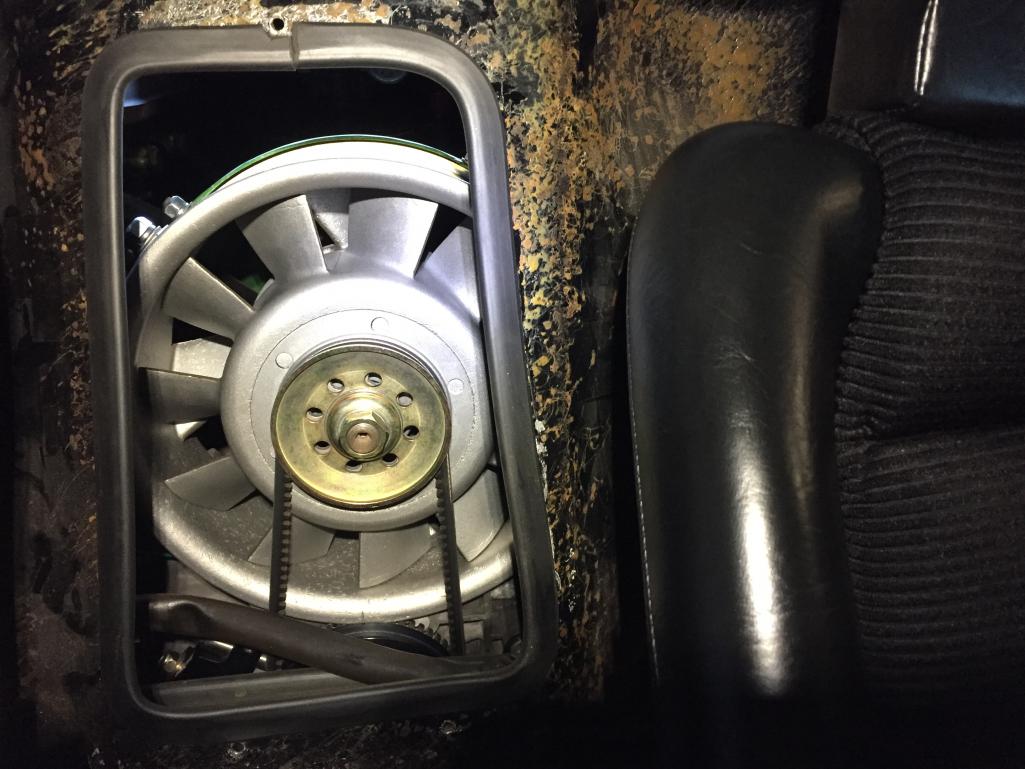
Posted by: Lucky9146 Oct 19 2017, 09:43 PM
It's really crazy how close that 911 engine really is.....It looks like a little monster hiding in there....
and it looks great!
Posted by: Larmo63 Oct 20 2017, 07:28 PM
I'm going to attempt to re-seal my rear window and re-do my sail panel trims. My question is this: Do I apply the butyl to the window, or the frame?
I think it is the frame the way Ruffino does my windshields.
Just checking........??
Posted by: 76-914 Oct 20 2017, 07:33 PM
The frame but before you do that be sure that little clip is in place. It helps support the glass. Then tilt the top of the glass back towards you as you offer it up to the opening. Once the bottom of the glass is where you want it push the tilted glass to mate with the upper portion. Do you save that piece you cut out for the fan. I need to do some patching on Red.
Posted by: Larmo63 Oct 20 2017, 09:57 PM
I think it went into the circular file....
Wait, what clip?
Posted by: Coondog Oct 20 2017, 10:14 PM
What happen to Forrest, I miss his post ??
Posted by: SO.O.C914er Oct 20 2017, 10:32 PM
Run Forrest run booyaa
Posted by: Larmo63 Oct 21 2017, 10:06 AM
Forrest bailed out to Arizona.
Posted by: 76-914 Oct 21 2017, 10:09 AM
I think it went into the circular file....
Wait, what clip?
My 76 has a small screw and clip dead center on the frame. It's not big enough to provide sealing pressure; only vertical support. Maybe it was only on later models?
I haven't done the 73 or 70 so I don't know about those models. Forrest quit Photo Bombing once he finished his project.
Posted by: bigkensteele Oct 21 2017, 07:09 PM
I think it went into the circular file....
Wait, what clip?
Not sure about a clip, but there should be two rectangular rubber pads that rest under the bottom of the window to keep it from moving down vertically.
Shea did a thread that is now in the classics. Read up!
http://www.914world.com/bbs2/index.php?showtopic=15821
Posted by: Larmo63 Oct 23 2017, 07:55 PM
I'm going to let Ruffino install the back glass. I attempted it, but in a black chassis it's hard to see what you're doing. I'd rather pay him the $45 to do it. Getting the Targa bar pad off of these cars is always an adventure, finding those elusive screws and not stripping them. Also, the DAPO had all kinds of shit jammed up between the window and the pad to get it to not rattle. It was time to suck it up, and take it all apart. I doubt that the rear glass has ever been out of this car in 45 years. It was basically hanging in the car by a thread.
In the meantime, I re-did the roll bar & sails with the excellent 914 Rubber German vinyl. (cheap plug)
It's bit tricky, but it came out nice.
Posted by: Larmo63 Nov 1 2017, 03:04 PM
I had an idea to do 911 style headliner material on the underside of my targa top. Today I bought some ivory/off white pin point vinyl and did the deed. for my first attempt at this, it turned out pretty good. I know what I would do differently next time; maybe line it with black hard cell foam(?)
Here is the stuff:
Attached thumbnail(s)
Posted by: Larmo63 Nov 1 2017, 03:05 PM
Finished product:
Posted by: drem914 Nov 1 2017, 03:15 PM
Nice work...
Posted by: Lucky9146 Nov 1 2017, 03:25 PM
Finished product:
Dang! That looks good. I like it.
Did you put it over the perlon?
Posted by: Larmo63 Nov 1 2017, 03:38 PM
No, the Perlon is long gone. I don't think it would work at all over Perlon. It does brighten up the interior.
Posted by: horizontally-opposed Nov 1 2017, 03:56 PM
Cool mod, and I always liked this stuff.
And, you say, it brightens up the interior.
Posted by: flyer86d Nov 1 2017, 03:57 PM
It looks great! Did you just glue it to the top?
Charlie
Posted by: Cairo94507 Nov 1 2017, 04:31 PM
Larmo - That looks very nice. Big improvement over the typical roof.
Posted by: Larmo63 Nov 1 2017, 04:31 PM
I go to my local smallish hardware store to get a new can of 3M 90 spray adhesive, and there is a can of this: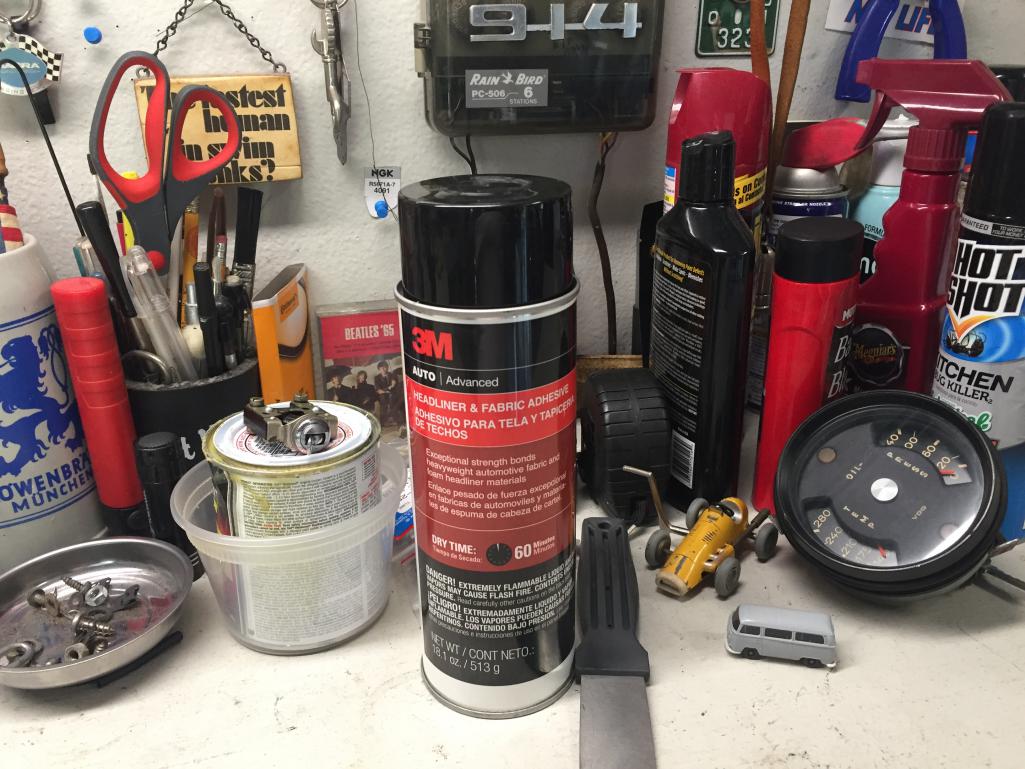
I couldn't believe it!
(Btw, I did glue it straight to the top. We'll see how long it lasts.)
Posted by: ndfrigi Nov 1 2017, 04:41 PM
beautiful sir Lawrence! Hope to see ur car this saturday!
Posted by: Coondog Nov 1 2017, 05:21 PM
I like it.....
Posted by: euro911 Nov 1 2017, 07:36 PM
Interesting mod, Lawrence, I like it. I painted the interior of my tan summer top with silver paint
Posted by: Larmo63 Nov 1 2017, 10:27 PM
These are real euro signals lit up. I think I'd like to use them as daytime running lights and be able to control them on their own, with a dedicated switch.
Posted by: Blue6 Nov 1 2017, 11:07 PM
That headliner looks great. I'll probably steal that idea....
Posted by: 914Timo Nov 2 2017, 11:01 AM
The headliner looks super good !! Very nice !!
Posted by: 914 7T3 Nov 2 2017, 11:06 AM
The headliner looks super good !! Very nice !!
I really like it...on YOUR car!
Posted by: Larmo63 Nov 2 2017, 12:29 PM
The headliner looks super good !! Very nice !!
I really like it...on YOUR car!
I forgot you are a Concours Weenie.
Posted by: JmuRiz Nov 2 2017, 01:39 PM
Cool headliner, I'm sure it really brightens up the interior and gives it a rest-of-Porsche model range look.
I was (probably still am) going to do ultra suede in grey.
Posted by: Larmo63 Nov 10 2017, 08:17 PM
I went up to Bob Ashlock's today to work on my gauges that weren't functioning, so much better to have them working now.
He has a really clean Tangerine '68 912 too. Lots of Porsche BS going back and forth.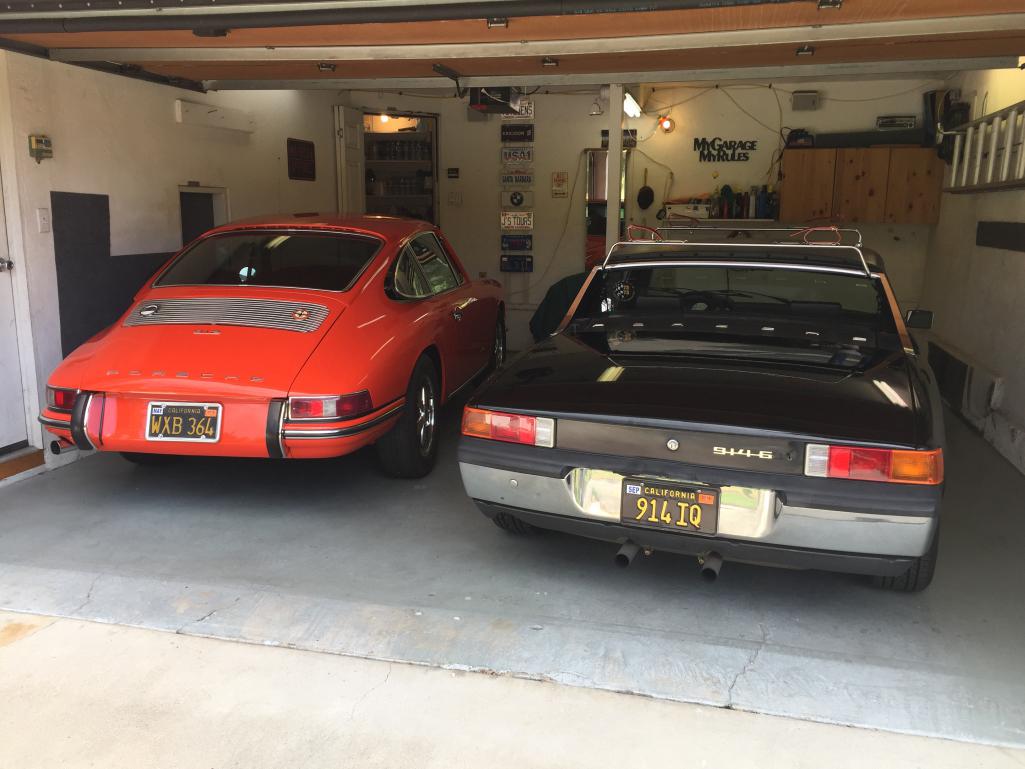
Posted by: porschetub Nov 10 2017, 09:02 PM
Has Bob still got his pristine 911T ?he sent me a pic ,really sharp looking car .
Posted by: Lucky9146 Nov 10 2017, 10:04 PM
I went up to Bob Ashlock's today to work on my gauges that weren't functioning, so much better to have them working now.
He has a really clean Tangerine '68 912 too. Lots of Porsche BS going back and forth.
Nice Pic and nice garage. Like "My Garage My Rules" sign. Gauges are always good!
Posted by: Larmo63 Nov 10 2017, 10:41 PM
He only has the 912 now. He really liked my 914 with the six in it.
Super cool guy.
doesn't the 914 look wide compared to the 912?
Posted by: Larmo63 Nov 29 2017, 05:52 PM
Does anybody have experience with 914 Restoration Design rocker covers? Do they fit well?
Posted by: Perry Kiehl Nov 29 2017, 09:36 PM
Everything I've ever gotten from RD recently, and years ago has been very good.
Posted by: 914 7T3 Nov 29 2017, 09:54 PM
Does anybody have experience with 914 Restoration Design rocker covers? Do they fit well?
Maybe you should have kept the ones from the G&R Swap meet.
Posted by: 76-914 Nov 30 2017, 09:14 AM
If your going to order a set LMK. We can double up and split the shipping cost.
Posted by: Larmo63 Dec 1 2017, 08:34 PM
License plate lights seem pretty straight forward, why will mine only work when I squeeze them tight to the bumper pad? Something is wrong, I get that, but they don't ground only when they are screwed in, do they? They each have power wires and ground wires. Weirdness.
Posted by: Larmo63 Dec 1 2017, 09:53 PM
I mean, shouldn't they just work when not screwed into the bumper?
Posted by: Dave_Darling Dec 1 2017, 11:29 PM
They should, but... Sounds like the ground wire has come adrift somewhere. Unplug one and check the resistance to the battery ground.
--DD
Posted by: Larmo63 Dec 2 2017, 05:07 PM
Backdating a '73.........running an early sharp corner rear bumper I picked last weekend. I got a really nice front too, both came with pretty good top rubbers.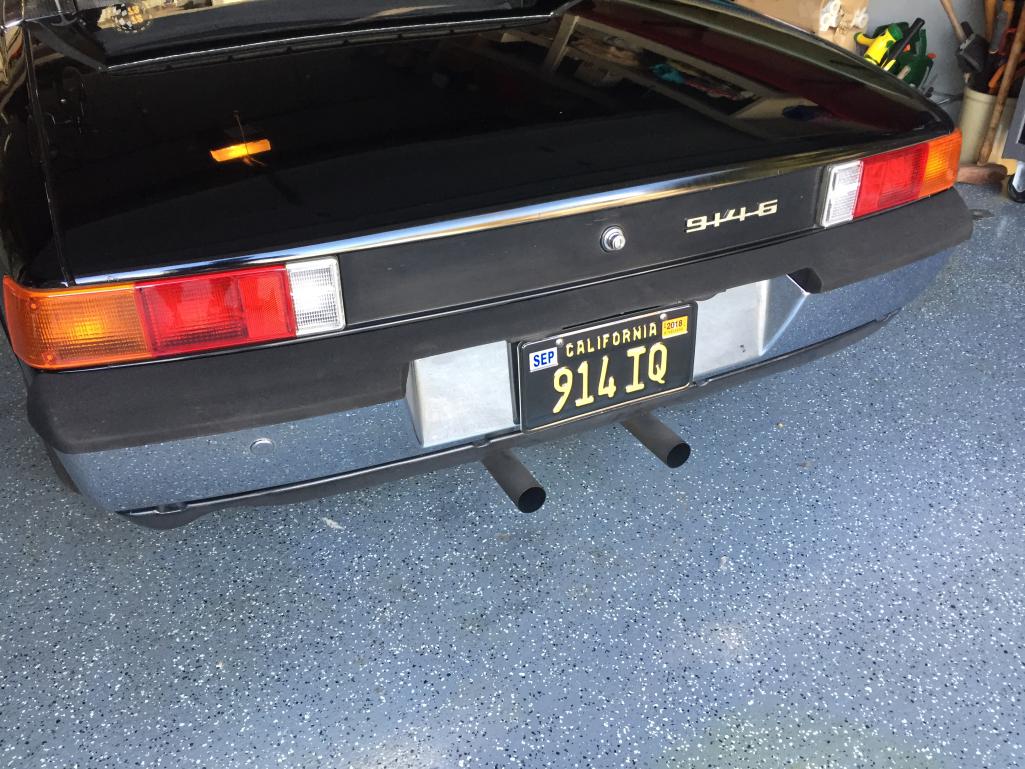
Posted by: Lucky9146 Dec 2 2017, 05:17 PM
Backdating a '73.........running an early sharp corner rear bumper I picked last weekend. I got a really nice front too, with pretty good top rubbers.
Nice Bumper!
Posted by: raynekat Dec 2 2017, 05:19 PM
Never thought a black 914 could look good....but yours looks great!
Posted by: 76-914 Dec 2 2017, 08:11 PM
Nice bumper but those tailpipes stick out like pee shooters. Want to borrow a pipe cutter?
Posted by: Larmo63 Dec 2 2017, 08:13 PM
The mark to the right of the license plate is a reflection. I found these locally by chance.
The front one is the one with the squarish holes not stamped out. They look like they came from the factory that way.
Posted by: Larmo63 Dec 5 2017, 08:25 PM
No dash lights all of a sudden. Where do I start looking? They are all out.
Posted by: 76-914 Dec 5 2017, 08:31 PM
IIRC, fuse 7 or 8 is the dash lights. Also, see if the reostat spring on the back of your light switch is still intact.
Posted by: mepstein Dec 5 2017, 08:31 PM
No dash lights all of a sudden. Where do I start looking? They are all out.
Fuse?
Posted by: Larmo63 Dec 5 2017, 08:33 PM
Fuses look good.
Posted by: Lucky9146 Dec 5 2017, 08:44 PM
It is fuse 7 just verified on my car. You didn't accidentally rotate the light switch to off did ya?
Posted by: Dave_Darling Dec 5 2017, 09:51 PM
Come on, you know that the fuses "look" good even when they're popped. Check them for real.
--DD
Posted by: Coondog Dec 5 2017, 11:16 PM
You need to install a J-West fuse box in that beast....... Gregs top ten 10 mods under 100 dollars.
Posted by: Larmo63 Dec 6 2017, 12:13 AM
I fiddled with it, then got called in for dinner. I'm not even hungry when I want to work on my toy.
More on this tomorrow. I'll look closer at the fuses.
Posted by: Larmo63 Dec 6 2017, 04:39 PM
That's so weird, I looked closer at the fuses, lo and behold, #7 was popped. I traced it back to wonky wires in the license plate light wiring that was a bit brittle and was shorting out. Now the dash lights and both license plate lights work.
I'm glad I figured that out.
Posted by: euro911 Dec 7 2017, 01:15 AM
I had an issue on the '71 several years ago, the engine would intermittently cut out and it was driving me crazy. Ended up being a fuse on the relay board - broken right at the end where the metal transitions to the end cup form that inserts into one of the holder tangs.
Only found the problem by removing the fuse from the holder to clean the tangs ... looks are deceiving.
Posted by: Coondog Dec 7 2017, 03:33 AM
Just Do It............ 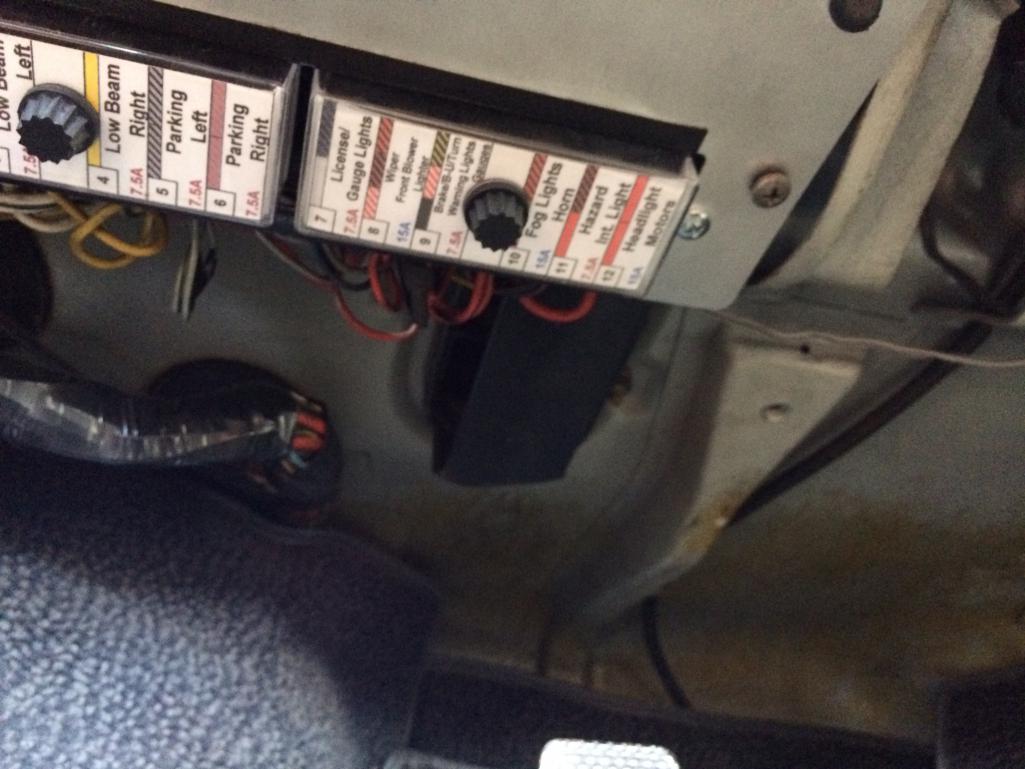
Posted by: Dave_Darling Dec 7 2017, 03:02 PM
... lo and behold, #7 was popped....
Toldja. I really don't want to try counting the number of popped 914 fuses I have found only when I have removed the fuse from the panel...
--DD
Posted by: Larmo63 Dec 7 2017, 05:59 PM
... lo and behold, #7 was popped....
Toldja. I really don't want to try counting the number of popped 914 fuses I have found only when I have removed the fuse from the panel...
--DD
Yup, you were right. I owe you one......
Posted by: mepstein Dec 7 2017, 06:16 PM
... lo and behold, #7 was popped....
Toldja. I really don't want to try counting the number of popped 914 fuses I have found only when I have removed the fuse from the panel...
--DD
Yup, you were right. I owe you one......
Ahem?
Posted by: Larmo63 Dec 7 2017, 07:49 PM
Mea culpa. I always seem to make electrical issues into something bigger (and scarier) in my empty head.
Practical and pragmatic investigation proved that the issue was cracked license plate wires to which I put new ends on cleanly stripped wire with new shrink tube.
You guys were right...........
Posted by: mepstein Dec 7 2017, 08:14 PM
Mea culpa. I always seem to make electrical issues into something bigger (and scarier) in my empty head.
Practical and pragmatic investigation proved that the issue was cracked license plate wires to which I put new ends on cleanly stripped wire with new shrink tube.
You guys were right...........
45 year old cars....
Posted by: 76-914 Dec 7 2017, 09:37 PM
Mea culpa. I always seem to make electrical issues into something bigger (and scarier) in my empty head.
Practical and pragmatic investigation proved that the issue was cracked license plate wires to which I put new ends on cleanly stripped wire with new shrink tube.
You guys were right...........
I always seem to make electrical issues into something bigger (and scarier) in my empty head.
This is exactly why you shouldn't do the JWest fuse box.
Search "license plate lights" and you'll find your not alone. Those chicken shit little bastards have bitten a lot of peeps in the ass.
Posted by: porschetub Dec 8 2017, 02:58 PM
Mea culpa. I always seem to make electrical issues into something bigger (and scarier) in my empty head.
Practical and pragmatic investigation proved that the issue was cracked license plate wires to which I put new ends on cleanly stripped wire with new shrink tube.
You guys were right...........
I wouldn't worry about we have all done the same @ one stage or another,my electrical skills are somewhat lacking,however it go's I generally get there.
.There seems to be 2 camps on the J-West board.....what gives
.
Posted by: mepstein Dec 8 2017, 03:19 PM
Mea culpa. I always seem to make electrical issues into something bigger (and scarier) in my empty head.
Practical and pragmatic investigation proved that the issue was cracked license plate wires to which I put new ends on cleanly stripped wire with new shrink tube.
You guys were right...........
I wouldn't worry about we have all done the same @ one stage or another,my electrical skills are somewhat lacking,however it go's I generally get there.
.There seems to be 2 camps on the J-West board.....what gives
.I think people buy it to try to solve a problem. Got to fix problems first.
Posted by: Larmo63 Dec 14 2017, 04:34 PM
I had my car up at Richard's shop in San Clemente. It's nice to get a real 911 expert to look your build over and tune the car. He re-jetted the carbs, re-torqued the heads and adjusted the valves.
It runs so much better, it was lean all around. He also caught a few loose bolts here and there, gave it the once over.
Posted by: raynekat Dec 14 2017, 04:42 PM
Mea culpa. I always seem to make electrical issues into something bigger (and scarier) in my empty head.
Practical and pragmatic investigation proved that the issue was cracked license plate wires to which I put new ends on cleanly stripped wire with new shrink tube.
You guys were right...........
I wouldn't worry about we have all done the same @ one stage or another,my electrical skills are somewhat lacking,however it go's I generally get there.
.There seems to be 2 camps on the J-West board.....what gives
.My take on why people "like" the JWest fuse panel....mainly for the modern blade fuses.
I didn't like the way the wires were directed into the JWest fuse panel.
Seemed like you had to bend the wires 180 degrees on one side, so that could with time stress those wires out and give you big electrical headaches down the road.
I simply cleaned up my factory fuse panel, installed all new fuses and enjoyed the way the wiring all connected to panel without any crazy 180 degree bends like one side of the JWest panel had.
Posted by: Coondog Dec 14 2017, 04:51 PM
I had my car up at Richard's shop in San Clemente. It's nice to get a real 911 expert to look your build over and tune the car. He re-jetted the carbs, re-torqued the heads and adjusted the valves.
It runs so much better, it was lean all around. He also caught a few loose bolts here and there, gave it the once over.
Always nice to have a third party go over your build.
Posted by: Larmo63 Dec 14 2017, 06:28 PM
I just took a nice drive down the coast through Camp Pendleton....car is running right.
Posted by: Lucky9146 Dec 15 2017, 08:38 AM
I had my car up at Richard's shop in San Clemente. It's nice to get a real 911 expert to look your build over and tune the car. He re-jetted the carbs, re-torqued the heads and adjusted the valves.
It runs so much better, it was lean all around. He also caught a few loose bolts here and there, gave it the once over.
Always nice to have a third party go over your build.Excellent points "real 911 expert" and "third party". Sounds like a smart thing to do and I look forward to a similar experience.
Posted by: Larmo63 Dec 16 2017, 06:22 PM
Some good Dallas Steering Wheels love came FedEx today, expensive, but WTH, it's Christmas.....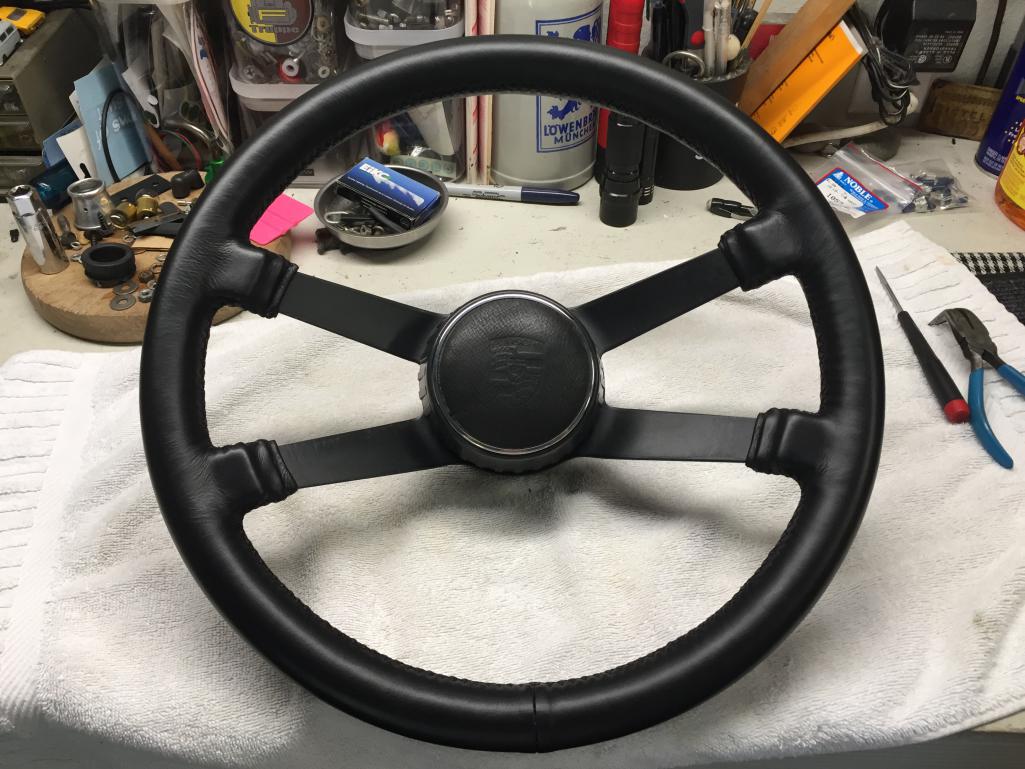
Posted by: raynekat Dec 17 2017, 12:12 AM
Some good Dallas Steering Wheels love came FedEx today, expensive, but WTH, it's Christmas.....
Very nice looking.
Bet it'll feel great in your hands as well.
Posted by: Krieger Dec 17 2017, 08:43 AM
Excellent looking wheel!
Posted by: mepstein Dec 17 2017, 08:46 AM
They have done 7 wheels for me. Always very pleased.
It’s not cheap but it’s the part you look at and touch so much, it’s worth it.
Attached image(s)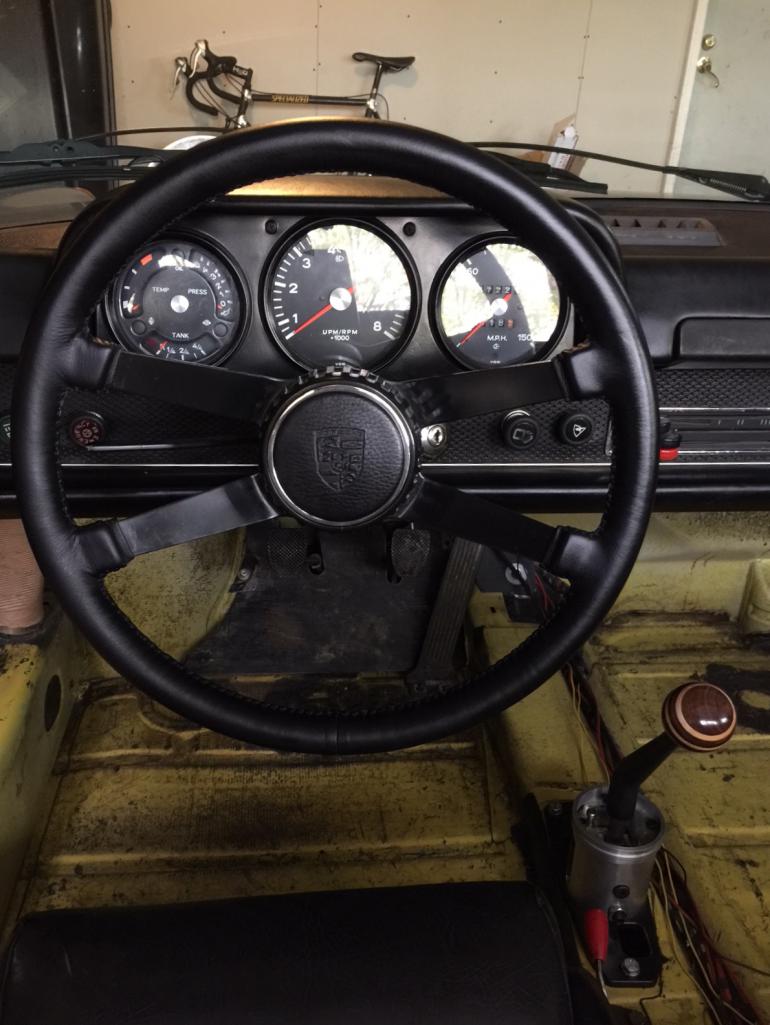
Posted by: Larmo63 Dec 26 2017, 10:57 PM
We went out by Camp Pendleton for a little father-son-Porsche bonding. My 26 year old drove the /6 for the first time, he didn't want to drive it back to Dad's house....
(can't attach the video)
Attached File(s) IMG_5532.mov ( 3.66mb )
Number of downloads: 161
IMG_5532.mov ( 3.66mb )
Number of downloads: 161
Posted by: Maltese Falcon Dec 27 2017, 12:08 AM
We went out by Camp Pendleton for a little father-son-Porsche bonding. My 26 year old drove the /6 for the first time, he didn't want to drive it back to Dad's house....
(can't attach the video)
I've downloaded and watched several times, nothing like a long empty road with a screaming flat six-engined 914 going by
Marty
Posted by: Larmo63 Dec 28 2017, 12:20 AM
My clutch seems like it is chattering a bit lately. Is this a symptom of a throw-out bearing going out? Warped flywheel? Clutch going? Everything seems like it is adjusted correctly, all gears and trans working fine. Clutch tube? Something loose? I need ideas on diagnosis before I pull the transmission to take a look. Everything in there is new; 228mm FW, PP, & matching clutch. Irritating, only about 2500 miles on this set up.
I mostly have issues in low RPMs, then it seems to go away at full scream.
Not looking forward to pulling it, but I know something isn't right.
Posted by: euro911 Dec 28 2017, 12:56 AM
My Vanagon started exhibiting the same thing no too long ago ... when taking off from a dead stop, but only intermittently.
The motor is currently out (being built up to a 2.1L) so I'll take a look at the clutch components and ask my builder (Randy at Automeister) what he thinks was causing it.
When he pulled the trans to replace a leaking RMS in it back in 2014, all the clutch components looked fairly new. Only put a couple thousand miles since then
Posted by: djway Dec 28 2017, 03:37 AM
Glazing, oil on the assembly, broken clutch tube. You can look in the tunnel to see of the clutch tube is moving with pedal compression. I am restoring a 914 right now that the tube was broken away in several spots. Most VWs I have worked on have the same problem. I add extra bracing when I do the repair. Good luck.
Posted by: 76-914 Dec 28 2017, 10:39 PM
Clutch tube would effect cable moment and movement. Do some hard starts a few times and let the clutch out slowly so it kinda slips. If there is oil on the disc it will burn off and get better. That won't stop the oil from getting on the disc but it will help you rule that out if'n that's what's happening.
Posted by: Larmo63 Jan 13 2018, 01:44 PM
Do the rubber/fuzzy track seals just slip in from the top? I think you take the plastic cap/top thing off, then slide 'em in?
I'm talking about the front ones of the roll up window, on the wind wing post.....
Posted by: Perry Kiehl Jan 13 2018, 02:21 PM
Fuzzy strips go in the aluminum channel before the channel is installed, there's holes in the strips that should line up with the mounting holes. Those are a pain
Posted by: Larmo63 Jan 13 2018, 02:28 PM
I'm looking at this closer window, my track has the plastic rollers. I hate the rattle when I close the door.
I don't think this rubber is right for my car. And, I ordered two rubbers, I guess they come as a set, I received four.
I have an early '73, I thought this would be considered a "late car?" Do I need new rollers?
Posted by: 76-914 Jan 13 2018, 06:08 PM
Yours isn't early style so your good on the rollers. The aluminum track that the fuzzy attaches to has 3-4ea small #3 or #4 Phillips head countersunk screws. They're almost always frozen and you need a screwdriver with a small tip. I've drilled them out but that's a PITA too. I use a 10" long #40 bit and flex the bit to line up and drill out. Once you finally get that little bastard off your mostly done. You still need to anchor the aluminum strip which has the new fuzzy strip and sometimes you need to relocate where the screws go because the old spot is trashed after you get it apart. Many steps. I've got this coming up on the '70 in the next few weeks.
Posted by: gothspeed Jan 13 2018, 11:23 PM
Some good Dallas Steering Wheels love came FedEx today, expensive, but WTH, it's Christmas.....
Wheel looks great
!! Is that horn configuration an OE or aftermarket option?
Posted by: Larmo63 Jan 14 2018, 09:05 PM
Porsche "hockey puck" set up.
Posted by: gothspeed Jan 15 2018, 09:30 AM
Porsche "hockey puck" set up.
Cool! Looks like a repro is made
https://www.zuffenhaus.us/product/911rs-horn-button/
Posted by: Larmo63 May 24 2018, 04:19 PM
What is the trick to a rattling driver's side window? It rattled when rolled down anywhere past full closed, so I've been working on fixing it.
My car is an early '73, early cable style window mechanism:
1) I put a new (used) lower corner block in the rear (it was missing) and greased the track a bit
2) New rollers (914 Rubber kit) in the front track and cleaned it
3) New top of the door felts/fuzzies (914 Rubber)
4) New rear plastic guide/end top block (914 Rubber)
The whole thing is better than it was, but still rattles a bit too much for my taste.
Am I missing something? Grease in the front track?
Help?
Posted by: 76-914 May 24 2018, 04:56 PM
Post a side view pic of your window fully down sitting in the drivers seat. I want to see the top of the window in relation to the wiper or squeegee. Take another from the top looking straight down. You didn't wear that damned Speedo anywhere near that car did you? That could have warped your entire 914.
EDIT: Is #3 the fuzzy strips?
Posted by: rhodyguy May 25 2018, 09:47 AM
How are the little rollers that ride up and down in the front post? Did you replace the press on fuzzy strip that goes on the inner top door lip?
Posted by: Larmo63 May 25 2018, 09:31 PM
New roller kit and new fuzzies
Posted by: Larmo63 Jun 3 2018, 12:00 AM
Say hello to my lil' frenn...........1955 bug arrived
Posted by: Travis Neff Jun 3 2018, 12:40 AM
Beautimous!
Posted by: euro911 Jun 3 2018, 03:30 AM
Nice 
Posted by: ValcoOscar Jun 3 2018, 04:12 AM
April fools deja vu.....
Posted by: Lucky9146 Jun 3 2018, 10:17 AM
That's a nice Dub! I'm with Oscar, hard to believe after that last stunt you pulled in April but I do see the 914 in the garage still, so I think it is for real.
Posted by: Larmo63 Jun 3 2018, 11:56 AM
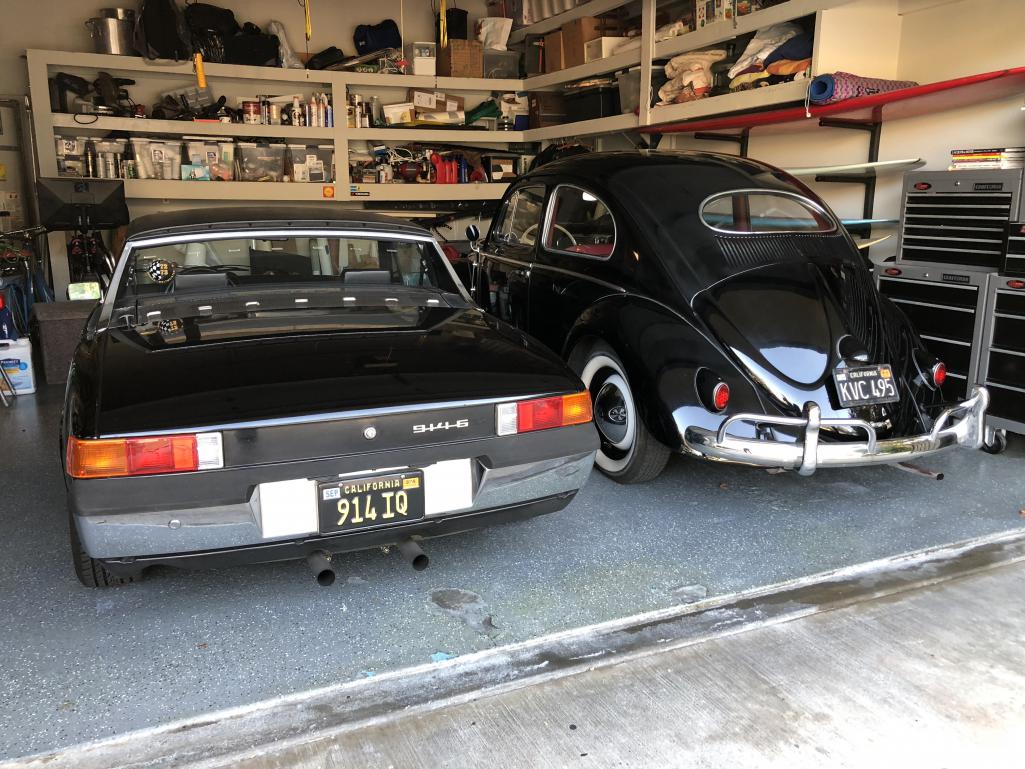
Posted by: horizontally-opposed Jun 3 2018, 12:00 PM
What a cool pairing.
What I am trying to figure out is how your 914 has not yet been COTM. Just has "the look," which isn't always easy to do with narrow body cars.
Keep on keepin' on.
Posted by: Larmo63 Jun 3 2018, 02:31 PM
Thanks, Pete.
No, no trick. I'd been looking for a while for an old bug and this one was family owned for many, many years in San Diego. I took the train down on Friday to drive it back. It's a two owner car, I'm the third owner. The guy I bought it from is 86 years old and suffering from Alzheimer's. He was so happy for me, but I don't think he really knew what was going on. Great family to deal with, and I bought it at a very fair price too. It's quite complete, some things need to be addressed as far as upholstery, but nothing bad.
Funny, when I was getting ready to sign the paperwork and get going with it, they kept loading it up with old parts. Mostly brake drums and other heavy stuff in boxes. I haven't gone through it all, but it was a LONG drive home up the coast.
I wanted to toss brake drums out on the side of the freeway to lighten the load. I goes about 65 top speed. 36 horsepower isn't quick.
Posted by: G e o r g e Jun 3 2018, 02:39 PM
Thanks, Pete.
No, no trick. I'd been looking for a while for an old bug and this one was family owned for many, many years in San Diego on Friday.. Two owner car, I'm the third owner. The guy was 86 and suffering from Alzheimer's. He was so happy, but I don't think he really knew what was going on. Great family to deal with, I bought it at a very fair price too. It's very complete, some things need to be addressed as far as upholstery, but it's nothing bad.
Funny, when I was getting ready to sig paperwork and get going with it, they kept loading it up with old parts. Mostly brake drums and some other heavy stuff in boxes. I haven't gone through it all, but it was a LONG drive home up the coast.
I wanted to toss brake drums out on the side of the freeway to lighten the load. I goes about 65 top speed. 36 horsepower isn't quick.
Sounds like a Type IV upgrade is in your future
Posted by: ValcoOscar Jun 3 2018, 03:39 PM
Okay..upon further review I can't see any evidence of photoshopping.
Congrats..what a perfect stable mate.
Posted by: Beach914 Jun 4 2018, 12:07 AM
Hey let's put my set of AA flares on it.......that way you can leave the teener alone.
Posted by: Maltese Falcon Jun 4 2018, 01:49 AM
Decades apart and a perfect pair from Germany ...congrats !
Posted by: mgp4591 Jun 4 2018, 02:08 AM
Wow, what a beauty! You could build your old 4 and drop it in... 100hp would be better for safety, cruising, your patience, etc. You'd never need to push it and just enjoy the ride - of course keep the original engine. But an amazing find - congrats!
Posted by: porschetub Jun 4 2018, 04:10 PM
My girl friend and I did one of these up years ago,the motor had been fully recond with all new parts by the aircraft engineer we bought it off,the gearbox was really sick so we adapted a later box,the old girl drove really well after we did the brakes up.
Great score enjoy .
Posted by: 76-914 Jun 4 2018, 04:51 PM
What's next; an Isso Moped?
Posted by: Larmo63 Jun 4 2018, 06:50 PM
The tires were out of date and cracked, so I put a new set of Firestone bias ply on today.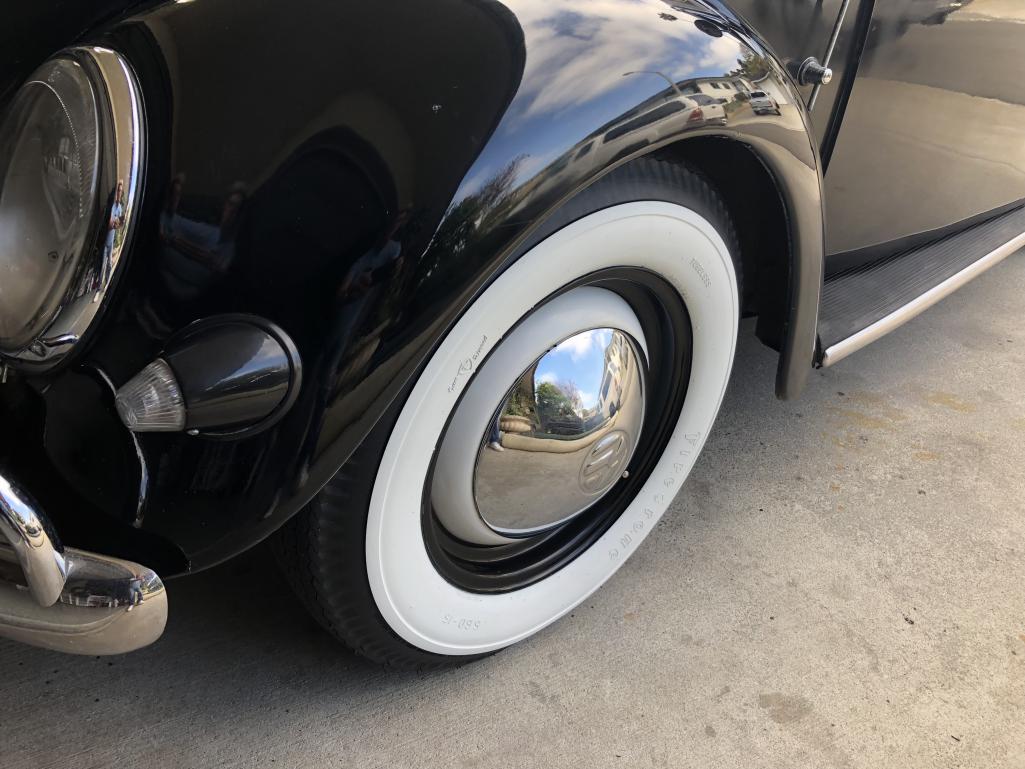
Posted by: mepstein Jun 4 2018, 07:23 PM
Even though I'm not a bug fan (hated being shoved in the back of them on hot days), Just opening your garage door and seeing the two cars, side by side, must make you very happy. Congrats.
Posted by: 914 7T3 Jun 4 2018, 10:21 PM
Even I am hesitant to call  at this point. However, I expect to see it first hand at Suspension Swap Saturday before offering heartfelt congratulations!
Posted by: Larmo63 May 3 2019, 09:26 PM
Will 911 3 1/2" spacing aluminum (908 style) calipers fit under 6 x 15 deep sixes?
I think they will, but I'm asking for another opinion.....
Posted by: sixnotfour May 4 2019, 01:40 AM
#1 908 style ? 911s had aluminum calipers ..76 turbo back,,so yes they. will fit......#2 what year do you have??
take pic ask pmb
Posted by: flyer86d May 4 2019, 09:12 AM
Yes, they will fit. Way back when in the early 1980’s, my sister and her husband at the time had a 73 914 2 liter autocross car that had 911S front suspension with big aluminum calipers and 15 X 6 deep six alloys. I have both the suspension, brakes and those wheels off that car. My sister flipped it at Lime Rock and wrote the car off.
Charlie
Posted by: horizontally-opposed May 4 2019, 09:14 AM
If you are talking about 911S calipers, yep, they should fit just fine. If you're talking about 908 calipers, that's a question for Dave Conklin and/or Eric Shea (there are others, I am sure).
As for the alloy PMB calipers, I can confirm they sit behind deep sixes very nicely, with or without spacers.
Your 914 is looking great....and I find that garage shot next to the Beetle, also in black, mesmerizing.
Posted by: mepstein May 4 2019, 10:28 AM
908 calipers fit and function the same as 911S. Our set of 908 calipers have thick pads and quick change hardware but except for some minor differences that I understand was to fit 13” wheels on the 908 hill climb cars, they look just like 911S calipers.
Posted by: Larmo63 May 9 2019, 07:39 PM
They aren't 908 calipers and they got bought out from under me.
I'm looking to lower unsprung weight.
Posted by: Larmo63 May 9 2019, 07:43 PM
I'm still thinking of doing the complete 911/914-6 steering column switcheroo. And left side switch.
Should I do an early dash too? I have the clamshell now too.
Posted by: mepstein May 9 2019, 08:00 PM
When you say “early dash” do you mean steel sub dash, top and bottom dash pad and larger glove box? Re-route the side vents. How far do you want to go?
Eric’s GT made it on Leno’s garage with a column mounted ignition.
Posted by: mepstein May 9 2019, 08:05 PM
They aren't 908 calipers and they got bought out from under me.
I'm looking to lower unsprung weight.
If you have 3.5” struts then yes, 911S calipers. Alfa Romeo calipers for 3” struts.
Ends up costing about $100 per pound saved.
Posted by: sixnotfour May 9 2019, 09:29 PM
5 holes no rewire,914-4 ign switch...just sayin..REDRUM
Attached image(s)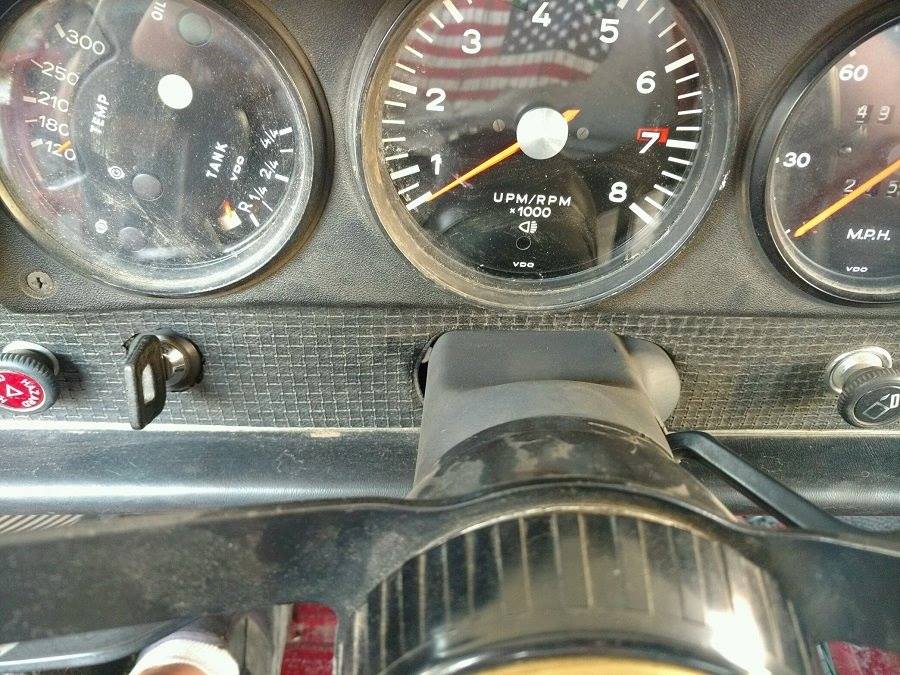
Posted by: Larmo63 Jun 1 2019, 08:39 PM
I'm ready to slap them onto the car, but I think the hard lines won't line up.
The A calipers look like the lines enter from the top, these enter from the back.
I assume I'll need to get banjos.....?
Little help here from the Gurus?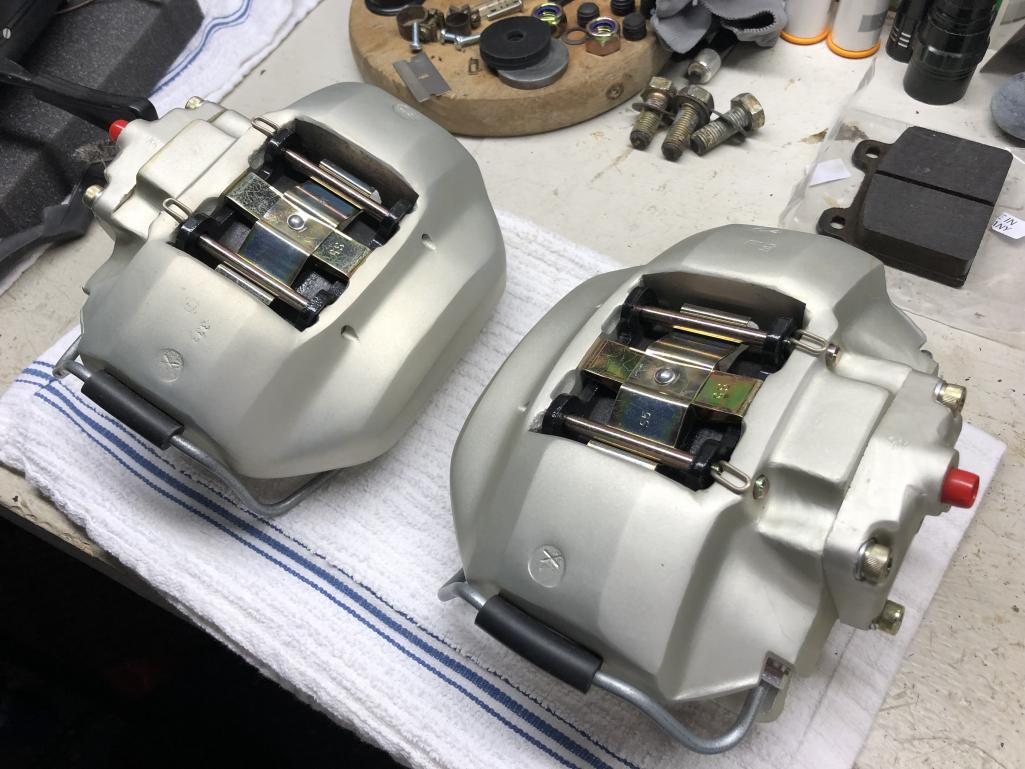
Posted by: SO.O.C914er Jun 1 2019, 09:51 PM
Damn those look purdy Larmo. Hope you get it figured out?
Posted by: sixnotfour Jun 1 2019, 09:55 PM
you had 2 pairs ?
Posted by: Larmo63 Jun 2 2019, 10:10 AM
Yes, I sold the other pair. These were re-done by PMB. Pagid pads.
Do I need banjos?
Posted by: mb911 Jun 2 2019, 10:19 AM
Yes you need banjos.
Posted by: sixnotfour Jun 2 2019, 10:20 AM
and the bolt
Posted by: mepstein Jun 2 2019, 10:21 AM
Yes, I sold the other pair. These were re-done by PMB. Pagid pads.
Do I need banjos?
Probably. You do for M calipers on a 914.
Ask Eric.
Posted by: Larmo63 Jun 2 2019, 02:49 PM
Yup, I guess I didn't realize I need two bolts, two banjos, and four crush washers.
Dang it, now to source them. I suppose Eric has them.
Posted by: ndfrigi Jun 2 2019, 03:01 PM
yes those calipers are beautiful! just use it for garage display.
Posted by: worn Jun 2 2019, 05:49 PM
They aren't 908 calipers and they got bought out from under me.
I'm looking to lower unsprung weight.
I am not sure that hurling brake drums off of the car will do that, but some sort of launcher oughta at least add forward thrust. Congrats on two matching cars!
Posted by: Larmo63 Jun 2 2019, 06:09 PM
Can someone school me as to what I need to mount these?
Banjos? Yes?
Most pictures I see online show lines directly into the calipers.
I'll call Eric tomorrow, but don't leave a guy in suspense if you know the answer.
Posted by: sixnotfour Jun 3 2019, 02:58 AM
???
Attached thumbnail(s)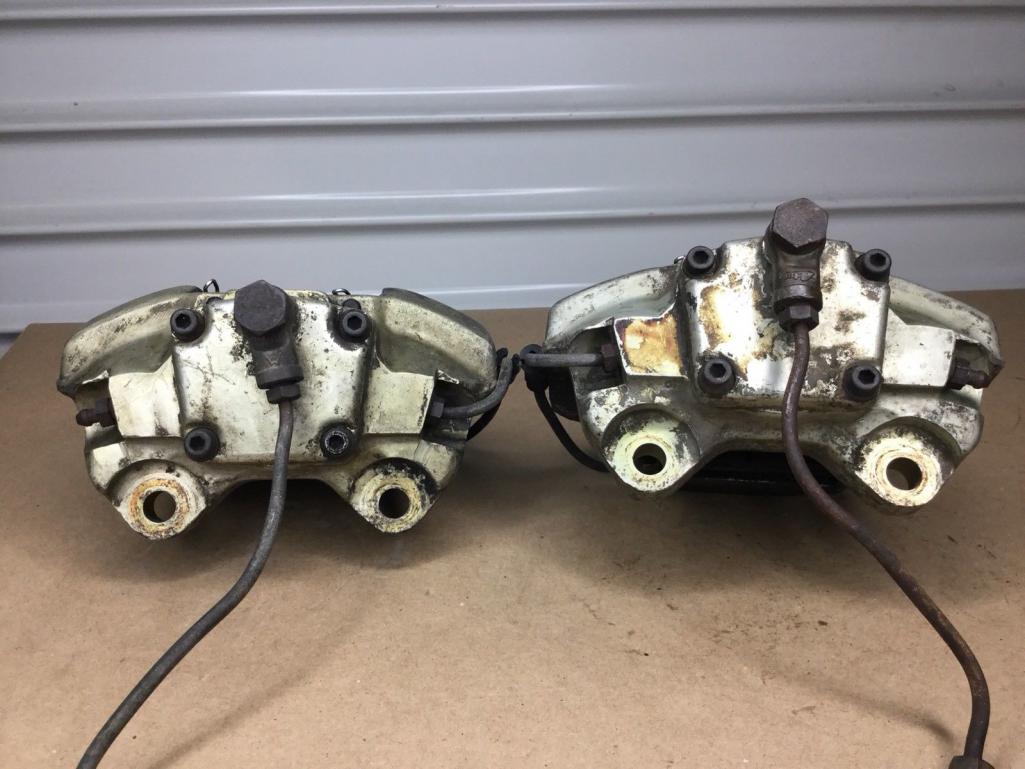
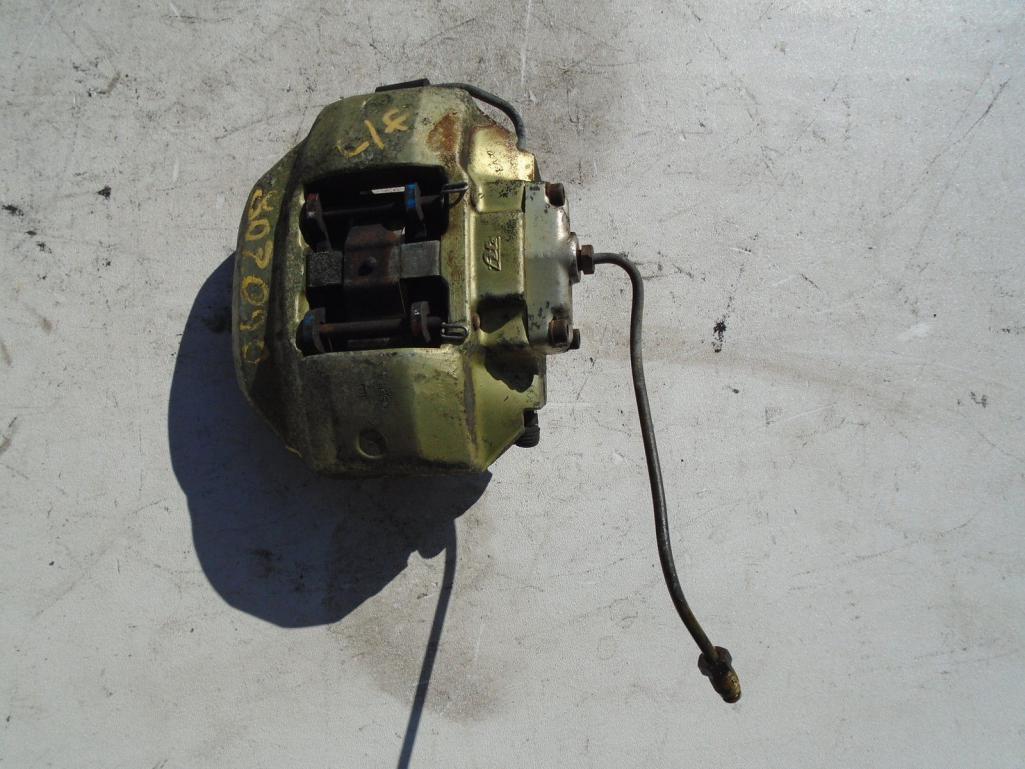
Posted by: Larmo63 Jun 3 2019, 10:24 PM
Eric is bringing my parts to WCR.
Tough room here.
Posted by: sixnotfour Jun 3 2019, 11:54 PM
maybe someone should have asked questions or someone should have provided intell...
Powered by Invision Power Board (http://www.invisionboard.com)
© Invision Power Services (http://www.invisionpower.com)