Printable Version of Topic
Click here to view this topic in its original format
914World.com _ 914World Garage _ puzzling body twist
Posted by: doug_b_928 Jun 3 2016, 08:12 PM
Sorry in advance for the longish post. My 73 was hit before I bought it as a naive kid of 15 (the car was badly rusted and poorly repaired or not repaired at all, more than 30 years ago). A few years ago I set out to begin the slow process of restoring the car only to find out how extensive the rust is and that the chassis is twisted. I wish I could drop it off to Rick or Scotty but that's not in the budget (especially with the exchange on the CAD). I know I should abandon any hope of restoring it, and it may well become my parts car, but it keeps sucking me back in.
Case in point: When looking at the car from the rear the twist is obvious, it's 1.25" higher on the passenger side. I've done the measurements on the car and the only part that's off is the rear end. The trunk is square but the 'length of rear body assembly' (q measurement) is 8mm short (and, as shown below, shorter on the driver's than passenger's side as well), the width of the trunk opening (r measurement) is a bit wide at the top (2-3mm), perfect at the point above the transmission crossmember, and narrow at the very back (-7mm). The diagonal across the trunk (s measurement) is square but 8mm short.
I also measured from various points under the car down to a flat surface (trailer floor) and was quite shocked to find symmetry side to side all of the way from the firewall back to the transmission crossmember and even a bit past that point. As well, I measured these points from the firewall and to the suspension mounting brackets and found symmetry.
I was able to check measurements on another shell that does not appear to have ever been hit and they were either identical or almost identical to mine (except the ones that are off on mine mentioned above).
The PO had put in a homemade engine bar, so I theorized that perhaps the bowing of the front of the fenders meant that the engine mounts bowed as well, but I acquired an engine bar and it fit like a glove. Then I thought that perhaps the trans mounts were shifted (necessitating a custom engine bar so the trans would mount), but the symmetry side to side from the attached measurements below as well as the consistency with the measurements I took from another shell suggest that's not the case either.
This all suggests to me that the car is only twisted at the very back, including the rear trunk floor pan but not the trans crossmember. Even the pinch weld of the "frame" a bit behind the trans cross member is not different side to side as measured to the floor of the trailer. The fender(s) are pushed in at the very back and maybe slightly bowed toward the front (at the bottom front the fenders they are bowed significantly past the doors). The inner wheel wells in the trunk area are also off from one another a bit in terms of height from the trailer floor, but not by much (I calculate at most 5mm).
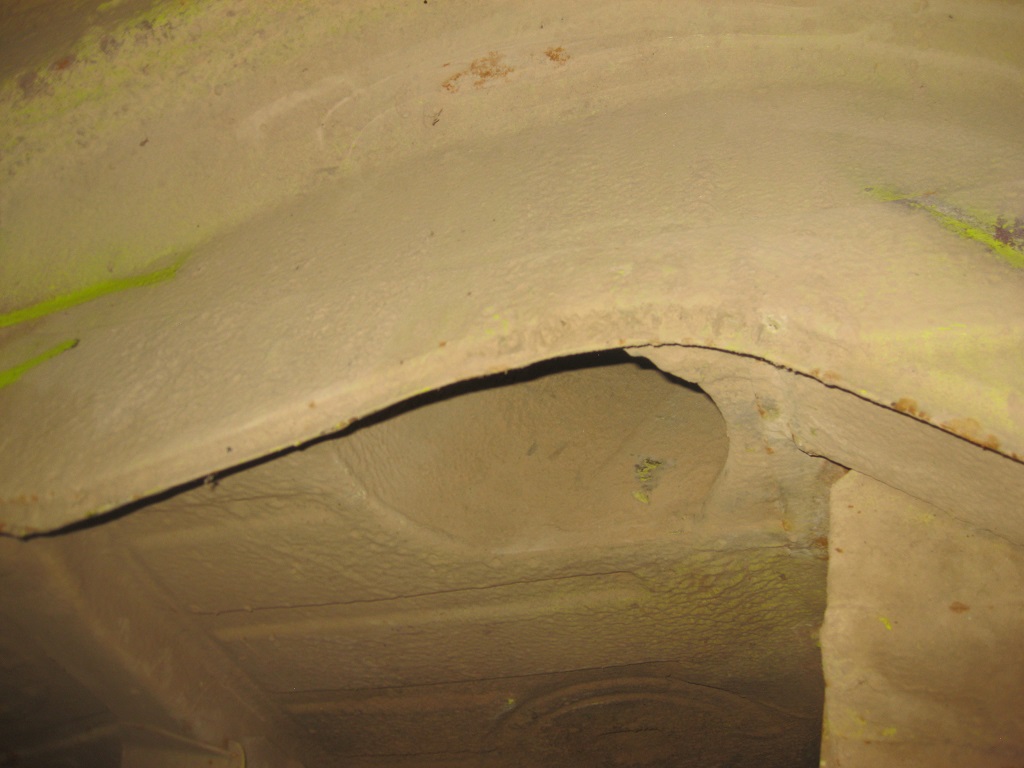
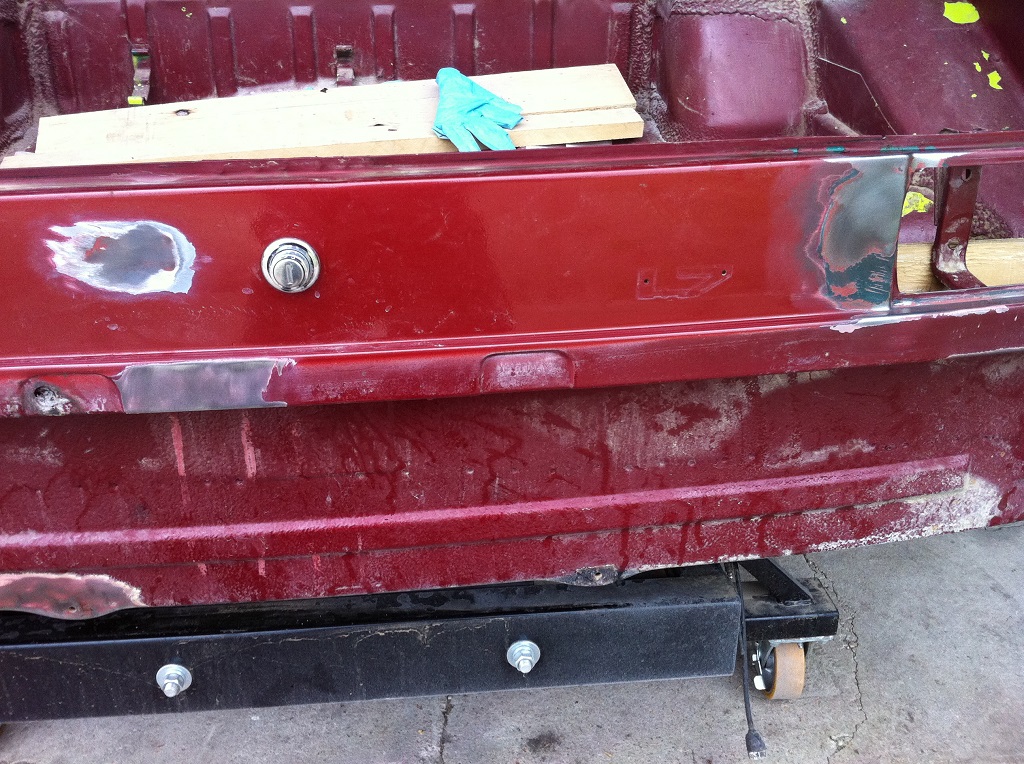
Attached are my measurements (that are supplementary to the ones on the list of 'Body Dimensions' as well as some pics that show the asymmetry in the rear of the car. It is clear that the rear trunk floor was pushed in, it took the hardest hit on the driver's side and there is a poor patch on that side (but there was also damage to the tail light area of the passenger fender). Looking from underneath you can see the difference in distance between the underside of the trunk floor and the tail section. It almost looks as if they welded on a different tail section crooked, but given the repair I doubt that any panels were replaced (even the broken tail liight housing was re-used with puddy to seal it up). When you look from the back of the car into the trunk you can see how crooked the tail piece is in relationship to the trans crossmember (see pic below).
So I have all of these data but I still can't figure out whether the driver's side is low or the passenger side is high, or both. Does anyone have any advice on what I can do to figure that out? Do the pics below showing the difference in distance from the underside of the trunk floor to the bottom of the tail piece give any clues?
Here's the view from the back where you can see how the tail section is off relative to the trans crossmember: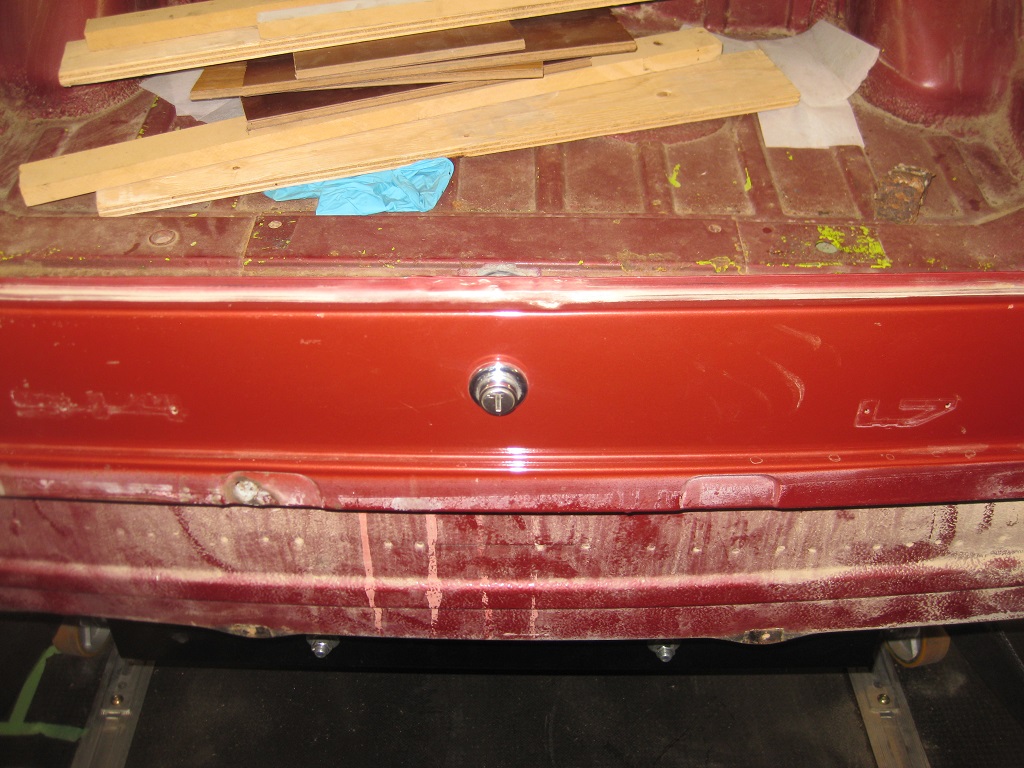
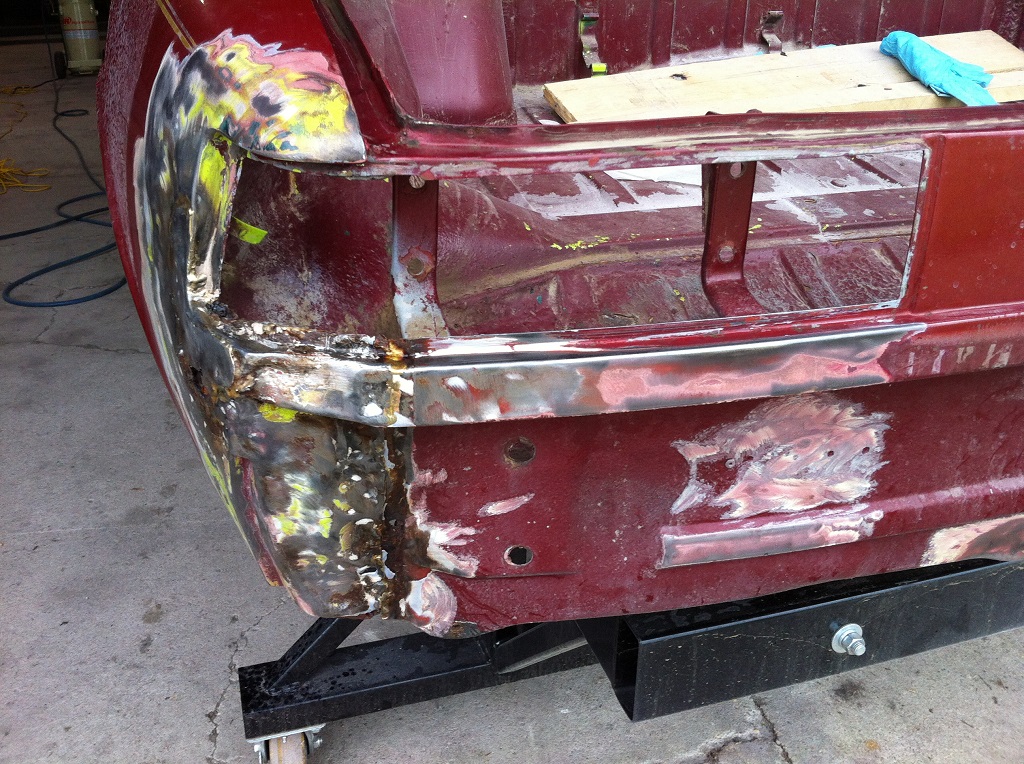
Here's a view of the underside where you can see, sort of, how the distance from the underside of the trunk floor to the bottom of the tail section is quite different from side to side (it's more obvious in real life):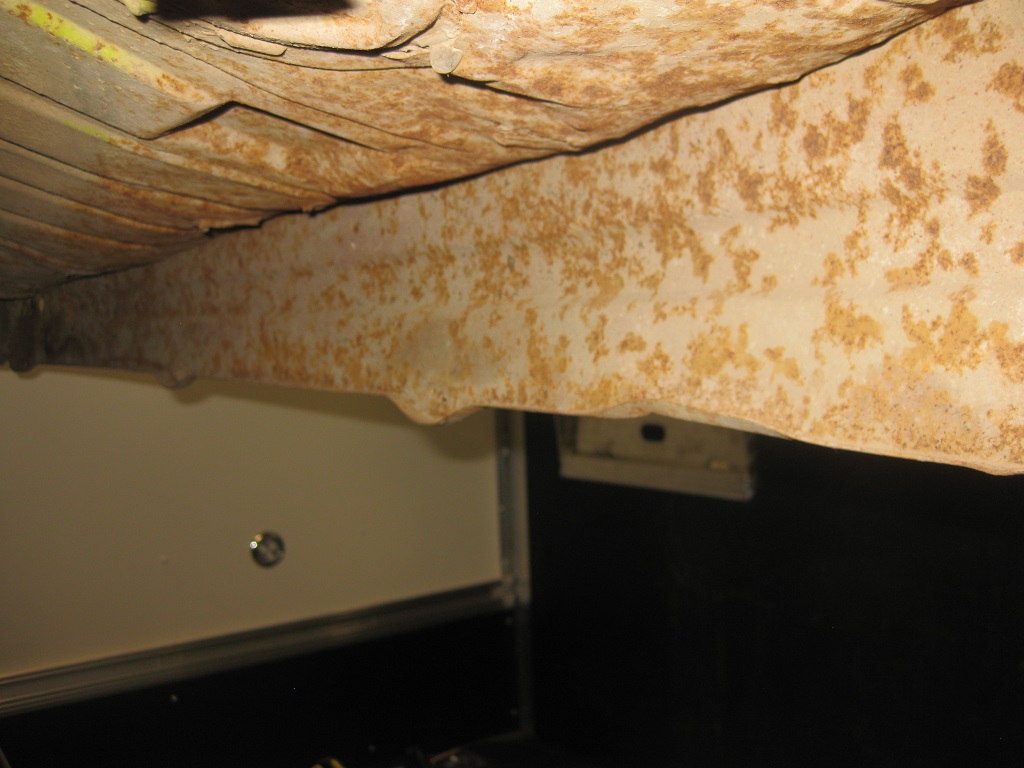
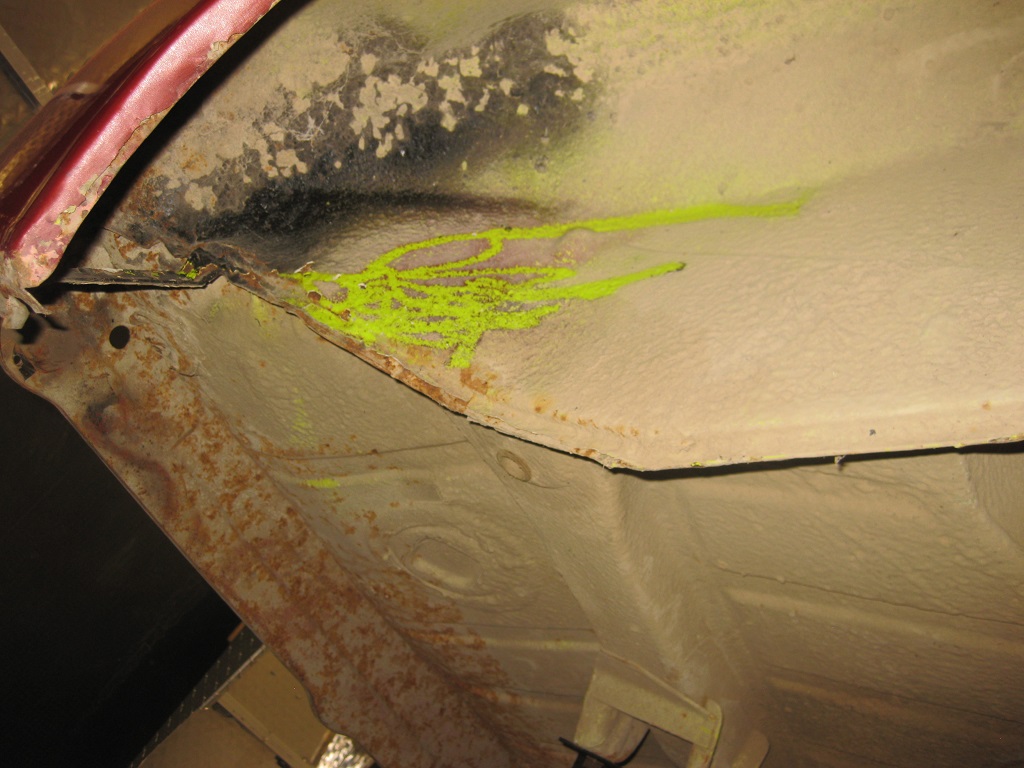
Here's the view from the underside of the dirver's side: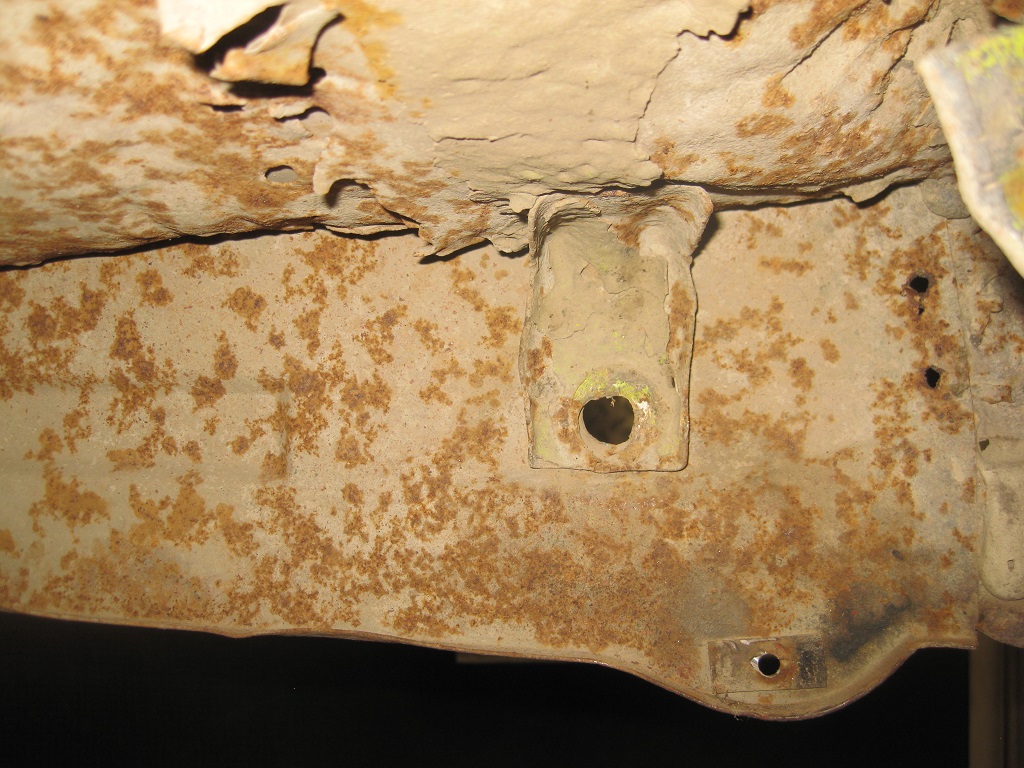
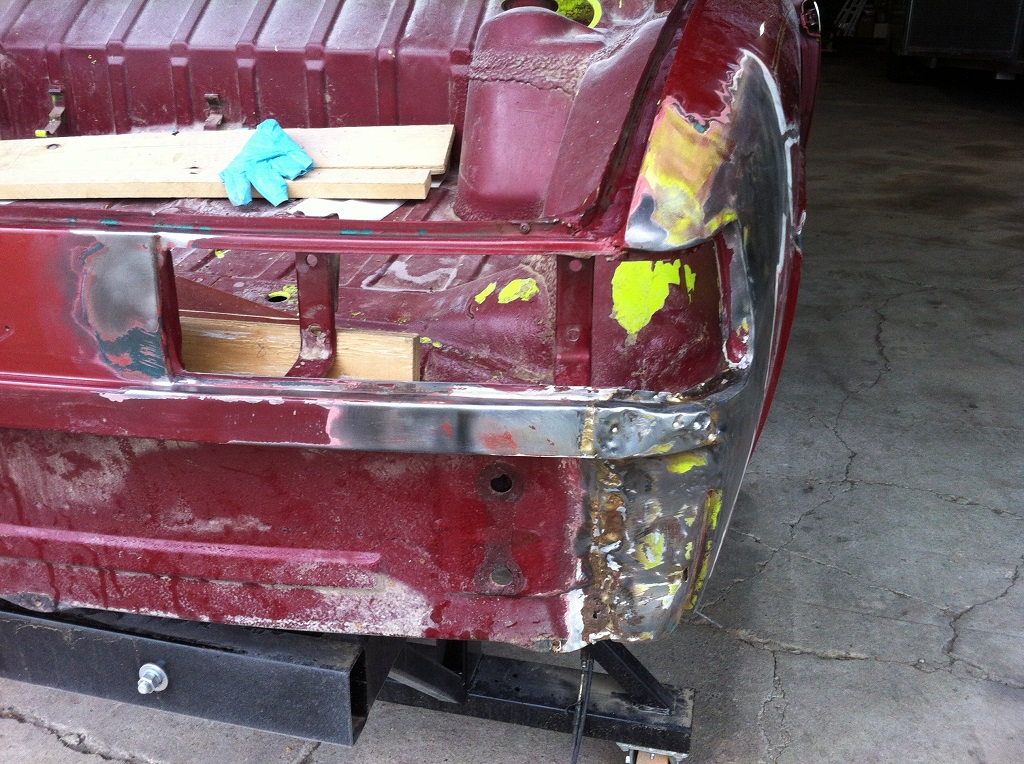
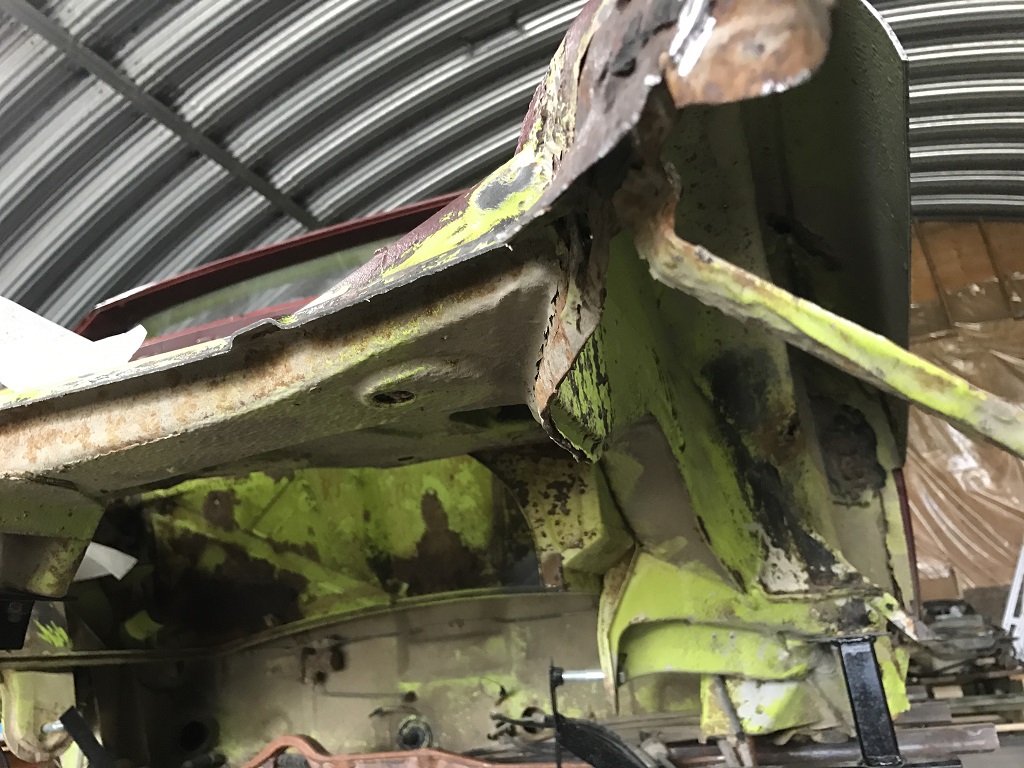
Here's the view from the underside of the passenger's side: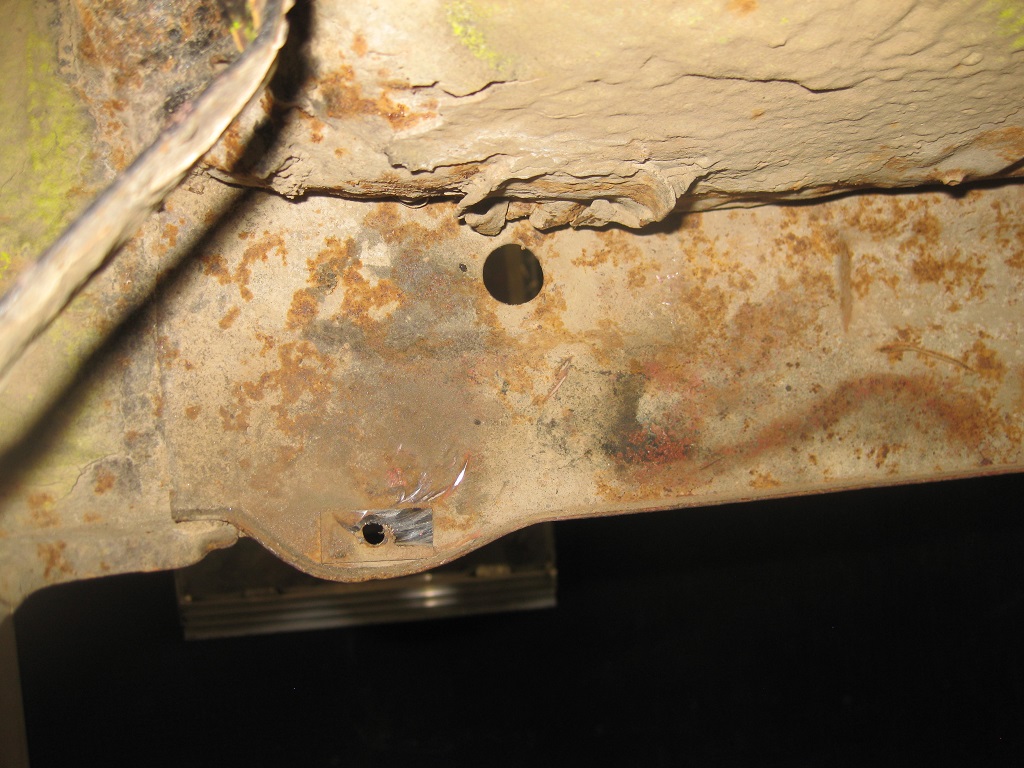
I'm hoping the latter two pics might give some clues as to which side is (more) off.
Here is a pdf attachment of the measurements that I took: 914_Supplementary_measurements_June_1_2016.pdf ( 1.06mb )
Number of downloads: 128
914_Supplementary_measurements_June_1_2016.pdf ( 1.06mb )
Number of downloads: 128
Posted by: doug_b_928 Jun 4 2016, 11:04 AM
No replies yet, and I'm not surprised as this is a tough one. In looking at the last two pics I see that the bracket has been cut away on the passenger side. If that bracket is the same as the one on the driver's side then it wouldn't line up with the hole, so that is suggesting to me that the tail section is pushed up relative to the trunk floor on the passenger side. Make sense?
Posted by: rick 918-S Jun 4 2016, 12:43 PM
I like chassis puzzles. Before I read the entire post I deduced the issue is the rear floor pan. I can see where it has been hammered to death. To repair it I would get a rear trunk floor from RD. While changing the rear section I would realign the tail light panel. 3mm is industry standard in the collision business. Early unit body cars conform nicely to the standard as there is still slots and alignment tolerance built in to the bolt on parts.
Posted by: doug_b_928 Jun 4 2016, 01:55 PM
Thanks very much for chiming in, Rick. The delta from the floor of the trailer to the tail light opening is over 1" side to side. With the rear trunk floor out can that be adjusted as well? I was guessing that the fenders would need to be removed and then the remaining adjusted before putting the fenders, tail section, and floor back in.
I wish your work would bring you closer to Winnipeg so I could show you the car. Perhaps there's a way to make it work...
Posted by: Jon H. Jun 5 2016, 05:44 AM
Is your suspension and tires still on? If so, if your measuring from the floor the difference might be in the tires/suspension.
Regards'
Jon
Posted by: doug_b_928 Jun 5 2016, 06:13 AM
The car is a shell, on a bench made from Jeff Hail's plans. It was made with a laser level so no worries about it being off.
The trunk floor was mangled but it's more or less level with the trans cross brace, which is level. To my untrained eye the tail piece and back parts of the fenders are what are out of whack. Going by my last two pics above where the bracket is missing from the passenger side and the hole wouldn't line up if the bracket were there, it looks to me like the passenger side rear fender and tail section need to come down an inch and a quarter.
If so, I'll talk to a frame shop to see if they can pull the passenger corner down. Should I remove the rear trunk floor first?
Posted by: rick 918-S Jun 5 2016, 06:17 AM
Take a photo of the chassis rails, right and left side profiles thru the rear wheel wells. If hit hard they kink or bulge at the wheel centerline.
Posted by: rick 918-S Jun 5 2016, 06:19 AM
Your like 7 hrs. away from me. If I wasn't upside down with a real job I would take a trip up and get eyes on. Maybe later in the year... 
Posted by: doug_b_928 Jun 5 2016, 07:31 AM
That would be terrific, Rick! That's why I was thinking if you're still covering Northern Minnesota you could pop up here (only 1 hour north of the border) when you're up North, or I could meet you/pick you up.
I'm thinking if the car won't cost much to straighten maybe I could still have you do some of the work that I'm not competent to do (well, that would be all of it, but you know what I mean...). I'm trying to figure what it's going to take to fix it before I spend any more money on it (e.g., before ordering panels from RD).
Here are the requested photos and then some, hot off the press.
Driver's side wheel well. I had a friend look at it and he thought he saw a small kink that I've circled in red (there is a vertical crack in the undercoating that's hard to see in the pic), but it really doesn't look like a kink to me (but what do I know).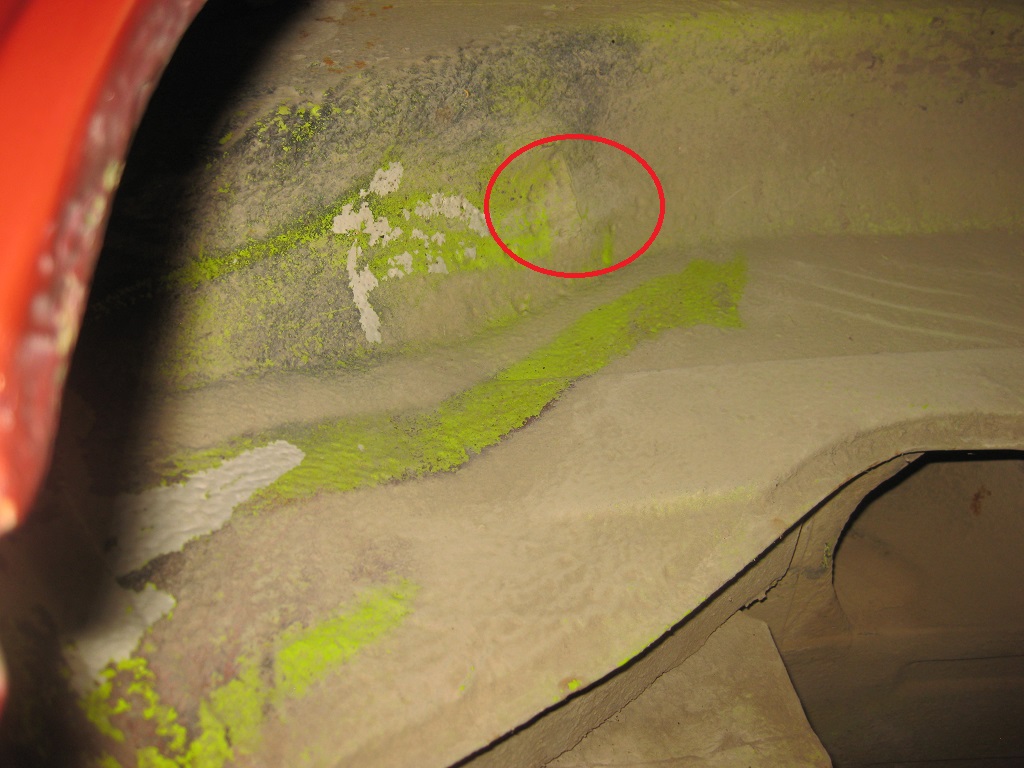
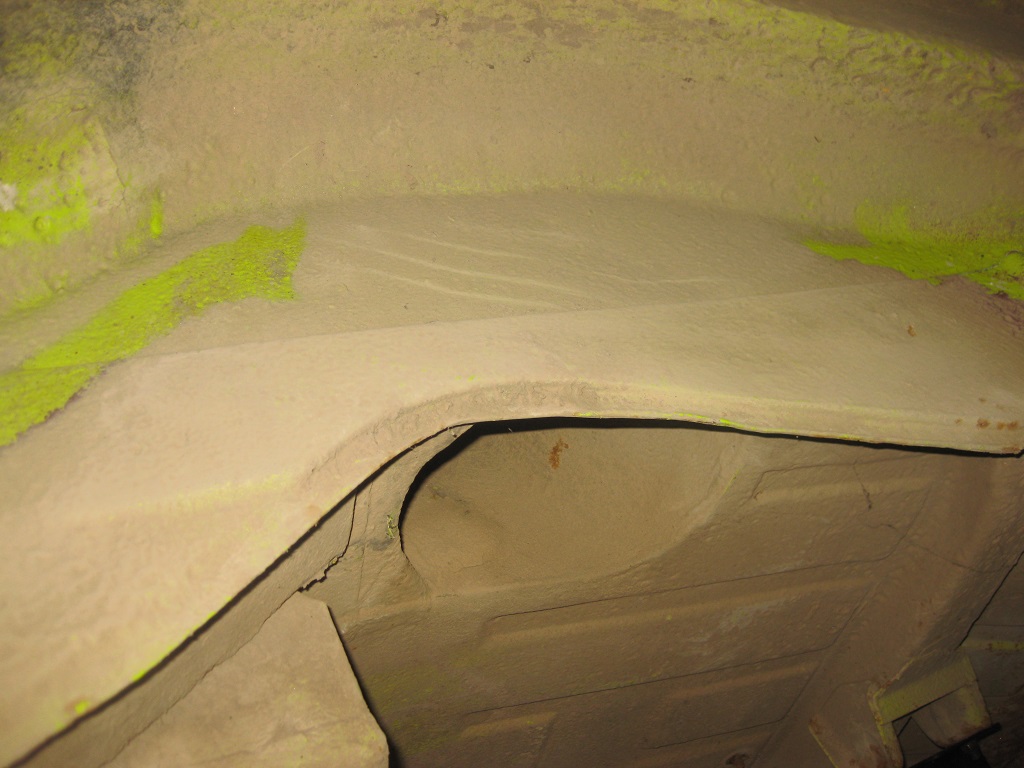
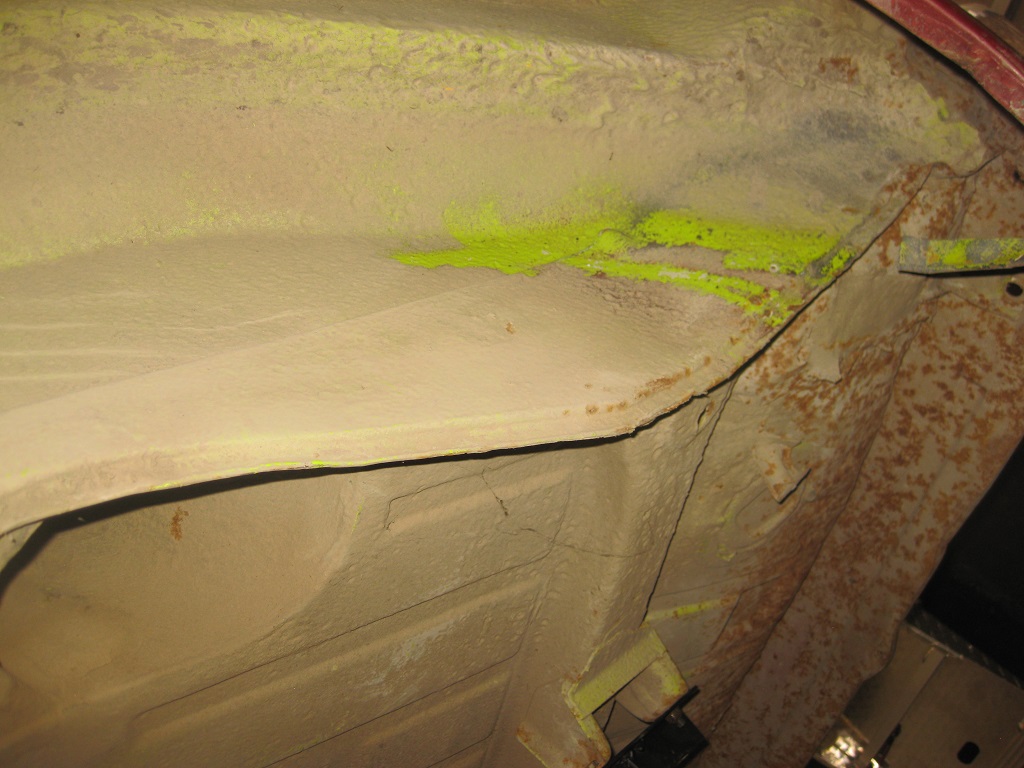
Passenger side wheel well: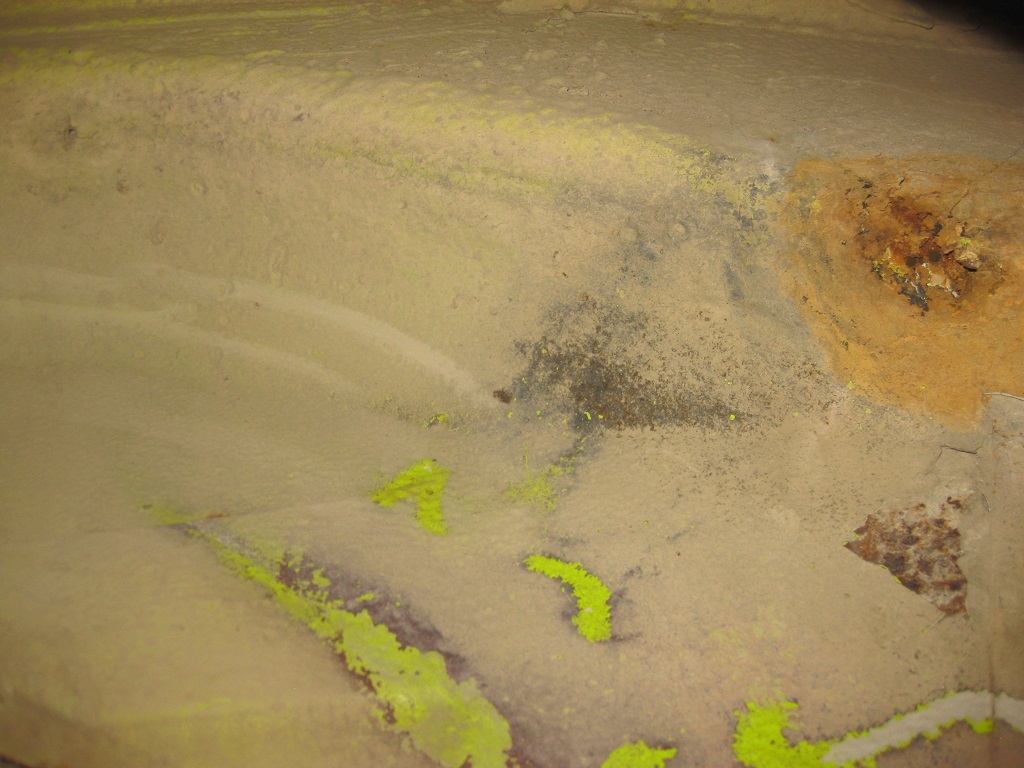
Another shot of the underside. You can really see in this one the difference relative to the trunk floor and if that bracket were present on the passenger side how far off the hole would be (when looking at it imagine that the trunk floor and trans crossbrace are level).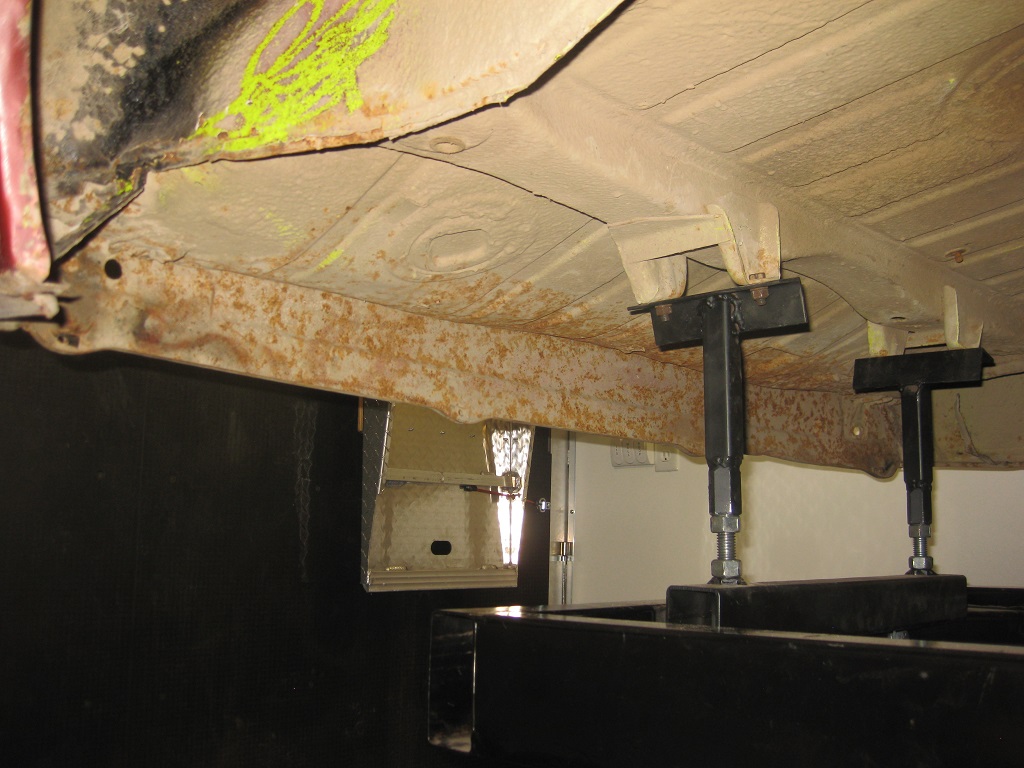
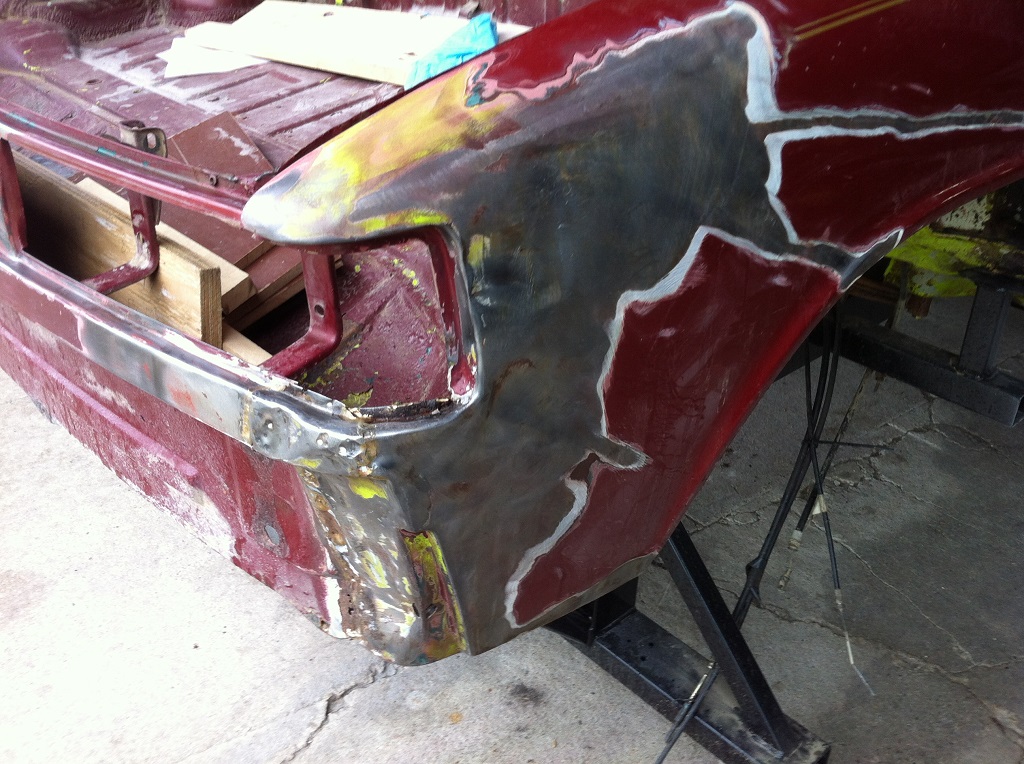
Here are some pics of the other trouble spots in terms of fit. The trunk lid is bent so in the two pics below I'm trying to hold it down with one hand and take the picture. The first pic is looking across from the passenger side at the line of the trunk on the driver's side fender. The fender doesn't quite match up. Looks like it bowed up when it was pushed in from the collision.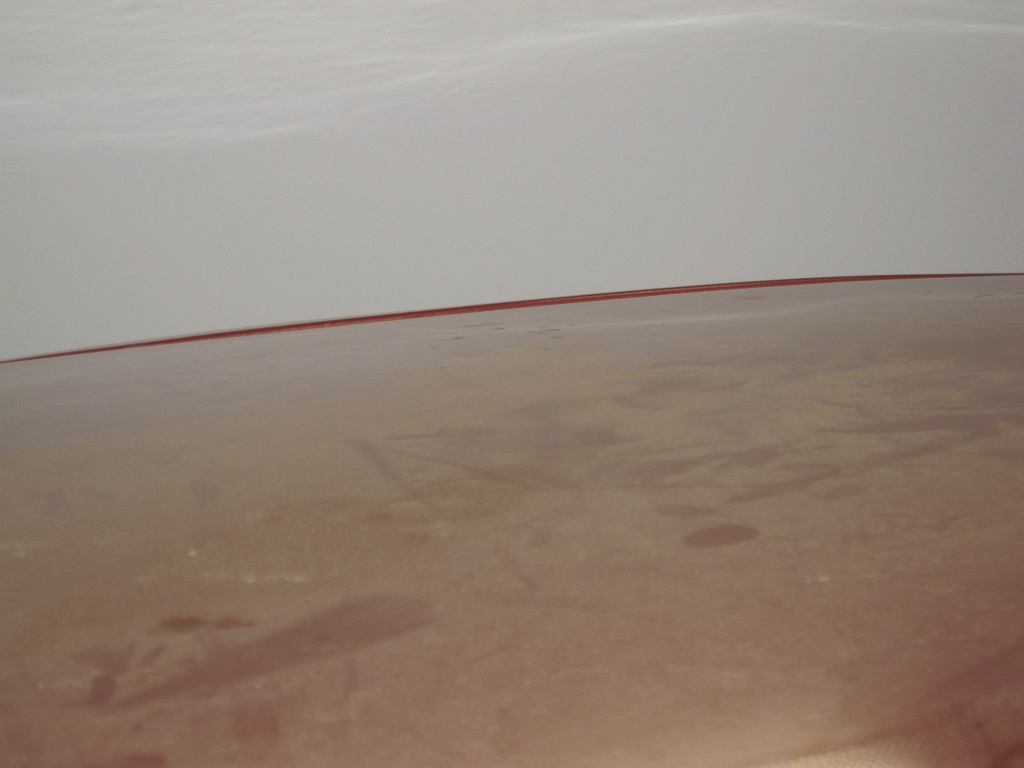
This is looking from the driver's side at the passenger fender-trunk seam. Not as bad as the driver's side: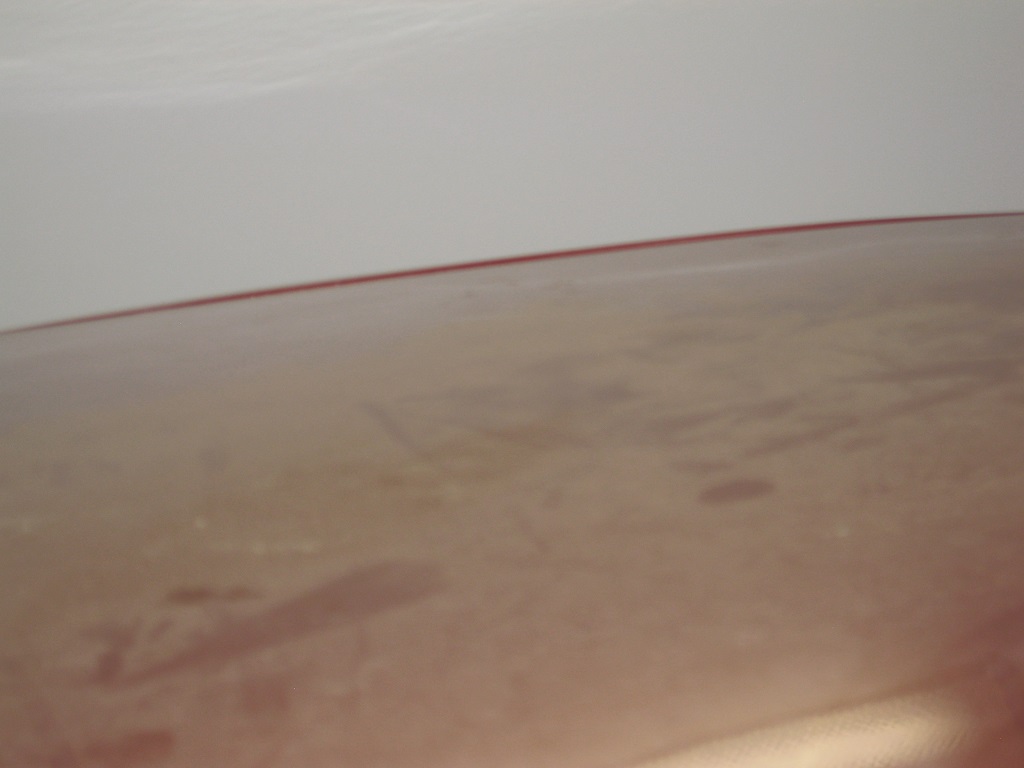
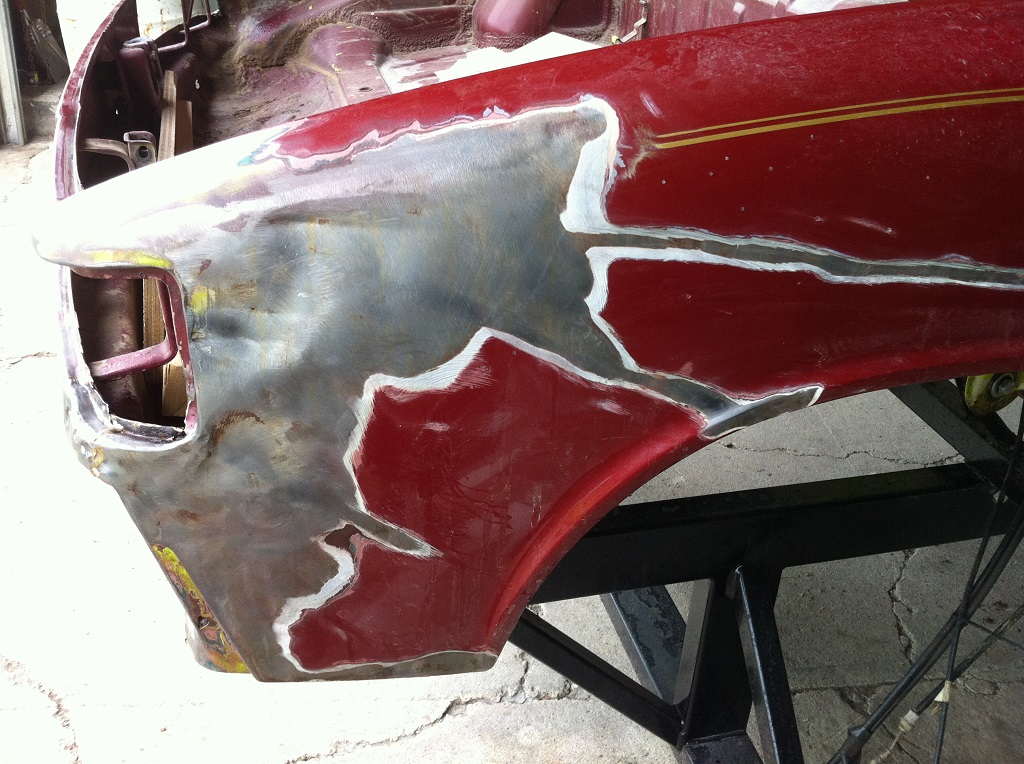
Here's the bowing I was talking about at the driver's rear fender where it meets the door: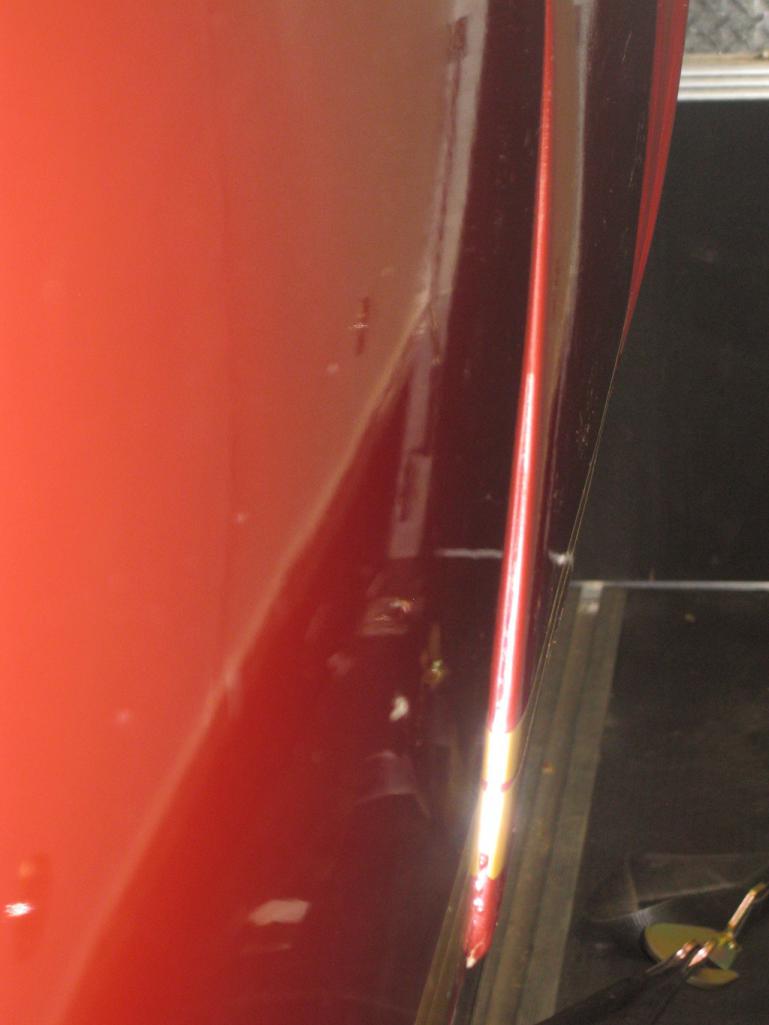
Same on the passenger side: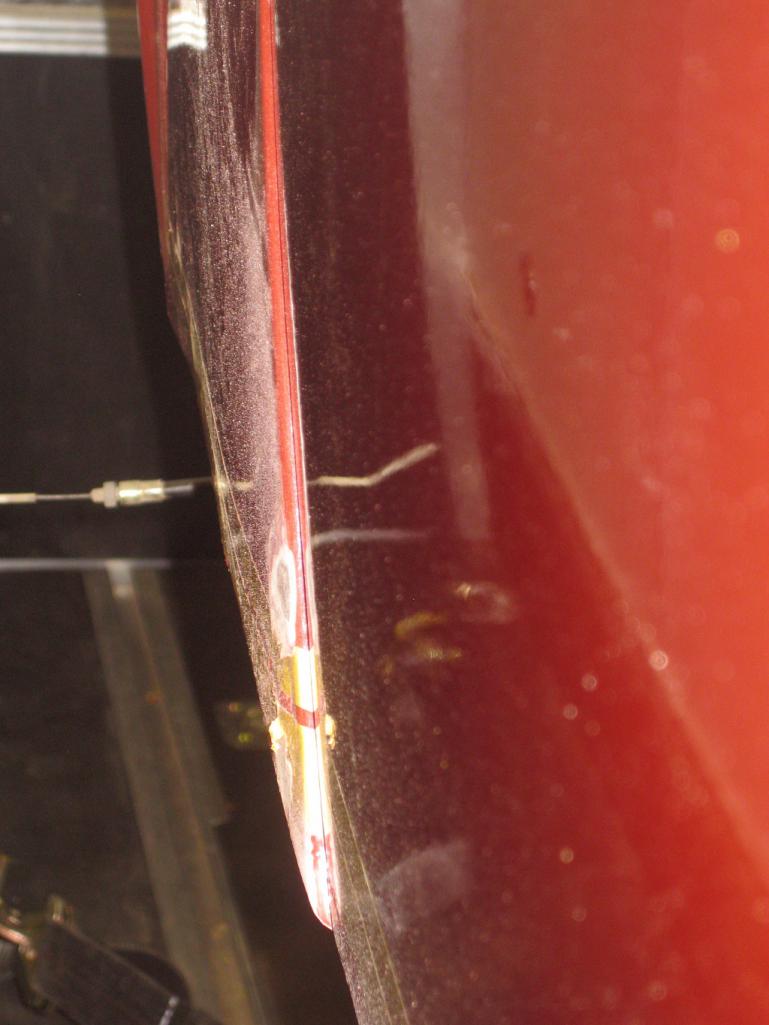
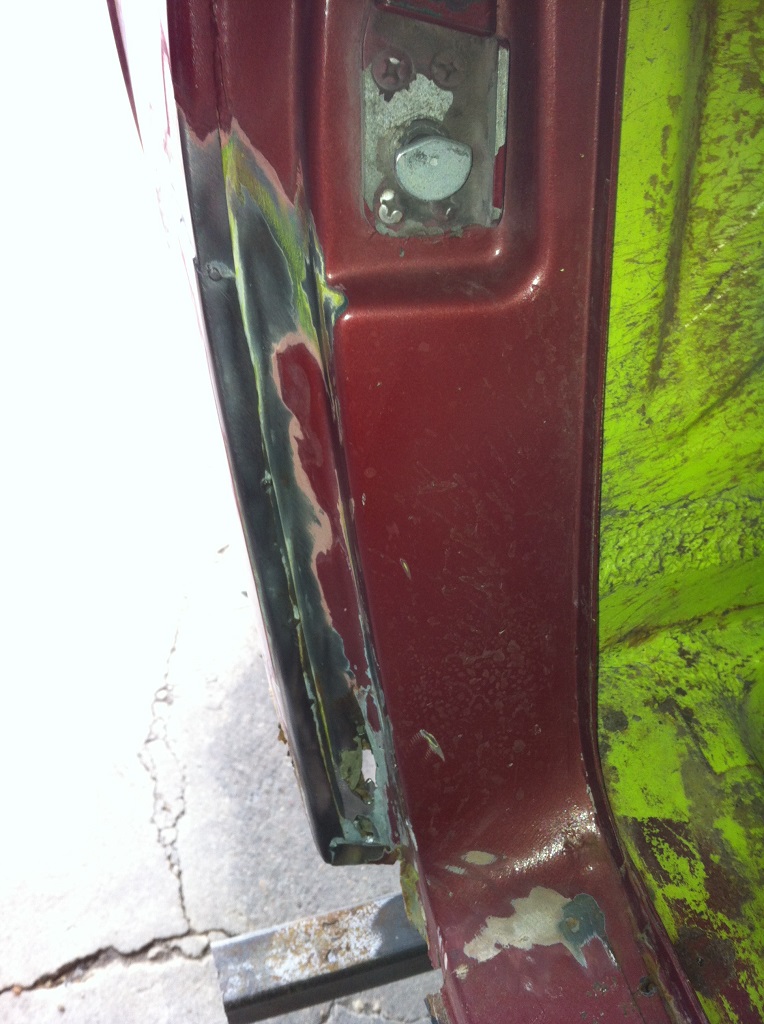
But the doors fit better at the front, suggesting to me that it can't be corrected by adjusting the door (but I've never tried adjusting the doors). Here's the driver's side door to front fender (I hadn't noticed before that it is a bit out):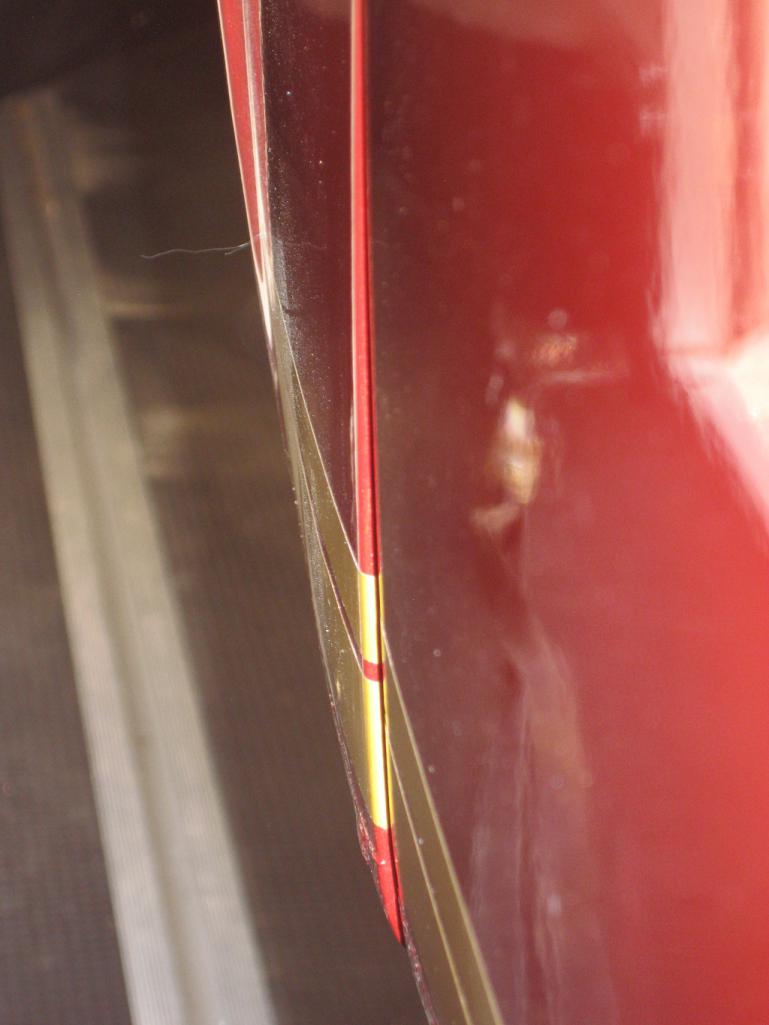
And here's the passenger door to front fender. It also appears to be a bit out but in real life it looks pretty good. 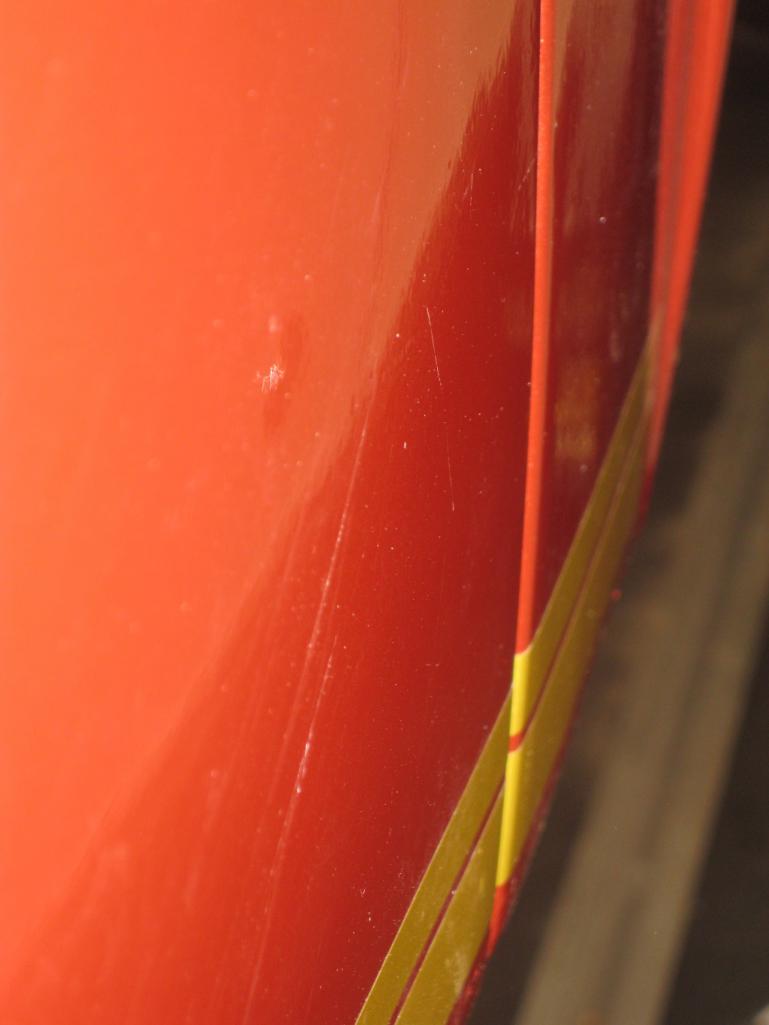
As an aside, the front door gaps are perfect and I've used my support bars to bring the targa bar to windshield opening to spec (25 and 1/8"; it was 3/16 wide) which made the rear door gaps perfect as well.
Posted by: sixnotfour Jun 5 2016, 08:25 AM
that maybe from the trunk torsion bar slapping down on the body ..hinge brake , or improper method of removal of tension.. look in the engine compartment..to see it it is the source..
Posted by: doug_b_928 Jun 5 2016, 09:52 AM
Interestingly, that crack is exactly where the top of the bracket is for the, for lack of a better descriptor, upper trunk torsion bar bracket (not the bar that has the 90 degree bend that sits more to the inside, but the bar that has a straight end that mounts inside an upside down u-shaped bracket that's spot welded to the top of the fender). I don't see any signs of damage/denting when looking at the bracket or surrounding area.
Posted by: rick 918-S Jun 5 2016, 10:51 AM
Here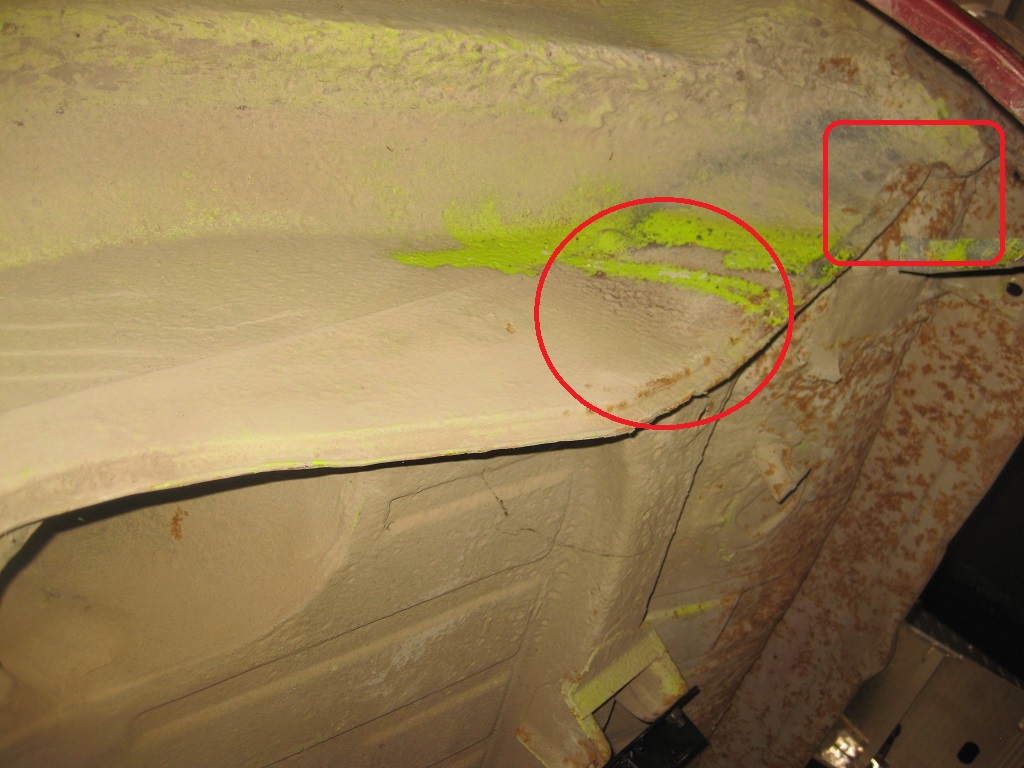
And the more I look at it the more I see. This looks kinked too.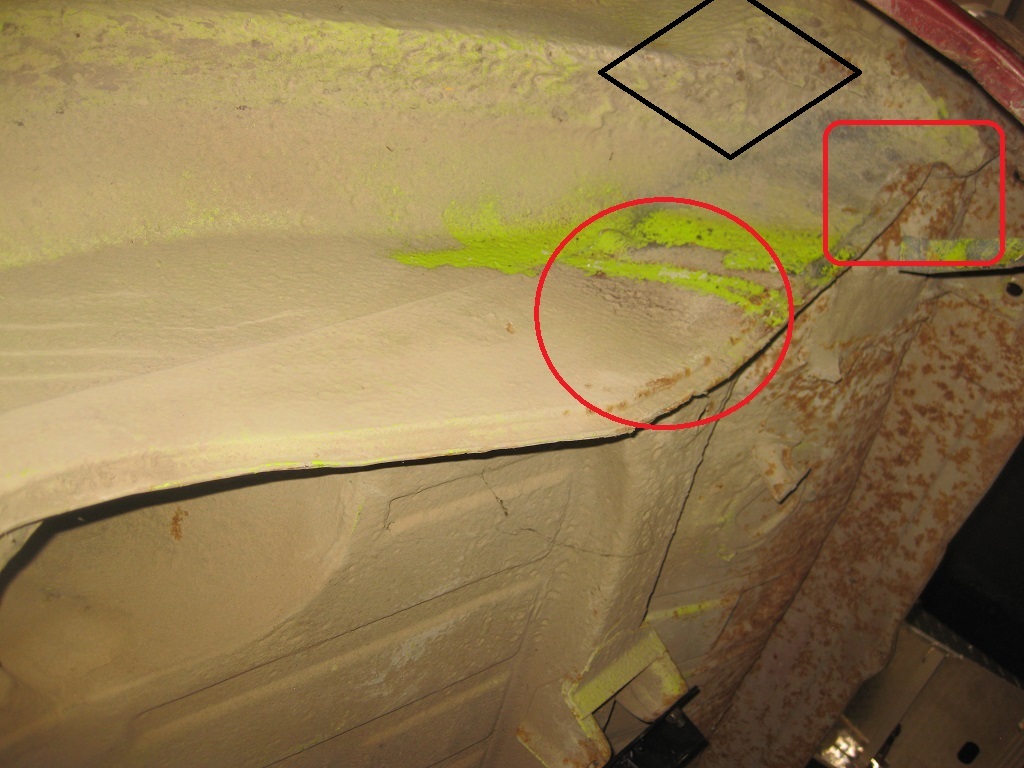
Posted by: rick 918-S Jun 5 2016, 11:05 AM
Closest I get to Canada is Grand Portage.
Posted by: doug_b_928 Jun 5 2016, 11:43 AM
I had to look up Grand Portage (third biggest city in Manitoba is called Portage), that's going the opposite direction (closer to Thunder Bay which is about 8 hours from here IIRC).
That's a sharp and experienced eye you have. It seems obvious when you point them out but most of them I hadn't noticed. So how bad is it? Given my measurements in the pdf attached to the first post indicating that none of the major points are off, could I go ahead and do the rust repair on the longs etc., and then have the rear end straightened? That way I could see if I'm able to do the rust repair work to save $$.
Posted by: rick 918-S Jun 5 2016, 11:50 AM

I had to look up Grand Portage (third biggest city in Manitoba is called Portage), that's going the opposite direction (closer to Thunder Bay which is about 8 hours from here IIRC).
That's a sharp and experienced eye you have. It seems obvious when you point them out but most of them I hadn't noticed. So how bad is it? Given my measurements in the pdf attached to the first post indicating that none of the major points are off, could I go ahead and do the rust repair on the longs etc., and then have the rear end straightened? That way I could see if I'm able to do the rust repair work to save $$.
Most of my claims are about a 1/2 from the border when I get up that way.
Ya. That's just typical collision repair stuff. Not to worry.
Posted by: doug_b_928 Jun 5 2016, 12:10 PM
Excellent, thanks Rick! What do you make of the bowing of the fenders at the front? Do you think complete fender replacement is needed?
Posted by: rick 918-S Jun 5 2016, 01:08 PM
Excellent, thanks Rick! What do you make of the bowing of the fenders at the front? Do you think complete fender replacement is needed?
Unless you strip off the re-paint I wouldn't really know. could be tension could be back body work, As long as the chassis and upper body measurements check out the rest is cosmetic repair.
Posted by: doug_b_928 Jun 5 2016, 01:20 PM
Okay, thanks Rick. There is a lot of filler on the car. In the pics above you can see where I took a conditioning disk and die grinder to see if there was metal in those spots where the rear fenders bow and there actually wasn't too much filler right there (about 1/4" or more though on the back sides of the rear fenders!
One final quick question and then I'll stop bugging you...for a while  . As mentioned above, I adjusted the windshield flange to targa bar to 25 1/4" as per the guide. But I wonder whether that gap will narrow when the car gets put back together (when it had wheels and was on the ground the door gaps weren't too bad). I realize that the longs strengthened after rust repair should reduce the flex, but when you set the opening do you leave that opening a little wider to compensate for flex when it's on the ground, or do you set it right at 25 and 1/4". I'm guessing the latter but just wanted to make sure.
Posted by: rick 918-S Jun 5 2016, 01:44 PM
H,I and Y need to be verified. Then F and X If you just adjust the windshield frame to meet F and X you will never get anything to fit correctly. It's easy to bend the windshield from to make F and x numbers work.
Set the chassis to make H, I and Y correct. Then check F and X then brace the car to hold these measurements while completing the repairs. If you watch the amount of stress you are introducing into the car by moving around and cooling the welds you should be fine.
Posted by: doug_b_928 Jun 5 2016, 02:55 PM
Okay, will do. Thank you so much!
Posted by: emoze Jun 5 2016, 05:26 PM
your first instinct was the best
unless you have a jillion $$$ to "invest"
I know I should abandon any hope of restoring it, and it may well become my parts car, but it keeps sucking me back in.
Posted by: rick 918-S Jun 5 2016, 05:28 PM
your first instinct was the best
unless you have a jillion $$$ to "invest"
I know I should abandon any hope of restoring it, and it may well become my parts car, but it keeps sucking me back in.
Sometimes it's not about money. Prime example was Buttercup.
Posted by: doug_b_928 Jun 5 2016, 06:48 PM
Very unfortunately no jillion here. That's why I'm trying to figure out a way to save the car doing as much as I can myself. For me it's not as much about having a 914, it's about having my 914. It still may end up becoming my parts car. If I'm able to do most of the rust repair myself, I think/hope that will make saving the car feasible.
Posted by: OU812 Jun 5 2016, 08:08 PM
Very unfortunately no jillion here. That's why I'm trying to figure out a way to save the car doing as much as I can myself. For me it's not as much about having a 914, it's about having my 914. It still may end up becoming my parts car. If I'm able to do most of the rust repair myself, I think/hope that will make saving the car feasible.
Depending on how far gone it is, how original you want to keep it, and how much time and money you want to invest in the car.
I have a 72 914 that is pretty far gone but I am tempted to fix it .
One option I was considering was to construct a roll bar/support that would go from the top of the sails to the window frame on the left and right sides
Posted by: doug_b_928 Jul 3 2016, 06:13 PM
Took the 914 to the farm this weekend to do some of the messy investigational work. It was really interesting to see what was under the filler in the suspicious places.
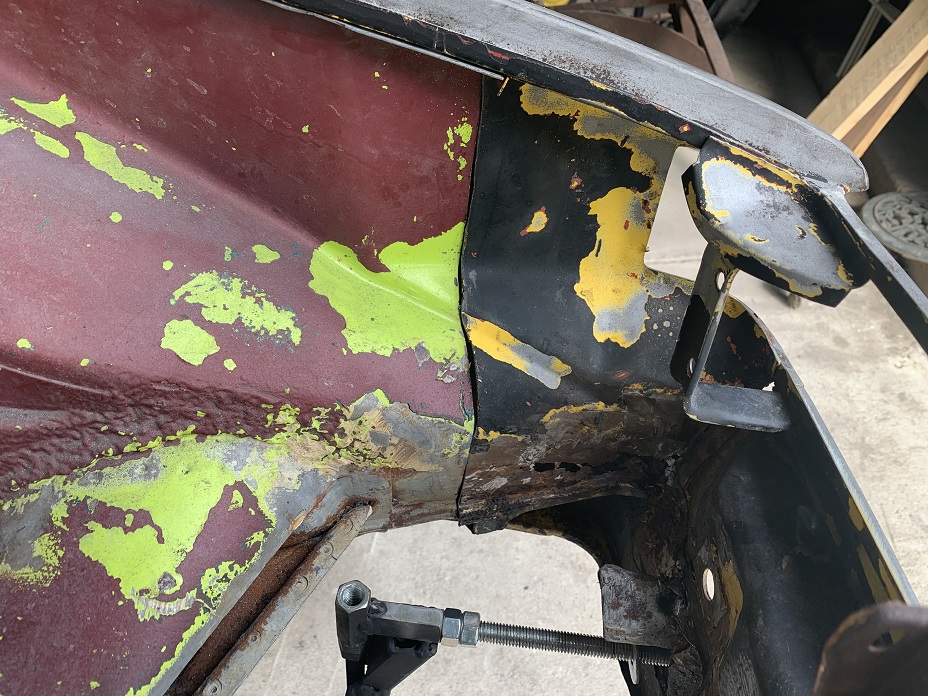
Both quarters at the rear are mangled at the side and bottom of the taillights. But, when I removed some test patches of paint from the tail section it isn't mangled. So, it looks like the car was rear ended and they replaced the tail section but not the fenders. 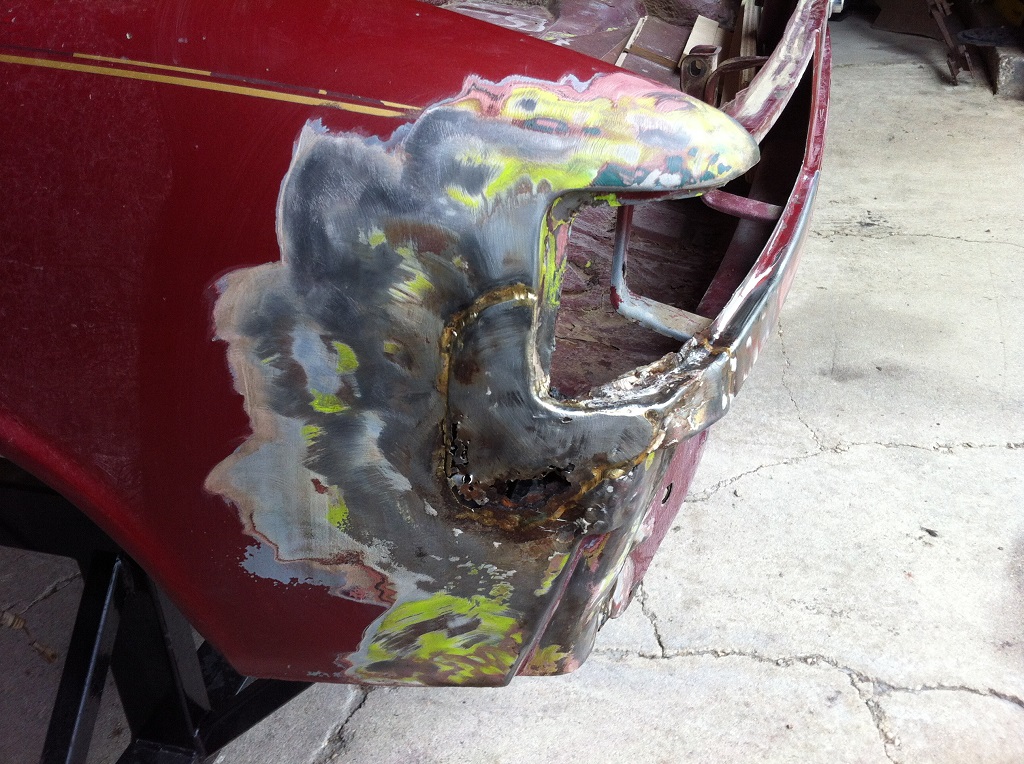
And a where the fenders stick out at doors is at least partly due to someone having scabbed on a rust repair panel rather than cutting out and replacing the metal.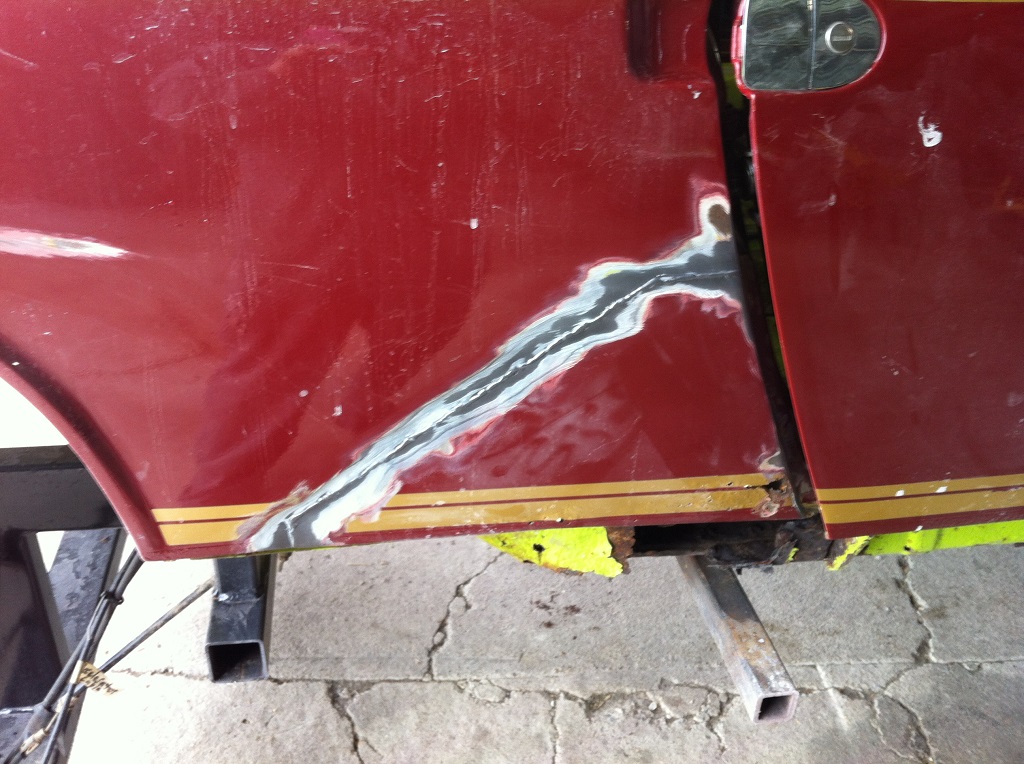
Would the best/only way to address this be to completely remove the rear fenders and replace with good ones from a parts car? Recall that the right rear is 1.25" higher than the left rear. So, if the fenders were removed completely, and then the rear floor pan removed for replacement with a new RD piece, would that be a time to pull down the right rear side so that it's level with the left side, then install the new rear trunk floor pan and then put on the new fenders? If the fenders and rear trunk floor pan are off, is there anything left holding in the tail section?
Posted by: DirtyCossack Jul 3 2016, 09:36 PM
For what it's worth:
My car was way worse than I thought when I bought it (there were some incredible artists in the conceal issues game), I had 2 cars to choose from and picked the wrong one. I've done a ton of rust repair before finding that the car had a more serious wreck/repairs than I would guessed. Theoretically it should have been parts, but I'm already vested. But now the silver lining: I'd been really torn about painting it the original color or my "idea." Finding my car's "issues" has kinda been liberating in that I know it will never be a top dollar sell no matter what I do, it will never meet concourse standards or survive the minutiae of a serious car show's judge. So now I can just do my best work and do whatever I want to the car and enjoy it. I figure if the Porsche train keeps rolling the way it is, I'll be able to get my money back out of it down the road if I so wish. No big profit unless something goes crazy, but my ratty car will allow me to live with gaps that are slightly off, improper lines, a non-factory color, and whatever bastardization I do. Though this liberation and realization has clamped the budget a bit...but I was broke with a small budget to begin with.
Posted by: doug_b_928 Jul 4 2016, 06:22 AM
Agreed. I know that no one else would save this car so whatever I do won't hurt it. I would like to paint it back to Ravenna green but was just last night trying to convince the boss on this. She insists that it become 93 Iris Blue. If I end up with the blue it will be less painful for the reasons you described.
Posted by: doug_b_928 Jul 4 2016, 07:36 PM
Paging Rick Ollah.... Curious to know what your approach to this would be Rick...
Posted by: rick 918-S Jul 4 2016, 08:44 PM
Watching the fireworks show. I'll get a look on a computer screen tomorrow.
Posted by: doug_b_928 Jul 4 2016, 08:46 PM
My bad Rick....You'll have to forgive a Canuck for forgetting it's your Independence Day. Have a good one!
Posted by: rick 918-S Jul 5 2016, 04:03 PM
Great American day. Had a 3 day weekend that went by entirely too fast. Anywho...
Looks like your getting someplace now. My suggestion: Take it back to base line and start over. The tail light panel may be savable depending on what they welded it to and if it was welded on straight. I'm doubtful but hey... A little optimism never hurts.
The quarter panels have had it. Garbage in garbage out right? Get a parts car with good quarter panels. That means look for a car that is showing original paint and no, I mean zero rust thru on the back corners and door jamb. Quarters are not hard to change compared to front fenders. I had a complete rear clip here twice, actually three times but no place to store the stuff in a city yard. Someone should be able to help.
Posted by: doug_b_928 Jul 5 2016, 05:20 PM
Thanks, Rick. I'm glad you had a good holiday; if far too short of one. The rear end is crooked, so I'm guessing the tail section wasn't welded on straight (because the fenders aren't level). I'll still hold out hope that the tail section can be re-used; I'm originally a farmer so I'm inherently eternally optimistic (can't take the farm out of the boy--and why the hell would one want to  ).
).
Parts cars are rare up here, and when they come up they are so badly rusted that there isn't much that can be reused. I'm glad to hear that it's not as difficult to replace them compared to the fronts. What's a fair price to pay for good quarters?
Posted by: doug_b_928 Jul 5 2016, 05:22 PM
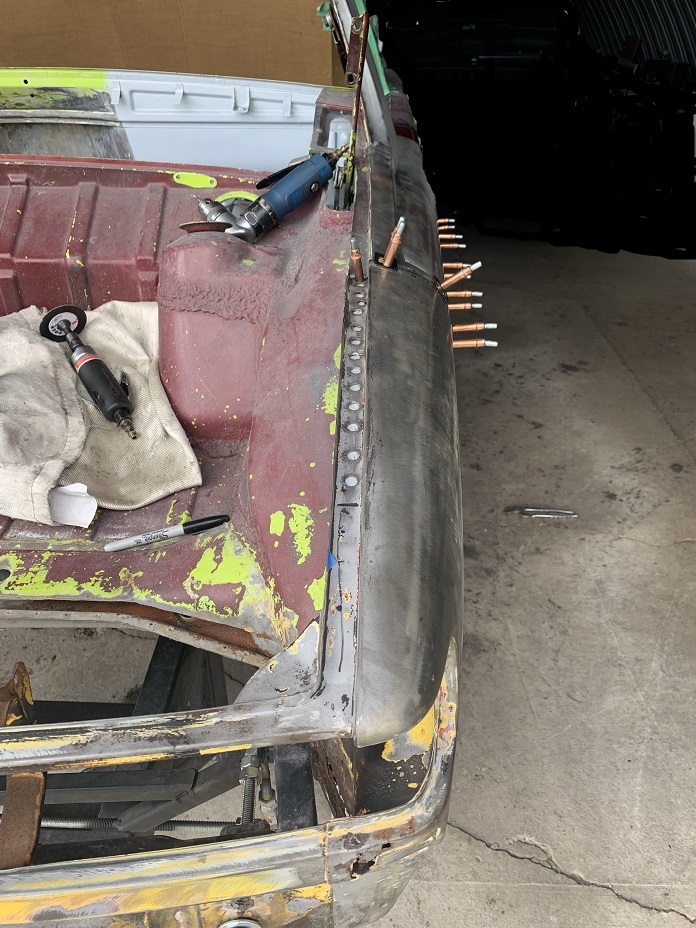
Oh yeah, I was also curious as to why the welds that they made are brass in colour. Is that some kind of brazing?
Posted by: injunmort Jul 5 2016, 05:30 PM
gold welds=brazing. should be eliminated before welding again.
Posted by: doug_b_928 Jul 5 2016, 05:31 PM
How do they get eliminated? Cut out or heated with a torch to melt them out (like lead). Is the gold stuff dangerous?
Posted by: Jeff Hail Jul 5 2016, 06:26 PM
Nice bench.
Now we have 6 in the US, would have been 7 but my old pal Wes Vann's rack vanished into thin air when he passed away along with his 914. 2 in England and 1 in Canada. Its a great day.
On your car: typical hit it low and cover it in space age microspheres repair method with a few cuts and splices thrown in. Seen worse. If it was repaired in the 70's or 80's brass was pretty common. I would take rear body panel and the qtrs. off at the lock pillars as one outer skin assembly, remove the rear short floor and see what you have to work with.
Posted by: doug_b_928 Jul 5 2016, 06:57 PM
Thanks Jeff. Yes, as I mentioned in my email correspondence, I'm a huge fan and I literally study your thread over and over. I would not have considered taking this on without it and your sage advice.
I followed your plans for the bench and fixtures. I also followed Wes's transmission fixture for the back and used his post in your thread about employing a laser level to get it true. I didn't know that he had died. I had emailed him and now I know why I didn't get a reply  .
.
Here's the bench before making fixtures (I subsequently put non-swivel castors on the front so that I'd have more control when loading and unloading from the trailer):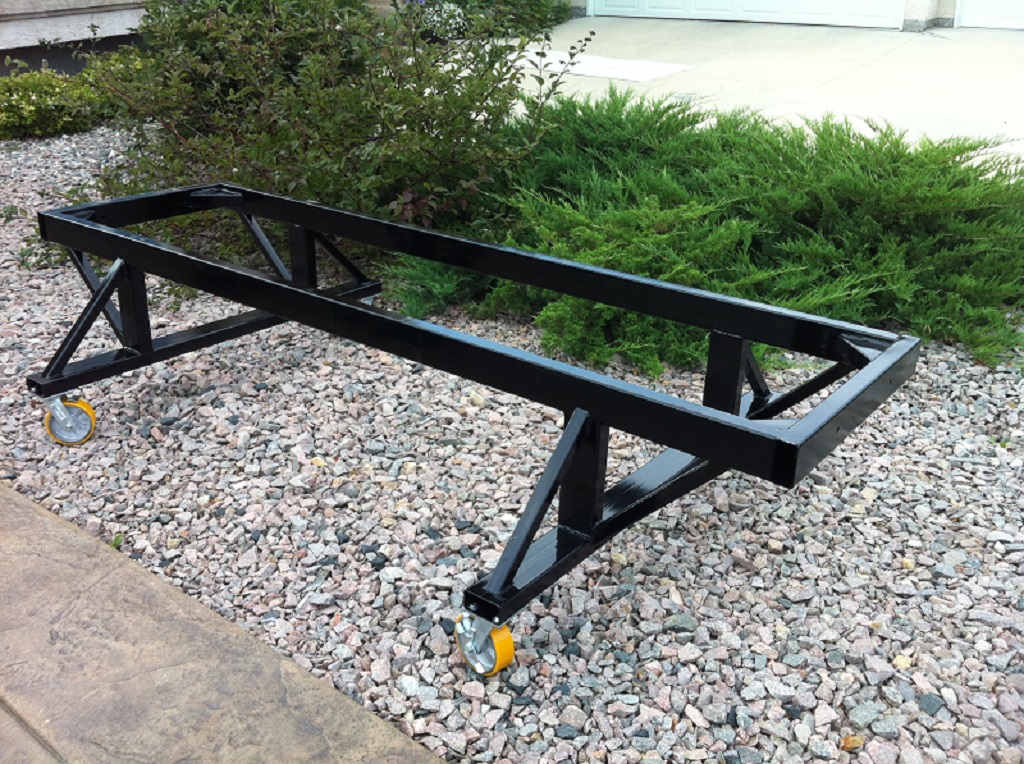
And the latest fixture I made this summer for the suspension mounting points: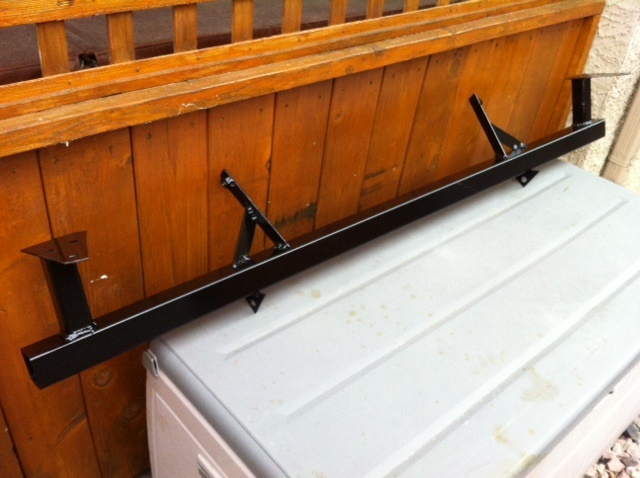
and in situ: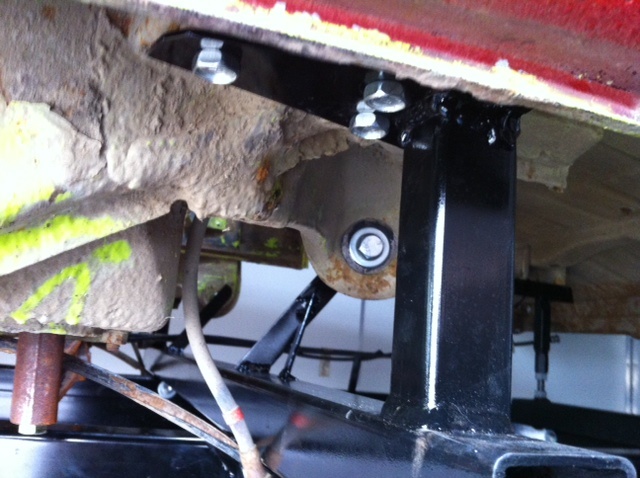
Yes, that repair would have been done sometime before my ownership, which began in 1985, so brass makes sense.
When you say to take the quarters off at the lock pillars, do you mean to cut below the sail panels? Sorry, I'm a total novice and don't know the language (in way over my head, but eager to learn).
Posted by: doug_b_928 Sep 14 2016, 06:34 PM
Hey guys,
I was away for most of the last half of summer (family obligations overseas) and am now able to start thinking about the 914 again. I was going to begin with the rust repair in the longs, but I think I'll heed Jeff's advice and first remove the rear trunk floor and then the fenders and tail section as one piece. That way I can get a better assessment of the extent of remaining twist in the body without the bent panels on.
Question for those who have experience removing and installing rear quarters: Given that I don't have new quarters yet and so don't know exactly what I'll have to work with, I'm planning to leave the sail panel areas in situ for now. So, in case I'm not able to get complete quarters with sail panels (or by some miracle don't need to replace the sail panels) and so have to graft some in, where is the best place to cut to make installing a new fender as easy as possible?
Posted by: Claus Graf Sep 14 2016, 08:52 PM
Agreed. I know that no one else would save this car so whatever I do won't hurt it. I would like to paint it back to Ravenna green but was just last night trying to convince the boss on this. She insists that it become 93 Iris Blue. If I end up with the blue it will be less painful for the reasons you described.
You should check out the 914 I'm saving. (the build thread is in the Pelican Parts website)
Attached thumbnail(s)
Posted by: doug_b_928 Sep 17 2016, 08:15 AM
I checked out your thread, Claus. Holy ingenuity Batman!
That pic of your sail panel has me worried....
For my fender removal, I'm still thinking to try to leave my sail panels and cut below where the 'door catch' (can't remember the correct term at the moment) is. Is this a good plan?
Posted by: doug_b_928 Sep 18 2016, 10:31 AM
Here's what I'm thinking (see pic below). Given that I don't yet have replacement fenders and so don't know what I'll be working with, would it be wise to cut on the line indicated in the pic in case I end up having to graft in new fenders rather than a full replacement? Is there a better place to cut?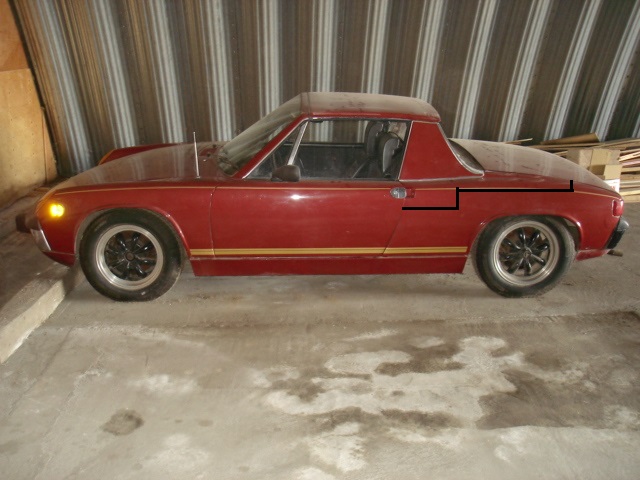
Posted by: doug_b_928 Oct 23 2016, 12:23 PM
Yesterday I spent the day at the farm removing the rear quarters and tail section as per Jeff's advice. I'm still puzzled as to whether the left side is low, or the right side is high, or both. Here are the data:
The bench is true, so I've added rectangles relative to the bench to show where the car is out of whack. As shown in the pic below, the only place where it is out is at the last foot of the inner fenders. Either the left side is pushed down or the right side is pushed up. But this does not extend very far into the chassis. The pinch welds on the bottom of the rails are the same height from the bench side-to-side. 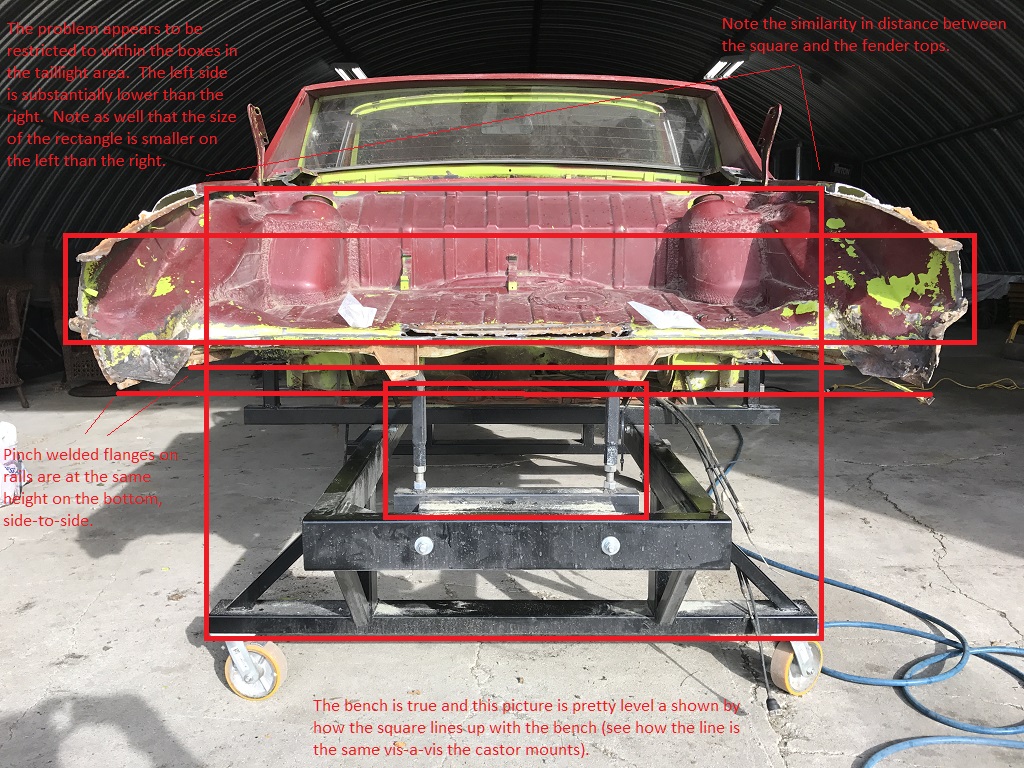
The tail was welded in crooked due to the difference in height side to side. It was also not equa-distant in its placement side to side. On the left side it appeared to be but welded to the fender and was to the right of the inner fender, so I was able to simply cut vertically to free the fender from it without damaging the tail panel. This could suggest that the left quarter is pushed out but I think the trunk opening was only 1cm narrow at the back. I supposed it could also be that the right quarter is pushed put as well.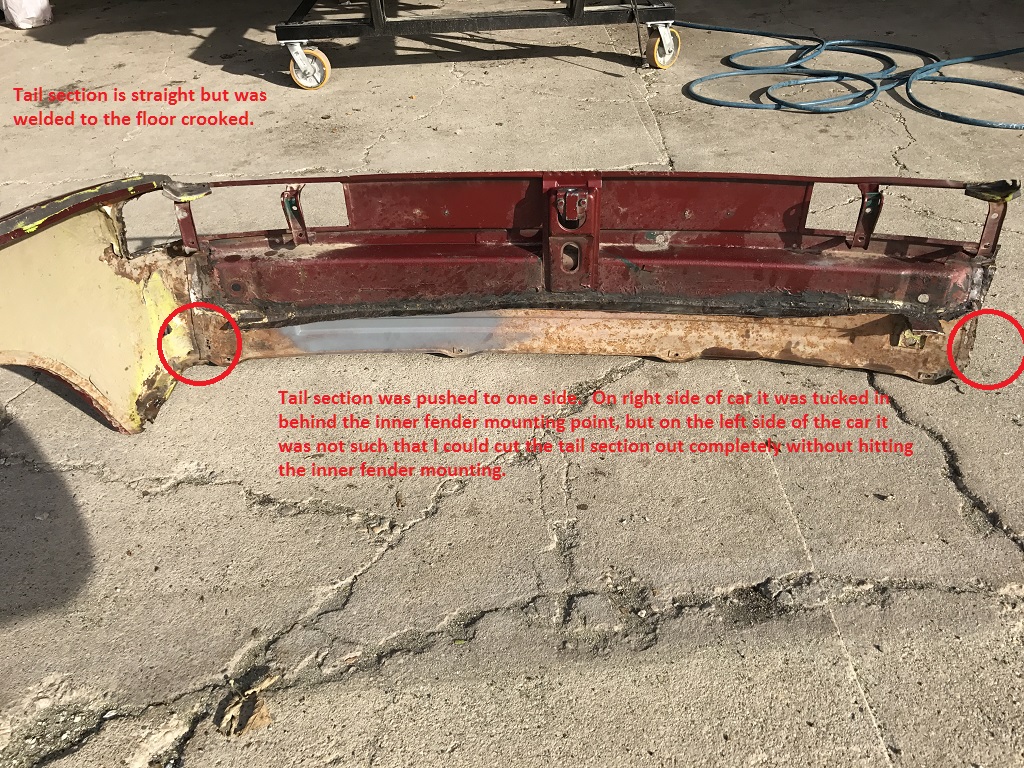
The right inner quarter seems less damaged than the left, though there is a piece missing from it (when compared to the left side; not referring to the gaping rust holes but rather the pice where the tail section welds to just below the taillight area). Again, the point indicated in the pic below is the same height from the bench on both sides.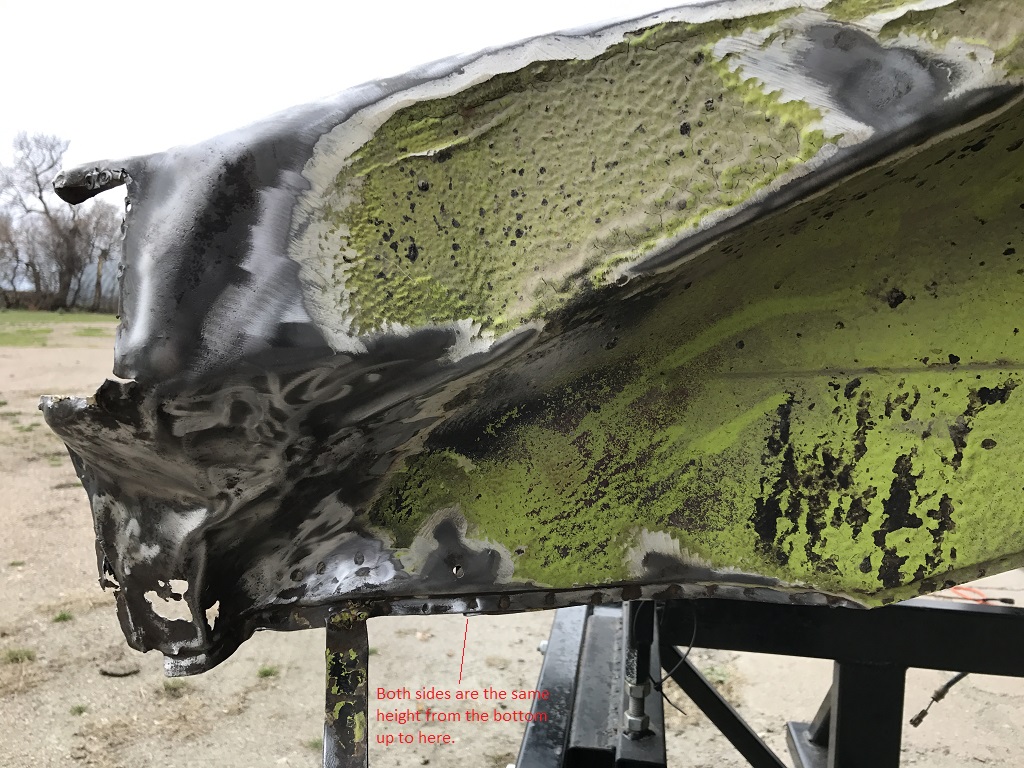
The left inner fender has more damage. It is pushed in and there is a bigger bulge in the pinch weld compared to the right side.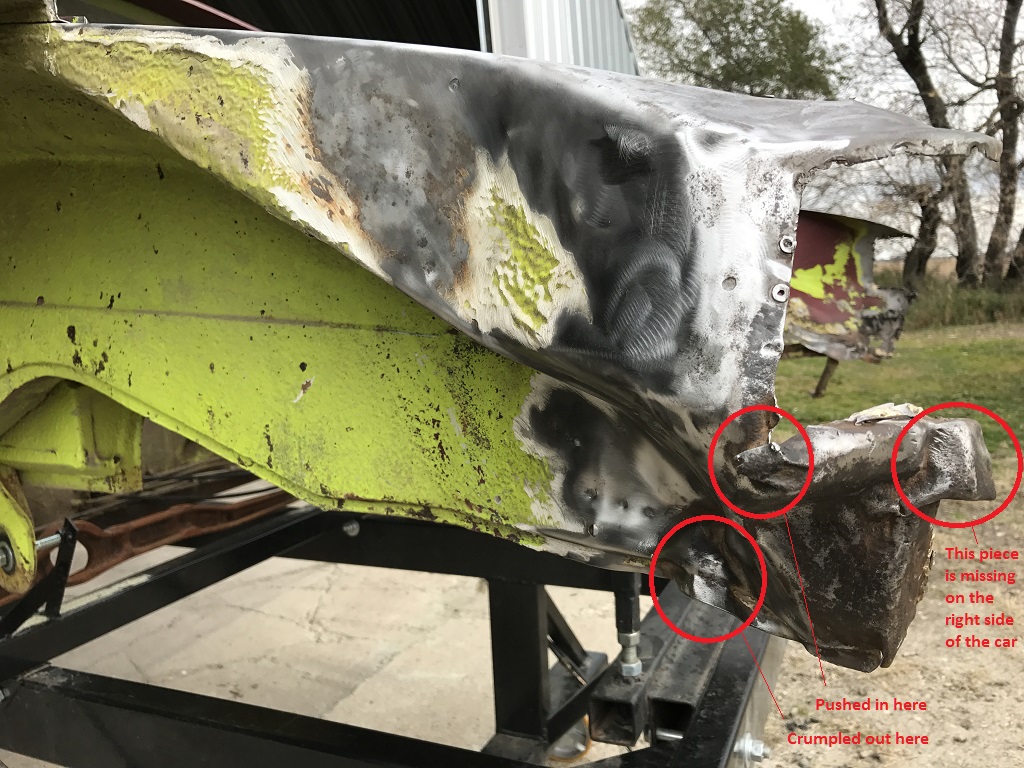
Aside from the damage, the overall shape of the rails/pinch weld areas looks similar side-to-side.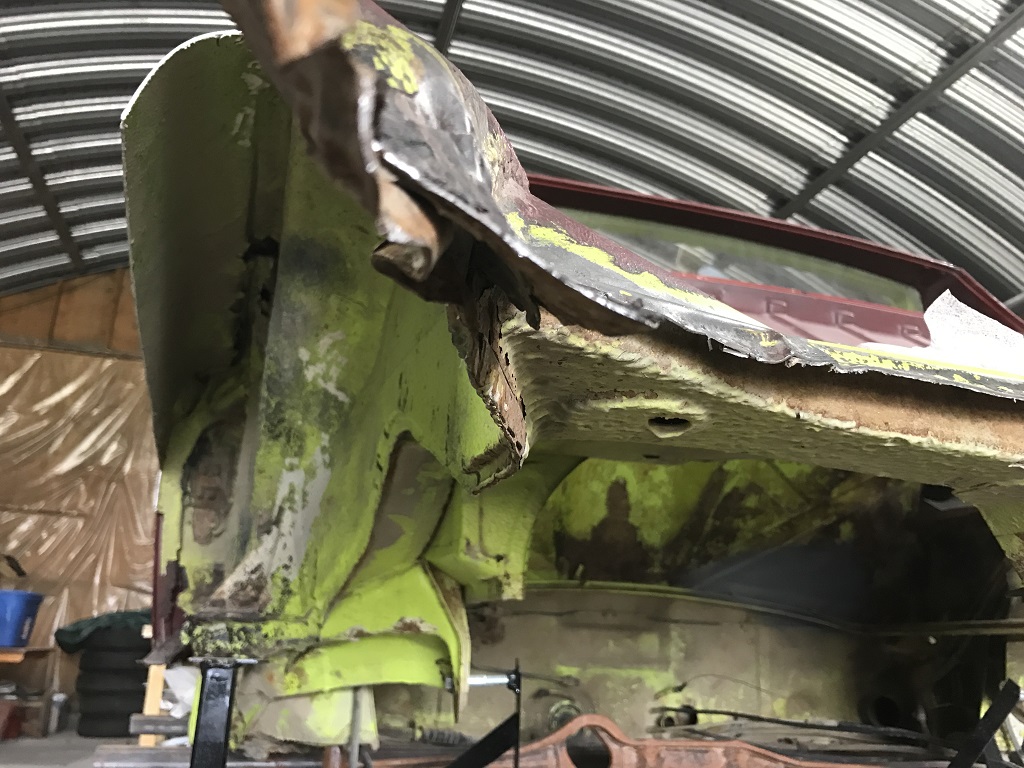
So, with that background, the question becomes, how do I figure out what needs to be adjusted? Should I mock up with new quarters as well as new trunk lid, and the tail section and just move stuff until it all fits straight?
Posted by: rick 918-S Oct 24 2016, 08:09 AM
I agree those out panels had to go. Here's a thought. Give me the height of your stanchions at the transaxle mount. I have my 6 on the Celette. I can give you the height of the rear bumper bolt holes. You can build an extension use the rear panel to guide the reinstallation of the rear floor and inner panels.
Also I just purchased a car from Camp that is the perfect donor for a rear clip for you. Let me know if you need it and we can work something out.
The car is actually too nice to cut up. looks like it just needs a rear floor and lower bulkhead. But hey I bought it for the front clip.
Posted by: doug_b_928 Oct 24 2016, 09:35 AM
Hi Rick. Thanks for chiming in. Great idea and terrific you have a rear clip. I'm very interested! Just at work but will email later today.
Posted by: Cairo94507 Oct 25 2016, 08:12 AM
This is turning into a terrific thread. I like the rear clip idea as that is going to likely be the easiest way to get this 'teener straight and right for the OP. Rick 918-S is just a great guy to step up and offer his expertise, wisdom and oversight.
Posted by: altitude411 Oct 25 2016, 08:16 AM
Yeah Rick 
Another of the long list of selfless, helpful, wonderful people that make this place so fantastic! 
Posted by: doug_b_928 Oct 25 2016, 08:44 AM
^^^^ +914
Posted by: mbseto Oct 25 2016, 12:11 PM
This thread is quite the clinic.
Posted by: Jamie Oct 25 2016, 12:19 PM
I continue to be amazed at the testicular fortitude and skills of members who can seemingly cut these rusty rollers apart and put them back together! 
Posted by: doug_b_928 Oct 25 2016, 01:39 PM
Well...I can handle the cutting part, but putting back together remains to be seen. Rick's idea of taking measurements and building a bracket to line up the dog bone holes in the tail piece as a guide is genius. I'm trying to ply him (with free accommodations, my mom's delicious home cooking, and, of course, payment) to come up in the Spring with the rear clip and spend a couple of days helping me do the straightening.
Posted by: doug_b_928 May 23 2017, 09:06 PM
I've finally had some time to work on this  (It took a lot of planning and thinking; even waking up in the middle of the night designing tools to do the job). I think I have the car straight. I'll know better once I get the donor quarters and tail section from the shell I'm getting from Rick.
I made a jig out of threaded rod and couplers. I made it so that I can bolt it to, or remove it from, the bench attachment that supports the rear of the car. Once I had it made, I unbolted the attachment that supports the rear of the car and bolted it to the trans mounts of the another shell that a fellow 914World member has in the city (Many thanks to 914World member Krank!). Then I set the jig per the shell. Then re-installed the jig on my bench.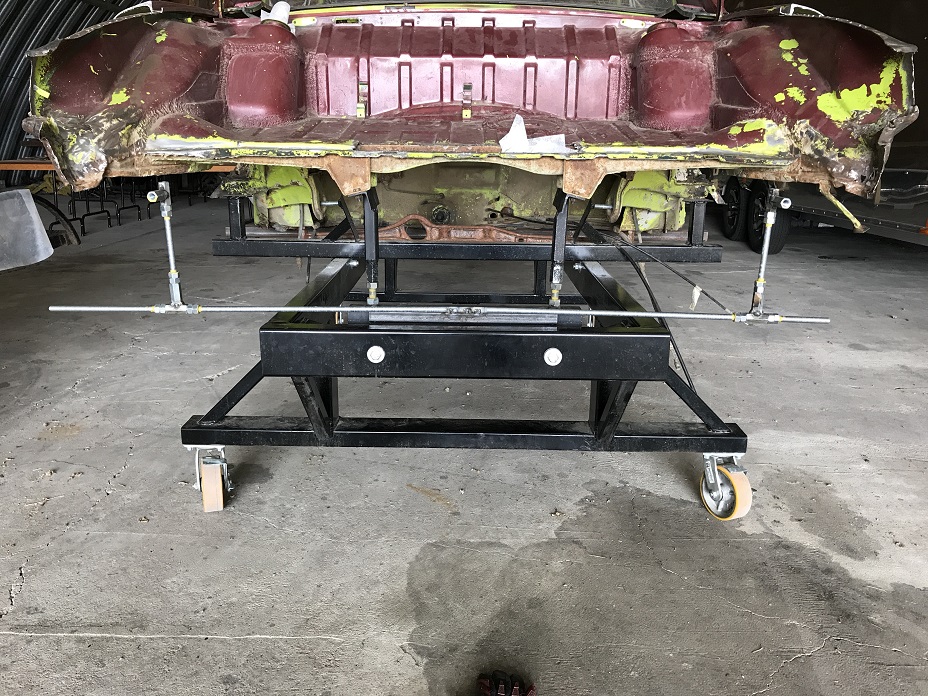
I should have used 5/8' threaded rod so it would be much less flexible and more precise, but it served the purpose for me to show me where my car was off. As you can see by looking at the tail section, which is set by the jig and suspended by a rack that I made (I'll also use it for hanging parts to prime and paint), the right side is correct and the left side was low (see how the tail light area is 1.25" low on the left; also note how the tail section is straight relative to the inside of the trunk).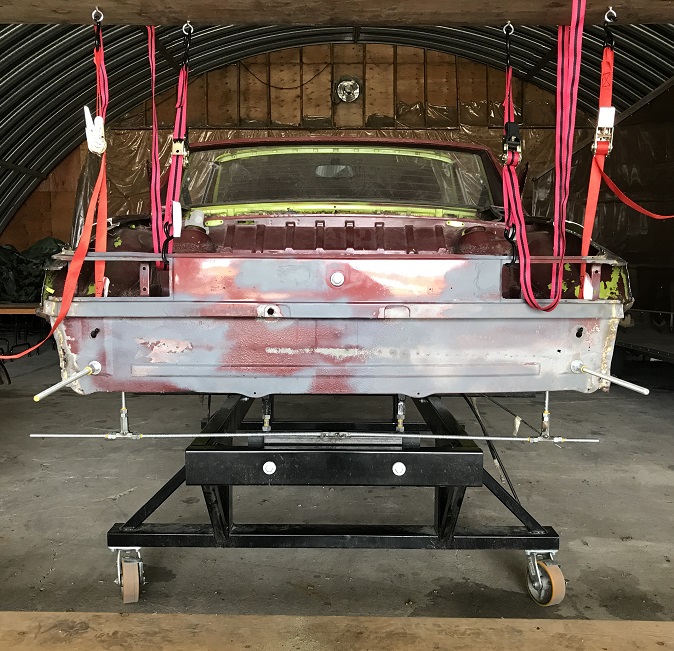
So, time to do some bending. I had to make a hold down to counter the force of pushing up the left rear. I used vise-grip pliers, with the adapter from my slide hammer, and made a receiver for the chain hook out of a large bolt with the correct fine threads that the slide hammer has and two washers welded to the bolt and to each other. Then chained and anchored to an existing anchor in the floor. It worked perfectly.
I marked measurements on the tops of the inner fenders based on distance from the trunk seal flange at the front of the trunk where it meets the inner fender on each side. I then used a straight piece of metal with a plum bob hanging off of each end, set the piece of metal on a given measurement on both sides, and measured from the piece of metal down to a straight bar resting on the bench. That way I could check the measurement of each side relative to the true bench. 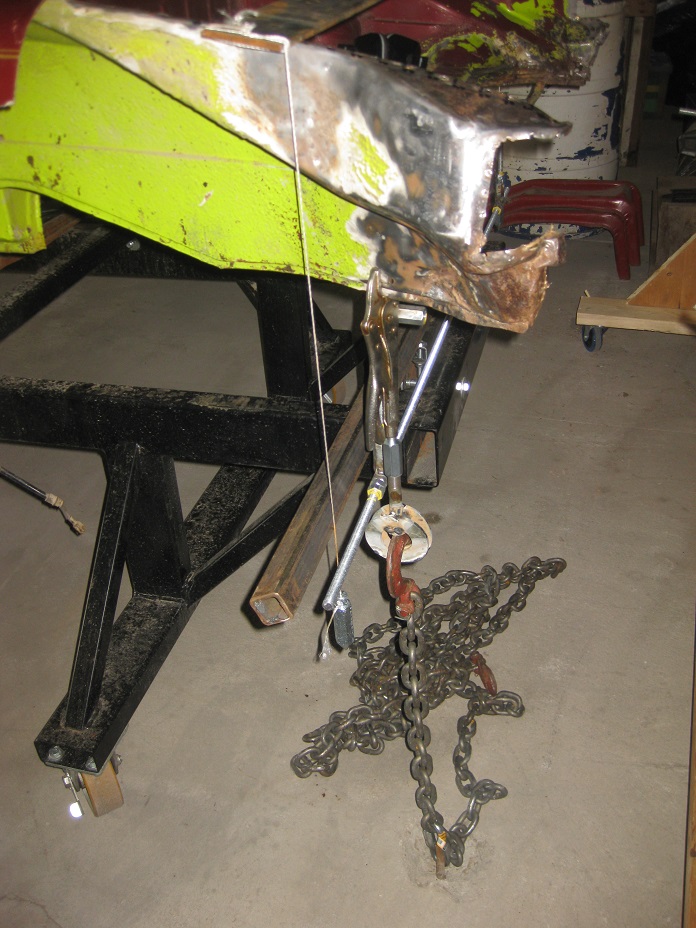
Then came the porta power.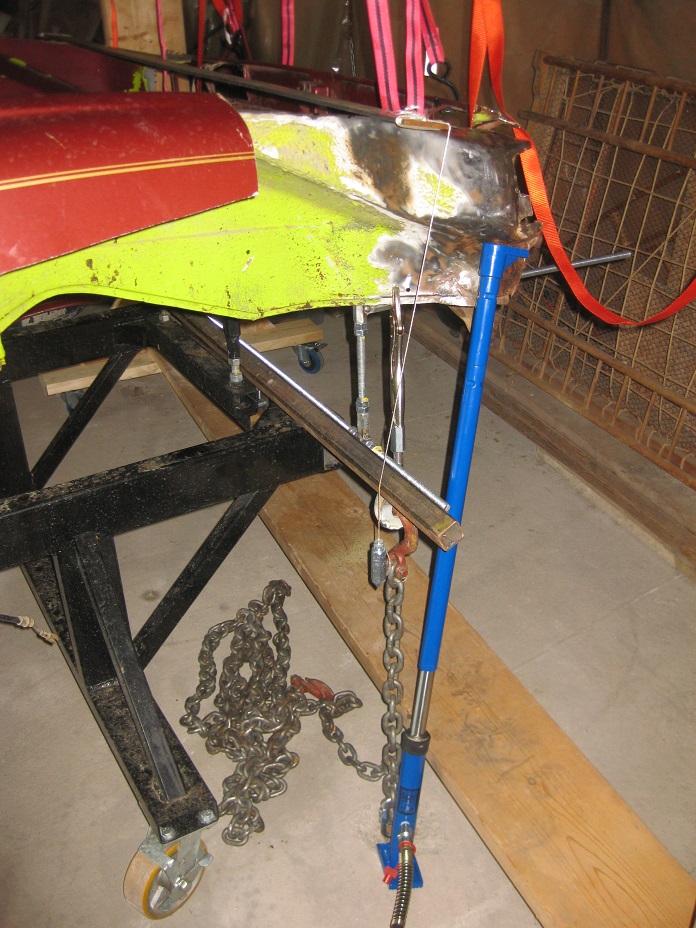
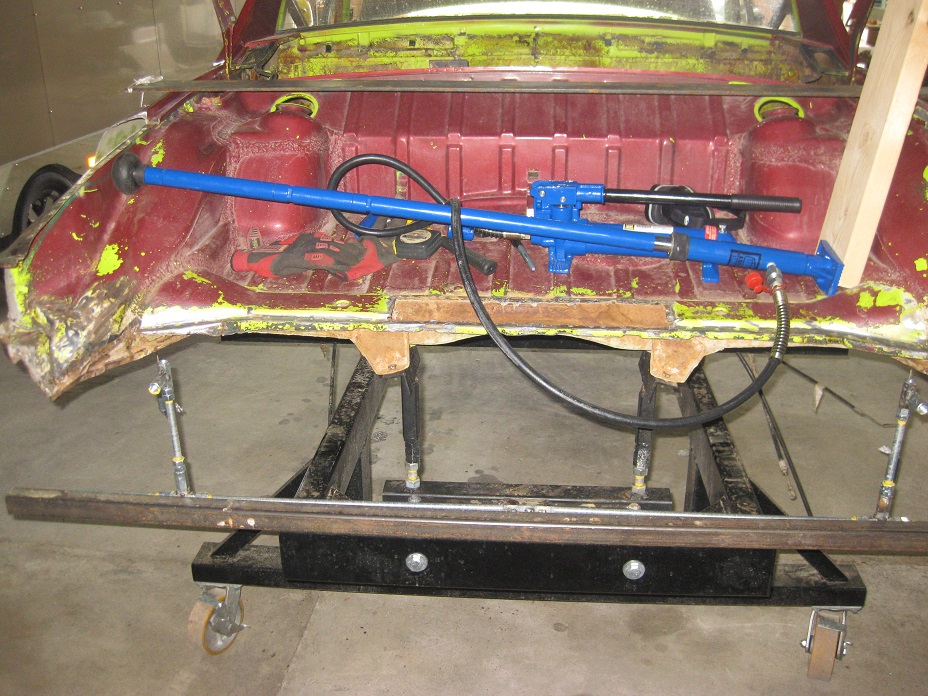
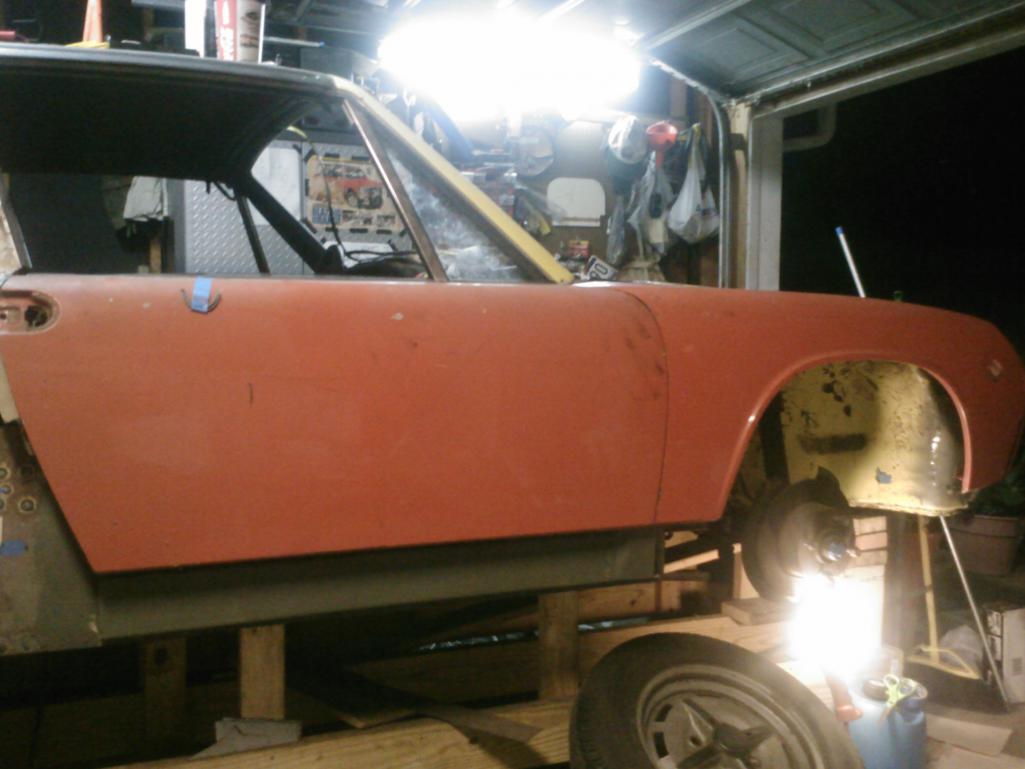
The car is now straight. I put some tape on it to assist with seeing some of the lines, but the tape is sagging. This pic is not perfectly square, but it's pretty close. As you can see, everything looks pretty good relative to the bench. 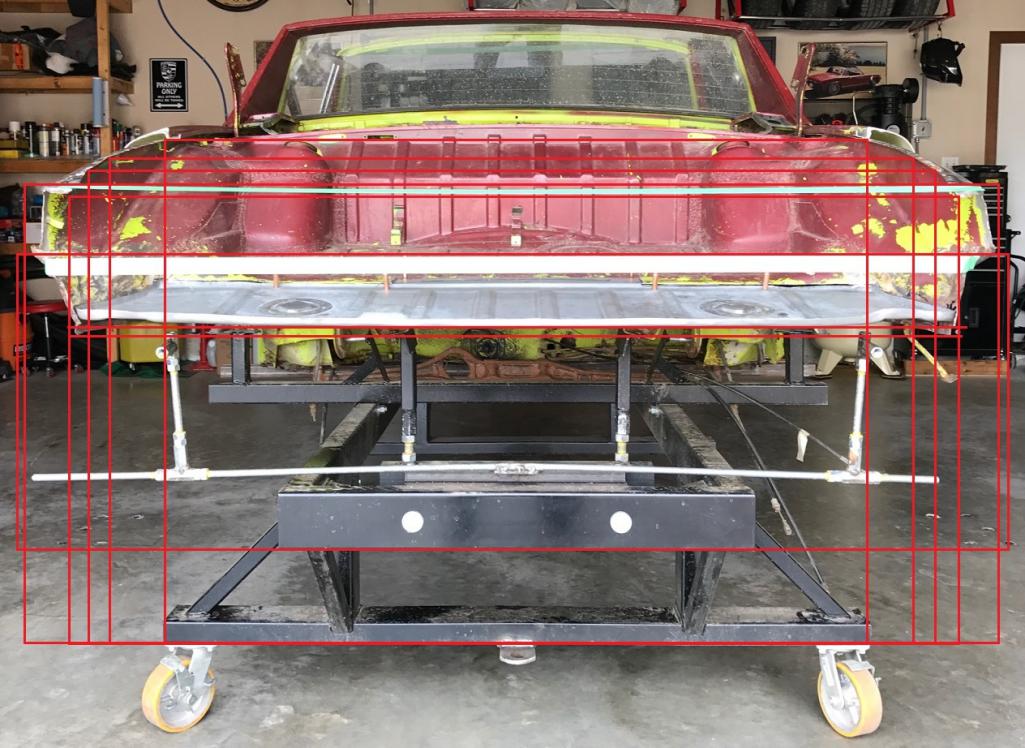
Finished off with some hammer and dolly work to smooth out the crash damage.
Before straightening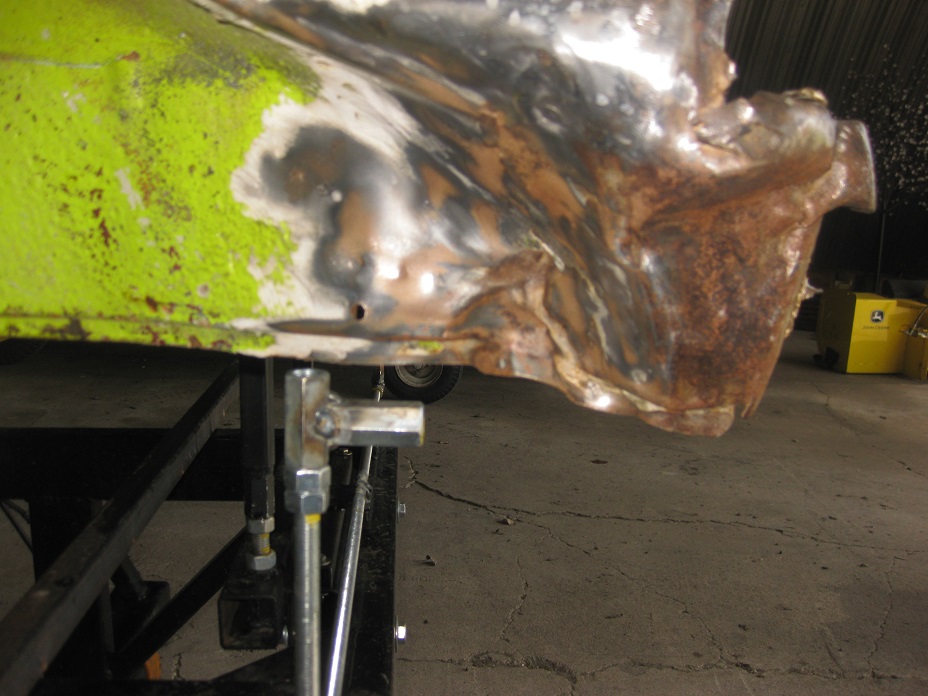
After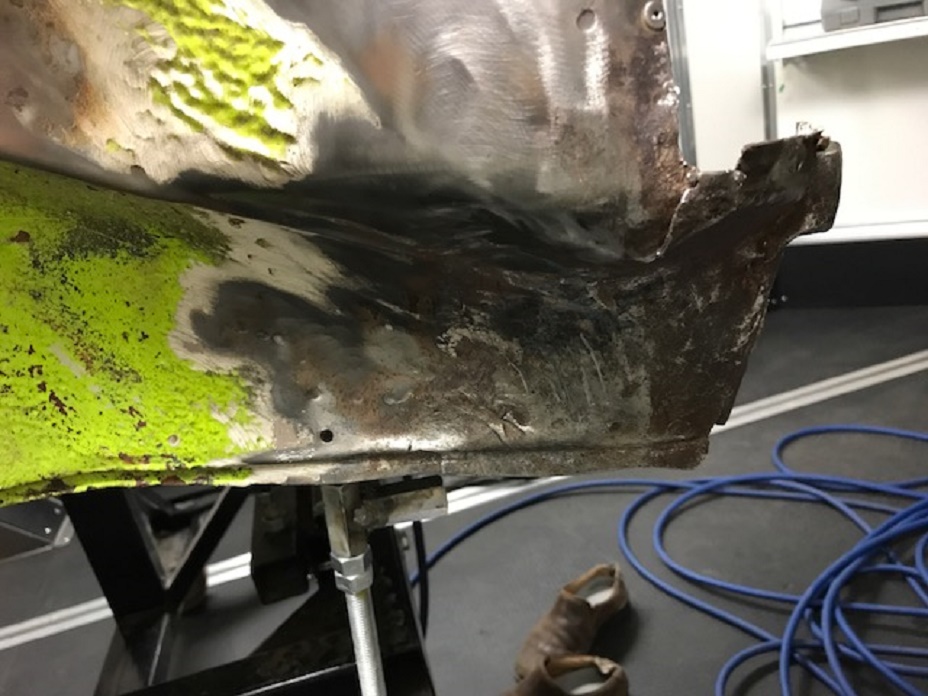
I'm not going to weld the crack etc. because there will undoubtedly be some adjustment needed once I get the new quarters (I just hope I don't need to make any major adjustments again).
Overall, for my first attempt at doing something like this I'm pleased with the result. Now that this is done I have to undo some of the poorly done repairs from more than 33 years ago before I can start the undoubtedly long process of making my own rust repairs.
Posted by: 76-914 May 24 2017, 07:47 AM
 This turned out to be quite the project. Nice job!
Posted by: doug_b_928 May 24 2017, 09:38 AM
Thanks very much 
Posted by: rick 918-S May 26 2017, 03:54 AM
Looks like your on track.
Posted by: doug_b_928 May 26 2017, 04:46 AM
Thanks very much, Rick. Your sage advice has been important to getting this far. Your idea to locate the tail section with the bumper mount holes was brilliant!
Posted by: defianty May 26 2017, 05:31 AM
Well done! Great work.
Posted by: doug_b_928 Jun 24 2019, 03:12 PM
I spent the weekend at the farm and finally had a chance to cut the portions of the quarters and tail section from the parts car and do an initial fit onto my car. Here is the parts car before cutting the quarters: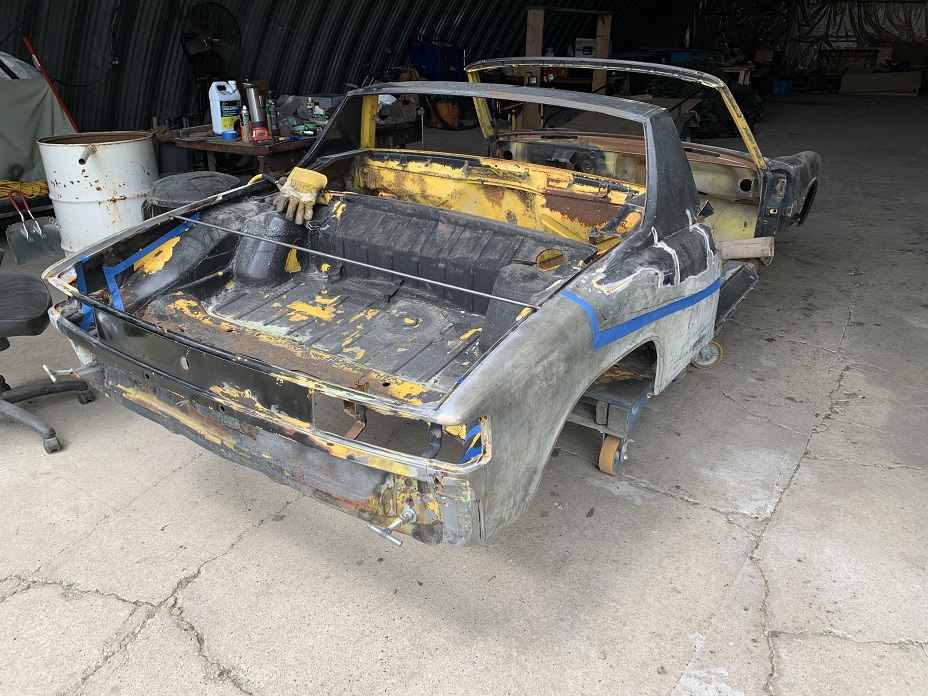
And after removal: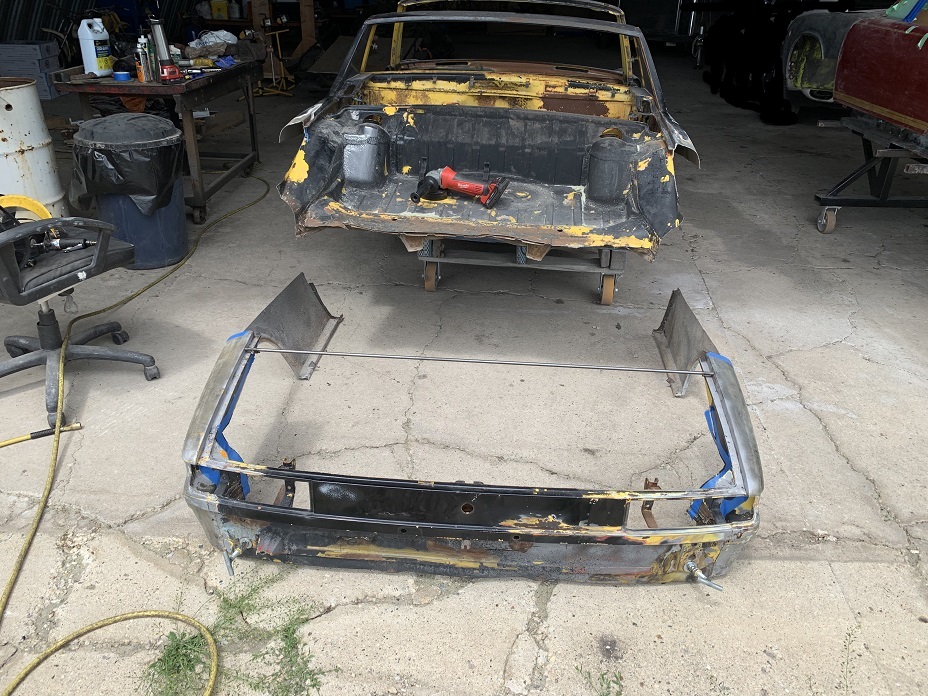
It will take A LOT of work to make these pieces acceptable, including making new where they mate to the door jam, but the end result will be far better than what I had to begin with.
I'm also going to need to tweak the fitment, but not bad for simply 'cutting and pasting' (after a lot of measuring back and forth):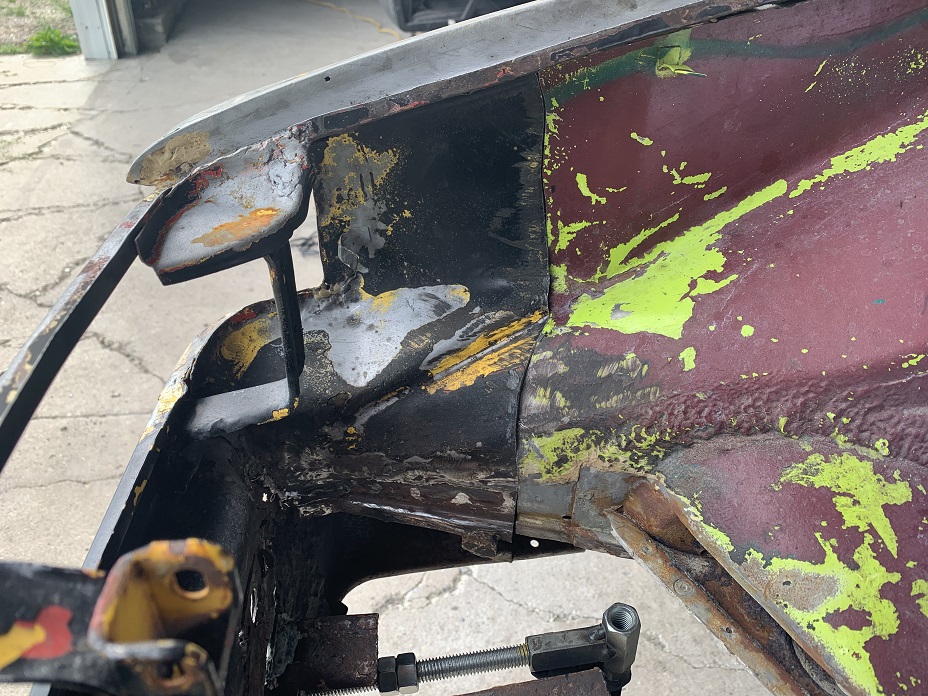
And, it appears to me that the straightening, on which I reported earlier in this thread, was effective since the tail section appears to be pretty straight! Here is the update pic.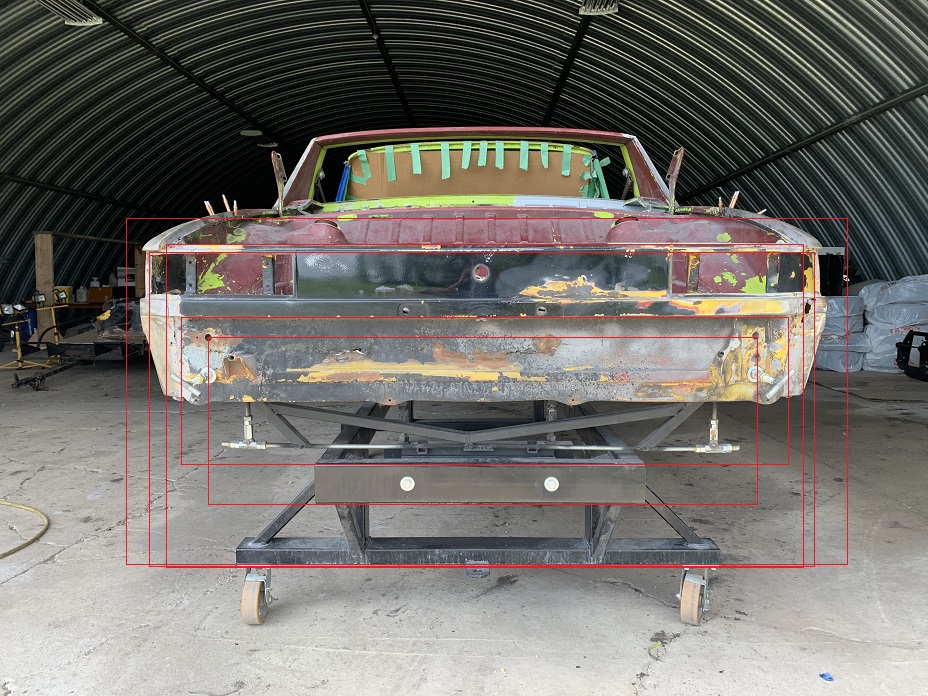
There is a lot of work to do before I'll be able to weld these parts to the car, but I'm relieved that it looks like I'll be able to make them work.
Attached image(s)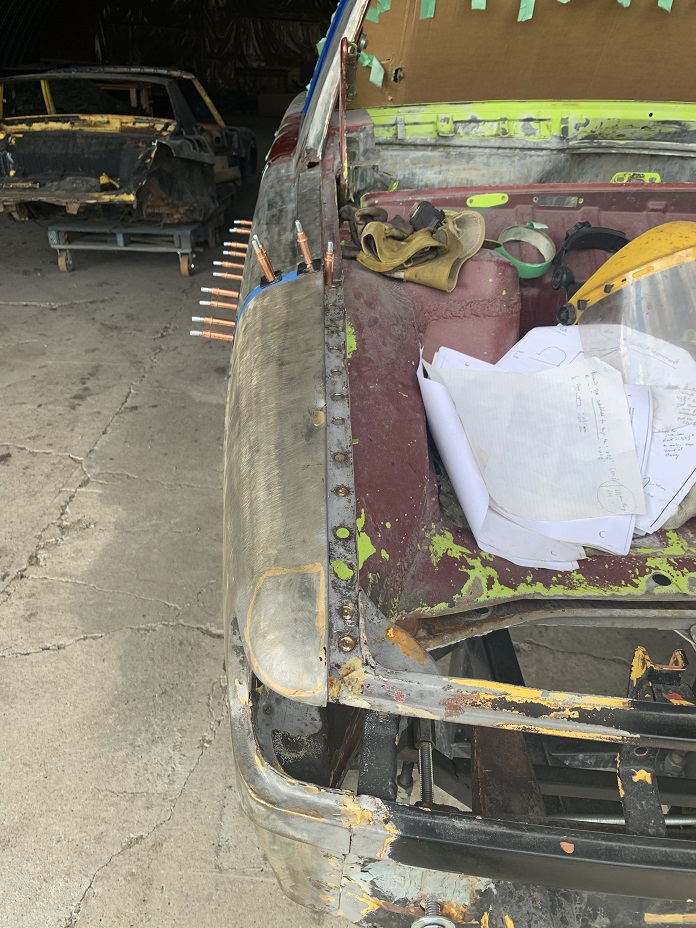
Posted by: bbrock Jun 24 2019, 03:50 PM
Holy smoke Doug! How have I missed this thread all this time? I guess I was too busy up to my eyeballs patching rust on my car. Just read the whole thread. Fantastic work! I don't think I could have pulled that off. 
Posted by: doug_b_928 Jun 24 2019, 05:46 PM
Holy smoke Doug! How have I missed this thread all this time? I guess I was too busy up to my eyeballs patching rust on my car. Just read the whole thread. Fantastic work! I don't think I could have pulled that off.
Oh yes you could. And your result would undoubtedly be better than mine!
Powered by Invision Power Board (http://www.invisionboard.com)
© Invision Power Services (http://www.invisionpower.com)