Printable Version of Topic
Click here to view this topic in its original format
914World.com _ 914World Garage _ Suspension Ties
Posted by: DirtyCossack Jun 11 2016, 06:18 PM
There's been a lot of talk about these lately. They're 12 gauge steel making them difficult to fabricate, unfortunately they're no longer available from Porsche, and tragically, nobody makes a replacement for them. So let's figure out what can be done.
Posted by: DirtyCossack Jun 11 2016, 06:27 PM
The outer/longer one's fabrication seems well covered here: http://www.performanceforum.com/wesvann/914a/rust-diary/rd-9-1-08.html
But the inner/shorter one is another matter. Cary and his father-in-law created one out of a single piece, which seems to be the best method in order to maintain structural integrity since you're tying the two sides together. I'm currently working a scheme for a 2 piecer, but am thinking the 12 gauge will be super difficult to work with the weird curves. I really don't know how Cary's Superman did it!
So here's an interesting question: I have me some 12 gauge sheet, but couldn't find any 14 (to cheat), do you think it has to be 12? Or do you think I could get away with 16? I'm confident I can get the bigger tie done in 12, so would the little one need to equal it, or could we get away with a little less?
Also, do you think a 2 piecer for the little will work? (I'll post cardboard pics of my idea when I get them done)
Don't hold back on your opinion.
Thanks.
Posted by: 914_teener Jun 11 2016, 10:24 PM

The outer/longer one's fabrication seems well covered here: http://www.performanceforum.com/wesvann/914a/rust-diary/rd-9-1-08.html
But the inner/shorter one is another matter. Cary and his father-in-law created one out of a single piece, which seems to be the best method in order to maintain structural integrity since you're tying the two sides together. I'm currently working a scheme for a 2 piecer, but am thinking the 12 gauge will be super difficult to work with the weird curves. I really don't know how Cary's Superman did it!
So here's an interesting question: I have me some 12 gauge sheet, but couldn't find any 14 (to cheat), do you think it has to be 12? Or do you think I could get away with 16? I'm confident I can get the bigger tie done in 12, so would the little one need to equal it, or could we get away with a little less?
Also, do you think a 2 piecer for the little will work? (I'll post cardboard pics of my idea when I get them done)
Don't hold back on your opinion.
Thanks.
I think Superinlaw is skilled in sheet metal and I think you should stick with the 12 ga.
If you know how to triangulate the curves then you can do what he does.
Half skill and art.
My 02.
Posted by: cary Jun 12 2016, 06:13 AM
Here's where we're at while I'm getting ready for my career change. Super In Law is still working on repairing the rust on the cut out long first (pattern base) . Sorry to say the four that I've cut open have had rust damage. After he finishes that he'll start the hammer work on the ties. When we're happy with what we've created we'll hand it off to an ME at church and he'll do the 3D thing. They'll see if they can manufacture them and at what cost. They manufacture crop picking machines, primarily tomatoes. All I hope to get of that is the drawings. Then we'll hand them to Mark and see what his metal folks can do.
If that hits a dead end. I'll see if my new boss, Mr. Gamroth can get us into contact with one of his manufacturing folks.
At the end of the day I hope Pete and his family at RD can do them. But it sounds like the entire next year is all scheduled out. My plan is to have Super In Law prepare both the left and right suspension pieces. Build two or three of each. Then maybe ship the long pieces to RD with one of each that we've created.
We'll get this done ............
Off to a PCA autocross .................
Posted by: DirtyCossack Jun 12 2016, 07:57 AM
After multiple cardboard experiments and a test with 20 gauge, I actually think the single piece is the way to go...
Posted by: saigon71 Jun 12 2016, 04:45 PM
I went with thicker steel, made individual pieces and welded them together. I may still have the poster board templates. Let me know if they would be any help in development of these parts.
Process starts on post 130:
http://www.914world.com/bbs2/index.php?showtopic=123957&st=120
Posted by: DirtyCossack Jun 12 2016, 05:38 PM
Those are very nice and pretty!
Posted by: DirtyCossack Jun 12 2016, 09:06 PM
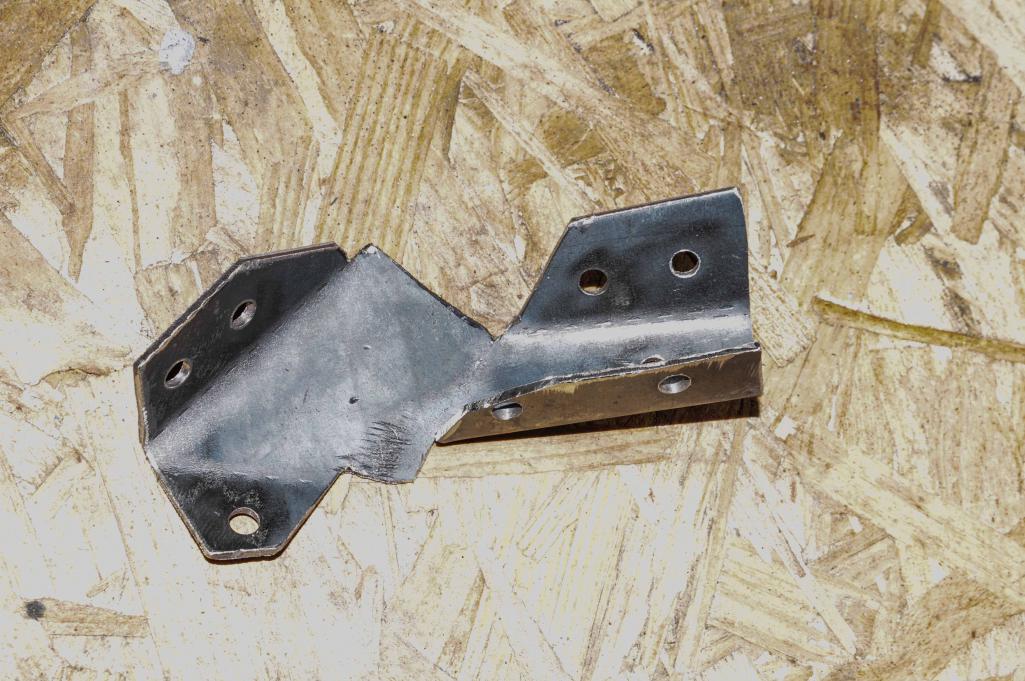
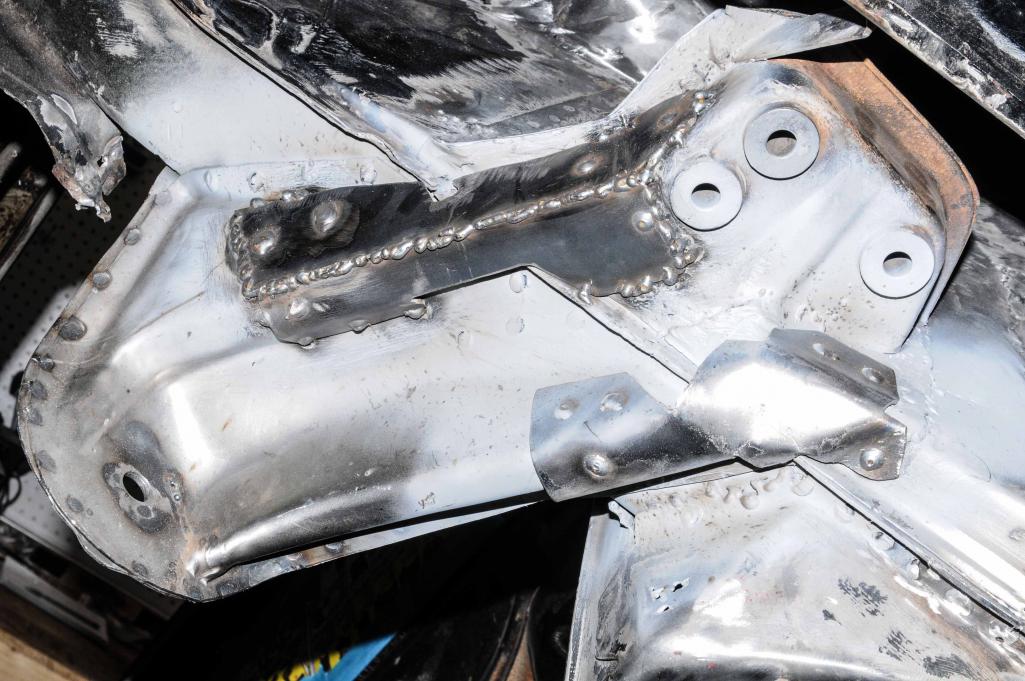
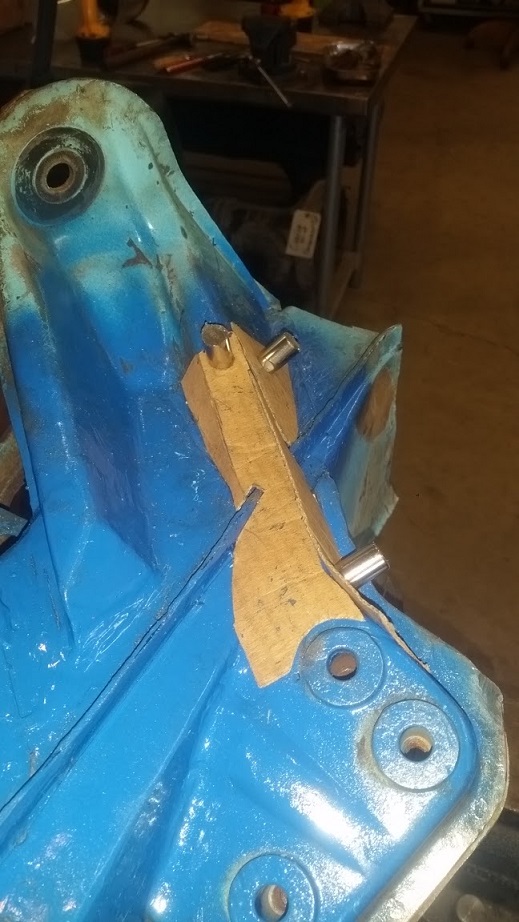
I went with the 12 gauge and found that it really wasn't too bad. Formed in one piece with a vice, torch, and BFH. The first picture shows my multiple cardboard forms and the 20 gauge sample/practice pieces.
Attached thumbnail(s)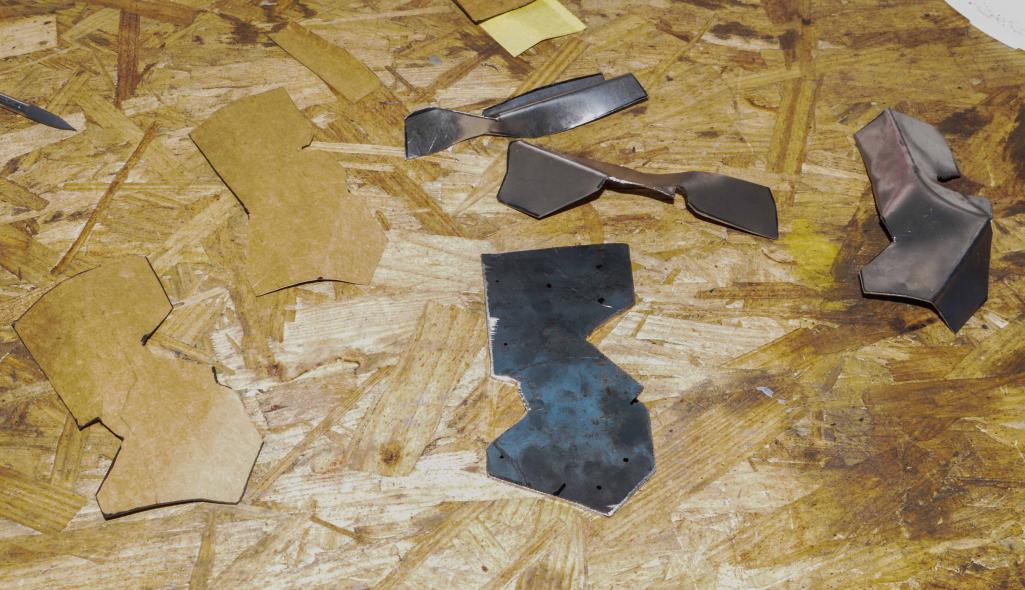
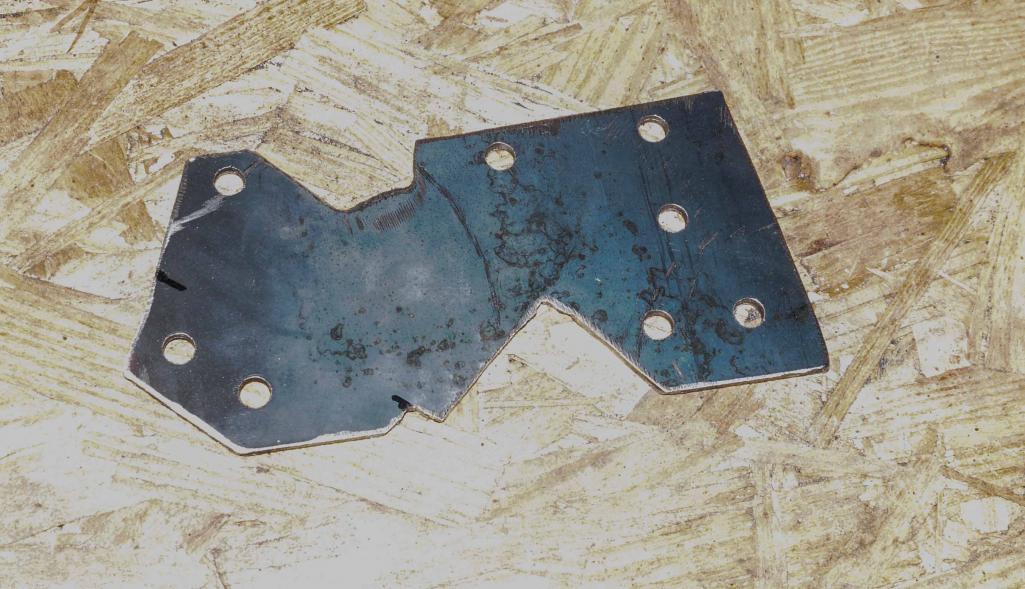
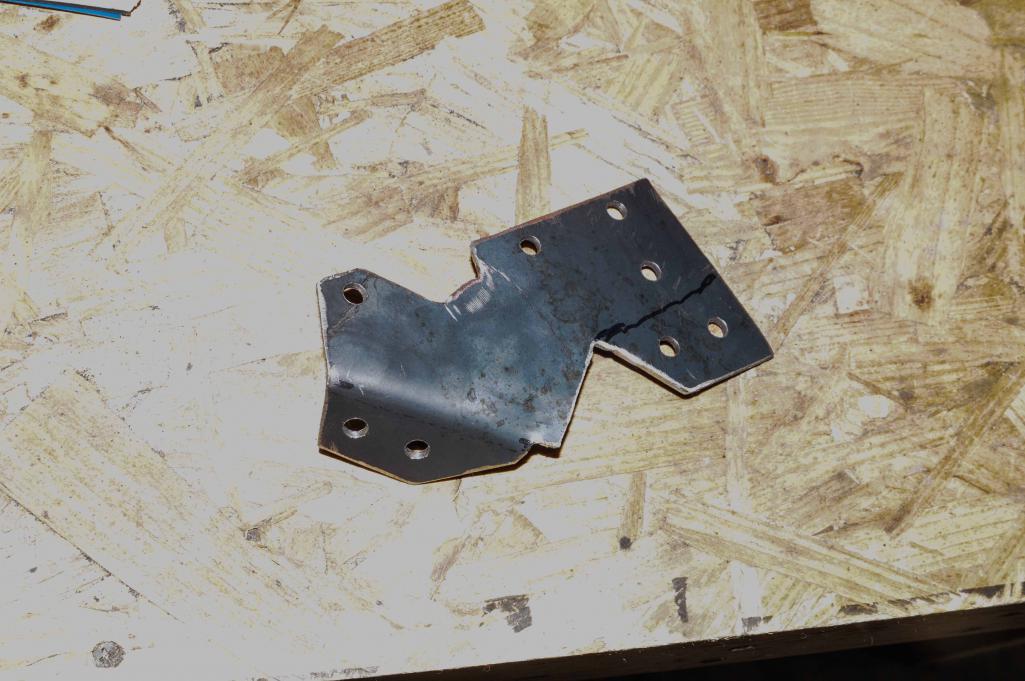
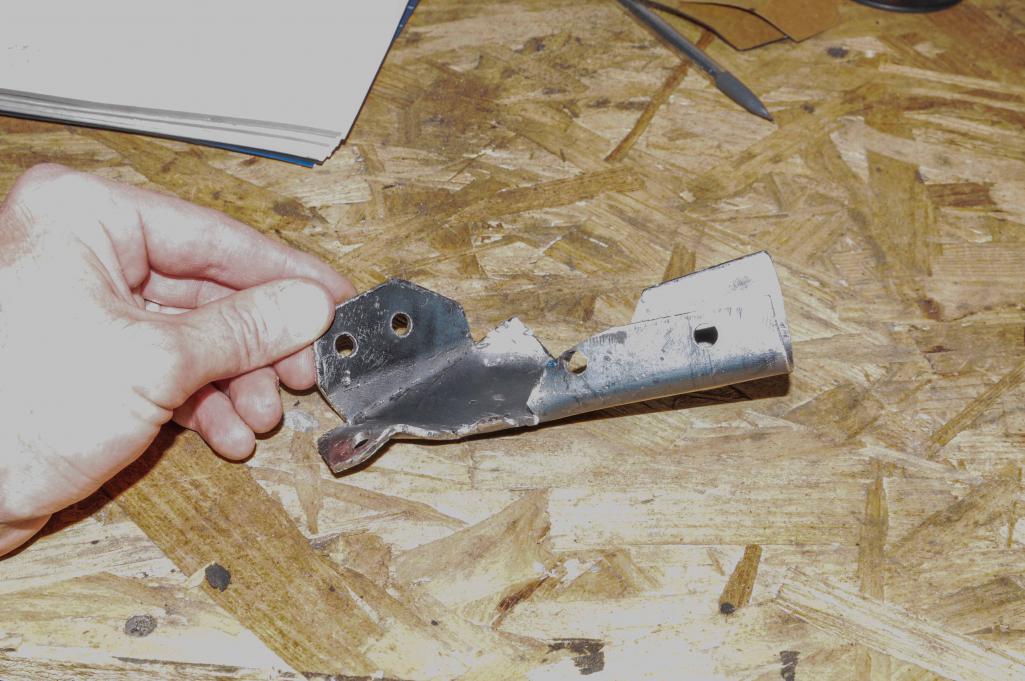
Posted by: DirtyCossack Jun 12 2016, 09:08 PM
Some more pics. For the bigger tie I used the method as seen in the link.
Attached thumbnail(s)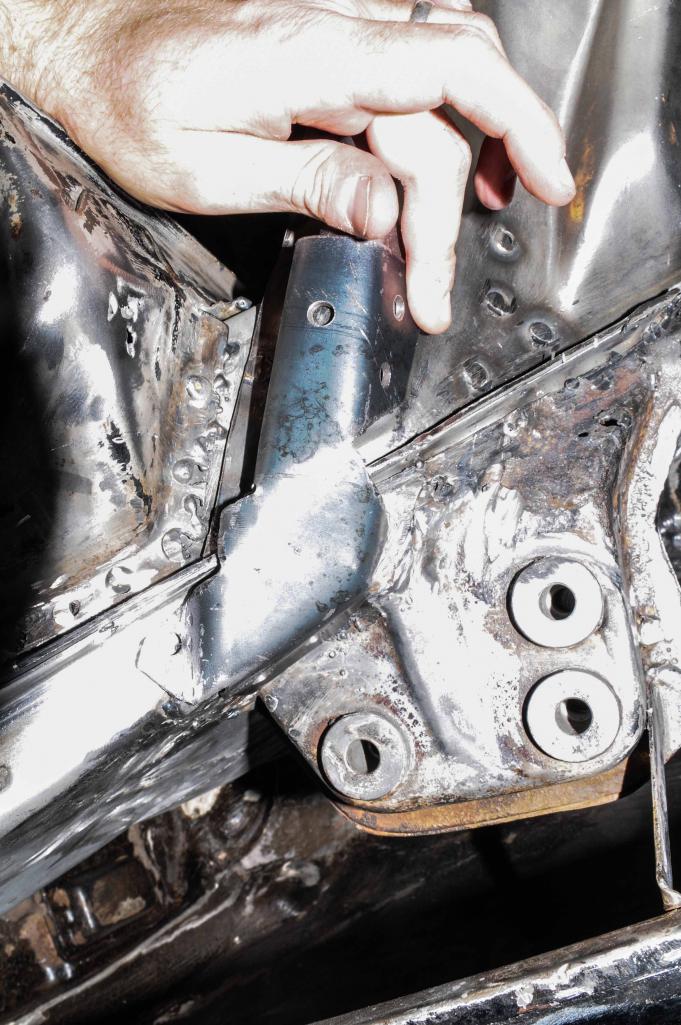
Posted by: r_towle Jun 12 2016, 09:27 PM
Is this the right thread to lodge a complaint regarding the rear suspension design?
Nice job so far, keep it up!
Posted by: DirtyCossack Jun 12 2016, 09:30 PM
Is this the right thread to lodge a complaint regarding the rear suspension design?
I'd say it is. I had my share of choice words for it this weekend.
Posted by: BeatNavy Jun 13 2016, 03:42 AM
Yup, this is very helpful for me. I've been avoiding this task and focusing on other things.
Nice work, and thanks for sharing.
Posted by: mgp4591 Jun 13 2016, 04:39 AM
Is it my imagination or does it look like seam welding could help the overall strength of this assembly?
Posted by: 914dave Jun 13 2016, 07:04 AM
Nicely done!!!!
Posted by: rdauenhauer Jun 13 2016, 07:33 AM
 This has been on my "to do" list for some time.
Nice work.
Posted by: mbseto Jun 13 2016, 08:10 AM
Any interest in creating a PDF file of the templates?
Posted by: DirtyCossack Jun 13 2016, 09:02 AM
I can see what I can do. I still have them, but it's going to be a long and busy week at work.
Posted by: mbseto Jun 14 2016, 07:38 AM
No rush, I still have a lot of work to do before I get back to the rear suspension.
If you're done with them and don't have a scanner handy, mail them to me and I'll scan them and post the scan.
Posted by: DirtyCossack Jun 14 2016, 08:23 AM
Is it my imagination or does it look like seam welding could help the overall strength of this assembly?
I think you're absolutely right, I'm going to see what's up this weekend.
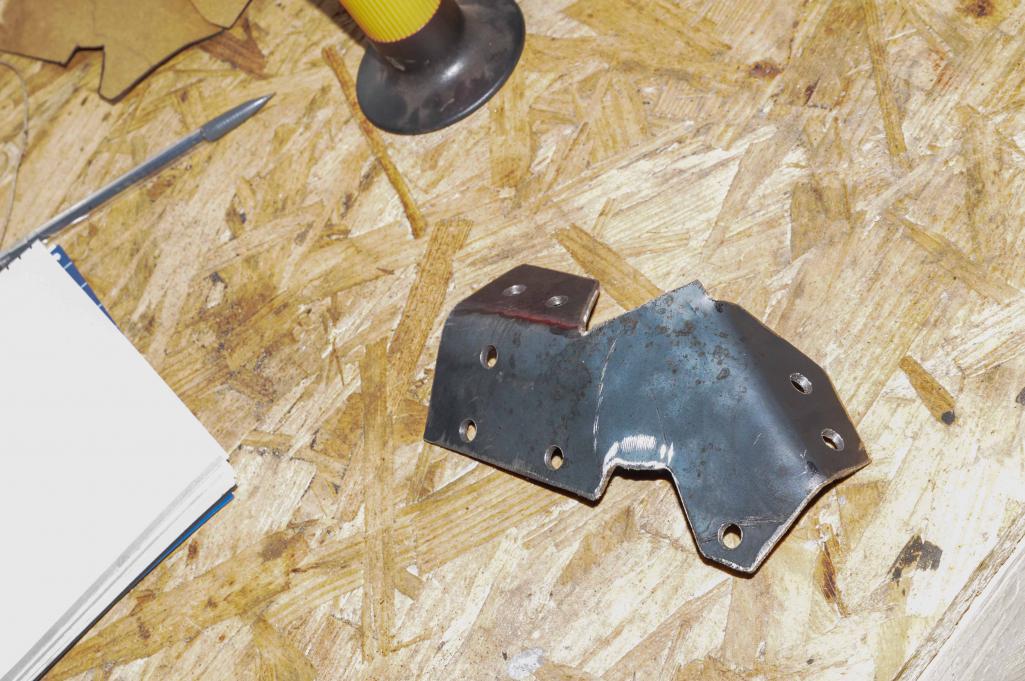
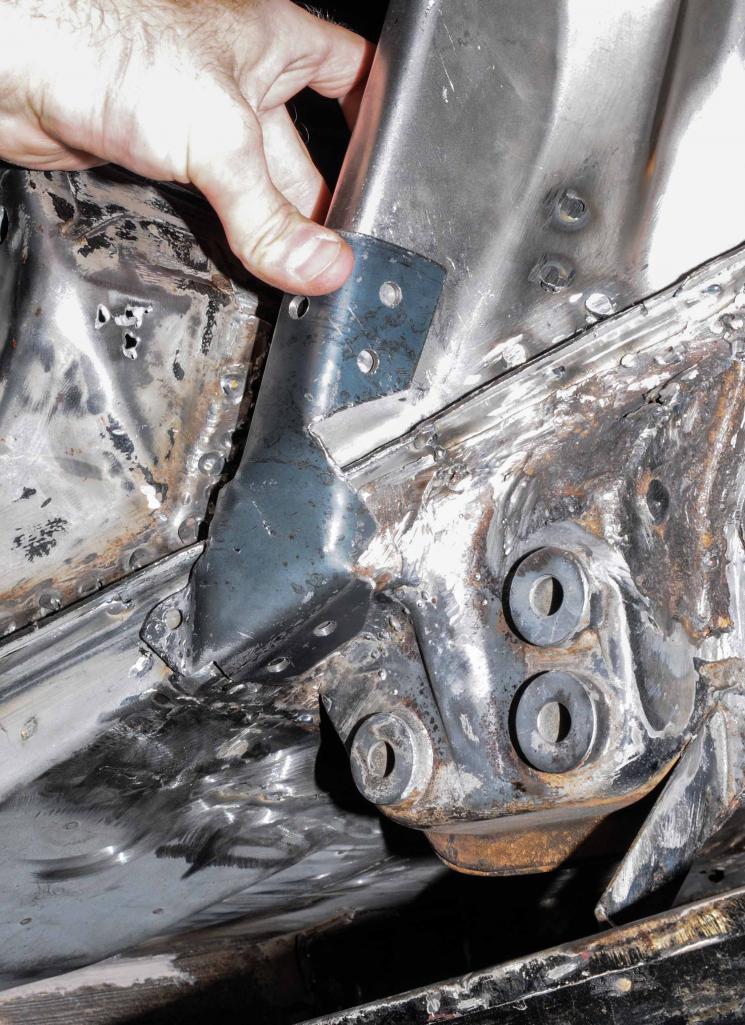
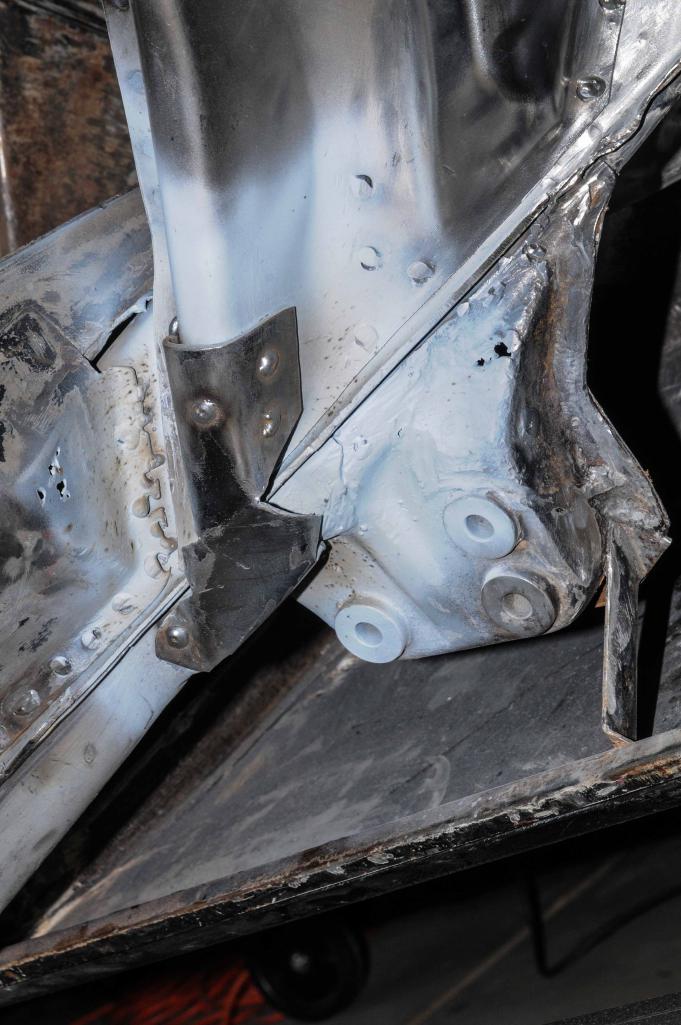
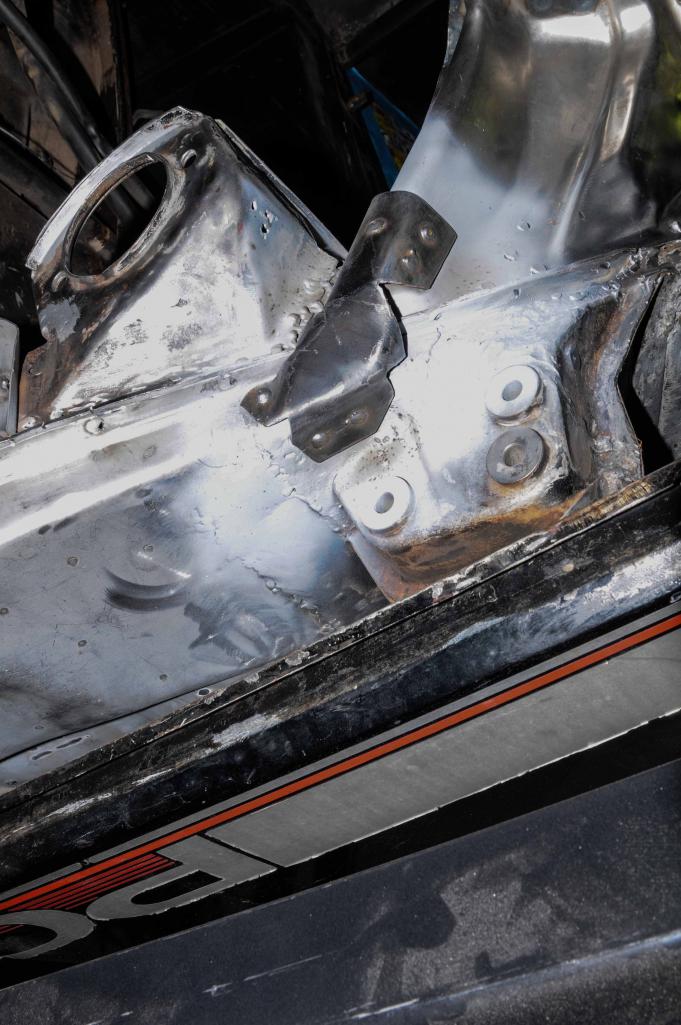
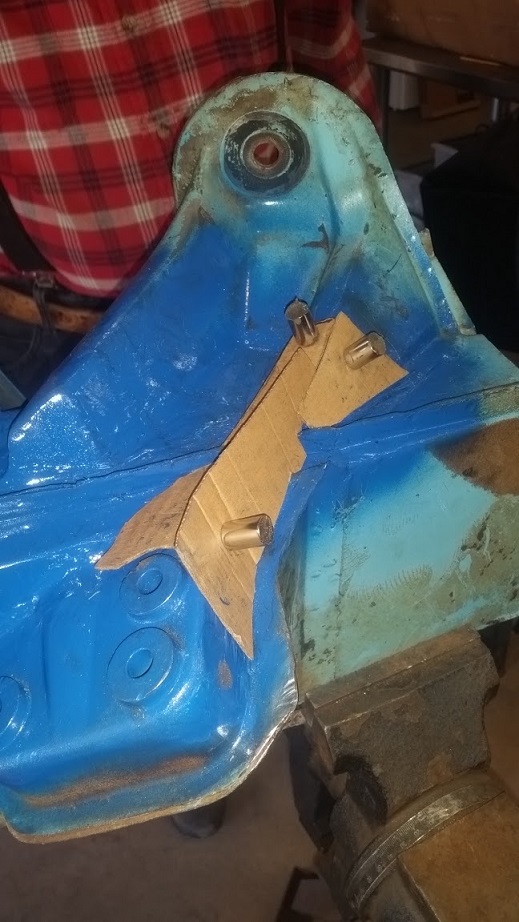
I'm also thinking about adding a little triangular piece in this area:

And an apology to mbseto, I should have known that as the early phone watcher I'd have nothing better to do at work this morning and should have brought the templates in to scan (I'll have to do them here at work anyways...). I'll try and see if I can trade an opening duty with somebody for later this week.
Posted by: draganc Jun 16 2016, 08:08 PM
Not trying to be a dick, but your seam welds look like they didn't penetrate the metal.
The spot welds looks right on!
PS: great design/work!
Posted by: DirtyCossack Jun 17 2016, 09:22 AM
Not trying to be a dick, but your seam welds look like they didn't penetrate the metal.
I wasn't going to say it in the hopes of maintaining an ego, but you're totally right; about 60% of them didn't penetrate. I knew lap welds to be one of my weaknesses, which is why I tried to design my pieces around plug welds...
Edit: I'm thinking I need more heat, nerves, better gun angle, and some real technique.
Posted by: cary Jun 18 2016, 08:53 AM
We're finally working back at my place. Super In Law finished repairing the suspension section itself. So on to creating the patterns. 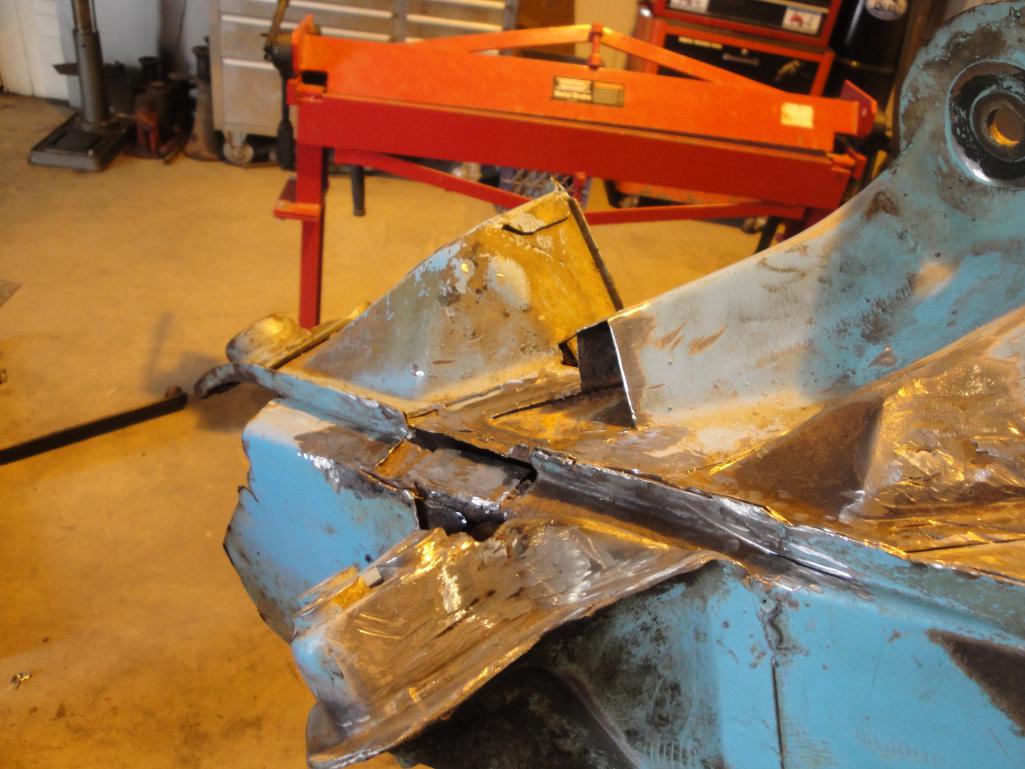
Still plan on making 4-5 sets when we get there. One for Mark. Send one to Pete at RD to set on his desk as a reminder. LOL.
Doing it by hand we will have a seam weld down the backbone.
Posted by: BeatNavy Jun 18 2016, 08:58 AM
Very cool, Cary. I'll buy a set or pattern from you or whoever on this thread is able to provide or share. Good idea on sending to RD - I don't know if I can wait that long though!
Posted by: tomeric914 Jun 18 2016, 09:12 AM
The heavier the gauge the larger the hole needs to be for the rosette weld, otherwise what little penetration was had will rip right out.
On too small of a hole on heavy gauge metal, the MIG wire will often start on the edge of the hole and barely touch the base metal.
Not trying to be a dick, but your seam welds look like they didn't penetrate the metal.
I wasn't going to say it in the hopes of maintaining an ego, but you're totally right; about 60% of them didn't penetrate. I knew lap welds to be one of my weaknesses, which is why I tried to design my pieces around plug welds...
Edit: I'm thinking I need more heat, nerves, better gun angle, and some real technique.
Posted by: cary Jun 24 2016, 09:52 PM
Getting back to work. Super In Law is back to work on the ties. He just finished up the longer piece.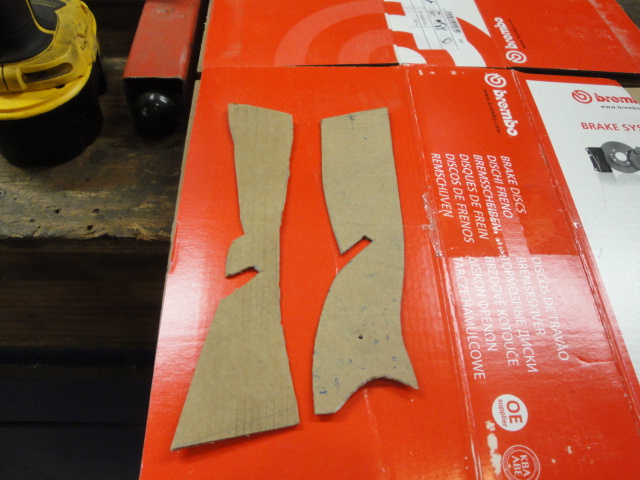
Patterns become 12 gauge steel pieces.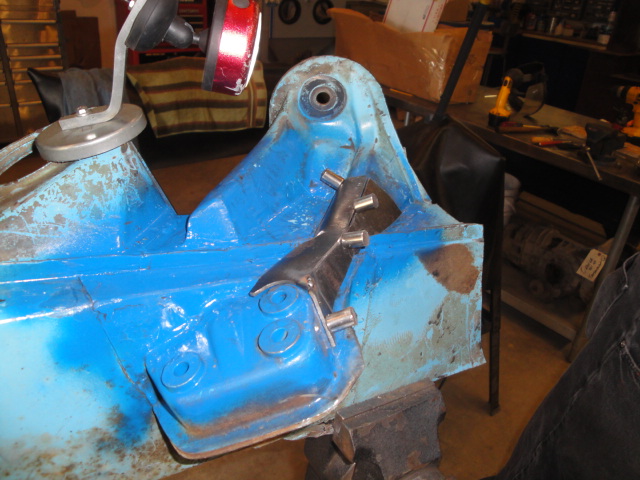
Fitted and seam welded.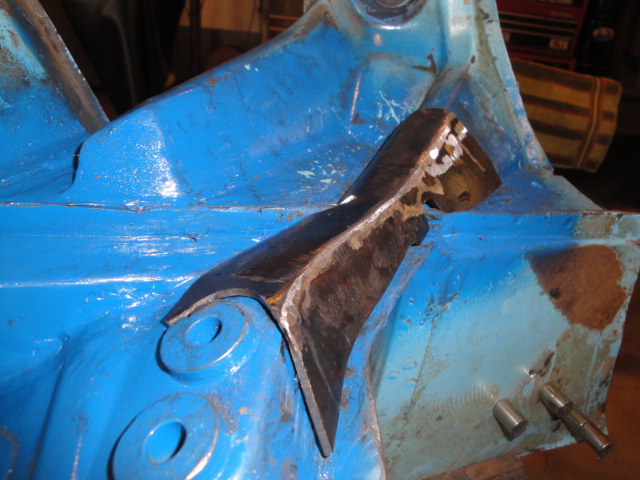
Best we can tell we'll be able flip the patterns over and use them on the other side.
We'll probably have to create these in two steps. Have the steel cut out on a CNC. Then have Super In Law fit, shape and weld them. Until RD makes them for use.
Powered by Invision Power Board (http://www.invisionboard.com)
© Invision Power Services (http://www.invisionpower.com)