Printable Version of Topic
Click here to view this topic in its original format
914World.com _ 914World Garage _ 3rd Brake Lamp, my best try...
Posted by: Garland Apr 9 2005, 10:20 PM
Well can you see it?
Attached image(s)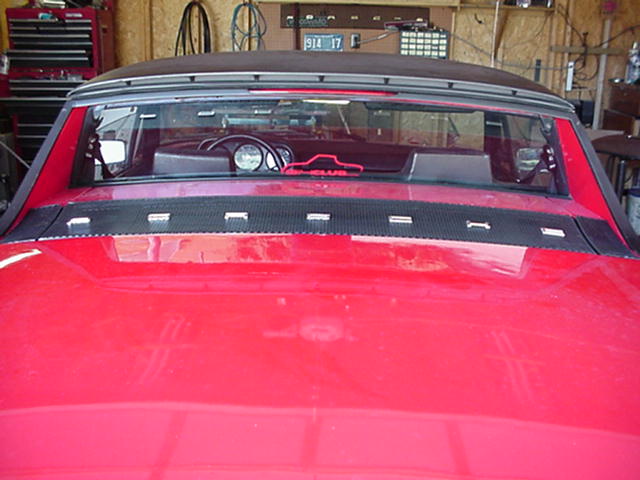
Posted by: Garland Apr 9 2005, 10:24 PM
Ask, and you will see more!
Posted by: scott thacher Apr 9 2005, 10:25 PM

Posted by: Aaron Cox Apr 9 2005, 10:27 PM
pretty cool...
wheer did you put the wires>?
Posted by: Garland Apr 9 2005, 10:38 PM
A little closer look.
Attached image(s)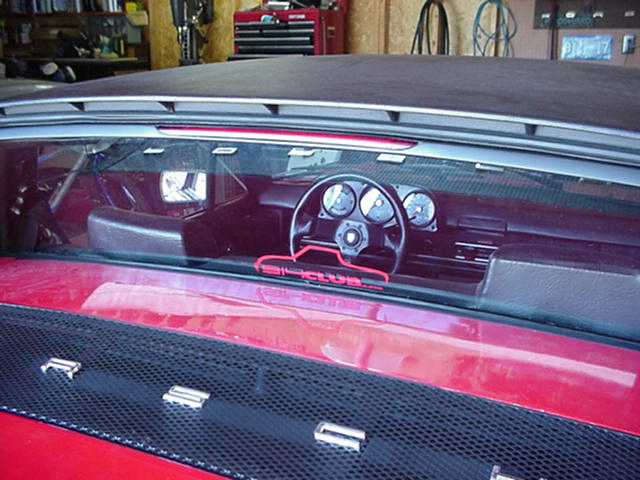
Posted by: Garland Apr 9 2005, 10:40 PM
Wires are inside the stock roll bar. Then behind the sail trim, and into the trunk.
Attached image(s)
Posted by: Garland Apr 9 2005, 10:44 PM
Cut the hole in the trim to fit the face of the lamp housing. Almost flush.
Posted by: Garland Apr 9 2005, 10:46 PM
Light on
Attached image(s)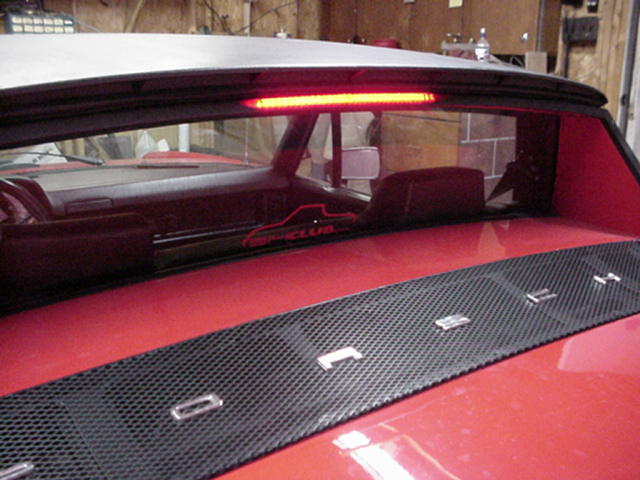
Posted by: Garland Apr 9 2005, 10:48 PM
DOT approved lamp, brightest light on the car.
Attached image(s)
Posted by: Garland Apr 9 2005, 10:50 PM
Top off.
Attached image(s)
Posted by: Garland Apr 9 2005, 10:53 PM
Again flush, almost with trim. Did not want to have the
"stuck on look".
Attached image(s)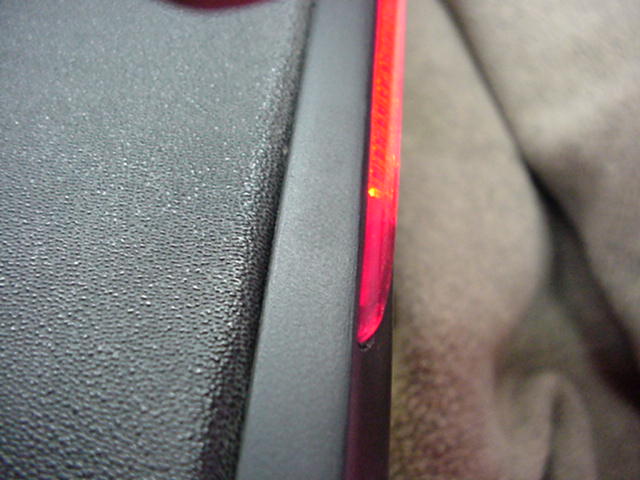
Posted by: Garland Apr 9 2005, 10:54 PM
This picture just was cool.
Attached image(s)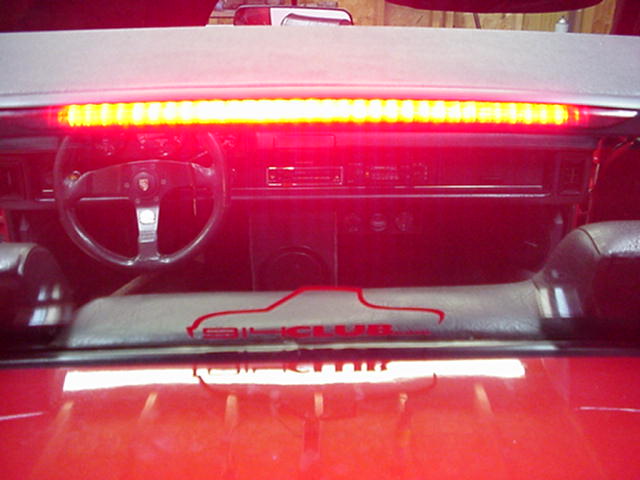
Posted by: SGB Apr 9 2005, 10:57 PM
Most certainly a keeper! It is great. Where did you get the light panel to start with? Did it require a resister to connect it to the incandescent system, like a replacement LED bulb?
Posted by: Flat VW Apr 9 2005, 10:58 PM
Will that illuminate on deceleration as well as with the brake lights? 
John
P.S. neat installation
Posted by: Andyrew Apr 9 2005, 11:04 PM
Who
What
When
Where
How much?
Are you reproducting these? or is this just something one off for you?
Posted by: Garland Apr 9 2005, 11:10 PM
| QUOTE (SGB @ Apr 9 2005, 11:57 PM) |
| Most certainly a keeper! It is great. Where did you get the light panel to start with? Did it require a resister to connect it to the incandescent system, like a replacement LED bulb? |
No resister needed. It came from this model car. OEM lamp.
Attached image(s)
Posted by: Andyrew Apr 9 2005, 11:14 PM
I dono.. that car looks expensive.....
what is it??
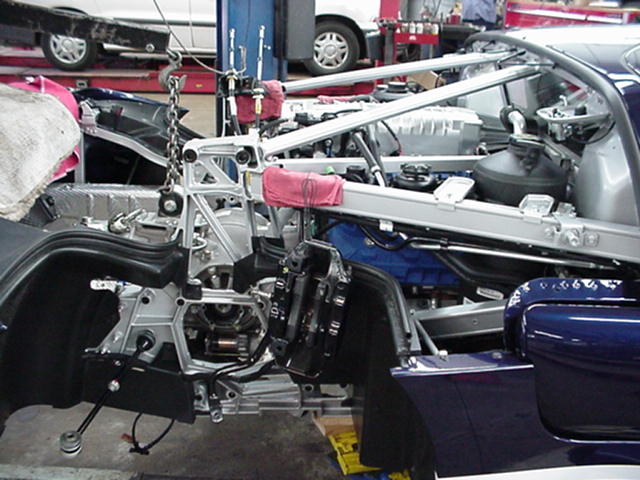
Posted by: Garland Apr 9 2005, 11:14 PM
You can just see it at the top of the rear glass. (O no I might be hijacking my own post.)
Attached image(s)
Posted by: Garland Apr 9 2005, 11:16 PM
Ford GT
Attached image(s)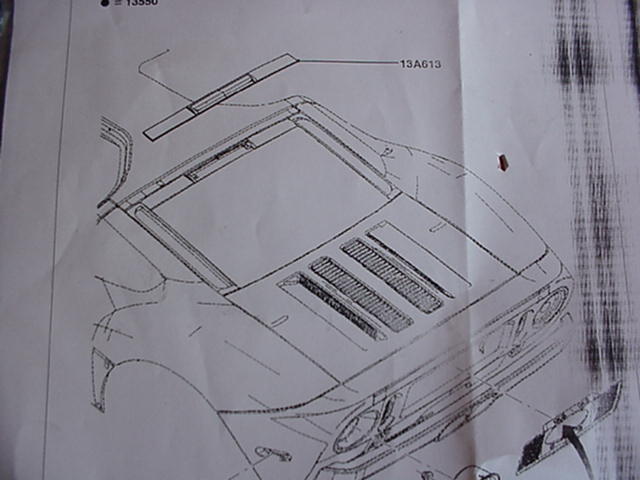
Posted by: Andyrew Apr 9 2005, 11:18 PM
How the heck did you get that part???
How much??
dont make me repost my questions... lol
Posted by: Garland Apr 9 2005, 11:22 PM
| QUOTE (Andyrew @ Apr 10 2005, 12:04 AM) |
| Who What When Where How much? Are you reproducting these? or is this just something one off for you? |
Me
GT
Last night took 3 hours
My garage
$40.00! at your Ford dealer
Your last question : Its one off for me. I did have to cut a pocket in the stock roll bar, not just the trim, due to the depth of the housing. I would not have done this to my project car. But this one is the daily driver and I like to customize it a bit.
Posted by: lagunero Apr 9 2005, 11:23 PM
| QUOTE (Andyrew @ Apr 9 2005, 10:18 PM) |
| How the heck did you get that part??? How much?? dont make me repost my questions... lol |
yea, don't make me repost his questions

Posted by: Aaron Cox Apr 9 2005, 11:24 PM
that is AWESOME
Posted by: Garland Apr 9 2005, 11:26 PM
| QUOTE (Aaron Cox @ Apr 10 2005, 12:24 AM) |
| that is AWESOME |
 I like it to. Thanks
Posted by: azbill Apr 9 2005, 11:40 PM
That is one the slickest ideas I have seen in a long time. Nice work!
Posted by: markb Apr 10 2005, 12:38 AM
| QUOTE (azbill @ Apr 9 2005, 09:40 PM) |
| That is one the slickest ideas I have seen in a long time. Nice work! |
Very nice!
Posted by: neo914-6 Apr 10 2005, 01:10 AM
Demick did similar some time ago for not much less in cost: http://www.914world.com/bbs2/index.php?act=ST&f=2&t=1272&hl=
Actual instructions are http://members.rennlist.com/demick/thirdbrake.html
I'd like to say I have a GT part on my car...
Posted by: Garland Apr 10 2005, 08:11 AM
Wow I did the same lamp last year. I wanted something a little more stelth. Removed the GM part and went with the GT.
Attached image(s)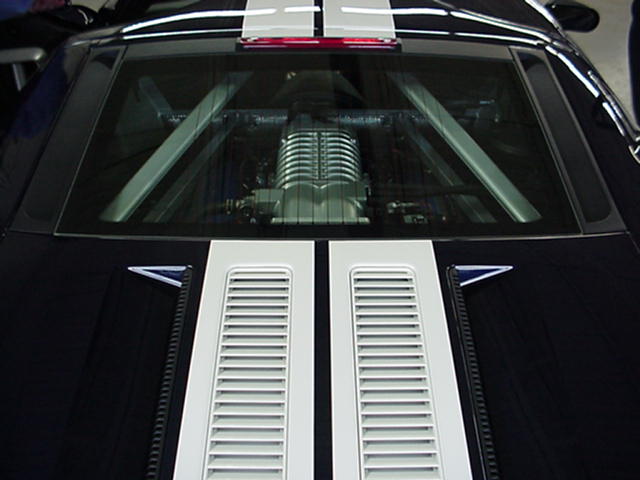
Posted by: Elliot Cannon Apr 10 2005, 09:03 AM
So I can just walk into any Ford dealer and order this thing? Kool! Do you maybe have a part number?
Thanks Elliot
Posted by: Garland Apr 10 2005, 09:40 AM
| QUOTE (Elliot Cannon @ Apr 10 2005, 10:03 AM) |
| So I can just walk into any Ford dealer and order this thing? Kool! Do you maybe have a part number? Thanks Elliot |
One lamp asy Part # 4G7Z-13A613-AA
Posted by: Aaron Cox Apr 10 2005, 10:40 AM
show us your wiring please..... 
Posted by: Jeroen Apr 10 2005, 10:45 AM
wow! excellent job!
Posted by: GeorgeRud Aug 19 2005, 02:44 PM
Got the part from my local Ford Dealer today. They wanted $59.20 for it, but it came in 2 days. I just hope I can cut my chrome trim nicely enough to fit it as well as the red car did. The look is just beautiful, I saw the car at the Midwest SMOG RAMBLE, and it made all the other 3rd brake lights look kind of stuck on.
I think that this is a very important upgrade if you drive your car in traffic these days. Here in Chicagoland, most of the drivers are semi-brain dead on there best days, so bright colors and bright lights are your best defense.
Posted by: Ferg Aug 19 2005, 02:54 PM
wow, that looks great, and I happen to have a spare trim section . I would love more pics of wiring, and a how to.
Ferg.
Posted by: redshift Aug 19 2005, 03:02 PM

Excellent!
M
Posted by: Garland Aug 20 2005, 09:10 PM
| QUOTE (Ferg @ Aug 19 2005, 03:54 PM) |
| wow, that looks great, and I happen to have a spare trim section . I would love more pics of wiring, and a how to. Ferg. |
Ok,
Aaron, George and Ferg I will pop off the trim and take some pictures to show I did it. I will post them Sunday night.
John
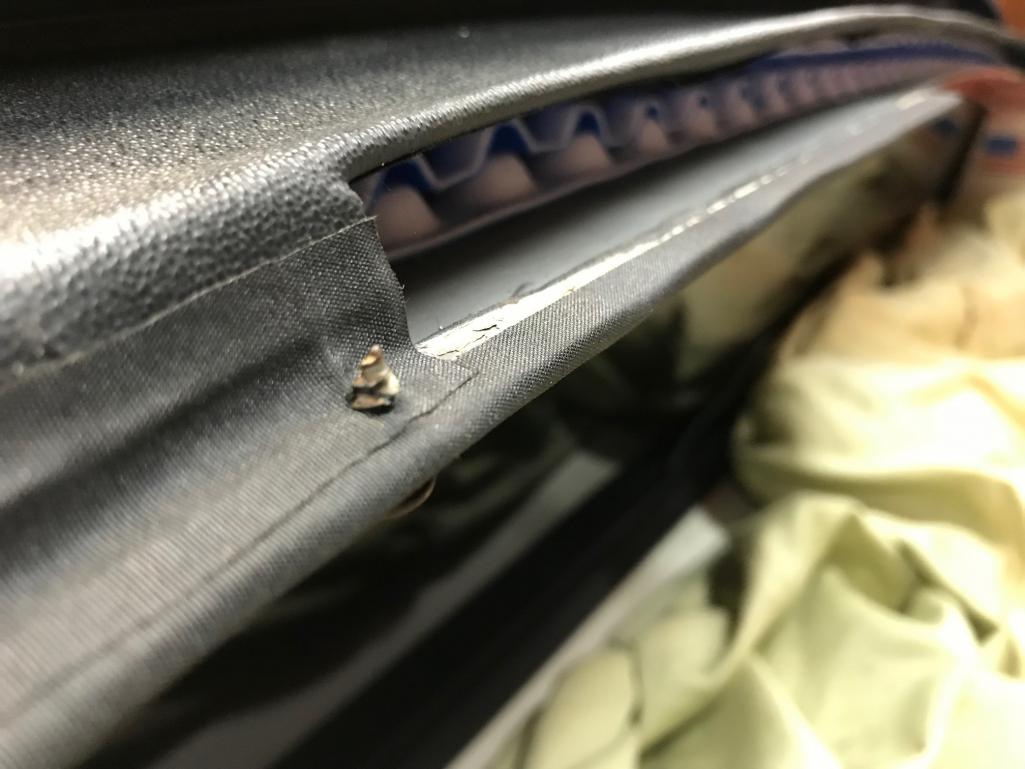
Posted by: Garland Aug 21 2005, 10:37 PM
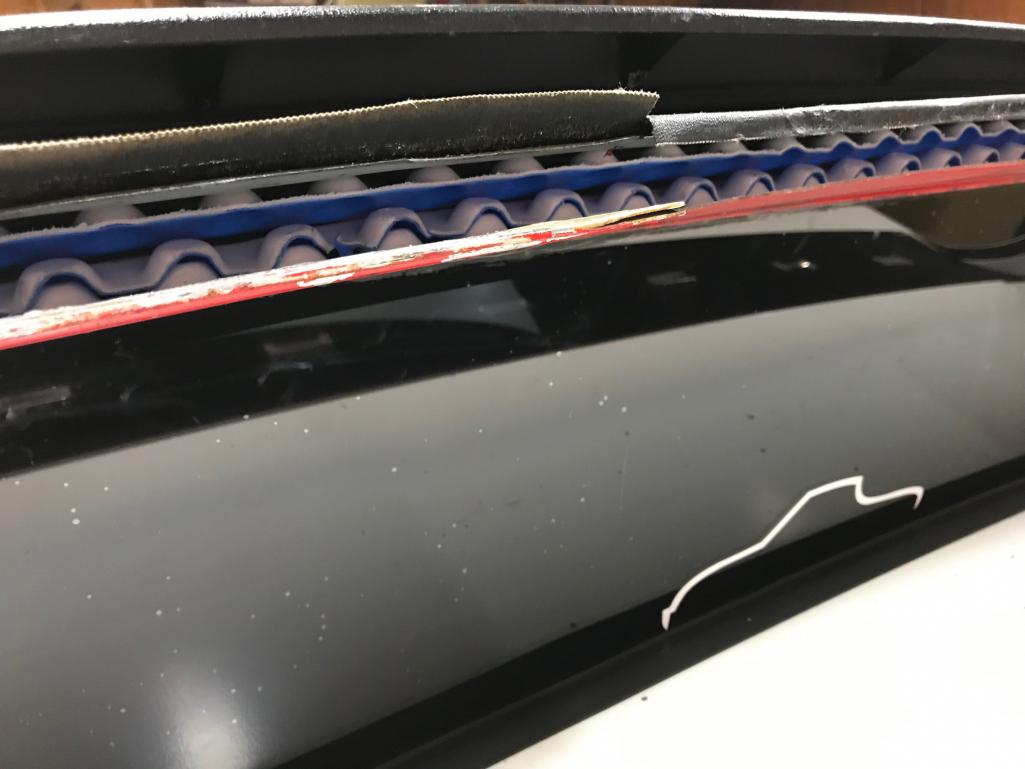
Here is the pocket cut out of the roll bar. I used a jig saw and a good blade. Inside the bar is a inner reinforcement. It will not need to be cut as this
lamps depth is just right to fit up to it when installed.
Attached image(s)
Posted by: Garland Aug 21 2005, 10:38 PM
This view shows the cut a little closer. (The roll bar cover folds under itself not into the pocket due to the tight fit of the lamp)
Attached image(s)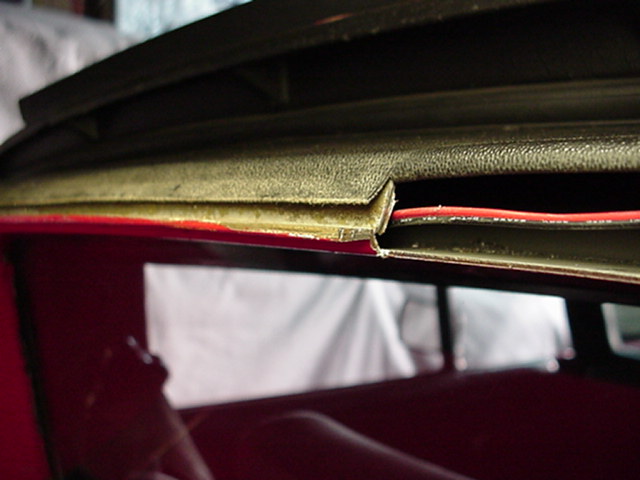
Posted by: Garland Aug 21 2005, 10:40 PM
Cut to top and bottom edge.
Attached image(s)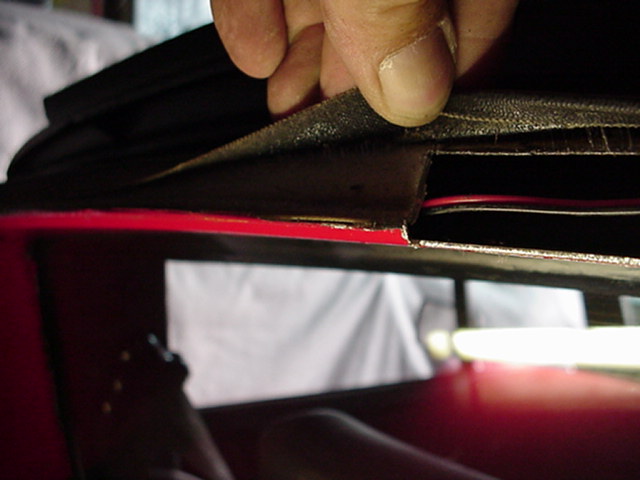
Posted by: Garland Aug 21 2005, 10:41 PM
The trim needs to be cut out of the top 2/3 for the light to fit into the roll bar, and fit into the trim due to the backside shape of the trim piece. No cutting of the trim is needed other then the hole for the lamp on the face side of the trim. This was also done with a jig saw after drilling a starter hole for the blade to fit through.
Attached image(s)
Posted by: Garland Aug 21 2005, 10:42 PM
This shot shows the trim bar upside down. Notice the curvature of the cut. Slightly smaller then the light so no gap shows. This also holds the lamp
from falling out. Nothing other then the trim holds the lamp in place.
Attached image(s)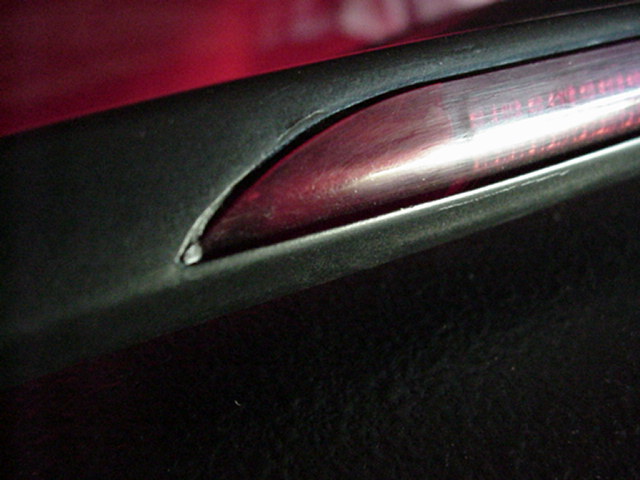
Posted by: Garland Aug 21 2005, 10:43 PM
This is from the back side of the trim. The black tape hides any bleed through when the lamp is on between the trim and roll bar.
Attached image(s)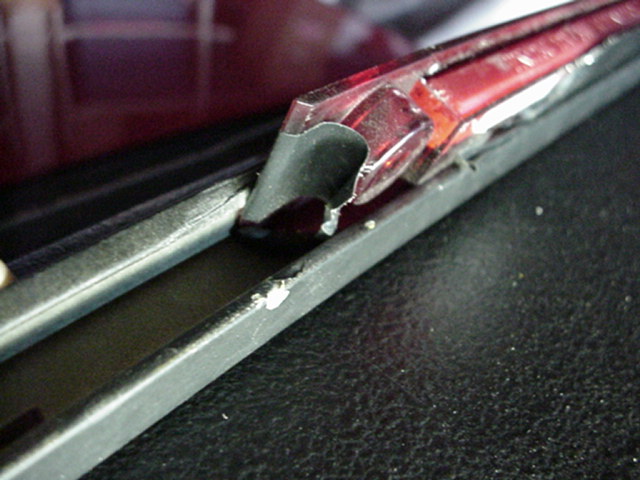
Posted by: Garland Aug 21 2005, 10:43 PM
Another view of the backside.
Attached image(s)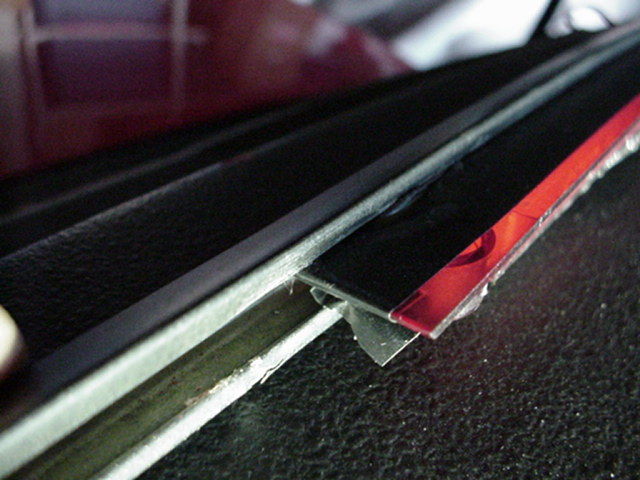
Posted by: Garland Aug 21 2005, 10:44 PM
The wiring comes out the back of the lamp through the roll bar, and out to a drilled hole at one end.
Attached image(s)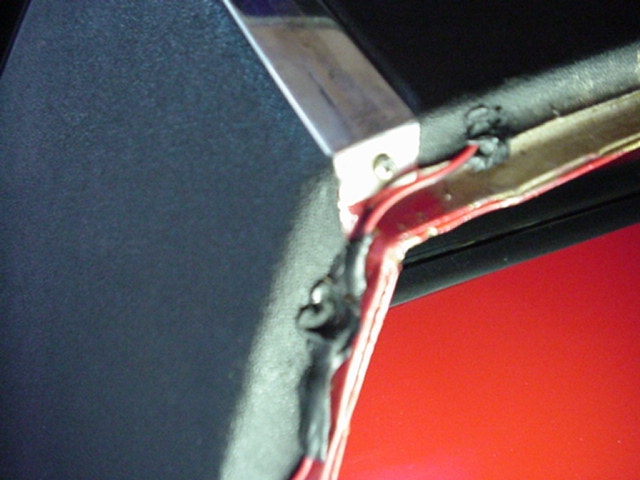
Posted by: Garland Aug 21 2005, 10:44 PM
Down the sail behind the sail trim,
Attached image(s)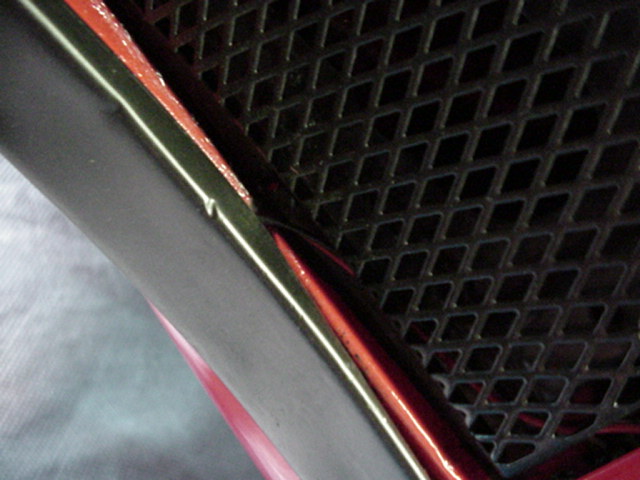
Posted by: Garland Aug 21 2005, 10:45 PM
and between the left grill end piece,
Attached image(s)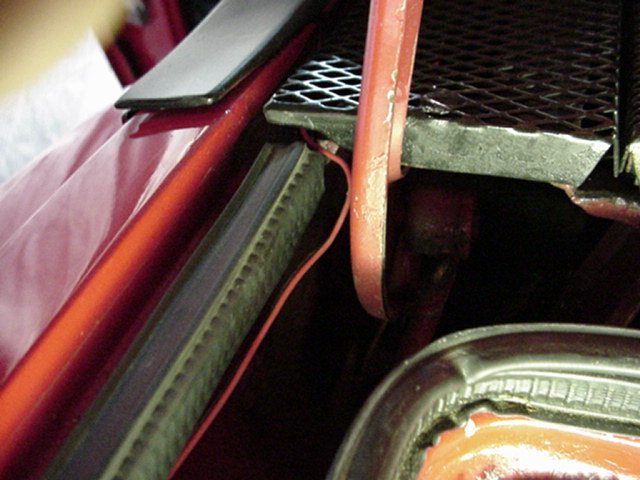
Posted by: Garland Aug 21 2005, 10:46 PM
into the trunk. Along the left side wiring harness, and tied into the left brake lamp leads.
Attached image(s)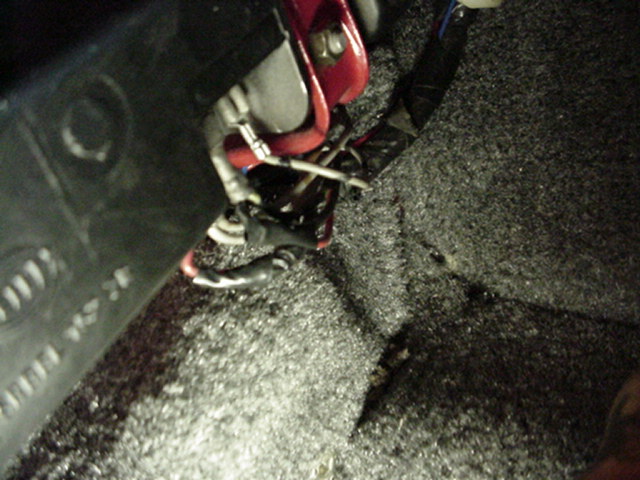
Posted by: Garland Aug 21 2005, 10:47 PM
I hope that will help anyone doing this 3rd brake lamp modification.
Thanks for the interest.
John
Attached image(s)
Posted by: SpecialK Aug 22 2005, 08:33 PM
NICELY DONE!! Looks like it should have been there all along! 
Posted by: Garland Aug 22 2005, 09:18 PM
A few more shots.
Attached thumbnail(s)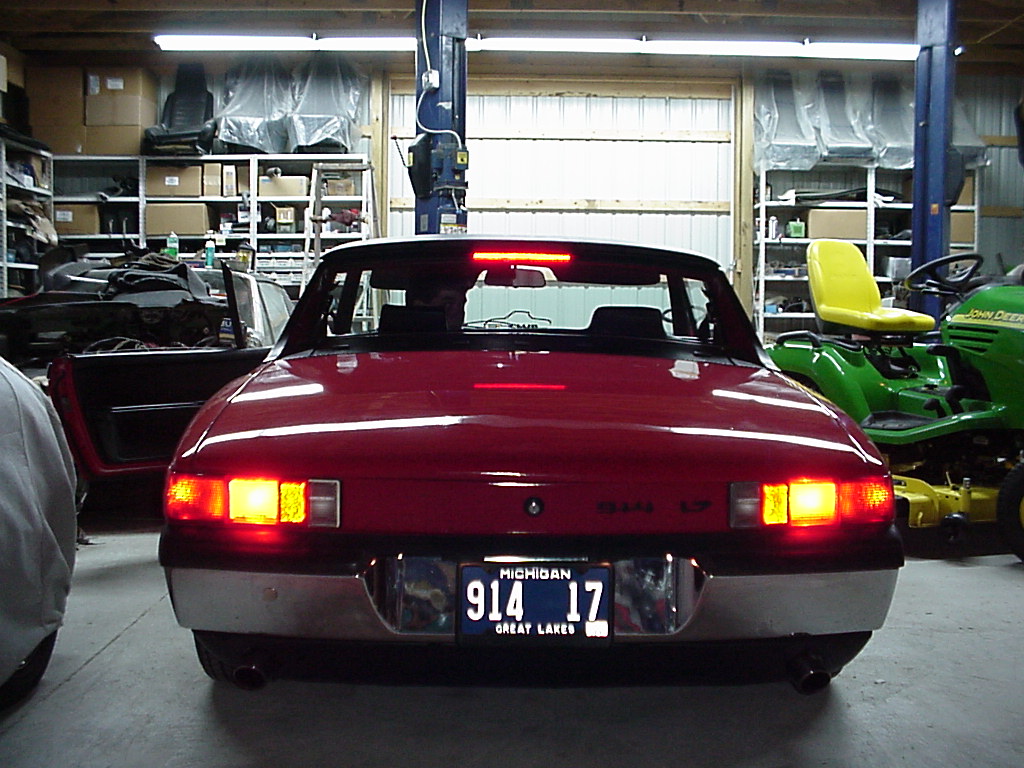
Posted by: Garland Aug 22 2005, 09:22 PM
Parking lamps are on also.
Attached thumbnail(s)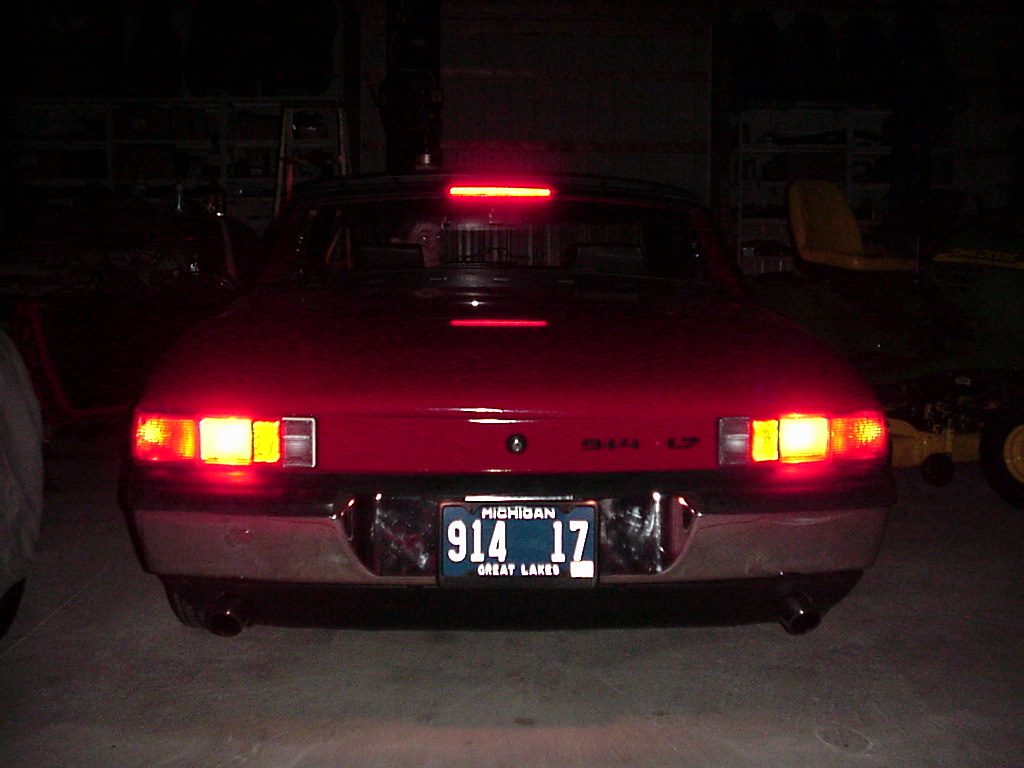
Posted by: lotus_65 Aug 28 2005, 09:24 AM
could a guy feed the wiring into the interior bolster and down the firewall? the po already has the wiring coming into the cabin (his dumb light's gone). it looks like i could hide everything completely this way.
looks great!
Posted by: Harpo Oct 4 2013, 04:05 PM
I agree that this is the best looking high mounted 3rd brake like application I have seen on a 914. The problem is that now this part that is no longer in production is $160
David
Posted by: Garland Oct 4 2013, 06:45 PM
I agree that this is the best looking high mounted 3rd brake like application I have seen on a 914. The problem is that now this part that is no longer in production is $160
David
This is the same lamp used in the Ford Taurus wing, just turned over. The Taurus part at the time I did the mod, was more then the GT. ( price set by demand)
I sure you can find a used 2002 Taurus lamp, wing or even a the whole deck lid for less.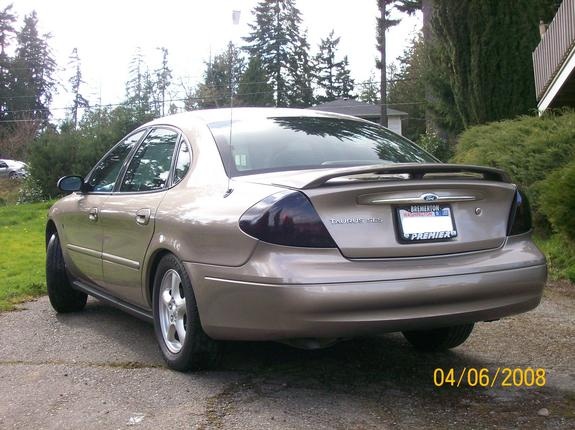
Hope this helps.
Posted by: StratPlayer Oct 4 2013, 07:09 PM
That's where I located mine
Attached image(s)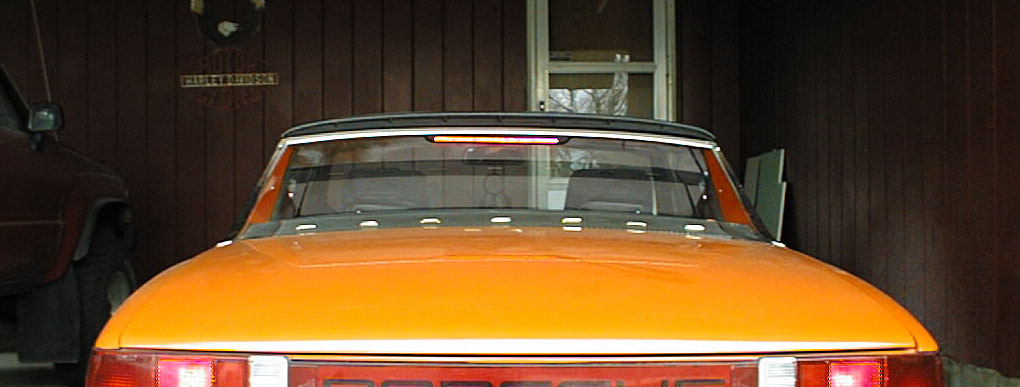
Posted by: Harpo Oct 5 2013, 07:14 AM
Thanks for the heads up. I just bought one off EBAY for $50
David
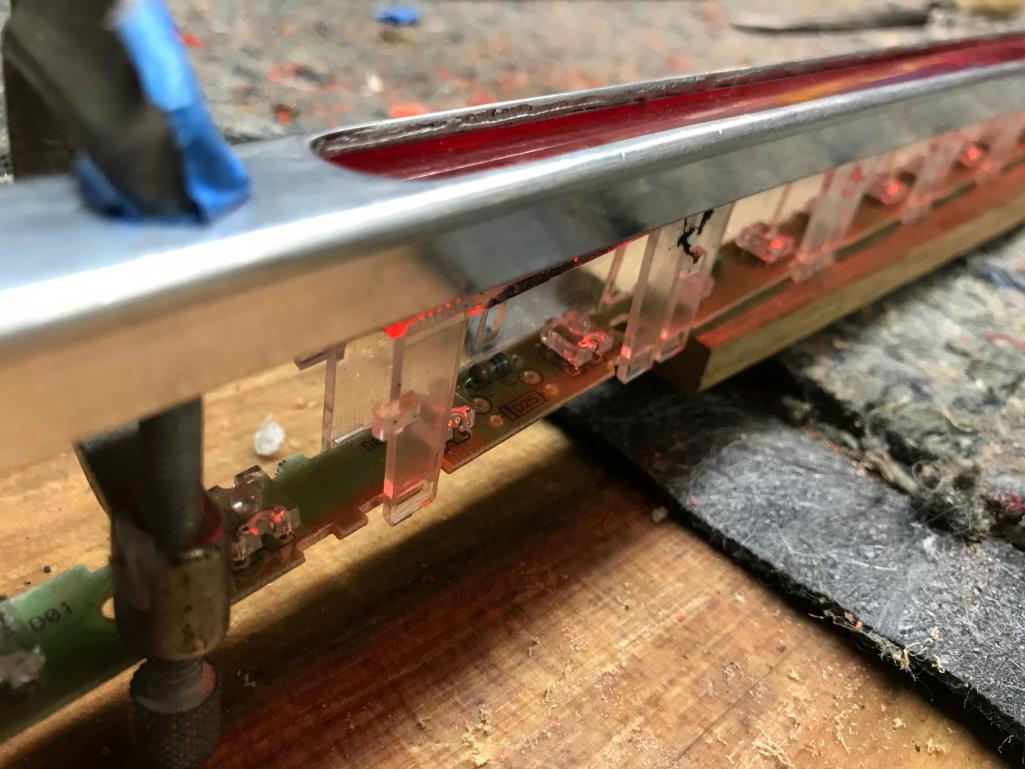
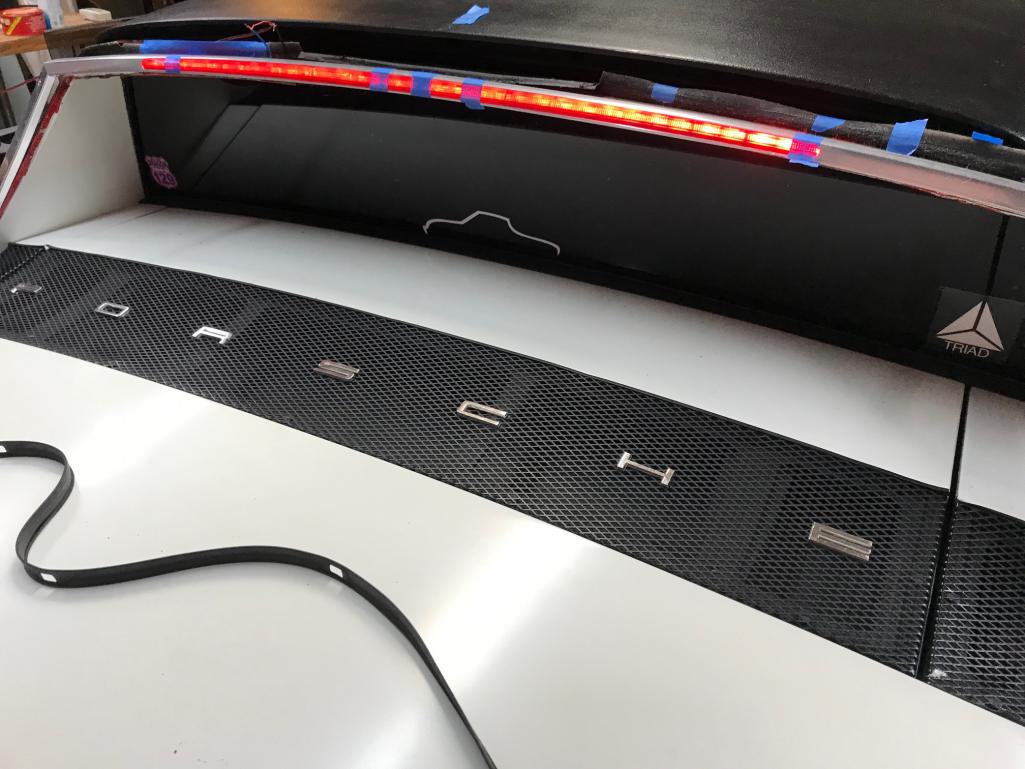
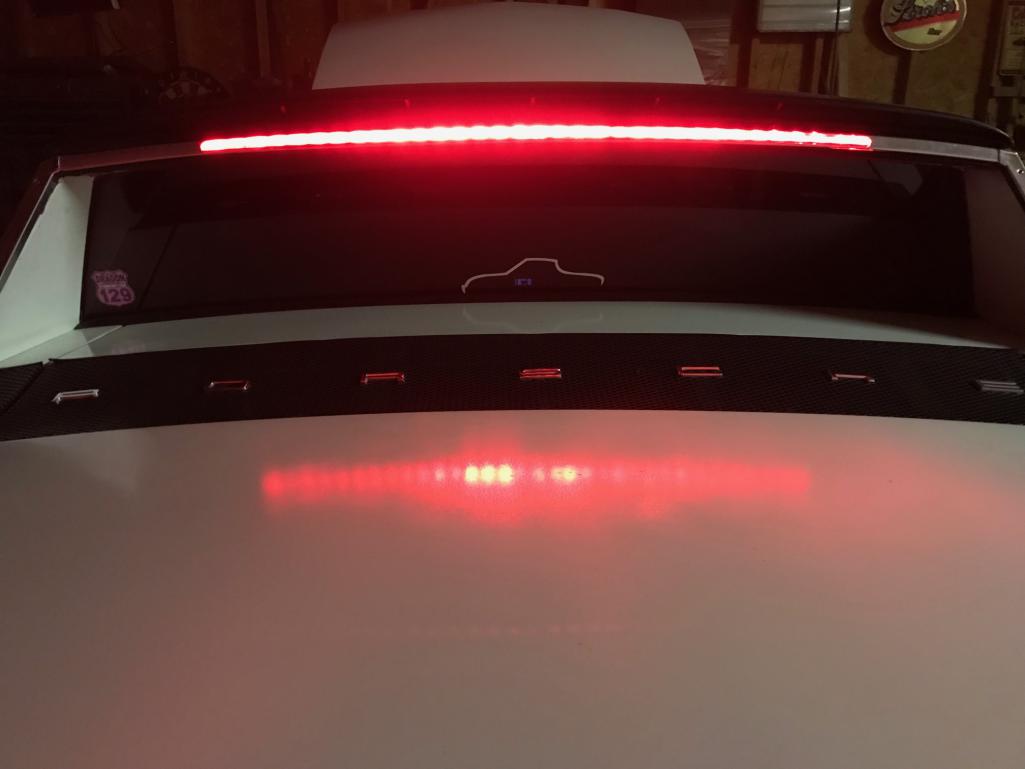
Posted by: Garland Jul 23 2019, 05:59 PM
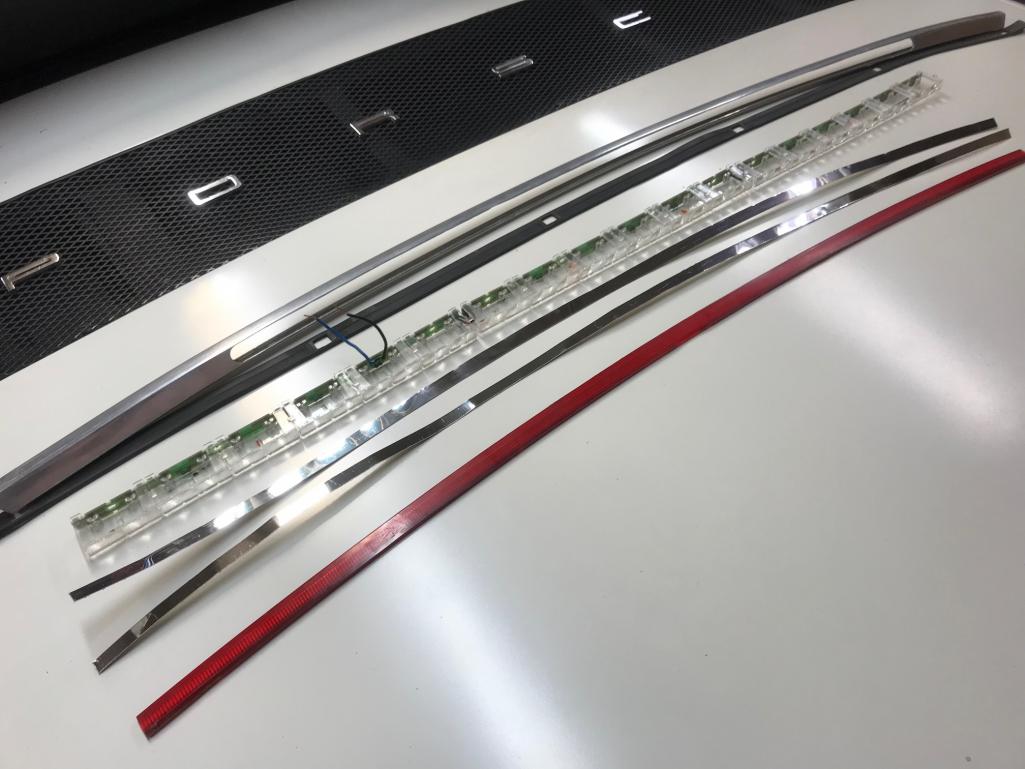
I’ve been wanting to extend the third brake lamp for more width. So this time I’m using the lamp from a Cadillac tailgate . I had to extensively modify the lens size, by filing and sanding it to fit inside the 914 trim. I wanted to reinforce the rollbar and give a backstop to the lamp, so I utilized some underlying material used for floating floors inside the roll bar. It also took quite a bit of time to shave/mill the hole in the roll bar trim.
Also I used the reflective material to get the best performance from the lamp.
Do to do the additional depth needed for the lenses and the style lamp, I needed a little more height, the trim is mounted ontop of the pinch weld, instead of over it. The center section of the pinch weld I removed when installing the other lamp, so a set screw at each end holds the trim in place. 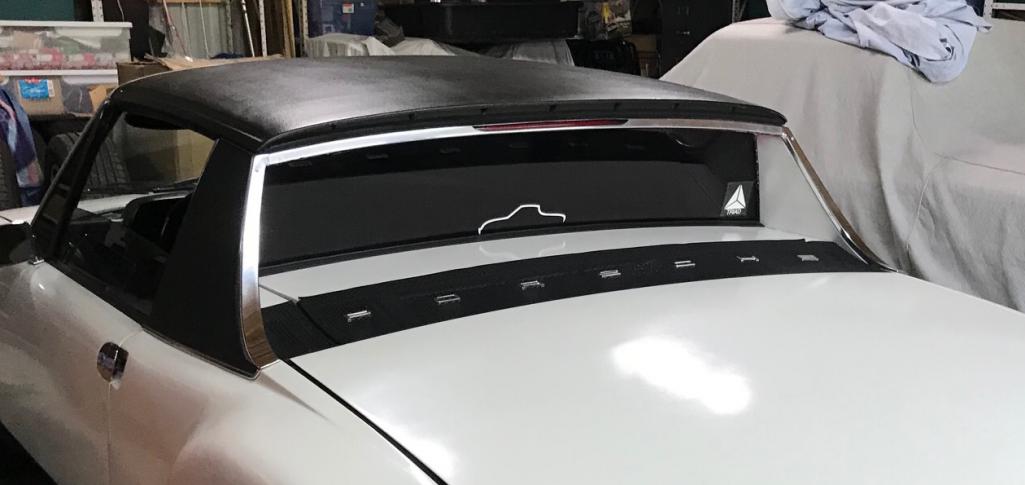
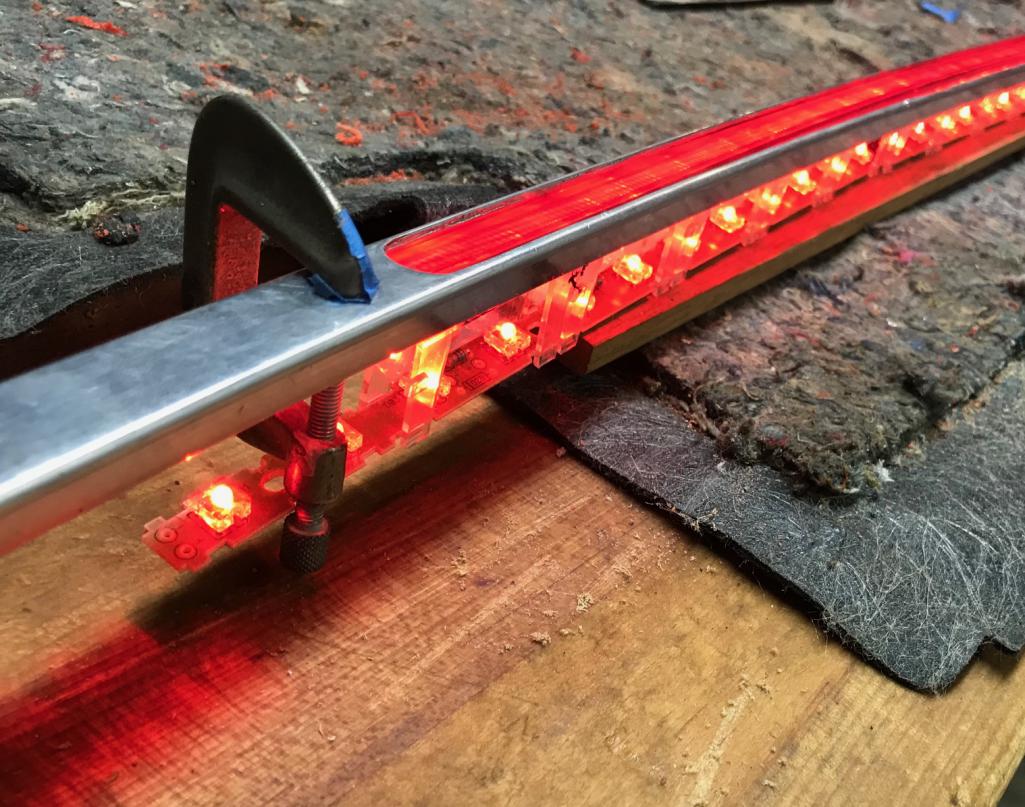
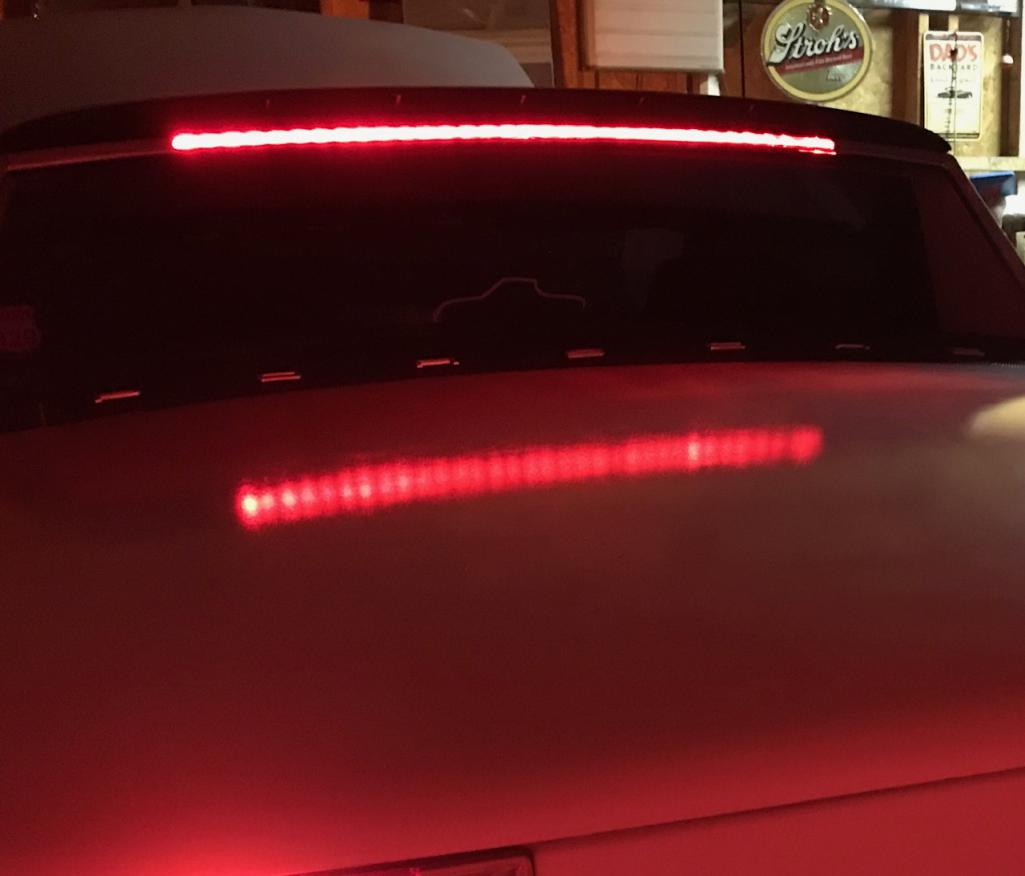
Posted by: Garland Jul 23 2019, 06:03 PM
More, and it’s very bright.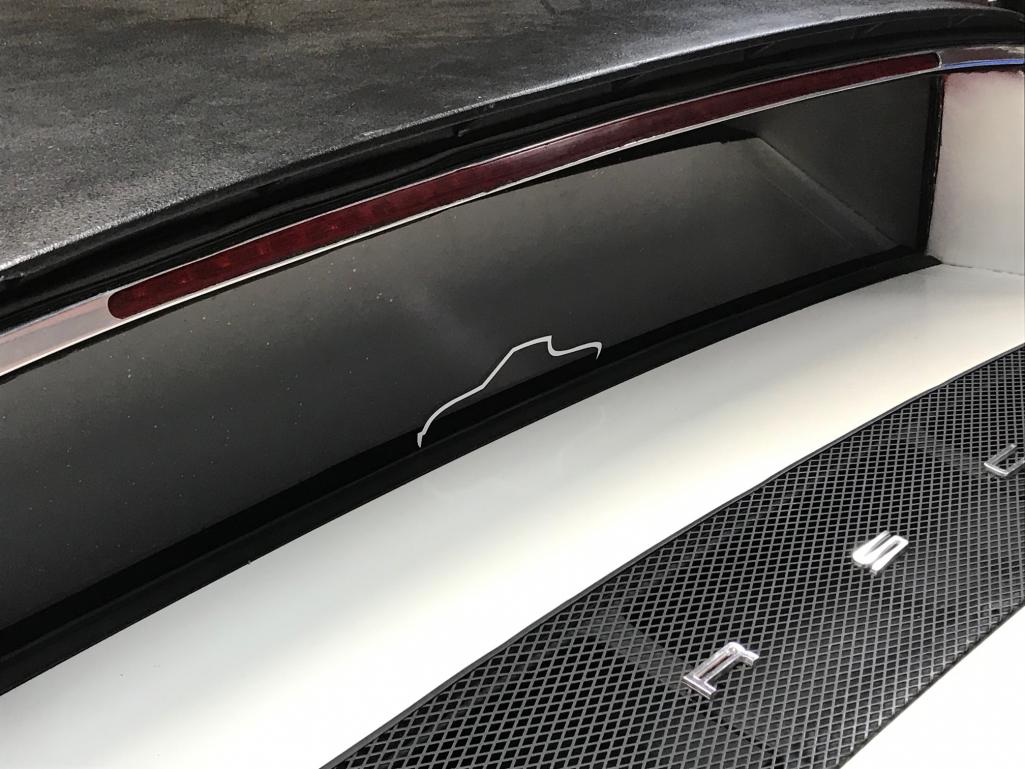
Posted by: Tdskip Jul 23 2019, 08:27 PM
Very neat installation, well done.
Posted by: euro911 Jul 23 2019, 08:59 PM
I have a spare crossbar trim piece and plan to do pretty much the same thing with a wide LED strip. My only fear is cutting the opening - not sure of the best method to accomplish the task.
I don't think my hands are steady enough to try it with a Dremel tool 
Should I make a fixture to hold the trim piece and use a router with a small diameter bit? ...
... or make a fixture and attempt to run it through a vertical mill?
Posted by: Garland Jul 23 2019, 09:42 PM
Are used a router bit, in a drill press. It’s an old craftsman so I adjusted the belt to a slower speed and used a piece of wood for a fence clamped to the table on one side. Tried two word guides to slide the piece in but binding became a concern.
I used my first attempt, only because of how much time it took to slowly remove material. I adjusted the depth with each pass. Did about a third at a time, easier to work with that way .
Posted by: euro911 Jul 23 2019, 11:58 PM
That sounds like a good method. Thanks 
Powered by Invision Power Board (http://www.invisionboard.com)
© Invision Power Services (http://www.invisionpower.com)