Printable Version of Topic
Click here to view this topic in its original format
914World.com _ 914World Garage _ Engmans inner long stiffening kit
Posted by: skline Apr 10 2005, 07:59 AM
Spent the day over at Joe Buckles house yesterday. What I thought would only take me till around noon or so wound up taking 6 hours. Still, the end result is amazing. If you have any doubts as to whether your car is solid, you should get one of these kits and install it. There will be no doubt in your mind afterwards. I would suggest that you follow the directions that come with it. Jack the car up and put it on Jack stands at the 4 jack posts under the car to make it level. remove and clean the paint from the areas where you will be welding in the kit. If you are using a wirefeed welder, you want to make sure it is bare metal otherwise it will make it much more difficult when trying to get a contact for your arc. Check fit the kit and trim as needed till it fits perfect and all holes are on the existing metal. That is pretty important so check all the holes. Once the kits fits everywhere leave it in place and start welding each hole. Start with the ones on the outside edges and do one or two on each end and then one or two on each end on the bottom and then fill in all the inner ones. Then go and weld around the outside of each part. When you weld each hole, start in the center of the hole and as it fills, work a nice round circle and fill the entire hole. You want good penetration so this is important. It will be obvious where you will need to take a hammer and pound in the metal so it conforms to the body of the car. The kit is very well thought out and does fit nice. Place a soaking wet towel over the center tunnel when welding across the back. Put all pieces in the car before welding any of them into place. We started with the back piece first and then the sides. I did a lot of the welds but Joe did an equal or better part of them so he could learn how to weld. I think he picked it up quite well. An excellent student. Once it is done and you take the car down off the jacks, you should see right away that your efforts are well rewarded. Before we started, his gap on the passenger side was tight at the top of the door and his window on the drivers side hit the weatherstrip at the top. When we were done, it was perfect and we made no adjustments. No flex in the body. Here are some pictures I took of some of the process. Any questions?
Attached thumbnail(s)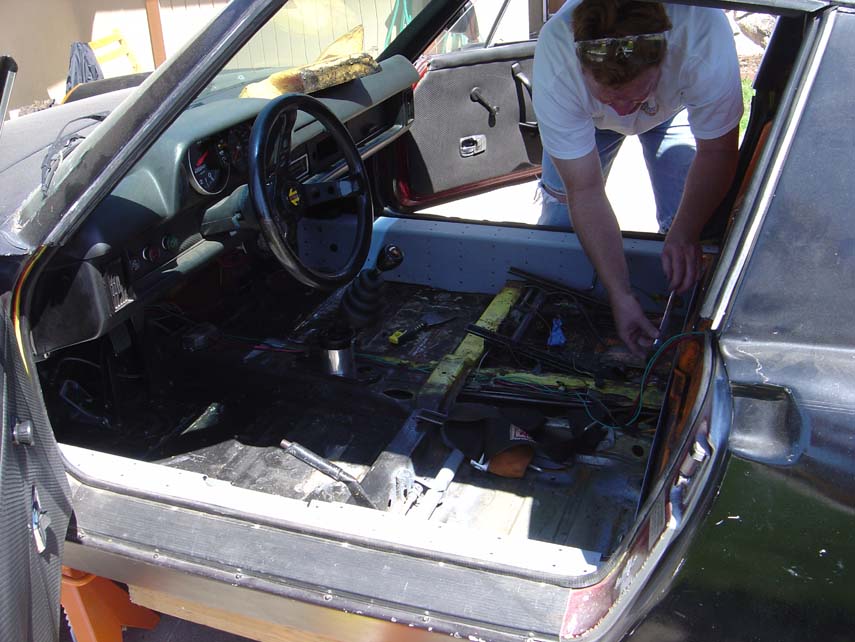
Posted by: skline Apr 10 2005, 08:00 AM
Test fit
Attached thumbnail(s)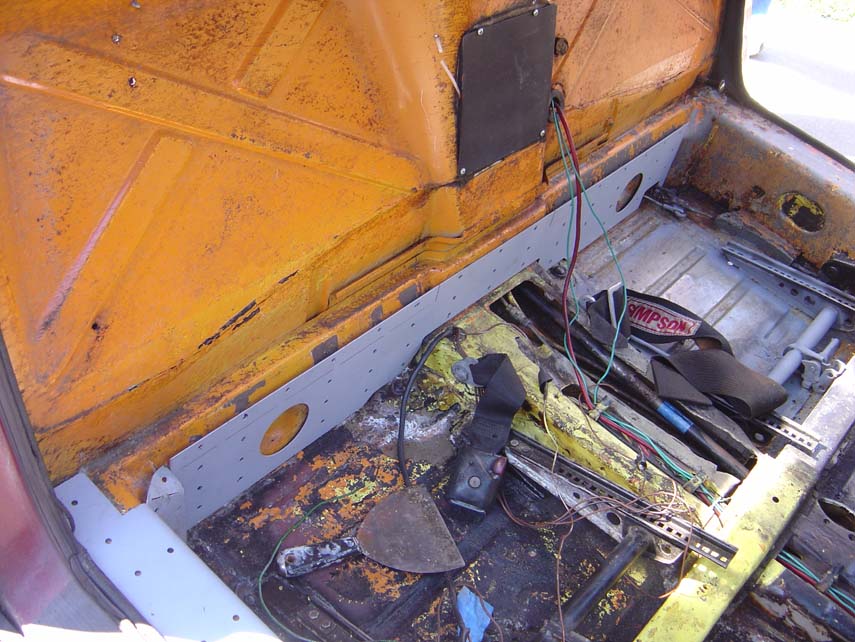
Posted by: skline Apr 10 2005, 08:00 AM
next
Attached thumbnail(s)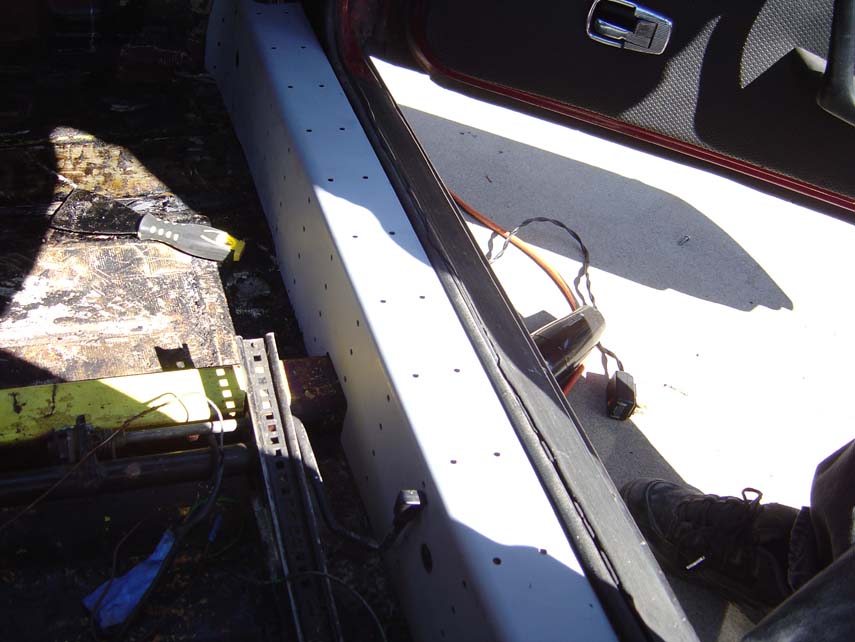
Posted by: skline Apr 10 2005, 08:01 AM
Another
Attached thumbnail(s)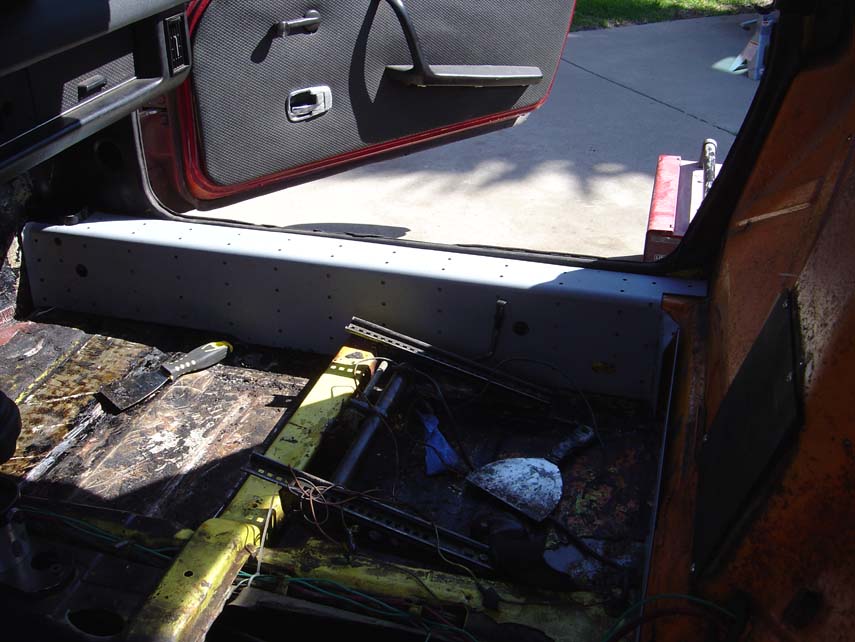
Posted by: skline Apr 10 2005, 08:01 AM
Driver side
Attached thumbnail(s)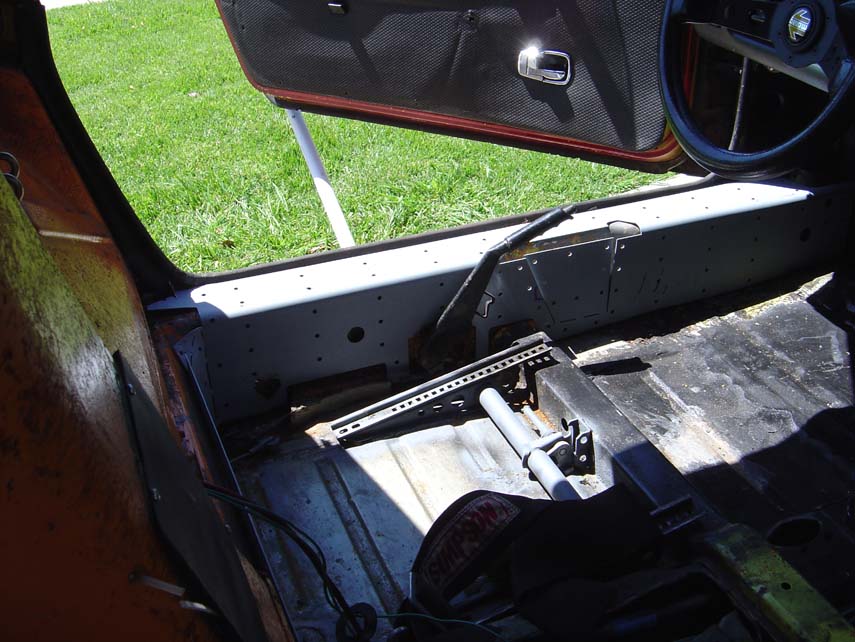
Posted by: skline Apr 10 2005, 08:02 AM
Joe, welding in some corners.
Attached thumbnail(s)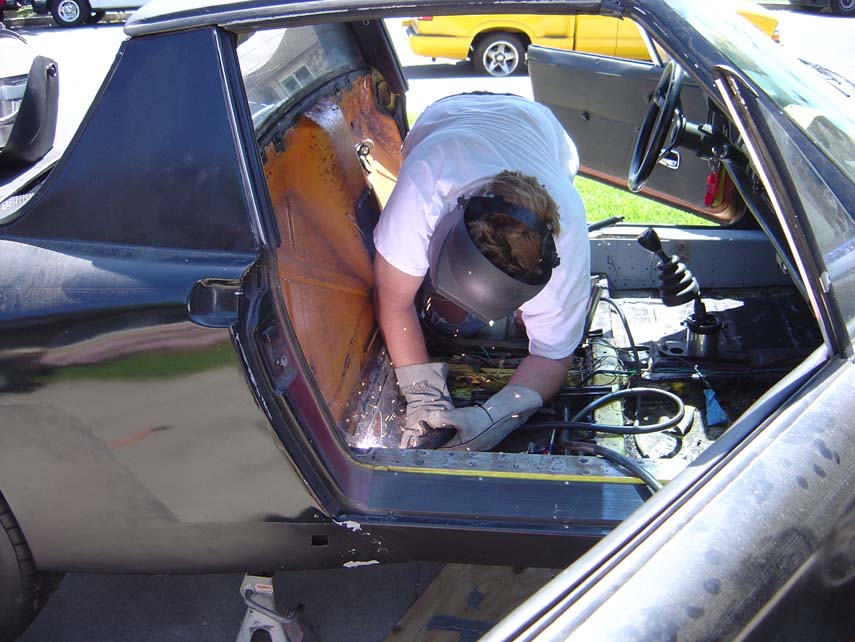
Posted by: skline Apr 10 2005, 08:03 AM
Yes, you have to do each and every hole
Attached thumbnail(s)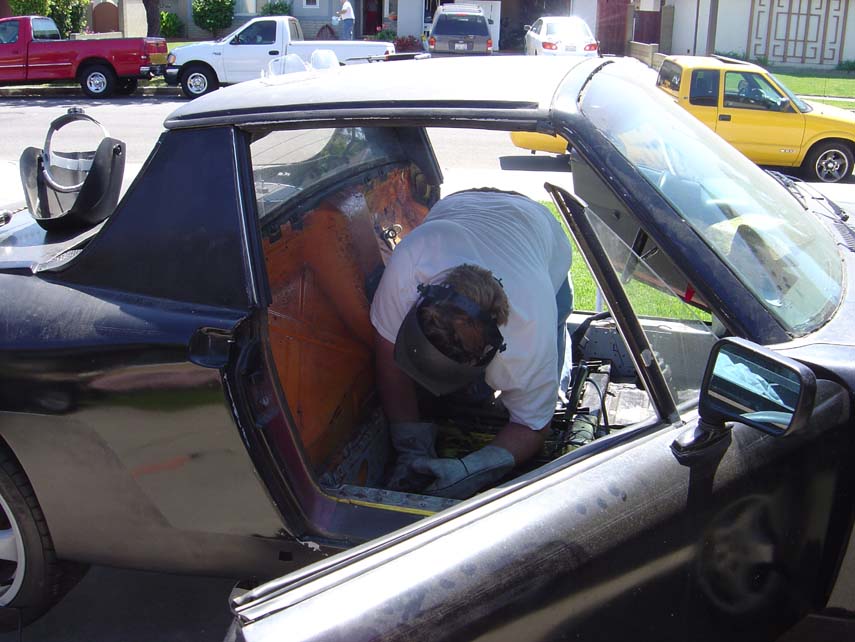
Posted by: skline Apr 10 2005, 08:04 AM
An auto darkening helmet is really worth the money when you do these.
Attached thumbnail(s)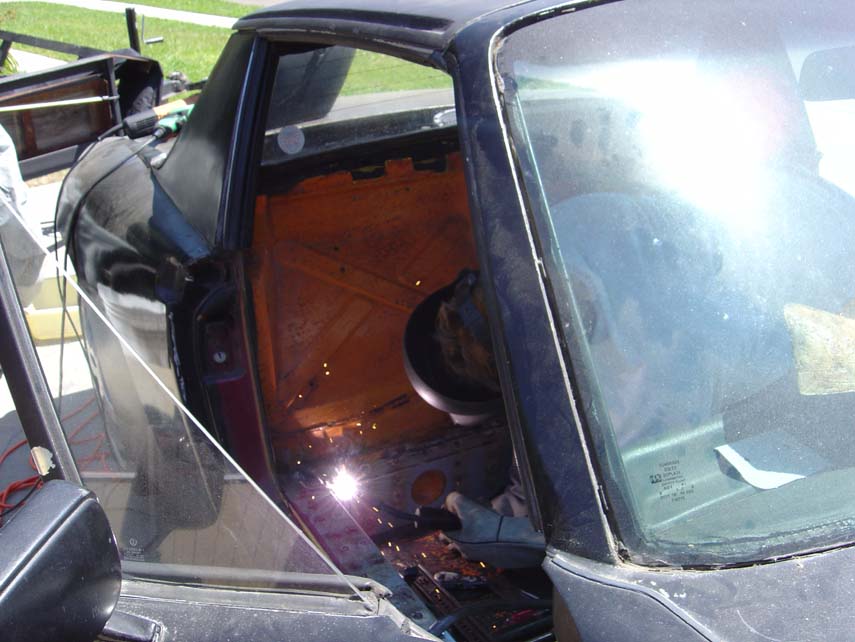
Posted by: skline Apr 10 2005, 08:05 AM
Almost there
Attached thumbnail(s)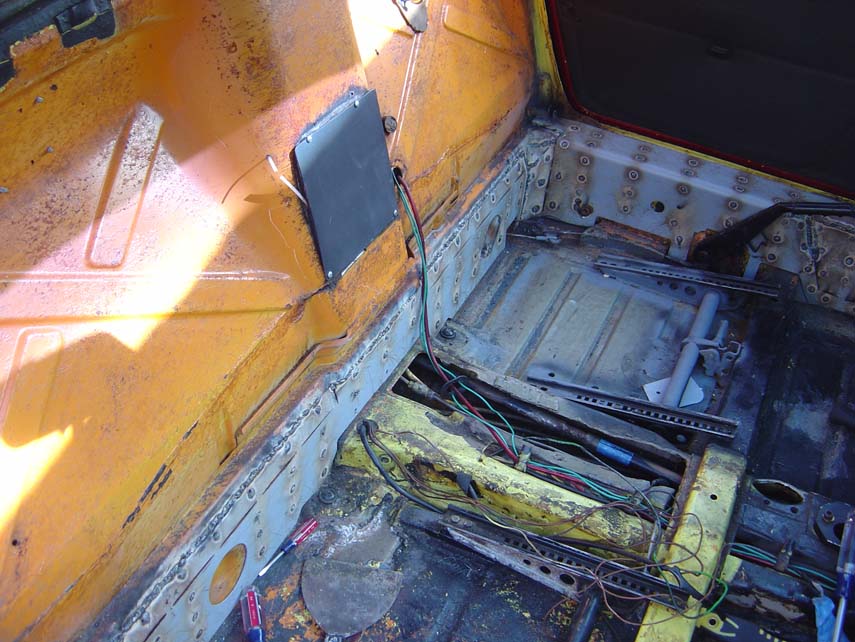
Posted by: skline Apr 10 2005, 08:06 AM
Obviously there will be places that you cannot get into but try to get as much of it as you can, the more the better.
Attached thumbnail(s)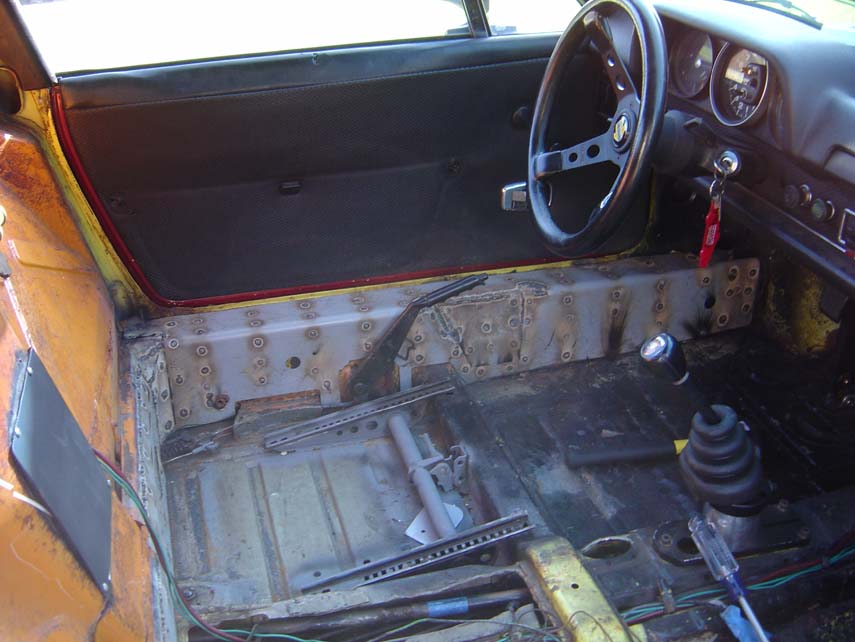
Posted by: skline Apr 10 2005, 08:07 AM
The little 2 pound sledge works great for this job.
Attached thumbnail(s)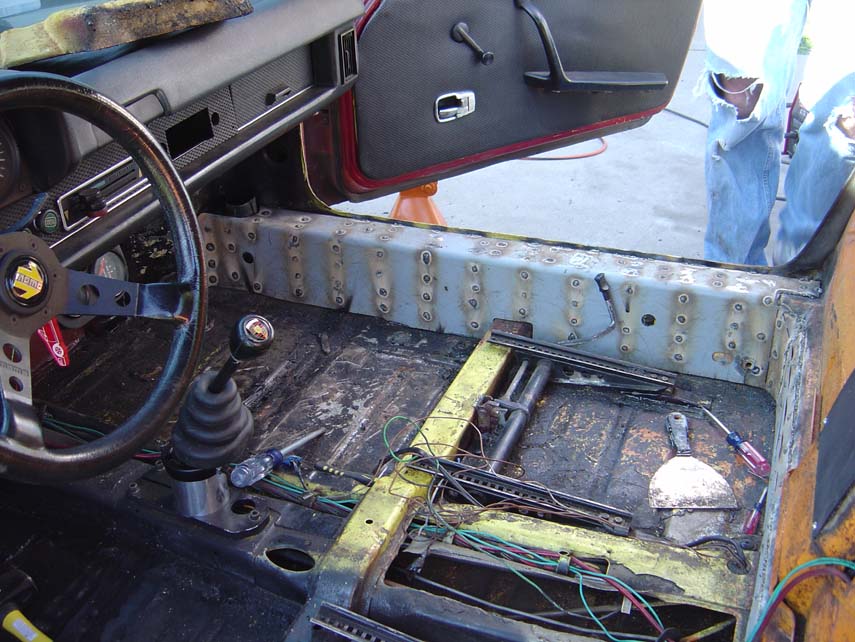
Posted by: skline Apr 10 2005, 08:08 AM
Last one, any questions now?
Attached thumbnail(s)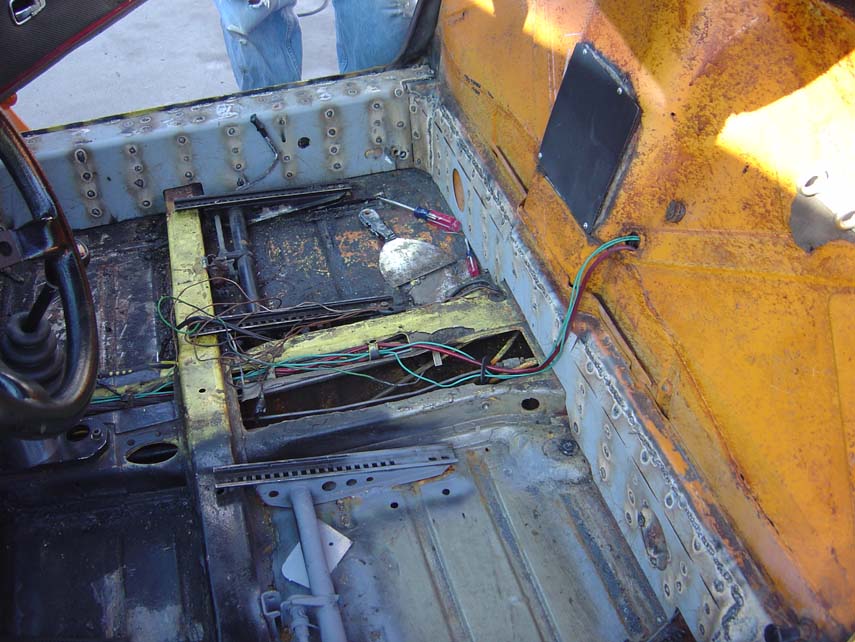
Posted by: skline Apr 10 2005, 08:10 AM
When you get all done, you can go back and grind the little bumps down so they dont show through the carpet. Joe will be doing that after I leave. My back in killing me after that. All in all, it wasnt that hard but some of the welds you do upside down or laying across it in some uncomfortable position. 

Posted by: Elliot Cannon Apr 10 2005, 08:21 AM
Nice job men. (You to Scott). LOL. This looks like a definate future project for me. Just as soon as I get that welder I have been threatening to buy. I guess I'll have to check with the Minister of Finance. If Joe welds like he cooks, he can do all my work for me!! Good job guys.
Cheers, Elliot
Posted by: sgomes Apr 10 2005, 08:41 AM
| QUOTE (skline @ Apr 10 2005, 06:08 AM) |
| Last one, any questions now? |
Just one: How bad is the sunburn oh your arms?
 I just had one spot uncovered when welding yesterday and now I have a little 'sun' burn today.
Other than that it looks great! I so want to do a stiffening kit on my car. You made it look easy!
Posted by: Elliot Cannon Apr 10 2005, 08:46 AM
So...which on of you burnt the seat belt buckle in the second pic?? Did Buckle burn the buckle? Hah! Oh man, I crack myself up.
Cheers, Elliot
Posted by: skline Apr 10 2005, 09:30 AM
Yeah Elliot, you are a funny guy. The first picture was Joe removing the seat belts before welding. So neither of us burned the buckle. Good try though. At least you are cracking yourself up.
Posted by: trekkor Apr 10 2005, 09:39 AM
Deja Vu?!? 
My only comments are that I found it unessesary to remove any paint as once you weld the first hole the kit will conduct for you. The arc will burn right through any paint or crud right away.
How did you like the tar removal around the perimeter?
And, be careful and cover the car's glass when you grind.
I sprayed my windows with molten steel. 
I'm still pickin' 'em off there.
Nice work. This is a great kit. No doubt.
KT
Attached image(s)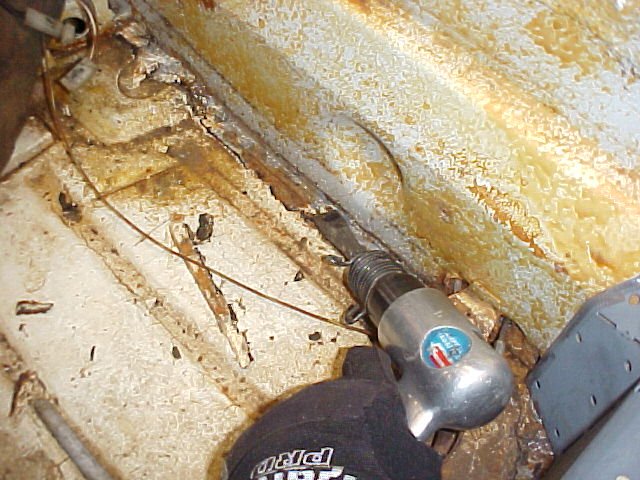
Posted by: skline Apr 10 2005, 09:43 AM
Joe came by and borrowed my heat gun to remove the crap from the floor and all around the edges. Seems his hair dryer just wasnt enough. He did all the prep work a day or so before. He is very ambitious. Likes to do as much of it as he can.
Posted by: Elliot Cannon Apr 10 2005, 09:46 AM
| QUOTE (skline @ Apr 10 2005, 08:43 AM) |
| Joe came by and borrowed my heat gun to remove the crap from the floor and all around the edges. Seems his hair dryer just wasnt enough. He did all the prep work a day or so before. He is very ambitious. Likes to do as much of it as he can. |
Joe has a hair dryer?
Elliot
Posted by: Paul Illick Apr 10 2005, 09:53 AM
You're burning off paint from the outside of the panels you're welding to, aren't you? You can't reach all those areas, so how can you prevent rust?
Posted by: skline Apr 10 2005, 10:03 AM
Now that is actually a very good question. I will attempt to answer it the best way I can figure it. After we get all done welding it in and grinding off the bumps, Joe will spray the area with Jasco and allow it to dry a few days, then he will go over the entire area with POR15 and then apply seam sealer to all surrounding edges. This should keep it sealed and with any luck, it wont rust. Unless you can think of a better way of doing it, this is what we came up with yesterday as the same question was already in our minds.
Posted by: JB 914 Apr 10 2005, 10:08 AM
I treated the areas where the panels are to POR-15 Metal Ready. once i finish stripping the floor pans of that nasty tar  i'm gonna treat the whole thing with more Metal Ready and POR-15 the whole inside of the car with a few coats.
Thanks for the help Scott!!
We saw a Arc welder at Harbor Freight that would be nice to make a bigger BBQ 

Posted by: rdauenhauer Apr 10 2005, 12:05 PM
Cool  This has gotta go on the "While Im in there" list.
Why couldnt you strip the paint off the hole concerned area down to bare steel and use weldable primer before applying the stiffening panels?
Posted by: Travis Neff Apr 10 2005, 12:15 PM
I have a question about supporting the car. As the instructions state, keep the car on jackstands at the lift points/donuts. However, while my car is on the ground all the gaps are great. Once I have the car on jackstands the passenger door gaps open up at the top a MM or two. I tried putting a jack under the tranny and push that gap back, but it won't go all the way. What do you guys think? I'd hate to weld in the kit and have that passenger door gap stay wide at the top, I know there might be a little shrinking from the heat.
Posted by: skline Apr 10 2005, 01:27 PM
Ok, well I am no expert on this so I can only make a suggestion. On Joe's car, we had to put the jack in the middle of the car and lift to get it to sit level. You may be able to do that to get it to work right. However, I might also add that when we had the car lifted and supported at the jack points, the doors would not close at all. Once we put the kit in, and took it down off the jack stands, everything was perfect. Someone else may chime in why it would do that, but this is from our experience yesterday.
Posted by: Thorshammer Apr 10 2005, 01:46 PM
What Do these pieces weigh, and how much does the kit cost???,
Erik
Posted by: JB 914 Apr 10 2005, 02:11 PM
you can get the kits from Engman. look under the products/services forum for info. I'm off to remove the tar 
Posted by: Lou W Apr 10 2005, 02:18 PM
http://www.914world.com/bbs2/index.php?act=ST&f=4&t=12376
Posted by: Brando Apr 10 2005, 06:47 PM
Were those the only peices? I thought the stiffening kit included some beefier supports for the swaybar mounts, some other 'box-like' peices that go in the wheel wells, near the engine shelves... Or something like that. Those 3 peices are all?
So did Joe Buckle have fun?
Posted by: Mueller Apr 10 2005, 06:59 PM
| QUOTE (Brando @ Apr 10 2005, 05:47 PM) |
| Were those the only peices? I thought the stiffening kit included some beefier supports for the swaybar mounts, some other 'box-like' peices that go in the wheel wells, near the engine shelves... Or something like that. Those 3 peices are all? So did Joe Buckle have fun? |
different kits:
inner long kit (this thread)
sway bar mount stiffening kit
"GT" chassis stiffening kit
and
outter clamshel stiffening kit
Posted by: Elliot Cannon Apr 10 2005, 07:00 PM
Engmans is an interior kit. You can order the other outer kit from other venders I think.
Cheers, Elliot
Posted by: Brando Apr 10 2005, 07:00 PM
I see. I thought these were part of a 'complete' stiffening kit (all the kits you mentioned).
Posted by: Elliot Cannon Apr 10 2005, 07:03 PM
| QUOTE (Mueller @ Apr 10 2005, 05:59 PM) | ||
different kits: inner long kit (this thread) sway bar mount stiffening kit "GT" chassis stiffening kit and outter clamshel stiffening kit |
Does Engman make them all? I guess I could look this up myself. Thanks
Elliot
Posted by: JB 914 Apr 10 2005, 07:08 PM
| QUOTE (Brando @ Apr 10 2005, 04:47 PM) |
| So did Joe Buckle have fun? |
Welding is way more fun than removing the tar from the floorboards. i'm gonna need a case of brake cleaner
Posted by: d914 Apr 10 2005, 07:16 PM
heat gun and a putty knife.....comes right up like .....putty
Posted by: Engman Apr 10 2005, 08:22 PM
Couple of answers -
Skline - you did it right - check the gaps before welding and add support under the middle of the long to set the gaps before welding.
The total weight added is about 17 lbs. Kits are listed in the vendor section and are only available here. You cannot get them anywhere else.
I make the inner long kit and the outer front sway bar reinfocements. Personally I do not like the GT style reinforcement kit and plan over the summer to look for a much better way to really do what this kit promises.
The outer clams are availble thru a number of places.
M
Posted by: trekkor Apr 10 2005, 08:30 PM
http://www.914world.com/bbs2/index.php?act=ST&f=5&t=14508
I did this last July.
I thought using the air chisel to blow the tar out was fast and simple. 10-20 minute per side, I believe.
KT
Posted by: CptTripps Apr 10 2005, 08:55 PM
This kit is awesome...
I put the kit on after I had it on stands. My gaps were perfect before. While I had it up, and before I put it on, I jacked the center a bit more. THEN put the kit on. After I welded it up, I dropped the car and put the door back on. The gap was still perfect. I can stand ON the long with my wife, for a combined weight of about 300lbs, and the gap desn't change. I found it helped a lot to get a $hit-load of clamps and to take the paint off first.
This kit is HIGHLY recomended!
Posted by: 914efi Apr 11 2005, 07:53 AM
When you weld the piece in across the rear of the cockpit, do the welds mess up the bulkead on the engine side? I have a six with original paint still in good shape in the engine compartment and would not want to hurt it.
Is there anyone with driving impressions after the kit is installed?
Posted by: trekkor Apr 11 2005, 08:18 AM
The rear piece is attatched to a double walled section so the welds won't show.
The car is much more stable and predictable. Especially in the turns.
KT
Posted by: charlesmac Apr 11 2005, 12:24 PM
This is definately on my list of "to do's"
But i got a question; after this kit is installed, would it even be necessary for the outer long kit to be added? I might could see it if it was a track only car with huge slicks and super stiff suspension. But for a street mostly car with maybe some auto-x, what other stiffening would i need. I'm thinking maybe 180# springs in the back, stock torsion bars, big front bar,(adjustable of course), yellow koni's, prolly stock rear bar, 16X7's or 16x8's, depending on how much i pound out my fenders. It's all still in the planning process, just thinking out loud. thanks
charles
Posted by: SpecialK Apr 11 2005, 12:57 PM
I was checking out the installation of the stiffener's, and all I could think is that bonding those babies in would be the way to go.
The way I see it, when you weld on the stiffeners you're essentially making little attach points at the rosette welds (and the periphery), but if you bonded the stiffener to the longs it would be a much stronger/stiffer assembly since there would be 100% adhesion between the two parts, not just at the welds.
I'll explain later, gotta go to work! 
Posted by: Aaron Cox Apr 11 2005, 12:58 PM
| QUOTE (Special_K @ Apr 11 2005, 11:57 AM) |
| I was checking out the installation of the stiffener's, and all I could think is that bonding those babies in would be the way to go. The way I see it, when you weld on the stiffeners you're essentially making little attach points at the rosette welds (and the periphery), but if you bonded the stiffener to the longs it would be a much stronger/stiffer assembly since there would be 100% adhesion between the two parts, not just at the welds. I'll explain later, gotta go to work! |
do both!
Posted by: Engman Apr 11 2005, 05:01 PM
As an M.E. there is no doubt that bonding these in would be the way to go. That being said you would have to have the ability and materials to do this properly. There are probably only a few people on this board that have both the knowledge, materials and ability to do it at all.
I have always been a fan of structural adhesives. Used them extensively when I was working for a company that made headlights. But the prep work and clamping of this to the body are not something I am willing to try to do. You really have to KNOW how to do this and have some experience to do it right.
For me the welding is the most reliable reproduceable way to do this.
| QUOTE |
| But i got a question; after this kit is installed, would it even be necessary for the outer long kit to be added? I might could see it if it was a track only car with huge slicks and super stiff suspension. But for a street mostly car with maybe some auto-x, what other stiffening would i need. |
If you have intact longs - nothing else. The only other area is where the GT kit is put. I am not a fan of this kit. I hope to be able to offer something better later this year. I am working on a few ideas now, but time is at a premiun due to work demands.
And the boxed trailing arm stiffening kit, while it does stiffen the arm, can cause the mount ears to break instead of the trailing arm bending - a much more expensive repair.
M
Posted by: SpecialK Apr 11 2005, 05:58 PM
| QUOTE (Engman @ Apr 11 2005, 03:01 PM) |
| As an M.E. there is no doubt that bonding these in would be the way to go. That being said you would have to have the ability and materials to do this properly. There are probably only a few people on this board that have both the knowledge, materials and ability to do it at all. I have always been a fan of structural adhesives. Used them extensively when I was working for a company that made headlights. But the prep work and clamping of this to the body are not something I am willing to try to do. You really have to KNOW how to do this and have some experience to do it right. |
Actually Mark, the hole pattern already in the stiffener is what made me think of bonding in the first place, it would be perfect for using 1/4" SS cherry-lok rivets (pop rivets that the mandrel stays in it when "popped"), and they're only about $.03 each.
The only special tools required would be a set of 1/4" cleco buttons (most autobody shops carry them) to hold the stiffeners in place while drilling. Maybe not "required", but it would sure make the job easier, and improve the quality of the holes/bond.
Prep the longs as you would for welding (grind to bare metal)
Using you stiffener as a pattern (after trim and hammer to fit), drill the holes in the longs and back panel (cleco's to hold it in place), remove the stiffeners, deburr the holes, thoroughly clean the stiffeners and longs/back, metal-ready/ospho the bare metal, trowel on some Hysol EA-9430 structural adhesive (aircraft spruce sells kits) using a notched trowel (fine toothed, like for bathroom wall tile), slap the stiffeners on and pop-rivet (cherry-lok) the stiffeners back into place. The fasteners would hold the stiffener in place during the adhesive cure, plus 1/4" SS cherry-loks (tension head) have a tensile strength of 2250 lbs. each. Scrape off the excess adhesive as you go (if done correctly you should have "squeeze-out" around the edges of the stiffener), and go have a couple/few beers while it cures. It would be ROCK SOLID when cured, and there would be no worry of rust developing between the stiffener and long down the road.
PS - the Cherry-loks also have a relatively flat head, so protrusion wouldn't be an issue.
Attached image(s)
Posted by: SpecialK Apr 11 2005, 07:14 PM
Sh*t.....now I'm thinkin' of making some CG and kevlar stiffeners (materials already onhand for the roof project) . Kevlar on the outer layers to keep the CG daggers at bay in the event of a side impact.......but I'm guessin' splinters in your ass would be the least of your worries in such a scenario 
About 6-7 layers of CF layed out right would be super light, and stiff as wedding day d*ck!! 
Powered by Invision Power Board (http://www.invisionboard.com)
© Invision Power Services (http://www.invisionpower.com)