Printable Version of Topic
Click here to view this topic in its original format
914World.com _ 914World Garage _ *Project 2.4* • Dion’s endeavor • Six conversion
Posted by: Dion Sep 9 2016, 10:27 AM
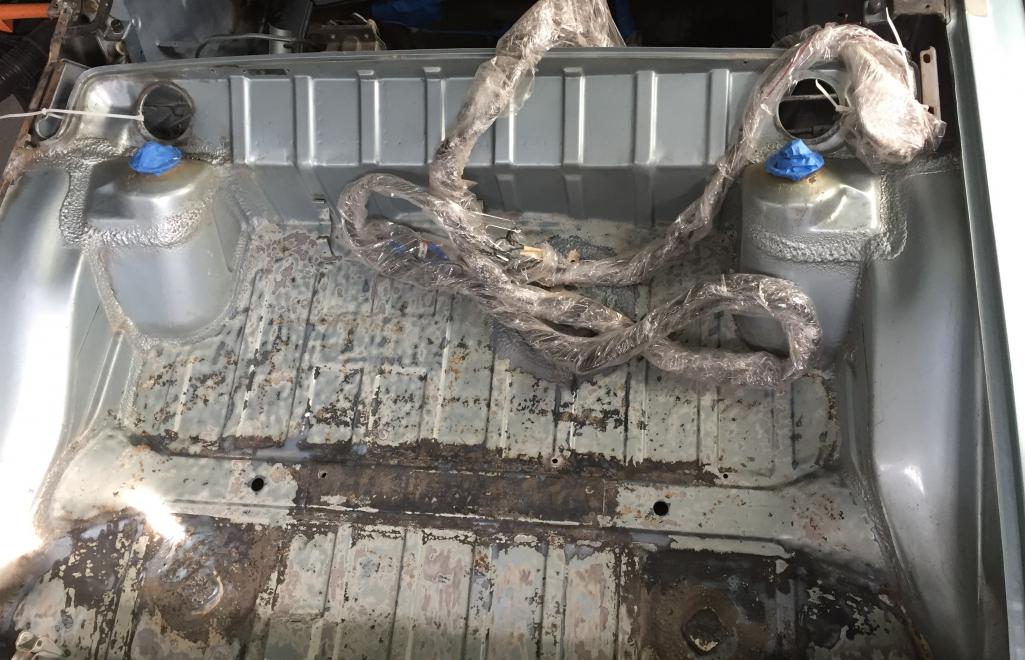
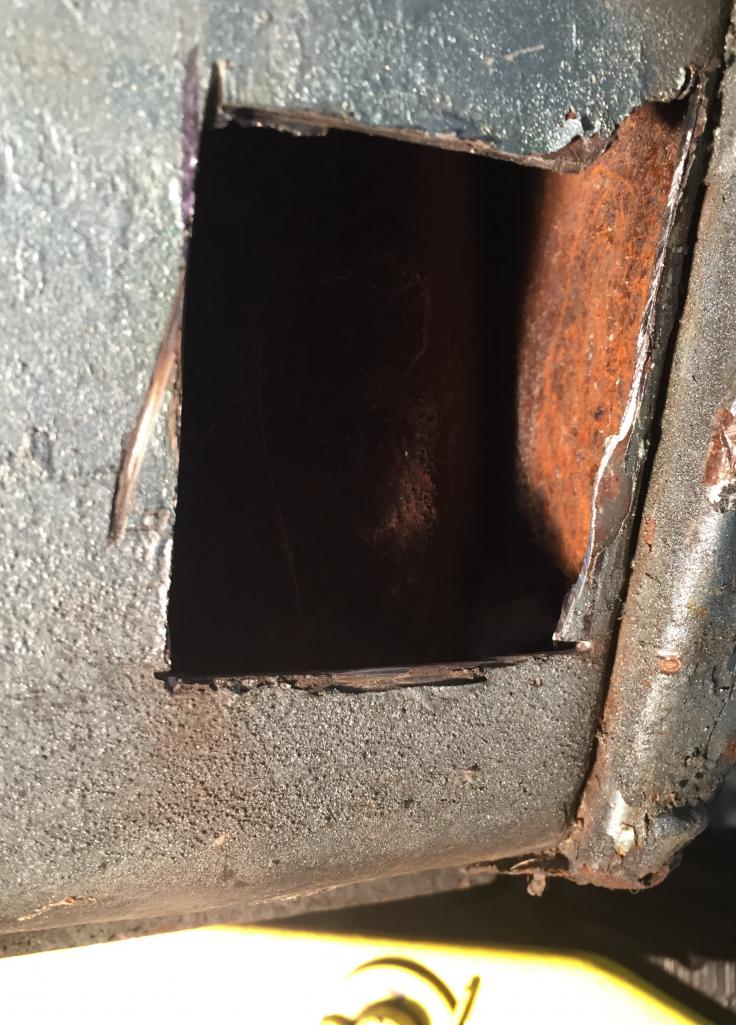
Well I've started the process of preparing for
my 2056 GT to 2.4L six "rallye tribute" auto.
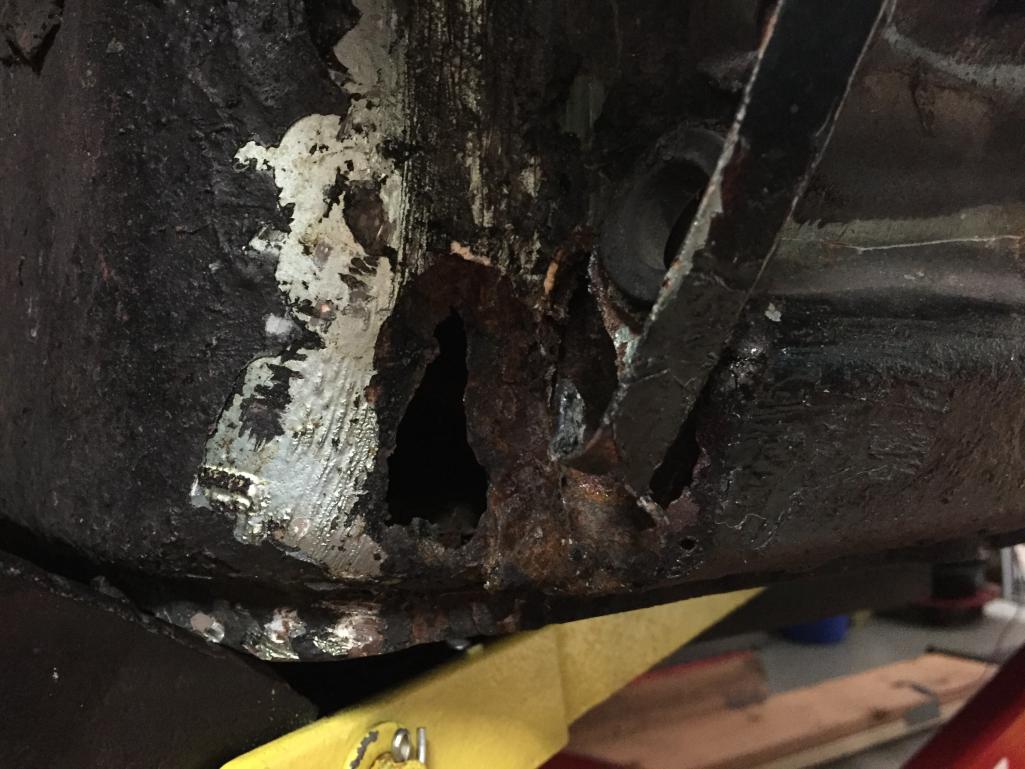
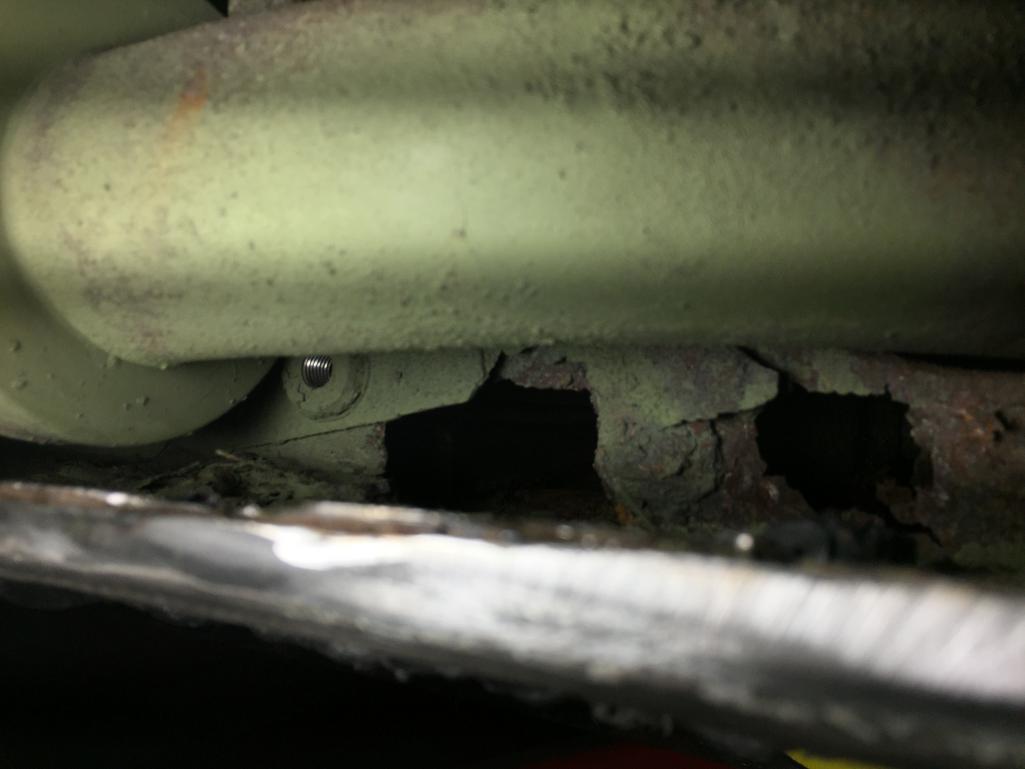
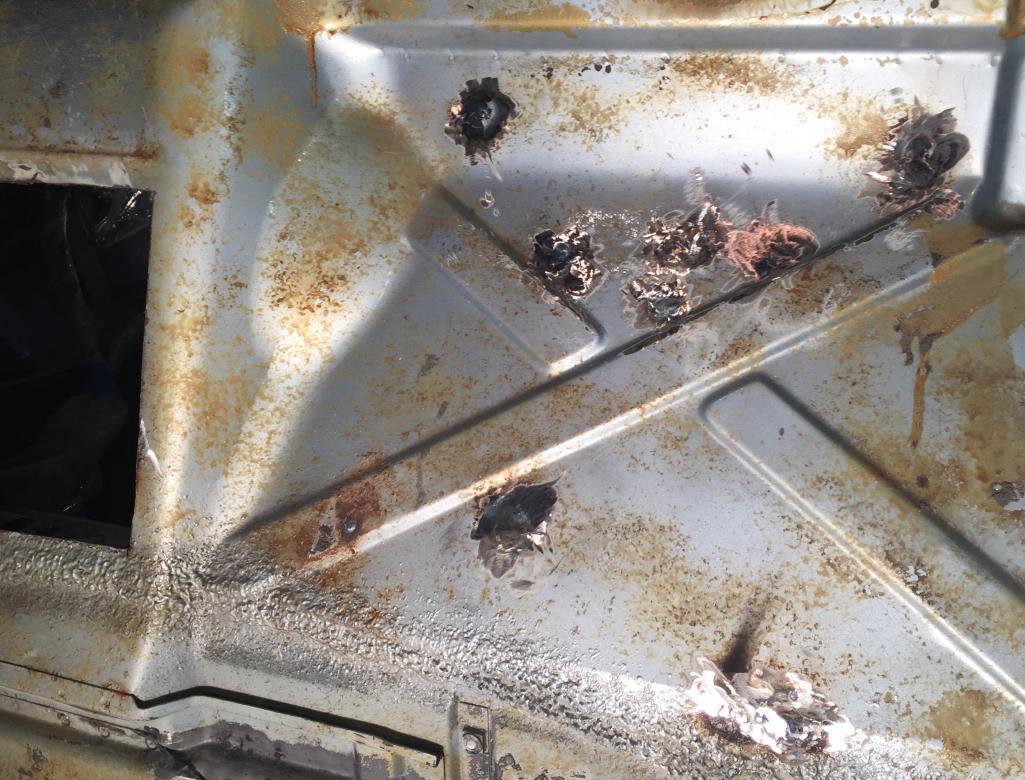
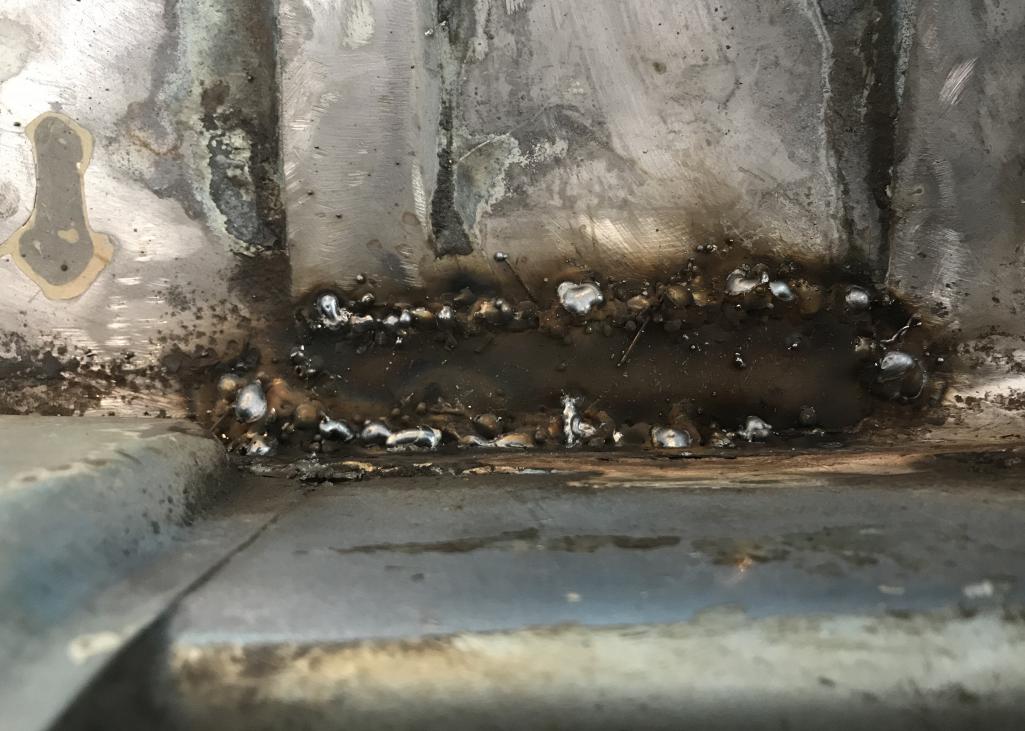
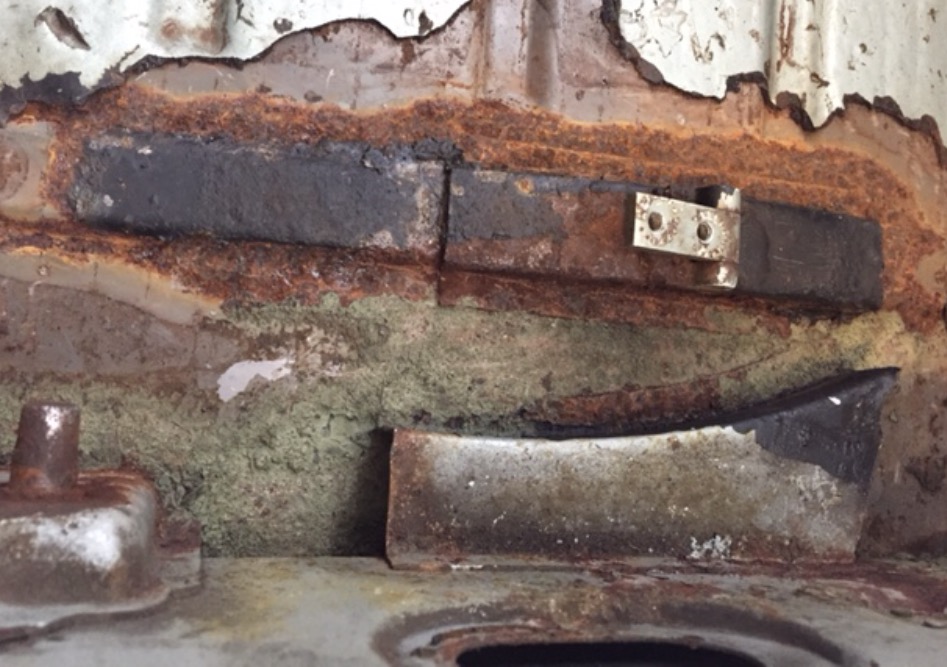
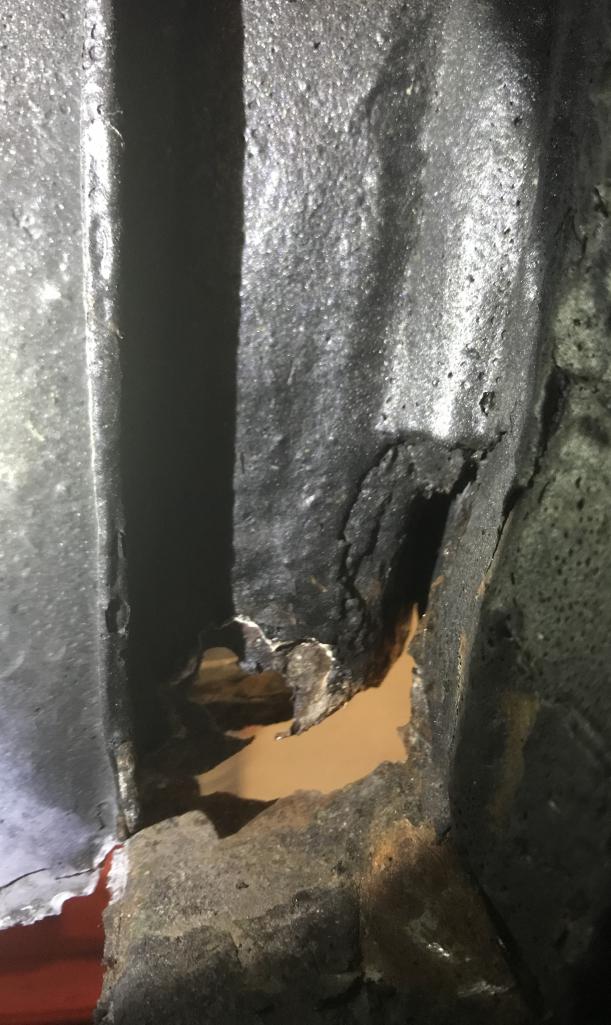
Tearing into the interior I discovered some rust mites have been eating for a while.
Doesn't look too extensive but will be probing some more. The exterior left long was
patched a long time ago, albeit incorrectly. This was done by shop
that wasn't fully up to speed on these cars and I was still a novice, well
still am. I'll be doing some exploratory surgery on this left side inside and out. So I'll get this addressed before any engine install takes place. Would like to
have it buttoned up for Hershey 2017. Wish me luck.
"
Attached thumbnail(s)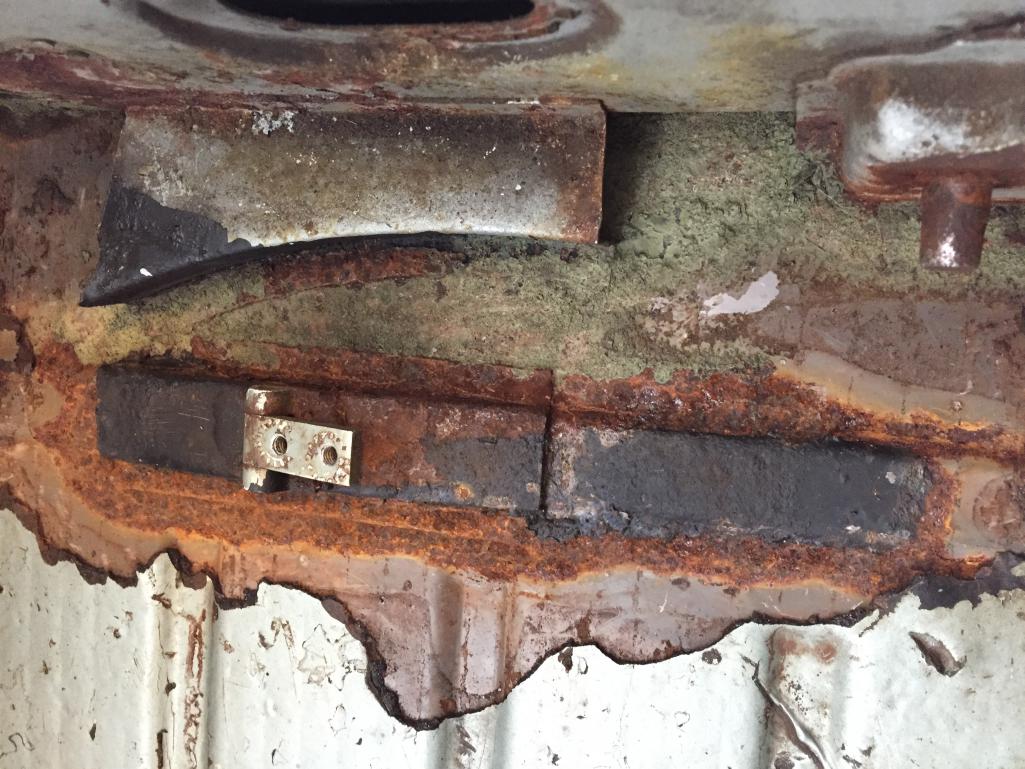
Posted by: Dion Sep 9 2016, 10:28 AM
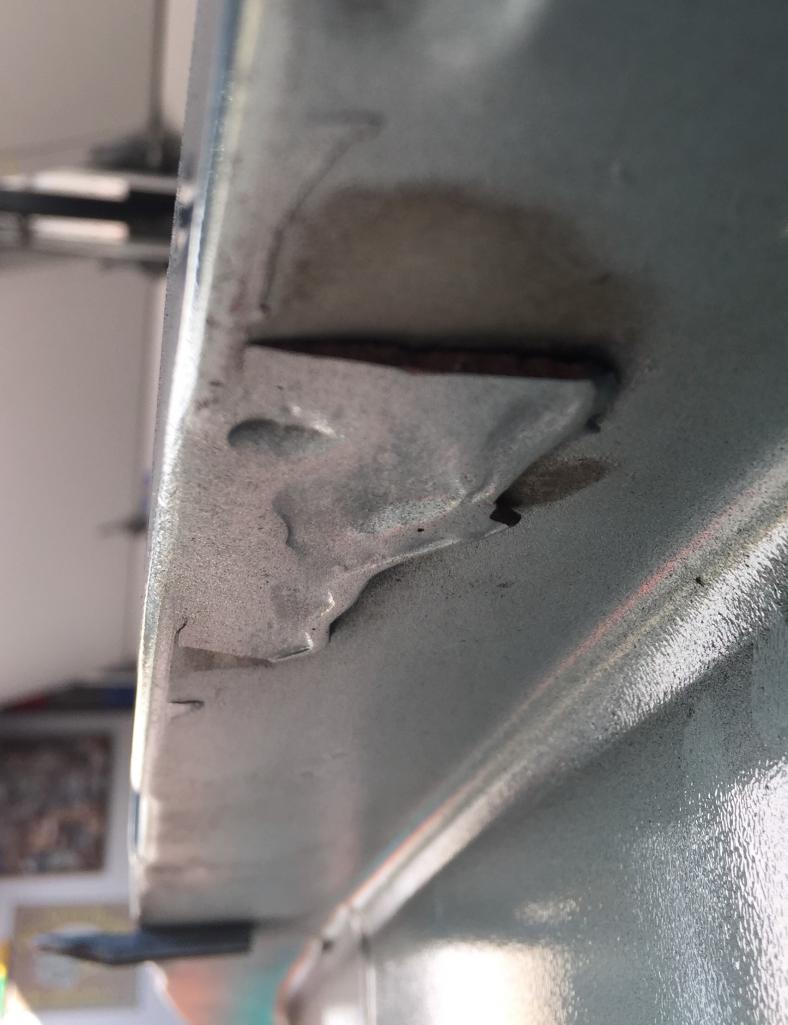
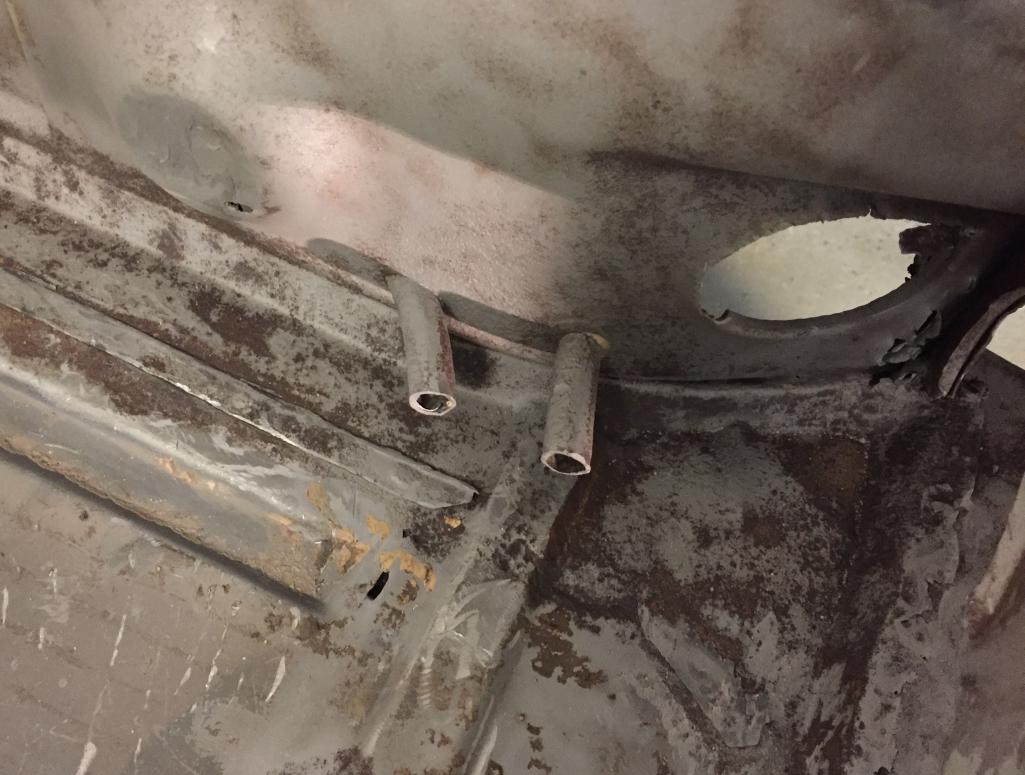
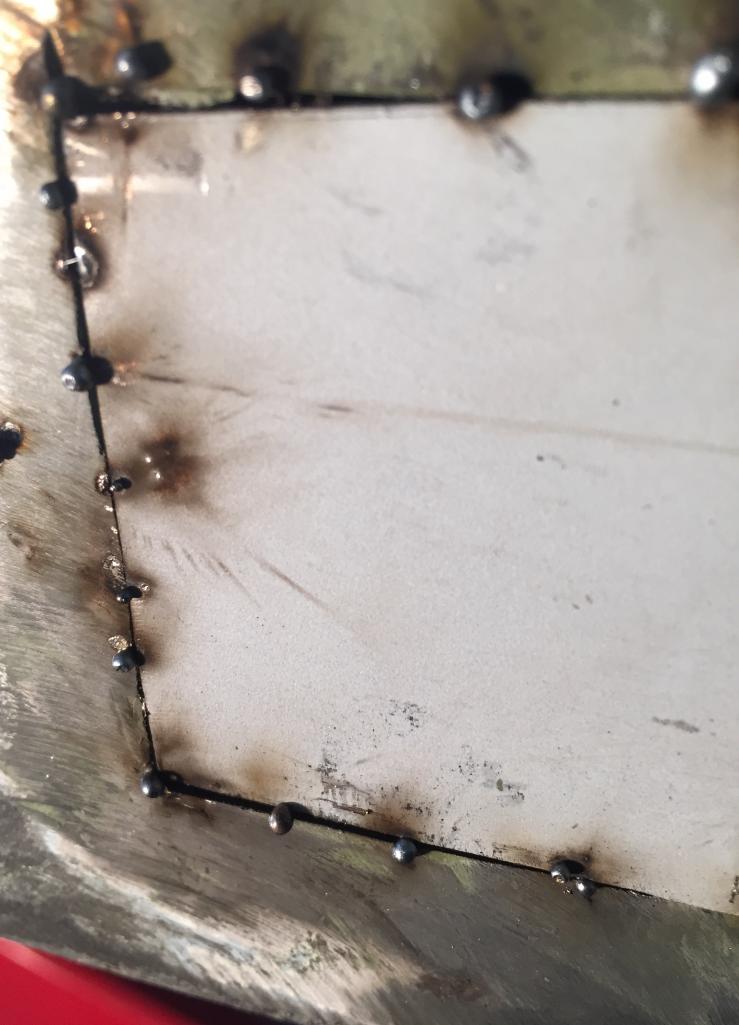
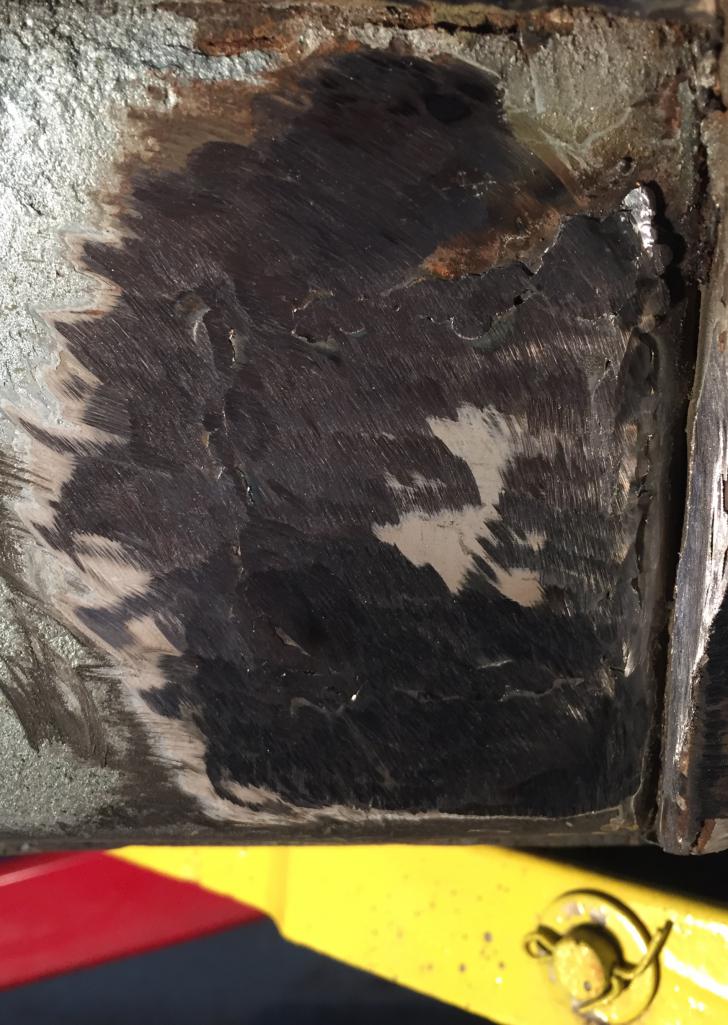
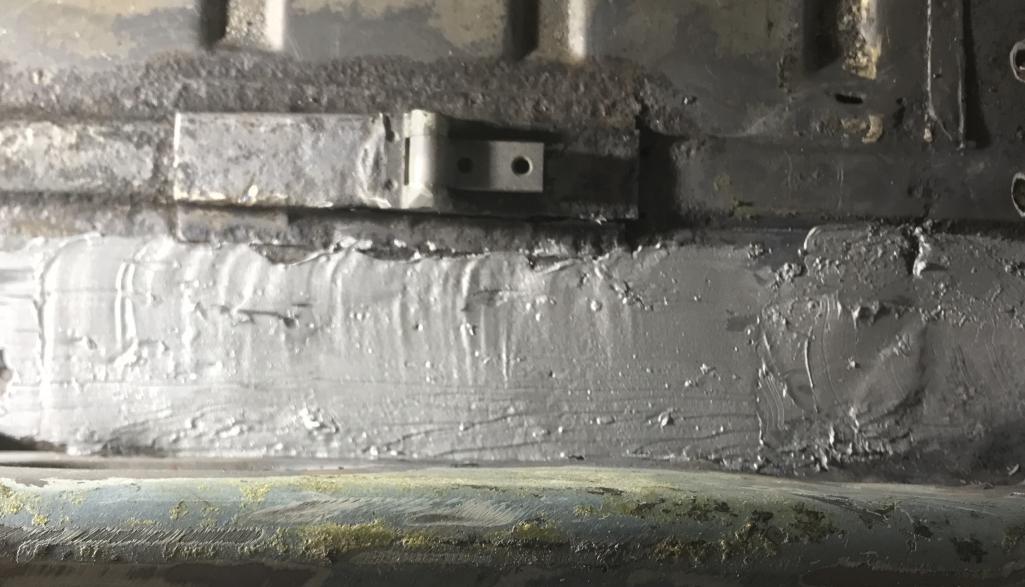
E brake area top:
Exterior long near door sill bottom pic
Attached thumbnail(s)
Posted by: mepstein Sep 9 2016, 11:16 AM
Doesn't look bad. Grab a multi tool and get rid of the floor tar once and for all.
Posted by: 914dave Sep 9 2016, 11:47 AM

Doesn't look bad. Grab a multi tool and get rid of the floor tar once and for all.
I was going to suggest , contact cement heavy duty aluminum foil in place and new carpets. Good as new. Wasn't sure how that would be received.

Posted by: Dion Sep 9 2016, 12:16 PM
I intend to Mark.
As always Dave has my back!
I rely on his Jedi knowledge.
Posted by: rgalla9146 Sep 9 2016, 12:25 PM
Doesn't look bad. Grab a multi tool and get rid of the floor tar once and for all.
I was going to suggest , contact cement heavy duty aluminum foil in place and new carpets. Good as new. Wasn't sure how that would be received.
License plate ( aluminum kind , easy to bend, more 'professional') and bondo.
1/2 hour max. Finish with duct tape to prevent further rust.
Posted by: mepstein Sep 9 2016, 12:32 PM
Doesn't look bad. Grab a multi tool and get rid of the floor tar once and for all.
I was going to suggest , contact cement heavy duty aluminum foil in place and new carpets. Good as new. Wasn't sure how that would be received.
License plate ( aluminum kind , easy to bend, more 'professional') and bondo.
1/2 hour max. Finish with duct tape to prevent further rust.
It's a VW. The proper method is to steal some street signs and fiberglass them in. Construction adhesive would also work.
Posted by: Dion Sep 9 2016, 12:49 PM
At what point do I go to Earl Schreib & Zeibart?
After the foil is in?
Posted by: 914dave Sep 9 2016, 01:10 PM
Right after the foil. If you want it proper.
Posted by: mepstein Sep 9 2016, 01:43 PM
All you need to do a pro repair- no metal work!
Attached image(s)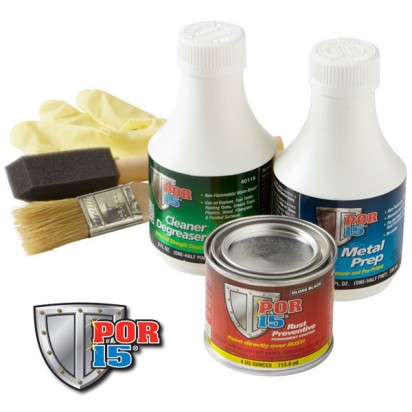
Posted by: Dion Sep 9 2016, 02:54 PM
I knew this club would payoff in its wealth of knowledge. 
Thanks boys!
Stay tuned.... 
Posted by: flippa Sep 9 2016, 04:22 PM
It's a VW. The proper method is to steal some street signs and fiberglass them in. Construction adhesive would also work.
What, no pop rivets?

Posted by: bretth Sep 9 2016, 05:14 PM
What, no pop rivets?
Yeah one pop rivet over a 4 inch hole in the frame is all it took to hold my car together.
Brett
Posted by: wndsnd Sep 9 2016, 05:23 PM
It's a VW. The proper method is to steal some street signs and fiberglass them in. Construction adhesive would also work.
What, no pop rivets?
Leave it to an engineer to overcomplicate this repair!
Posted by: Dion Sep 9 2016, 05:30 PM
You guys are great. This is gonna be fun. 
Posted by: jmitro Sep 9 2016, 07:56 PM
looks like you got a little work to do. Good luck with it!
Posted by: rgalla9146 Sep 10 2016, 03:25 AM
Paint it Red.
Very important.
Posted by: cary Sep 10 2016, 08:10 AM
The problem your going to run into is the degradation of the inner stiffening layer too. Which is the layer where the seat belt anchor starts it spot welds. 
Jeff did an extensive rebuild/patch in that area in his thread.
http://www.914world.com/bbs2/index.php?showtopic=76791&hl=dead
Hopefully yours won't be that extensive. Was the jack point replaced on the prior repair ?
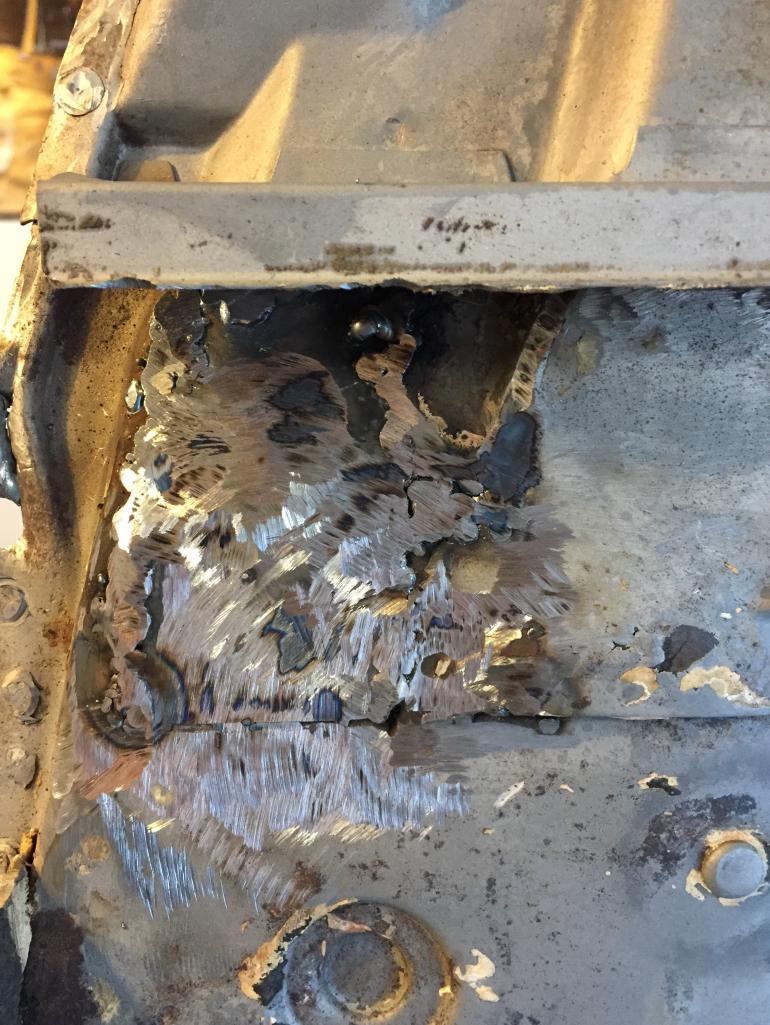
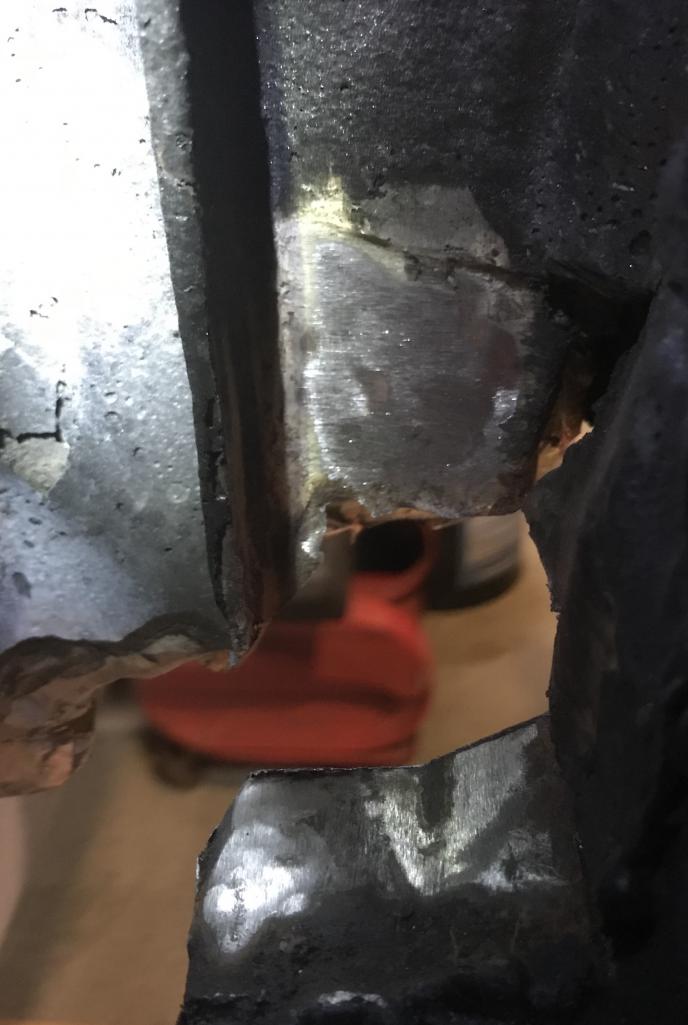
Posted by: Dion Sep 10 2016, 10:25 AM
Hey Cary,
The jack point was completely cut out. They just welded up "patch".
However unbeknownst to me they never joined the top of the patch to where it meets
the door sill area. I will cutting out that whole area to see what's what.
Yeah it will be a nice challenge with that seat belt anchor area. We'll get it done.
Also need to address front of long next to front left wheel well/fender.
Purchasing cut off wheels and a new grinder/ die grinder. I'll add to this thread as I make progress
Thanks guys.
Attached thumbnail(s)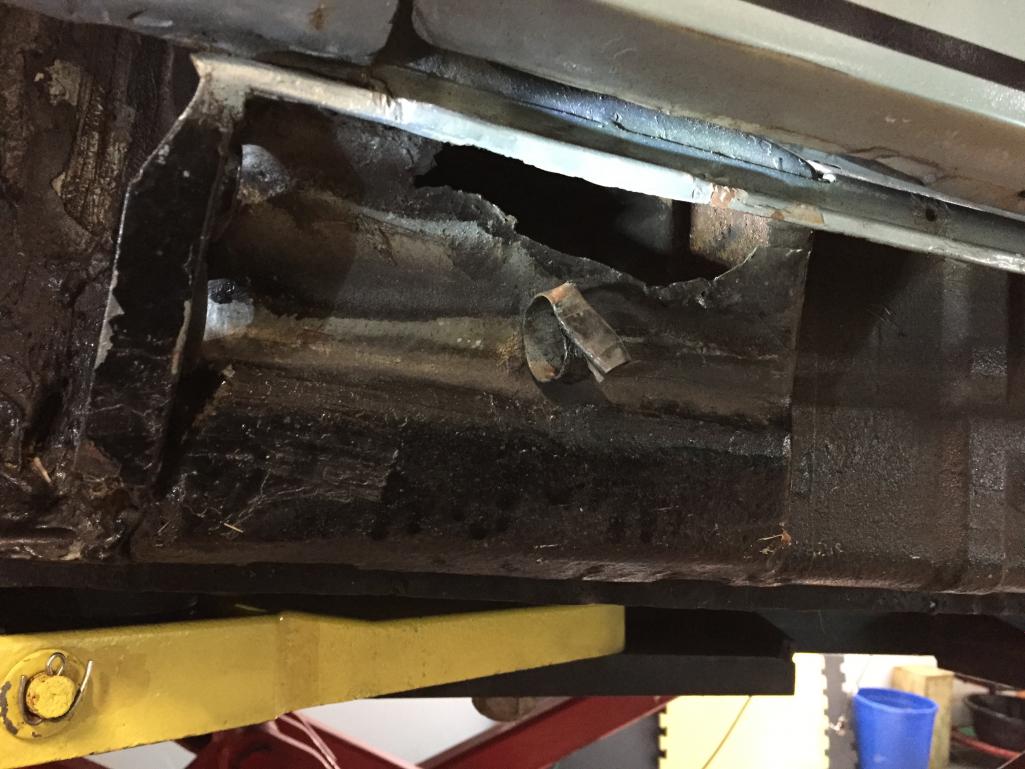
Posted by: Dion Oct 2 2016, 05:27 PM
Ok, tar all scraped out. Door braces in place.
Time this week to start cutting and removing the
offending rust areas on the longs.
Attached thumbnail(s)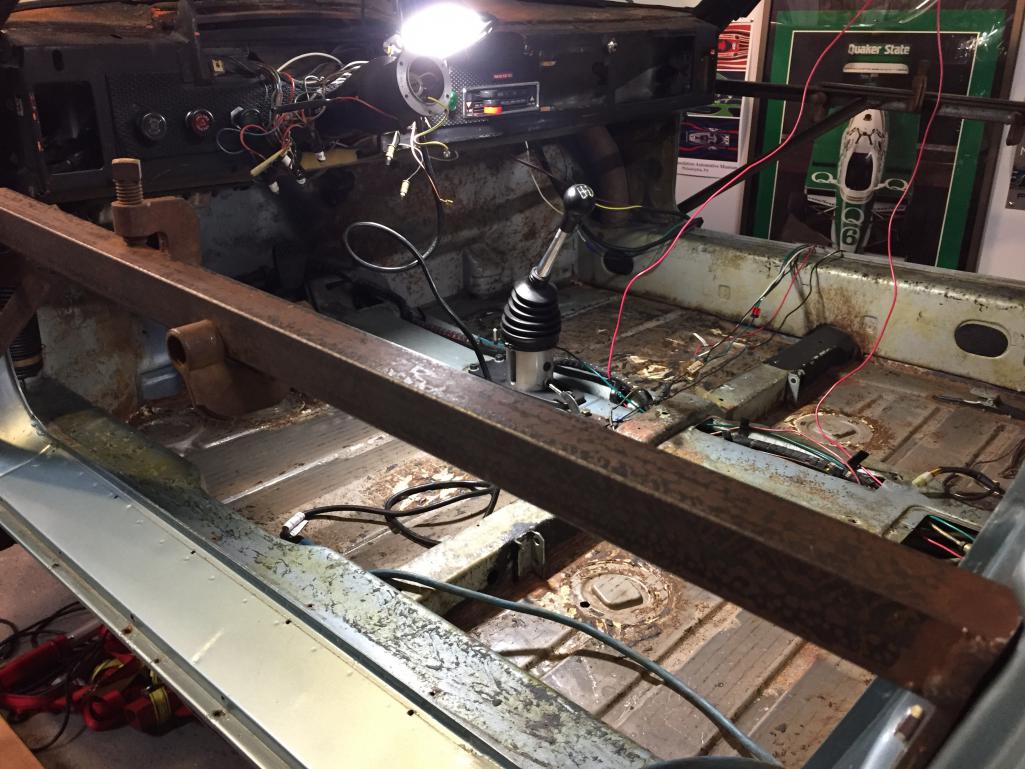
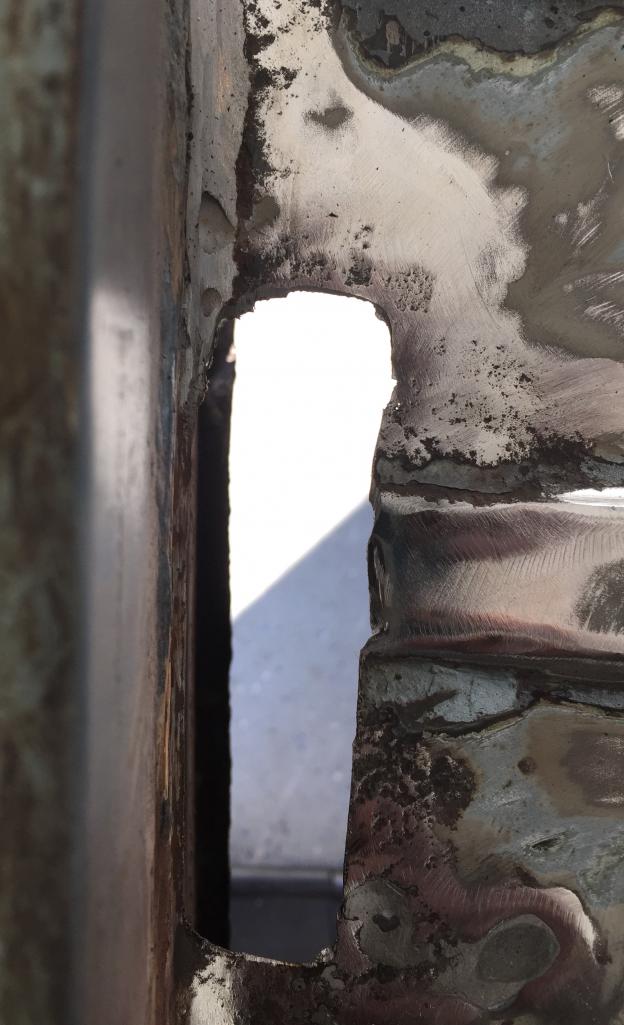
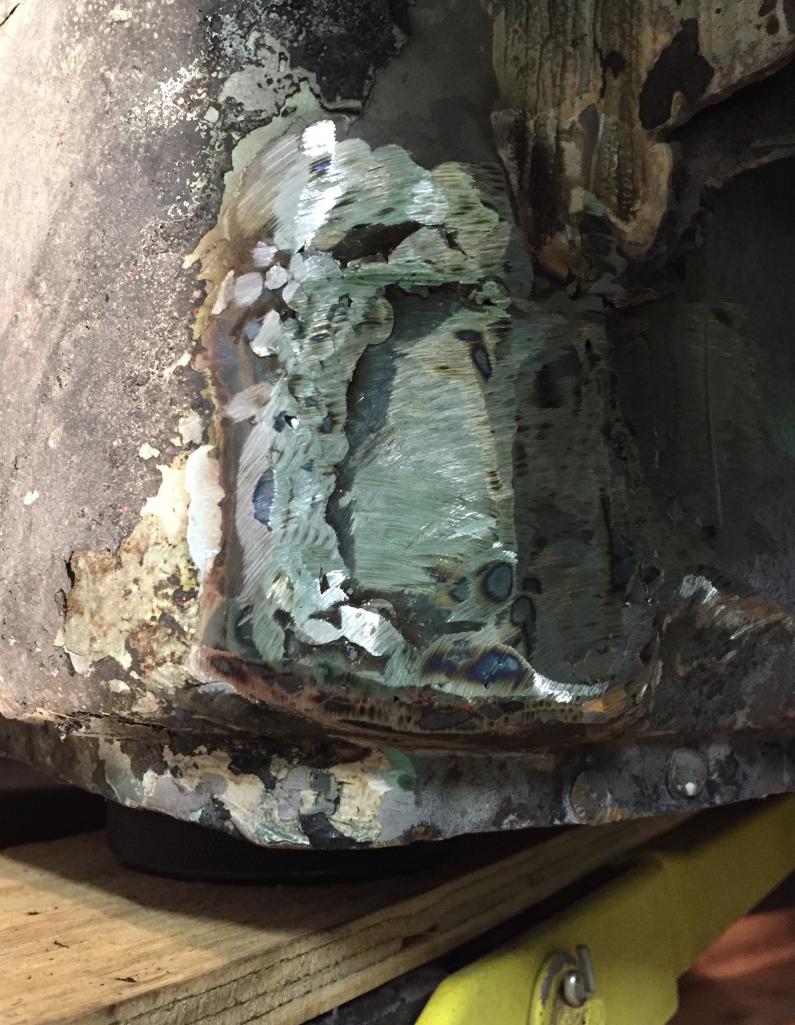
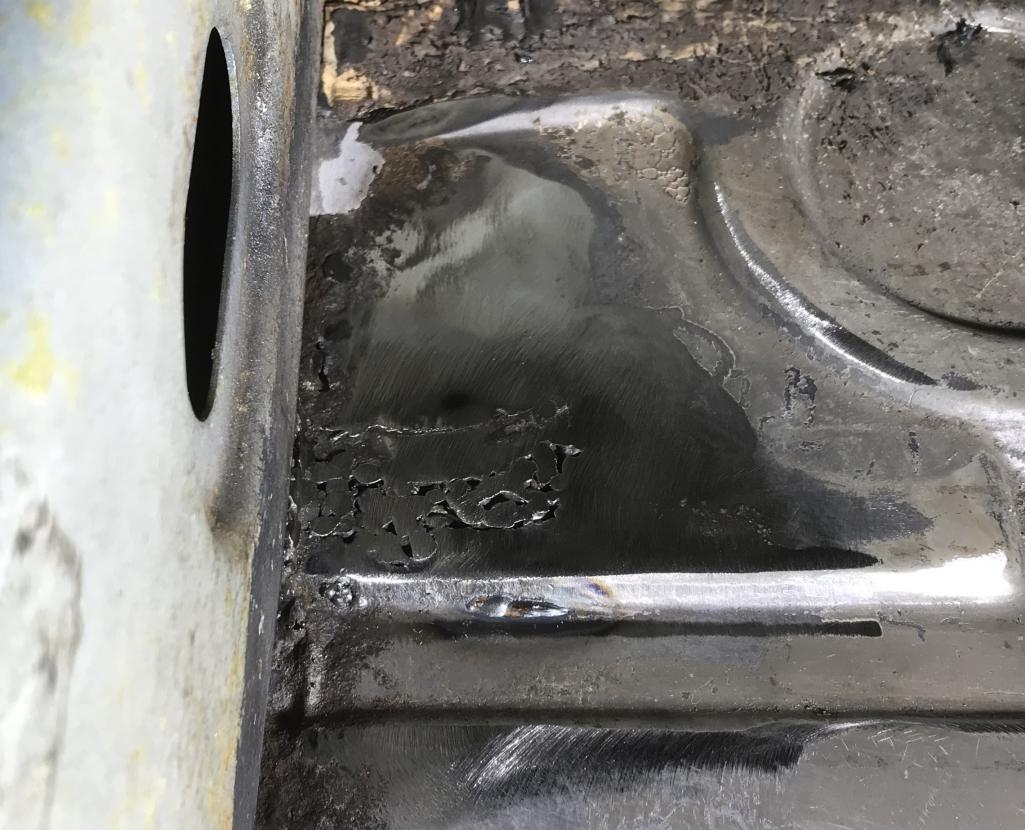
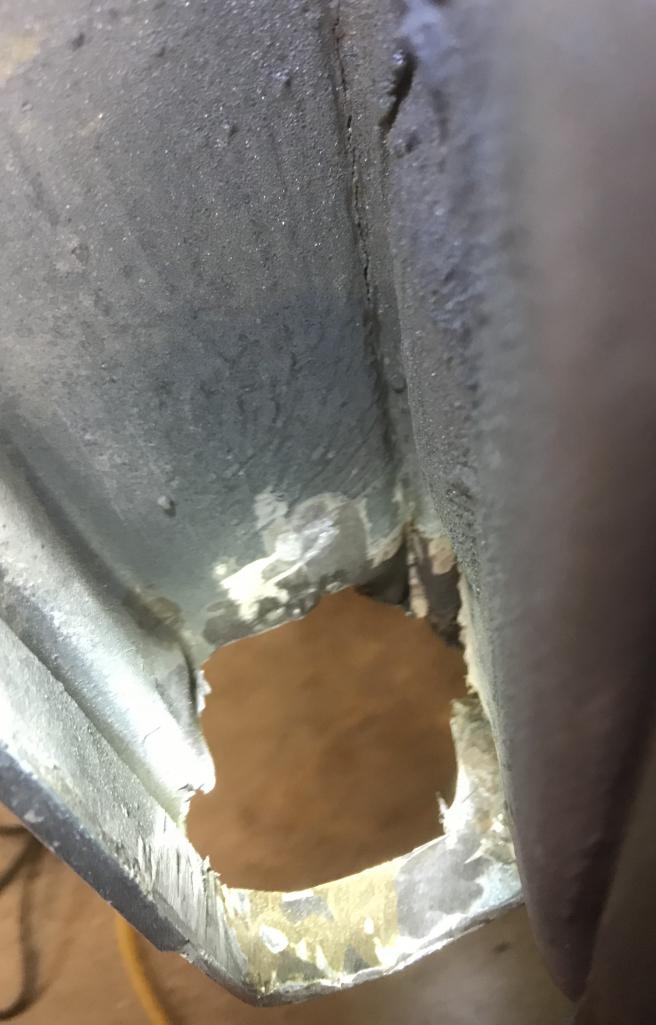
Posted by: Dion Oct 4 2016, 06:01 PM
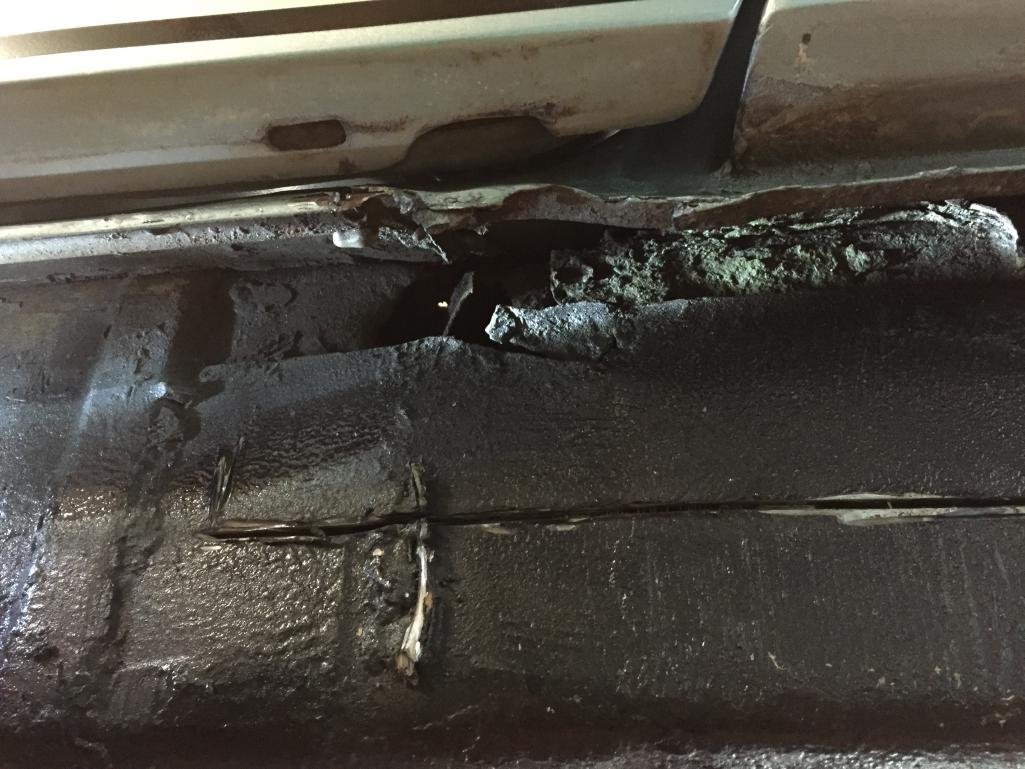
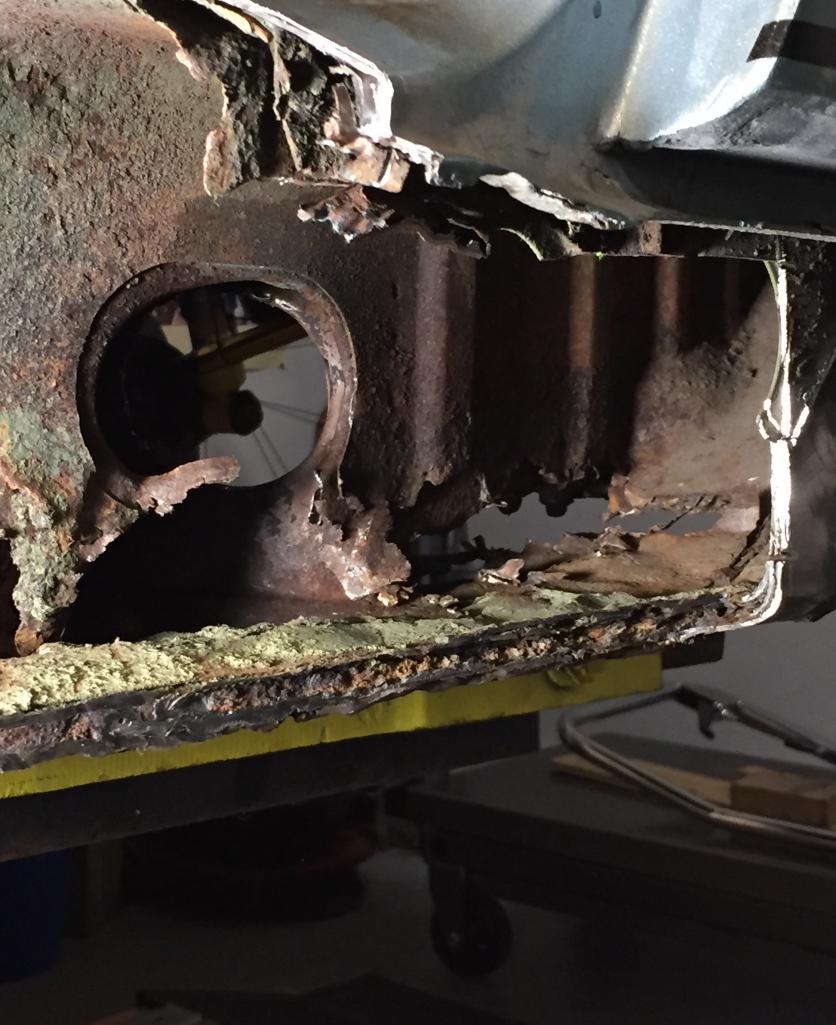
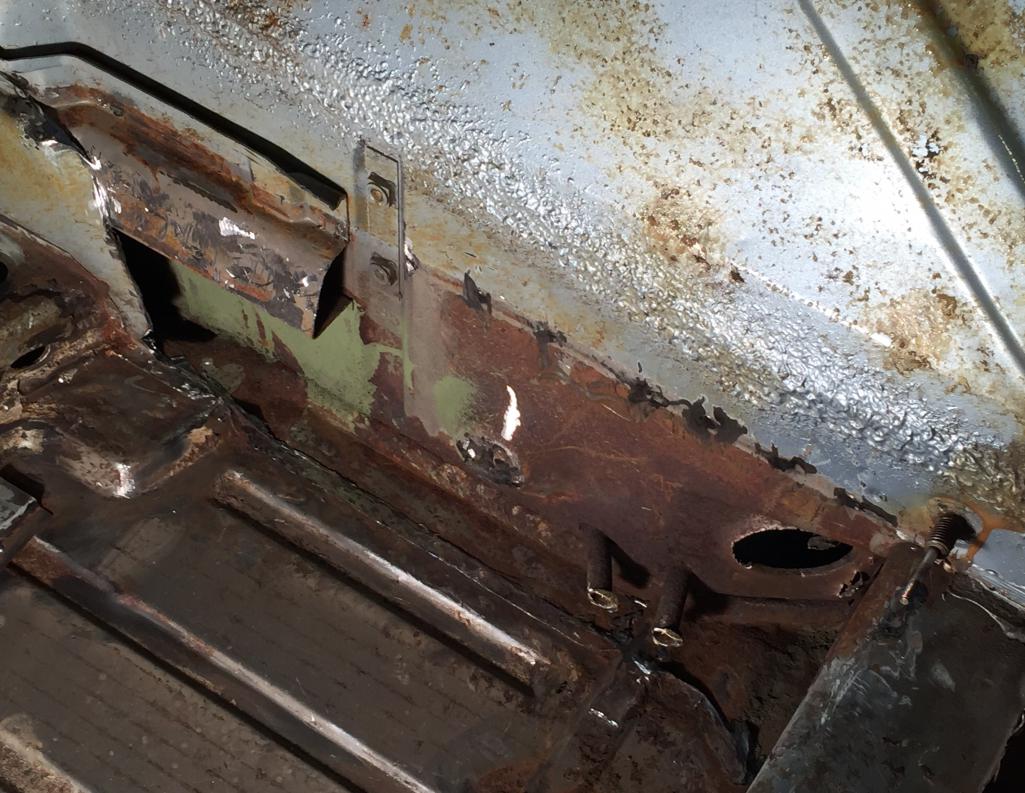
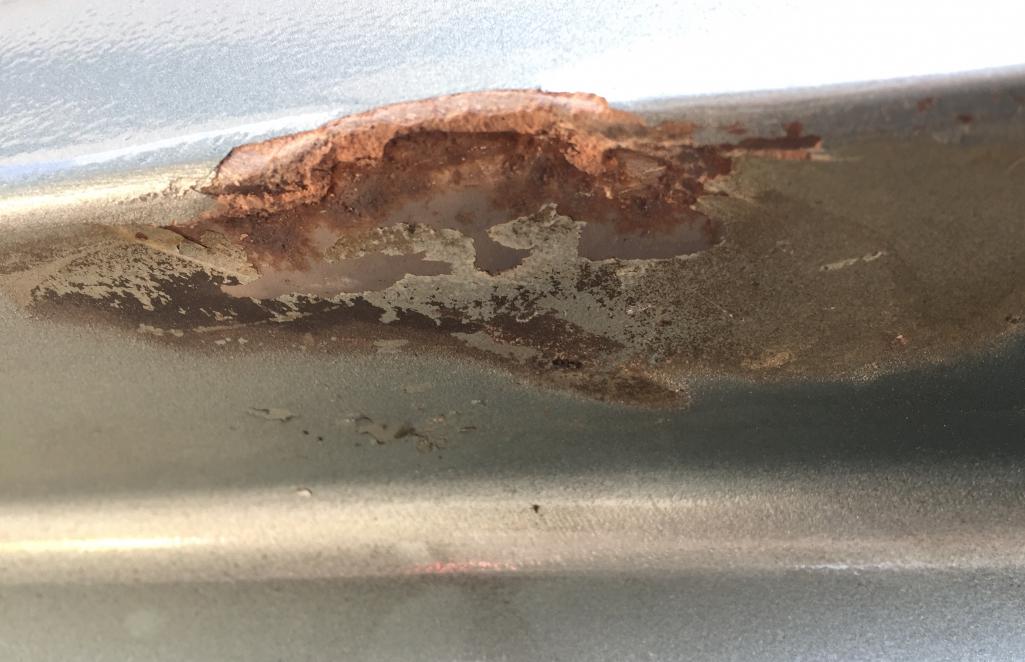
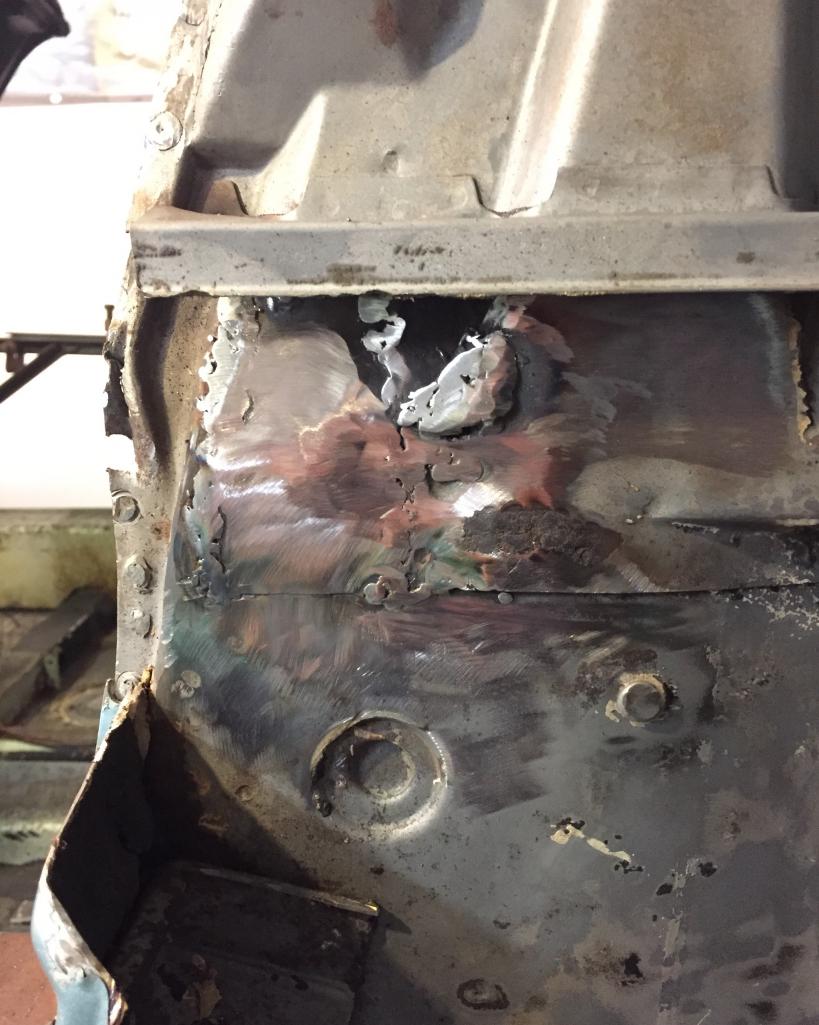
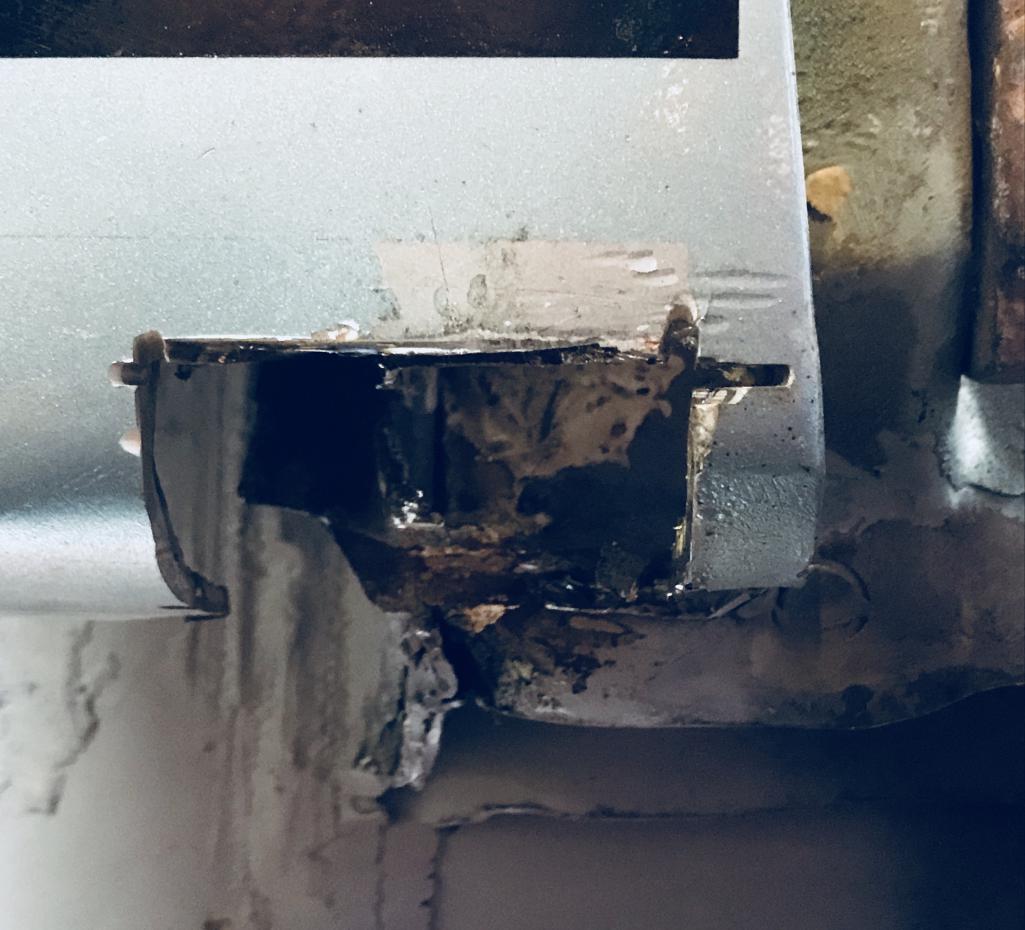
Well did more exploratory surgery and it's ugly. Beauty on
the left side was in fact only skin deep. Consulted with my
bro Dave ( 914Dave ). So time to cut out the outer long complete.
To the kickup and replace the metal accordingly. Inside the cabin
area can be fixed with a few patches. Floor is in good shape remarkably.
I should just enter the buildoff at this point 
Stay tuned...
Attached thumbnail(s)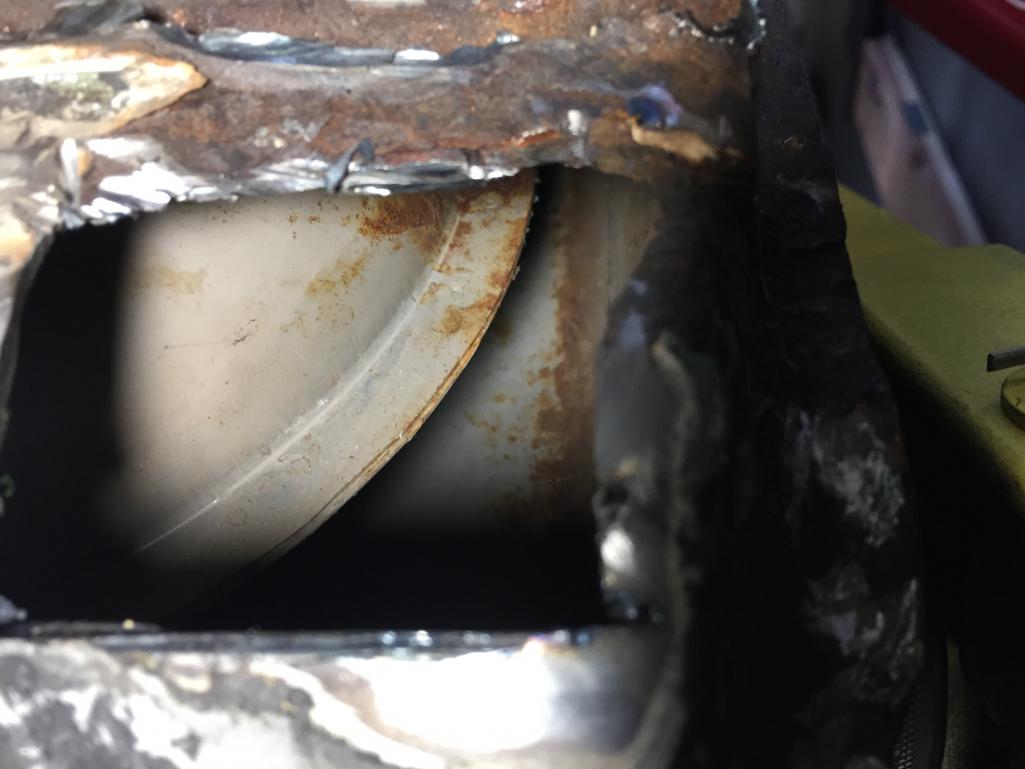
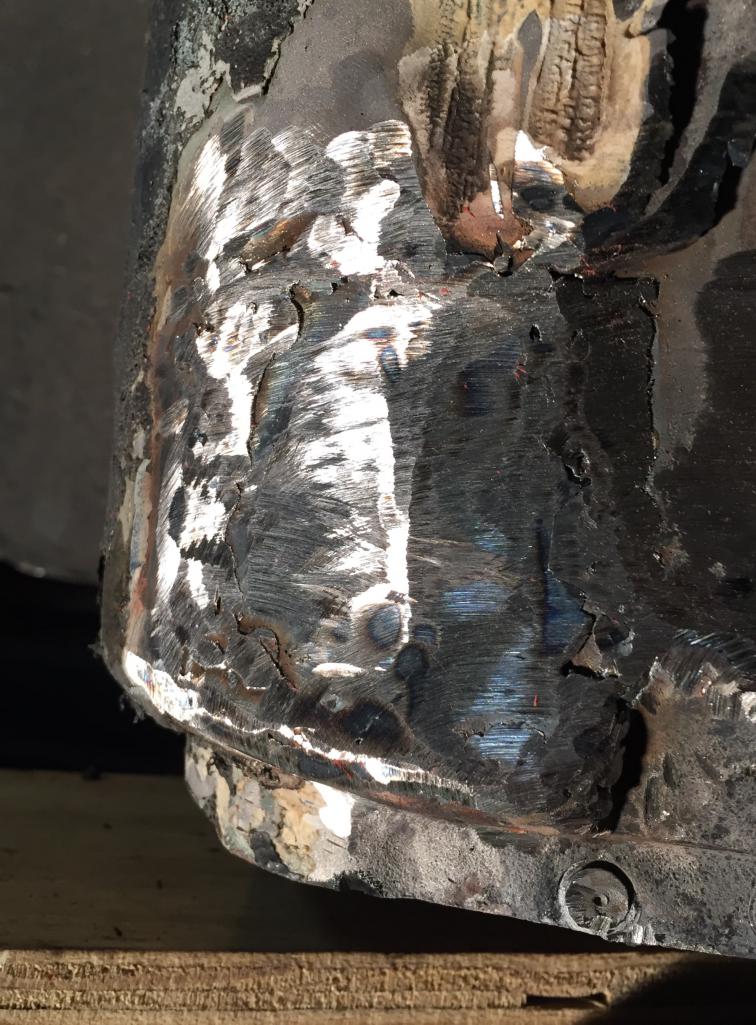
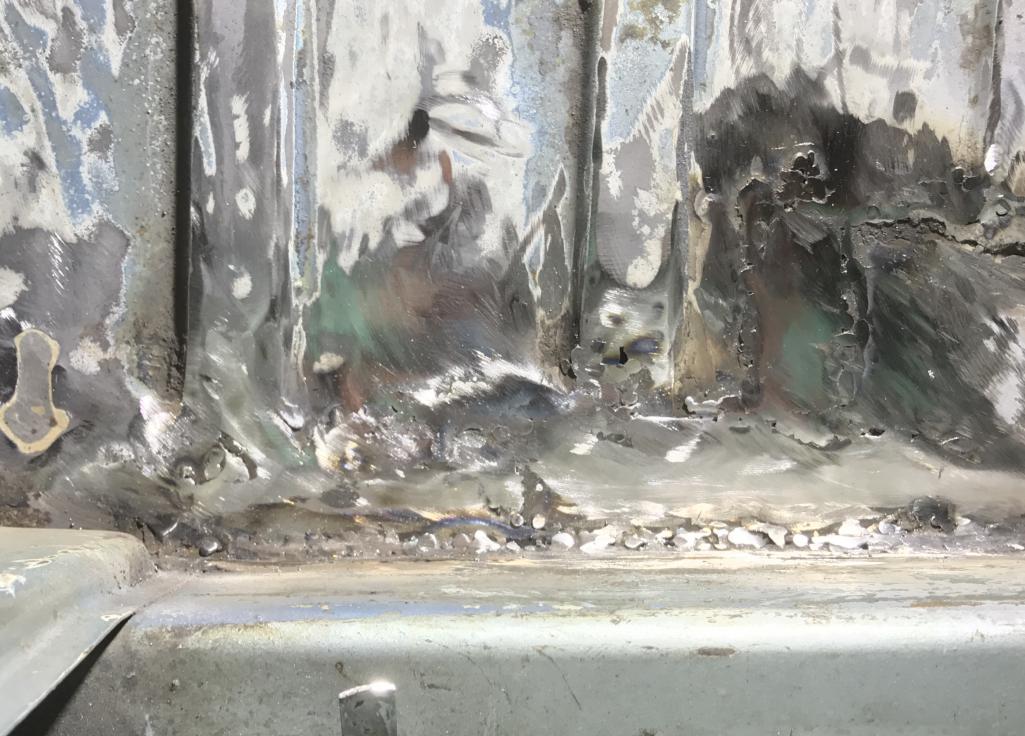
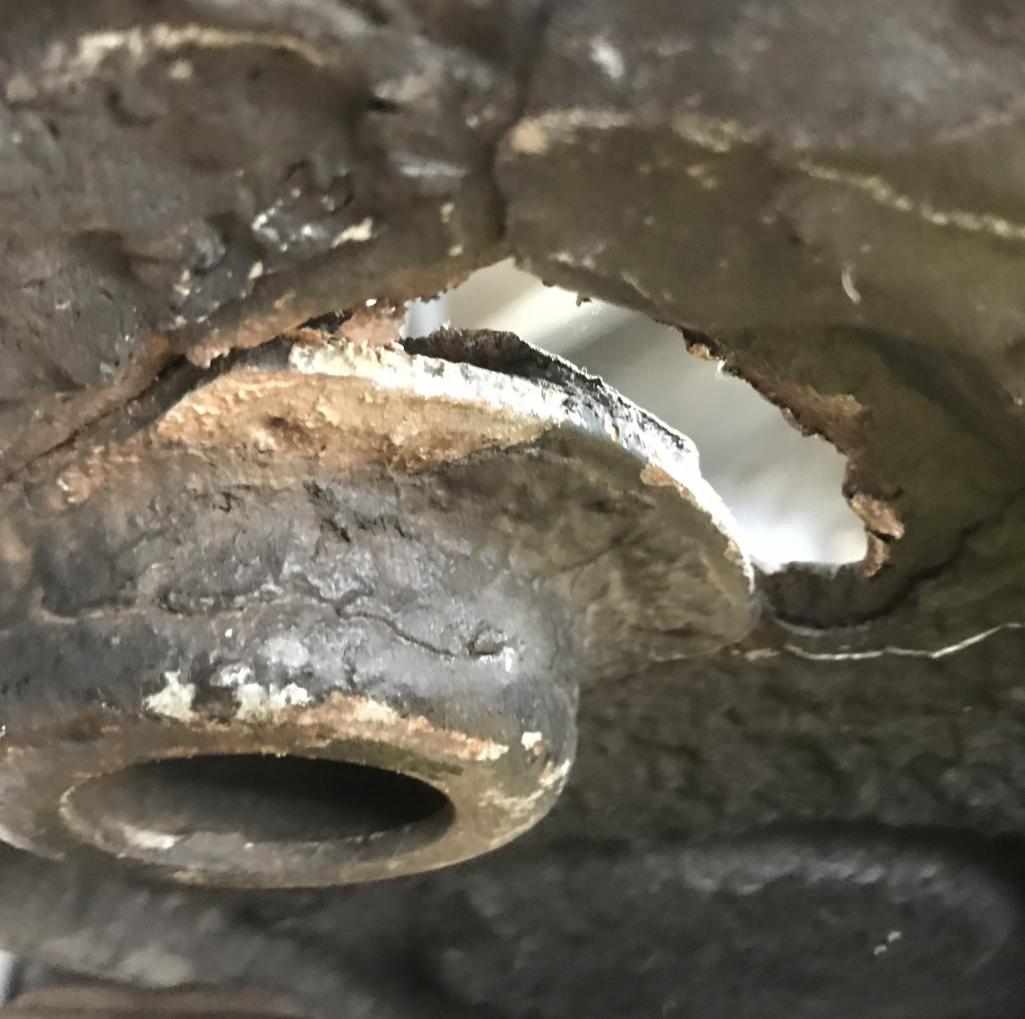
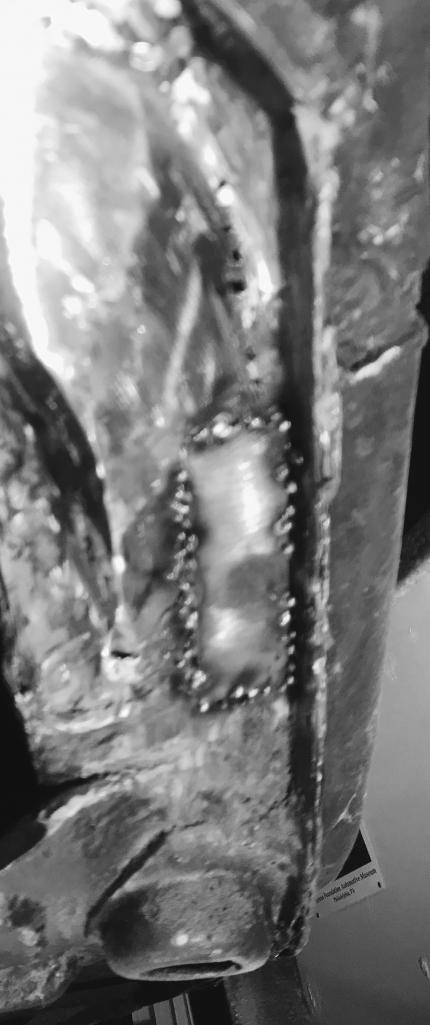
Posted by: Dion Oct 4 2016, 06:02 PM
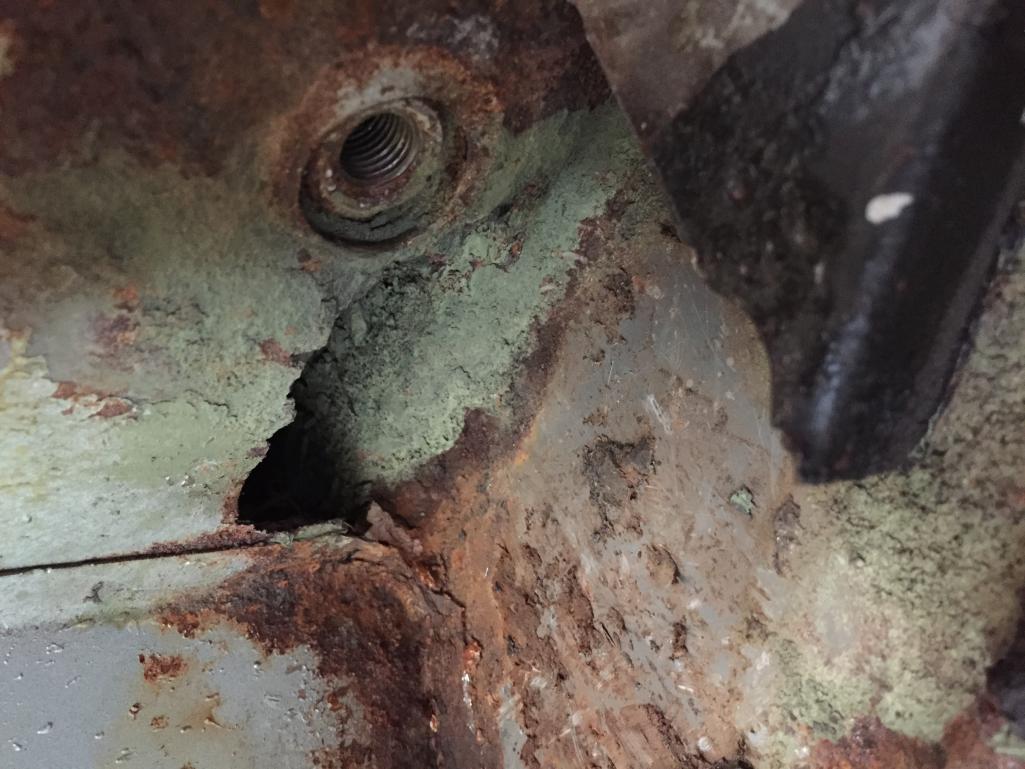
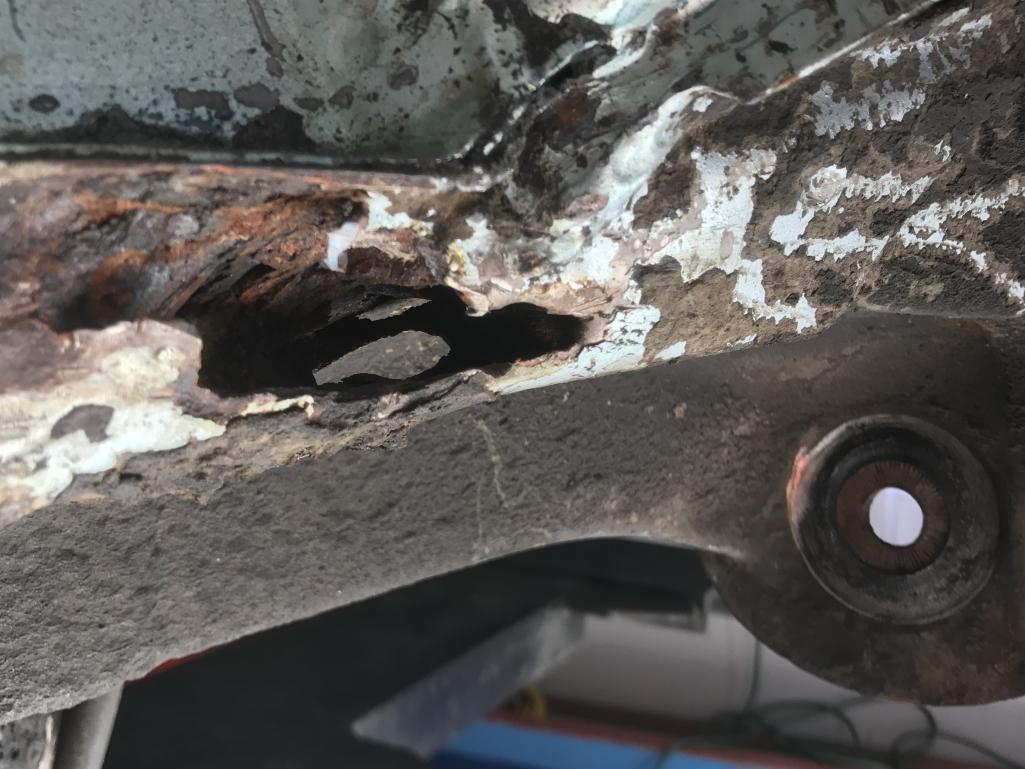
Ugly
Attached thumbnail(s)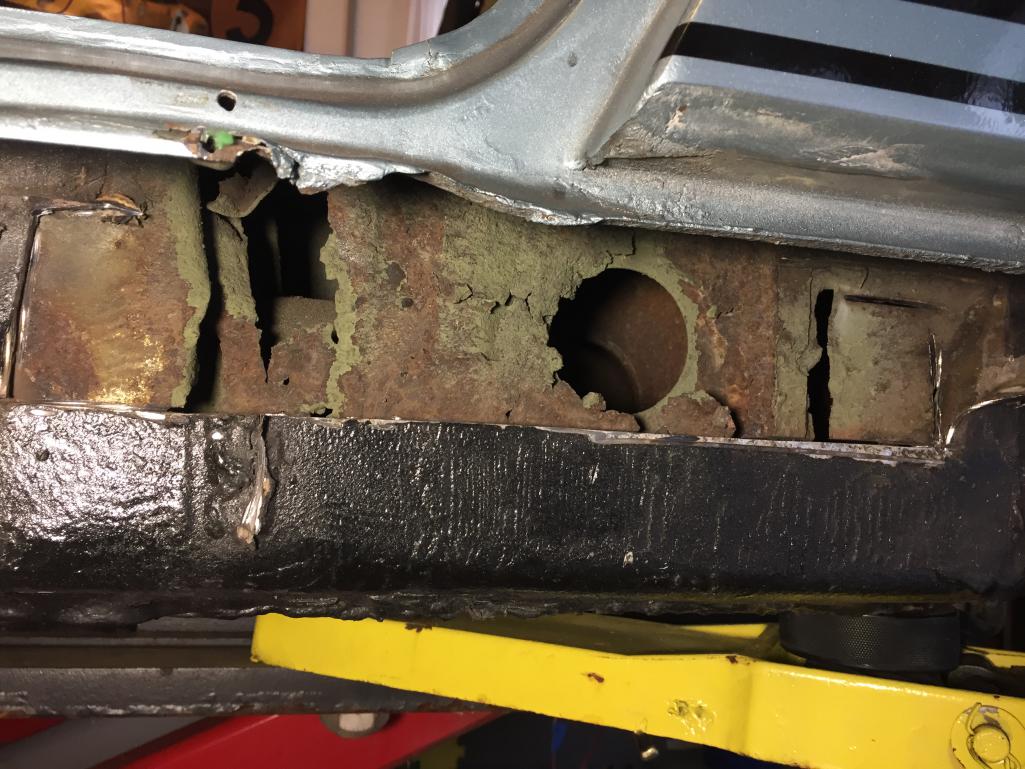
Posted by: Dion Oct 4 2016, 06:03 PM

Attached thumbnail(s)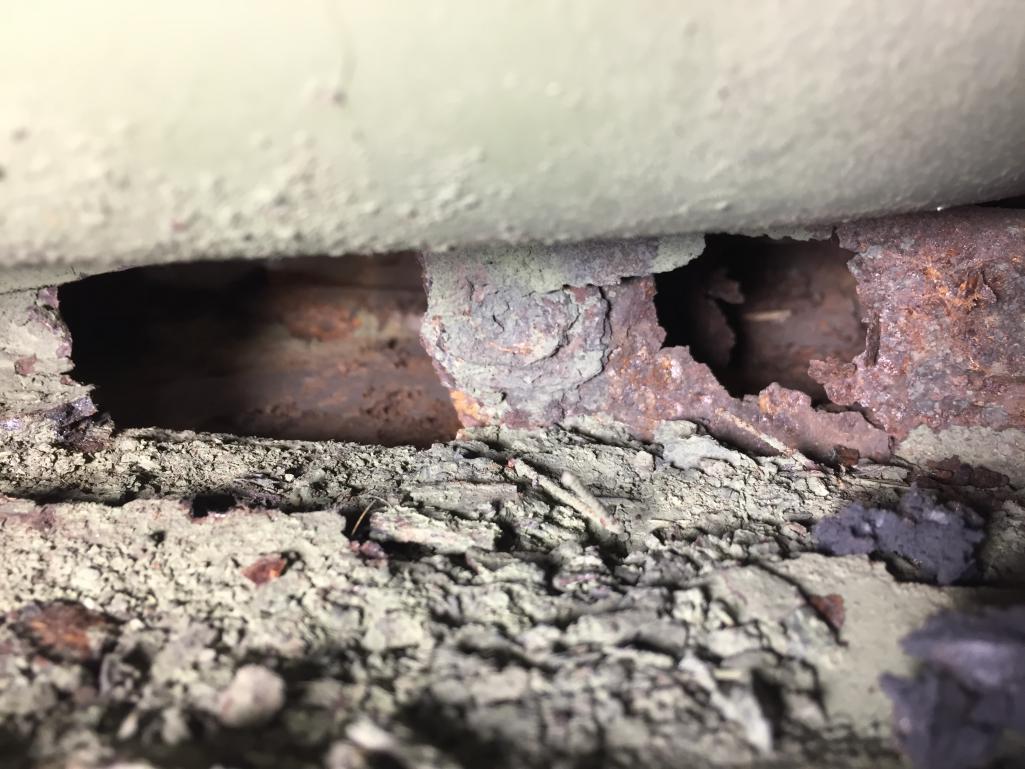
Posted by: Dion Oct 4 2016, 06:05 PM
Attached thumbnail(s)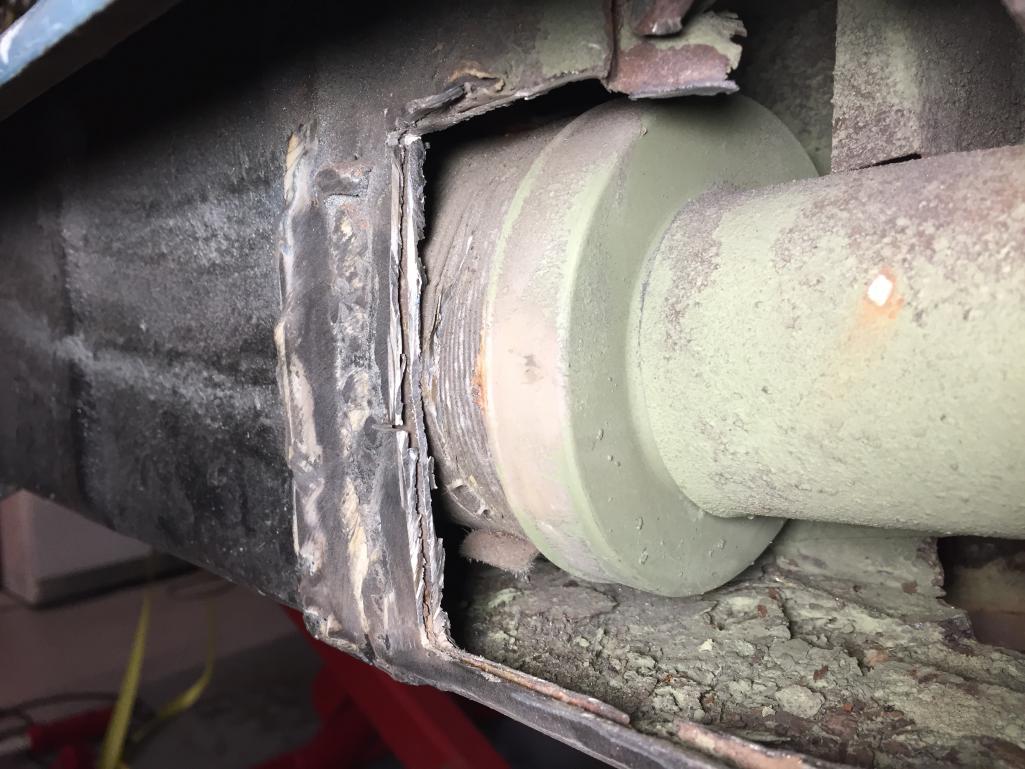
Posted by: Dion Oct 5 2016, 09:34 PM
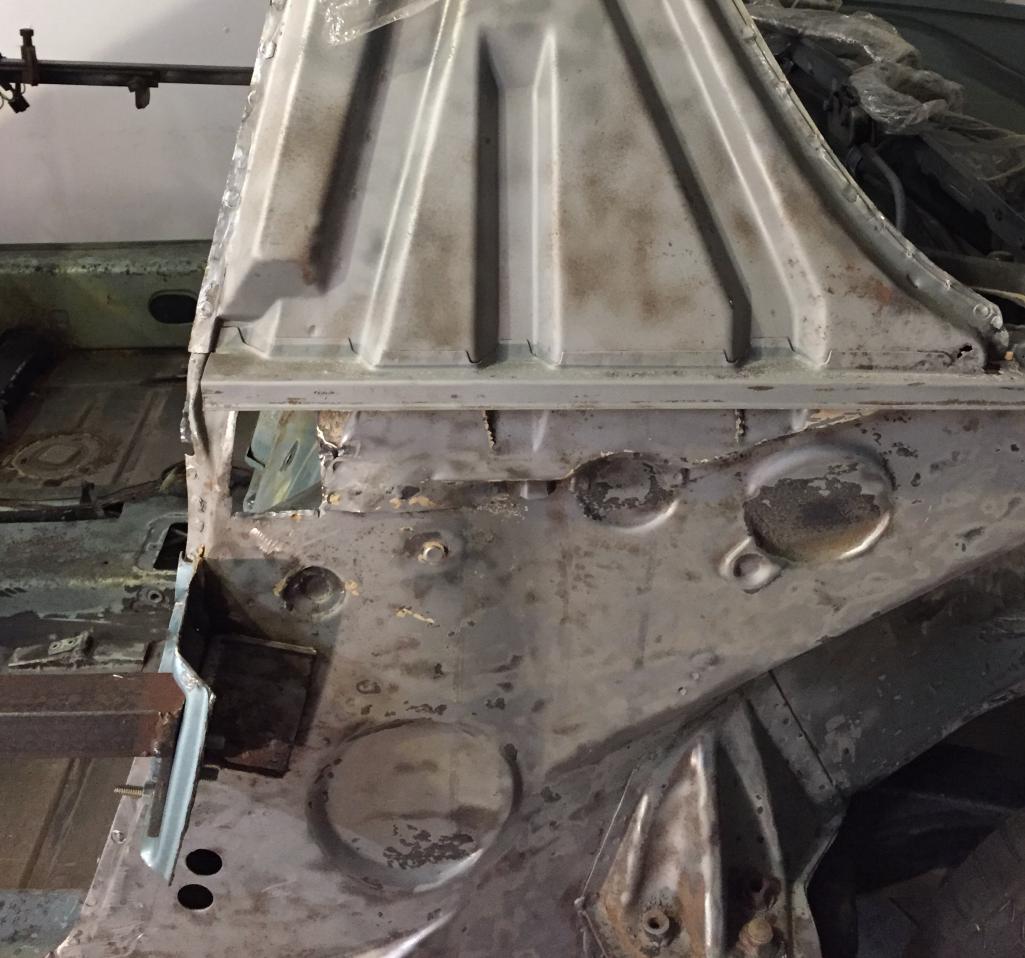
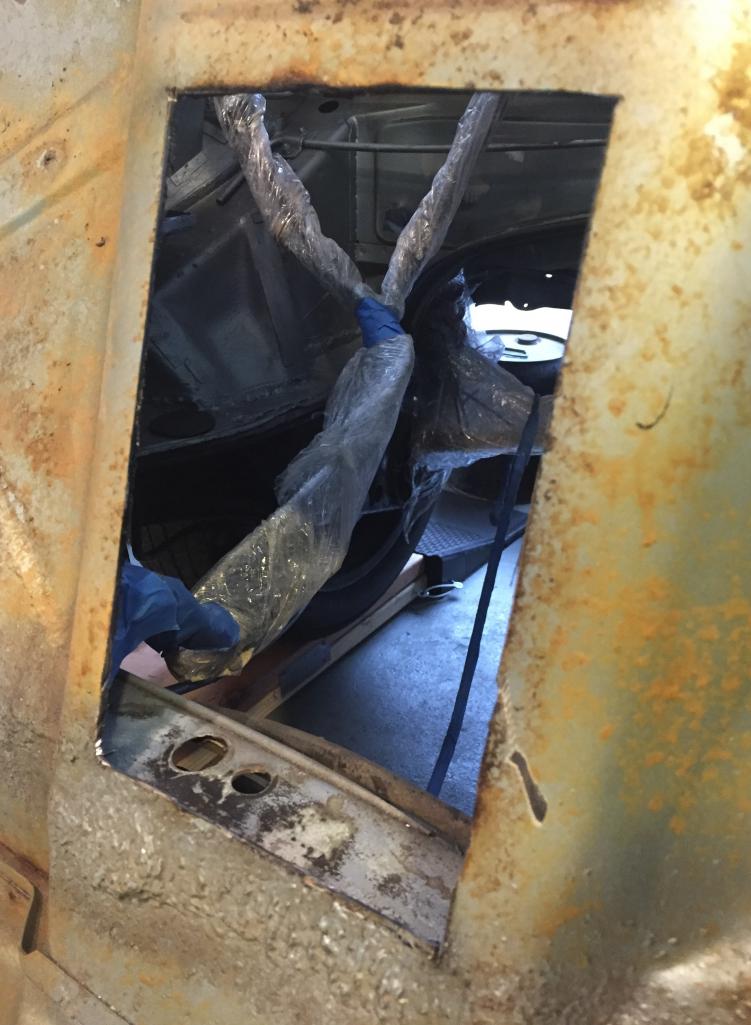
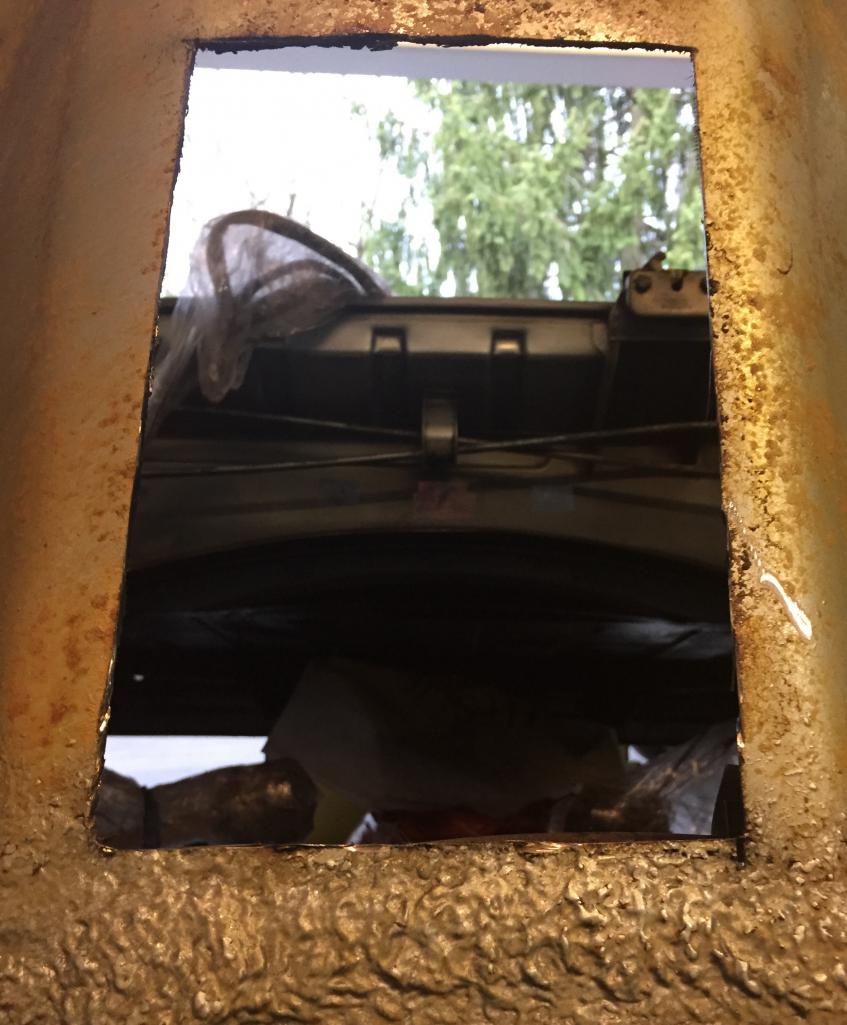
Opened up whole of left longitudinal today. I'll be ordering some metal
for the U-boat. I'll be replacing the sill,door jamb, rocker outer cover,
the rear jack donut and inner rear lower firewall.
Dave lent me his spot weld remover bits so that's where I'll begin.
Then I'll address a "hatch" for the six to adjust the timing. Lots of work ahead.
Many of you guys have been here before. Wish me luck.
This will be going at the same time as reassembling Dave's GT. So little time!
Attached thumbnail(s)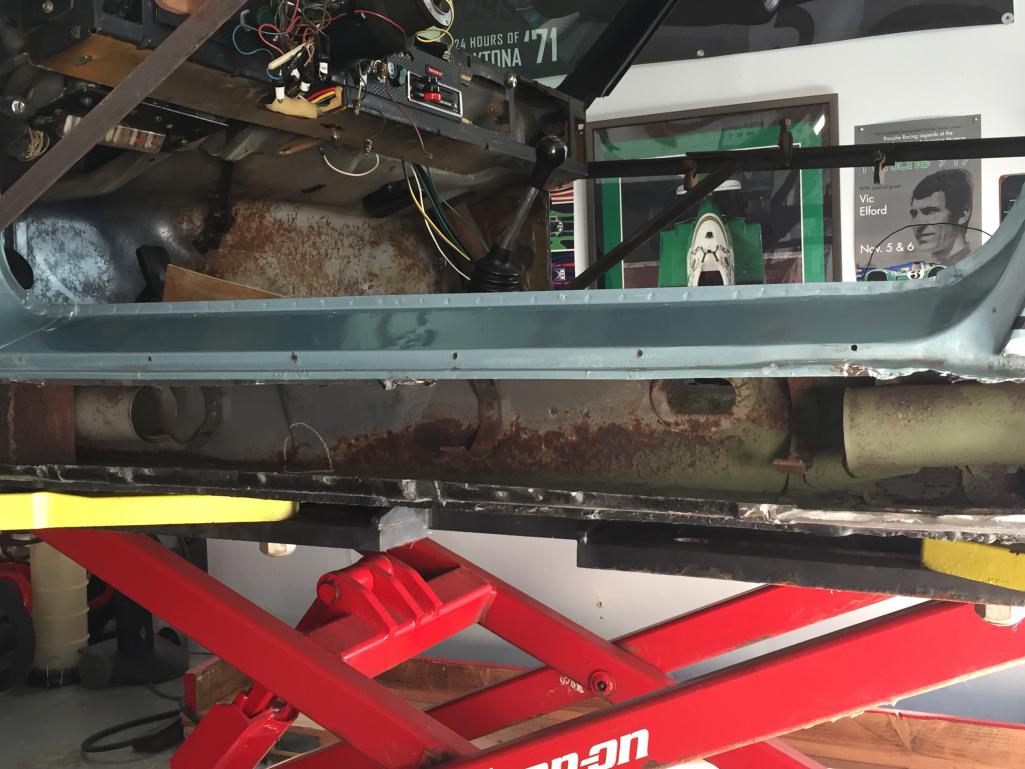
Posted by: altitude411 Oct 6 2016, 11:48 AM
Your going to need a few more license plates and possibly another roll of duct tape... ![popcorn[1].gif](style_emoticons/default/popcorn[1].gif)
*subscribed*
Posted by: Dion Oct 6 2016, 12:25 PM
Your going to need a few more license plates and possibly another roll of duct tape...
*subscribed*
Hahahah. Yeah pretty much!
What has the collective done with regards to the door jamb
sticker? Is it salvageable? Do you even bother.
Being it's an "Antique" here in PA, the car doesn't get inspected.
Just wondering what you have done.
Thanks
Posted by: Dion Oct 17 2016, 08:50 PM
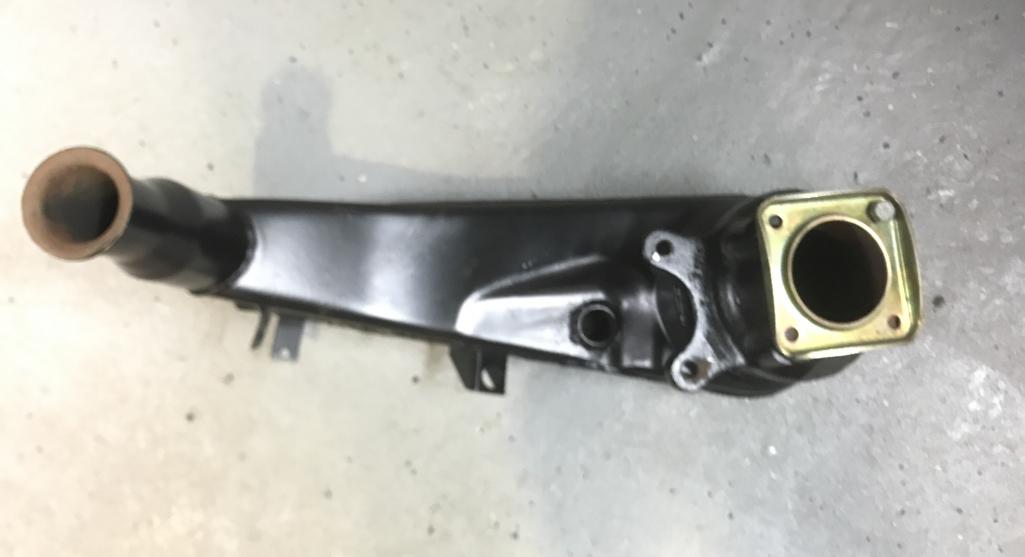
So the build challenge is on. Happy to say I've obtained a nice heater tube from
Rich (rdauerhauer). So that's a relief as the original was a little cut into.
My supply of spotweld cutters is here, so hope to post more pics soon of progress.
Goal for this time frame till January is to remove rear quarter panel and lower firewall
driver side. As well as weld up the many numerous holes in the firewall that were used for running wires. Parts have been ordered from Restoration Design as well as 914rubber. Carry on.
Posted by: mepstein Oct 17 2016, 08:59 PM
Your going to need a few more license plates and possibly another roll of duct tape...
*subscribed*
Hahahah. Yeah pretty much!
What has the collective done with regards to the door jamb
sticker? Is it salvageable? Do you even bother.
Being it's an "Antique" here in PA, the car doesn't get inspected.
Just wondering what you have done.
Thanks
Take a picture of it for your records and then order a new one from Andy ( I forget his screen name on this site but someone will chime in)
I guess the lift purchase is paying off.
Posted by: Dion Oct 17 2016, 09:07 PM
Mark, I don't think I'd go this deep into "hell" if it wasn't for this lift. Heheheh
I'll keep checking on the sticker. For some reason "car-bone" comes to mind regarding
odd,one off stickers and such. Thanks.
Posted by: Larmo63 Oct 17 2016, 09:15 PM
SoCalAndy makes the stickers.....
Posted by: altitude411 Oct 17 2016, 09:28 PM
Socalandy. His awesome six build is in the restoration forum
Posted by: Dion Oct 18 2016, 07:13 AM
Thanks for the info on the stickers. I'll give him a shout. Yes I have his build bookmarked. It's excellent.
Posted by: mbseto Oct 18 2016, 07:53 AM
I would say you have your work cut out for you. But really, your work is cutting everything out. :-)
Posted by: Dion Oct 25 2016, 06:31 PM
Still cutting away. Parts from Restoration Design on the way. Time to break out
the kerosene heater soon. Hitting 38*F tonite.
Drilling out spotwelds is certainly a test of wills. Progress is
slow but it's progress.
Attached thumbnail(s)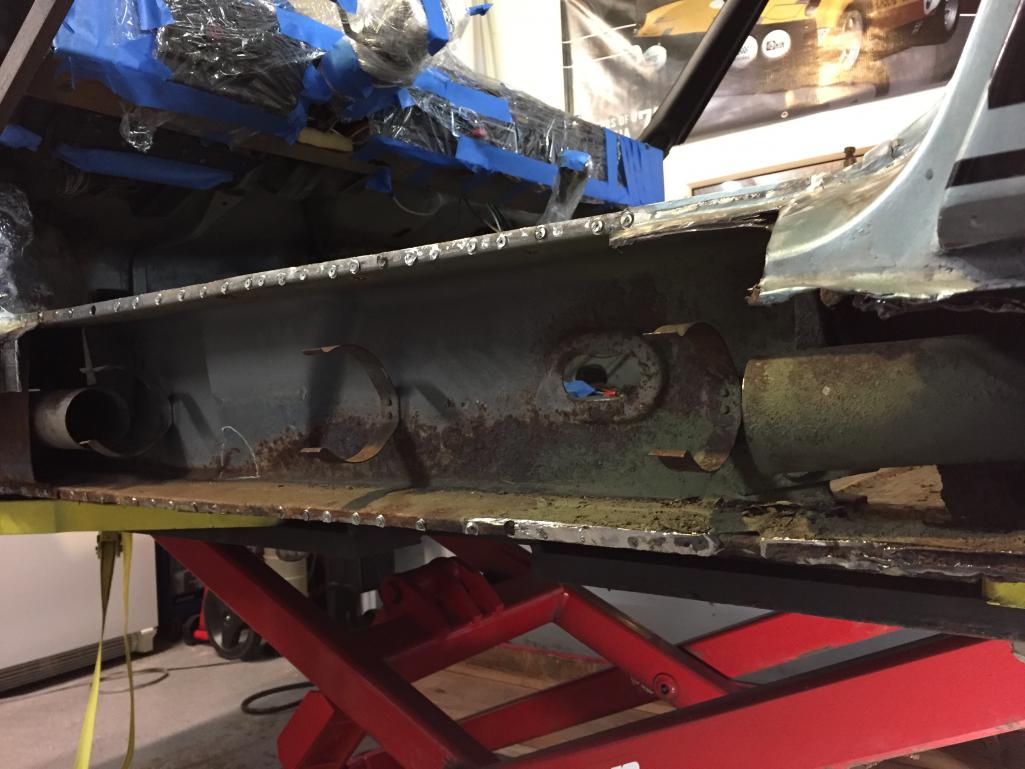
Posted by: JmuRiz Oct 25 2016, 07:07 PM
After knowing and talking with ScottyB enough, he says that even the nice looking ones have rust...looks like you got lucky and hit the motherload 
I guess it's good restoration design is a sponsor. Best of luck on the fixn', your progress thus far shows you are going to be able to handle it just fine.
Posted by: theleschyouknow Oct 25 2016, 08:04 PM
keep up the good work
somebody I think in the 2016 build off had an alternate method of drilling out the spot welds using regular bits
sorry can't remember who it was or the details like bit sizes but basically it involved drilling just thru the first layer with a larger bit and 'exposing' the weld then drilling a thru hole large enough to remove most if not all of the weld then, if necessary, he reported it was easy to pry/pop the panels apart
kinda sounds like 2 steps to do 1 to me but he seemed to like the results
looks like you have your hands full but also that it is in good hands, have fun!

cjl
Posted by: Dion Oct 25 2016, 09:28 PM
Thanks guys. Appreciate the confidence.
Posted by: DirtyCossack Oct 26 2016, 10:57 AM
keep up the good work
somebody I think in the 2016 build off had an alternate method of drilling out the spot welds using regular bits
sorry can't remember who it was or the details like bit sizes but basically it involved drilling just thru the first layer with a larger bit and 'exposing' the weld then drilling a thru hole large enough to remove most if not all of the weld then, if necessary, he reported it was easy to pry/pop the panels apart
kinda sounds like 2 steps to do 1 to me but he seemed to like the results
looks like you have your hands full but also that it is in good hands, have fun!
cjl
Doesn't sound exactly like my technique, but I use a cut off (so it only sticks out about 1/4" from the chuck to prevent breaking bits) 1/8" bit to start a pilot hole (aids a big bit's bite), then use something like a 3/8" bit to only go through that top layer before carefully using a seam buster tool to separate. The technique allowed for welding separate panels back together.
Then again, you could be talking about somebody different...
Posted by: theleschyouknow Oct 26 2016, 11:17 AM
keep up the good work
somebody I think in the 2016 build off had an alternate method of drilling out the spot welds using regular bits
sorry can't remember who it was or the details like bit sizes but basically it involved drilling just thru the first layer with a larger bit and 'exposing' the weld then drilling a thru hole large enough to remove most if not all of the weld then, if necessary, he reported it was easy to pry/pop the panels apart
kinda sounds like 2 steps to do 1 to me but he seemed to like the results
looks like you have your hands full but also that it is in good hands, have fun!
cjl
Doesn't sound exactly like my technique, but I use a cut off (so it only sticks out about 1/4" from the chuck to prevent breaking bits) 1/8" bit to start a pilot hole (aids a big bit's bite), then use something like a 3/8" bit to only go through that top layer before carefully using a seam buster tool to separate. The technique allowed for welding separate panels back together.
Then again, you could be talking about somebody different...
yep that was you nice work!
I got it kinda backward in my explanation
re reading my post it I think it might sound critical but no offense was meant in fact I was impressed with your ingenuity and hoping to pass it on
keep up the good work!
cjl
Posted by: Dion Oct 28 2016, 03:04 PM
Fed ex truck dropped off some goods today.
Thanks to the guys at Restoration Design.
These parts are gonna make life a lot easier
in the coming months.
Attached thumbnail(s)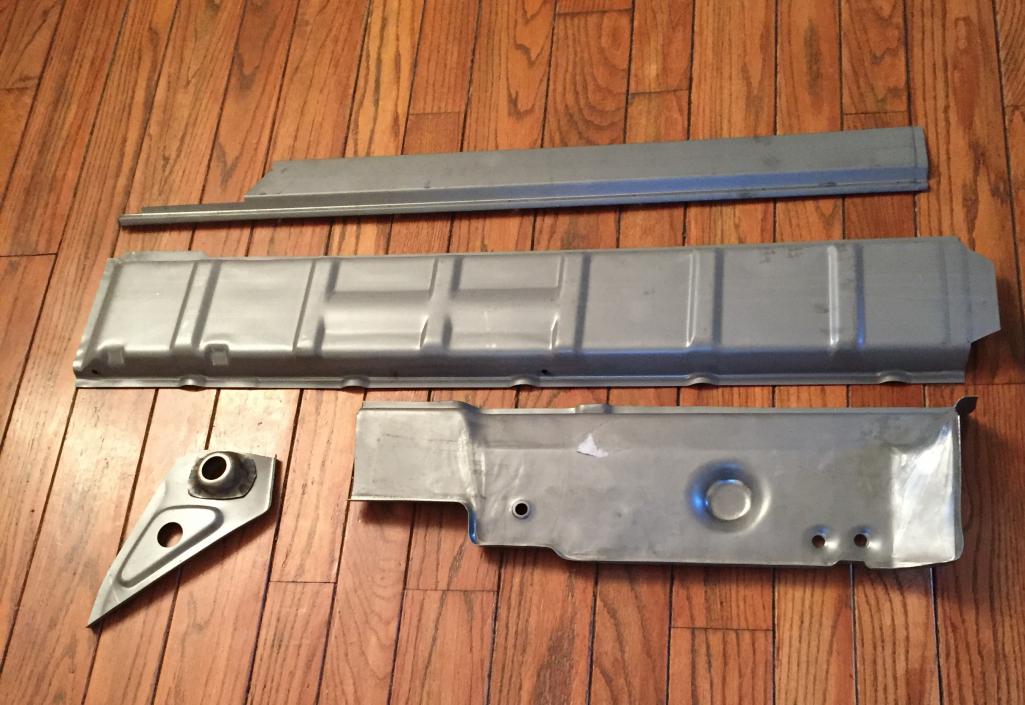
Posted by: porschetub Oct 28 2016, 04:13 PM
Still cutting away. Parts from Restoration Design on the way. Time to break out
the kerosene heater soon. Hitting 38*F tonite.
Drilling out spotwelds is certainly a test of wills. Progress is
slow but it's progress.
Good skills on the bodywork,clever to see you covered the dash....amazing how those little chips of steel go so far and stick/burn to stuff.
Keep up the good work.
Posted by: tygaboy Oct 28 2016, 04:30 PM
Fed ex truck dropped off some goods today.
Thanks to the guys at Restoration Design.
These parts are gonna make life a lot easier
in the coming months.
You're probably OK, but you may want to double check that rear jack point piece to be sure the donut is welded on in the correct orientation. I just got around to fitting mine, only to find out it was put on backwards. It causes the jacking surface of the donut to be "way not parallel" to the ground.
It was a known error but a few parts did get out there.
Posted by: Dion Oct 28 2016, 04:40 PM
Thanks Dean, the whole dash is out. Have a nice NOS to put in there.
I'll be covering more of it with thicker plastic when it's time for paint.
Cutting around the door brace on the jamb side till I can weld a triangular
plate near the floor and long and firewall then I'll remove the jamb.
Goal for tomorrow is removing all of rear left quarter panel. "Tyga" I'll check the donut thanks.
Attached thumbnail(s)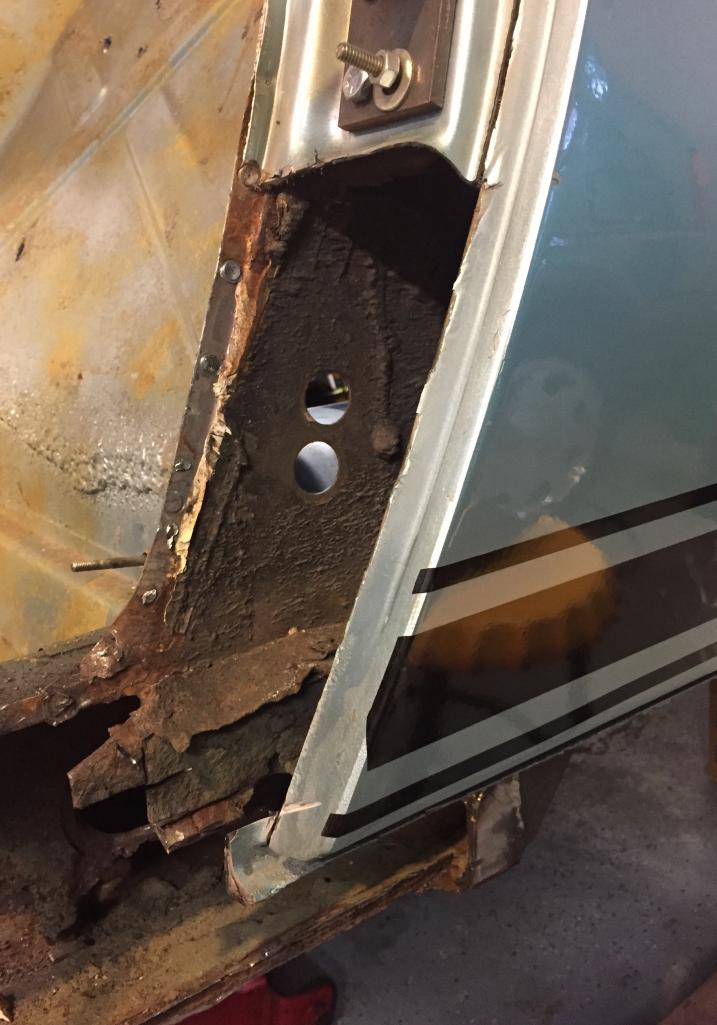
Posted by: Dion Nov 5 2016, 07:15 PM
Ok finally removed rear quarter. It's really amazing what you can find hidden
underneath nice paint. A complete chunk missing beneath the left rear light housing.
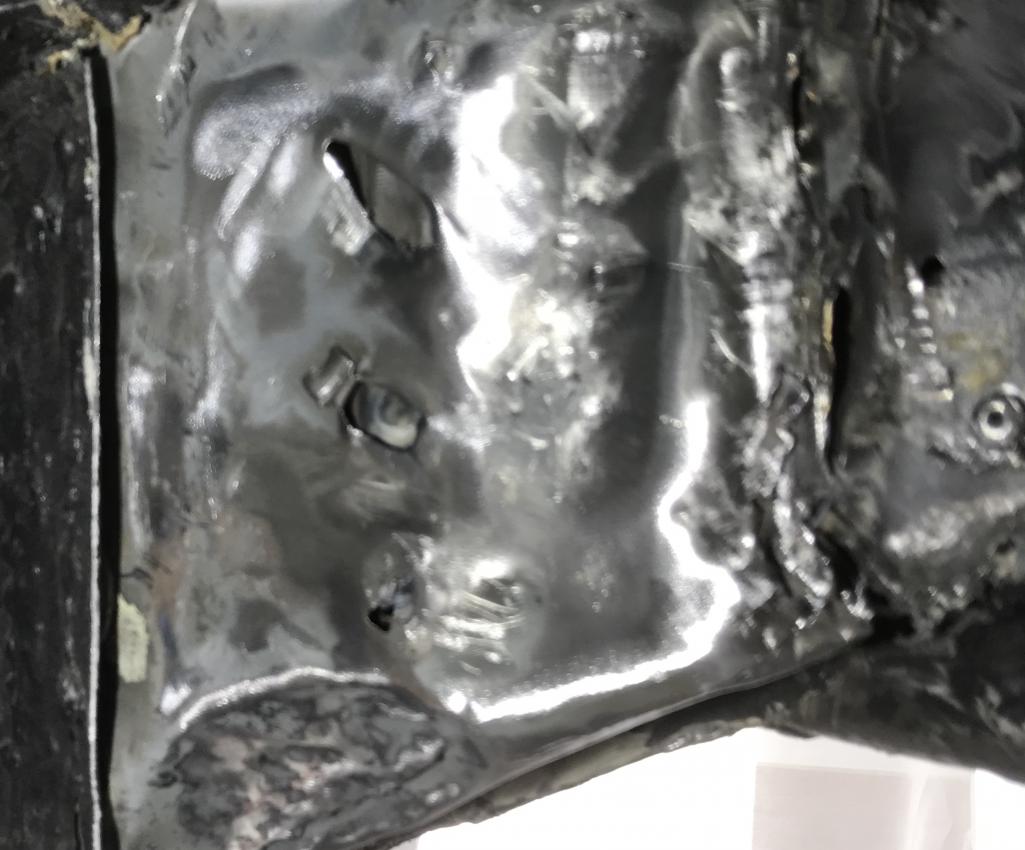
Popped right out when I flexed the panel while removing. Next up left inner lower firewall. Oh and my "fresh air" elbow was half bondo!?! So this car had issues
back before 1986. I purchased it March 1986. I never would have known till I took on the task of
putting the six in.
Attached thumbnail(s)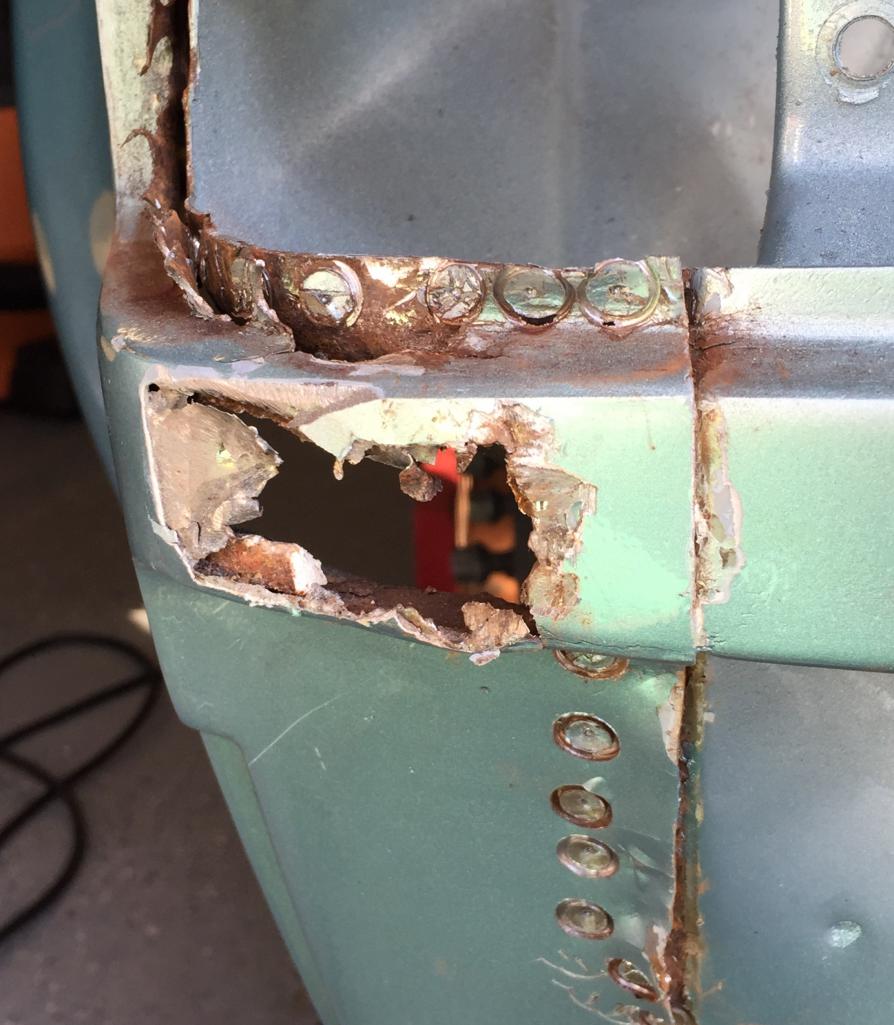
Posted by: Dion Nov 5 2016, 07:17 PM
Panel off
Attached thumbnail(s)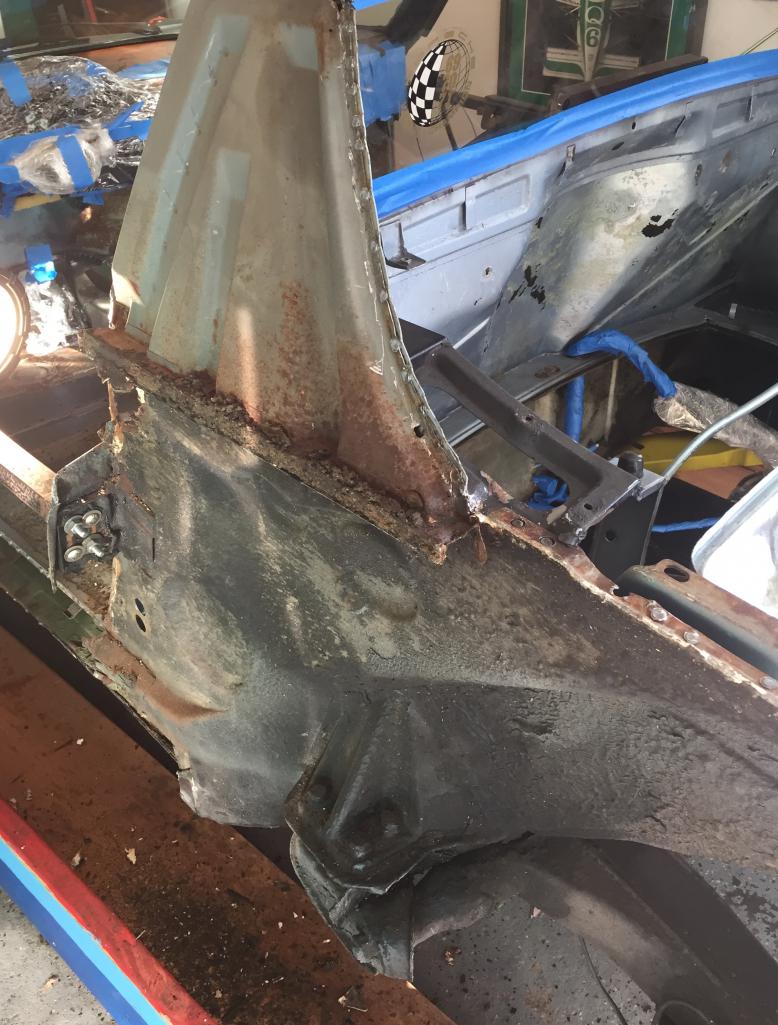
Posted by: Dion Nov 5 2016, 07:22 PM
So this will get fresh paint
Attached thumbnail(s)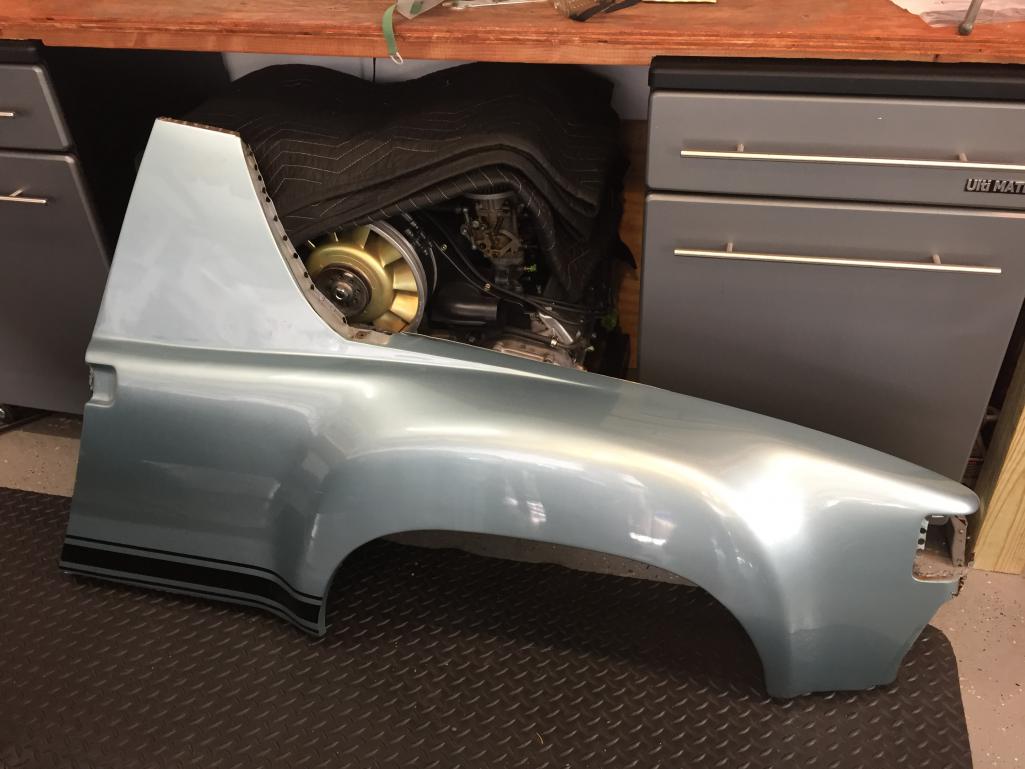
Posted by: tygaboy Nov 6 2016, 07:43 AM
So this will get fresh paint
I love pics like the one above! It's like the 6 is patiently waiting, hiding under the bench. Here it's peeking out and saying "Hey car, I see you! We are gonna have some kinda fun!!"
Keep up the great work!
Posted by: Dion Nov 13 2016, 04:13 PM
So with the rear panel off was better able to access the work at hand.
Cleaned up a lot of undercoating.
Found a decent sized hole on the left susp. console.
So I'll be ordering a bit more steel. I want to next remove
the lower inner firewall , to clean up and cut out around and including
the seatbelt anchor.
Attached thumbnail(s)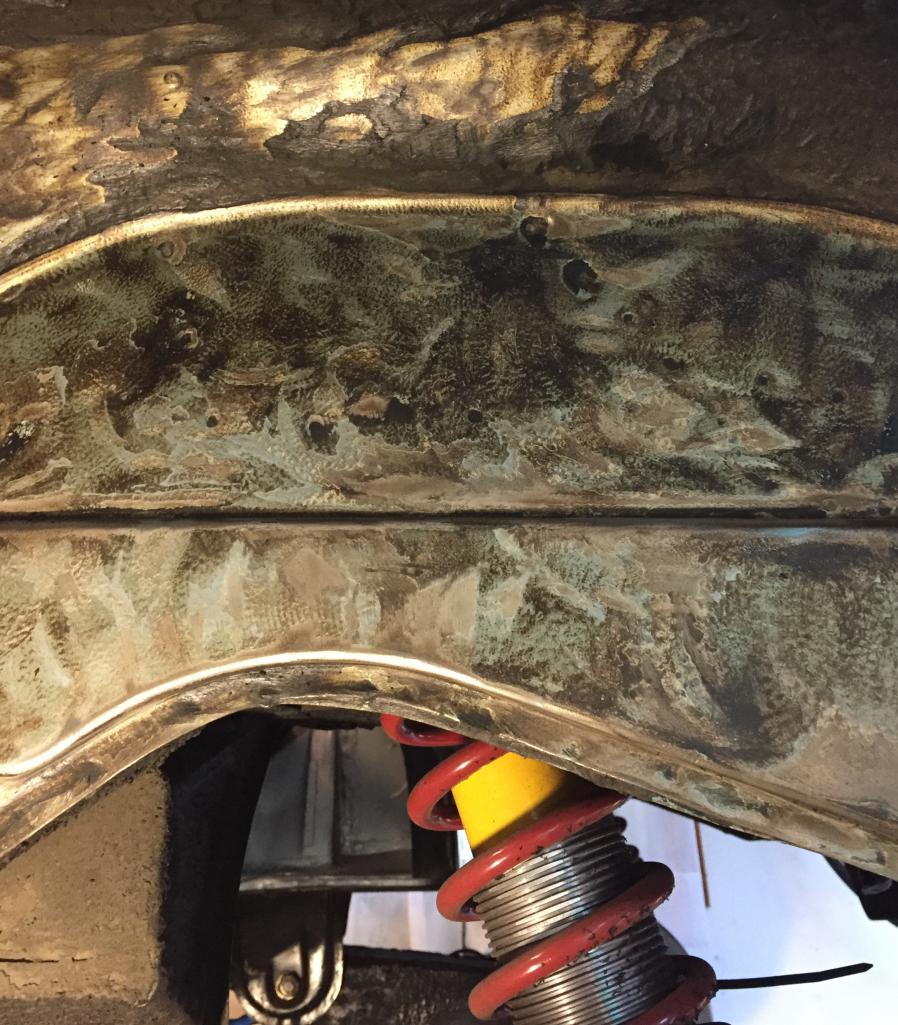
Posted by: Dion Nov 13 2016, 04:14 PM
Deterioration
Attached thumbnail(s)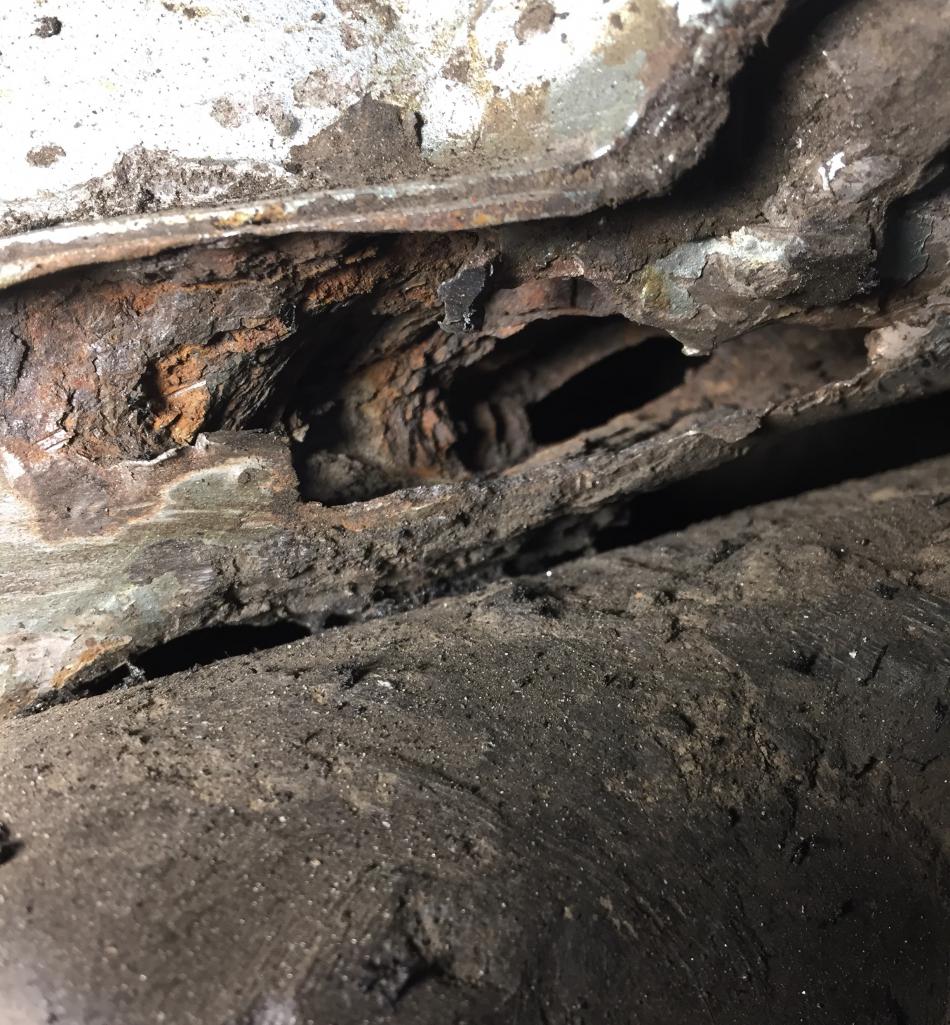
Posted by: tygaboy Nov 13 2016, 07:43 PM
Dion - I have a '72 donor car that is virtually rust free. I've been slicing off the handful of pieces that I'll need but feel free to contact me if you need any sheet metal parts that you can't find. It's got solid consoles on both sides.
I'd love to see it help a fellow Build-Off Challenger!
Keep up the great work!
Chris
Posted by: Dion Dec 1 2016, 01:29 PM
Cut away the remainder of the sill panel.
Surface rust on the extra panel in front of heater tube.
No issues there. Will make patch panel for lead edge of the long that you
see just inside the wheel well.
Attached thumbnail(s)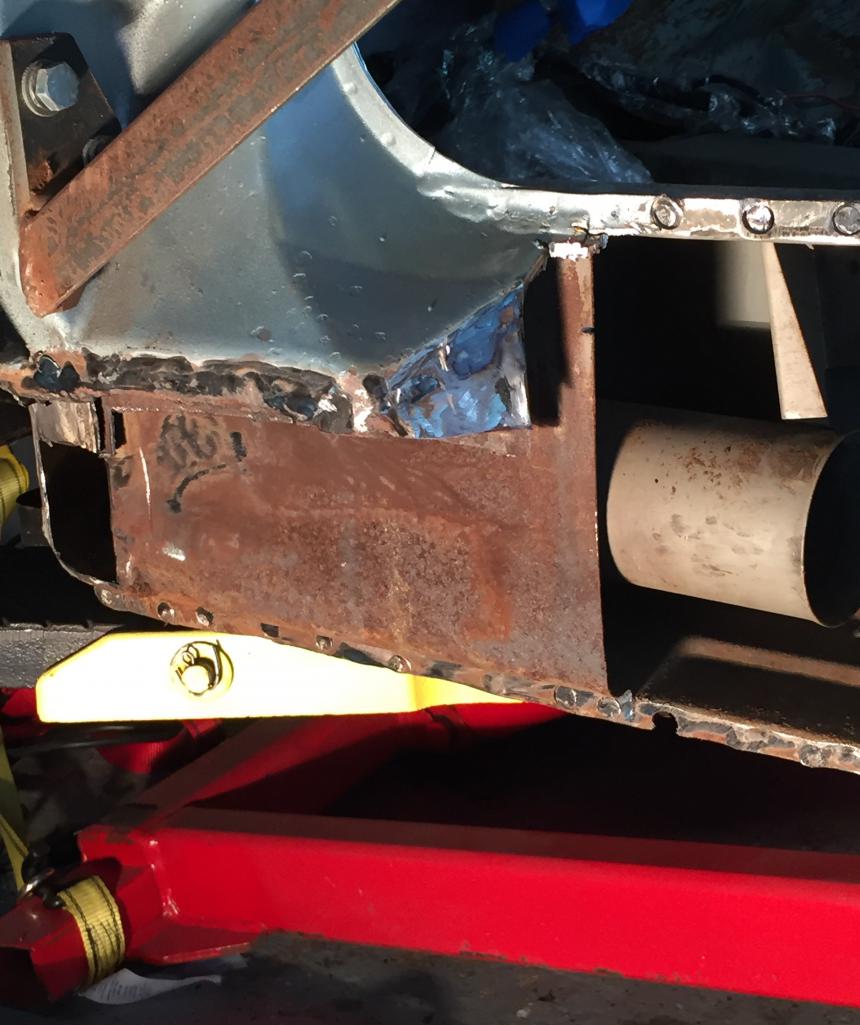
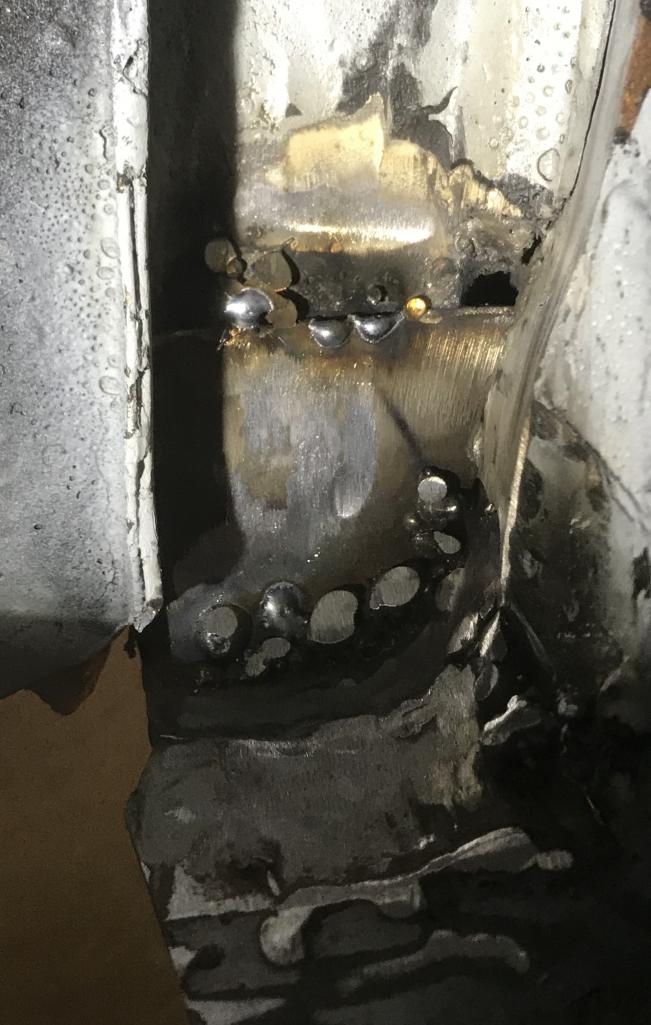
Posted by: Dion Dec 1 2016, 01:37 PM
Removed more of the door jamb except for brace area.
Cut open seatbelt anchor region to take care of that and prepare for
placing in new steel.
I removed the left half of inner firewall just before
tunnel overlap. The tunnel is sound from what I can tell on probing and
scraping. Test fit the new panel of firewall. Should be real nice when complete.
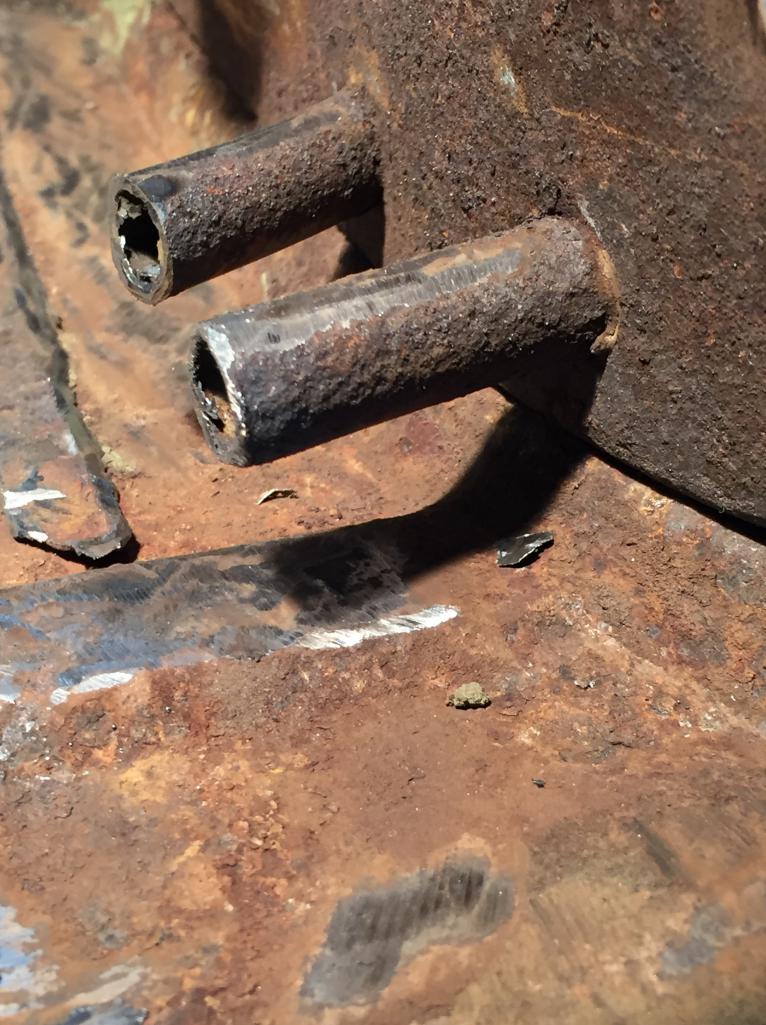
The bronze brazing mixture on those E brake tubes are a bugger. Did my best
not to destroy them.
I'm at the point now that I'll be sandblasting all these
areas. I'm awaiting a call from Lowes for my new
compressor (Christmas gift). Then that will be the next
coming weeks chore.
Attached thumbnail(s)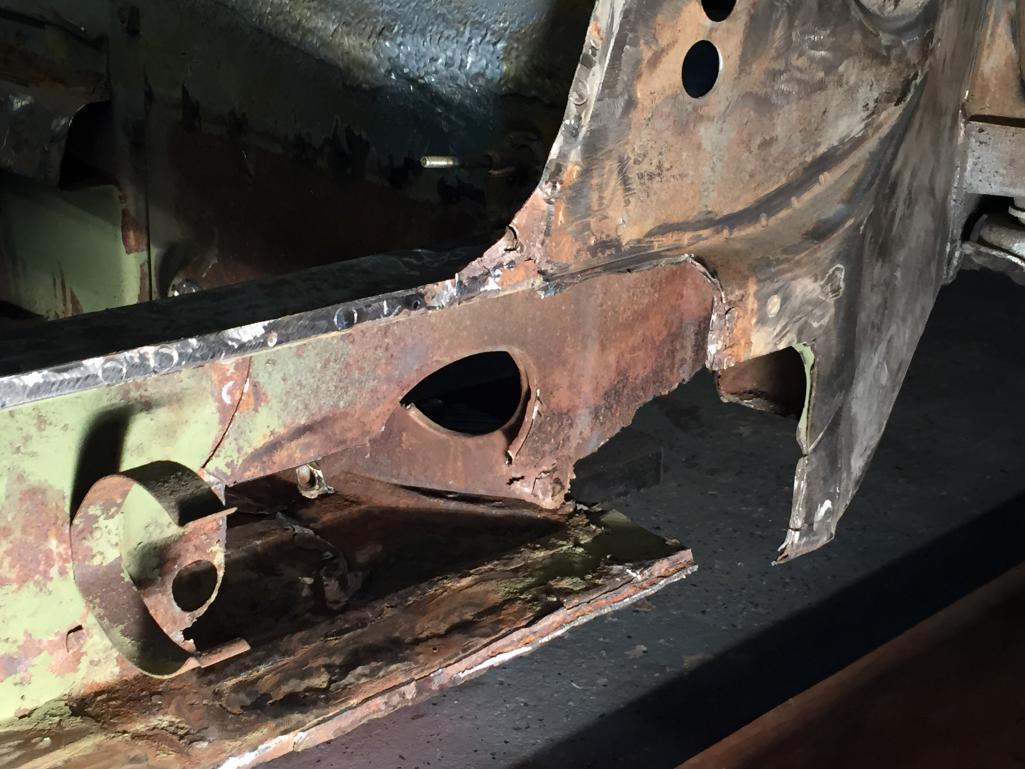
Posted by: Dion Dec 1 2016, 01:41 PM
Pics
Attached thumbnail(s)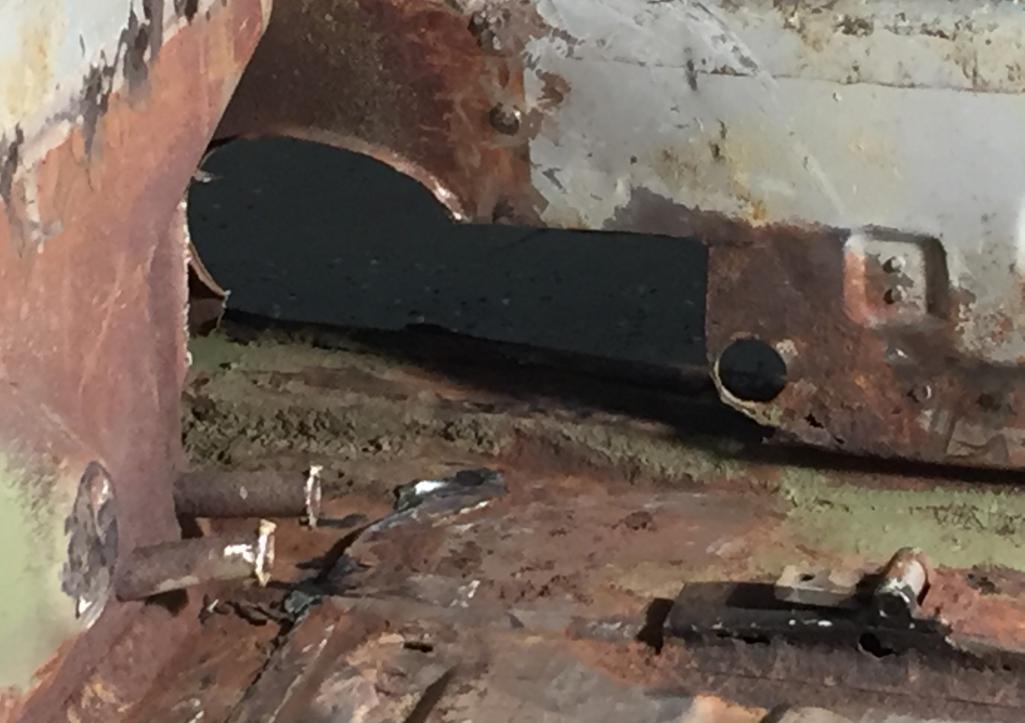
Posted by: Dion Dec 1 2016, 01:43 PM
Pics
Attached thumbnail(s)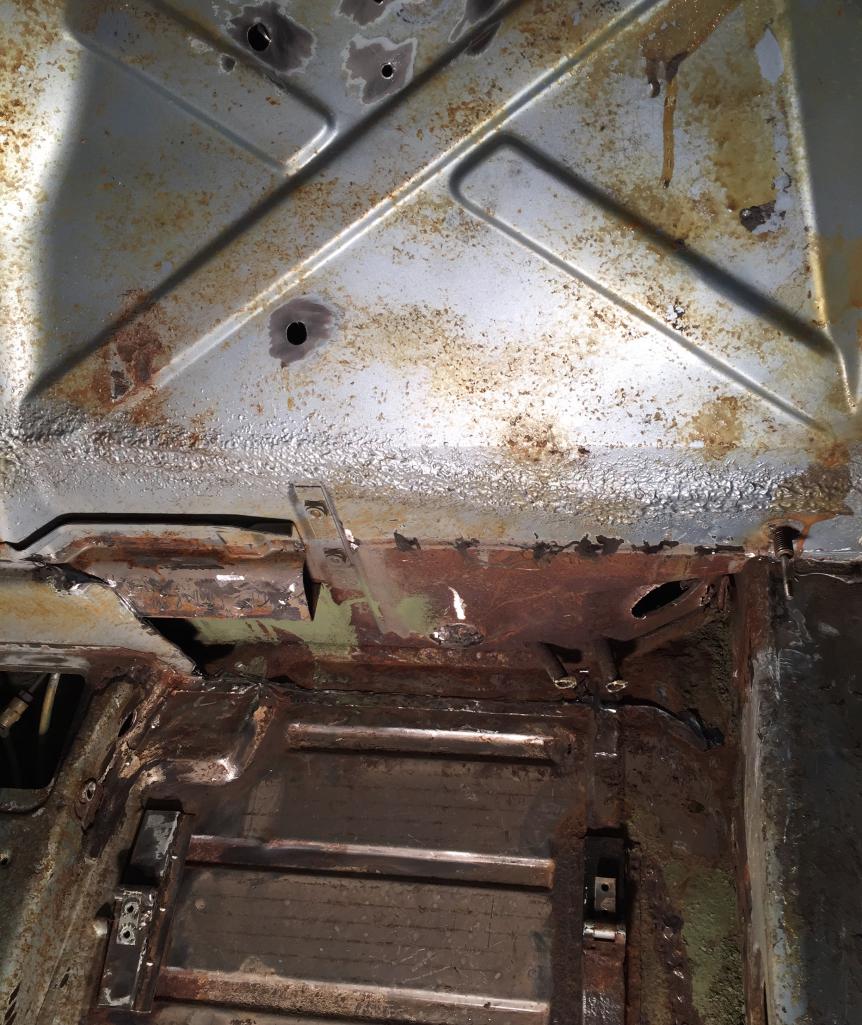
Posted by: Dion Dec 1 2016, 01:44 PM
New firewall panel test-fit & de-brazed E-brake tubes.
Attached thumbnail(s)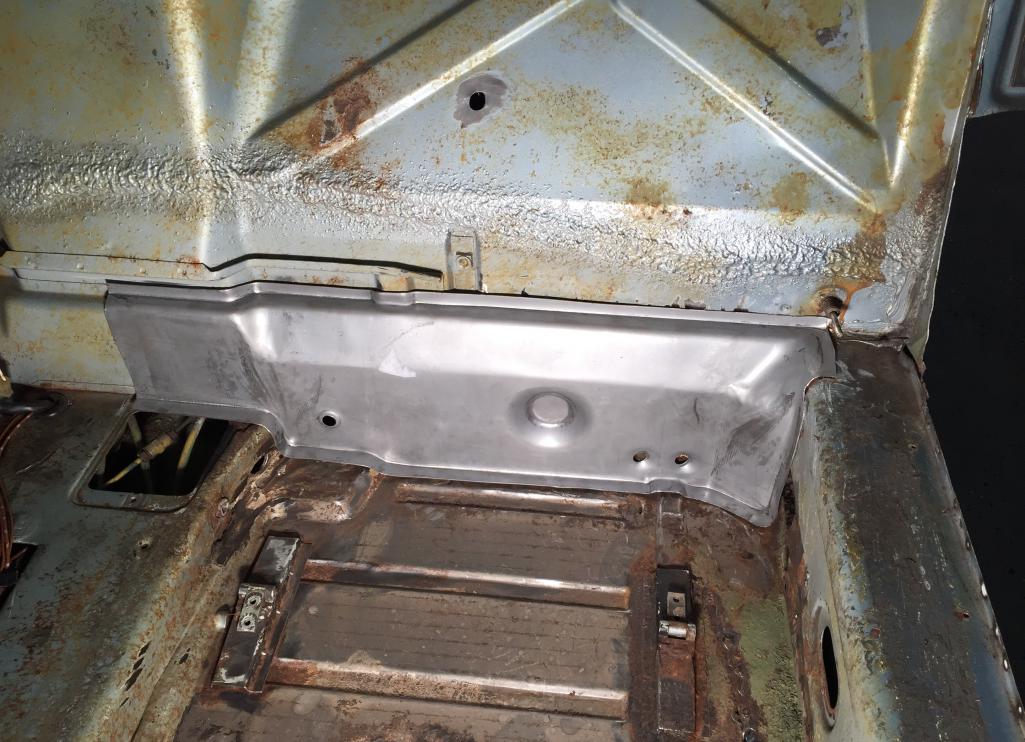
Posted by: tygaboy Dec 1 2016, 01:46 PM
I'm amazed at the level and extent of  surgery you're taking on! Impressive.
I always thought R&R was short for "Rest and Relaxation", but your work has me thinking it's really "Remove and Repair"!
Keep up the great work.
Chris
ps. I should be able to get you that suspension console by around year end. Let me know if there are any other pieces you need.
Posted by: Dion Dec 1 2016, 02:01 PM
Thanks for that Chris. I'm the one that gets slack jawed seeing the other builds.
The tube frames & carbon fiber stuff. Just incredible.
Hats off to all you guys.
Cheers all, Dion
Posted by: Mitox Dec 1 2016, 08:15 PM
Ok, I'm an idiot. I moved my post to the official challenge thread. Sorry.
Posted by: Dion Dec 1 2016, 10:04 PM
Ok, I'm an idiot. I moved my post to the official challenge thread. Sorry.
Heheheh no worries Mike!
Posted by: Dion Jan 9 2017, 04:06 PM
Since PA has been hit with the 20*F temps for a while now and
snow is on the ground. It's been slow progress. My kerosene heater
is having a hard time keeping up. I'm also waiting for my electrician
to be available to run a dedicated line for my new compressor.
So doing some other jobs.
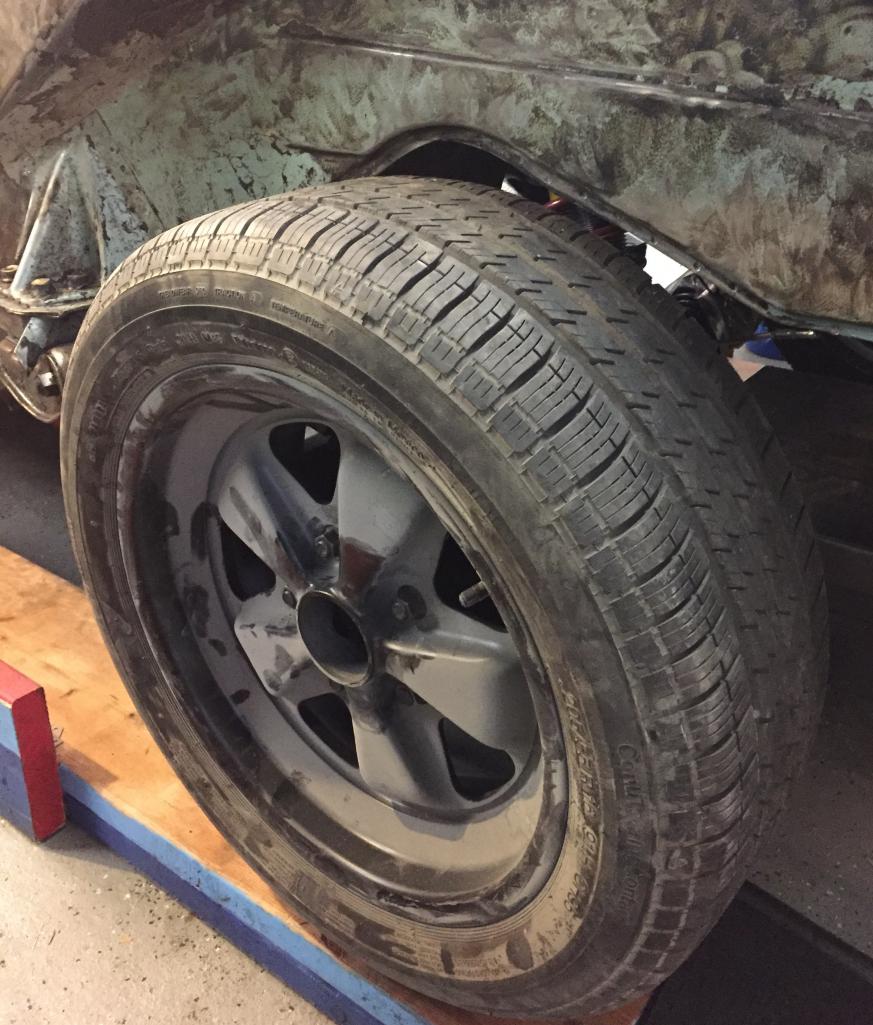
Obtained some "past it" Fuchs to roll the car around for when
the weather breaks and commence with the sandblasting.
Also working on front struts. They are renewed and painted.
Proceeding with placing new bearings in the 911 hubs so I can
have the front suspension done and ready to bolt in.
Have some minor work to do on the six engine as well.
I'll update accordingly.
Cheers!
Attached thumbnail(s)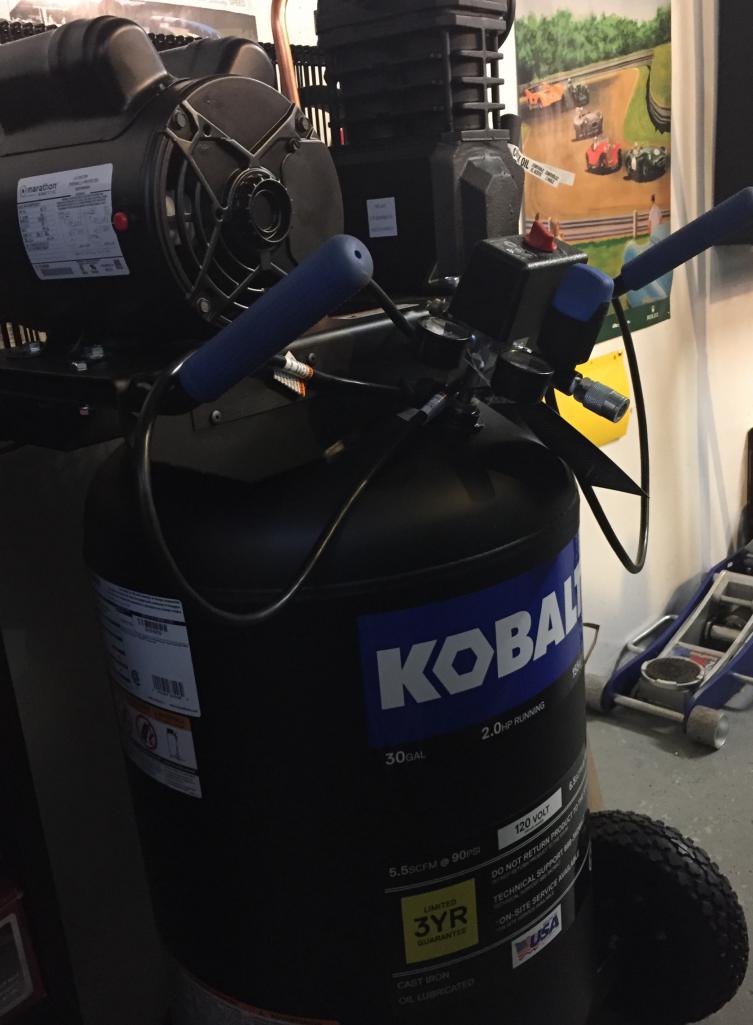

Posted by: Dion Jan 9 2017, 04:07 PM
Bilsteins
Attached thumbnail(s)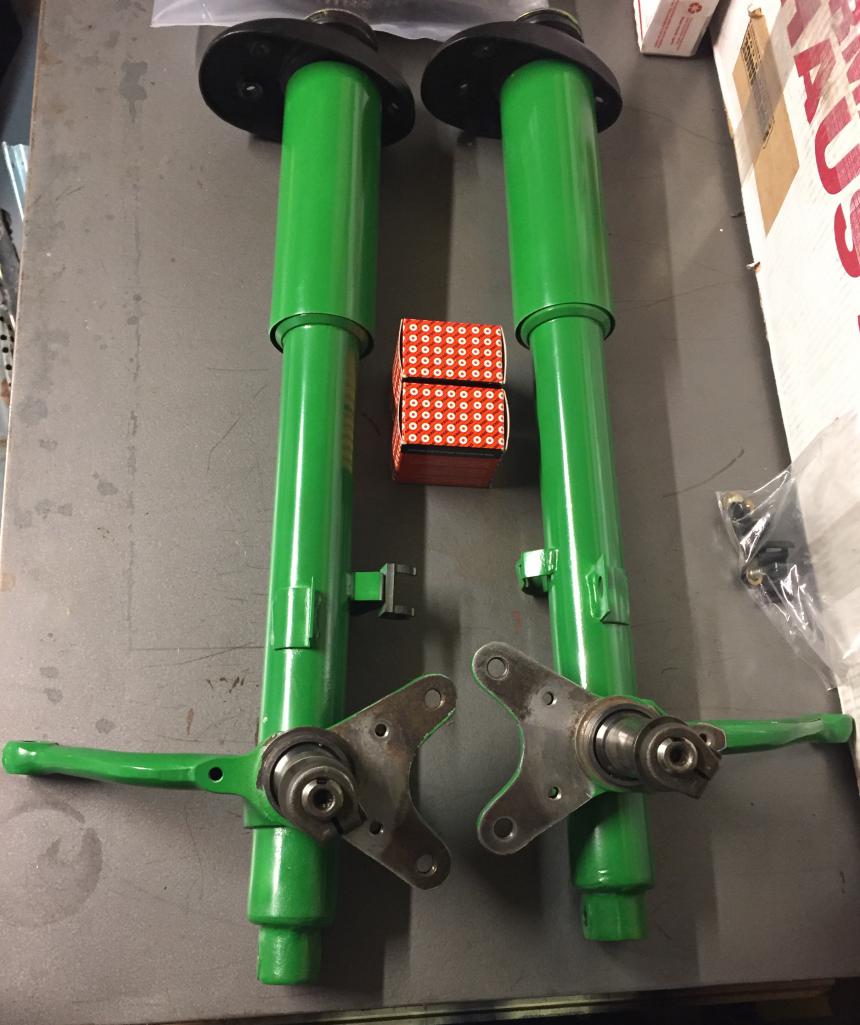
Posted by: 914dave Jan 9 2017, 05:45 PM
The weather and electrician have conspired against Dion making progress. To my benefit as he helped me fish the wiring harness and hang the dash in my car yesterday. Thanks D! I guess it pays to have proper heat in the garage
Posted by: tygaboy Jan 9 2017, 06:17 PM
Your Bilsteins are making me green with envy...
Our cold can't rival yours but we're in the 30s, which is uncomfortable enough.
I got a 220V electric heater and put in on a roll around stand. I just point at where I'm working and it makes all the difference.
Keep up the great work!
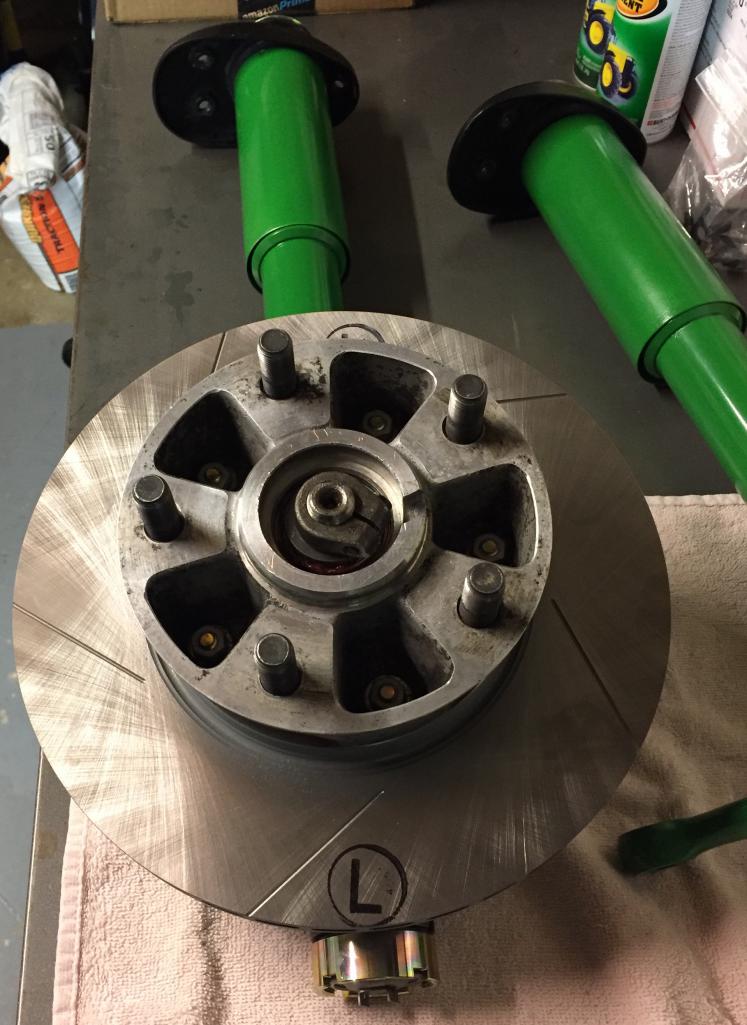
Posted by: Dion Jan 22 2017, 09:26 PM
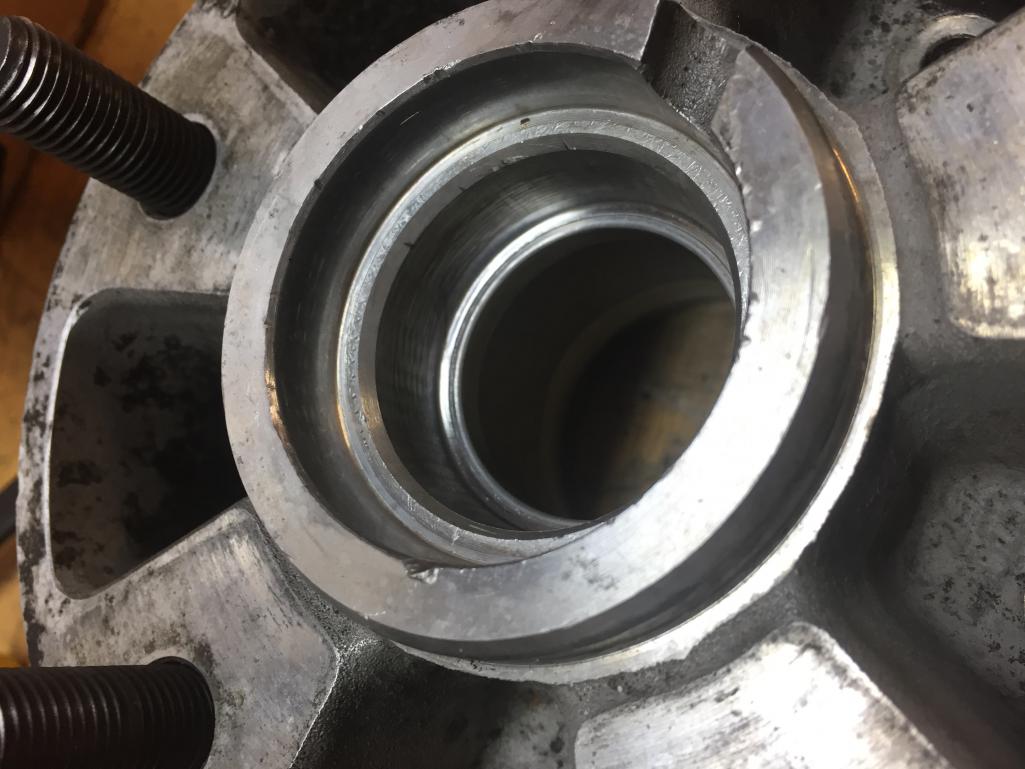
Tackling front suspension work. Replaced hub bearings and installed new
vented rotors.
Attached thumbnail(s)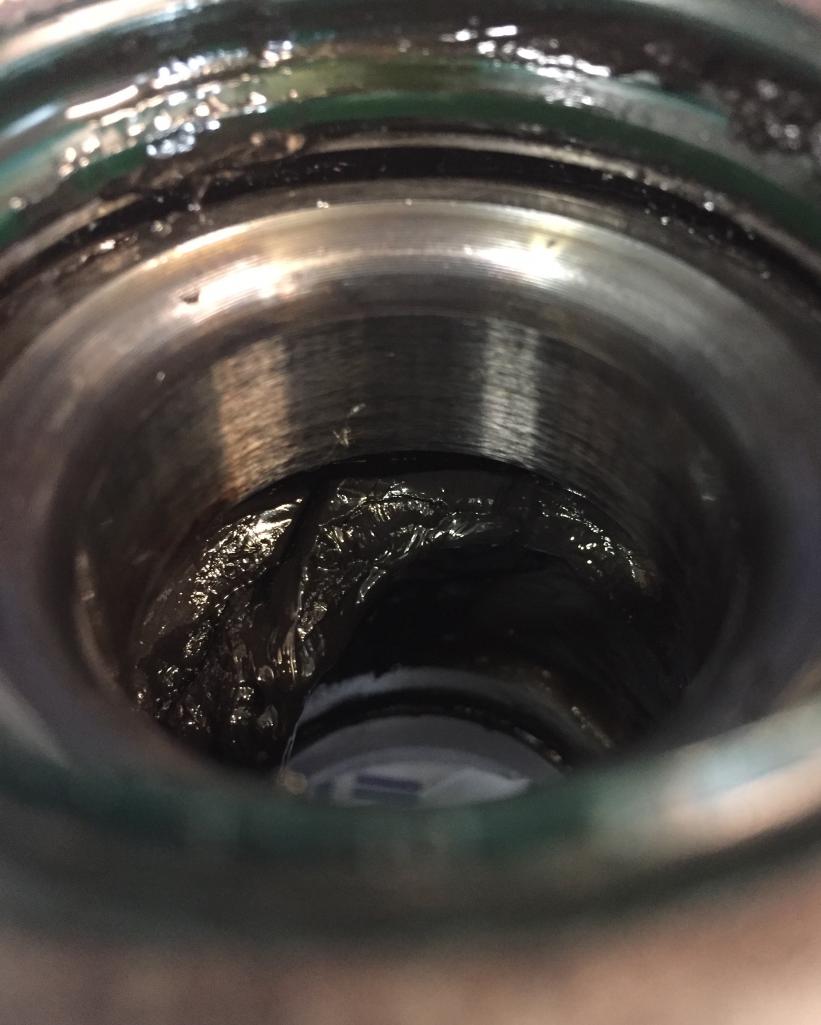
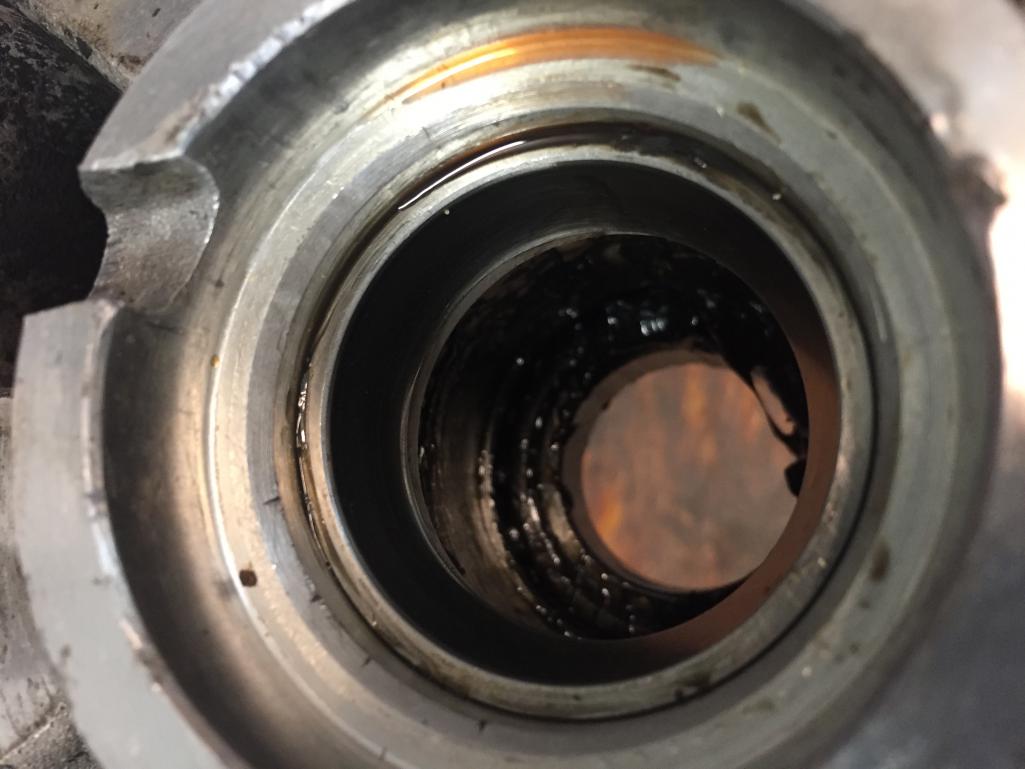
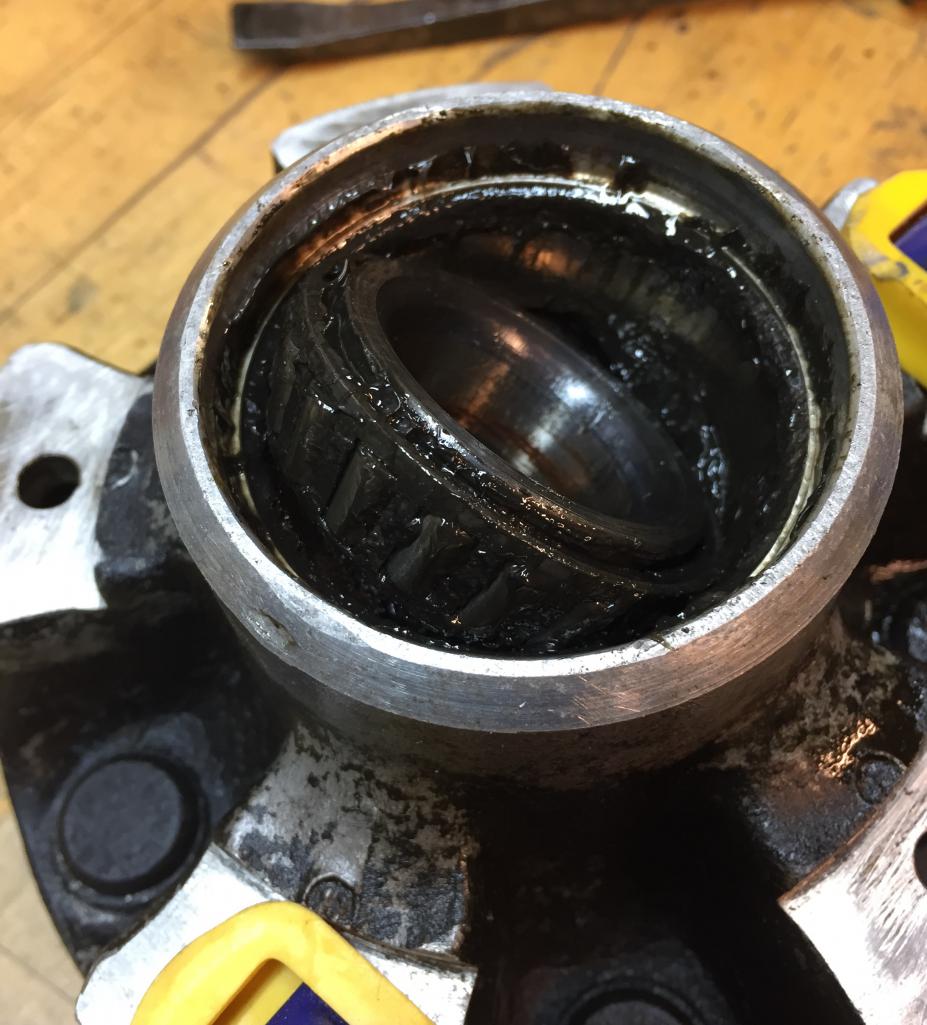
Posted by: Dion Jan 22 2017, 09:28 PM
Baked the hubs at 250*F for 25 minutes to coax the
races out.
Attached thumbnail(s)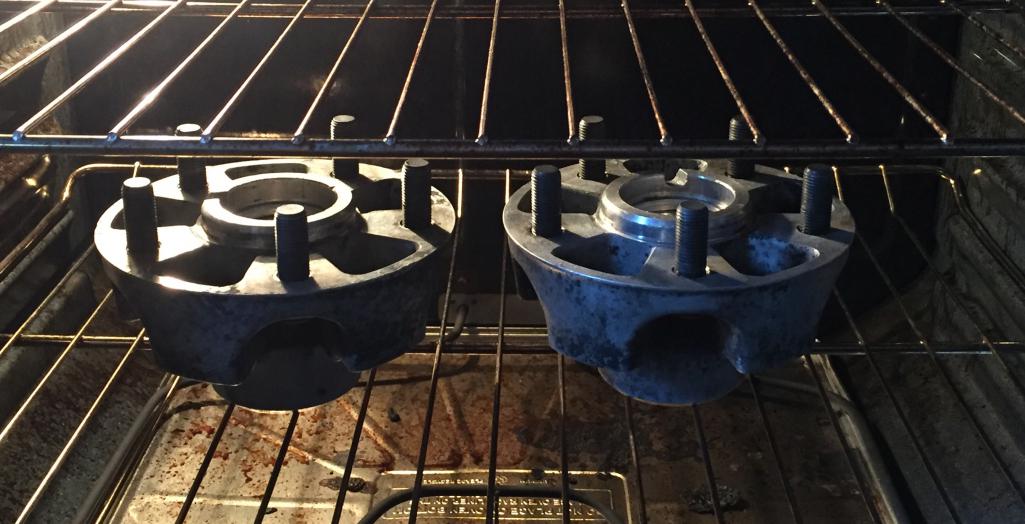
Posted by: Dion Jan 22 2017, 09:29 PM
Clean hubs
Attached thumbnail(s)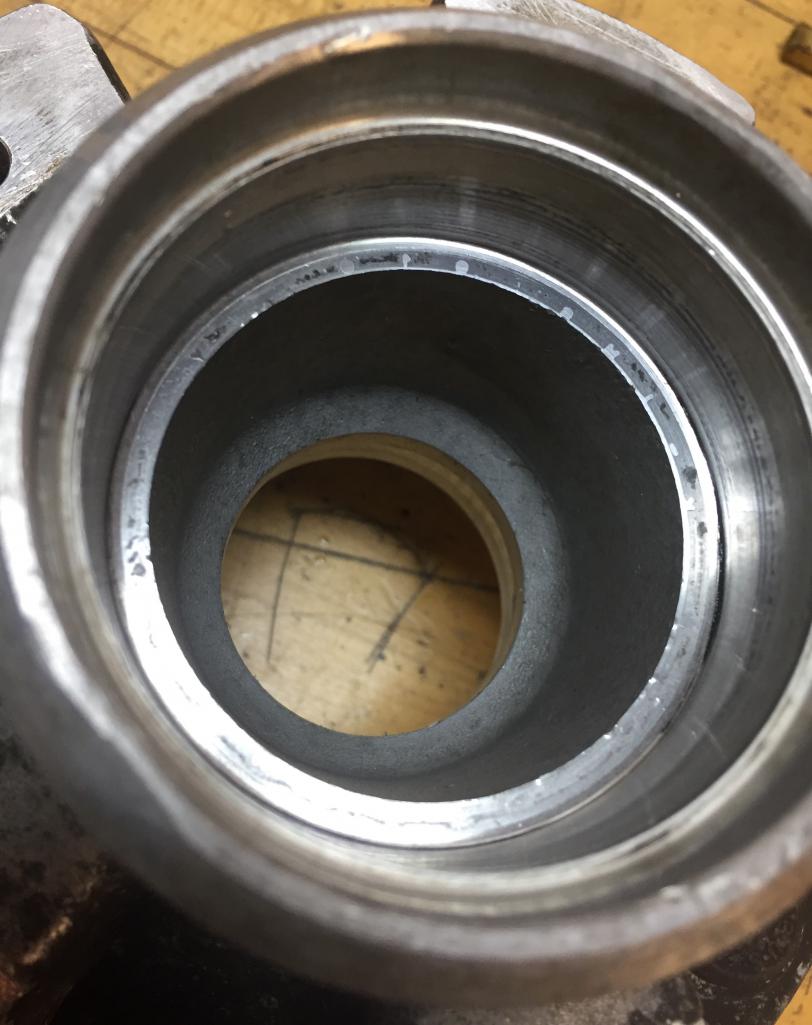
Posted by: Dion Jan 22 2017, 09:30 PM
Repacked
Attached thumbnail(s)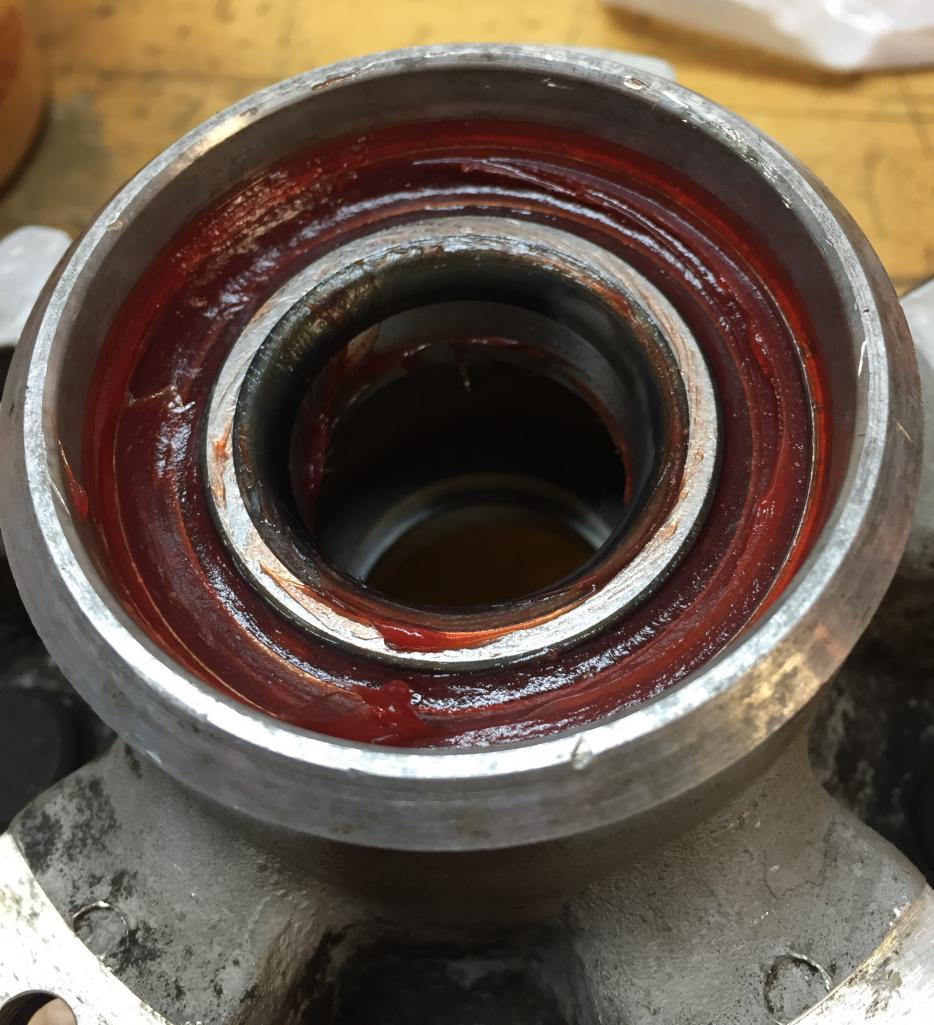
Posted by: Dion Jan 22 2017, 09:35 PM
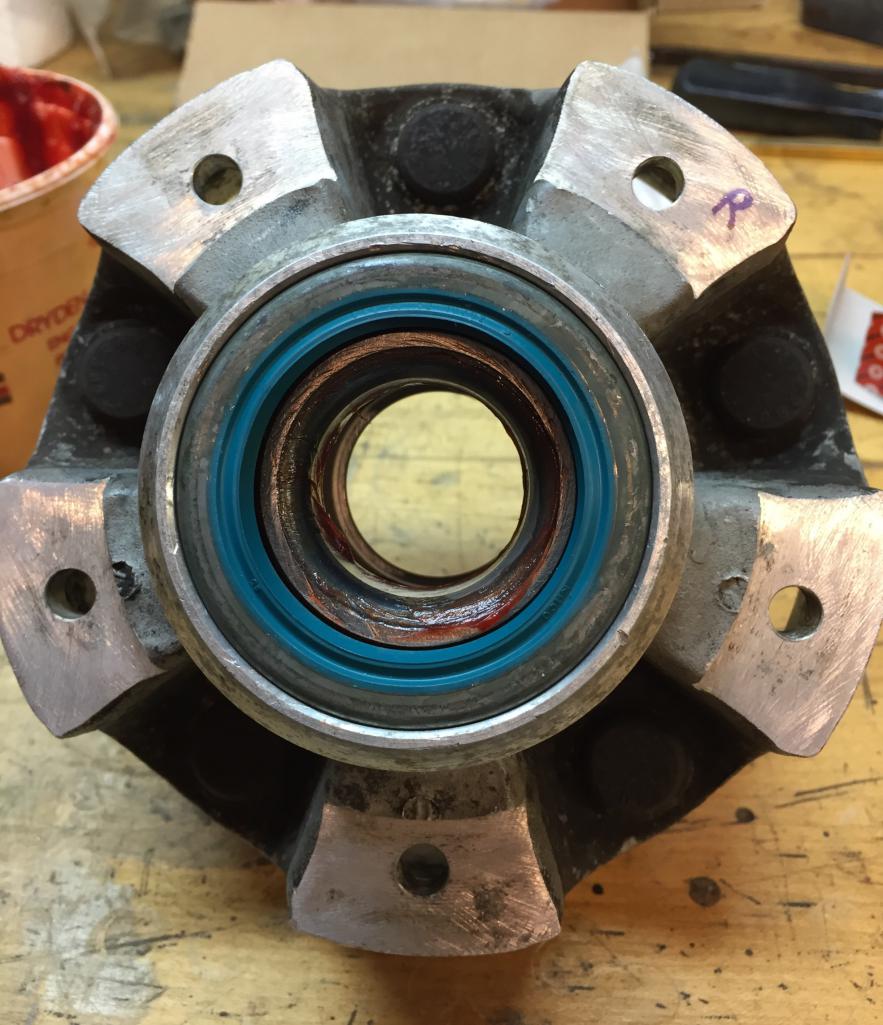
New ball joints installed. Pay attention to the type of pinch bolt
you have. Torque slowly. Some have reported snapping but must have
"drawn" the bolt through with nut instead of hammering in flush first.
Attached thumbnail(s)
Posted by: Dion Jan 22 2017, 09:36 PM
Rotors
Attached thumbnail(s)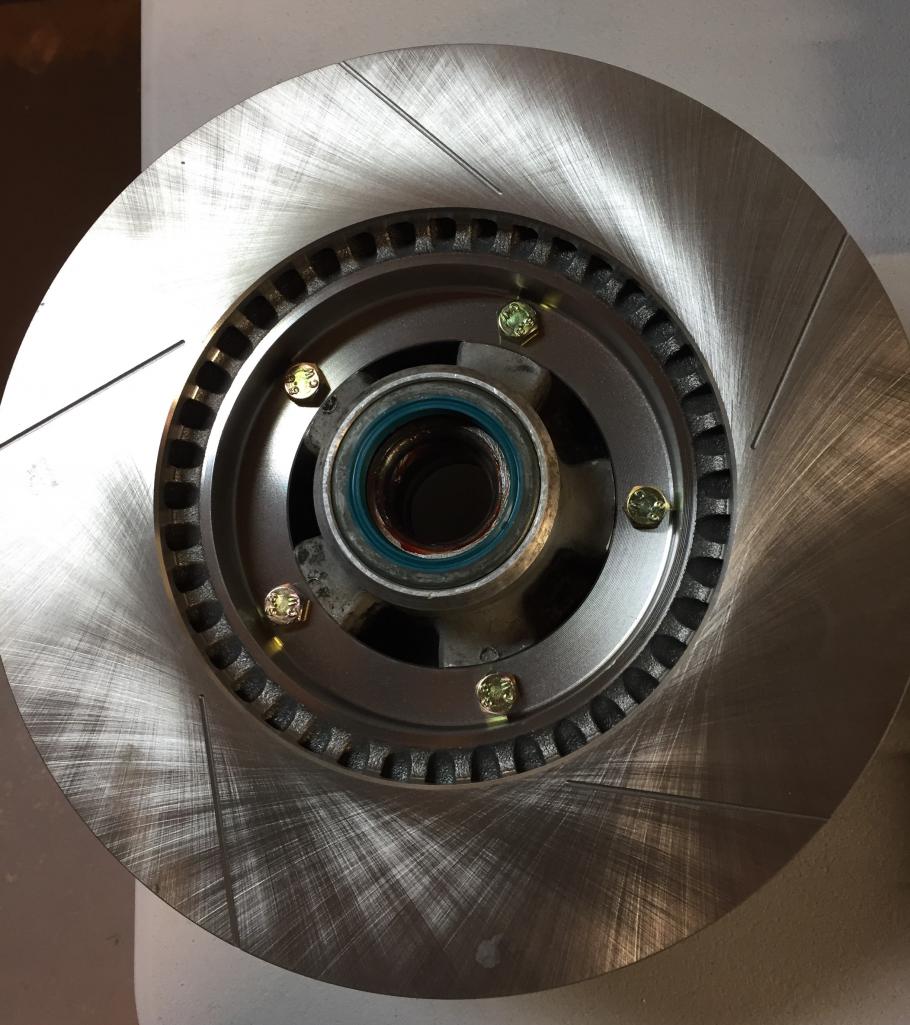
Posted by: Dion Jan 22 2017, 09:38 PM
Front calipers will be sent to PMB soon.
Time to get back to the chassis rust repair.
Attached thumbnail(s)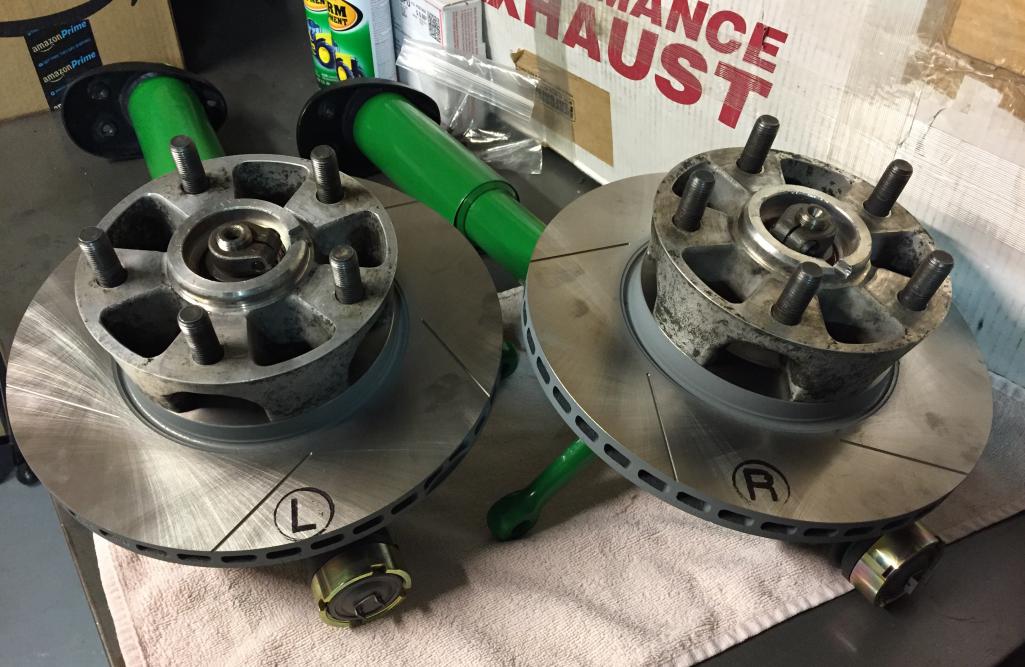
Posted by: tygaboy Jan 22 2017, 10:50 PM
Nothing like a little brake and suspension porn on a Sunday evening!
Looking good, Dion.
Posted by: Garland Jan 22 2017, 10:58 PM
Looks great,
Posted by: jmitro Jan 22 2017, 11:00 PM
great work; the bilsteins look very nice
Posted by: Dion Jan 26 2017, 04:23 PM
Some garage time this afternoon.
Started prepping trunk area. Removed a chunk of JB weld from trunk I patched
years ago. Needless to say hole enlarged. Learned my lesson. So cut out around it.
This will get a patch.
Attached thumbnail(s)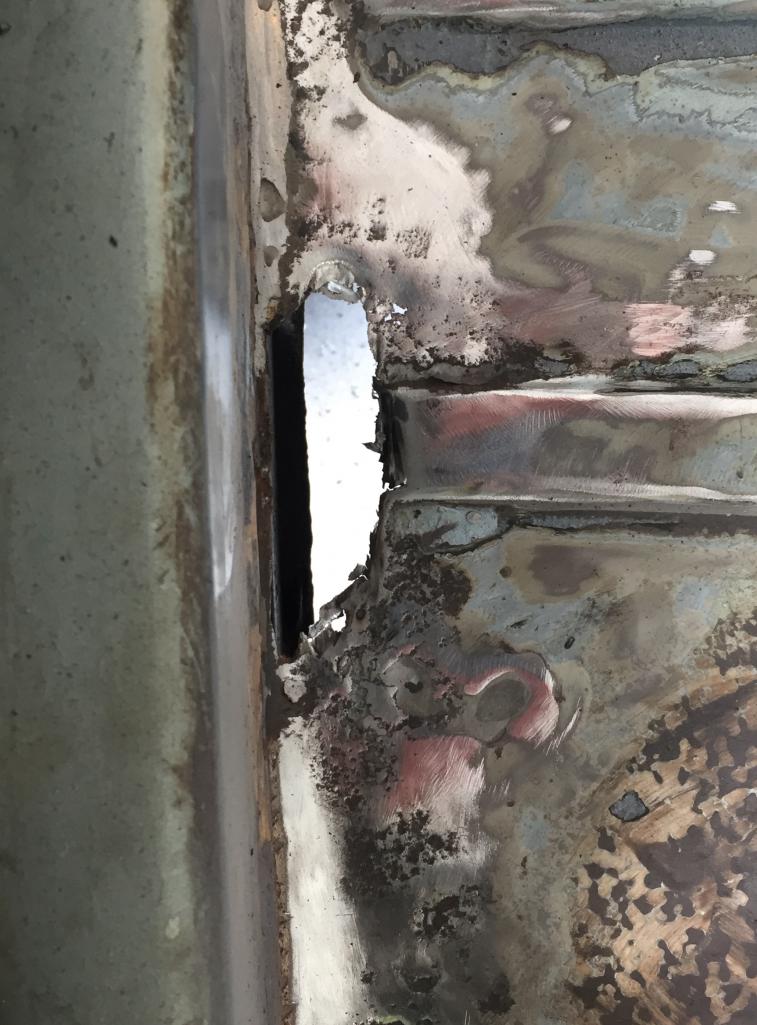

Posted by: Dion Jan 26 2017, 04:27 PM
Also some body filler escaped proper contouring from way back in 2004.
Popped it off to find a strange upward dent. No idea how
that would ever happen since it behind the rubber cap of bumper top.
So hammered it back to more appropriate shape.
Attached thumbnail(s)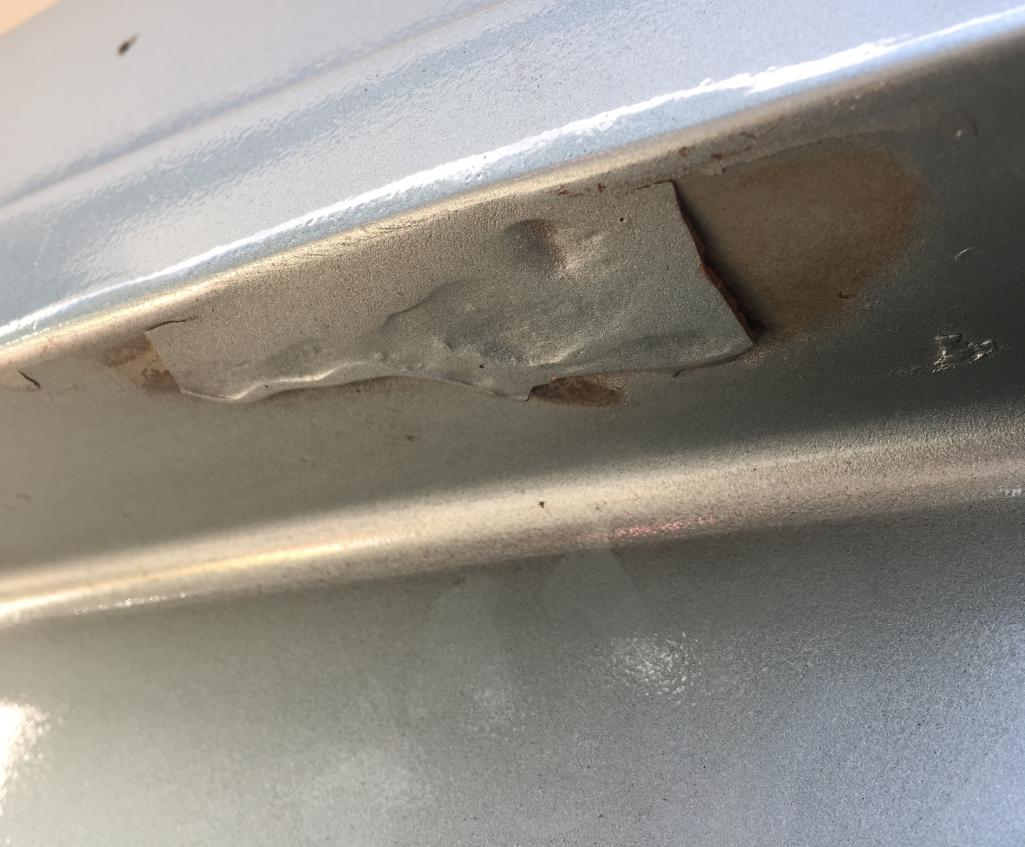
Posted by: Dion Jan 26 2017, 04:27 PM
Hammered.
Attached thumbnail(s)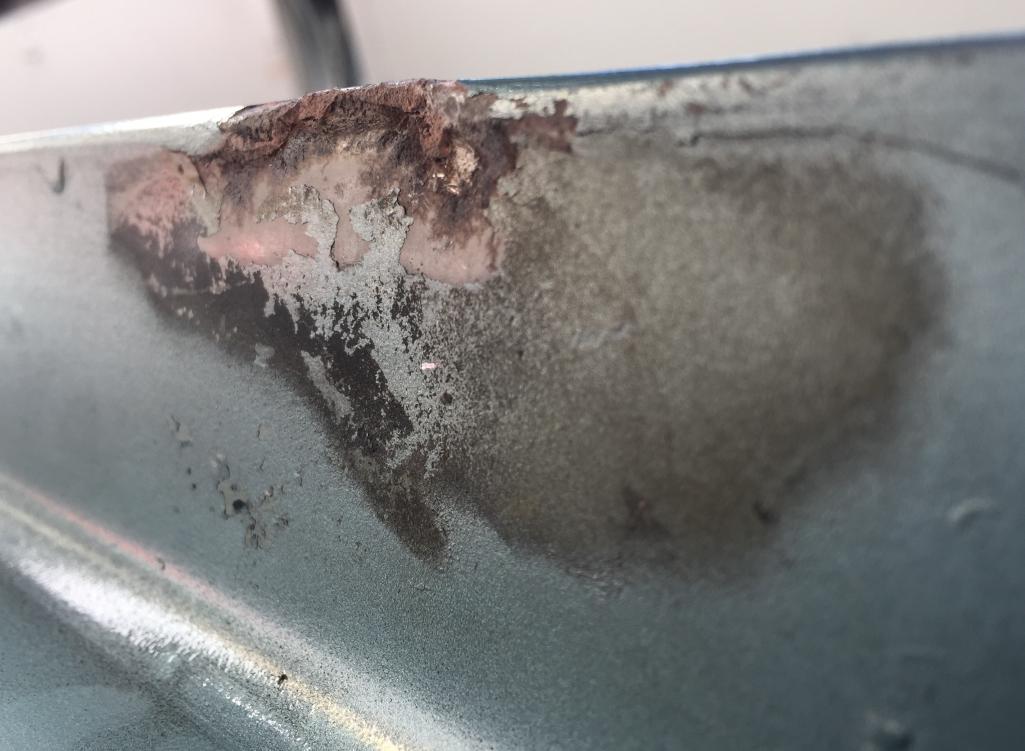
Posted by: Dion Jan 26 2017, 04:31 PM
Curious? Anyone have a "proper" hole on right side of rear of car near bumper mounts?
Looks like it's a mirror placement for tow eye bolt on left minus the tube and bracing.
Attached thumbnail(s)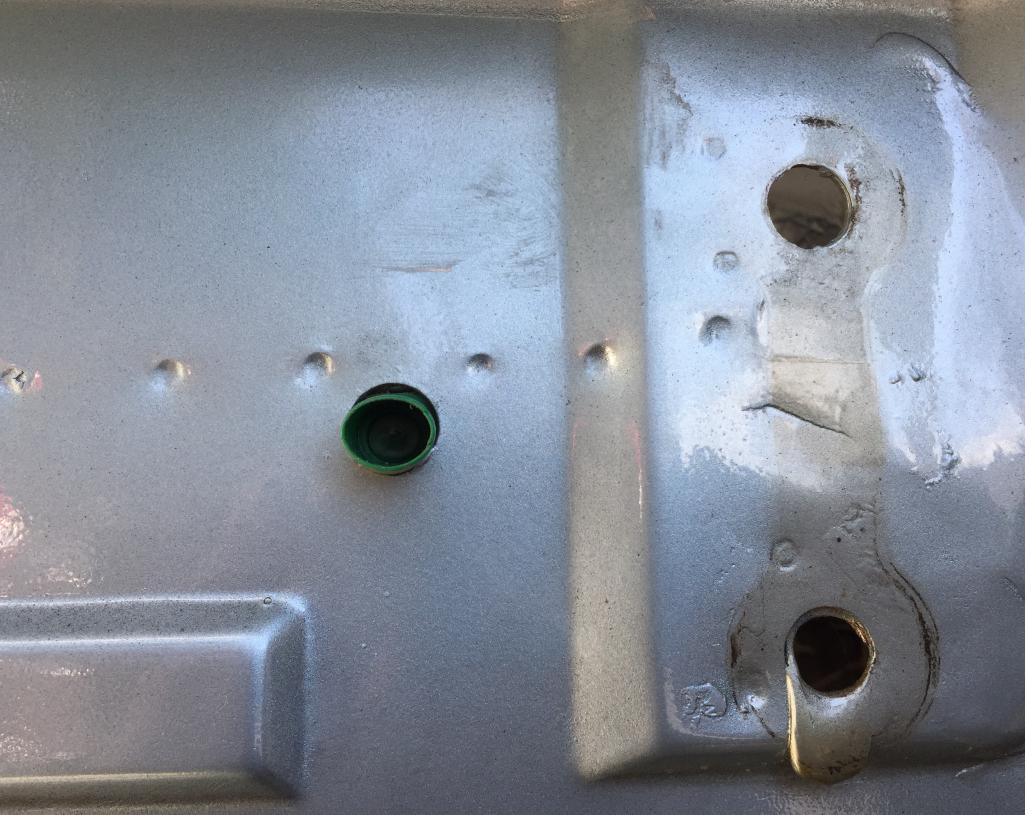
Posted by: Dion Jan 26 2017, 04:32 PM
Tow hook spot?
Attached thumbnail(s)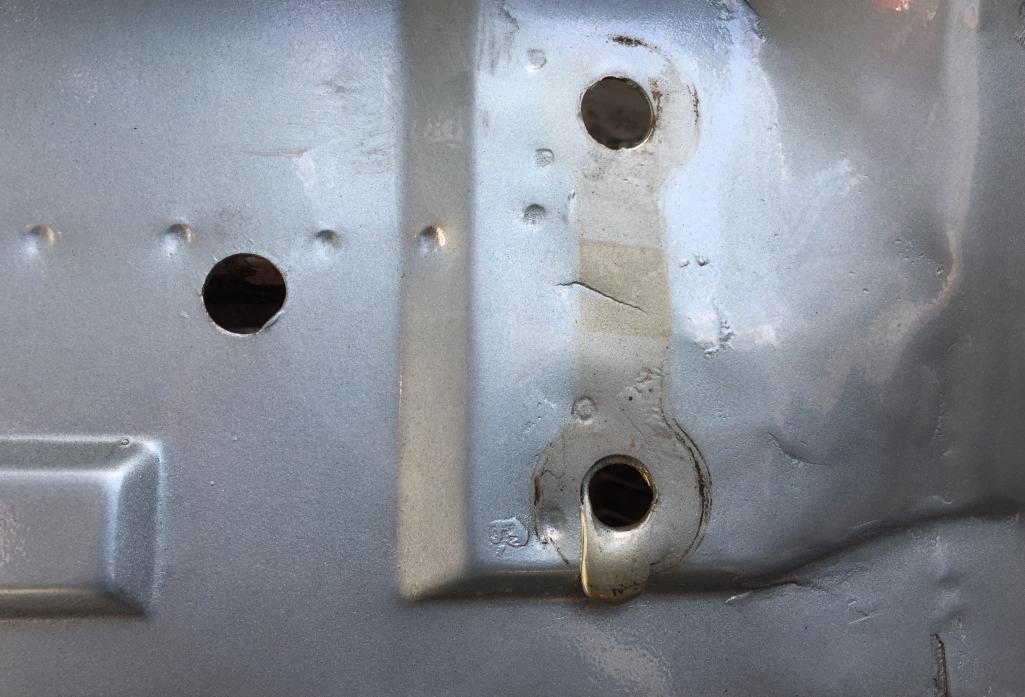
Posted by: altitude411 Jan 26 2017, 04:49 PM
Curious? Anyone have a "proper" hole on right side of rear of car near bumper mounts?
Looks like it's a mirror placement for tow eye bolt on left minus the tube and bracing.
Yes. SOP
Posted by: 914dave Jan 26 2017, 04:49 PM
Mine has the same hole. No idea what it's for.
Posted by: tom.esh Jan 26 2017, 06:29 PM
My replacement pan has that hole. I don't think it was on my 73.
Posted by: Dion Feb 5 2017, 10:26 AM
Bodywork has come full stop for now.
Temps are in 20's to 30's and I've come down
with a major sinus infection. Uggh! Been battling it since New Years,it comes and go
but has come back with a vengeance. Being an RN we are the last
ones to see a doctor. Ok enough of that.
I'm updating with older pics here since it is my build thread. So it
serves as a great history.
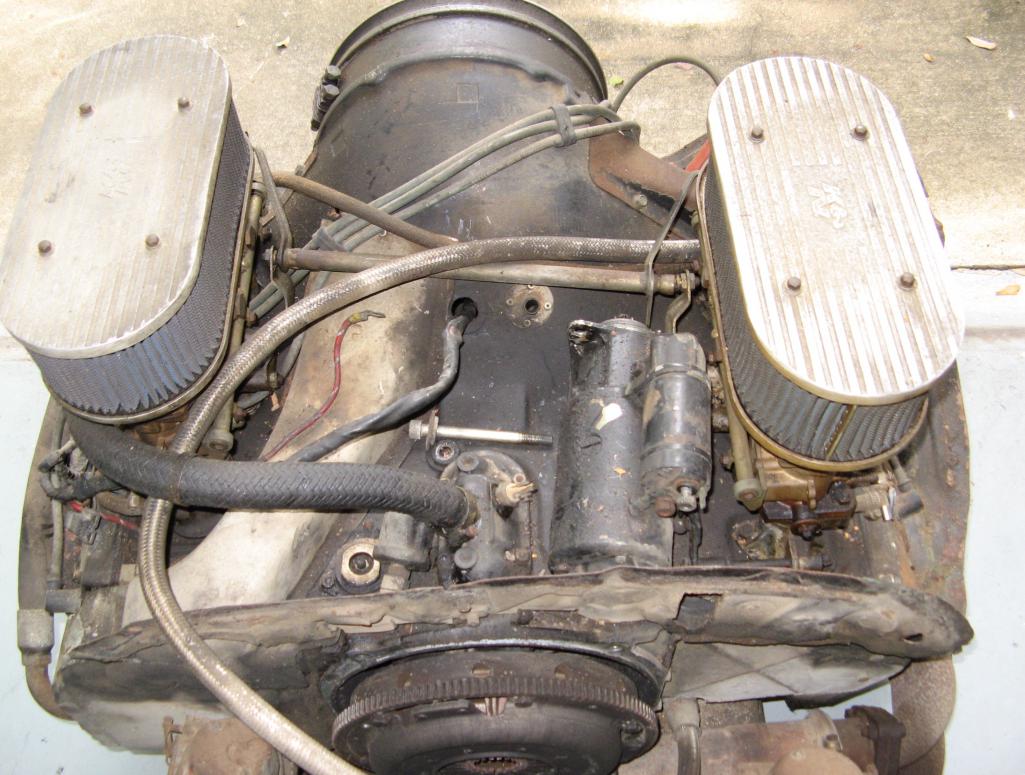
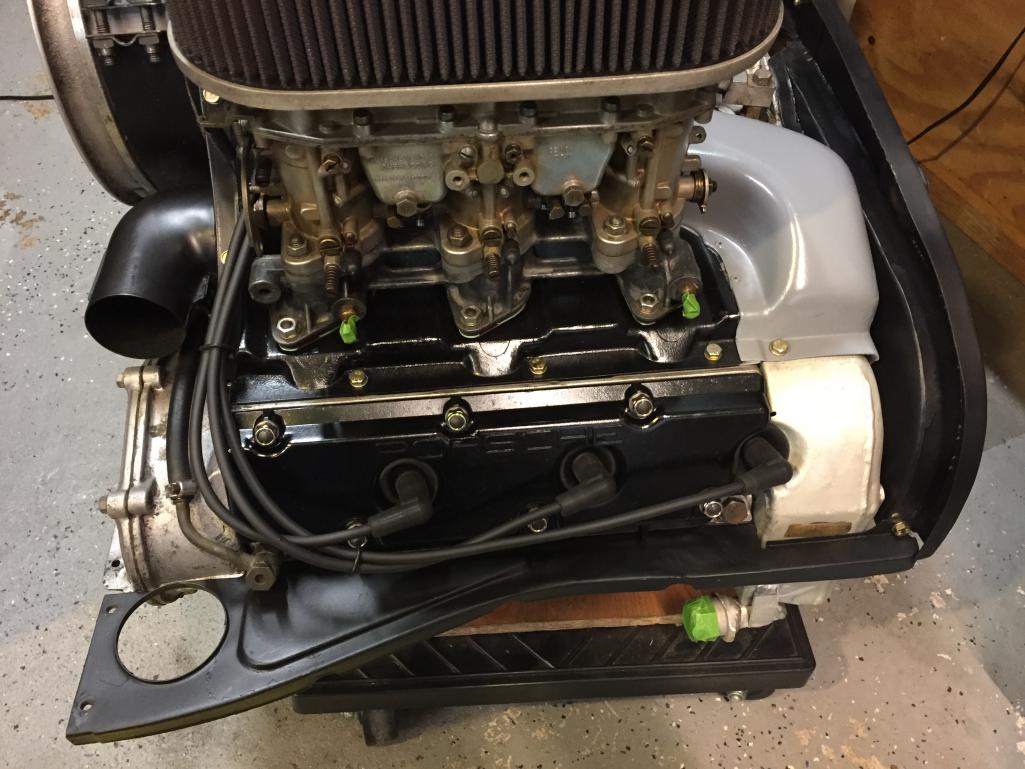
So first is the 2.4 when I first purchased it nearly 2
years ago. I then cleaned it up and began replacing items
Attached thumbnail(s)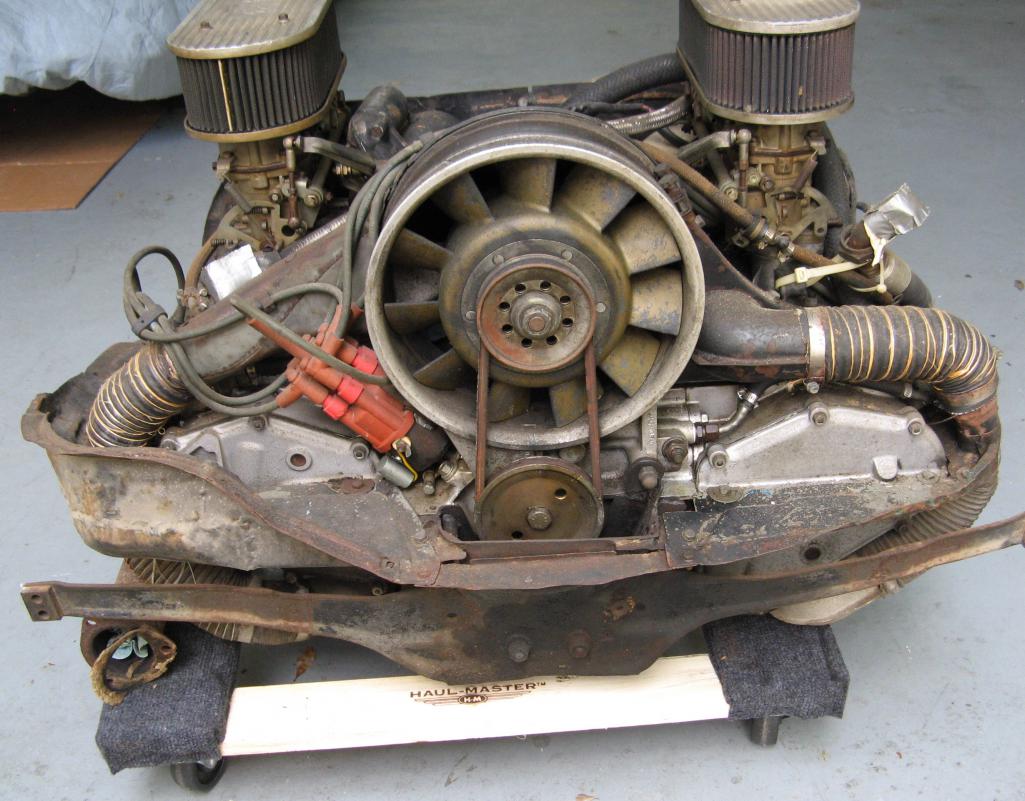
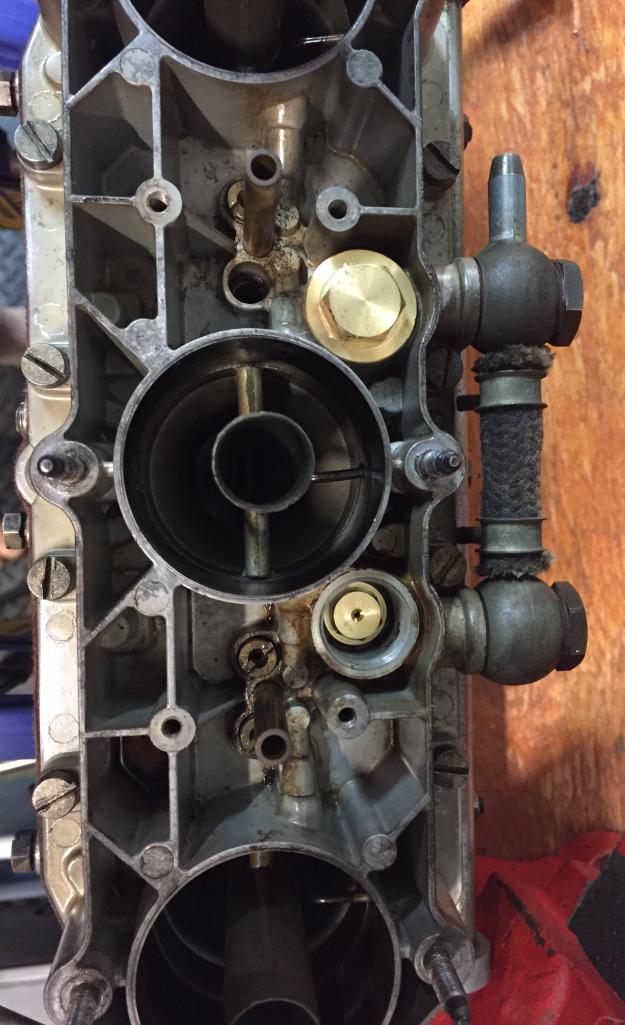
Posted by: Dion Feb 5 2017, 10:28 AM
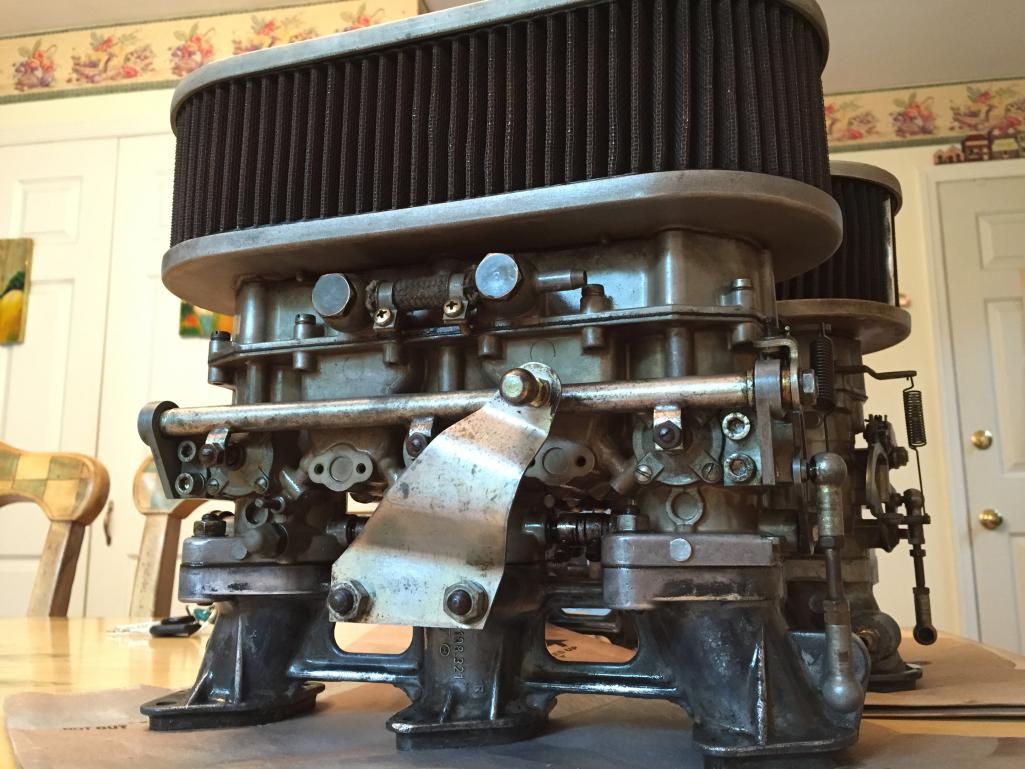
Took the carbs off for cleaning and replaced all the seals.
Attached thumbnail(s)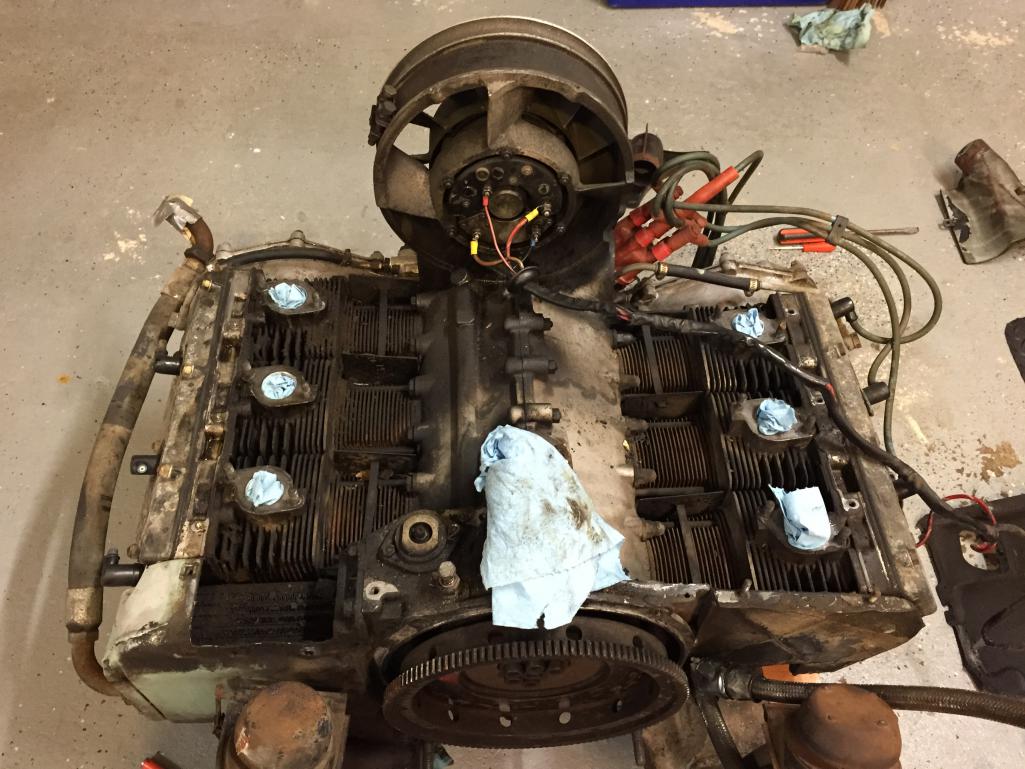
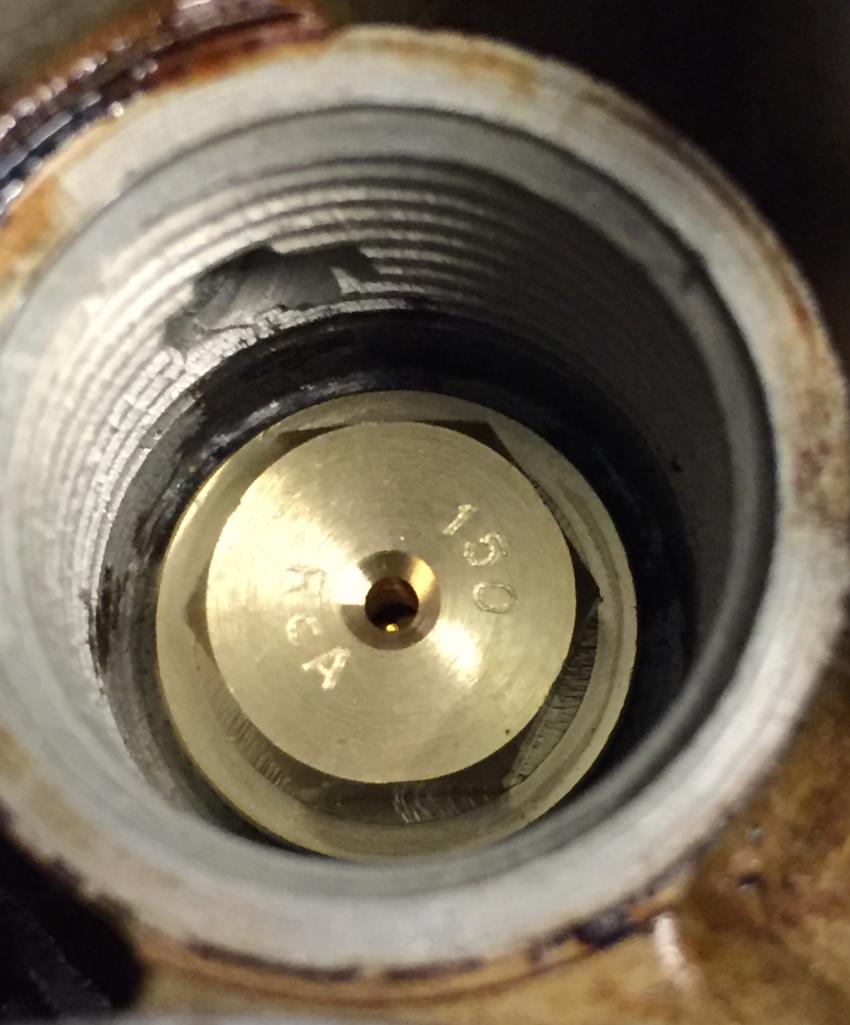
Posted by: Dion Feb 5 2017, 10:30 AM
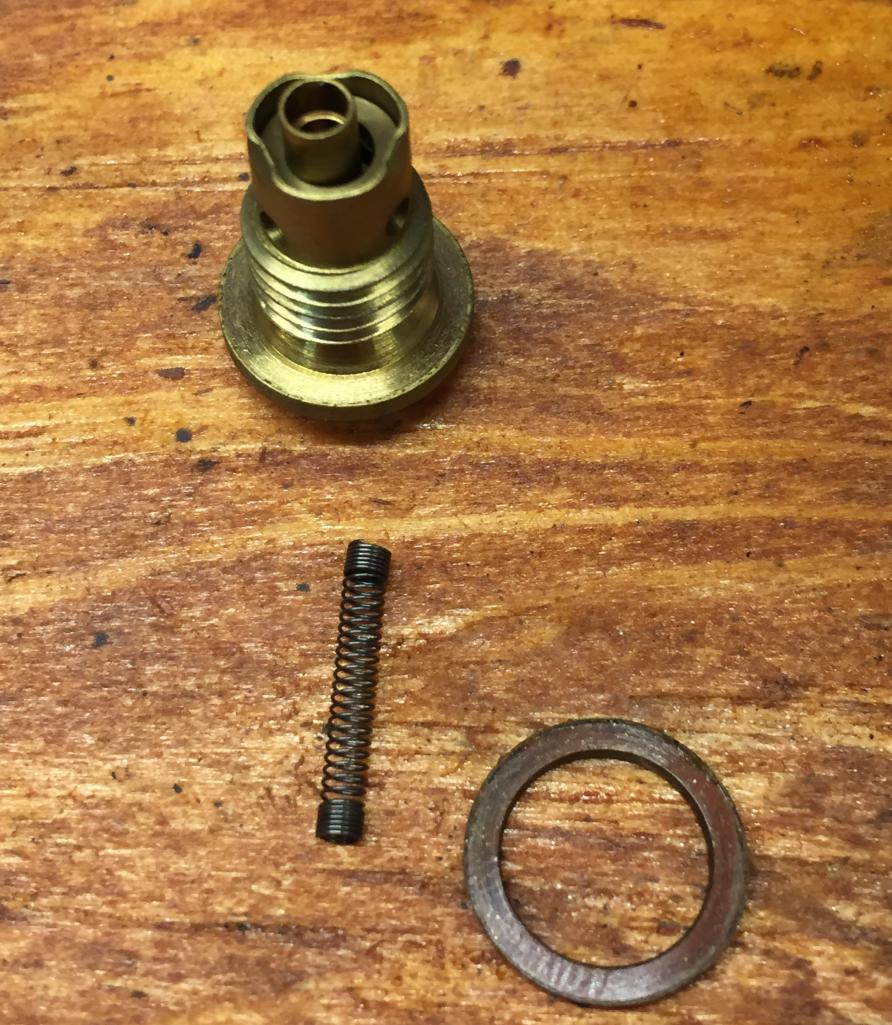
Found the ball that was supposed to be on the spring was missing.
Glad I dug into these Zeniths.
I found a great thread about the Zenith carb being rebuilt on the bird site:
http://forums.pelicanparts.com/porsche-911-technical-forum/797607-zenith-rebuild-my-first-carby-project.html
I read it about 10 times before I had the nerve to dig in.
Attached thumbnail(s)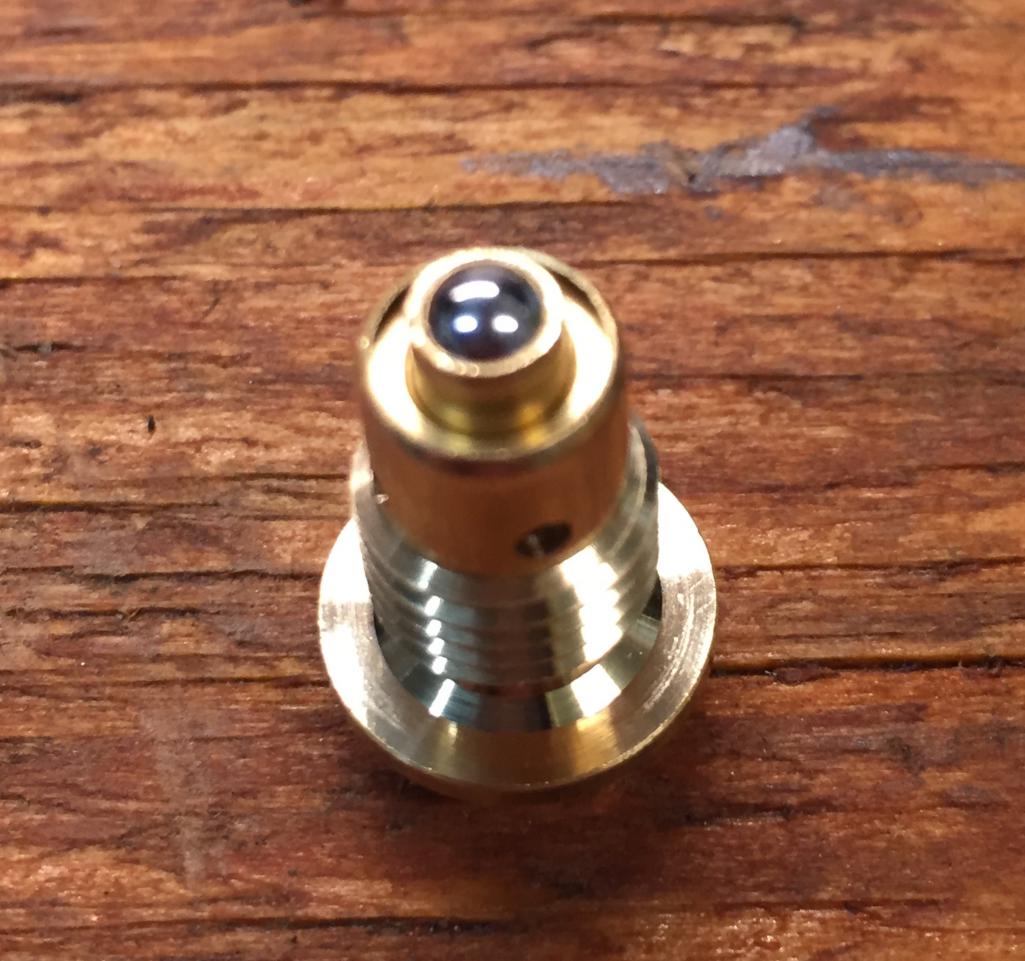
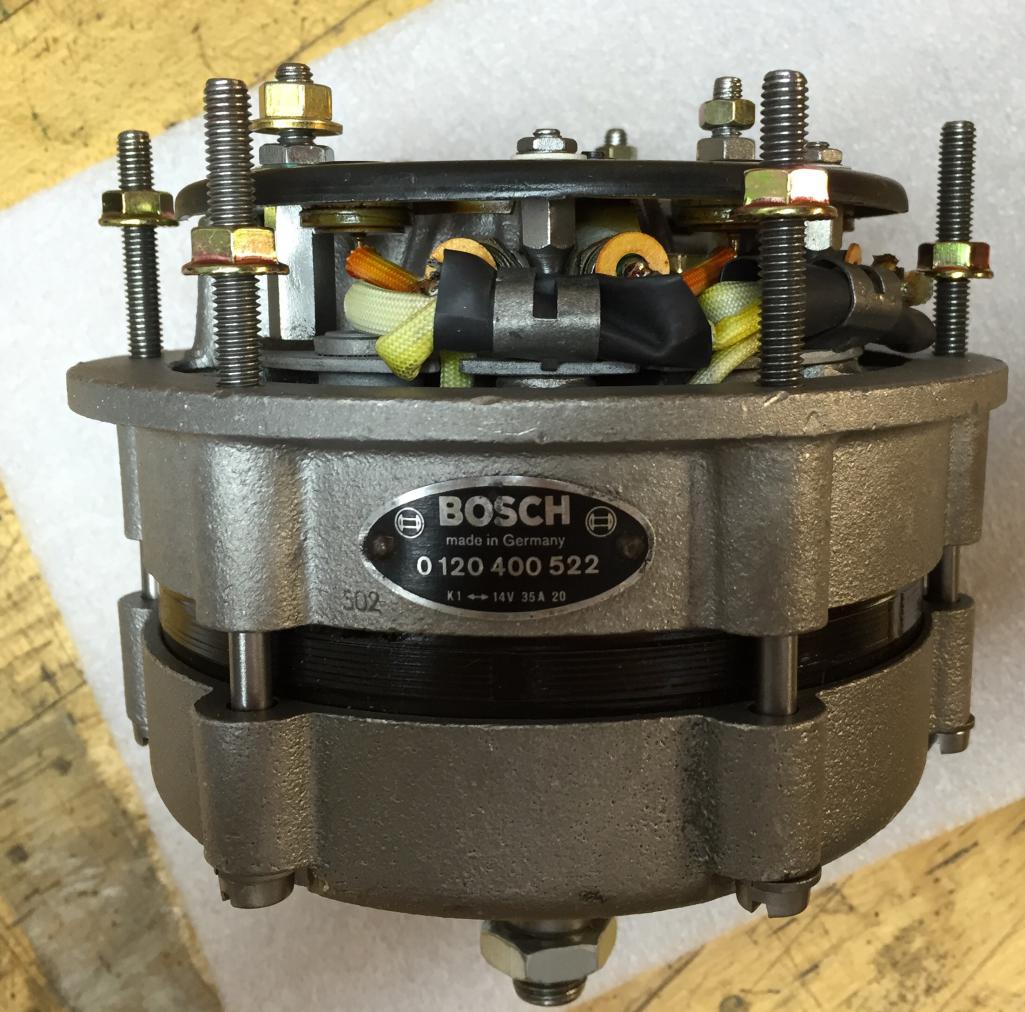
Posted by: Dion Feb 5 2017, 10:43 AM
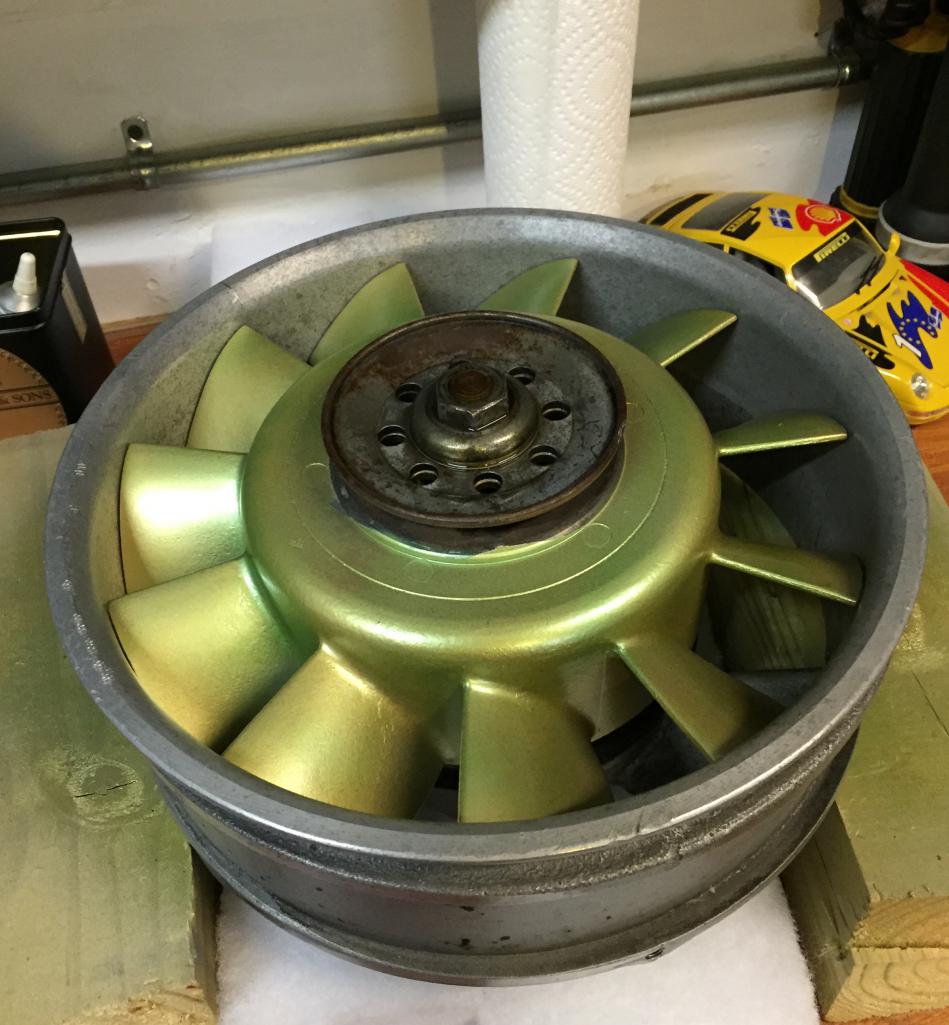
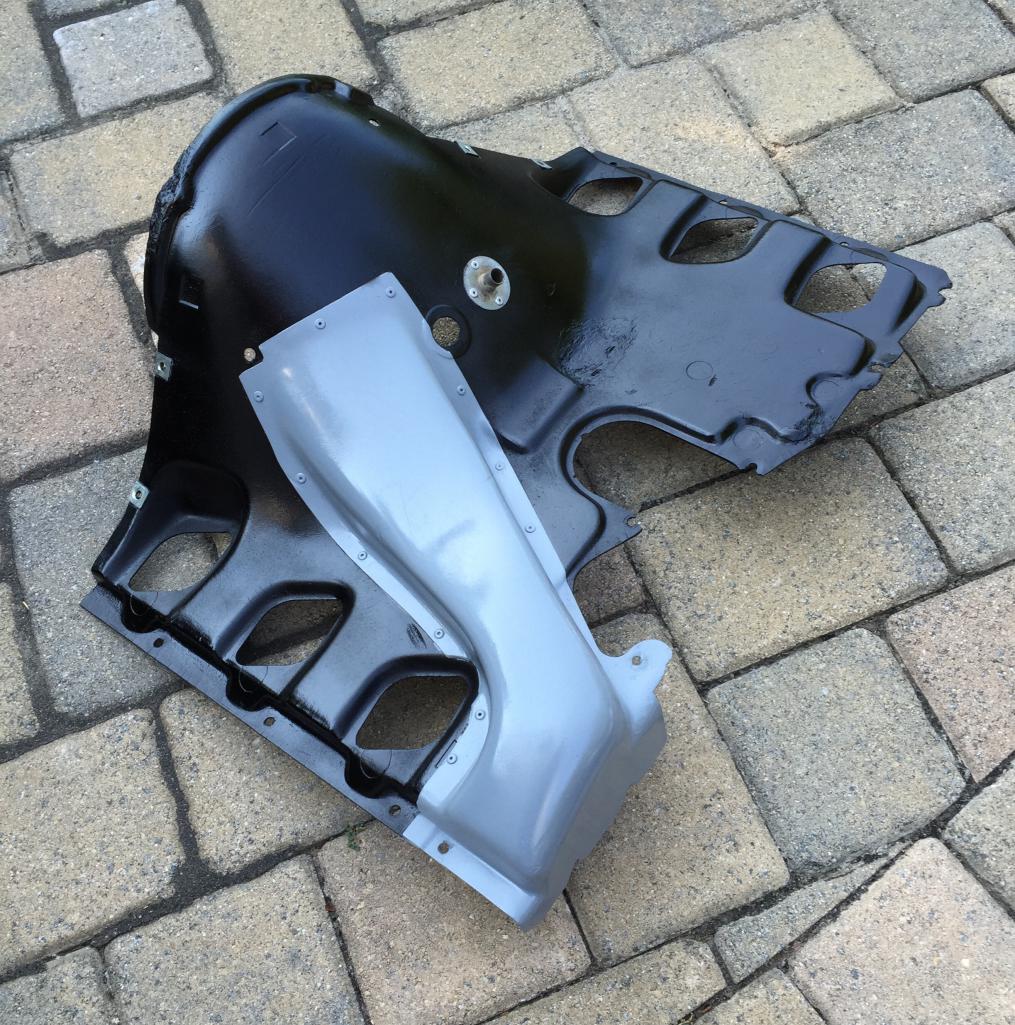
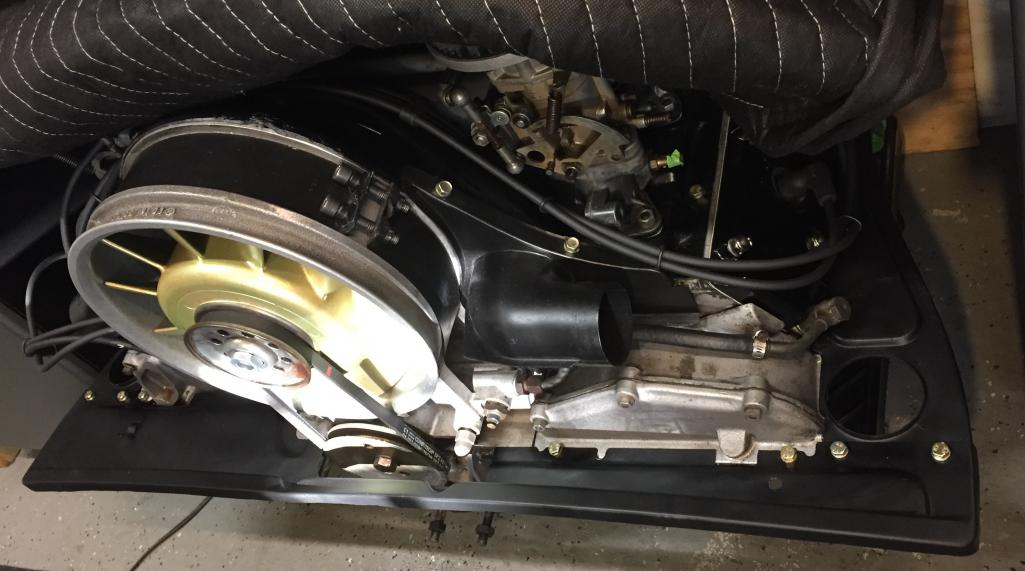
Replaced the alternator and painted the fan and shroud.
Attached thumbnail(s)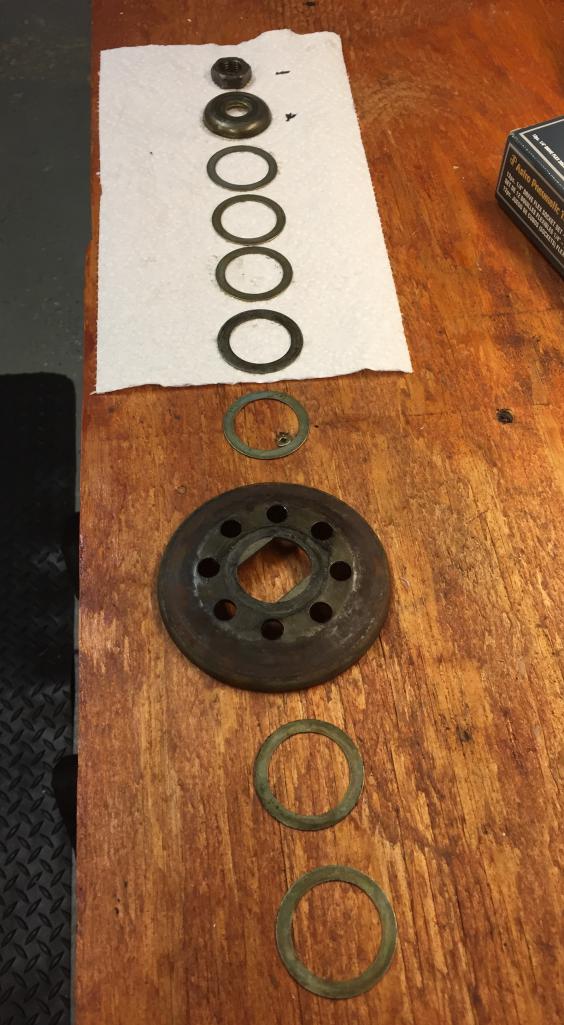
Posted by: Dion Feb 5 2017, 10:47 AM
Shroud
Attached thumbnail(s)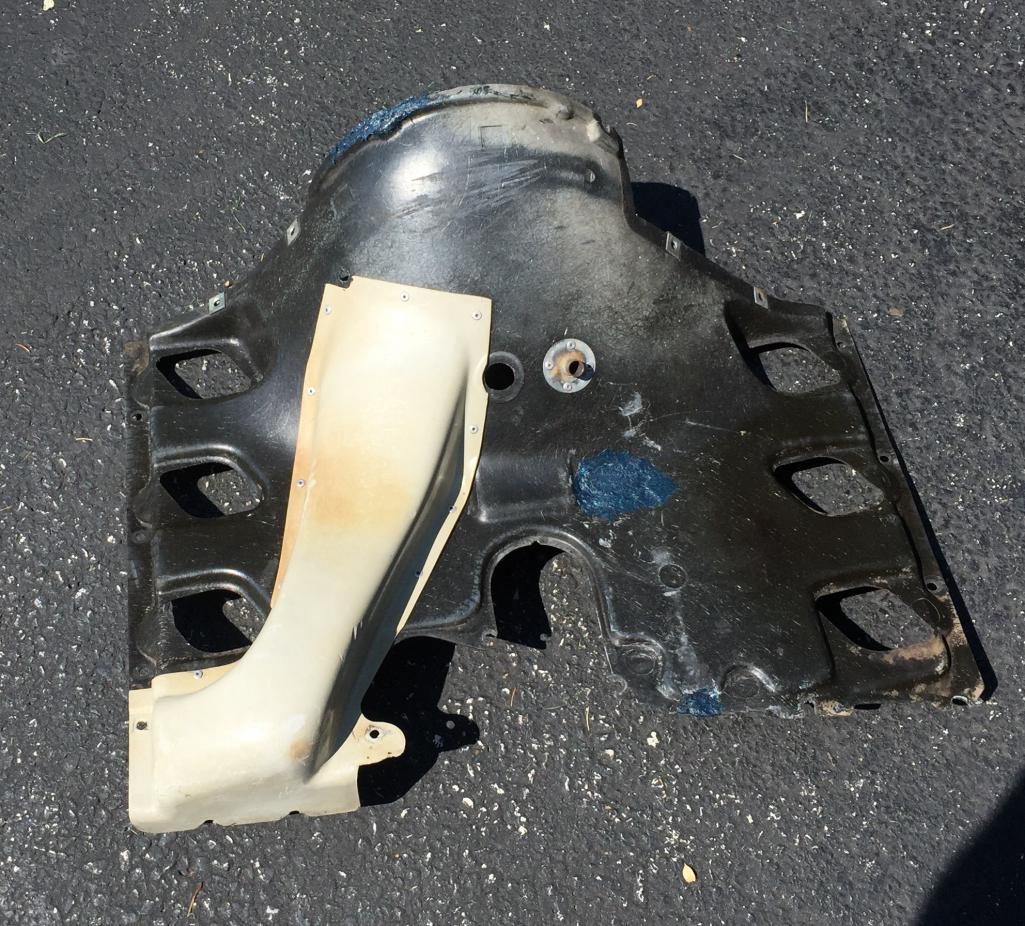
Posted by: Dion Feb 5 2017, 10:51 AM
Fan installed
Attached thumbnail(s)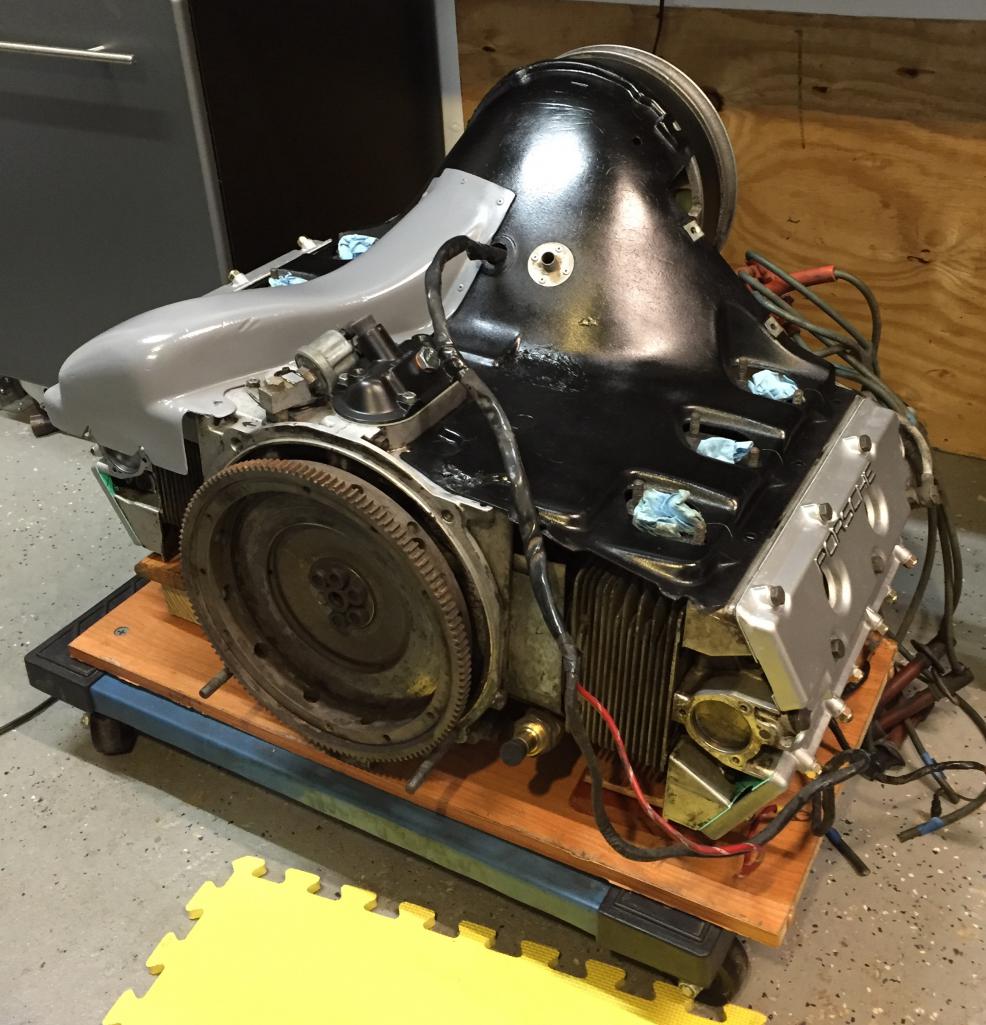

Posted by: Dion Feb 5 2017, 11:00 AM
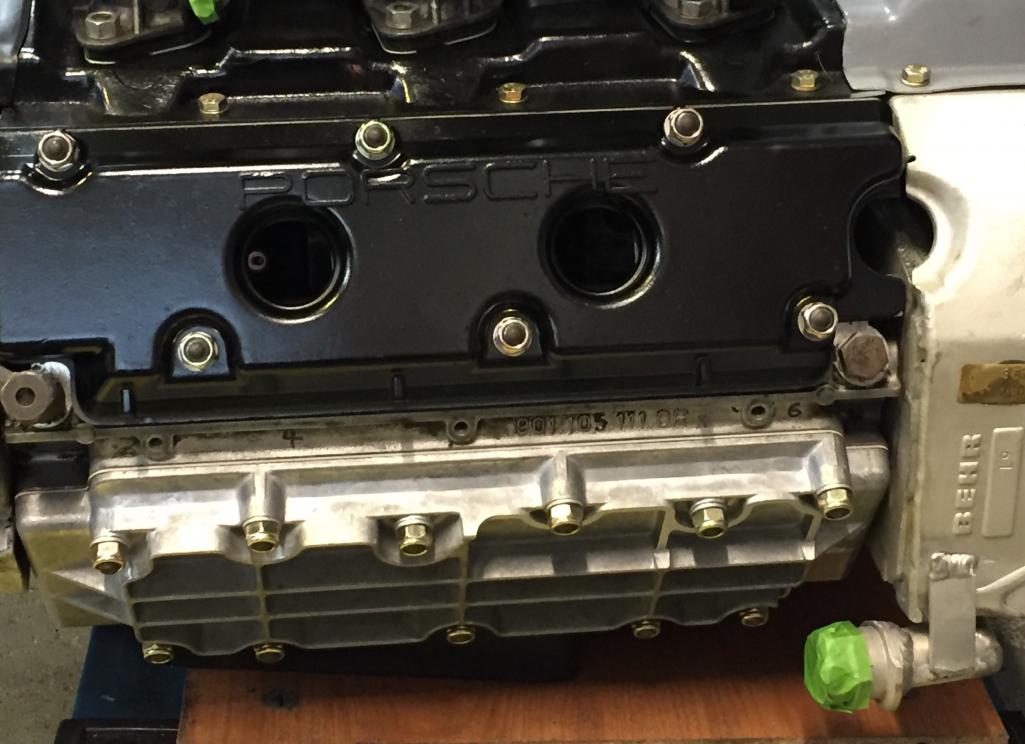
So the upper valve covers that I did in silver paint were done over
in black since the silver didn't adhere very well. Must have had
remnants of oil on them. So after I adjusted the valves this past week
i cleaned the covers up again and did them in black.
Doing the valves with the motor out has to be the way to go.
If you have a lift. It took me over just 2 hours. First time doing a six.
I did it using the standard method as well as the "backside" method mentioned on the
bird site. I prefer the standard method honestly. As I found variations using the backside method. But that's me.
Attached thumbnail(s)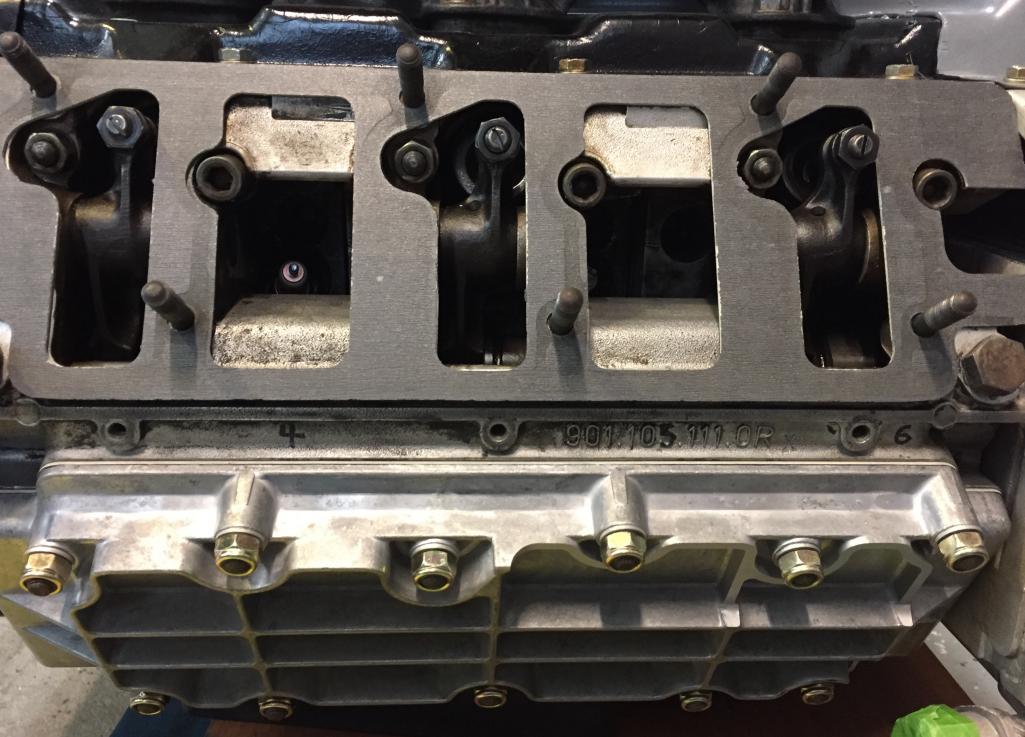
Posted by: Dion Feb 5 2017, 11:04 AM
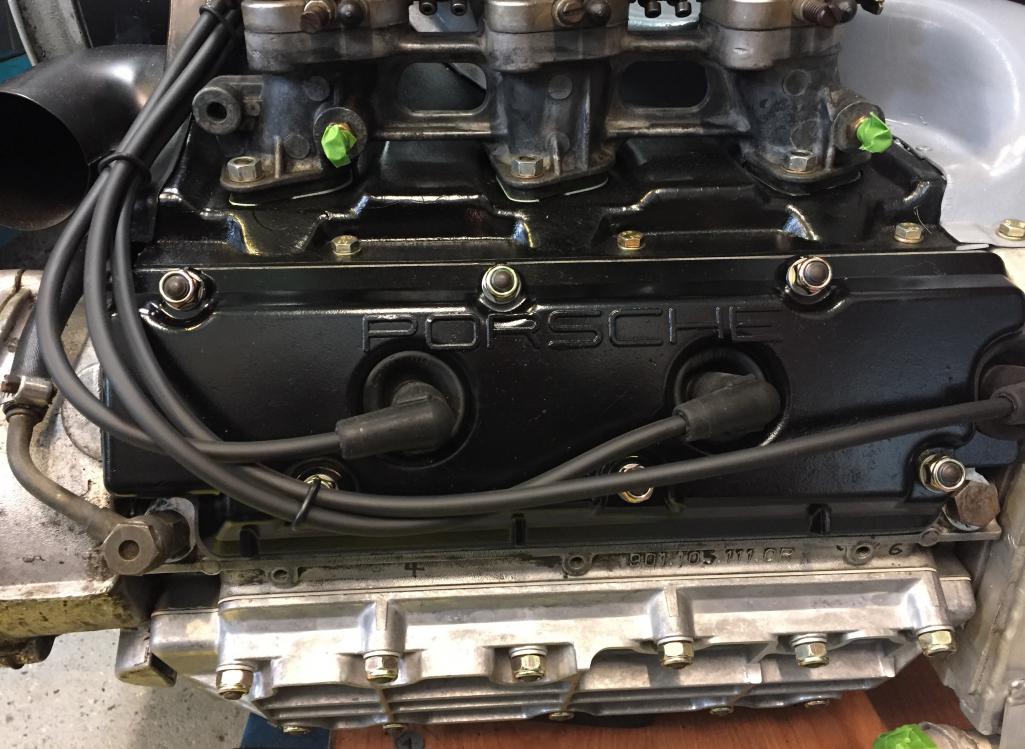
Put the carbs back on. Added the surrounding sheet metal.
Fan side will have to come back off to place motor mount on.
Momentarily felt bad as I had to cut into original 914/6 tin to
Make it fit the 2.4 engine. Oh well. Sorry purists!
Attached thumbnail(s)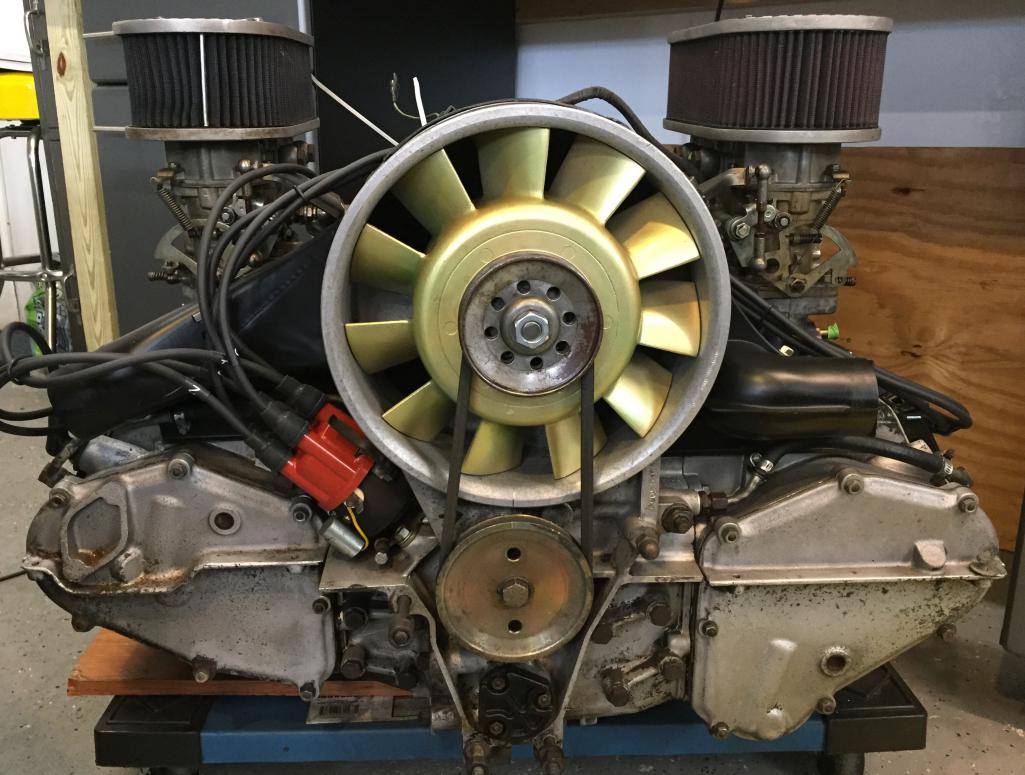
Posted by: Dion Feb 5 2017, 11:06 AM
Engine tin
Attached thumbnail(s)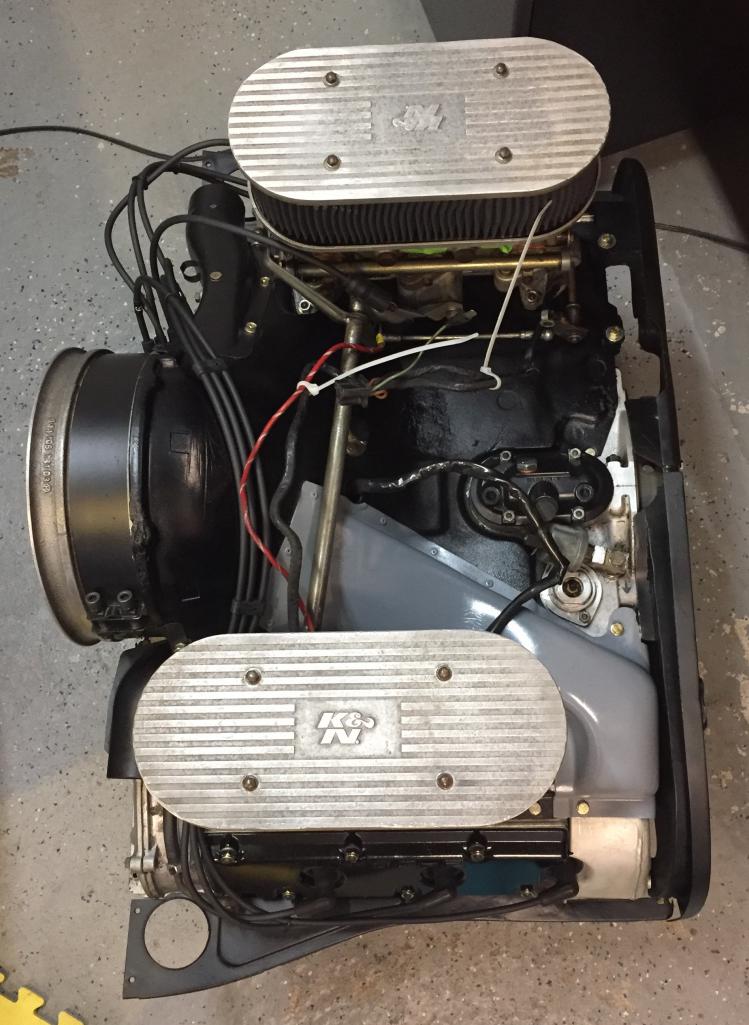
Posted by: Dion Feb 28 2017, 11:37 AM
Weather finally gave me a window to sandblast the left side of chassis.
Attached thumbnail(s)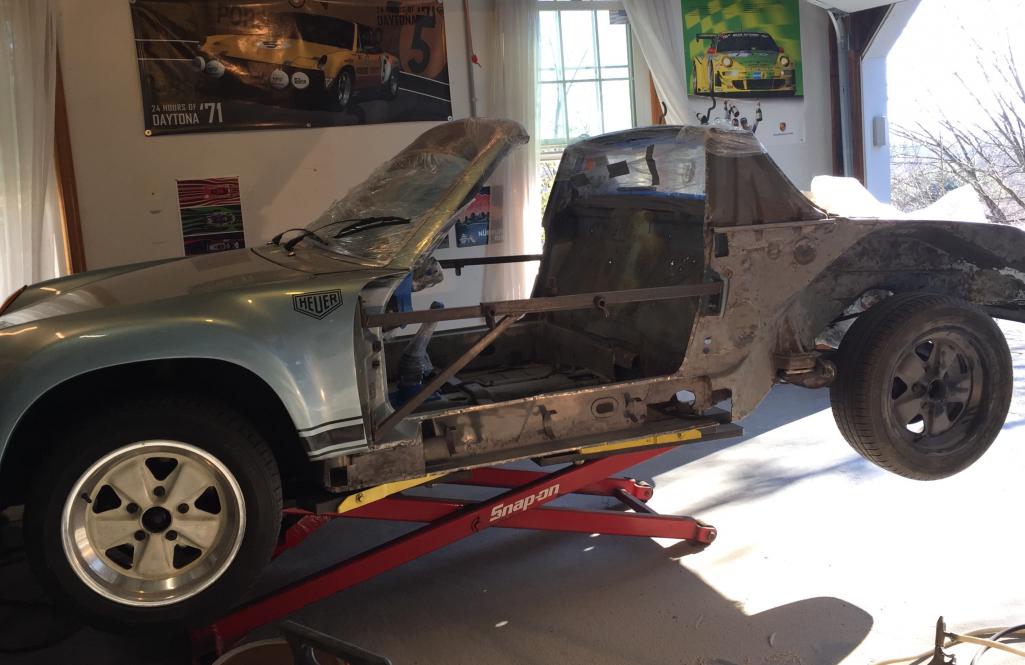
Posted by: Dion Feb 28 2017, 11:39 AM
Sandblasted
Attached thumbnail(s)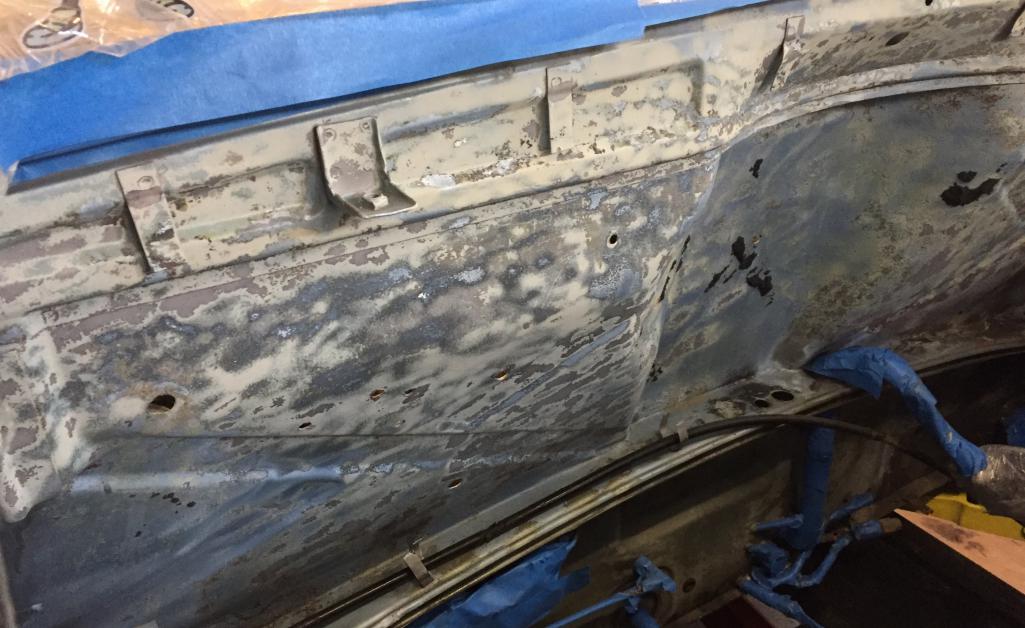
Posted by: Dion Feb 28 2017, 11:44 AM
Cut out the firewall to make my life easier in the future.
I know there's plenty of opinions on this.
Rest assured it will be covered with a steel door made from another
firewall courtesy of Garold. I will be welding nuts to engines side to secure it. Add appropriate rubber seals,etc.
That's a way down the list. Nevertheless that's the plan
Attached thumbnail(s)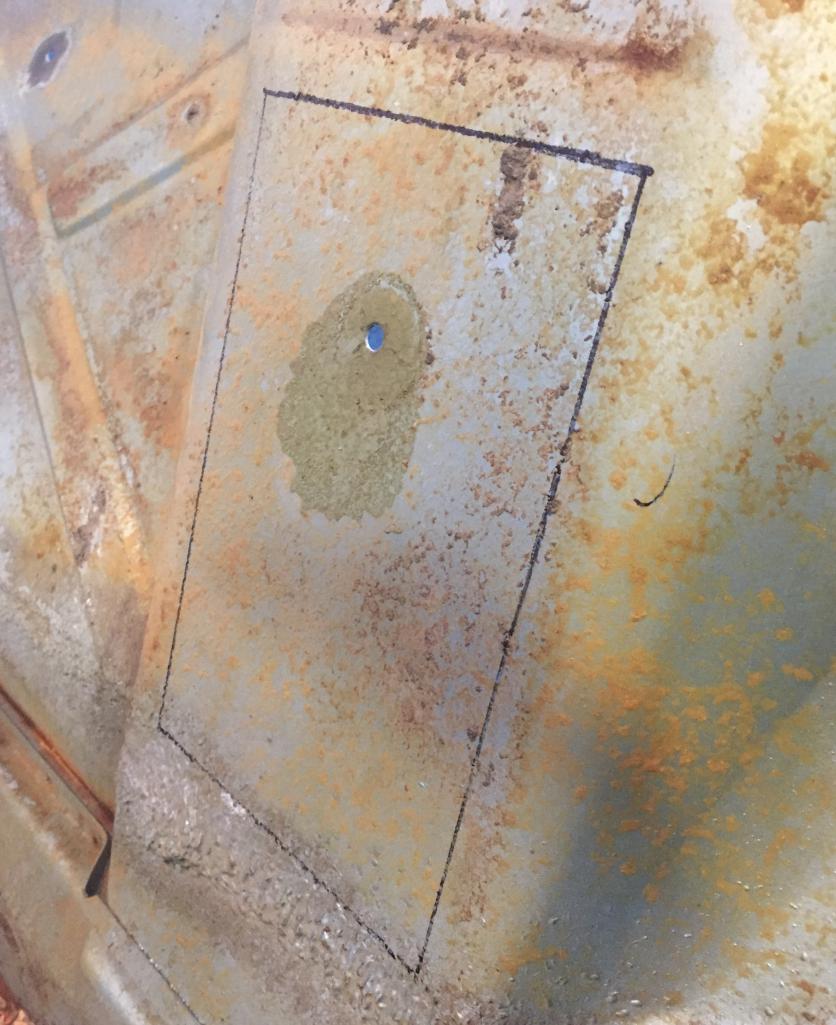
Posted by: porschetub Mar 19 2017, 02:37 PM
Nice work on the motor Dion,what history do you have on it ?,bet the can't wait to get it in.
You did a better job of the firewall cut than I did,mine was a bit of a hack job  ,it was great to have it open to do timing etc.
I see you have the ''holy grail'' Bosch cast iron distributor ,is it a ''06'' off the "S" model ?.
Keep up the good work
Posted by: Dion Mar 19 2017, 03:41 PM
Hey Dean, thanks for the compliments. I can't wait to be up and running like yours!
The distributor is a 0231-159-001 cast iron from a '67 T. I think they might also have
been used on the "S".
The 2.4 has an aluminum '67 case, counterweight crank, rods were checked and
balanced by Ray Litz. New Mahle pistons and cylinders.
Heads have 46 intake and 40 exhaust.
The Zeniths are configured similar to Webers and have the emission circuit eliminated.
The engine looks tired on the outside when I first purchased it. It was used for
about 20,000 miles in a VW Vanagon project for the fellow I Purchased it from.
He's a fellow 914 racer down in Texas. He was going to put it in his
vintage racer but decided to stay 4 cyl. He was happy in his class. Didn't want to deal with different specs and rules that the six would entail. Besides he has
a 356 project looming. Been on the phone and email a couple times with him.
Good guy. He's waiting for me to fire this thing up as well!
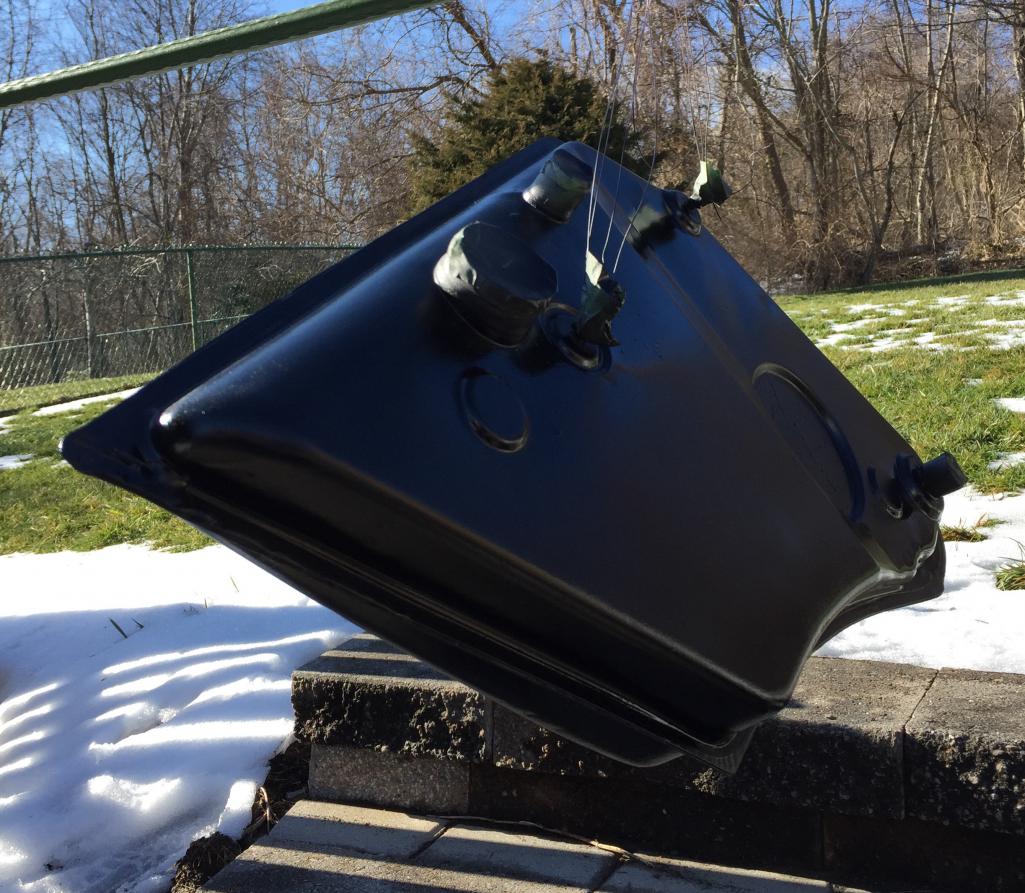
Posted by: Dion Mar 19 2017, 03:45 PM
So it's sort of warming up here. Did a little but necessary project today.
Late start, wasn't in the mood to weld. Took care of the oil tank today.
Cleaned up, prepped, primered & painted. Prolly help Dave this week further
his. Hershey closing in.
Attached thumbnail(s)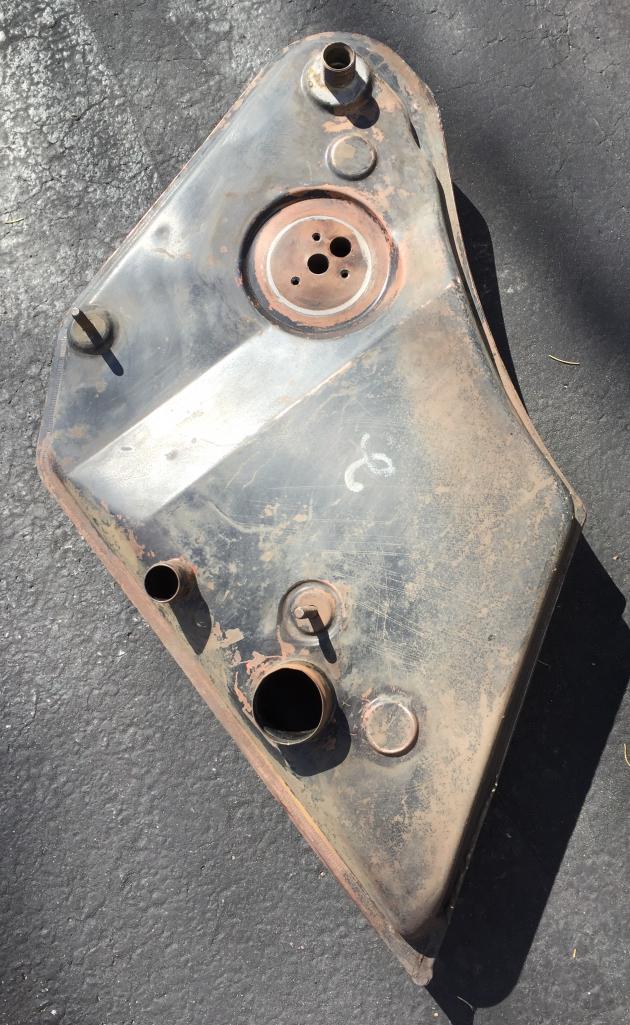
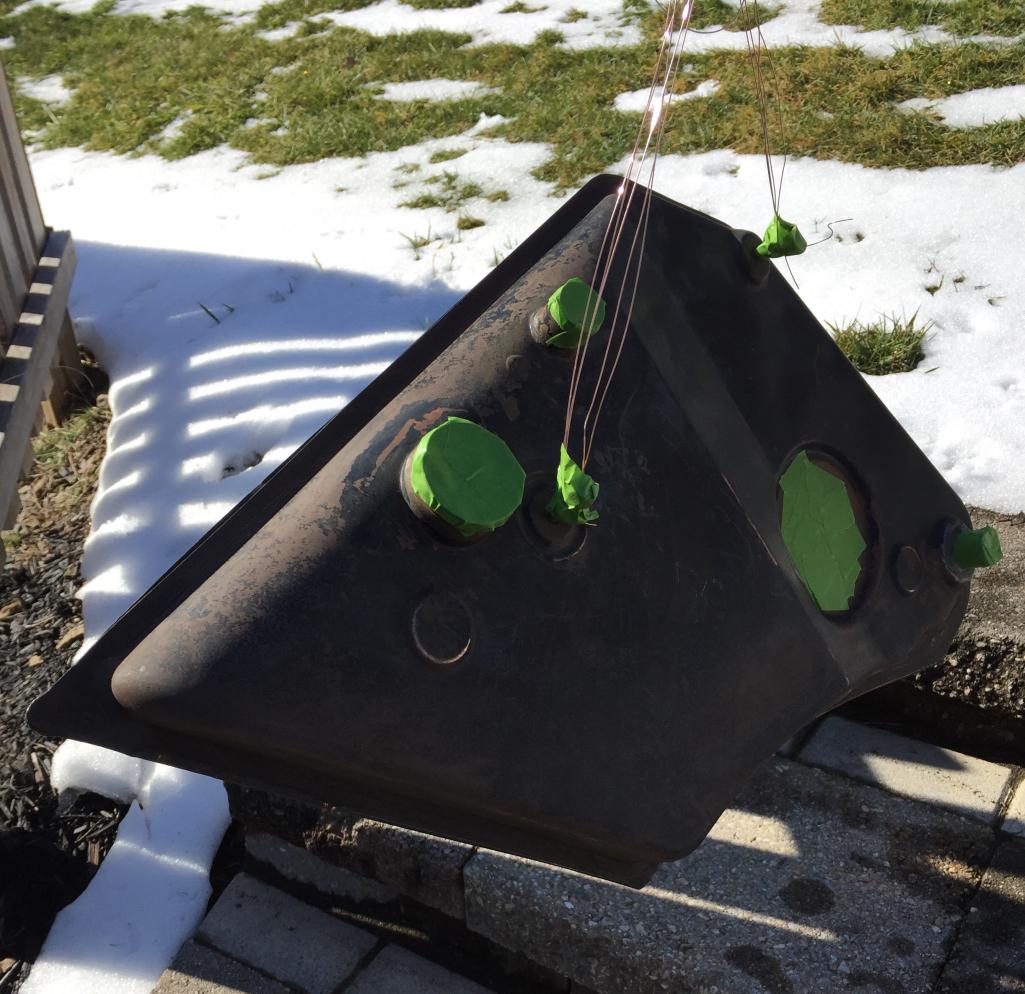
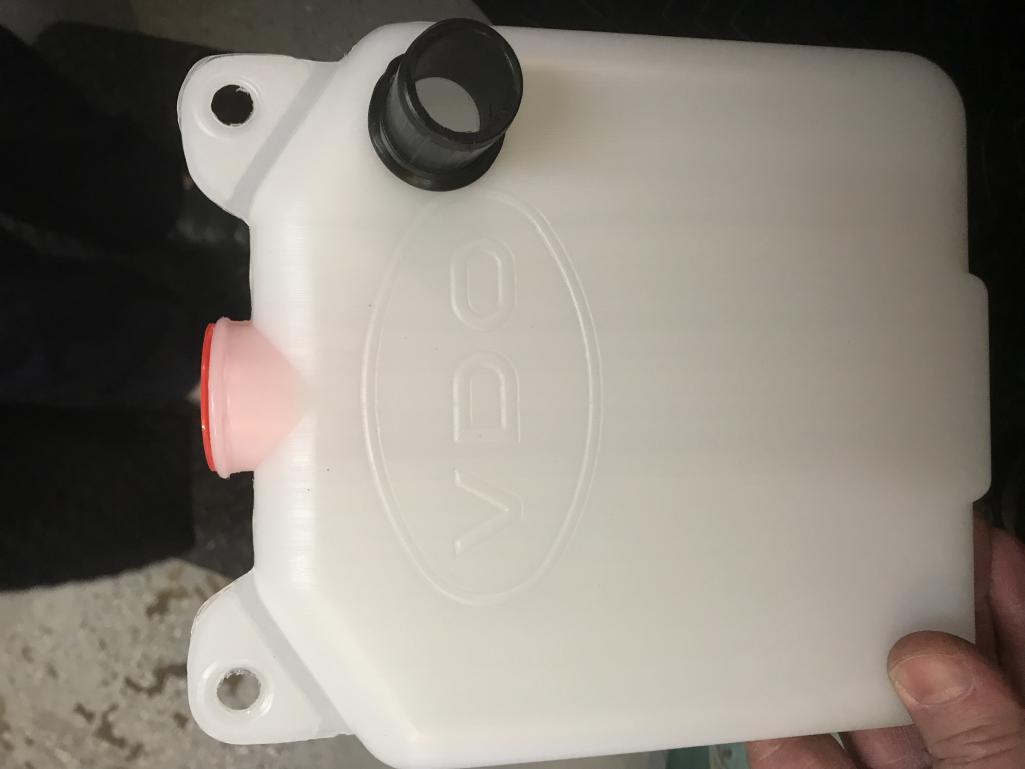
Posted by: Dion Mar 19 2017, 03:46 PM
Primer & paint.
Attached thumbnail(s)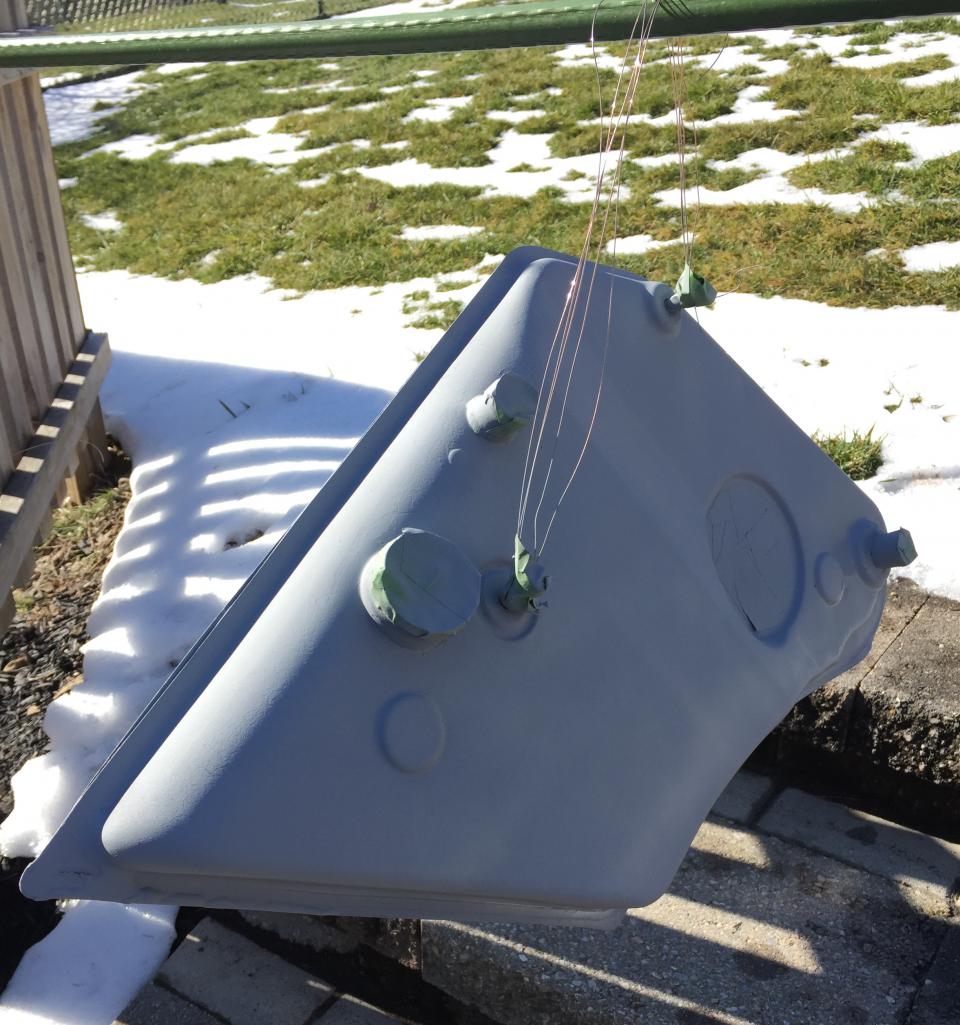
Posted by: porschetub Mar 19 2017, 06:18 PM
Cool sounds like a nice engine with great mods,you will get good power with the carbs,the dizzy is from memory used on the "S" there were 3 types used over the years of that model which were all 2 litre motors 001, 003 and 006.
The dizzy you have has a fairly aggressive advance curve but was made to work with carbs however ,but the ''S'' had aggressive cams to suit,had a friend with one (68 ''S ") and he said the power came on late like an old 2 stroke motocrosser he said it was a very quick car on the open road.
Do you have stock cams?,what spec was the motor to start with?
I just guessing cause I'am the late stages of final tune with my zeniths but you would have 32mm vents,55-60 idles and mains around 130-135 or at least close,you will certainly have the setup to run the larger vents with your valve size.
Nice stock oil tank good score,mine has an PITA leak at the suction hose thread no matter how tight I do it up it leaks,only had it out 3 times so Iam fairly quick @ it now .
Keep up the good work on your car ok.
Posted by: Dion Mar 19 2017, 06:53 PM
Dean, I wish I could say E cams but alas it's a T cam.
It started life with a magnesium case with hi-comp Forge-true Pistons with crank and rods from a 2.7.
It was a 2.5L essentially. Then it was rebuilt as the 2.4 with aluminum case.
with 2.7 crank & Rods, and then the 2.4 Mahle P&C with the Zeniths to suit.
Thanks for the info on Zeniths and distributor.
Keep at Dean I know you'll tame the oil leak!
Posted by: porschetub Mar 19 2017, 08:37 PM
All good,you are on the right track without me sticking my nose in ,however,we have same coloured car,both our engines came from a VW bus,and we have same coloured engine fan ,we are miles apart but maybe not  .
.
Posted by: Dion Mar 19 2017, 09:27 PM
my brother in the South Pacific!
Heheh that is funny!
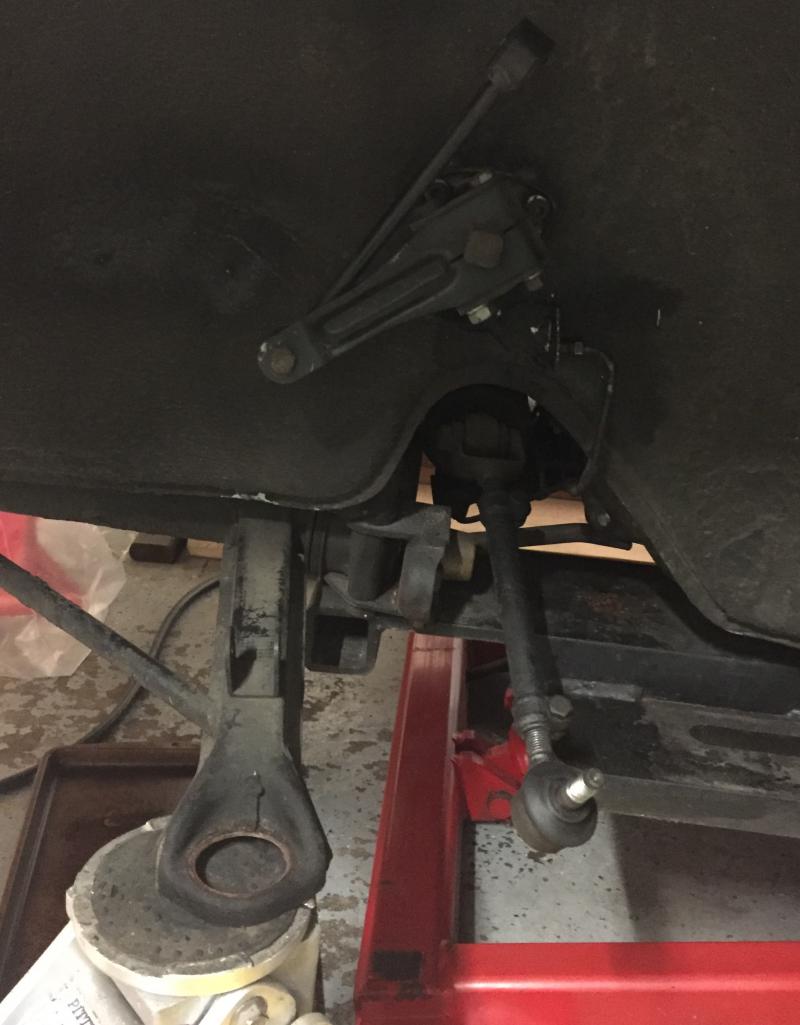
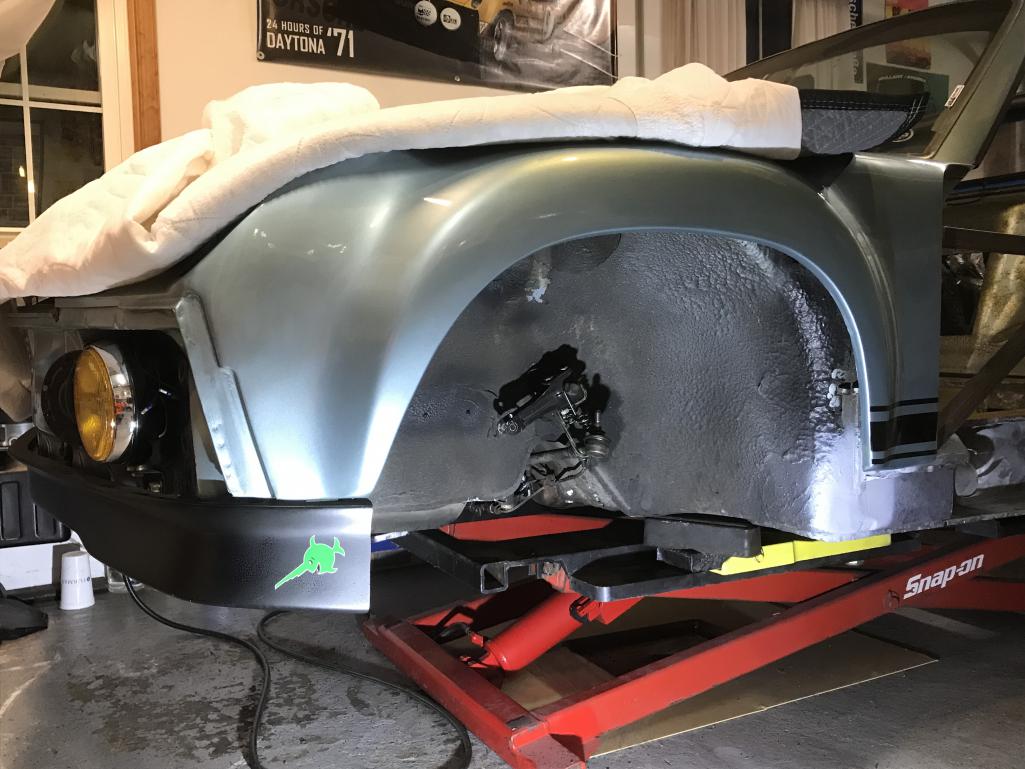
Posted by: Dion May 22 2017, 06:33 AM
Been a while. Time to update.
Removed both front suspension spindle/brake/strut assemblies. They will be replaced by
the 911 assemblies I renewed earlier.
I was also able to get on with the welding. First up was a small area on the left inner wheel well, beginning of the left long. It was right at the corner where it gets pelted with debris and water.
My goal is to get some welding done every week. See what outside influences will disrupt that! .
Attached thumbnail(s)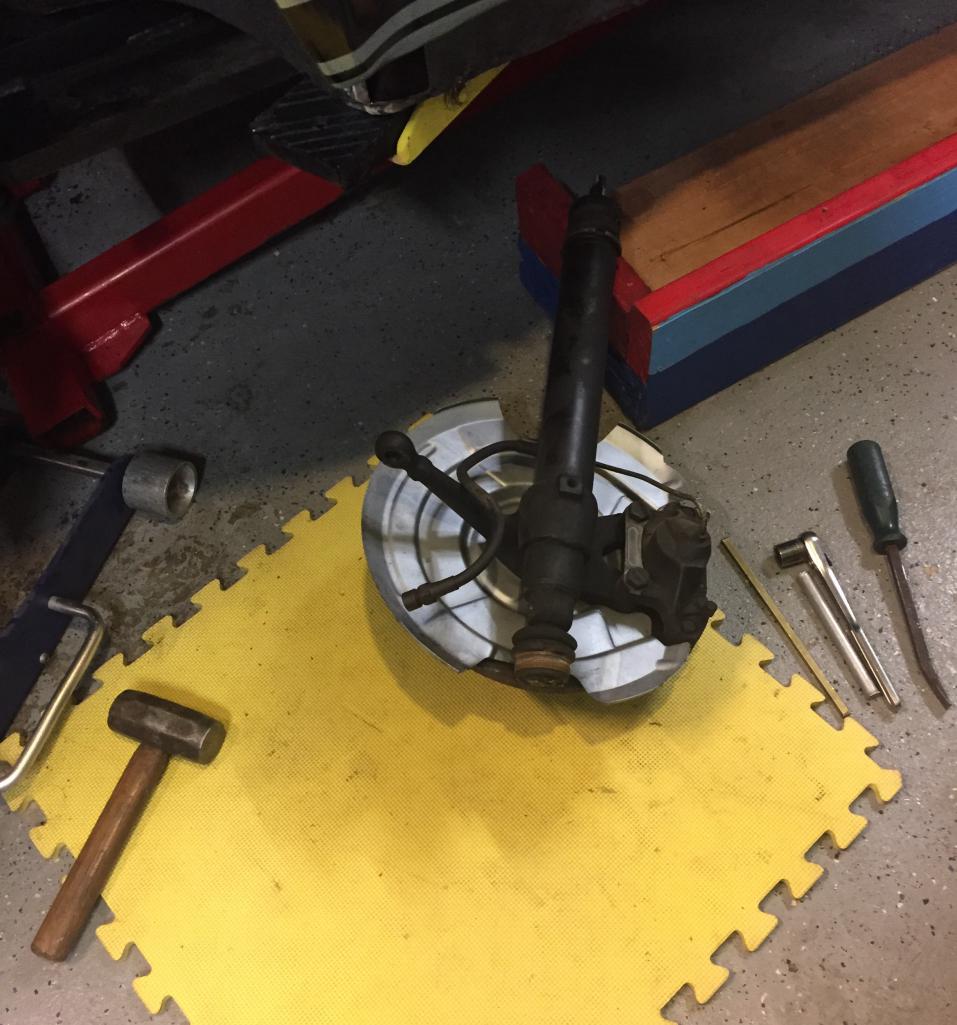
Posted by: Dion May 22 2017, 06:34 AM
Patch:
Attached thumbnail(s)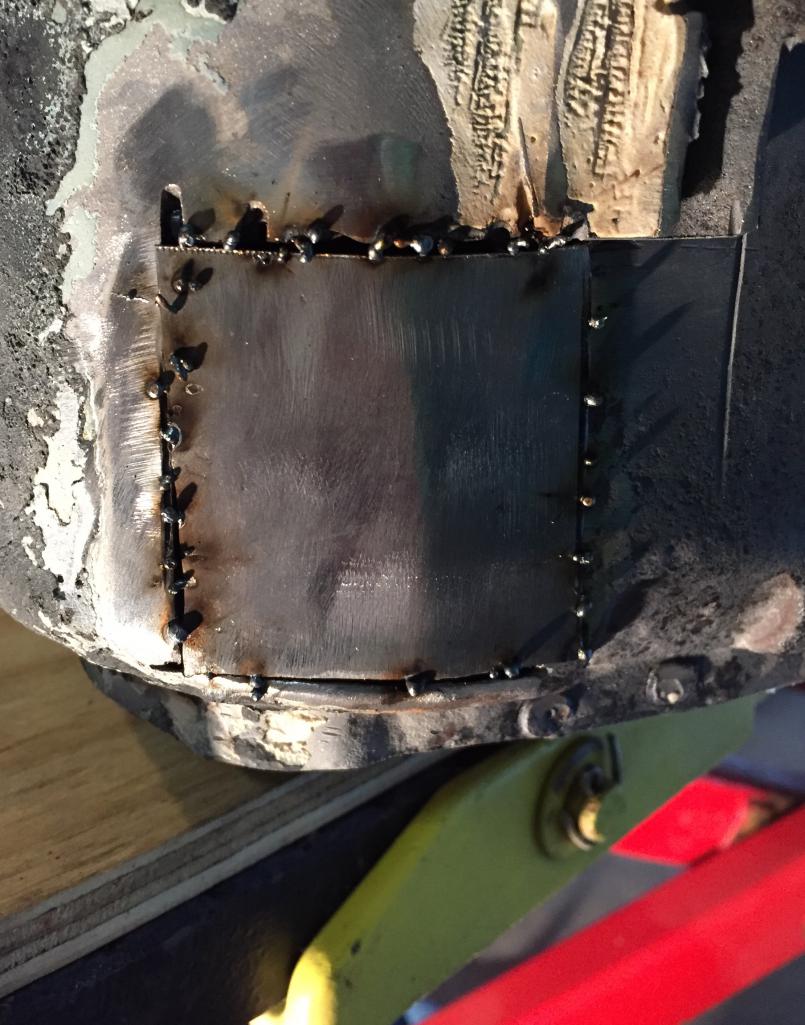
Posted by: Dion May 22 2017, 06:50 PM
This evening, welded all my "ventilation" holes in the firewall.
Holes were for previous harnesses and electrical "clothes lines" as my bud Dave
termed them. Heheh. All wires will now be routed properly through tunnel.
Not the best pics but I'm pleased with my amateur work.
The smell of seam sealer burning is quite distinctive.
Hope to work on "timing" access door for firewall soon.
Getting the little things done while Dave finishes his car.
I'll need his assistance taking the trailing arm suspension console out.
He has a "buck" to form the additional metal I'll need to fix that area.
Attached thumbnail(s)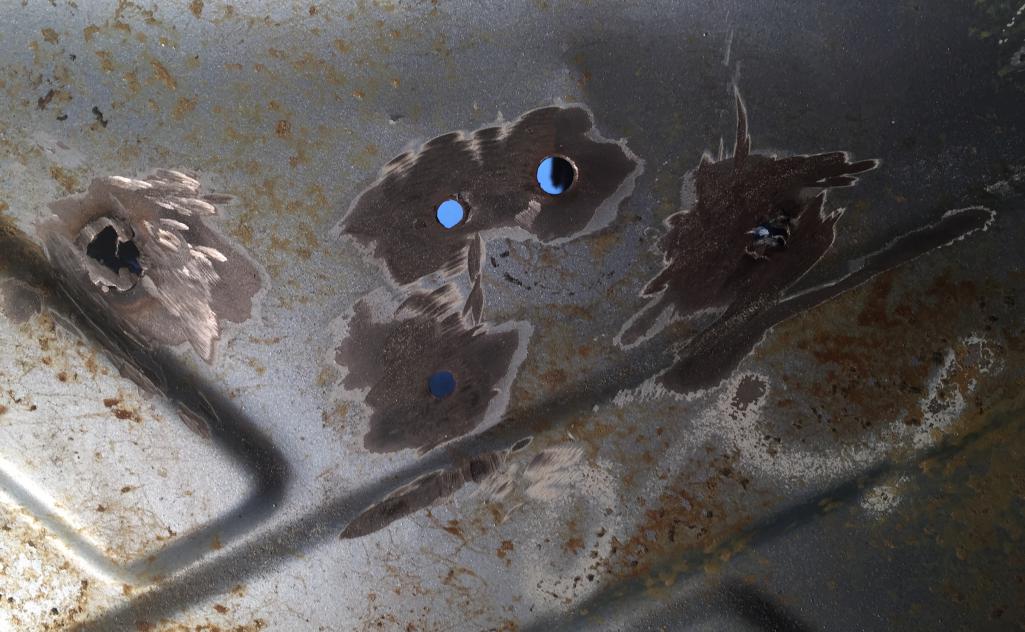
Posted by: Dion May 22 2017, 06:53 PM
Closed holes:
Attached thumbnail(s)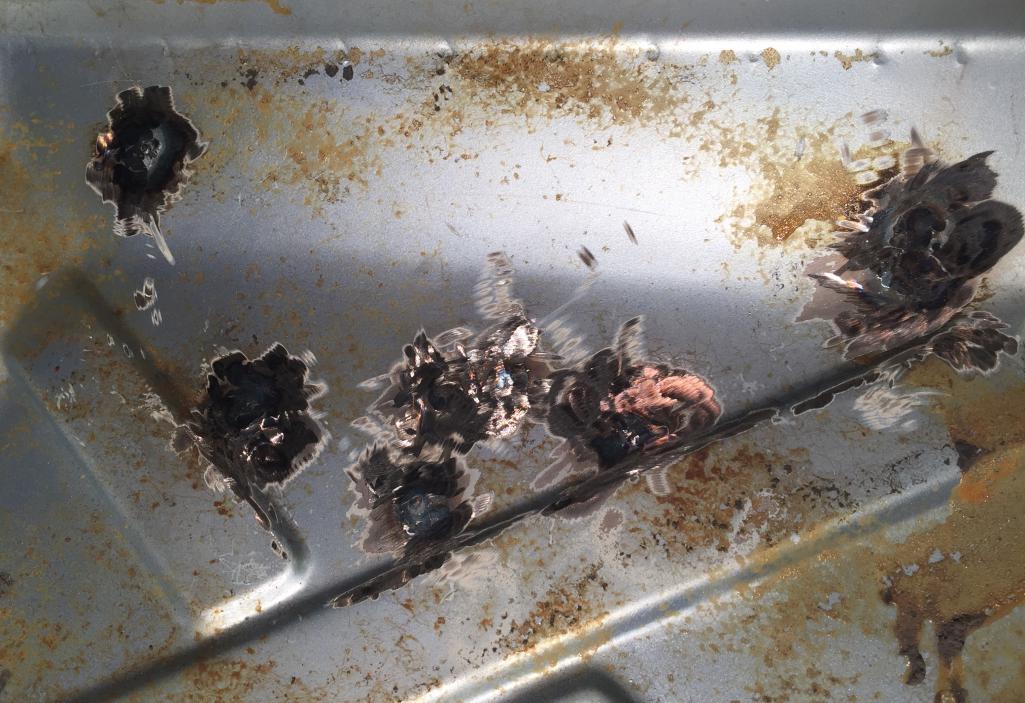
Posted by: Dion May 27 2017, 04:26 PM
Added some self etching primer to the recently repaired hole on
Left front long radius.
I also repaired a similar hole on right front long.
Attached thumbnail(s)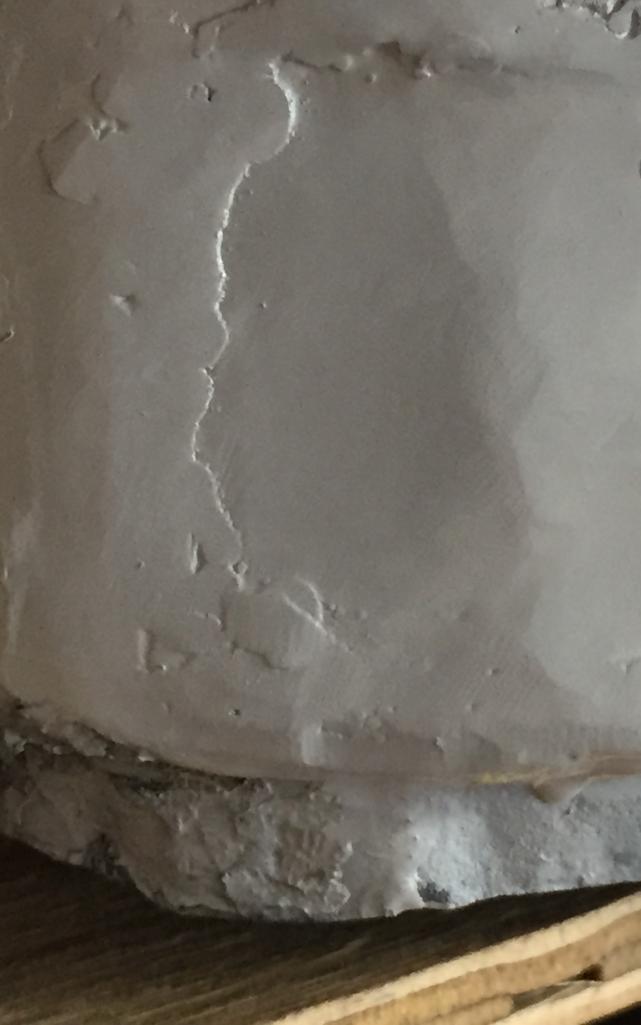
Posted by: Dion May 27 2017, 04:27 PM
Right front side long:
Attached thumbnail(s)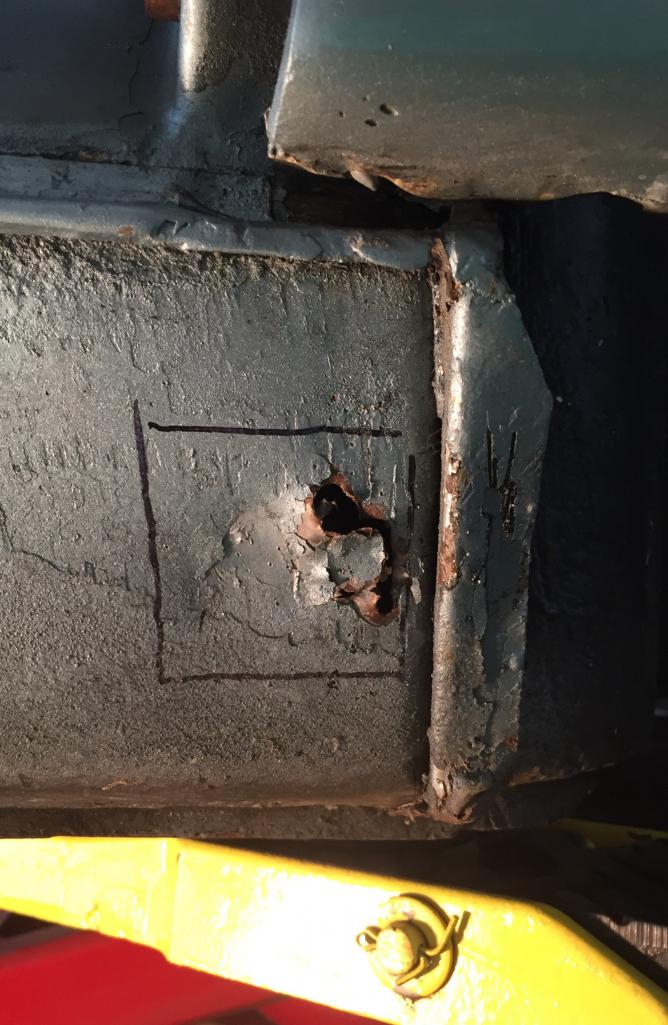
Posted by: Dion May 27 2017, 04:29 PM
"Green" frame coating, and welds.
Attached thumbnail(s)

Posted by: Dion May 27 2017, 04:30 PM
Primered
Attached thumbnail(s)
Posted by: Dion May 28 2017, 01:47 PM
Well after watching a decent Monaco F1 race,
headed into garage to get dirty. I'm taping Indy for later and
to have a . I'm gonna need it after playing with the welder.
I'm slowly improving. I have a lot of admiration for you guys doing it so well.
Trunk hole had to be made even larger cause there was a nice mix of filler and steel combined. Yeah and filler doesn't weld so well. Stinks like hell to. The metal was very thin in this area. I'm guessing because of previous repair and grinding away of the steel.
So here is what was done today.
Attached thumbnail(s)
Posted by: Dion May 28 2017, 01:48 PM
Welded piece. Will primer later. Thanks for lookin'
Attached thumbnail(s)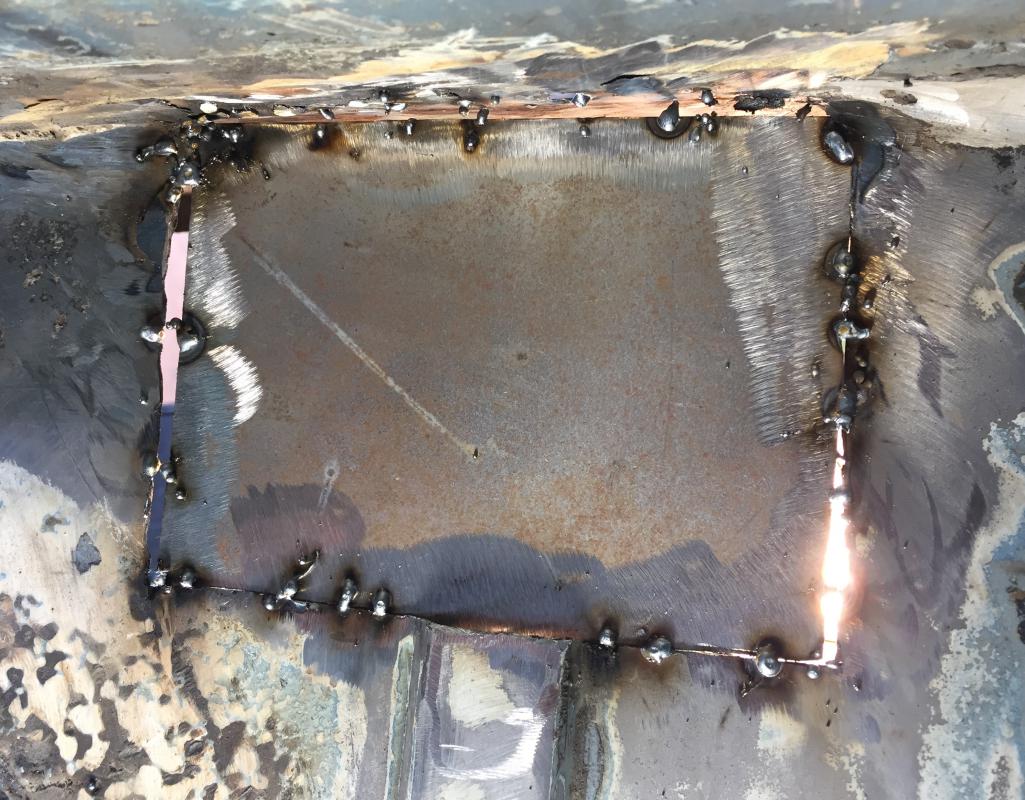

Posted by: Dion Jun 4 2017, 05:39 PM
I had a very nice phone call recently with Keith Von-Laws,
we were discussing my welding skills or lack of.
I've been working with a mig welder machine that is prolly over 20 yrs old.
Keith (who has welded for a living) was noticing a few things when checking out my
build. The settings on my welder may no longer be what it says on the
rotating dials. He suggested a "newer", If not , new welder.
Keeping in mind we have budgets. Also discussed what settings would be used for
difference situations. Talked about this also with my bro Dave.
All in agreement that a newer one could make life a wee bit easier.
I'm going to try and pick up an Eastwood model that will not kill the budget.
Looking forward to see if this helps me improve. Need a refill on the mig bottle anyway
I'll treat it to a new machine.
Thanks Keith for the pointers and encouragement.
Dave did say that with the new welder he was able to make noticeable
cleaner work. Thus improving the skills. Practice,practice right? Thanks Dave.
Having the right tools should help. Stay tuned.
Posted by: Dion Jun 11 2017, 05:31 PM
Alright picked up a new Mig! Early Father's Day gift!
Keith you were right. Life became much easier with the new welder. Thanks for the pointers.
Now I can improve on technique.
Attached thumbnail(s)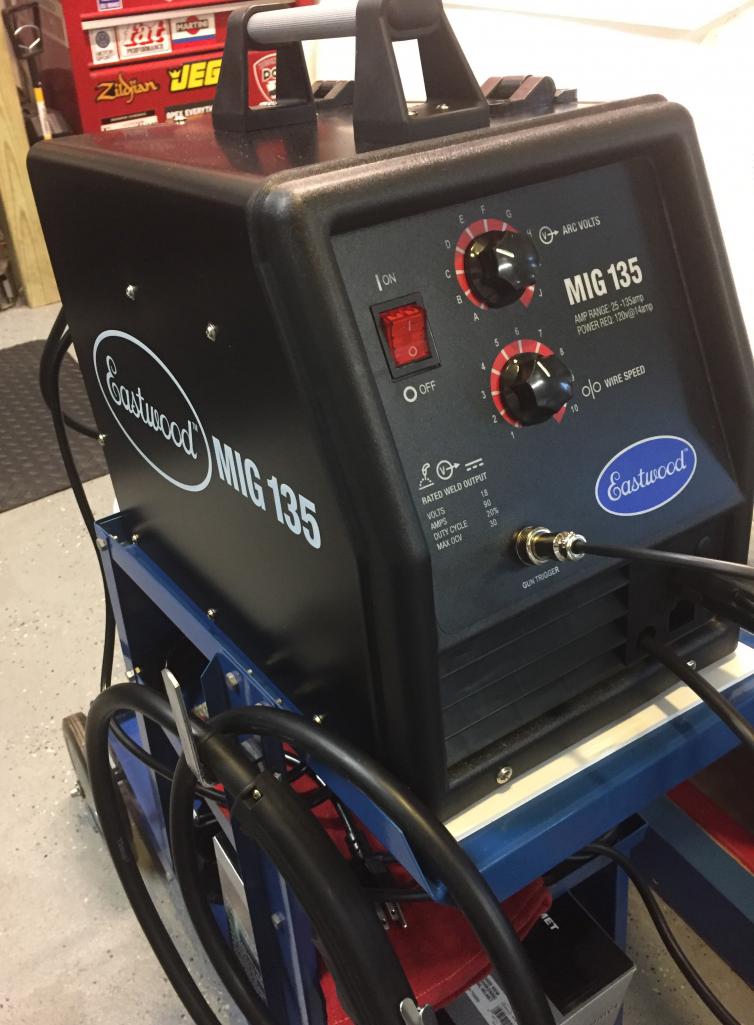
Posted by: Dion Jun 11 2017, 05:34 PM
Made a patch for the spot where the old "snorkel" was for fresh air and pressure relief.
That area was rotted. I'll be adding a new snorkel later.
Attached thumbnail(s)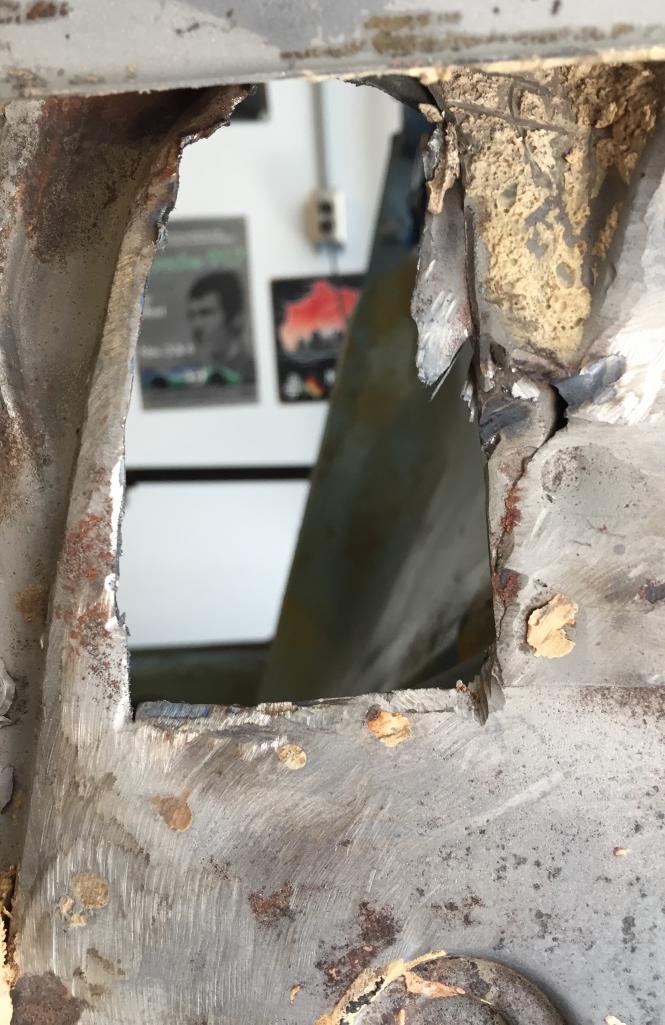
Posted by: Dion Jun 11 2017, 05:35 PM
Also repaired the ratty edge of inner sail panel.
Attached thumbnail(s)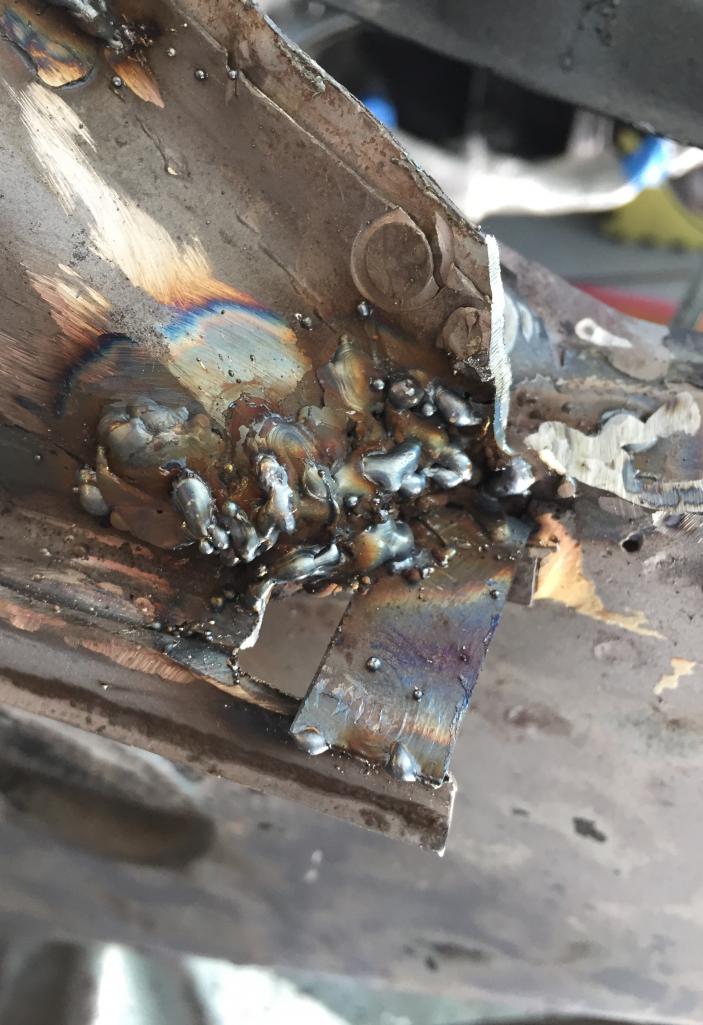

Posted by: Dion Jun 11 2017, 05:37 PM
Closed the holes on the old insignia spot.
I'll be mounting the 914-6 emblem here.
This area had a lot of filler on it.
Attached thumbnail(s)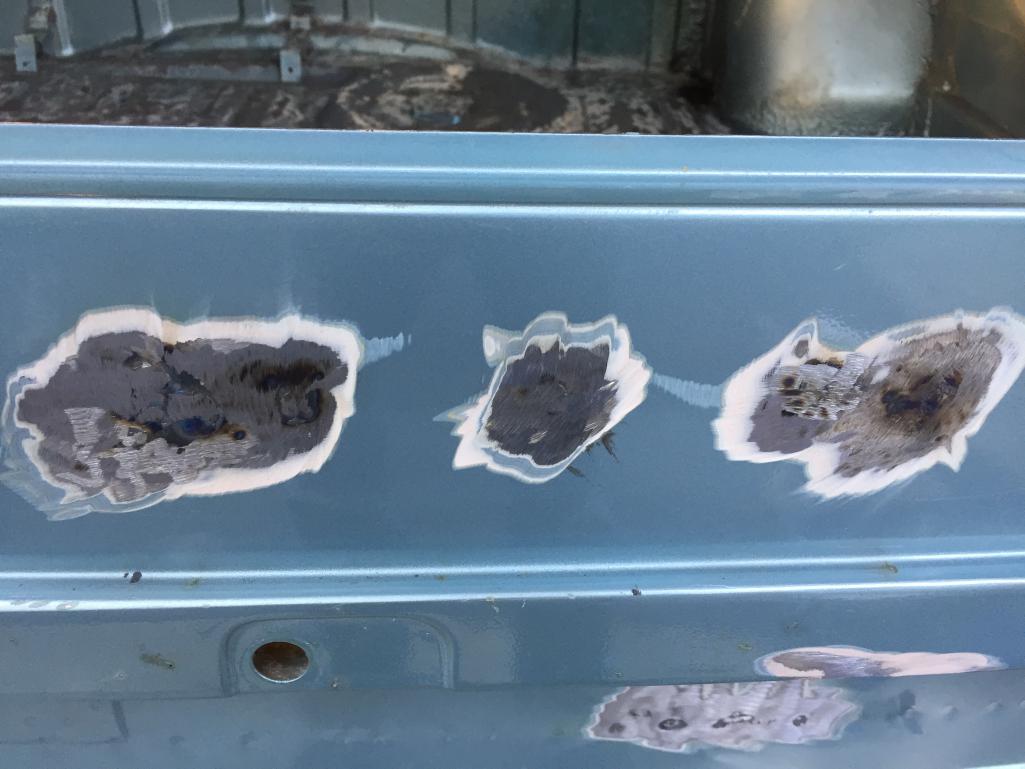
Posted by: Dion Jun 17 2017, 12:17 PM
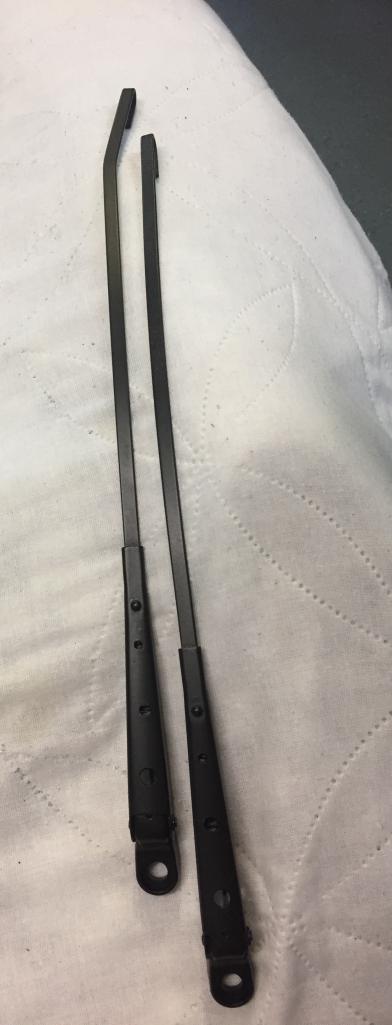
Some fresh paint for these items.
Added some "lightness" for the wiper arms ala
"Colin Chapman" style for laughs.
Attached thumbnail(s)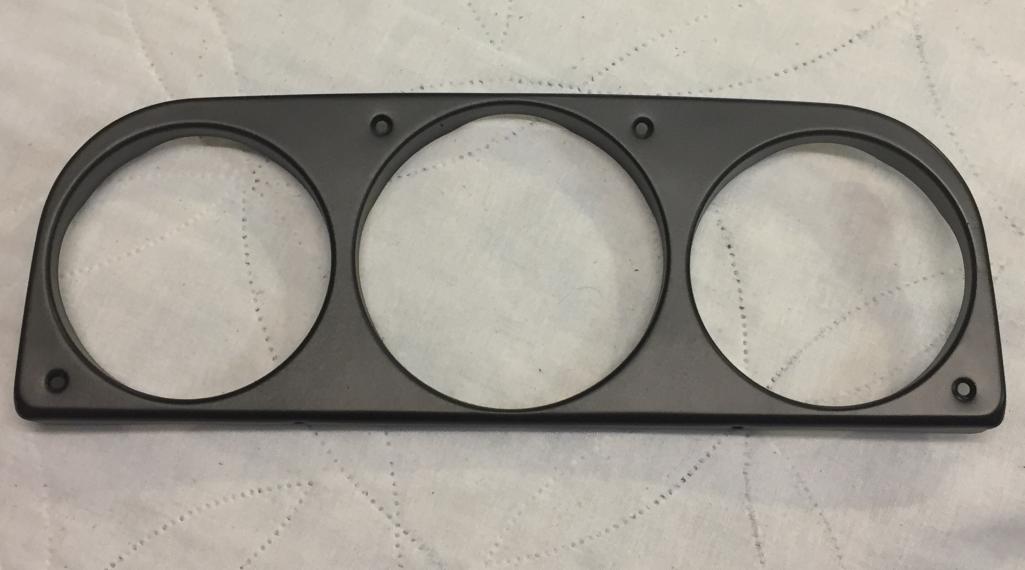
Posted by: mb911 Jun 17 2017, 02:43 PM
Grinder skills will improve with time but blend down a biy more and it won't look as apparent of a repair area. I teach this for a living at the college level..
Posted by: mb911 Jun 17 2017, 02:44 PM
Finish with a blending wheel or a softpack with 120 grit.
Posted by: Dion Jun 17 2017, 03:42 PM
Thanks, Ben. Appreciate the feedback. I do need to get more supplies. I'm
Finding out how much more I need the more I'm getting into repairing the
metal. This is all new territory for me.
So grind welds down "better",then flap disc.
Is that better than using a wire wheel when cleaning up the welds?
Thanks.
Posted by: Dion Jun 19 2017, 09:41 AM
Ok so not much gonna get done over the next couple of weeks.
Family vacation time. Heading out west to see some of the National Parks including Yellowstone & Bryce as well as the Grand Canyon. So...
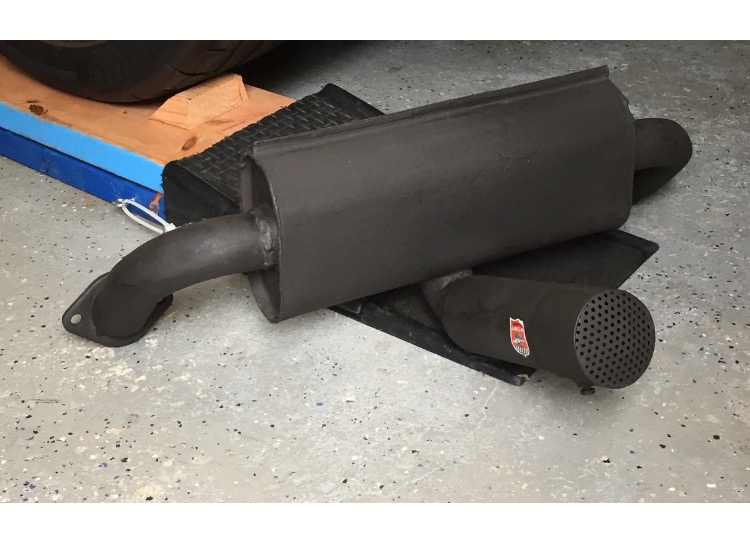
Forgot to share this neat silencer I obtained. Can't wait to hear it. NOS! Pretty neat.
May not make the greatest HP gains but I thought it be cool.
Attached image(s)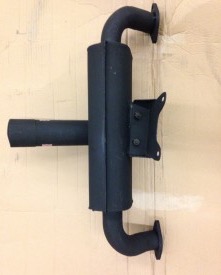
Posted by: Dion Jun 19 2017, 09:45 AM
Original advertisement came with it.
Attached thumbnail(s)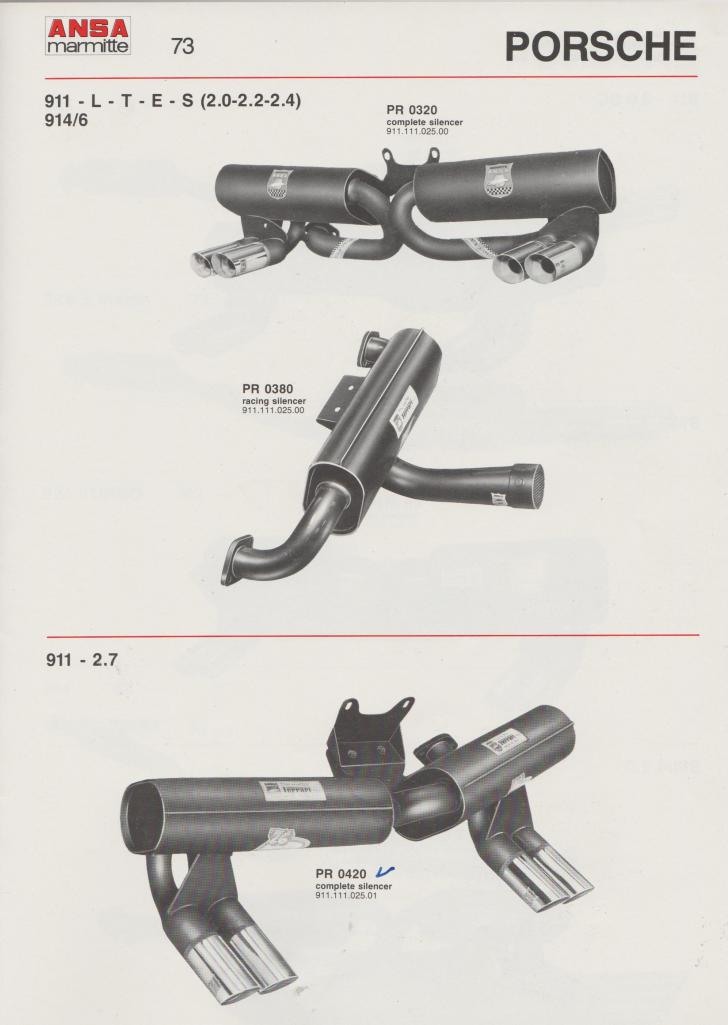
Posted by: mb911 Jun 19 2017, 09:50 AM
Thanks, Ben. Appreciate the feedback. I do need to get more supplies. I'm
Finding out how much more I need the more I'm getting into repairing the
metal. This is all new territory for me.
So grind welds down "better",then flap disc.
Is that better than using a wire wheel when cleaning up the welds?
Thanks.
The best advise I can give anyone when grinding is to just grind the high spots pf the weld down until it is flush with the Parent material. then use a blending disk, Soft pack, Flap disk. Wire brushes are only for removing paint, and rust etc.
I like to to use a die grinder with a thick abrasive wheel on it to bring all high spots down then I use a soft pack which is a glorified sanding disk with a rubber backing that flexes to the contours 36 grit then 80.. this allows it to look virgin..
Posted by: Dion Jun 19 2017, 09:57 AM
Thank you Ben. Going to head to the local hardware store and get some supplies.
Get to some finishing work tonite. I'll post pic, hopefully see improvements.
As you said, it takes time. Hopefully my skills will be improving.
Thank you again.
Posted by: tygaboy Jun 19 2017, 11:52 AM
Go Dion - You're making good progress (unlike some of us...)
LOVE that exhaust! And that advert is very cool. It's great to have those sorts of goodies to go along with the parts.
Posted by: Dion Jun 19 2017, 12:41 PM
Progress is a strong word Chris! Hehehe
Thanks though. It be nice to button this car by
the challenge's allotted time. But....
Yeah I grabbed the silencer cause of its rarity.
I've only seen one on a racing 911. So I thought it was cool.
The fella in Holland could only give me an estimate on decibels
and HP changes. It is literally NOS. A neat find.
Posted by: porschetub Jun 19 2017, 02:09 PM
Progress is a strong word Chris! Hehehe
Thanks though. It be nice to button this car by
the challenge's allotted time. But....
Yeah I grabbed the silencer cause of its rarity.
I've only seen one on a racing 911. So I thought it was cool.
The fella in Holland could only give me an estimate on decibels
and HP changes. It is literally NOS. A neat find.
Hi mate ,like that muffler,it will be load and fun
 .
.Good score on the welder ,I think for rust repair you need the advantage of a better welder,hope you have more luck than I did with my new 180....crapped out after a week and they give me a replacement
,new one seems fine.Keep up the good work
 .
.Posted by: Dion Jun 19 2017, 07:23 PM
Ok per Bens advice. Obtained some flap discs. Trying to correct my sins. Welded some pin holes and reground, then flapdisc the area again. No one will see the amateur job but it's giving me practice. This patch will get cut open again for the snorkel tube.
At least it's a rust free and solid area. Not the prettiest.
Attached thumbnail(s)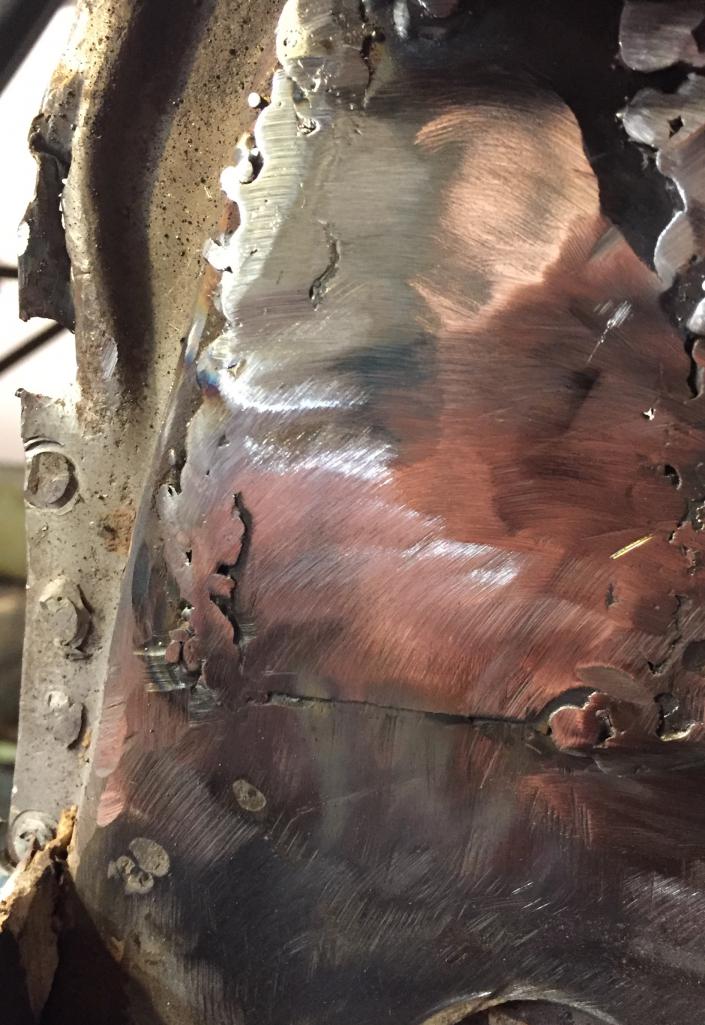
Posted by: Dion Jul 17 2017, 01:41 PM
For your viewing pleasure and critiquing:
Heeding the advice of the experienced on this board, I went back to my trunk floor repair. It improved a little. I'll need some body filler to smooth out for better aesthetics
and then paint. I know it gets covered by the mat and carpet. My concern is being watertight. I do like summer but working with the safety equipment on when it's 85F and
90% humidity , whew! A new appreciation for those that do this for a living.
Attached thumbnail(s)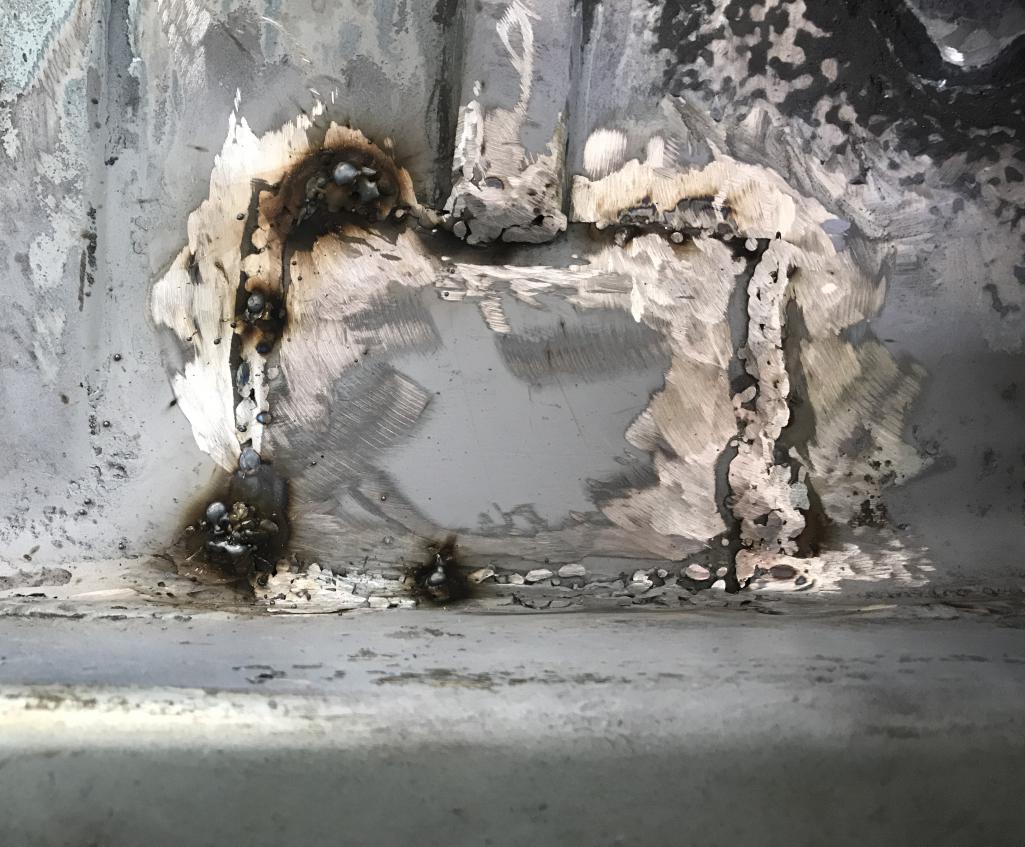
Posted by: Dion Jul 17 2017, 01:42 PM
Top:
Attached thumbnail(s)
Posted by: Dion Jul 17 2017, 01:42 PM
Bottom:
Attached thumbnail(s)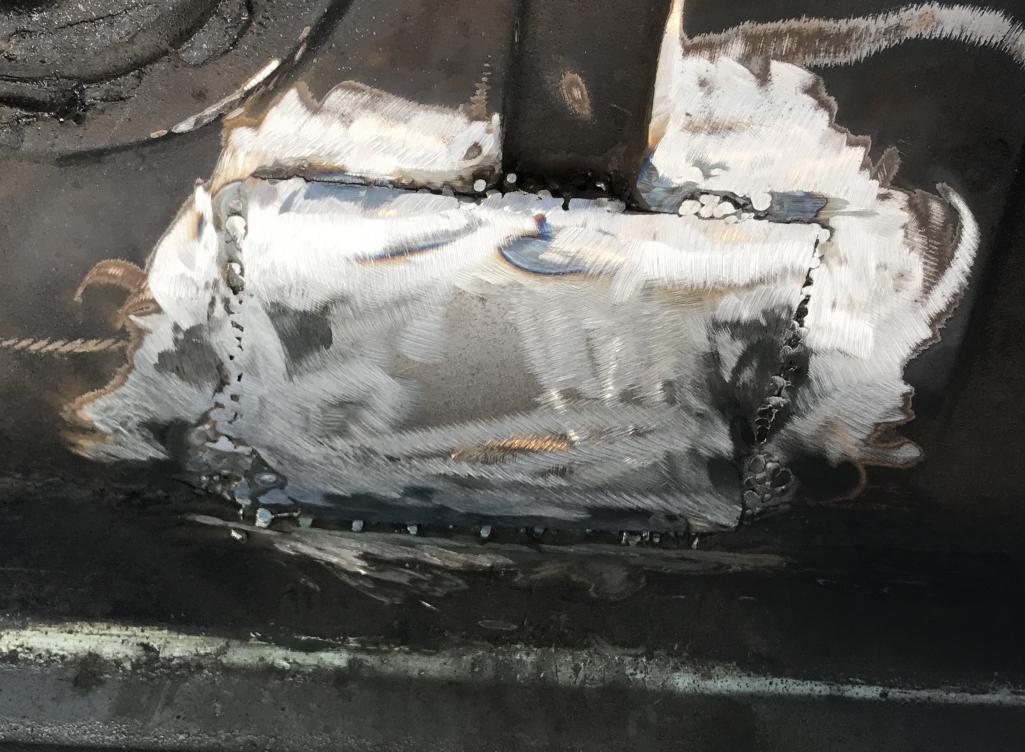
Posted by: tygaboy Jul 17 2017, 06:13 PM
Dion - It's hard to tell from the pics but it looks like you may have the repair piece not quite aligned / in level. It looks like you're ending up with a step where your weld is.
I know I've got it "right" when I can use a 1/4" grinding wheel to knock down the majority of the weld bead and not get into the parent material of either side.
I use the grinder to get close then hit it with a 2" or 3" abrasive wheel on an air angle grinder (depending on the available clearance) to take it almost to the parent material level.
If I have the room, I then do 80 grit on a d/a sander. If no room, 100 grit on the 2"/3".
On the water tight: get a powerful light and shine it on one side of the weld while viewing from the other side. You'll see pinholes where there are, well... pinholes!
buzz them closed and check again til they're all gone.
And remember: It's only metal!
Keep up the great work.
Posted by: Dion Jul 17 2017, 06:52 PM
Chris, you are correct. Slowly getting there. Yes I have a halogen work lamp under the car shining up. Pinholes revealed themselves. Closed them, found another after I hit the area with some primer. Yep it's only metal. I'll still need to address it. But it's way better than my previous attempt. Thanks for the encouraging words.
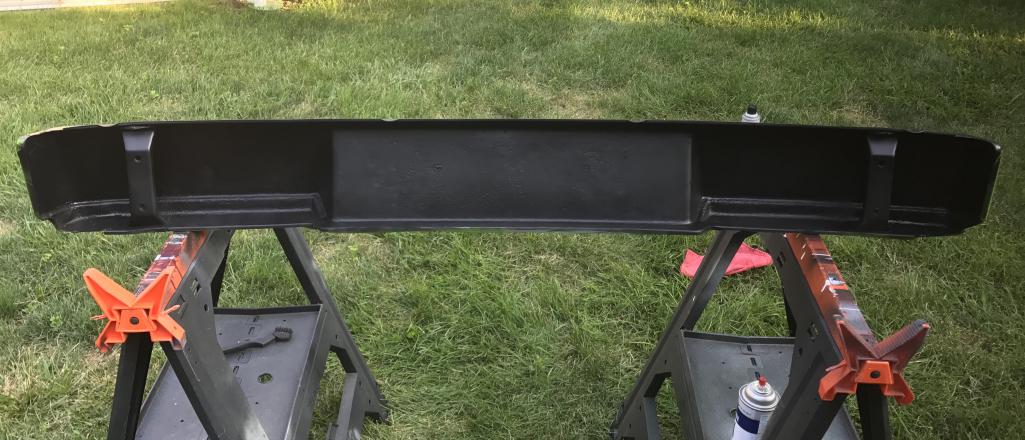
Posted by: Dion Jul 31 2017, 08:38 PM
Rescuing an early bumper. Rusty backside. Sandblasted, some flap disc work. Rust encapsulater from Eastwood. Then some paint. Chrome side is.... well it's better than
my scratched and dented one. This one has a few dimples but less obvious than my previous bumper. Took a buffer to it. It's a 10 footer. Good for my driver. It has built in
patina
Attached thumbnail(s)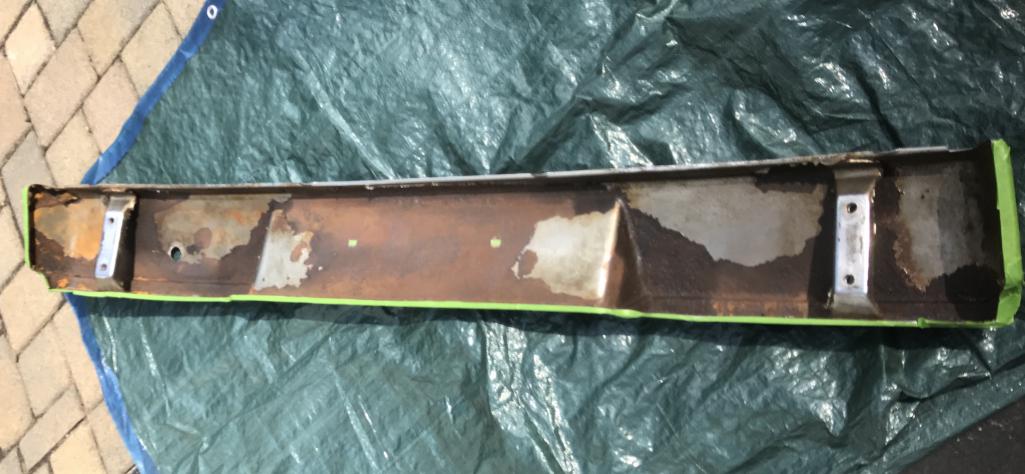
Posted by: mb911 Aug 1 2017, 06:05 AM
Dion - It's hard to tell from the pics but it looks like you may have the repair piece not quite aligned / in level. It looks like you're ending up with a step where your weld is.
I know I've got it "right" when I can use a 1/4" grinding wheel to knock down the majority of the weld bead and not get into the parent material of either side.
I use the grinder to get close then hit it with a 2" or 3" abrasive wheel on an air angle grinder (depending on the available clearance) to take it almost to the parent material level.
If I have the room, I then do 80 grit on a d/a sander. If no room, 100 grit on the 2"/3".
On the water tight: get a powerful light and shine it on one side of the weld while viewing from the other side. You'll see pinholes where there are, well... pinholes!
buzz them closed and check again til they're all gone.
And remember: It's only metal!
Keep up the great work.

Posted by: Dion Aug 1 2017, 06:28 AM
Polished
Attached thumbnail(s)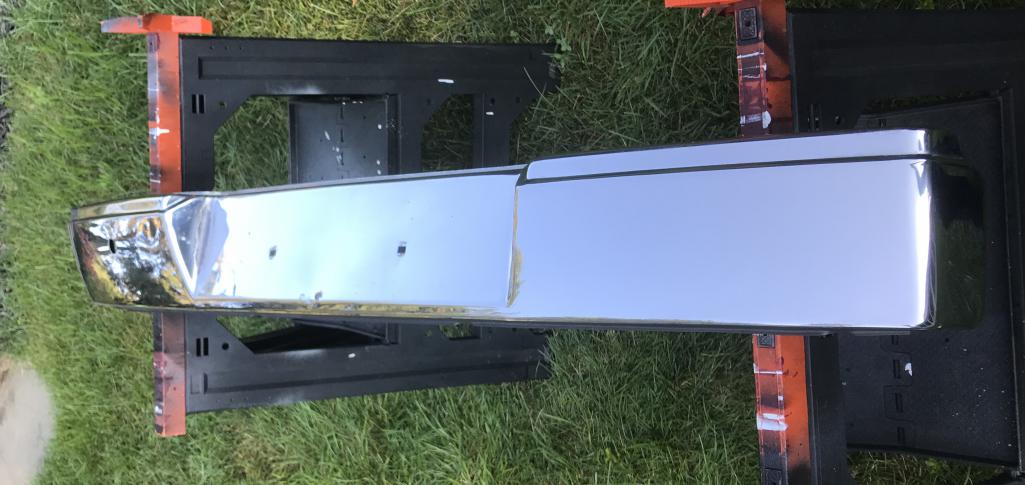
Posted by: mb911 Aug 1 2017, 07:26 AM
Looks nice way better then what I had ..
Posted by: tygaboy Aug 1 2017, 07:26 AM
Looking good, Dion! 
And slightly hijacking but: I'm with you on "driver quality". I plan to drive my car, do an occasional track day, park it near other vehicles, even leave it outside sometimes.
I look at some of the fantastically wonderful work being done by folks like 914dave (and his helpers!) and wonder if I'd ever really want something that nice. I'd be worried sick about every little thing. Heck, just working on my car with the new seat in it is nerve wracking.
It's also a convenient excuse for not spending a ton on paint!
Sorry to distract but this is just my way of supporting you in not obsessing about a bumper that isn't perfect!
Keep on posting - you're helping keep me motivated.
Posted by: Dion Aug 1 2017, 08:53 AM
Chris your too funny man! I have to agree. Mine is a driver for sure.
I'll never have the level of finish some of these builds have because....
Yes I'd prolly be paranoid! I told Dave that first rock chip is gonna hurt
real bad. Heheheh Hell I get nervous about of his tools in the garage near
his ride.
I'll be getting back to welding shortly. Like melting the metal.
Thanks guys!
Posted by: 914dave Aug 1 2017, 12:40 PM
Chris and Dion, enough talk about stone chips!!!! Hahaha
Posted by: Dion Aug 1 2017, 01:22 PM
Chris and Dion, enough talk about stone chips!!!! Hahaha

Posted by: Dion Aug 13 2017, 02:43 PM
Rear "boot" repair part 2
Went back to rear trunk repair to seal up pin holes from welding. Upon grinding more metal away found some more weak metal. Repairs ensued.
Cut, removed and replaced the original patch panel.
Followed that with an adjacent area repair. Used "all metal" for the pinholes I could not
seal up. Still working on sanding technique. But it's a trunk floor. Not concours worthy
but rust free and strong. I'll add seam sealer later when the primer dries. Working on smoothing the bottom of this area next.
Attached thumbnail(s)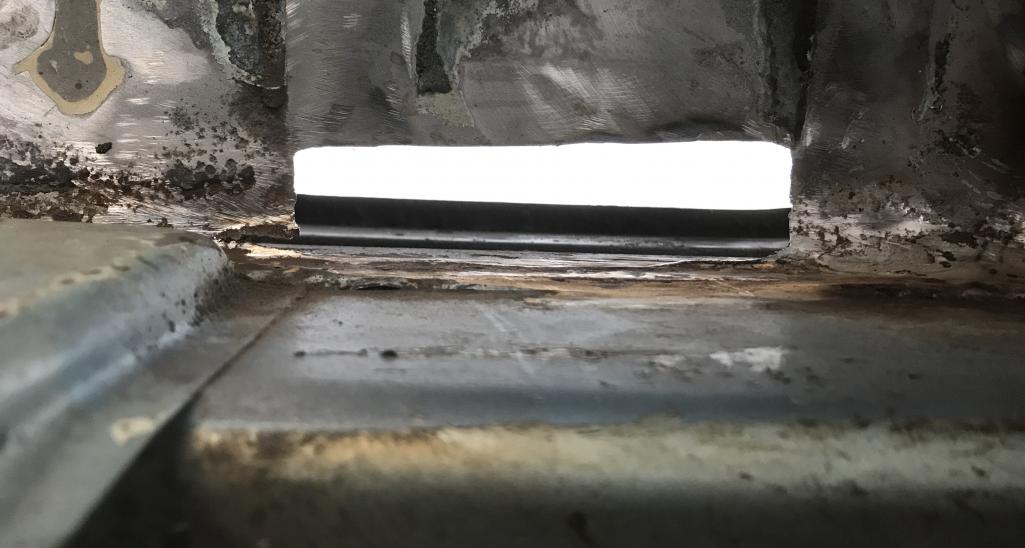
Posted by: Dion Aug 13 2017, 02:44 PM
Pic
Attached thumbnail(s)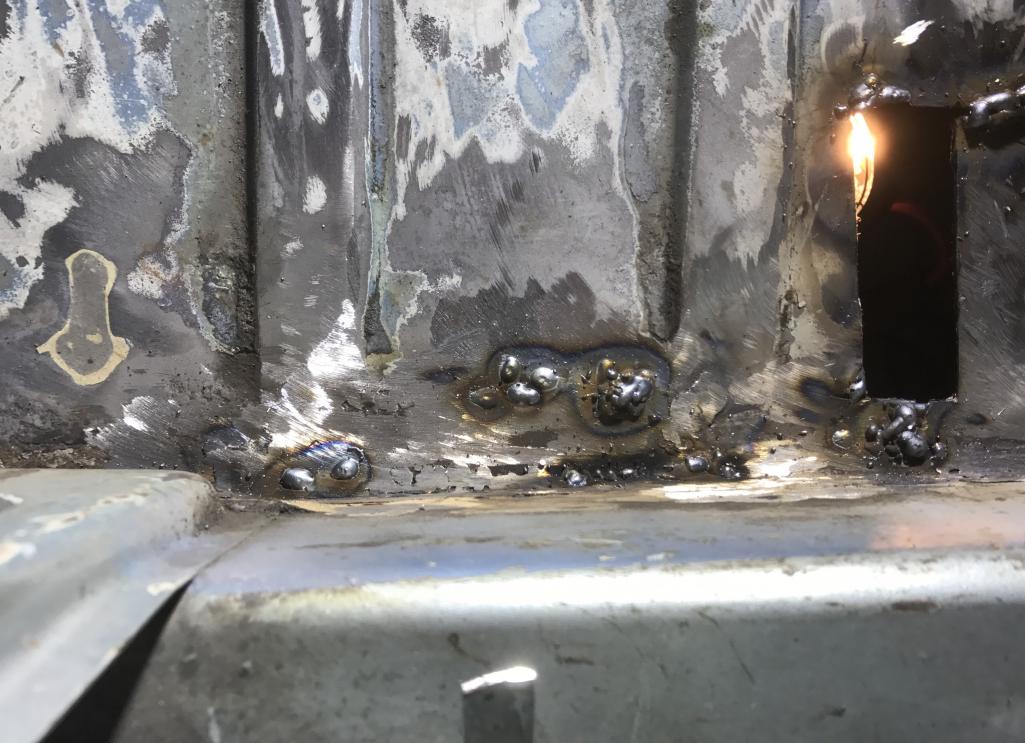
Posted by: Dion Aug 13 2017, 02:45 PM
Pic
Attached thumbnail(s)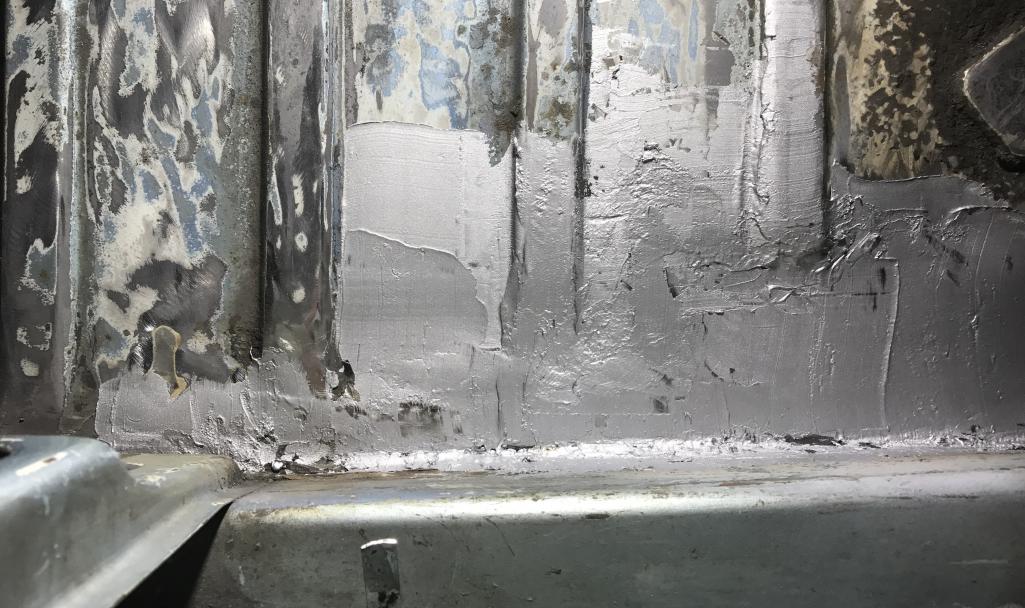
Posted by: Dion Aug 13 2017, 02:46 PM
Pic
Attached thumbnail(s)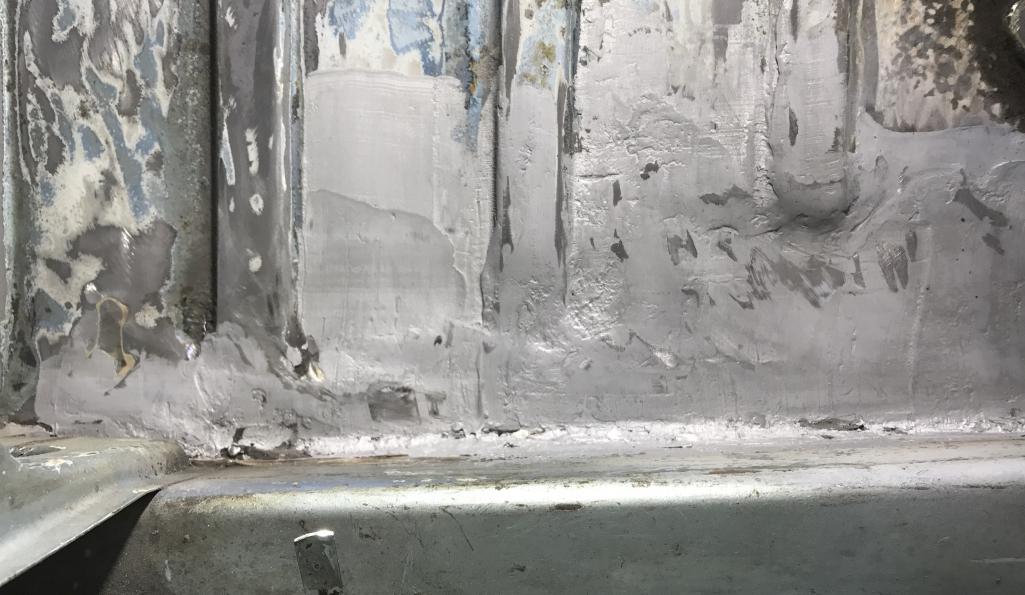
Posted by: Dion Aug 15 2017, 07:32 PM
Primer & seam sealer for trunk patch area. Topside and muffler side.
Onwards and upwards. Slowly getting the hang of this.
Unbelievable how many items one needs to purchase to complete certain tasks.
Didn't really know how many grades of sandpaper existed until I entered
this realm of bodywork. It's far from the best repair.
Constantly learning from experience of what is proper and what was a bad decision as most things in life. One obvious lesson is be patient!!! Don't rush things.
Thanks for looking in.
Attached thumbnail(s)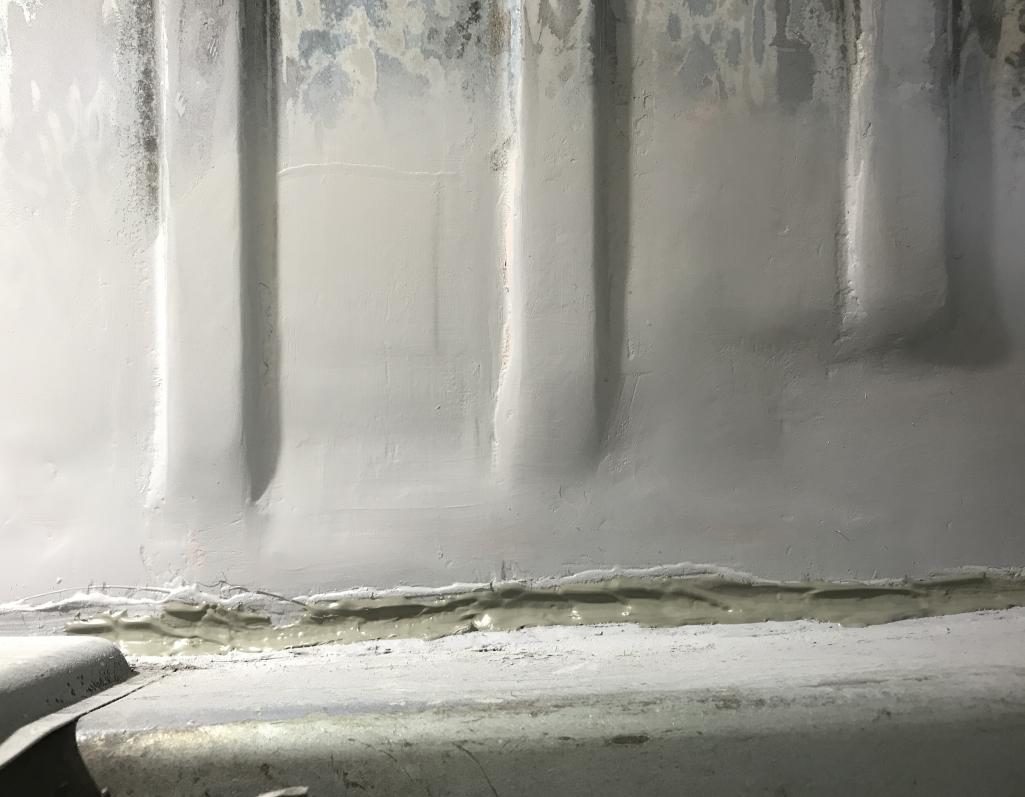
Posted by: Dion Aug 31 2017, 07:12 PM
Ok here's an update for August. Obviously not going to make it for the
deadline of 9-14. I must admit I have been a bit distracted as I just sold
my 1992 VW GTi of which I owned since new on BaT. So that will fund the rest of this
resto. Sad to see it go but I can't afford to maintain a fleet. Especially with my daughter in college. Ok I digress.
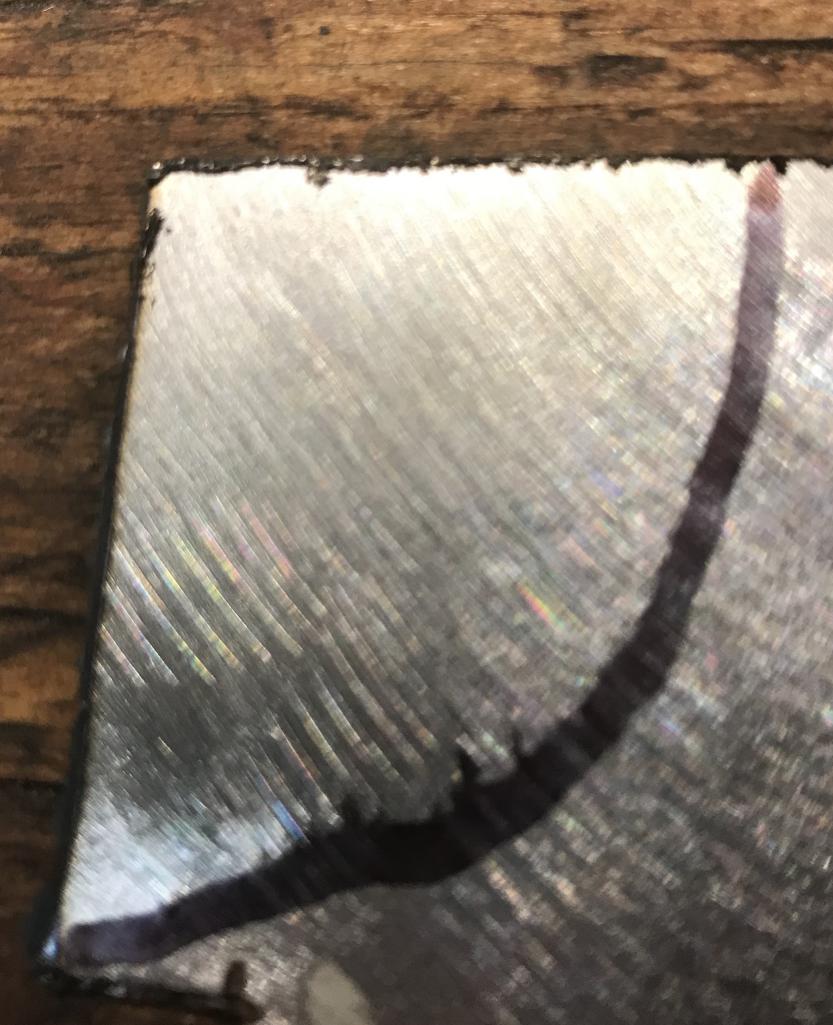
I worked on the left long that had a hairline crack in it and also a hole that was adjacent to the seat rail on drivers side rear. Trying to heed advice from the experts here.
I'm getting there! Slowly but getting there.
I ground the welds down and then smoothed them a bit with the "all metal" aluminum
"bondo". Will coat with primer next.
Attached image(s)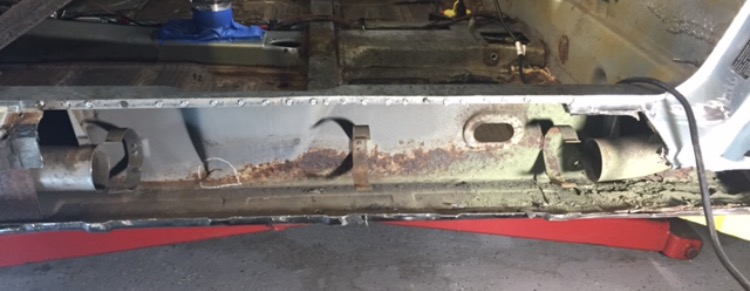
Posted by: Dion Aug 31 2017, 07:14 PM
Pix
Attached thumbnail(s)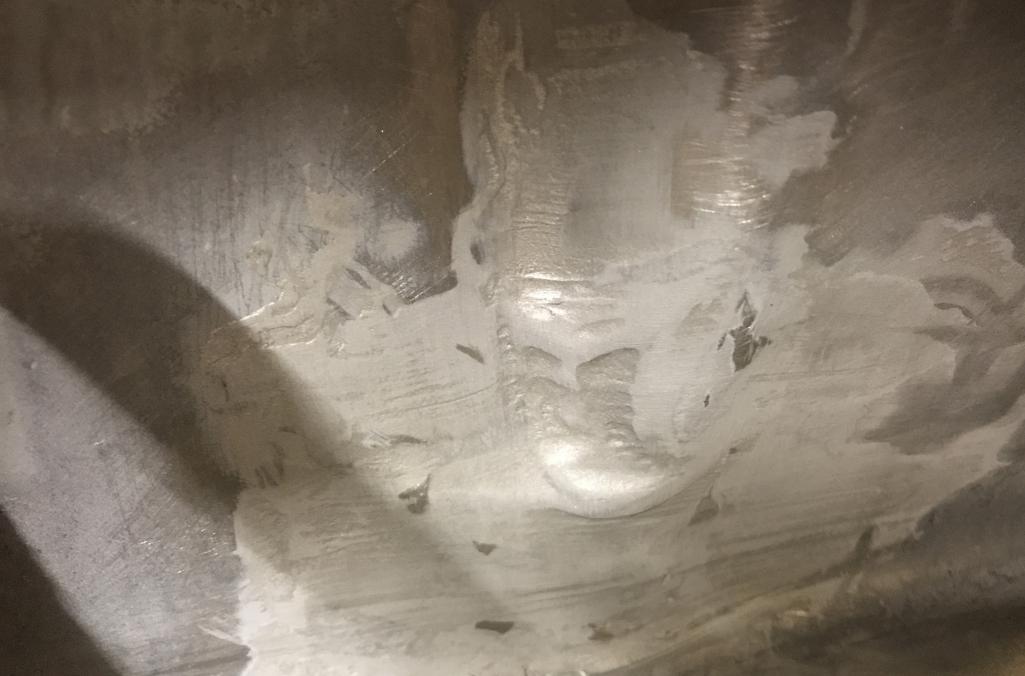
Posted by: Dion Aug 31 2017, 07:16 PM
Seat rail area, sorry pics loaded in reverse order.
Attached thumbnail(s)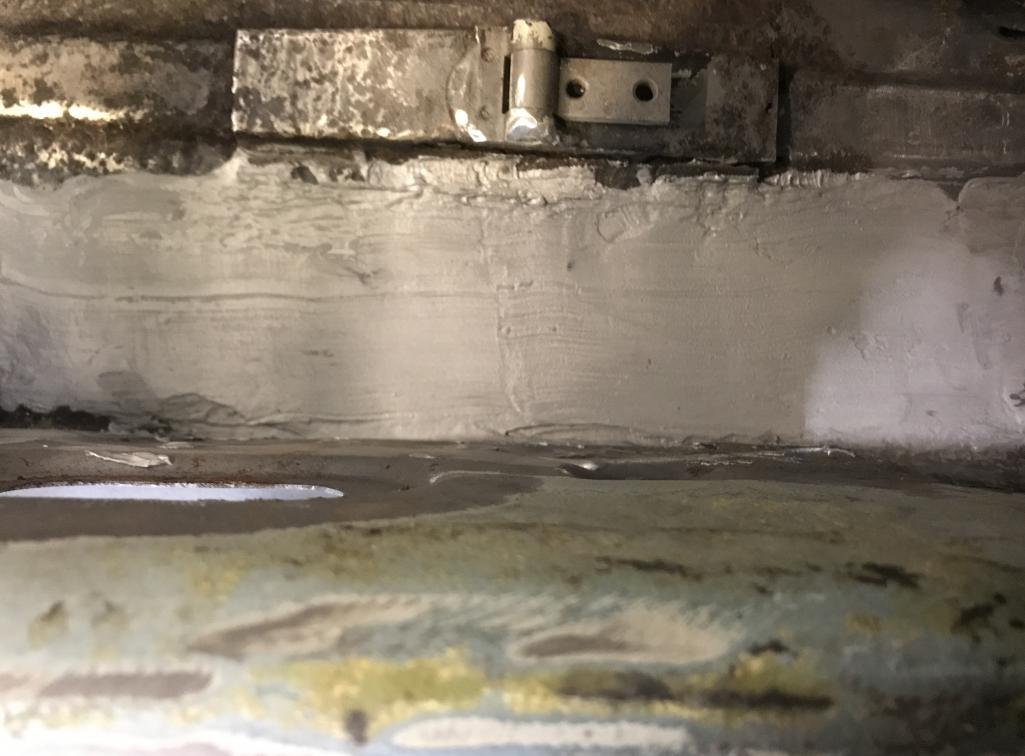
Attached image(s)
Posted by: Dion Sep 13 2017, 06:21 AM
Well it's the day before 9-14-17 challenge.
Figure I'd update today as I'm nowhere near done.
Worked on removing rear brakes & trailing arms.
Attached thumbnail(s)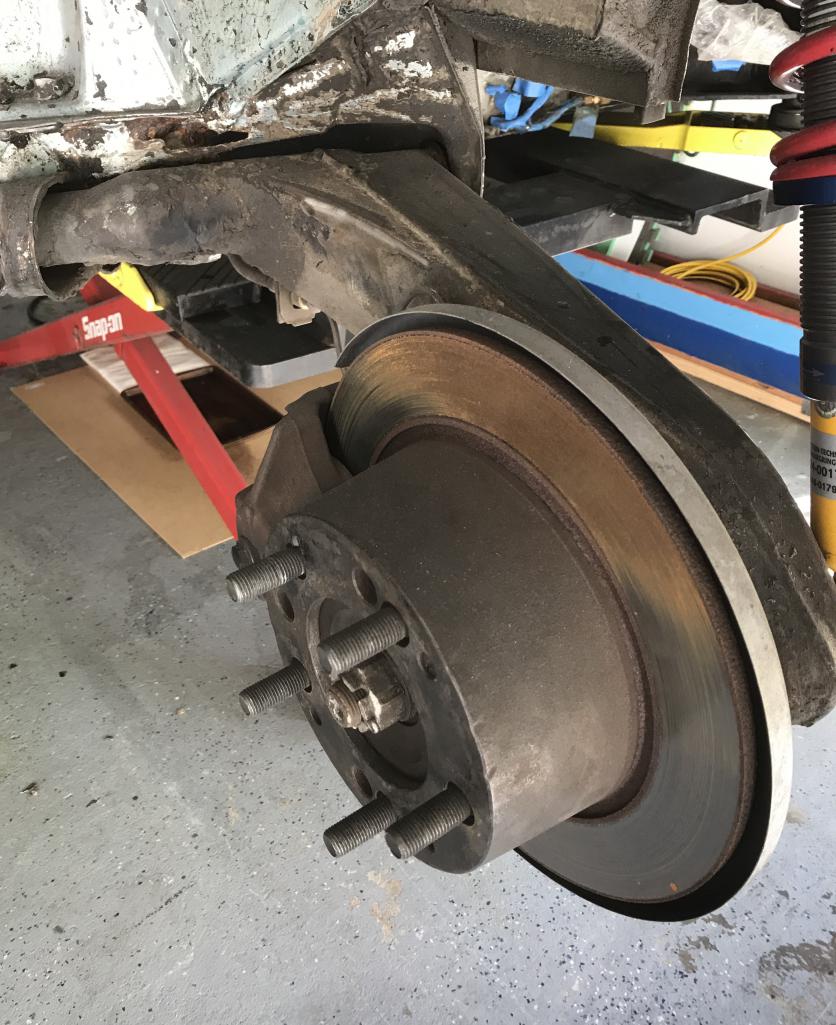
Posted by: Dion Sep 13 2017, 06:22 AM
Pic
Attached thumbnail(s)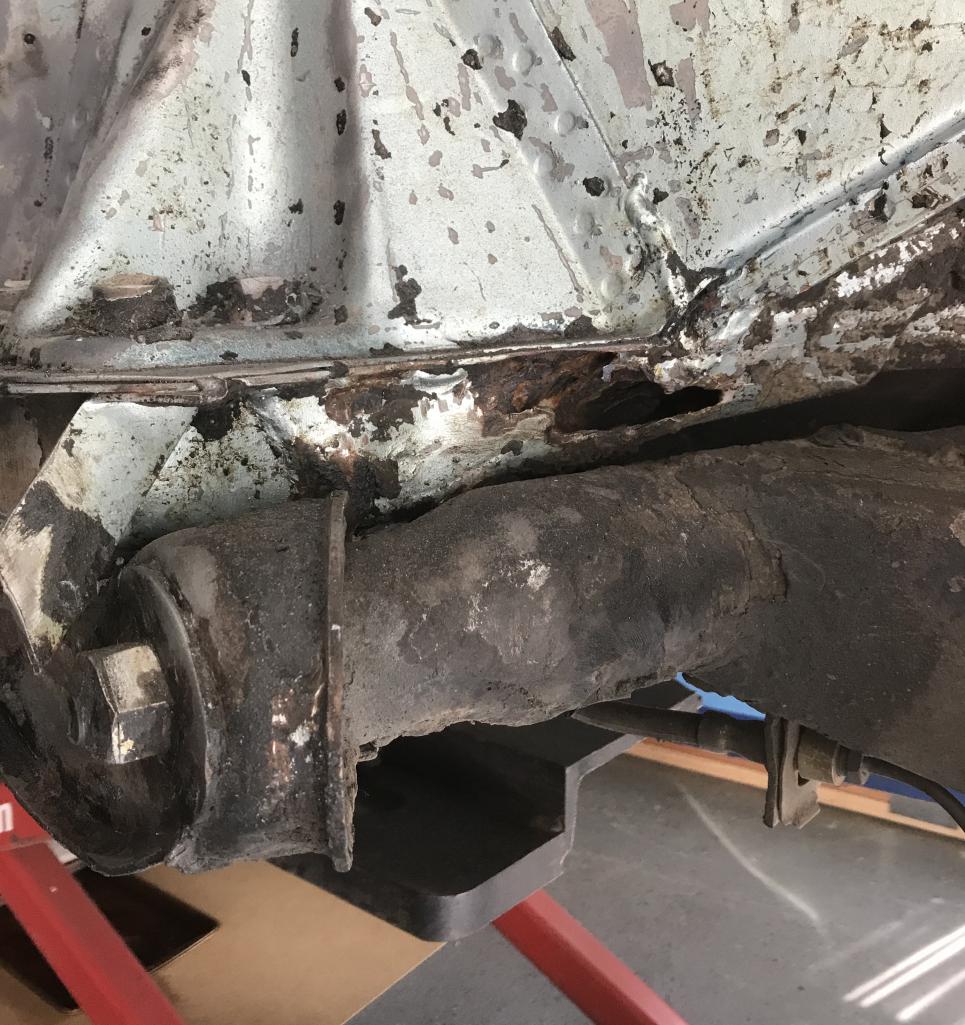
Posted by: Dion Sep 13 2017, 06:24 AM
Rear console will be cut out and replaced.
Attached thumbnail(s)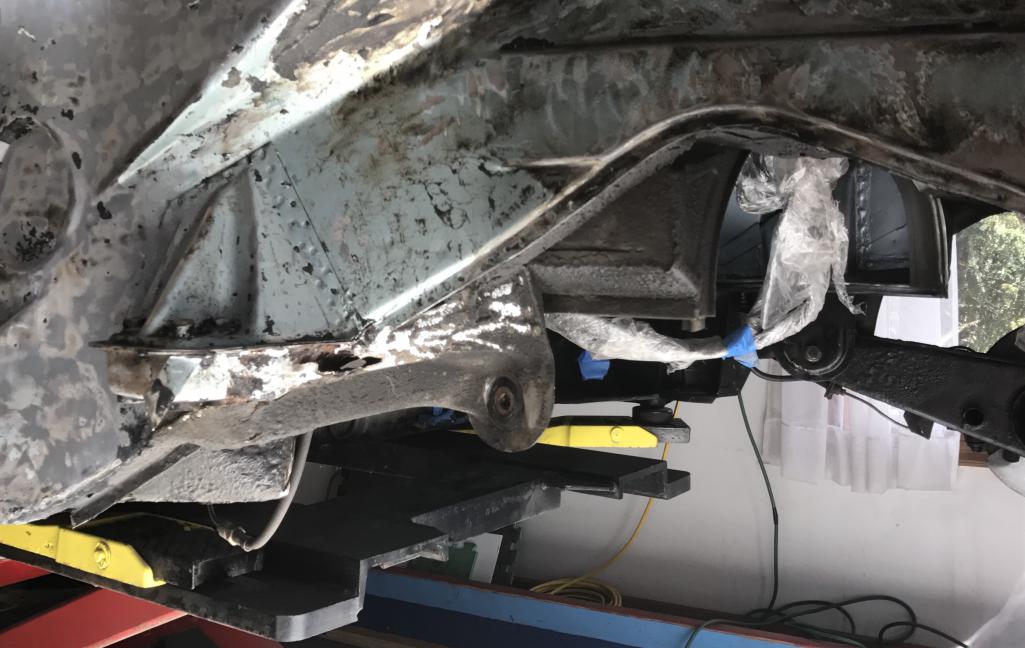
Posted by: Dion Sep 13 2017, 06:27 AM
Engine bay side is nice and clean (rust free?)
Reconditioned arms courtesy of Jayman.
Attached thumbnail(s)
Posted by: Dion Sep 13 2017, 06:33 AM
After the work on Sat. had a visit from Dave (914Dave) on Sunday.
Hopefully the good karma from his car will transfer to my U-boat.
He needed a "more flat" floor than his garage had to set up camber/caster measurements.
Before he goes to a final setting at a "pro" shop.
His car is stunning.
Attached thumbnail(s)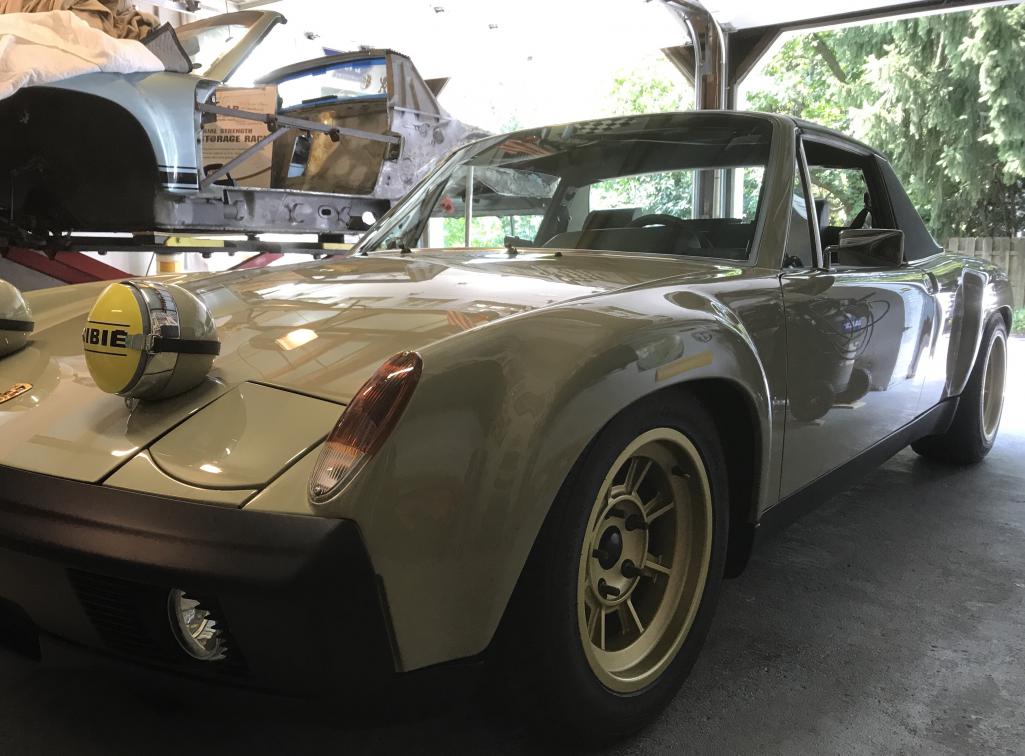
Posted by: jmitro Sep 13 2017, 10:10 AM
that's awesome; what size wheels/tires in the rear?
Posted by: Dion Sep 13 2017, 10:25 AM
Hey Joseph, 225/50/15. 8 up front, 9 in the back.
Daves rims are repops from Group4 of the Campagnolo rims.
Just like the Lancia Stratos ran. They're very,very cool.
Posted by: Dion Sep 25 2017, 07:00 PM
Right so Build off challenge is on the simmer. I actually feel less
pressure working on this car now.
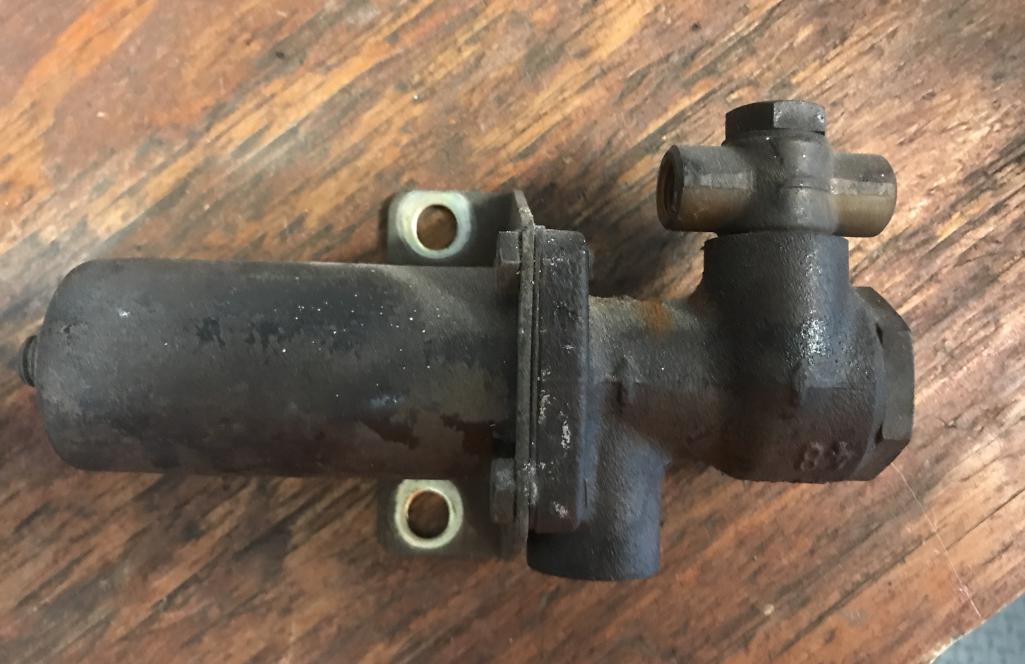
Changed gear from body work to working on mechanical
bits. First up removing rear brake lines and "ABS" device.
Will send that bugger of to PMB for an overhaul along with the
front S calipers.
Attached thumbnail(s)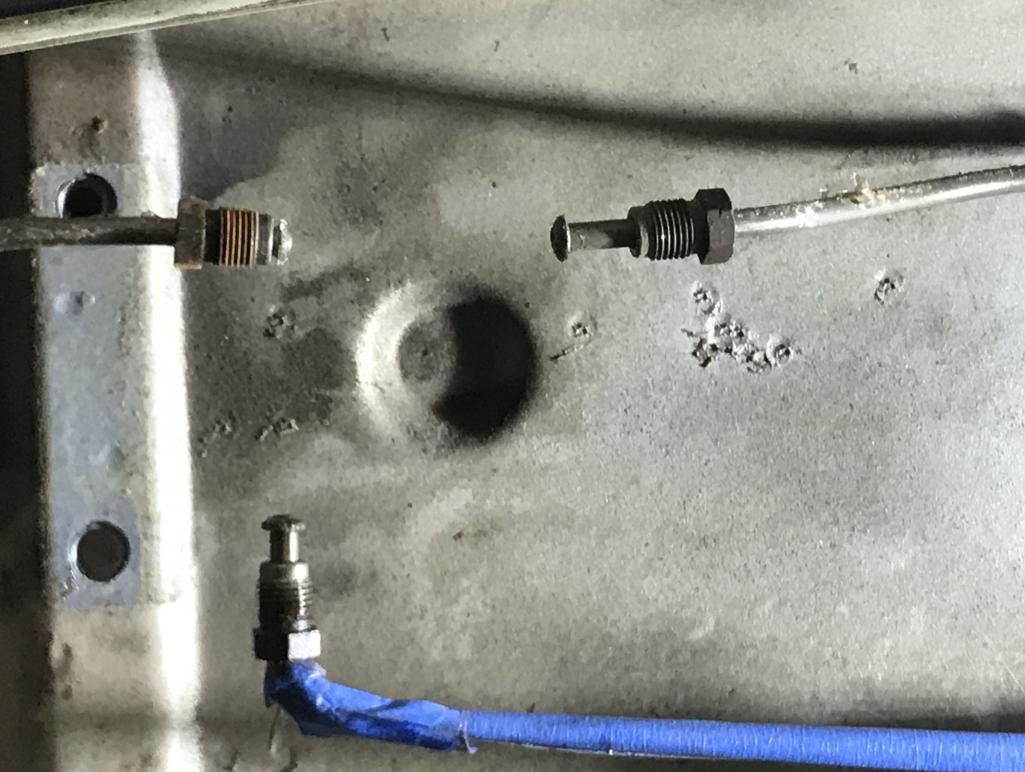
Posted by: Dion Sep 25 2017, 07:01 PM
Brake line layout
Attached thumbnail(s)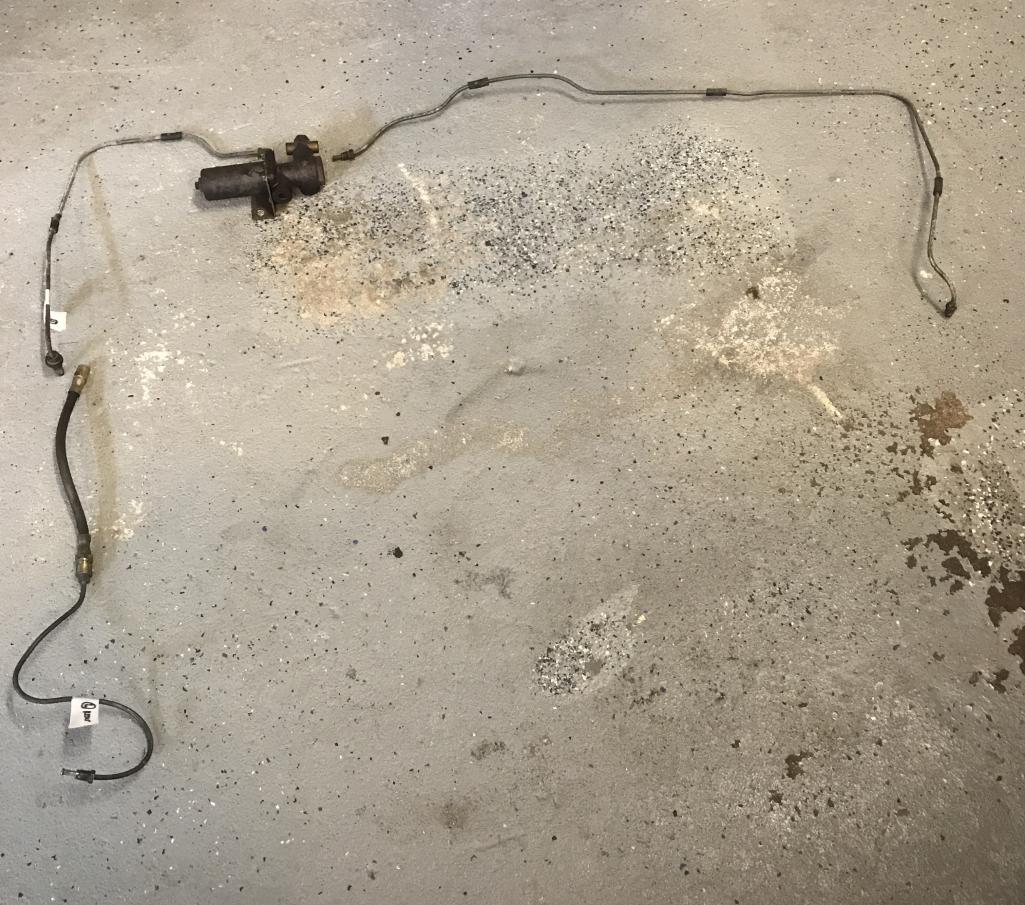
Posted by: Dion Sep 25 2017, 07:07 PM
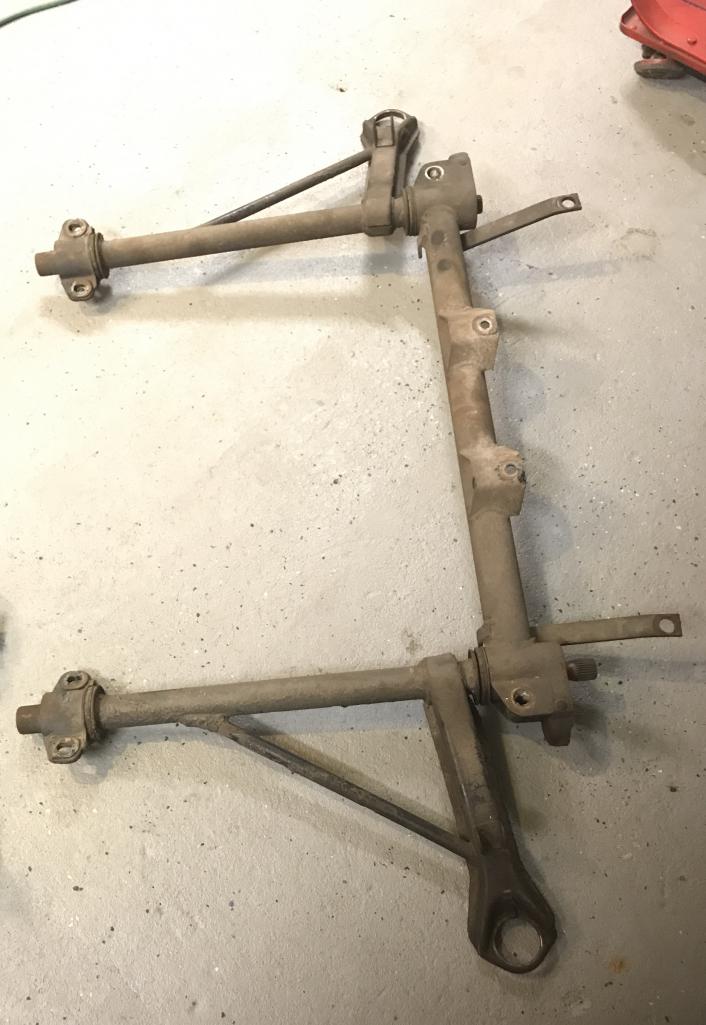
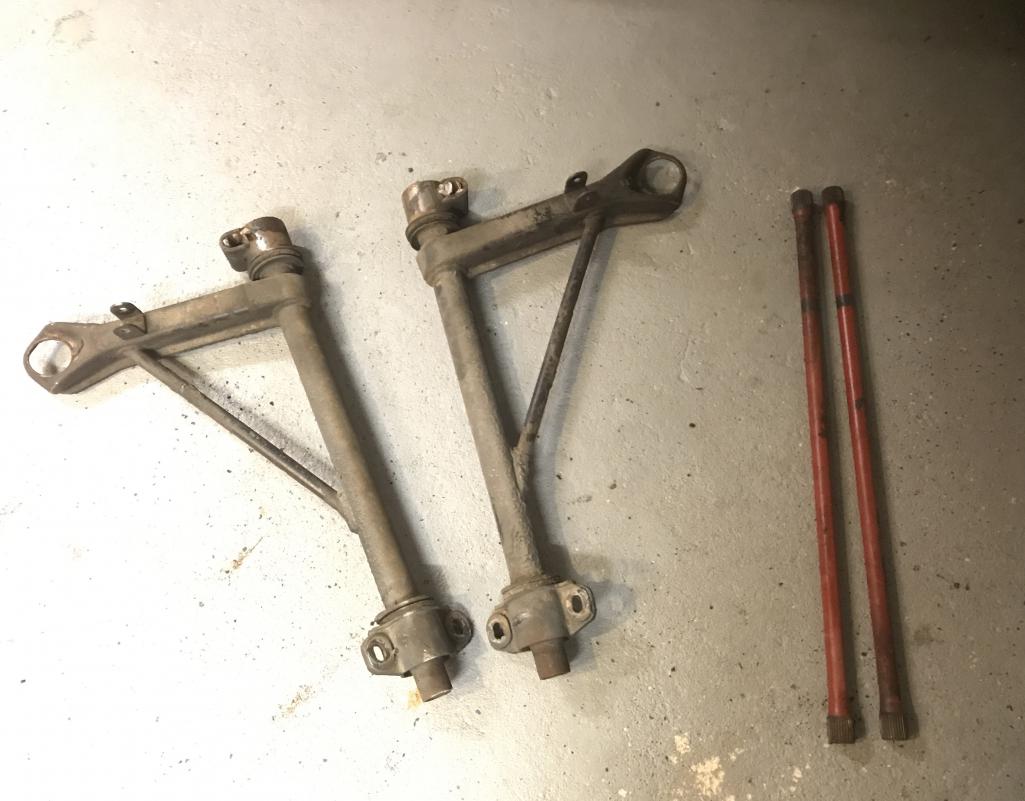
This evening removed front control arms to replace all the bushings
and give it a good cleanup. The rust that poured from the torsion tubes, unreal.
Makes no sense to have fresh brakes and lines and not freshen the front end.
Taking those arms off was a bugger of a job. Took the whole assembly out
and used the "heavy" lift to keep all still while a nice sized hammer
helped tap out the arms from cross member. Felt good to make mechanical progress.
Attached thumbnail(s)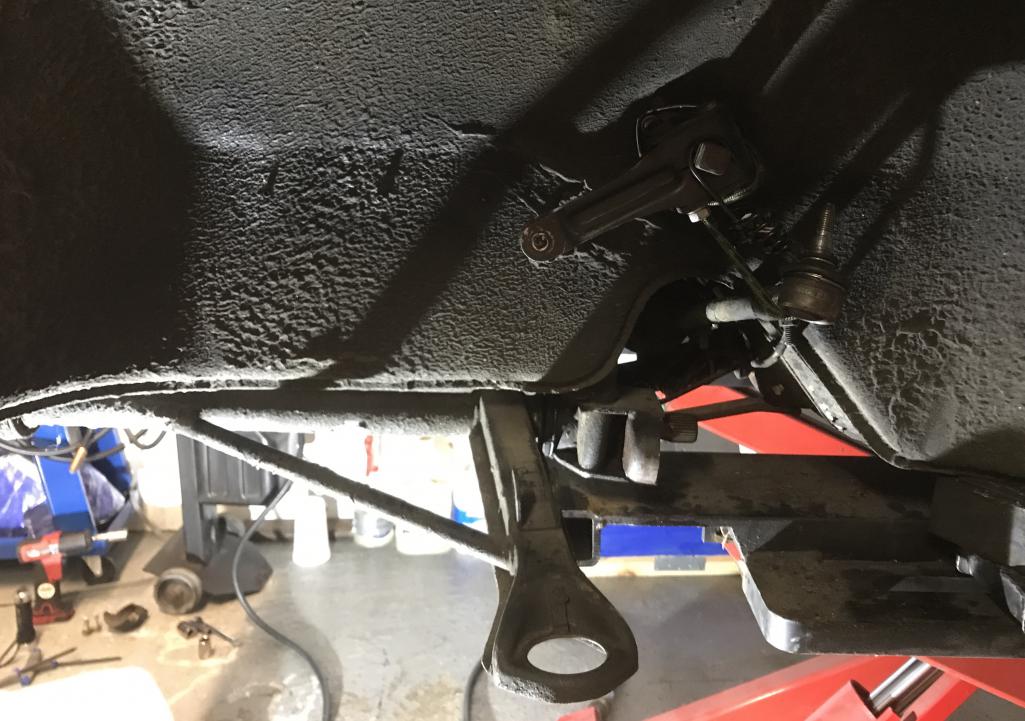
Posted by: Dion Sep 25 2017, 07:08 PM
Assembly and control arms removed
Attached thumbnail(s)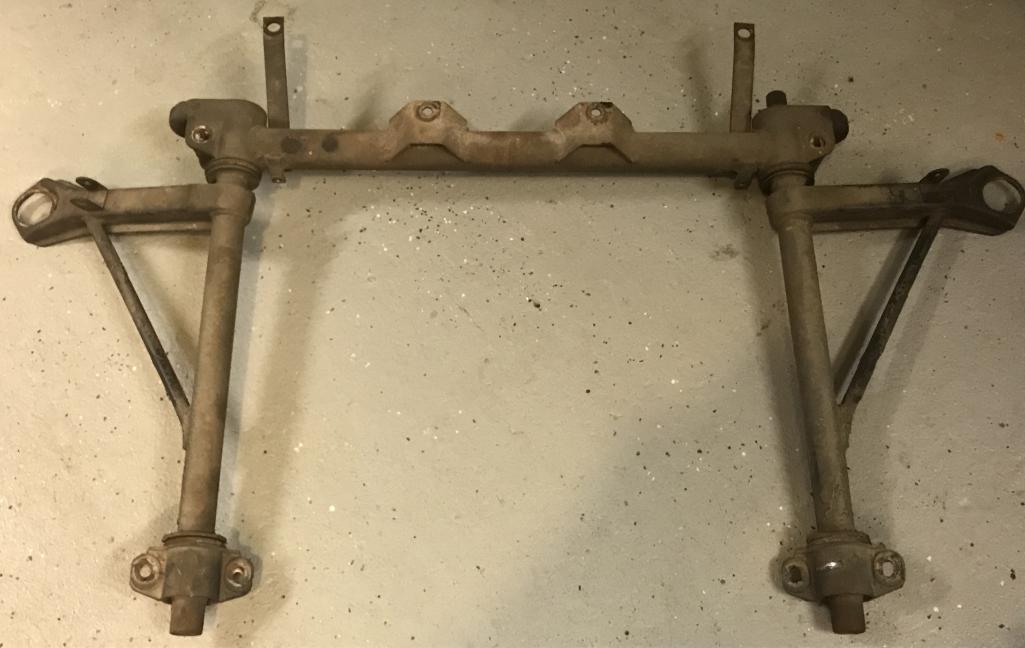
Posted by: porschetub Sep 25 2017, 09:04 PM
Yes correct you switch jobs to something else for a while and you come back to the other better focused....has always worked for me.
Cheers mate.
Posted by: 914dave Sep 26 2017, 08:10 AM
Yes correct you switch jobs to something else for a while and you come back to the other better focused....has always worked for me.
Cheers mate.
He's waiting on me to help with the inner drains rail patch. He's been patient. He's done a lot of the crap work. The going back together should go fast.
Posted by: tygaboy Sep 26 2017, 08:16 AM
Yes correct you switch jobs to something else for a while and you come back to the other better focused....has always worked for me.
Cheers mate.
He's waiting on me to help with the inner drains rail patch. He's been patient. He's done a lot of the crap work. The going back together should go fast.
Dave - It's great that you and Dion are there for each other. Having another set of eyes and hands is (nearly!) always a good thing. I most appreciate the way Martin, my build co-conspirator, helps talk me off the ledge when I start to get overwhelmed by whatever the latest challenge happens to be. Having someone there who isn't so emotionally attached to the car really helps me maintain perspective.
So... Good on you both. Now get back to work. I want to see the replacement rear suspension console go in!
Posted by: Dion Sep 26 2017, 08:26 AM
Yes correct you switch jobs to something else for a while and you come back to the other better focused....has always worked for me.
Cheers mate.
He's waiting on me to help with the inner drains rail patch. He's been patient. He's done a lot of the crap work. The going back together should go fast.
Well yeah, waiting for your expertise. You've been a busy lad.
Not that I don't have enough to do that I can get into trouble with. Heheheh
Posted by: Dion Sep 26 2017, 08:31 AM
Yes correct you switch jobs to something else for a while and you come back to the other better focused....has always worked for me.
Cheers mate.
He's waiting on me to help with the inner drains rail patch. He's been patient. He's done a lot of the crap work. The going back together should go fast.
Dave - It's great that you and Dion are there for each other. Having another set of eyes and hands is (nearly!) always a good thing. I most appreciate the way Martin, my build co-conspirator, helps talk me off the ledge when I start to get overwhelmed by whatever the latest challenge happens to be. Having someone there who isn't so emotionally attached to the car really helps me maintain perspective.
So... Good on you both. Now get back to work. I want to see the replacement rear suspension console go in!
Chris man, Dave has been outstanding in helping me achieve my goals with this build.
He allows me to screw up and learn from my mishaps and then allows ME to correct them which I appreciate. Only way to learn.
And yes, I CANT WAIT TO GET THAT CONSOLE IN! Hahahahah.
I still owe you a coffee Chris. Need to get that done. :-)
Posted by: 914dave Sep 26 2017, 08:35 AM
Yes correct you switch jobs to something else for a while and you come back to the other better focused....has always worked for me.
Cheers mate.
He's waiting on me to help with the inner drains rail patch. He's been patient. He's done a lot of the crap work. The going back together should go fast.
Dave - It's great that you and Dion are there for each other. Having another set of eyes and hands is (nearly!) always a good thing. I most appreciate the way Martin, my build co-conspirator, helps talk me off the ledge when I start to get overwhelmed by whatever the latest challenge happens to be. Having someone there who isn't so emotionally attached to the car really helps me maintain perspective.
So... Good on you both. Now get back to work. I want to see the replacement rear suspension console go in!
Chris man, Dave has been outstanding in helping me achieve my goals with this build.
He allows me to screw up and learn from my mishaps and then allows ME to correct them which I appreciate. Only way to learn.
And yes, I CANT WAIT TO GET THAT CONSOLE IN! Hahahahah.
I still owe you a coffee Chris. Need to get that done. :-)
Chris
I'm only concerned that he's going to cover all his fine work with stickers.
 he has an unresolved issue. Hahahaha!!!
Posted by: Dion Nov 6 2017, 06:11 PM
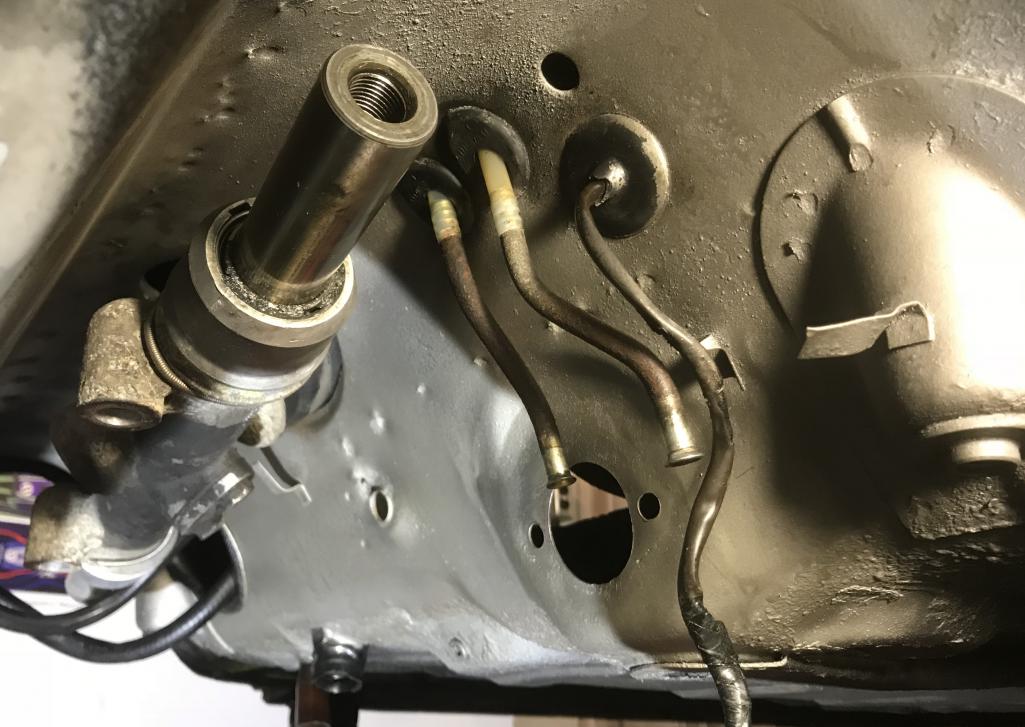
I prepped and painted the steering rack crossbar. Also cleaned up the rack & master cylinder area.
Just received back my reconditioned A-arms and bushings as well as new swaybar droplink from Elephant. Also picked up new CV/Axles and rear control arm bushings from Tangerine.
While probing a “tiny” area of perforation on the left front fender; a nice piece popped
right off. Pure bondo. Ok another area to get sorted and it will.
But first to get started on the rear console that Chris (Tygaboy) provided.
Always enjoyable removing spotwelds so that will be my life after work for the
next couple of nights.
Cheers all.
Attached thumbnail(s)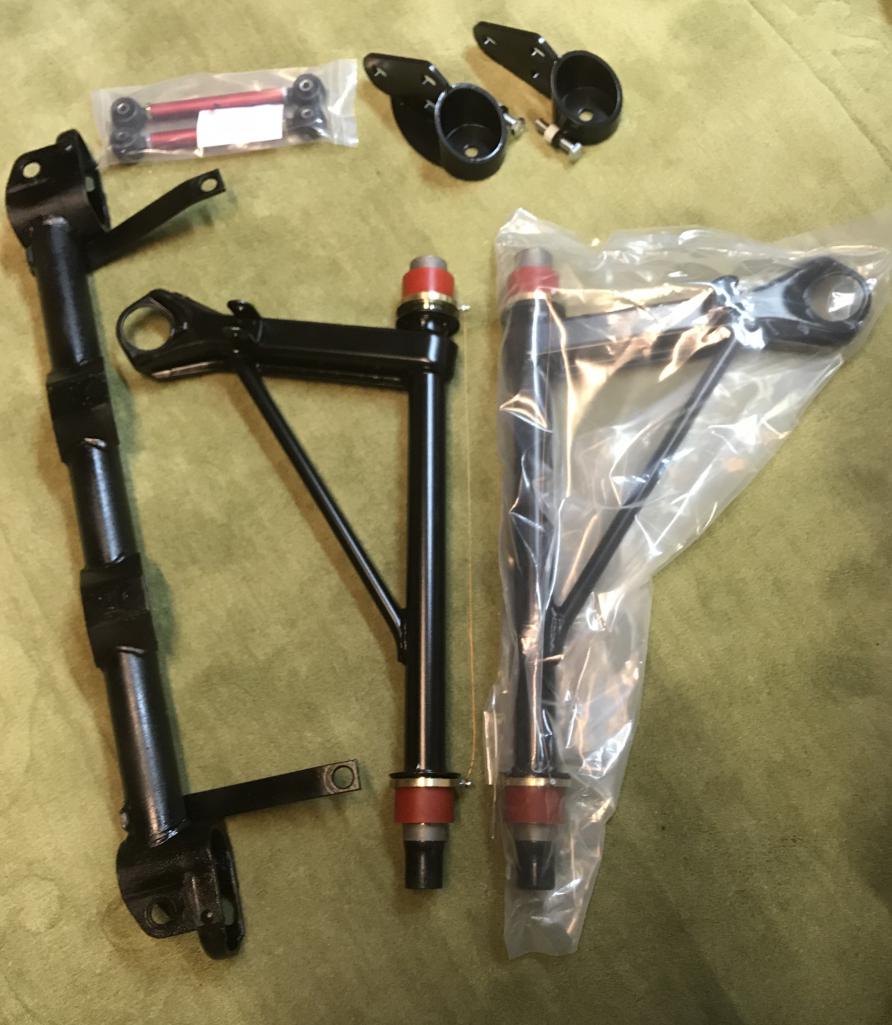
Posted by: Dion Nov 6 2017, 06:12 PM
Front left fender bottom next to door opening. 
Attached thumbnail(s)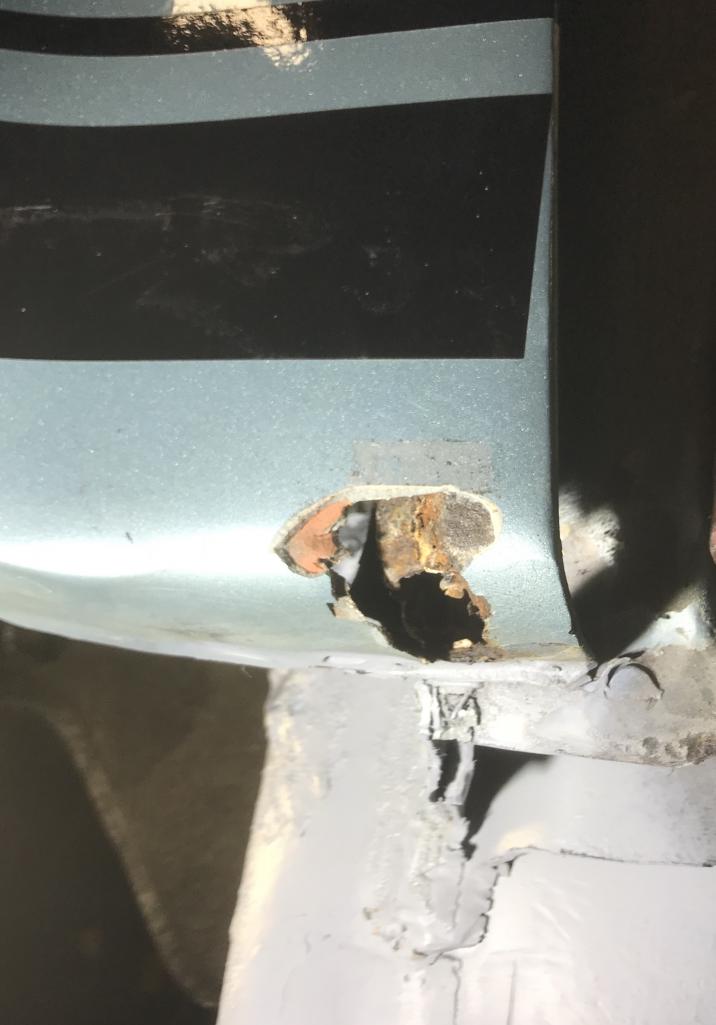
Posted by: tygaboy Nov 6 2017, 08:21 PM
Dion - Great to see you're making progress! It's been a while since you posted and I was getting a little worried. Glad to see it was all for naught.
ANd maybe we should have a little side bet on if you'll get your console in before I get the Tangerine raised pick ups installed! I'll take anything to help me get going on that.
And no complaining - I have to remove BOTH consoles!
Keep on keepin' on!
Posted by: Dion Nov 6 2017, 08:47 PM
Dion - Great to see you're making progress! It's been a while since you posted and I was getting a little worried. Glad to see it was all for naught.
ANd maybe we should have a little side bet on if you'll get your console in before I get the Tangerine raised pick ups installed! I'll take anything to help me get going on that.
And no complaining - I have to remove BOTH consoles!
Keep on keepin' on!
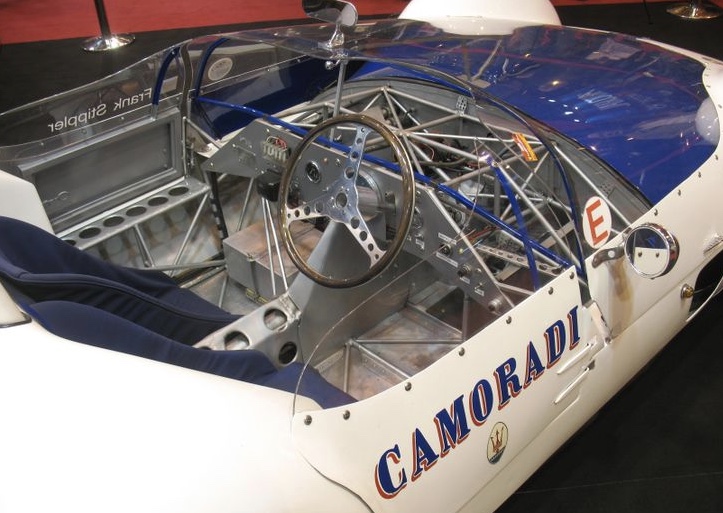
Chris I just checked your thread. OMG heheh
It’s staggering how much fabrication you’ve done.
It really is a Maserati/Porsche birdcage replica!
Heheheh
What Chris 914 will look like when complete see below
Attached image(s)
Posted by: Dion Dec 10 2017, 06:00 PM
Ok so winter is setting in on Pennsylvania.
I don’t have my heat set up in garage yet therefore no
welding as of now.
So went ahead with some small projects I could do in the basement.
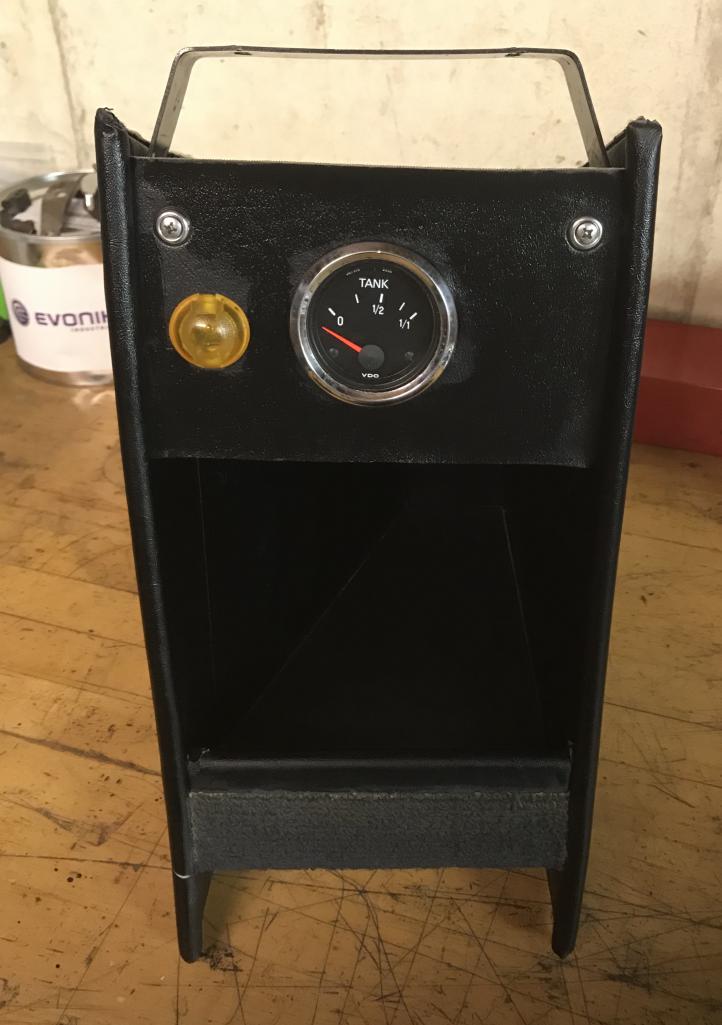
Placed the gauges in the gauge frame. I modified
a center console for a fuel gauge to have a home since the “6”
oil press/temp gauge is on the dash now. Obtained a really cool
warning lamp like the 917,935’s had. I still wanted a low fuel lamp.
So the yellow will glow when we are low! Should work out nice.
Attached thumbnail(s)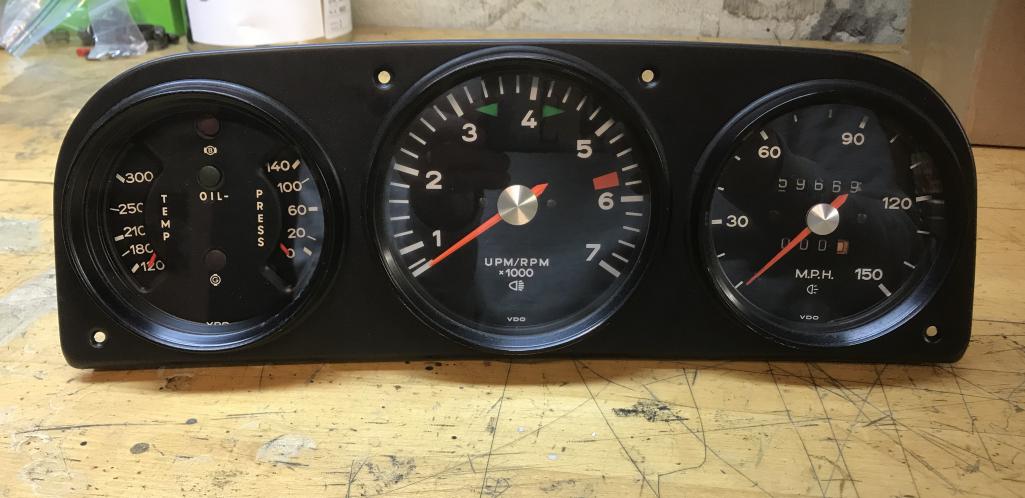
Posted by: Dion Dec 10 2017, 06:00 PM
Pic2
Attached thumbnail(s)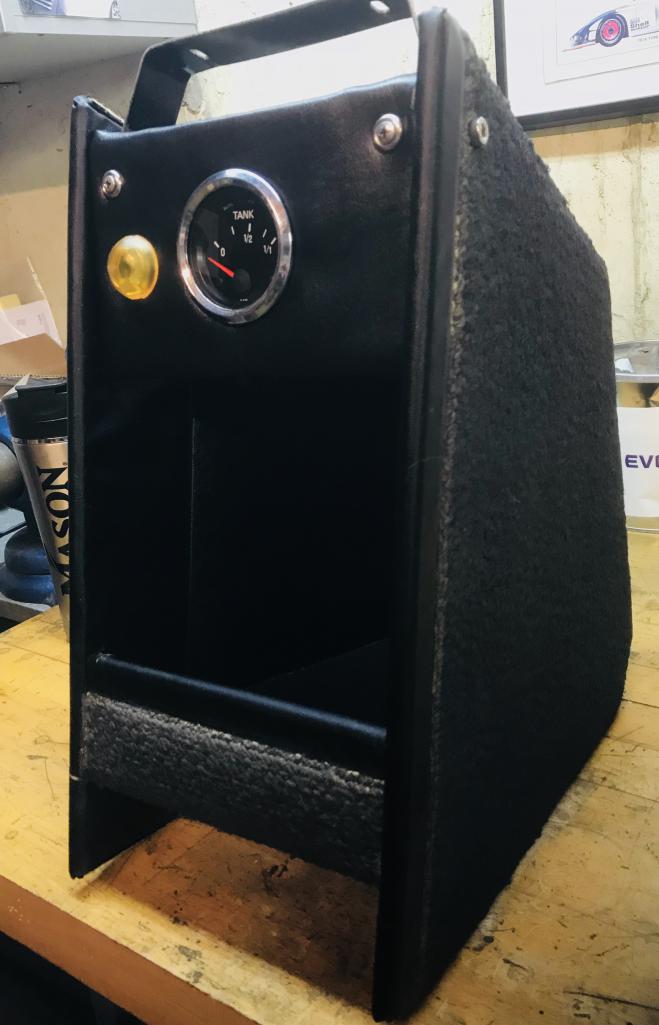
Posted by: raynekat Dec 10 2017, 06:21 PM
That warning light is cool, ultra rare, and likely worth many hundreds of dollars. Impossible to find these.
Posted by: mb911 Dec 10 2017, 08:11 PM
And a muffler coming this week to play with..
Posted by: Dion Dec 10 2017, 09:55 PM
And a muffler coming this week to play with..
Thanks Ben! Look forward.
Posted by: Dion Jan 6 2018, 02:26 PM
It’s not as bad weather wise in PA as it is in New England but it’s cold enough to
keep me in the basement workshop.
I started taking the suspension console Chris (Tygaboy) supplied me with apart.
Porsche did a nice job spot welding this one together. Thanks Chris it is so much better
than what’s on the car now.
Dave came over last weekend and took some measurements for the buck and to make
a pattern for the kick up to the console.
First I removed the overlay reinforced steel pieces.
Attached thumbnail(s)
Posted by: Dion Jan 6 2018, 02:27 PM
First piece removed
Attached thumbnail(s)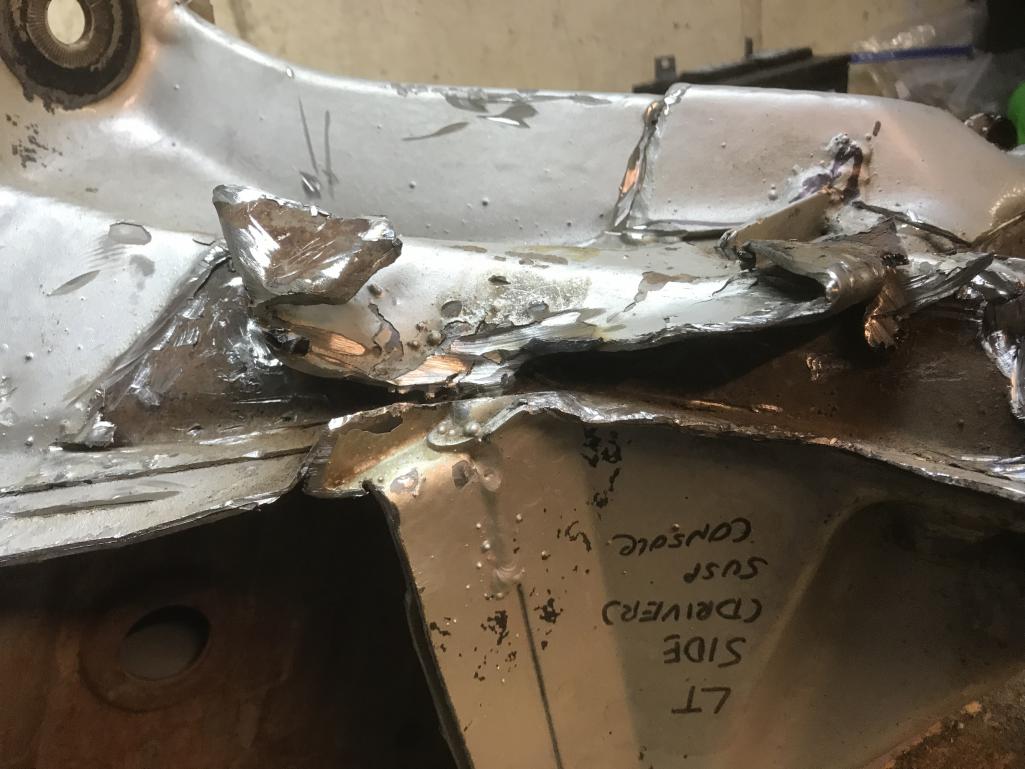
Posted by: Dion Jan 6 2018, 02:27 PM
Steel overlays
Attached thumbnail(s)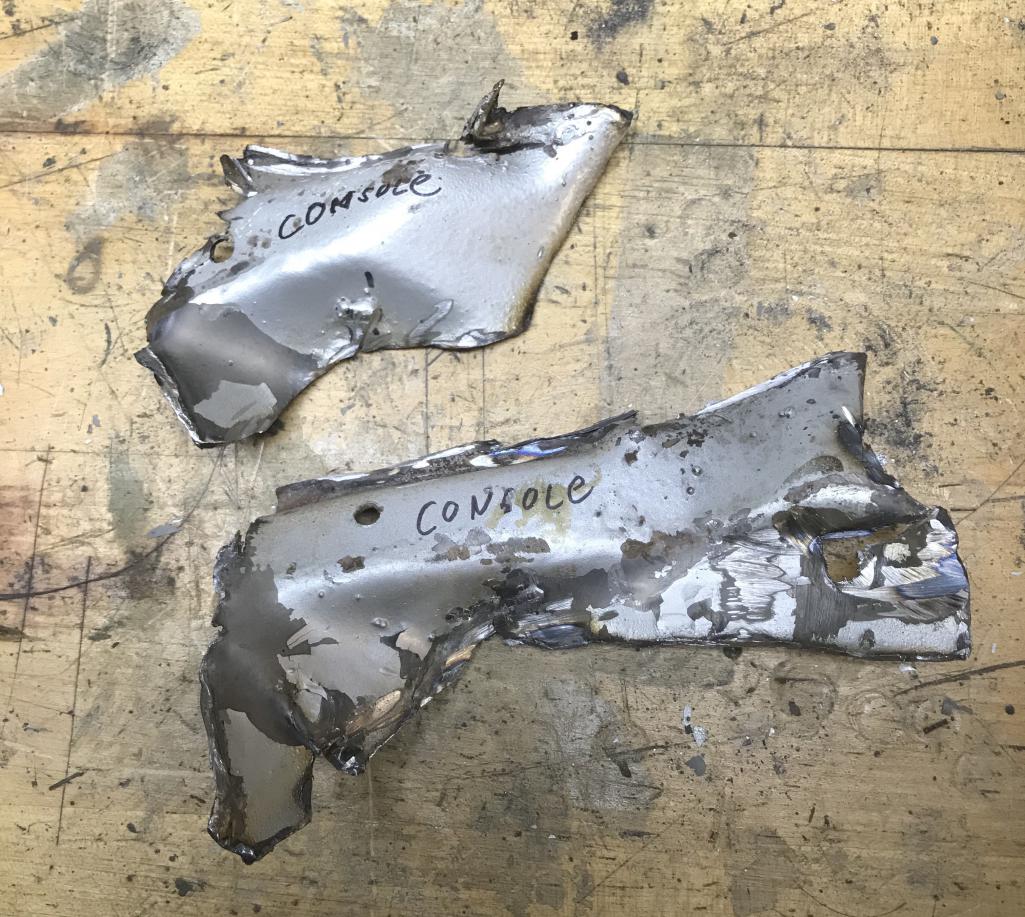
Posted by: Dion Jan 6 2018, 02:28 PM
Then the fun spotweld removal
Attached thumbnail(s)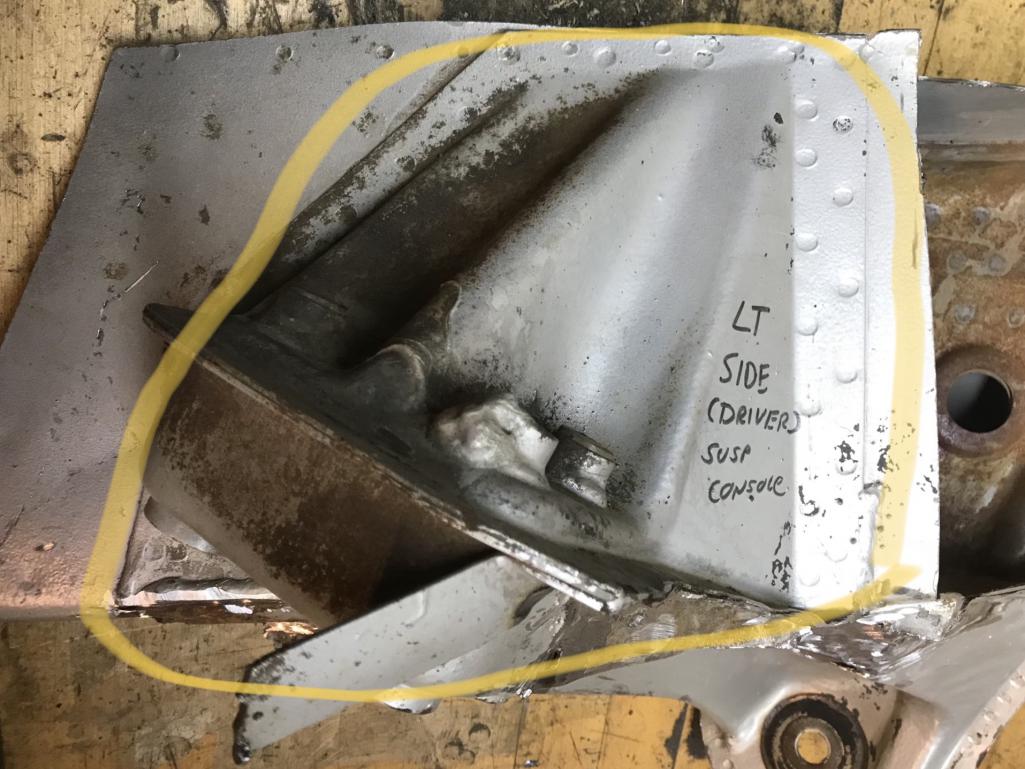
Posted by: Dion Jan 6 2018, 02:30 PM
Freed console
Attached thumbnail(s)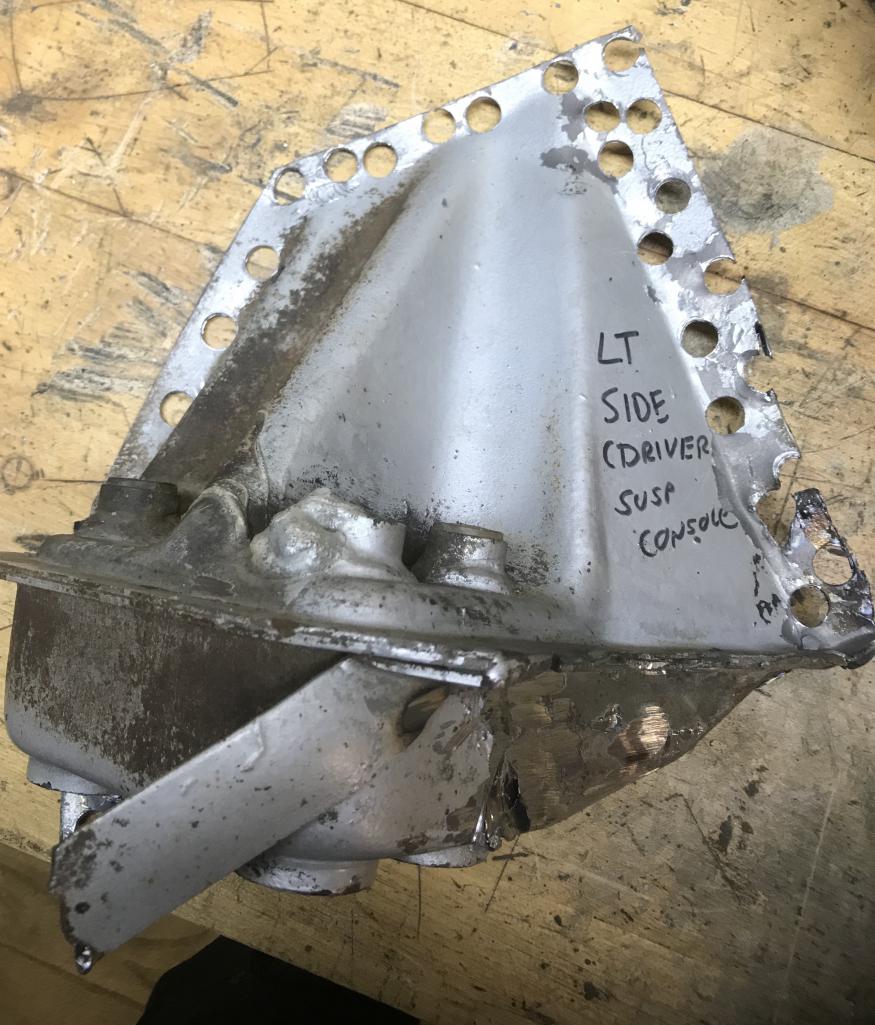
Posted by: Dion Jan 6 2018, 02:30 PM
Interior look
Attached thumbnail(s)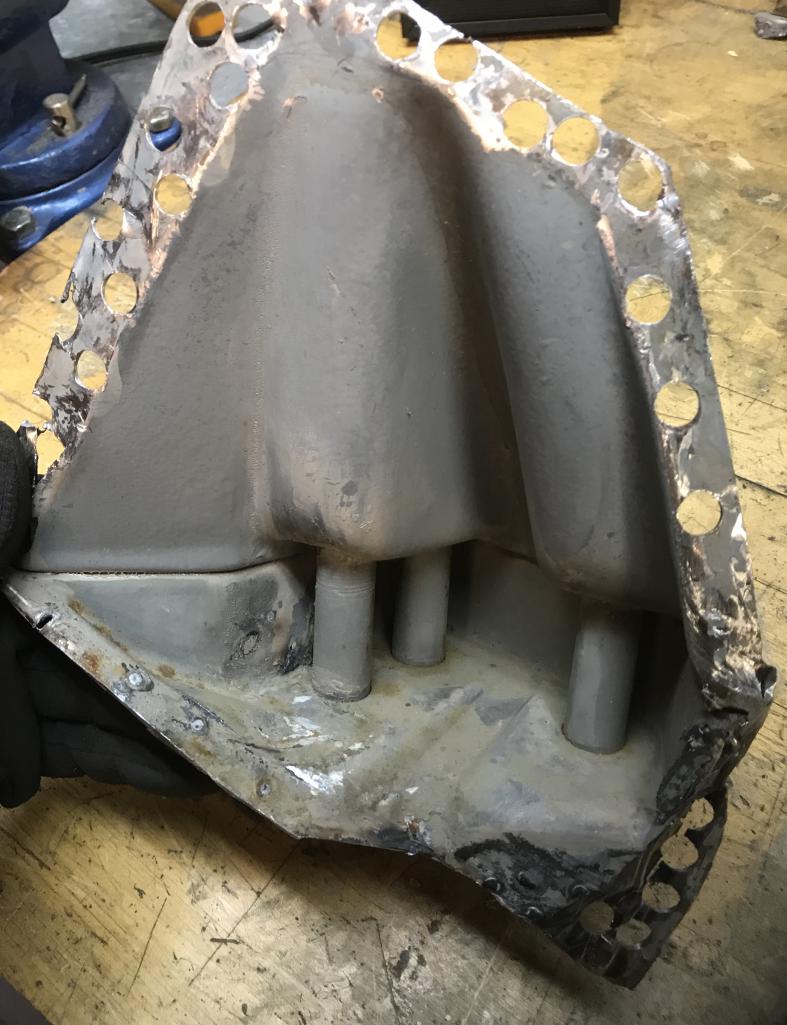
Posted by: Dion Jan 6 2018, 02:32 PM
Need to address small deterioration on this portion that was hidden under re-enforcement steel piece.
Attached thumbnail(s)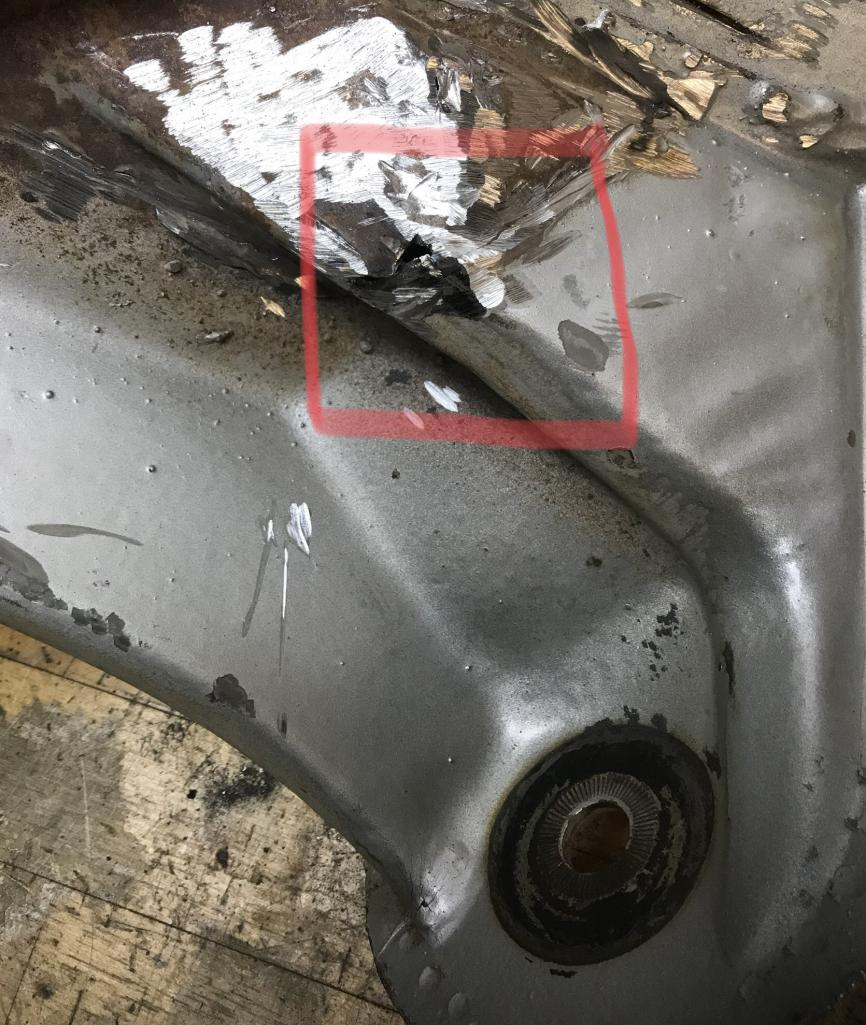
Posted by: Dion Jan 6 2018, 02:33 PM
The collection... and yesterday’s view from my driveway!
Attached thumbnail(s)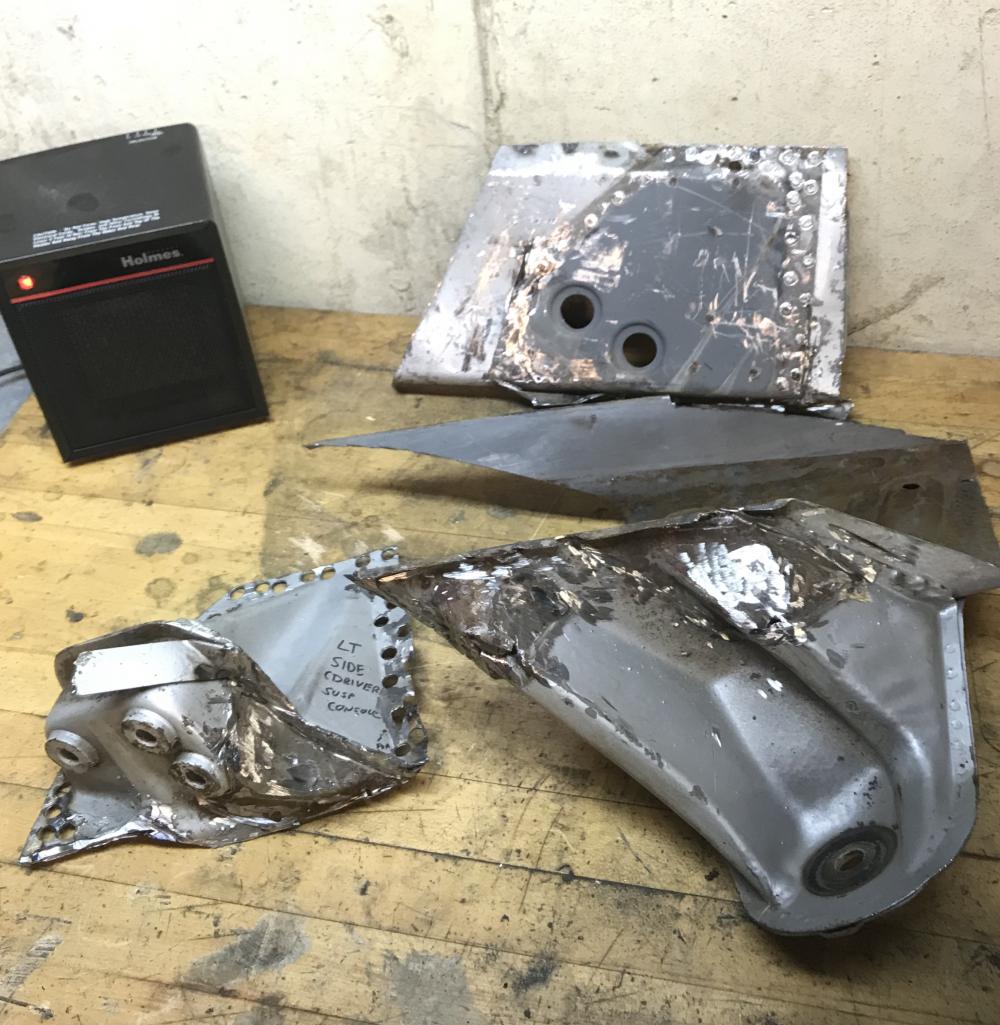
Posted by: Dion Jan 6 2018, 02:34 PM
Driveway
Attached thumbnail(s)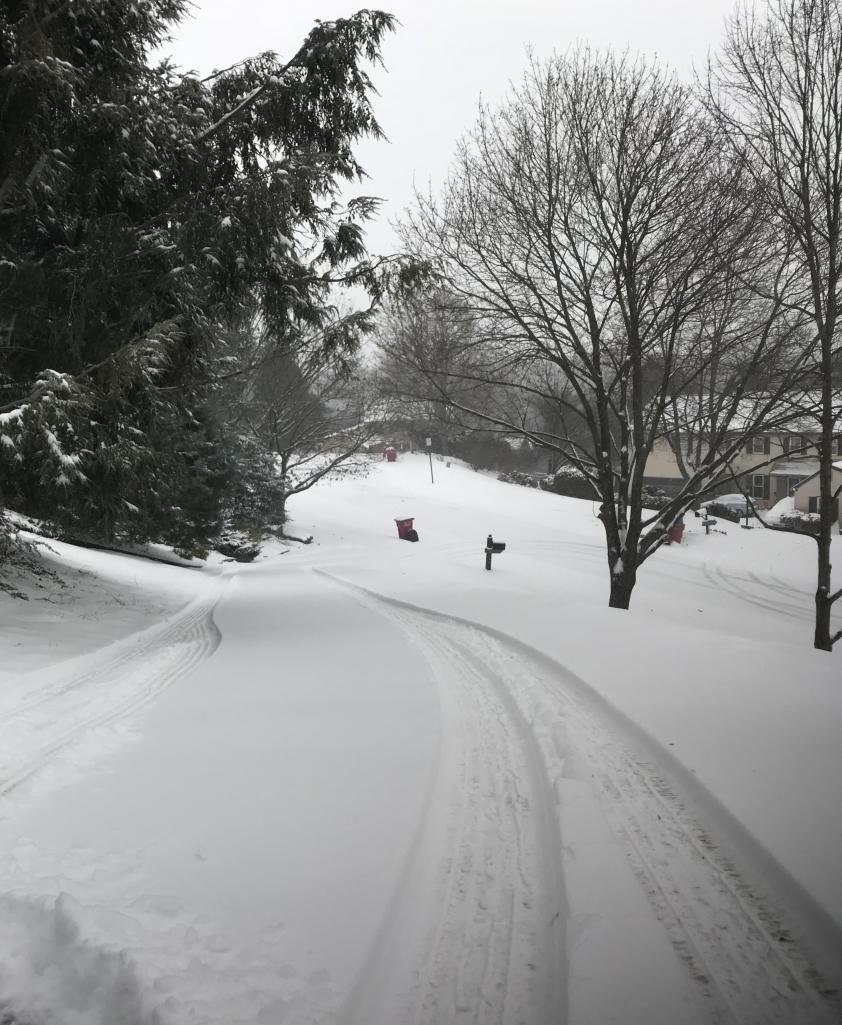
Posted by: bbrock Jan 6 2018, 03:18 PM
Nice work! I know what a job getting those console pieces apart is. I'm in awe that you were able to get those metal reinforcement gussets off so cleanly. They still look useable.  Those are some nice pieces you got from Chris.
Posted by: Dion Jan 6 2018, 03:53 PM
Appreciate the compliment Brent.
Yeah that was time consuming. Chris certainly came up aces on such a
clean piece. Very well pleased. When the thermometer decides to
pop above freezing I can begin to dismantle the four cylinder mounts and
begin removing the old console once Dave and I get the jig in place and
can connect the “long/kick up” piece.
Posted by: tygaboy Jan 6 2018, 06:42 PM
Looking really good, Dion!
And I demand you not paint over my Sharpie writing. I took a lot of extra time to do that excellent parts identification documentation!
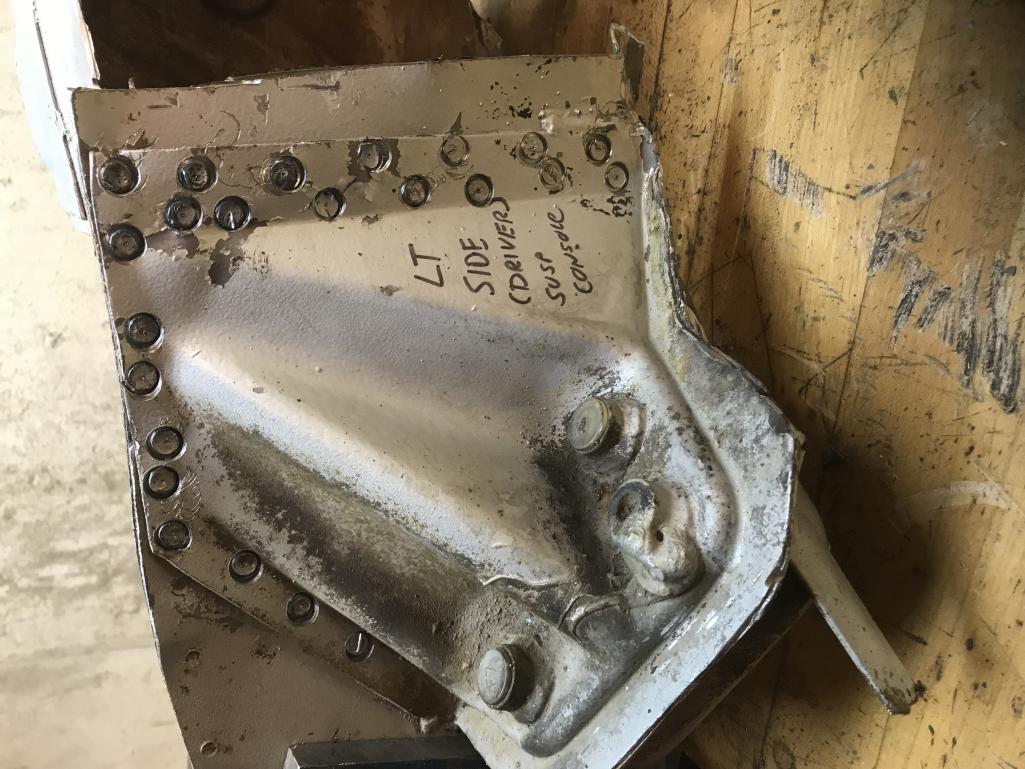
Posted by: Dion Jan 21 2018, 06:06 PM
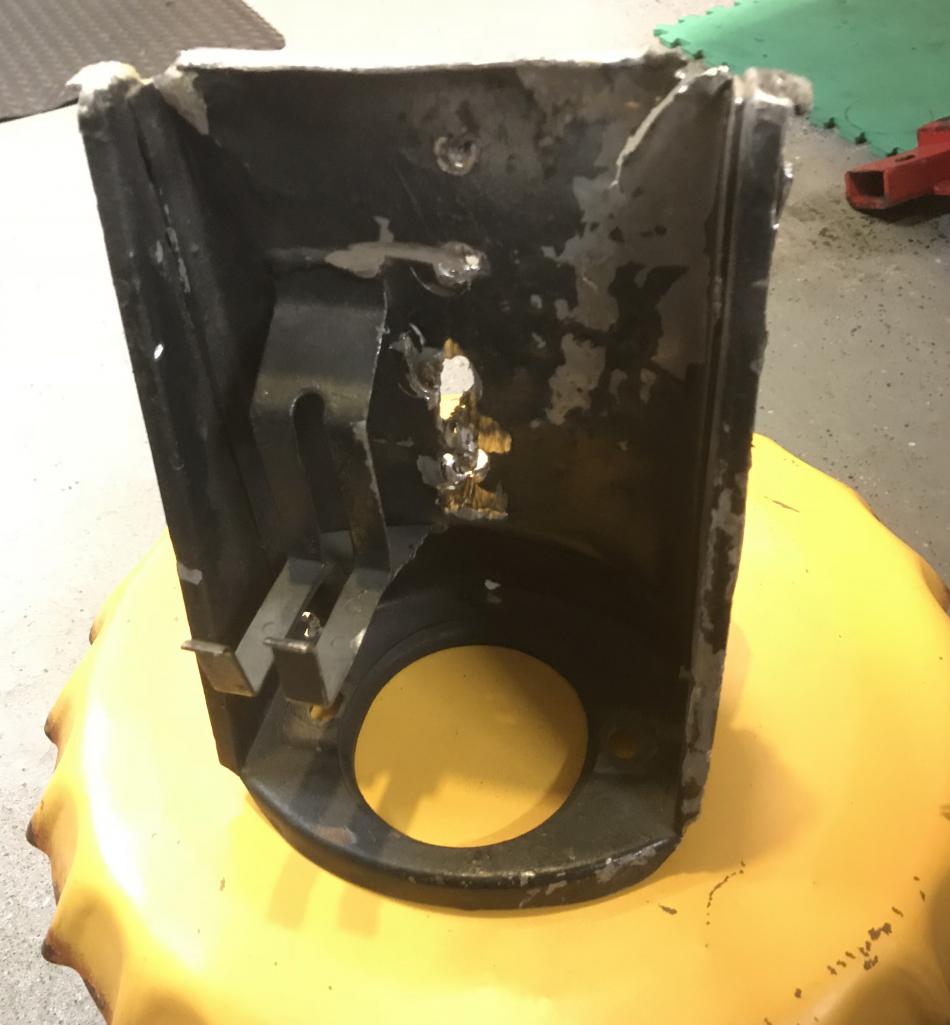
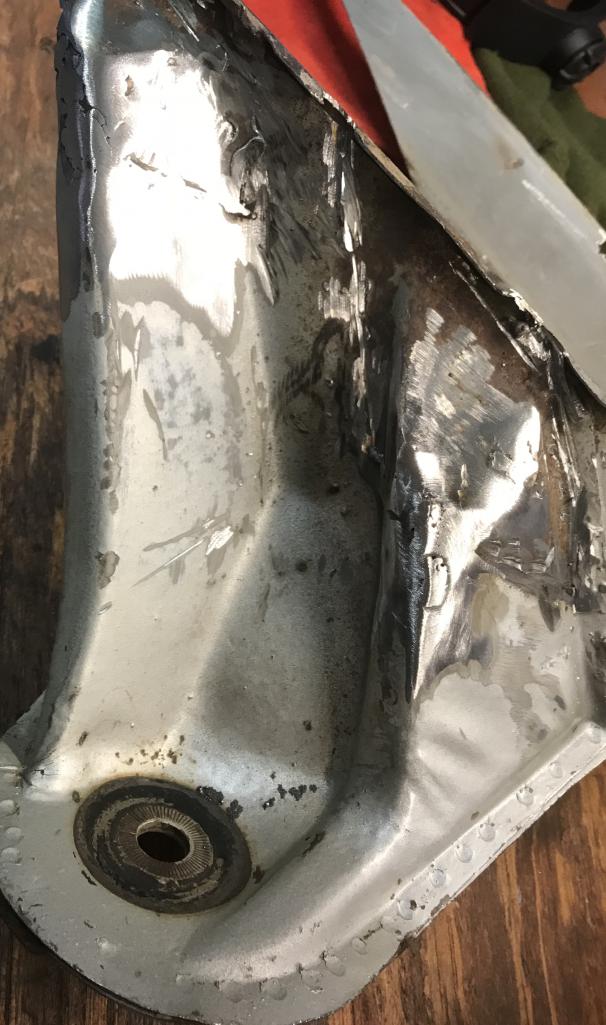
So just finished up removing 4 cylinder engine mount on the
drivers side. What a true mess this side of longitudinal this is.
Thankfully for Chris’ part of console and the parts from
Restoration Design all can be remedied.
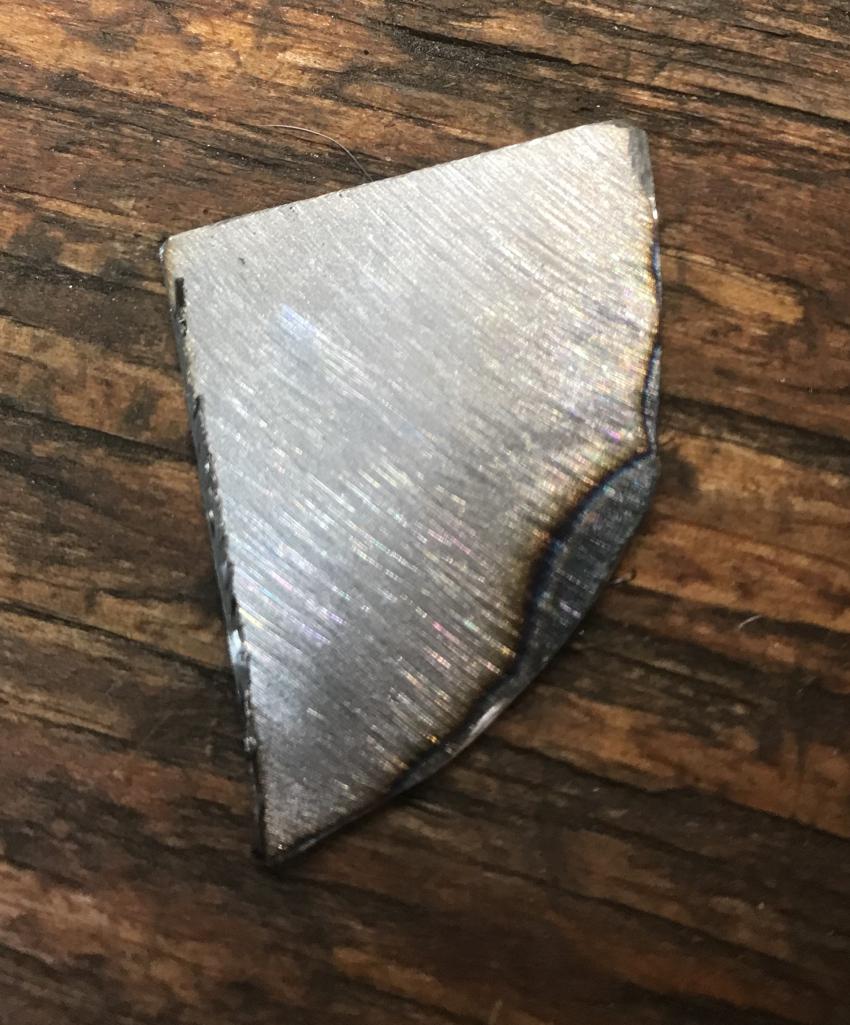
Tiring and tedious job removing mount.
I wasn’t able to save it. I hope to save the right mount
in case someone would need it. It is in far better shape.
Attached thumbnail(s)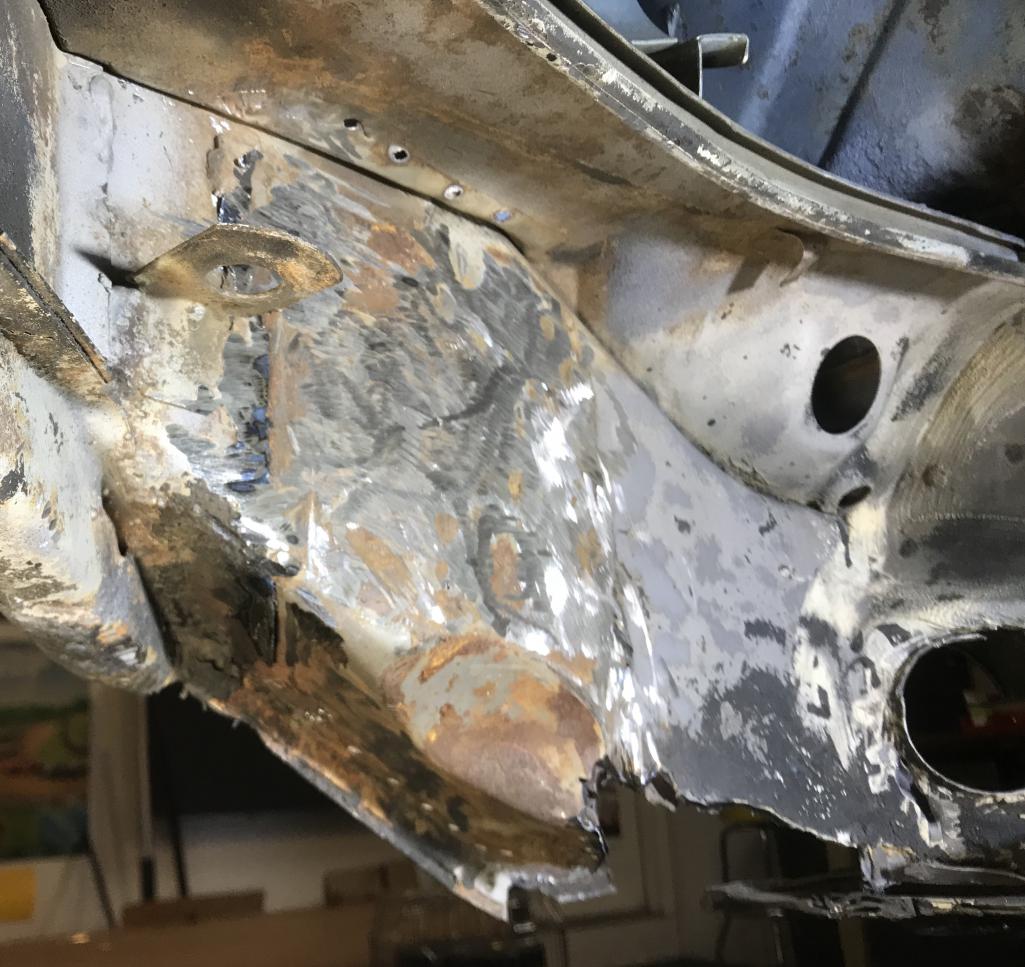
Posted by: Dion Jan 21 2018, 06:07 PM
Pic
Attached thumbnail(s)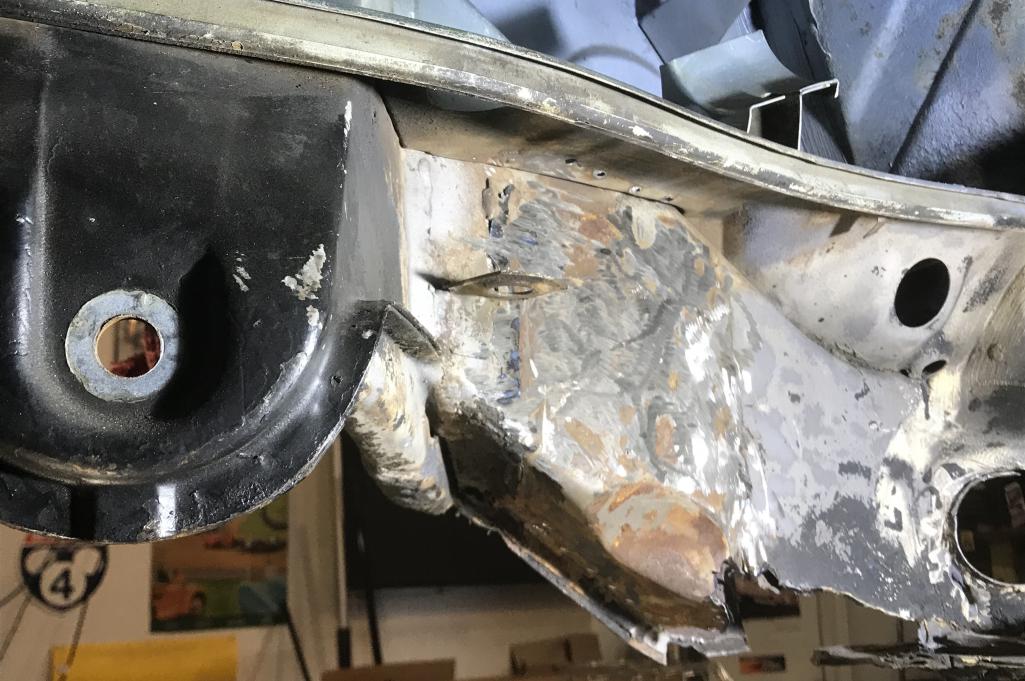
Posted by: Dion Jan 21 2018, 06:07 PM
Right engine mount
Attached thumbnail(s)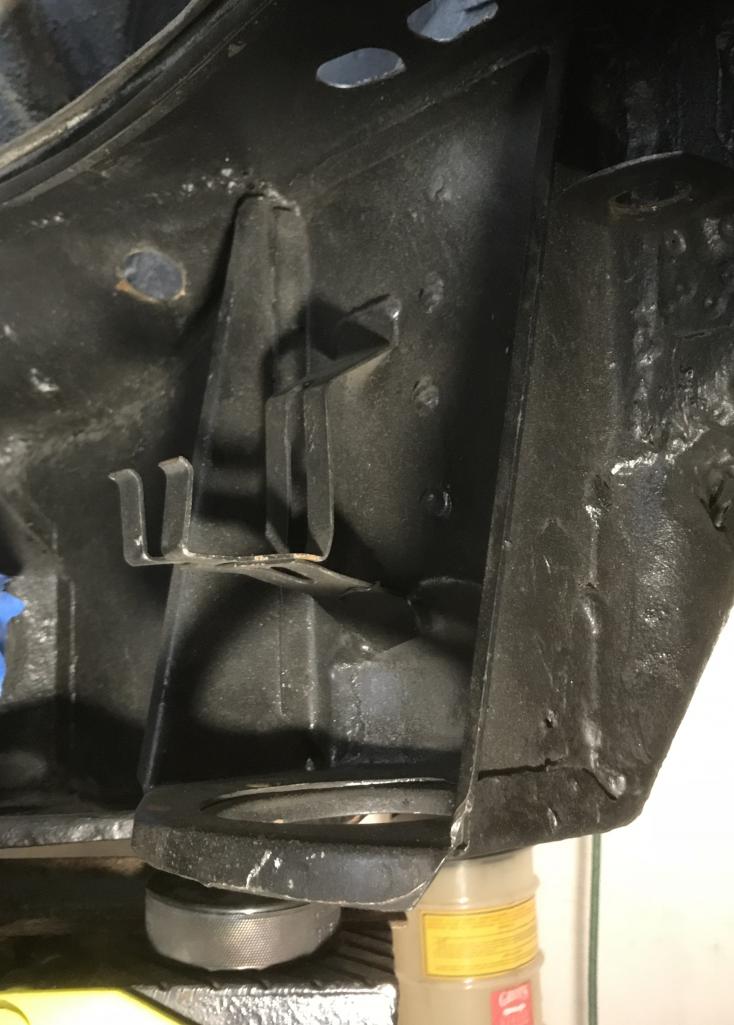
Posted by: tygaboy Jan 21 2018, 10:19 PM
Wow... You've made great progress! Did you make any sort of jig to help align things as you put it all back together? There are a couple key measurements and a few posts that cover all that. I assume you're all over that sort of thing...
Keep up the great work!
Posted by: Dion Jan 21 2018, 11:19 PM
Hey Chris,
I haven’t freed up the existing left console yet.
The car is still with its door braces intact.
Dave has a jig/measurements plan before I tear that apart.
Thanks for the input and push to persevere!
Posted by: Dion Jan 23 2018, 12:33 PM
Moved on to Right engine mount. Challenging to
not destroy it upon removal. A cutting torch I reckon would make
quick work of it but I’d prolly set my car on fire!
I’ll post a pic of mount if any one would need of it pm me and I can take a few more pics of it for you.
The top of the mount was tied into engine shelf/long as well as 4 spot welds.
Totally unlike the left. You can see in the pics how the right side was repaired
back in the early nineties when I had a pro shop do the hell hole and reposition
my suspension so the right wheel would not have EXTREME exaggerated camber!
That’s when I learned of the hell hole troubles.
Looks like they did their best at the time. No rust.
But not factory like :-/ So I’ll get to welding up the right side deficiencies hopefully
this weekend.
Attached thumbnail(s)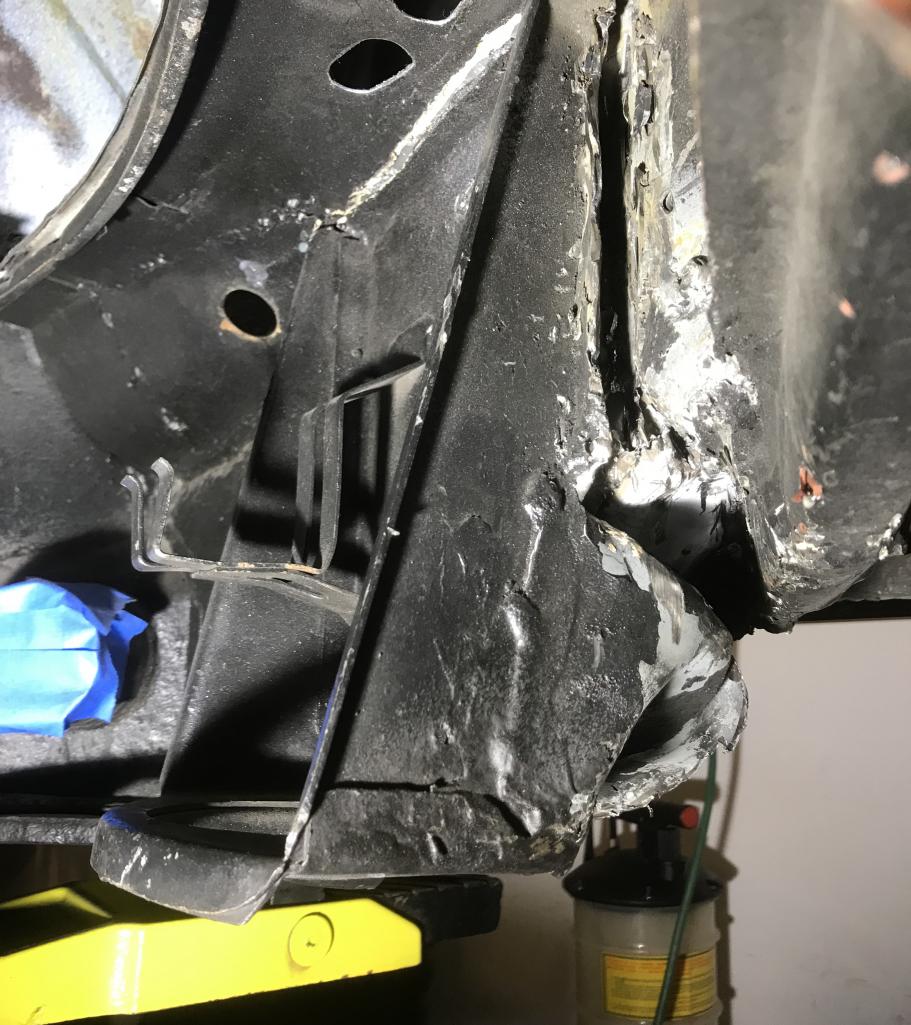
Posted by: Dion Jan 23 2018, 12:35 PM
Pre removal. Starting to separate
Attached thumbnail(s)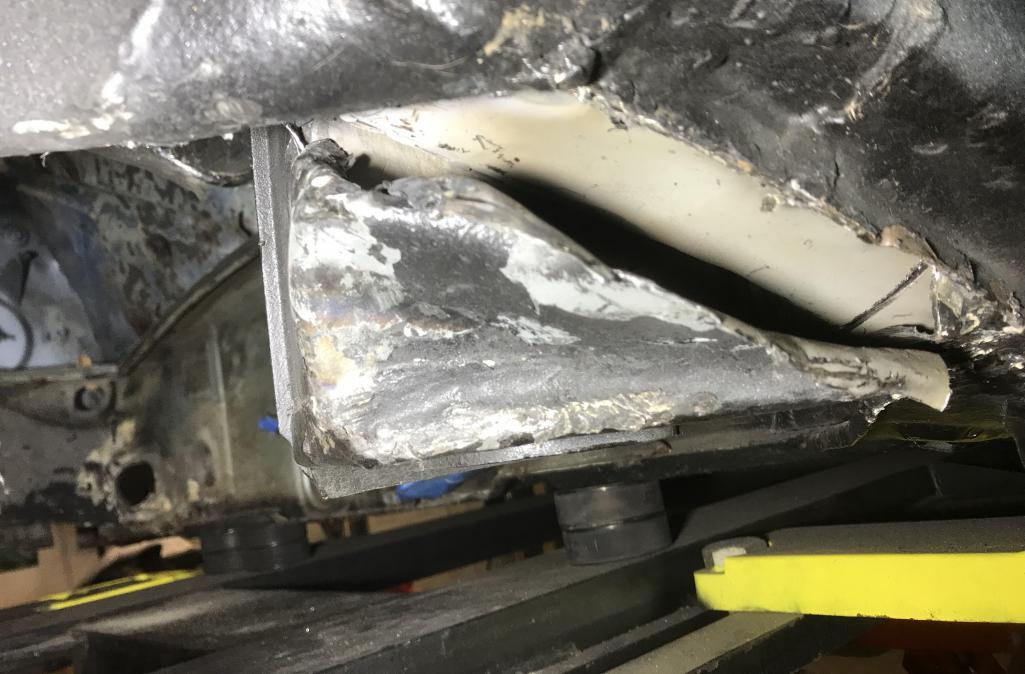
Posted by: Dion Jan 23 2018, 12:35 PM
Removed
Attached thumbnail(s)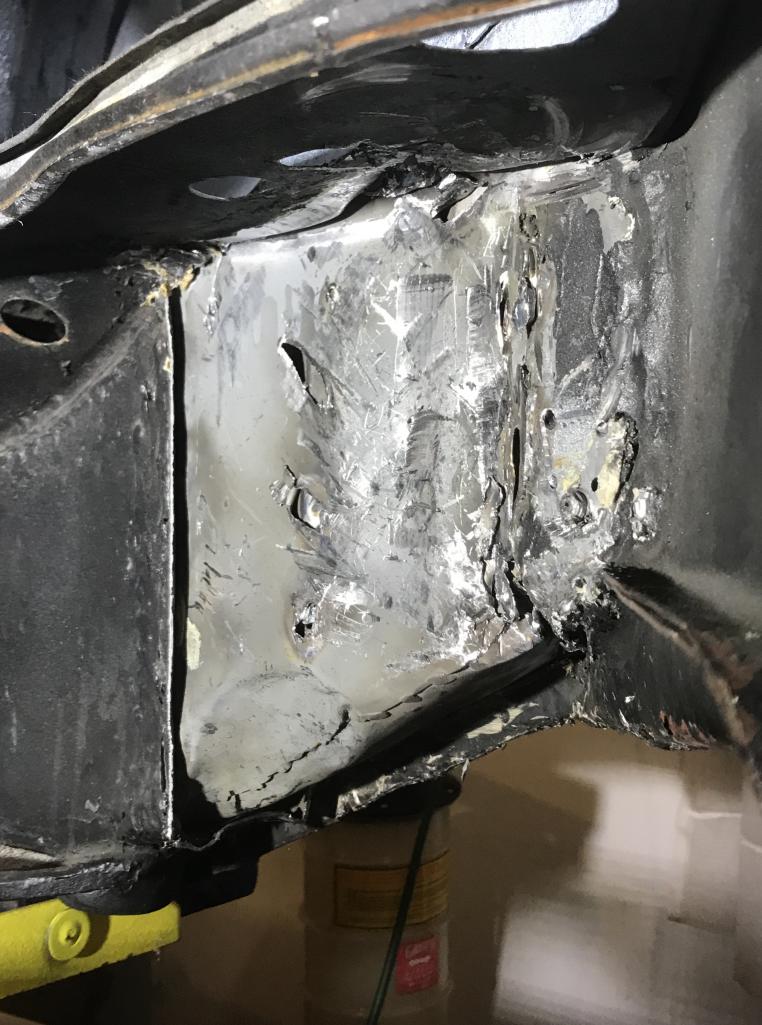
Posted by: Dion Jan 23 2018, 12:37 PM
Right mount (back)
Attached thumbnail(s)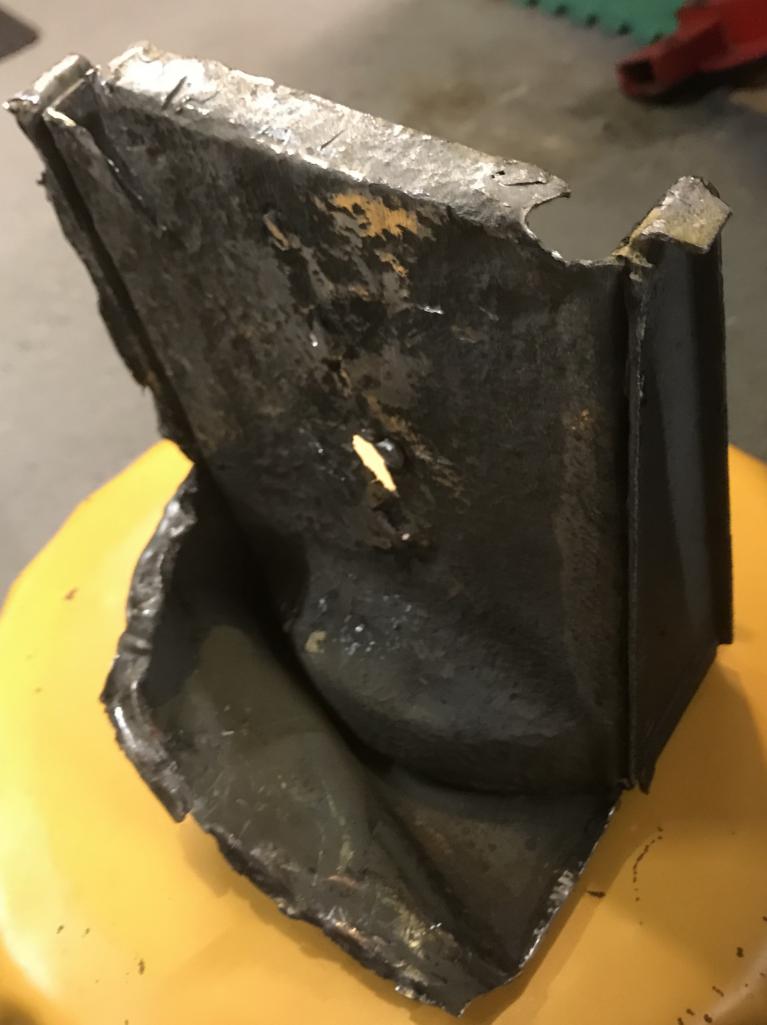
Posted by: Dion Jan 23 2018, 12:38 PM
Some cleanup
Attached thumbnail(s)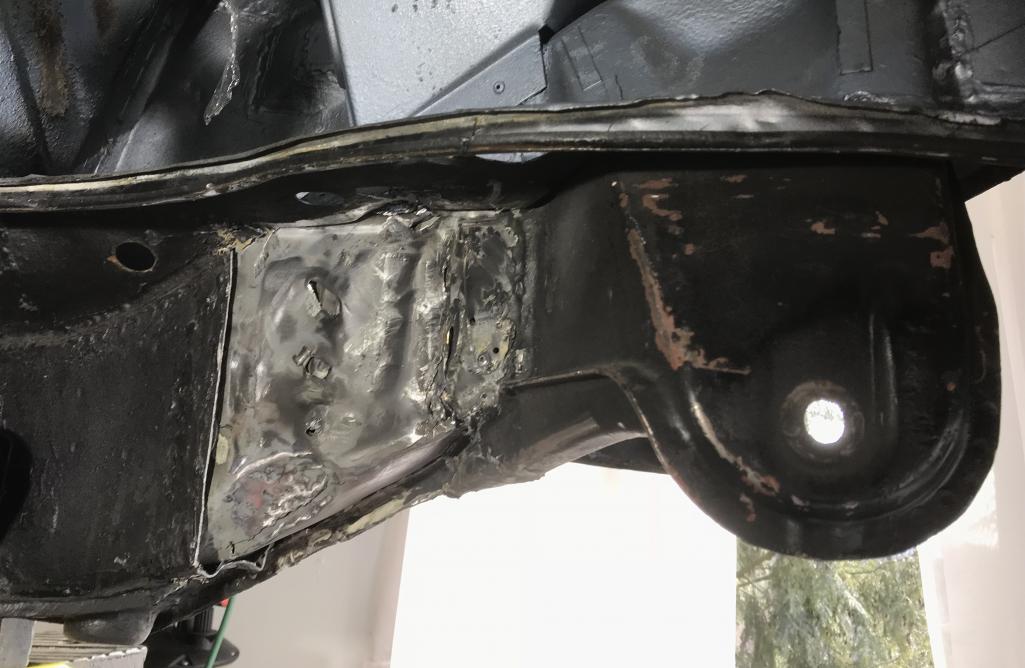
Posted by: Dion Jan 23 2018, 12:39 PM
The brake line clip was riveted on??
Attached thumbnail(s)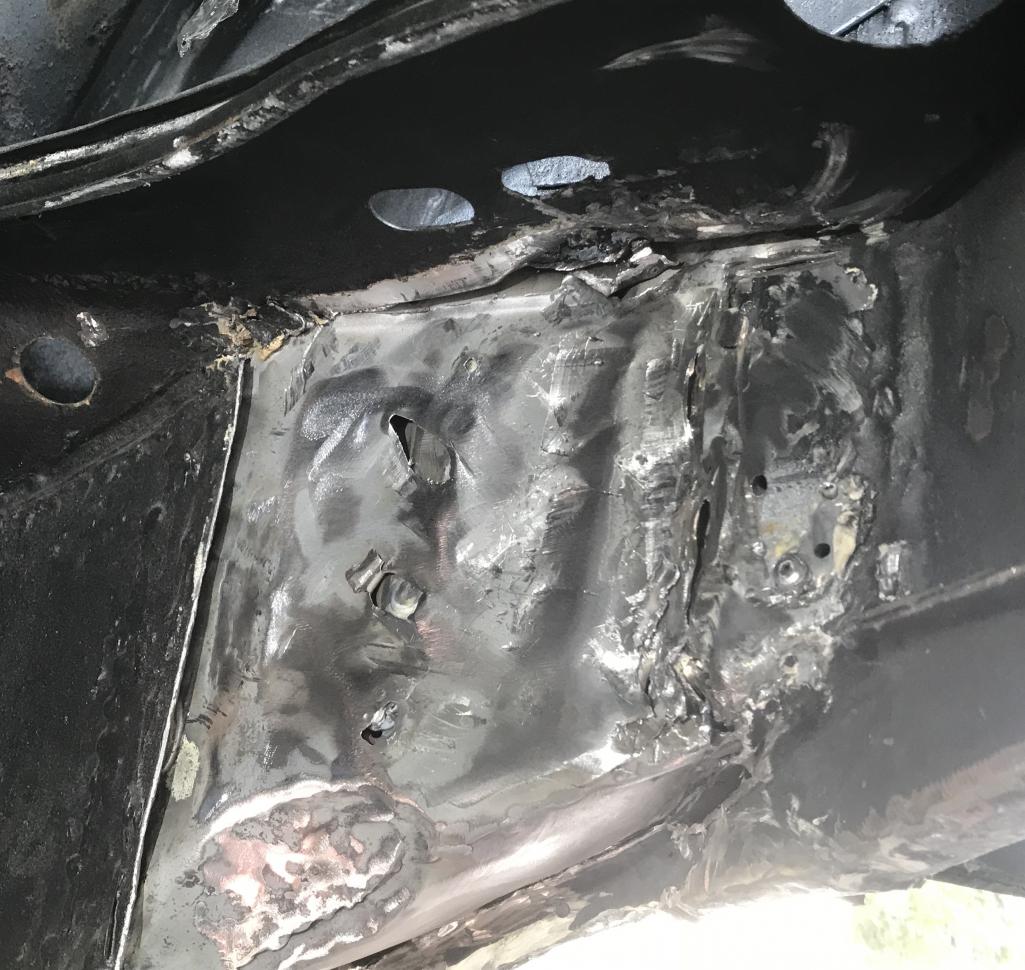
Posted by: Dion Jan 23 2018, 12:40 PM
Picked this up the other day. Cool period appropriate oil catch tank!
Attached thumbnail(s)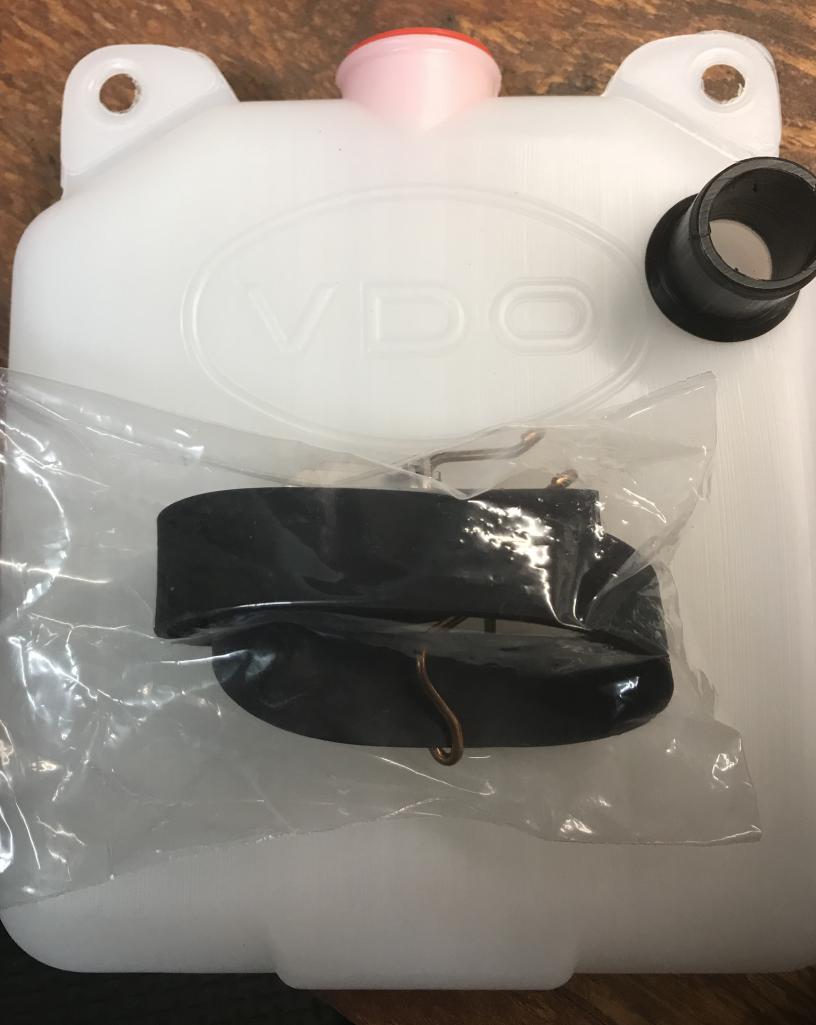
Posted by: defianty Jan 23 2018, 01:28 PM
Having recently removed my motor mounts I can vouch for what a pig of a job it is. Well done!
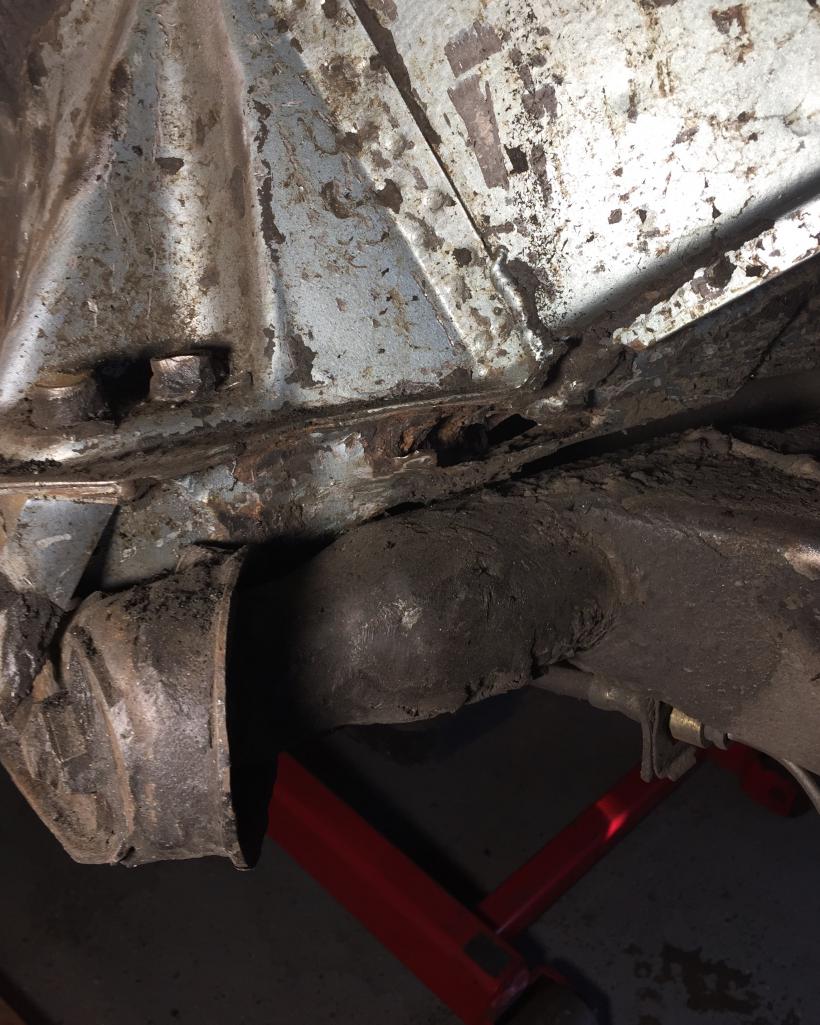
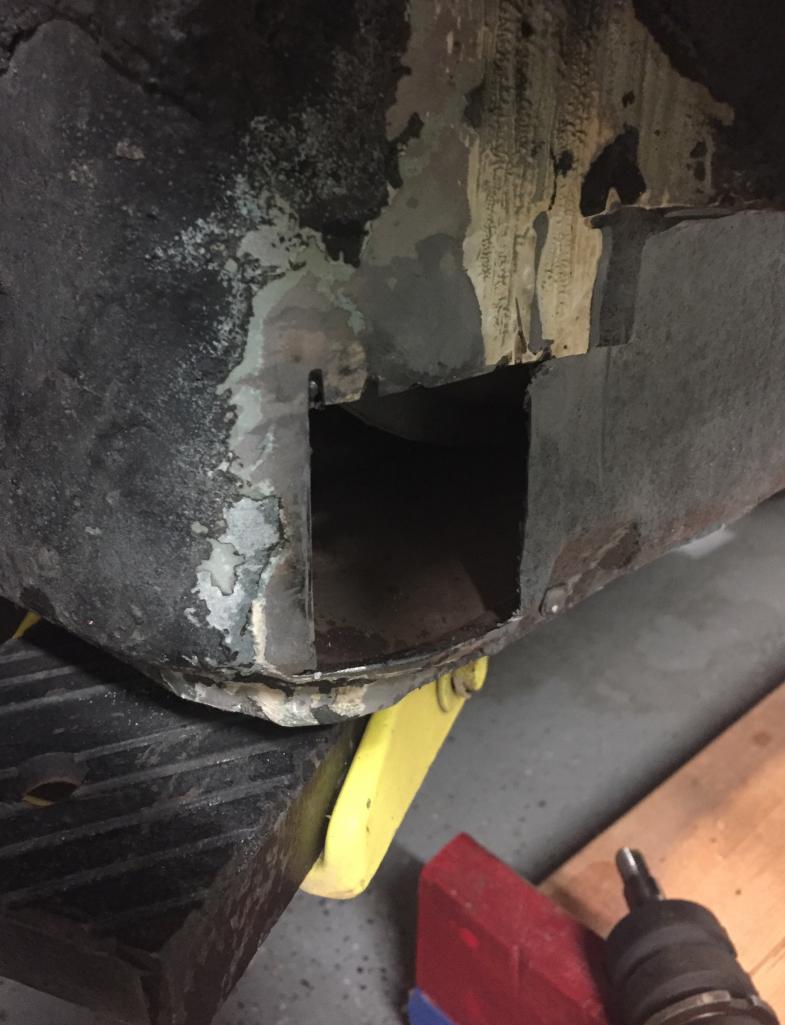
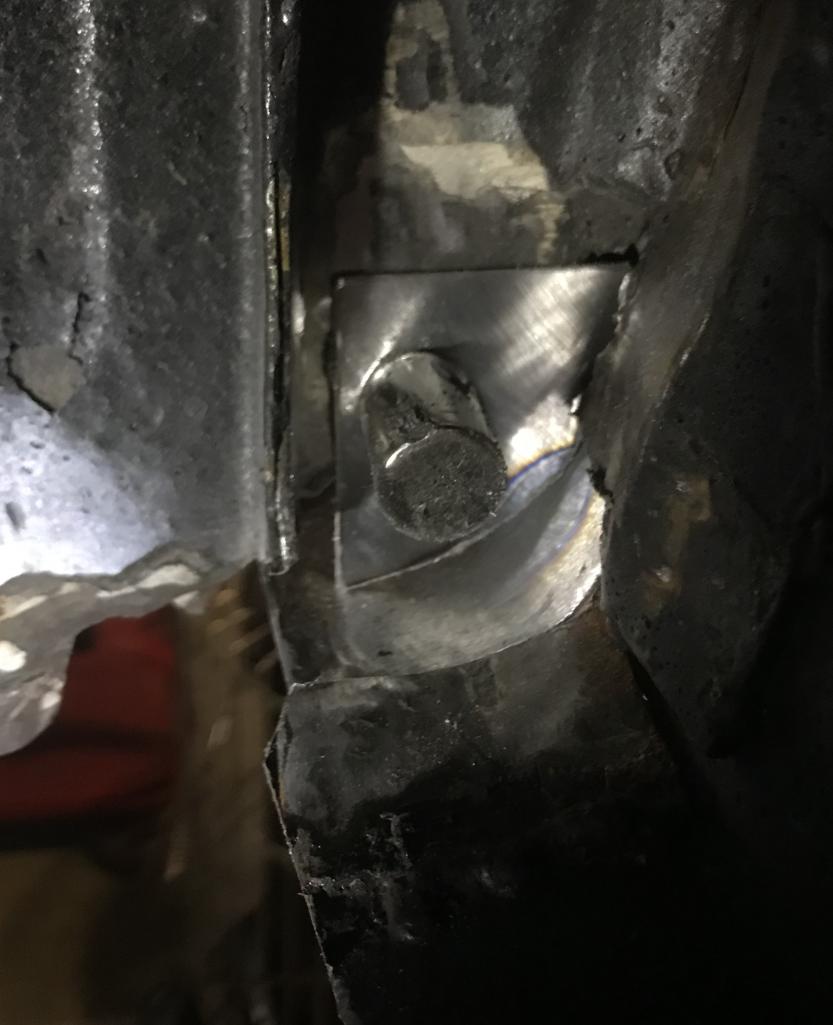
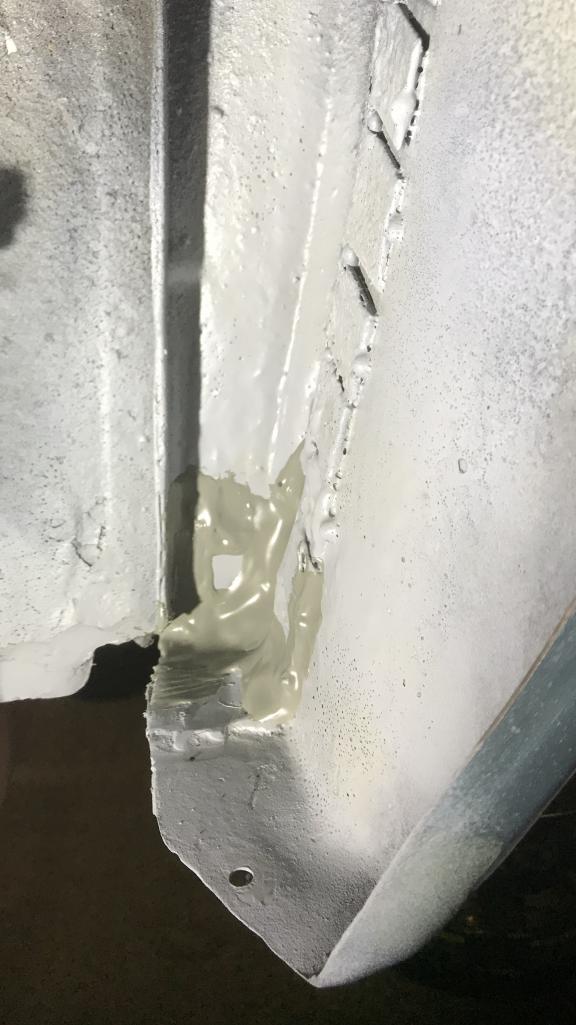
Posted by: Dion Jan 27 2018, 09:18 PM
Saturday’s project while listening and occasionally glancing at the 24hr at Daytona:
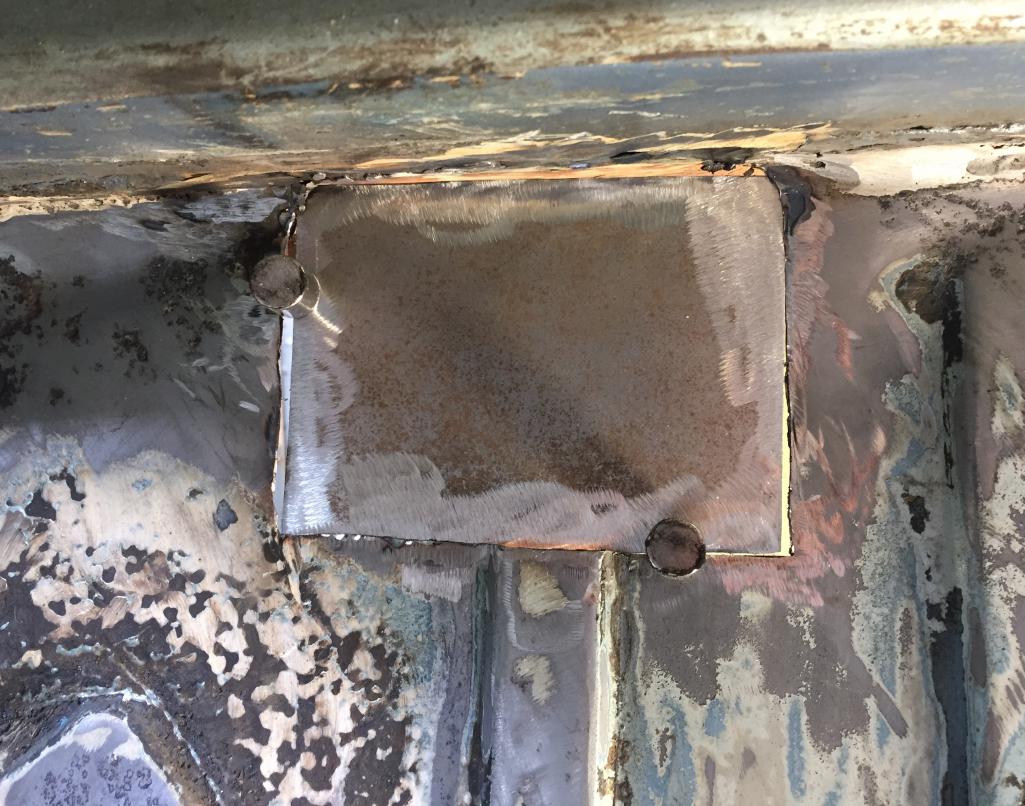
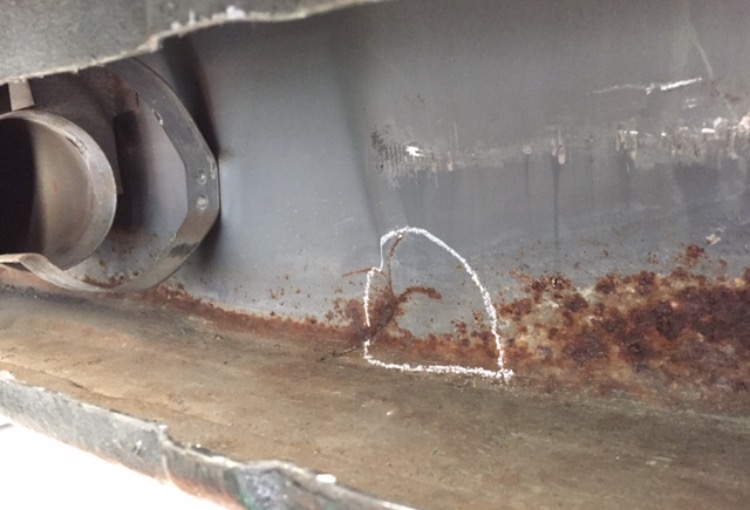
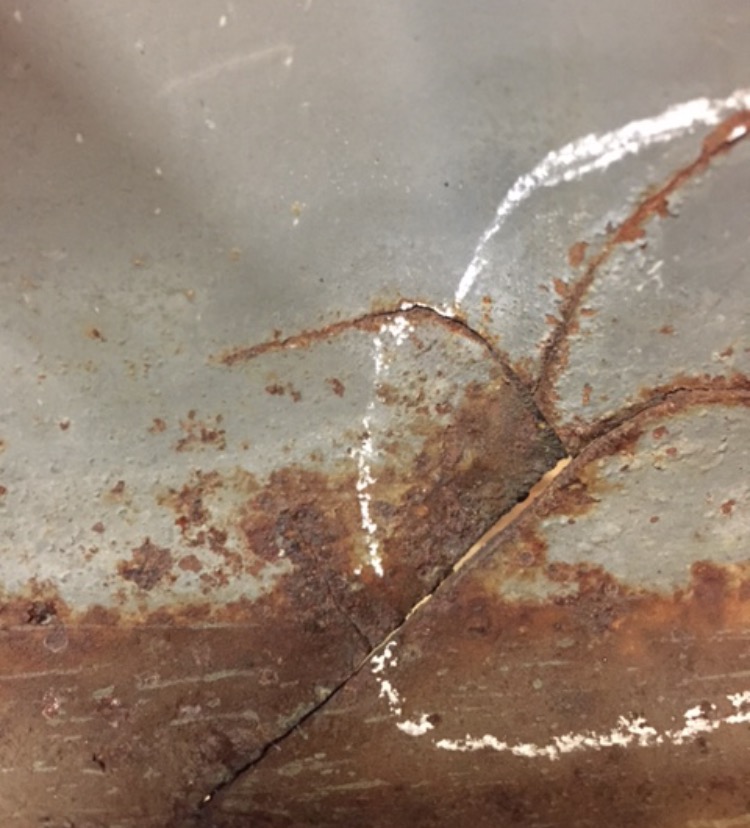
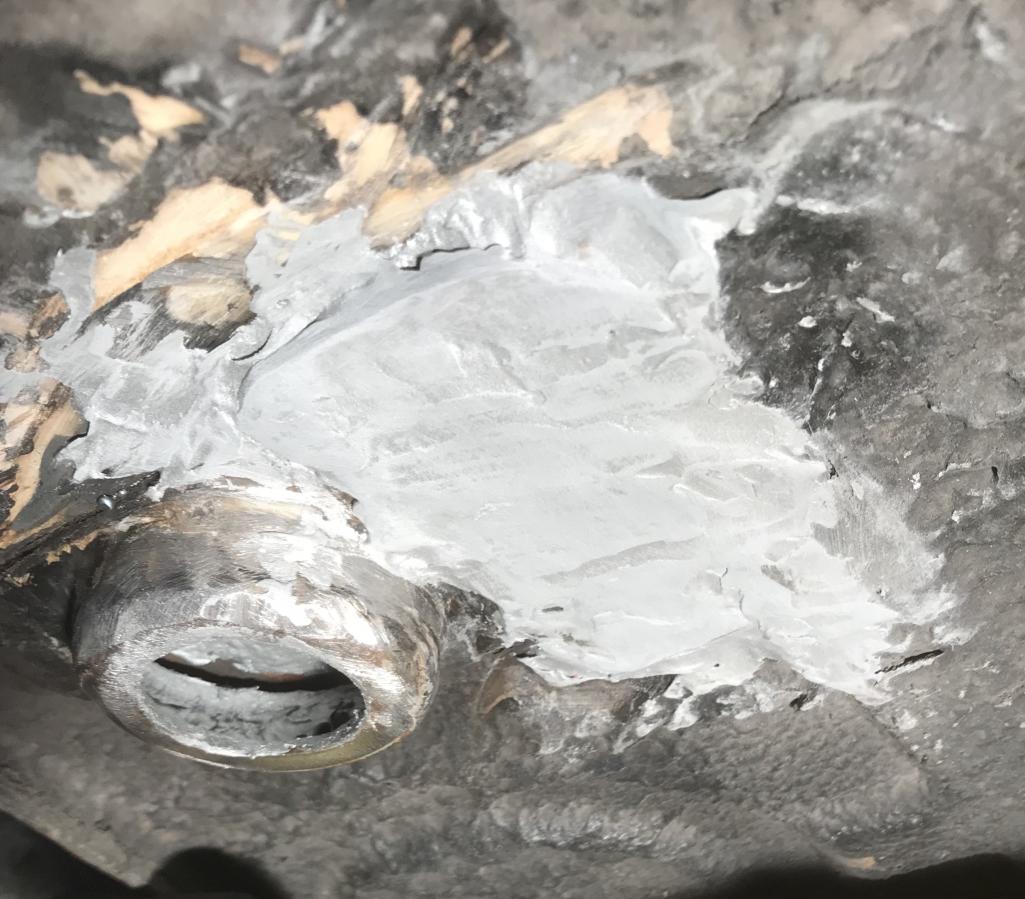
Addressed the hole in the floor that made me give my 914 the U-boat moniker.
It’s not pretty, no finish sanding or primer yet.
Just wanting to fill that split. It must have occurred due to an improperly
adjusted jack. That whole was filled with pure undercoating when I was removing it from the interior floor.
Attached thumbnail(s)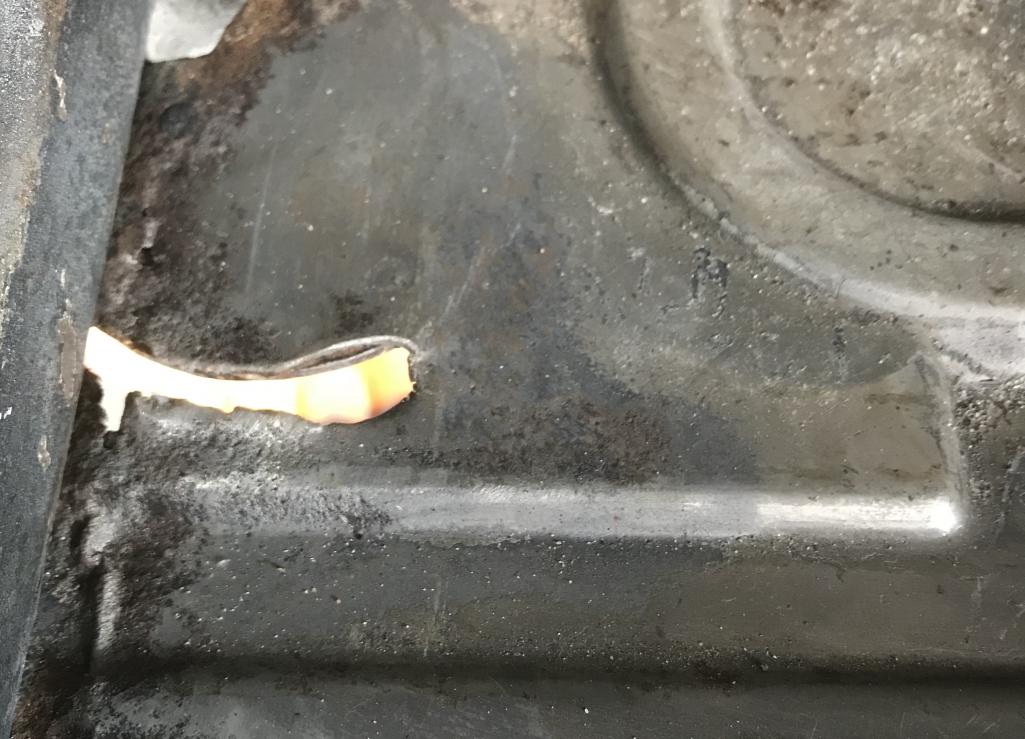
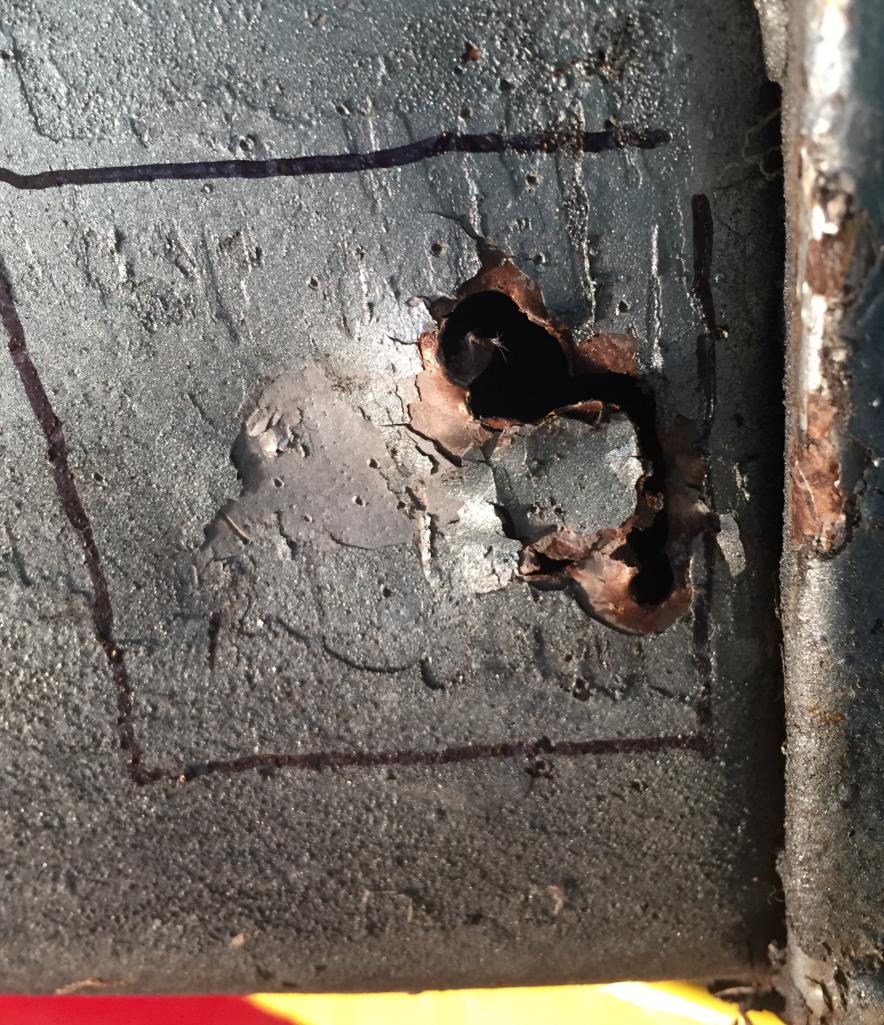
Posted by: Dion Jan 27 2018, 09:19 PM
Interior/ exterior near jack donut.
Attached thumbnail(s)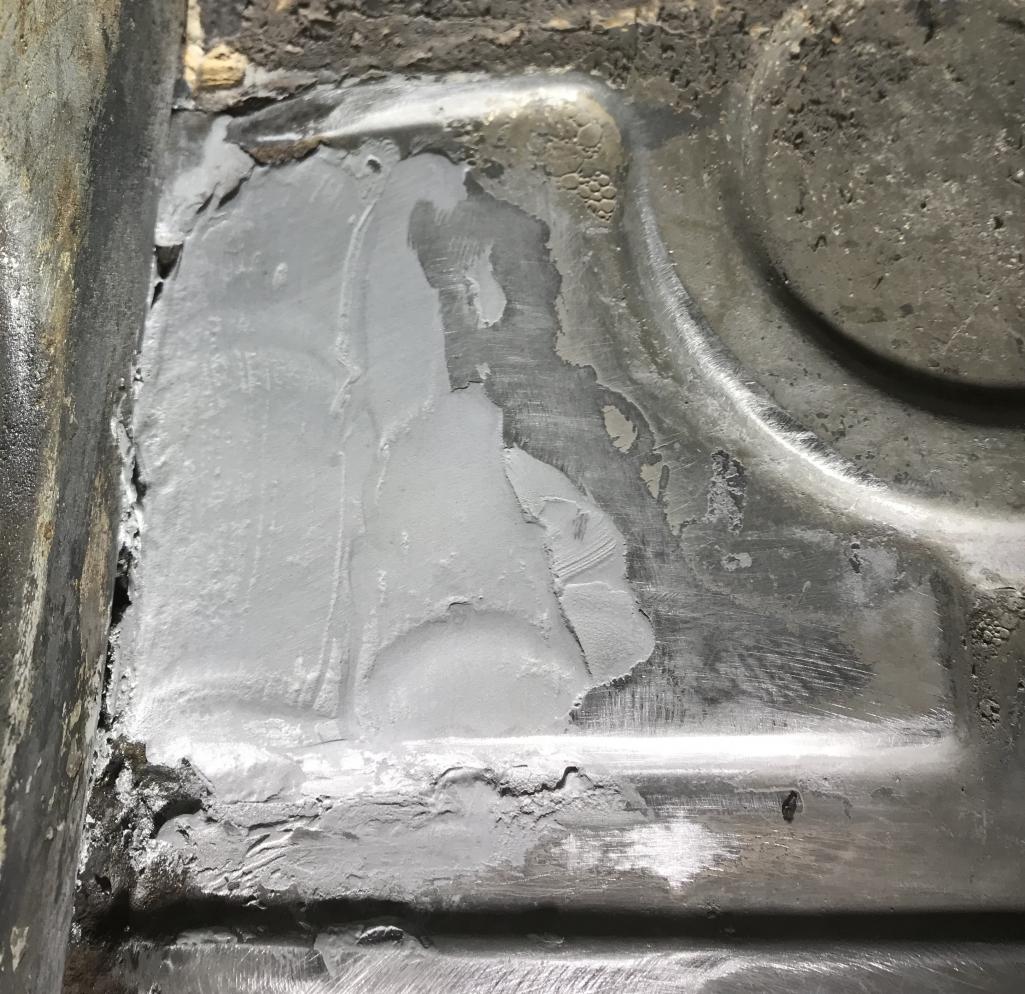
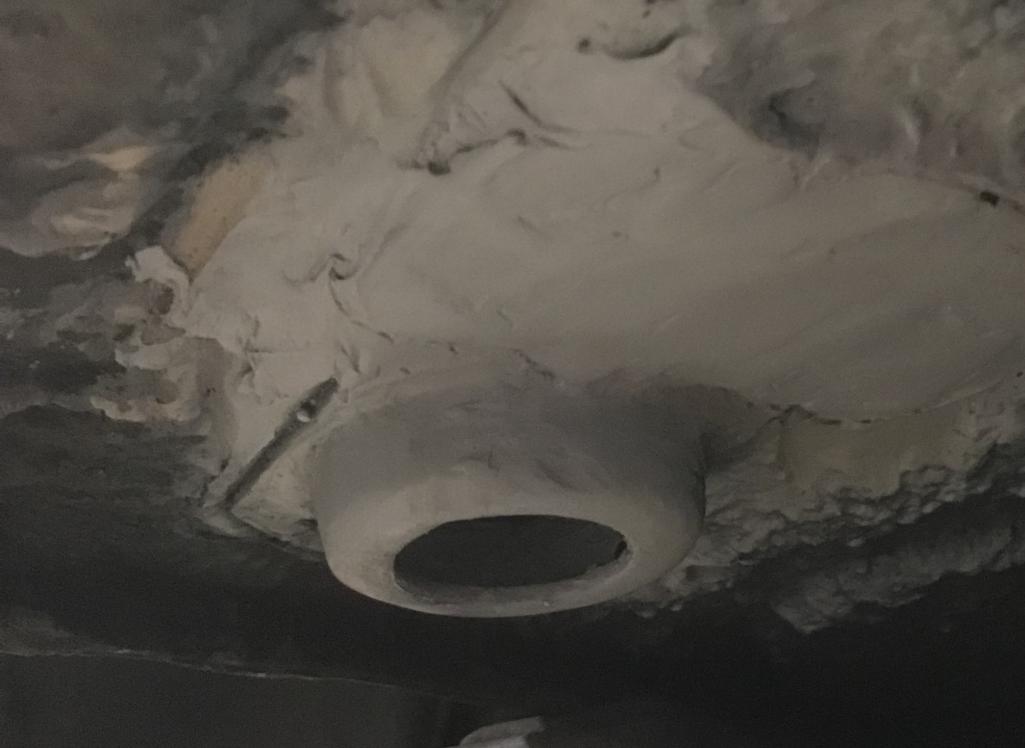
Posted by: Dion Jan 27 2018, 09:20 PM
Exterior repair
Attached thumbnail(s)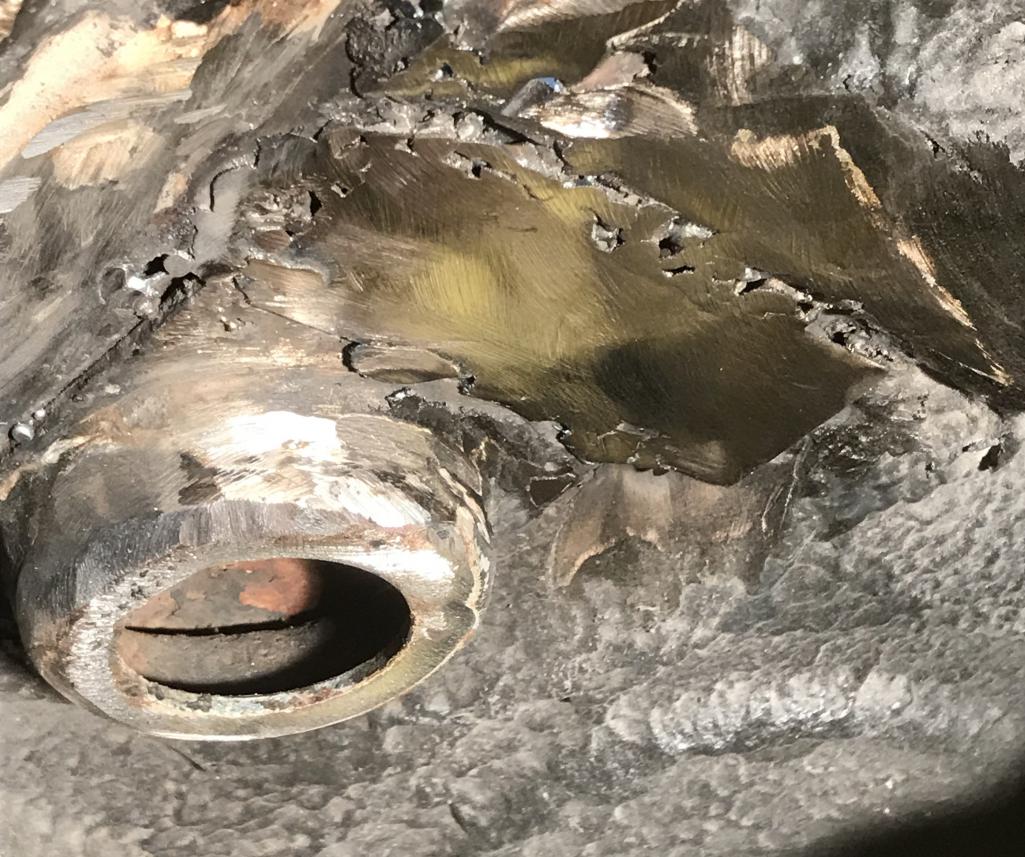
Posted by: Dion Jan 27 2018, 09:29 PM
Some primer:
Attached thumbnail(s)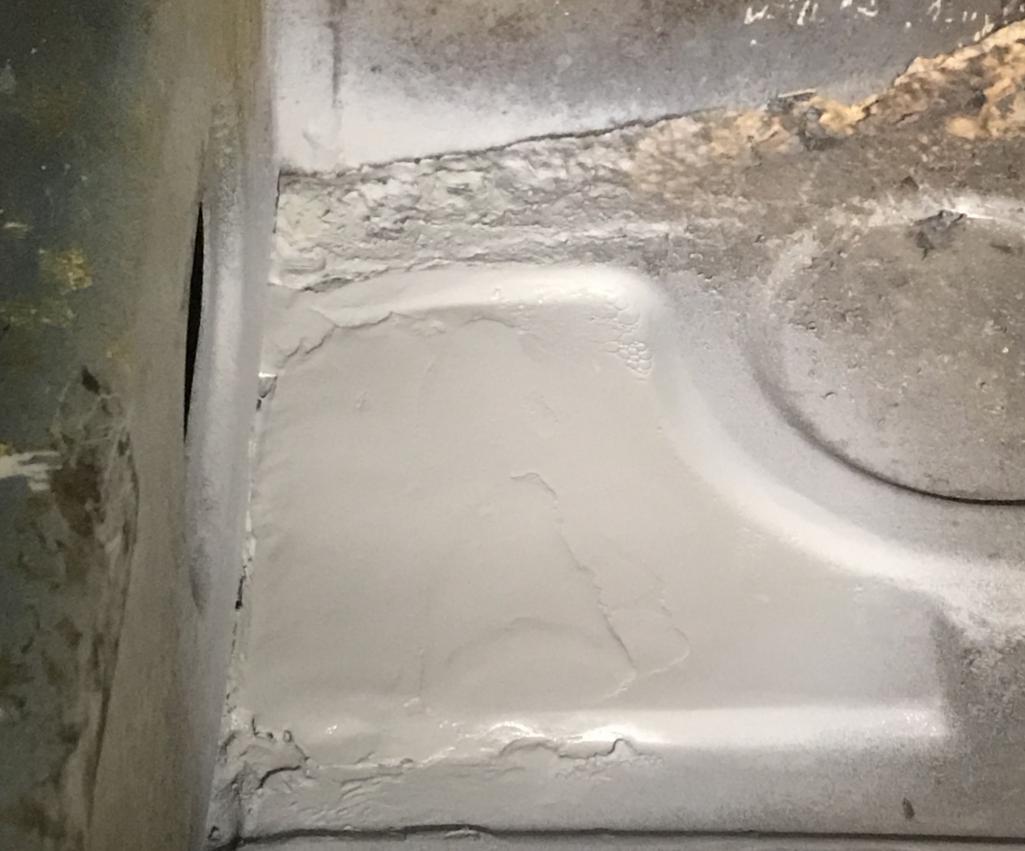
Posted by: Dion Jan 29 2018, 05:24 PM
Closed the holes on the console piece that were under the extra steel plates.
Those plates are for strengthening the console.
I do enjoy the welding. Hopeful I will get more proficient the more I do. And there’s plenty to do!
Attached thumbnail(s)
Posted by: Dion Jan 29 2018, 05:26 PM
Primer pic
Attached thumbnail(s)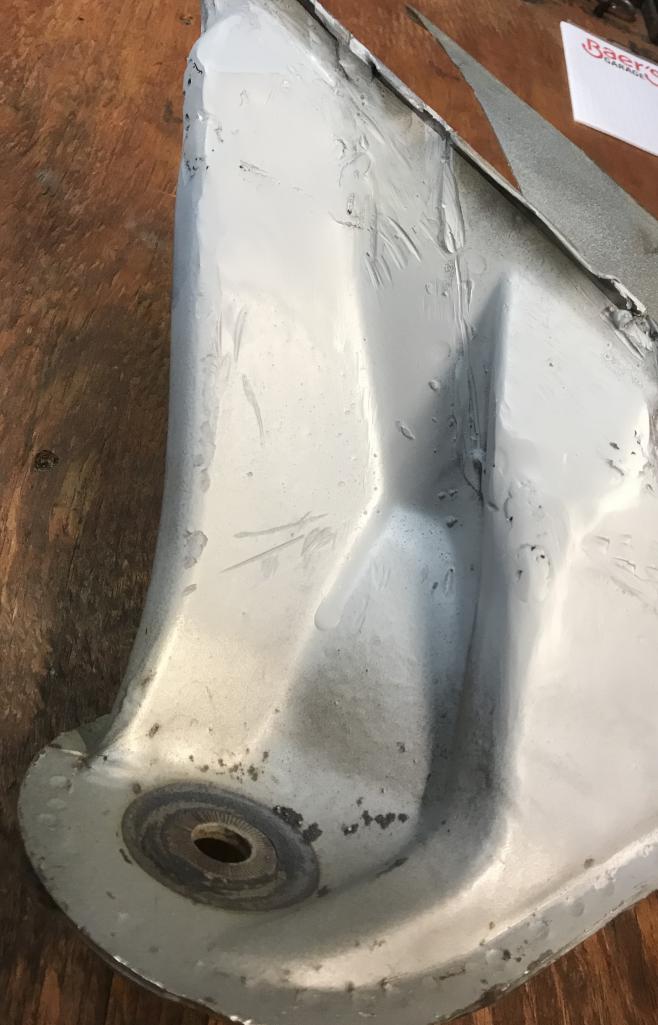
Posted by: mepstein Jan 29 2018, 06:01 PM
Looking good Dion!
Posted by: Dion Feb 10 2018, 05:17 PM
Attempted cleaning up the right engine mount area. Had a few holes to weld up
and a rather large one along the edge of the console. Some small holes were from the
spot welds holding the mount. Making progress.
Still need to reattach the brake line/hose bracket. Wanted to get some
primer on the bare metal. I’m getting flash rust showing up. It’s been raining and the
garage is a bit humid.
Attached thumbnail(s)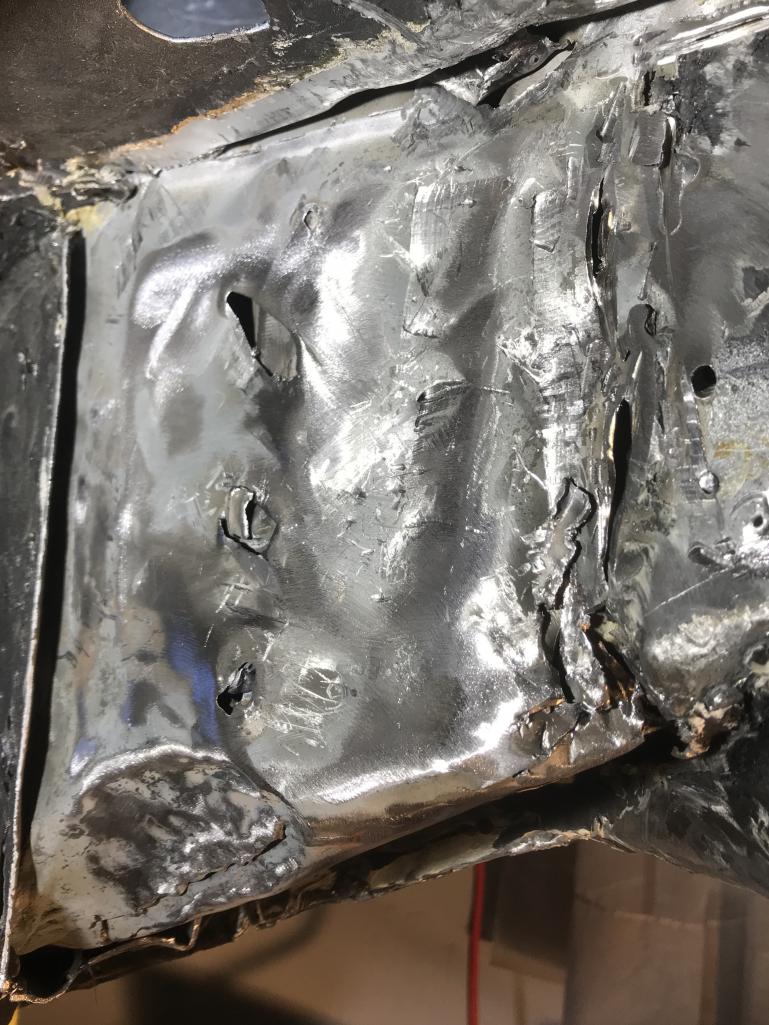
Posted by: Dion Feb 10 2018, 05:18 PM
Top pic is primered.
Bottom pic just welded holes up.
Attached thumbnail(s)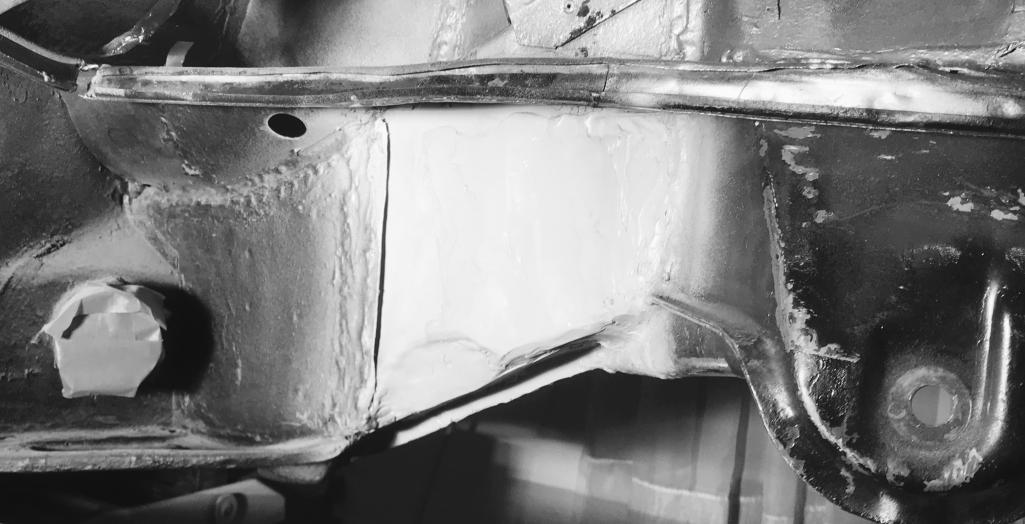
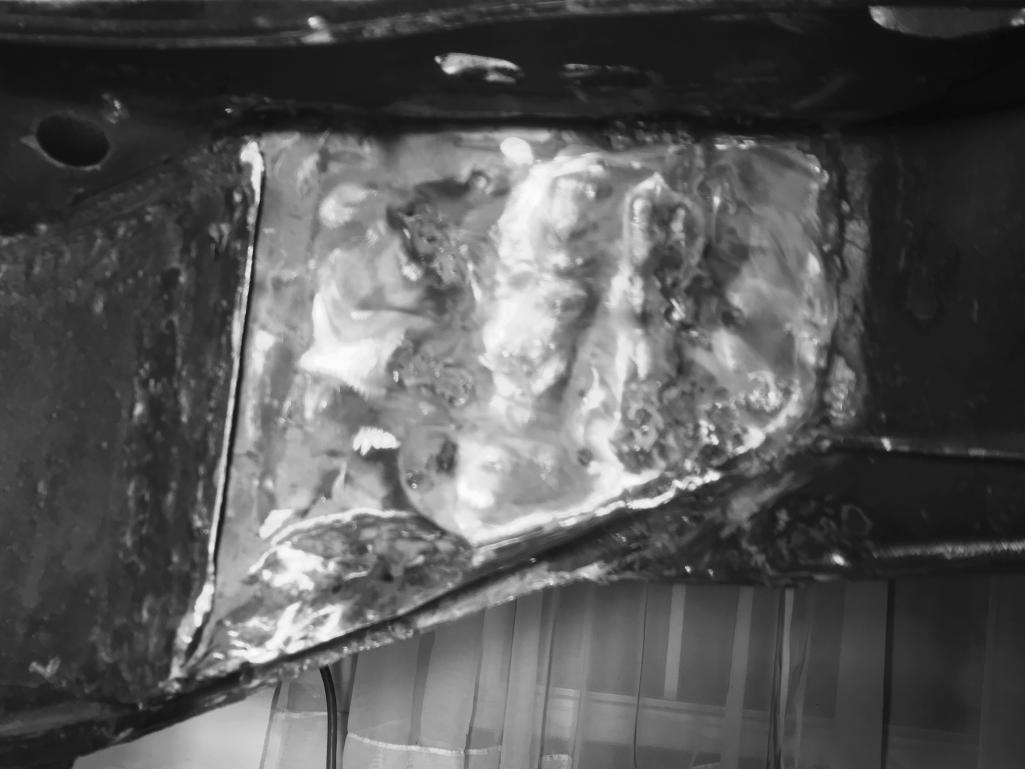
Posted by: Dion Feb 10 2018, 05:20 PM
Gap/hole on bottom of console edge/kick up.
Attached thumbnail(s)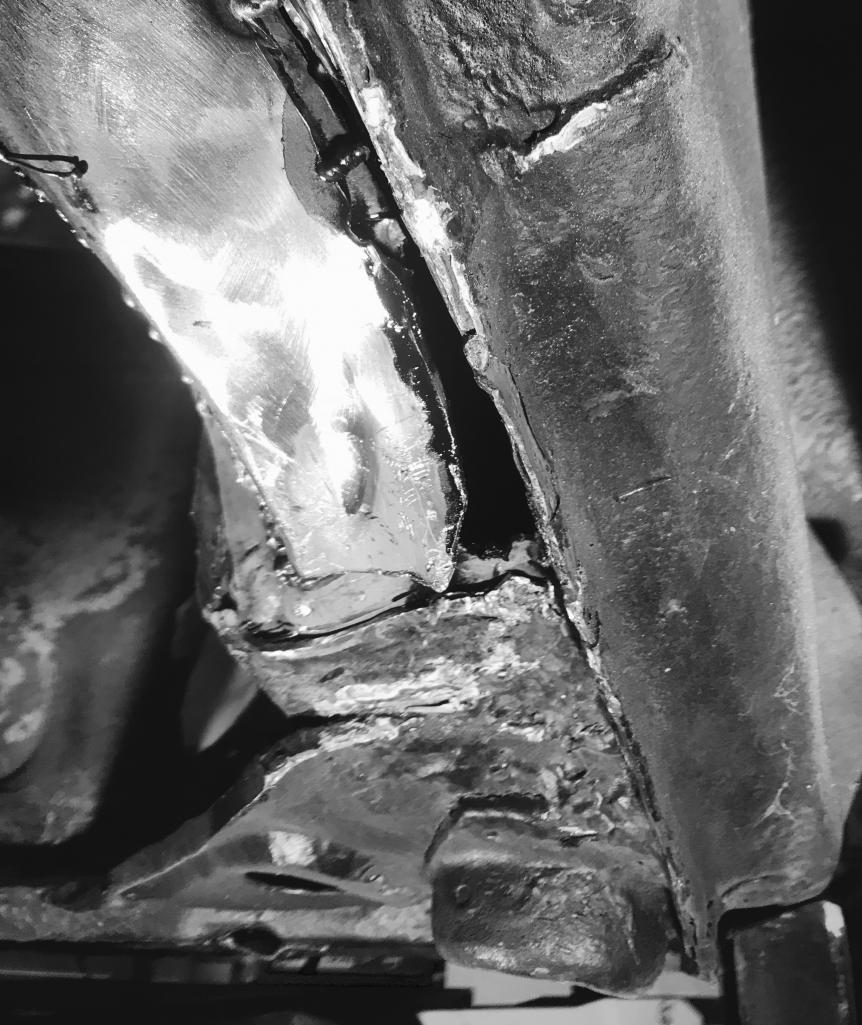
Posted by: Dion Feb 10 2018, 05:21 PM
Rough finish with primer.
Attached thumbnail(s)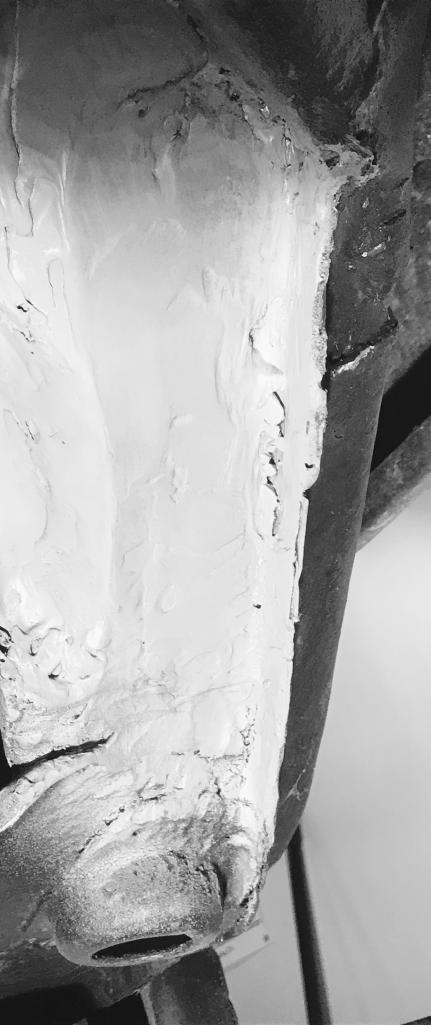
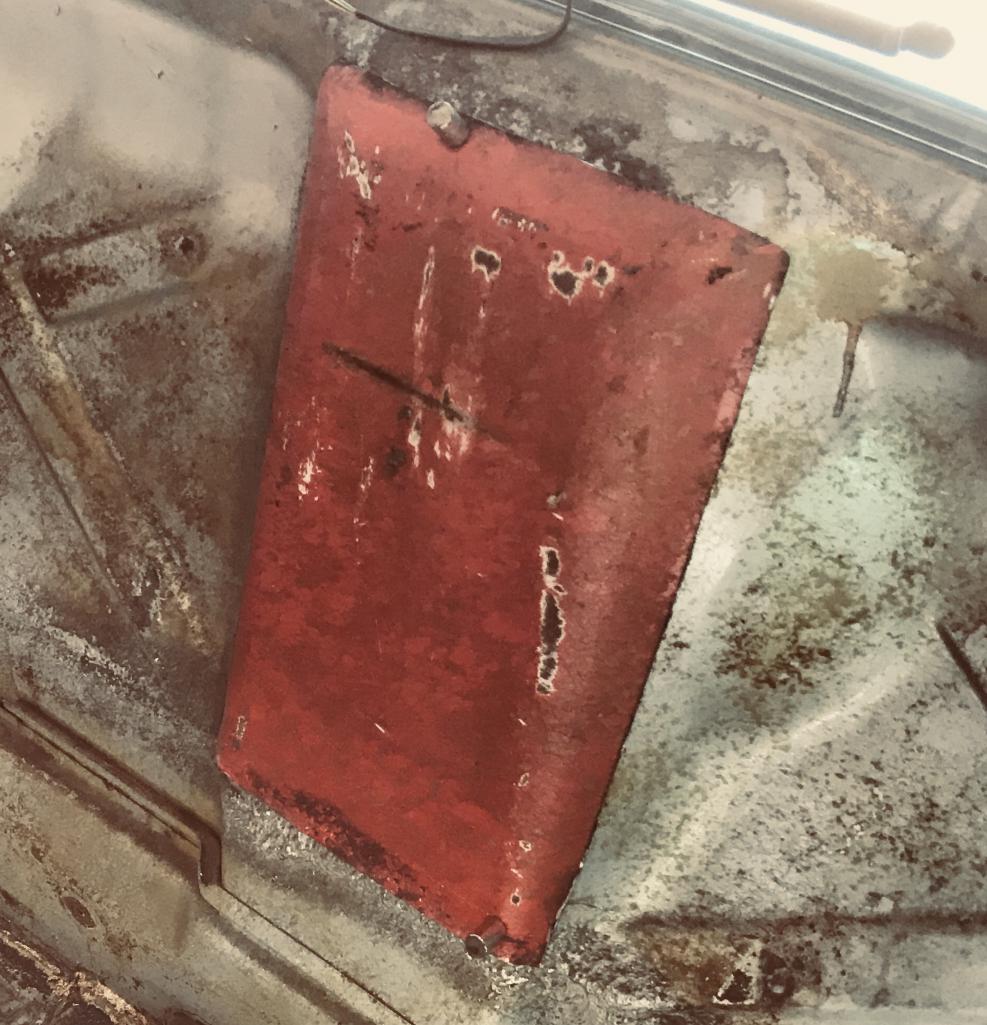
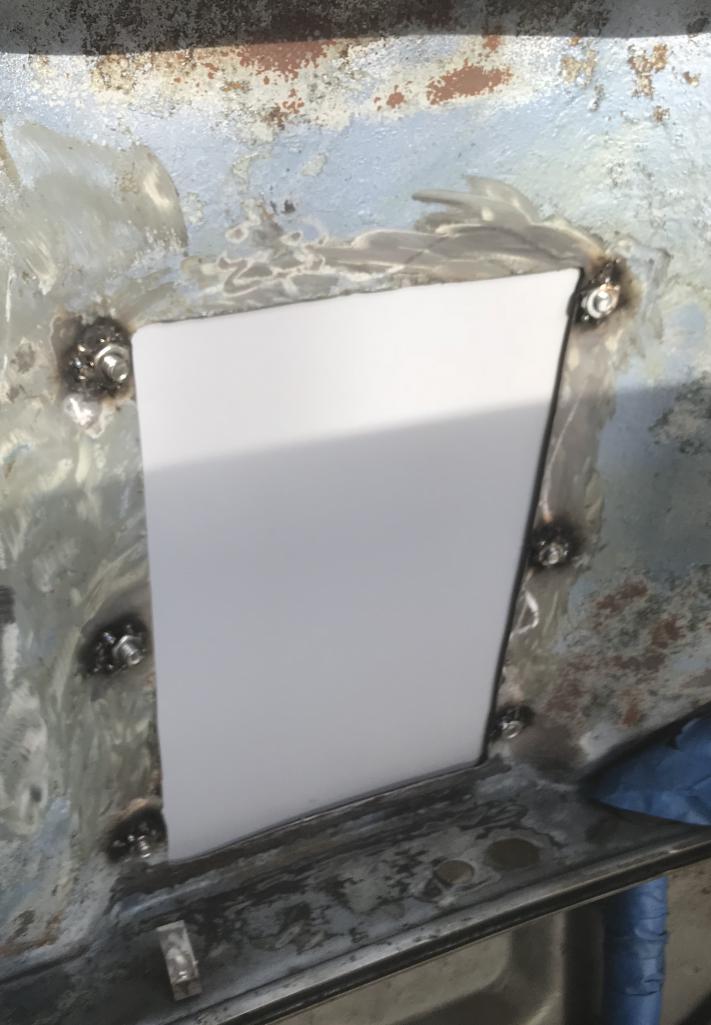
Posted by: Dion Feb 20 2018, 06:34 PM
Out of work early today to take advantage of good warm weather, tackled a small job.
I can finally tic that off the punch list.
Made a panel for the access panel in the firewall. Using a firewall provided by Garold
I cut a piece out oversized so it could lay on top of the contours of the existing firewall
in the car enabling me to use two sets of rubber weatherstripping.
One will surround the cut out and another will wrap around the larger cover.
So noise and any water (unlikely) will be stopped. As well as flames (ha, never know with carbs). I still need to weld the nuts to the engine side. Take care of that this weekend. Cheers all.
Posted by: Dion Feb 20 2018, 06:34 PM
double post, sorry
Attached thumbnail(s)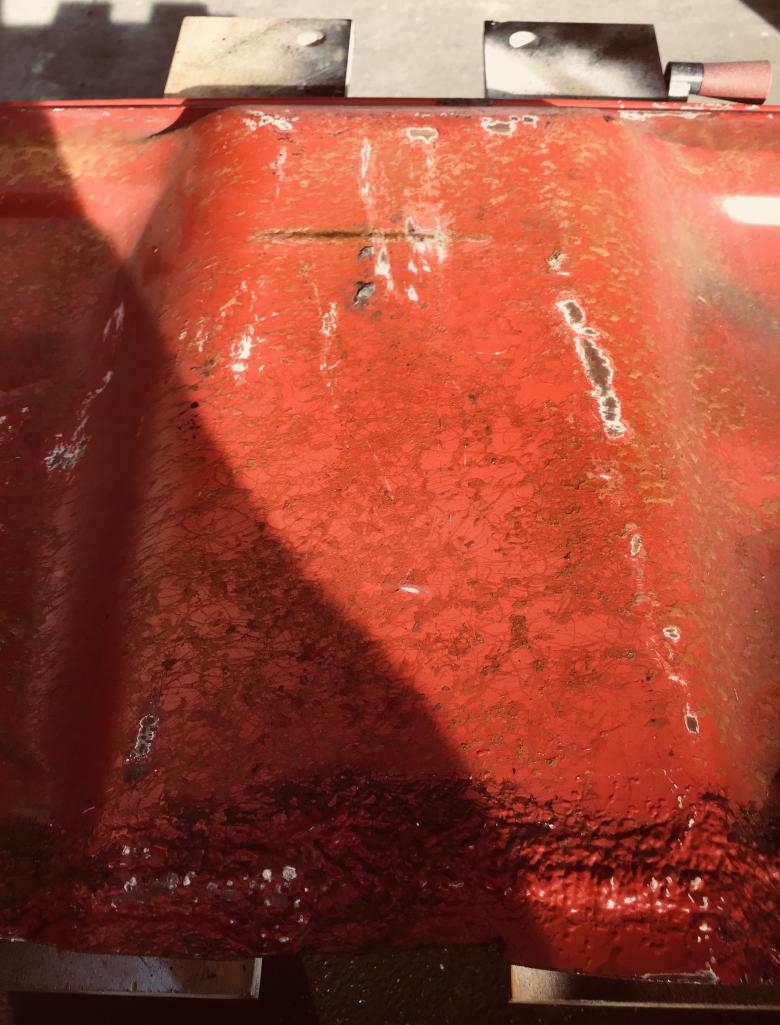
Posted by: Dion Feb 20 2018, 06:35 PM
Pic
Attached thumbnail(s)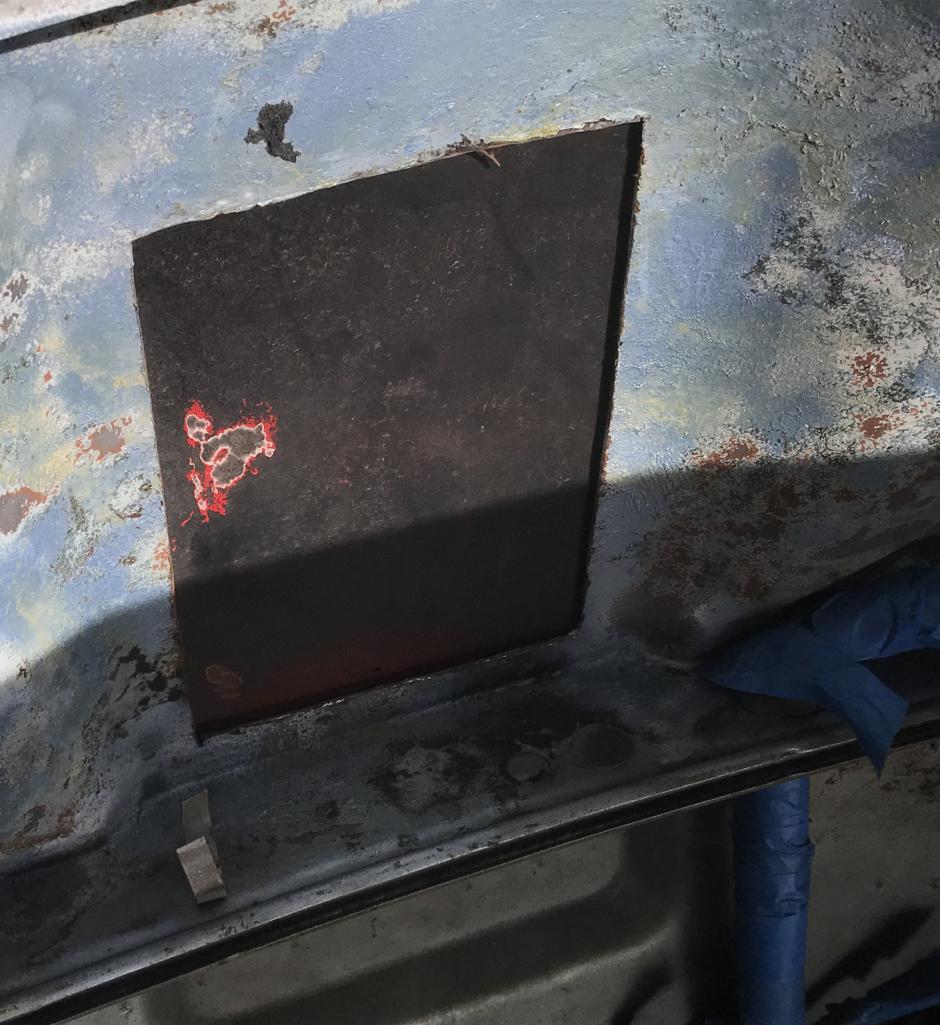
Posted by: Dion Feb 20 2018, 06:36 PM
Front engine access panel
Attached thumbnail(s)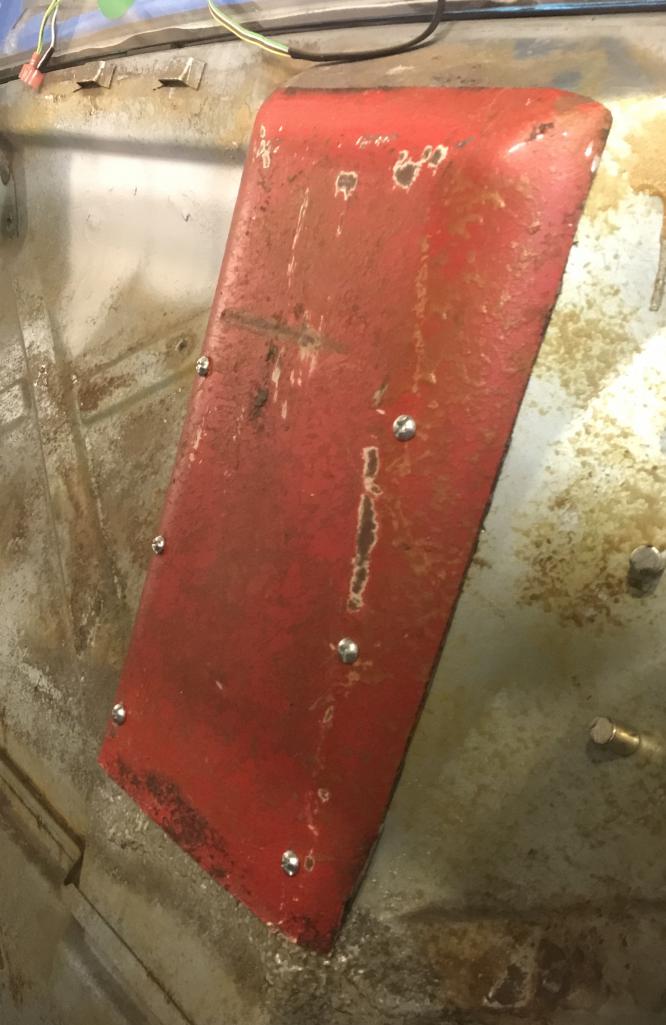
Posted by: tygaboy Feb 20 2018, 06:44 PM
Very nice!
Just a minor suggestion: you may want to round the corners of the opening in the firewall. That'll eliminate the likelihood of a crack developing in that area.
Keep up the great work and progress and you'll be on the road before you know it. 
Posted by: Dion Feb 20 2018, 07:37 PM
Thanks Chris. Ok will round the edges. Thanks for the suggestion. Never thought of that happening.
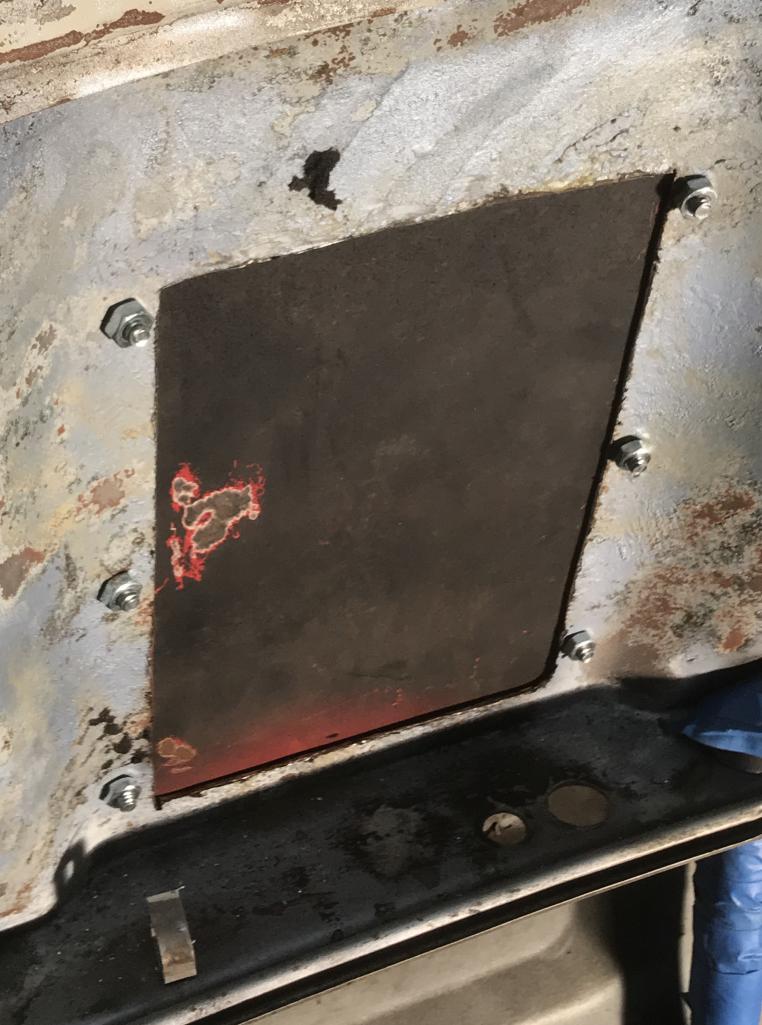
Posted by: Dion Feb 26 2018, 03:40 PM
Took Chris advice and rounded the corners slightly of hatch opening.
Welded the nuts on the panel. Primered the cover, wanted to do more but the temps are
dropping quickly so no further primer today. Come on spring!
Attached thumbnail(s)
Posted by: tygaboy Feb 26 2018, 04:45 PM

Nice!
Posted by: mb911 Feb 26 2018, 05:16 PM
I need to do this as well.. Need to either find a panel like you did or weld a flange all around..
Posted by: JmuRiz Feb 26 2018, 07:50 PM
Ben, a panel might be a good idea for your /6 conversion parts 
Posted by: mb911 Feb 27 2018, 06:24 PM
Ben, a panel might be a good idea for your /6 conversion parts
Very true..
Posted by: Dion Mar 17 2018, 07:50 PM
So for a change of pace and not having a lot of free time for sanding/painting I did a
a small project for a bit of fun. I modified the horn bracket to accept a banjo horn like
a few of the real GT ran. I was lucky to stumble upon this one for a
reasonable price (to me). The prices on these horns can be ridiculous. Found it on a Sweden based car parts site. Tested and functions as it supposed to. It certainly sounds different from the stock horn.
I need to modify the “flat” area on the chrome bumper where the rubber spacer meets the body. I will make a slot on the bumper bracket for the trumpet end to slide through. Shouldn’t be too bad to do. Wel’ll see :-)
Attached thumbnail(s)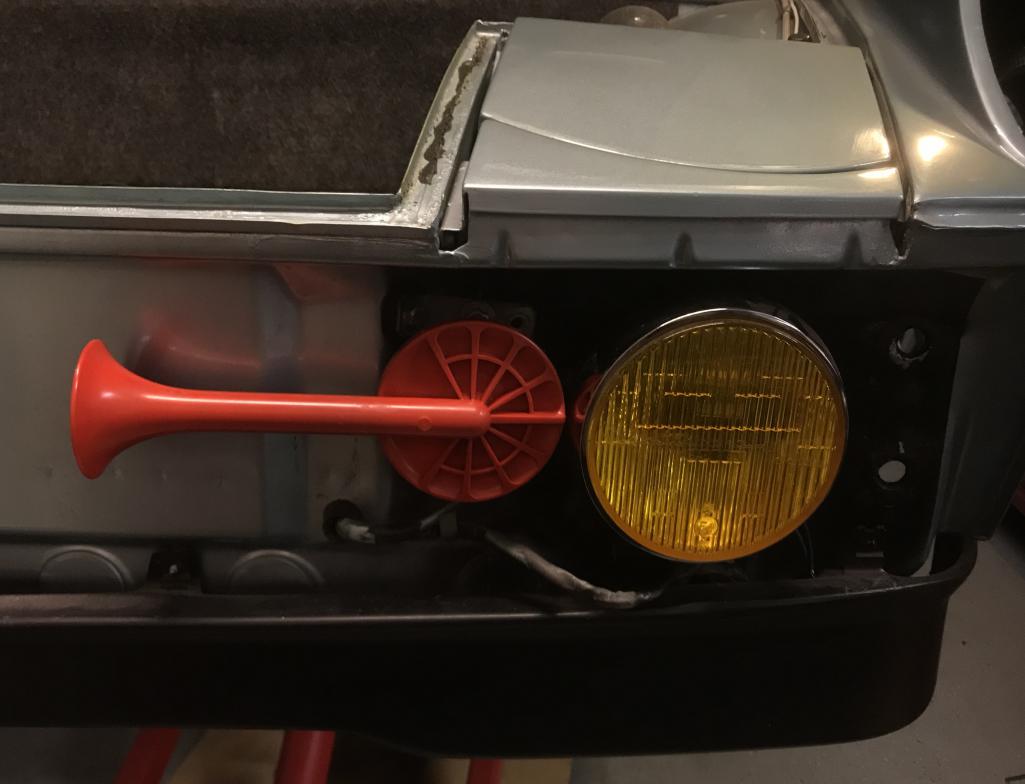
Posted by: Dion Mar 25 2018, 06:30 PM
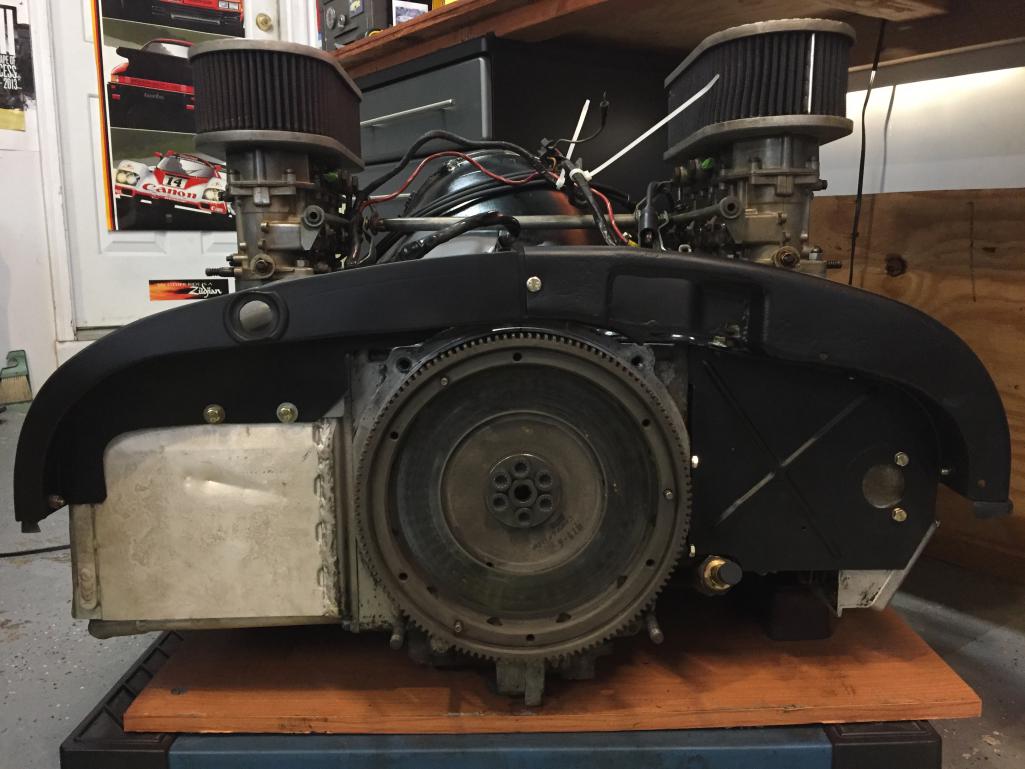
And here it waits...... Placed the Webers on.
If anyone needs some Zeniths from a 911T ,I’ll be posting them soon on
here as well as Pelican.
Attached thumbnail(s)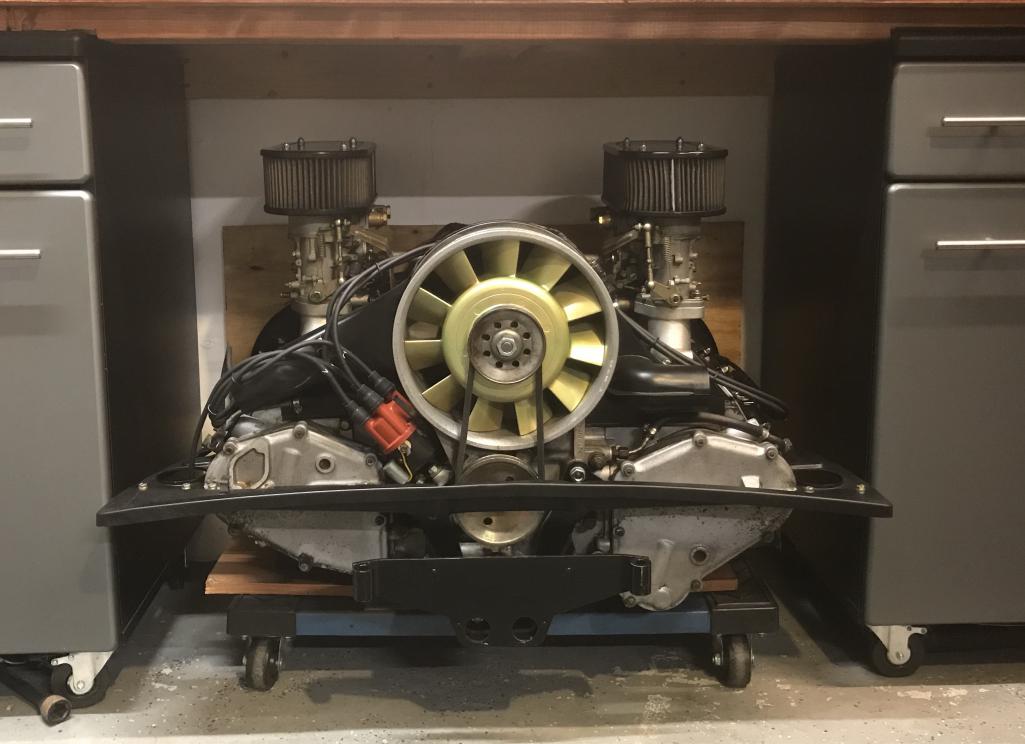
Posted by: Dion Mar 25 2018, 06:32 PM
Began digging into the front left fender.
Attached thumbnail(s)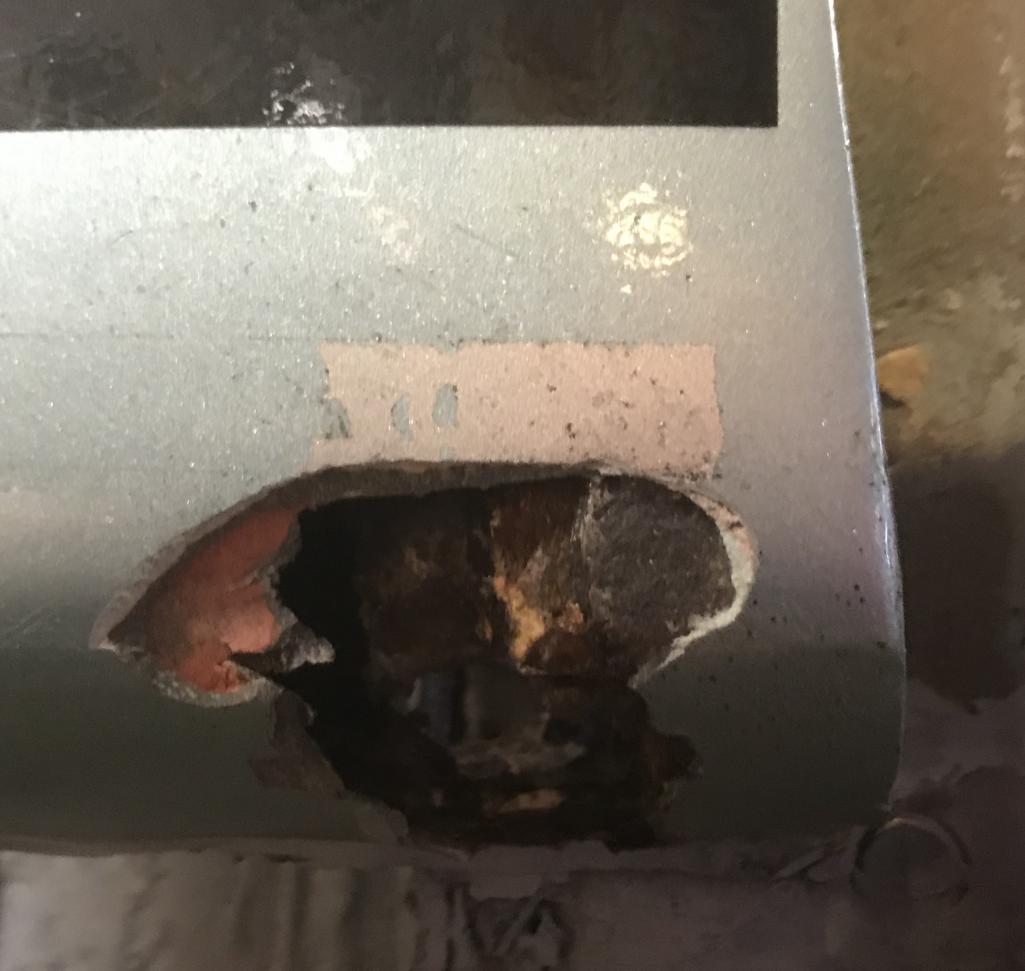
Posted by: Dion Mar 25 2018, 06:35 PM
Cleaning out the bad metal.
Attached thumbnail(s)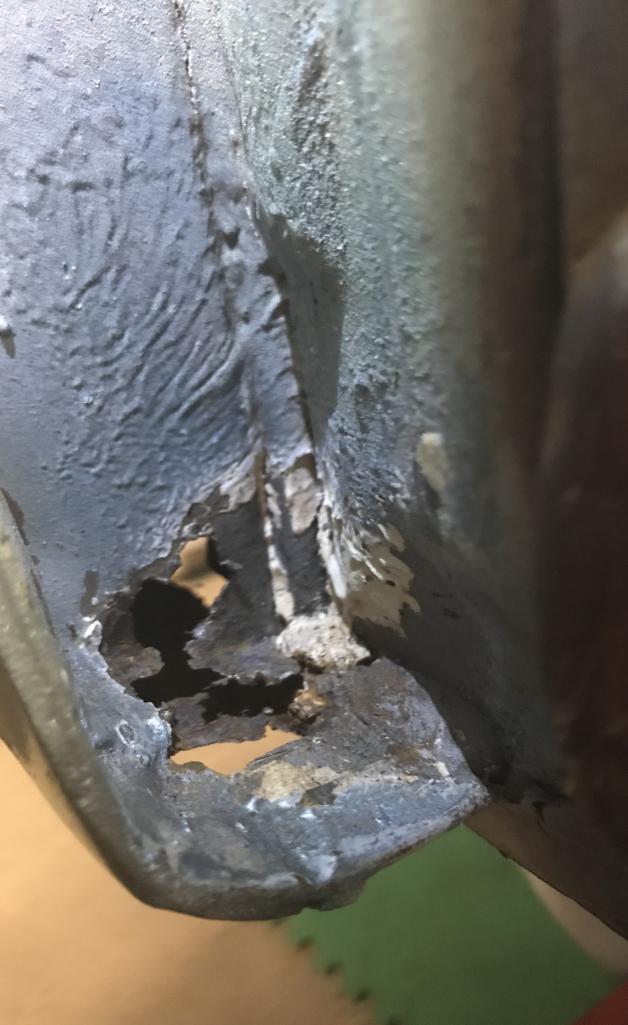
Posted by: Dion Mar 25 2018, 06:38 PM
Next weekend I’ll make a patch and weld it up. Made sure I had clean metal to weld to
and no further perforations. Certainly going to be a challenging area to sort out.
Attached thumbnail(s)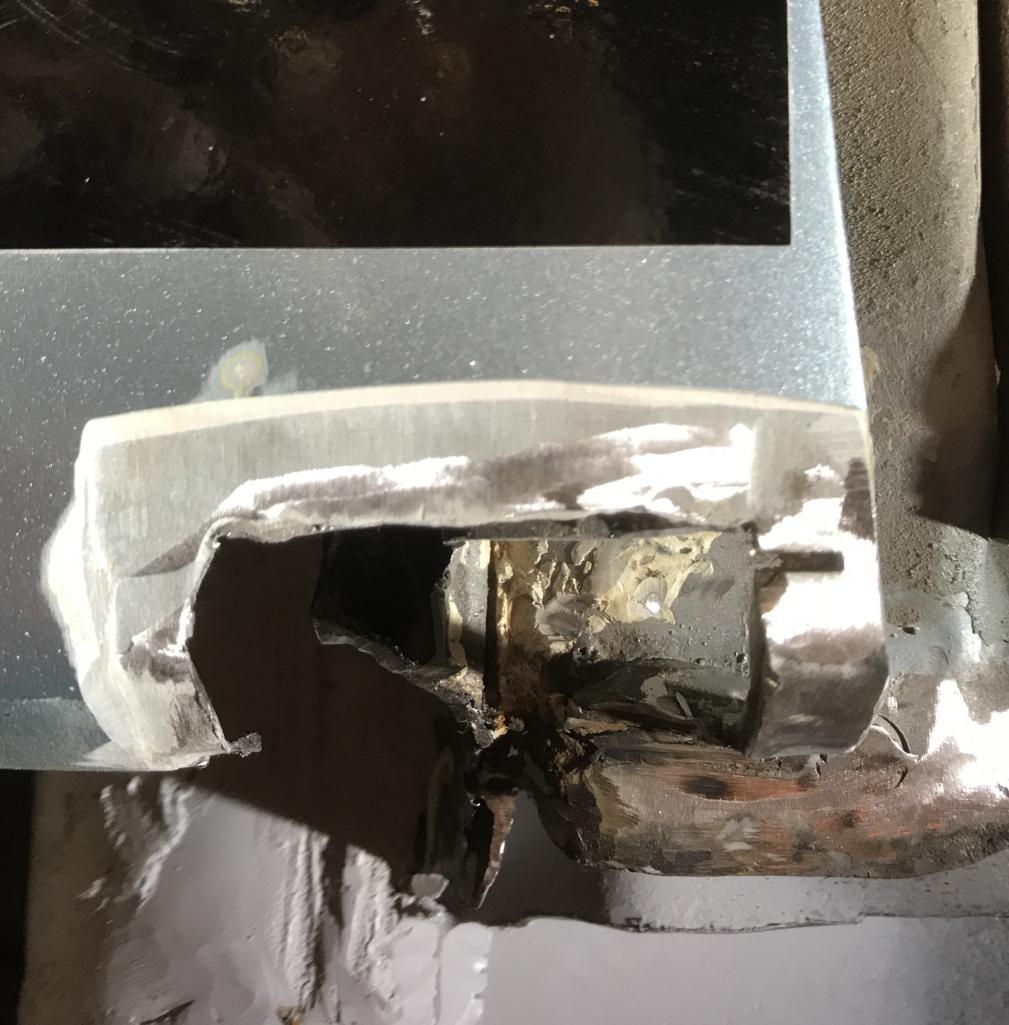
Posted by: bbrock Mar 25 2018, 07:14 PM
I'm going to be hitting that same spot on both sides of mine soon. I think I'll sit back and wait while you show me how it's done first.
Posted by: mepstein Mar 25 2018, 07:42 PM
And here it waits...... Placed the Webers on.
If anyone needs some Zeniths from a 911T ,I’ll be posting them soon on
here as well as Pelican.
Pretty
Posted by: Dion Mar 25 2018, 07:59 PM
I'm going to be hitting that same spot on both sides of mine soon. I think I'll sit back and wait while you show me how it's done first.
 You are too kind sir!
I will do my best.
Posted by: bbrock Mar 25 2018, 08:05 PM
I'm going to be hitting that same spot on both sides of mine soon. I think I'll sit back and wait while you show me how it's done first.
You are too kind sir!I will do my best.
BTW, I have serious engine envy!
Posted by: Dion Mar 25 2018, 08:29 PM
It will be extremely nice to wrap this project up and drive it out your way Brent.
To cruise about Big Sky country would be awesome. I only had a taste of it
exiting Yellowstone near Roosevelt’s Arch.
Be more than happy to let ya have a go!
Posted by: bbrock Mar 25 2018, 09:33 PM
It will be extremely nice to wrap this project up and drive it out your way Brent.
To cruise about Big Sky country would be awesome. I only had a taste of it
exiting Yellowstone near Roosevelt’s Arch.
Be more than happy to let ya have a go!
Deal! Our house is only 1 hour from Roosevelt Arch and you are welcome to stay in our guest room. A cruise over the Beartooth Hwy is a must!
Posted by: tygaboy Mar 26 2018, 08:58 AM
Dion - Your engine  is BEAUTIFUL!
Posted by: mb911 Mar 26 2018, 01:23 PM
Dion,
Those are interesting cam covers what are they from?
Posted by: Dion Mar 26 2018, 01:34 PM
Ben it’s a 1967 aluminum case.
Posted by: mepstein Mar 26 2018, 01:38 PM
Ben it’s a 1967 aluminum case.
I must have missed that. Those cases are very pricey these days.
Posted by: Dion Mar 26 2018, 01:49 PM
Great, now I can be more nervous. Thanks Mark hehehe.
Posted by: mb911 Mar 26 2018, 01:51 PM
Great, now I can be more nervous. Thanks Mark hehehe.
If thats the case you just hit the lottery.. I would really consider cashing out on thay engine and buy another..
Posted by: Dion Mar 26 2018, 01:58 PM
Heheheh sweet.  Didn’t know they’ve escalated. I’m trying to cash out with Mark right now on the Zeniths! Heheh. Fingers crossed Mark!
Posted by: mb911 Mar 26 2018, 01:59 PM
Looks like 8-9k for a case..
???
Posted by: Dion Mar 26 2018, 02:09 PM
Wow. Well I appreciate that news. I spent 7k originally for the engine,carbs & an oil tank! Thanks Ben. Now the paranoia can set in! Heheheh
Posted by: porschetub Mar 26 2018, 02:24 PM
And here it waits...... Placed the Webers on.
If anyone needs some Zeniths from a 911T ,I’ll be posting them soon on
here as well as Pelican.
Hi mate,love the engine tucked away in the corner crying 'bolt me in'
 I found having a built engine inspired to get on with the job,hope it works that way for you.
Wow that's a nice engine I notice an early cast iron dizzy too
 ,these work really well with carbs I have read.
Best of luck and keep knocking away @ that bloody rust

Posted by: porschetub Mar 26 2018, 02:27 PM
Looks like 8-9k for a case..
???
I did see one of these cases listed for 15k a while back .
I think Dion bought this a while back.....just guessing
.Posted by: Dion Mar 26 2018, 02:32 PM
Thanks Dean. Yes the clean motor does inspire, as
well as Dave’s completed beauty! I purchased the engine in 2015. I guess before all the 911 speculation took off.
Cheers mate!
Here’s 914Daves:
Attached thumbnail(s)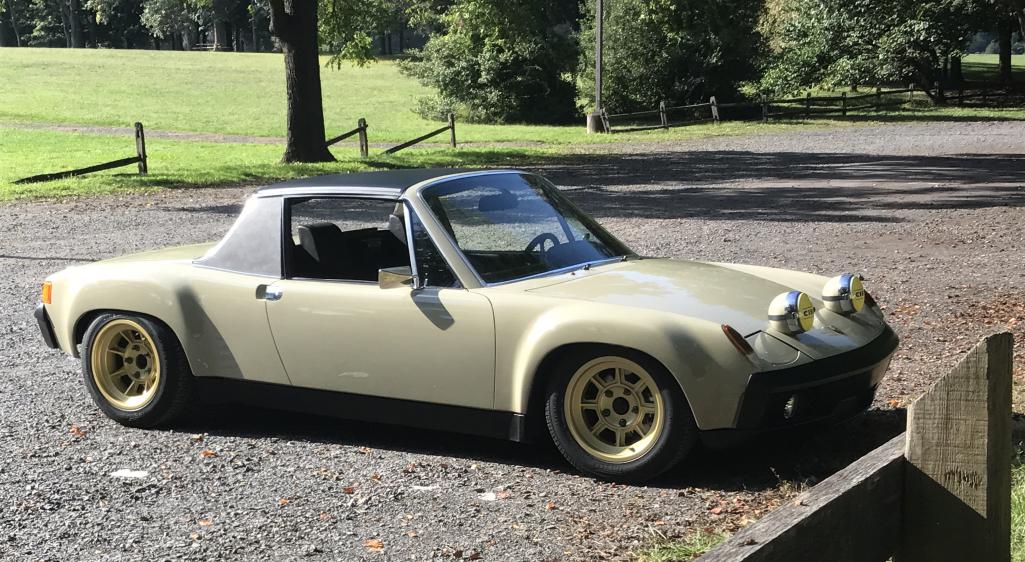
Posted by: Dion Apr 1 2018, 07:43 PM
Happy Easter from the guy working on this project.
I worked on the front lower left fender today. What a treat this was.
Made some cardboard templates and then cut my shapes.
Bending the one piece was tricky as I don’t have the proper tools for this so
some pipe of different diameters and a vice helped me shape the curve.
Attached thumbnail(s)
Posted by: Dion Apr 1 2018, 07:46 PM
Shapes
Attached thumbnail(s)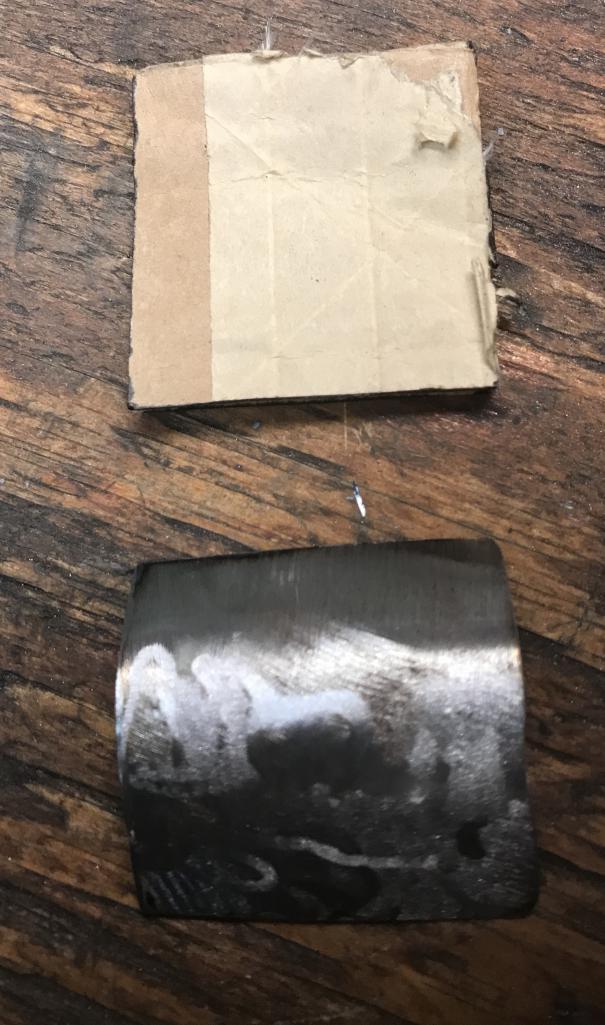
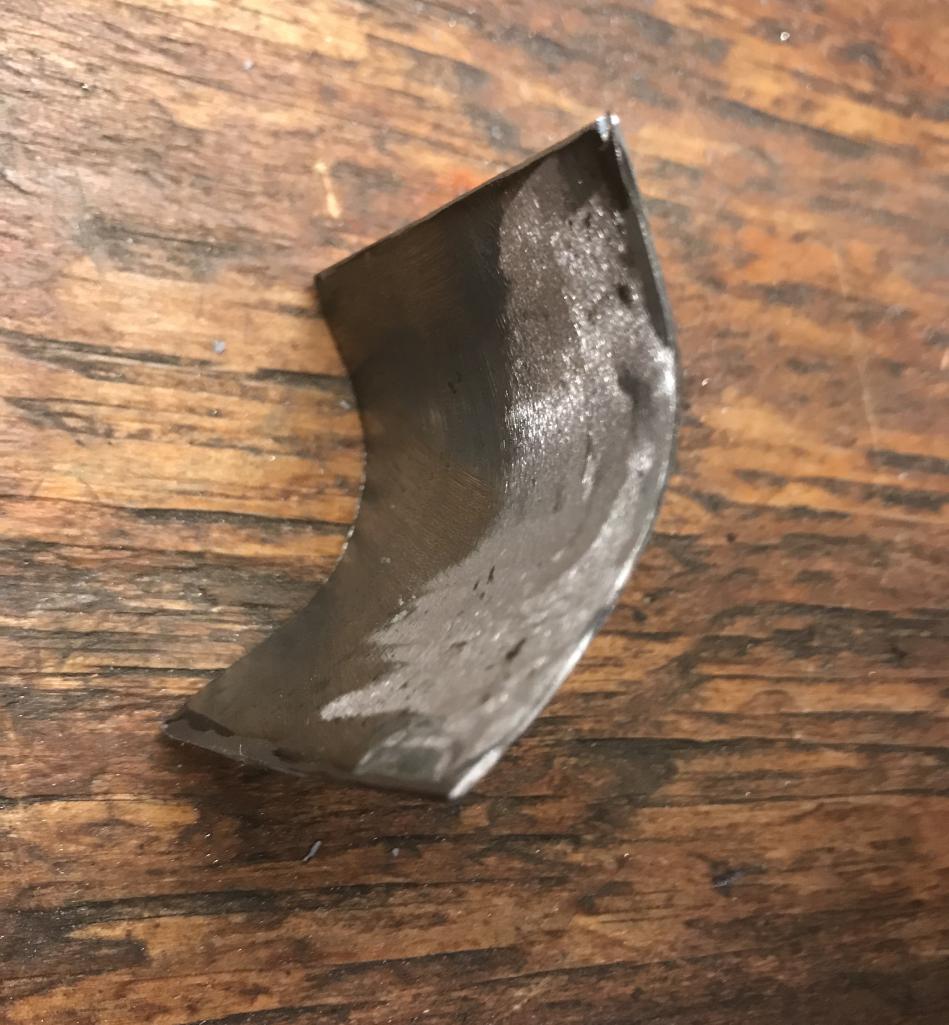
Posted by: Dion Apr 1 2018, 07:49 PM
Placement
Attached thumbnail(s)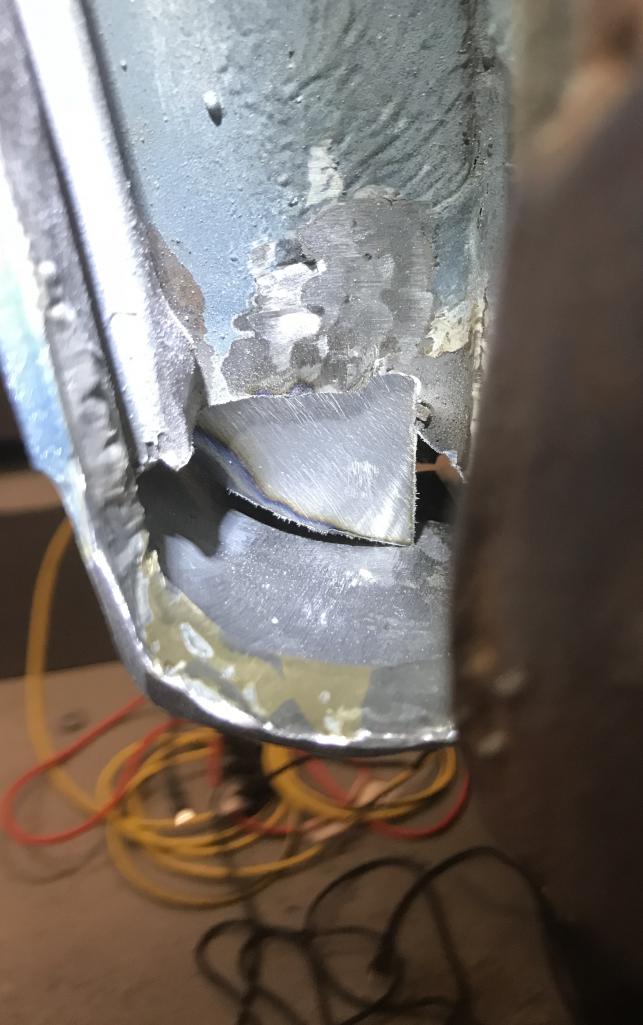
Posted by: Dion Apr 1 2018, 07:52 PM
Curved outer piece mounted, welds ground & sanded.
Attached thumbnail(s)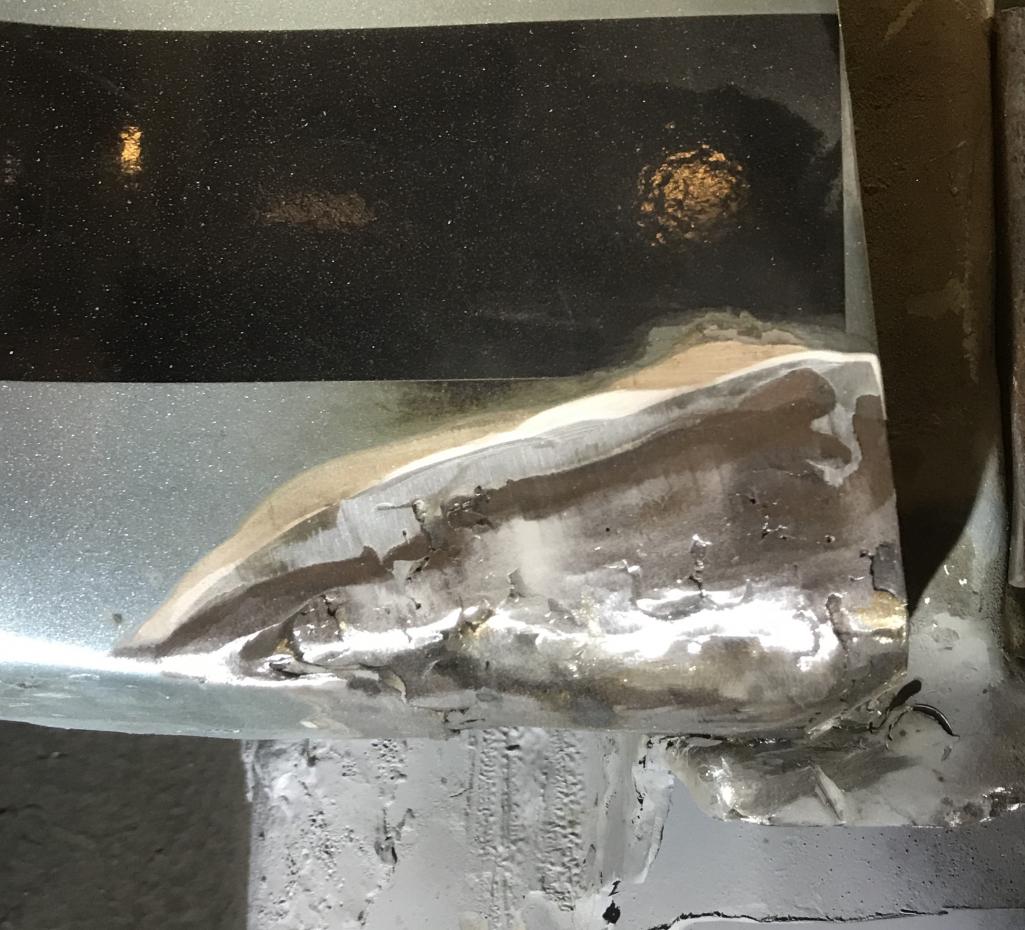
Posted by: Dion Apr 1 2018, 07:54 PM
Inside door jamb welded piece. None of my tools for grinding or sanding would fit in this area. So had to rely on primer and sealer to button up. Not the best but weather proofed.
Attached thumbnail(s)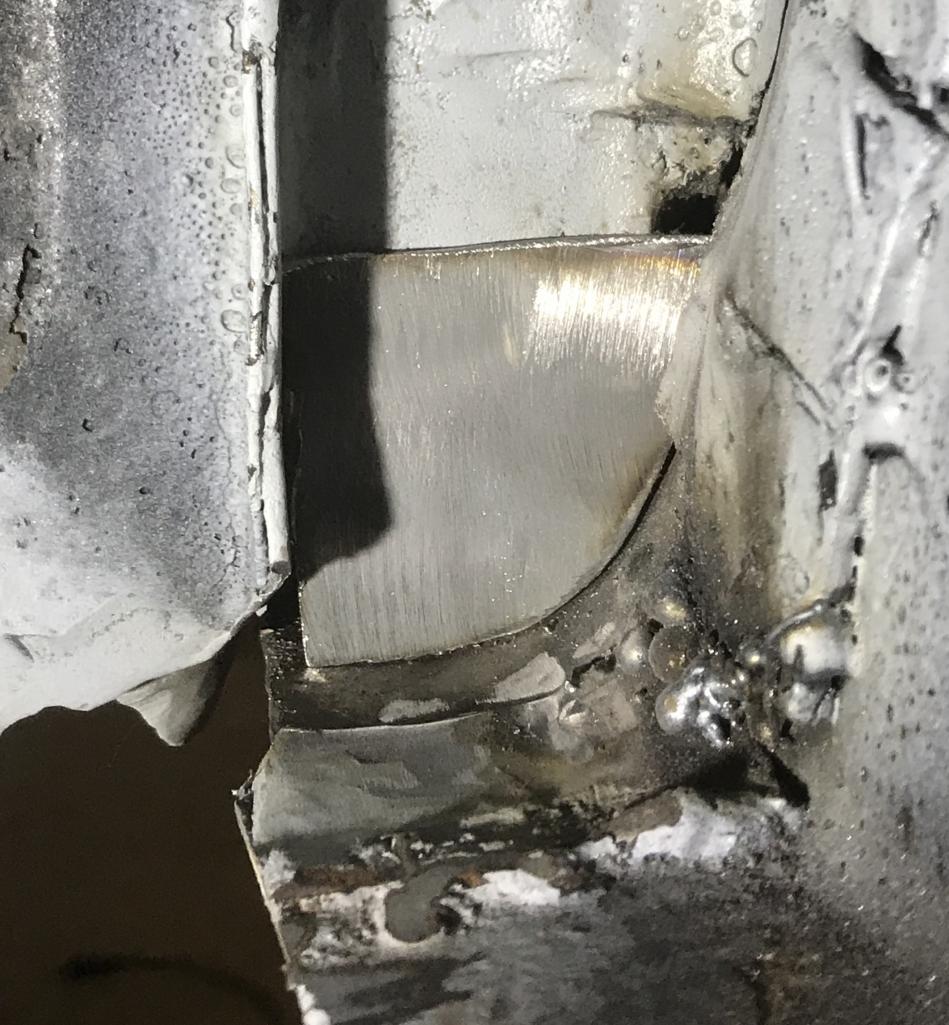
Posted by: Dion Apr 1 2018, 07:55 PM
seam seal & primer
Attached thumbnail(s)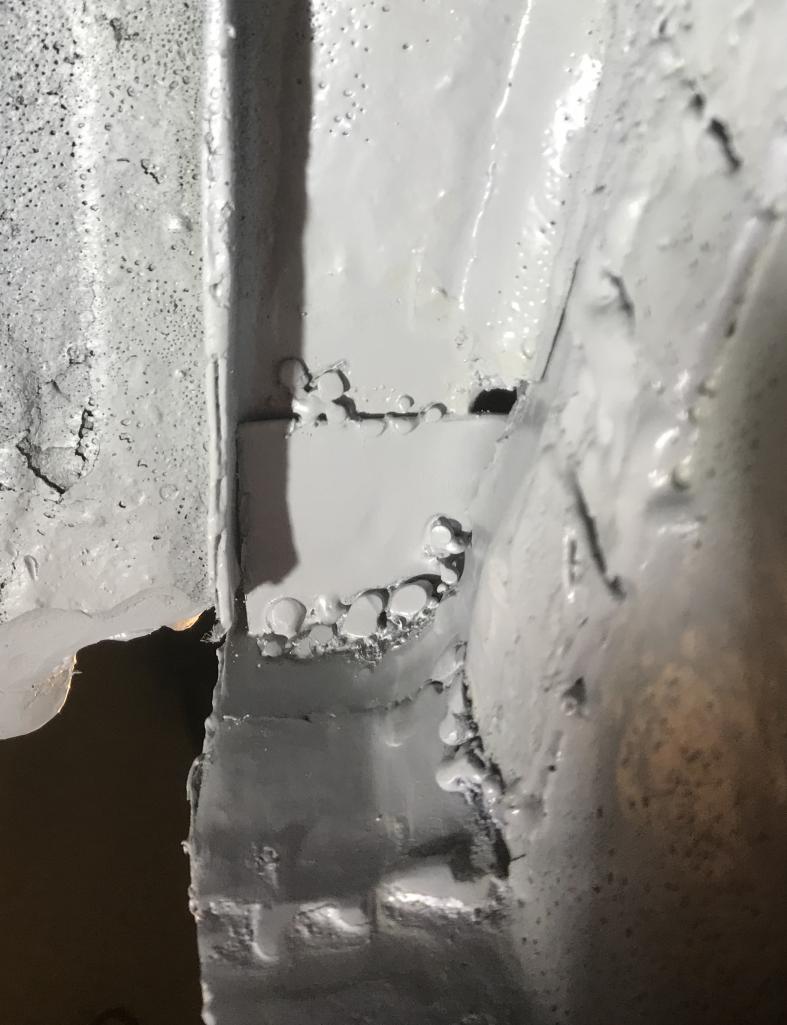
Posted by: mepstein Apr 1 2018, 08:07 PM
Thanks Dean. Yes the clean motor does inspire, as
well as Dave’s completed beauty! I purchased the engine in 2015. I guess before all the 911 speculation took off.
Cheers mate!
Here’s 914Daves:
No, aluminum cases have been pricey for awhile. You just bought well. I sold one for $12K last year and that was a core short block. It would be hard to find a good running engine for less than $20K these days.
Posted by: jmitro Apr 1 2018, 09:05 PM
nice work Dion. Keep at it.
Take it from my mistake and make sure your door gaps are still good before you get all that painted. I had to backtrack after having my whole car painted and cut out some extra metal in that spot as it squeezed my door gap down.
I should be installing your old 2056 by end of summer
Posted by: Dion Apr 1 2018, 09:59 PM
“I should be installing your old 2056 by end of summer”
That’s good news Joseph! Sorry to hear of the mishap with the doors. Especially after
the paint! Thanks for the reminder.
Send some pics would love to see it.
Posted by: Dion Apr 14 2018, 12:22 PM
Ok gentlemen need advice. So my flares were welded on, not in the ideal way.
They used an overlap weld instead of butt welds. Removing and starting over is not on the table. Although that’s the ultimate answer. I’d like to prevent further rust. I have some surface rust below the thinly applied undercoating. I wire wheeled off the undercoating. I was thinking of using an acid etch and spraying it in all the seams then
use a rust “encapsulate” type spray and then prime/paint then undercoat.
Any other “ chemical suggestions for getting in those overlapping seams?
Thanks guys.
Attached thumbnail(s)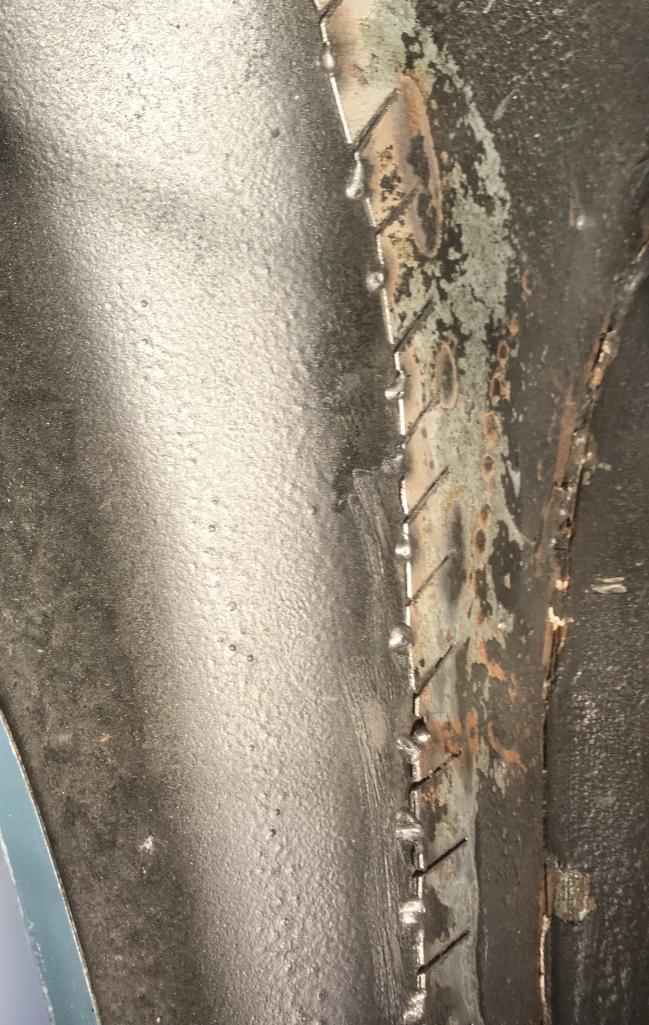
Posted by: Dion Apr 14 2018, 12:23 PM
Seams
Attached thumbnail(s)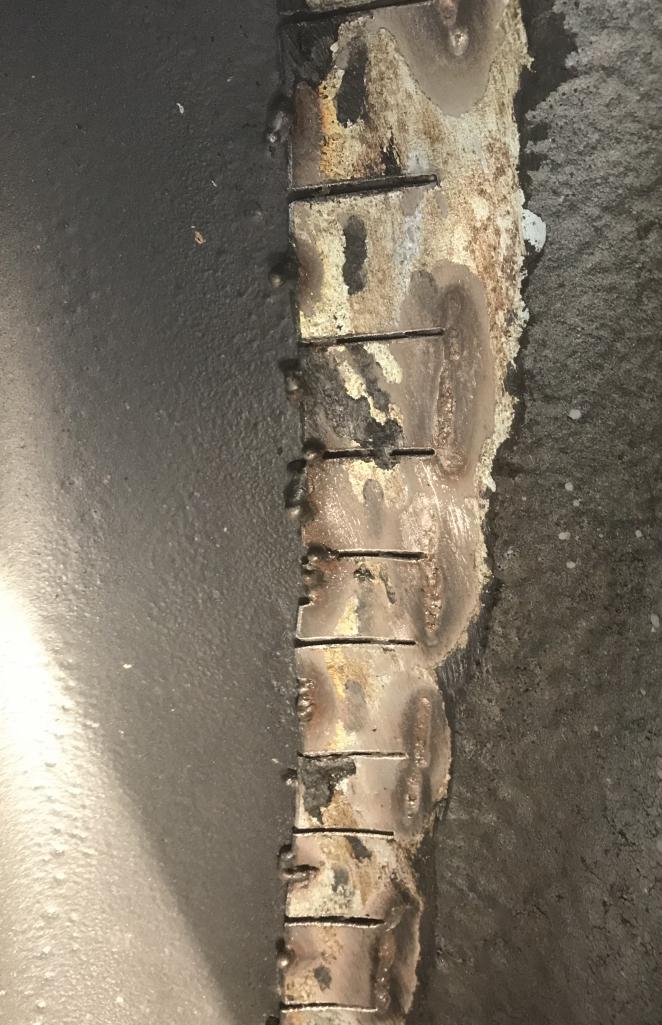
Posted by: Dion Apr 14 2018, 12:25 PM
Also need to re do the seam seal on the rear of front fender where it meets chassis.
And a little welding.
Attached thumbnail(s)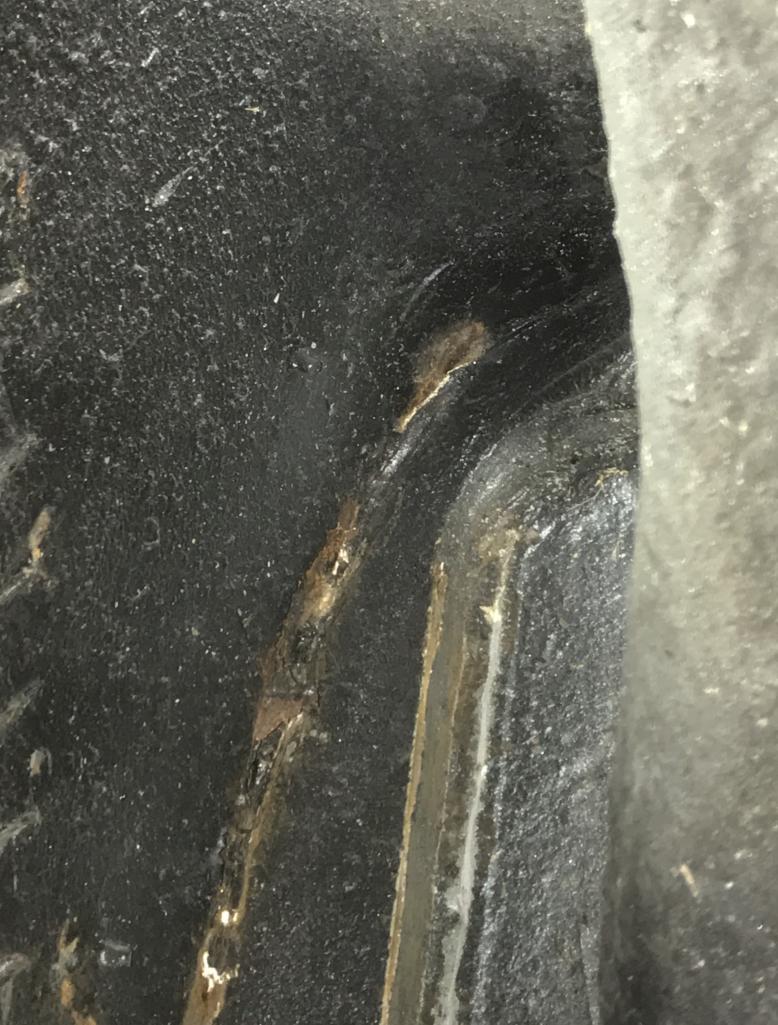
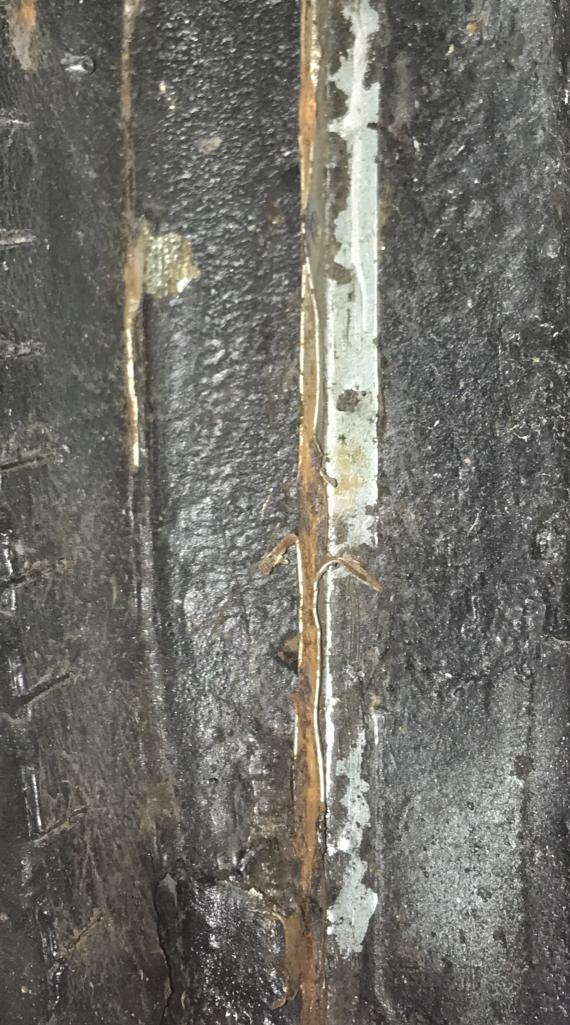
Posted by: Dion Apr 14 2018, 12:27 PM
Damage that needs welding up. Lower portion in front of long. Base of front fender.
Attached thumbnail(s)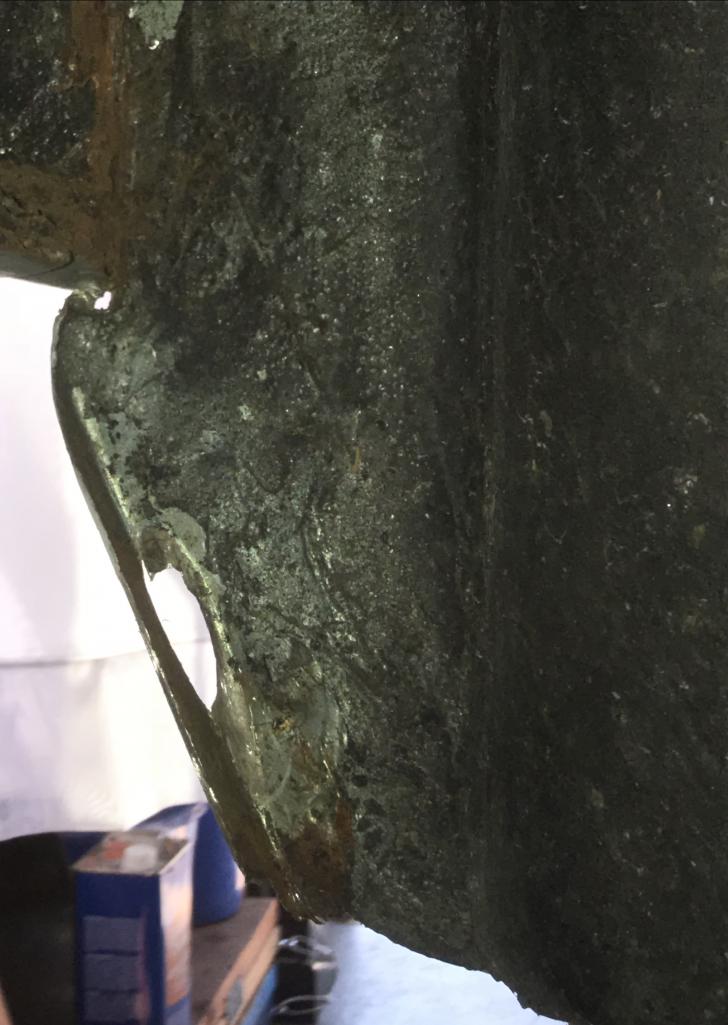
Posted by: Dion Apr 14 2018, 07:32 PM
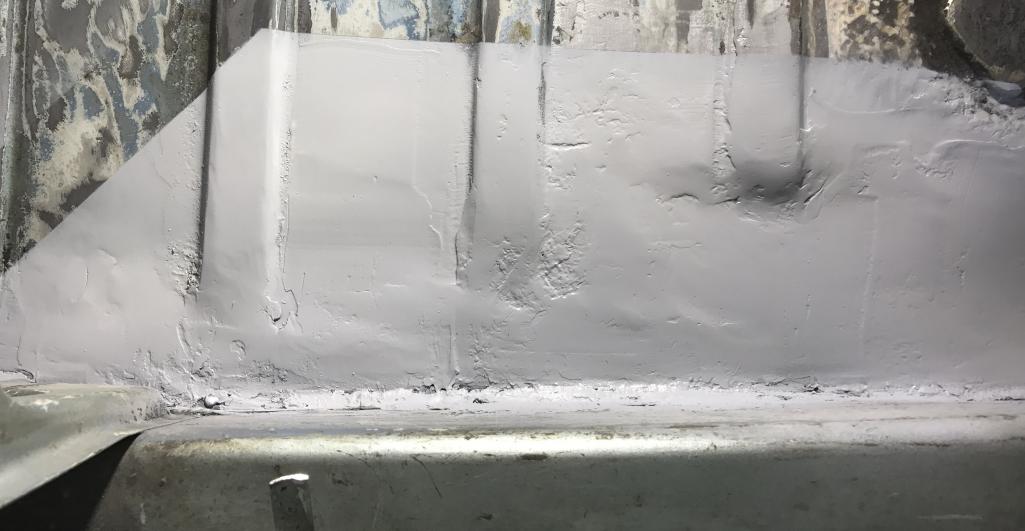
So had a suggestion to use the Eastwood Internal Frame coating.
I had that on hand. This stuff creeps into crevices so it made sense.
After washing it down with the “ Fast Etch” and cleanup with pre paint prep,
I hit it with the “frame coating” then coated with rubberized undercoating.
Didn’t get to the welding today. Drying time of the chemicals ate into weld time.
That’s for another weekend. Thanks for looking in!
Attached thumbnail(s)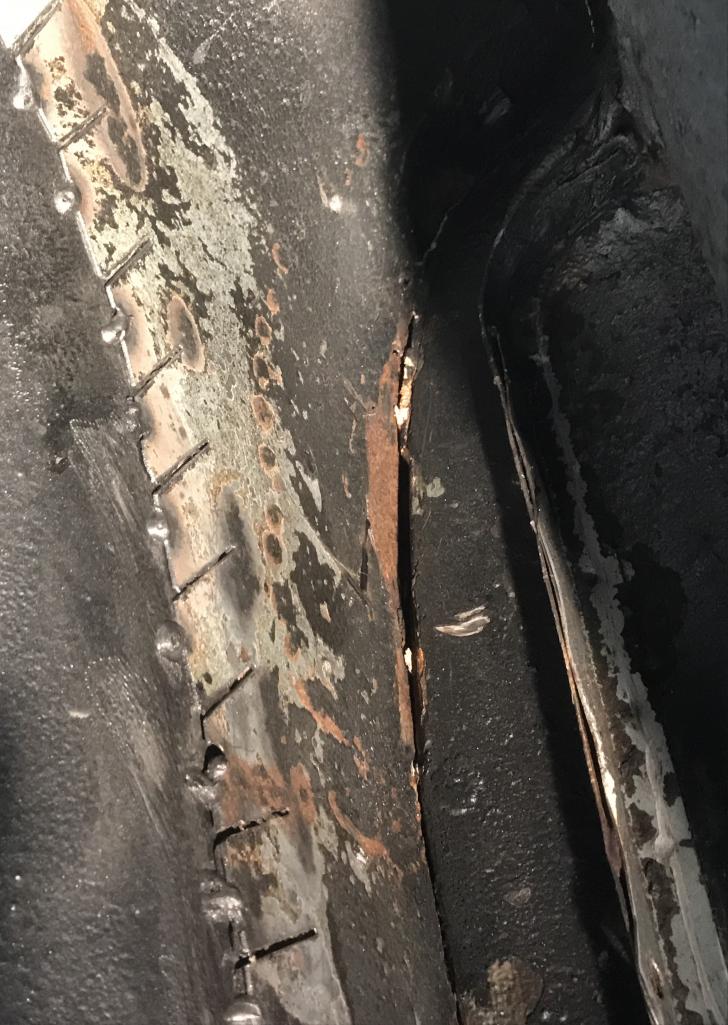
Posted by: Dion Apr 14 2018, 07:33 PM
Etch turning rust to black with the phosphates.
Attached thumbnail(s)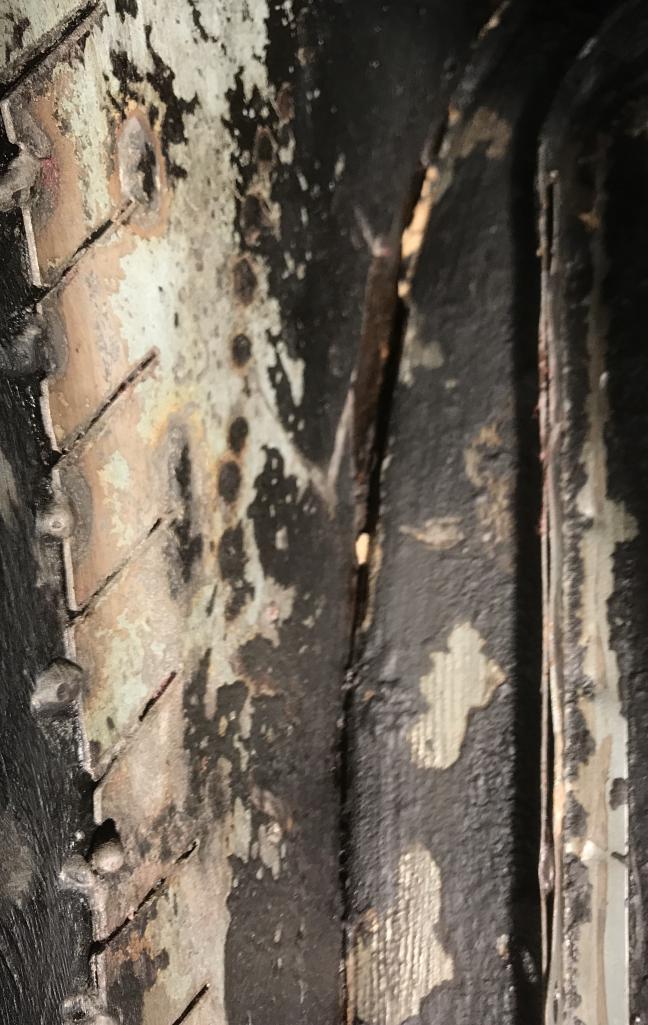
Posted by: Dion Apr 14 2018, 07:35 PM
Frame coating and seam sealer
Attached thumbnail(s)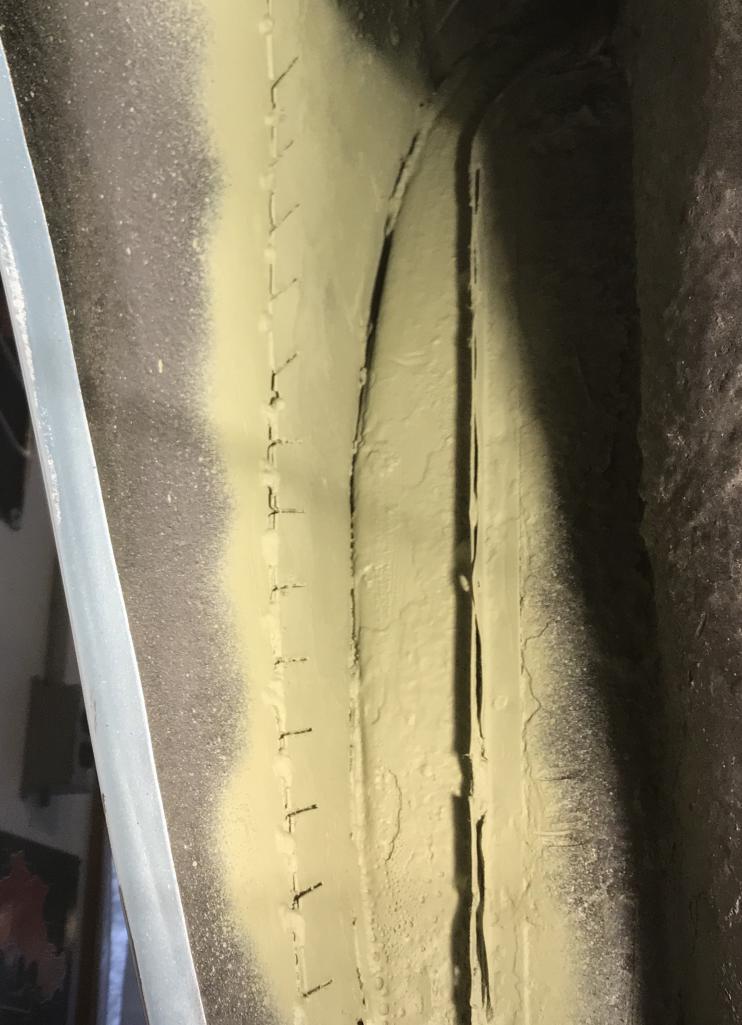

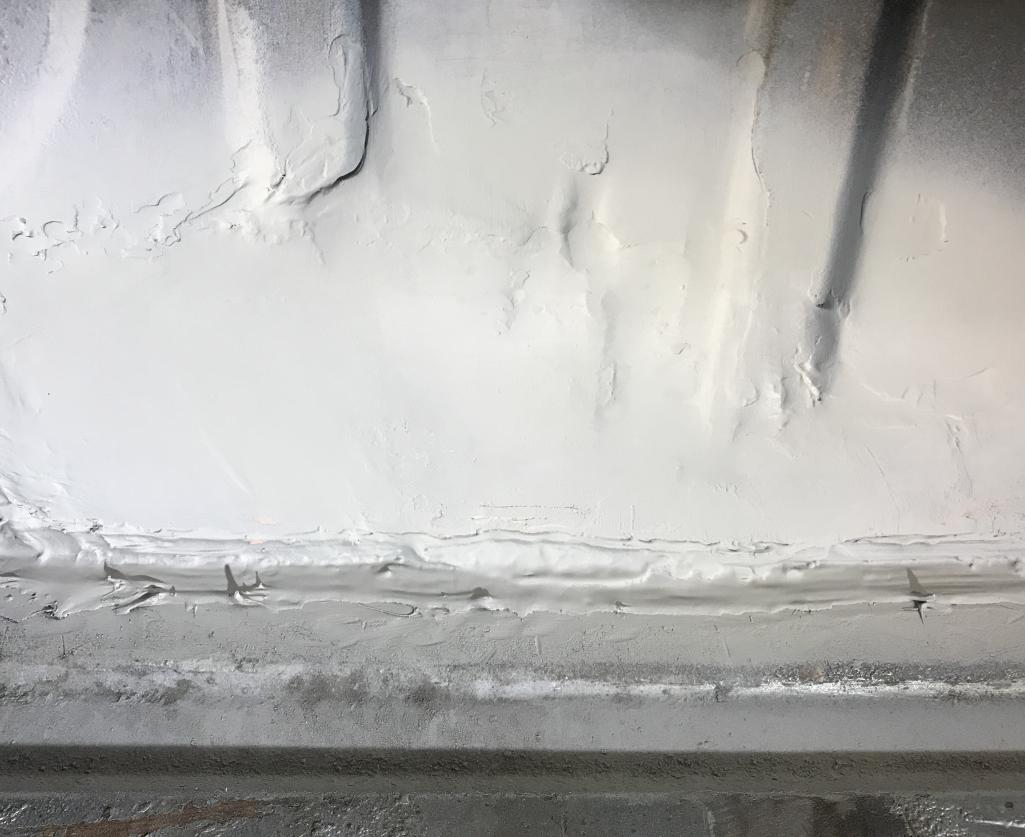
Posted by: Dion Apr 14 2018, 07:35 PM
Undercoating
Attached thumbnail(s)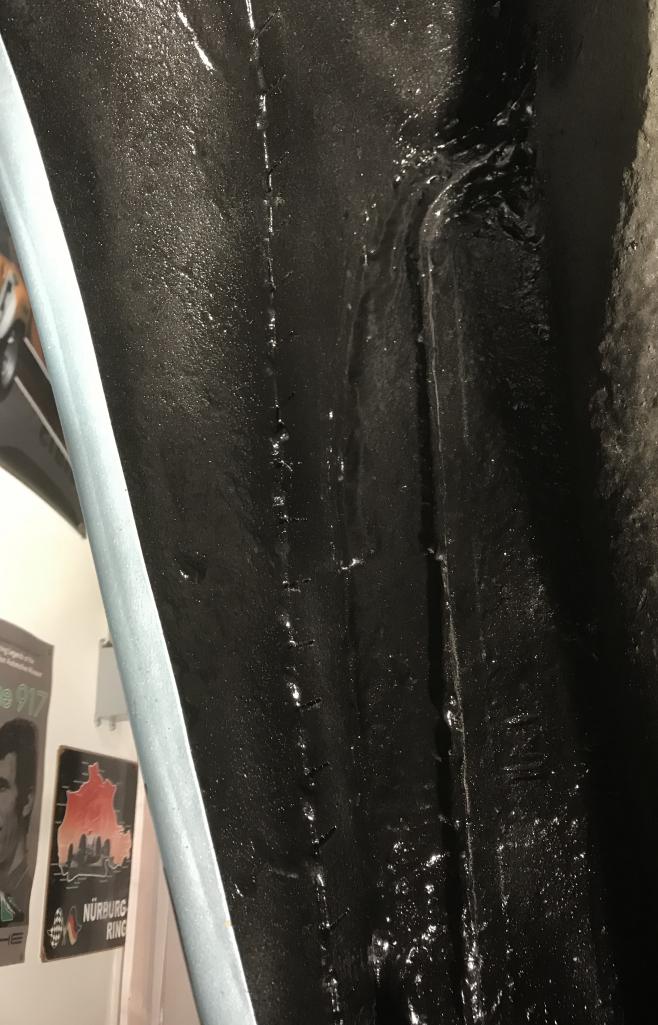
Posted by: Dion Apr 14 2018, 07:36 PM
Undercoating on overlap welded areas
Attached thumbnail(s)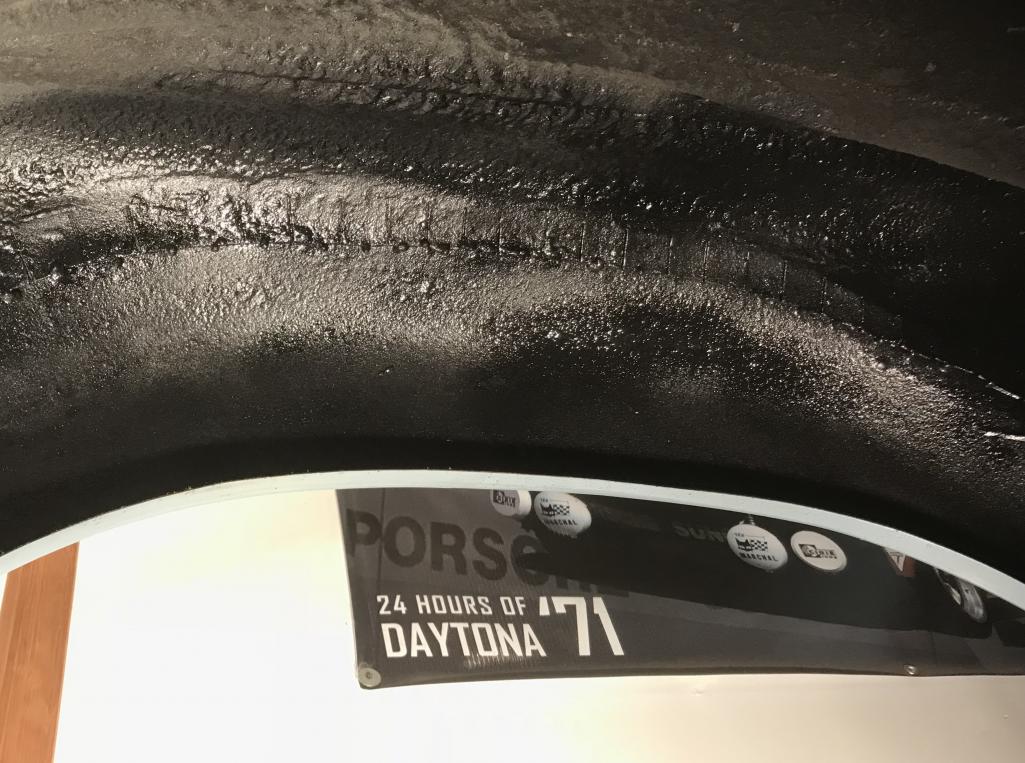
Posted by: porschetub Apr 15 2018, 12:58 AM
Happy Easter from the guy working on this project.
I worked on the front lower left fender today. What a treat this was.
Made some cardboard templates and then cut my shapes.
Bending the one piece was tricky as I don’t have the proper tools for this so
some pipe of different diameters and a vice helped me shape the curve.
Ha ha just like me older and hopefully wiser,good skills on the safety gear,I admit to being a bit slack @ times and payed the price,last we while I have 2 cut fingers with 1mm cutting wheels decided to wear mig/tig gloves from that point....makes sense.
If your flairs were overlap welded that's not too much of an issue as long as the steel was "keyed up" with a course abrasive and the filler hasn't cracked you should be fine,never been a fan of fillers but if prepped properly generally they are fine.
I understand this was done a while back if still holding up well on the exterior leave it,there's a lot you can do on the inside that's not seen afterall.
Good luck mate
 .
.Posted by: mb911 Apr 15 2018, 09:42 AM
What kind of metal etch are you using? I have some areas I would like to apply this to on my car and I have never used an etch applied by hand that converts rust. Please share.
Posted by: Dion Apr 15 2018, 12:23 PM
What kind of metal etch are you using? I have some areas I would like to apply this to on my car and I have never used an etch applied by hand that converts rust. Please share.
Hey Ben, it was Eastwood “Fast Etch”
Shop personnel explained to me it etches and will
coat the rust with a phosphate. I used it in spray form, I let soak in for around 45 minutes. It then needs to be cleaned off. I used pre paint prep to clean it up. Then I used the frame interior coating.
Cheers, Dion
Posted by: bbrock Apr 15 2018, 04:16 PM
As near as I can tell, Fast Etch is comparable to Ospho or any other phosphoric acid etcher/converter/protectant. I'm using KleanStrip brand form Home Depot now that Jasco discontinued theirs. Same as Ospho but cheaper.
Looking good Dion! 
Posted by: mb911 Apr 15 2018, 04:24 PM
As near as I can tell, Fast Etch is comparable to Ospho or any other phosphoric acid etcher/converter/protectant. I'm using KleanStrip brand form Home Depot now that Jasco discontinued theirs. Same as Ospho but cheaper.
Looking good Dion!
So can you prime right over this stuff or ?
Posted by: Dion Apr 15 2018, 05:06 PM
For the Fast Etch brand once it’s cleaned off with acetone or pre paint prep
cleaner it can be primered over.
Posted by: Dion Apr 15 2018, 05:36 PM
seam seal & primer
Left front fender buttoned up.
Attached thumbnail(s)
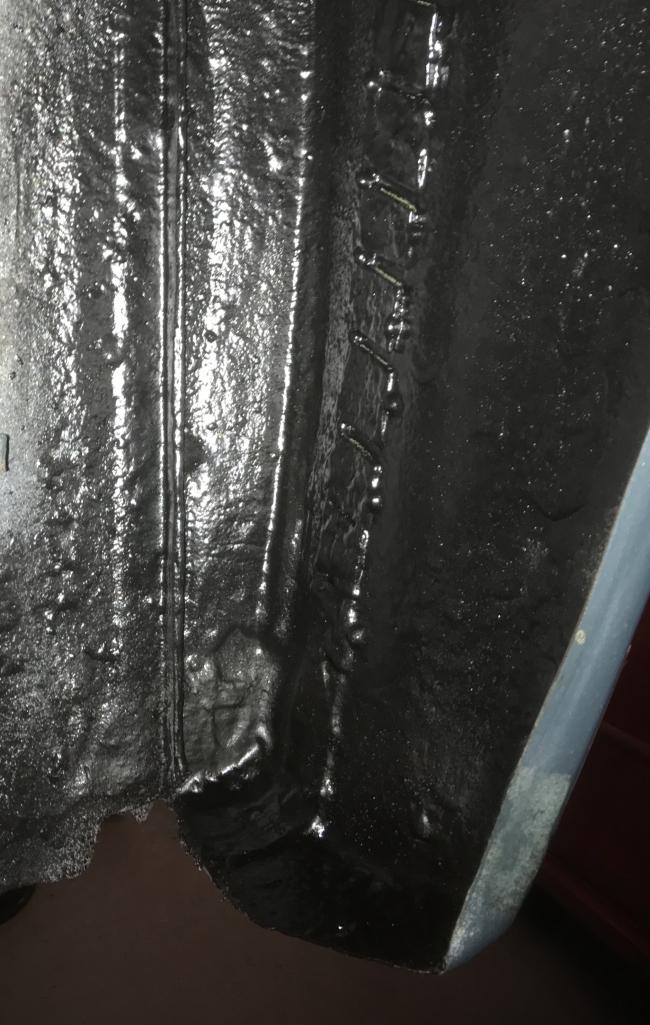
Posted by: bbrock Apr 15 2018, 05:42 PM
As near as I can tell, Fast Etch is comparable to Ospho or any other phosphoric acid etcher/converter/protectant. I'm using KleanStrip brand form Home Depot now that Jasco discontinued theirs. Same as Ospho but cheaper.
Looking good Dion!
So can you prime right over this stuff or ?
Yep. I neutralize with water and after it is dry, use a red scotch brite pad to knock off any loose phosphate, then clean and dewax as usual. PPG even has a note in their epoxy primer tech sheet that use of this type of rust converter improves adhesion. Of course, they want to sell you their brand and outrageous prices.
Posted by: mb911 Apr 15 2018, 06:08 PM
Having never done it this way on my paint jobs prior should this be applied to all bare metal then scotch brite and spray primer?
Posted by: mb911 Apr 16 2018, 09:10 AM
As near as I can tell, Fast Etch is comparable to Ospho or any other phosphoric acid etcher/converter/protectant. I'm using KleanStrip brand form Home Depot now that Jasco discontinued theirs. Same as Ospho but cheaper.
Looking good Dion!
Looks like that stuff is about 15 dollars.. Gonna give that a try. Dion thanks for bringing this up ..now gonna make my car better in the end
Posted by: Dion Apr 16 2018, 09:58 AM
No worries Ben, and thanks again for the muffler bracket & the straps info!
Plenty more bodywork to be done.
I told Dave I’m gonna have to get the whole car resprayed.
In for a pound in for a penny! The paint job is over 14 years now, it always
had it’s blemishes. Chance to rectify all that.
Maybe have it done by Octeenerfest.....
Dave .... Hehehehe
Posted by: 914dave Apr 16 2018, 11:59 AM
Posted by: Dion Apr 25 2018, 06:30 PM
Just wanted to give a shout out to Eric and the gang at PMB.
Received my restored S calipers and regulator today as well as the brake line kit.
Thanks a bunch guys. They look awesome,& I’m sure they’ll provide plenty of STOP! 
Attached thumbnail(s)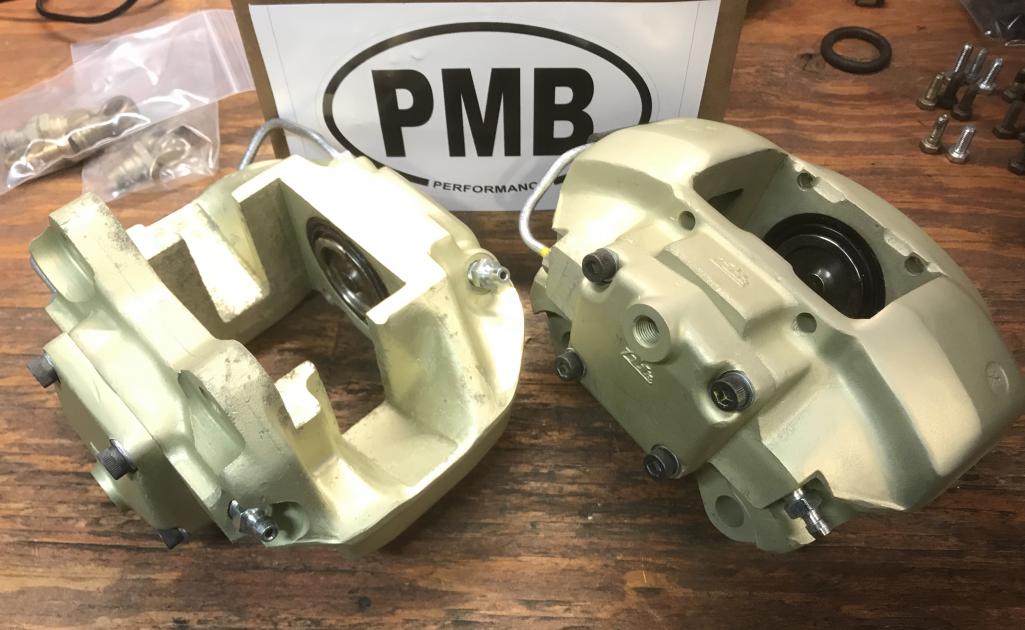
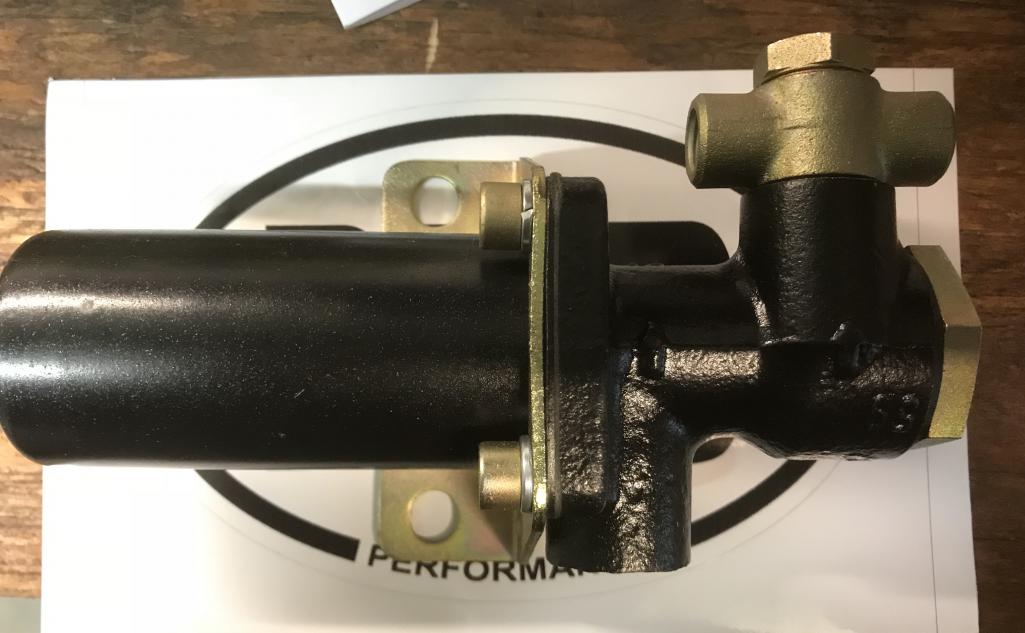
Posted by: Dion Apr 26 2018, 07:10 PM
This afternoon repaired the remaining rust issue on the right front fender wheelhouse/longitudinal area. Cut off the offending piece. Made
a new one in as close a profile as I could. Using the workbench vise and a hammer to make the bend. Tacked it in. I’m pleased as to how it came out.
Listening to Ben, Chris, Brent & Dave, I think I’m finally gettIn the hang of this
welding business!
Attached thumbnail(s)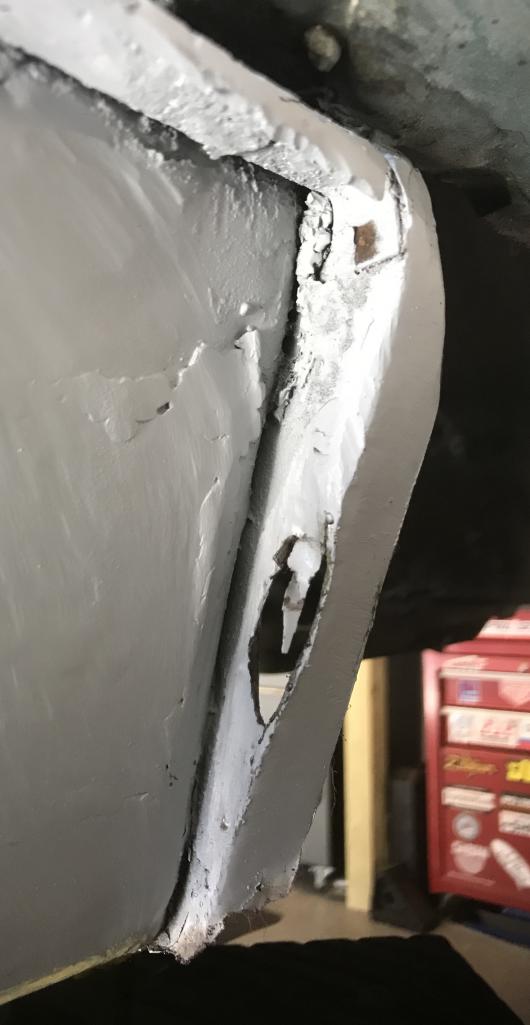
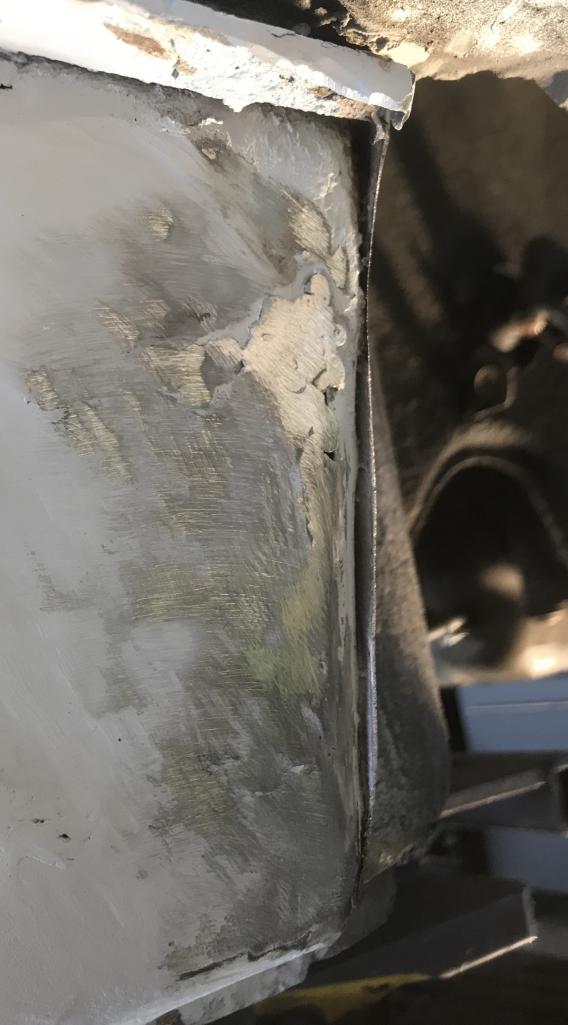
Posted by: Dion Apr 26 2018, 07:11 PM
New shape offered up
Attached thumbnail(s)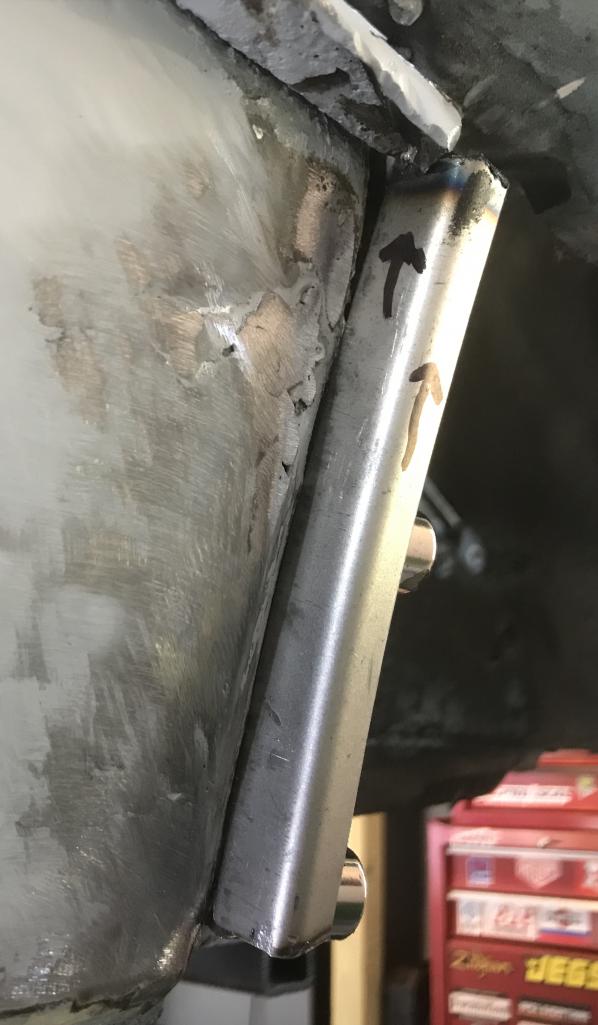
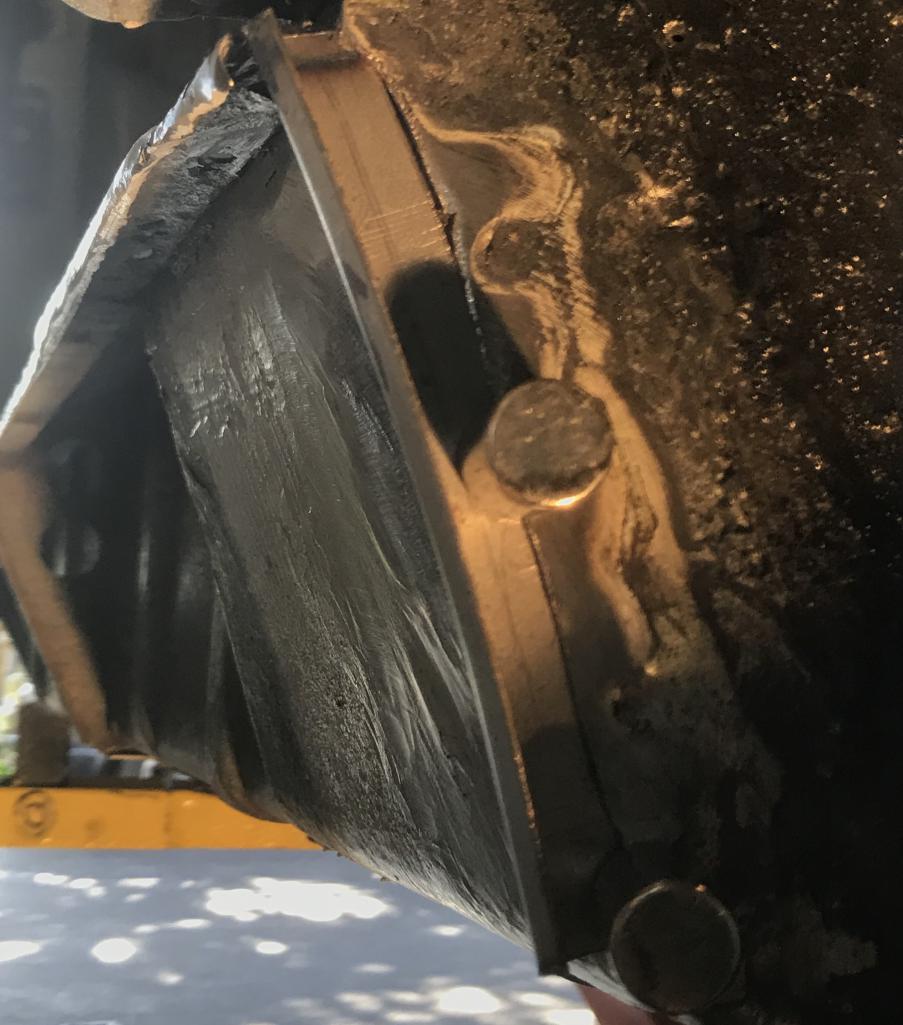
Posted by: Dion Apr 26 2018, 07:12 PM
Tacked
Attached thumbnail(s)
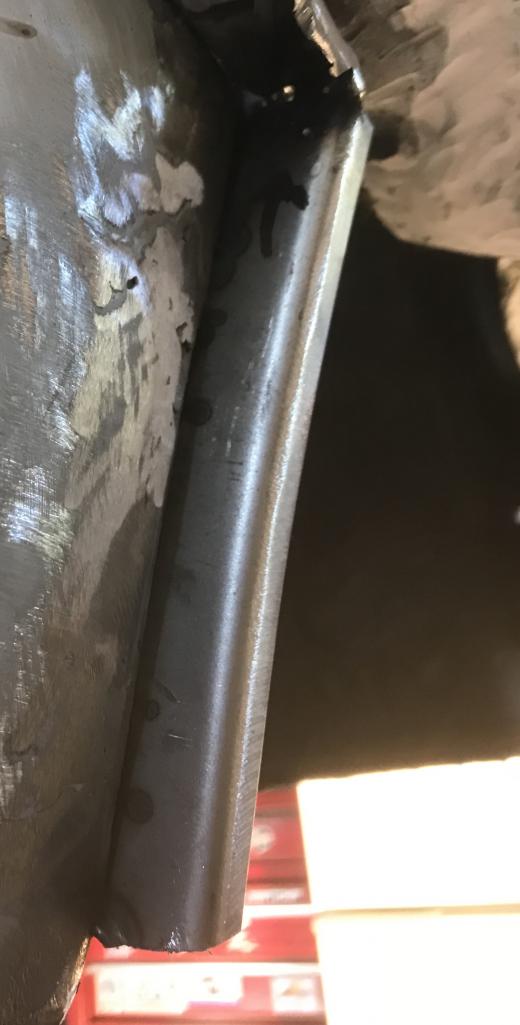
Posted by: Dion Apr 26 2018, 07:13 PM
Clean up
Attached thumbnail(s)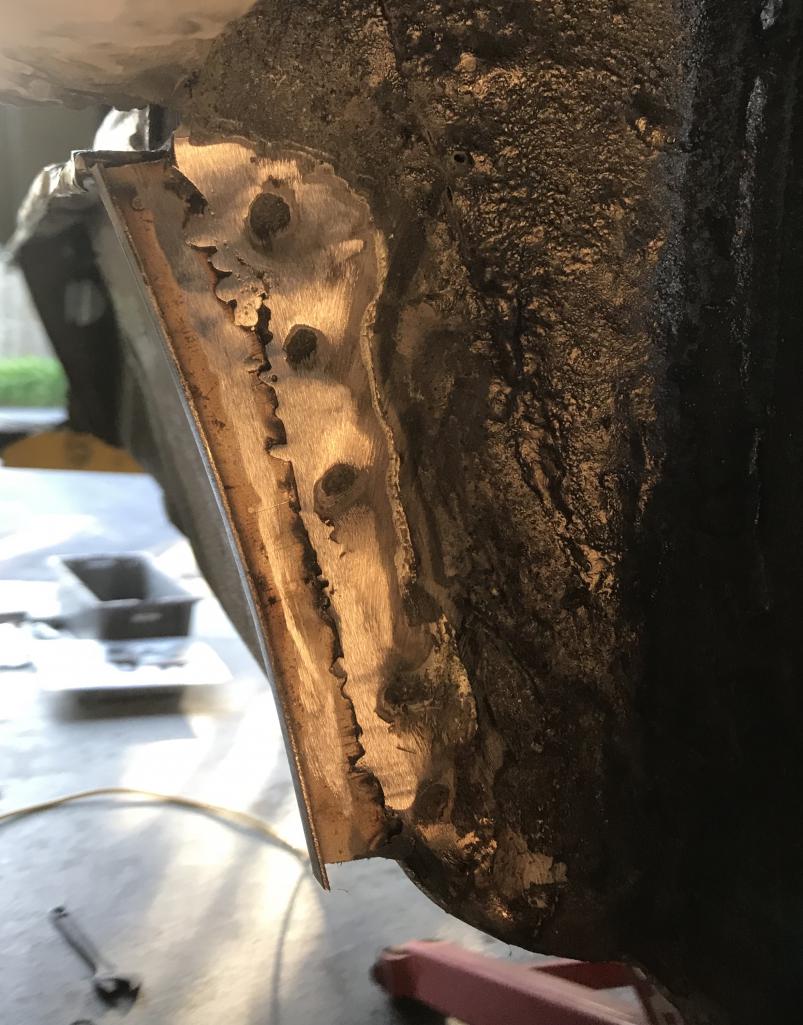
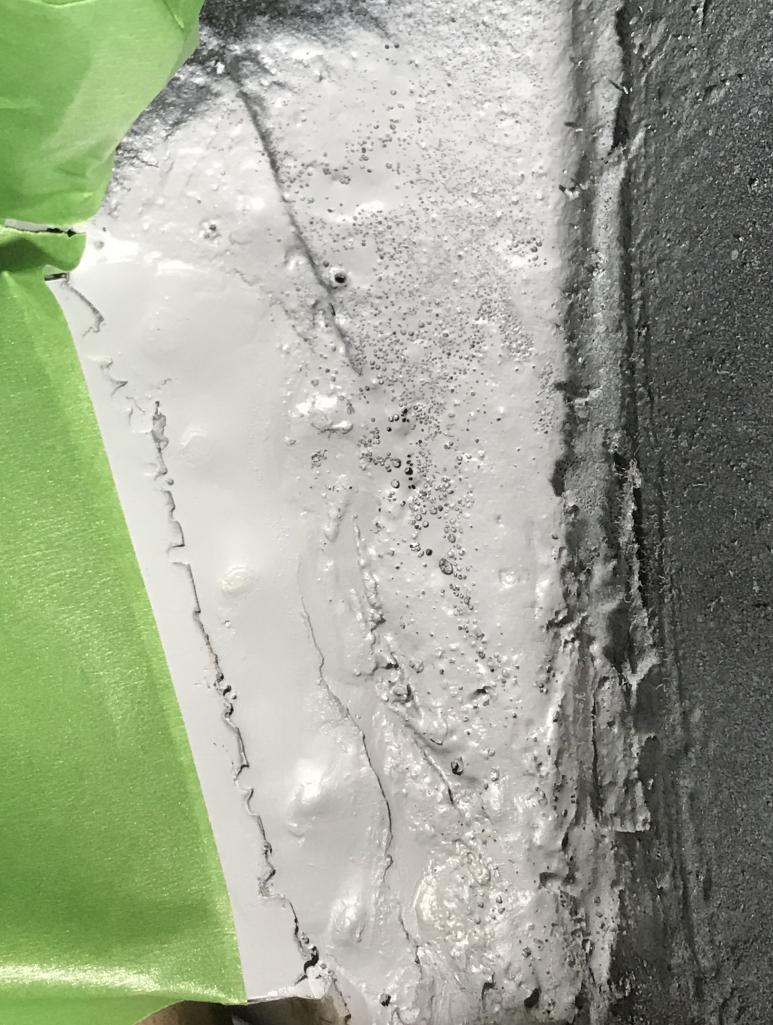
Posted by: Dion Apr 26 2018, 07:14 PM
Fin!
Attached thumbnail(s)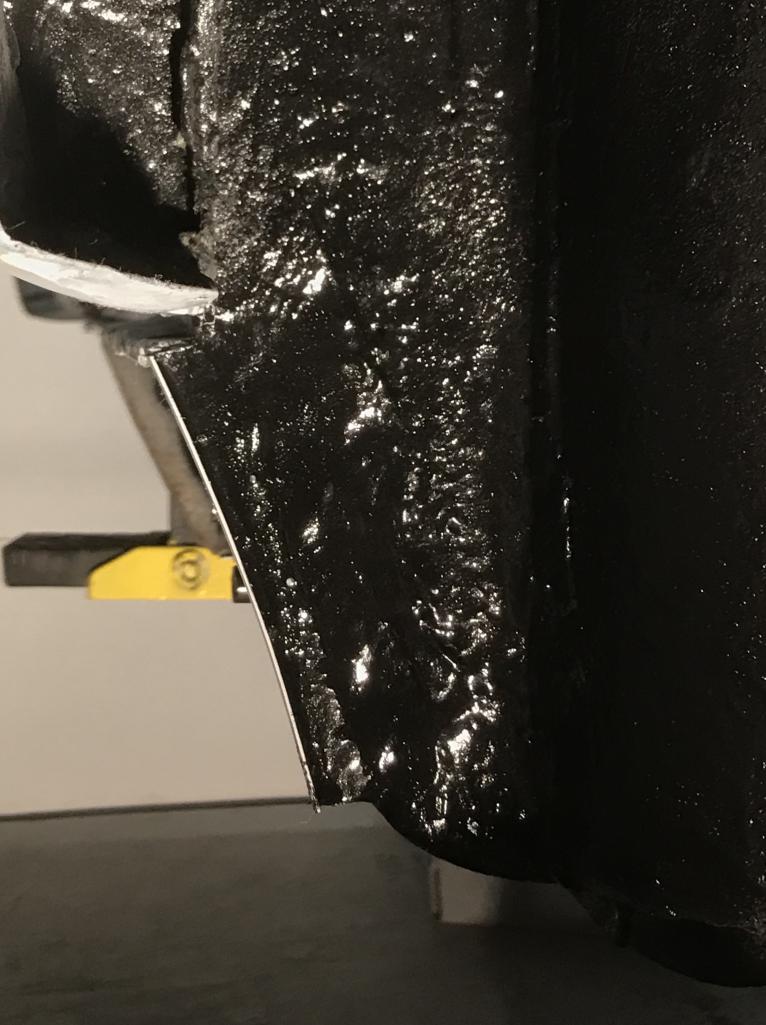
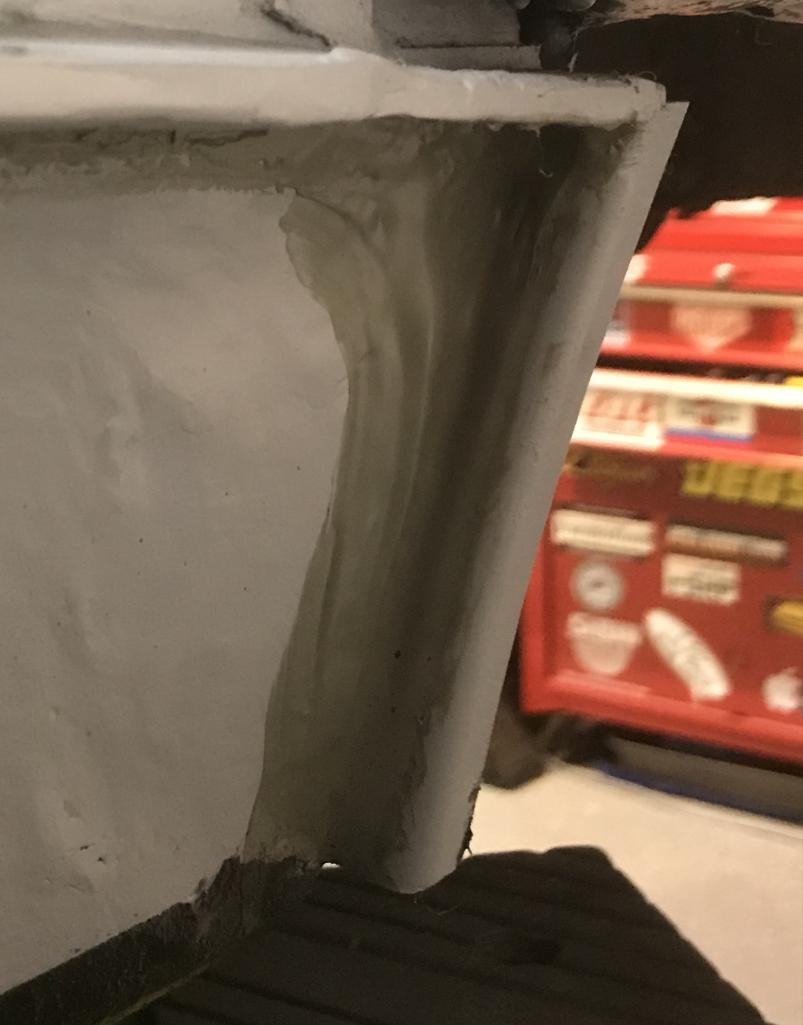
Posted by: bbrock Apr 26 2018, 07:50 PM
Looks great!
Posted by: Dion Apr 29 2018, 07:29 PM
Nothing exciting today except for the cheap high. Man even while wearing the 3M
NIOSH respirator those fumes creep in!
I sanded the engine side of the firewall yesterday and today I coated it with
Epoxy primer.
Attached thumbnail(s)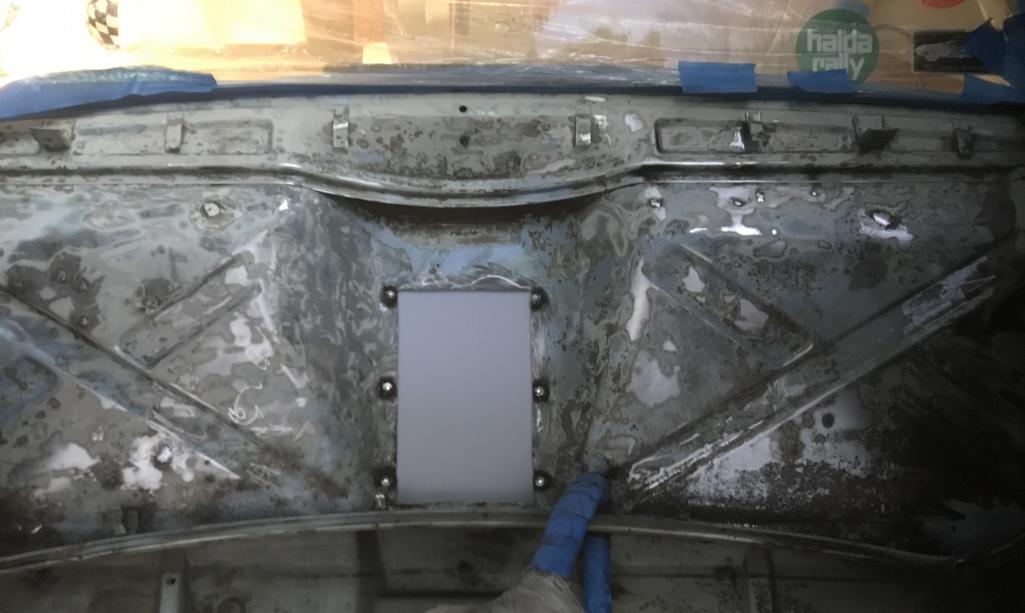
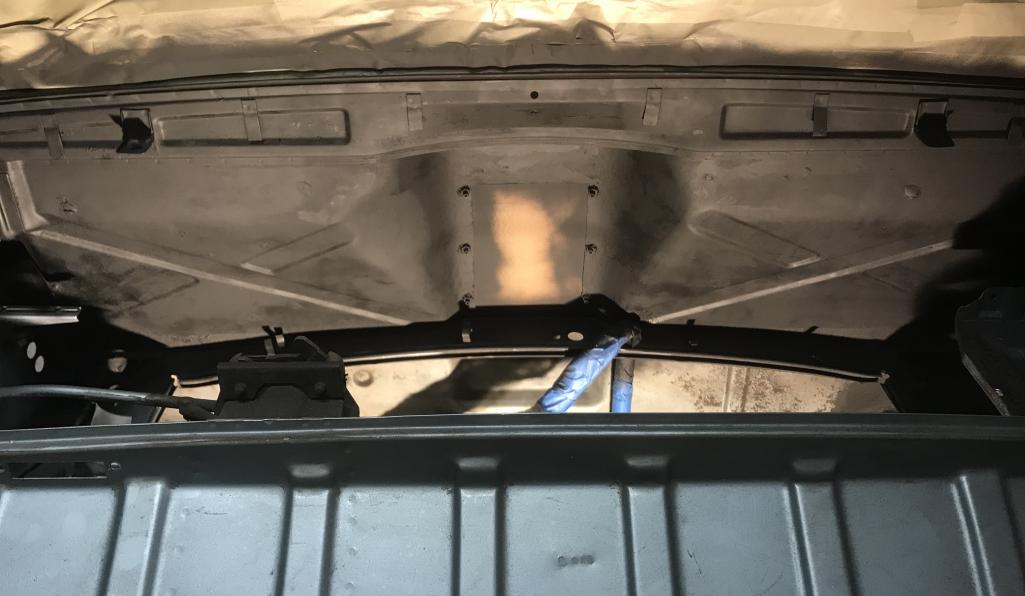
Posted by: Dion Apr 29 2018, 07:46 PM
Question fellas. I’m working on the right side sill next. I have six holes. Centered 6” apart.
Can someone verify if that is correct for the factory sill plates.
Mine are packed away. Not at hand to check. I have a little welding to repair one as it
really isn’t s circular hole anymore and I want to redrill properly afterwards.
Thanks.
Attached thumbnail(s)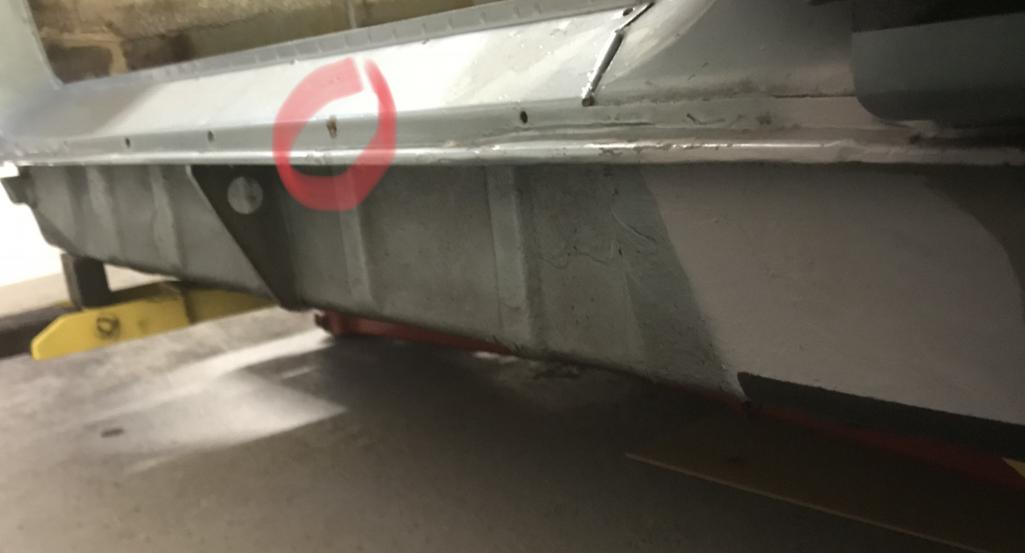
Posted by: Dion Apr 30 2018, 06:31 PM
Ok, Dave says just weld them all close and redrill when
the rust issue is fixed and I can then use the sill as a template.
It’s great when common sense prevails. Thanks bro!
I was ready to make it more complicated.
Posted by: Dion May 8 2018, 10:17 AM
Worked on passenger side sill area.
Welded up the too numerous holes for rocker panels and sill plate.
Also removed some surface rust. A general cleanup.
Next up will be working on the left rear quarter panel/fender.
Attached thumbnail(s)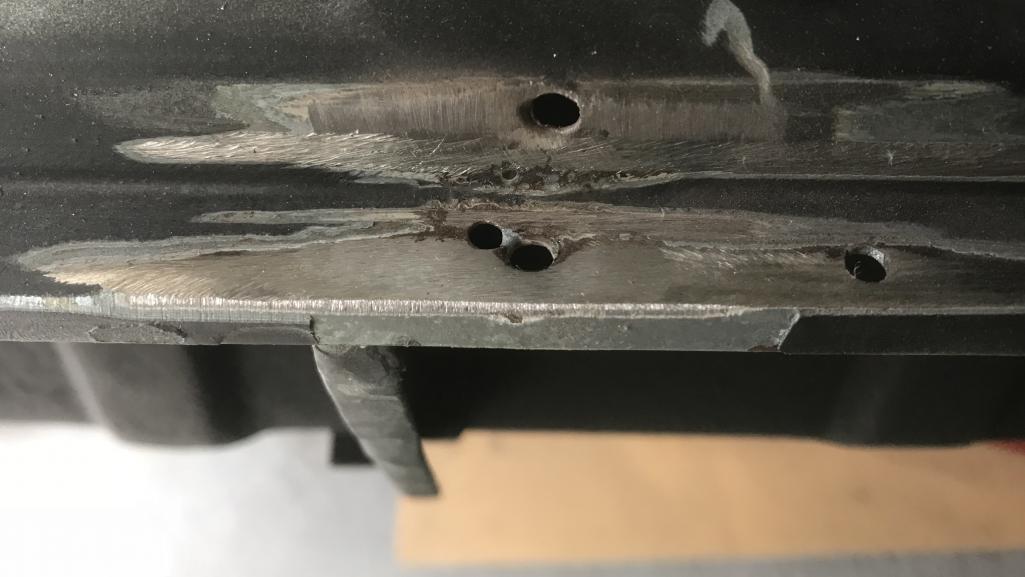
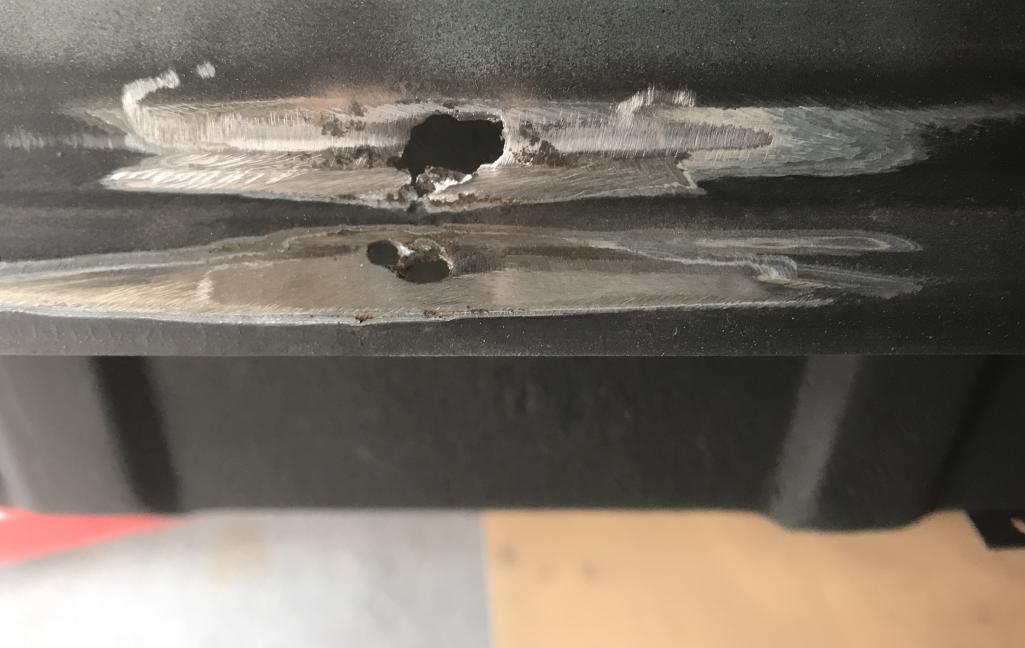
Posted by: Dion May 8 2018, 10:18 AM
Welded & cleaned
Attached thumbnail(s)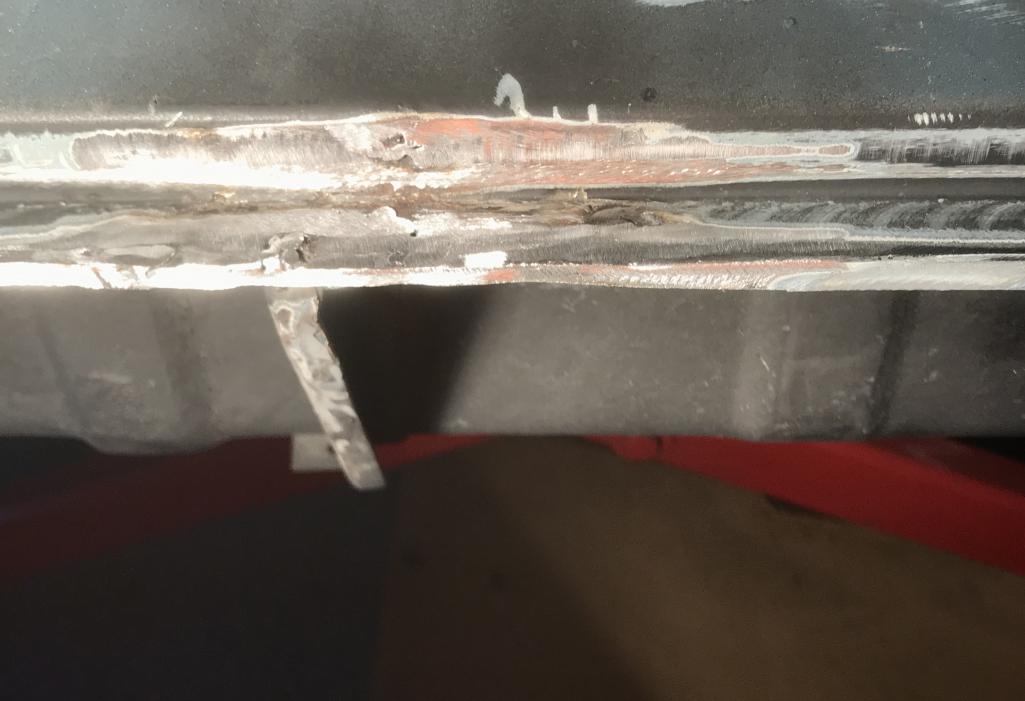
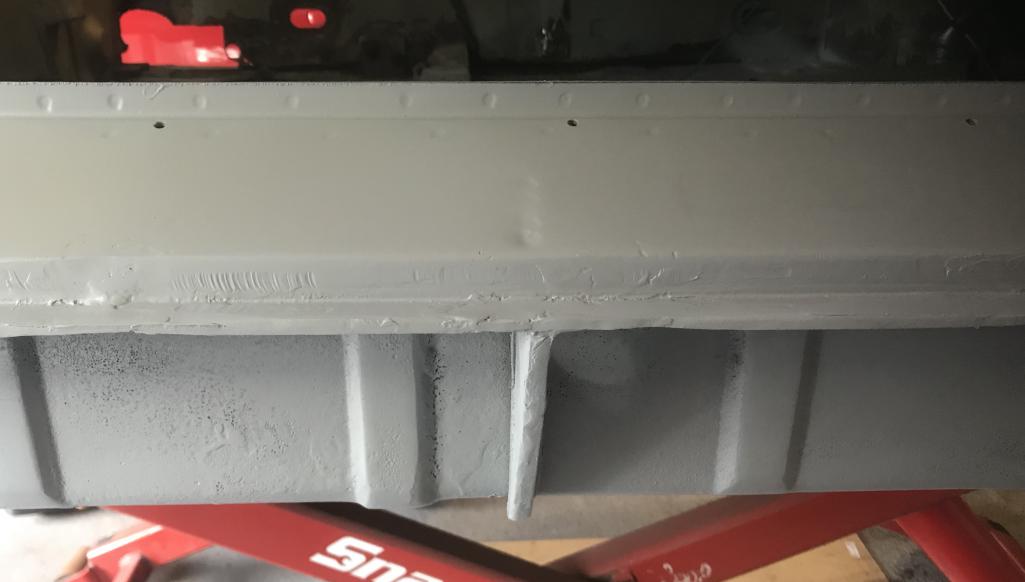
Posted by: Dion May 8 2018, 10:20 AM
Primered & seam sealed.
Attached thumbnail(s)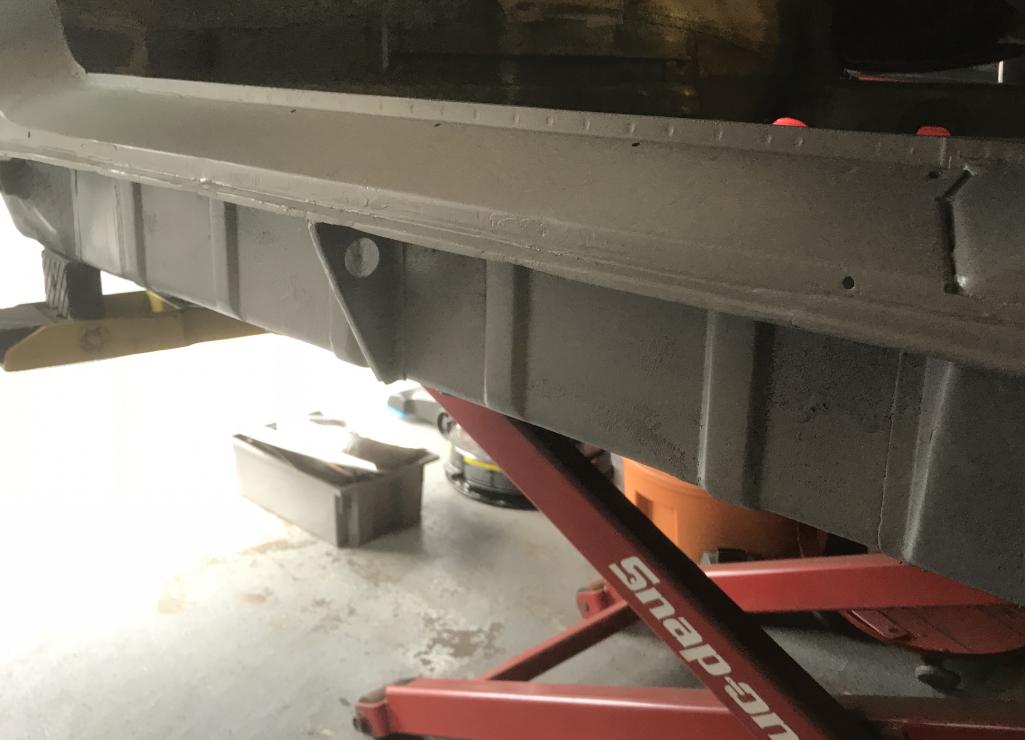
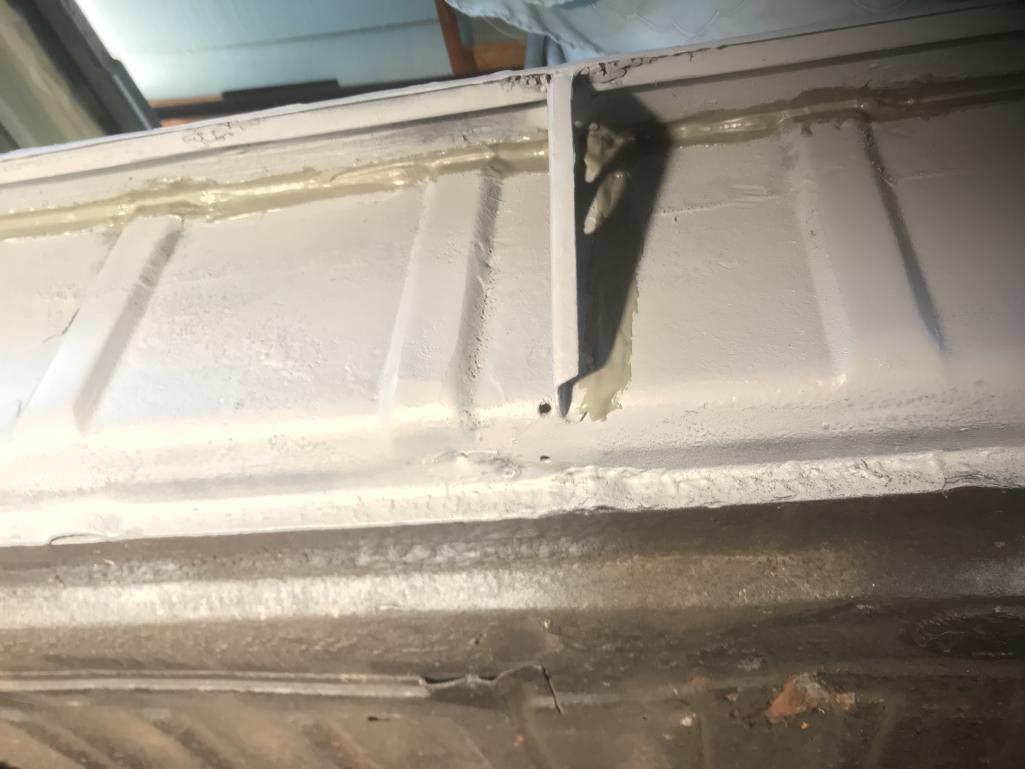
Posted by: Dion May 8 2018, 10:22 AM
Done
Attached thumbnail(s)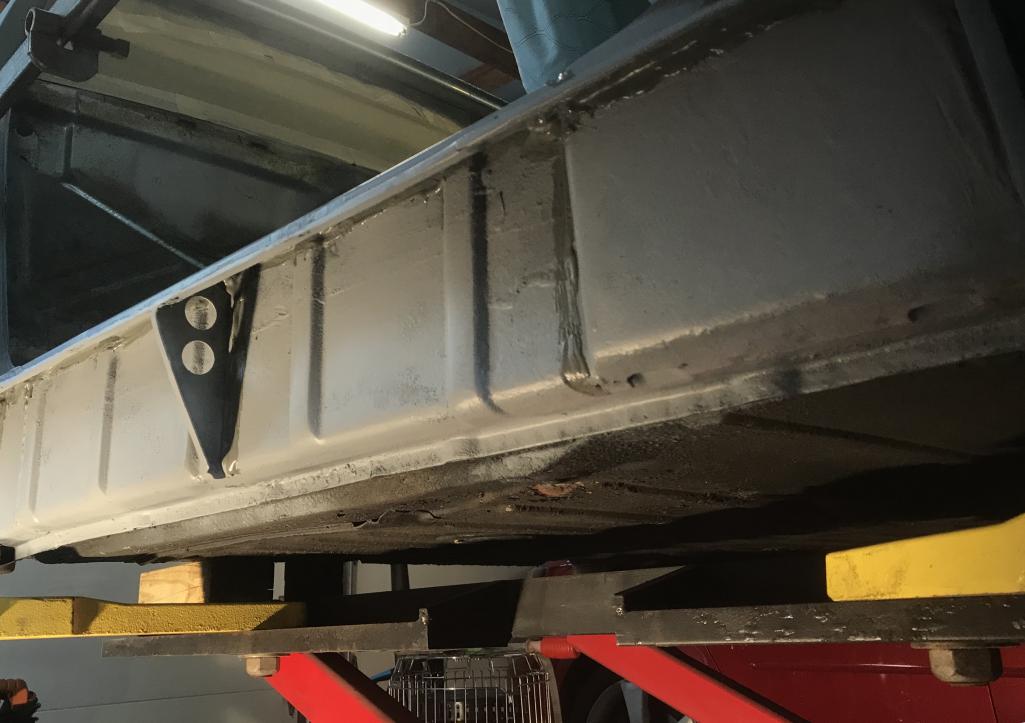
Posted by: 914dave May 8 2018, 12:36 PM
That’s some fine looking work. Looks like you don’t even need help. You got this. Let me know when you want to borrow the finish gun. Hahaha
Posted by: Dion May 8 2018, 01:07 PM
That’s some fine looking work. Looks like you don’t even help!
WOW!
Nice save with the edit. Splitter! :-)
Posted by: Dion Jul 9 2018, 06:23 PM
Ok, trying not to piss off Brent anymore while working on 944s...the weather in PA finally broke. I can breathe again. Damn humidity!
So did some masking around windows and dash to protect them.
Started sanding and cleaning the cabin floor and trunk floor so I could epoxy prime them.
Attached thumbnail(s)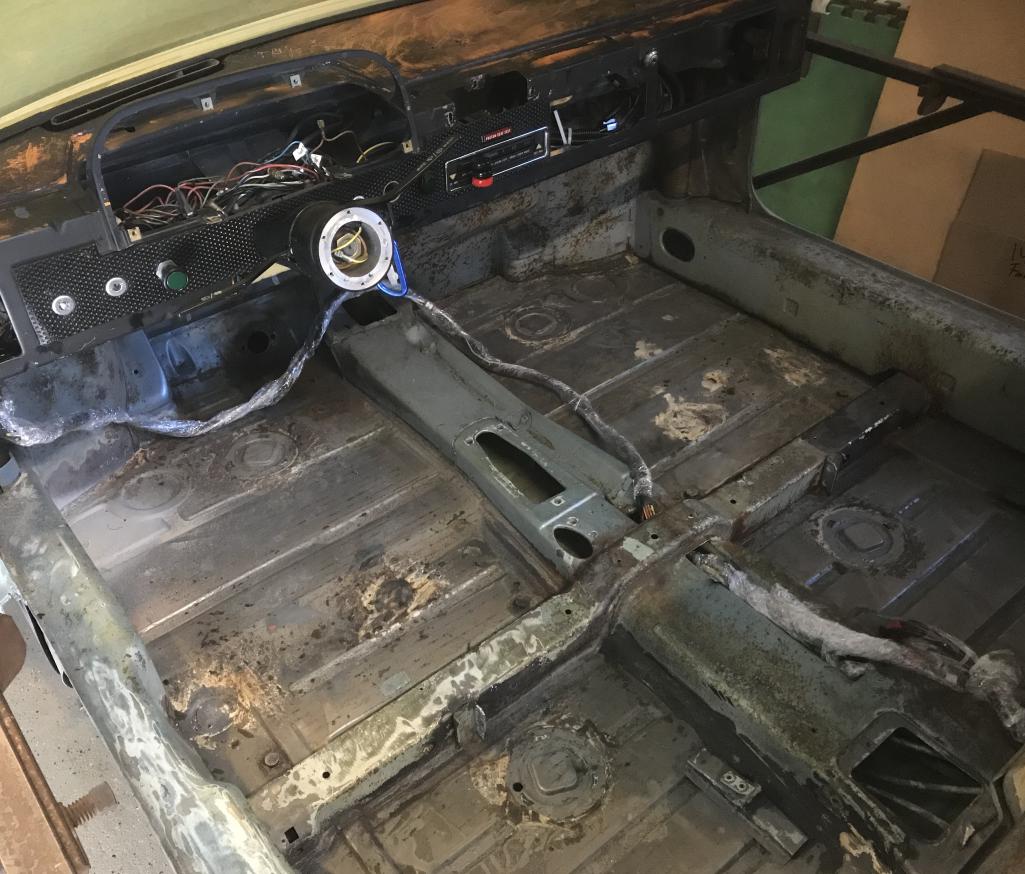
Posted by: Dion Jul 9 2018, 06:24 PM
Cabin
Attached thumbnail(s)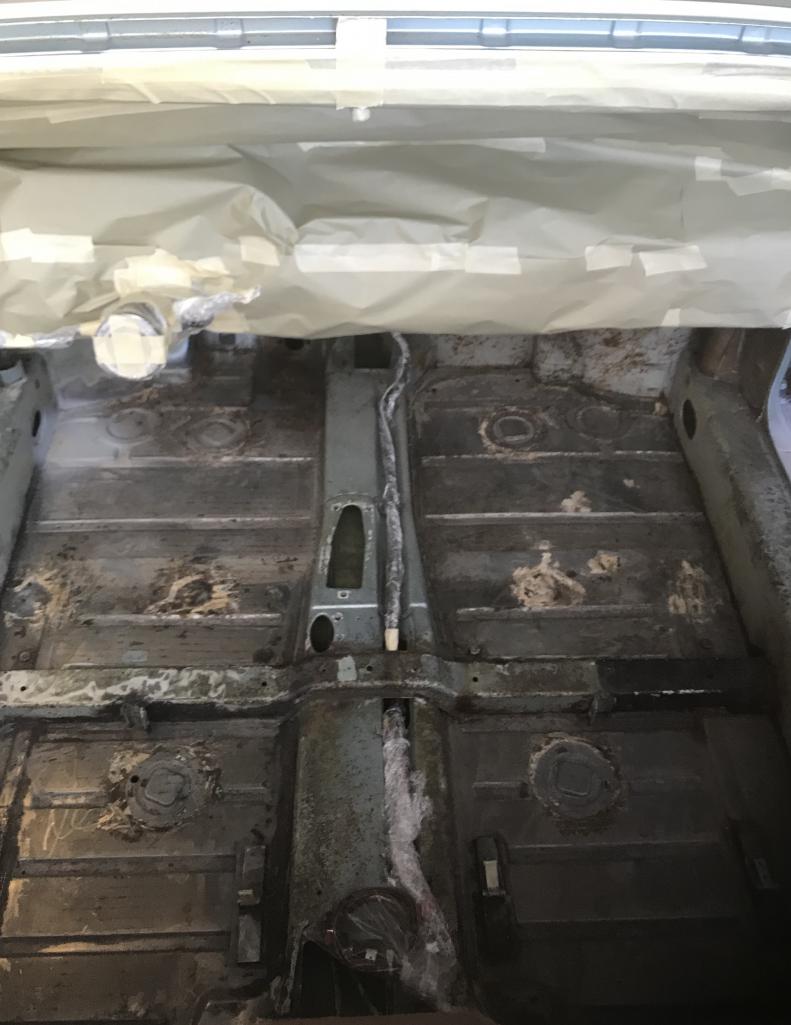
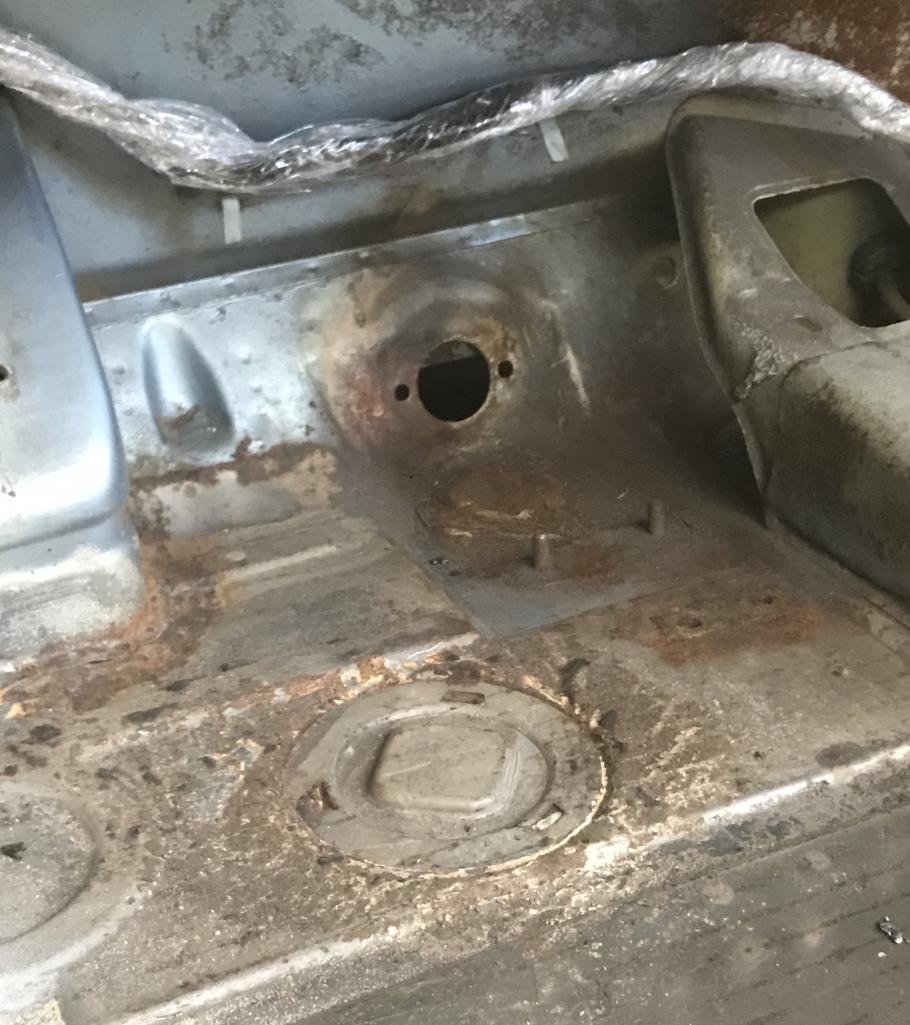
Posted by: Dion Jul 9 2018, 06:25 PM
Trunk
Attached thumbnail(s)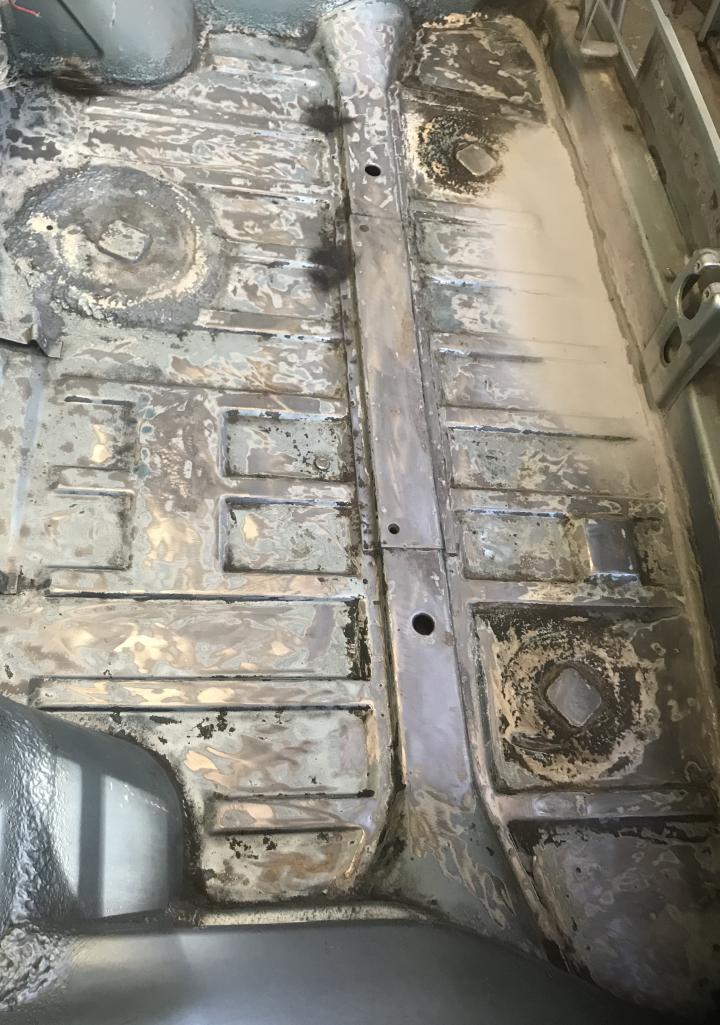
Posted by: Dion Jul 9 2018, 06:26 PM
Application of the epoxy primer.
Attached thumbnail(s)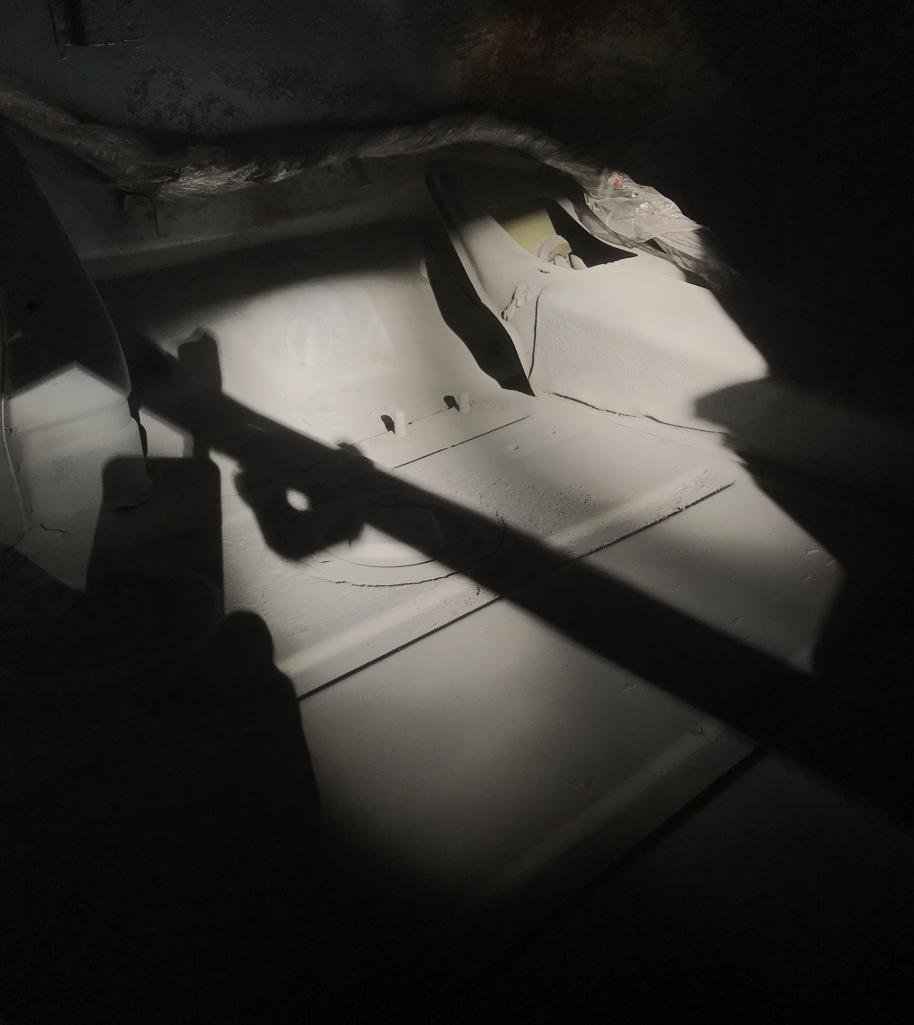
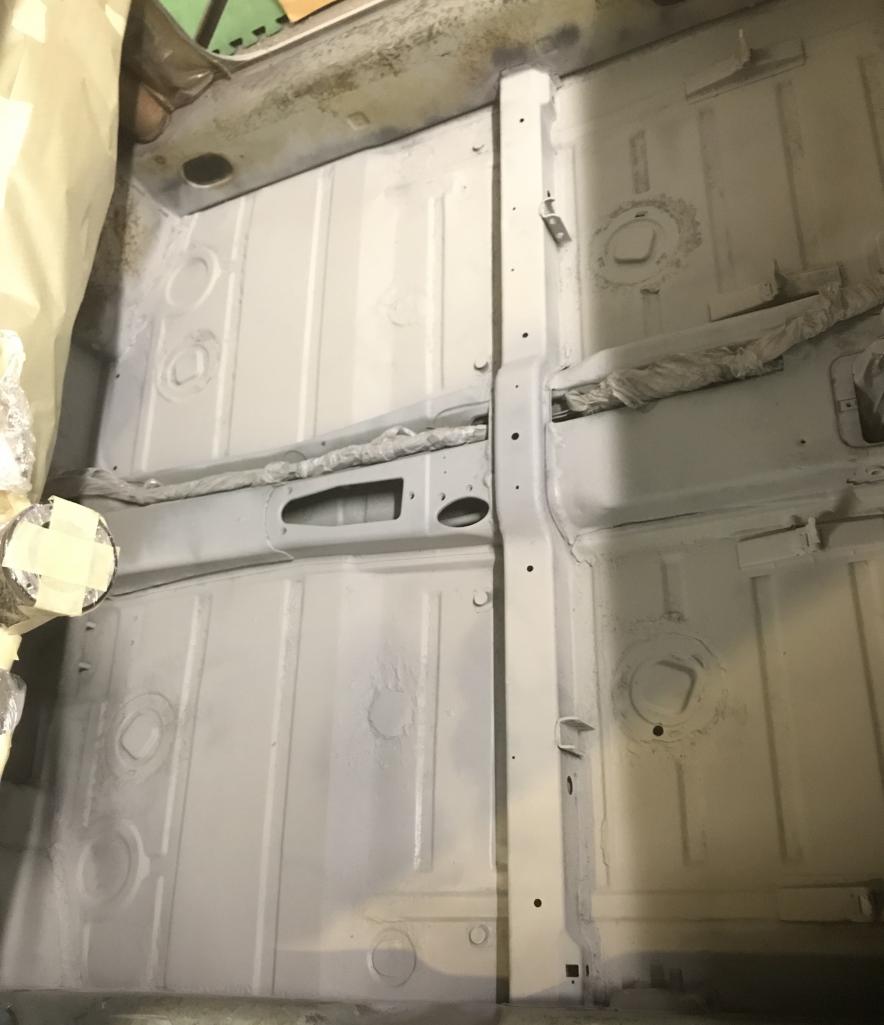
Posted by: Dion Jul 9 2018, 06:27 PM
Trunk primed
Attached thumbnail(s)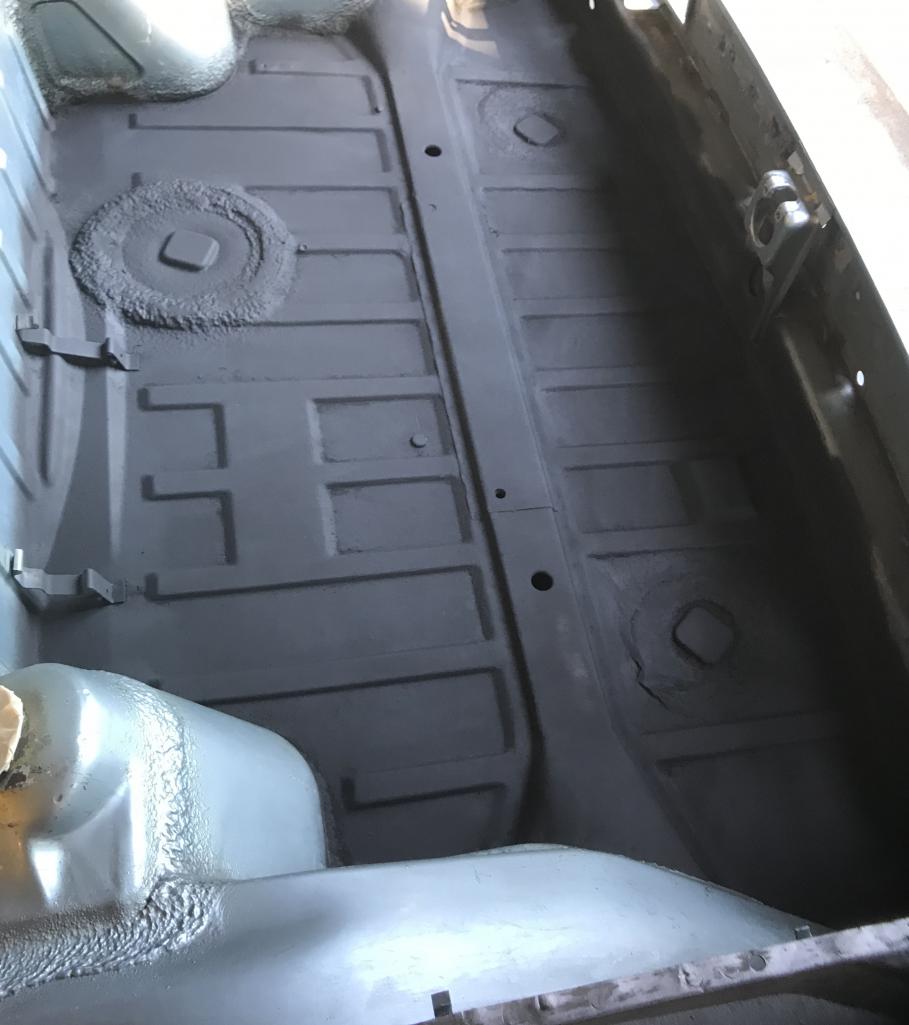
Posted by: Dion Jul 9 2018, 06:29 PM
& finally interior firewall primed.
Attached thumbnail(s)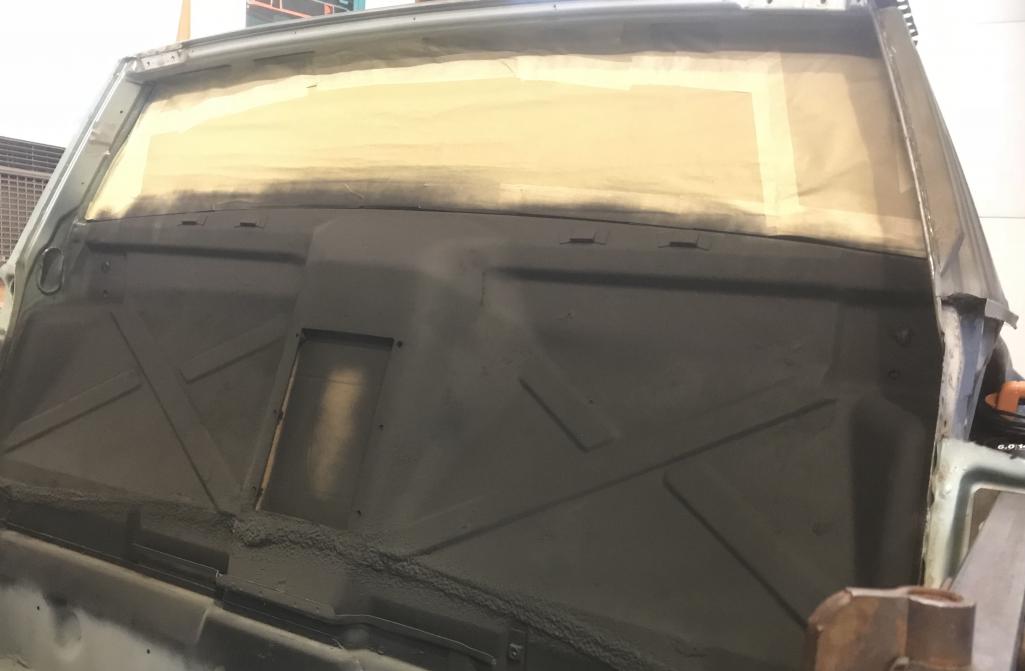
Posted by: tygaboy Jul 10 2018, 07:36 AM
Hey Dion - good to see you back at it!
It's got to be a great feeling to see paint instead of bare metal, eh? Keep it coming, you're making great progress!
(And selfishly): So that's what a complete fire wall looks like...!
Posted by: bbrock Jul 10 2018, 08:33 AM
Sweet! Looking good. About time you stopped fiddling with that water pumper and got back to your project
Posted by: Dion Jul 10 2018, 02:32 PM
Yes, getting the bare metal protected is a good feeling.
We had such hi temps and humidity I wasn’t sure if the primer would adhere proper.
So finally was able to do this. bought different colours of primer
but it will all be the same later. Now on to more difficult tasks: left rear fender &
The all important Left long/kick up and console.
Thanks guys
Attached image(s)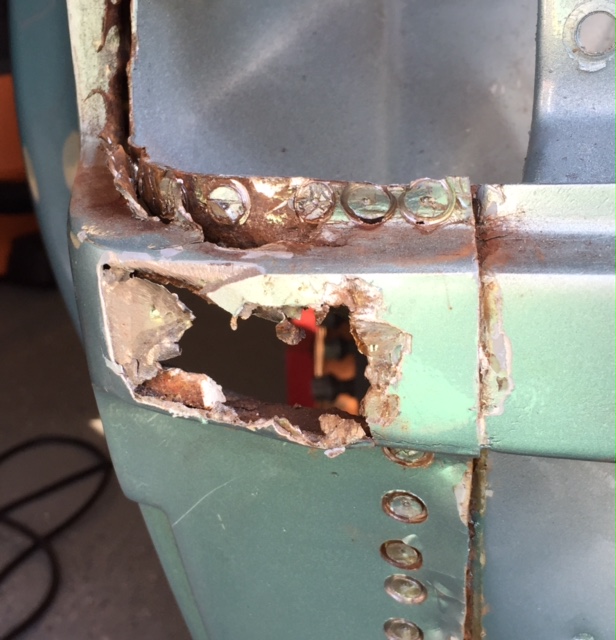
Posted by: ThreeV8s Jul 10 2018, 08:48 PM
I just read through this entire thread and have no idea how I missed all this. I did not realize you were doing anything to this extent. You are way too modest about your skillset...truly impressive work! Looking forward to stopping by at some point soon and seeing it in the metal.
Posted by: Dion Jul 11 2018, 07:04 AM
Thanks for those kind compliments Brian.
Posted by: Dion Aug 2 2018, 07:20 PM
Started prep work on drivers rear quarter panel.
Removed the undercoating with heat gun, left the flare alone since that is
paint and not tar. Found yet another hole lurking. Apparently minding its own
business till the flap disc found him out. Oh how I miss my complete car.....
Oh well we are here to make it whole again. There is a nice chunk missing by the tail lamp I’ll be utilizing a good piece from Garold. I’ll prep
that next week hopefully. So some before and after pics:
Attached thumbnail(s)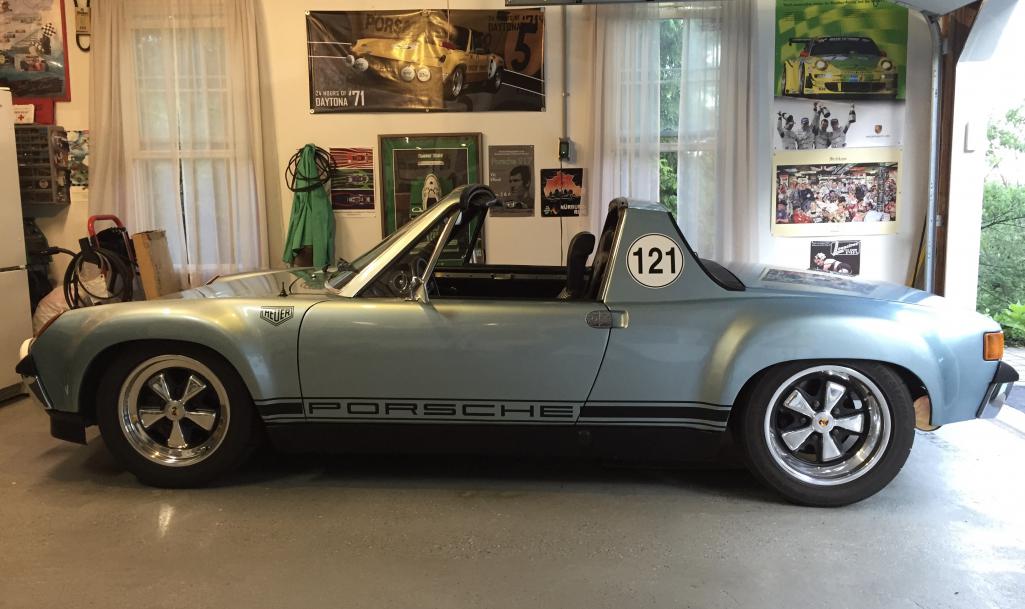
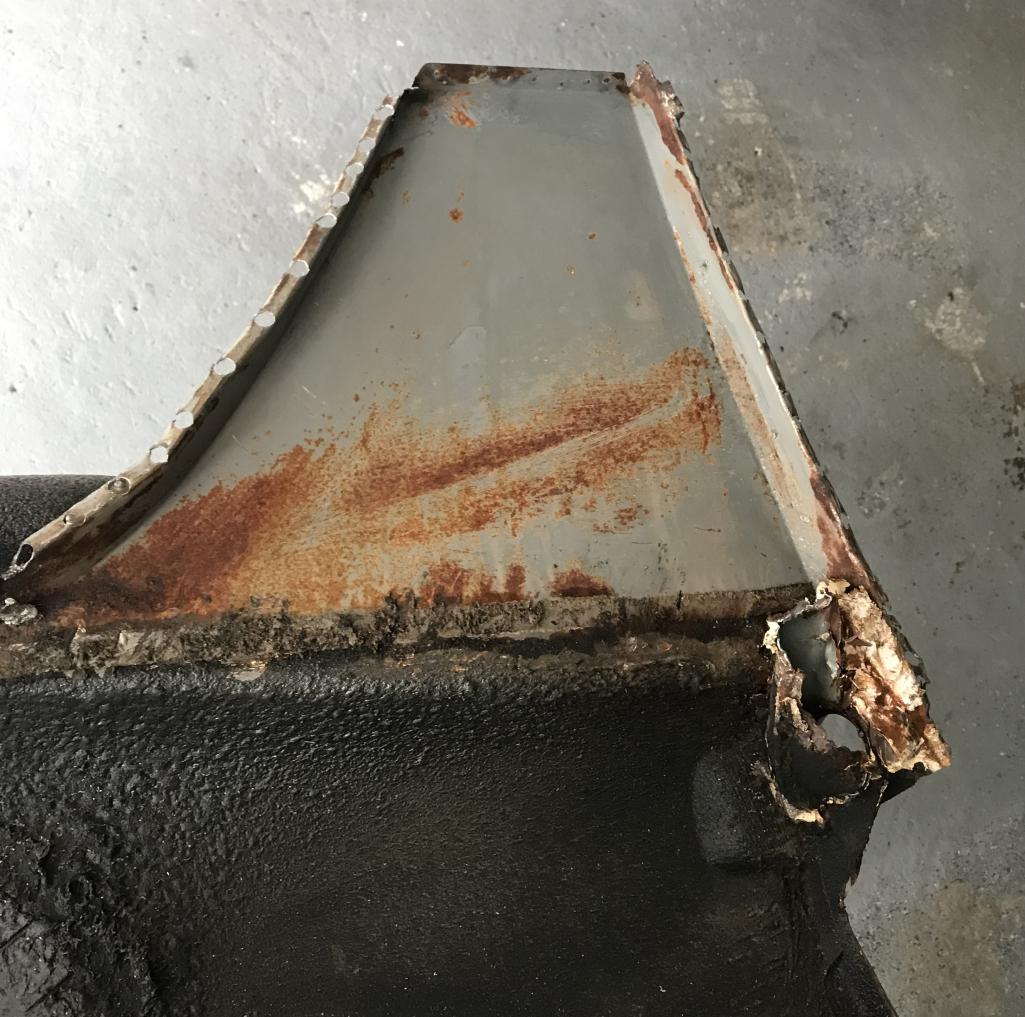
Posted by: Dion Aug 2 2018, 07:23 PM
Unbelievable the amount of seam sealer that was around the snorkel. Dug that out.
I have a new snorkel and slam panel for that area.
Removed the ..urethane? Foam from the panel as well.
Attached thumbnail(s)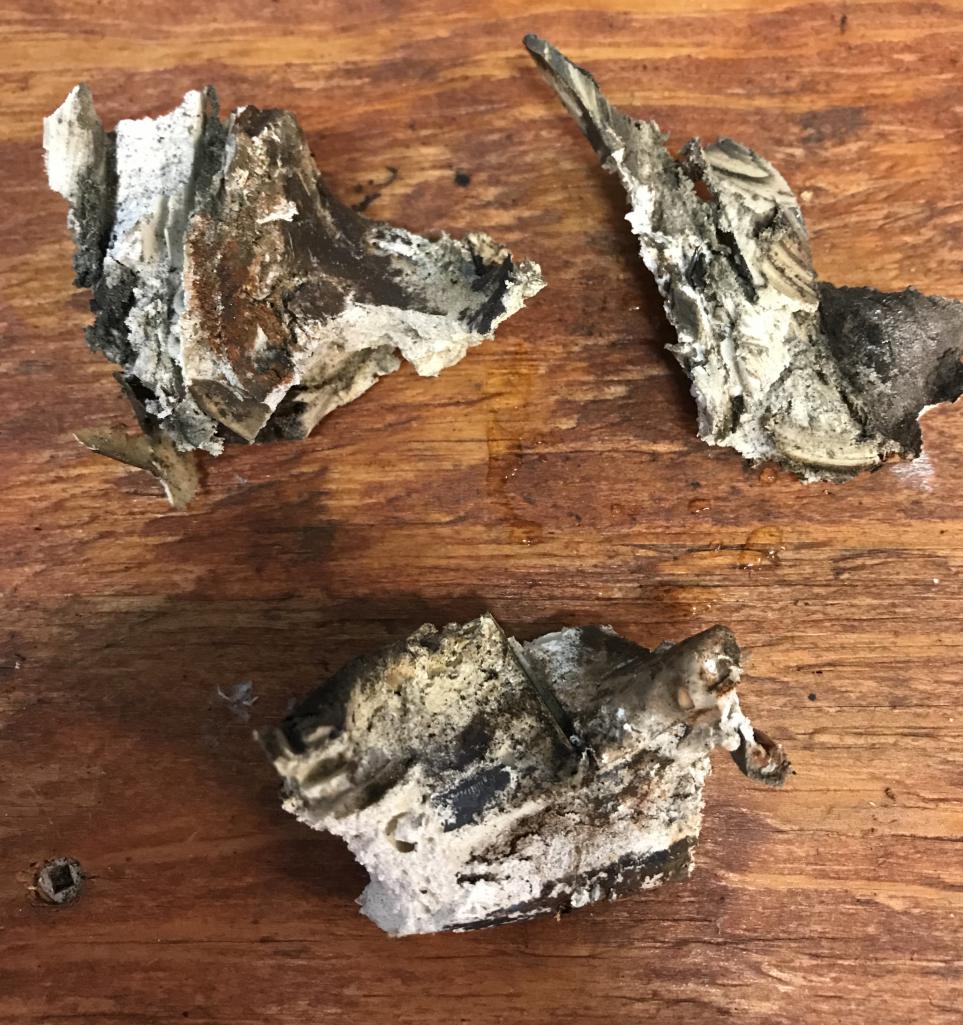
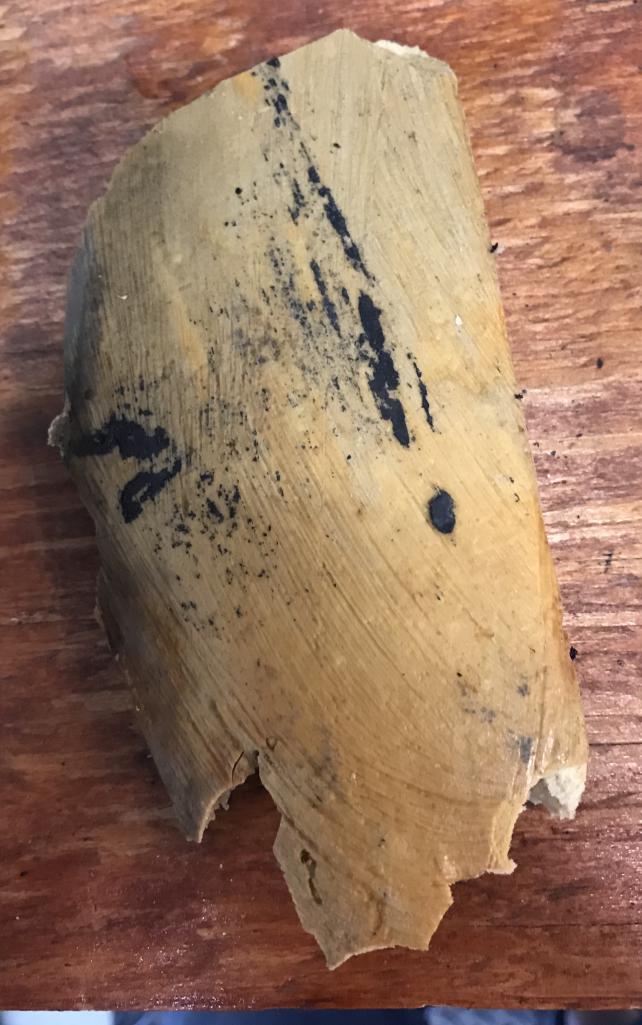
Posted by: Dion Aug 2 2018, 07:24 PM
Ugly metal:
Attached thumbnail(s)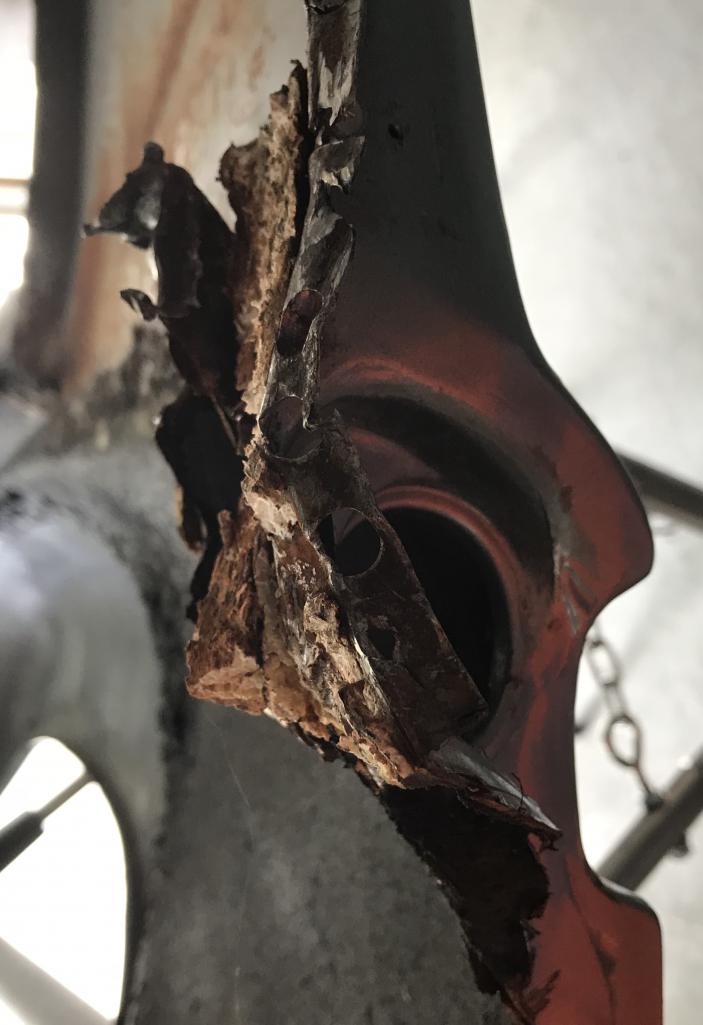
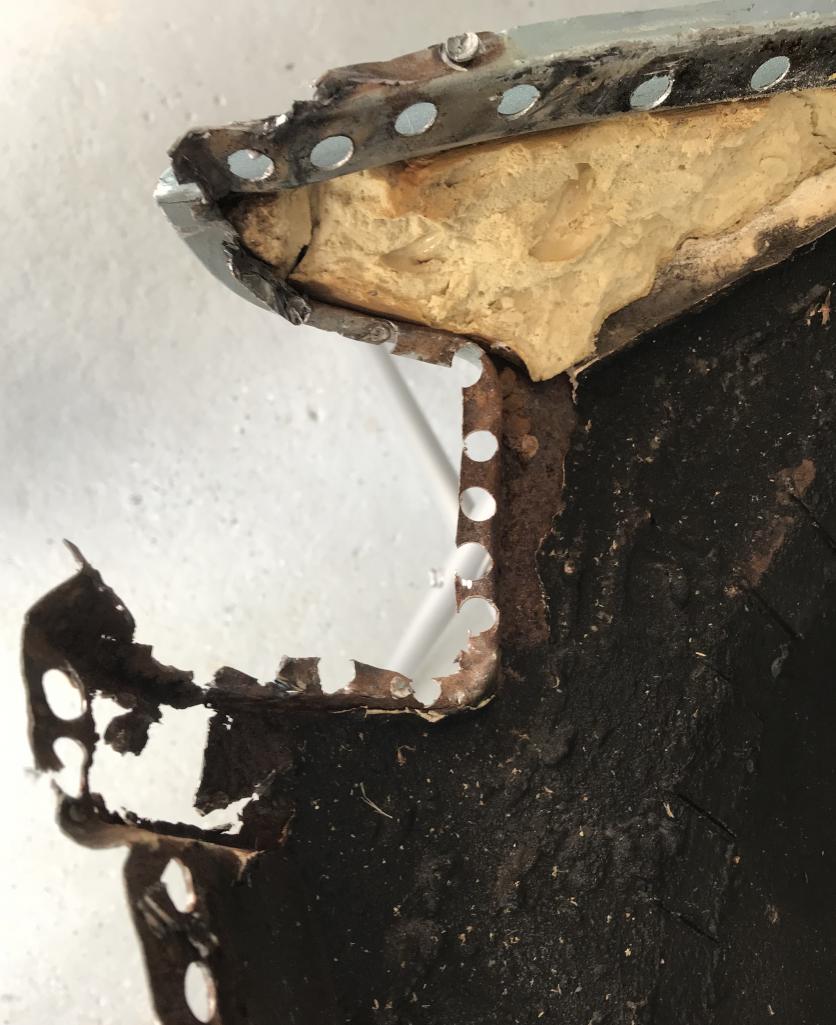
Posted by: Dion Aug 2 2018, 07:26 PM
Foam
Attached thumbnail(s)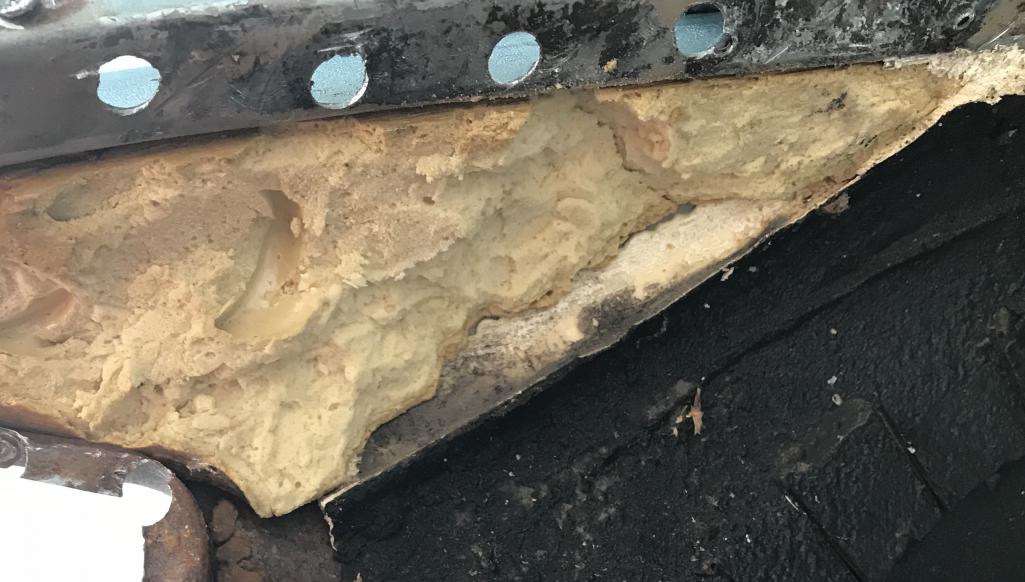
Posted by: Dion Aug 2 2018, 07:26 PM
Sail panel damage
Attached thumbnail(s)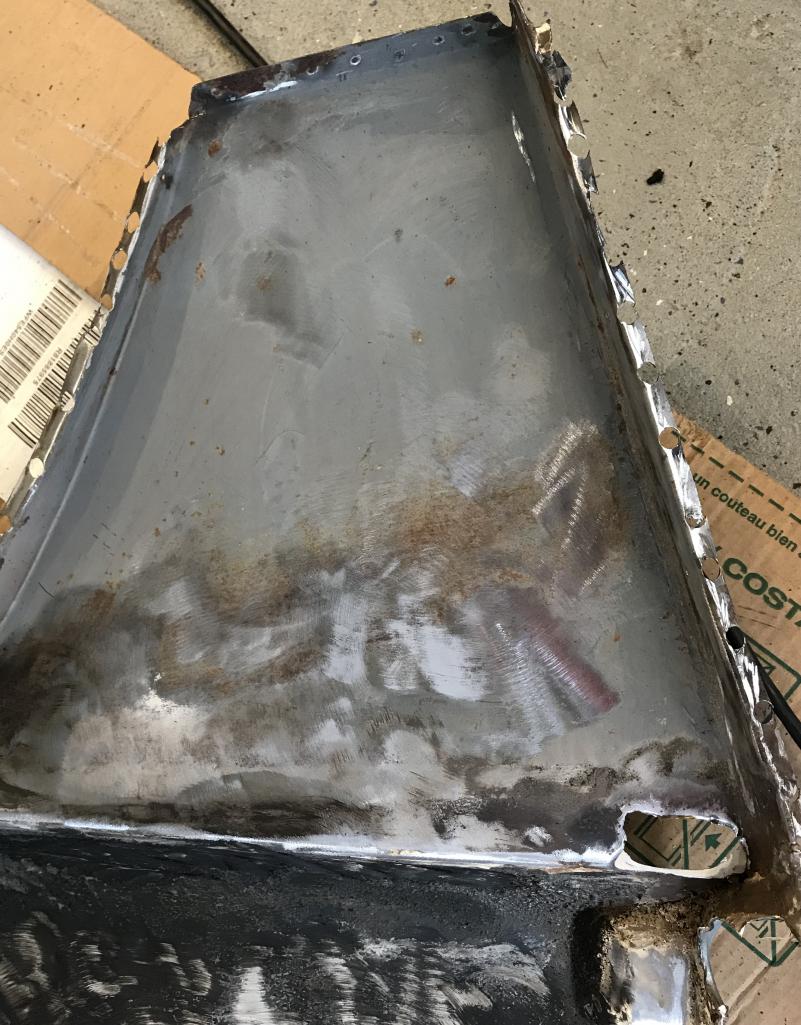
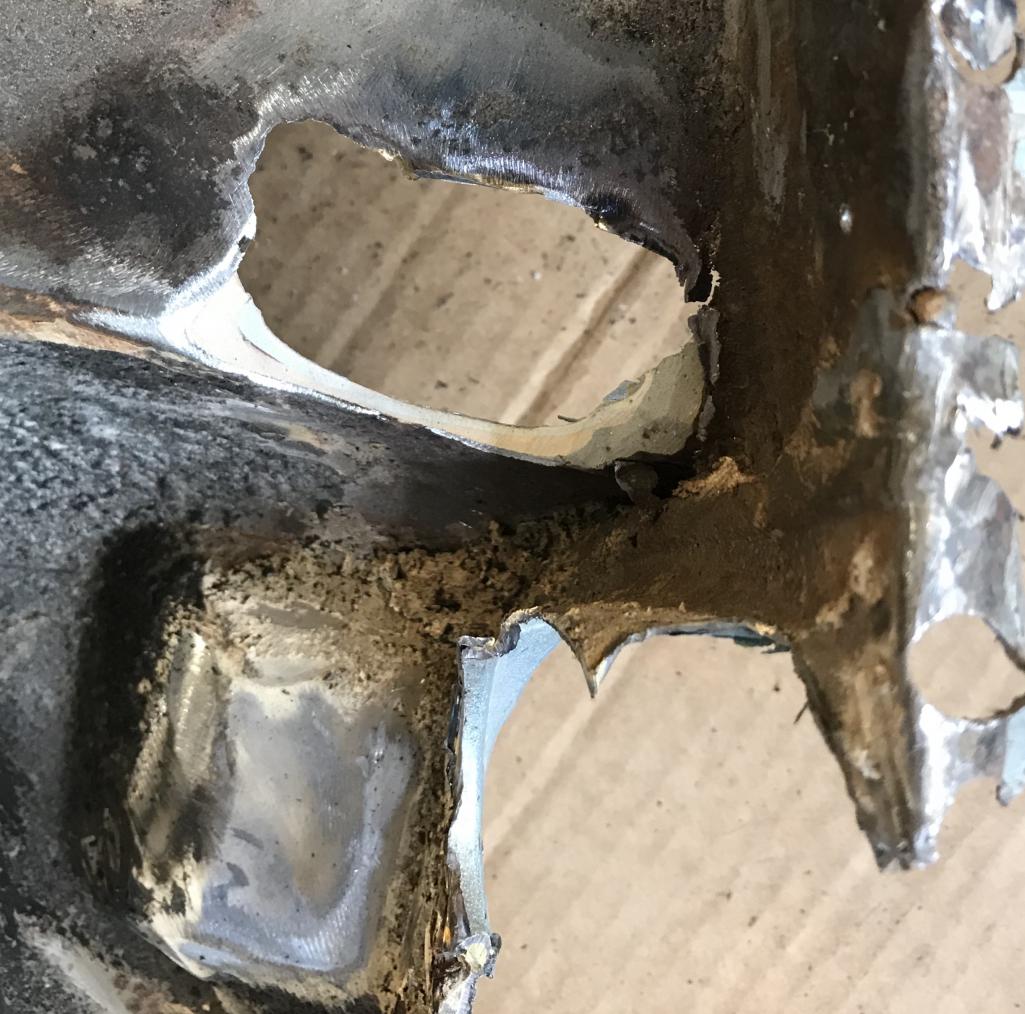
Posted by: Dion Aug 2 2018, 07:27 PM
Panel
Attached thumbnail(s)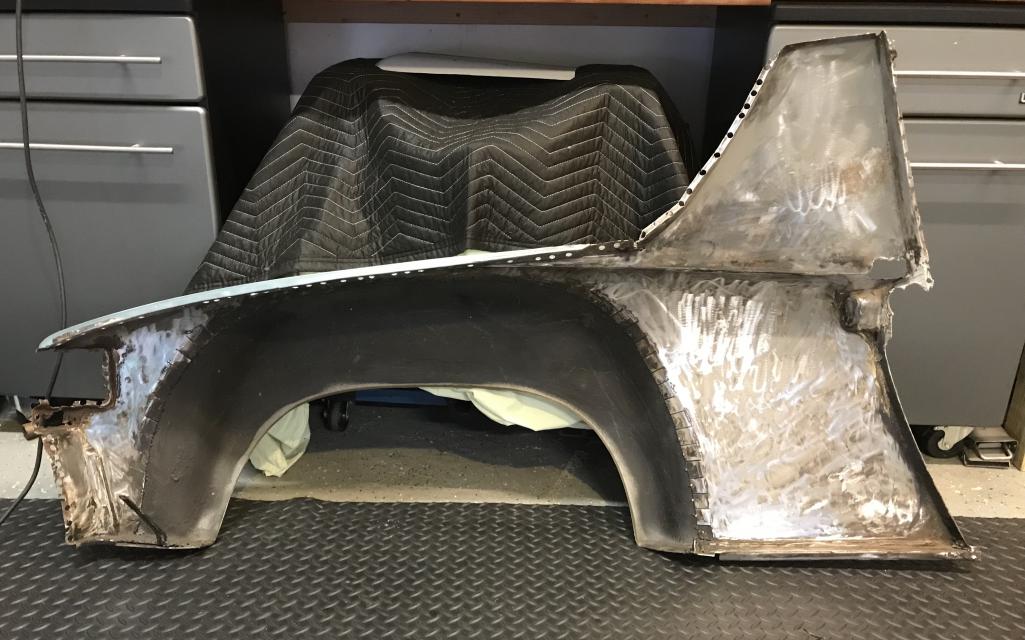
Posted by: Dion Aug 2 2018, 07:29 PM
If any one has a compromised panel but not in the area I need to repair
would gladly like to have it so I could make a patch.
Let me know what ya have...thanks for checking in.
Attached thumbnail(s)

Posted by: bbrock Aug 2 2018, 10:03 PM
If any one has a compromised panel but not in the area I need to repair
would gladly like to have it so I could make a patch.
Let me know what ya have...thanks for checking in.
Let me check the scrap pile in the morning. I had a pair of extra sail panels that were too far gone to use to replace mine, but I don't remember where they were damaged. We might get lucky.
Posted by: Dion Aug 3 2018, 03:29 AM
Thanks Brent
Posted by: bbrock Aug 3 2018, 09:03 AM
Pulled it out of the scrap pile. It's a bit crusty under vent tube but looks like it might clean up and cover the area you need to patch. If you think it has promise, I can hit it with the media blaster this evening and send more pics. If you decide you want it, pm me with your address and how much you want cut off and it's yours.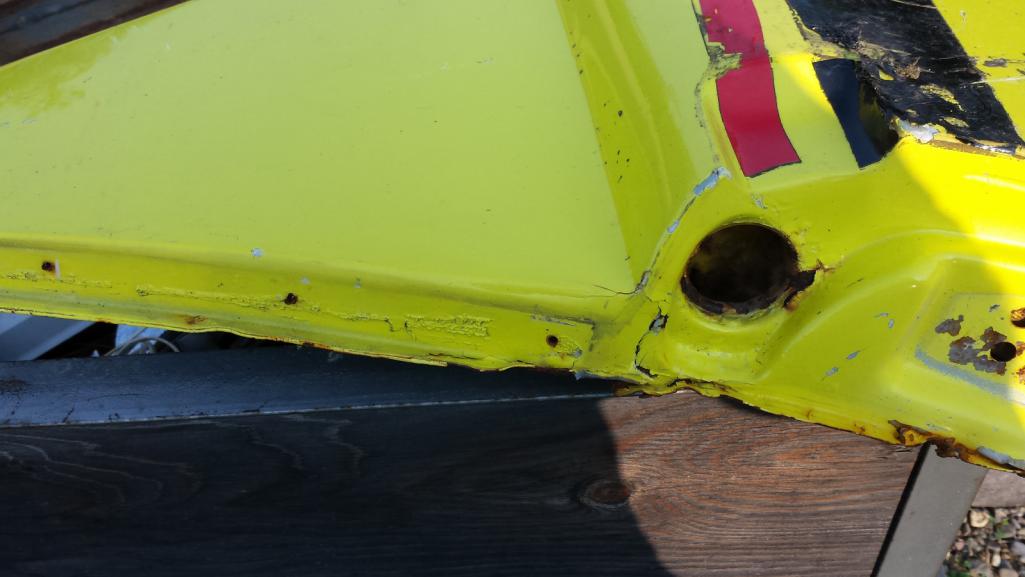
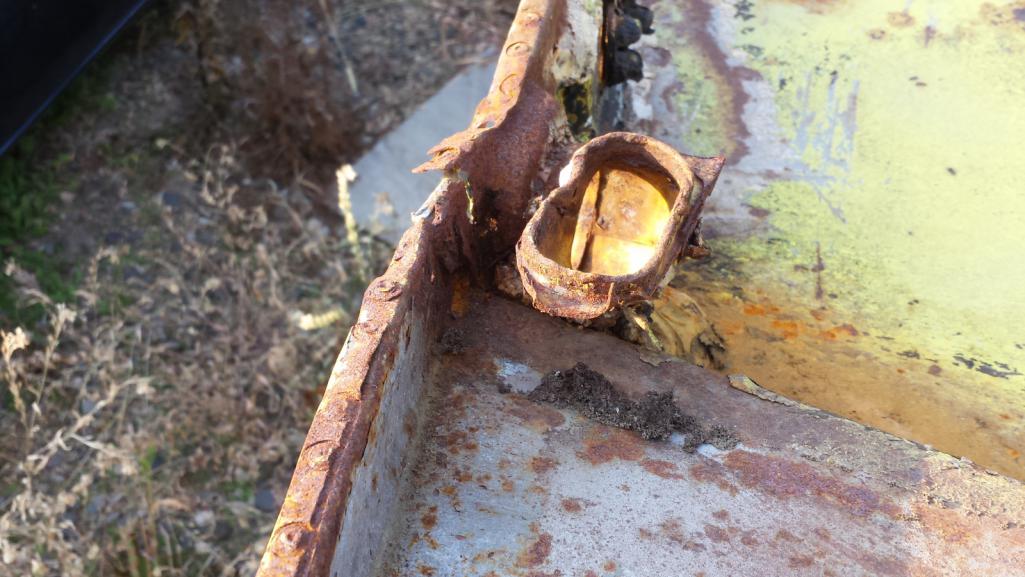
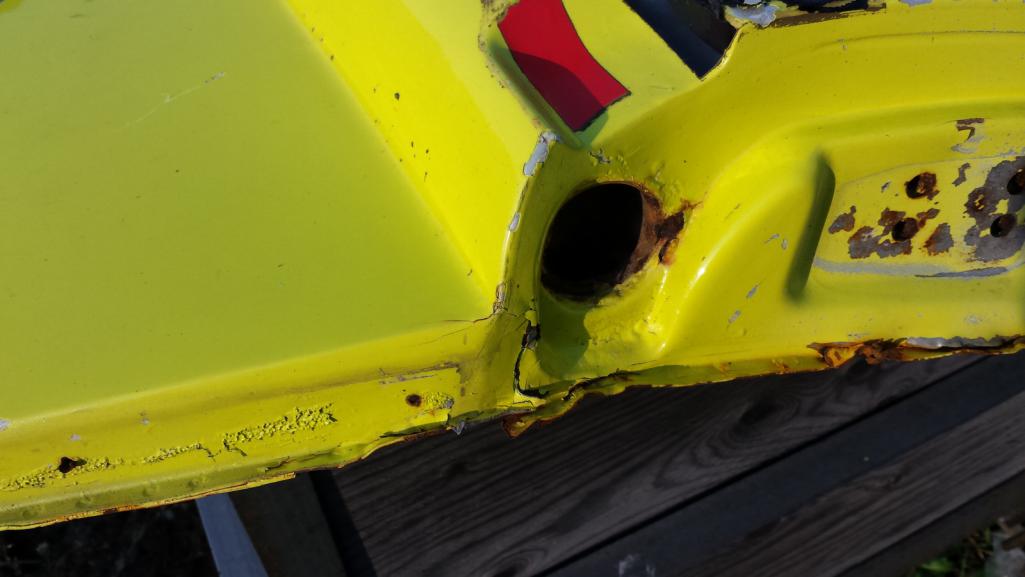

Posted by: Dion Aug 3 2018, 09:14 AM
Brent that should do the trick. Will save me trying to duplicate that contour. Thanks buddy!
Posted by: 914dave Aug 3 2018, 09:25 AM
Oh look , a real snorkel! We can use that
Posted by: Dion Aug 3 2018, 09:48 AM
I broke down and bought a snorkel from RD.
Ya guilted me. I’m diggin the racing stripes on the yellow/ green colour!
Yeah baby, groovy!
Posted by: bbrock Aug 3 2018, 10:19 AM
I broke down and bought a snorkel from RD.
Ya guilted me. I’m diggin the racing stripes on the yellow/ green colour!
Yeah baby, groovy!
Ah!
I wish I'd have known. My recollection is that part isn't cheap and you can have this one for free.
Posted by: Dion Aug 3 2018, 11:01 AM
All part of the adventure!
Posted by: tygaboy Aug 3 2018, 01:14 PM
All part of the adventure!
I was about to say "Forget the snorkel. You're in deep enough that you need full on SCUBA gear!"
Look great, Dion. You're really getting there!
Posted by: Jeff Hail Aug 3 2018, 02:36 PM
Repacked
Nice work.
When you get your car on the road if you find you have any vibrations even subtle ones in the front wheels or run out in the hubs, wheels that mystifies all diagnostics start here.
Those are high spots where the race bottoms out which occurs when removing the old races with a drift, punch etc I usually take an old race slice it with a cut off wheel, a rubber drum on a drill motor, some 600 grit lapping compound and spin the "race lapping tool" for about 20 seconds until the high spots are gone. (hubs are soft aluminum)
Yours aren't bad but could show up as a gremlin later. I've seen hubs much worse that I have repaired were murdered by the BFH.
On the Pelican site I have seen a 50+ times guy replaces bearings and races then shows back up three month later with an issue and a new vibration thread then later needlessly replacing hubs.
The high spots are small but when you extend that small rise to tread distance or wheel bead it turns into preventable amount of run out. The tapered rollers will last longer also.
Attached image(s)
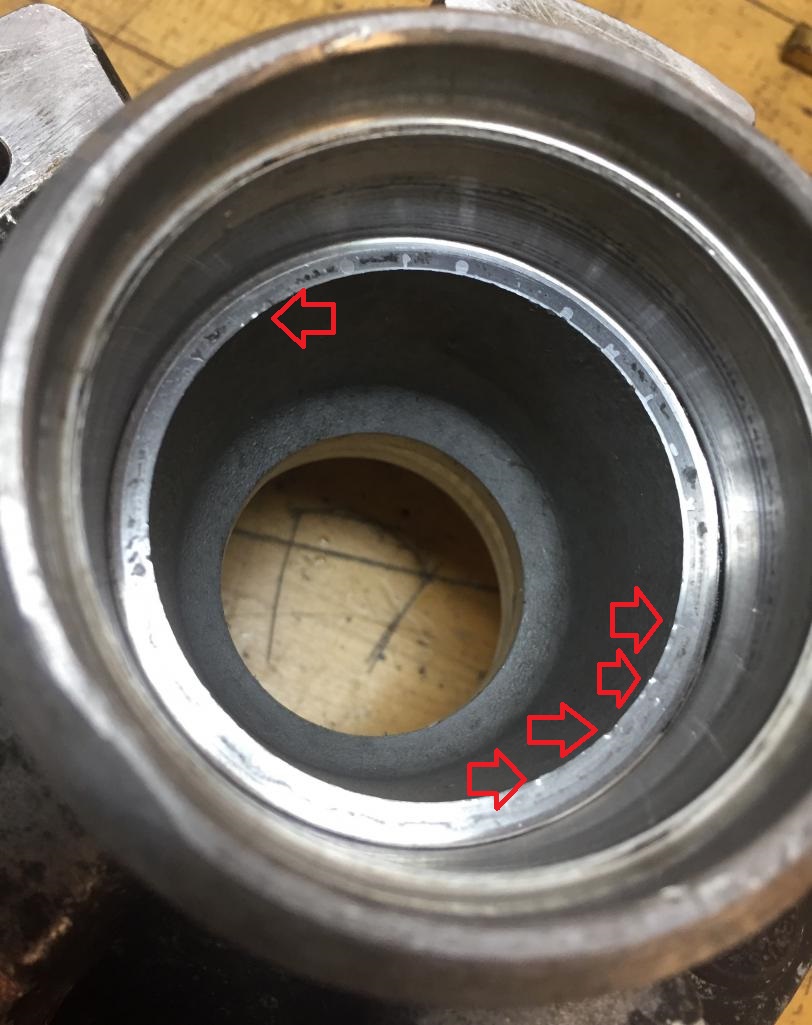
Posted by: Dion Aug 3 2018, 02:46 PM
Jeff , thanks for the heads up! Would never had known. I really appreciate that. Great info. Always learning something.
Cheers, mate.
PS: love your thread, tons of info.
Posted by: Dion Aug 19 2018, 11:04 AM
No body work updates ...but just wanted to share a story in which I wanted to honor my friend Jim McLeod (type47). Before the time of his passing he and I were both doing
2.4L six conversions. So we had a friendly wager going on as to whom was
gonna get on the road first. Well Jim we both are!
I was fortunate to obtain Jim’s 2.4L yellow fan/engine shroud at the recent picnic honoring him. So it’s now home on my engine. I hope his spirit will enjoy
some road trips with me and my 914 friends. It may be silly to some
but has meaning to me.
Attached thumbnail(s)
Posted by: Dion Aug 19 2018, 11:05 AM
Yellow
Attached thumbnail(s)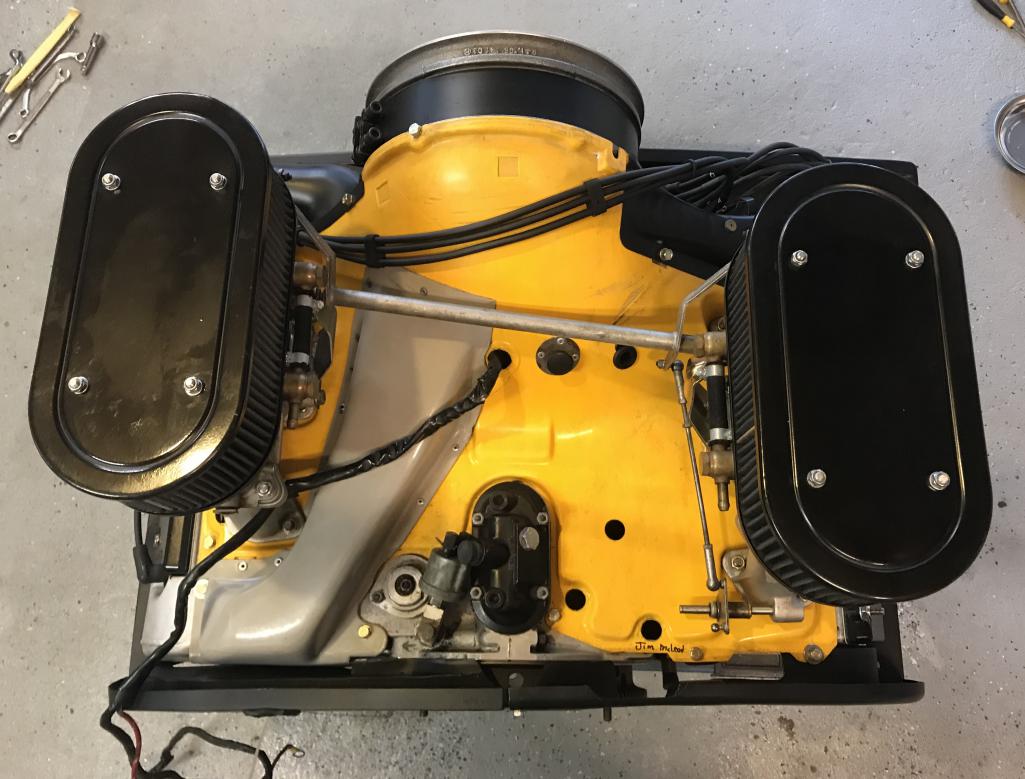
Posted by: mb911 Aug 19 2018, 03:13 PM
I personally think that's awesome.. I am all kinds of about these type of thing's. Everytime I see someone that has served in the military I shake their hand, everytime I look at something my dad has given me I think about back to my childhood and remember the time he gave it to me. Your tribute to Jim is just fantastic..
Posted by: bbrock Aug 19 2018, 04:07 PM
I personally think that's awesome.. I am all kinds of about these type of thing's. Everytime I see someone that has served in the military I shake their hand, everytime I look at something my dad has given me I think about back to my childhood and remember the time he gave it to me. Your tribute to Jim is just fantastic..
Couldn't have said it better. Very cool and now you will never be lonely in your car.
Posted by: Dion Aug 19 2018, 04:15 PM
Thanks fellas. Appreciate your sentiments.
Posted by: Dion Aug 20 2018, 07:07 PM
Duplicate
Posted by: Dion Aug 20 2018, 07:08 PM
Back to this
Rear left tail lamp area. Swiss cheese.
Nothing too exciting just documenting.
Attached thumbnail(s)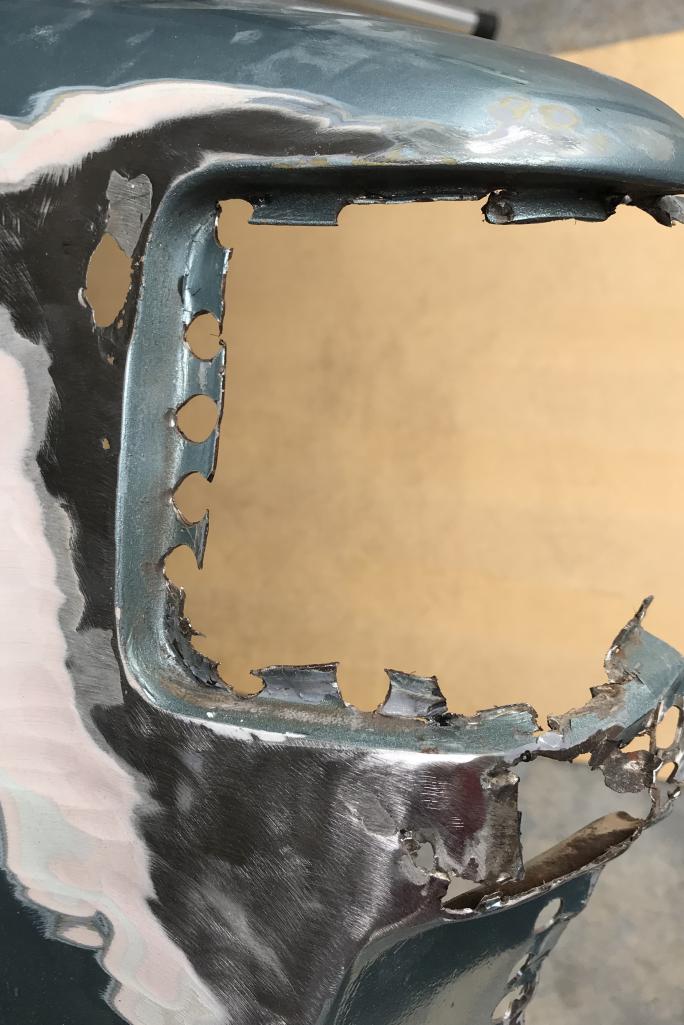
Posted by: Dion Aug 20 2018, 07:08 PM
Duplicate post
Posted by: Dion Aug 20 2018, 07:09 PM
Donor piece
Attached thumbnail(s)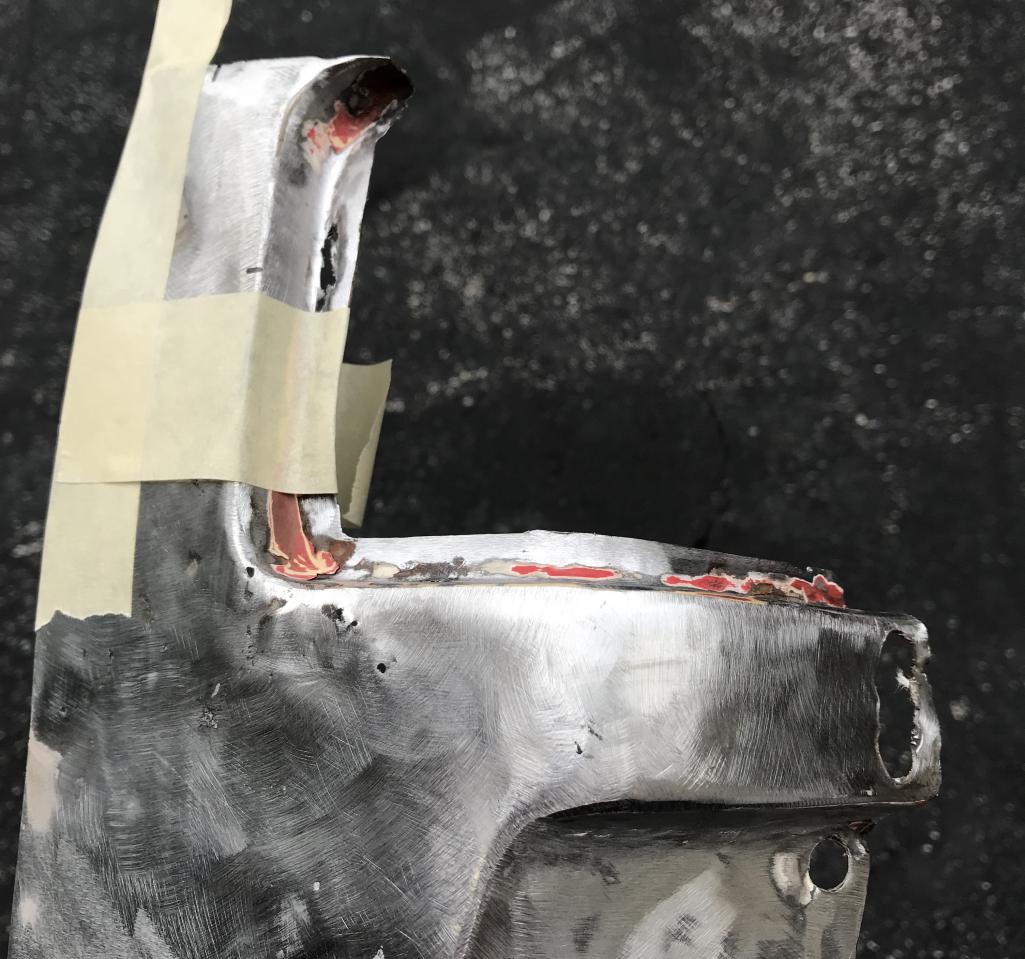
Posted by: Dion Aug 20 2018, 07:14 PM
Upper outer portion repair
Attached thumbnail(s)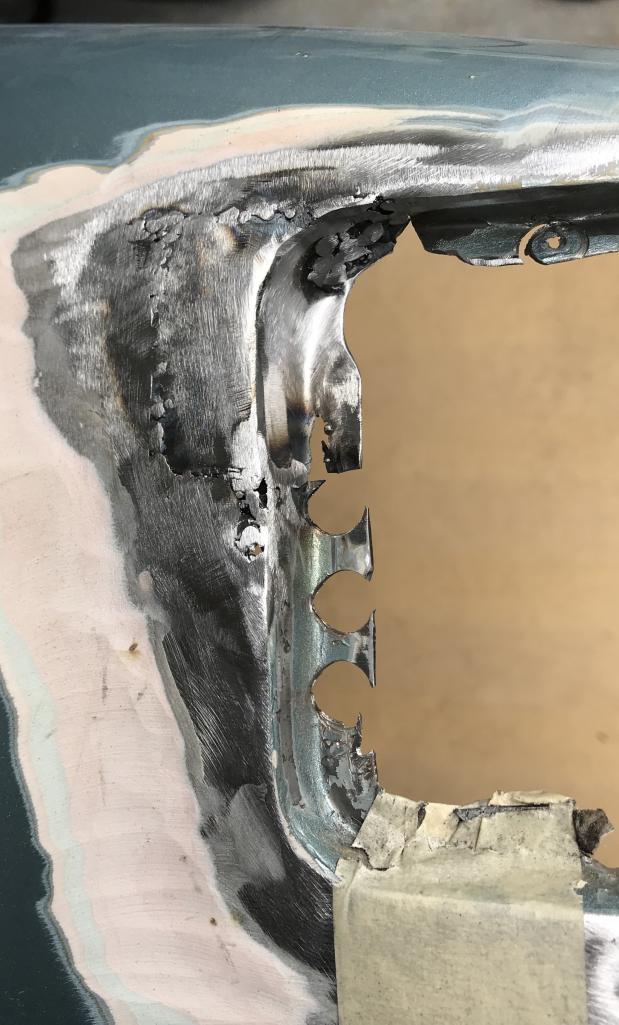
Posted by: Dion Aug 20 2018, 07:15 PM
Next: rear just above rubber cap region. Offending piece cut out.
Attached thumbnail(s)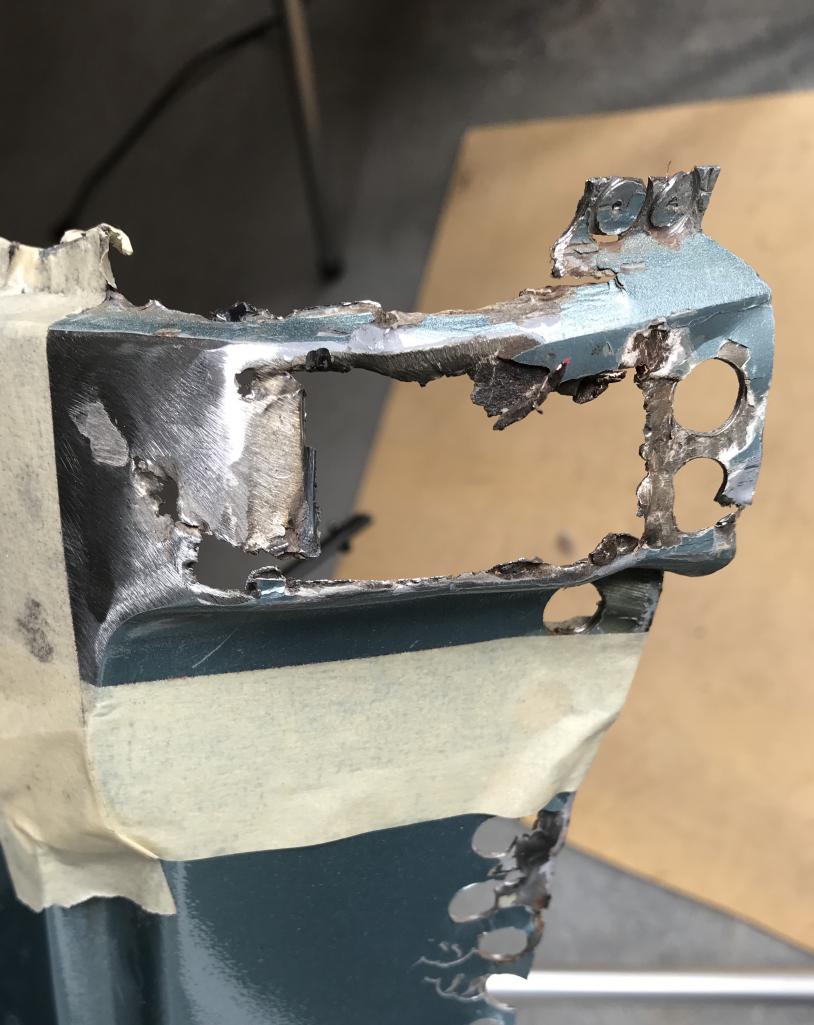
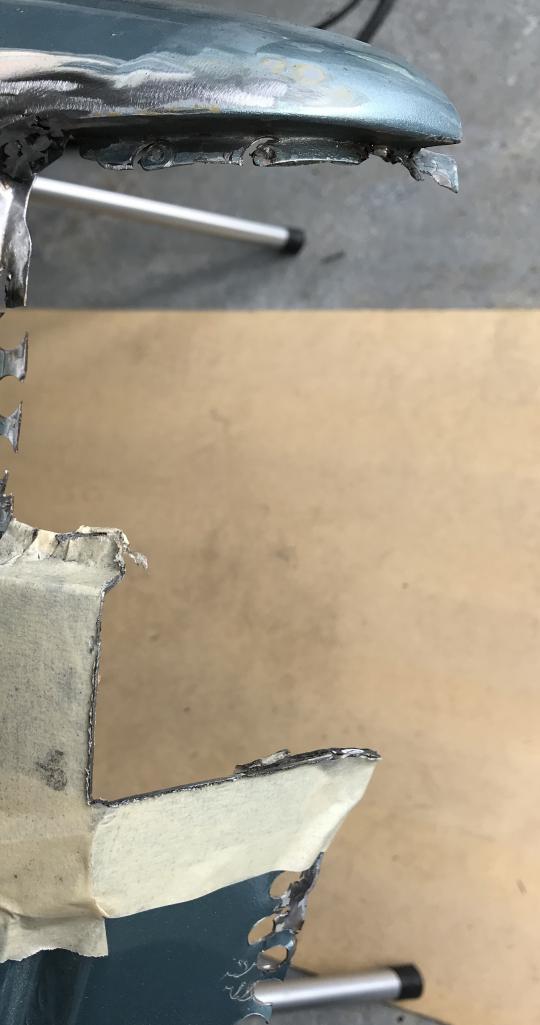
Posted by: Dion Aug 20 2018, 07:16 PM
Patch piece test fit.
Attached thumbnail(s)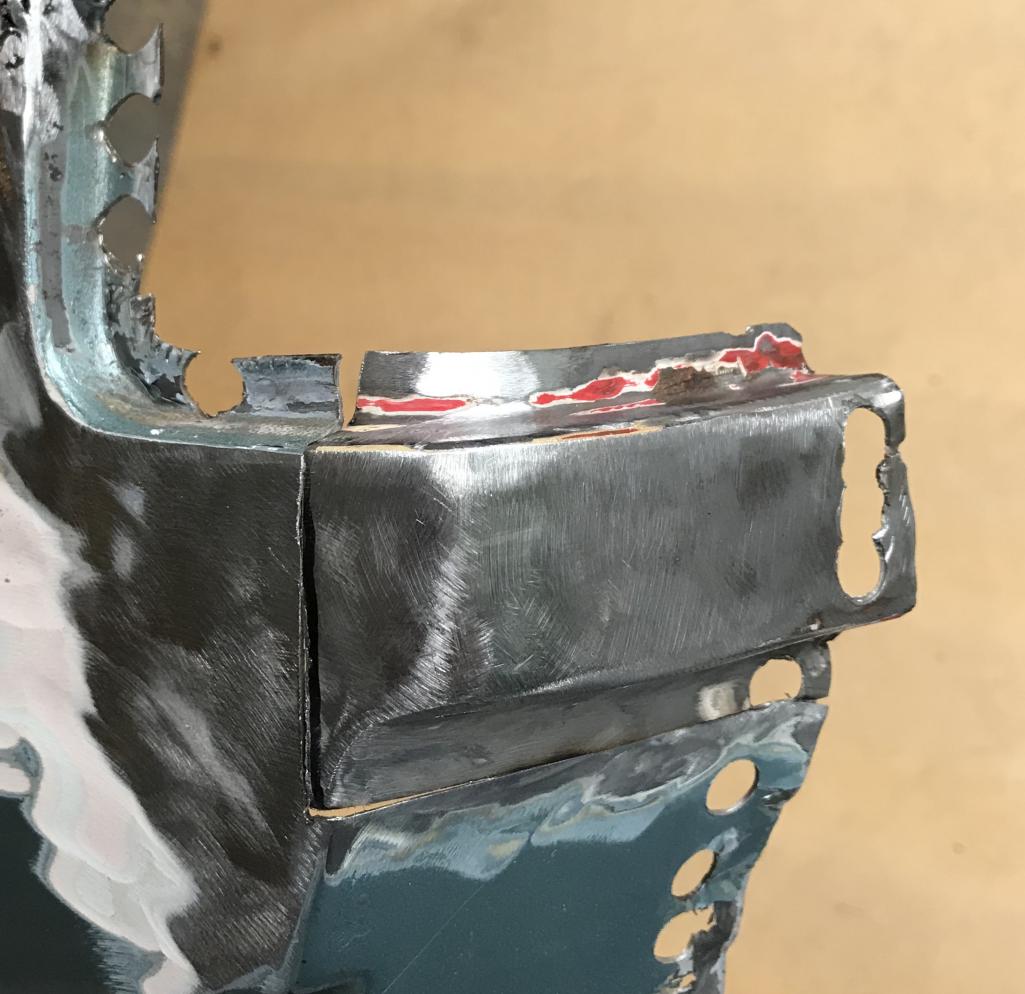
Posted by: Dion Aug 20 2018, 07:17 PM
For those wondering about all those other holes on the perimeter those are the spot weld holes
which will be addressed when mounting panel to car structure. Will be working on sail panel tomorrow and get some primer on the bare metal.
Attached thumbnail(s)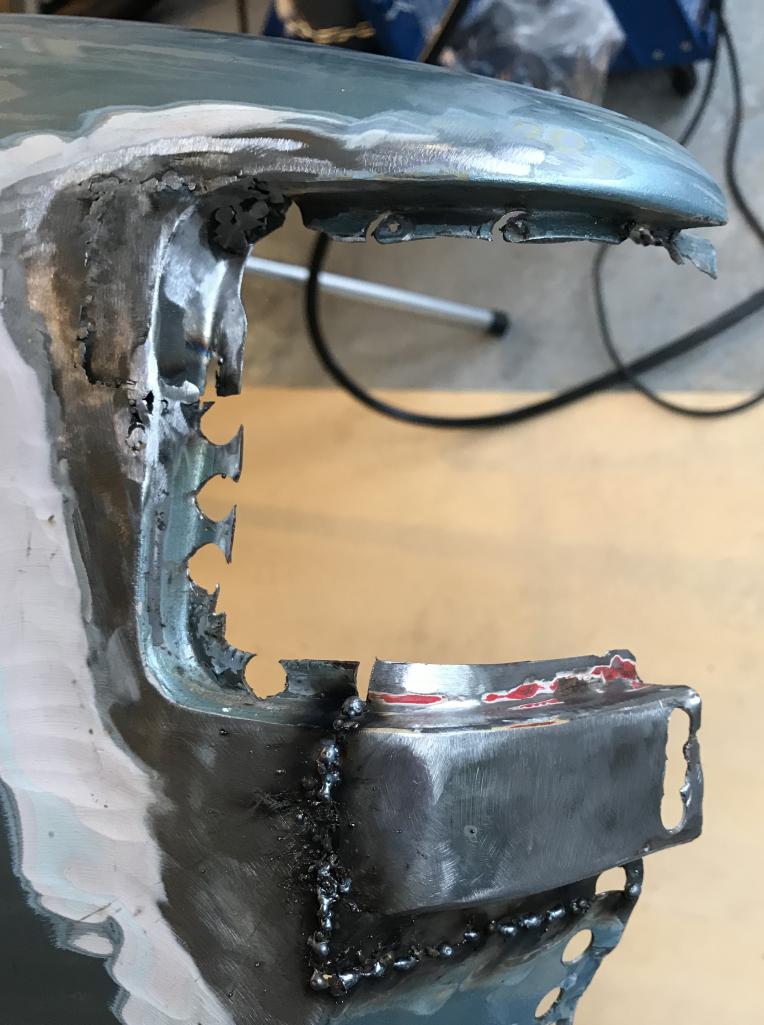
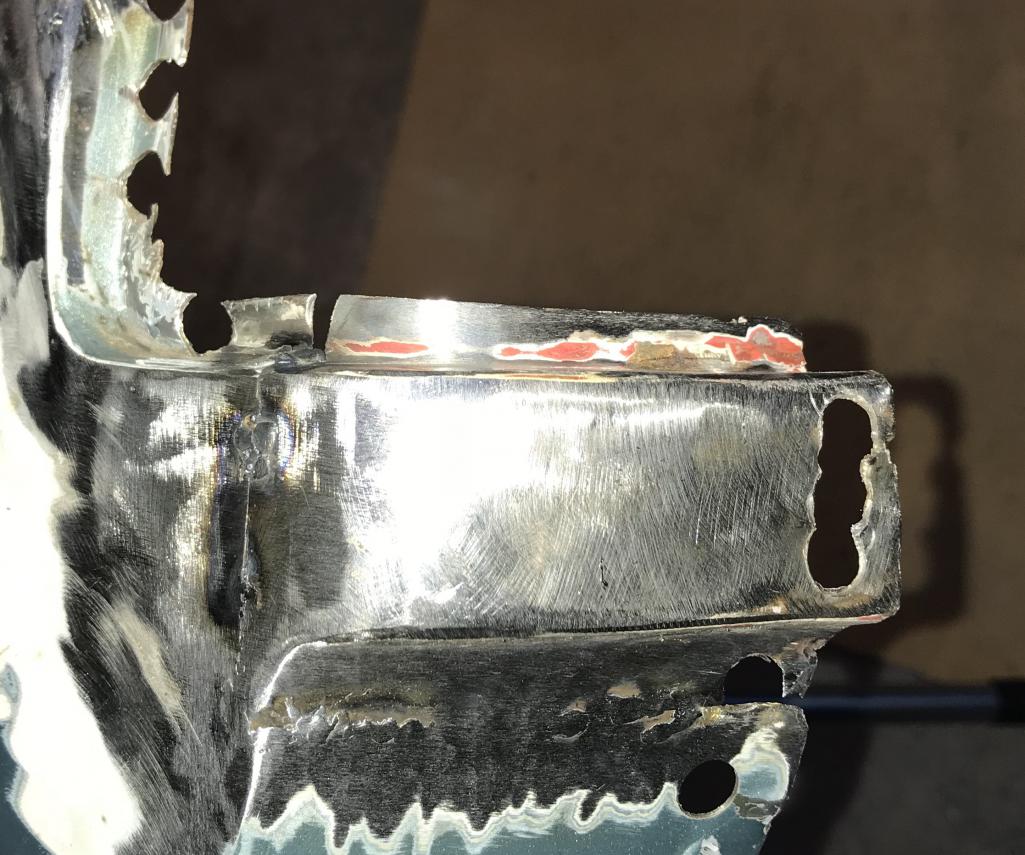
Posted by: Dion Aug 24 2018, 05:23 PM
Worked on the sail panel a bit. Brent thanks mate!
The piece you sent worked out fine. When the finish body work is done all should look
proper. Glad it has metal back where it should be.
Here’s some photos of progress. Next on the “ to do “ list, will be the Left console/ longitudinal.
Attached thumbnail(s)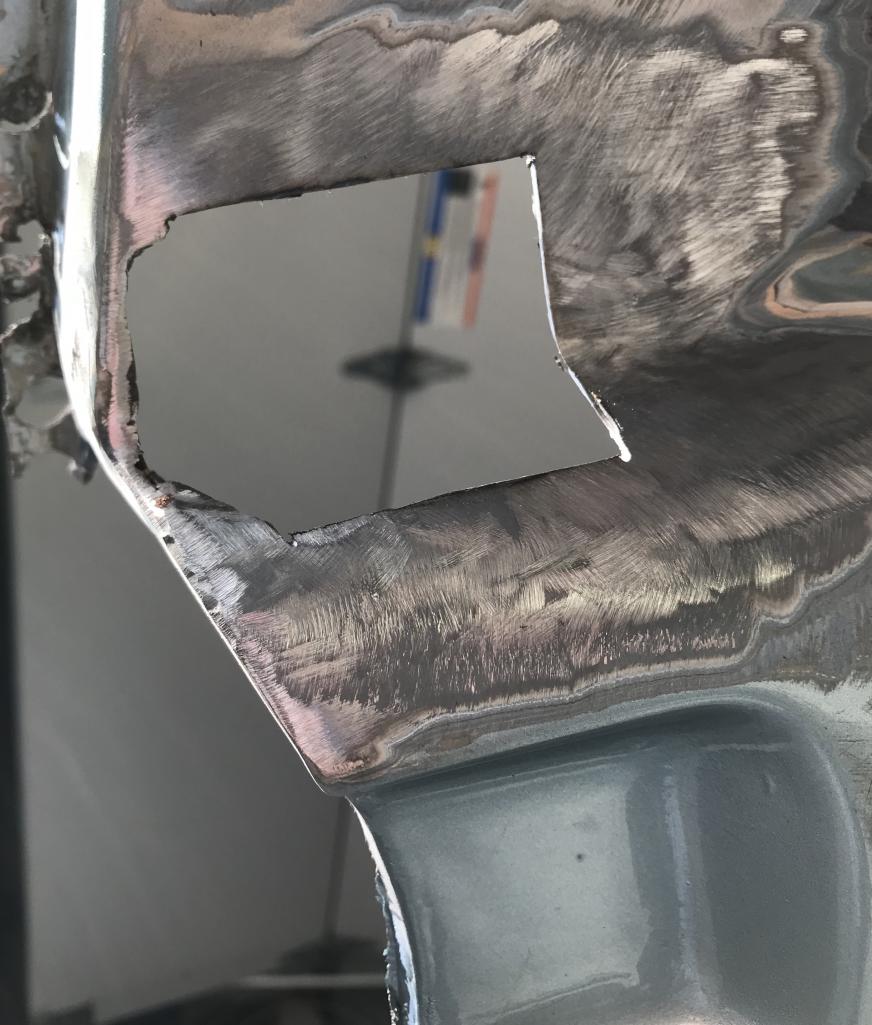
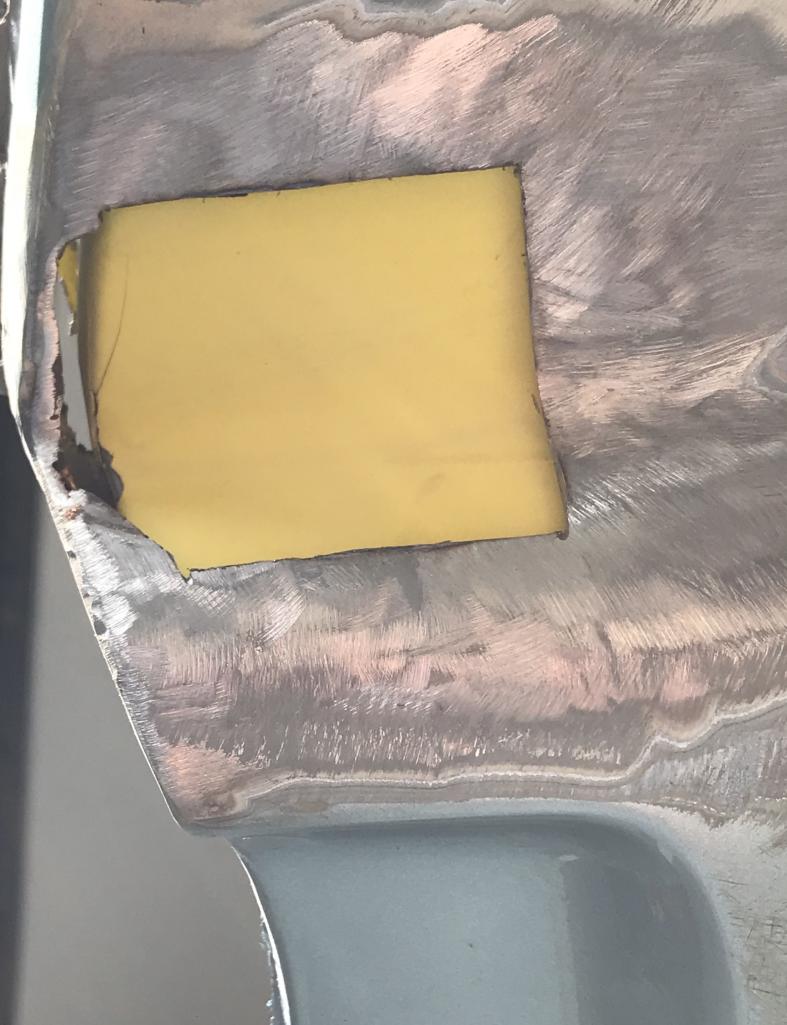
Posted by: Dion Aug 24 2018, 05:24 PM
Patch piece being sized up
Attached thumbnail(s)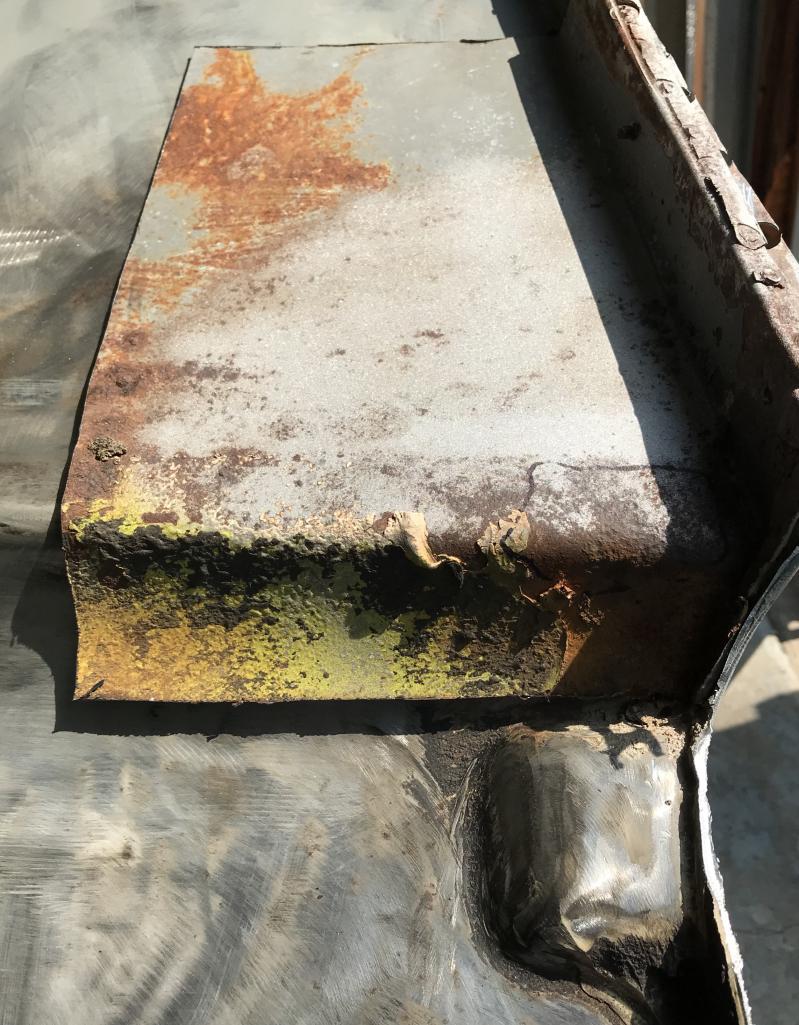
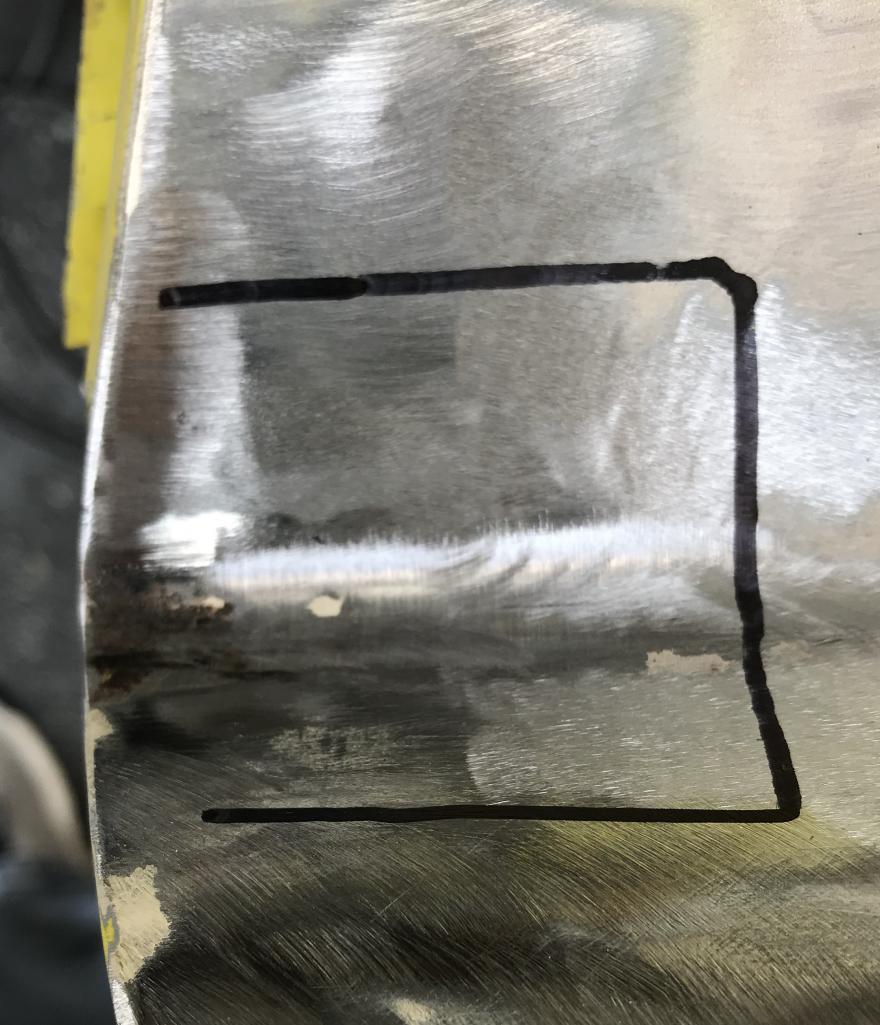
Posted by: Dion Aug 24 2018, 05:26 PM
Cut & weld
Attached thumbnail(s)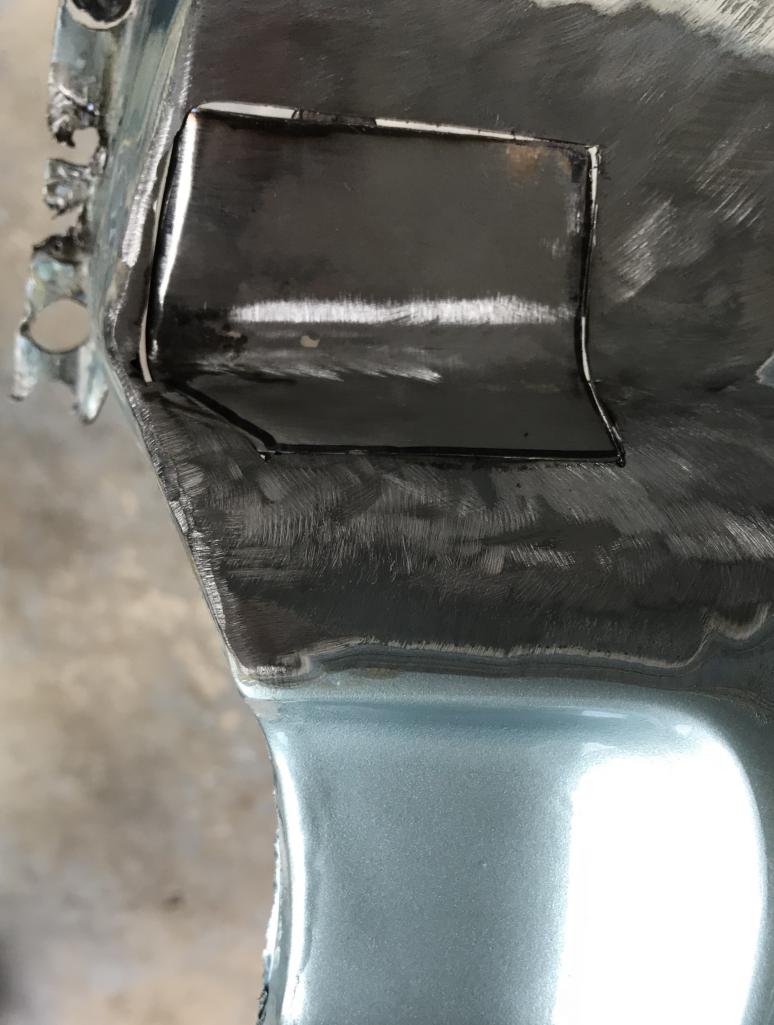
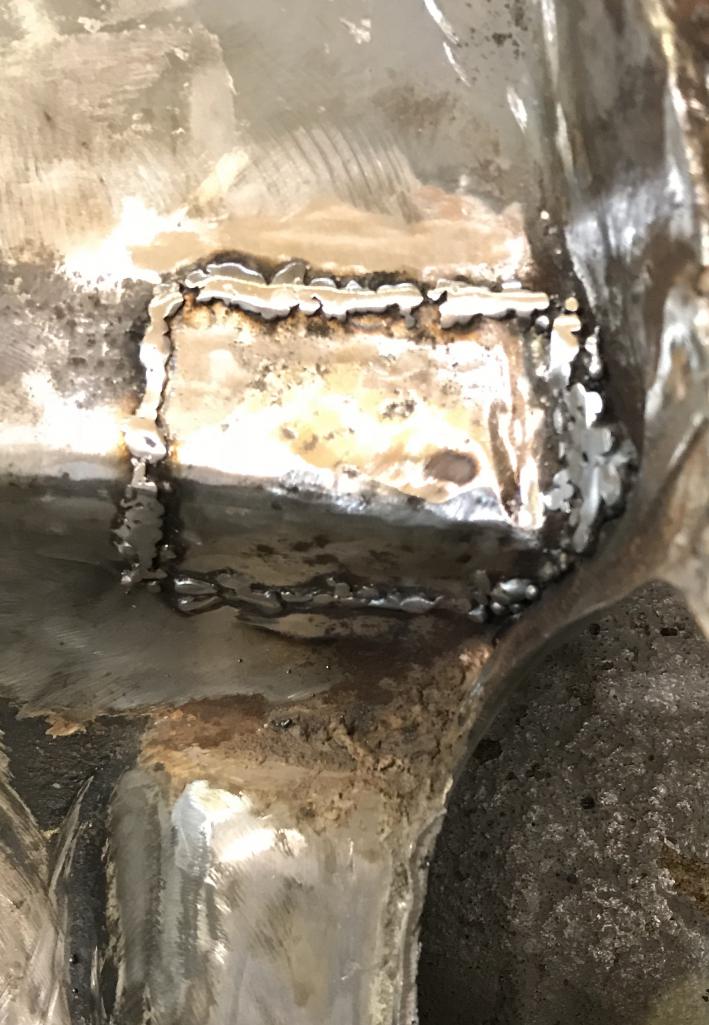

Posted by: Dion Aug 24 2018, 05:27 PM
Some primer
Attached thumbnail(s)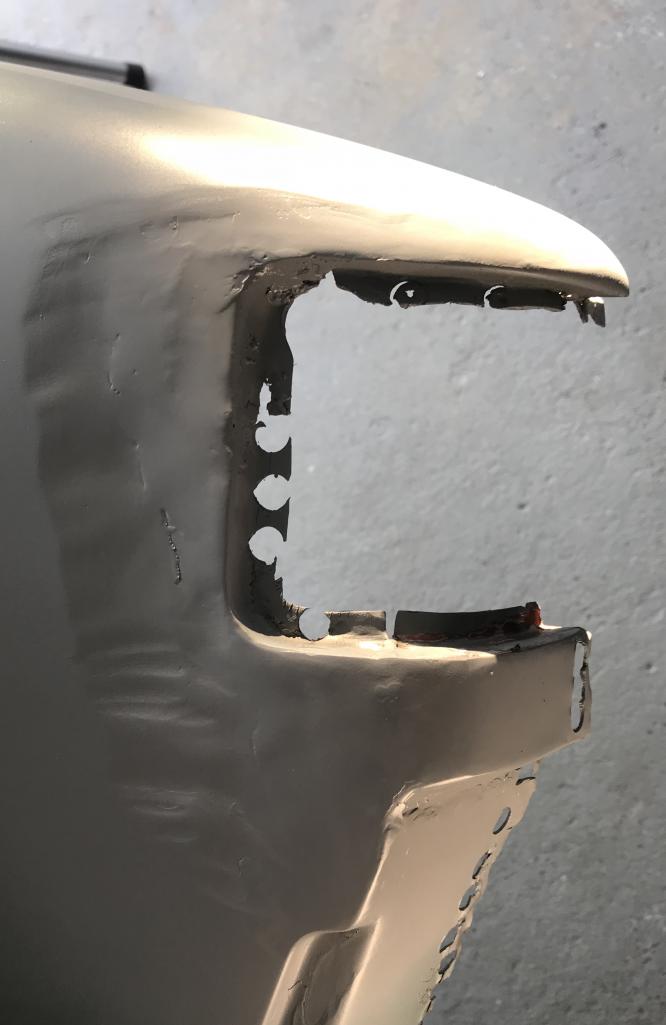
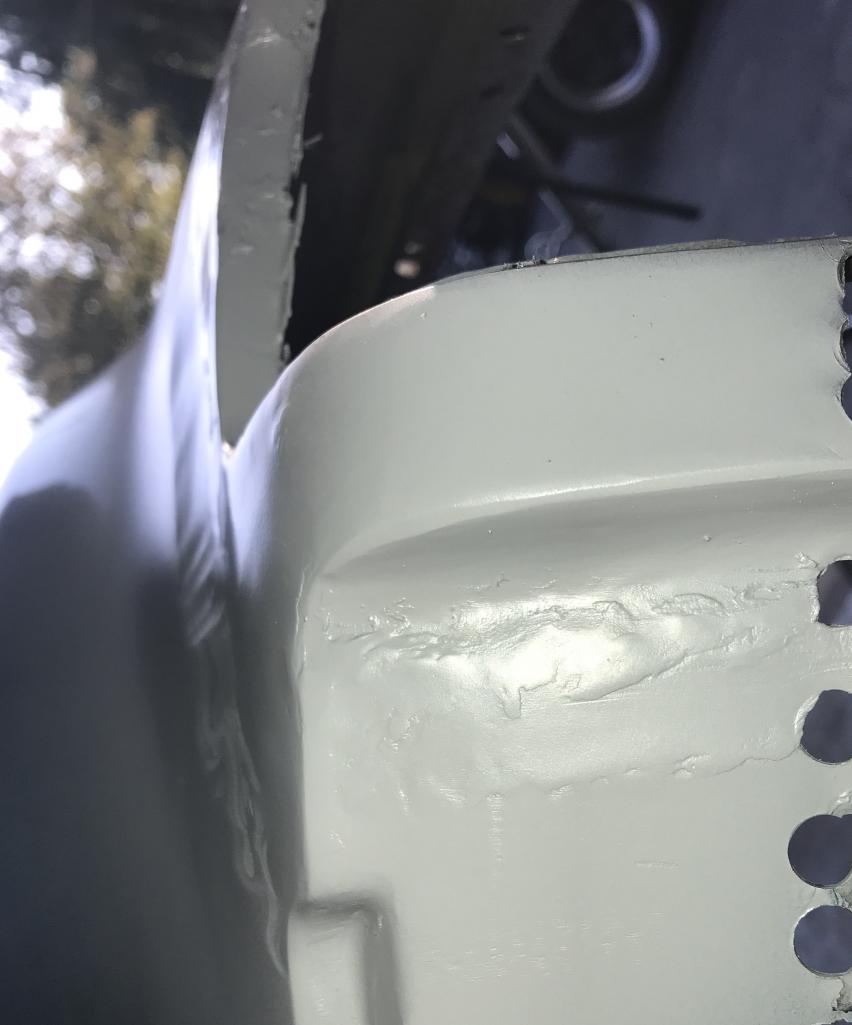
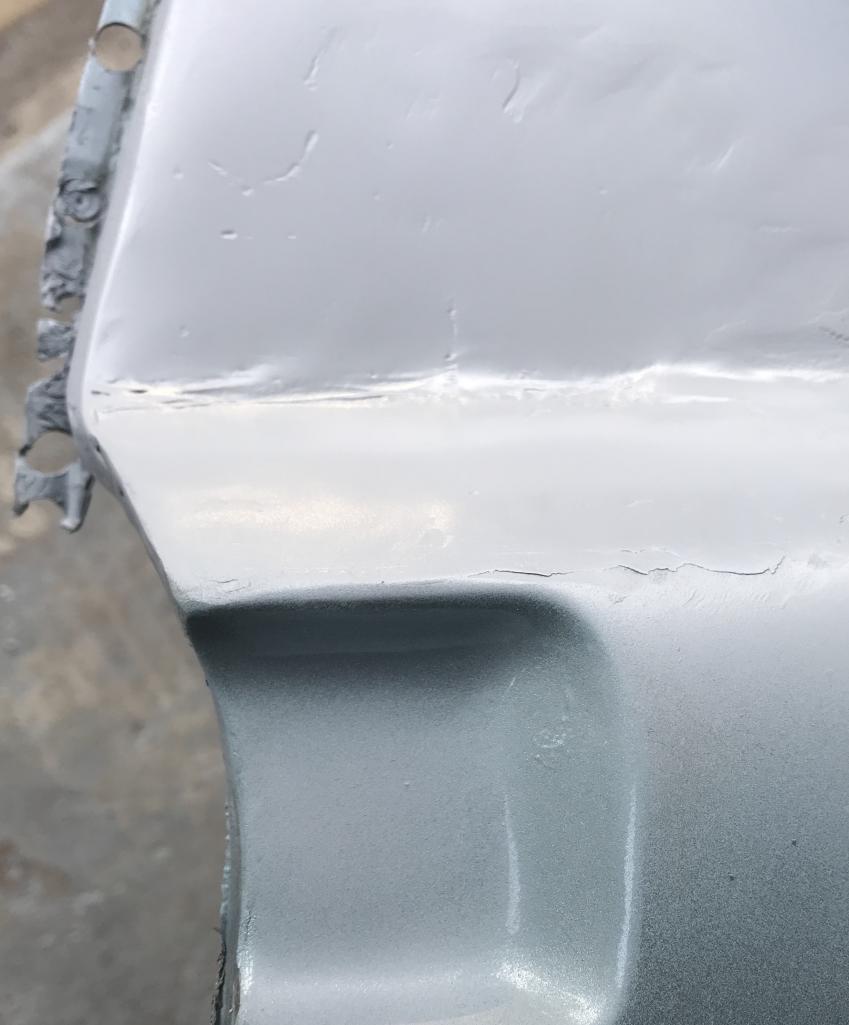
Posted by: bbrock Aug 24 2018, 07:10 PM
Worked on the sail panel a bit. Brent thanks mate!
The piece you sent worked out fine. When the finish body work is done all should look
proper. Glad it has metal back where it should be.
Here’s some photos of progress. Next on the “ to do “ list, will be the Left console/ longitudinal.
Hey look at that! I'm glad that old rusty turd still had a use for someone. Nice work.
Posted by: Dion Aug 24 2018, 07:16 PM
Thanks boss, I’m trying.
Posted by: Dion Sep 8 2018, 04:35 PM
Went back to work on the sail panel patch again.
Wasn’t really happy that some flash rust had shown through the primer.
Sanded that area again and prepped. Then used some self etching primer there
since it has the “zinc” content in it.
Attached thumbnail(s)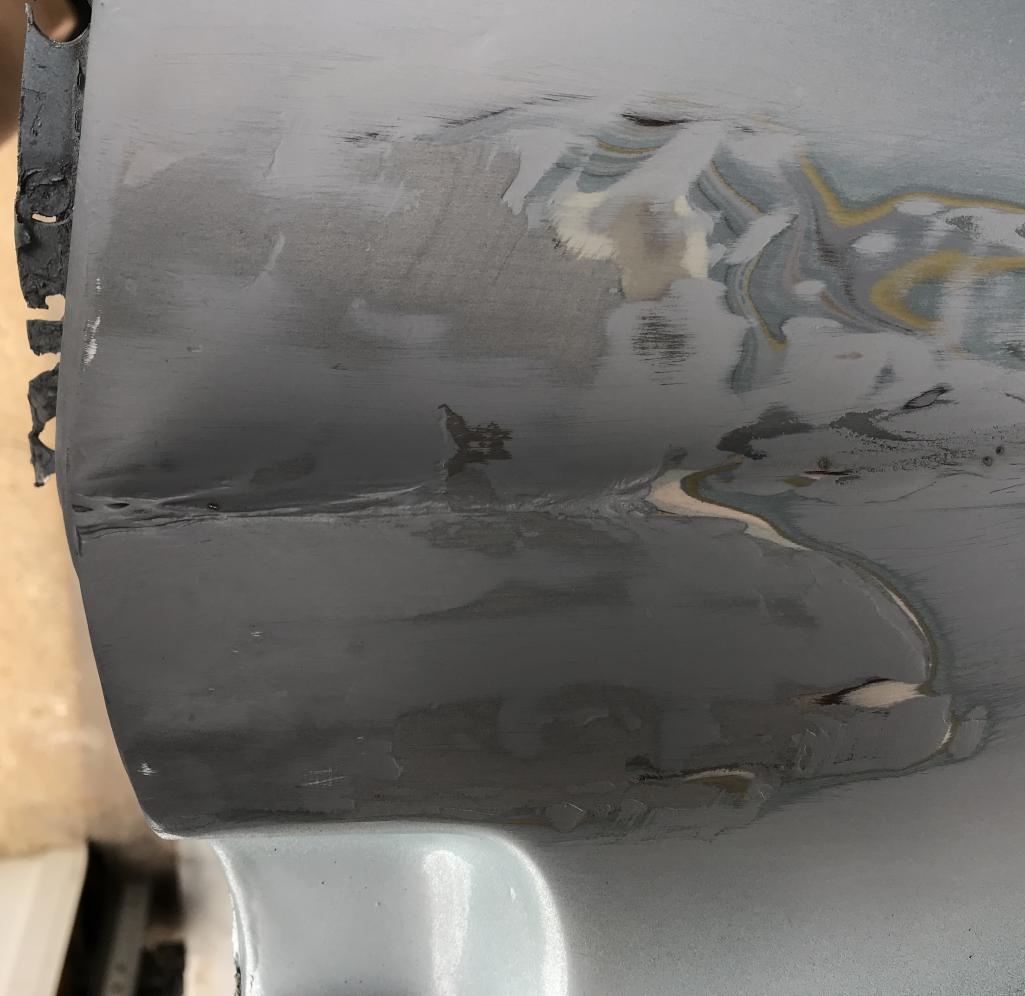
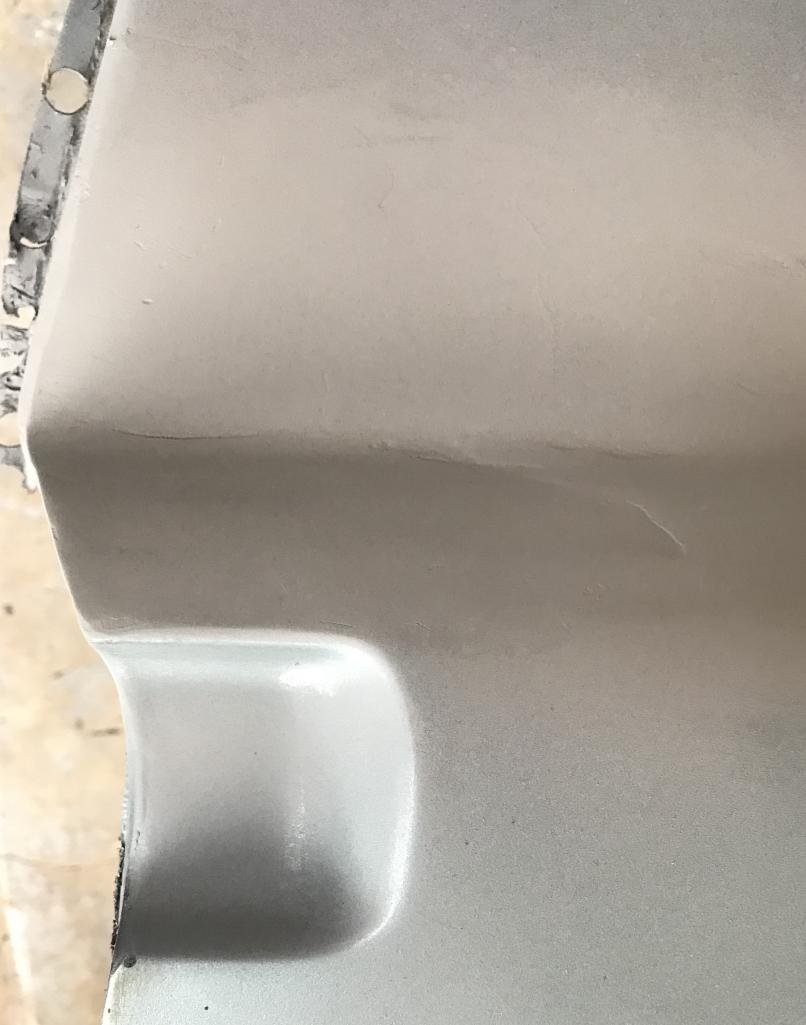
Posted by: Dion Sep 8 2018, 04:45 PM
Flipped the fender over and used the same treatment I did for the other flares.
Where as my flares had been “lap welded” as opposed to “butt weld” , I wanted to add
an extra means chemically to warn off problems.
I used Eastwood’s internal chassis coating to have it creep into the small crevices of the welded areas. Of course cleaned it thoroughly first. Then I used “rubber undercoating” on the flare itself. The condition of paint on the inner flare was quite sound. After prepping and cleaning the rest of the interior of the fender I then sprayed with epoxy primer. This should keep till the rest of the chassis is done. Then finish bodywork can begin.... that’s a bit aways yet!
Attached thumbnail(s)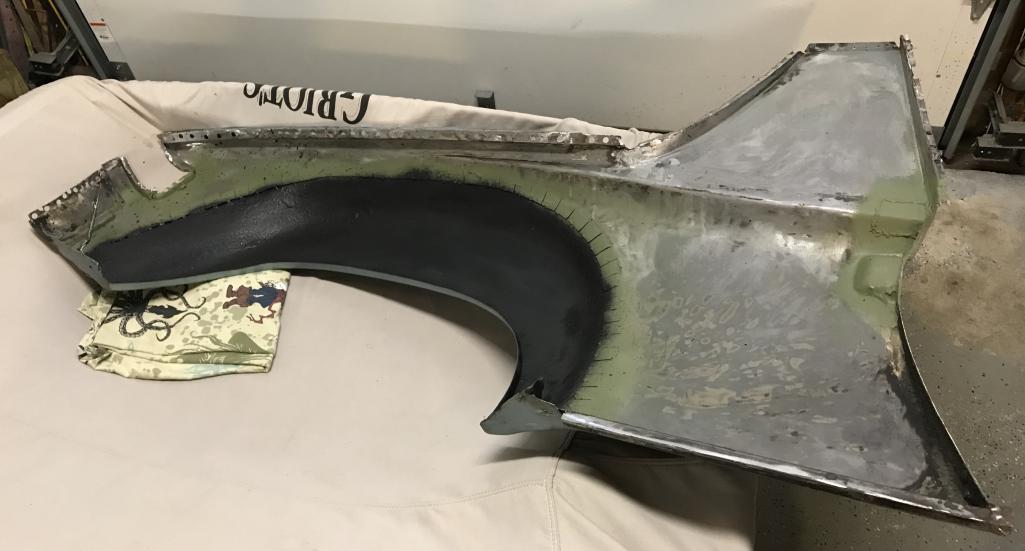
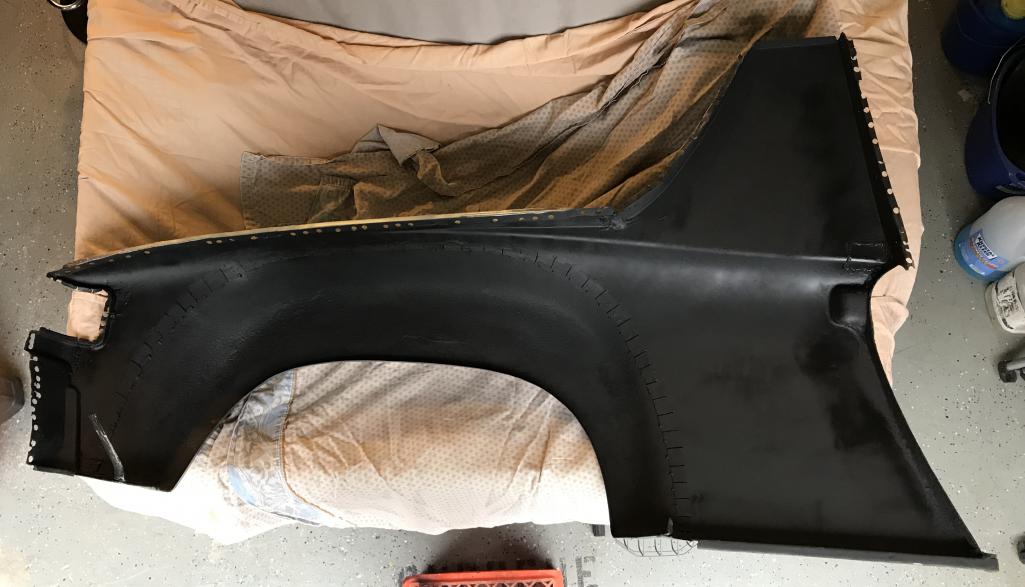
Posted by: Dion Sep 23 2018, 07:37 PM
I know this car was a COTM & I appreciate that very much.
However the paint job was 14 years old and was just applied on the topsides.
No door jambs or underhood areas. So since we’re in for a pound in for a penny,
I’m addressing areas that need attention. I’m not calling this a restoration but a freshening. This is my build, my hot-rod. Not concours by any means. So if ya see flaws
oh well I’m doing my best. So this weekend I tackled the headlite hardware and
the buckets. Sanded the headlite hardware, primered and gave em the zinc phosphate look with a spray bomb from Eastwood.
Attached thumbnail(s)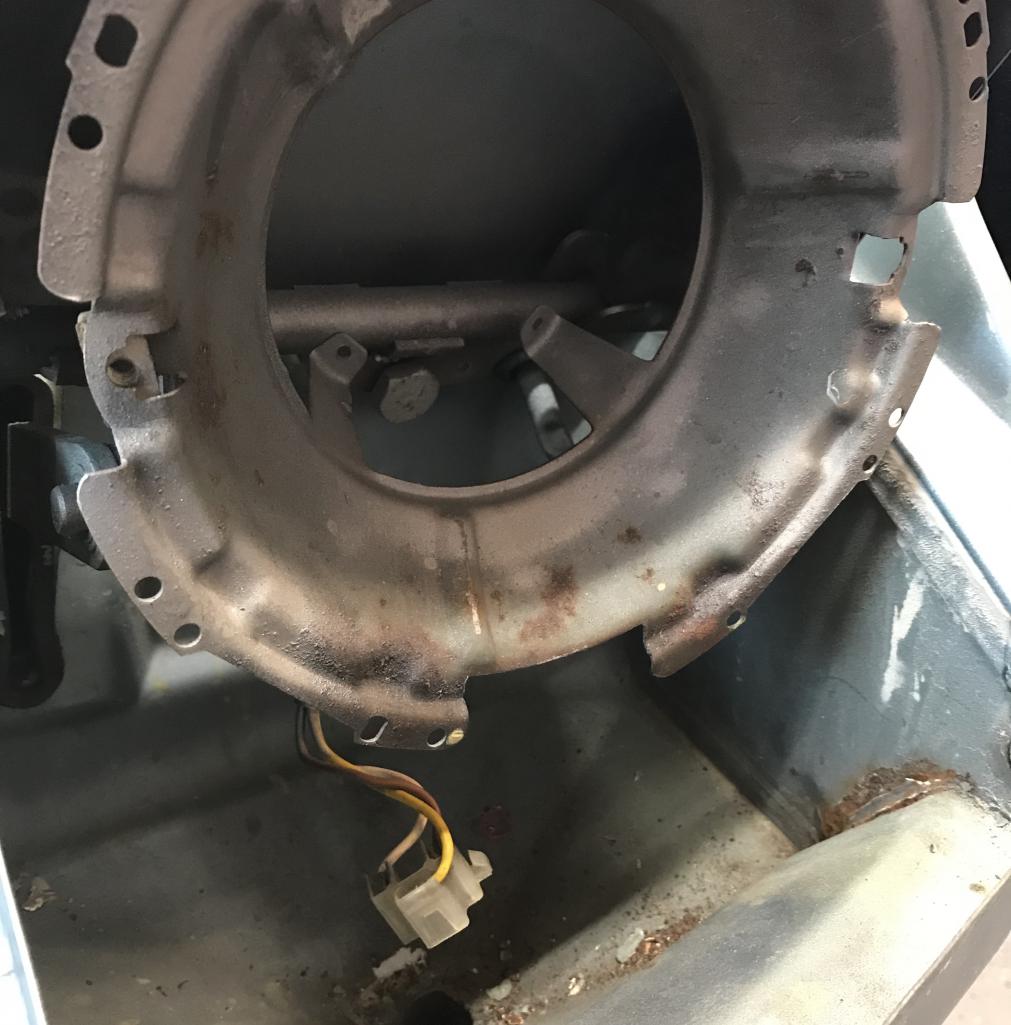
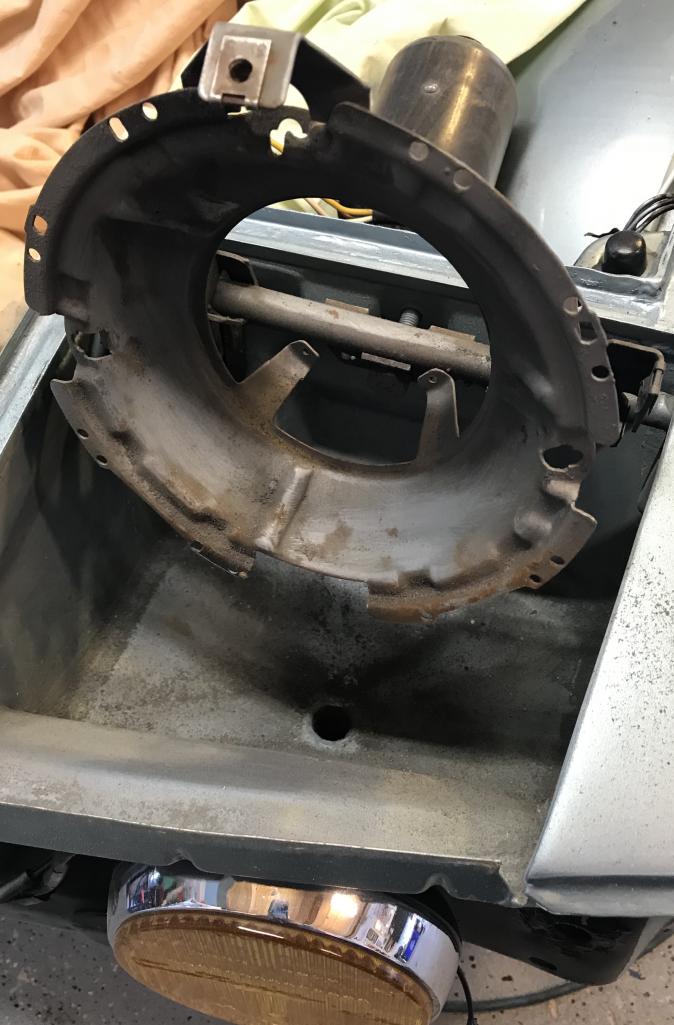
Posted by: Dion Sep 23 2018, 07:38 PM
Sanded
Attached thumbnail(s)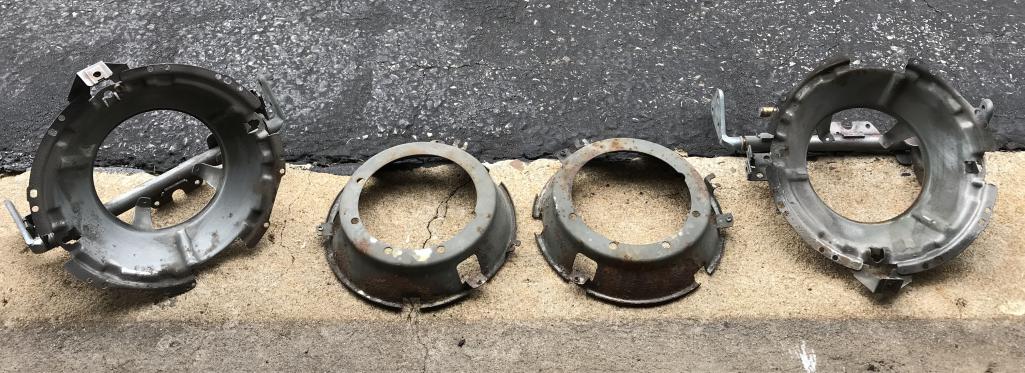
Posted by: Dion Sep 23 2018, 07:39 PM
Sanded
Attached thumbnail(s)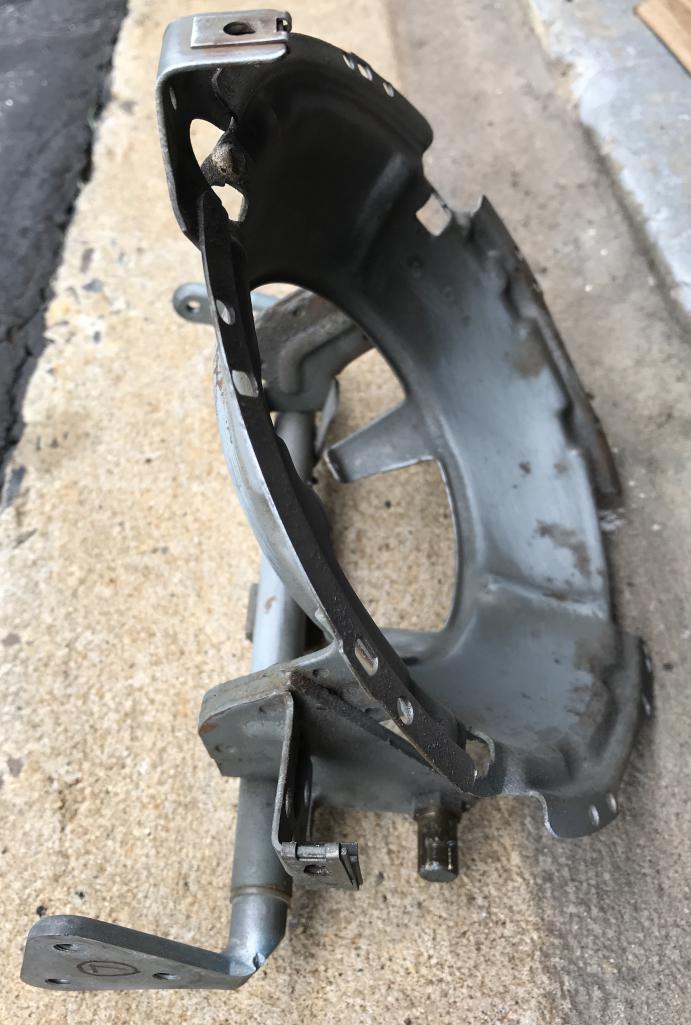
Posted by: Dion Sep 23 2018, 07:39 PM
Paint
Attached thumbnail(s)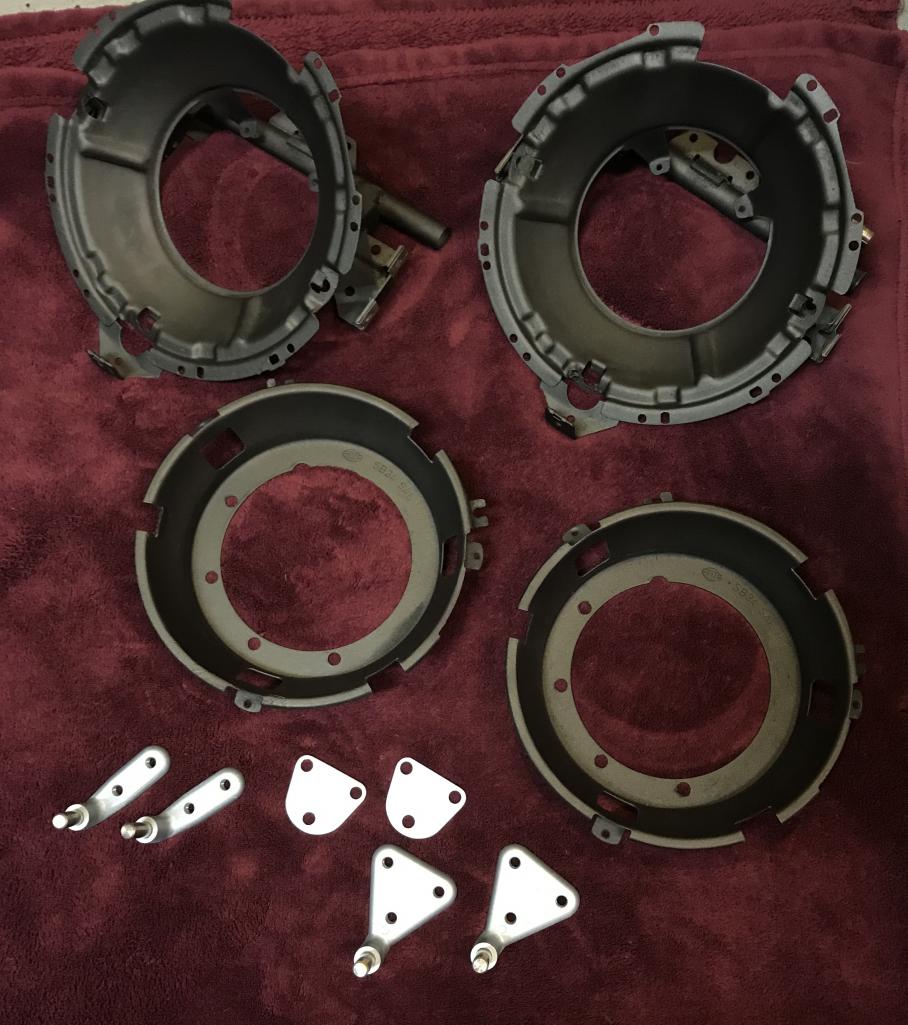
Posted by: Dion Sep 23 2018, 07:44 PM
Sunday’s chore was the bucket area and the front portion of the rain channel around the hood. Also did a re-spray of the floor of the frunk. It was a bit scuffed up.
Attached thumbnail(s)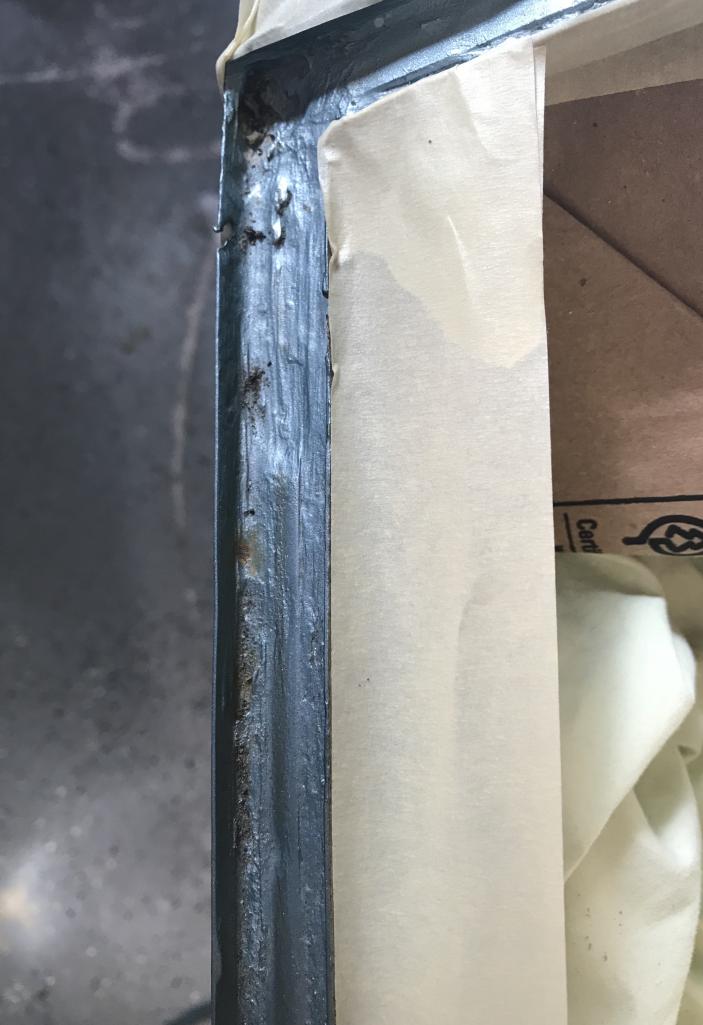
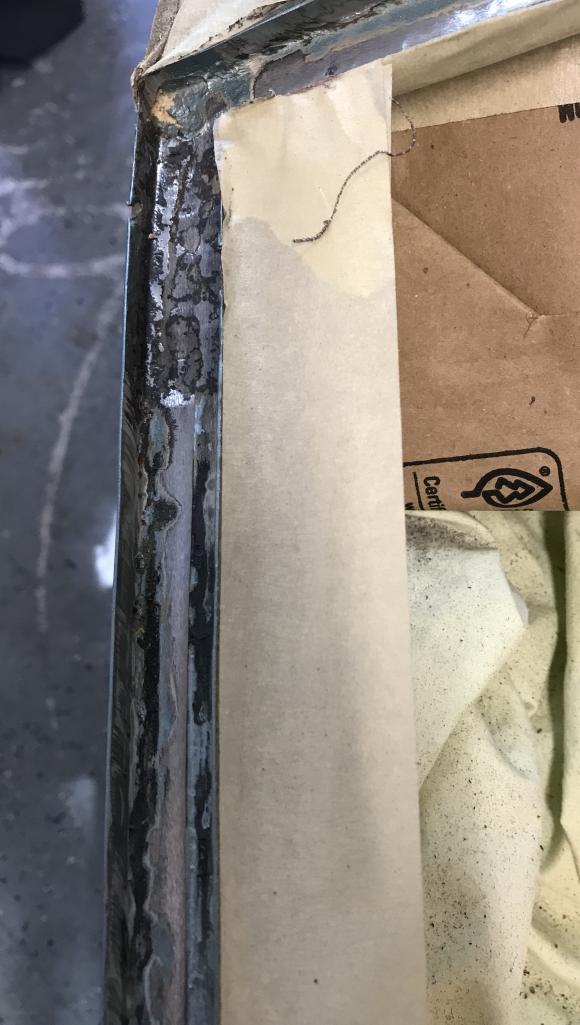
Posted by: Dion Sep 23 2018, 07:45 PM
Primer & Paint on channel
Attached thumbnail(s)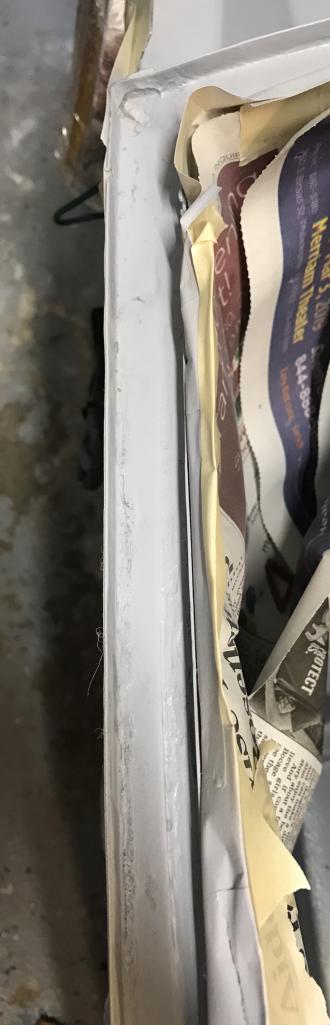

Posted by: Dion Sep 23 2018, 07:49 PM
The buckets & frunk
Attached thumbnail(s)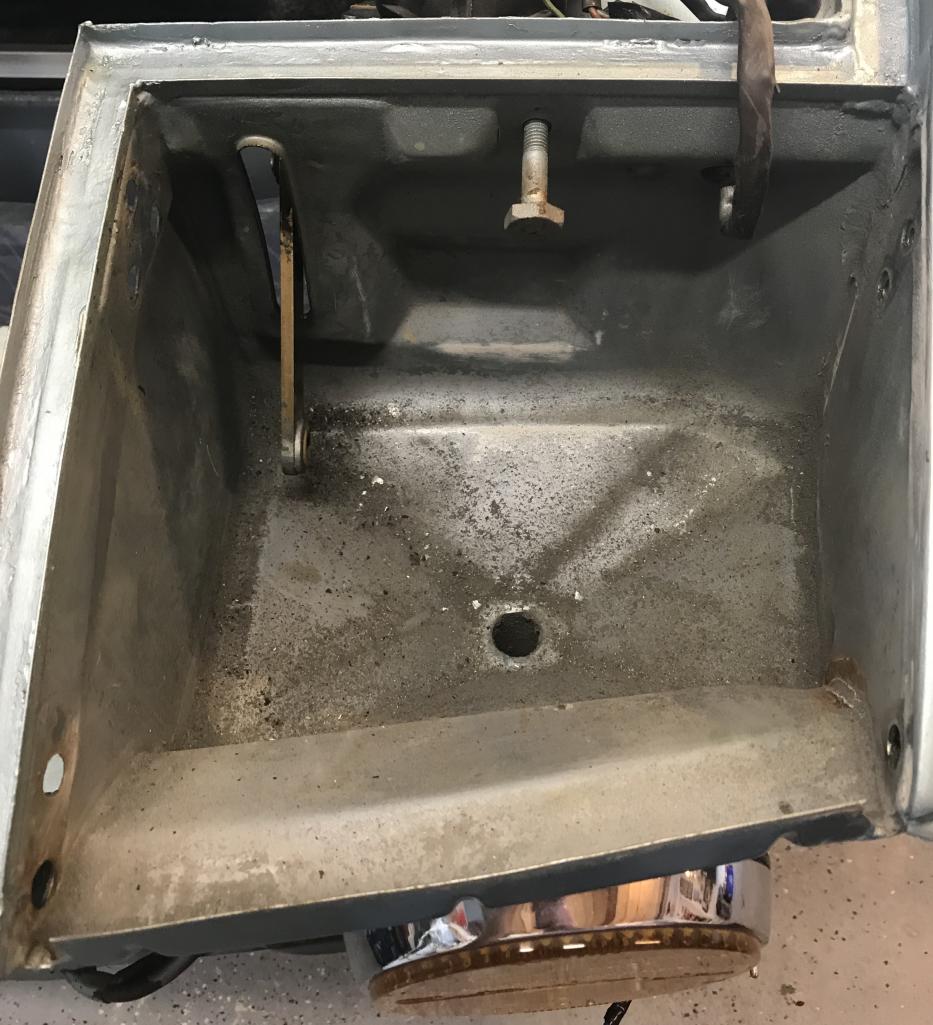
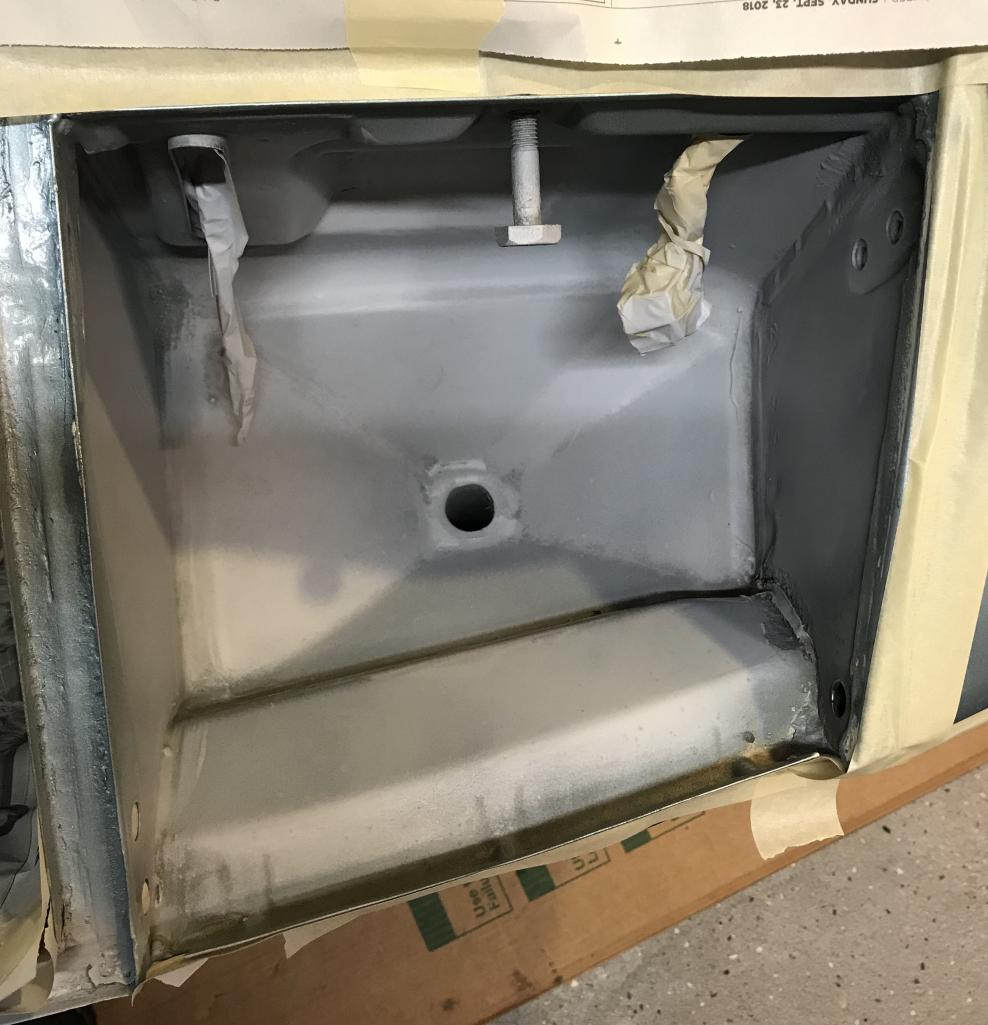
Posted by: Dion Sep 23 2018, 07:50 PM
P
Attached thumbnail(s)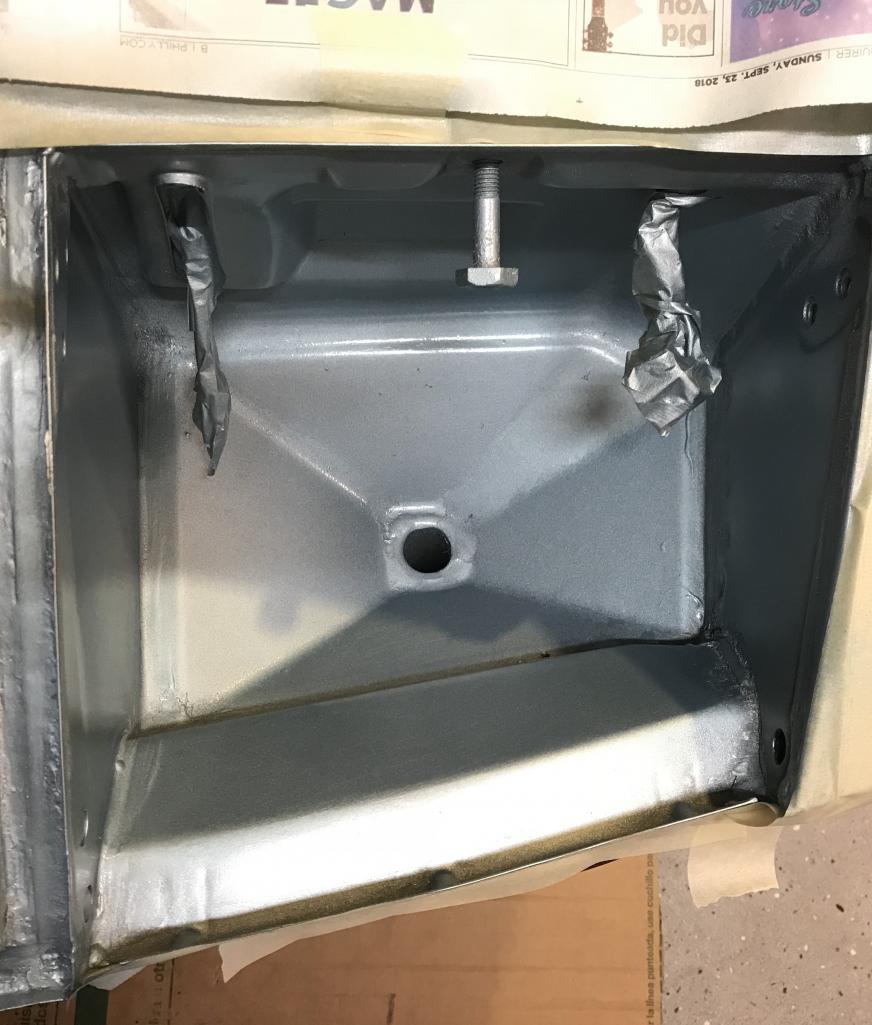
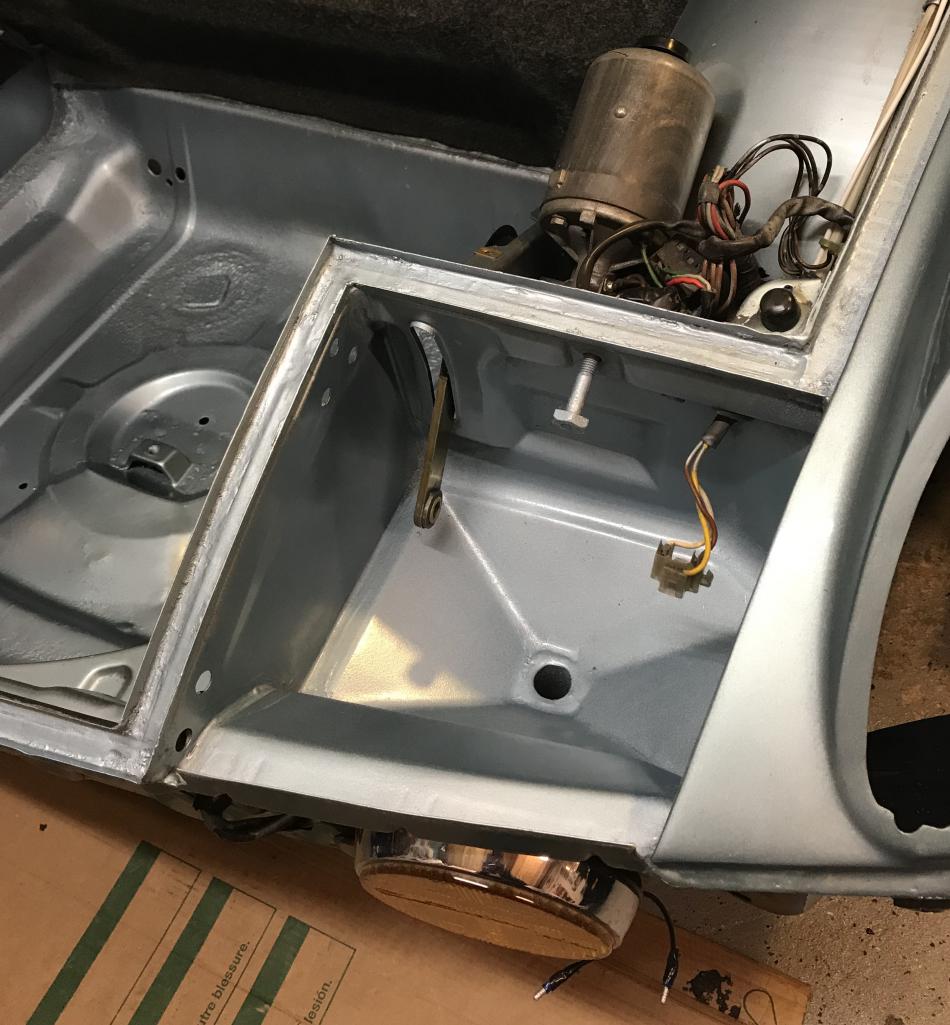
Posted by: Dion Sep 23 2018, 07:52 PM
Frunk
Attached thumbnail(s)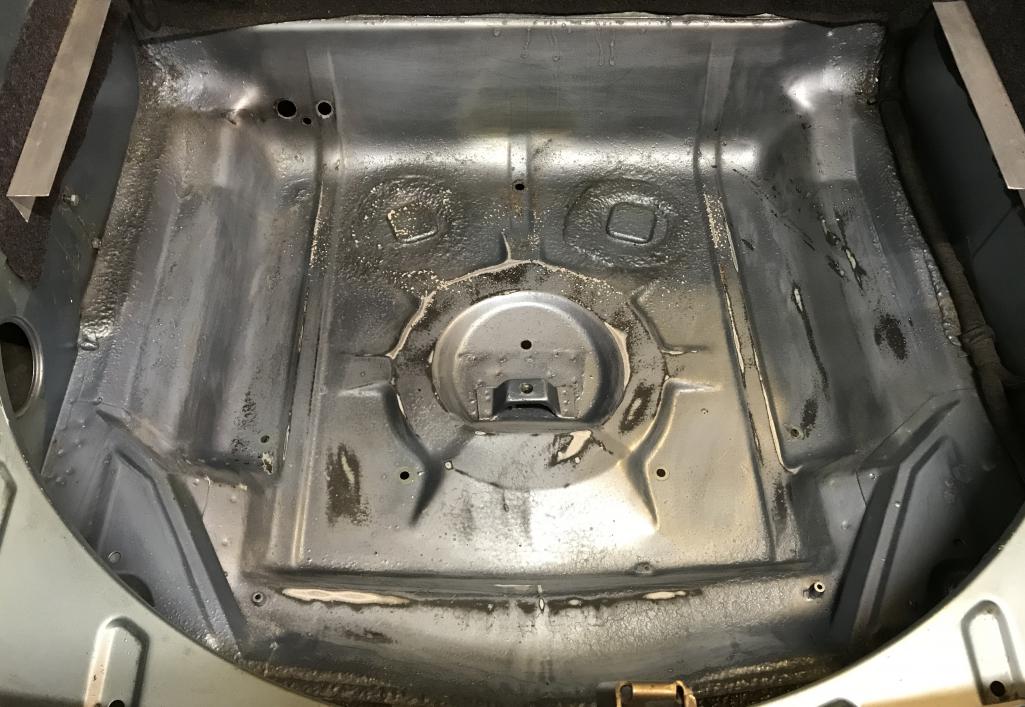
Posted by: Dion Sep 23 2018, 07:52 PM
Fresh paint
Attached thumbnail(s)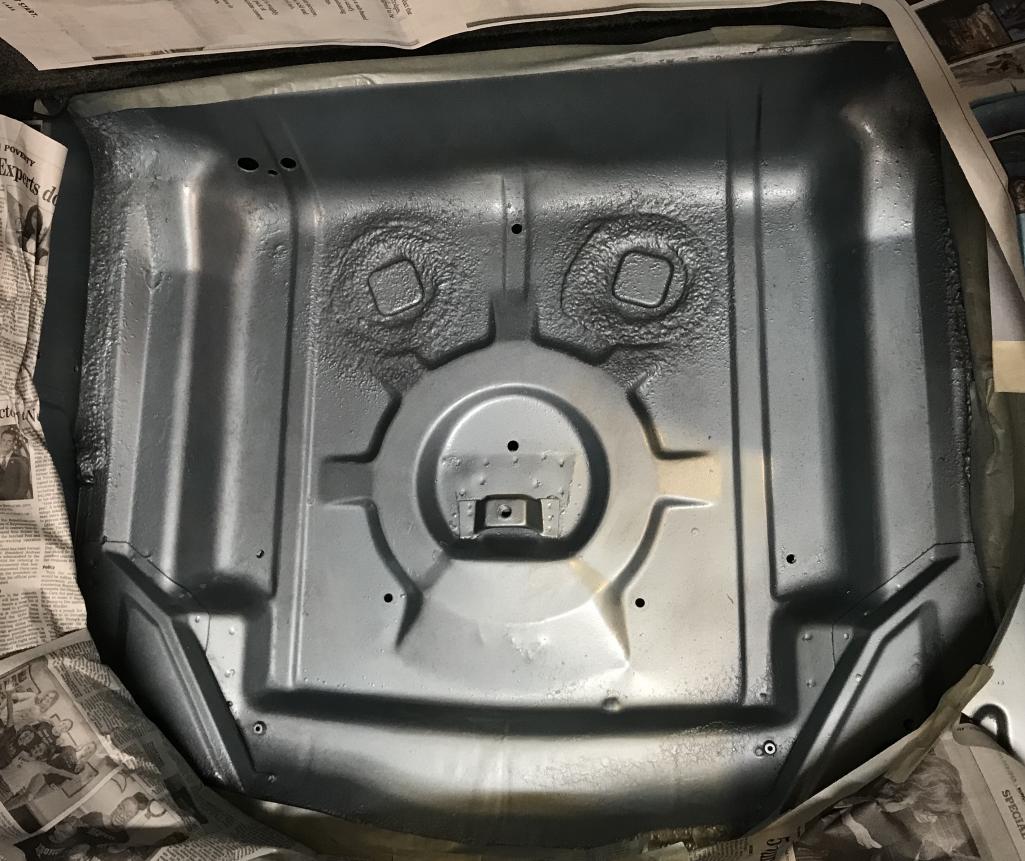
Posted by: Dion Sep 23 2018, 07:53 PM
Supervisor
Attached thumbnail(s)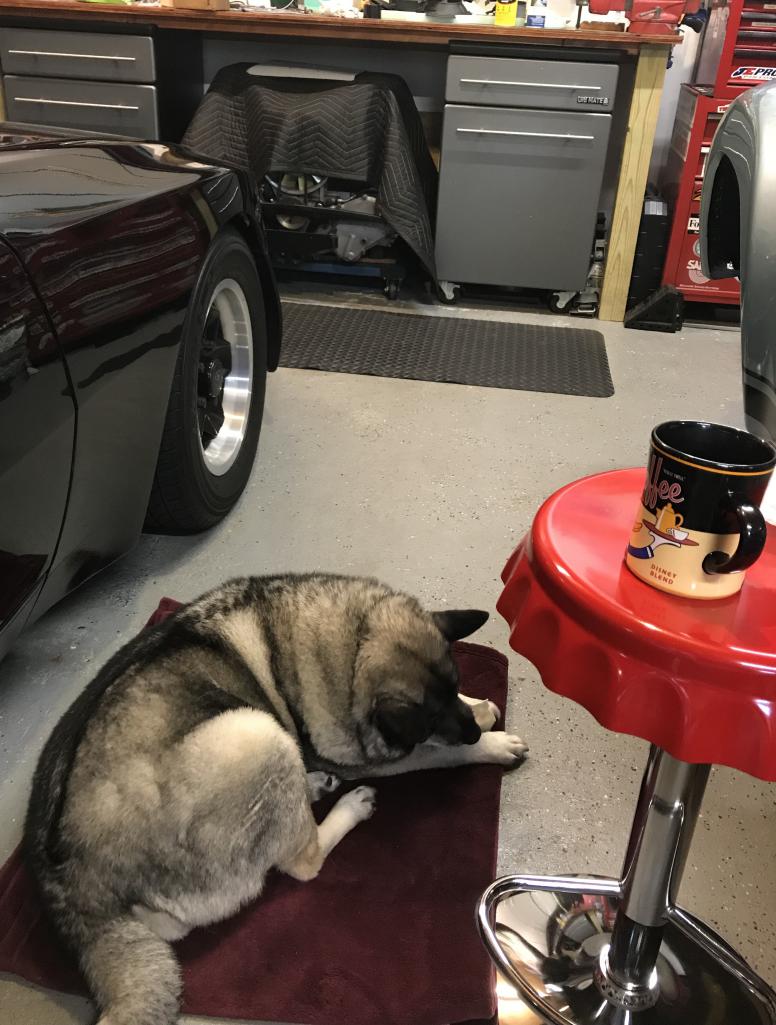
Posted by: mb911 Sep 23 2018, 08:23 PM
Paint
Dion,
I sand blasted mine as well and I swear that 914rubber.com had a kit to do this and replace the hardware.. Am I imagining that? Mine have been bare metal while I wait to find that kit. Any insight?
Posted by: Dion Sep 23 2018, 08:27 PM
Honestly Ben I don’t recall that. I wouldn’t doubt it though.
@http://www.914world.com/bbs2/index.php?showuser=9892
Posted by: Dion Sep 23 2018, 08:36 PM
@http://www.914world.com/bbs2/index.php?showuser=9892 just checked Mikey’s site. He has the lite adjuster blocks, nylon bushings and the arm/lever. That’s what I found.
Posted by: bbrock Sep 23 2018, 08:49 PM
Paint
Dion,
I sand blasted mine as well and I swear that 914rubber.com had a kit to do this and replace the hardware.. Am I imagining that? Mine have been bare metal while I wait to find that kit. Any insight?
This one? https://shop.914rubber.com/Headlight-Bundle-914HLA.htm?categoryId=-1
Posted by: bbrock Sep 23 2018, 08:51 PM
Lookin' great Dion! No doubt it couldn't be done without that good looking supervisor.
Posted by: Dion Sep 23 2018, 09:08 PM
Thanks Brent! Yes the pup is a task master. I didn’t see that headlite kit. Good find. Might have to spring for that, hmmm....Xmas will soon be here....
Posted by: Dion Oct 2 2018, 06:15 PM
This is what happens when you see too many Rennsport reunion pictures,
and there is a drill nearby..... just a bit of fun.
Attached thumbnail(s)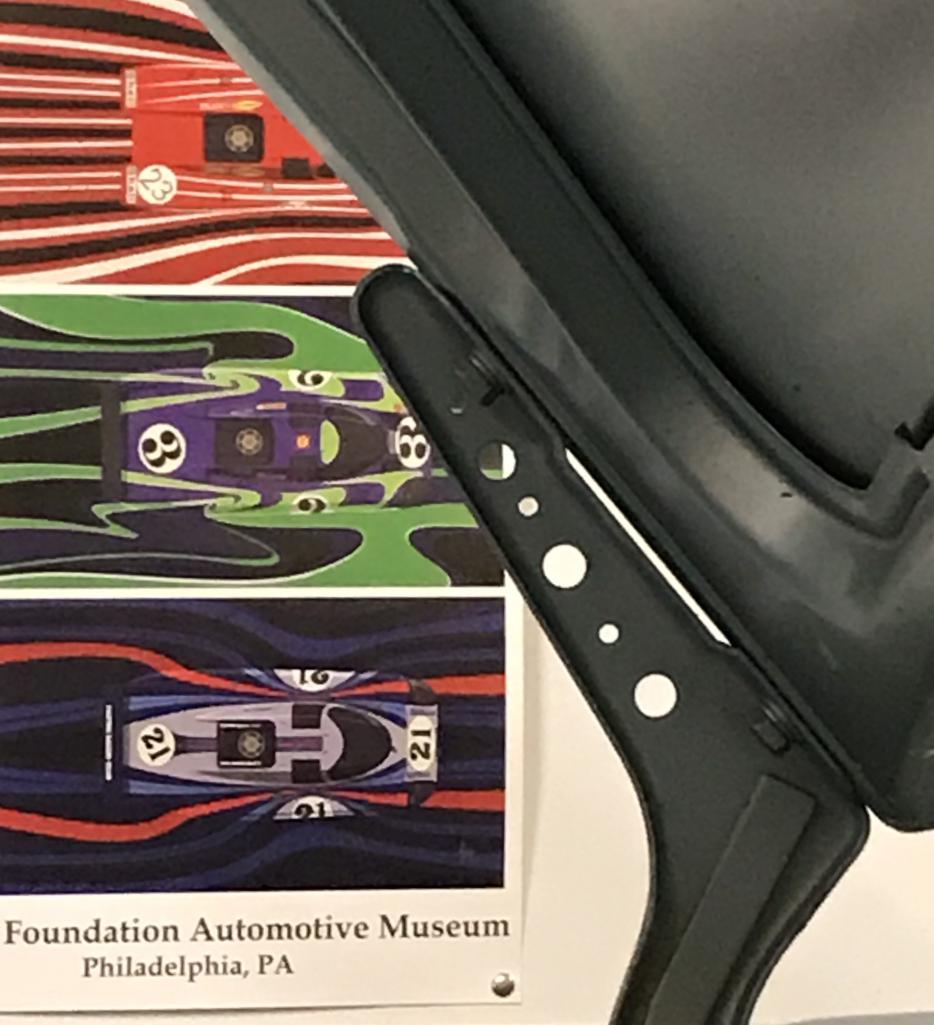
Posted by: Dion Oct 14 2018, 02:36 PM
Took the fuel tank out, being that I’ll being running a different pump for the carbs and rerouting fuel lines.
Cleaned up the area under the tank.
Attached thumbnail(s)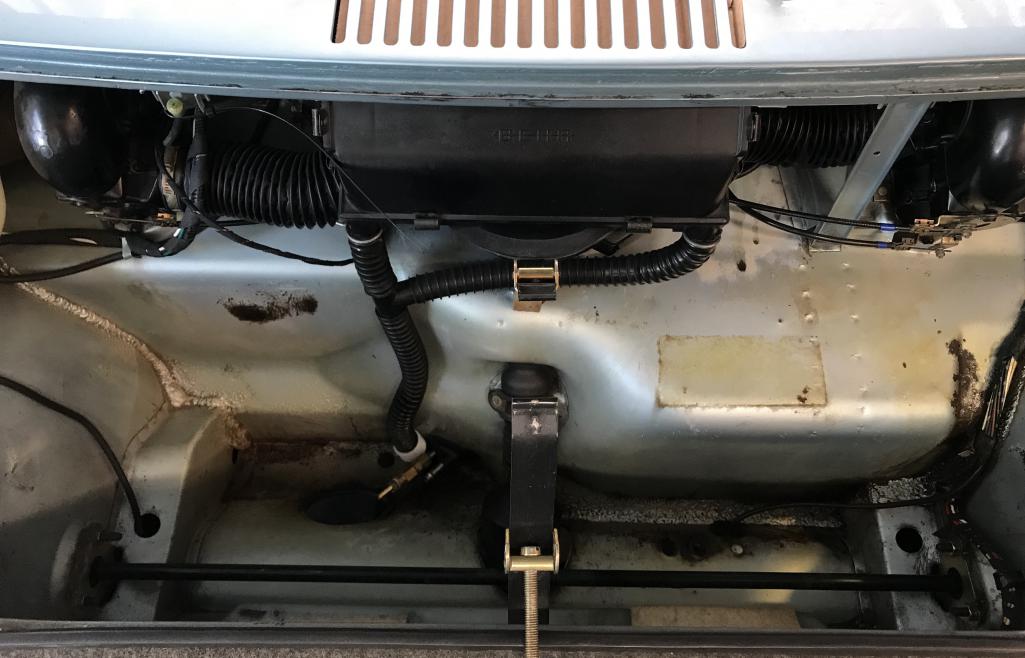
Posted by: Dion Oct 14 2018, 02:36 PM
Spruced up
Attached thumbnail(s)
Posted by: Dion Oct 14 2018, 02:38 PM
Also since I’m tired of breaking my knuckles when dealing with and checking the fuel lines and fittings I enlarged the access opening.
Attached thumbnail(s)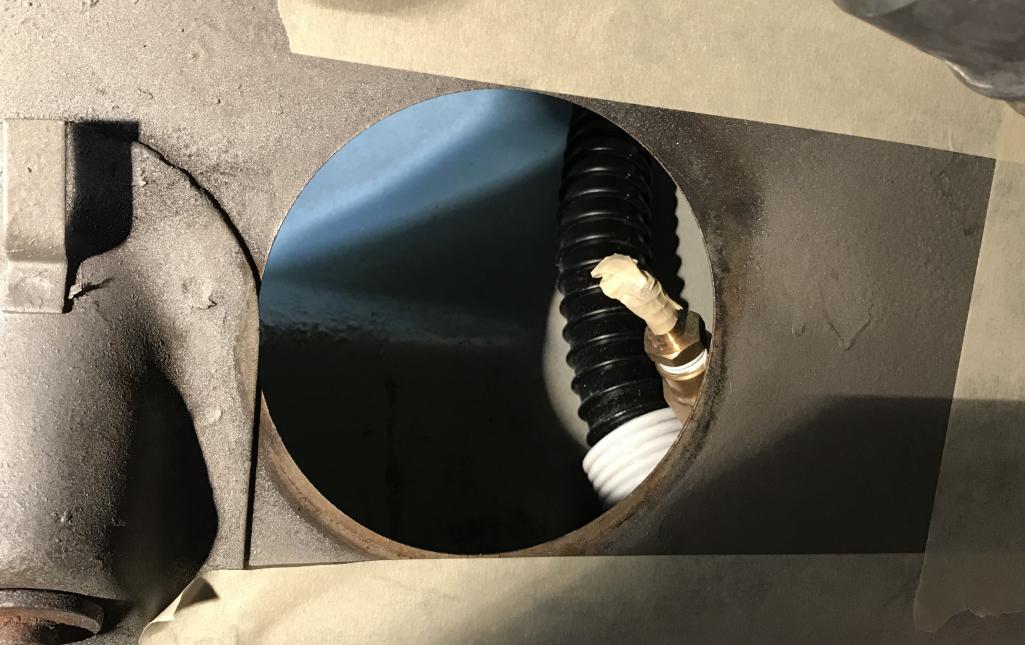
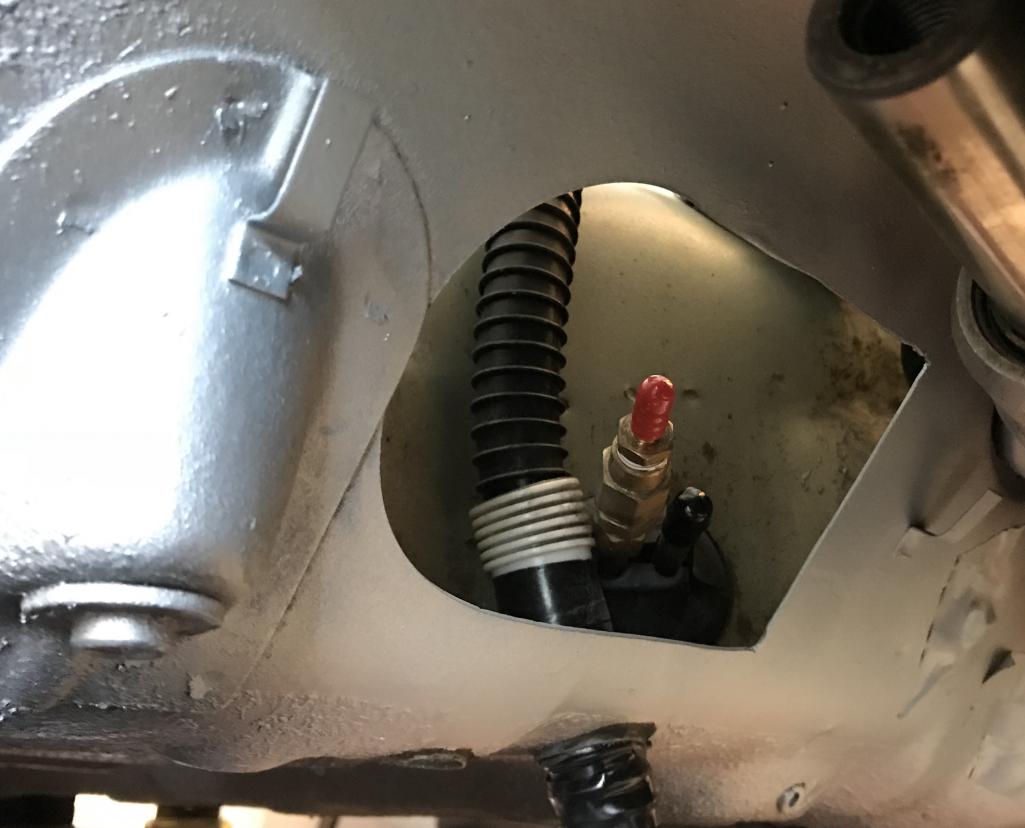
Posted by: Dion Oct 14 2018, 02:41 PM
Fitted with edging so ya don’t get cut up & lines don’t get sliced.
Attached thumbnail(s)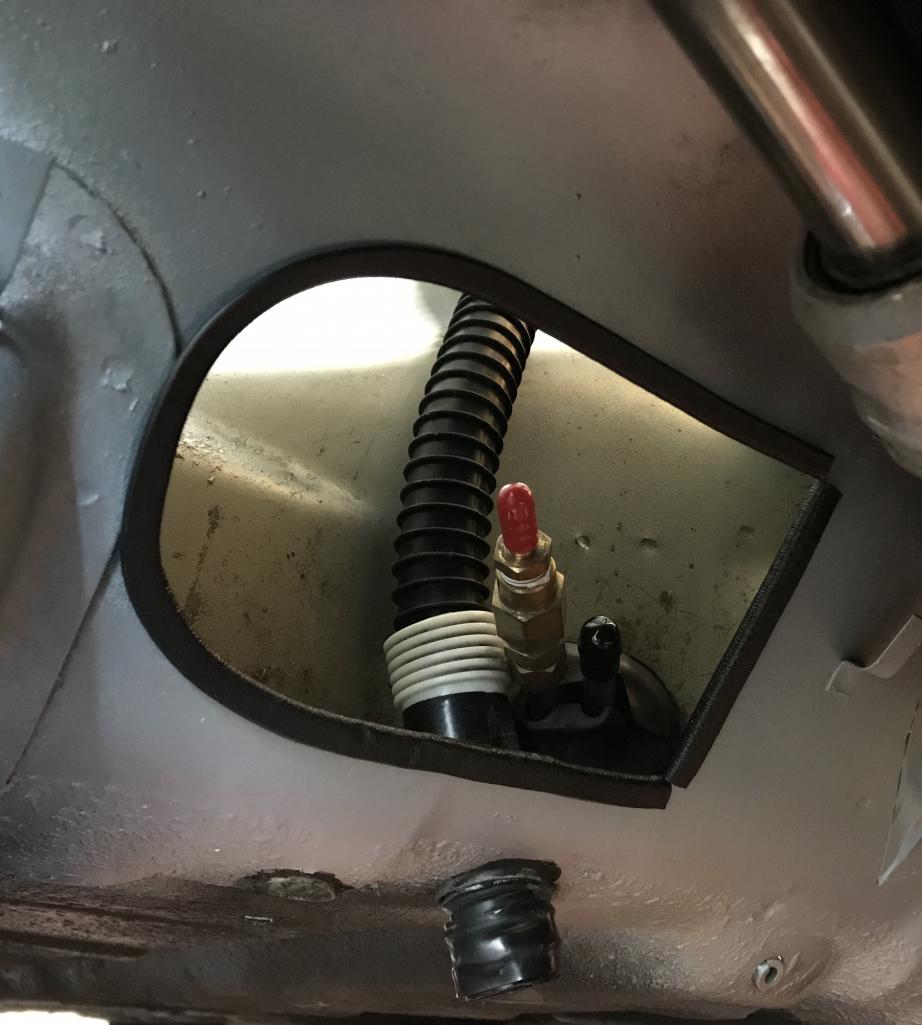
Posted by: Dion Oct 14 2018, 02:42 PM
Placed the headlamps hardware back in. Rust free!
Attached thumbnail(s)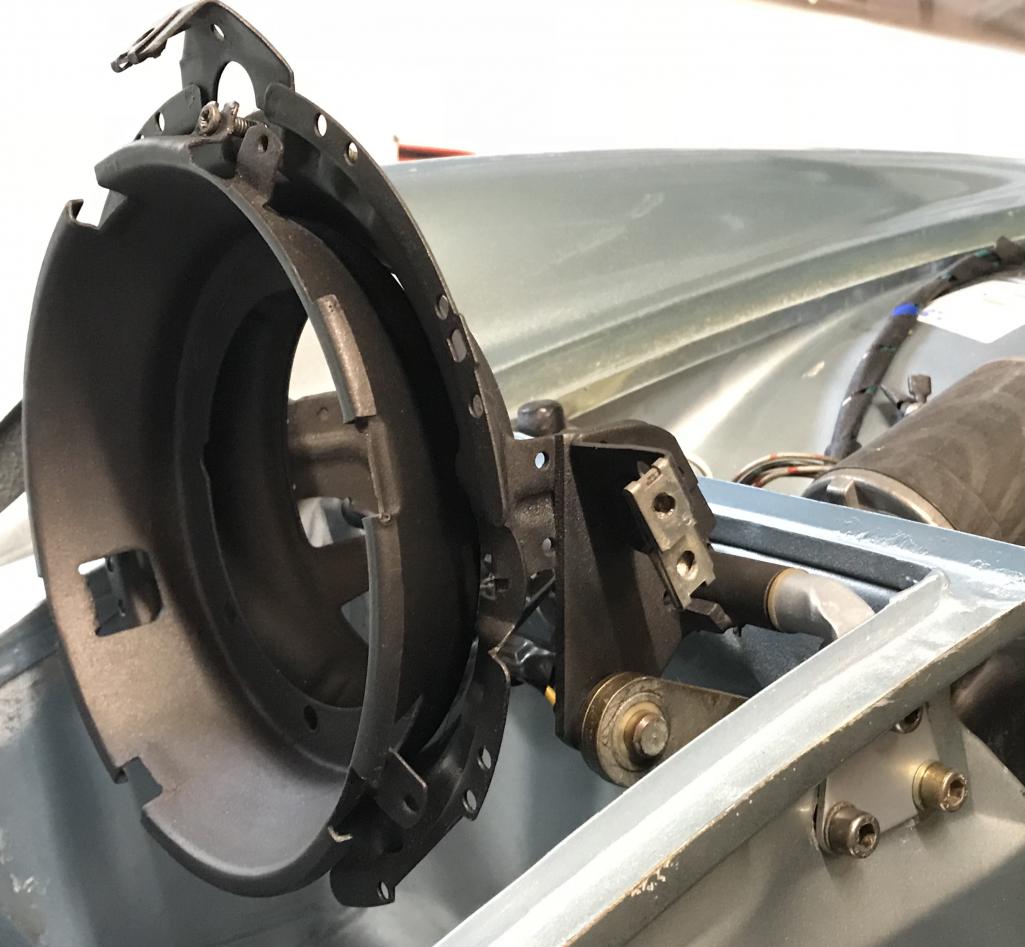
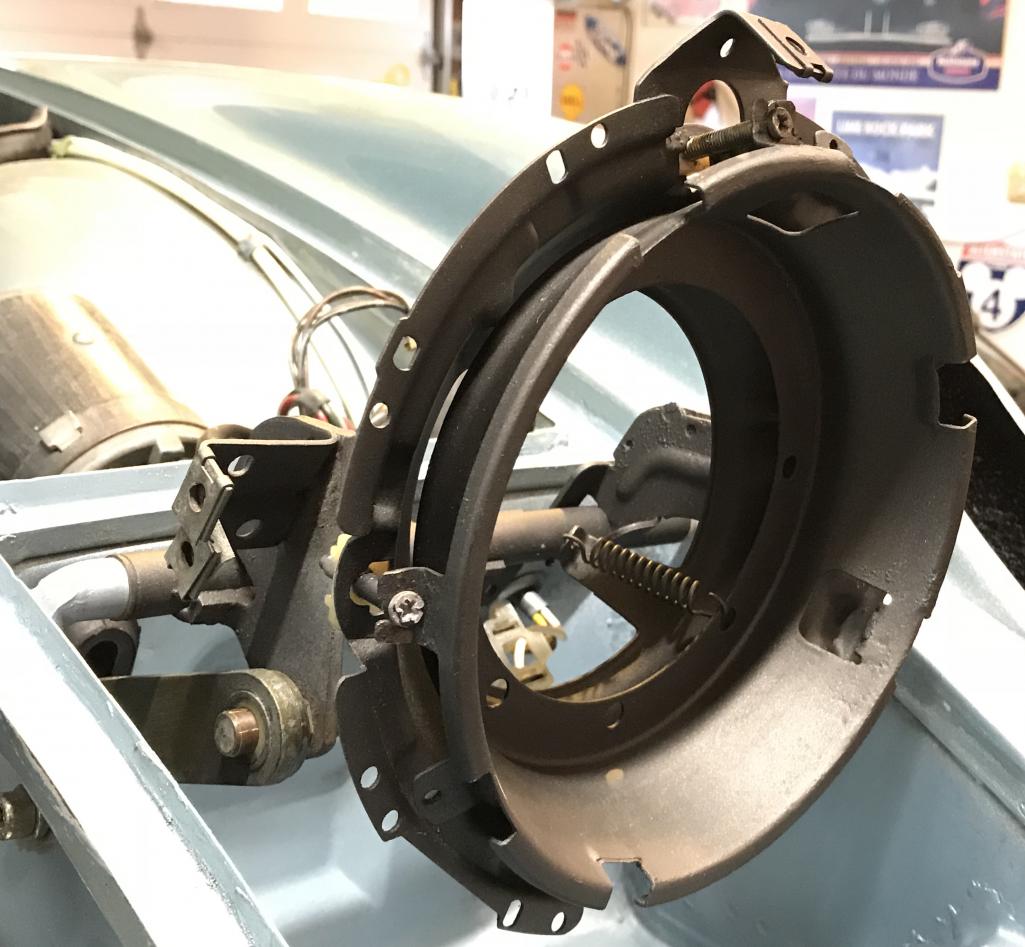
Posted by: Dion Oct 14 2018, 02:45 PM
Since I’m not running a rear valance and don’t ever intend to...
I removed the tabs off the rear closing panel and welded up the gaps.
I wanted a smoother look.
Attached thumbnail(s)
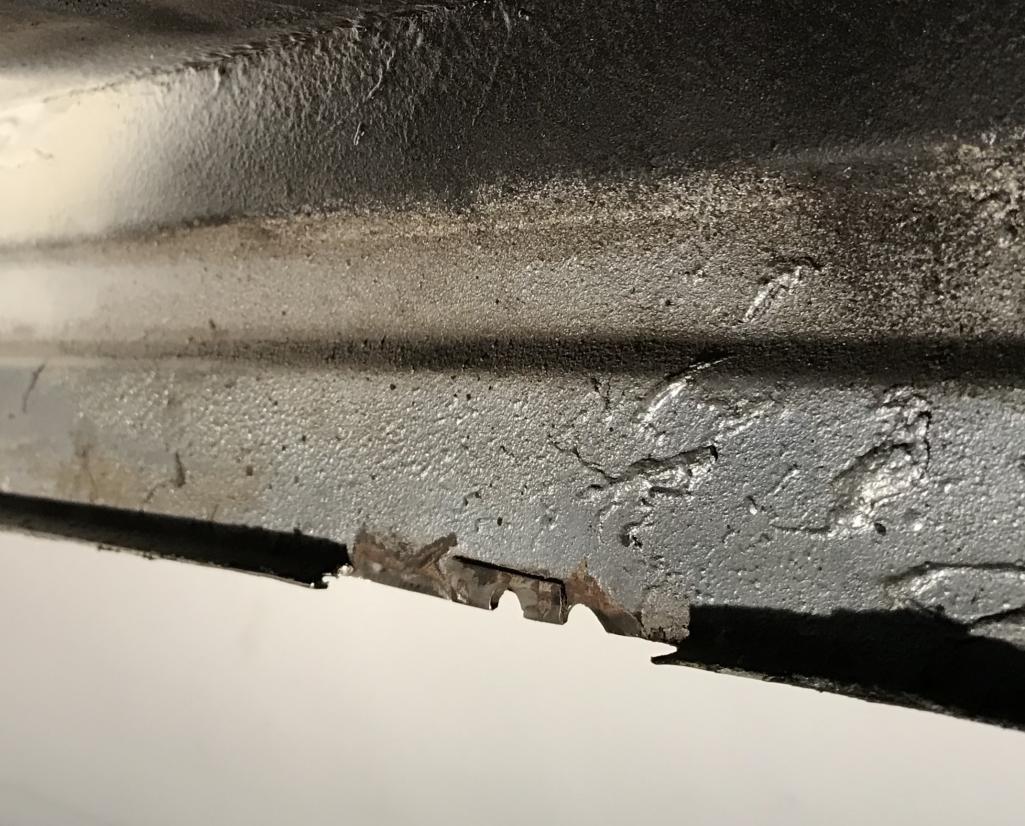
Posted by: Dion Oct 14 2018, 02:48 PM
I used the metal from the piece i cut from the front firewall
to make strips to fill the gaps of the former tab locales.
Attached thumbnail(s)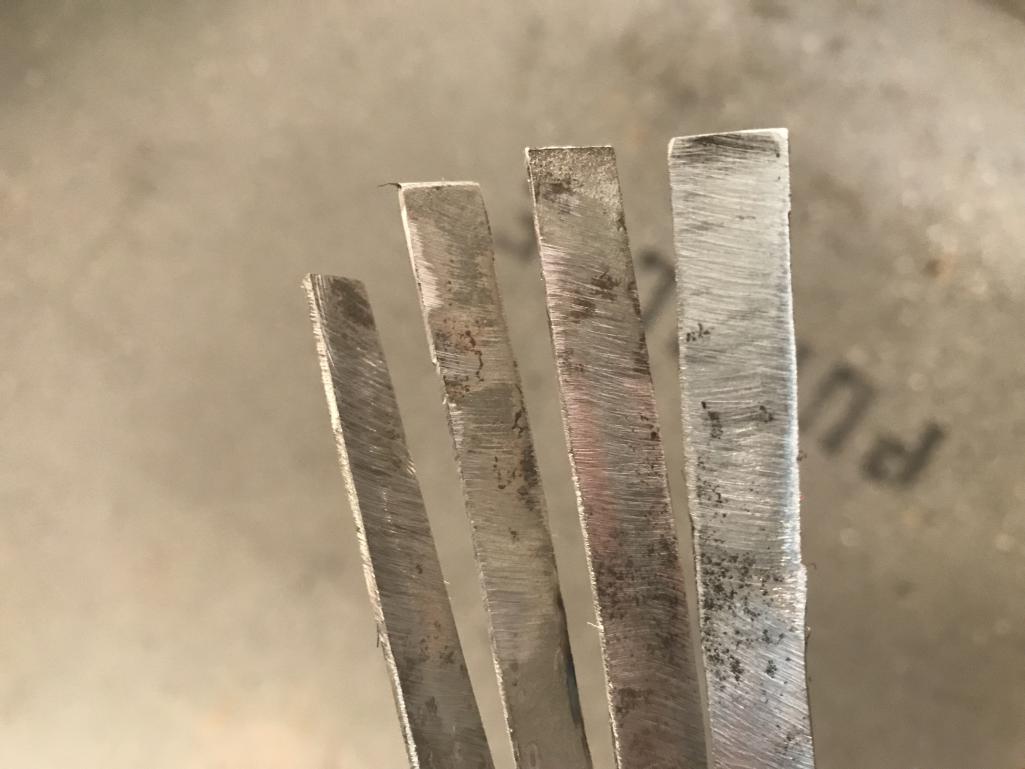
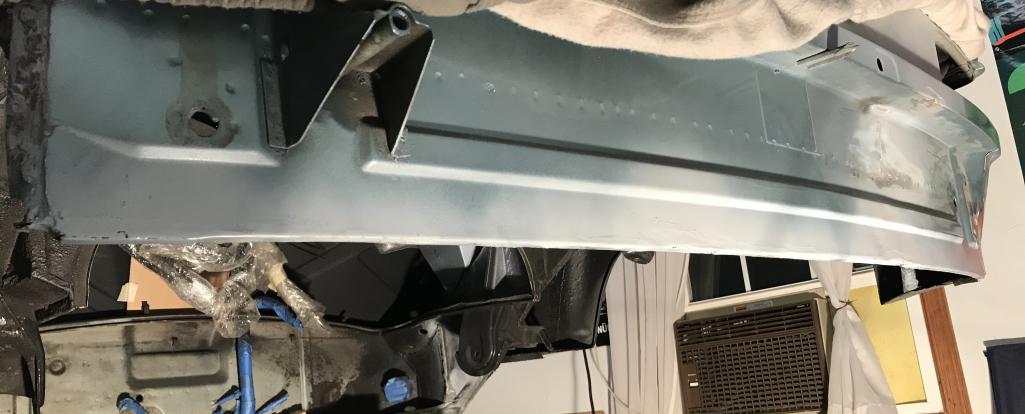
Posted by: Dion Oct 14 2018, 02:51 PM
Sanded and primered. I’m pretty happy with it.
There is a slight dip on one area I took too much metal away.
The bumper should trick the eye that it’s all level :-)
Attached thumbnail(s)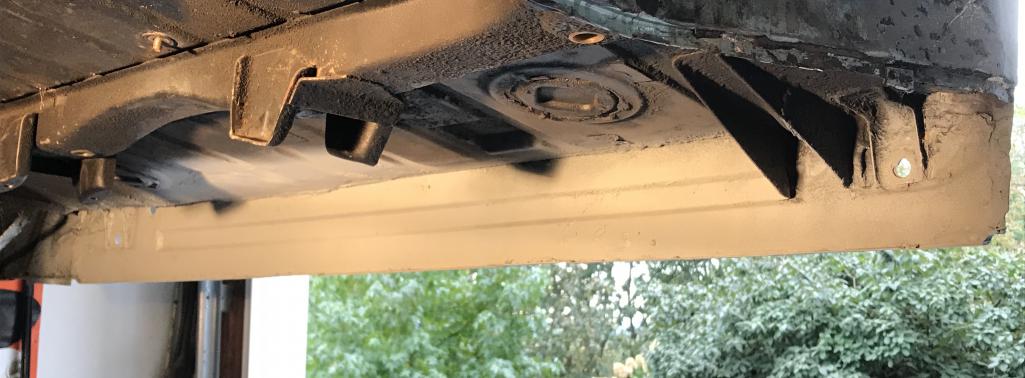
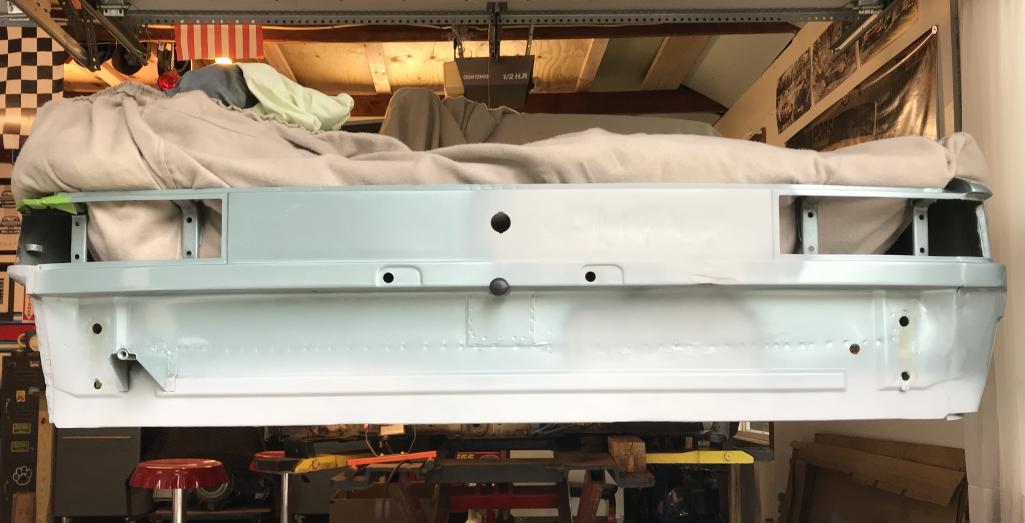
Posted by: bbrock Oct 14 2018, 08:29 PM
Looking good! I had to zoom in on the full sized image to see the dip you were talking about. Only you will ever notice.
Posted by: mepstein Oct 14 2018, 08:41 PM
I wanted a ride when you were done but I don't think I can be seen in a car with such an obvious flaw. Everyone will point.
WTG. Former COTM made even better.
Posted by: saigon71 Oct 15 2018, 05:33 AM
Freaking awesome work Dion!
I can't believe that this much rust was hiding in your stellar car.
Posted by: Dion Oct 15 2018, 01:34 PM
As someone else said earlier, even the “nice” ones may have treacherous rust hiding.
Obviously our east coast cars are more susceptible.
My car did spend its early life along the Chesapeake Bay area. So salt air and
it being a daily driver for five years in PA by me took its toll.
I’m having fun with this project. It’s given me a chance to make it sound, and to
really customize it. Thanks for the support guys I wouldn’t have tackled this without
your help. Particularly 914Dave. Thanks for the compliments as well,
It’s a nice motivator. The big structural stuff is up next as well as tacking in the six mount.
Posted by: Dion Nov 9 2018, 07:05 PM
Update time. Had a cool distraction. Dave’s buddy from another PCA region grabbed some tickets for us to see Hurley Haywood at the Simeone Museum in Philadelphia.
What can I say about Hurley...just one damn cool dude.
Bought his book and got it signed, also signed my 914 baseball cap.
Dr Simeone is the fella with the mic introducing Hurley.
Funny part was, we met Hurley out in the parking lot before the dinner and the event started , he was checking out Dave’s 914. He approved! Thought it was very cool.
Attached thumbnail(s)

Posted by: Dion Nov 9 2018, 07:12 PM
Ok here’s where I’m at on the project.
Rust inhibitor (Green colour) and undercoating applied to the right rear fender/flare.
Attached thumbnail(s)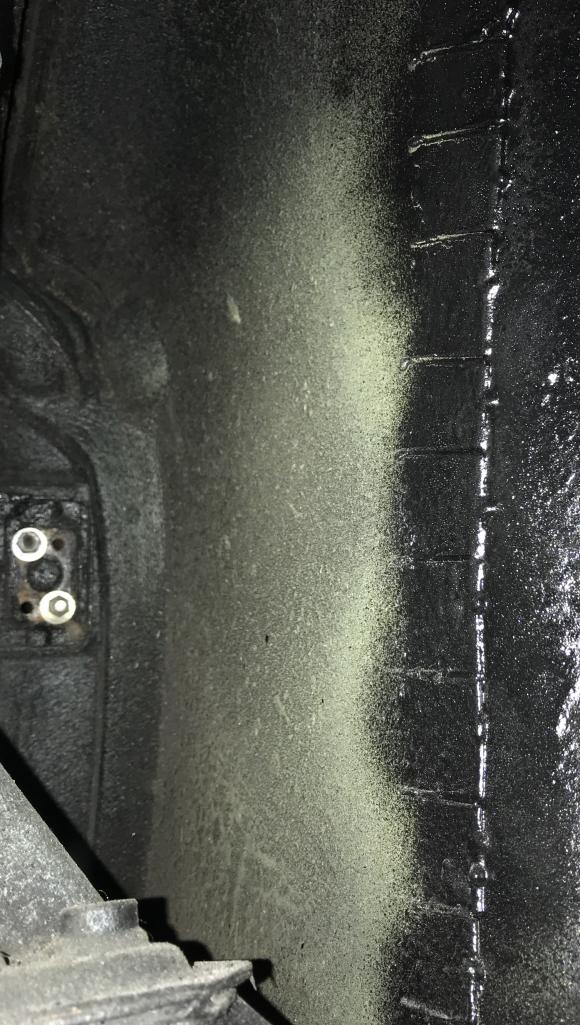
Posted by: Dion Nov 9 2018, 07:13 PM
Flare
Attached thumbnail(s)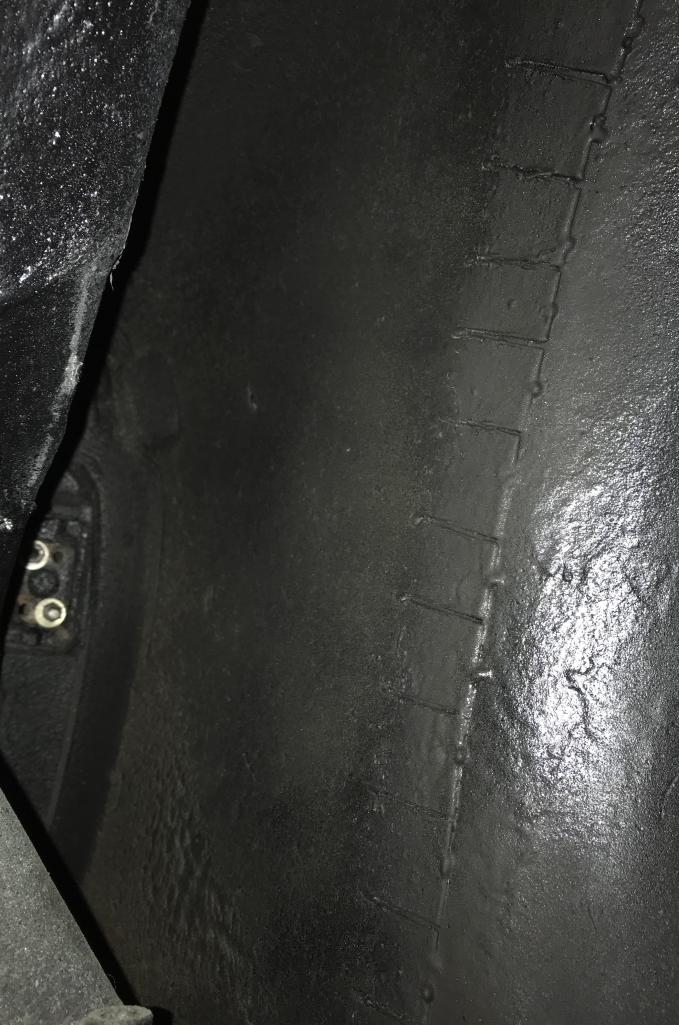
Posted by: Dion Nov 9 2018, 07:13 PM
Right flare
Attached thumbnail(s)
Posted by: Dion Nov 9 2018, 07:26 PM
The 6 mount gave this amateur trouble. Welding thick metal to thin challenged me.
I’m using the RJ mount. It is a nice piece of kit.
I got a little bit overzealous in the application of the mig. Paranoid about not having a
6 cylinder drop anchor! Ben (mb911) was gracious and patient with my questions.
My buddy Rich in England (tig welds, makes his own mufflers, Turbothomas) also criticized my lack of skills but I’m here to share and learn. Hopefully you’ll learn as well, what not to do.
So here’s the pics: Prepped the area.
And checking placement.
Attached thumbnail(s)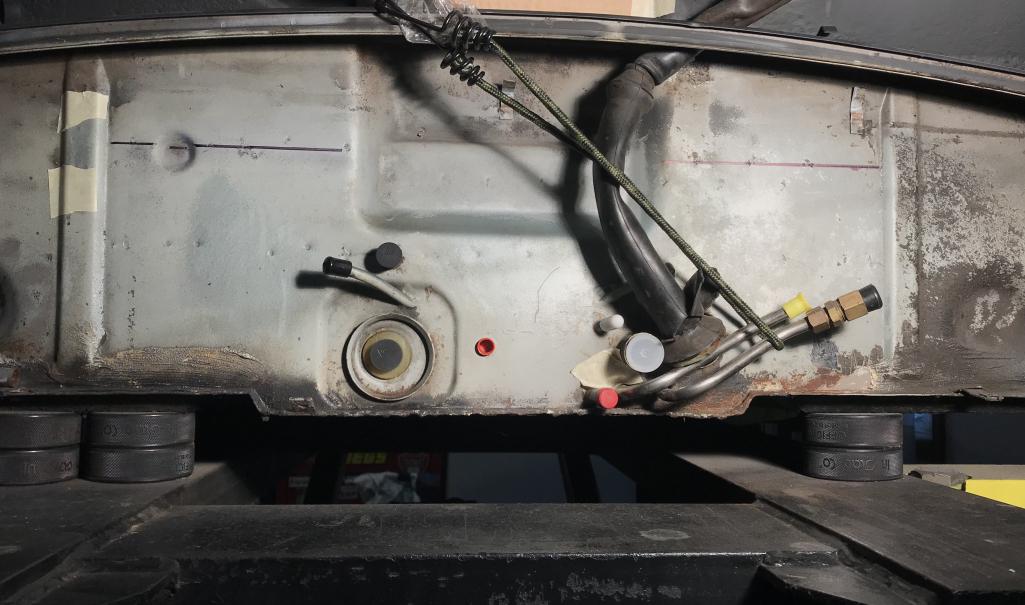
Posted by: Dion Nov 9 2018, 07:27 PM
Weld thru Primer:
Attached thumbnail(s)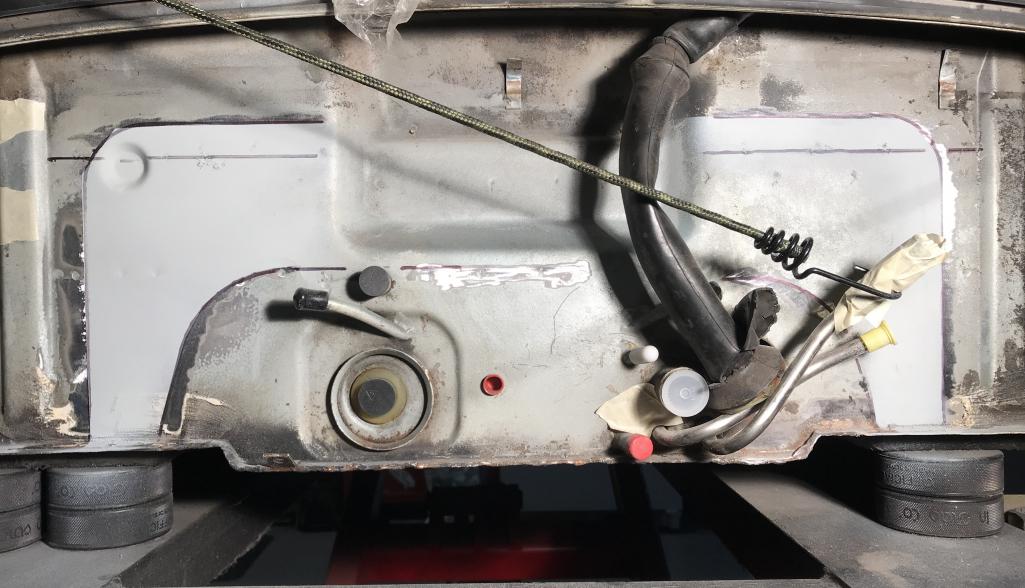
Posted by: Dion Nov 9 2018, 07:31 PM
First attempt at melding metal. First pic: Rubbish! 2nd: hmmm getting there.
Attached thumbnail(s)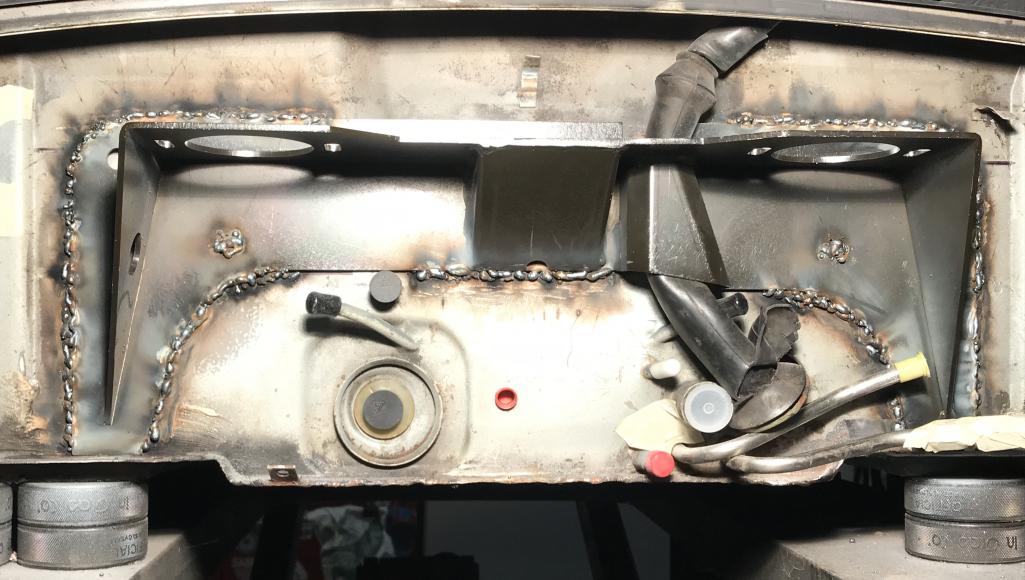
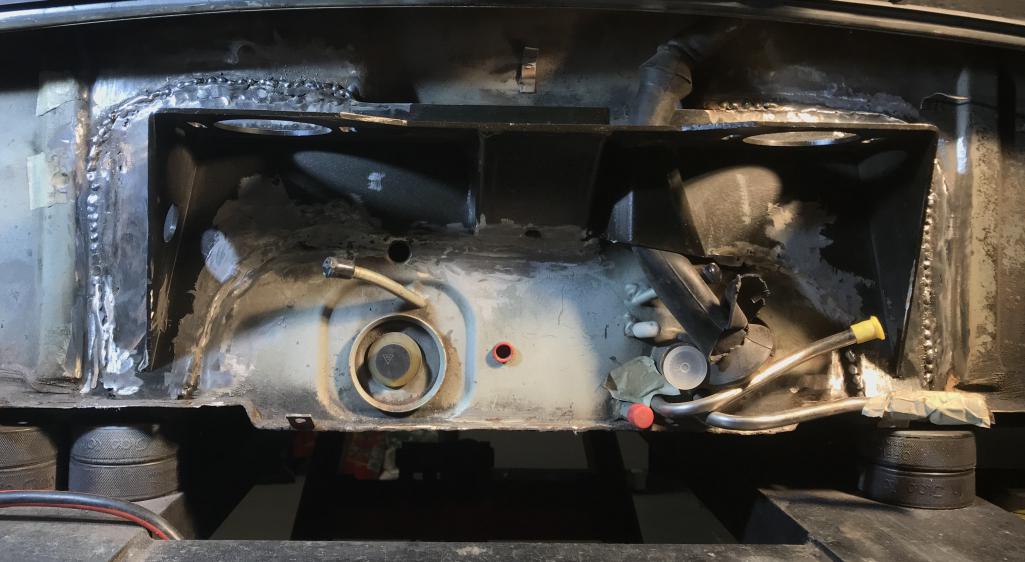
Posted by: Dion Nov 9 2018, 07:32 PM
Weld
Attached thumbnail(s)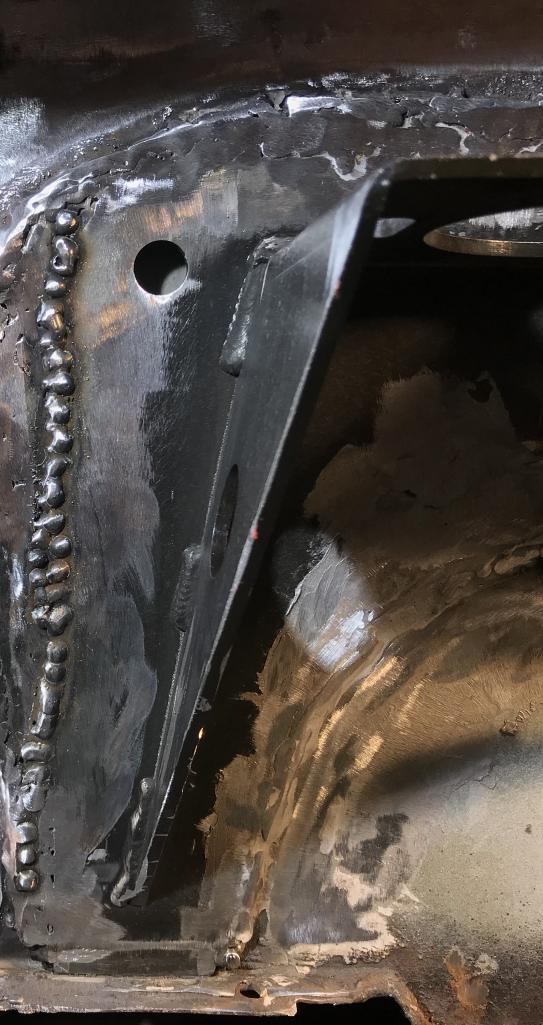
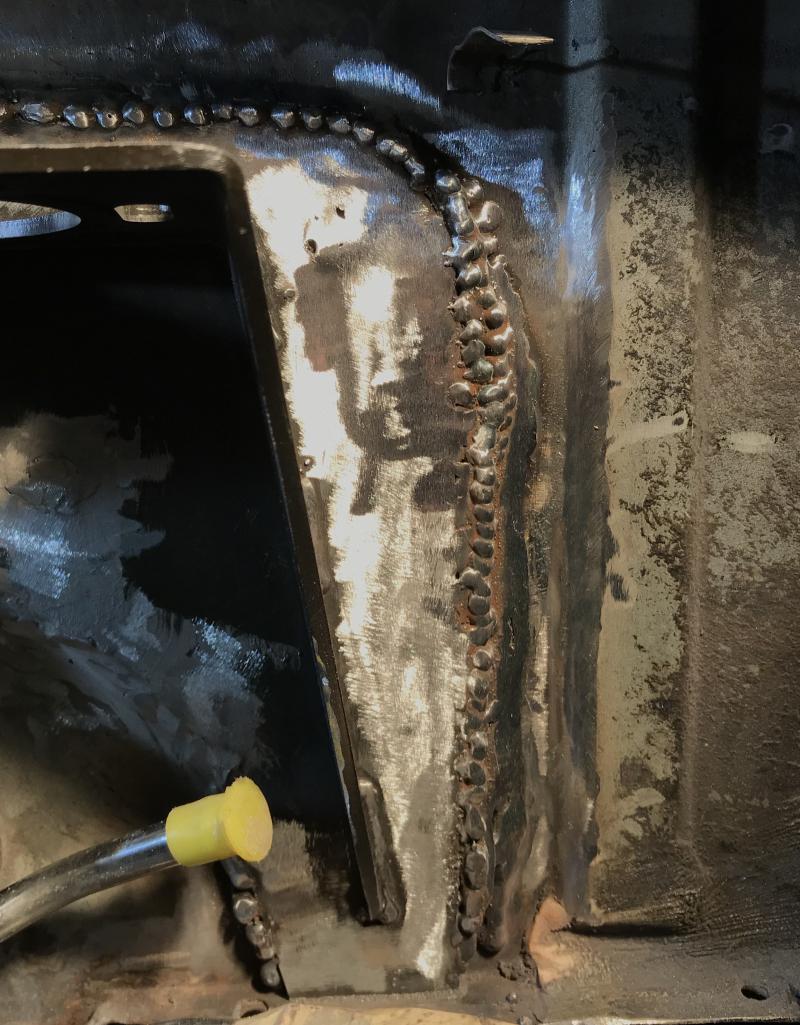
Posted by: Dion Nov 9 2018, 07:34 PM
Then I had my welding discussion regarding “fusion”, heat & speed.
So we tried again...
Attached thumbnail(s)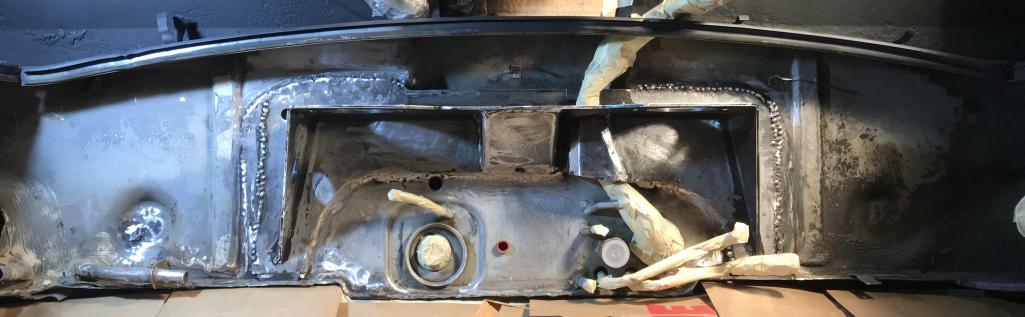
Posted by: Dion Nov 9 2018, 07:38 PM
After grinding some metal away and “adding” some, I got to the point where Ben said I should be safe. 
So sanded all, primered and seam sealed.
Attached thumbnail(s)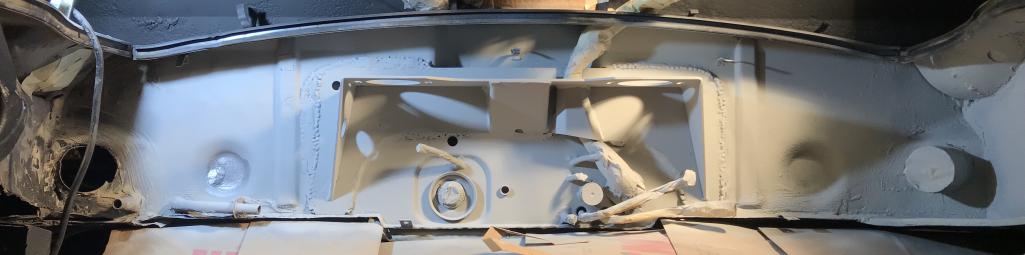
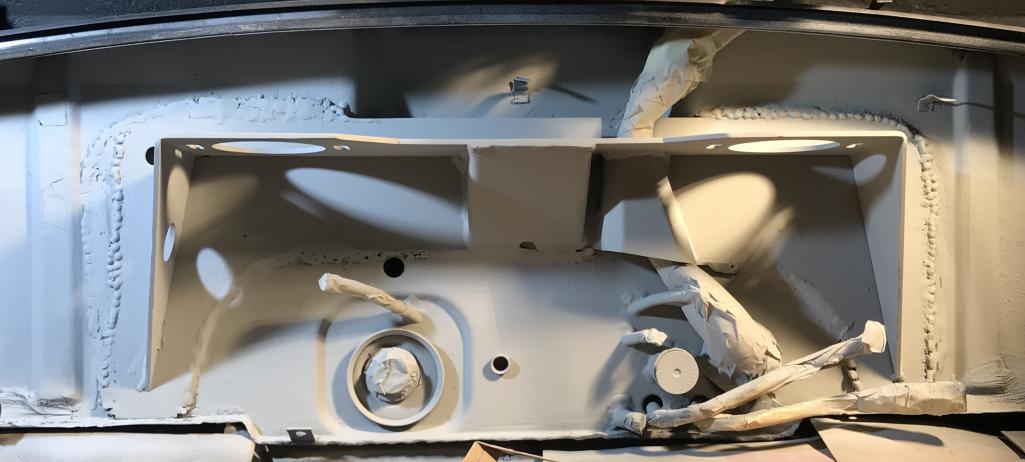
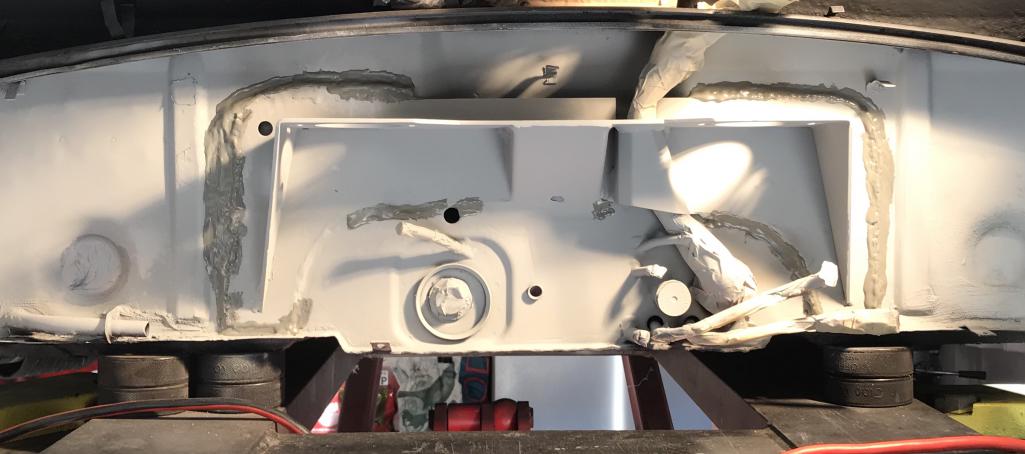
Posted by: Dion Nov 9 2018, 07:39 PM
Seam sealed, paint & clear coat.
Attached thumbnail(s)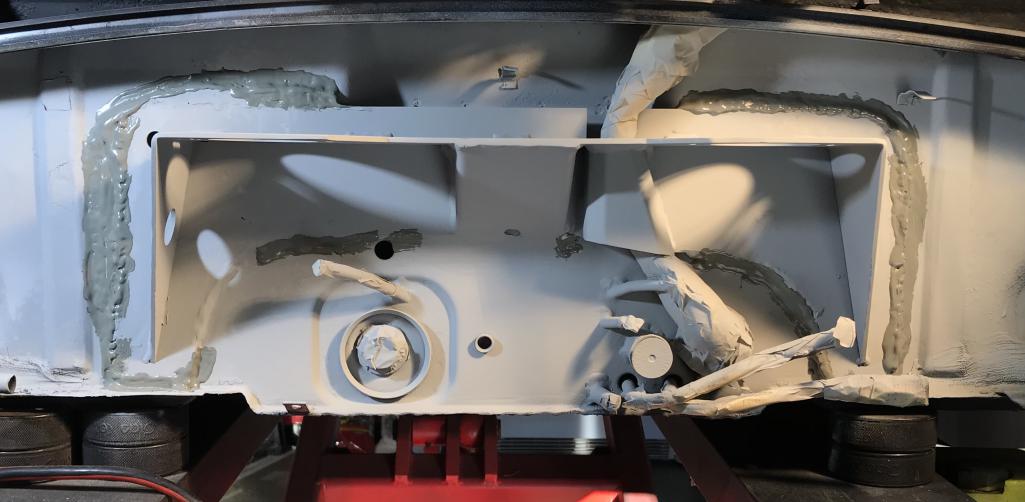
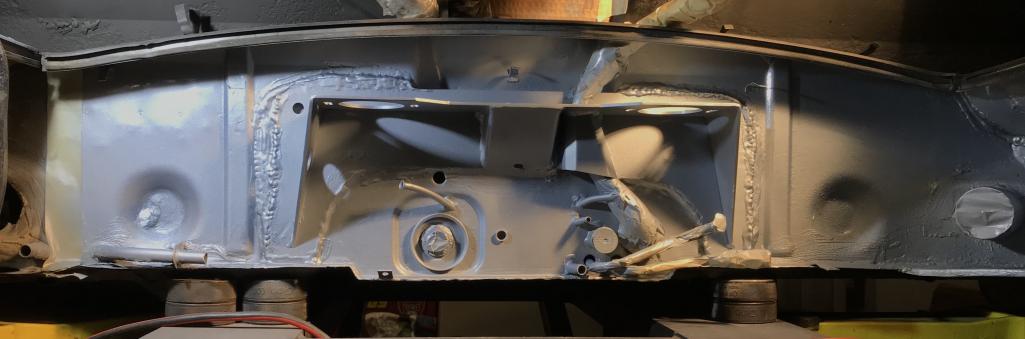
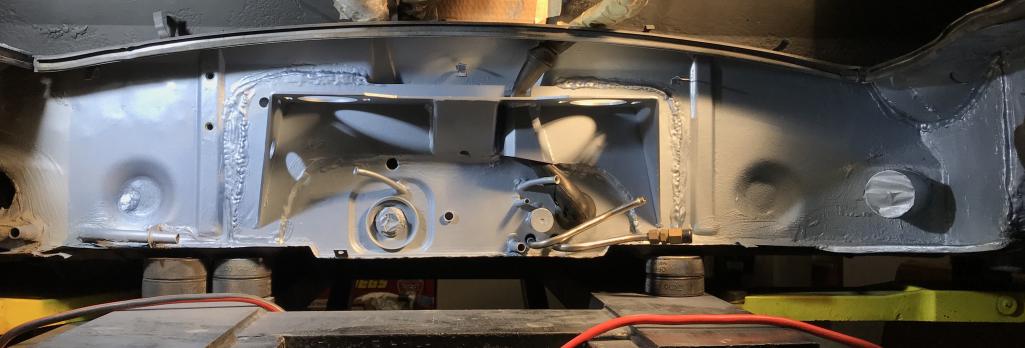
Posted by: Dion Nov 9 2018, 07:41 PM
Painted Marathon Blue and clear coated.
Attached thumbnail(s)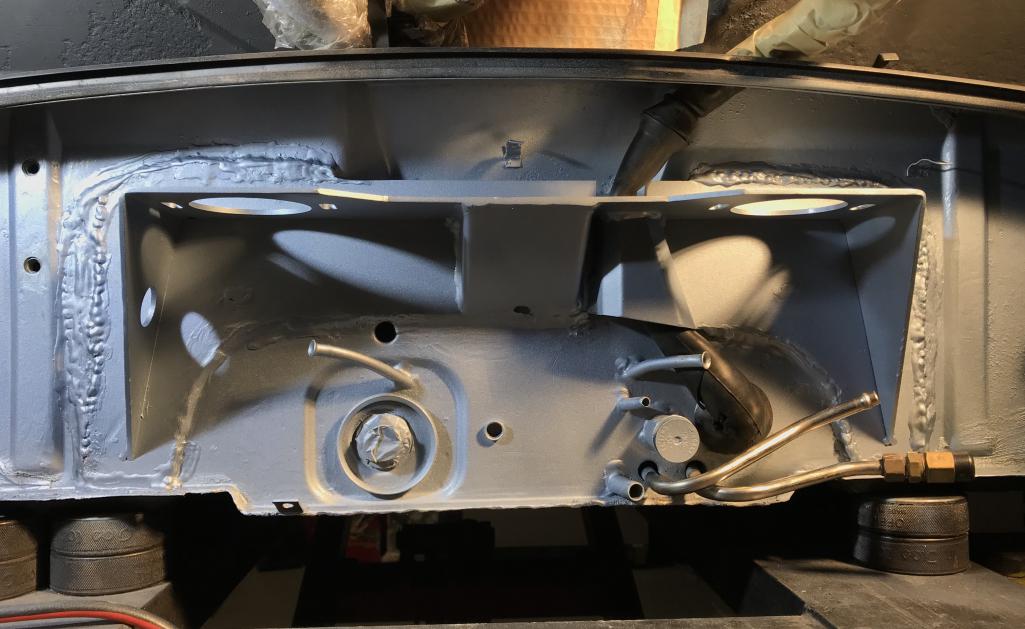
Posted by: Dion Nov 9 2018, 07:42 PM
Top view
Attached thumbnail(s)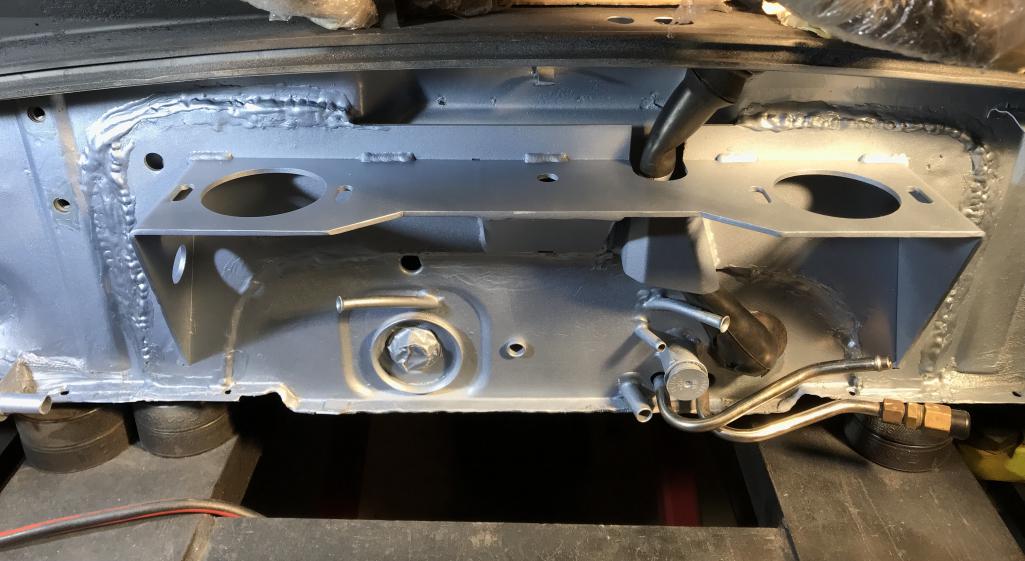
Posted by: Dion Nov 9 2018, 07:43 PM
I’m hoping this is the gods smiling down upon this project,
( artsy pic) . Storm just ended and a very cool sky with double rainbows occured
Attached thumbnail(s)
Posted by: Dion Nov 9 2018, 07:45 PM
Another artsy pic:
Attached thumbnail(s)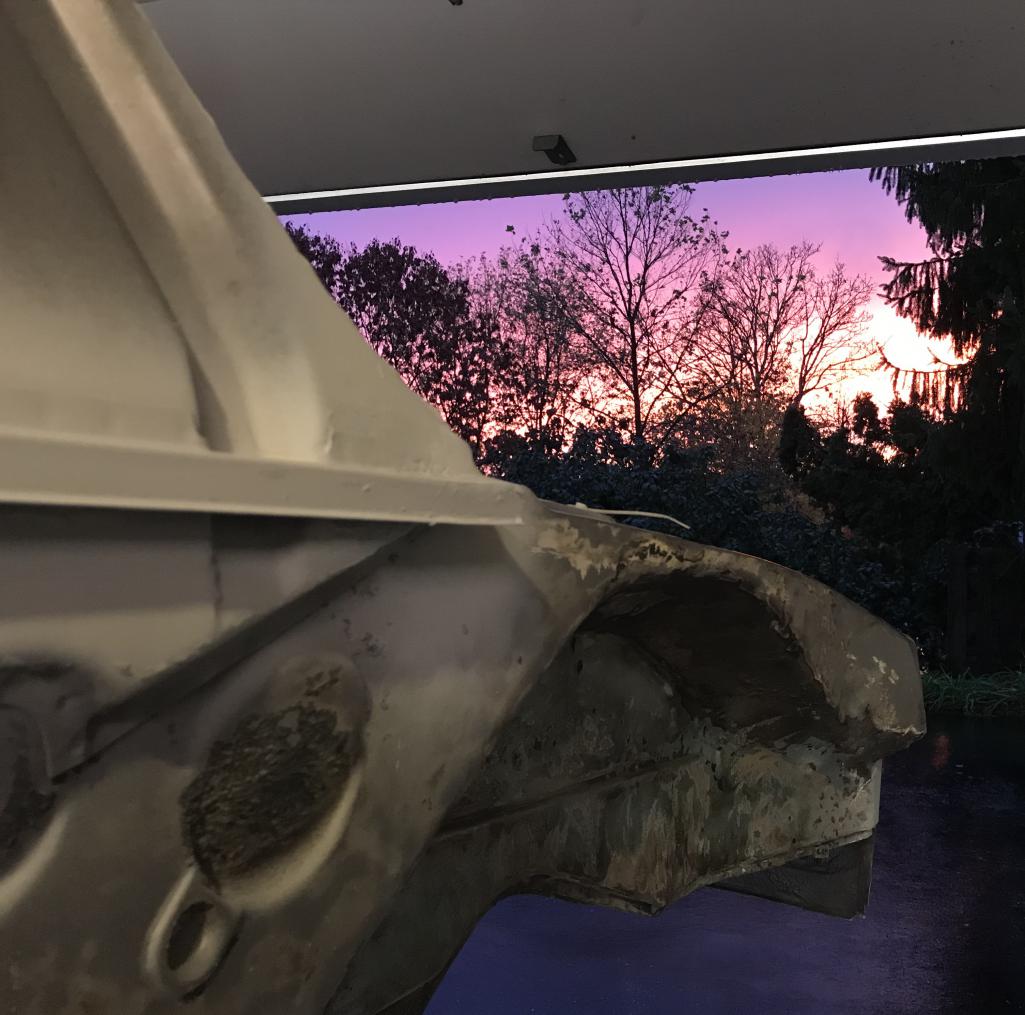
Posted by: Dion Nov 9 2018, 07:55 PM
Pics of the 6 mount “fusion” location. I’ll need to primer and paint before this side gets buttoned up.
Attached thumbnail(s)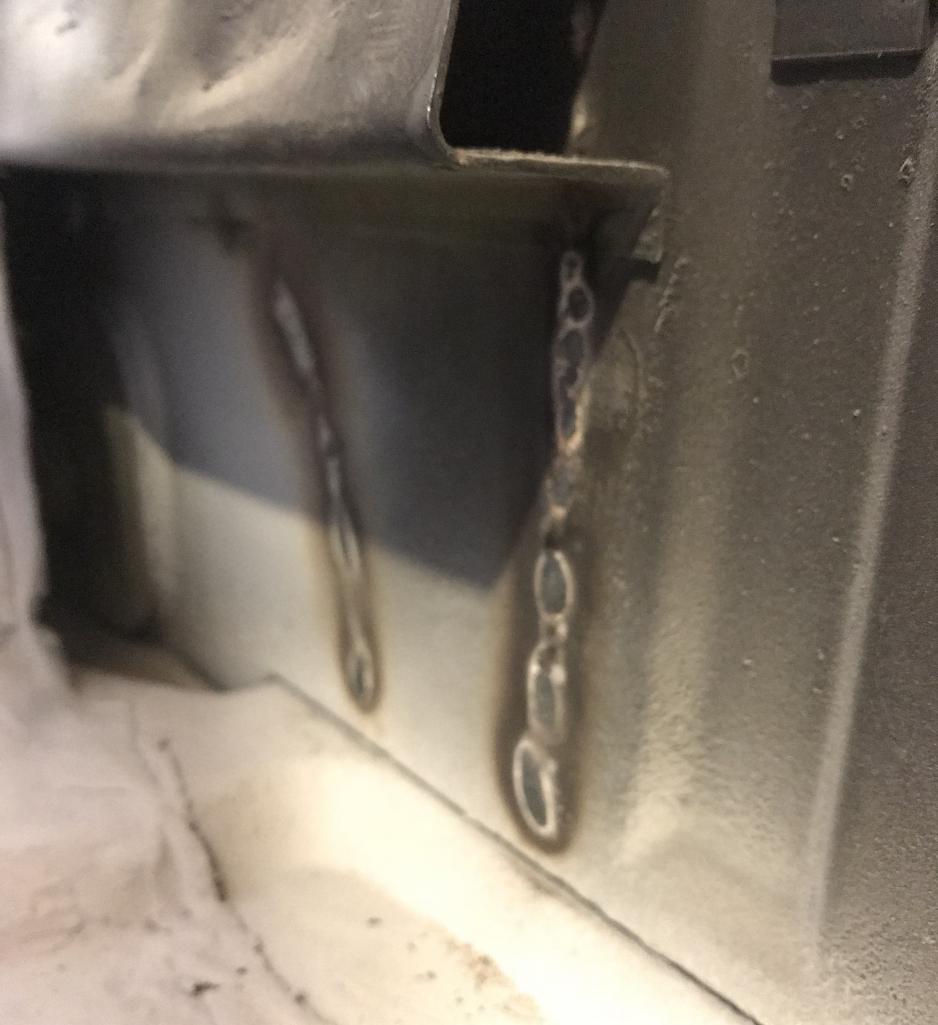
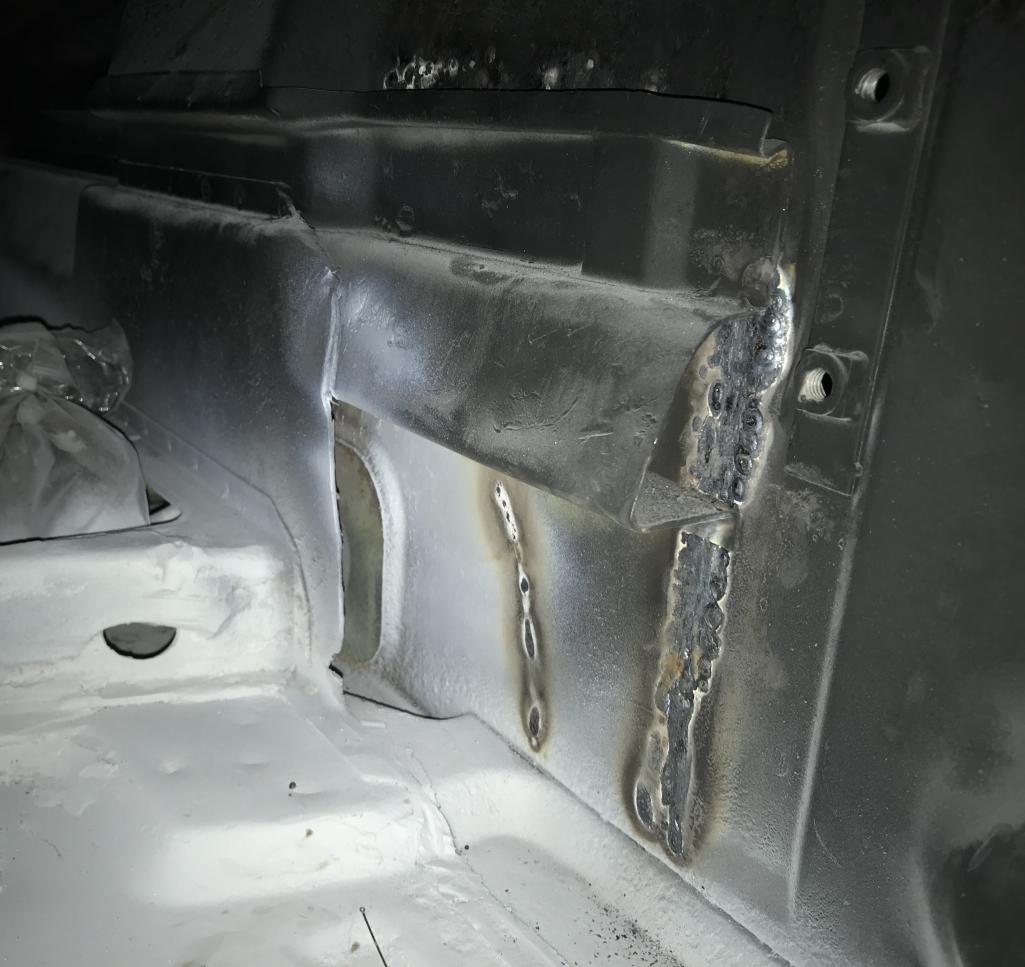
Posted by: bbrock Nov 9 2018, 08:56 PM
I'd have this one framed! Nice fab work too
I’m hoping this is the gods smiling down upon this project,
( artsy pic)
. Storm just ended and a very cool sky with double rainbows occuredPosted by: mb911 Nov 10 2018, 03:02 PM
Dion looks much better..
Posted by: Dion Nov 25 2018, 08:34 PM
A small update before the Christmas holiday hits.
See how much garage time is available.
Dave stopped by this past Saturday to evaluate the left chassis issue.
So now we have a game plan. It will be nice to make progress on this critical
area and the suspension console.
Found out when Dave was cutting, that part of the existing long was not
a factory piece of metal! This was previously repaired even before I had someone address the jackpoint years ago,(another butcher job). I’d know since I’m still a hack at this.
The very outer edge of long just before the kick up
was a 1” X 14” strip welded in and attached to the floor.
Dave was suspicious, so asked me to strip the underside of floor pan in this
area. Somewhat clean metal with some pinholes. Thank the gods. Maybe that rainbow was a lucky sign. I’m sure it could have been worse.
Placed another order with Restoration Design for the left
overlay frame stiffener with the kick up portion.
Ok that’s all for now
Attached thumbnail(s)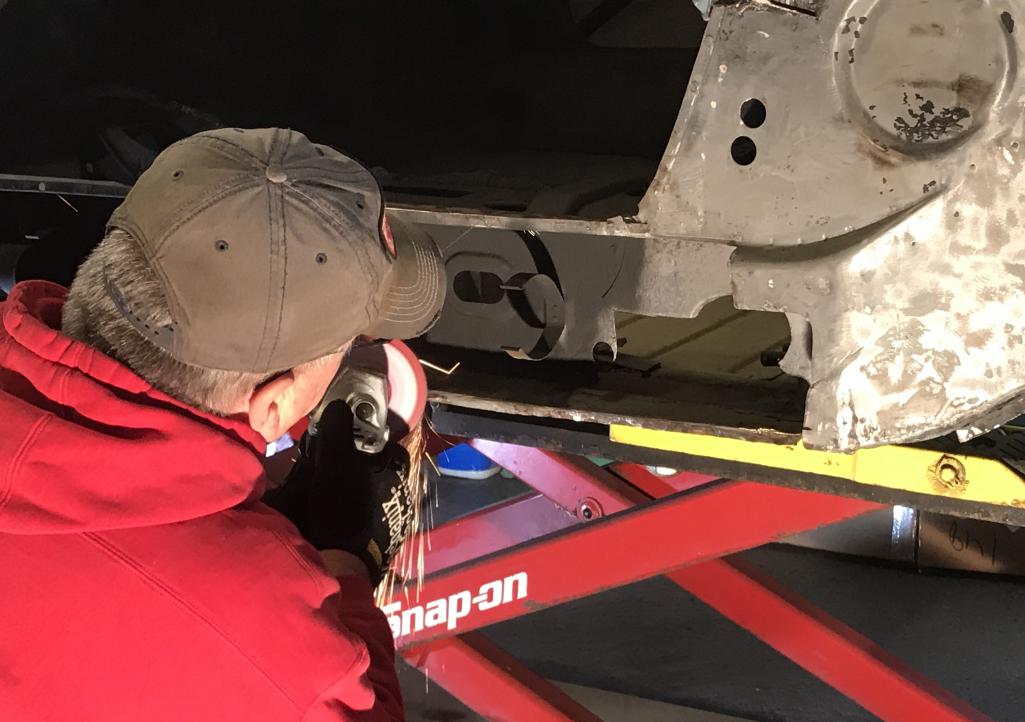
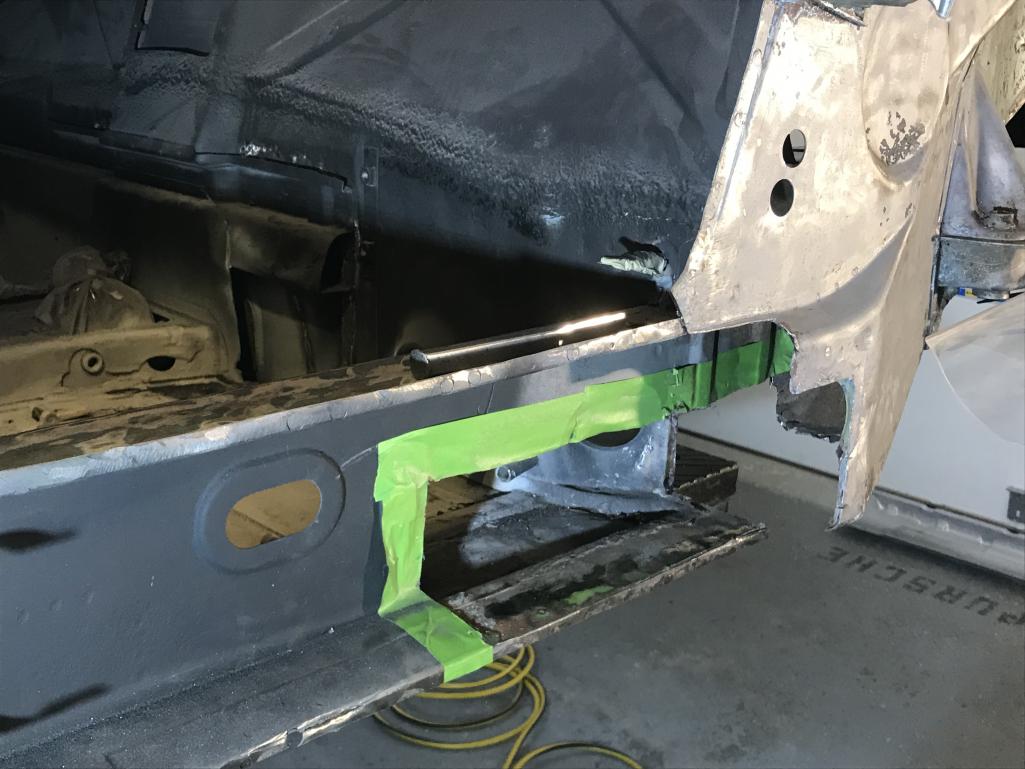
Posted by: Dion Nov 25 2018, 08:36 PM
Cut out
Attached thumbnail(s)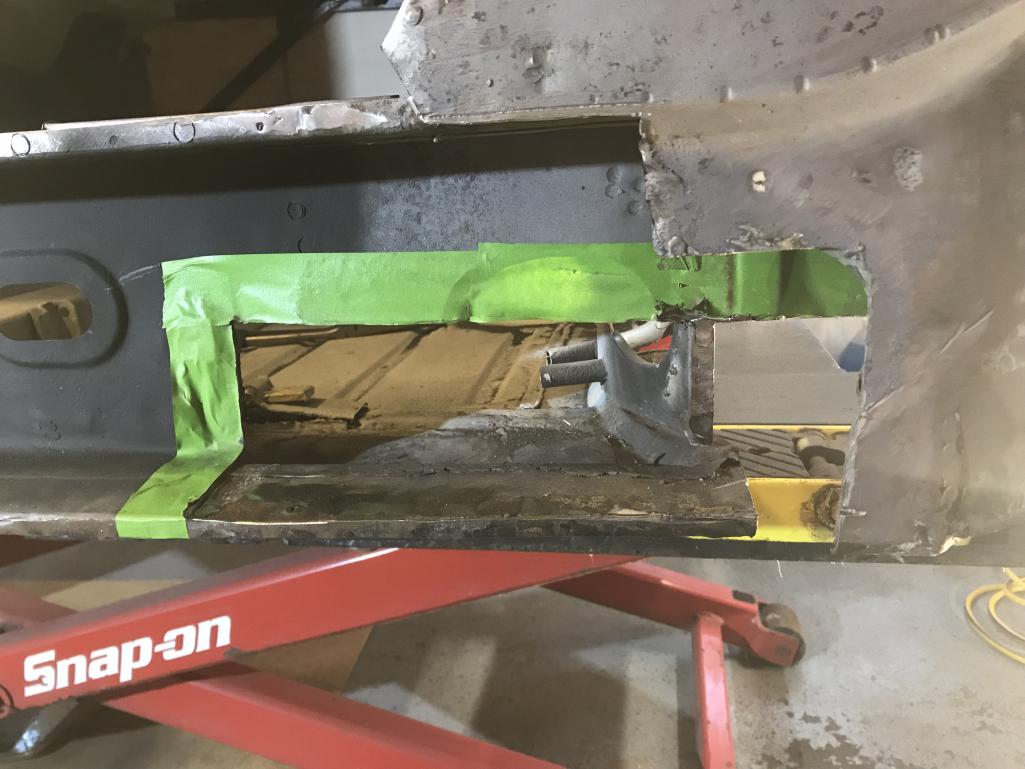
Posted by: Dion Nov 25 2018, 08:36 PM
Clean floor pan with some pinholes. Will address.
Attached thumbnail(s)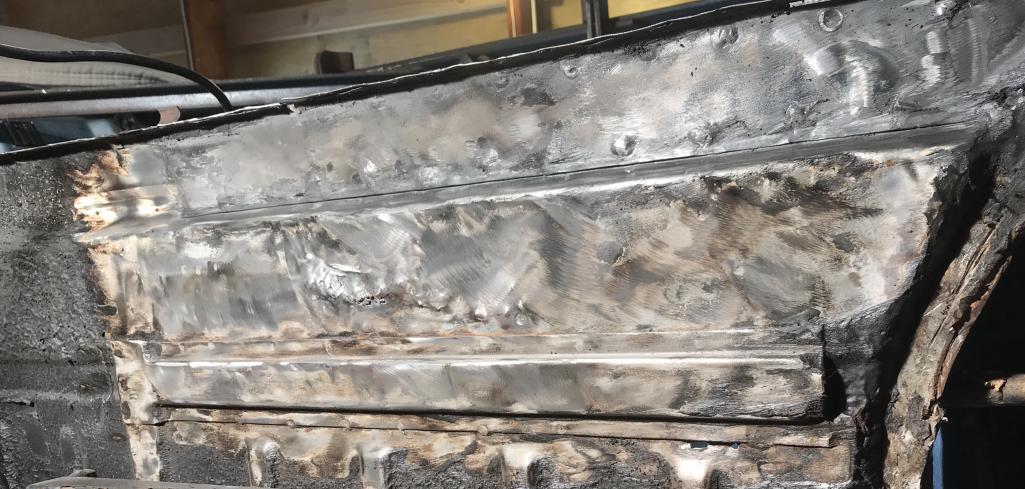
Posted by: Dion Nov 25 2018, 08:37 PM
This undercoating s**t sticks to everything!
Attached thumbnail(s)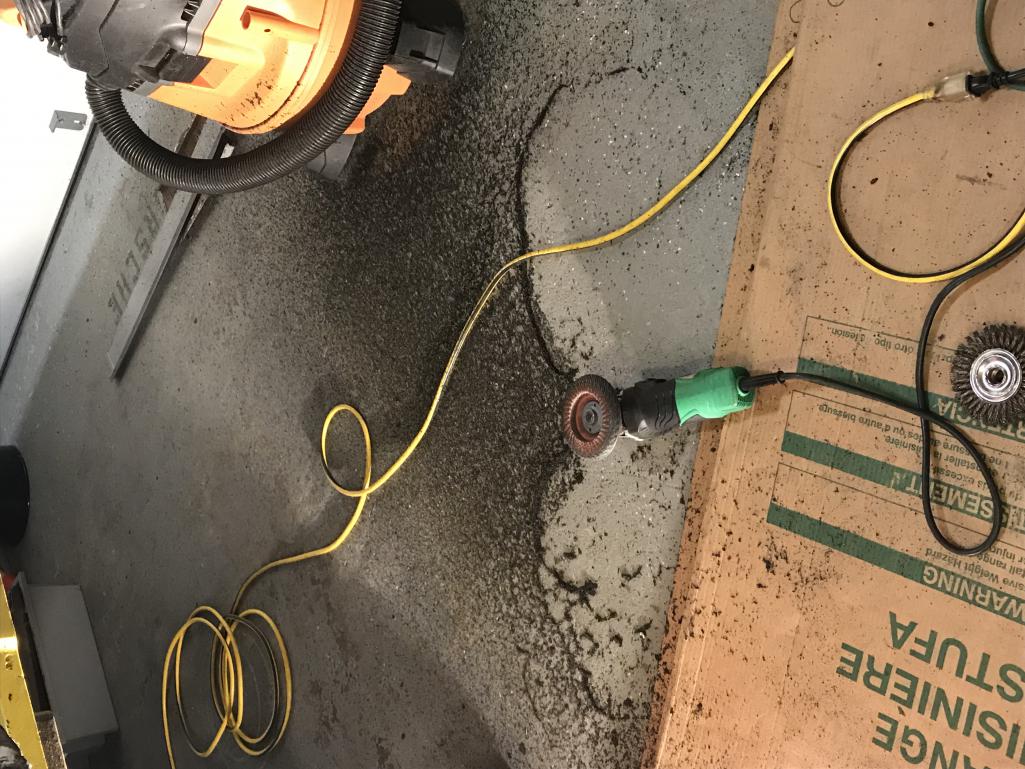
Posted by: Dion Nov 25 2018, 08:42 PM
In contrast.... a clean Right side of chassis.
Attached thumbnail(s)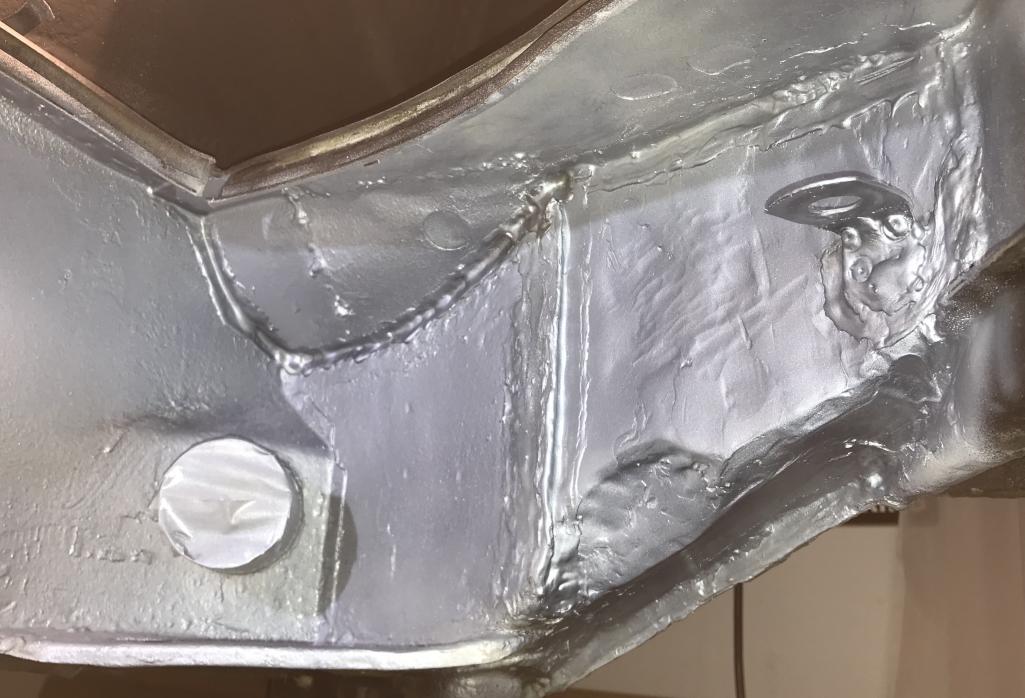
Posted by: Dion Dec 4 2018, 06:44 PM
I’ve addressed some holes left behind on the left engine shelf that occurred when I removed the motor mount. This left side is SO totally screwed up
I honestly can’t believe the carnage I’ve been driving around with the past 31 years.
Very hard to get a good pic of this area and keeping perspective of where the holes were.
Attached thumbnail(s)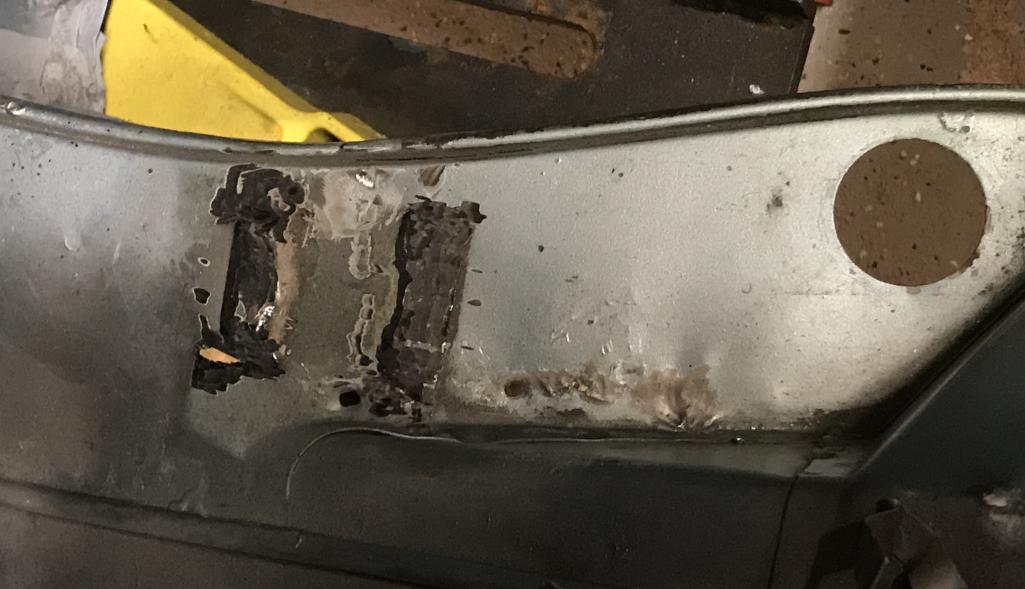
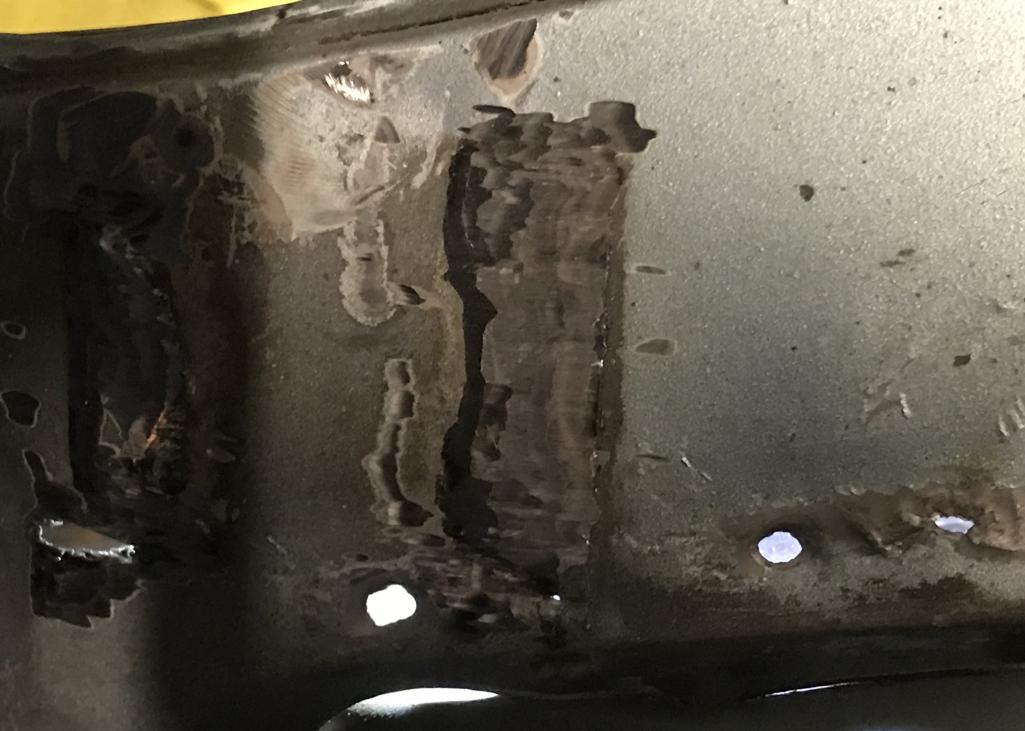
Posted by: Dion Dec 4 2018, 06:45 PM
Need to weld up the left engine shelf holes left behind when I removed the rear fresh air fan.
Attached thumbnail(s)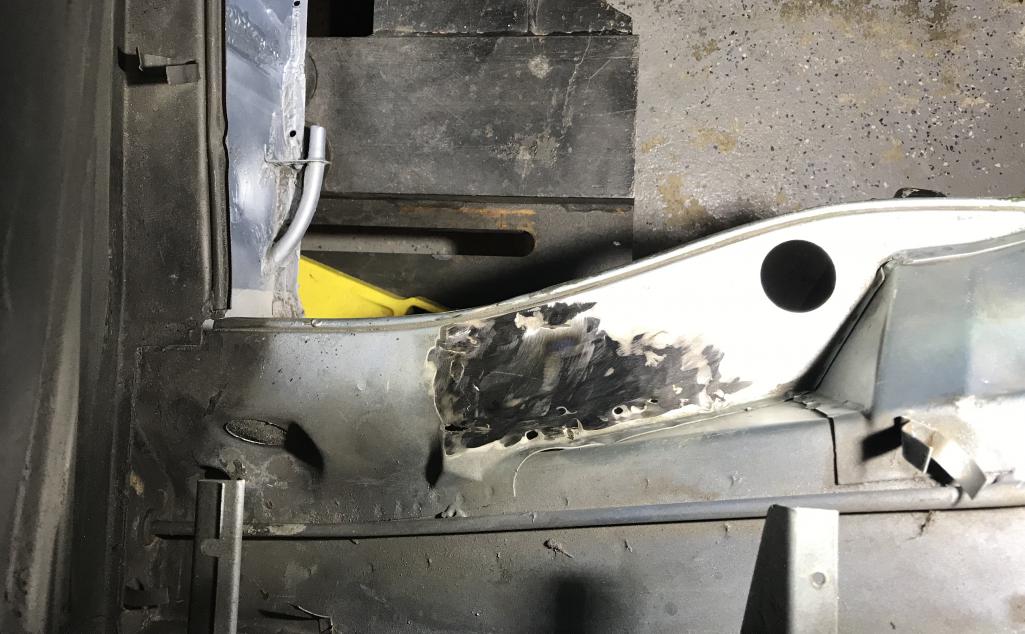
Posted by: Dion Dec 4 2018, 06:51 PM
Went back to the drivers side floor where the seat mounts. Thought I had this
buttoned up. No I didn’t.
Dave saw a few spaces under the mount. He has a good one to
use later. So I went ahead and removed the crap one.
I also cut out an area of perforations in the floor adjacent to mount.
Like I said, I thought i addressed this.....
Underside pic trying to find pinholes.
Attached thumbnail(s)
Posted by: Dion Dec 4 2018, 06:55 PM
Sorry looking seat mount...fellas check these buggers, when Dave tackled his car
He said his seat was only attached by the inboard mount. Mine was pretty similar.
Attached thumbnail(s)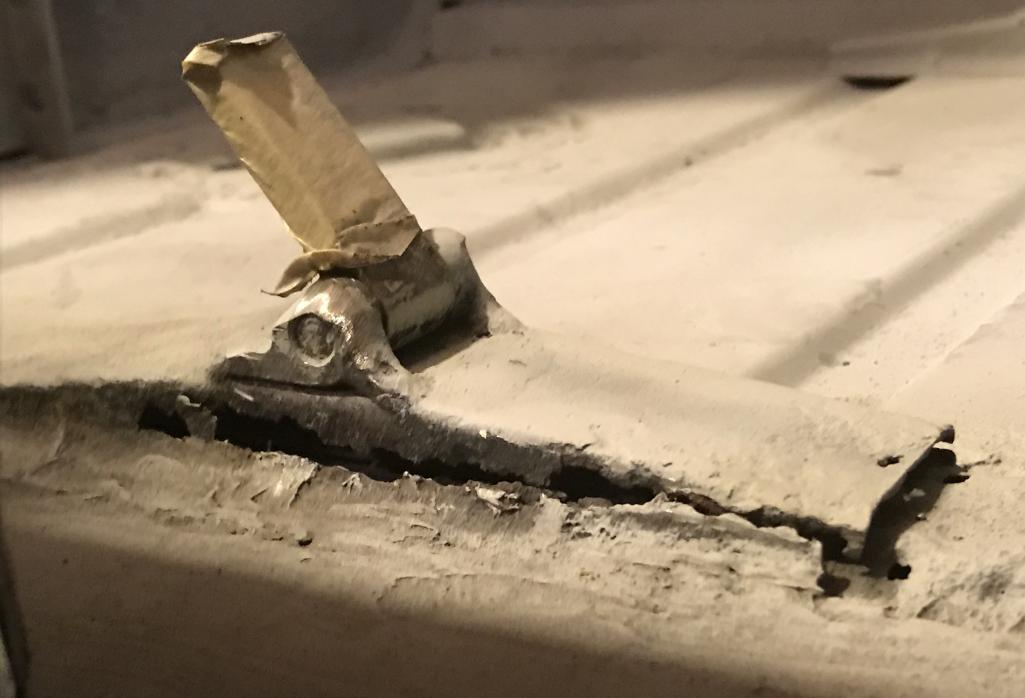
Posted by: Dion Dec 4 2018, 06:56 PM
Removal of seat hinge:
Attached thumbnail(s)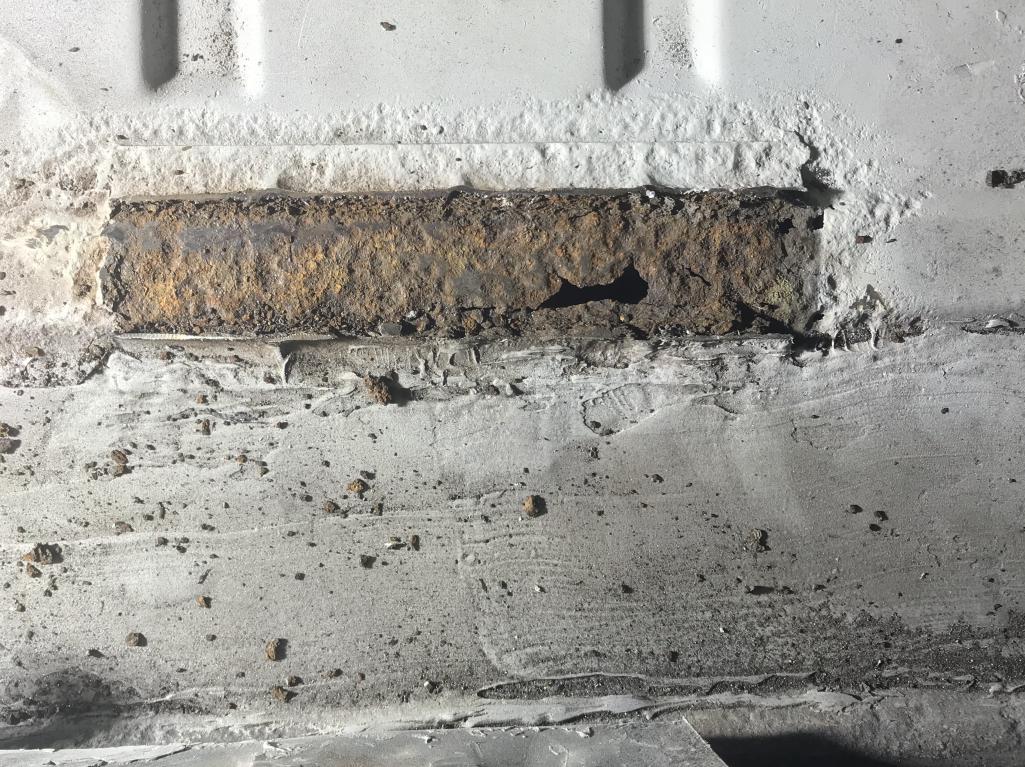
Posted by: Dion Dec 4 2018, 06:57 PM
Clean up of surrounding metal.
Attached thumbnail(s)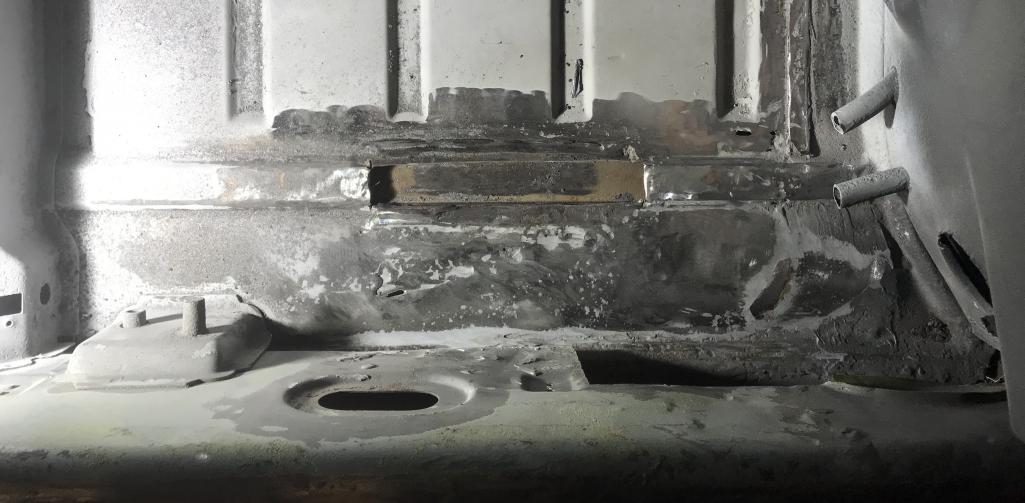
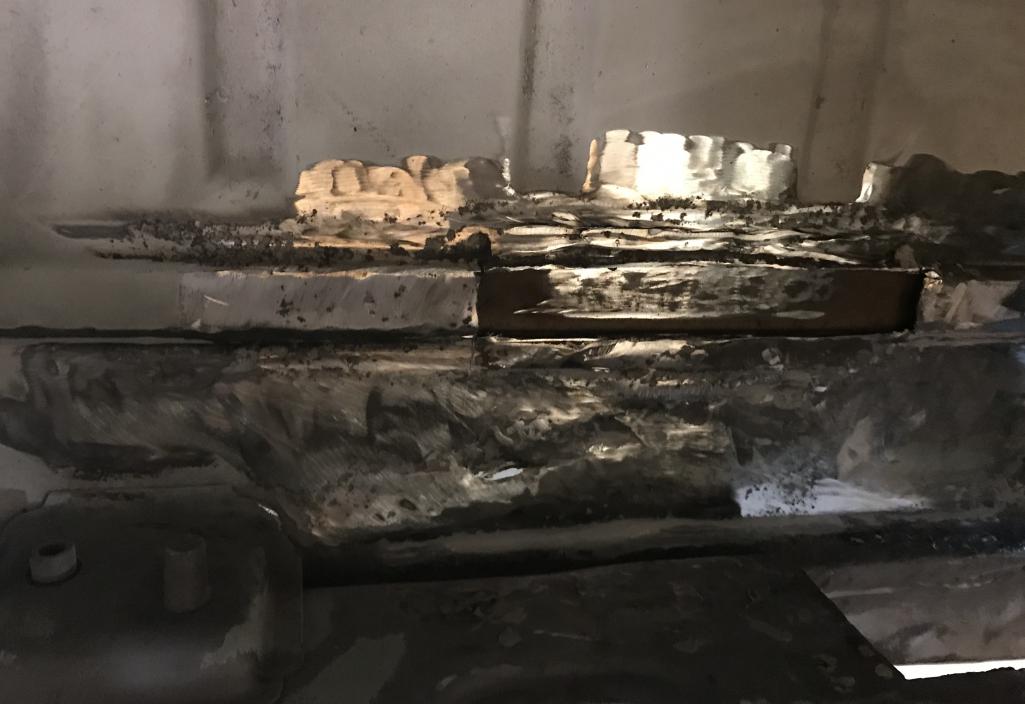
Posted by: Dion Dec 4 2018, 06:59 PM
Found the bastards
Attached thumbnail(s)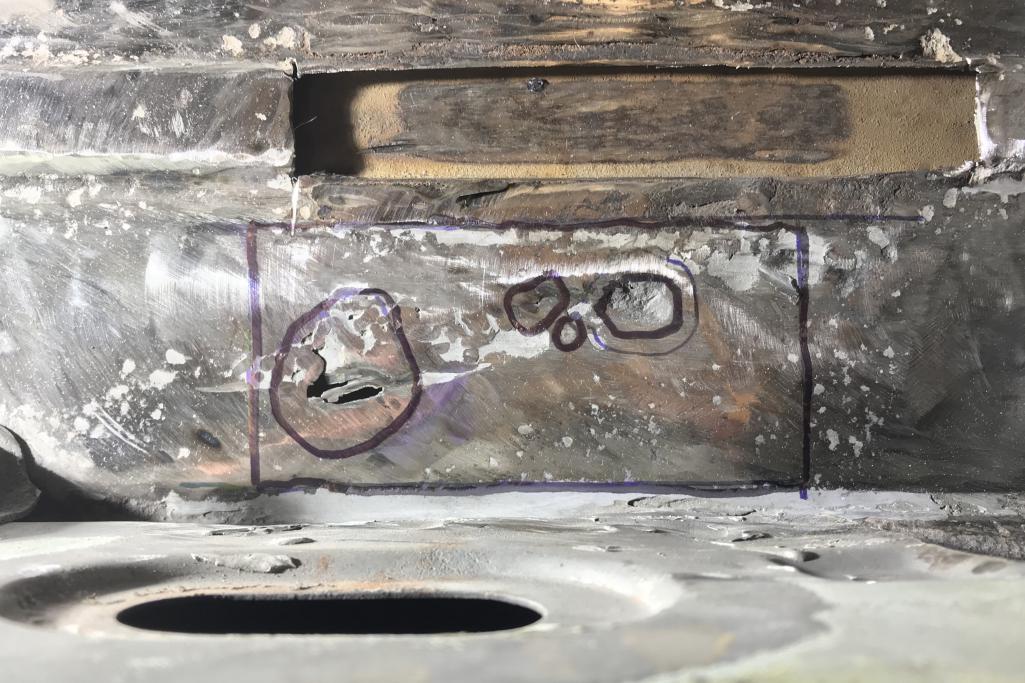
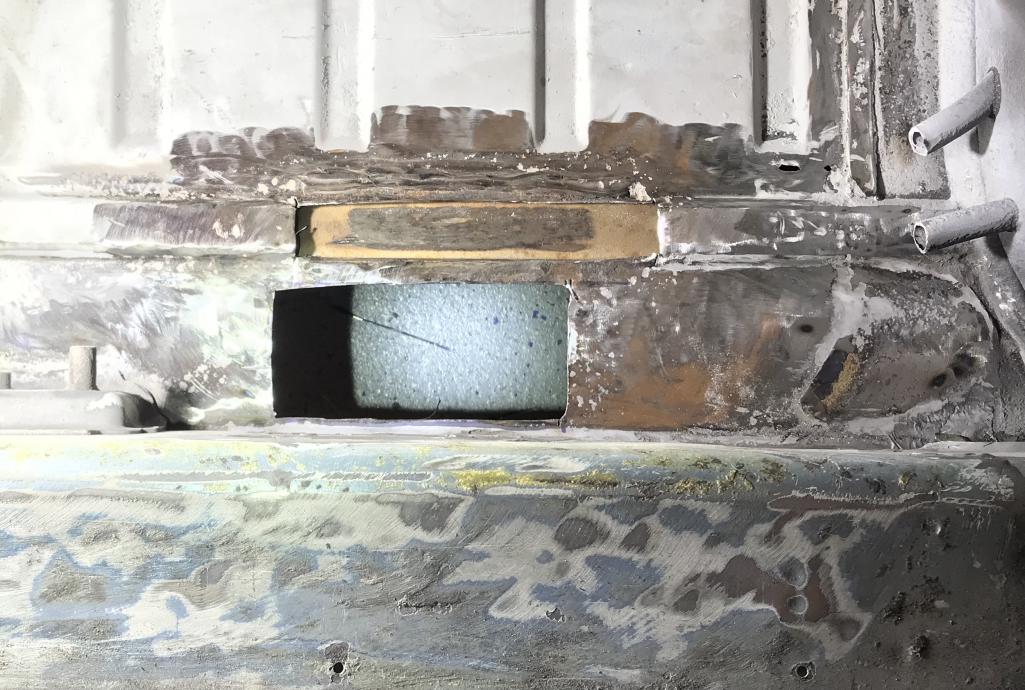
Posted by: Dion Dec 4 2018, 07:00 PM
Cut a nice clean patch and
Attached thumbnail(s)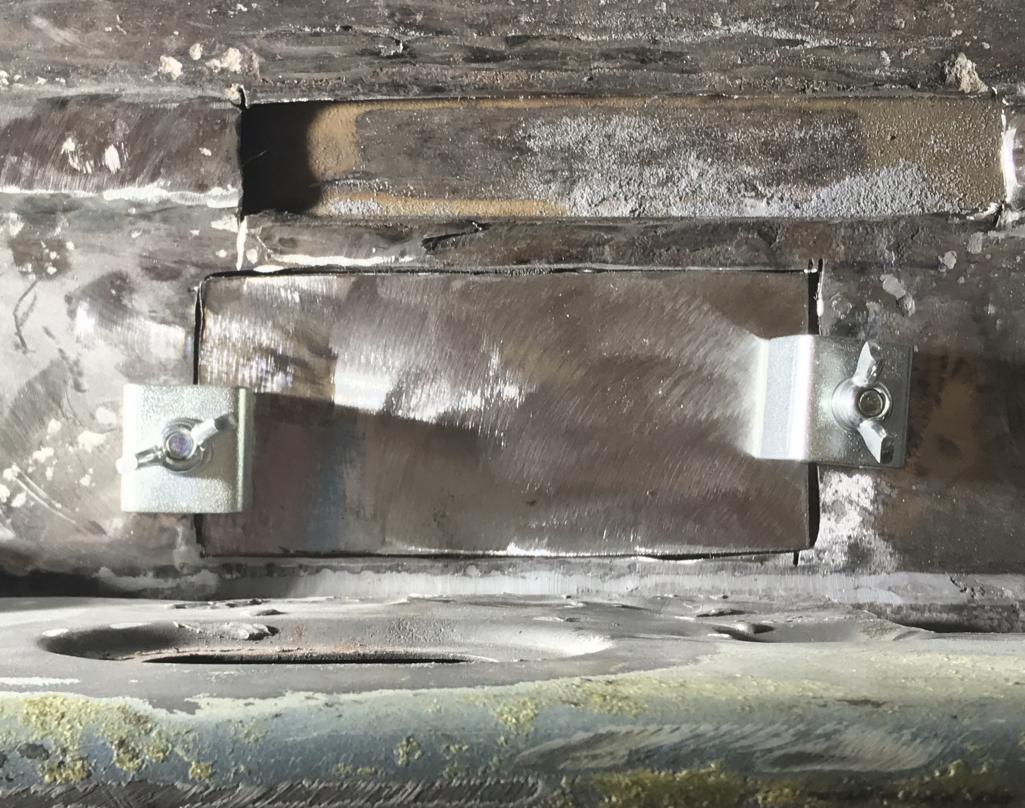
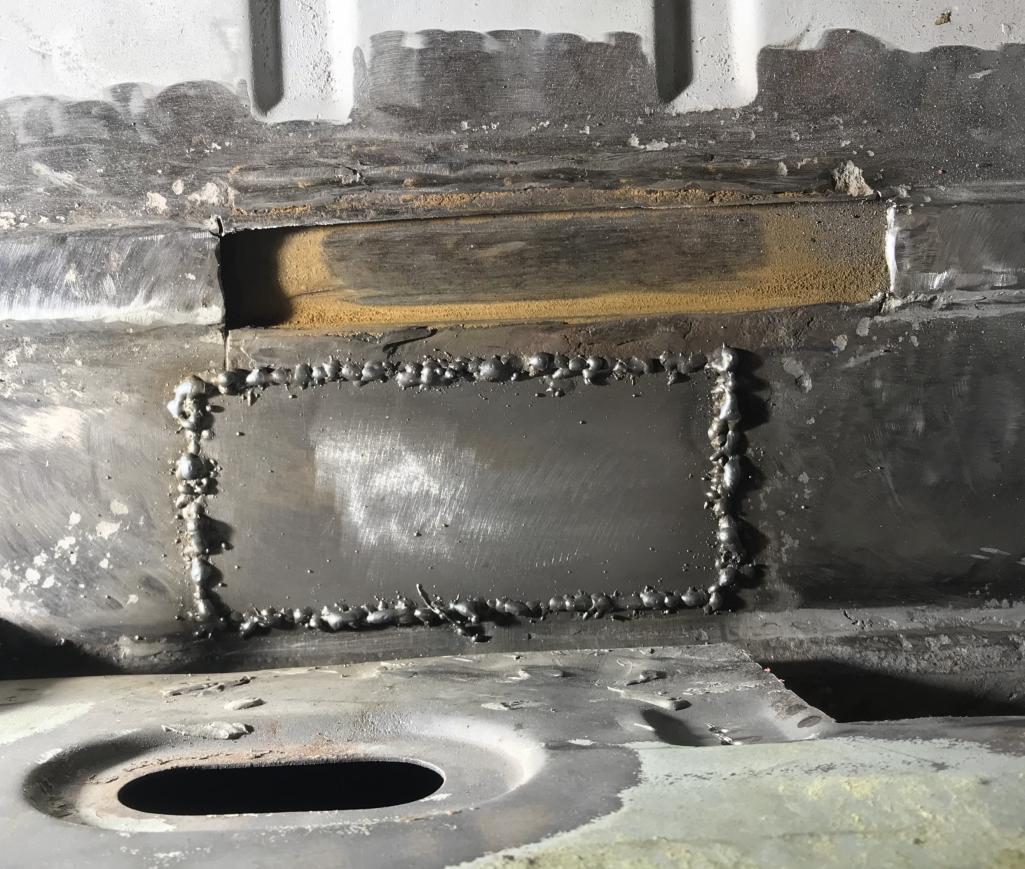
Posted by: Dion Dec 4 2018, 07:03 PM
Cleaned up, I’ll put the seat hinge/mount back after the lower firewall and longitudinal are in fixed positions.
Attached thumbnail(s)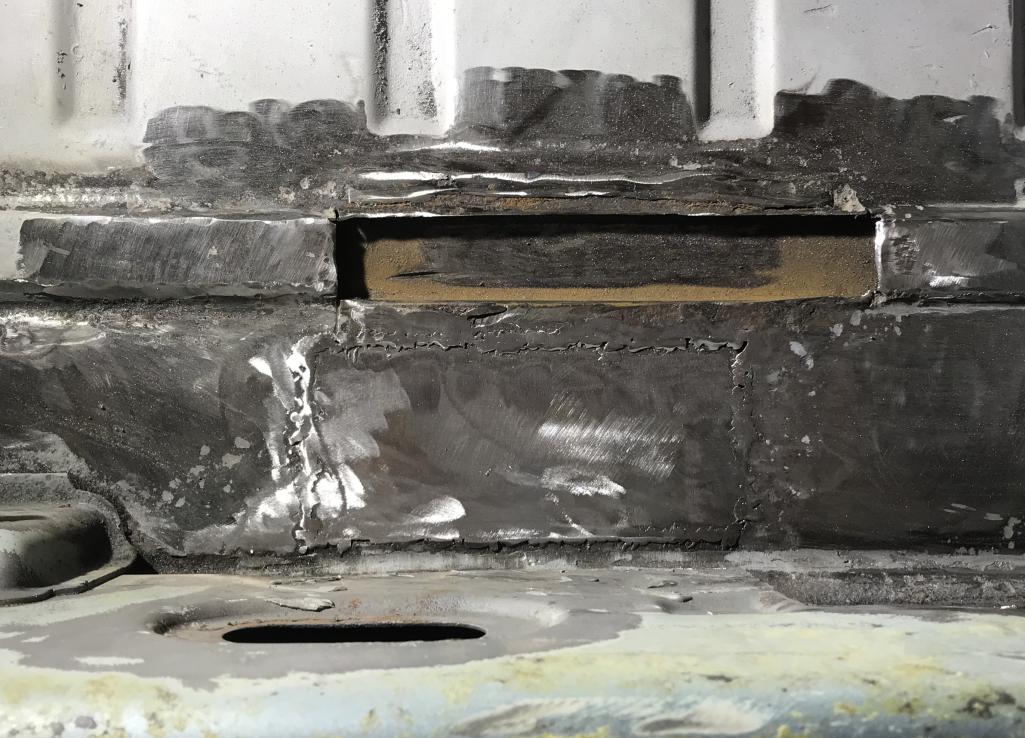
Posted by: Dion Dec 4 2018, 07:03 PM
Overall floor pic. I’ll get some primer on this tomorrow.
Attached thumbnail(s)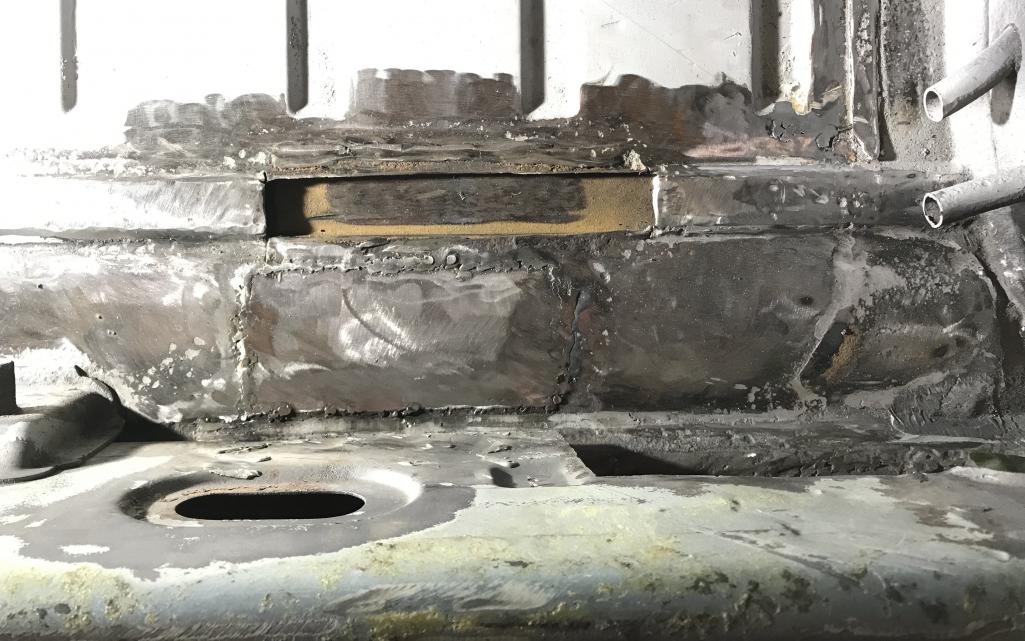
Posted by: Dion Dec 4 2018, 07:07 PM
Couldn’t resist a test a test fit of Restoration Designs
Outer long chassis plate. Fits beautifully. Can’t wait till it’s actually welded to the
chassis! Thanks for lookin in.
Attached thumbnail(s)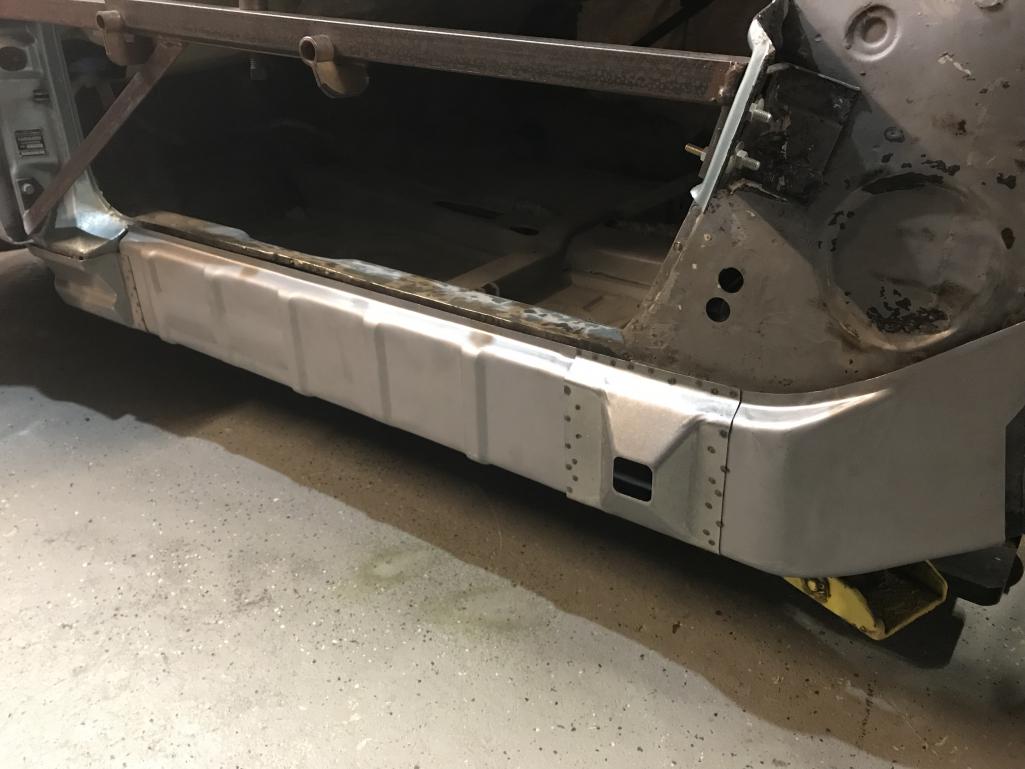
Posted by: ThreeV8s Dec 4 2018, 08:15 PM
Great to see the progress! I think it's safe to say that there a lot of us here who find this thread extremely interesting, motivating, and educational.
Posted by: Dion Dec 7 2018, 08:11 PM
Still wasn’t satisfied with that patch, went back at it.
Cleaned it up again finding more pinholes. I’m more pleased
this round. It’s solid again. I’m finding a balance between the welding and cleaning up with the grinder. I have been taking away too much parent metal, thinning it and creating my pinholes. It’s all up to experience I guess. As I’m sure all you experienced metal workers can attest. And we have a lot of skilled peeps on this forum I’m in awe of. I’ll hit the bottom with primer, paint and undercoating as usual.
Ok here’s the pics:
Attached thumbnail(s)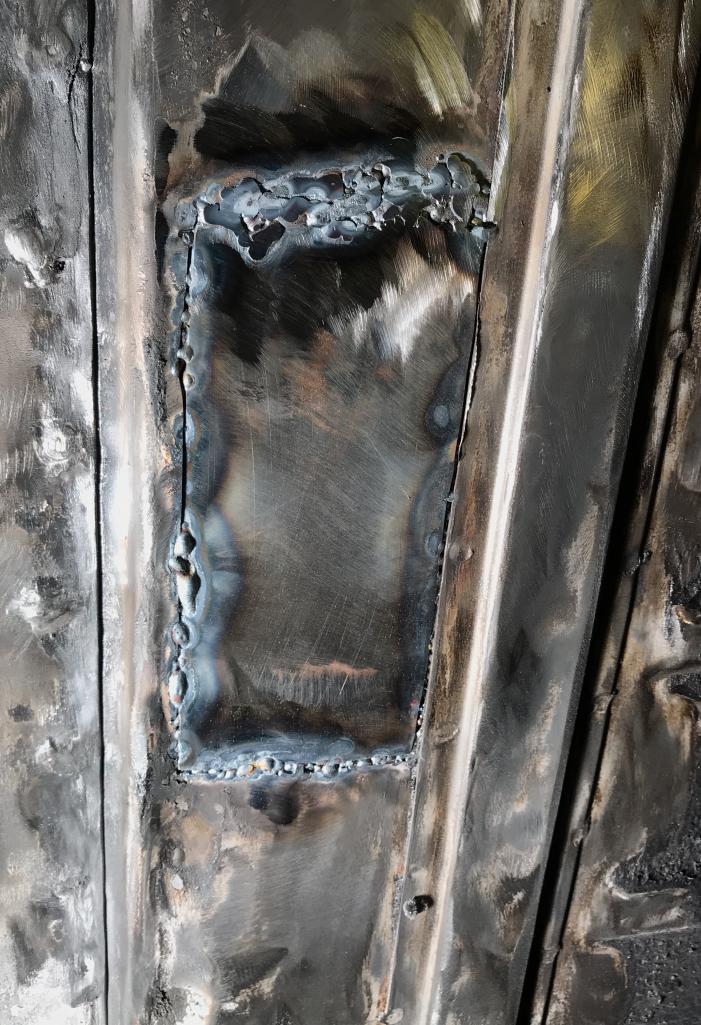
Posted by: Dion Dec 7 2018, 08:14 PM
Final
Attached thumbnail(s)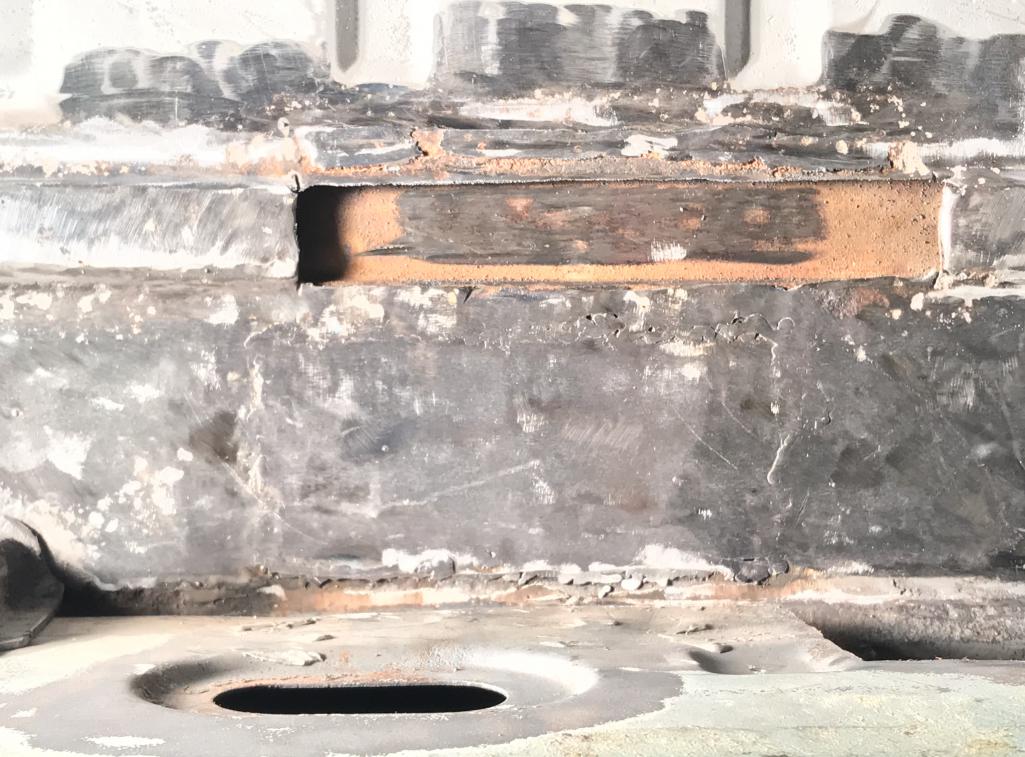
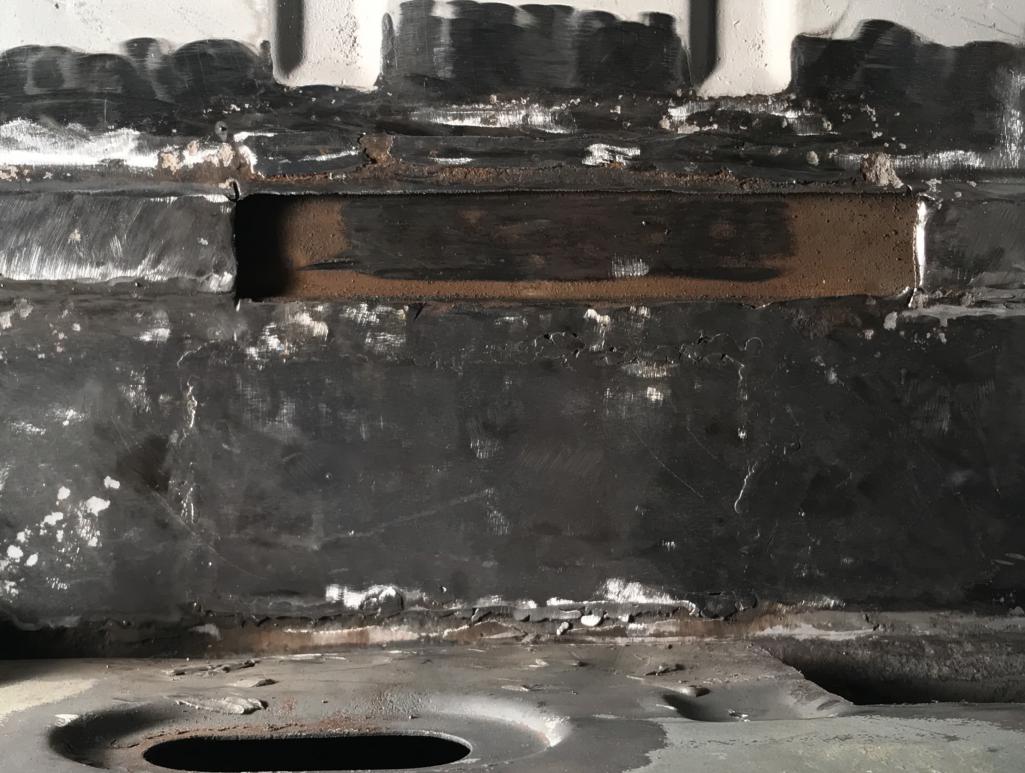
Posted by: bbrock Dec 7 2018, 08:20 PM
Lookin' good! I think the grinding is as tricky as the welding. I tended to have the opposite problem of leaving too much meat on the bone.
Posted by: Dion Dec 15 2018, 08:04 PM
Your going back in the garage again?!?!
Attached thumbnail(s)
Posted by: Dion Dec 15 2018, 08:07 PM
Well yes. Tackled the engine shelf debacle.
Couple of holes welded,hit it with primer till the rest of this left side
is finished.
Attached thumbnail(s)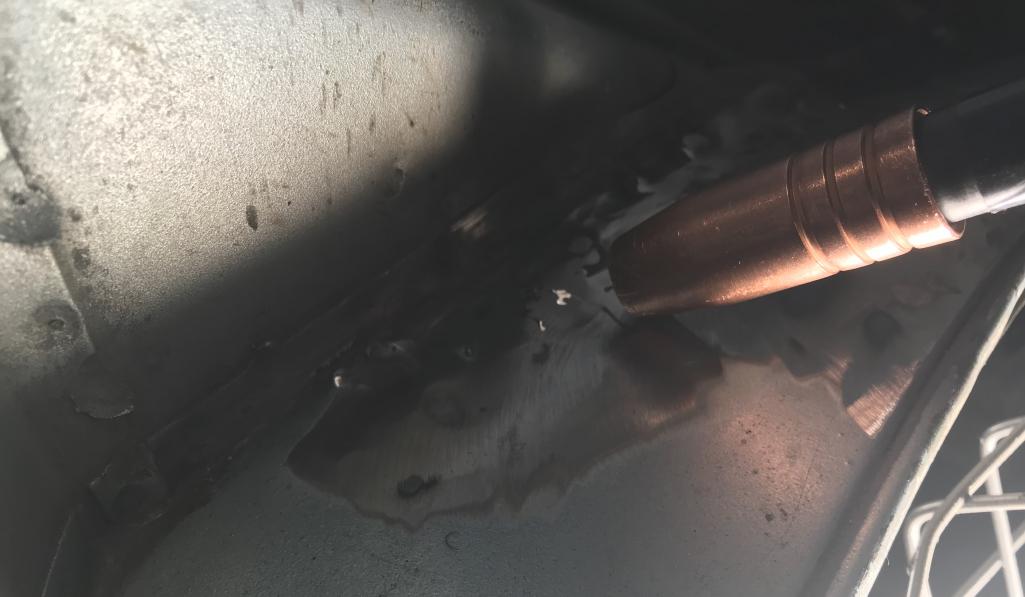
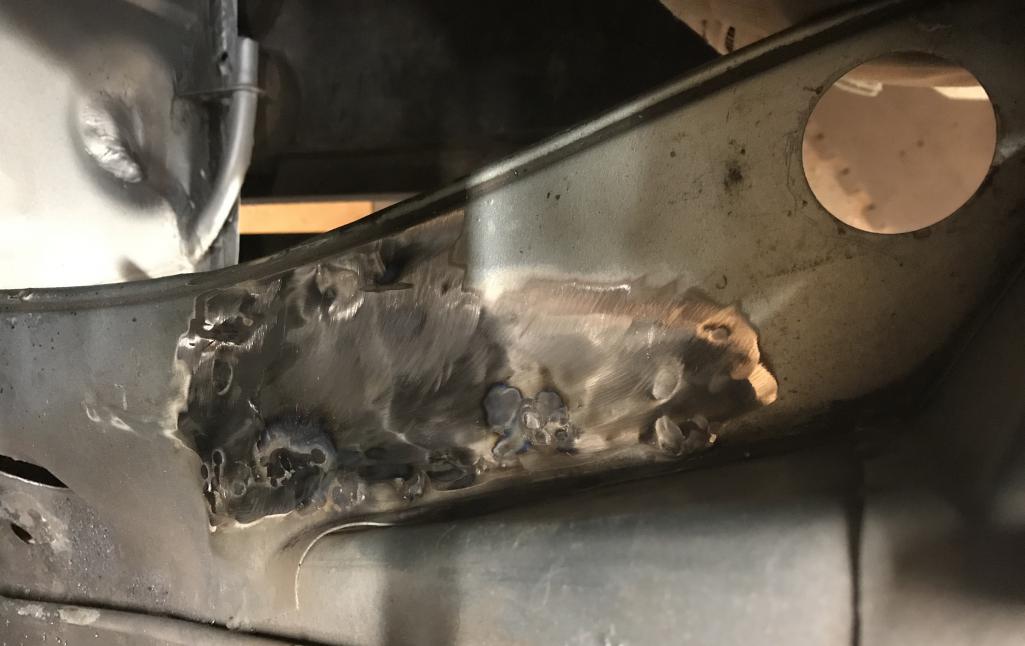
Posted by: Dion Dec 15 2018, 08:10 PM
Left engine shelf
Attached thumbnail(s)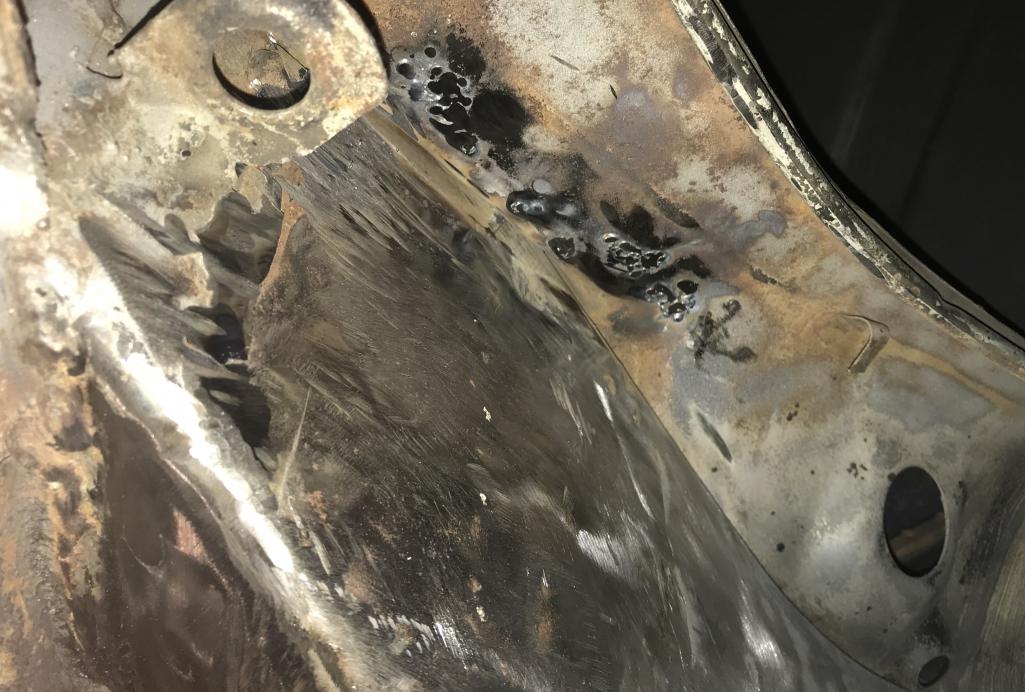
Posted by: Dion Dec 15 2018, 08:11 PM
Primer
Attached thumbnail(s)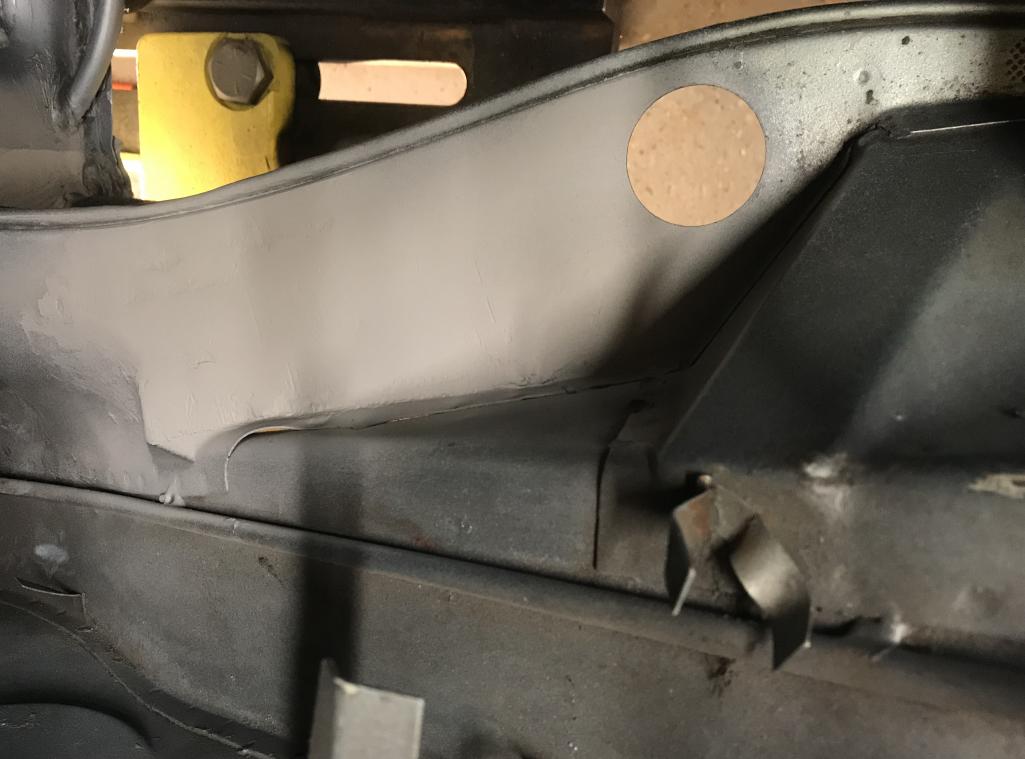
Posted by: Dion Dec 15 2018, 08:12 PM
Primer and paint of left floor patch near seat mount
Attached thumbnail(s)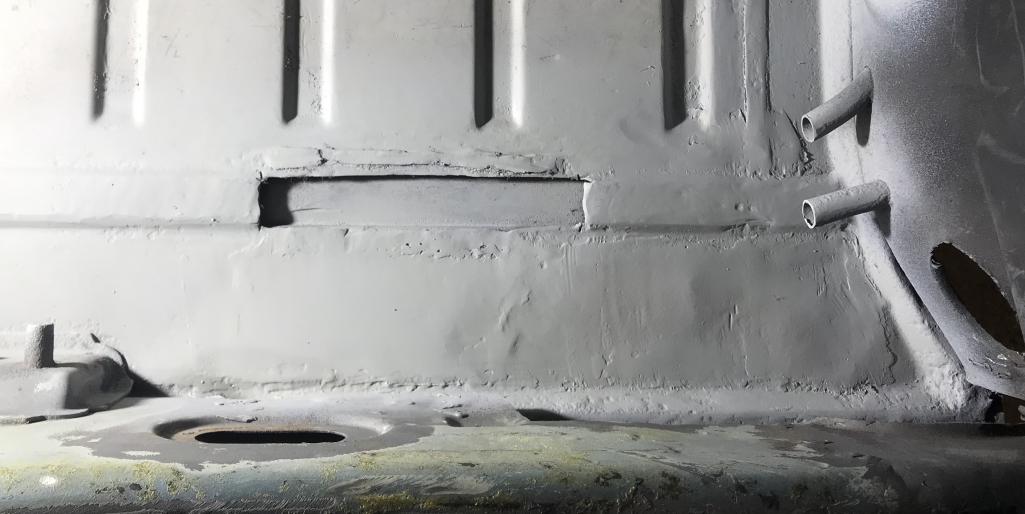
Posted by: Dion Dec 15 2018, 08:14 PM
Exterior of floor area in question. Primer & Paint. I’ll undercoat it when all is wrapped up
on the chassis repairs.
Attached thumbnail(s)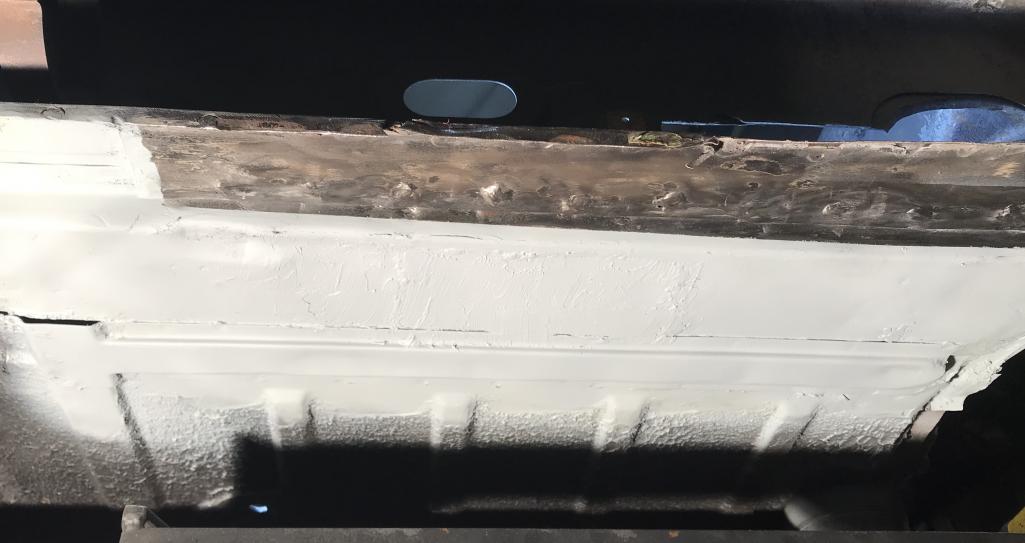
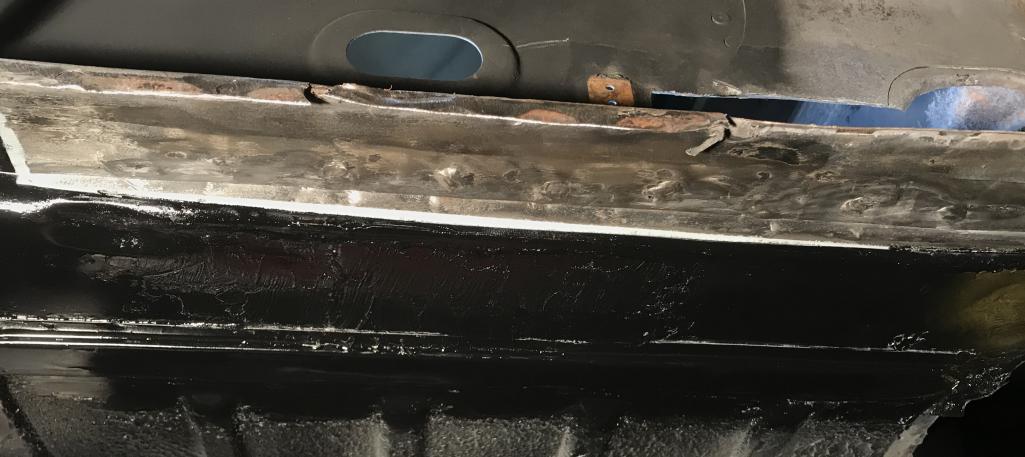
Posted by: Dion Dec 15 2018, 08:17 PM
Getting some fresh air.... while paints dry.
View of neighbors and some Christmas lites.
Attached thumbnail(s)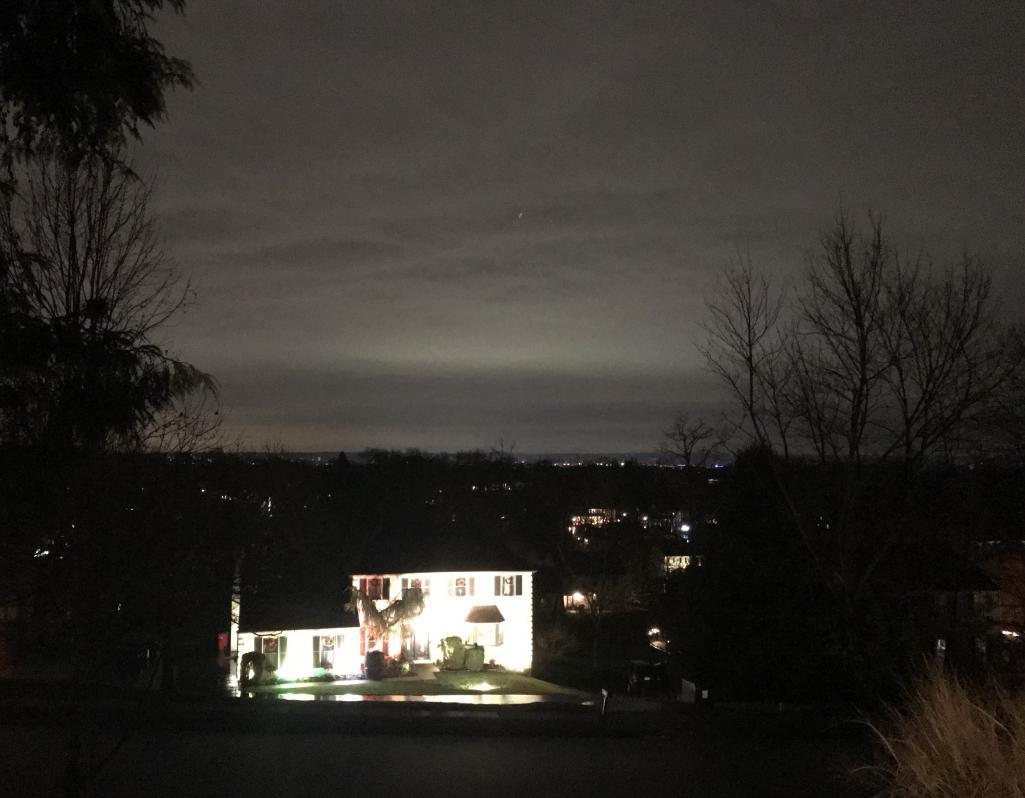
Posted by: Dion Dec 15 2018, 08:21 PM
Some surface rust lurking under the engine shelf.
I honestly don’t think it was hit with paint under here or very minimalistic amounts.
Looks just primer on engine rubber seal channel area.
Just sprayed some rust converter for now on the underside
of shelf. All this will be sanded again when the suspension console goes in.
Attached thumbnail(s)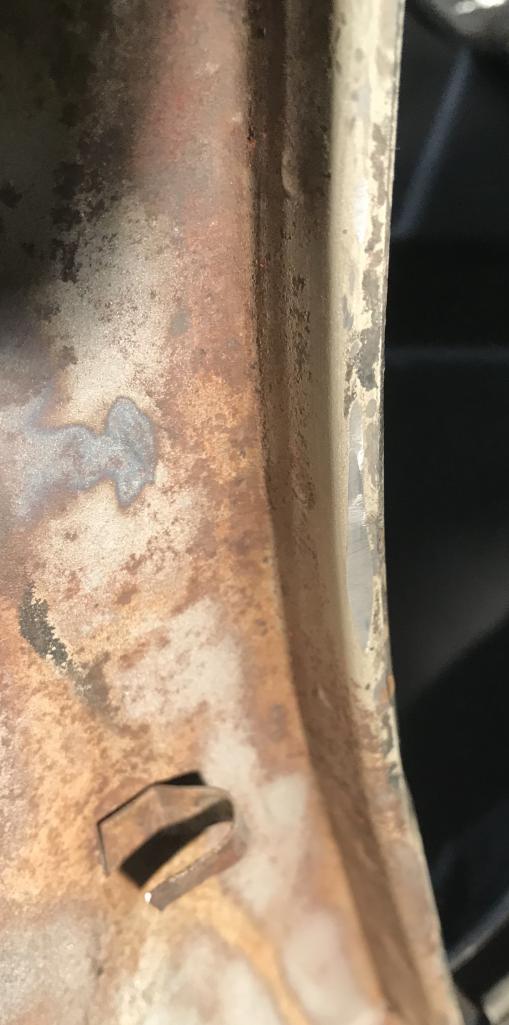

Posted by: Dion Dec 15 2018, 08:22 PM
Rust converter spray coating
Attached thumbnail(s)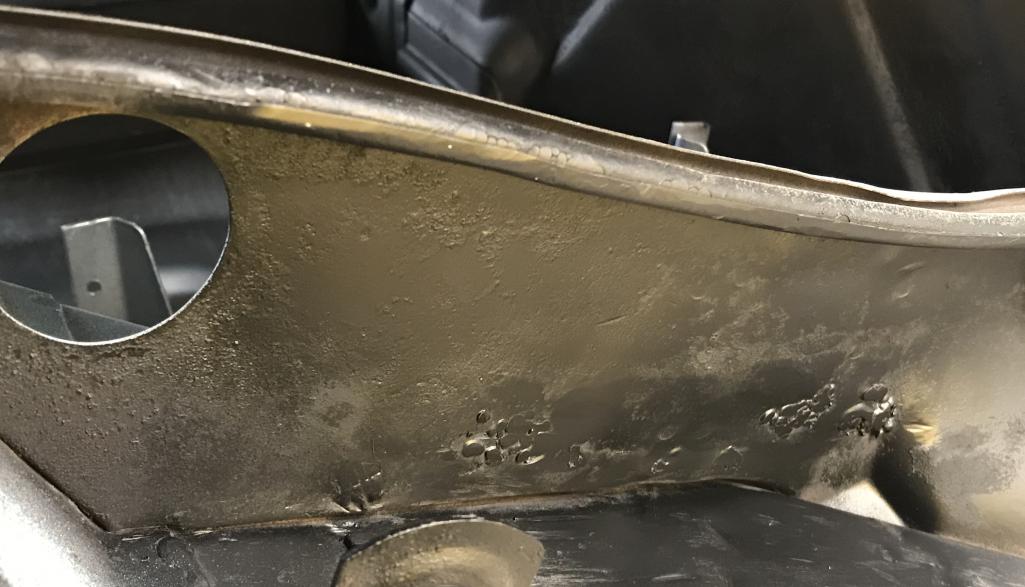
Posted by: Dion Dec 15 2018, 08:23 PM
Definitely needs a freshening...
Attached thumbnail(s)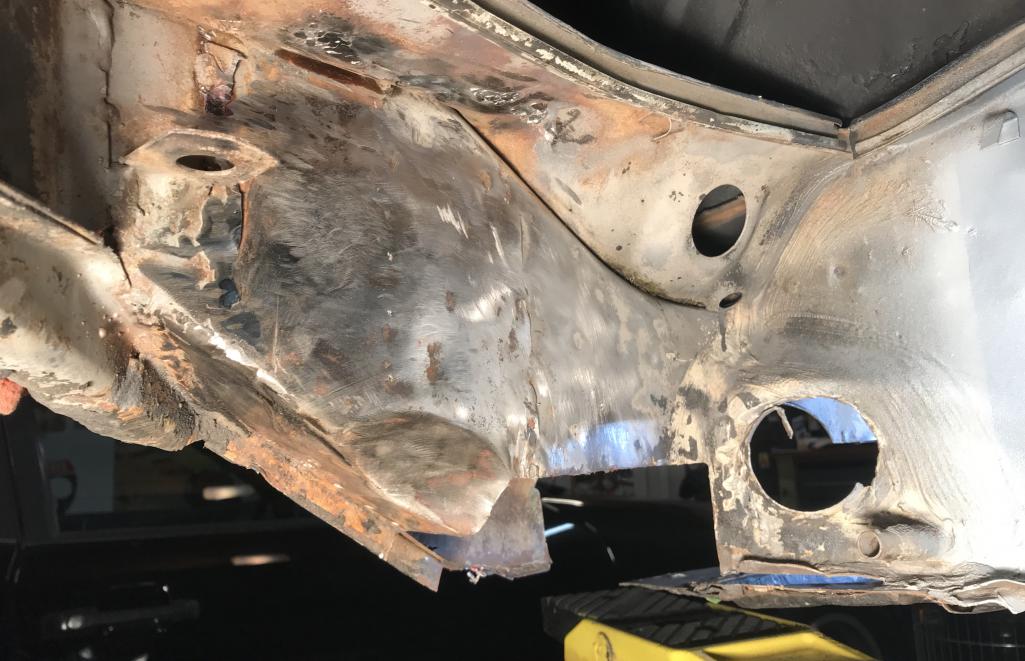
Posted by: 914dave Dec 30 2018, 09:52 AM
Dion hard at work removing a sketchy patch. 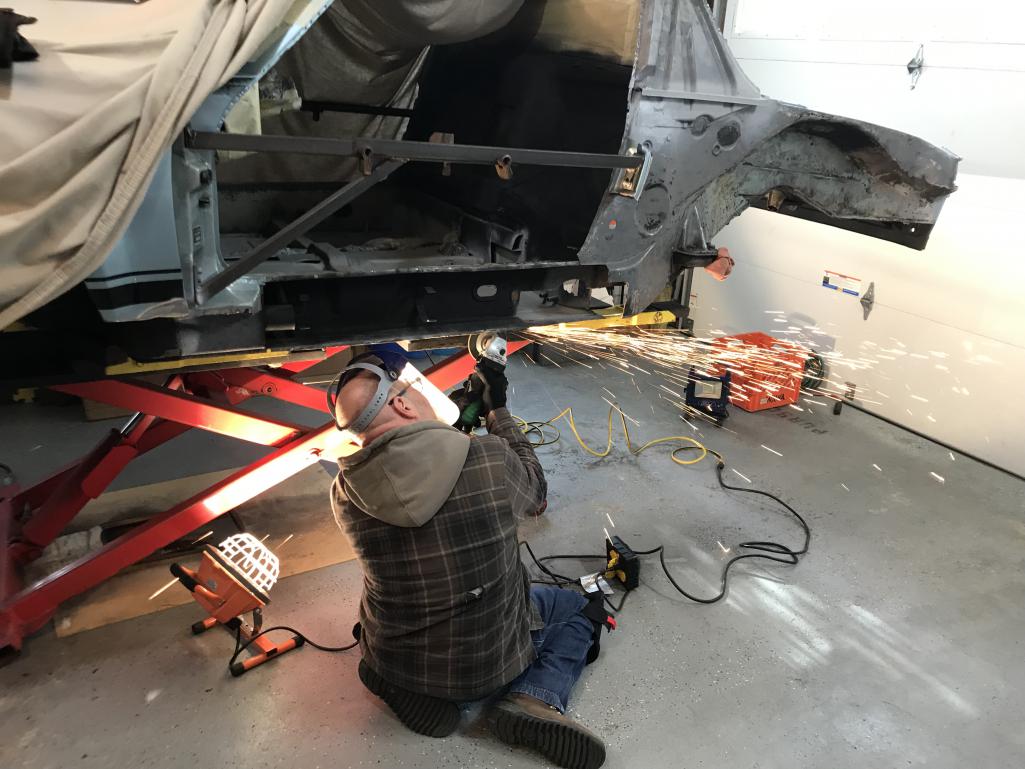
Posted by: tygaboy Dec 30 2018, 10:02 AM
Dion -
I'll say it again: I am always amazed (and a little intimidated!) when I see how far you're going with your car. So cool to see.
You're giving me confidence to go after some of the panel repairs I need to make on mine.
Keep up the awesome work and pics.
(and get that suspension console on there!!! )
Safe and Happy New Year to you and yours.
Chris
Posted by: mb911 Dec 30 2018, 11:45 AM
@http://www.914world.com/bbs2/index.php?showuser=2766 looks great.. Keep up the good work.. By the time your done you will be amazed at how your skills have improved and probably want to do another one..
Posted by: Dion Dec 30 2018, 07:45 PM
Thanks Chris & Ben. It’s always nice to hear your encouragement.
Ben... not so sure about another resto..
With Dave’s mold making & fabricating skills we started on
the longitudinal. Fantastic work on the outer floor flange and radius.
The steel was screwed onto a buck Dave had made for his 914 repair.
Attached thumbnail(s)
Posted by: Dion Dec 30 2018, 07:46 PM
Securing to buck
Attached thumbnail(s)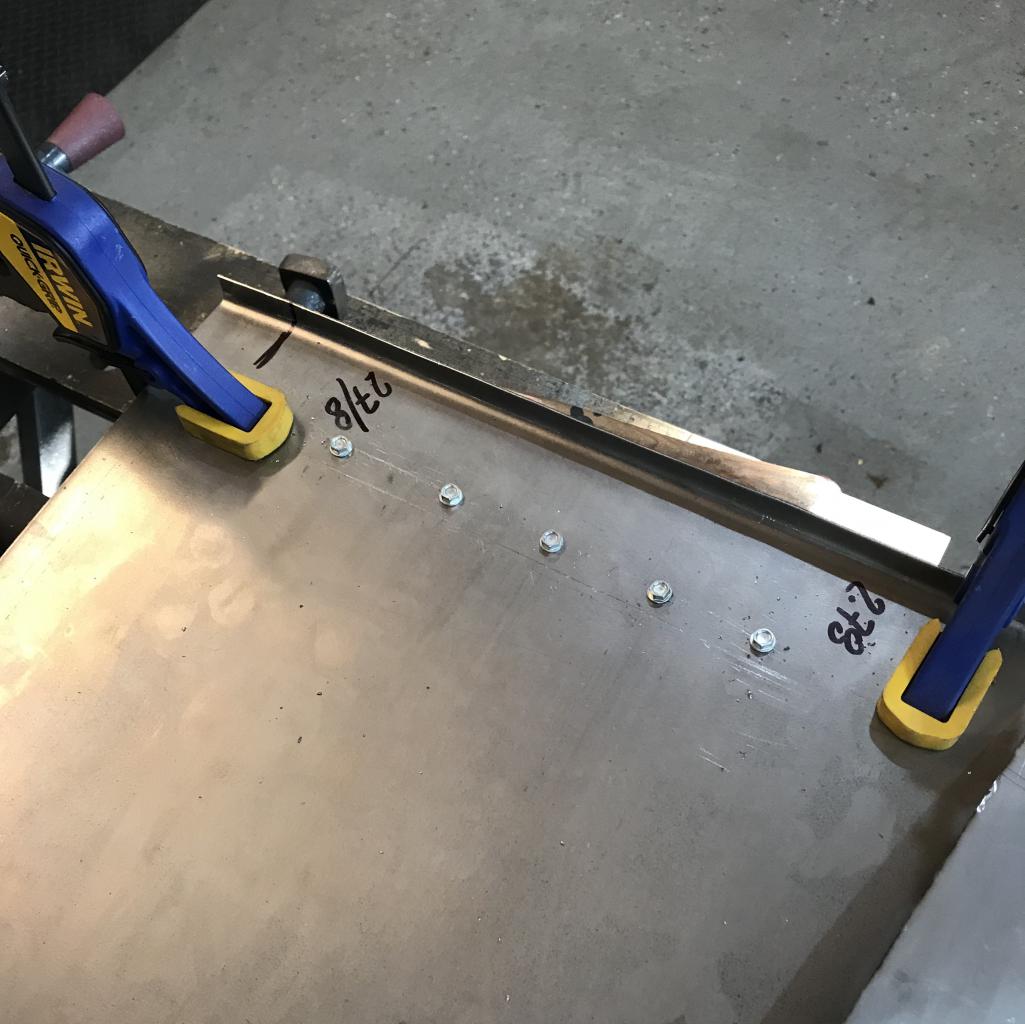
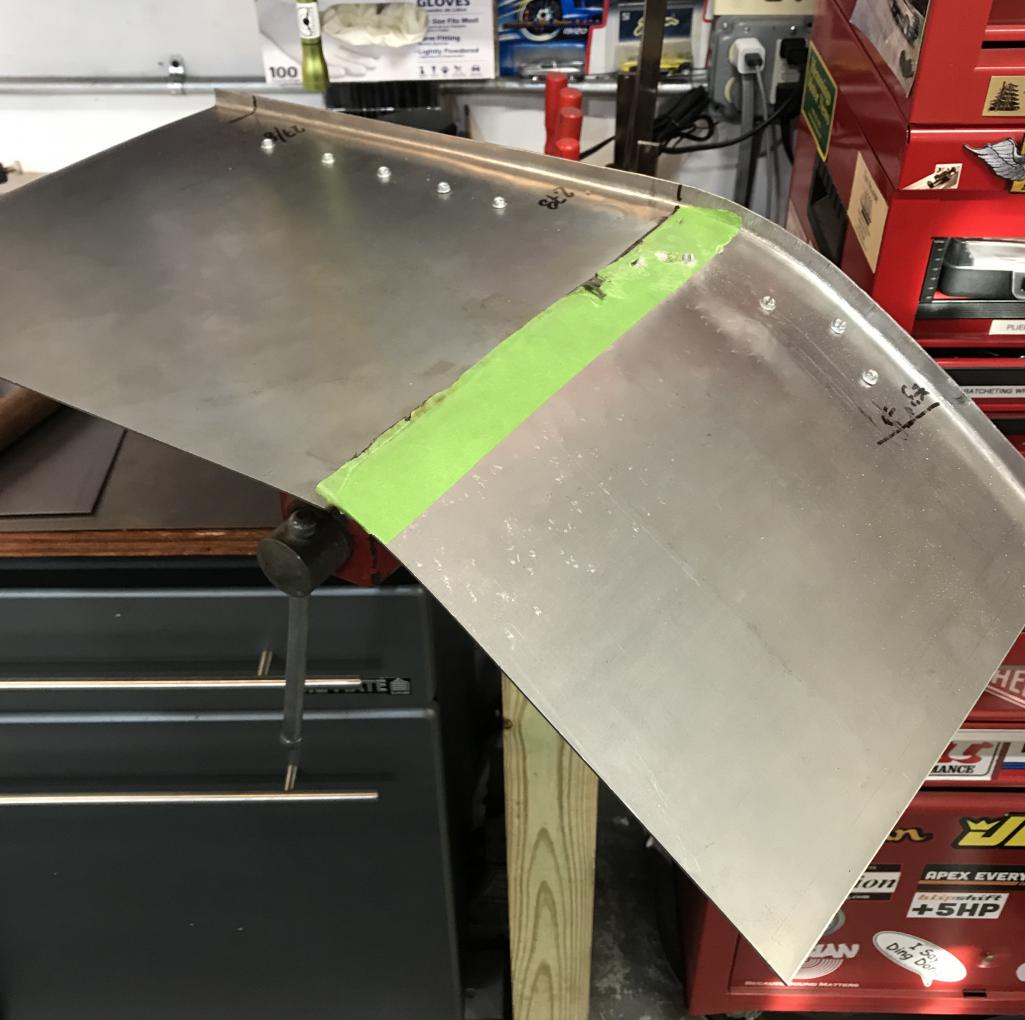
Posted by: Dion Dec 30 2018, 07:50 PM
Then the heating with the torch took place to coax that steel into shape.
“ Fire, fire ,yeah ,yeah”
Attached thumbnail(s)
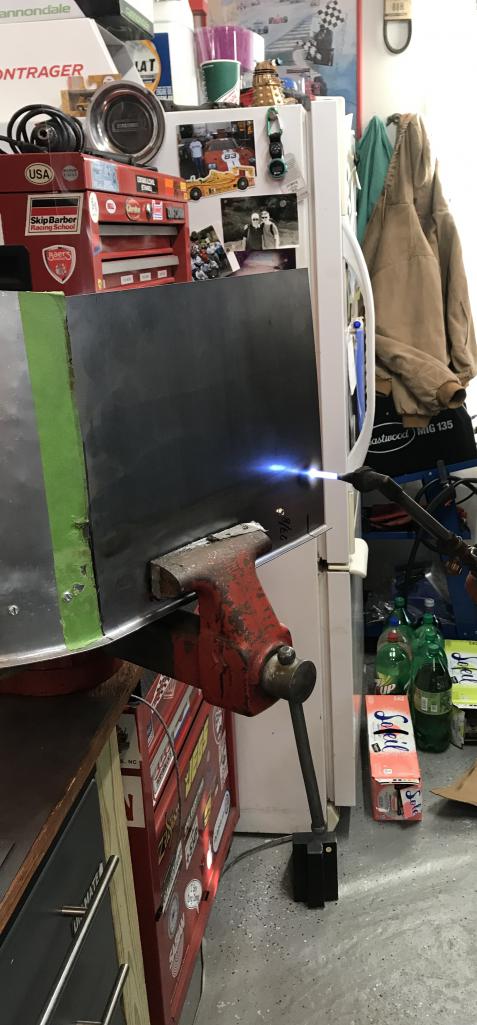
Posted by: Dion Dec 30 2018, 07:51 PM
A nice blue-white flame and cherry coloured steel....
Attached thumbnail(s)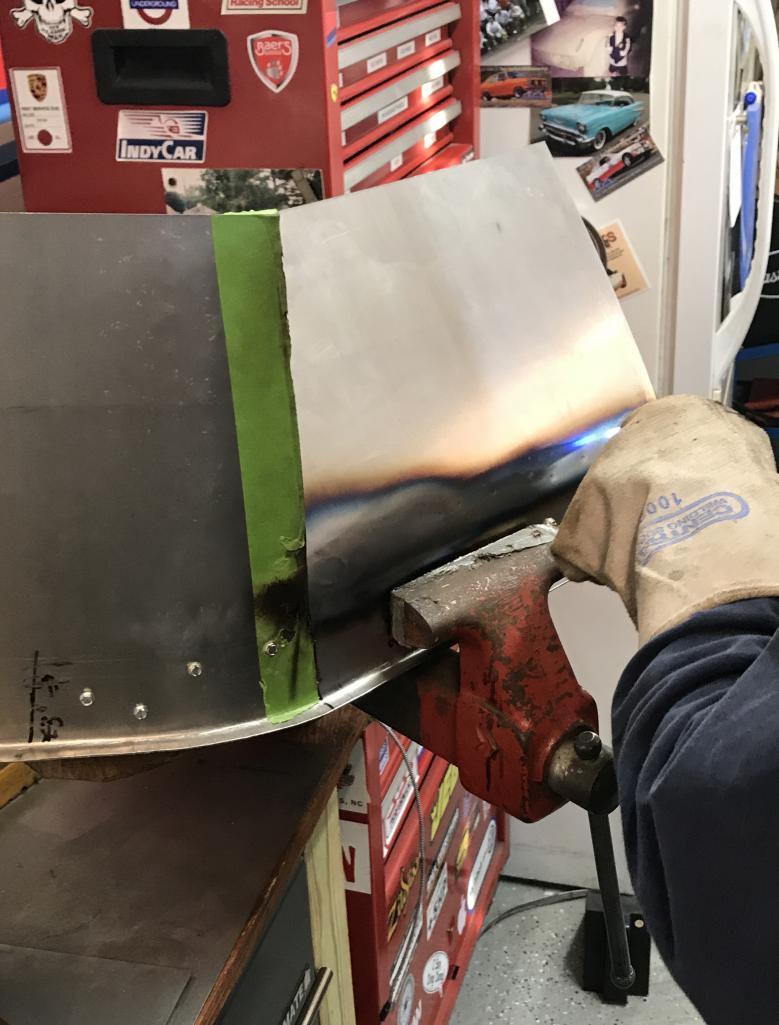
Posted by: Dion Dec 30 2018, 07:53 PM
Then the bending and hammering took place and clamped down into position.
Attached thumbnail(s)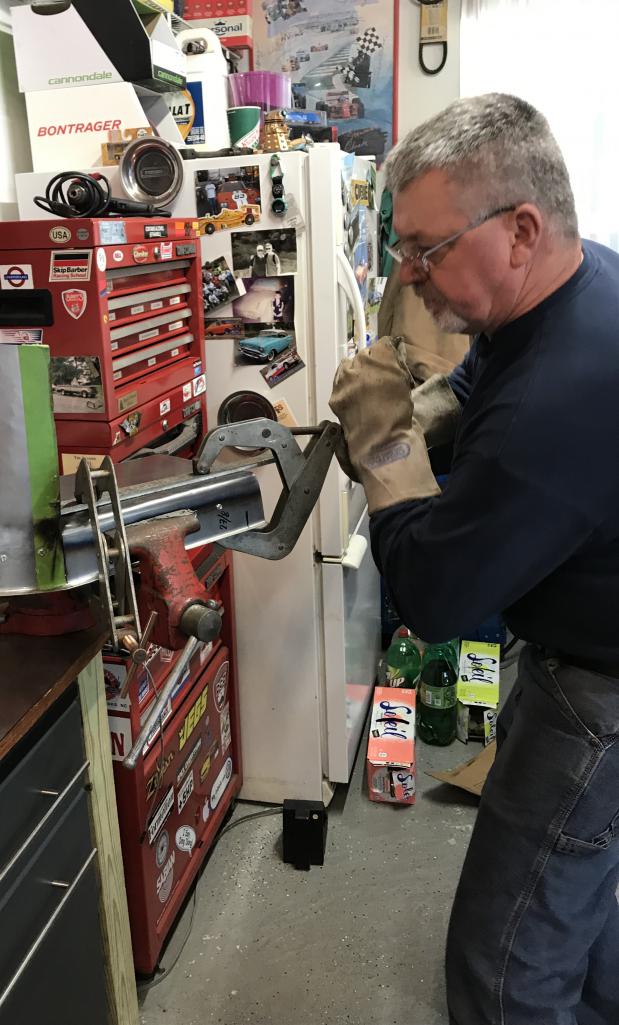

Posted by: Dion Dec 30 2018, 07:55 PM
Then the vertically challenged one (me). Secured the bent piece down to the buck.
Attached thumbnail(s)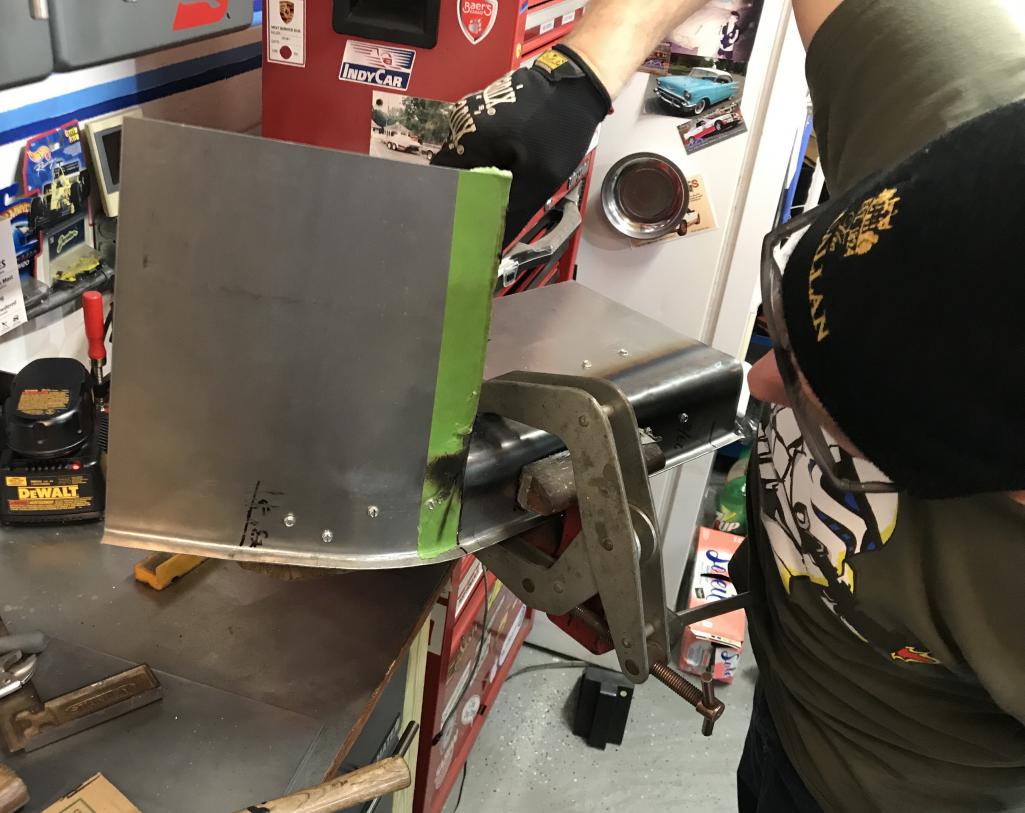
Posted by: Dion Dec 30 2018, 07:58 PM
So we have a portion of this rear kick-up piece beginning to take shape!
This is all very cool and exciting. Enjoying this journey.
Attached thumbnail(s)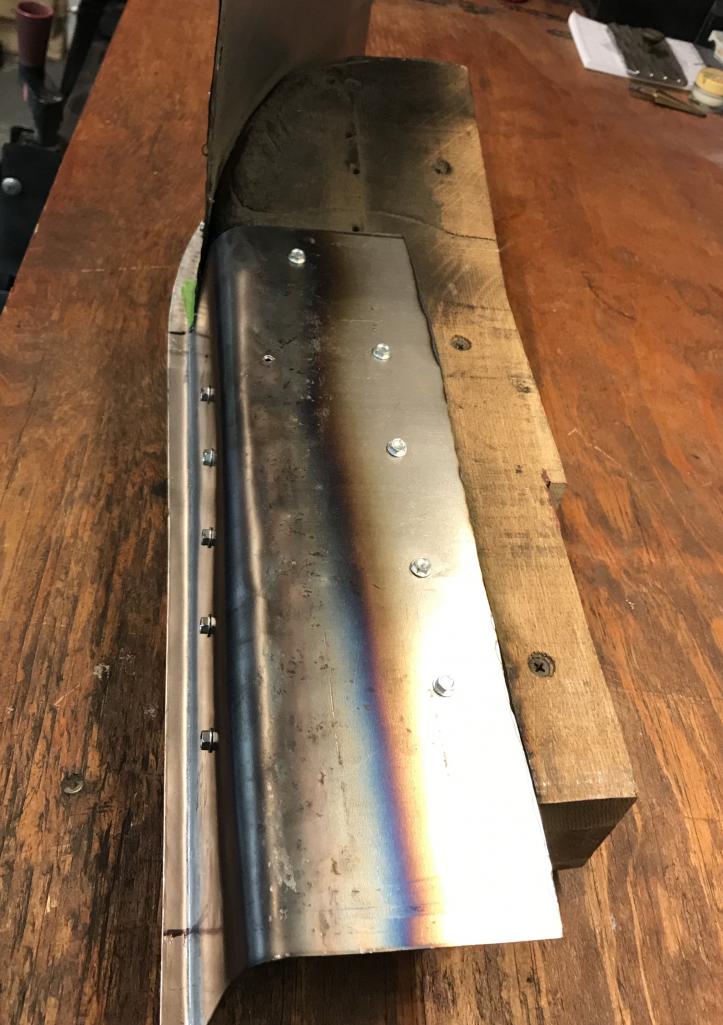

Posted by: Dion Dec 30 2018, 08:01 PM
Kick up
Attached thumbnail(s)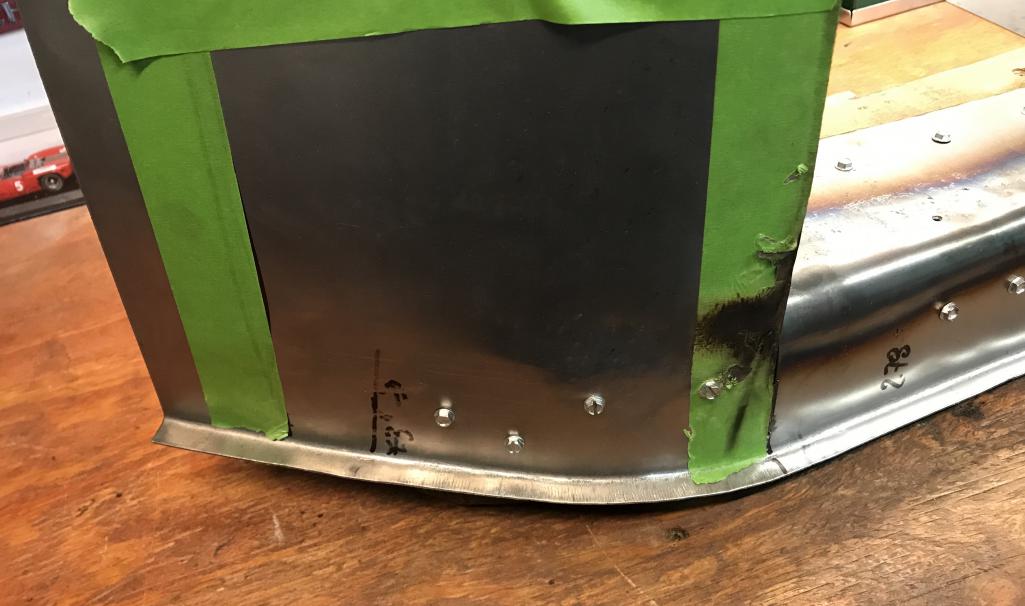
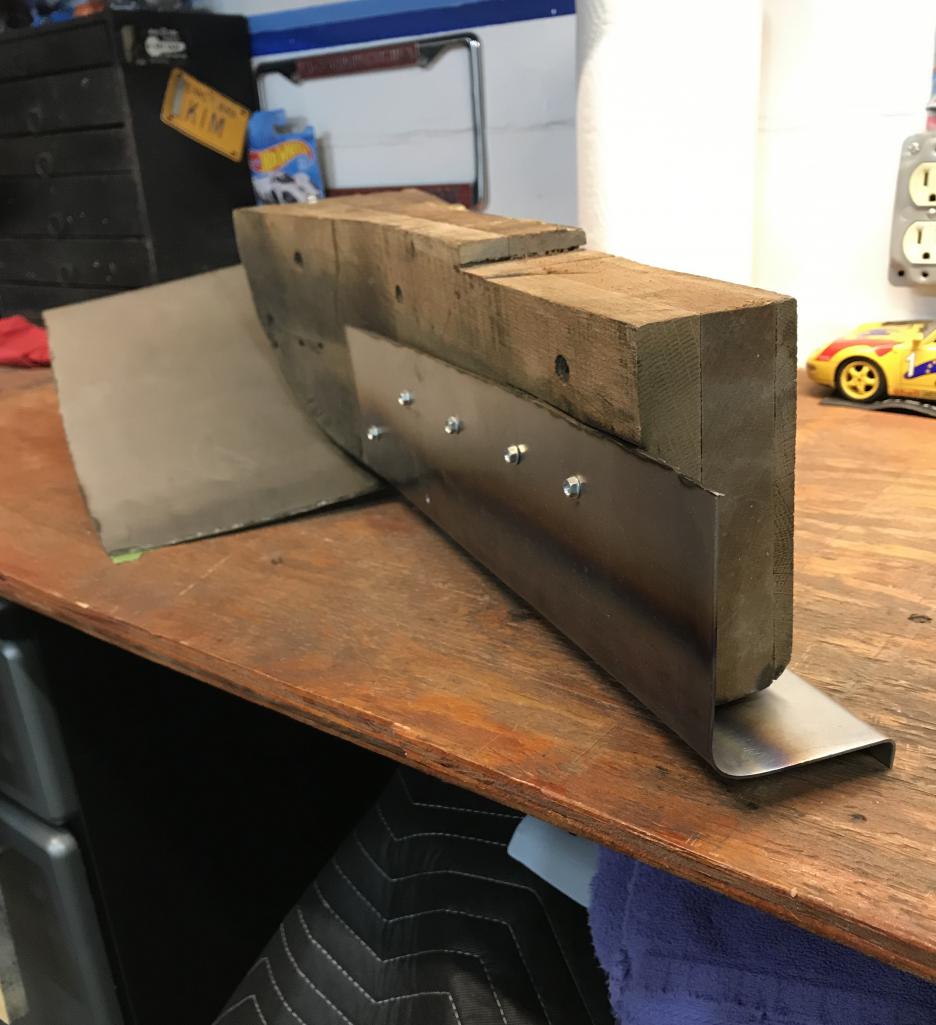
Posted by: Dion Dec 30 2018, 08:07 PM
The wide portion is the “floor” of the kickup yet to be pie cut and wrapped around the buck.
Attached thumbnail(s)
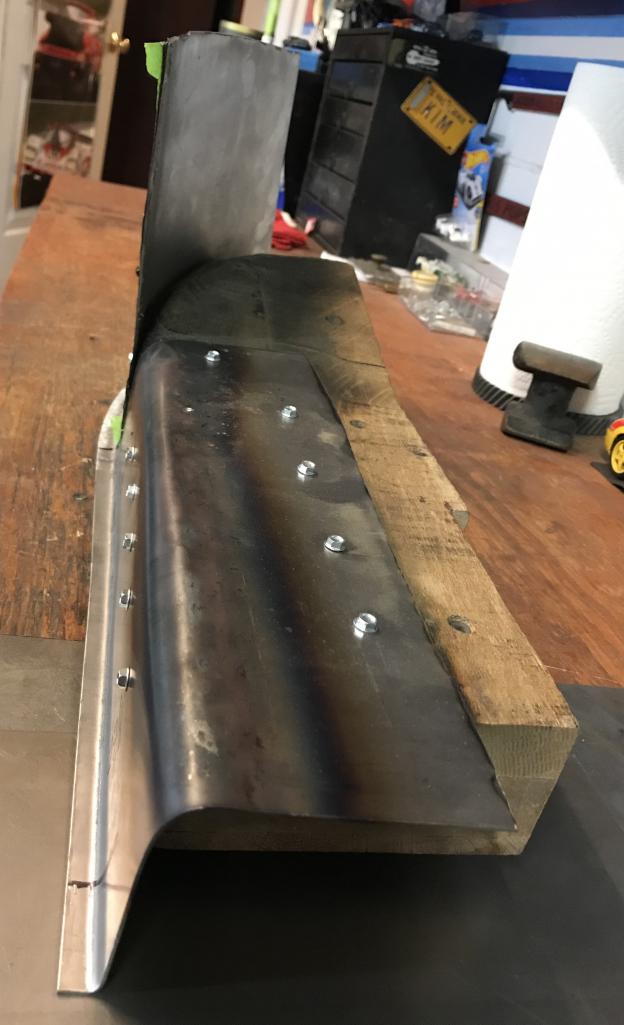
Posted by: Dion Dec 30 2018, 08:09 PM
Essentially will be oriented like this when welded to chassis . To be continued....
Attached thumbnail(s)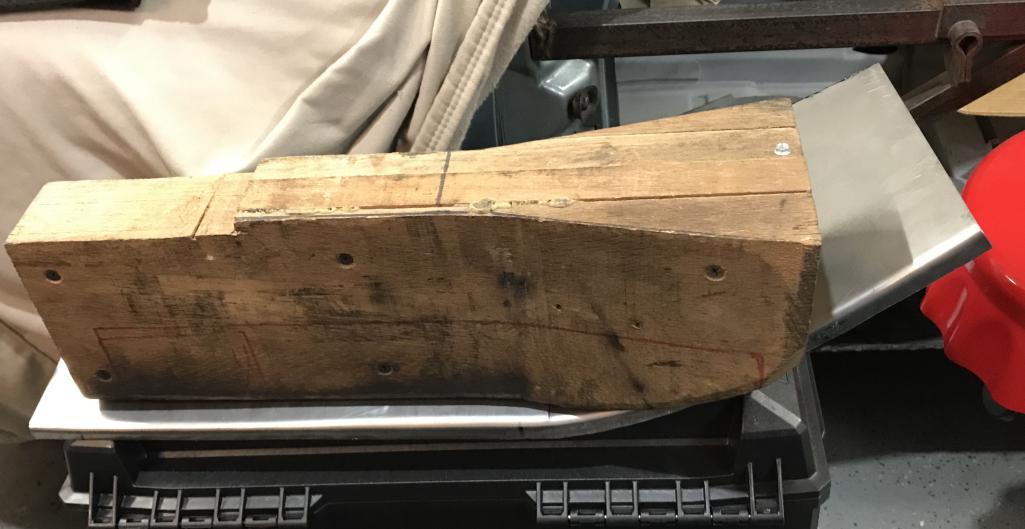
Posted by: 914forme Dec 30 2018, 08:13 PM
Wow that is looking great
Posted by: sixnotfour Dec 30 2018, 08:35 PM
why hasn't any vendors made this piece ??....
Posted by: bbrock Dec 30 2018, 09:01 PM
NICE fab work! Love the pics of you two wizards at work.
Posted by: tygaboy Dec 31 2018, 10:01 AM
Wood and Flame and Force
A needed part from raw steel
Nine fourteen Rebirth
Posted by: TravisNeff Dec 31 2018, 10:26 AM
Great fab work, impressive!
Posted by: mepstein Dec 31 2018, 10:52 AM
WTG guys!
Posted by: Dion Mar 1 2019, 08:23 PM
Ok time for an update. Been doing a lot of odds & ends.
If your following this thread you know I’m not the metal master. So while Dave is
addressing some issues on his car and the weather is crap here, not as bad as
Brent’s but PITA regardless. I’m tackling some items.
Obtained a bloody great 60’s compressor for future chores, fellow member Howard Hinsdale told me about it. Thanks Howard!
Unfortunately it needs a new tank, found a previous welded patch on the bottom. So no go!
I did find another tank so it’s another project to do. I removed the motor and pump.
Should be a fun project getting it back up to snuff.
Attached thumbnail(s)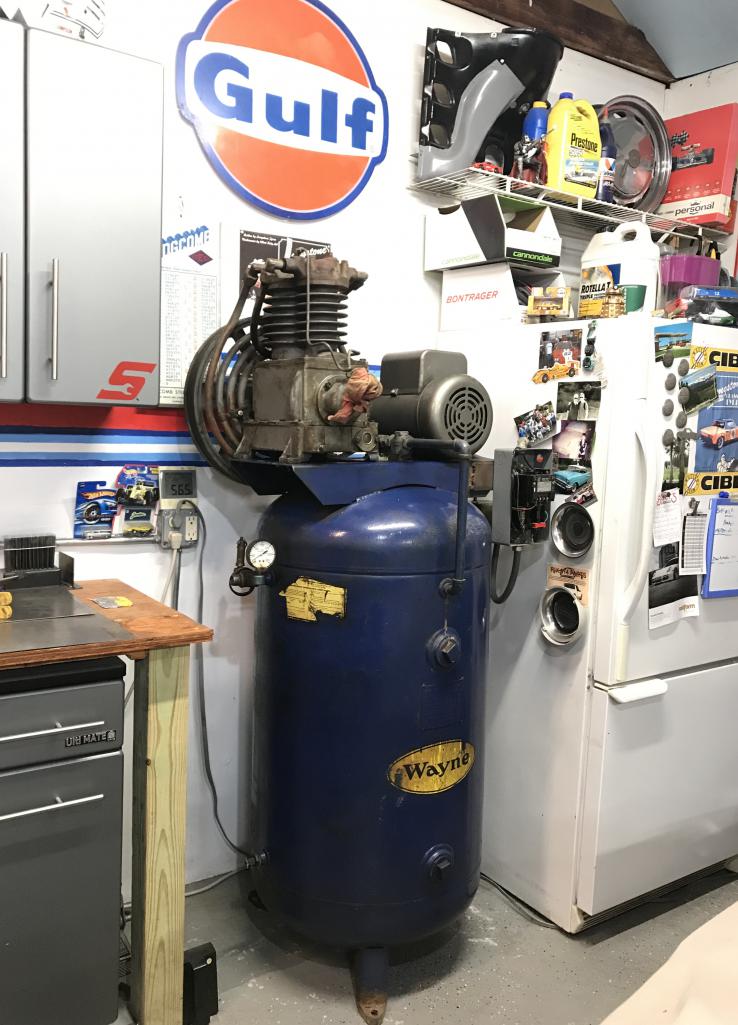
Posted by: Dion Mar 1 2019, 08:24 PM
Motor & pump
Attached thumbnail(s)
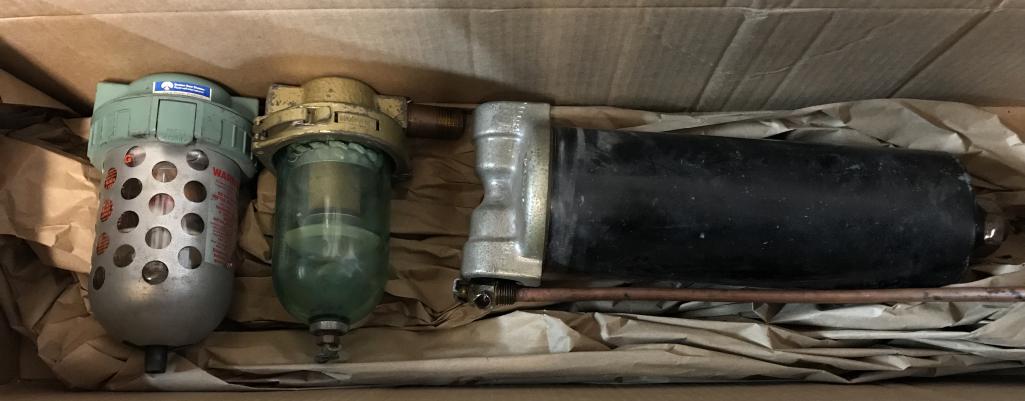
Posted by: Dion Mar 1 2019, 08:29 PM
Started prepping drivers door. A cleanup & primer on the jamb portion.
Attached thumbnail(s)
Posted by: Dion Mar 1 2019, 08:33 PM
Living dangerously. Removed the trunk hinges for a makeover.
In there place... a chunk of wood, grooved to contain that
bone crusher of torsion rod. No the tie-wrap isn’t doing anything.
I had it there to hold the wood in place before i released the rod ends.
Attached thumbnail(s)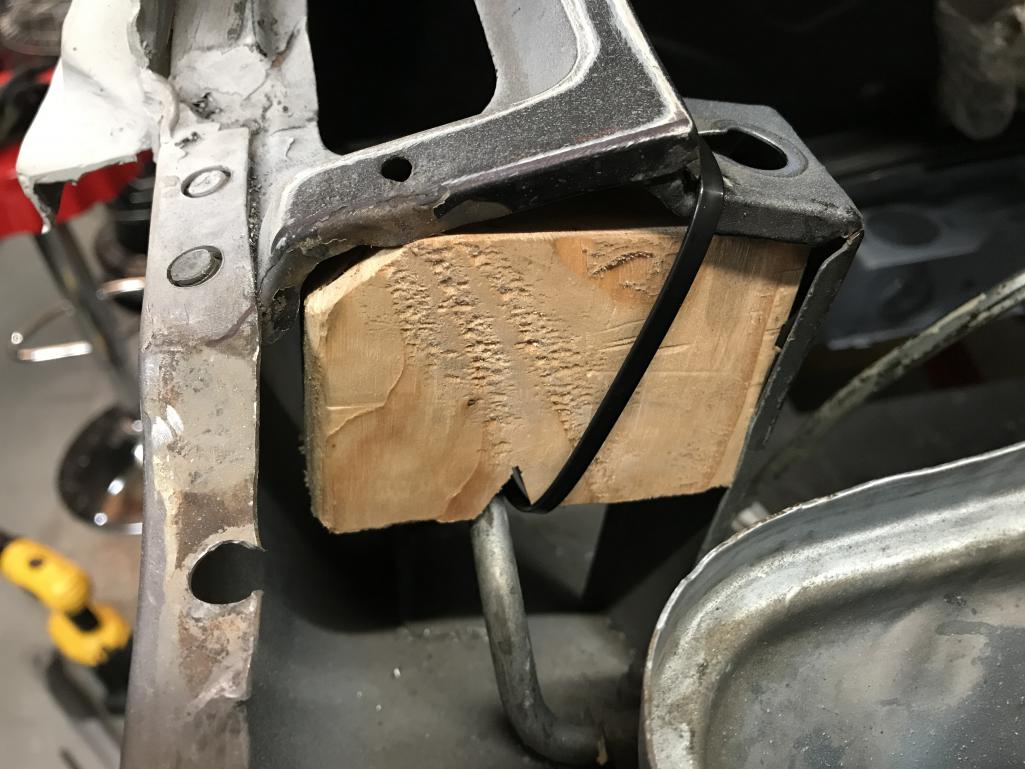
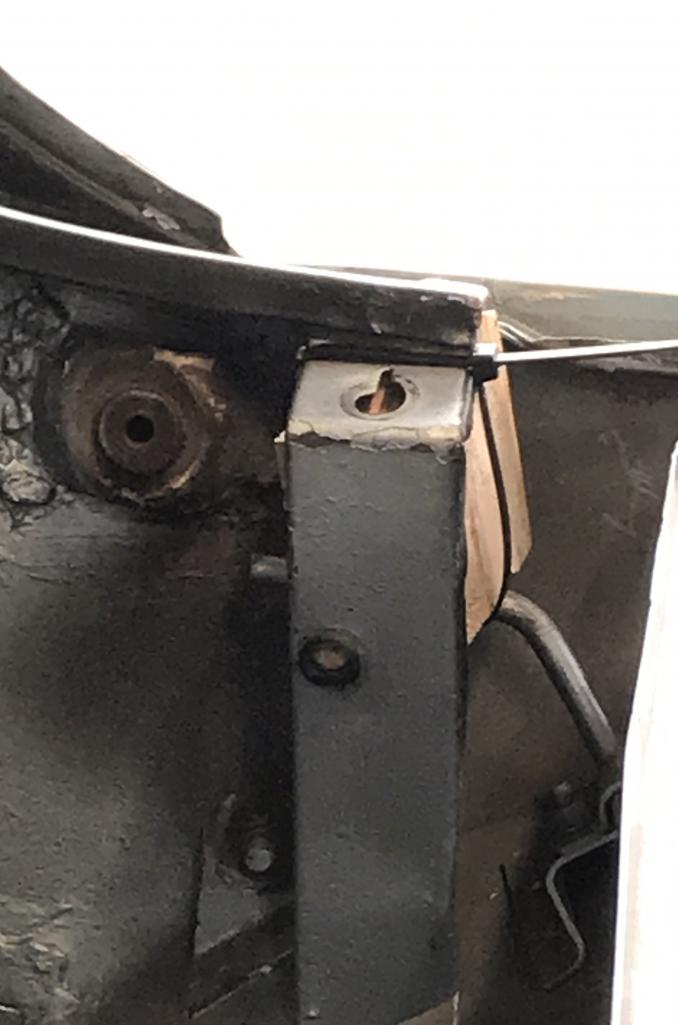
Posted by: Dion Mar 1 2019, 08:38 PM
Cleaned up and painted the trunk supports ....and added that racer look.
So I can pretend I’m piloting down the Mulsanne.
Attached thumbnail(s)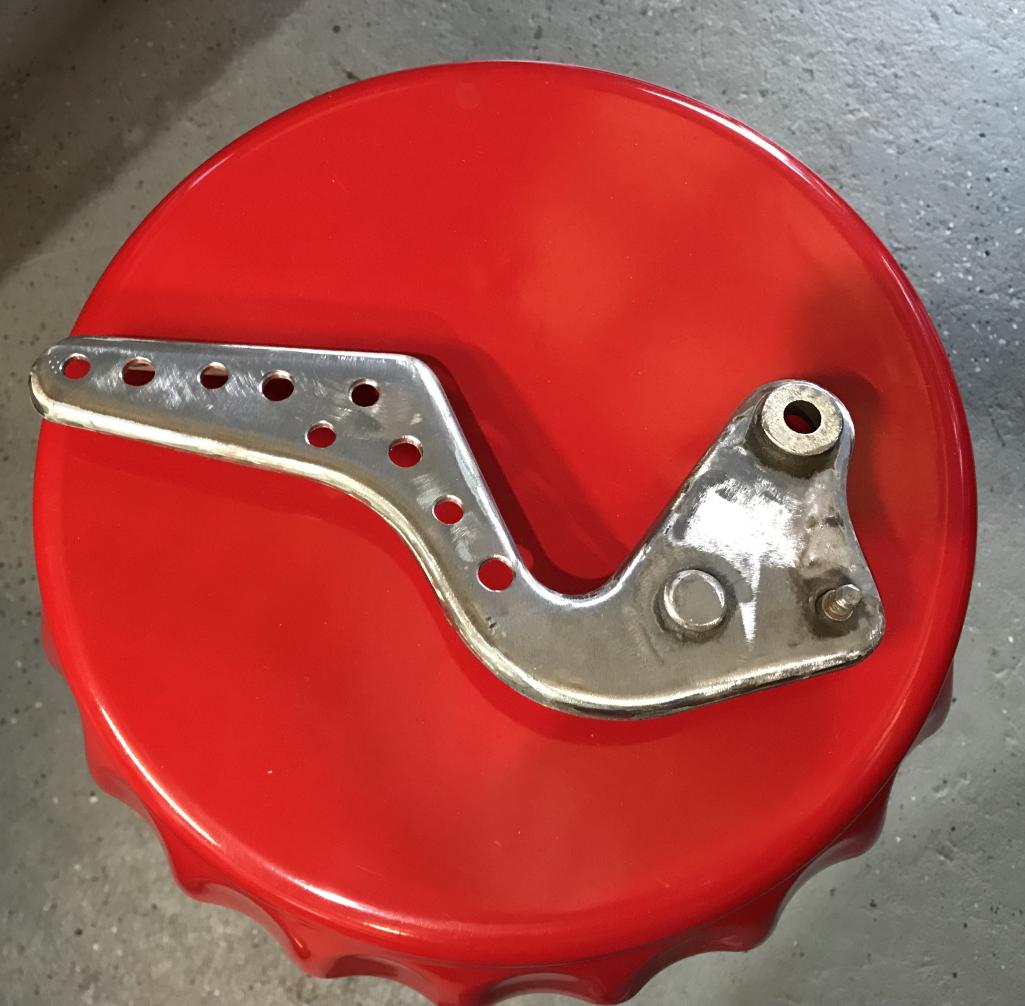
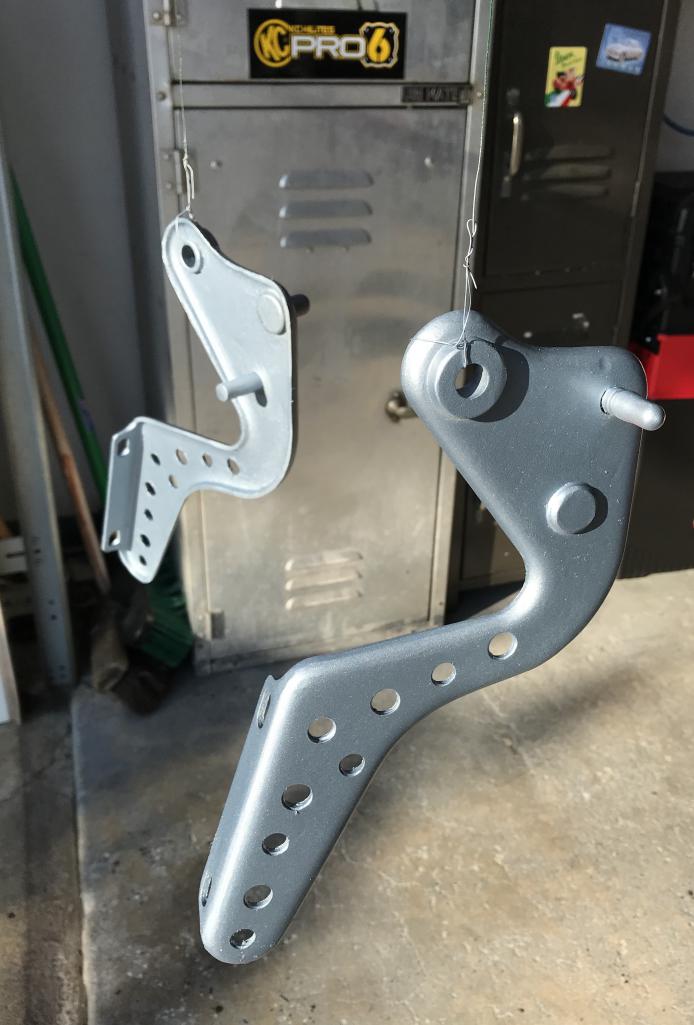
Posted by: Dion Mar 1 2019, 08:43 PM
Another project was what to do with the front valance.
I’m not running a front cooler set up with this six.
Everyone is making cut out style valances.
So I dug out my original and and coaxed out the edges a little with
pie cuts and added some flared edges to get as close as possible to the fender flare dimensions.
Attached thumbnail(s)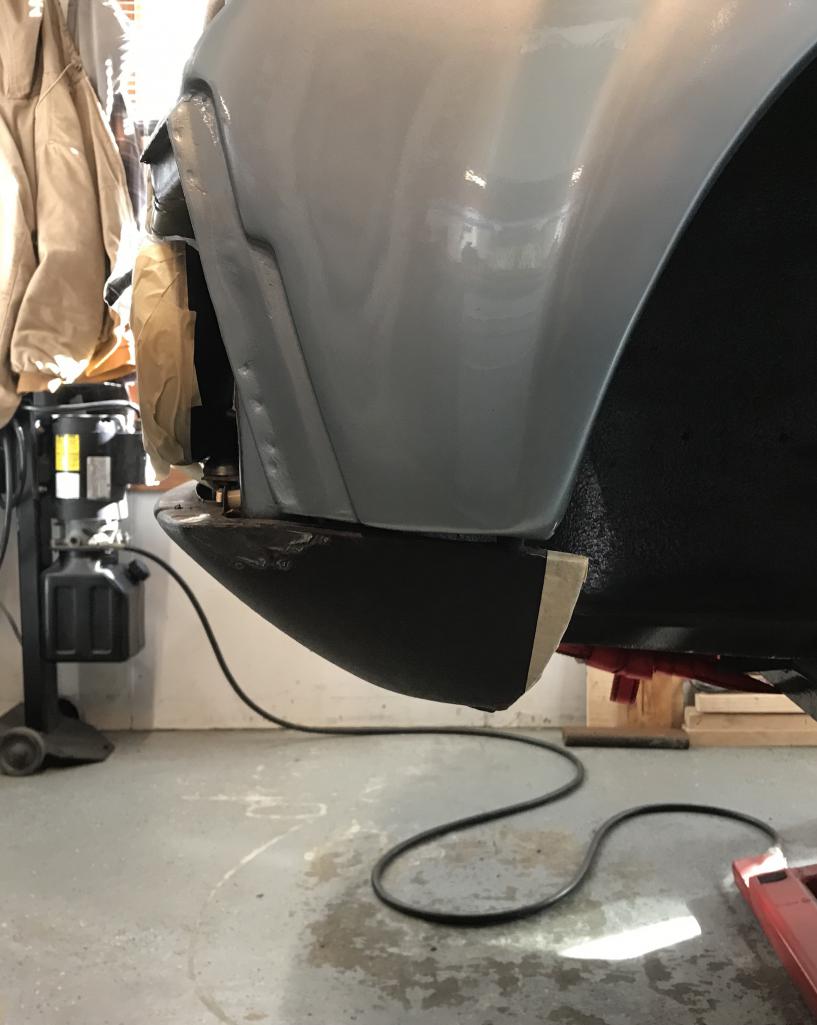
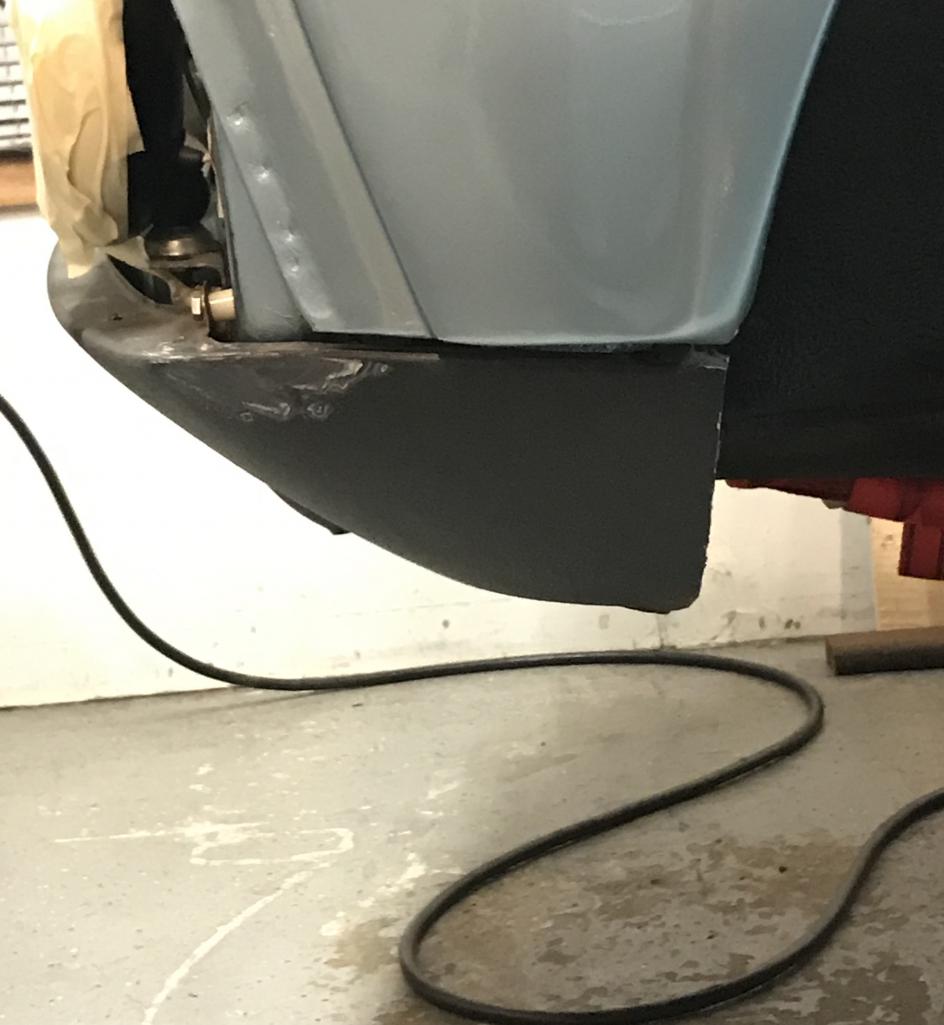
Posted by: Dion Mar 1 2019, 08:46 PM
The pie cuts.... toyed with the idea of adding canards like a 906 but
didn’t want to be Batman like and take out peeps legs. 
Attached thumbnail(s)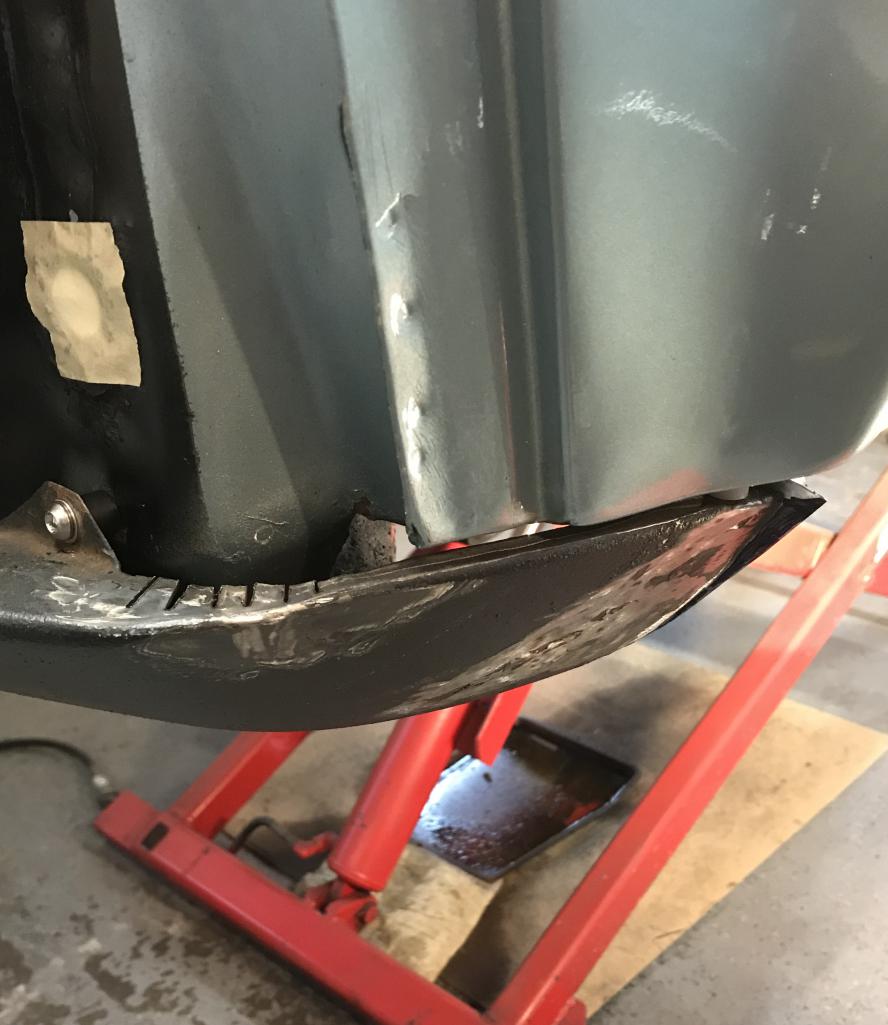
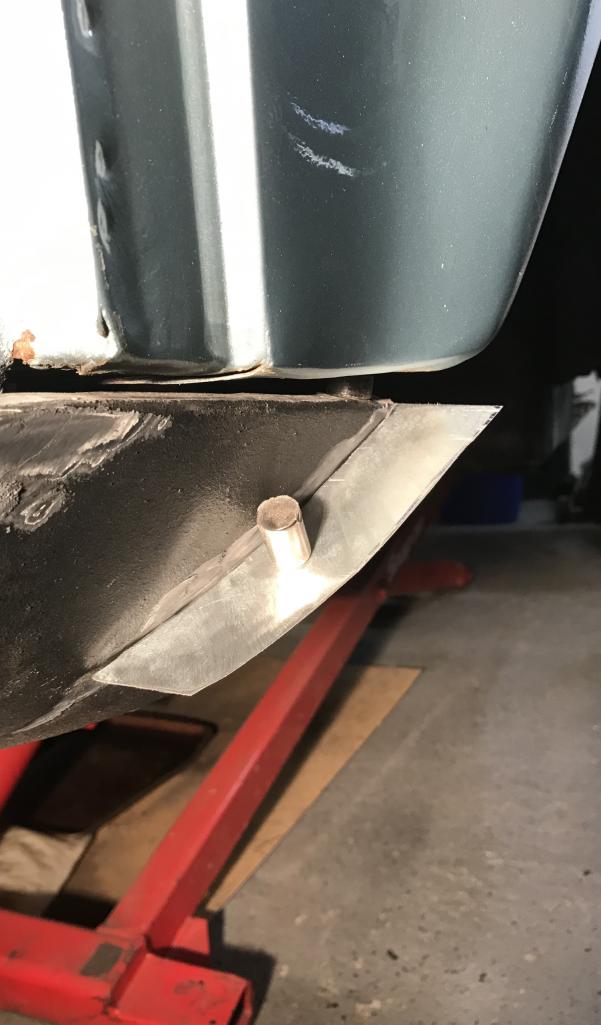
Posted by: Dion Mar 1 2019, 08:48 PM
Adding some metal for rear edge of valance and to build up
the flare.
Attached thumbnail(s)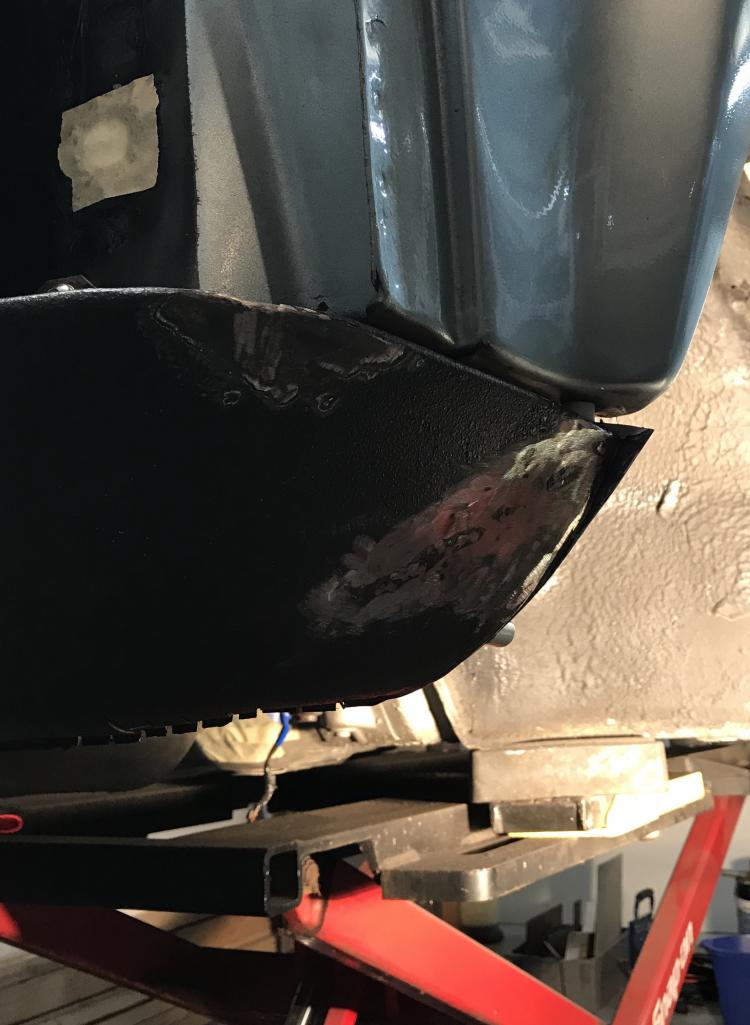
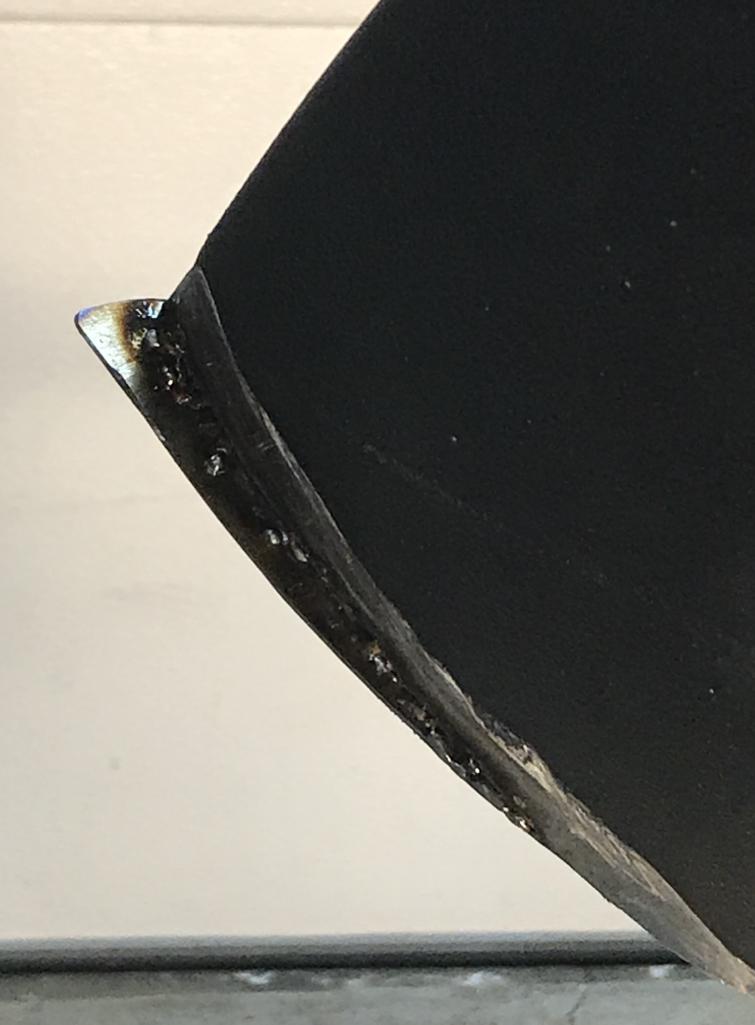
Posted by: Dion Mar 1 2019, 08:52 PM
“aluminum mud” for the shaping. Still need to sand,prep & primer,paint but the weather is not allowing that currently.
Attached thumbnail(s)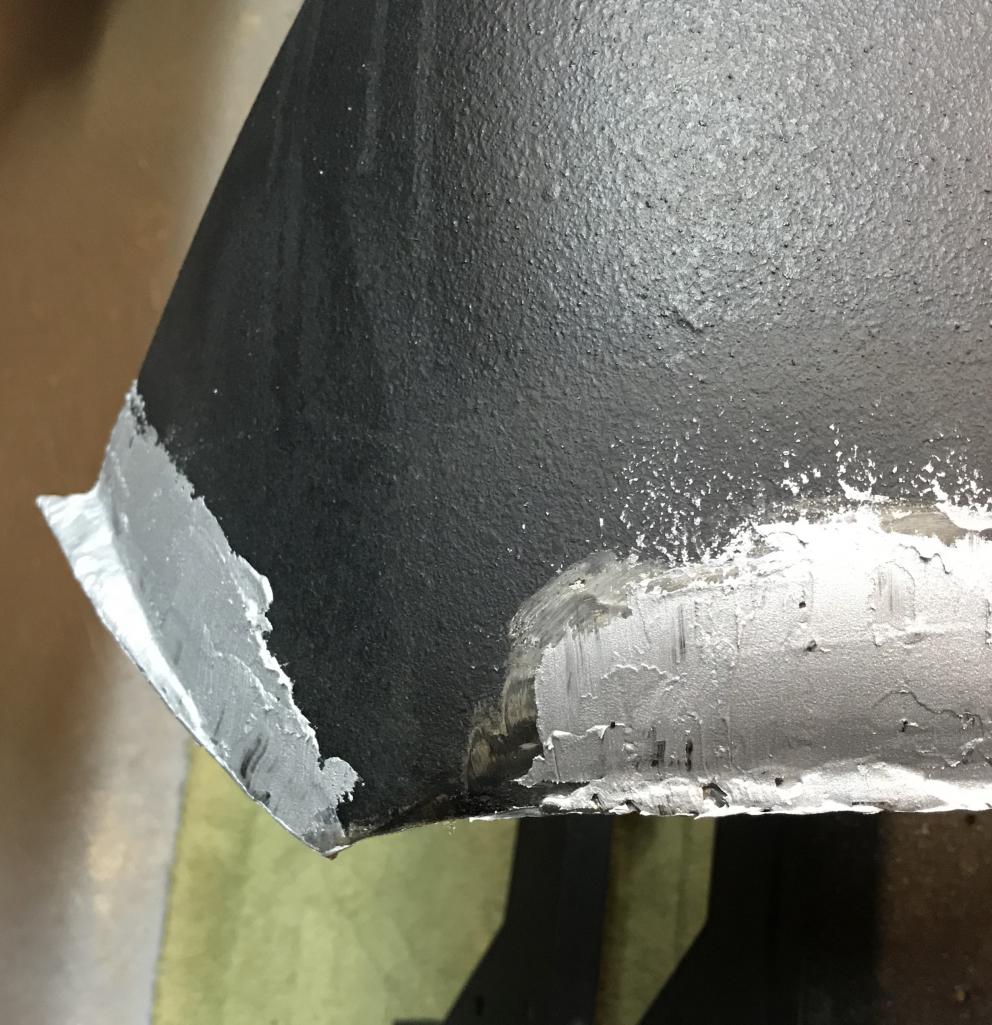

Posted by: Dion Mar 1 2019, 08:54 PM
Edges. Still need some fine tuning.
You get the idea.
Attached thumbnail(s)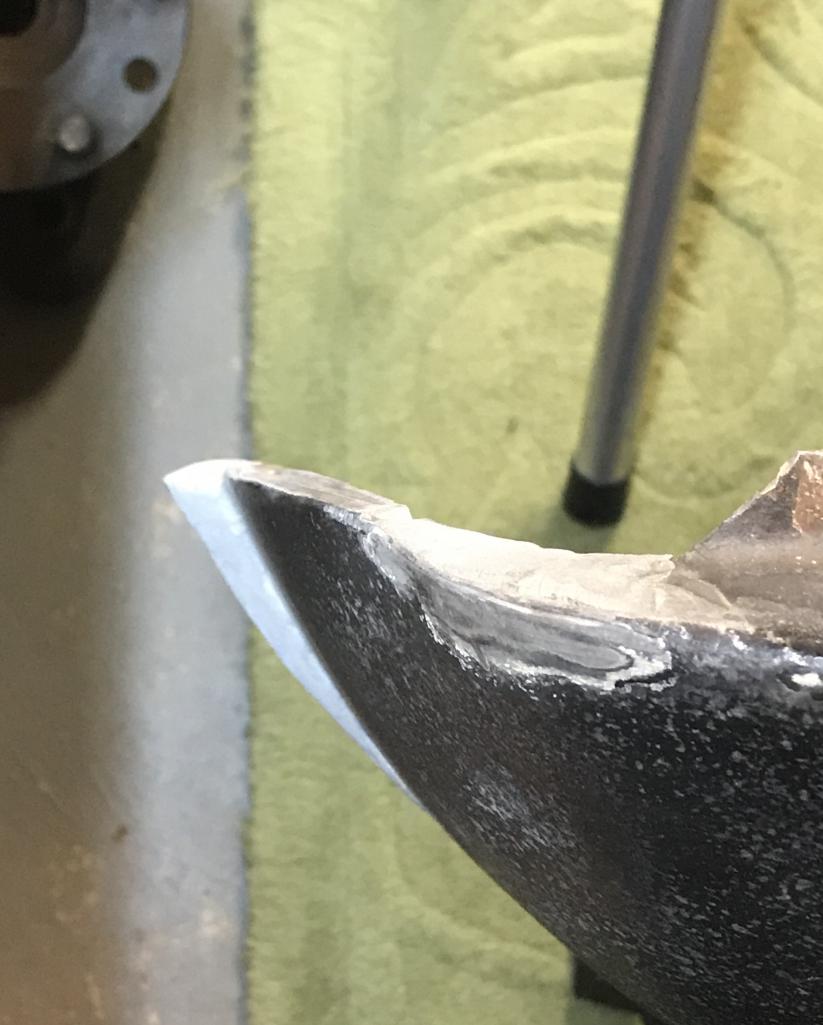
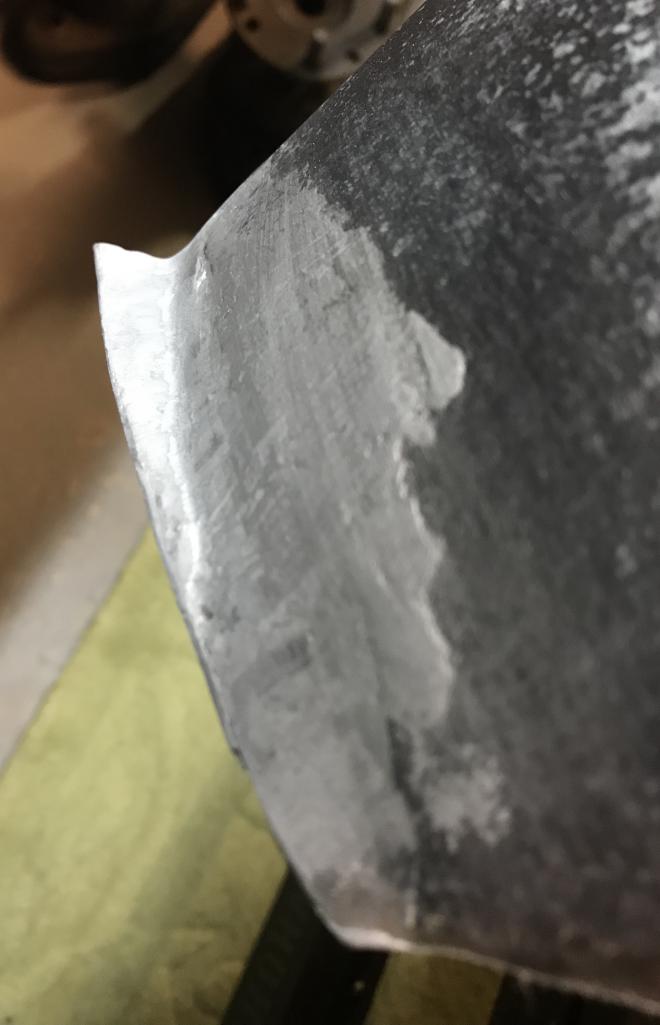
Posted by: Dion Mar 1 2019, 08:55 PM
Some how , all this needs to go back on the car!!
Eventually
Attached thumbnail(s)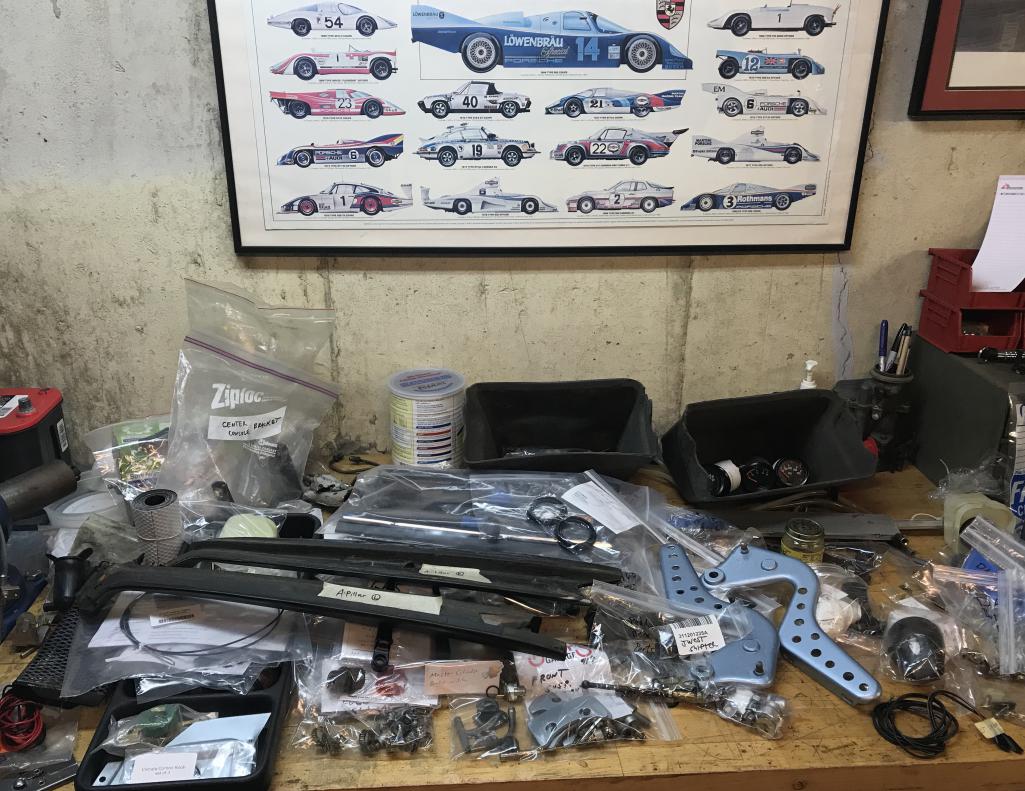
Posted by: bbrock Mar 1 2019, 09:22 PM
Nice work! Can't wait to see the double glove box mod you seem to be planning
Really glad to see you finally got some air. You have no idea how often I think of your project and wonder how the heck you get by without it. Most recently was... well... just a few hours ago.
Oh, and peeps legs are over rated. I wouldn't worry about them.
Posted by: Dion Mar 1 2019, 10:06 PM
[quote name='bbrock' date='Mar 1 2019, 07:22 PM' post='2693386']
Nice work! Can't wait to see the double glove box mod you seem to be planning
Damn you spotted that!
@http://www.914world.com/bbs2/index.php?showuser=20845 , hey I’m going to pick the better one to rehab.
Did you list where you obtained that flocking kit on your thread?
The local craft stores here aren’t carrying it. When I enquirered about
flocking to the cashier, she called security on me.
Posted by: bbrock Mar 1 2019, 10:10 PM
Nice work! Can't wait to see the double glove box mod you seem to be planning
Damn you spotted that!
@http://www.914world.com/bbs2/index.php?showuser=20845 , hey I’m going to pick the better one to rehab.
Did you list where you obtained that flocking kit on your thread?
The local craft stores here aren’t carrying it. When I enquirered about
flocking to the cashier, she called security on me.
I did, but you won't like it. @http://www.914world.com/bbs2/index.php?showuser=18263 sent me what he had for me to use and then send back what was left. You can get it on ebay though. Charcoal is what you want and you can pick up acrylic paint at your craft store for the glue.
Posted by: Dion Mar 1 2019, 10:14 PM
Thanks Brent! I’ll search it out.
Posted by: raynekat Mar 7 2019, 03:20 PM
Nice work! Can't wait to see the double glove box mod you seem to be planning
Damn you spotted that!
@http://www.914world.com/bbs2/index.php?showuser=20845 , hey I’m going to pick the better one to rehab.
Did you list where you obtained that flocking kit on your thread?
The local craft stores here aren’t carrying it. When I enquirered about
flocking to the cashier, she called security on me.
I did, but you won't like it. @http://www.914world.com/bbs2/index.php?showuser=18263 sent me what he had for me to use and then send back what was left. You can get it on ebay though. Charcoal is what you want and you can pick up acrylic paint at your craft store for the glue.
I got my kit on eBay from: http://www.ebaystores.com/Flocking-Unlimited
I'd contact them and have them put together a charcoal kit for you. I think I only got the flock and application bottle from them and bought the acrylic paint at a local craft store. This group should be able to give you a matching paint as well.
Posted by: Dion Mar 7 2019, 07:51 PM
Thanks @http://www.914world.com/bbs2/index.php?showuser=18263 for the info. Need to make a purchase & take care of the glove box.
This is a nice project for working in the WARM basement.
Is it spring yet?!?
Posted by: saigon71 Mar 8 2019, 05:46 AM
Some impressive work going on here Dion.
Will she be ready for Hershey?
Posted by: Dion Mar 8 2019, 07:34 AM
Not this year Bob. Thanks for being optimistic for
me ! Hahahaha. Making progress, but lots to do. I’ll be at Hershey but
without a 914. See ya there.
Posted by: Dion Mar 11 2019, 03:01 PM
Finally had some sun & decent temps to apply primer & paint to the front valance.
First up the primer
Attached thumbnail(s)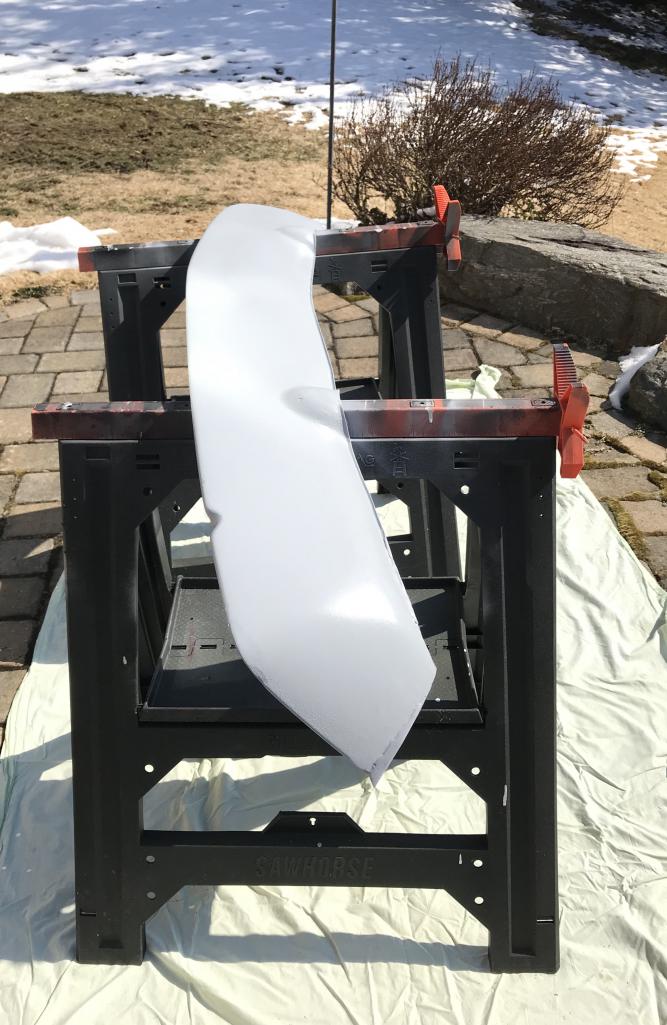
Posted by: Dion Mar 11 2019, 03:03 PM
I used SEM satin black stone chip paint for the finish look.
Applied 3 coats.
Attached thumbnail(s)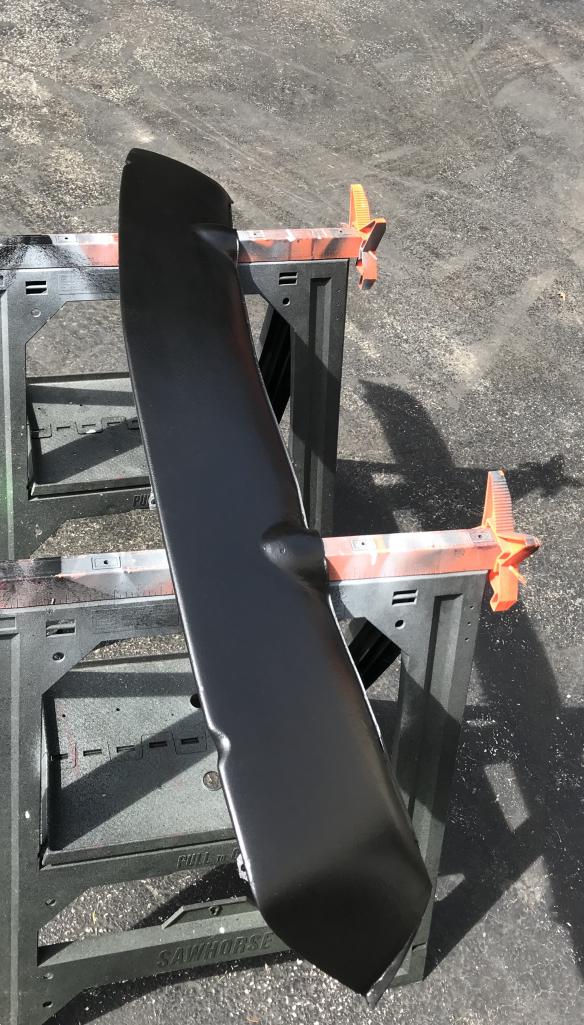
Posted by: Dion Mar 11 2019, 03:05 PM
Did a test fit. I’m pretty happy with it.
The contour match is ok. I can live with it.
Attached thumbnail(s)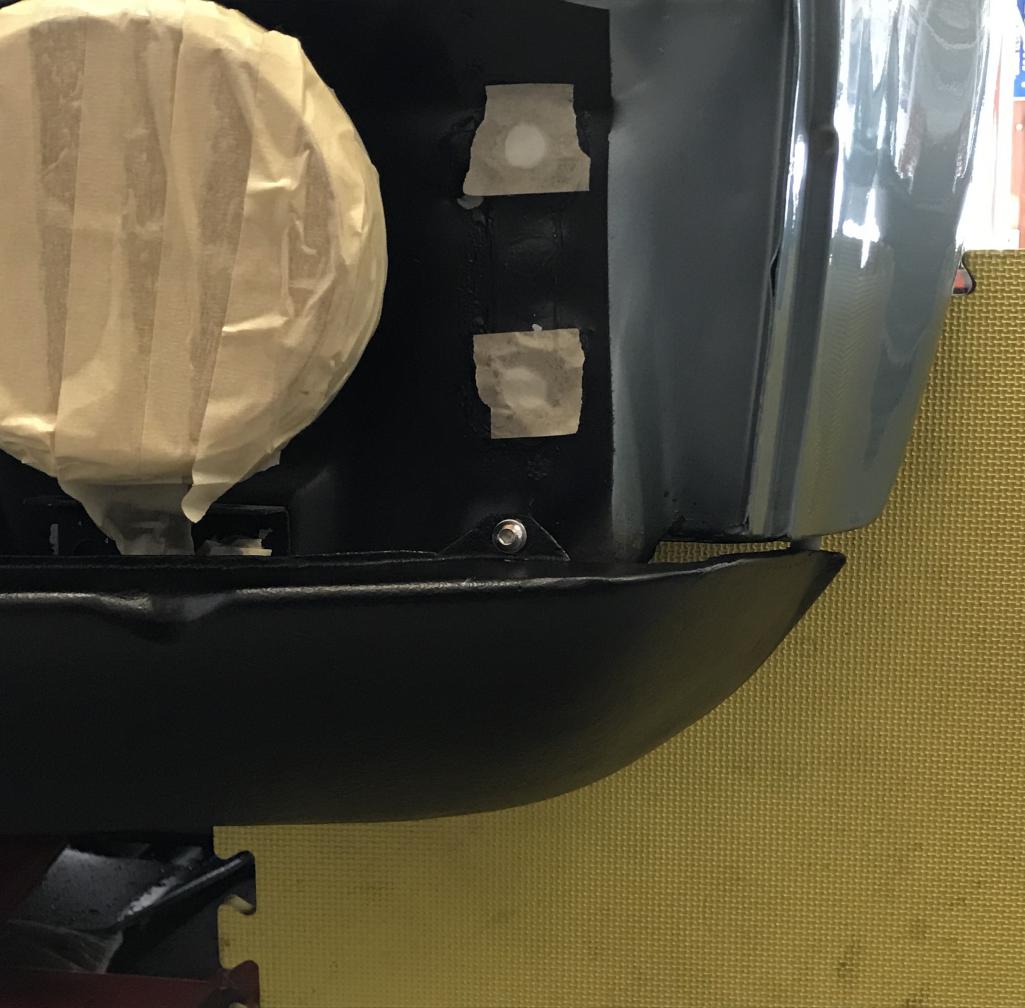
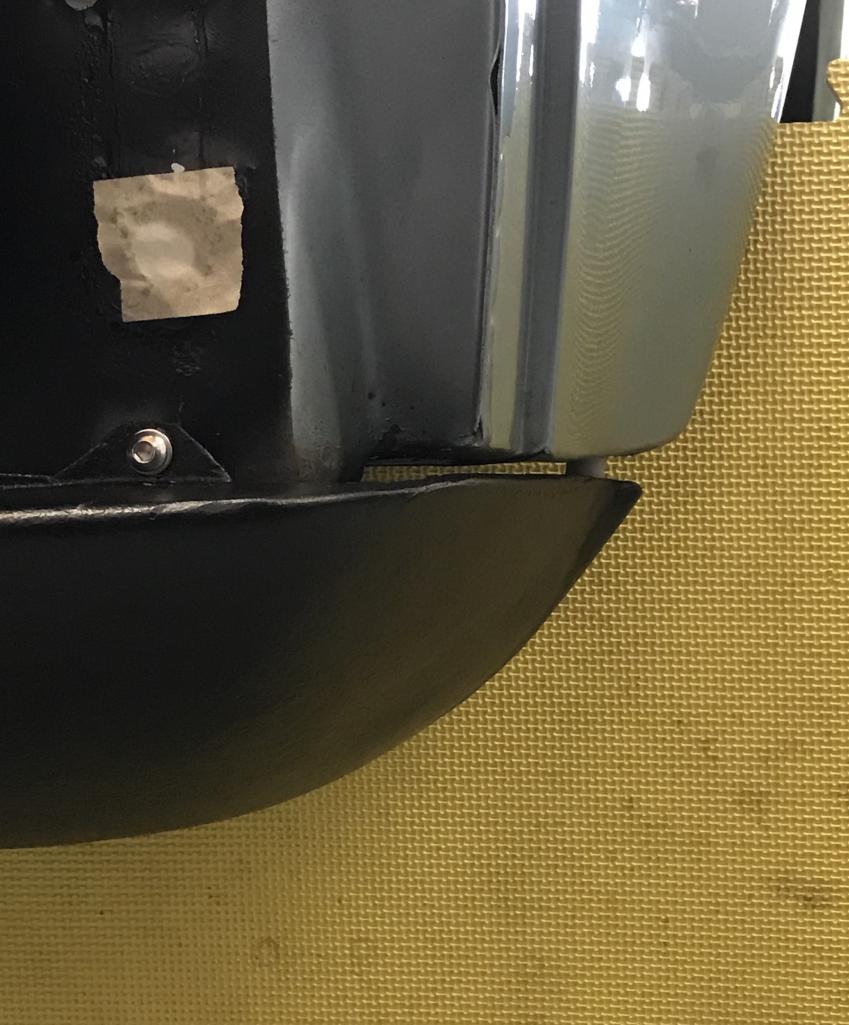
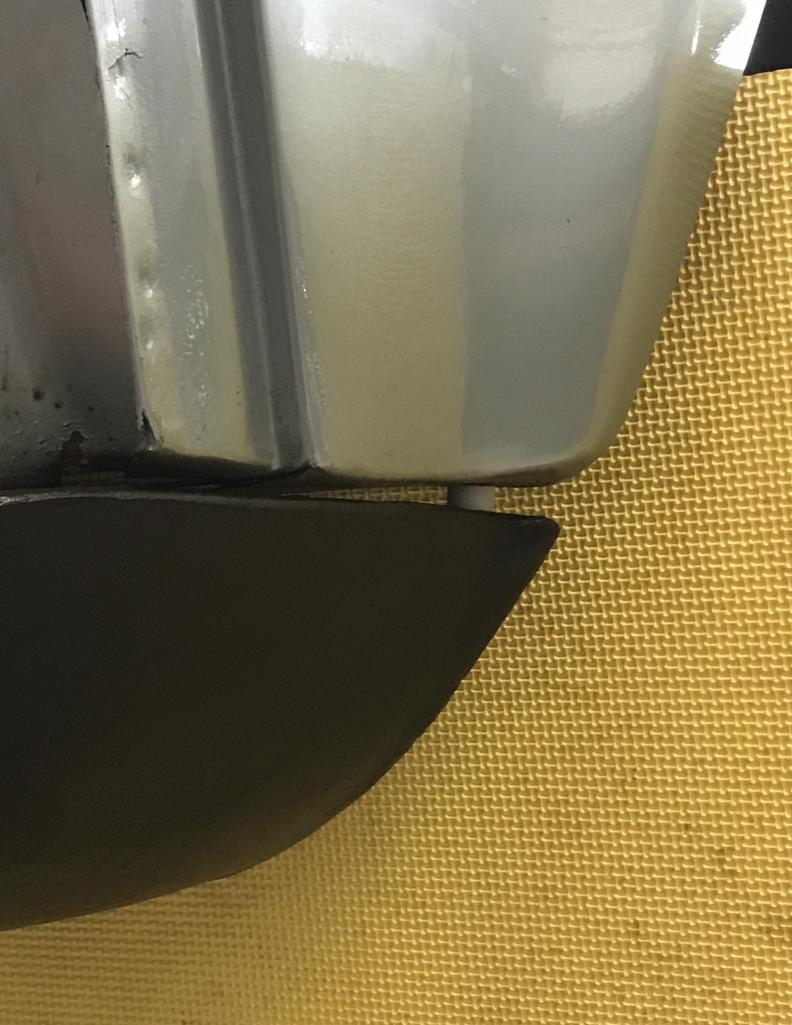
Posted by: Dion Mar 11 2019, 03:10 PM
Long view.
Attached thumbnail(s)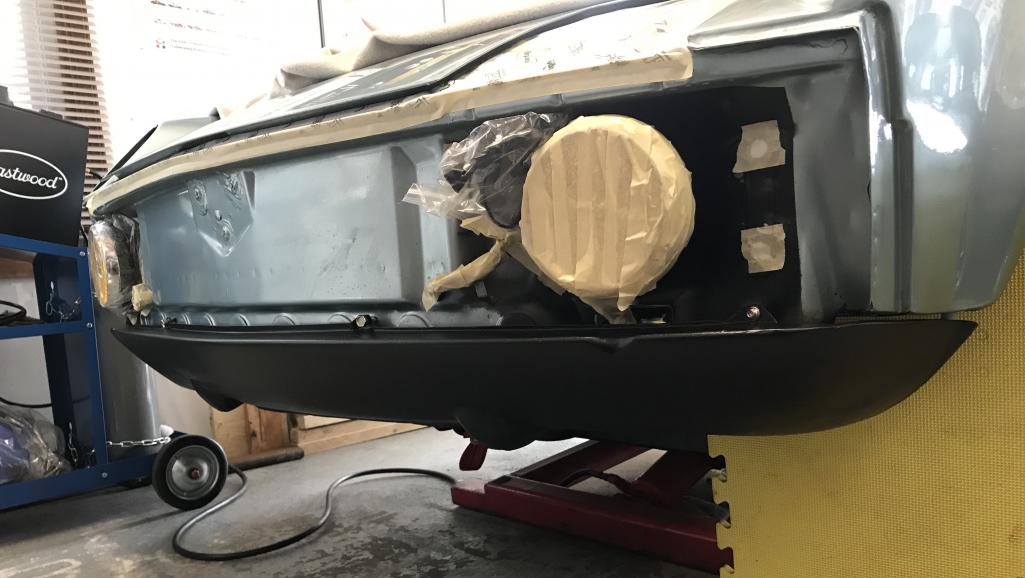
Posted by: bbrock Mar 11 2019, 03:28 PM
My goodness that's a lot of snow
That valance looks nice. How do you like the stone chip paint? I was thinking of using that myself on valances and rocker covers. Looking sharp
Posted by: Dion Mar 11 2019, 03:54 PM
@http://www.914world.com/bbs2/index.php?showuser=20845 Ha, our snow prolly looks like a lite frost to you! Hey Brent,
I like the SEM stuff. Especially the satin trim black.
The “stone chip” is nice. It all depends on distance your spraying with
the rattle can. Farther=small beads, close=blobs. If your using a “gun” I’m sure you’ll have better control.
The only thing is I’m not a total fan of is the sheen. It looks ... well...
rubbery. Being it’s gonna get pelted with debris, fine. Even though it’s
Satin finish it’s more gloss than I’d like.
I’m gonna try and topcoat with normal black satin.
Maybe temps affected it.
It was only 54F out today. I’ll try again when warmer.
I prefer the rockers just smooth satin.
Looking good out there! Keep at it.
Cheers. Dion
Posted by: bbrock Mar 11 2019, 07:32 PM
@http://www.914world.com/bbs2/index.php?showuser=20845 Ha, our snow prolly looks like a lite frost to you! Hey Brent,
I like the SEM stuff. Especially the satin trim black.
The “stone chip” is nice. It all depends on distance your spraying with
the rattle can. Farther=small beads, close=blobs. If your using a “gun” I’m sure you’ll have better control.
The only thing is I’m not a total fan of is the sheen. It looks ... well...
rubbery. Being it’s gonna get pelted with debris, fine. Even though it’s
Satin finish it’s more gloss than I’d like.
I’m gonna try and topcoat with normal black satin.
Maybe temps affected it.
It was only 54F out today. I’ll try again when warmer.
I prefer the rockers just smooth satin.
Looking good out there! Keep at it.
Cheers. Dion
Good info, thanks! I was hoping it was more like the stuff on the rockers of my newer cars that shows a little extra orange peel, but has the same gloss/sheen as the body paint. I can live with some orange peel on the rockers in exchange for fewer chips, but yeah, it needs to be satin.
Posted by: mb911 Mar 12 2019, 05:57 AM
Looks great.. I wonder though if you bought the upol that defiantly used on his roof would be an even better match??
Both @http://www.914world.com/bbs2/index.php?showuser=2766 and @http://www.914world.com/bbs2/index.php?showuser=20845 you are passing me up.. Looking great.
Posted by: 914dave Mar 12 2019, 06:24 AM
Looks great.. I wonder though if you bought the upol that defiantly used on his roof would be an even better match??
Both @http://www.914world.com/bbs2/index.php?showuser=2766 and @http://www.914world.com/bbs2/index.php?showuser=20845 you are passing me up.. Looking great.
Ben
You don’t want to use undercoat on the roof. Too unstable, ask me how I know. The paint will move under the trunk clips and crack. I stripped mine down and am using Raptor bed liner reduced 10% thru a Shutz gun. Raptor uses a hardener. Someone in my paint class did Colorado fender flares in Raptor and painted body color over it. 3 years and still holding up to daily driving.
Dave
Posted by: mb911 Mar 12 2019, 03:31 PM
Looks great.. I wonder though if you bought the upol that defiantly used on his roof would be an even better match??
Both @http://www.914world.com/bbs2/index.php?showuser=2766 and @http://www.914world.com/bbs2/index.php?showuser=20845 you are passing me up.. Looking great.
Ben
You don’t want to use undercoat on the roof. Too unstable, ask me how I know. The paint will move under the trunk clips and crack. I stripped mine down and am using Raptor bed liner reduced 10% thru a Shutz gun. Raptor uses a hardener. Someone in my paint class did Colorado fender flares in Raptor and painted body color over it. 3 years and still holding up to daily driving.
Dave
Upol is the brand name of raptor bed liner. We are on the same page.
Posted by: Dion Mar 16 2019, 07:26 PM
Following the master of all things detailed... @http://www.914world.com/bbs2/index.php?showuser=20845 ,
(He keeps raising the bar doesn’t he?!)
I rejuvenated the glove box.
It was in a sad state. The mice had enjoyed a stay in it.
Attached thumbnail(s)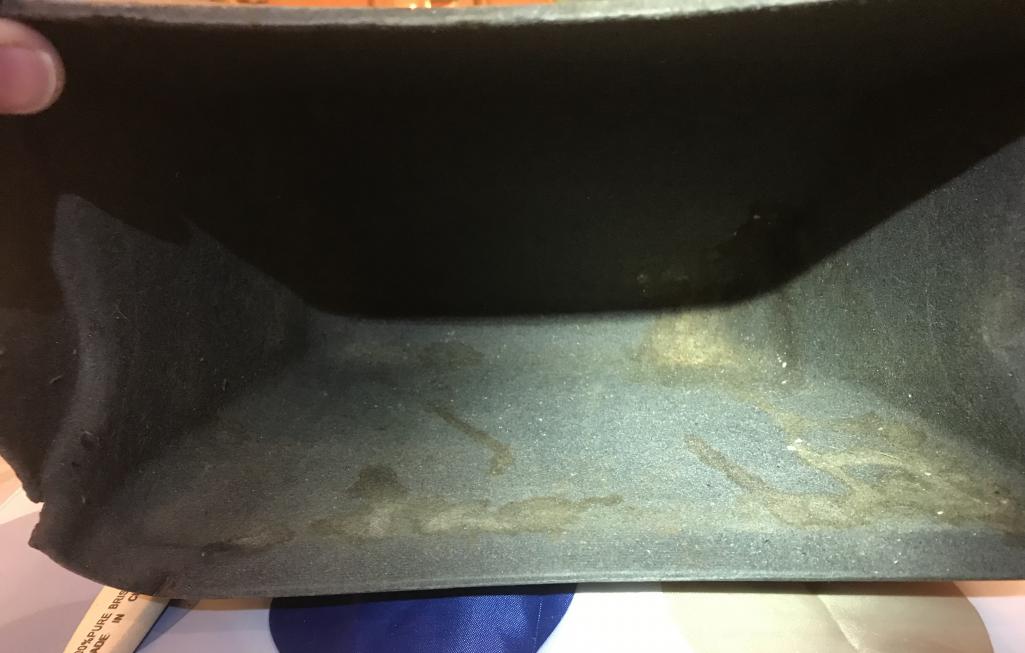
Posted by: Dion Mar 16 2019, 07:27 PM
First the acrylic grey paint..
Attached thumbnail(s)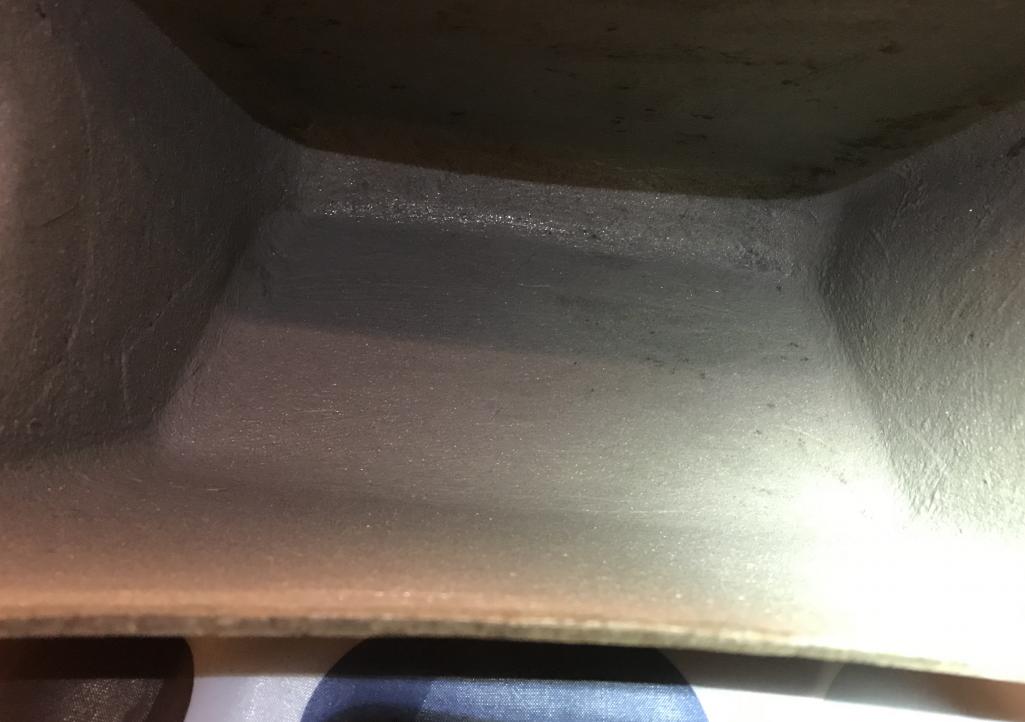
Posted by: Dion Mar 16 2019, 07:28 PM
Then the gray (grey?) flocking ...
Attached thumbnail(s)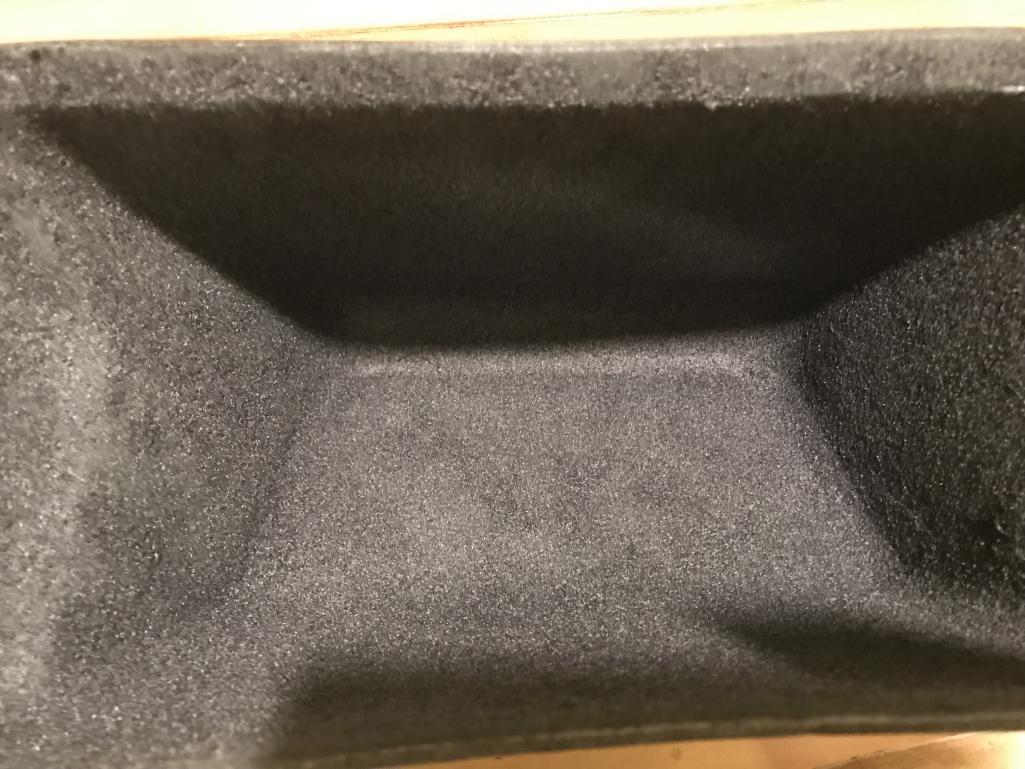
Posted by: Dion Mar 16 2019, 07:29 PM
fin....
Attached thumbnail(s)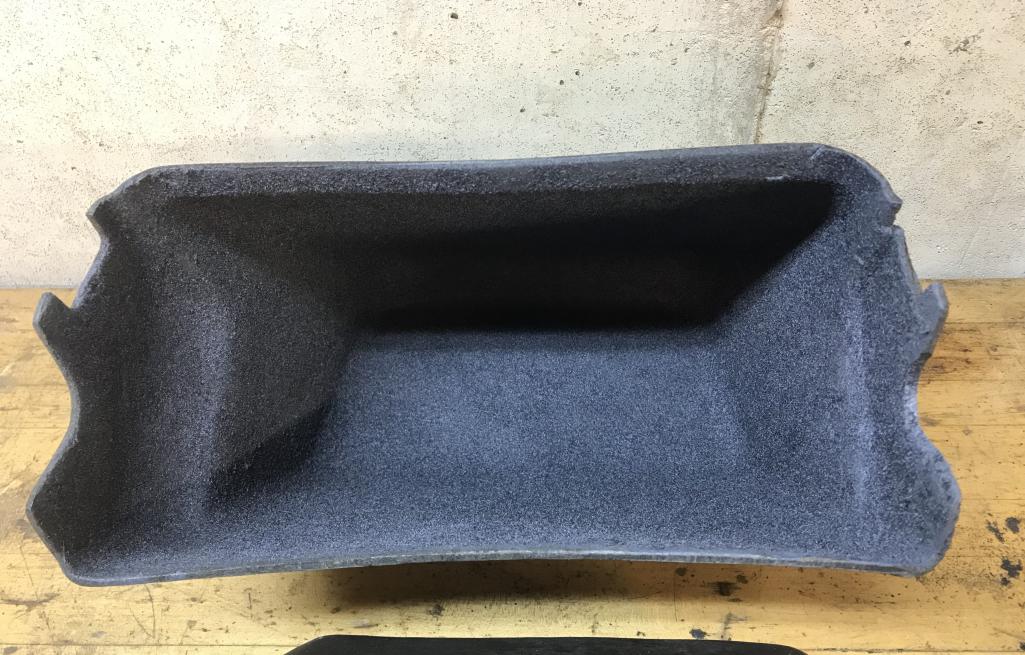
Posted by: bbrock Mar 16 2019, 07:33 PM
That looks fantastic Sure beats the mouse pee stains, but you can't blame me for this one. This is all on @http://www.914world.com/bbs2/index.php?showuser=18263 . I didn't know a flocking thing about flocking until Doug steered me right.
Posted by: Dion Mar 16 2019, 07:38 PM
That looks fantastic
Sure beats the mouse pee stains, but you can't blame me for this one. This is all on @http://www.914world.com/bbs2/index.php?showuser=18263 . I didn't know a flocking thing about flocking until Doug steered me right.He’s guilty as charged too!
Posted by: defianty Mar 17 2019, 02:32 AM
Looks great and I suppose it's something I need to do to mine now. Thanks for the peer pressure guys 
Posted by: RolinkHaus Mar 17 2019, 06:21 AM
Let's see that 2.4??
Any mods, carbs, cis?
I've got one too 
Posted by: Dion Mar 17 2019, 08:28 AM
@http://www.914world.com/bbs2/index.php?showuser=22330 it’s a 2.4 on a ‘67 case. Originally with MFI before my purchase. Now on
Webers. The counterweighted crank and rods came from a 2.7 Liter 911 engine .
Standard of course . Rods were sent to Ray Litz to be checked and balanced .
No other mods. Your motor looks sweet.
Attached thumbnail(s)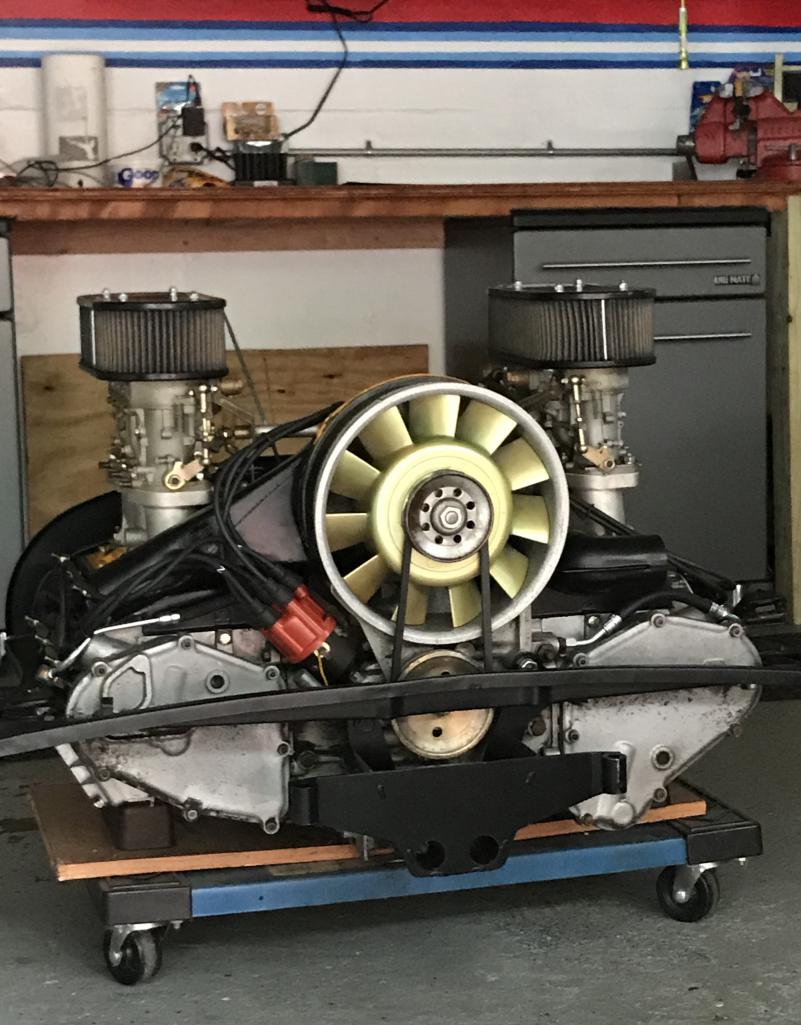
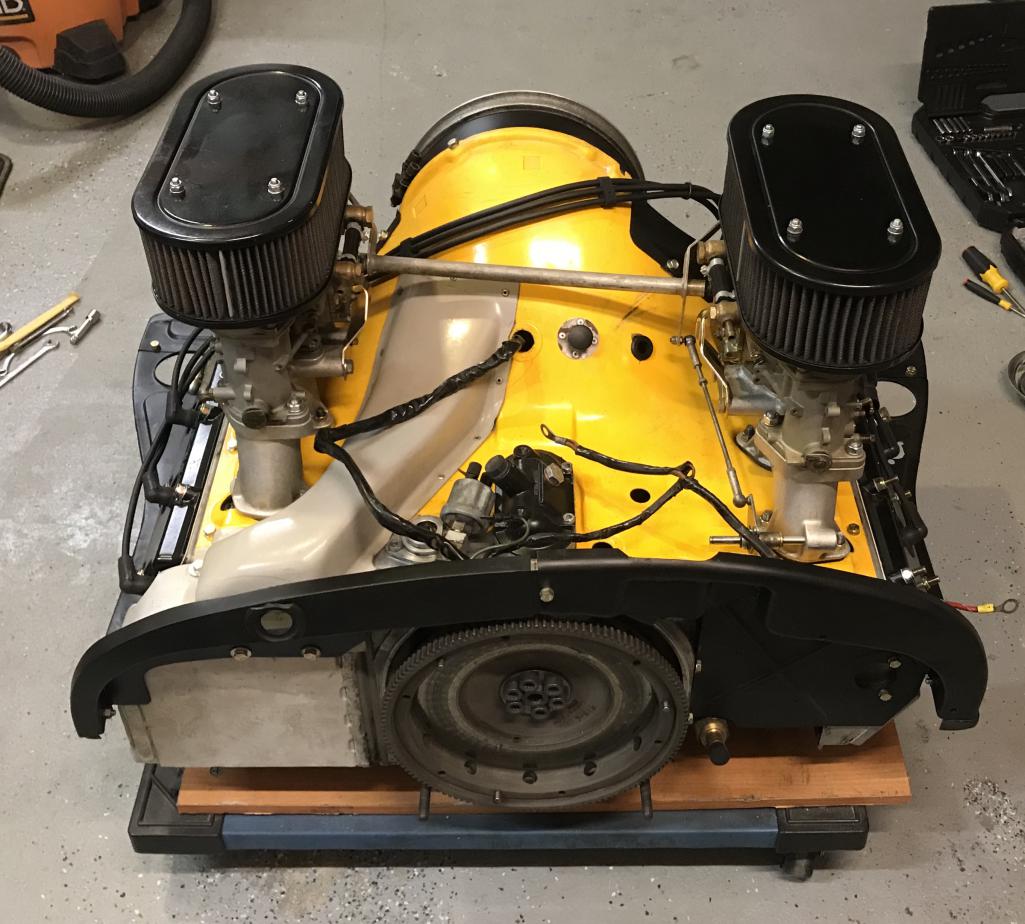
Posted by: RolinkHaus Mar 17 2019, 10:06 AM
It will be a long time before it looks anything like yours;)
What's your HP?
Posted by: Dion Mar 17 2019, 10:13 AM
Well it’s all to factory spec. Rebuilt around 20K miles ago.
Supposedly good for 140 per the books. We know Porsche is conservative with their stated numbers. I’d love to dyno it when the car is
complete. I’m sure it will be pleasing no matter what:-)
Posted by: Superhawk996 Mar 17 2019, 10:26 AM
Jealous. I want as six!!!!
Looks fabulous.
Posted by: RolinkHaus Mar 17 2019, 11:09 AM
I hope to just keep mine stock change the cam and run some headers.
Check out this 2.4
http://youtu.be/VBxaiNvYrcI
Pretty sure this has carburetors.
Posted by: mb911 Mar 17 2019, 01:34 PM
I hope to just keep mine stock change the cam and run some headers.
Check out this 2.4
http://youtu.be/VBxaiNvYrcI
Pretty sure this has carburetors.
My engine is a 2.4 s with carbs ..
Posted by: Dion Mar 17 2019, 04:13 PM
I hope to just keep mine stock change the cam and run some headers.
Check out this 2.4
http://youtu.be/VBxaiNvYrcI
Pretty sure this has carburetors.
That was a sweet sound.
I have an Abarth/ANSA to run when i want to piss peeps off
but will be running Ben’s @http://www.914world.com/bbs2/index.php?showuser=9892 nice exhaust when I’m
sane and reasonable
Bloody hell I can’t wait to be back on the streets. :-)
Posted by: mb911 Mar 17 2019, 05:59 PM
I hope to just keep mine stock change the cam and run some headers.
Check out this 2.4
http://youtu.be/VBxaiNvYrcI
Pretty sure this has carburetors.
That was a sweet sound.
I have an Abarth/ANSA to run when i want to piss peeps off
but will be running Ben’s @http://www.914world.com/bbs2/index.php?showuser=9892 nice exhaust when I’m
sane and reasonable
Bloody hell I can’t wait to be back on the streets. :-)I think what I am going to do for my set up will use the prototype muffler to your muffler @http://www.914world.com/bbs2/index.php?showuser=2766 and then put some sport muffler tail pipes and then make them removable and cap-able so can make it quiet or loud.
Posted by: Dion Mar 17 2019, 06:40 PM
I hope to just keep mine stock change the cam and run some headers.
Check out this 2.4
http://youtu.be/VBxaiNvYrcI
Pretty sure this has carburetors.
That was a sweet sound.
I have an Abarth/ANSA to run when i want to piss peeps off
but will be running Ben’s @http://www.914world.com/bbs2/index.php?showuser=9892 nice exhaust when I’m
sane and reasonable
Bloody hell I can’t wait to be back on the streets. :-)I think what I am going to do for my set up will use the prototype muffler to your muffler @http://www.914world.com/bbs2/index.php?showuser=2766 and then put some sport muffler tail pipes and then make them removable and cap-able so can make it quiet or loud.
@http://www.914world.com/bbs2/index.php?showuser=9892
Ben, I’m imagining this....
If you ever make something like the bottom pic. I’d be interested fer sure!
Attached image(s)
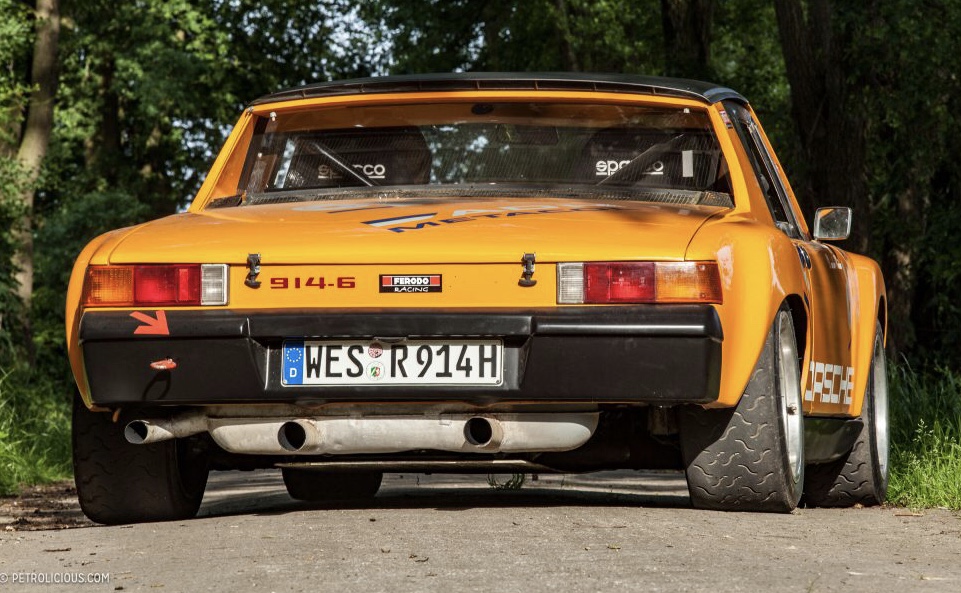
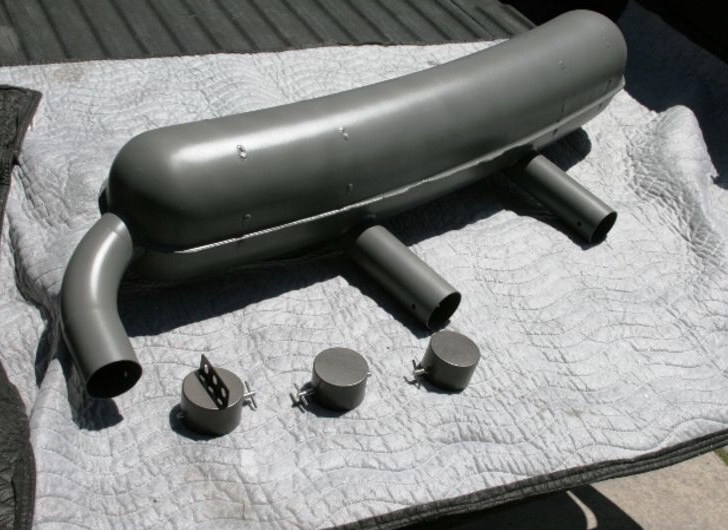
Posted by: mb911 Mar 18 2019, 05:01 AM
@http://www.914world.com/bbs2/index.php?showuser=2766 yes but one step further were the center tail pipes remove and then cap. That way you don't bang your shins on them
Posted by: mepstein Mar 18 2019, 06:52 AM
Dion - here’s what Ben made for me.
Attached thumbnail(s)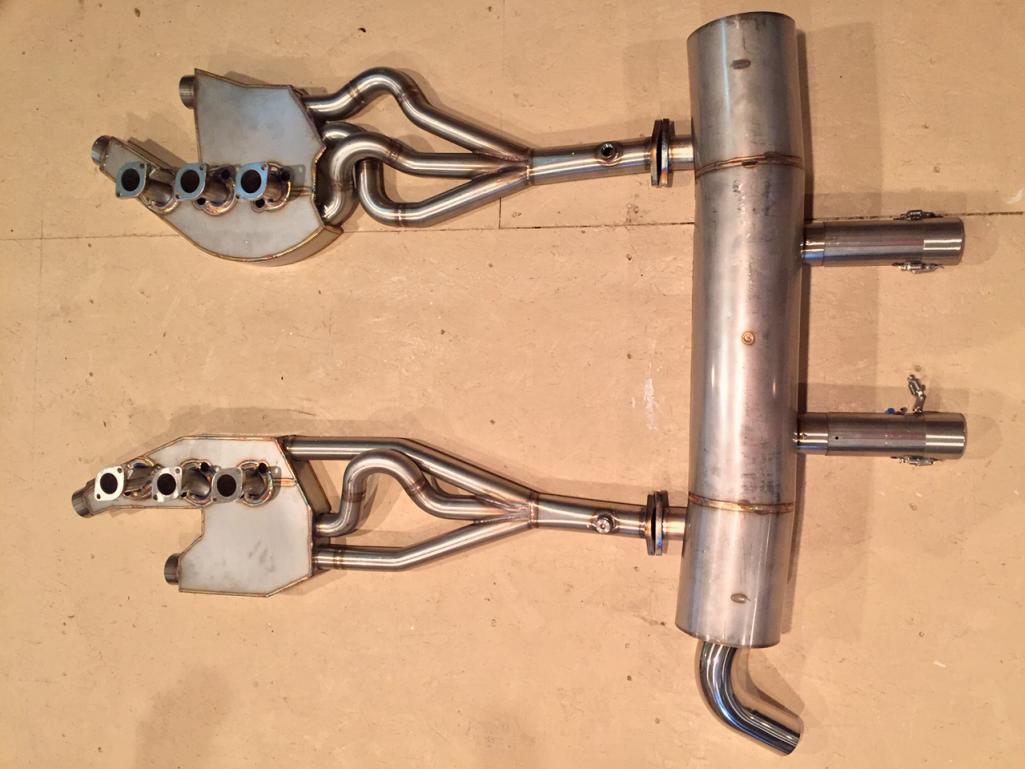
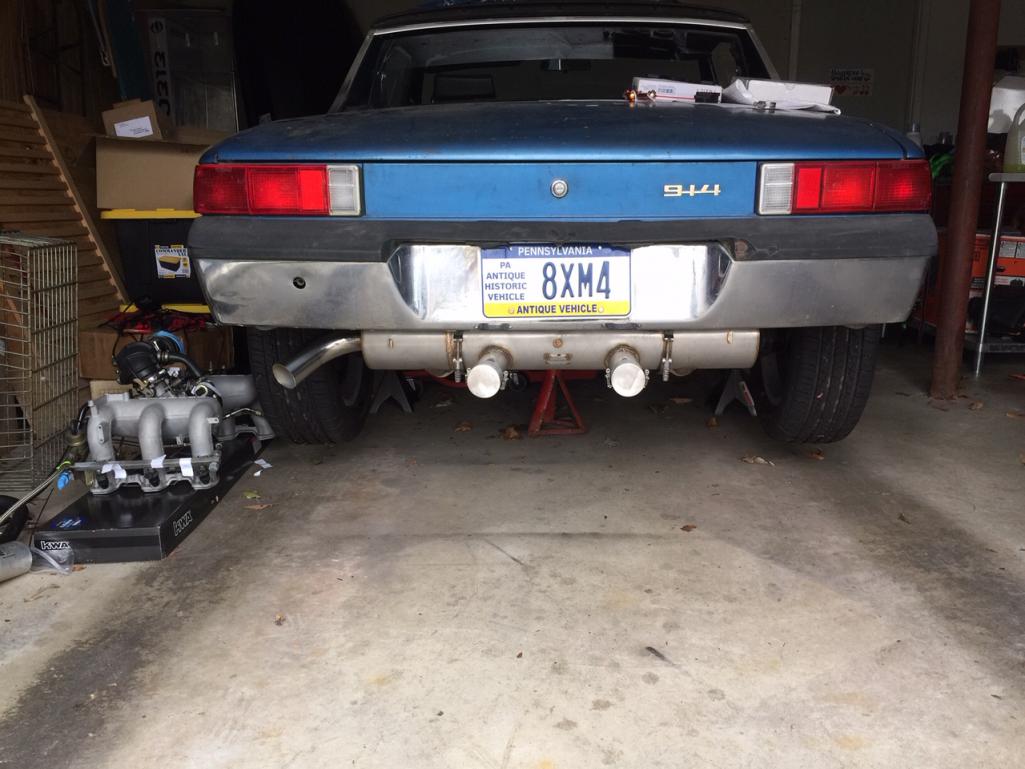
Posted by: 914dave Mar 18 2019, 06:56 AM
The drone of a 3.2 with a sport muffler is numbing. 2000/2800 rpms. I’m considering a single outlet or convertible muffler like yours Mark.
Posted by: Dion Mar 18 2019, 07:15 AM
Dion - here’s what Ben made for me.
@http://www.914world.com/bbs2/index.php?showuser=10825 Mark you’ve been holding out on me! That’s excellent. Nice one Ben.
Posted by: Dion Mar 18 2019, 07:23 AM
I posted this earlier in my thread but I think it’s cool to look at
and I’m sure it’s gonna be loud. The primitive diffuser is interesting.
Attached image(s)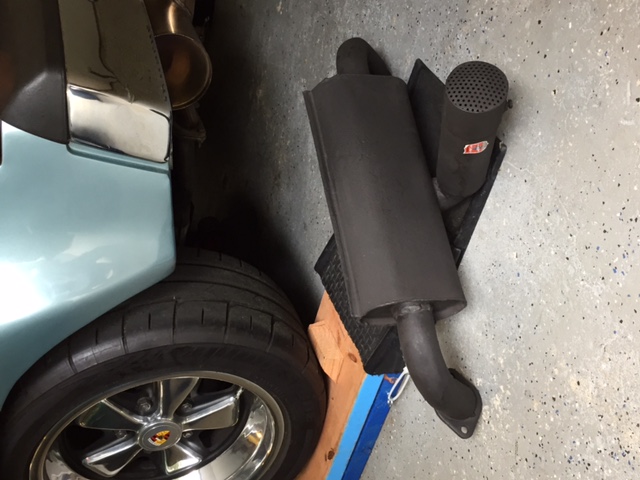
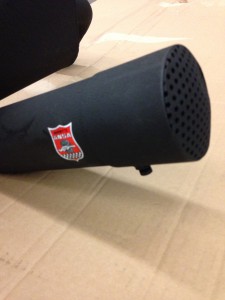
Posted by: mepstein Mar 18 2019, 07:28 AM
The drone of a 3.2 with a sport muffler is numbing. 2000/2800 rpms. I’m considering a single outlet or convertible muffler like yours Mark.
Have Ben modify yours. Or sell it. They get good money on pelican
@http://www.914world.com/bbs2/index.php?showuser=1262
Posted by: mepstein Mar 18 2019, 07:37 AM
Dion - here’s what Ben made for me.
@http://www.914world.com/bbs2/index.php?showuser=10825 Mark you’ve been holding out on me! That’s excellent. Nice one Ben.
It's built on Ben's quiet muffler so it can be truly duel purpose. The ss latches to hold on the caps were my idea but Ben did all the work. If the latches go bad, the extensions are removable and replaceable - Ben's idea.
If I ran a rear valance, I could cut the third pipe short and cap the center two to make people wonder what's going on.
Posted by: bbrock Mar 18 2019, 07:49 AM
Dion - here’s what Ben made for me.
@http://www.914world.com/bbs2/index.php?showuser=10825 Mark you’ve been holding out on me! That’s excellent. Nice one Ben.
Or maybe you just weren't paying attention: http://www.914world.com/bbs2/index.php?s=&showtopic=331296&view=findpost&p=2633031
Posted by: Dion Mar 18 2019, 08:32 AM
@http://www.914world.com/bbs2/index.php?showuser=20845 uggh 4 cylinder peeps Heheheh.
Posted by: mb911 Mar 18 2019, 09:12 AM
Dion I can modify yours pretty inexpensively if you decide to go that route.
Posted by: Dion Mar 18 2019, 09:15 AM
@http://www.914world.com/bbs2/index.php?showuser=9892 .....  ..... that is noted!
Thanks Ben.
Posted by: raynekat Mar 19 2019, 12:44 PM
That looks fantastic
Sure beats the mouse pee stains, but you can't blame me for this one. This is all on @http://www.914world.com/bbs2/index.php?showuser=18263 . I didn't know a flocking thing about flocking until Doug steered me right.He’s guilty as charged too!
Beauty....you buys both have rocking 914's now that your glove box inners are properly restored. Ha

Posted by: Dion Mar 24 2019, 04:49 PM
Staying as close to “six” form as possible, I tried to emulate the
heat flapper valves on the sixes. Took a page out of @http://www.914world.com/bbs2/index.php?showuser=10825 technique.
I’ve never seen one for sale for quite a while, so a bit of diy.
Basically a hole saw cut in the mushroom cap.
I’m a bit pissed as the craftsman arbor refused to stay clamped
tightly and we had a wobble on the one cap. So we don’t want to look at that one too closely. 
Ran to Lowe’s and picked up a new Lenox arbor and 32mm hole saw.
A lick of paint later. We are ready for heat.
Attached thumbnail(s)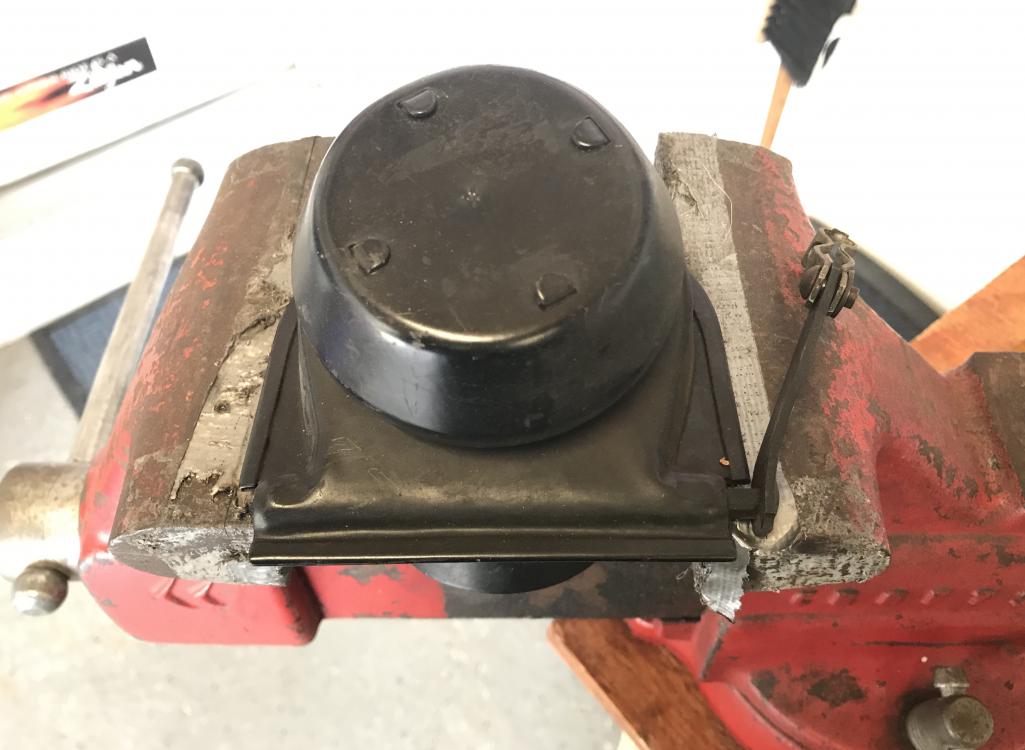
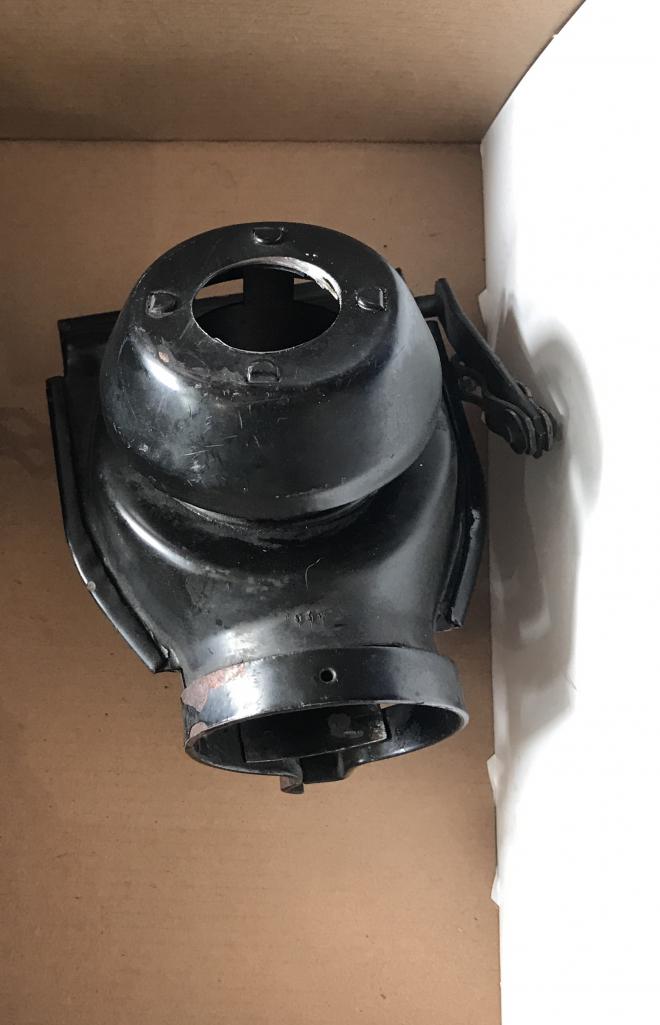
Posted by: Dion Mar 24 2019, 04:51 PM
Finished set
Attached thumbnail(s)
Posted by: bbrock Mar 24 2019, 05:00 PM
Nice work!
I hate cheap hole saws for that very reason, but I can barely see that wobble. It's nothing like that giant valance delete googe.
Posted by: mepstein Mar 24 2019, 05:00 PM
Looks good to me. I just eyeballed mine.
Posted by: Dion Mar 24 2019, 05:47 PM
Nice work!
It's nothing like that giant valance delete googe.
Ouch Vicious !
Posted by: horizontally-opposed Mar 25 2019, 10:42 AM
Staying as close to “six” form as possible, I tried to emulate the
heat flapper valves on the sixes. Took a page out of @http://www.914world.com/bbs2/index.php?showuser=10825 technique.
I’ve never seen one for sale for quite a while, so a bit of diy.
Basically a hole saw cut in the mushroom cap.
I’m a bit pissed as the craftsman arbor refused to stay clamped
tightly and we had a wobble on the one cap.
So we don’t want to look at that one too closely. Ran to Lowe’s and picked up a new Lenox arbor and 32mm hole saw.
A lick of paint later. We are ready for heat.
Can you tell me more about the difference between the caps? Have been saving a pair of NOS 914-4 flapper valves I used for a few years on my car before converting it to six cylinders. Is the hole there because the 914-6 makes too much heat?
One of the worst things about my 914-4 SSIs with the new heater flappers was too much heat (even without the blower up top) and heat bleed on hot days.
Thanks!
Posted by: mepstein Mar 25 2019, 11:03 AM
Rhodguy/Kevin was selling a six flapper box. I figured Porsche did it for a reason so I just copied it. I just used some regular 4 pieces, cut out the hole with a hole saw in a drill press and then blasted and powdercoated the parts. Mine weren’t in great shape so I had nothing to loose.
First one is Kevin’s original.
2nd is my modded one.
3rd pic is a comparison from Rory.
Attached image(s)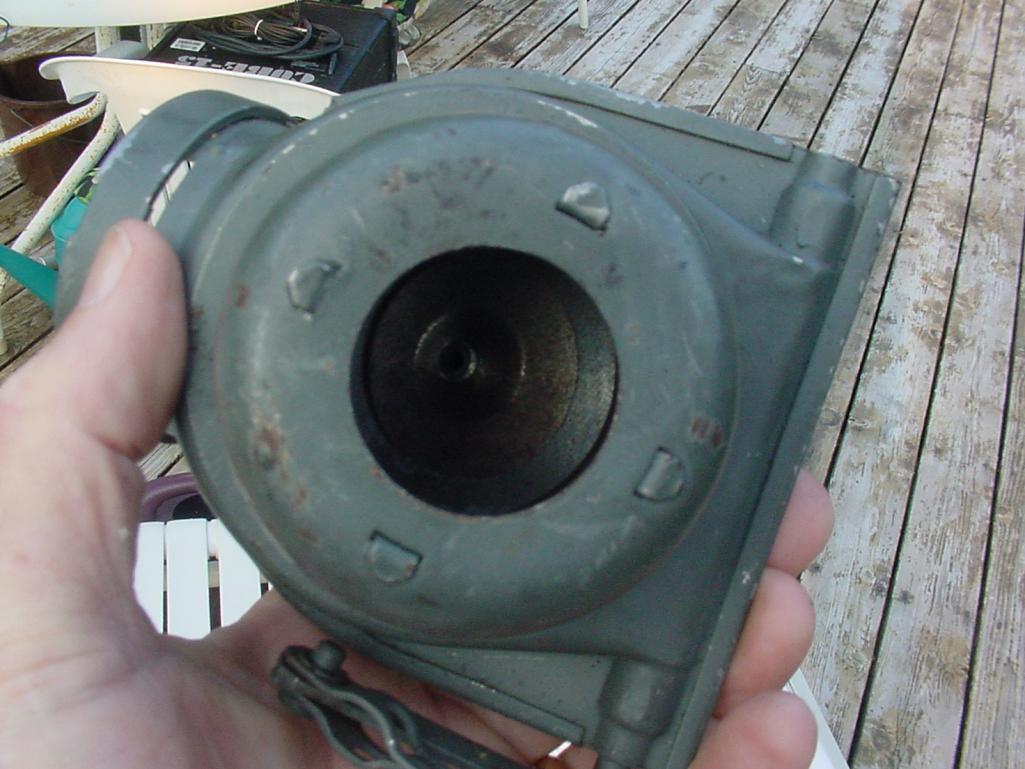

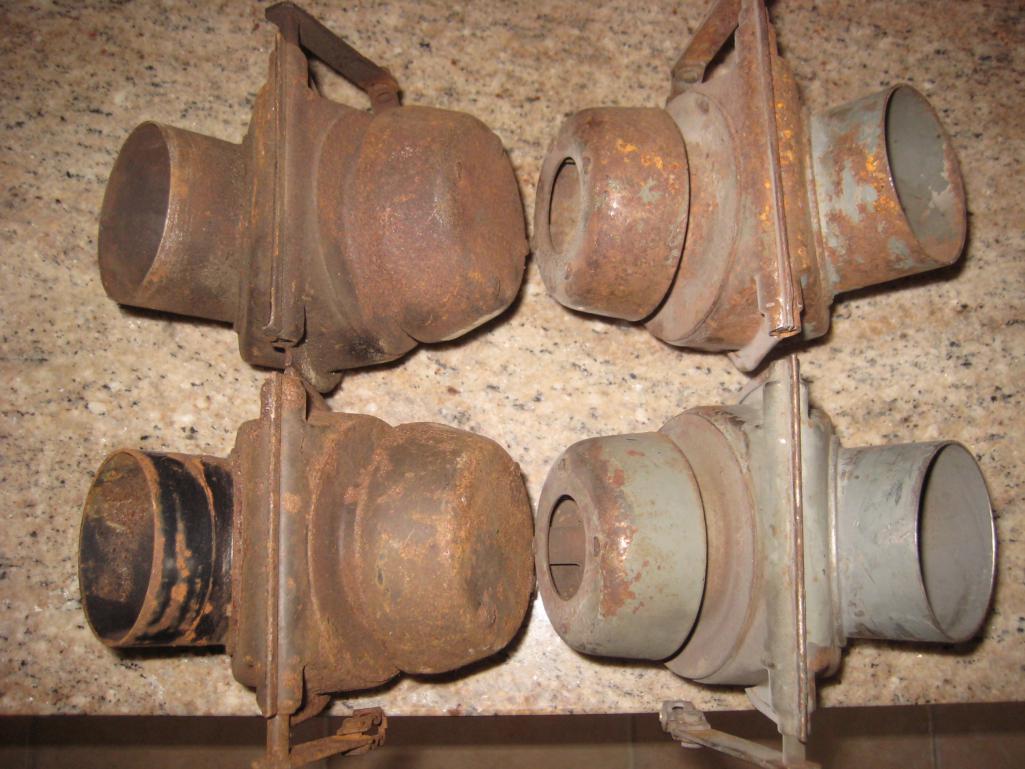
Posted by: 914dave Mar 25 2019, 11:25 AM
I did the same as Mark and Dion.
Posted by: bbrock Mar 25 2019, 11:31 AM
Staying as close to “six” form as possible, I tried to emulate the
heat flapper valves on the sixes. Took a page out of @http://www.914world.com/bbs2/index.php?showuser=10825 technique.
I’ve never seen one for sale for quite a while, so a bit of diy.
Basically a hole saw cut in the mushroom cap.
I’m a bit pissed as the craftsman arbor refused to stay clamped
tightly and we had a wobble on the one cap.
So we don’t want to look at that one too closely. Ran to Lowe’s and picked up a new Lenox arbor and 32mm hole saw.
A lick of paint later. We are ready for heat.
Can you tell me more about the difference between the caps? Have been saving a pair of NOS 914-4 flapper valves I used for a few years on my car before converting it to six cylinders. Is the hole there because the 914-6 makes too much heat?
One of the worst things about my 914-4 SSIs with the new heater flappers was too much heat (even without the blower up top) and heat bleed on hot days.
Thanks!
Just a wild guess, but I'm thinking the cooling fan on a six moves more air and can apply more pressure on those valves so Porsche added the holes to prevent blow-by and the heat bleed you mention.
Posted by: Dion Mar 25 2019, 11:40 AM
With all the above.
Posted by: 914dave Mar 28 2019, 06:41 AM
The drone of a 3.2 with a sport muffler is numbing. 2000/2800 rpms. I’m considering a single outlet or convertible muffler like yours Mark.
Have Ben modify yours. Or sell it. They get good money on pelican
@http://www.914world.com/bbs2/index.php?showuser=1262
That might be an option.
Posted by: mepstein Mar 28 2019, 07:50 AM
The drone of a 3.2 with a sport muffler is numbing. 2000/2800 rpms. I’m considering a single outlet or convertible muffler like yours Mark.
Have Ben modify yours. Or sell it. They get good money on pelican
@http://www.914world.com/bbs2/index.php?showuser=1262
That might be an option.
Or you can cap one end for highway driving.
Posted by: Dion Apr 2 2019, 06:53 AM
Small update to chassis repair. A strip of steel added to the area where the floor meets
the outer Lt. long. It took some coaxing to put that bend in! Was surprised in all honesty! It does not run the whole length because Dave said to hold off because we will need to tie in a couple other pieces. The piece on the buck is not done yet, so
just a small patch for now. I used a piece of an outer long to line up where the outer edge should lie. Levels & straight edge where very important here. I’ll trim off the
excess later.
Wanted to make sure there was plenty of real estate to weld the out halves to.
Attached thumbnail(s)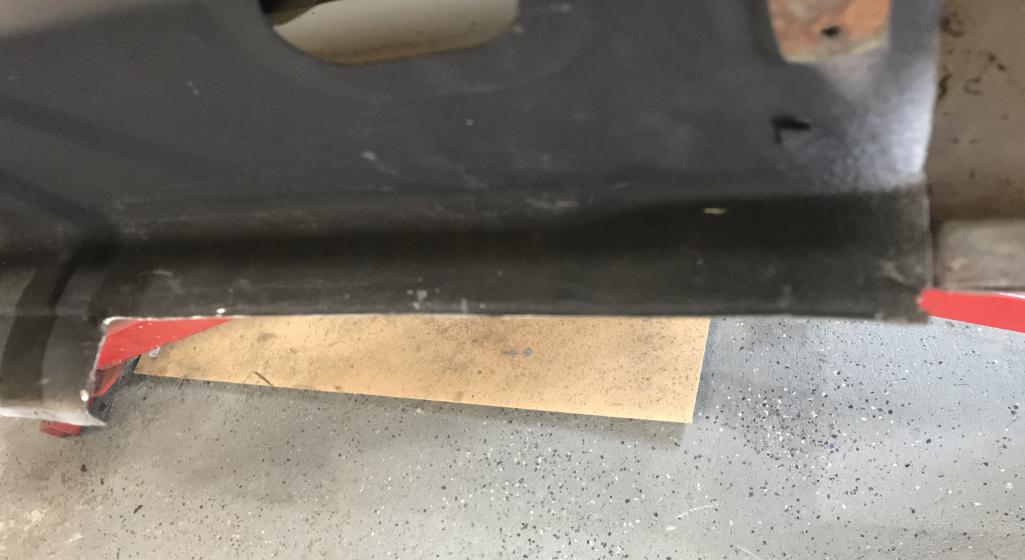
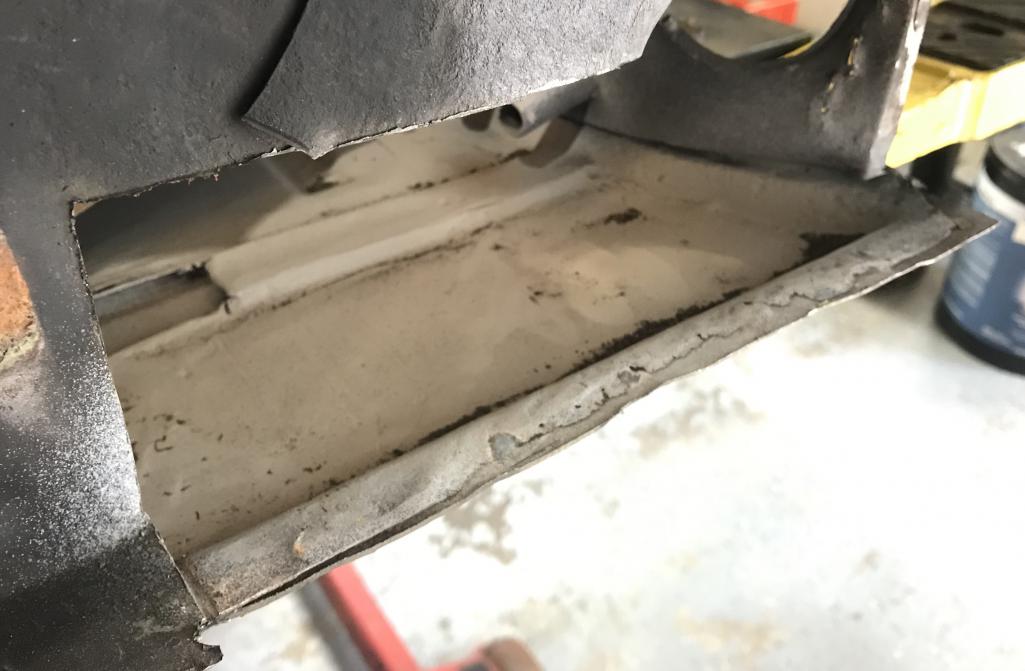
Posted by: Dion Apr 2 2019, 06:54 AM
Pic
Attached thumbnail(s)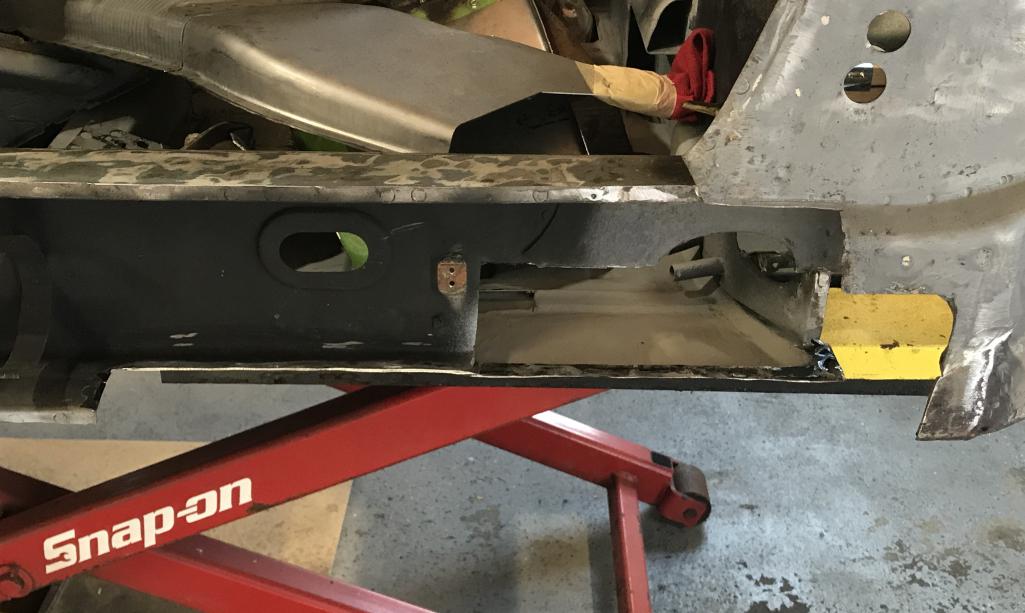
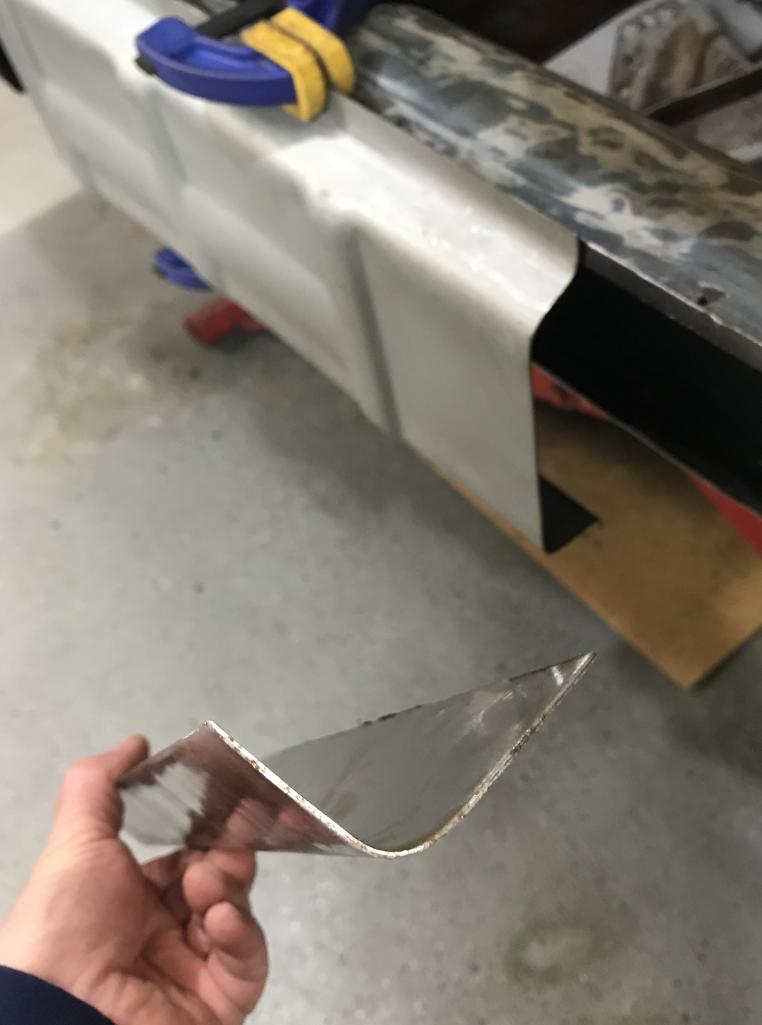
Posted by: Dion Apr 2 2019, 06:55 AM
Pic
Attached thumbnail(s)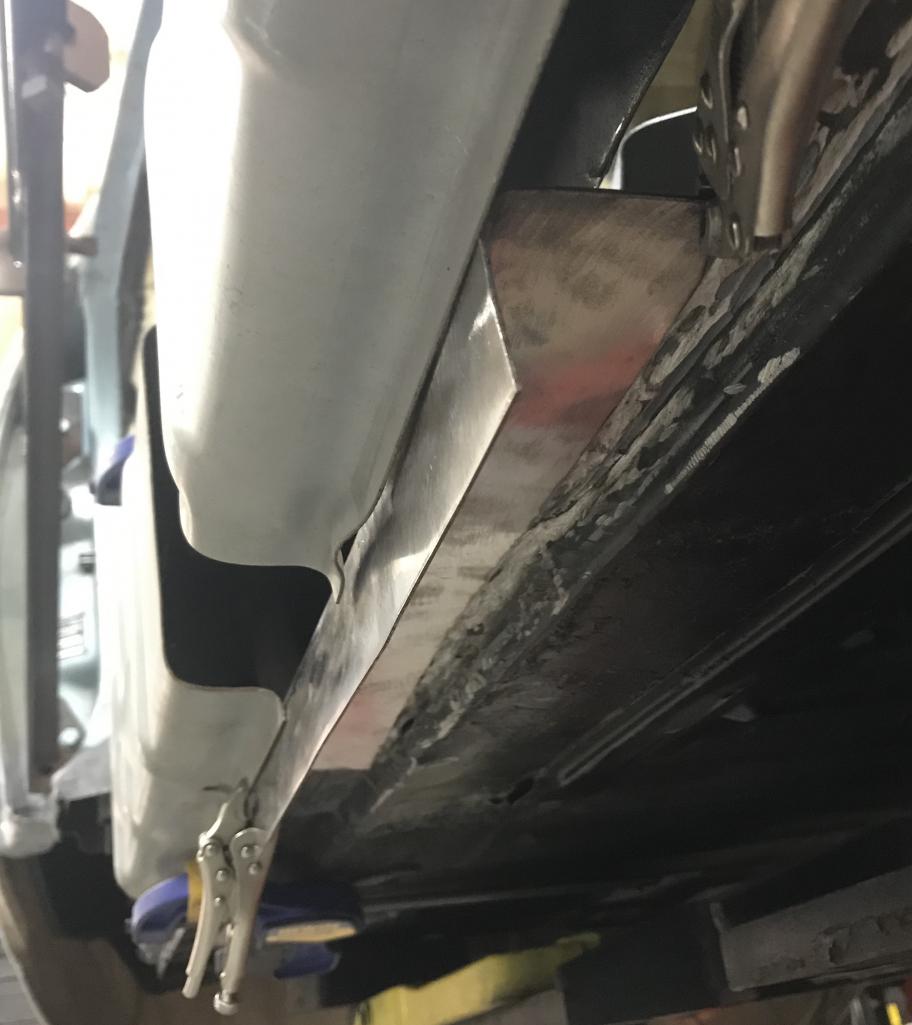
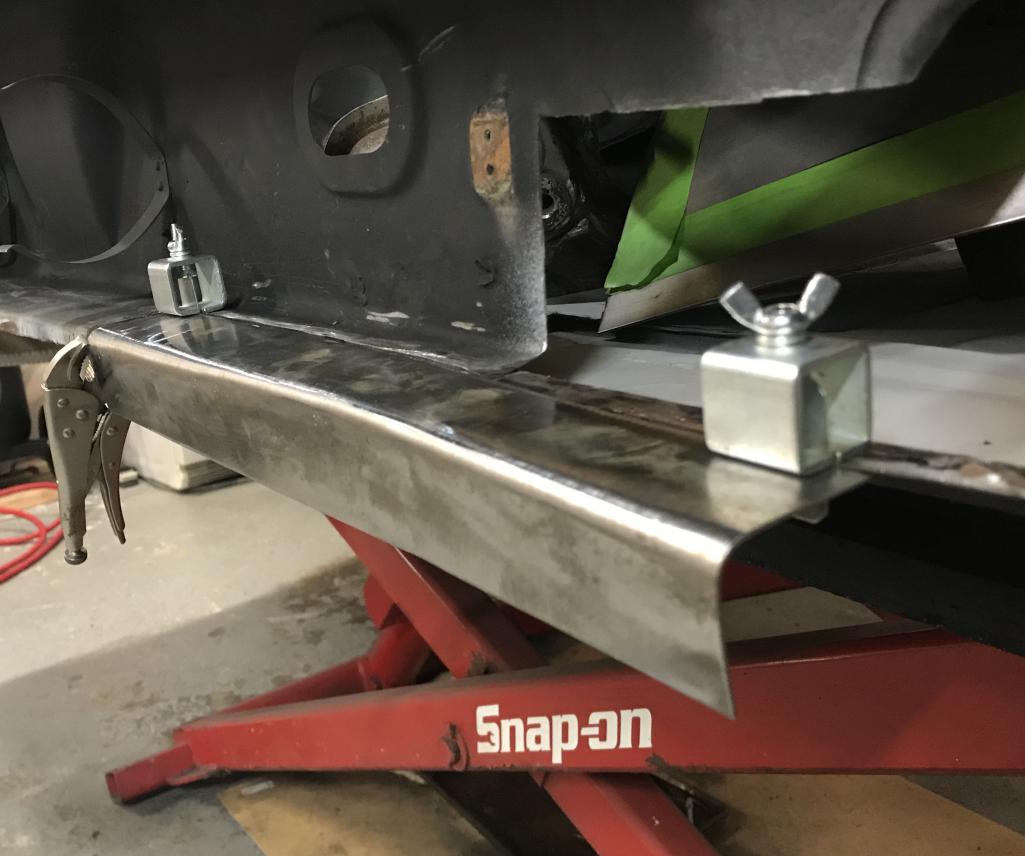
Posted by: Dion Apr 2 2019, 06:55 AM
Pic
Attached thumbnail(s)

Posted by: Dion Apr 2 2019, 06:56 AM
Pic
Attached thumbnail(s)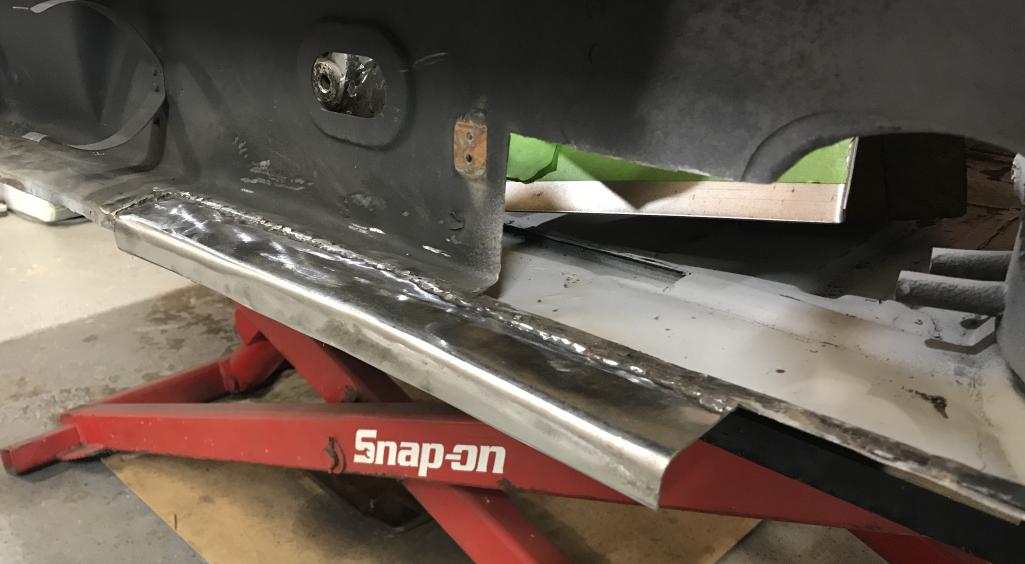
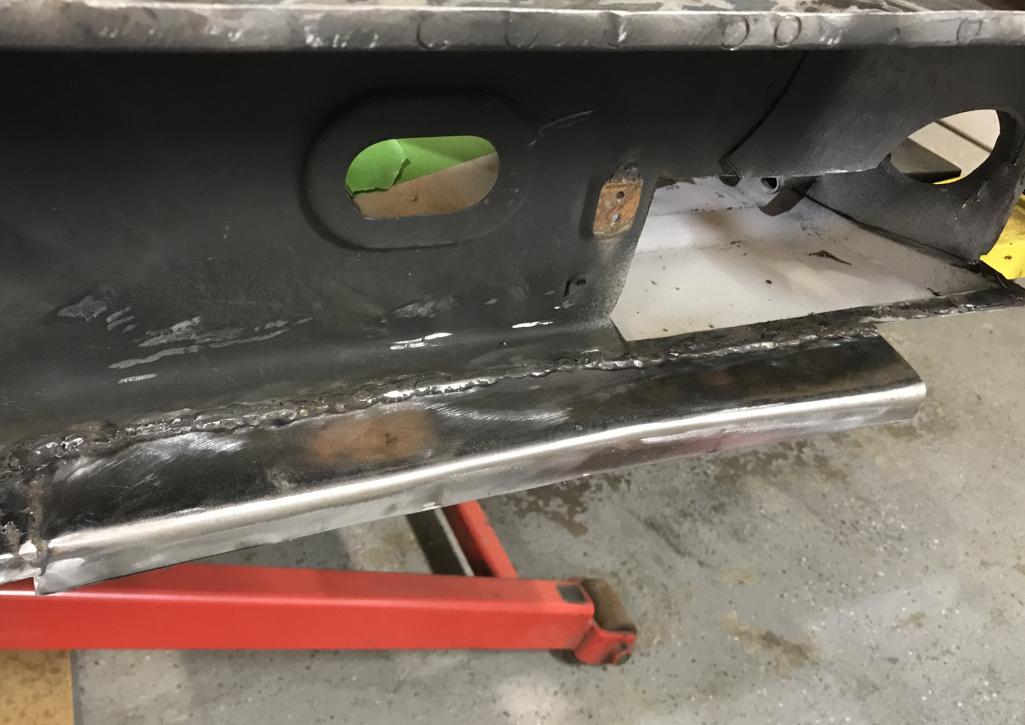
Posted by: Dion Apr 2 2019, 06:57 AM
Pic
Attached thumbnail(s)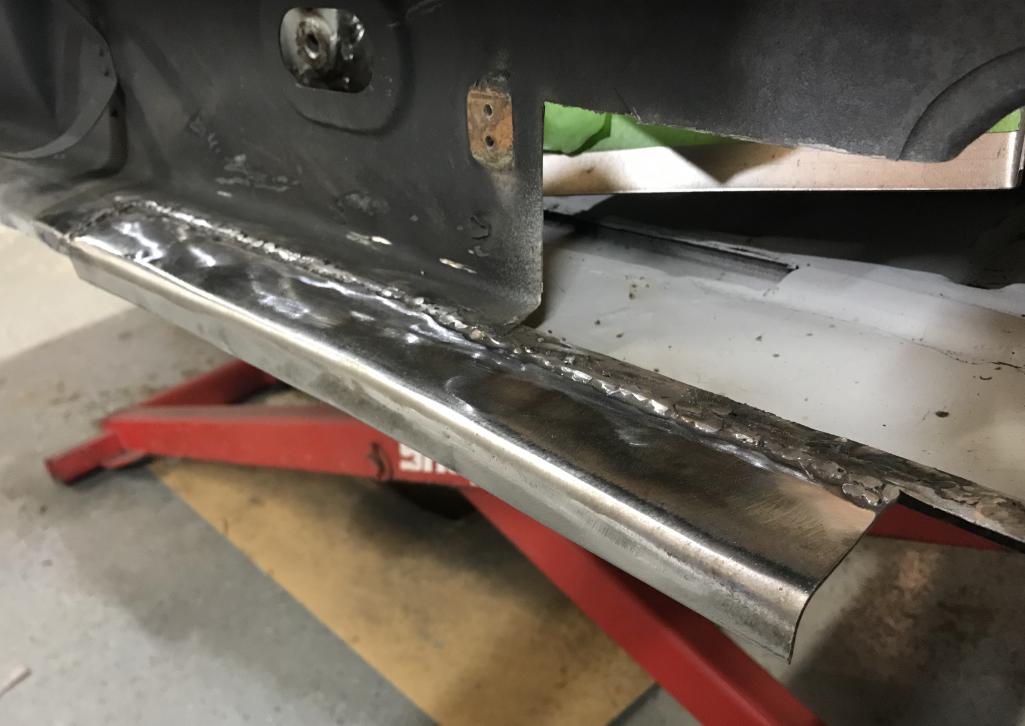
Posted by: mepstein Apr 2 2019, 07:01 AM
Posted by: bbrock Apr 2 2019, 07:39 AM
Nice work! It's causing flashbacks though  I did the same thing leaving the weld flanges wide and I think it is a good idea. It is easy to trim those back to flush with the outer clam shell flanges for perfect alignment.
Posted by: Dion Apr 2 2019, 08:12 AM
One day there prolly will be a diagnosis of 914 PTSD.
Thanks for the props & encouragement.
Posted by: TonyA Apr 2 2019, 11:01 AM
One day there prolly will be a diagnosis of 914 PTSD.
Thanks for the props & encouragement.
Looking good....there is a cure for 914 PTSD
Posted by: mb911 Apr 2 2019, 11:22 AM
Nice work!
It's causing flashbacks though I did the same thing leaving the weld flanges wide and I think it is a good idea. It is easy to trim those back to flush with the outer clam shell flanges for perfect alignment.I agree same thing for me..
Posted by: Dion Apr 7 2019, 06:45 PM
Busy weekend doing yard work, front hill needed a new batch of
mulch but found time to refresh the
tired E-brake. Found a nylon spacer at Lowe’s. It was close, a 5/8 x 1/2 x 1/2.
Sanded down a little on the outer circumference and tapped her in with a brass hammer.
It’ll do.
Attached image(s)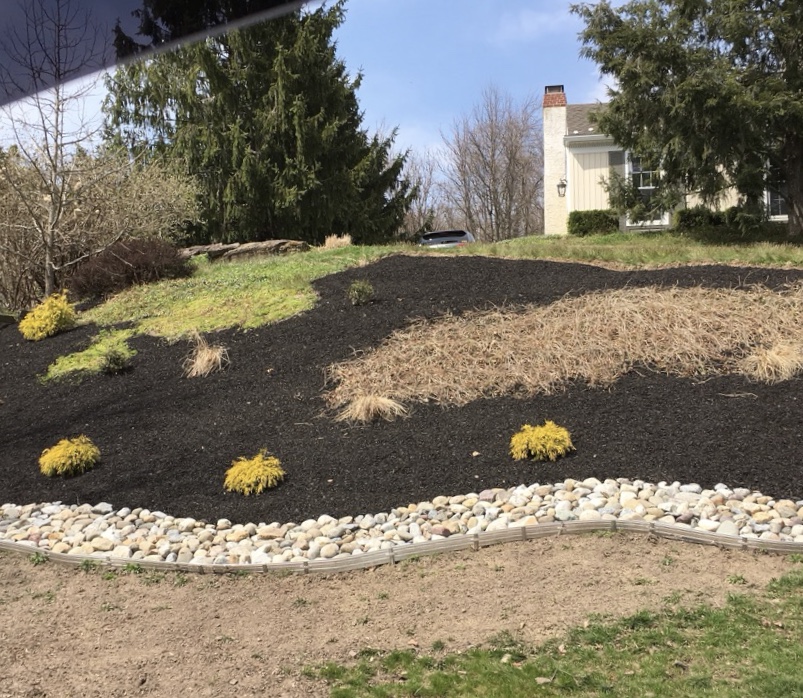
Posted by: Dion Apr 7 2019, 06:49 PM
Wretched
Attached thumbnail(s)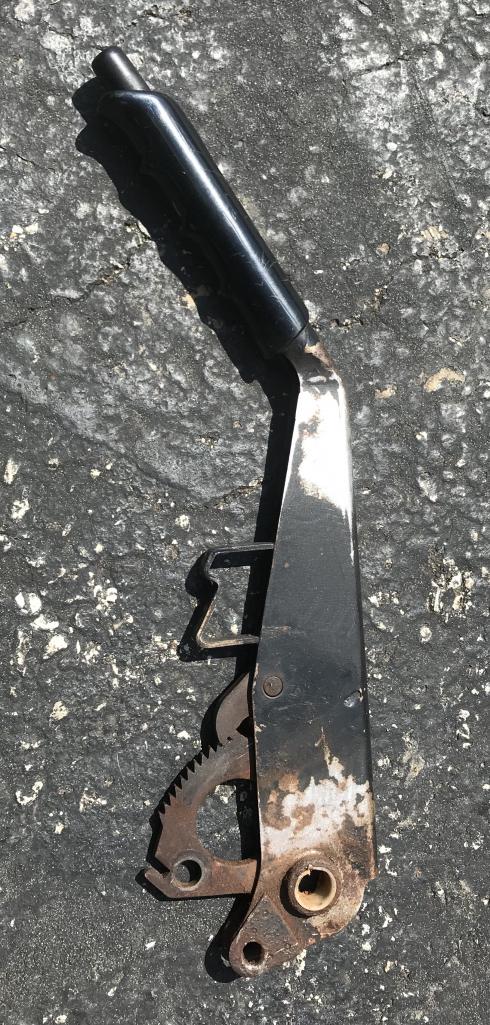
Posted by: Dion Apr 7 2019, 06:50 PM
Better, bottom pic with spacer tapped in. It moves nicely on the pivot shaft after a test fit. That’ll do for now.
Thanks for looking in.
Attached thumbnail(s)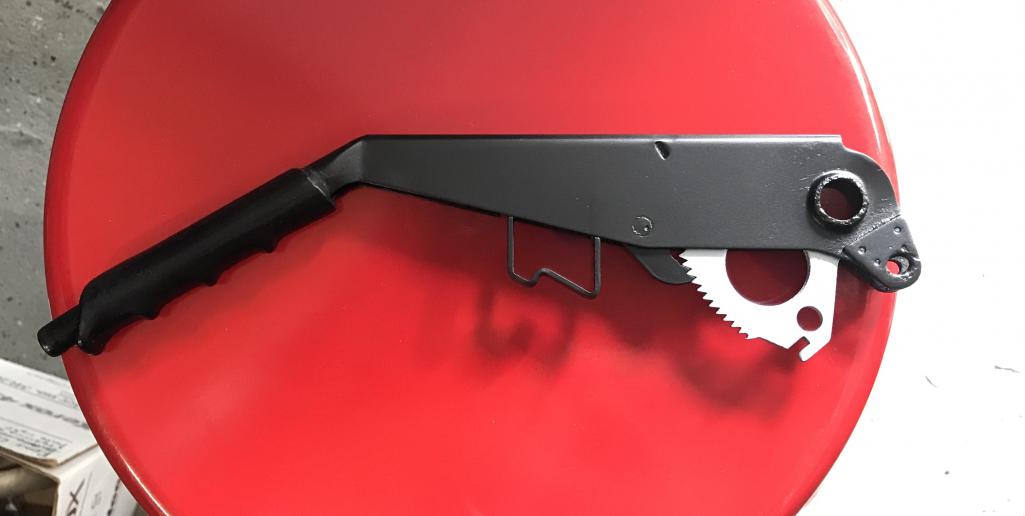
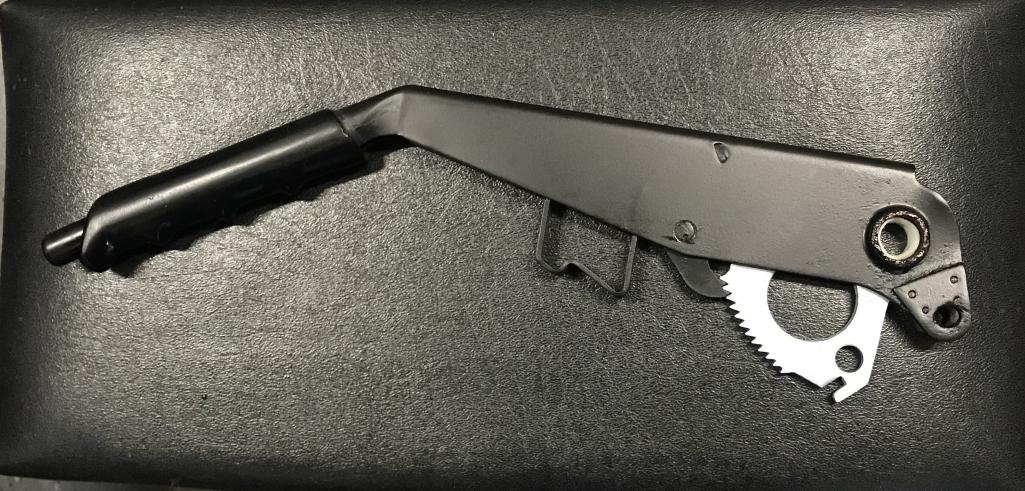
Posted by: Dion May 21 2019, 07:00 PM
Well between life (freshening a 914) and my other life (Family) and work. Here’s a quick update. Just
Cleaned and spruced up some air elbows.
Attached thumbnail(s)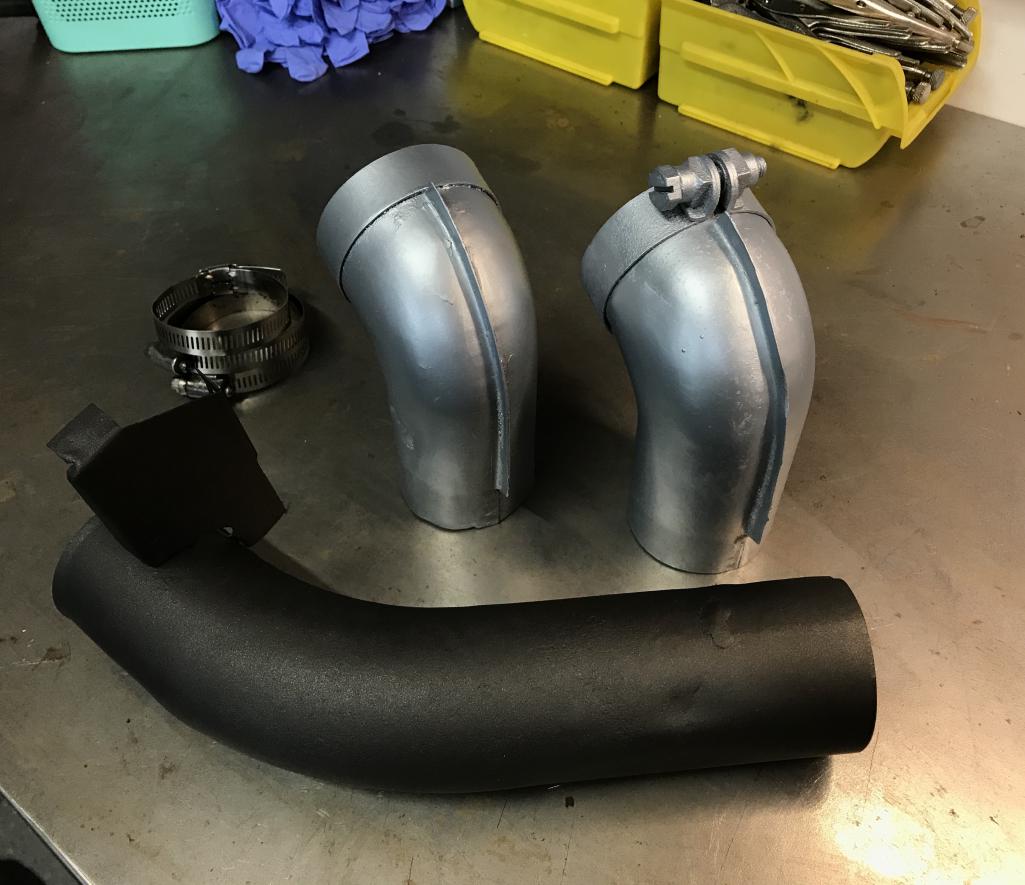
Posted by: Dion May 21 2019, 07:05 PM
And restored a free air tank. Moved components off the rusted out, iffy older tank.
Found a sound one through a friend. Placed everything back on.
The weight of the compressor pump is amazing.
And for a short dude it took every ounce of my energy and with help from my son to get it on the tank. ( a hoist would have been real handy) Wired it up and runs great.
Just need to address a tiny pinhole in the copper cooling coil and bolt it down. It likes to walk . Frankenstein it is.
Attached thumbnail(s)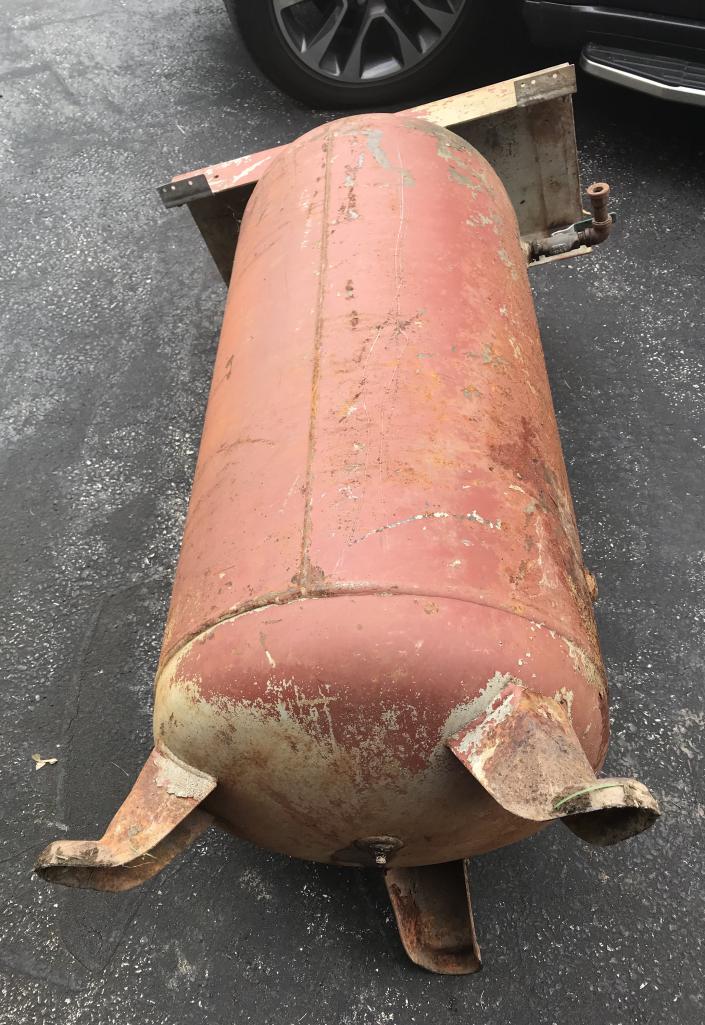
Posted by: Dion May 21 2019, 07:06 PM
Paint
Attached thumbnail(s)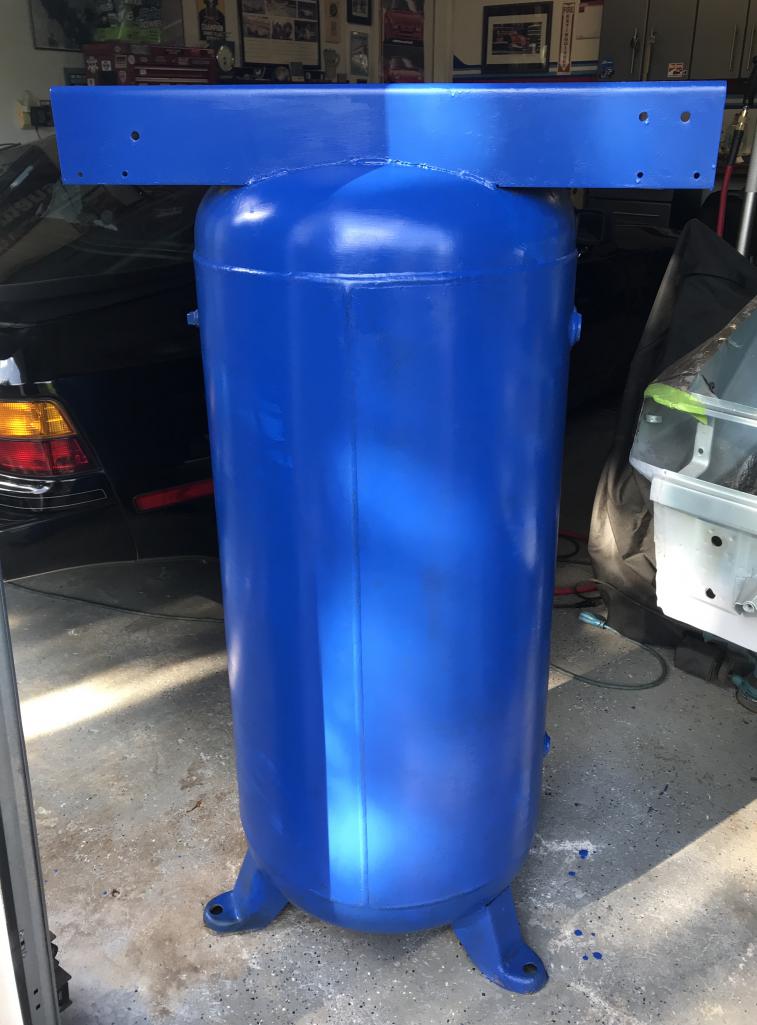
Posted by: Dion May 21 2019, 07:07 PM
Walla!
Attached thumbnail(s)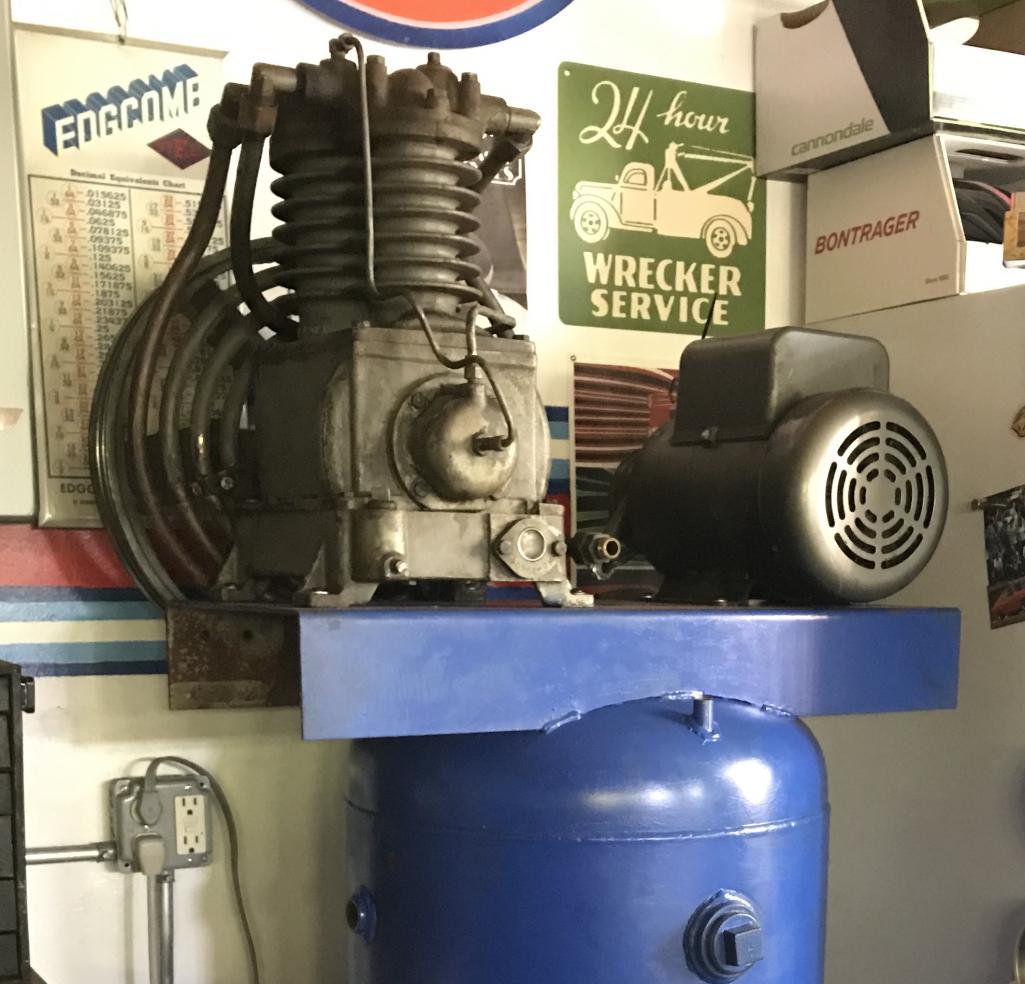
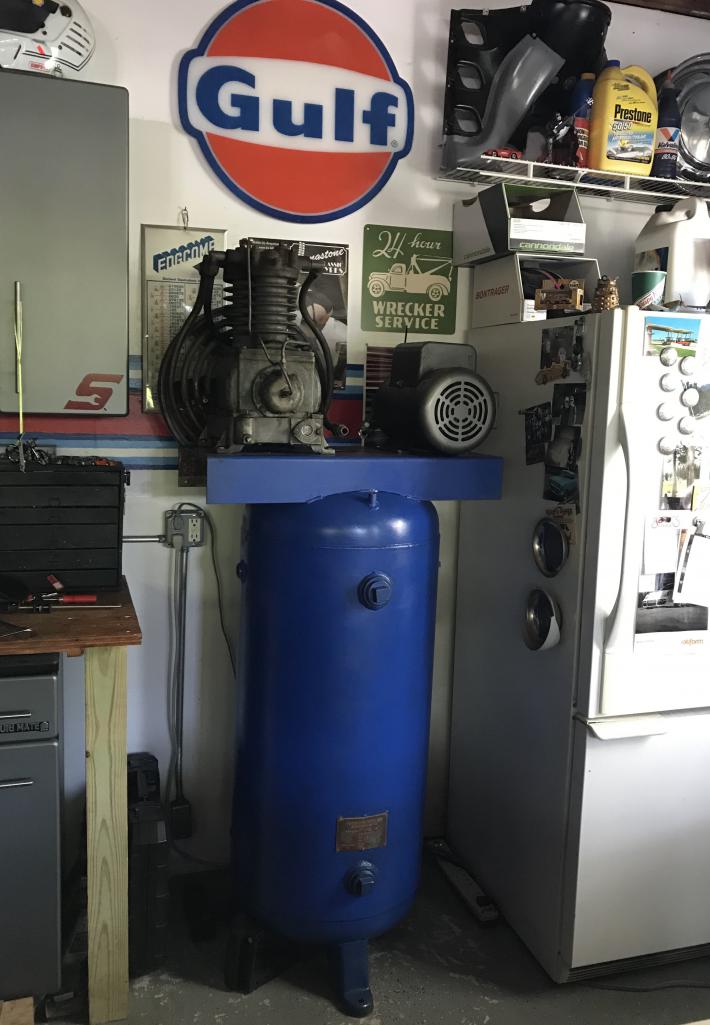
Posted by: Dion May 21 2019, 07:11 PM
Electric & piping, now to get back on this 914.....
Attached thumbnail(s)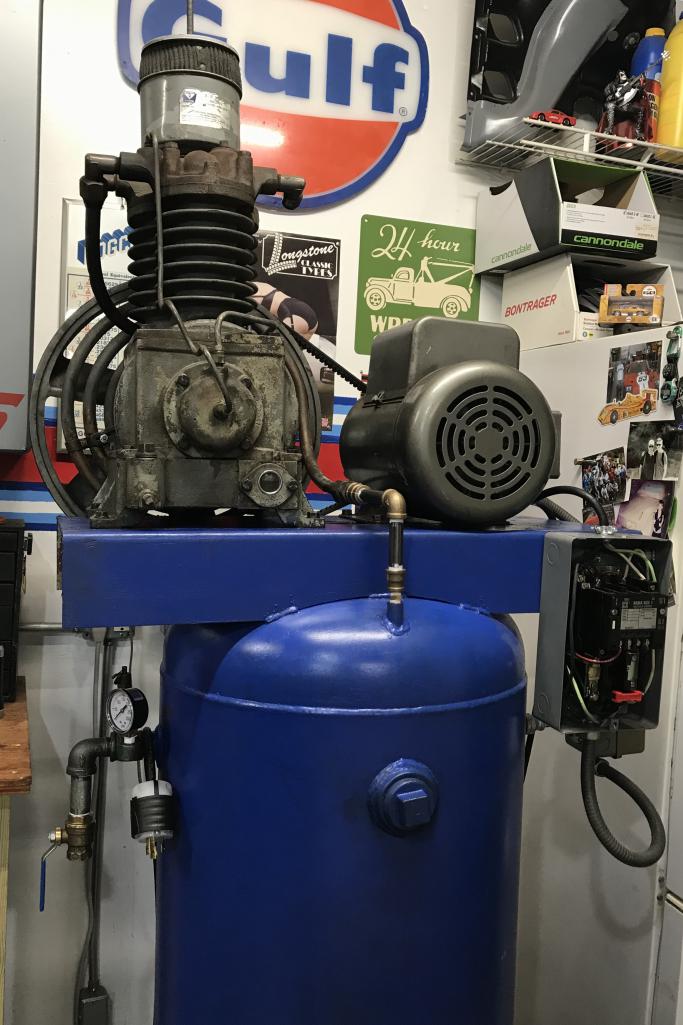
Posted by: tygaboy May 21 2019, 07:21 PM
Nothing better than adding useful tools to the shop! Air tools, baby!
Posted by: bbrock May 21 2019, 07:47 PM
Awesome! Your life will be changed by that.
Posted by: Dion Jun 12 2019, 06:25 PM
Nothin groundbreaking, just adding to my thread. Not a
lot of garage time of late. Between work & my son graduates HS tomorrow nite. So little things get done for now.
Steel wool and a lick of paint for the seat runners.
Before:
Attached thumbnail(s)
Posted by: Dion Jun 12 2019, 06:26 PM
After:
Attached thumbnail(s)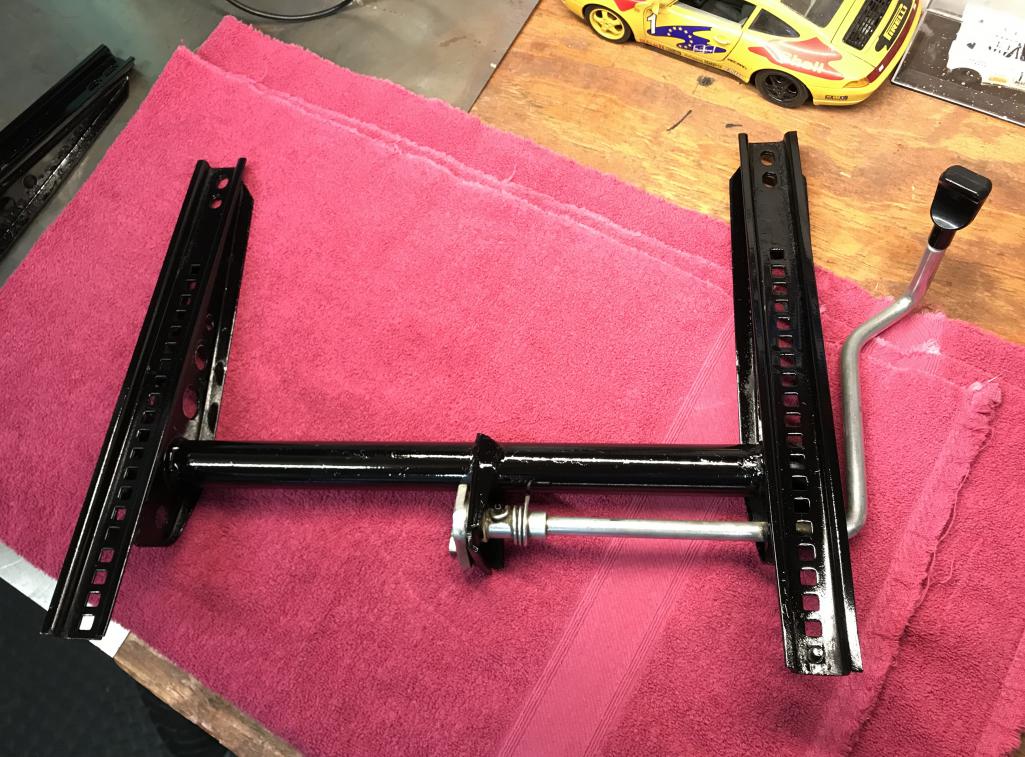
Posted by: Dion Jul 7 2019, 07:14 PM
Hot & humid.....time to sweat in the garage.
At least one P-car is running. While the other is still in sick bay.
My mentor Dave stopped by this morning and set me up for the
next task on the left interior portion of the longitudinal kick up.
Attached thumbnail(s)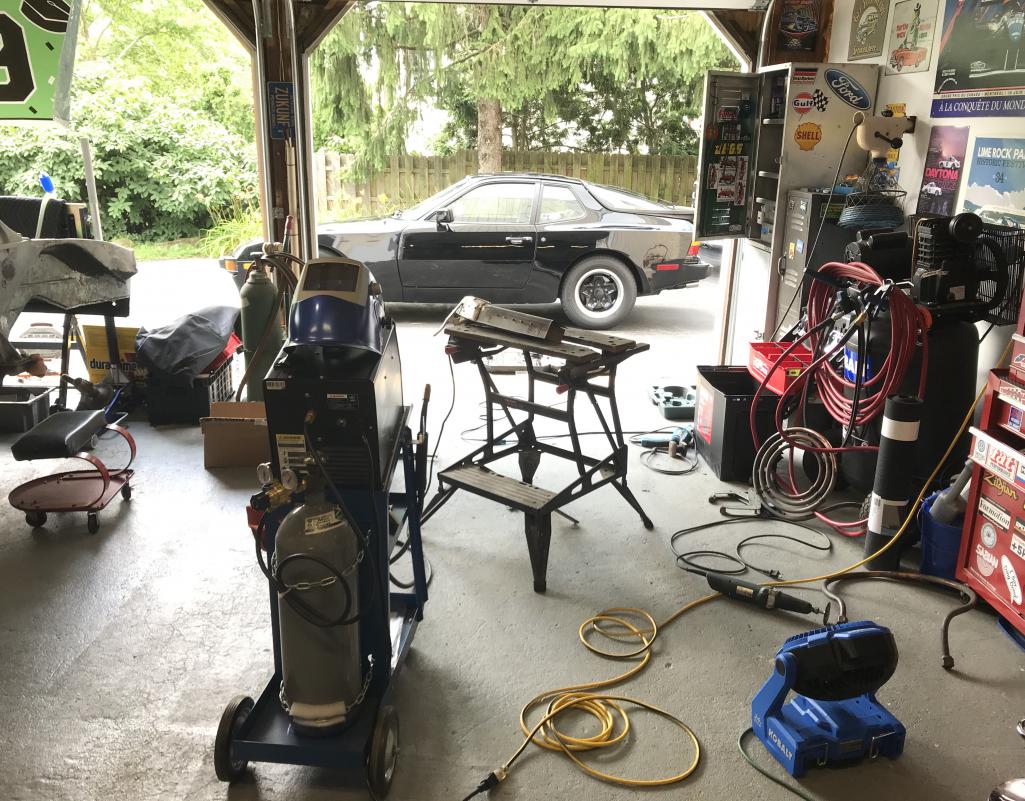
Posted by: Dion Jul 7 2019, 07:15 PM
Made some cuts... and bends
Attached thumbnail(s)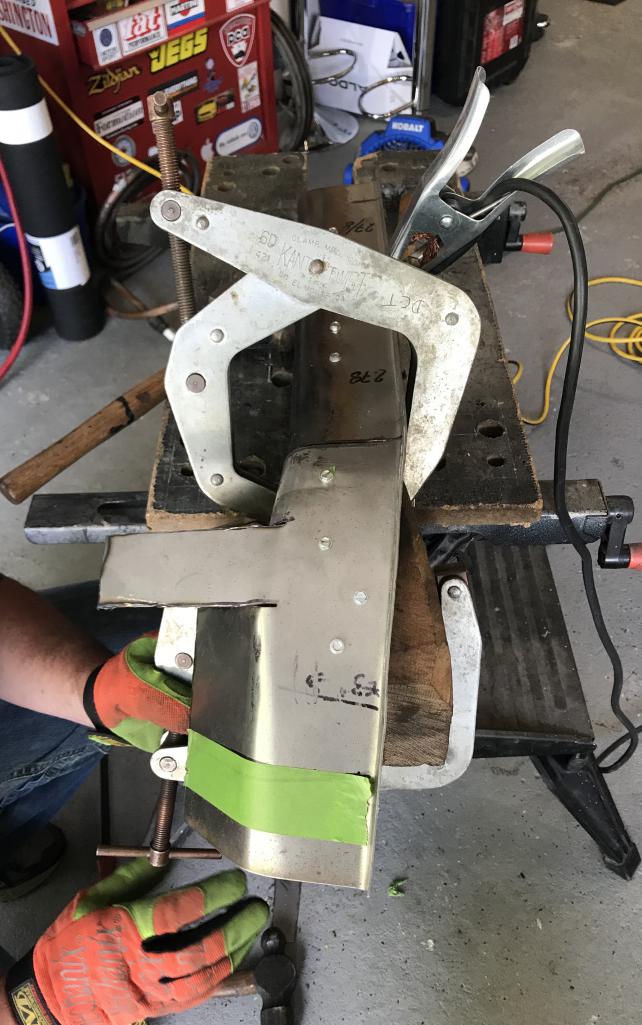
Posted by: Dion Jul 7 2019, 07:16 PM
Then welded it together ....
Attached thumbnail(s)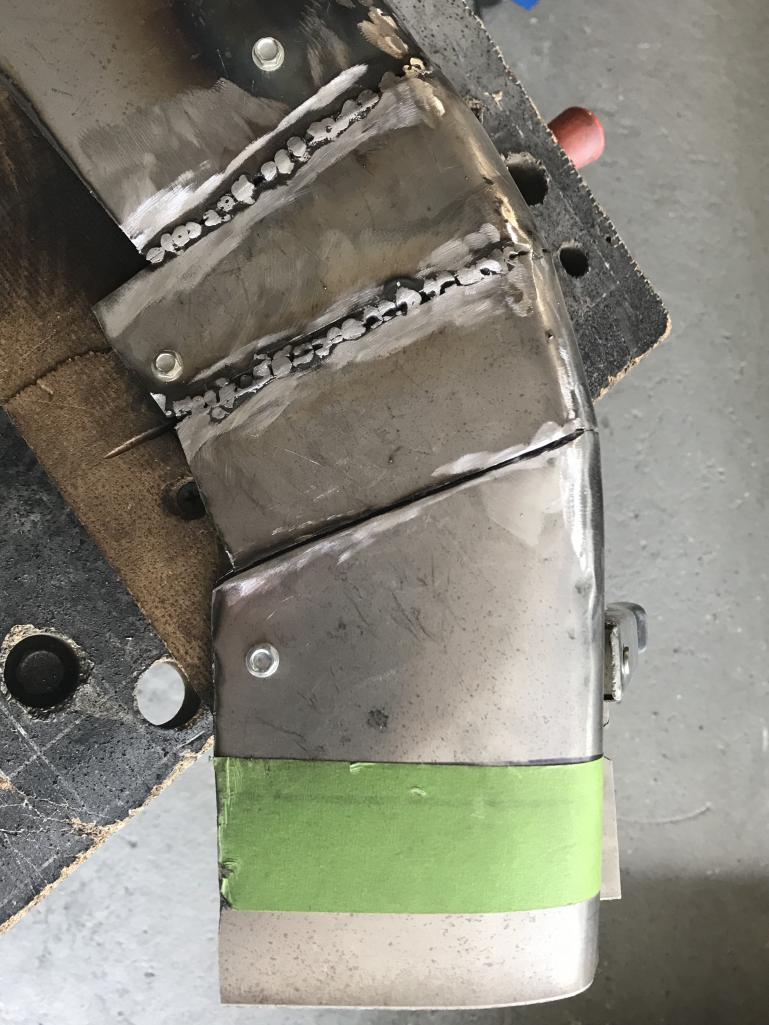
Posted by: Dion Jul 7 2019, 07:17 PM
Welds
Attached thumbnail(s)
Posted by: Dion Jul 7 2019, 07:19 PM
And “cleaned up”...
Attached thumbnail(s)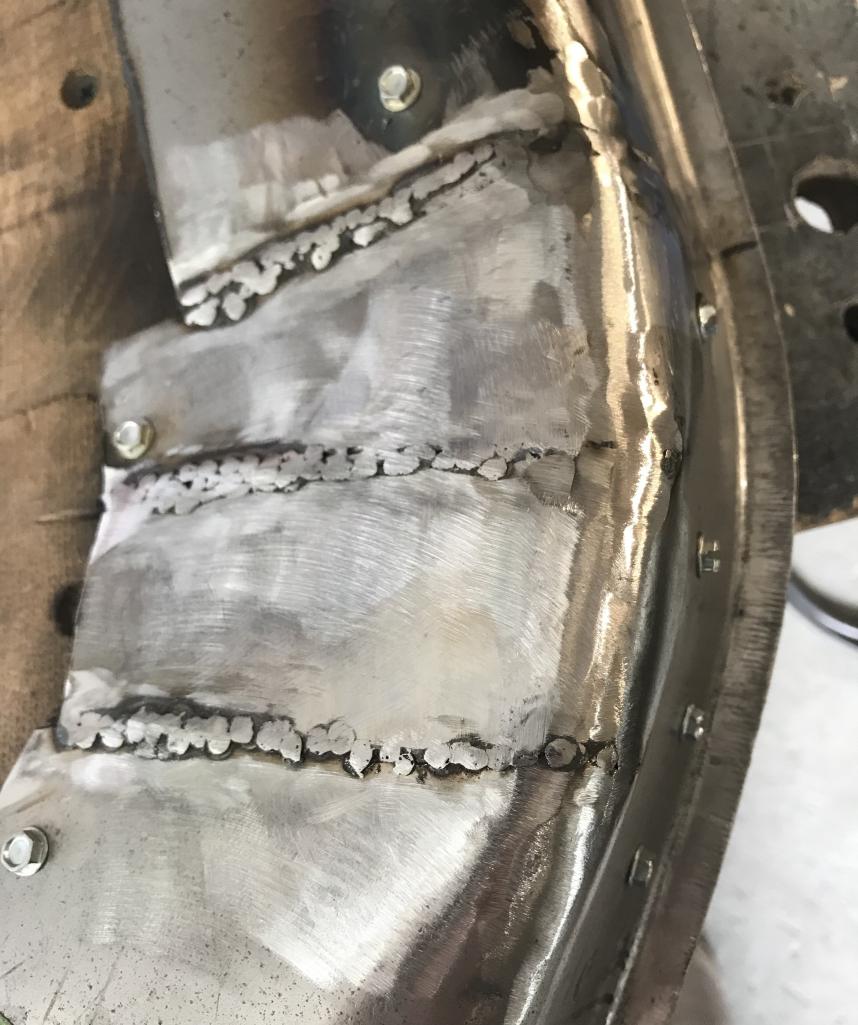
Posted by: Dion Jul 7 2019, 07:20 PM
Another portion of this task completed.
Attached thumbnail(s)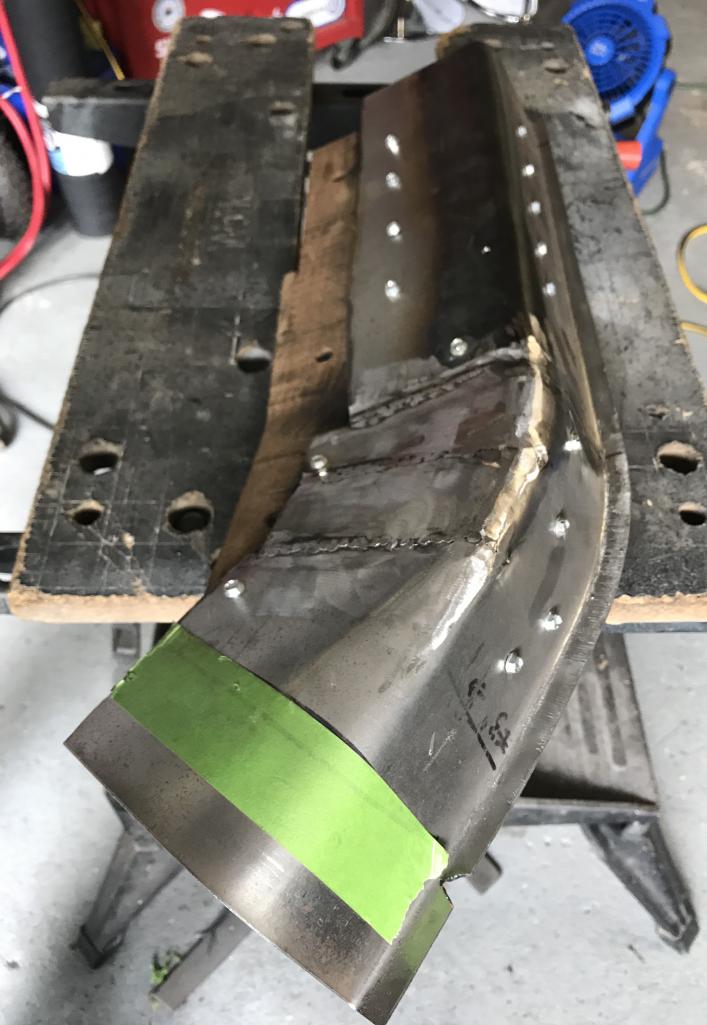
Posted by: TonyA Jul 7 2019, 07:20 PM
Looking good
Posted by: bbrock Jul 7 2019, 08:32 PM
That's a major piece to have out of the way! Nice work.
Posted by: 914dave Jul 8 2019, 07:58 AM
Dion in action!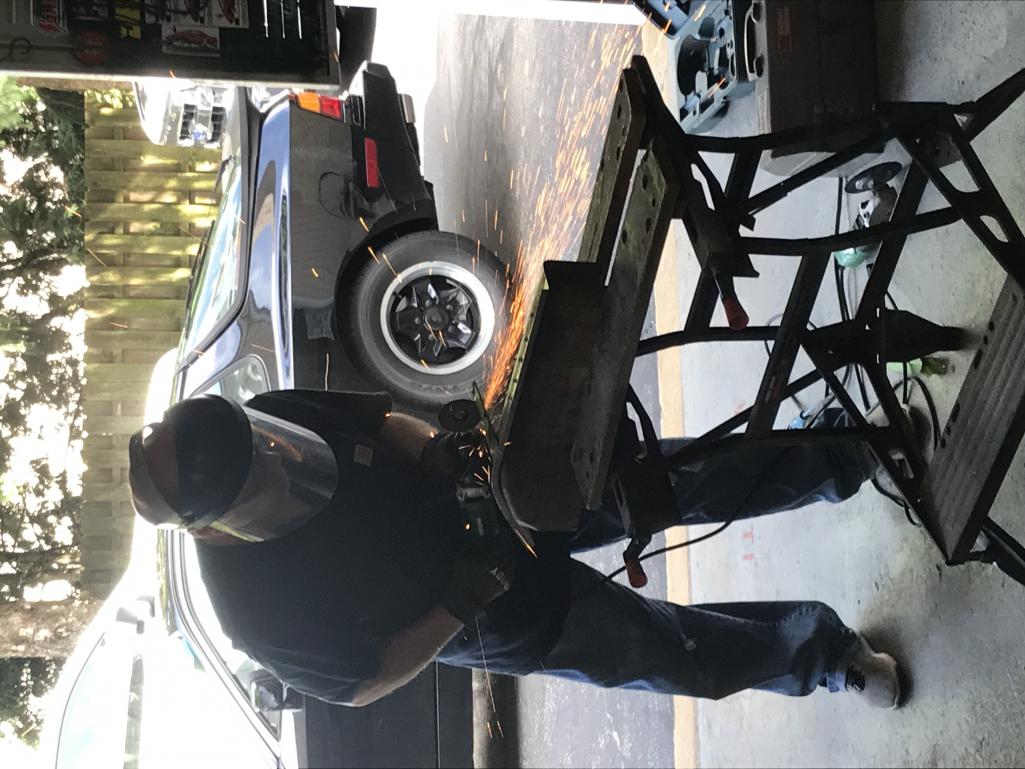
Posted by: 914dave Jul 8 2019, 08:01 AM
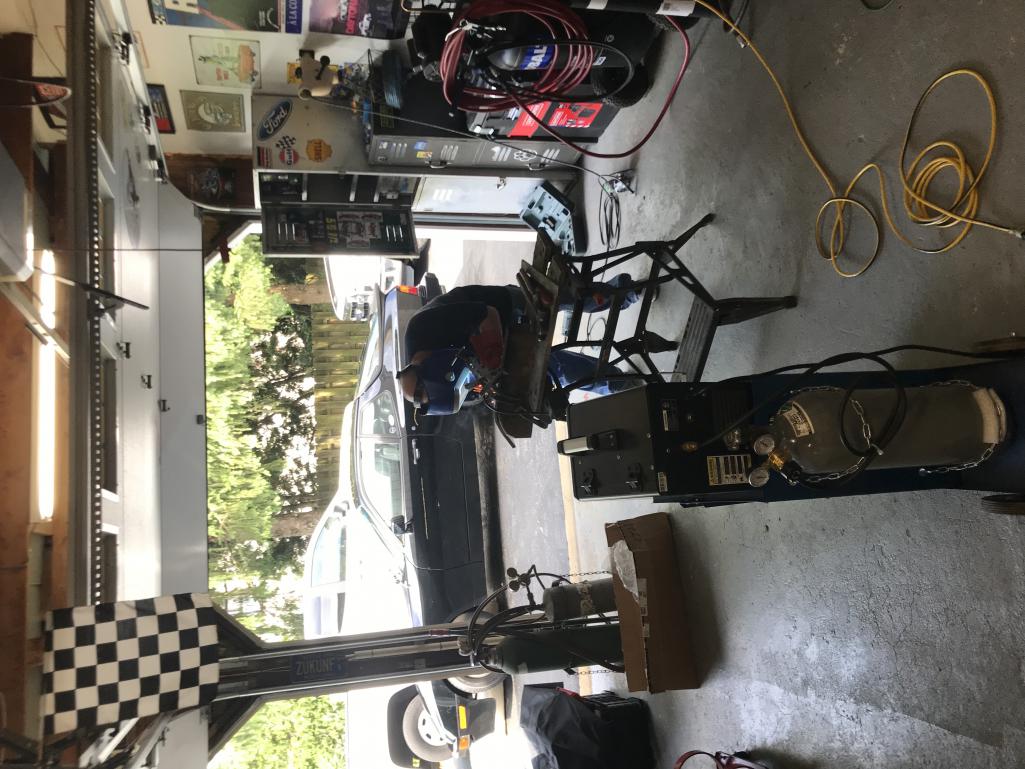
Posted by: Dion Jul 8 2019, 07:46 PM
That's a major piece to have out of the way! Nice work.Thanks Tony & Brent. Yep, still here, just being the tortoise.

Posted by: rgalla9146 Jul 9 2019, 07:28 AM
Rhodguy/Kevin was selling a six flapper box. I figured Porsche did it for a reason so I just copied it. I just used some regular 4 pieces, cut out the hole with a hole saw in a drill press and then blasted and powdercoated the parts. Mine weren’t in great shape so I had nothing to loose.
First one is Kevin’s original.
2nd is my modded one.
3rd pic is a comparison from Rory.
I thought that looked familiar.
Posted by: tygaboy Jul 9 2019, 08:05 AM
Fabricating your own parts!
Way to go, Dion.
Posted by: rgalla9146 Jul 9 2019, 11:31 AM
I posted this earlier in my thread but I think it’s cool to look at
and I’m sure it’s gonna be loud. The primitive diffuser is interesting.
Hey Dion
I have one of those.
I can report it IS friggin' LOUD !
Loved it.
But not easy to be inconspicuous with.
Mine is not nearly as clean as yours.
Posted by: Dion Sep 17 2019, 07:16 PM
Seeing all these 914 50th celebrations got me inspired again.
Kids are sorted and back at college. Enough of that running around.
Not too mention the new Jeep toy. So didn’t do any big welding of chassis
just little jobs for now.
First up drilled the rear panel for proper 6 emblem placement.
Attached thumbnail(s)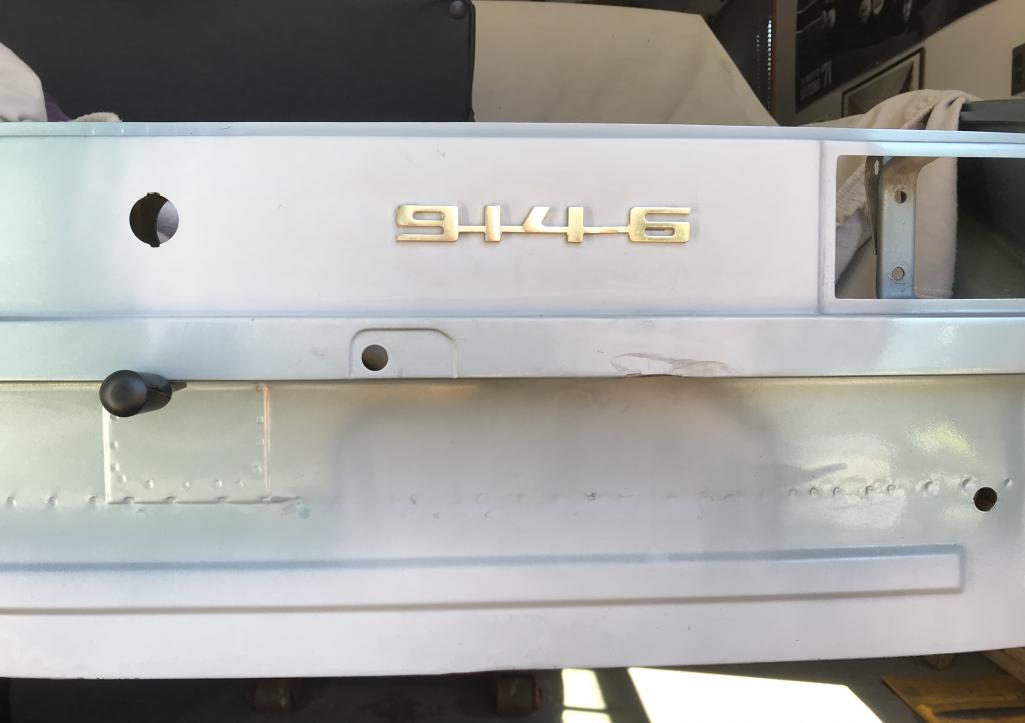
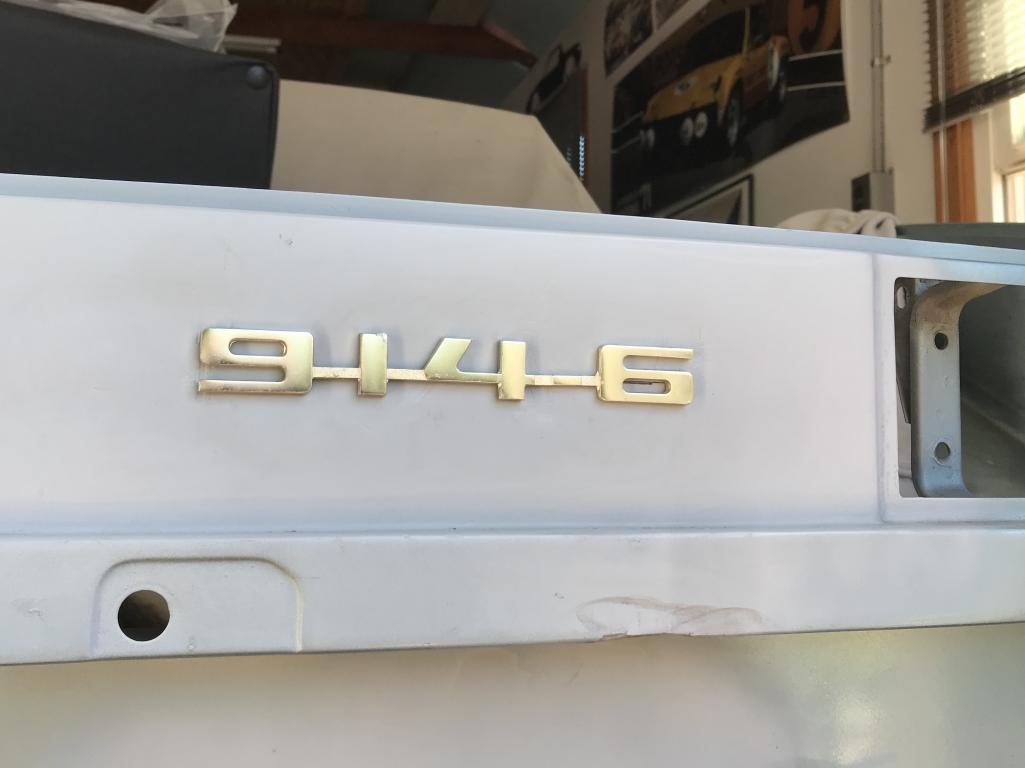
Posted by: Dion Sep 17 2019, 07:18 PM
2nd on the list today. Mocked up the bracket for the rear fog lamp.
Attached thumbnail(s)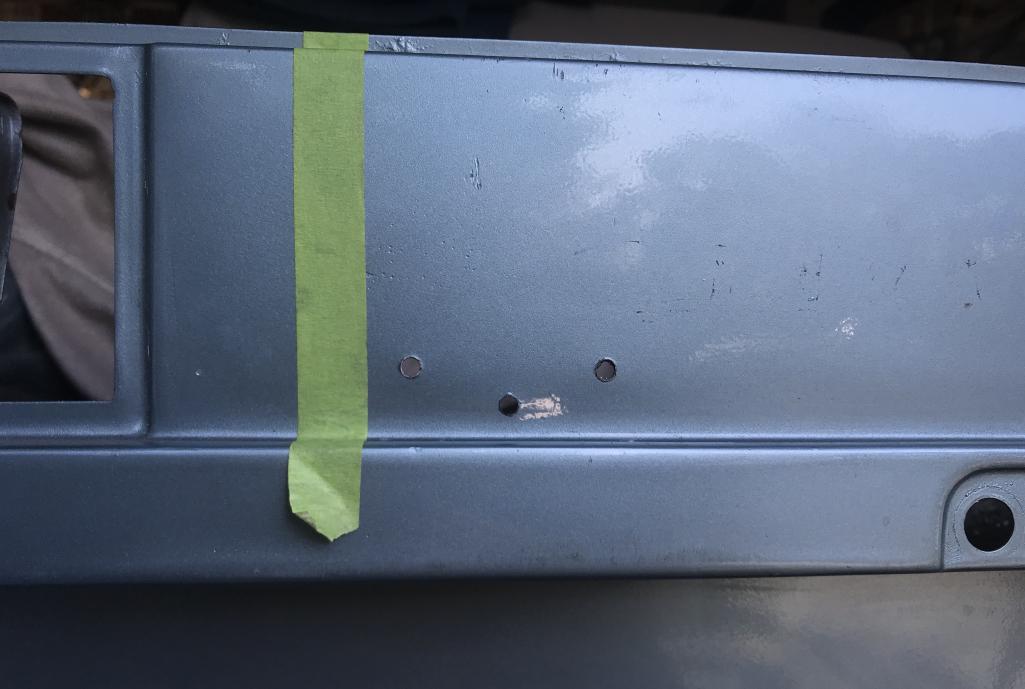
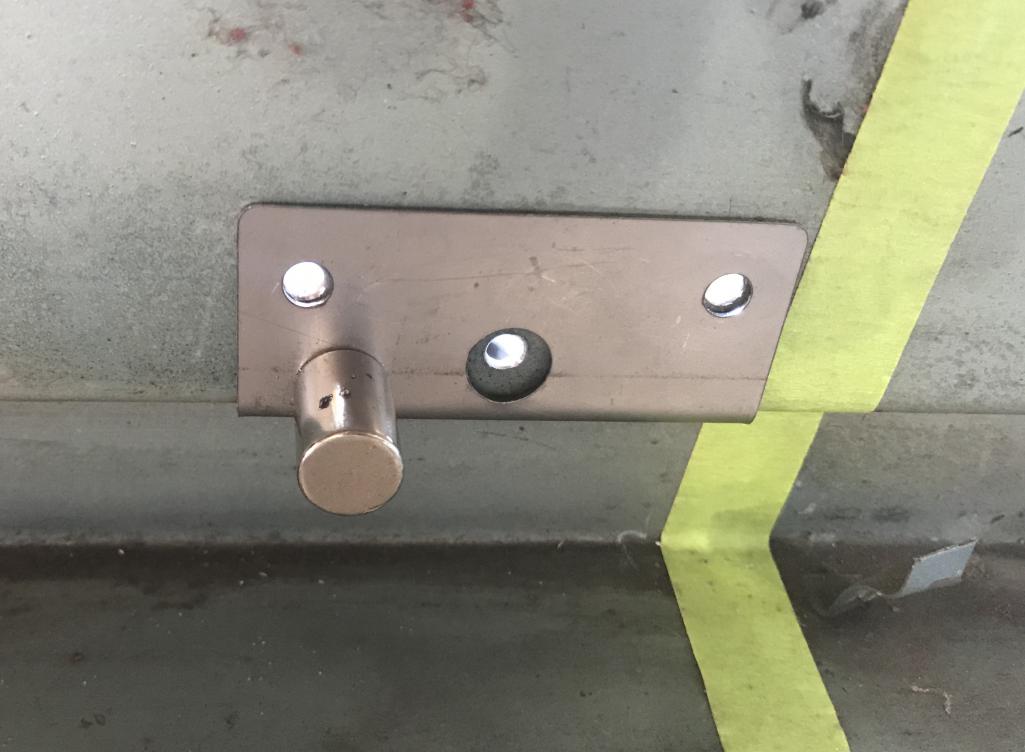
Posted by: Dion Sep 17 2019, 07:19 PM
Placement
Attached thumbnail(s)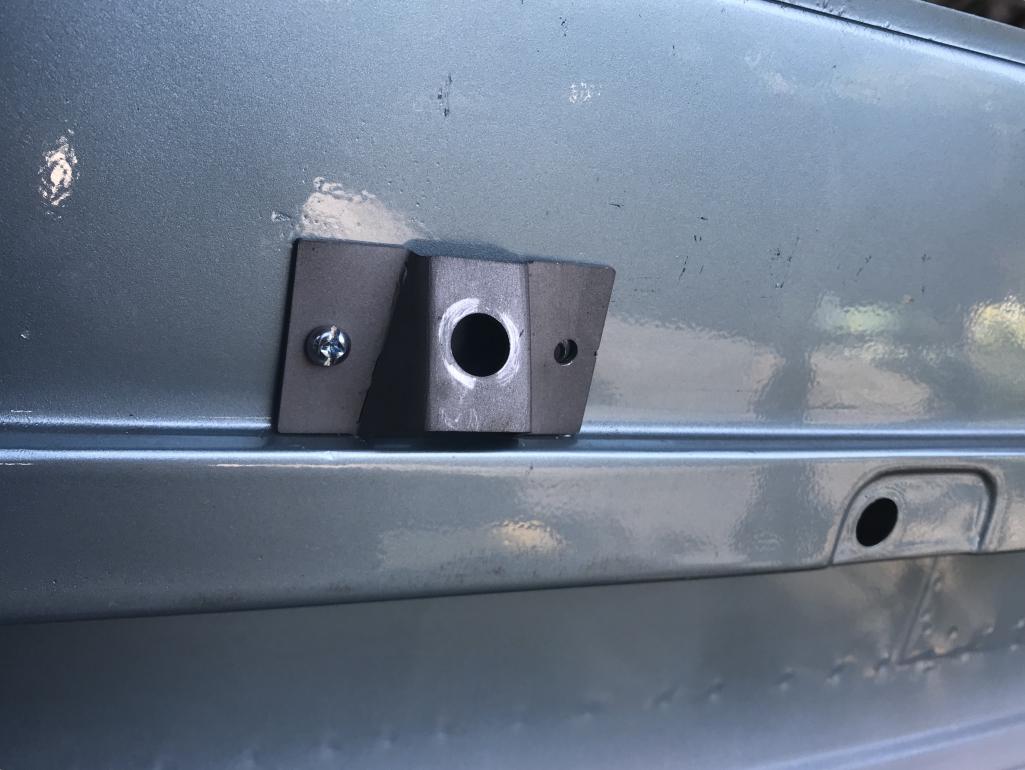
Posted by: Dion Sep 17 2019, 07:20 PM
Realized that the bracket is just a little too big so I skimmed some metal off the bottom portion.
Attached thumbnail(s)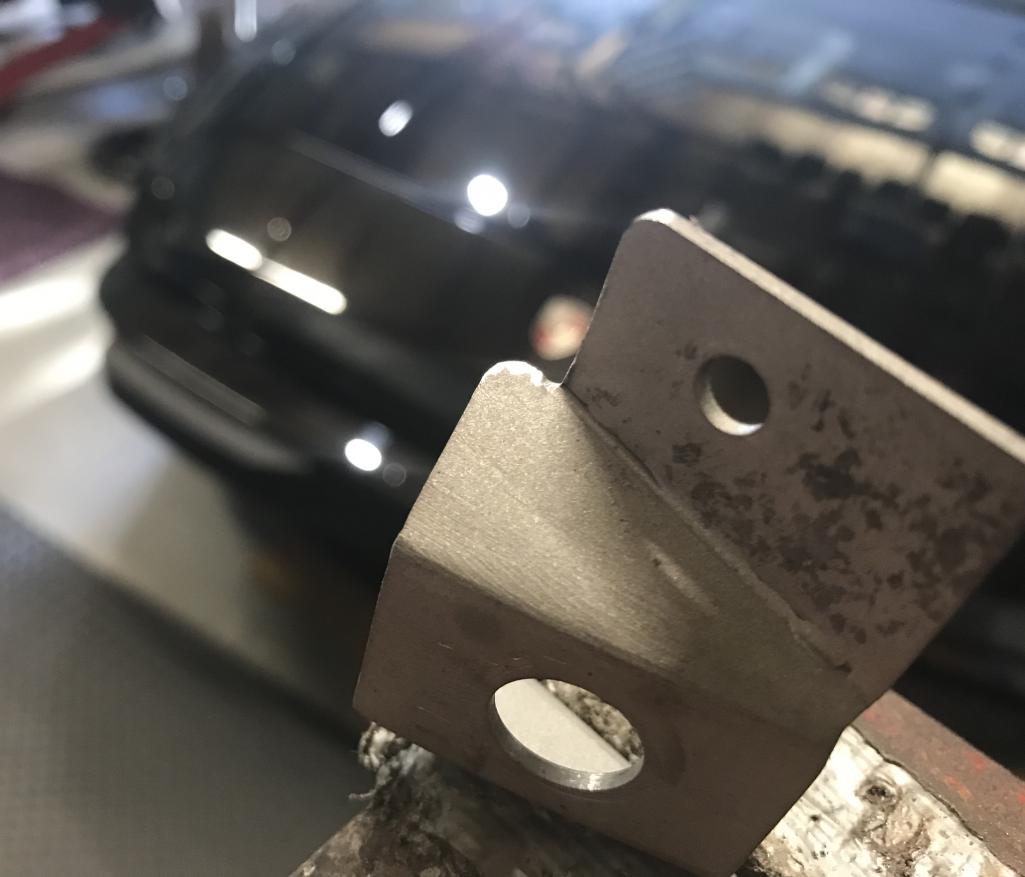
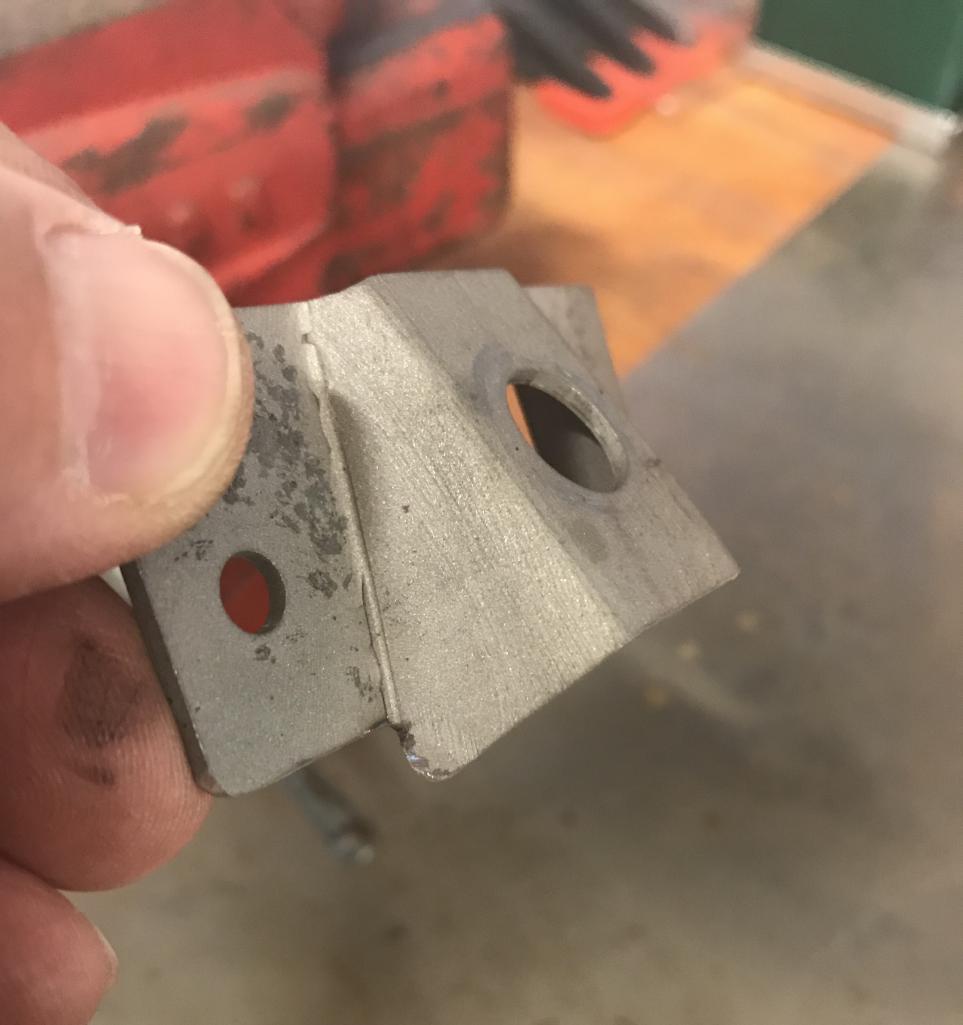
Posted by: Dion Sep 17 2019, 07:21 PM
Finished edge
Attached thumbnail(s)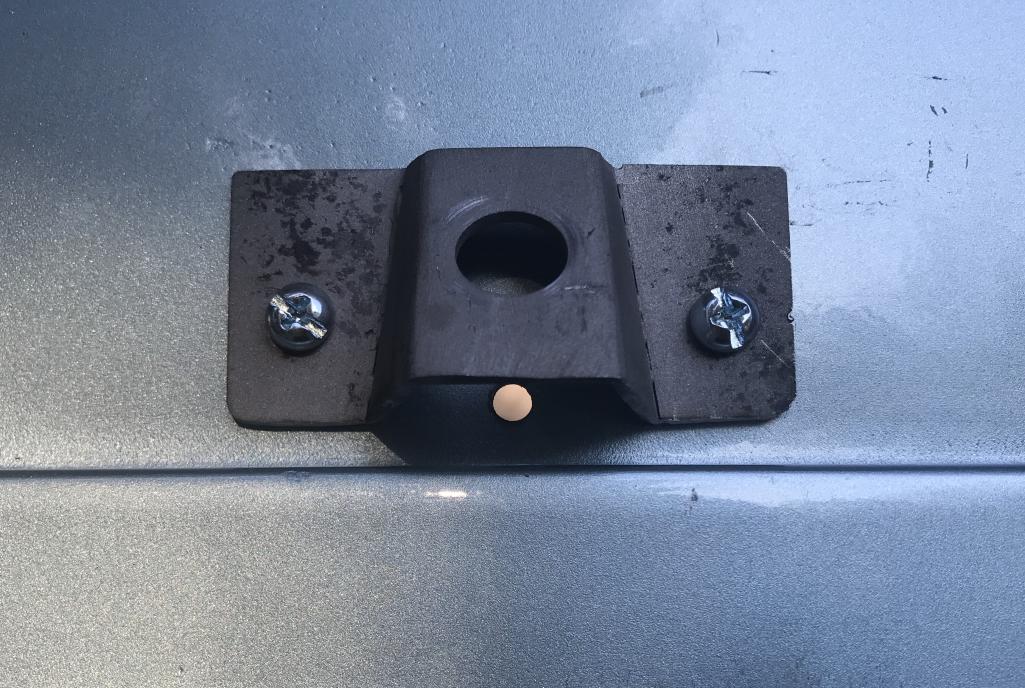
Posted by: Dion Sep 17 2019, 07:25 PM
Next was taking Larmo’s advice and bored a new hole in the fog lite itself so
it is oriented in the proper plane with regards to the car.
Drilled out the “21w” logo
Attached thumbnail(s)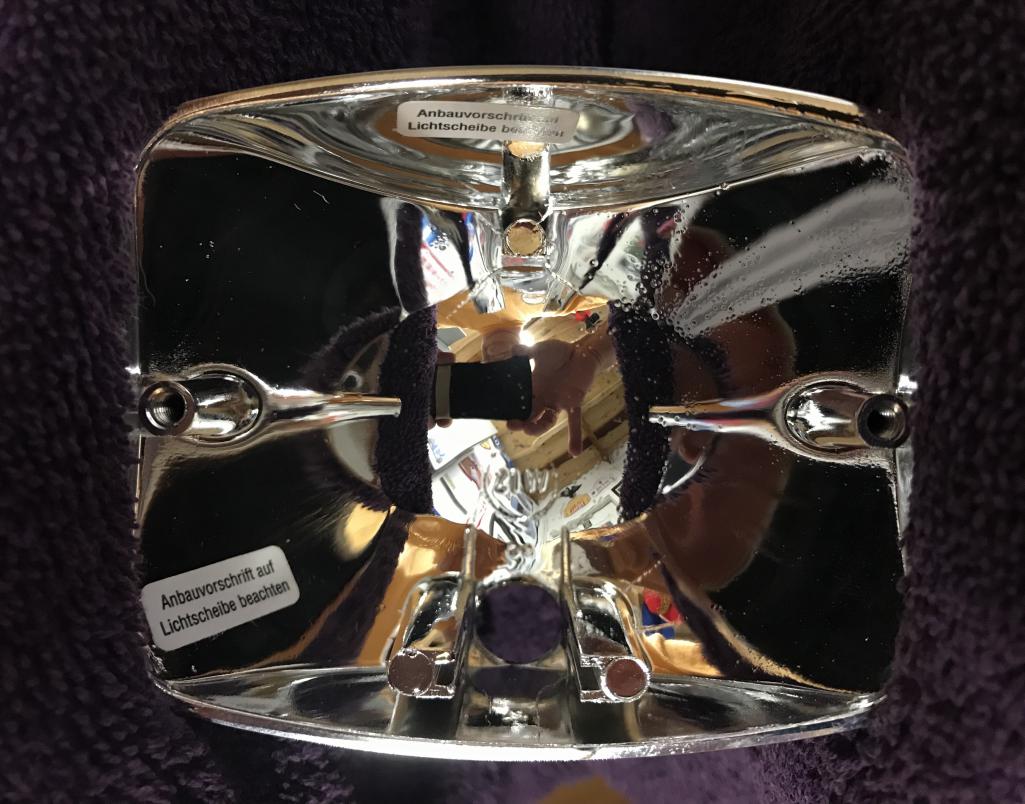
Posted by: Dion Sep 17 2019, 07:26 PM
New hole. Hard to see.
Attached thumbnail(s)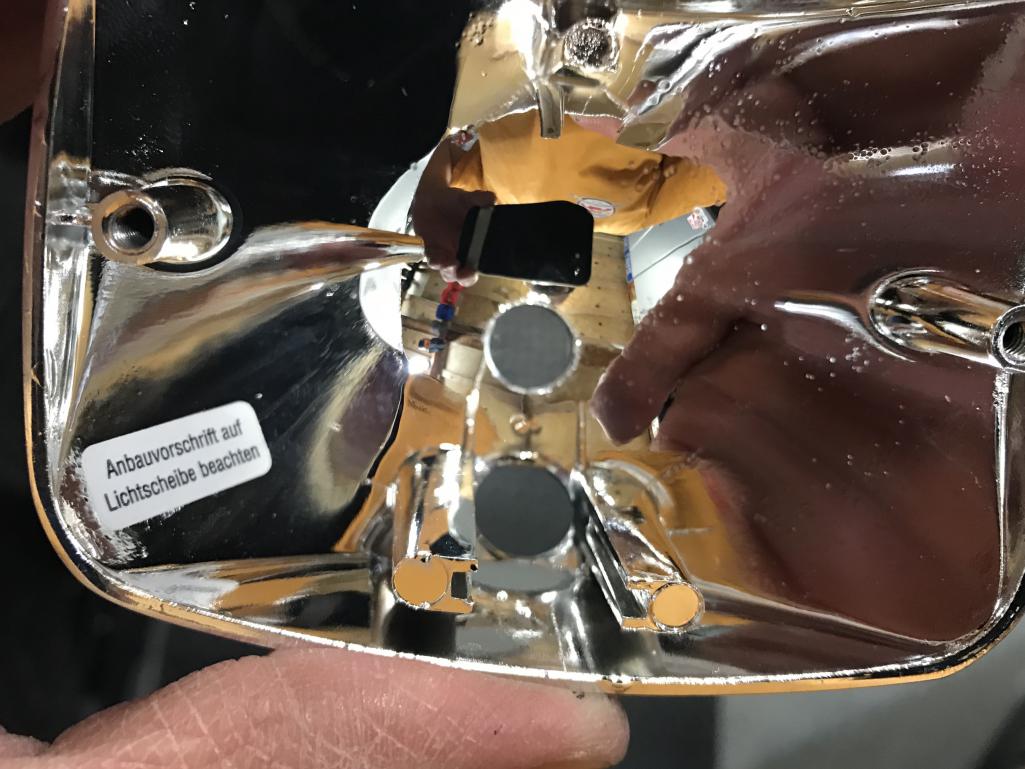
Posted by: Dion Sep 17 2019, 07:27 PM
And mounted. Will run wiring when the rest of bodywork is completed. It looks massive without the bumper being there. I’ll
source some proper hardware when doing the finish work. Give the brackets a proper coat as well.
Attached thumbnail(s)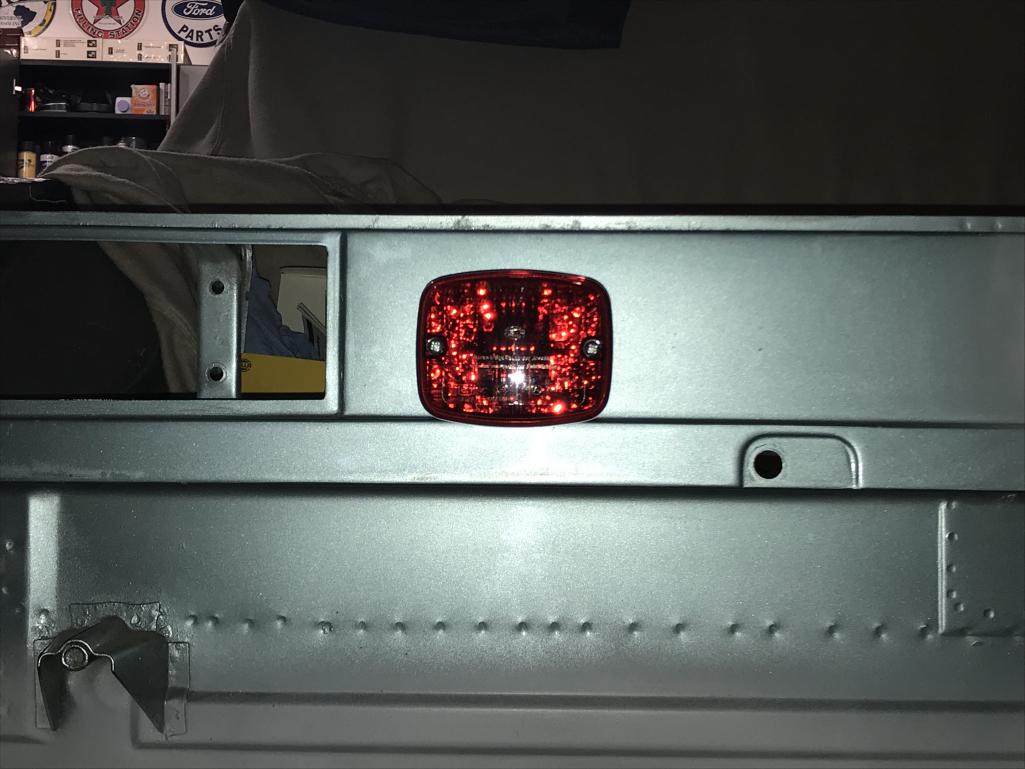
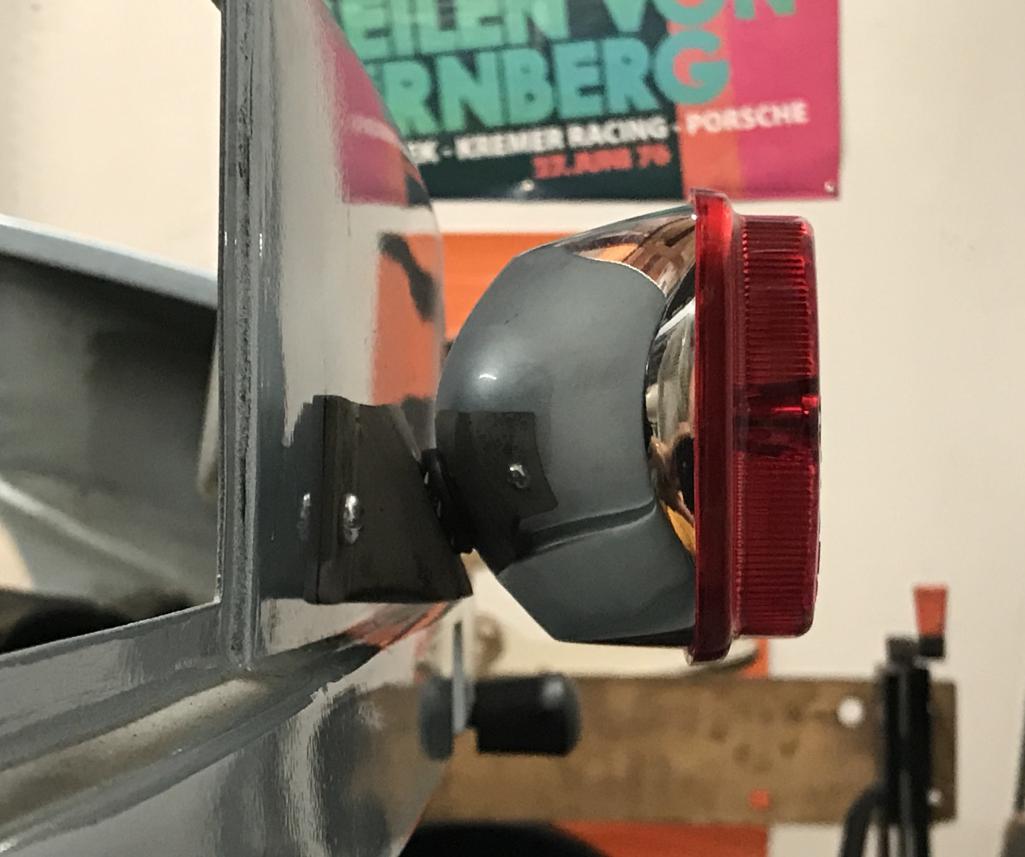
Posted by: Dion Sep 17 2019, 07:28 PM
One more.
Attached thumbnail(s)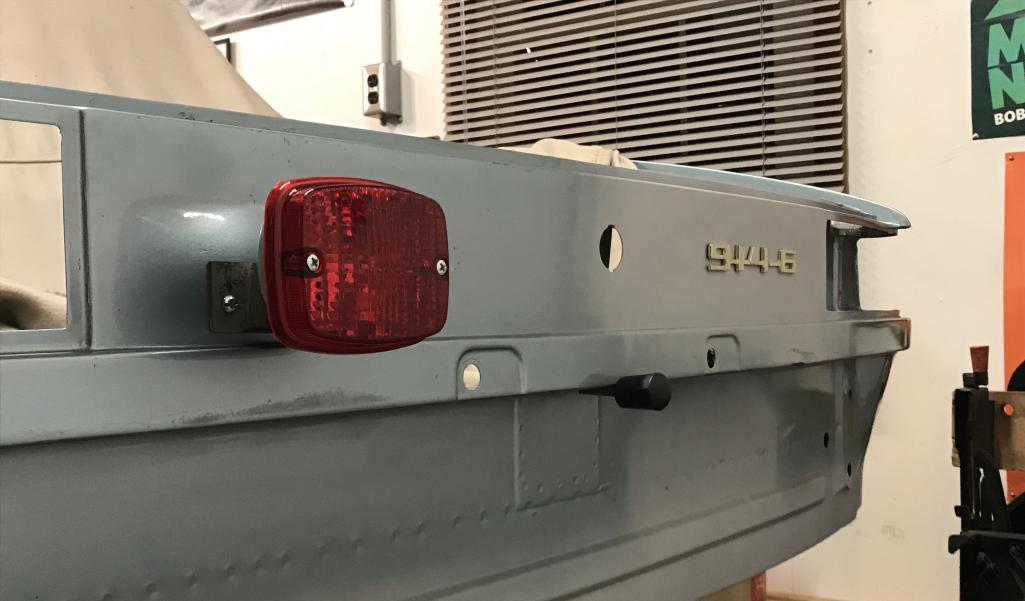
Posted by: 914dave Sep 18 2019, 05:28 AM
Looking good. Remind me what this light is for? Is it to keep faster cars from running into the back of you? Wouldn’t it have been easier to put in something bigger than the 2.4 and leave the warning light off? Just a thought.
Posted by: bbrock Sep 18 2019, 08:43 AM
Looking good! Glad to see you are back at it. I was beginning to question your priorities.
Posted by: 914dave Sep 18 2019, 08:59 AM
Looking good! Glad to see you are back at it. I was beginning to question your priorities.
It’s not his priorities, his helper has been galvanizing all over the country.
Posted by: Maltese Falcon Sep 18 2019, 09:37 AM
Looking good. Remind me what this light is for? Is it to keep faster cars from running into the back of you? Wouldn’t it have been easier to put in something bigger than the 2.4 and leave the warning light off? Just a thought.
Savvy drivers in the fog look for this red Beacon aka the "Fog Dog " and have a better chance of navigating tough conditions by following
Posted by: Dion Sep 18 2019, 10:46 AM
[quote name='Maltese Falcon' date='Sep 18 2019, 07:37 AM' post='2748137']
[quote name='914dave' post='2748075' date='Sep 18 2019, 04:28 AM']
Looking good. Remind me what this light is for? Is it to keep faster cars from running into the back of you? Wouldn’t it have been easier to put in something bigger than the 2.4 and leave the warning light off? Just a thought.
[/quote
Savvy drivers in the fog look for this red Beacon aka the "Fog Dog " and have a better chance of navigating tough conditions by following
[/quote]
Hahahahaha Thanks Marty.
Posted by: 914forme Sep 18 2019, 08:41 PM
Thanks for the detail on the fog light mount and modification.
Posted by: Dion Oct 29 2019, 06:20 PM
Thanks for the detail on the fog light mount and modification.
Glad to be of some help Stephen.
Posted by: Dion Oct 29 2019, 06:24 PM
Still tackling the little but absolutely necessary jobs.
With the help of the HF press I removed the rear hubs from the old trailing arms.
As previously mentioned I have a nice new set to place the rear hubs in.
Hope to do that job in the coming days.
So here’s a few pics of progress...
The press, without this I can’t imagine the task!
Attached thumbnail(s)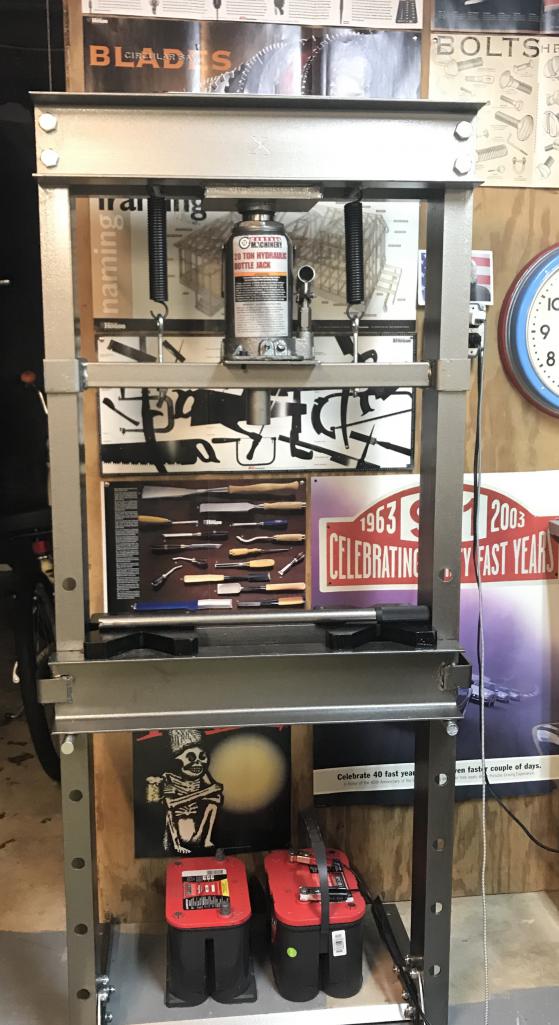
Posted by: Dion Oct 29 2019, 06:27 PM
So first removed the hub. Destroying bearing in the process.
Then to get the race off that is left behind on the hub. I followed PMB excellent and entertaining vids to make life easier. Thanks Mr. Shea!
Applied a little MAP gas to heat the hub race and cold chisel it off.
Attached thumbnail(s)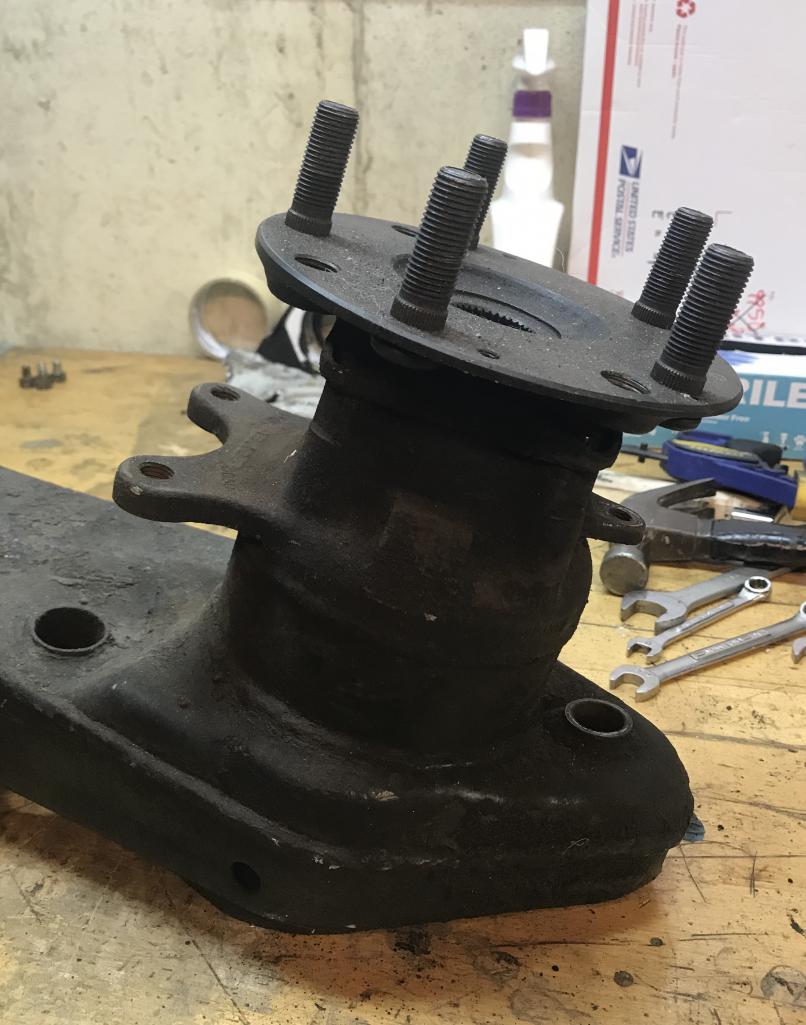
Posted by: Dion Oct 29 2019, 06:28 PM
Destroyed bearing
Attached thumbnail(s)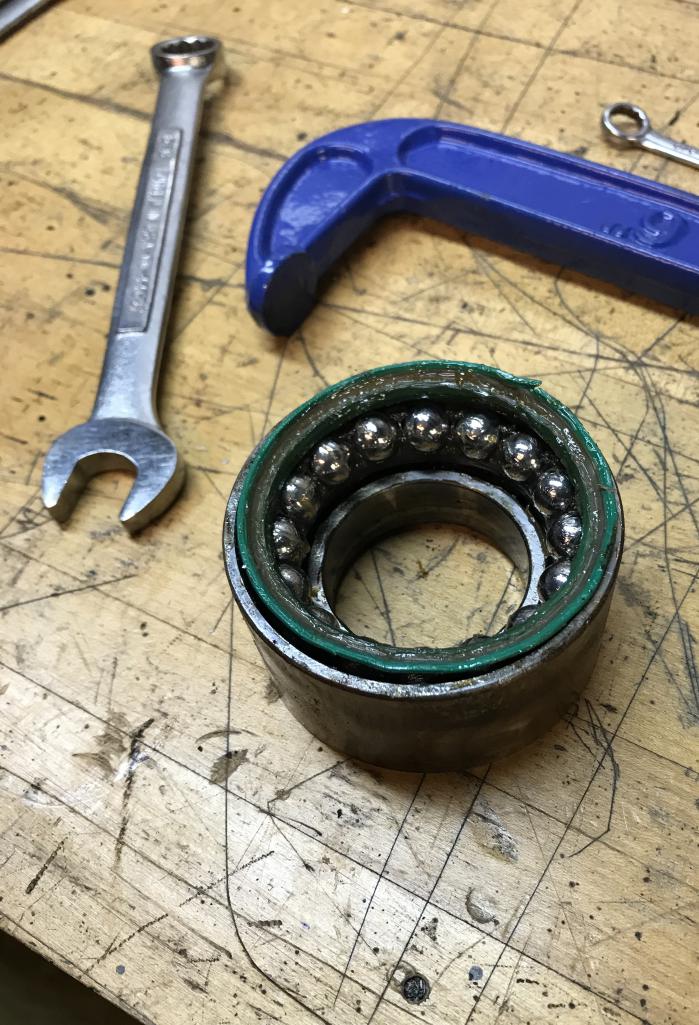
Posted by: Dion Oct 29 2019, 06:29 PM
Heat
Attached thumbnail(s)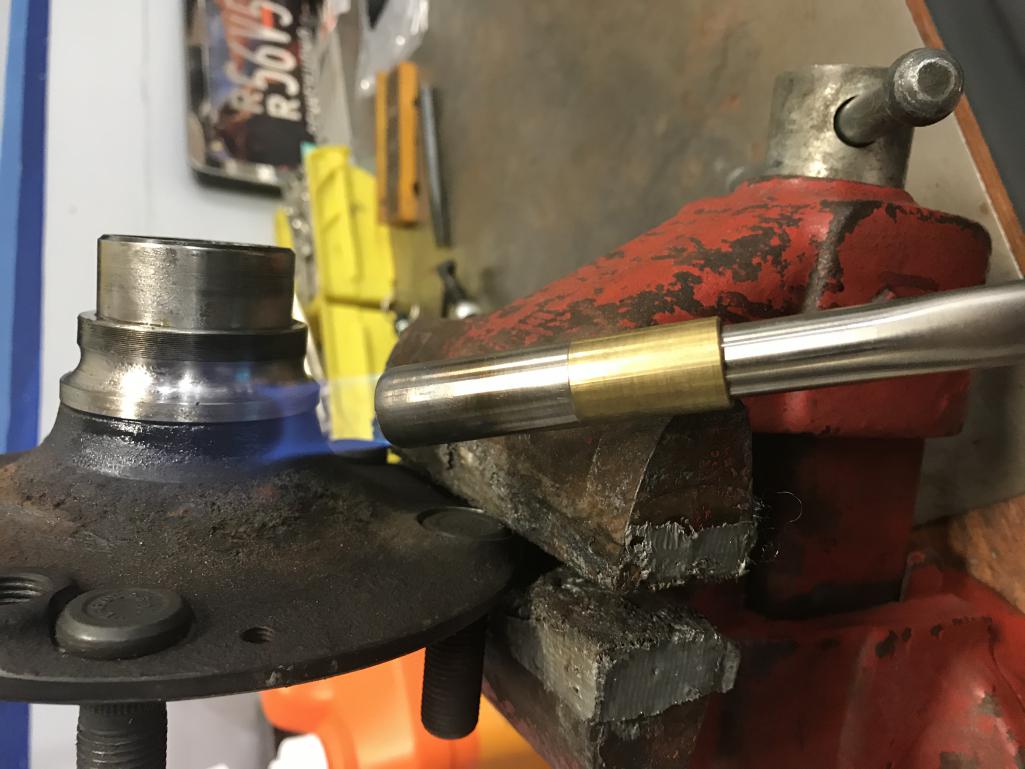
Posted by: Dion Oct 29 2019, 06:30 PM
Movement of race...
Attached thumbnail(s)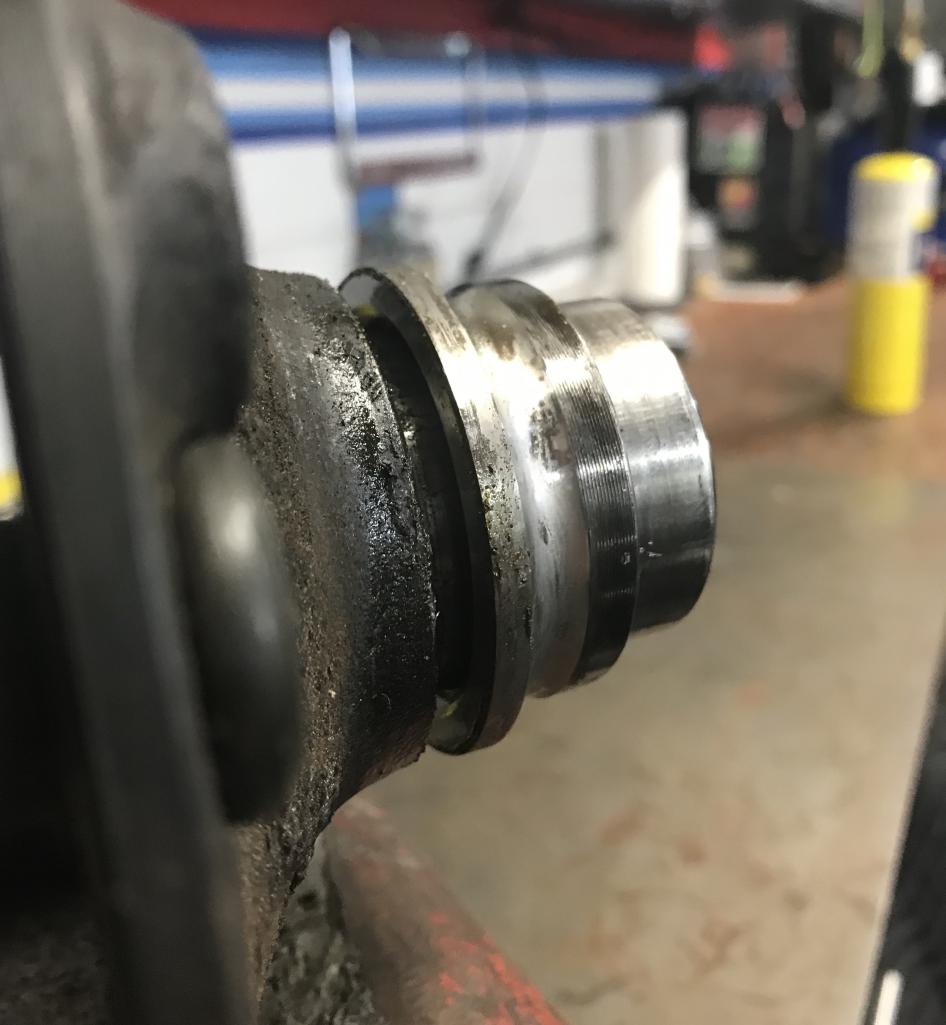
Posted by: Dion Oct 29 2019, 06:32 PM
Freedom!
Attached thumbnail(s)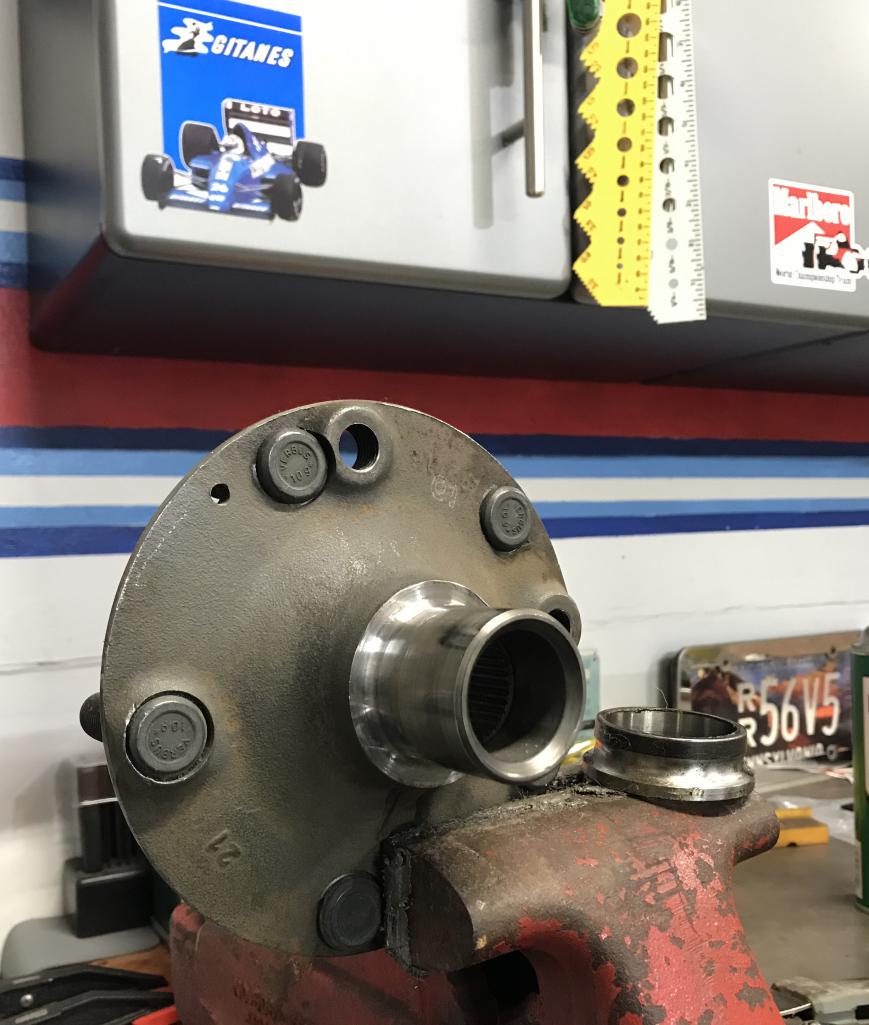
Posted by: Dion Oct 29 2019, 06:32 PM
Ready for new bearings.
Attached thumbnail(s)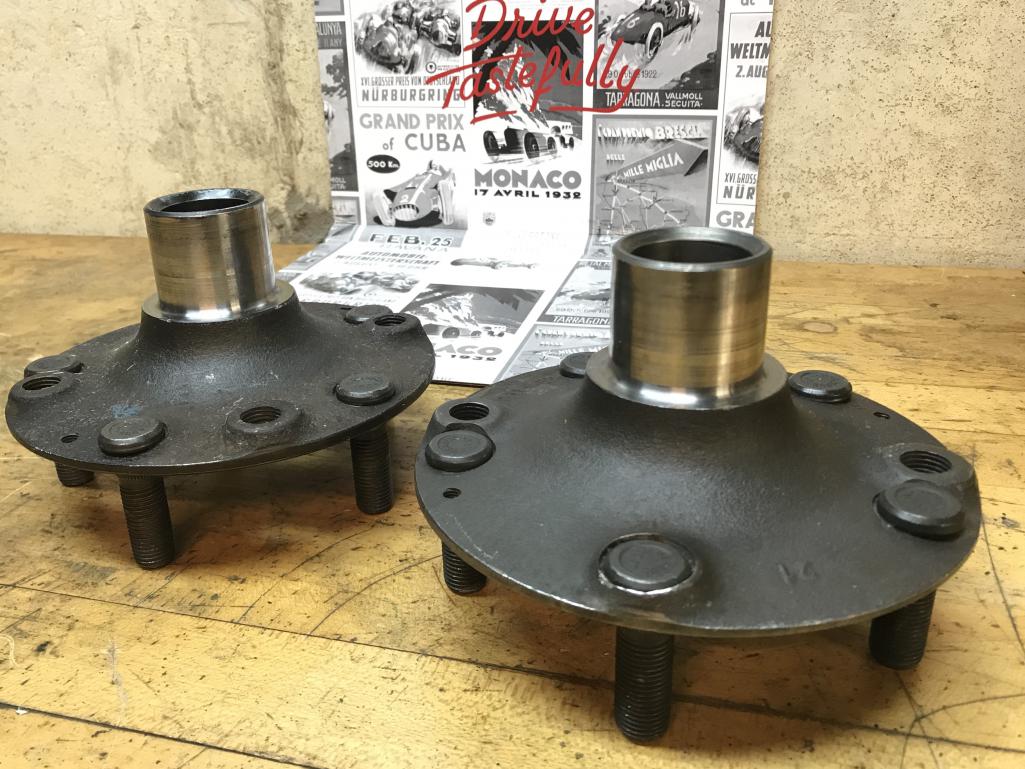
Posted by: Dion Jan 5 2020, 08:30 AM
Managed to tackle some chassis work. My bud Dave came by the other day and helped out on the difficult task. When he removed the formed chassis piece from the buck/form
found out real quick on of my welds wasn’t up to the task. Cracked immediately after
due to stresses of the flex. So I cut another straight edge pie cut in that area to be re welded.
Attached thumbnail(s)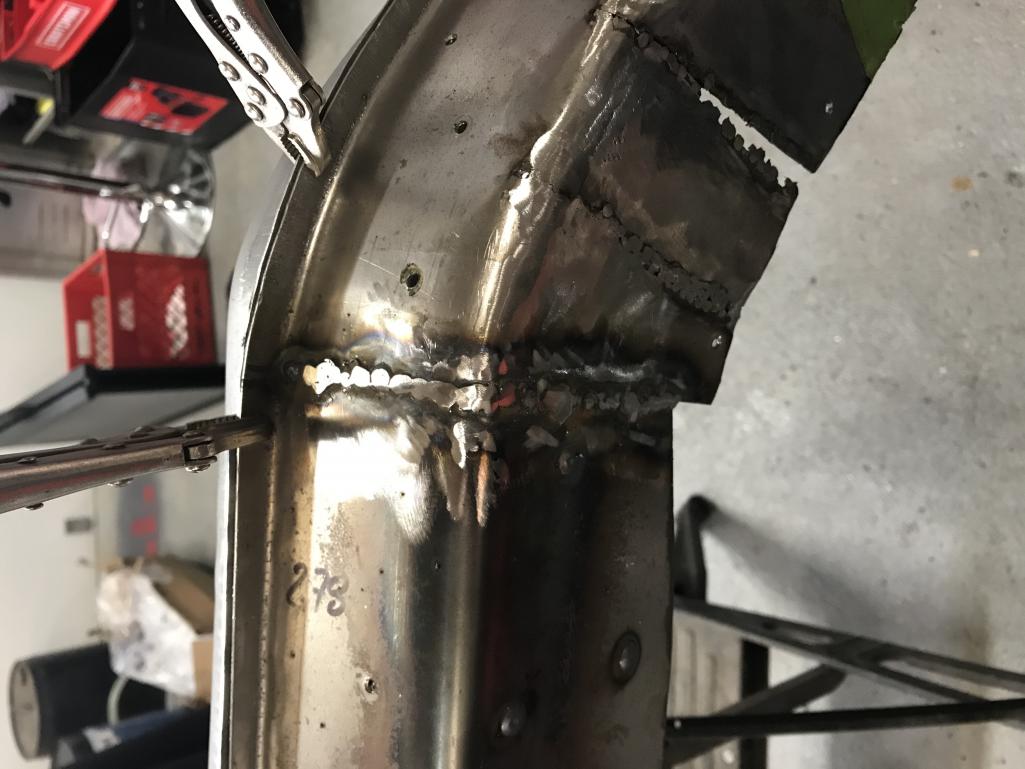
Posted by: Dion Jan 5 2020, 08:36 AM
While Dave set up my welders setting found out that maybe one of the reasons the weld didn’t hold (newbie mistakes) the gas flow wasn’t sufficient.
He took to the task of welding up the crack. I went ahead and trimmed up some more of the long to help orient the new piece.
Attached thumbnail(s)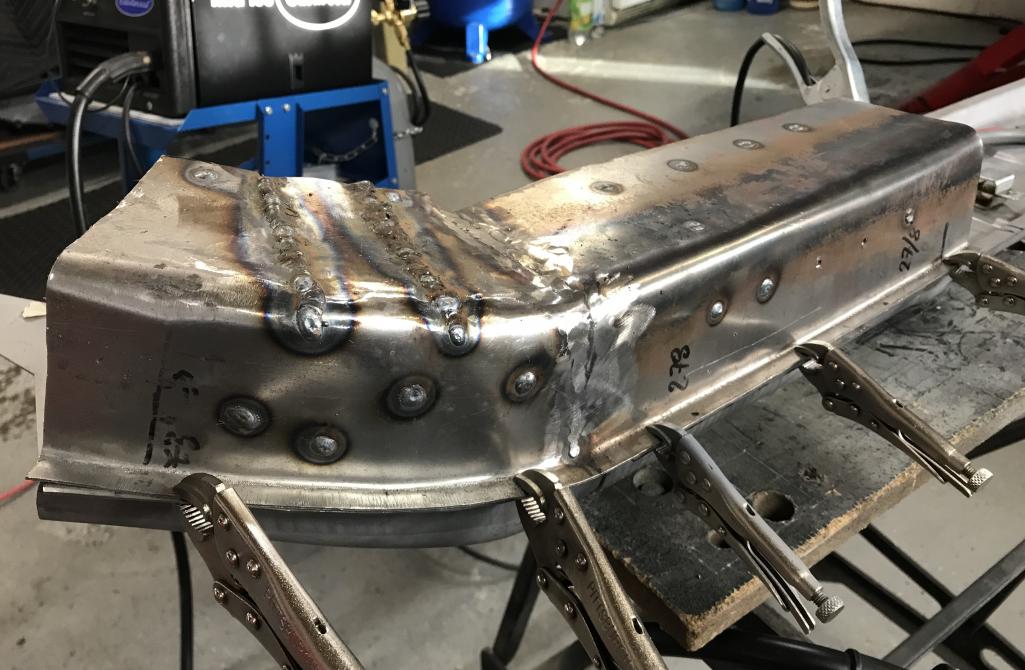
Posted by: Dion Jan 5 2020, 08:37 AM
Trimmed out
Attached thumbnail(s)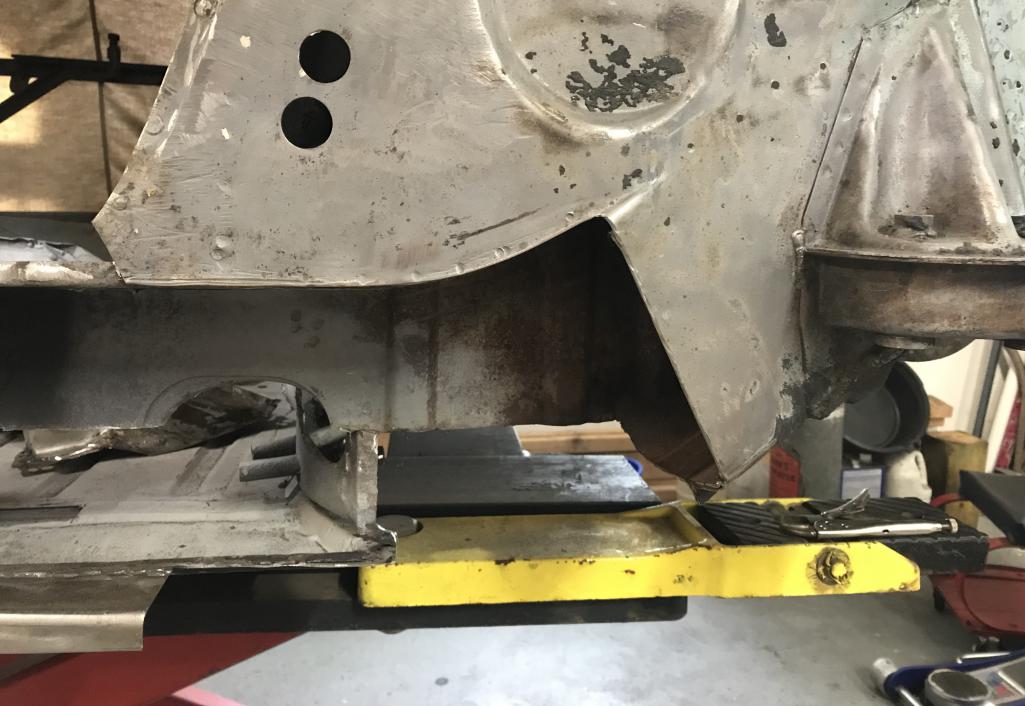
Posted by: Dion Jan 5 2020, 08:38 AM
Cut
Attached thumbnail(s)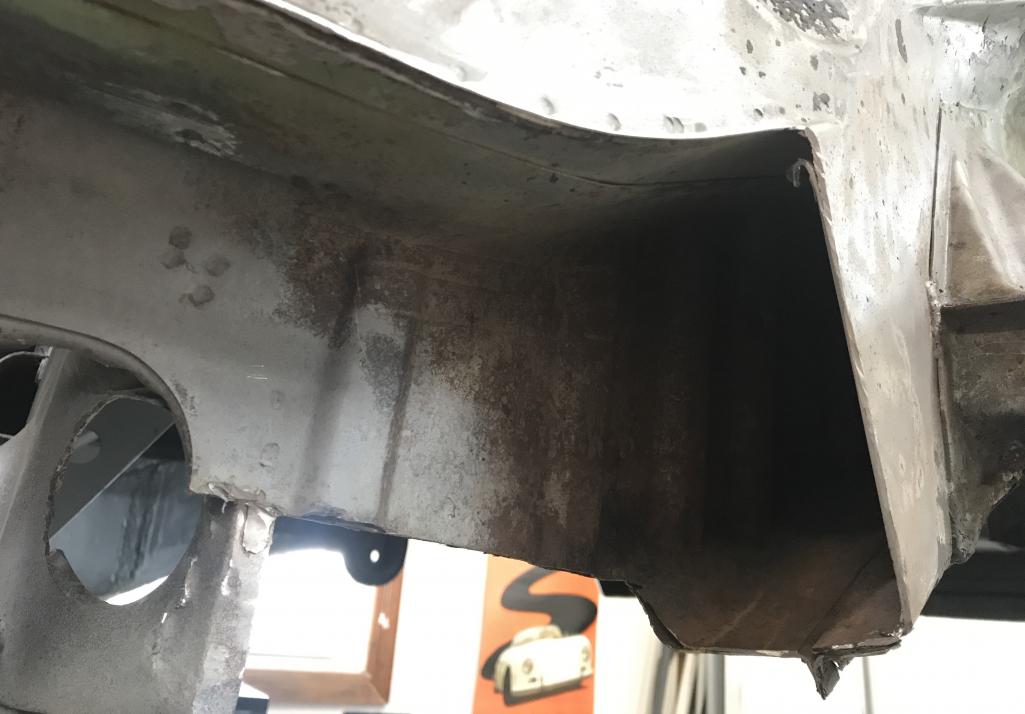

Posted by: Dion Jan 5 2020, 08:41 AM
Mock up of two pieces together that will form the new “long” kick up.
Attached thumbnail(s)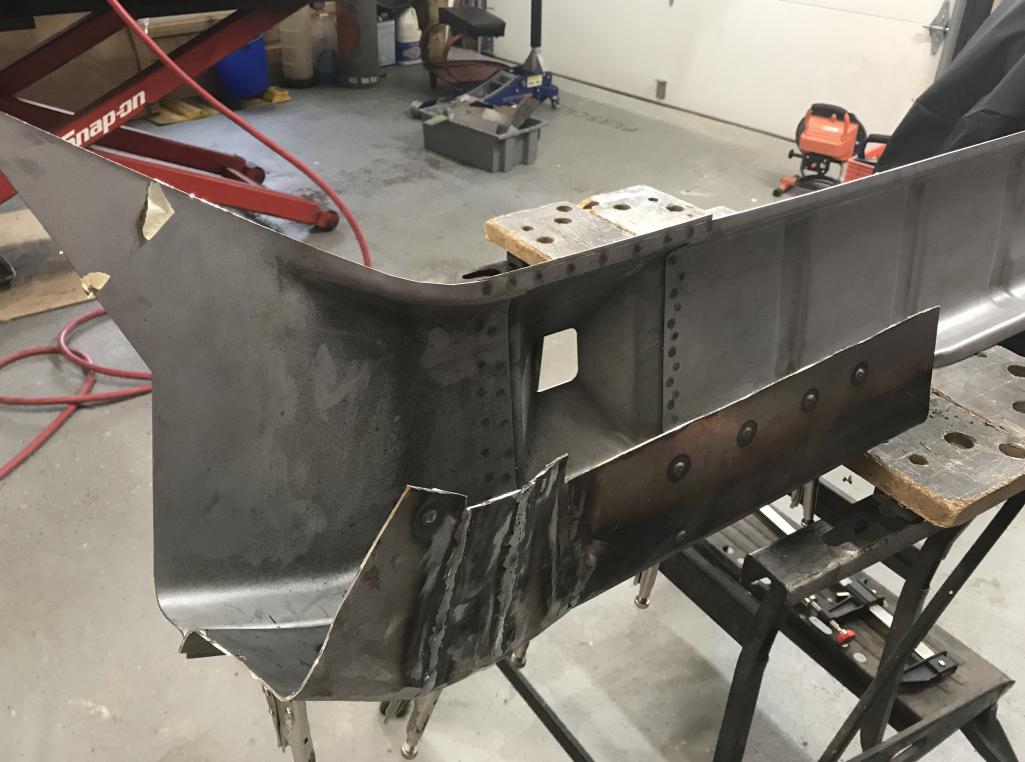
Posted by: Dion Jan 5 2020, 08:43 AM
Joined temporarily
Attached thumbnail(s)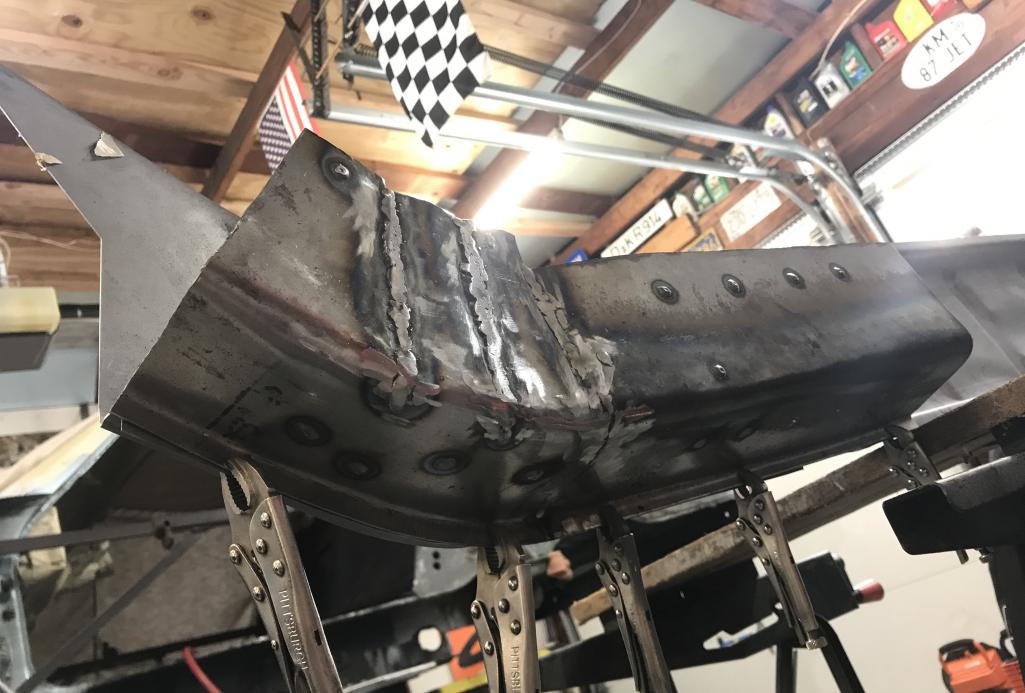
Posted by: Dion Jan 5 2020, 08:47 AM
Will need more trimming. Getting there.
Progress is progress. Not the most glamorous. More metal needs to be added to this piece. Goal to make sure there will be NO FLEX here. More to come....
Attached thumbnail(s)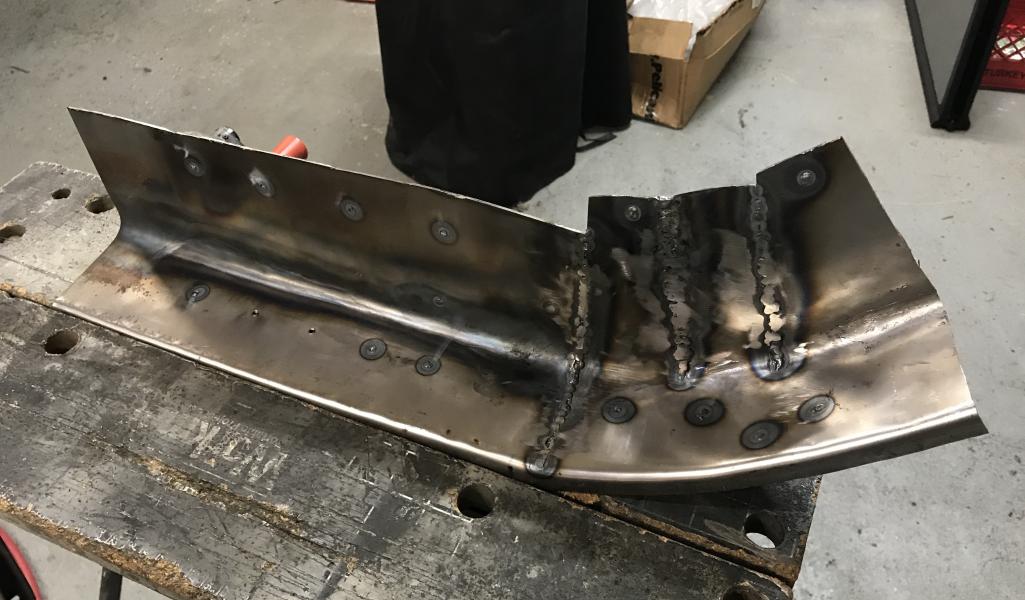
Posted by: tygaboy Jan 5 2020, 09:00 AM
Happy New Year Dion! Great documentation and helpful pointers.
You may have mentioned it in an earlier post so apologies if I missed it but I'm assuming you have plans to make sleeves where these pieces will be fit to the chassis?
I found Jeff Hail's post about this topic super helpful and ended up copying his approach when I did a similar repair to my car.
See post # 43 here:
http://www.914world.com/bbs2/index.php?showtopic=76791&st=40
Again, sorry if you already had this covered.
Keep up the great work and you'll be in 2020!
Posted by: BeatNavy Jan 5 2020, 09:04 AM
Keep up the great work and you'll be
in 2020! Nice job, Dion!
Posted by: Dion Jan 5 2020, 09:07 AM
@http://www.914world.com/bbs2/index.php?showuser=19241 Happy New Year Chris & thank you for all your encouragement.
Yes do plan on a “sleeve” for this area. No apologies ever needed.
Jeff does have some awesome documentation, as do you buddy!
Thanks @http://www.914world.com/bbs2/index.php?showuser=17042 ,
Cheers
Posted by: bbrock Jan 5 2020, 09:42 AM
That there is a monumental piece to tackle. Well done!
Posted by: mb911 Jan 5 2020, 10:56 AM
Looks great dion.. I hope you will have a great 2020 with this project.
Posted by: 914dave Jan 5 2020, 11:42 AM
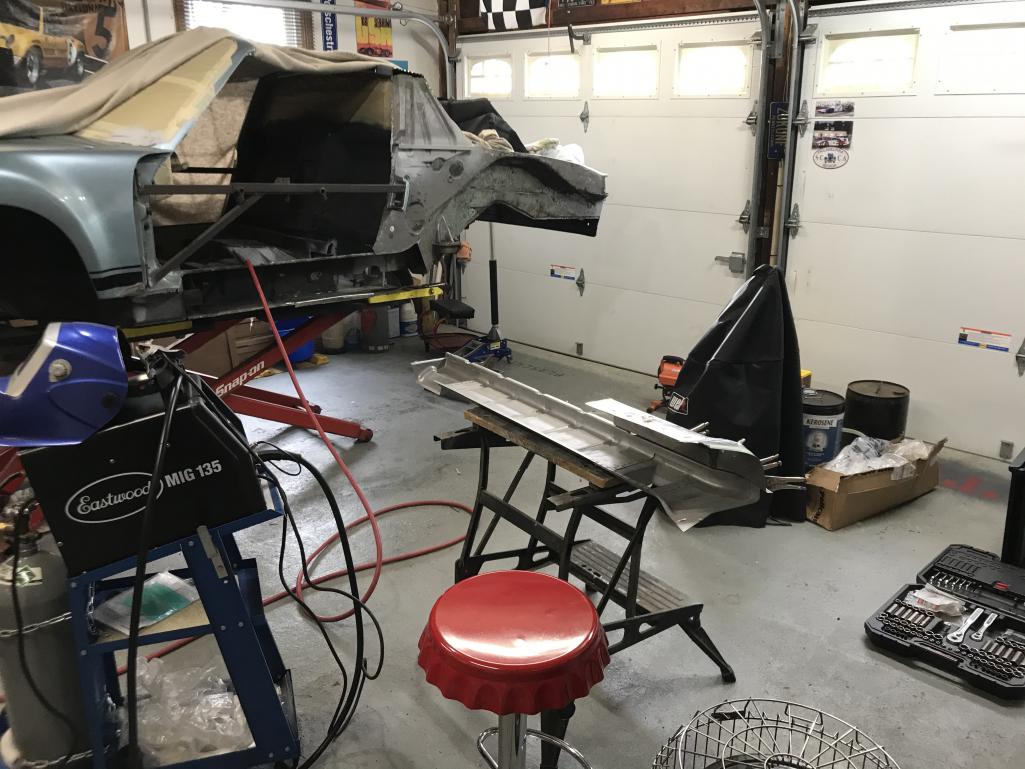
Posted by: 914dave Jan 5 2020, 11:43 AM
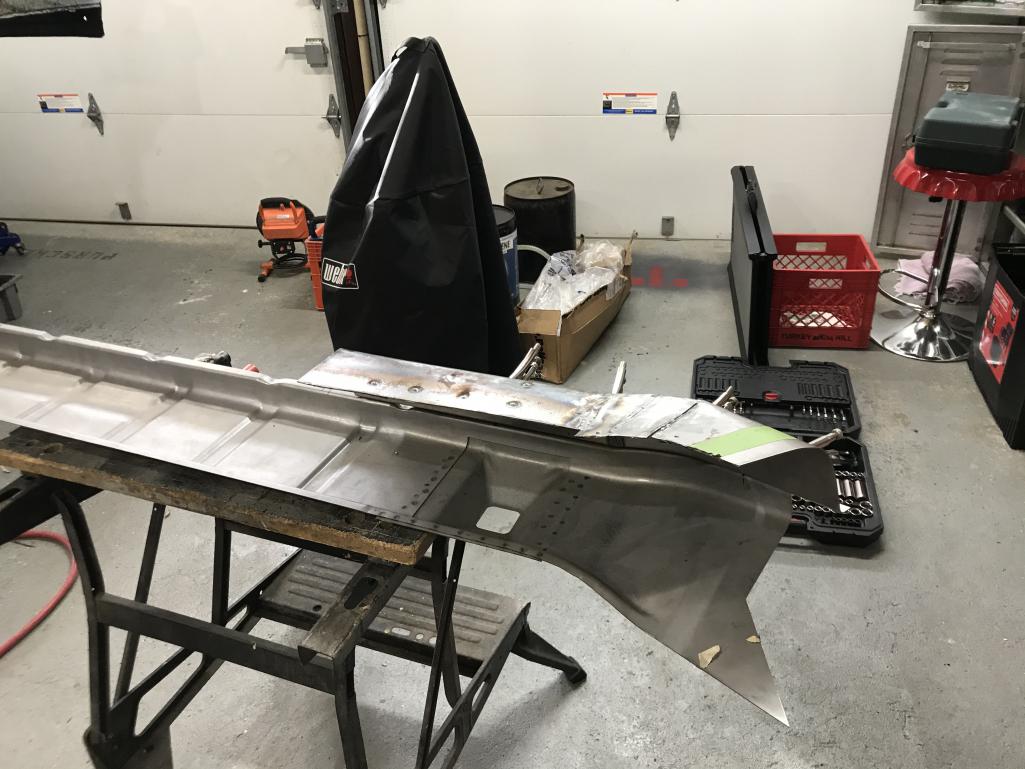
Posted by: porschetub Jan 5 2020, 12:30 PM
Still tackling the little but absolutely necessary jobs.
With the help of the HF press I removed the rear hubs from the old trailing arms.
As previously mentioned I have a nice new set to place the rear hubs in.
Hope to do that job in the coming days.
So here’s a few pics of progress...
The press, without this I can’t imagine the task!
Hi Dion ,great to see you are back on it,happy new year mate
.
Posted by: TonyA Jan 5 2020, 02:48 PM
Guess your feeling better work looks great.
Posted by: Dion Jan 5 2020, 05:53 PM
@http://www.914world.com/bbs2/index.php?showuser=20845
@http://www.914world.com/bbs2/index.php?showuser=9892
@http://www.914world.com/bbs2/index.php?showuser=20596
@http://www.914world.com/bbs2/index.php?showuser=18995
Appreciate the positive vibes fellas!
A debt of gratitude is due to Dave. His experience with this area and his skillset have
kept me on track with this project. Thanks buddy.
Nice pics too.
Cheers all.
Posted by: Dion Feb 10 2020, 04:14 PM
Another miserable grey, wet, winter day in Pennsylvania. So today pressed in the wheel hub bearings for the rear trailing arms.
I’ll tell ya it’s a bit nerve wracking. The fear is not getting them in straight and then
have the expense of buying another bearing.
I followed PMBs’ video for this procedure. Thanks Eric!
Started with placing the bearing in the freezer. I then tapped it in the arm gently, just seating it. Next was onto the press. Made short work of situating that bearing in place. It did the trick.
The next challenge will be the other end of the trailing arm. Everything I have read says that’s the fun part. Woo hoo!
Stay tuned.
Attached thumbnail(s)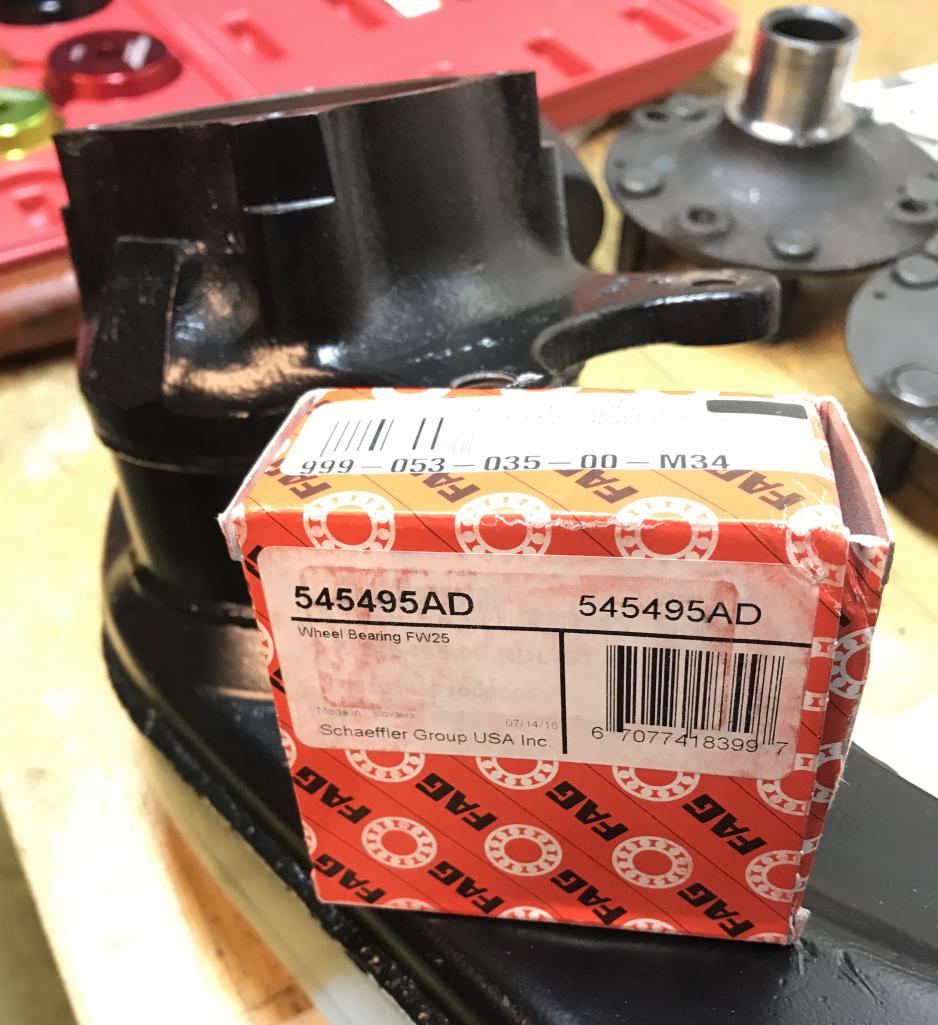
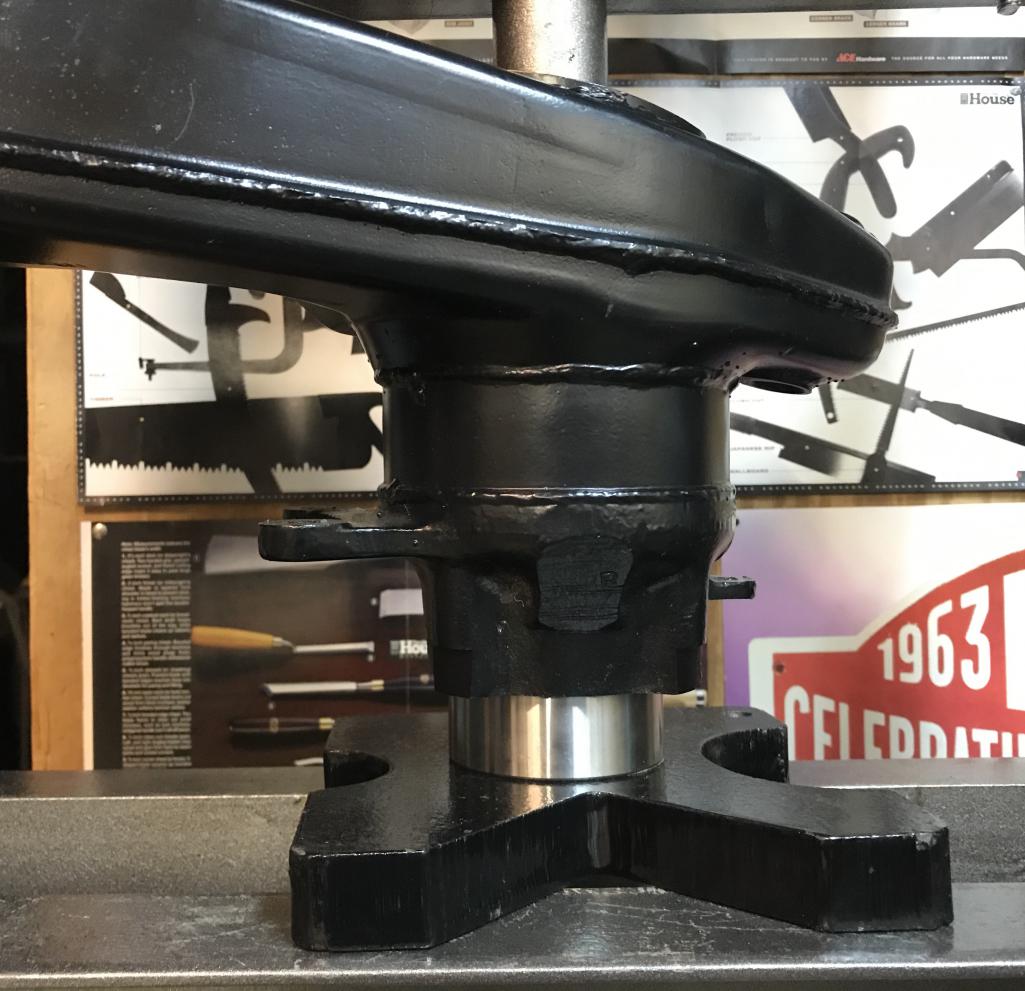
Posted by: Dion Feb 10 2020, 04:15 PM
Bearings in.
Attached thumbnail(s)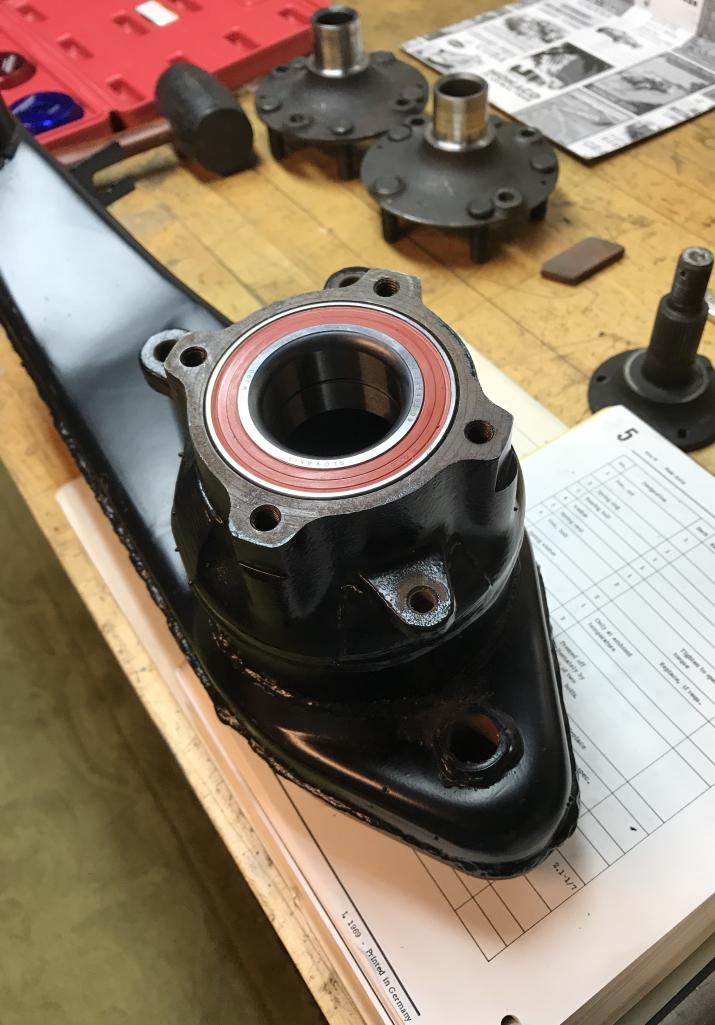
Posted by: Dion Feb 10 2020, 04:17 PM
With retainer. Torqued down. Nice shiny anodizing
Attached thumbnail(s)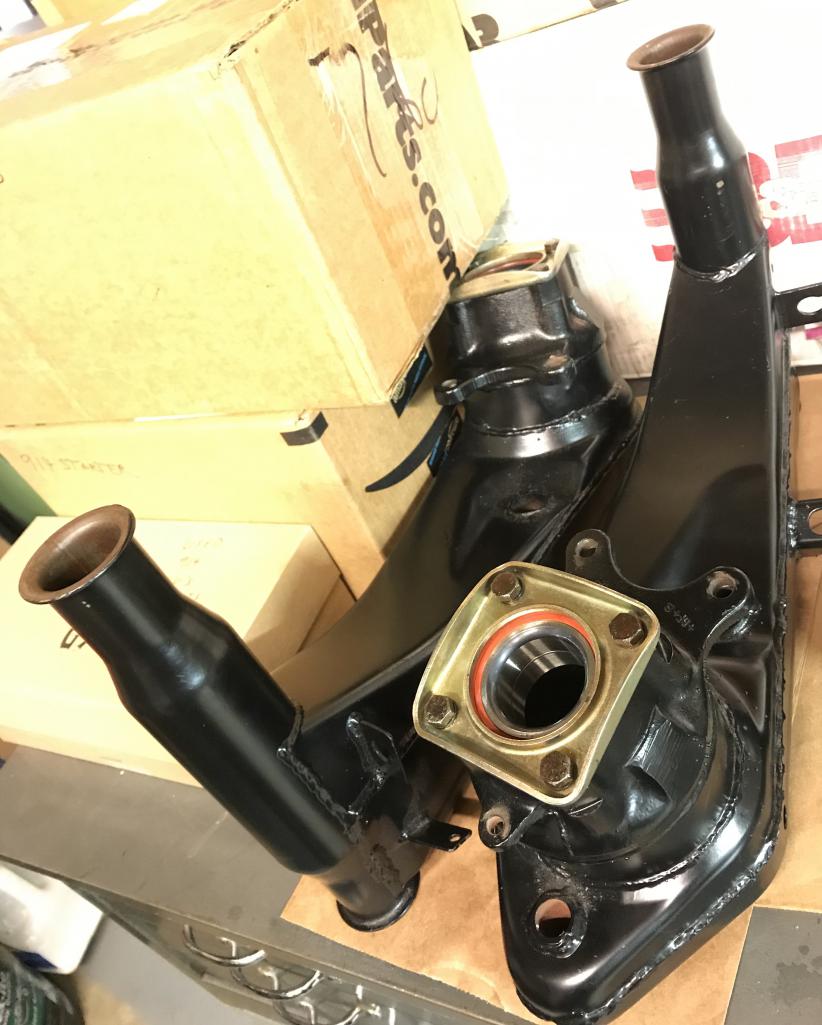
Posted by: Cairo94507 Feb 10 2020, 04:52 PM
Pretty!
Posted by: BeatNavy Feb 10 2020, 04:57 PM
Nice job, Dion! Nothing like shiny new parts!
Yeah, the trailing arm bushings can be a bear. Hopefully you have someone who can provide a third (or fourth) hand for that.
Posted by: tygaboy Feb 10 2020, 05:53 PM
"Pressing business..." as they say!
Nothing better than brand spankin' new stuff. Especially when it's you who did the work.
Looking really good.
And I can't wait to see that long repair. You're doing a great job all around!
Posted by: TonyA Feb 10 2020, 06:39 PM
Looking good.... you need a press?
Posted by: Dion Feb 17 2020, 08:26 PM
Metal master Dave stopped by on this Presidents’ Day to work his magic on my 914.
This longitude kickup is quite the challenge. I’d be totally lost without his expert help.
The amount of back and forth measurements and fitting, time consuming.
This is why restorations take a long time. Happy to report progress.
Somewhat re-arranged what was originally formed on the “buck”.
When placed in situ you really see what needs trimmed and stretched.
He did all the mental measuring and massaging with the grinder.
My task was removing most of the remnants of the jack point doughnut.
Lucky he has a keen eye. Found metal that i thought was part of the floor but was still
doughnut triangle metal.
So fitted up today. Welding to be done
soon. Happy this is almost completed then the outer long can be attached.
Moving toward that suspension console .....
Pic of floor clamped with firewall flange.
All this has to tie in.
Attached thumbnail(s)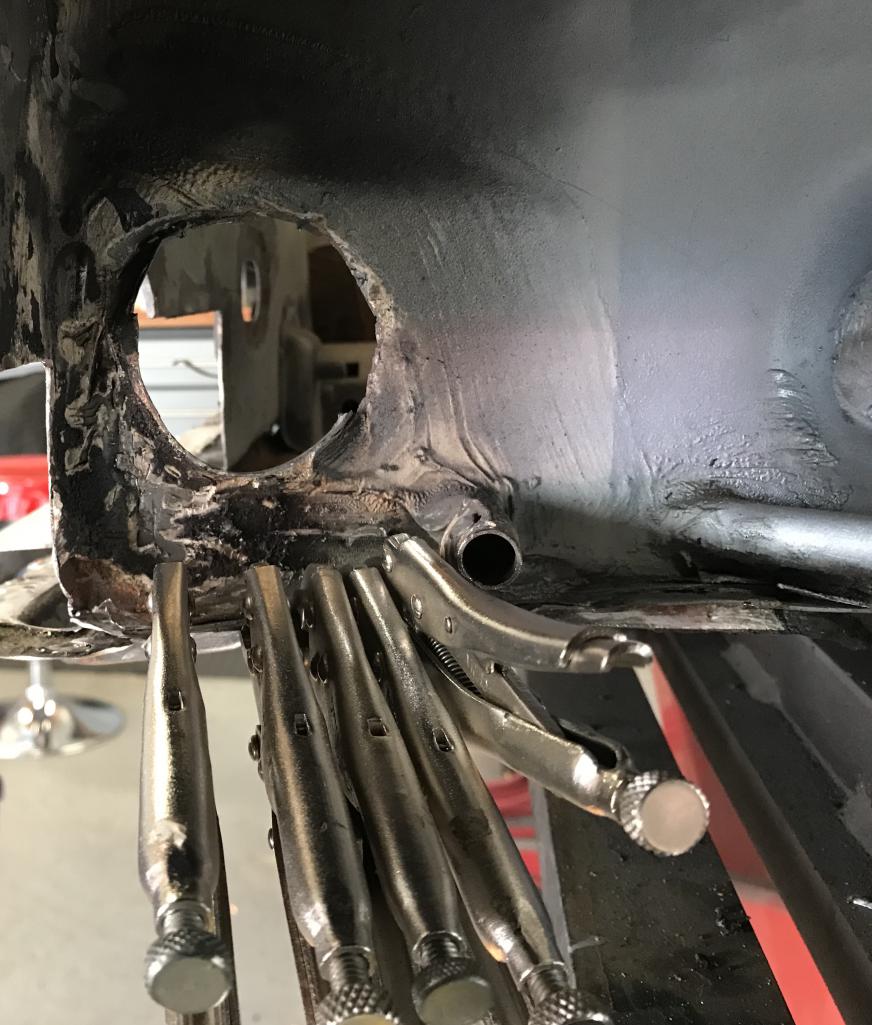
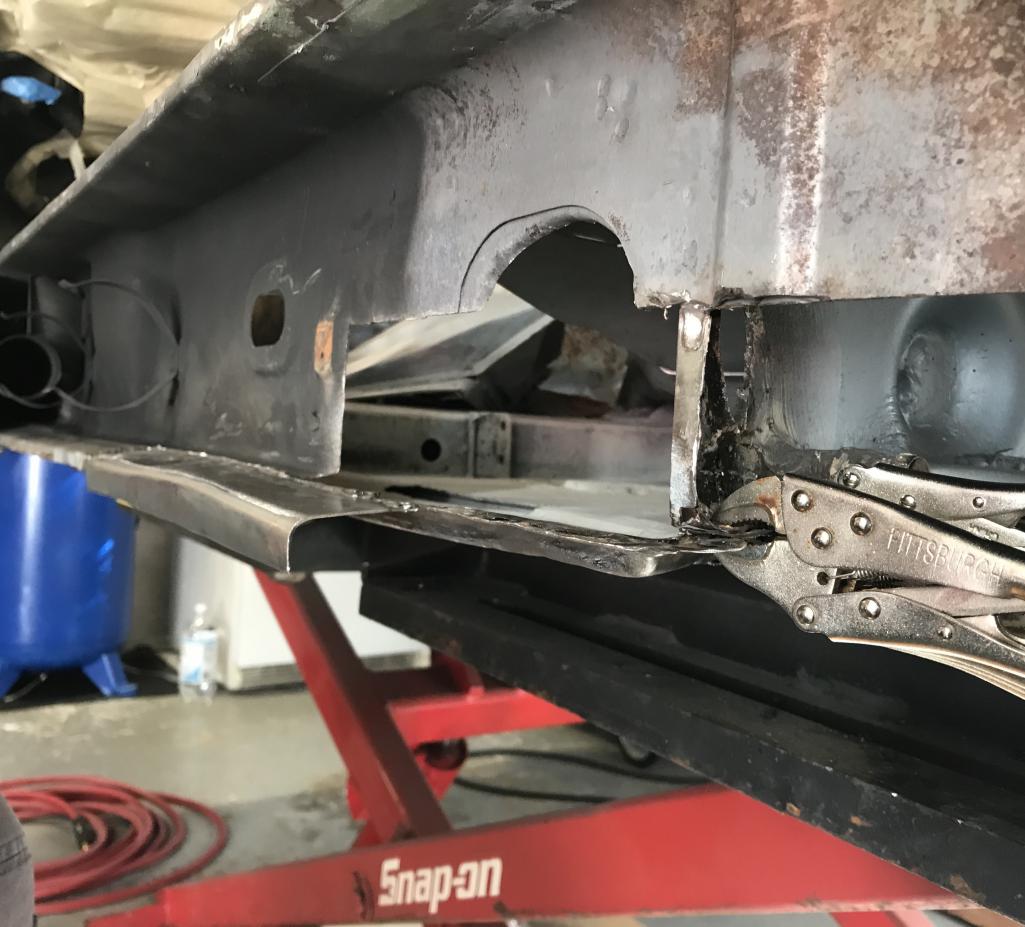
Posted by: Dion Feb 17 2020, 08:27 PM
Metal master at task
Attached thumbnail(s)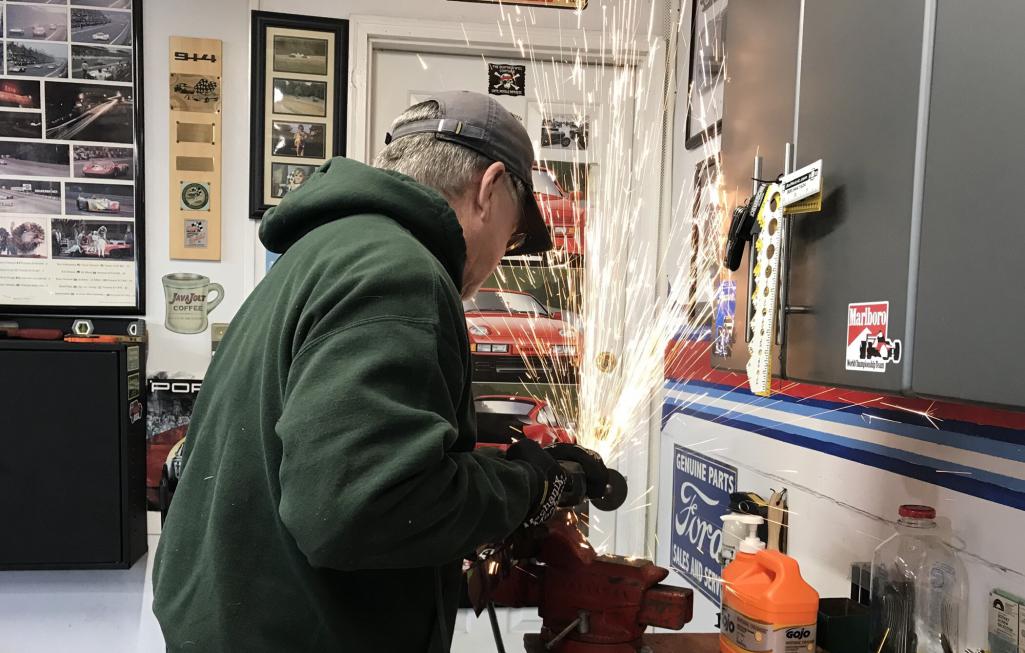
Posted by: Dion Feb 17 2020, 08:28 PM
Test fittings
Attached thumbnail(s)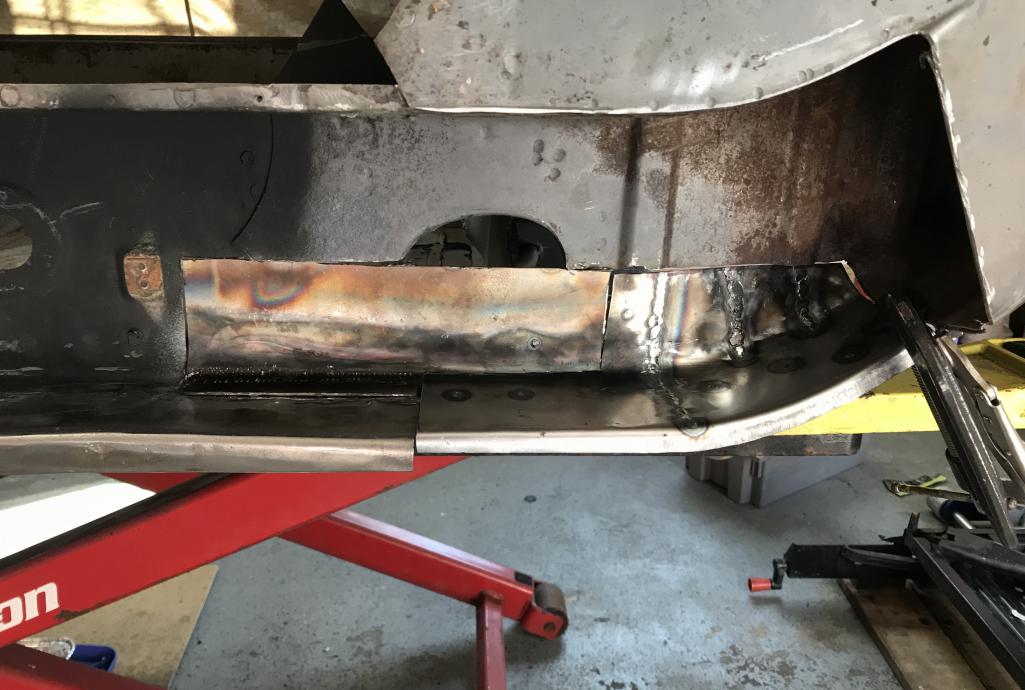
Posted by: Dion Feb 17 2020, 08:28 PM
Fitting
Attached thumbnail(s)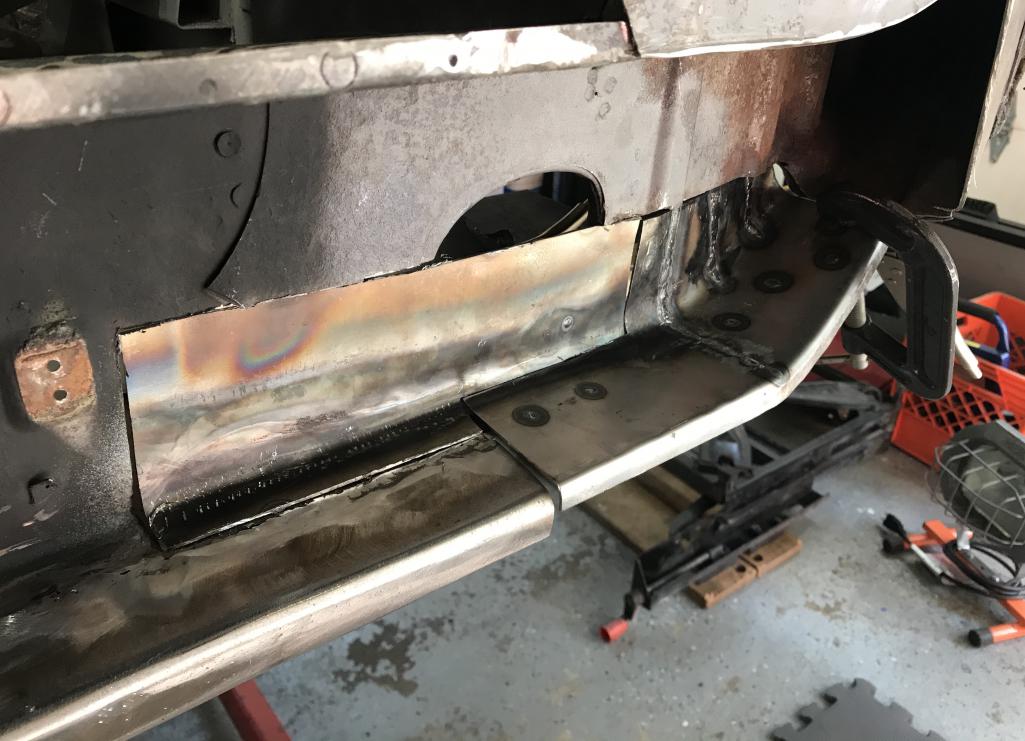
Posted by: Dion Feb 17 2020, 08:29 PM
Final orientation. Heater tube cut out will be done as well as some additional metal will be added for additional torsional rigidity.
Attached thumbnail(s)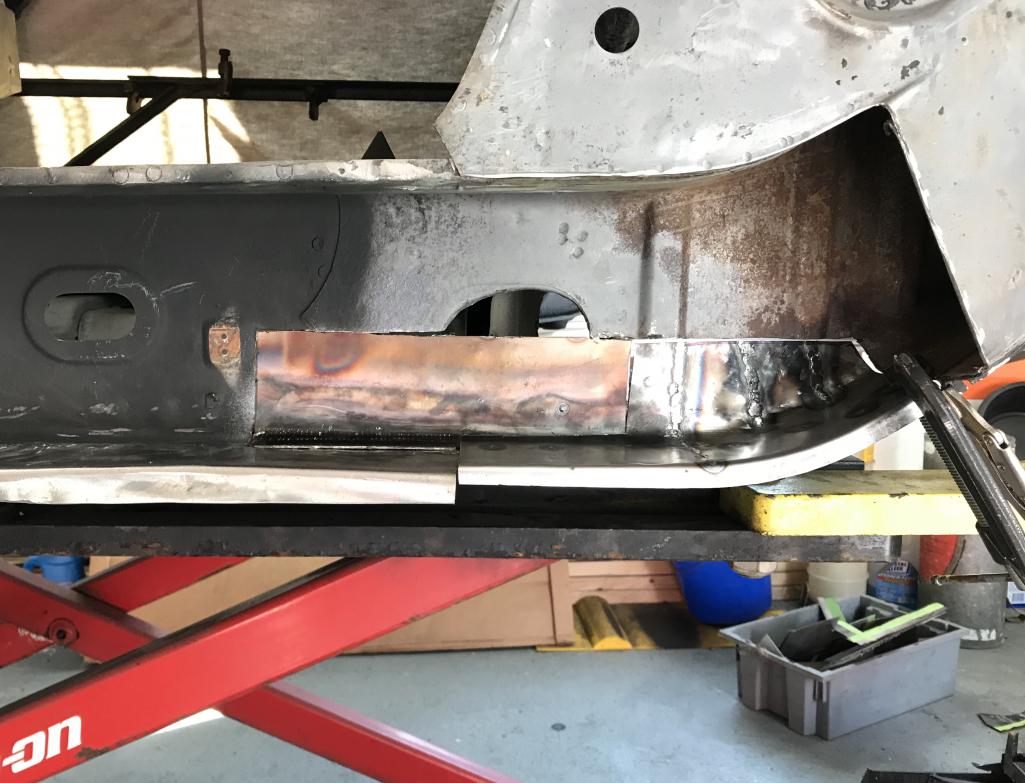
Posted by: bbrock Feb 18 2020, 06:04 PM
Sweet! Looking great. She'll be a solid ride soon.
Posted by: tygaboy Feb 18 2020, 10:31 PM
METAL!!!!
Posted by: TonyA Feb 19 2020, 06:42 AM
Nice work.. and your shop is as clean as an OR !
Posted by: Dion Mar 25 2020, 06:23 PM
Finally found time to get back on the 914 project. Distracted by my sons 944. It needed new injectors and motor mounts. So that is finished, back to this P-car.
Tackled the opening for the heater tube coming from the engine bay.
Not exciting but needed to be done. Cleaned up the firewall opening a little from the seam sealer that was gooped all around and then made a paper template of the area I needed to open on the new metal.
Attached thumbnail(s)
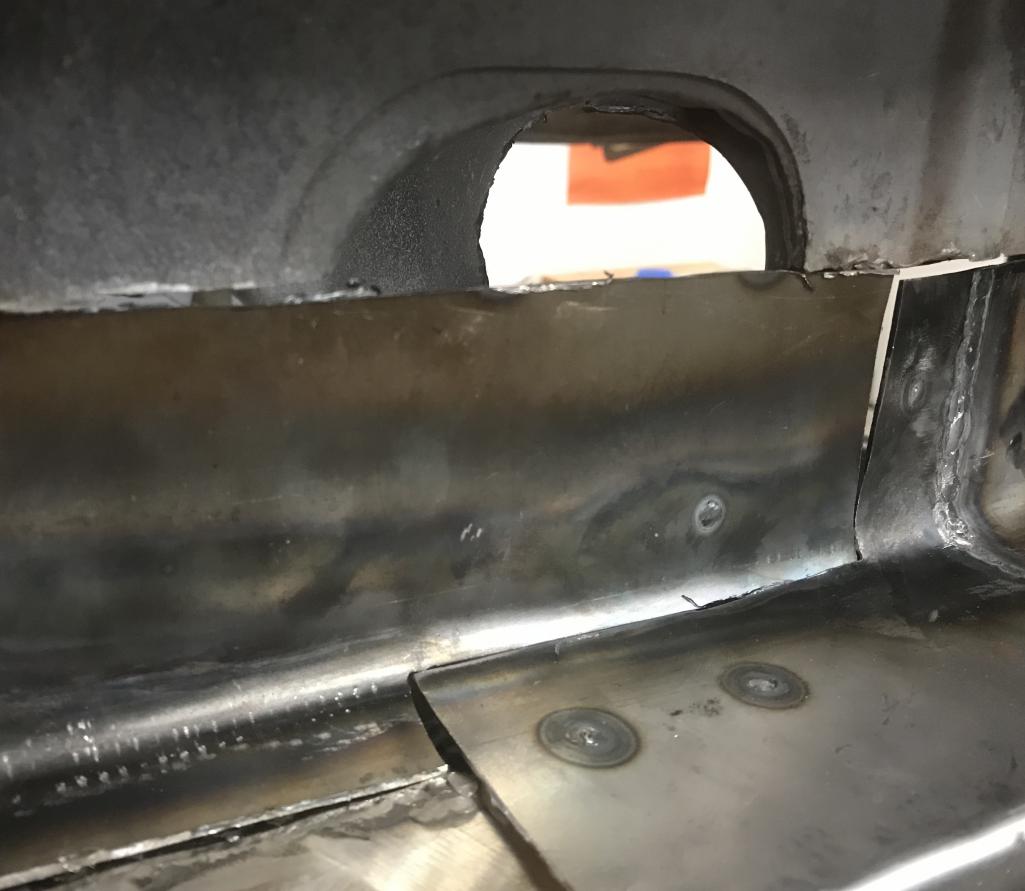
Posted by: Dion Mar 25 2020, 06:25 PM
Paper template & test fit of heat tube.
Attached thumbnail(s)

Posted by: Dion Mar 25 2020, 06:26 PM
Cut complete and fitting.
Attached thumbnail(s)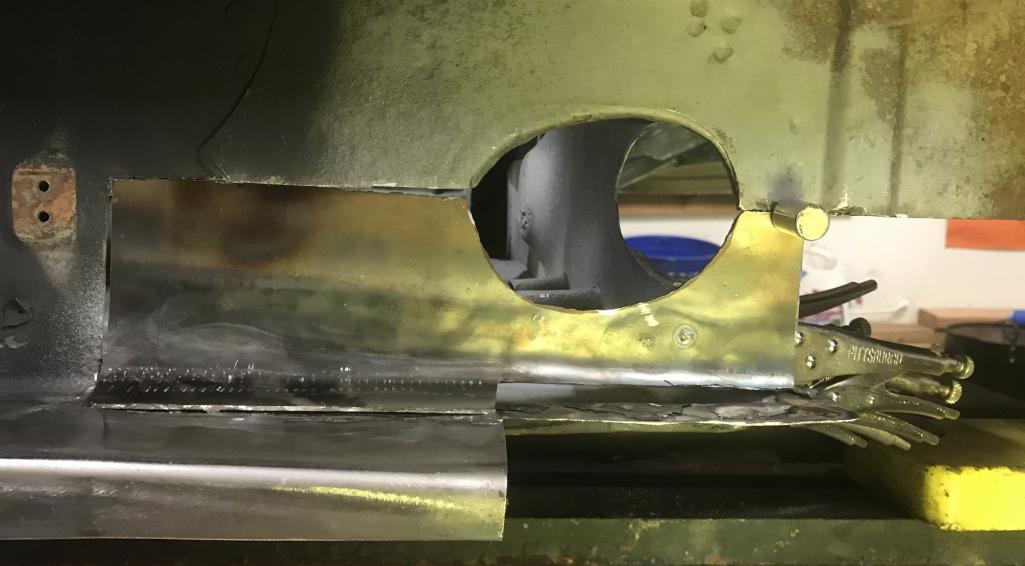
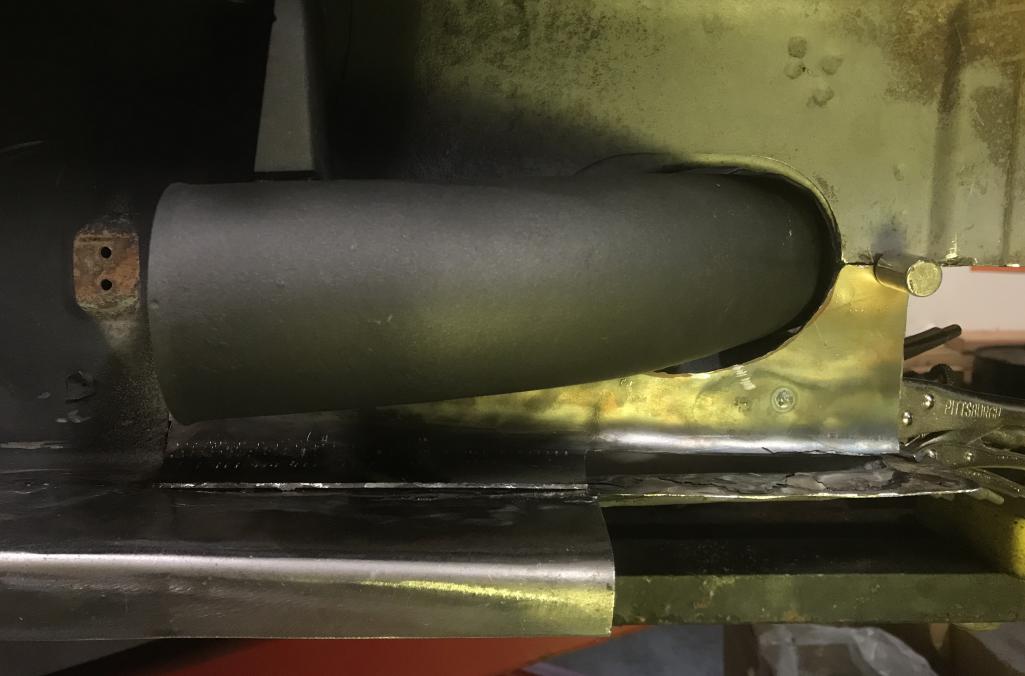
Posted by: Dion Mar 25 2020, 06:28 PM
Up next :Ready for tack welding of the metal to the long. Stay tuned.
Attached thumbnail(s)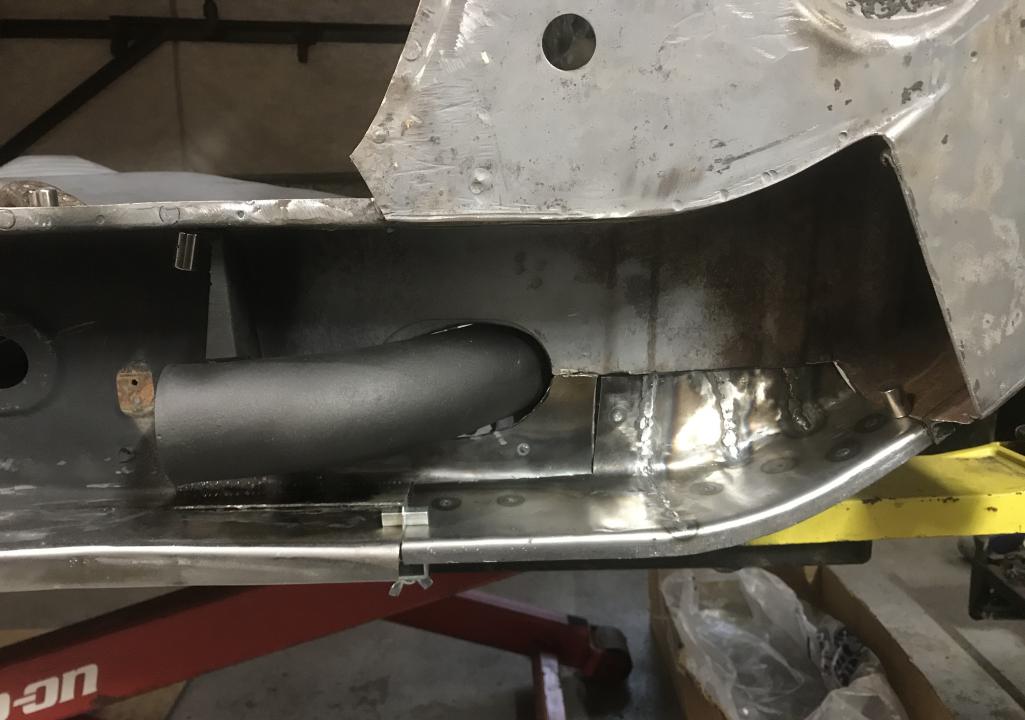
Posted by: TonyA Mar 25 2020, 07:28 PM
Staying tuned....looks good. Wash ya hands
Posted by: tygaboy Mar 25 2020, 09:53 PM
METAL!!!
Fab(rication)ulous, Dion!
Isn't it great when all that tedious work pays off with a nice fit? Keep up the great work.
Posted by: Dion Apr 5 2020, 08:41 AM
Covid be damned! So while my PACU is being converted to an ICU unfortunately, I have some time to be at home and work on 14.
Welded in the new metal that was previously test fitted.
Attached thumbnail(s)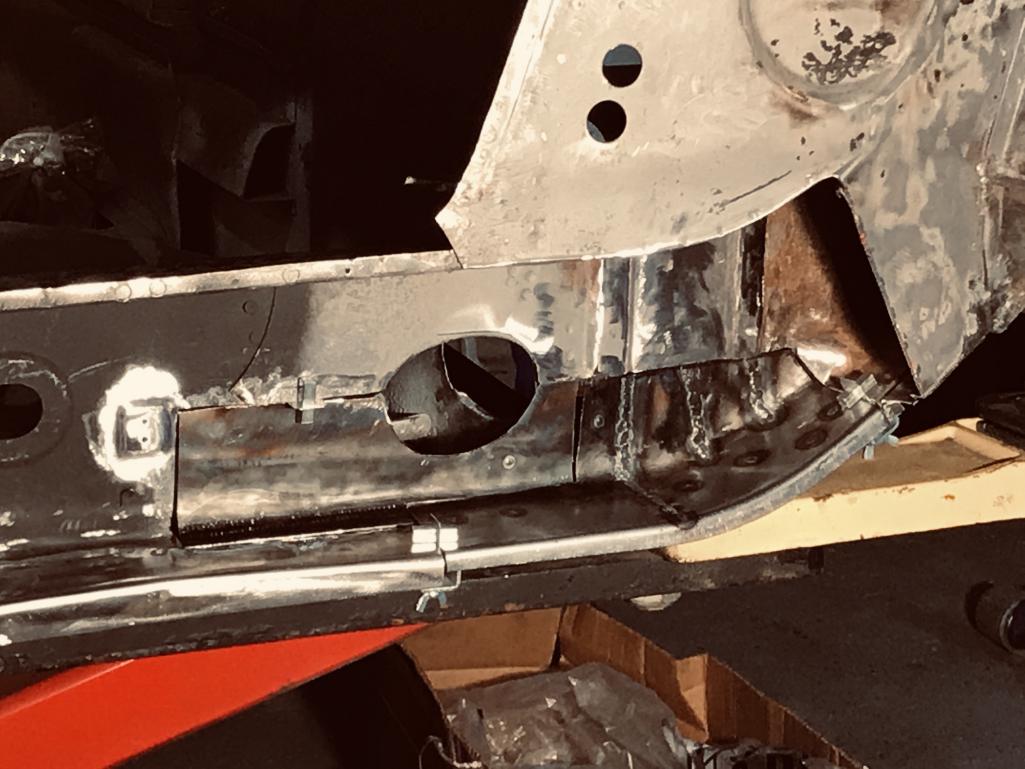
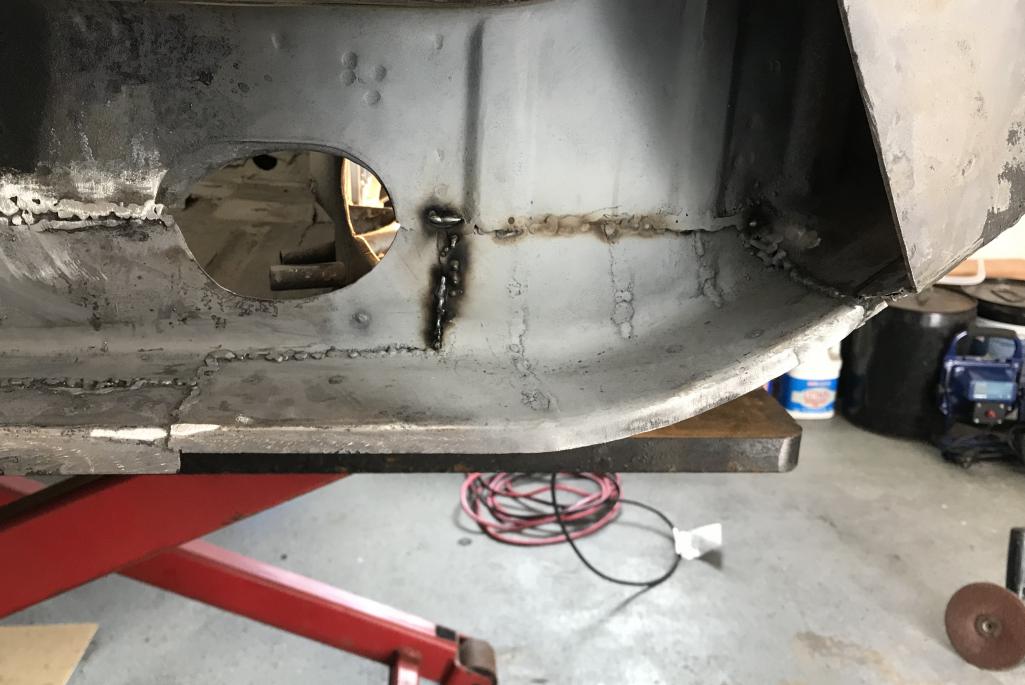
Posted by: Dion Apr 5 2020, 08:42 AM
Weld
Attached thumbnail(s)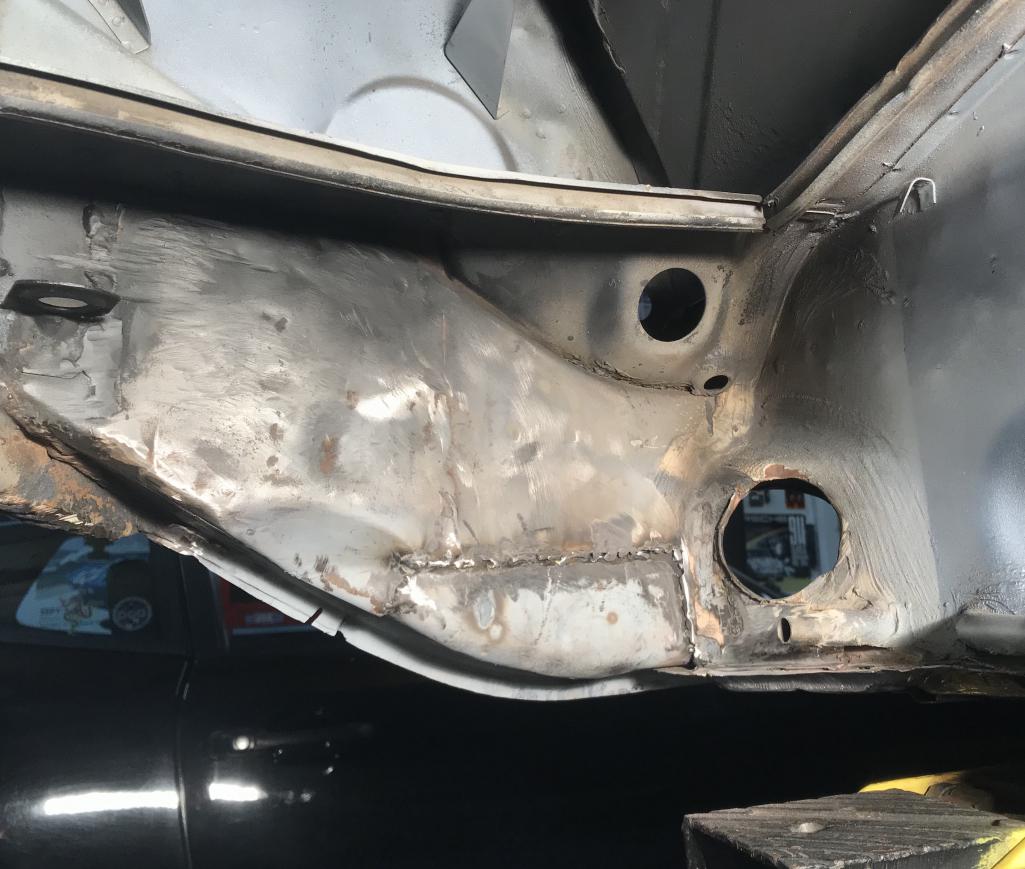
Posted by: Dion Apr 5 2020, 08:43 AM
Weld and acid etched
Attached thumbnail(s)
Posted by: Dion Apr 5 2020, 08:48 AM
Formed a metal plate for the “sleeve” on this area for re-enforcement.
Attached thumbnail(s)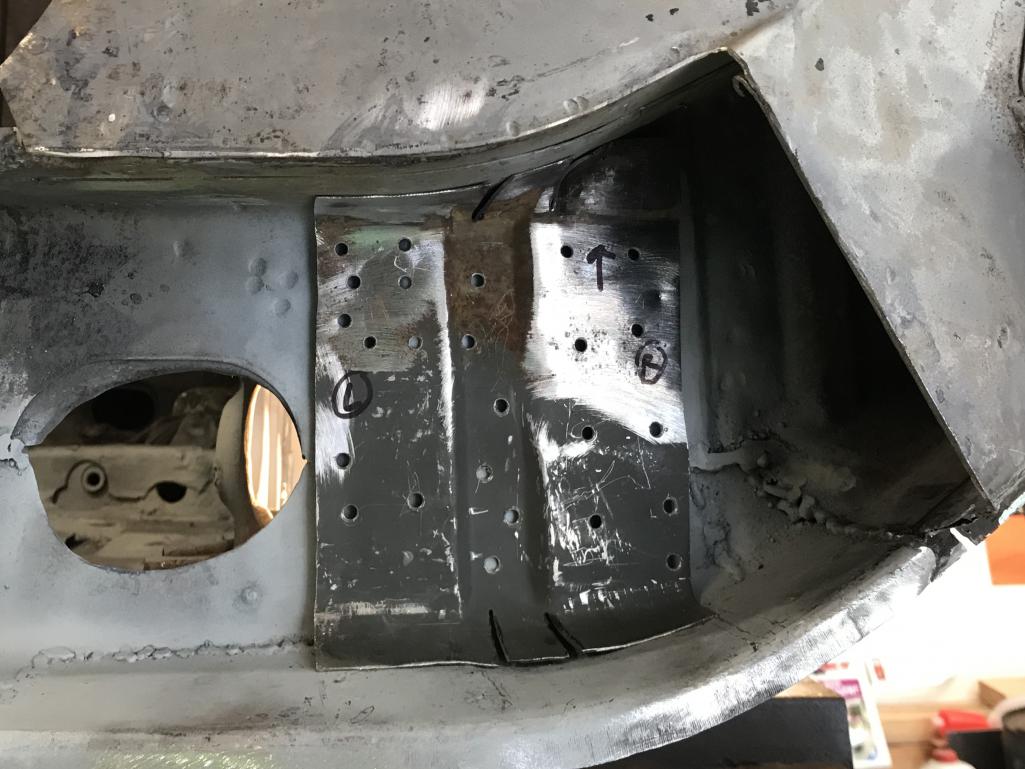
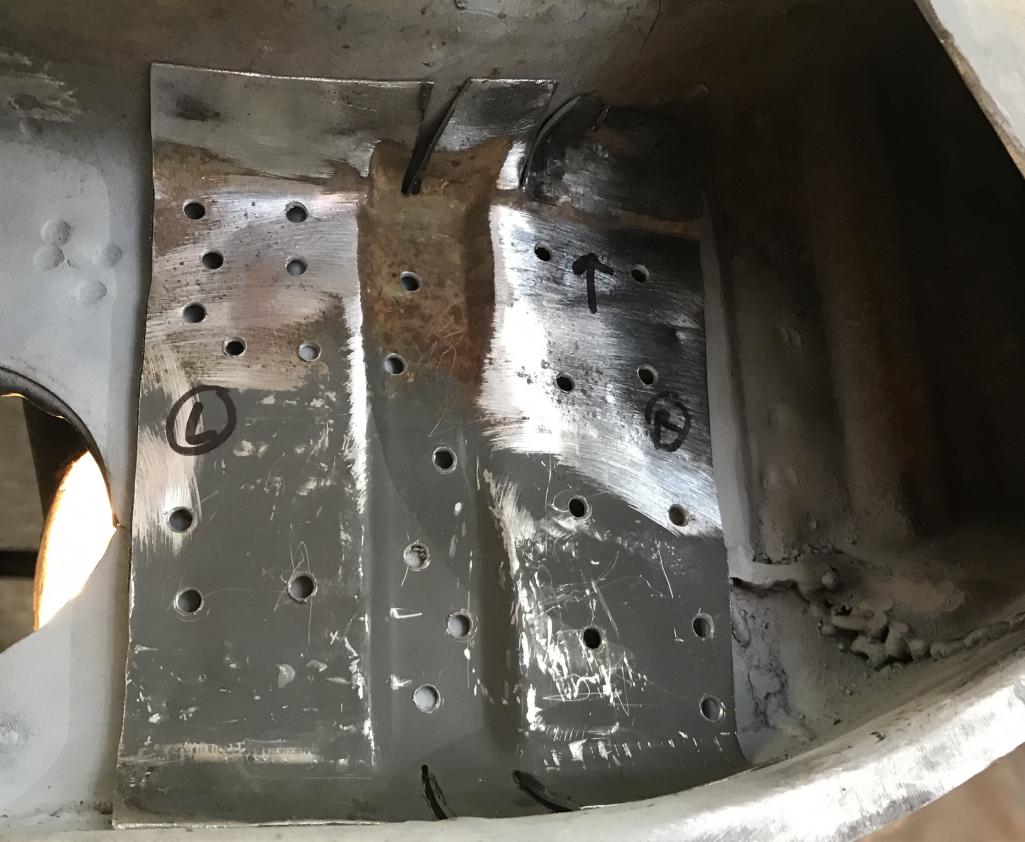
Posted by: Dion Apr 5 2020, 08:49 AM
Plug and seam welded
Attached thumbnail(s)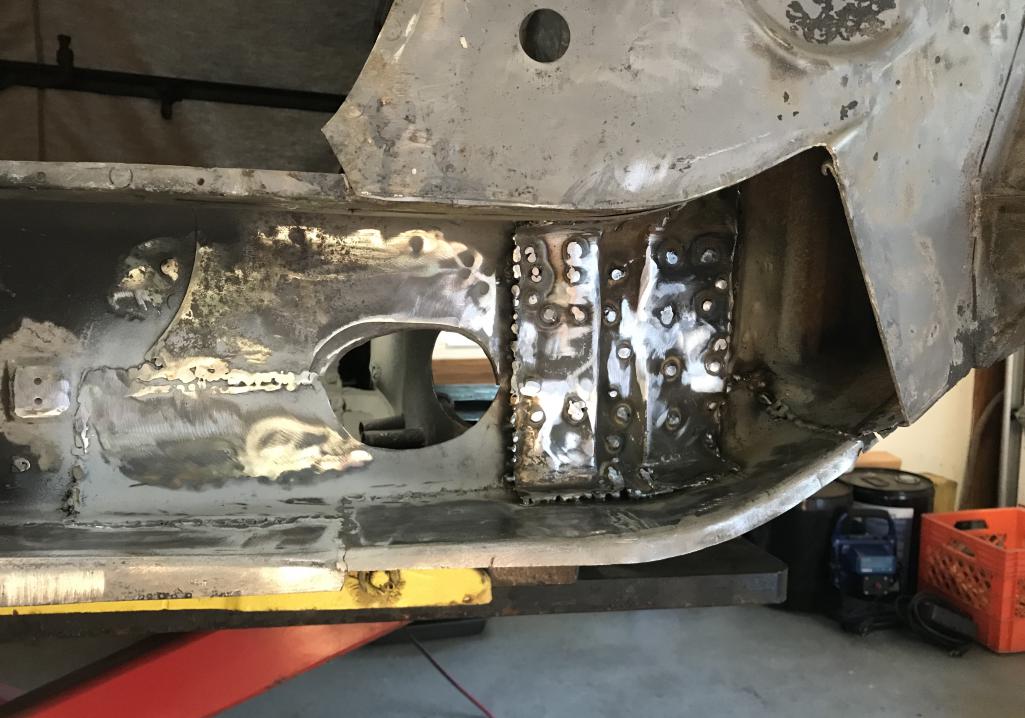
Posted by: Dion Apr 5 2020, 08:51 AM
Etch prime & seam sealed.
Attached thumbnail(s)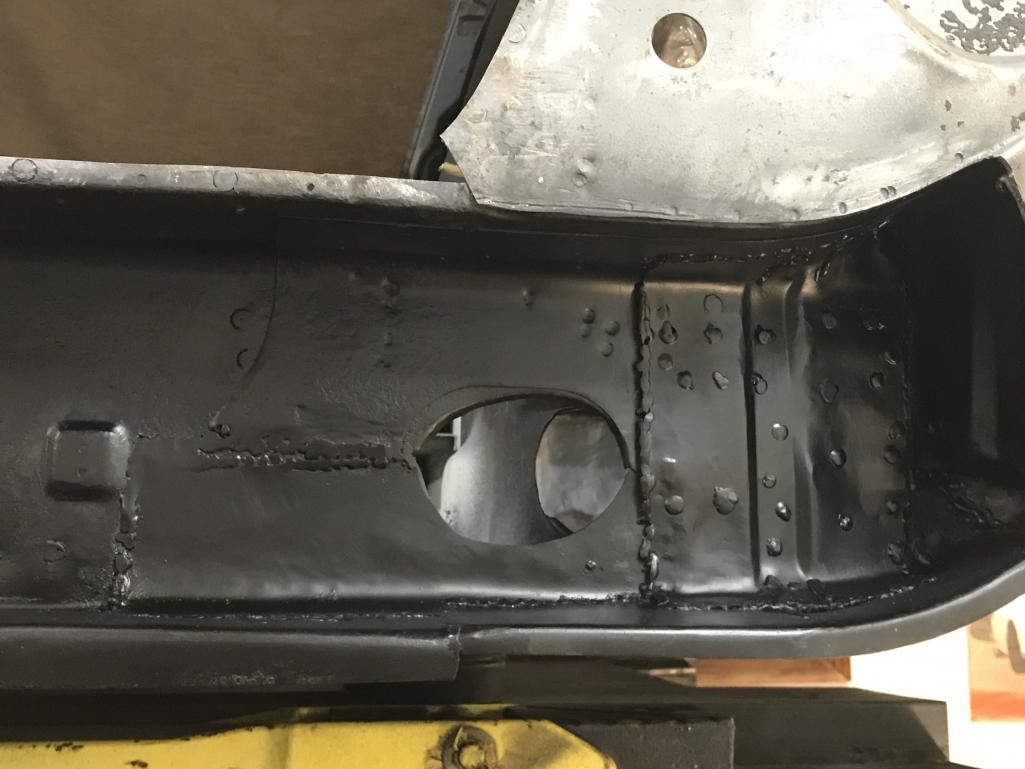
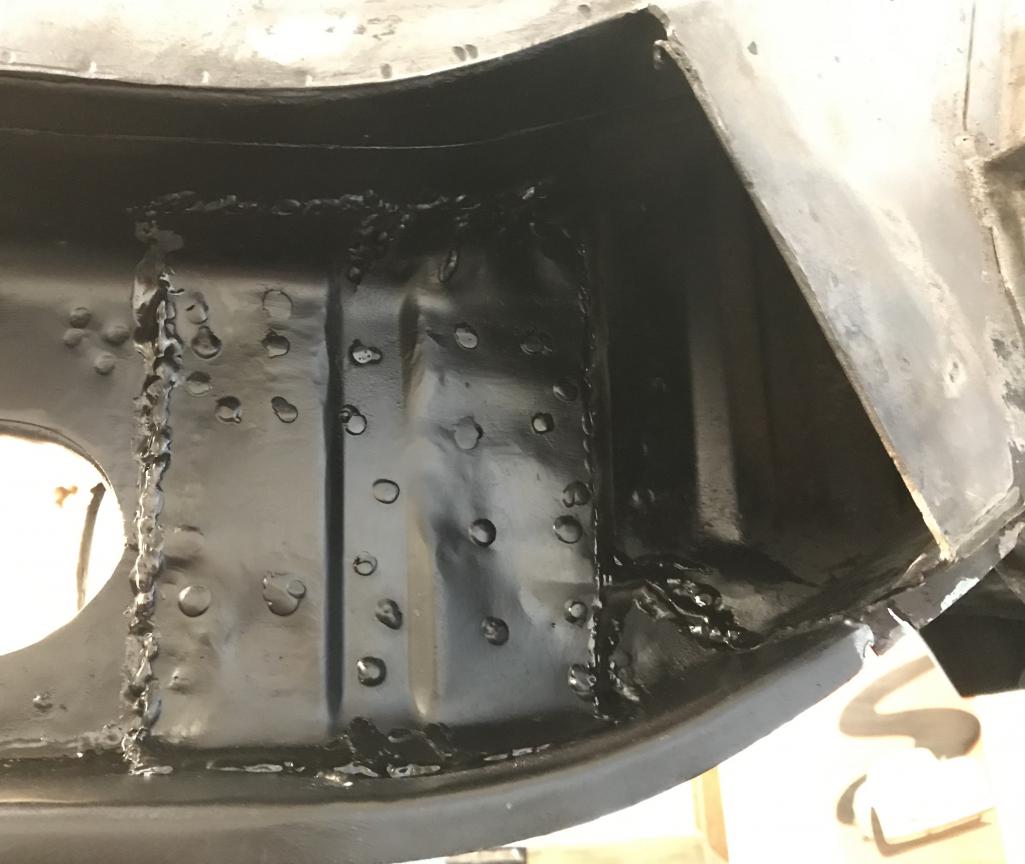
Posted by: Dion Apr 5 2020, 08:53 AM
Etched prime & seam sealed engine side. No water allowed EVER!
Attached thumbnail(s)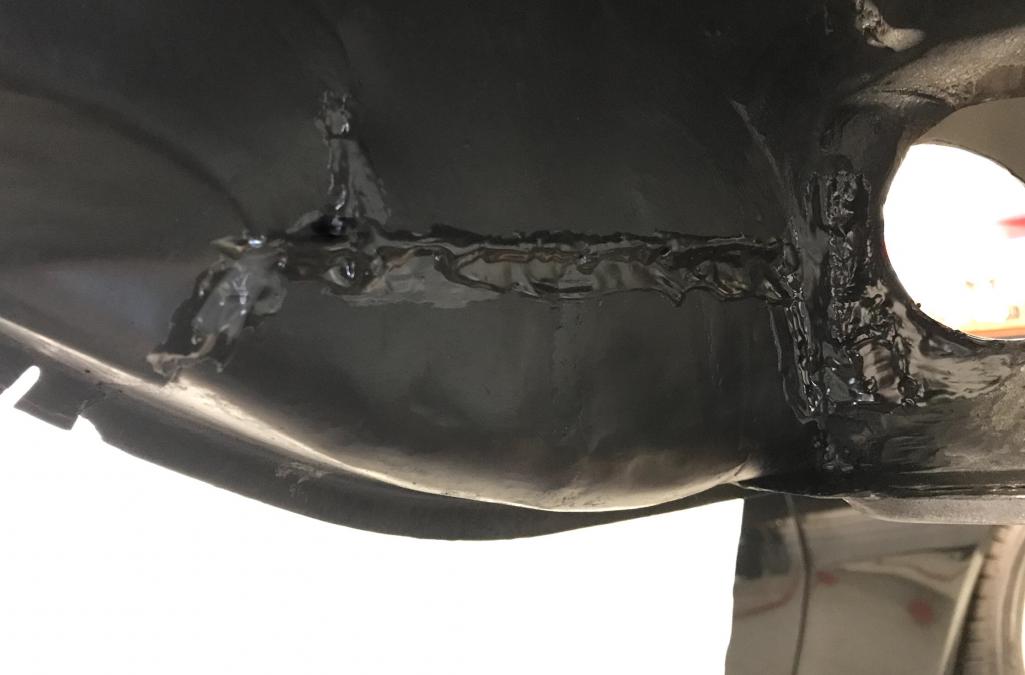
Posted by: Dion Apr 5 2020, 08:55 AM
Interior portion. Still need to add seatbelt re-enforcer plate and bolt.
Also have “jack donut” to add as well. All in due time.
Attached thumbnail(s)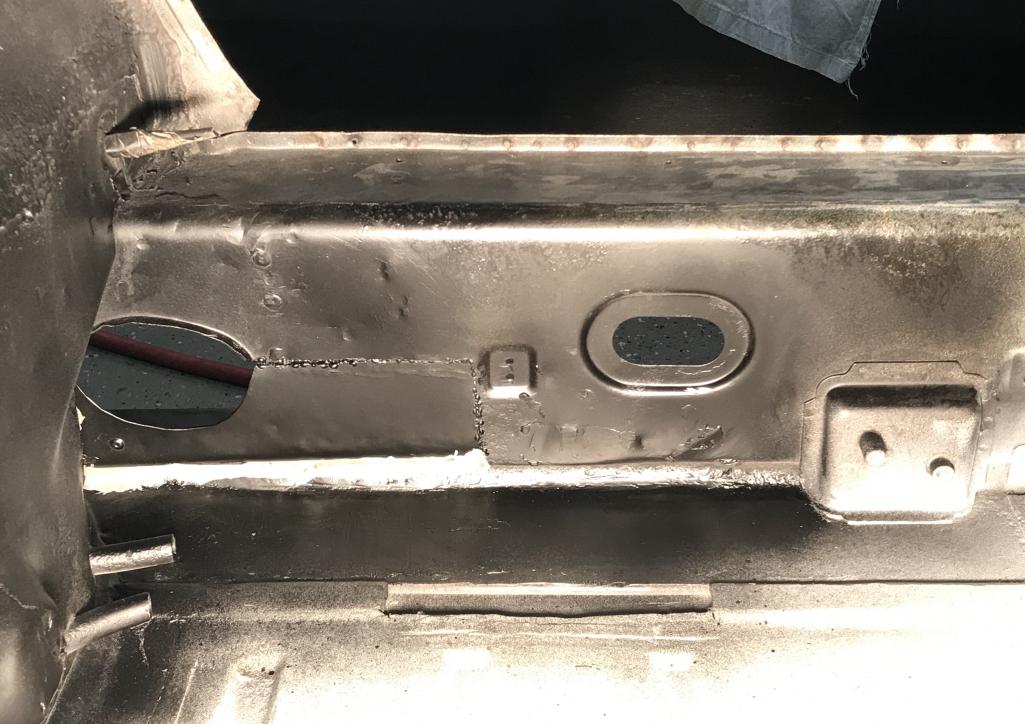
Posted by: tygaboy Apr 5 2020, 09:32 AM
Gettin' it DONE!
Posted by: bbrock Apr 5 2020, 10:02 AM
Love it! Did you spray that with something before the last pic? Why does it look so clean? Nice work!
Posted by: Dion Apr 5 2020, 10:11 AM
Love it!
Did you spray that with something before the last pic? Why does it look so clean? Nice work!Thanks mate! Prolly just the glare from the halogen work lite. It’s just Eastwood’s black
etch primer.
Posted by: rgalla9146 Apr 5 2020, 10:37 AM
I posted this earlier in my thread but I think it’s cool to look at
and I’m sure it’s gonna be loud. The primitive diffuser is interesting.
Dion I have one of those and can confirm it is wonderfully annoying.
Had it on my stock 6.
Obnoxious and anti-social come to mind.
I keep it for special occasions.
Your work looks great.
I hope the North East Gathering happens.
We'll finally meet maybe ?
Posted by: Dion Apr 5 2020, 12:49 PM
@http://www.914world.com/bbs2/index.php?showuser=5176 Hey Rory, I planned on coming over with the valance you wanted to check out as well as see your car. Was waiting for weather to improve and now we have this health situation. I do plan on being at the East gathering with Mepstein. Hopefully it will happen.
Cheers
Posted by: rgalla9146 Apr 5 2020, 02:42 PM
Looking good! Glad to see you are back at it. I was beginning to question your priorities.
It’s not his priorities, his helper has been galvanizing all over the country.
Come on Dave.....maybe that's what you told you girl but you were
galavanting weren't you ?
Posted by: jmitro Apr 5 2020, 05:04 PM
nice work Dion!
Posted by: Dion Apr 7 2020, 06:40 PM
nice work Dion!
Thanks Joseph.
Time for coffee & donuts. I had the Yeti filled with coffee while dealing with this donut. Donut is courtesy of Restoration Design.
Attached thumbnail(s)
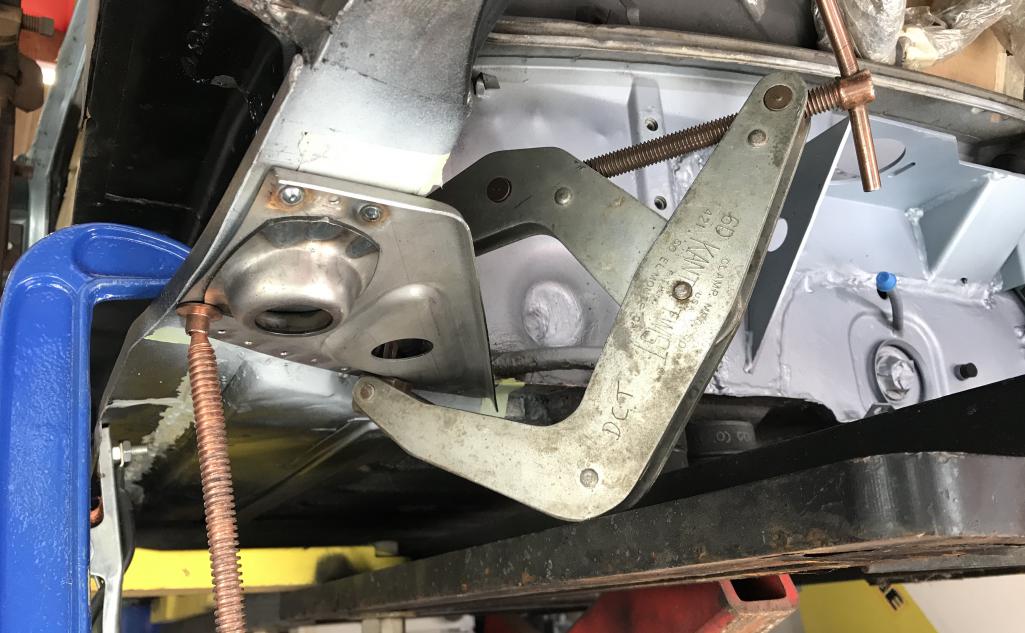
Posted by: Dion Apr 7 2020, 06:41 PM
After a few hammer hits to shape the donut to the contour of the curved kick-up, arc was then applied.
Attached thumbnail(s)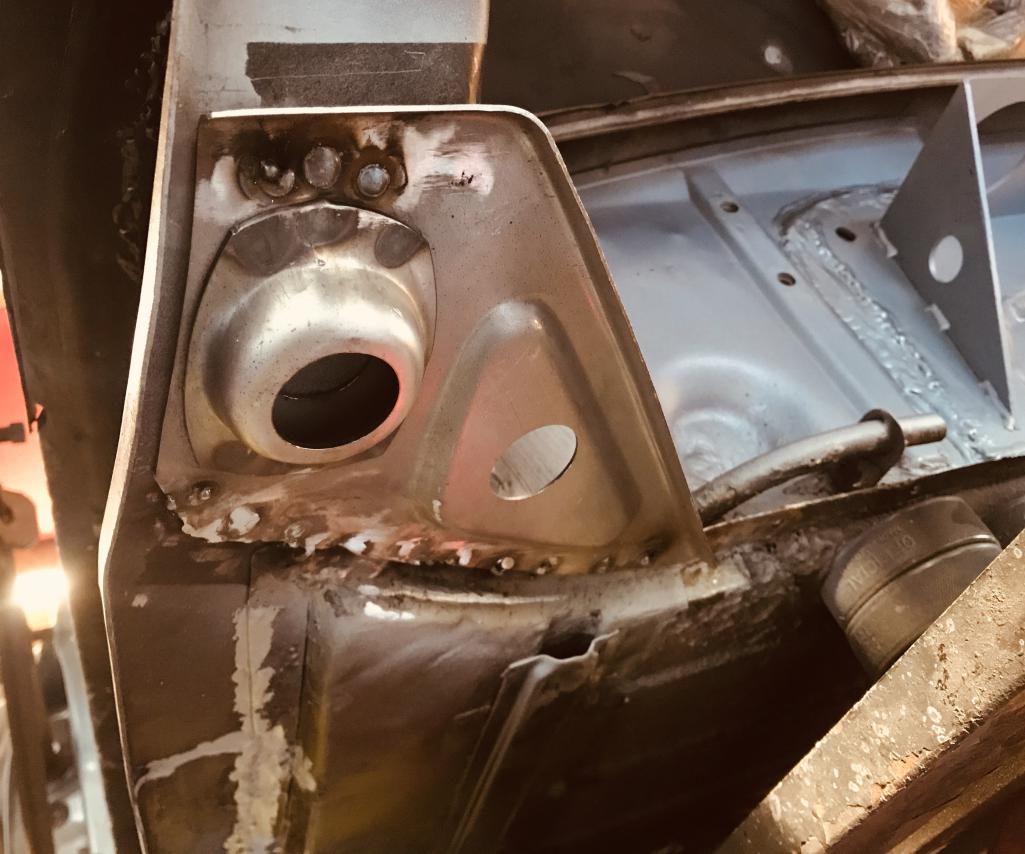
Posted by: Dion Apr 7 2020, 06:44 PM
Donut
Attached thumbnail(s)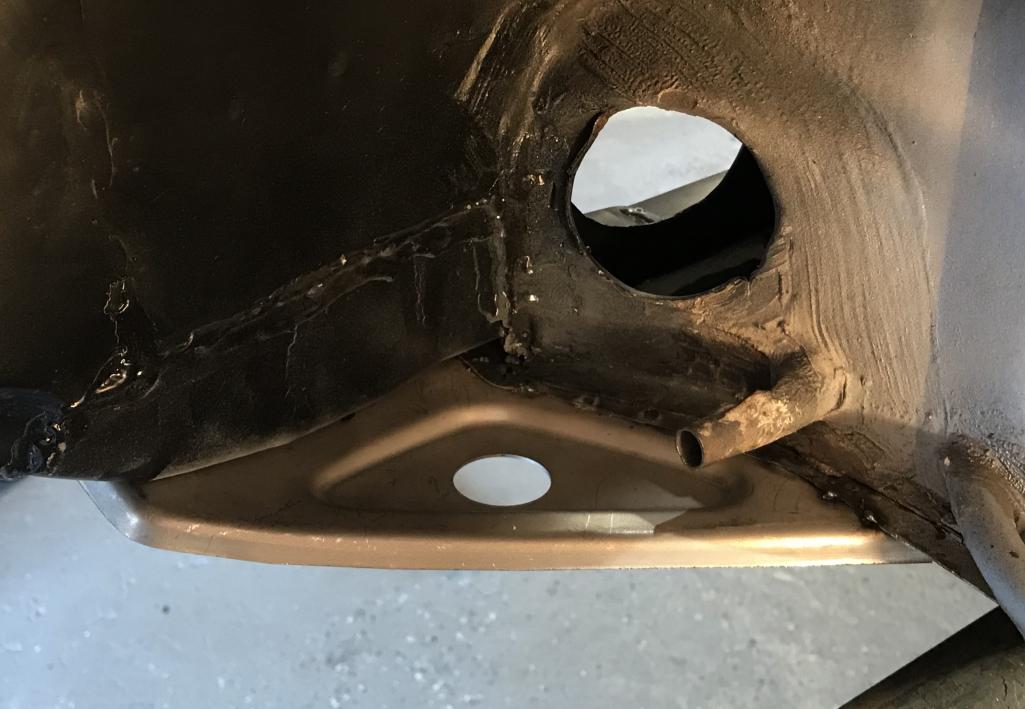
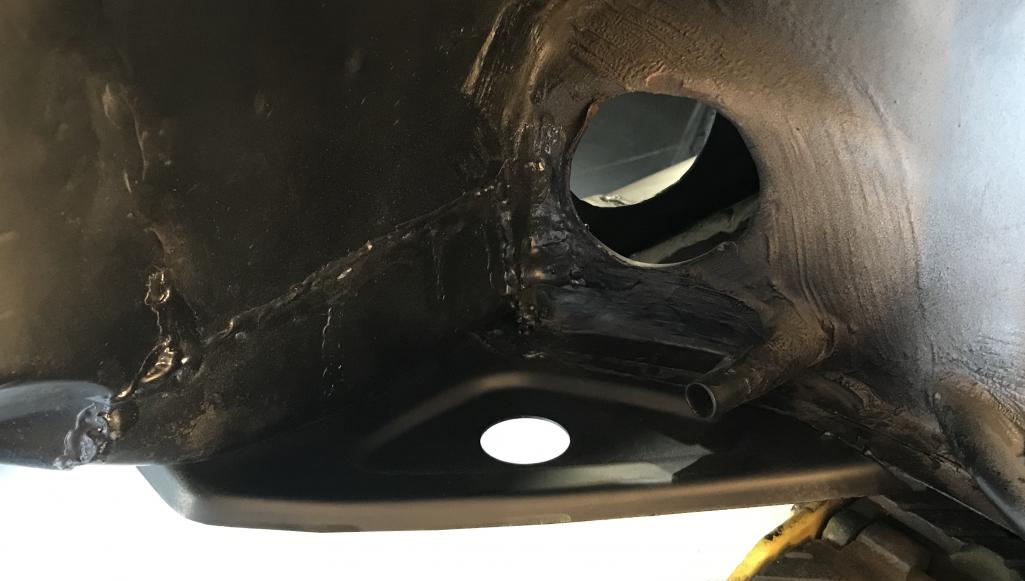
Posted by: Dion Apr 7 2020, 06:45 PM
Donut bottom after primer applied.
Attached thumbnail(s)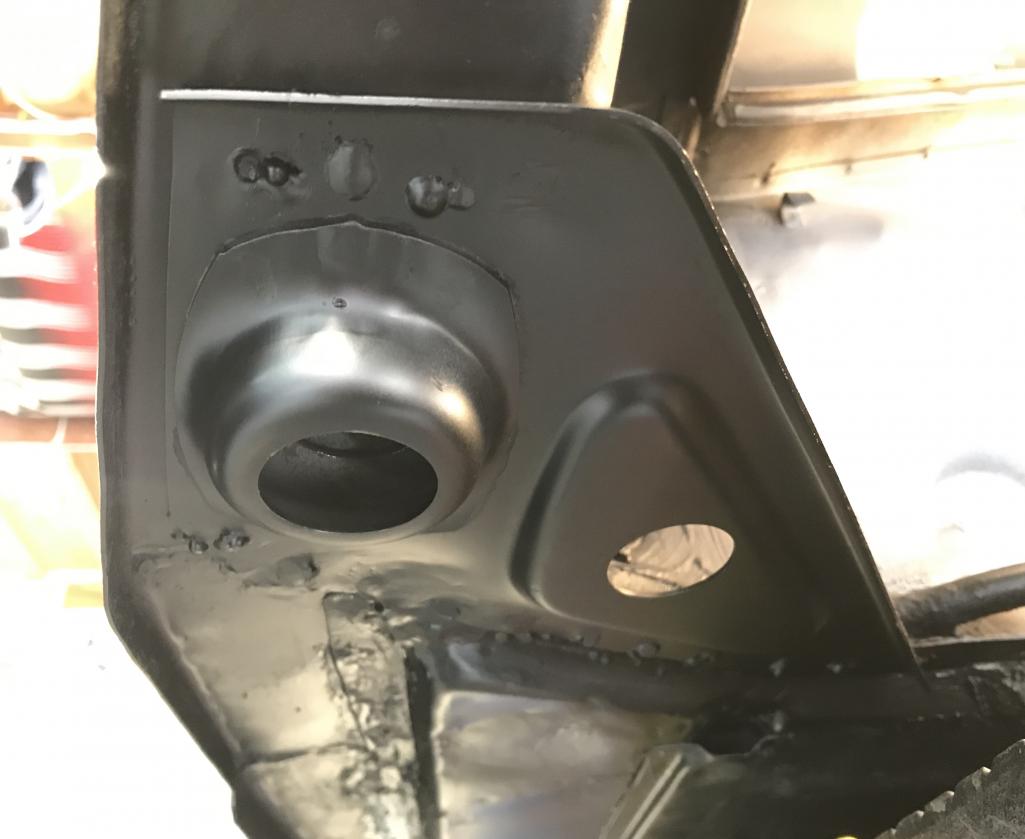
Posted by: TonyA Apr 7 2020, 07:08 PM
Looks great Dion...shiny glazed donut!
Posted by: Dion Apr 16 2020, 07:36 PM
Latest task is the seatbelt bolt and plates.
Here’s a reminder pic of why this COTM car was torn apart.
Before i was going to install the six I thought I’d put a new carpet set in,BUT....
This is what was lurking under “nice” paint.
Attached image(s)
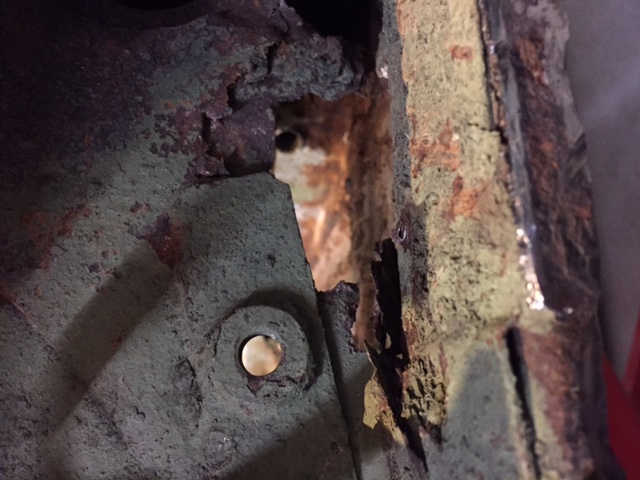
Posted by: Dion Apr 16 2020, 07:38 PM
So got some measurements from the passenger side. Did a rough sketch of the set up
X marks the spot.
Attached thumbnail(s)
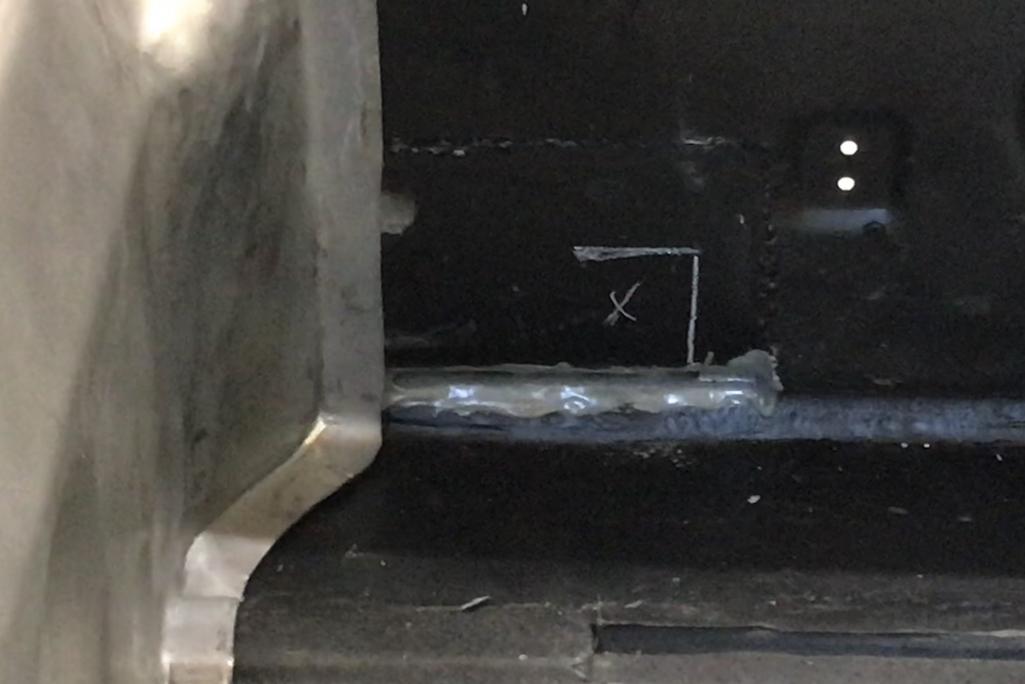
Posted by: Dion Apr 16 2020, 07:40 PM
Used a metal punch to make a nice cut-out. Then did the same to the 16g plate.
Attached thumbnail(s)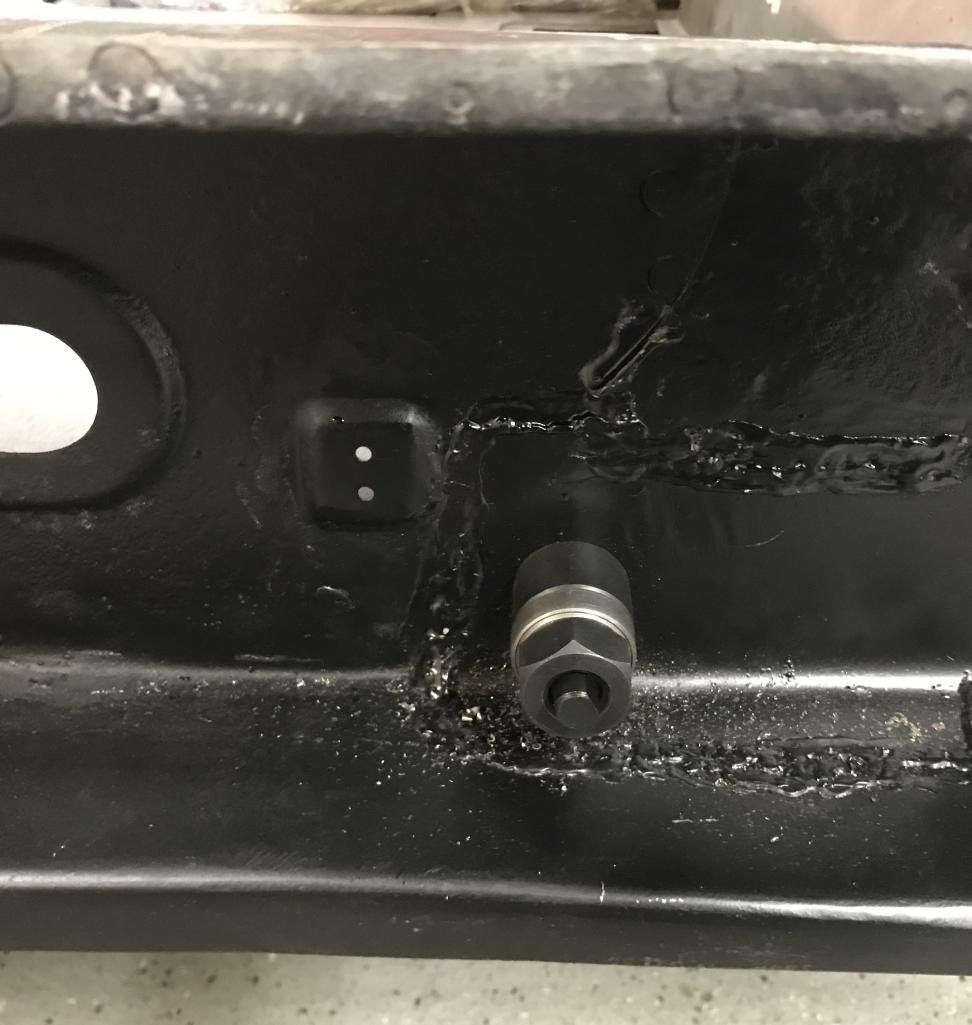
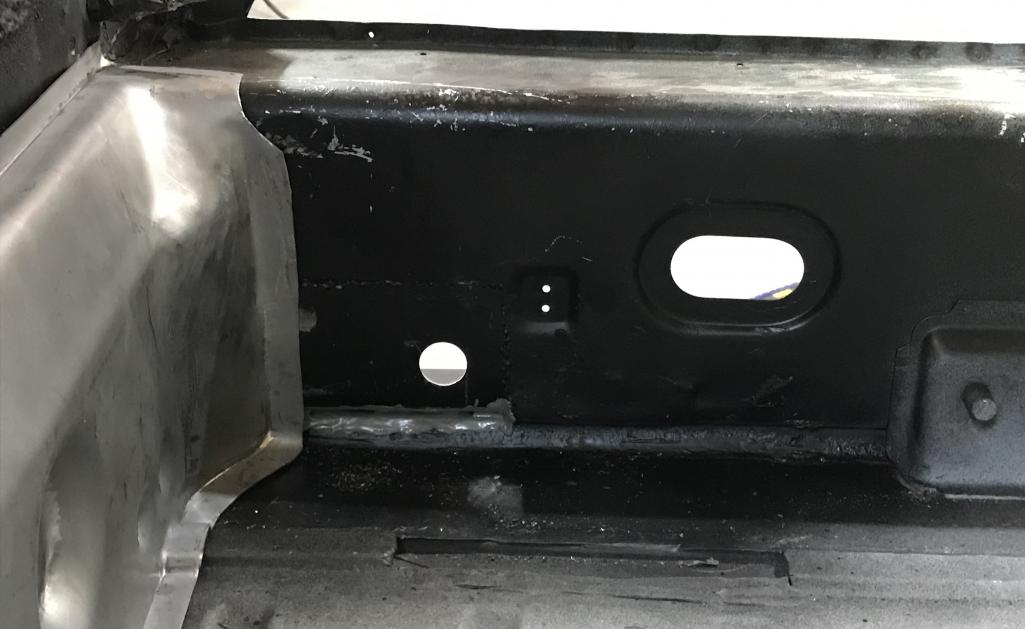
Posted by: Dion Apr 16 2020, 07:42 PM
16g plate with punch out and then plug welded together.
Attached thumbnail(s)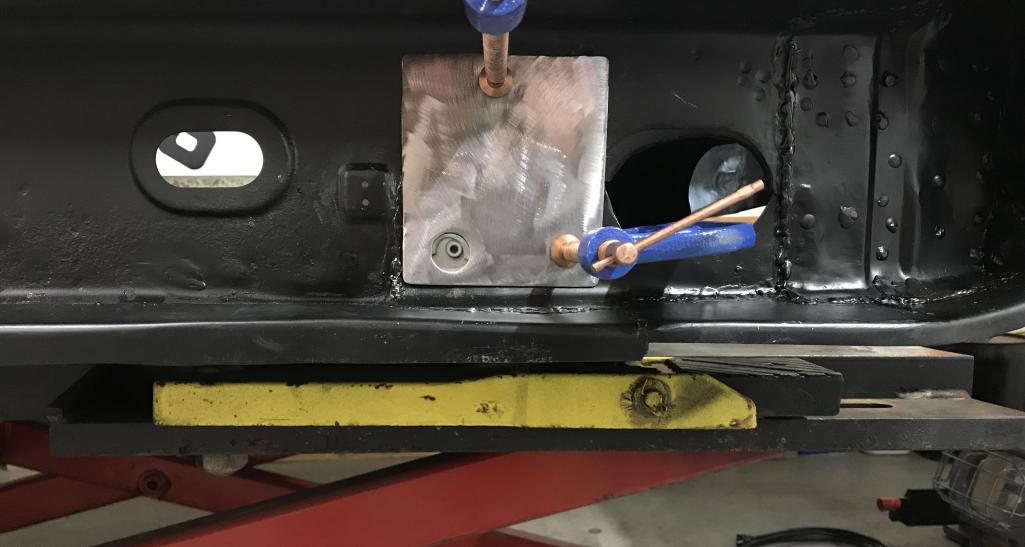
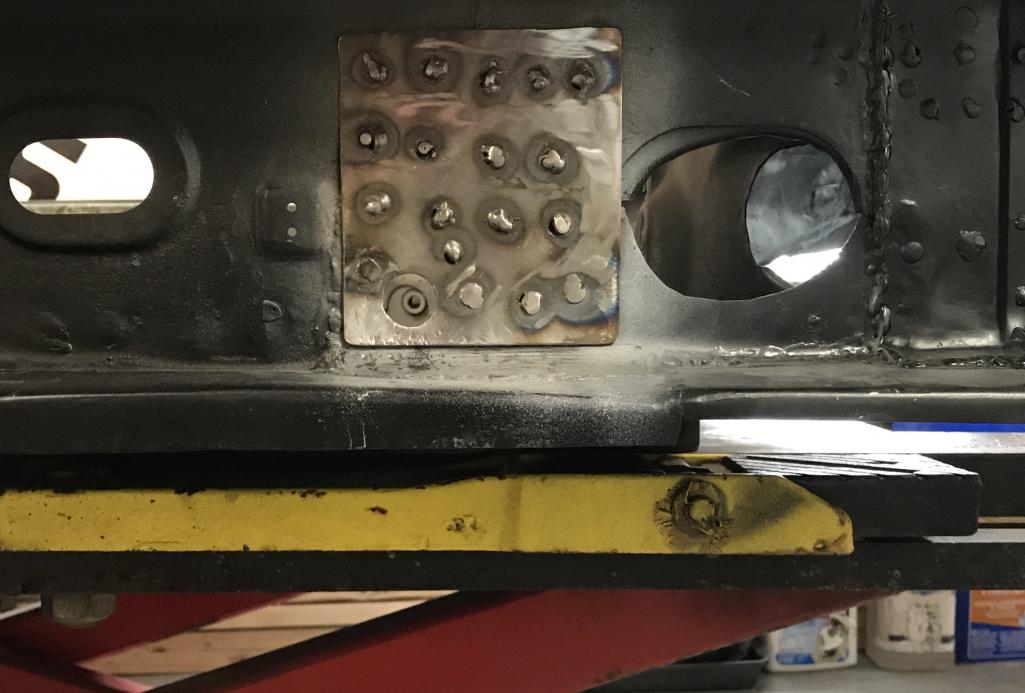
Posted by: Dion Apr 16 2020, 07:45 PM
Actual seatbelt bolt/plate courtesy Restoration Design.
Welded in place.
Attached thumbnail(s)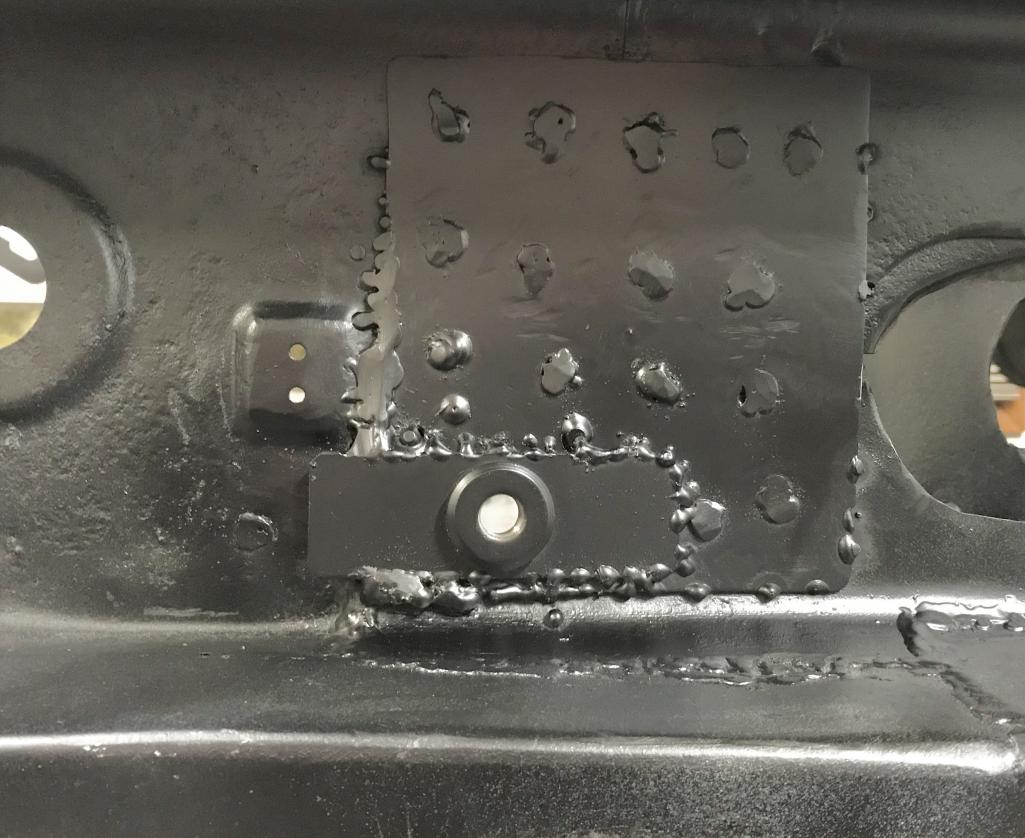
Posted by: Dion Apr 16 2020, 07:47 PM
Next tacked on the heater tube and the flexible tube bracket.
Attached thumbnail(s)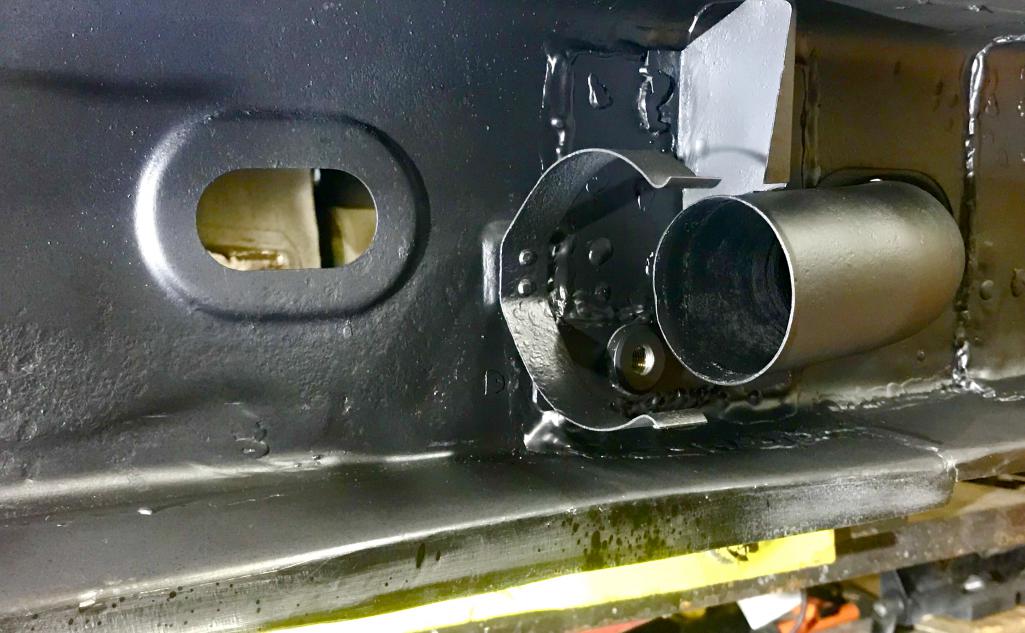

Posted by: Dion Apr 16 2020, 07:49 PM
Starting to look proper again.
Attached thumbnail(s)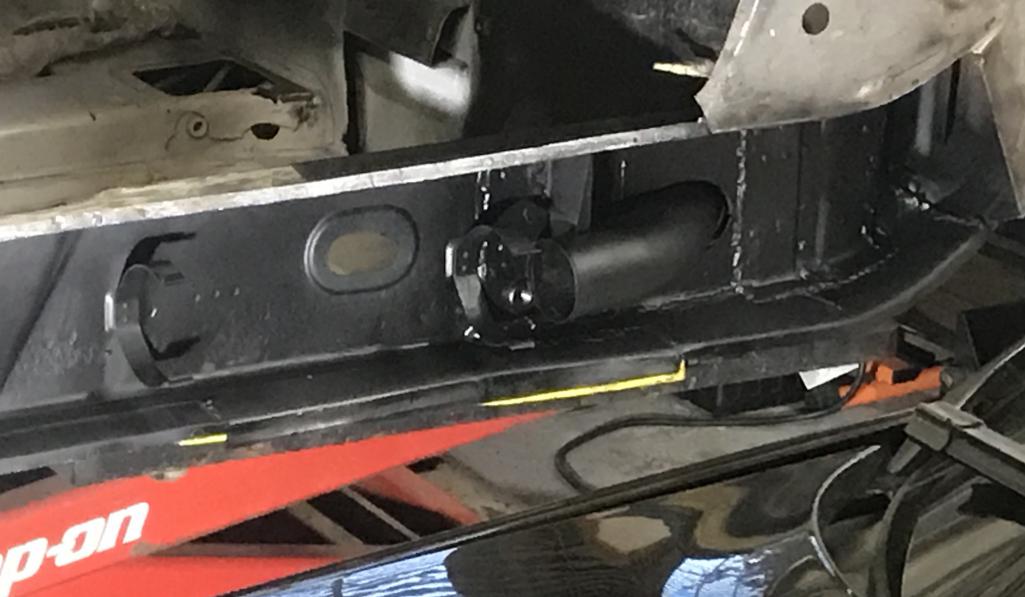
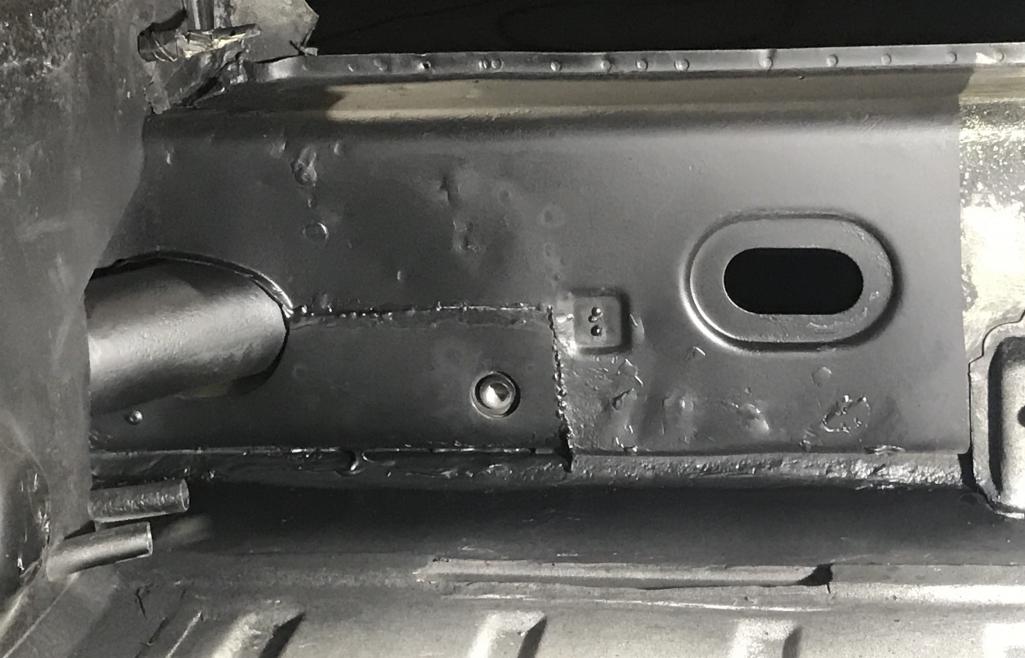
Posted by: saigon71 Apr 17 2020, 05:10 AM
Nice work Dion - good to see more progress on this. She'll be ready for the gathering in Strasburg for sure!
Posted by: 914dave Apr 17 2020, 06:22 AM
You go!!!
Posted by: BeatNavy Apr 17 2020, 06:31 AM
Great progress, Dion. Look forward to seeing this in person one day
Posted by: tygaboy Apr 17 2020, 07:50 AM
Starting to look proper again.
That'll work!
Posted by: Dion Apr 17 2020, 12:36 PM
Thank you all for the kind words & encouragement fellas.
I know my skill set does not approach
the talents seen on this site, I’m just very happy it is strong and sound again. Eventually
I hope I can make the metal work look better.
Posted by: mepstein Apr 17 2020, 01:09 PM
Thank you all for the kind words & encouragement fellas.
I know my skill set does not approach
the talents seen on this site, I’m just very happy it is strong and sound again. Eventually
I hope I can make the metal work look better.
Dion - You're doing great. The factory welding was nothing special. It got the job done.
Posted by: Superhawk996 Apr 18 2020, 10:05 AM
Keep going! This type of work is painfully slow but you'll be glad you did it.
That seatbelt attachment is scary. There are so many teeners running around with that very same condition and people don't even know the risk they are taking or choose to ignore it hoping they'll never need a seat belt in an impact.
Posted by: Dion May 6 2020, 04:03 PM
Addressed the lower left inner firewall. Again thank the gods for Restoration Design stampings. Placed it in position, did a chalk line to see where i was going to scuff to bare metal for the plug welds. It needed a little coaxing and some hammer/dolly to shape. I prolly disturbed adjacent panels a bit ripping out the rusted piece. Then drilled out the panel for the areas to be welded.
Attached thumbnail(s)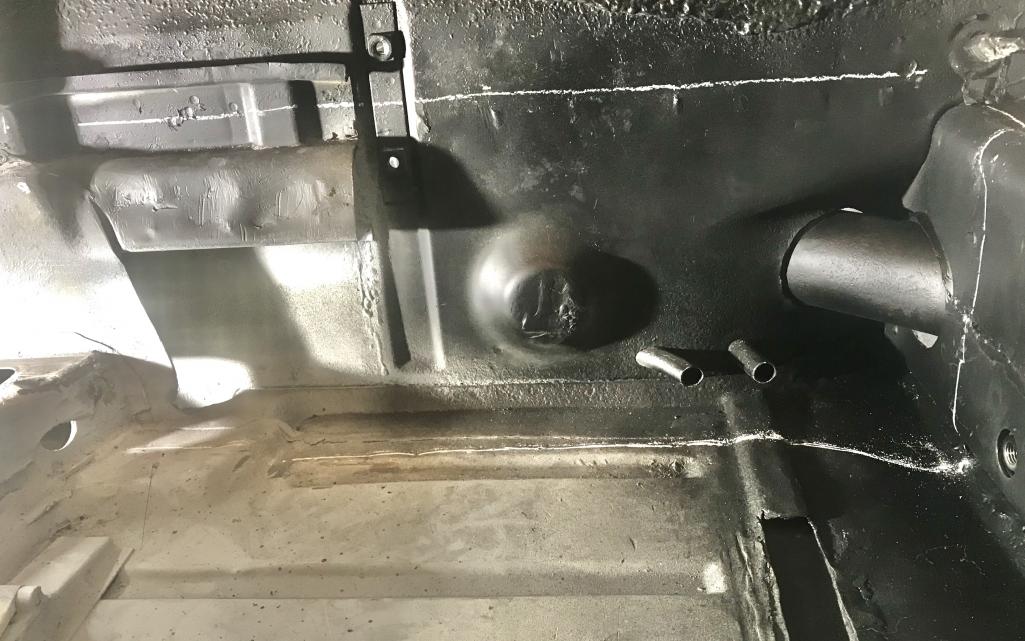
Posted by: Dion May 6 2020, 04:04 PM
Positioning
Attached thumbnail(s)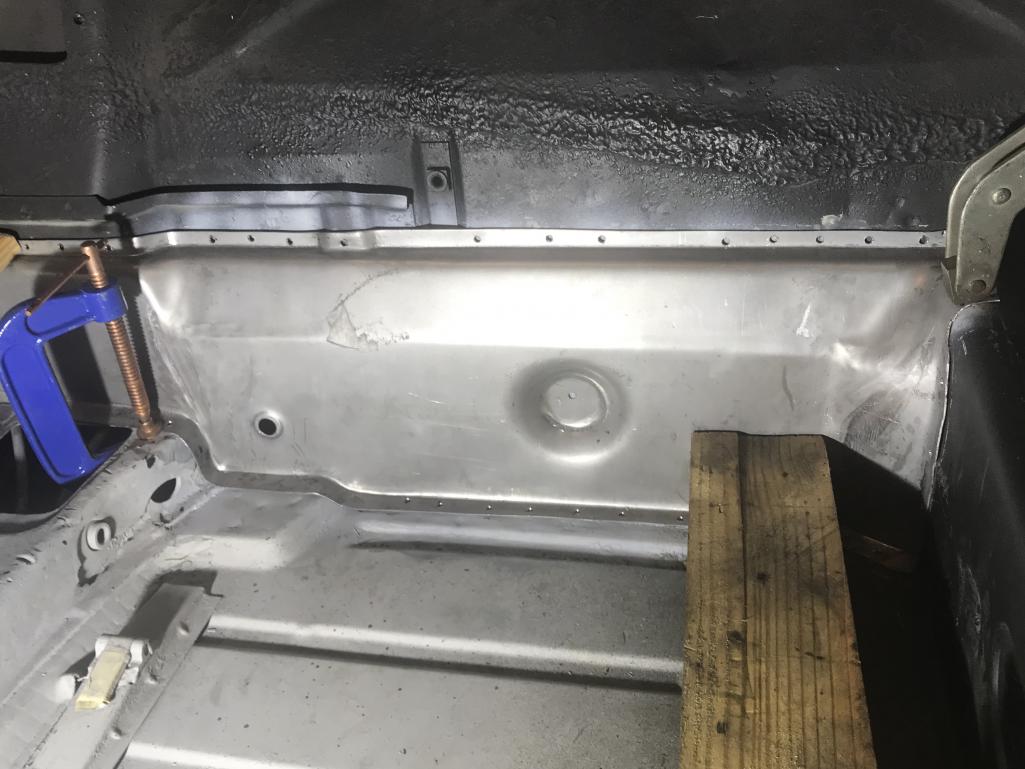
Posted by: Dion May 6 2020, 04:07 PM
Plug welds & seam sealer
Attached thumbnail(s)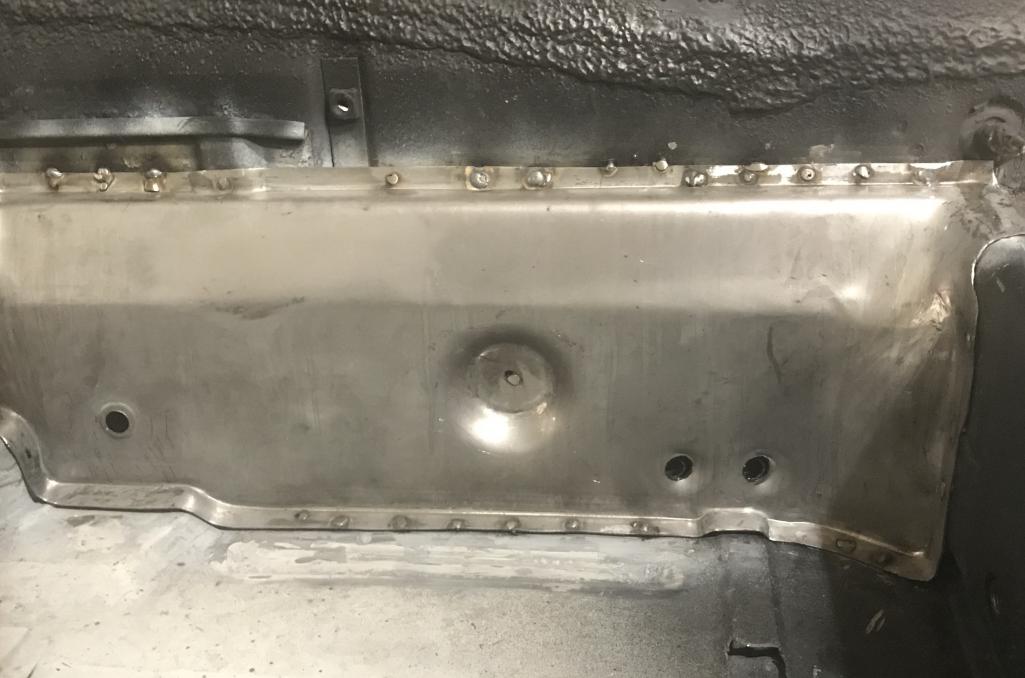
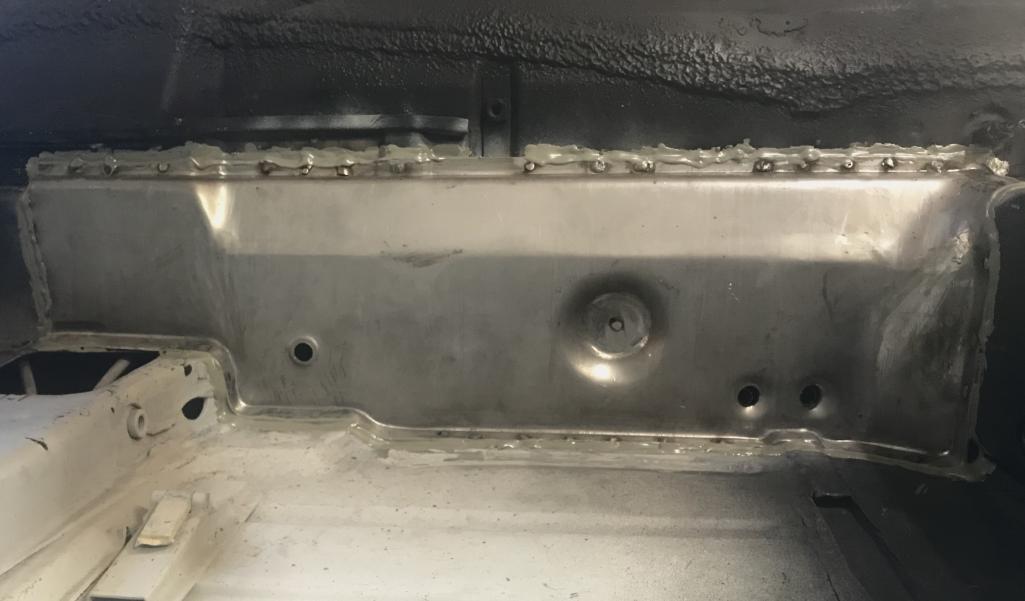
Posted by: Dion May 6 2020, 04:10 PM
Placed the new E-brake cover in as well. As simple a piece as this is it gave me fits
keeping it in position with magnets.
Attached thumbnail(s)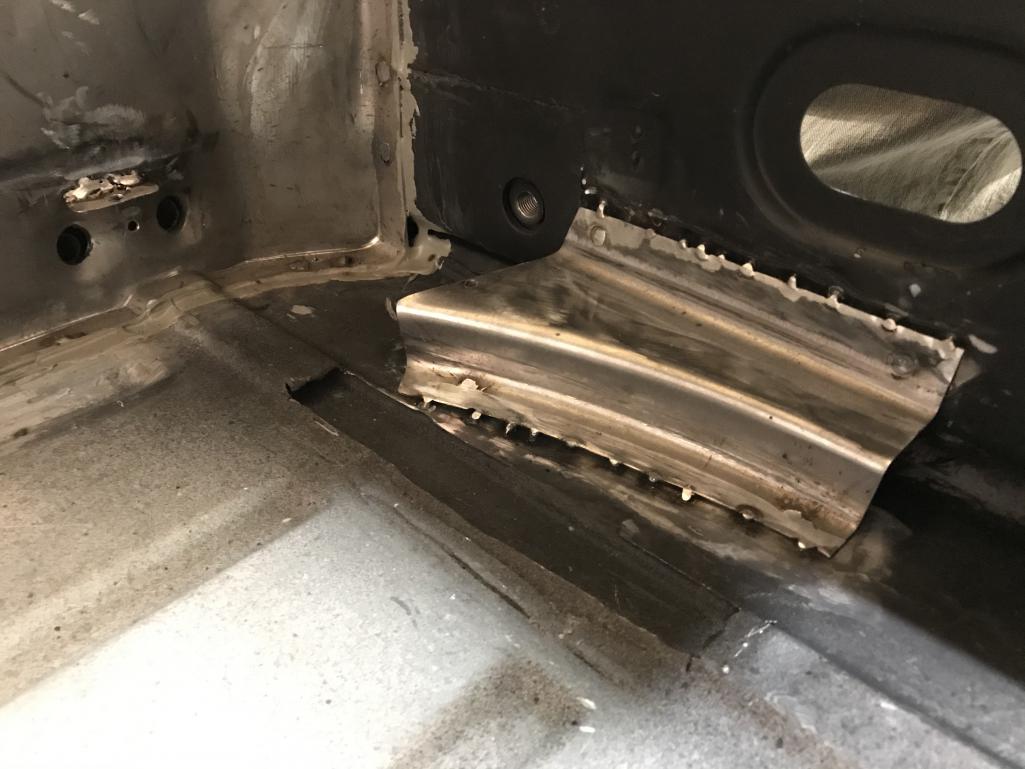
Posted by: Dion May 6 2020, 04:11 PM
A coat of primer:
Attached thumbnail(s)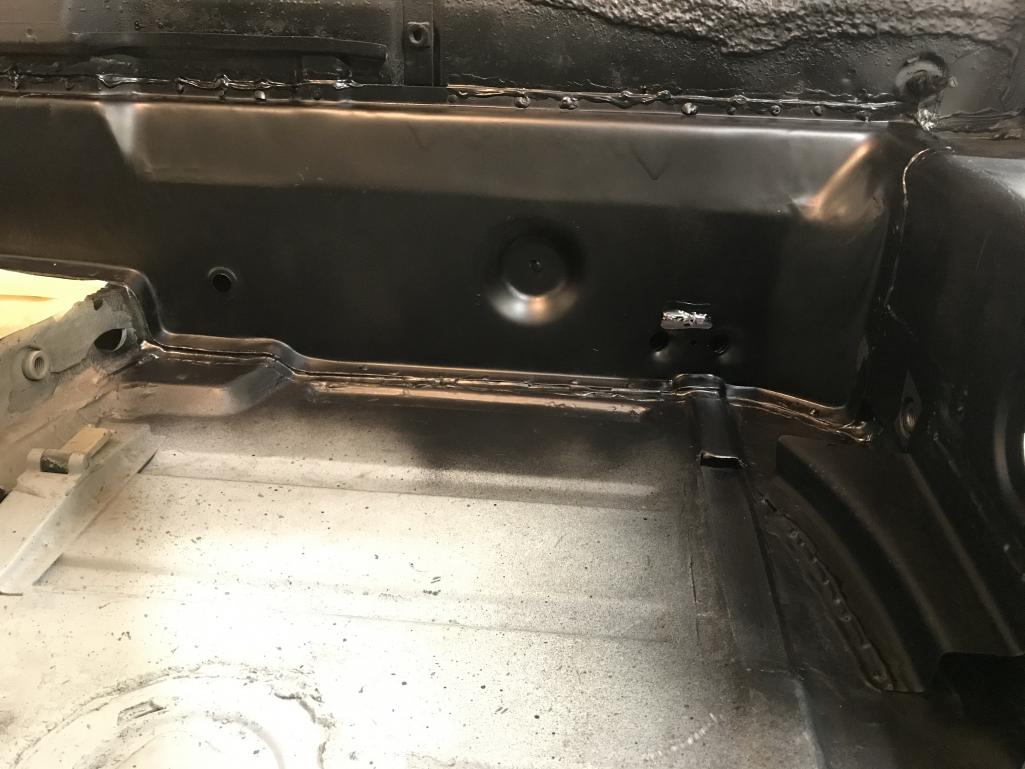
Posted by: Dion May 6 2020, 04:11 PM
E brake area
Attached thumbnail(s)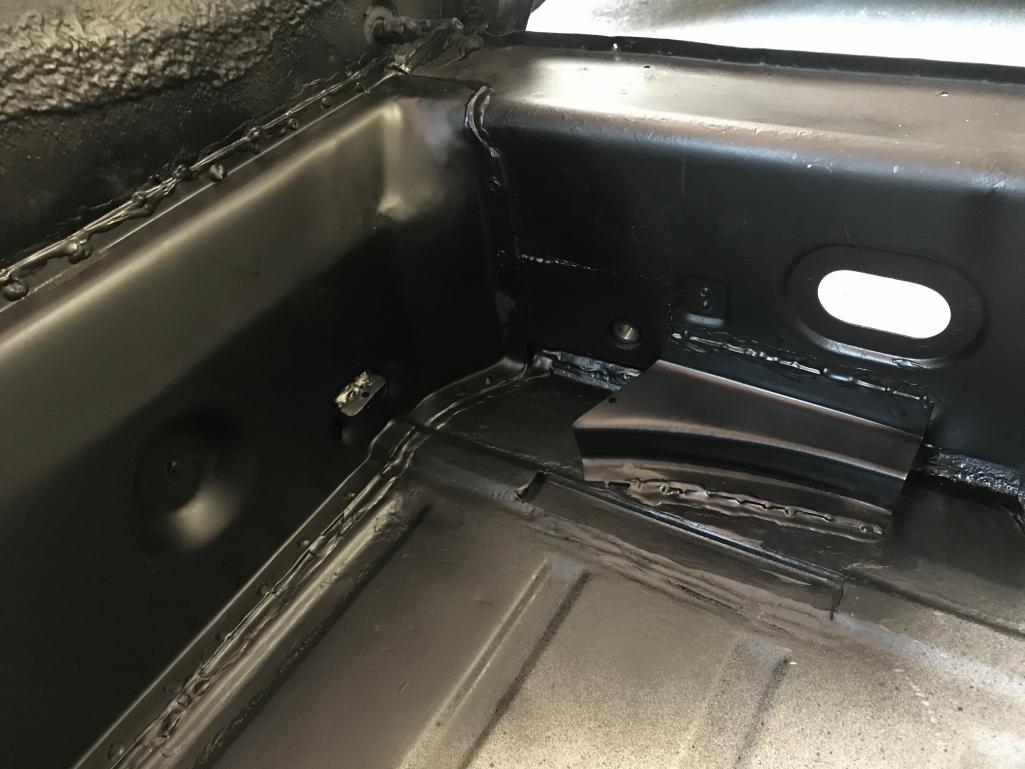
Posted by: Dion May 6 2020, 04:17 PM
Turned attention to finishing up my trailing arms. Pressed in the outer hubs as well as installing the Elephant Racing poly bronze bushings.
Those grease fittings are a tedious bunch . Only one grabbed the way the coach drew it up. I had to cheat and add a little JBWeld to seal them up. The circular area just kept allowing grease to slip on by. All good now
Attached thumbnail(s)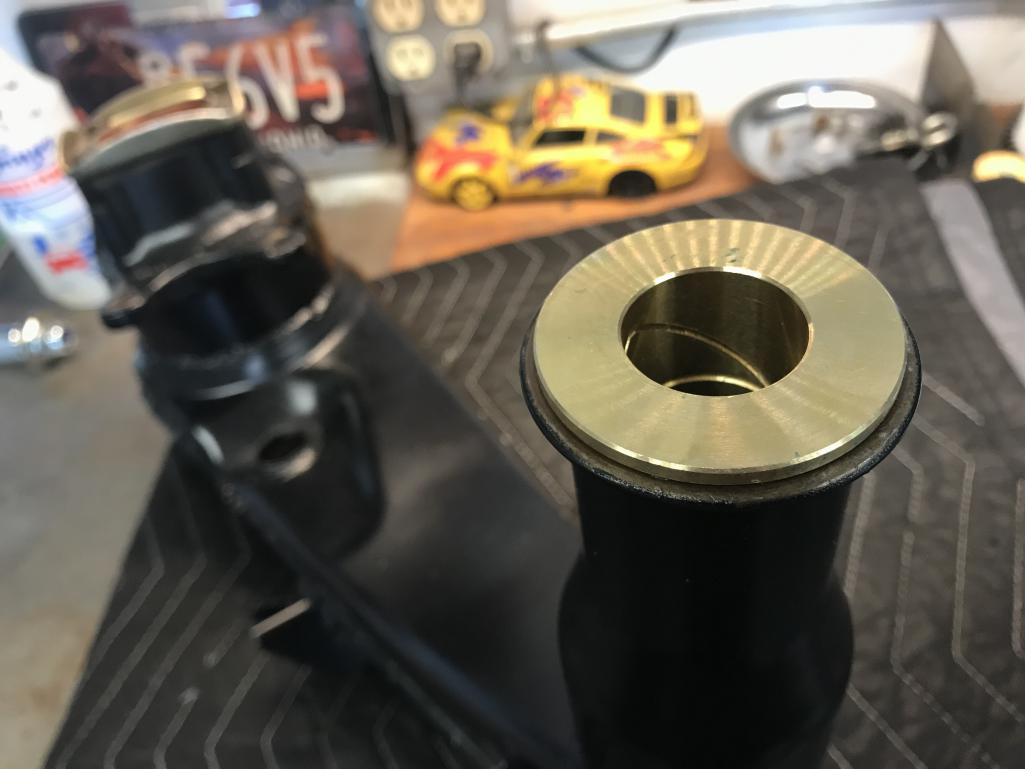
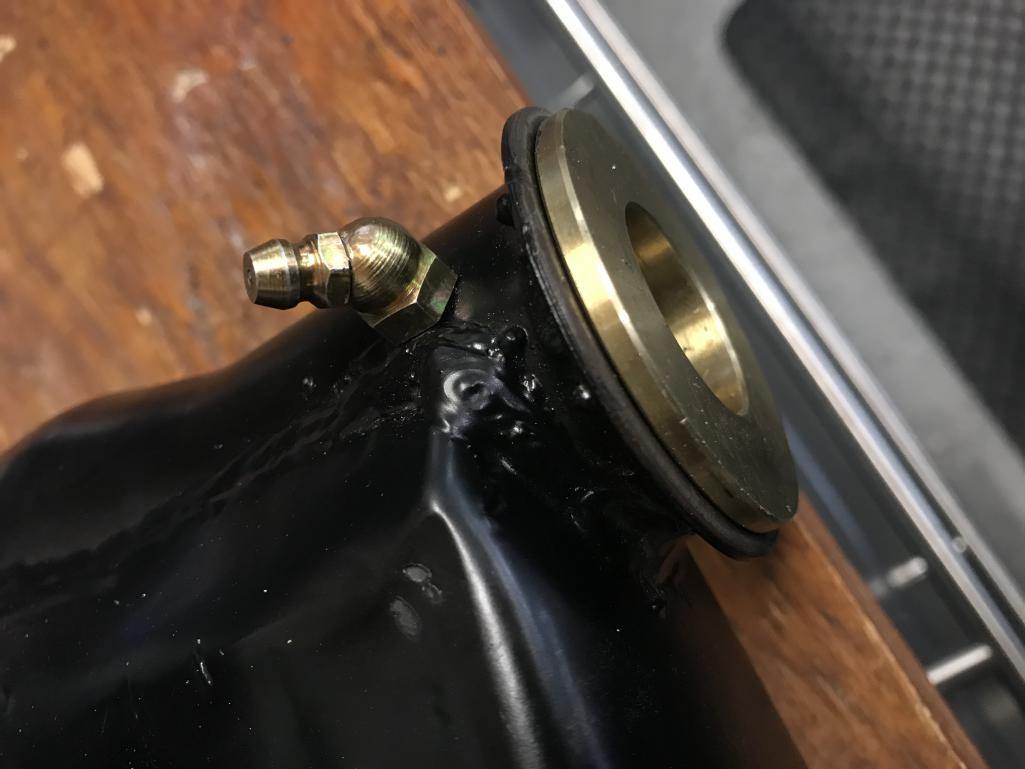
Posted by: Dion May 6 2020, 04:19 PM
Assembled
Attached thumbnail(s)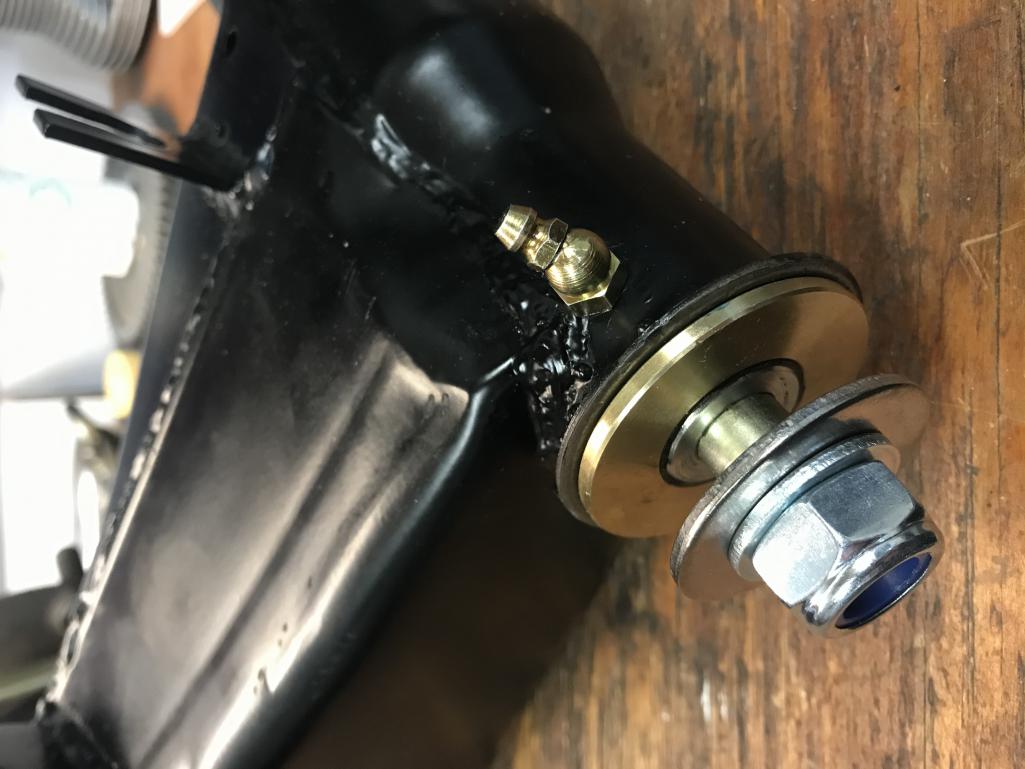
Posted by: Dion May 6 2020, 04:20 PM
Complete set ready to go. Just needs inner stub axle to be joined.
Attached thumbnail(s)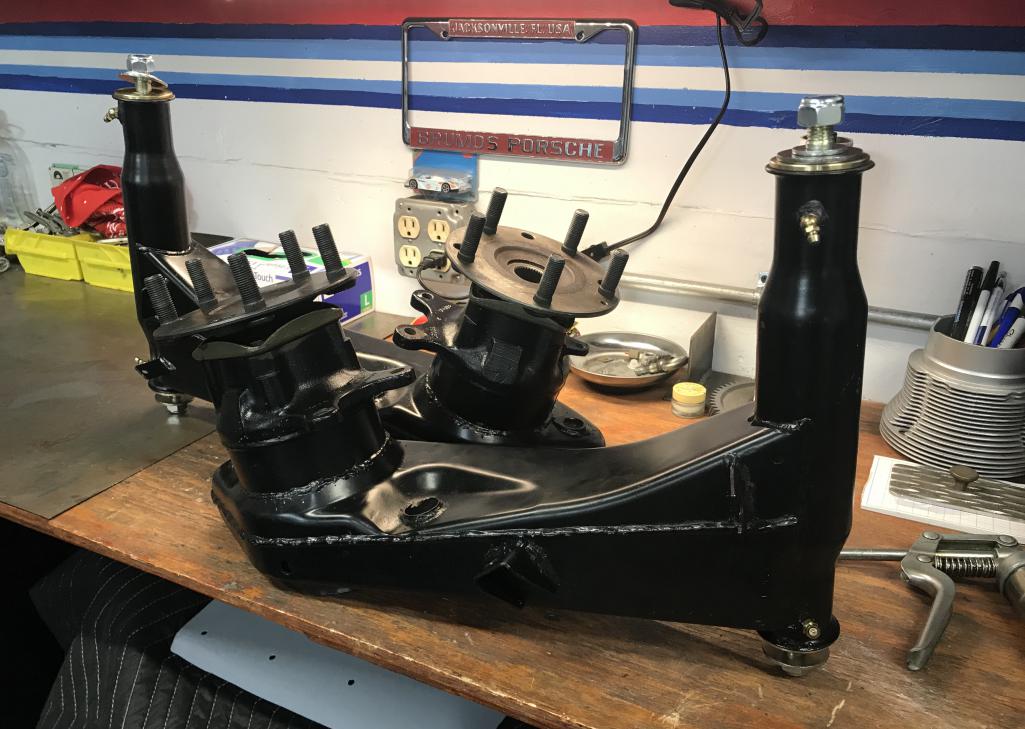
Posted by: tygaboy May 6 2020, 04:24 PM
Yeah, baby! And it's all "Back in Black"!
Congrats on your great progress, Dion!
Posted by: Dion May 6 2020, 04:31 PM
Yeah, baby! And it's all "Back in Black"!
Congrats on your great progress, Dion!
Thanks Chris.
& a great song!
Posted by: bbrock May 6 2020, 05:21 PM
That looks great! Too bad these jewels get hidden under the car.
Posted by: TonyA May 7 2020, 06:56 PM
Looks good Dion. What bushings did you use
Posted by: Dion May 7 2020, 09:36 PM
@http://www.914world.com/bbs2/index.php?showuser=20596 Elephant Racing’s Poly-bronze.
What’s up Dean
Posted by: rgolia May 8 2020, 08:58 AM
Great work Dion - cant wait to see it in person.
Posted by: porschetub May 8 2020, 04:12 PM
@http://www.914world.com/bbs2/index.php?showuser=20596 Elephant Racing’s Poly-bronze.
What’s up Dean
Hi mate will PM or email latter for a catch-up,man you have been busy
.Posted by: Dion May 28 2020, 08:50 AM
Some updates to the project.
Replaced the Lt. outboard seat bracket/hinge that had to be cut out due to rusted out areas on the “riser” portion. Welded the hinge to the riser, also welded a plate to fill the gap beneath the riser that was cut out. Used a spare seat rail assembly to get things lined up.
Attached thumbnail(s)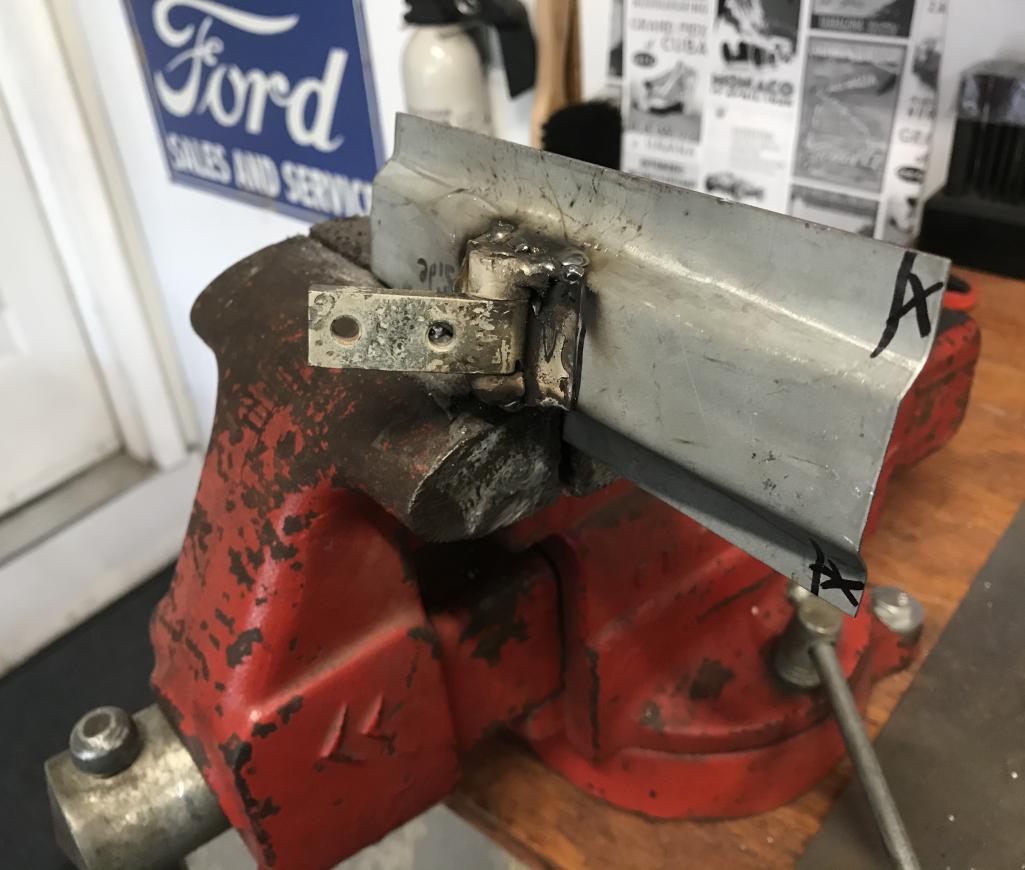

Posted by: Dion May 28 2020, 08:55 AM
Plate install
Attached thumbnail(s)
Posted by: Dion May 28 2020, 08:56 AM
Plate install
Attached thumbnail(s)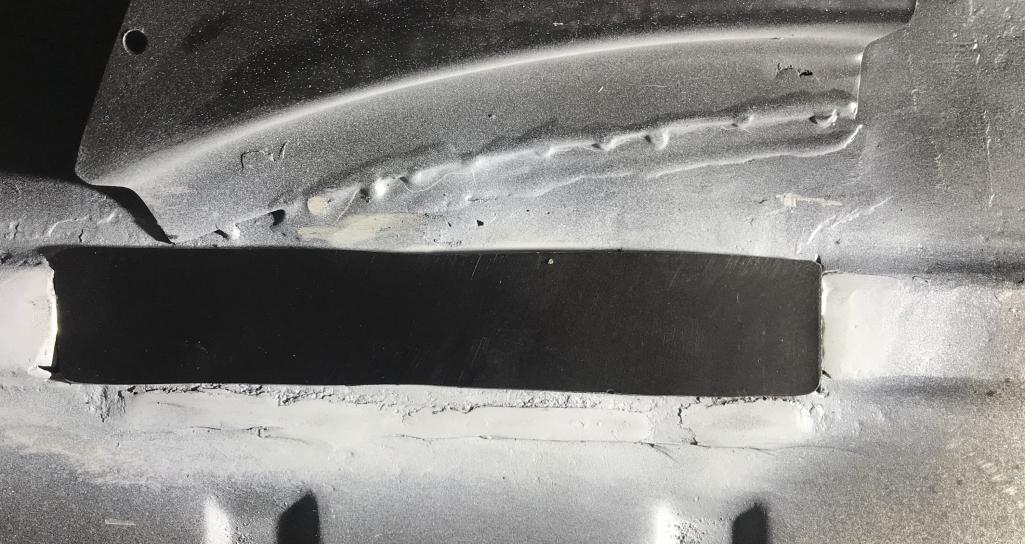
Posted by: Dion May 28 2020, 08:57 AM
Result
Attached thumbnail(s)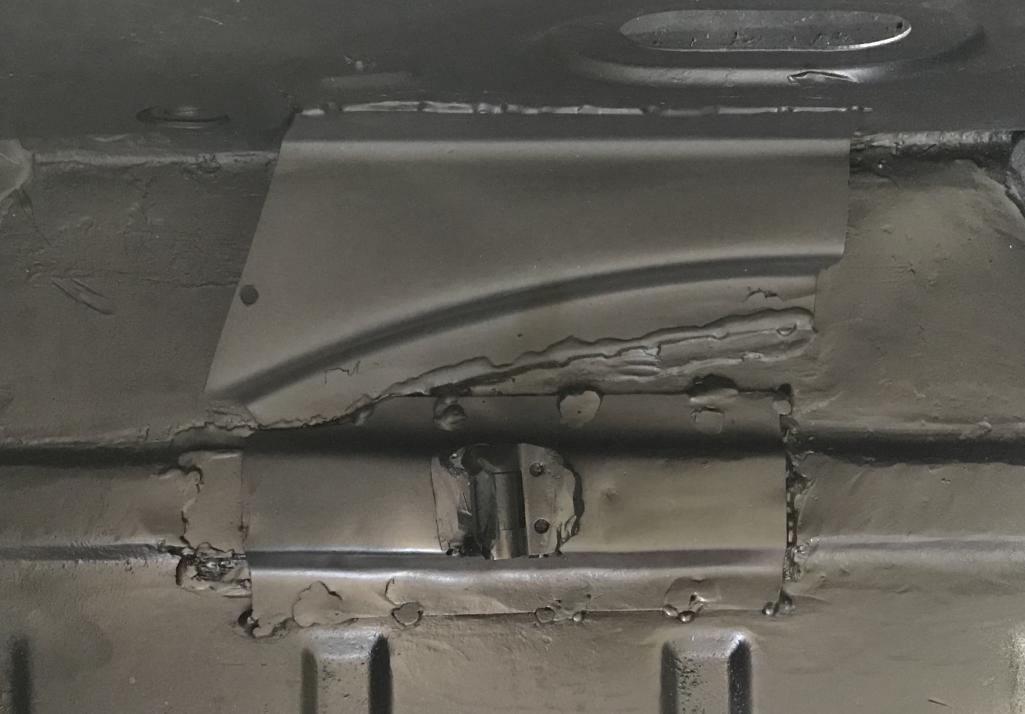
Posted by: Dion May 28 2020, 09:00 AM
Reattached the left rear inner fender to the rear closing panel. It had popped apart when
removing the outer fender panel.
Attached thumbnail(s)
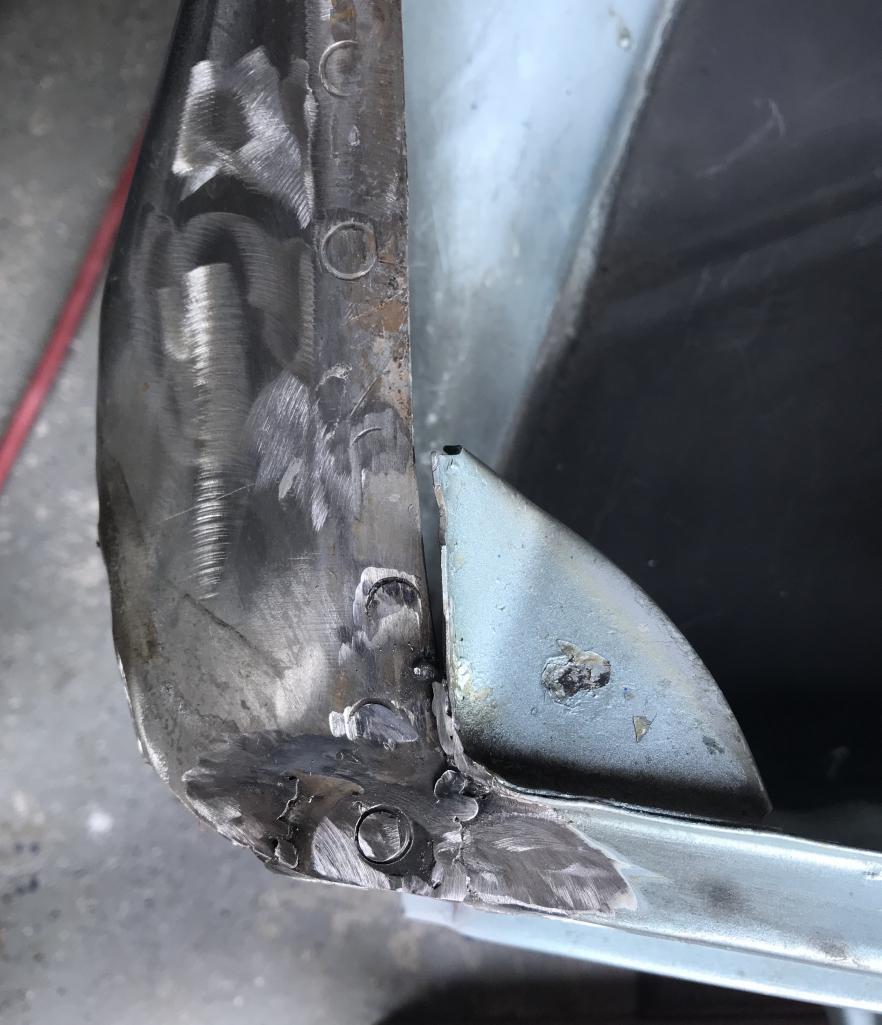
Posted by: Dion May 28 2020, 09:06 AM
Removed the door stays and refurbished. Used 914rubbers’ kit. I know some have had fitment issues regarding pin sizes. No problems noted with my set. The drivers side definitely needed attention. The plastic bushing was split and missing a good chunk.
No wonder it was always noisy.
Attached thumbnail(s)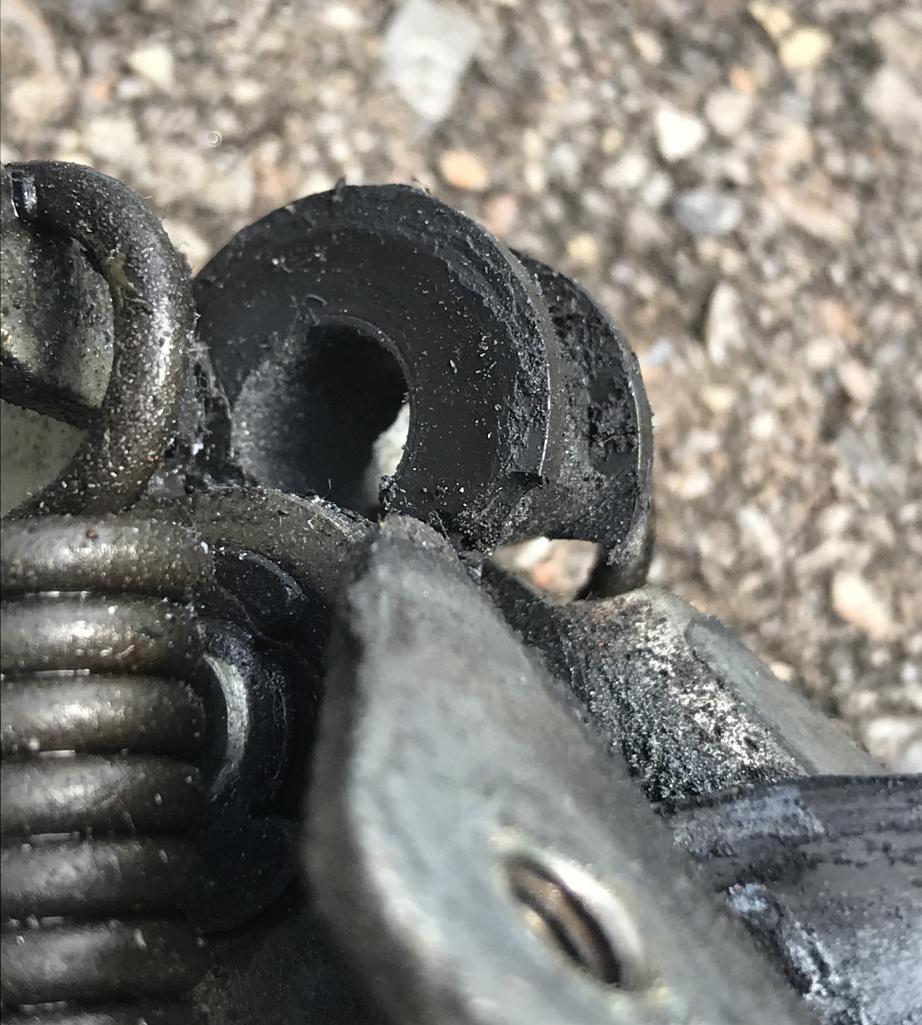
Posted by: Dion May 28 2020, 09:10 AM
Before
Attached thumbnail(s)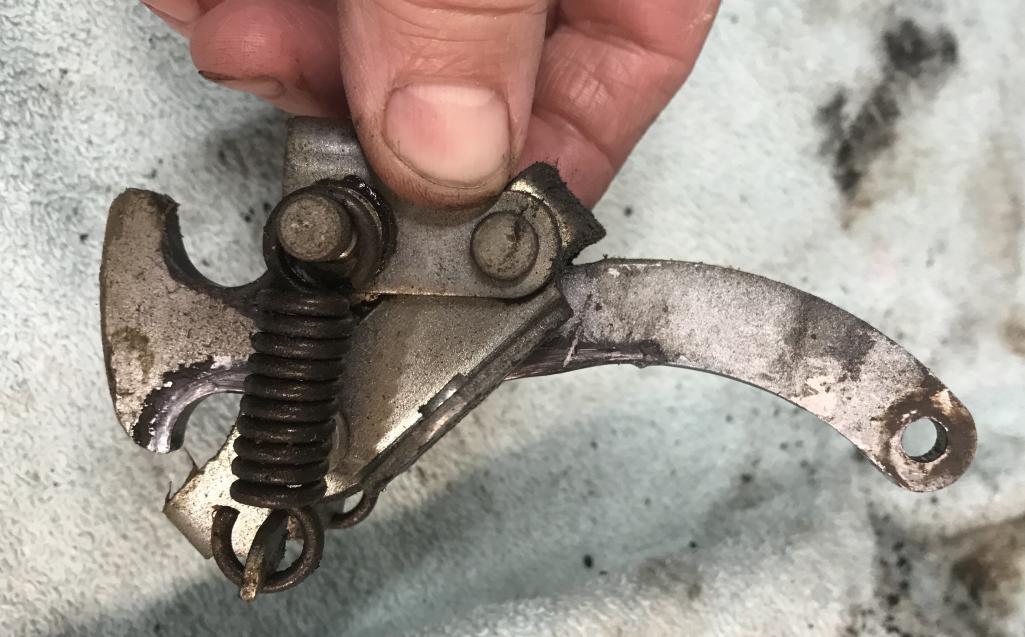
Posted by: Dion May 28 2020, 09:10 AM
After
Attached thumbnail(s)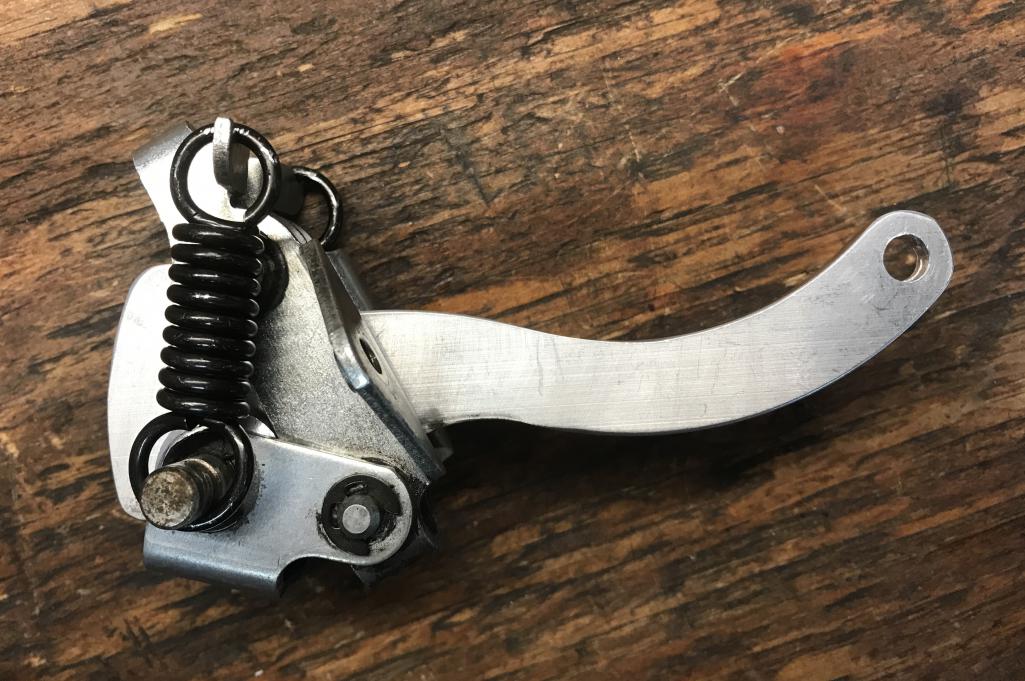
Posted by: Dion May 28 2020, 09:26 AM
Began work on the left rear suspension console repair. Finally @http://www.914world.com/bbs2/index.php?showuser=19241 !
I picked up the necessary steel from Dave last week and began welding the steel
uprights to the left long. Dave came by this past weekend and brought his heavy duty drill bits & knowledge! Transferred the console bearing bolt hole locations onto 3/16” steel. This was the template. After measuring and locating. Holes were drilled into the
steel uprights as well as thru the steel bar stock. Dave was able to make at his work
some dowel pins. So the jig could be removed easily when it was time to remove spot welds from console.
Attached thumbnail(s)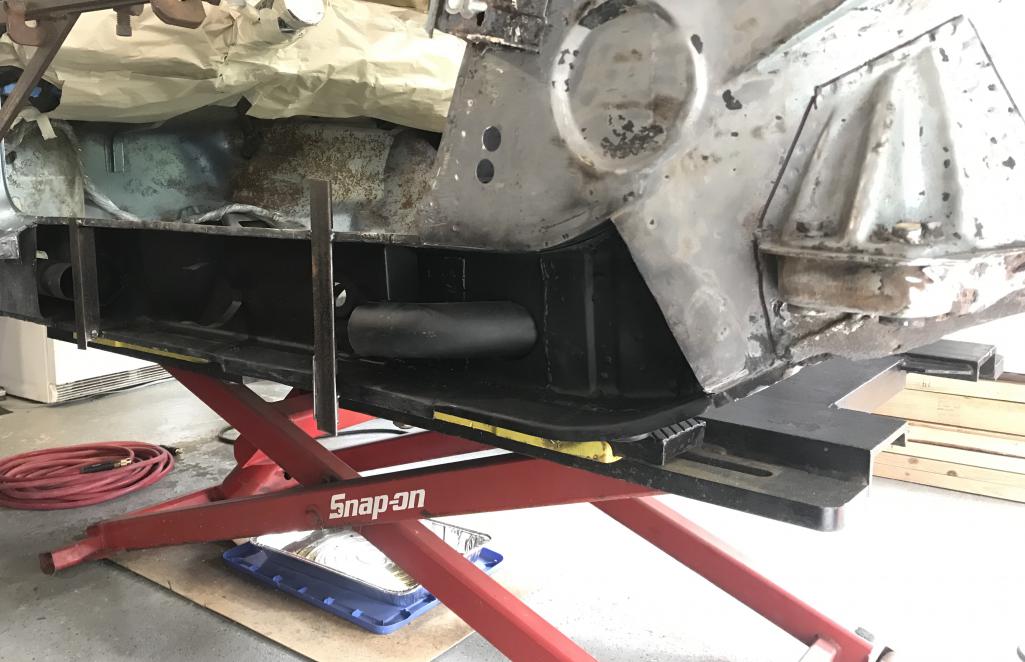
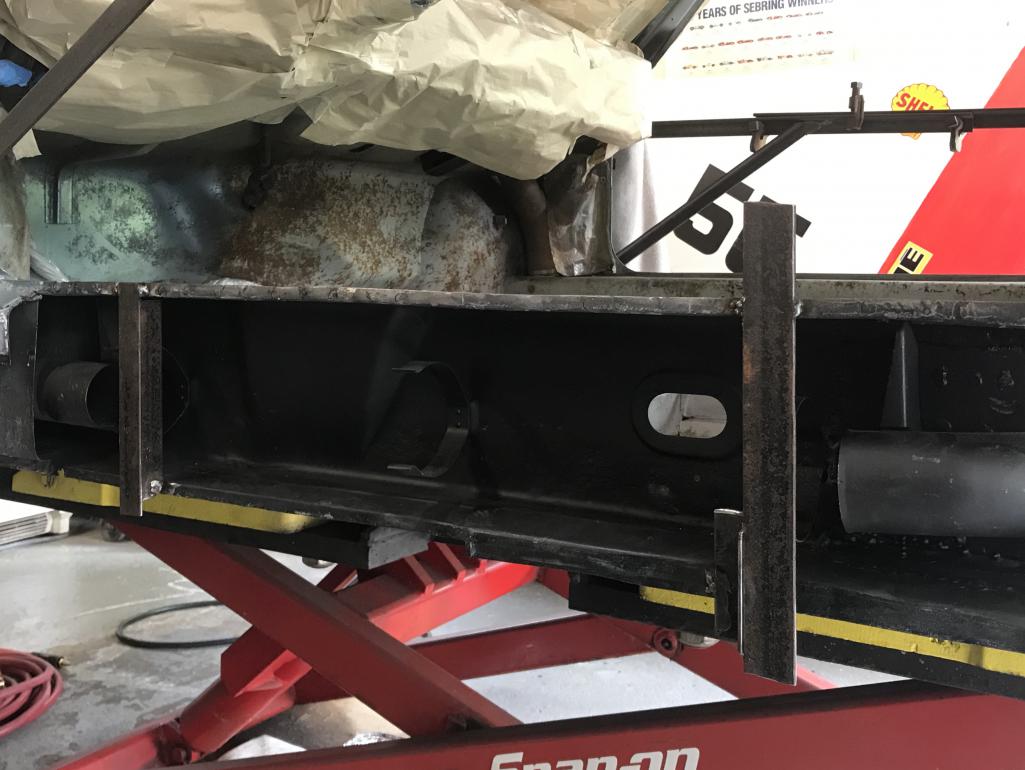
Posted by: Dion May 28 2020, 09:28 AM
Uprights and “jig” barstock.
Attached thumbnail(s)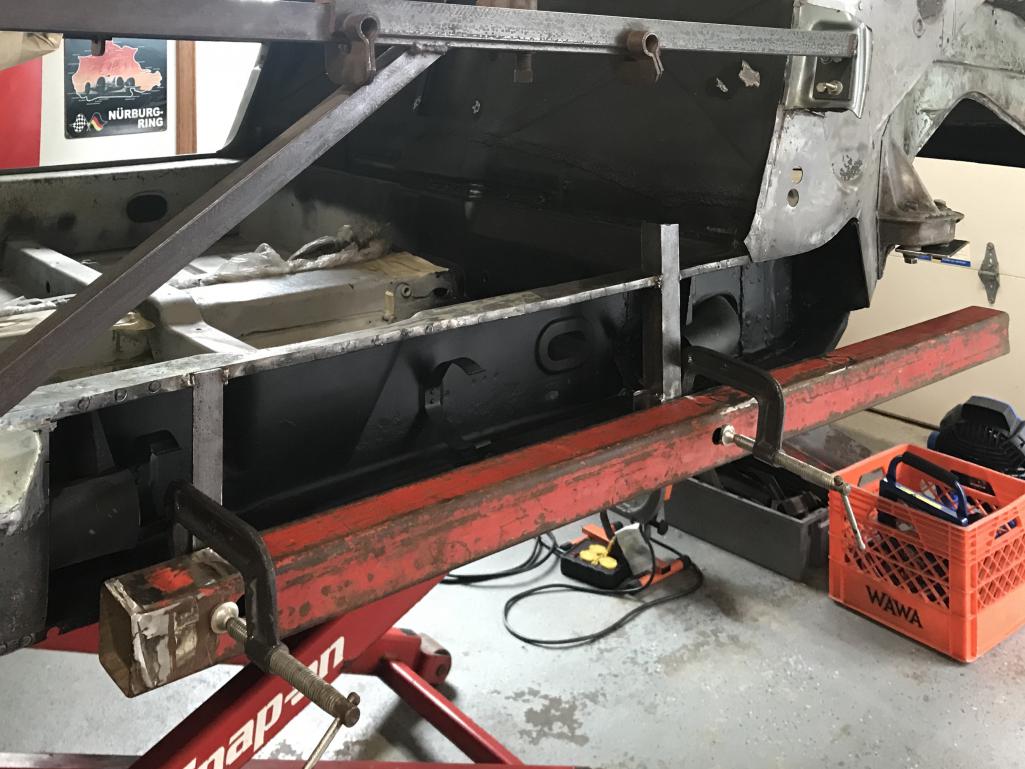
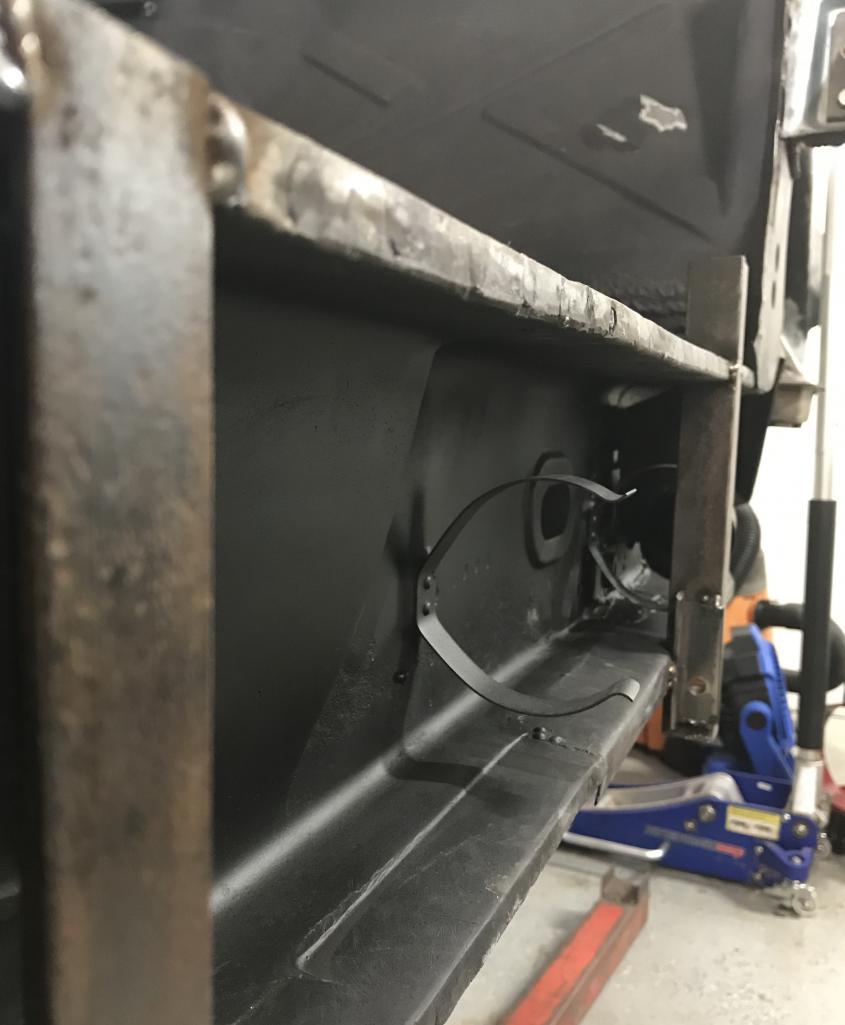
Posted by: Dion May 28 2020, 09:34 AM
After Dave gave me my instructions I went about welding up the platform to attach the
plates to console. This mother is not going anywhere. This assuring we will have proper location for the new console.
Attached thumbnail(s)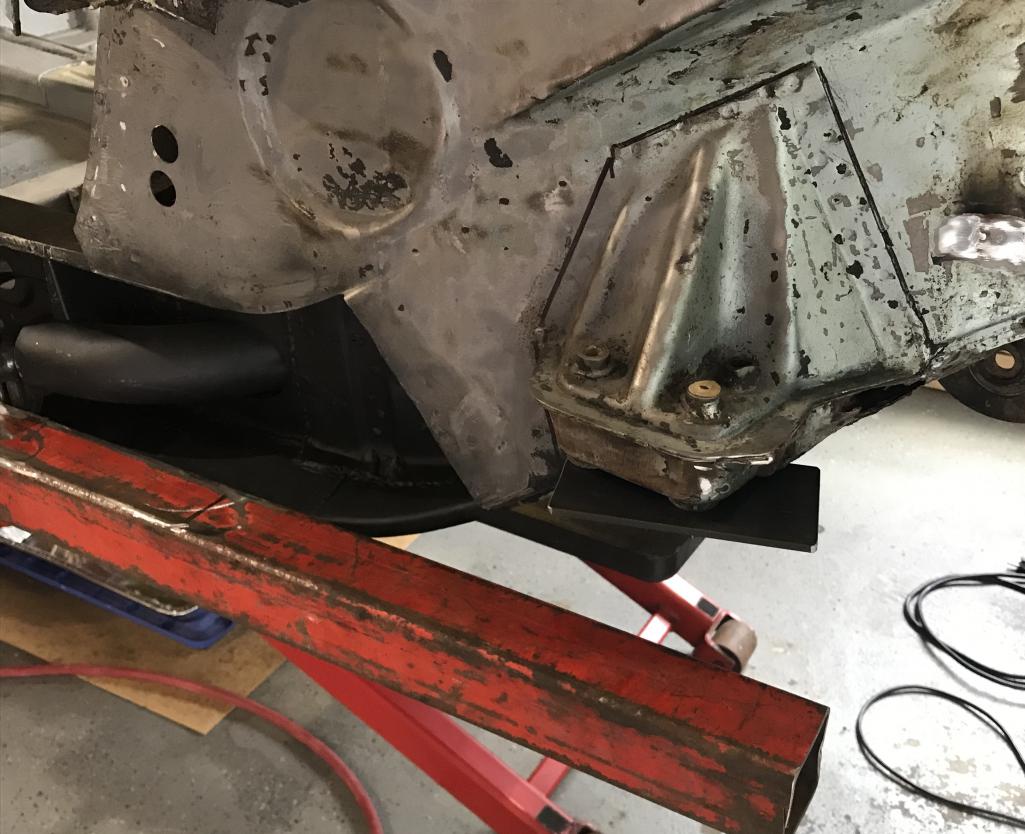
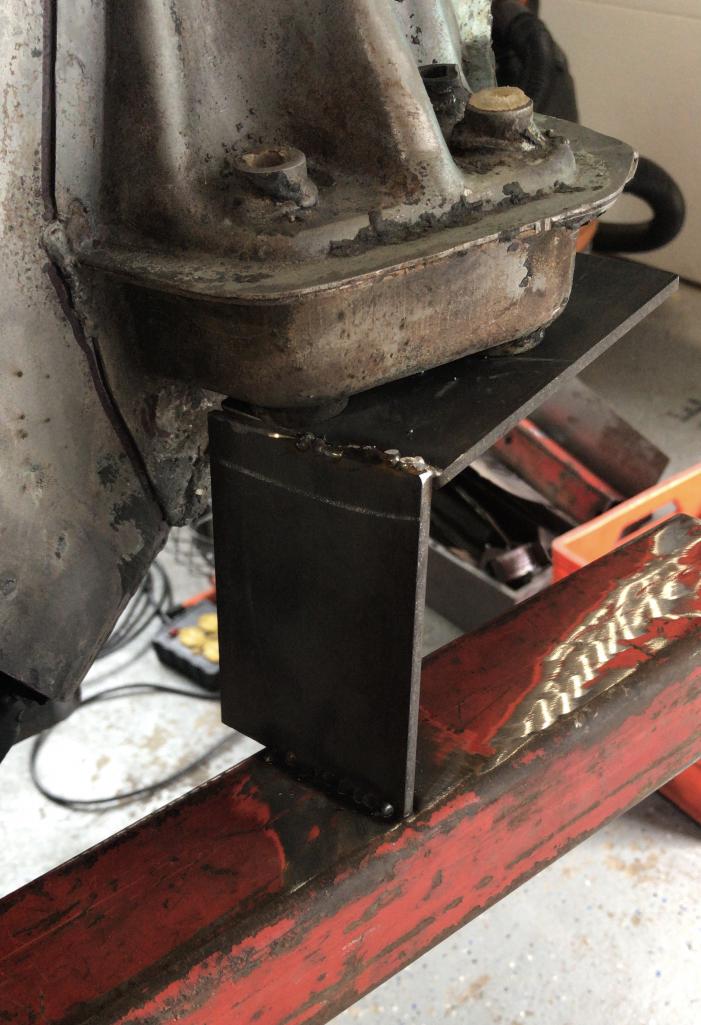
Posted by: Dion May 28 2020, 09:35 AM
Not a house of cards
Attached thumbnail(s)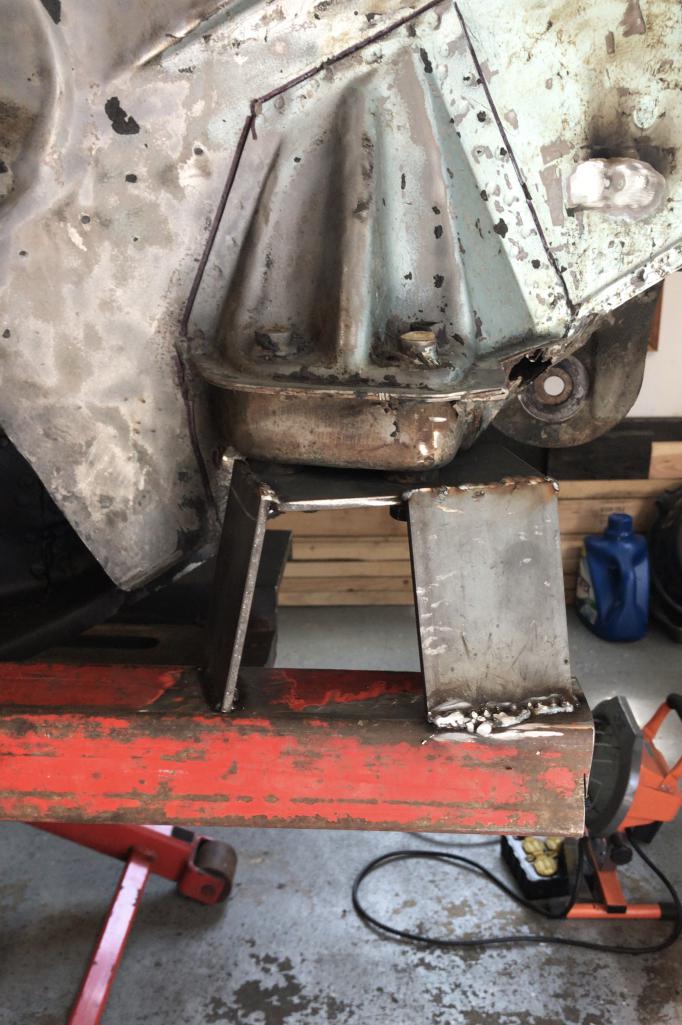
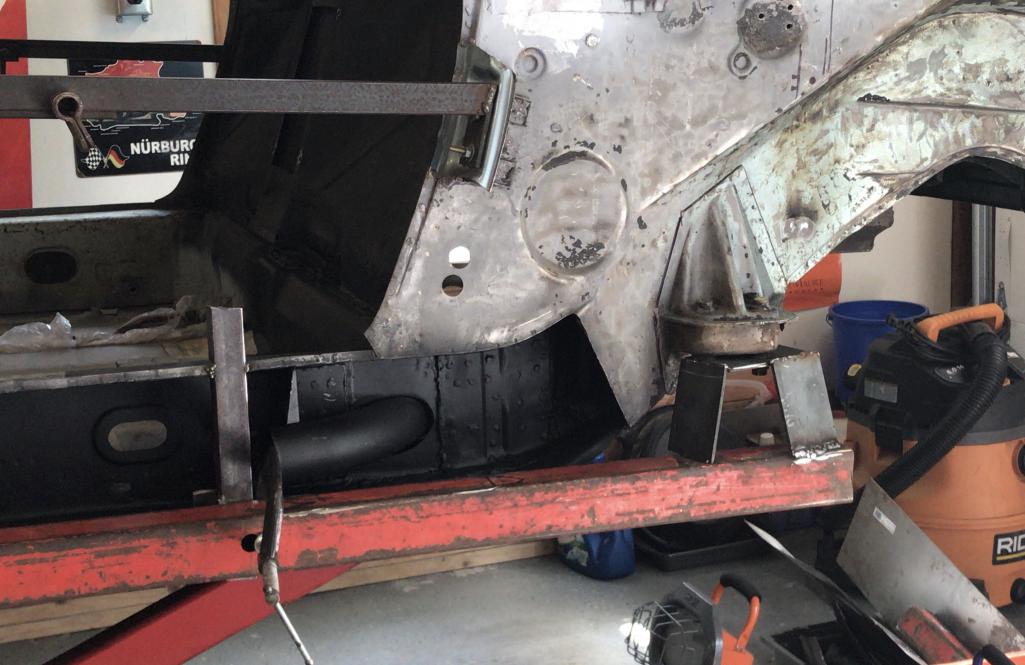
Posted by: Dion May 28 2020, 09:38 AM
Bolted up
Attached thumbnail(s)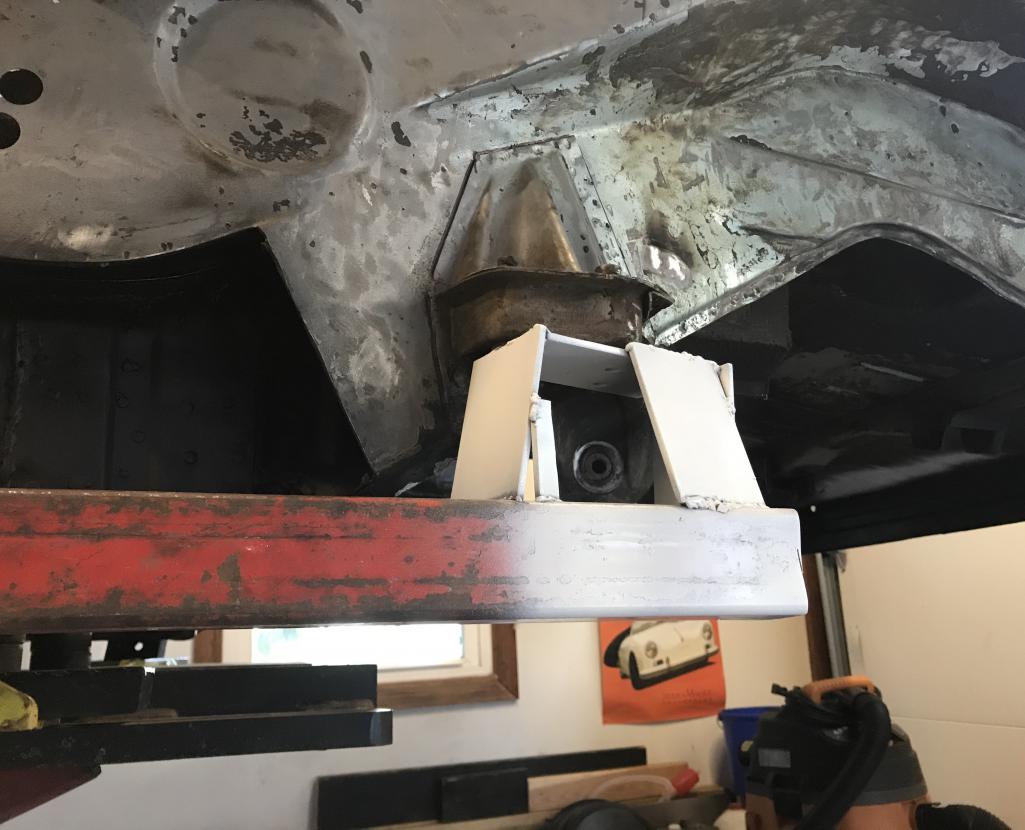
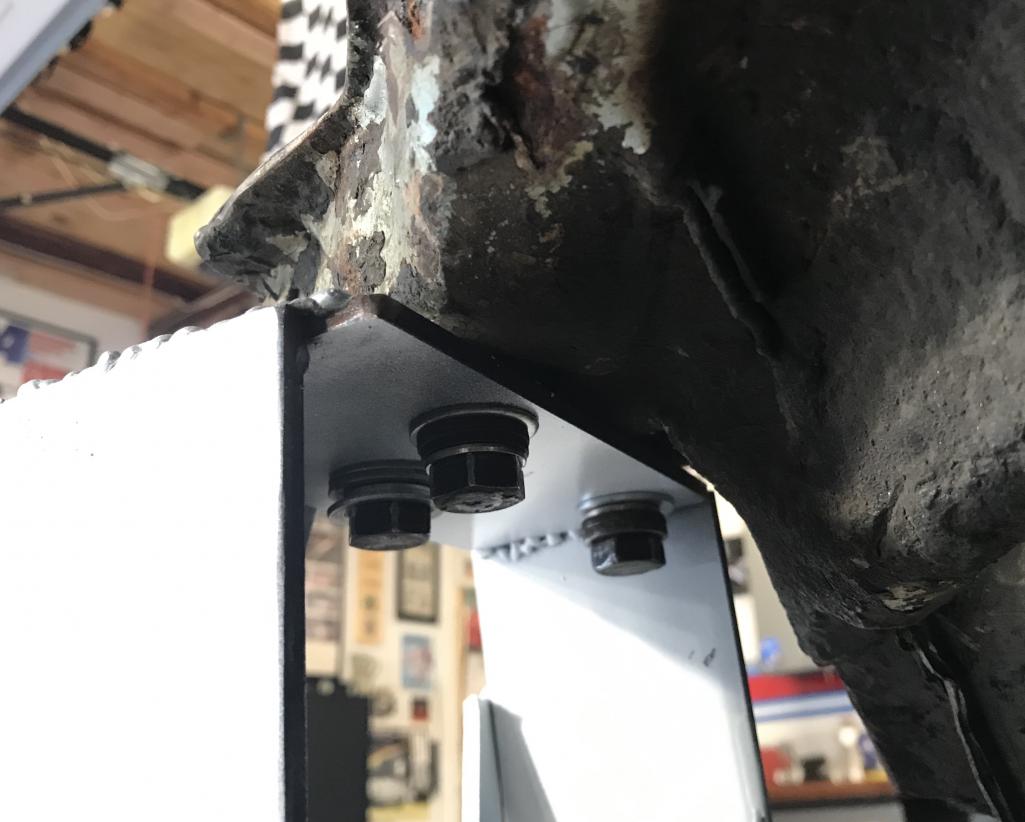
Posted by: Dion May 28 2020, 09:40 AM
Oh yeah, the reason for this endeavor
Attached thumbnail(s)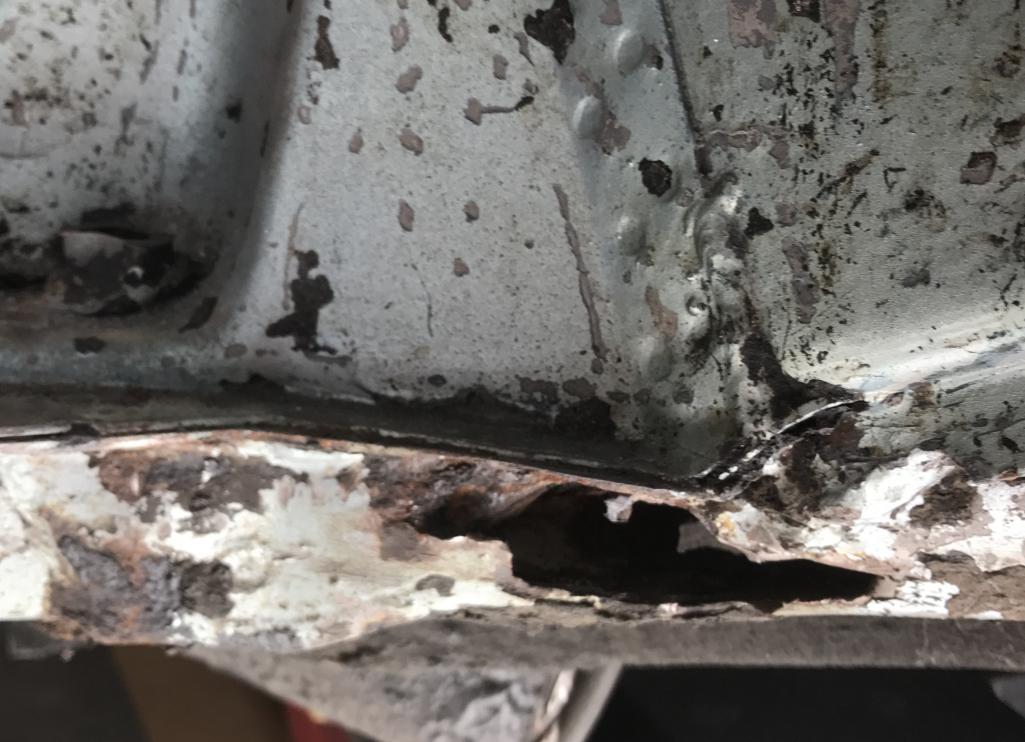
Posted by: Dion May 28 2020, 09:42 AM
The offender has been removed!
Attached thumbnail(s)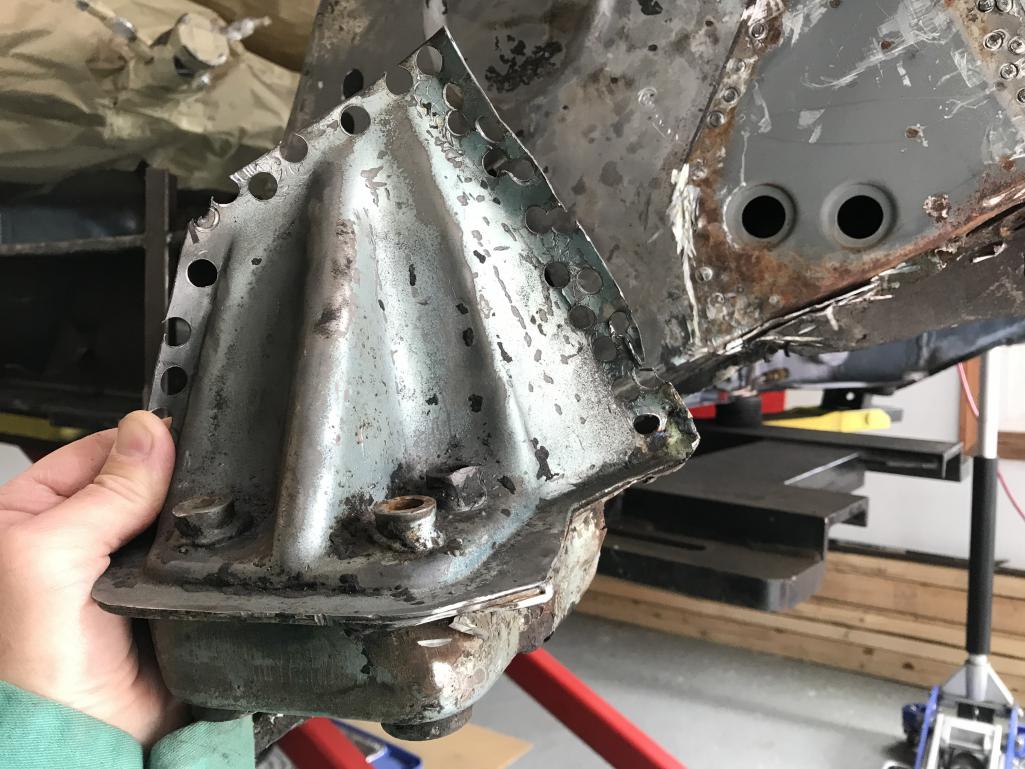
Posted by: Dion May 28 2020, 09:43 AM
It was past its time.
Attached thumbnail(s)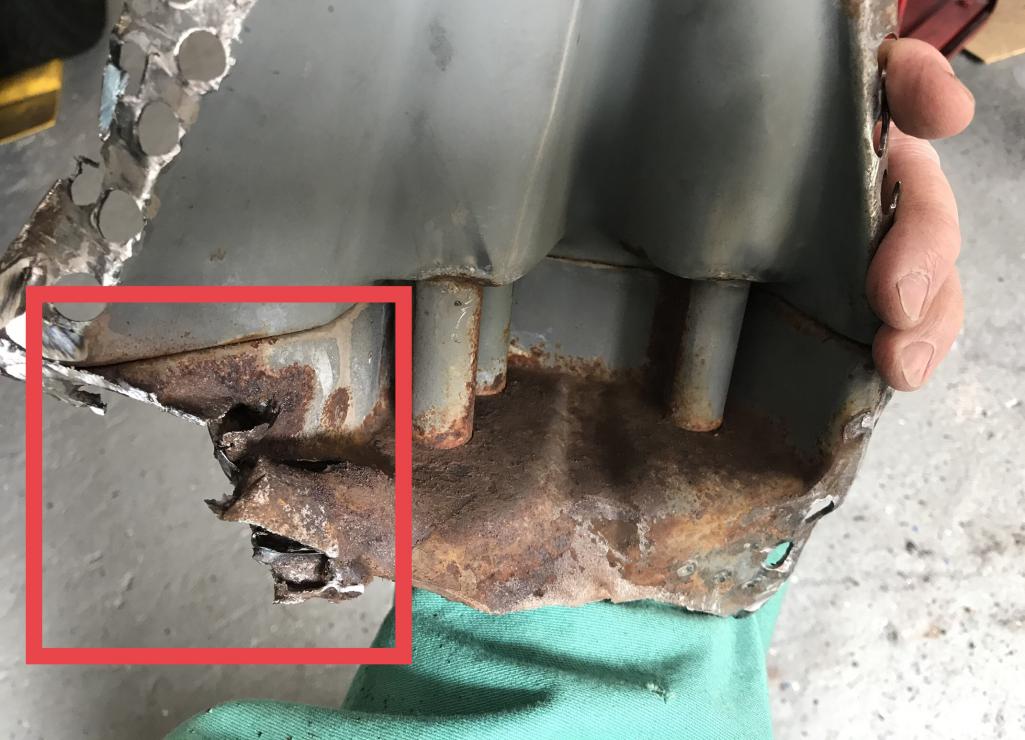
Posted by: BeatNavy May 28 2020, 09:44 AM
Nice work, Dion Is the jig because you are removing the outer console to repair it? May be a dumb question, but that's a heck of a setup and I just wanted to make sure I understand it correctly.
Lots of progress!
Edit: yeah, looks like I posted too soon. Should have given you a chance to finish
Great work!
Posted by: Dion May 28 2020, 09:48 AM
Now to tackle the inside portion. This part of the console is in worse shape than the bearing area. I was just going to do spot weld removal but also resorted to cutting wheel.
It was basically trash anyway.
Attached thumbnail(s)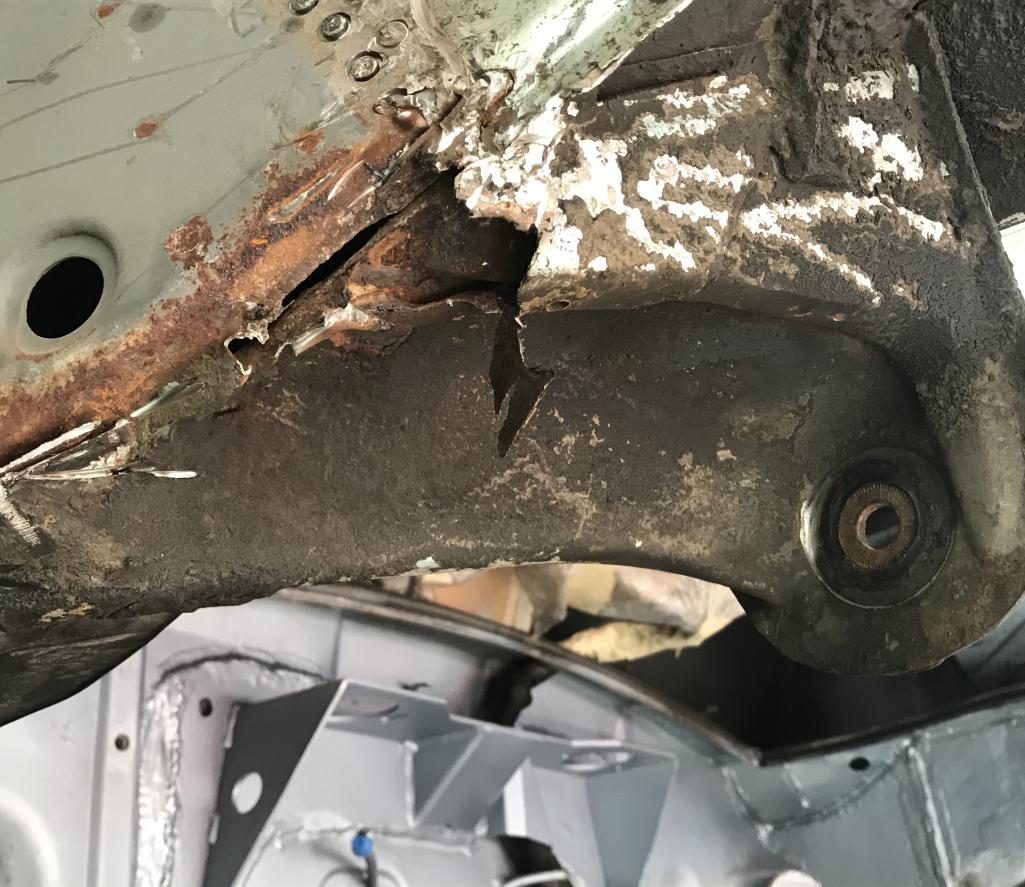
Posted by: Dion May 28 2020, 09:50 AM
Rob, yes it is to make sure I’m within spec when the replacement console is welded back on. Don’t want to be crabbing down the road. This gives a good shot to be in the ballpark of specs.
Posted by: Dion May 28 2020, 09:53 AM
Slowly removing the old metal.
Attached thumbnail(s)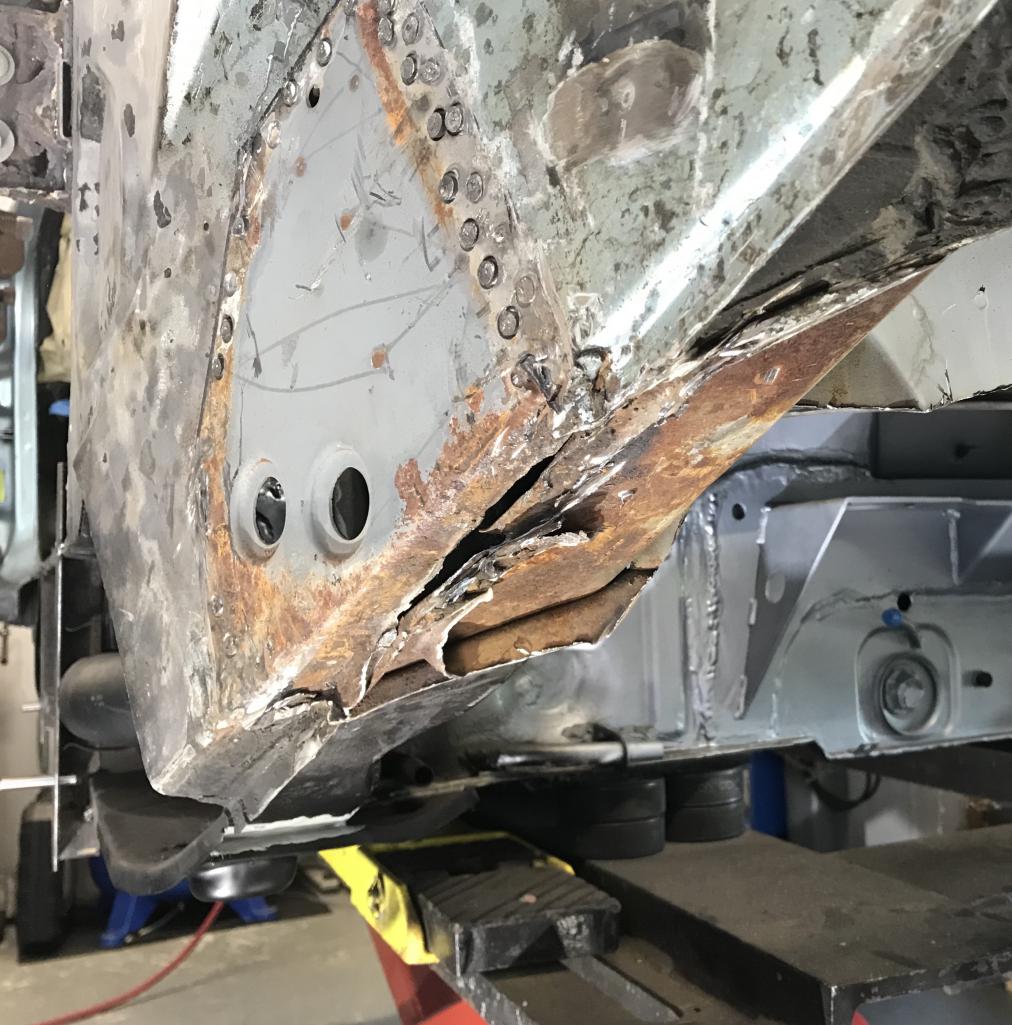
Posted by: Dion May 28 2020, 09:54 AM
Engine room side
Attached thumbnail(s)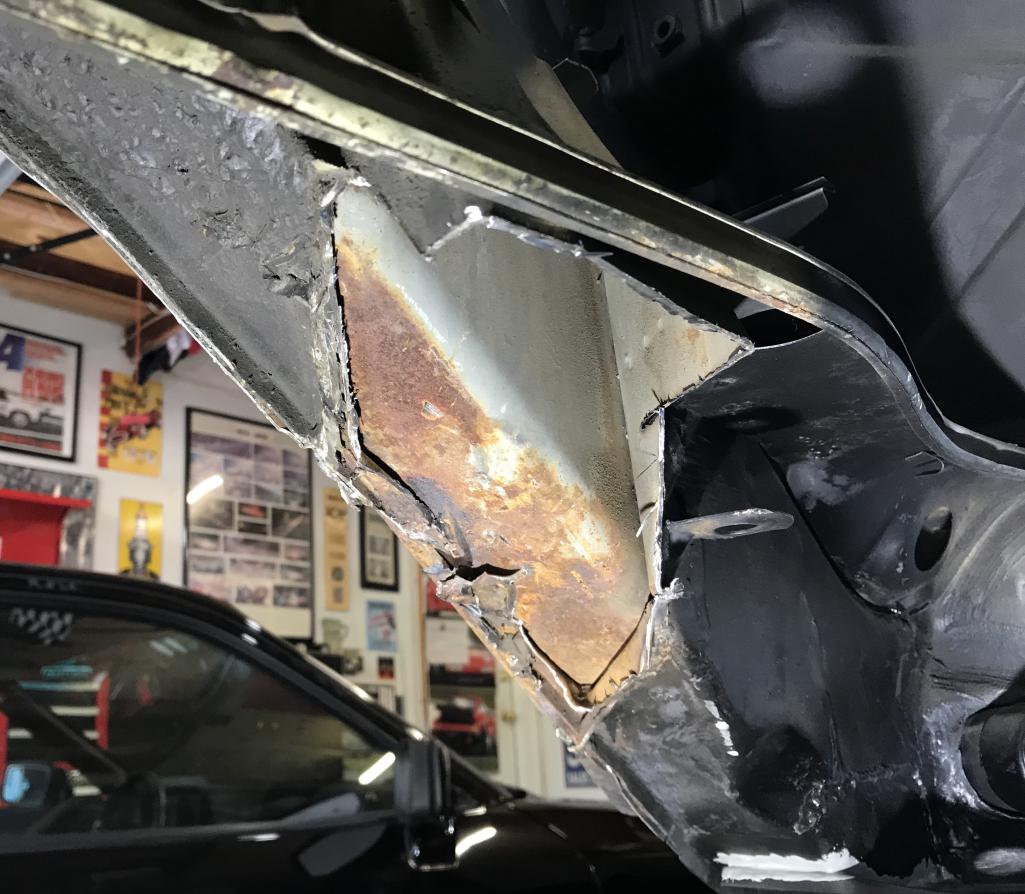
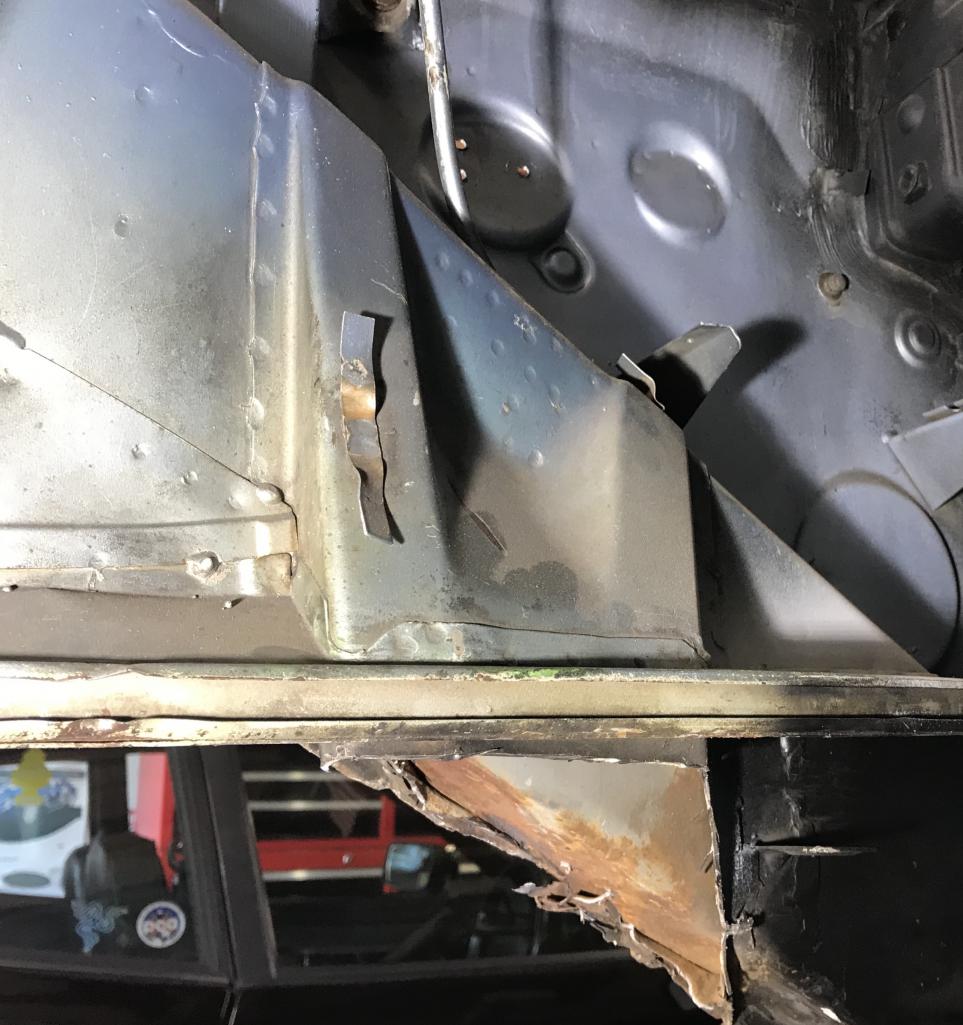
Posted by: Dion May 28 2020, 09:58 AM
Removed upper portion.
Have to repair a gap on bottom of kickup . Combo of rust and my removal tactics.
Attached thumbnail(s)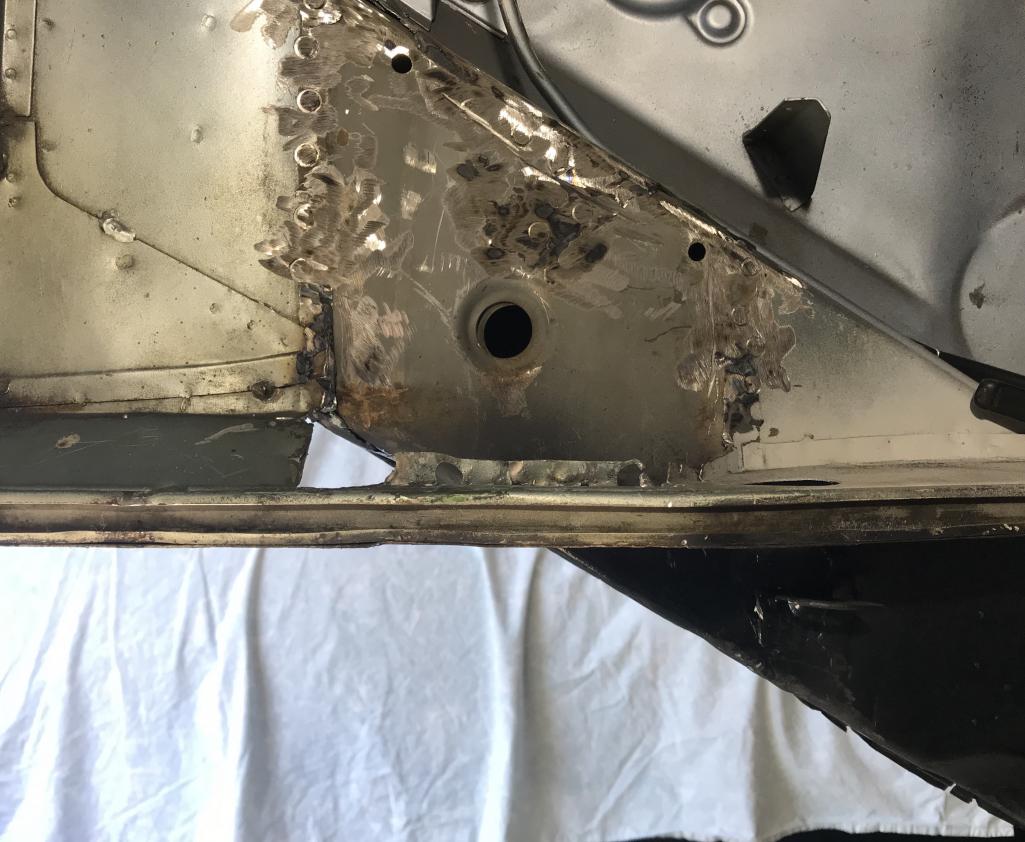

Posted by: Dion May 28 2020, 10:00 AM
Measure, cut, replace, weld. Forgot to measure twice, left a little too much leeway. didn't account for cutting wheel either :-(
Attached thumbnail(s)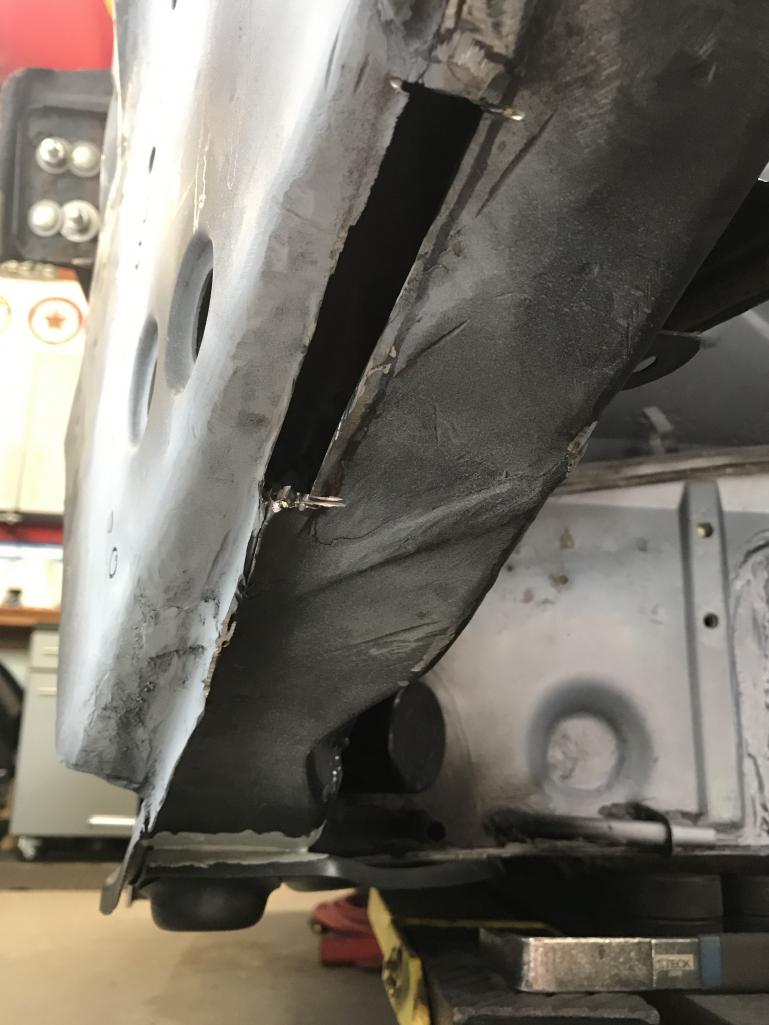
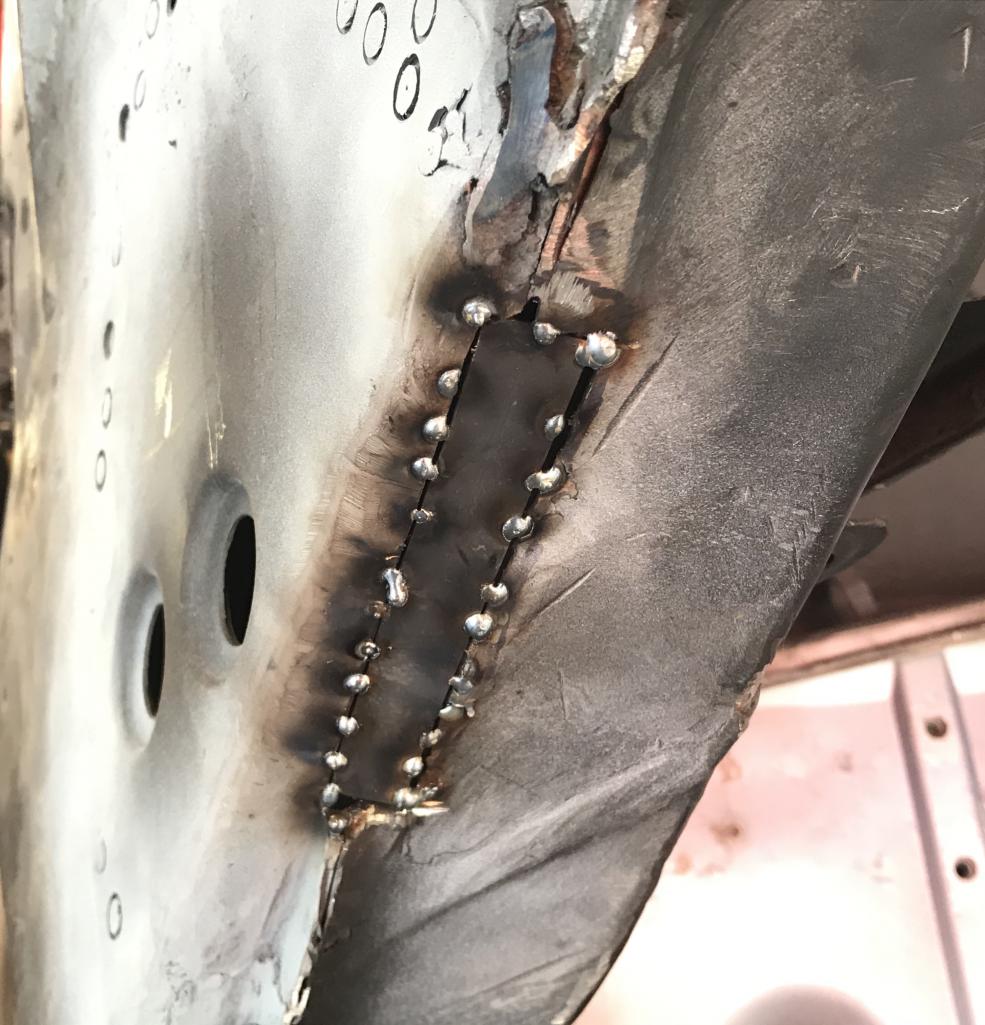
Posted by: Dion May 28 2020, 10:09 AM
Some primer. Now ready to weld in the pieces Chris sent me. Thanks @http://www.914world.com/bbs2/index.php?showuser=19241 !
Really appreciate the parts.
Attached thumbnail(s)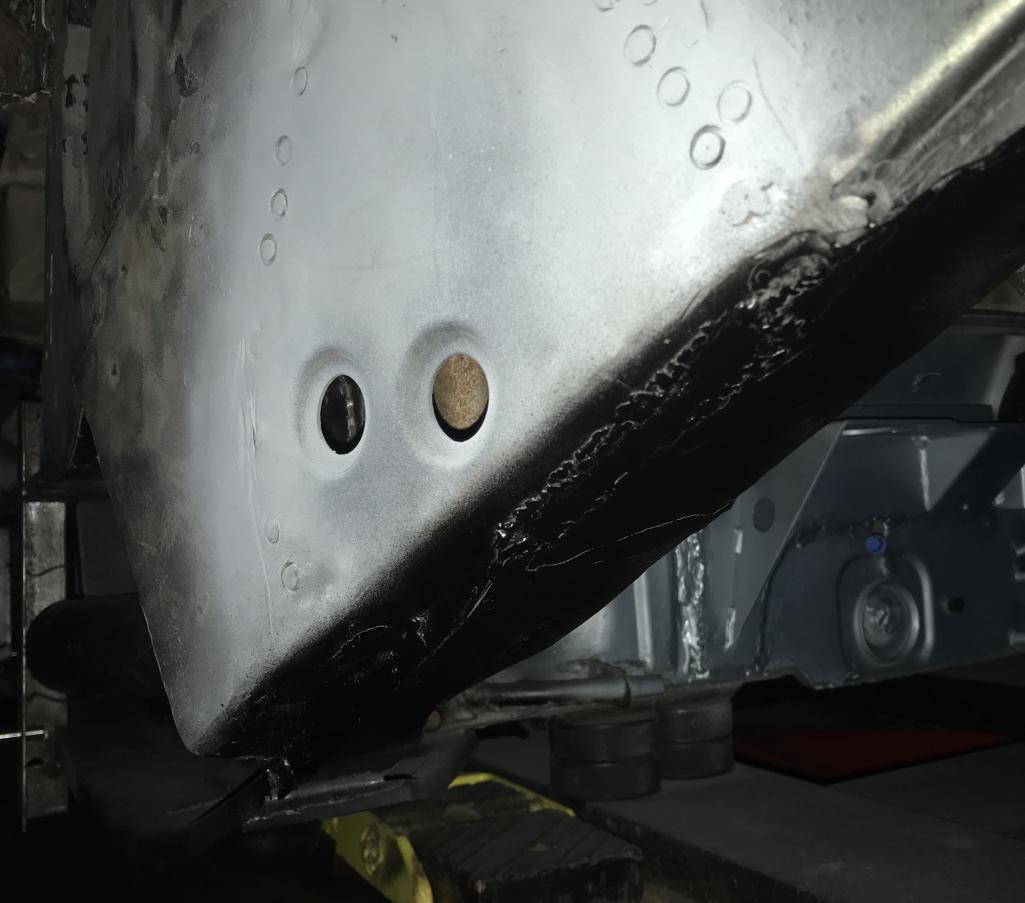

Posted by: tygaboy May 28 2020, 10:11 AM
Yeah, baby! Great to see you're at the point of installing the console!
And welcome to the club of folks who've removed those mofo consoles. Not fun, as you well know...
Great job on that locator jig, too!
Posted by: TonyA May 28 2020, 10:18 AM
Looking good Dion! I did a LOL when you said Dave made some dowel pins at Work. It reminded me of my dad making stuff at work at the Budd company as a tool as die guy. He would bring stuff home to incorporate into my go cart we were building.
Posted by: Dion Jun 29 2020, 11:53 AM
It’s been a little while. Time to update the diary.
With the console jig in place and outer trailing arm console firmly attached I began the task of welding it in place. It was pretty straightforward. The spot weld areas had already been drilled out. Tacked it in. Rechecked the measurements. All was good. Gave it some primer and seam sealer. Next up, the engine (Inner console).
Attached thumbnail(s)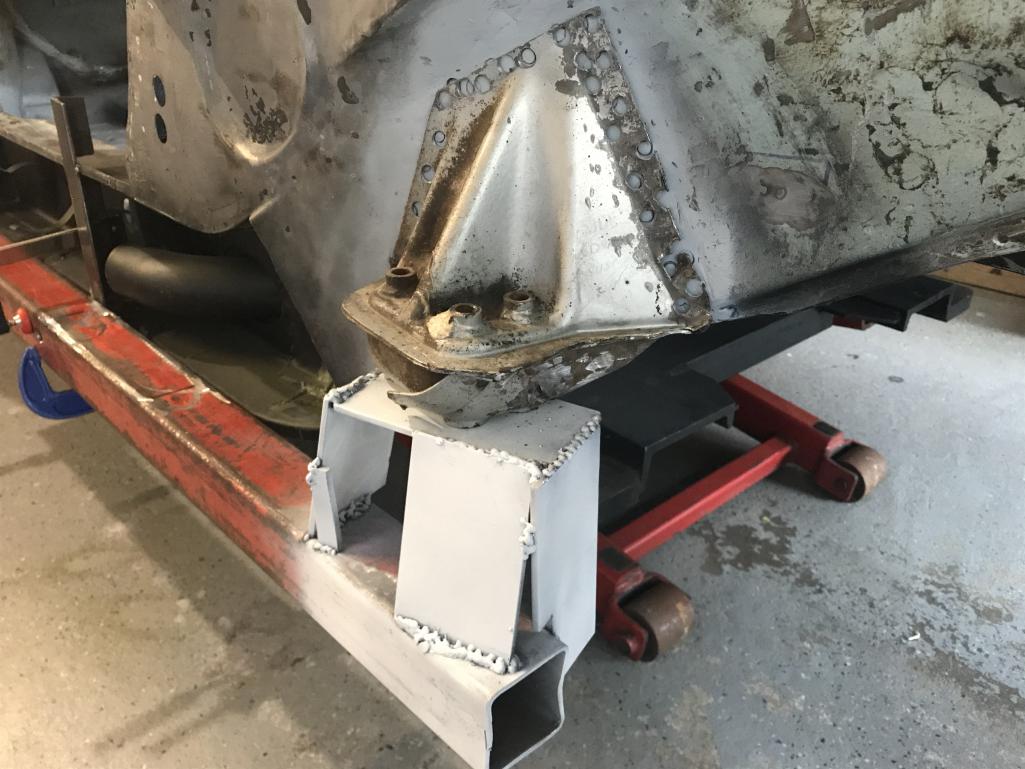
Posted by: Dion Jun 29 2020, 11:54 AM
Welded & primered
Attached thumbnail(s)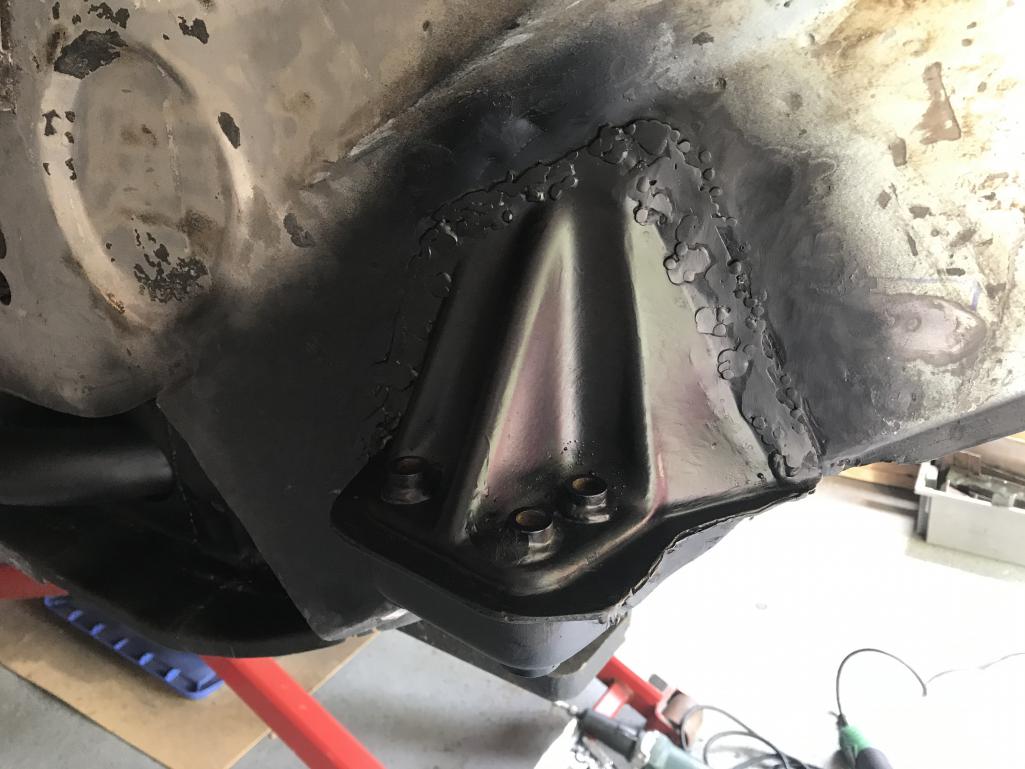
Posted by: Dion Jun 29 2020, 11:58 AM
Inner console piece was prepped and positioned.
I also cut some steel rods to use as measurement guides to keep me on track.
Attached thumbnail(s)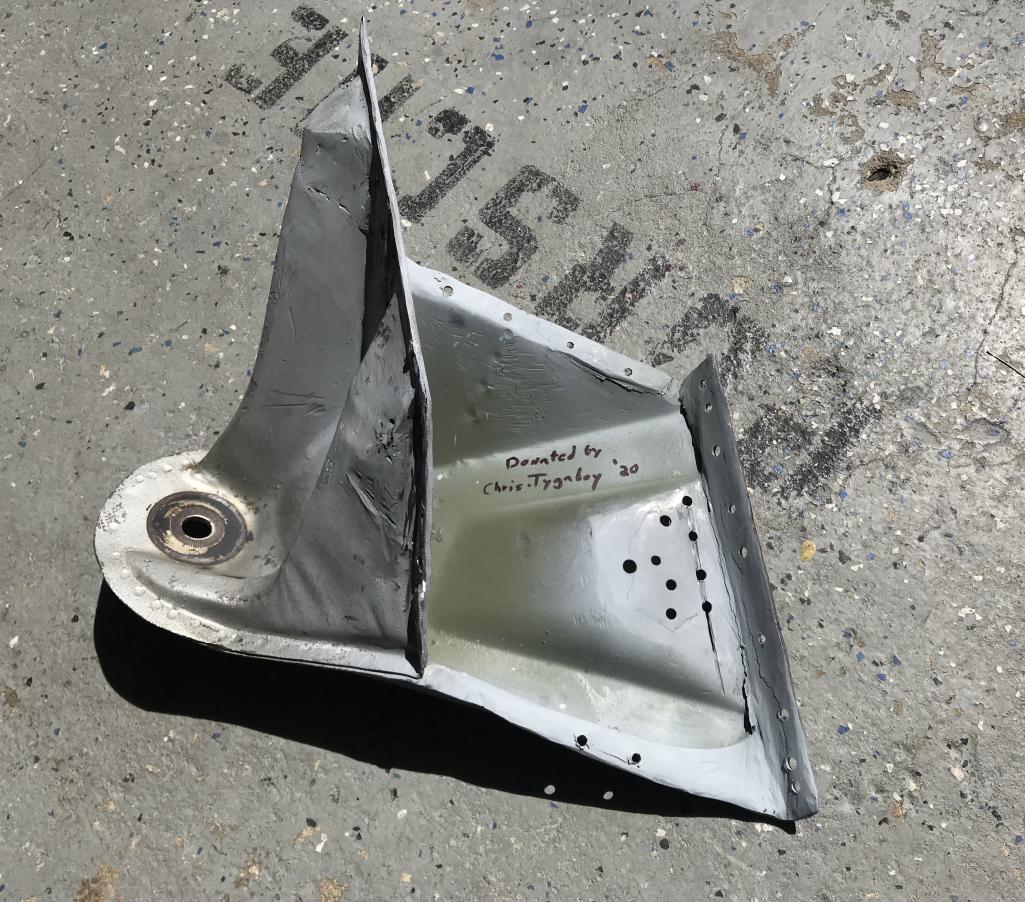
Posted by: Dion Jun 29 2020, 11:59 AM
Measurement rods
Attached thumbnail(s)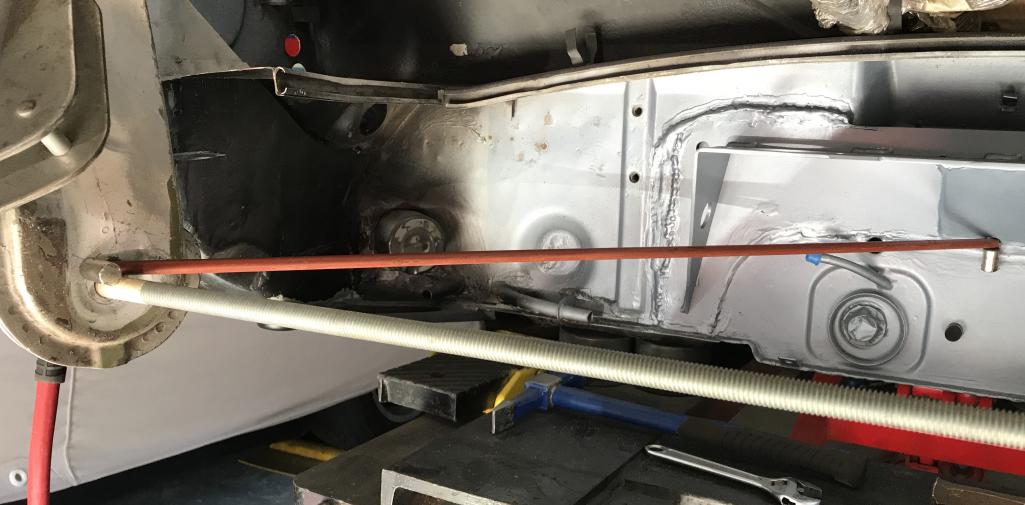
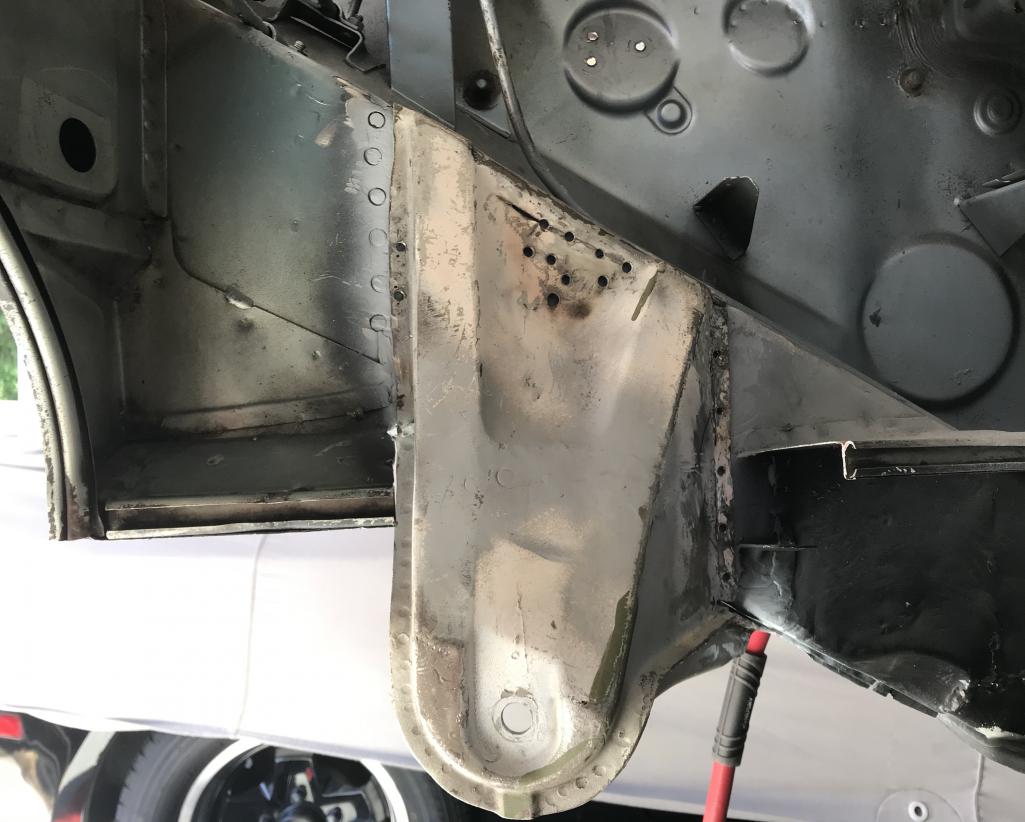
Posted by: Dion Jun 29 2020, 12:03 PM
Welded in and then set to add the extra strengthening pieces that wrap around the console arm.
Attached thumbnail(s)
Posted by: Dion Jun 29 2020, 12:04 PM
Extra metal gussets
Attached thumbnail(s)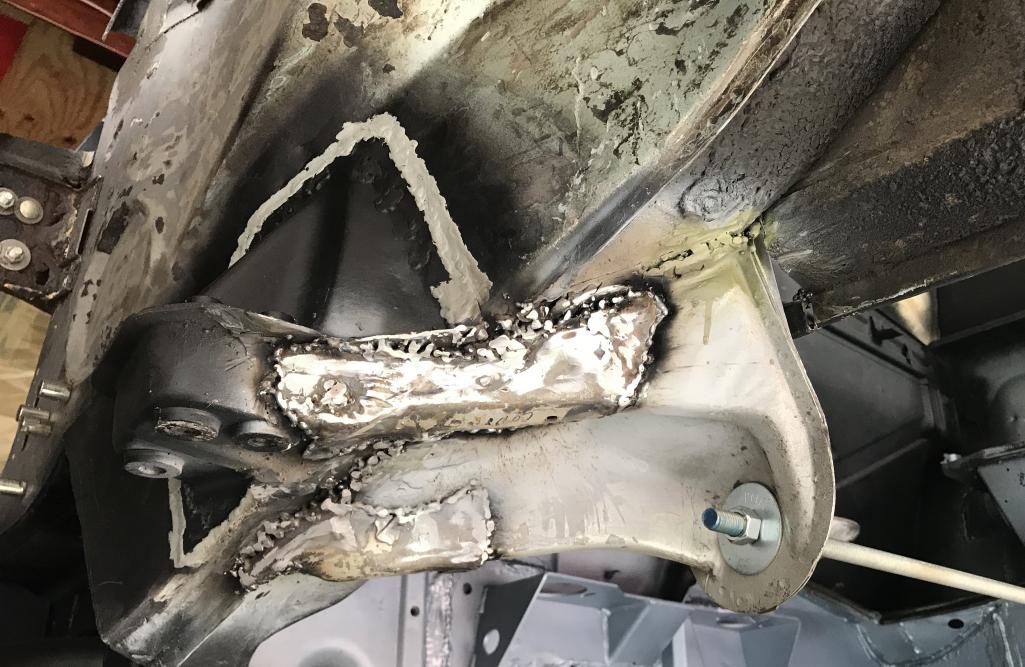
Posted by: Dion Jun 29 2020, 12:06 PM
Some seam seal and primer
Attached thumbnail(s)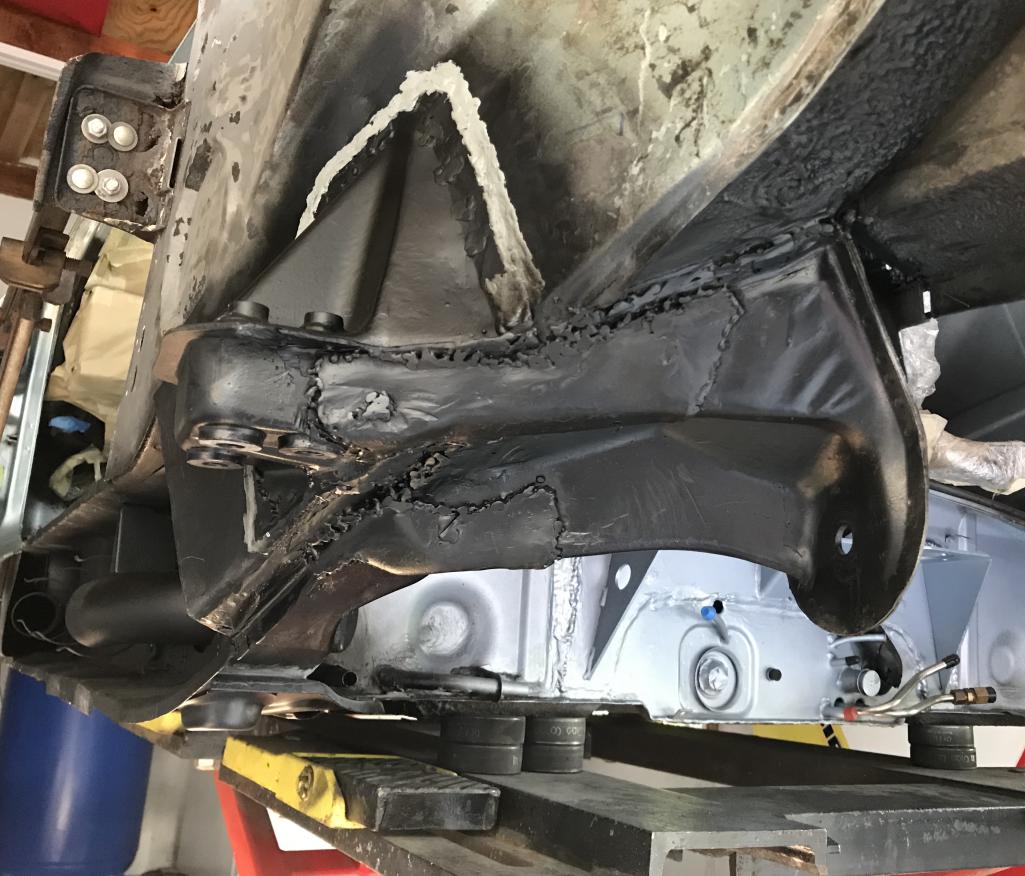
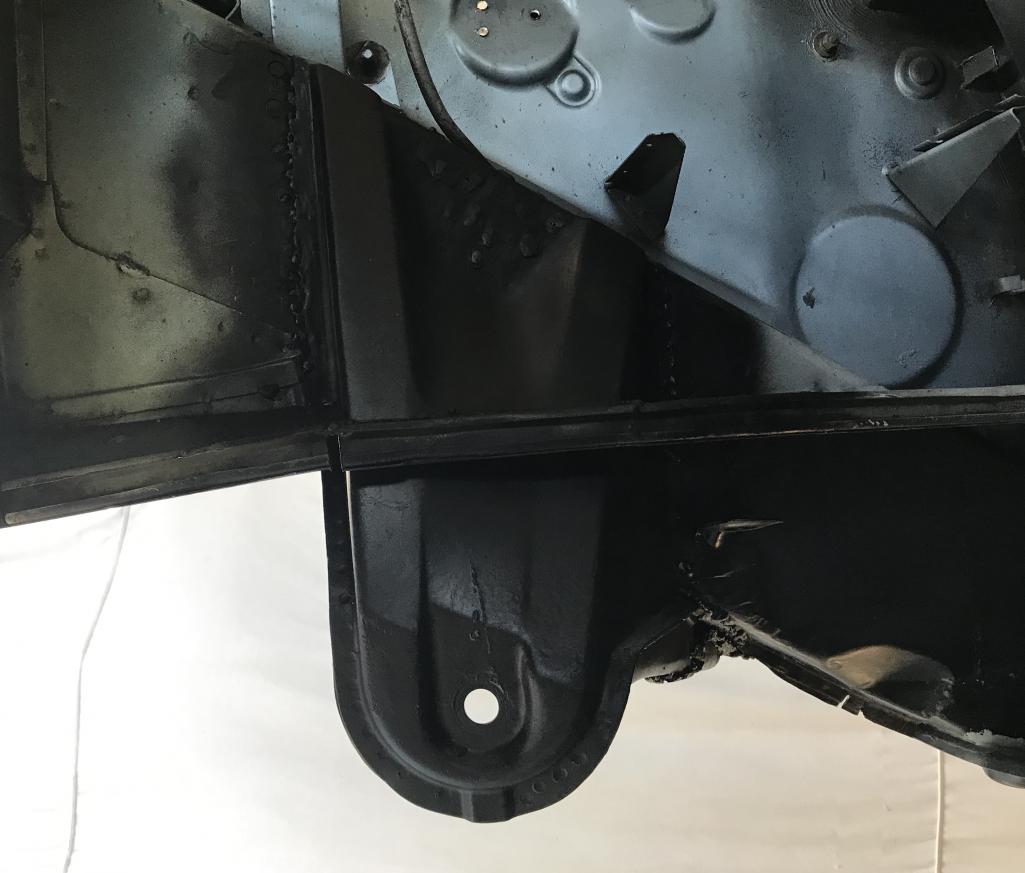
Posted by: tygaboy Jun 29 2020, 12:07 PM
Dion - That is one BIG job you just did there, my friend! BIG Congrats on the major item checked off your to-do list. Way to go.
Posted by: Dion Jun 29 2020, 12:09 PM
Now onto buttoning up the long.
Some mods needed to resto design piece.
Attached thumbnail(s)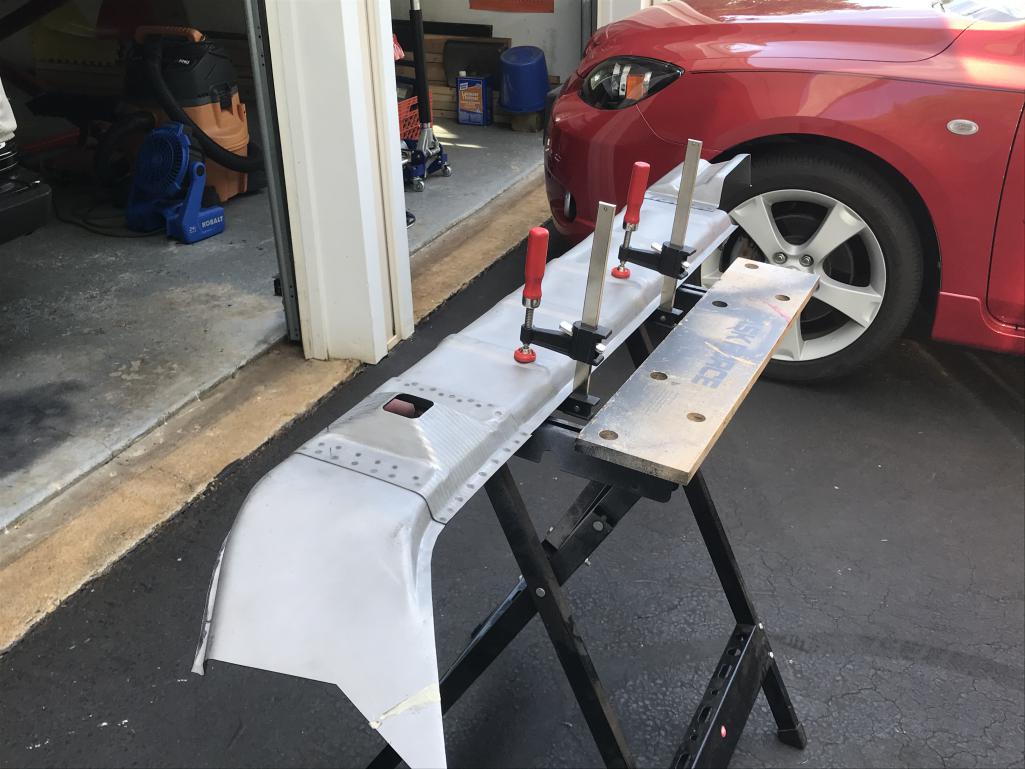
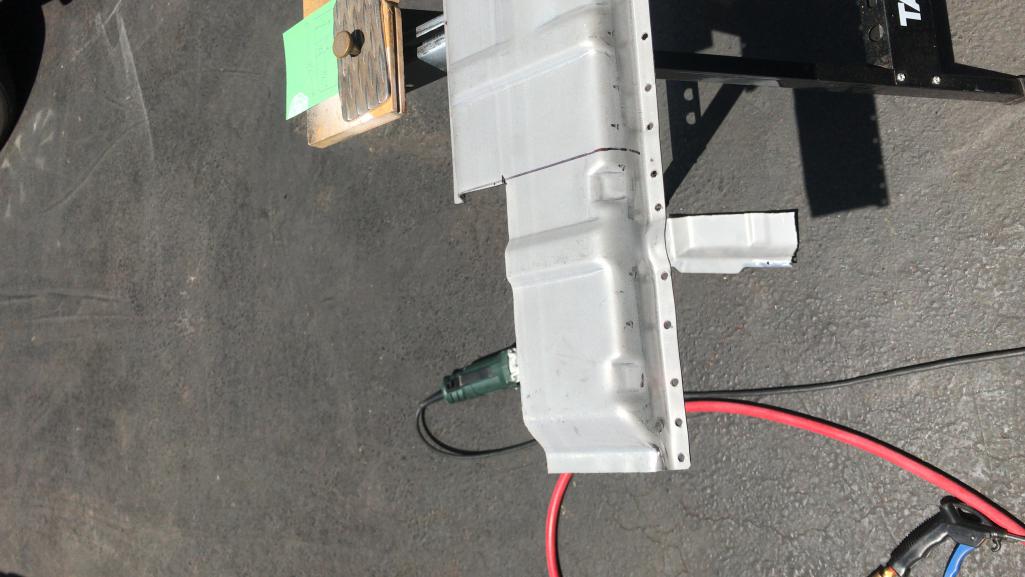
Posted by: Dion Jun 29 2020, 12:11 PM
Spiffy “new to me” heater tube put in place.
Attached thumbnail(s)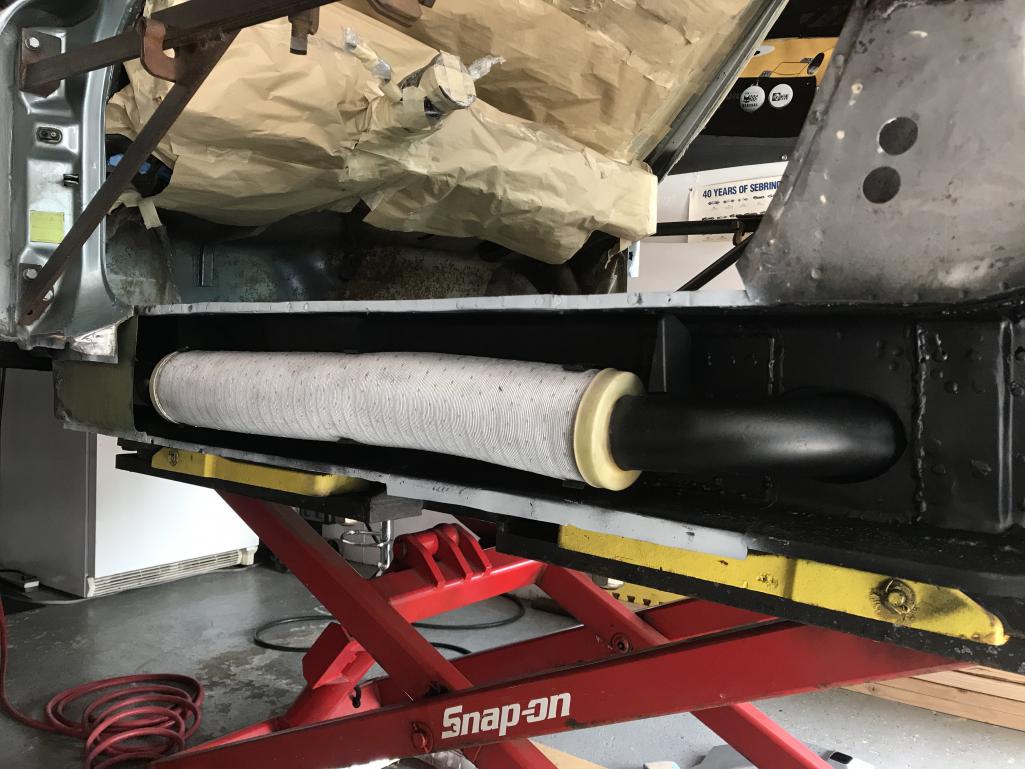
Posted by: Dion Jun 29 2020, 12:53 PM
Double checked alignments and clamped the outer clamshell on. I want to add: prior to welding the outer clamshell on and the rear kickup piece, (forgot to take pics, too excited about getting them on) I sprayed the perimeter where I would be welding with weld through primer. The rest of the panels interior i treated with Eastwood internal chassis coating. Even though the RD panels are galvaneal i figure the extra coating won’t hurt.
Attached thumbnail(s)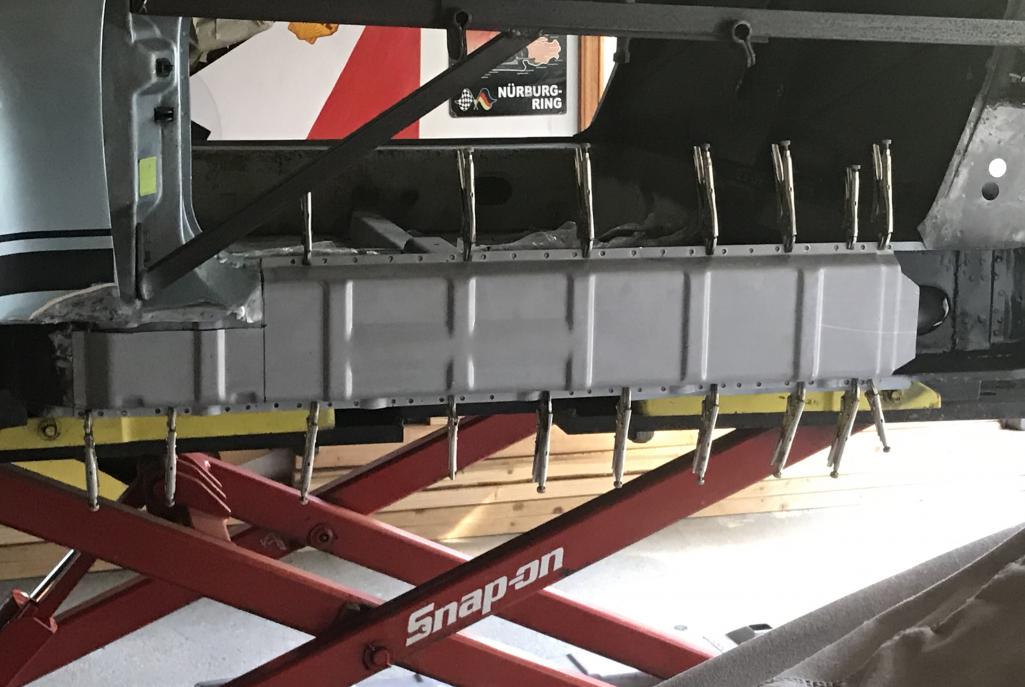
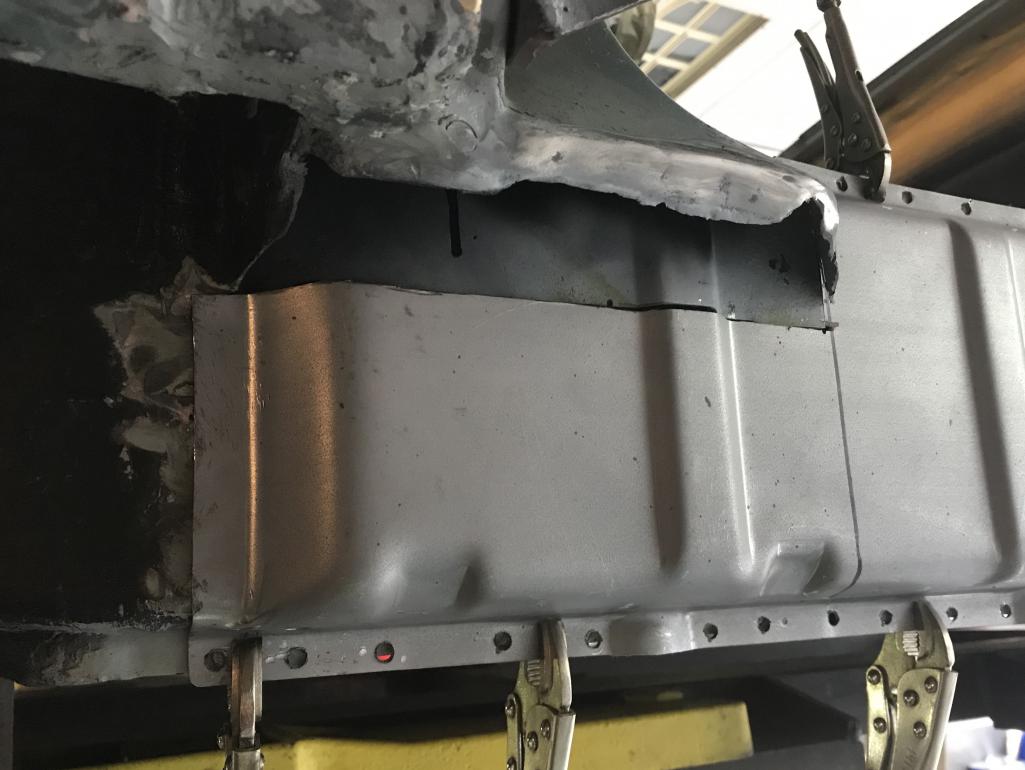
Posted by: Dion Jun 29 2020, 01:29 PM
Thanks for the kudos Chris! @http://www.914world.com/bbs2/index.php?showuser=19241 . It was a bit nerve wracking for the novice here.
Welded clamshell
Attached thumbnail(s)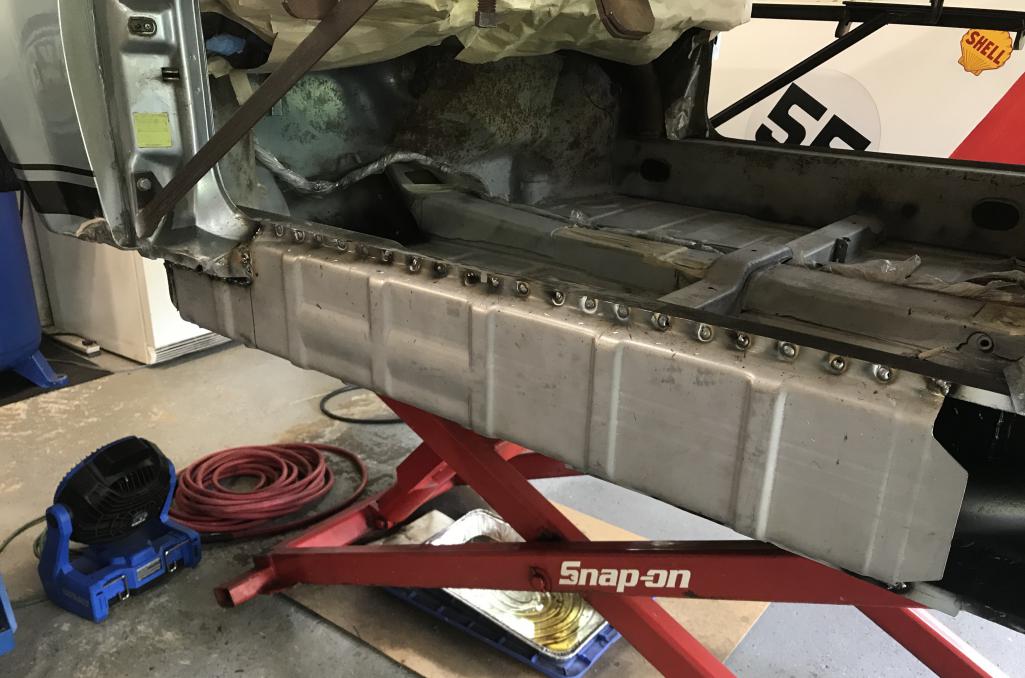

Posted by: Dion Jun 29 2020, 01:34 PM
Then finally finished up the kickup area. As you can see I’m not doing the factory jack post. It is never going to be concours. I will always be using my lift to service it.
If it needs lifting on the road well there’s AAA flatbed or use the “donut” areas.
Attached thumbnail(s)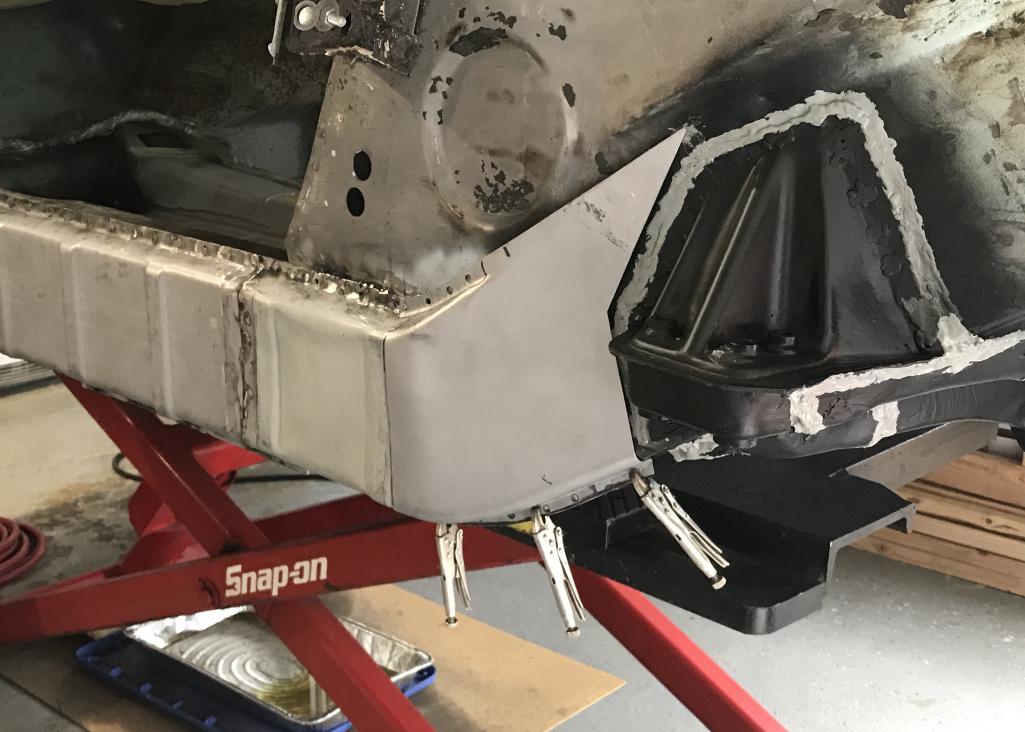
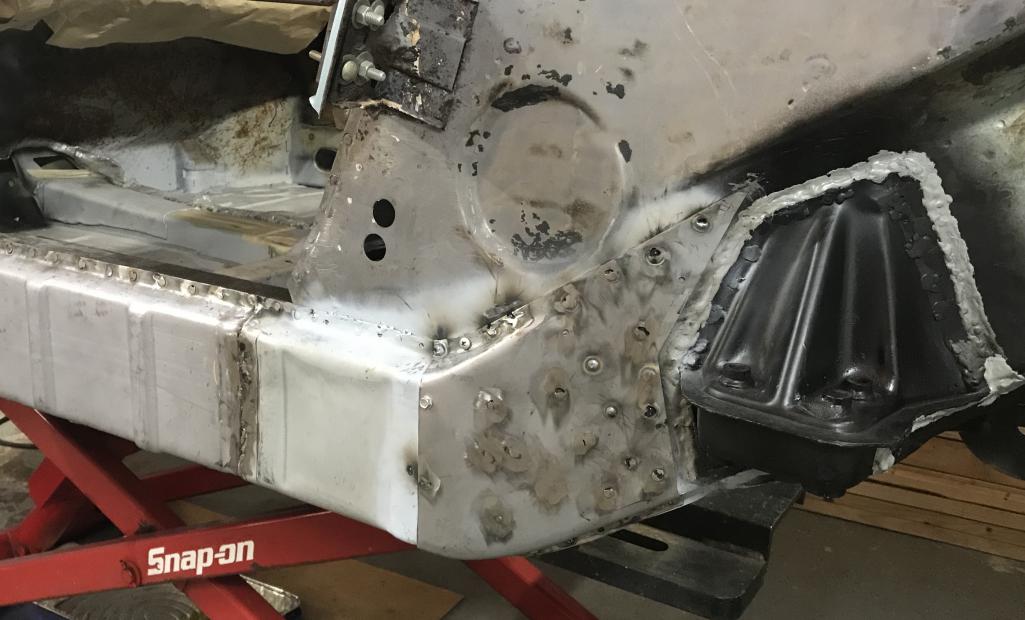
Posted by: Dion Jun 29 2020, 01:40 PM
After the kick up i returned to the front of long and worked the a-pillar base
Attached thumbnail(s)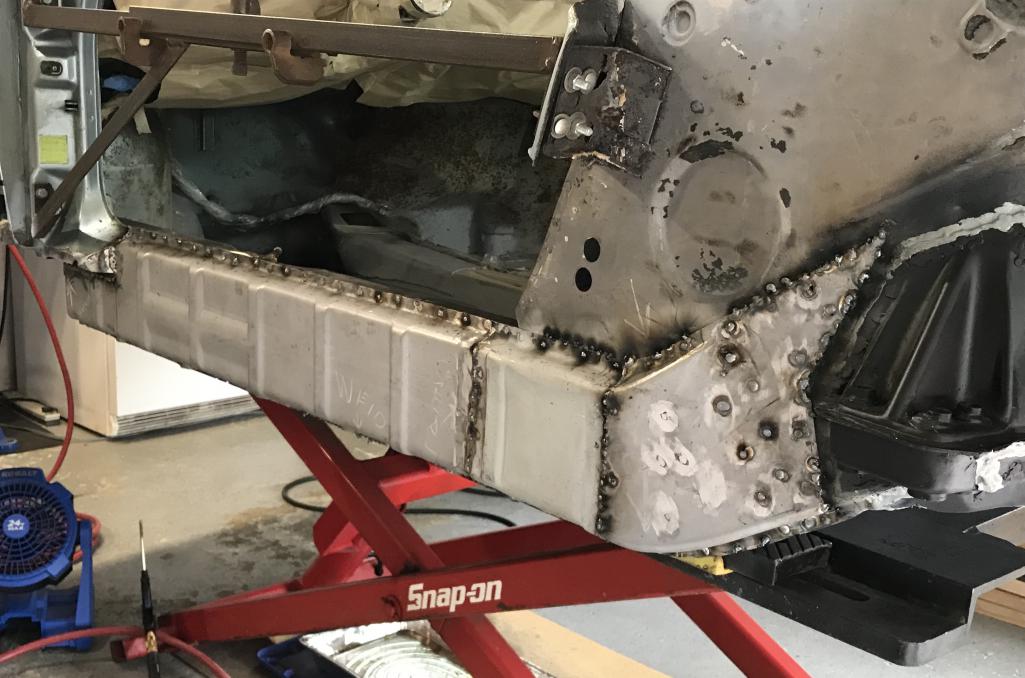
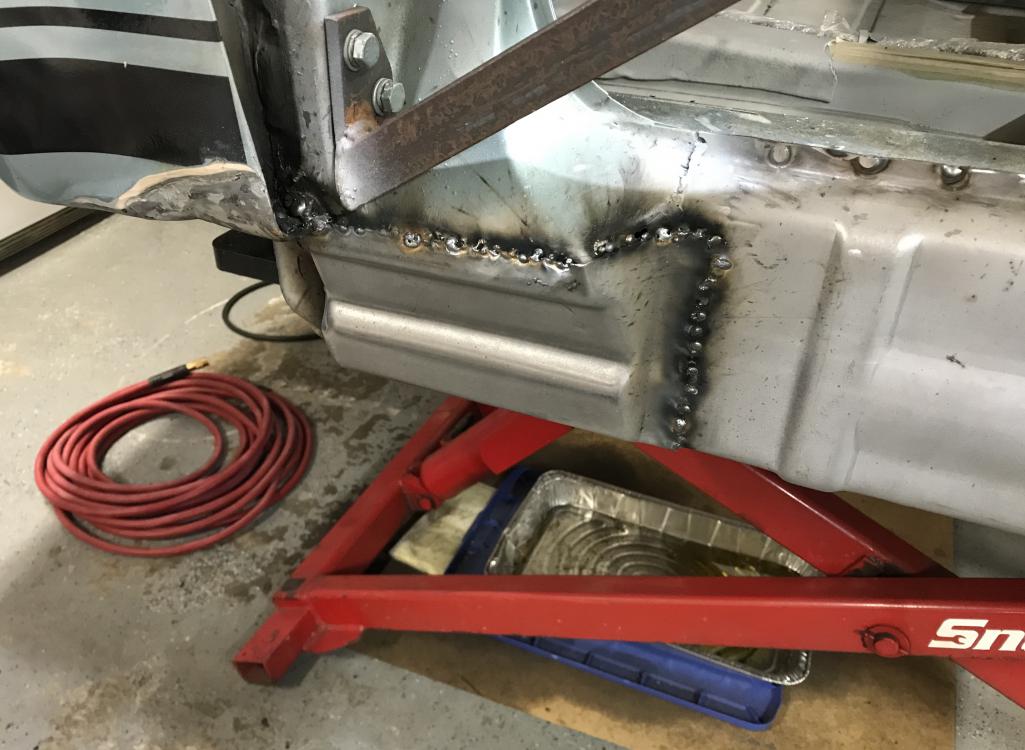
Posted by: Dion Jun 29 2020, 01:43 PM
Took the door brace out and thankfully all the measurements stayed in spec!!
Attached thumbnail(s)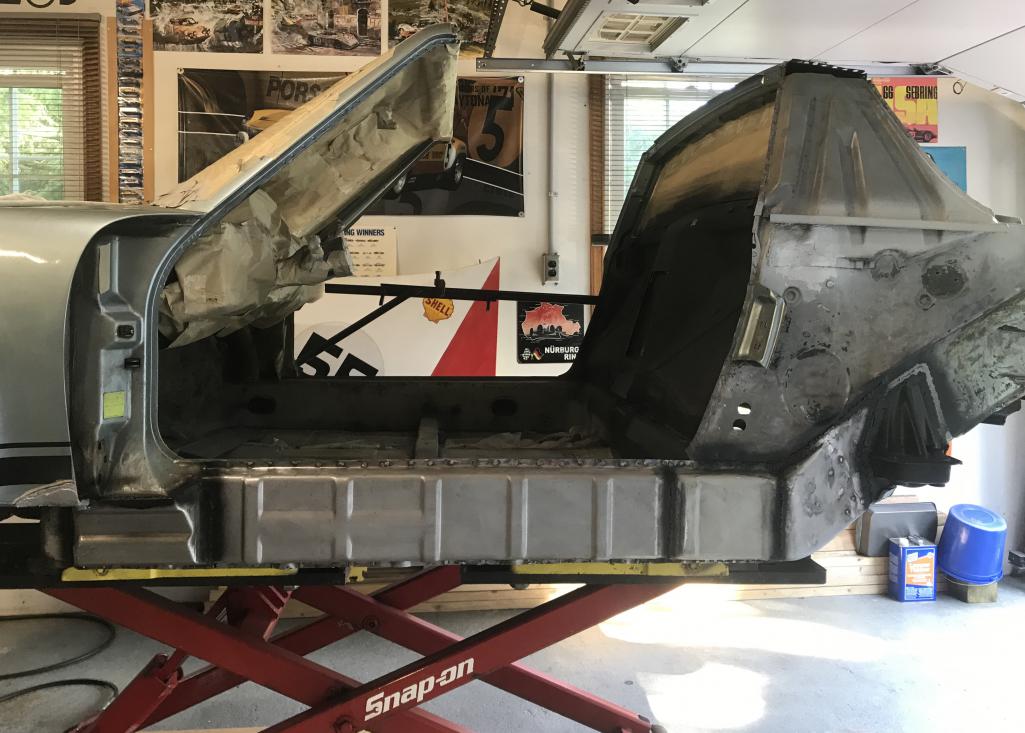
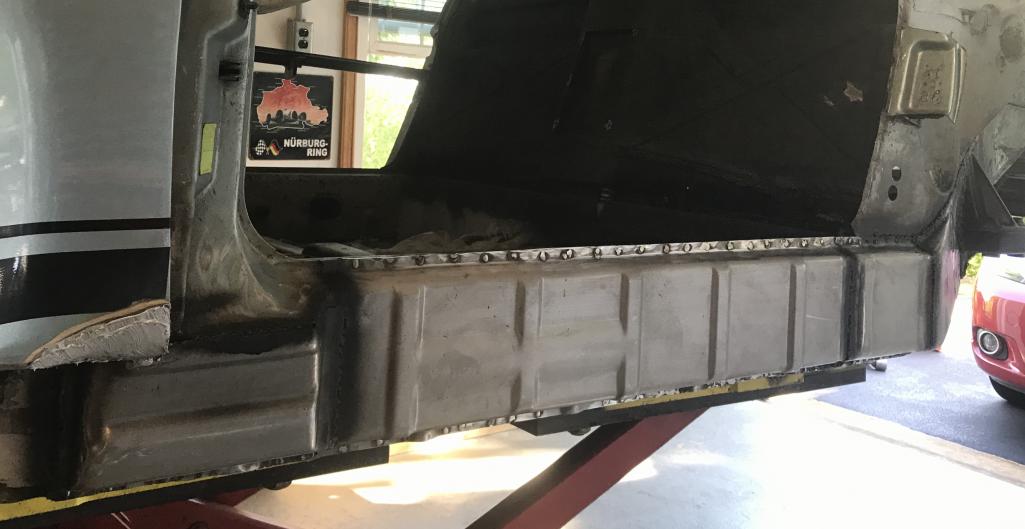
Posted by: Dion Jun 29 2020, 01:46 PM
Removed the door catch piece. It was a rusty hunk. Surprised it was strong enough to handle the braces. Had to cut out bad metal lurking behind it.
Attached thumbnail(s)
Posted by: Dion Jun 29 2020, 01:48 PM
Making way for a clean piece of metal
Attached thumbnail(s)
Posted by: Dion Jun 29 2020, 01:52 PM
In addition to adding the new metal, I needed to make another hole for the fresh air elbow and test fit the door jamb.
Attached thumbnail(s)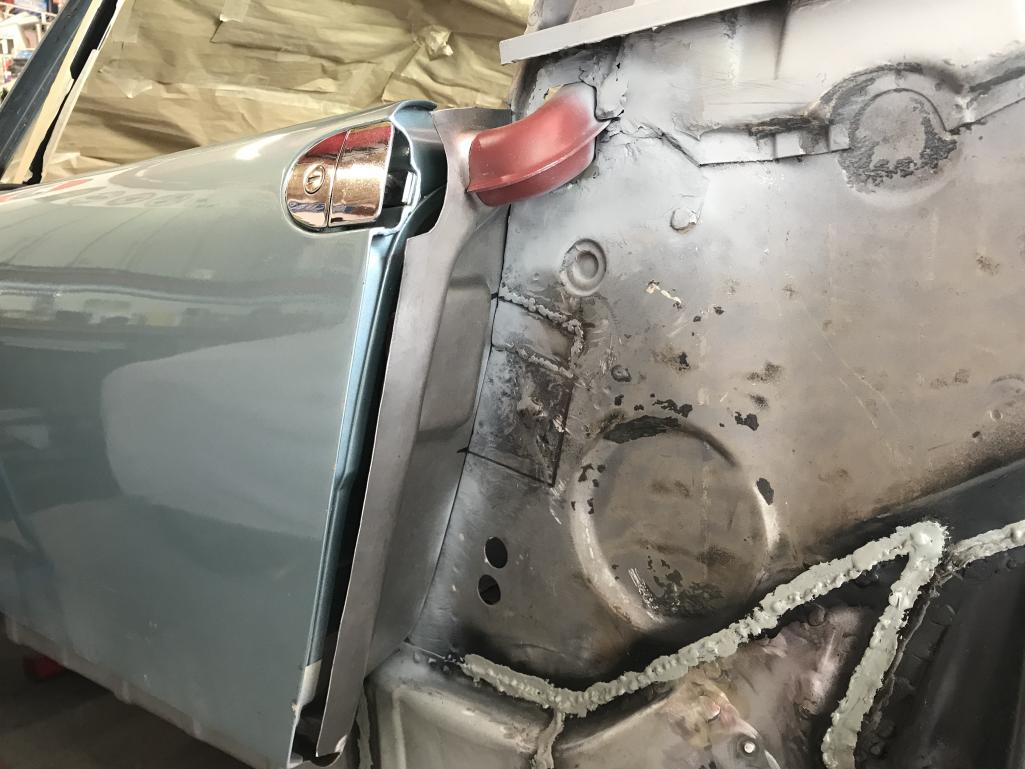
Posted by: Dion Jun 29 2020, 01:54 PM
Trying to line everything up. Talked with @http://www.914world.com/bbs2/index.php?showuser=20845 for a few ideas.
Attached thumbnail(s)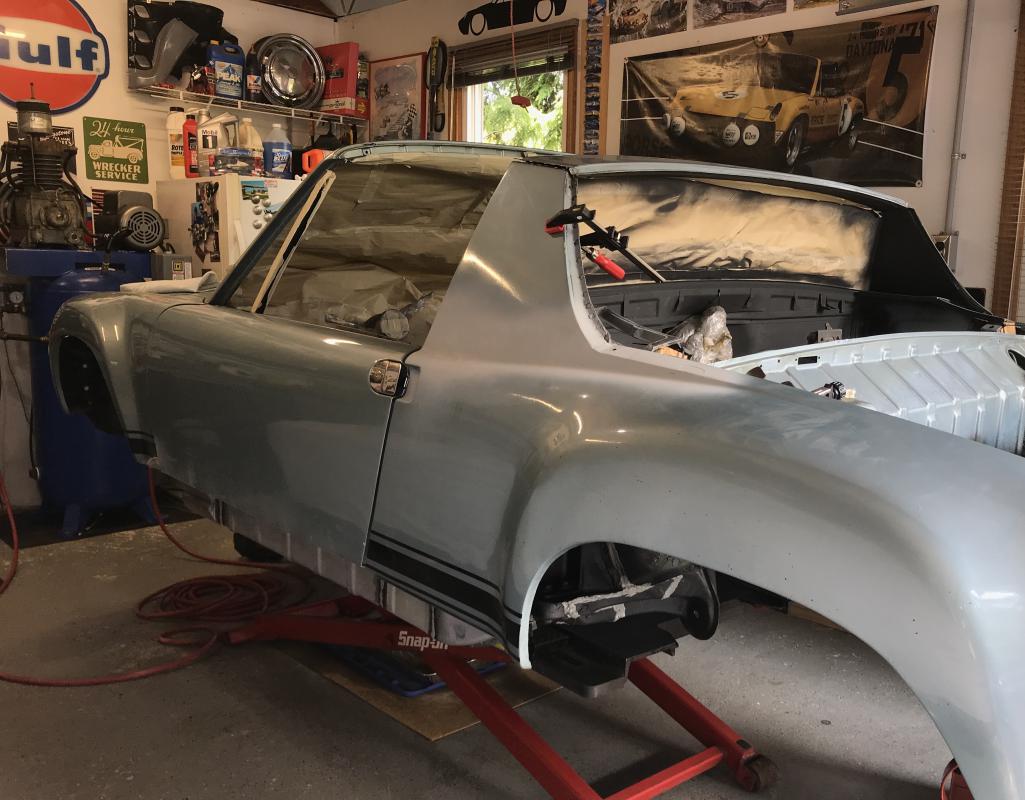
Posted by: Dion Jun 29 2020, 01:57 PM
Door jamb positioned and clamped. Welded it in.
Some of the outer edge will need to be ground down as it sits too proud and pushes out the rear fender.
Attached thumbnail(s)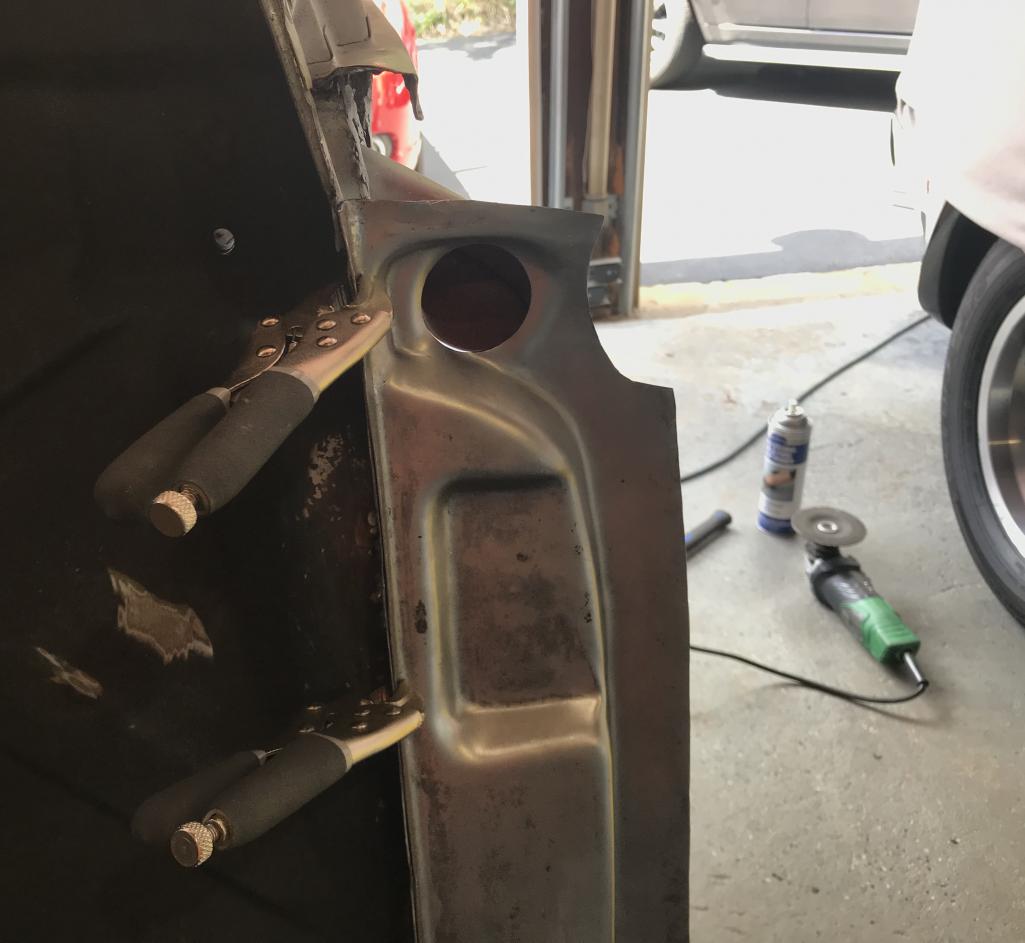
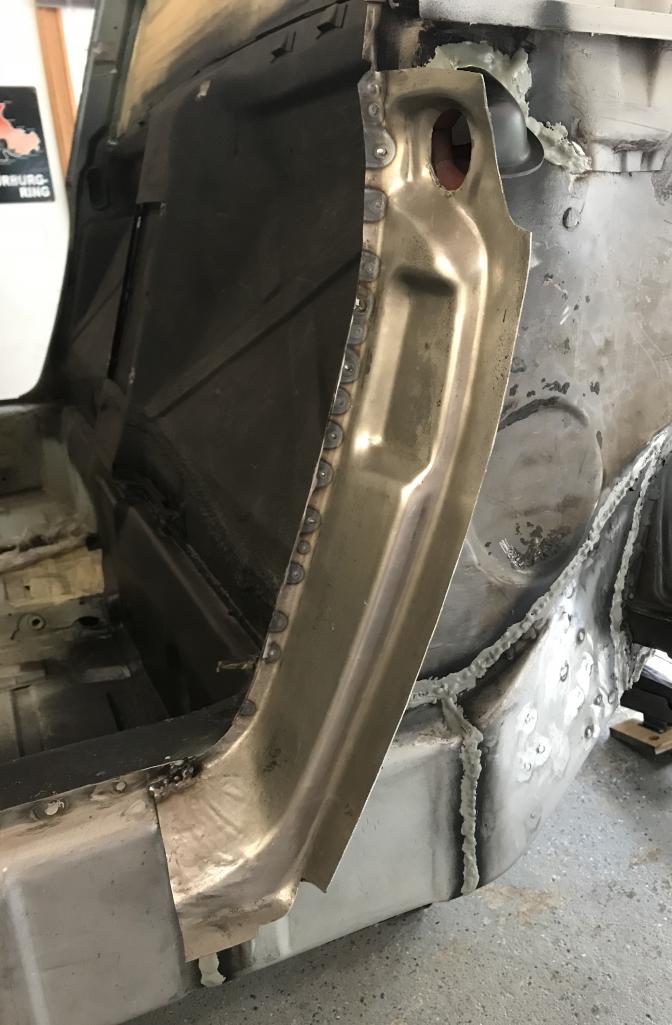
Posted by: Dion Jun 29 2020, 02:04 PM
Seam sealed around air tube. Still need backing plate for latch to go on and placement f the sill & triangles. That’s up next.
As well as need to drill out the holes for the six oil tank.
Thanks for listening.
Attached thumbnail(s)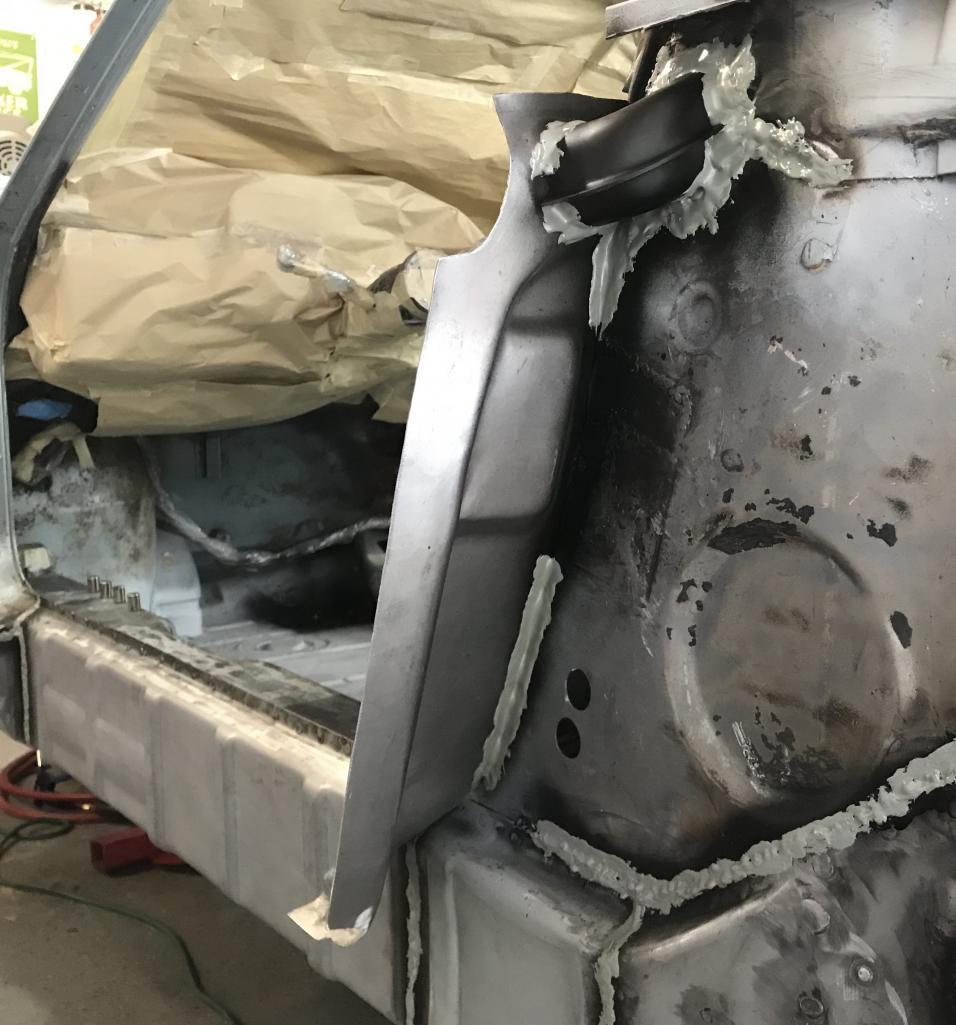
Posted by: TonyA Jun 29 2020, 02:07 PM
Are you now welding aluminum cans also ?
Posted by: Dion Jun 29 2020, 02:17 PM
Are you now welding aluminum cans also ?
Yes, need to recycle!
I don’t know Tony, better see what’s lurking in those LE’s !
Posted by: BeatNavy Jun 29 2020, 03:37 PM
Are you now welding aluminum cans also ?
Nice work, Dion! That's a ton of progress. That door jamb piece would really worry me, but it looks like you have it under control. And Brent is a great guy to consult!
Posted by: tygaboy Jun 29 2020, 04:45 PM
Wow, you have been quite the busy boy! Great progress.
Posted by: Dion Jun 29 2020, 06:16 PM
@http://www.914world.com/bbs2/index.php?showuser=19241 Chris, truth be told.
As crazy as it sounds, ... I was furloughed by the hospital for April & May. So made very
good use of the time, in addition to a bathroom renovation.
Thanks again.
Thanks for the kudos @http://www.914world.com/bbs2/index.php?showuser=17042
Posted by: Dion Jul 9 2020, 01:24 PM
Some updates.
Welded on the new sill and triangle supports.
still need to make one for the very front of long and make another triangle for the passenger side. Right side has been without one for the past twenty plus years!
I’ll venture to say not needed but I’ll make one anyway. Just want to wait now till temps drop. It’s been 90 plus degrees all week here. Humidity is off the wall.
Anyway some pics:
Attached thumbnail(s)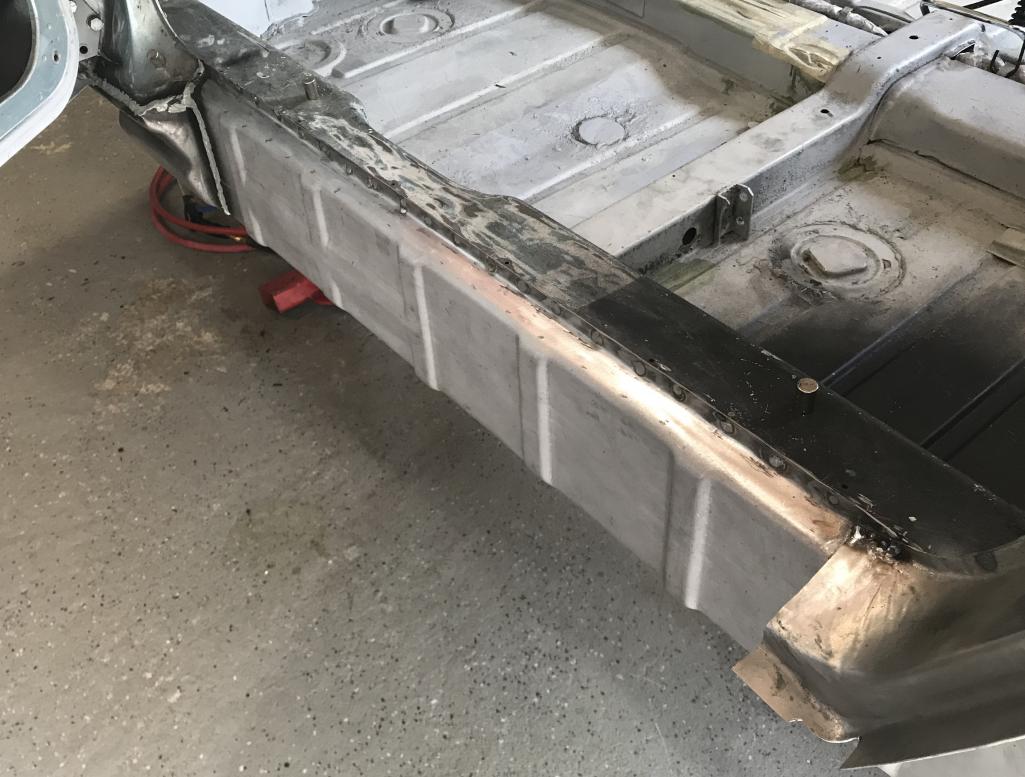
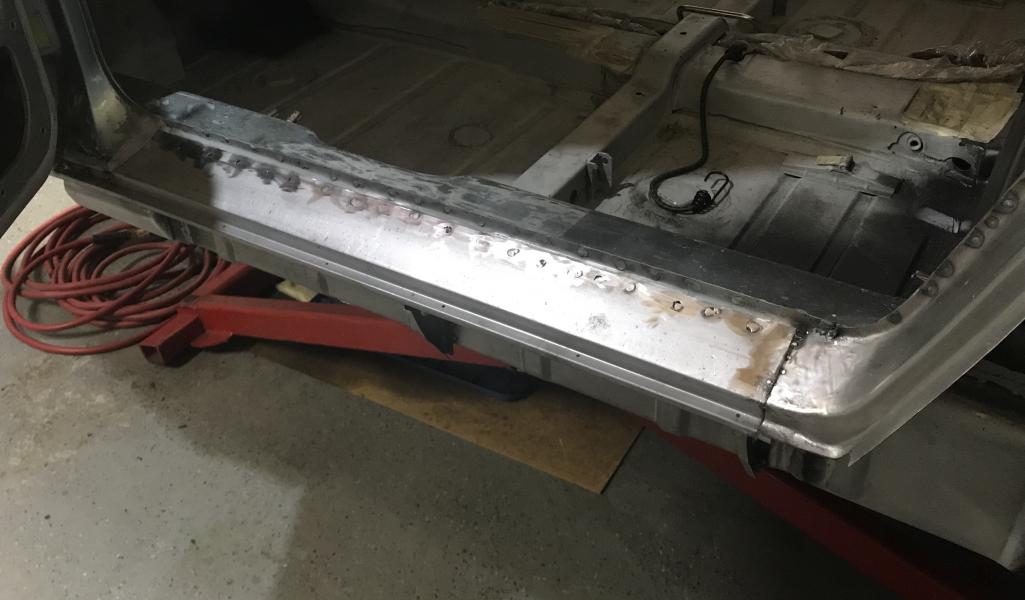
Posted by: Dion Jul 9 2020, 01:24 PM
Triangle supports
Attached thumbnail(s)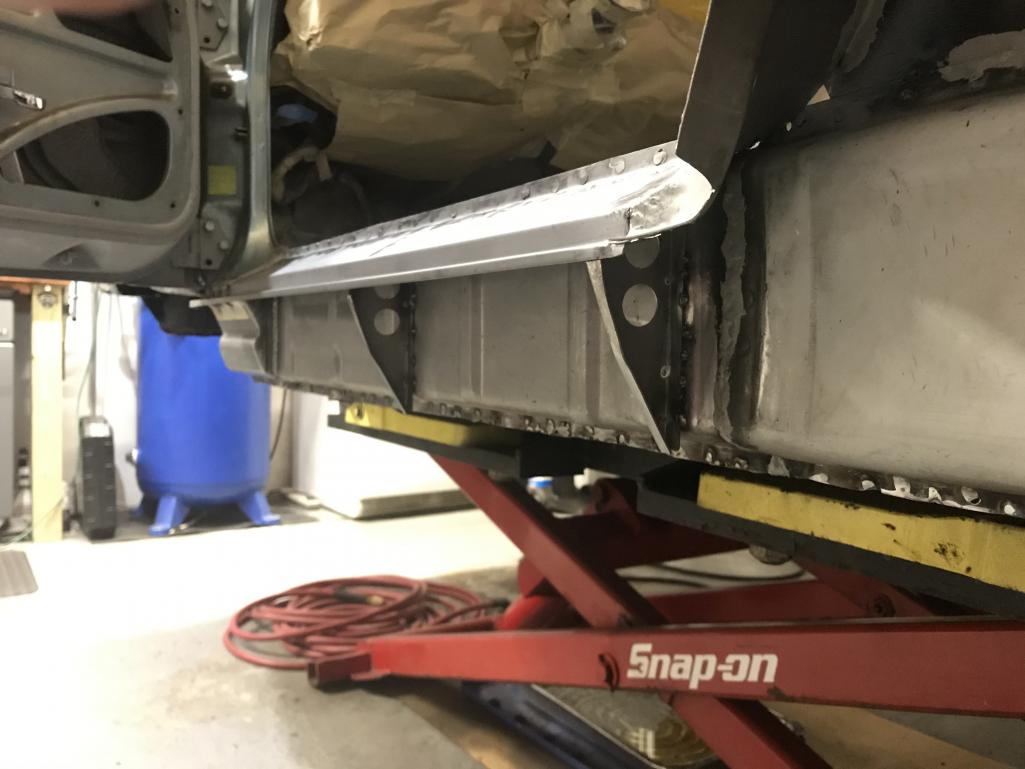
Posted by: Dion Jul 9 2020, 01:27 PM
Moved on to opening up the oil tank bosses. Anyone who drilled these open with an engine in place or the fender still on.... well ... hats off to ya! That 4” hole was a mother!
Attached thumbnail(s)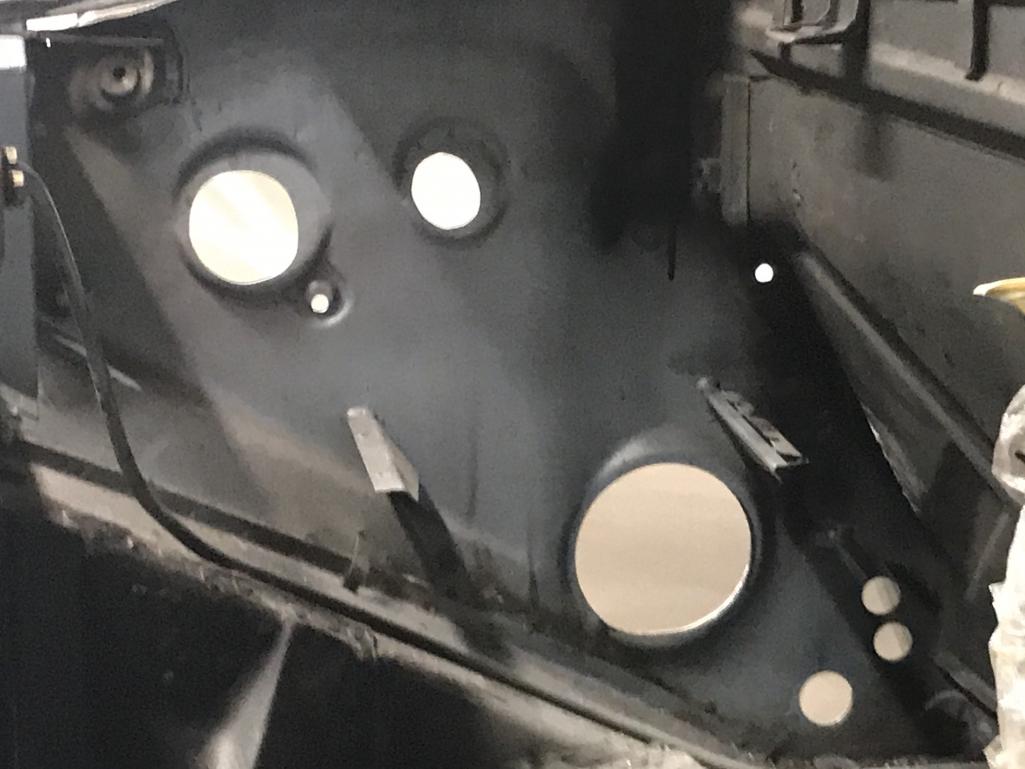
Posted by: Dion Jul 9 2020, 01:28 PM
Test fit the tank. All is well.
Attached thumbnail(s)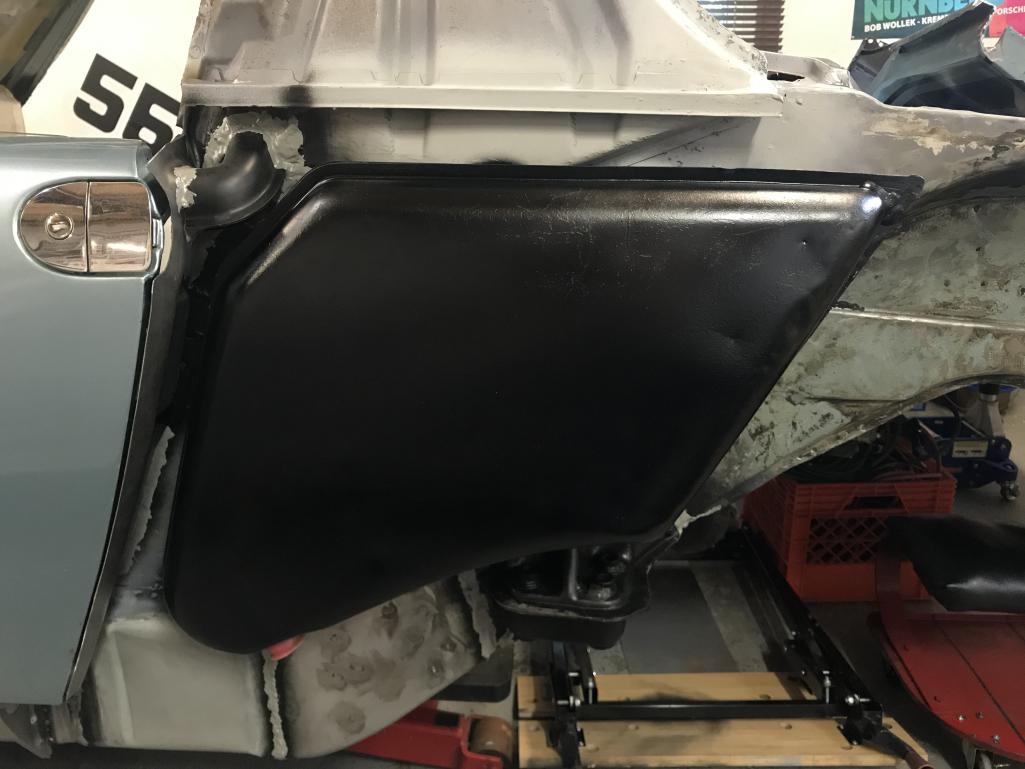
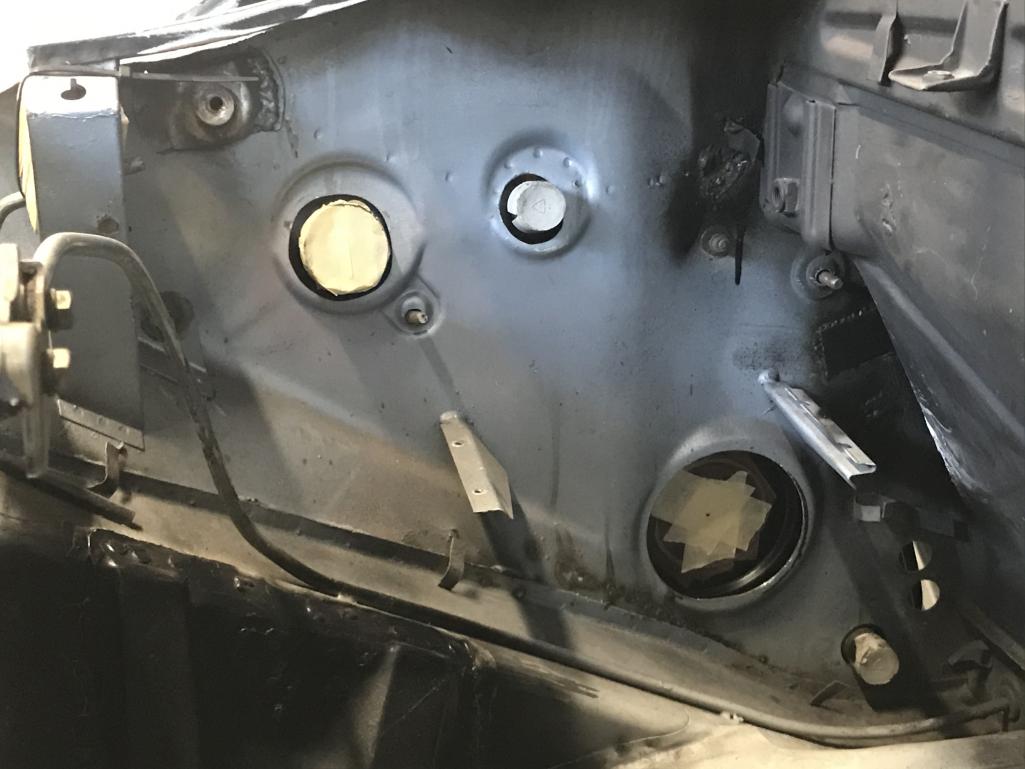
Posted by: Dion Jul 9 2020, 01:30 PM
Welded in the door catch plate.
Attached thumbnail(s)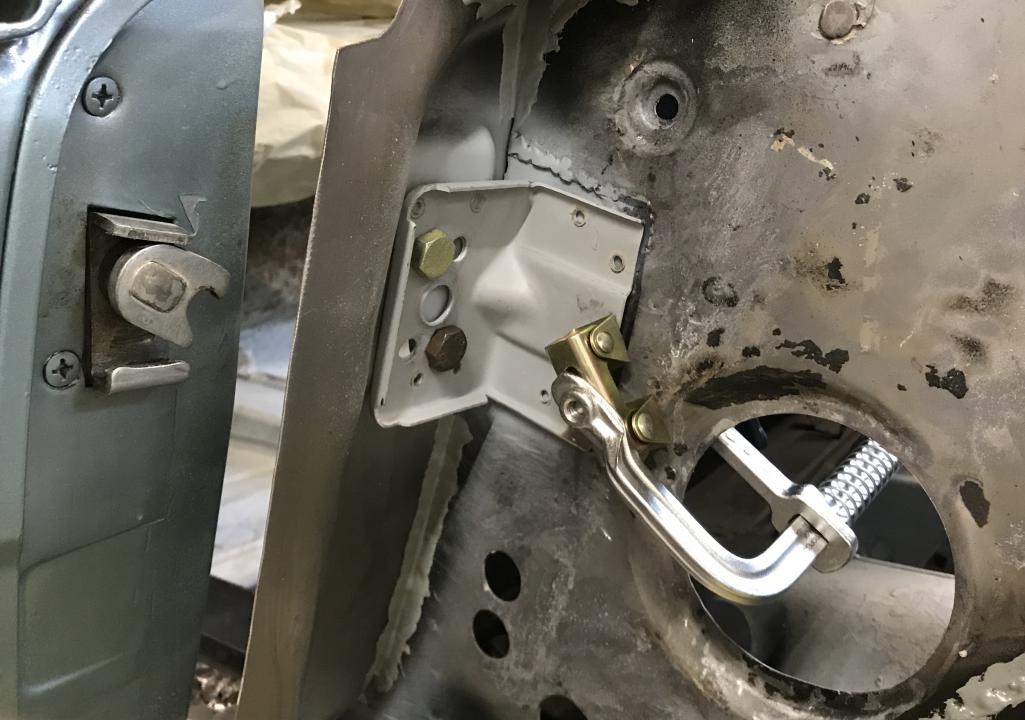
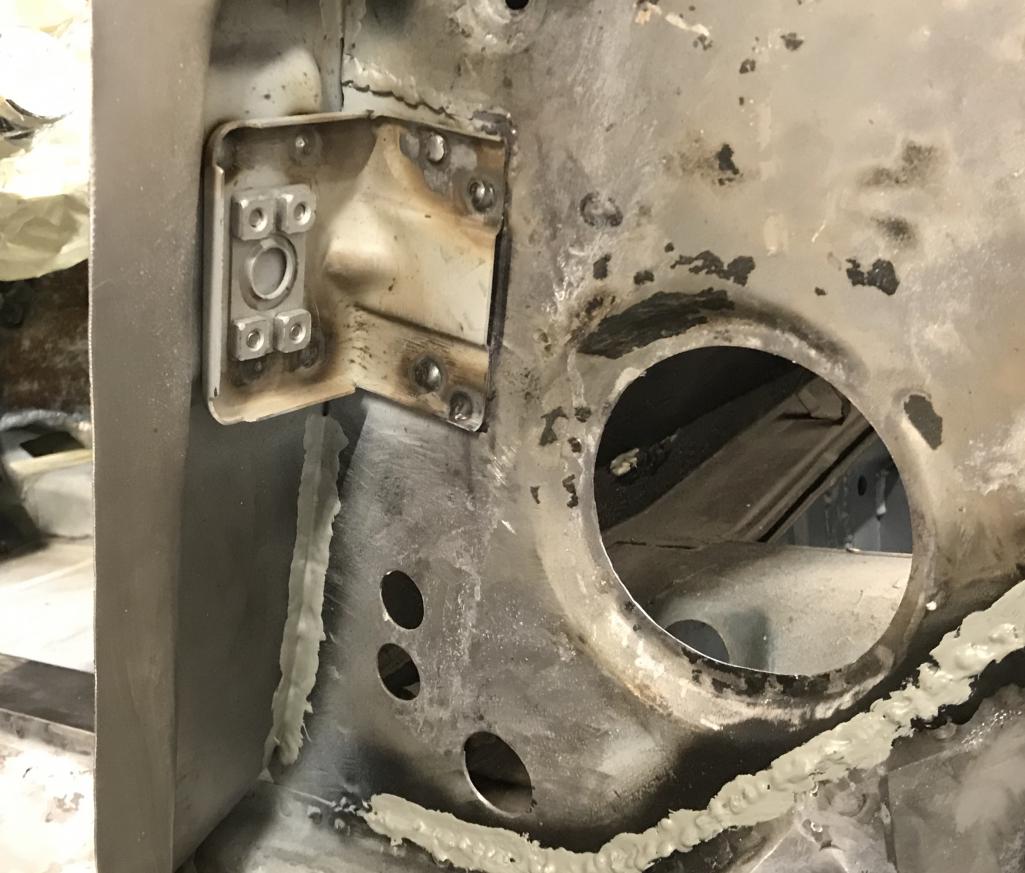
Posted by: Dion Jul 9 2020, 01:33 PM
Door and jamb seem to be good. Rear fender needs some more TLC before I place it back on, so that’ll be up next.
Attached thumbnail(s)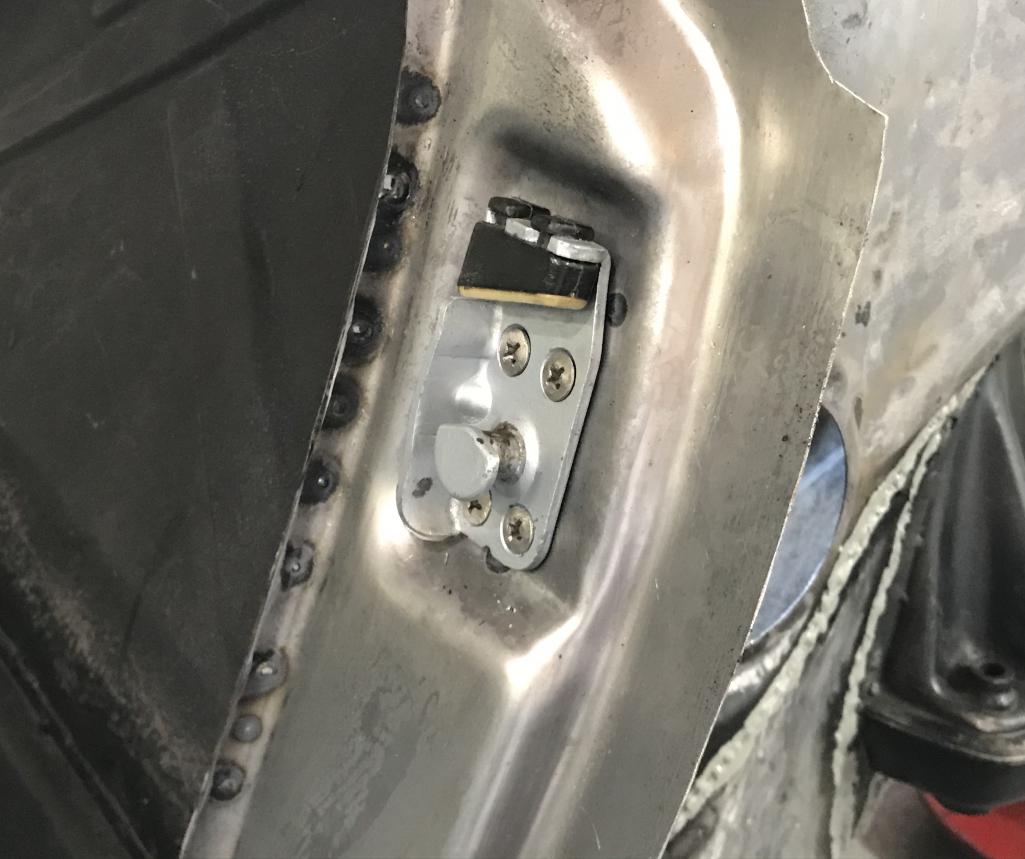

Posted by: Dion Jul 9 2020, 01:33 PM
Fin
Attached thumbnail(s)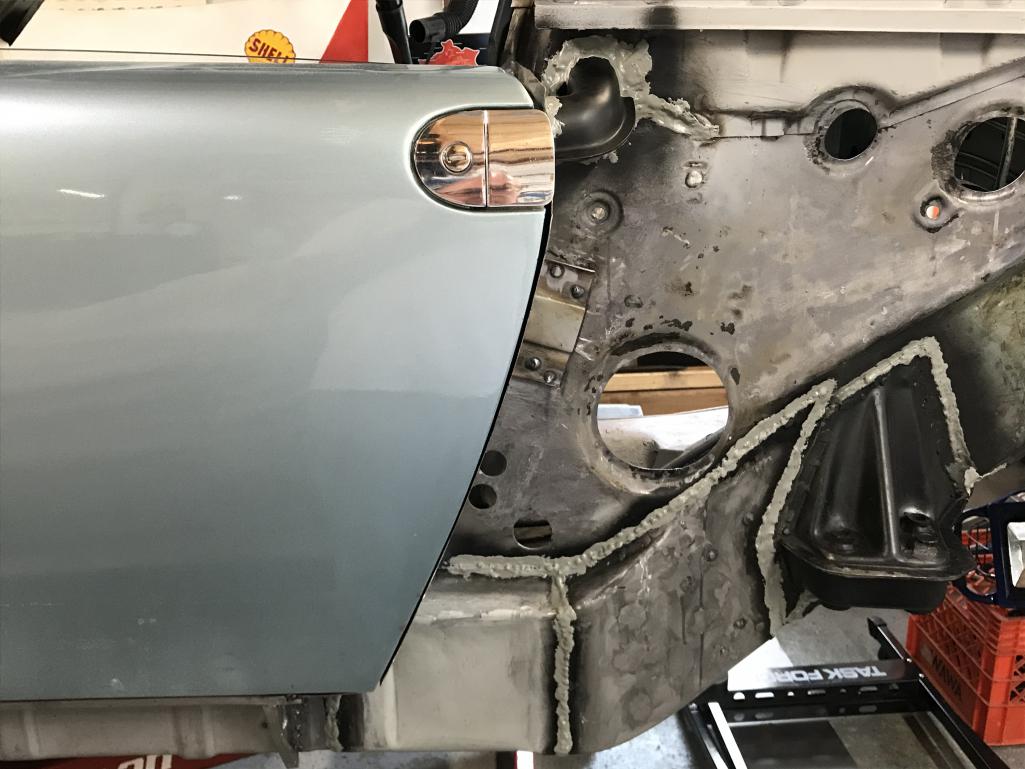
Posted by: BeatNavy Jul 9 2020, 02:13 PM
Holy cow, Dion. That's a lot of work, and a lot of new metal! And in areas where there is no room for error.
Nice job!!
Posted by: Cairo94507 Jul 9 2020, 04:13 PM
Wow! That's amazing. You will have the buttoned up in no time. Great work.
Posted by: Dion Jul 13 2020, 09:31 PM
Had some time today and made up those sill triangles.
As I said my right sill only had one support all these years after being worked on back in the 90’s. I’ll need to primer them yet. One more item off the list.
Made a small template then crudely cut out a shape. Started forming it using a small brass hammer and my vice/anvil.
Attached thumbnail(s)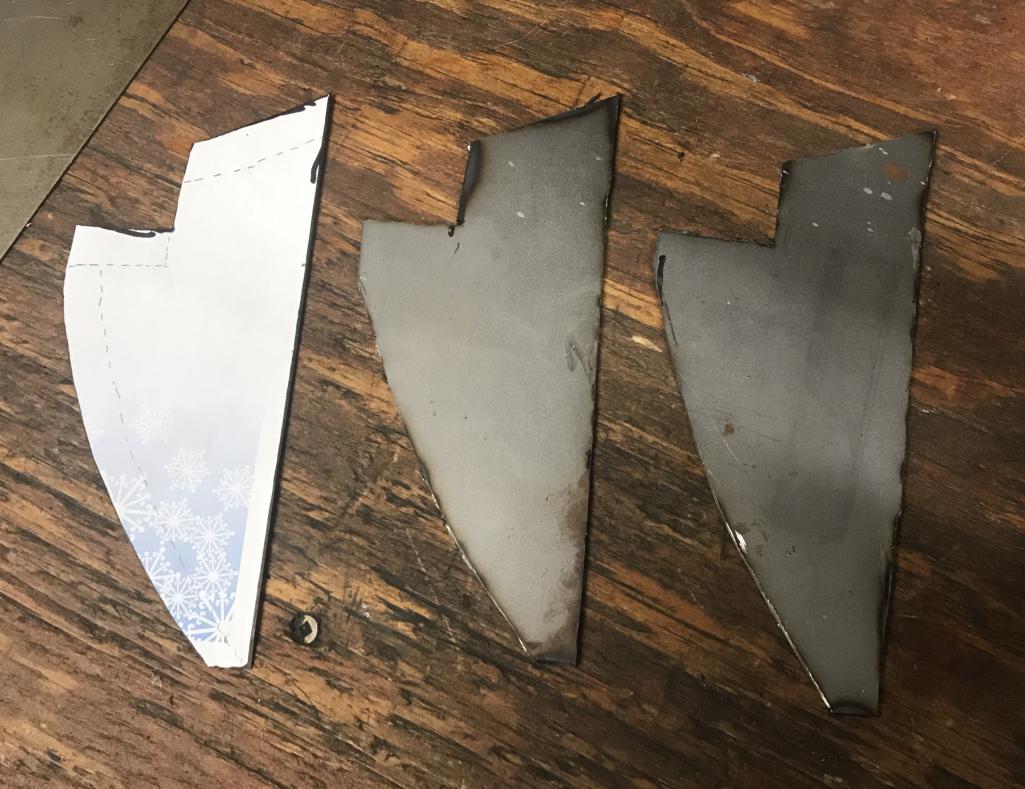
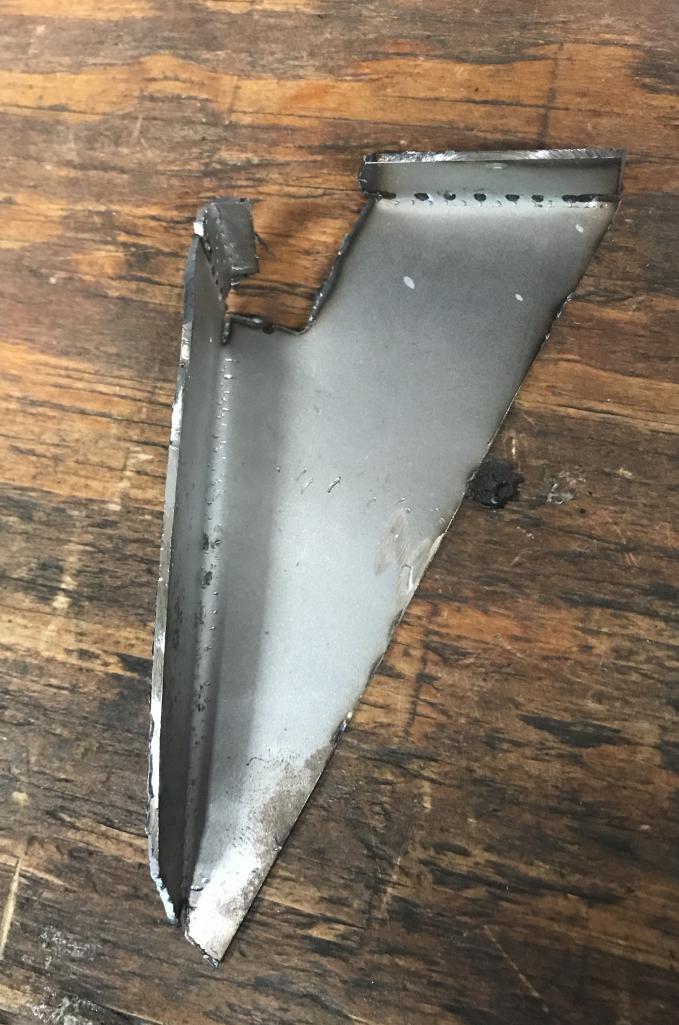
Posted by: Dion Jul 13 2020, 09:33 PM
Then tacked on a base plate.
Attached thumbnail(s)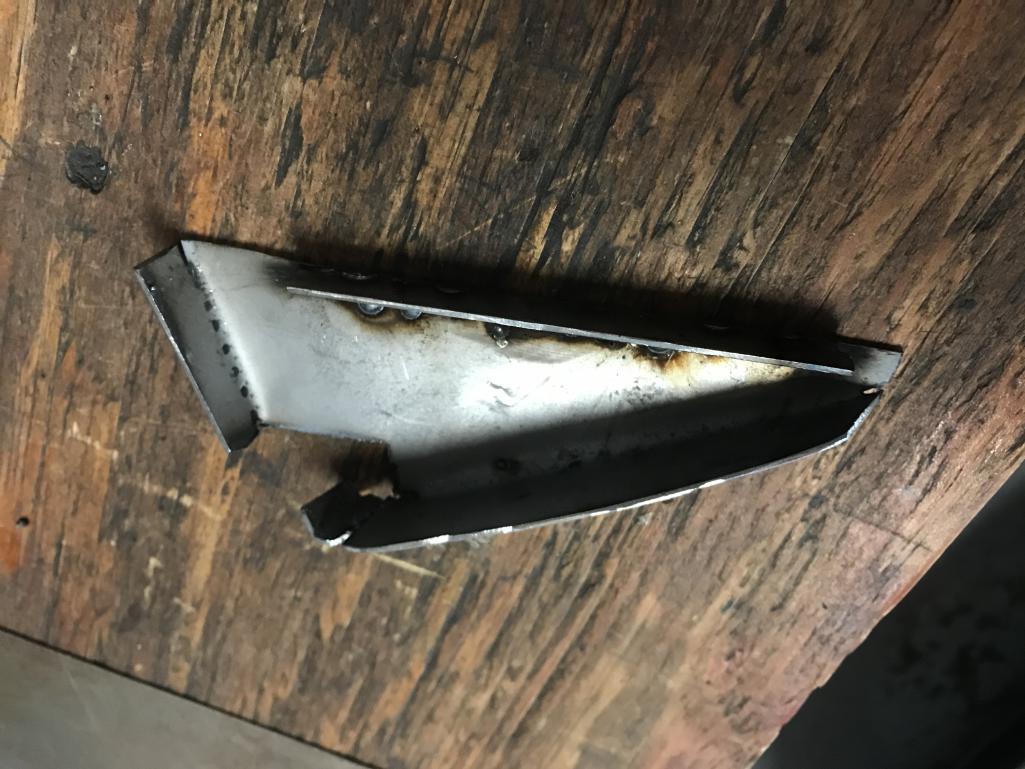
Posted by: Dion Jul 13 2020, 09:34 PM
Positioned and then welded it on.
Attached thumbnail(s)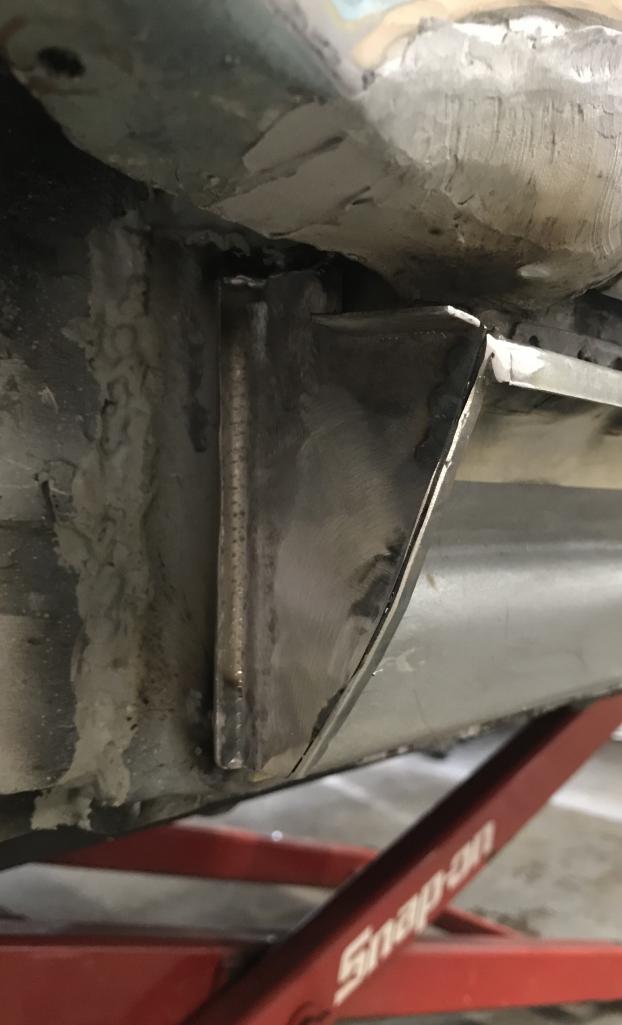
Posted by: Dion Jul 13 2020, 09:39 PM
Right sill support. Now onto the Left rear fender. That won’t happen until after
The Northeast 914 gathering
Look forward to seeing some of you guys!
Attached thumbnail(s)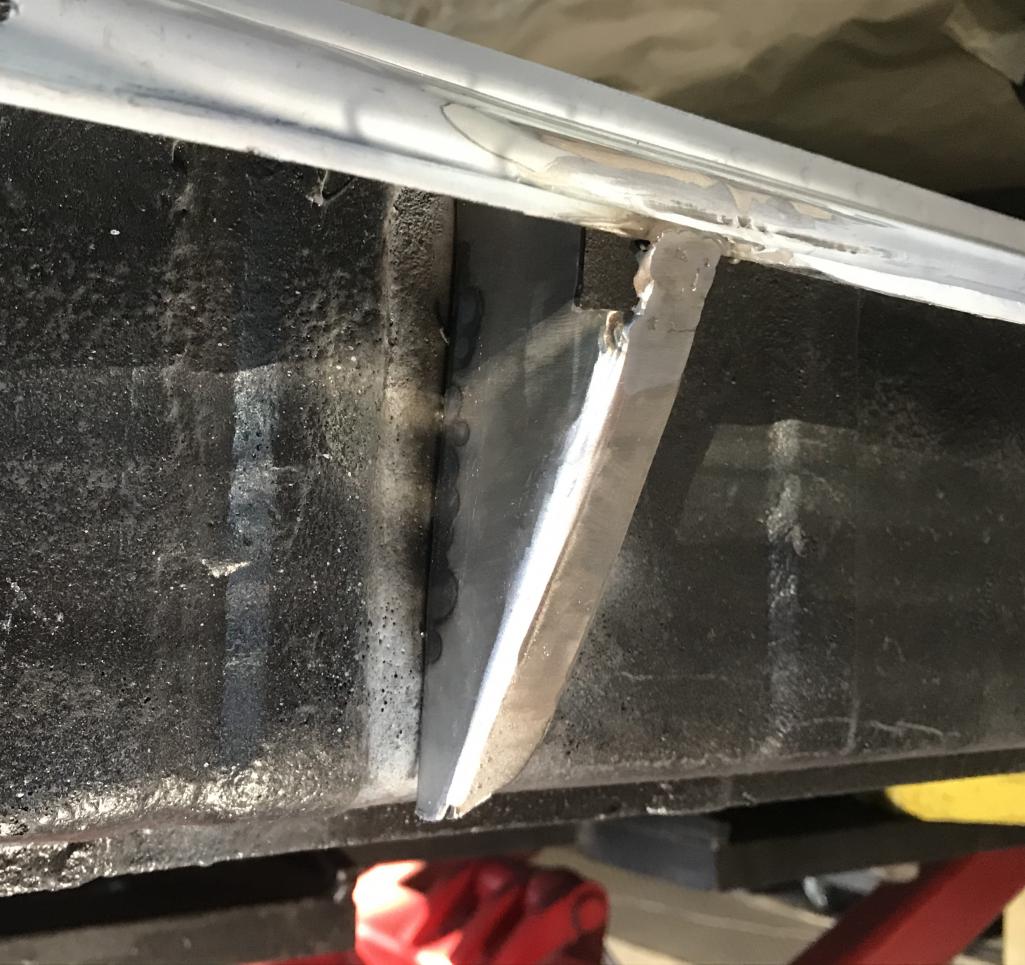
Posted by: saigon71 Jul 14 2020, 05:24 AM
Impressive work Dion! You are on a roll. Can't wait to see this thing back on the road.
Posted by: Dion Aug 5 2020, 07:05 AM
Update time.
After a nice break at the 914 NorthEast Gathering was inspired to get back to this project.
Minor in the scheme of things but necessary.
Epoxy primed the left longitudinal and left rear of chassis. Followed that up with Eastwood’s chassis black paint.
Attached thumbnail(s)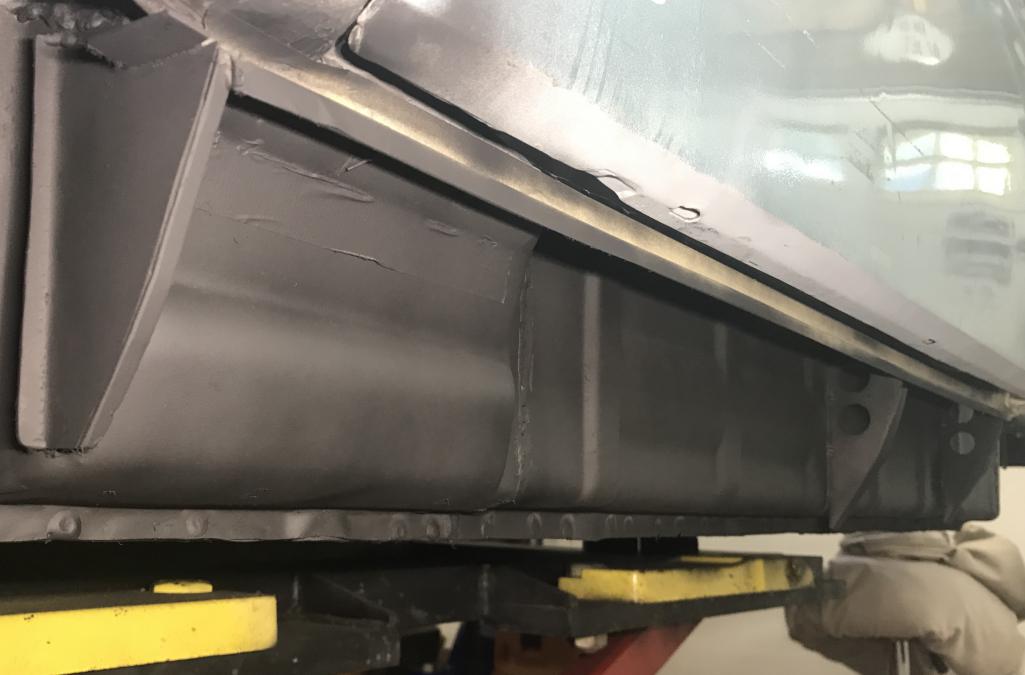
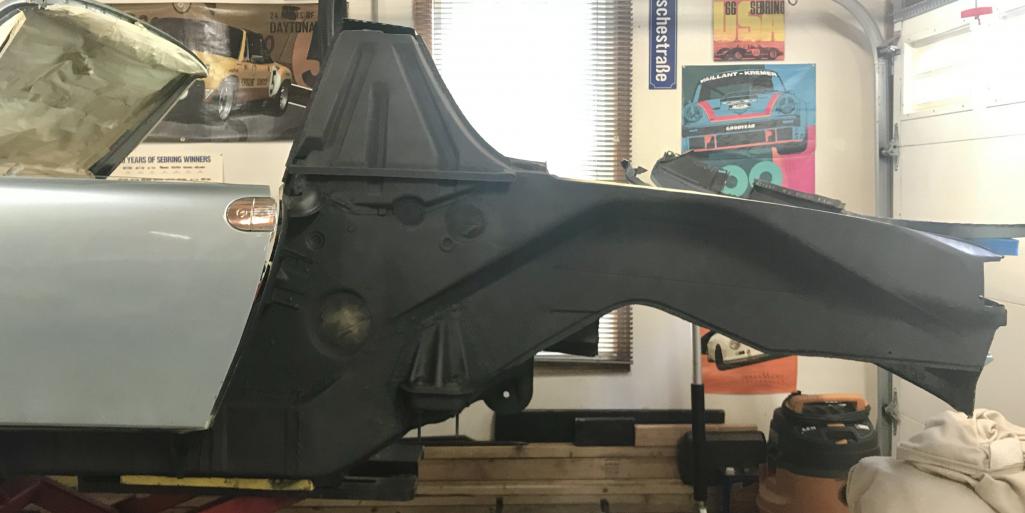
Posted by: Dion Aug 5 2020, 07:07 AM
Chassis black
Attached thumbnail(s)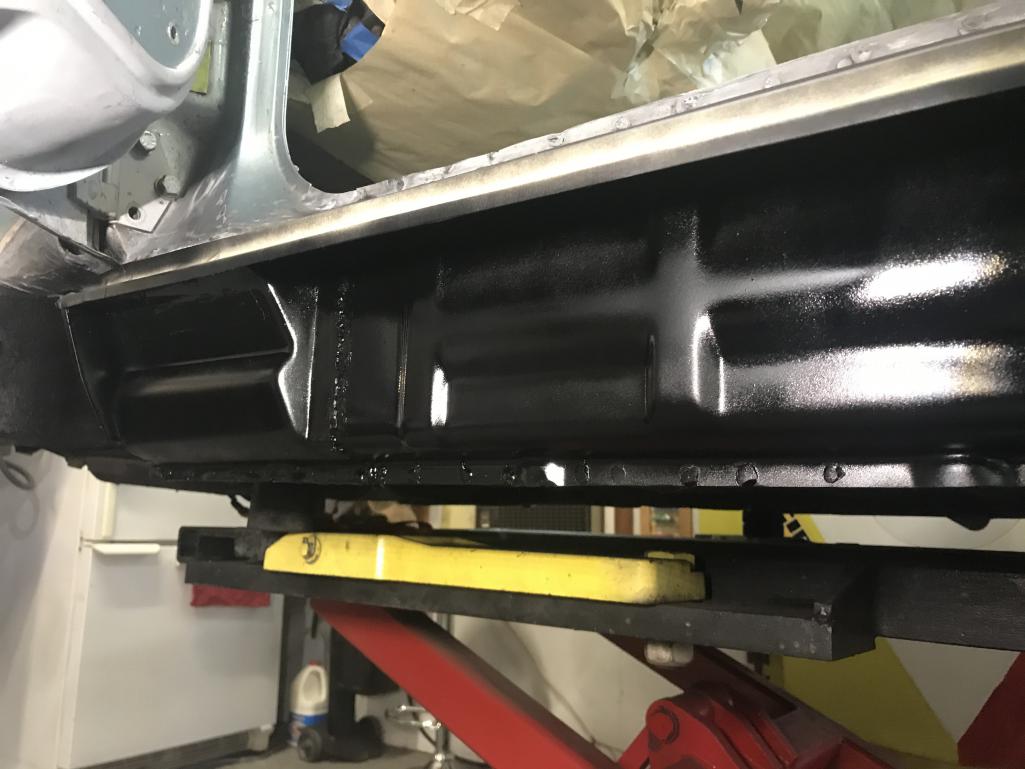
Posted by: Dion Aug 5 2020, 07:07 AM
Chassis black
Attached thumbnail(s)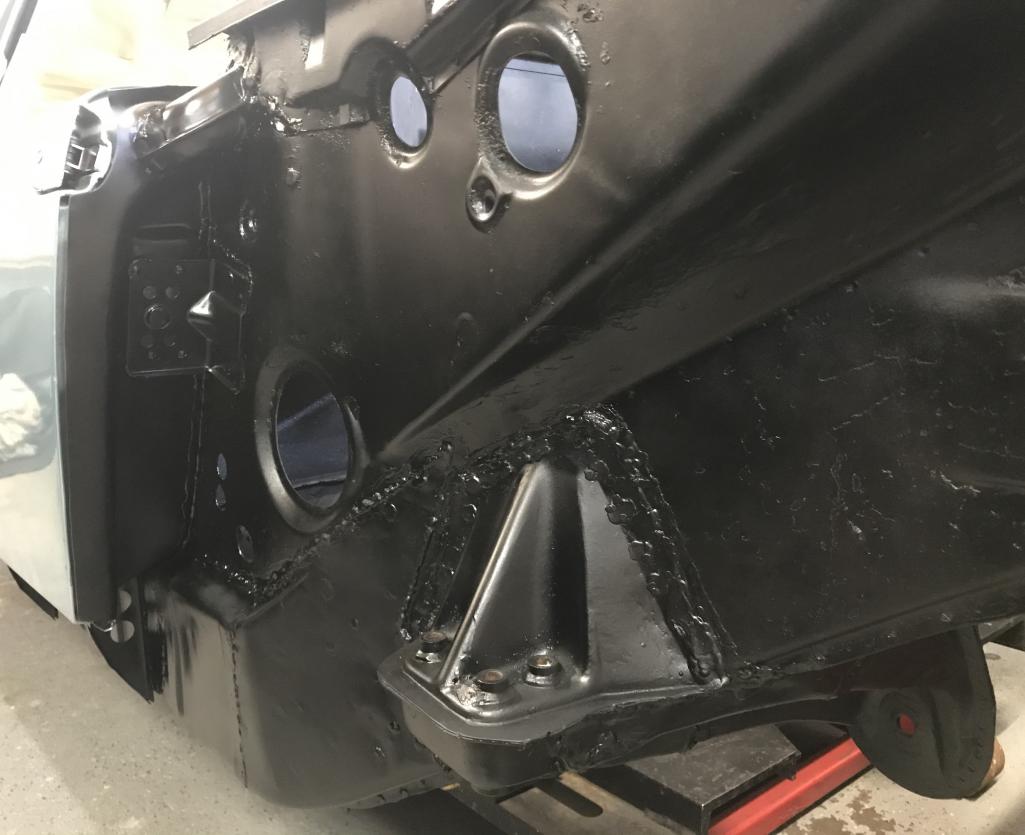
Posted by: Dion Aug 5 2020, 07:16 AM
Brent @http://www.914world.com/bbs2/index.php?showuser=20845 I have to apologize. The small part of the sail panel I wanted to use didn’t
fully cooperate.  Was prepping the rear fender for the chassis black.
Scuffing up the epoxy primer and discovered more rust in that vicinity of the sail where
the handle and snorkel sit. Uggh! Hit it with grinder and it revealed more issues.
I went ahead and cut out the metal, I had nothing to weld to. It was so thin. Just blowing holes on the minimal settings. The foam backing did it in all those years.
So ordered a new sail panel from Restoration D.
While that waits at the border I can clean up my flooded basement and remove a tree!
Thanks tropical storm Isaias! Always something.
Attached thumbnail(s)
Posted by: Dion Aug 5 2020, 07:16 AM
Bad sail
Attached thumbnail(s)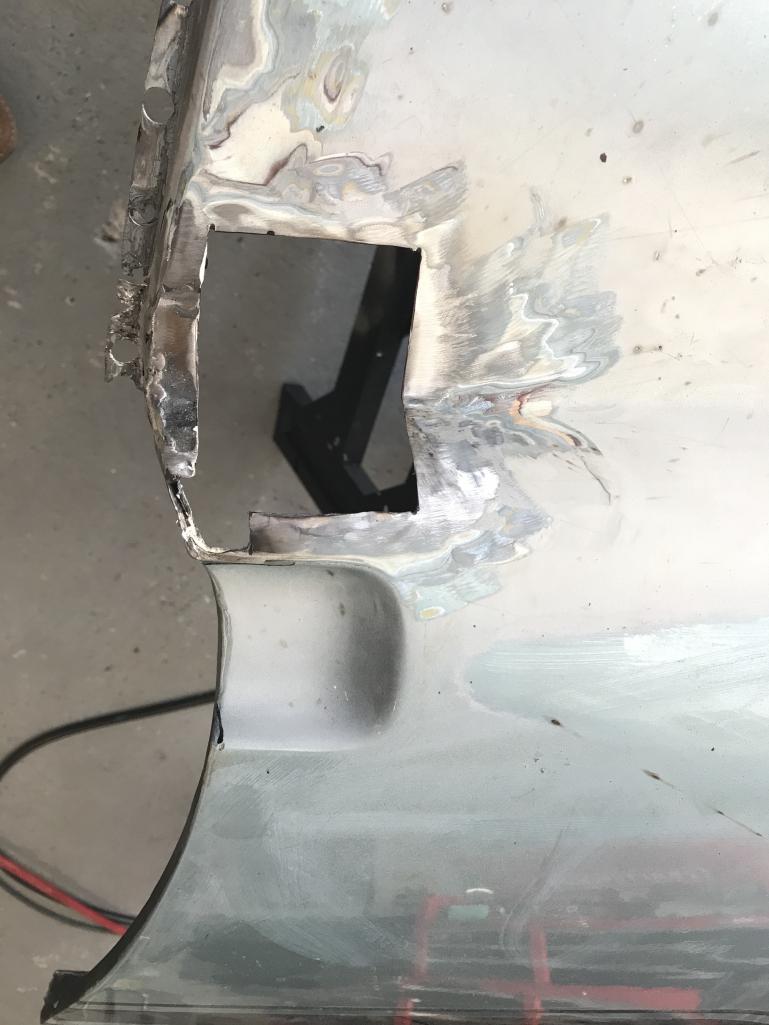
Posted by: Dion Aug 5 2020, 07:18 AM
Isaias handy work. The end of the tree is on top of my shed. The John Deere is in there
so I need to rescue him.
Attached thumbnail(s)
Posted by: Dion Aug 5 2020, 07:21 AM
Not the biggest tree, just landed wrong! Be nice if it just fell in the woods!
Ok hopefully more 914 stuff soon. Stay safe and dry.
Attached thumbnail(s)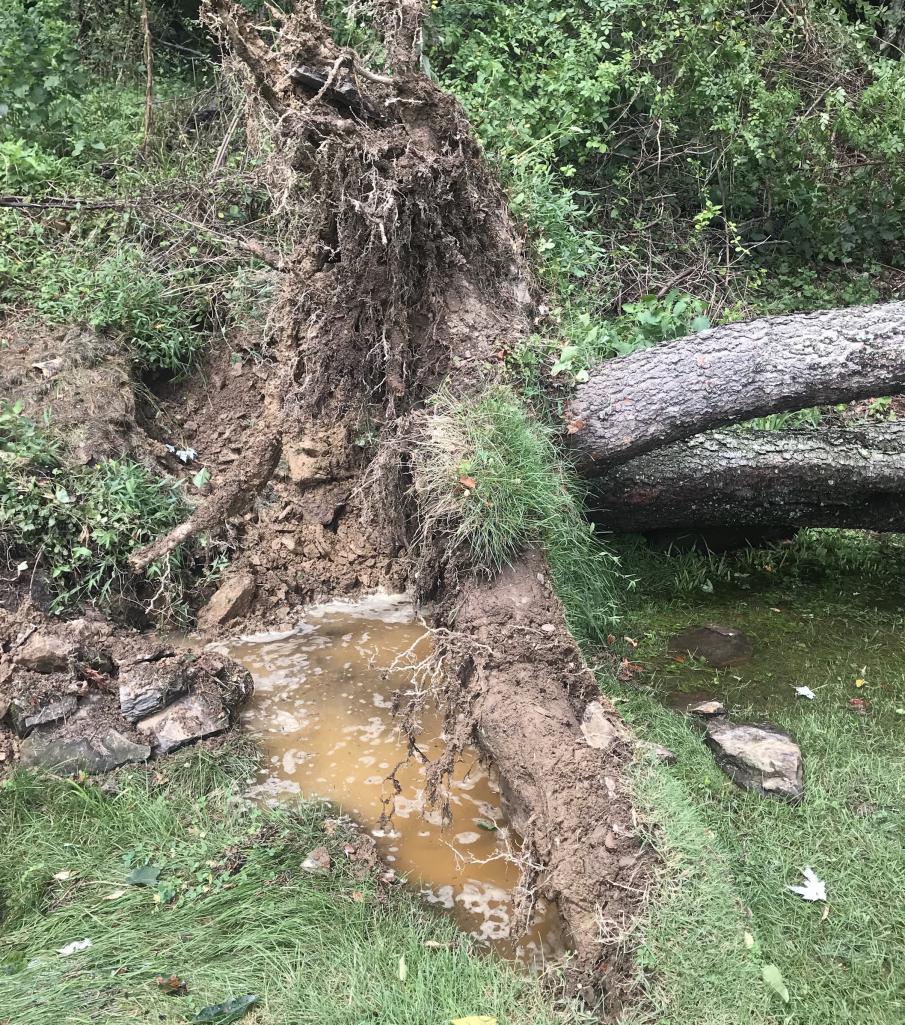
Posted by: mepstein Aug 5 2020, 07:34 AM
Yea. Isaias sucked.
Attached image(s)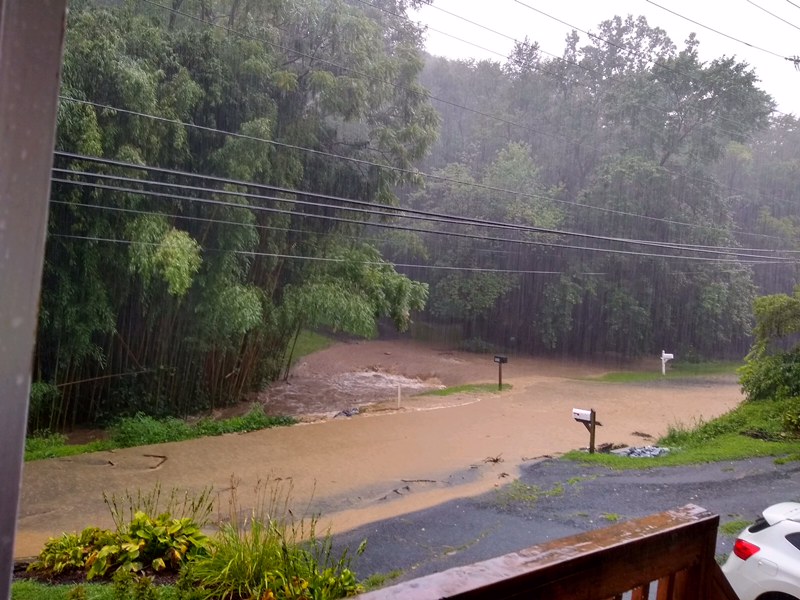
Posted by: Cairo94507 Aug 5 2020, 07:48 AM
Wow. Incredible you guys. Stay safe.
Posted by: bbrock Aug 5 2020, 07:54 AM
Isaias handy work. The end of the tree is on top of my shed. The John Deere is in there
so I need to rescue him.
Hackberry? At least the bird house is okay.
I had forgotten all about that sail panel piece. Jogging my memory, IIRC it was too trashed to use on my car but we thought the small area you needed might be okay. Good call on getting an RD panel. Made life a lot easier for me.
Glad you are safe!
Posted by: TonyA Aug 5 2020, 07:58 AM
Isaias handy work. The end of the tree is on top of my shed. The John Deere is in there
so I need to rescue him.
I have two chain saws
Posted by: Dion Aug 5 2020, 08:03 AM
Isaias handy work. The end of the tree is on top of my shed. The John Deere is in there
so I need to rescue him.
Hackberry? At least the bird house is okay.
I had forgotten all about that sail panel piece. Jogging my memory, IIRC it was too trashed to use on my car but we thought the small area you needed might be okay. Good call on getting an RD panel. Made life a lot easier for me.
Glad you are safe!
That bird house has survived many a storm!
Boy Scouts made that one.Hackberry? I don’t know. I liked it. Was only around 5 feet tall when we moved here 22 years ago. Right on the woods edge. Sad ending.
Yes Brent thought we’d get lucky but more little rust damage than I thought. The edge toward the door jamb is almost pure seamsealer, after skimming more metal away.
The “meatier” side of the sail looked ok. Unfortunately SO thin. It just kept disintegrating
with every trigger pull. Yes new panel. The right call now.
Cheers Brent, Michael, Mark!
Posted by: Dion Aug 5 2020, 08:05 AM
@http://www.914world.com/bbs2/index.php?showuser=20596 , well get down here!
Posted by: Dion Sep 13 2020, 08:59 PM
Time for an update. So I received the Restoration Design sail panel. I kinda cheated and used only the section from it to do repairs on my fender. I wanted to keep the original
outline of the sail so it would match up to the chassis without a lot of fettling. I’m not a body shop guy so trying to make it easier on me. Concentrating on that task I didn’t
take a lot of pics, oh well.
Attached thumbnail(s)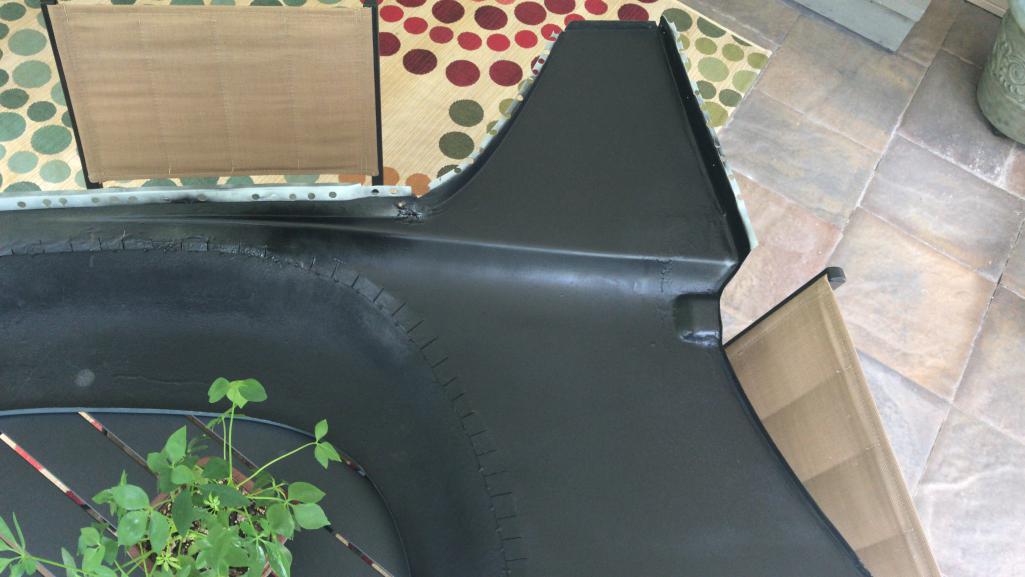
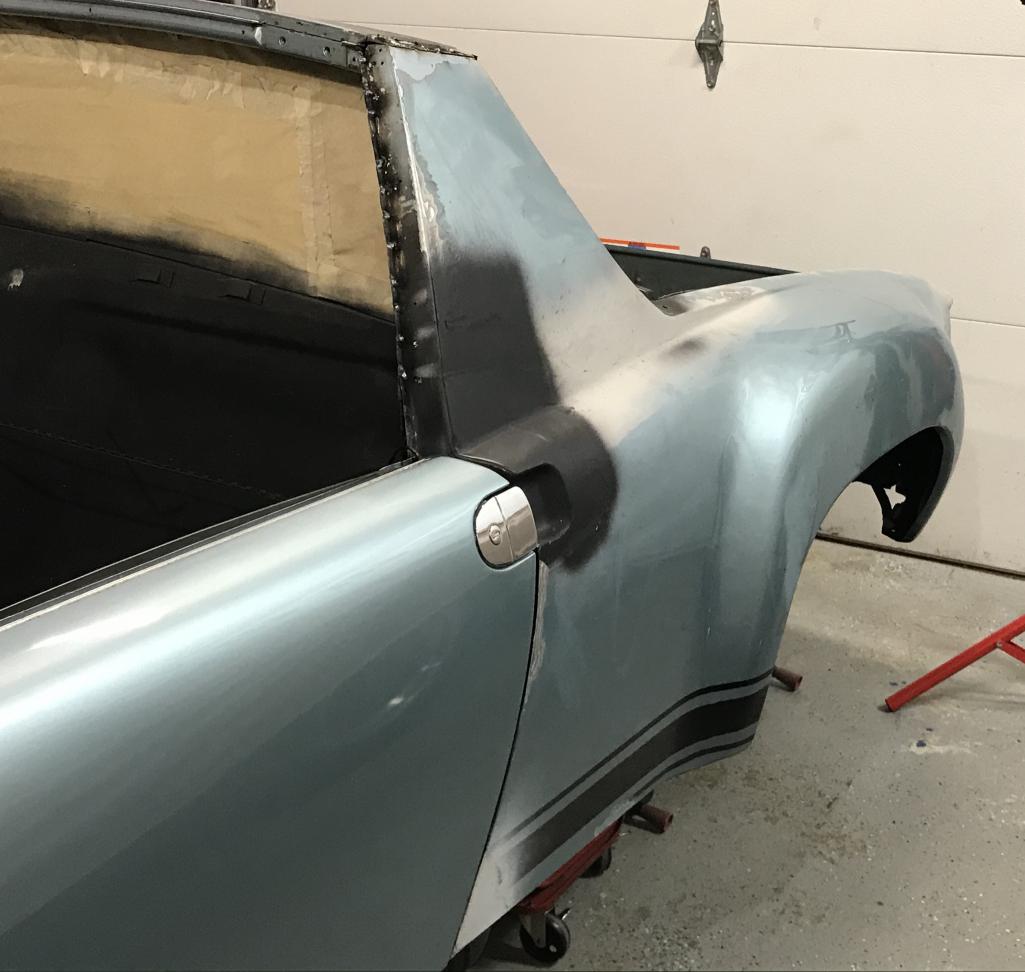
Posted by: Dion Sep 13 2020, 09:01 PM
Securing the fender/trunk area
Attached thumbnail(s)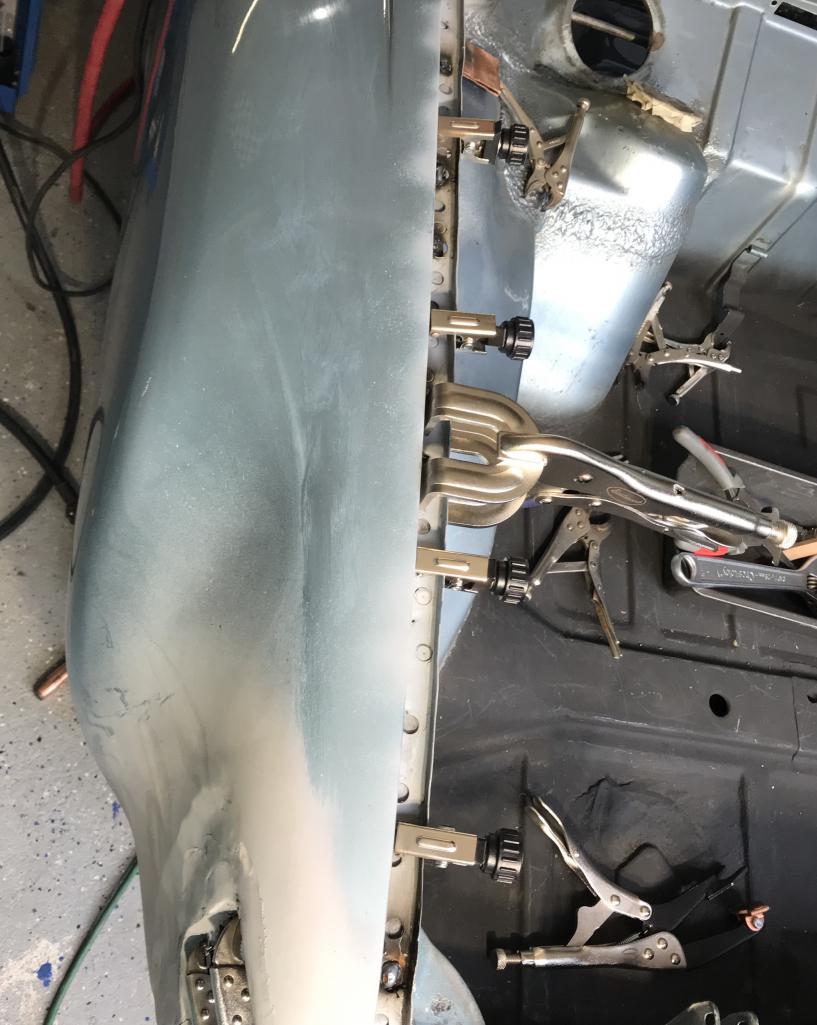
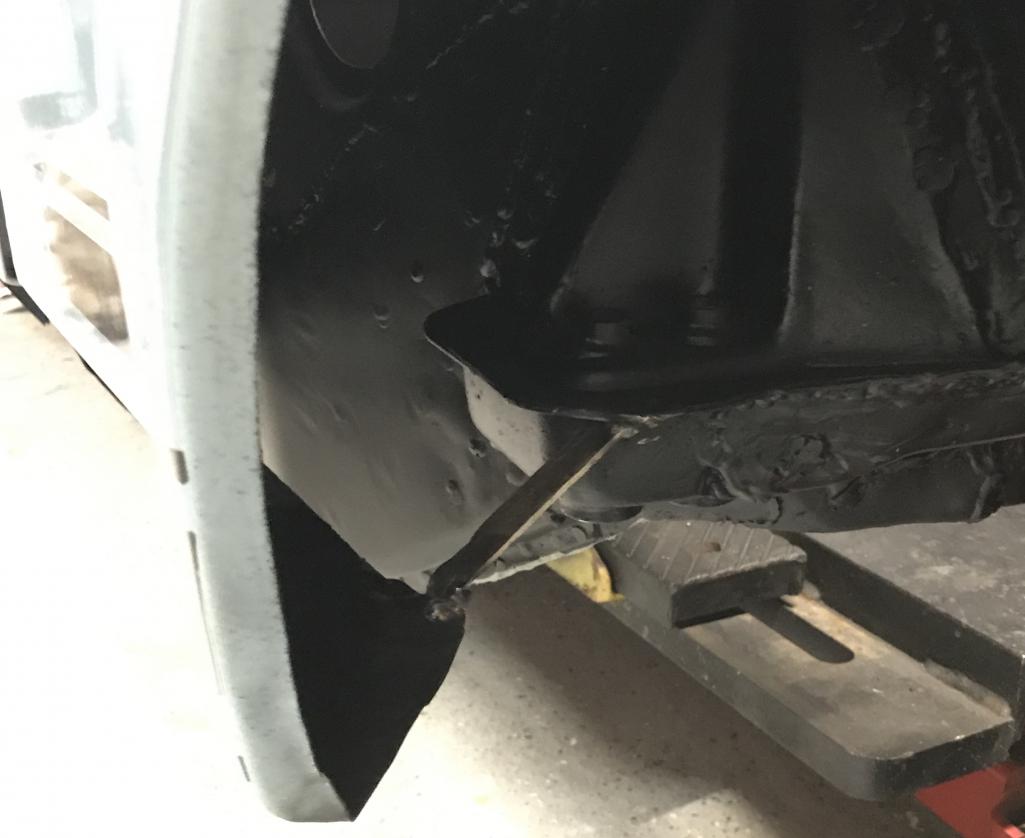
Posted by: Dion Sep 13 2020, 09:03 PM
Fender
Attached thumbnail(s)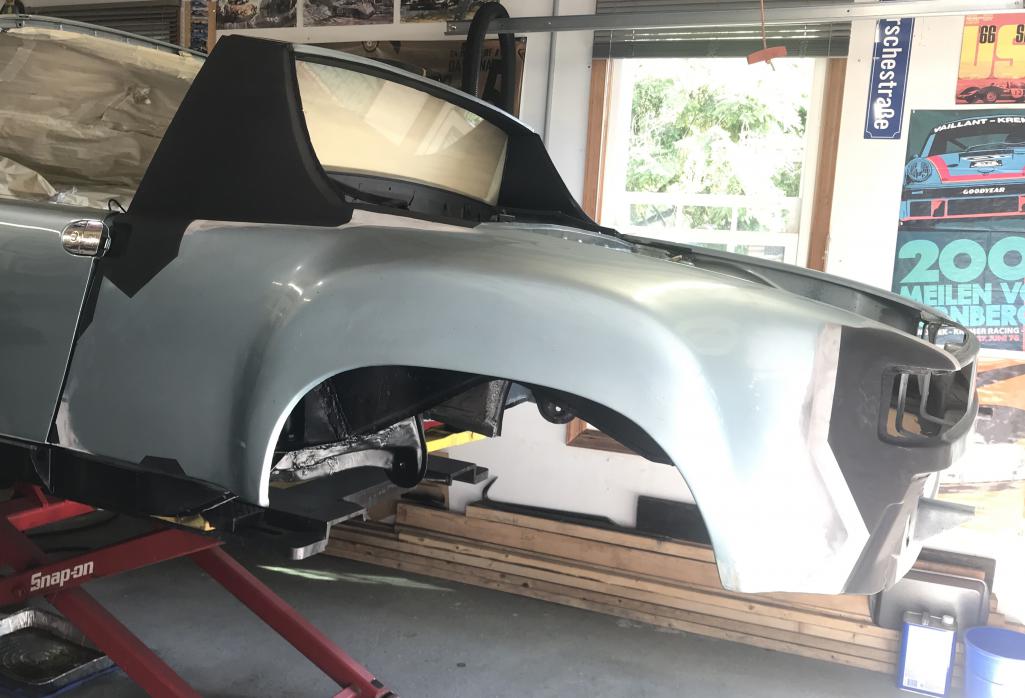
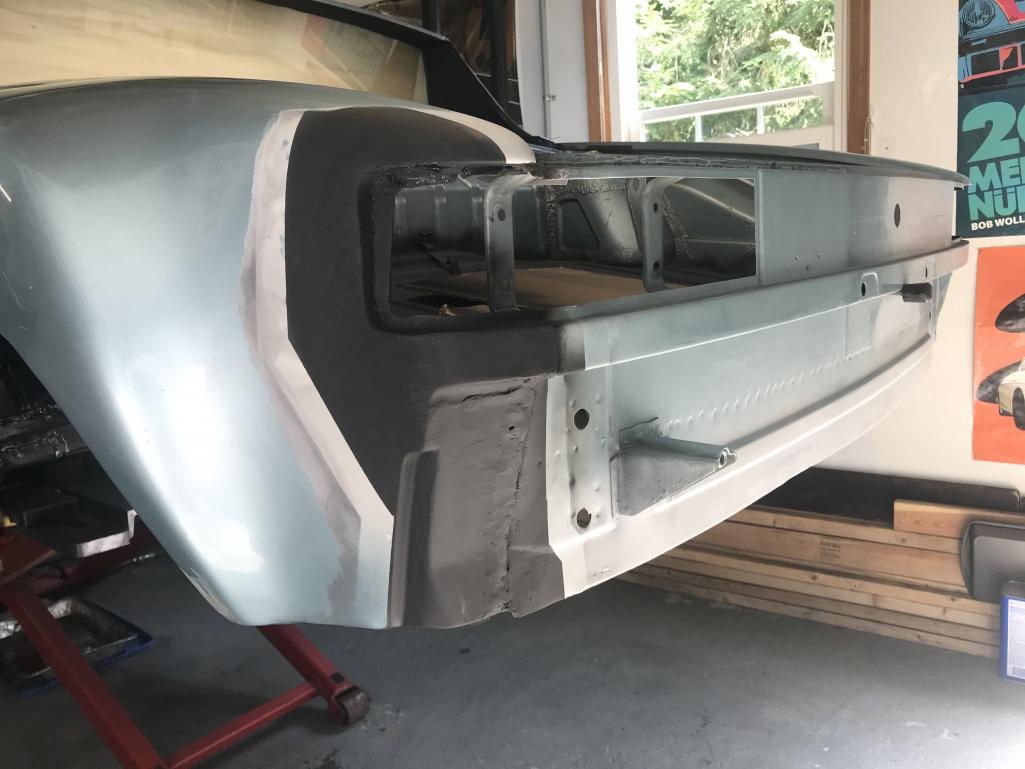
Posted by: Dion Sep 13 2020, 09:03 PM
Fender/Trunk seam
Attached thumbnail(s)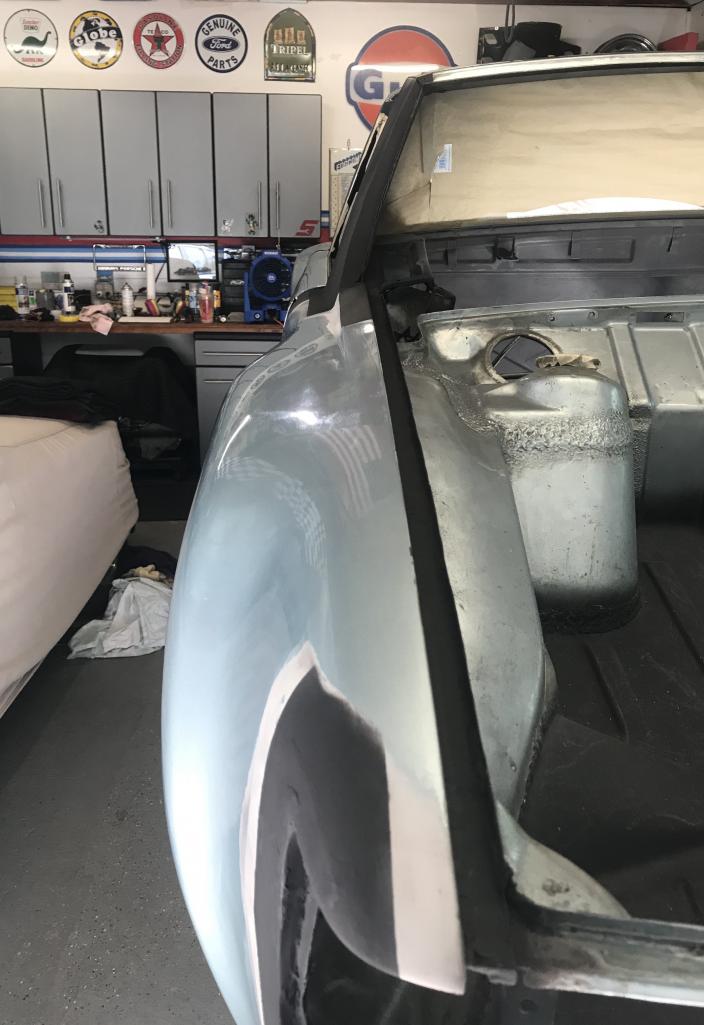
Posted by: Dion Sep 13 2020, 09:08 PM
After scuffing the epoxy primer in the trunk, gave it a coat of Marathon Blue and clear coat. This is more the true colour than the overall body colour currently on my 914.
I intend to get the body sprayed in this hue. The body colour has way more blue in it than should be. The last paint job when the flares were done was in 2004.
Amazing the difference in colour. I do prefer the more silverish .Which is more proper
to Marathon.
Attached thumbnail(s)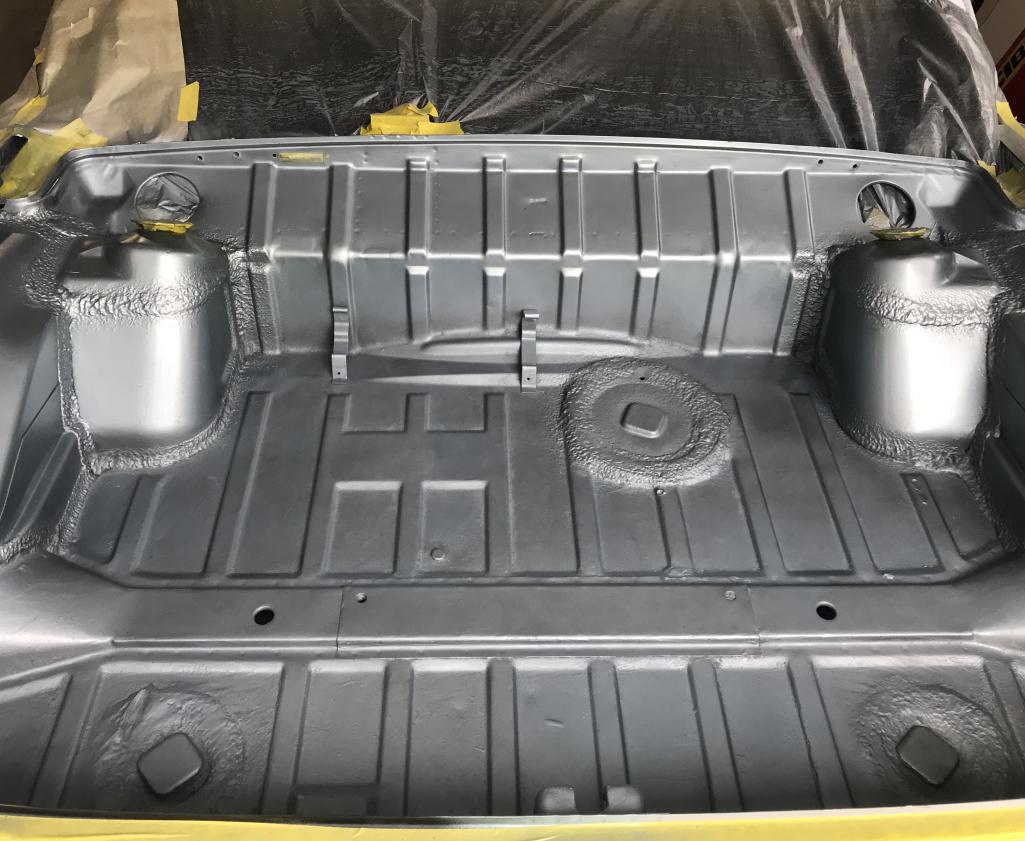
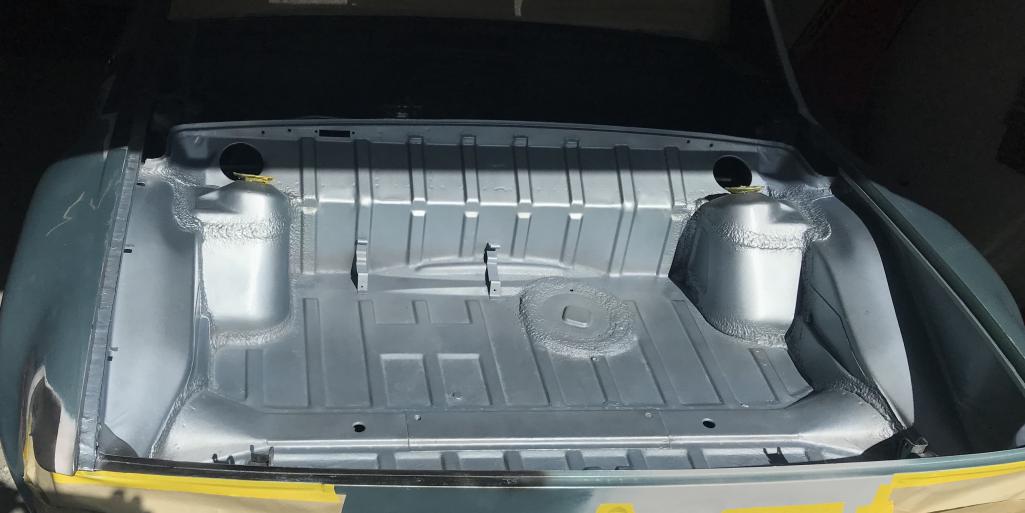
Posted by: Dion Sep 13 2020, 09:09 PM
Trunk
Attached thumbnail(s)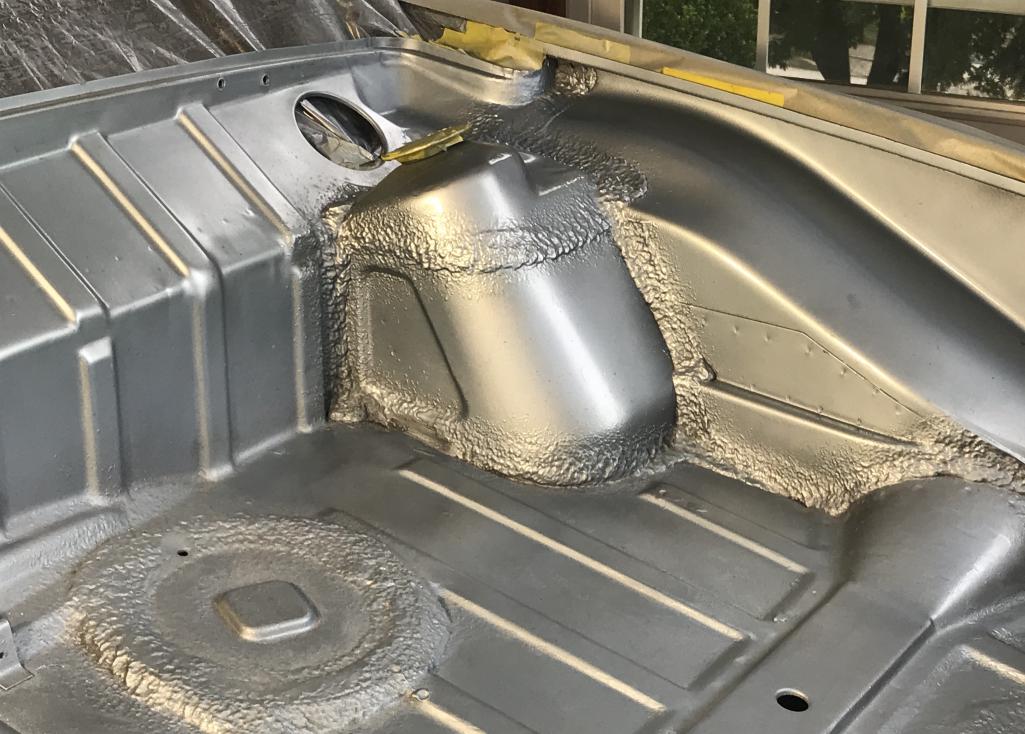
Posted by: Dion Sep 13 2020, 09:10 PM
Trunk seam
Attached thumbnail(s)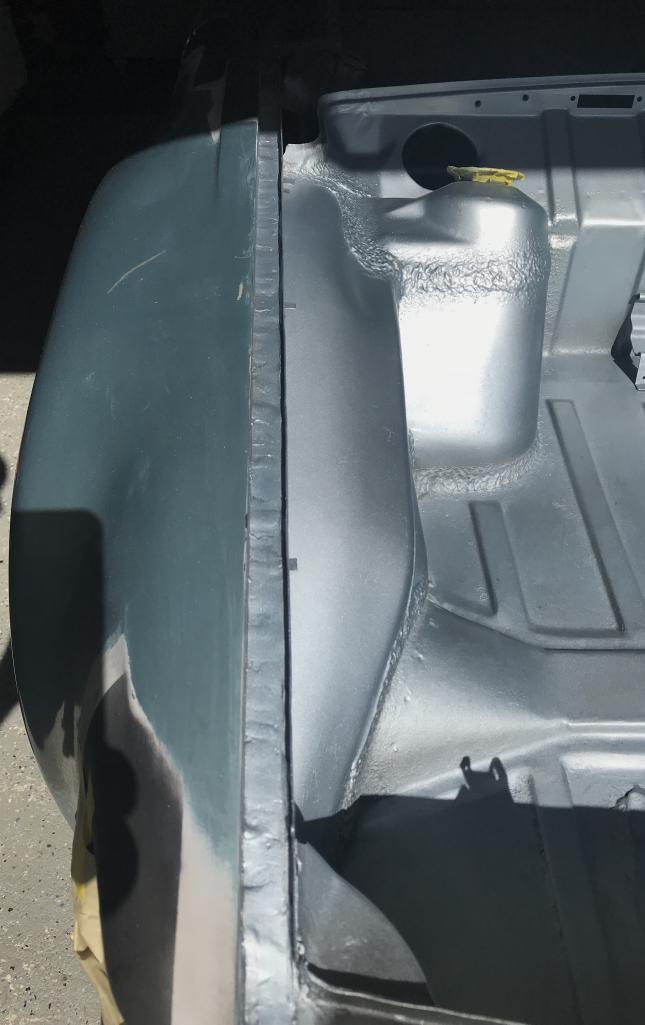
Posted by: saigon71 Sep 14 2020, 04:56 AM
Fantastic work Dion!
I may contact you the next time I need to paint something.
Posted by: BeatNavy Sep 14 2020, 05:58 AM
Fantastic work Dion!
Nice job Dion. Glad to see you're still rolling along. That sail panel replacement is in my future. Hopefully the RD sail panel doesn't require too much fiddling for a good fit.
Posted by: TonyA Sep 14 2020, 06:41 AM
Looks fantastic but I am sure even better in person. Ill bring the beer.
Posted by: bbrock Sep 14 2020, 07:43 AM
That's a lot of great progress. Looking great!
Posted by: Dion Sep 25 2020, 06:07 PM
Had some time recently to throw some colour on the firewall, engine bay and the cockpit floor.
Attached thumbnail(s)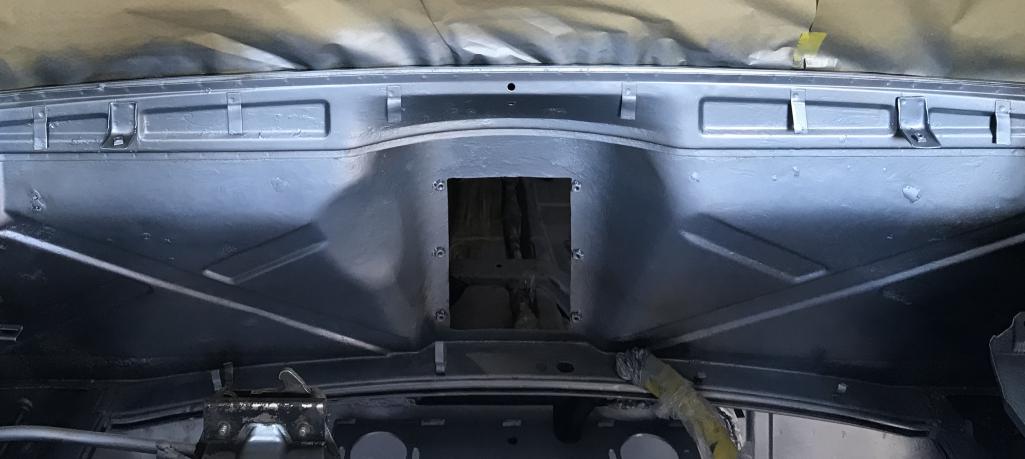
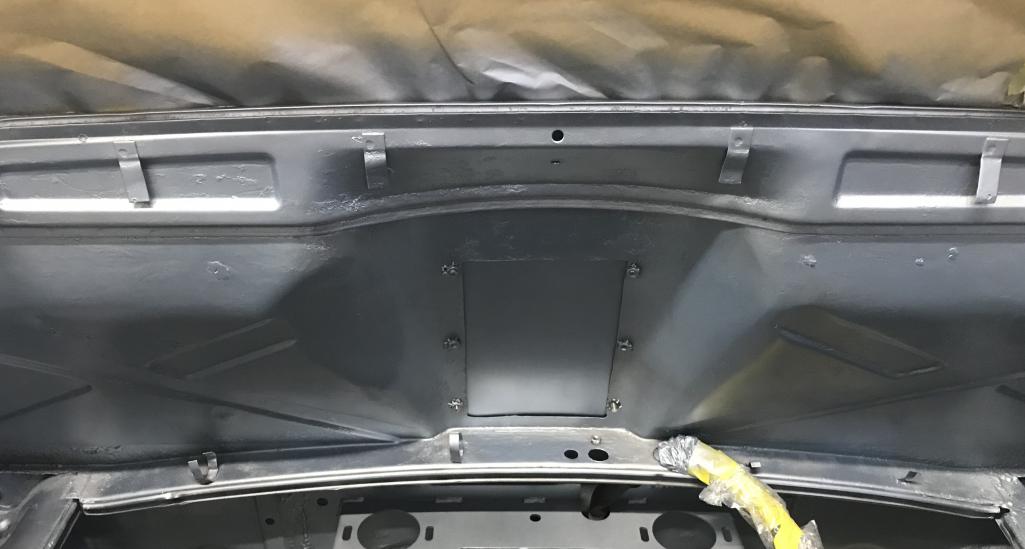
Posted by: Dion Sep 25 2020, 06:07 PM
Underside
Attached thumbnail(s)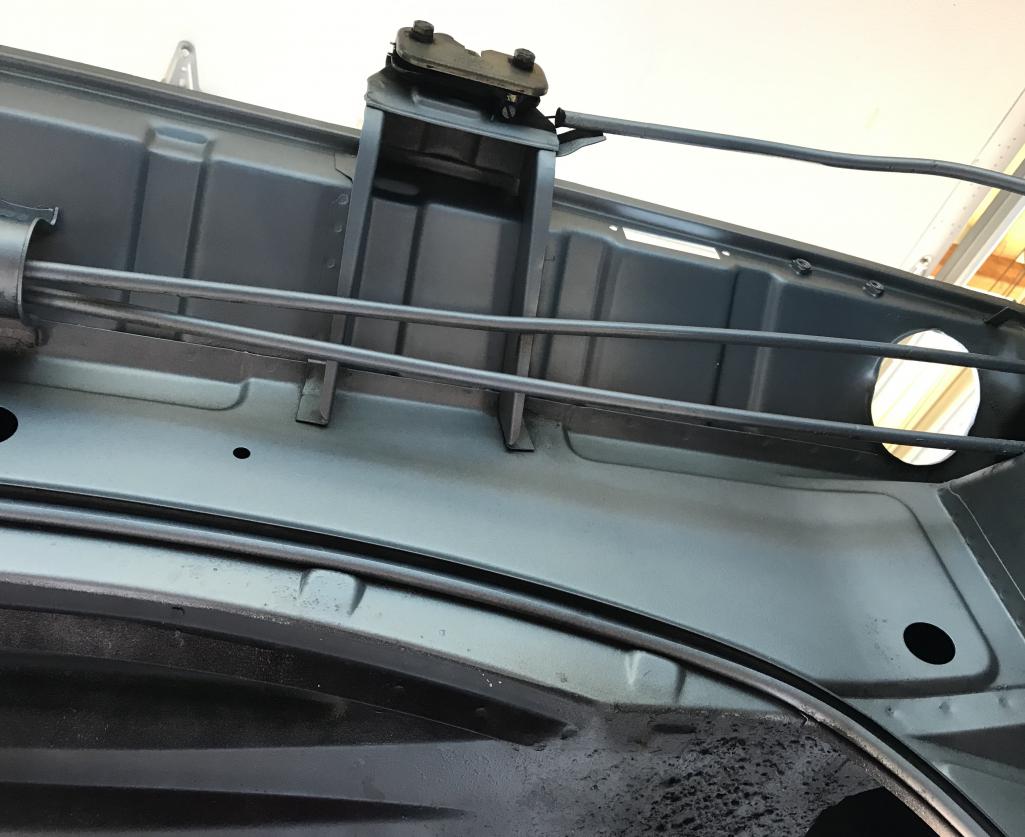
Posted by: Dion Sep 25 2020, 06:08 PM
Cockpit ...before
Attached thumbnail(s)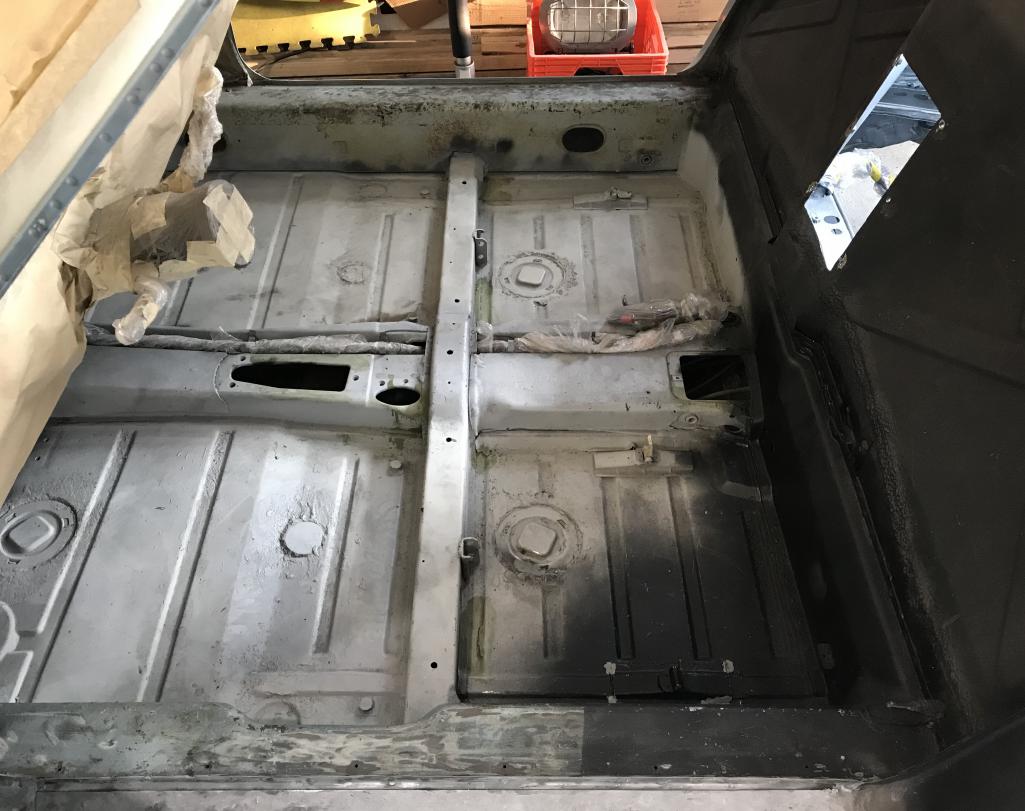
Posted by: Dion Sep 25 2020, 06:09 PM
Cockpit ...after
Attached thumbnail(s)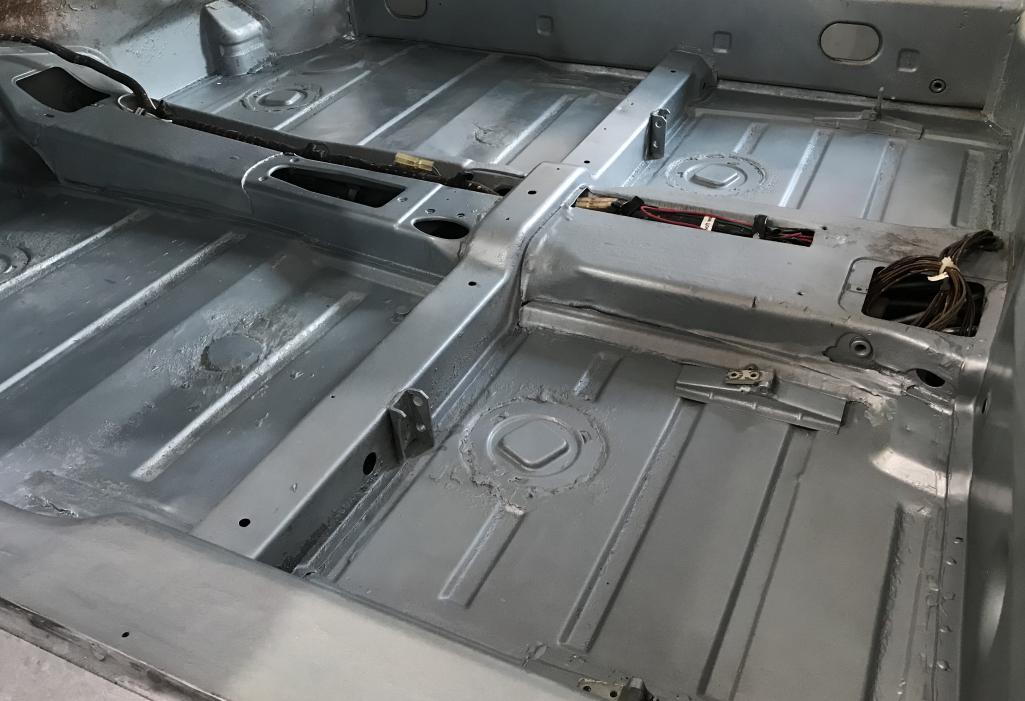
Posted by: Dion Sep 25 2020, 06:10 PM
Firewall...before
Attached thumbnail(s)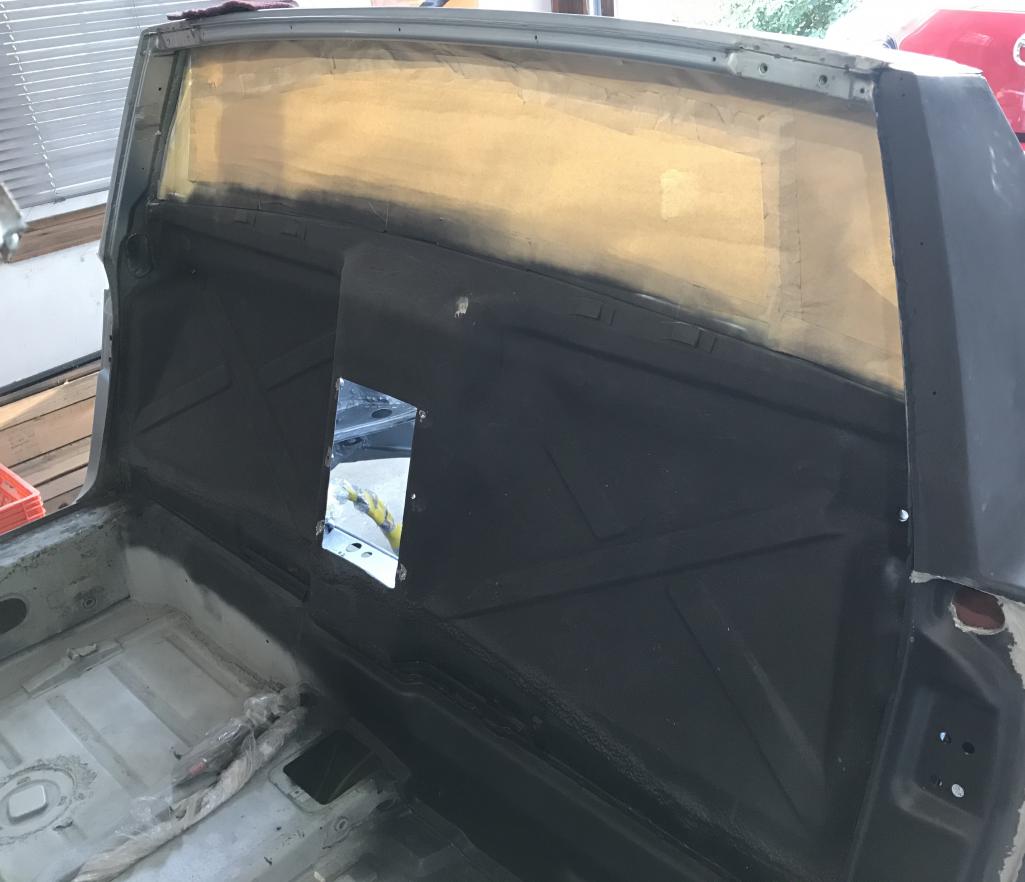
Posted by: Dion Sep 25 2020, 06:11 PM
Firewall... colour
Attached thumbnail(s)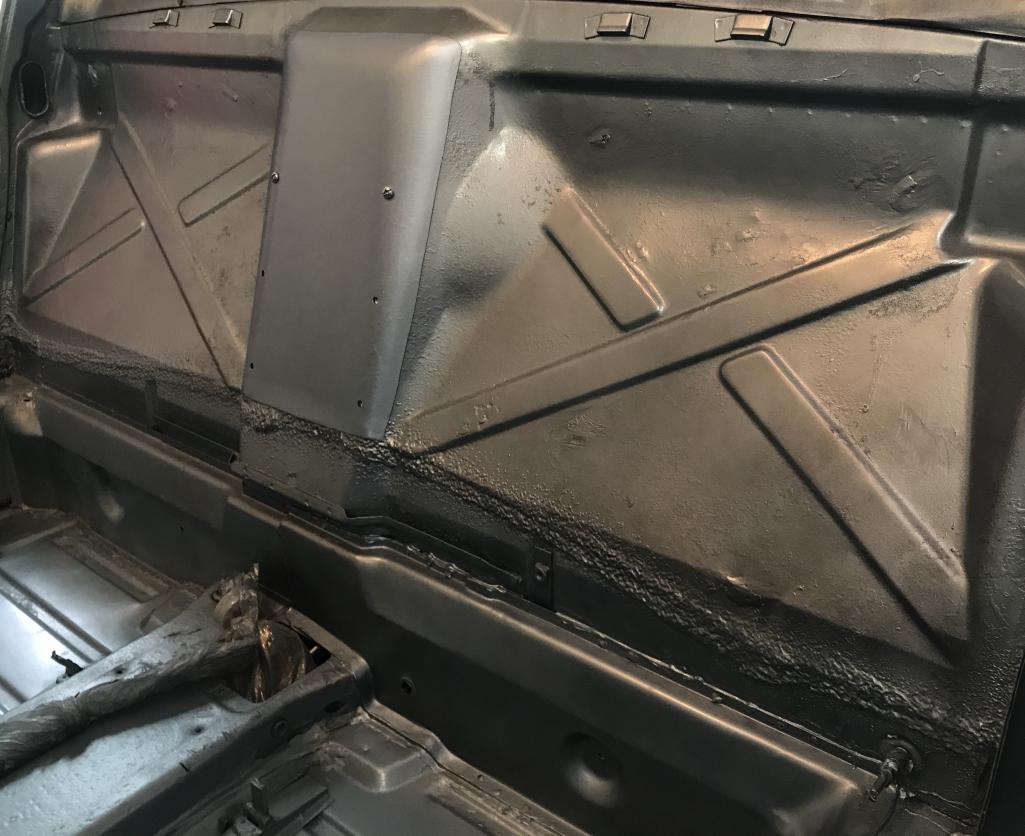
Posted by: Dion Sep 25 2020, 06:14 PM
I decided to put the car back together. Make sure the engine is sound and get all the ancillaries functioning. Tackle the bodywork and paint next spring/summer. See how it goes.
Posted by: Dion Sep 25 2020, 06:17 PM
2 more of engine bay.
Attached thumbnail(s)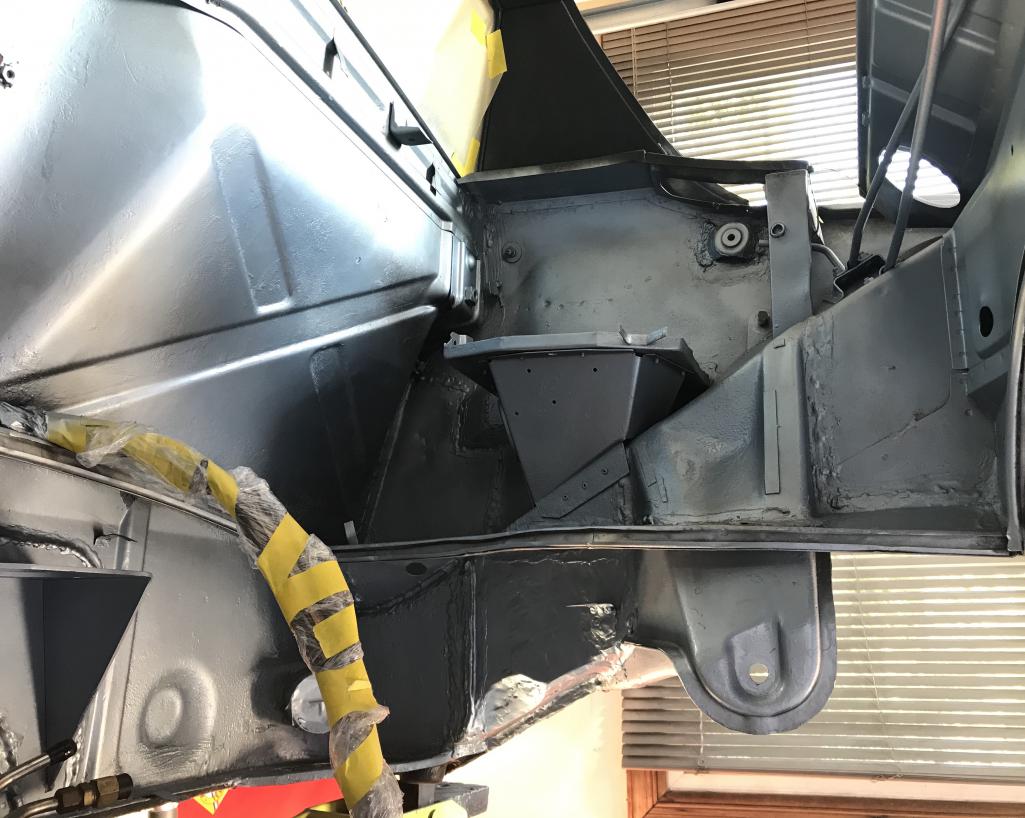
Posted by: Dion Sep 25 2020, 06:17 PM
Oil tank area
Attached thumbnail(s)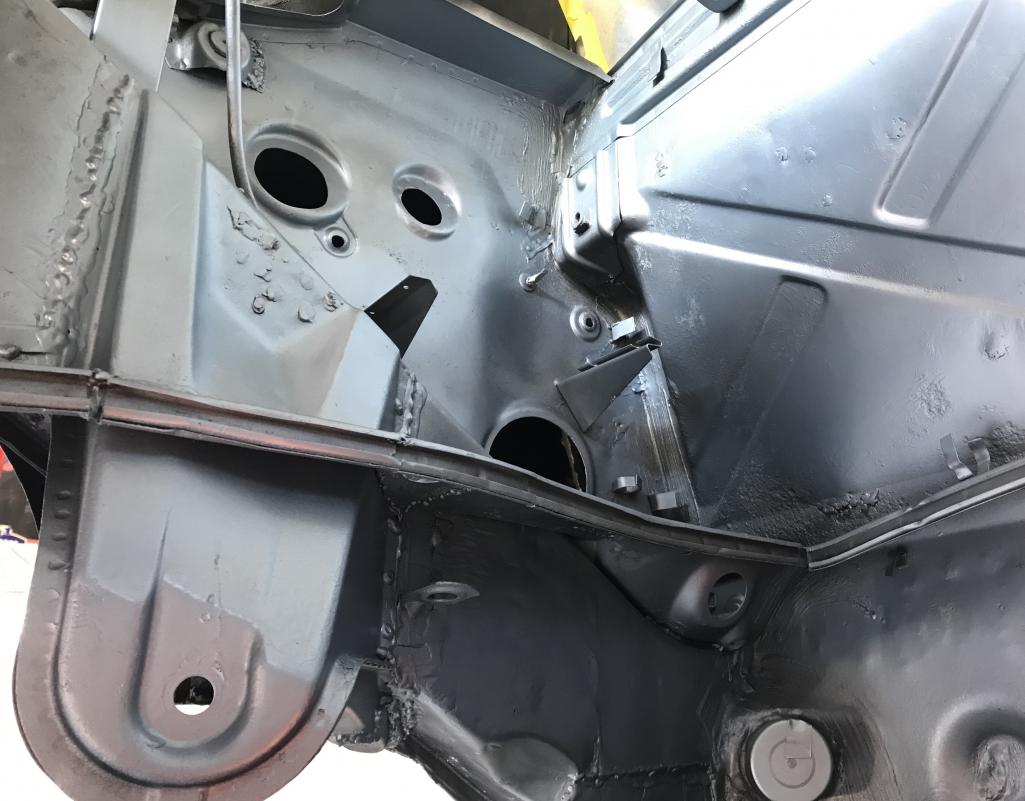
Posted by: ndfrigi Sep 25 2020, 07:51 PM
yehey almost done! Great work and congratulations finishing the tub!
Posted by: bbrock Sep 25 2020, 08:07 PM
Lookin' good dude! Loving the progress.
Posted by: PanelBilly Sep 25 2020, 08:15 PM
I wish I have put mine altogether before finishing the body work and painting. Its a lot more work, but it means you're not cutting into finished paint when you make changes.
Posted by: TonyA Sep 25 2020, 08:26 PM
Paint looks great
Posted by: Dion Sep 25 2020, 08:44 PM
Thanks so very much fellas. I really do appreciate the encouragement.
You’ve been a great support group. Always learning. Mistakes are made. Some rectified, some ...well.... that’s good enough
I’ll keep posting. I hope some of my pics and ideas provide an illustration to
Someone else’s questions.
Cheers all!
Posted by: porschetub Sep 25 2020, 11:19 PM
Oil tank area
Great work Dion ..big milestone eh ? pleased for you mate,you have come a long way
.Posted by: Dion Oct 4 2020, 08:31 PM
Started assembling the basics back to the chassis.
First up was the hard brake lines and pressure regulator.
I purchased the OEM lines from PMB. They also restored the regulator for me.
Attached thumbnail(s)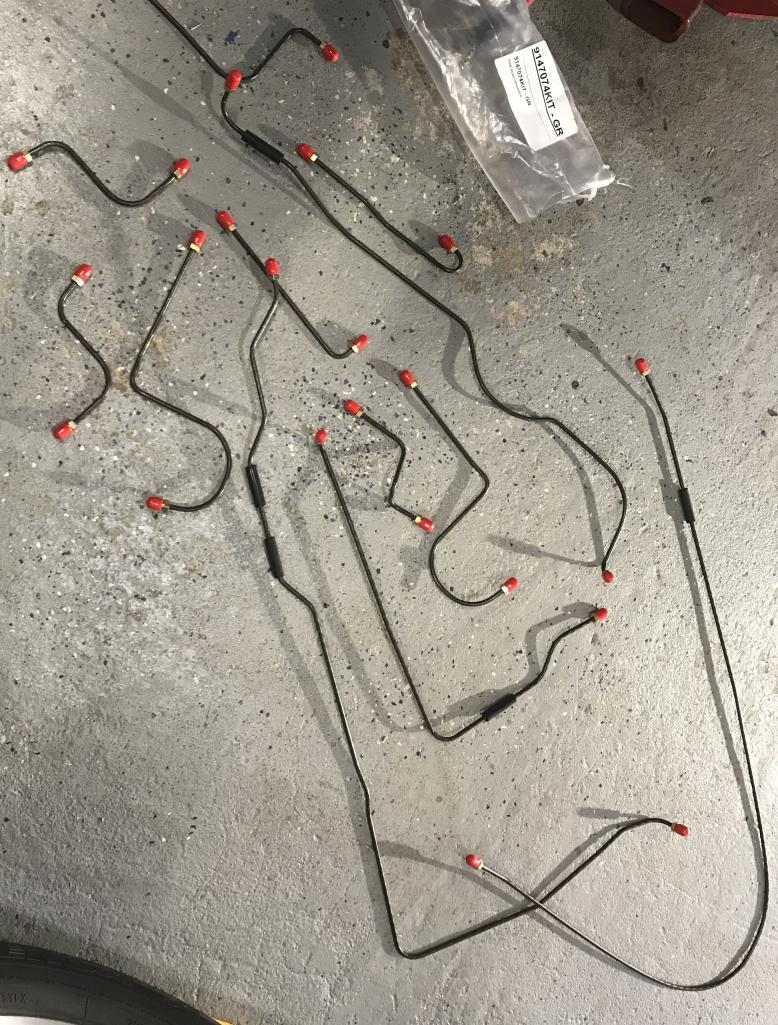
Posted by: Dion Oct 4 2020, 08:33 PM
Mounted regulator
Attached thumbnail(s)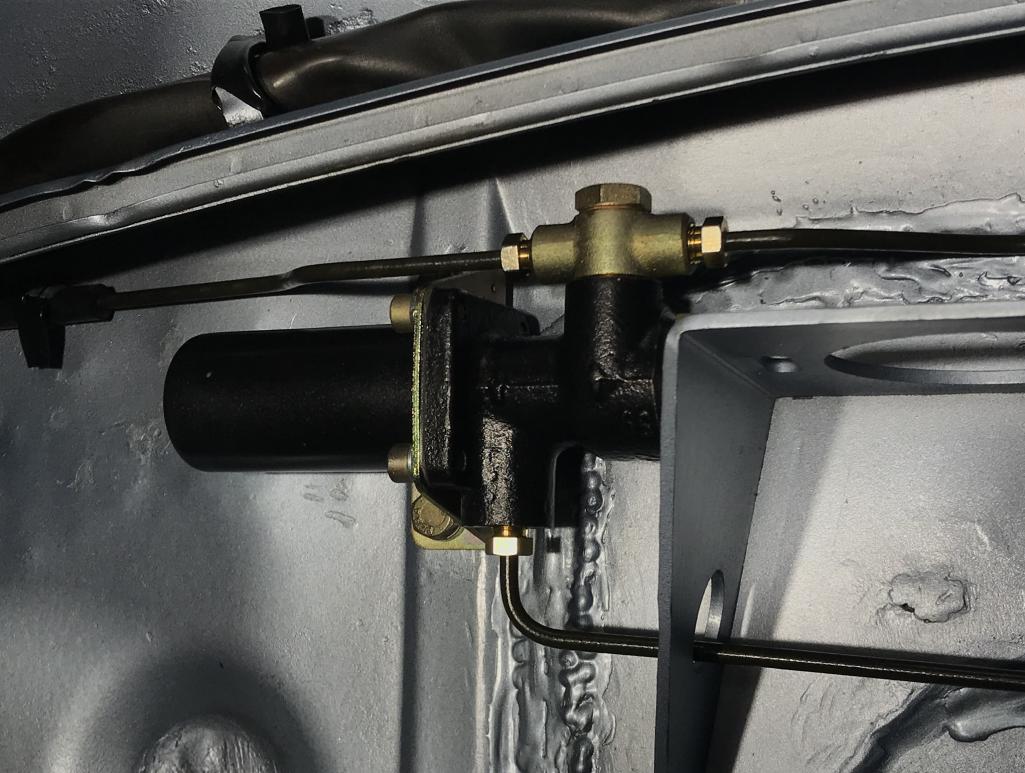
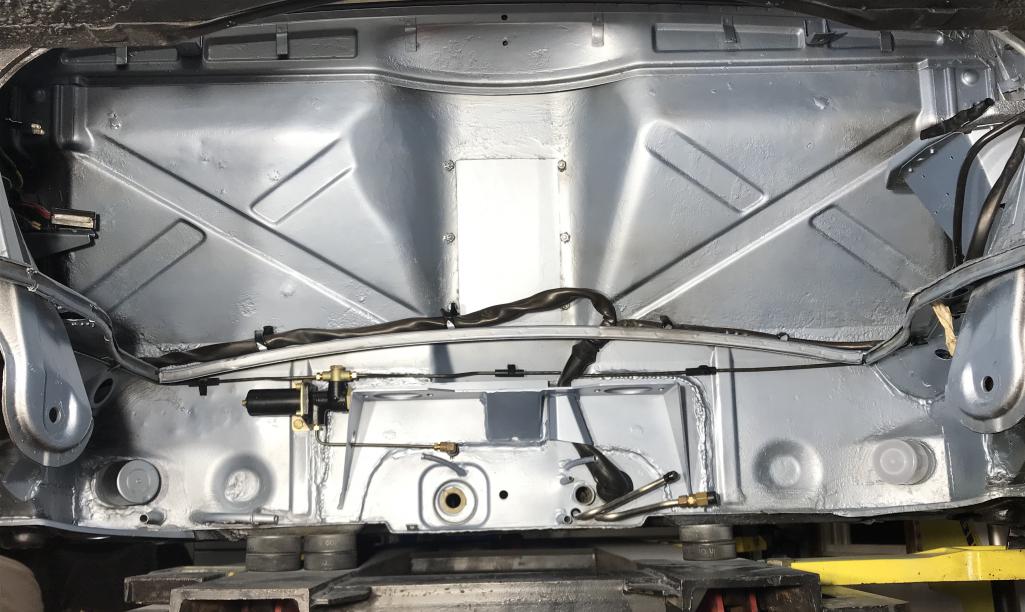
Posted by: Dion Oct 4 2020, 08:37 PM
For the engine “hatch” I applied some foam weather stripping to aid in sealing out noise,fumes. That is placed in between the metal surfaces and I utilized some extra engine
grille edging for the opening edges.
Attached thumbnail(s)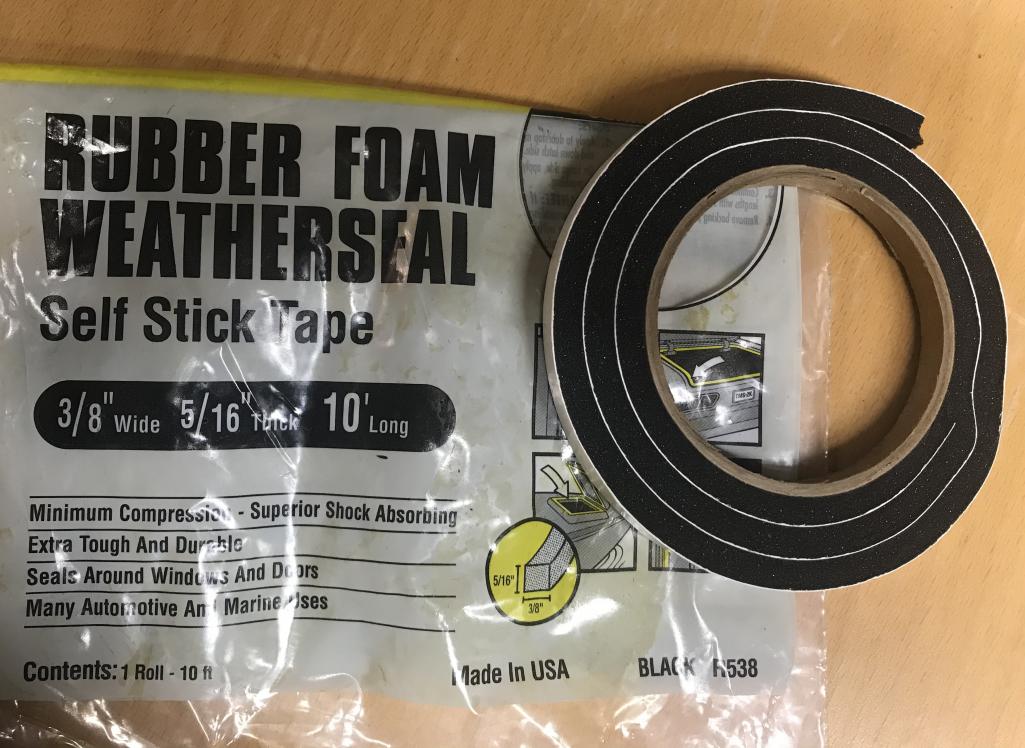
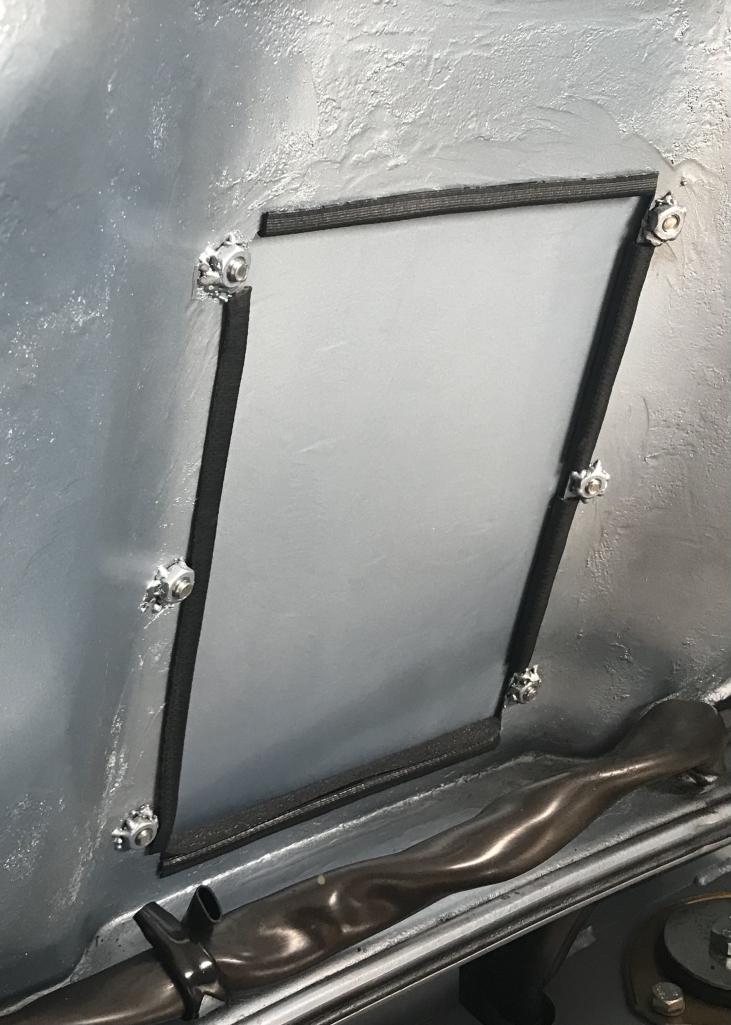
Posted by: Dion Oct 4 2020, 08:41 PM
E-brake handle installed with cables and it’s warning lite wiring.
Attached thumbnail(s)
Posted by: Dion Oct 4 2020, 08:42 PM
E-brake
Attached thumbnail(s)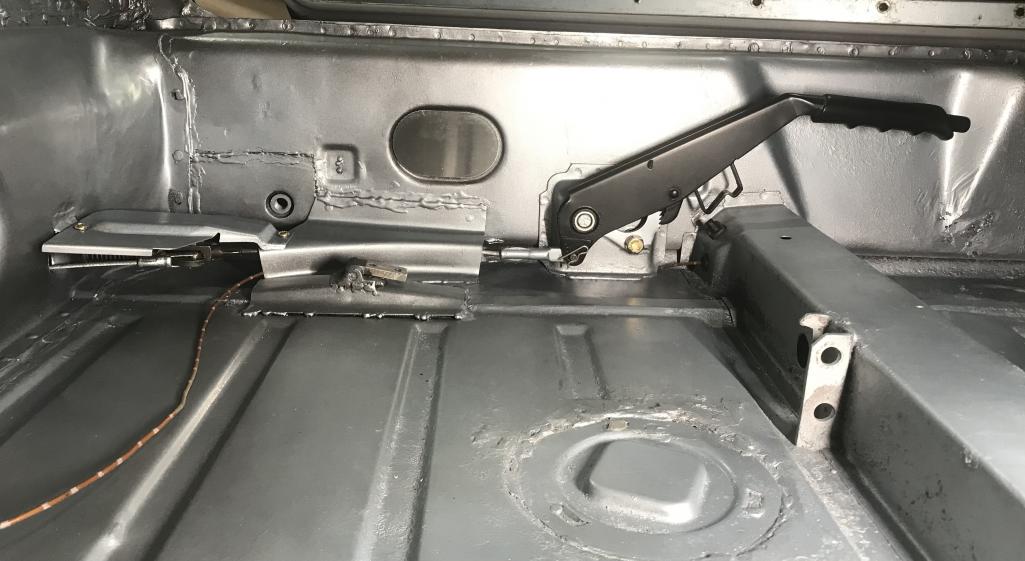
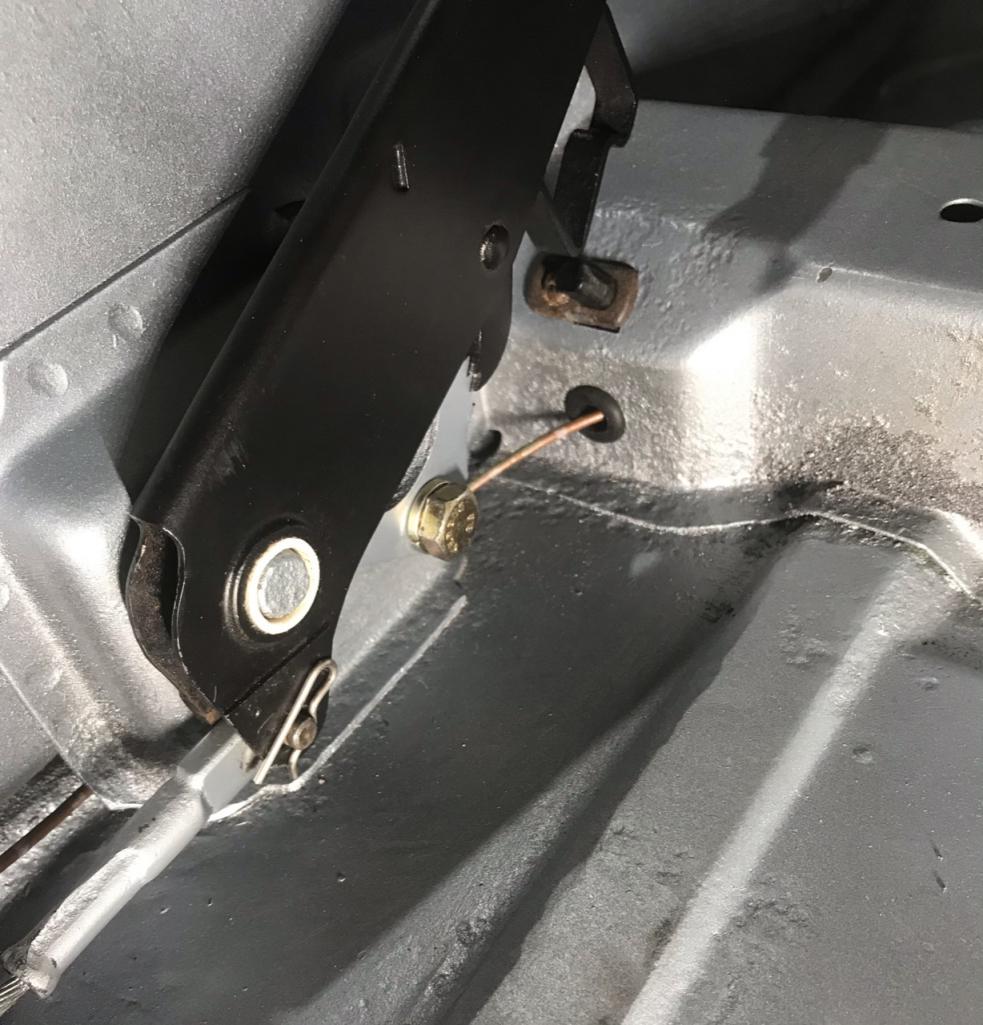
Posted by: Dion Oct 4 2020, 08:44 PM
Lastly for this weekend, a nicely restored heater lever courtesy @http://www.914world.com/bbs2/index.php?showuser=18263 . Thanks Doug!
Attached thumbnail(s)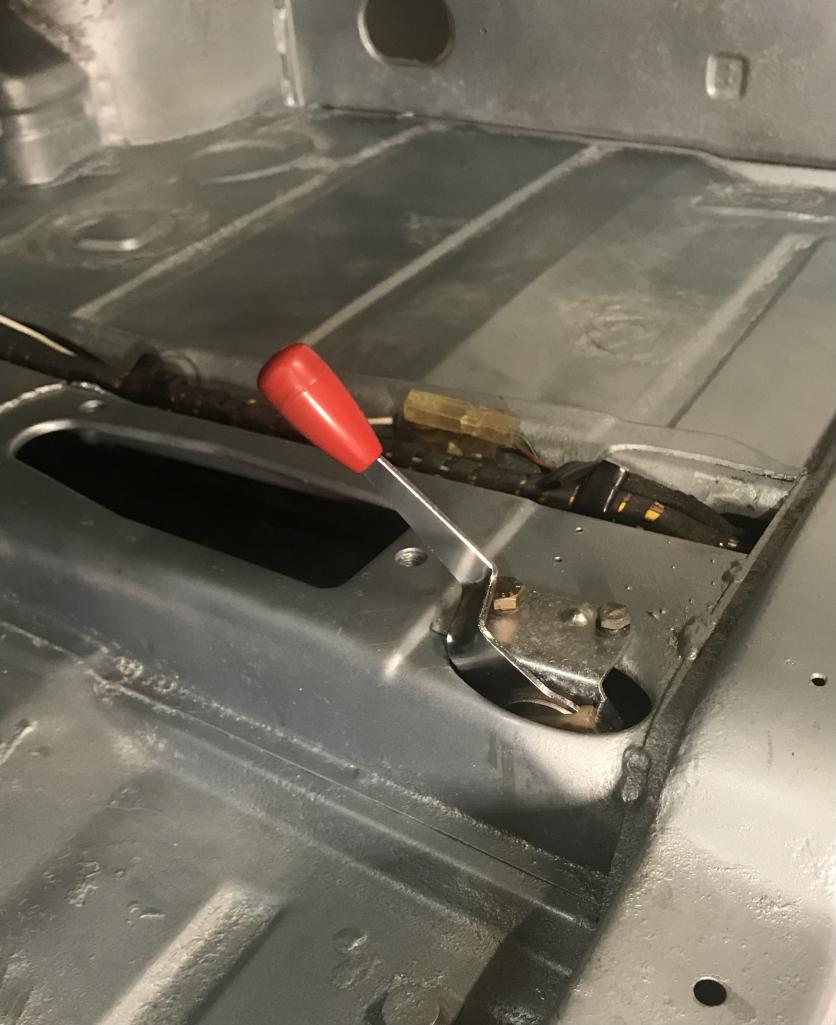
Posted by: bbrock Oct 4 2020, 10:01 PM
Nice work. I'm loving the green brake lines. Good call on gasketing that hatch too.
Posted by: TonyA Oct 5 2020, 05:34 AM
Wow I need to get over there and see this in person.
Posted by: rgolia Oct 5 2020, 07:37 AM
Dion - Outstanding work and progress....didn't know you were getting this much done during the Covid. I want to come see too.
Posted by: Dion Oct 5 2020, 09:52 AM
Dion - Outstanding work and progress....didn't know you were getting this much done during the Covid. I want to come see too.
Always welcome fellas
Be great to maybe hangout on a nice fall day. Bench racing in the garage.
Posted by: Dion Oct 29 2020, 05:26 PM
Alright end of month update. Nothing that hasn’t been seen or done before but again hopefully helps someone out working on their own.
First up, throttle control for the carbs. I’m using 914Rubbers kit. Pretty straightforward.
I welded the little shark fin on the pedal end. I also had to take a slice out of my JW shifter console so this whole setup can function.
Turned out pretty good.
Attached thumbnail(s)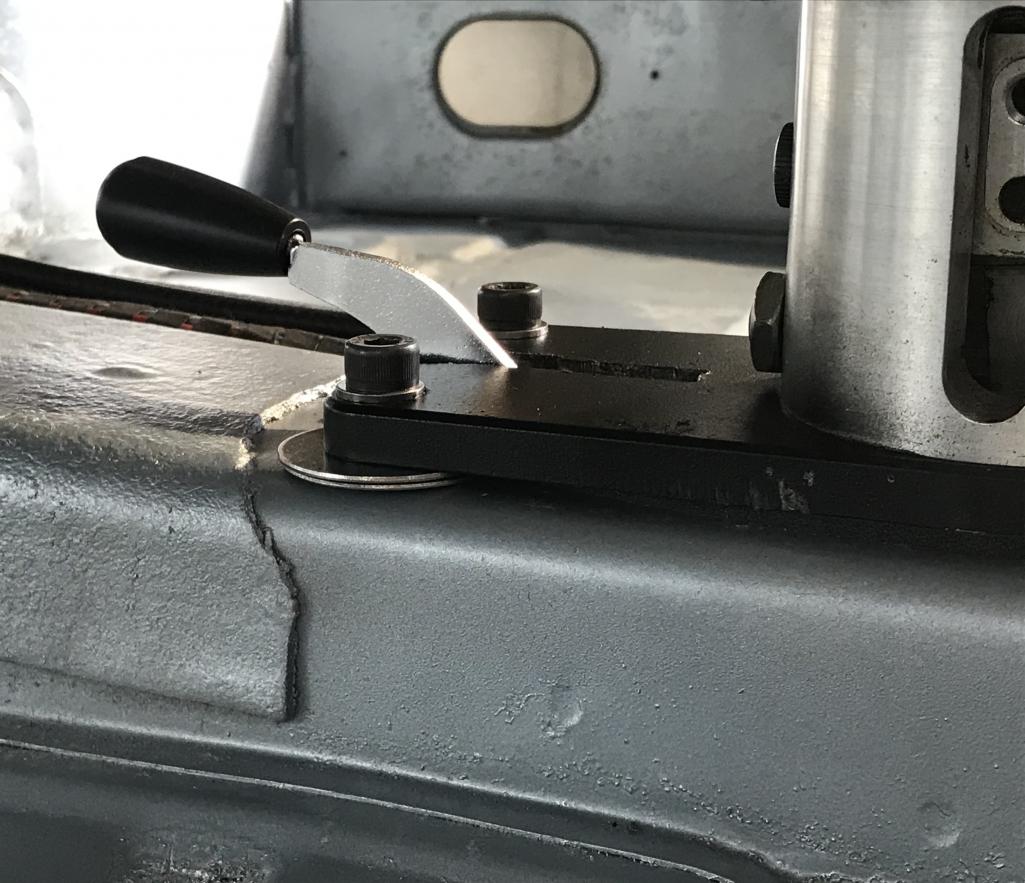
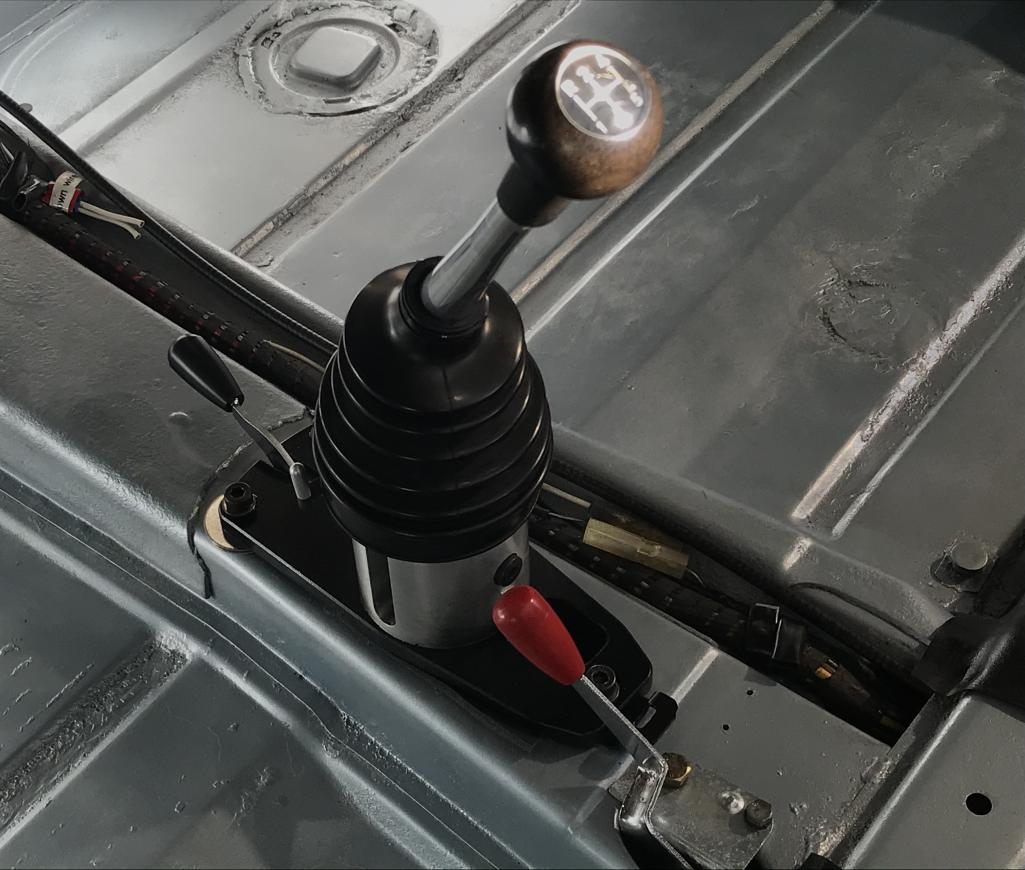
Posted by: Dion Oct 29 2020, 05:36 PM
Installed a new master cylinder. Followed Ian’s brilliant video. It was a bit of a pain in the arse as my lifts crossbar happens to lay in the region I needed to access. Moving the car on the lift isn’t an option yet. The test of wills for me was getting the hoses to lay against the bulkhead. I was getting some interference from the steering rack bellows.
I used the EZ install where the hoses go into the cylinder. All worked out.
Attached thumbnail(s)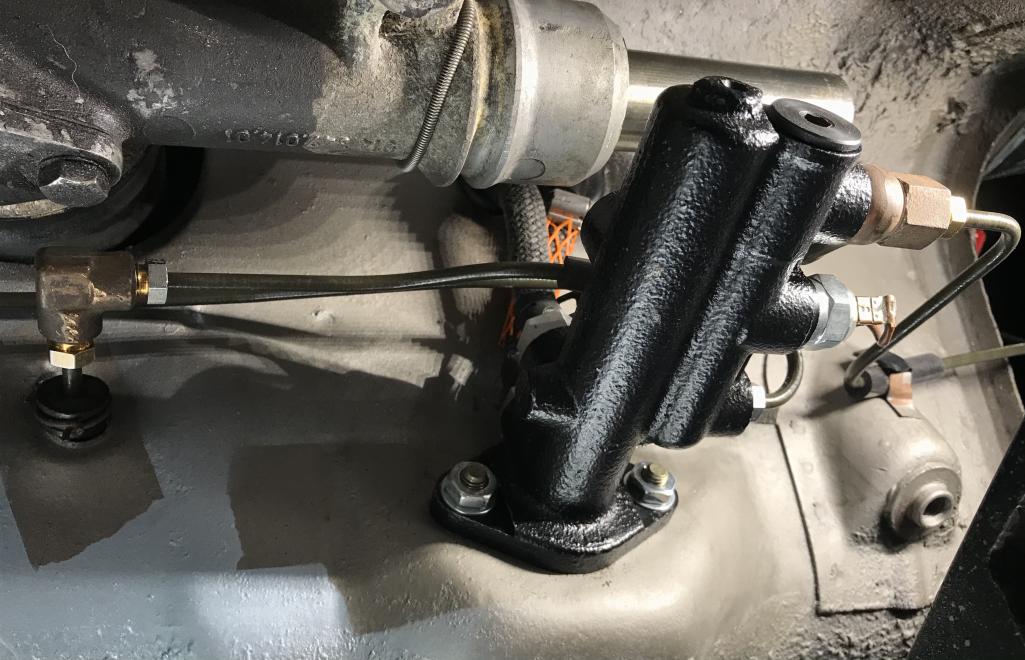
Attached image(s)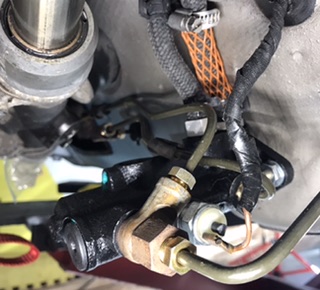
Posted by: Dion Oct 29 2020, 05:42 PM
Front suspension went on. Bilstein struts, reconditioned A-arms with Elephant Racing’s polybronze bushings and some Sebro vented rotors.
Attached thumbnail(s)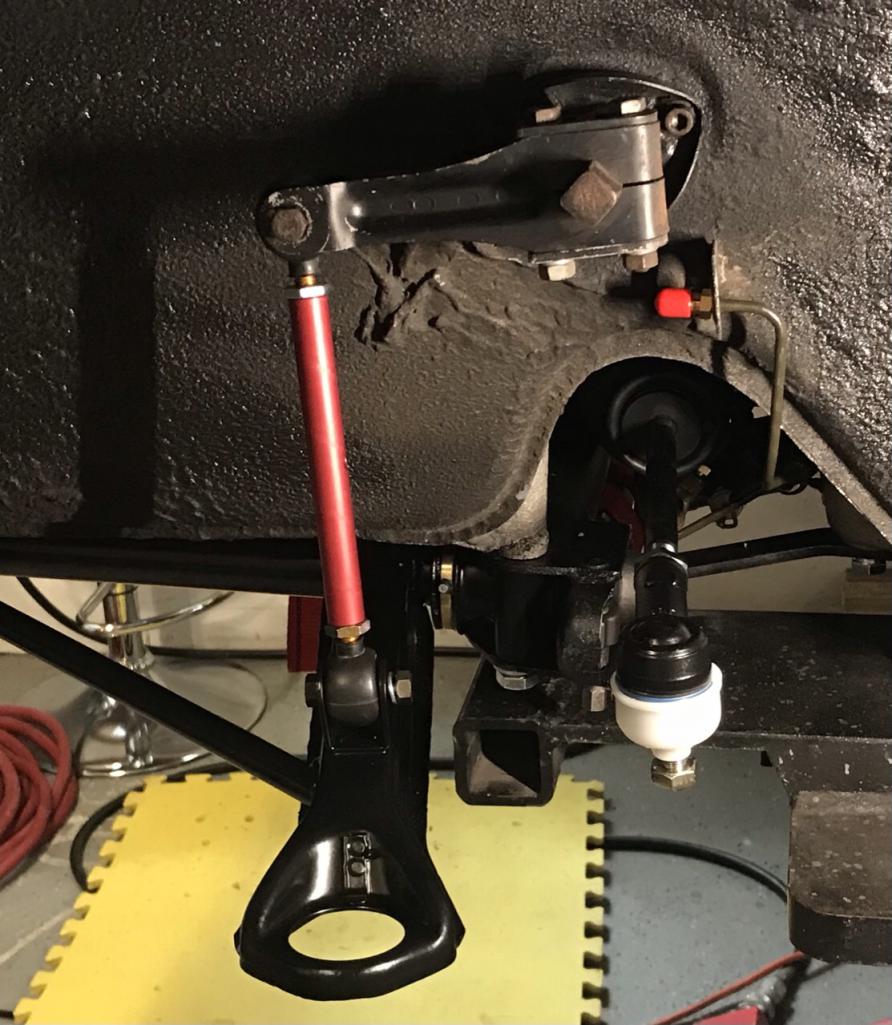
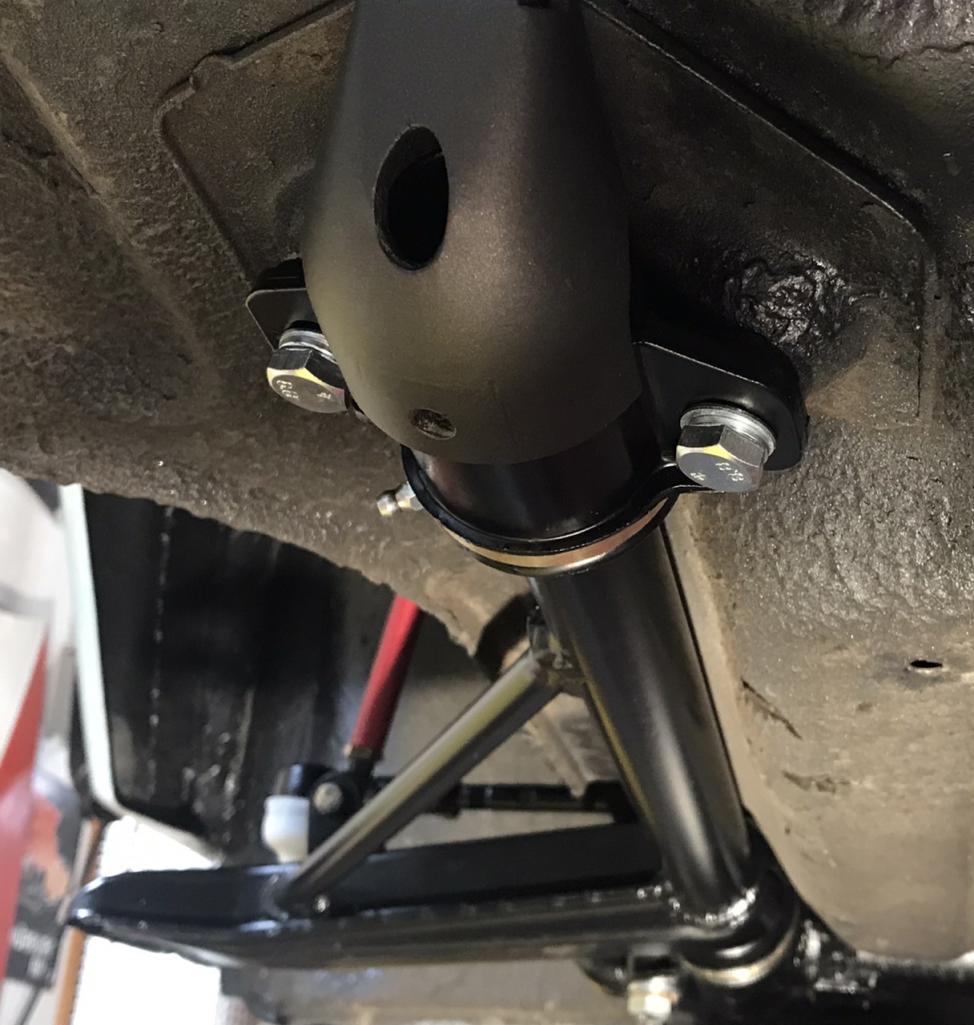
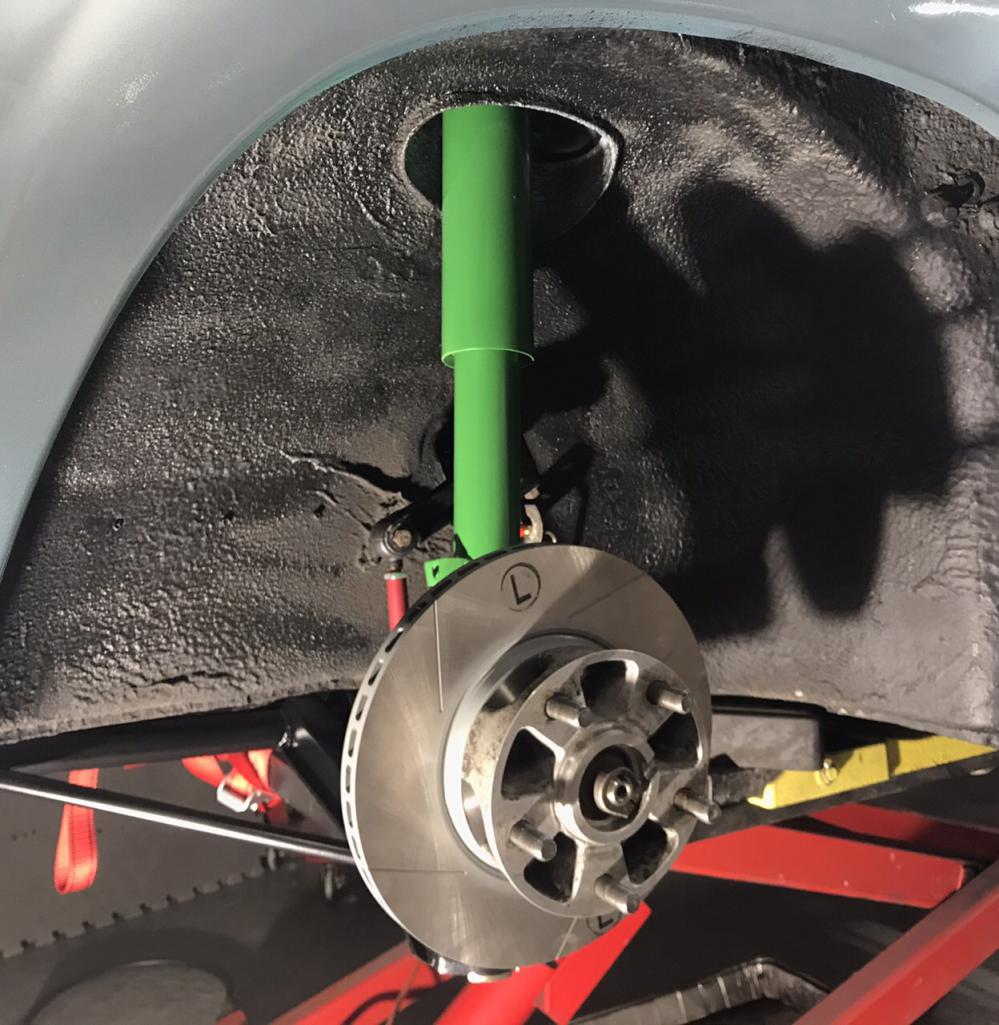
Posted by: Dion Oct 29 2020, 05:45 PM
Close-up. You have to love some John Deere colour.
Attached thumbnail(s)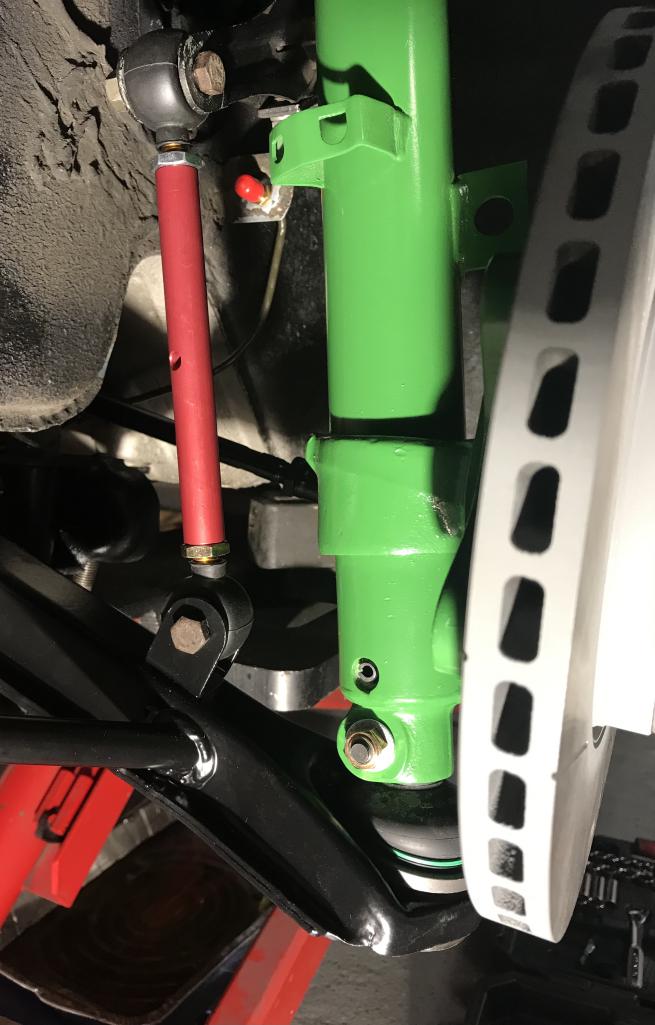
Posted by: Dion Oct 29 2020, 05:59 PM
Oil tank. Sourced the proper “plastic” washers from Stoddard to mount the tank and also the rubber grommet around the console. The foam piece for around the oil fill neck is a
nutty price. Not installed yet, no pic.
Attached thumbnail(s)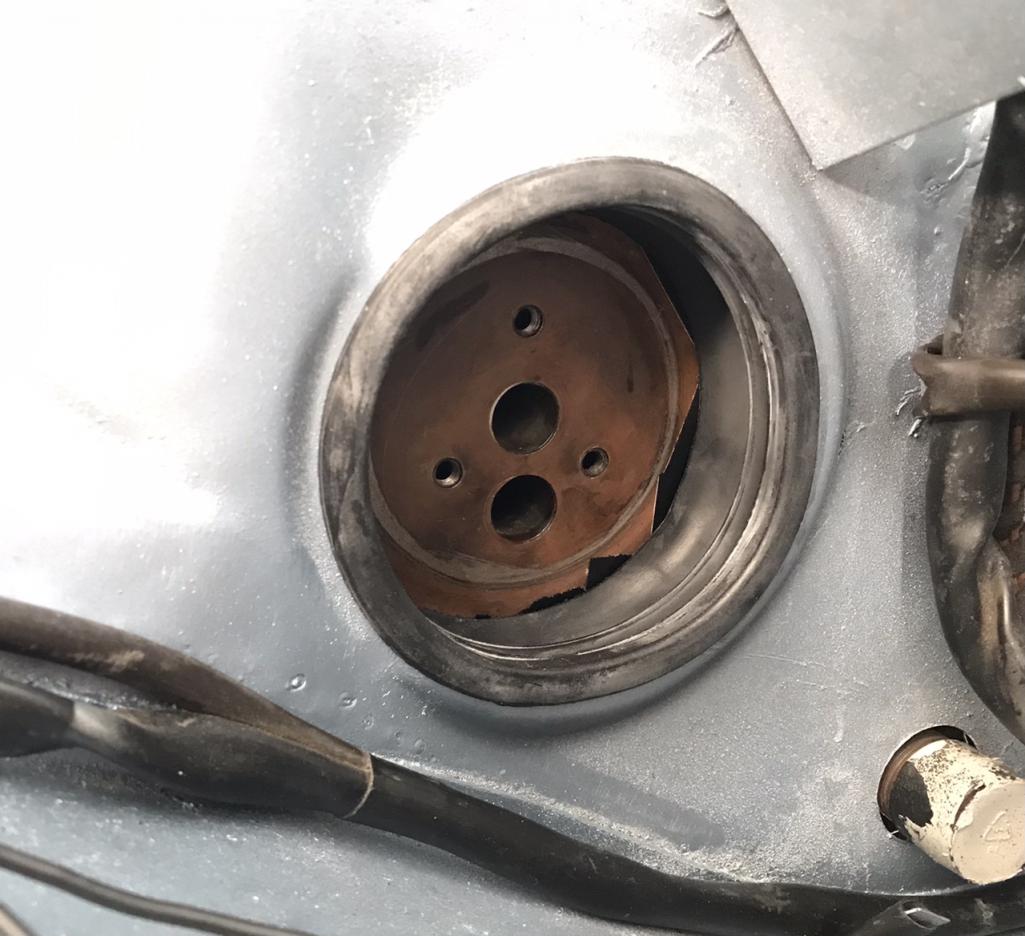
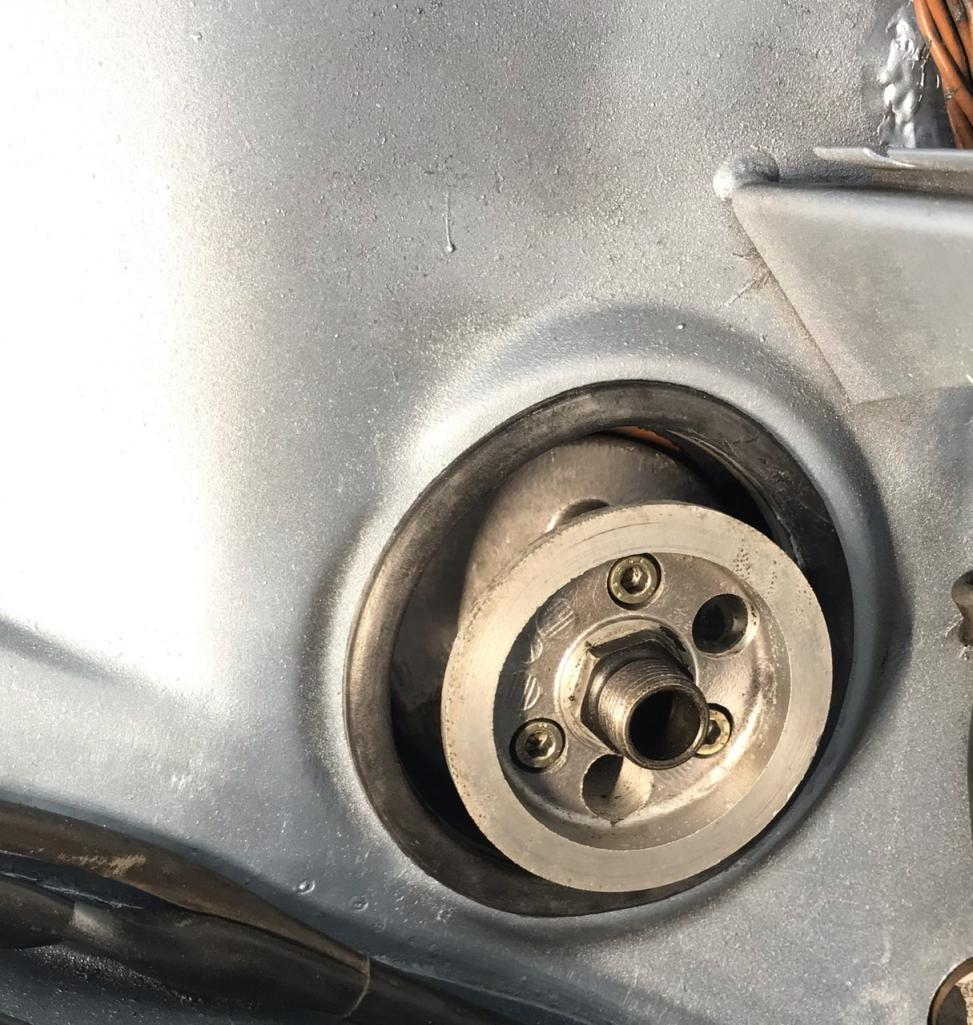
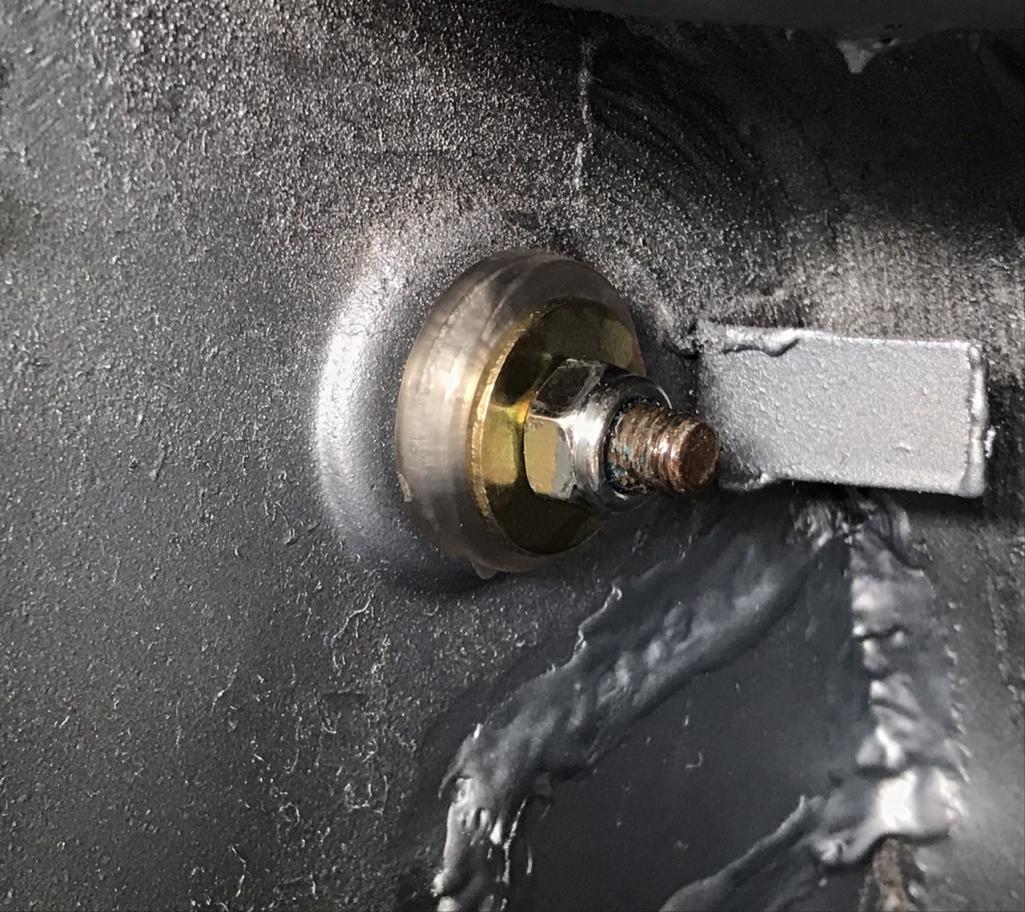
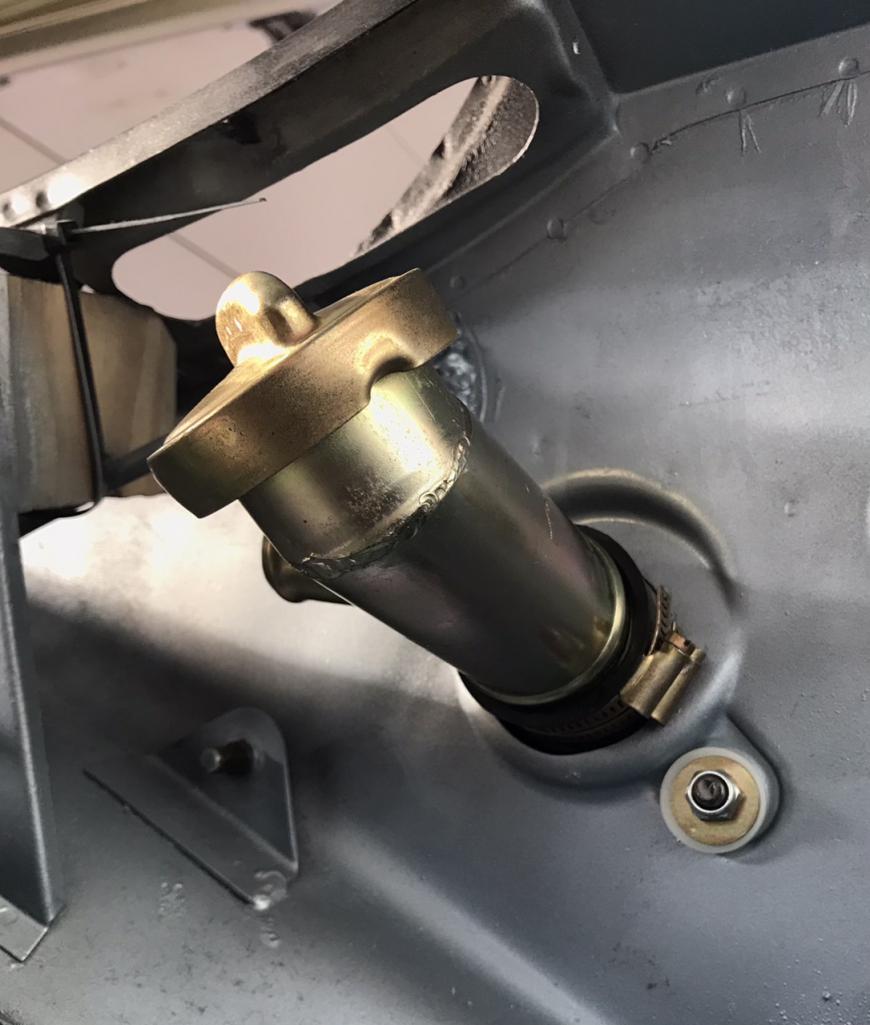
Posted by: tygaboy Oct 29 2020, 05:59 PM
It's always a good day when there's an update from Dion!
Coming right along and looking really good.
Posted by: Dion Oct 29 2020, 06:04 PM
Some tasty bits that will bring this to a halt. S calipers restored courtesy of Eric & the gang at PMB. They turned out beautiful.
Attached thumbnail(s)
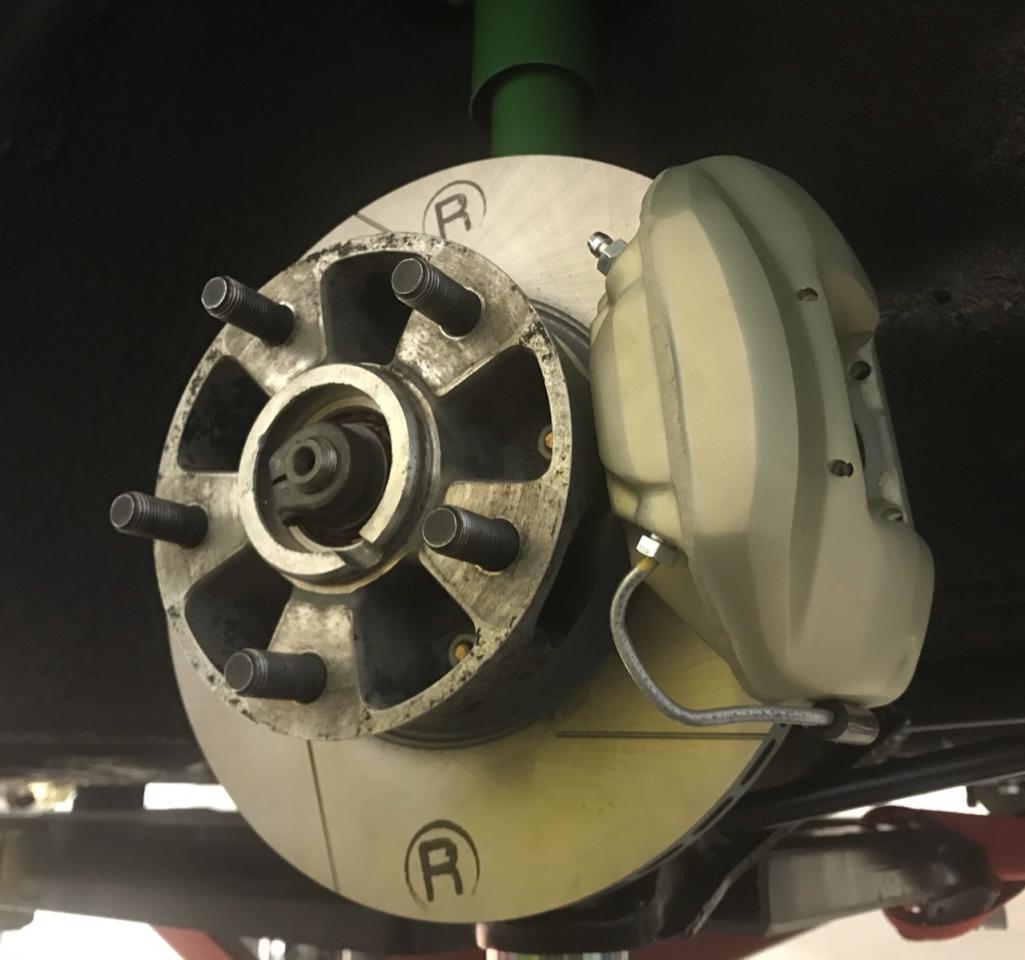
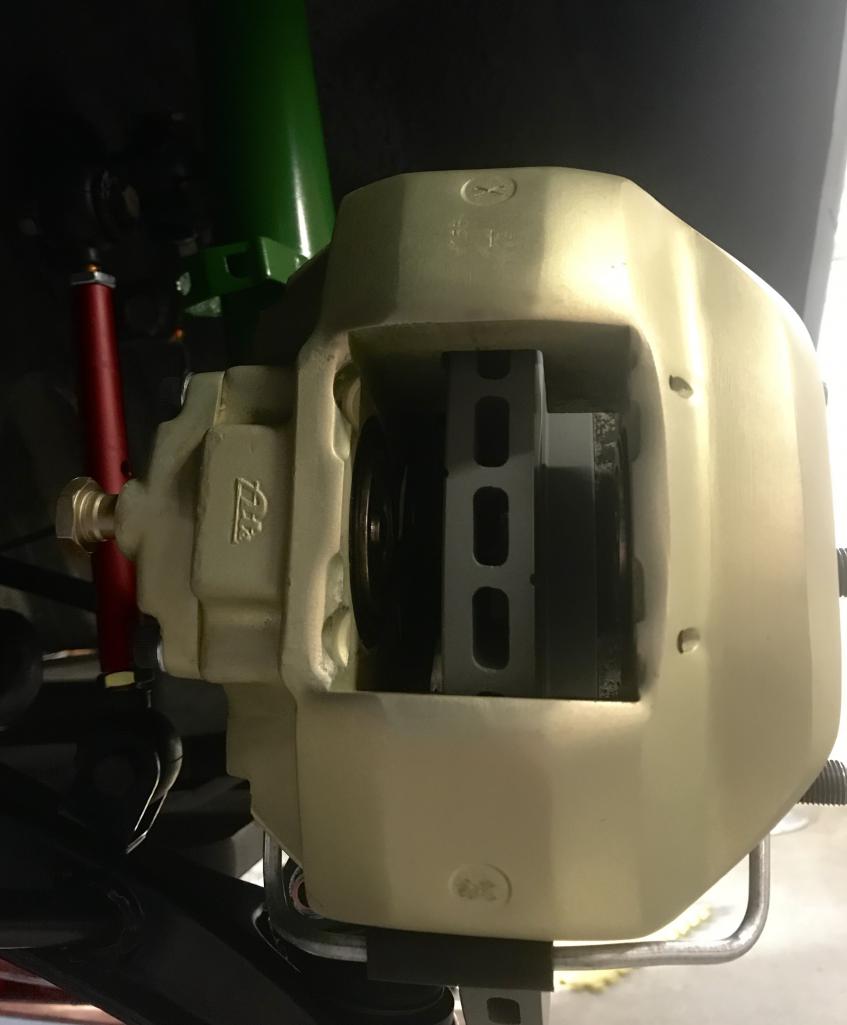
Posted by: Dion Oct 29 2020, 06:05 PM
Thanks Chris!
Posted by: Dion Oct 29 2020, 06:21 PM
As I was losing my mind, because when I first fitted my rear rotors and rotated them,
they wobbled like the Flintstones jalopy! I was like what the hell! I screwed up the bearing install. My sanity was restored when i contacted Dave who asked “did you torque
the rotor all the way down” .....Ummm no. So after feeling like a Jack-ass. I did. I also went and purchased my first dial indicator. What a cool device! I checked both sides run-out.
Sent a vid to Dave to make sure I was doing this correctly. All checked out. I was within spec. Whew! Thanks @http://www.914world.com/bbs2/index.php?showuser=1262 Always learning.
So then I was able to mount the rear (PMB restored ) GT calipers. Owe Mark ( @http://www.914world.com/bbs2/index.php?showuser=10825 ) a debt of gratitude for allowing me to purchase these from him.
Love that fresh factory appearance.
Need to order the soft lines and get some fluid, then... I’m sure the fun will begin.
Also need to source the E-brake pins. My previous setup was a nut and bolt.
Anyone have a source? My searches keep showing NLA.
Cheers all.
Attached thumbnail(s)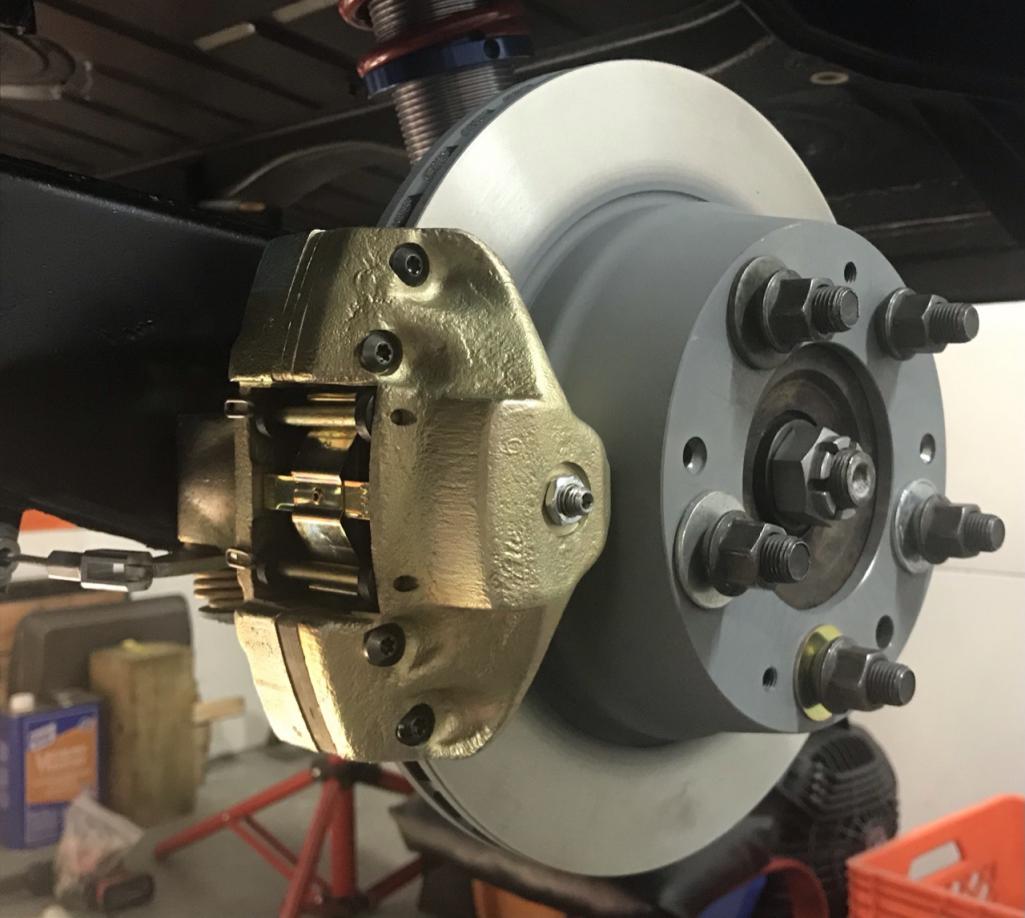
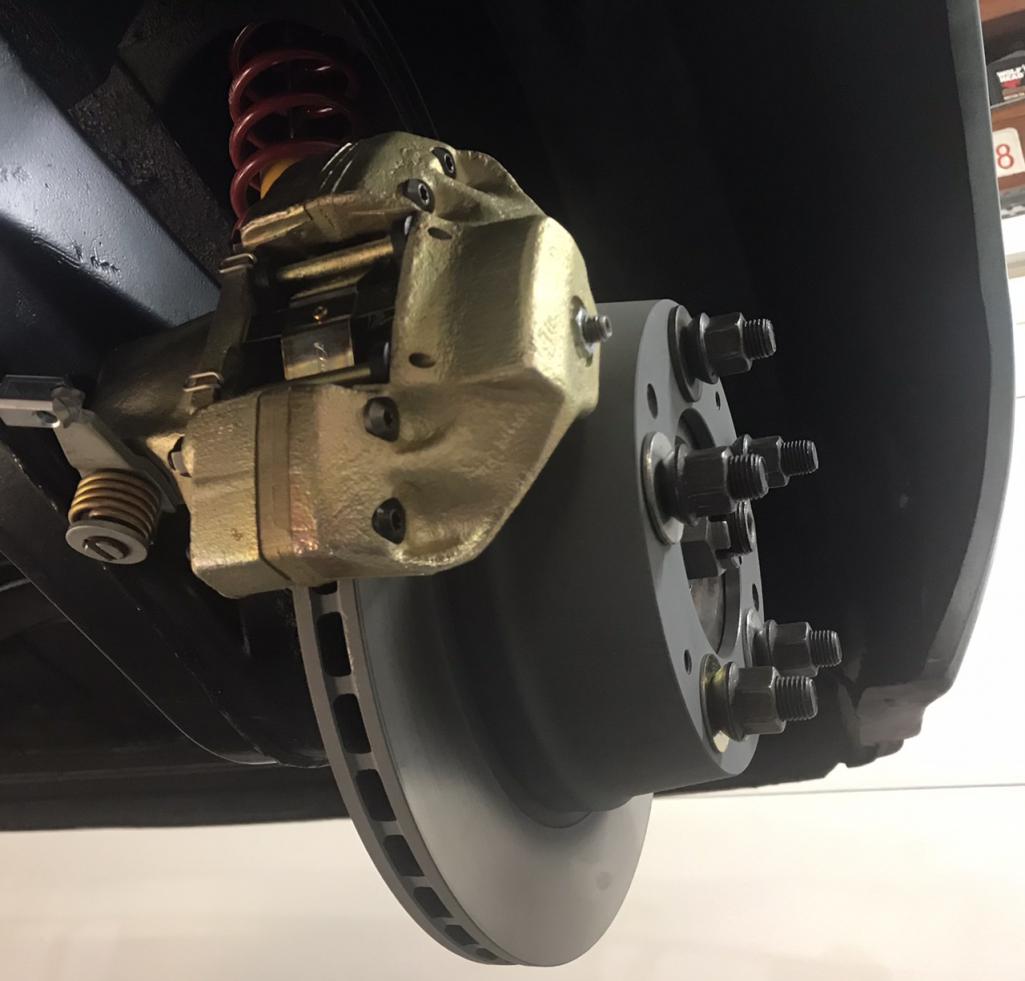
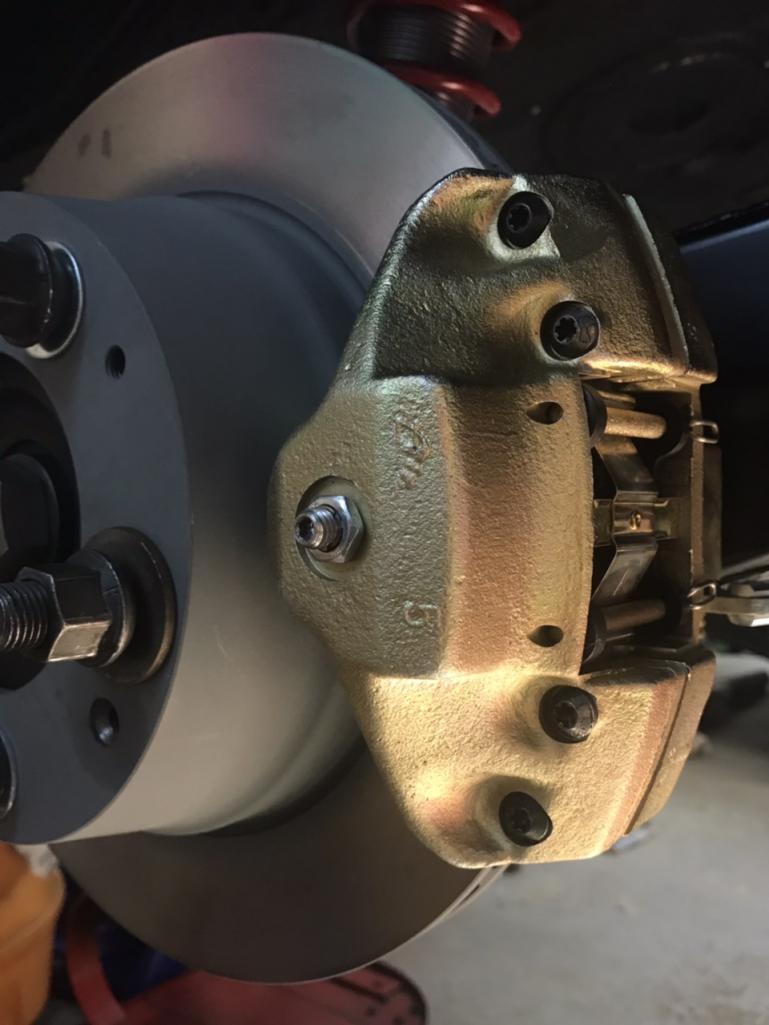

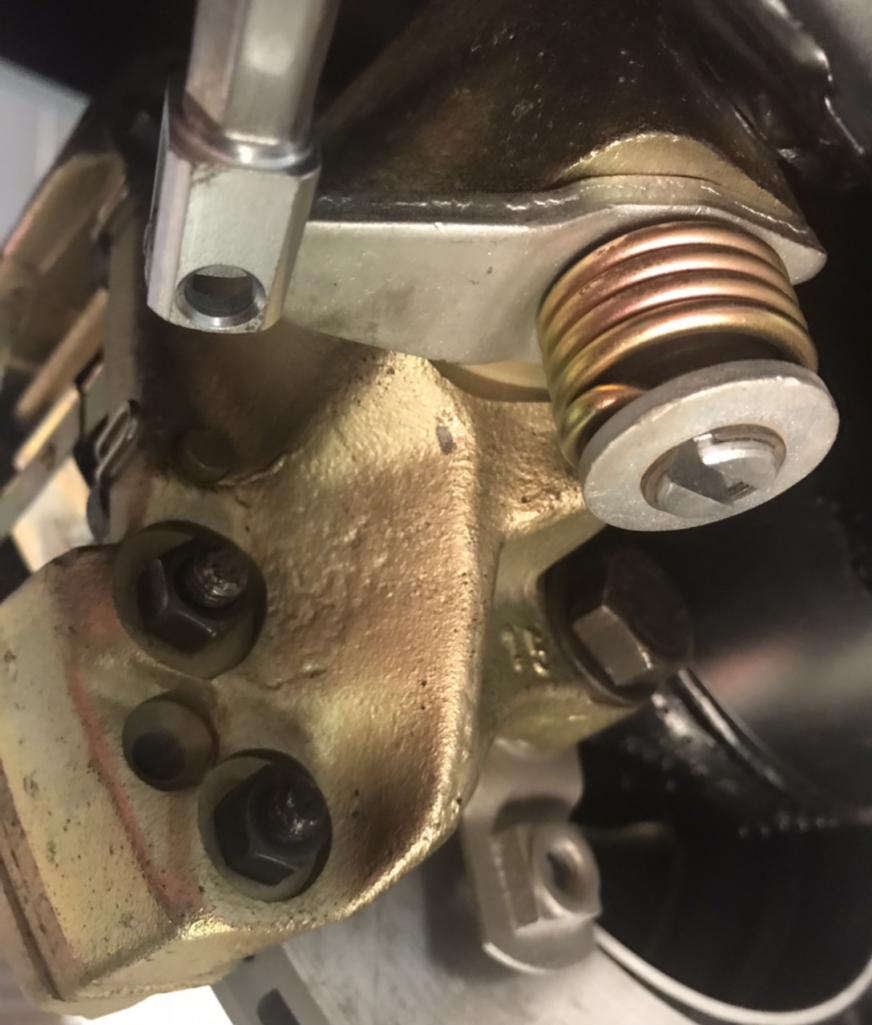
Posted by: mepstein Oct 29 2020, 06:44 PM
Dion - I’m pretty sure PMB keeps the pins in stock.
Posted by: Dion Oct 29 2020, 07:04 PM
Dion - I’m pretty sure PMB keeps the pins in stock.
Thanks Mark, I’ll check it out and give em a ring.
Posted by: bbrock Oct 29 2020, 07:36 PM
Dion - I’m pretty sure PMB keeps the pins in stock.
Posted by: rgalla9146 Oct 29 2020, 09:19 PM
Looking good Dion !
Great progress.
Well done !
Posted by: Larmo63 Oct 29 2020, 09:22 PM
There are little caps that go on the outside (wheel side) adjusters too.
I'm not sure where you get them, just mentioning.
Posted by: TonyA Oct 30 2020, 03:55 AM
Maybe when it stops raining Rgolia Dave and I could cruise over.
Posted by: 9146C Oct 30 2020, 01:40 PM
That's a very impressive build!
Posted by: Dion Dec 21 2020, 06:15 PM
There are little caps that go on the outside (wheel side) adjusters too.
I'm not sure where you get them, just mentioning.
@http://www.914world.com/bbs2/index.php?showuser=17068 thanks my friend. I was able to get them from PMB.
Posted by: Dion Dec 21 2020, 07:00 PM
Time to update.
Been busy with my real job and also at the same time working on a new career.
Recently obtained a CDL license. That’s my bridge “job” to retirement. Hopefully that
works out like I’d like it too.
Anyways .... A few more items to this project.
Connected 2 of oil tank lines. After reading some of the how to threads on here, I went and bought a HF set of those special wrenches. They worked out very nice.
Attached image(s)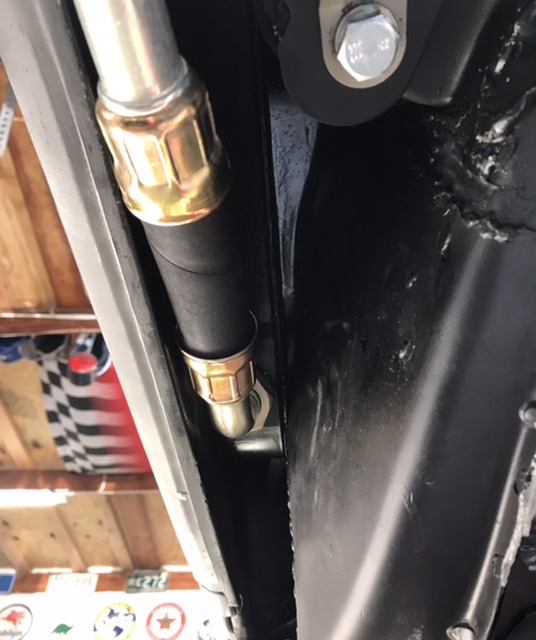

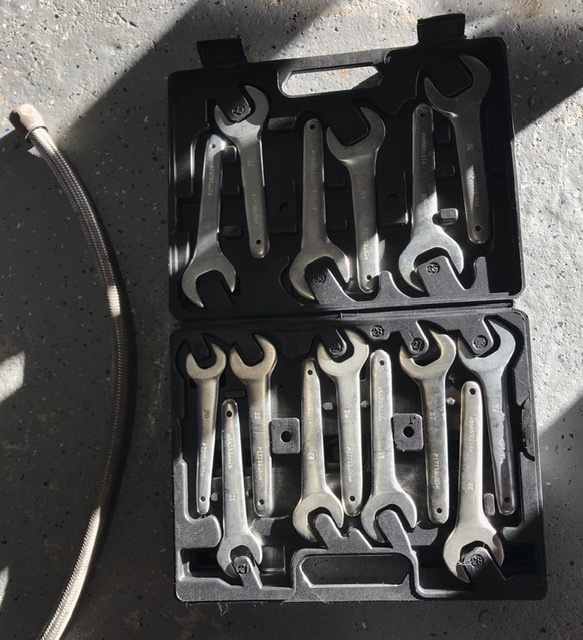
Posted by: Dion Dec 21 2020, 07:09 PM
Next up was the gauges and their corresponding wiring. Why is wiring so stressful?
I really hope they all function as they should!! The most challenging was the damn little
trip odometer cable. Don’t know why but is was a bugger to get it to lay proper, so it wouldn’t bind on the dash bulkhead.
Looks like my car received a tangerine colour dash before the black paint went on.
Attached thumbnail(s)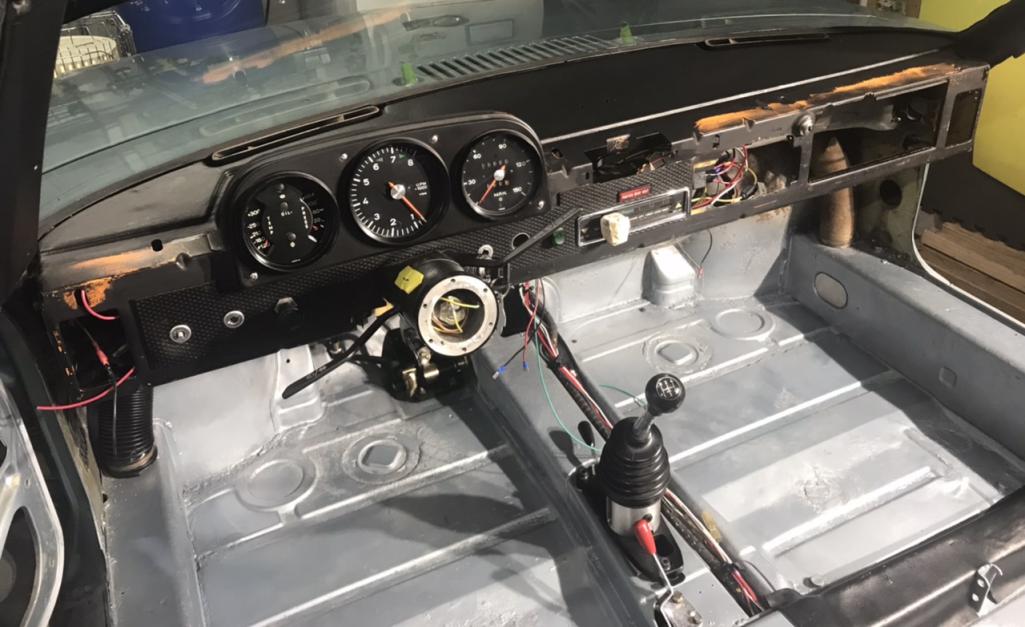
Attached image(s)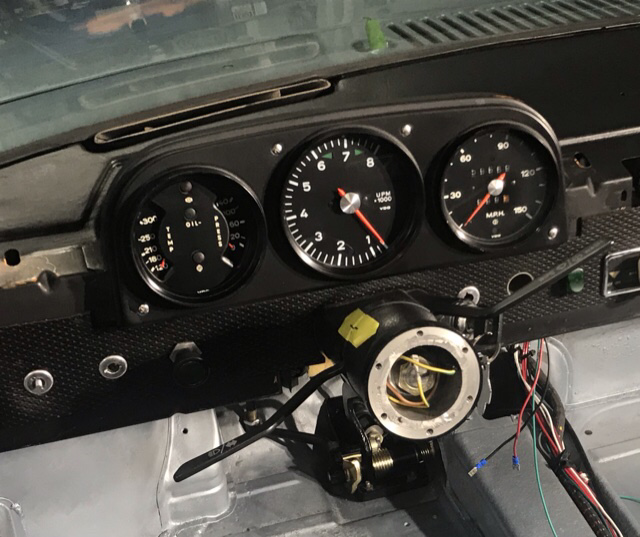
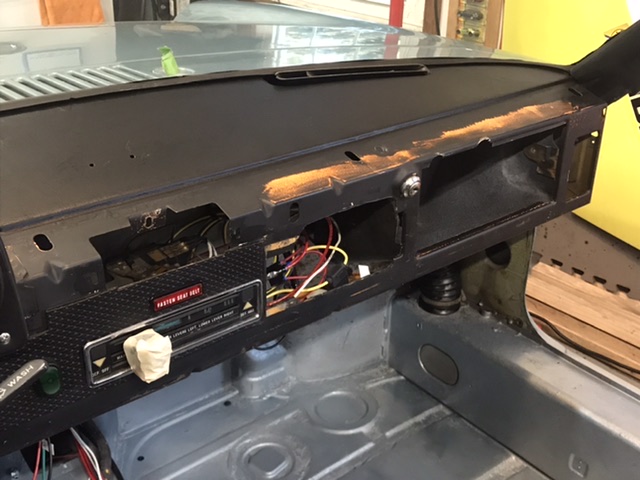
Posted by: Dion Dec 21 2020, 07:15 PM
Ahhh the nice leather dash gets its place of honor. It’s a nicely done piece.
Attached thumbnail(s)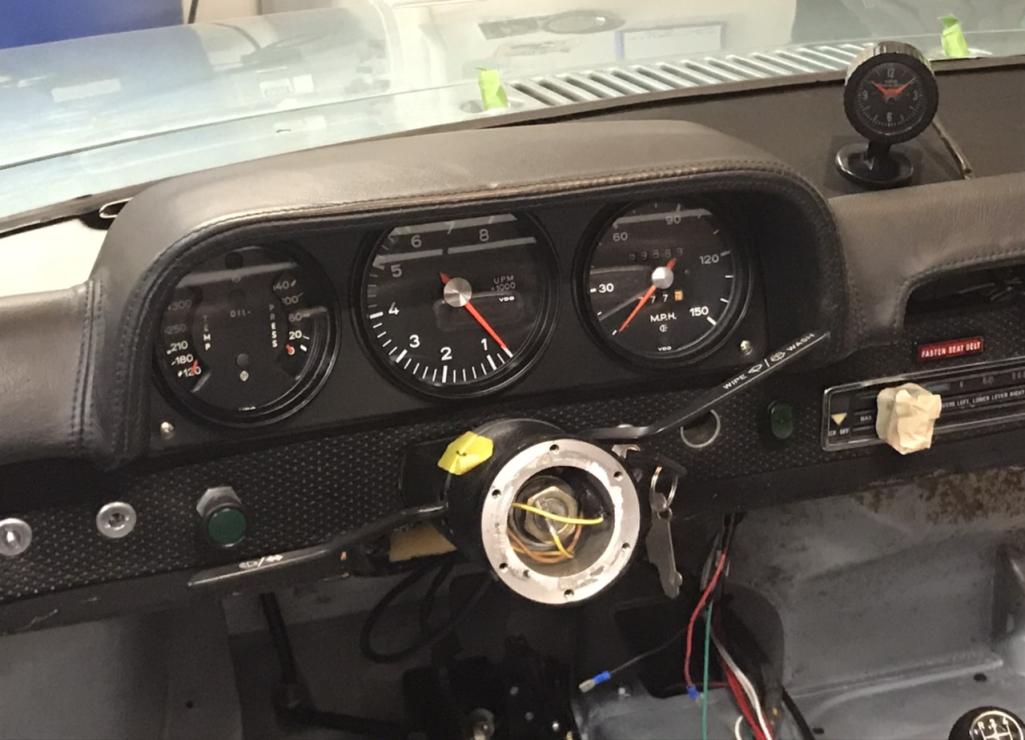
Attached image(s)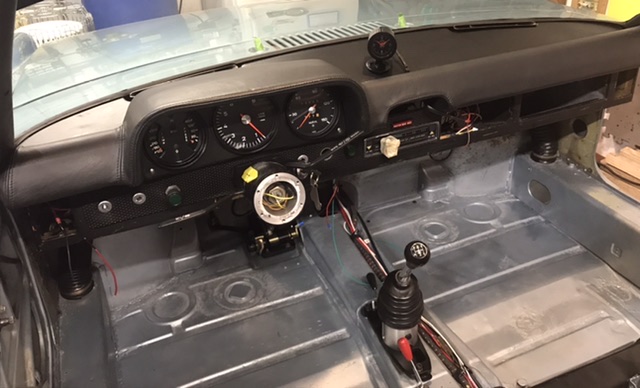
Posted by: Dion Dec 21 2020, 07:18 PM
Some German loop carpeting courtesy 914rubber. Charcoal colour.
Attached thumbnail(s)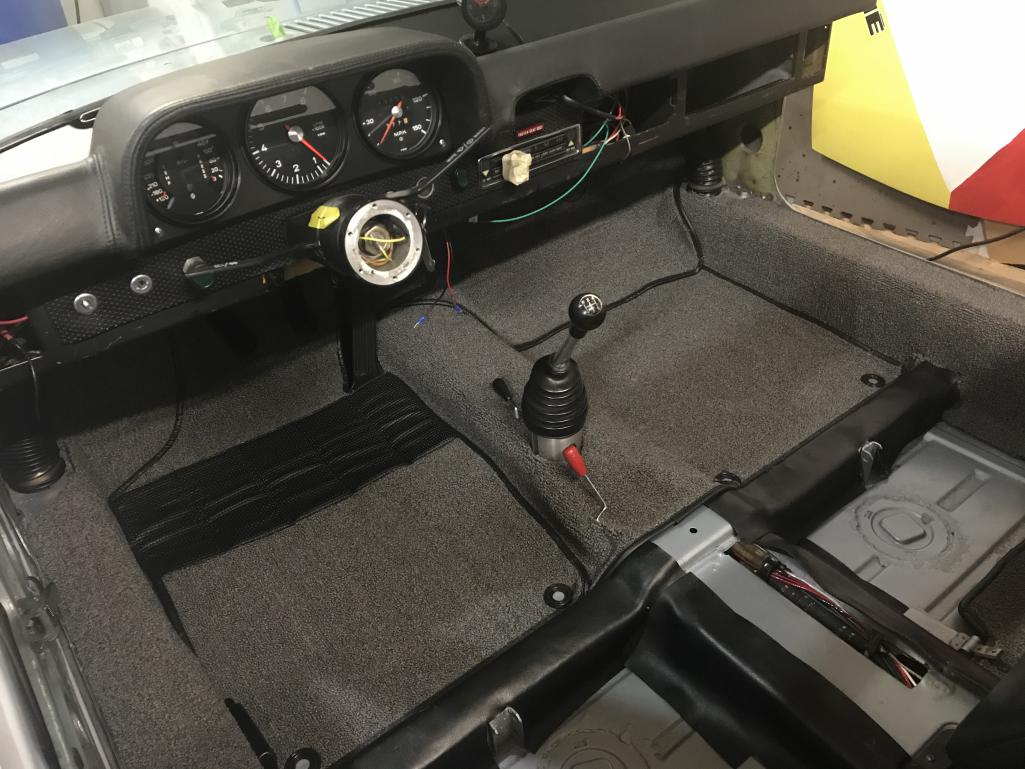
Posted by: Dion Dec 21 2020, 07:24 PM
The supervisor joined me one evening, it was a chilly one. She’s getting up in age. 14 years now. Every day is a bonus. @http://www.914world.com/bbs2/index.php?showuser=20845 knows this all too well. buddy, for Niaqaq.
Attached thumbnail(s)
Posted by: Dion Dec 21 2020, 07:27 PM
Changed the interior a wee bit. Decided to mount the shifter above the carpet... more mechanical look to it. Added the center storage box with my fuel gauge and low fuel lamp.
Attached thumbnail(s)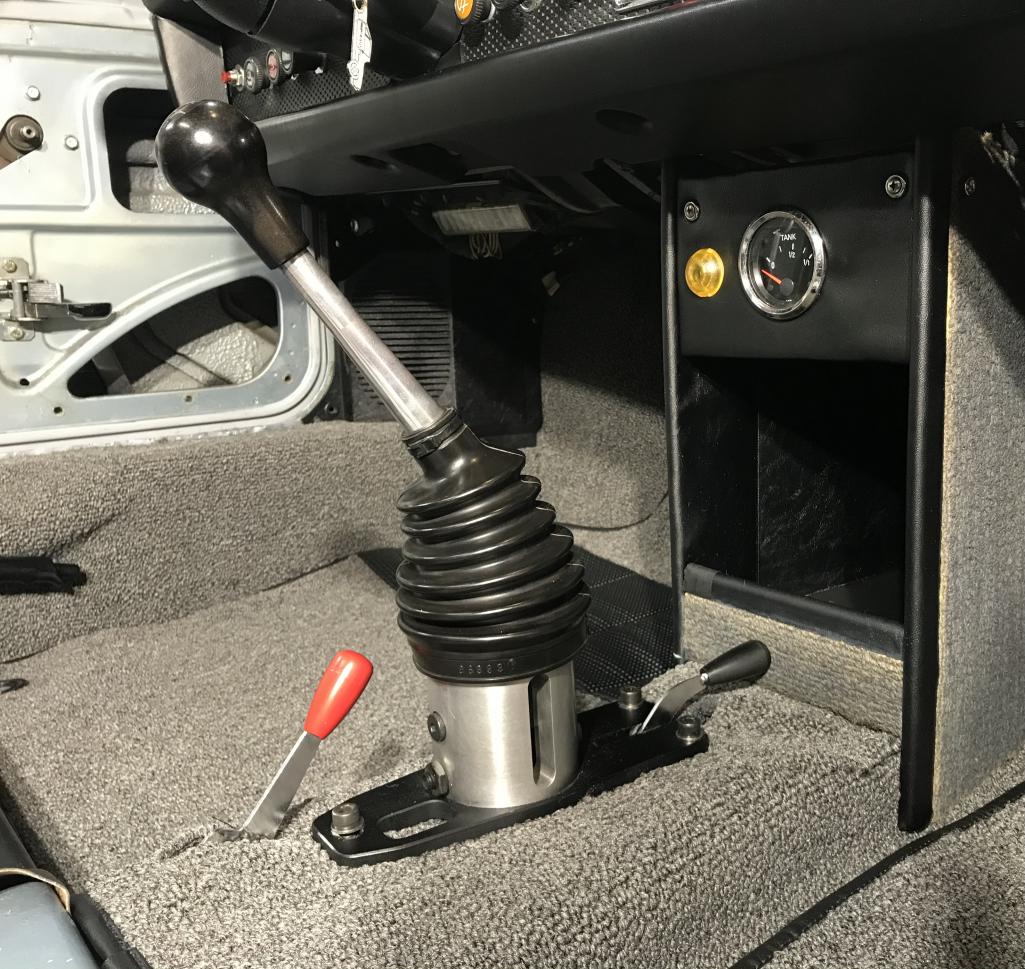
Posted by: bbrock Dec 21 2020, 07:30 PM
The supervisor joined me one evening, it was a chilly one. She’s getting up in age. 14 years now. Every day now is a bonus. @http://www.914world.com/bbs2/index.php?showuser=20845 knows this all to well.
buddy for Niaqaq.Thanks Dion. Give the supervisor a scratch behind the ears for me. Awesome looking buddy there.
Posted by: Dion Dec 21 2020, 07:30 PM
And to wrap up December work, the 1970’s version of Sport Chrono
Merry Christmas all, be safe and well!
Attached thumbnail(s)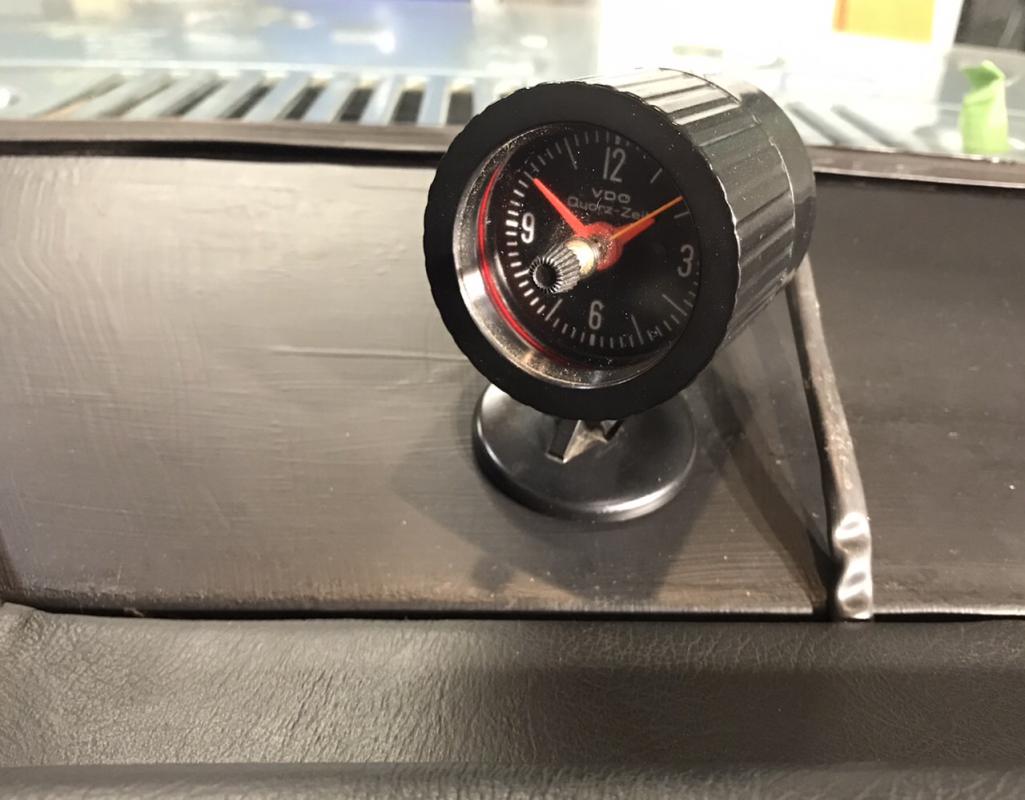
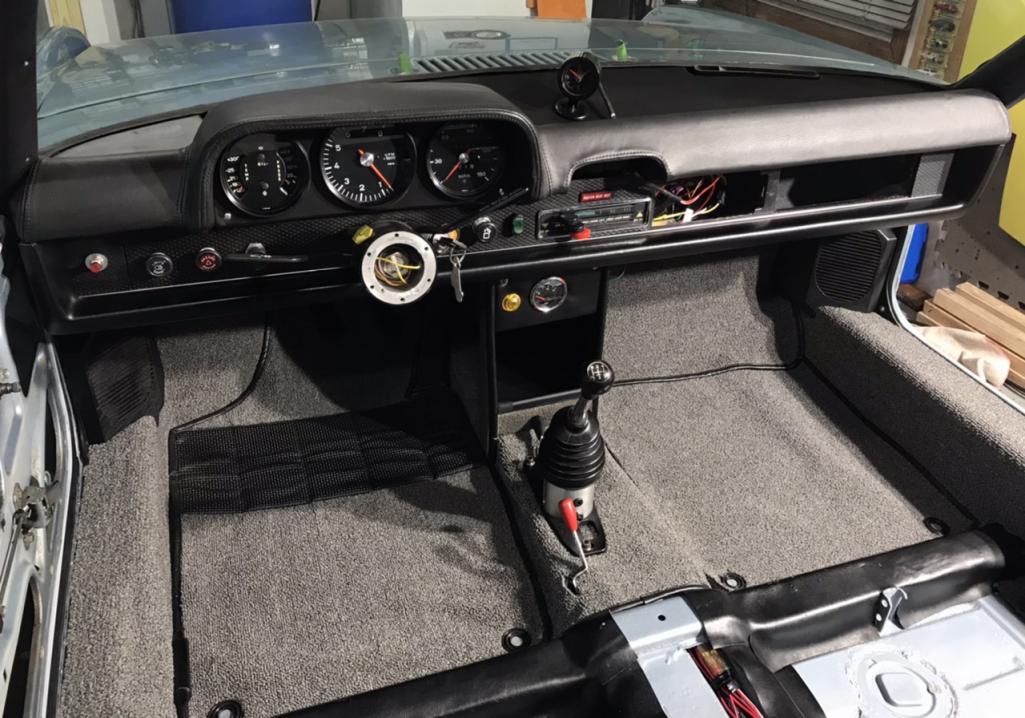
Posted by: mepstein Dec 21 2020, 08:11 PM
I was loving it until you got to the clock on the dash.
Posted by: Dion Dec 21 2020, 08:32 PM
I was loving it until you got to the clock on the dash.
Heheheheh. Aww c’mon Mark! A little 70’s kitsch. Easily removed. 3M tape. If I’m honest not totally sold on it.
It’s a cool period piece though.
Posted by: tygaboy Dec 21 2020, 08:39 PM
Dion - WOW!! Your car is looking great! LOVE the interior. Dash = very nice.
And I like the shifter above the carpet.
Merry Happy to you and yours.
Posted by: TonyA Dec 21 2020, 09:10 PM
I was loving it until you got to the clock on the dash.
He needs that clock now that he is a professional driver. He will only be able to drive for x # of hours
Posted by: mepstein Dec 21 2020, 09:58 PM
I was loving it until you got to the clock on the dash.
Heheheheh. Aww c’mon Mark! A little 70’s kitsch. Easily removed. 3M tape. If I’m honest not totally sold on it.
It’s a cool period piece though.Didn’t you used to have some timers on the dash?
Posted by: Dion Dec 21 2020, 10:52 PM
I was loving it until you got to the clock on the dash.
Heheheheh. Aww c’mon Mark! A little 70’s kitsch. Easily removed. 3M tape. If I’m honest not totally sold on it.
It’s a cool period piece though.Didn’t you used to have some timers on the dash?
@http://www.914world.com/bbs2/index.php?showuser=10825 , yeah Mark. I’m prolly going back to my Heuer clocks. I also have the Halda
speedpilot. I’m not sure on direction for those trinkets yet. I’m just messing about. The clock was placed just to get an idea for wiring purpose. Wanted to see what to run where.
Priority will be mechanical next. Need to get that 6 in there!
Posted by: BeatNavy Dec 22 2020, 07:15 AM
I was loving it until you got to the clock on the dash.
He needs that clock now that he is a professional driver. He will only be able to drive for x # of hours
Way to go, Dion! Glad you're still rolling along
Posted by: Superhawk996 Dec 22 2020, 10:50 AM
Coming along! Nice to see this one heading toward completion!
Posted by: mb911 Dec 22 2020, 11:07 AM
Looks great.. You gonna be driving this summer?
Posted by: Dion Dec 22 2020, 11:21 AM
Looks great.. You gonna be driving this summer?
@http://www.914world.com/bbs2/index.php?showuser=9892 ,
If the stars align Ben, it’s the goal. I decided to wait on exterior paint/bodywork for later next year. I want to get it mechanically sorted.
Posted by: Dion Mar 4 2021, 07:59 AM
Making further progress. Did a little mod to my dash face. Made the glove box more like a mail slot. Just having a bit of fun. Keeping it simple.
Attached thumbnail(s)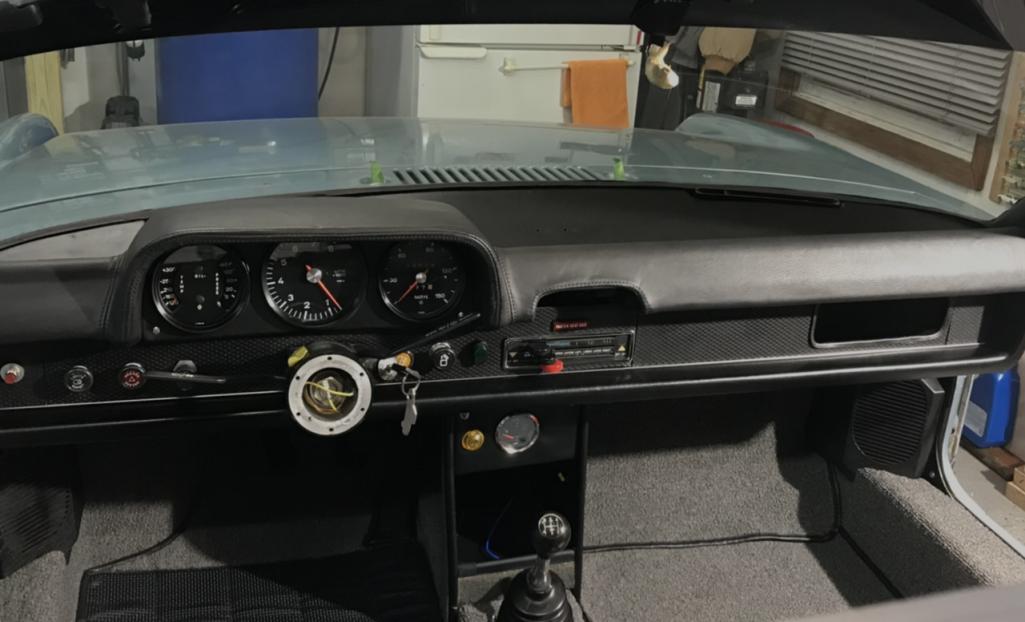
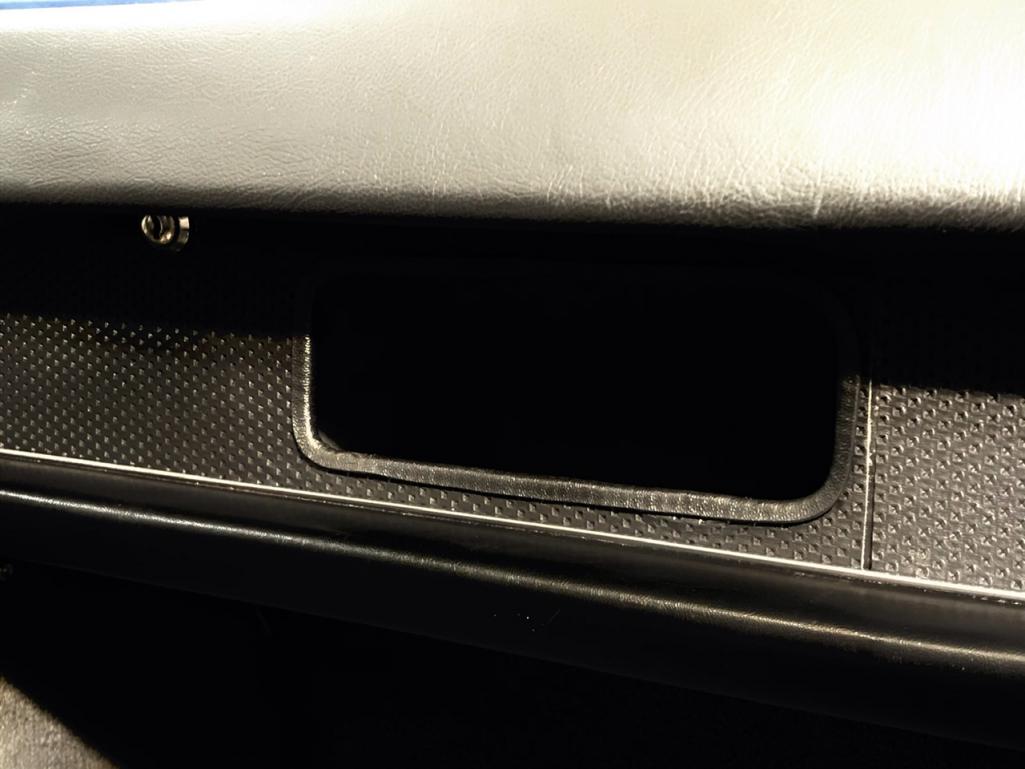
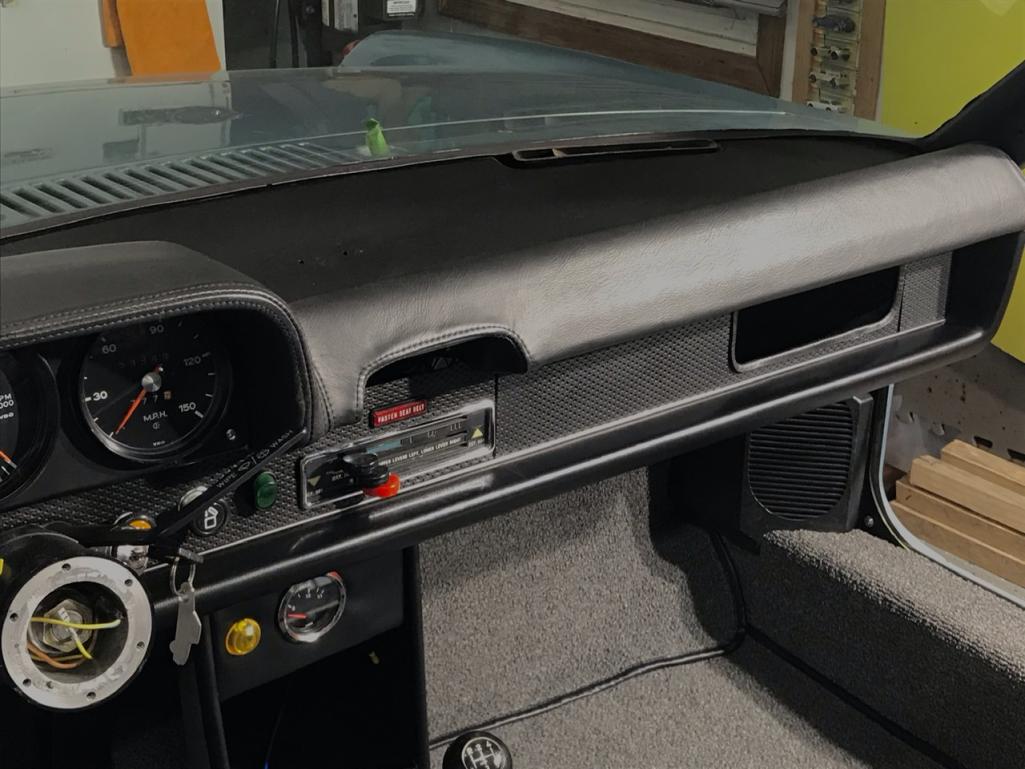
Posted by: Dion Mar 4 2021, 08:02 AM
Placed the seats in. It’s looking like a car again!
Attached thumbnail(s)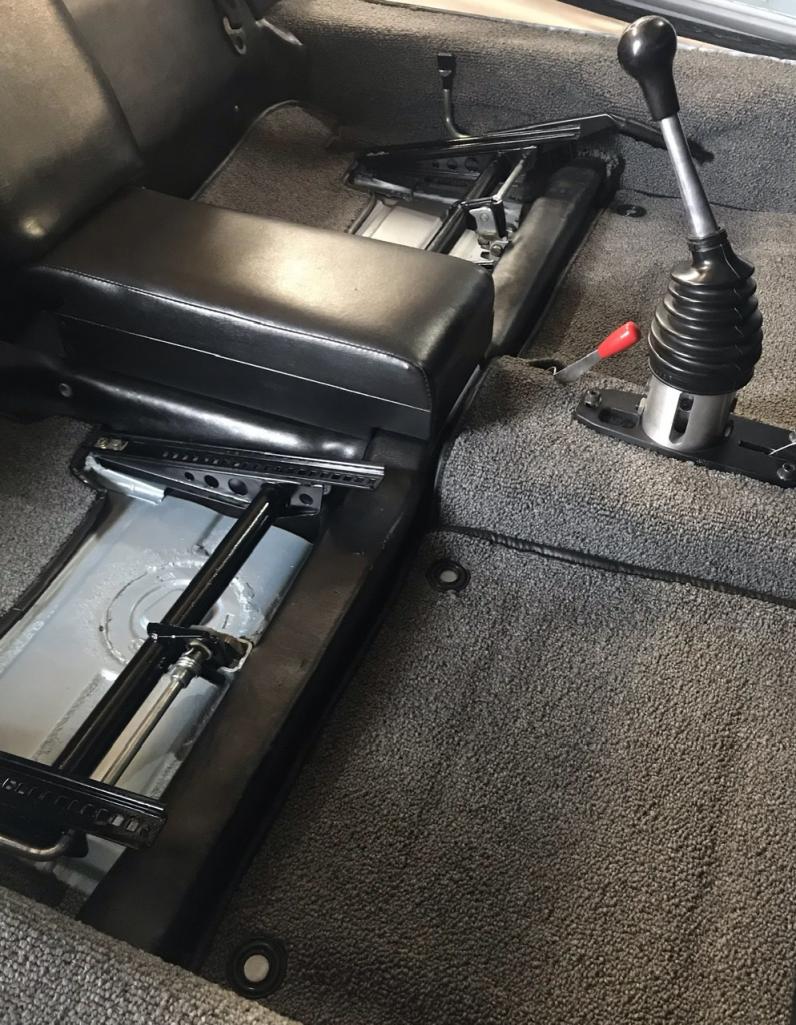

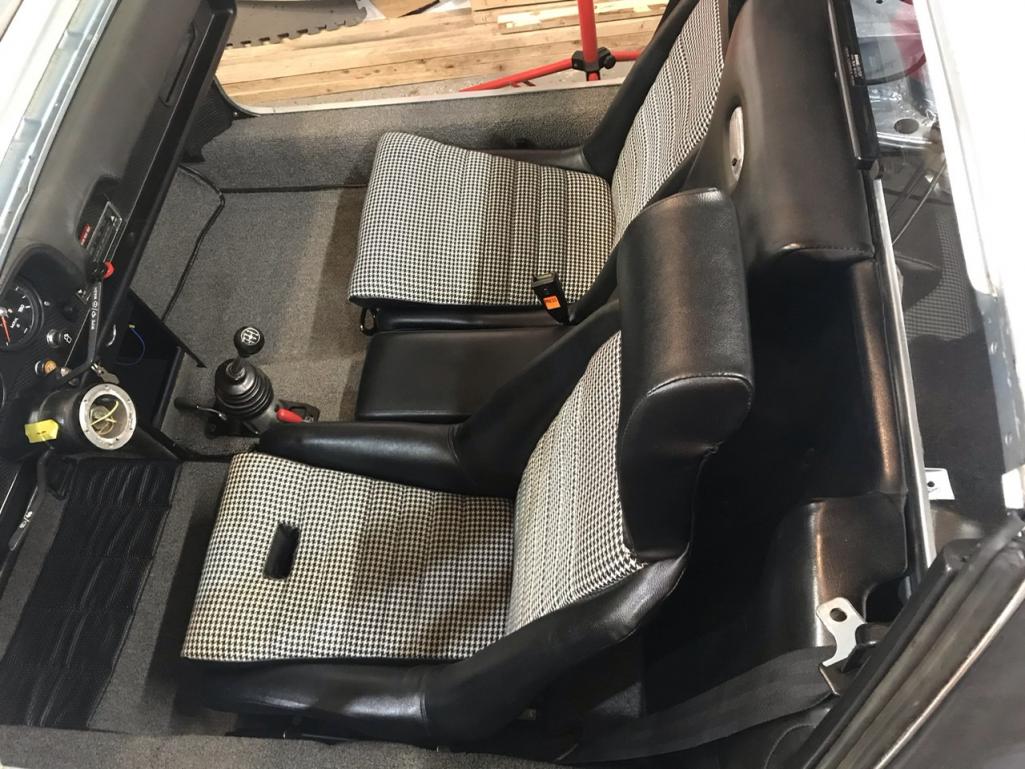
Posted by: Dion Mar 4 2021, 08:08 AM
Installed freshened targa latches and a not torn up targa bar pad, which unfortunately I’ll take out again ... very carefully... when it’s time to paint. By then I’ think I’ll have 914rubber new targa bar pad and I’ll install that one.
Attached thumbnail(s)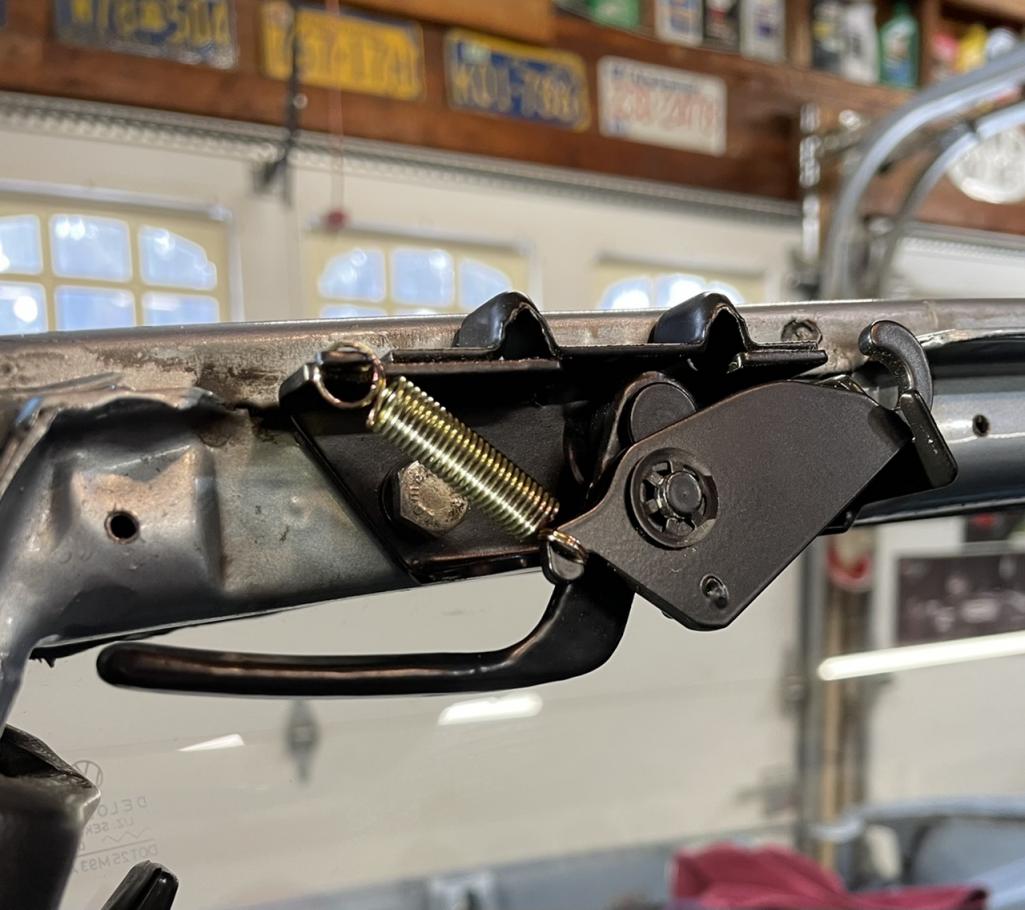
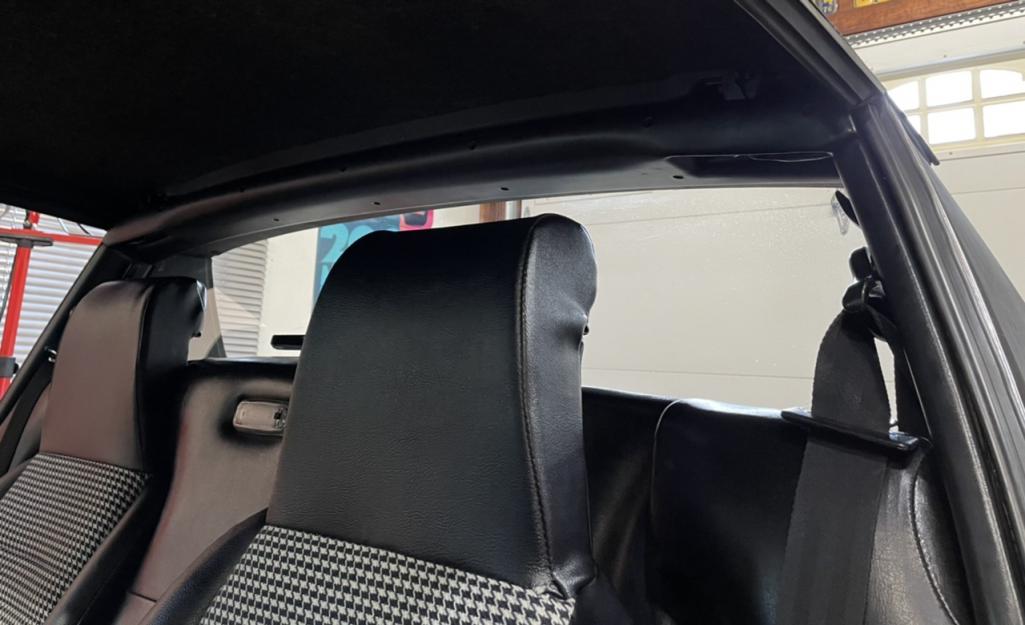
Posted by: Dion Mar 4 2021, 08:12 AM
The eyes have it....
Attached thumbnail(s)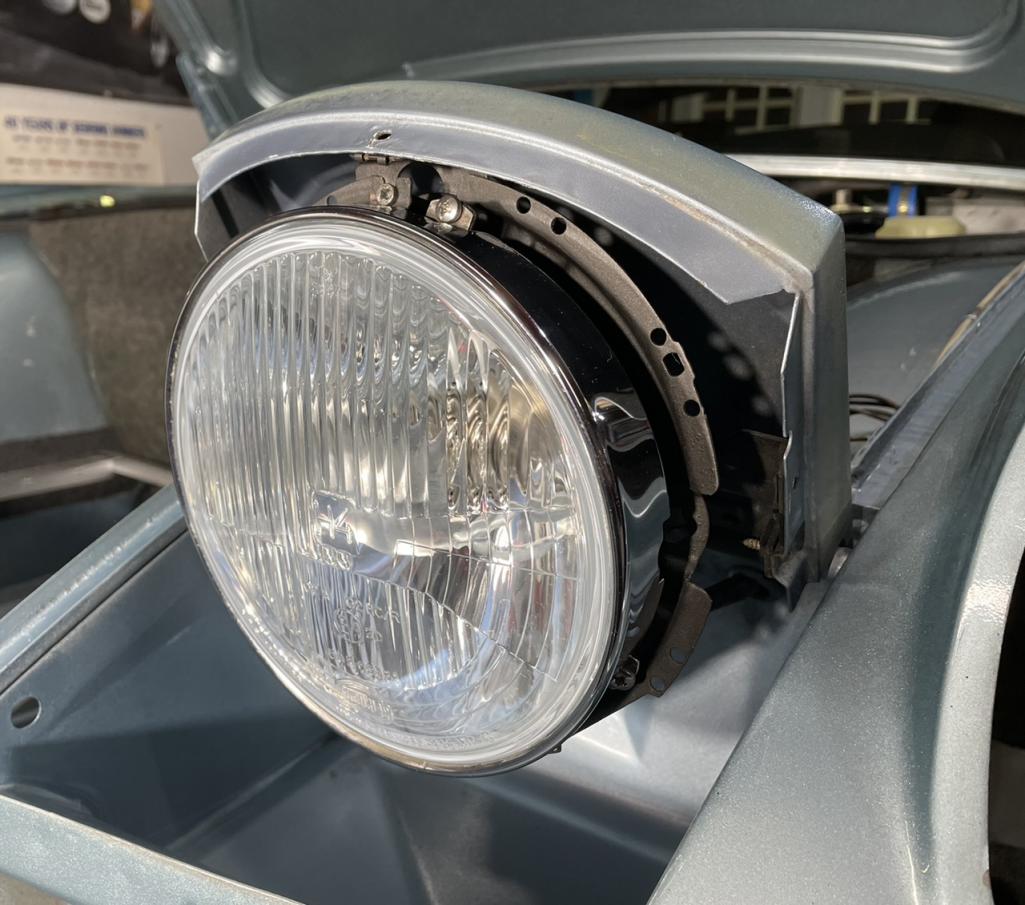
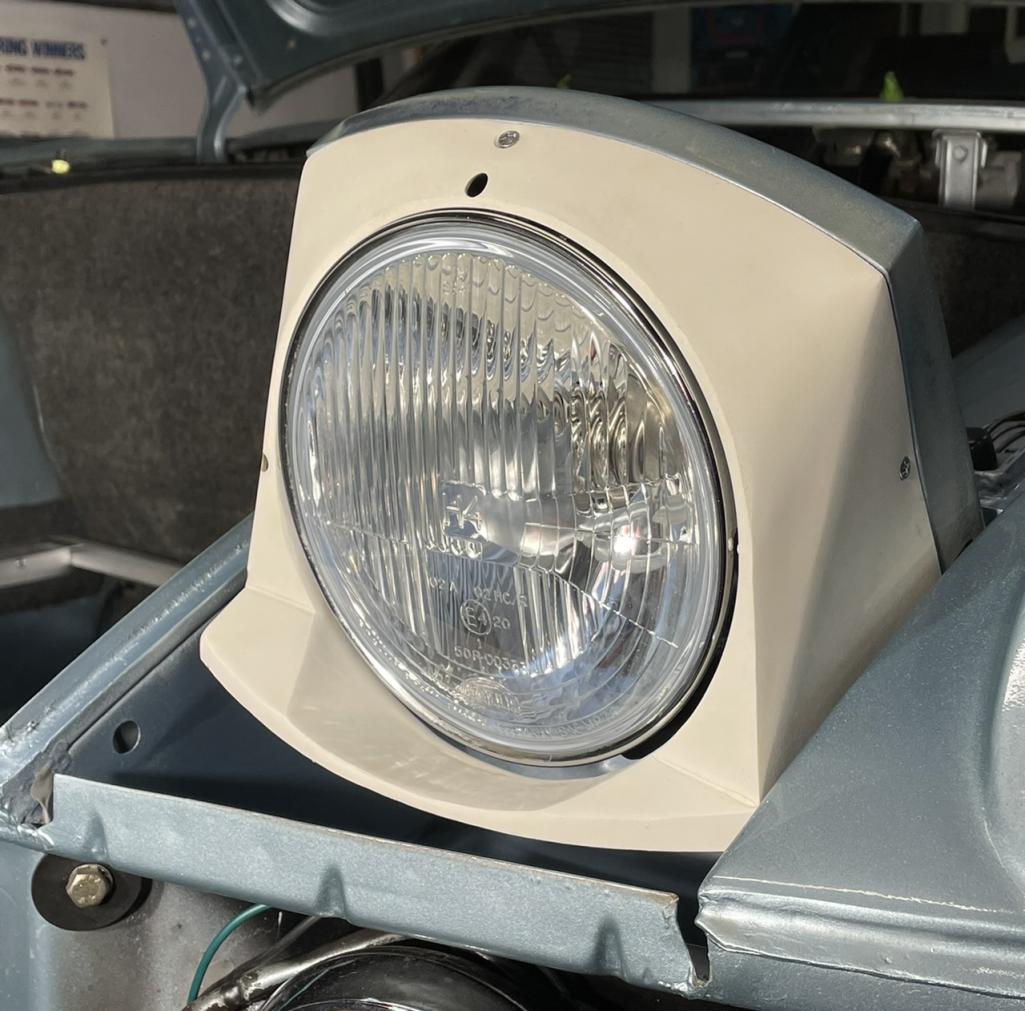
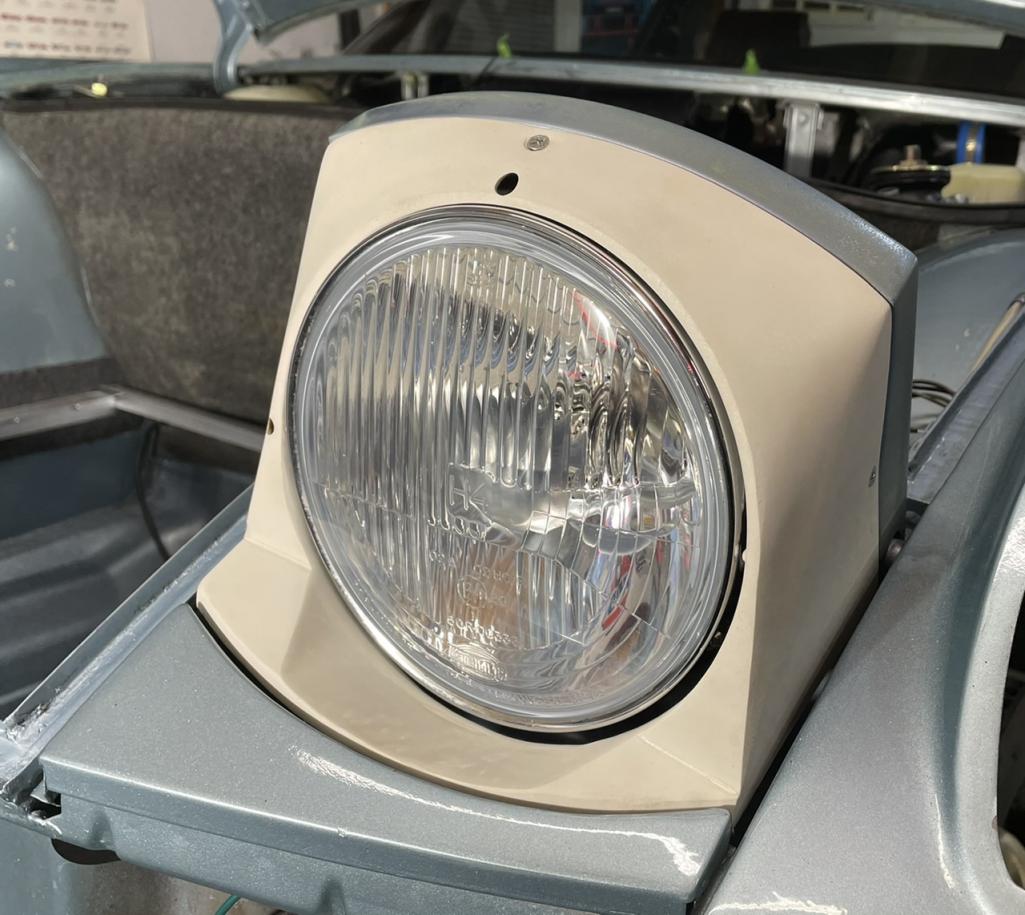


Attached image(s)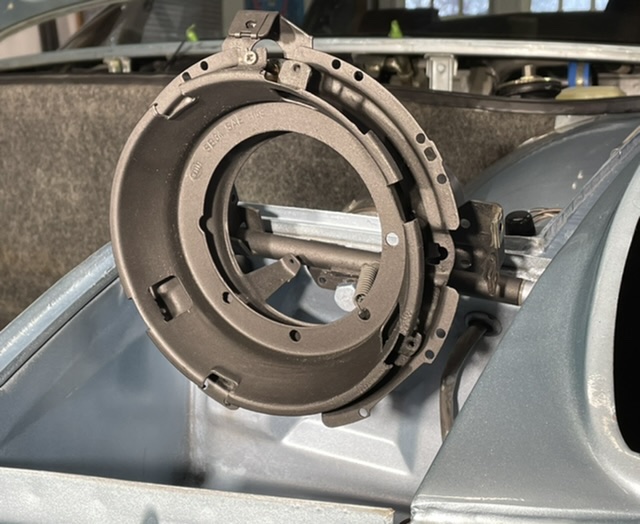
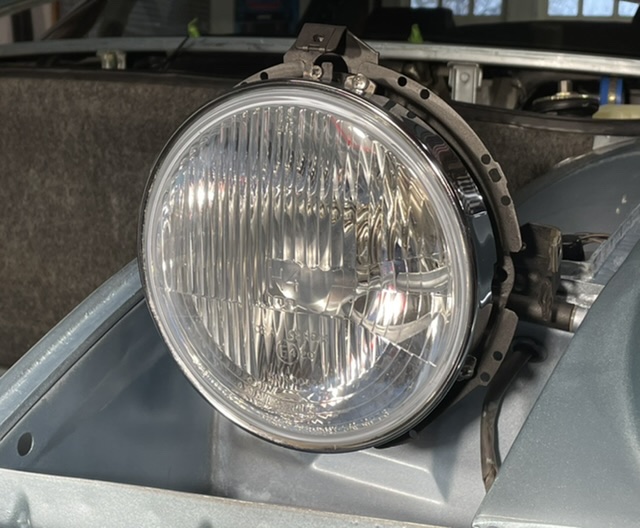
Posted by: Dion Mar 4 2021, 08:16 AM
New brake hoses and clips.
Attached thumbnail(s)
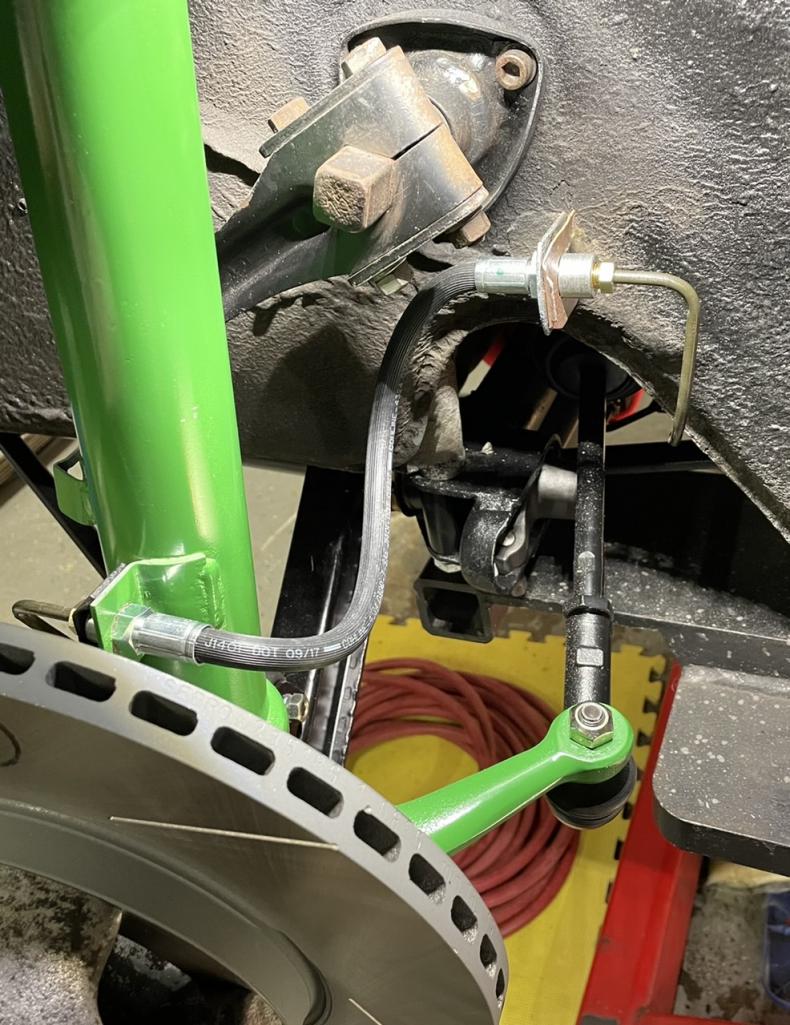
Posted by: Dion Mar 4 2021, 08:19 AM
Torqued all the suspension bolts up to spec and placed the lock washer on strut.
That’s all buttoned up.
Attached thumbnail(s)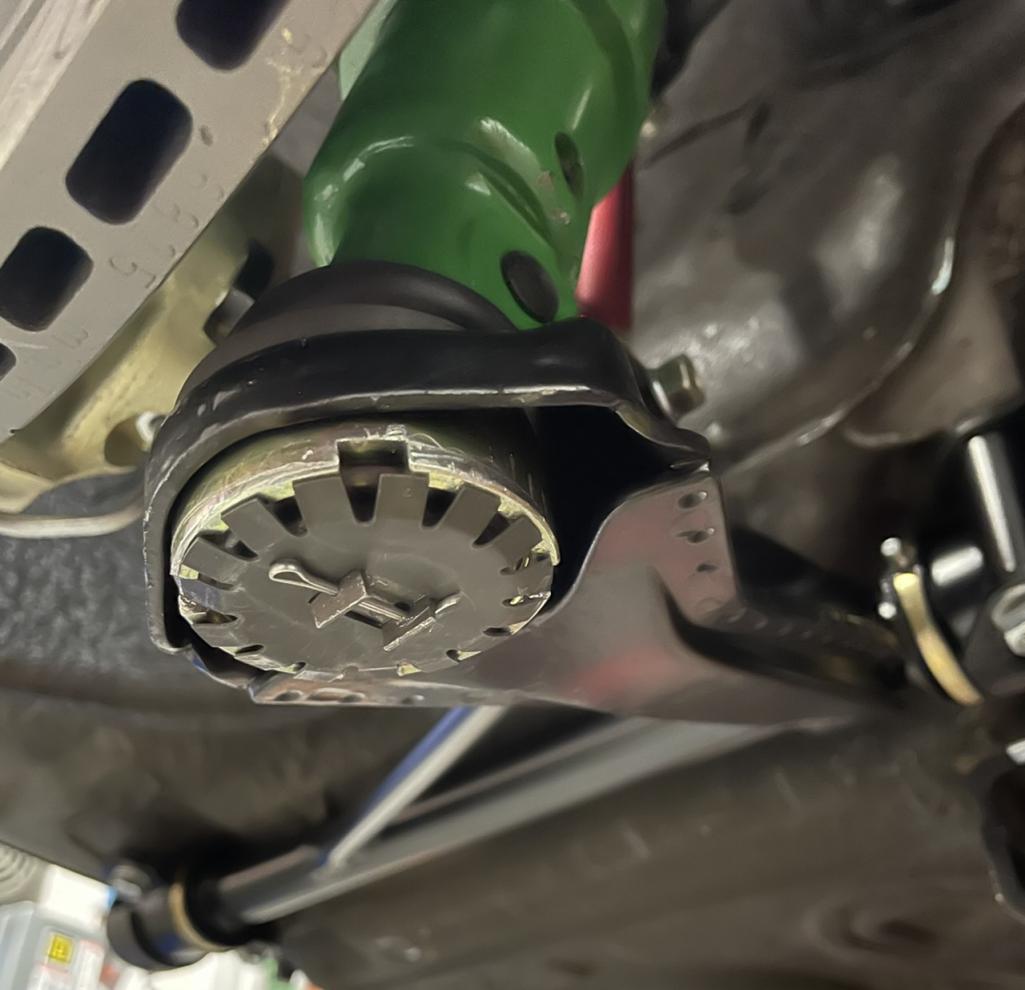
Posted by: Dion Mar 4 2021, 08:23 AM
Placed the oil catch tank in the trunk. Need to order all the proper hoses now for the oil tank system. I copied the version that was used in the “Lufthansa” GT.
Attached thumbnail(s)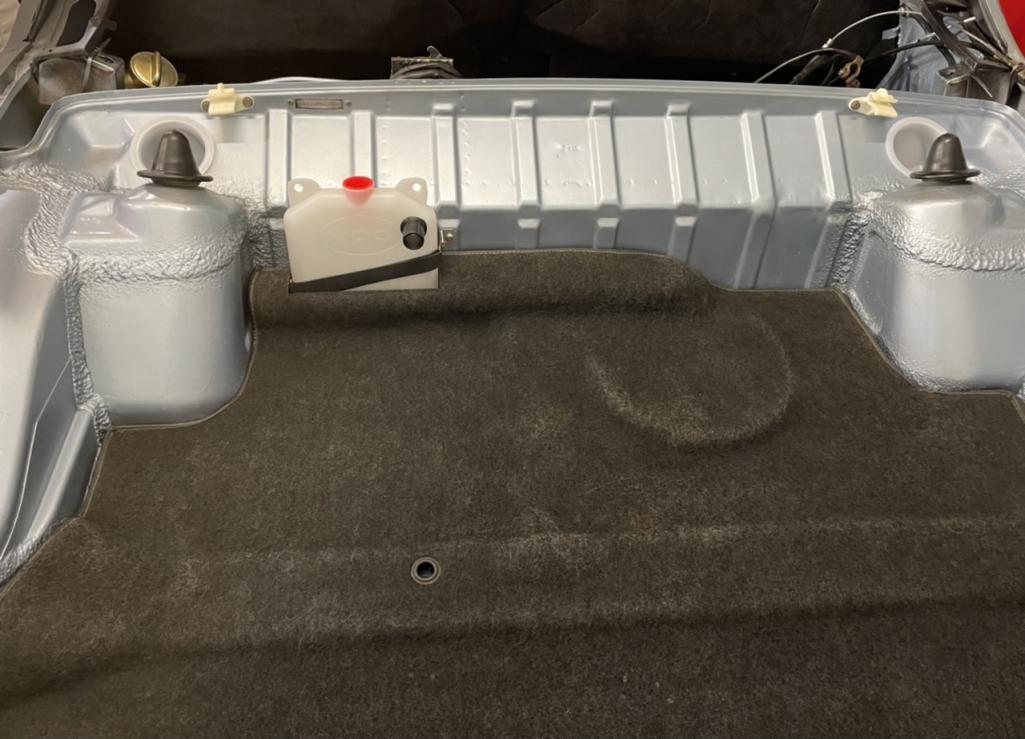
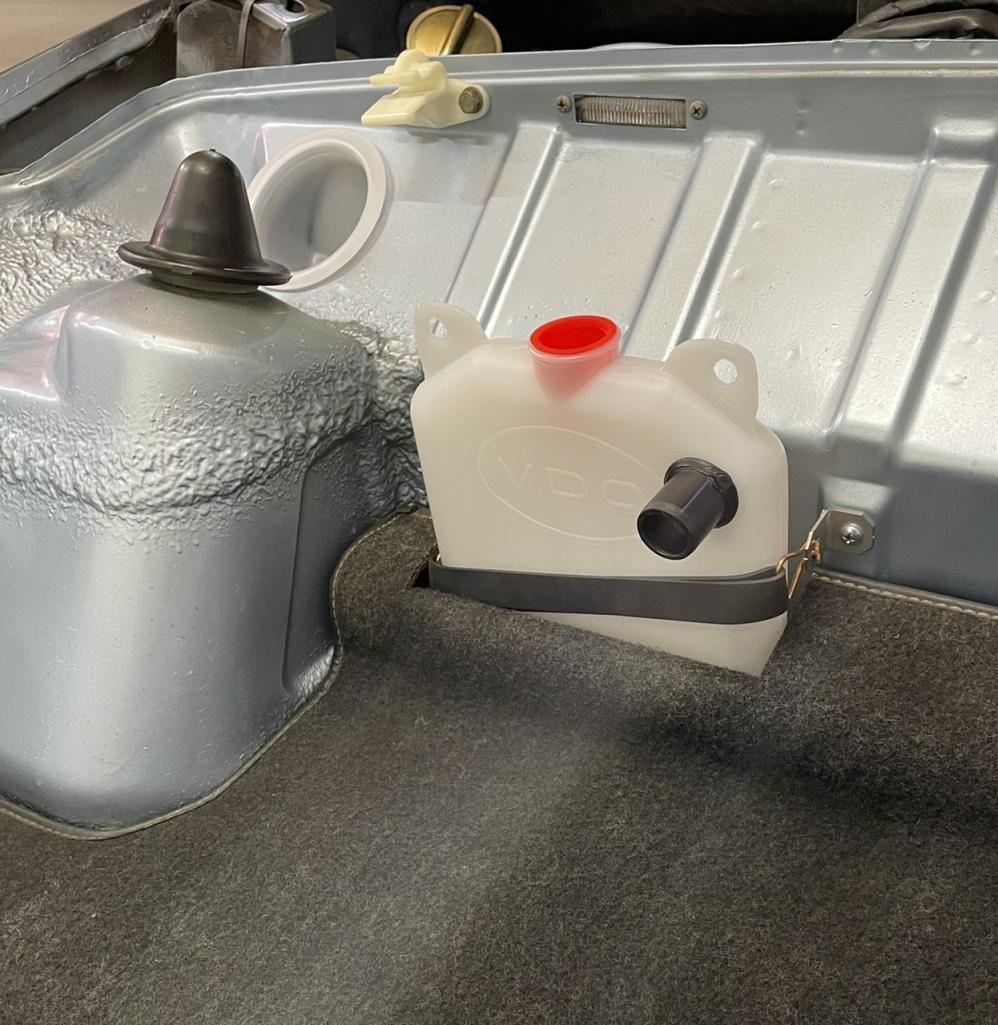
Posted by: Olympic 914 Mar 4 2021, 08:23 AM
Looks good. will it be ready for Carlisle Swap this year?
Hope to see you there.
Posted by: Dion Mar 4 2021, 08:25 AM
Tom, thanks mate! Carlisle’s a long shot, but I’ll give it my best.
Posted by: bbrock Mar 4 2021, 08:45 AM
Finding a Dion update on the forum is always a big treat, but WOW! You have been busy. This is looking great!
Posted by: rgolia Mar 4 2021, 09:02 AM
Looks great Dion....cant wait to follow that beauty down the road.
Posted by: tygaboy Mar 4 2021, 09:04 AM
Finding a Dion update on the forum is always a big treat, but WOW! You have been busy. This is looking great!
Your car is looking GREAT, Dion. Thanks for the update treat!
Posted by: ThreeV8s Mar 4 2021, 09:27 AM
Incredible work, as always! Amazing level of talent and productivity.
Posted by: JmuRiz Mar 4 2021, 09:31 AM
Very nice, it's getting close!
Posted by: TonyA Mar 4 2021, 12:01 PM
Wow changing jobs was a good choice I see. Looking forward to some cruises with you.
Posted by: Dion Mar 4 2021, 12:05 PM
@http://www.914world.com/bbs2/index.php?showuser=20915 , @http://www.914world.com/bbs2/index.php?showuser=19241 , @http://www.914world.com/bbs2/index.php?showuser=11329 , @http://www.914world.com/bbs2/index.php?showuser=20845 , @http://www.914world.com/bbs2/index.php?showuser=50
Thank you fellas always appreciate your positive input. Take a lot of inspiration from you guys. So looking forward to driving back on asphalt instead of jack stands!
Posted by: saigon71 Mar 4 2021, 01:41 PM
Can't wait to see this car again live. Northeast gathering?
Great work Dion!
Posted by: Dion Apr 11 2021, 06:17 PM
Little things but important none the less.
Upon install of the rear trunk hinges I had forgotten the passenger side one had a stripped thread for the bolt. So had a helicoil kit at hand and fixed the issue. It was a M8 x1.25.
Attached thumbnail(s)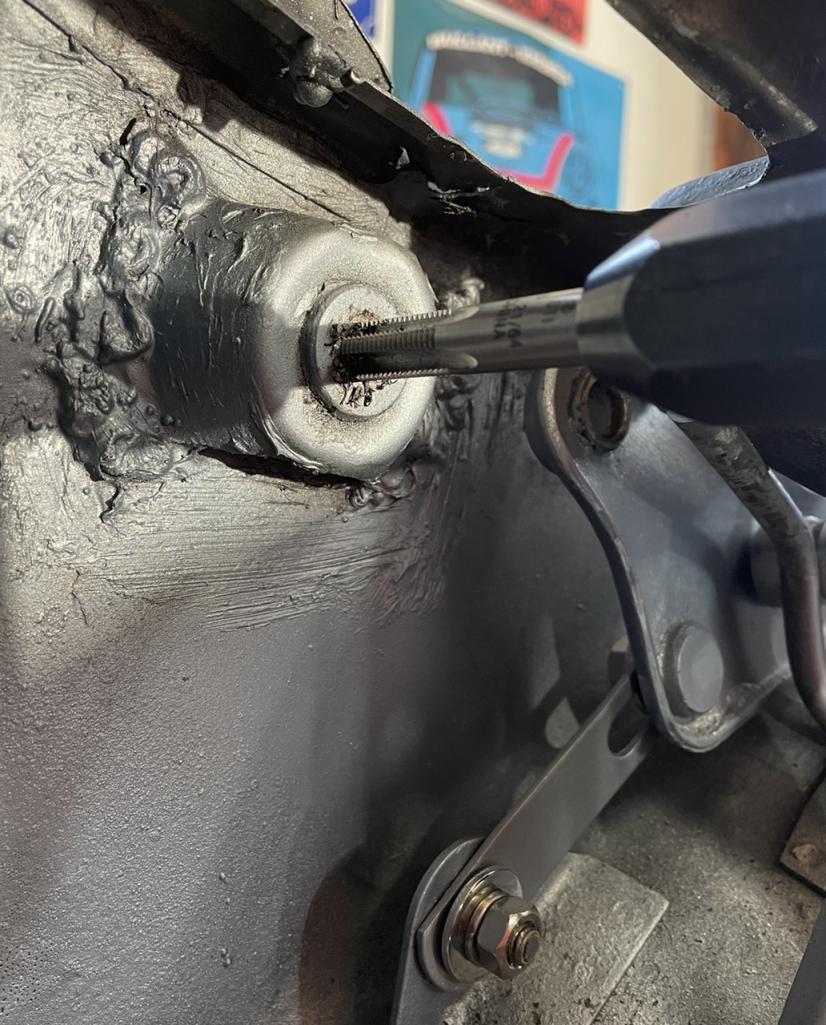
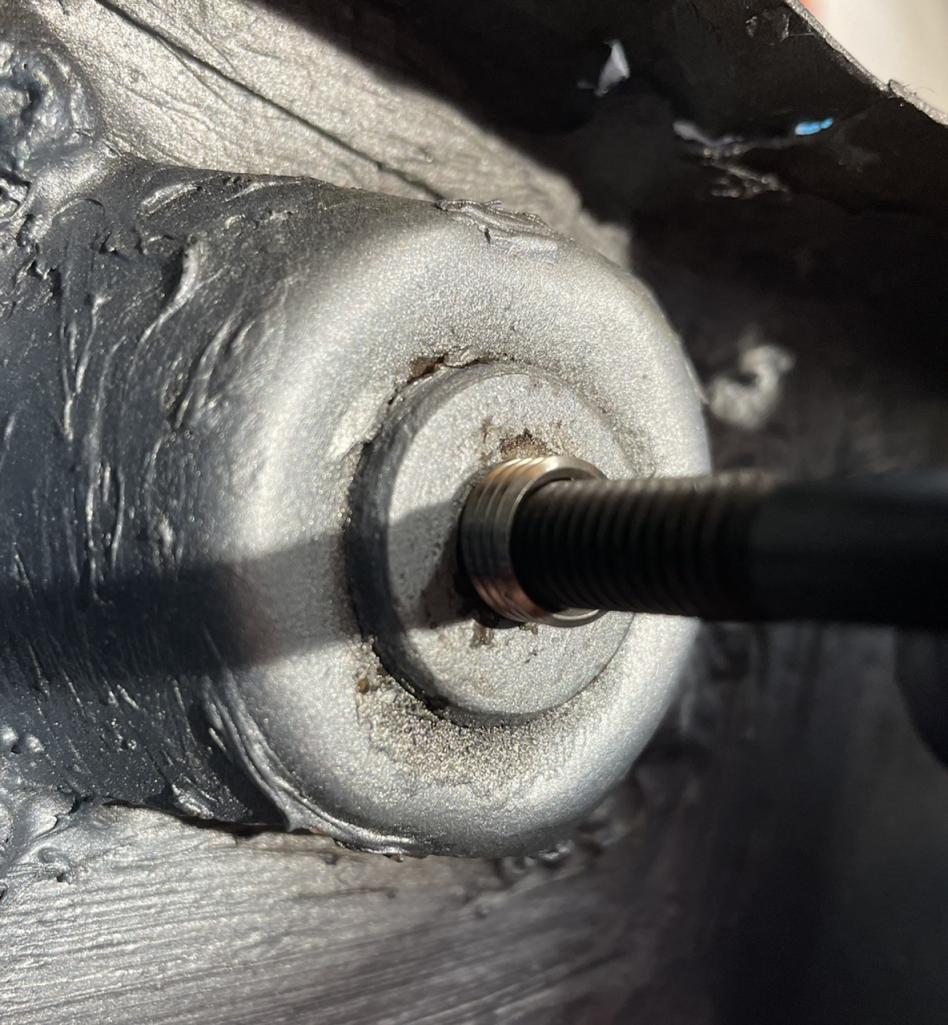
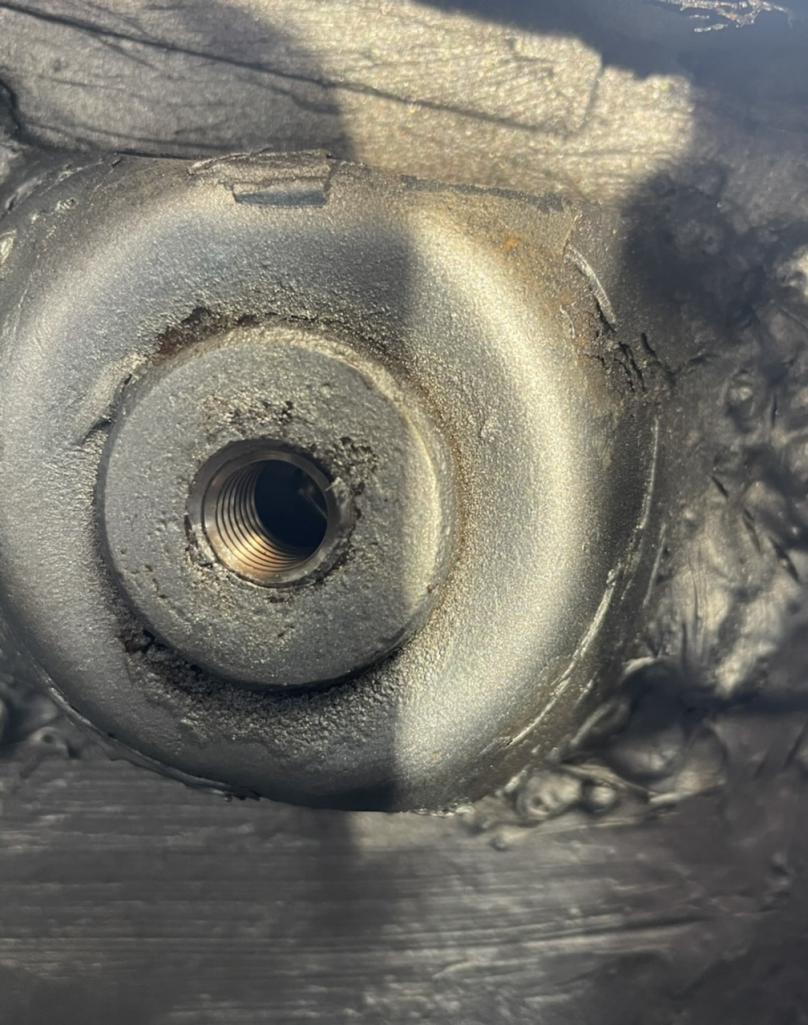
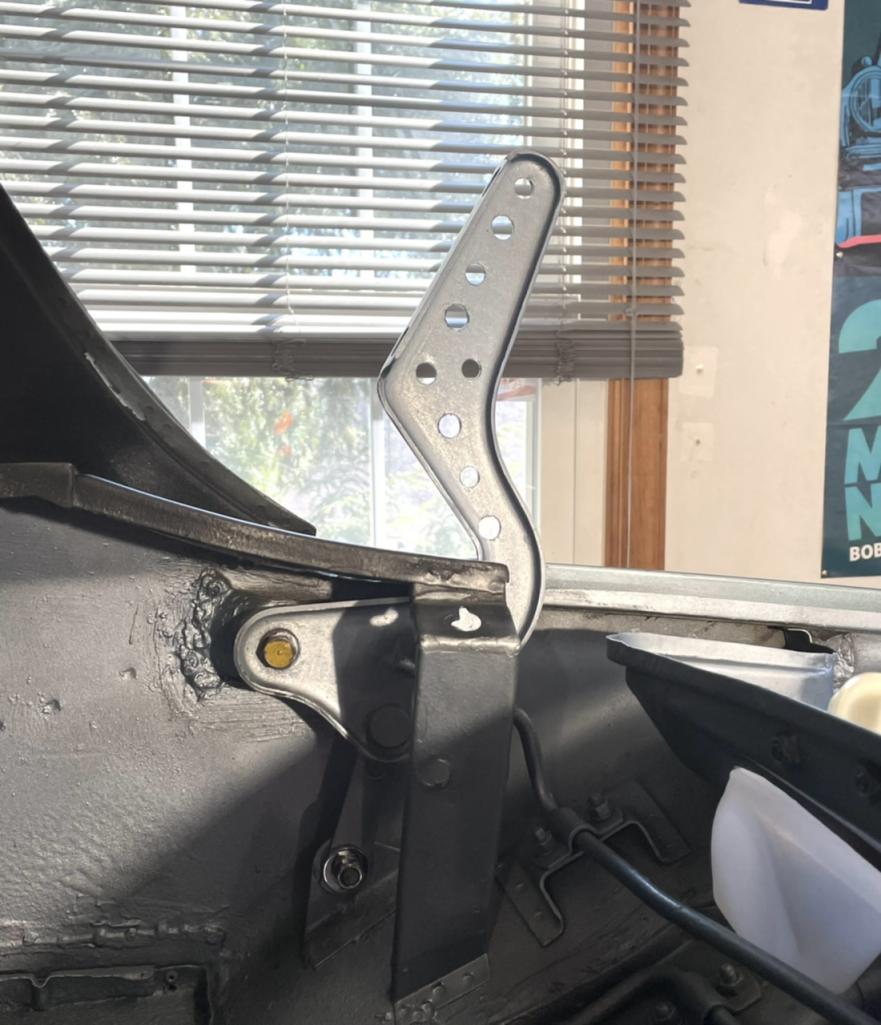
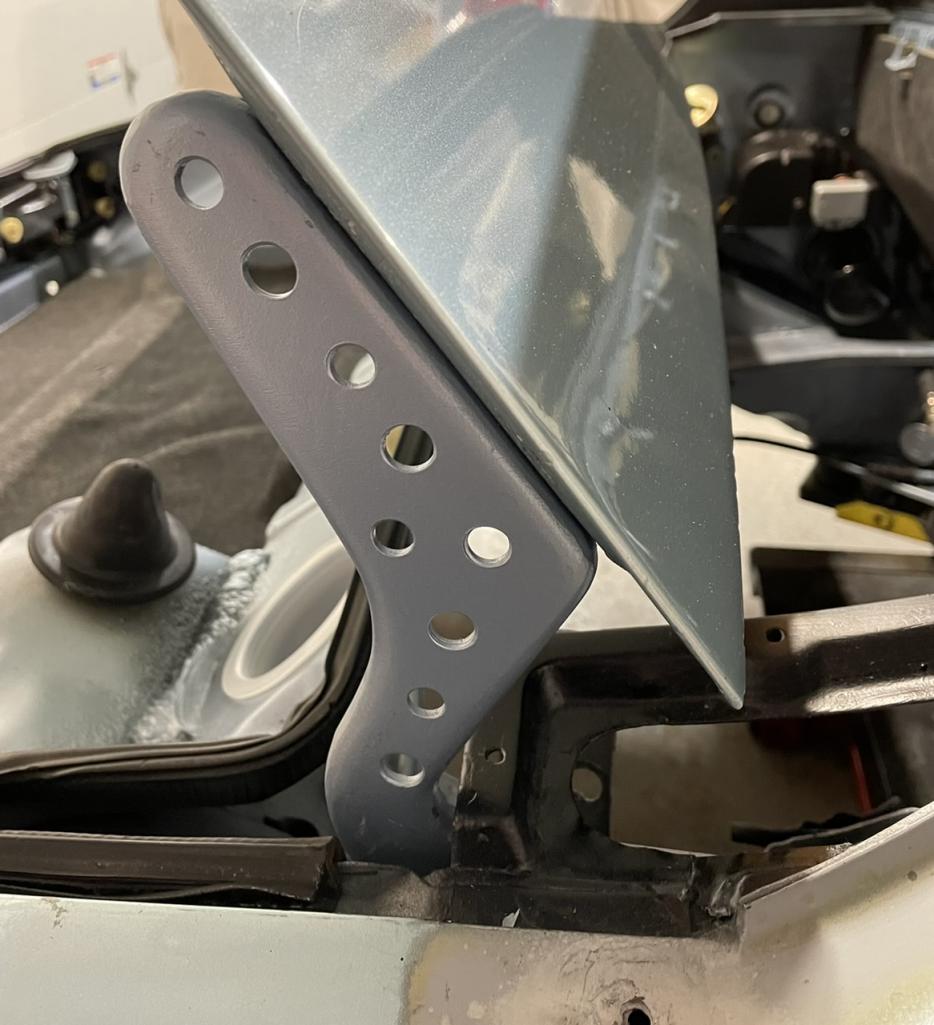
Posted by: Dion Apr 11 2021, 06:18 PM
Got these guys installed. Again little but important.
Attached thumbnail(s)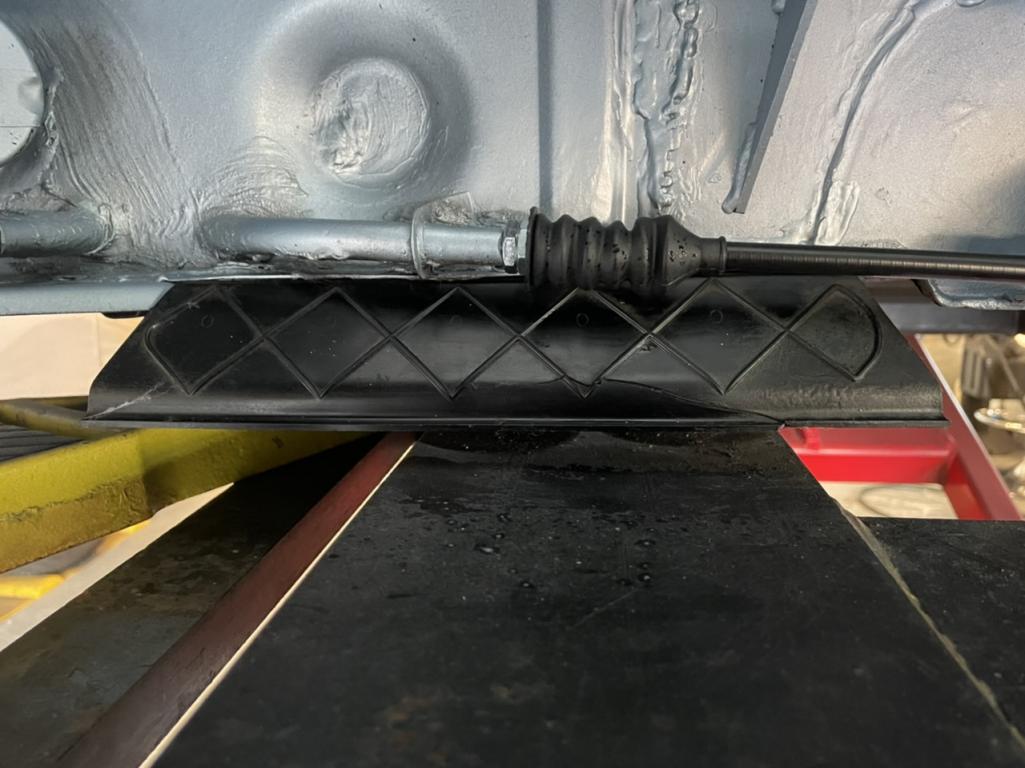
Posted by: Dion Apr 11 2021, 06:21 PM
The oil tank vent hoses came in. Installed the one for the catch can. Obviously the other will wait till engine install.
Attached thumbnail(s)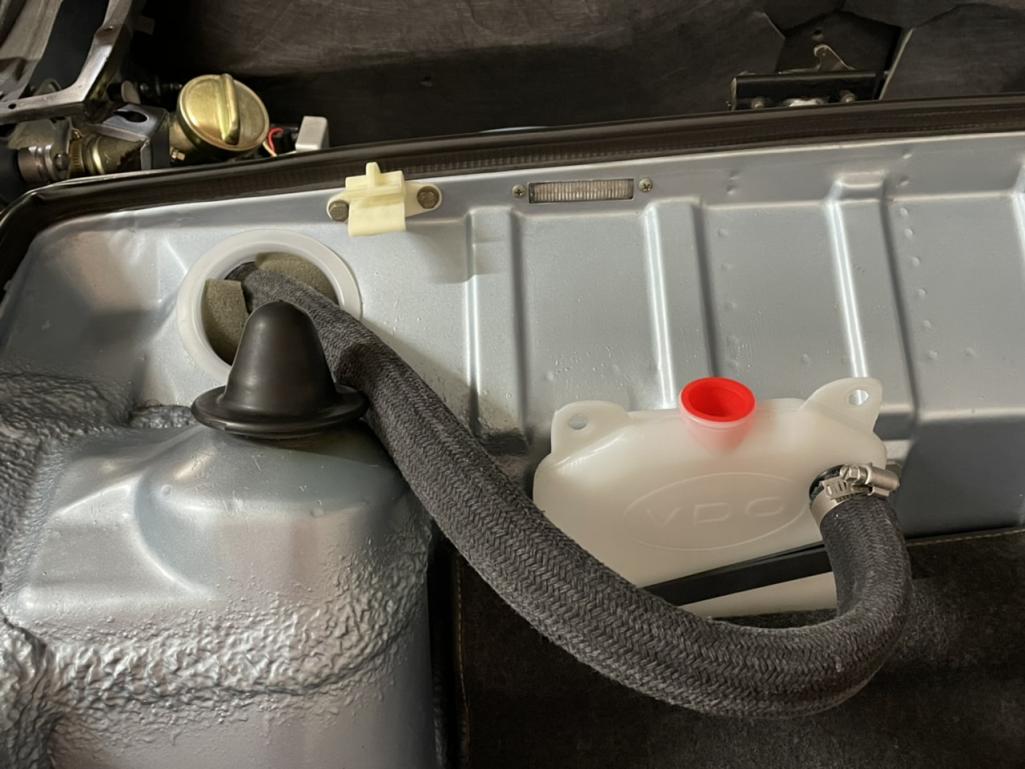

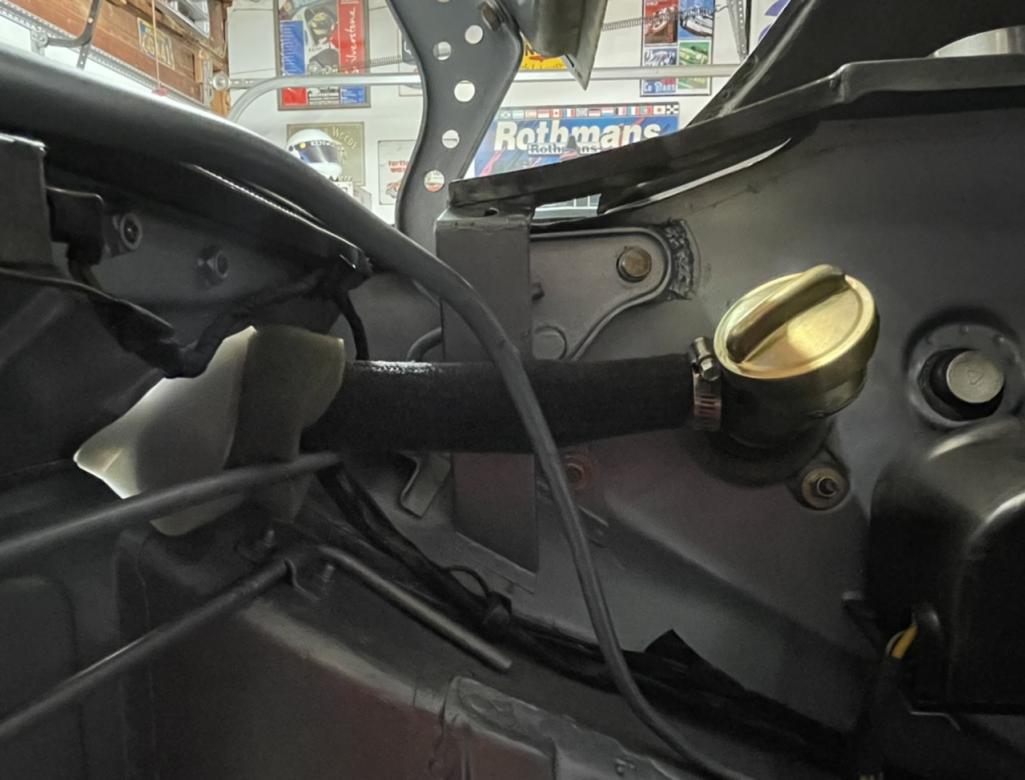
Posted by: Dion Apr 11 2021, 06:27 PM
I borrowed a flaring kit from my daily driver mechanic and he supplied me with some appropriate metal tubing to make the hard fuel lines in the engine bay. These connect with the rear metal line that feed the Carbs on the six. One will be for the return line.
Attached thumbnail(s)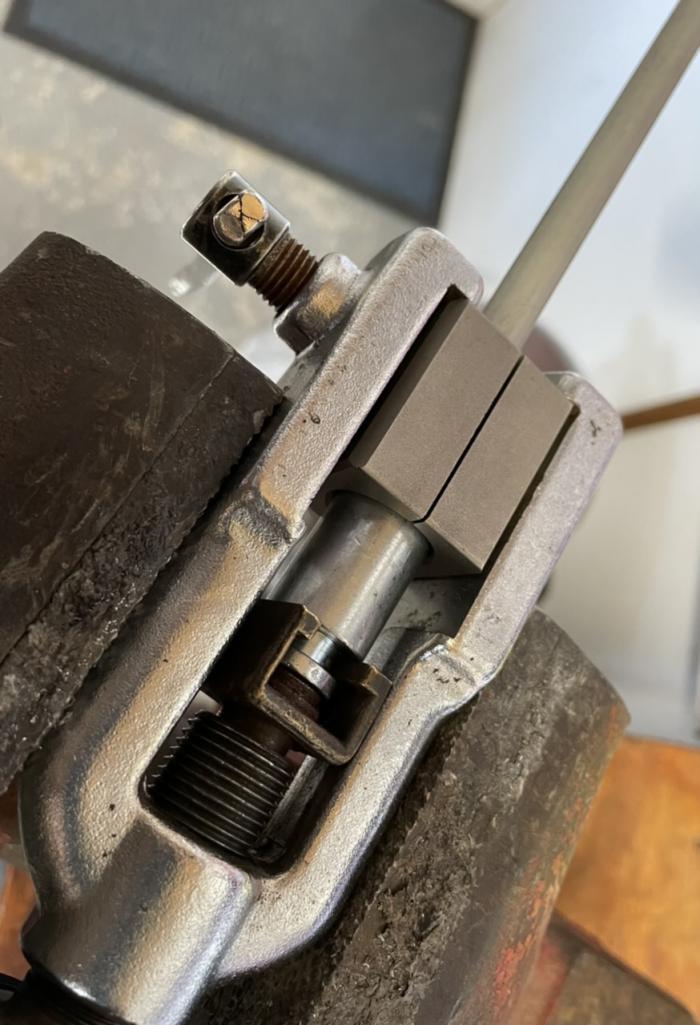
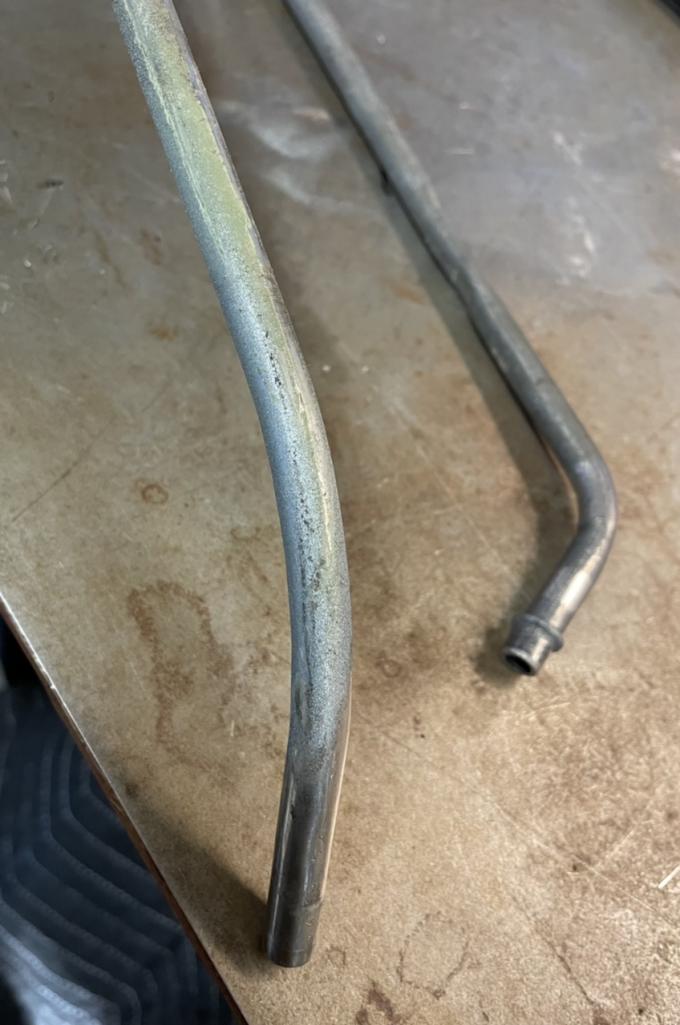
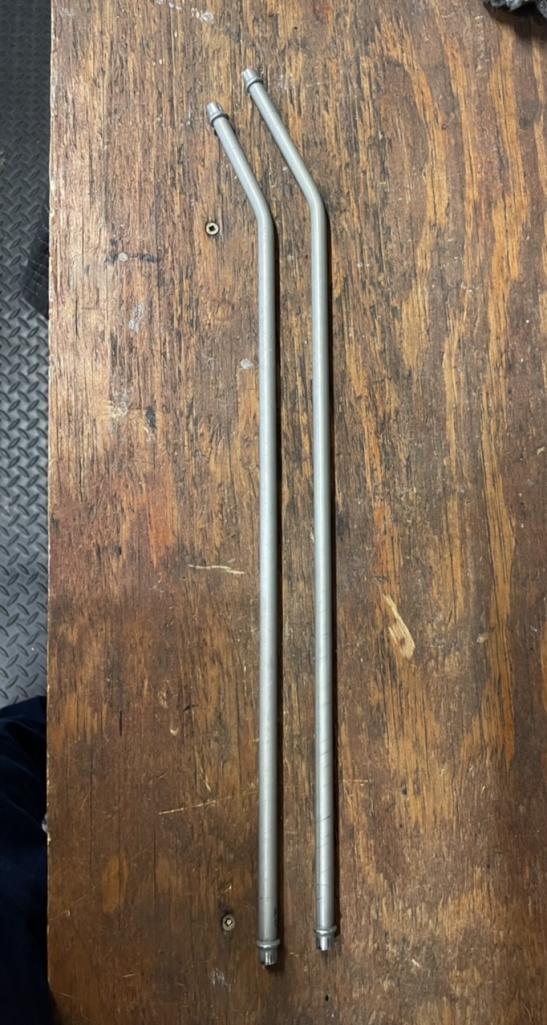
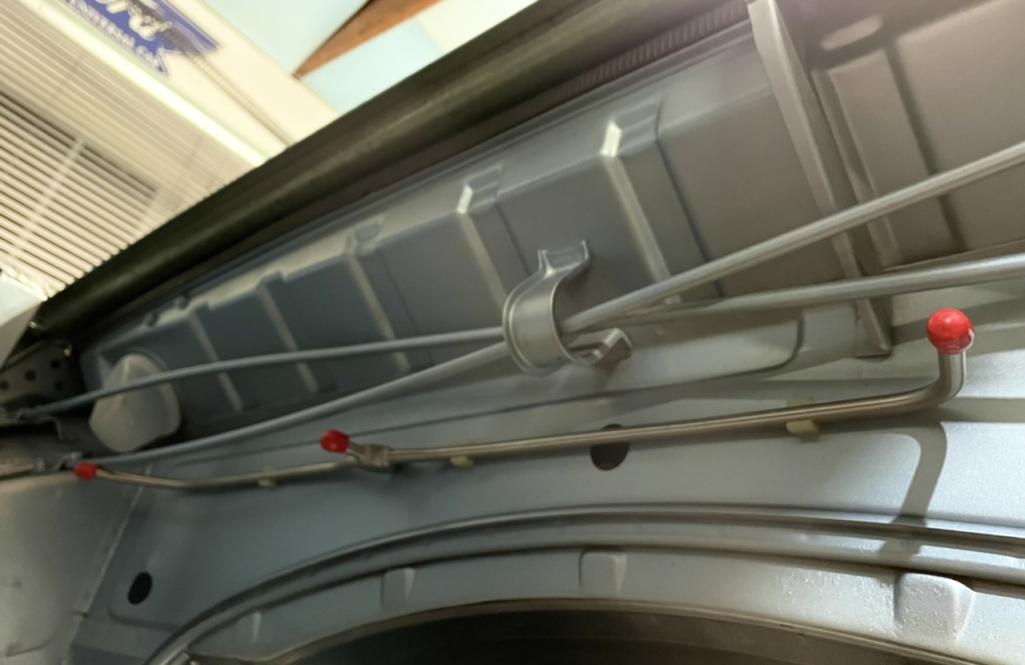
Posted by: Dion Apr 11 2021, 06:30 PM
Installed with the rubber hoses. Awaiting shipment of the proper fuel hose clamps.
I’ll then move to the install of fuel tank, pump and all those fun connections.
Cheers
Attached thumbnail(s)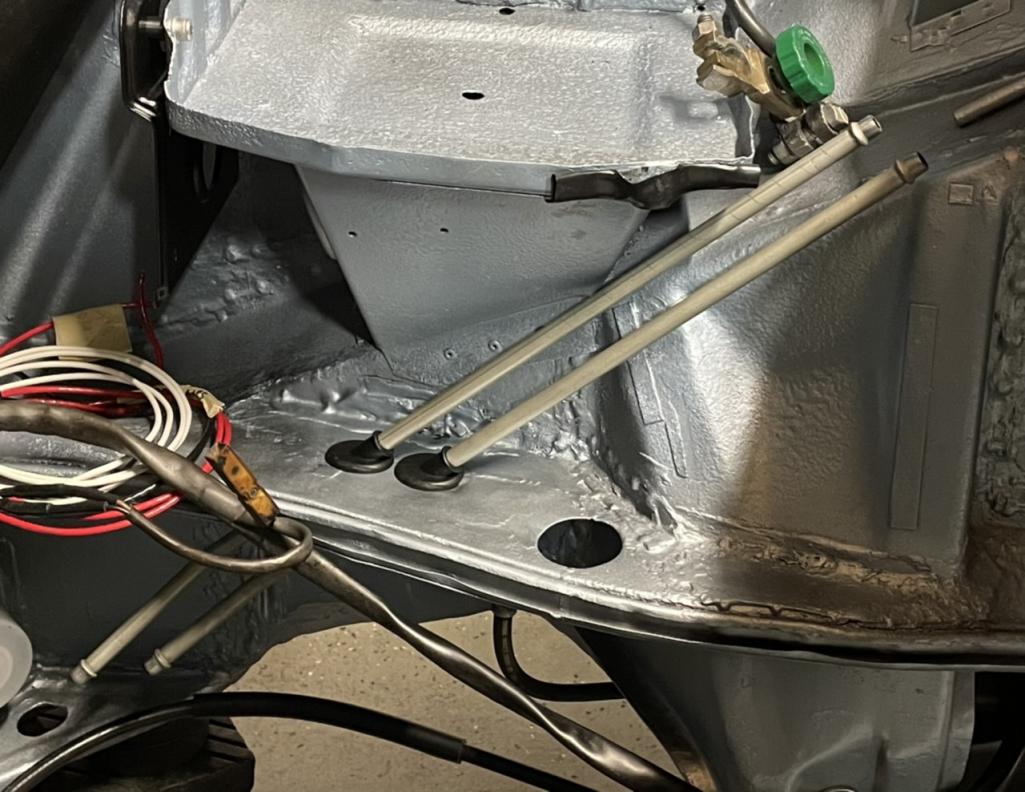
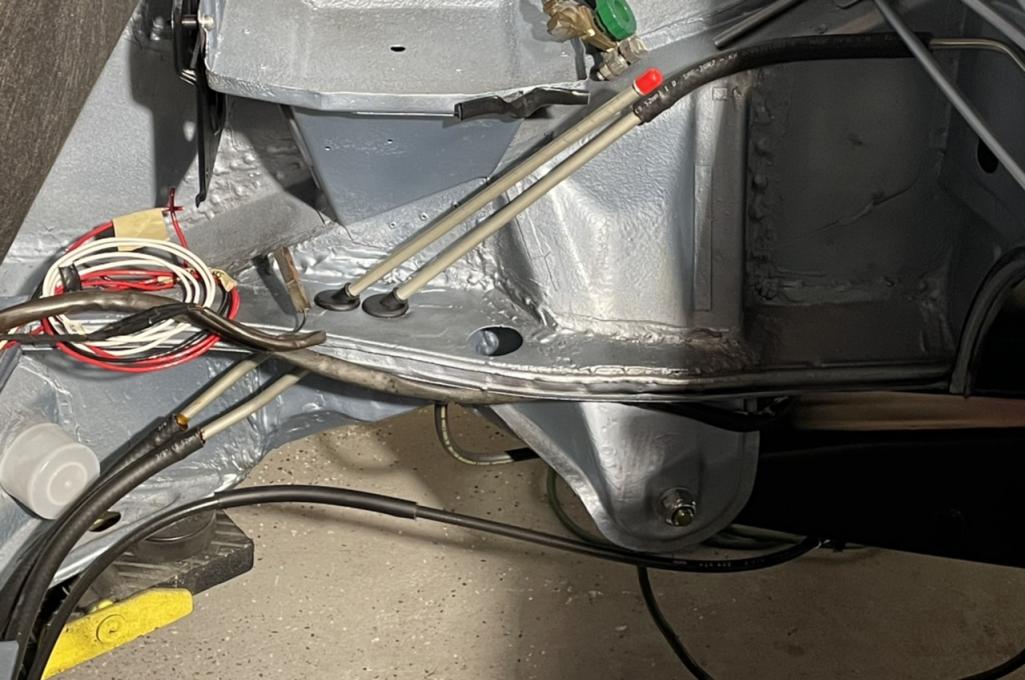
Posted by: bbrock Apr 11 2021, 08:21 PM
Nice work! I really wanted to make my own fuel lines but the cost of the flaring tools didn't pencil out. It never occurred to me to try being NICE to someone for loaners. Looking good!
Posted by: Superhawk996 Apr 12 2021, 06:48 AM
Like the hard fuel line across the back -- did you make those too? Looks real clean!
Posted by: Dion Apr 12 2021, 08:00 AM
Like the hard fuel line across the back -- did you make those too? Looks real clean!
Hey Phil, thanks! I picked up the rear hard line from 914Rubber. It’s a neat piece. Looks the business. I’m sure the real ones are like unicorns.
Cheers
Posted by: tygaboy Apr 12 2021, 08:35 AM
Dion - All that looks GREAT! Any target date to getting it running?
Posted by: Root_Werks Apr 13 2021, 10:03 AM
I like how you removed the 4cyl mounts (or they were already removed). Nice and clean looking.
Posted by: Dion Apr 13 2021, 10:21 AM
@http://www.914world.com/bbs2/index.php?showuser=2105 thanks, appreciate that.
I took them off. A little fussy to do but done.
Attached image(s)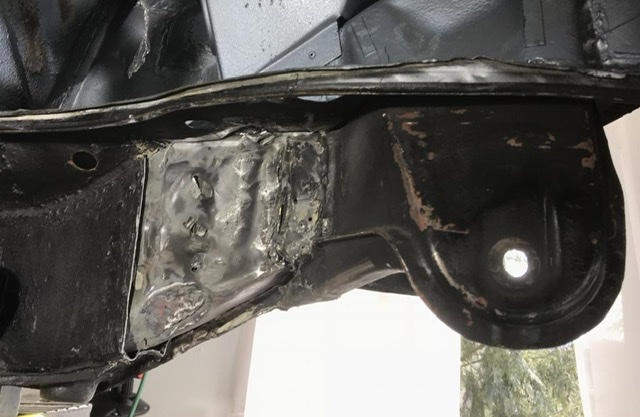

Posted by: Root_Werks Apr 13 2021, 11:49 AM
Only done it once myself and will again with my current 914-6 conversion. NOT a light task, but worth it.
Posted by: Dion Apr 29 2021, 06:22 PM
End of month update.
Mounted the Carter fuel pump in the space previously occupied by the FI cis pump.
What a drop in psi eh ? 75psi downgraded to 3-5psi for the carbs. I plan on making a little cage around this when done for safety. I never got around to it with the 2056 pump
but will now.
Attached thumbnail(s)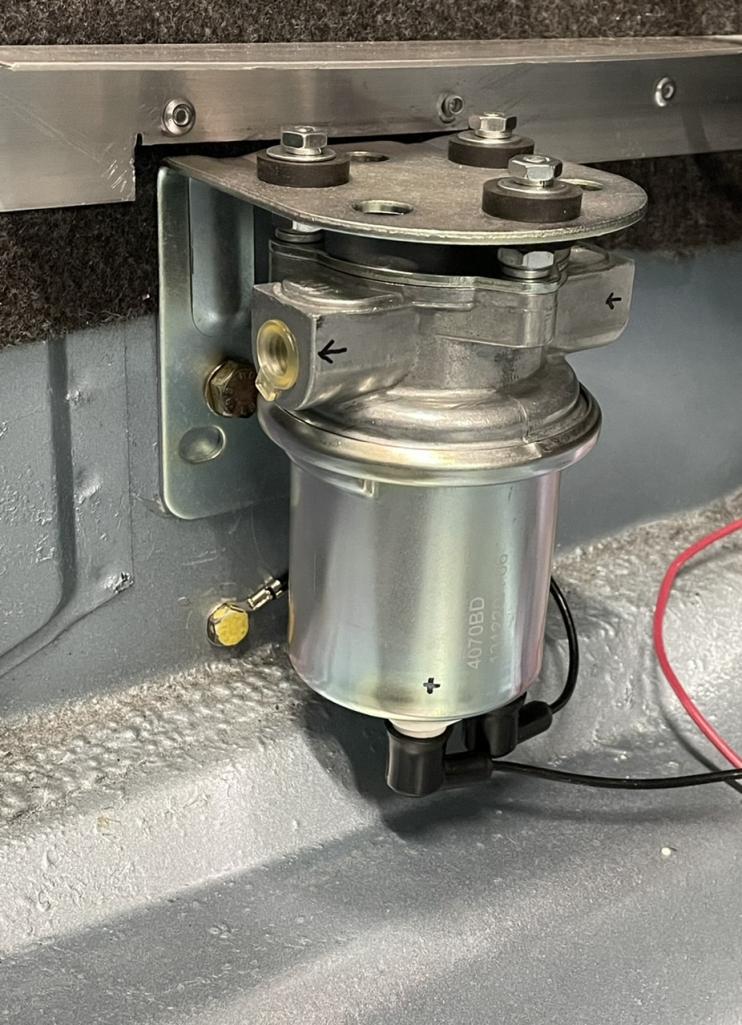
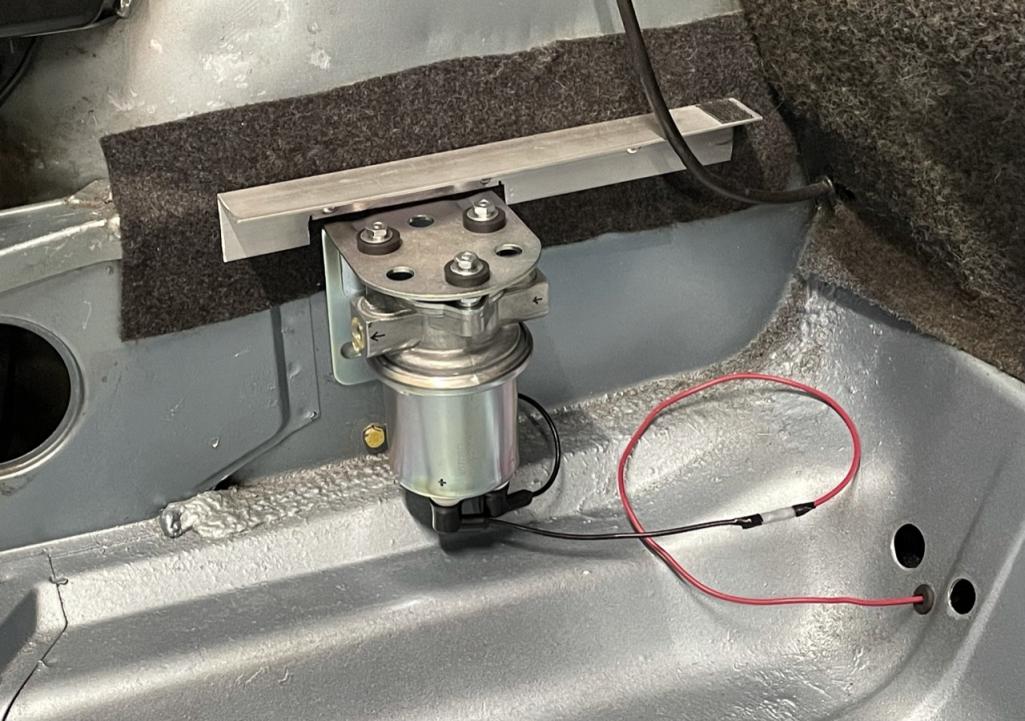
Posted by: Dion Apr 29 2021, 06:26 PM
Then started the plumbing. Attached the pump hoses first, then mounted my filter
on the steering rack cross member. Wrapped some protective rubber around it. Doing my best to keep the kinks at bay. I do like Ray Davies but not this kind of Kinks
Attached thumbnail(s)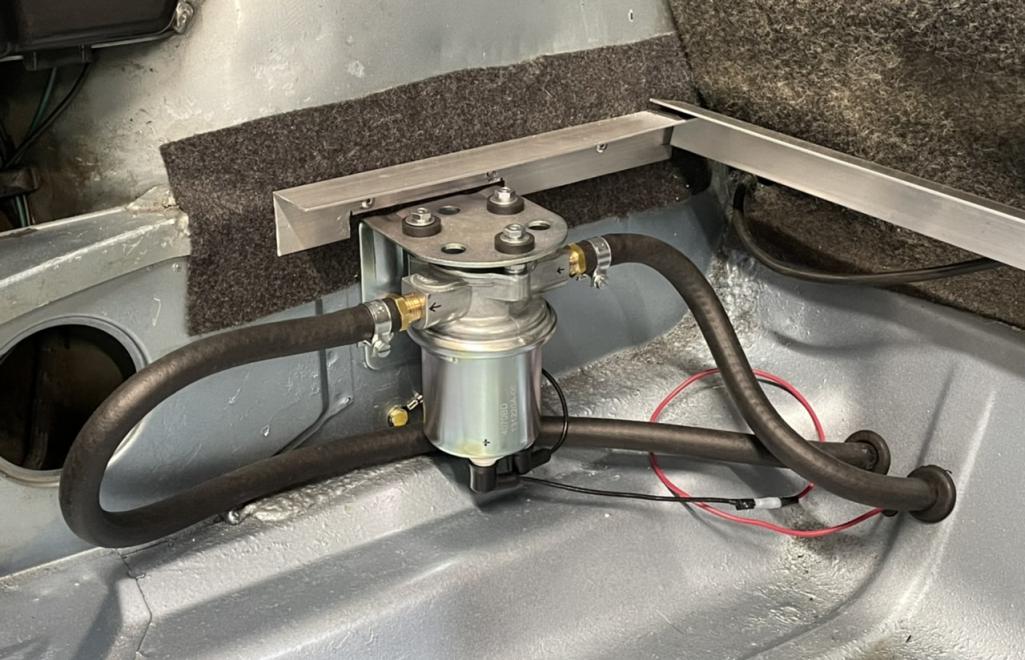

Posted by: BeatNavy Apr 29 2021, 06:35 PM
I do like Ray Davies but not this kind of Kinks
Ray says "Well done, Dion!"

Posted by: Dion Apr 29 2021, 06:39 PM
Proceeded to the tank drop. Its not a hard job, just fiddly. Easing one side then the other.
Lining up those rubber support blocks. I had laid moving blankets over both the fresh air box area and the front bulkhead to avoid scraping up the tank and those items. I also thought ahead to place the hoses on the tank first as well. I stole Brent’s idea of using the aircraft grade sealant for these fuel fittings as well as FI hose clamps. Since I don’t have a charcoal canister or it’s accompanying hoses down the long anymore, Taking SirAndy’s advice about the fuel vapor smell. I made a small canister from some Tupperware and used proper sized grommets for the vapor hose. Filled it with some activated charcoal and popped it beside the washer bottle. It then has the exiting hose running inside the overflow hose exiting out the bottom. (Forgot to snap pic) next
time.
That’s all for now. Hope to see some of you guys at the “Hershey” swap in Carlisle
Attached thumbnail(s)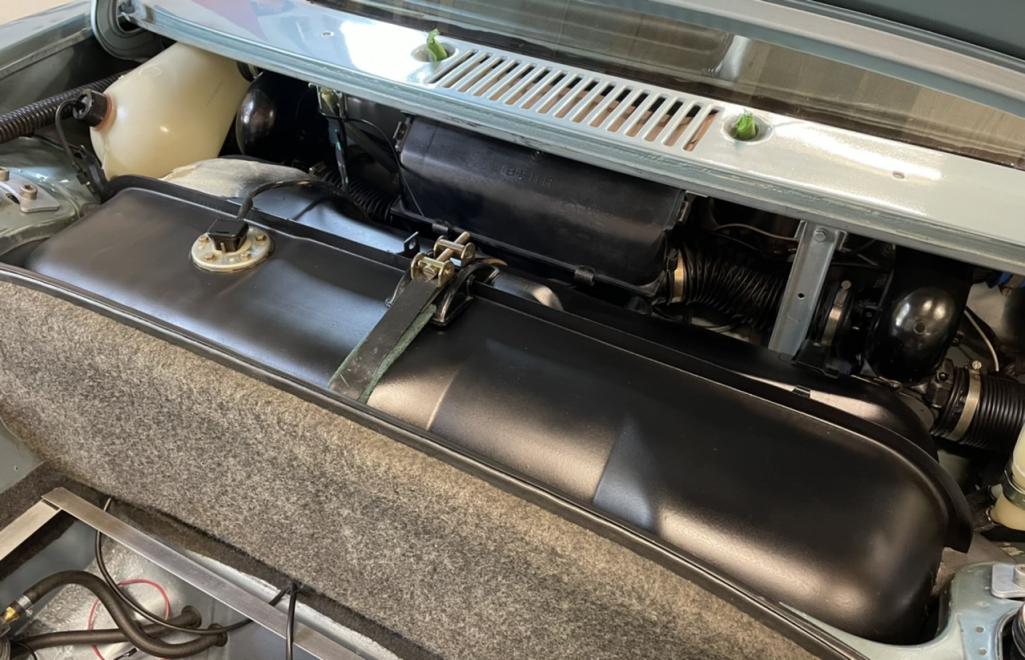
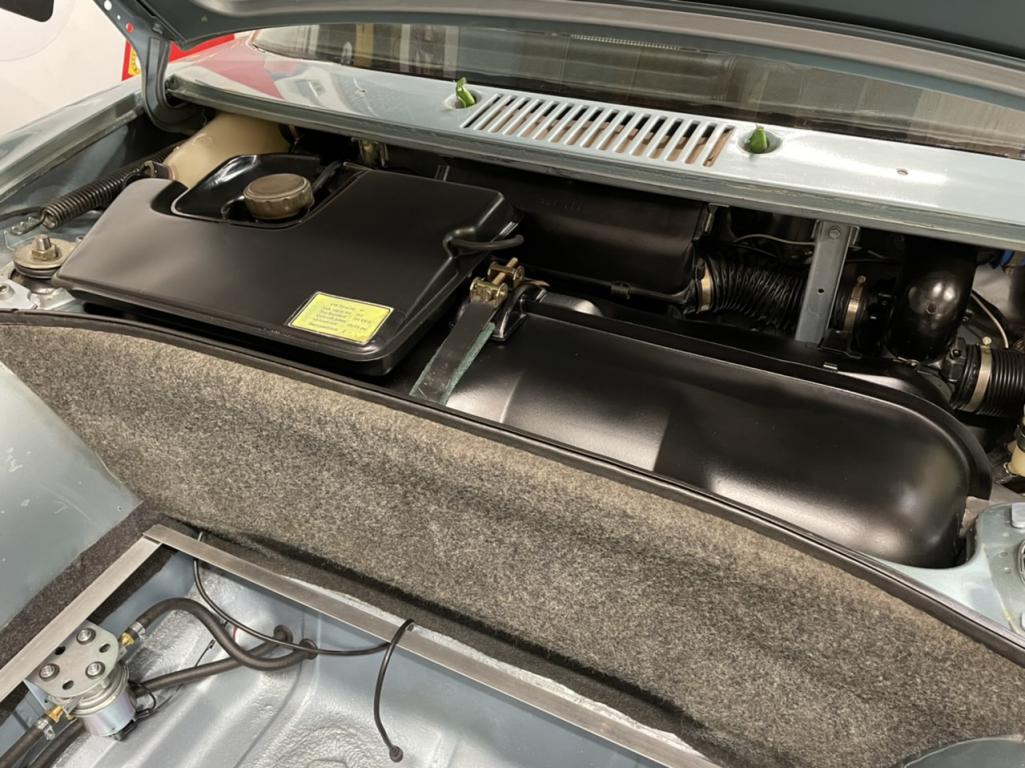
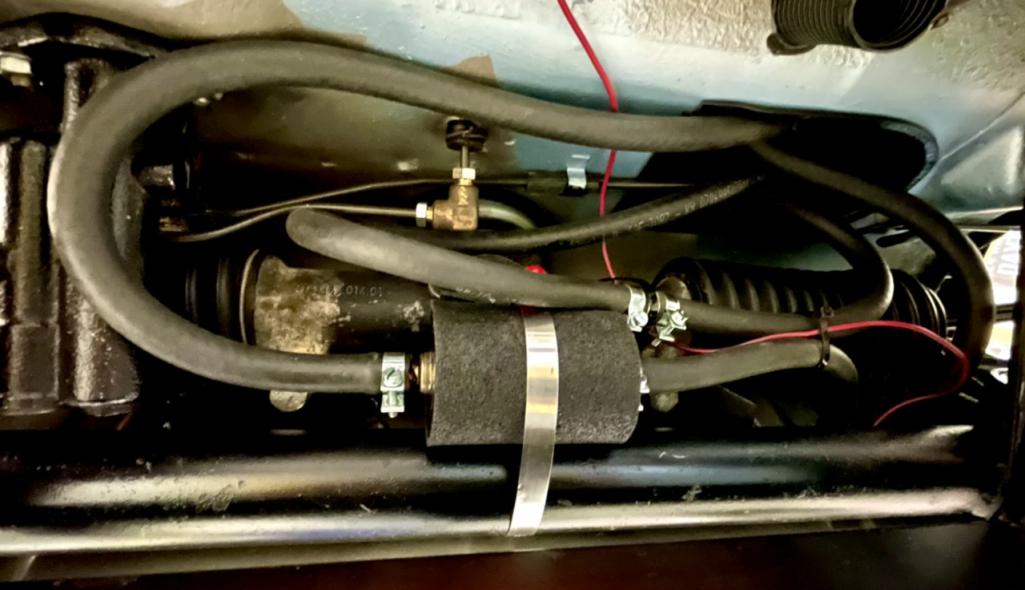
Posted by: Dion Apr 29 2021, 06:40 PM
I do like Ray Davies but not this kind of Kinks
Ray says "Well done, Dion!"
Hehehehehe!
Posted by: bbrock Apr 29 2021, 07:28 PM
Props for double Ray Davies references
Fantastic work there dude! I can't claim credit for the aviation sealant. That came from the Google weirdos. But tell me, is that not the messiest stuff to work with? I gave up on trying to keep the outside of the bottle clean.
Posted by: TonyA Apr 29 2021, 08:00 PM
Looking good !
Posted by: Dion Apr 29 2021, 08:03 PM
Props for double Ray Davies references
Fantastic work there dude! I can't claim credit for the aviation sealant. That came from the Google weirdos. But tell me, is that not the messiest stuff to work with? I gave up on trying to keep the outside of the bottle clean.
Heheheh so right you are Brent, I felt like it was a battle between cotton candy and molasses !
Posted by: Dion Apr 29 2021, 08:03 PM
Looking good !
Thanks Tony.
Posted by: Dion Jul 2 2021, 09:42 AM
So picked up a spare rim at the Carlisle event. Placed that in. Needs a modern tyre. This one not keeping air because it’s from the Nixon administration era.
Constructed my fuel pump protection from an old VW catalytic converter shield. Attached that to the aluminum brackets that make up the supports for the spare tyre cover.
Attached thumbnail(s)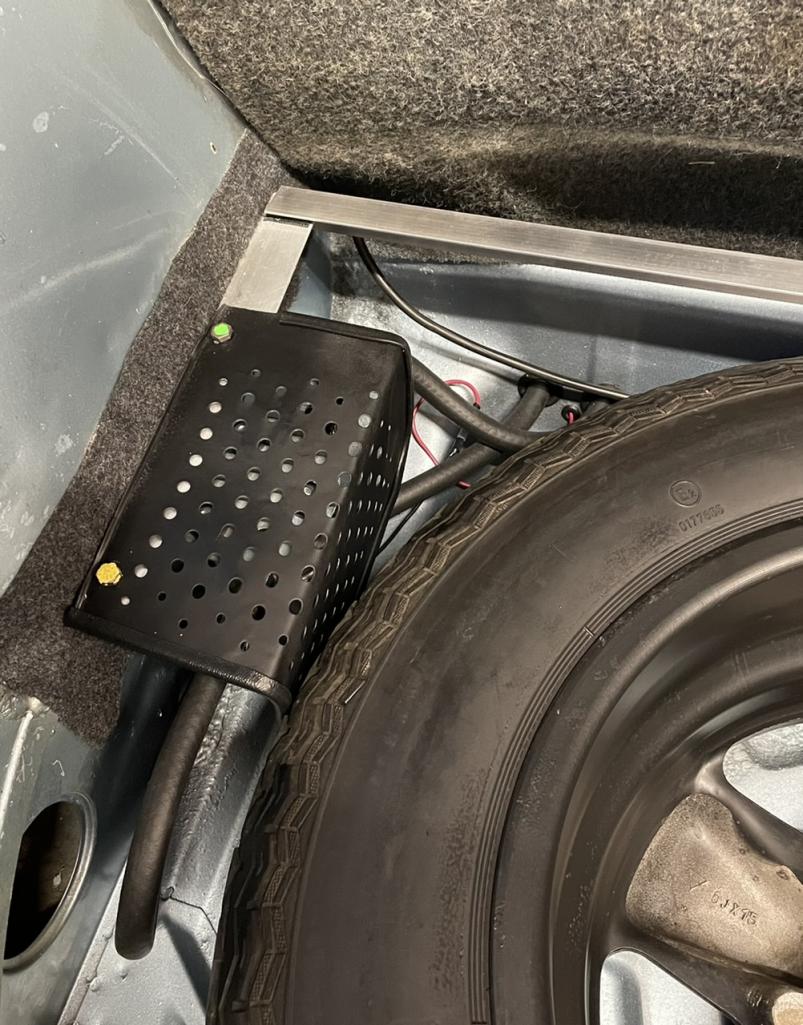
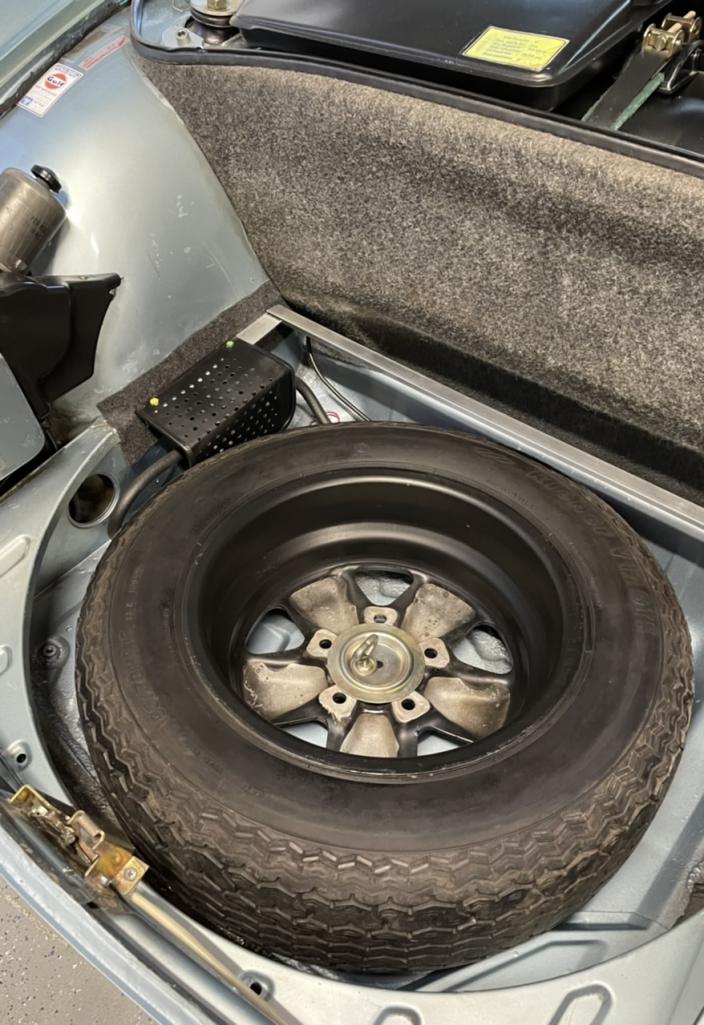
Posted by: Dion Jul 2 2021, 09:46 AM
Here is my vapor canister. Filled with activated charcoal and vented out the bottom near steering rack.
Attached thumbnail(s)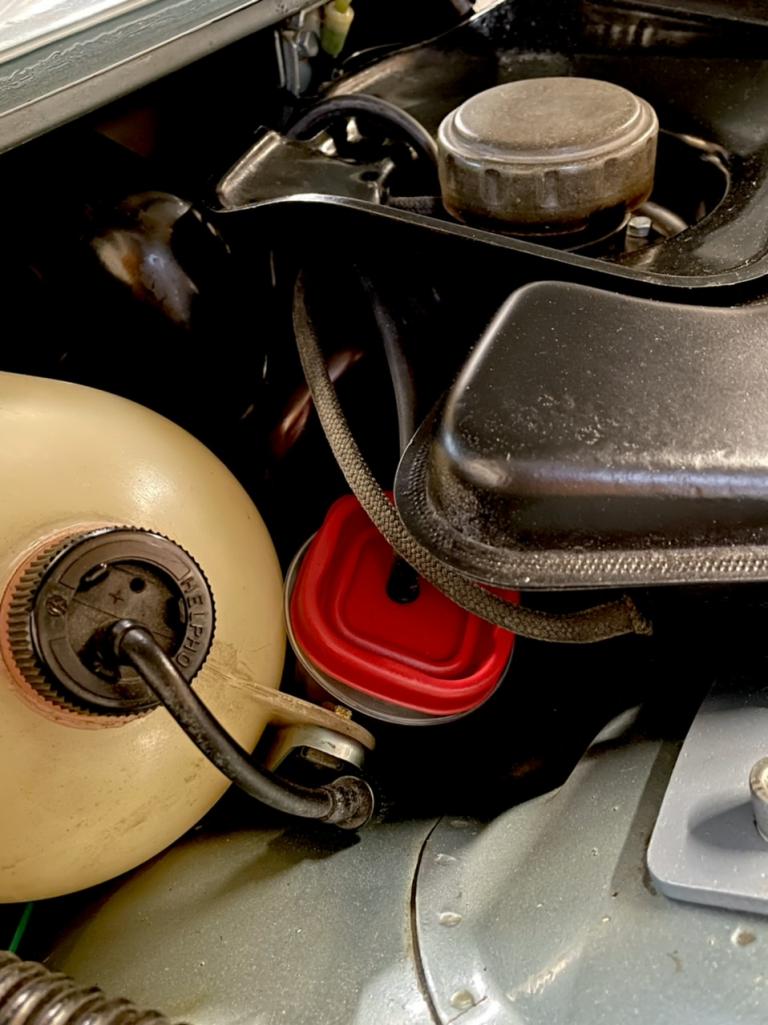
Posted by: Dion Jul 2 2021, 09:49 AM
Found out I had no brake pad adjustment gears in the rear GT calipers. A quick email to PMB and all was remedied.
A few pics ….
Attached thumbnail(s)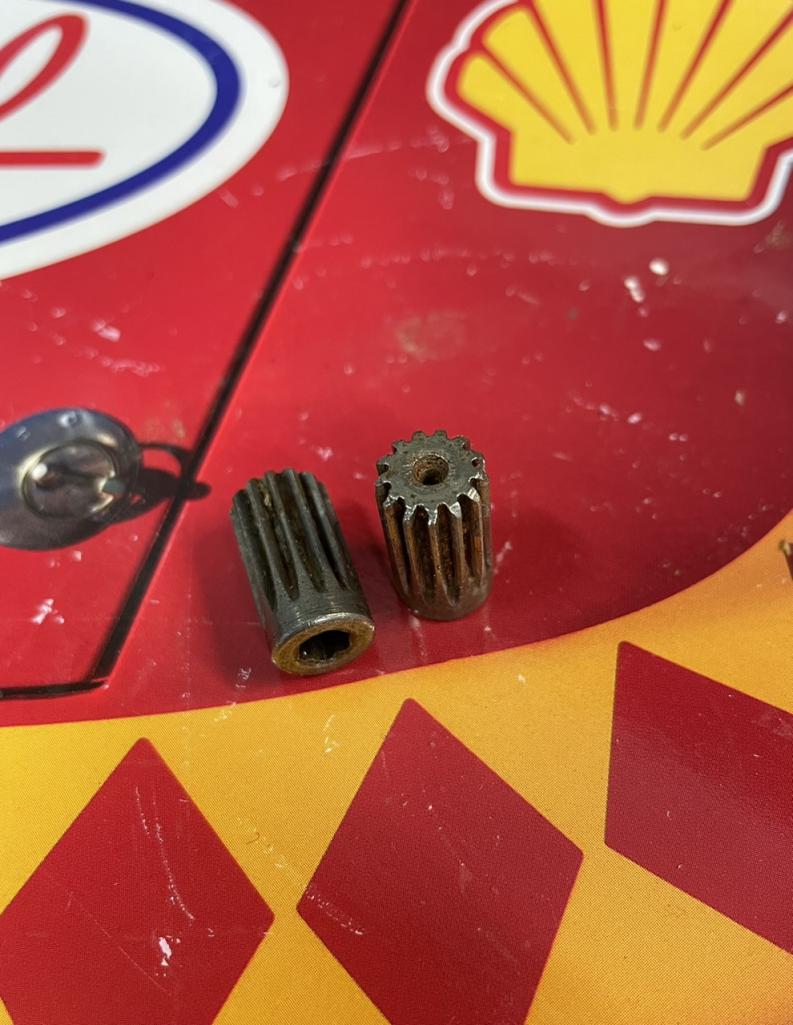
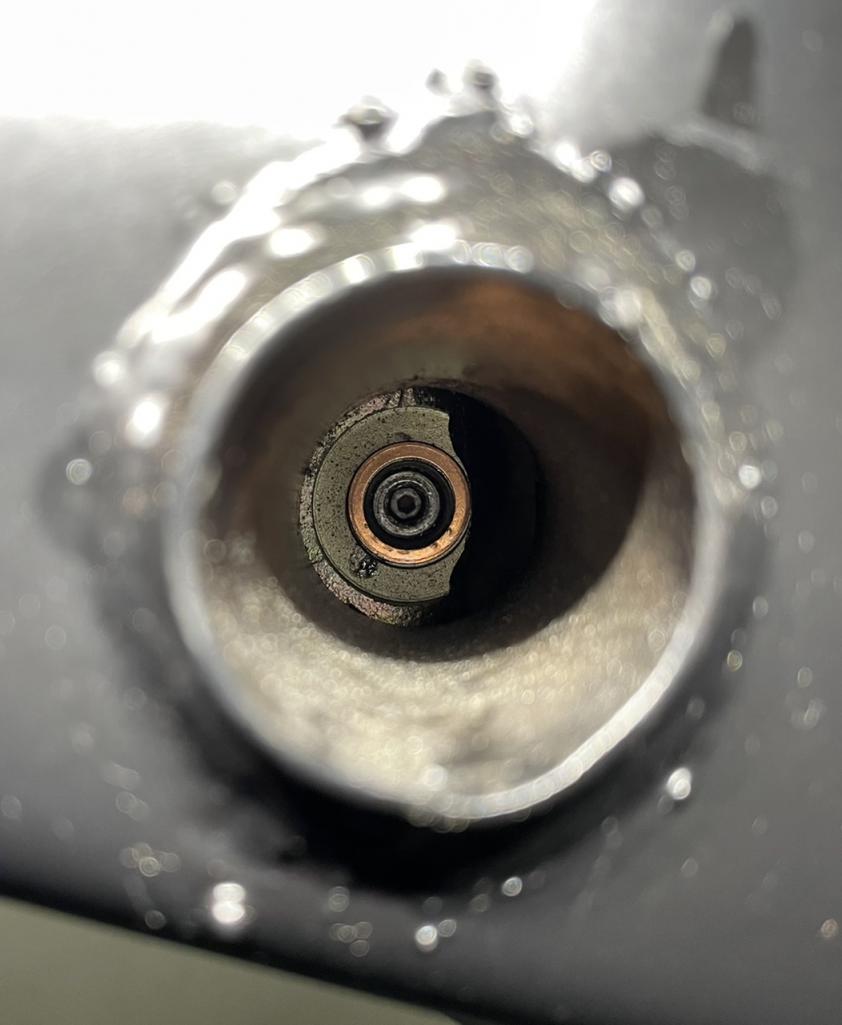
Attached image(s)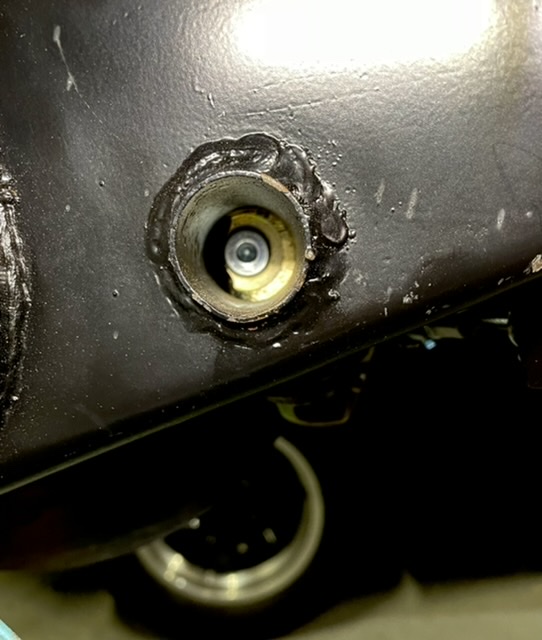
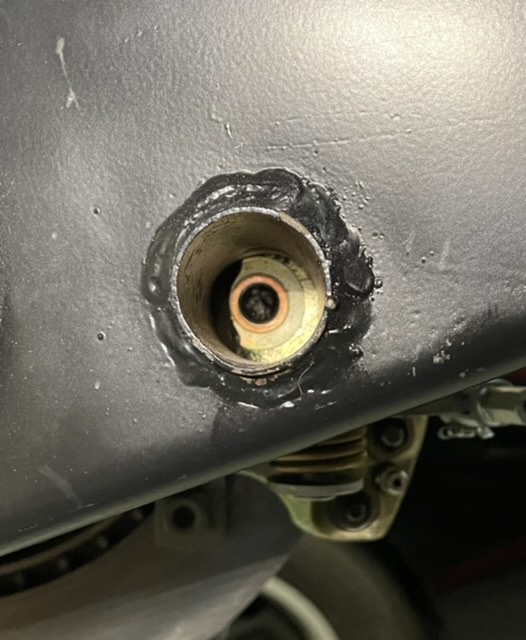
Posted by: Dion Jul 2 2021, 09:55 AM
Finally, for June’s project….Pressure plate and clutch Delayed by not having a proper triple square tool for the flywheel bolts. The harbor fright one just rounded its edges.
With a proper tool I was able to torque them properly and complete the assembly.
Attached thumbnail(s)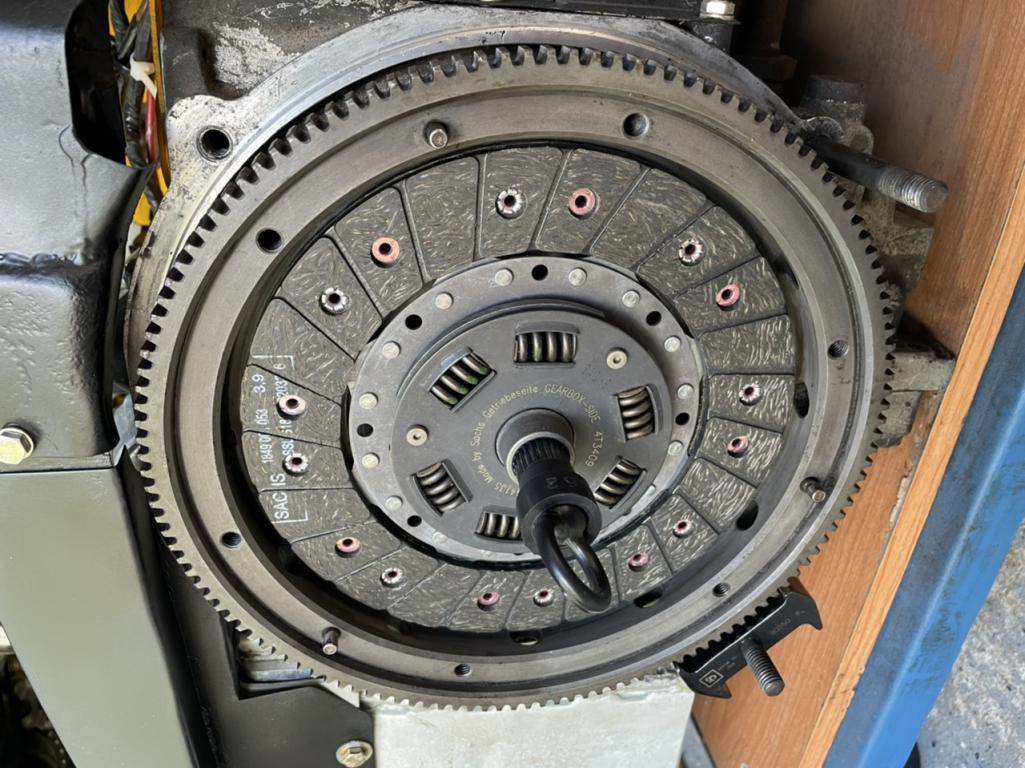
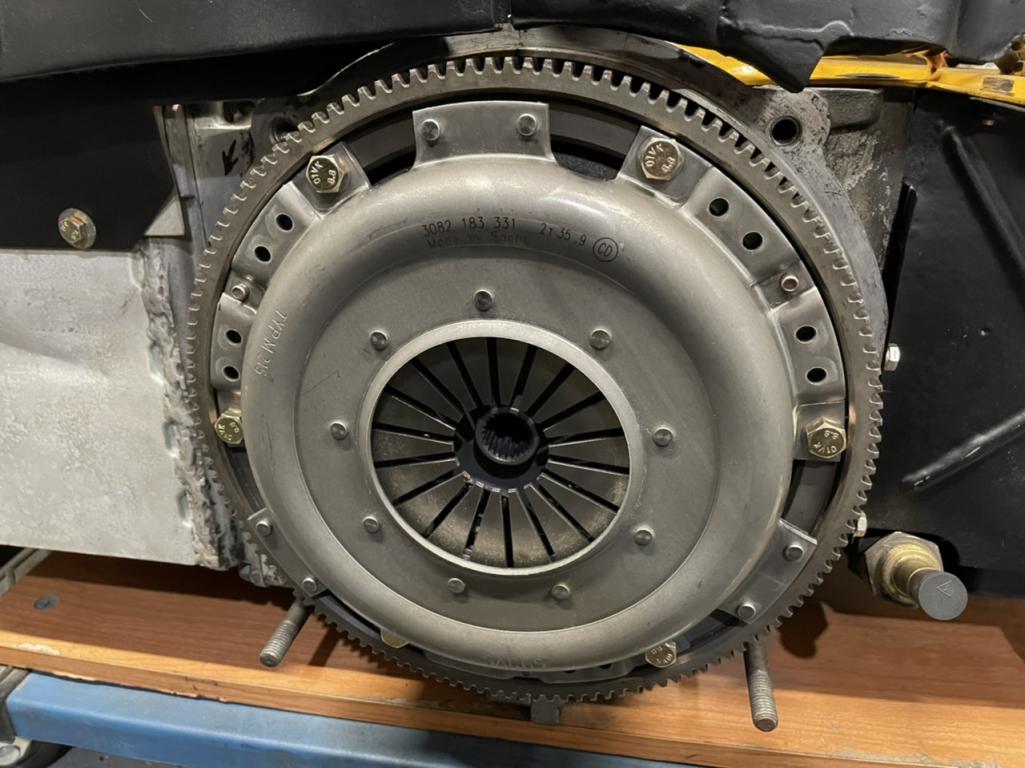
Posted by: Dion Jul 2 2021, 10:02 AM
Mounted my “Stig” steering wheel. Blomqvist that is!
Attached thumbnail(s)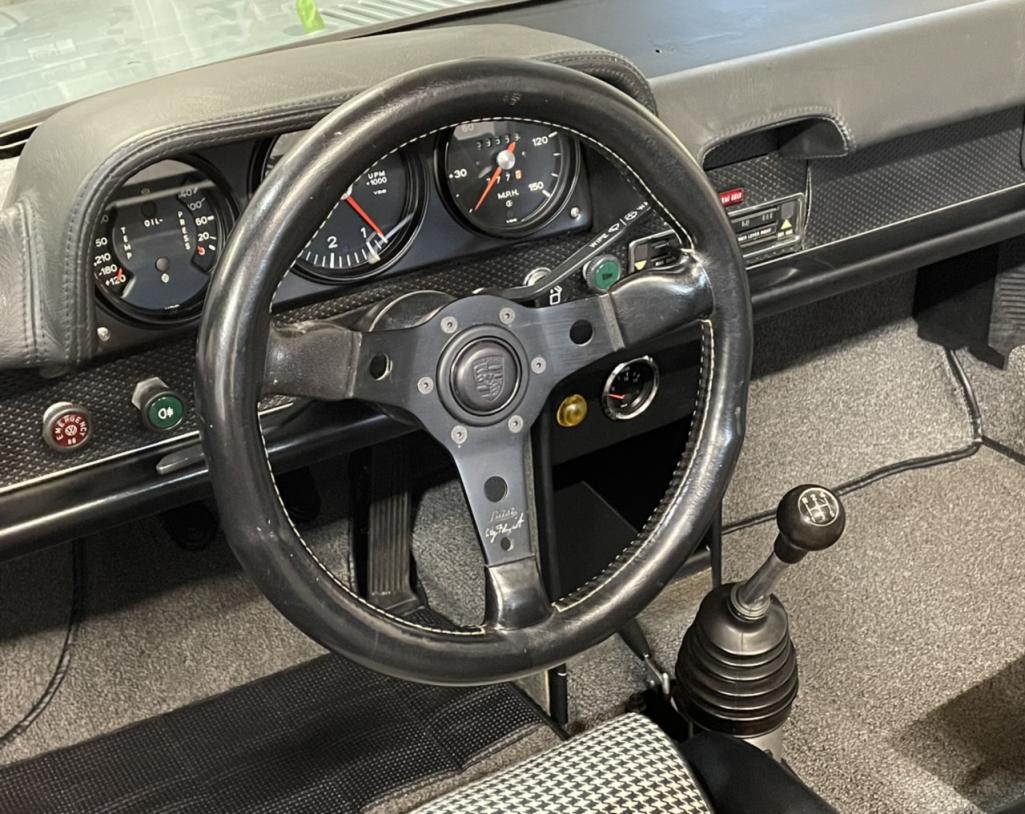
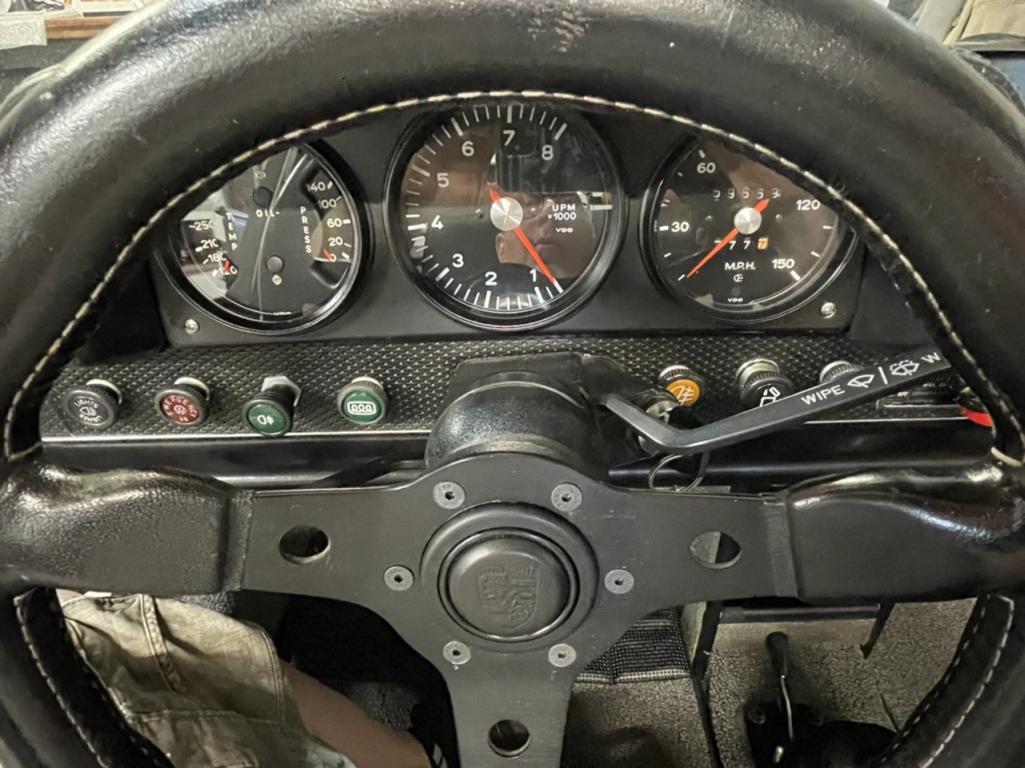

Posted by: Dion Jul 2 2021, 10:09 AM
Proper CDI box placed. 3 pin appropriate for this 2.4
That’s all for now. Next up is getting trans and engine mated and placed in chassis.
Working on collecting a few more parts for the throttle cable. Have the
rod and bell crank. Need to make a bracket for trans as I don’t have the stud for bell crank. See what I can cobble together. I checked with Rich Johnson he doesn’t have any on hand at the moment. See some of you at the NorthEast gathering.
Cheers.
Attached thumbnail(s)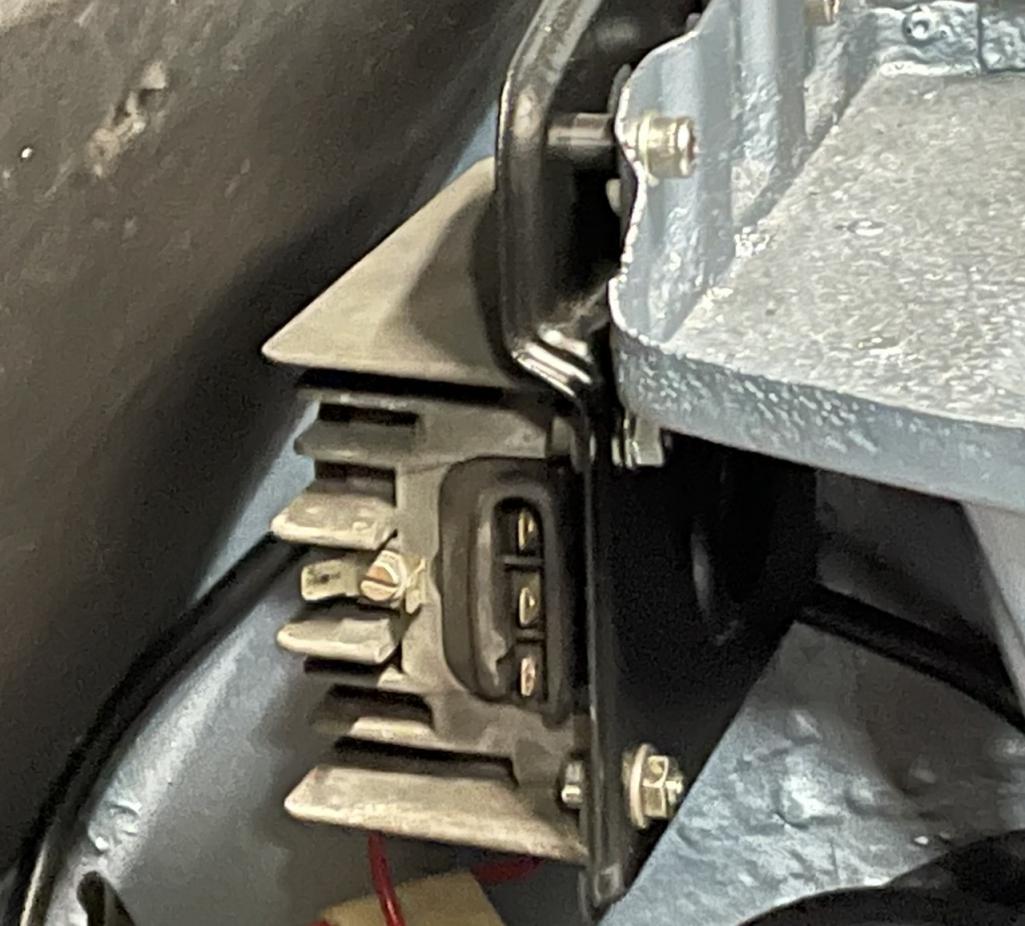
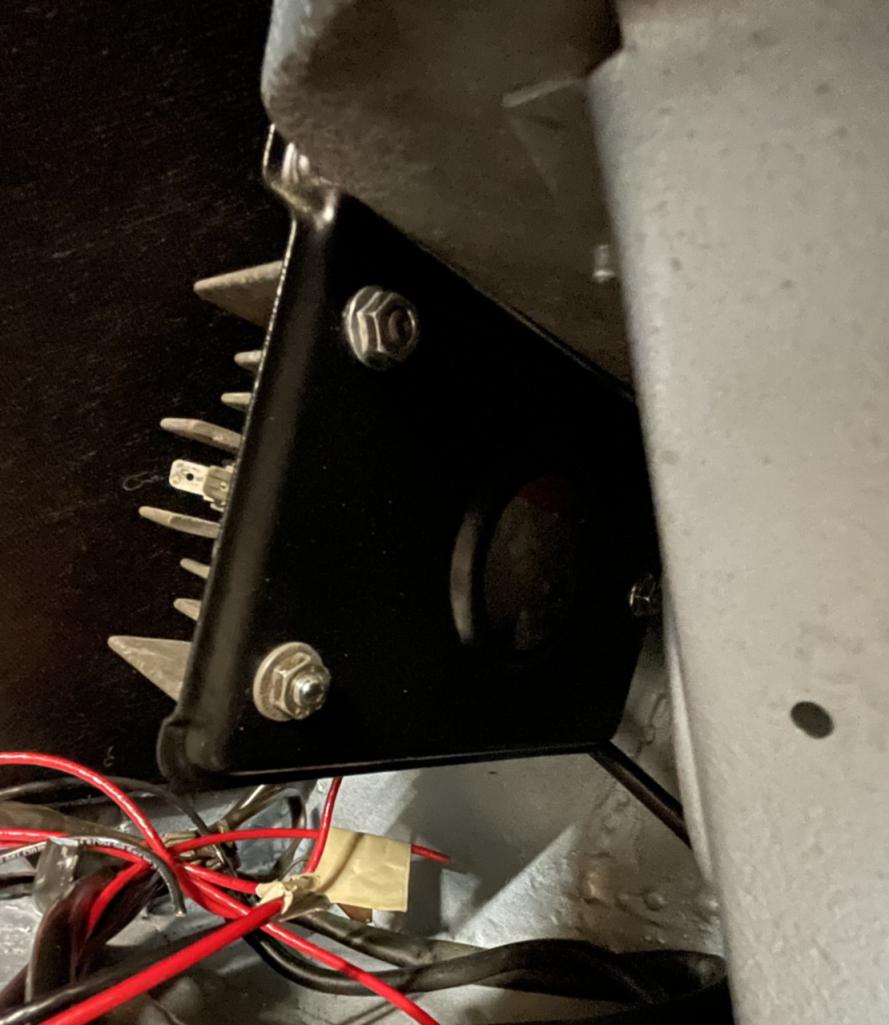
Posted by: mepstein Jul 2 2021, 10:12 AM
Dion - I have an RJ bracket. Let me find it for you.
Posted by: Dion Jul 2 2021, 10:15 AM
Mark , your awesome mate! Thank you.
Posted by: Dion Jul 24 2021, 06:04 AM
A big thank you to Mark @http://www.914world.com/bbs2/index.php?showuser=10825 for hooking me up with the RJ throttle cable bracket for the six configuration. I was able to tap the transmission for the M8 stud.
That was a very tense moment drilling into that case. I did it with 3 different bits stepping up each time till i had the size hole that was needed. Applied plenty of oil when
using the tap. Its only approximately 16mm deep. Glad it turned out well is an understatement.
Attached thumbnail(s)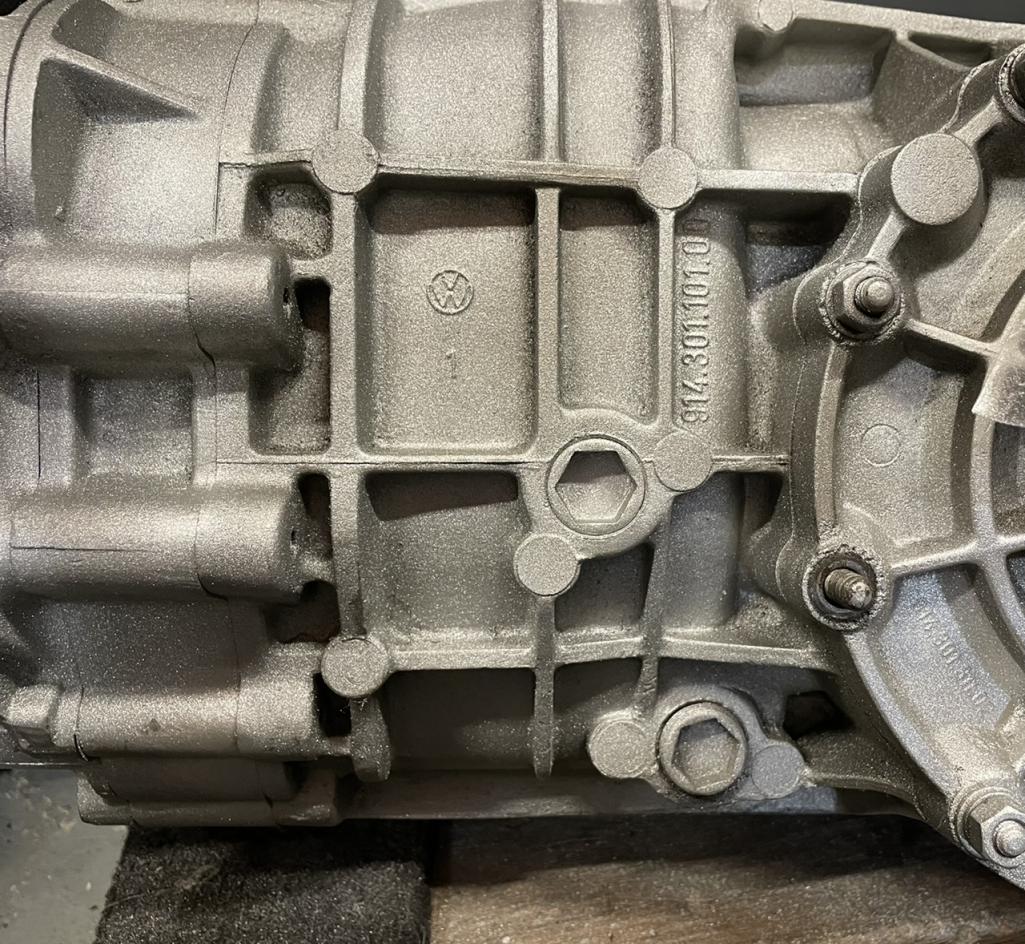

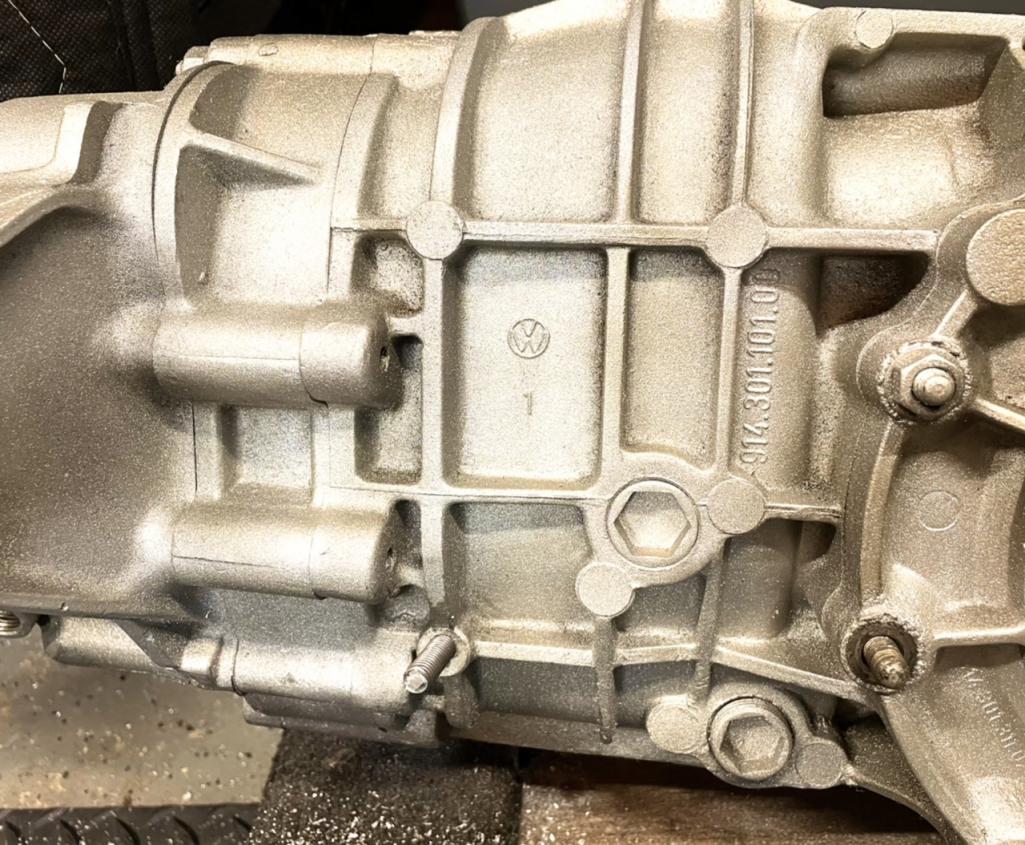
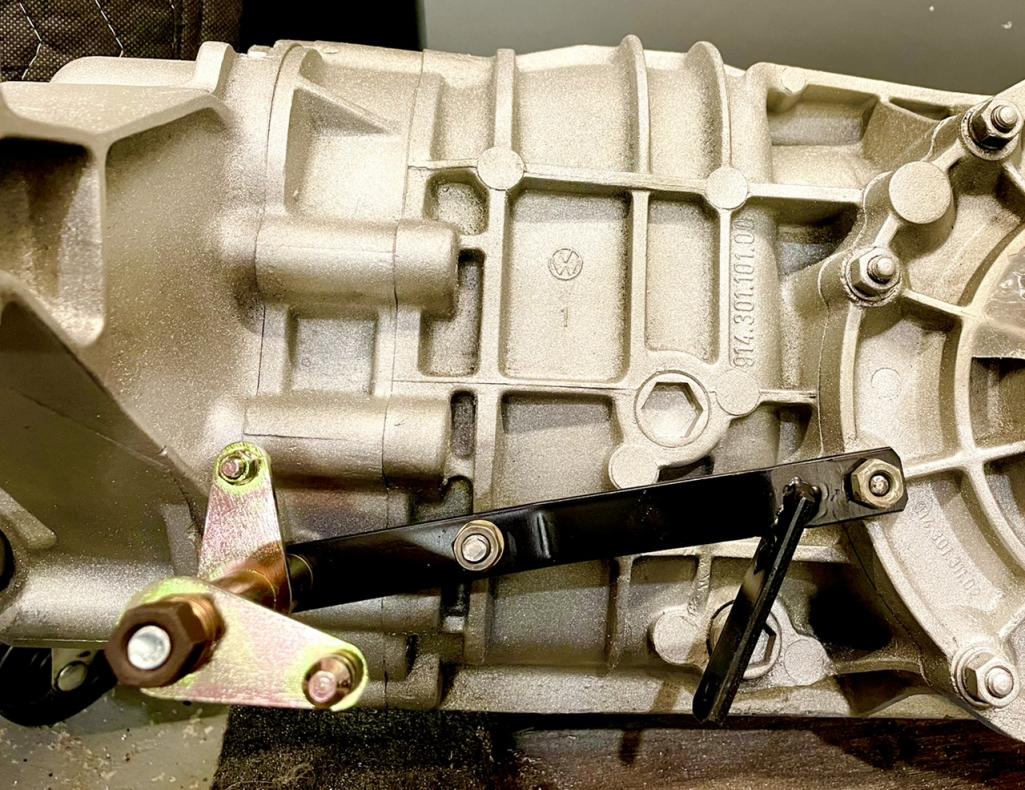
Posted by: Dion Jul 24 2021, 06:12 AM
Time to get married…finally engine and gearbox meet!
Placed the starter on. I want to add the starter relay at this time to help reduce the current going through the ignition switch. Try to get to that this coming week.
Now to find the engine tin rubber seals….
Attached thumbnail(s)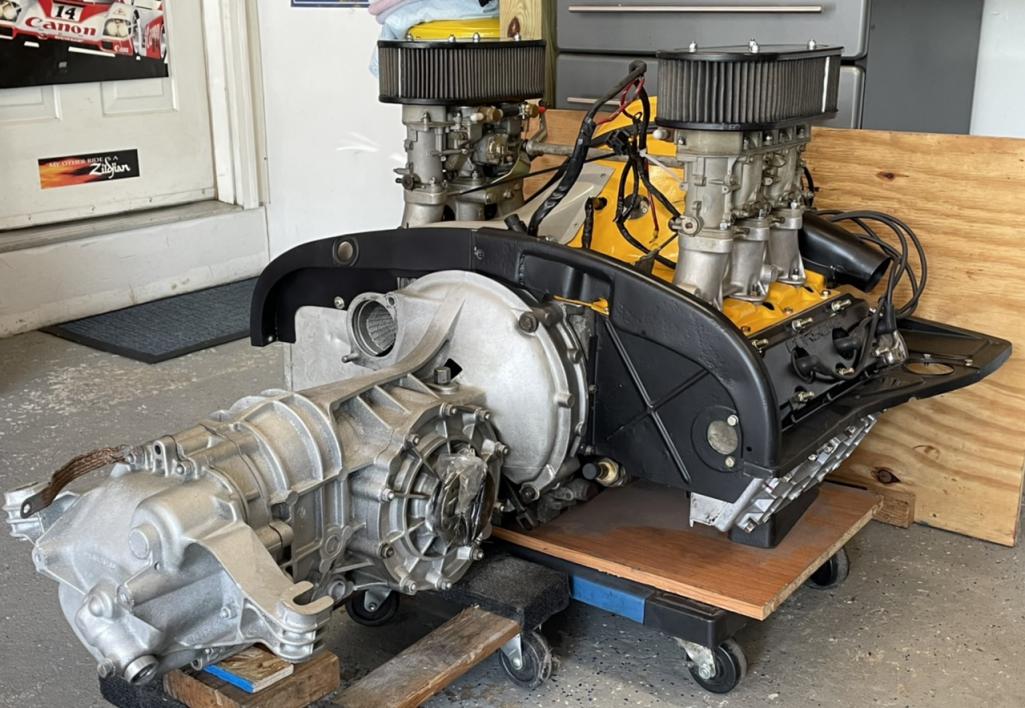
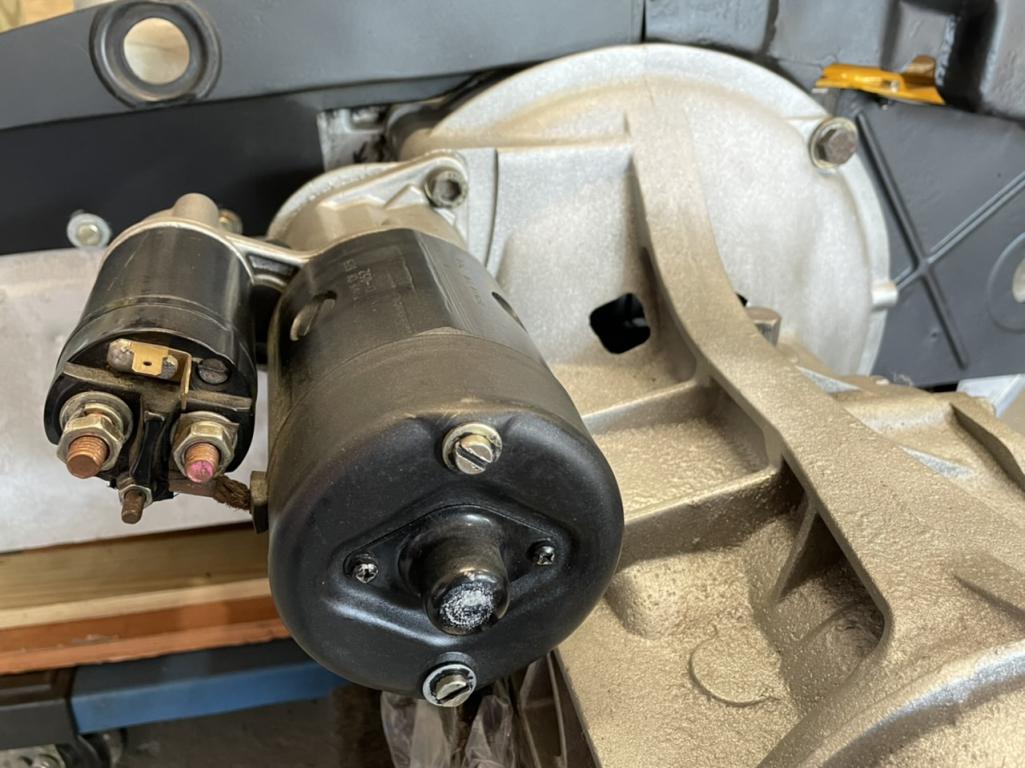
Posted by: Dion Aug 5 2021, 05:40 PM
While sharing pics of my build with Rory at the East Coast Gathering had a discussion on my fuel pump and lines. Yeah basically shaved off 8” of fuel line using the 90 degree pump fittings. Thanks Rory! @http://www.914world.com/bbs2/index.php?showuser=5176 Much cleaner and less clutter.
Attached thumbnail(s)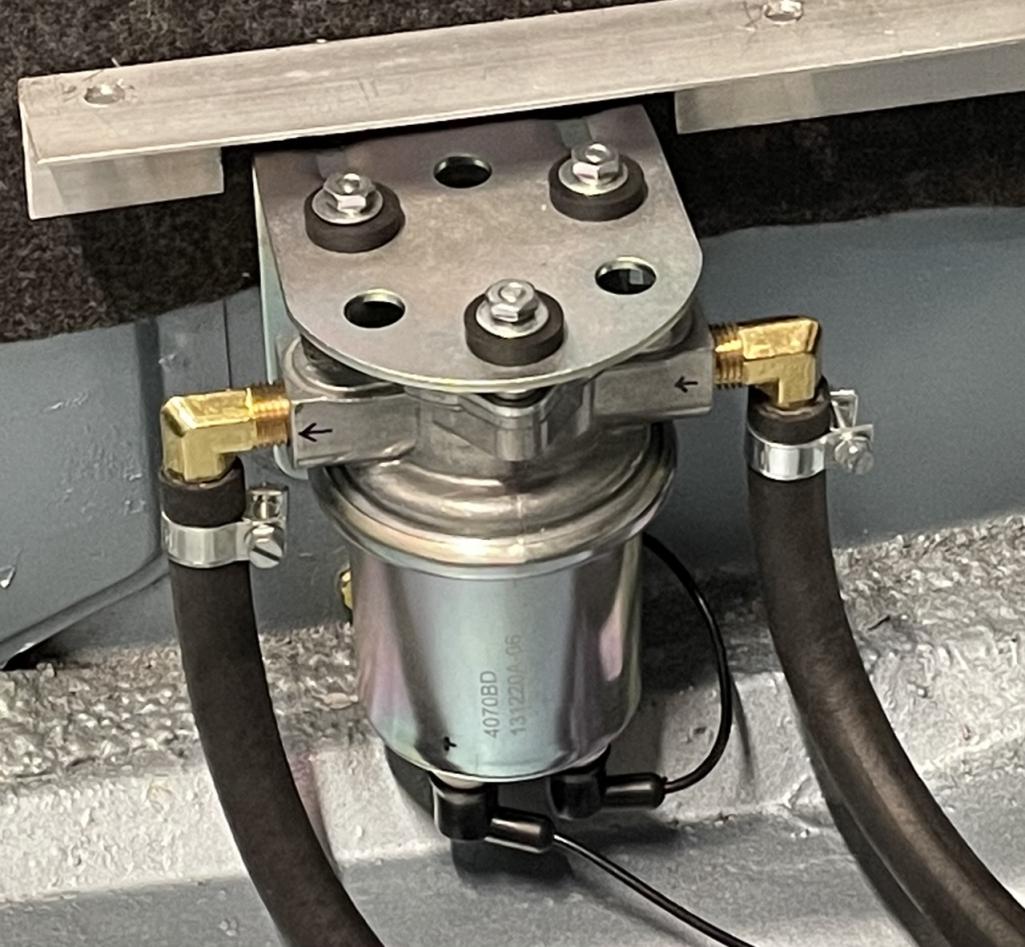
Posted by: Dion Aug 5 2021, 05:44 PM
Needed a place for the coil. My early engine doesn’t have the provision to mount on fan housing. So using some square steel tubing, I made a mount for it and bolted that to the firewall in the same manner the GT cars had theirs.
Attached thumbnail(s)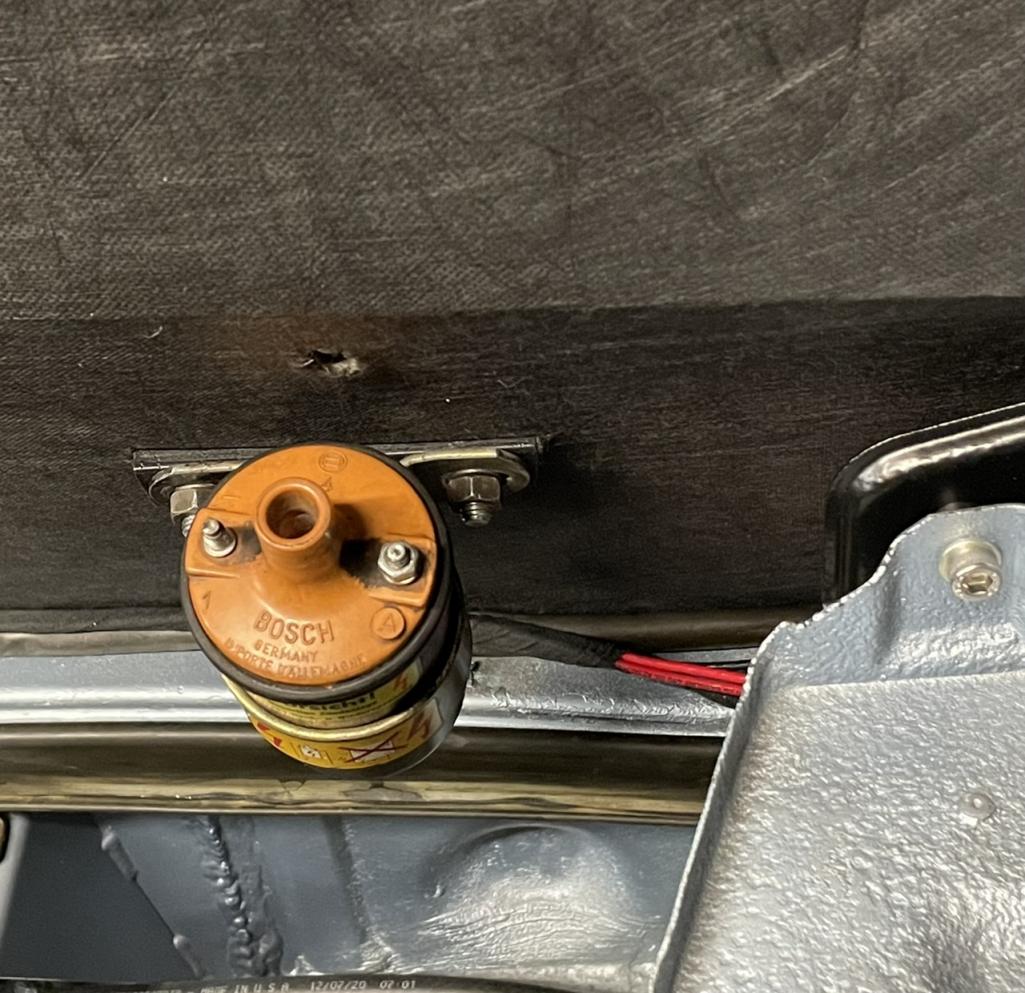
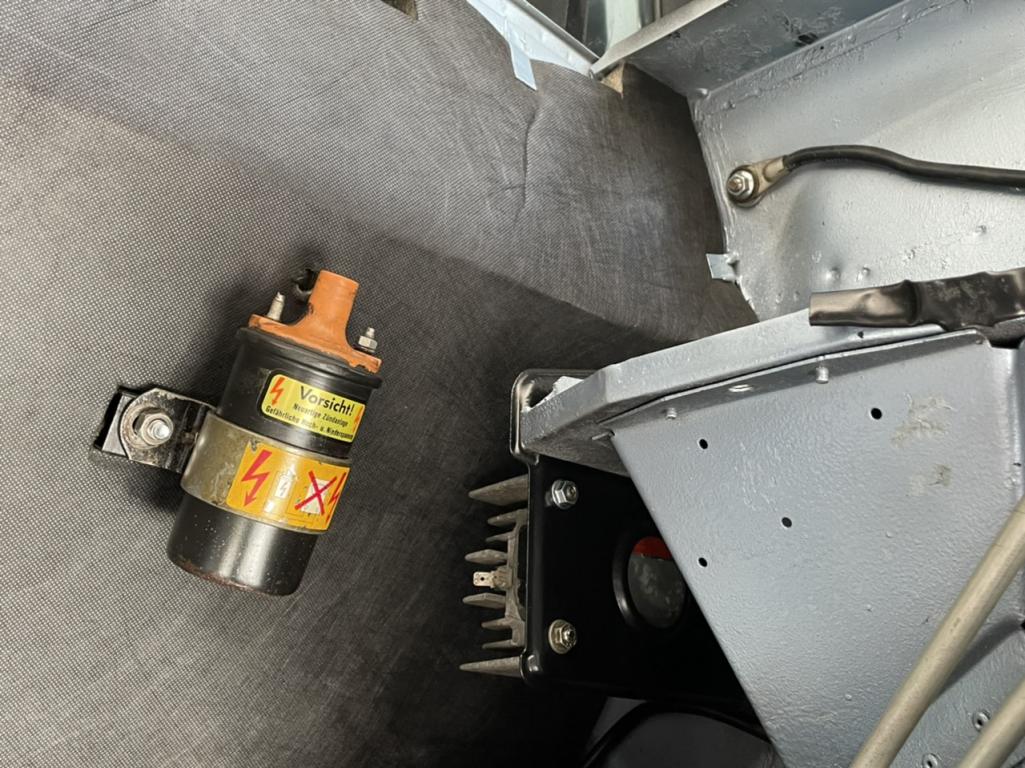
Posted by: Dion Aug 5 2021, 05:46 PM
Ok, let’s do this!
Attached thumbnail(s)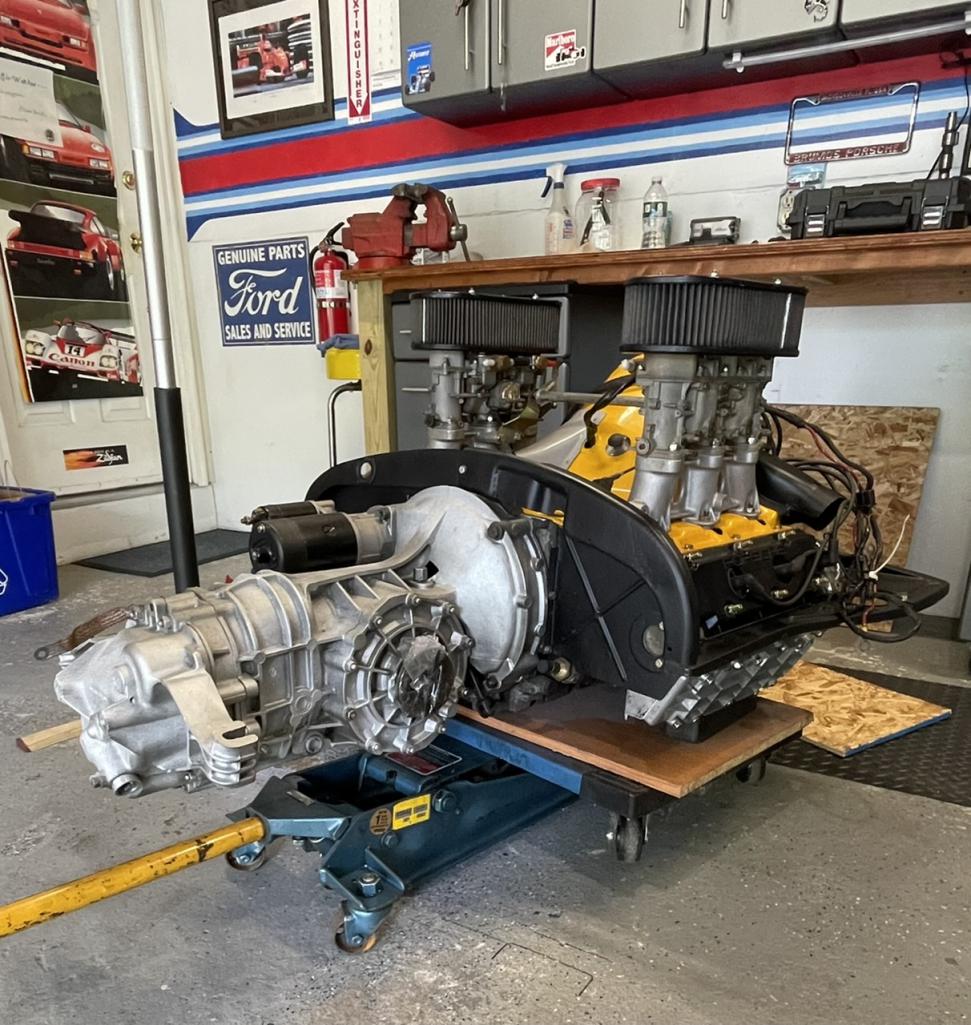
Posted by: Dion Aug 5 2021, 05:51 PM
Took my time, I removed the tin on the left side. I didn’t want those suspension ears damaging anything.
Attached thumbnail(s)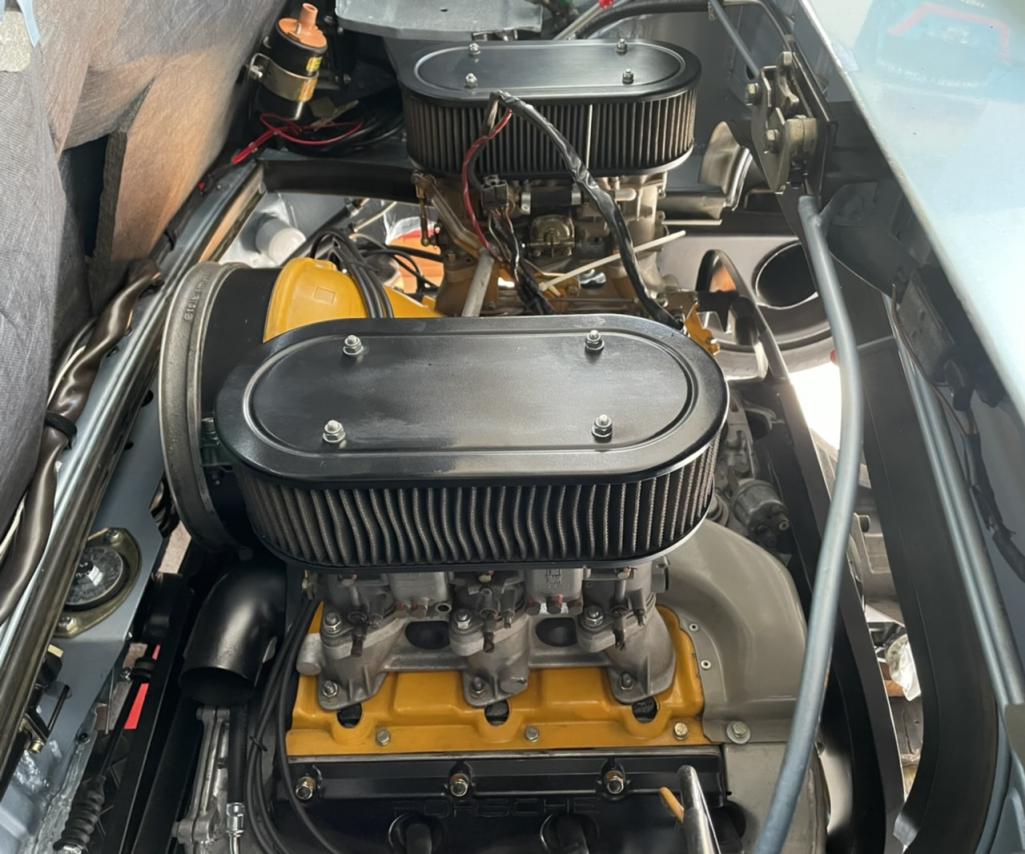
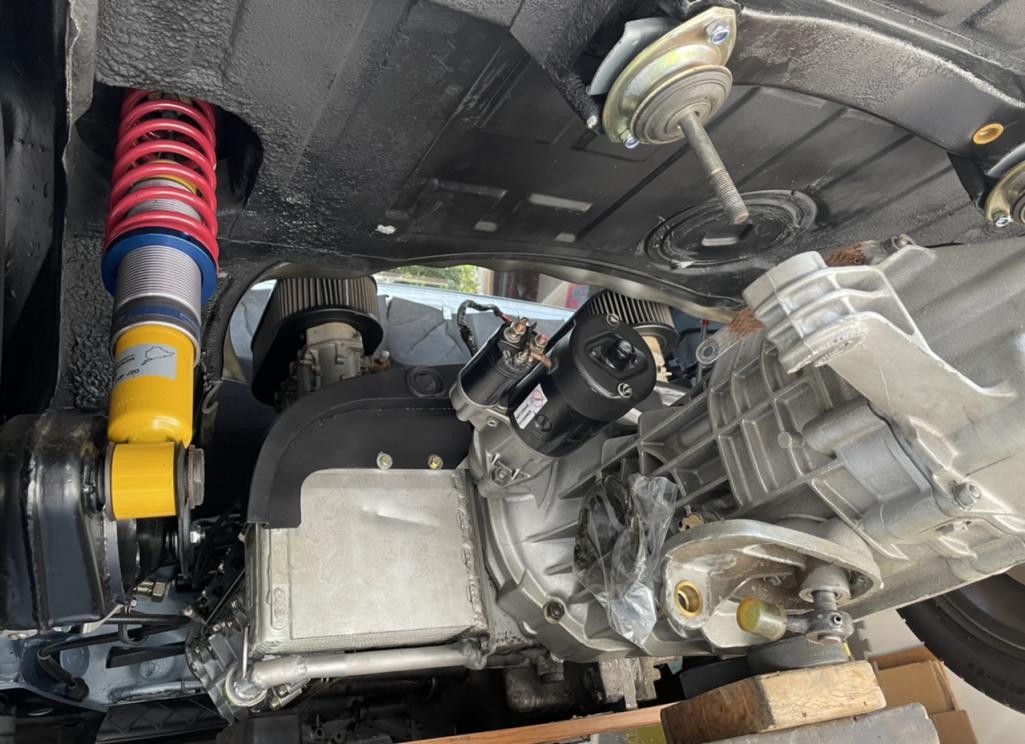
Posted by: Dion Aug 5 2021, 05:56 PM
I had to order a few fittings so I can button up the oil lines. Then I can move on to axles, HE’s , etc. So nice to have it finally in place.
Attached thumbnail(s)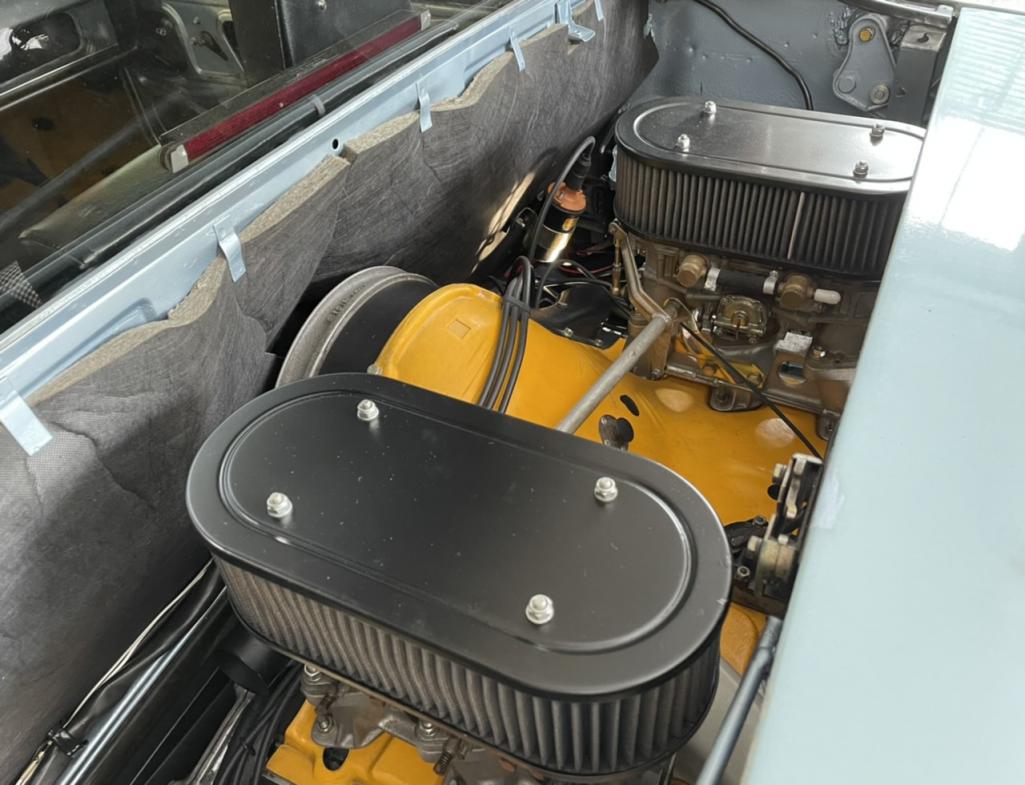
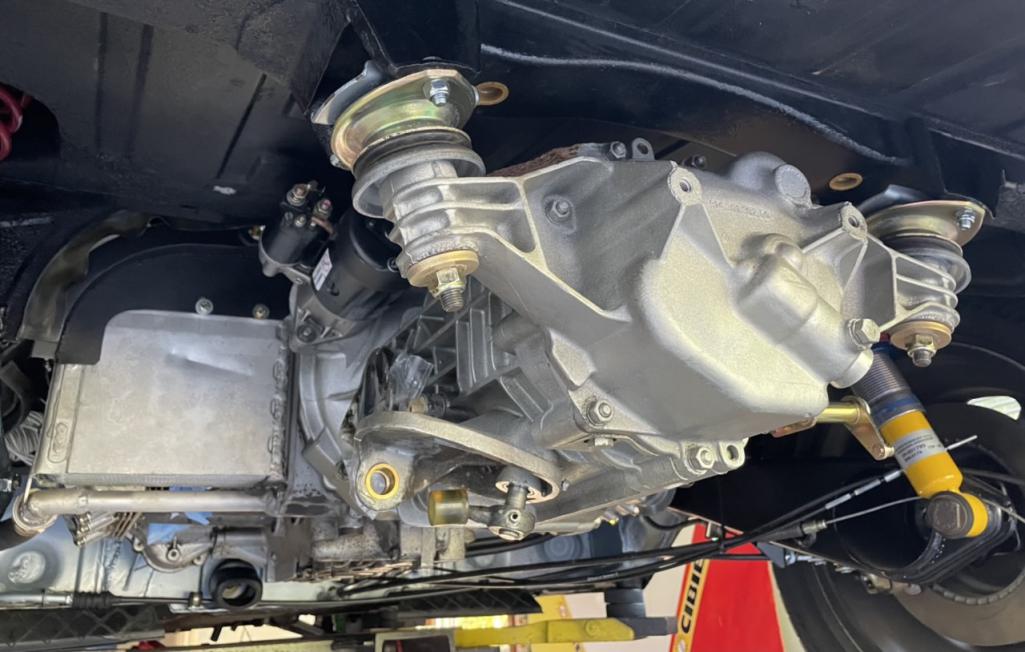
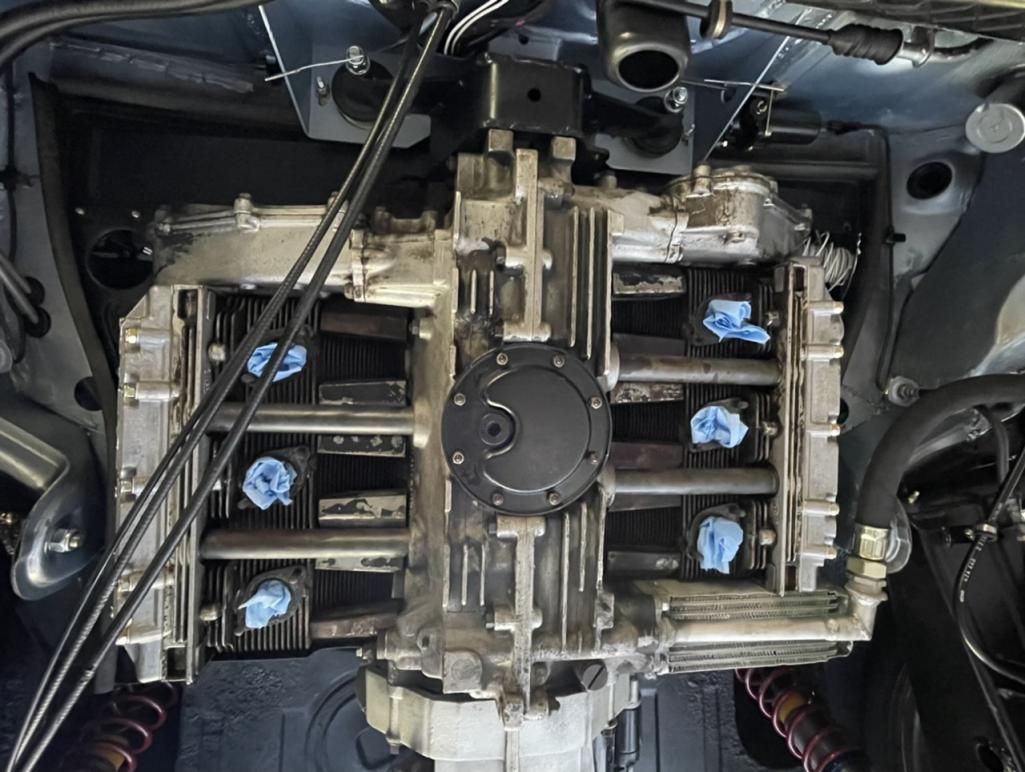
Posted by: tygaboy Aug 5 2021, 06:02 PM
MAN, that looks good in there! Big congrats on a major milestone.
Posted by: BeatNavy Aug 5 2021, 07:41 PM
MAN, that looks good in there! Big congrats on a major milestone.
Way to go Dion!!
Posted by: bbrock Aug 5 2021, 09:19 PM
That there is quite a milestone and one beautiful engine! 
Posted by: Cairo94507 Aug 6 2021, 07:08 AM
Sweet!
Posted by: rgalla9146 Aug 6 2021, 07:23 AM
Beautiful job Dion !
It's all coming together now.
Have fun installing that left side tin.
Reaching down into the engine compartment to start that last bolt in the rear is
especially enjoyable.
You'll be motoring soon
Posted by: raynekat Aug 6 2021, 11:49 PM
Yes, very nice there....very nice!
Posted by: Tdskip Aug 7 2021, 06:38 AM
Great updates, thank you
Posted by: Dion Aug 11 2021, 08:00 AM
Thank you fellas, your comments on this thread and support goes a long way. I really appreciate the help and encouragement.
I’m now working on some electrical fiddly bits.
This car has the CDI box, the old cast iron distributor and black transformer ( coil ) .
I’m looking for verification and some help.
First off I’m not putting a battery anywhere near this car till I know the layout of wiring is correct. I’ve gone over many threads and the Haynes book for references.
Needless to say there is some conflicting information.
Some of my original harness was modified by a previous mechanic (old D-jet issues) but for the most part seems to be “as” the original .
So here’s the lay of the land:
RELAY PLATE: purple/black wire to pin #1 on transformer.
red/black wire to pin # 15 “A” on transformer.
yellow wire to starter.
CDI BOX ( I have a reproduction PartsKlassic harness)
Terminal A blue wire to pin#15 “A” on transformer
Terminal B red wire to ?
Terminal C black wire to distributor (points tab)
Alternator plug into factory location on relay plate.
All braided grounds connected.
This all seems correct. My QUESTION is where should the red wire of terminal B go to?
Some diagrams show it to switched power at relay plate & some show it going to battery. What is safe and appropriate? Thanks in advance!
Attached thumbnail(s)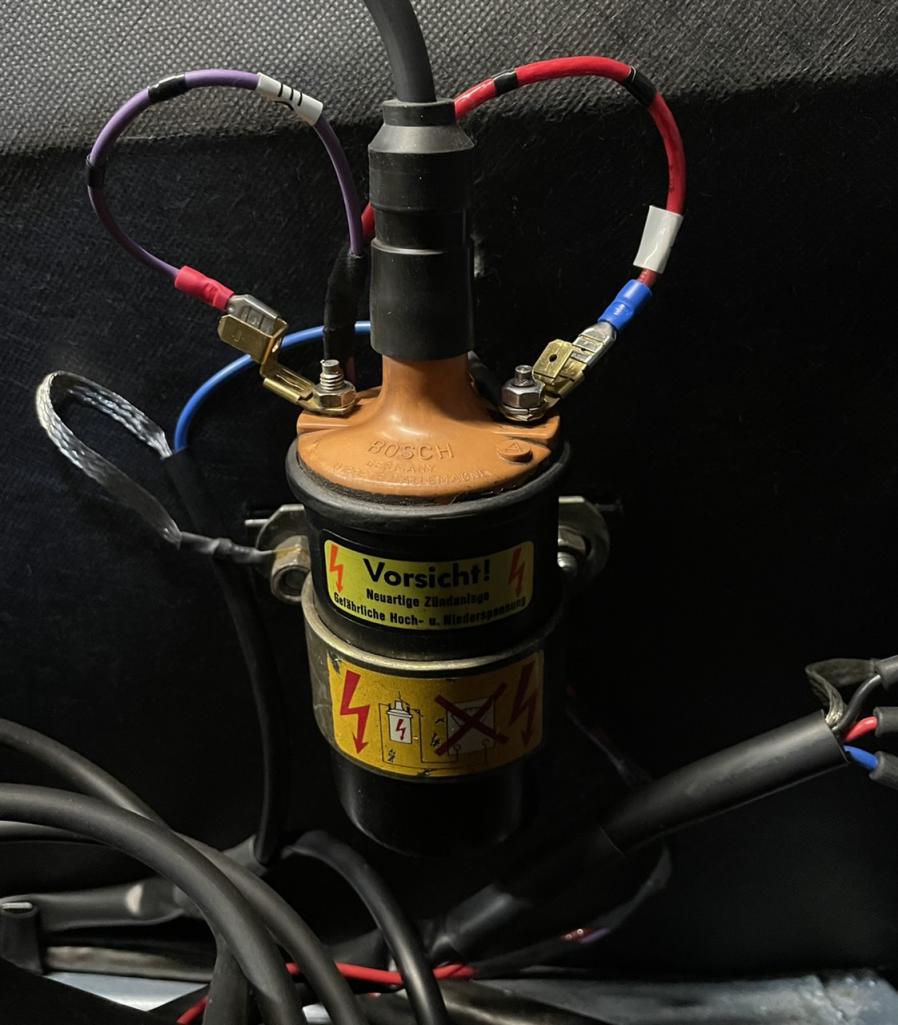
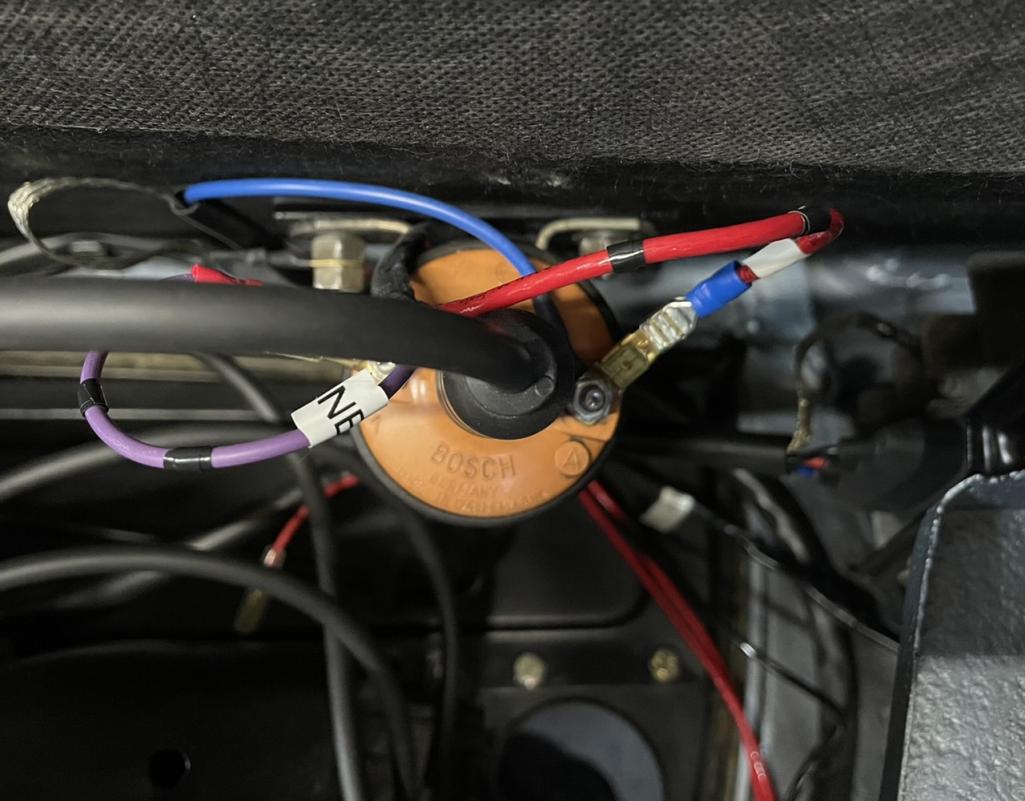
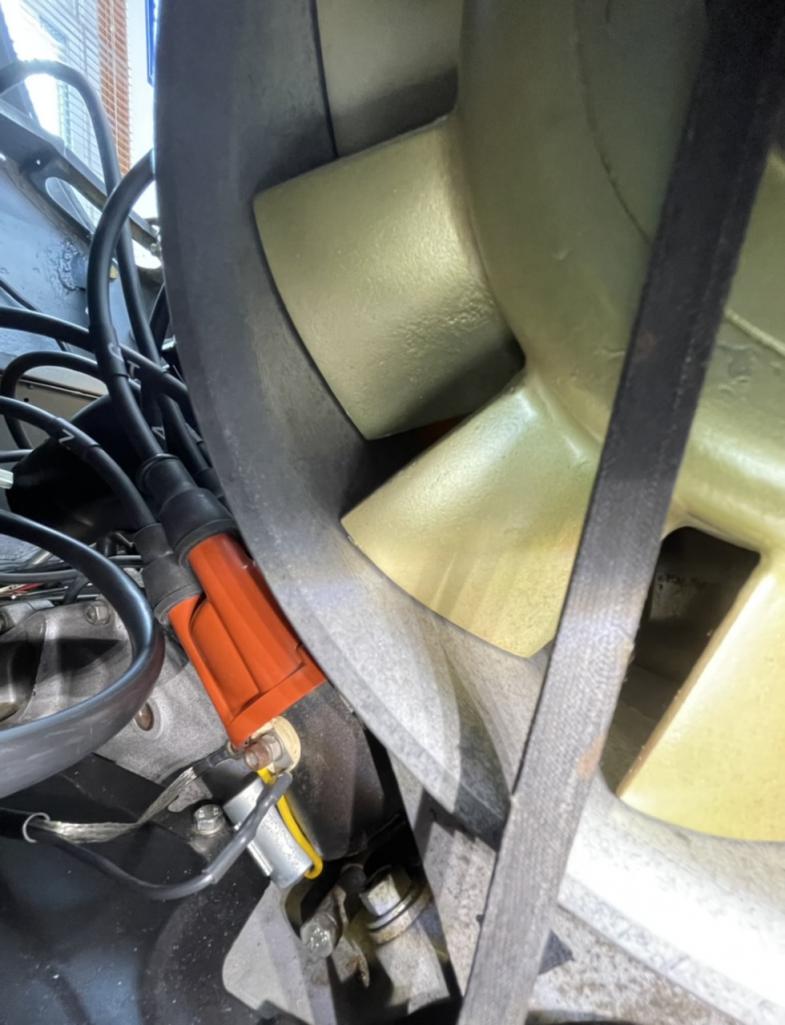
Posted by: mb911 Aug 11 2021, 09:32 AM
Oh man sorry that one I do not know off the top of my head.
Posted by: Root_Werks Aug 11 2021, 09:45 AM
B should be the battery or ign switch. Lemme google it...
Posted by: Root_Werks Aug 11 2021, 09:47 AM
Yup, not the best picture, but shows all the terminals.
Assuming you have a 3 pin CD box.
Attached image(s)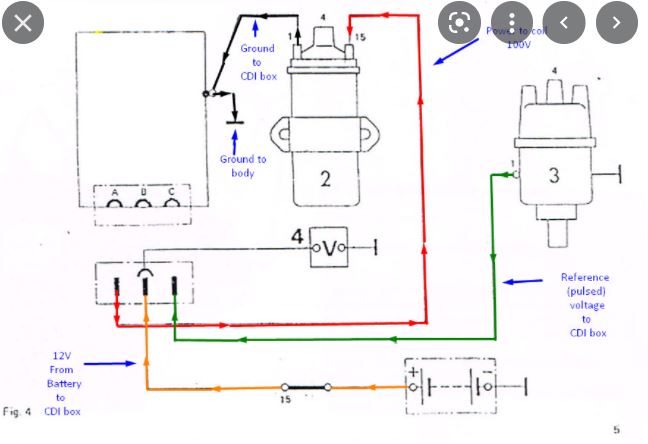
Posted by: Dion Aug 11 2021, 11:19 AM
@http://www.914world.com/bbs2/index.php?showuser=2105 , yes I have that diagram as well. My confusion is that anther thread showed it needs to be on a switched power supply.
So is it ok that the CDI gets battery juice constantly, will that harm it? The harness I have I guess was made to go to the 911 plate on the rear fender (Kettering set up?)
Yes it is a 3 pin CDI.
If I did run to relay plate for “switched” power. What is a good spot?
The last resort one adjacent to the 12 pin connector?
Thanks guys.
Attached thumbnail(s)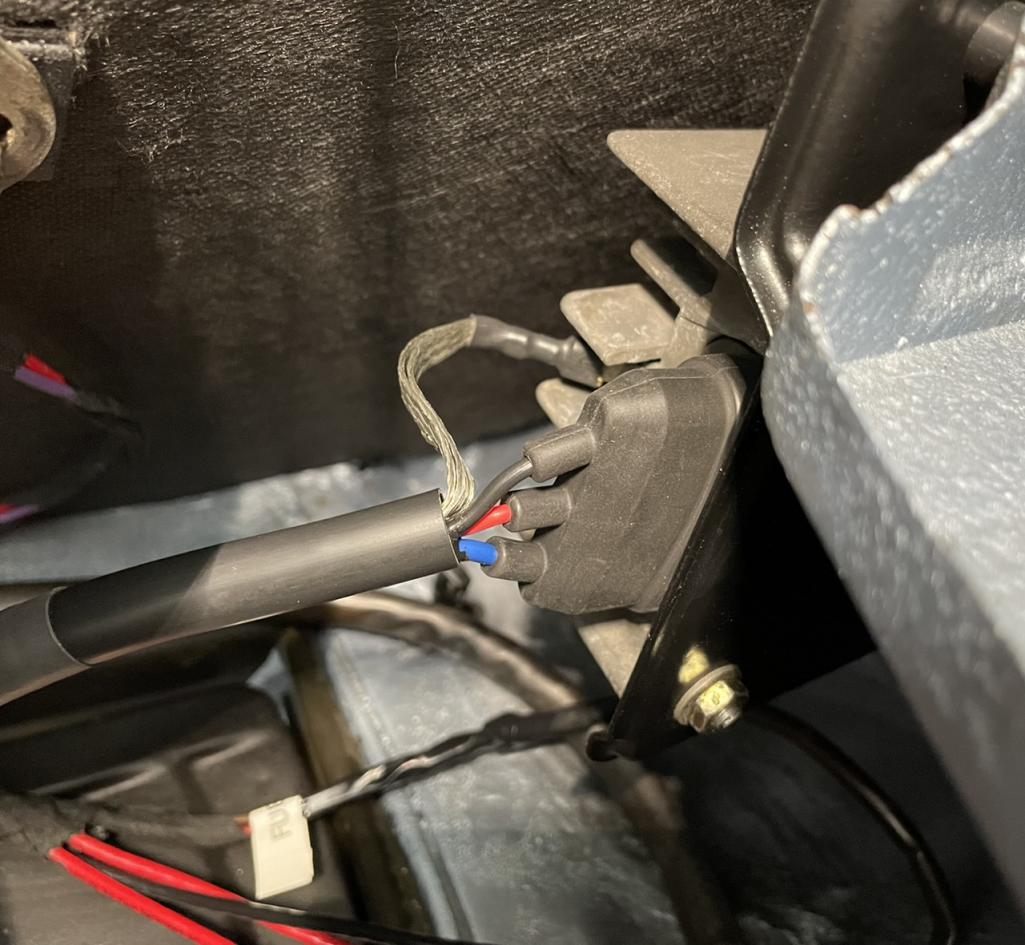
Attached image(s)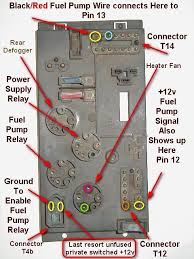
Posted by: Root_Werks Aug 12 2021, 08:47 AM
I would think switched, you don't want the CD box to have power all the time. Been a few years so hopefully someone with more recent experience will chime in.
I think what I used to do was use the wire from terminal 15 to the coil for CD box terminal B. Then just ran a new wire from A to 15 coil.
Posted by: Dion Aug 12 2021, 09:13 AM
@http://www.914world.com/bbs2/index.php?showuser=2105 thank you my instincts are agreeing with you. That’s my concern.
Having battery voltage going to the box constantly just doesn’t seem right. Of course I might be mistaken. Going with your suggestion.
Thank you.
Posted by: Dion Aug 23 2021, 04:58 PM
Some continuing work. Mounted the scavenge line from Ben @http://www.914world.com/bbs2/index.php?showuser=9892 . Had to make a change to the soft line though. My original one had a 26mm end on it and a 30Mmm was needed to mate with the hard line. A quick trip to a local hydraulic facility and they were able to make a new line with proper fittings for me.
Attached thumbnail(s)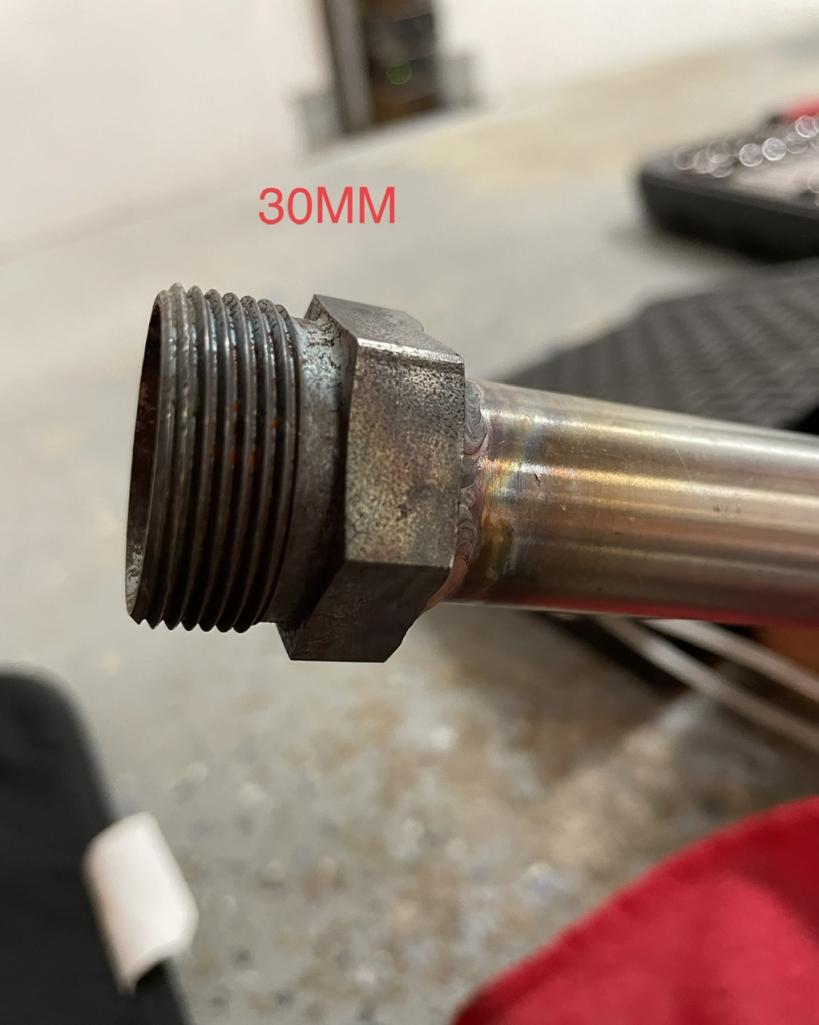
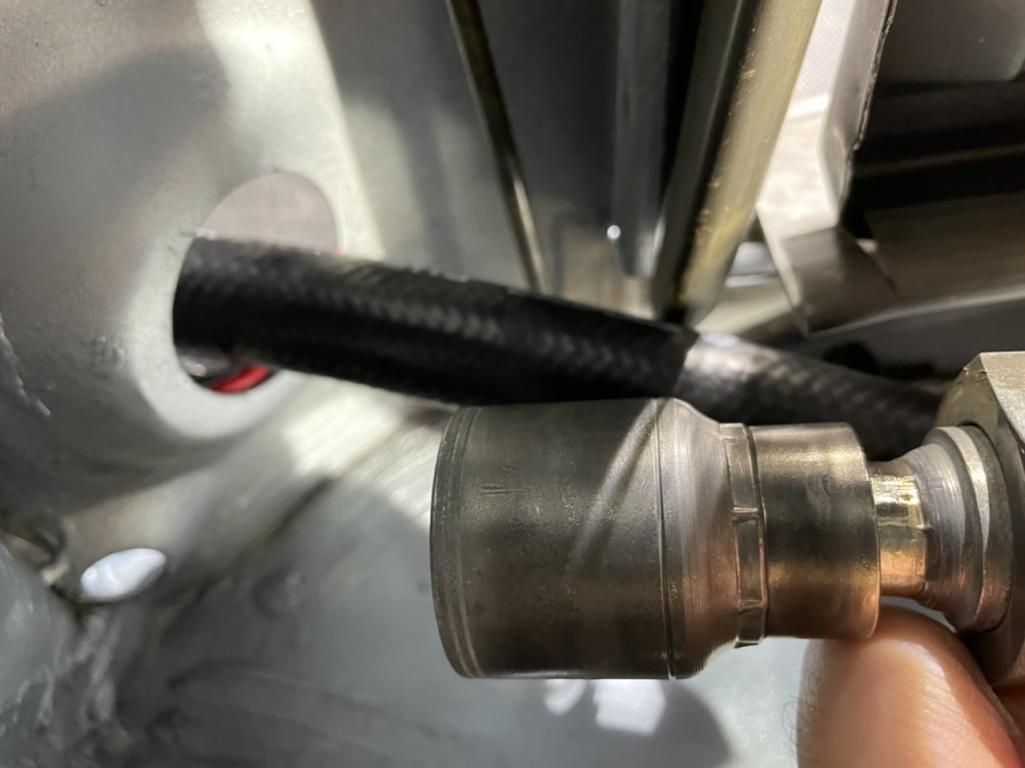
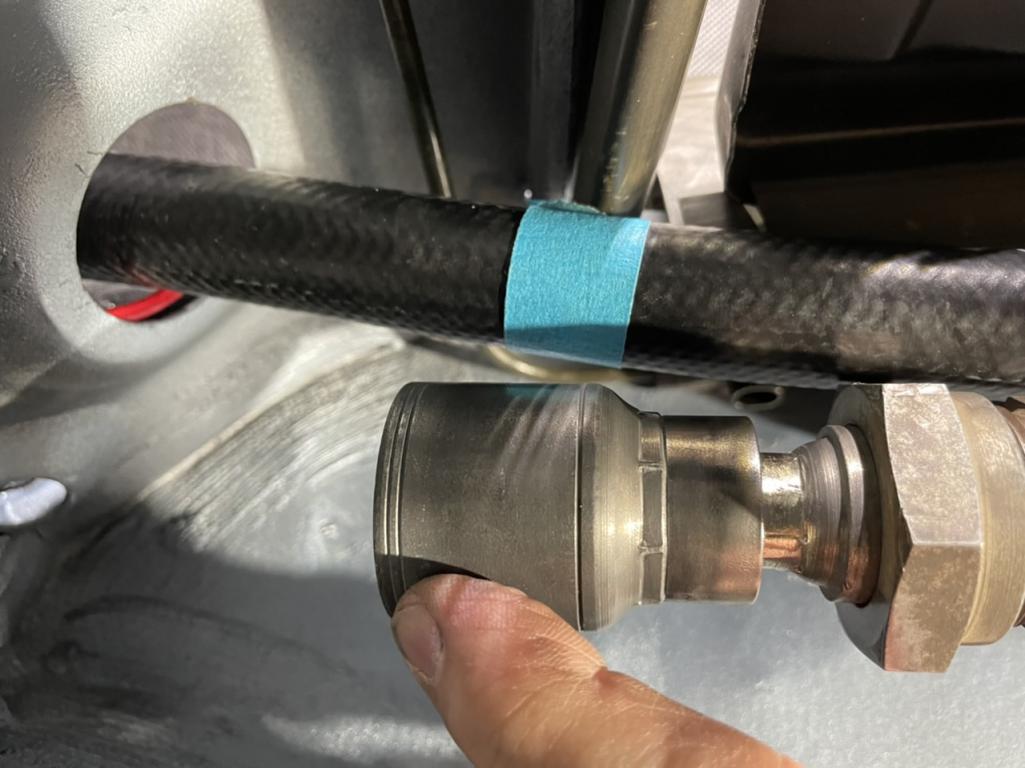

Posted by: Dion Aug 23 2021, 05:04 PM
Installed the half-shafts that Chris at Tangerine Racing was making. Nice new Lobro CV
Fresh Schnorr washers and correct torque values.
Attached thumbnail(s)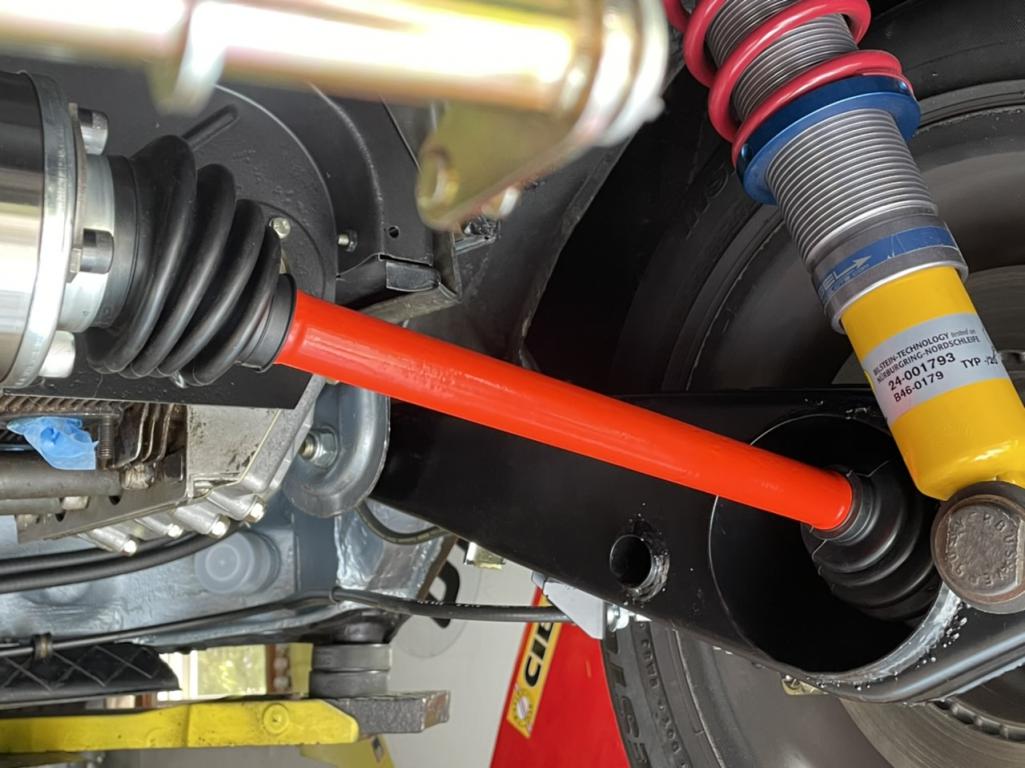

Posted by: Dion Aug 23 2021, 05:10 PM
Then came the factory heat exchangers. Man if you aren’t lined up perfectly they don’t cooperate. Tolerances was exacting. Once on the studs they moved freely. Challenge was keeping the damn gaskets on. Should have dabbed some grease on them as I learned later on from a friend. All the cables were hooked up and aligned proper. Need to do heater hoses. More to come.
Attached thumbnail(s)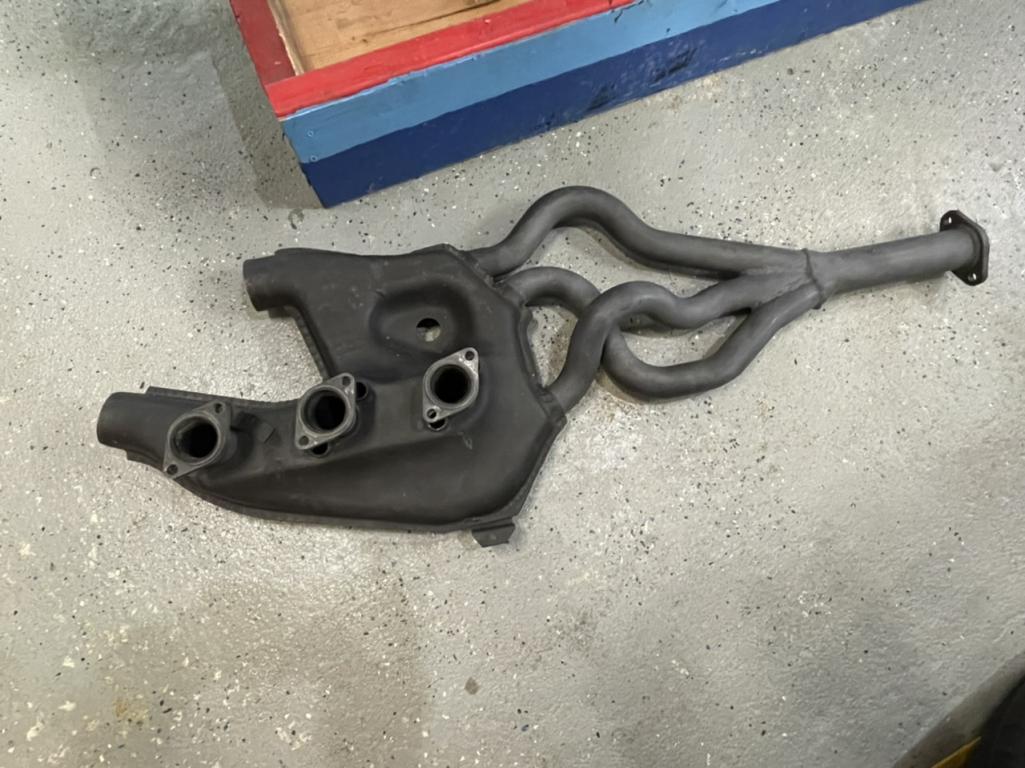
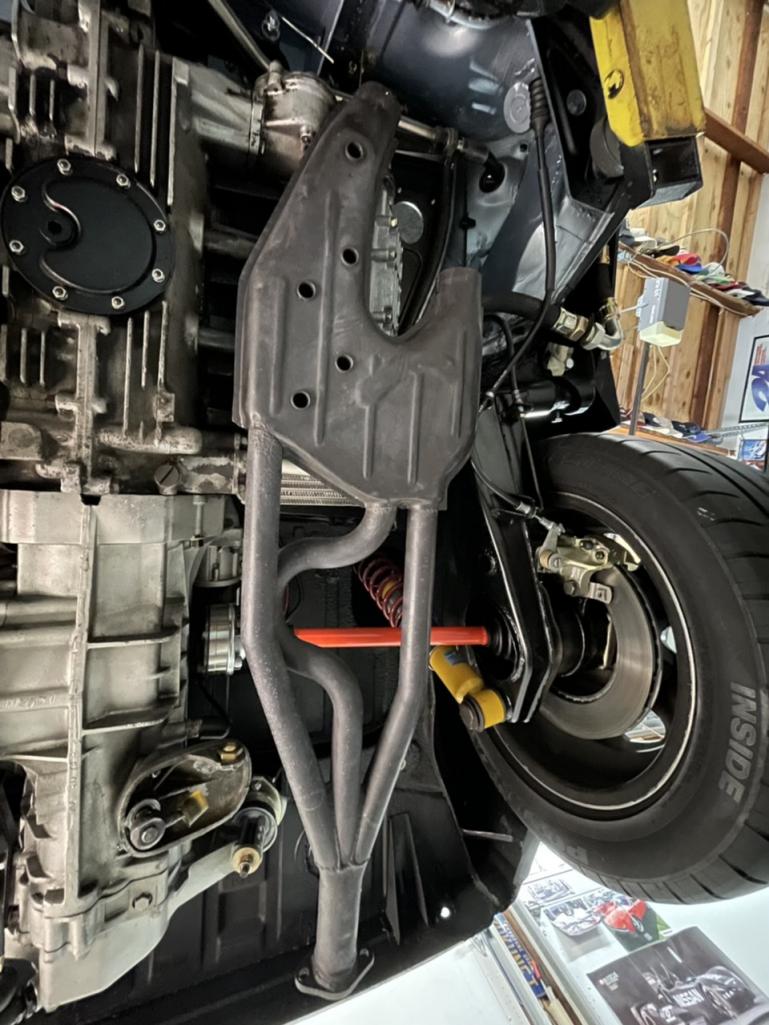

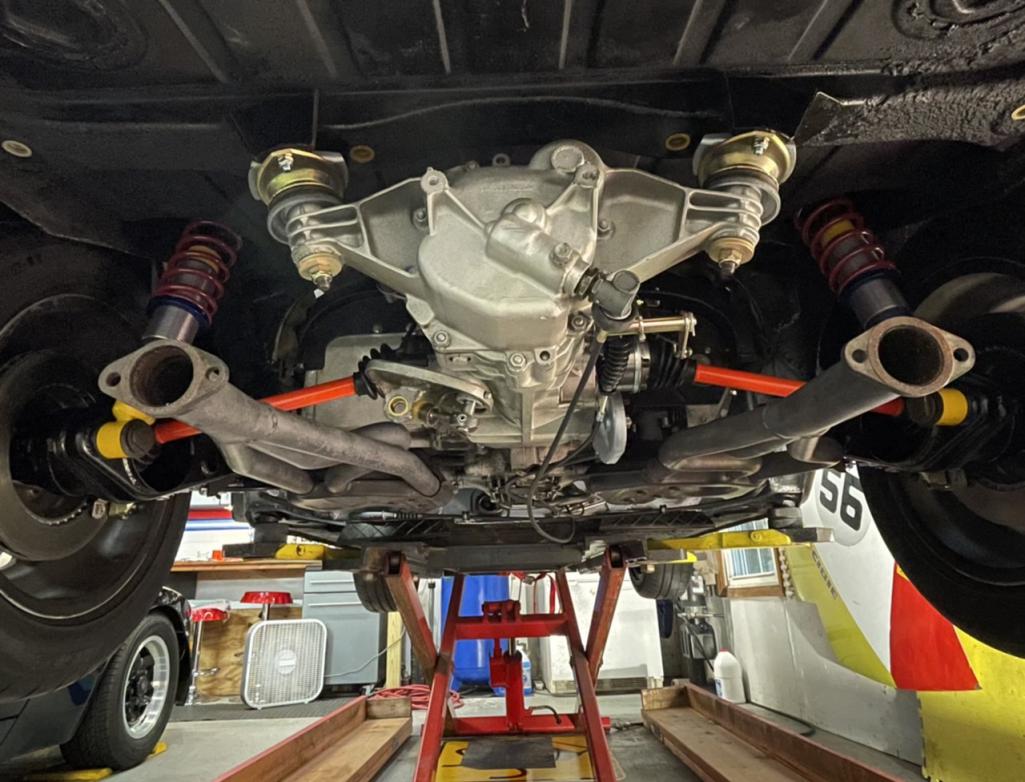
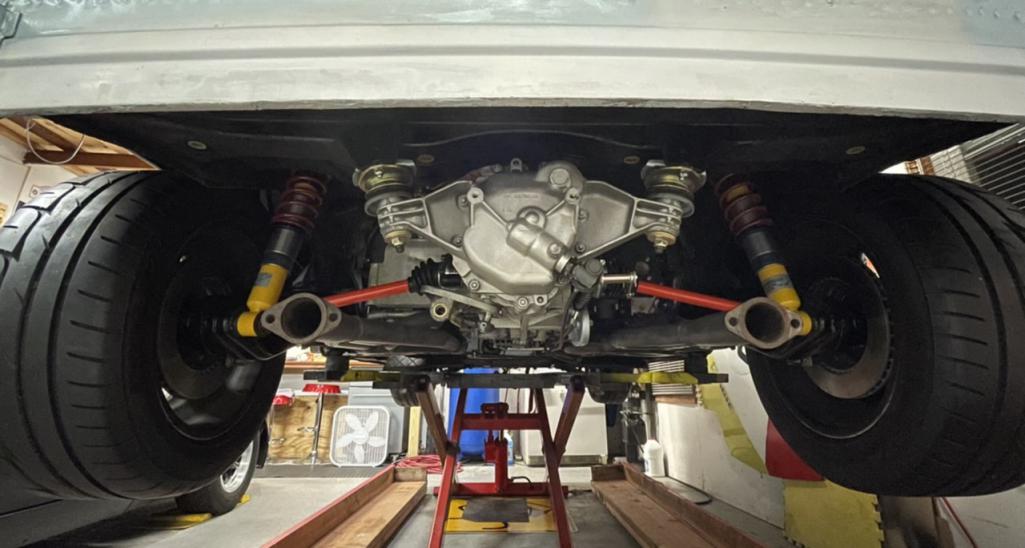
Posted by: rgalla9146 Aug 23 2021, 05:11 PM
Lookin' good Dion
Don't forget a support bracket for that hard line around the front of the engine.
The bracket extends up from the tube and attaches to the front tin.
Your picture shows the hole in the tin that the bracket attaches to.
Posted by: Dion Aug 23 2021, 05:17 PM
Lookin' good Dion
Don't forget a support bracket for that hard line around the front of the engine.
The bracket extends up from the tube and attaches to the front tin.
Your picture shows the hole in the tin that the bracket attaches to.
Thanks Rory! Great eye for details! I’ll have to look for the correct one. I have a zip-tie contraption there currently taking the static weight.
Posted by: rgalla9146 Aug 23 2021, 05:38 PM
Doh!!! walked the dogs in between and forgot everything.
I have a bad case of rear tire envy. Man ! those are big !
It all looks so good. Excellent.
Posted by: Dion Aug 27 2021, 05:42 PM
I’m excited but NOT for the starting of the engine. That is put on hold. I need a battery yet, fuel, and I still need to put oil in the machine.
I’m excited because my body shop guy called. He just finished a 356 and he has a spot for me! He has over 30 years in concourse caliber Porsche restoration. I’m well pleased he took my project on. Will be loading on a trailer in the morning. Excited and nervous
Attached thumbnail(s)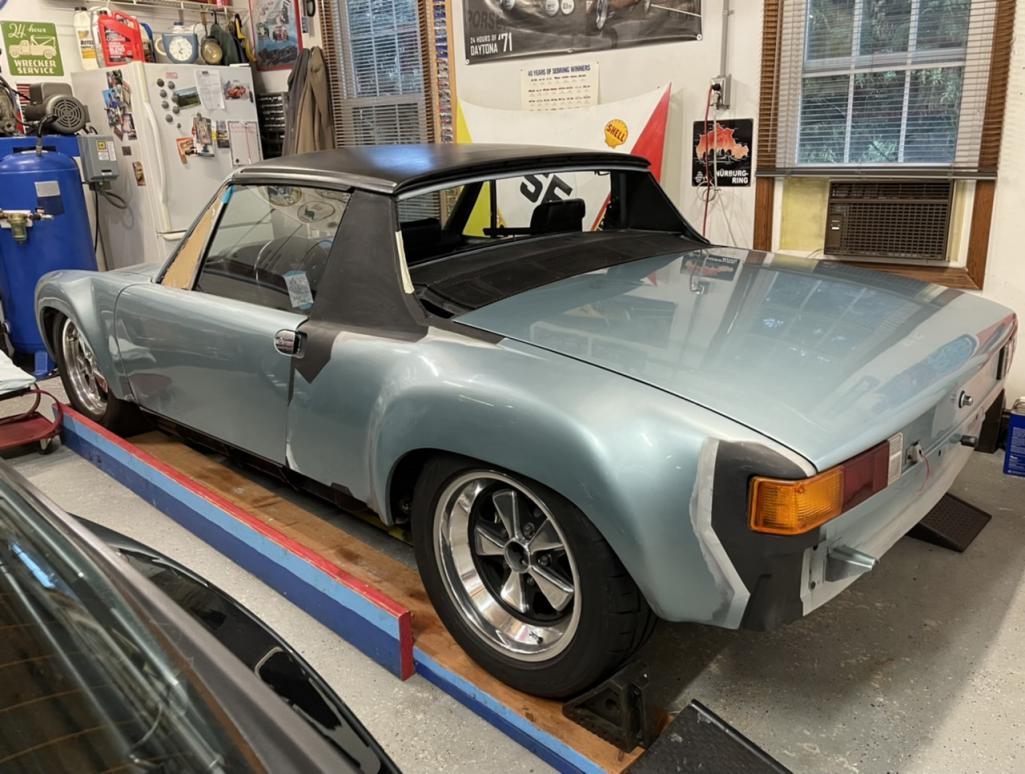
Posted by: BeatNavy Aug 27 2021, 05:47 PM
Excited and nervous
Almost there, Dion!
Posted by: Dion Aug 29 2021, 04:55 PM
Wasn’t a bad cruise to the body shop. Murphy’s law dictated that the sky bucketed down
the rain just as we were unloading. All went well in the end. A few towels and all good.
This will be its home for a few weeks. Need to find all the rubber seals now for proper door/hood gaps. I know I’ll be ordering new rear trunk seals. Already have new rear light housing seals. There was probably about an inch of water that made it’s way in that boot. Yeah, need to source a battery. I guess an Odyssey is in order. See what happens.
Cheers all.
Attached thumbnail(s)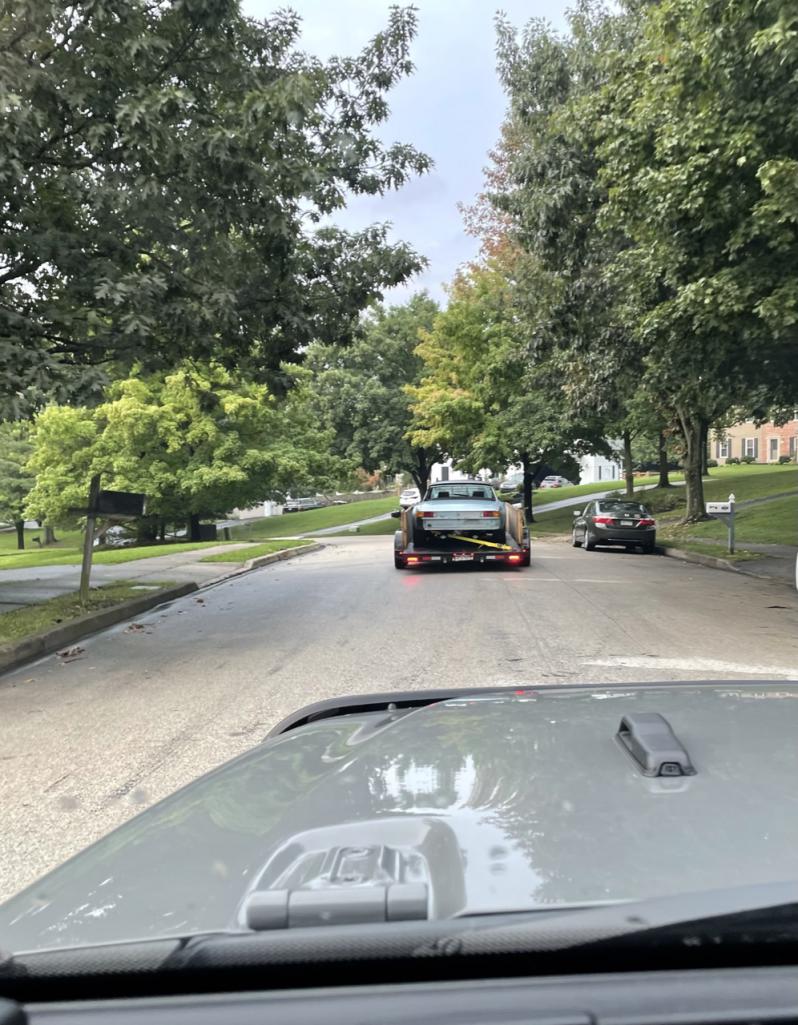
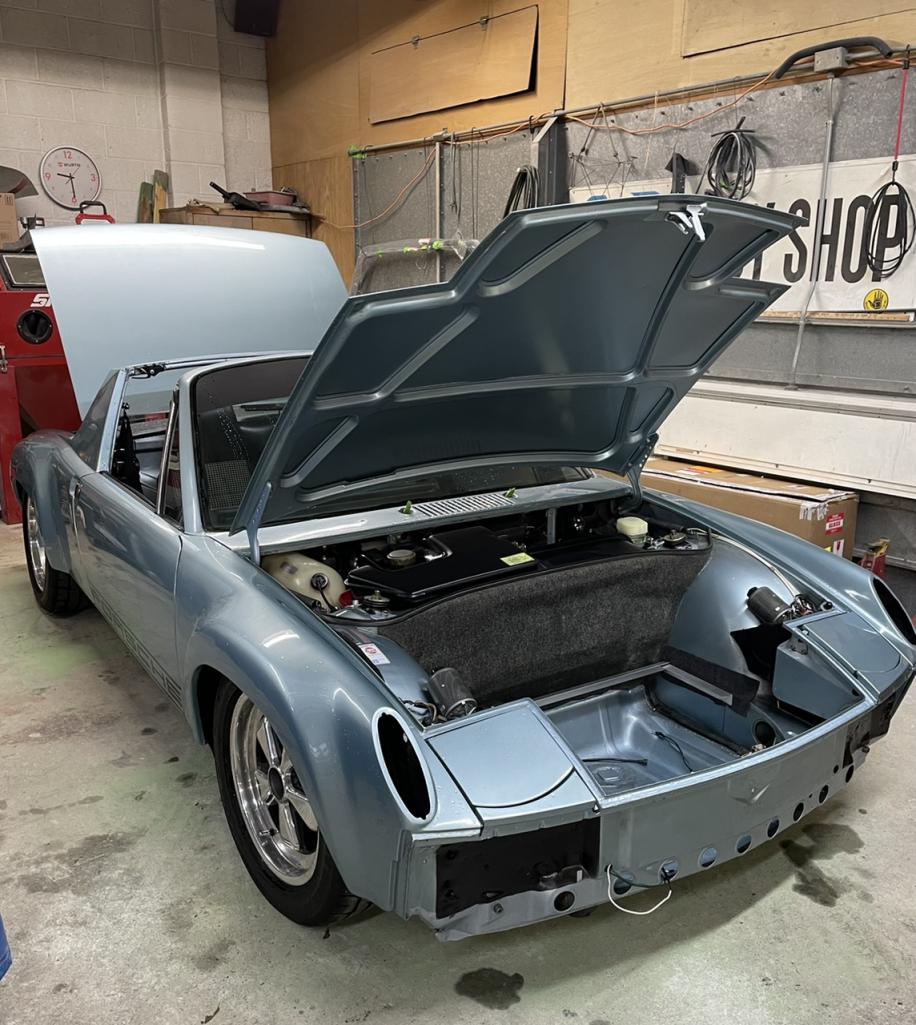
Posted by: Dion Aug 30 2021, 06:46 PM
Peeling back the onion
Attached thumbnail(s)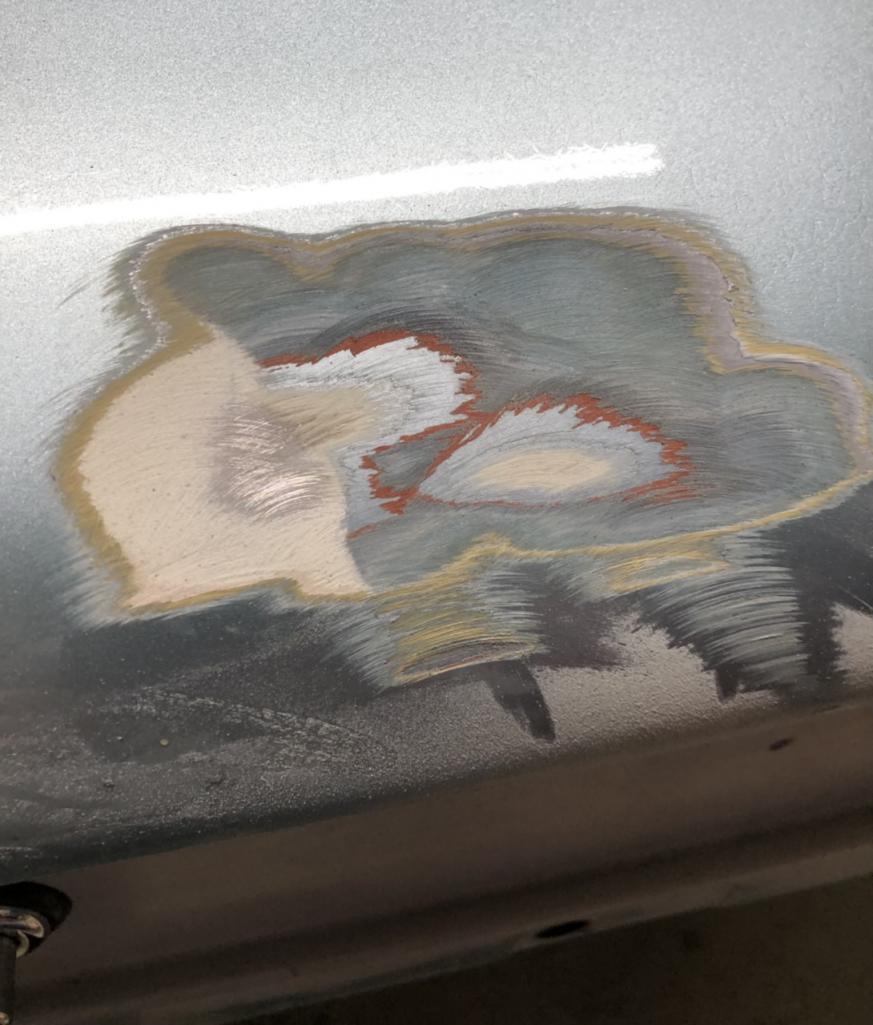
Posted by: Dion Aug 30 2021, 06:48 PM
Well, well, look what’s under that bondo. Old spoiler holes and some unpleasant metal
Attached thumbnail(s)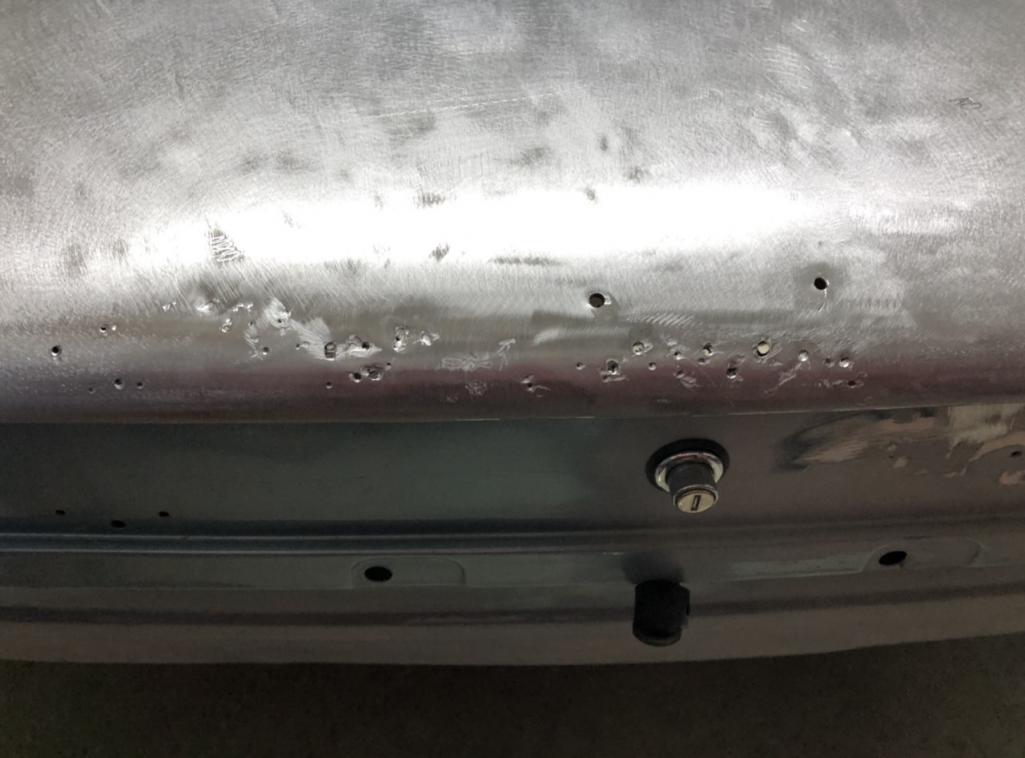
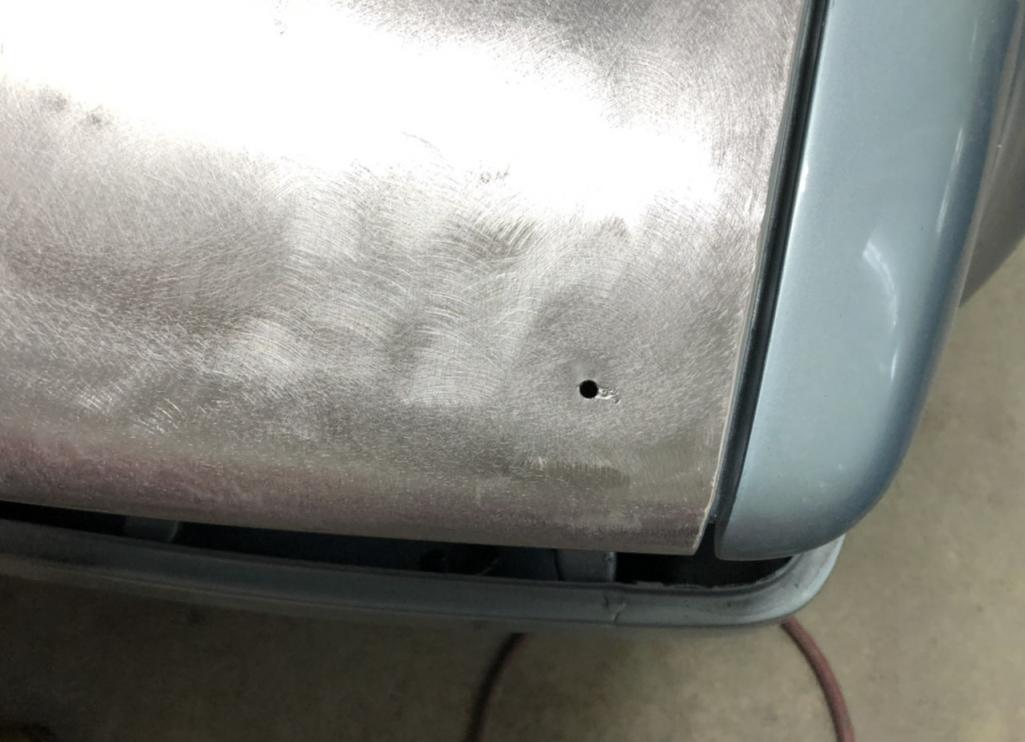
Posted by: Dion Aug 30 2021, 06:49 PM
Take it all off.
Attached thumbnail(s)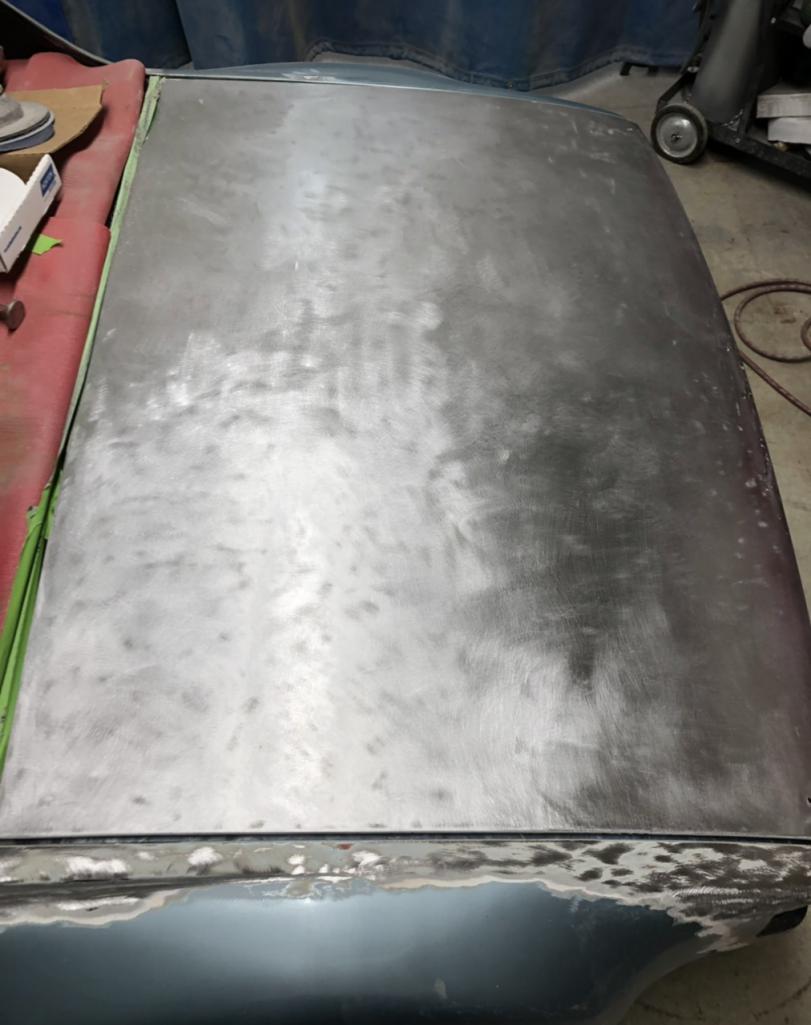
Posted by: tygaboy Aug 30 2021, 07:22 PM
@http://www.914world.com/bbs2/index.php?showuser=2766 - I've said it before, I'll say it again:
I love a good strip show!
Can not WAIT to see your beauty in new paint!
Posted by: TonyA Aug 31 2021, 07:06 PM
Take it all off.
Looking good.... I may need to higher that guy also.
Posted by: Dion Sep 1 2021, 10:55 AM
Trunk got some love. Holes were made whole. A brazing technique was used for repair.
For some reason this trunk had 4 paint jobs, of which I’m responsible for 2 of them.
Overall the trunk is in good shape. Not sure of the paint job done after the factory one.
Never had a colour change. Always Marathon Blue.
Attached thumbnail(s)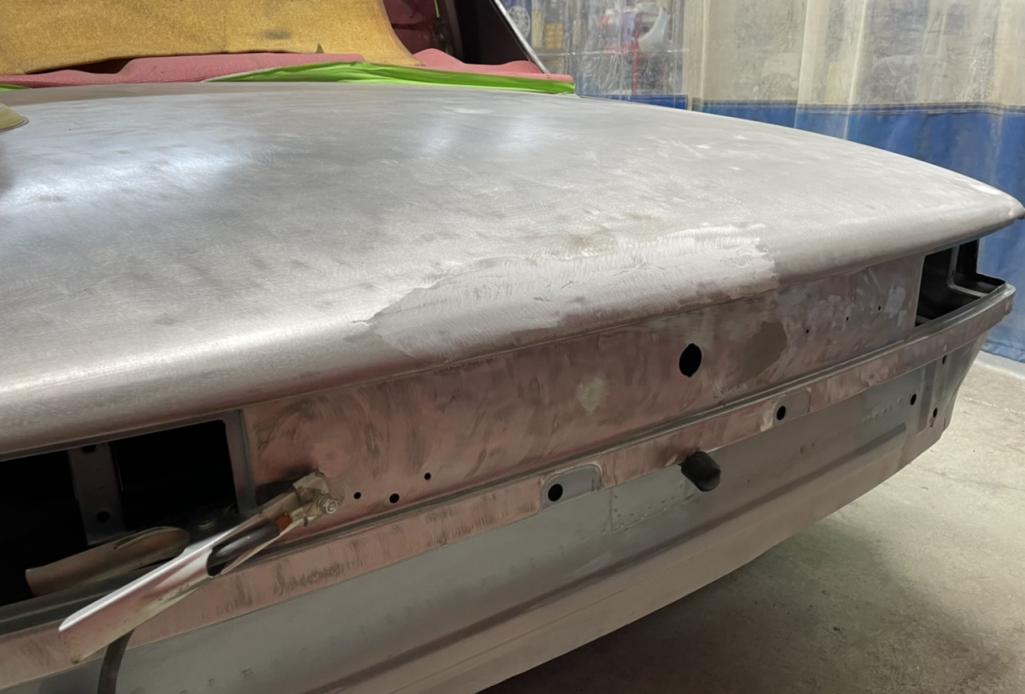
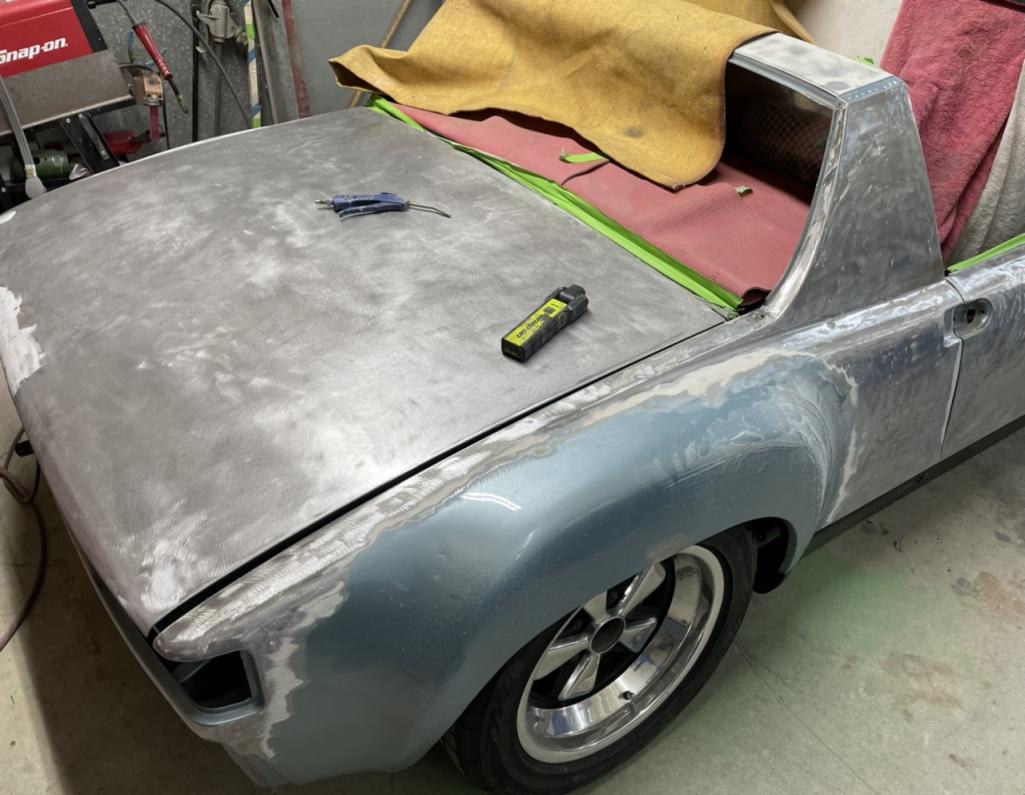
Posted by: Dion Sep 1 2021, 10:58 AM
Drivers door had some surprises. Sometime during previous ownership, a different mirror must have been slapped on. I never knew. It was always stock since my purchase in ‘86.
Attached thumbnail(s)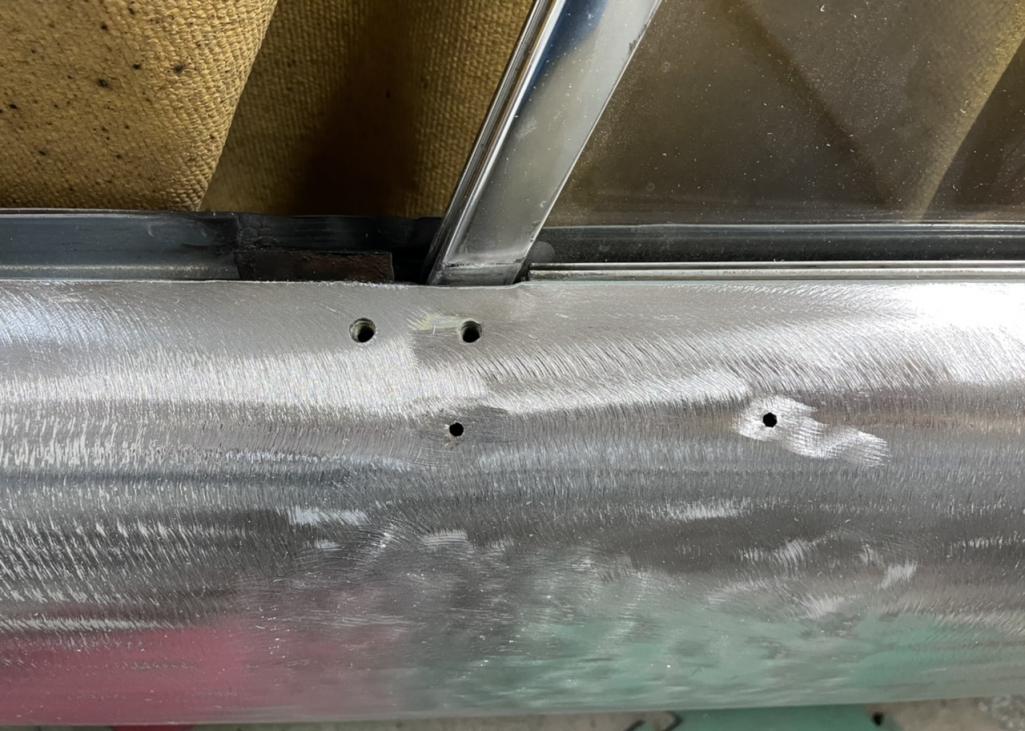
Posted by: Dion Sep 1 2021, 11:01 AM
Driver’s door also had a nice dent on lower half.
Some body shop looked to have tried to pull it. They left their holes in the door but wind up just putting 2lbs of bondo on it.
Attached thumbnail(s)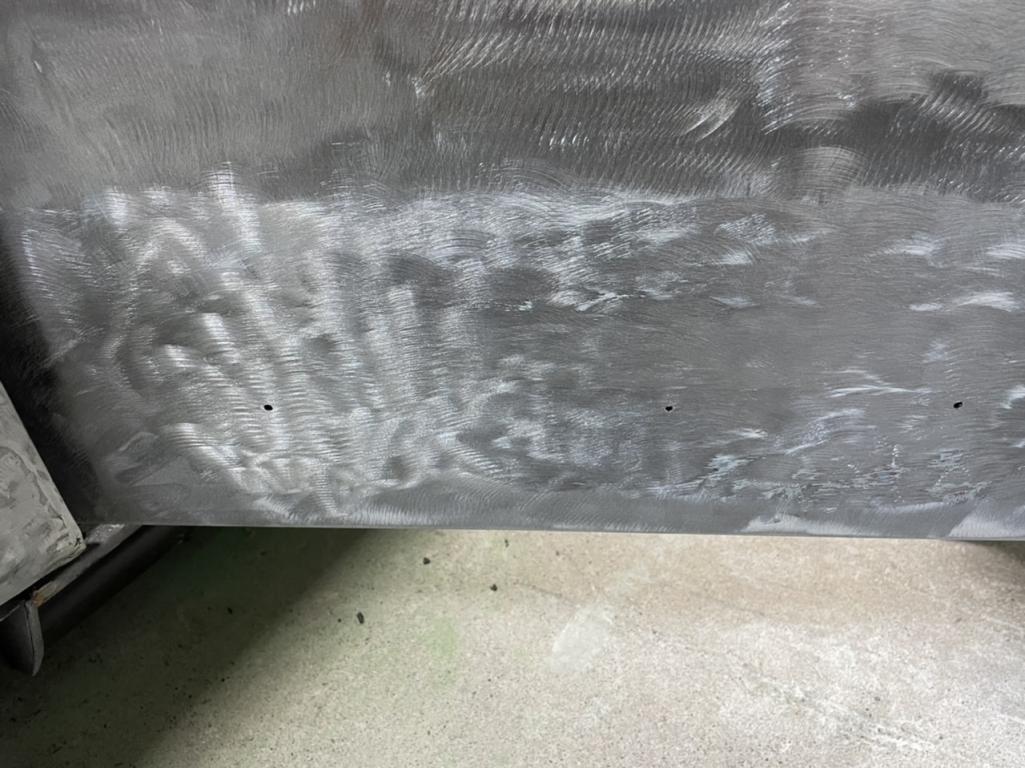
Posted by: Dion Sep 1 2021, 11:03 AM
Some more leveling with bondo revealed. All getting hammer and dolly treatment now.
Attached thumbnail(s)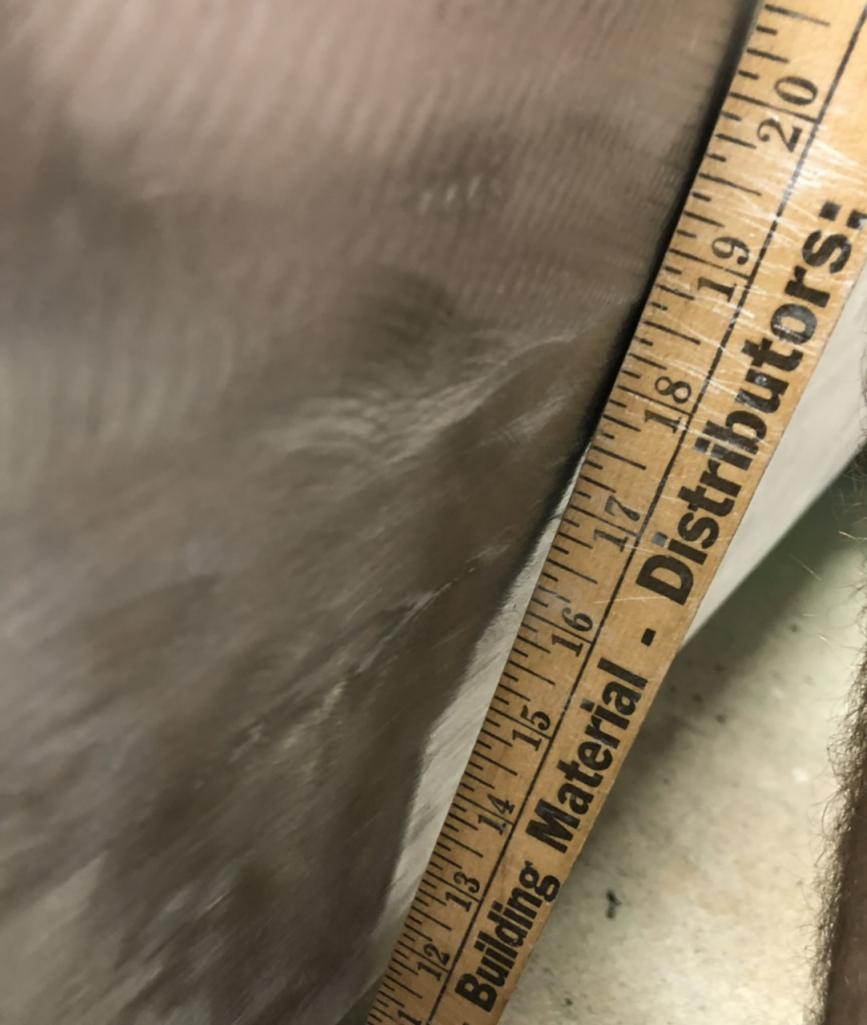
Posted by: Dion Sep 1 2021, 11:07 AM
This was the worst on the sheet metal. A couple potholes! They were opened up to more clean solid metal and brazed closed. The backside on inside of fender/wheel well was sound. This area is quite the meeting spot of panels. It’s no wonder water gets trapped.
Attached thumbnail(s)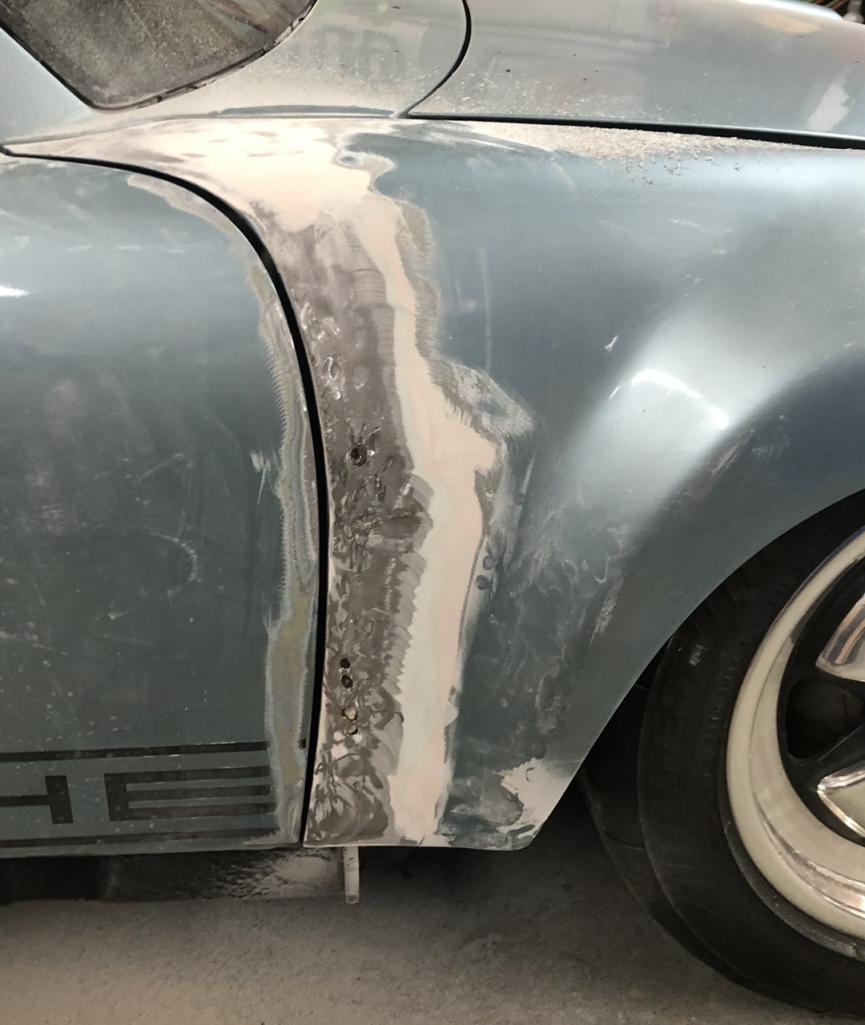
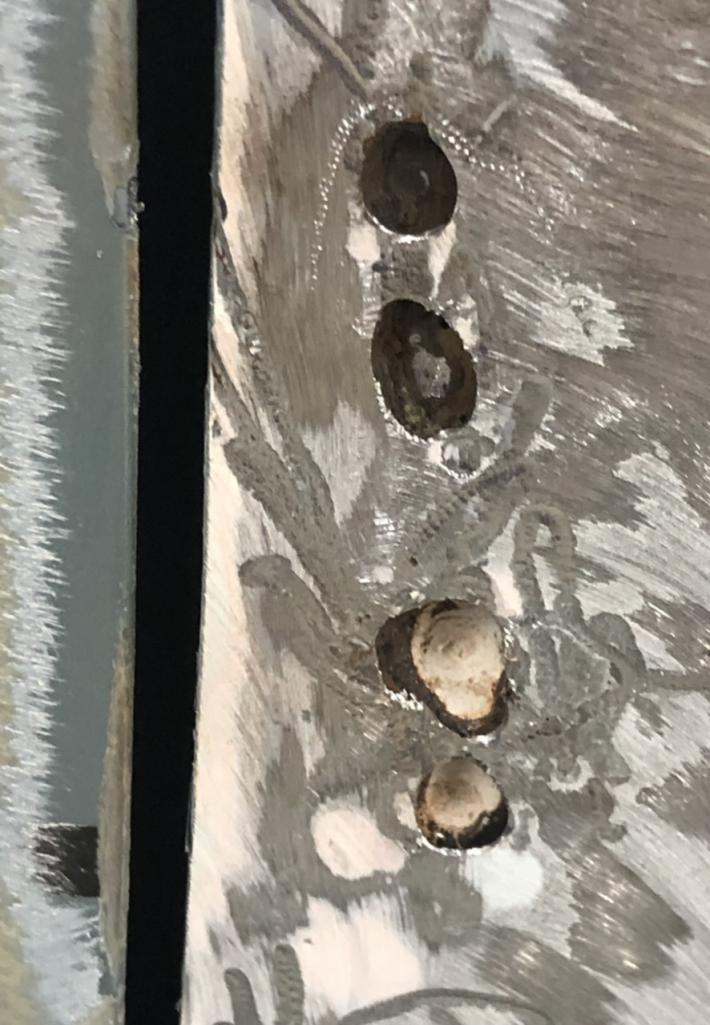
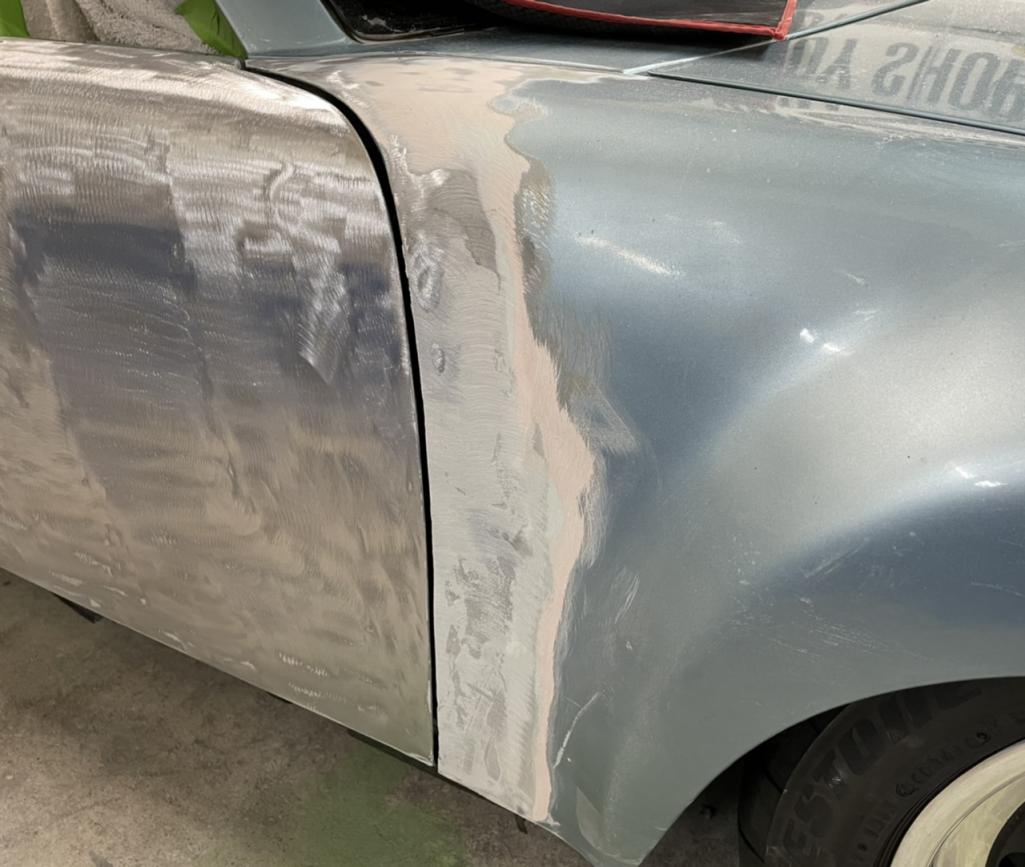
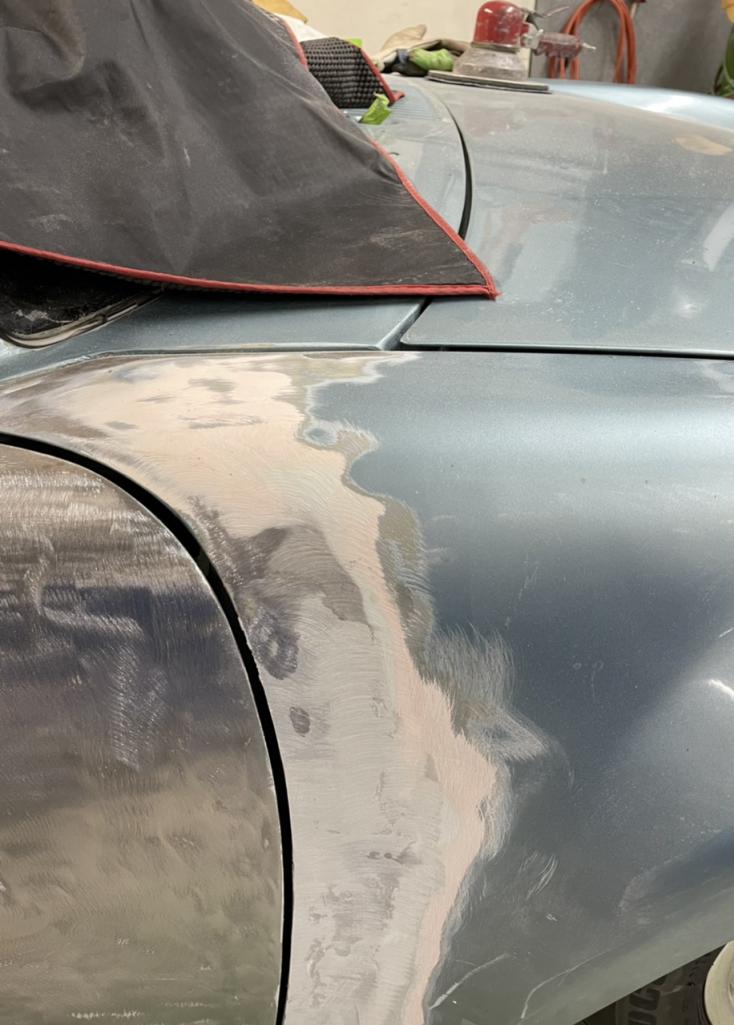
Posted by: Dion Sep 1 2021, 11:10 AM
Panel and door gaps are looking good. There is room for more tweaking.
Attached thumbnail(s)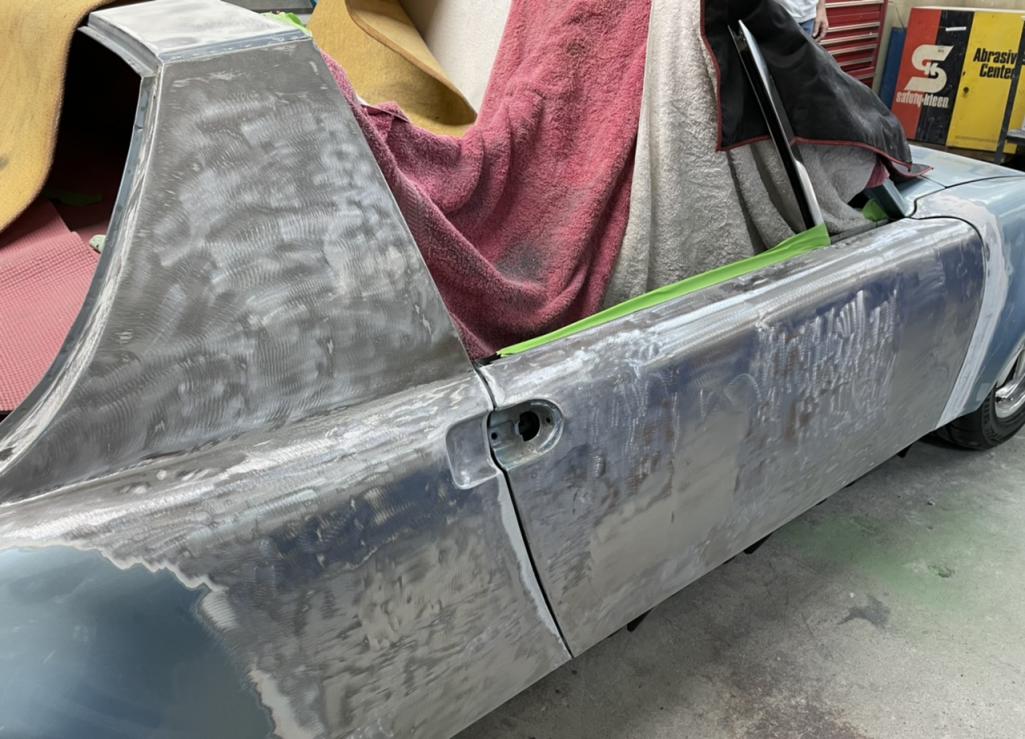
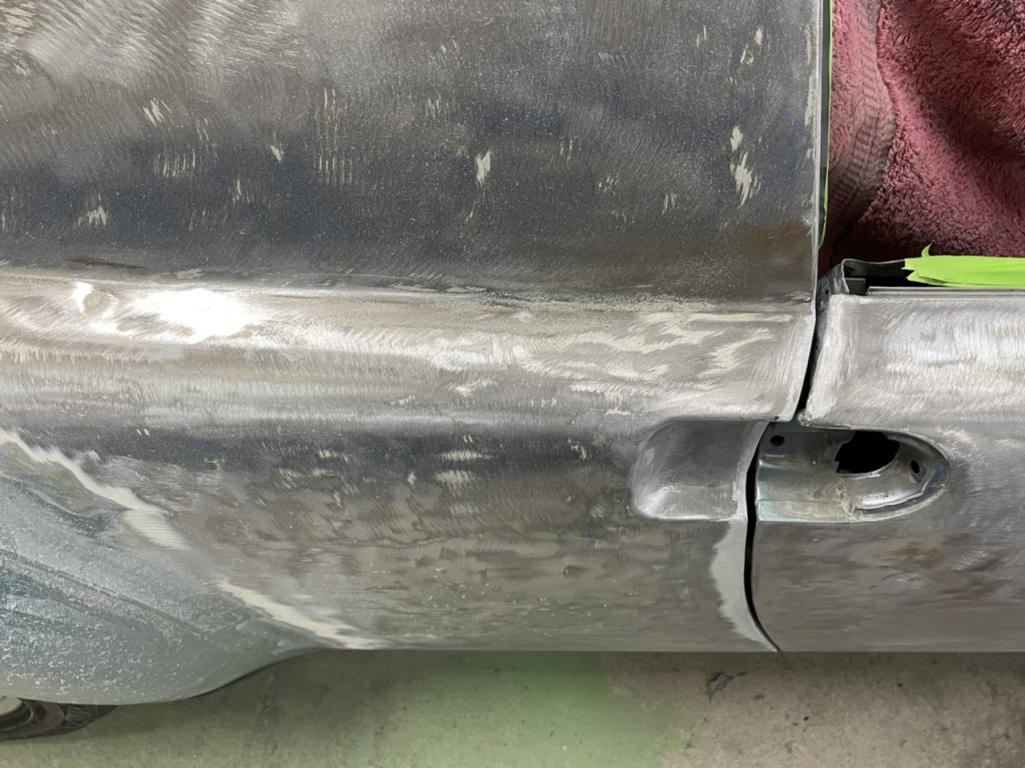
Posted by: Dion Sep 1 2021, 11:13 AM
Hood seems pretty healthy. Only factory layer, and my 2 kiss and a promise layers.
Decent amount of progress.
Attached thumbnail(s)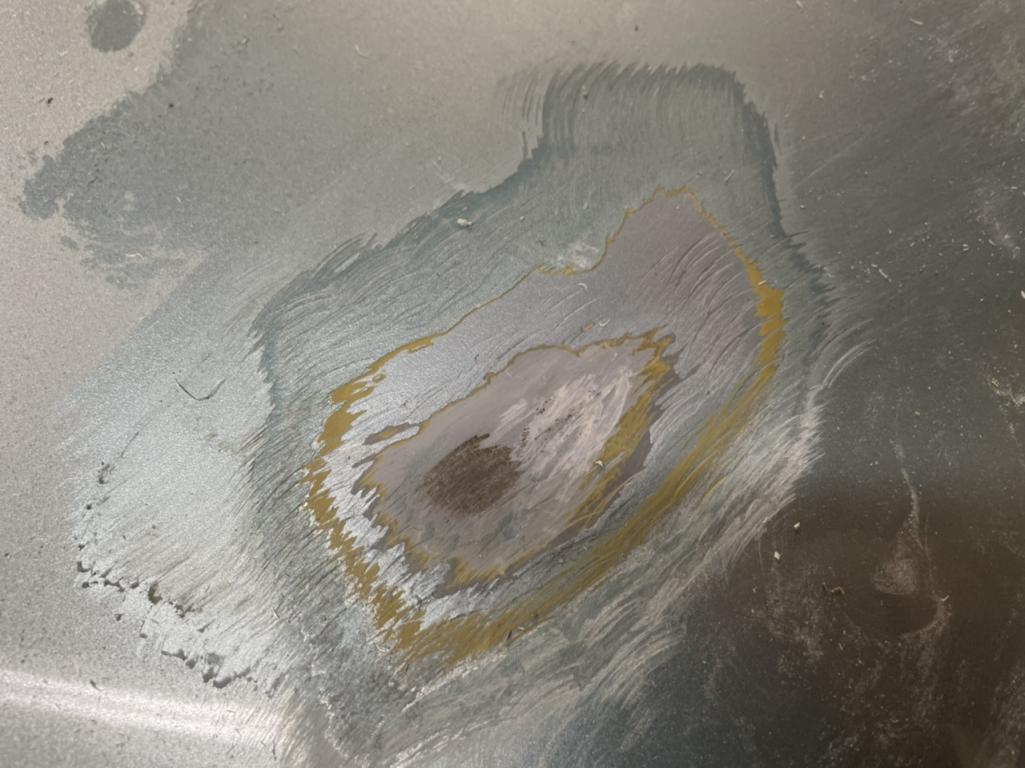
Posted by: Root_Werks Sep 1 2021, 12:30 PM
Nothing is looking that bad and very cool to finally get it to body/paint! My paint guy is starting on my 914-6 this week as well. Excited and nervous about what he'll find. Those first pictures that get sent and phone call is always the worst. How much bondo?!?!?!?
Posted by: tygaboy Sep 1 2021, 06:50 PM
Thanks for all the details, Dion. Have I told you how much I love your build?
Gonna be a stunner!
Posted by: rgalla9146 Sep 2 2021, 05:28 AM
Thanks for all the details, Dion. Have I told you how much I love your build?
Gonna be a stunner!
Great color, big effort, built not bought.
Posted by: TRS63 Sep 2 2021, 01:28 PM
Some surprises but nothing bad ! Keep us updated on the progress!
Antoine
Posted by: Dion Sep 8 2021, 01:55 PM
Front hood received some attention. Took out 2 small dimple dents. Most likely caused by closing the lid with improper hand positions. Careful how ya close these lids!
Attached thumbnail(s)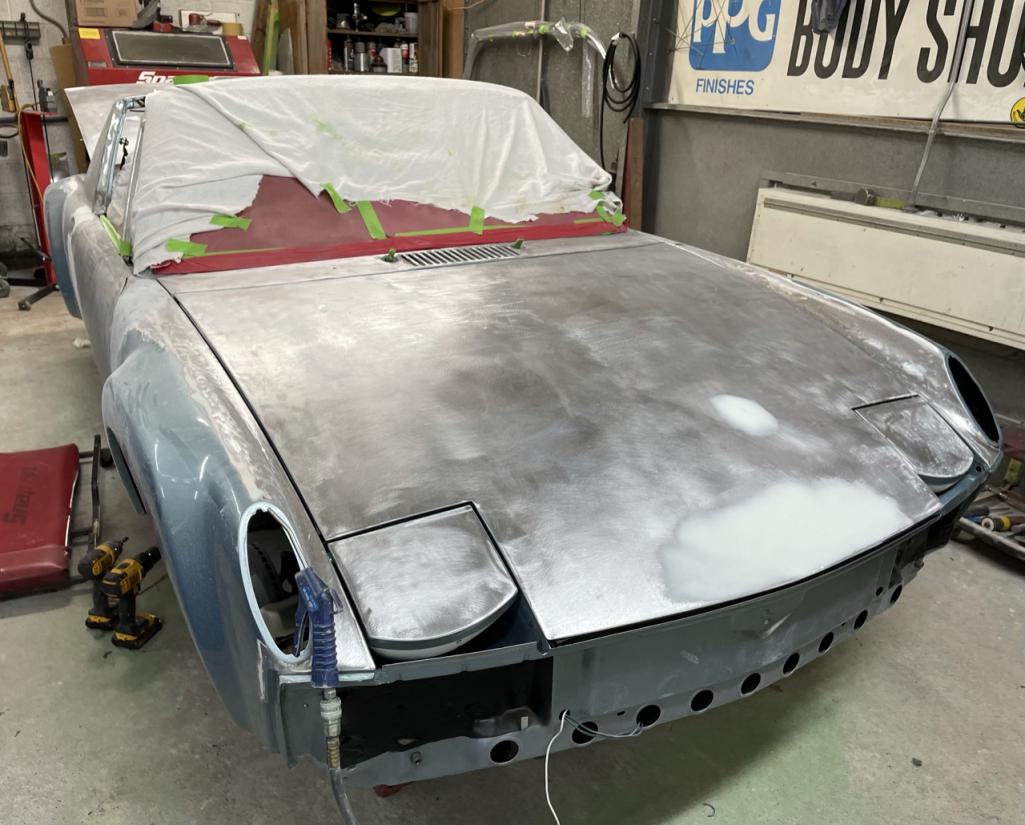
Posted by: Dion Sep 8 2021, 01:58 PM
More finesse worked on this fender. He’s determined to get the crown of the fender top dead even with the contour of the door.
Many adjustments going on between adding metal and filler and working the door gaps.
Attached thumbnail(s)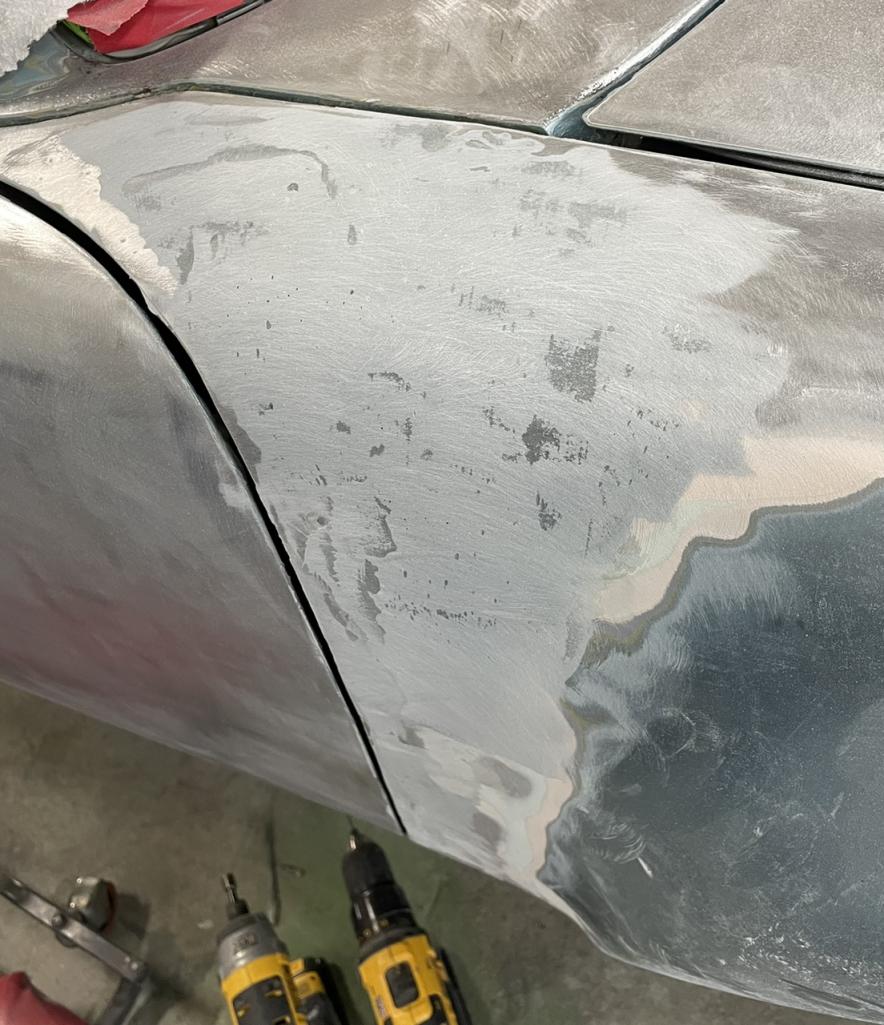
Posted by: Dion Sep 8 2021, 02:00 PM
Left door
Attached thumbnail(s)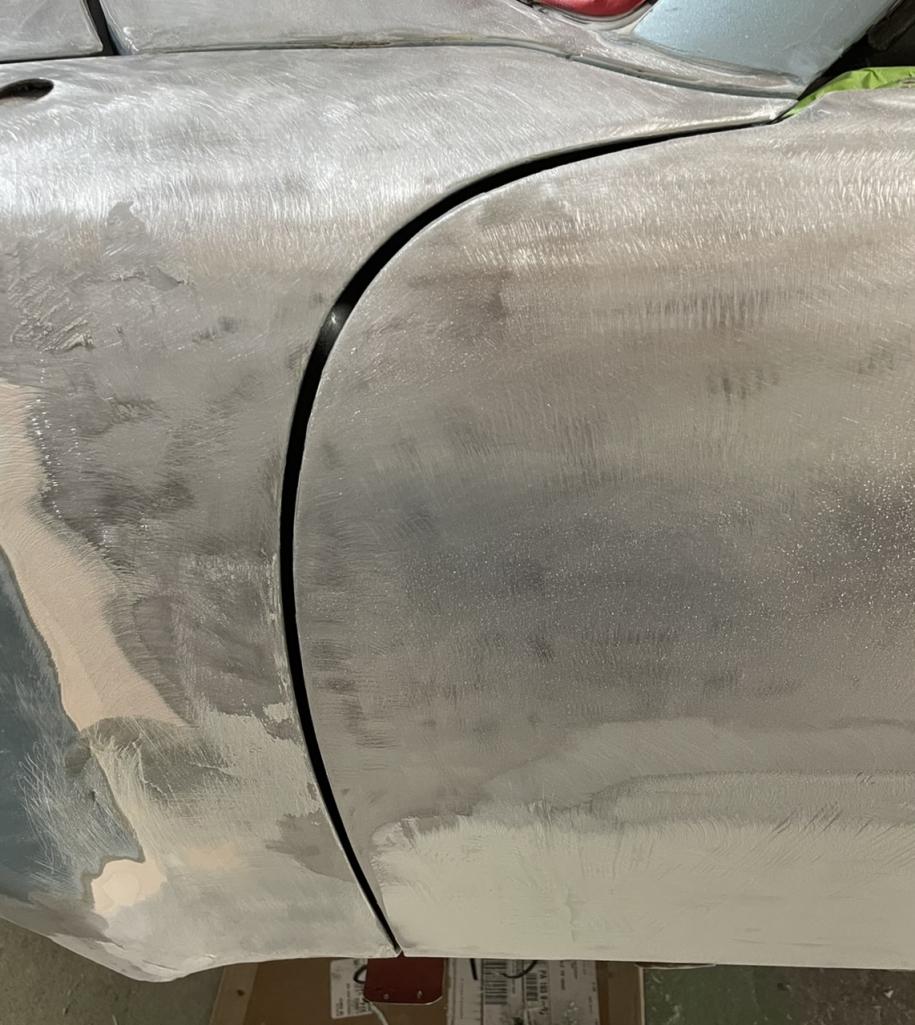
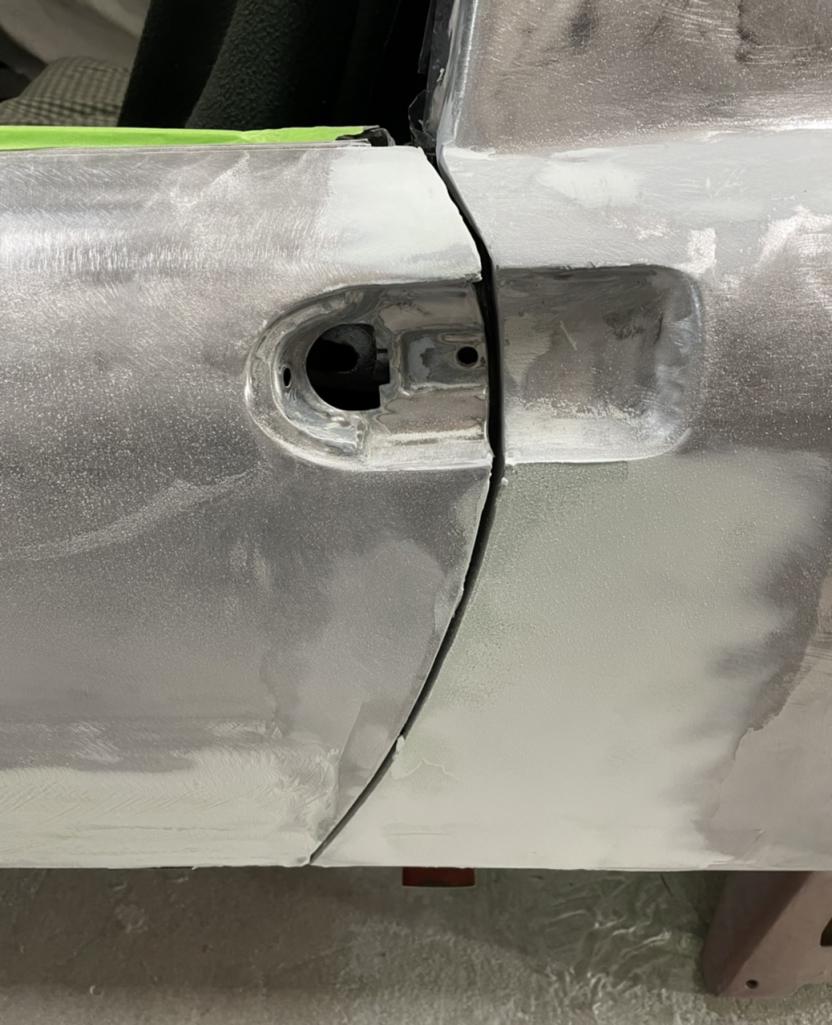
Posted by: Dion Sep 8 2021, 02:01 PM
Patience
Attached thumbnail(s)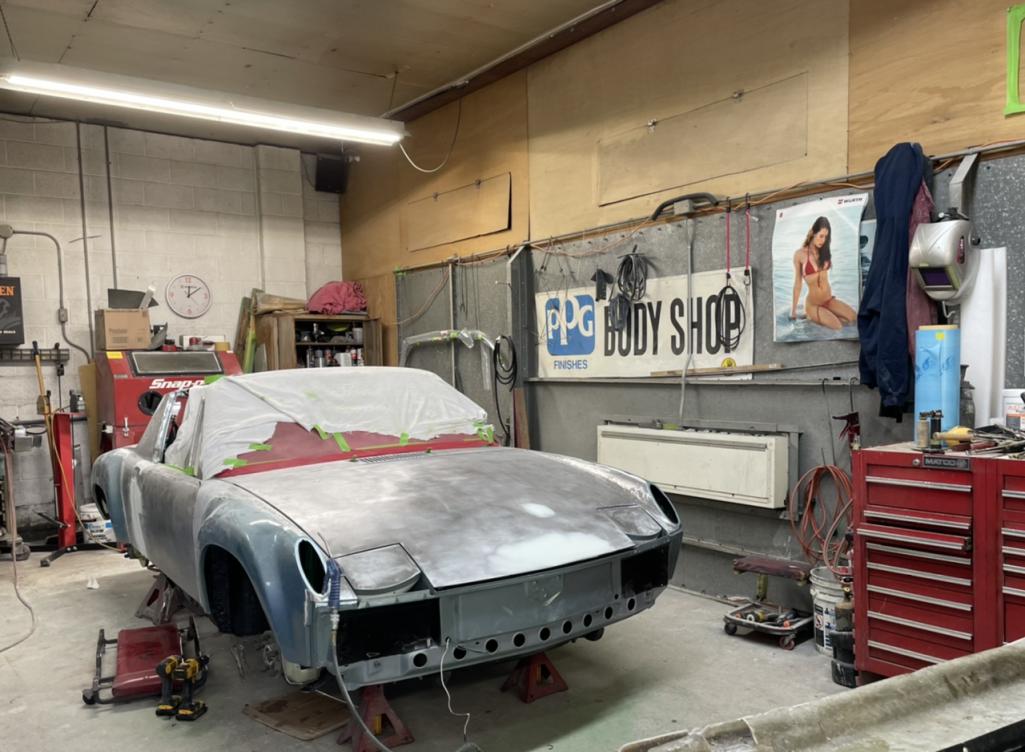
Posted by: Dion Sep 8 2021, 02:09 PM
Ordered the paint today. Base coat clear coat system from R-M.
Attached thumbnail(s)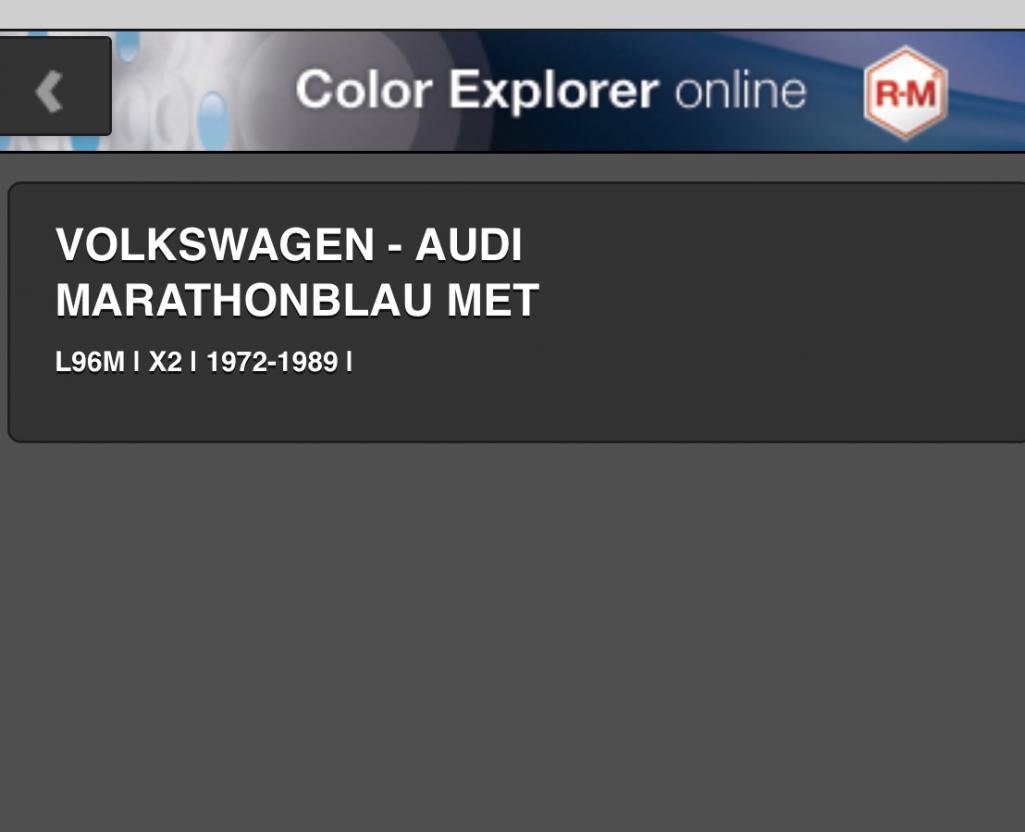
Posted by: Cairo94507 Sep 8 2021, 04:12 PM
Great color. That is going to look sweet!
Posted by: Dion Sep 8 2021, 04:59 PM
@http://www.914world.com/bbs2/index.php?showuser=9712 Thank you Michael. Had a little going back and forth on colour but in the end decided to stick with the original.
Posted by: Dion Sep 28 2021, 03:35 PM
Some rot discovered on the right door jamb catch plate area. It’s been remedied.
Attached thumbnail(s)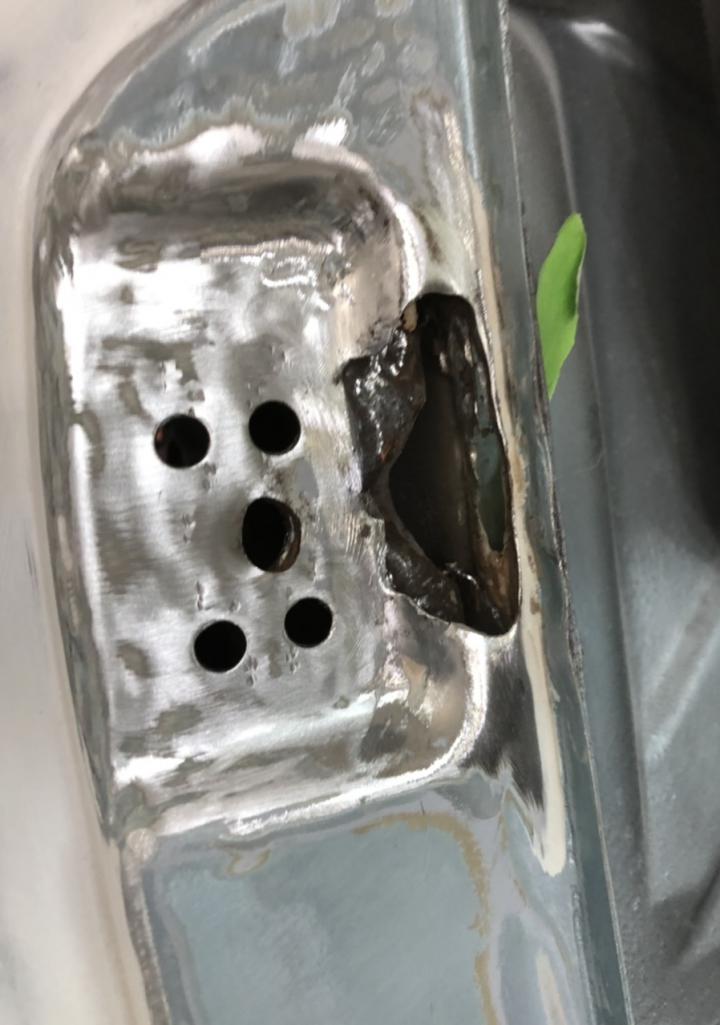
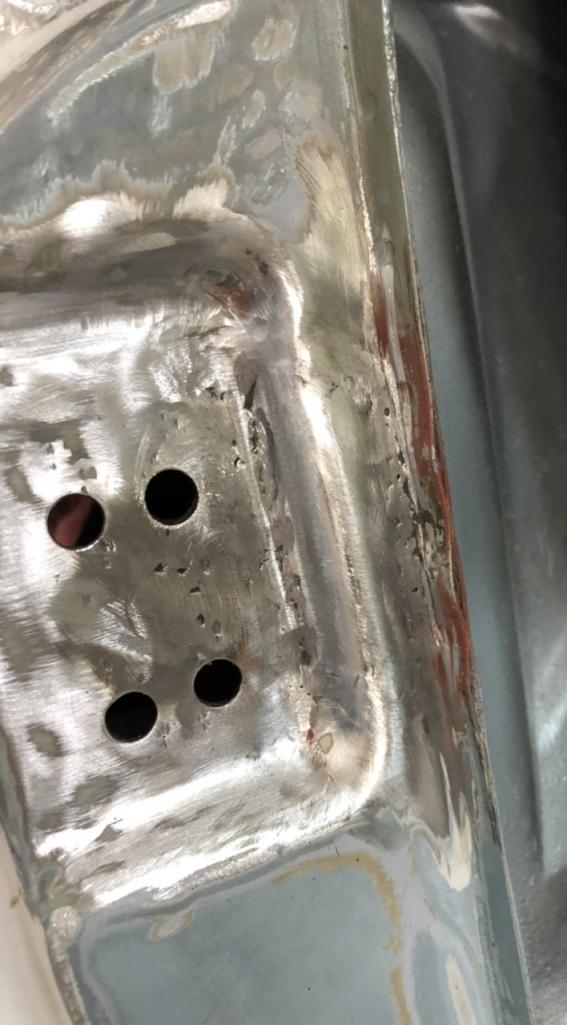
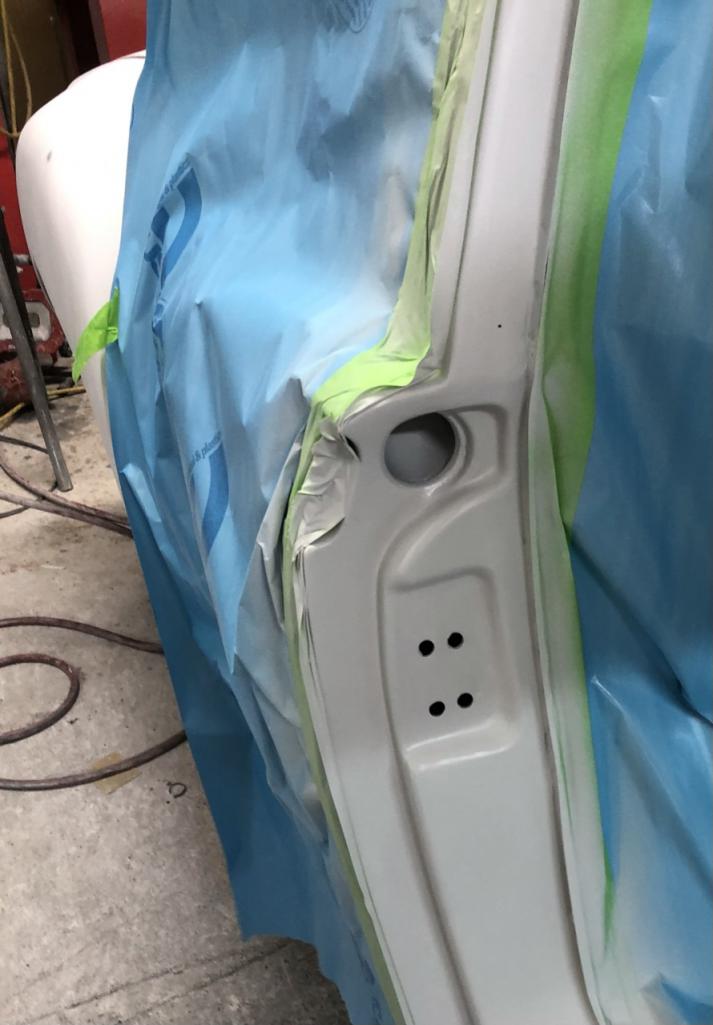
Posted by: Dion Sep 28 2021, 03:46 PM
Poly and guide coat application
Attached thumbnail(s)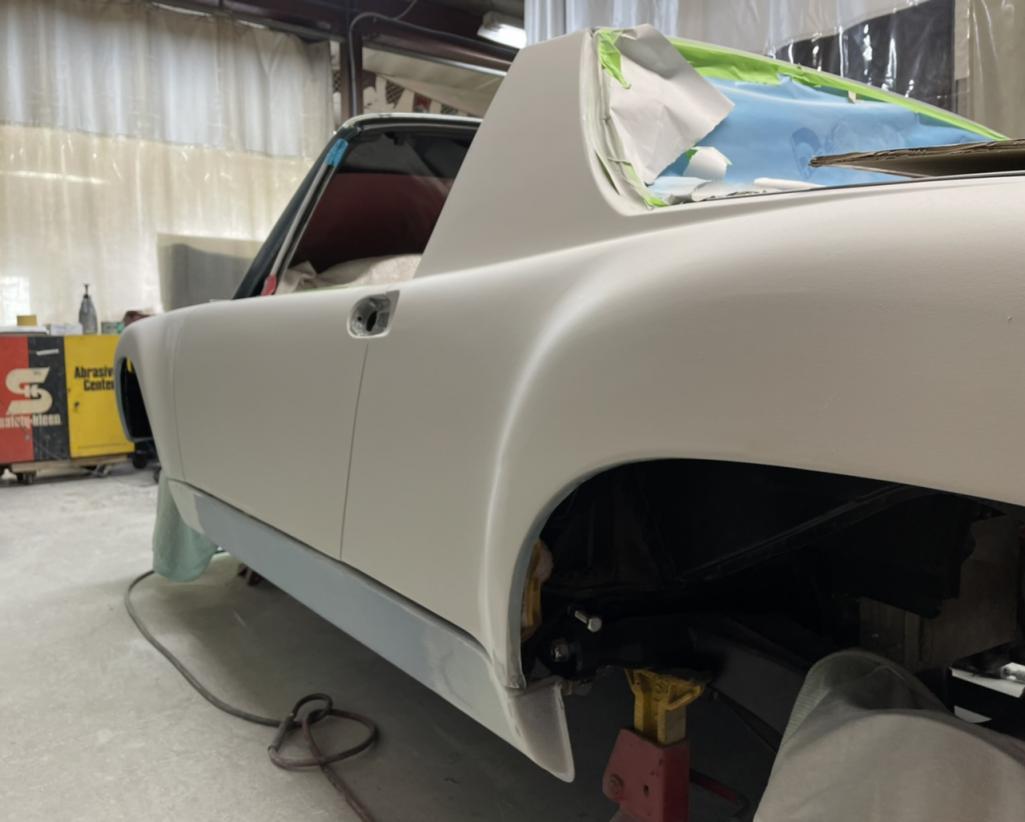
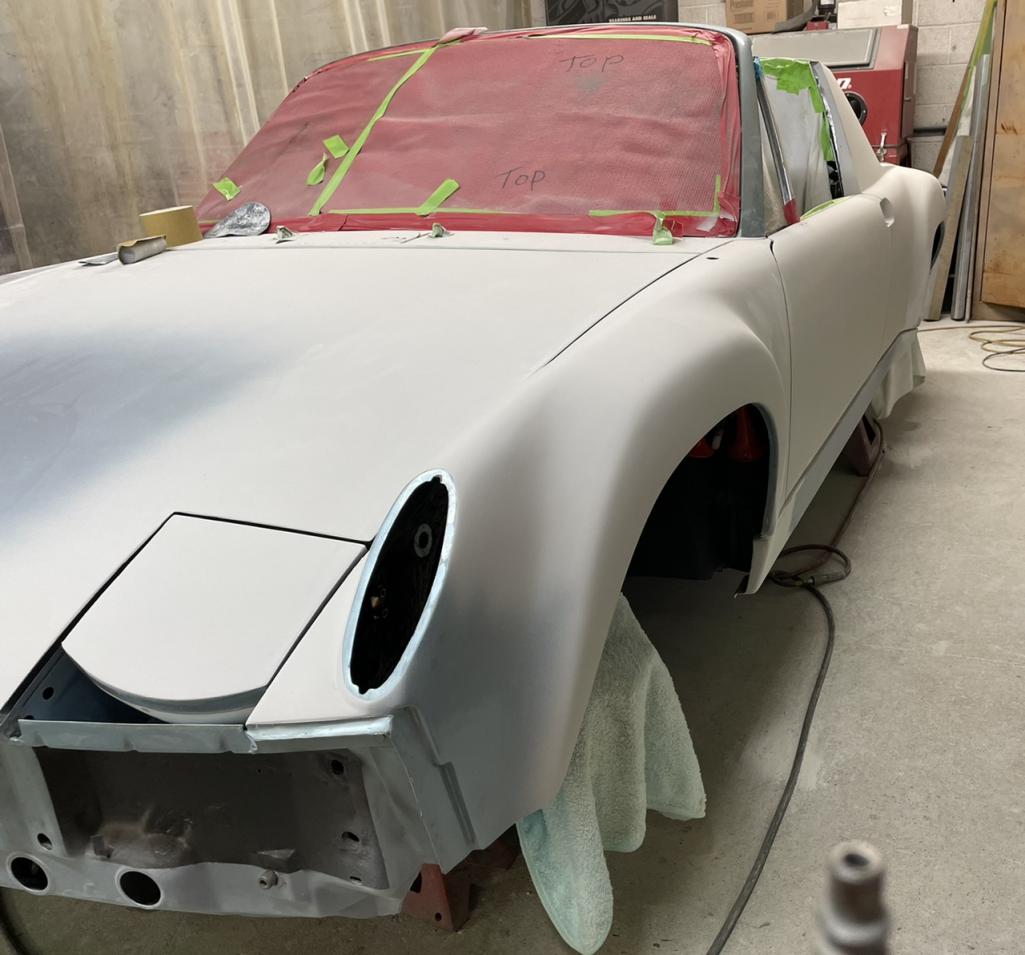
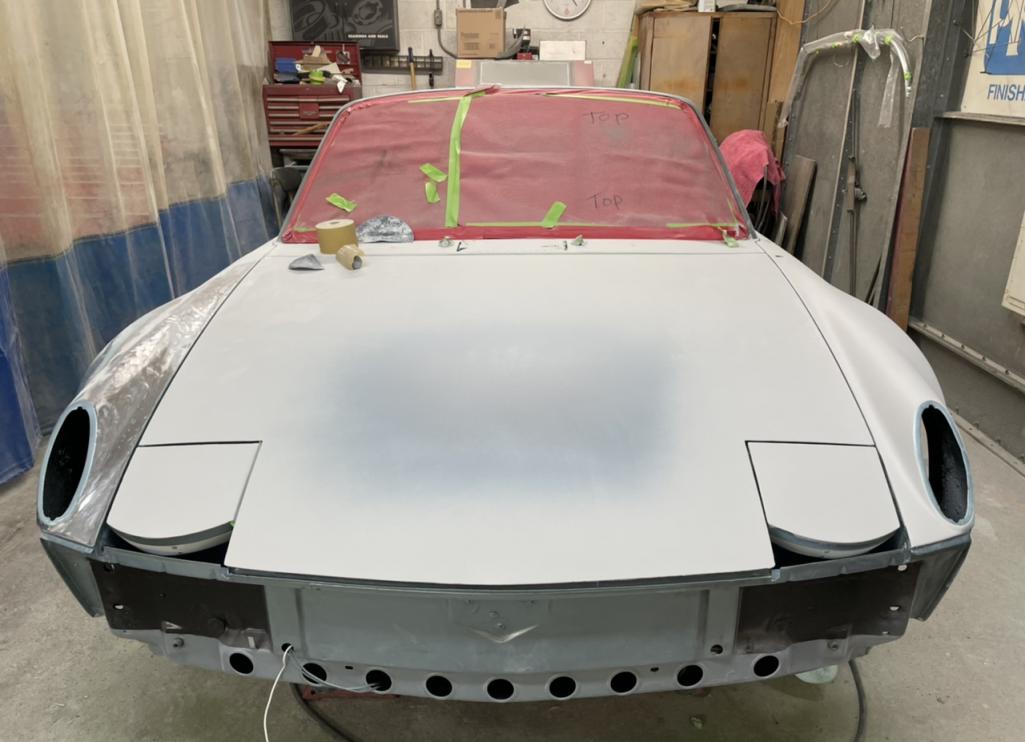
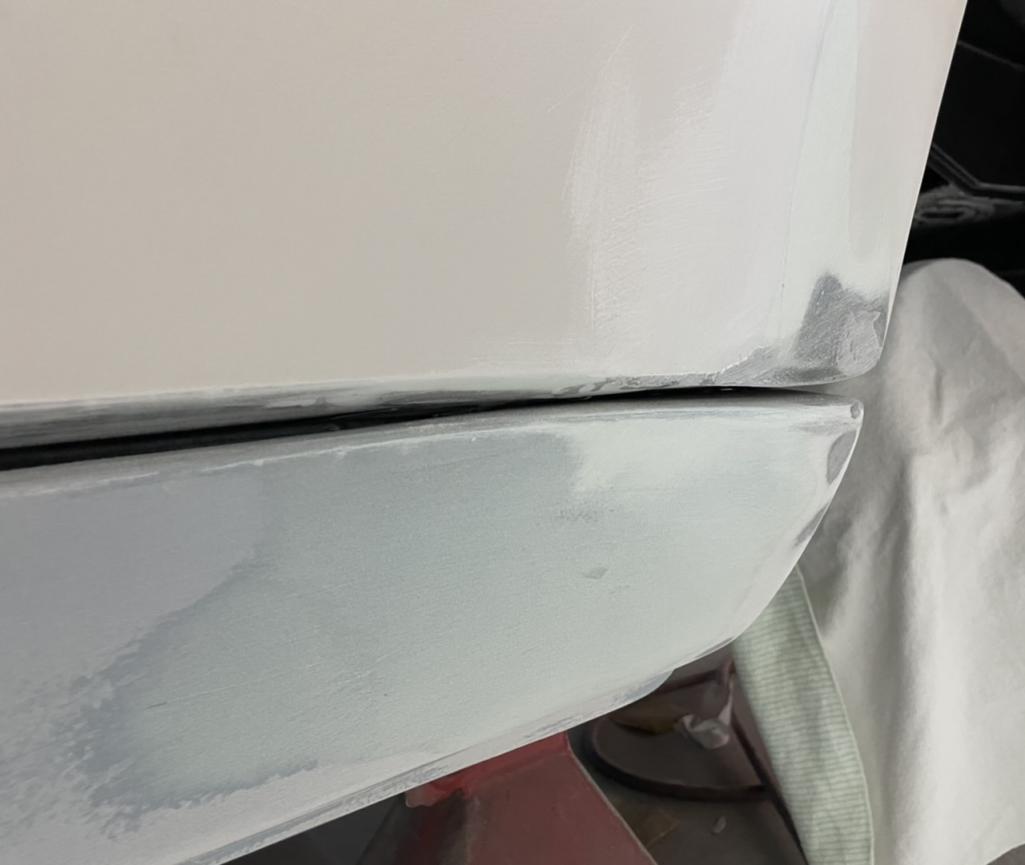
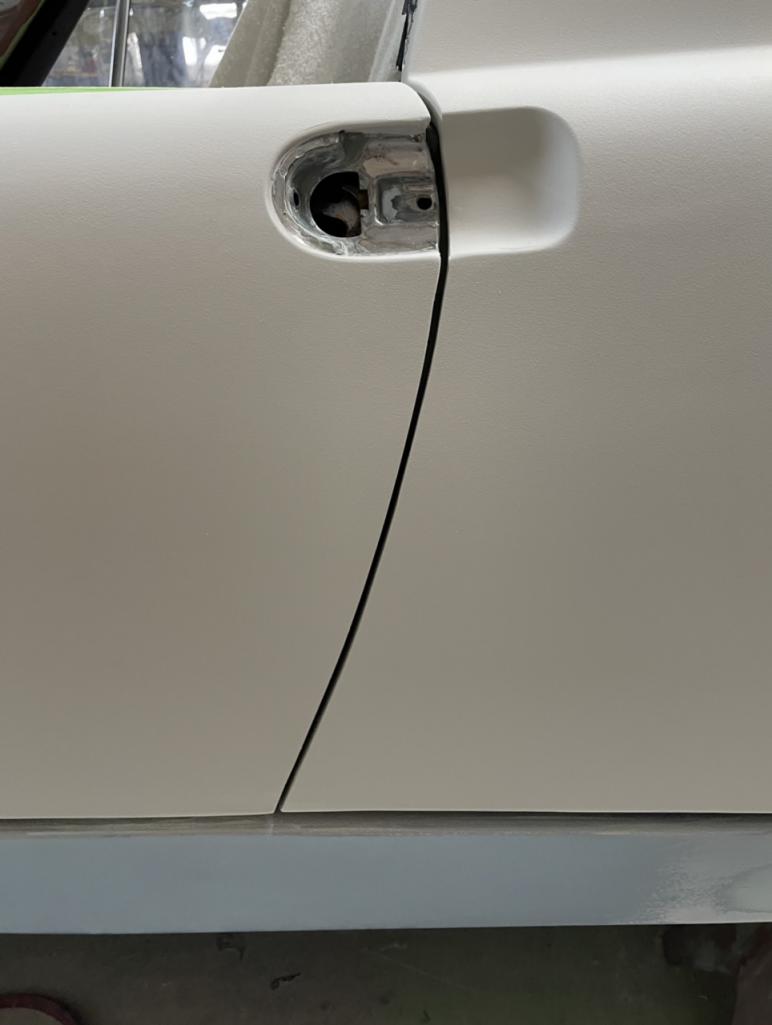
Attached image(s)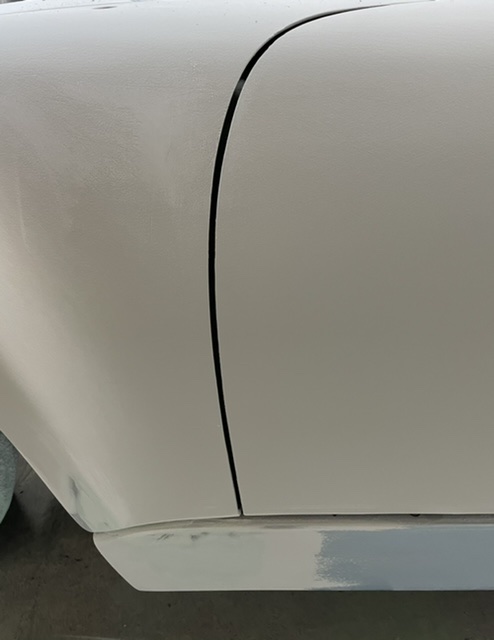
Posted by: Dion Sep 28 2021, 03:49 PM
Passenger side
Attached thumbnail(s)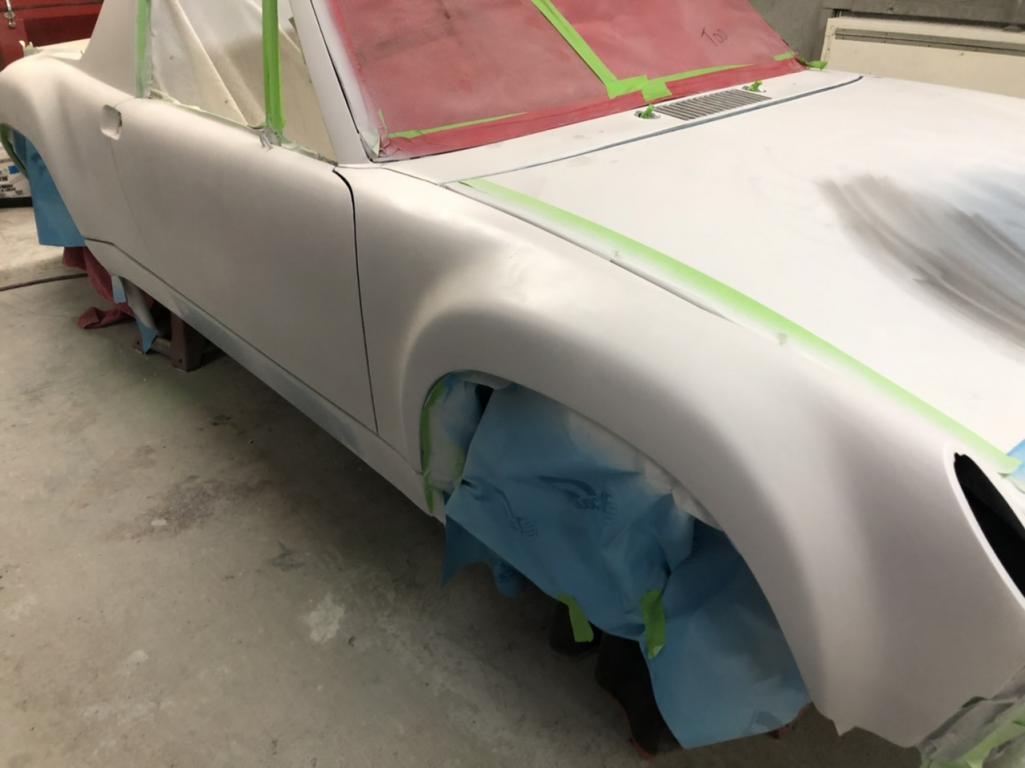
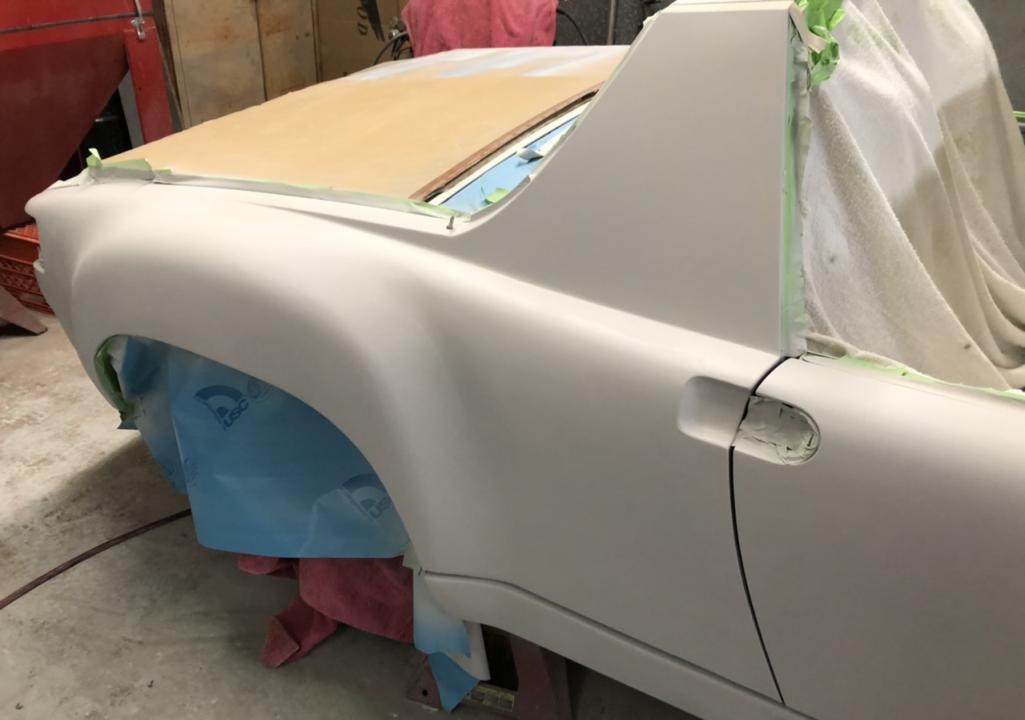
Posted by: Dion Sep 28 2021, 03:53 PM
Changed paint brands. My painter likes R&M single stage, but he wasn’t impressed with how their metallic was laying down.
So we went with Glasurit. He had positive experience with this brand and their metallics.
Everything has been block sanded. I was tasked with doing all the door and frunk ,trunk edges. Saved me a few dollars. I’m helping where I can. Not sure there is a budget per se, but
I want to stay “happily” married :-)
Attached thumbnail(s)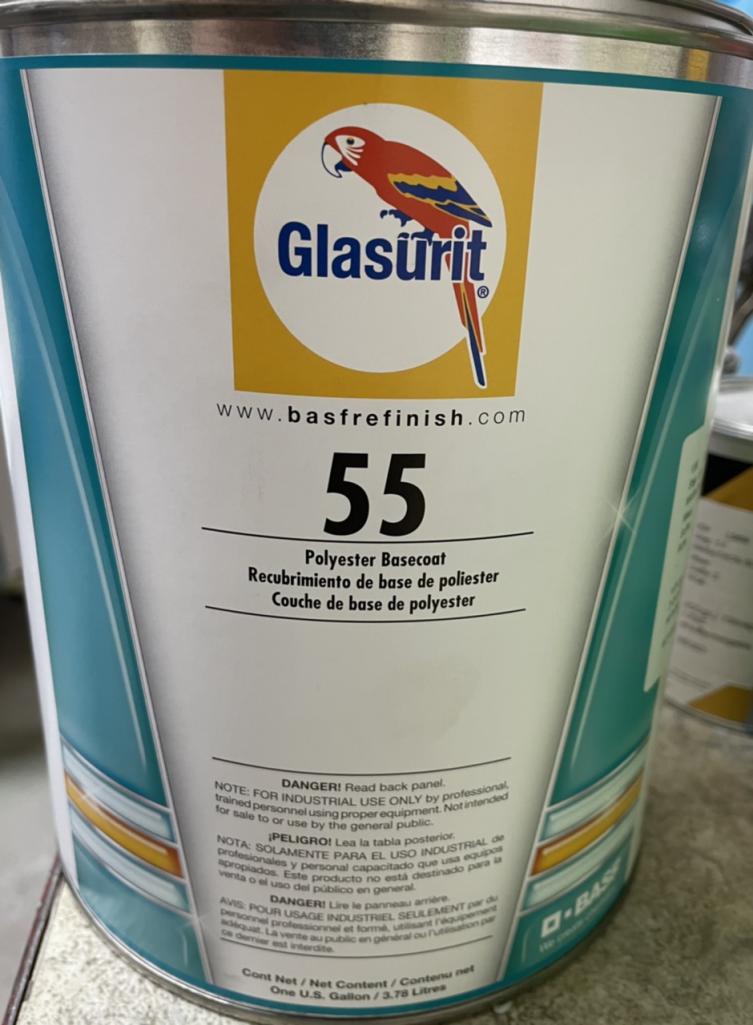
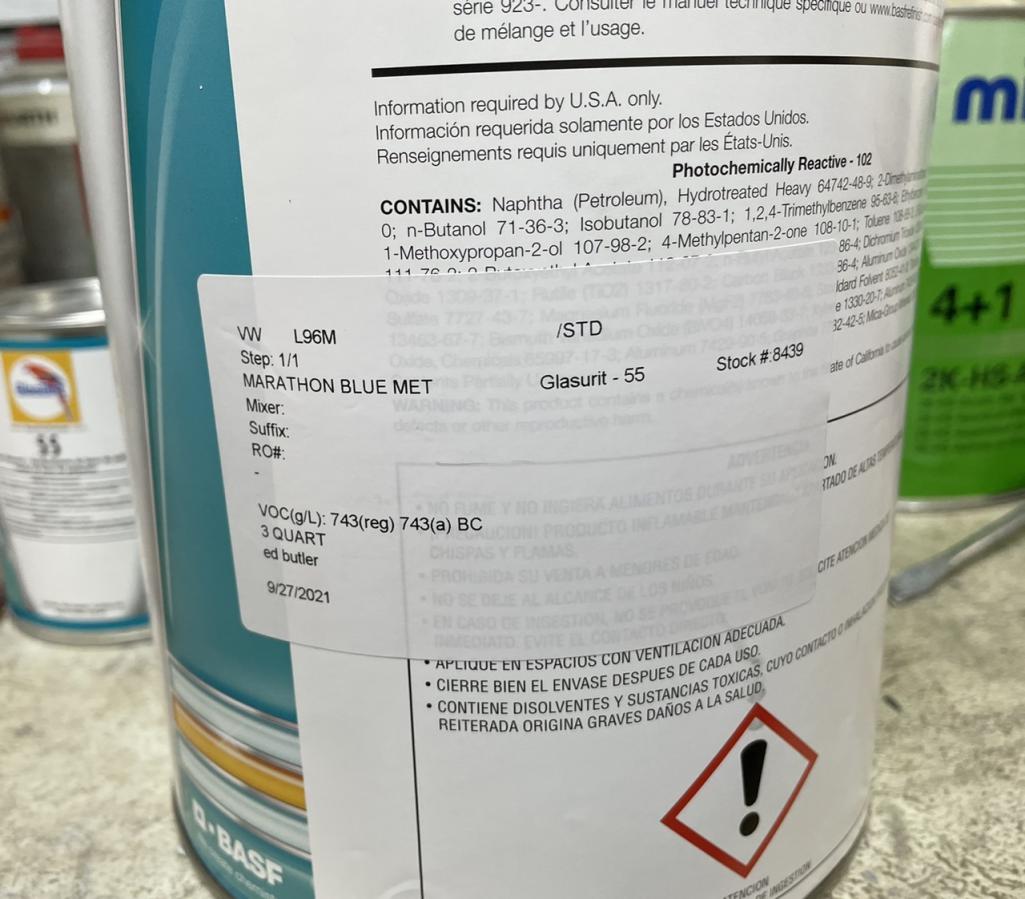
Posted by: Dion Sep 28 2021, 03:56 PM
First round of paint application.
Attached thumbnail(s)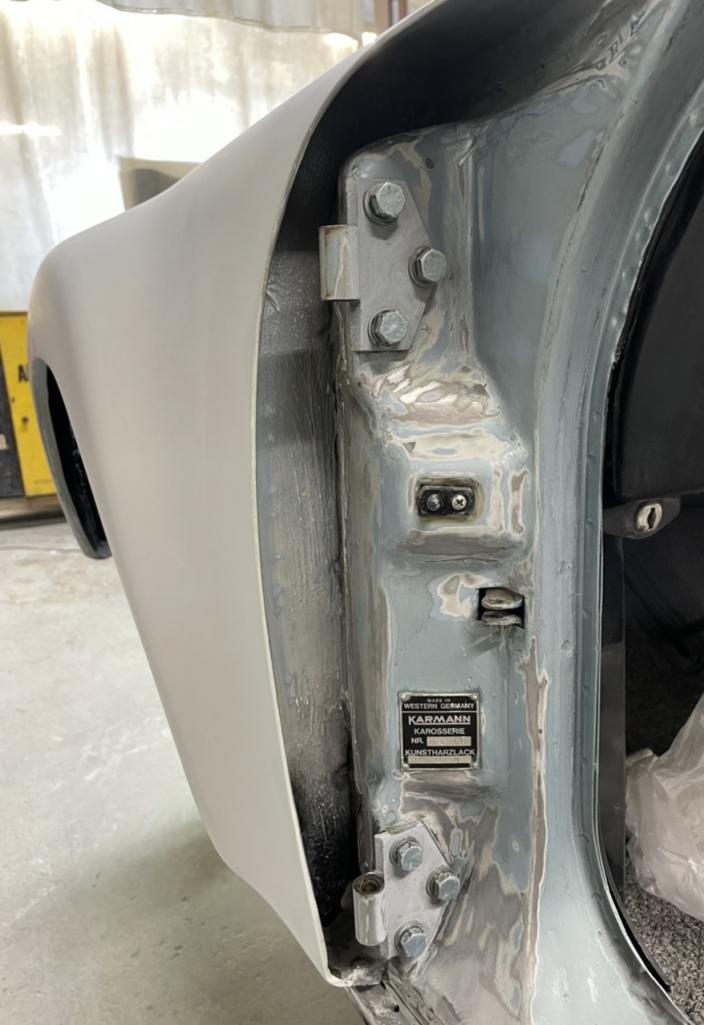
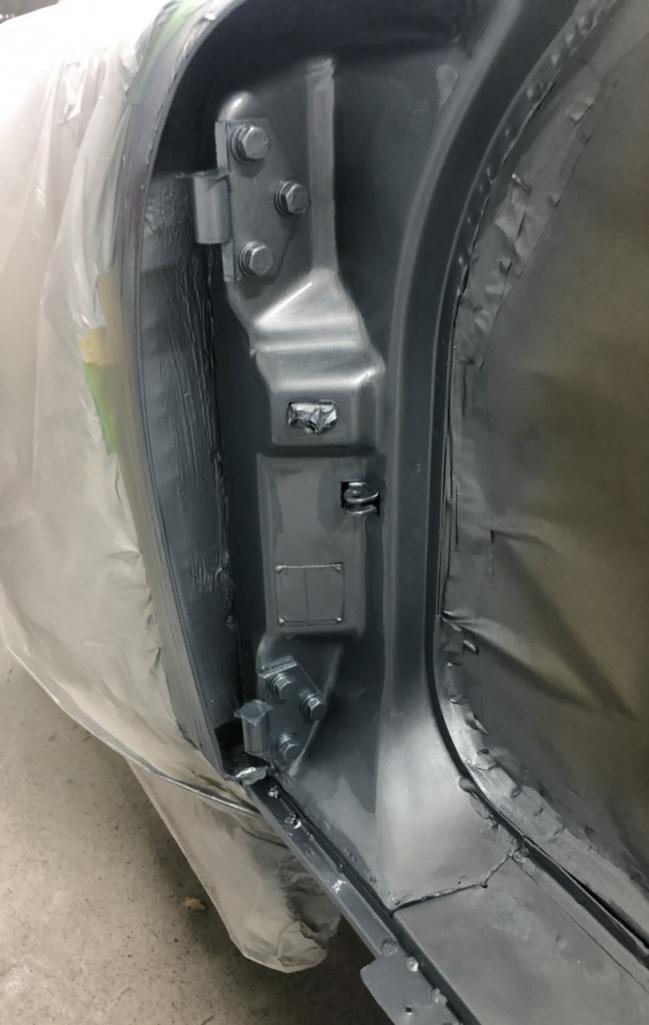
Attached image(s)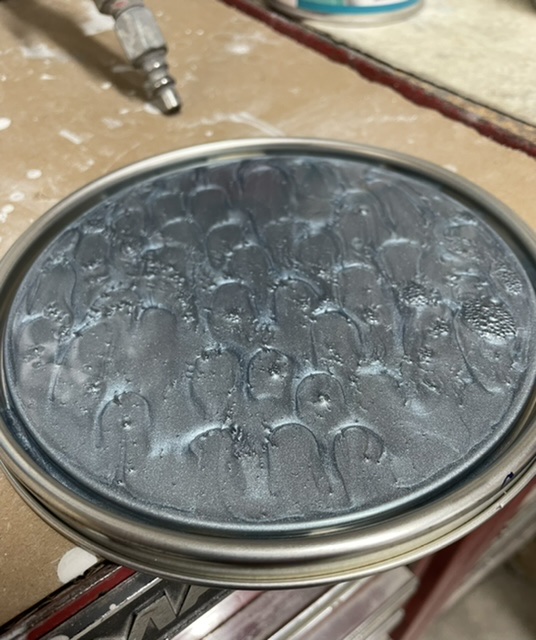
Posted by: Dion Sep 28 2021, 03:59 PM
Refinished door innards
Attached thumbnail(s)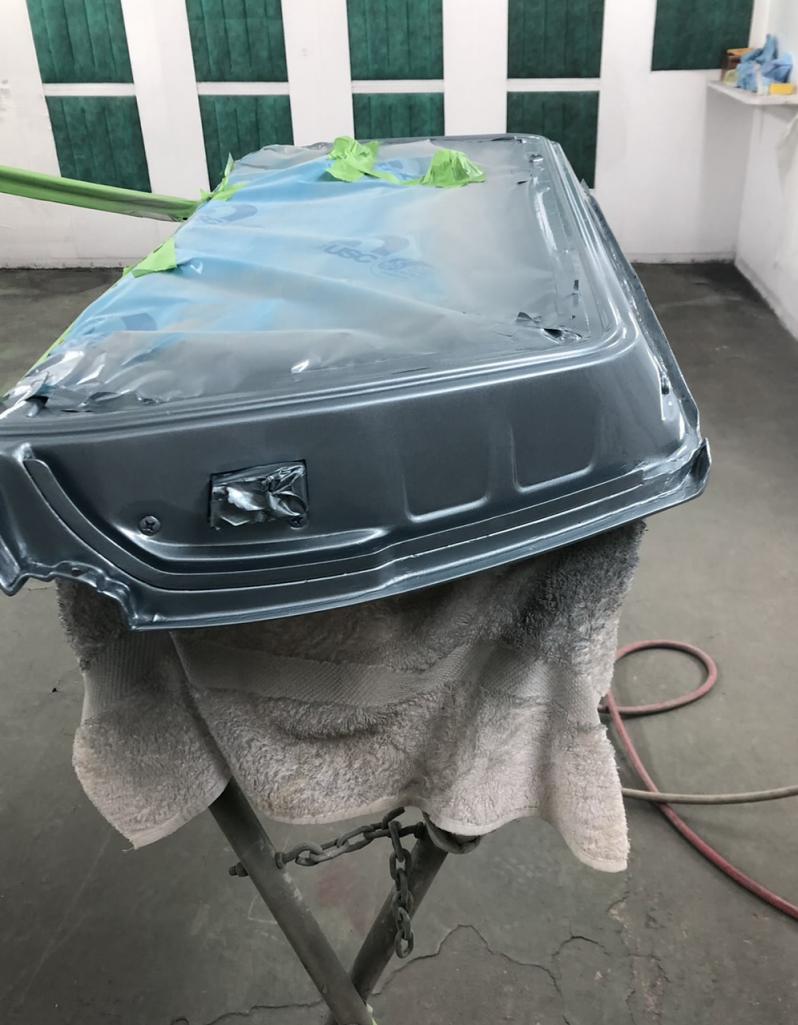
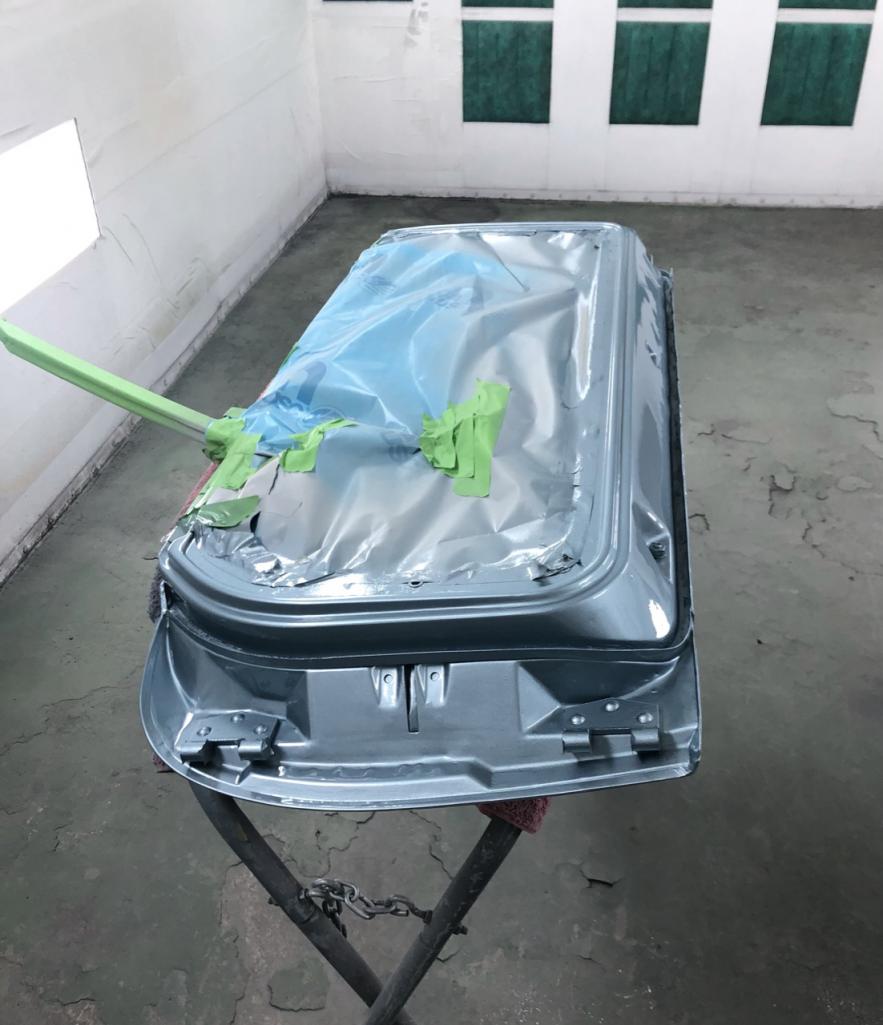
Posted by: 9146C Sep 28 2021, 05:01 PM
That's looking great! Love the color!
Posted by: tygaboy Sep 28 2021, 05:25 PM
DUDE! Your car is getting PAINTED!!!!
That is so awesome. Don't even try and pretend you're able to sleep, what with how excited you must be.
Can.
Not.
WAIT!
...to see this all done. It's gonna be a STUNNER!
Posted by: bbrock Sep 28 2021, 05:45 PM
I only let the monkeys out on special occasions. THIS is such an occasion!
Posted by: Cairo94507 Sep 29 2021, 06:57 AM
Love the color and that you chose to go with Glasurit paint. That is going to look amazing. Congratulations.
Posted by: rgolia Sep 29 2021, 08:33 AM
even I am excited...how will you sleep. Let me know when the grand viewing is....can't wait.
Posted by: Dion Sep 29 2021, 01:29 PM
You guys rock! Thank you. Yeah, I’m stoked !
Posted by: Dion Sep 29 2021, 01:31 PM
Hung the doors back on today and placed the new rear window in.
Getting It in the booth now for Urethane coating.
Attached thumbnail(s)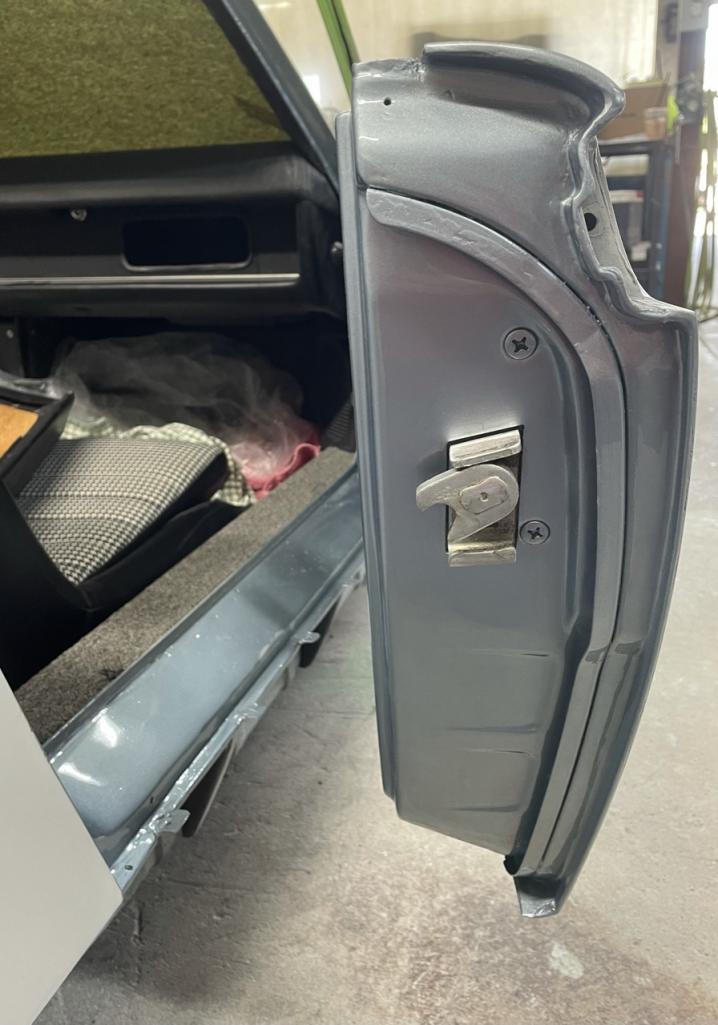

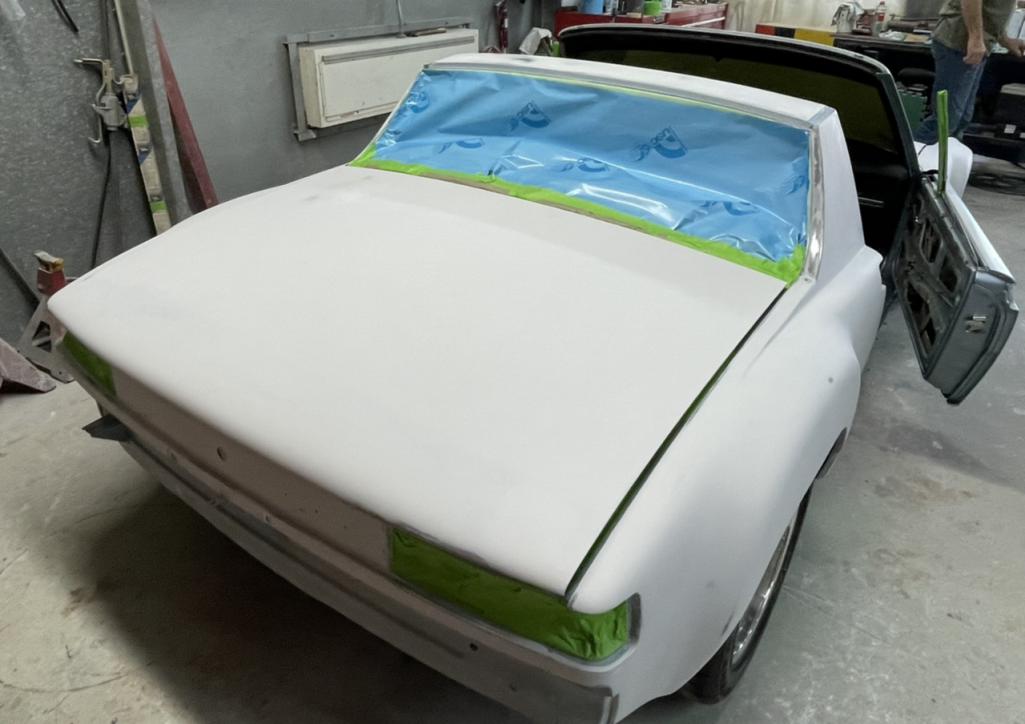
Posted by: Dion Sep 29 2021, 01:33 PM
The booth! Meet the man behind the bodywork & paint. Ed’s been fantastic to work with.
Attached thumbnail(s)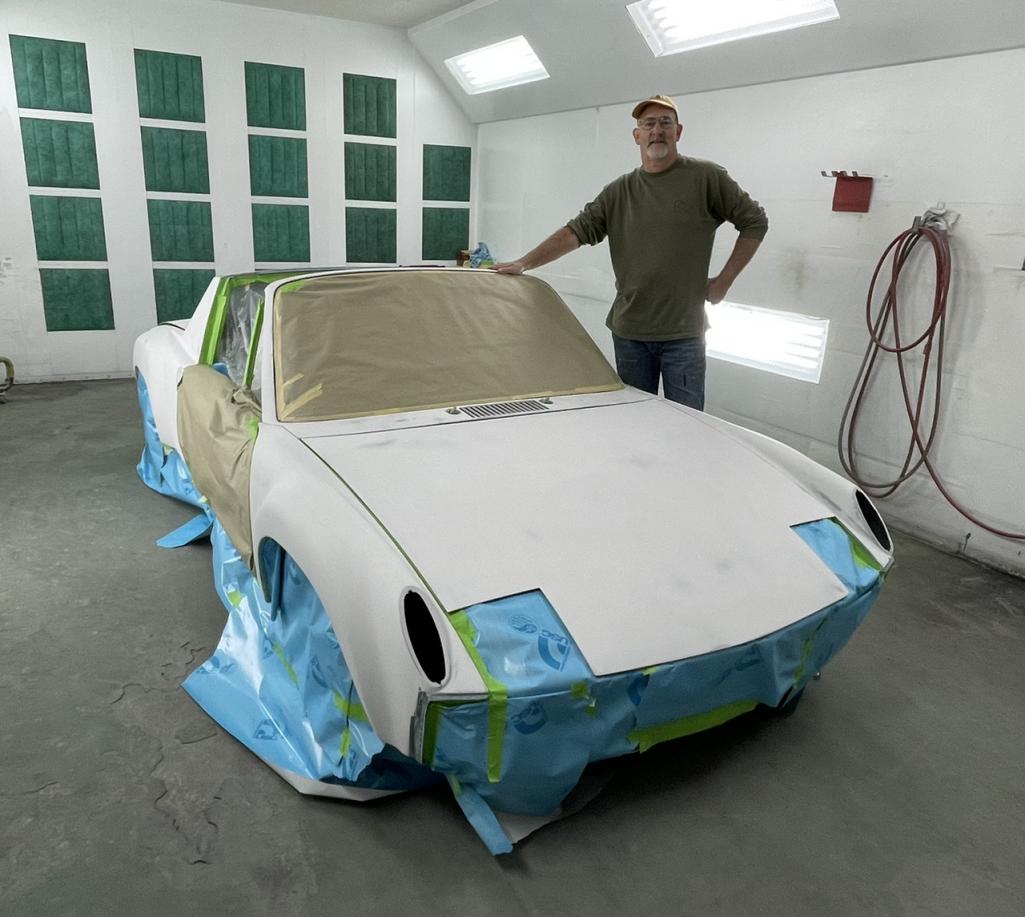
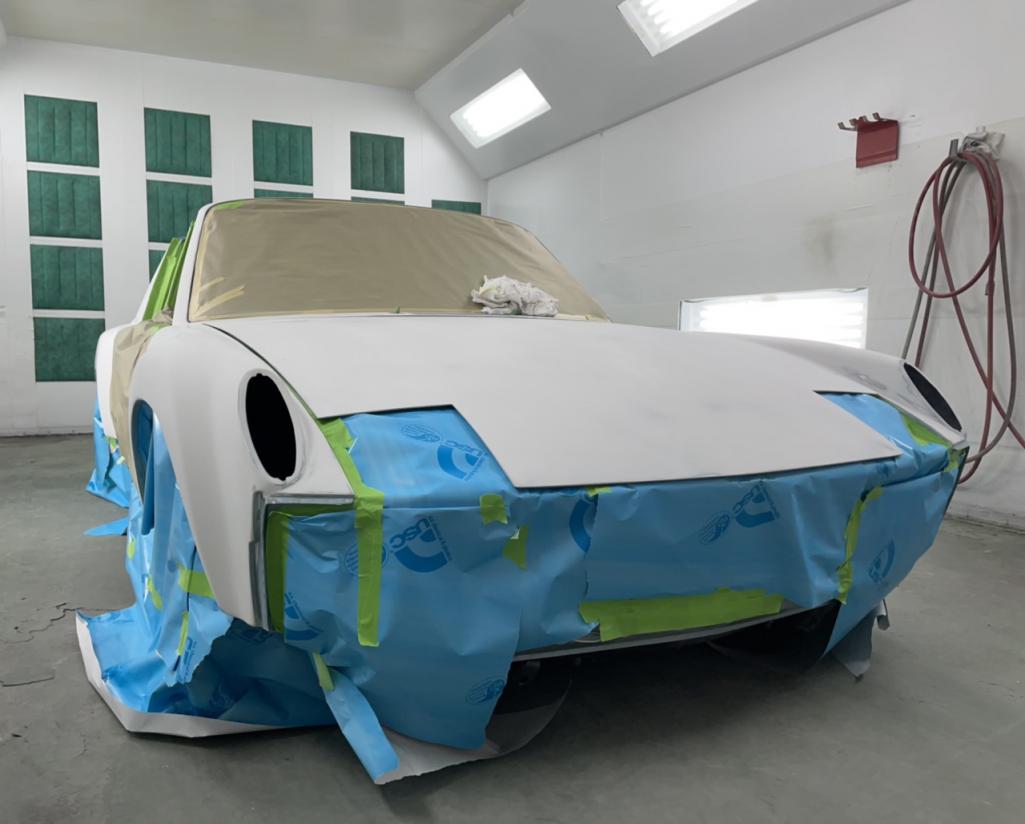
Posted by: Dion Sep 29 2021, 04:29 PM
After a few hours …. Ready for some sanding later this week.
Attached thumbnail(s)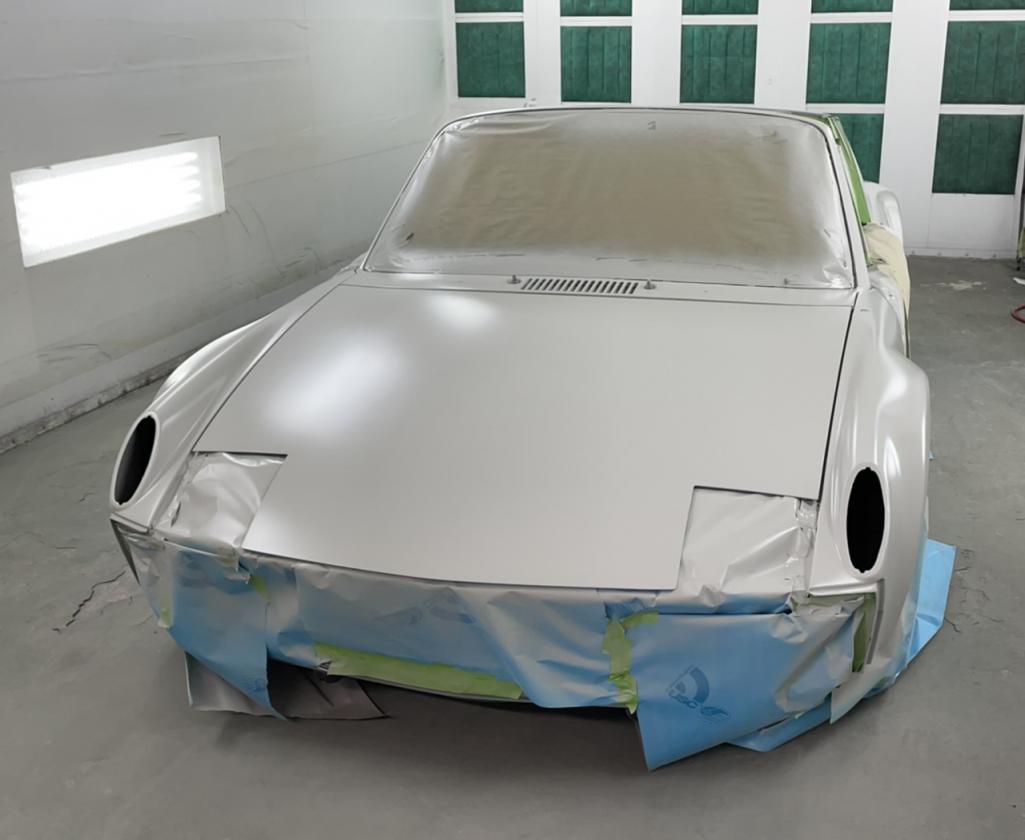
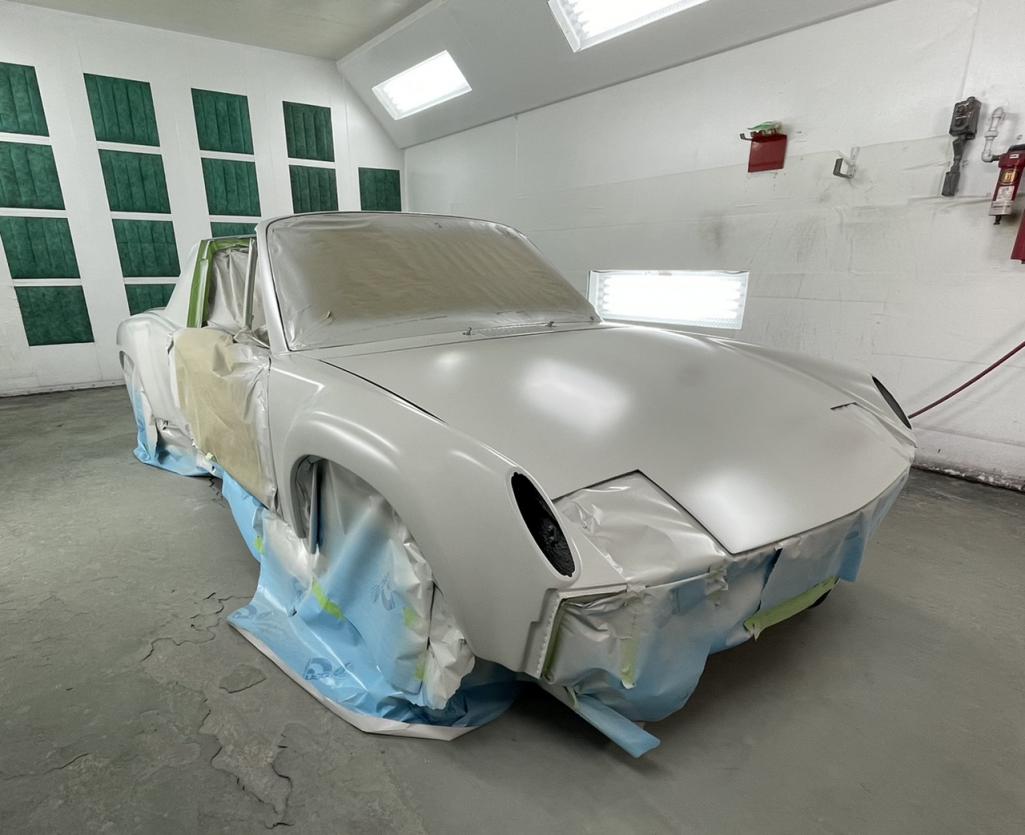
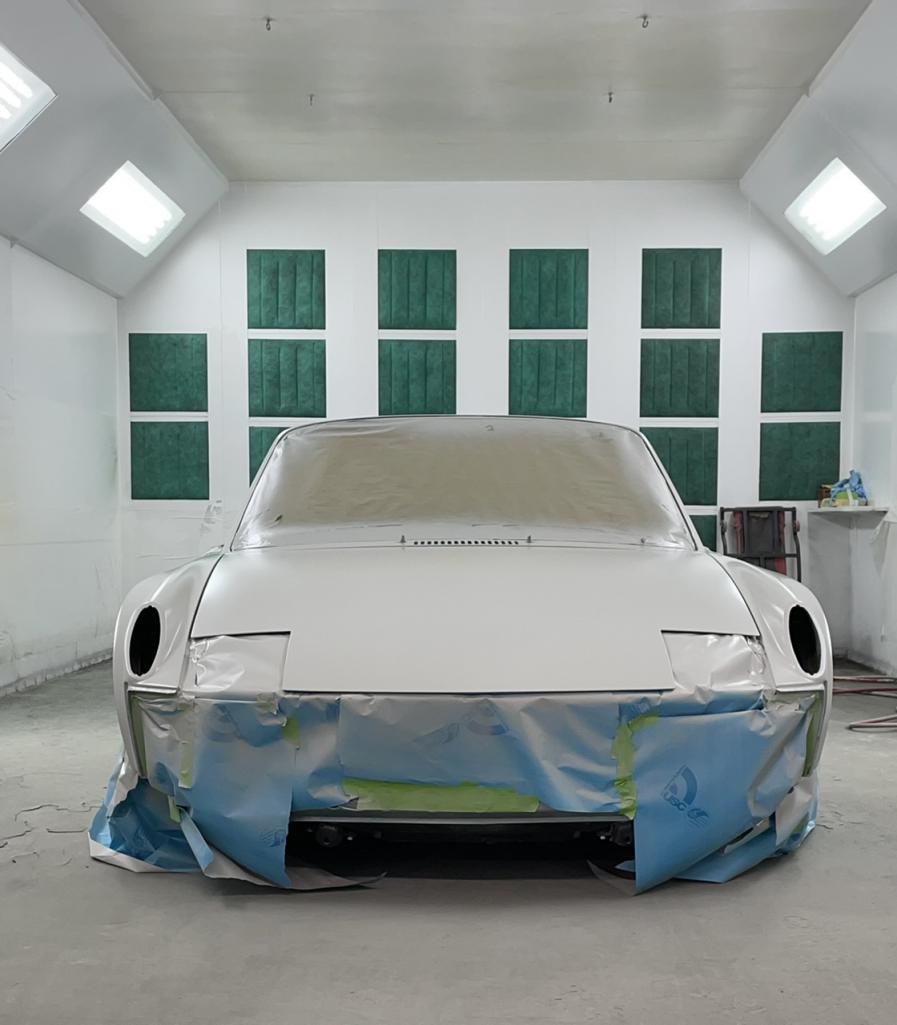
Posted by: Dion Sep 29 2021, 04:29 PM
Colour goes on next week
Attached thumbnail(s)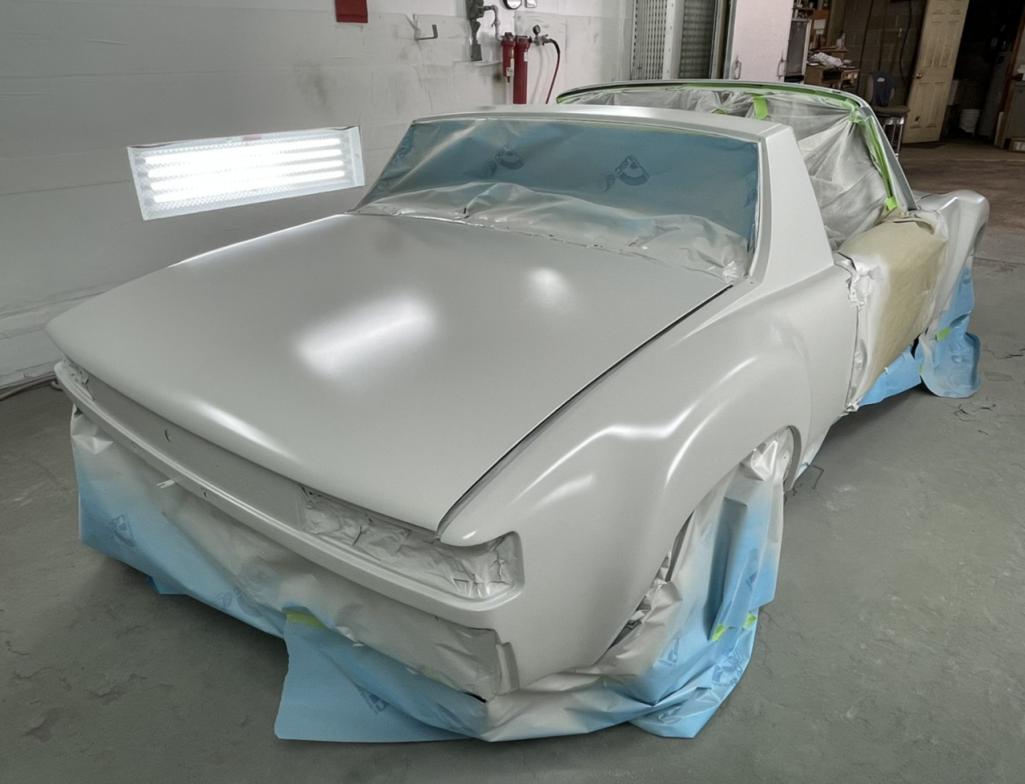
Posted by: Dion Oct 23 2021, 06:23 PM
We have colour. Extremely pleased with the results. It’s been hard to photograph, the lighting in the shop is very harsh and then when finally outside it’s overcast. The colour looks to me 99% of what it might have been rolling out the factory. Much better hue than previous paint. Ed did a fantastic job. Now it’s time to reassemble and get the motor fired up. Been hard to find “free”!time lately. Prolly not get on the road till spring. See how it goes. Anyway enjoy the pics.
Attached thumbnail(s)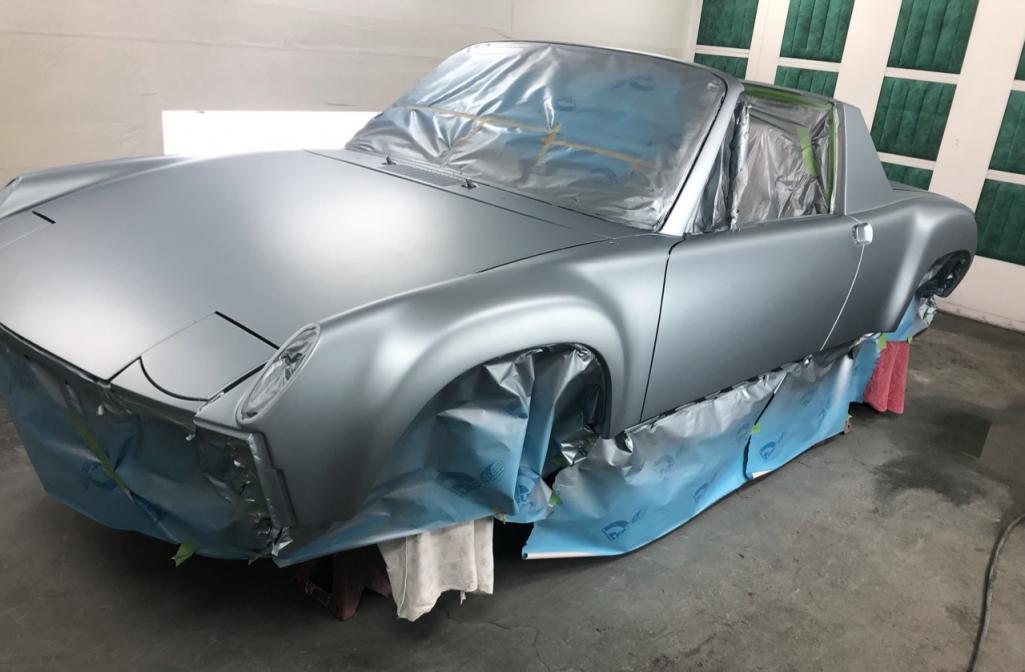
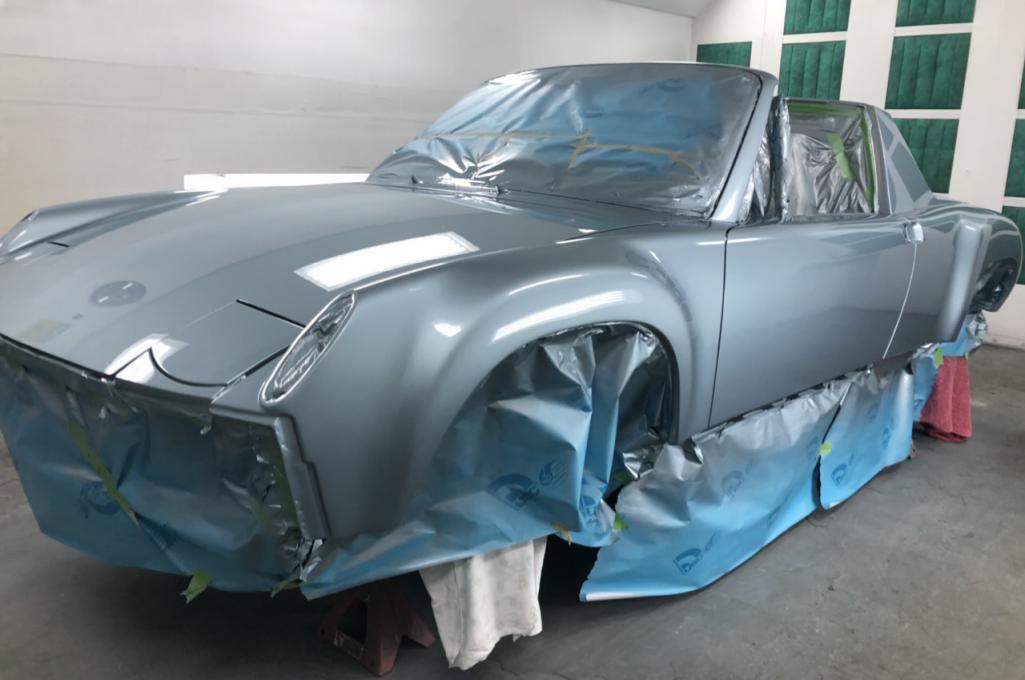
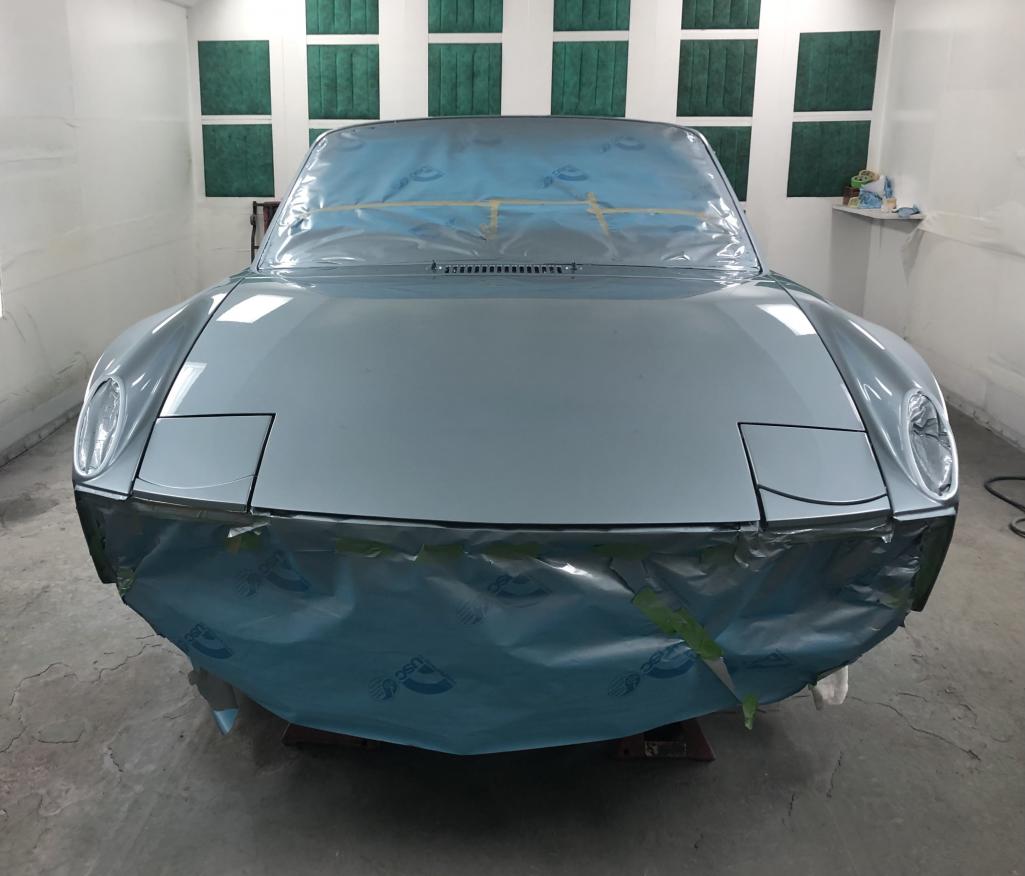
Posted by: Dion Oct 23 2021, 06:25 PM
Shop lights
Attached thumbnail(s)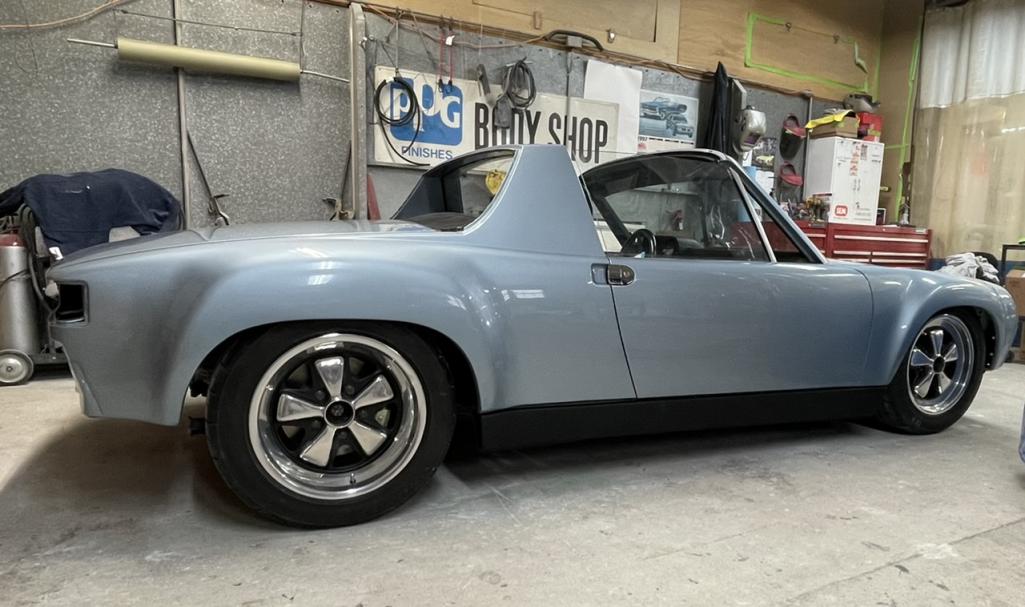
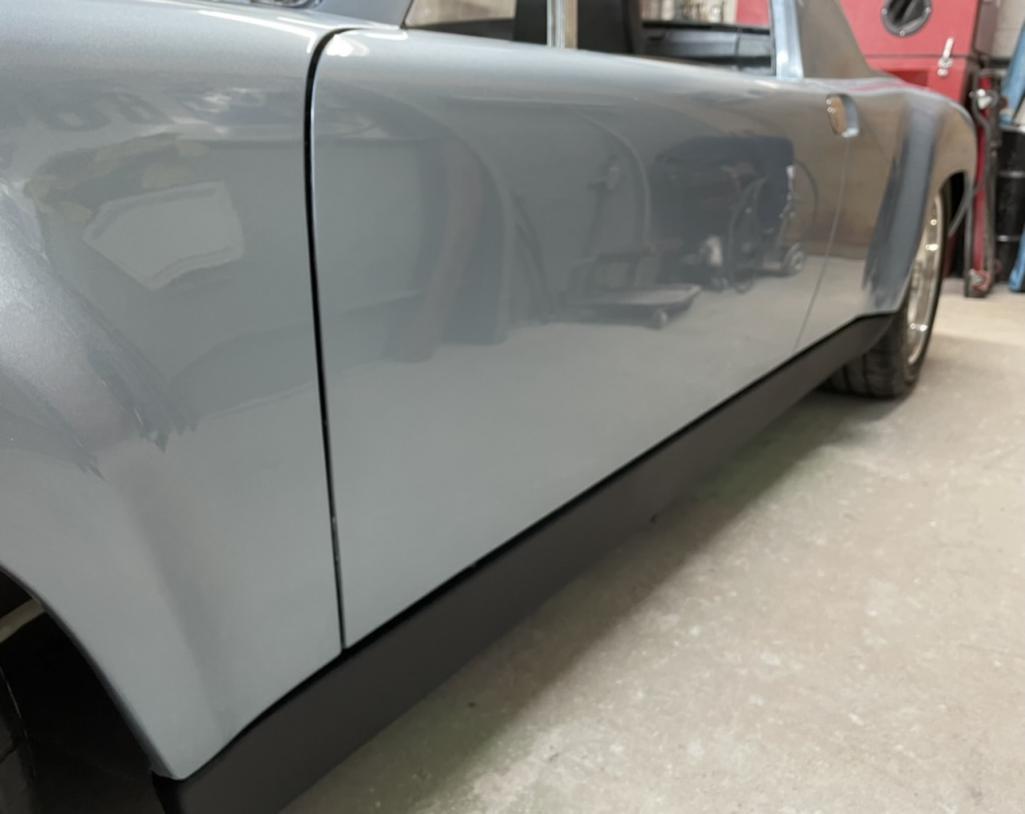
Posted by: Dion Oct 23 2021, 06:26 PM
Outside overcast.
Attached thumbnail(s)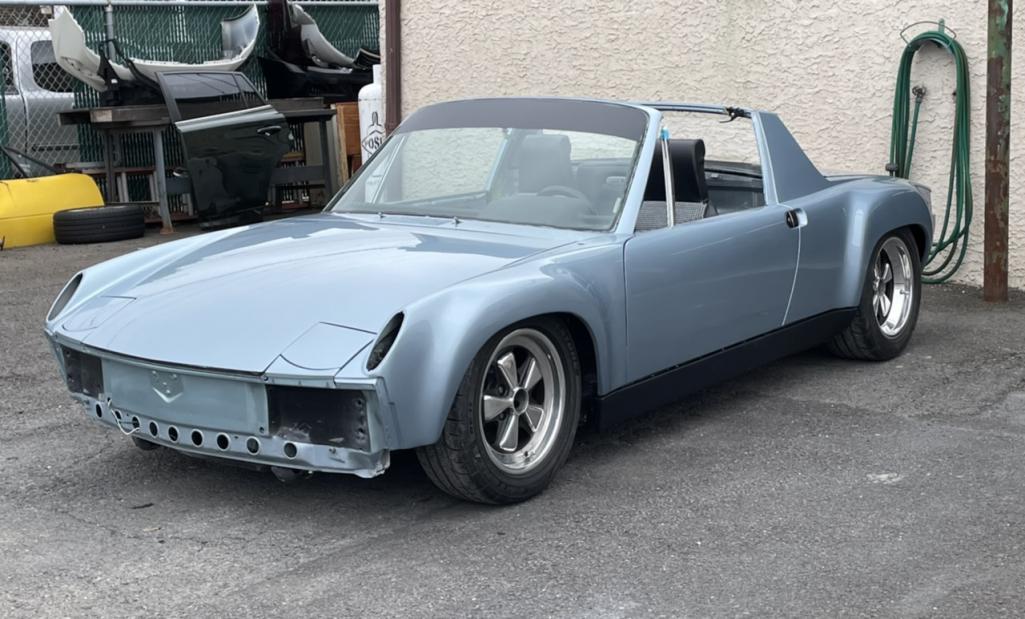
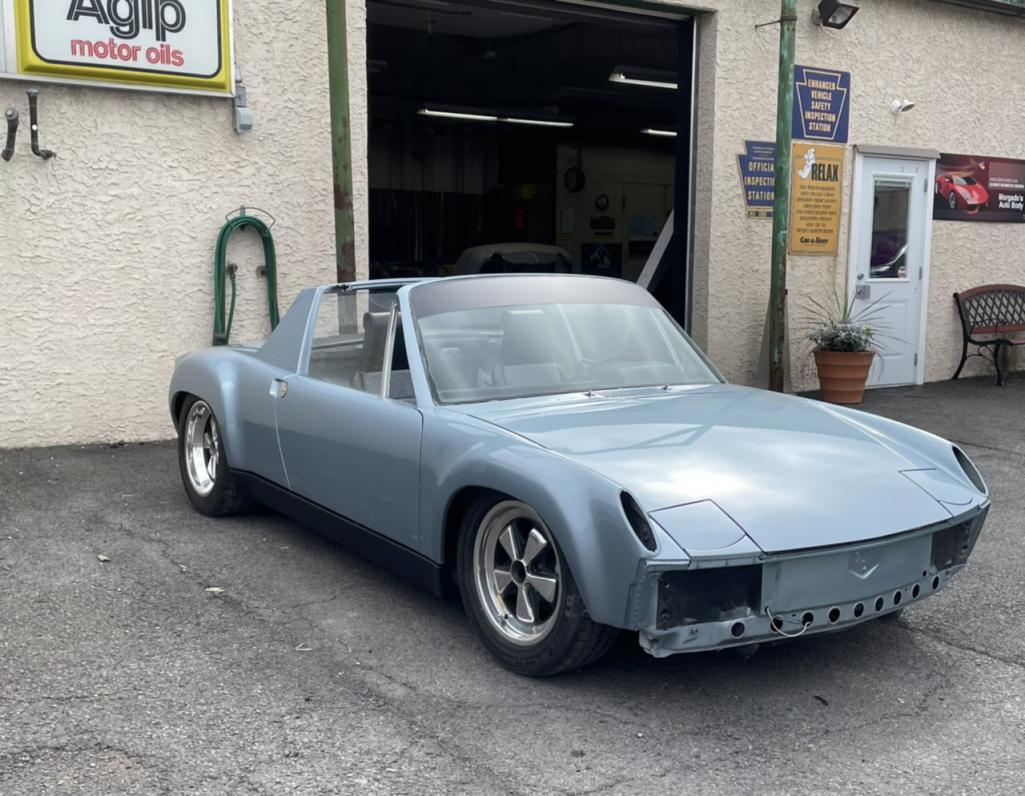
Posted by: Dion Oct 23 2021, 06:27 PM
Home , just off the flatbed.
Attached thumbnail(s)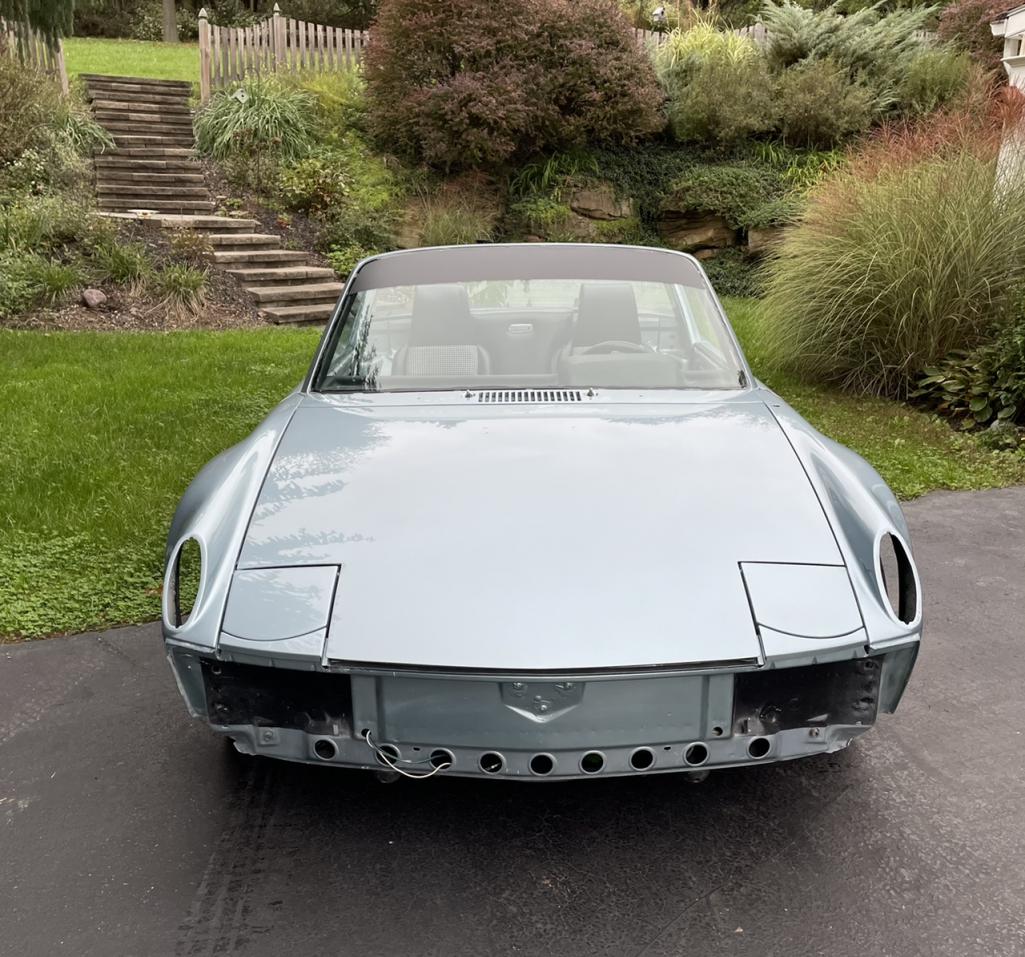
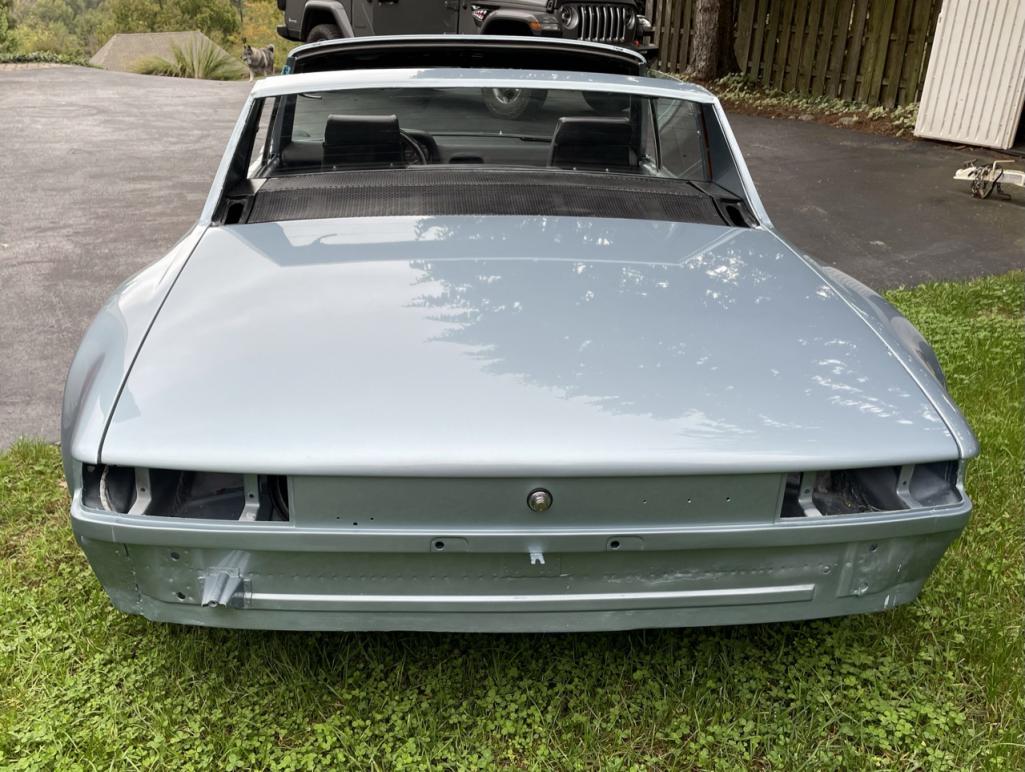
Posted by: Dion Oct 23 2021, 06:29 PM
Some parts going on.
Attached thumbnail(s)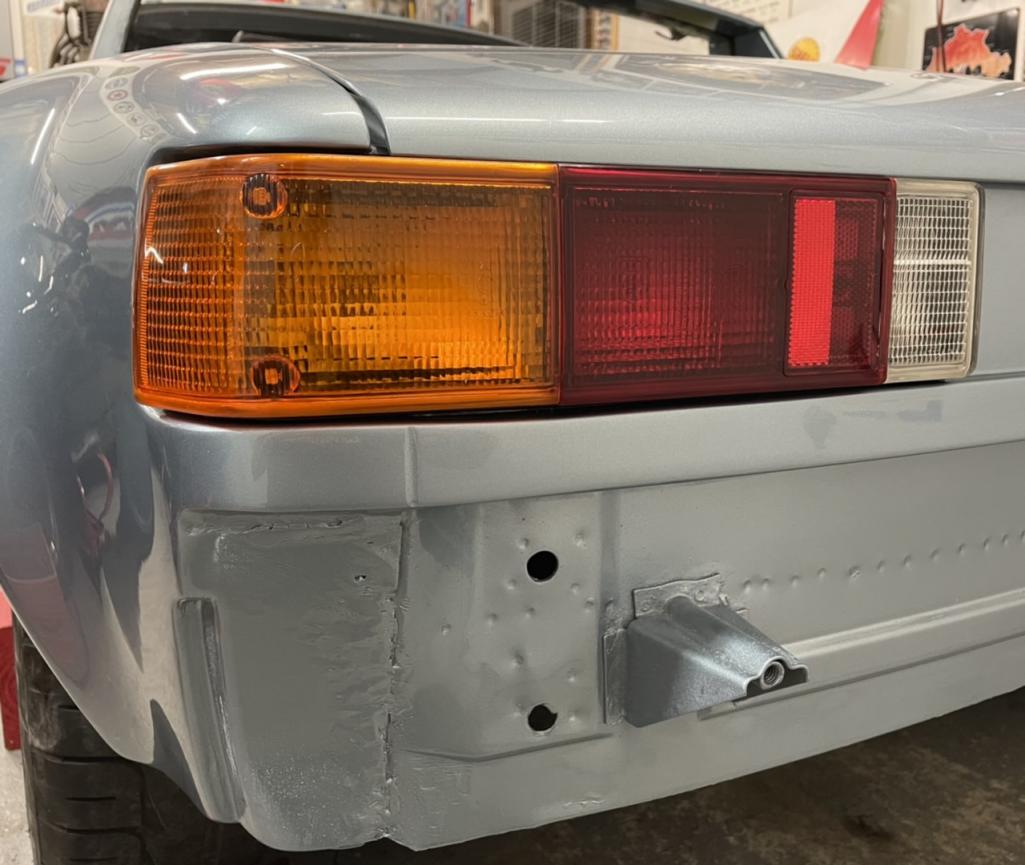
Attached image(s)
Posted by: Dion Oct 23 2021, 06:31 PM
Bright evening sun.
Attached thumbnail(s)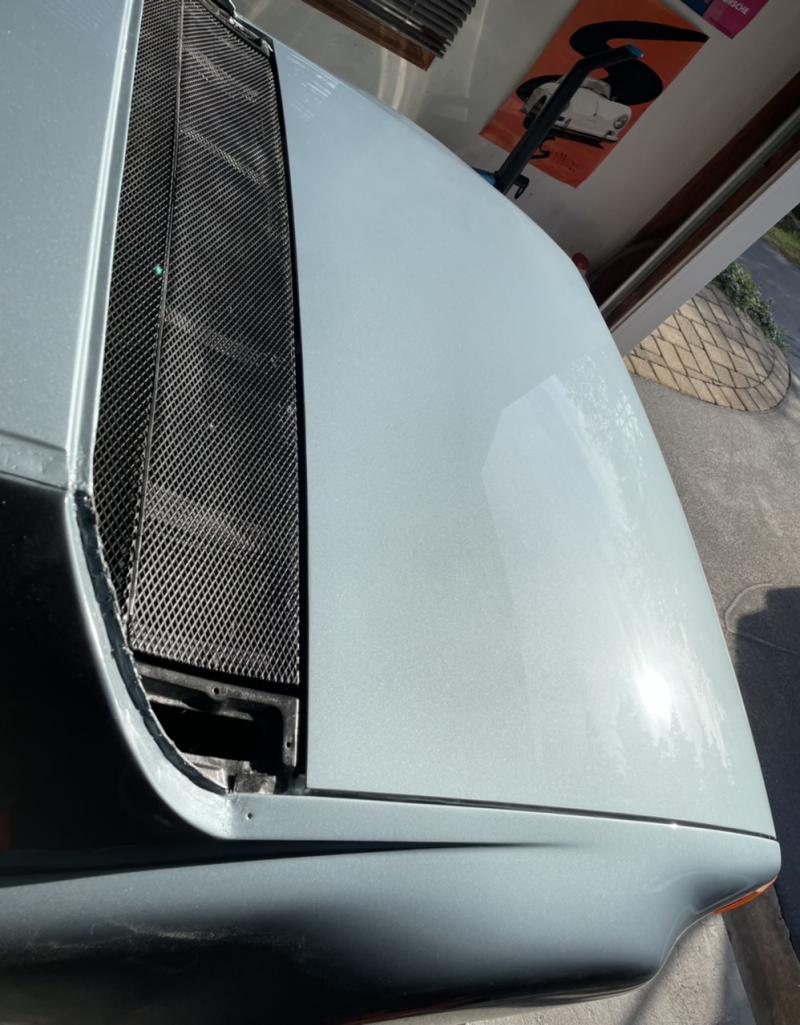
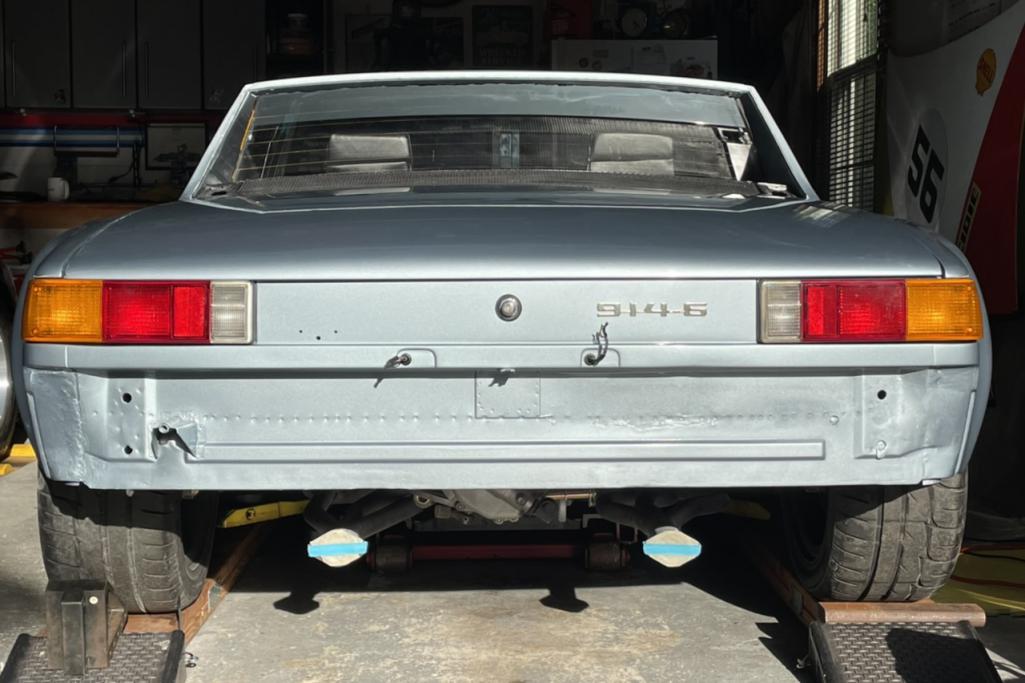
Posted by: Dion Oct 23 2021, 06:32 PM
Close up of metallic. More to come. Thanks for stopping by.
Cheers!
Attached thumbnail(s)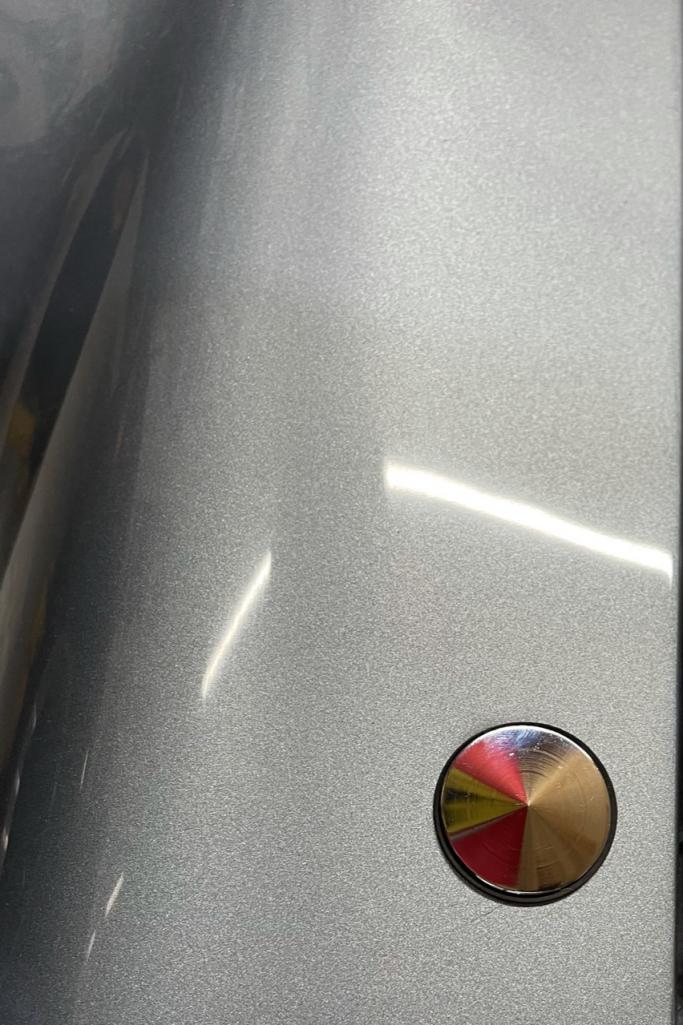
Posted by: tygaboy Oct 23 2021, 06:48 PM
HOOOOOOOOOLY-MOOOOOOOLEY!
That is )*^#$%_$ Beaut-E-FULL!
You have to be over the moon.
Dude. Wow.
Posted by: bbrock Oct 23 2021, 07:24 PM
That is dead sexy!!! So great to see!
Posted by: Dion Oct 23 2021, 07:31 PM
HOOOOOOOOOLY-MOOOOOOOLEY!
That is )*^#$%_$ Beaut-E-FULL!
You have to be over the moon.
Dude. Wow.
@http://www.914world.com/bbs2/index.php?showuser=19241 . You know it.
Thanks Chris.
Posted by: Dion Oct 23 2021, 07:33 PM
@http://www.914world.com/bbs2/index.php?showuser=20845 . Thanks Brent. Appreciate the compliment.
You set the high standards around here!
Posted by: raynekat Oct 23 2021, 08:33 PM
Looks incredible.
Can you share the name of Ed's shop and where he's located?
Others might likely wish to use his services one day.
Love that Marathon blue.
Posted by: Dion Oct 23 2021, 08:42 PM
@http://www.914world.com/bbs2/index.php?showuser=18263 Thanks Doug. Appreciate it. Good idea, Ed Butler is his name. Works out of Morgado’s Auto body in Lansdale,PA. 356 are his usual customers. I was the first 914 he worked on. Found the car interesting.
Posted by: rgalla9146 Oct 23 2021, 08:56 PM
YES !!!!!
Beautiful !!!!!
Great color. All your hard work is paying off.
Congrats Dion !
Posted by: Cairo94507 Oct 24 2021, 04:49 AM
Let the fun begin. Your car looks great. You will be driving before you know it.
Posted by: BeatNavy Oct 24 2021, 06:49 AM
I was the first 914 he worked on. Found the car interesting.
I guess he was just being polite
That's really beautiful. Way to go, Dion!!
Posted by: autopro Oct 24 2021, 08:27 AM
The paint looks awesome, what a great color.
Posted by: 9146C Oct 24 2021, 08:36 AM
Your car looks amazing!
Posted by: Dion Oct 30 2021, 06:30 PM
Some more parts finding their way back on board. Rechromed rear bumper courtesy
@http://www.914world.com/bbs2/index.php?showuser=16669 mounted.
Attached thumbnail(s)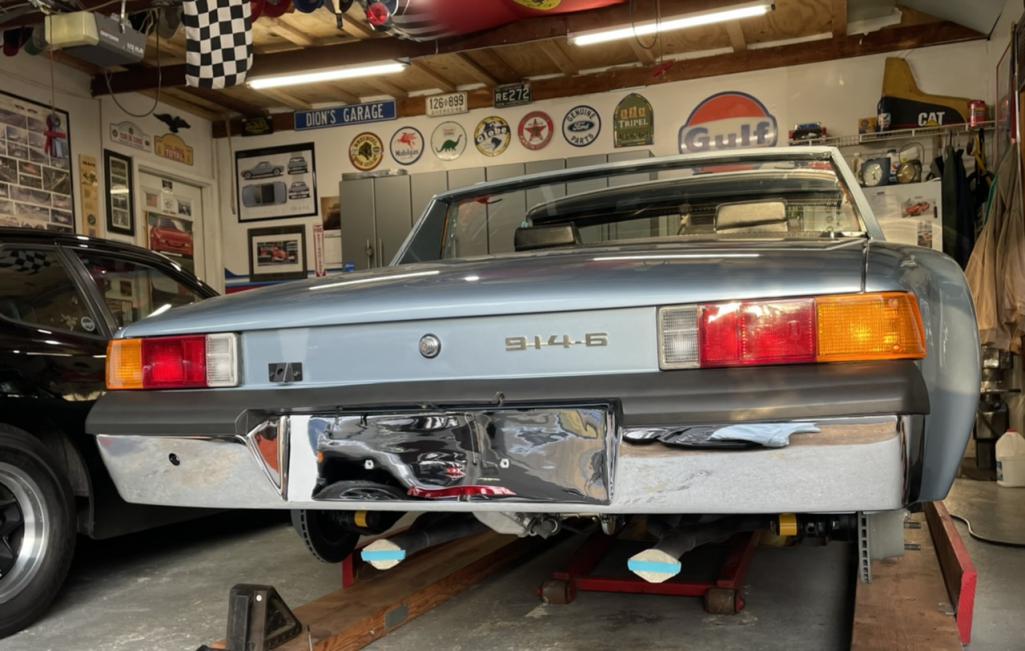
Posted by: Dion Oct 30 2021, 06:30 PM
Fogs & horn:
Attached thumbnail(s)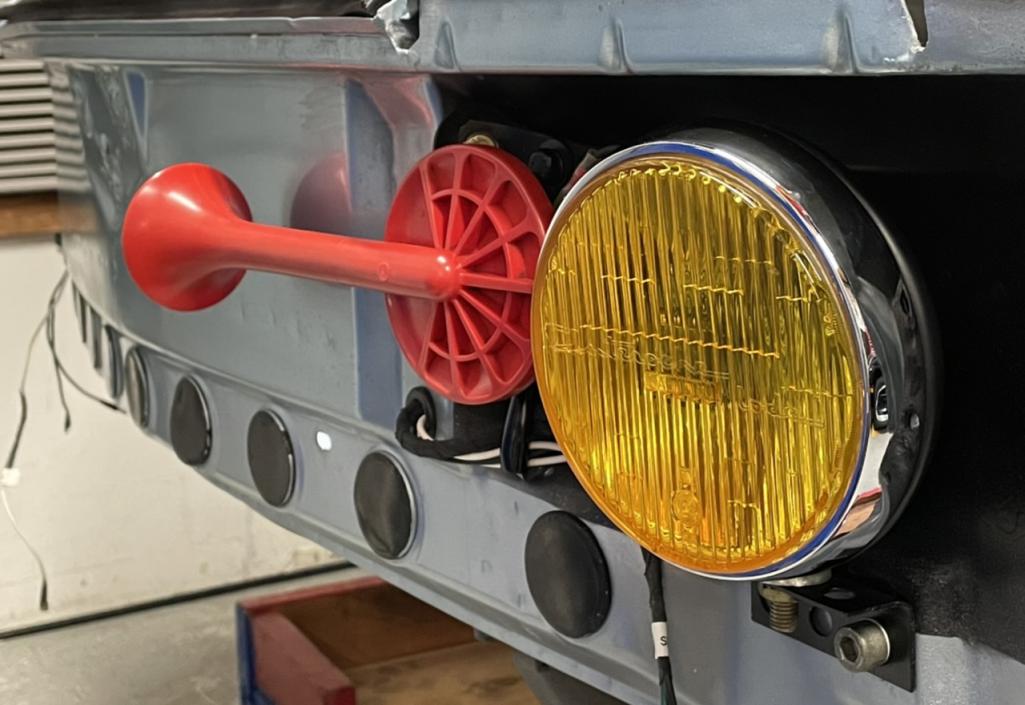
Posted by: Dion Oct 30 2021, 06:33 PM
& the front rechromed bumper. Turn signals and rubber boots to come. Slowly coming back.
Attached thumbnail(s)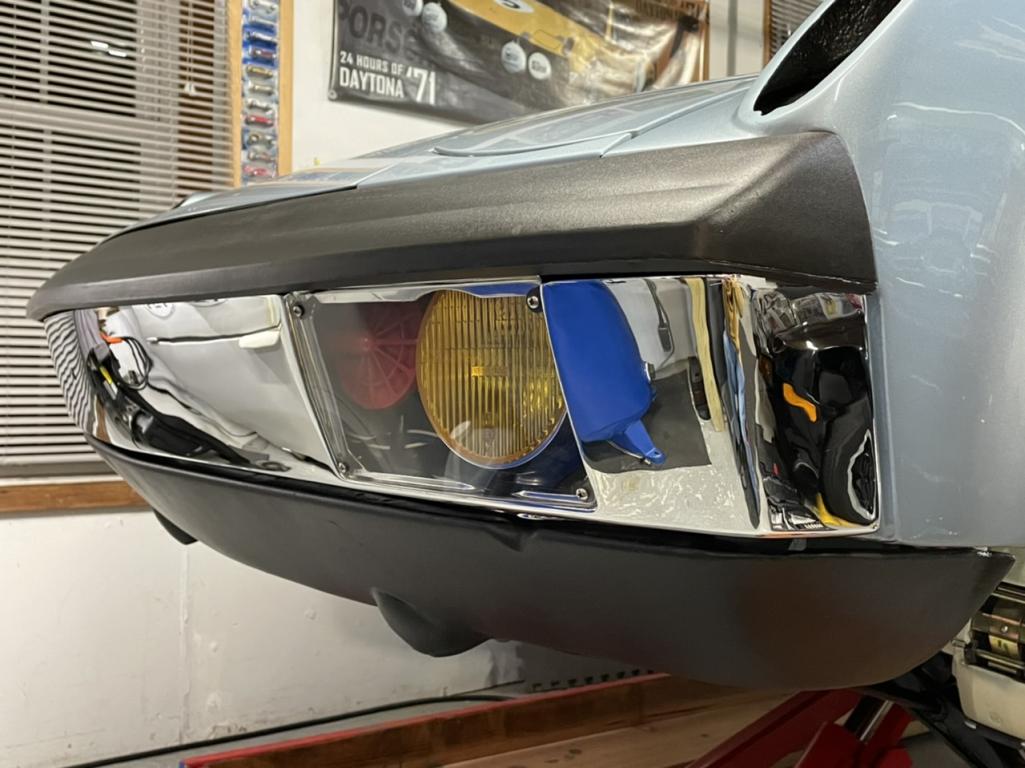
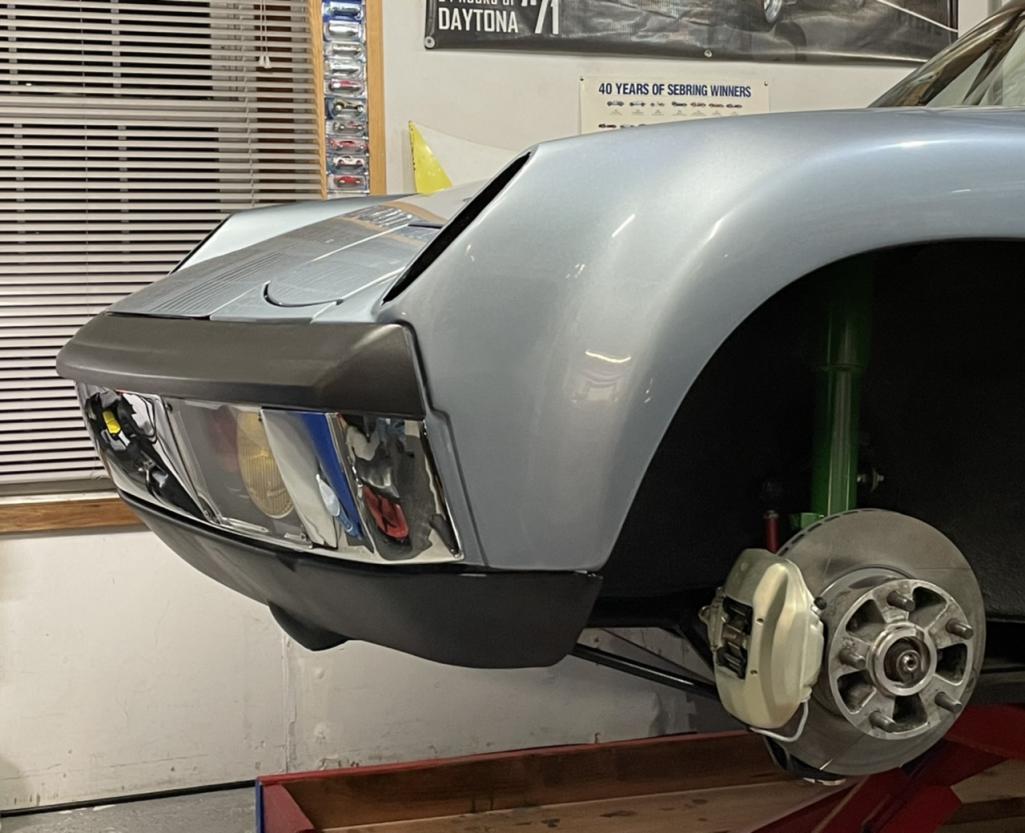
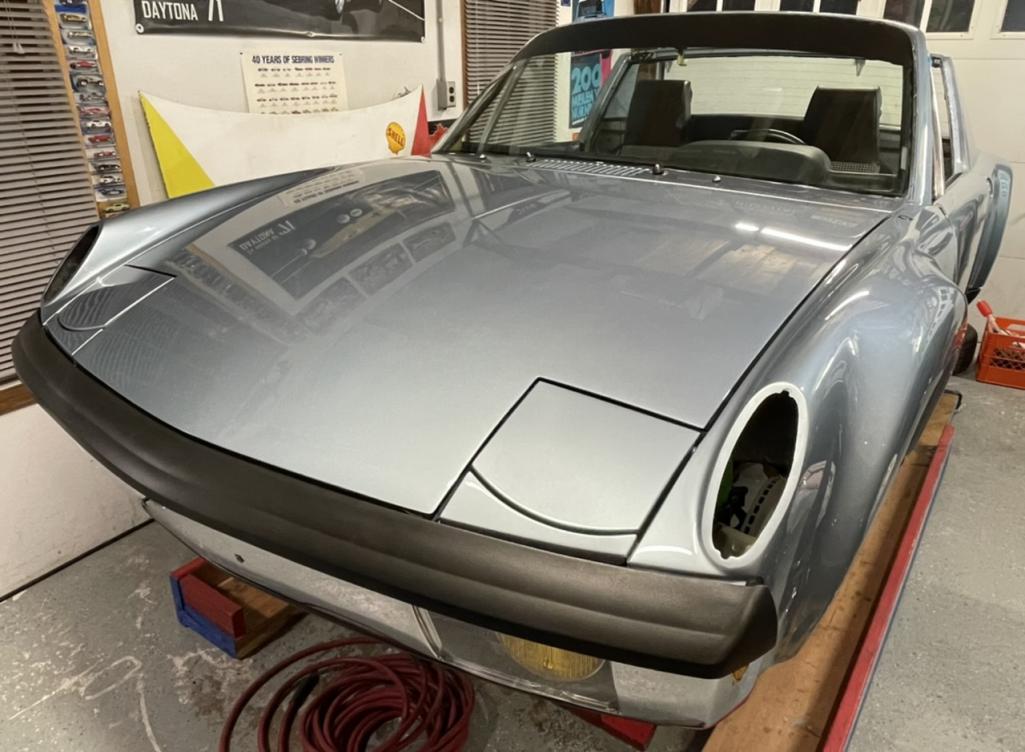
Posted by: tygaboy Oct 30 2021, 06:47 PM
Speechless here... Well, other than to say "I'm speechless."
Dion - you've hit it out of the park. Just beautiful.
Posted by: ndfrigi Oct 30 2021, 06:55 PM
Almost there Dion! Congrats and nice work! And with that air horn, it will surely makes anyone blocking infront of you will immediately move away!
Posted by: TonyA Oct 30 2021, 07:20 PM
Wow Dion that looks great. I may drive over there tomorrow just to see it.
Posted by: Dion Oct 30 2021, 08:01 PM
Kudos Chris @http://www.914world.com/bbs2/index.php?showuser=19241 . Noel @http://www.914world.com/bbs2/index.php?showuser=13474 working on finding the other horn that compliments this one. Different Hz. Trying to be like a GT in sound if I can’t match the performance!
@http://www.914world.com/bbs2/index.php?showuser=20596 I’m home tomorrow. Feel free to swing by anytime.
Cheers
Posted by: djway Oct 30 2021, 09:37 PM
Those clear fog light covers probably add 2mph top end from better aero
Posted by: TRS63 Oct 31 2021, 03:28 AM
Fantastic
Antoine
Posted by: ValcoOscar Oct 31 2021, 04:47 AM
What a stunner....
Work well done.
Oscar
Posted by: Dion Oct 31 2021, 09:30 AM
@http://www.914world.com/bbs2/index.php?showuser=20596 swung by this morning. His LE sounded & looked great as usual! Nice time catching up on things. So appropriate that an “orange “ car shows up on Halloween!!
Thanks Tony! Enjoy the drives.
Attached thumbnail(s)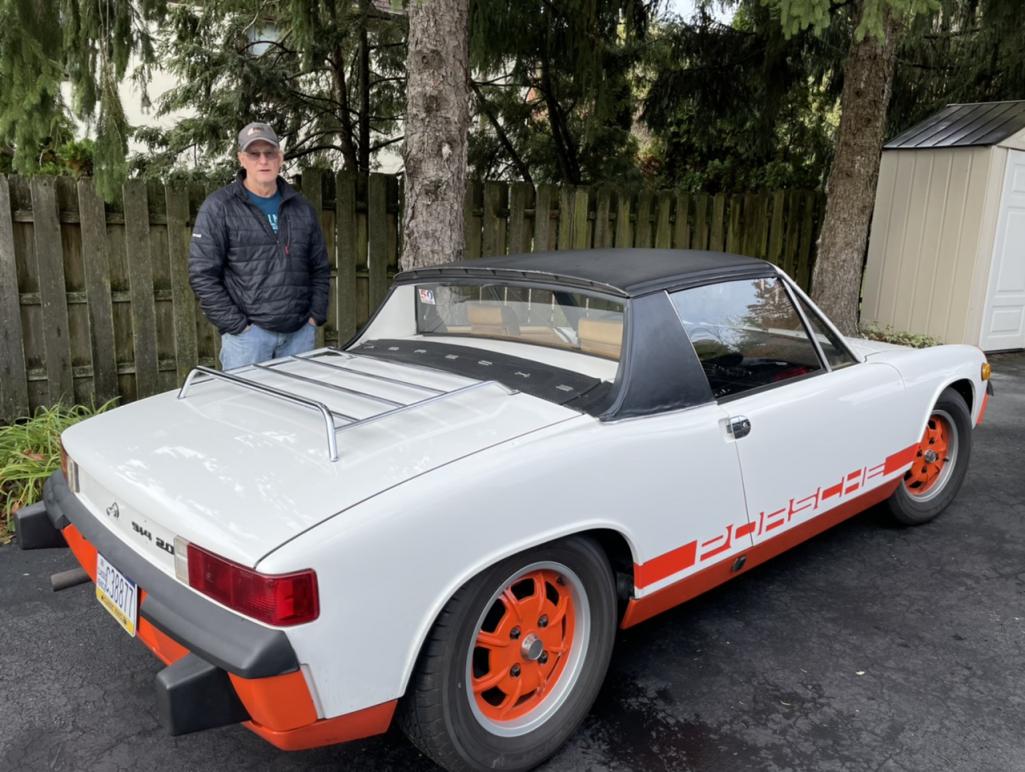
Posted by: TonyA Oct 31 2021, 11:18 AM
Thanks Dion , pictures don’t do your car justice absolutely stunning. It was worth the risk of driving in the rain (which held off) to see it in person. Can’t wait to follow you and Dave around in the spring because I certainly will be in the dust.
Posted by: Dion Nov 11 2021, 07:11 PM
Right , so here we are. Have the refurbished door stays in.
Attached thumbnail(s)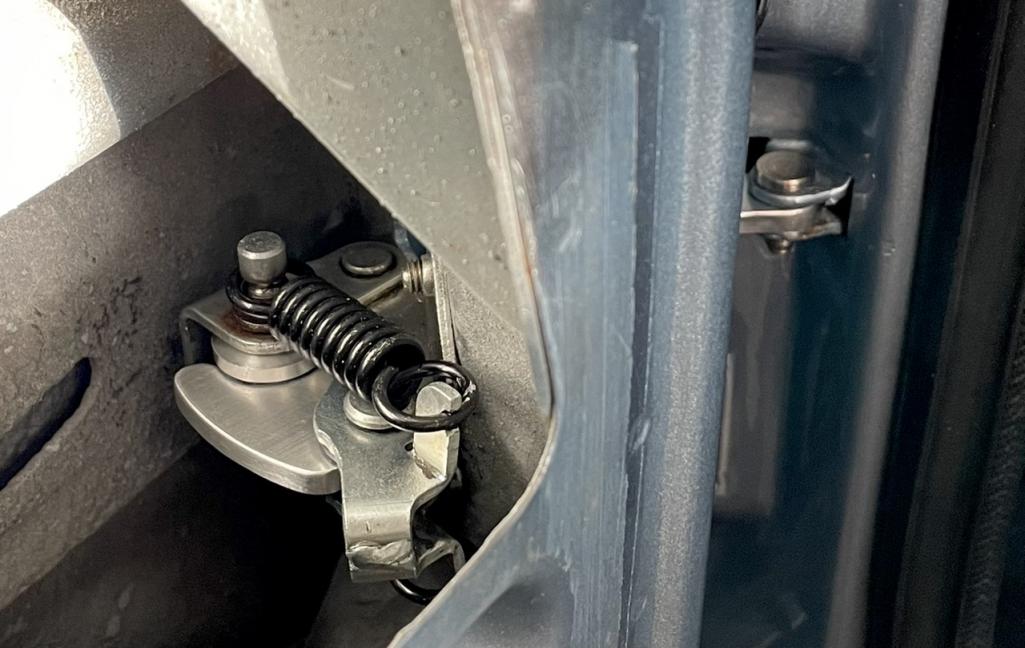

Posted by: Dion Nov 11 2021, 07:14 PM
Added my rallye style vent perspex triangle windows I made. Along with that bloody wonderful seal we all love to install. I will say Glycerin helped tremendously. Only drawback is that it drips everywhere and does not seem to evaporate too quickly. I’m still cleaning it off the windup window!
Attached thumbnail(s)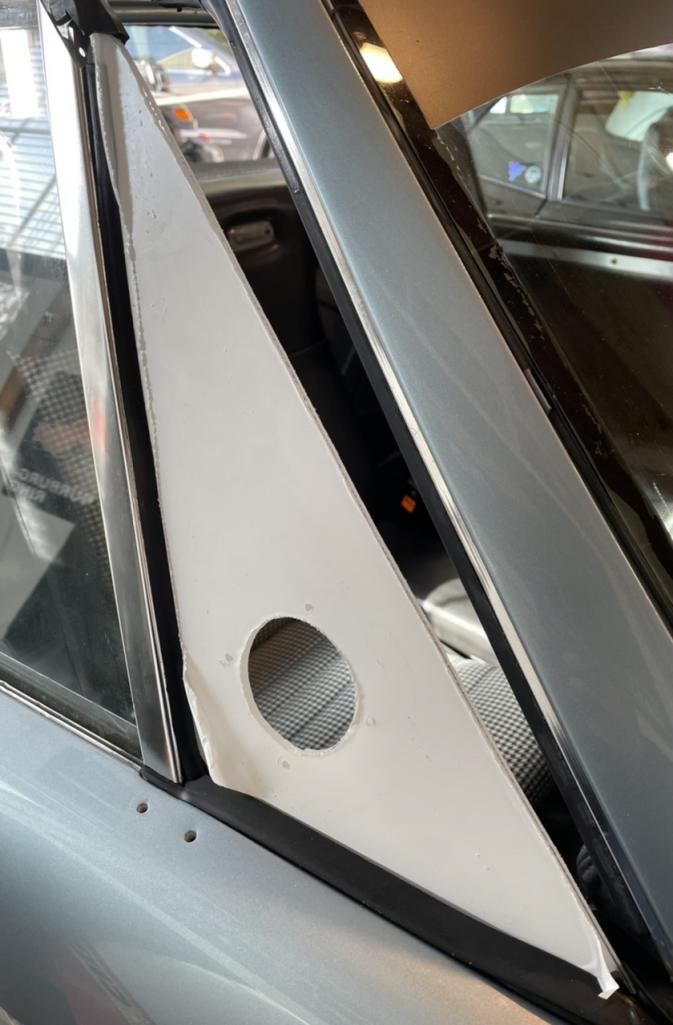
Posted by: Dion Nov 11 2021, 07:18 PM
Vent installed. Found them on an aircraft website. They are functional.
Attached thumbnail(s)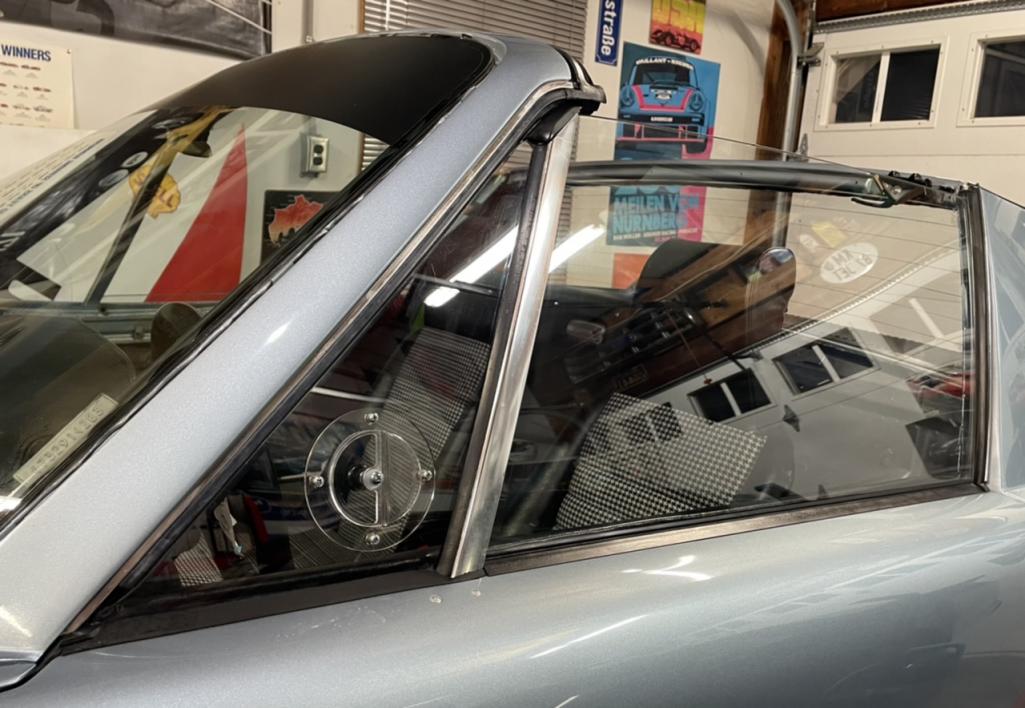
Posted by: Dion Nov 11 2021, 07:18 PM
New vapor barrier
Attached thumbnail(s)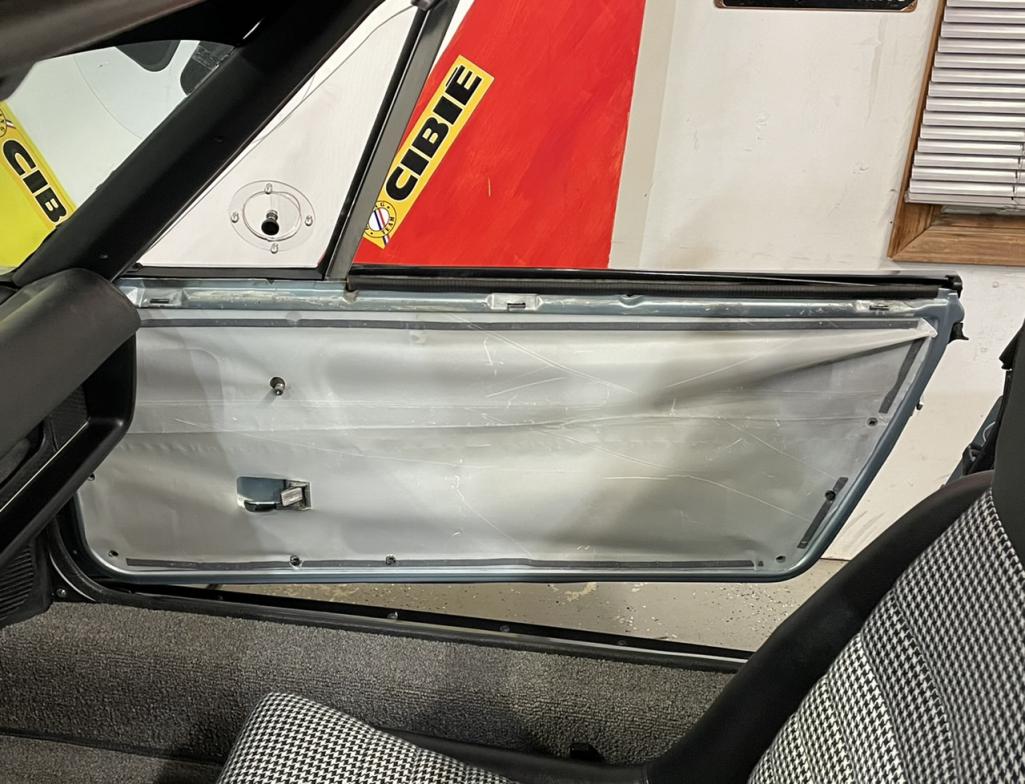
Posted by: Dion Nov 11 2021, 07:20 PM
Door cards
Attached thumbnail(s)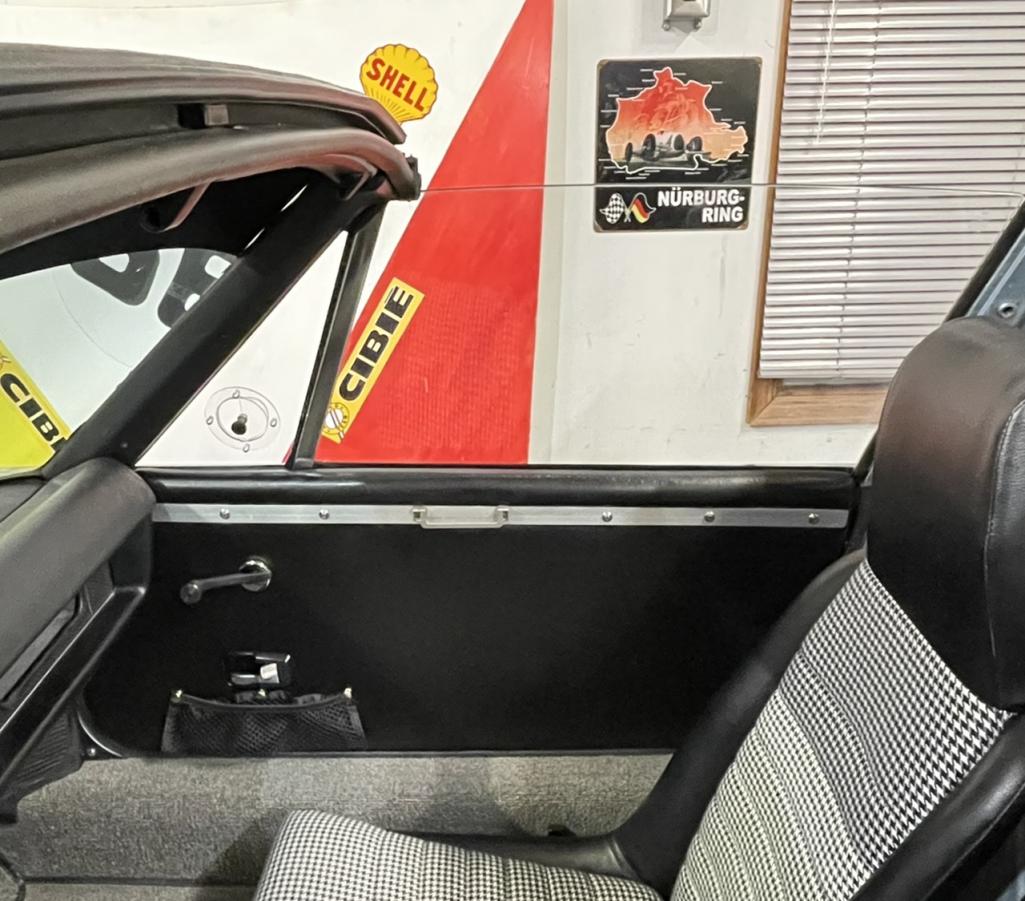
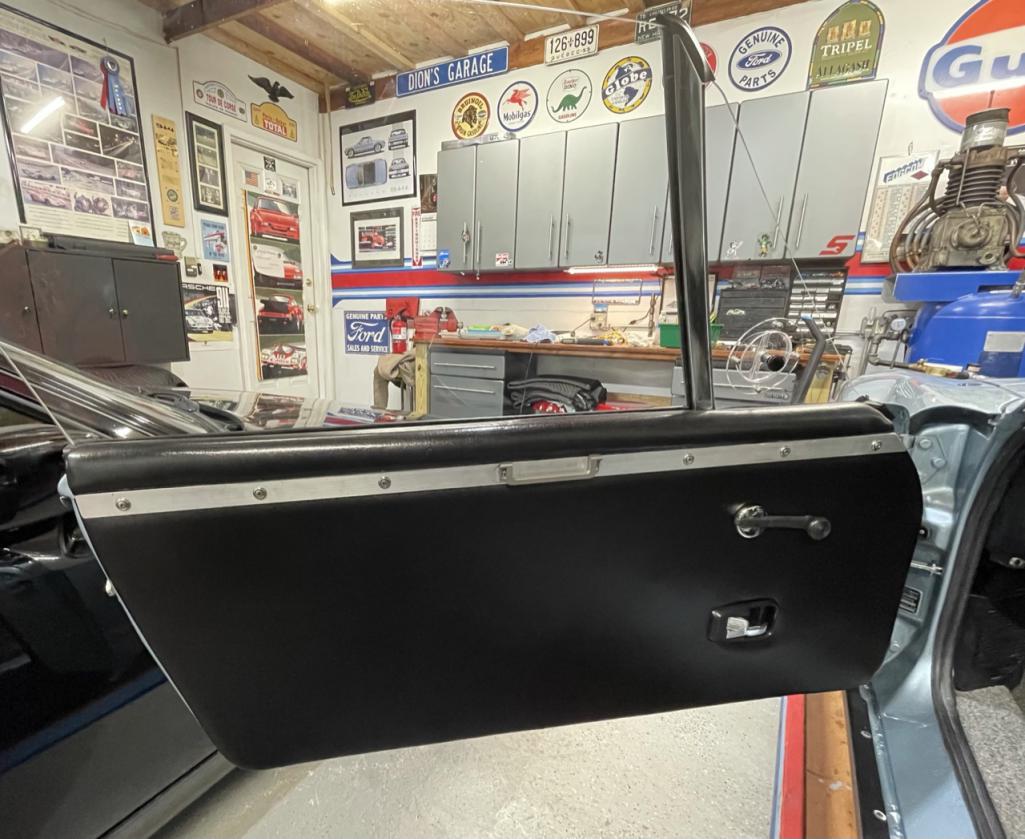
Posted by: Dion Nov 11 2021, 07:26 PM
Next up I need to modify my oil return tube a wee bit more. It’s making contact with the shift rod. Approximately 1-2mm needs to be persuaded to dimple in. Then I need to take out the rear window again. :-( I did not catch it at first but the bugger dropped off one of the spacers and settled…crooked! I also need to repair one of the defrost
grid lines . So just as well that it comes out to make it right.
Cheers
Posted by: bkrantz Nov 11 2021, 08:44 PM
I love your attention to detail. And it makes me feel better about my own OCD.
Posted by: 9146C Nov 11 2021, 09:37 PM
Wow!
Posted by: raynekat Nov 11 2021, 10:12 PM
Those vents in your quarter windows are awesome!
Very nice.
Posted by: TRS63 Nov 12 2021, 01:18 AM
Wow! The windows with vents are a great details and I really like how simple yet functional your doorcards are !
Thanks for sharing!
Antoine
Posted by: wonkipop Nov 12 2021, 01:39 AM
those air vents are pretty good.
i have to agree.
i want to rip those off to put in windows in a building.
do you mind?
thats like something the japanese would think of.
Posted by: autopro Nov 12 2021, 01:39 PM
Agreed, those vents are way cool and I love the way the interior is coming out.
Posted by: Dion Jan 3 2022, 10:02 PM
Happy New Year! Getting some more things done.
I took the rear window out again to fix the defrost grid. I purchased a grid repair kit. I’m never going to be a pin-striper. Even with masking tape it was challenging with the mixture. The brush supplied could have been thinner and higher quality. It got the job done though.With an ohmmeter I checked for continuity. It’s functioning now.
Attached thumbnail(s)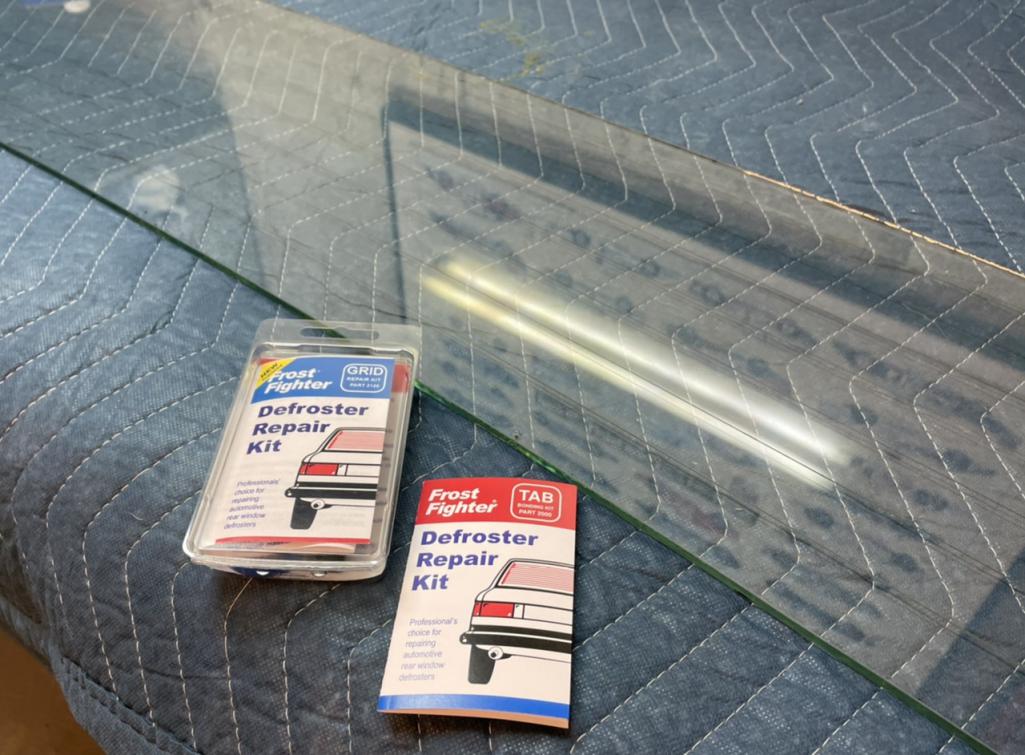
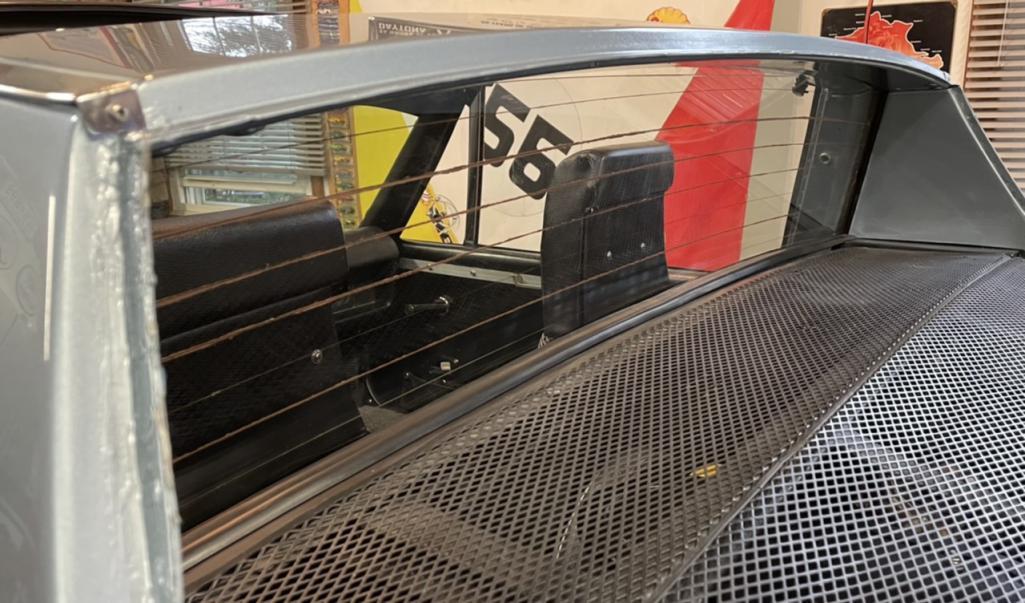
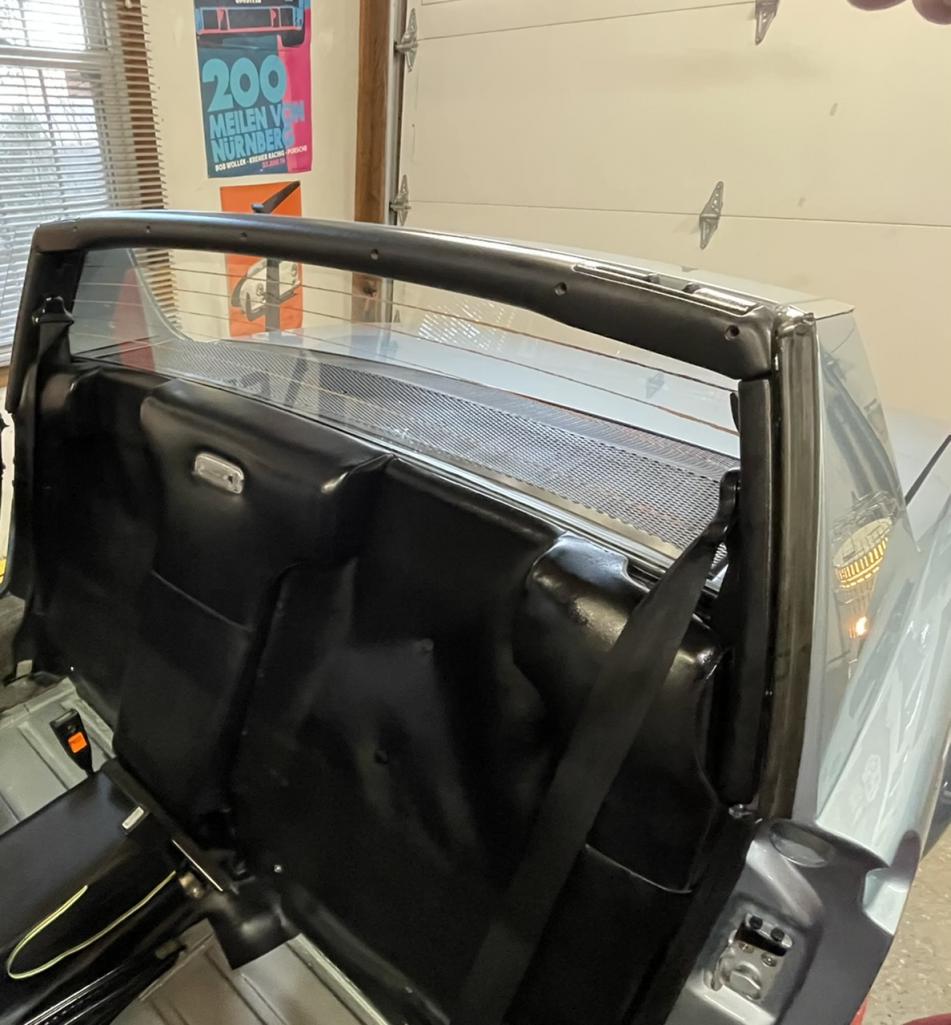
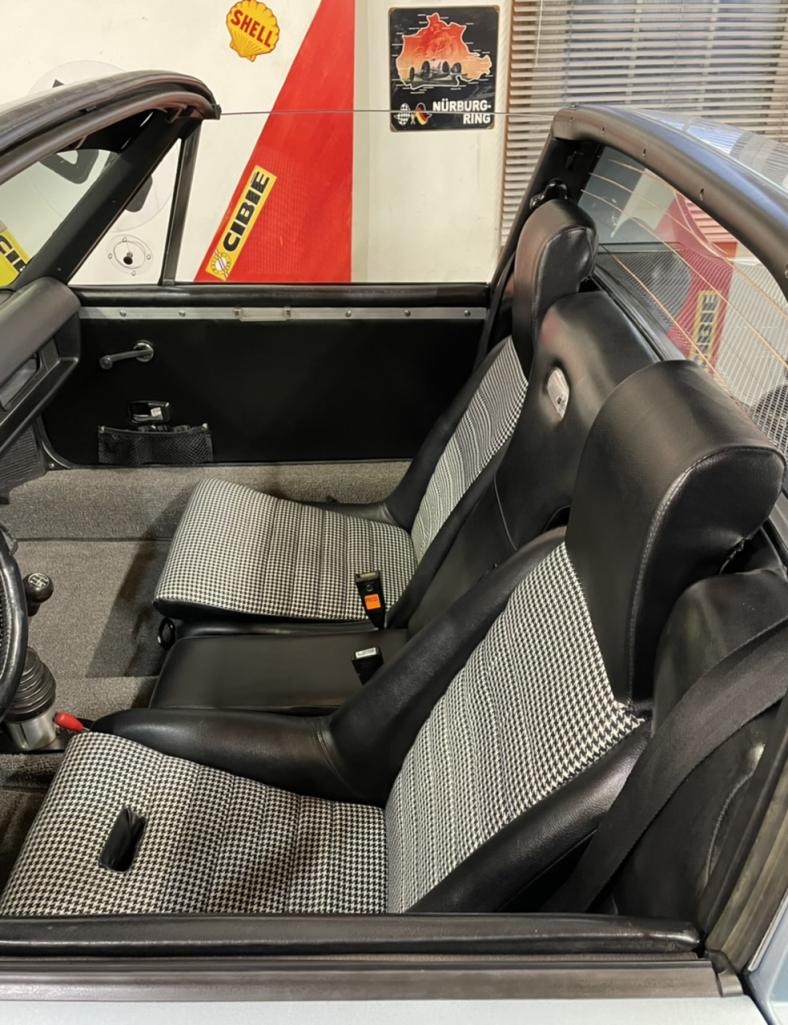
Posted by: Dion Jan 3 2022, 10:17 PM
Had to re-visit my scavenger line to tank. I could not manage to make Ben’s steel line
stay in proper orientation when I tightened all the fittings. My Rich Johnson mount may be sitting a mm or 2 lower than it should. Real estate on this firewall at a premium!
I purchased a Patrick hard line and had to tweak that as
well. It was the wrong angle for this engine mount combo. I had the hydraulic shop change fittings and make me a soft line. Also made a support rod out of a curtain rod bracket! The original sixes are NLA.
Attached thumbnail(s)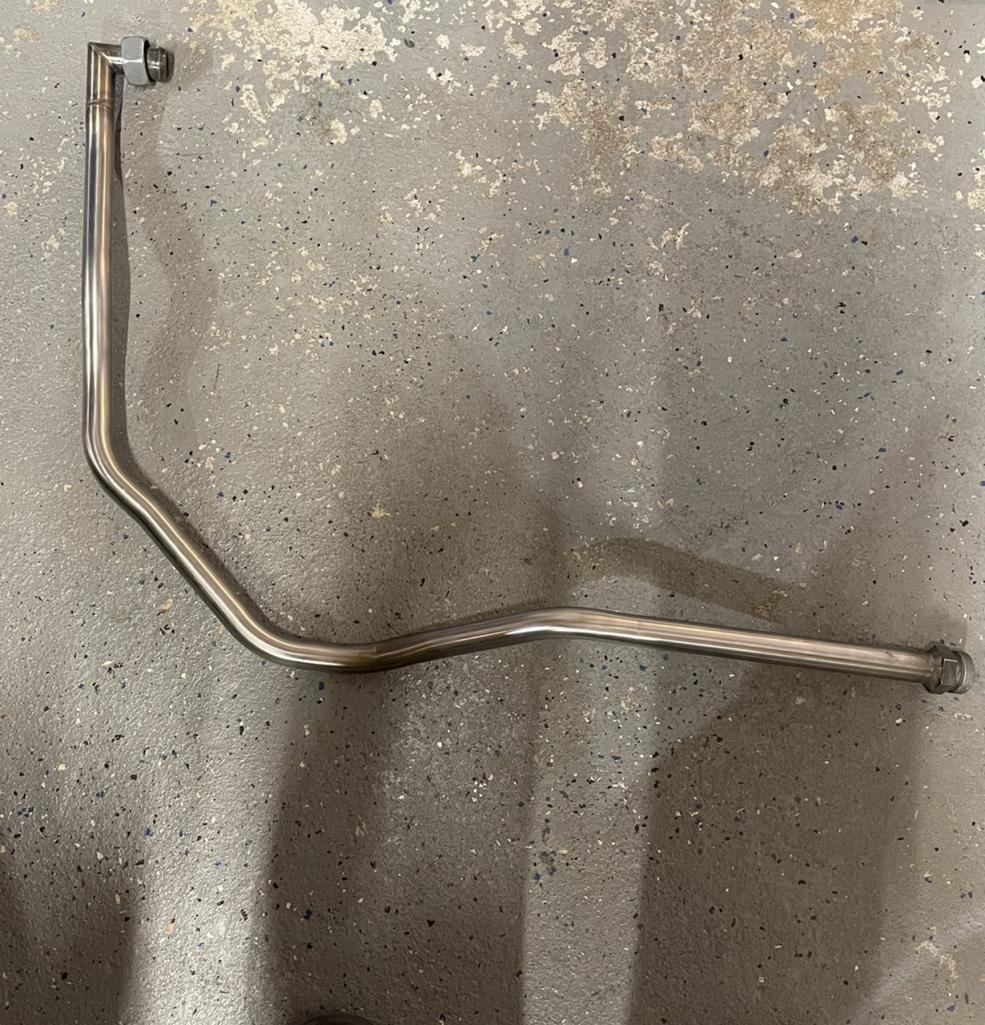
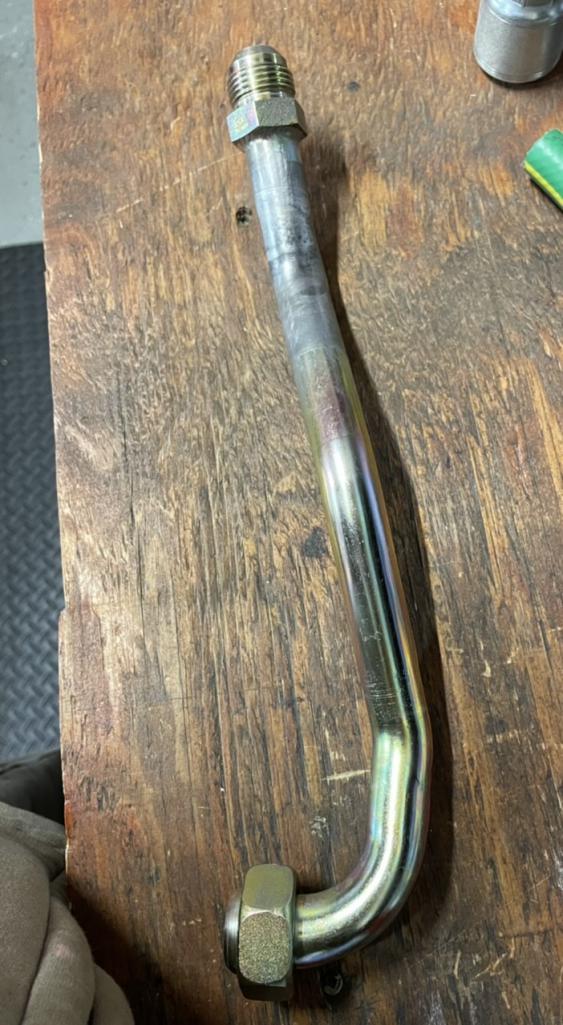
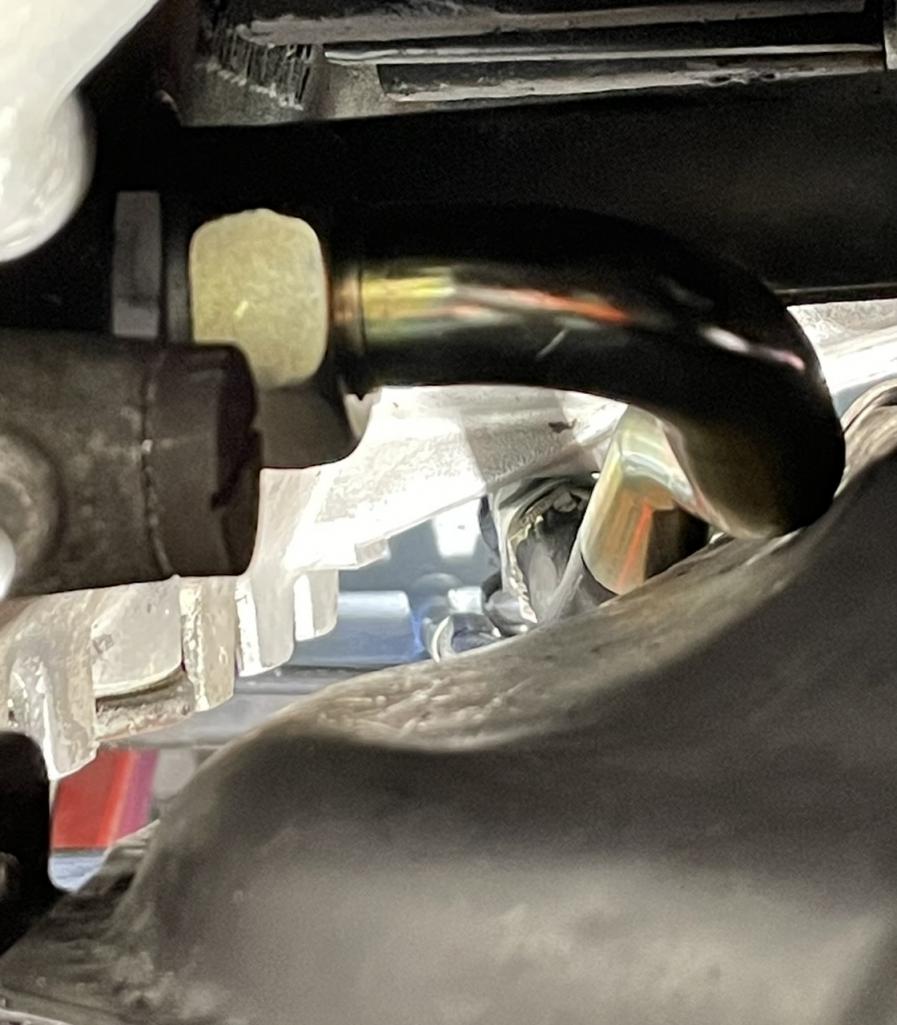
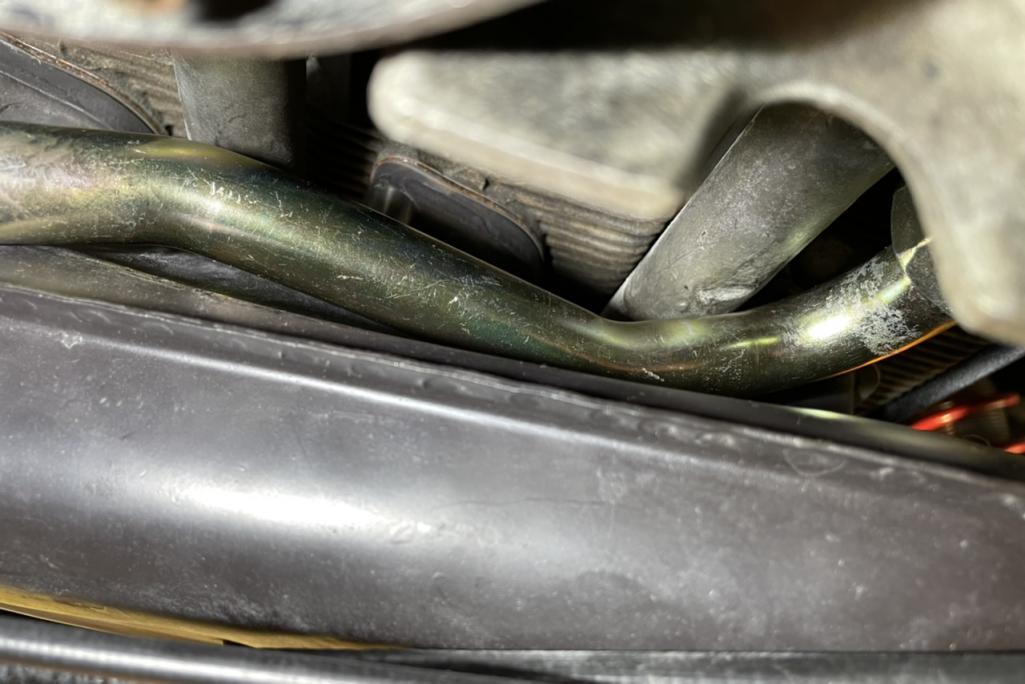
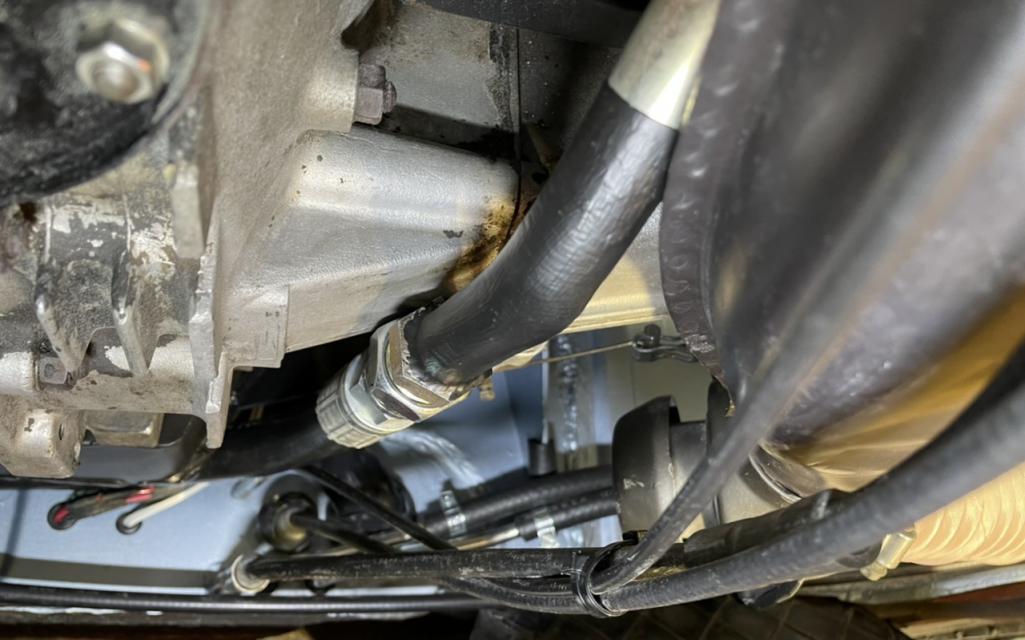
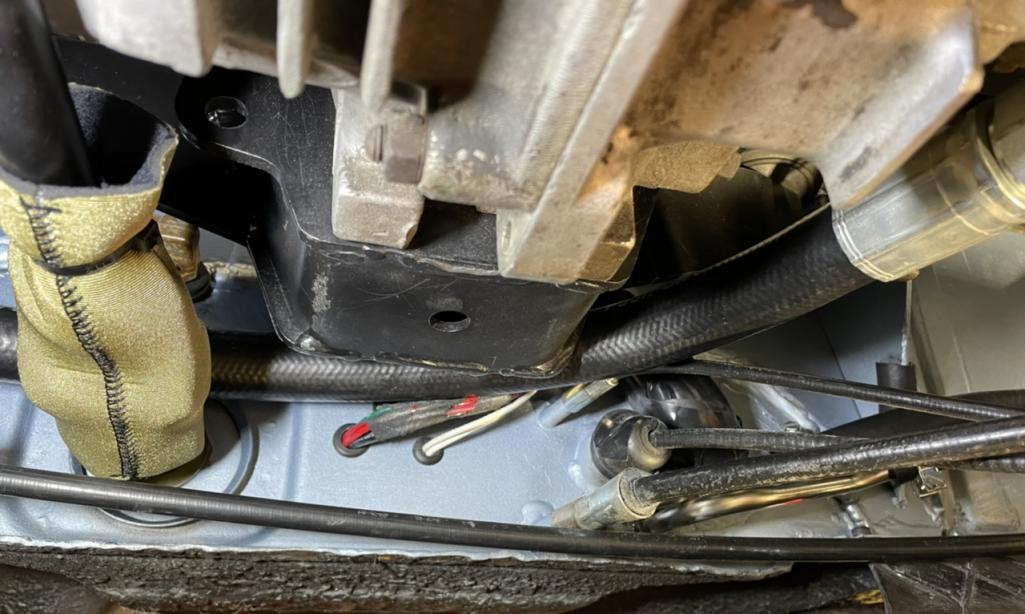
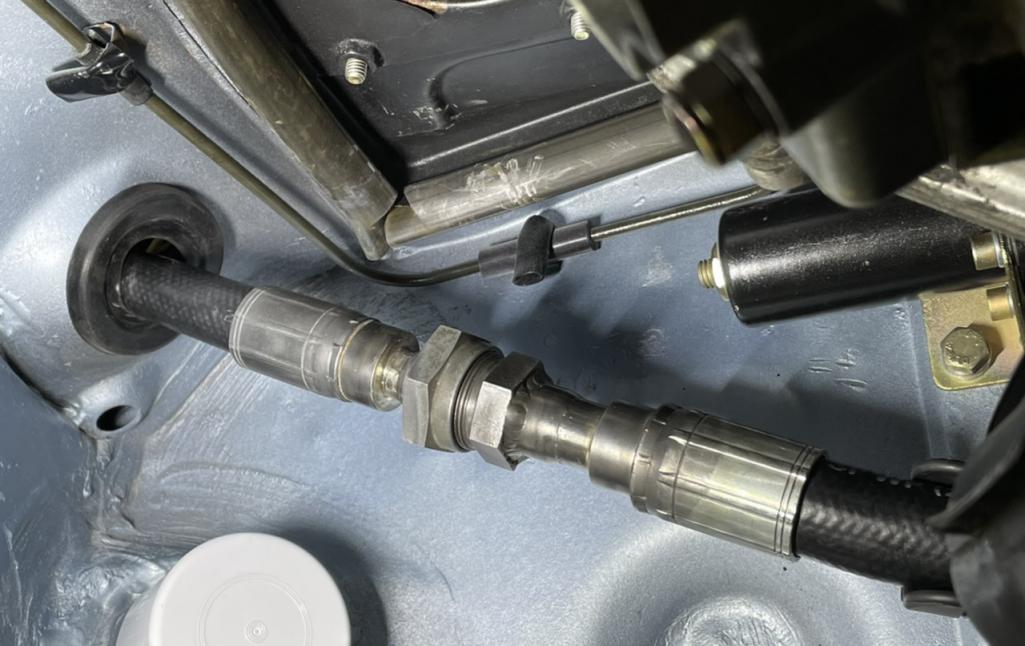
Posted by: Dion Jan 3 2022, 10:19 PM
Bracket/support
Attached thumbnail(s)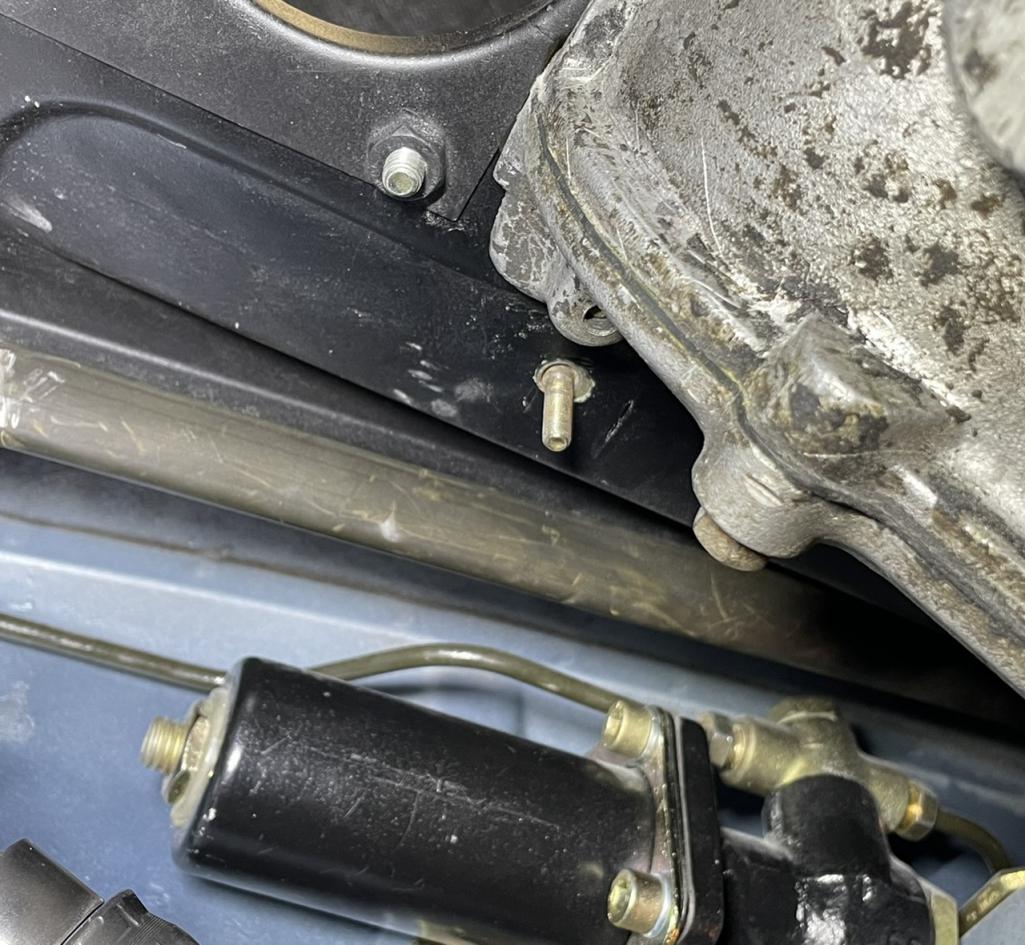
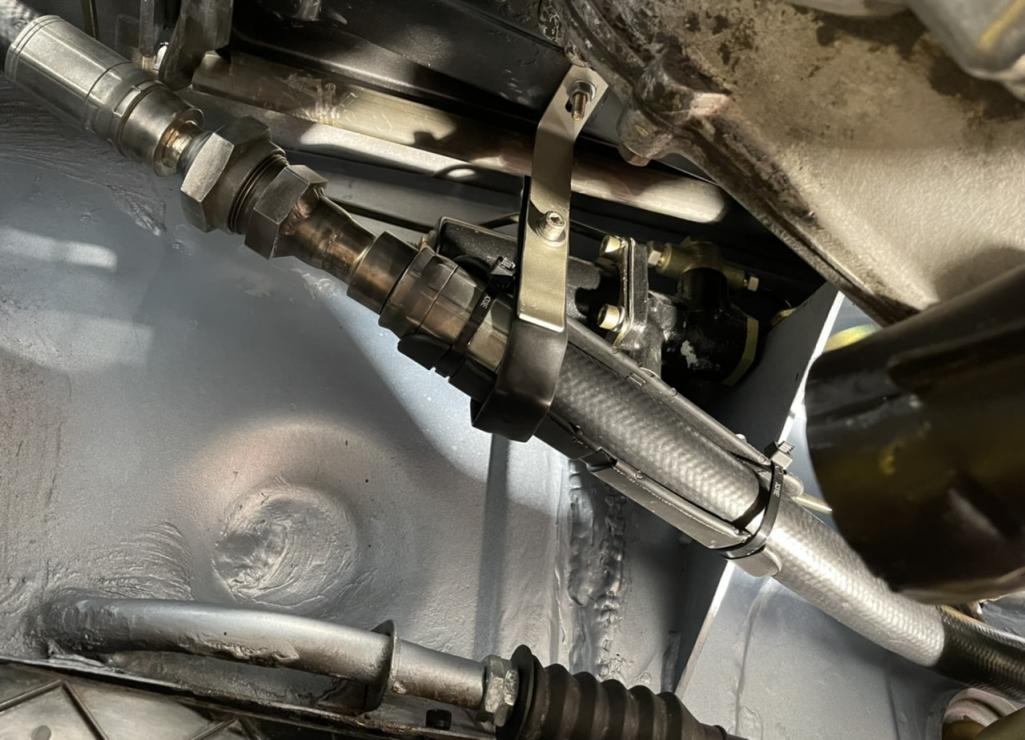
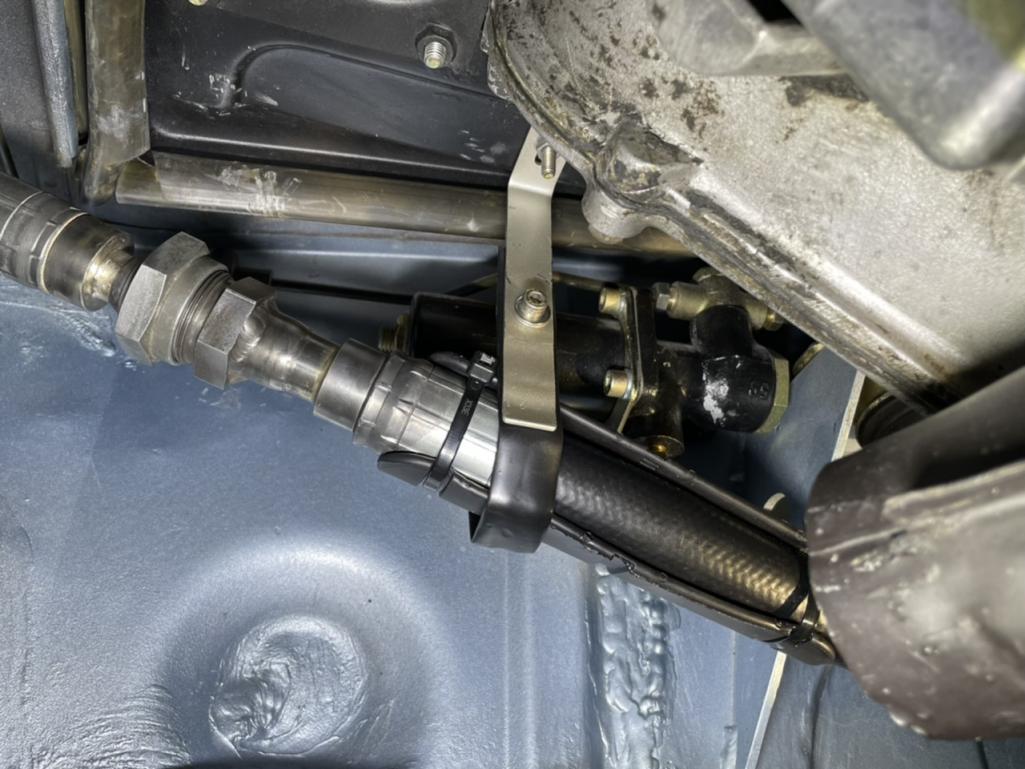
Posted by: Dion Jan 3 2022, 10:21 PM
Flapper box on, it’s getting tighter in engine room!
Attached thumbnail(s)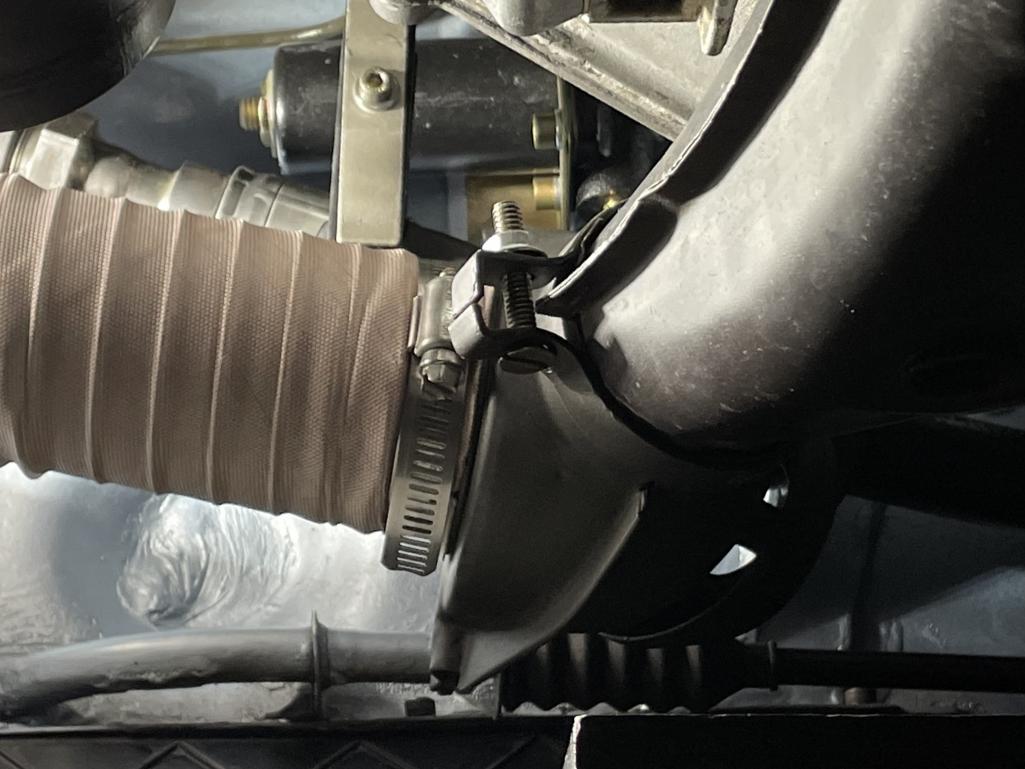
Posted by: Dion Jan 3 2022, 10:22 PM
New hardware for the gearbox/rod selector console.
Attached thumbnail(s)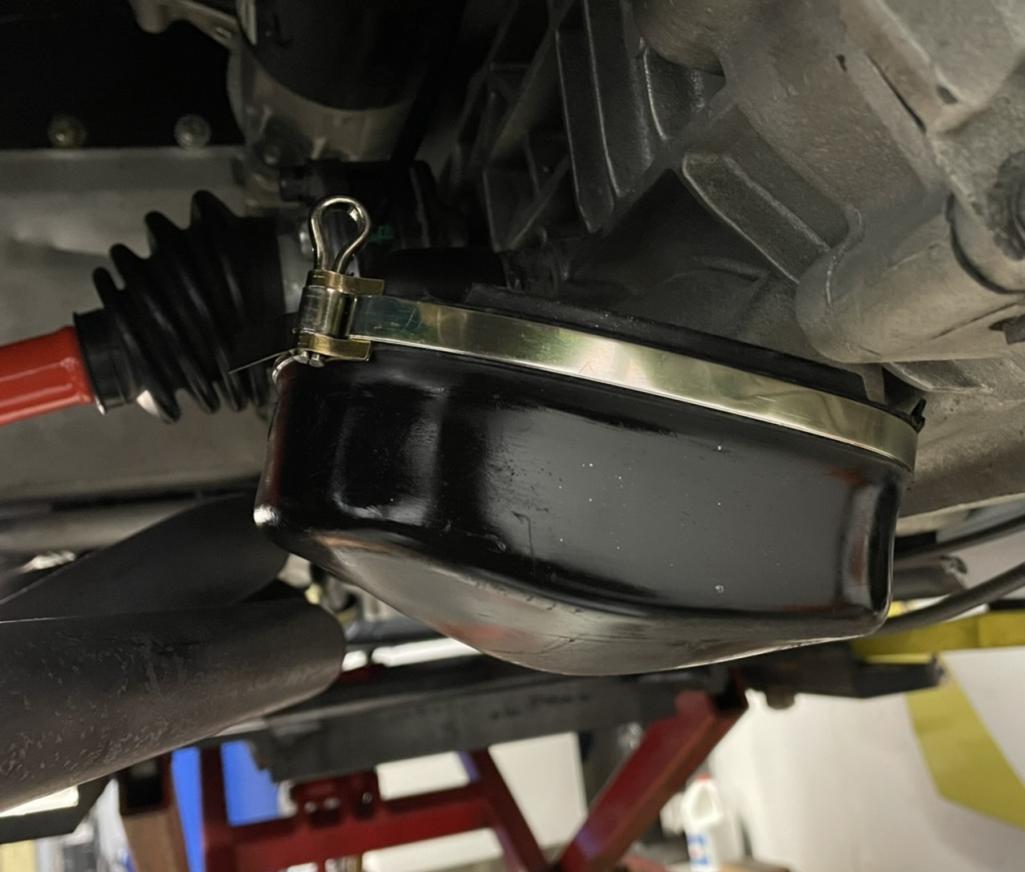
Posted by: Dion Jan 3 2022, 10:27 PM
Slowly hooking up the electrics. Found I had no brake lites. Checked the grounds, turns out the contacts at the pedal cluster were not engaging. Fixed that.
Goal in the coming weeks is sorting the ignition system. I’m getting close.
Attached thumbnail(s)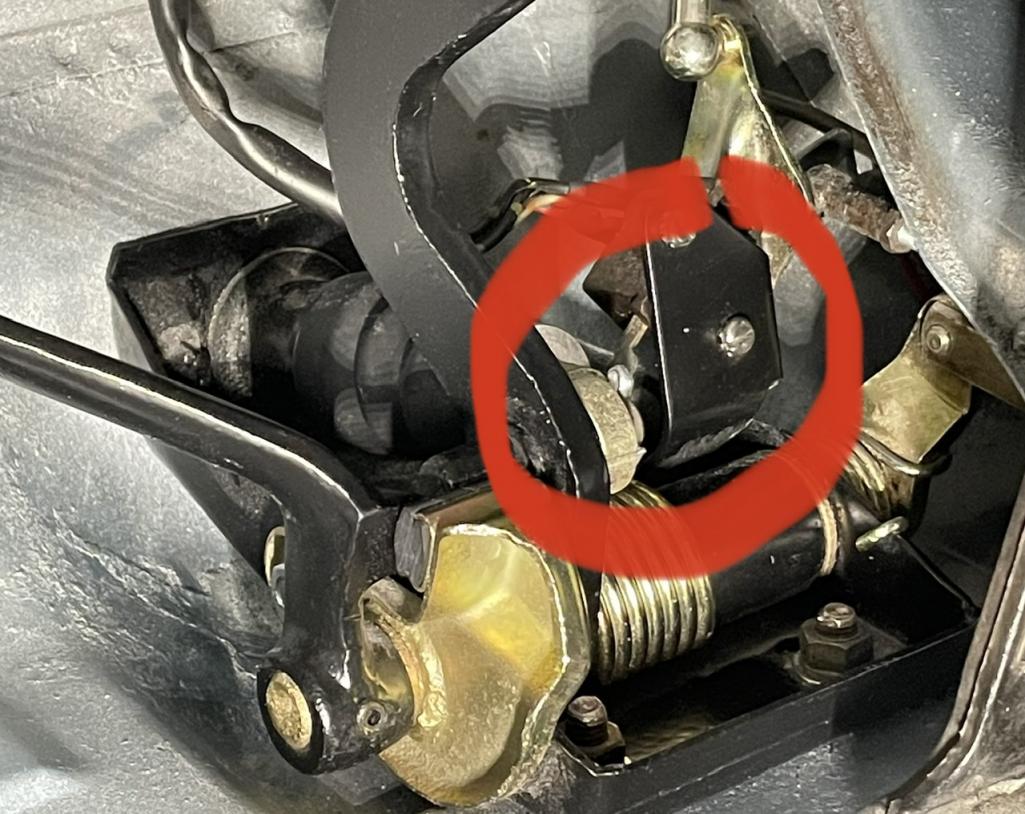
Posted by: barnfind9141972 Jan 3 2022, 11:27 PM
Awesome work, the car is coming together brilliantly bit of a silly question, are there any issues with installing your Rennshifter above the carpet? I’d like to do the same as I think it would look awesome but don’t want to mess anything up.
Posted by: TRS63 Jan 4 2022, 02:50 AM
A lot of work done here, as we all know how much time these "details" are taking!
Thanks for sharing, looks great as usual,
Antoine
Posted by: Dion Jan 4 2022, 05:28 AM
@http://www.914world.com/bbs2/index.php?showuser=24976 Thanks for the kind words. No, no issues mounting on top of carpet. I trimmed just enough carpet away to access the linkage beneath for adjustments. BUT if you change your set up you’ll prolly need a new tunnel carpet piece.
Cheers
Posted by: Dion Jan 4 2022, 05:32 AM
Thank you Antione. How right you are with regards to time consuming. The little fiddly bits can eat a lot up!
Cheers mate.
Posted by: saigon71 Jan 4 2022, 06:51 AM
Beautiful work as usual Dion.
Posted by: ClayPerrine Jan 4 2022, 07:34 AM
This may help with the ignition wiring.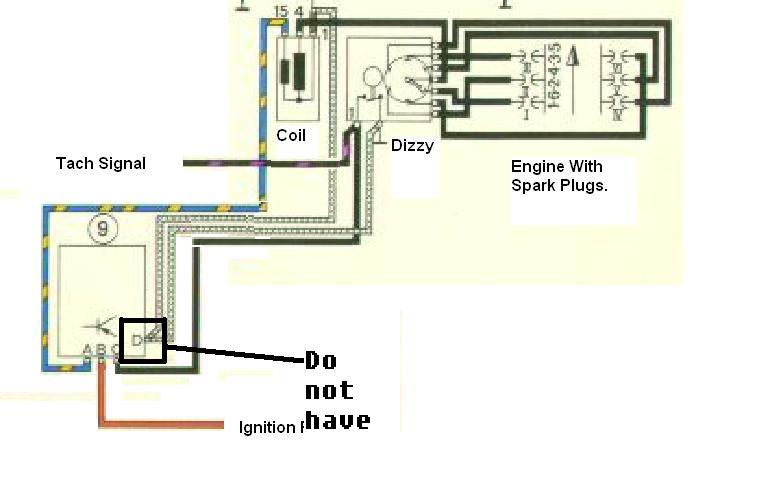
I put this diagram together years ago, and lost the original. I found this searching the board. The drawing was modified by the person reposting it.
Here's the original thread on it.
http://www.914world.com/bbs2/index.php?showtopic=58372&st=0&p=749463&
Hope that helps!
Clay
Posted by: tygaboy Jan 4 2022, 10:01 AM
Getting close.... Can't wait for video of the maiden voyage!
Posted by: Luke M Jan 4 2022, 12:36 PM
Had to re-visit my scavenger line to tank. I could not manage to make Ben’s steel line
stay in proper orientation when I tightened all the fittings. My Rich Johnson mount may be sitting a mm or 2 lower than it should. Real estate on this firewall at a premium!
I purchased a Patrick hard line and had to tweak that as
well. It was the wrong angle for this engine mount combo. I had the hydraulic shop change fittings and make me a soft line. Also made a support rod out of a curtain rod bracket! The original sixes are NLA.
My brother's 6 conv he has the same engine mount and Ben's lines. I had an issue fitting the steel line as well. No heat exchangers on his car but the line wouldn't go up enough at the front. It hit the engine mount. I spoke with Ben and I bent the line to fit. Then ran into the issue with the rubber line at the tank. 1st the rubber hose would kink when trying to fit it to the steel line. I figured out that the steel line is too long. Then the steel line fitting is a 30 mm and rubber hose is 26 mm. I went back to Ben and we where working on a solution. I just put that on hold for now as I needed to get the car out of my garage. I went and dug out my org 6 steel line and installed that for now. All works well now. Ben was good to deal with on this and we figured it out. I'll address that in the spring as we need to run the front oil cooler lines anyways.. If I were to do another 6 conv I'm going to use the factory 6 style mount the Maddog sells. Seams like a lot of my problems where at the mount on this one.
Posted by: Dion Jan 4 2022, 04:50 PM
@http://www.914world.com/bbs2/index.php?showuser=1143 Clay thanks for that. You sent me one similar earlier. I’m going to read that link very well. Appreciate it! I’m pretty sure I have the basic layout correct. Just need to verify and double check the Tach feed.
Thanks again.
Posted by: Dion Jan 4 2022, 05:03 PM
@http://www.914world.com/bbs2/index.php?showuser=6113 M Luke thanks for verifying my sanity. It was a back and forth game with my hydraulic shop. You’ve exactly described what I was experiencing. Yes the soft line on tank would kink way too much and I was hitting the motor mount. After I tweaked it to clear the shift rod , I made it worse. The Patrick hard line is a tad tight near the OEM exchanger but it works. That one I had to tweak a few degree to steer it away from mount. Then was able to snake the soft line around. Yes the metric fittings baffled the hydraulic shop a bit.  They knew AN but they never dealt with 30 and 26 mm
fittings. They were cool tho regarding the furrin’ car. They are used to CAT, John Deere, and Volvo machines. Glad you sorted yours out and Ben came through. I didn’t want to bug Ben. He was moving at the time.
Posted by: Dion Feb 17 2022, 06:29 PM
Ok, so I added 8 quarts to the oil system (tank).
Removed the plugs. Cranked a few times. We have pressure! Hit 20 on the gauge and the lite went out. Will try and upload a vid. (Not good with vid).
https://youtu.be/LQYnAgbCLkY
Posted by: Dion Feb 17 2022, 06:34 PM
View of fan doing it’s thing, while cranking.
Next step is getting the fuel going.
Work on that in the coming days.
https://youtube.com/shorts/2cevj_Z0Rmw?feature=share
Posted by: tygaboy Feb 17 2022, 06:39 PM
@http://www.914world.com/bbs2/index.php?showuser=2766 - Looks like your 2nd video is set to "Private".
Don't be such a tease! We NEED to see this NOW!!!!
Posted by: Dion Feb 17 2022, 06:45 PM
Hahah @http://www.914world.com/bbs2/index.php?showuser=19241 I think I fixed that. Told you I’m not good with this vid stuff!
Posted by: tygaboy Feb 17 2022, 07:09 PM
Hahah @http://www.914world.com/bbs2/index.php?showuser=19241 I think I fixed that. Told you I’m not good with this vid stuff!
Well, you know I'm a big "fan" of you and your build!
So close! When do you plan to fire it?
Posted by: Dion Feb 17 2022, 07:24 PM
@http://www.914world.com/bbs2/index.php?showuser=19241 , hopefully fire up next week. Lot of good info from the peeps here on going about this procedure. Engine has been waiting a wee bit!
Thanks my friend.
Posted by: nivekdodge Feb 17 2022, 07:53 PM
Your going to need a few more license plates and possibly another roll of duct tape...
*subscribed*
Hahahah. Yeah pretty much!
What has the collective done with regards to the door jamb
sticker? Is it salvageable? Do you even bother.
Being it's an "Antique" here in PA, the car doesn't get inspected.
Just wondering what you have done.
Thanks
very old post but read your comment on the jamb sticker
there's an app that let's you take a picture and send it.
Posted by: Dion Feb 17 2022, 08:48 PM
@http://www.914world.com/bbs2/index.php?showuser=25860 thanks. I purchased a replacement from CarBone.
Posted by: porschetub Feb 17 2022, 09:11 PM
@http://www.914world.com/bbs2/index.php?showuser=25860 thanks. I purchased a replacement from CarBone.
Looks like you are very close buddy,always a nervous time on first start but my experience was great considering I had zero engine history on my motor.
Good luck .
Posted by: rgalla9146 Feb 18 2022, 08:06 AM
Not only did the warning light go out but you had rising oil pressure in a very short
time.....nice results !
Keep up the good work !
Beautiful
Posted by: Root_Werks Feb 18 2022, 12:50 PM
So close!
Posted by: rgolia Feb 18 2022, 03:29 PM
Go Dion go.....are we invited for the firing up? If so I will bring the beverages.
Posted by: Dion Feb 18 2022, 05:09 PM
Go Dion go.....are we invited for the firing up? If so I will bring the beverages.
@http://www.914world.com/bbs2/index.php?showuser=11329 Hey Ralph, more like “bring fire extinguishers”
. I’m gonna be nervous as hell.I think that would be a great idea though, if I only knew when I’d be playing with fuel.
Making good on my promise to refinish the wood floor in the kitchen. So…….
Put a bottle of the Vino on the side for me! Cheers!
Posted by: Dion Feb 24 2022, 04:30 PM
First I want to thank you fellas that helped me out with the start up procedure regarding waking this engine up after its dormancy.
Took your suggestions and after about 7 cranks the candle lit.
I have 2 small weepy areas on the bottom valve covers that I’ll check on and re-torque.
Seems to idle well. When the weather clears here in PA, I’ll see about getting it on the road under load. Need an alignment as well. More details to add yet. Trim, muffler, etc.
Happy we got this far. Thanks again for the pointers guys. @http://www.914world.com/bbs2/index.php?showuser=14943 , @http://www.914world.com/bbs2/index.php?showuser=5176 ,
@http://www.914world.com/bbs2/index.php?showuser=1143 , @http://www.914world.com/bbs2/index.php?showuser=2026 Werks, there will be plenty more peeps I’ll be thanking. You don’t know how much it’s all appreciated.
https://youtu.be/9DFoFdHPjHs
https://youtu.be/9qOlhma-5Wk
https://youtu.be/XrprV-TmDZw
Posted by: tygaboy Feb 24 2022, 06:22 PM
AWESOOOOOOOOOOOOME!!!
Big congrats on THE major milestone, Dion!
Also, I vote you run it just like that: no muffler, ever!
Seriously, GREAT job, long time coming, well deserved result. Now, drive the hell out of it.
Posted by: ndfrigi Feb 24 2022, 06:48 PM
Congrats Dion!
Posted by: 9146C Feb 24 2022, 07:11 PM
It's been a pleasure to watch this build progress...congrats on getting her running...sounds great!
Posted by: BeatNavy Feb 24 2022, 07:45 PM
Awesome, Dion! Congratulations to you
Look forward to seeing you drive it at the next gathering
Posted by: Cairo94507 Feb 25 2022, 09:00 AM
So very cool when they start up again. Congratulations Dion.
Posted by: roblav1 Feb 25 2022, 02:46 PM
Congrats! Always a very nerve wracking and exciting time!
Posted by: TRS63 Feb 25 2022, 03:18 PM
What a great step, congrats!!
Antoine
Posted by: Maltese Falcon Feb 25 2022, 04:52 PM
Well done Dion...just something about a yellow fan shroud !
Posted by: pete-stevers Feb 26 2022, 01:53 AM
Fogs & horn:
Where did you get that horn from?
What type of mods did you need to do to mount it??
Posted by: Dion Feb 26 2022, 07:26 AM
Fogs & horn:
Where did you get that horn from?
What type of mods did you need to do to mount it??@http://www.914world.com/bbs2/index.php?showuser=2914 I made a small bracket that went into the original horn mount. I purchased that particular horn from a fellow in Sweden. The GT cars ran them. I wanted a piece of the action
it’s loud.https://pbase.com/9146gt/factory_oem_9146gt_parts_bosch_fanfaren_horns
Posted by: Olympic 914 Feb 26 2022, 08:25 AM
Are you bringing it to Carlisle swap this year??
Looks like it will be ready.
Posted by: Dion Feb 26 2022, 12:08 PM
Just want to say thanks for the compliments. Michael your cars an inspiration. Thank you: @http://www.914world.com/bbs2/index.php?showuser=13474 , @http://www.914world.com/bbs2/index.php?showuser=23460 , @http://www.914world.com/bbs2/index.php?showuser=9712 , @http://www.914world.com/bbs2/index.php?showuser=24690 ,@Maltese Falcon.
Marty that #40 is looking so amazing. I want to see that in person one day!
Posted by: Dion Feb 26 2022, 12:09 PM
Are you bringing it to Carlisle swap this year??
Looks like it will be ready.
@Olympic 914 Tom that is very much my intention this spring.
Posted by: Dion Feb 26 2022, 12:17 PM
I want to thank you guys for getting me through this endeavor and all the help with obtaining parts. Wealth of knowledge here. Very much appreciated. Still have a bit more to add before it’s wrapped up. @http://www.914world.com/bbs2/index.php?showuser=1262 , @http://www.914world.com/bbs2/index.php?showuser=10825 @http://www.914world.com/bbs2/index.php?showuser=19241 @http://www.914world.com/bbs2/index.php?showuser=5176 , @http://www.914world.com/bbs2/index.php?showuser=374 Von-Laws, @http://www.914world.com/bbs2/index.php?showuser=20845 , @http://www.914world.com/bbs2/index.php?showuser=9892 , @http://www.914world.com/bbs2/index.php?showuser=1342 Shea, @http://www.914world.com/bbs2/index.php?showuser=18995
More to come.
Posted by: Superhawk996 Feb 26 2022, 12:26 PM
More to come.
Keep the pic's rolling. . . . it's been a few pages
Want to see video when this rolls!
Posted by: mb911 Feb 26 2022, 04:01 PM
I am so happy your wrapping this up. Very cool.
Posted by: bbrock Mar 1 2022, 06:22 PM
Well, it isn't the sweet clackety-clack of a /4 now is it? But I guess it will do
Seriously though - how AWESOME!!!!! What a truly huge milestone. You are the MAN!
Posted by: rgalla9146 Mar 1 2022, 07:07 PM
Fantastic ! Persistance pays.
Great work Dion.
Beautiful job. Great to see.
Posted by: 914dave Mar 10 2022, 08:30 AM
Rock On!!!! Do you remember how do drive a stick? It's been a while
Posted by: Shivers Mar 10 2022, 09:27 AM
Fogs & horn:

Hahahahaha
I missed these the first time. I've got the compact version, where the trumpet is circular. And mine are LOUD. Hahahaha, I can't imagine how loud yours will be. And the fact that you got those to fit. They'll know you are there. Beautiful car dude.
Posted by: Dion Apr 26 2022, 11:08 AM
Took my first “official” run in the six. Picked it up from my mechanics shop yesterday evening. He went and tuned the carbs, set timing, cured a uncooperative valve cover leak. Warped cover. Plus a 4 wheel alignment.
Wow can’t be more pleased. Love the low end torque. Brakes are awesome (Thanks @http://www.914world.com/bbs2/index.php?showuser=1110 ) Looking forward to taking her on the long run out to the Carlisle Swap meet.
https://youtu.be/nFRTbrAZldg
Ben @http://www.914world.com/bbs2/index.php?showuser=9892 muffler does the job!
Cheers
Posted by: Root_Werks Apr 26 2022, 11:19 AM
Love the video! Sounds perfect, good exhaust note.
Posted by: mepstein Apr 26 2022, 11:44 AM
Posted by: mb911 Apr 26 2022, 01:03 PM
Awesome.
Posted by: ndfrigi Apr 26 2022, 01:13 PM
amazing sound Dion! congratulations!
Posted by: TRS63 Apr 26 2022, 02:42 PM
How cool, congrats!!
Antoine
Posted by: 9146C Apr 27 2022, 04:41 PM
Congratulations on the milestone!
She sounds great!
Posted by: tygaboy Apr 27 2022, 05:24 PM
There is absolutely nothing like the "first drive". That can only happen once. Awesomely great that yours went so well. BIG congrats. You earned the right to be very proud, my friend. So cool...
Posted by: rgalla9146 Apr 28 2022, 06:49 PM
YES !!!!!
I'm so happy for you.
Sounds great a runs beautifully !
What a great accomplishment.
Beautiful. Enjoy it.
Posted by: autopro Apr 29 2022, 09:00 AM
Wow Dion, congratulations. I left off right before you got the engine running, I am so happy to see that not only does it run but you are driving your car now. What a great accomplishment. Best to you.
Posted by: mepstein Apr 29 2022, 10:19 AM
Well done Dion...just something about a yellow fan shroud !
That shroud is sort of special.
Posted by: saigon71 Apr 29 2022, 01:36 PM
Your car sounds as great as it looks - congrats!
I look forward to seeing it tomorrow at Carlisle.
Posted by: Dion Apr 29 2022, 06:33 PM
Thanks for the kind words and compliments fellas, I truly appreciate it.
Spent the day today sorting a fuel feed leak. I believe it is now ok. Also was getting a few backfires. Might be too rich. Also temps were cold past days. Today being a bit warmer it calmed down. It’ll be a long test tomorrow heading to Carlisle.
It’s first Turnpike cruise in 7 years. Spiffed er up a little today as well. Mark & Bob see ya tomorrow all things being equal.
Attached thumbnail(s)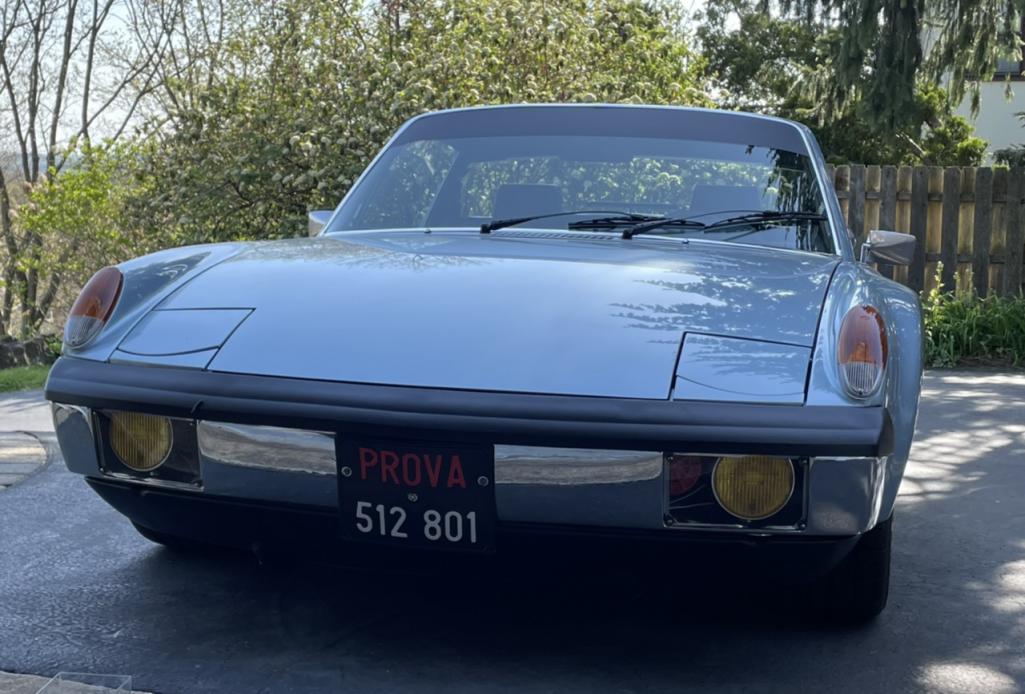
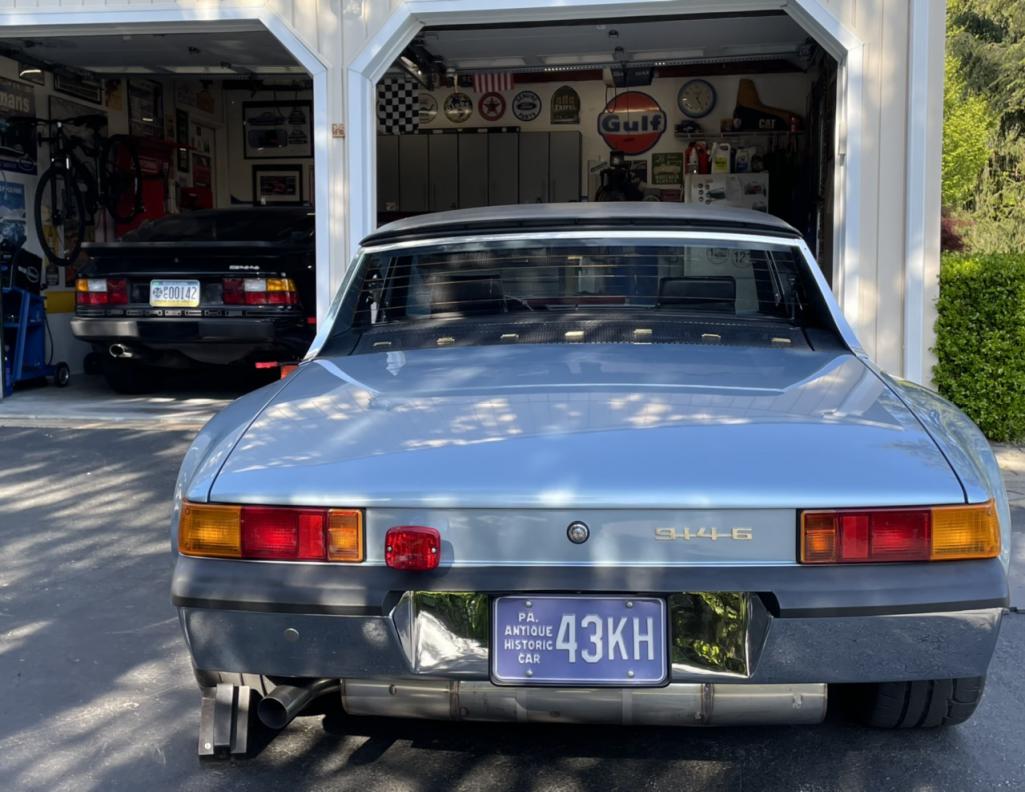
Posted by: Cairo94507 Apr 30 2022, 06:58 AM
Dion- your car is looking terrific; are you planning to run a rear valance?
Posted by: mepstein Apr 30 2022, 01:35 PM
Saw it in person today. Pictures don’t do it justice.
Posted by: Dion May 14 2022, 12:17 PM
Had to replace the previous fuel gauge with a new one. Found one that works very closely per VDO with the 914 sender. I’m not needing exact parameters. I’ll rely on the yellow warning lamp for when we hit the 1
gallon area. The gauge part # was VDO-301-020 if interested.
I never saw a fuel pointer go down as you put more fuel in maybe was reading the amount of cash in my wallet. Anyway it stopped working altogether after that so purchased the new one.
Attached thumbnail(s)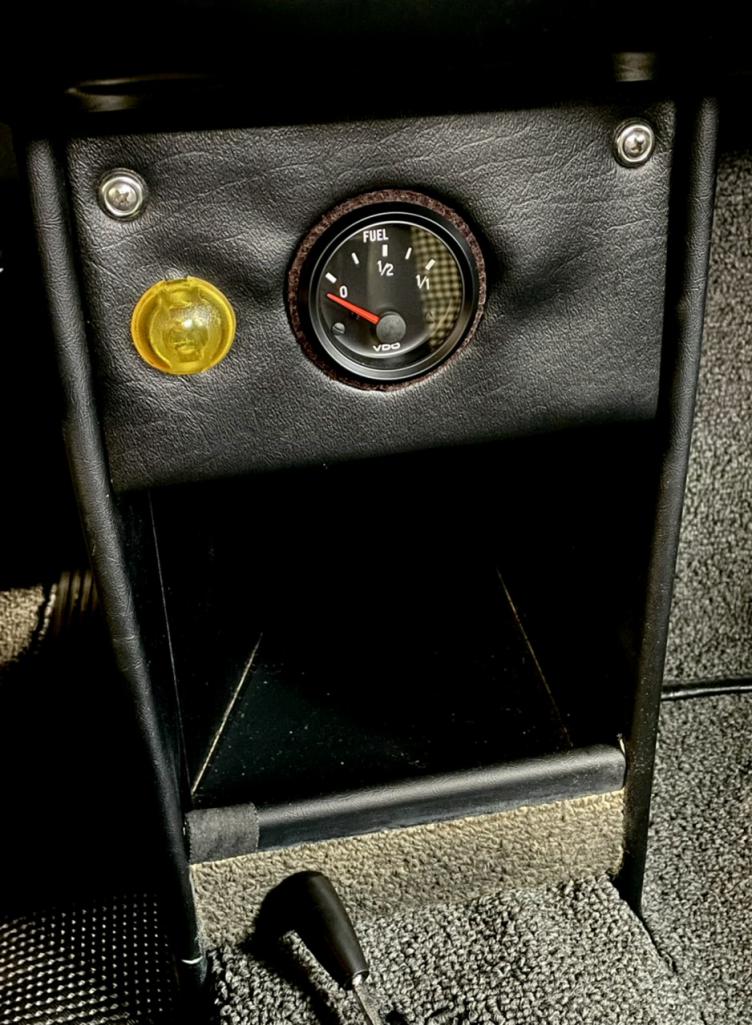
Posted by: Dion May 14 2022, 12:23 PM
In addition to the bumper mounted trumpet ( say that 3 times fast), horn. I believe you can’t have too many horns in a small car. So… I added some Italian trumpets under the bonnet. Loud as hell. Plenty of decibels when the lid is shut.
Attached thumbnail(s)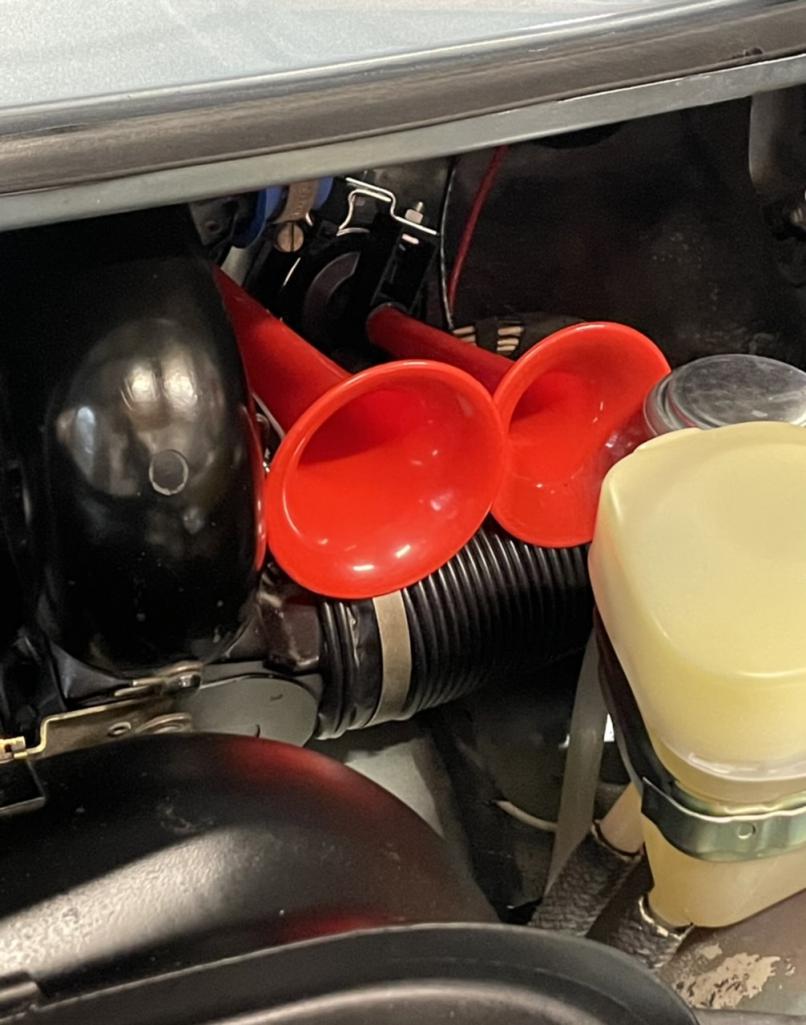
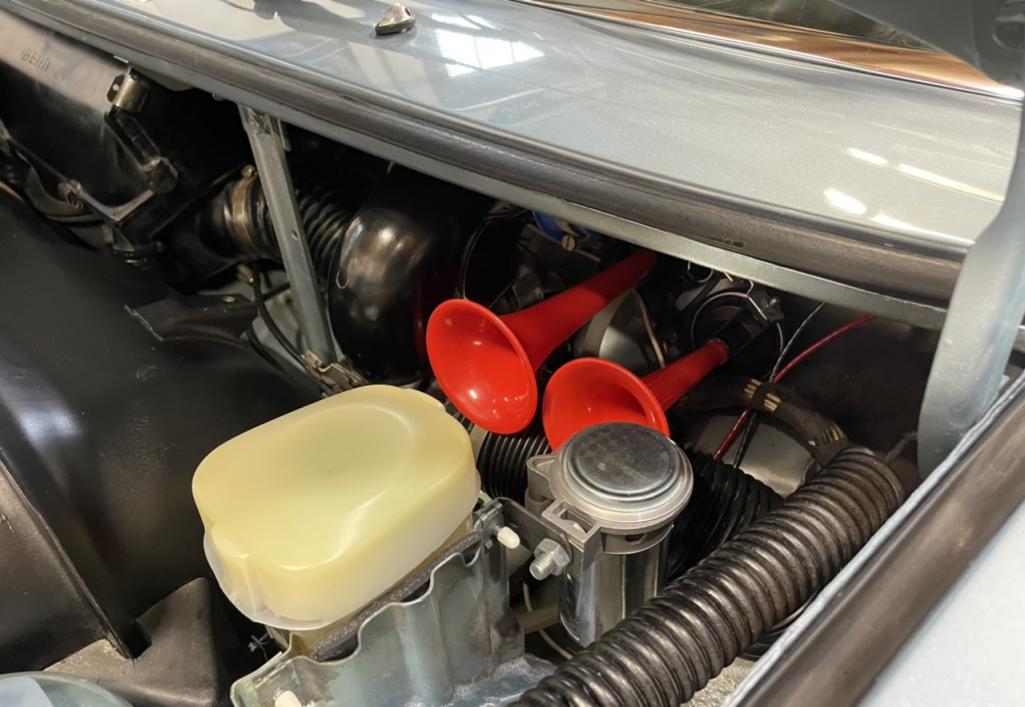
Posted by: autopro May 15 2022, 08:42 PM
In addition to the bumper mounted trumpet ( say that 3 times fast), horn. I believe you can’t have too many horns in a small car. So… I added some Italian trumpets under the bonnet. Loud as hell. Plenty of decibels when the lid is shut.
Bet this will make people get out of the way
Posted by: Dion Jun 27 2022, 07:15 AM
Uggh, might be lagging and limping going to the NE gathering. The old cast iron distributor is complaining. It’s out of advance. It’s tired.
Thinking about that 123 Distributor.
Sent them an email to see which one is suitable for my set up.
Also have cylinder #4 showing signs of poor performance. Leak down showed all cylinders healthy at 7-10% except #4 was showing near 60%!
Stuck or broken ring?, Valve too tight or stuck in guide? Oh well, find out over coming week. Have to open up that valve cover and see.
I guess the honeymoon is over
It was running so well. Maybe i expected too much from the motor, it was sleeping for nearly 7 years.
Posted by: nditiz1 Jun 27 2022, 08:11 AM
Sorry to hear about the bad news Dion. Let me know what you find on the 123 end, I was thinking about making the switch on my 2.4. Praying that the leak down being low is something simple and not a rebuild.
Posted by: tygaboy Jun 27 2022, 08:37 AM
Ugh. These cars... I'm working through teething problems with my E9 and have had to be towed home on two separate occasions in the month I've had it back on the road. What immediately pops into my head is "Screw this, I'll sell it." Hey, with my 914, I already have a car that always needs something!
But more than one person has reminded me by saying something to the effect of "these are the things we have to get through to get our wonderful (old!) cars dialed in..."
I get how deflating it can be, believe me. All I can offer is that once it's resolved, these sorts of things become part of the rich, historical record you have with your wonderful creation.
Hang in there, my friend. You will persevere!
Posted by: Dion Jun 27 2022, 08:47 AM
@http://www.914world.com/bbs2/index.php?showuser=18763 , @http://www.914world.com/bbs2/index.php?showuser=19241 thanks guys appreciate the encouragement. Sorry about the E9 Chris. Yes you are familiar all too well with re configuring and starting over. Perseverance for sure. Yeah will get to bottom of it whatever it will be.
Nick I will let you know what they say.
Cheers, fellas!
Posted by: rgolia Jun 27 2022, 10:48 AM
Dion - that sweet 914 better be at the NE Gathering. You have two weeks. Lots of time. let me know if you need someone to hold a flash light....I will send Tony.
Posted by: Dion Jun 27 2022, 11:14 AM
Thanks Ralph, Hmmm Tony, He just told me creamsicle is being disagreeable. He’s gonna need a hand with his baby.
Posted by: Cairo94507 Jun 27 2022, 12:00 PM
Hi Dion - Sorry about the leak down problem- hopefully it is a simple fix.
Posted by: 9146C Jun 27 2022, 03:24 PM
Hopefully just a temporary, and minor setback.
Posted by: Dion Jul 3 2022, 07:45 PM
Right, update.
So a couple of things. All you experienced fellas know all to well a sitting engine is not happy. I knew going into this that the engine was an unknown quantity.
I spent many hours on the phone with the seller he did all he could to preserve the engine. It still sat 6 years at my home plus the 2-3 after he took it out of previous machine. Did another leak down test and compression test. All cylinders but #4 are good. Checked it out next with a scope. Found out that #4 had a lot of crusty carbon sitting on the piston top as well as the valves. Some rust in certain areas noted as well. Rings are prolly suffering for sure. The other cylinders were a little crusty too but not as bad. My daily driver mechanic with many year of experienced suggested a chemical treatment. So using some nasty rocket fuel kind of stuff, the Webers swallowed this mixture. Ha we created a fog that could rival London! No mosquitoes here now.
Did this procedure twice. Scoped it again. Low and behold, could not believe how much crap it cleaned off. Mind you it is still coated in areas but significantly cleaned up.
Today, fellow 914 enthusiast and friend Howard came by to help with the 123Ignition dizzy install.
After some minor setbacks it was in and set up. Amazing difference! Took a couple quick runs and it was night and day. Howard then wasn’t happy with the carbs. He adjusted them for me and wow. This thing does not act like it has poor compression.
The overrun throttle backfires have almost become non existent.
Just sharing the up beat news. I was already on the phone with Mepstein
getting ready to line up parts orders. I will eventually. It will need a freshening but for now going to drive the piss out of it! See ya at the gathering.
Bloody hell it better not rain! I’ll have to do my best Schumacher rainmeister at the wheel.
I still need tyres!
Cheers all.
Posted by: tygaboy Jul 3 2022, 09:24 PM
Posted by: BeatNavy Jul 4 2022, 05:28 AM
Excellent news, Dion!
Posted by: Cairo94507 Jul 4 2022, 06:17 AM
I love it when a plan comes together.
Posted by: mb911 Jul 4 2022, 09:34 AM
Right, update.
So a couple of things. All you experienced fellas know all to well a sitting engine is not happy. I knew going into this that the engine was an unknown quantity.
I spent many hours on the phone with the seller he did all he could to preserve the engine. It still sat 6 years at my home plus the 2-3 after he took it out of previous machine. Did another leak down test and compression test. All cylinders but #4 are good. Checked it out next with a scope. Found out that #4 had a lot of crusty carbon sitting on the piston top as well as the valves. Some rust in certain areas noted as well. Rings are prolly suffering for sure. The other cylinders were a little crusty too but not as bad. My daily driver mechanic with many year of experienced suggested a chemical treatment. So using some nasty rocket fuel kind of stuff, the Webers swallowed this mixture. Ha we created a fog that could rival London! No mosquitoes here now.
Did this procedure twice. Scoped it again. Low and behold, could not believe how much crap it cleaned off. Mind you it is still coated in areas but significantly cleaned up.
Today, fellow 914 enthusiast and friend Howard came by to help with the 123Ignition dizzy install.
After some minor setbacks it was in and set up. Amazing difference! Took a couple quick runs and it was night and day. Howard then wasn’t happy with the carbs. He adjusted them for me and wow. This thing does not act like it has poor compression.
The overrun throttle backfires have almost become non existent.
Just sharing the up beat news. I was already on the phone with Mepstein
getting ready to line up parts orders. I will eventually. It will need a freshening but for now going to drive the piss out of it! See ya at the gathering.
Bloody hell it better not rain! I’ll have to do my best Schumacher rainmeister at the wheel.
I still need tyres!
Cheers all.
Well that is good news. Those things can get scary expensive quickly.
Posted by: Dion Aug 4 2022, 11:51 AM
So I had an additional “lollipop” lite from when i ordered the yellow one for a low fuel warning indicator. Did not know what I was going to use it for. I noticed I had lost the little green lite for the parking lamps when i switched to the 911 oil gauges and had the center tach redone. It’s a bit overkill but it was another excuse to have a 910,917 lite in the car.
My ashtray had been history for a while as I had my stopwatches and Halda mounted in the car previously. So cut another small steel plate and punched a hole in it. Applied the appropriate vinyl trim and walla!
No excuse for having low battery due to lites being left on I left room toward the left of the piece in case of a needed switch or maybe run a USB port there.
Thankfully car has been running nicely.
PS: I did tack back down that flap that’s curling!
Attached thumbnail(s)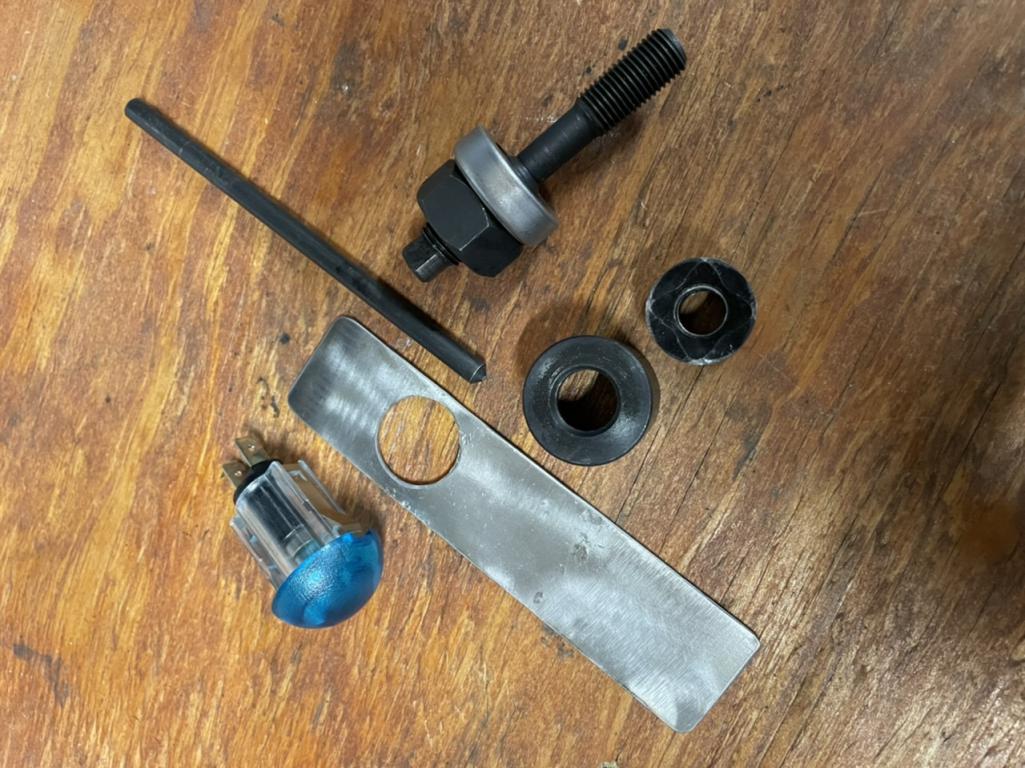
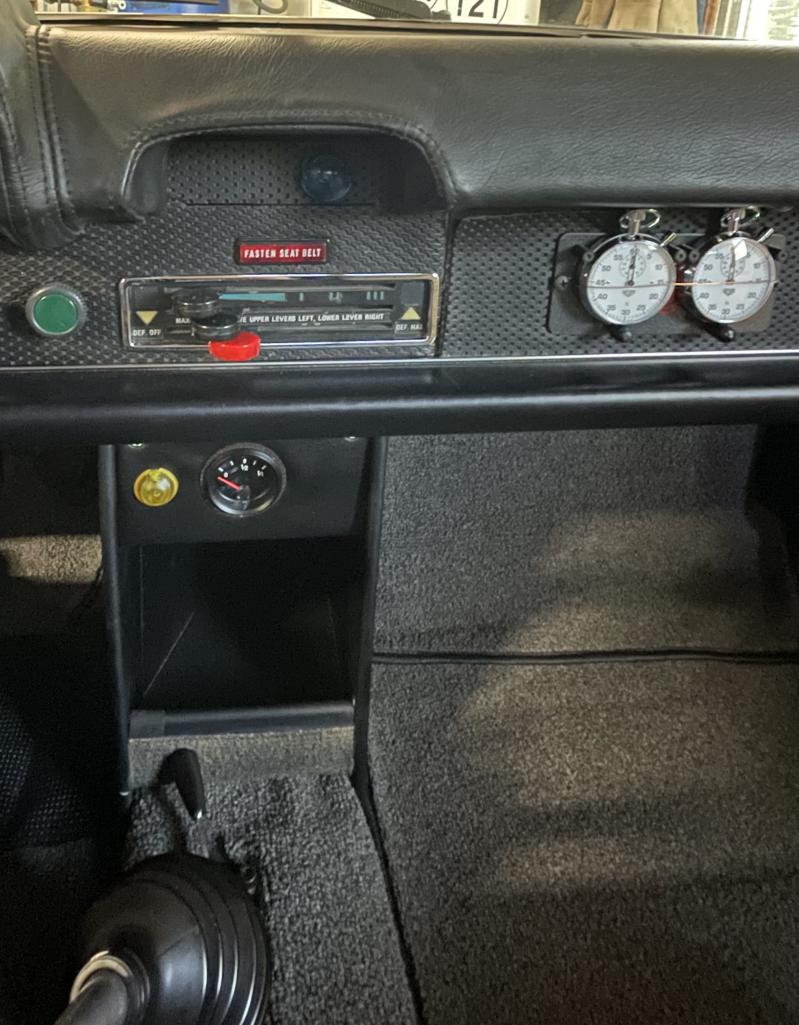
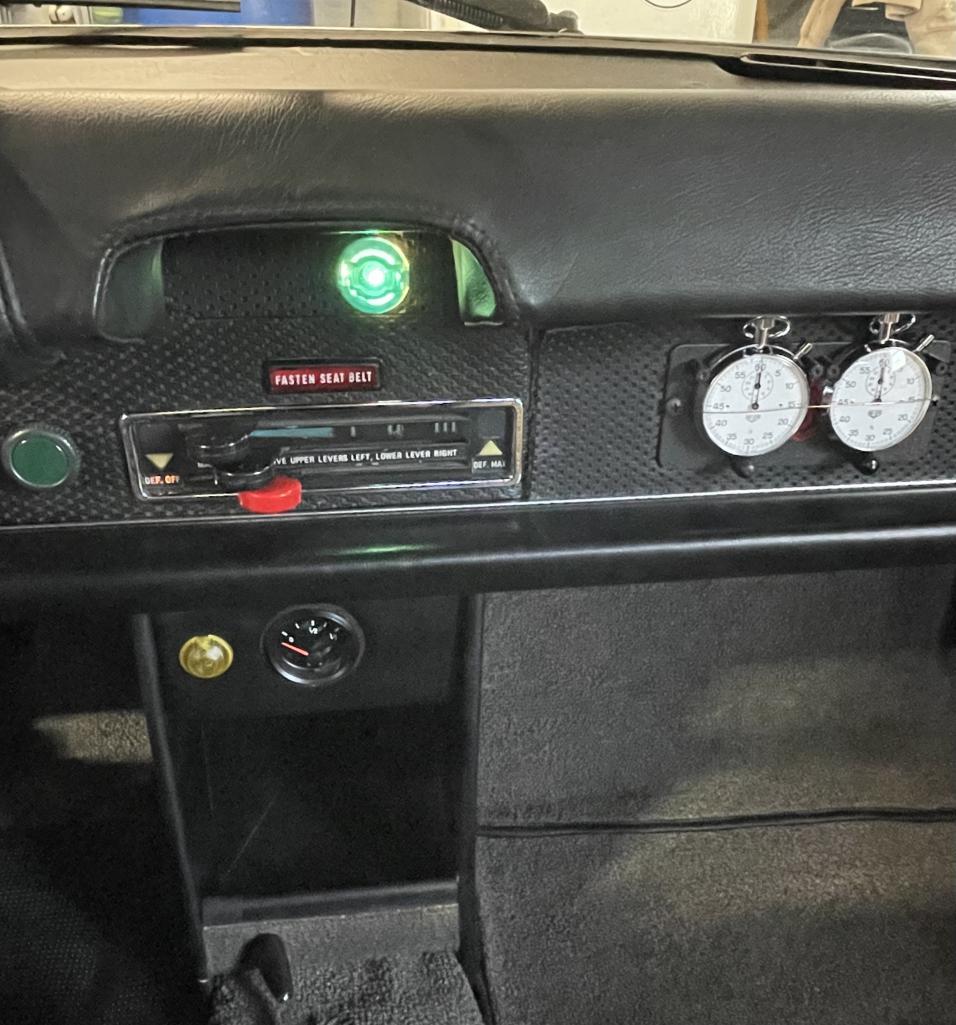
Attached image(s)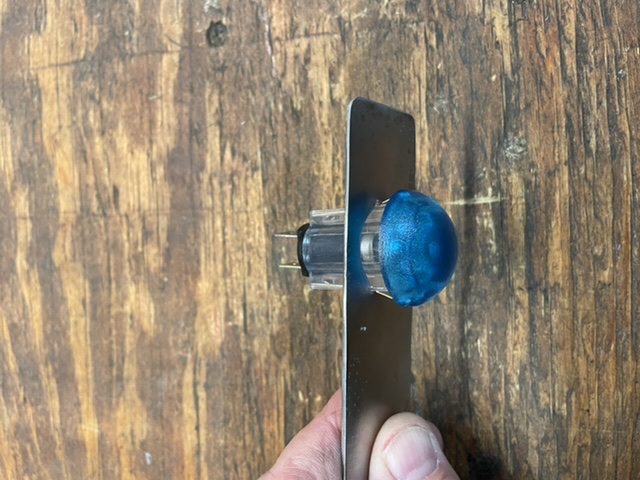
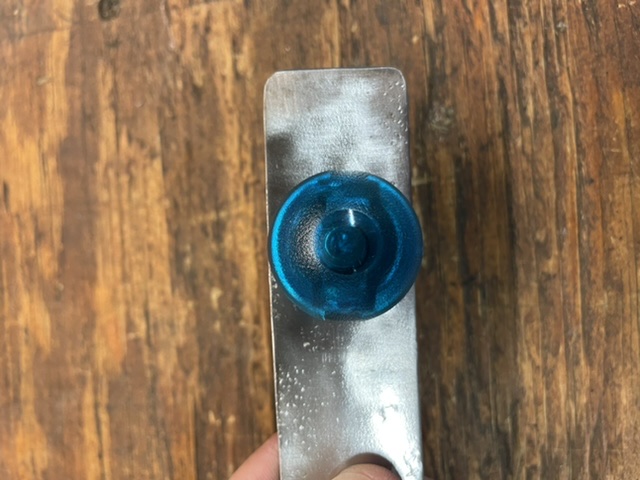
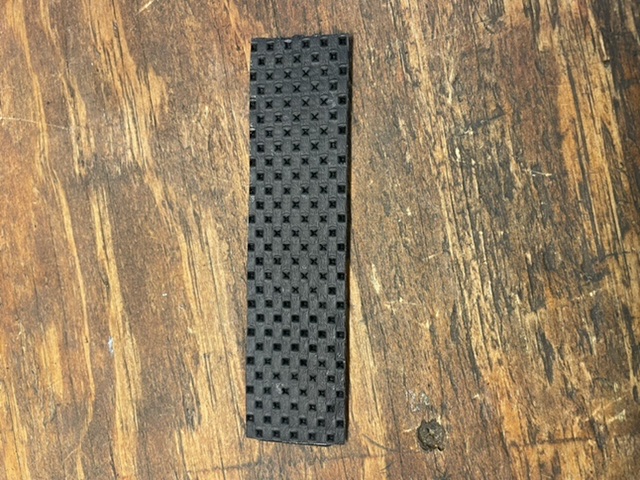
Posted by: Superhawk996 Aug 4 2022, 12:03 PM
Who did your leather dash? I went back through your build back to page 40 where it went in but I don't see a mention of who did the work recovering it.
I really like the look of a leather dash.
Posted by: Dion Aug 4 2022, 12:41 PM
@http://www.914world.com/bbs2/index.php?showuser=22428 , Thanks Phil, I purchased that from fellow member sixaddict here back in 2018.
I can’t recall who had done it for him or if he did it. It is in great shape. Well made.
Hope all is going well. Especially with your relocation.
Posted by: Dion Aug 4 2022, 03:29 PM
Went back to the factory steering wheel. Did not like, not seeing all the gauges completely. May try the larger Prototipo one day, I’ll see.
Attached thumbnail(s)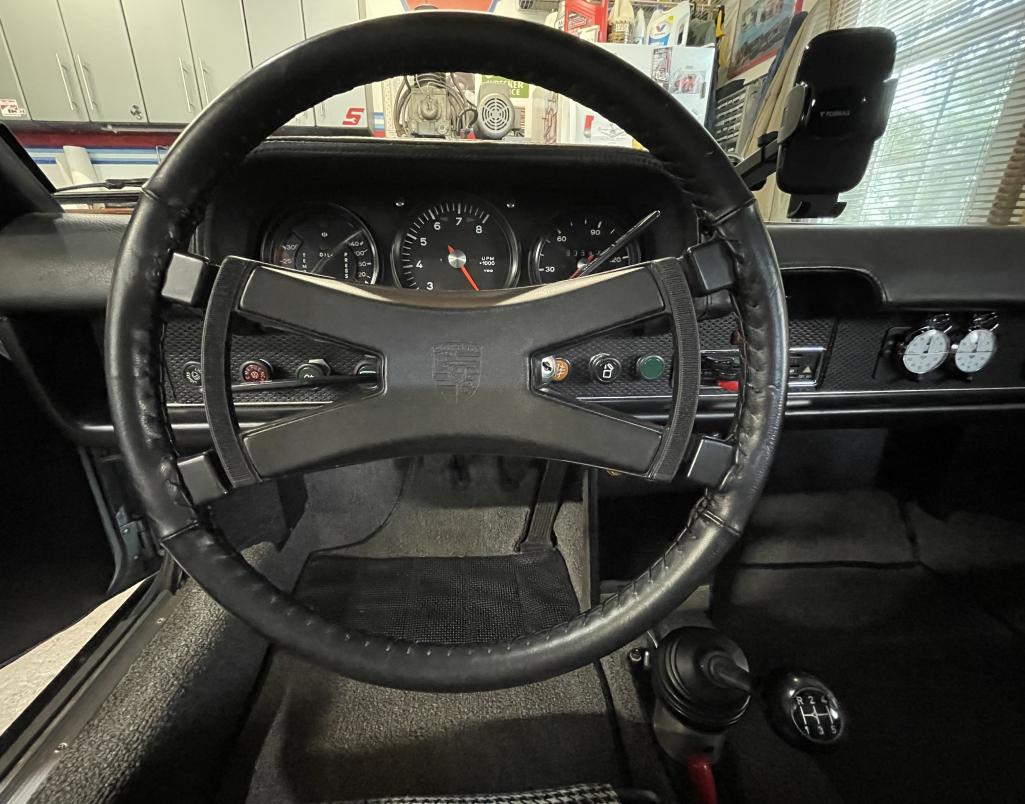
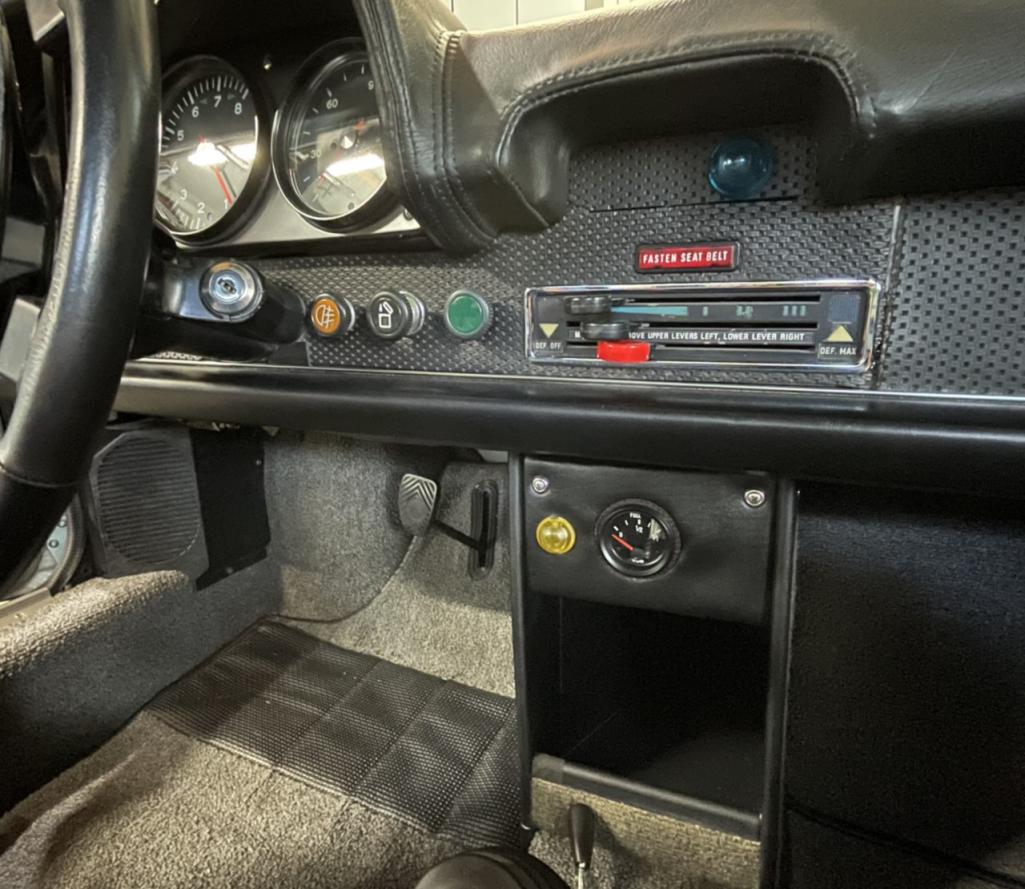
Posted by: Superhawk996 Aug 4 2022, 06:05 PM
@http://www.914world.com/bbs2/index.php?showuser=22428 , Thanks Phil, I purchased that from fellow member sixaddict here back in 2018.
Mark always has the good stuff
I've seen a few sources for them but always nice to see one that was well done rather than going it blind with an unknown vendor.
Luckily, I've got at least a year before I need to worry about it. Next year will be earmarked to build a garage. Then I can get back to getting the 914 on the road.
Keep up the nice work on yours! I don't comment here often enough but watch it and really appreciate how yours has come together and the tidbits on the /6 conversion details. Loved the video of the 1st drive - a six just sounds right to me.
Posted by: Dion Mar 4 2023, 03:56 PM
A few more mods to the Sports Purpose 914
Picked up another Banjo trumpet horn for the passenger side.
Now my OCD can relax with it being balanced.
Attached thumbnail(s)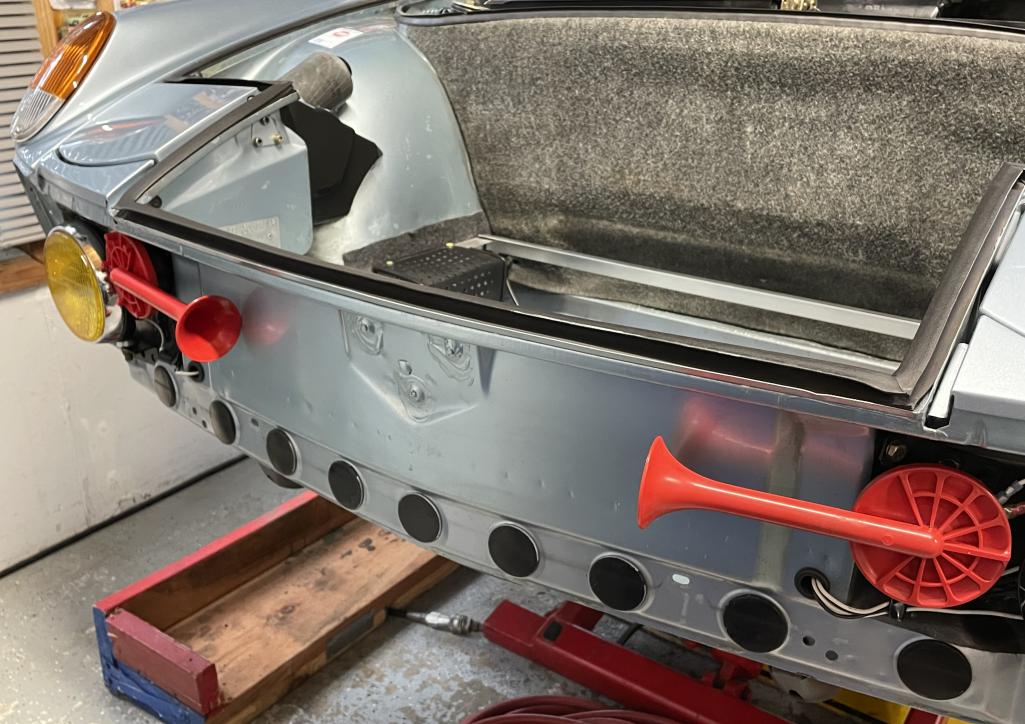
Posted by: Dion Mar 4 2023, 03:59 PM
Made some brackets up and mounted to front panel for the Cibie Oscar+ .
Basically some Home Depot ties and welded some triangles underneath for more support and stability.
Attached thumbnail(s)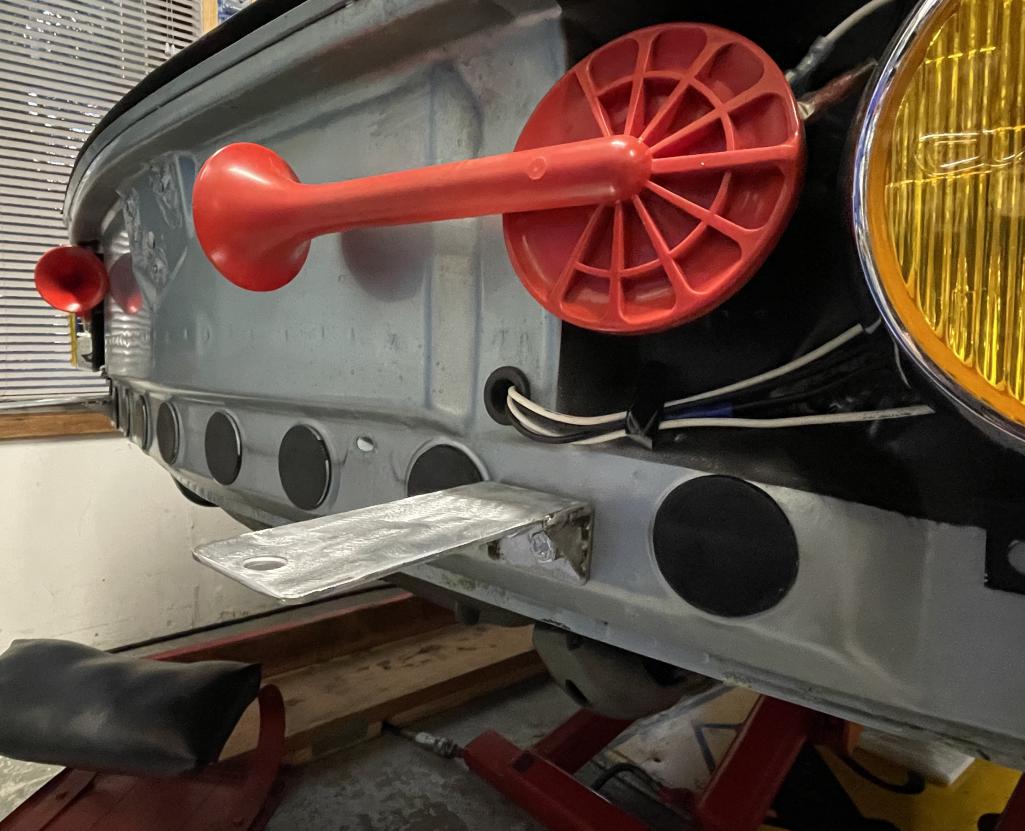
Posted by: Dion Mar 4 2023, 04:01 PM
Cibie’s placed.
Attached thumbnail(s)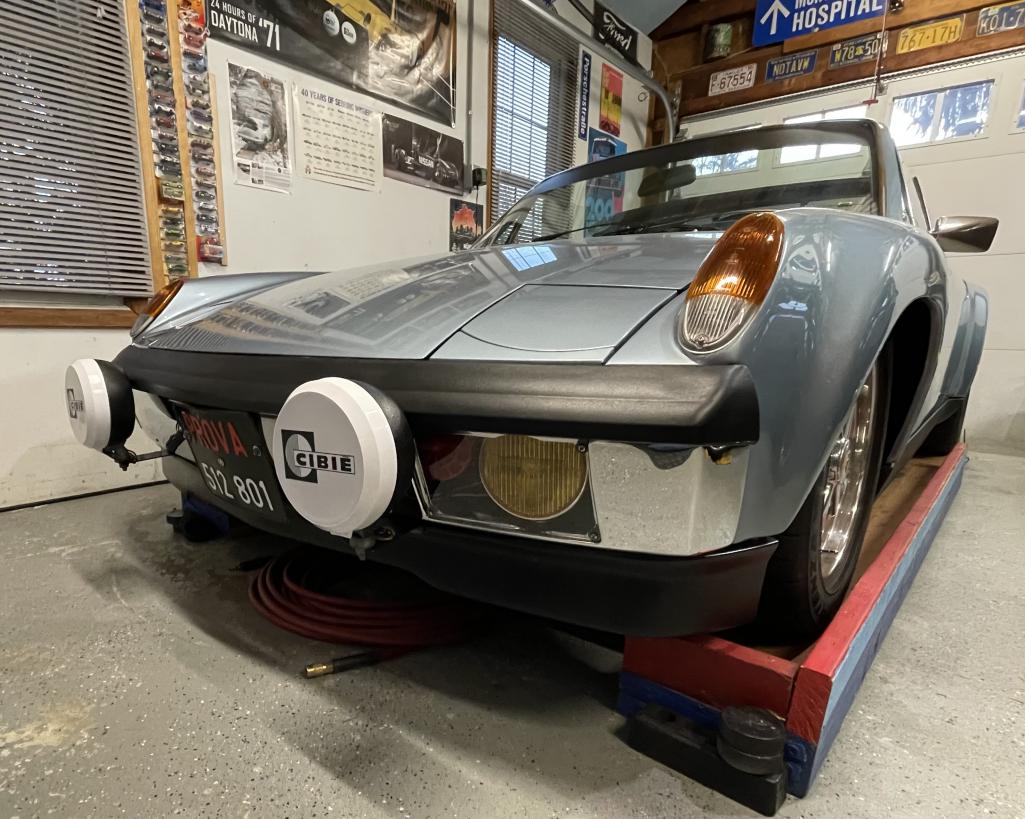
Posted by: Dion Mar 4 2023, 04:05 PM
Was still a bit shakey at the top. I ordered some proper “Stay bars” and fabbed up simple brackets for them. Placed them in the seal trough of front trunk. Also some tar caulking around the brackets to divert any water away.
Attached thumbnail(s)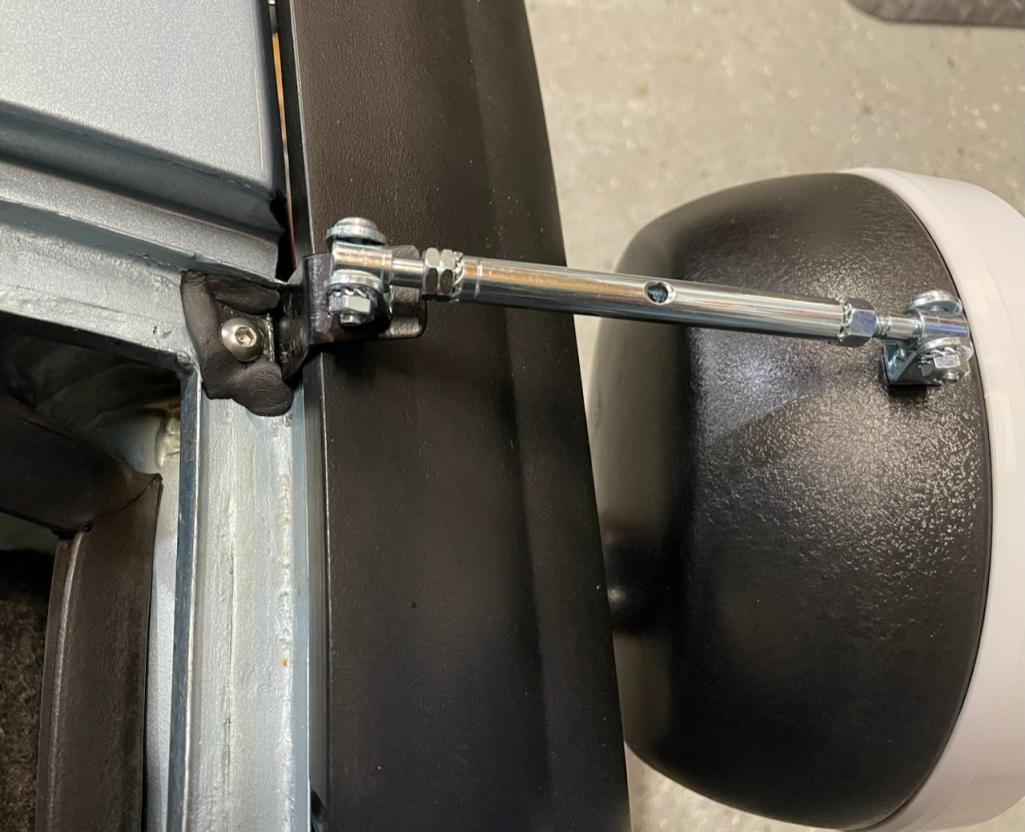
Attached image(s)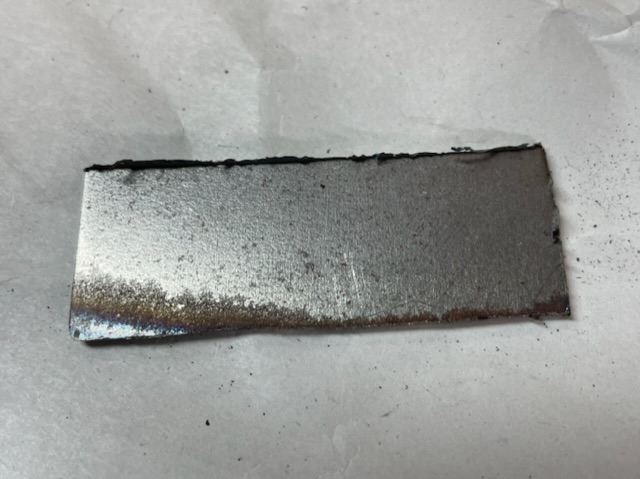
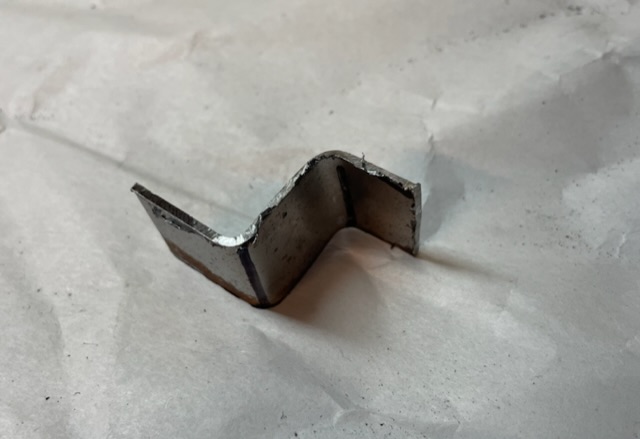
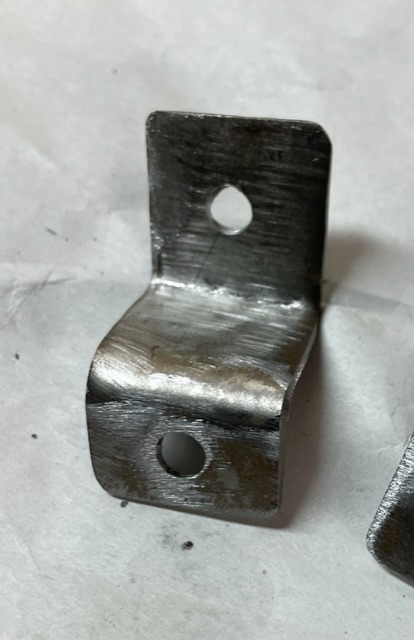
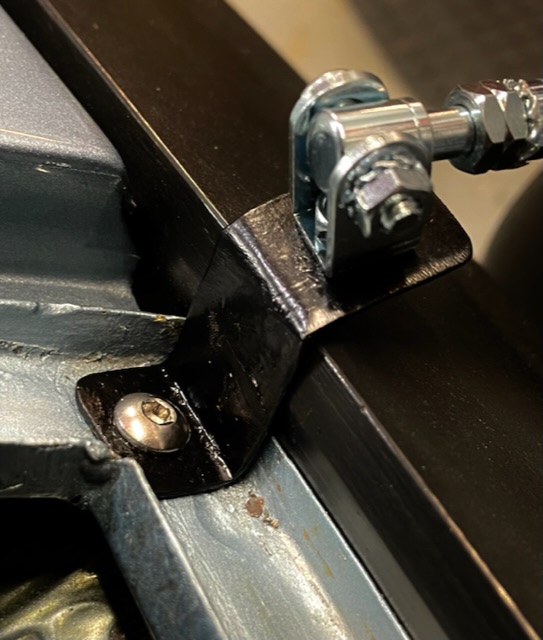
Posted by: Dion Mar 4 2023, 04:07 PM
Fin! Wonder if I should paint the bars black. Any thoughts guys?
Attached thumbnail(s)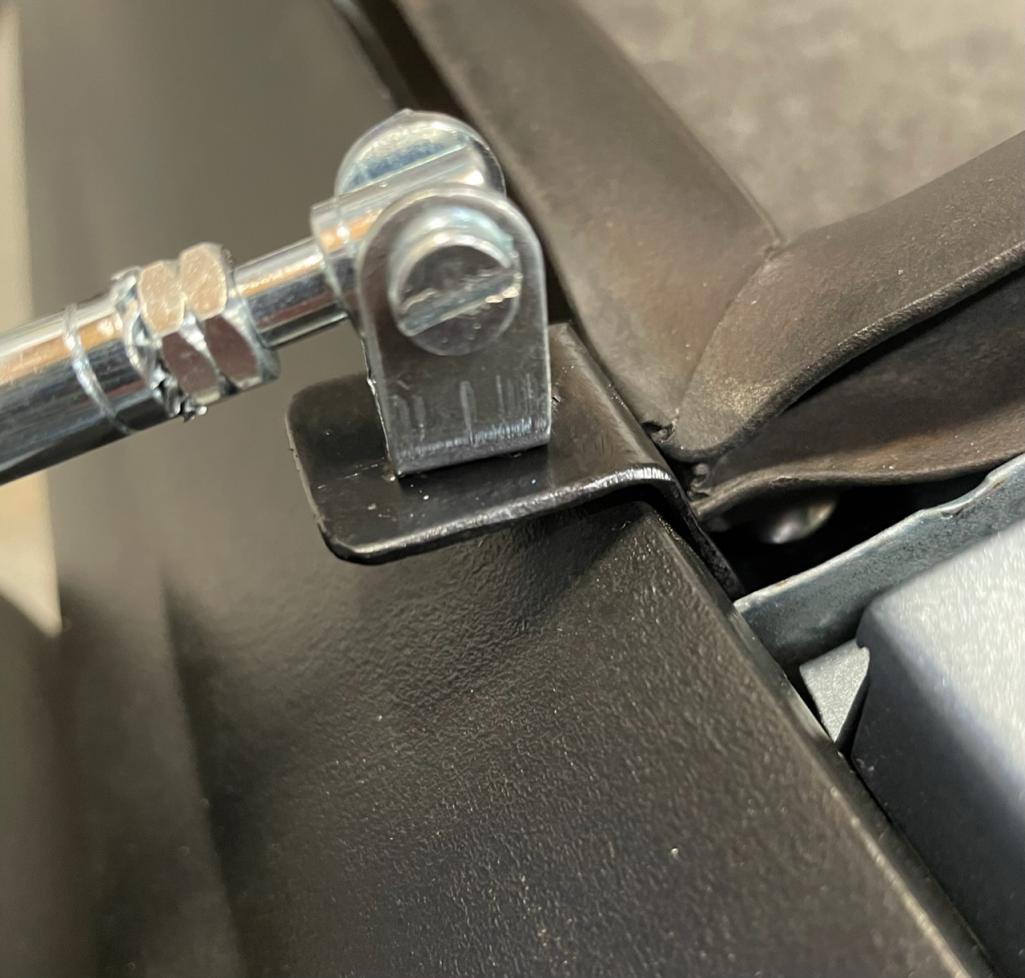
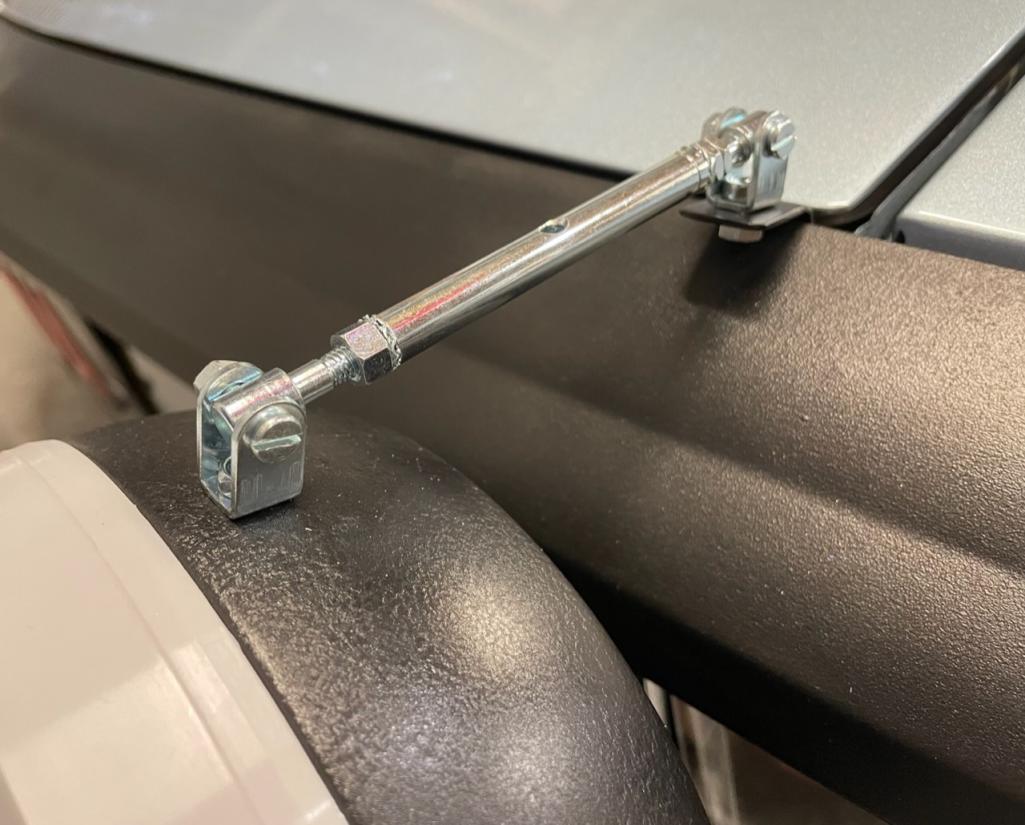
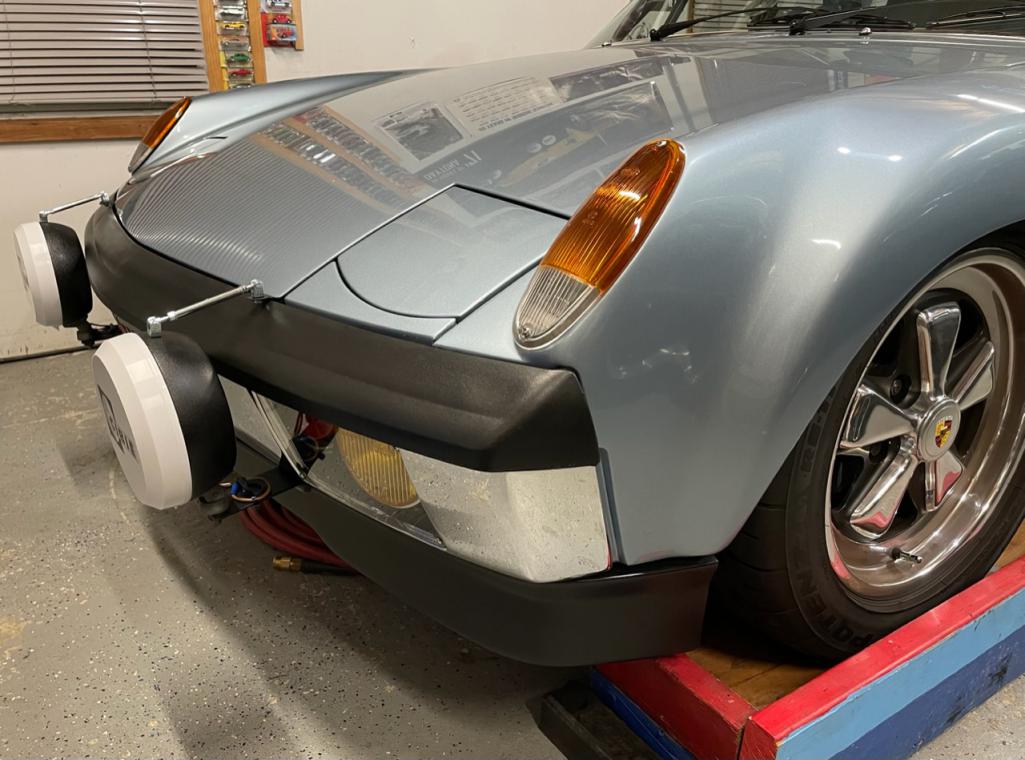
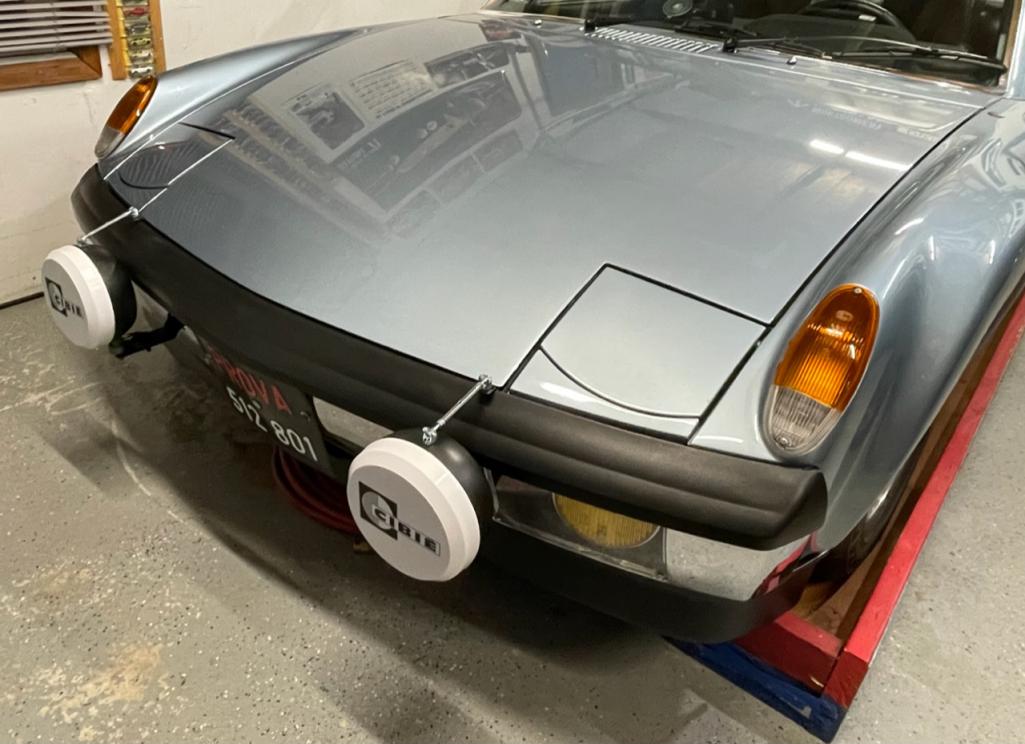
Posted by: mepstein Mar 4 2023, 04:33 PM
A hockey puck horn button might give you a bit more visibility around the spokes. If you want to borrow one to try out, let me know.
Attached image(s)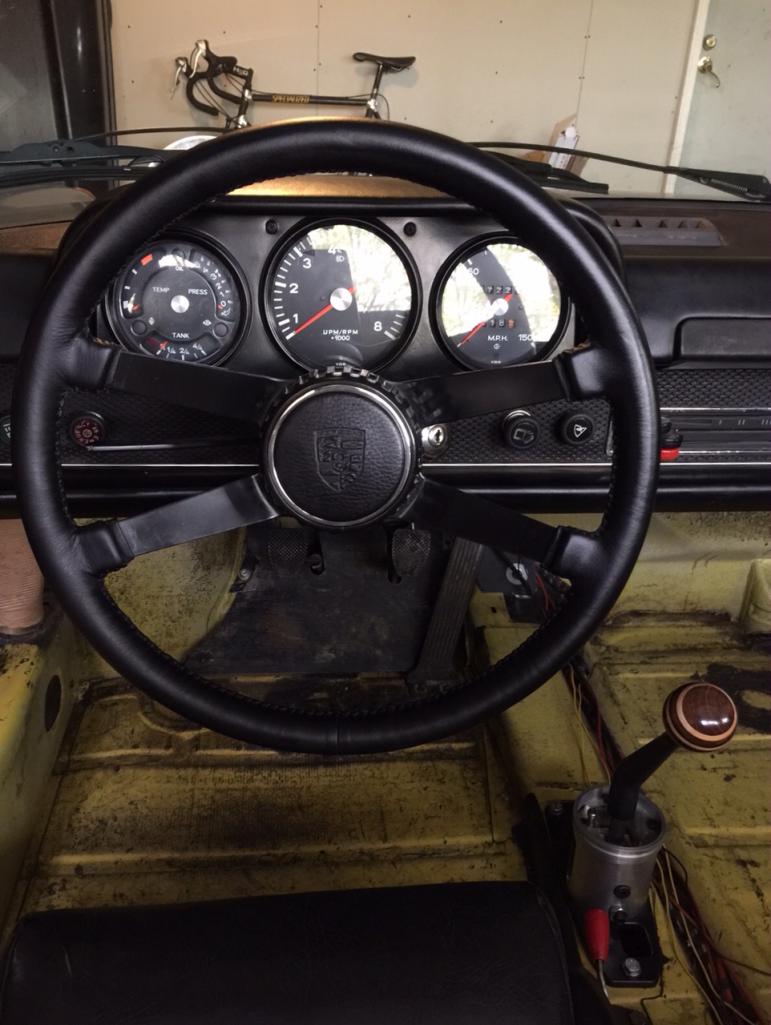
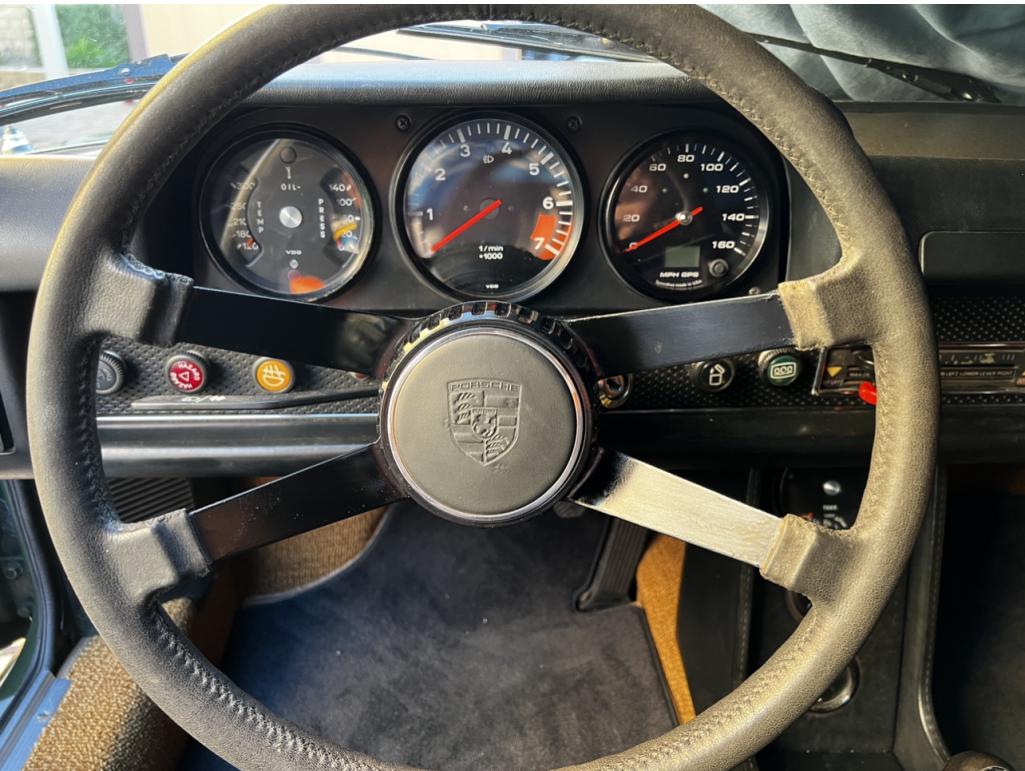
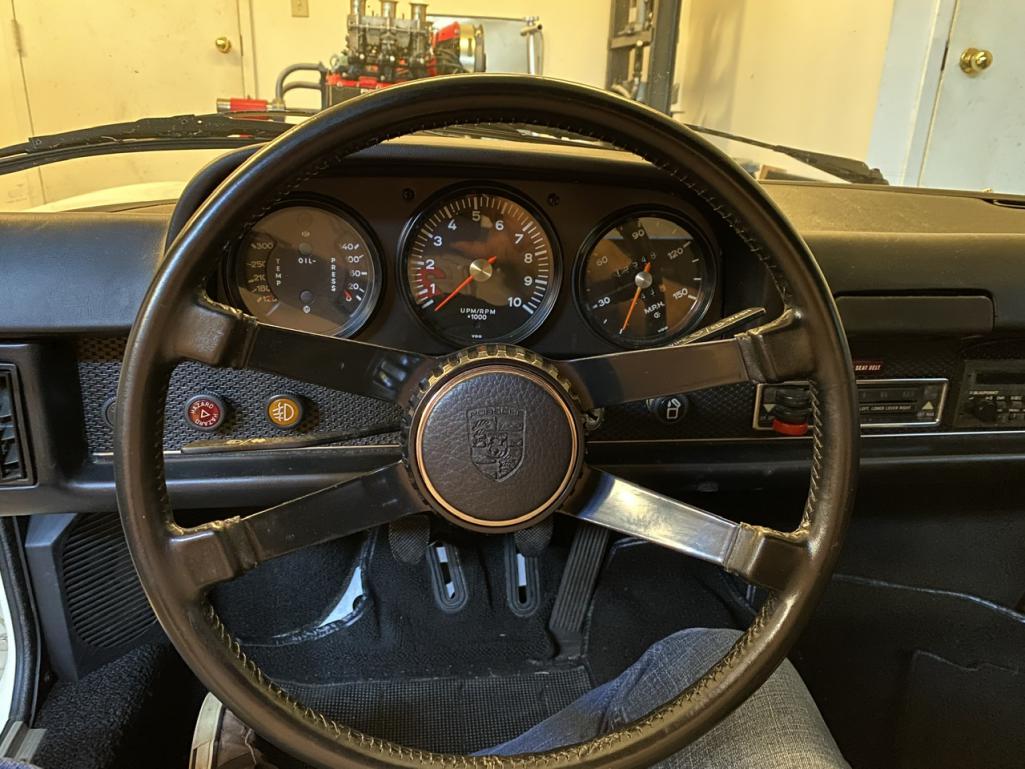
Posted by: Dion Mar 4 2023, 05:08 PM
Thanks Mark! Great looking wheel, always liked that style.
Posted by: Dion Mar 13 2023, 09:28 PM
Painted the rod portion of stay bar with “plasti-dip black”. I think
it looks better like this.
Any excuse to post a pic
Cheers all
Attached thumbnail(s)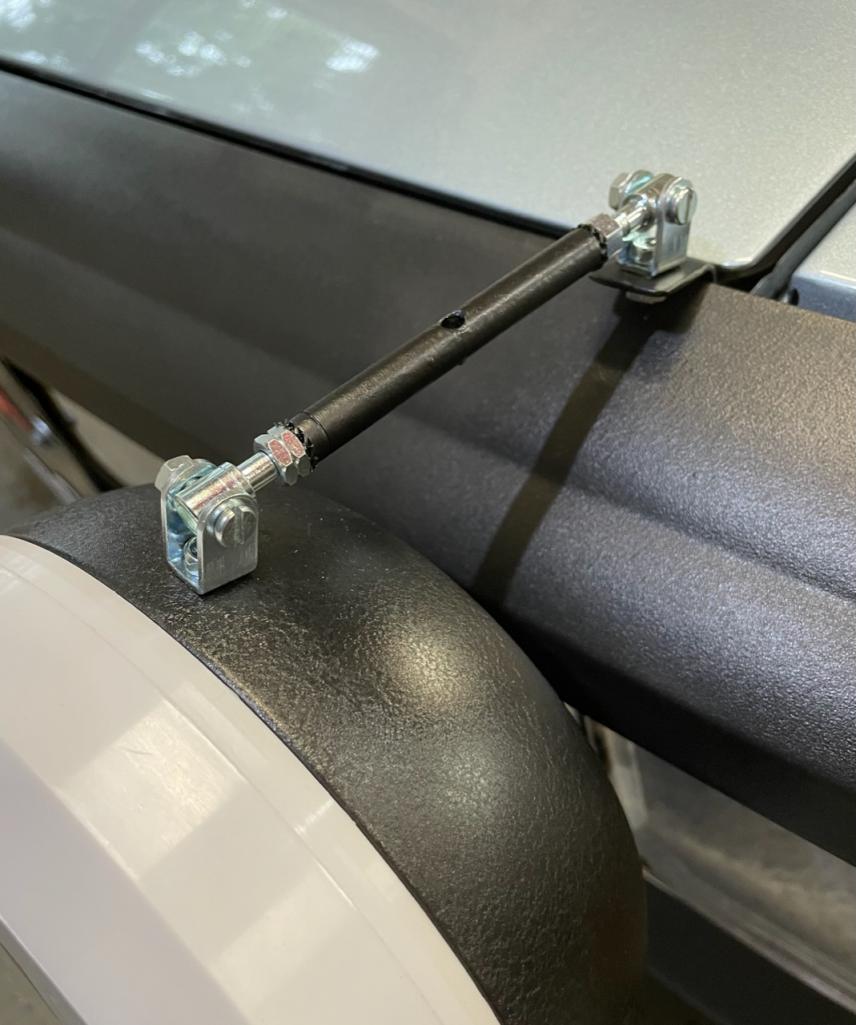

Posted by: Nate W Mar 13 2023, 10:22 PM
Those lights are bad ass I like the black bars. Awesome build
Posted by: peteinjp Apr 10 2023, 10:55 PM
Yeah- Love the Oscars! Looking great and well deserve results! Another way I have heard of de carbonizing an engine is to simply drip water in the intake while running. Haven't tried it but worth looking into if you never need to do it in the future. did you give another compression test after?
Pete
Posted by: Dion Apr 11 2023, 07:23 AM
@http://www.914world.com/bbs2/index.php?showuser=25723 , Pete only did a leak down again shortly after the “treatment” and a bit of running about. Same results with other cylinders between 10-15%. #4 still sad. It was around 35%. Will do again at some point this summer , see if anything settled out with the rings or more crud burned off. So rebuild definitely in the future.
Cheers.
Posted by: mepstein Apr 11 2023, 11:53 AM
If it’s still drivable with that leak down, keep driving it. No reason to tear it down during the driving season.
Posted by: porschetub Apr 15 2023, 11:08 PM
@http://www.914world.com/bbs2/index.php?showuser=25723 , Pete only did a leak down again shortly after the “treatment” and a bit of running about. Same results with other cylinders between 10-15%. #4 still sad. It was around 35%. Will do again at some point this summer , see if anything settled out with the rings or more crud burned off. So rebuild definitely in the future.
Cheers.
Hi mate,shit thats no good after all your work,have you taken it out for the classic "Italian
tune up "which maybe you have done? ,when you have done a carb tune up have you noticed poor vacuum on that cylinder ?.
Cheers.
Posted by: Dion Jul 31 2023, 12:46 PM
Latest update to conversion.
Did Mark Henry’s Ford solenoid conversion.
Just a bit more peace of mind of having less juice go through the ignition switch.
Car is running well. Aside from too many pops on accelerator tip in.
Was discussing this with Dave. Might be a need for re jetting. Carbs were set up for Mike Fittons beautiful 2.7 six. Prolly a bit too much for my 2.4. Will investigate.
Solenoid pics:
Attached thumbnail(s)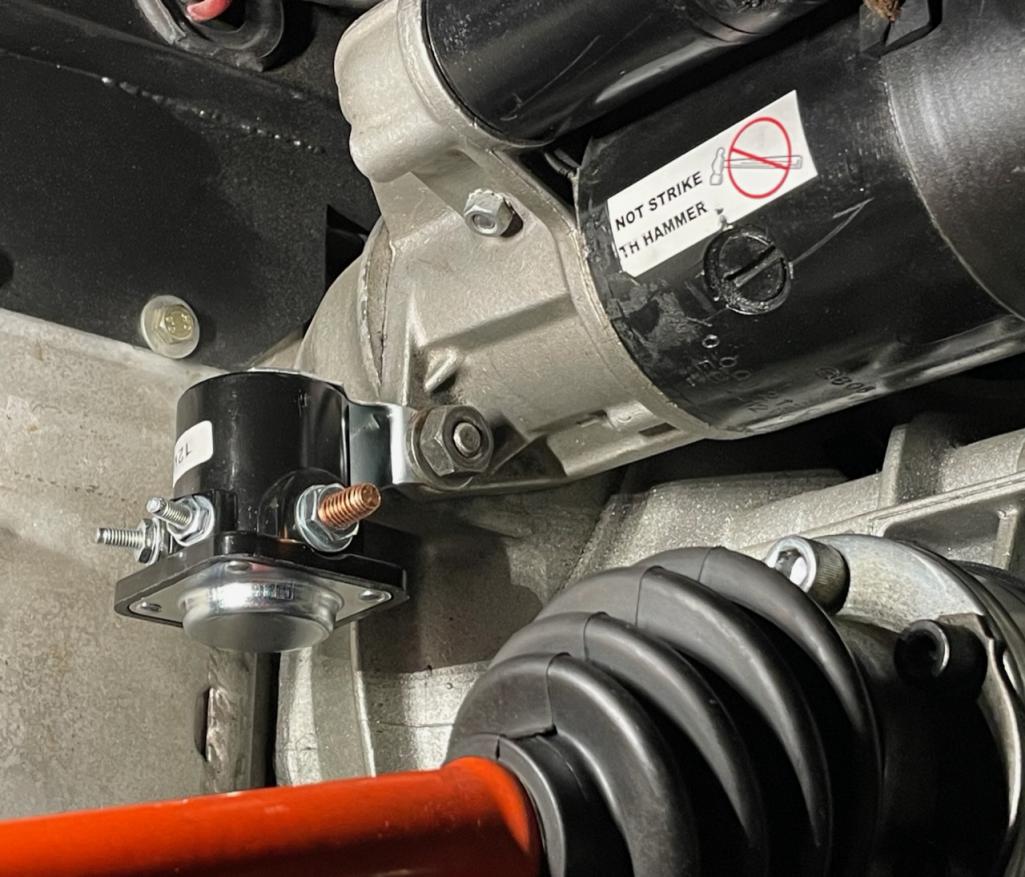
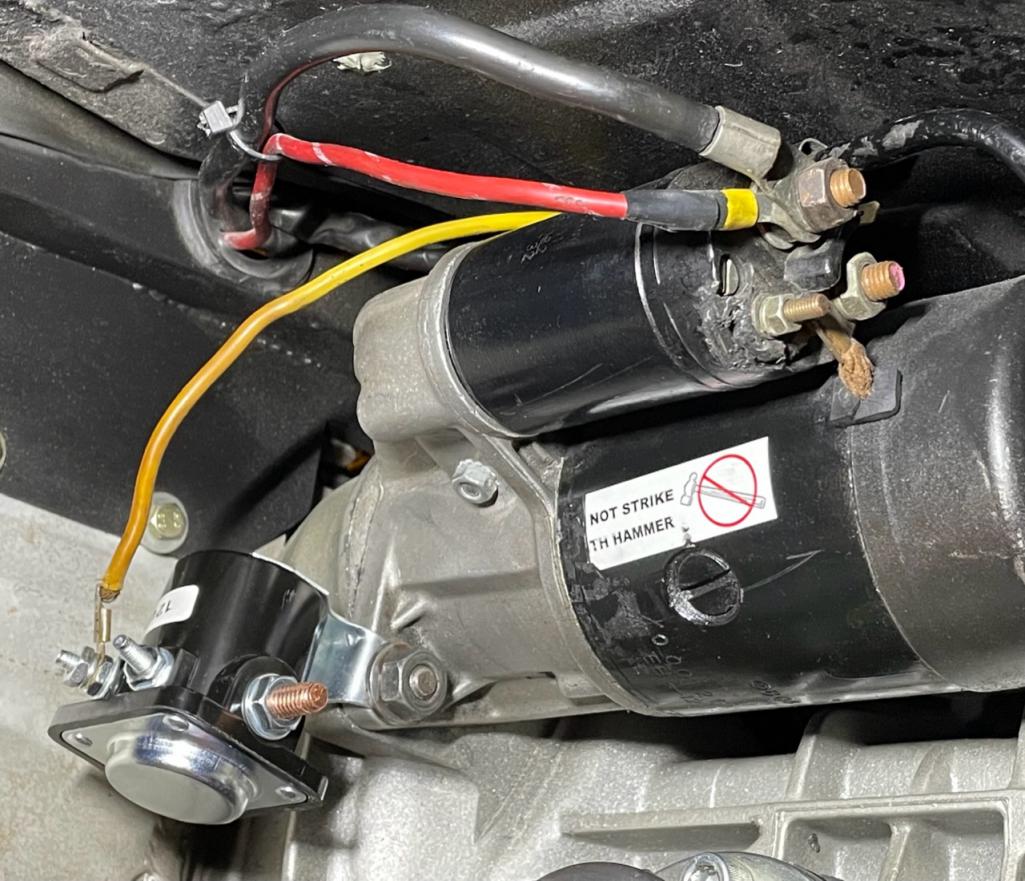
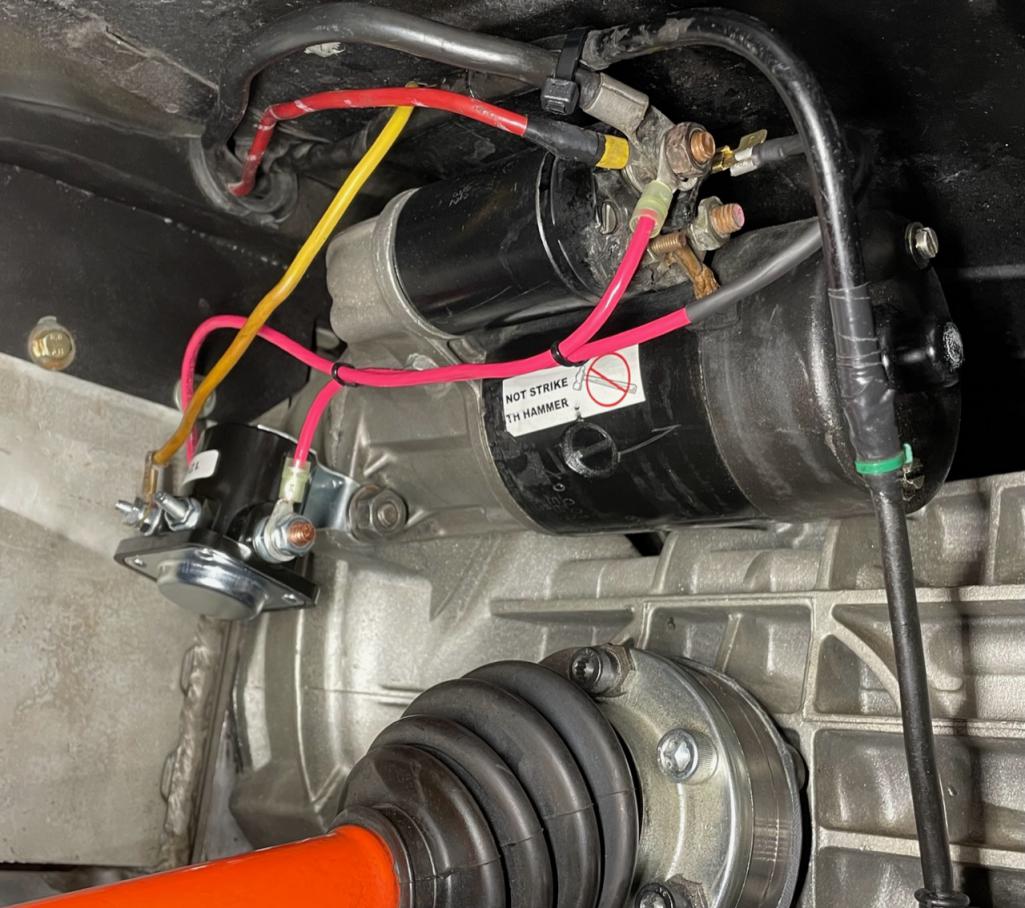
Posted by: Dion Jul 31 2023, 12:52 PM
Chillin at Toppin’s place this morning. “Smokey” looking good sporting new mini-lites. Sorry don’t have a better pic. Trust me the StoneGrau car looks awesome. Discussed LeMans, carburetors, etc. A great visit. So glad all his surgeries are done and dusted. He’s doing quite well.
Attached thumbnail(s)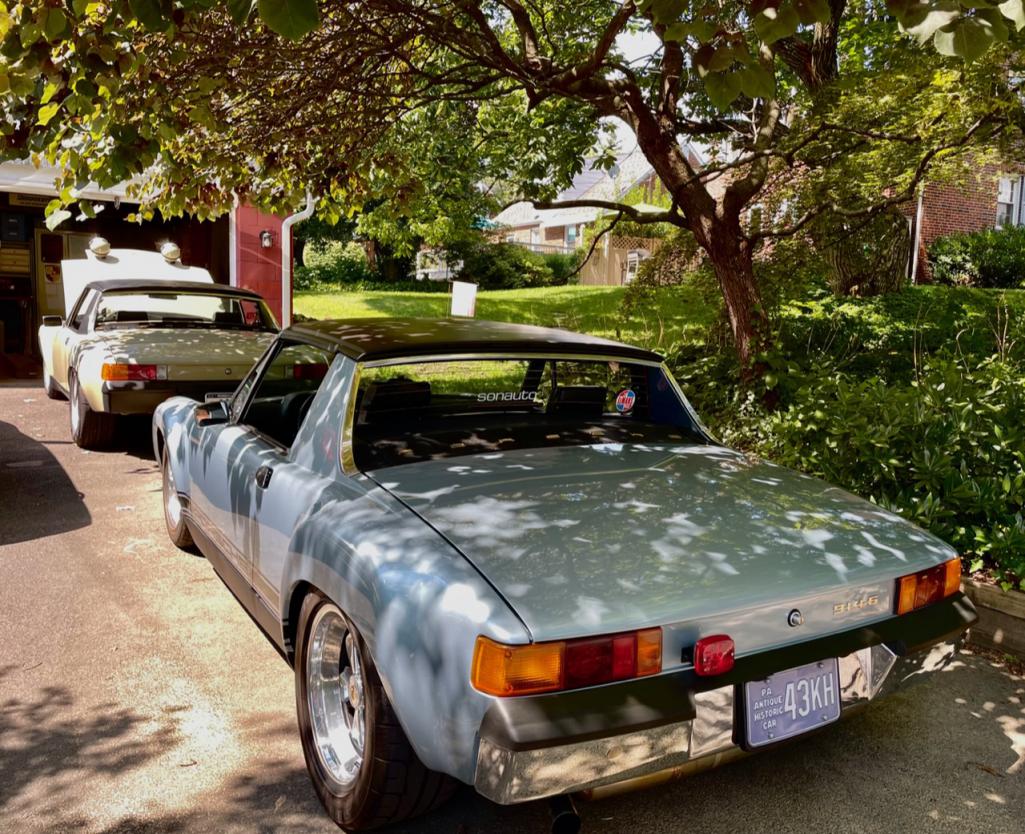
Posted by: BeatNavy Jul 31 2023, 12:59 PM
A great visit. So glad all his surgeries are done and dusted. He’s doing quite well.
Posted by: mepstein Jul 31 2023, 01:14 PM
Posted by: OrangeBones Jul 31 2023, 09:17 PM

Posted by: TRS63 Aug 1 2023, 02:04 AM
Beautiful as usual
Antoine
Posted by: DRPHIL914 Aug 1 2023, 07:07 AM
Latest update to conversion.
Did Mark Henry’s Ford solenoid conversion.
Just a bit more peace of mind of having less juice go through the ignition switch.
Car is running well. Aside from too many pops on accelerator tip in.
Was discussing this with Dave. Might be a need for re jetting. Carbs were set up for Mike Fittons beautiful 2.7 six. Prolly a bit too much for my 2.4. Will investigate.
Solenoid pics:
Chillin at Toppin’s place this morning. “Smokey” looking good sporting new mini-lites. Sorry don’t have a better pic. Trust me the StoneGrau car looks awesome.
Discussed LeMans, carburetors, etc. A great visit. So glad all his surgeries are done and dusted. He’s doing quite well.nicely done, i plan on doing this soon as well, just for that extra piece of mind, i have never had a non start on my current and original starter from the OEM motor, but i did with a new one, and tihnk the new solenoids are not good so i pulled the new one are returned it and put my orignal one back in and no issues, but it couldnt hurt right? supposed to help protect the ignition switch too. looks pretty simple .
oh and hi to dave good to hear he's doing well and hope to see him at Okteenerfest!!!!
Posted by: tygaboy Aug 1 2023, 08:29 AM
Hey Dion - Great to see you out and about with your lovely car doing the most important thing: hanging with good buddies!
Posted by: Dion Aug 10 2024, 06:12 PM
Decided I’m going to do an engine rebuild this fall/winter. I was able to obtain, thanks to my eagle eyed buddy Toppin, a set of E cams. Well they are actually 2.7 cams.
They were for another fellas project, he went a different direction.
These were ground to E spec by WEB Cam. So let the parts accumulation begin!
Are these cars ever done?!
The 914MOB has volunteered to help….I hope. Should be a nice package when all done.
Attached thumbnail(s)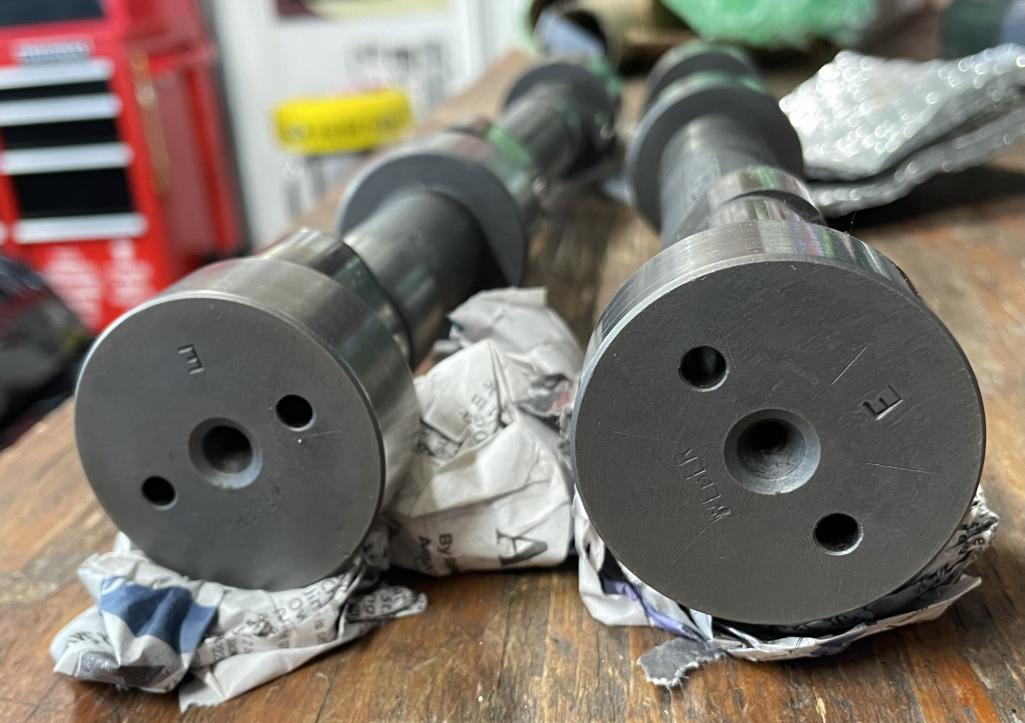

Posted by: OrangeBones Aug 10 2024, 07:41 PM
914MOB will be there. Can’t wait to get wrenching as it will give us an activity after Tennessee.
Decided I’m going to do an engine rebuild this fall/winter. I was able to obtain, thanks to my eagle eyed buddy Toppin, a set of E cams. Well they are actually 2.7 cams.
They were for another fellas project, he went a different direction.
These were ground to E spec by WEB Cam. So let the parts accumulation begin!
Are these cars ever done?!
The 914MOB has volunteered to help….I hope. Should be a nice package when all done.
Posted by: Dion Jan 29 2025, 09:12 AM
Ok. Finally have found some time to begin the process of the rebuild for the 2.4
Oil drained, ancillaries removed, engine out, transmission separated.
The 914Mob is stopping by Sunday to help me attach the engine to the stand. Thanks fellas!
Attached thumbnail(s)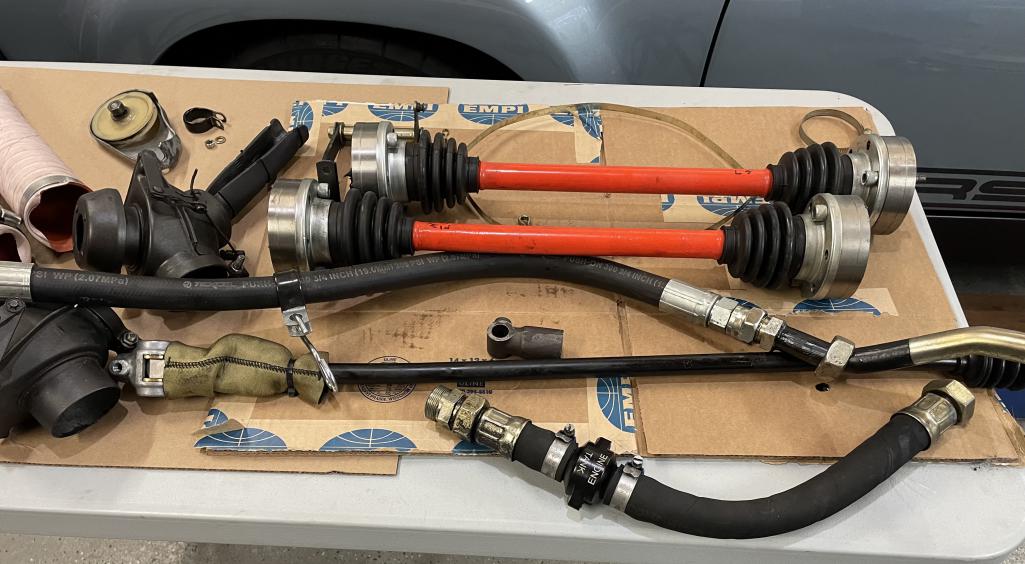
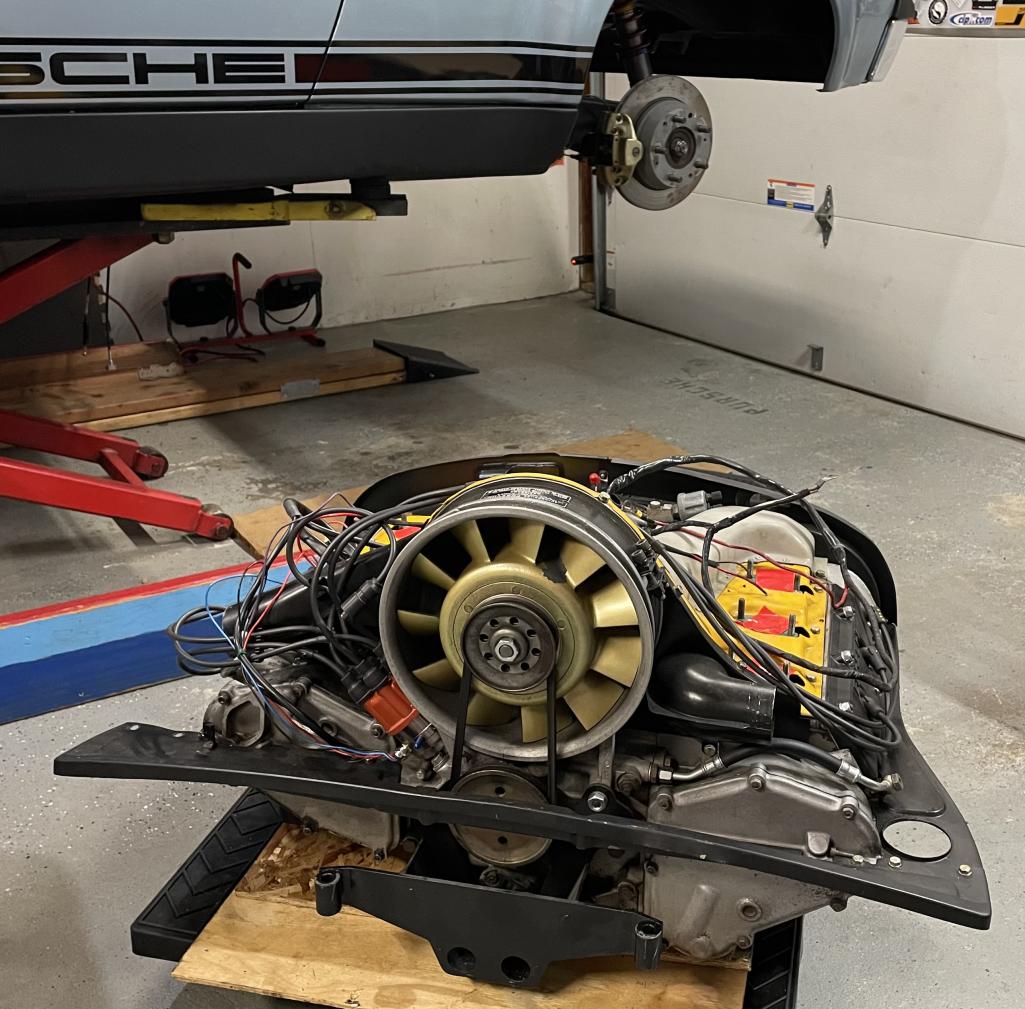
Posted by: porschetub Jan 29 2025, 08:04 PM
Ok. Finally have found some time to begin the process of the rebuild for the 2.4
Oil drained, ancillaries removed, engine out, transmission separated.
The 914Mob is stopping by Sunday to help me attach the engine to the stand. Thanks fellas!
Hi buddy, looks like you are on the way on your voyage of discovery engine wise ? ,IMO don't think you will find anything serious and it must be great to have a helper too.
Go well my friend, look fwd to your progress as you move on ,cheers.
Posted by: rgalla9146 Jan 30 2025, 07:19 AM
Hey Dion
It's been too long buddy !
Looking forward to your latest.
Good luck with the engine.
An E is a sweet thing.
I HAD a '72 E ...sold...mistake
Rory
Posted by: Dion Feb 15 2025, 03:24 PM
With some help from the “914Mob” , made tremendous progress on the tear down phase.
So #4 cylinder was toast. Rust pitting, etc. Obviously these engines are not really happy sitting for 6yrs. or longer. I can’t really complain. It ran strong for 2 yrs. Albeit smokey at times.
So decisions to be made now on moderate performance upgrades.
I do have the E cams which I was amped up on but might go yet on different path.
With the help of a local Porsche engine guru (Comes with Epsteins blessing :-) I’ve been schooled on the different cams, heads, p & c combos. Still milling ideas around.
Still sticking with the lovely sandcast aluminum case though!
Thanks you guys for hanging out and your help with some of the tear down.
Attached thumbnail(s)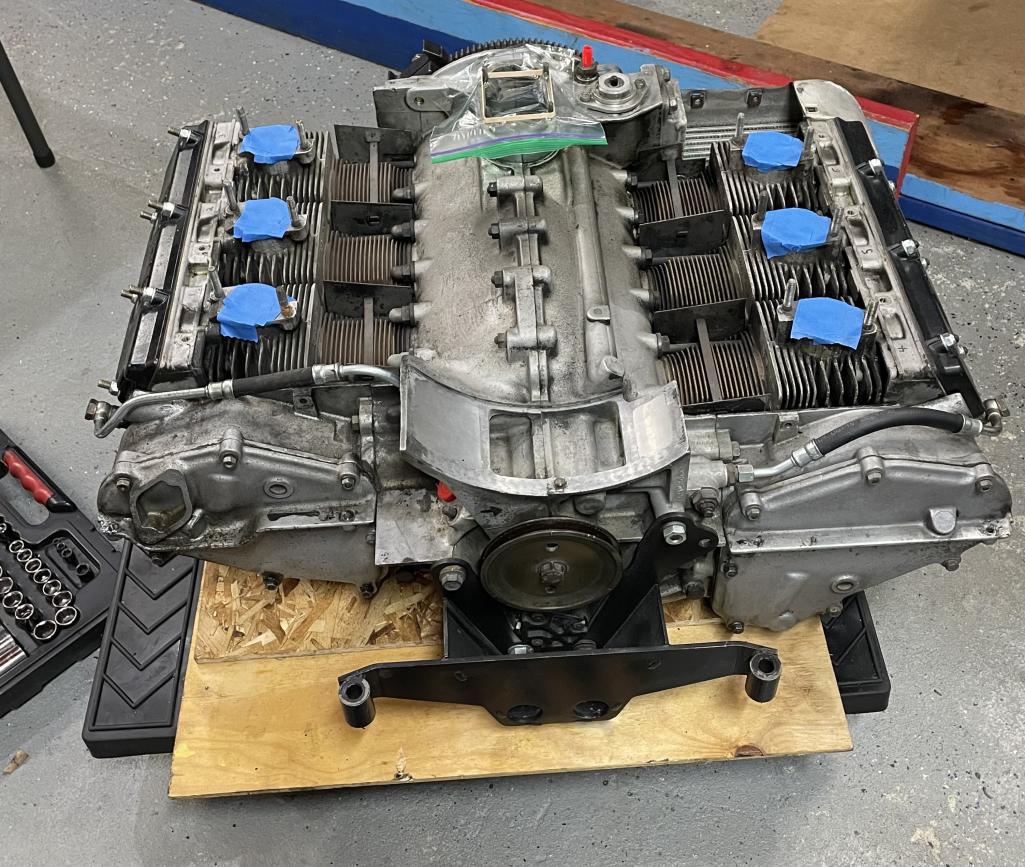

Posted by: Dion Feb 15 2025, 03:25 PM
Consultation
Attached thumbnail(s)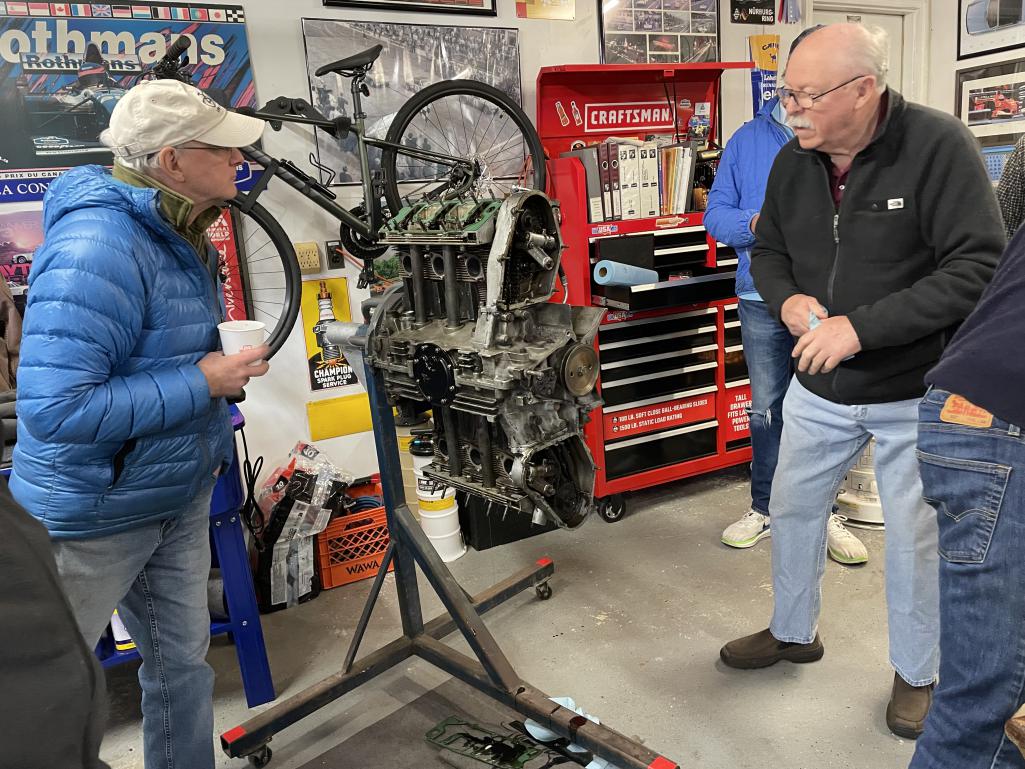
Posted by: Dion Feb 15 2025, 03:28 PM
Sad #4
Attached thumbnail(s)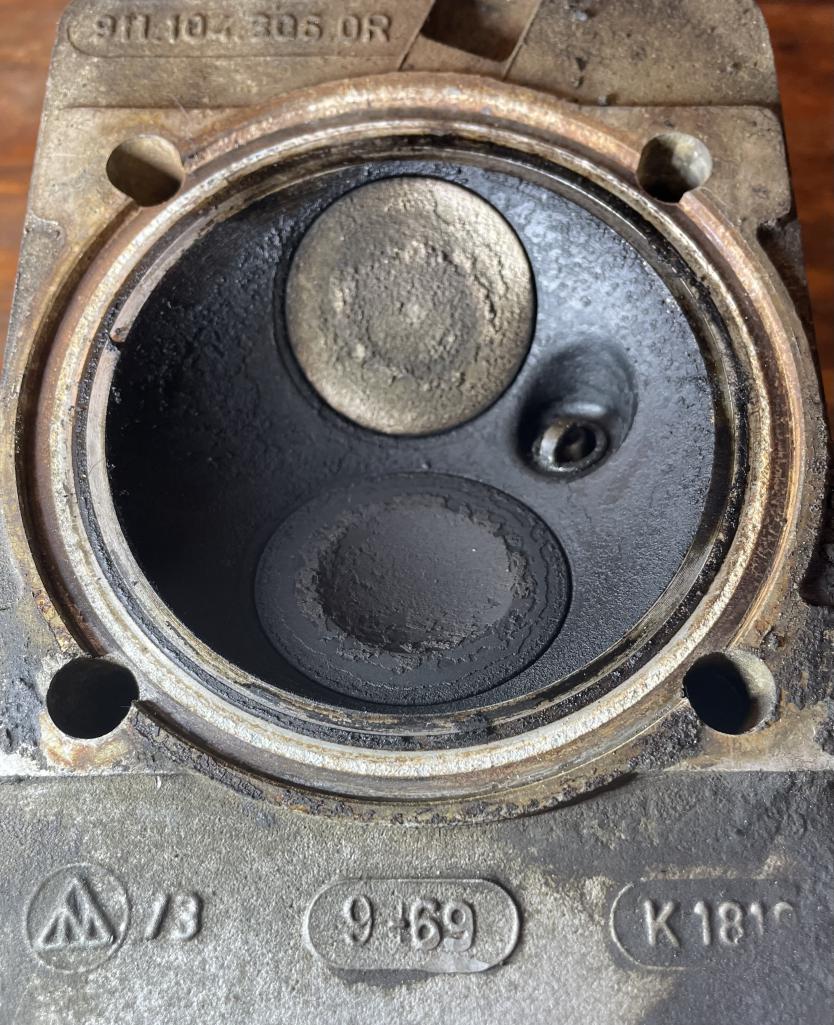
Posted by: Dion Feb 15 2025, 03:29 PM
#4
Attached thumbnail(s)
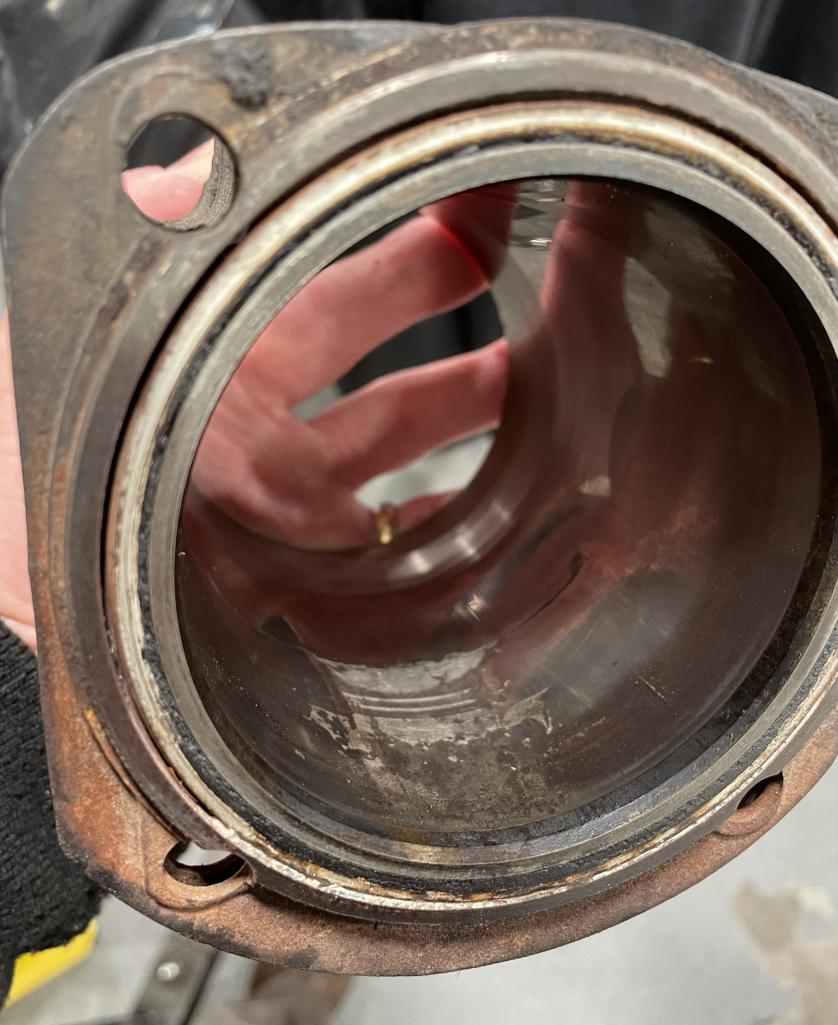
Posted by: Dion Feb 15 2025, 03:31 PM
Oh did I mention some chattering of teeth.
Attached thumbnail(s)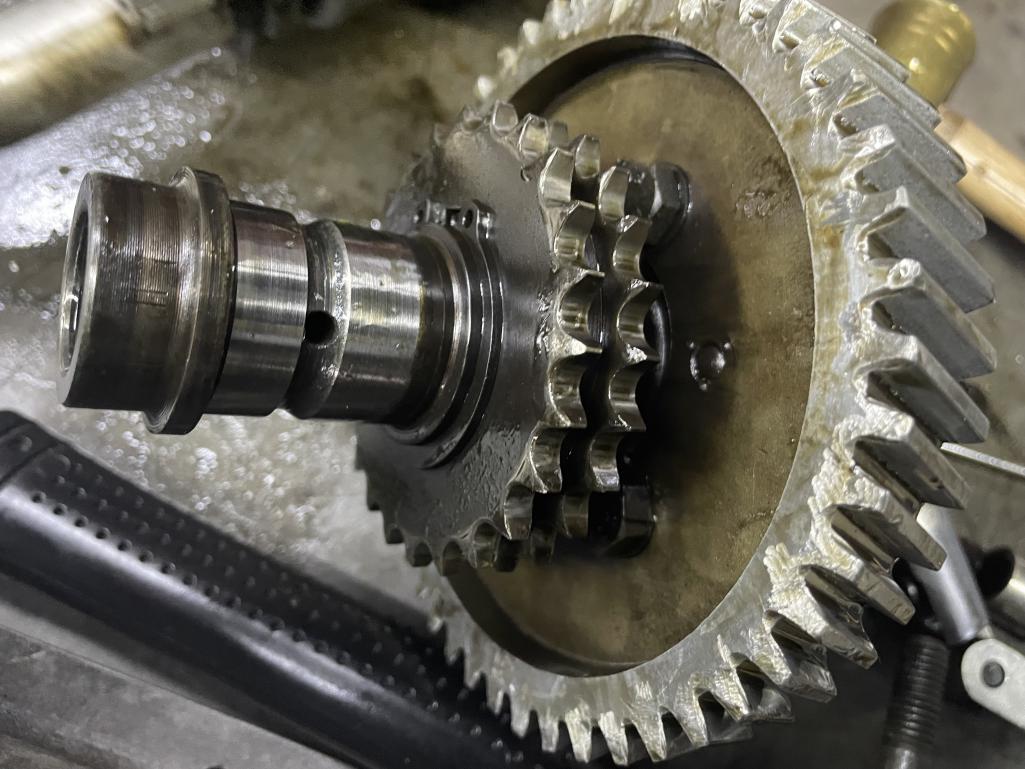
Posted by: Dion Feb 15 2025, 03:36 PM
Heads to be shipped to machine shop. Case will get piston squirters and oil bypass mod in prep for oil pump upgrade. 4 rib version likely.
Attached thumbnail(s)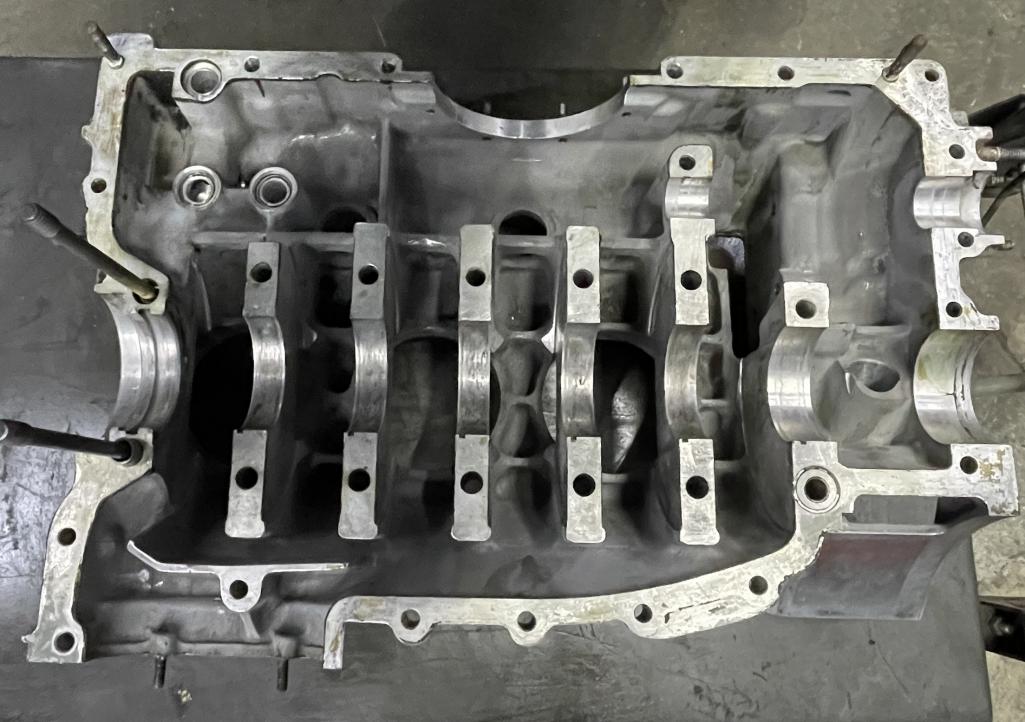
Posted by: Dion Feb 15 2025, 03:38 PM
Case ready to ship.
Attached thumbnail(s)
Posted by: Dion Feb 15 2025, 03:42 PM
Procured some Biral cylinders for the project. Will get these reconditioned.
Attached thumbnail(s)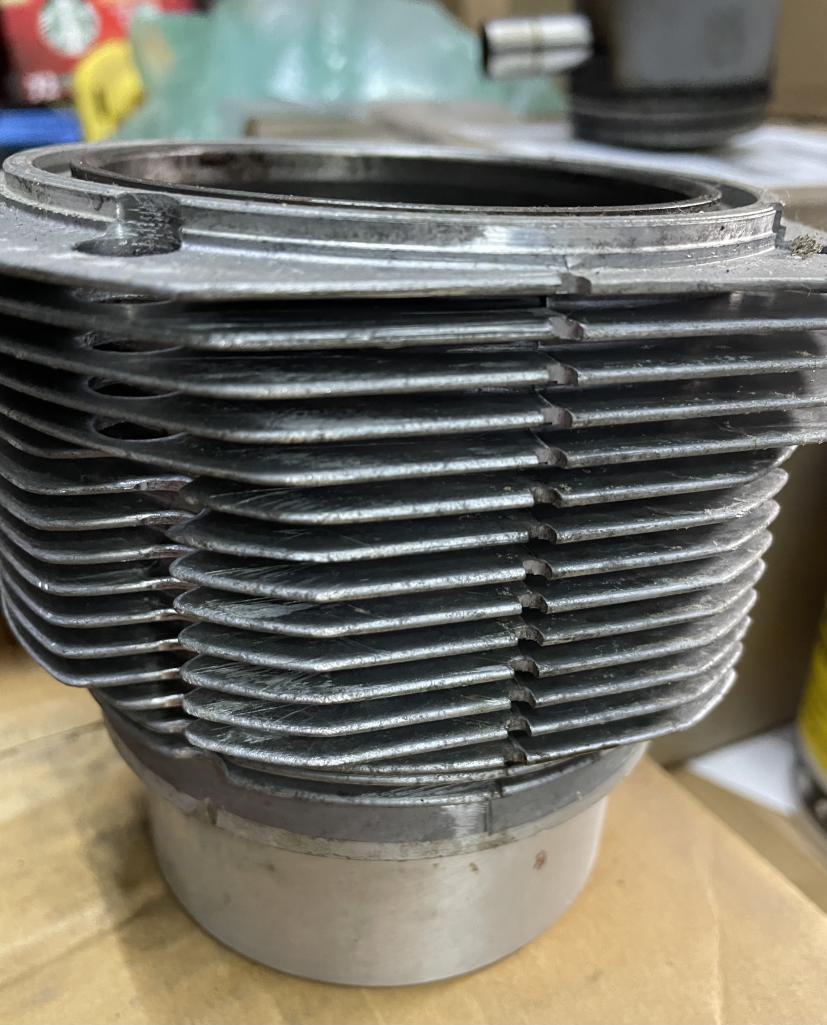
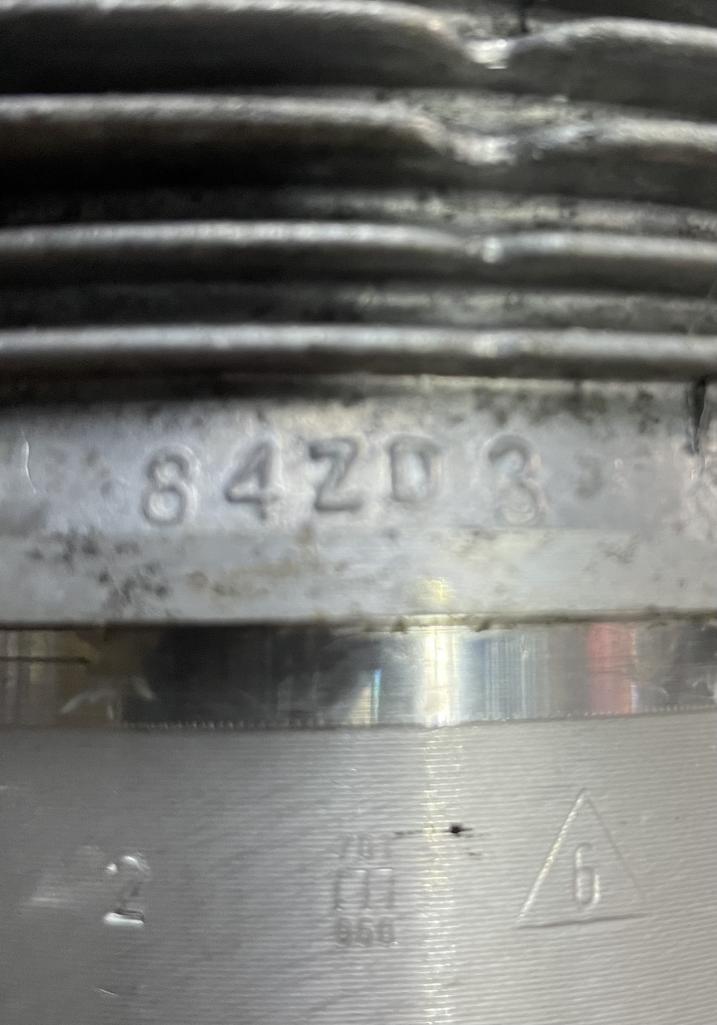
Posted by: Dion Feb 15 2025, 03:44 PM
This was a fun project the other day. Gear prolly on here since ‘67.
Plenty of heat. Stubborn as hell. Still have the other set to remove.
Attached thumbnail(s)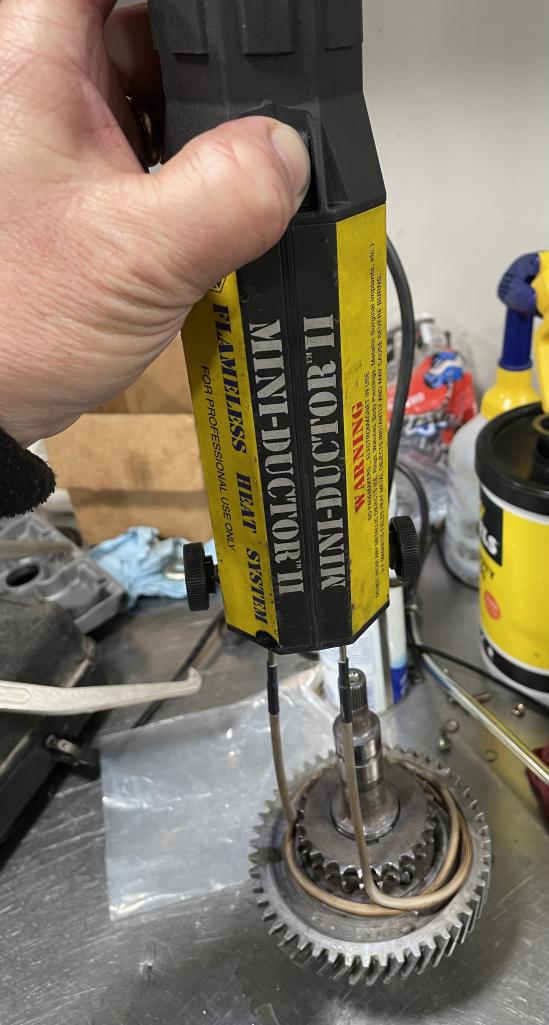
Posted by: Dion Feb 22 2025, 08:02 AM
First round cleaning of the cam carriers. Need to hit them with the scotch brite again and then another round in the ultrasound tank.
Spray bar inside had the end plugs tapped and pulled.
Attached thumbnail(s)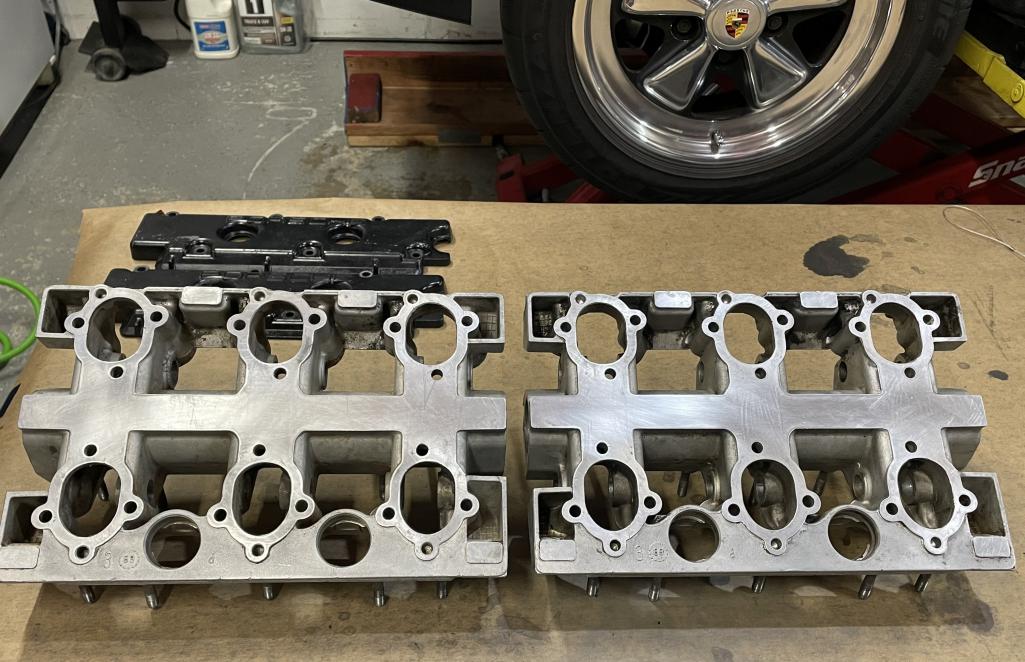
Posted by: Dion Feb 22 2025, 08:05 AM
Was able to find some nice replacement gears for the IMS.
Attached thumbnail(s)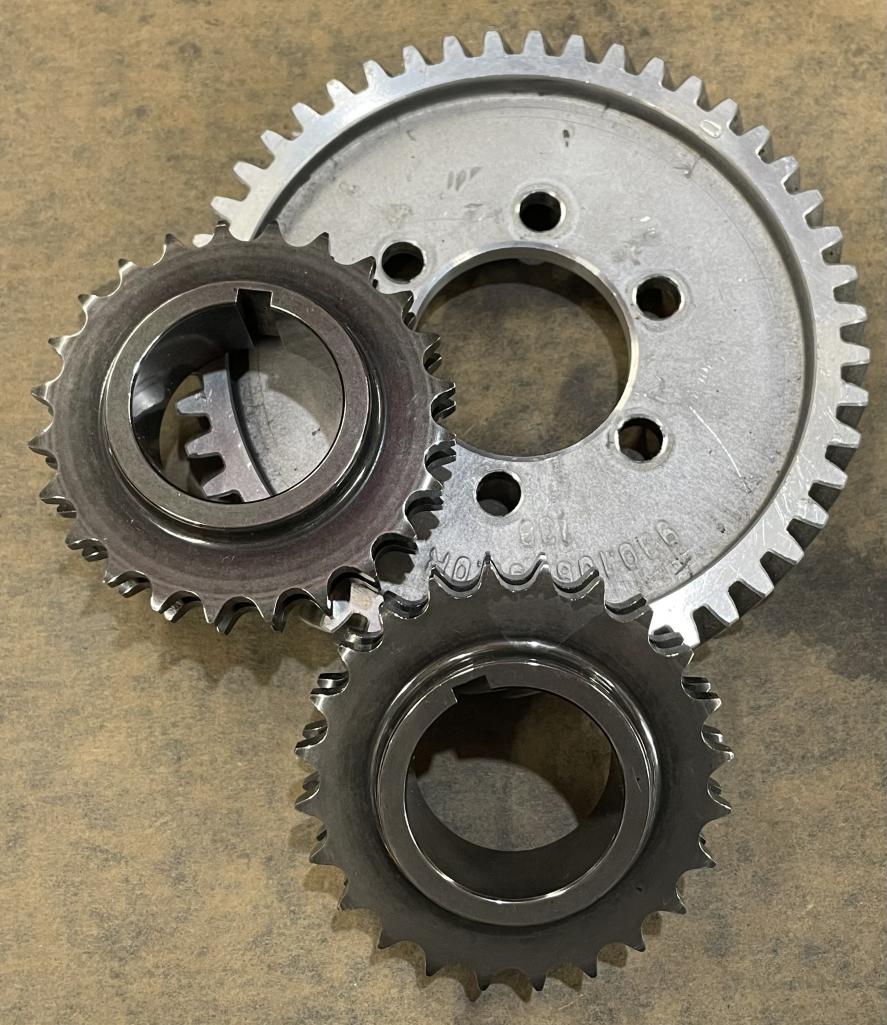
Posted by: Olympic 914 Feb 22 2025, 08:48 AM
Pretty serious project. Will you be doing the reassembly ?
Will be following this.
Posted by: tygaboy Feb 22 2025, 08:56 AM
Hey Dion! Great progress. Can't wait to see it back together and on the road.
Posted by: Dion Apr 1 2025, 07:49 AM
Reconditioned barrels have returned.
Attached thumbnail(s)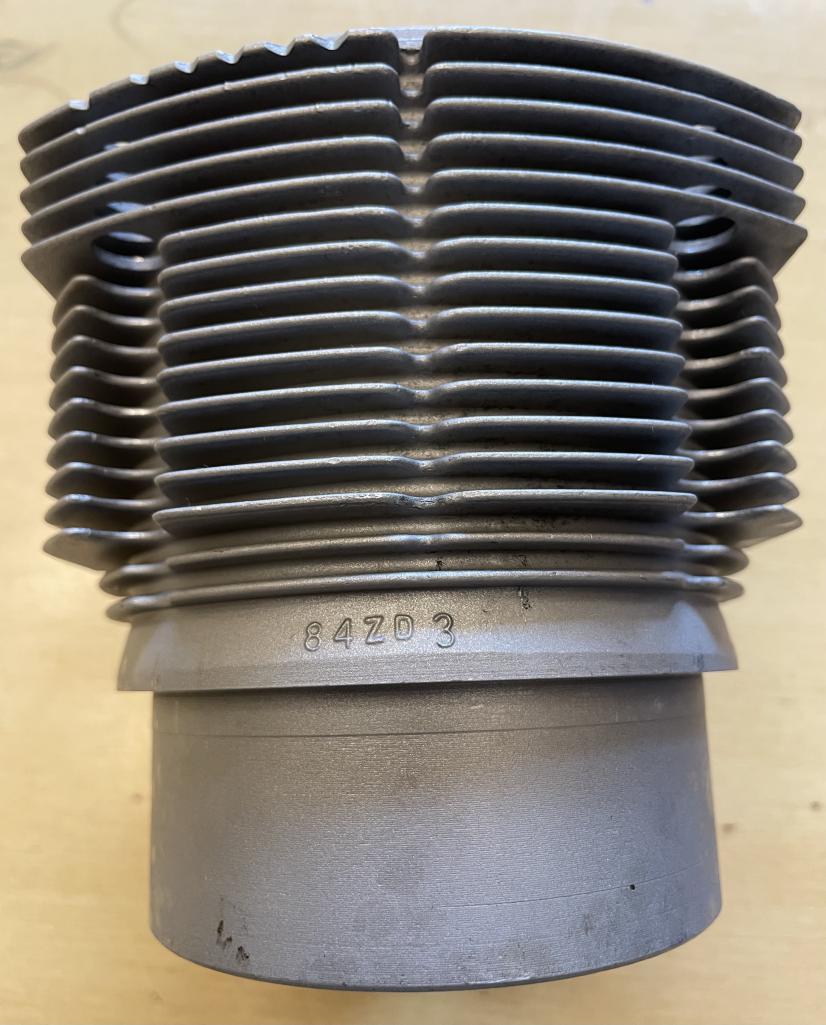
Posted by: Dion Apr 1 2025, 07:52 AM
Barrel
Attached thumbnail(s)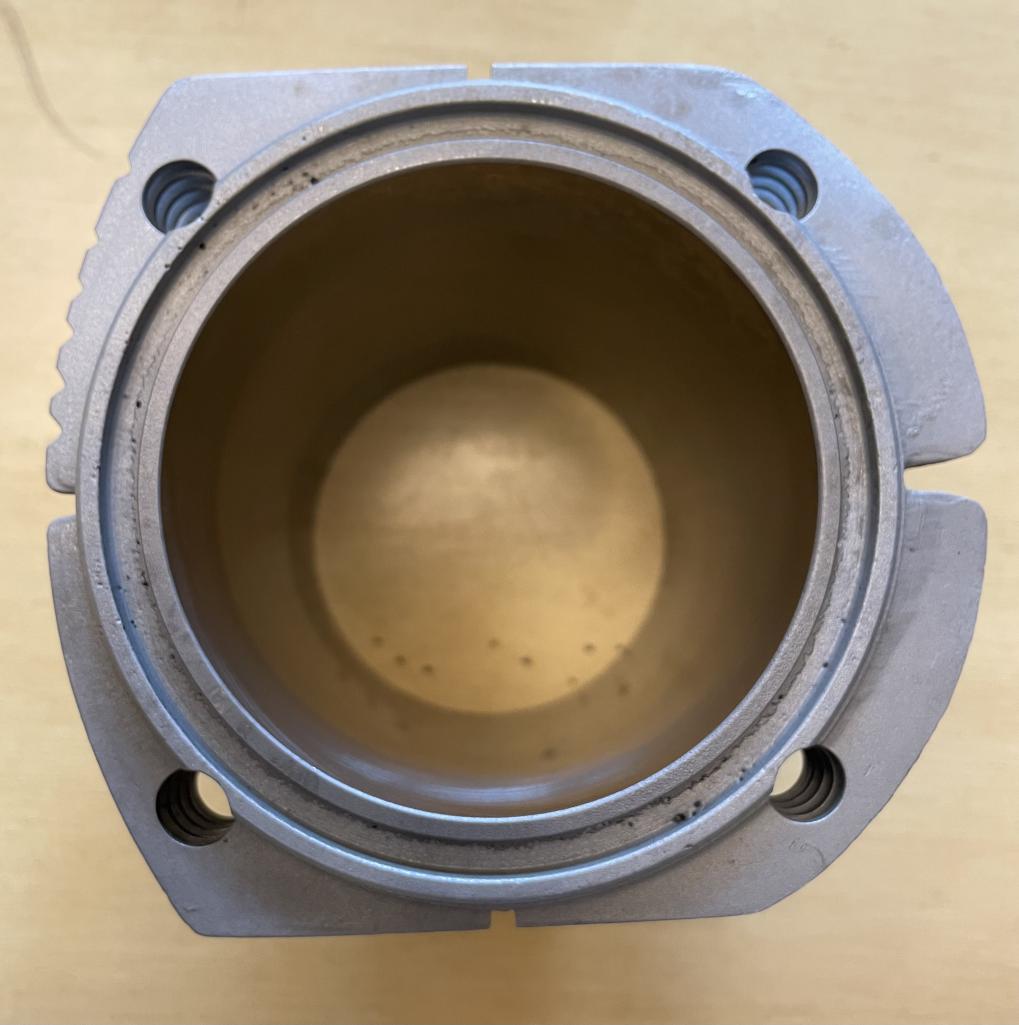
Posted by: Dion Apr 1 2025, 07:54 AM
& JE pistons have arrived. Still awaiting for machine shop to complete the heads.
Attached thumbnail(s)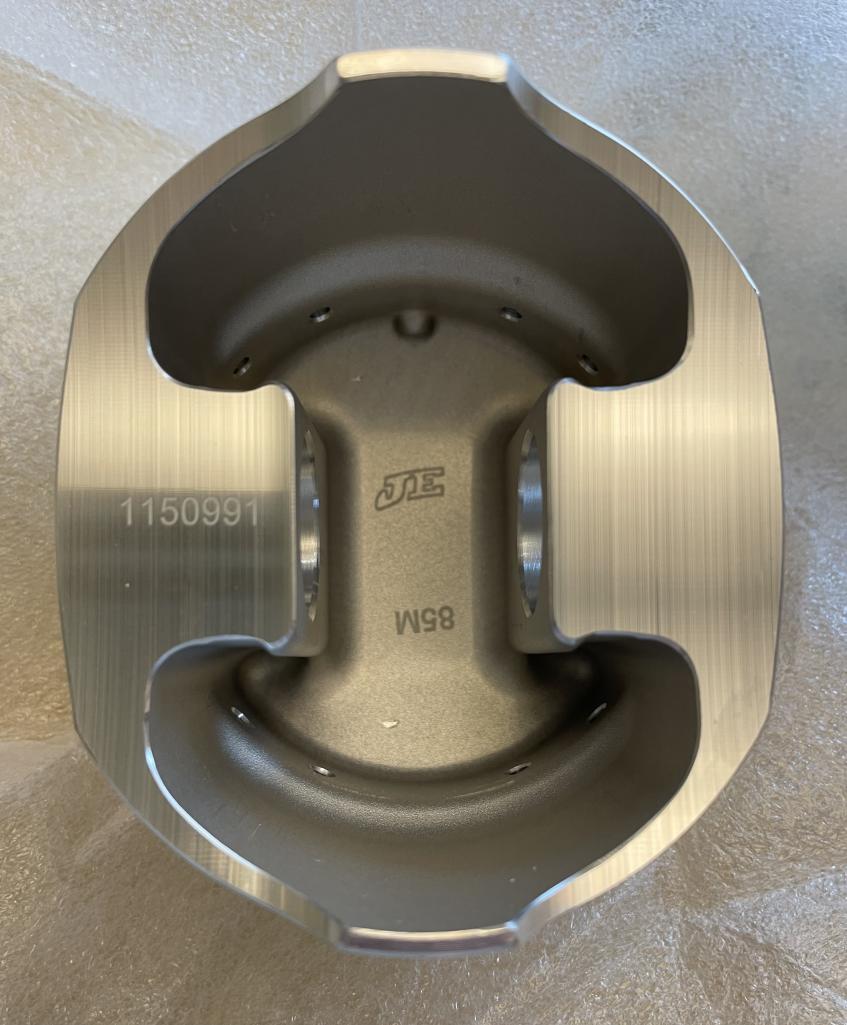
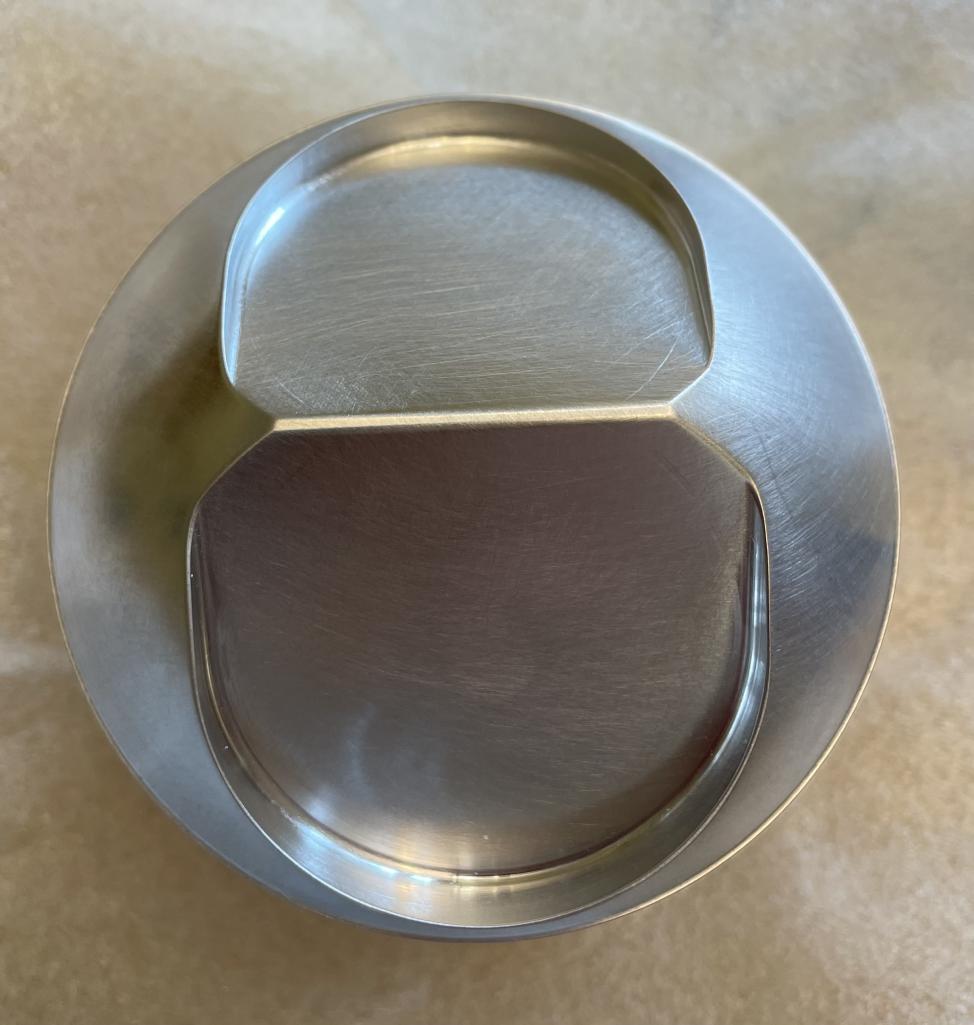
Posted by: Dion Apr 1 2025, 07:55 AM
JE 85mm. Hoping to begin reassembly in late April.
Attached thumbnail(s)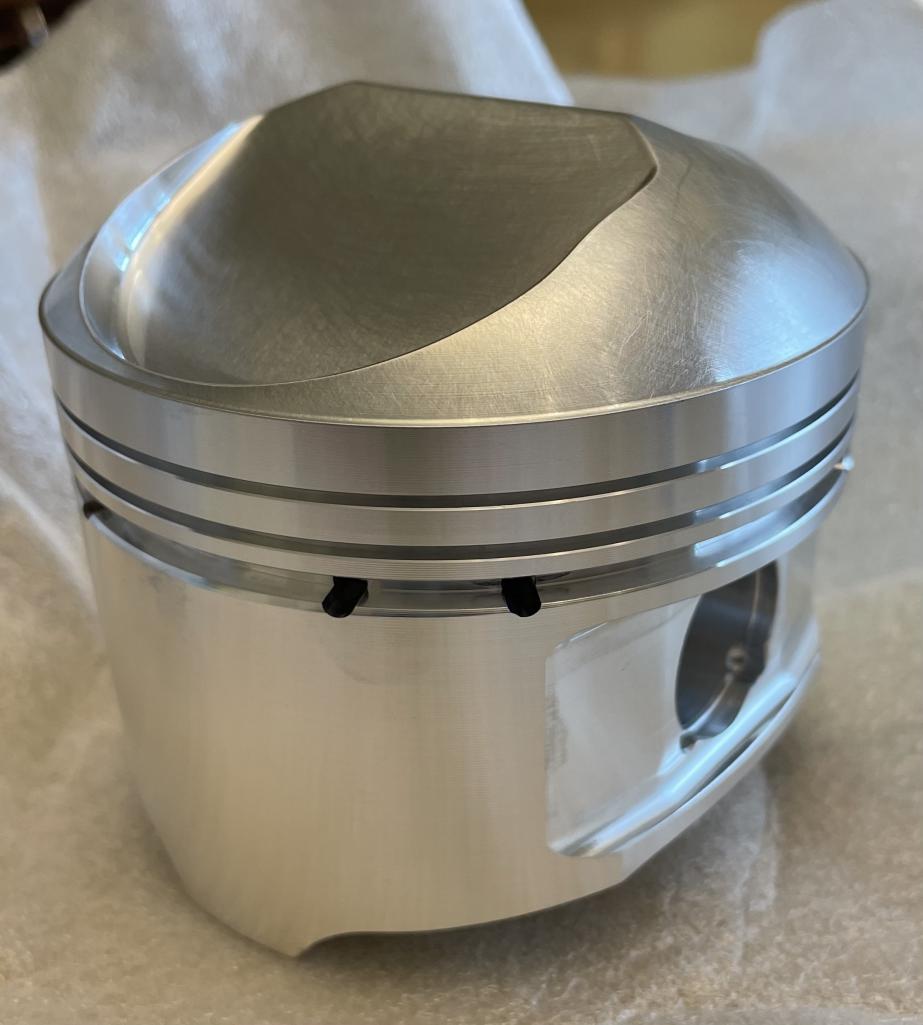
Posted by: campbellcj Apr 1 2025, 07:02 PM
Posted by: tygaboy Apr 2 2025, 08:10 AM
Nothing more exciting than lovely, new engine parts... Can't wait to hear it running!
Posted by: Dion May 13 2025, 08:26 AM
Well it’s been a hot minute. Trying to get the 2.4 rebuilt along with dealing with my Dad who unfortunately suffered a stroke, fell and broke his humerus.
So firstly I want to thank my family and friends in helping keep my sanity through all this.
Hats off to the 914Mob, they know who they are!
A big thanks to @http://www.914world.com/bbs2/index.php?showuser=10825 who helped me procure parts and services.
The shop that is helping me allows me to make mistakes and teach me the rebuilding process. It’s an absolutely cool learning experience.
So here we are, a catch up on my build.
Lovely rebuilt heads:
Attached thumbnail(s)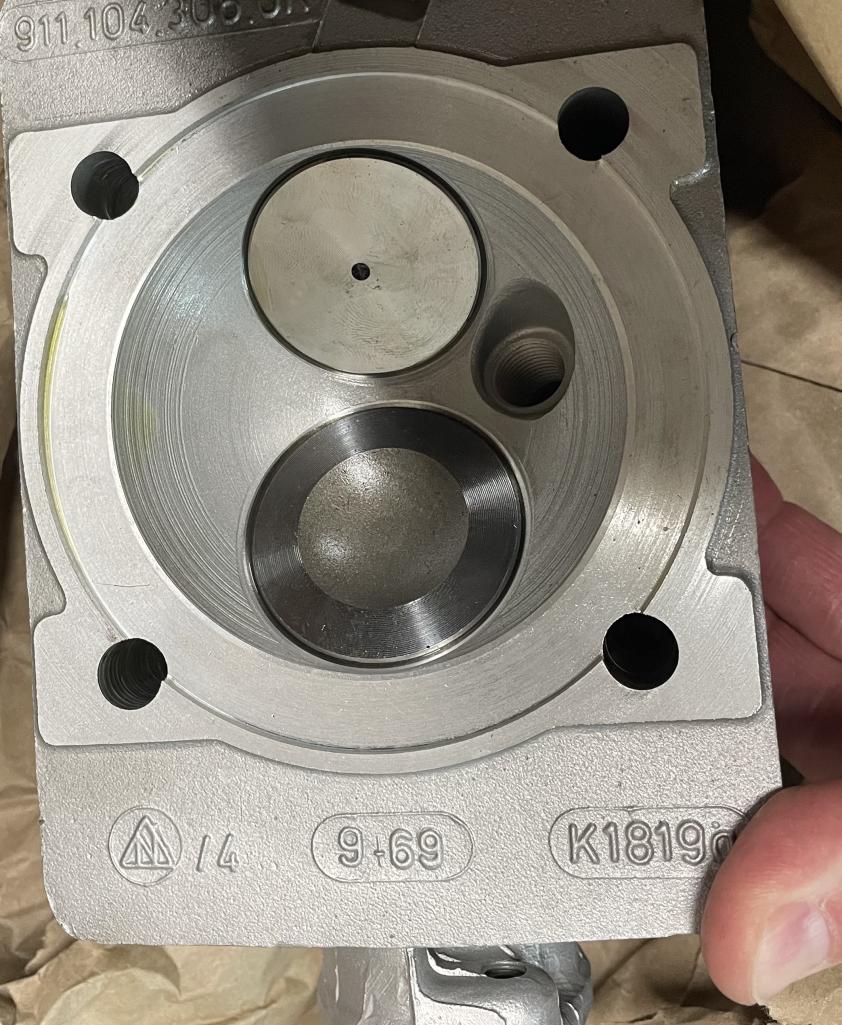
Posted by: Dion May 13 2025, 08:30 AM
Timing gears on IMS and polished chains.
Attached thumbnail(s)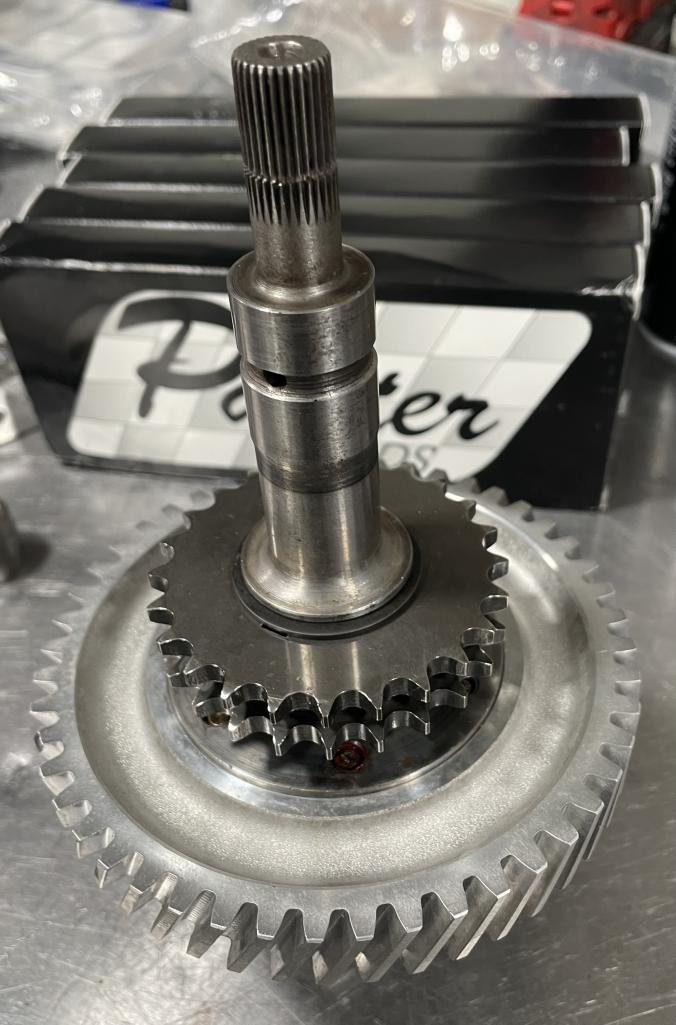
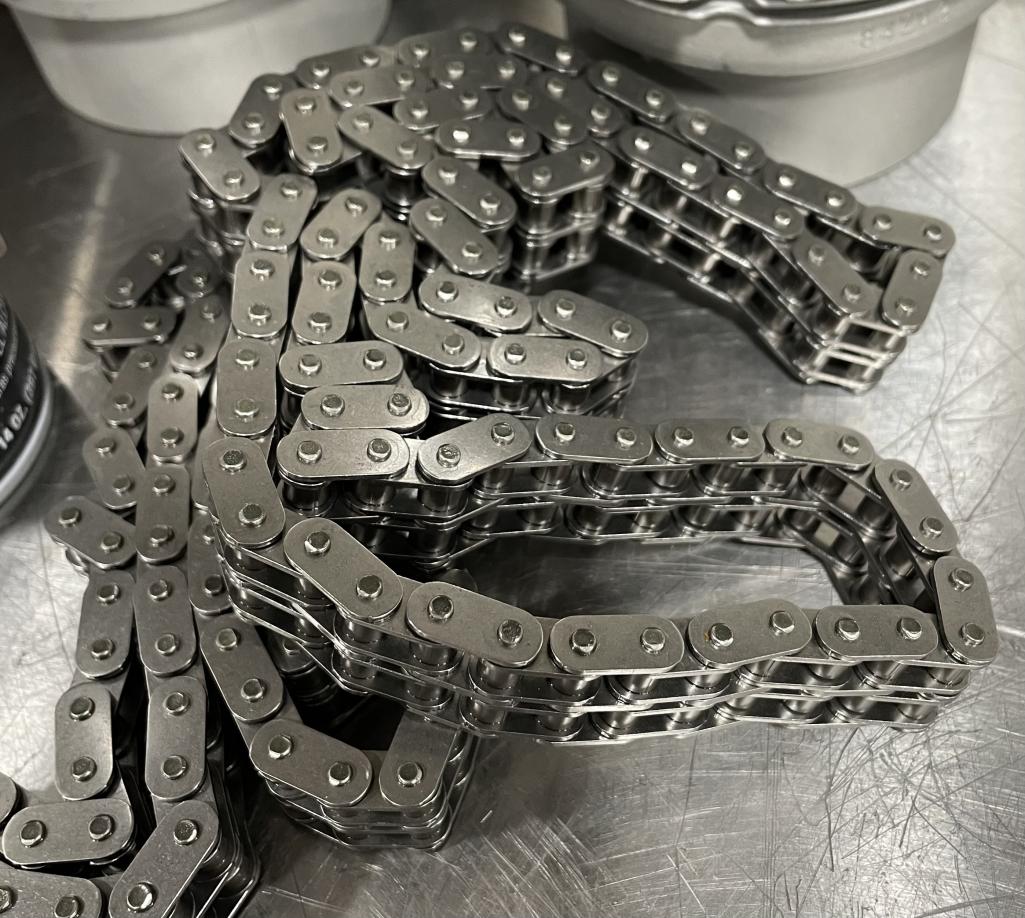
Posted by: Dion May 13 2025, 08:31 AM
Cranky
Attached thumbnail(s)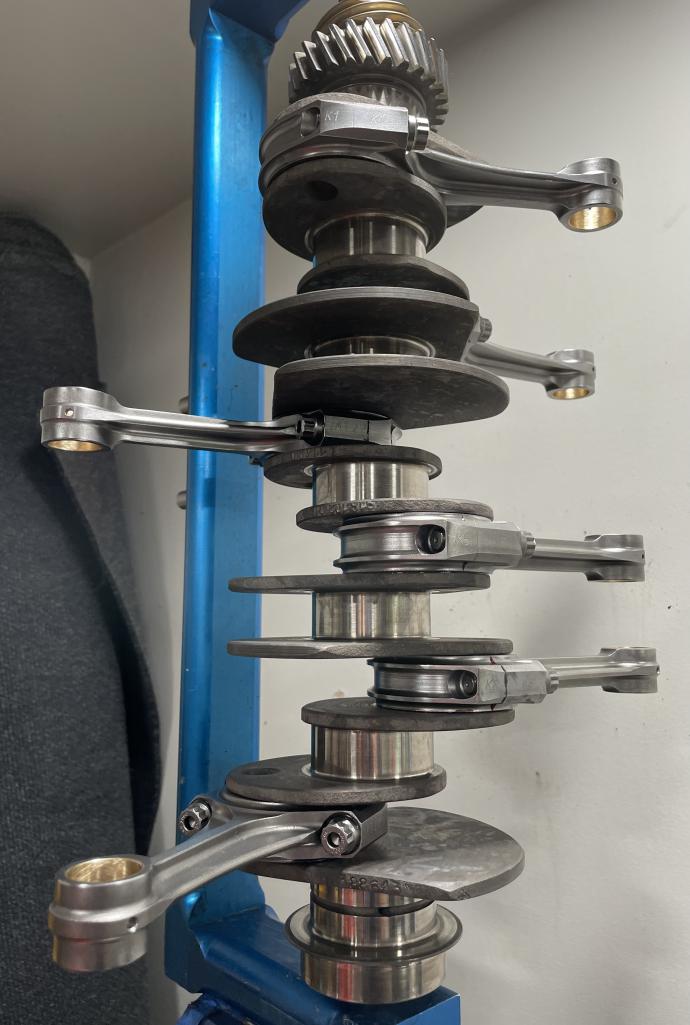
Posted by: Dion May 13 2025, 08:33 AM
Double coated Bearings in place.
Attached thumbnail(s)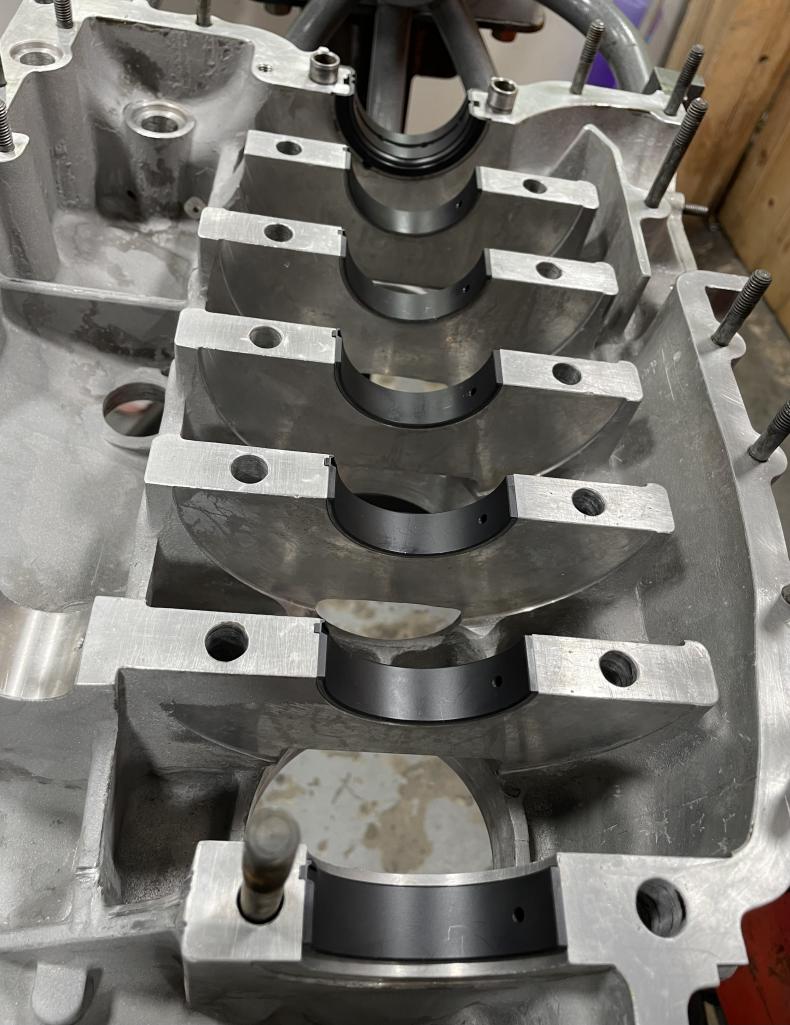
Posted by: Dion May 13 2025, 08:35 AM
Rebuilt 4 rib pump
Attached thumbnail(s)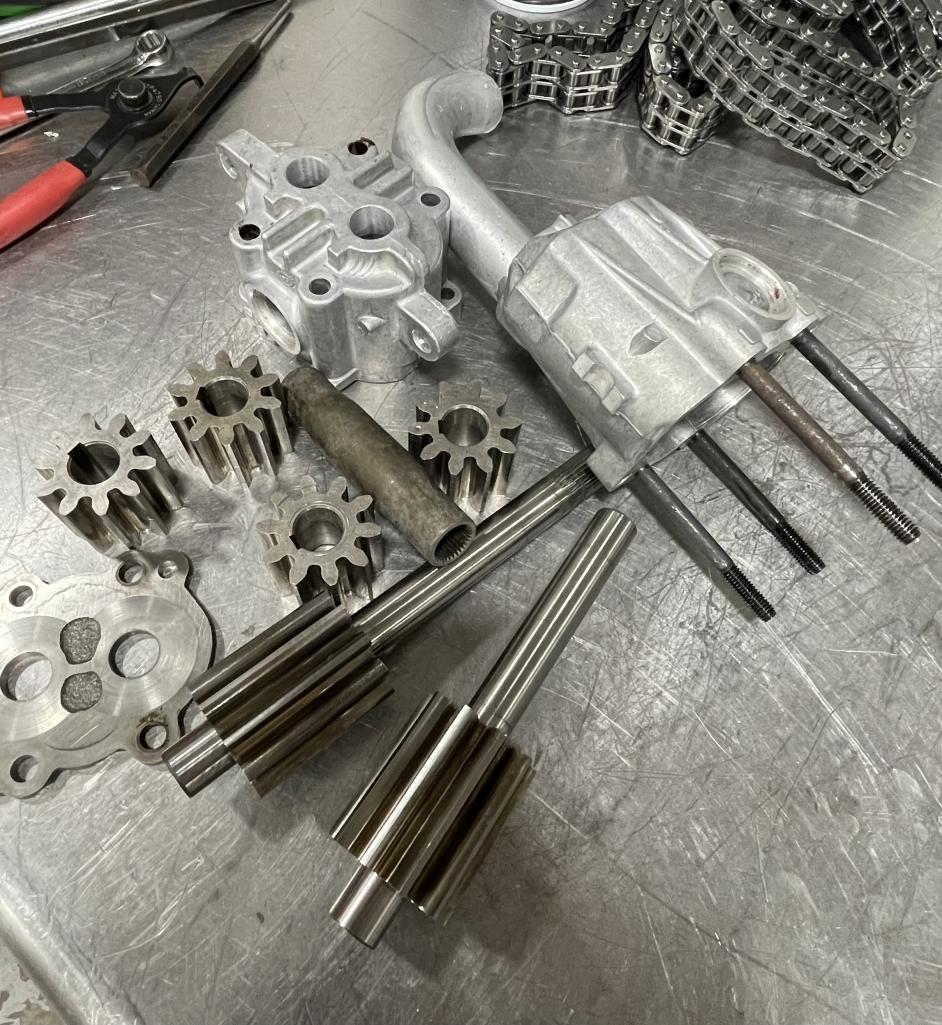
Posted by: Dion May 13 2025, 08:36 AM
Come together
Attached thumbnail(s)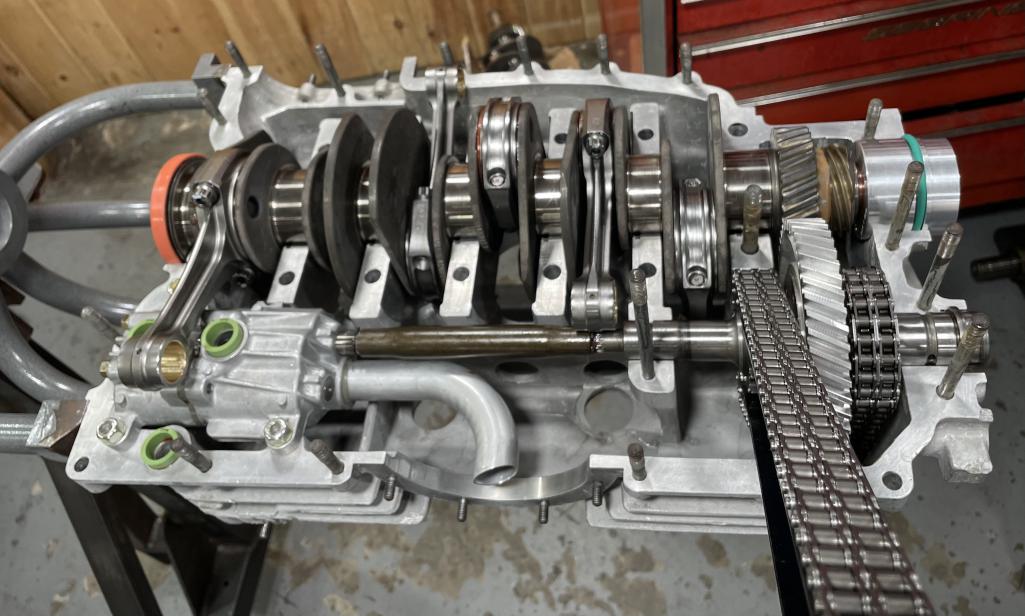
Posted by: Dion May 13 2025, 08:37 AM
Mating case halves
Attached thumbnail(s)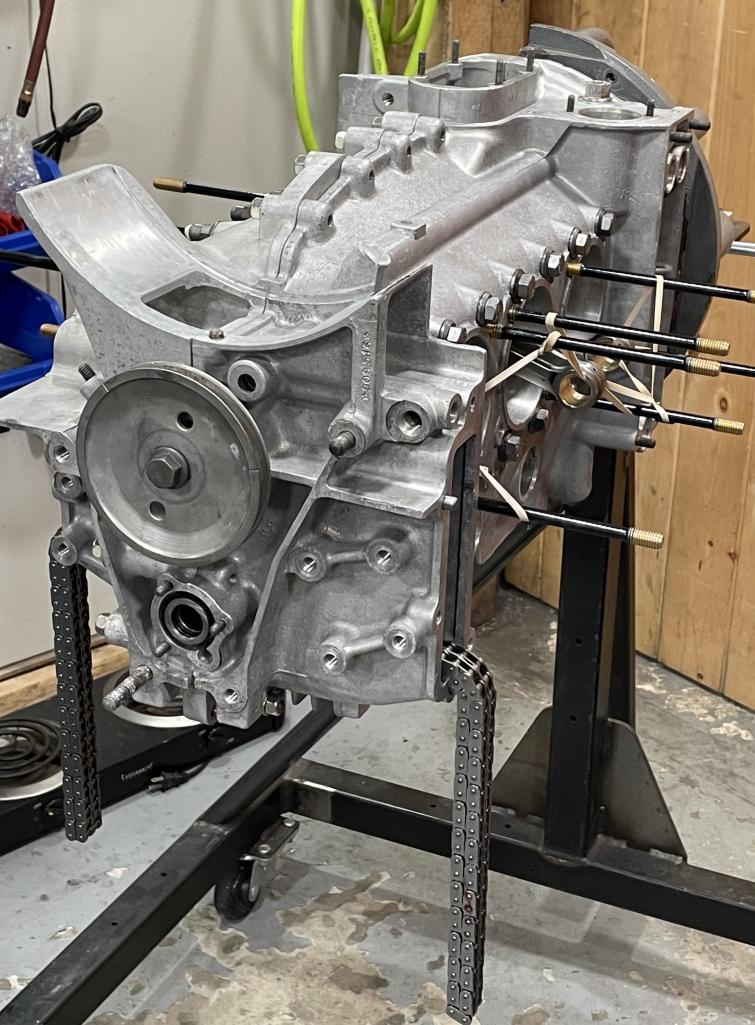
Posted by: Dion May 13 2025, 08:38 AM
Pistons and barrels on
Attached thumbnail(s)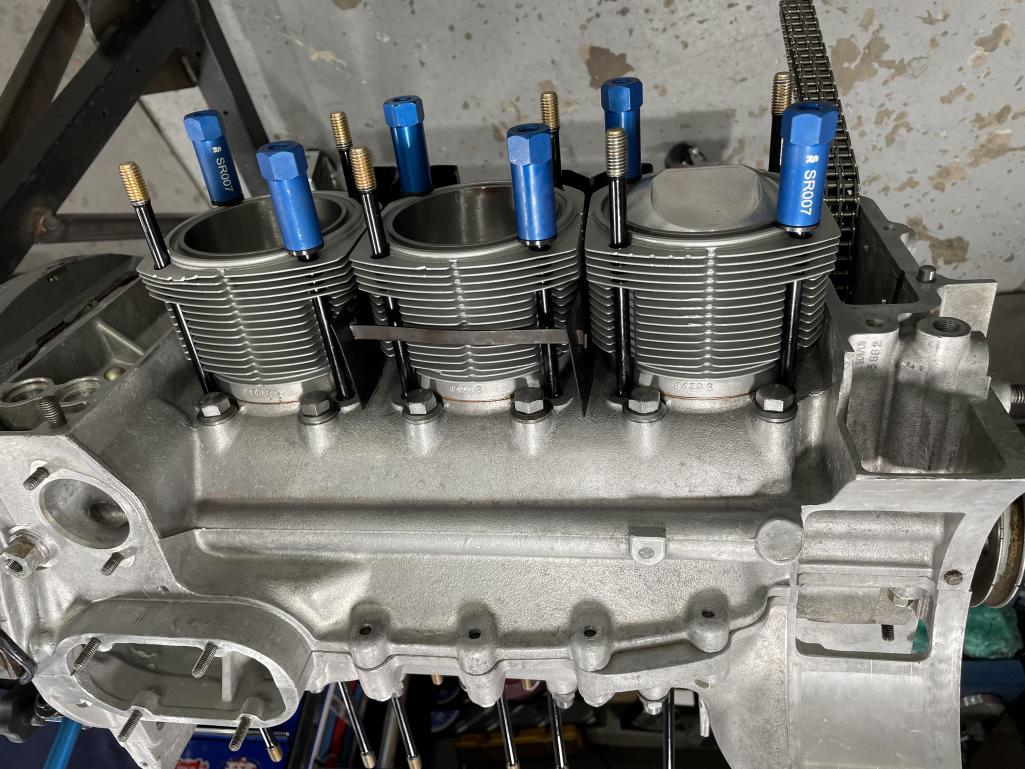
Posted by: Dion May 13 2025, 08:41 AM
Getting there
Attached thumbnail(s)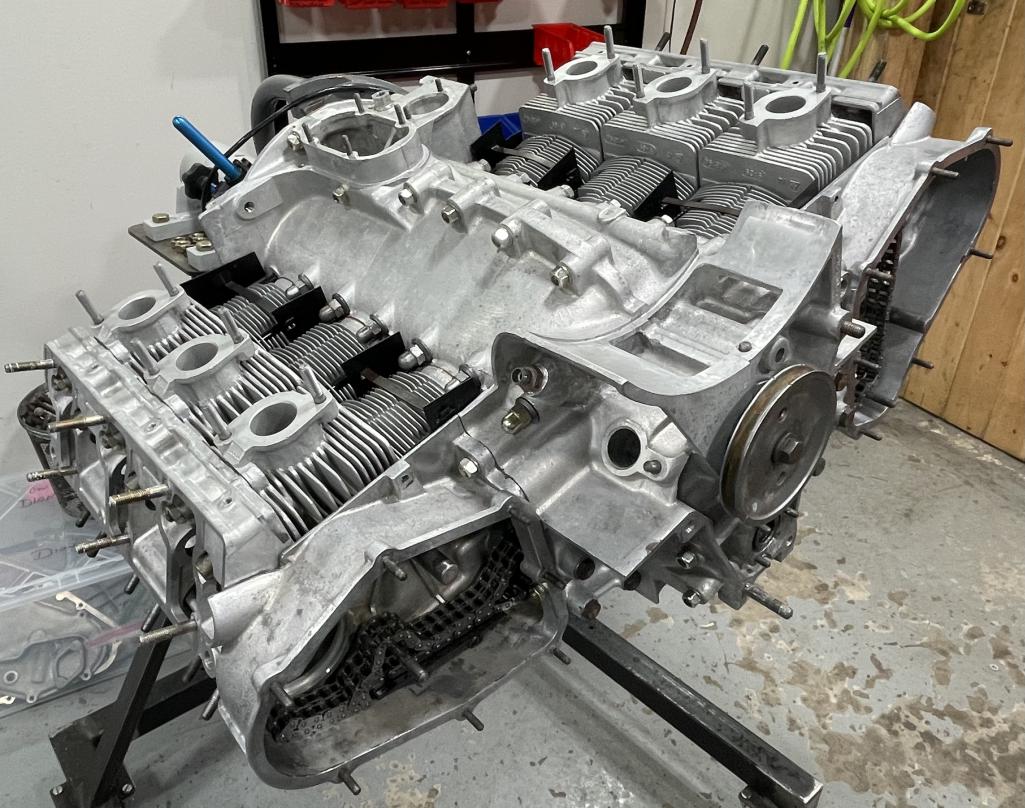
Posted by: Dion May 13 2025, 08:43 AM
930 tensioners with safety collars:
Attached thumbnail(s)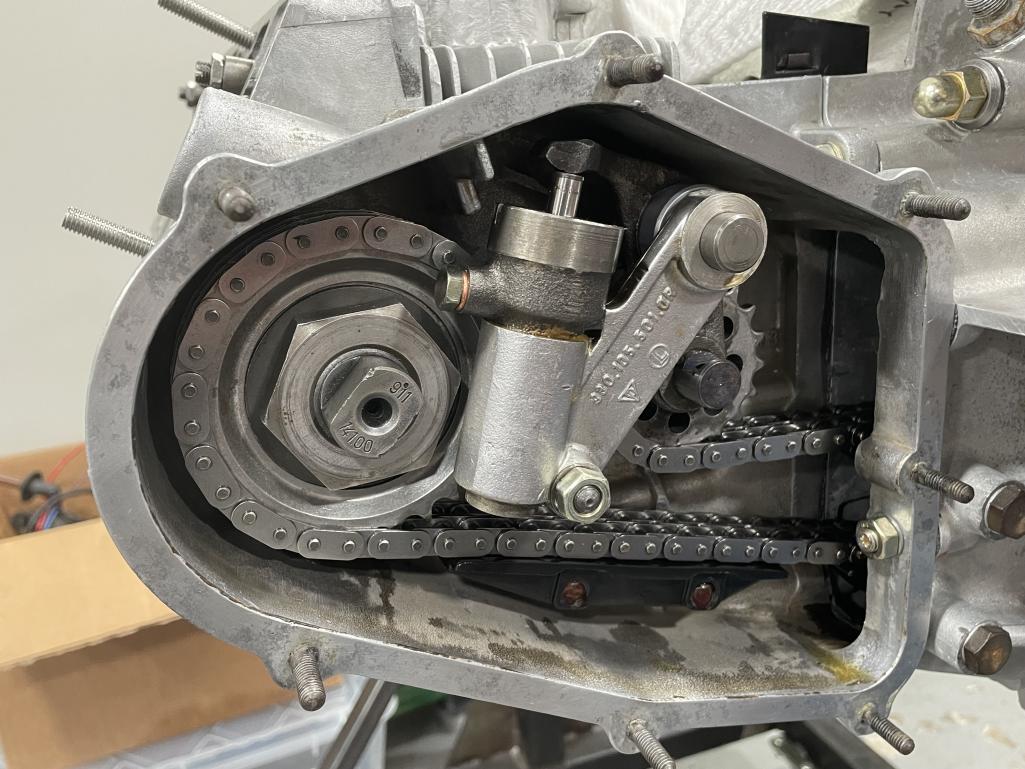
Posted by: Dion May 13 2025, 08:45 AM
Rockers in & valves adjusted:
Attached thumbnail(s)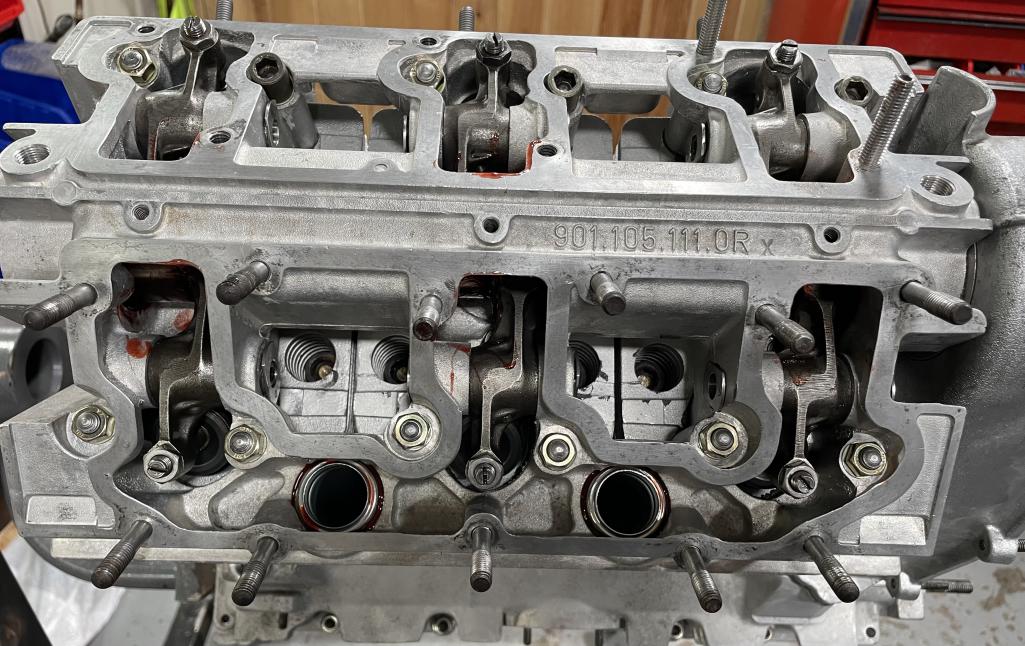
Posted by: Dion May 13 2025, 08:47 AM
It’s looking more like a complete powerplant.
Attached thumbnail(s)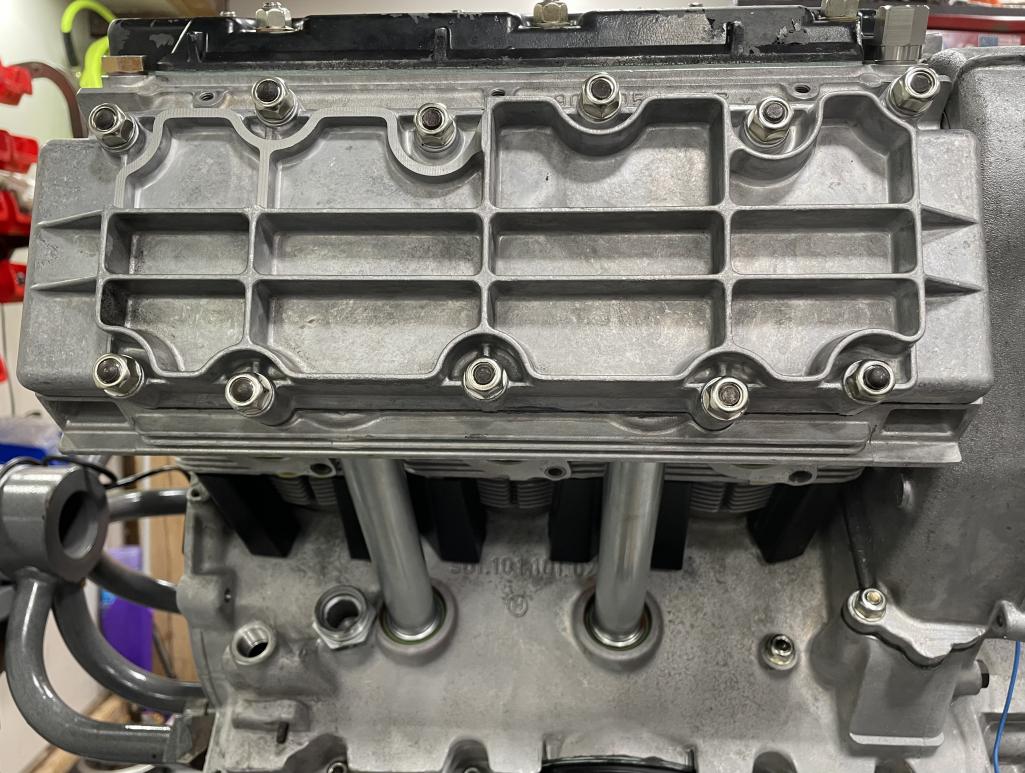
Posted by: Dion May 13 2025, 08:48 AM
Bottoms up
Attached thumbnail(s)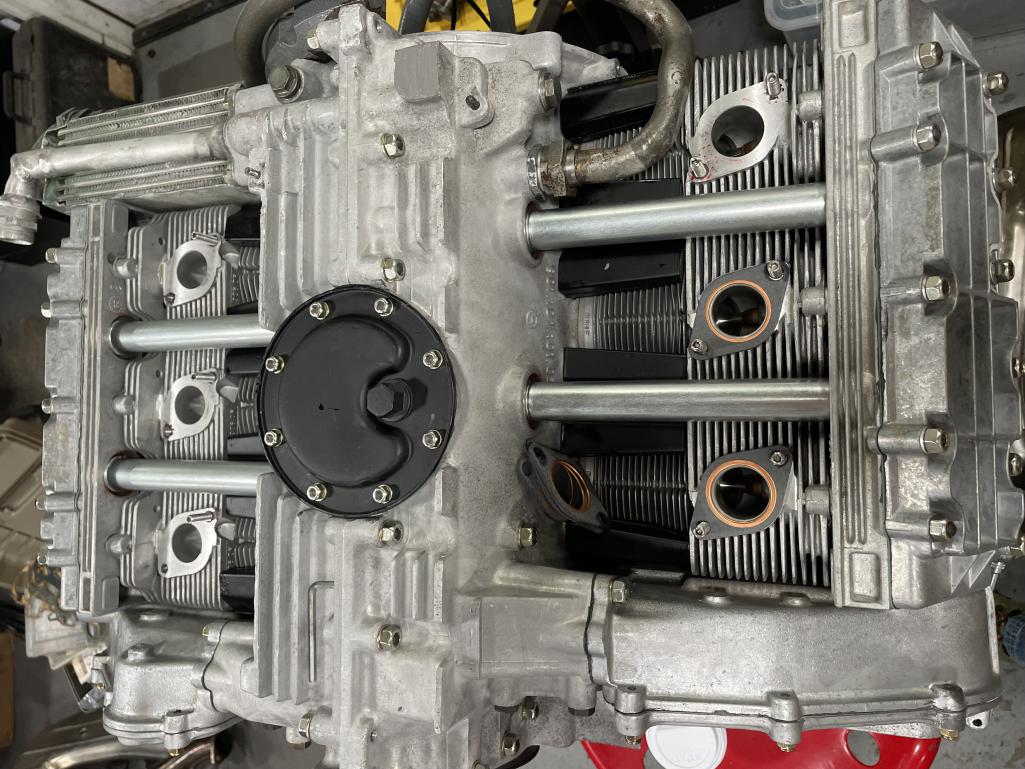
Posted by: Dion May 13 2025, 08:50 AM
Came to find out , my engine never had a cozy cone. Now it does!
Attached thumbnail(s)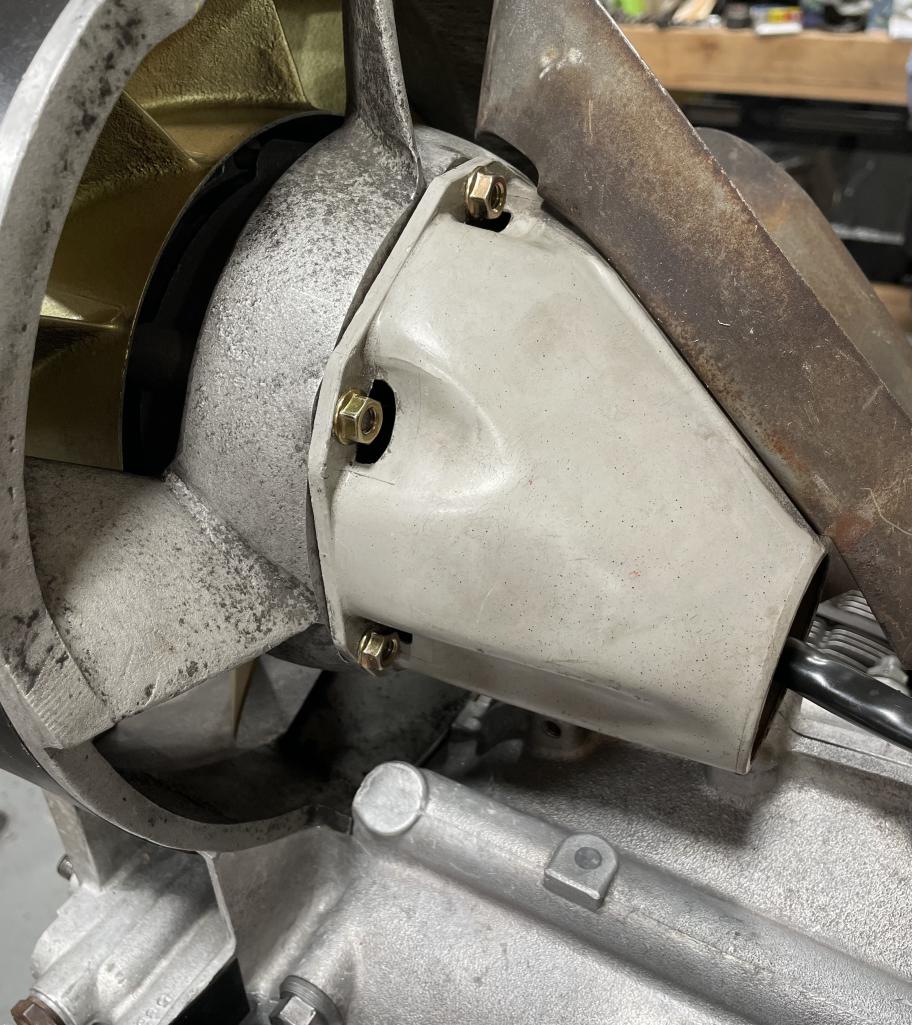
Posted by: Dion May 13 2025, 08:51 AM
Almost there
Attached thumbnail(s)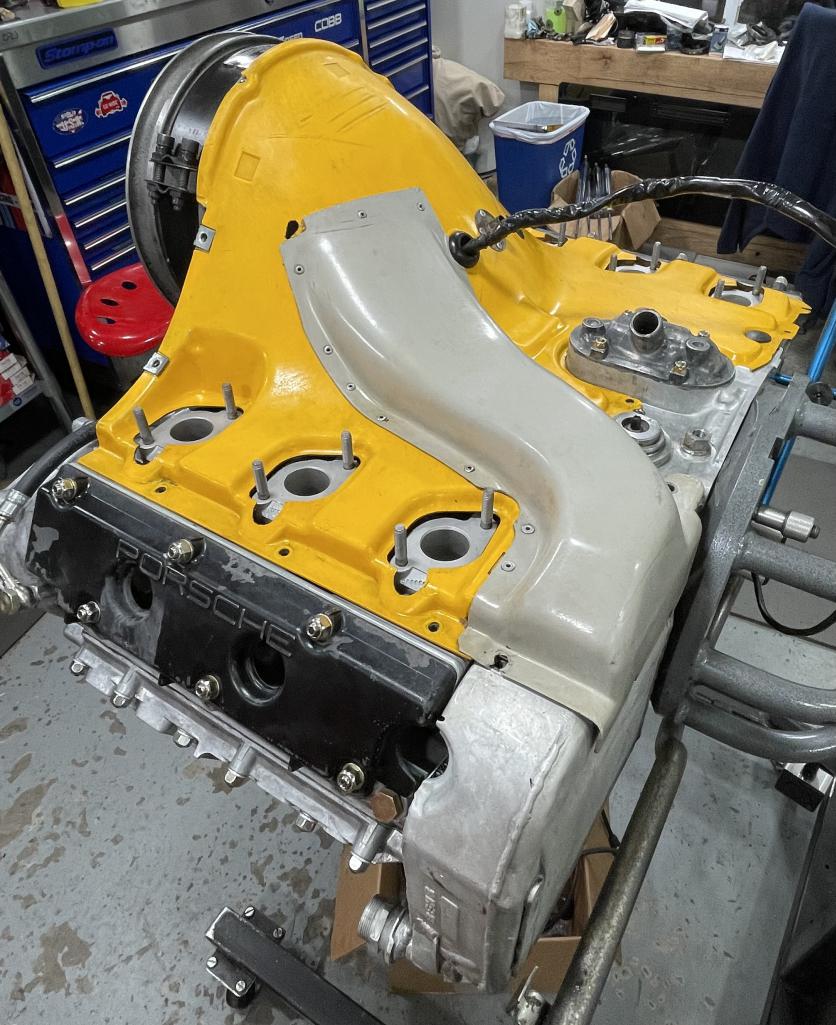
Posted by: Dion May 13 2025, 08:53 AM
On the test stand
Attached thumbnail(s)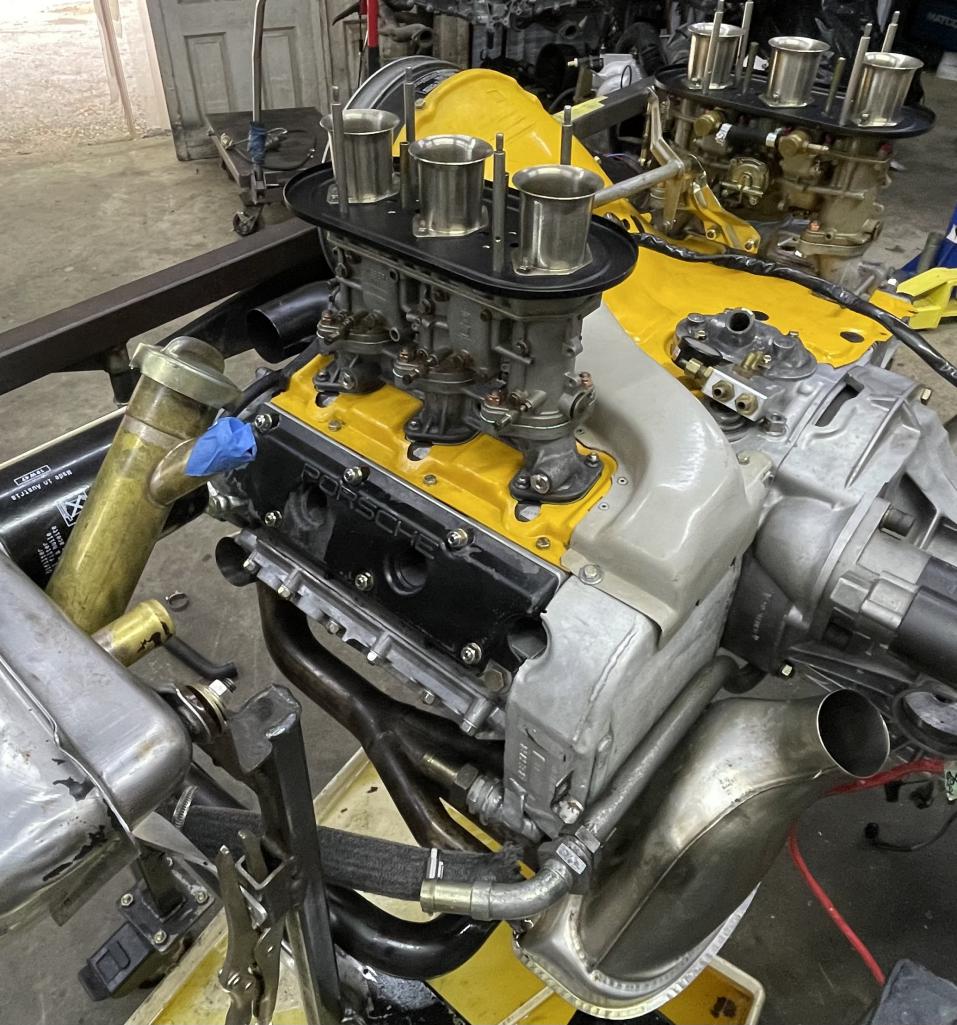
Posted by: Dion May 13 2025, 09:02 AM
Building pressure 20 to 60 to 80psi 30weight break in oil.
https://youtube.com/shorts/ZRLZRBSk6u0?si=8c9RuF5NqY9gPfQI
Posted by: Dion May 13 2025, 09:09 AM
Dialing the Webers
https://youtu.be/BZ9M-RIee2Q?si=gzbA13lAcfM3NCyJ
Posted by: Dion May 13 2025, 09:12 AM
A lovely sound, DONE!
https://youtu.be/Buh6J86nLRI?feature=shared
Posted by: Dion May 13 2025, 09:15 AM
So plan is to mate to chassis this Thursday. Need to put some miles on and then redo
valve adjustments.
Will be participating in Ruchlos Rallye with some of 914Mob. Looking very much forward to this.
Thanks for looking in!
Posted by: Root_Werks May 13 2025, 09:50 AM
Awesome progress! It's so nice to run an engine on a stand before installing it.
Posted by: TJB/914 May 13 2025, 10:41 AM
Dion,
Congratulations
Tom
Posted by: Dion May 13 2025, 10:54 AM
Thanks Dan & Tom.
I’m quite surprised at how well the engine ran prior to this rebuild.
In addition to the sad valves on #4, all the valve guides were worn, valves had to be replaced & the case had someone in there before. Found evidence of Mr Rod knocking.
It’s had a tough life. We will now treat with some respect.
Porsche built some tough engines that’s for sure.
Posted by: Cairo94507 May 13 2025, 11:02 AM
Congratulations Dion; sounds really nice. Good luck on the install Thursday.
Posted by: mepstein May 13 2025, 01:13 PM
Thanks Dan & Tom.
I’m quite surprised at how well the engine ran prior to this rebuild.
In addition to the sad valves on #4, all the valve guides were worn, valves had to be replaced & the case had someone in there before. Found evidence of Mr Rod knocking.
It’s had a tough life. We will now treat with some respect.
Porsche built some tough engines that’s for sure.
I can’t wait to hear feedback comparing before and after.
Posted by: BeatNavy May 13 2025, 04:08 PM
That's excellent, Dion
Hopefully I'll get a chance to hear it later this summer.
Posted by: rgalla9146 May 13 2025, 04:33 PM
Hey Dion
Well done !
Sounds great.
Looking forward to NEG and seeing in person.
Rory
PS no mention of those con rods ? I'm not tellin'
Posted by: friethmiller May 13 2025, 04:38 PM
Yeah baby! She's alive!
Posted by: Dion May 27 2025, 05:50 AM
Ok, back on track. Shout out to @http://www.914world.com/bbs2/index.php?showuser=20596 for bringing the chassis to the shop.
A few days of fettling, engine mounted, wiring began, linkage etc.
Carbs were quite a challenge. To get to that sweet spot for “most” driving conditions.
Attached thumbnail(s)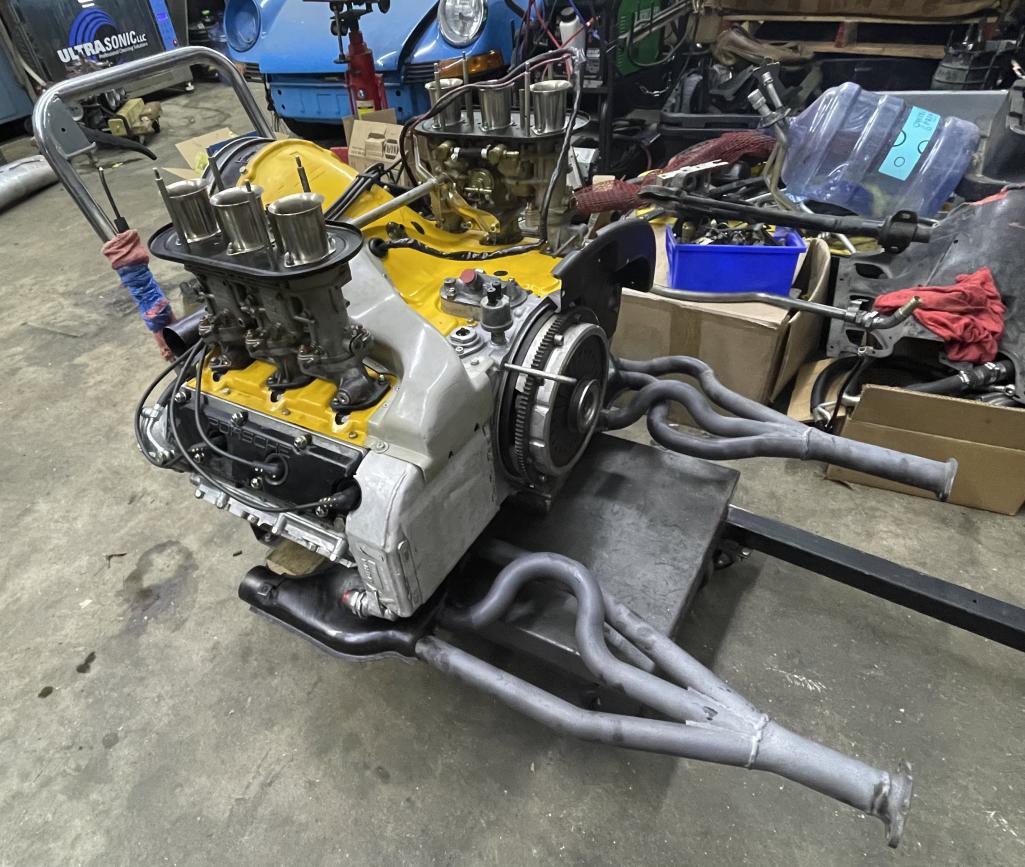
Posted by: Dion May 27 2025, 05:52 AM
Flywheel/clutch
Attached thumbnail(s)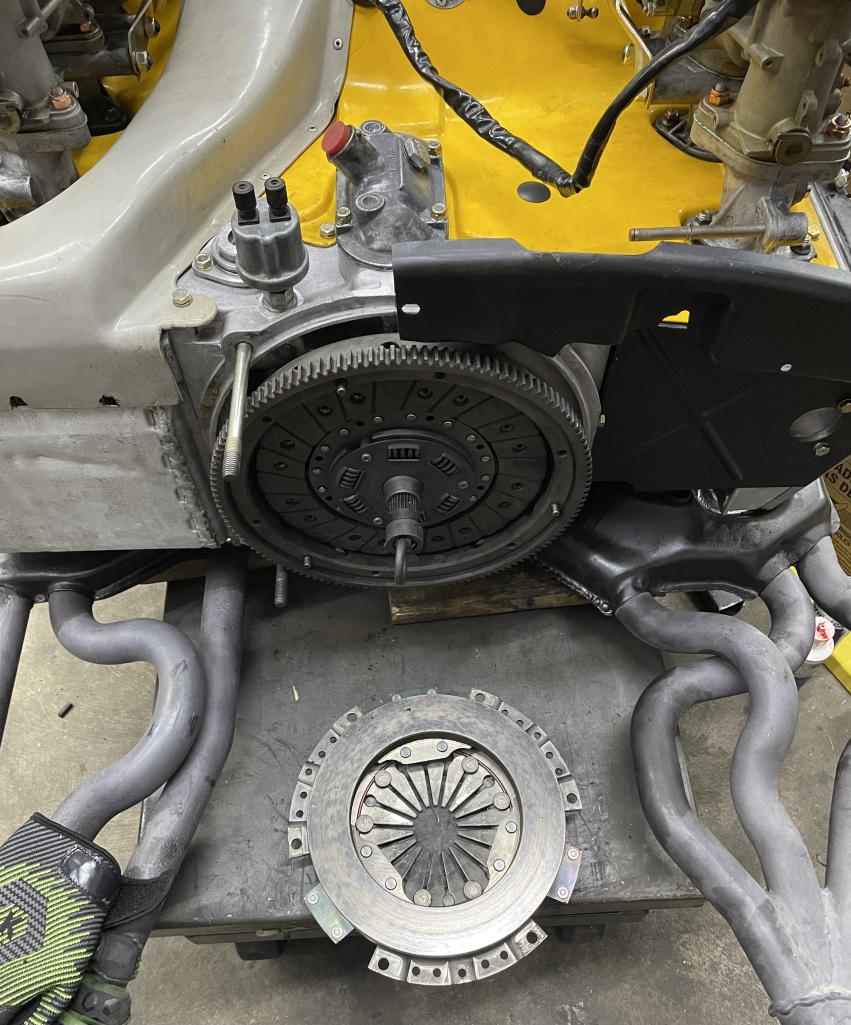
Posted by: Dion May 27 2025, 05:53 AM
Ready for lifting
Attached thumbnail(s)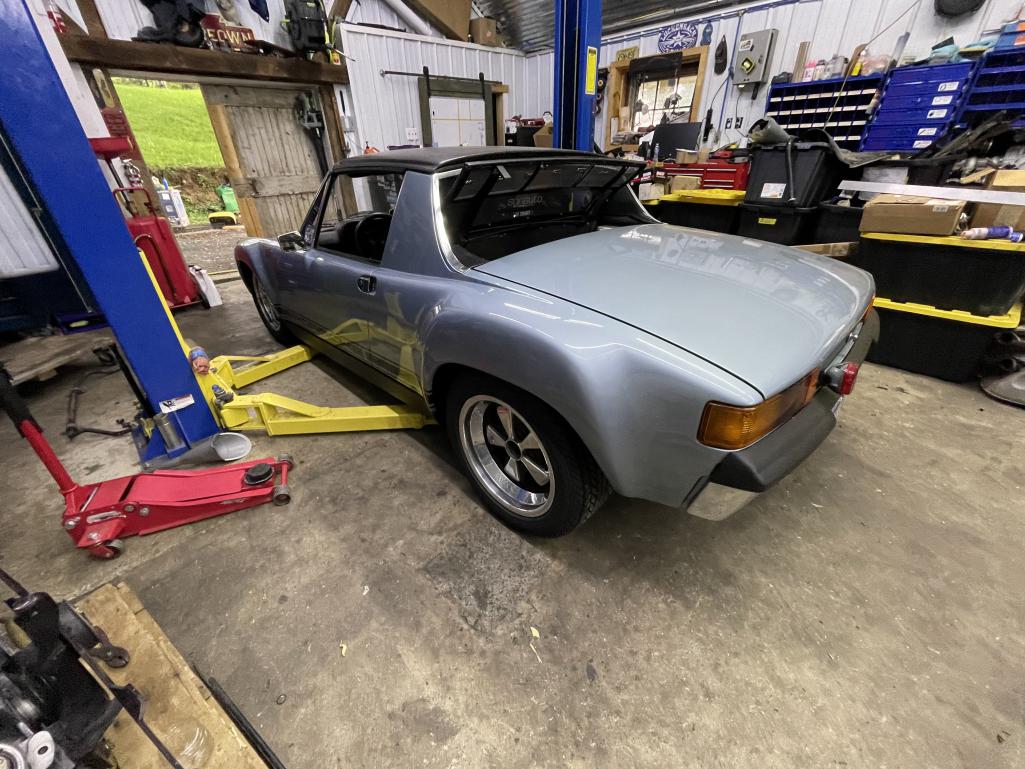
Posted by: Dion May 27 2025, 05:56 AM
So too busy installing, no pics of that but, once done. We sent it to get alignment.
New Pirelli on board.
Attached thumbnail(s)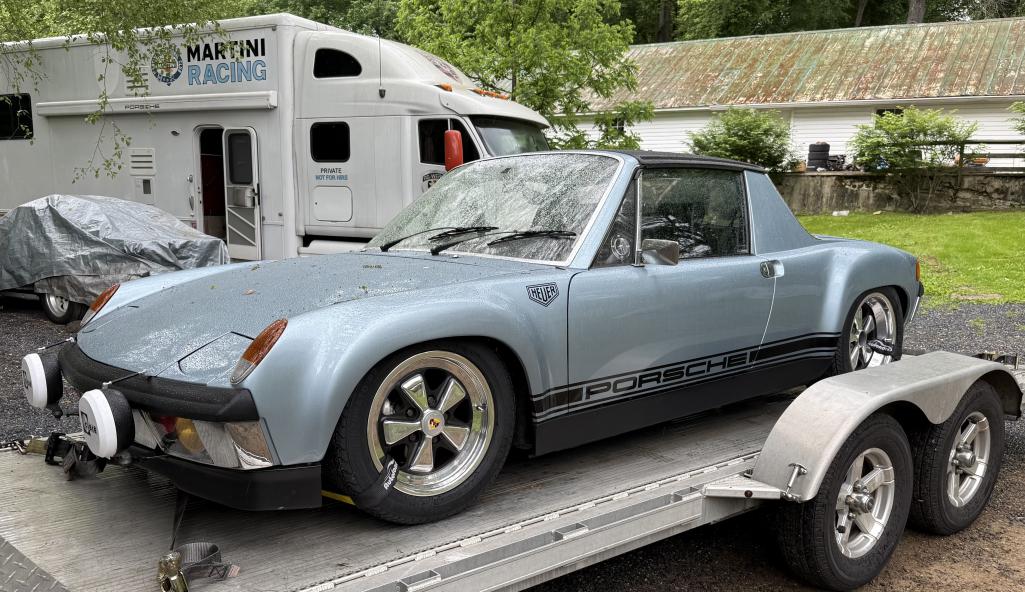
Posted by: Dion May 27 2025, 05:59 AM
A good buddy of mine Dave Tr. picked it up for me. Gave her a drink & brought back to the shop.
Attached thumbnail(s)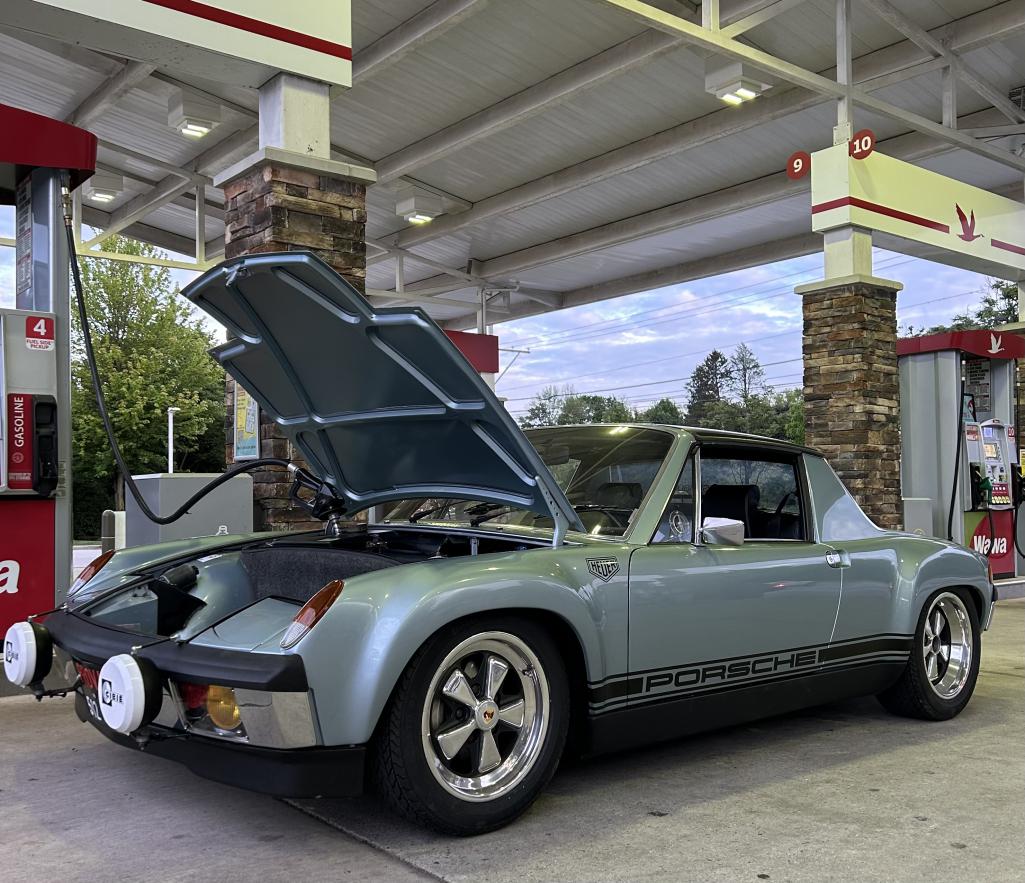
Posted by: Dion May 27 2025, 06:04 AM
So more fiddling at the shop for carb adjustments and fixing tach signal plus timing.
Was able to take home. Runs like a banshee.
Well pleased. Now to get some details addressed. Wire wrapping and layout, fixing some
headlights that decided to work when they feel like it, plus the air hoses for heat.
Here’s a vid:
https://youtu.be/jFl-6Xdy_6o
Posted by: mate914 May 27 2025, 06:12 AM
Timing gears on IMS and polished chains.
Dion, Why do they polished the chains?
Matt
Posted by: Dion May 27 2025, 06:14 AM
Matt I was told it was for minimizing frictional losses.
Posted by: Cairo94507 May 27 2025, 06:40 AM
Congratulations Dion; that is a beautiful car.
Posted by: nditiz1 May 27 2025, 06:43 AM
Looks to be ready for RR5!
Posted by: tygaboy May 27 2025, 07:37 AM
Dion! WOW, your car looks great! Congrats!
Posted by: JmuRiz May 27 2025, 07:39 AM
What a looker, congrats!
Posted by: mepstein May 27 2025, 07:55 AM
I don’t hear 7K yet - LOL.
Posted by: Dion May 27 2025, 08:45 AM
Thanks a lot fellas! I really appreciate the compliments and good karma.
It’s definitely a different engine from prior previous year.
@http://www.914world.com/bbs2/index.php?showuser=10825 , you should hear it screaming this afternoon when I stop down.
Posted by: Maltese Falcon May 27 2025, 09:12 AM
Dion the vid is on Point ! Love the car + countryside drive
Marty
Posted by: gereed75 May 27 2025, 10:58 AM
Beautiful car and love the engine choice! Something about the smaller displacement motors that really compliment the spirit of these car, for me anyway.
Sweet!!
Posted by: mate914 May 28 2025, 06:49 AM
Thanks a lot fellas! I really appreciate the compliments and good karma.
It’s definitely a different engine from prior previous year.
@http://www.914world.com/bbs2/index.php?showuser=10825 , you should hear it screaming this afternoon when I stop down.
Dion,
So, your engine was a aluminum block someone put T or E pistons in, 30+ years ago?
Now it is a 2.4S+?
Engine sounds great. I am leaning also, so I have a few questions.
1 What compression?
2 what valve springs did you use to achieve 7K RPM?
3 Distributor advance?
4 85mm or 84mm pistons?
5 What camshaft?
Thanks,
Matt
Posted by: Dion May 28 2025, 07:37 AM
@http://www.914world.com/bbs2/index.php?showuser=10102 '67 sandcast case, Biral cylnders, JE 85mm pistons,10.1 compression, E cams, Billy Ring machine shop did the heads. I do not know the exact specs on valve springs. i believe we set advance at 10*. It has a 123distributor.
Cheers, Dion
Posted by: sb914 May 28 2025, 08:09 AM
Very beautiful car .
Posted by: mepstein May 28 2025, 08:21 AM
@http://www.914world.com/bbs2/index.php?showuser=10102 '67 sandcast case, Biral cylnders, JE 85mm pistons,10.1 compression, E cams, Billy Ring machine shop did the heads. I do not know the exact specs on valve springs. i believe we set advance at 10*. It has a 123distributor.
Cheers, Dion
Performance valve springs (a notch more than stock) and machine work done by Billy at Performance auto works in kearneysville WV.
Posted by: porschetub May 28 2025, 03:58 PM
@http://www.914world.com/bbs2/index.php?showuser=10102 '67 sandcast case, Biral cylnders, JE 85mm pistons,10.1 compression, E cams, Billy Ring machine shop did the heads. I do not know the exact specs on valve springs. i believe we set advance at 10*. It has a 123distributor.
Cheers, Dion
Looks great buddy,you must be pleased to see thay "saga" behind you ,time to tell us about the lovely con rods ...time to fess up lol, best regards mate.
Posted by: OrangeBones May 28 2025, 06:41 PM
Can’t wait to have you in my mirrors at RR5! She sounds amazing! Glad the fellas were able to get us ready in time!
Posted by: Dion May 28 2025, 10:15 PM
@http://www.914world.com/bbs2/index.php?showuser=15191 Thank you!
@http://www.914world.com/bbs2/index.php?showuser=24914 Yes looking forward to this Rallye.
@http://www.914world.com/bbs2/index.php?showuser=18995 Dean, thanks my friend. Con rods ? Oh those little Pauter things?
Just a little somethin’ somethin’
@http://www.914world.com/bbs2/index.php?showuser=5176 Rory you & Dean zeroed in on those con-rods
@http://www.914world.com/bbs2/index.php?showuser=15674 Thanks buddy, yeah I think the 2.4 should have been the standard 6 for the 914. Seems made for it, IMHO.
@Maltese Falcon Thanks Marty!
Doing a punch list before this rally. Bolts to be torque’d, spare wipers, bulbs, fuses, fuel pump, tool kit, oil, etc.
Posted by: gereed75 May 29 2025, 07:42 AM
Matt
I basically have the same motor except 9.5 JE pistons and DC30 mod Solex cams. Really like the cams. Good low end power with a nice almost S top end kick.
Stock rods and valve train. Revs to 7200 no problem.
Powered by Invision Power Board (http://www.invisionboard.com)
© Invision Power Services (http://www.invisionpower.com)