Printable Version of Topic
Click here to view this topic in its original format
914World.com _ 914World Garage _ Taylors new project thanks to Wes
Posted by: Mikey914 Nov 14 2016, 01:53 AM
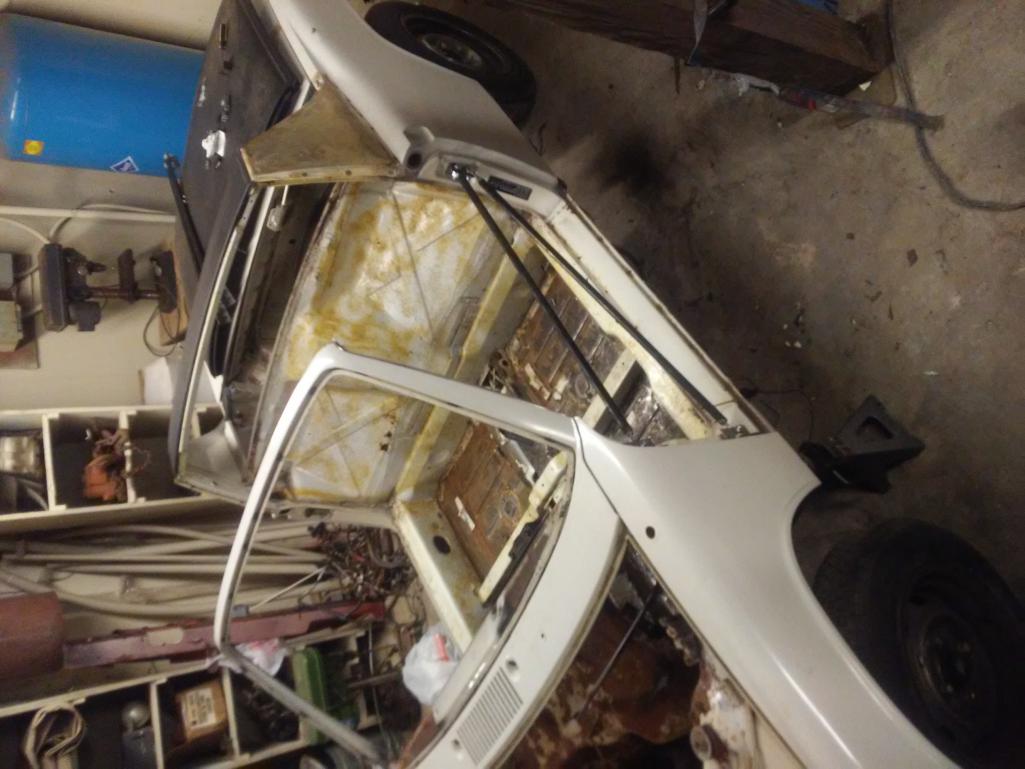
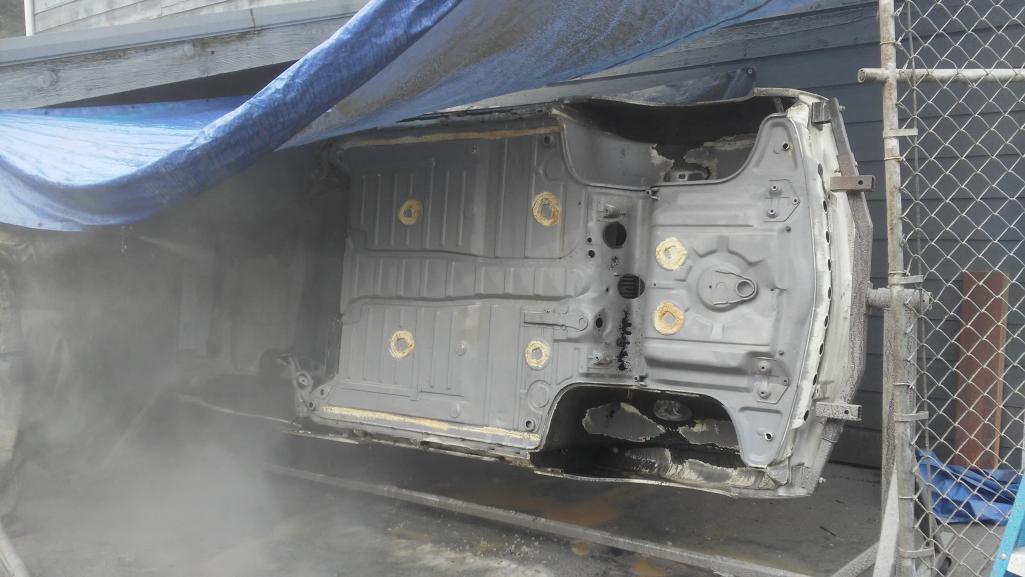
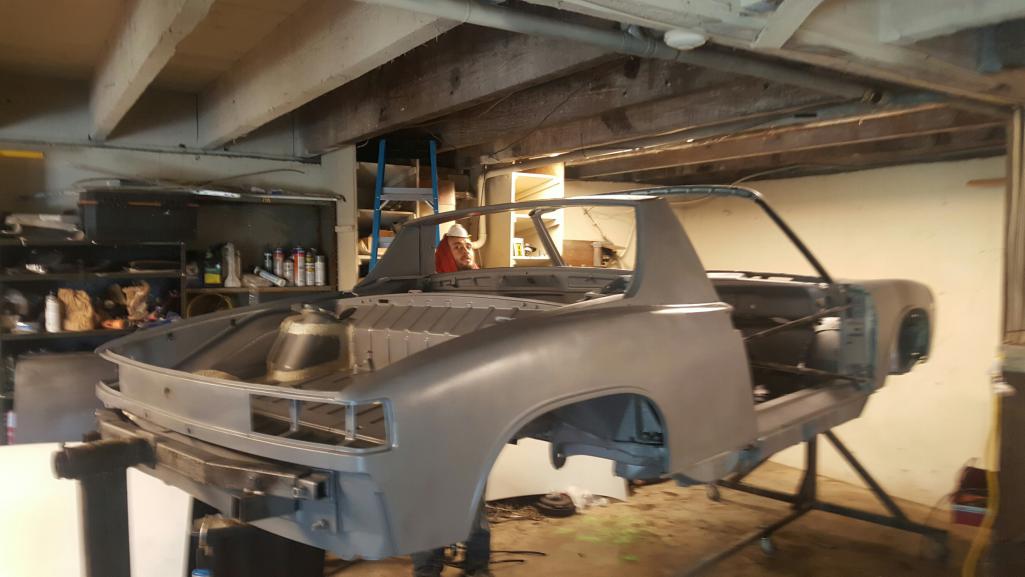
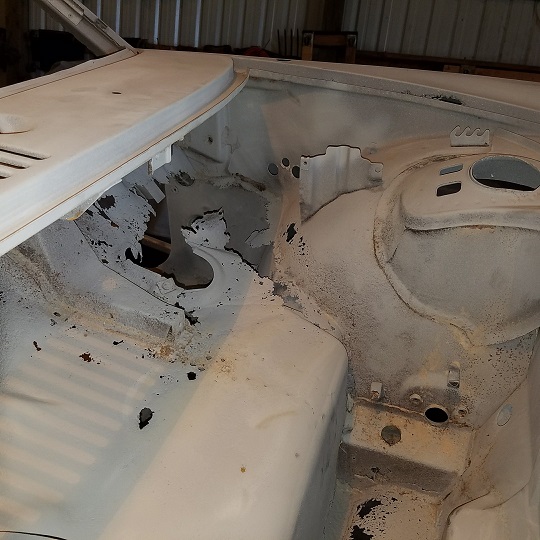
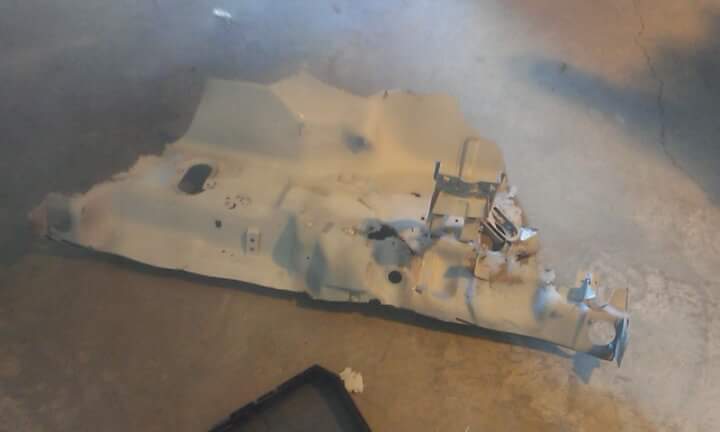
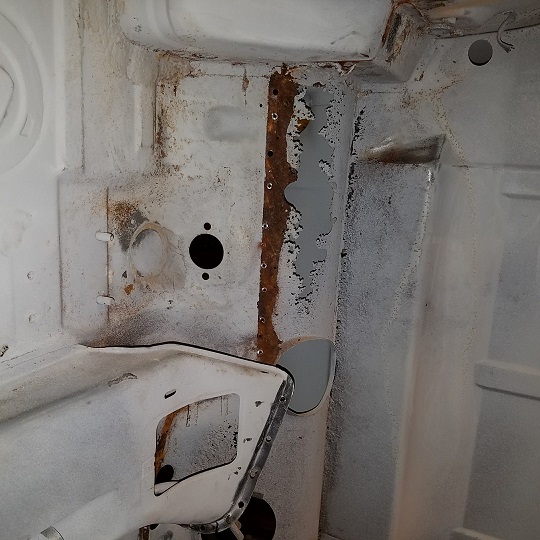
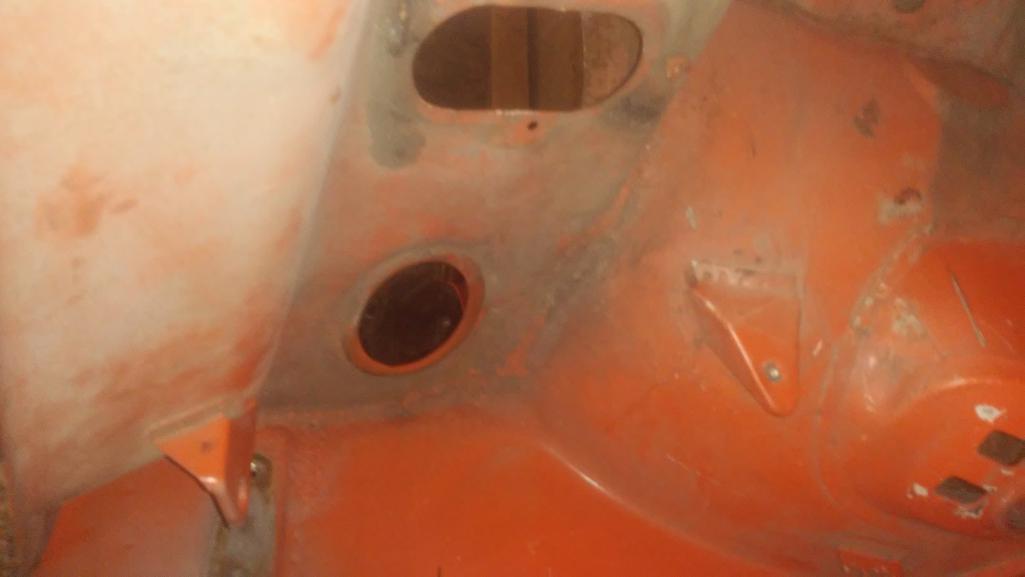
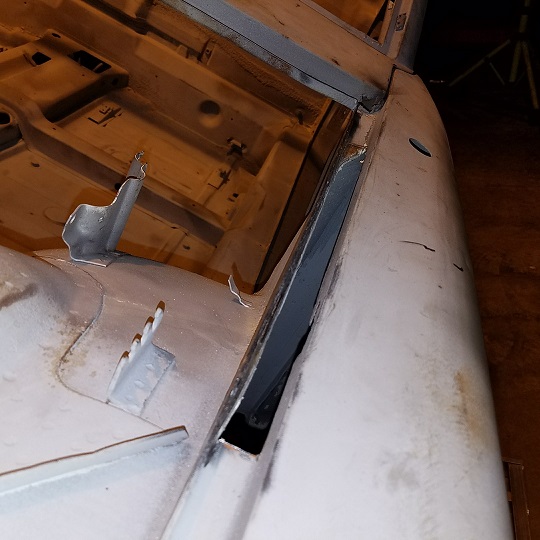
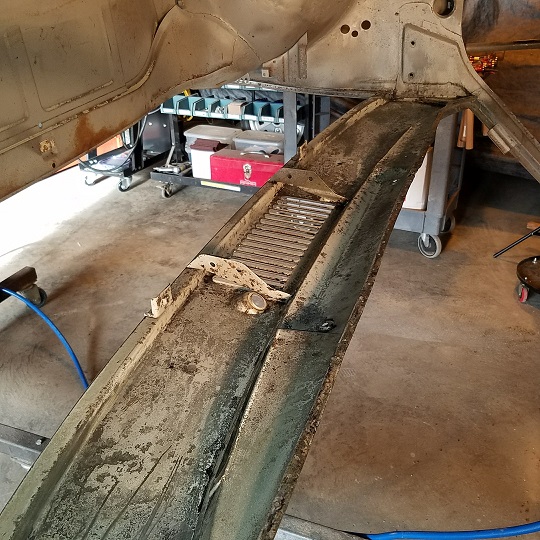
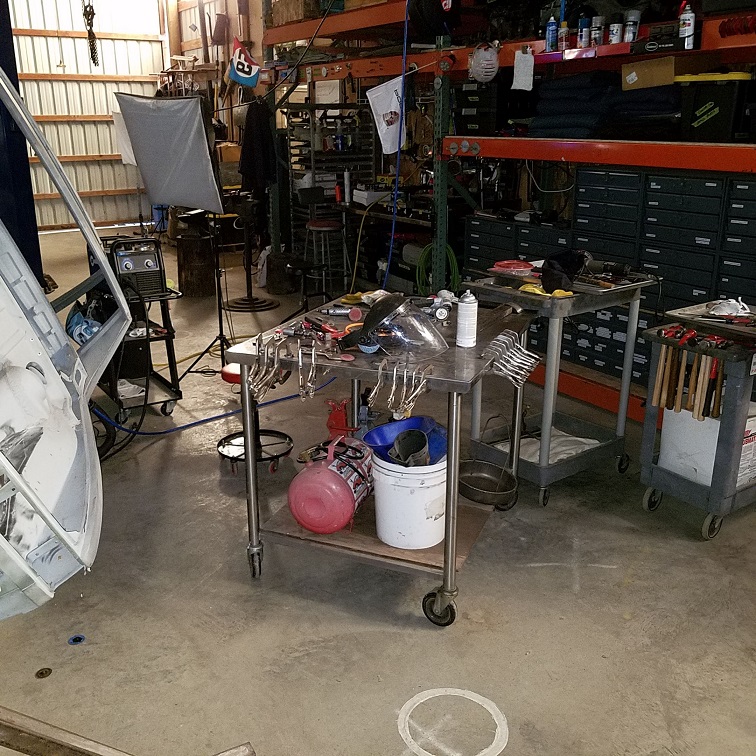
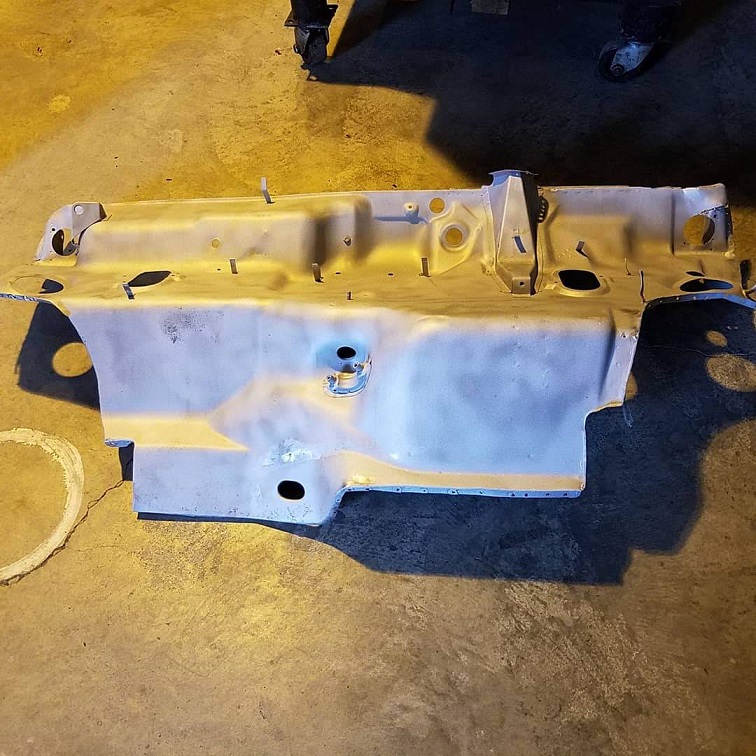
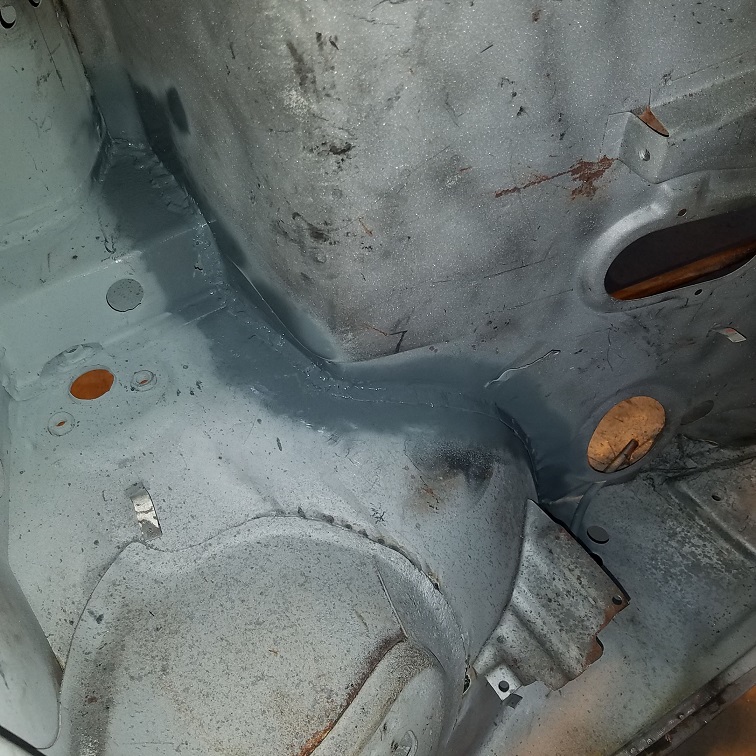
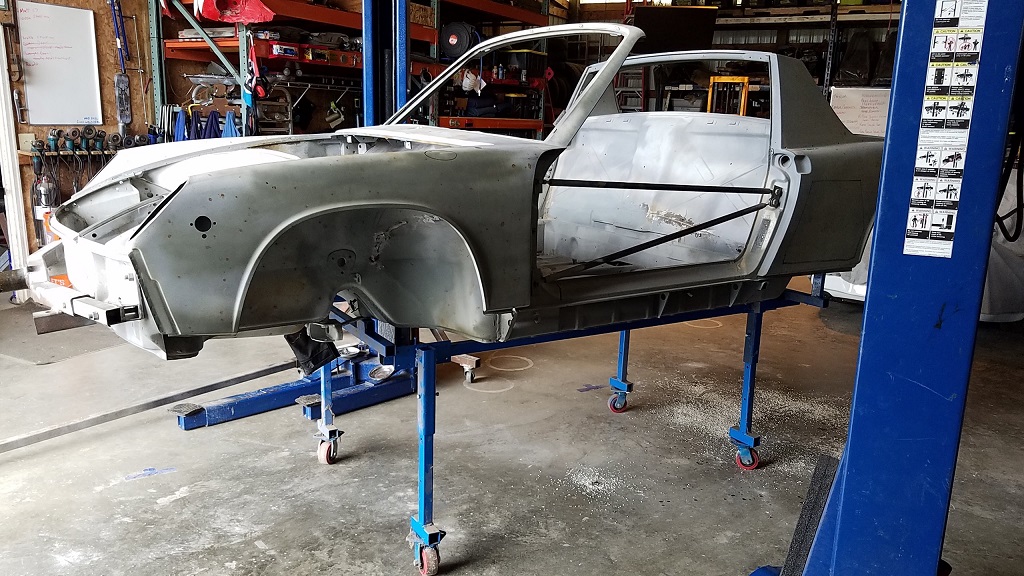
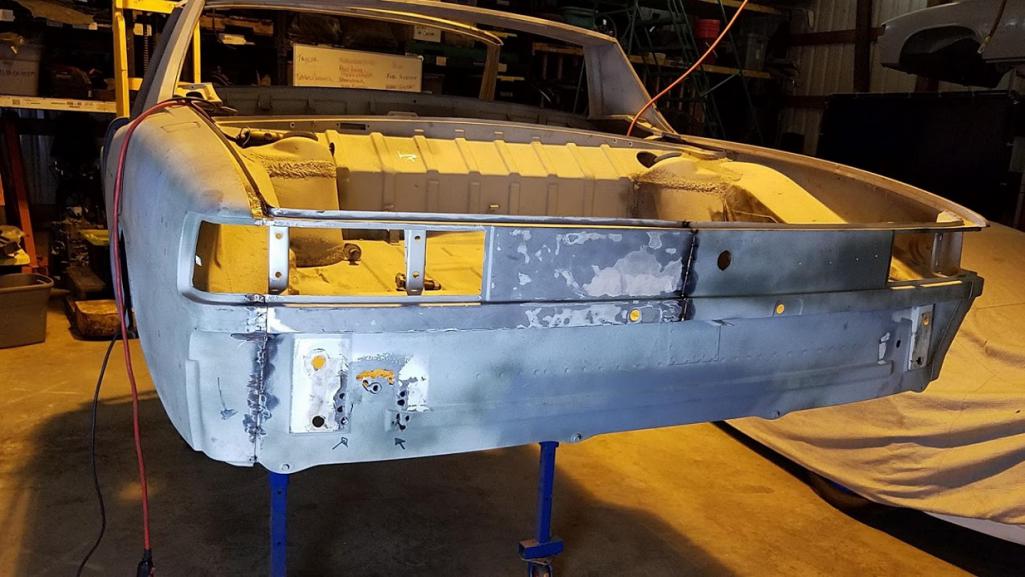
Wes was nice enough to hook Taylor up with a roller project. He drove down to Mendocino to get it about 3 weeks ago. We finally have it in a place we can work on it and started the clean up.
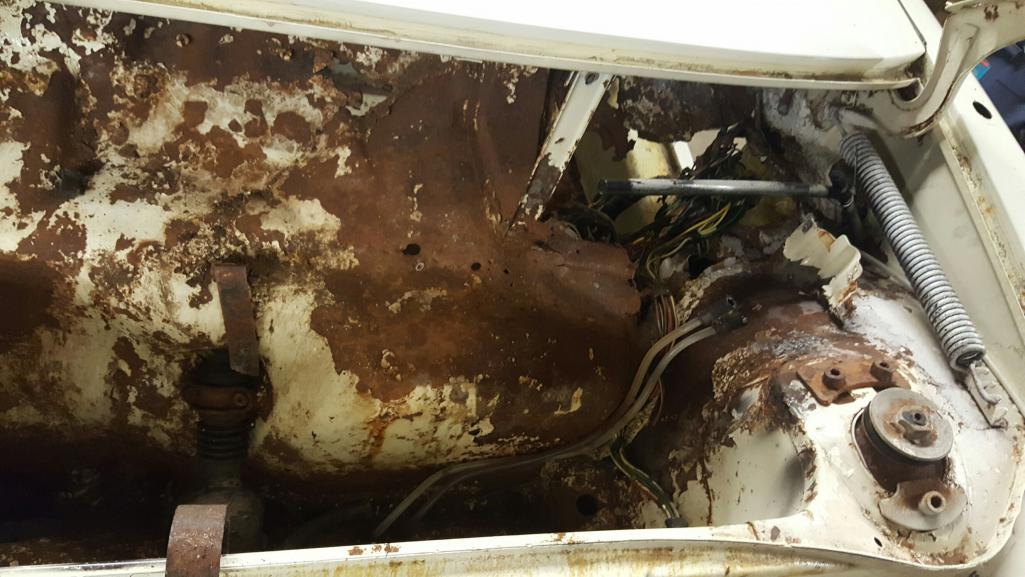
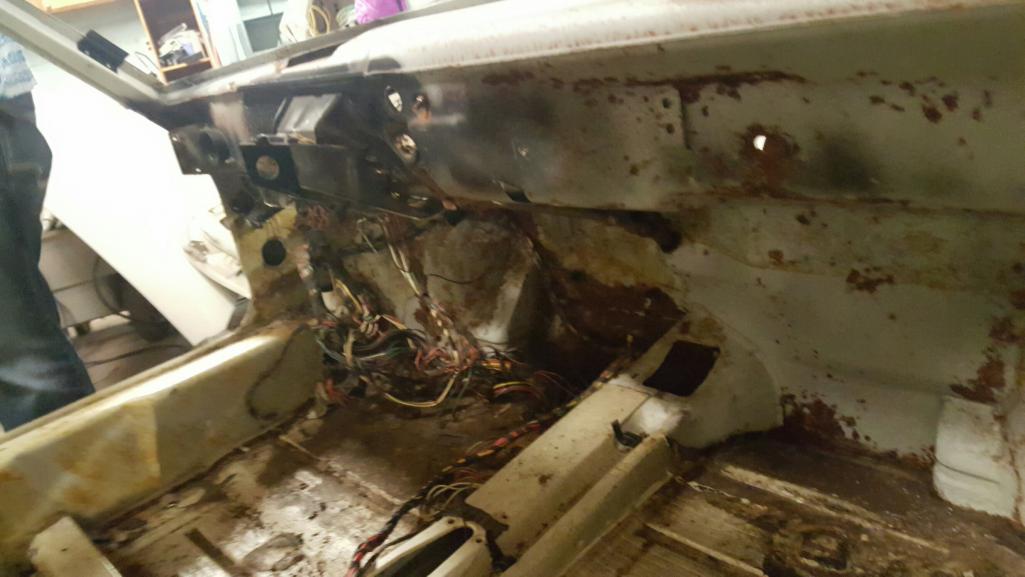
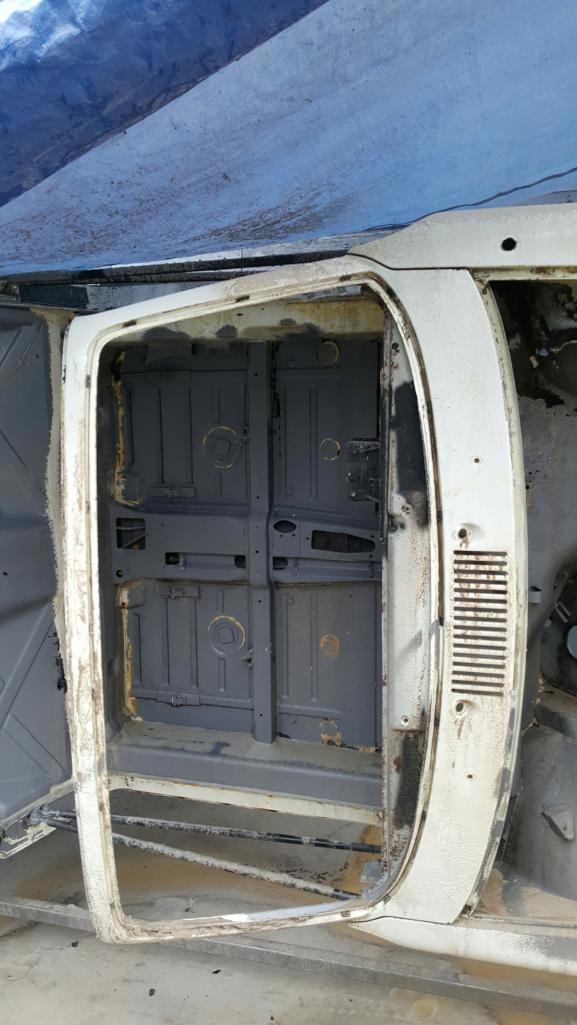
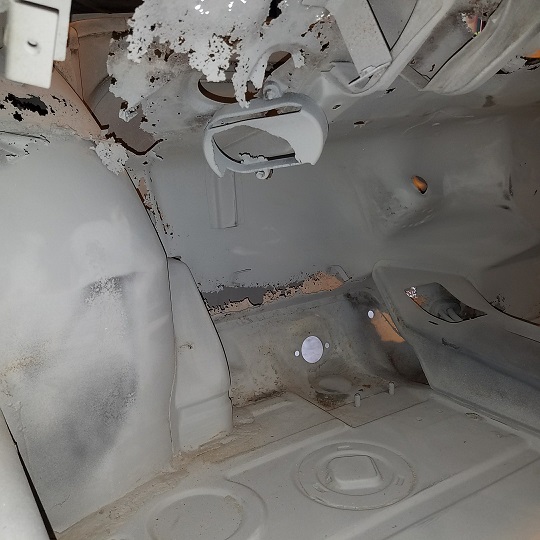
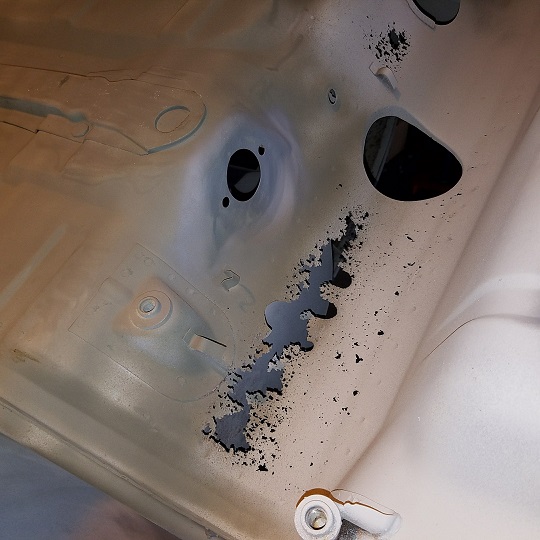
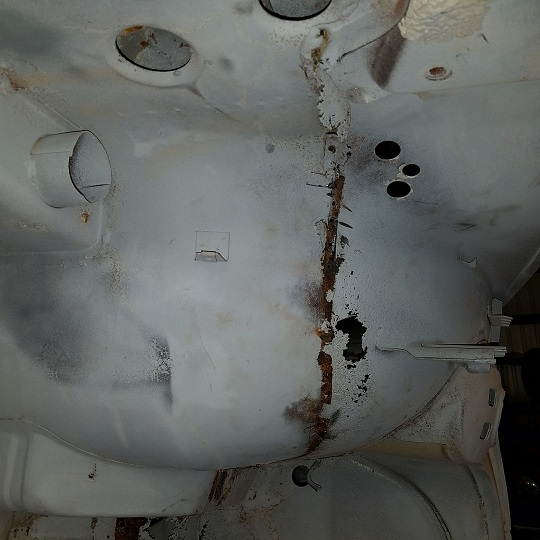
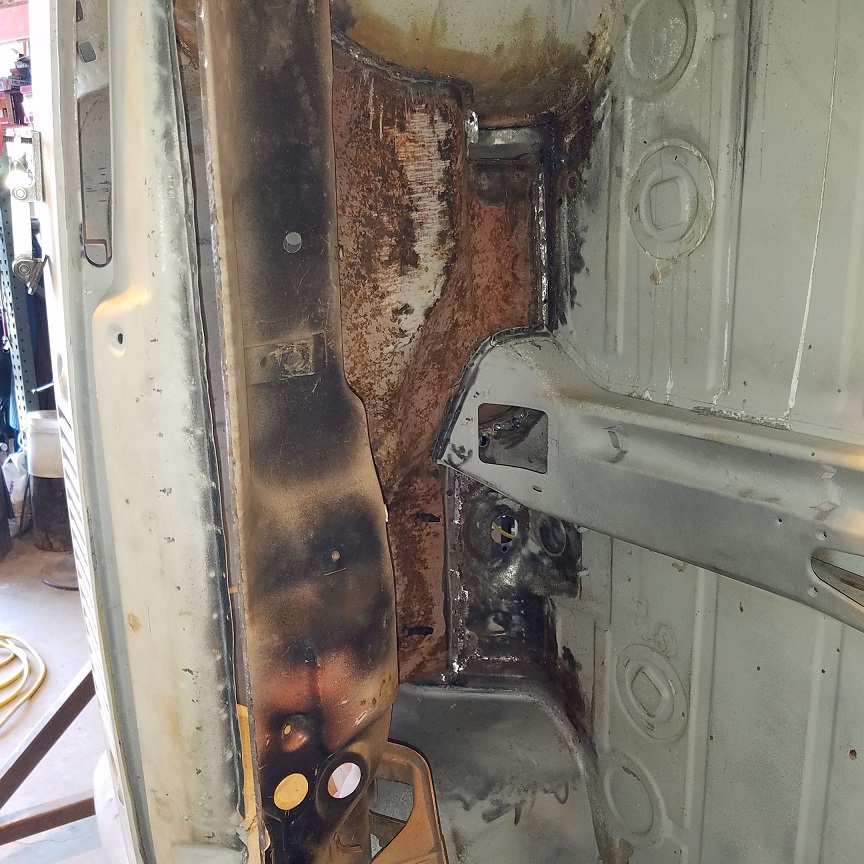
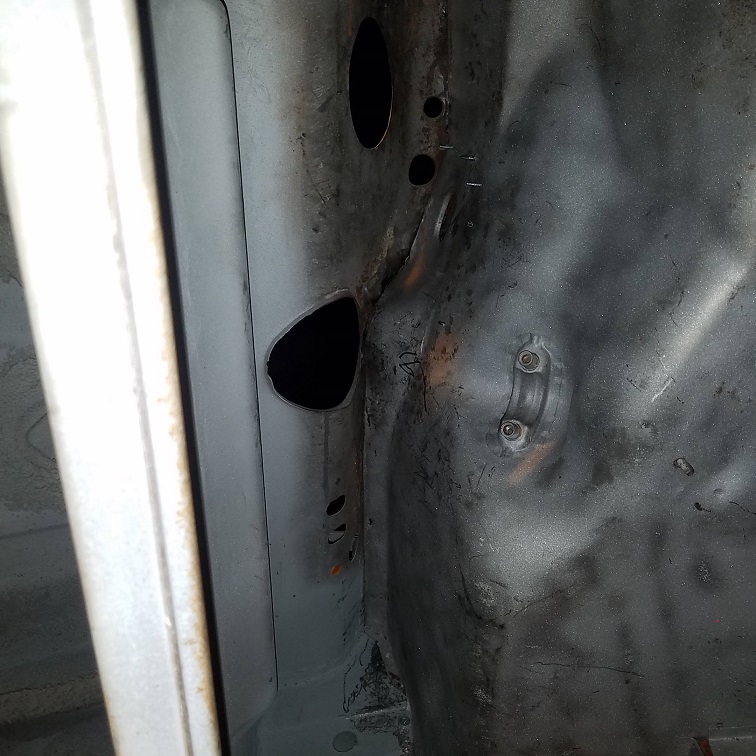
The backstory is that Wes got it in Oakland where it had sat behind a rib joint for some time. Apparently, some rodents made a home in the air box. They also acquired a taste for ribs. It appears the brought a few back with them. They were there for some time, and urinated eating the bulkhead out. The hell hole and floorboards look good. The pan is intact and looks good.
He has a bunch of work ahead of him, but it will get restored back to stock ivory white.
Attached thumbnail(s)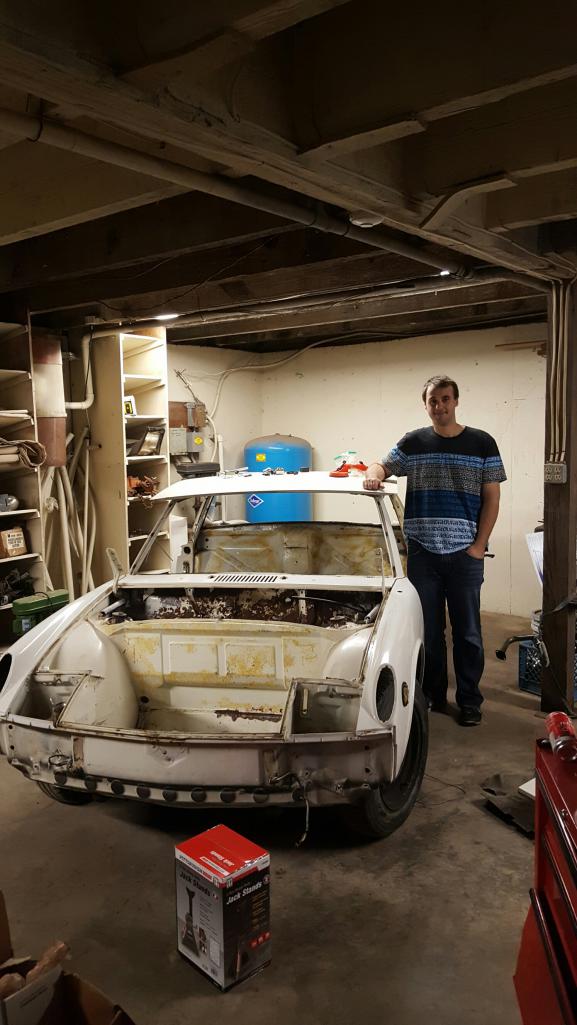
Posted by: wes Nov 14 2016, 05:00 PM
I'm very  happy to see she's in good hands and up for a new life. Som that's my wife is more than
  happy to finally have her garage back. So have fun I'm pretty sure you've got a good lead on Parts and the eng. is still waiting for you.
Posted by: cary Nov 15 2016, 01:02 AM
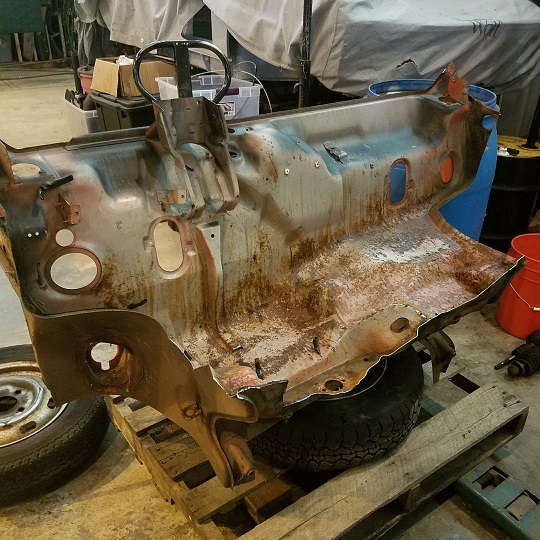
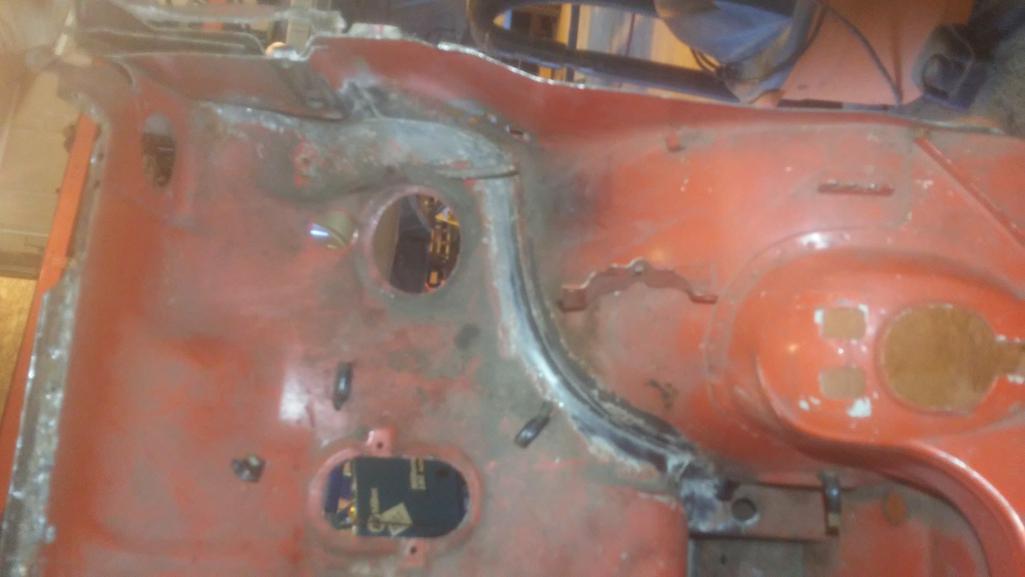
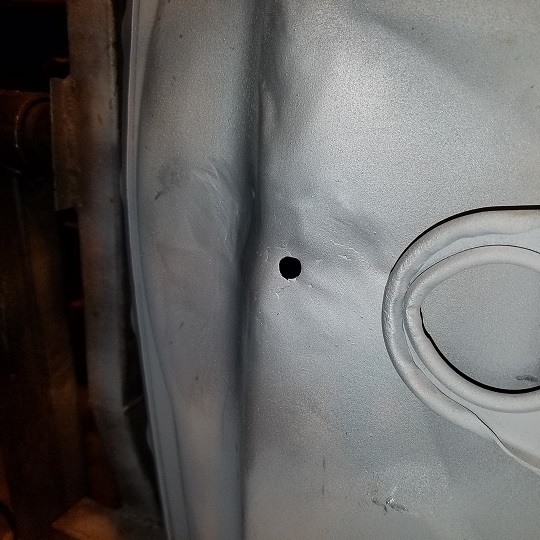
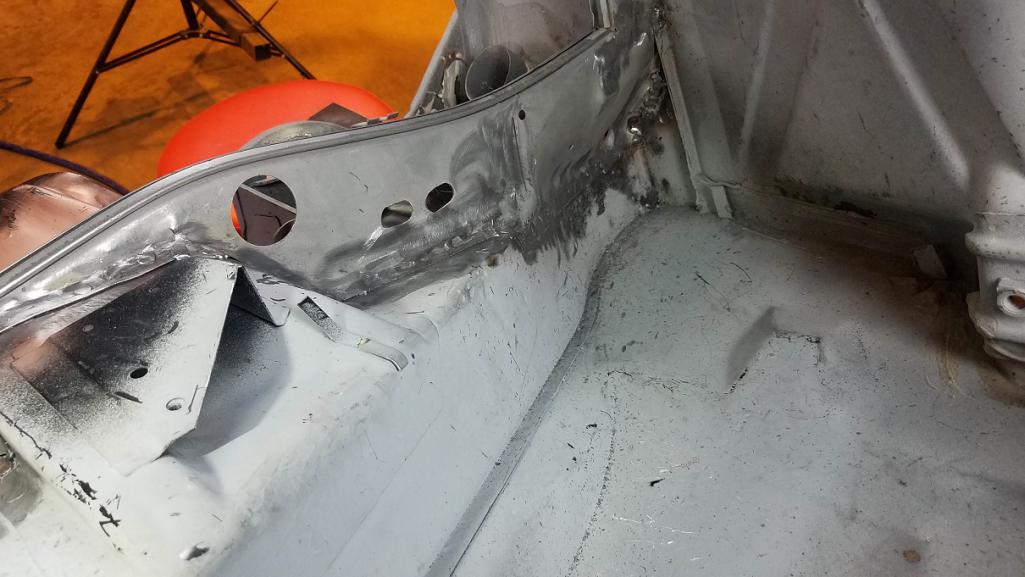
Looks like the heater hose hole and the trunk pull mounting pocket have gone to 914 heaven?
Posted by: Mikey914 Nov 15 2016, 09:31 AM
Yes pretty much gone. Need to buy / build a rotisserie so we can media blast it. Looks like it's the bulkhead only. We need to blast the area under the tank to make sure there's not more down there.
Either way Taylor will be getting ahold of you (Cary) to see what and how to cut.
Posted by: sixnotfour Nov 16 2016, 12:18 AM
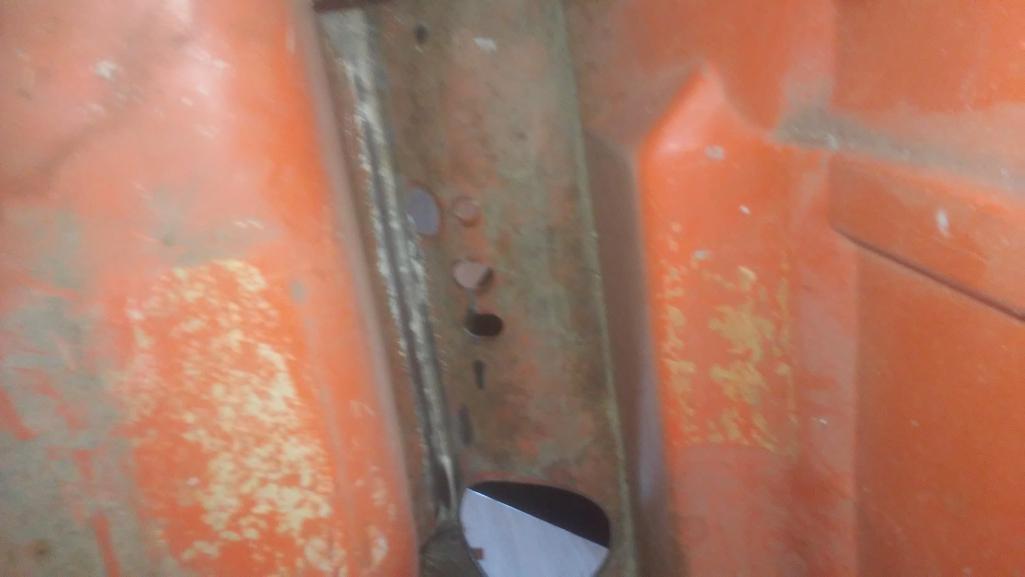
mouse/rat nest area...,,, hope fully they didn't get into the tunnel or longs..pee uuu.... I hate mouses..  I had a six that was really smelling ,,
Posted by: Mikey914 Nov 16 2016, 12:01 PM
Looks like we didn't get any other than the bulkhead, possibly part of a fender well.
We need to blast the seams to assess the welds.
Posted by: rhodyguy Nov 16 2016, 08:14 PM
Does he know about that ratchet jackstand in the box on the floor?
Posted by: Mikey914 Nov 17 2016, 12:49 AM
Yes, He bought ceremonial jack stands. Trying to save them from being used. Need to get it blasted 1st so we can assess and repair.
Posted by: Taylor.914 Jan 18 2017, 11:55 PM
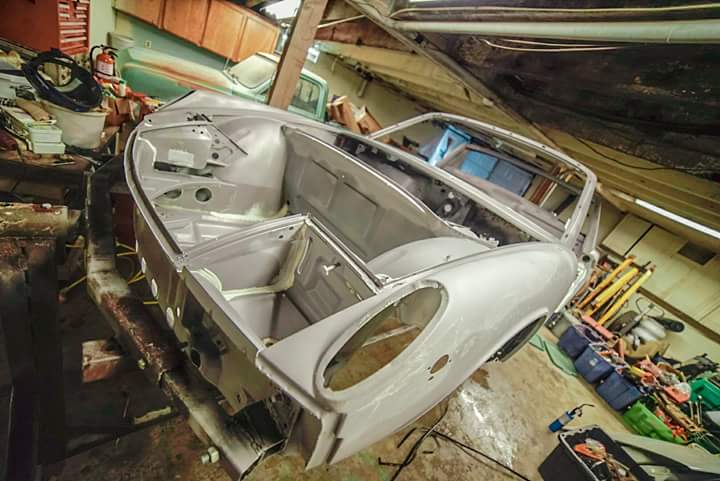
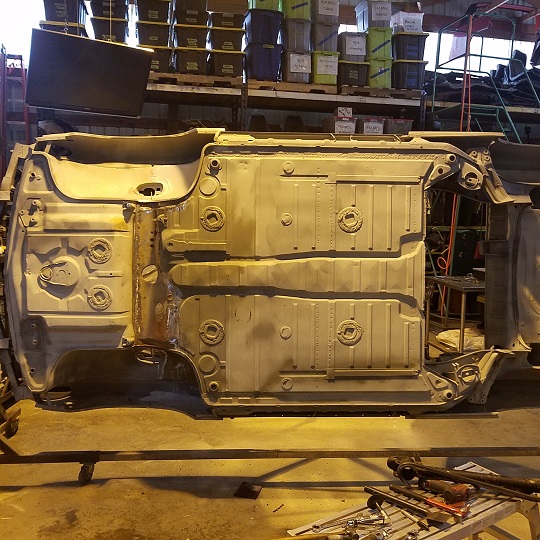
Since the pictures were taken i have gotten a little more done. I have pulled the wiring harness , taken out the dash frame and have the inside fully stripped. Just scrapped the tar off the floor pans and was plesantly supprised at how little rust was found.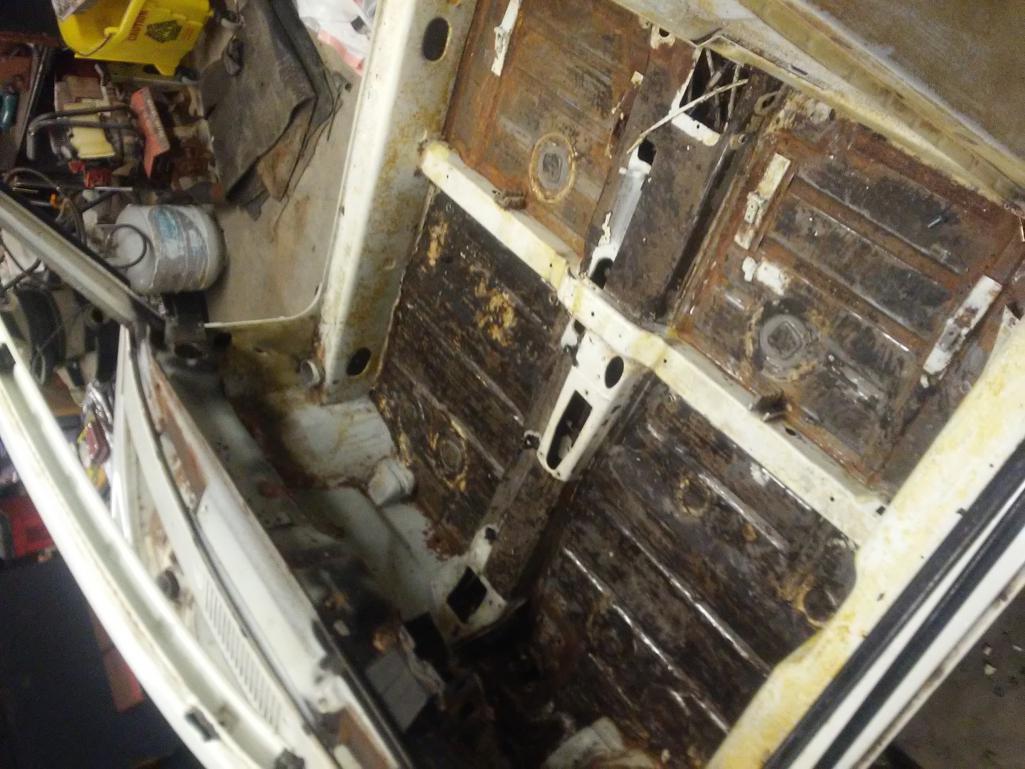
Posted by: Krieger Jan 19 2017, 12:01 AM
Congratulations! That looks like a decent car to start with. 
Posted by: wes Jan 19 2017, 02:05 PM
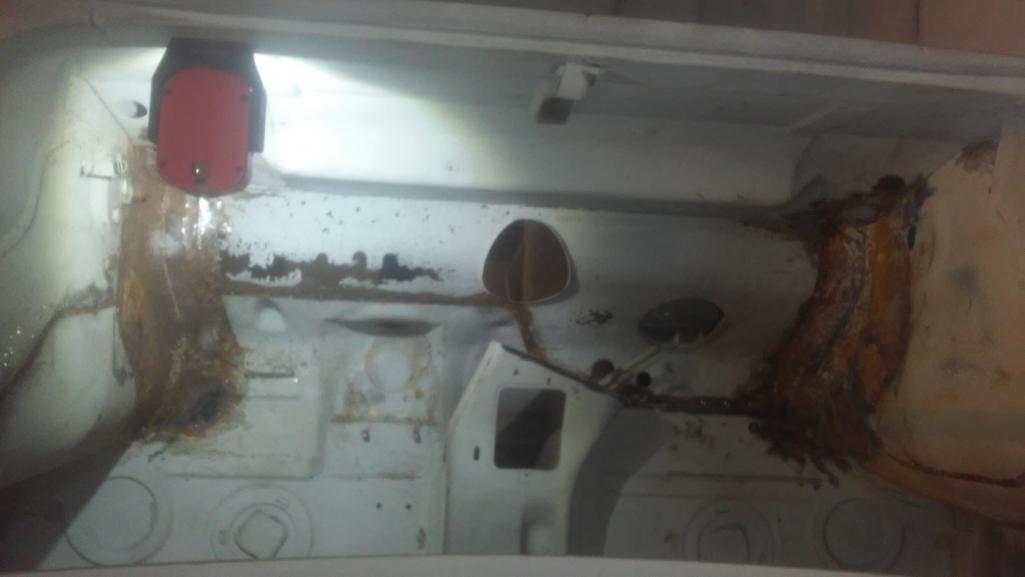
This was a fairly nice car that someone let set for sometime and apparently made a perfect home to a family of rats, at any rate eating through wiring and pissed on the cowling bulkhead rusting it away to a point where you could literally stick your finger easily through the rusted out bulkhead and gas tank. Other wise fairly clean and rust free. I used it as a parts car and found it good to compare wile resembling my yellow car. I at one point thought I might build a little truck out of it but just getting to a point that I don't need any new projects. I'm very happy that Taylor has decided to bring this little 73 back to life.
Posted by: ConeDodger Jan 19 2017, 08:50 PM
That's a great color. I know a guy, who knows a guy who can get you a lot of the rubber parts for a 914. PM me if you need a hook-up! 

Posted by: Mikey914 Jan 19 2017, 10:45 PM
Yes Rob. I know him well too.
I'm actually excited to see Taylor making headway. I took the mounts for the rotisserie to Cary to have them made to easily bolt up. As soon as he's done we will put up and blast all the rust and known problem areas to take back to metal. These all look really solid so should be little drama there. Cary is getting a section for Taylor to cut out and I'll be helping him as much as I can to get this to primer as soon as we can.
Still will be a drawn out process, but he's got the patience to do it right.
Posted by: cary Jan 26 2017, 10:34 PM
Super In Law should get them finished up tomorrow.......................
We had a few issues. Looks like the 75 -76 stub tubes were welded on kind of free hand. They aren't equal lengths from the center. So the 75-76 mounts will have to wait.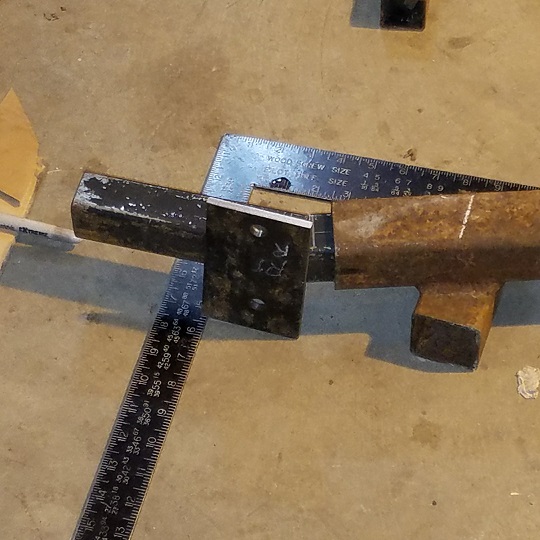
Posted by: Mikey914 Jan 27 2017, 02:39 AM
Thanks Cary,
Not too concerned about the 75+ ones now.
I'll call tomorrow
Posted by: Taylor.914 Feb 11 2017, 06:05 PM
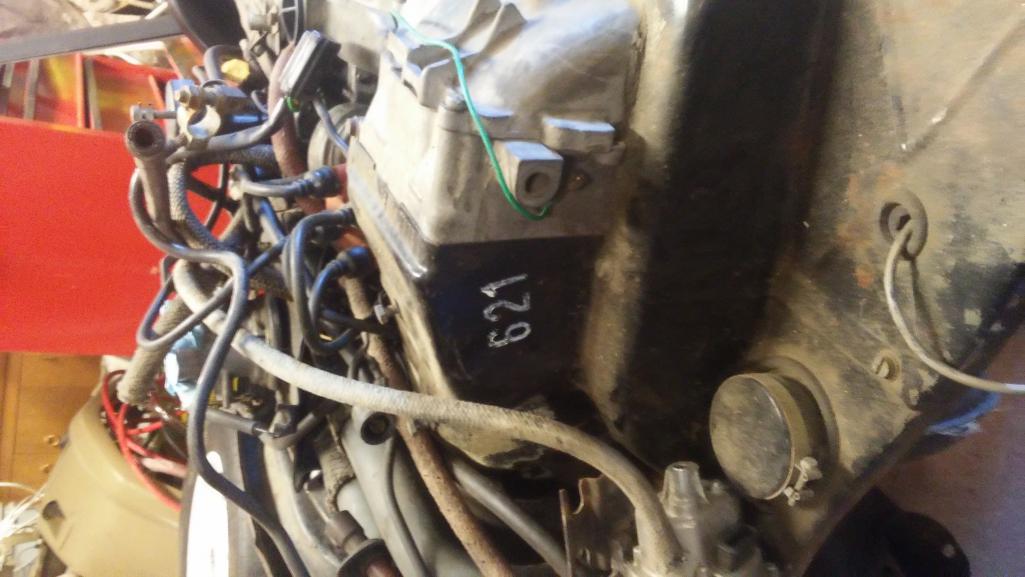
Just got back from california to pick up the motor (Thanks again Wes) and had sometime to work on the beast. Got it up on the stands and the front dropped. I did notice that on the engine tins there seemed to be a white stamp. Anyone know if thats from the factory or what it means? 
Posted by: Larmo63 Feb 11 2017, 06:11 PM
Yes, that is a factory stamped control number.
Posted by: wes Feb 11 2017, 06:55 PM

Just got back from california to pick up the motor (Thanks again Wes) and had sometime to work on the beast. Got it up on the stands and the front dropped. I did notice that on the engine tins there seemed to be a white stamp. Anyone know if thats from the factory or what it means?
Might be the HP stamp!
Posted by: Mikey914 Feb 12 2017, 10:07 AM
There is also an I.O. stamped in the front of the passenger side tin. I've never seen this any idea what it means?
Posted by: Taylor.914 Feb 27 2017, 07:44 PM
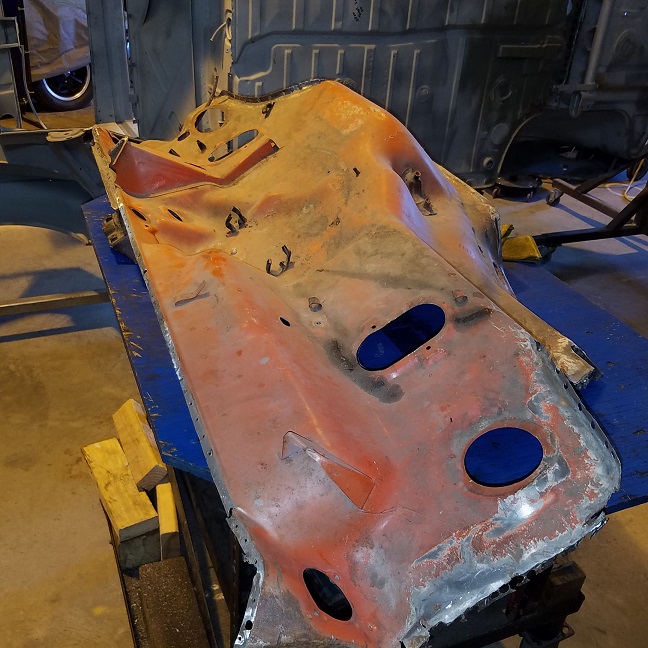
Just a taste more pic later. finished the blasting and looking good. 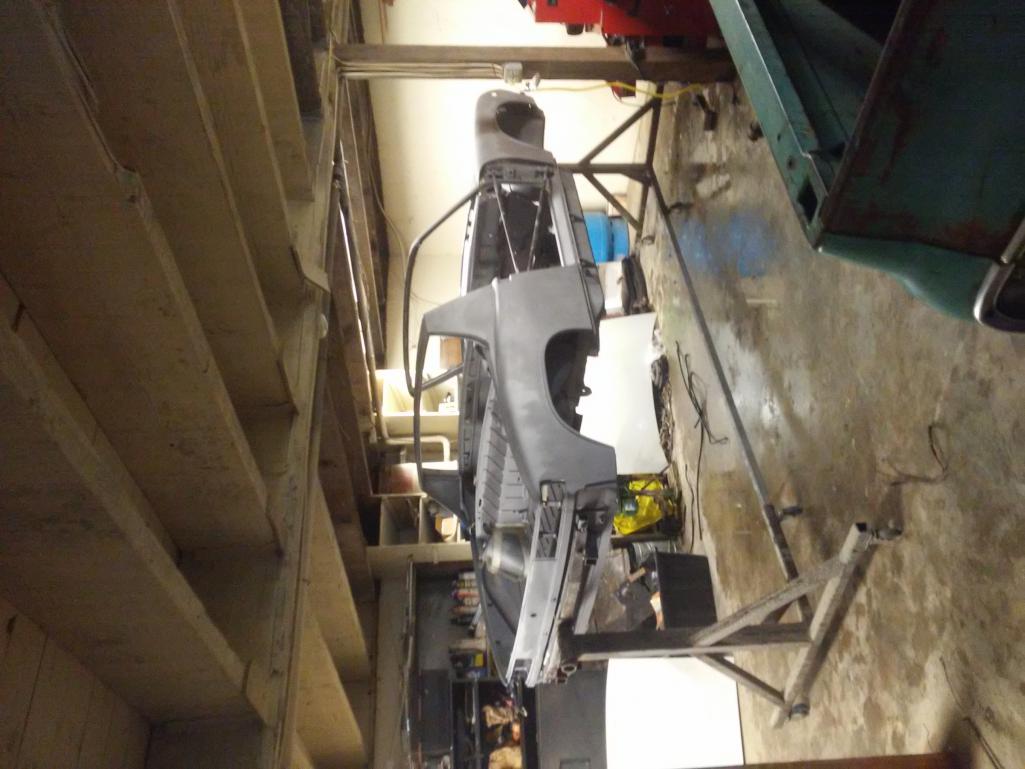
Posted by: cary Feb 27 2017, 08:24 PM
Lookn good ..........................
Hope to cut out your gas tank/firewall portion this weekend.
Posted by: Mikey914 Mar 1 2017, 12:48 AM
A few more
Attached thumbnail(s)

Posted by: Mikey914 Mar 1 2017, 12:50 AM
more
Attached thumbnail(s)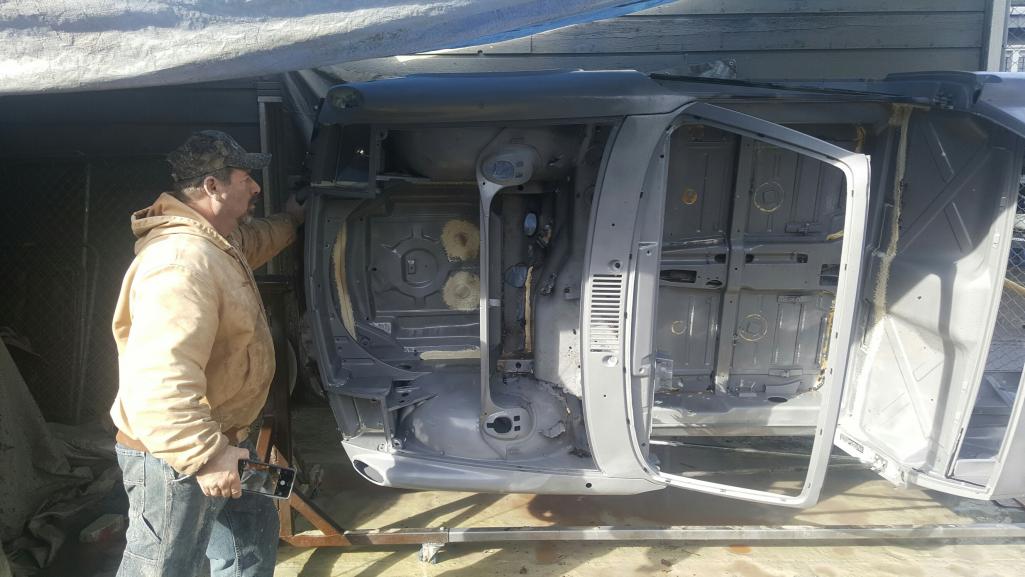
Posted by: cary Mar 4 2017, 10:28 PM

Still need to pull the steering column and windshield frame.
Posted by: Taylor.914 Apr 29 2017, 09:31 PM
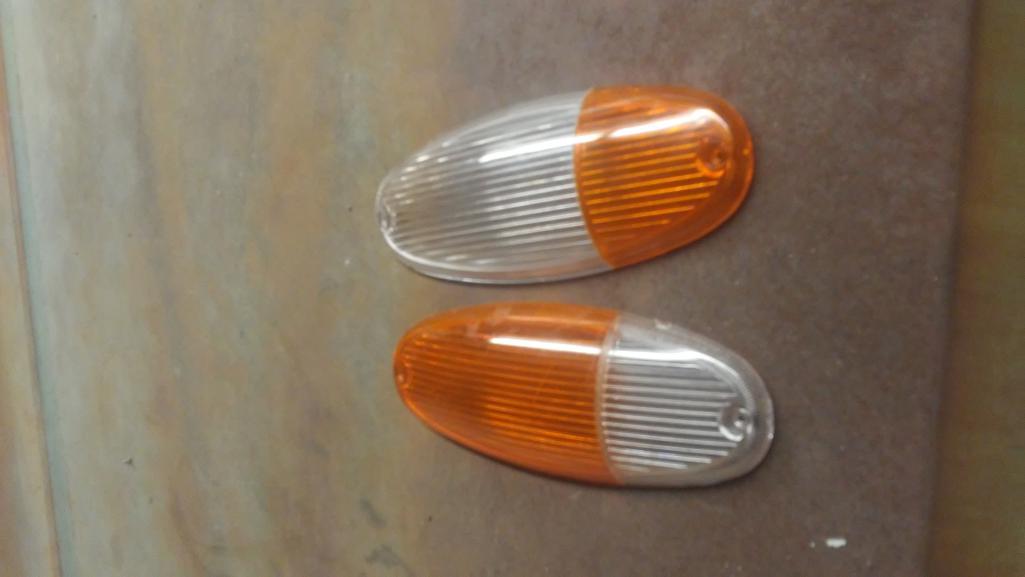
Here is the up date. Had a bit of a sawzall party and made some custom turn signal lenses.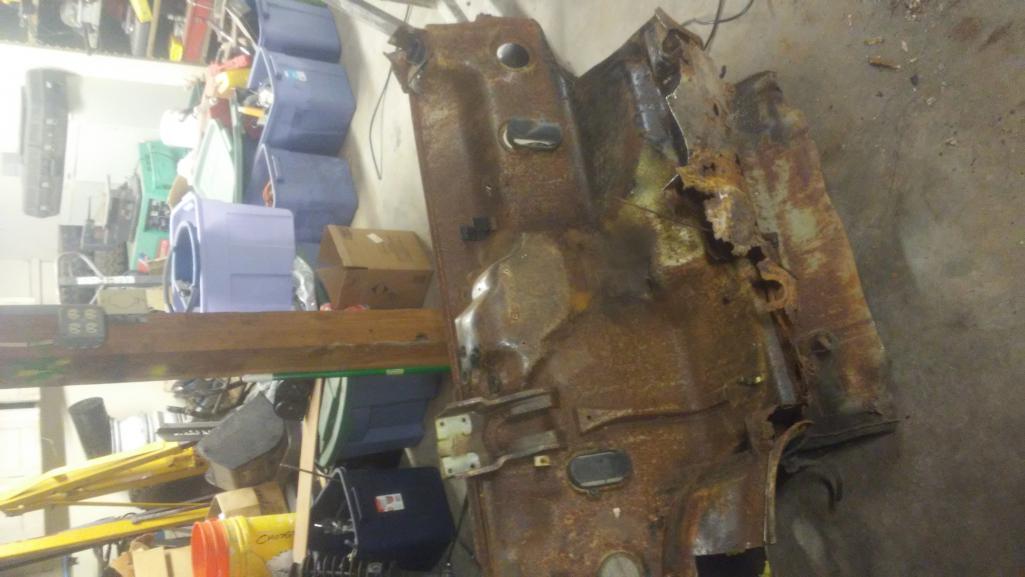
Posted by: Taylor.914 Apr 29 2017, 09:32 PM

Posted by: porschetub Apr 30 2017, 04:09 PM
Wow clean looking tub,dam those rats that's a hard area to repair,but I know you guys will get there with a bit of and a  keep up the good work .
Posted by: wes Apr 30 2017, 10:08 PM
Looking good really glad to see her coming back to life, looks like this will be a good one in the end.
Posted by: cary Jun 16 2017, 10:16 PM
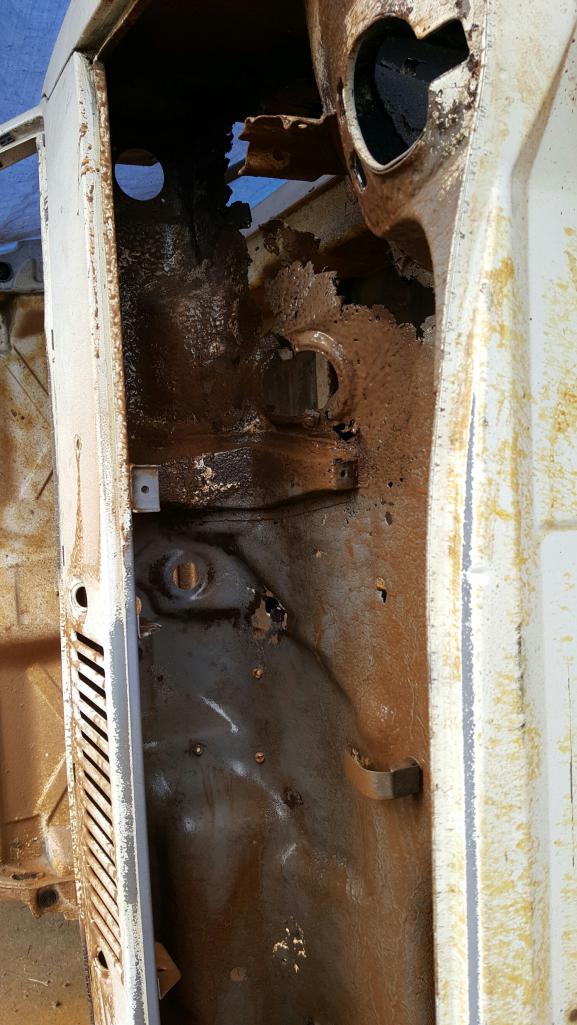
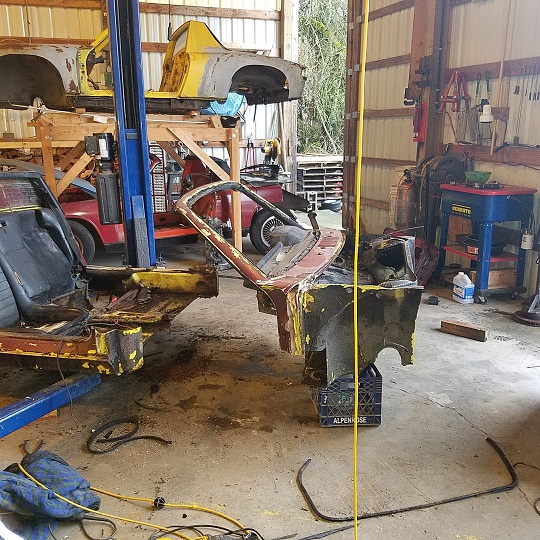
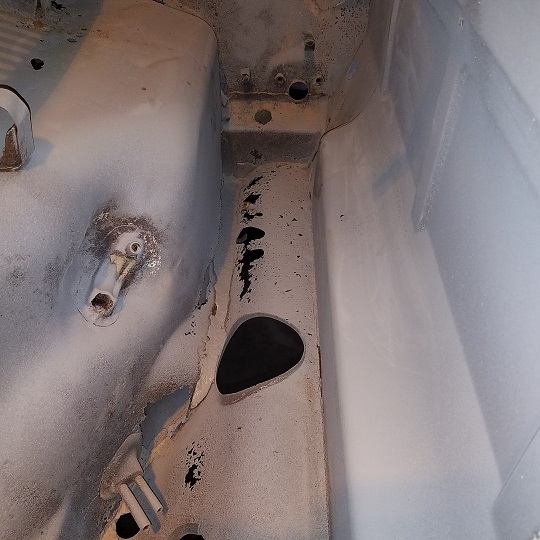
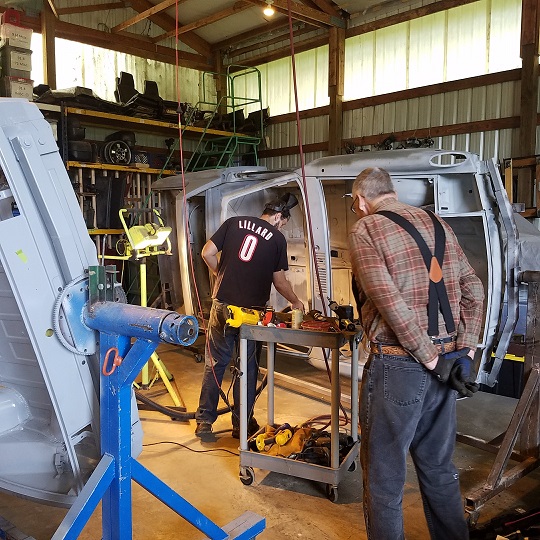
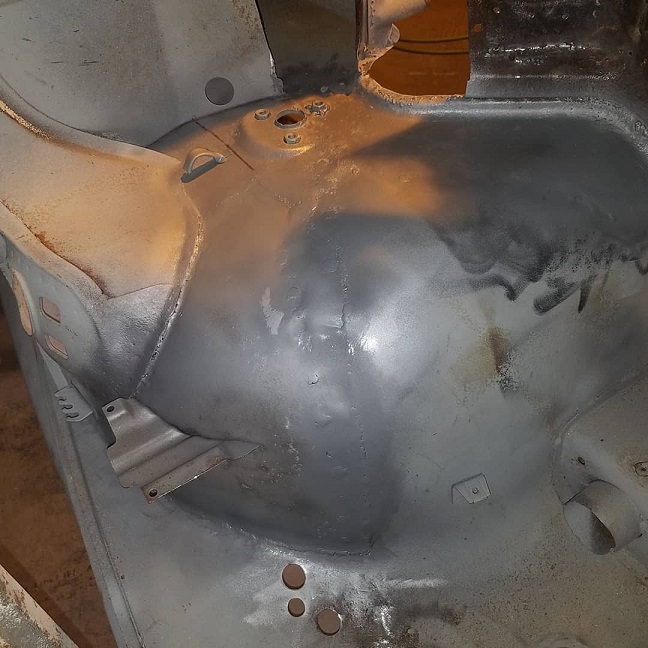
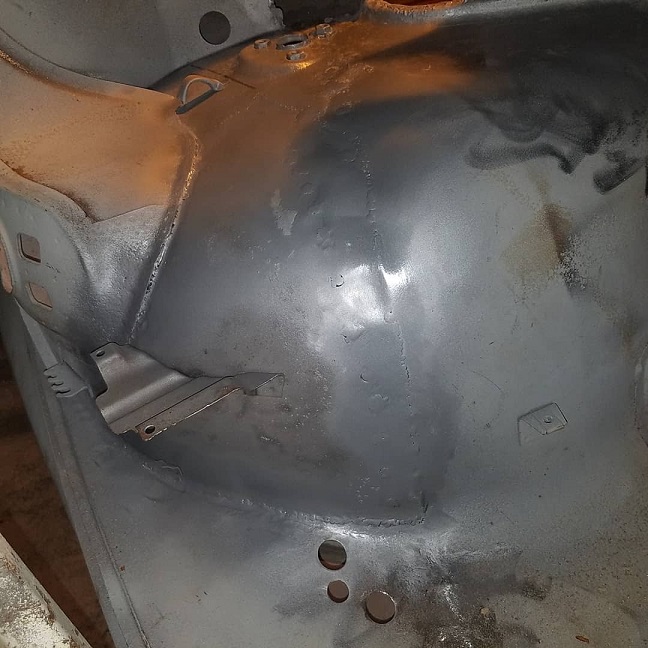
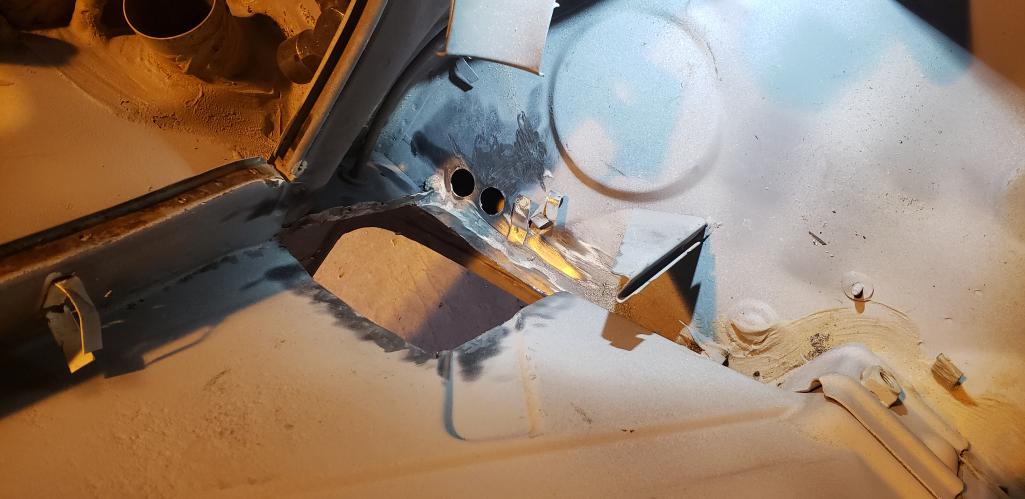
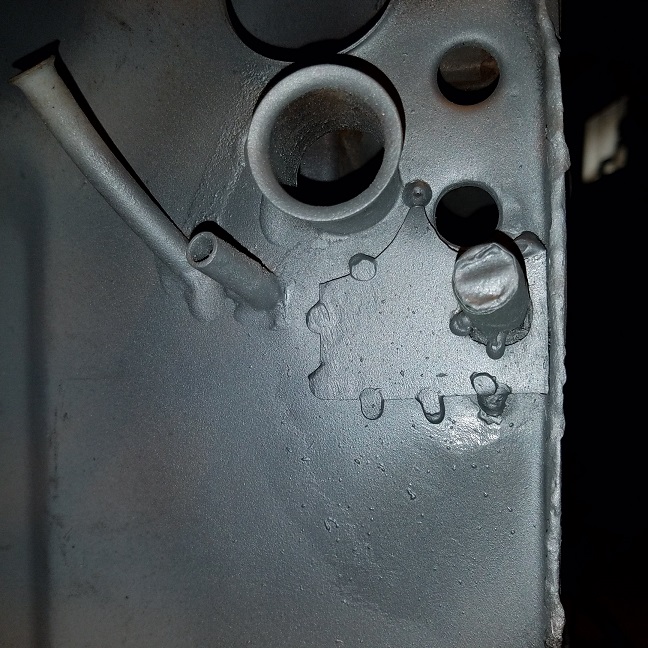
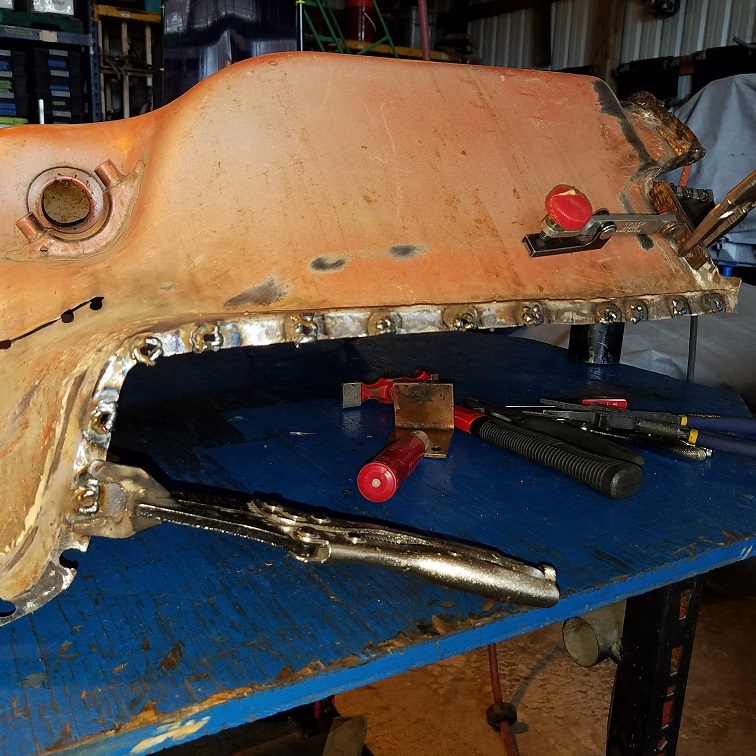
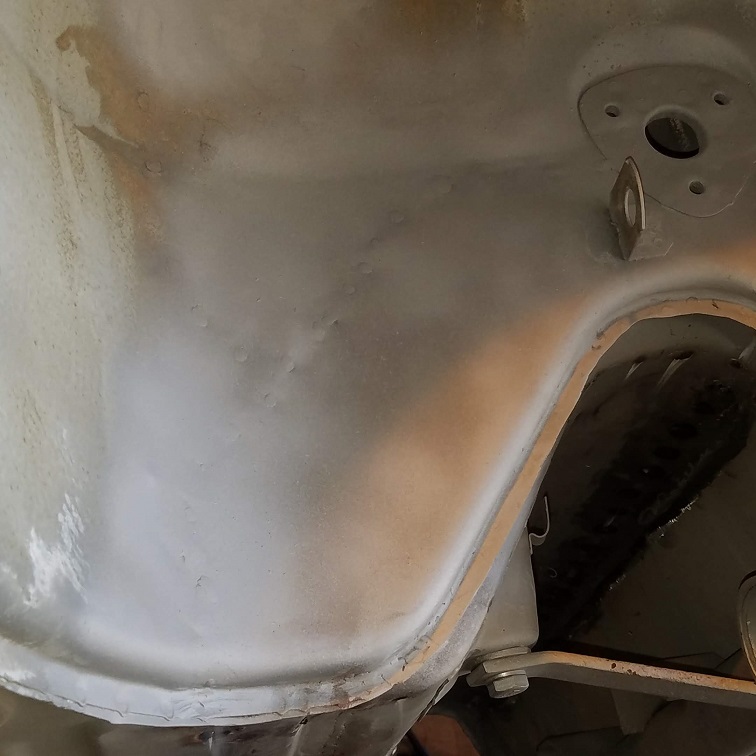
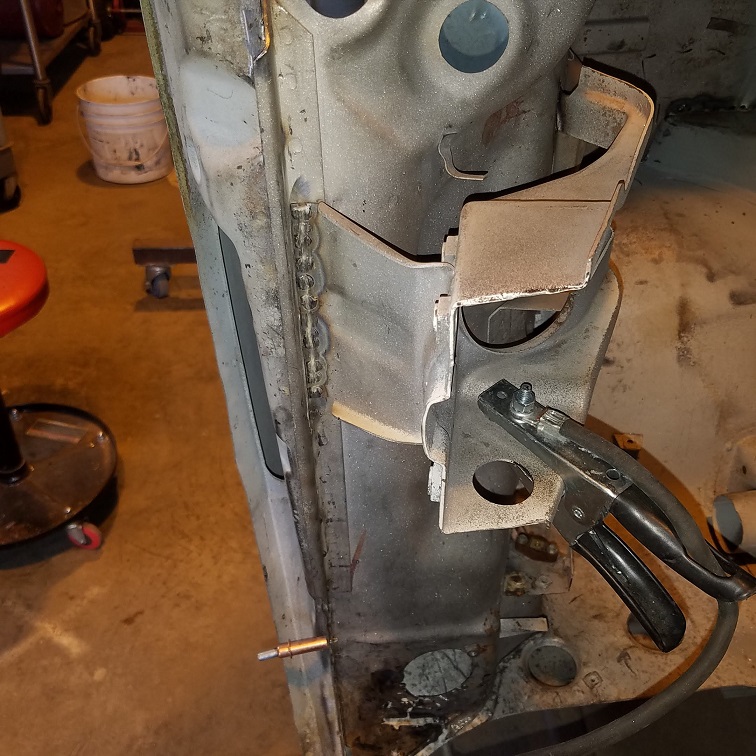
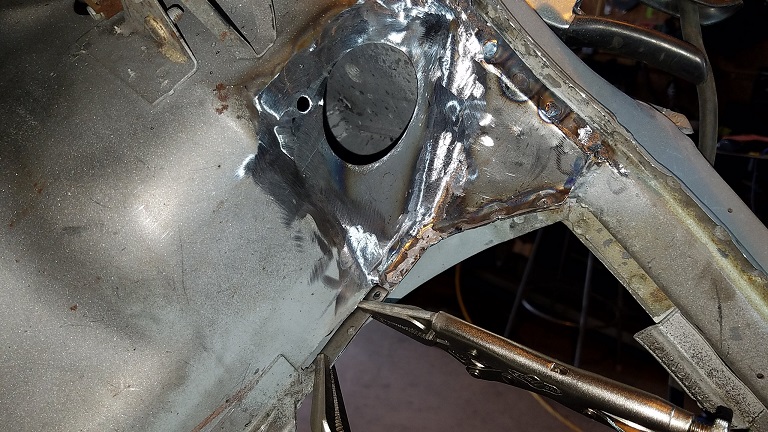
Taylor's project arrived at MiddleMotors this am. It came in style, on a flatbed tow truck. Here's some close ups of the areas that will need some work. It's a shame this really is a pretty good tub. It will need a right suspension ear (early battery acid). It will need a patch in the right engine firewall right behind the passenger (soggy engine sound mat). Doesn't seem to be any cosmetic body damage. But the rat damage is pretty severe.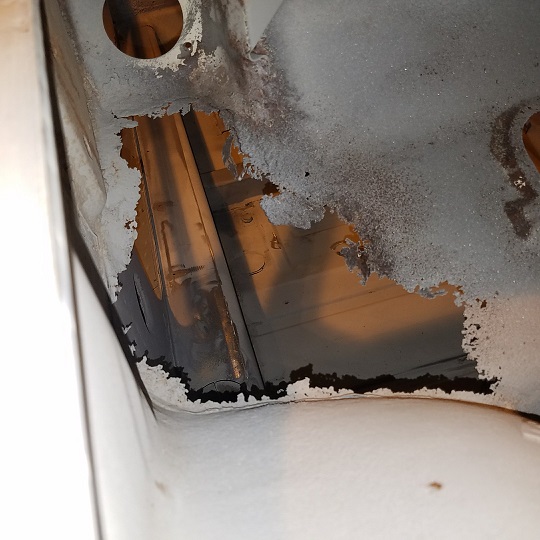
This is going to be a tag team effort with Taylor and I. By the time we get this thing ready for paint he'll an accomplished welder and spot weld remover.
Project starts tomorrow at 10am. I plan to arrive around 9am and get the center field section of the front firewall and dash marked out so Taylor can saw away.
Super In Law is going to take and mark down all the X Y Z measurements that might come into play. We discussed welding in a brace between the longs. I'm thinking maybe one between the front shock towers.
Here's right suspension ear. SOP.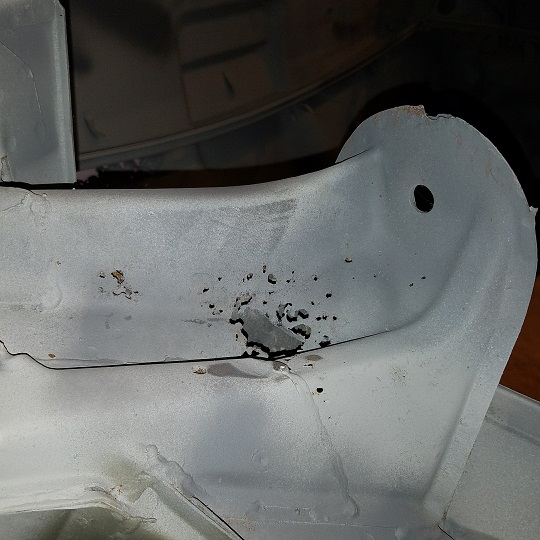
It is on a rotisserie so that makes things a little easier.
I can hear the nay sayers already. Crush It.
I'm up for the challenge. Taylor's eager to learn. Lets see how things look after we get the majority on the field sawed out tomorrow. What does it look like behind the spot welds?
Posted by: Larmo63 Jun 16 2017, 10:25 PM
Keep at it, that looks like a good body/chassis from the outside (at least)
Posted by: Taylor.914 Jun 17 2017, 07:22 PM
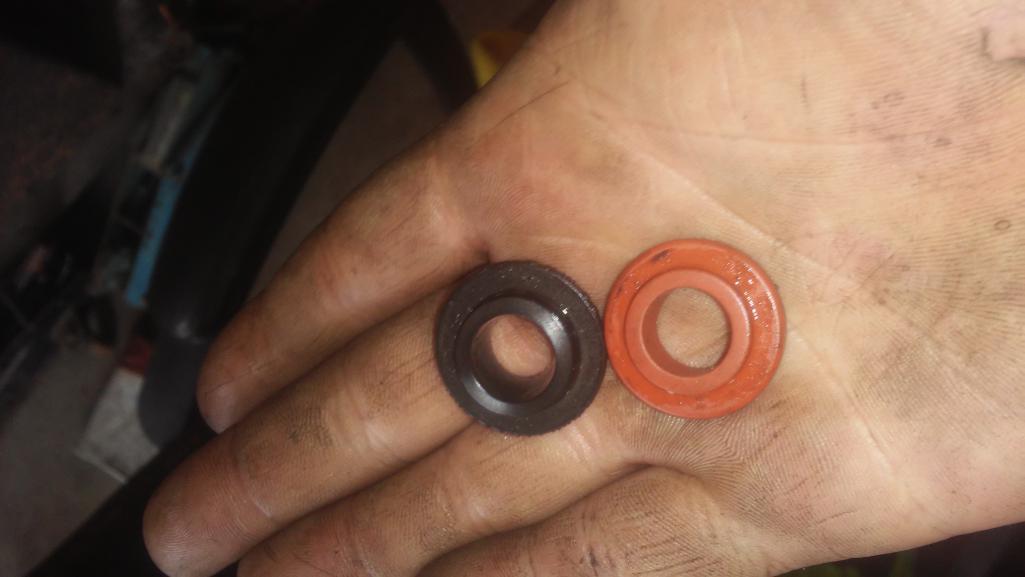
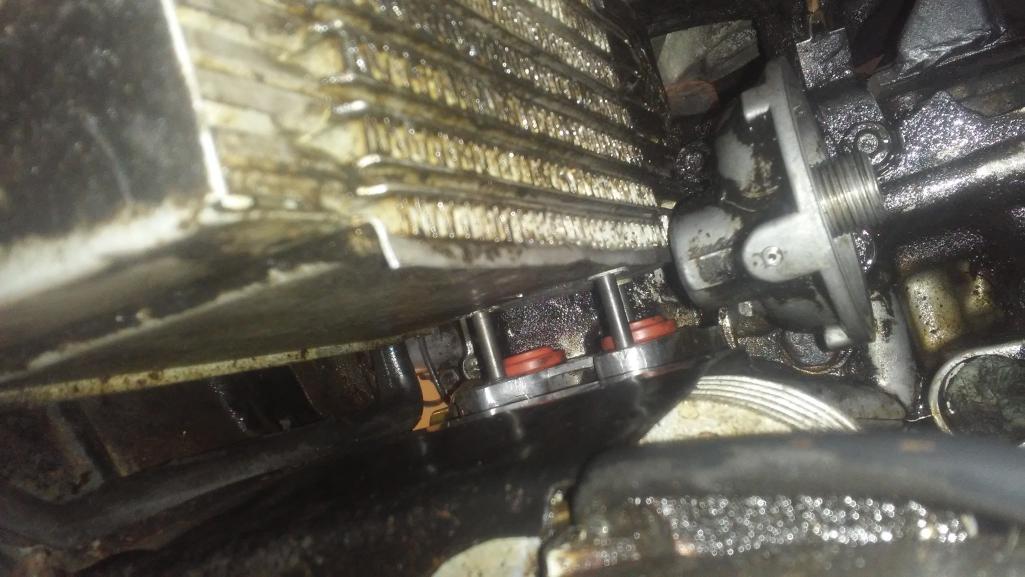
Back at it cutting out the rust and drilling spot welds. Also took some time to clean up the engine and replaced the leaky oil cooler seals with new ones from 914 Rubber.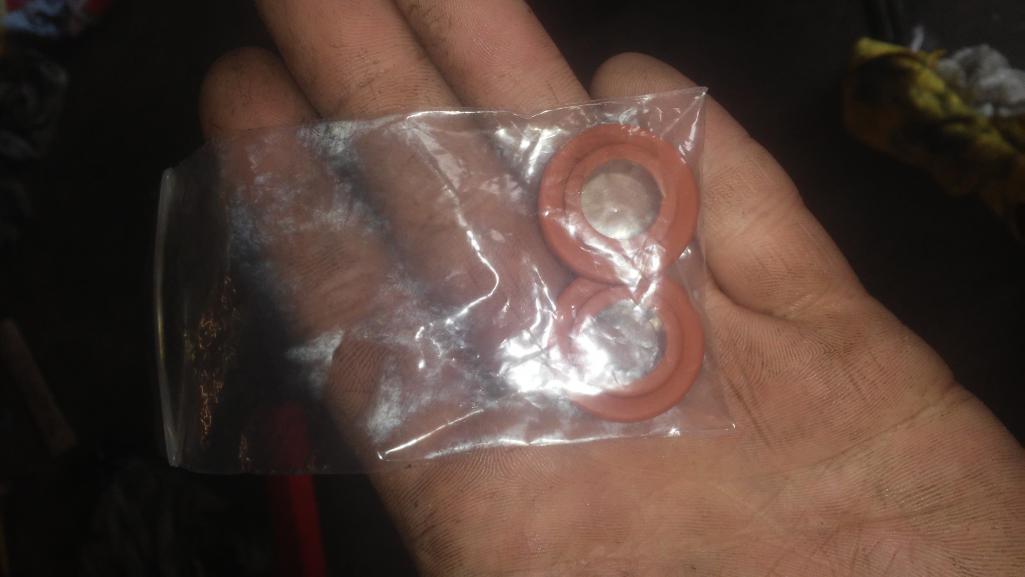
Posted by: Taylor.914 Jun 17 2017, 07:25 PM

Attached thumbnail(s)
Posted by: cary Jun 18 2017, 06:34 AM
A couple more shots from yesterday. Taylor had a great day. Got him lined out and and away he went. Gave him a couple coaching sessions on using Rick's grind and peeling spot weld removal technique. He's getting a good feel on what the metal is telling him.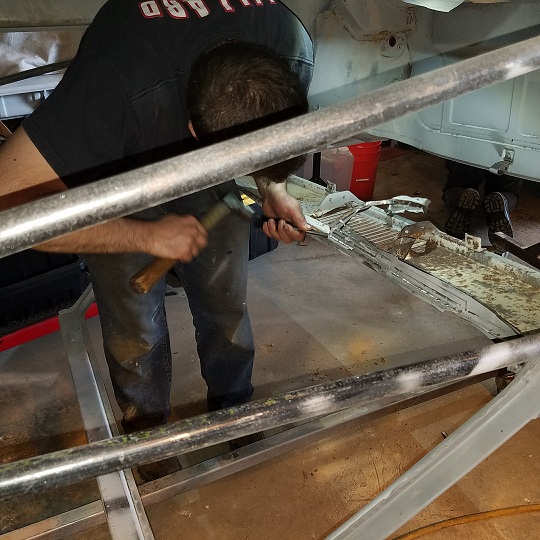
Posted by: Garland Jun 18 2017, 06:57 AM
Taylor,
Welcome to the path that leads to the road of 914 freedom, and the day of its first drive.
Good looking project, and Light Ivory is a great color!
Posted by: cary Jun 30 2017, 10:27 PM
Back to work on Taylor's project.
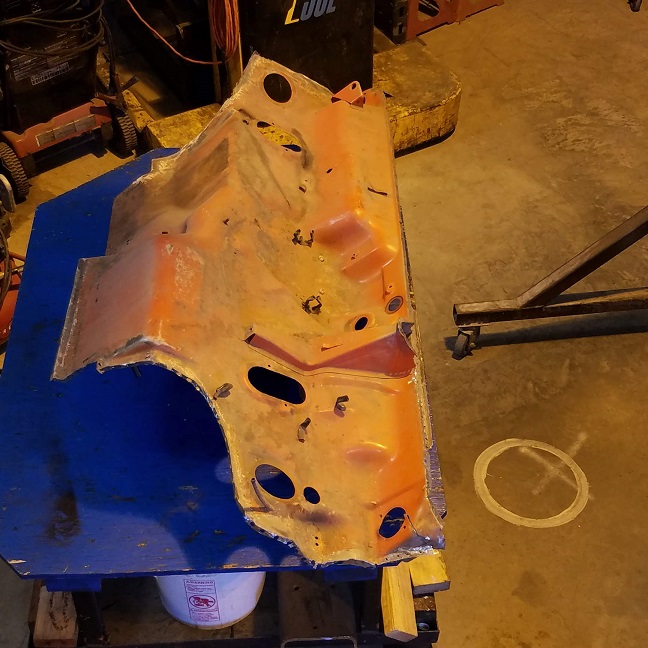
1st. Cut off the nose ................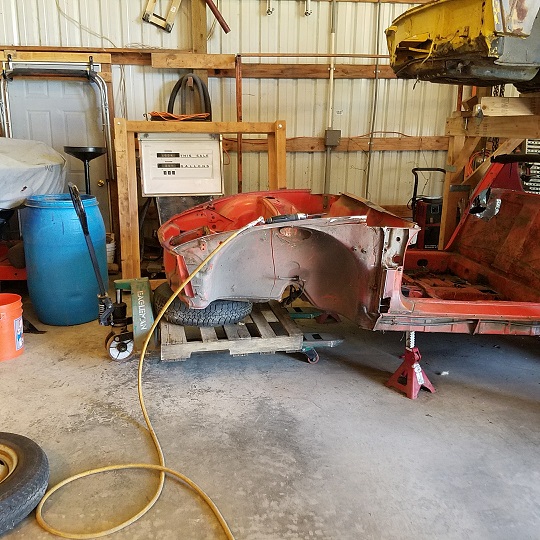
Pretty much junk ............. You can see the wrinkle on the right side.
When time allows we'll trim some other pieces off. The seal channels are nice.
#2. Off came the needed section. As Taylor is drilling out spot welds on the car tomorrow. I'll ponder how much we're going to use.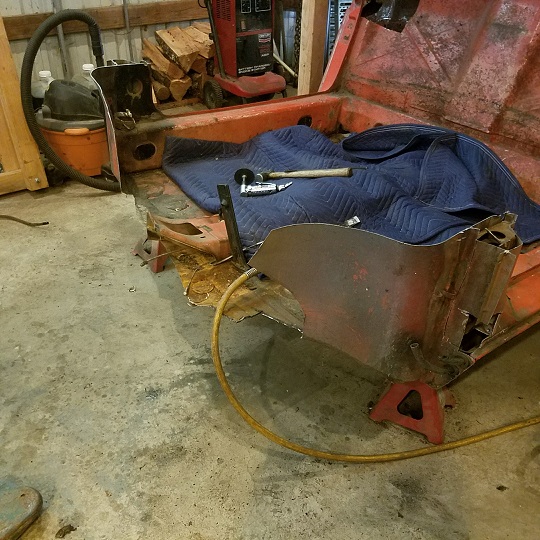
#3. Drilled out the center tunnel so it can be saved in it entirety. 
Posted by: 914Sixer Jul 1 2017, 06:51 AM
I have never seen rust in half those places.
Posted by: cary Jul 1 2017, 07:58 AM
Today I'll get Taylor set up removing the trimmed off spot weld flanges inside the project car. Slow tedious work .......................
Looking at it again yesterday it looks like we'll replace the lower 1/2 of the fuel tank/strut support wall.
Still pondering the upper inner fender portion. Will the remaining portion of the dash have to come out to get it in ?
Posted by: Mikey914 Jul 1 2017, 11:12 AM
I have never seen rust in half those places.
Rats made a nest in the air box and over time the urine ate the metal. Fortunately, as you mentioned most cars do not have rust here so lots of options for donor parts.
Way to go Taylor keep plugging away!
I know you'll have 150 hours + into this, but I hope we can paint it this late summer so you can assemble this winter. Who knows WCR next year???
Posted by: cary Jul 1 2017, 08:52 PM
Taylor had a very productive day. He got most of the spot welds cut out side to side under the dash on the project car. 
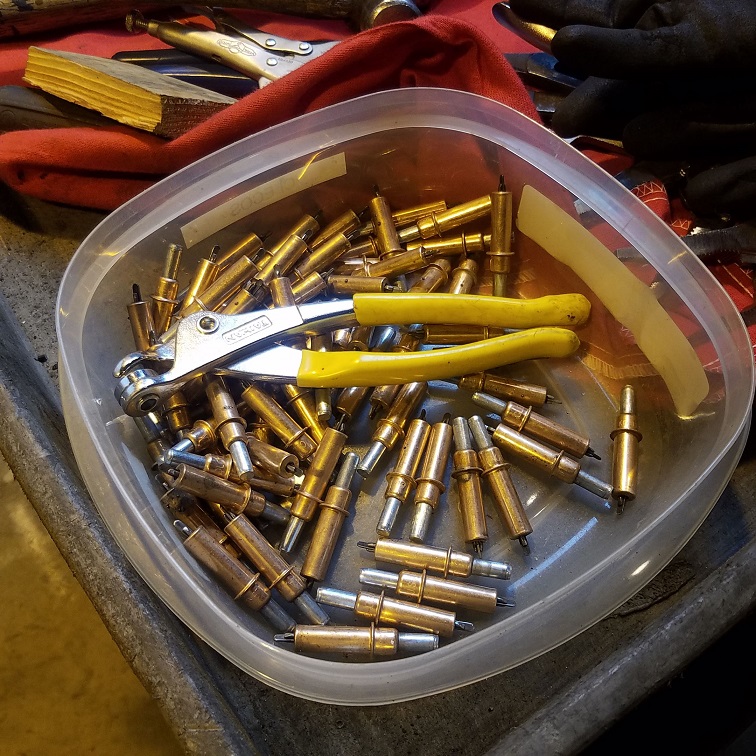
Very impressed. He has a good handle on the Rotabroach spot weld cutter.
Posted by: Taylor.914 Jul 8 2017, 07:55 PM
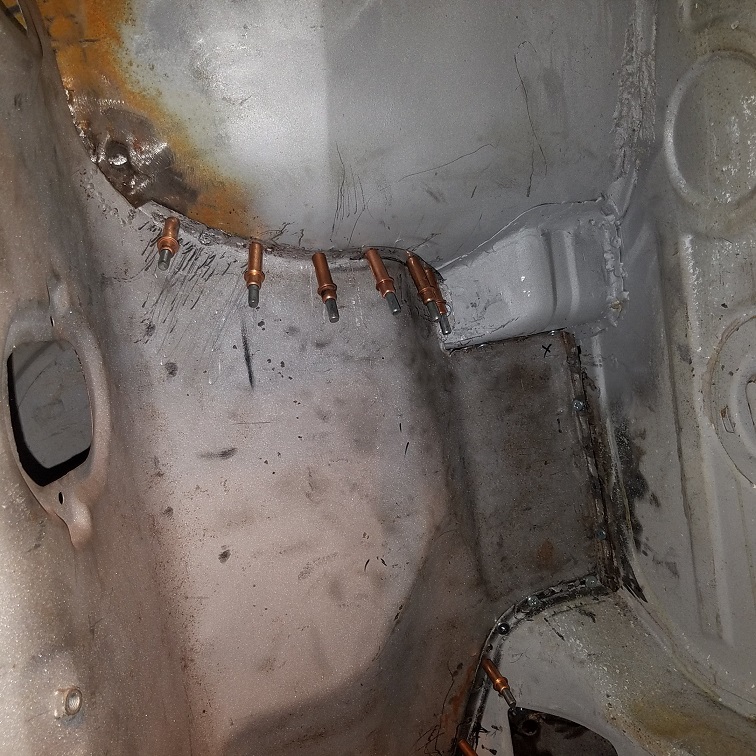
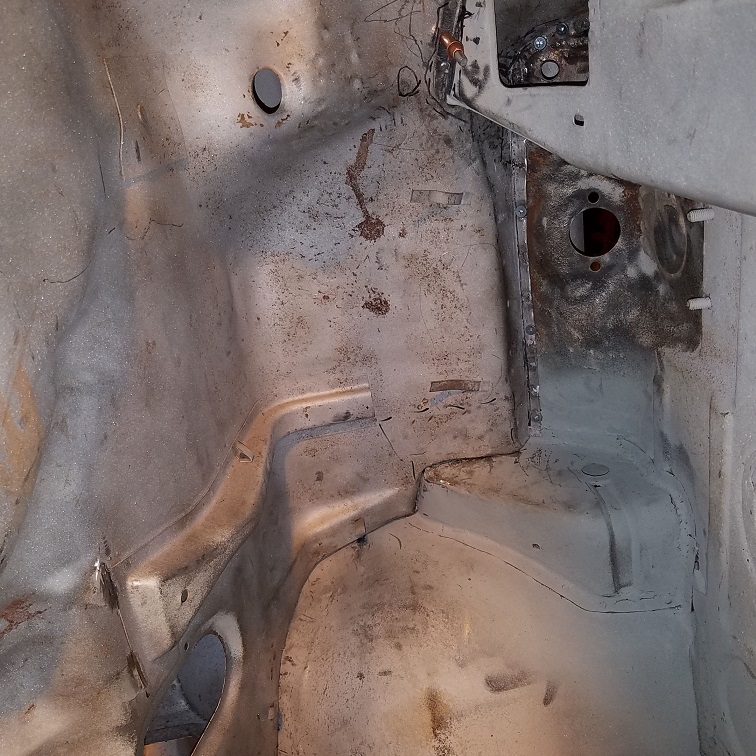
Weekend update. Finished drilling the welds and removing metal on my car for now. Moved in to scraping the seam sealer cleaning the meatal and began to drill away on the donor.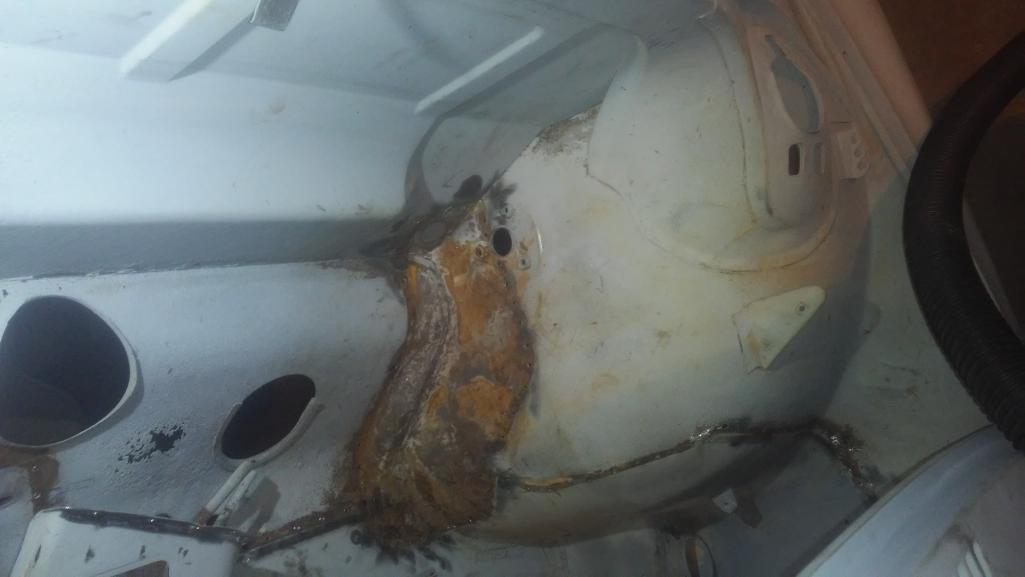
Posted by: Taylor.914 Jul 8 2017, 07:59 PM
Posted by: Taylor.914 Jul 8 2017, 08:00 PM
Attached thumbnail(s)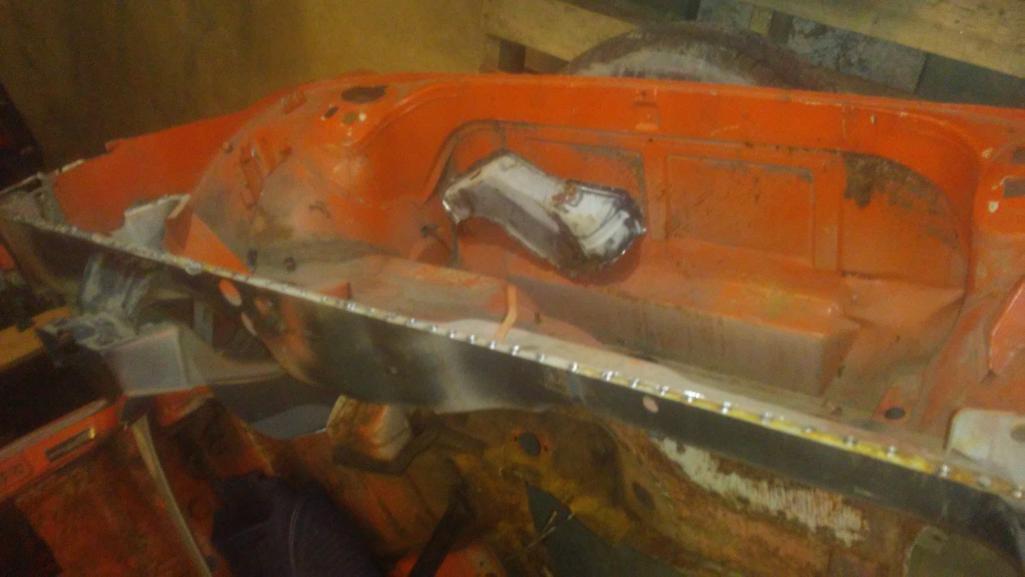
Posted by: Taylor.914 Jul 8 2017, 08:01 PM
[attachmentid=611474]
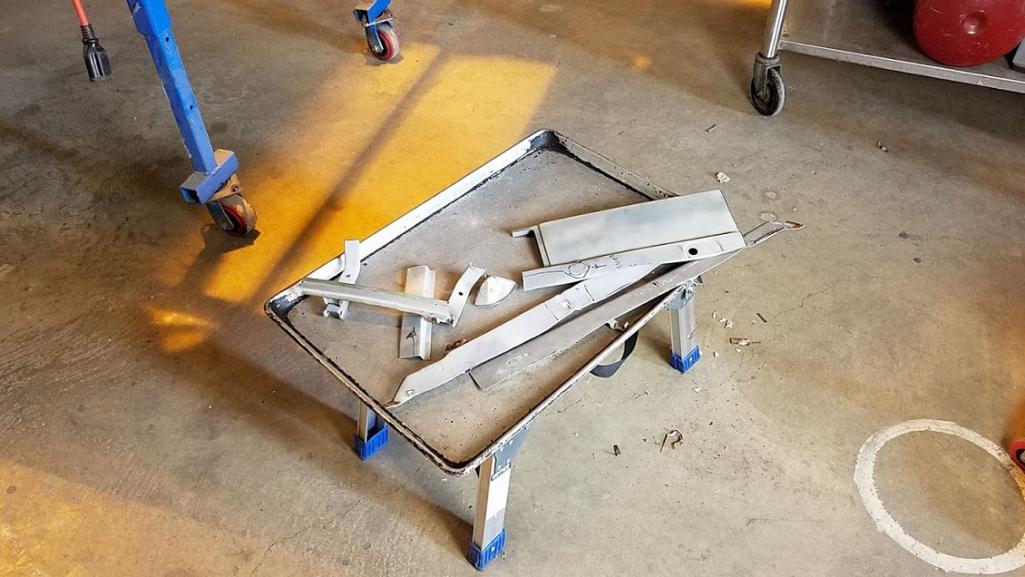
Posted by: Taylor.914 Aug 7 2017, 11:18 AM
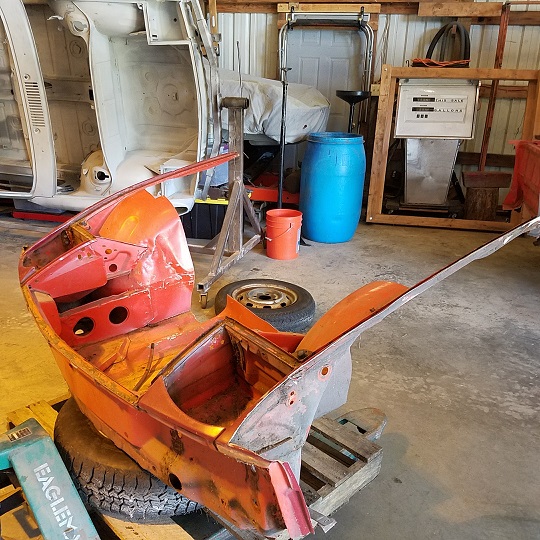
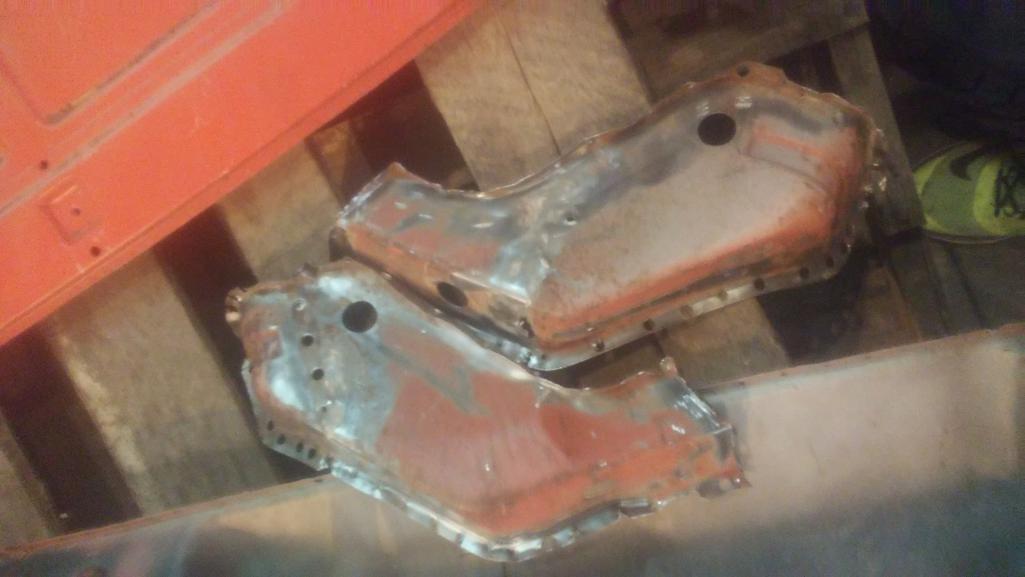
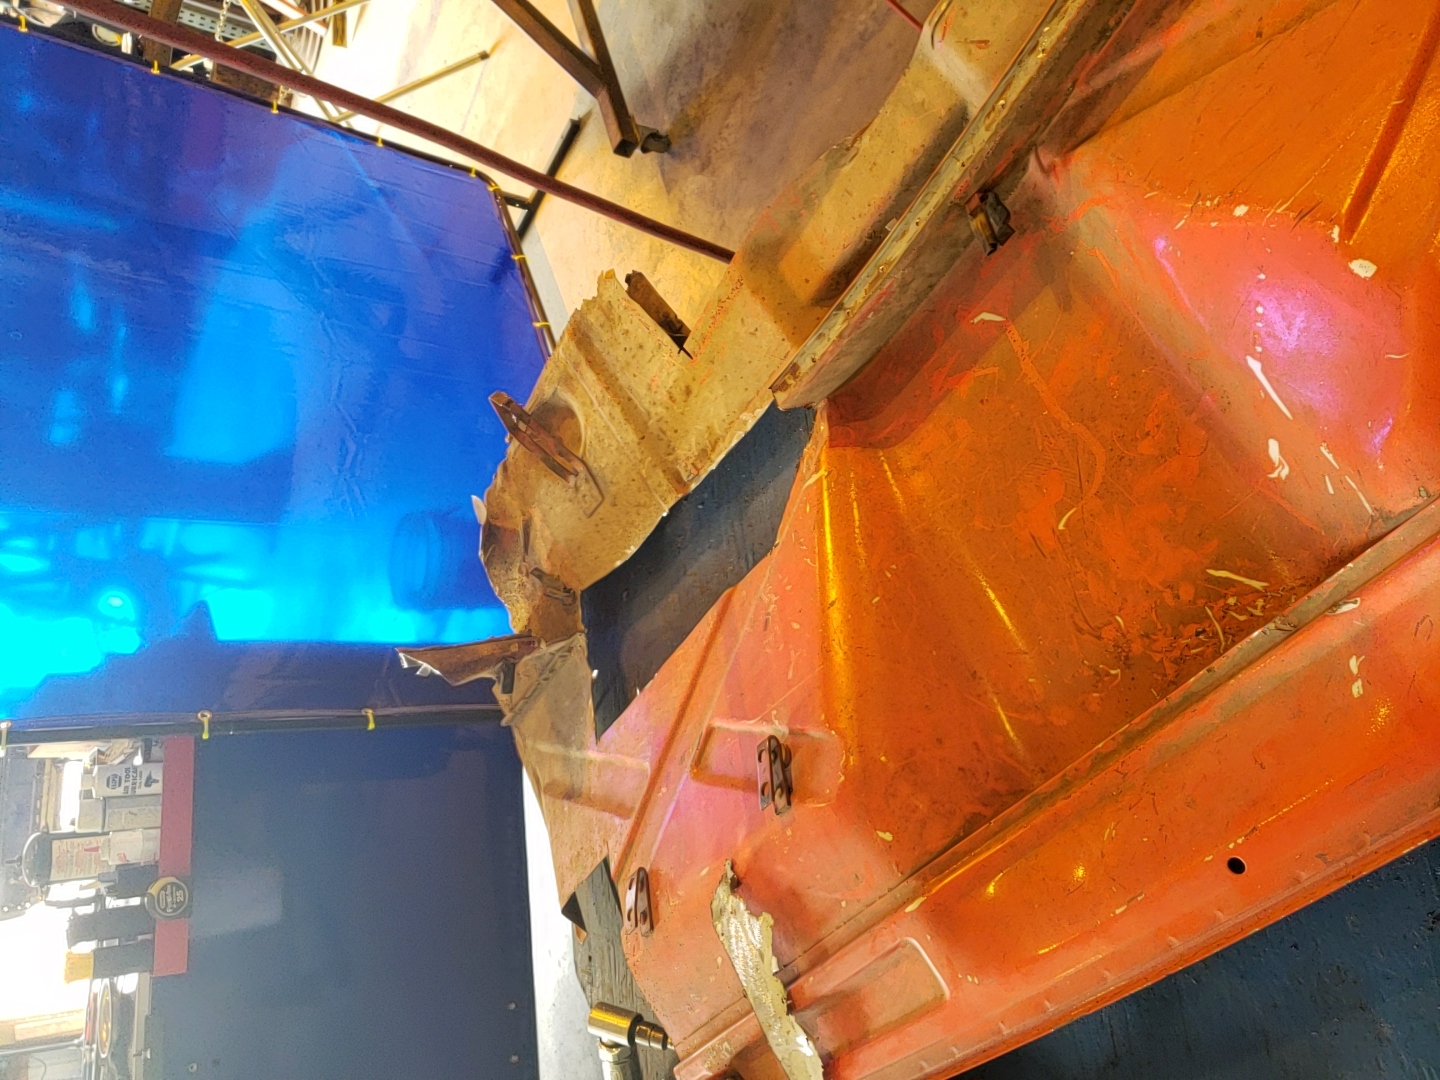
Making some more progress. Got the front end of the donor separated into pieces and now time to figure out what im going to use. Its been a a long process but i can see the end in sight. Hopefully a few more months and she will be ready for paint.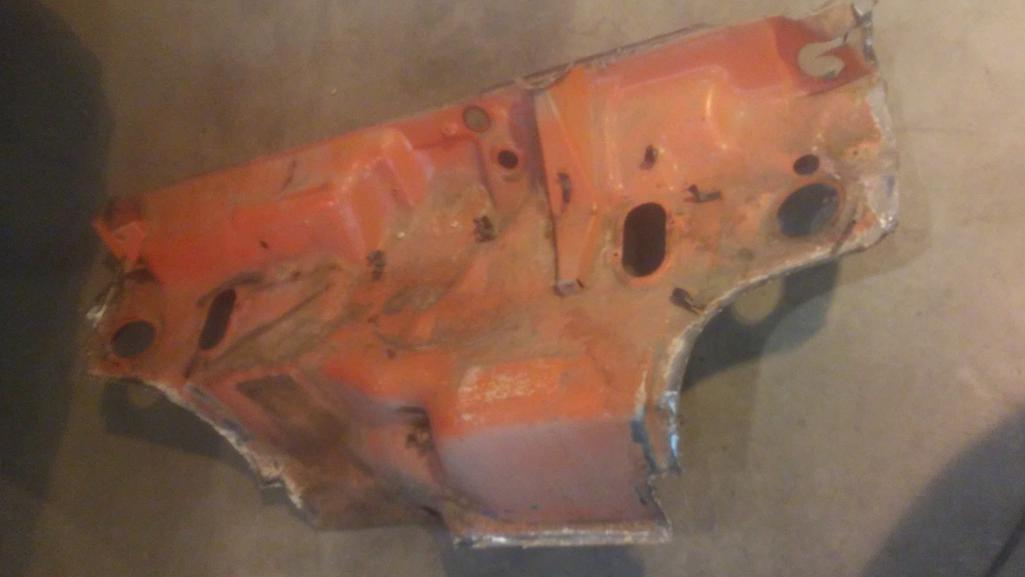
Posted by: Taylor.914 Aug 7 2017, 11:19 AM
Posted by: tygaboy Aug 7 2017, 11:53 AM
Taylor - Those of us who have dissected these cars know how much work (very careful work ) you did to get that panel out... Nice job, good on you.
Keep on posting and know we're out here rooting for you! 
Posted by: mb911 Aug 7 2017, 12:17 PM
Taylor - Those of us who have dissected these cars know how much work (very careful work
) you did to get that panel out... Nice job, good on you.Keep on posting and know we're out here rooting for you!

And chris is particularly talented at drilling spot welds.. Thanks again.
And looks good..
Posted by: Matty900 Aug 7 2017, 10:09 PM
He's got some skills. Great work Taylor 
Attached thumbnail(s)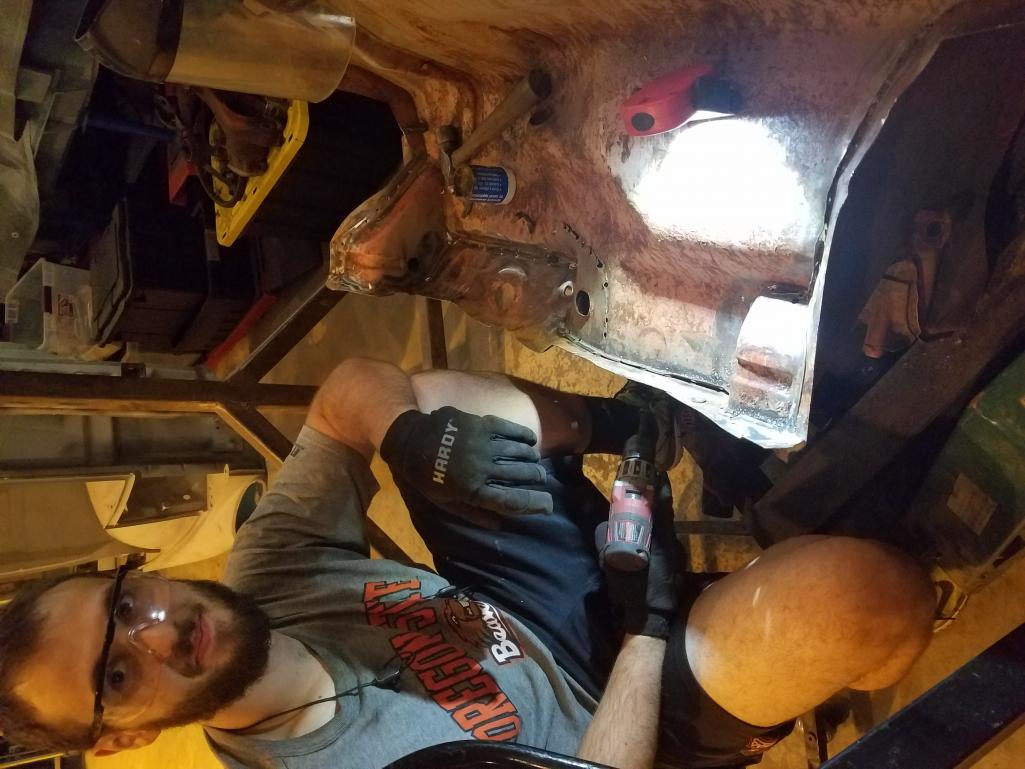
Posted by: cary Sep 2 2017, 09:12 AM
Today's the day Taylor's harvested parts start paying rewards.
Super In Law is going to get Taylor set up on the small welder and have him weld up the spot weld cutter holes on the braces he removed.
My contribution for today will be the inner fender patch. Should be interesting, lots of curves. Haven't decided how big a piece patch its going to be.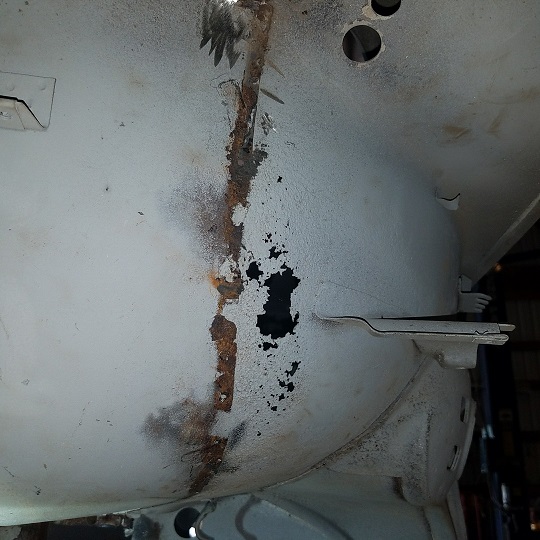
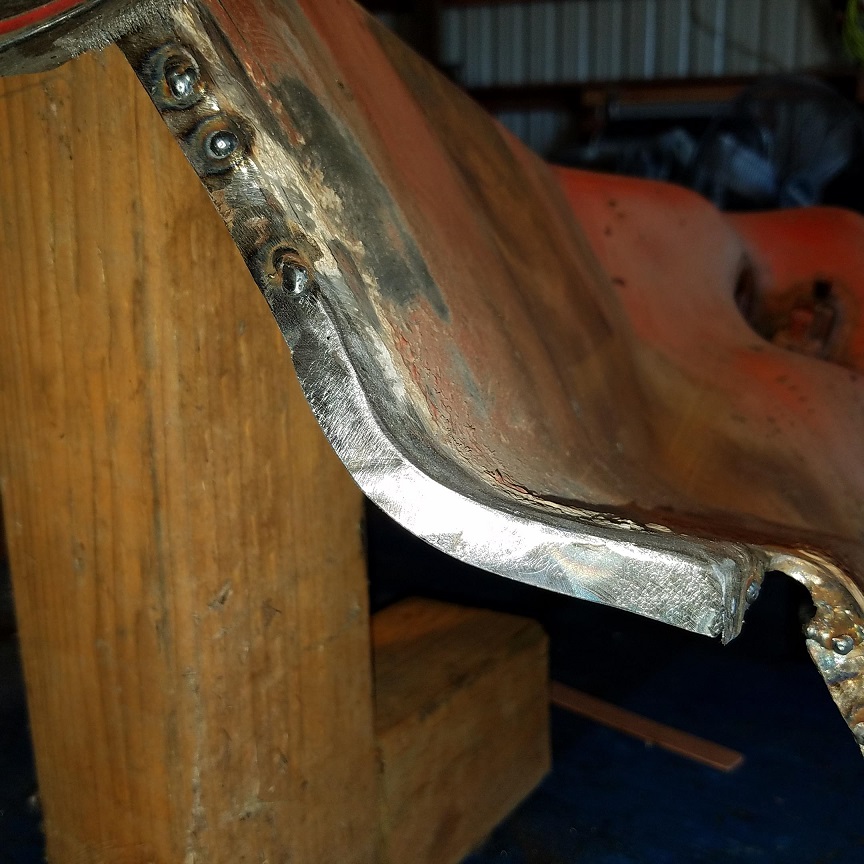
Posted by: cary Sep 3 2017, 10:09 AM
Time to switch from coach to hired gun.
Cut out the destroyed section. 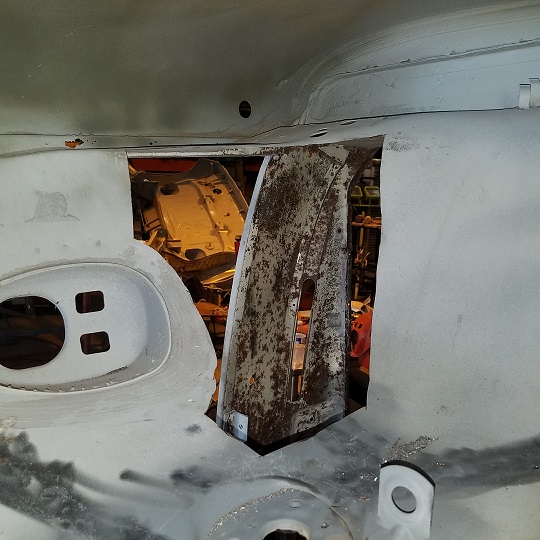
It takes quite a bit of nip, tuck and cuts to get the patch piece fitted. You what it tight enough for a nice weld. But you need enough room to take it in out 100 times to get it trimmed up. 
In went the new section. After sending Super In Law home head down and back to work. I was bound and determined to get the replacement portion tack in.
From inside the fender.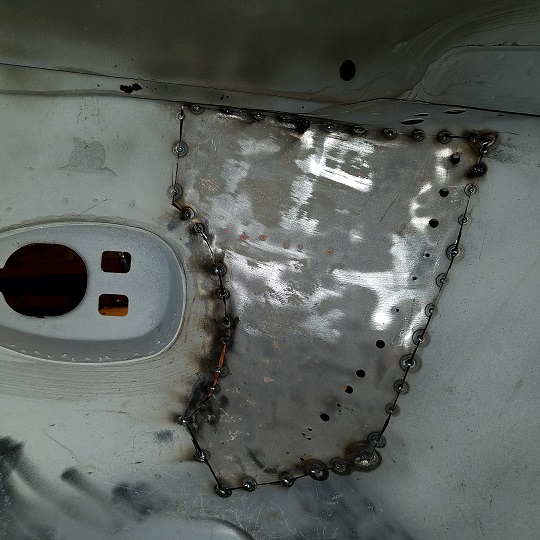
Topside shot. Seam along the wall was a bit tough to fit. Back corner cut out was a little over-sized, but the copper backer took care of that. Looks like I cut it back far enough to get good weldable metal. I do have a few impurities coming out from between the layers on the shock mount. 
Posted by: cary Sep 3 2017, 10:11 AM
Monday the right fender will get a close inspection. No holes per say, but quite a bit of degradation. Might be ok.
Posted by: cary Sep 4 2017, 06:36 AM
Labor Day 2017
Taylor will be laboring to remove the remainder of the inner fender from our pedal box firewall patch panel.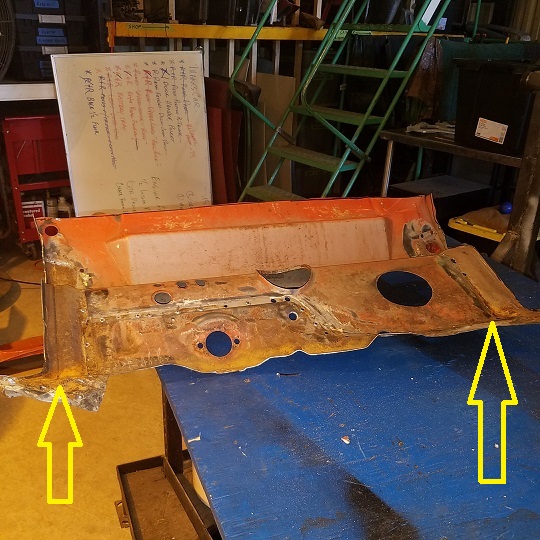
Posted by: cary Sep 5 2017, 08:38 AM
Started Labor Day doing my least favorite task, outdoor media blasting. 
I blasted the lower portion of the front firewall that we'll be using for our patch panel.
Hopefully it made it easier for Taylor to remove the spot welds.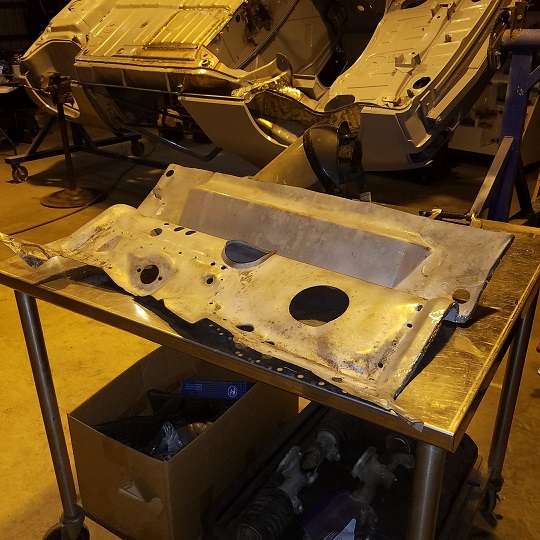
I got the fender patch welded in. I did it from the inside so I wasn't fighting the cowl.
I did a couple test sections of smoothing the weld from the top side. Looks like they finish up real nice.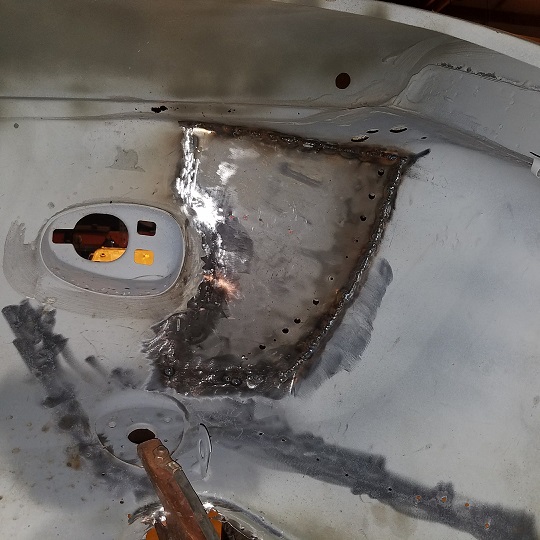
Taylor did a nice job of removing the trimmed off fender portions and hammered out a wrinkle that we didn't see originally.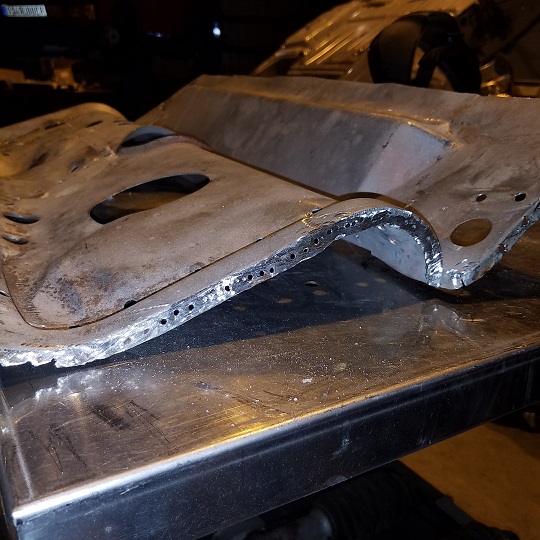
Posted by: cary Oct 4 2017, 08:13 AM
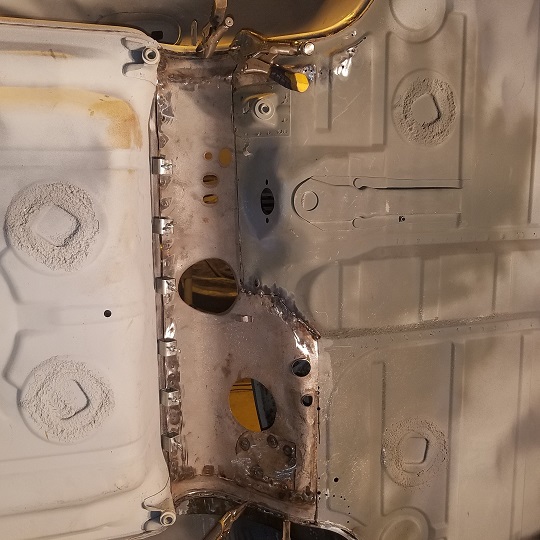
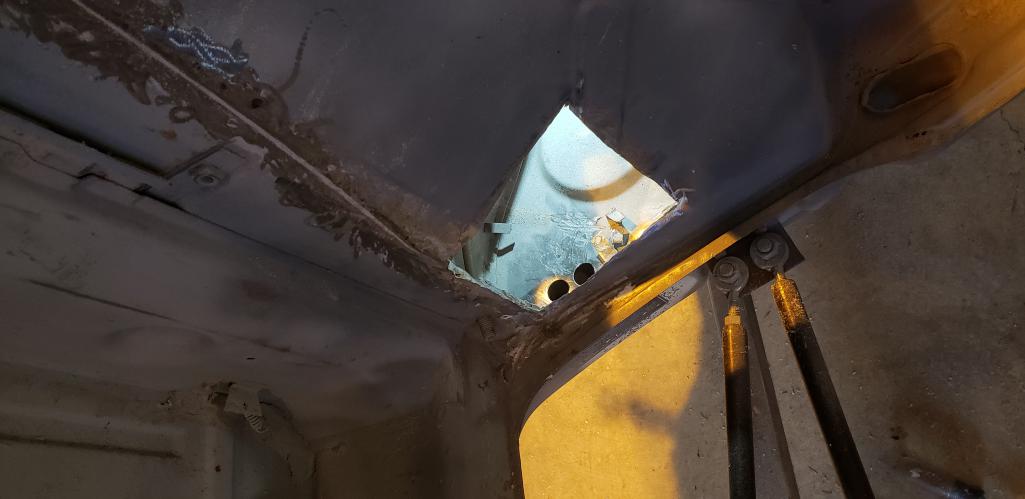
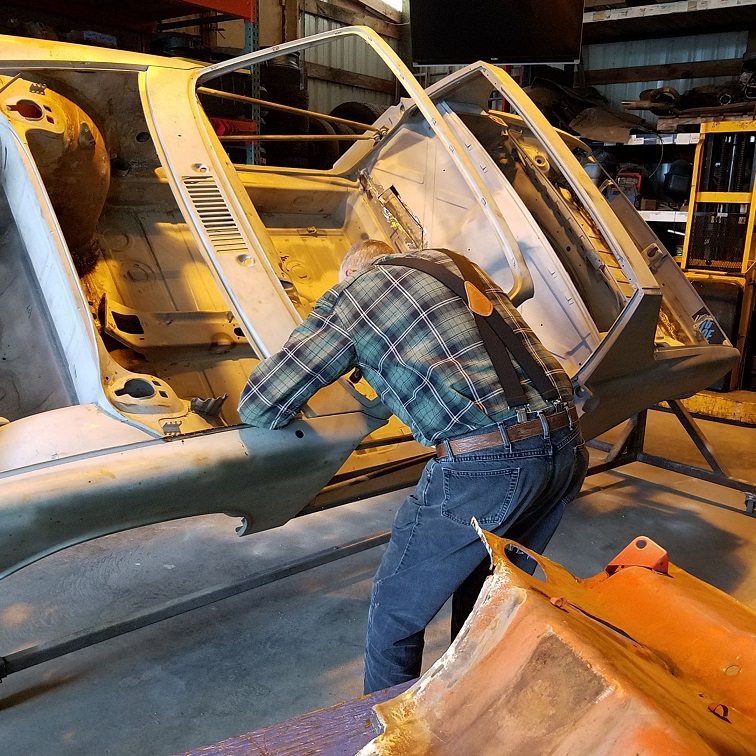
Here's a shot of where we're at on Taylor's car . Your looking thru the targa bar down into the front firewall and into the frunk. The panel had to be seperated to be installed.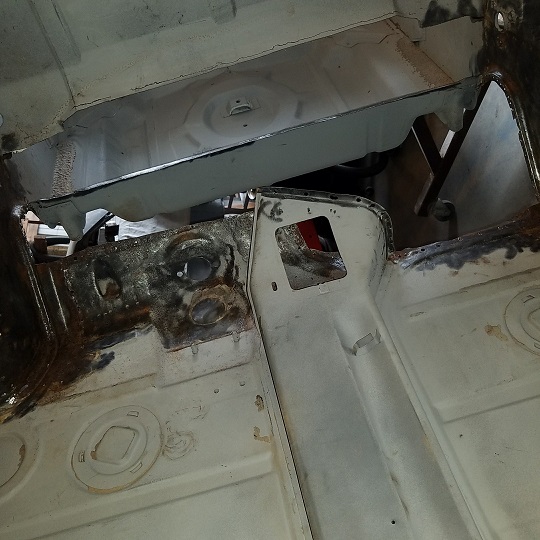
Everything is kind on hold till I finish up Doug's project and or add another welder to the shop. Super In Law gave Taylor a MIG welding lesson and he's been tuning up the spot weld cutter holes on the parts we're going to put back in the car.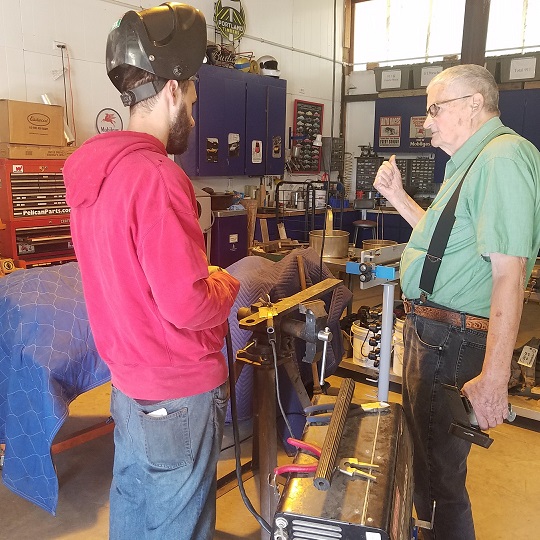
Posted by: Andyrew Oct 4 2017, 08:40 AM
Here's a shot of where we're at on Taylor's car . Your looking thru the targa bar down into the front firewall and into the frunk. The panel had to be seperated to be installed.
Wow, You dont see that too often! Rarely does the front firewall have to be removed...
Great looking project!
Posted by: Mikey914 Oct 4 2017, 10:04 AM
Yes this was a almost rust free car. Otherwise this would be a parts car.
Posted by: bbrock Oct 4 2017, 10:11 AM
Man, this is not your ordinary restoration. Keep up the great work!
Posted by: wes Oct 4 2017, 02:34 PM
Yes this was a almost rust free car. Otherwise this would be a parts car.
Ah you forget it was a parts car, a very good parts car at that. With the amazing work going into her she’s looking more everyday like the day will come that she’s reborn as new. Great amazing work you’re going to end up with a very nice car to be proud of.
Posted by: cary Dec 26 2017, 10:05 AM
With Super In Law awaiting his release, its time to get back to work.
Kind of stuck finishing up Mike's transmission swap and engine freshen up.
The mounting stud on the Pertronix was loose so Mike took it home for a JB Weld repair in a heated house.
So it's time to bring Taylor's project out Front and Center. It's a little chilly in the Non-Heated portion of the shop, but I'll push thru it. Cools the tack welds faster, LOL.
Posted by: cary Dec 26 2017, 11:35 PM
Getting off to a chilly start ..................brrrr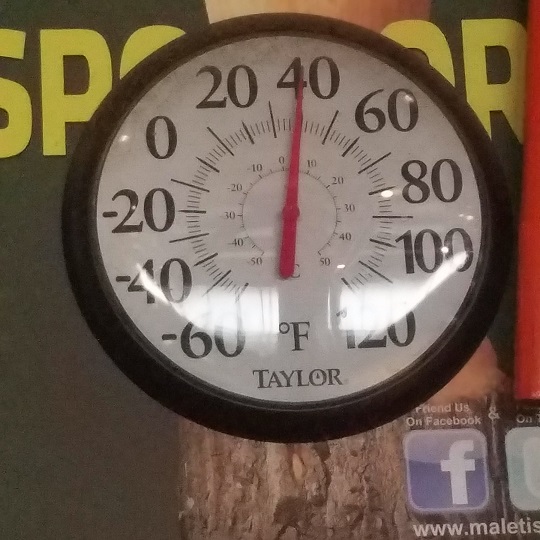
Started with grinding and sanding the seam welds. Then onto welding up all the spot weld cutter holes.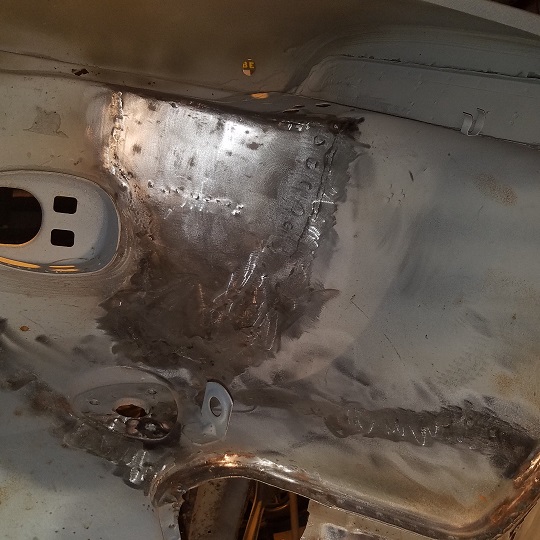
Needs a little and dolly work. But turned out pretty good considering where we started. 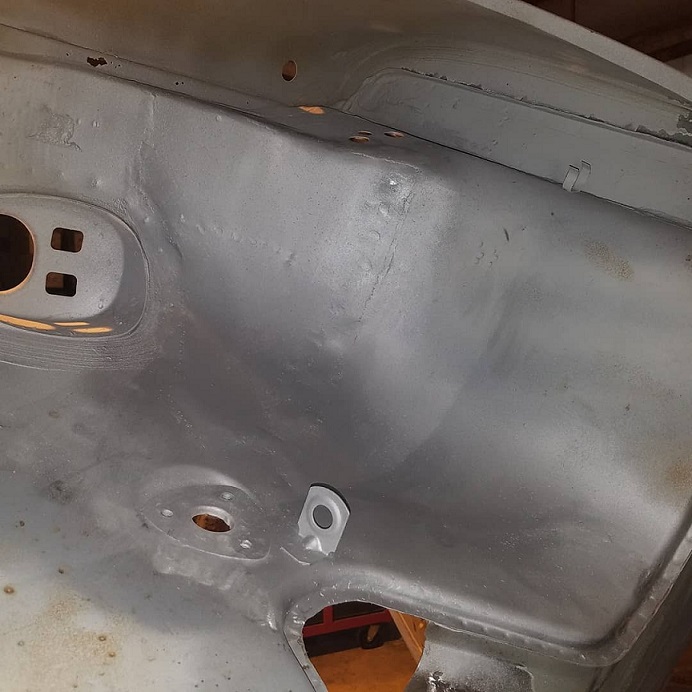
As long as was there I tuned up the door frame / tub wall.
Posted by: cary Dec 26 2017, 11:43 PM
After a little more inspecting ..................
I found the left front sway bar mount is missing a nut and torn. 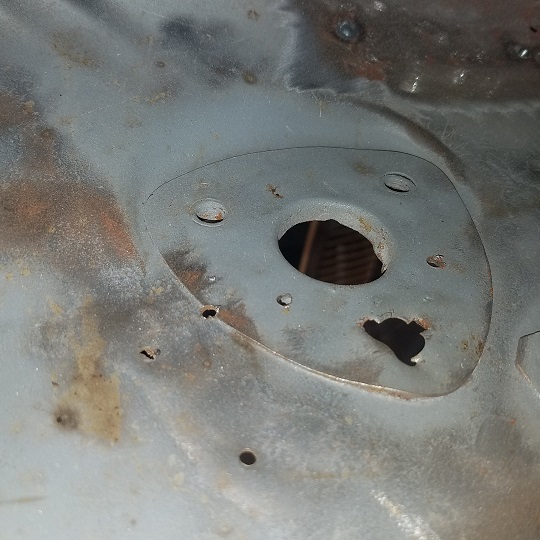
Used my Tangerine backing plate to center it up and weld on an 8mm flange nut to
put it back in business.
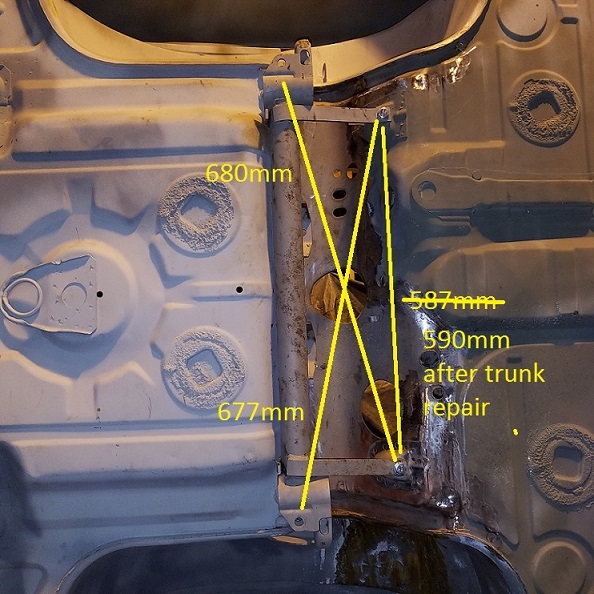
Then it was time to take a look at the front trunk channel.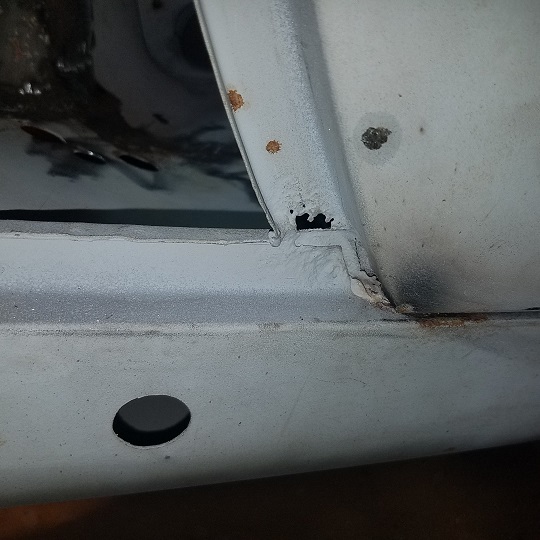
I'll probably move this repair to a separate thread because I'll be using the 914 Rubber's weatherstripping channel repair strips.
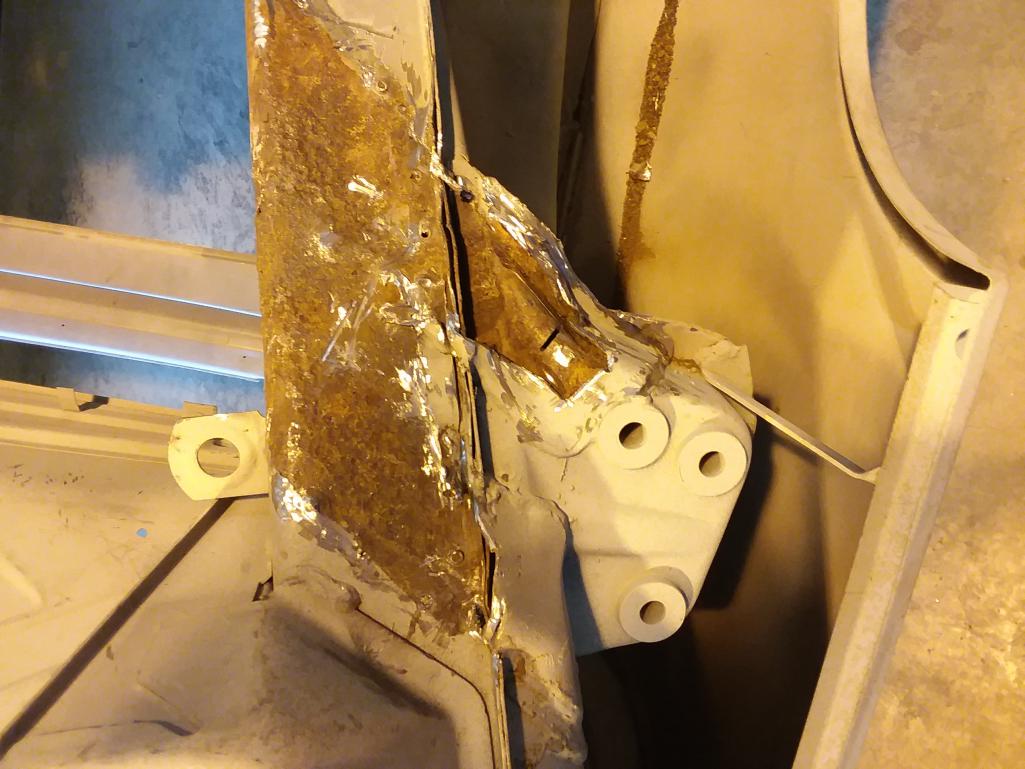
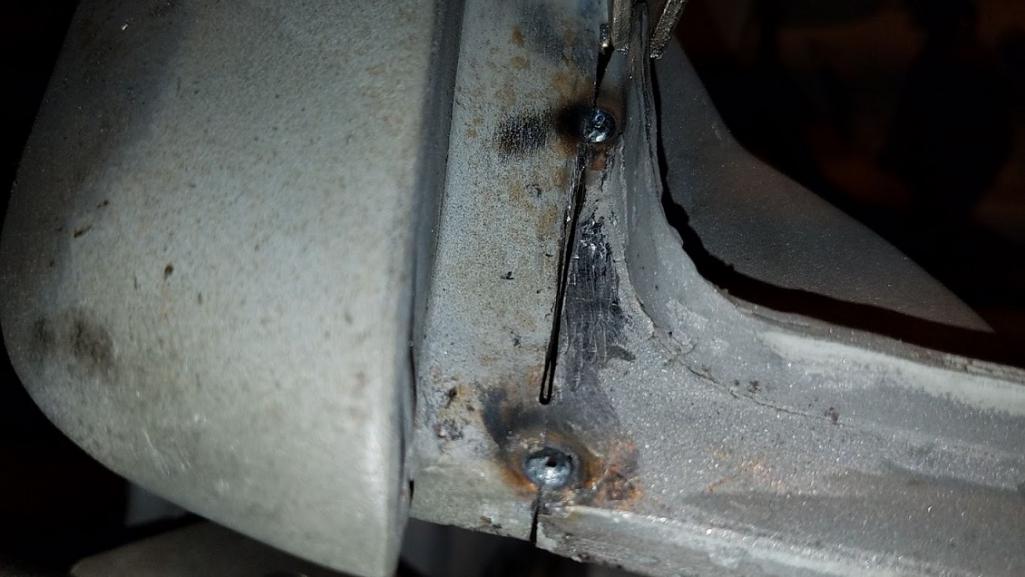
Posted by: cary Dec 26 2017, 11:48 PM
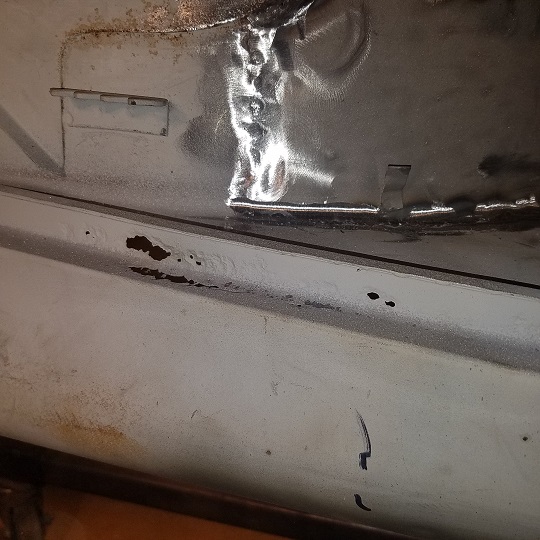
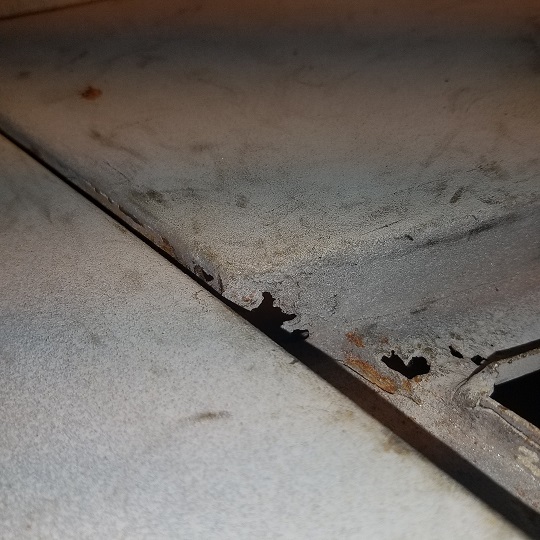
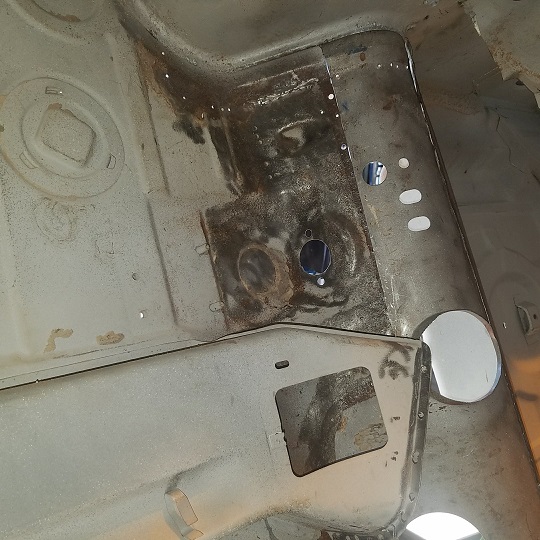
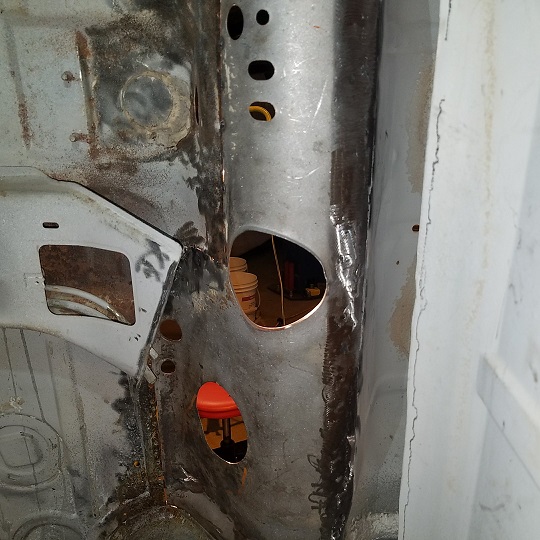
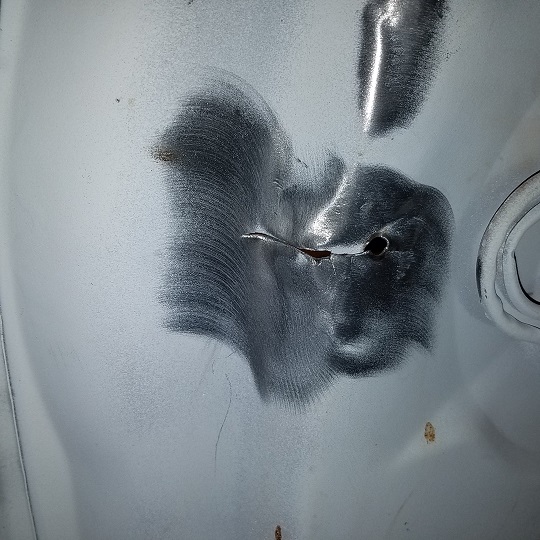
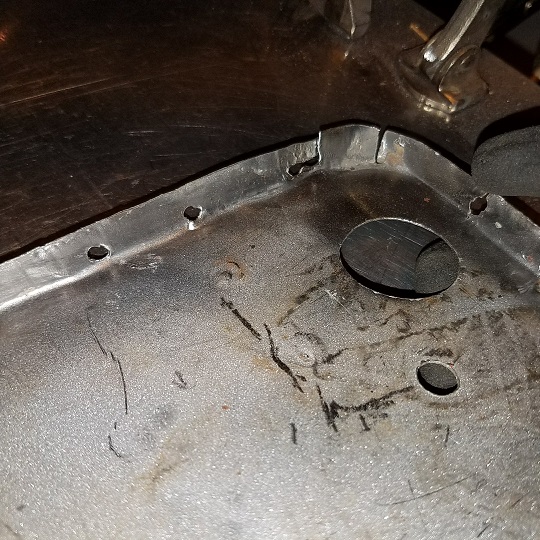
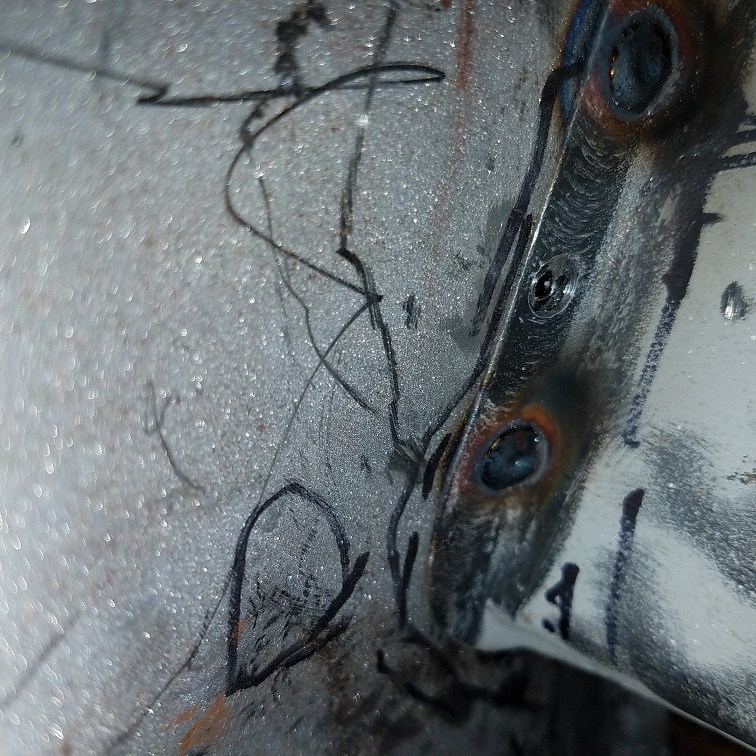
Next it was time to cut out the right fender pee pee holes.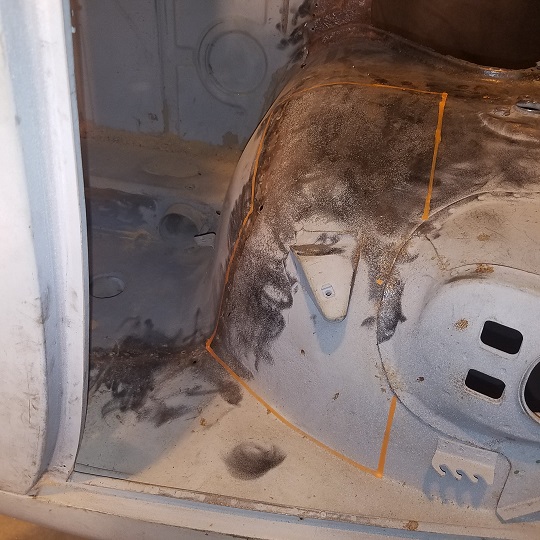
Here's a few shots of the pee peed metal.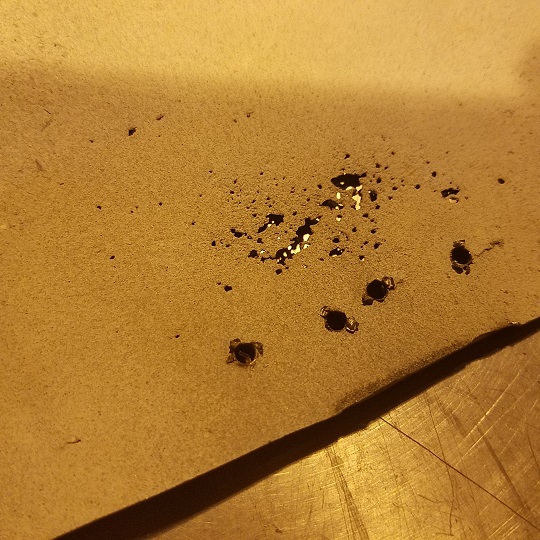
[attachmentid=632738]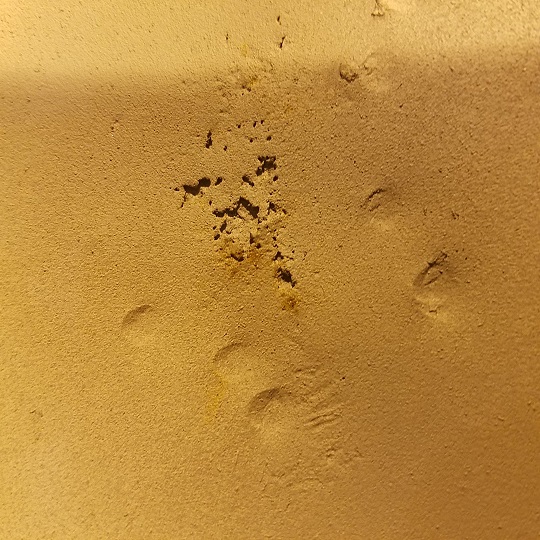
Posted by: Mikey914 Dec 27 2017, 01:56 AM
Thanks Cary,
Looks like it was a little worse there than we thought, but a t least we will have it fixed.
Posted by: cary Dec 27 2017, 11:26 PM
Got all bundled up and got back to work. Still 40 degrees ...............
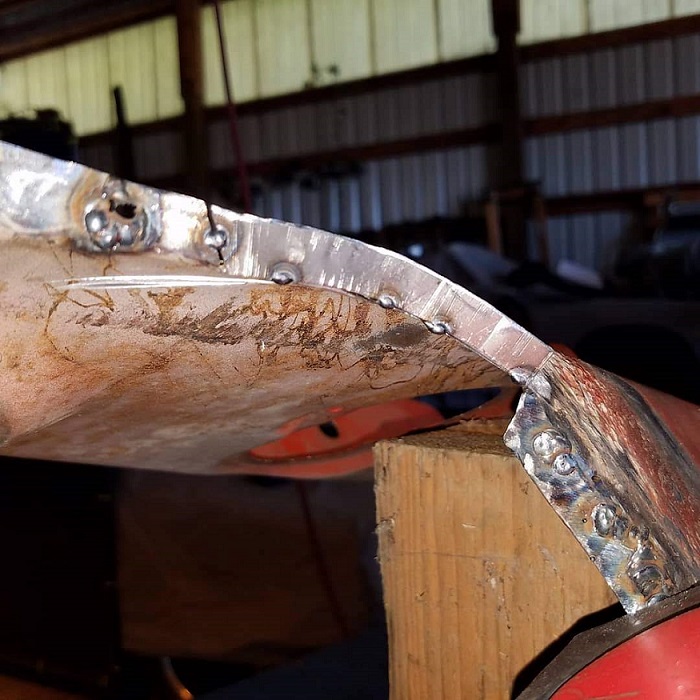
Out came the right fender..............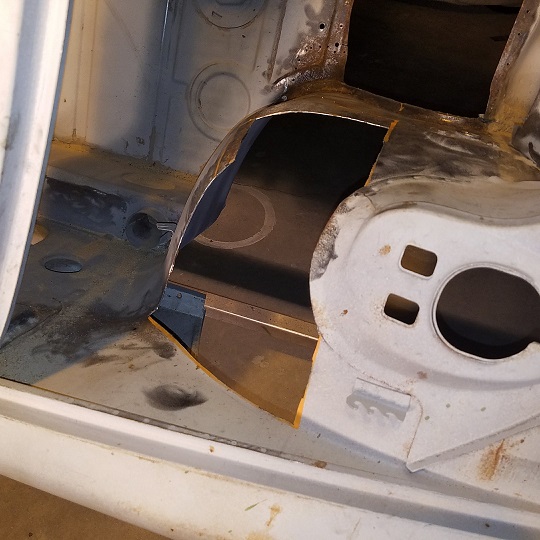
Trimmed off the excess on the new patch piece. Then clamped it up and cut out the patch to fit.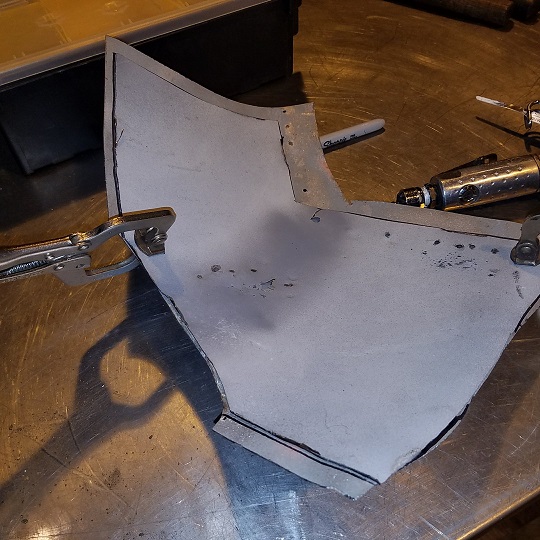
Got a nice tight fit on the patch. I was thinking that I made the patch too big. But I still ran into some thin spots along the seam. 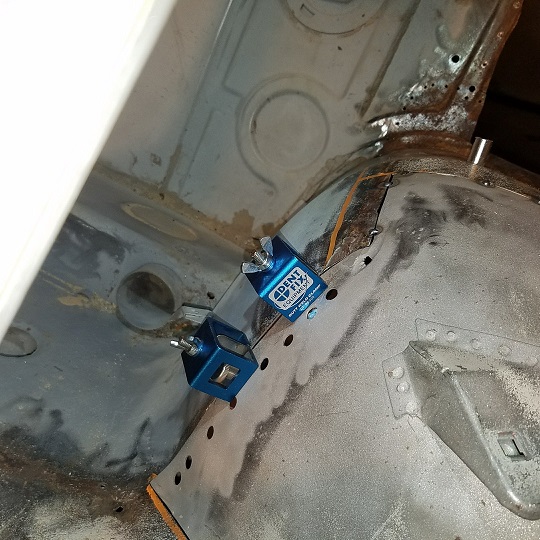
Let the fun begin ..................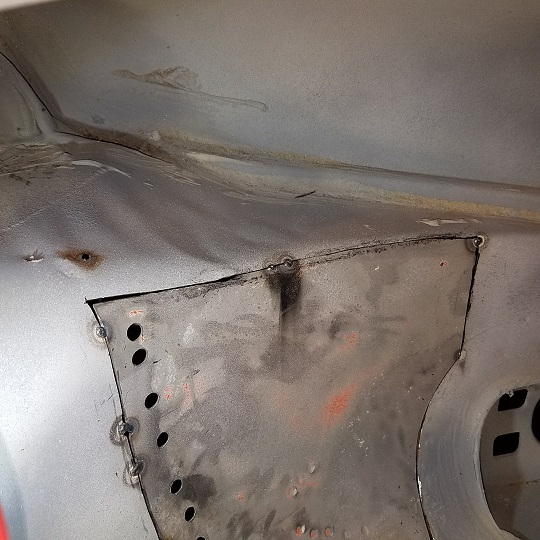
Welding was pretty uneventful ............ other than the thin spots I'll need to tackle in the morning.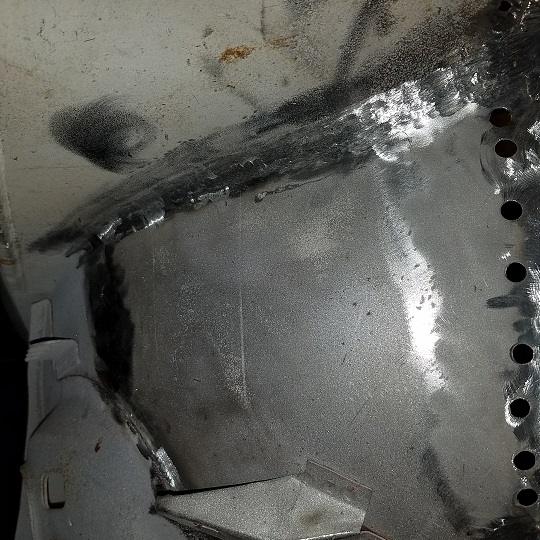
I love my MillerMatic 141 ....................
Posted by: Mikey914 Dec 28 2017, 12:37 AM
Good news is it's supposed to be warmer tomorrow.
Mark
Posted by: cary Dec 29 2017, 10:55 AM
Started with tidying up the thin spots created by the round material and over finishing.
Tough sledding on the round surfaces.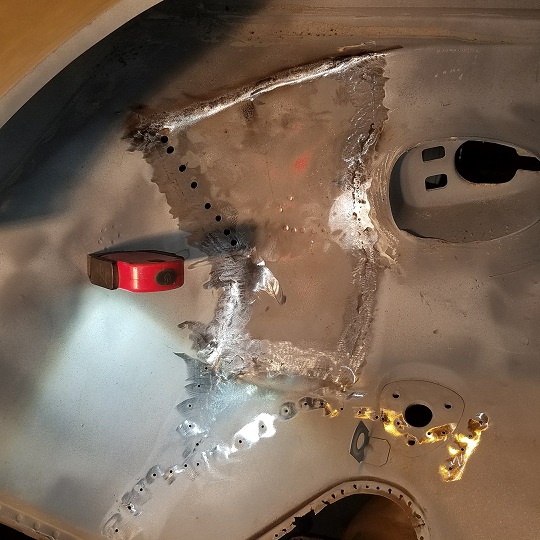
Then on to filling all the spot weld holes and 40 years of PO sheet metal holes.
Had to make a couple patches on the cross member arch.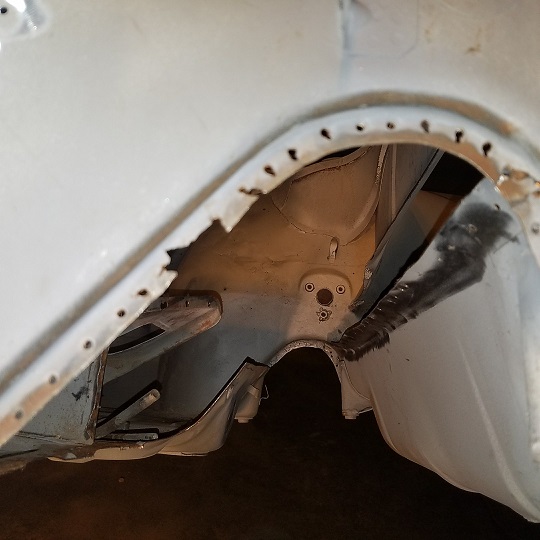
Handy tool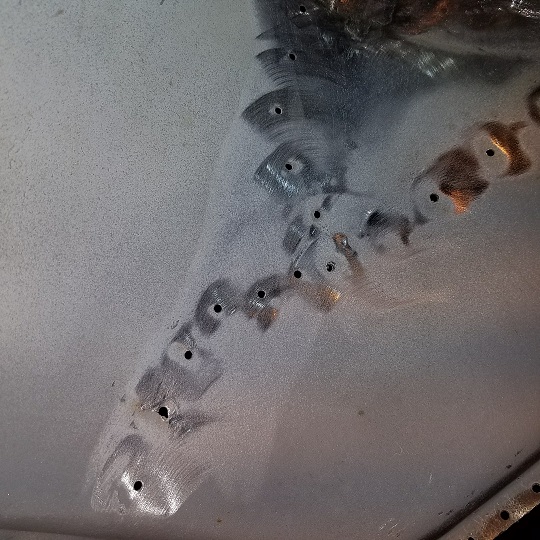
Took a while but got them ready for the next step. Didn't over finish too much. They'll get spot or rosette welded again.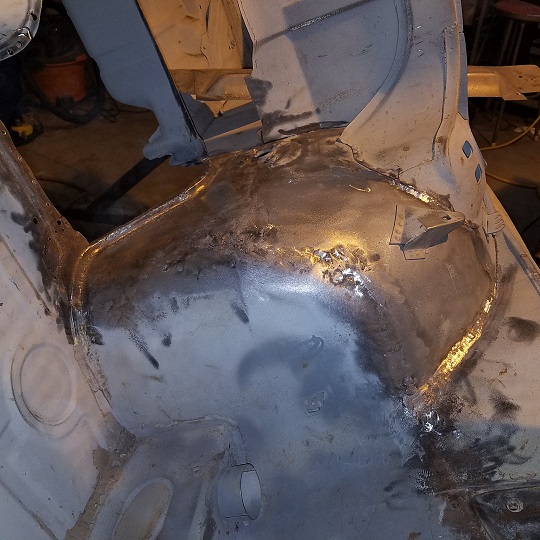
Posted by: Mueller Dec 29 2017, 10:56 AM
^wow, great sheet metal work there!
Posted by: jimkelly Dec 29 2017, 12:17 PM
man, i love to see a car being blasted right down to metal, nice 
Posted by: cary Dec 29 2017, 12:27 PM
It costs. But it's the only way you find everything.
Posted by: Mikey914 Dec 29 2017, 02:02 PM
This is my gift to my son. He puts in the time, I put up the cash ...and parts.
Posted by: cary Dec 29 2017, 09:42 PM
Next was the tune up of the hinge support and dash tie in.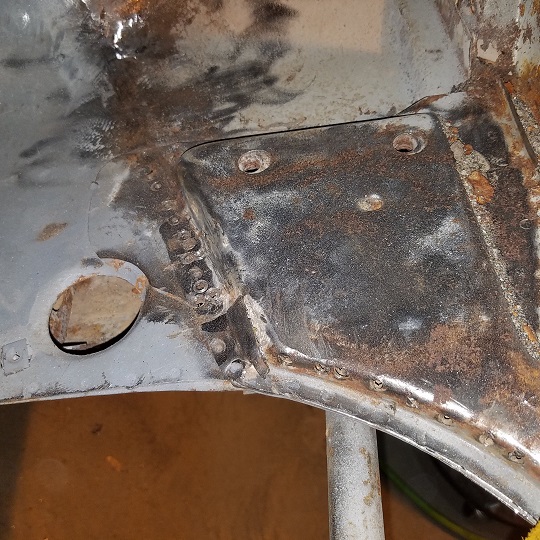
Yes, the blasting glass continues to fall out of the long ...............
After close inspection I decide the floor/firewall/chassis tie in braces need new flanges rather than trying to fill in the damage done by the spot weld removal.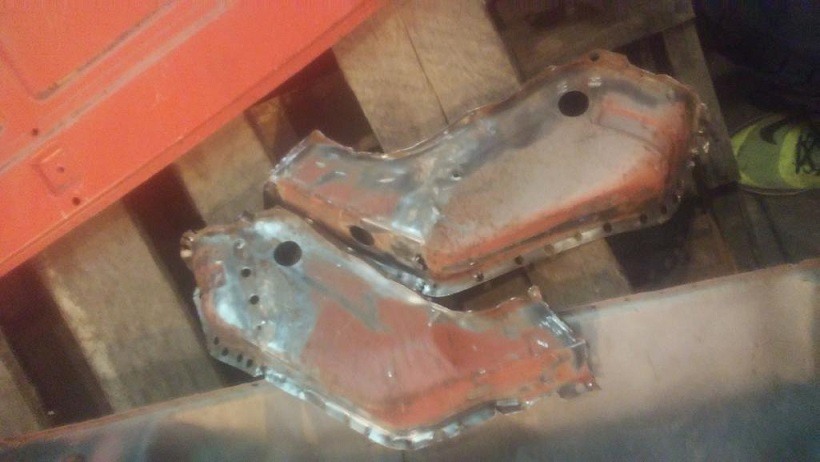
Went to Rothsport today and stomp sheared some 1/2" 20ga strips.
Then it was time to start the fitting of the replacement fuel tank/firewall lower portion.
It's going to take some time determining the cut out. Nothing was left of original section. It came out in pieces.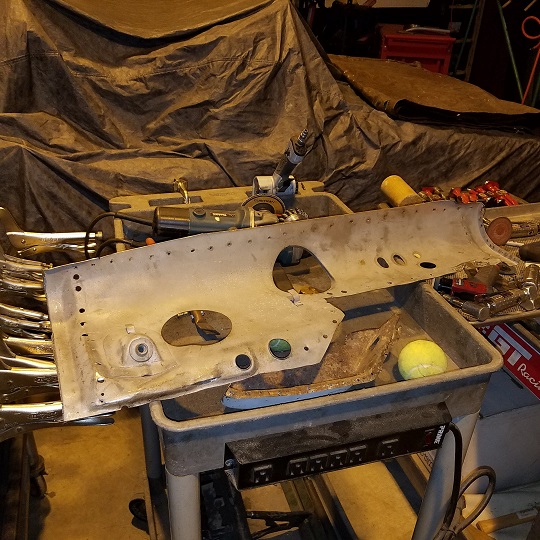
The lower section of the fender/fuel tank will be installed after the section above.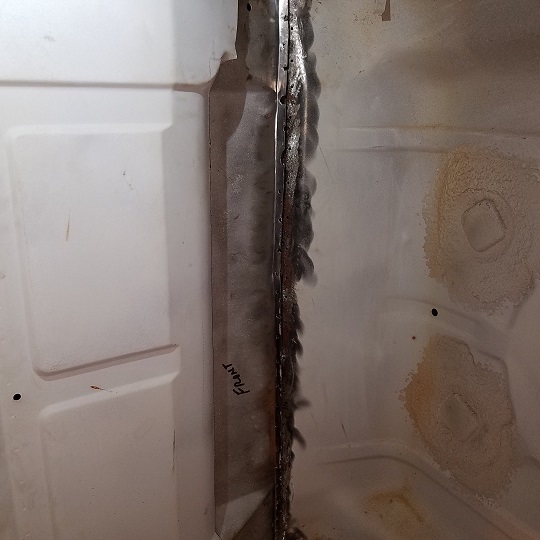
Posted by: cary Jan 1 2018, 10:42 PM
Forgot to post Sunday's work.
Started the day by seeing if I could shrink the 1/2" strips I sheared at Rothsport.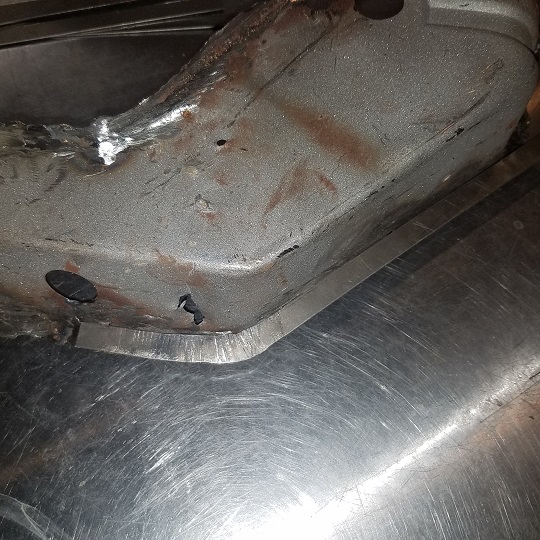
We'll come back to those later ................
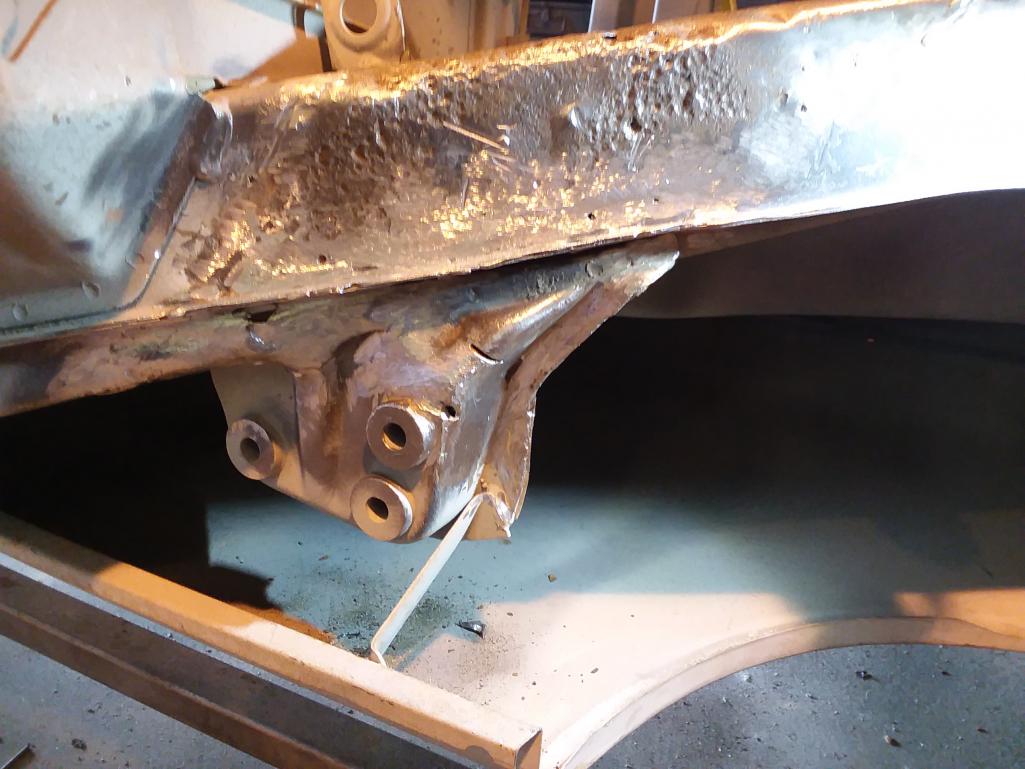
Posted by: cary Jan 1 2018, 10:55 PM
Next onto the seriously dented cross-member mount.
I decided the mount would have to come off first so I can pound out the dent.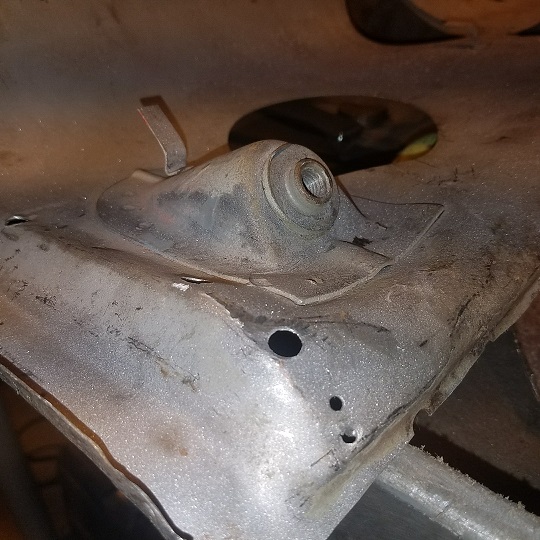
That's supposed to be flat .....................
I'm surprised Jack didn't catch it when he dropped the front suspension.
Off she came.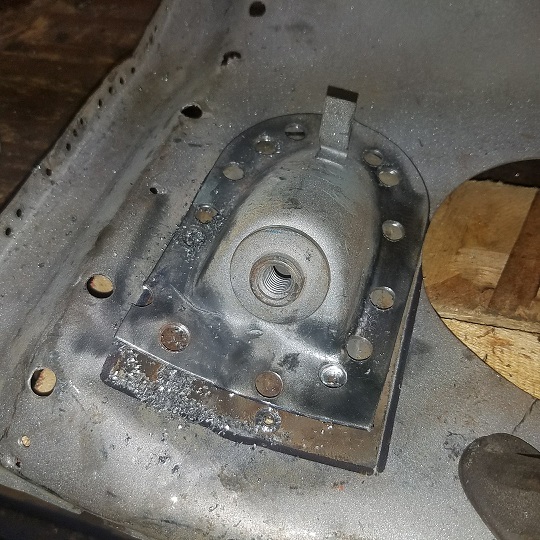
Ended up with an oil can dent inside the orange lines. Tried to move the metal too fast.
Needs to be in the car and solidly attached. Shrinking hammer was enough. I'll fire up the shrinking disk after the patch panel is solidly welded in.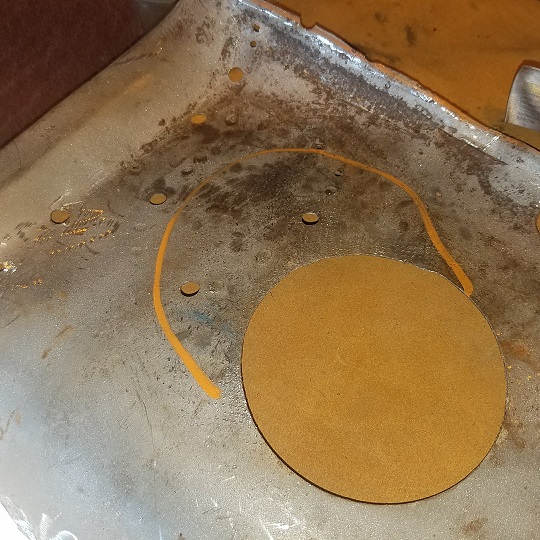
Posted by: cary Jan 1 2018, 11:02 PM
Then it was time to start fitting and trimming .................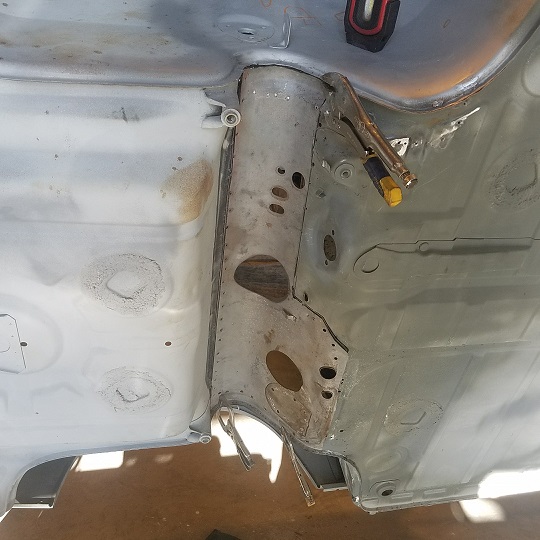
Here's the bottom of the cross-member mount dent.
It will take some tuning to get the edge to line up correctly.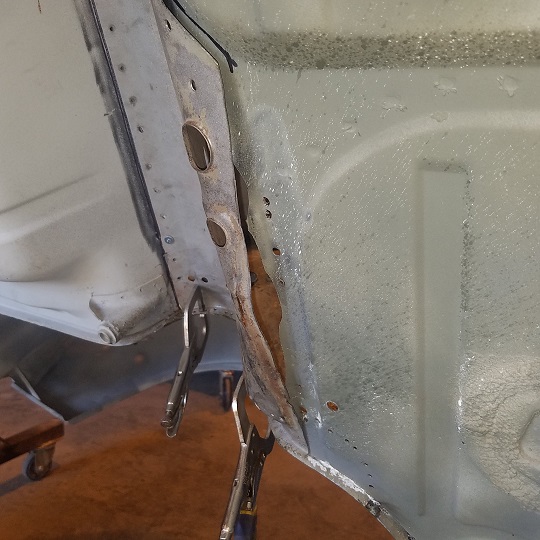
Then it was time to fill all the spot weld cutter holes.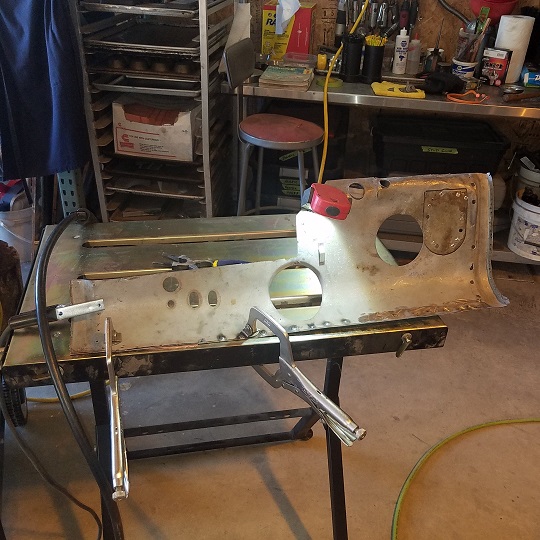
Posted by: cary Jan 1 2018, 11:05 PM
Let the fun begin. Tuning and tacking ................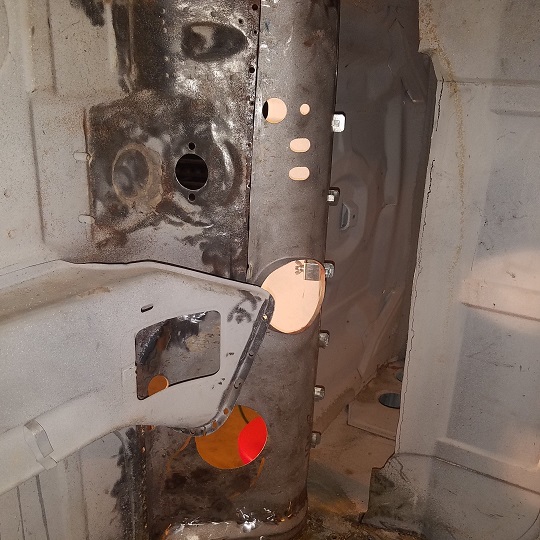
Got a good start before I headed home ................
Posted by: Mikey914 Jan 2 2018, 02:14 AM
Thanks Cary,
See you Wed with some cash.
Posted by: cary Jan 6 2018, 09:15 AM
Friday didn't quite go as planned so I went back to work on Taylor's car.
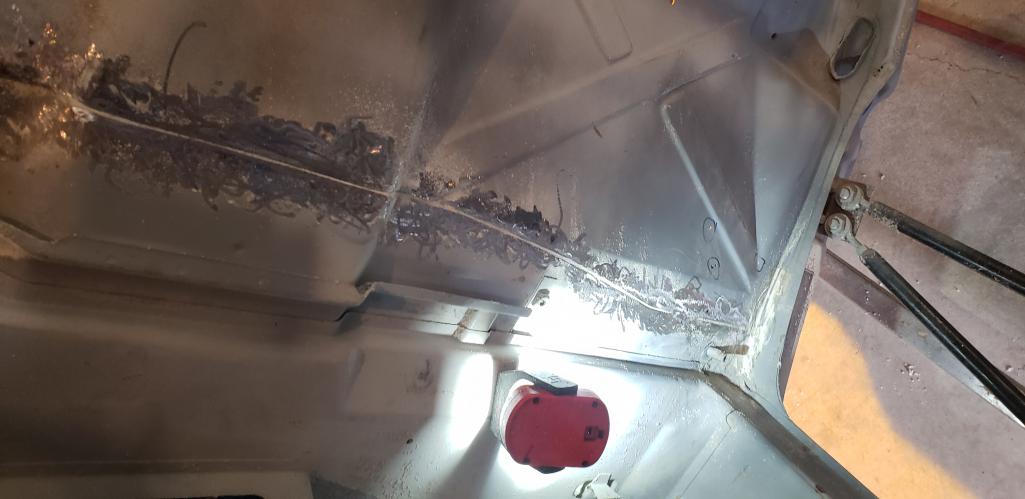
Finished the stitching and got the front seam welded in. Didn't over finish the bottom. It will be under coated. The top side finished up real nice and its ready for the wall section.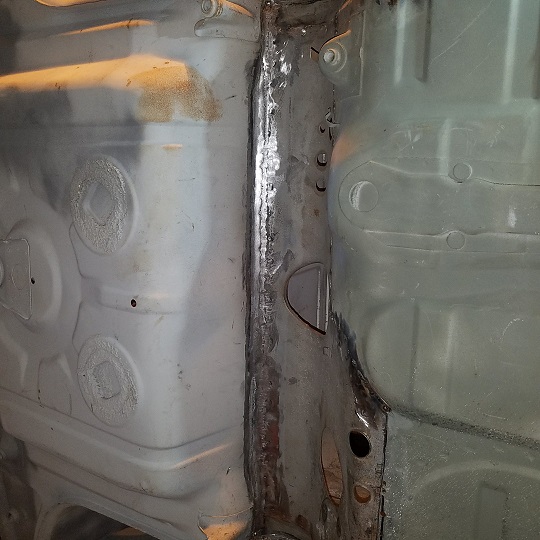
Then it was back to the oil canned section next to the fuel tank access hole.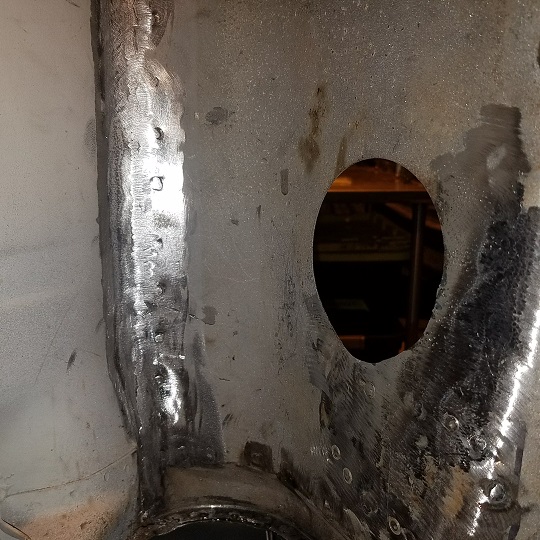

The little shrinking disk takes quite a long time to get the metal heated up. Or maybe its just cold outside. With the front attached I got about 80% of it out.
On to the passenger floor seam .................
With the front tied down it allowed me to pound it down flat. As it flattened out I trimmed a couple more mms out between the 2 pcs as I went along. Saw blade width.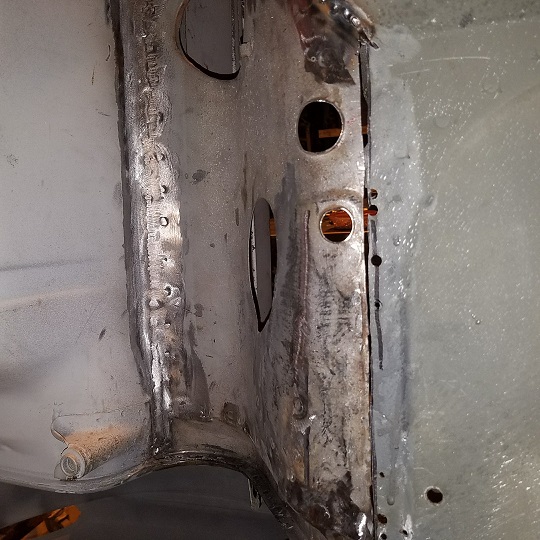
I even retained the drain slot ...............
6 inches to go on the back side. I have a piece to trim down to replace the section that got scalped during cut out.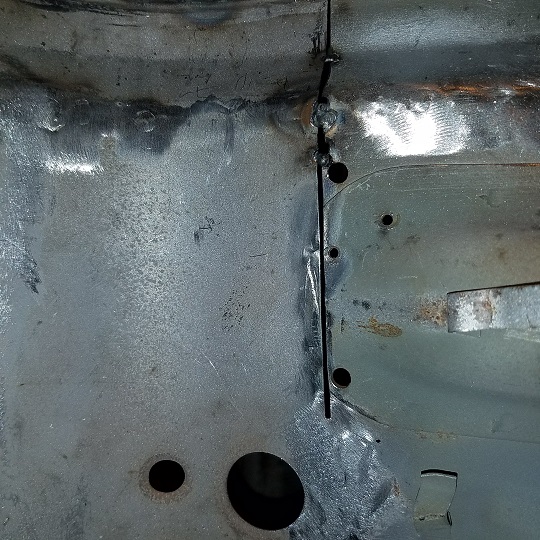
Getting an early start. Want to get this section finished up. Plus waiting for a reply on a wood/metal upright band saw on Craigslist.
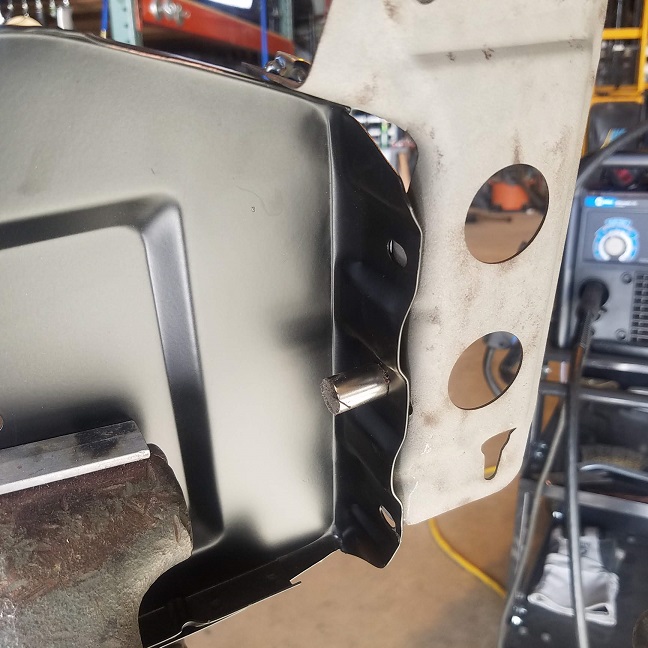
Posted by: cary Jan 7 2018, 11:34 AM
Got the tip welded back on ...........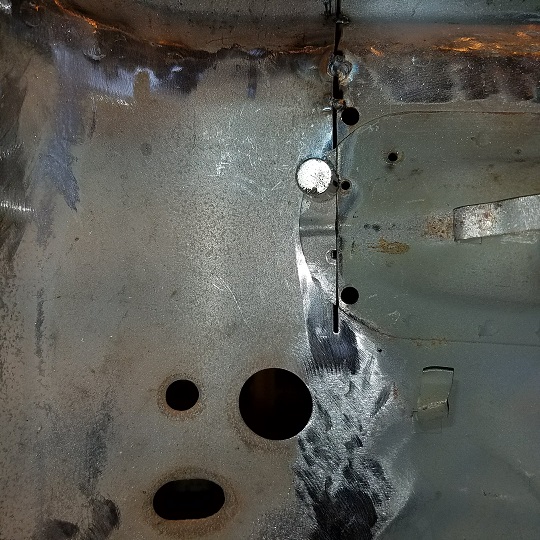
After test fitting Doug's old cross member it looks like we have a little issue.
I'll do some measurements tonite to see where we're off. I have the car on the frame bench to measure against.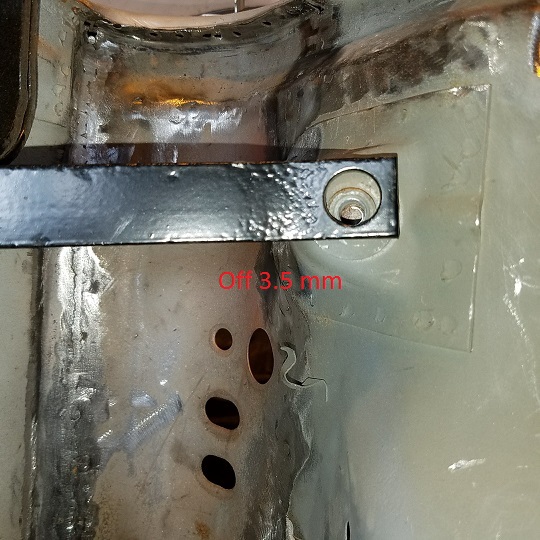
Yes, I could make it fit. Bigger Hammer. But I don't want to use up our given +/- tolerance with a hammer.
Doug's mount fits into my project car, like butter. 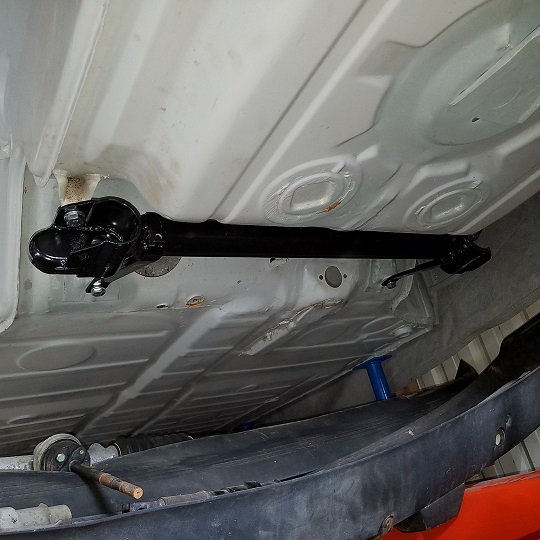
Taylor brought out his cross member and it fits like Doug's so we'll go with that.
Odd thing though. The cross member we'd set aside for the frame bench fits into Taylor's car as is. Who knows ......... They should all fit the same ............. Strap(s) tweaked.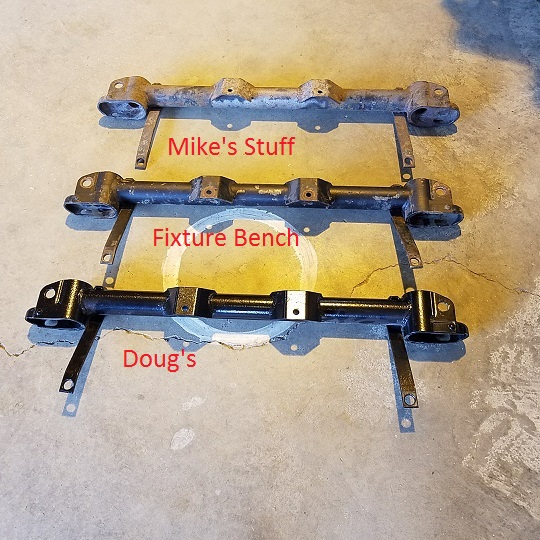
Posted by: cary Jan 10 2018, 11:10 PM
Well I went to the geometry expert for some input. Rick 918-S.
Best guess is that the car took a bump to the right torsion bar tube end.
I'll take some more measurements in the am to confirm. While we're measuring and coming up with a plan I'm going ahead with the front channel rust repair.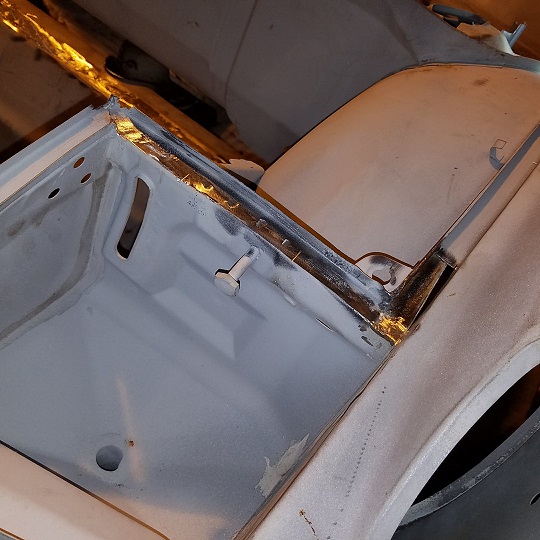
I'm going to cover this in a separate thread. Because ................
Mark and the team at 914 Rubber are going to make the replacement pieces available.
But looks like I need to get some measurements to get some complete channels made up.
Posted by: rick 918-S Jan 11 2018, 03:06 AM
Nice work Cary. It's always interesting and challenging when it comes to chassis diagnosis. Specially with 2000 miles between us. Looks like we figured out what happened. I have a few ideas how to set it right. I will send another email then we can talk again.
Posted by: tygaboy Jan 11 2018, 09:03 AM
Nice work Cary. It's always interesting and challenging when it comes to chassis diagnosis. Specially with 2000 miles between us. Looks like we figured out what happened. I have a few ideas how to set it right. I will send another email then we can talk again.
Such a great community....
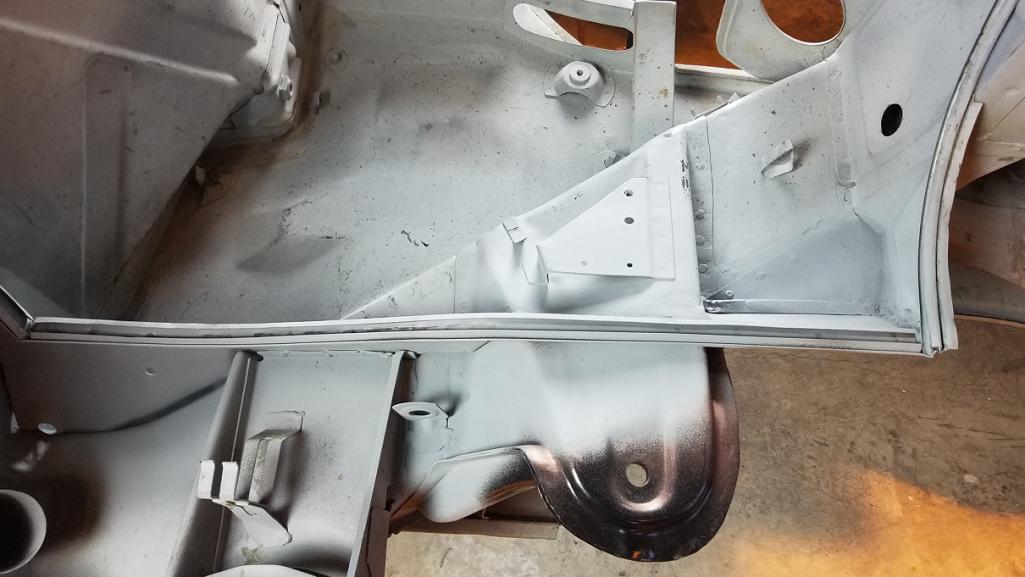
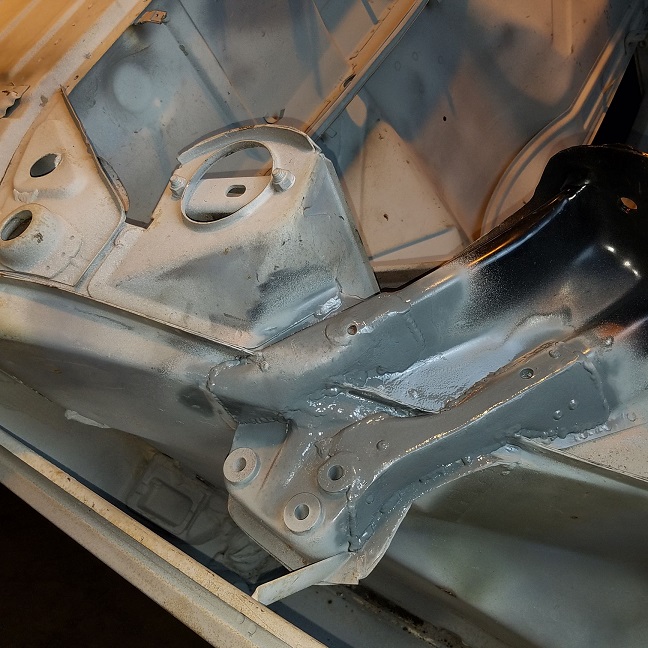
Posted by: cary Jan 11 2018, 11:01 PM
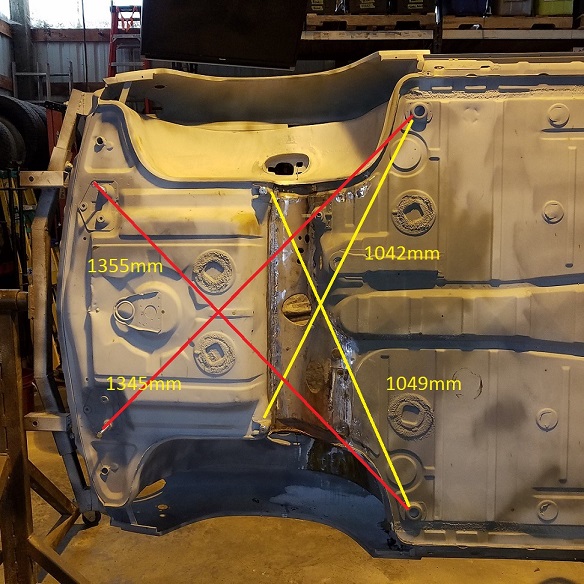
Well after all the measurements, pictures and emails Rick and I came to the consensus that the car took a hit on the right control arm end cap and tire wheel.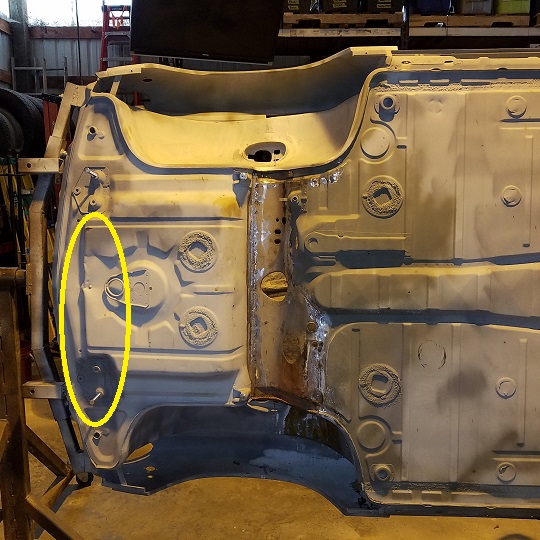
pretty significant whack..................
But after all the geometry, it looks to be 2-3 mm both back and to the right. Which is just a smidgen out of tolerance. So back to work ...............
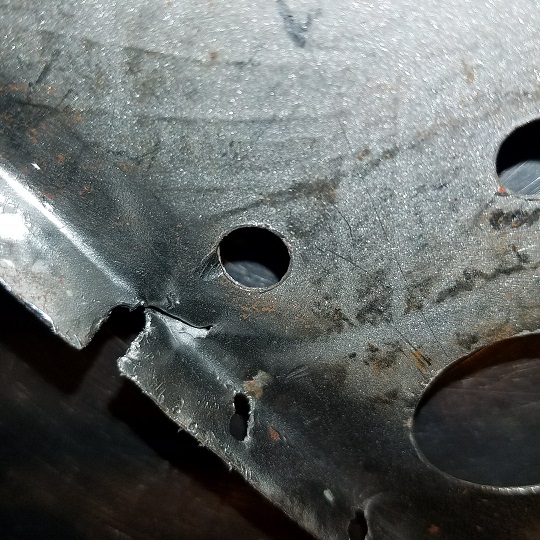
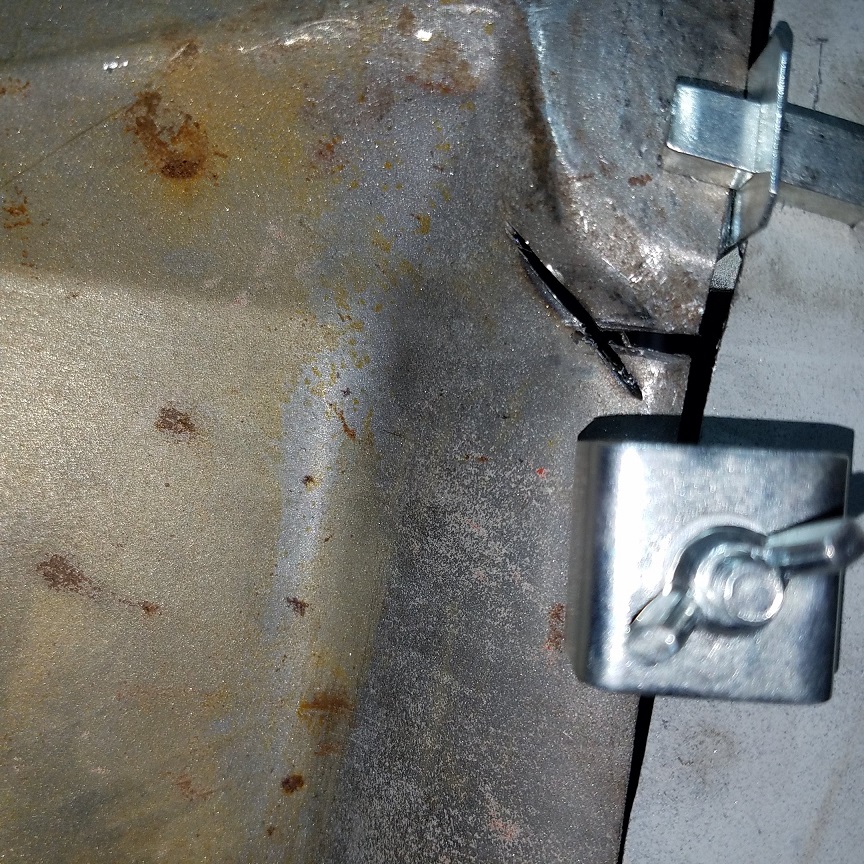
First order of business. I'll fix the split in the tire well.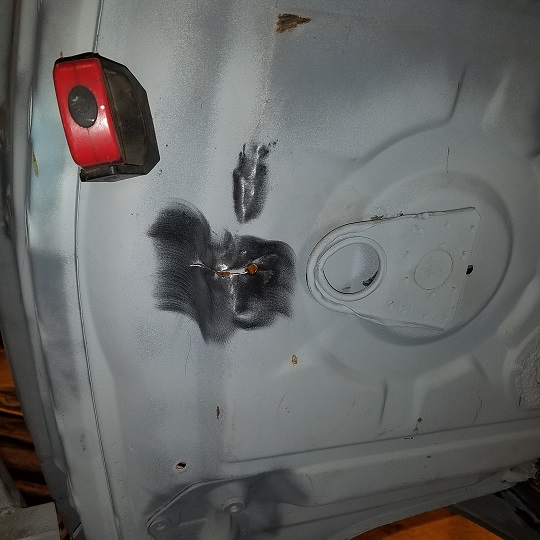
Needs a little more hammer and dolly work when I have a second set of hands.
Blasted the cross member and gave it a couple coats of cold galvanizing.
After just a smidgen of tuning and she slipped into place.
Next onto welding in the right rear cross member mount.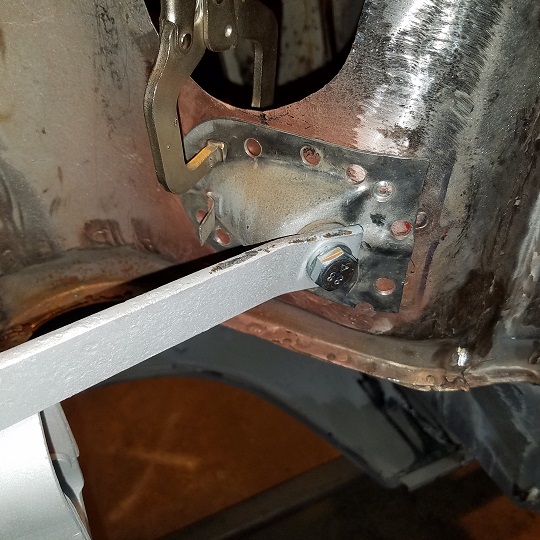
Posted by: rick 918-S Jan 12 2018, 07:06 AM
Always enjoy a challenge. 
Posted by: cary Jan 13 2018, 08:44 AM
Here's all the geometry ..............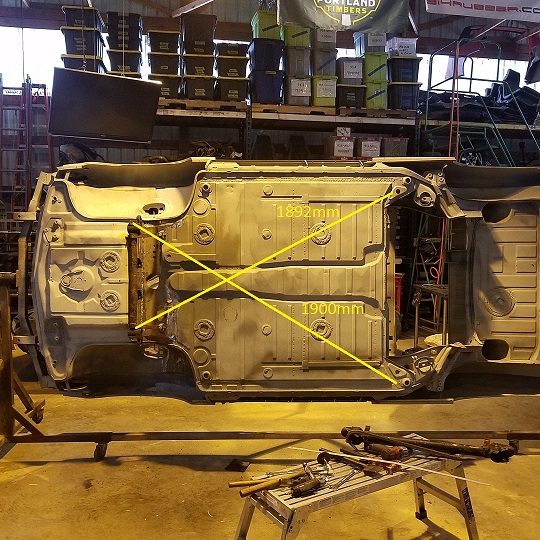

For prosperity's sake, I'll double check my notes on the 498.
Back to work ............
Posted by: cary Jan 13 2018, 09:11 AM
Spent the morning weldng on the right rear cross member mount and re welding the arch. A little dicey ........... The flange took quite a beating coming out. But it came together nicely.
Checking the backside ............. a couple pin holes to fill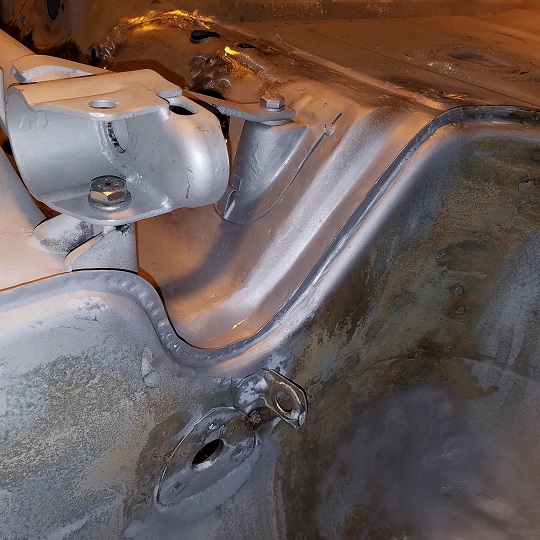
Gooder as new .......
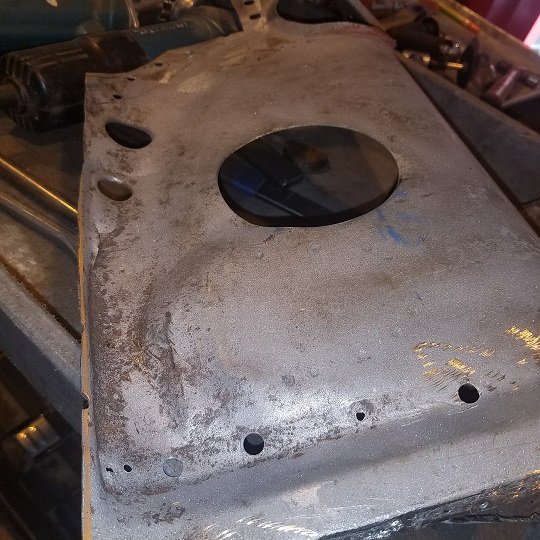
Left last night with the bottom side of the cowl getting an Ospho treatment.
Best guess is the rust freckles are from the Dustless Blaster media left hanging.
Prior to the treatment, Taylor spent about 3 hours removing blasting media from the tub.
Round and round on the rotisserie. Plus some tapping with rubber mallets.
Posted by: cary Jan 19 2018, 09:36 AM
Finished up the left side arch yesterday.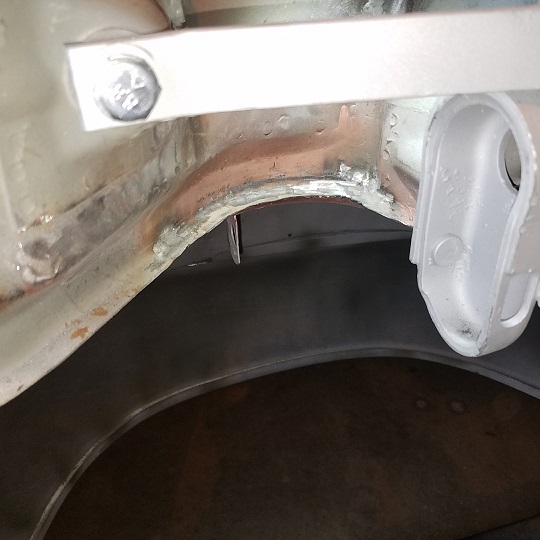

Next is the bottom 1/2 patch piece on the strut/fuel tank trunk wall.
Posted by: cary Jan 21 2018, 08:48 PM
Catch up on Taylor's car.
1st. Treated the bottom side of the cowl with OSPHO. It had quite a bit of over spray or condensation from the paint stripping. After the OSPHO dried Taylor scrubbed it down with a red pad.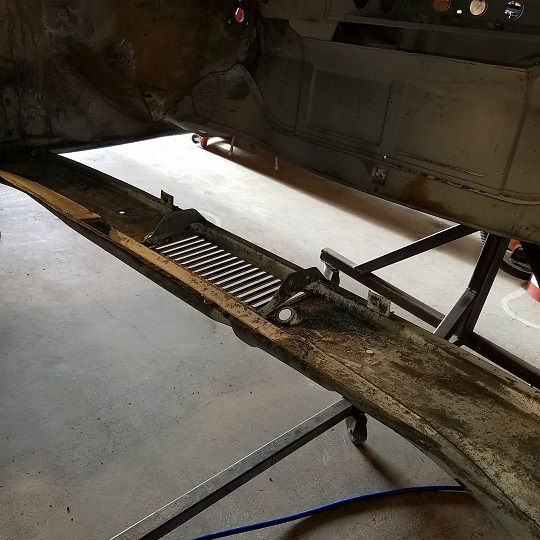
Then I gave it two coats of cold galvanizing in case it gets missing during paint.
Forgot to shoot a photo. I'll be back.
2nd. Onto the patch at the base of the cross panel.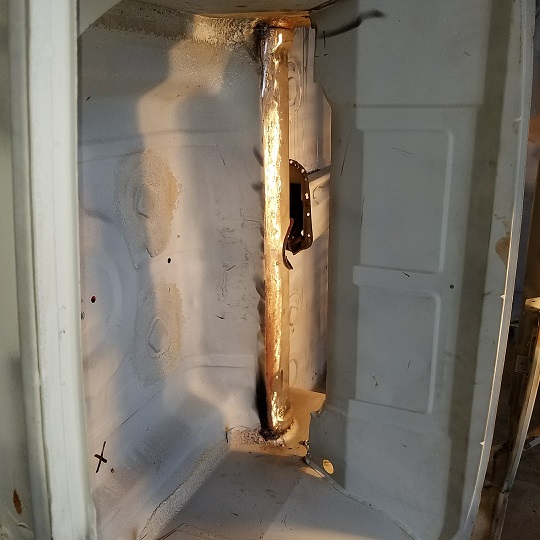
Posted by: cary Jan 21 2018, 08:55 PM
Took a little tuning to get it ready to weld in. It's a pretty tough removal. It's wedged in there pretty good.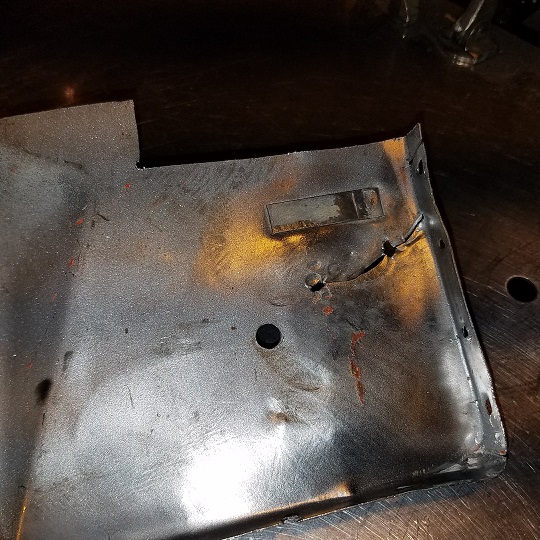
Ready to go ................
Decided that the left inner fender needed a patch on a fairly thin spot.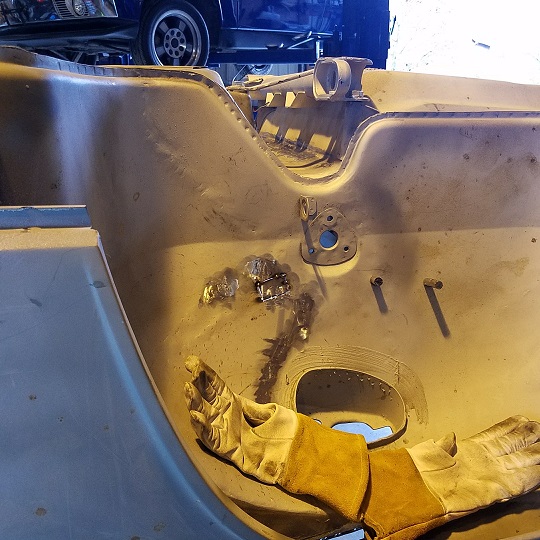
Posted by: Taylor.914 May 6 2018, 12:33 PM
Have not been very active on the forum but still making progress. Don't have any pictures of before or during, but spent the weekend tearing out the rotted suspension. Now for some patch work and the me part us ready for install. 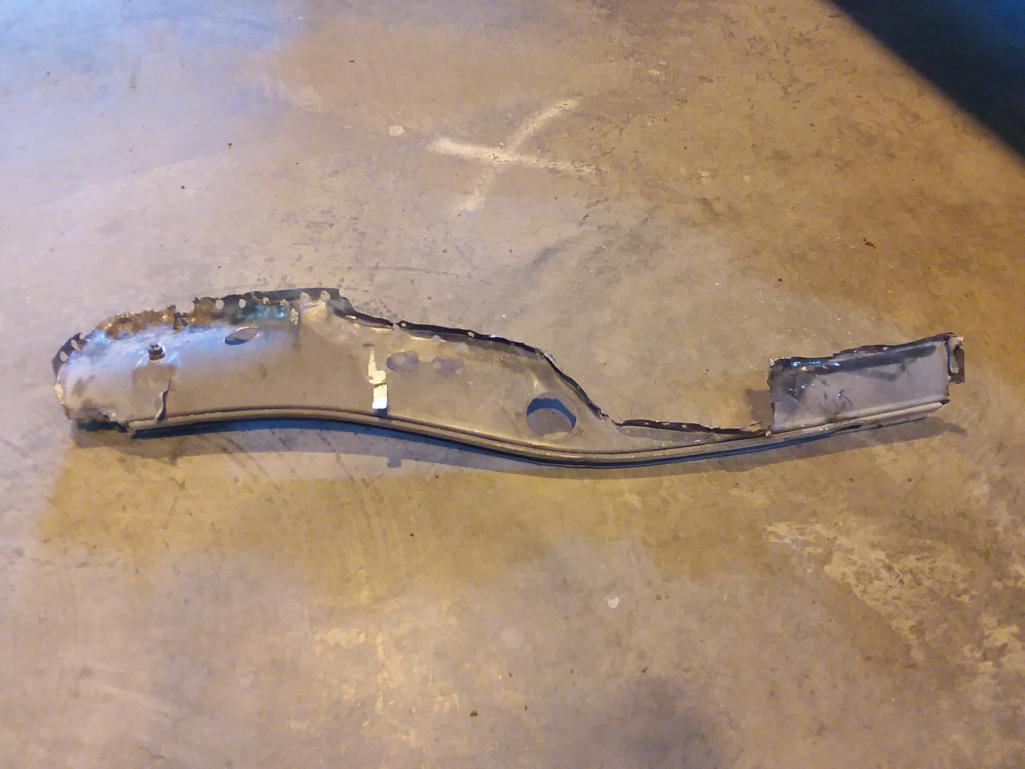 koo
koo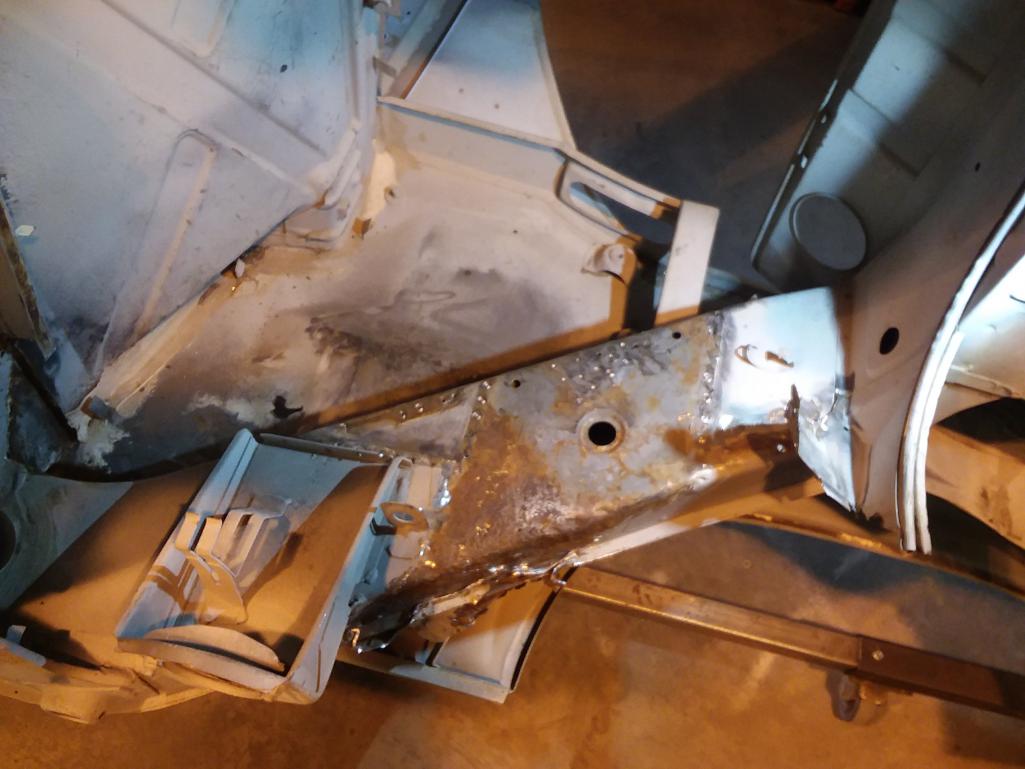
Posted by: Taylor.914 May 6 2018, 12:39 PM
 koo
koo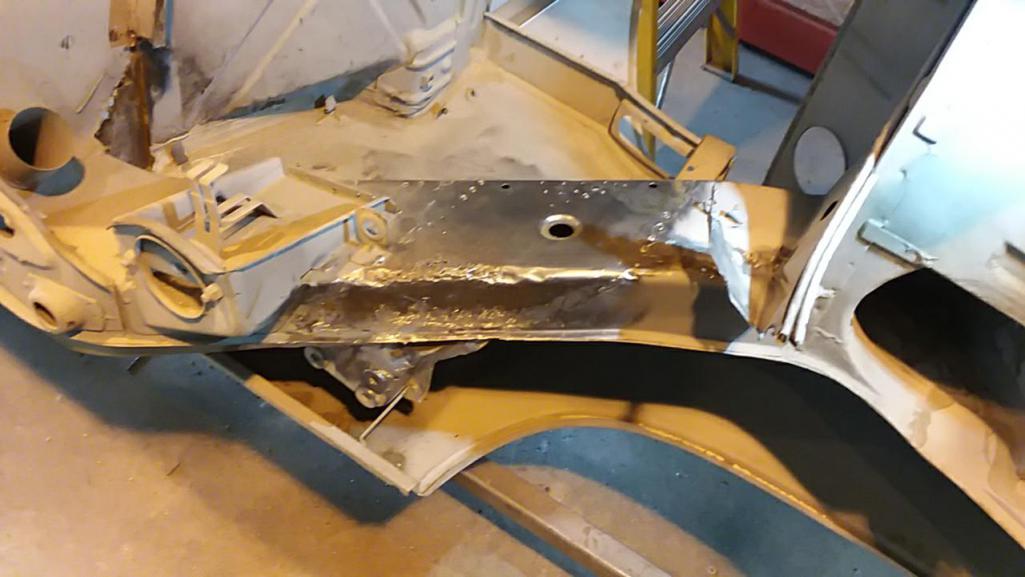
Posted by: Taylor.914 May 6 2018, 12:40 PM
Posted by: cary May 6 2018, 01:20 PM
I feel bad. I've been so busy in the other room working with Matt. I haven't taken any pictures when go out and answer Taylor's questions. He did a great job on the suspension console removal. Looks like we'll have a little skin transfusion on the outer layer of the upper long.
Posted by: Taylor.914 Aug 6 2018, 09:25 PM
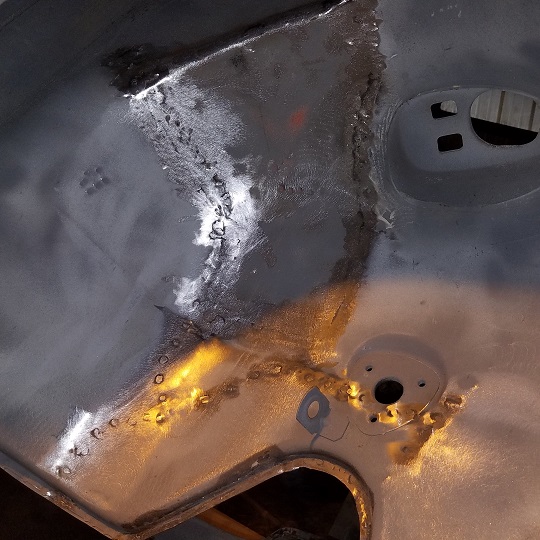
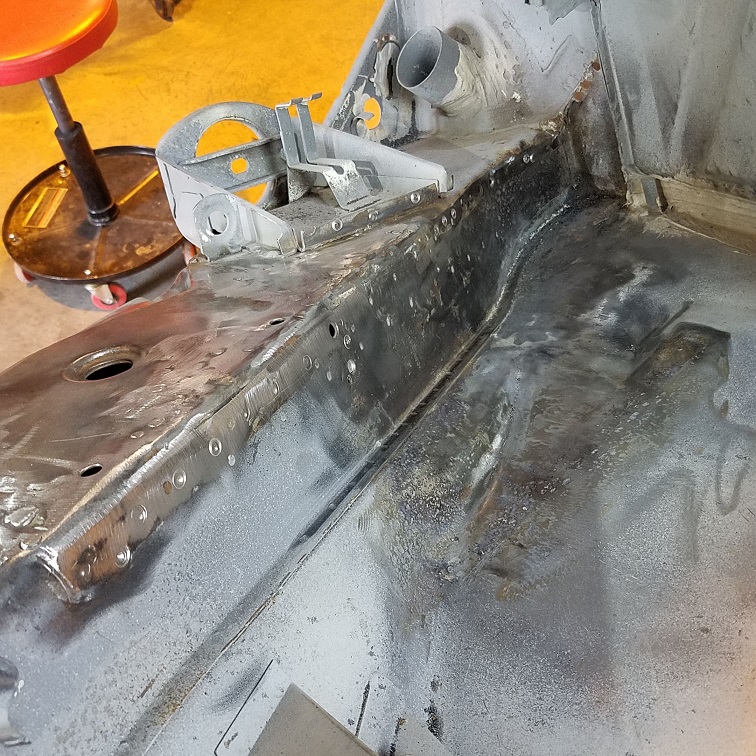
Some good progress was made this weekend on firewall patches. 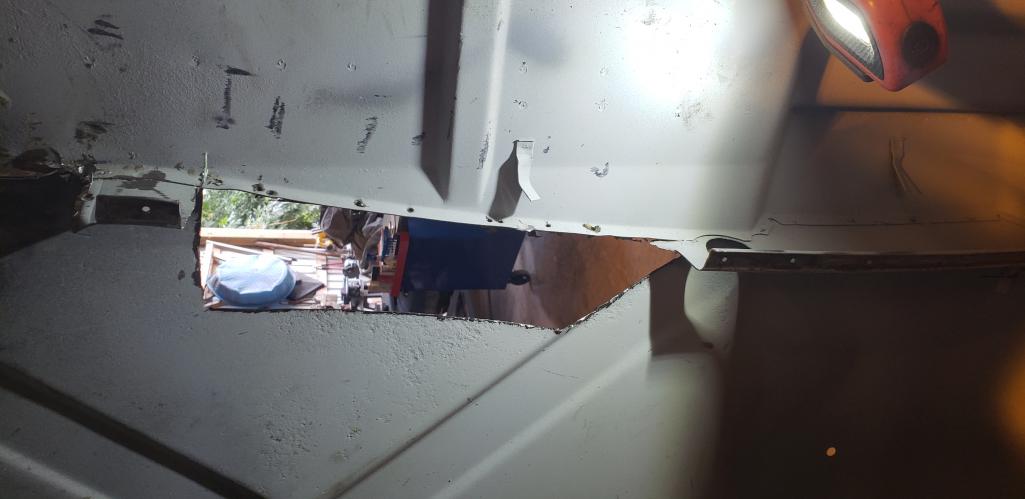
Posted by: Taylor.914 Aug 6 2018, 09:26 PM
Posted by: Taylor.914 Aug 6 2018, 09:27 PM
Posted by: Taylor.914 Aug 6 2018, 09:27 PM
Posted by: Taylor.914 Aug 6 2018, 09:29 PM
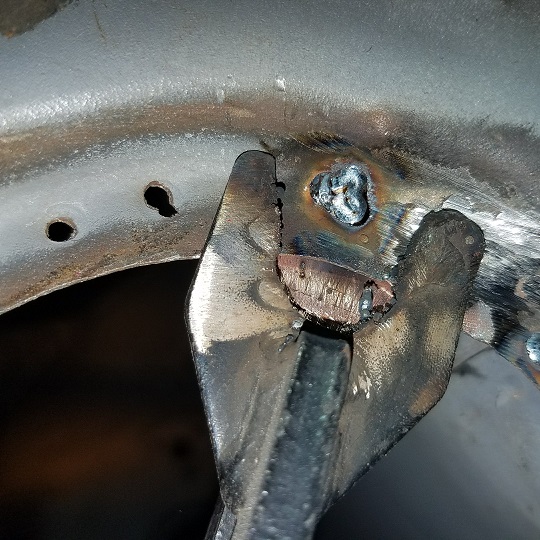
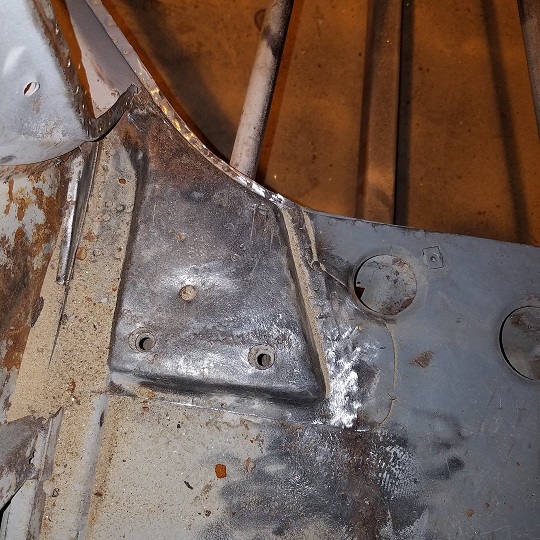
Prepping the donor. 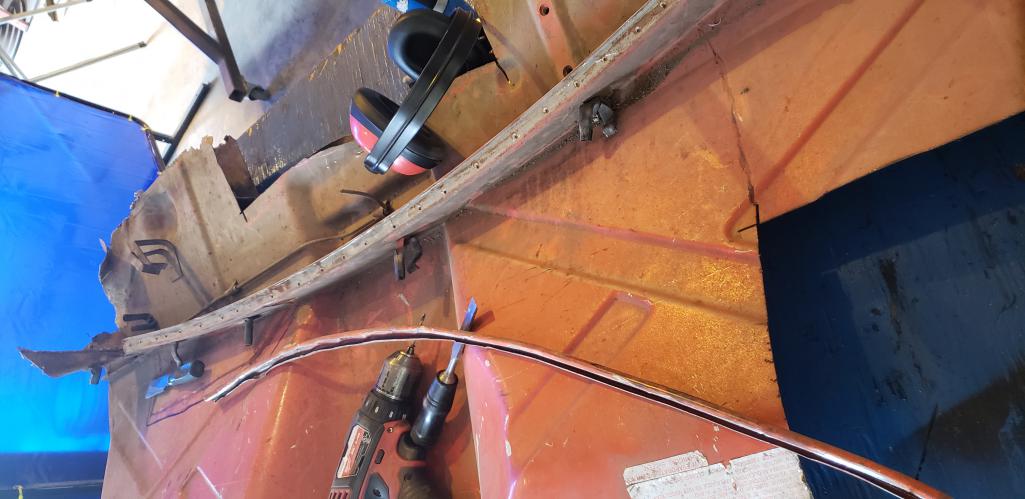
Posted by: Taylor.914 Aug 6 2018, 09:29 PM
Posted by: Mikey914 Aug 8 2018, 04:52 PM
just ordered up the passenger side engine tray section from Restoration design. Next week ready for install, maybe???
Posted by: wes Aug 8 2018, 05:07 PM
Amazing work, turned out the car had more rust than I found when decided it was a Parts’s car.
Posted by: cary Sep 1 2018, 11:02 PM
Finally getting back to Taylor's project. Next part going is the lower portion of the fuel tank / shock tower panel.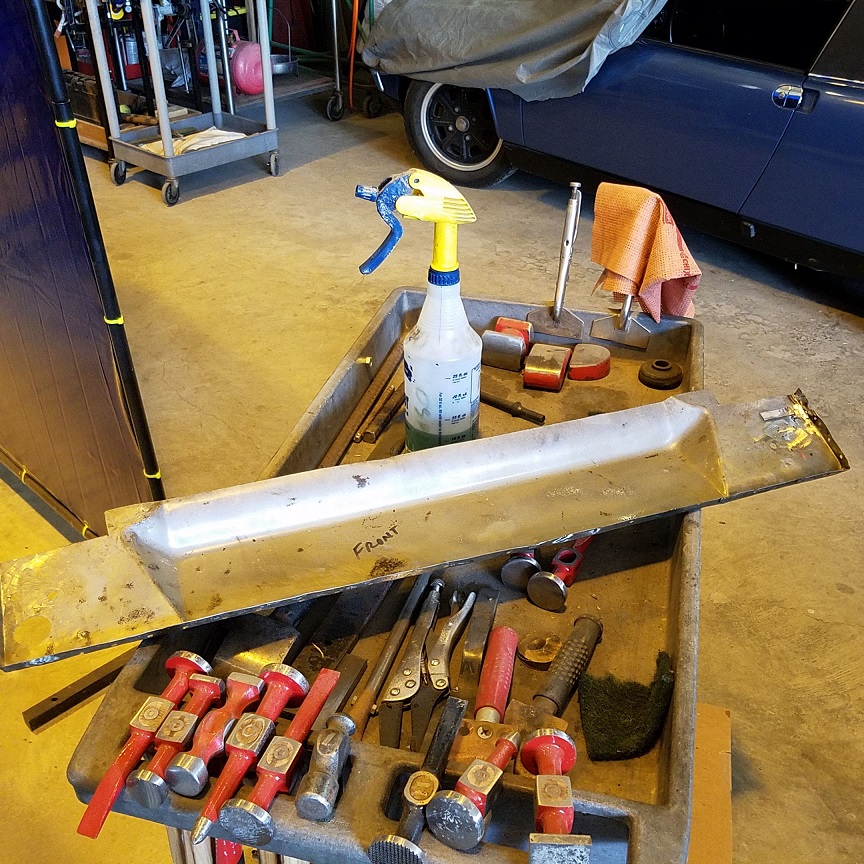
After all the trimming and fiddling it's ready to go in. But there's always something. The left side lines up perfect. The right side not so much. It will need some creative tuning.
At quitting time the bottom flange is rosette welded in. And the center section is seam welded, smoothed and polished.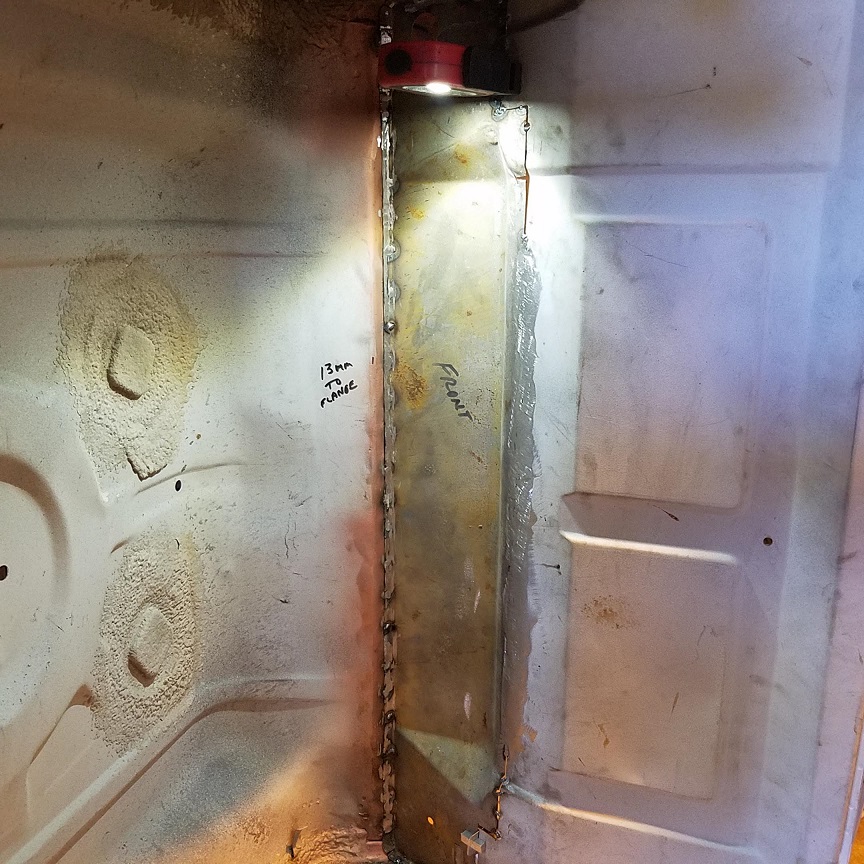
Bottom flange got pretty beat up from spot weld removal. It's not really meant to be removed
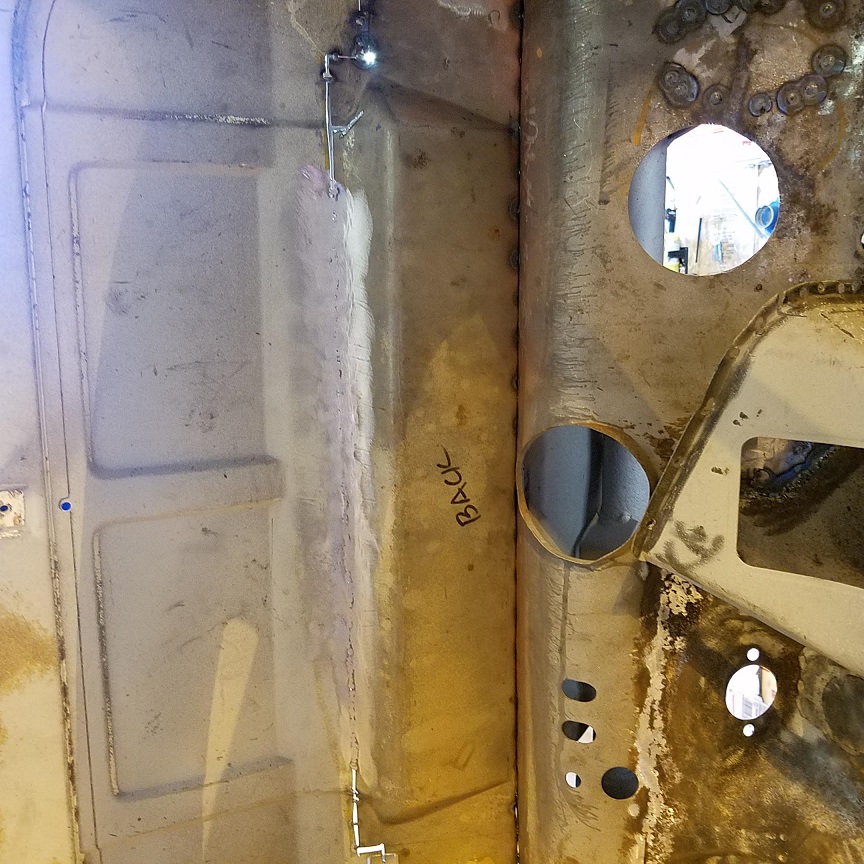
Posted by: cary Sep 9 2018, 07:27 PM
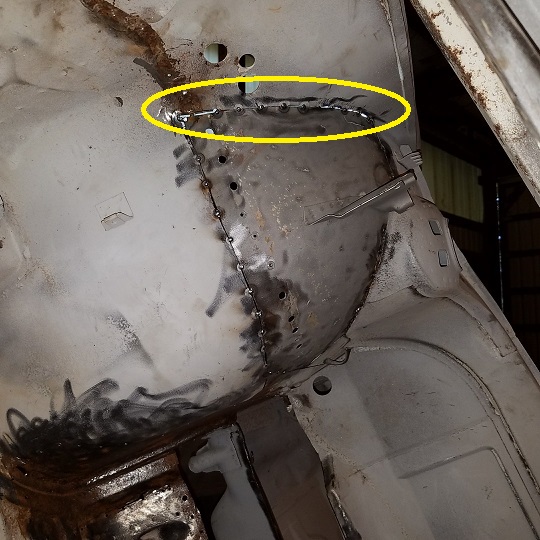
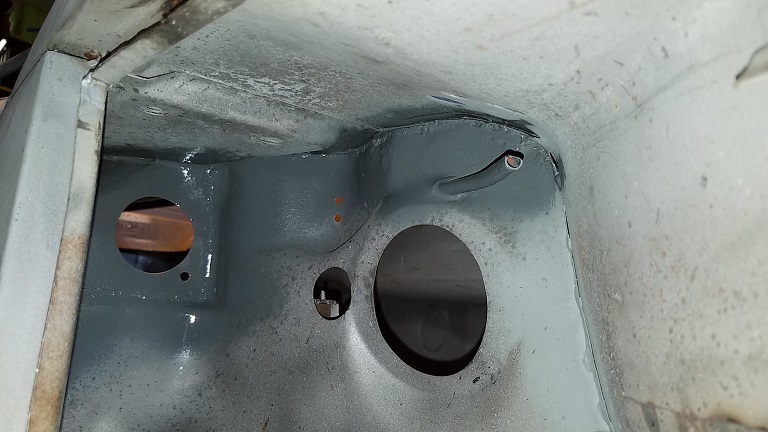
Finally have the front firewall / fuel tank support welded into place. I did have to cut out an additional thin section and patch it up.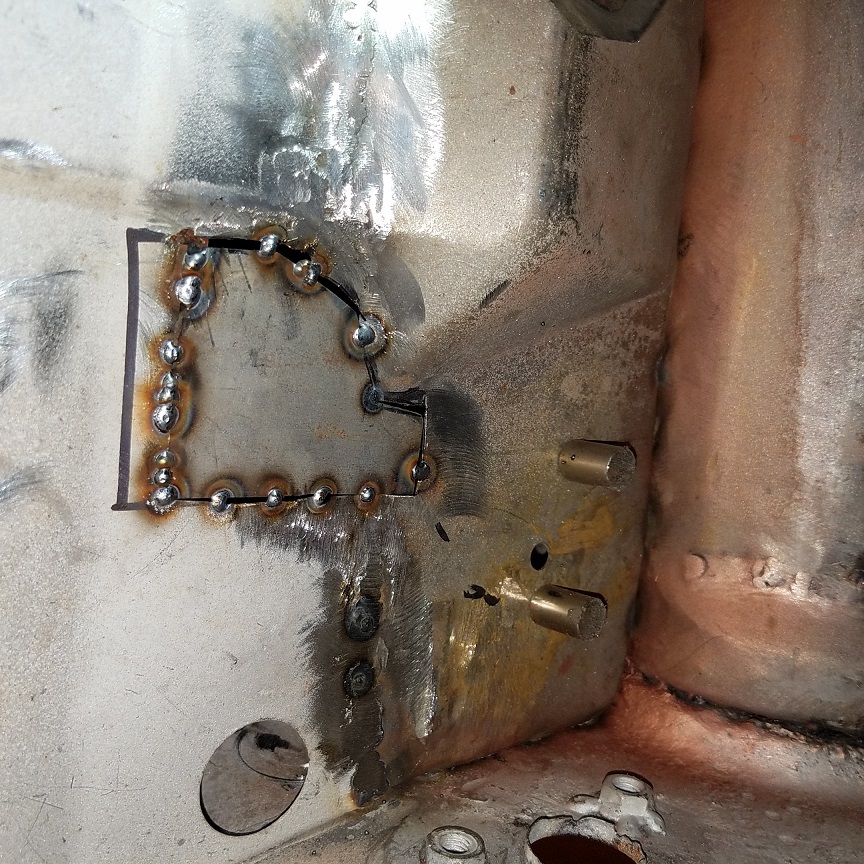
Posted by: cary Sep 9 2018, 07:33 PM
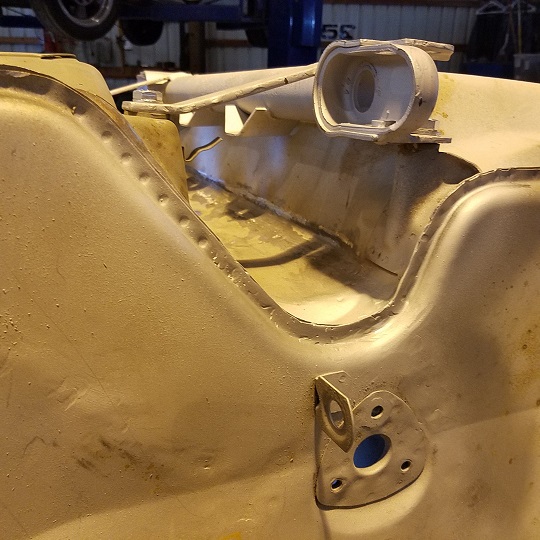
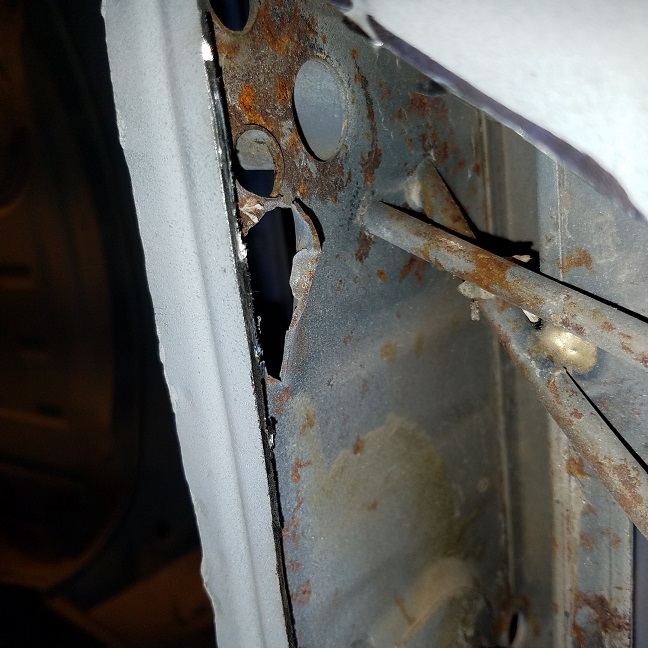
Next, the big kahuna. The front bulkhead under the dash. It's going to be some tough work. The side flanges need some serious repairs.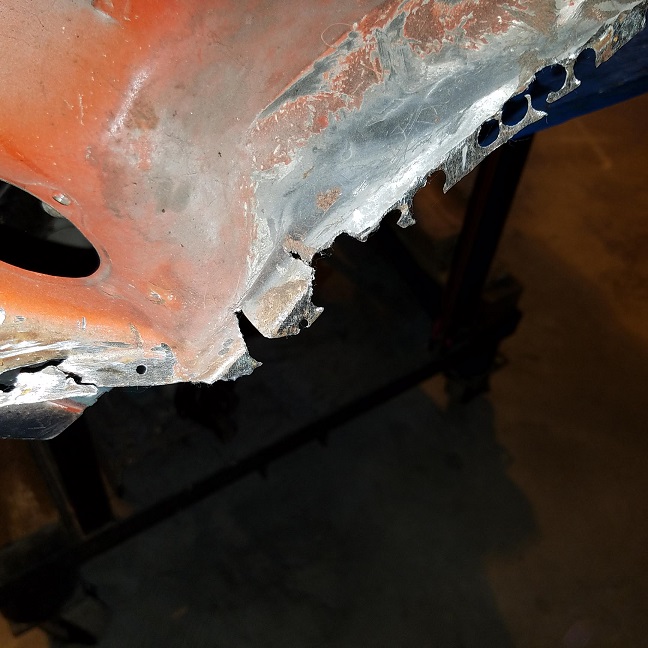
Posted by: bbrock Sep 9 2018, 09:41 PM
You've got guts. That is an intimidating piece you are tackling there. 
Posted by: Mikey914 Sep 10 2018, 10:21 AM
Might be a good time to relocate he fuel pump to the front?
Nice to see some progress.
Cary I'll catch up with you later this week.
Mark
Posted by: cary Sep 14 2018, 08:40 PM
1st order of business today. Test fitting the donor front cockpit bulkhead. It's got some twists and turns. But it went into the hole. 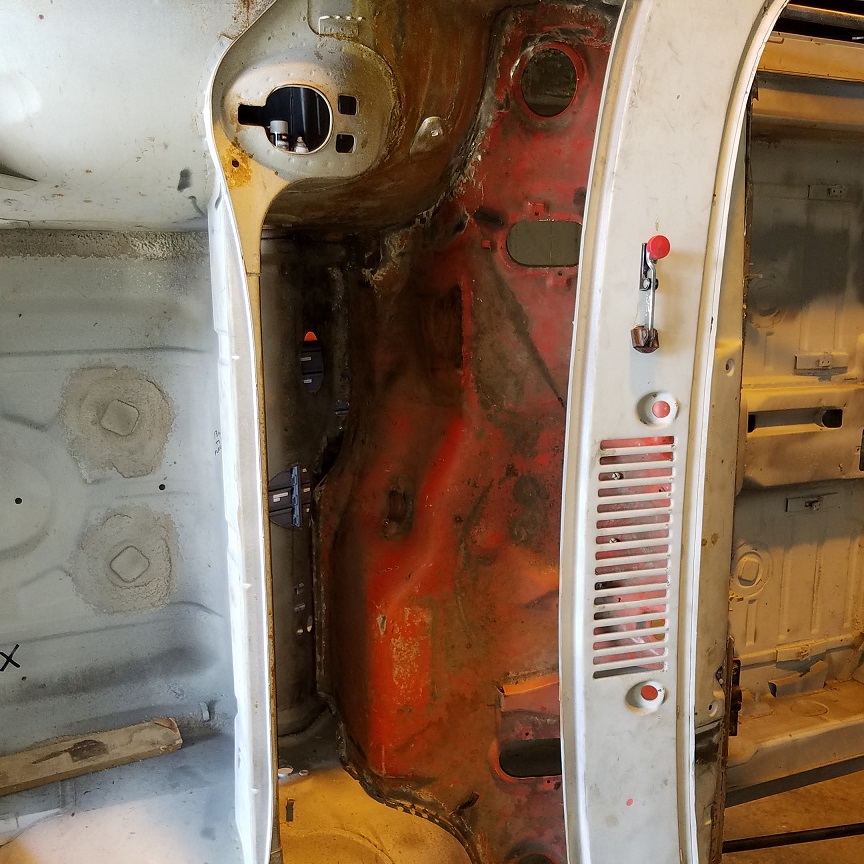
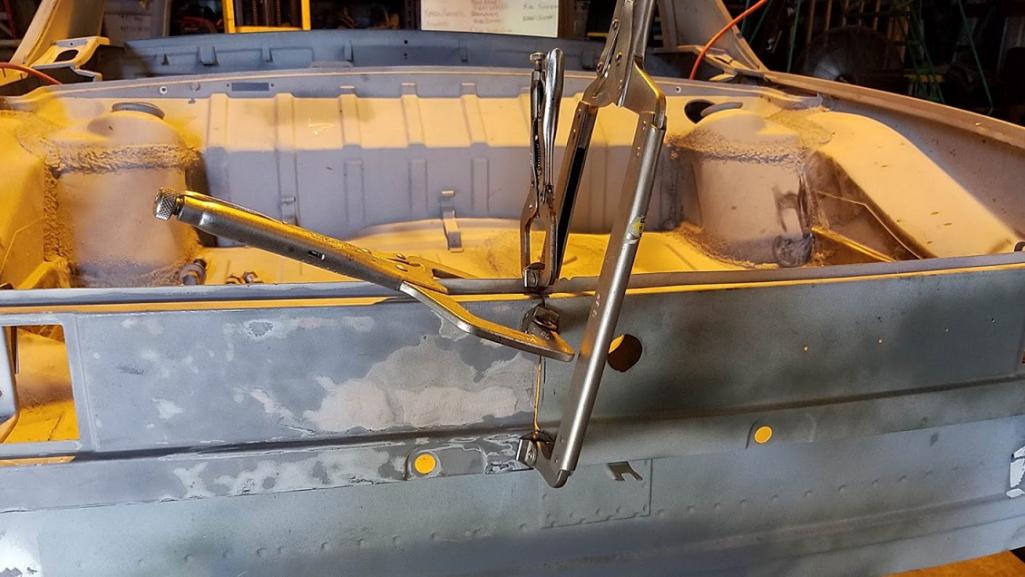
Posted by: cary Sep 14 2018, 09:34 PM
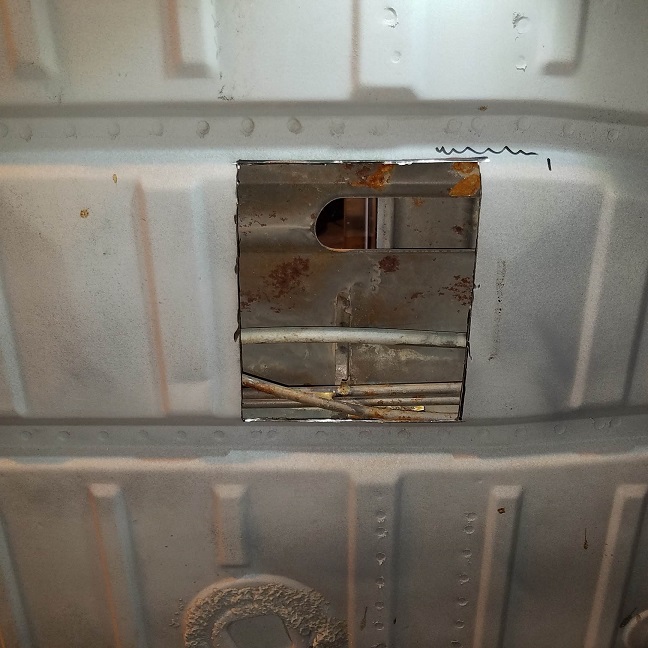
Decided to take on the tunnel issues first.
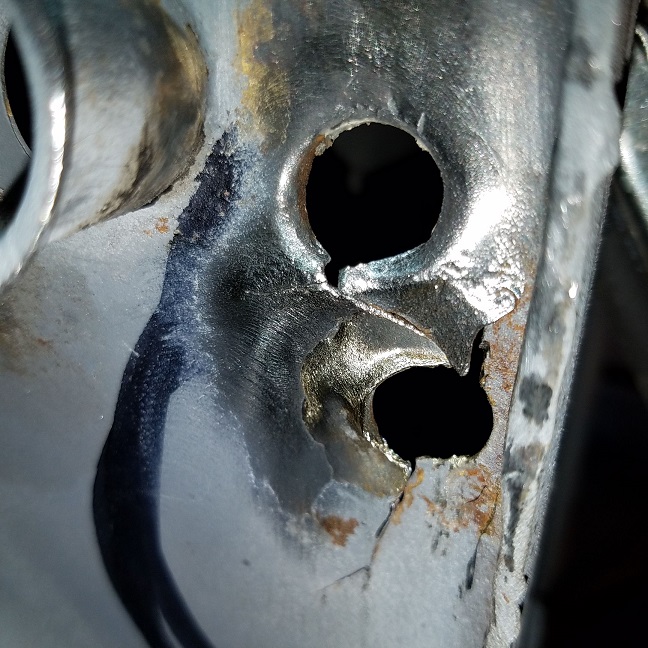
The clutch tube is disconnected in all 3 locations. The firewall, the shifter guide loop and the tunnel wall in front of the shifter.
Here's the firewall strap.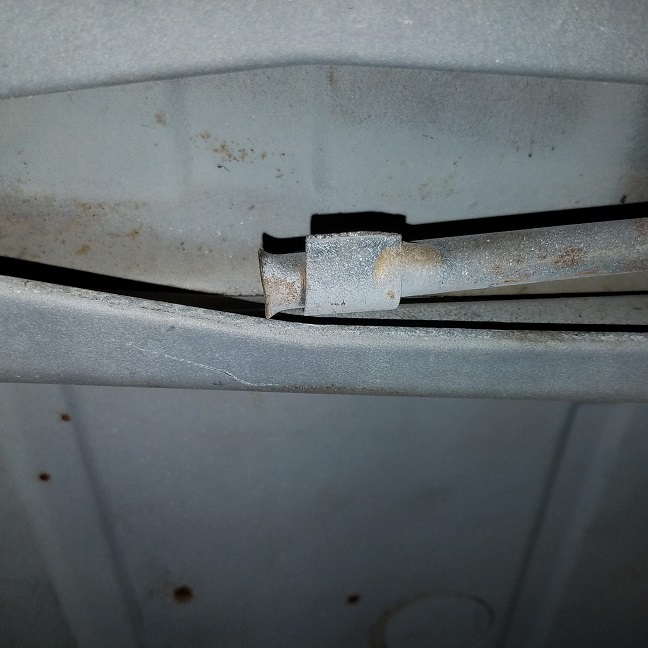
Here's the ripped out section.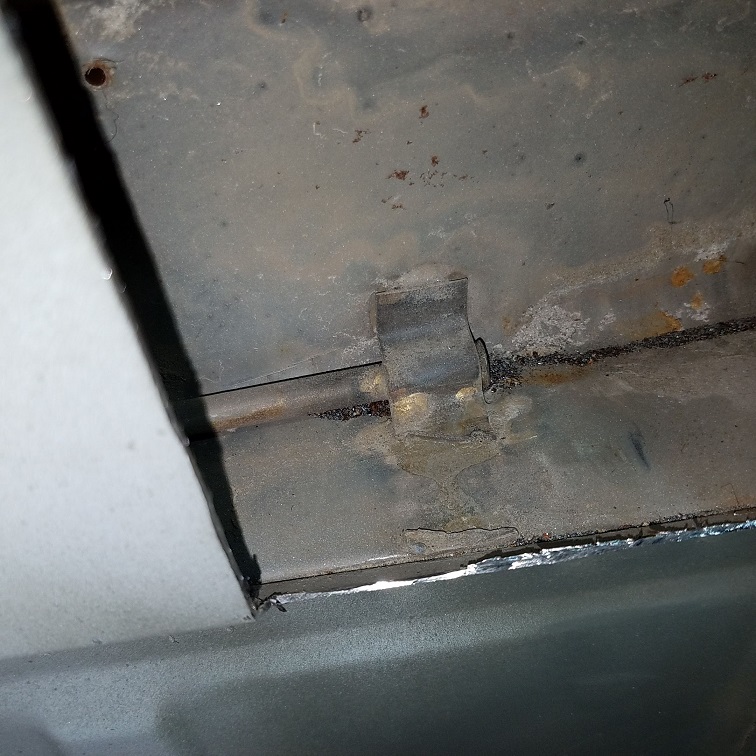
Here's what the shifter guide loop should look like ............... minus the rust LOL
Here's Taylor's guide loop in pieces.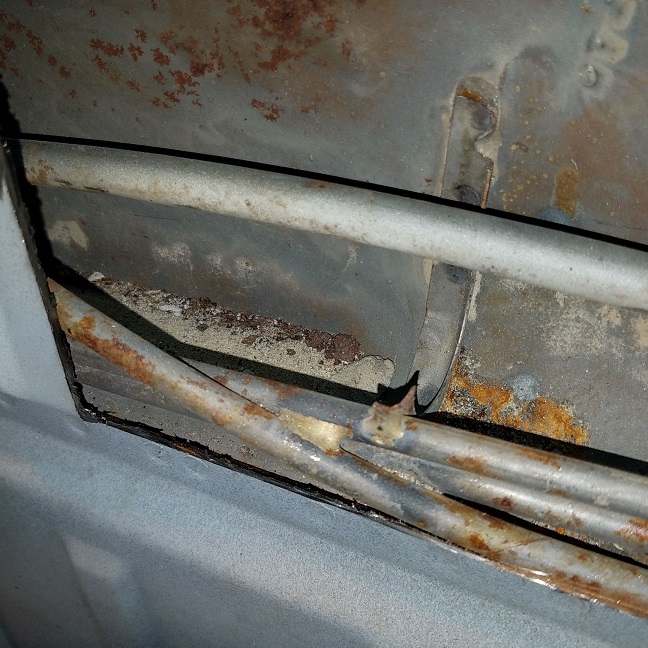

Here's Taylor's engine fire wall.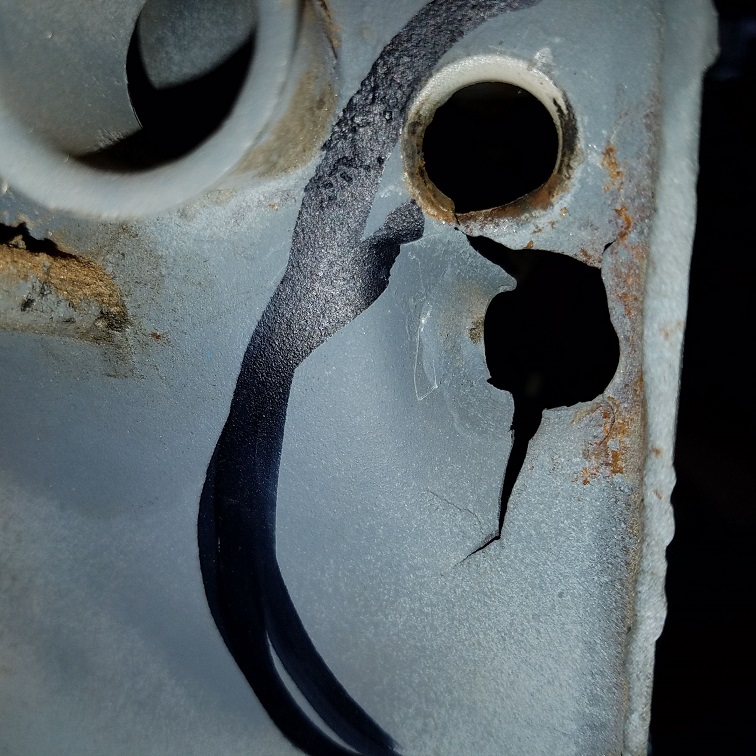
Posted by: cary Sep 14 2018, 09:48 PM
We'll start with the firewall first.
After a little work with some hammers, blocks and re-bar.
After some low power welding with my little 110 welder.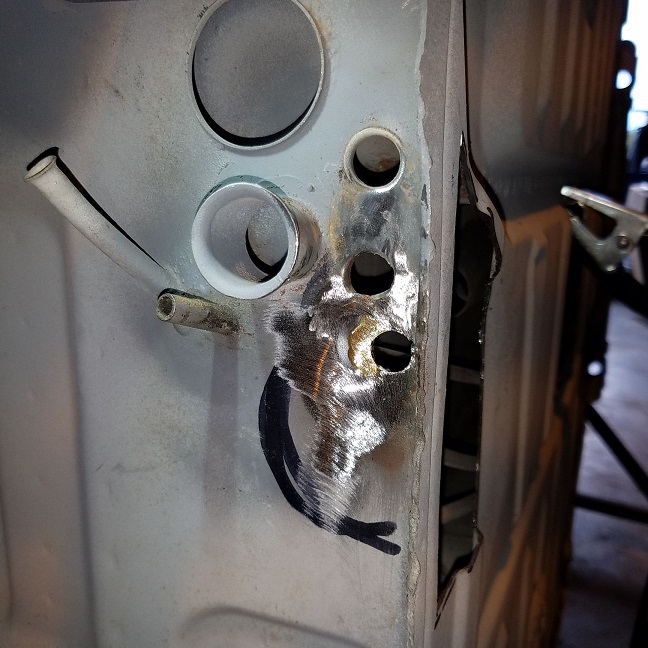
Test fitting the MiddleMotors firewall stiffener. The 72's that we've used it on before had the clutch tube hole in a higher location.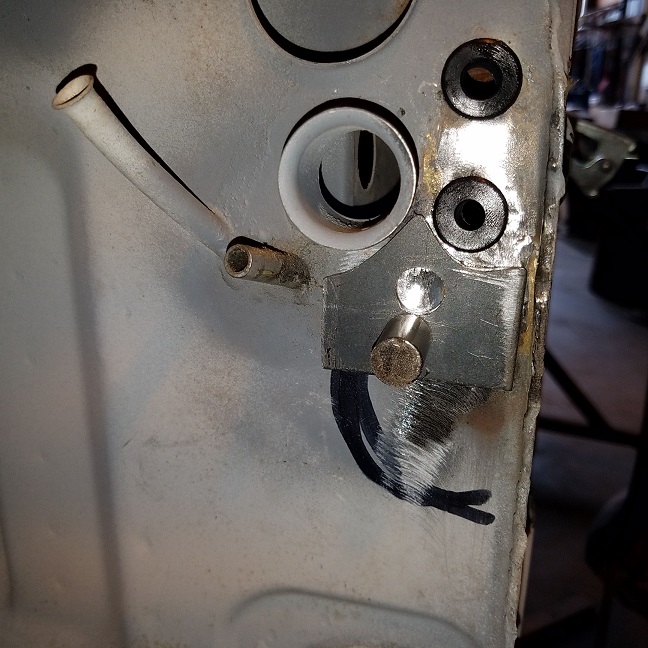
Posted by: cary Sep 14 2018, 09:55 PM
Cut open the tunnel in 3 spots ........................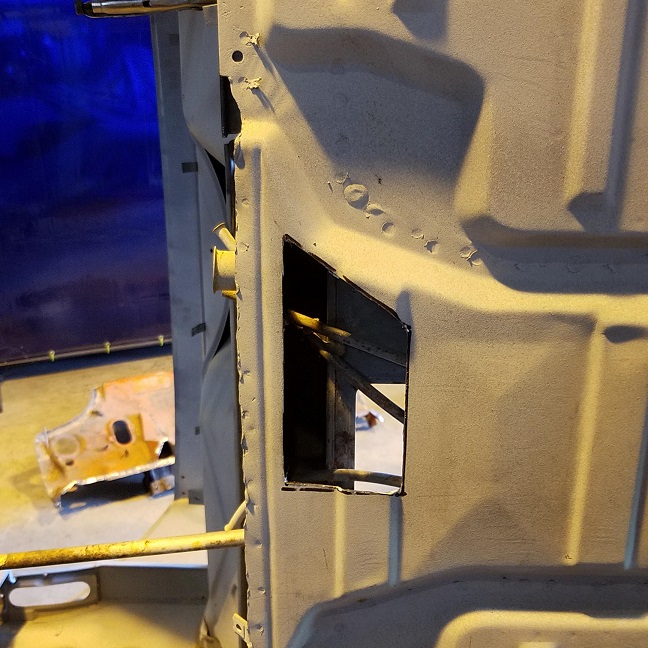

Posted by: cary Sep 15 2018, 05:14 PM
Another short day .................
Re installed clutch cable tube.
Started with installing Jack's shift loop replacement piece.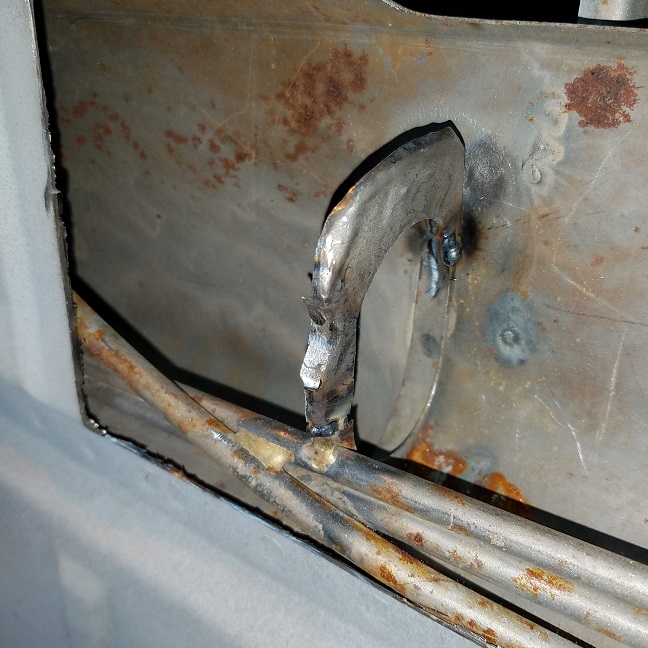
Tidied up the front strap area in front of the shifter.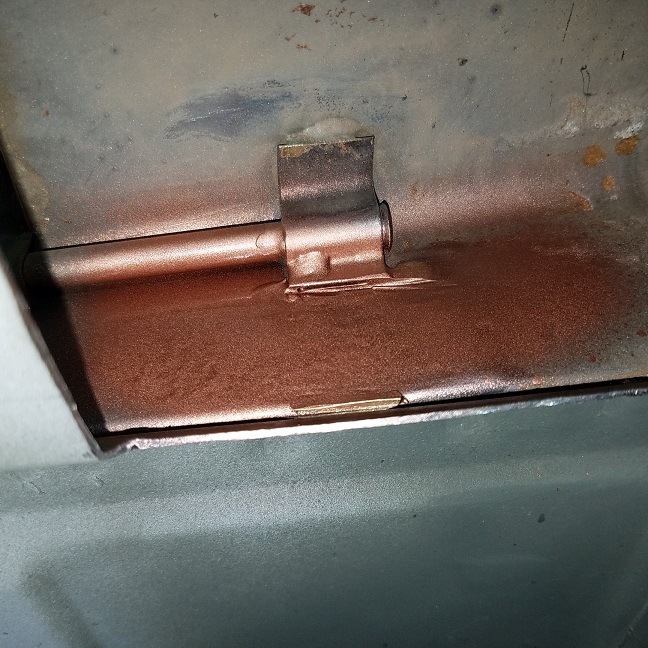
Installed the clutch tube.

Time to fire up the torch. Brazed in with the Mapp torch. Could have been a bit hotter and faster. But didn't feel like breaking out the oxy torch.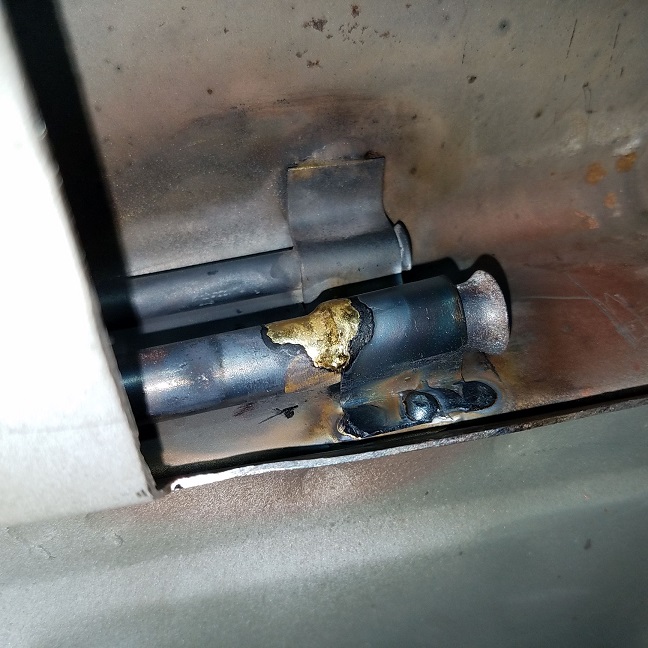

Attached image(s)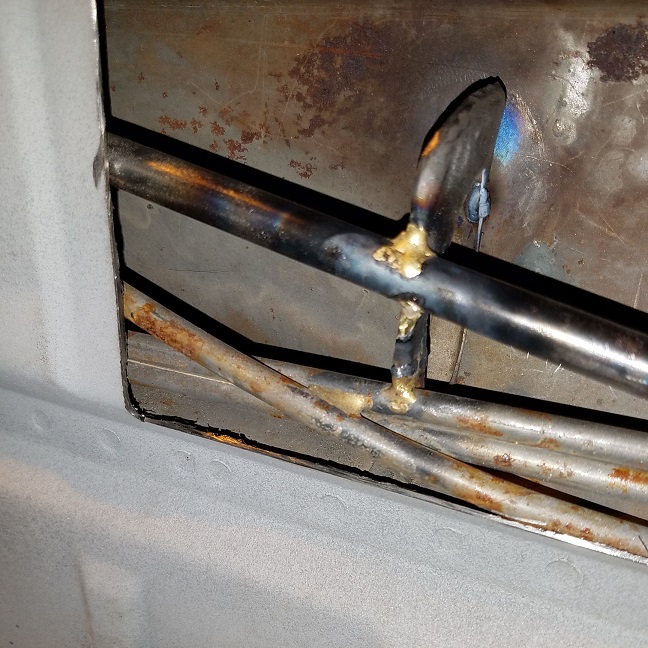
Posted by: cary Sep 15 2018, 05:20 PM
Next onto the engine firewall. Even though I repaired the firewall I added the MiddleMotors firewall stiffener.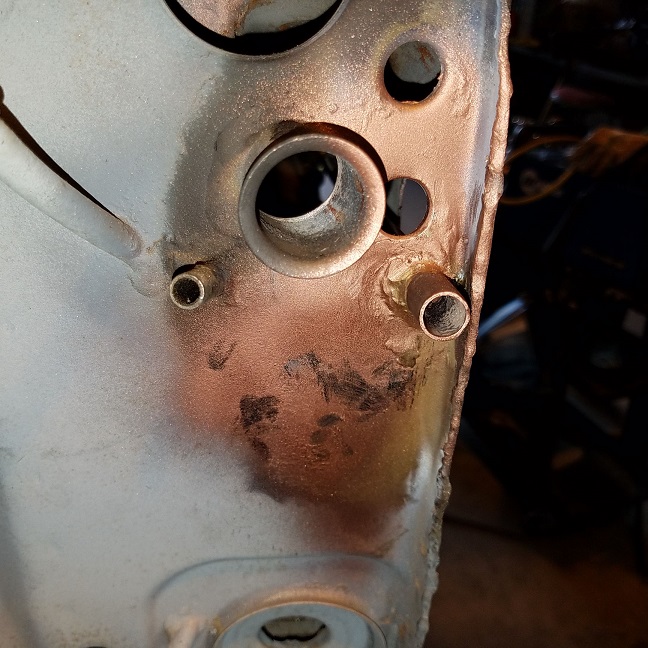
Posted by: cary Sep 18 2018, 09:03 AM
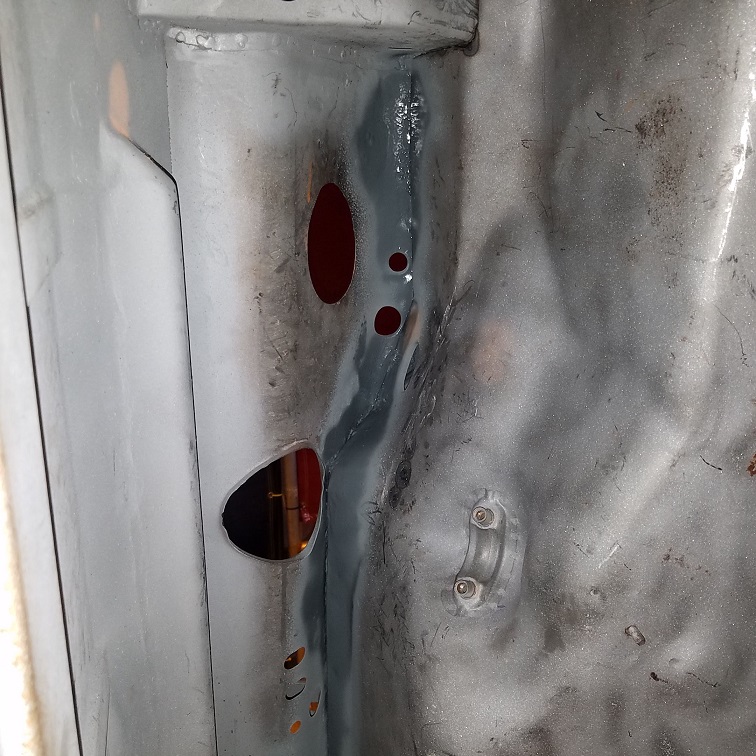
Next ......
I figured I'd get the trunk rail repaired before the bulkhead goes in. Easier to weld and much easier to add OSPHO and primer for long term protection.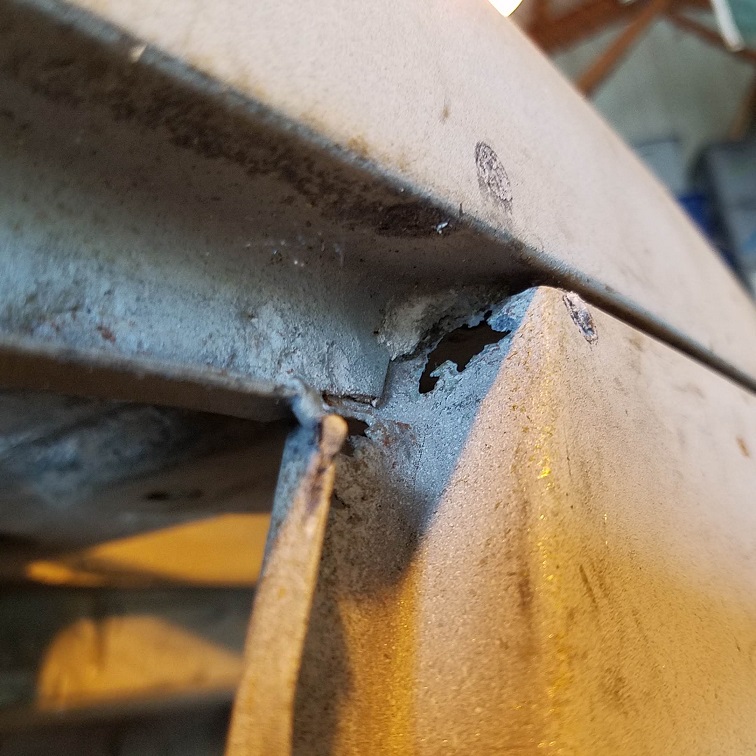
Posted by: cary Sep 19 2018, 08:39 AM
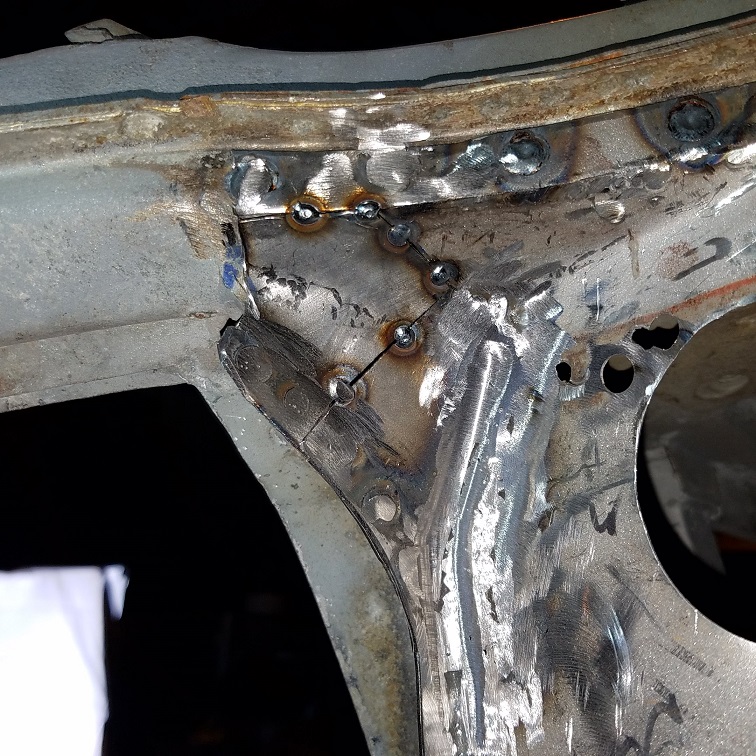
The smaller hole(s) on the flat portion I welded closed. The new 141 lets me really make a small weld.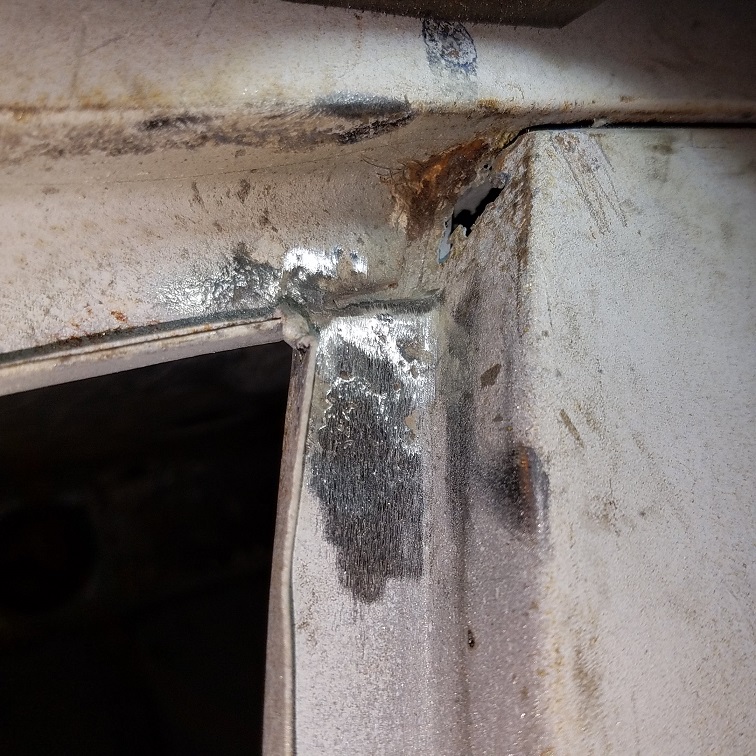
The vertical portion got a patch piece. Lots of trips back on forth to the sander to get a nice tight fit for easy welding.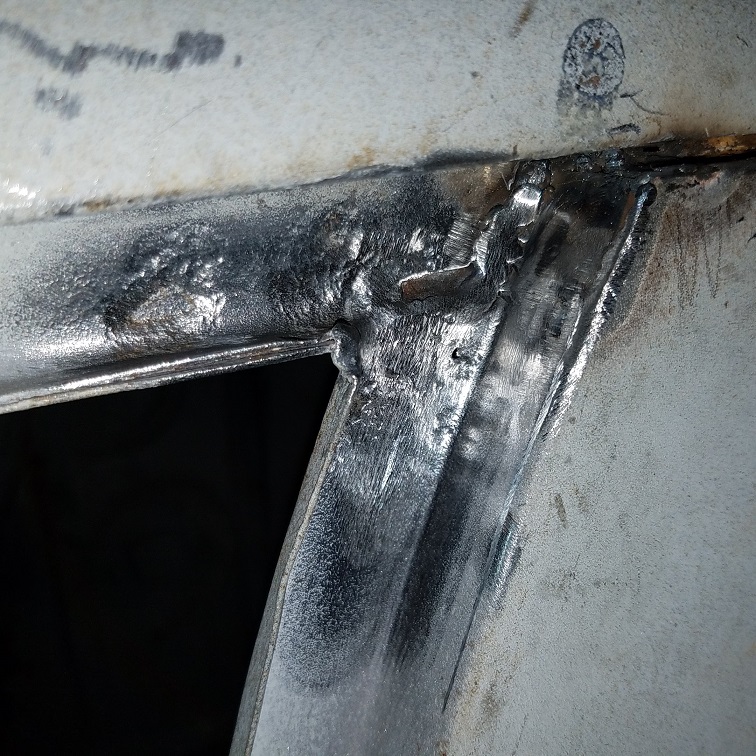
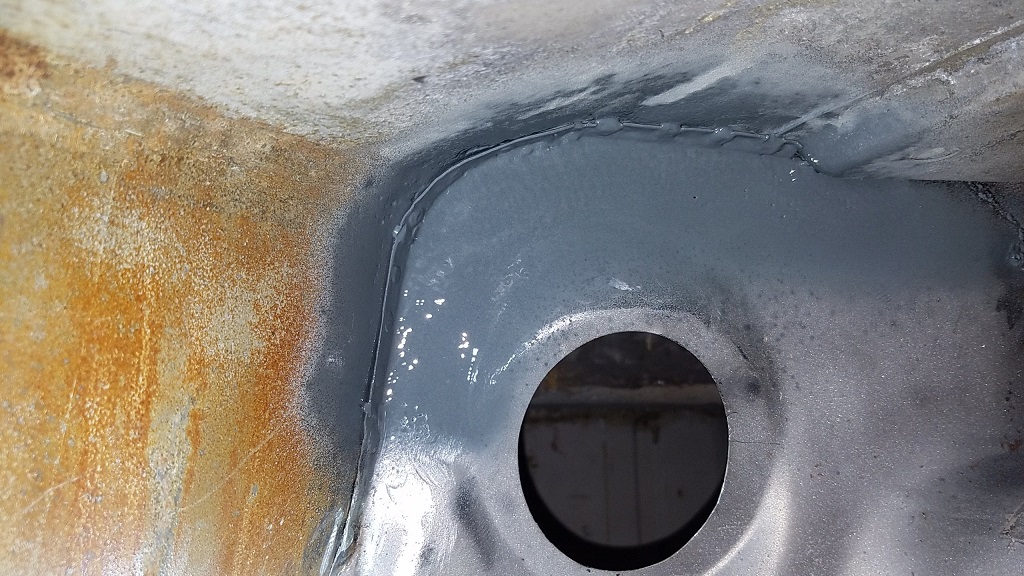
I'm not going to over finish. Both of these corners will get sealed up with JB Weld or All Metal.
Left side will be a little more complicated. Damage goes into the piping slot. But having the dash and bulkhead out gives me good access to the back side.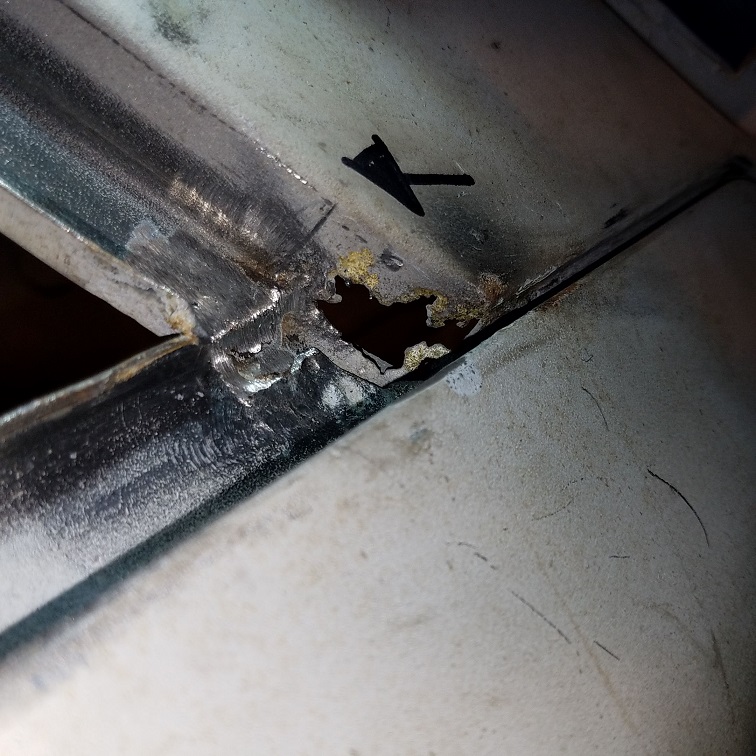
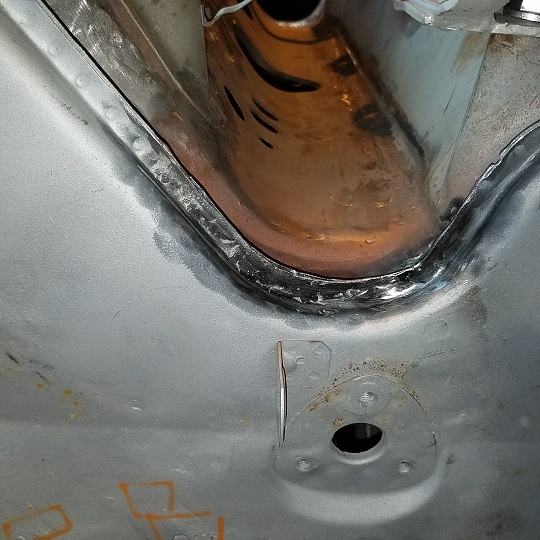
Posted by: cary Sep 20 2018, 09:24 AM
Finished up the other trunk/cowl/fender corner. I'm going to look at adding some additional Dremel bits to my tool assortment.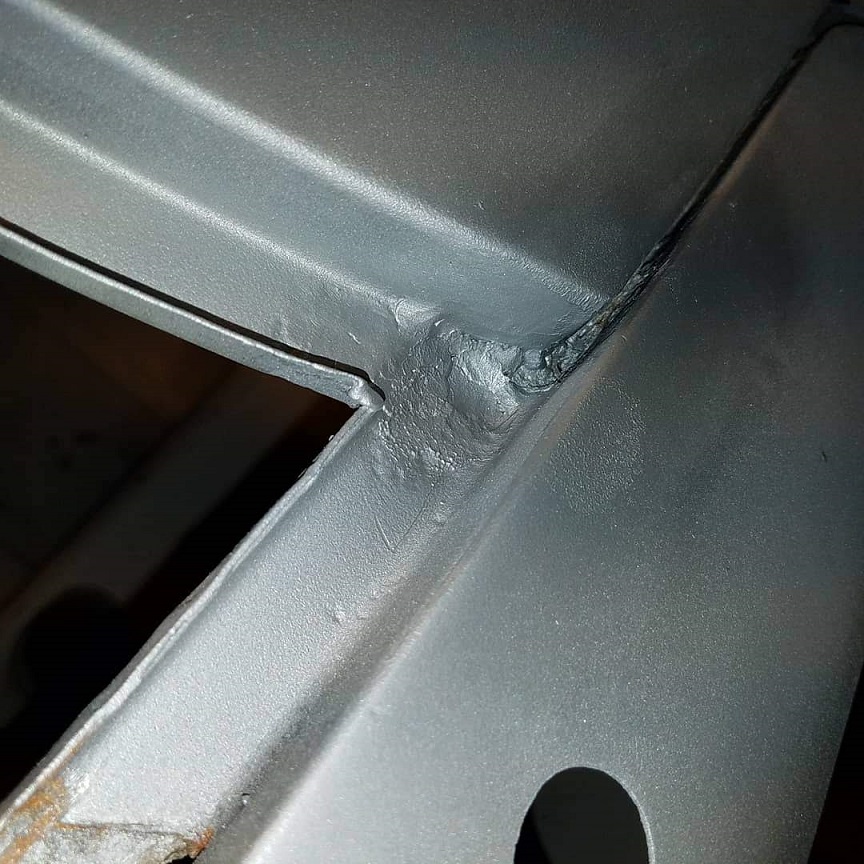
Backside. No bulkhead or dash. Makes it much easier.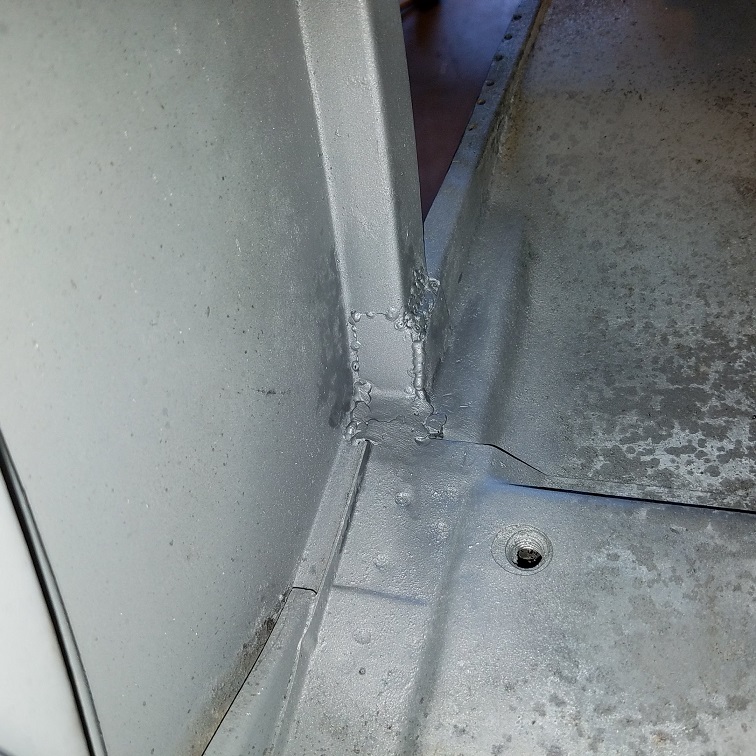
Using the Millermatic Mode on my 141. Really lets me dial it in. It gets pretty tricky some
time with old metal and hidden seal sealer.
Posted by: cary Sep 20 2018, 09:34 AM
Now on to the dreaded bulkhead. Lots of spot weld cutter holes to build back up for a
new 1/4" hole.
I'll ring them. Then sand/grind down. Then drill a new hole. Plus it strengthens the flange
during the need for going in and out for fitting.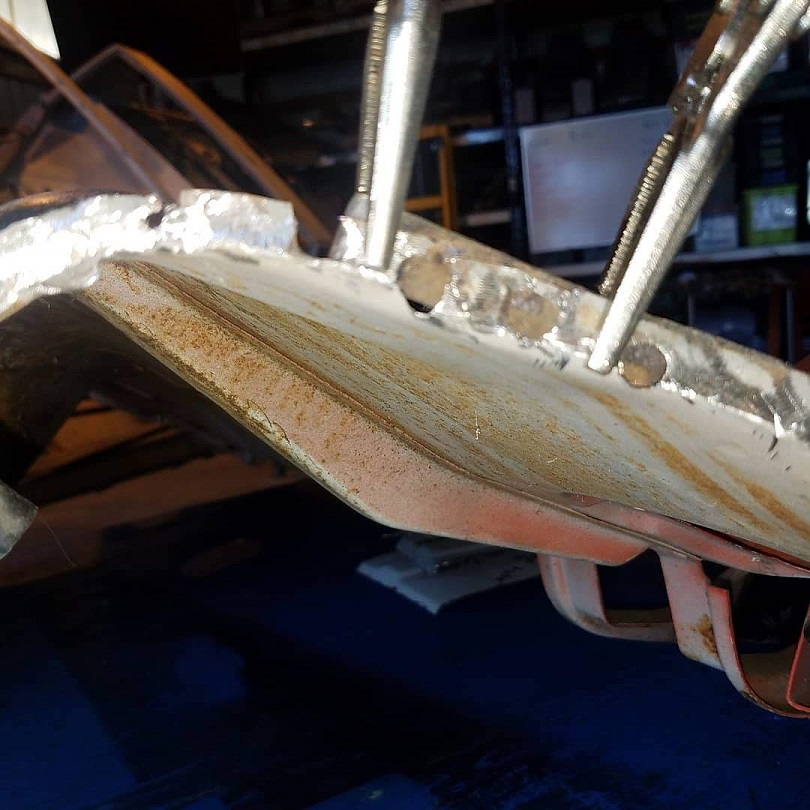
While I'm doing that Jack is creating some patterns for the hard sections that got tore up
during removal.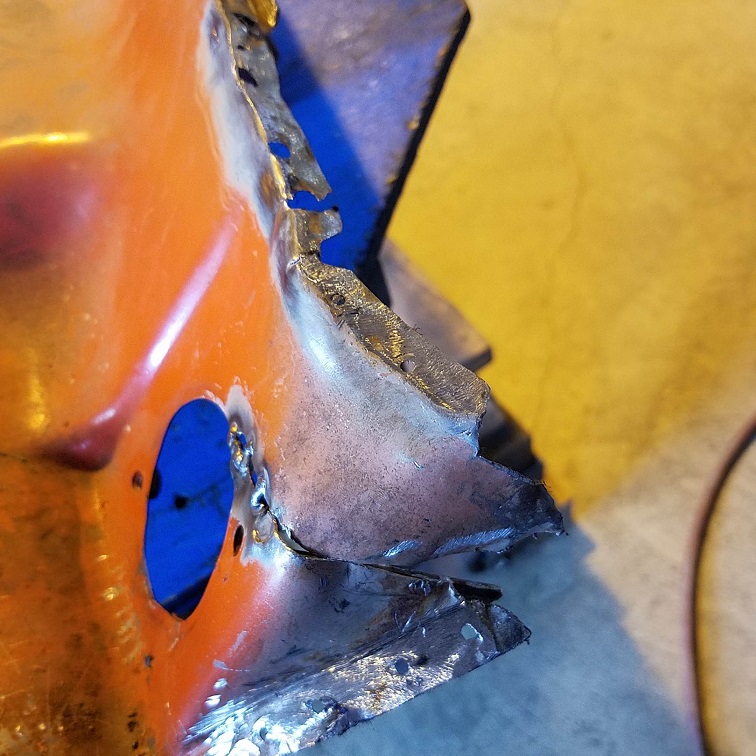
Posted by: cary Oct 14 2018, 08:49 PM
I forgot to post the continuation of the flange repairs to the front bulk head.
Numerous sections have to be removed and replaced.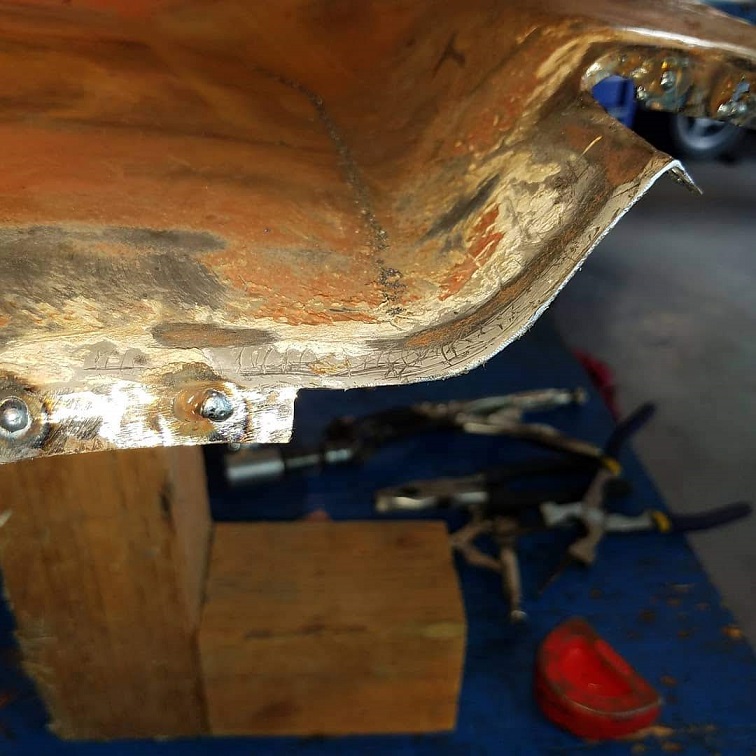
Cut outs continue.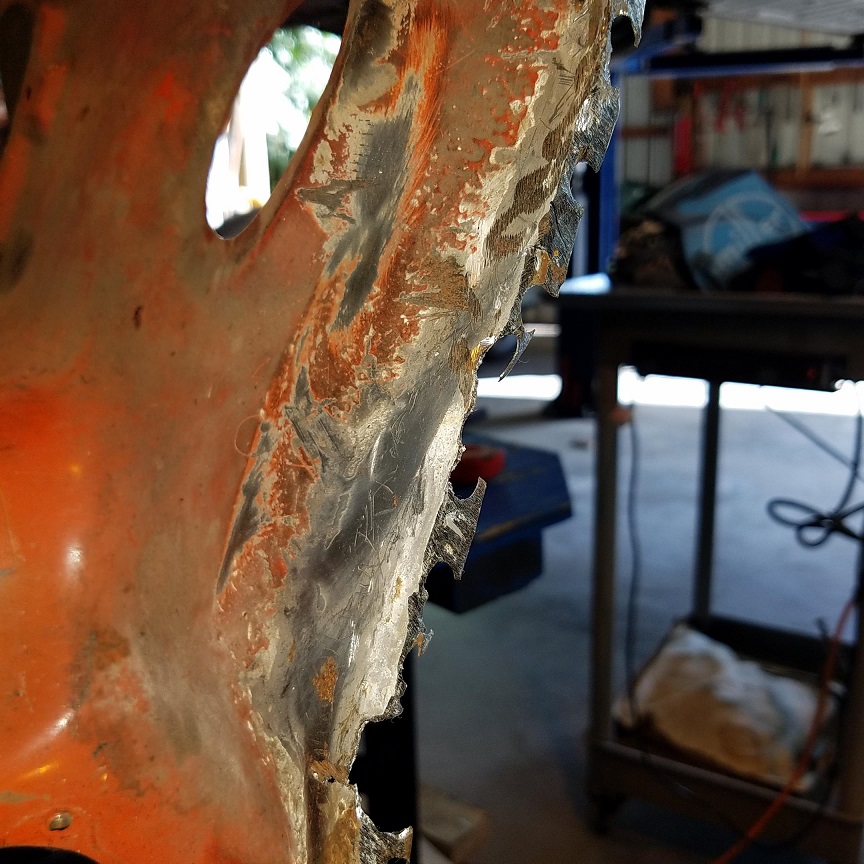
Posted by: cary Oct 15 2018, 08:14 AM
Decided to repair and install the chassis ties to get a better test fit of the bulk head. They would need to go in first anyway. But they too were pretty tore up so I'd been holding off.
More of the same on the flange repairs. Some hole filling, some cut out and replacement.
But we got it tuned up and she got a nice coat of cold galvanizing on the inside.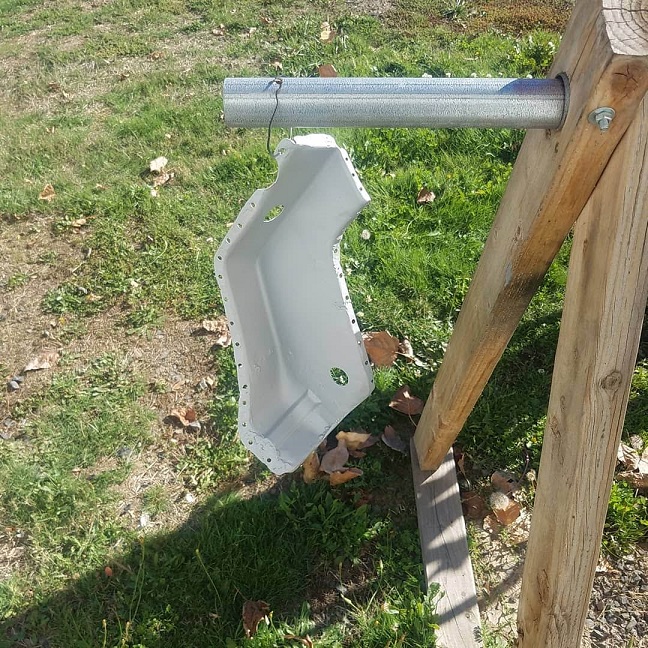
Here's where she goes.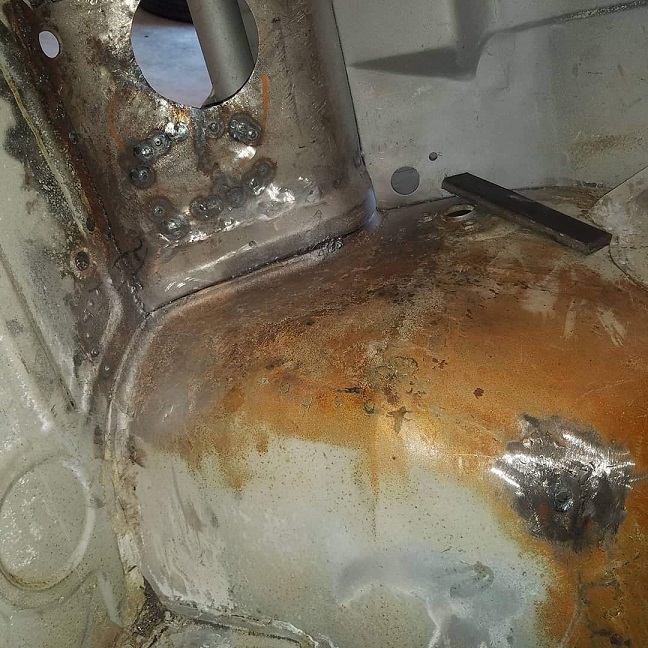
Test fitted and ready for screws.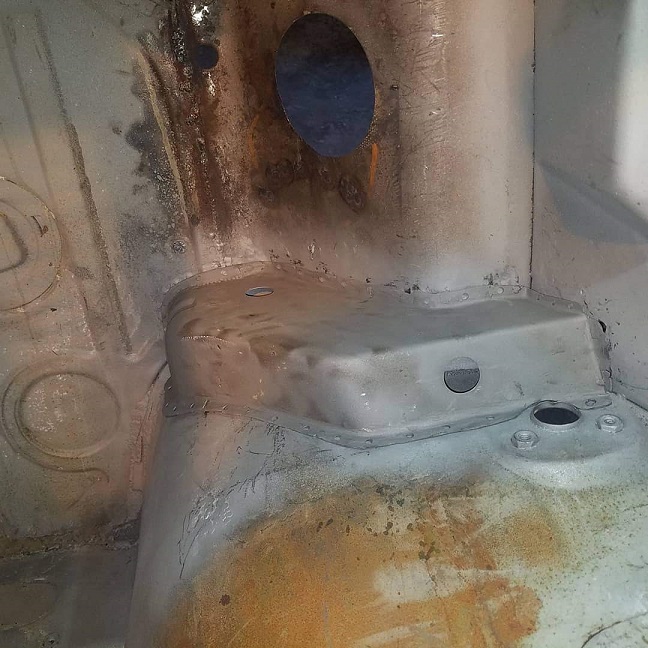
About 1/2 way welded in. Short day, heading out for dinner with the wife.
Plus an oil change on the daughters car first thing this am.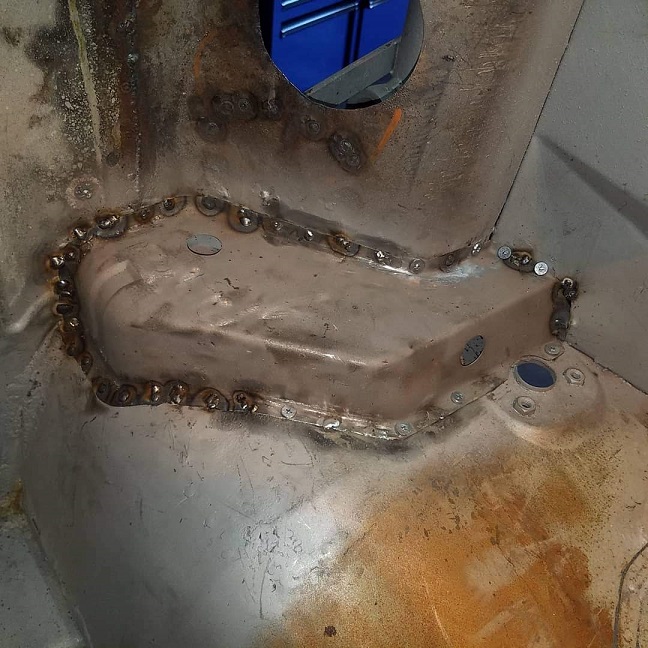
Posted by: mepstein Oct 15 2018, 08:21 AM
Cary - I have to applaud you for the way you save these cars.
Posted by: Mikey914 Oct 15 2018, 10:54 AM
I know Taylor appreciates it. This is much deeper than we 1st thought when we got into this. The idea was Taylor wanted to get some hands on in the metal department. He got a whole lot more than he bargained for.
Hoping this winter we can get this to paint, but still a ways to go.
Let Taylor drive my 72 when we went to lunch, I know he misses it. 
Posted by: wes Oct 15 2018, 01:19 PM
Amazing work Cary! I’m quite sure Taylor will respect and care for that car far longer than if it were just bought in good condition. Plus gold metal memories of the intire project.
Posted by: cary Oct 20 2018, 08:26 AM
Jack is off with one of his Federal Highway buddies so I was all by myself.
A couple shots of the right tie brace all finished up.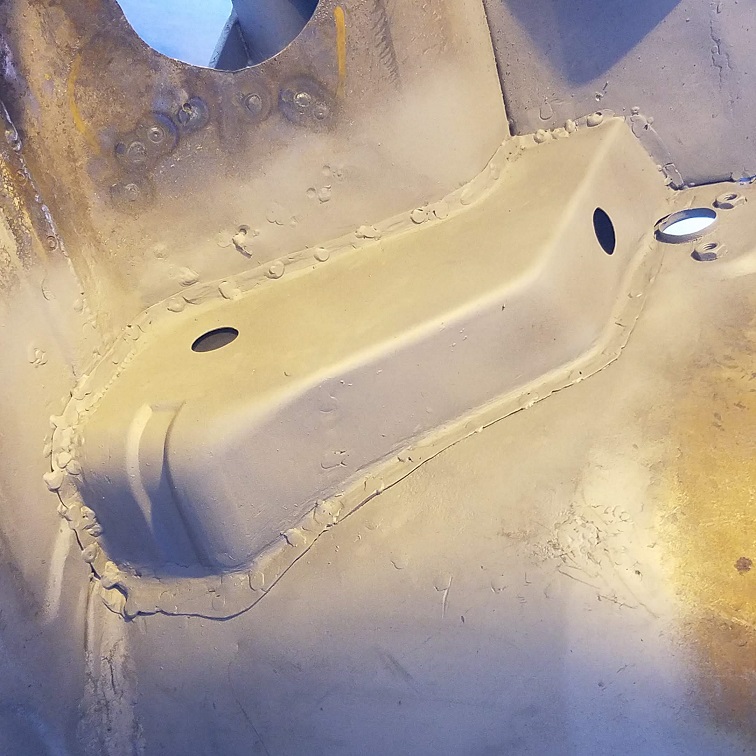
I didn't over grind the spot welds. It will get sprayed with seam sealer.
Probably should changed out more of the flange to get a smoother and flatter surface.
Or maybe I could have used the Lenco panel spot welder.
I decided I'd leave rebuilding the flnges on the other brace to Jack. I'll start checking things off the list.
First order of business is welding in the patch panels Taylor cut out from a donor firewall.
Test fit #1 on the left side panel.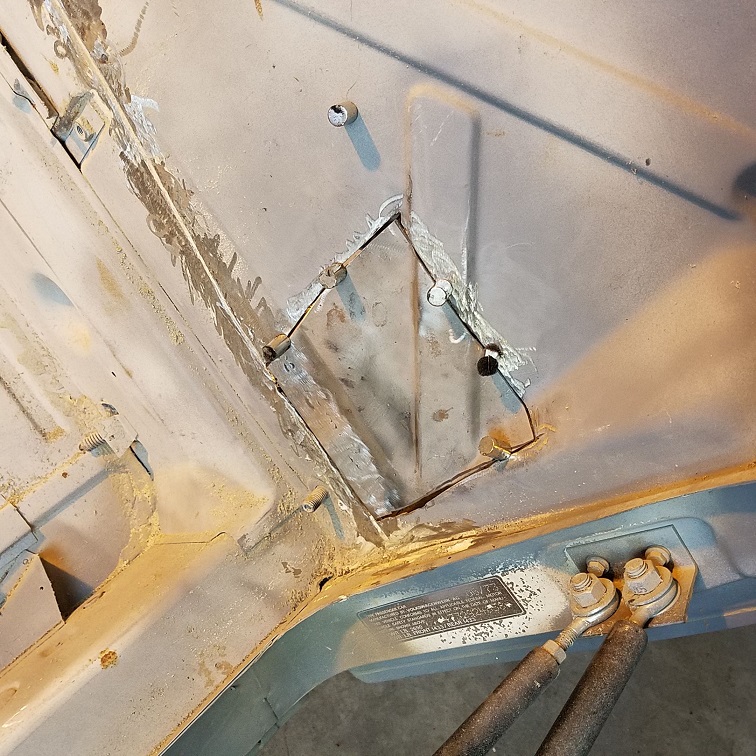
Bottom flange was junk so I cut off the bottom 1/2" and added on some new metal.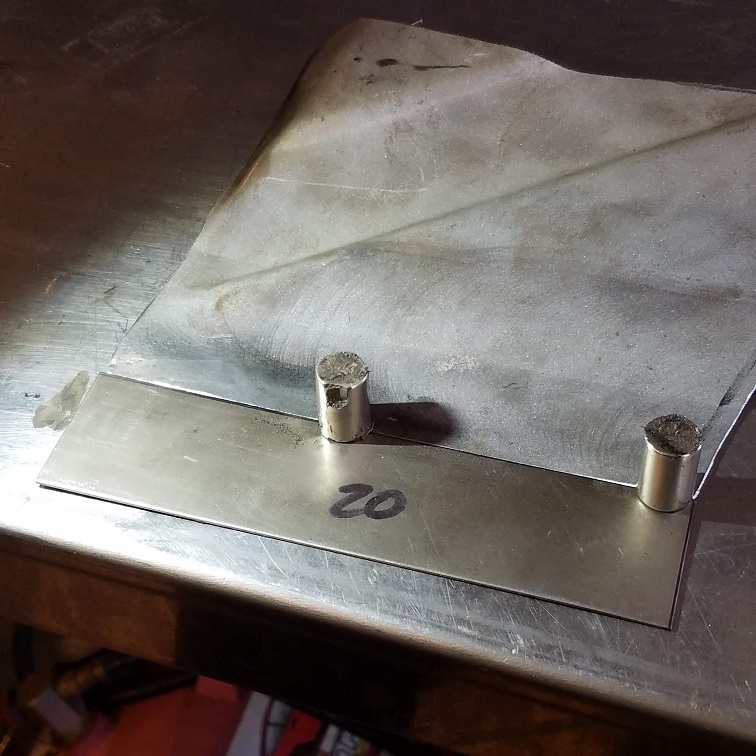
Tacked into place. But I did stop and fill the big gap in the corner before moving to the other and harder patch.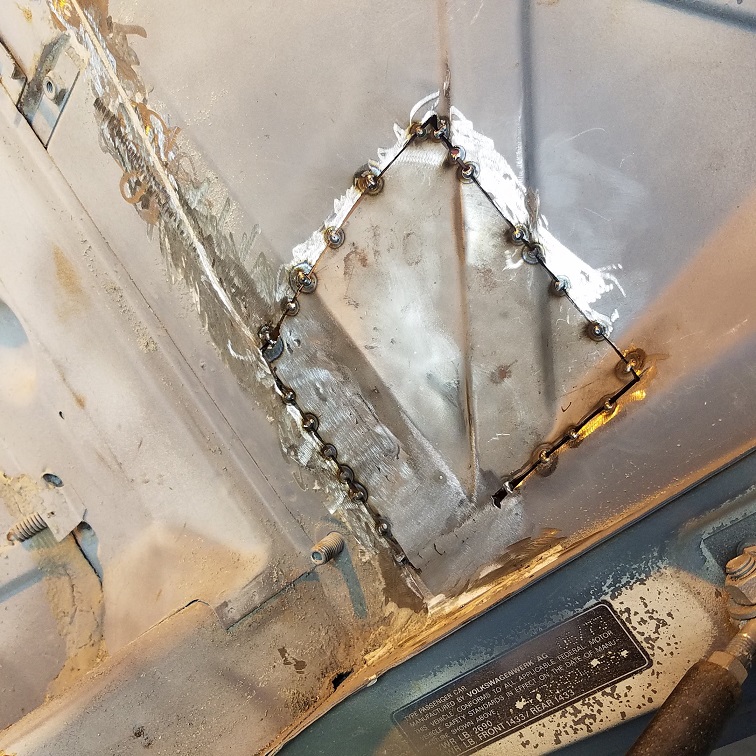
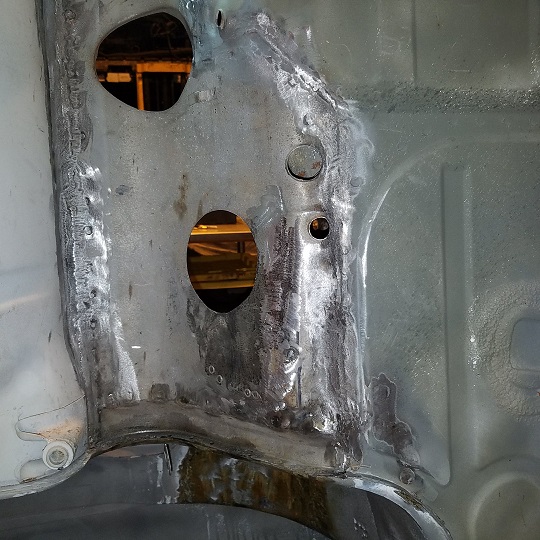
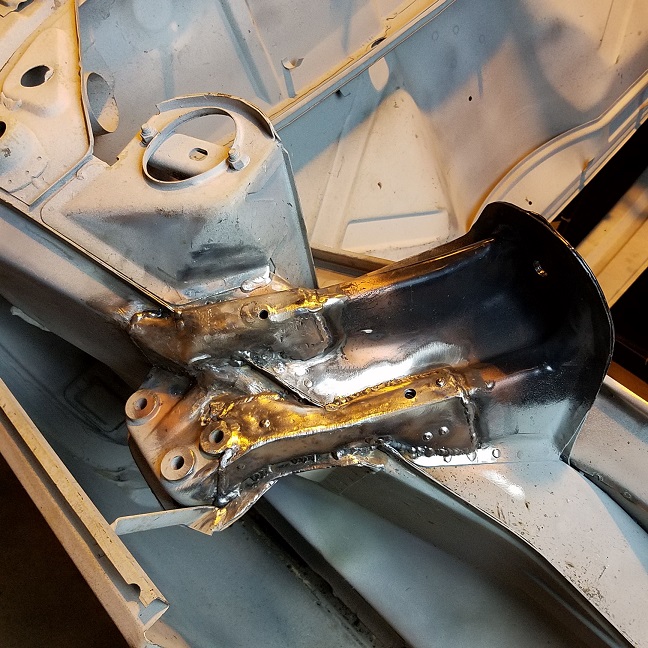
Posted by: cary Oct 20 2018, 08:45 AM
Now on to the more difficult patch. In Taylor's defense the front shots don't tell all the story. Not only was he matching up the front. We're carrying the engine shelf on the backside with us. More photos tomorrow.
The starting point.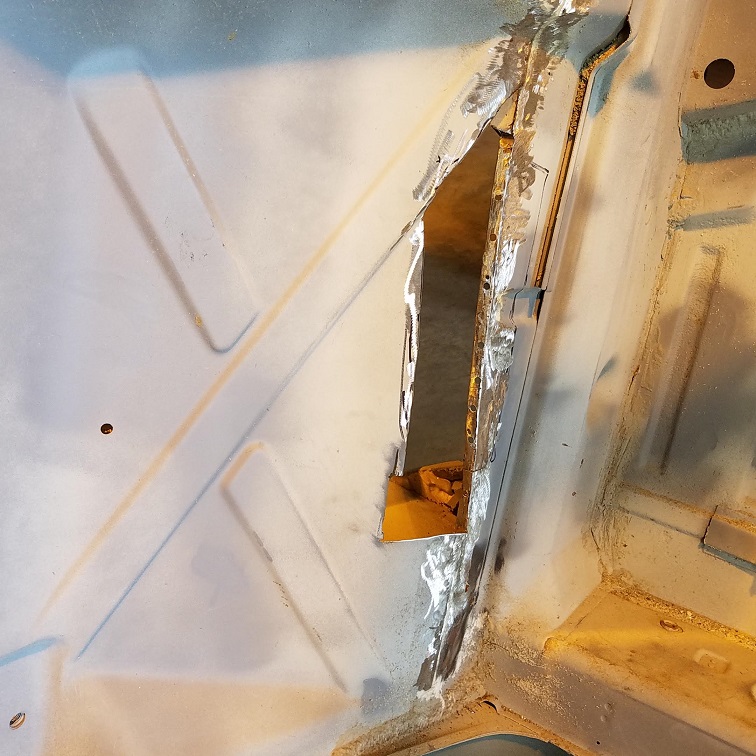
Test fit.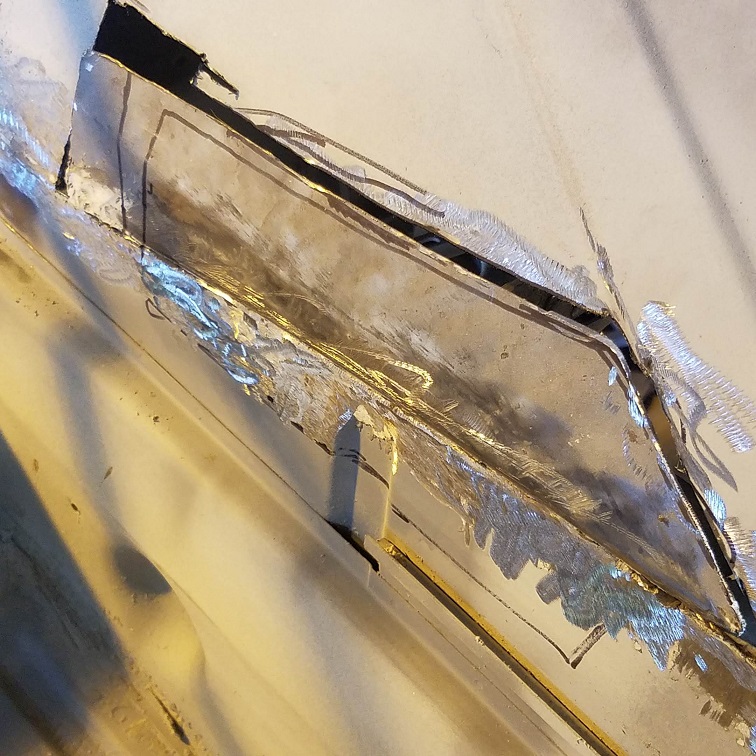
Trimmed and locked in. Added a flange to the outer right big hole.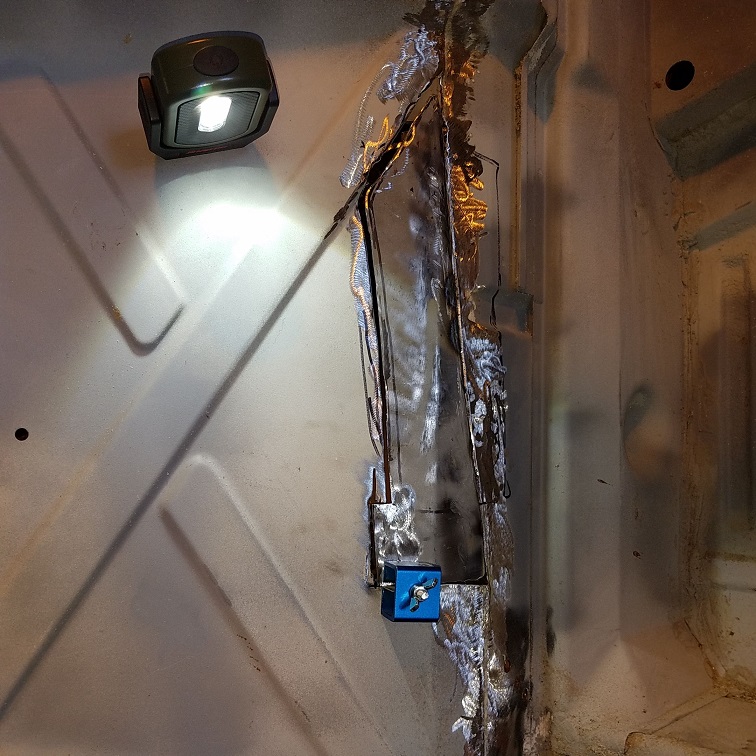
Welded in and heading home ............... I'll finish tomorrow.
Won't over do it. Beings that this will be a fair weather driver and both sides will be covered up with 914 Rubber parts. Front side sprayed with seam sealer.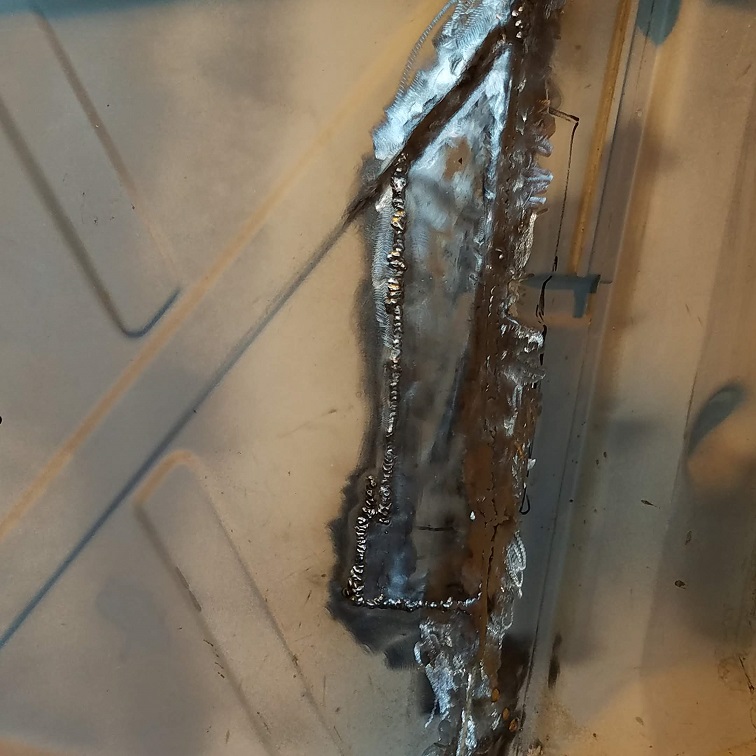
Almost out of gas, showing about 4%. Will probably have to steal the one off the 180.
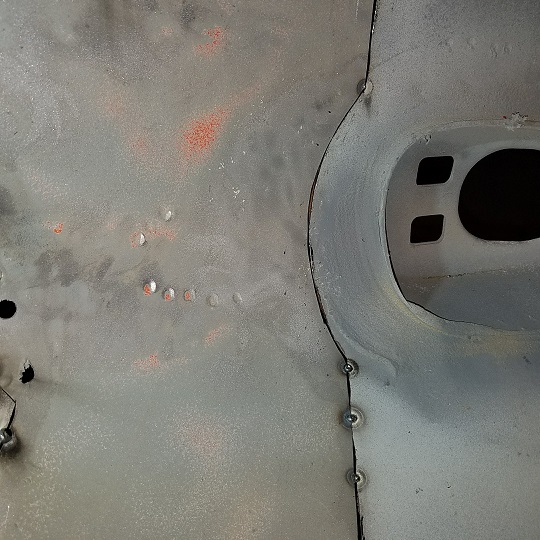
Posted by: cary Oct 22 2018, 09:23 PM
Here's the left side all tidied up on the front side.
Here's the right side with the welds all tuned up. Once again, it will be sprayed with seam sealer after it's primered.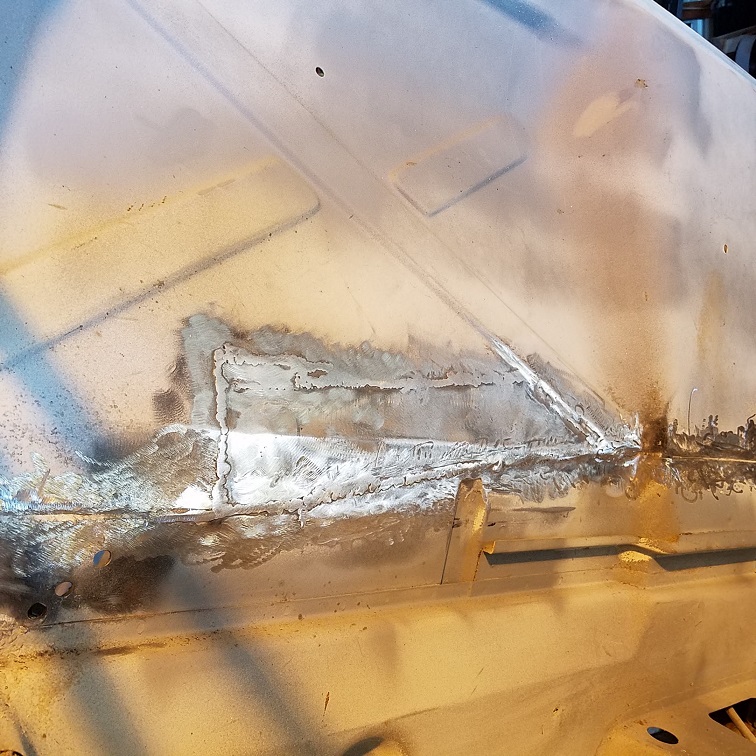
Back side of both patches.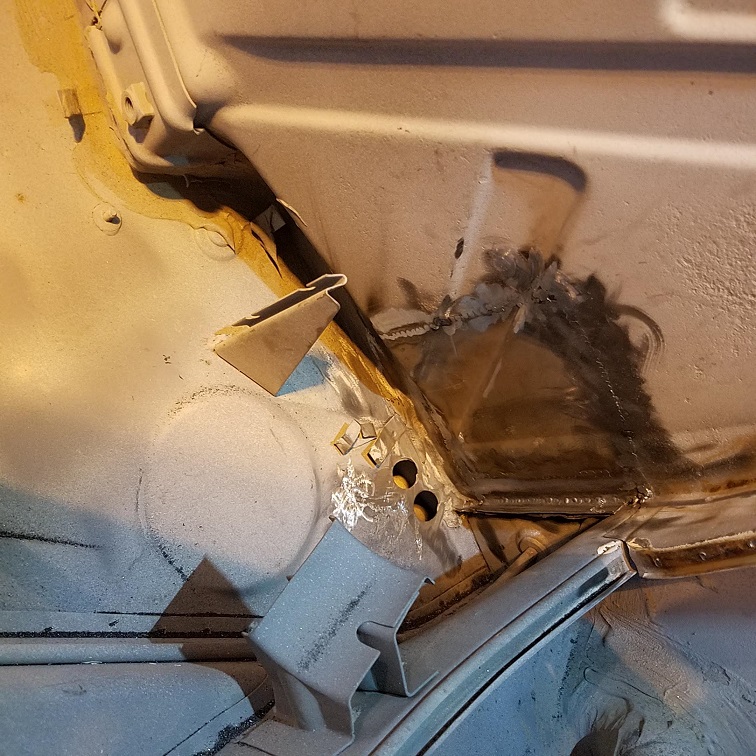
Next, onto filling the large gap in the engine shelf.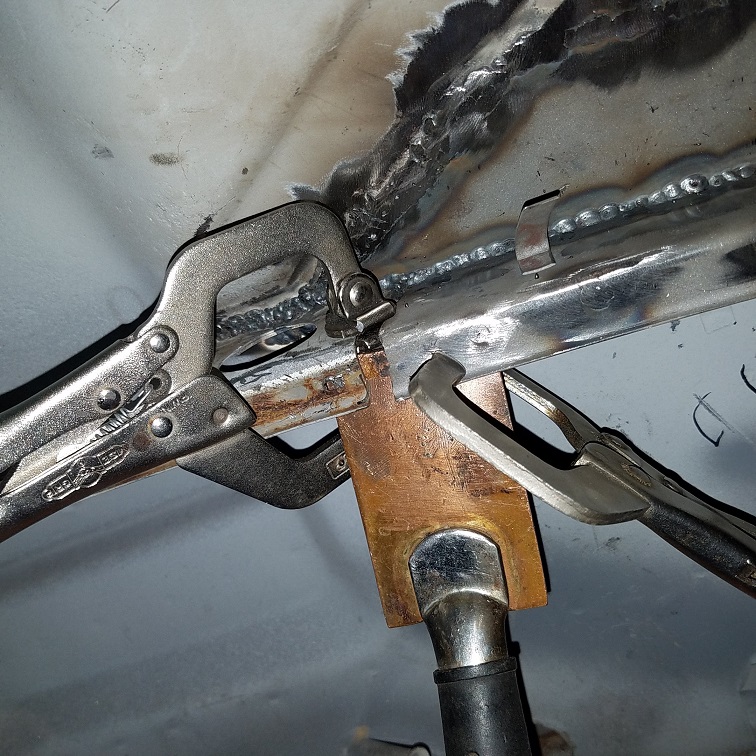
Here's where I was at after building up both sides twice. Then I cut down the welds to keep it from pilling up.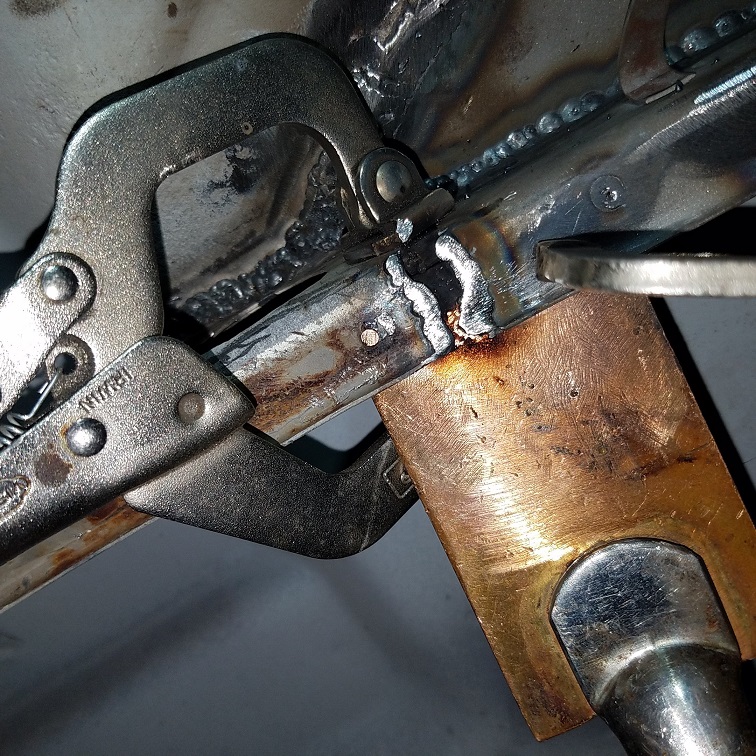
The front after a little tuning.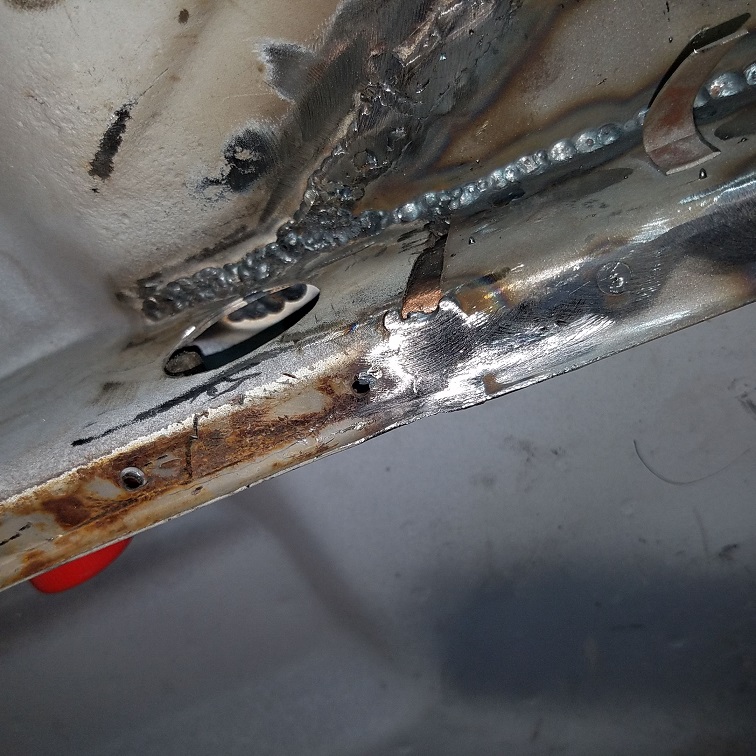
The under side of the engine tray after welding up the rosettes.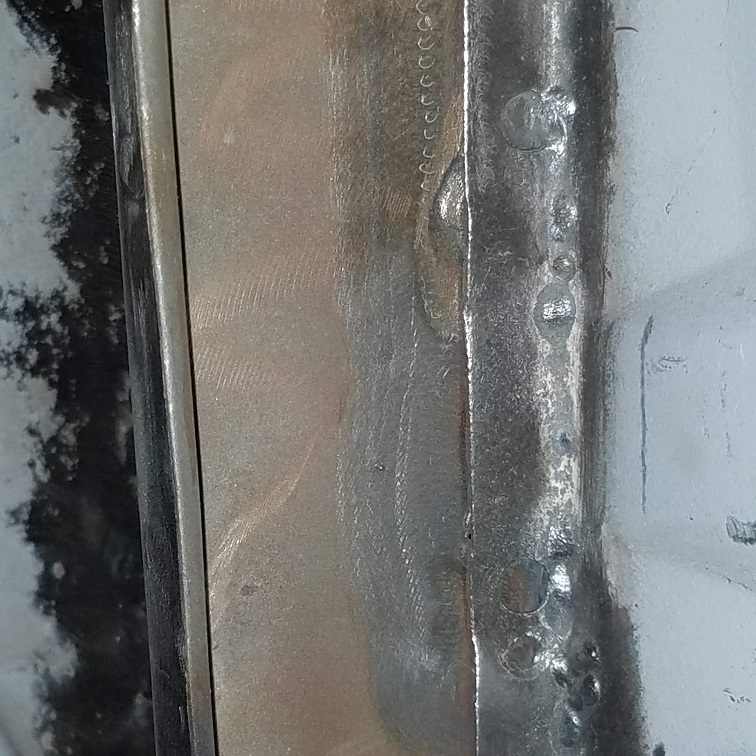
Posted by: dan10101 Oct 22 2018, 10:49 PM
Looking good. Thanks for posting.
I have a bunch of sheet metal work to do and this really helps me with ideas!
I need to find some copper scraps....
Posted by: cary Oct 23 2018, 08:14 AM
I see it as my way of giving back for all the help I received over the years.
Here's a shot of the white board. We keep chipping away at it.
While I'm working on the list Jack is rebuilding the left chassis brace / tie.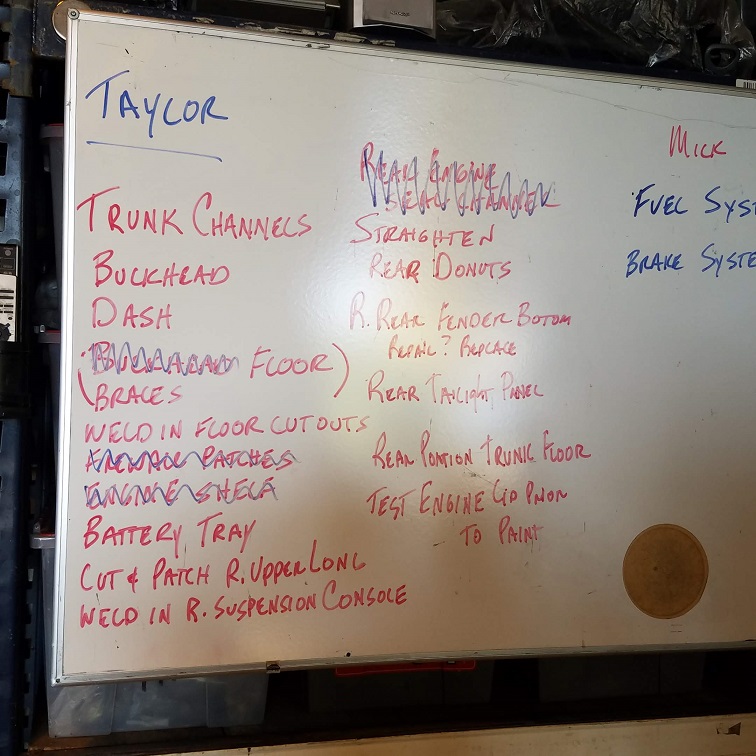
Posted by: cary Oct 23 2018, 08:18 AM
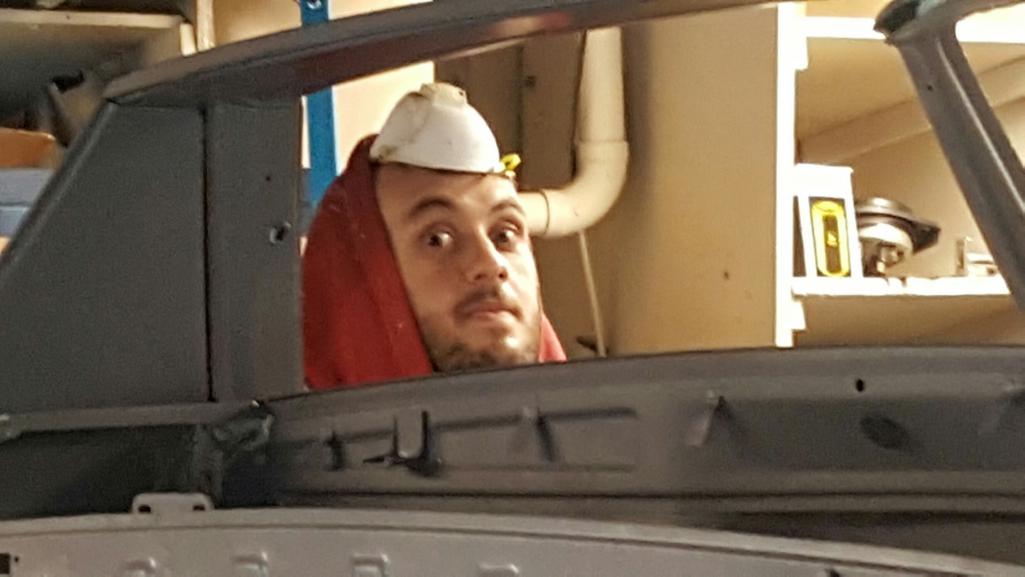
While I'm going in and out from the engine bay with the car on the rotisserie I'm wearing the bump hat Mike (Warpig) gave to me.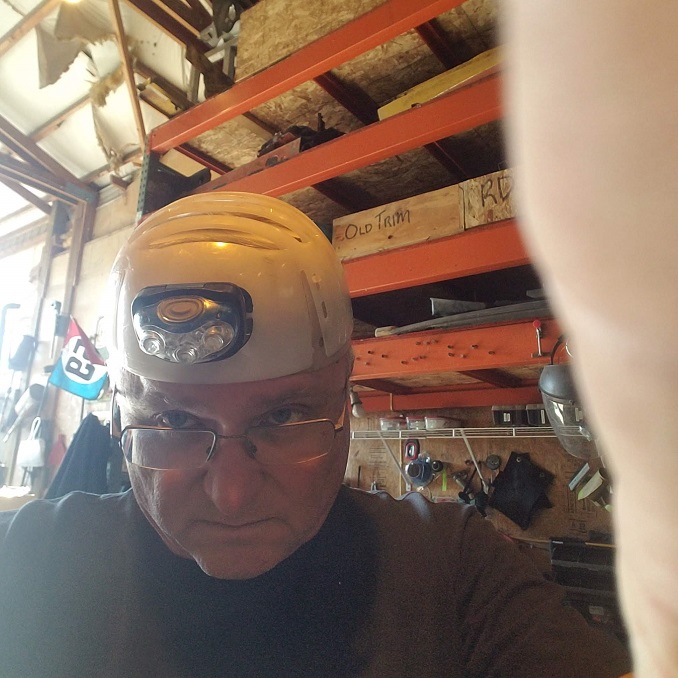
Lots of ugly thing to catch your head on.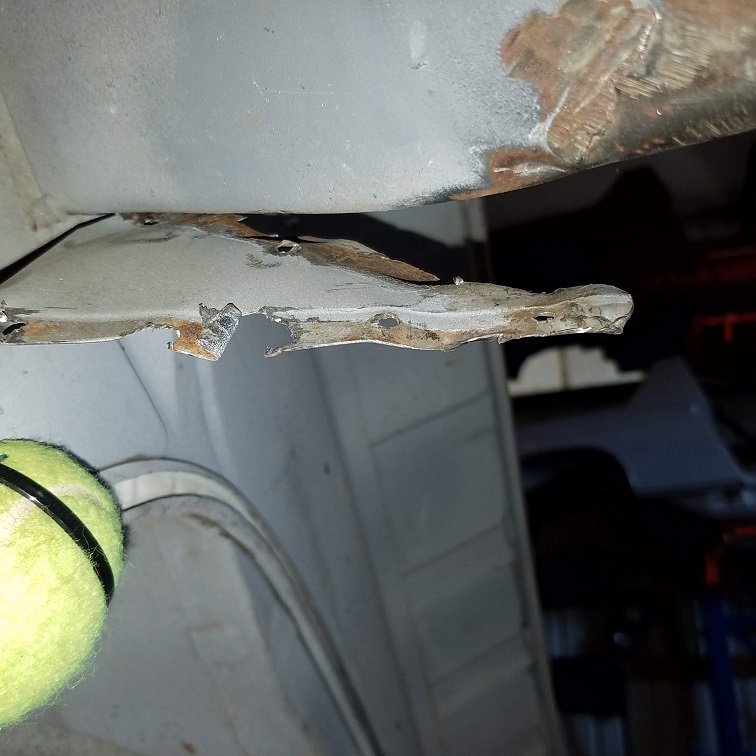
I've forgotten to mention .............. the sand keeps coming.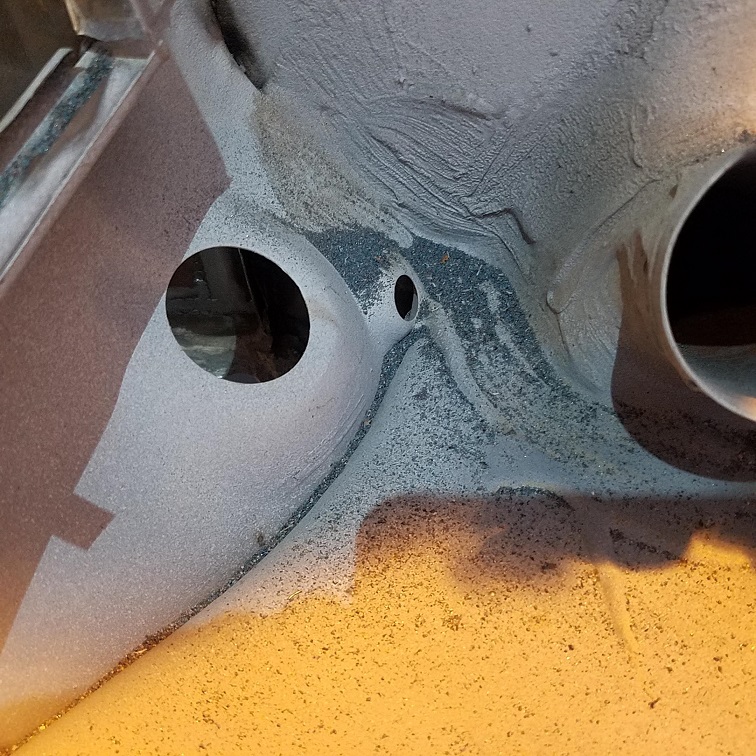
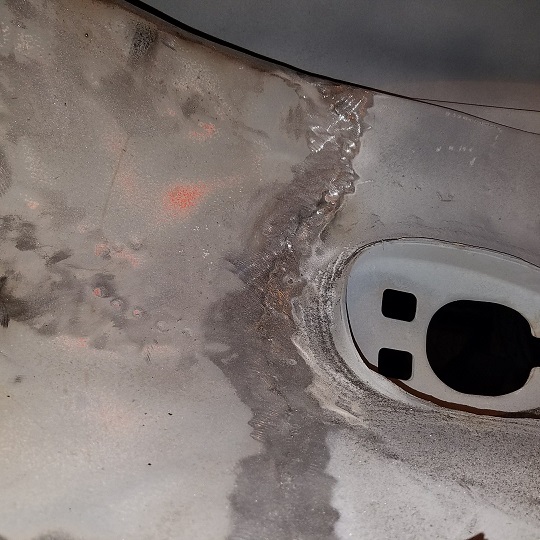
Posted by: cary Oct 23 2018, 08:21 AM
Picked a couple new cans of Rustoleum cold galvanizing.
Here's a shot of the front of the right patch sealed up.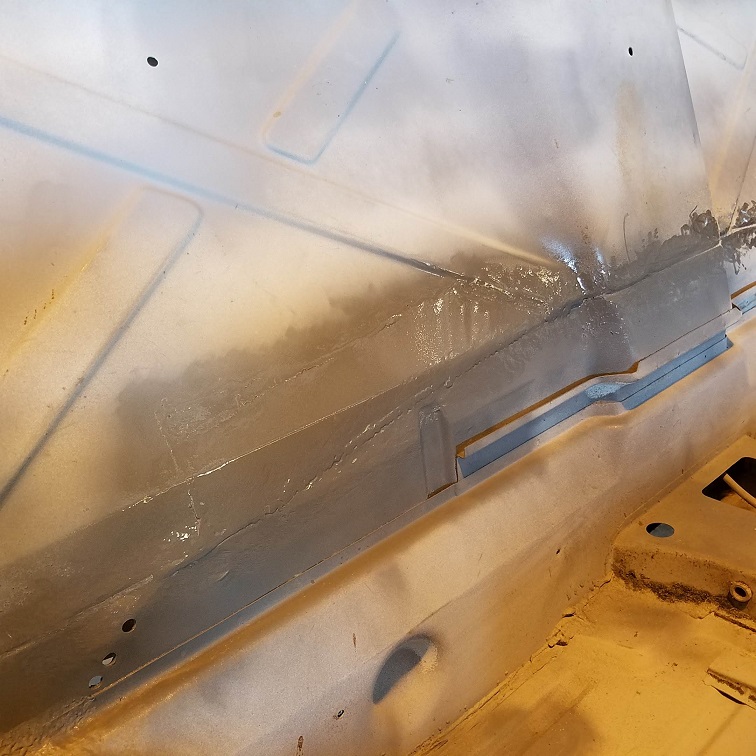
Posted by: bbrock Oct 23 2018, 08:30 AM
Oh boy do I need that hat! Cut my ear last night on the corner of the windshield frame as I backed out after installing sound deadener. That engine bay is nothing but a head gasher.
Posted by: cary Oct 23 2018, 08:30 AM
On to the rear engine seal channel. Decided to go with the new one I had in stock.
We would be time, which is $$ ahead. Filled all the spot weld removal holes on the engine
tray.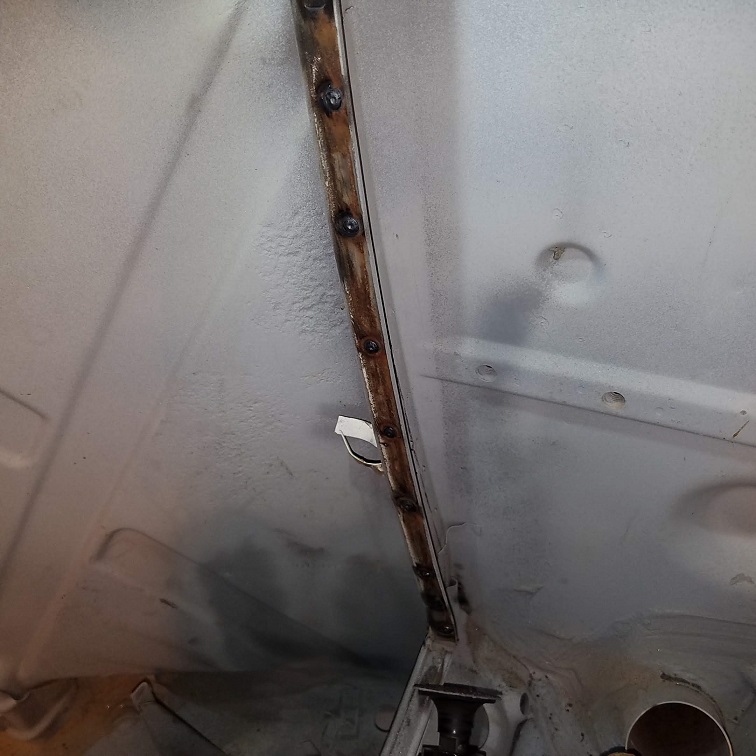
Then moved on to shaping the straight piece to the curved rear engine tray.
Tried a couple different ways outside the car. No go. Wrinkled the rolled lip.
So I started on the right end and clamped it down with a pair of 6R Vice Grips.
Then heated it with the Mapp gas torch. Working about 2" at a time. Go my curve/shape
then clamped it again. Rinse and repeat until I got to the other side.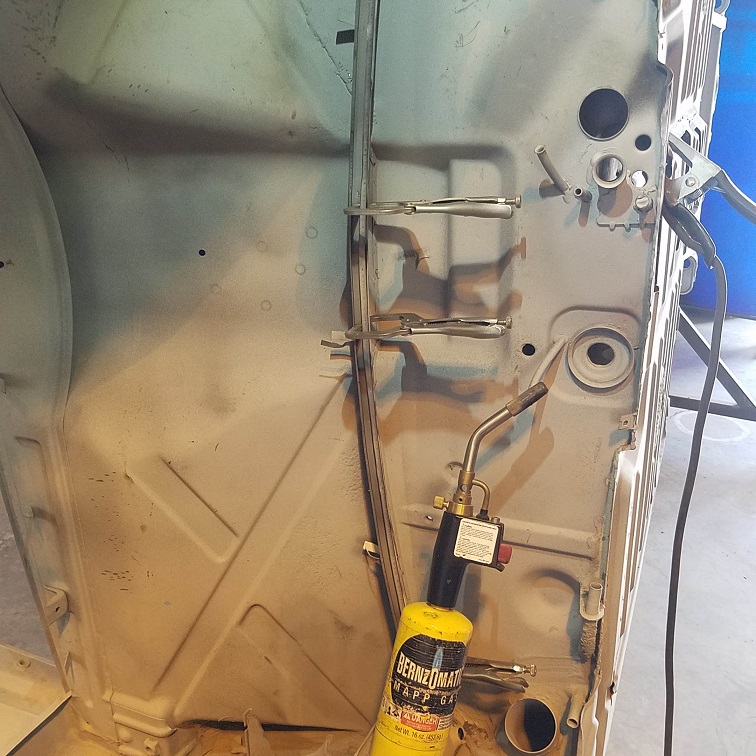
Drilled 5/32 holes every 2" and welded it into place.
Posted by: cary Oct 24 2018, 08:23 AM
Onto the rest of Monday's work. Waiting for powder coating at Rothsport.
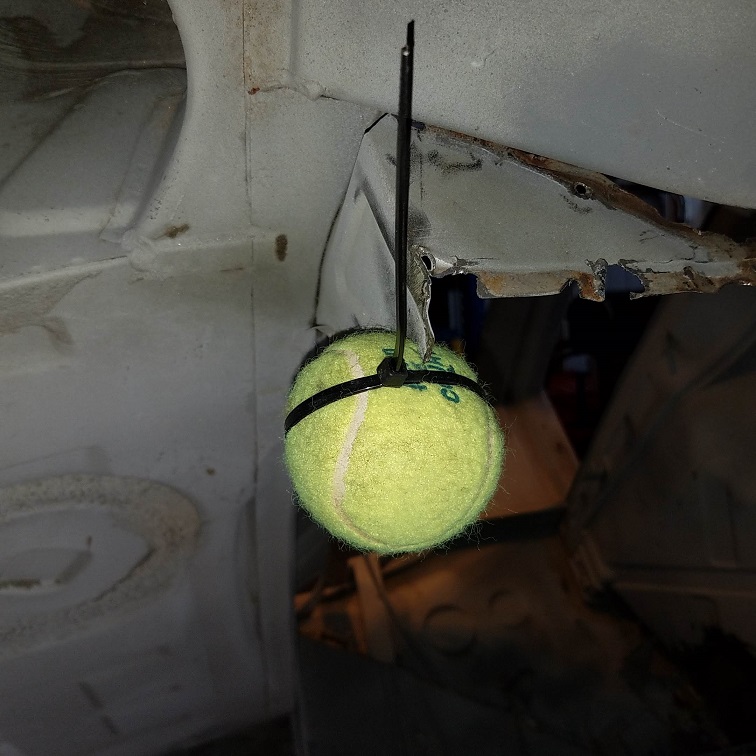
Staying in the engine bay. On to installing the right suspension mount. But first, doing a little patching on the upper long.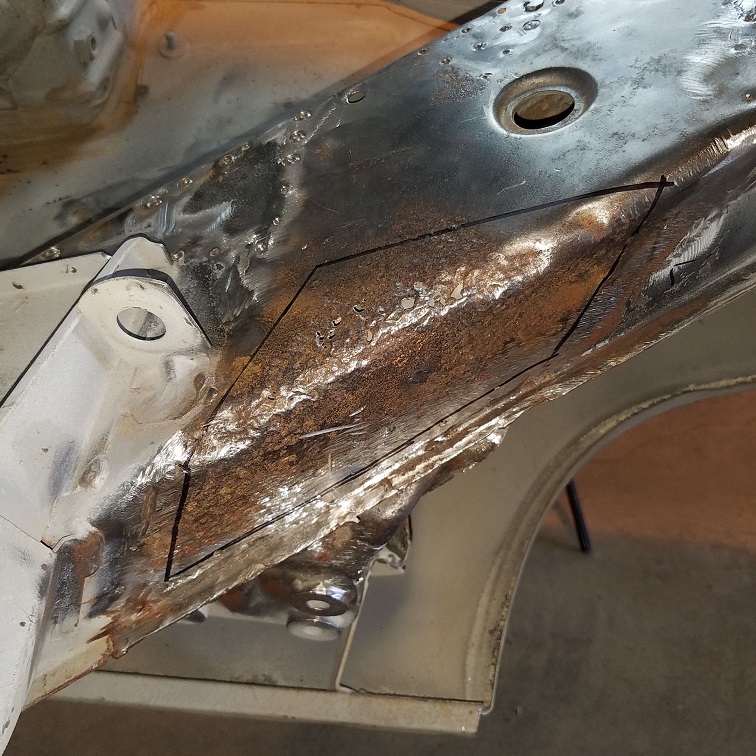
Hell hole is in relatively good shape. Just need to weld up the spot weld cutting holes from removing the right engine shelf. 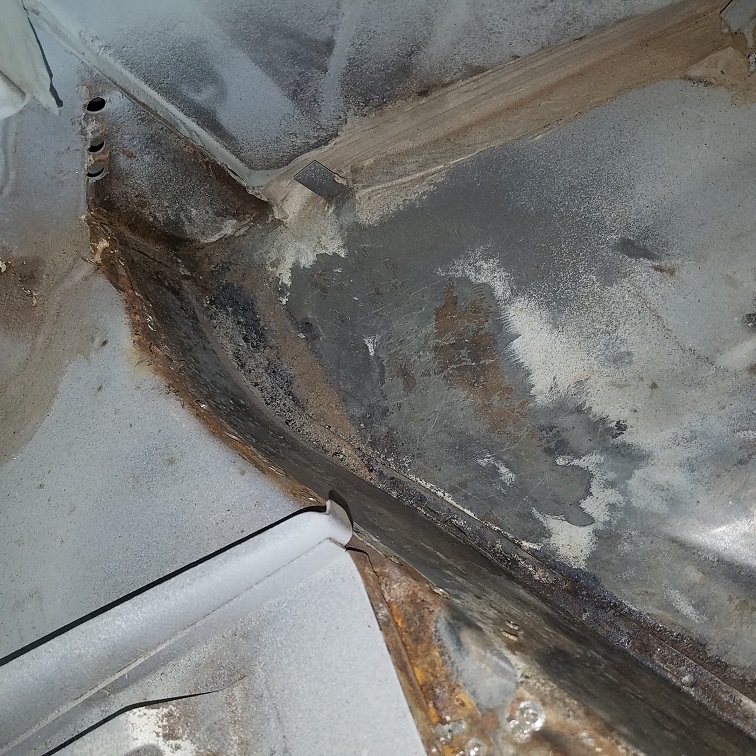
Scalpel ................ Cutting away the outer layer of the upper long.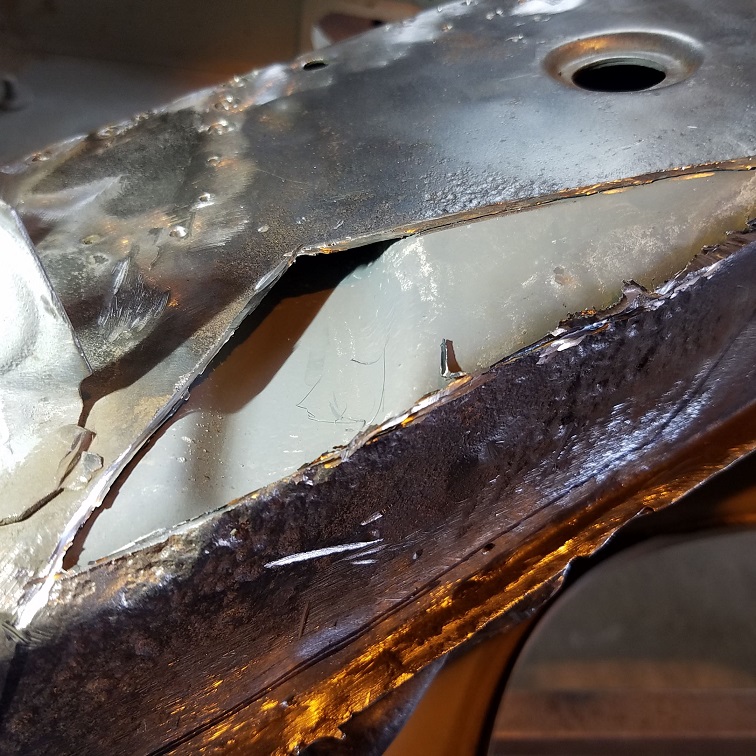
The inner box support look pristine.
Next a little work with the lie detector (wire cup brush). Under suspension mount welded up. Hell hole ramp is a before shot. But its all done.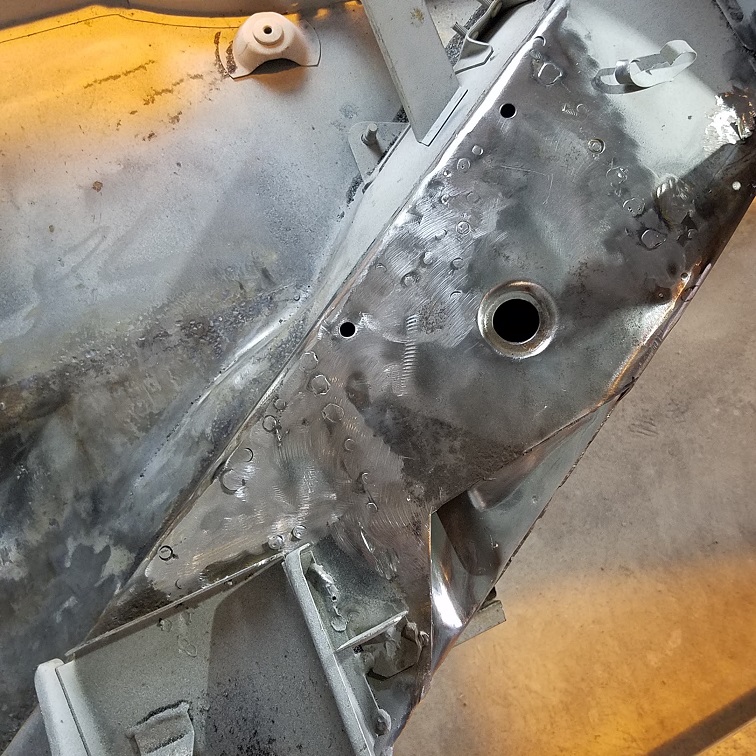
Patch all ready to go. Opened area sprayed with Weld Thru primer.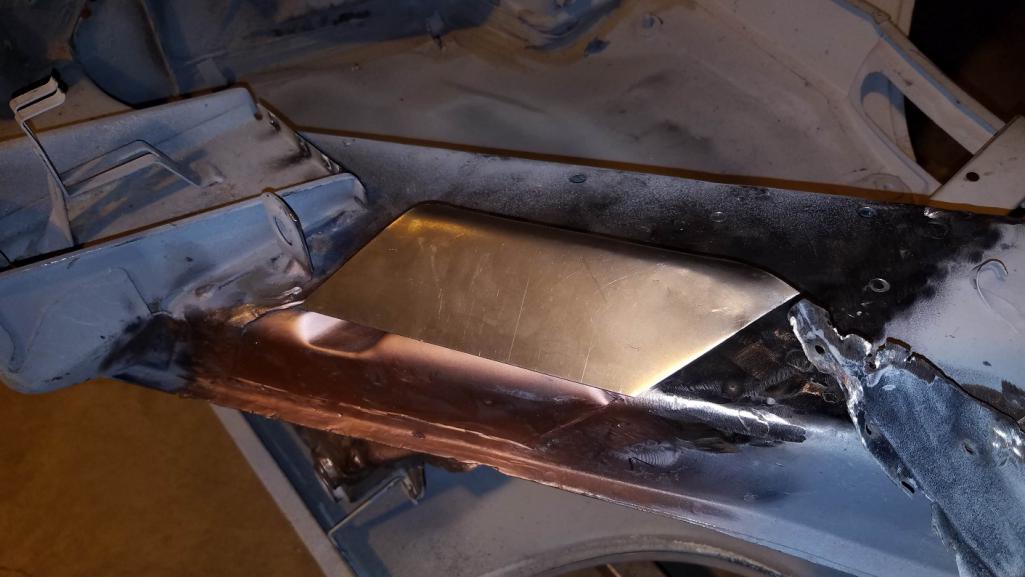
Posted by: cary Oct 27 2018, 08:47 PM
Back to it. Welding in the patch left from Monday's work.
A few self tapping screws and a clamp.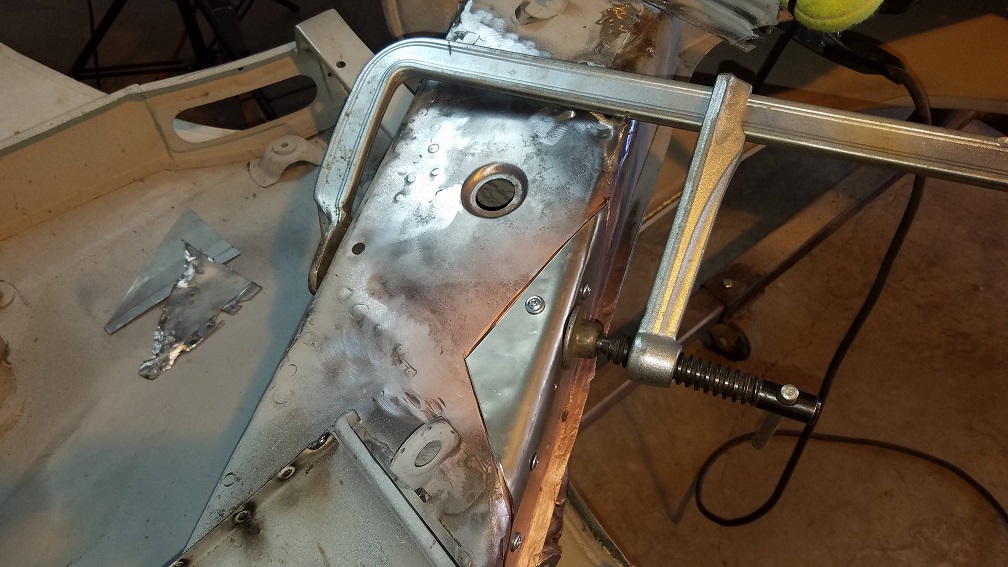
Blip, blip, blip. No real issues.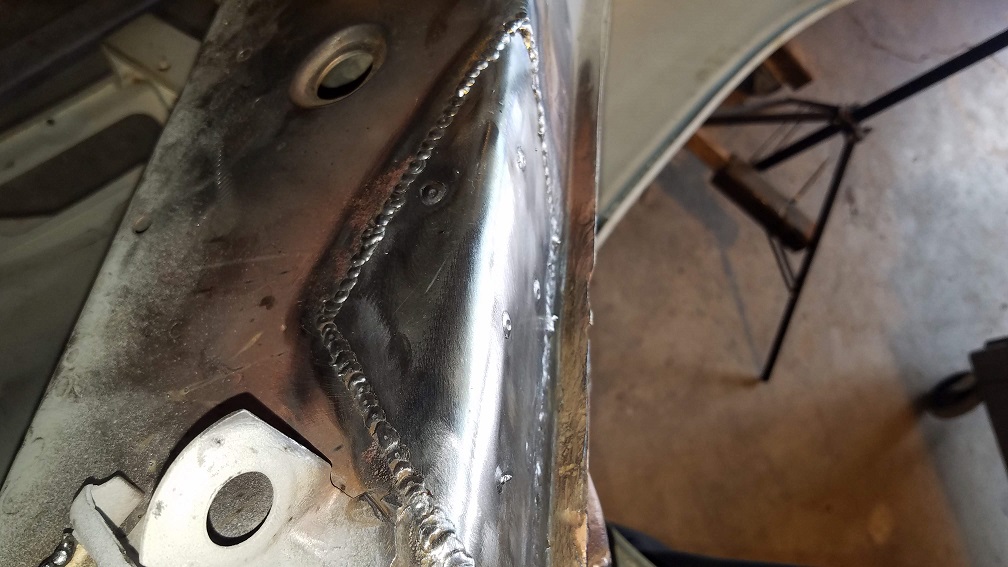
Ready for the suspension mount fitting.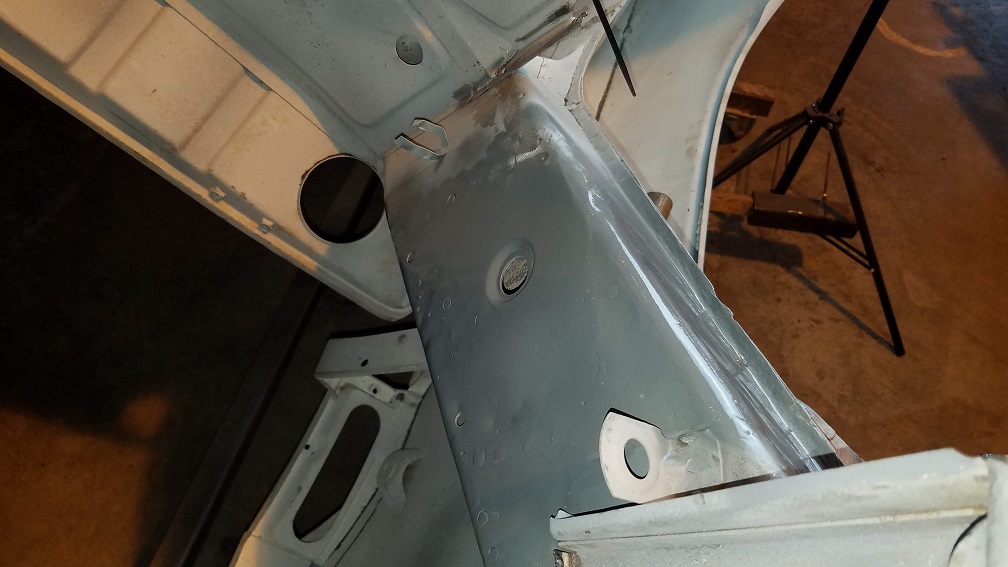
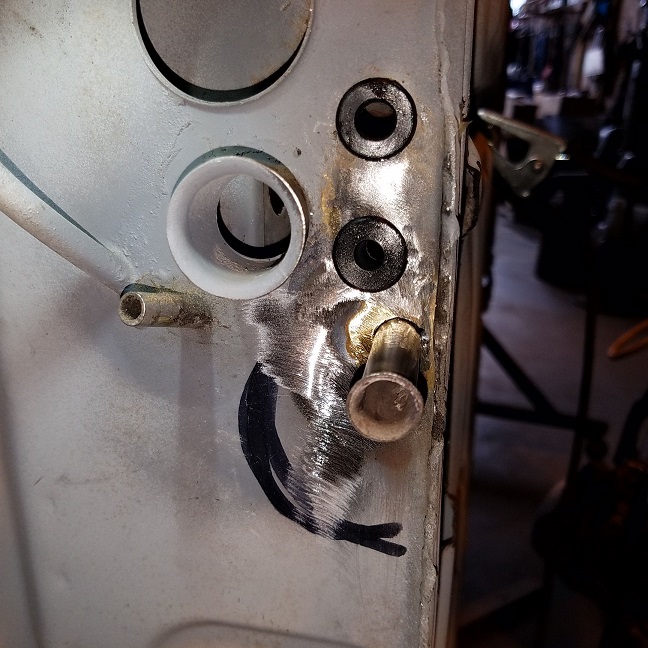
Posted by: cary Oct 27 2018, 08:57 PM
Time for fitting the suspension mount.
1st issue, the bottom edge needs a little tuning. A little too long.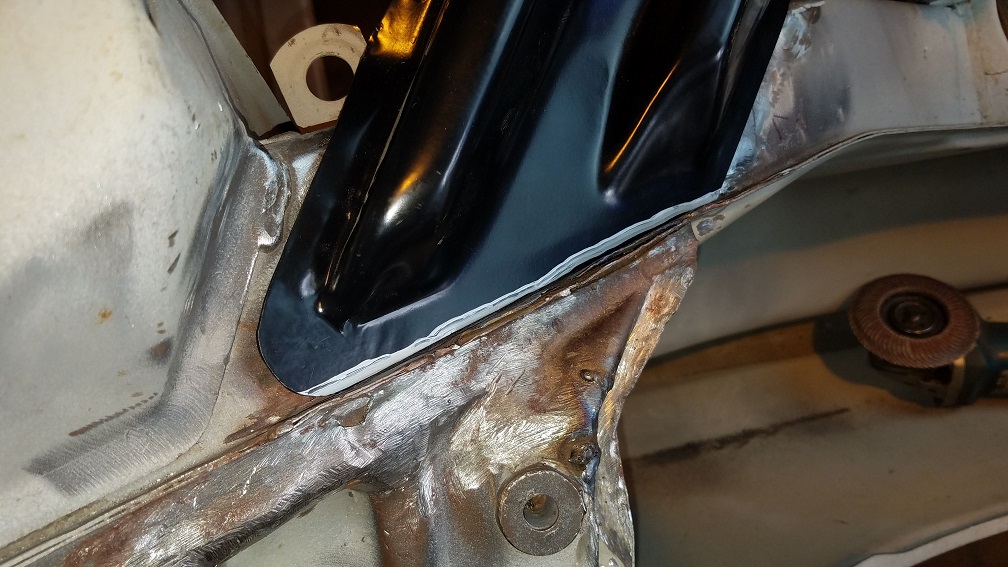
Here's the measurement points for the suspension mount.
Hole in the center of firewall.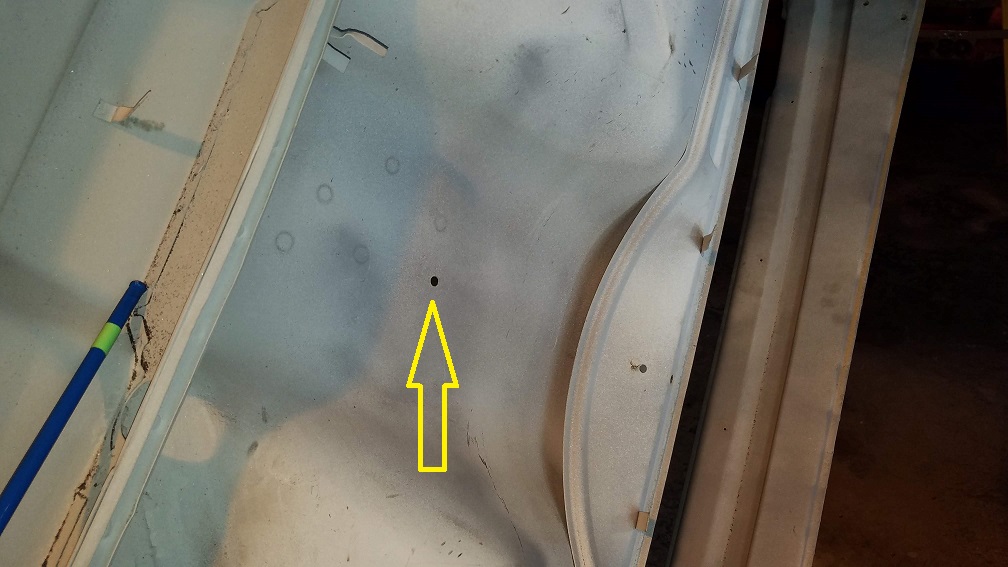
Here's 28.25"s from the measurement hole.
I created a piece of brake line with a bubble flare for the hole end. And a 37 degree flare for the mount hole measurement.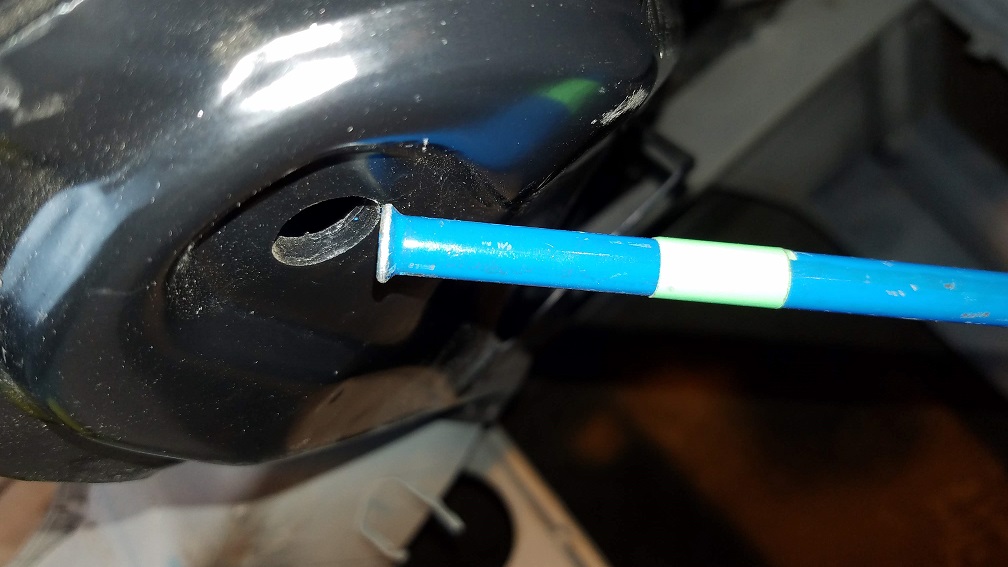
Posted by: cary Oct 27 2018, 09:05 PM
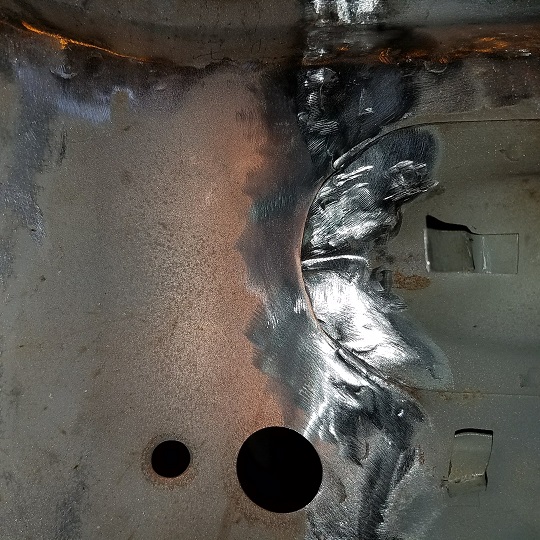
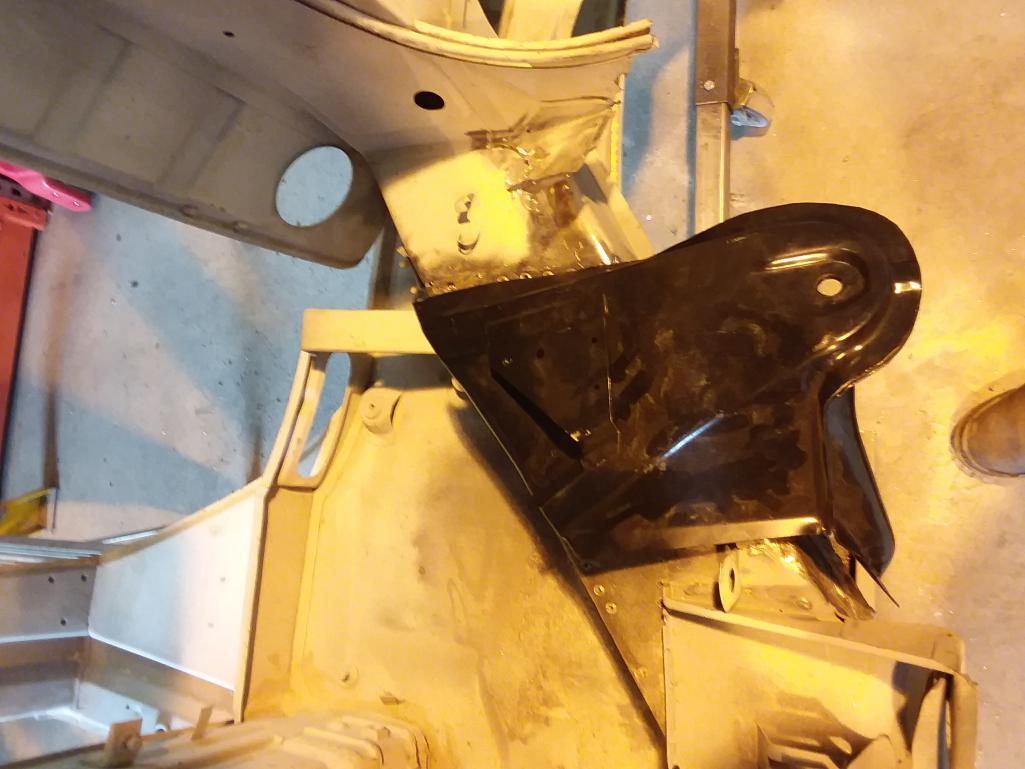
After a little welding ............... Right in place. Right & Tight.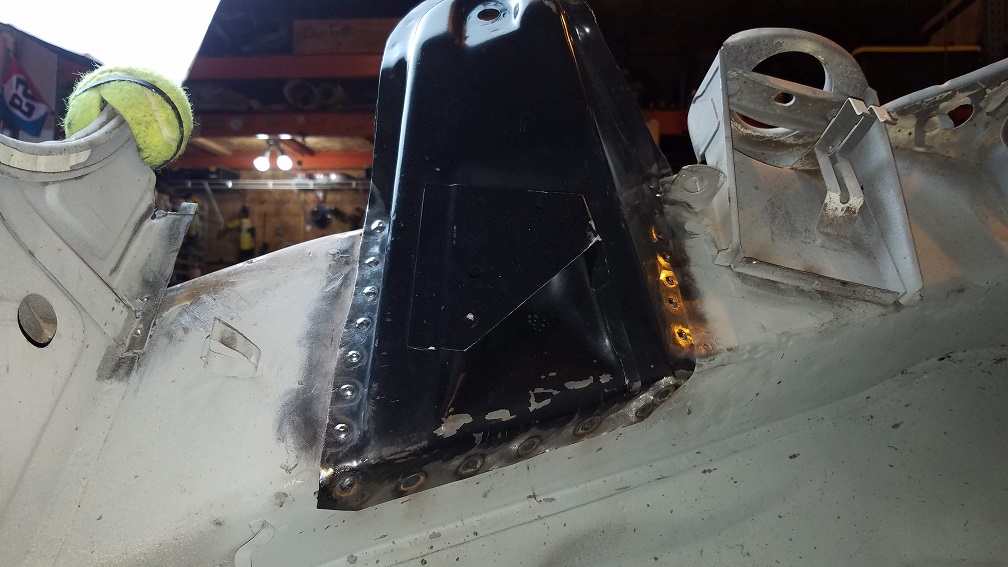
Welds and exposed metal covered with cold galvanizing.
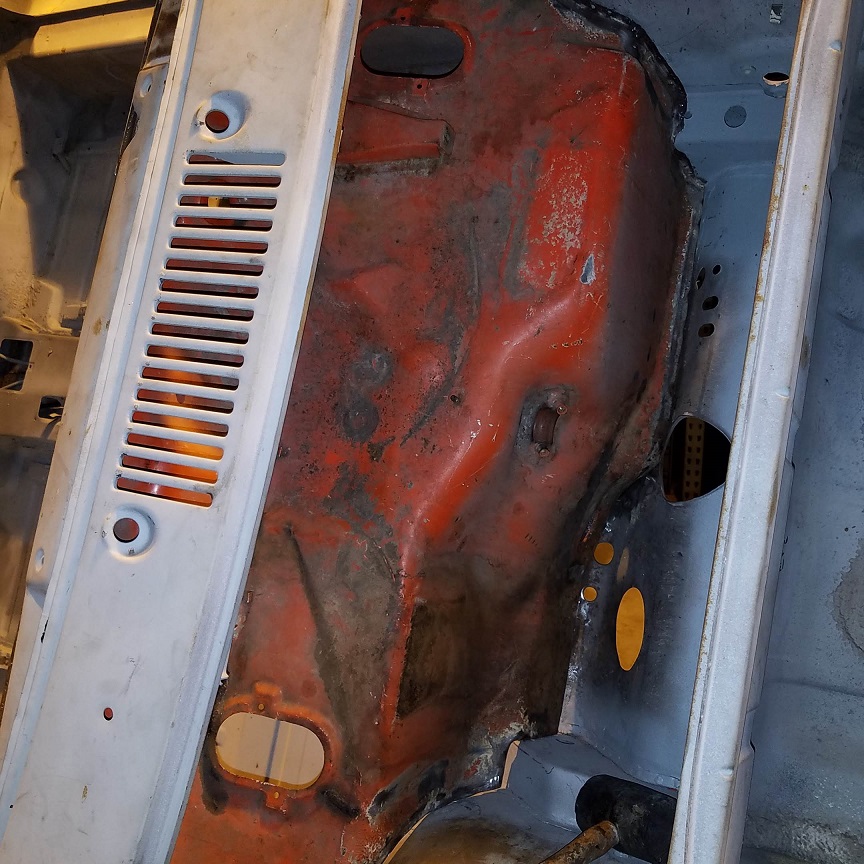
Ready for the right engine shelf.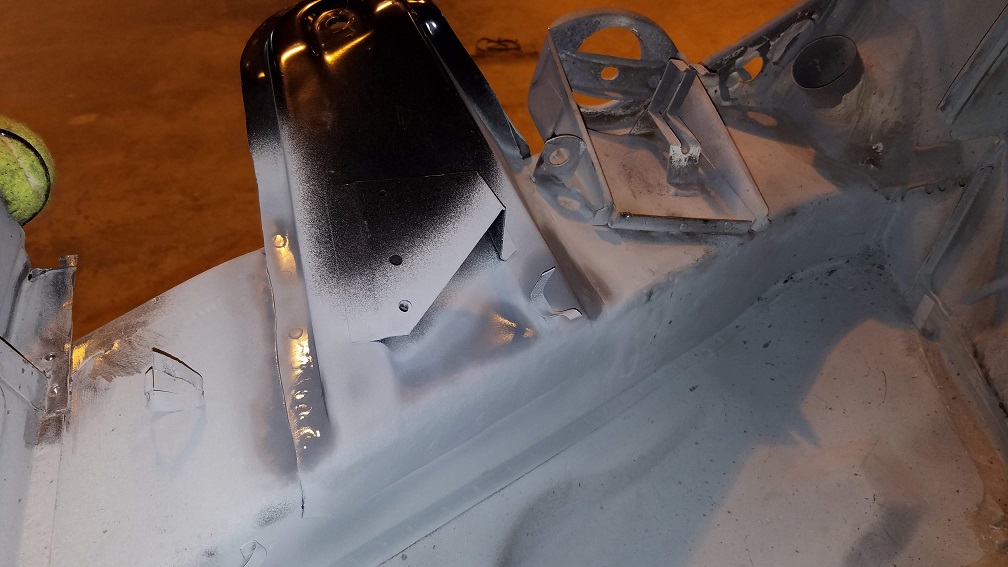
I think we'll strip off the black paint sometime in the future. This is the first P318 that came in black. As tough as it was to clean off the welding surfaces I'm thinking it was powder coated.
Posted by: Mikey914 Oct 28 2018, 04:42 PM
I'll ask, but if it's paint leave it.
Posted by: cary Oct 28 2018, 05:24 PM
I'd planned on leaving that to you and Taylor and who's ever going to prime and paint it. Just documenting what I saw. I only removed what I needed to weld. Then coated that surface with weld thru primer.
Posted by: cary Nov 2 2018, 09:09 PM
Pile of new parts ................ Thursday 11/1
On to fitting and trimming the engine shelf. Took quite a bit of work on the sand bag to
get the shape I wanted.
All welding surfaces prepped with weld thru primer.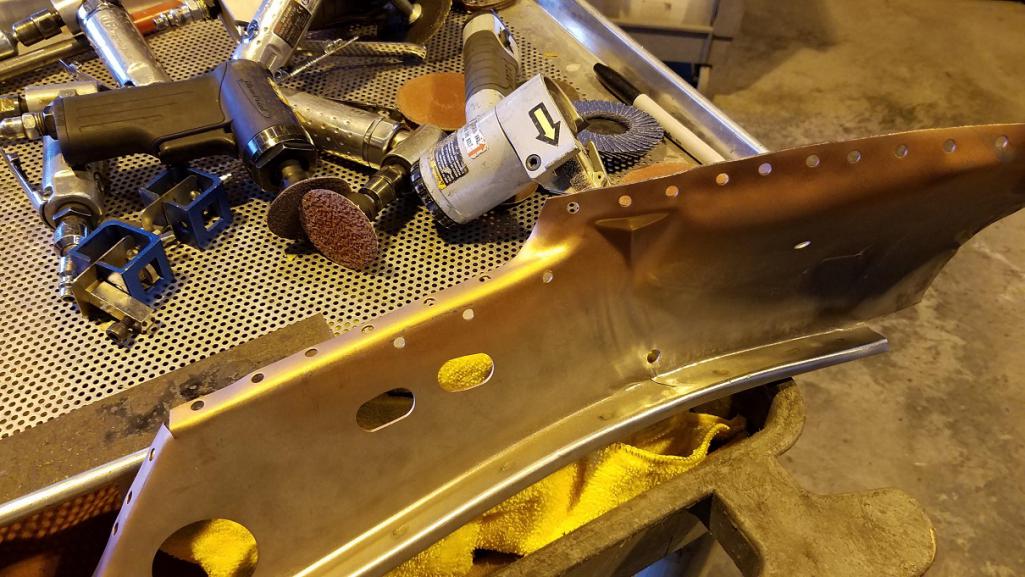
Welding in the small patch piece Jack whipped up.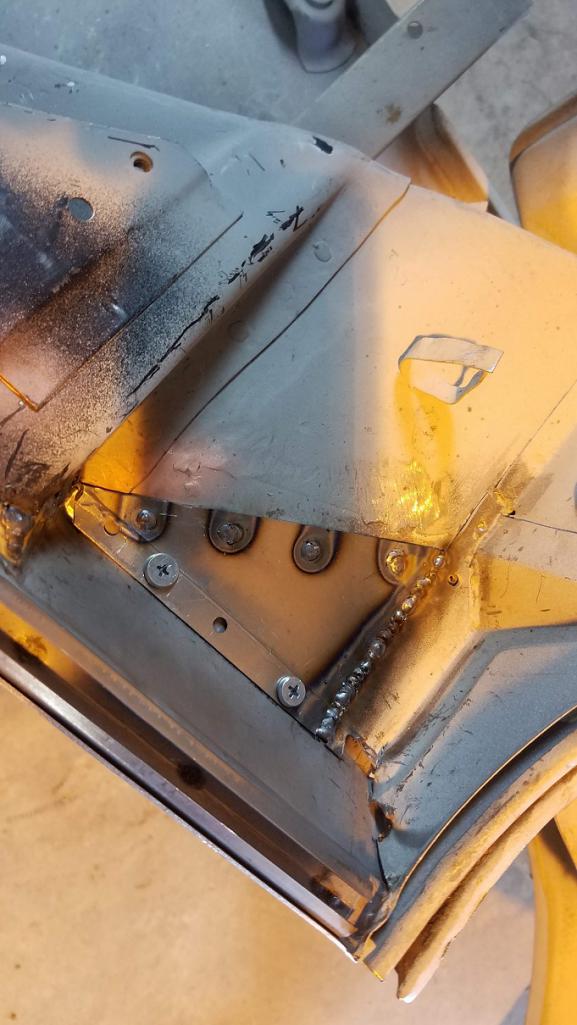
After welding and sanding.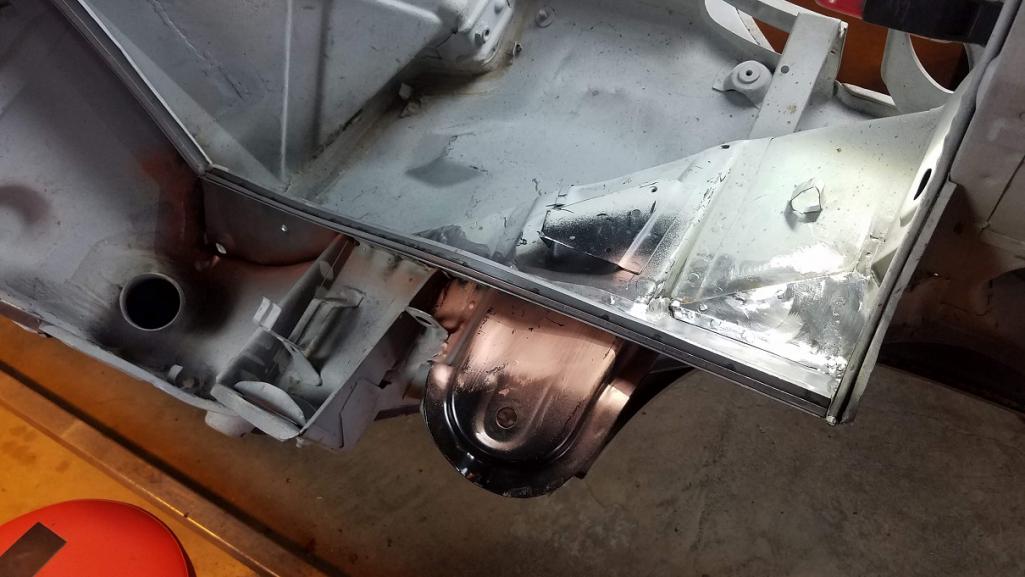
After cold galvanizing.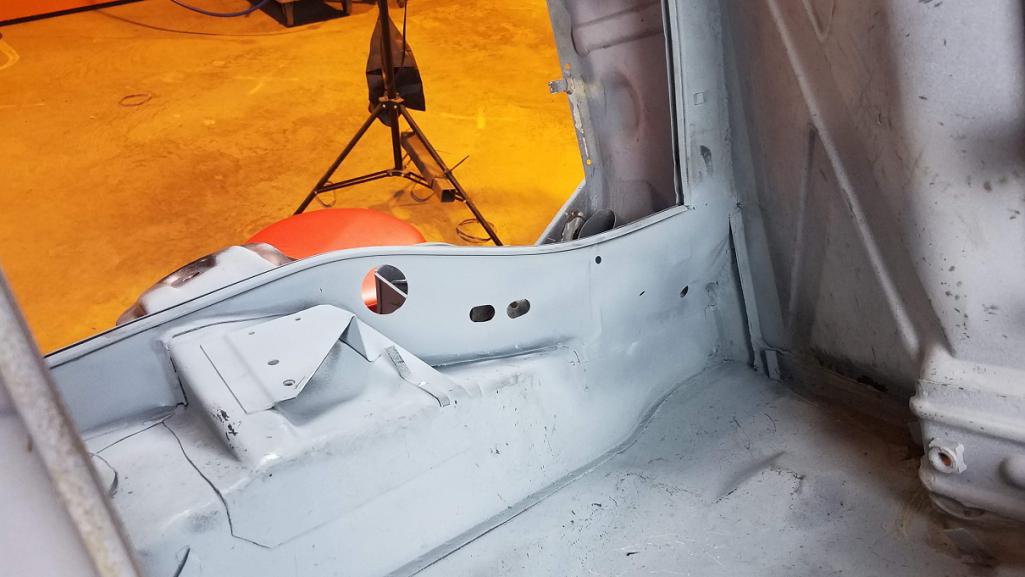
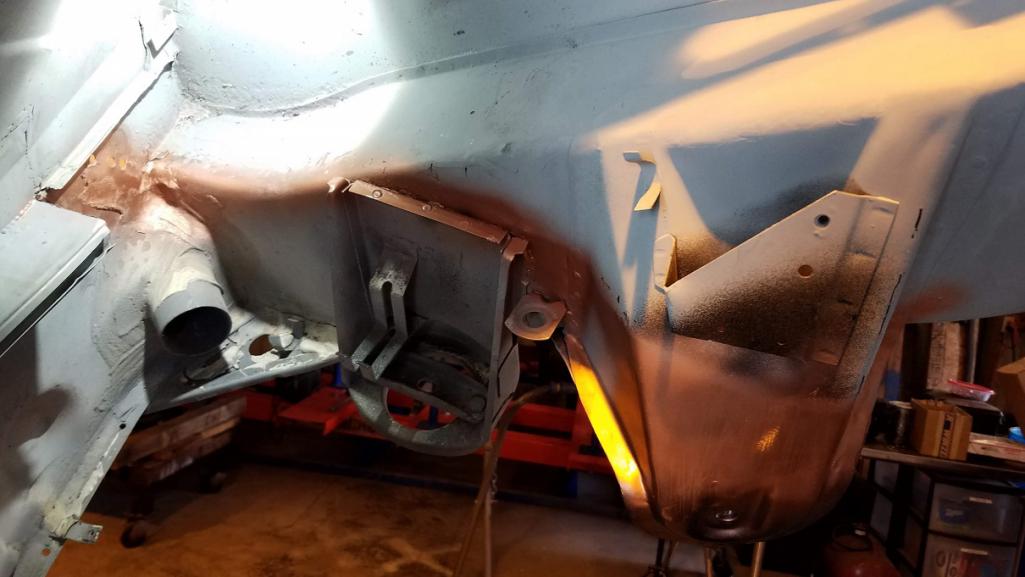
Posted by: cary Nov 3 2018, 08:57 AM
Don't forget to drill your D-Jet bracket holes on your new Dansk battery tray before installation. Doing it in the car doesn't give you much angle of the dangle.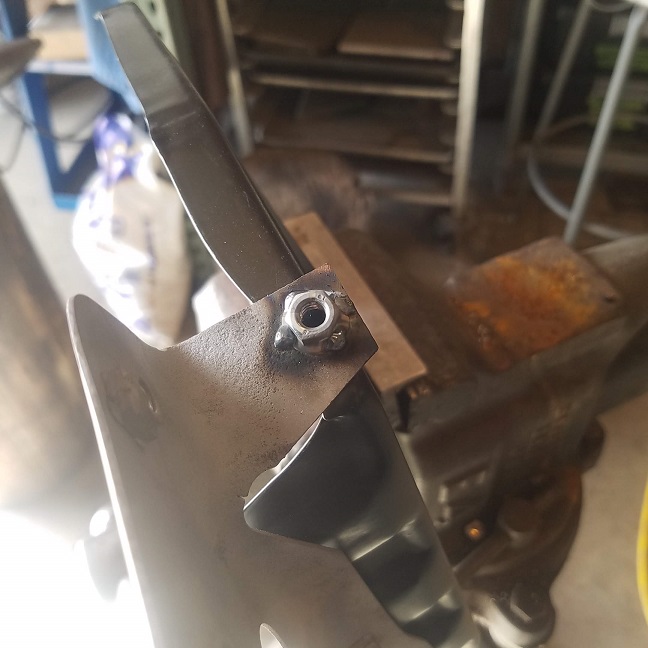
Plus don't forget to weld on your battery hold down nut.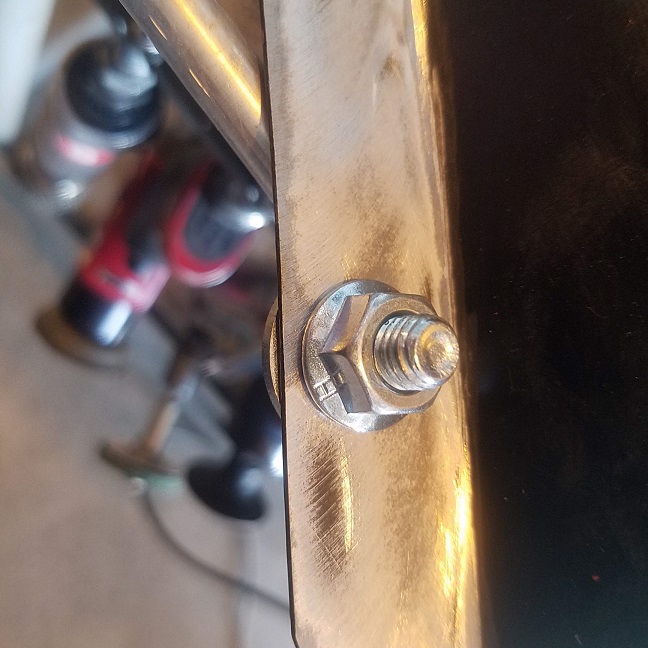
After some twisting, turning and tuning ................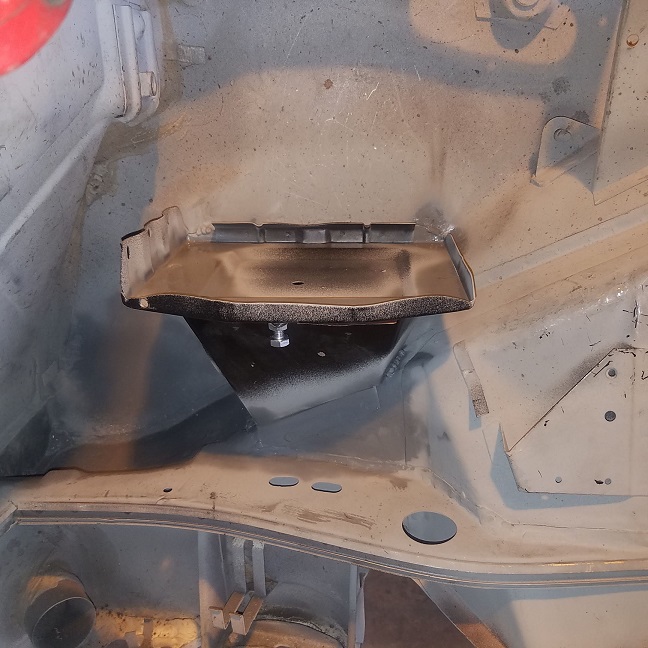
Posted by: cary Nov 3 2018, 09:12 AM
Well Super In Law finished up the left chassis brace / tie so its time for me to install it.
I had to make a couple tweaks (like every part I install, new or old) before it was ready.
Its all about a nice tight fit for nice flat welds. But then you run into thinner spots in the old metal, then thins sections of the new flange and seam sealer coming thru the joints and so on and so on.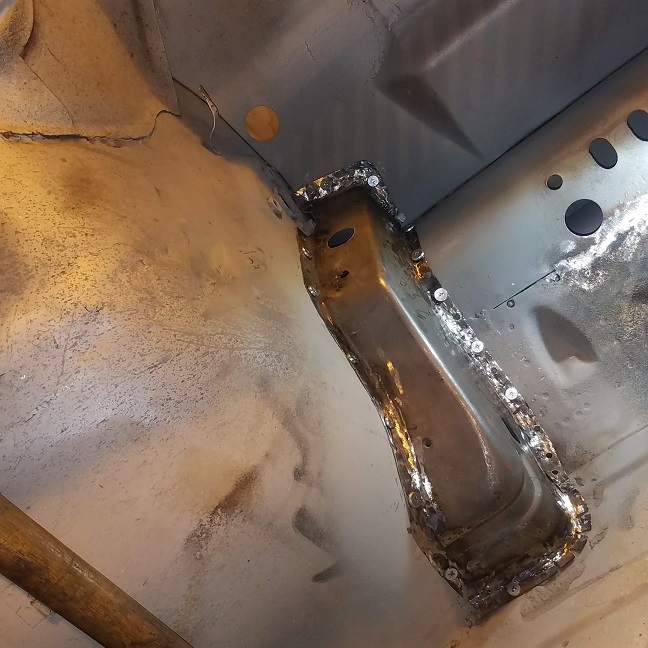
Screwed into position ............
Magic ...............
I'll notch the right brace access to the lower sway bar nut. So when it comes loose some time the next 50 years the holes ready to go.
End of the day ...............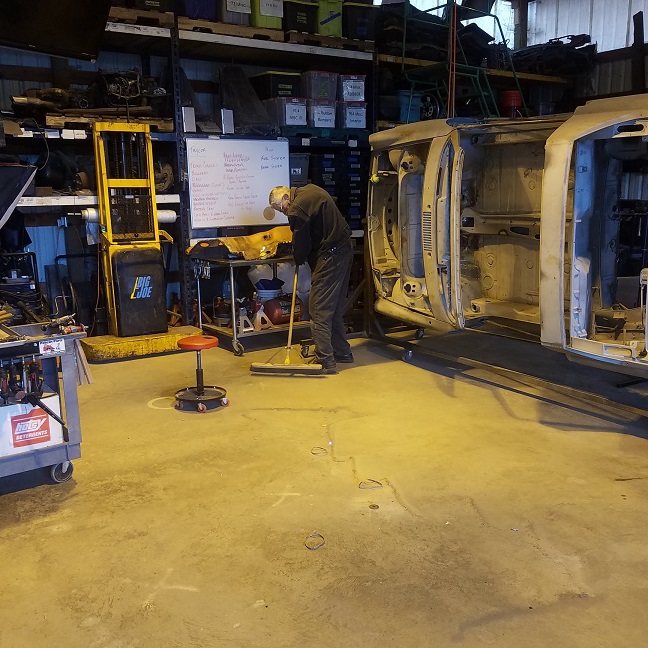
Tomorrow. Jack will pound out another set of suspension mount tie plates while I get back into the frunk seal channels.
I wish there were 9 days a week. I have a 914-6 to totally disassemble and prepare for stripping next week at Rothsport. I'll send the VIN to SirAndy. Its' been in storage at Rothsport for 15 years. At the same time I'll climb up on the rack and get the serial # off a 914-6 engine up on another rack.
Posted by: raynekat Nov 3 2018, 12:41 PM
Looking good there on all that fine rust repair work.
Posted by: FourBlades Nov 4 2018, 07:20 AM
Great work by your whole team!
I like the cold galvanizing spray, I have found it to be very rust resistant.
Can you prime and paint over it or are you planning to remove it before the final paint?
That always seems like an issue when you are repairing a car section by section. You need to put something over the sections as you finish them, but it is painful thinking you will need to remove it all before final paint. It is a lot of trouble to mix up and shoot two part epoxy primer for each little section and have to clean you gun afterwords. It is nice to just grab a can of something and spray it on. I used to use Eastwoods rust encapsulator, and the primer and paint I shot over it is still sticking well. I did this on interior and engine areas. On the outside of the car I stripped it down to bare metal for the final paint.
John
Posted by: cary Nov 4 2018, 08:49 AM
John it comes off with lacquer thinner. But I'll leave that up to the painter.
I'm going to try and get a hold of Rod Emory and see what he does on his projects. He buys the stuff by the pallet.
Posted by: cary Nov 4 2018, 08:54 AM
Started Saturday with getting Jack set up create a couple more pairs of suspension ties.
1st. our cleaned off partial upper long for test fitting.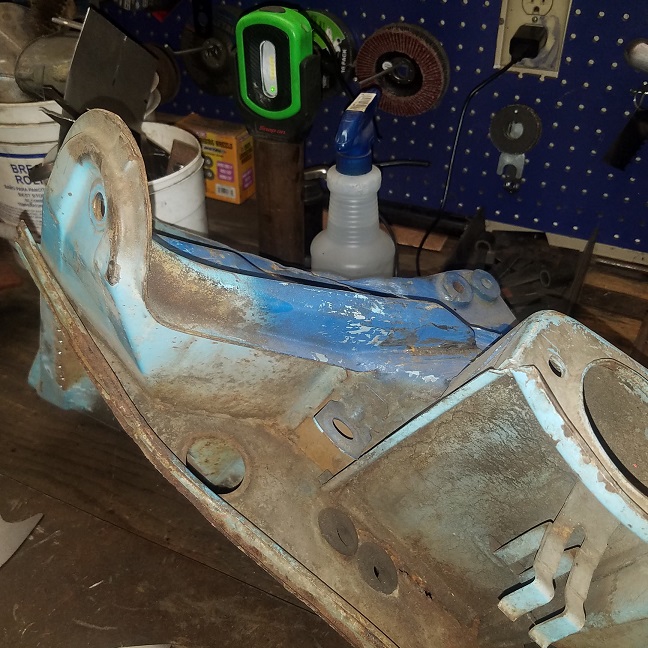
Got the 1st weld together piece just about ready.
Posted by: cary Nov 4 2018, 09:53 AM
Here's a couple links of getting to the install task.
http://www.914world.com/bbs2/index.php?showtopic=249327&st=320&p=2537320&#entry2537320
http://www.914world.com/bbs2/index.php?s=&showtopic=249327&view=findpost&p=2536585
Posted by: cary Nov 4 2018, 10:54 AM
Looking good there on all that fine rust repair work.
Thank You, fine sir ................
Posted by: cary Nov 16 2018, 09:59 PM
Back to work on Taylor's car.
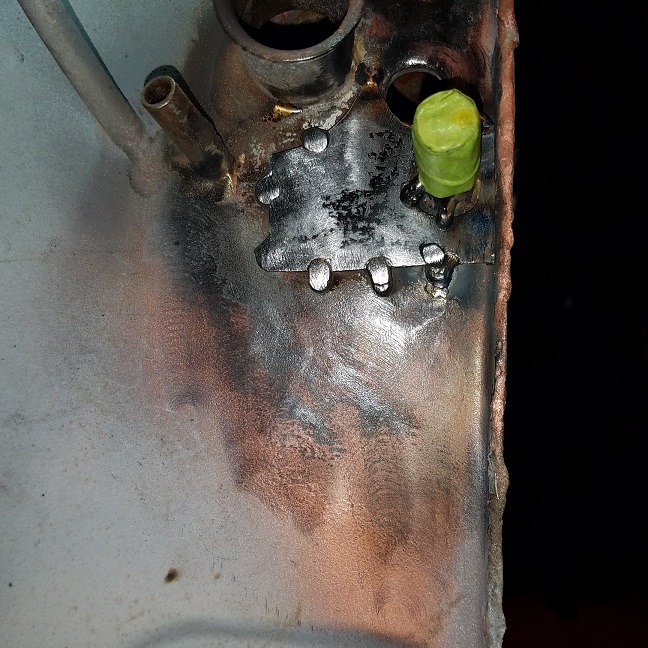
Friday task #1. Weld in the cut outs from the clutch tube repair.
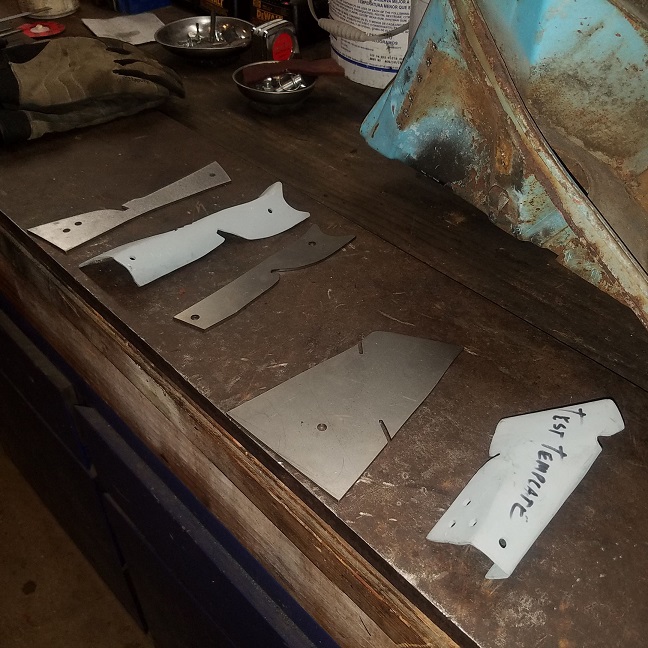
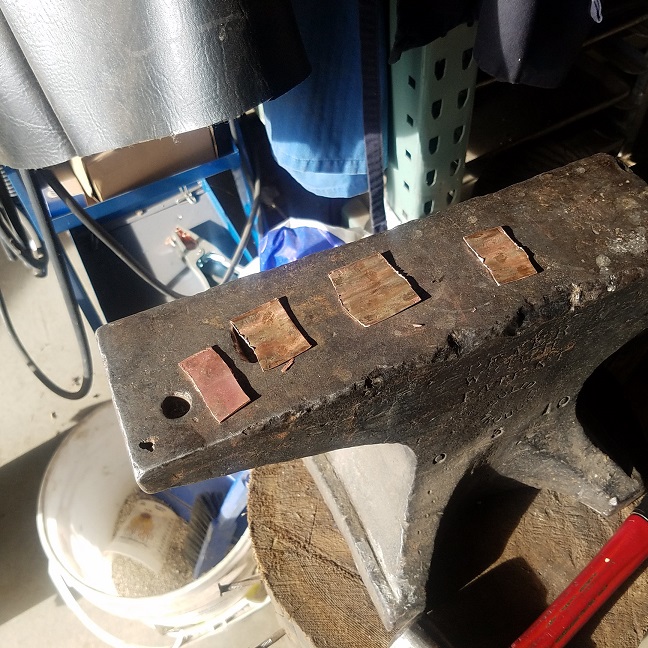
Job one is creating copper backers for the middle cut out. That one has the tubes laying right on the bottom of the tunnel................
I use an old piece of copper pipe to create the backers. Cut into three 1" sections and a 3" section. On Doug's car I tried to make them removal. Not. They're jammed in too tight. So they'll be there for eternity. But they'll be hidden under the green Eastwood Encapsulator that will be applied in the future.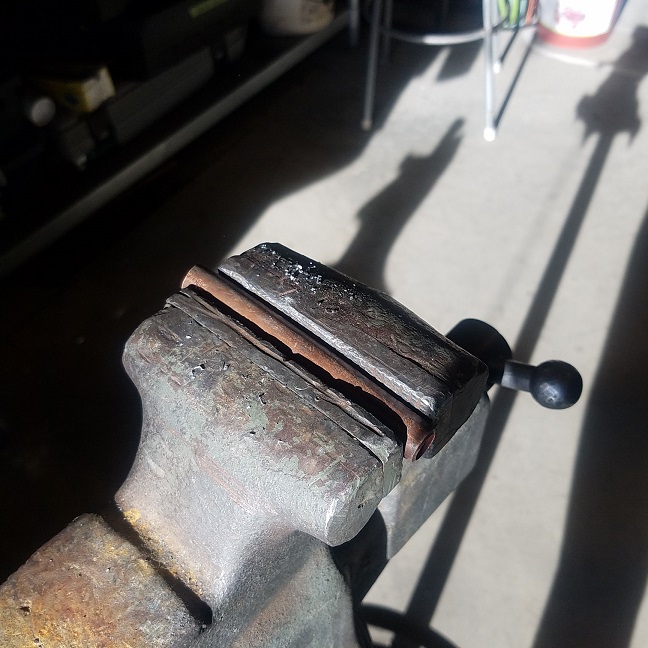
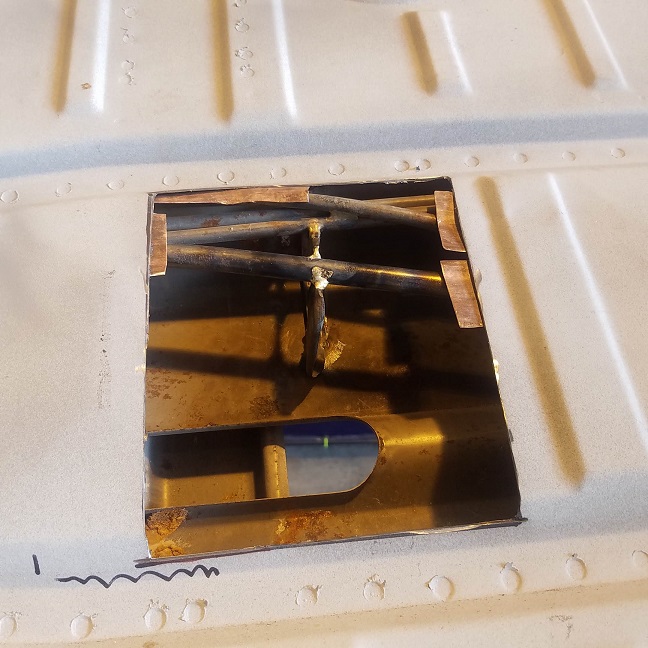
All covered up. Not going to over finish the welds. The car is going to be totally undercoated.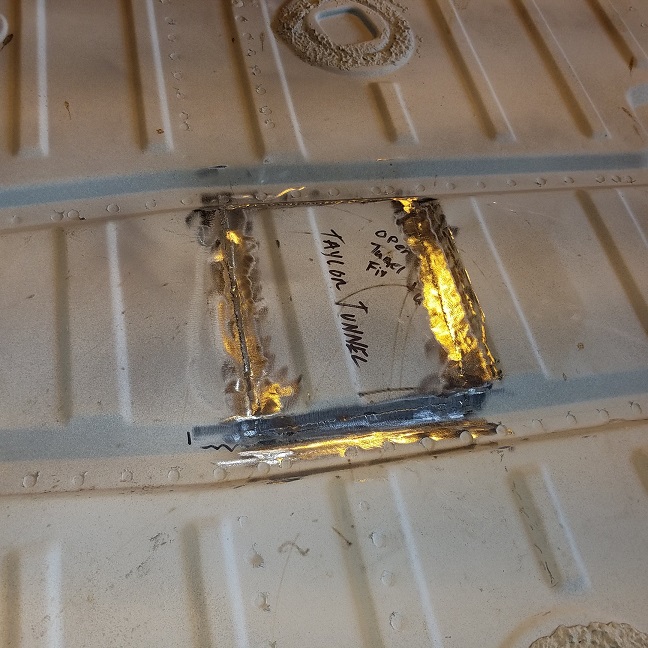
Posted by: cary Nov 16 2018, 10:07 PM
Job #2. Weld in the suspension mount tie plates. Took Super In Law another 4 hours to get the tight fit I was looking for. 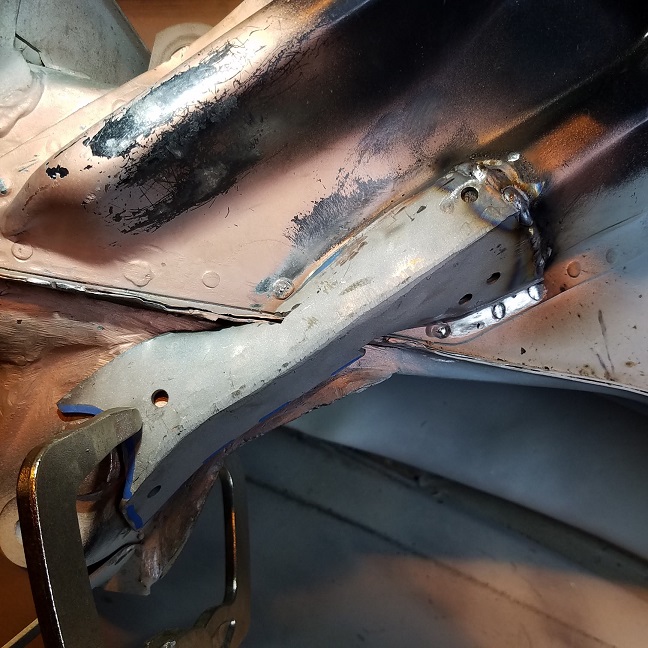
He's creating 2 more sets of rights and one left.
Running my MillerMatic 141 at Warp Factor 10. Capn I'm giving it all I got ....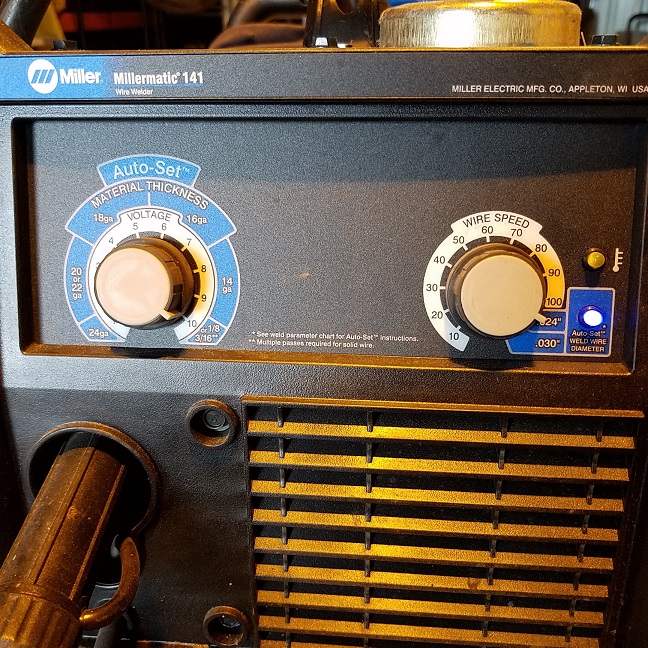
Gooder than new ....................
Posted by: cary Dec 14 2018, 09:00 AM
All the flanges aren't repaired, but I did a bulkhead test fit on Taylor's car on Tuesday. A little tight in a couple spots, will need some scalpel work. But all in all pretty pleased that it would slip right in.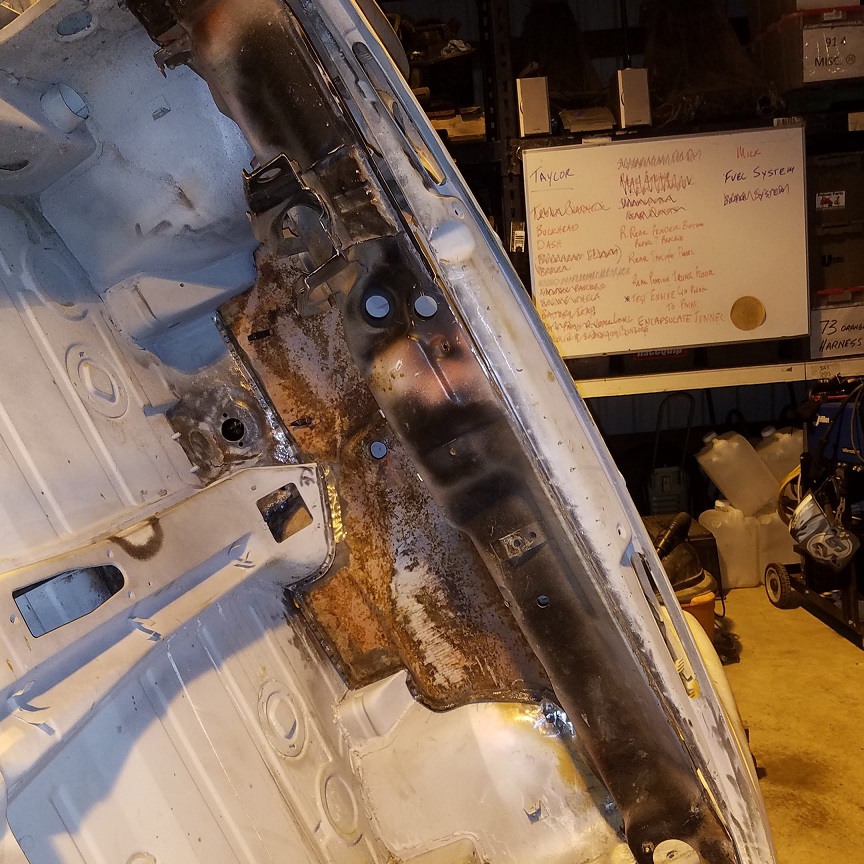
If it warms up and stops raining we'll getr blasted along with the tail light panel Taylor brought over.
Posted by: cary Feb 12 2019, 01:29 PM
Finally getting back to Taylor's car after a getting Mick's car up and running and solid month at Rothsport.
Job #1, strip paint off donor part.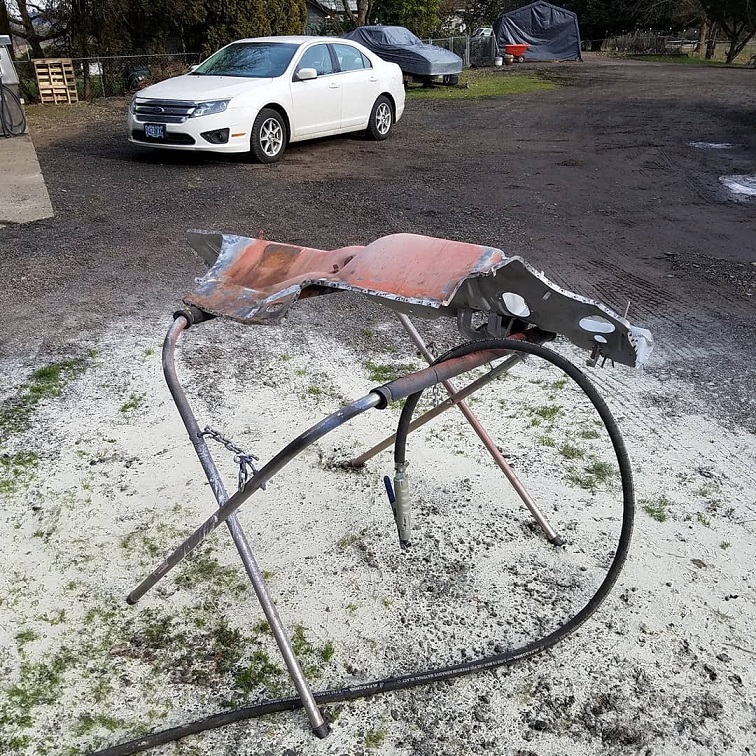
Ready to go.
Work continues. In and out, In & out to get it to fit correctly. Almost there.
In a conversation with Bruce Stone sounds someone in Europe is thinking of taking on this crazy task. Not for the faint of heart.
Posted by: cary Mar 7 2019, 01:32 PM
Time to get back on the horse. Beginning the welding in of the bulkhead. Because of all the angles, bends and flanges they'll still be a little bit trimming and patching of the upper part after the lower portion is welded in.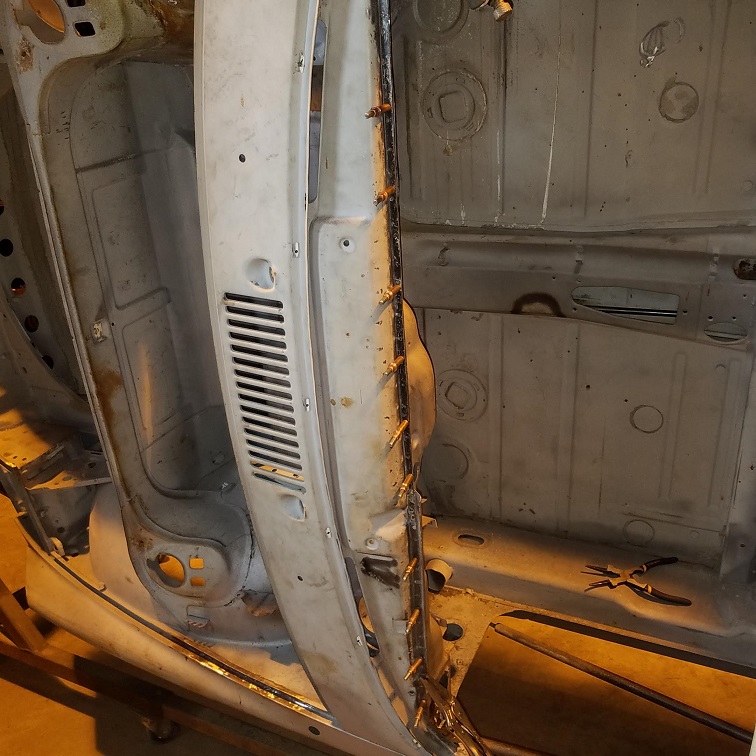

Like I've said before, this piece really isn't supposed to be removed without first removing the cowl/windshield frame.
Posted by: cary Mar 7 2019, 01:42 PM
The left corner / vent hole will have to be re created. Got pretty tore up during the harvesting of the donor part.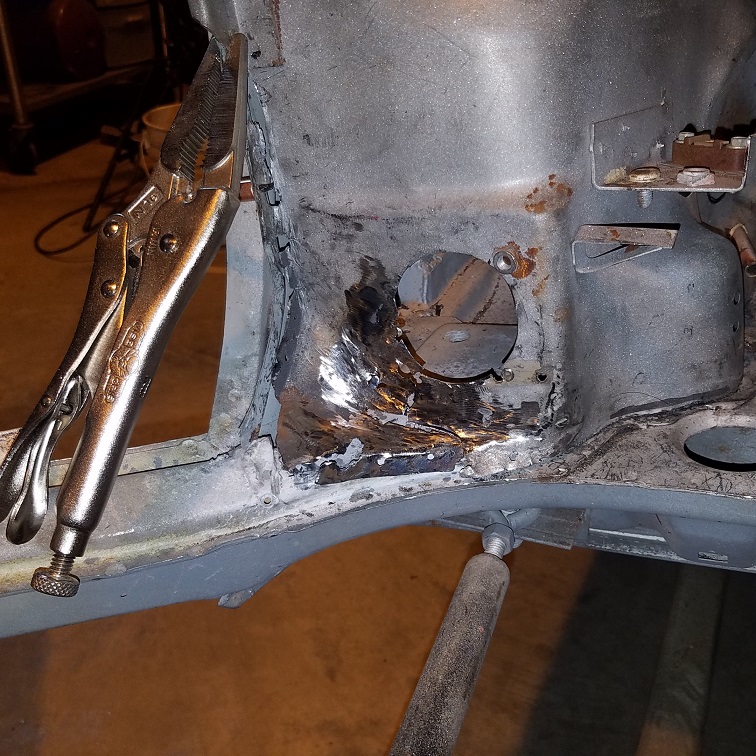
Wouldn't be a MiddleMotors post without a couple tool shots.
Posted by: bbrock Mar 7 2019, 05:37 PM
I am in absolute awe of this bulkhead patch. Love seeing the progress. Thanks for posting. 
Posted by: cary Mar 8 2019, 11:54 AM
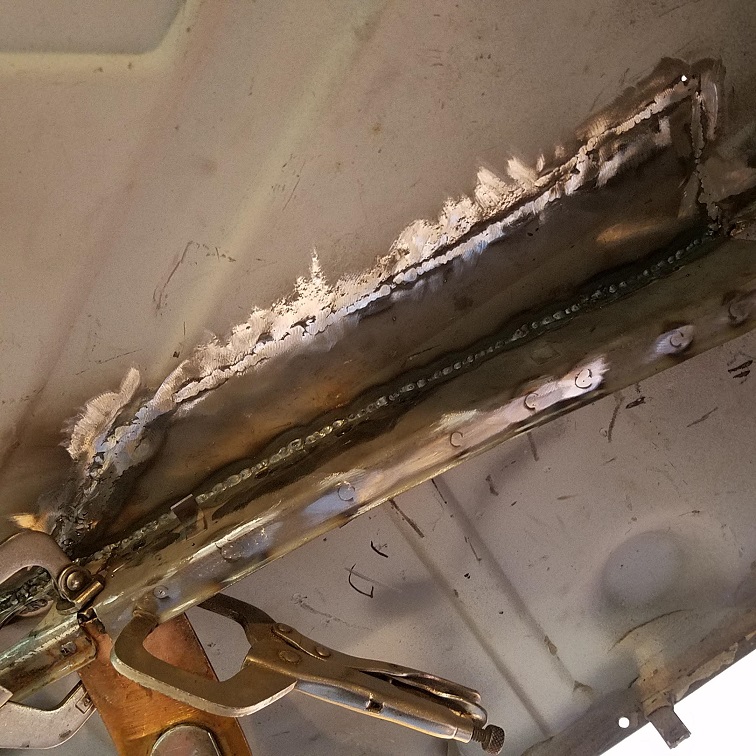
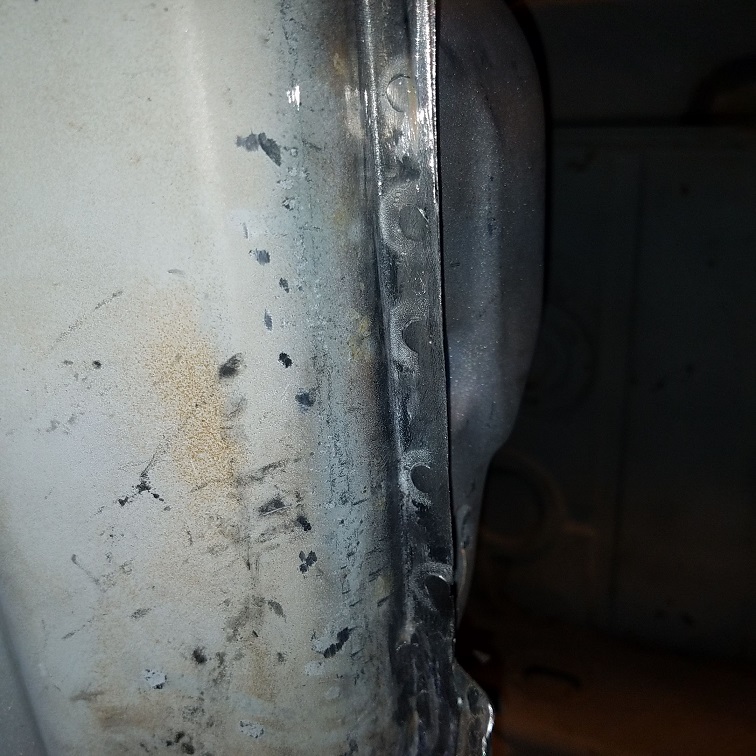
Let the welding begin.
Series shows 1/8 Cleco hole. Then outer layer enlarged with sheet metal cutter.
Then rosette welded.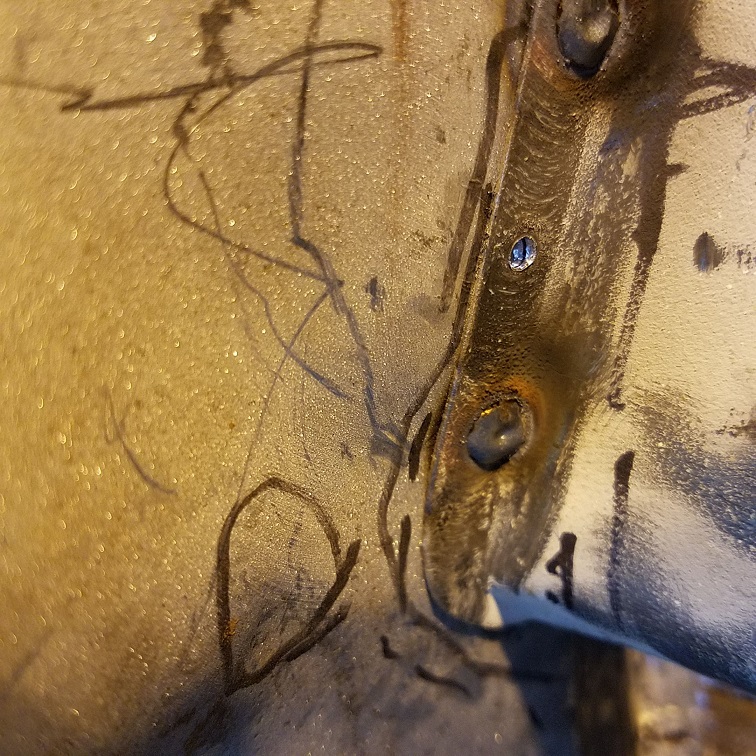

A couple more rosettes.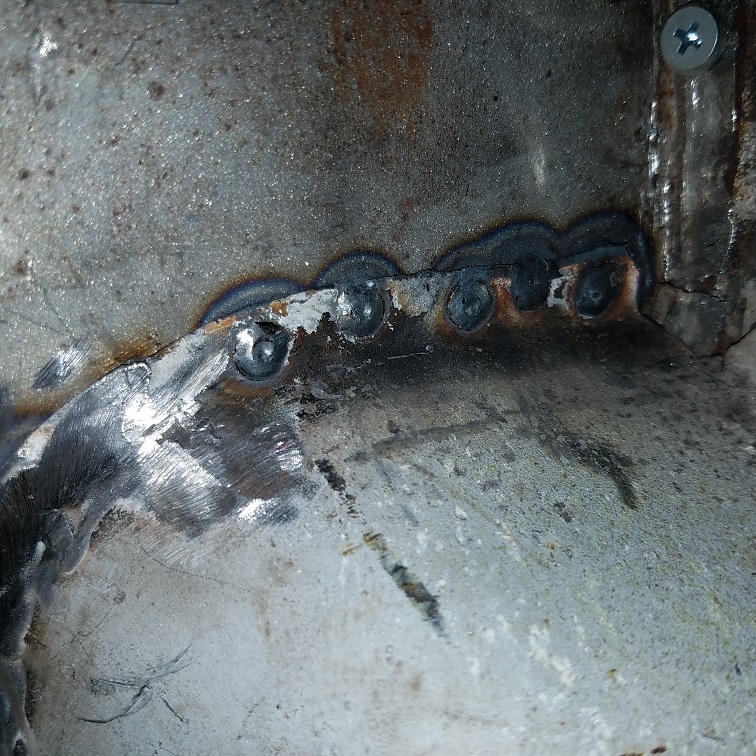
Still need to back off the trigger 1/4 to 1/2 second sooner. Some day I'll get it.
Bottom welded, finished up and galvanized.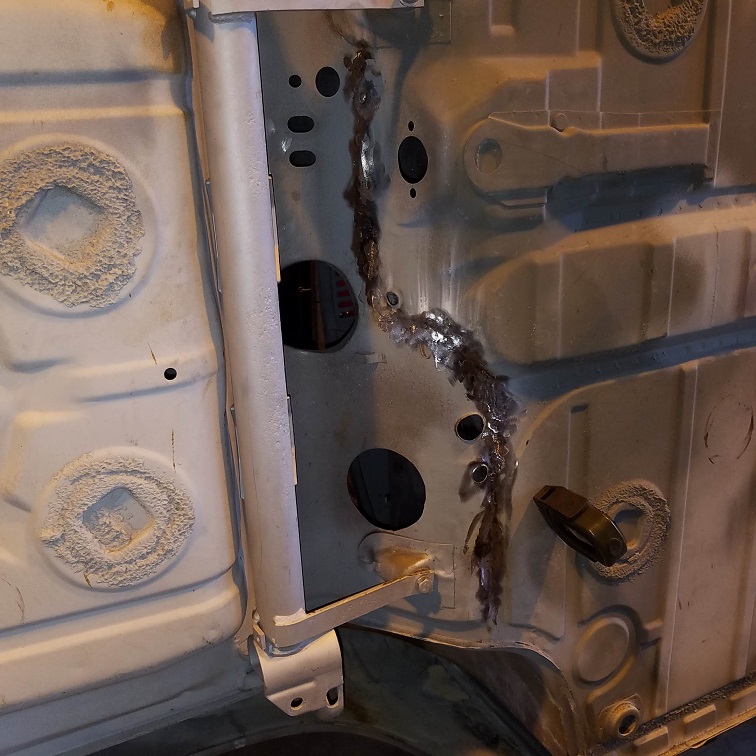
[attachmentid=688847]
Selfie
Posted by: cary Mar 9 2019, 10:55 AM
Slow going. 36 degrees and raining in Forest Grove. So only out there 6 hours a day.
Dash welded back to the bulkhead.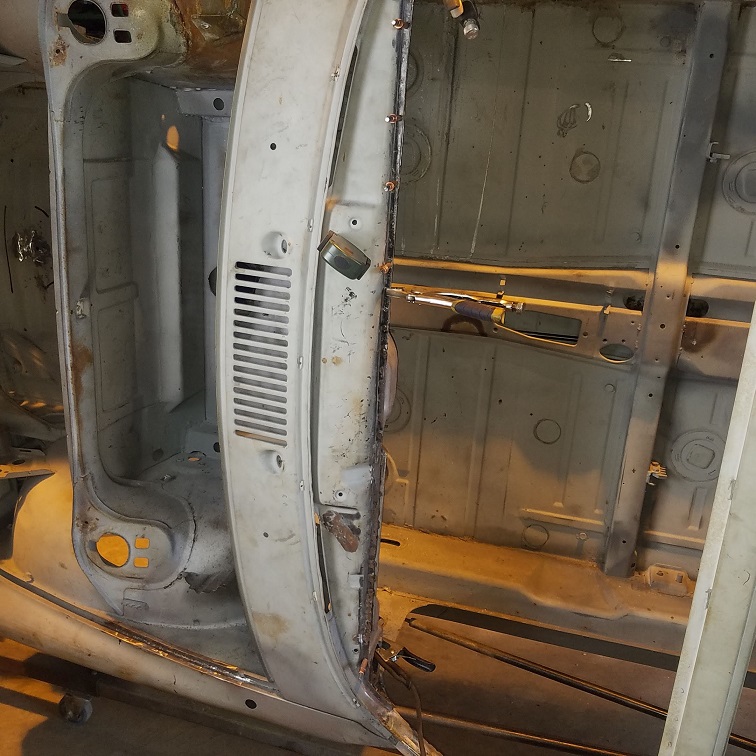
Steering column support welded back on. Removed to aid in the flexibility of the bulkhead.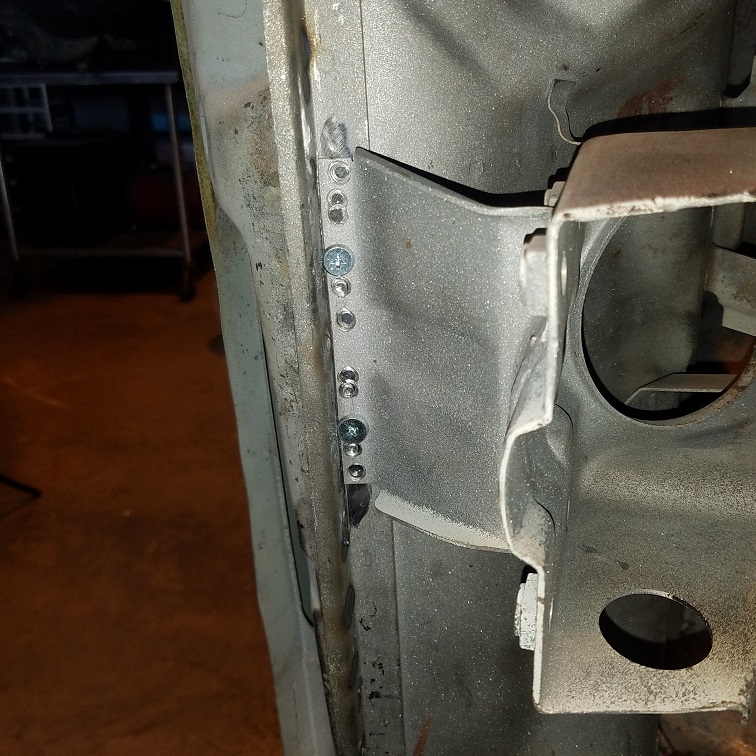
It takes a pile of tools to get the fit and finish I want.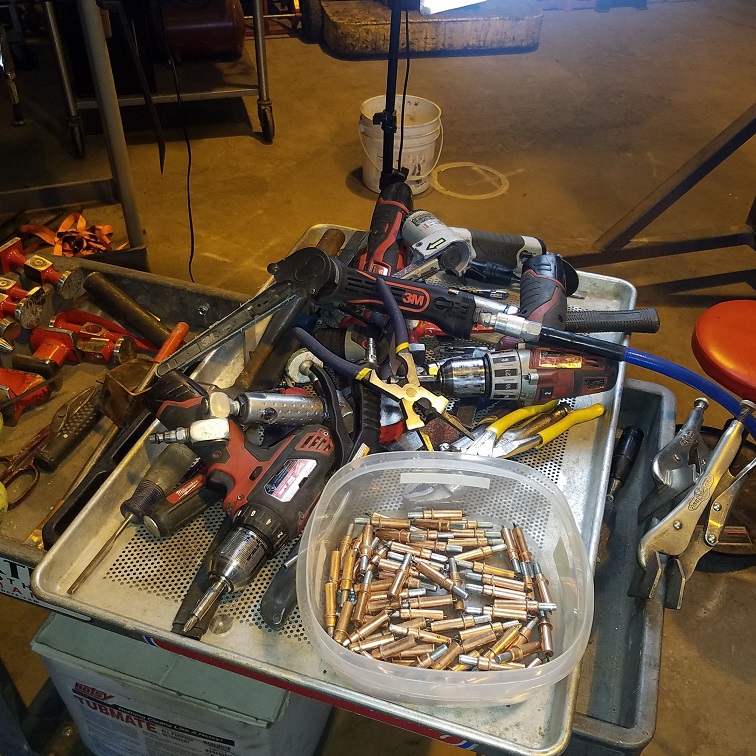
Posted by: cary Mar 9 2019, 11:00 AM
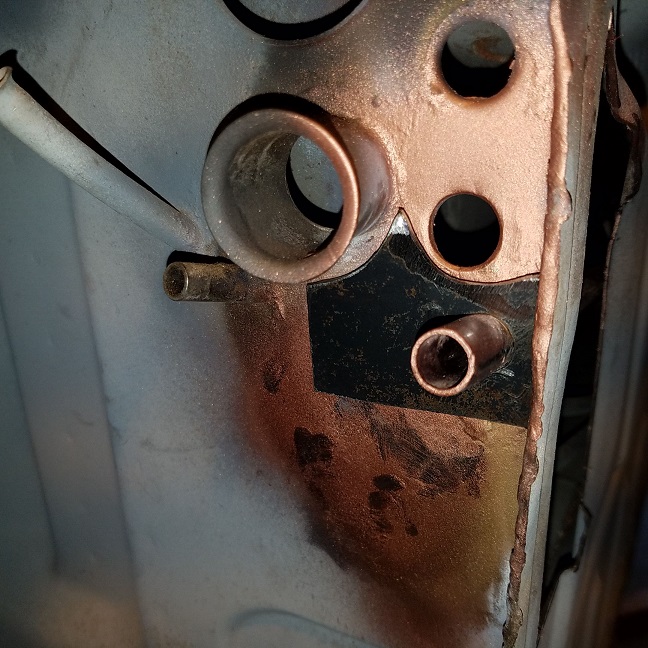
Next on to the right inner fender and fuel tank cavity.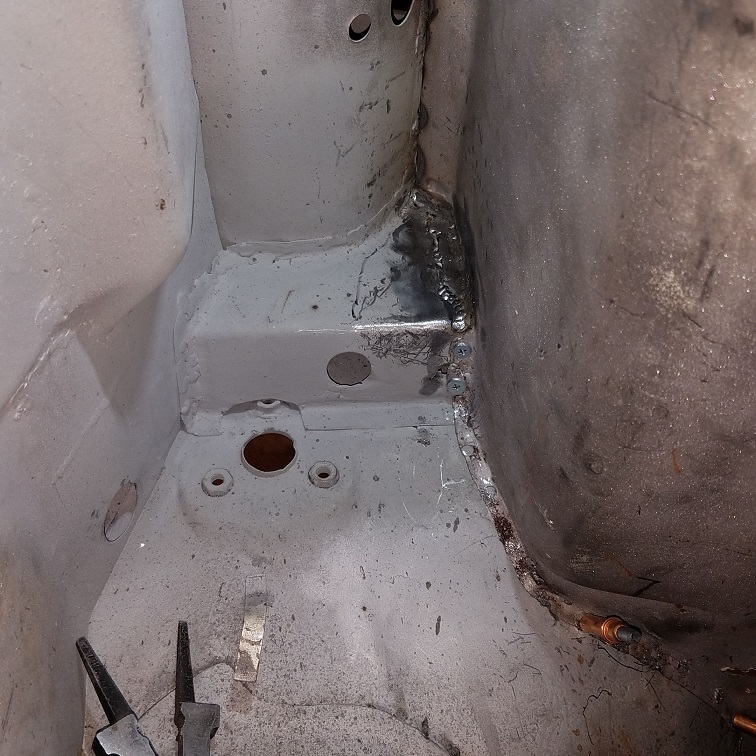
That lower section tough to fit. And tough to weld.
Next onto the air vent holes to the cowl/door frame. Right will get a new piece all together.
Posted by: cary Mar 10 2019, 09:50 AM
Left side air vent sheet metal is just about worthless so out it comes.
Super In Law is creating the 2 piece large patch.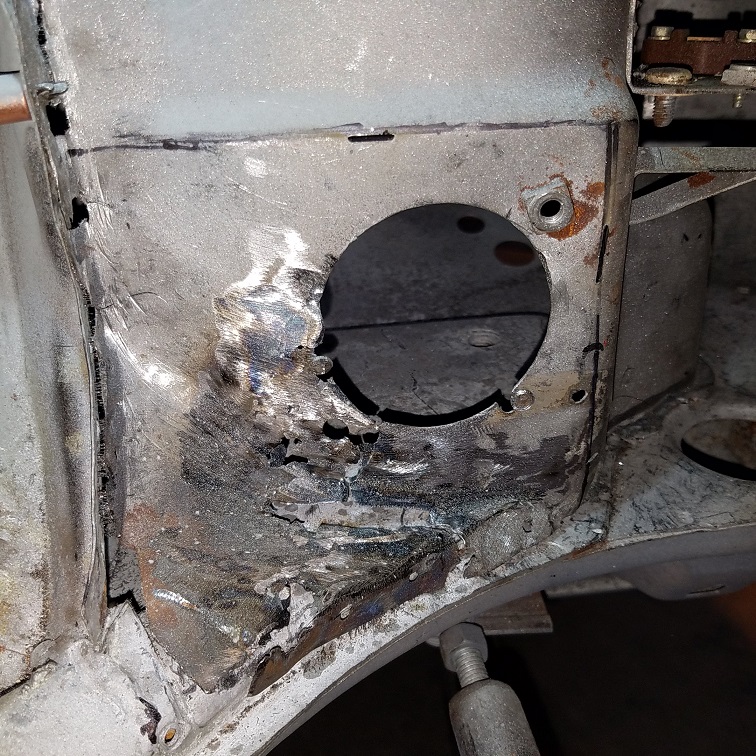
I start by cutting out a section that was a little short.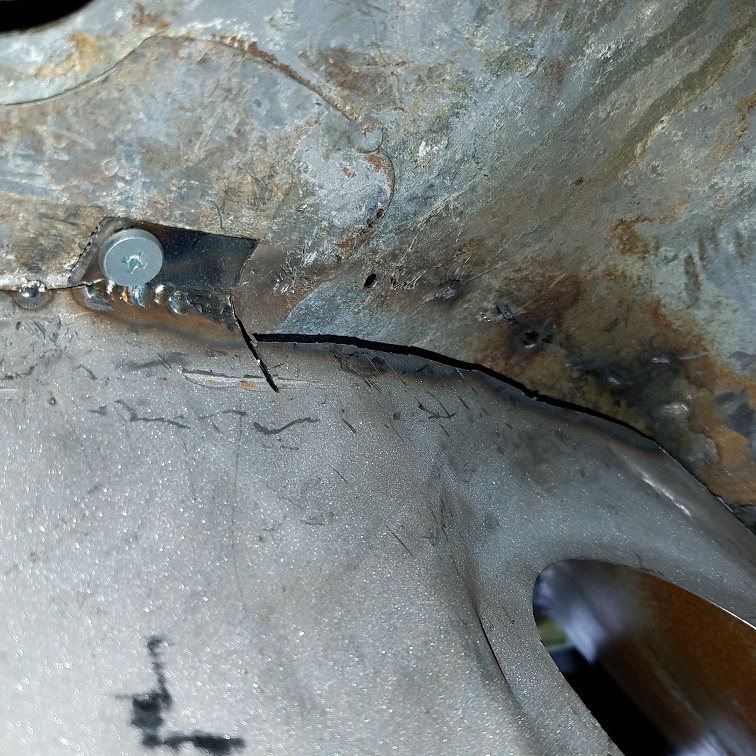
Bottom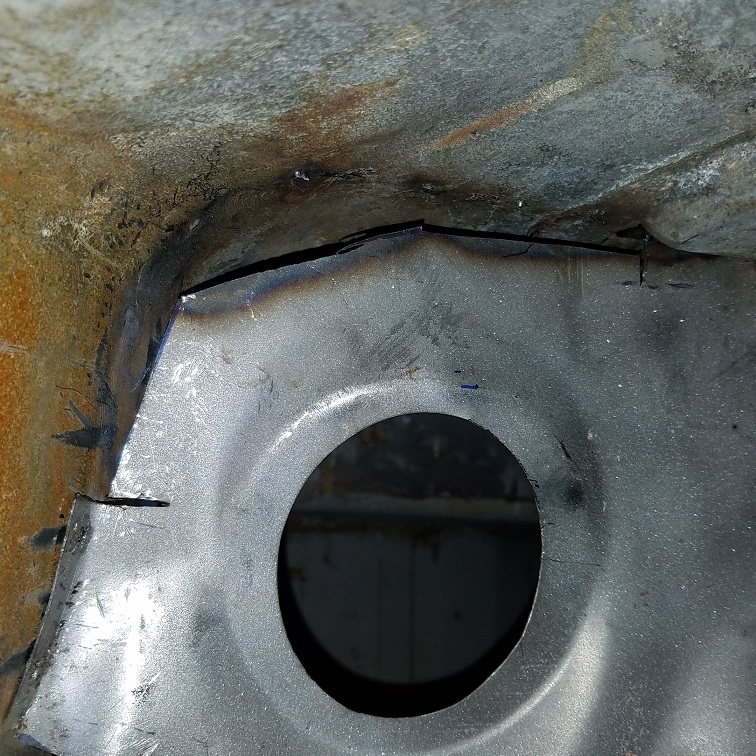
Top
Then on to repairing the left side.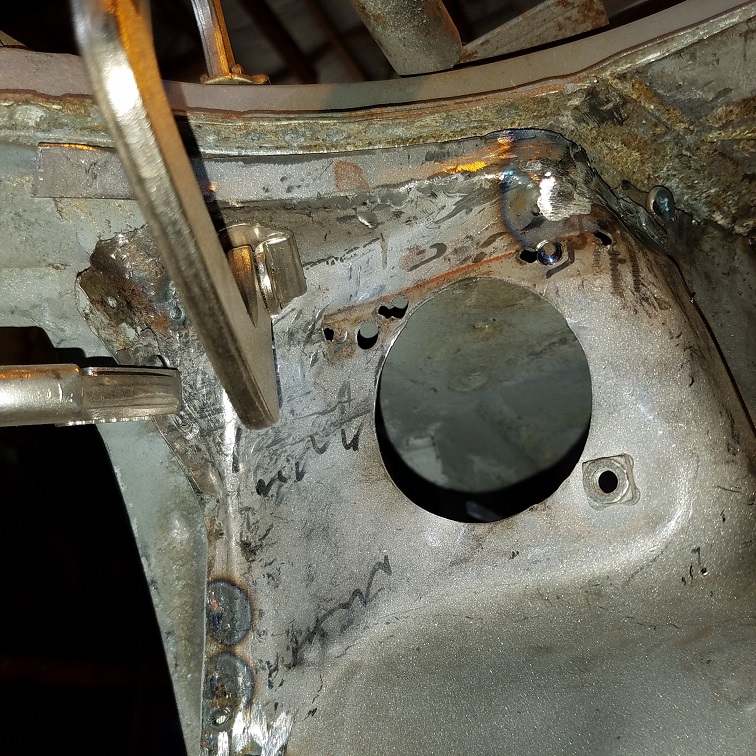
Patch #1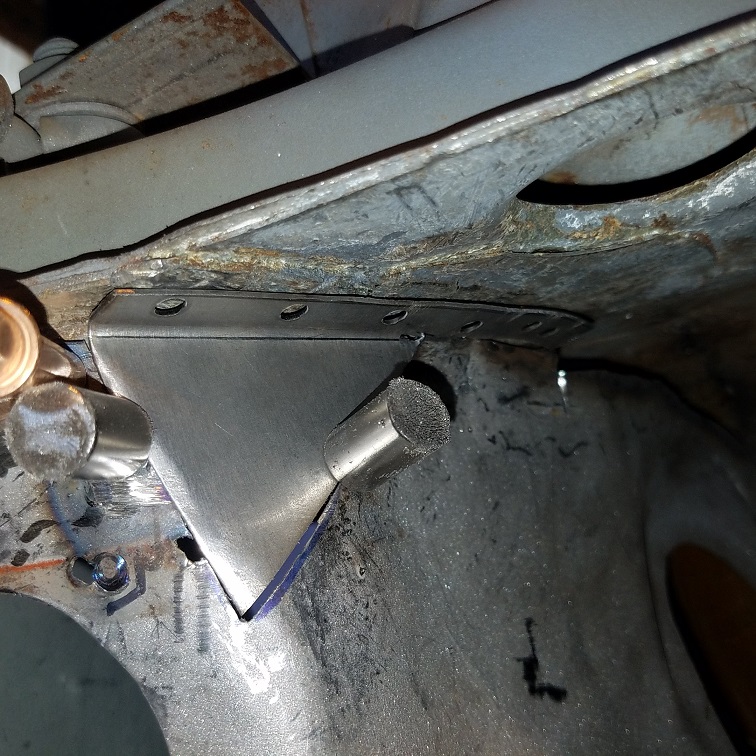
Patch #2, a little tougher, curved in the middle.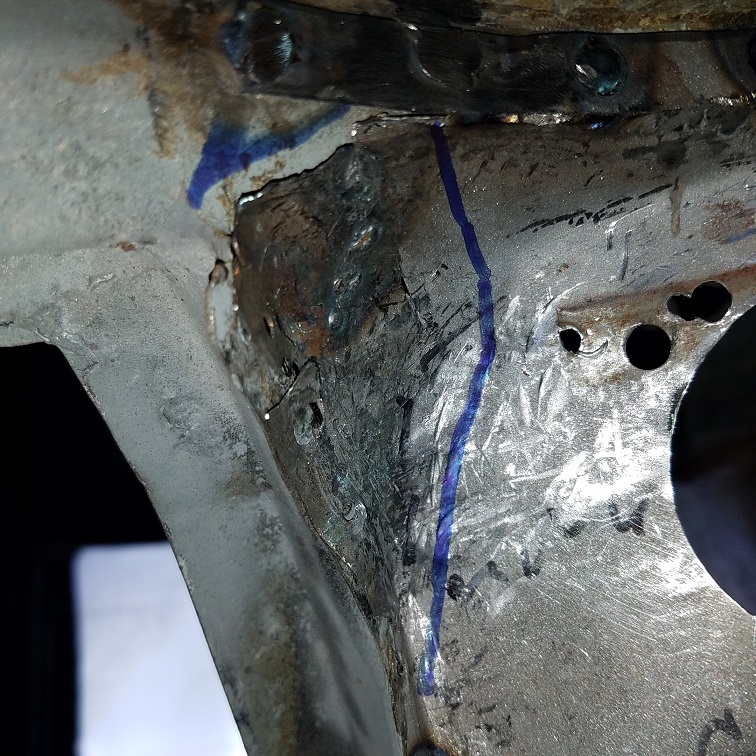
Had to make in 2 pieces, too small to create in the beater bag. Bent the flange with the
hammer on a RR rail piece.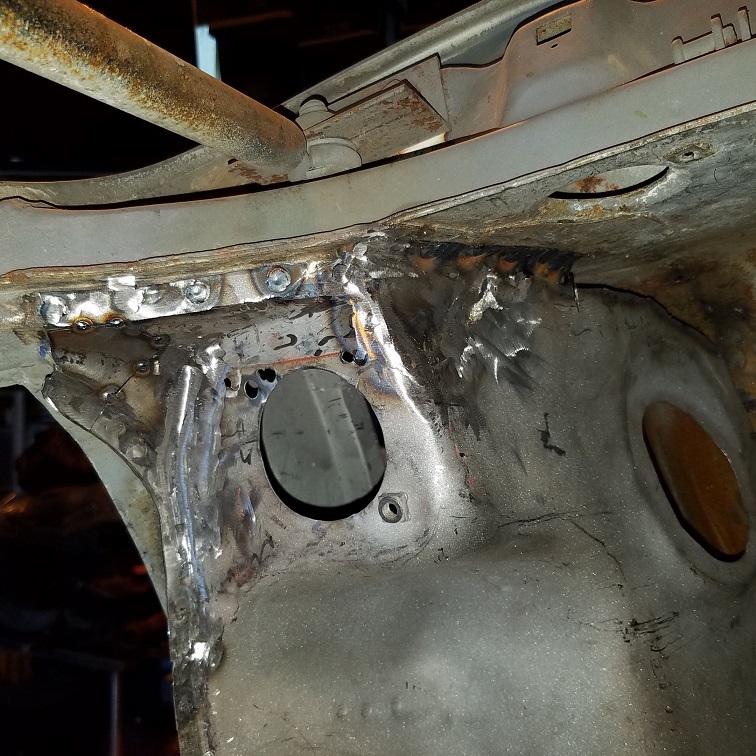
Time to go home.
I need a bigger hammer.
https://www.trick-tools.com/Scotchman_50514_CM_50_ton_Ironworker_50514_CM_1886
Posted by: euro911 Mar 12 2019, 03:13 AM
The monstrous tasks you hard-core metal guys take on and complete is absolutely amazing
... but it also make me feel good about the near rust-free cars I've been fortunate to own 
Keep up the good work ![popcorn[1].gif](style_emoticons/default/popcorn[1].gif)
Posted by: cary Jul 6 2019, 07:36 AM
Been a while. Been working on mechanical projects.
Back to finishing up the welding in of front chassis bulkhead. Corners up against the hinge pillar got pretty tore up during harvesting.
Finishing up the right side.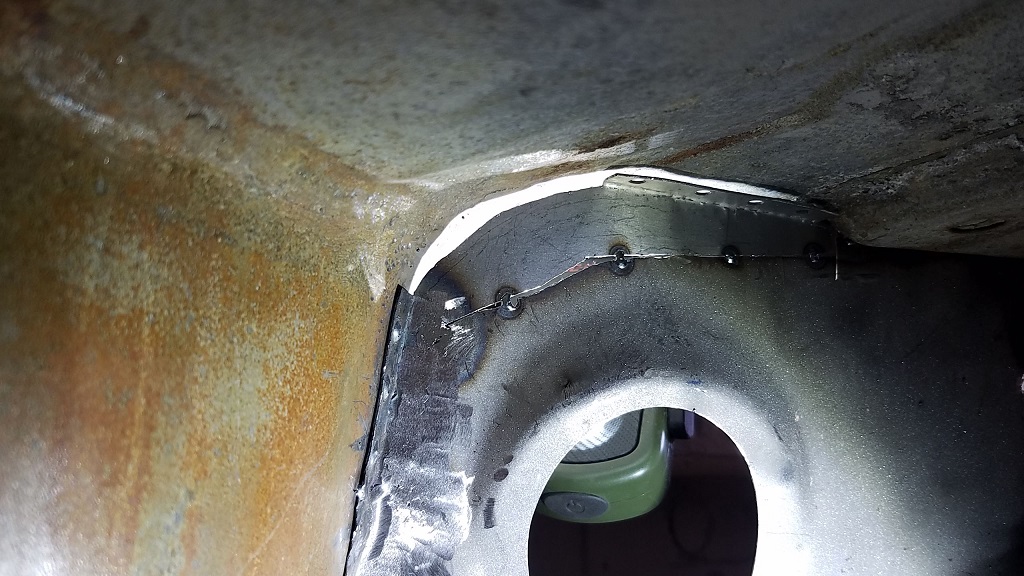
Inside the fuel tank cavity
Above the passengers knees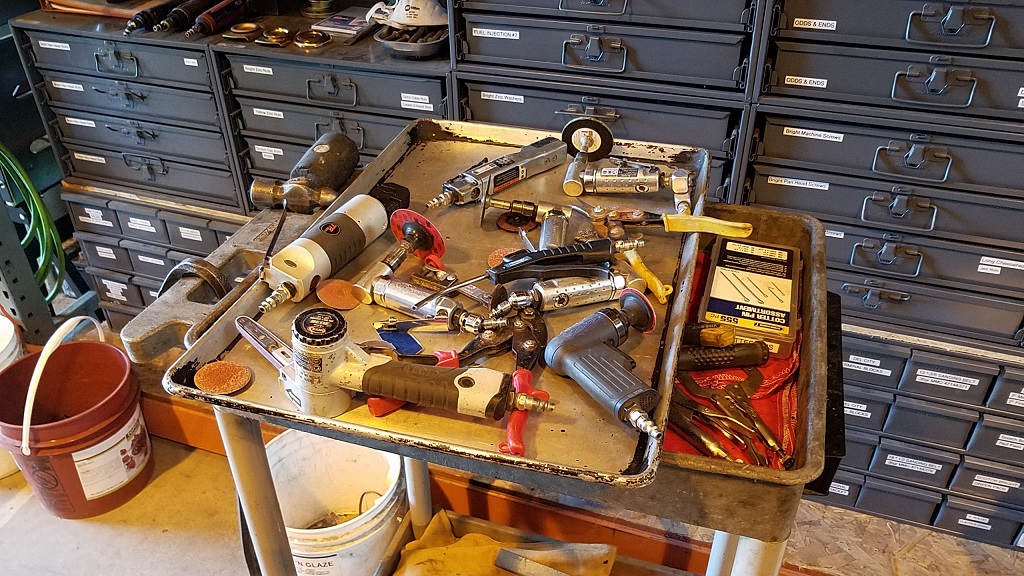
Tray was empty when I started.
Posted by: cary Jul 6 2019, 07:42 AM
On to the left side that has its own set of challenges.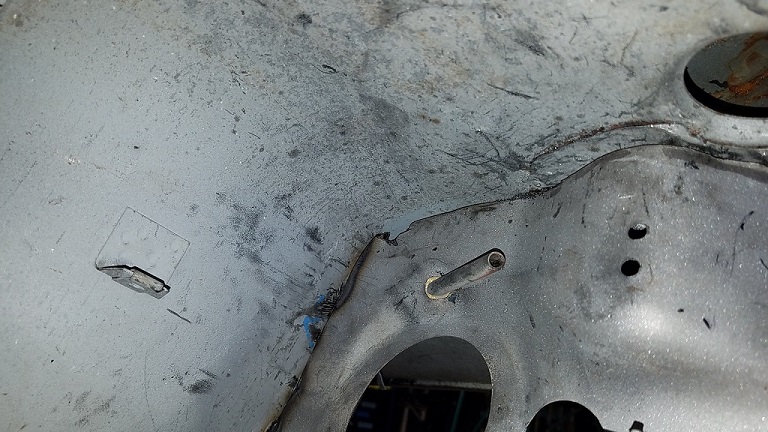
No flange

Vent section didn't survive.
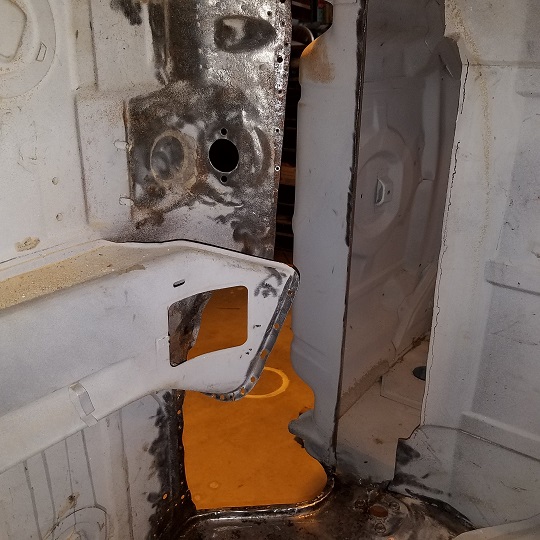
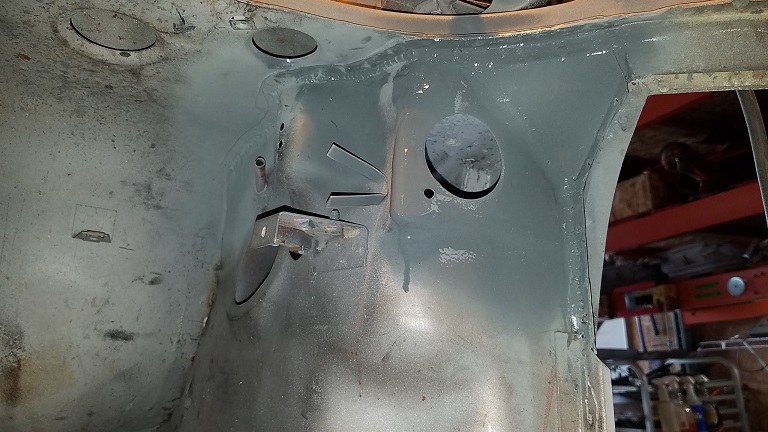
Posted by: cary Jul 19 2019, 08:43 AM
Time for a little catch up on Taylor's car.
The bulk head is finally finished.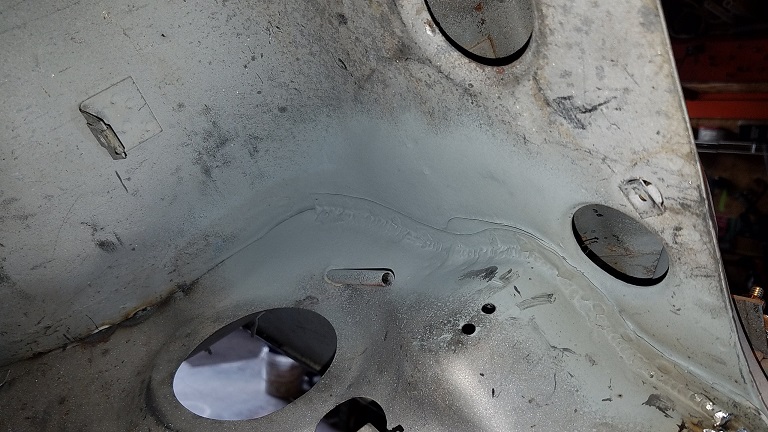
Now the question lies. Will I attempt to save another bulkhead from
the parts car outside ? Would I ever want to do another one ?
Posted by: bbrock Jul 19 2019, 08:53 AM
Now the question lies. Will I attempt to save another bulkhead from
the parts car outside ? Would I ever want to do another one ?
I wouldn't have the guts to do the first one so whatever you decide, you are a far better man than I. Unbelievable work there.
Posted by: cary Jul 19 2019, 09:18 AM
With the bulkhead completed its time to address the tail light panel.
Lots of owees. 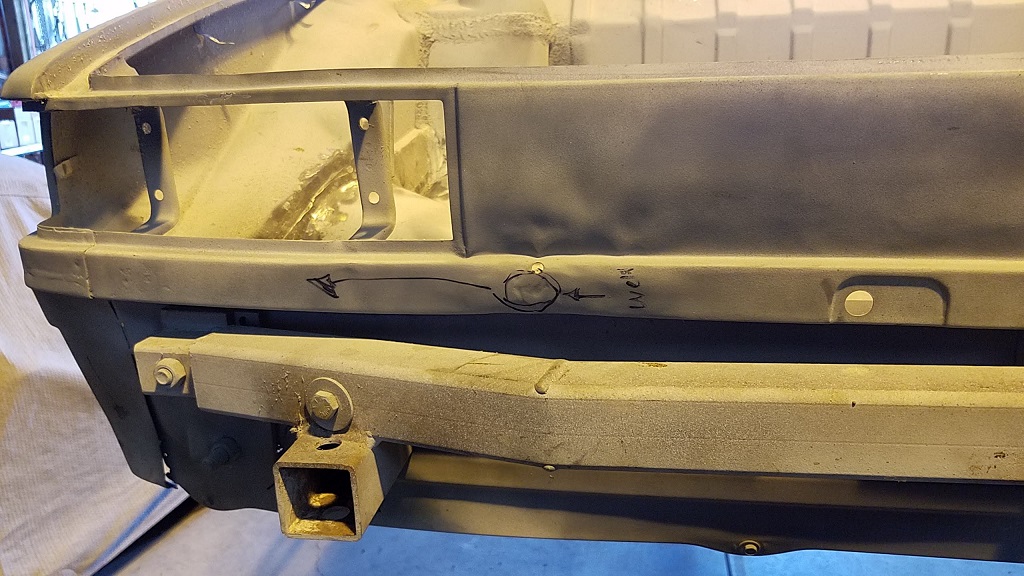
Looks like some one made an attempt to remove the tow hook. Or its a half ass attempt
to remove the stress from collision damage.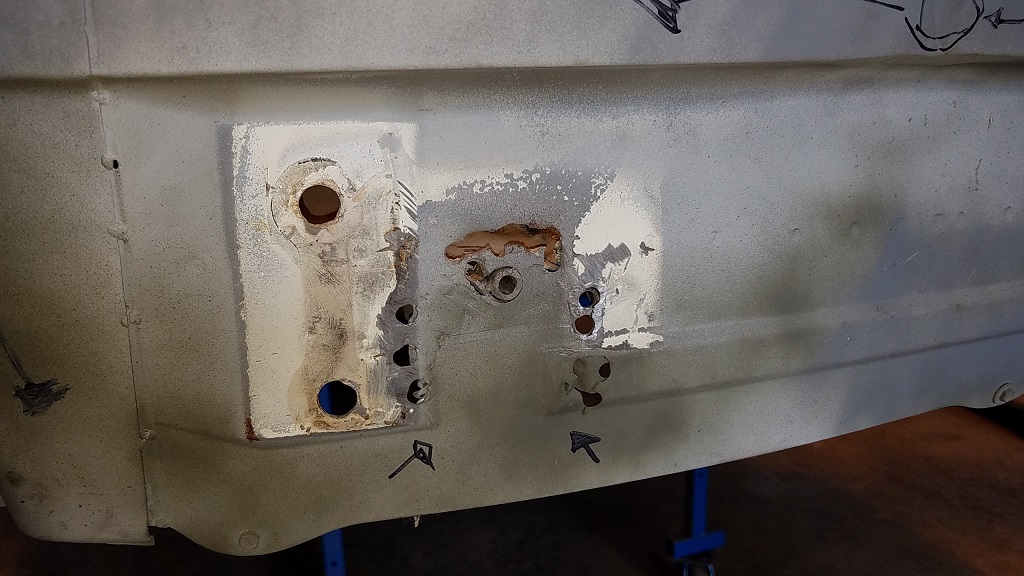
Plus it looks like it was backed over something. That corner already has been patched.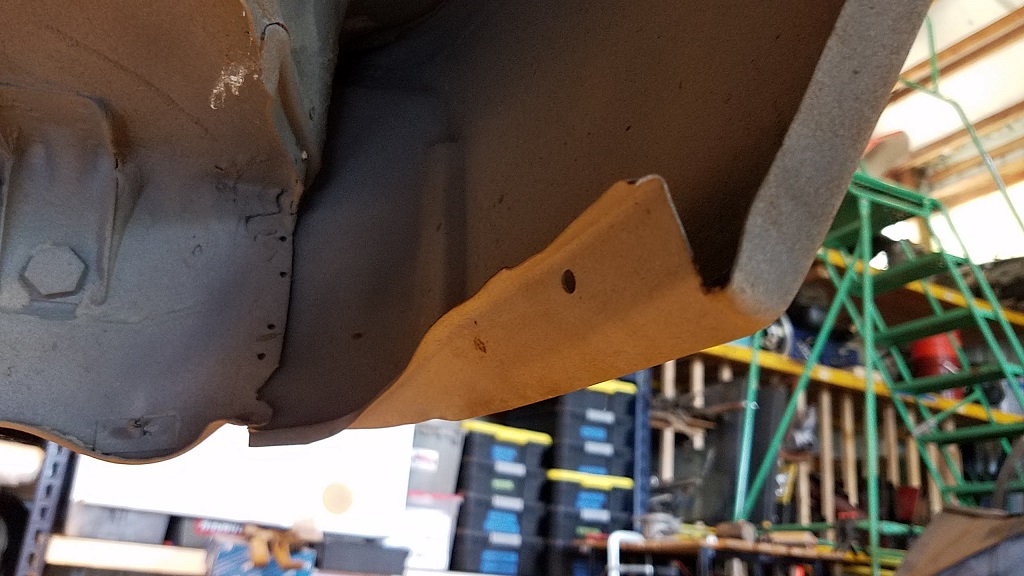
Posted by: cary Jul 19 2019, 09:32 AM
But in order to work on the tail light panel it has to come off the rotisserie.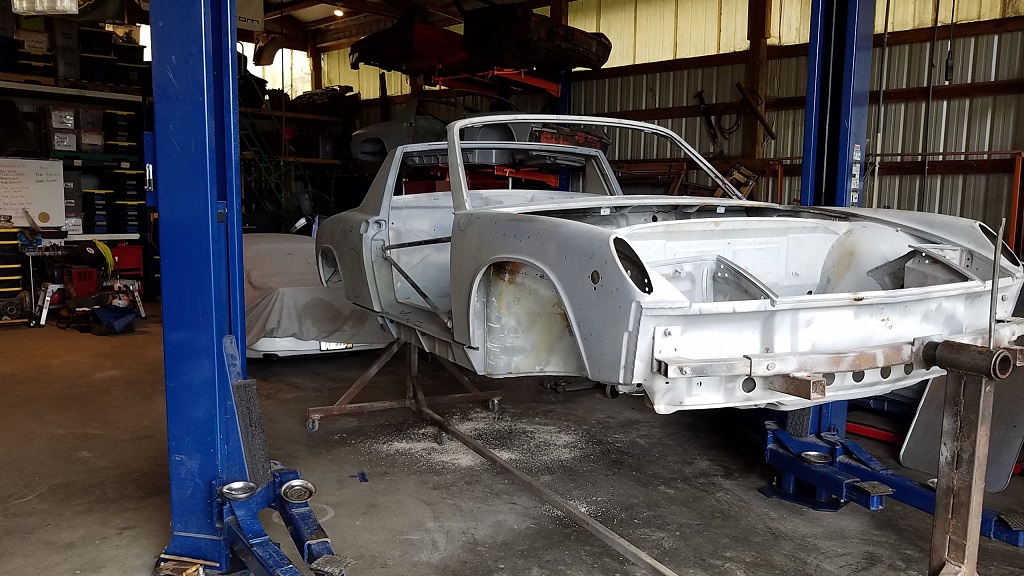
But on a positive note, like I mentioned on Instagram. The chassis dolly is actually
our old chassis jig converted into a dolly. Other than a couple taps with a hammer
it bolted straight in. So from the trailing arm mounts to the rear steering rack she's
5 * 5.
Another shot of the panel. Mark has a used one that I'll attempt to use after its stripped.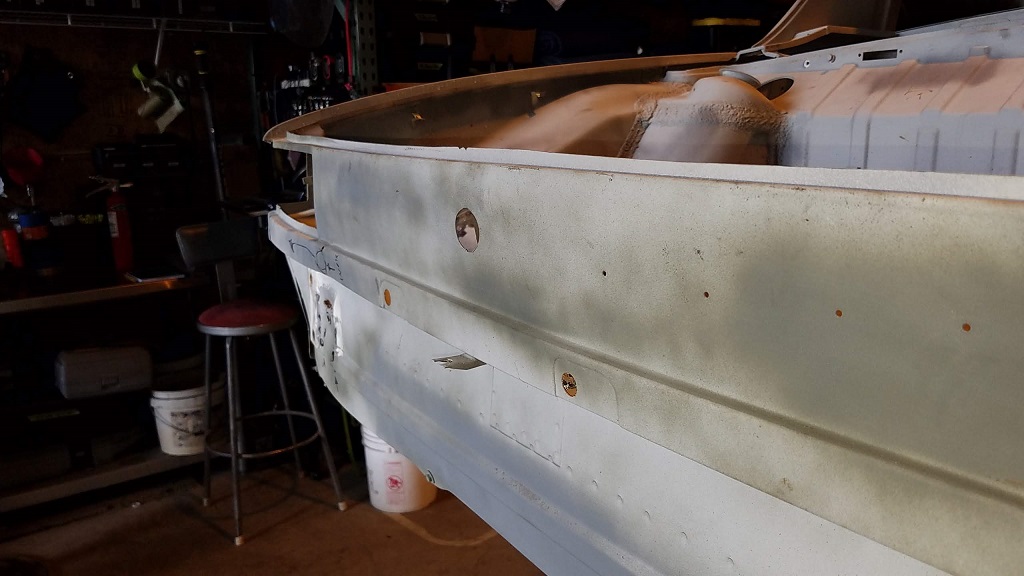
Surgery center all set up for my return in a couple weeks.
Vacation with wife.
8 day commitment at Rothsport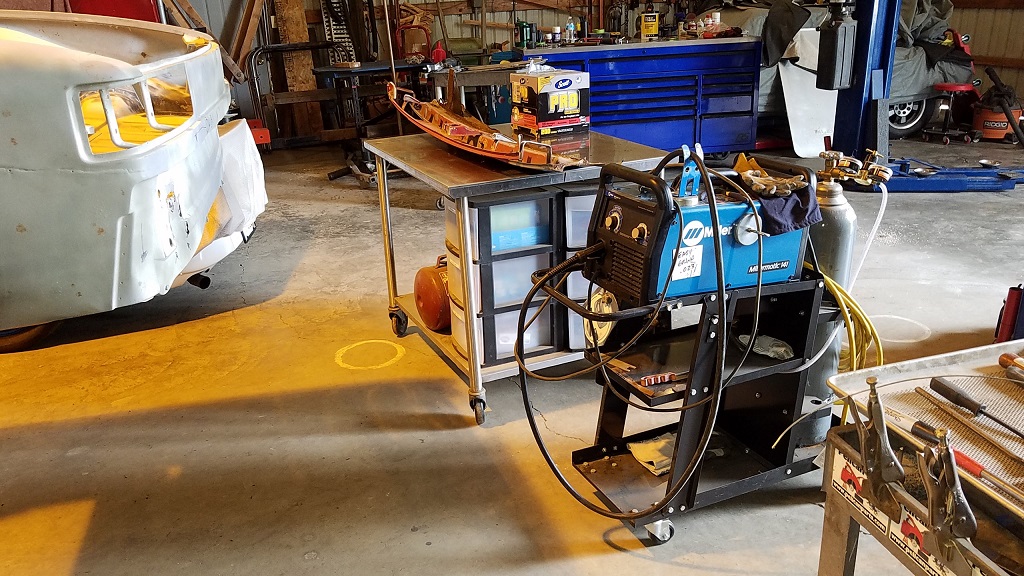
Posted by: cary Aug 7 2019, 08:14 AM
Labor of love .................
Super In Law straightening the folded over qtr. corner .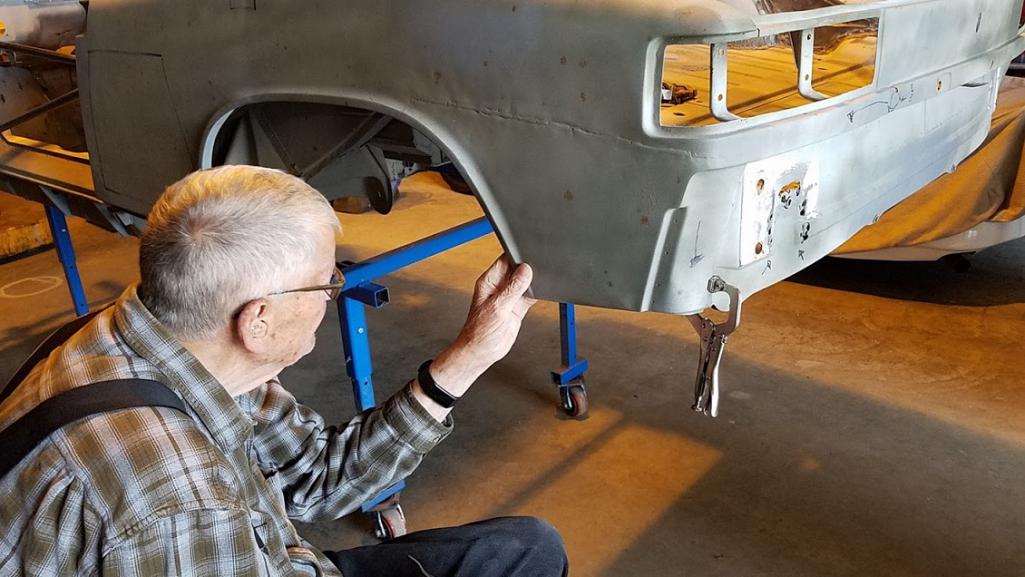
Posted by: cary Aug 7 2019, 05:11 PM
Last couple issues before it heads home or to the body shop for mud and paint.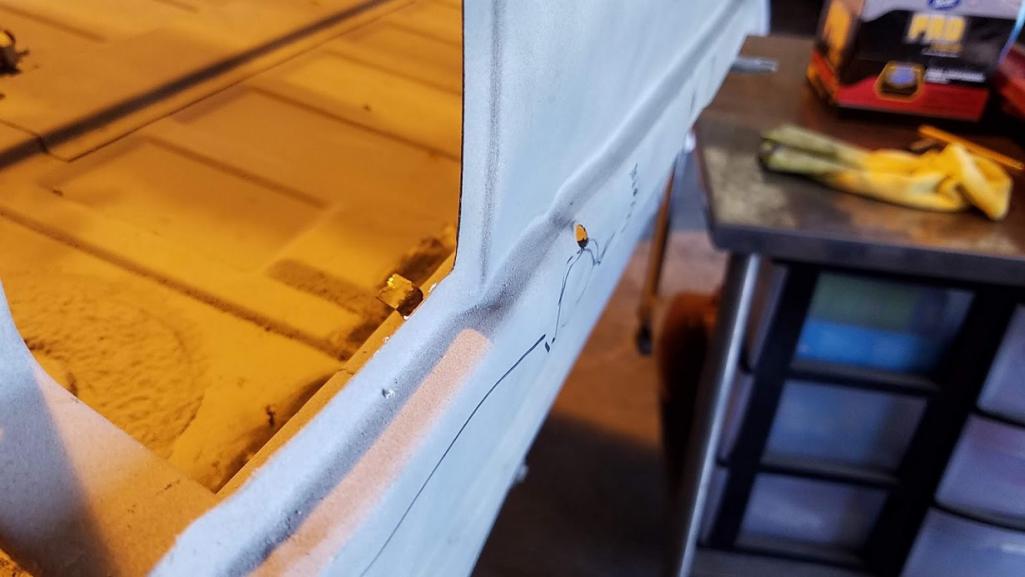
Trunk for too bad. It has some PO cuts and holes that can be patched or filled. But the
left side of the tail light looks like it was beaten too death. In the essence of time I only cut out the beat to death section.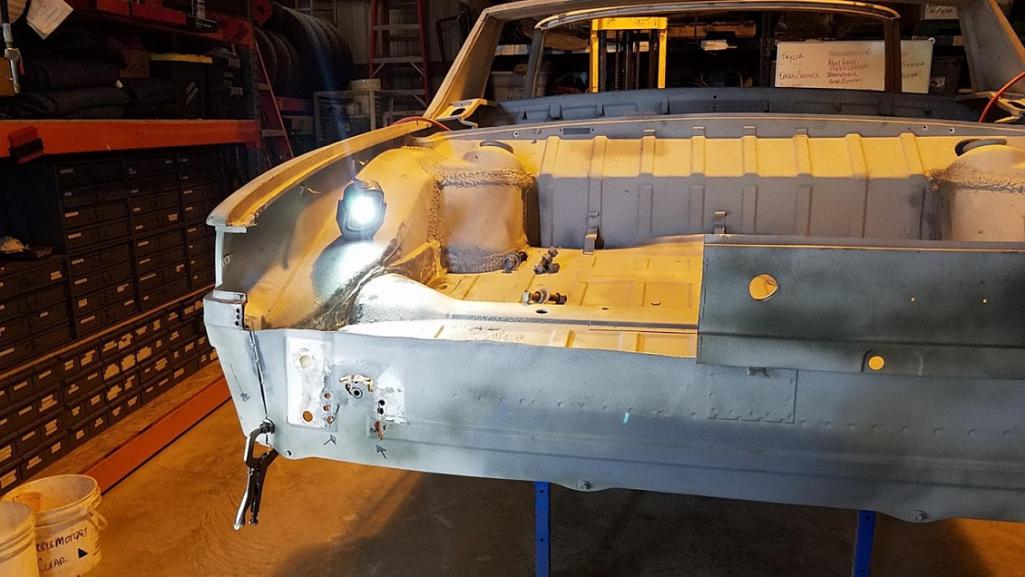
Out it came and in in went ................
Not quite that easy. But you get the gist of it. A lot of measure 10 times, cut once.
Then blip, blip, blip.
Donor piece has had some love in the past but should be ok.
Posted by: Mikey914 Feb 19 2020, 12:55 AM
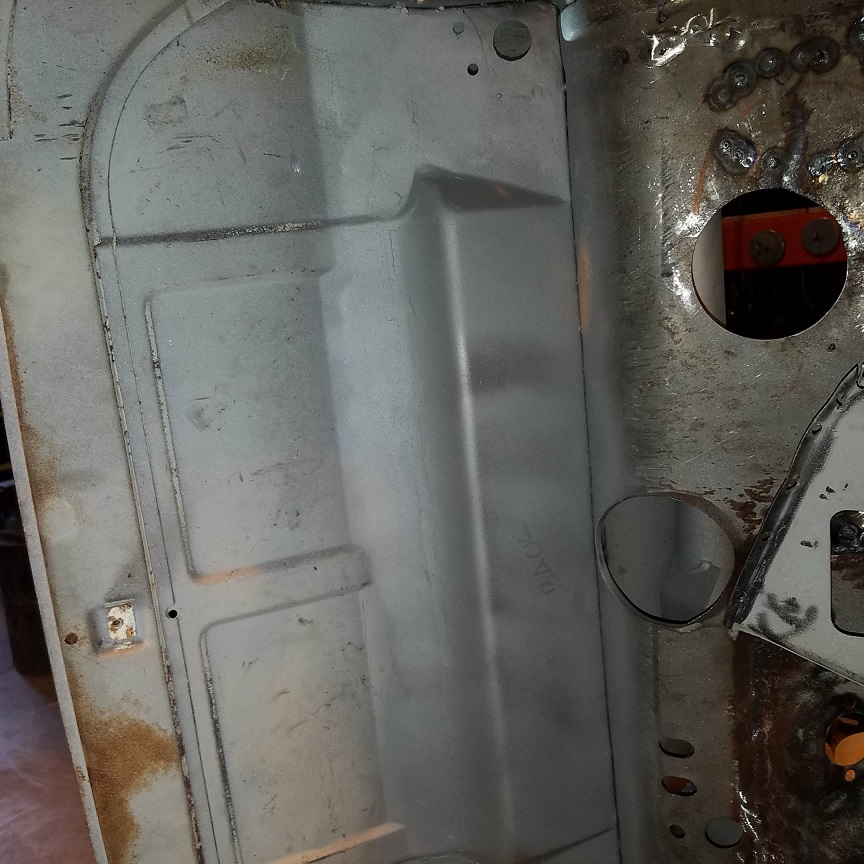
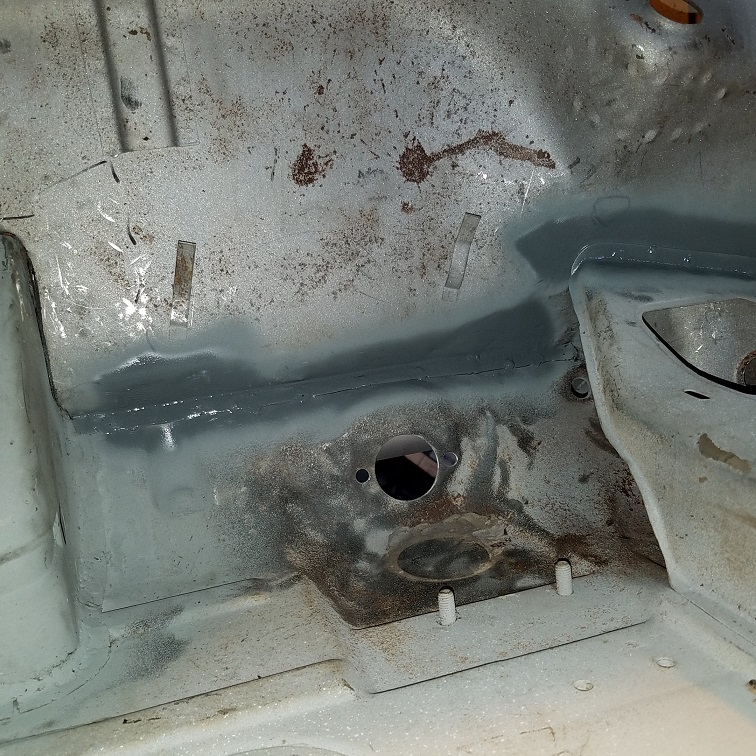
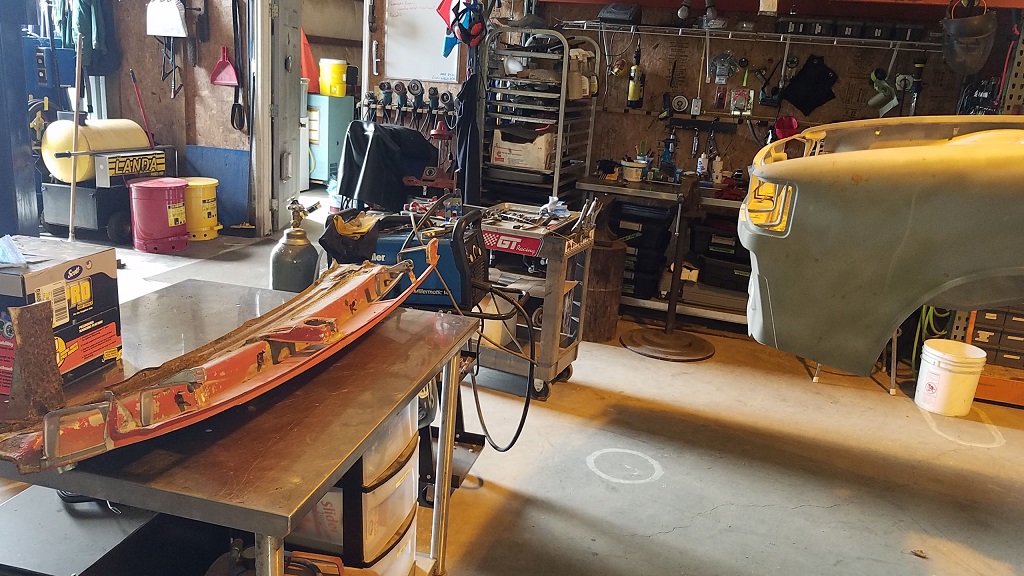
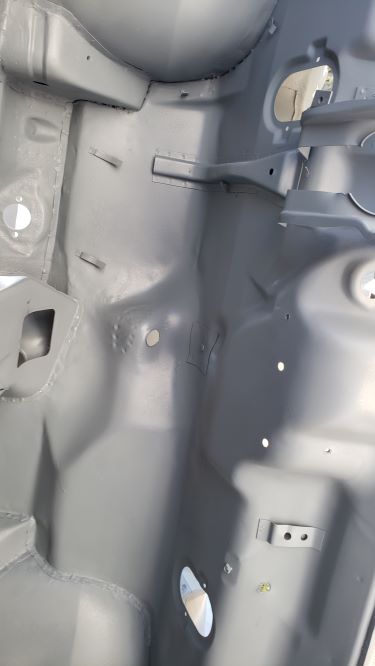
Making some progress.
we used tint-able truck bead liner and made it the color of the car. shot it and let it cure for about 12 weeks (no intentionally, just didn't have time and the weather to press on.
Taylor was sanding and prepping the rest of the shell for the epoxy primer we shot today.
Did make a few mistakes. Realized we needed seam sealer in a few places is the big one. That and a little learning curve with the gun, but we have sand paper.... lots of sandpaper.
Plan to shoot the interior, windshield area, and the engine compartment so we can begin putting the engine, suspension and interior back in. Will shoot the rest onece most of the assembly work is done.
Attached image(s)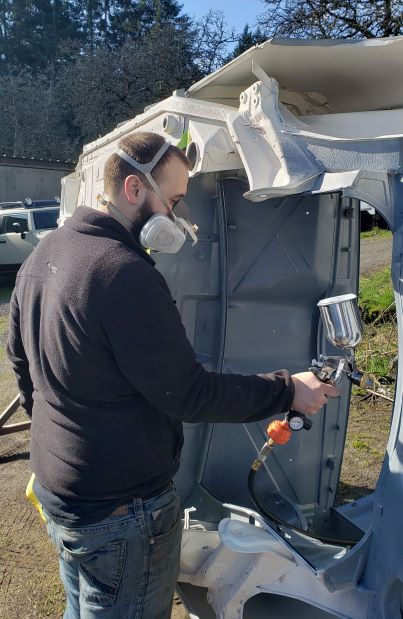
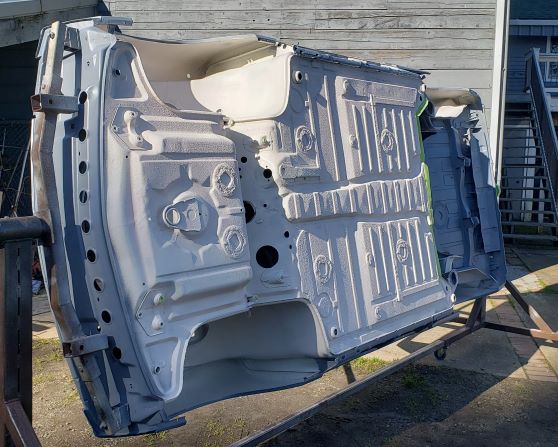
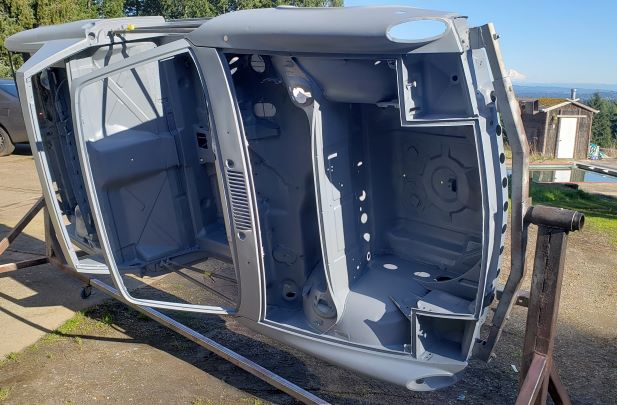

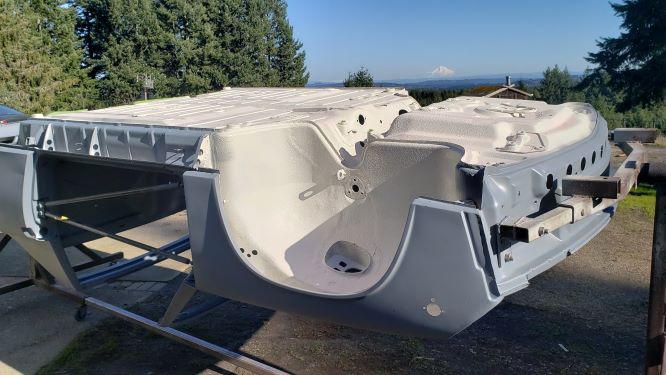
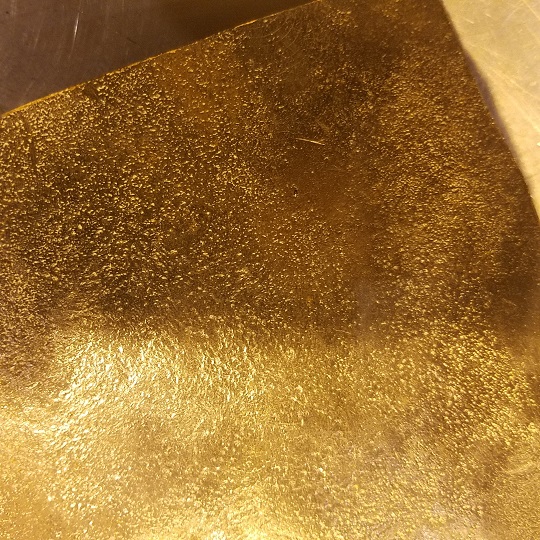
Posted by: Mikey914 Feb 19 2020, 12:55 AM
And the artsy shot
It was a nice day today! 
Attached image(s)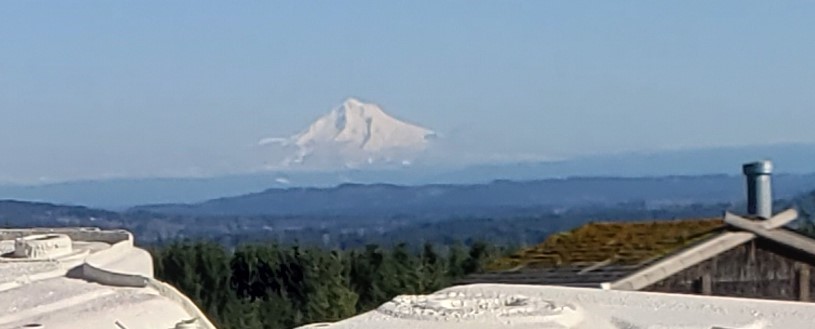
Posted by: raynekat Feb 19 2020, 09:59 PM
Looking good there....
I was actually up at Timberline lodge with the wife and twins today (Feb 19), but the weather was identical to you pic. 25F up there and sunny. Fun day. Nice to be able to drive there from our house in just under an hour.
Posted by: sixnotfour Feb 20 2020, 06:23 AM
Good progress, Great view from the shop... 
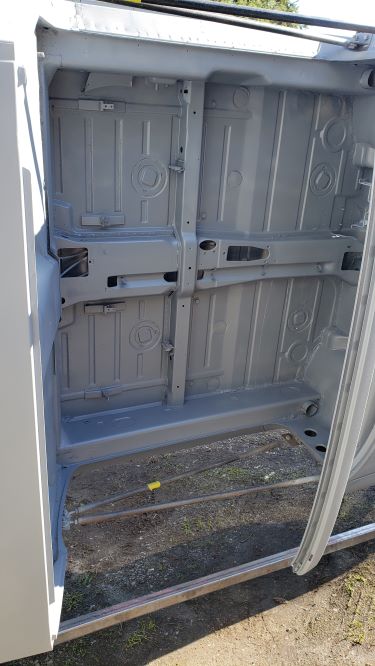
Posted by: Mikey914 Feb 24 2020, 11:50 AM
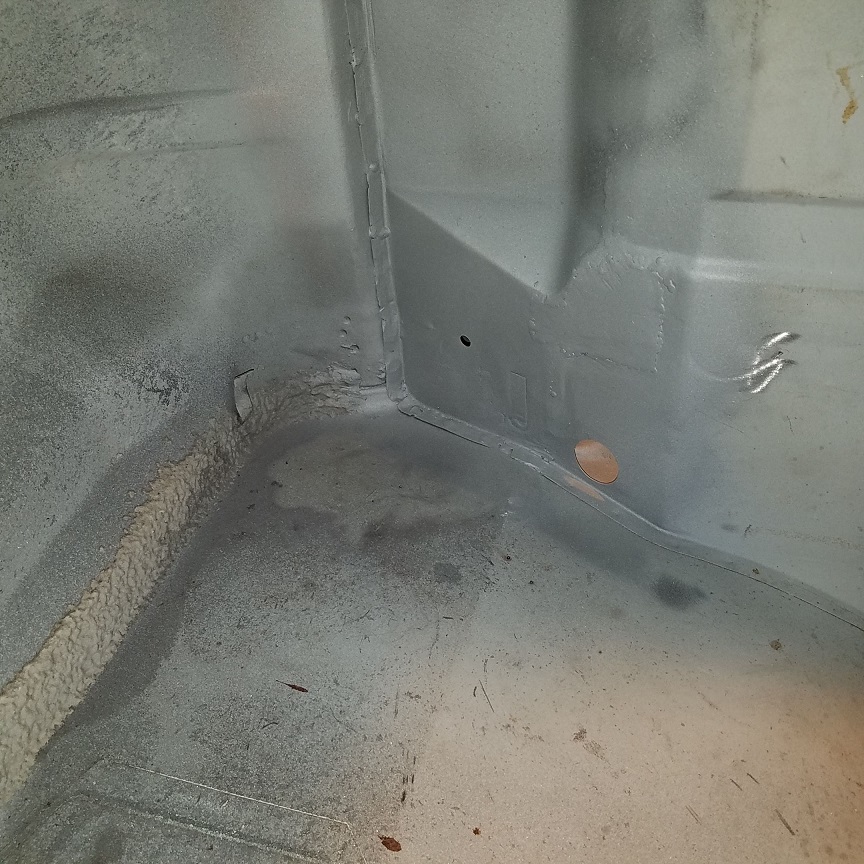
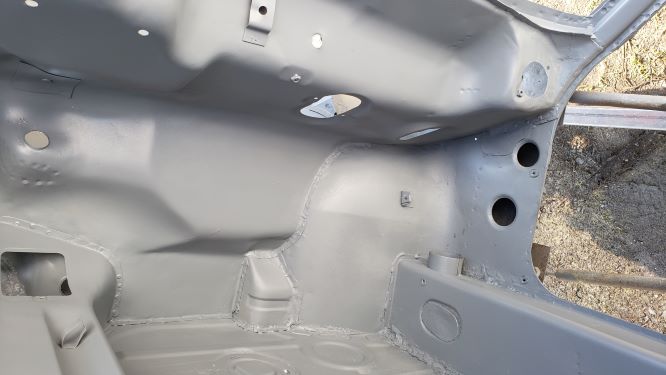
Taylor laid some paint down in the areas that he needs to reassemble and will not be accessible once stuff is in.
The fun is about to start.
Attached image(s)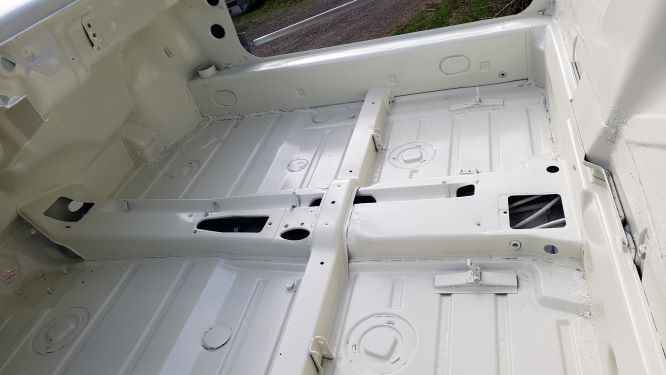
Posted by: Mikey914 Feb 24 2020, 11:51 AM
more
Attached image(s)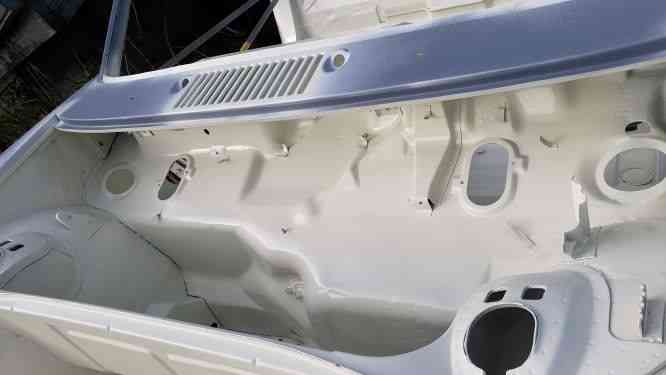
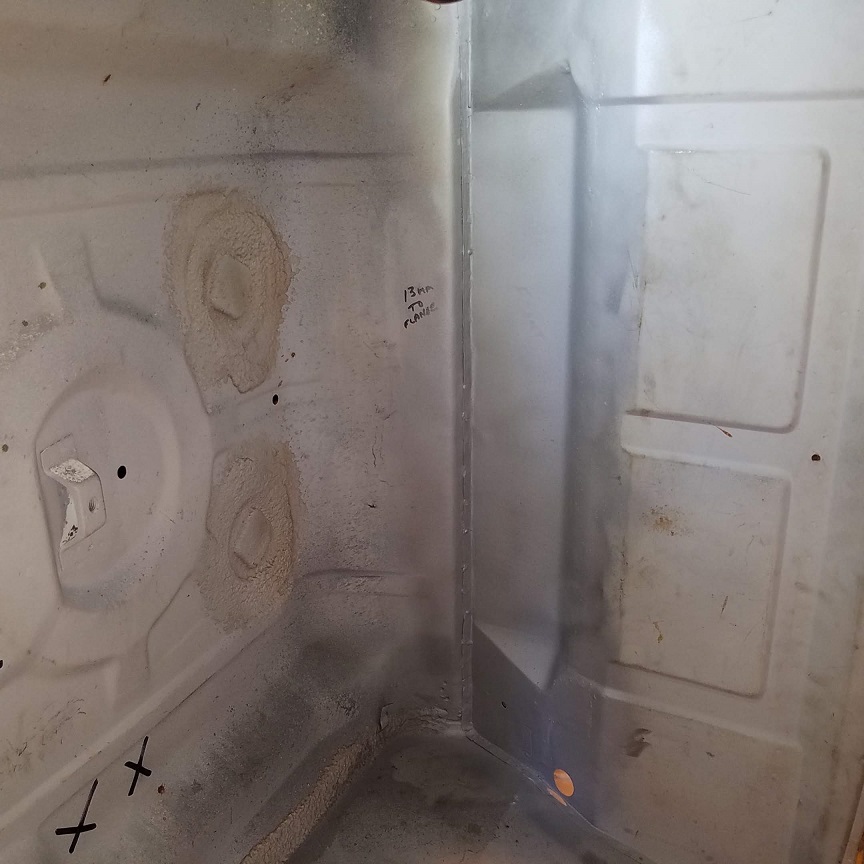
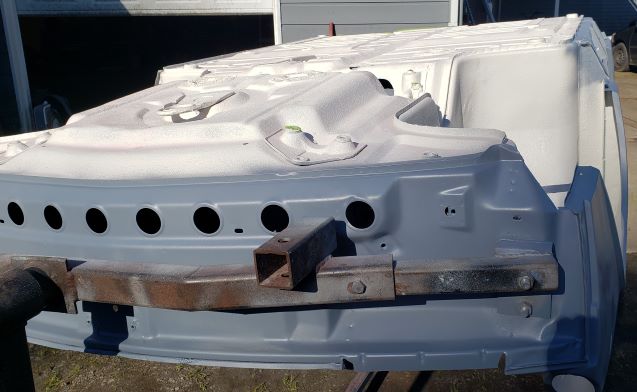
Posted by: Mikey914 Feb 24 2020, 12:00 PM
more
Attached image(s)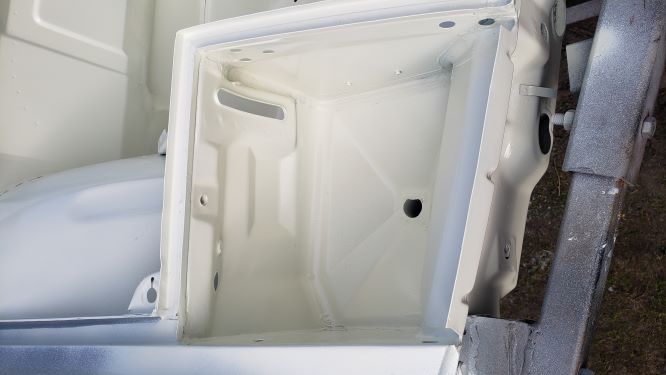
Posted by: Mikey914 Feb 24 2020, 12:00 PM
and more
Attached image(s)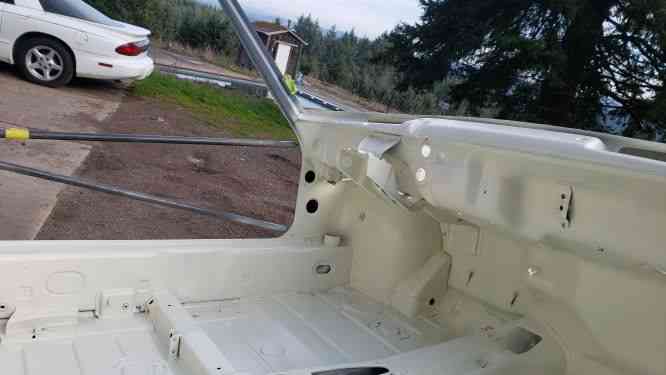
Posted by: Mikey914 Feb 24 2020, 12:01 PM
and where we will be starting
Attached image(s)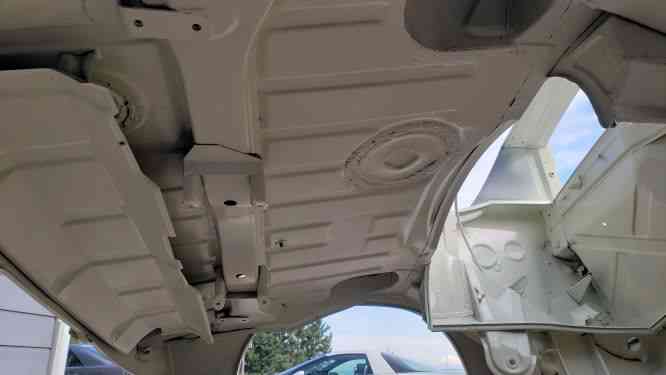
Posted by: euro911 Feb 25 2020, 12:13 AM
Looking good ...
Powered by Invision Power Board (http://www.invisionboard.com)
© Invision Power Services (http://www.invisionpower.com)