Printable Version of Topic
Click here to view this topic in its original format
914World.com _ 914World Garage _ Replaced TPS board
Posted by: oakdalecurtis Dec 14 2016, 05:59 PM
My 76 2.0 always ran pretty well, passes smog every two years. But the engine did miss sometimes at different rpm's, but usually under load more in lower gears. It has a Crane ignition, new plugs, wires, tuned fine. I finally ordered a TPS board from 914Rubber and replaced it. By the way, when I pulled the throttle body, there was no gasket or sealant present, just metal to metal! This lack of a gasket here probably gave me a small vacuum leak all along. Here's a picture of my old board. It was a little tricky drilling out the existing TPS board rivets and reinstalling the new ones. One of the rivets is under the contact fingers making it difficult to get to. With the job done, I just took the car out for a test drive. The engine started and ran flawlessly without a single miss that I could detect! It's never run like that since I got it 20 years ago. I wish I had done this repair years ago. If you're trying to fix erratic ignition missing, I would recommend replacing your TPS early in the diagnostic process and make your engine run smoothly!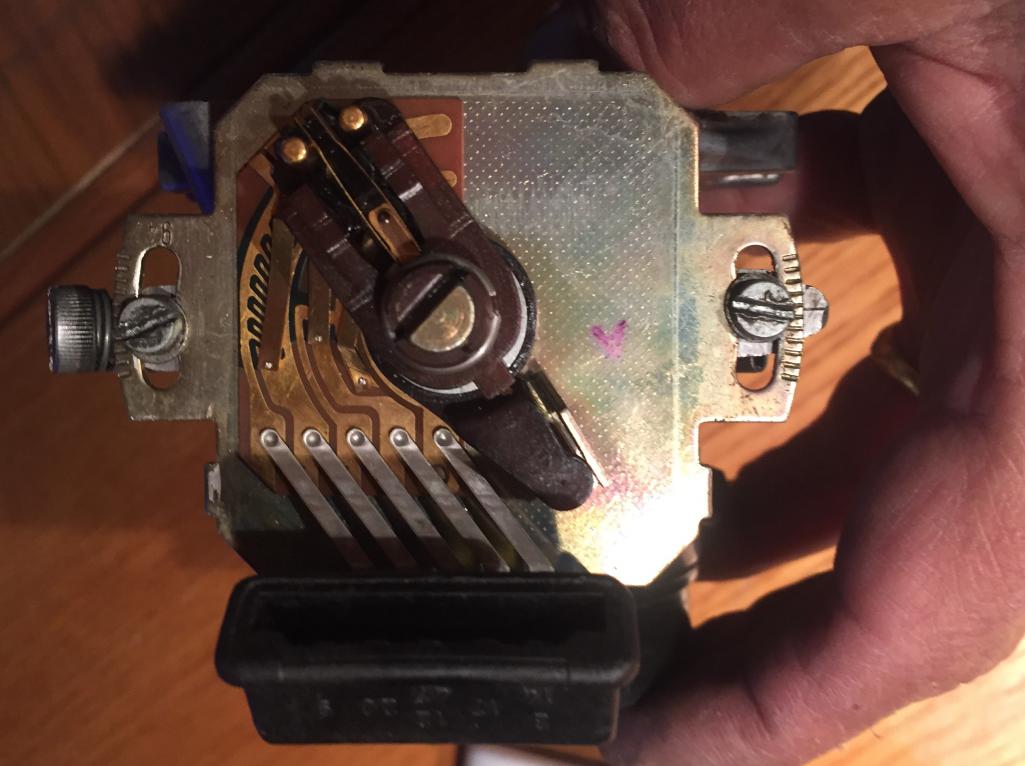
Posted by: ConeDodger Dec 14 2016, 06:21 PM
Nice!
I've got one of those sitting around but I don't have a 4 cylinder! 
Posted by: second wind Dec 14 2016, 10:34 PM
would love to do that but as'cared marshall.....how about a photo walk thru of the process....one million thank yous!!!!
gg
Posted by: oakdalecurtis Dec 14 2016, 10:56 PM
It is a delicate operation. You must always be aware of the little contact fingers and not bend or damage them. It's not hard to drill the rivets out if you have a small drill press and clamp the sensor board where it's flat to the edge of the drill table to hold it still. Be sure you control drill depth when drilling out the rivet that's under the silver contact arms or you will push the drill through too far and bend them. You will have to remove the circular ring clip at the top of the rotating arm to remove the arm, which then allows you to lift off the big square metal plate to work on to remove the board. When you install the rivet under the silver arms, you will push the arm up a little, but it will spring back when you set the rivet. Here's a YouTube video of the process, see if that helps. Be patient. Good luck, it's well worth it if your engine stumbles or misses at all.
Posted by: Mikey914 Dec 14 2016, 11:32 PM
Gary Cotton made an excellent 2 part video with in depth details and explanation.
These links are also on my site
Thanks Gary
https://m.youtube.com/watch?v=6x4TBwXlJu4
Posted by: oakdalecurtis Dec 14 2016, 11:35 PM

Gary Cotton made an excellent 2 part video with in depth details and explanation.
These links are also on my site
Thanks Gary
https://m.youtube.com/watch?v=6x4TBwXlJu4
Thanks Mikey, I forgot to post the links to the video! Getting old.....
Powered by Invision Power Board (http://www.invisionboard.com)
© Invision Power Services (http://www.invisionpower.com)