Printable Version of Topic
Click here to view this topic in its original format
914World.com _ 914World Garage _ Front Trunk Seal Glue
Posted by: mmascari Jan 7 2017, 06:35 PM
I installed a new front trunk seal which fits great. Its from 914 Rubber. There are a couple corners, near the headlight bucket that wont seat. The seal lifts. I am thinking about putting a little glue in these spots to hold it down.
I know glue is not desired but I need the seal to stay put.
What glue do you guys recommend?
Posted by: Mowog4 Jan 7 2017, 06:42 PM

I installed a new front trunk seal which fits great. Its from 914 Rubber. There are a couple corners, near the headlight bucket that wont seat. The seal lifts. I am thinking about putting a little glue in these spots to hold it down.
I know glue is not desired but I need the seal to stay put.
What glue do you guys recommend?
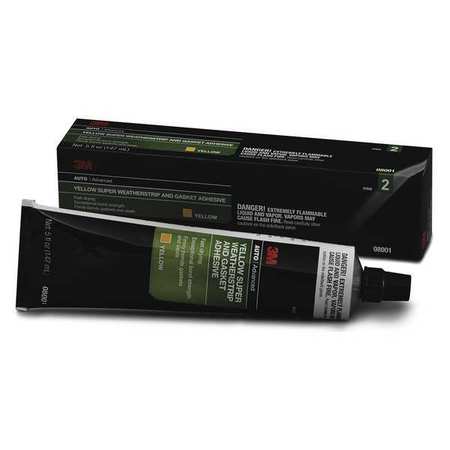
My Choice would be 3M Weatherstrip Adhesive.
Posted by: Mikey914 Jan 7 2017, 06:59 PM
Yep thats what I would use.
Mark
Posted by: mmascari Jan 7 2017, 09:30 PM
I installed a new front trunk seal which fits great. Its from 914 Rubber. There are a couple corners, near the headlight bucket that wont seat. The seal lifts. I am thinking about putting a little glue in these spots to hold it down.
I know glue is not desired but I need the seal to stay put.
What glue do you guys recommend?
My Choice would be 3M Weatherstrip Adhesive.
Thanks guys, I will pick some up. Mark
Posted by: shoguneagle Jan 8 2017, 01:21 AM
YEP, THREE!!!
Posted by: cary Jan 8 2017, 12:09 PM
When I installed the new seal in Mark's blue car I added a couple square pieces of cardboard over all the corners. It gave it just a little more down pressure on the black snot when the hood was closed.
Posted by: second wind Jan 8 2017, 01:00 PM
When I installed the new seal in Mark's blue car I added a couple square pieces of cardboard over all the corners. It gave it just a little more down pressure on the black snot when the hood was closed.
I too have struggled to get rubber seal to stay put and have found that nothing sticks to the rubber. Will this 3M product do the trick? I have tried contact cement and epoxy and who knows what else? I am hoping new profile seal doesn't raise hood as much as well.
Thank you!
gg
Posted by: slotty008 Jan 8 2017, 01:10 PM
The 3M 08008 adhesive is impossible to obtain in Belgium ( and Europe i suppose). Does anyone have an alternative?
Posted by: mmascari Jan 8 2017, 01:14 PM
I just used the 3M adhesive as recommended and it worked fantastic. I had a couple corners that would lift and now they stay in place. I recommend it.
Posted by: cary Jan 8 2017, 01:15 PM
Maybe Wurth W-8905401 ?
Posted by: Mark Henry Jan 8 2017, 05:37 PM
Why glue it in? 
If it's not glued in you can take it out to keep the channel clean, dry and rust free. 
Posted by: cary Jan 8 2017, 07:44 PM
The area protected with tape is the only area that I used adhesive on.
The rest was just fitted into the channel.
It's really going to depend on the condition of your channel and or previous repairs on what will work.
Posted by: rgalla9146 Jan 9 2017, 06:01 AM
Read and follow the instructions on the 3M products.
It's also sold in rattle cans in a couple strengths....you'll have to mask....
but you'll get a uniform application.
Posted by: jkb944t Jan 9 2017, 06:45 AM
I installed a new front trunk seal which fits great. Its from 914 Rubber. There are a couple corners, near the headlight bucket that wont seat. The seal lifts. I am thinking about putting a little glue in these spots to hold it down.
I know glue is not desired but I need the seal to stay put.
What glue do you guys recommend?
My Choice would be 3M Weatherstrip Adhesive.
I used the 3M just on the corners of my new seal and it worked great to hold it in place. I think I wiped the bottom of the seal with some prep-sol to make sure the 3M would adhere.
The new seal from 914Rubber is a huge improvement over the older seal and I would highly recommend it!
Jeff B
Posted by: lsintampa Jan 9 2017, 03:58 PM
I did not and don't intend to glue mine. It sits in just fine and after a while, it relaxes a bit.
They don't seal well anyway, and water will ALWAYS collect in the corners... so after a bath (car never sees rain unless by mistake) I remove the gasket to clean out the channel it sits in.
Rust is NOT are friend.
That's my two cents!
Posted by: Mikey914 Jan 9 2017, 04:20 PM
The 3M product is not really a glue in the traditional sense.
It stays tacky so it grips but can easily be removed.
Posted by: Mark Henry Jan 9 2017, 04:59 PM
The 3M product is not really a glue in the traditional sense.
It stays tacky so it grips but can easily be removed.
Is it a different glue?
The 3M yellow super adhesive the sell at the FLAP's up here drys to a hard slightly rubber texture and it's a PITA to remove.
To me I'd call it a water resistant contact bond cement and it smells exactly like it.
I'd rather be able to remove it easy, to me the seal is a water trap.
Posted by: Mikey914 Jan 11 2017, 06:10 PM
The 3M product is not really a glue in the traditional sense.
It stays tacky so it grips but can easily be removed.
Is it a different glue?
The 3M yellow super adhesive the sell at the FLAP's up here drys to a hard slightly rubber texture and it's a PITA to remove.
To me I'd call it a water resistant contact bond cement and it smells exactly like it.
I'd rather be able to remove it easy, to me the seal is a water trap.
3M weatherstrip adhesive will not harden. It's like super sticky snott. Great visual, but the only way I can give you an of the texture.
Powered by Invision Power Board (http://www.invisionboard.com)
© Invision Power Services (http://www.invisionpower.com)