Printable Version of Topic
Click here to view this topic in its original format
914World.com _ 914World Garage _ Oh joy....engine wiring harness fun begins
Posted by: Mueller May 2 2005, 10:39 AM
sorry for the Andy-esque photo 
Started to read the install manual for the Link fuel injection/ignition controller last night as well as the wiring for the Mallory CDI which will be used as well 
Man, wiring is never fun, the hardest part I think will be laying everything out and figuring out how to run the wires so that it looks like a clean install....I'm still not sure if I'll be shrink tubing the entire harness or use the wire harness specific cloth-type tape.
Attached image(s)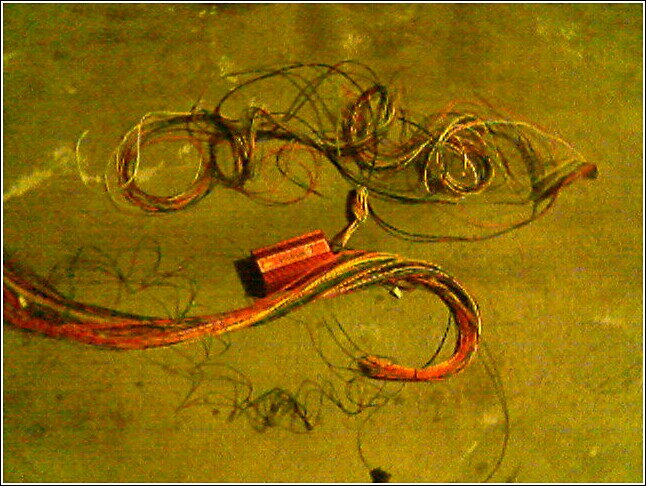
Posted by: McMark May 2 2005, 10:52 AM
 BTW, I hate you camera phone.
 J/K
J/K
Posted by: Mueller May 2 2005, 11:06 AM
My wife does not like the camera phone either...we took the 911 up to Sonoma this weekend and I just "had" to take a few pictures of the car with my "phone"....she just shaked her head and said "whatever" , hahahaha
oh yea, the wiring mess on top is the Link harness, the big bundle below is for the Megasquirt, I'll be using a combo of both...I am also going to use the megasquirt relay board which has 3 relays (main power, fuel pump and fast idle)..it also has 4 fuses as well and can be mounted in the engine compartment.
I have to contact Mallory to find out what signal/voltage the box wants for triggering the coil, I'm pretty sure it's 12vdc sq.
Posted by: Aaron Cox May 2 2005, 11:16 AM
you are a glutton for punishment mike,
and thats a good thing 
look forward to seeing it all done 
Posted by: Mueller May 2 2005, 11:23 AM
| QUOTE (Aaron Cox @ May 2 2005, 10:16 AM) |
| you are a glutton for punishment mike, and thats a good thing look forward to seeing it all done |
yea I must like pain and confussion
with projects like this, I'm really glad I am not color blind !!!!
the megasquirt wiring is really nice, each wire is labeled with it's function/location about every 5 inches or so.....
Posted by: Aaron Cox May 2 2005, 11:24 AM
| QUOTE (Mueller @ May 2 2005, 10:23 AM) | ||
yea I must like pain and confussion with projects like this, I'm really glad I am not color blind !!!! the megasquirt wiring is really nice, each wire is labeled with it's function/location about every 5 inches or so..... |
and you are integrating the CDI into the Link system?
Posted by: Mueller May 2 2005, 11:39 AM
| QUOTE (Aaron Cox @ May 2 2005, 10:24 AM) |
| and you are integrating the CDI into the Link system? |
yep...for the ignition, it'll go something like this:
dizzy>Link>CDI>coil
the dizzy will be locked, the mechanical advance disabled, when optics inside the dizzy see the light, it'll send a signal to the Link, the Link will calculate how many µS before it sends the signal to fire to the CDI, the CDI sends the signal to the coil to fire it.
Posted by: Aaron Cox May 2 2005, 11:41 AM
which dizzy?
the link enables you to make your own advance curve electronically correct?
BTW- why not go crank trigger 
Posted by: Mueller May 2 2005, 11:51 AM
the Mallory distributor will be used...I could use a stock one if I wanted to, but the Mallory is brand new and I like the larger diameter cap and rotor.....
yes, the Link will give me electronic adjustable advance and retard....
I spoke to a few people about the crankfire, it appears to be overrated for the most part (one source was a MoTec dealer/installer), depending on the manufacture, the crank trigger wheels are not as accuate as one would think and the teeth apperantly vary a few degrees. It came down to that for the extra cost/hassle of converting it to crankfire, the benifit was not worth it at all for me.
Posted by: Aaron Cox May 2 2005, 11:53 AM
how do you disable the mech advance on the unilite?
is there a sensor that looks for vaccum and changes the advance accordingly?
as always mike,
rock on 
Posted by: lapuwali May 2 2005, 11:53 AM
To lay everything out, mount all of the components first in their final positions. Lay the harness out wire by wire, so you can get each to exactly the length required. Use zip ties to temporarily bundle wiring to keep it neat.
Don't use heat shrink on the whole harness. Use the corrogated plastic split tubing. This stuff is specifically made for this, and you can easily get back in later without unravelling a zillion miles of tape, or cutting into the heatshrink and hoping you don't cut into wire insulation. Use heat shrink over connectors where the wires feed in, both as a waterproofing and strain relief. Sometimes you have to put layers of heat shrink on to get a good seal. A big piece that will fit over a connector usually won't shrink down to the wire bundle, so use a smaller piece over the shrunk bigger piece, and repeat as necessary.
After you get the whole harness done and operating properly, re-zip-tie as necessary so "branches" collapse into natural "trunks". Wrap the trunks in the split tubing.
Use good connectors. If you're crimping (my preference in a high vibration environment), buy a good crimp tool, one of the $40-50 jobs that properly "fold" the crimp connector around and into the wire. If you use the hardware store insulated connectors with the crimp tool that just crushes the insulation and the crimp, you're going to end up with something that will be flaky to start with, and will give endless trouble. If you REALLY want to be anal, use a small bit of heat shrink around each wire and the crimp connectors. Don't use spade or bullet connectors if you can avoid it. Use only-goes-together-one-way multi-pin connectors with crimp-on pins where possible.
Posted by: Mueller May 2 2005, 12:08 PM
James,
all of my connectors are brand new and have the seals that the wire passes thru....I also bought some new rubber boots for a few of the connectors for extra protection, not sure if they will work with the new Bosch FI style connectors or not, I'll know for sure when I get them this week. I'll also be using brand new GM Weatherpack connectors for some of the other components.
As for the crimping tools, I have a nice selection of the proper AMP/Tyco hand crimpers that crimp terminals correctly.
Posted by: lapuwali May 2 2005, 12:40 PM
| QUOTE (Mueller @ May 2 2005, 10:08 AM) |
| James, all of my connectors are brand new and have the seals that the wire passes thru....I also bought some new rubber boots for a few of the connectors for extra protection, not sure if they will work with the new Bosch FI style connectors or not, I'll know for sure when I get them this week. I'll also be using brand new GM Weatherpack connectors for some of the other components. As for the crimping tools, I have a nice selection of the proper AMP/Tyco hand crimpers that crimp terminals correctly. |
Sounds perfect. I've seen way too many crap jobs done here, and the suffering afterwards.
Have you tried hooking up the Link to the handheld controller, yet? Can it use PC software, too?
Posted by: Mueller May 2 2005, 12:41 PM
| QUOTE (Sammy @ May 2 2005, 11:24 AM) |
| What ever you do, don't let the magic smoke out! |
trust me, that is a huge concern of mine.....never been a huge fan of electronics just for that fear of "let'n the smoke out"....
Posted by: Jeff Bowlsby May 2 2005, 01:52 PM
Now you know I couldn't leave this one alone...sorry to disagree James but my experience is that...
The split tube casing really does not belong in an engine bay, as a permanent solution. Not only do it and its funky intersection pieces look cheesy, it really has very limited performance. It is not very heat resistant and does not seal out dirt and liquid contaminants. The casing is there to configure and protect the wiring. The boots or connectors preotefct the terminations and connections. Corrugated split tube is made for interior, protected uses not subject to open engine bay-type environments. It is accessible so wires can be reconfigured easily, but this should only be considered for temporary use. The sharp edges of the tubing can be a paint too.
You really want to shrink tube this harness permanently for a couple simple reasons:
The shrink tube adds insulation value (somewhere around about 200F protection) to protect the wiring from heat damage. As a casing it also effectively seals the internal wiring and connectors from contamination from oil and water, that will negatively affect the wire terminal connections.
Posted by: lapuwali May 2 2005, 02:46 PM
| QUOTE (bowlsby @ May 2 2005, 11:52 AM) |
| The split tube casing really does not belong in an engine bay, as a permanent solution. Not only do it and its funky intersection pieces look cheesy, it really has very limited performance. It is not very heat resistant and does not seal out dirt and liquid contaminants. The casing is there to configure and protect the wiring. The boots or connectors preotefct the terminations and connections. Corrugated split tube is made for interior, protected uses not subject to open engine bay-type environments. It is accessible so wires can be reconfigured easily, but this should only be considered for temporary use. The sharp edges of the tubing can be a paint too. You really want to shrink tube this harness permanently for a couple simple reasons: The shrink tube adds insulation value (somewhere around about 200F protection) to protect the wiring from heat damage. As a casing it also effectively seals the internal wiring and connectors from contamination from oil and water, that will negatively affect the wire terminal connections. |
A goodly number of OEMs disagree with your experience regarding the split harness tubes, as a glance into the engine bays in quite a few recently manufactured cars will attest. Perhaps there's higher performance split tubing in use now than whatever you're familiar with. Some of this stuff is now rated for temps over 250dC. There's one outfit that sells some reflective stuff that they claim will survive one inch away from a 500dC heat source, like an exhaust pipe.
I believe I indicated above that the ENDS of the wiring at the connectors should be heat-shrinked, so we agree there. I just don't like the idea of heat-shrinking the whole thing for serviceability reasons. I don't deny it will protect it, and perhaps will do a better job than the split tubing will. The tubing is mostly there to prevent chafing and to keep wires bundled and tidy. Since our engine bays are open, the sun can cause the insulation colors and labelling to fade over time without UV protection, which the tubing will also provide.
Posted by: TimT May 2 2005, 07:17 PM
I also think split tube looks cheesy and cheap.. even if it is OEM. I use braided material, and heat shrink tubing. The braided material comes in a number of different sizes, and can accomodate as few as 1 to over 50 conductors..
With this braided sleeve you can branch out conductors where ever needed, Use some heat shrink at the branches and terminations.
Attached image(s)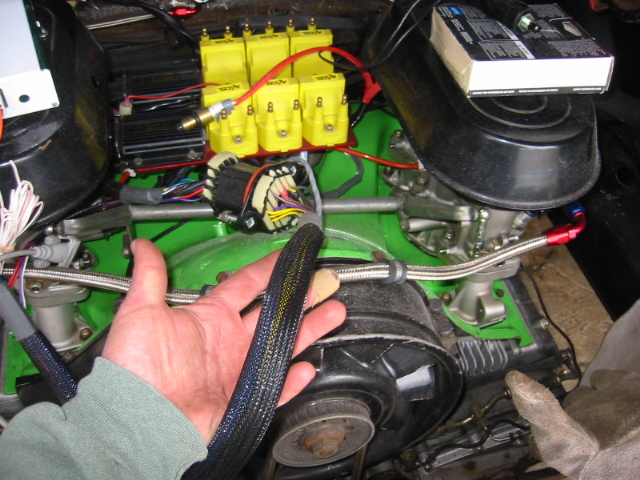
Posted by: TimT May 2 2005, 07:18 PM
nutter butter peanut butter cookie
Attached image(s)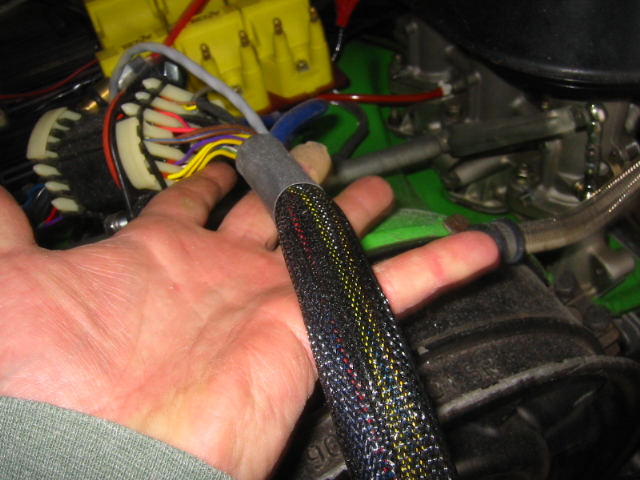
Posted by: TimT May 2 2005, 07:19 PM
burp
Attached image(s)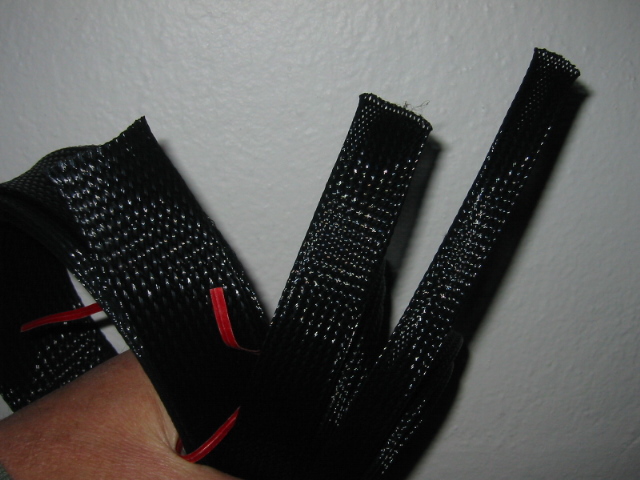
Posted by: Mueller May 2 2005, 07:21 PM
Hey Tim....what the heck is that connector attached to the wiring harness???
Posted by: TimT May 2 2005, 07:32 PM
Mike, that connector would be a 26 pin weather-pac connector. To drop the engine in my 911 you disconnect ONE connector.for the electrics
Posted by: Mueller May 2 2005, 07:44 PM
| QUOTE (TimT @ May 2 2005, 06:32 PM) |
| Mike, that connector would be a 26 pin weather-pac connector. To drop the engine in my 911 you disconnect ONE connector.for the electrics |
good idea !!!!
here is a picture of the relay board I'm going to use (I think)
the one pictured has the ground/12vdc switch/12vdc main power lines soldered to the board, I don't like that so I am looking for something I can more solder to the board so I can use terminals or the like......
Attached image(s)

Posted by: lapuwali May 2 2005, 08:10 PM
Tim, what's that braided stuff made out of? Where do you get it?
Looks nice, and looks like it would do a good job in the anti-chafe dept.
Posted by: Brad Roberts May 2 2005, 08:15 PM
I must be doing something right.. finally.. I started using the stuff TimT is using back in Sept. of last year and never looked back. Once I saw it in the engine compartment of 996's/986's, I knew it would work for us.
B
Posted by: Brad Roberts May 2 2005, 08:17 PM
James,
I bought rolls and rolls of it from the electronic supply place on Spring street in RWC about 4 blocks down from HPH. They have it in different colors and sizes.
I combined it with heat shrink of the same color.. and coded where stuff was going for a easy to read wiring diagram for the car when I was done.
B
Posted by: Mueller May 2 2005, 08:21 PM
| QUOTE (lapuwali @ May 2 2005, 07:10 PM) |
| Tim, what's that braided stuff made out of? Where do you get it? Looks nice, and looks like it would do a good job in the anti-chafe dept. |
digikey
non-fraying expandable braid sleeving
.125 nominal .093-.250 57 bucks per 100 ft
.250 nominal .125-.440
.500 nominal .250-.750
and
.75 nominal .500-1.250 233 buck per 100 ft
digikey part ag110nf18b-100-nd (top one)
they also have flame redardant for about 2x the price
Posted by: TimT May 2 2005, 08:24 PM
Yeap can be had in electronic supply houses... however they are a dying breed...
Ill post the McMaster-Carr p/n along with specs tomorrow... or someone smack me in the head if I forget
Posted by: TimT May 2 2005, 08:24 PM
Heh Mikeholio lets the cat out
LOL
Posted by: Brad Roberts May 2 2005, 08:34 PM
Call me back Mueller.. I walked outside and missed your call.
B
Posted by: Jeff Bowlsby May 2 2005, 08:42 PM
James, modern cars do not have engine bays open to direct water like ours do...That split in the corrugeted casing is not waterproof. Consider where water will end up when the engine bay is exposed rain...yes, inside the harness...Corrugated casing is not optimum or even appropriate for our cars engine bays. My wifes 5-series Bimmer has sealed harness even in the rear trunk, don't know about other modern cars. I have taken apart at leat 200 of our 914s harnesses...I see the kind of harsh conditions they are exposed to...and how the OEM harnesses have performed.
Now if its to be used in protected locations...I couldn't see a problem with that....
Same with the polyester braided sleeving guys, its not waterproof. While its great for abrasion resistance, it wont keep the dirt/fluids out from where it counts. I think heat resistance may be questoinable too, but I would have to check the products specs.
Just MHO...YMMV...you are free to disagree....
Posted by: Brad Roberts May 2 2005, 08:49 PM
Yes. I knew going in there was NO way the braided stuff would be waterproof (duh!).. but these are on cars that will only get "caught" in rain.
I also thought of it this way:
If it is braided.. I stand a better chance of it drying out and having NO water sitting in the harness.
I yank every piece of GM "wireloom" I can find from every 914 I see with it. Cheap shit that doesnt belong on a german built car 
B
Posted by: cha914 May 2 2005, 09:22 PM
Ok...since this is a wiring discussion...where the hell do you order decent crimp connectors from? I am not looking for original porsche stuff, just good connectors...and I do have a "good crimper" just looking for good connectors to go with it.
Thanks,
Tony
Posted by: lapuwali May 2 2005, 10:11 PM
| QUOTE (cha914 @ May 2 2005, 07:22 PM) |
| Ok...since this is a wiring discussion...where the hell do you order decent crimp connectors from? I am not looking for original porsche stuff, just good connectors...and I do have a "good crimper" just looking for good connectors to go with it. Thanks, Tony |
The GM Weatherpak connectors come with crimp pins. They're available in 1-N pins. I used to think N was 12, but Tim showed N is much higher than that. You can get these connectors from several online stores.
Posted by: jonwatts May 2 2005, 11:25 PM
Nylon braided harness covering can be bought in the south bay area from http://www.halted.com/ in various sizes. Who will be the first to use it over their shrink-tube covered wiring harness  (actually that might not be a bad idea).
The stuff makes great Chinese finger puzzles if you have kids.
Posted by: Mueller May 3 2005, 09:15 AM
| QUOTE (cha914 @ May 2 2005, 08:22 PM) |
| Ok...since this is a wiring discussion...where the hell do you order decent crimp connectors from? I am not looking for original porsche stuff, just good connectors...and I do have a "good crimper" just looking for good connectors to go with it. Thanks, Tony |
Tony,
I bought my uncrimped connectors from this guy:
http://www.rs-autosport.com/
I know NAPA autoparts carries these connectors as well.
Summit Racing "might" have them......
Posted by: Mueller May 3 2005, 11:26 PM
spent some time tonight on the new harness...oh boy, what a bunch of work....
Attached image(s)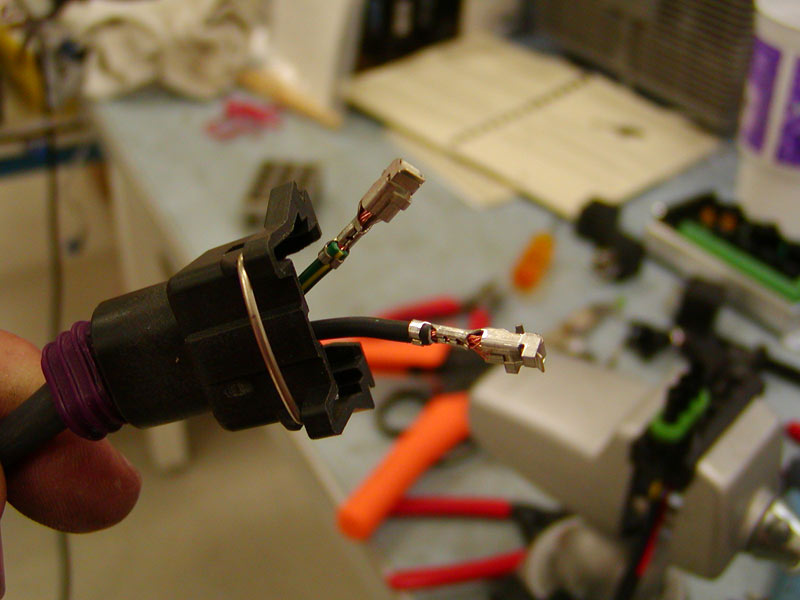
Posted by: Mueller May 3 2005, 11:27 PM
it'll take a few revisions to get it perfect
Attached image(s)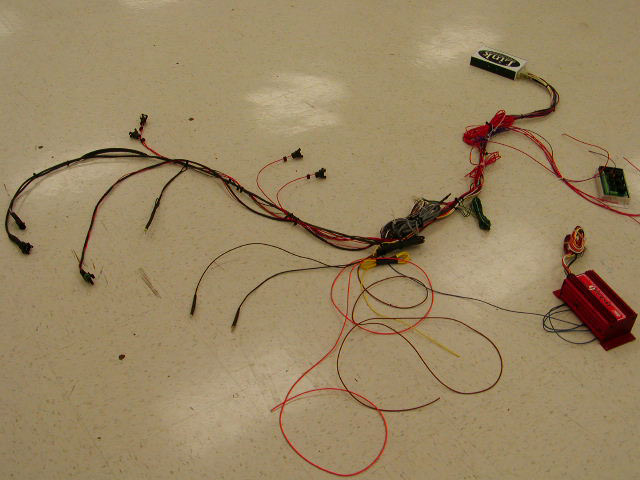
Posted by: Mueller May 3 2005, 11:30 PM
for the GM Weatherpack connectors, I added a little bit of potting compound to ensure a watertight fit 
yes, the little rubber gromments are backyards on this one...no big deal with the potting compound 
Attached image(s)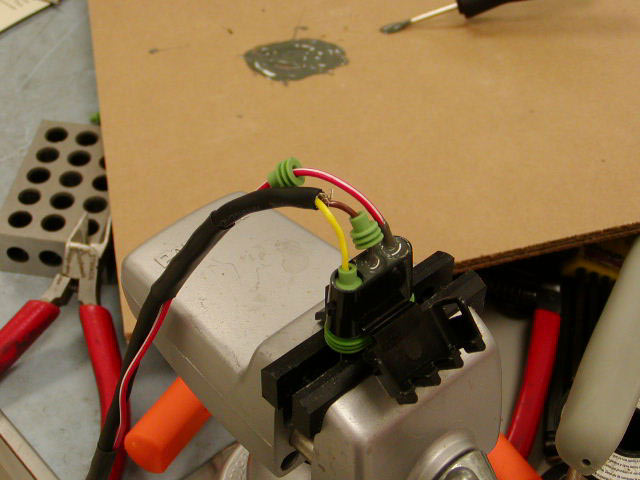
Posted by: McMark May 4 2005, 12:10 AM
Real pictures!
Looking good! 
BTW, I got the laptop working with my machine tonight. Tomorrow I search for a consumables supplier!
Posted by: Tom Perso May 4 2005, 04:34 AM

Hey Mark, I got one of Mueller's laptops as well. Finally got my PCMCIA card to work in 95, and I just upgraded to 98. Seems to be working OK. If it's stable, then goes in my 802.11b card and we'll see how it flies...
Nice Pics, BTW.
I like those weather-pack connectors. I need to get some of 'em.
Later,
Tom
Posted by: Mueller May 4 2005, 09:08 AM
| QUOTE |
| Nice Pics, BTW. |
putting the camera on a tri-pod helps...too much coffee normally
glad the laptop(s) are working, hate to see them go to waste....
Posted by: Mueller May 4 2005, 04:56 PM
James or anyone else:
any real difference between the ceramic resistors and the aluminum bodied resistors other than heat dissipation being better with the aluminum bodied units???
Posted by: lapuwali May 4 2005, 05:32 PM
Not that I know of, no. Resistors are basically just resistors. Ohms, tolerance, and power rating are all that matter. I suppose the Al units might be smaller for a given power rating, which would be useful in some cases.
Posted by: Mueller May 4 2005, 05:39 PM
| QUOTE (lapuwali @ May 4 2005, 04:32 PM) |
| Not that I know of, no. Resistors are basically just resistors. Ohms, tolerance, and power rating are all that matter. I suppose the Al units might be smaller for a given power rating, which would be useful in some cases. |
thanks...I picked up the ceramic style at Frys for .99 cents instead of the aluminum ones at $5 each @ R and D Electronics..........I'll mount them on a heatsink I pulled out of an old Pentium workstation
Posted by: Mueller May 4 2005, 06:10 PM
now I know why I don't throw too many things away....for the resistors, I need heatsinks.....threw away a few Pentium II systems but took a few items out of the case before being tossed:
The blue one houses the 2 resistors I need for my fuel injection.........
Attached image(s)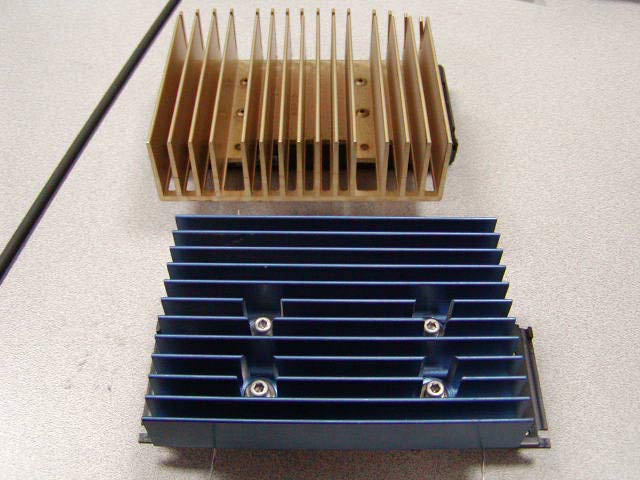
Posted by: Mueller May 4 2005, 06:11 PM
bottom view, I still need to figure out how I will mount this in the car...no heatsink grease on the parts yet....
Attached image(s)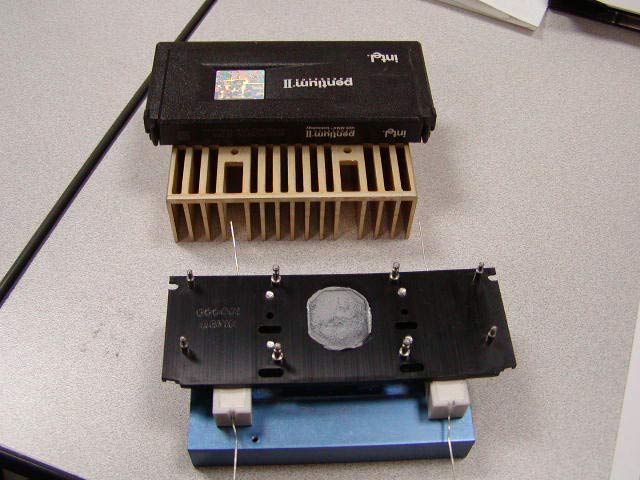
Posted by: Aaron Cox May 4 2005, 06:15 PM
thats a lot of heatsync....
where are you going to put it all?
Posted by: Britain Smith May 4 2005, 07:11 PM
On the topic of heat sinks, where can I get some nice panel mount type connectors? I want to use them on the firewall of my car so that I can put all the electronics inside the car and be able to just plug it in. I would like to be able to remove the ECU from the inside of the car and plug it into the engine directly when the engine is on a dyno. I would probably need to connectors, each with about 20 pins.
-Britain
Posted by: Mueller May 4 2005, 07:13 PM
| QUOTE (Britain Smith @ May 4 2005, 06:11 PM) |
| On the topic of heat sinks, where can I get some nice panel mount type connectors? I want to use them on the firewall of my car so that I can put all the electronics inside the car and be able to just plug it in. I would like to be able to remove the ECU from the inside of the car and plug it into the engine directly when the engine is on a dyno. I would probably need to connectors, each with about 20 pins. -Britain |
Mouser, Digikey....Jasons storage shed
Posted by: TimT May 4 2005, 07:18 PM
Britain look on page one of this thread, there is a pic of a 26 pin weatherpac connector Im using on my 911. Just one plug pulled, a few hoses and the engine is out.
Posted by: Mueller May 4 2005, 07:27 PM
http://www.weatherpack.com/pages/900555/index.htm
I cannot find any connectors with more than 6 pins???
Posted by: Britain Smith May 4 2005, 07:27 PM
Where did you get it?
I really want a panel mount connector that can mount to the firewall. Kinda like the ones on the bottom of this picture.
-Britain
Posted by: TimT May 4 2005, 07:33 PM
Oh duh, brainfart, Clewett sells that 26 pin connector.
Britain, the connectors in your pic can be sourced from MoTec or EFI Technology. I haven forgotten the trade name for those connectors, but they are Mil-spec aircraft connectors..
Posted by: Mueller May 4 2005, 07:46 PM
| QUOTE (TimT @ May 4 2005, 06:33 PM) |
| Oh duh, brainfart, Clewett sells that 26 pin connector. Britain, the connectors in your pic can be sourced from MoTec or EFI Technology. I haven forgotten the trade name for those connectors, but they are Mil-spec aircraft connectors.. |
Think those might be Deutsch brand connectors???
http://www.deutschdao.com/
Posted by: Mueller May 26 2005, 03:23 PM
ditched the stock relay board....had to come up with a "cheap" solution for the 14 pin and 12 pin connector
I ended up drilling the pins out of the relay board...
Attached image(s)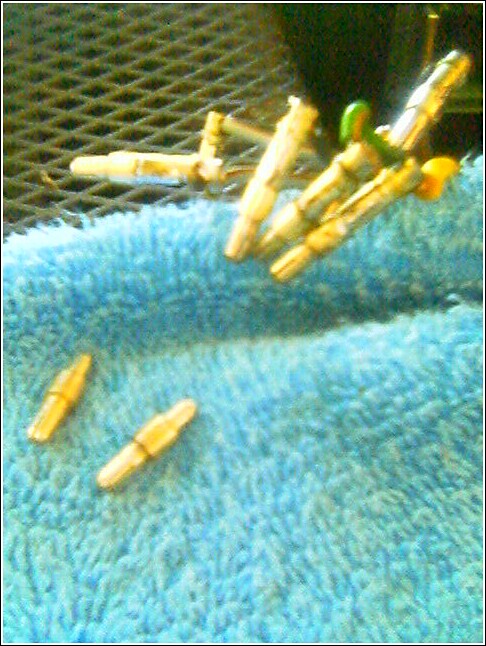
Posted by: Mueller May 26 2005, 03:25 PM
i then soldered them to female sockets from the 12pin connector and placed them in the correct socket of the 14pin connector...
Attached image(s)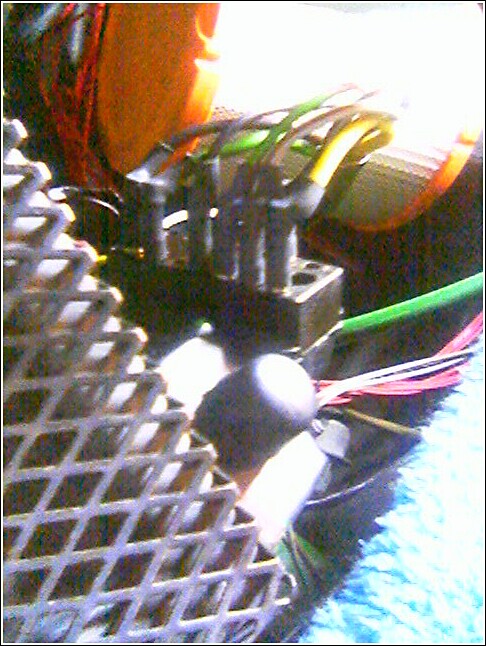
Powered by Invision Power Board (http://www.invisionboard.com)
© Invision Power Services (http://www.invisionpower.com)